Category: Bathroom Decor

  • 25 Cozy Bathroom Ideas That Turn Small Spaces Into Relaxing Retreats

    25 Cozy Bathroom Ideas That Turn Small Spaces Into Relaxing Retreats

    Small bathrooms don’t have to feel cramped or stressful. In fact, some of the most relaxing retreat spaces start in tight quarters—it just takes the right tweaks. Whether you’re renting, working with an awkward layout, or simply tired of your bathroom feeling more functional than fun, these 25 ideas will help you create a spa-like oasis without needing a total renovation. From budget-friendly hacks to splurge-worthy upgrades, you’ll find solutions that work with your space and your wallet. Let’s turn that bathroom into somewhere you actually want to linger.

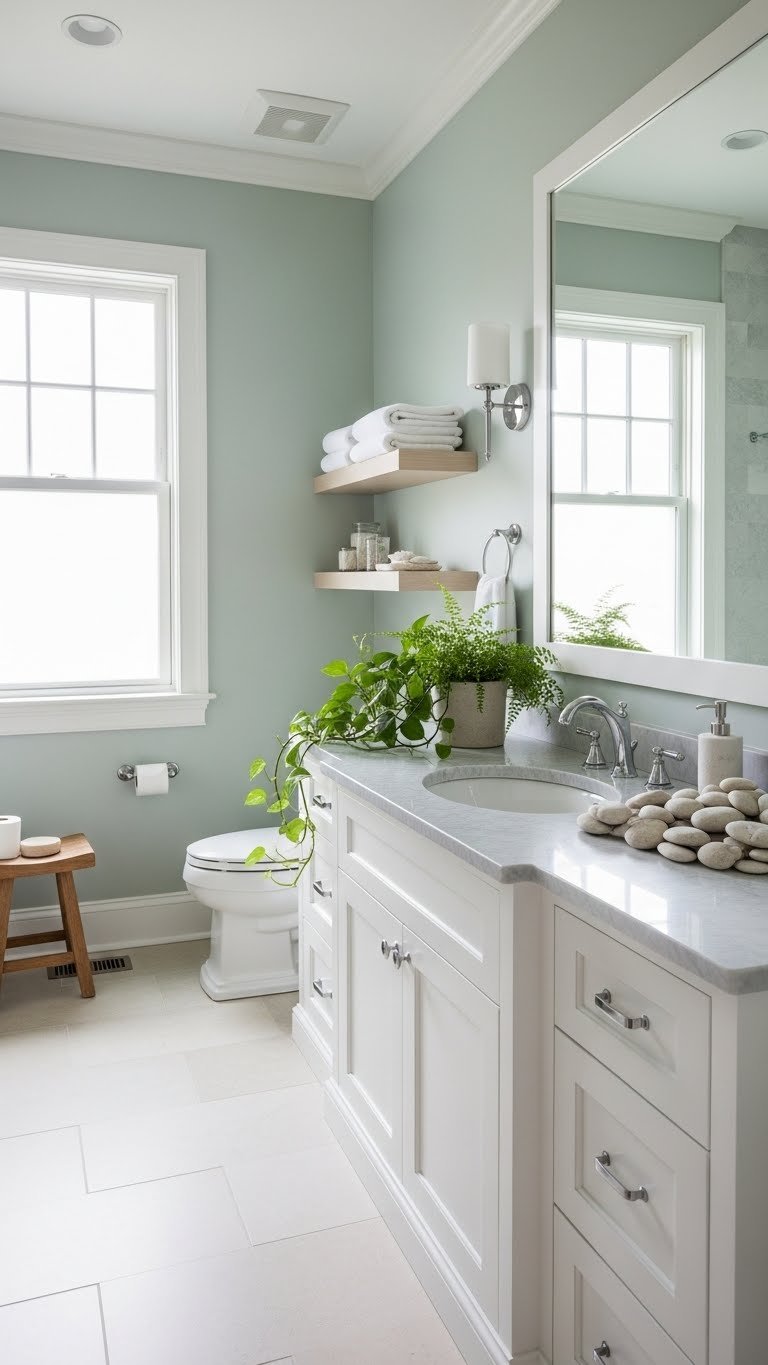
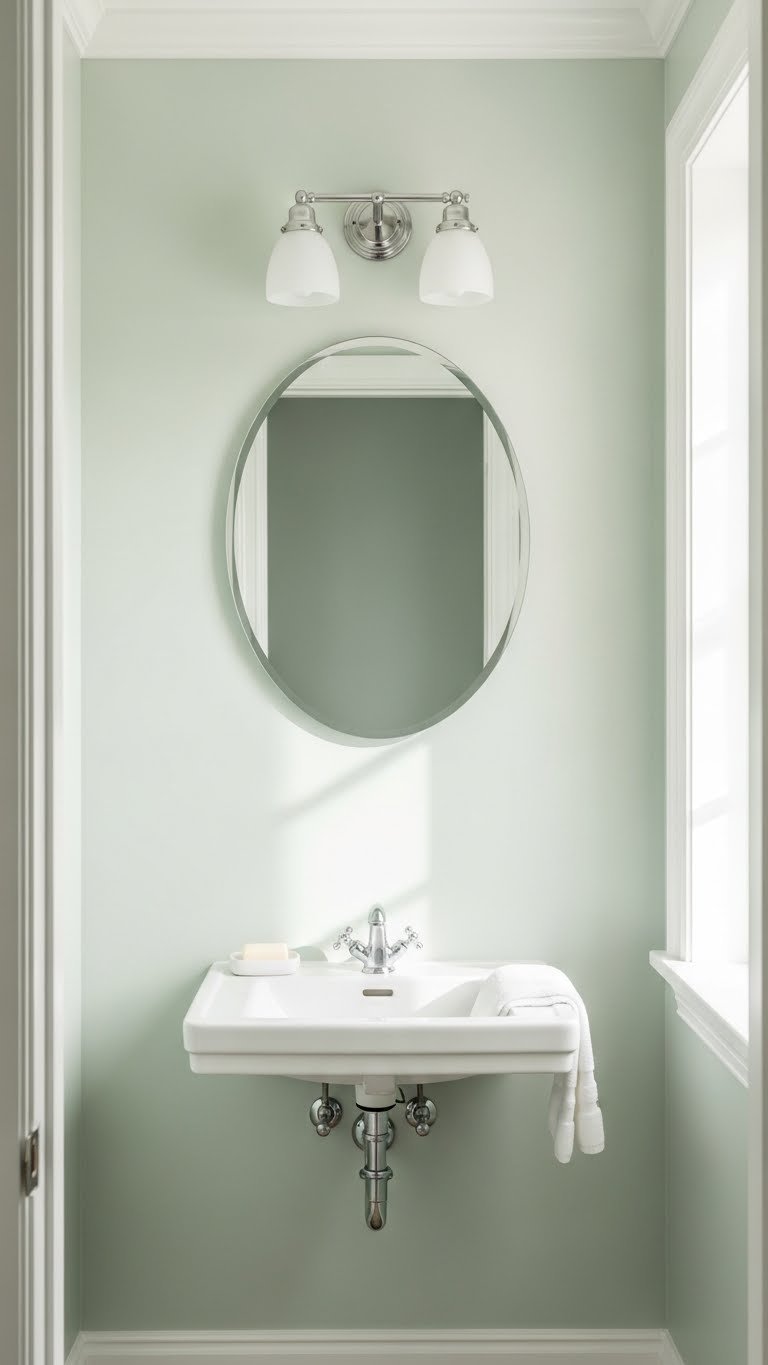
    1. Paint Walls a Soft, Light Color

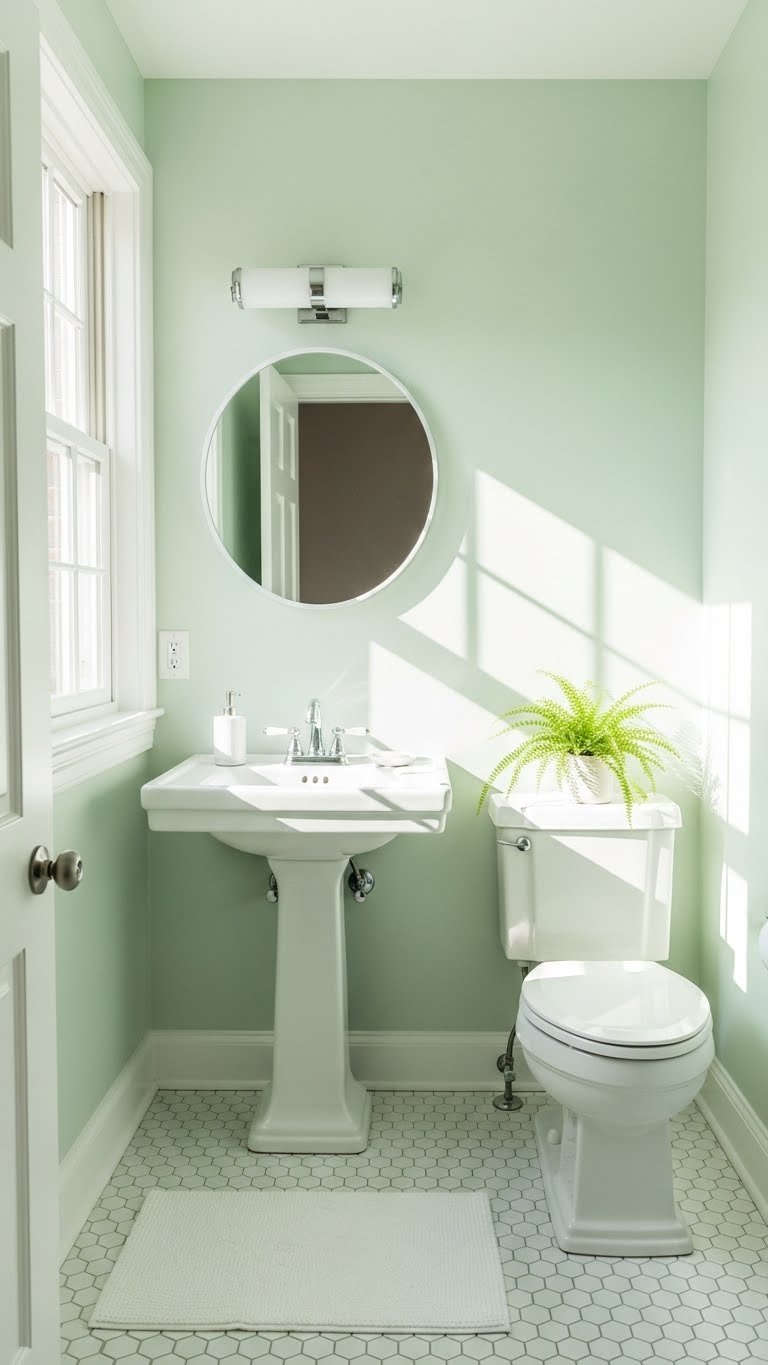
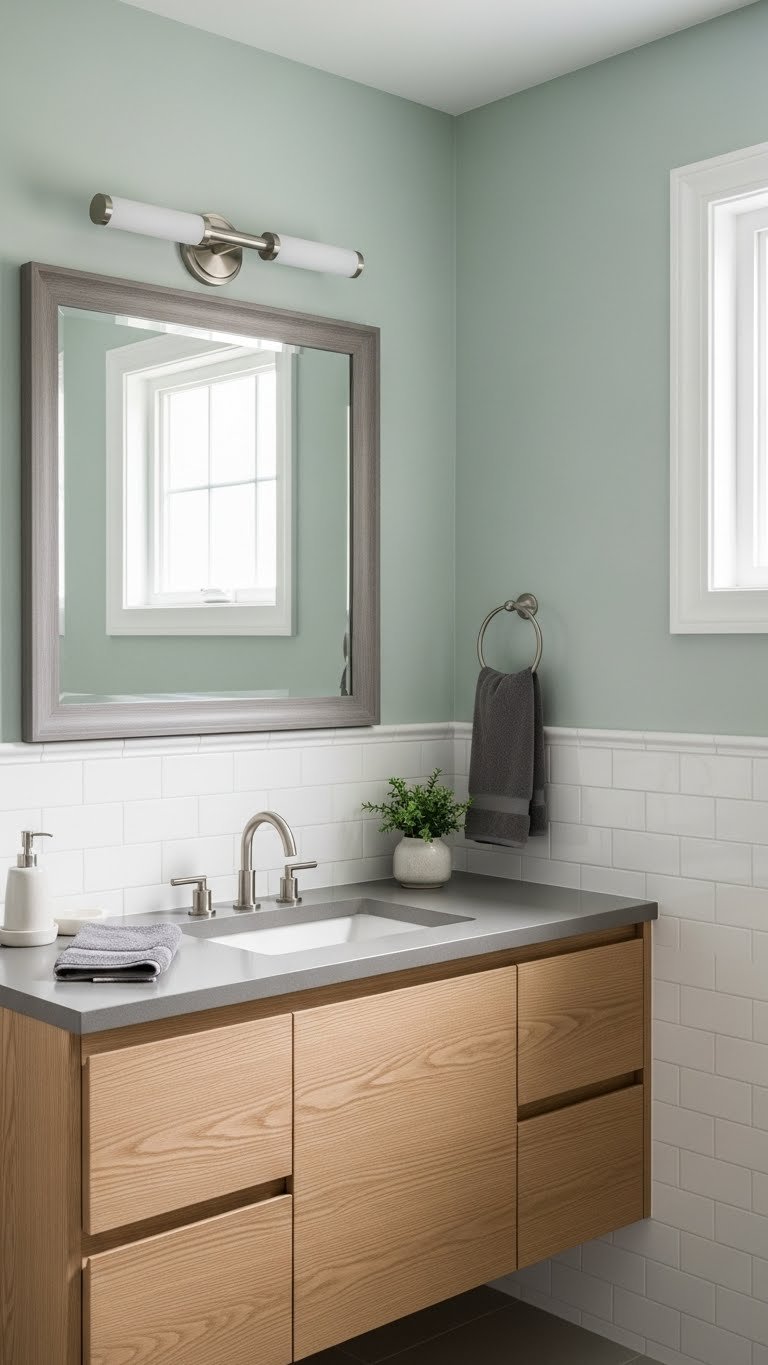
    Color is the cheapest way to completely change how a space feels. Light, cool-toned walls (soft sage, pale blue, warm white, or barely-there gray) make even the tiniest bathroom look and feel bigger while creating that calm, retreat-like vibe.

    Pick a paint in a finish that handles moisture well—satin or semi-gloss works best in bathrooms. One gallon covers about 400 square feet, so you’ll likely need just one can. Aim for quality paint from Sherwin-Williams, Benjamin Moore, or Behr ($30–$50 per gallon). You can paint this yourself in an afternoon with a small roller and brush. Pro tip: primer isn’t always necessary if you’re going light over light, but it helps coverage.

    The moment you step in after painting, you’ll notice how much more spacious and calm the room feels. Light walls bounce natural and artificial light around, making your bathroom look less boxy.

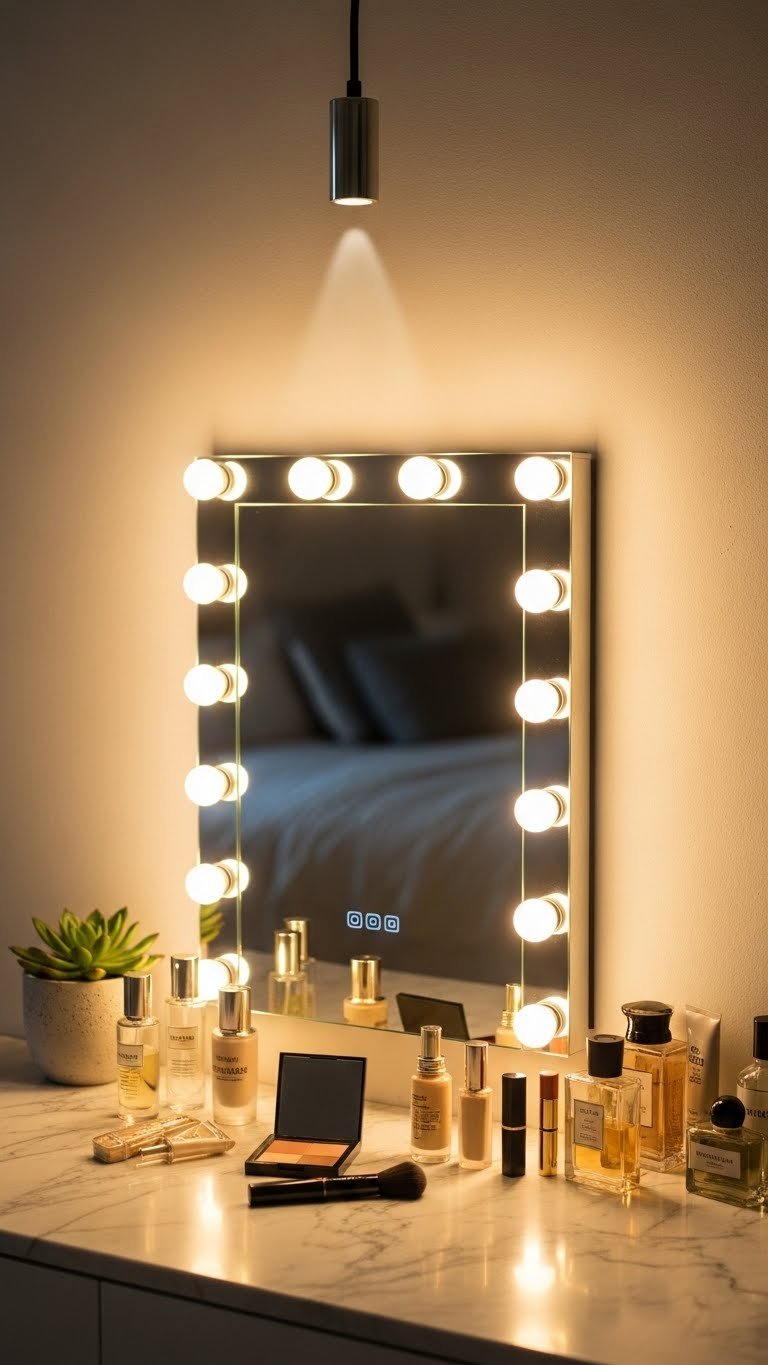
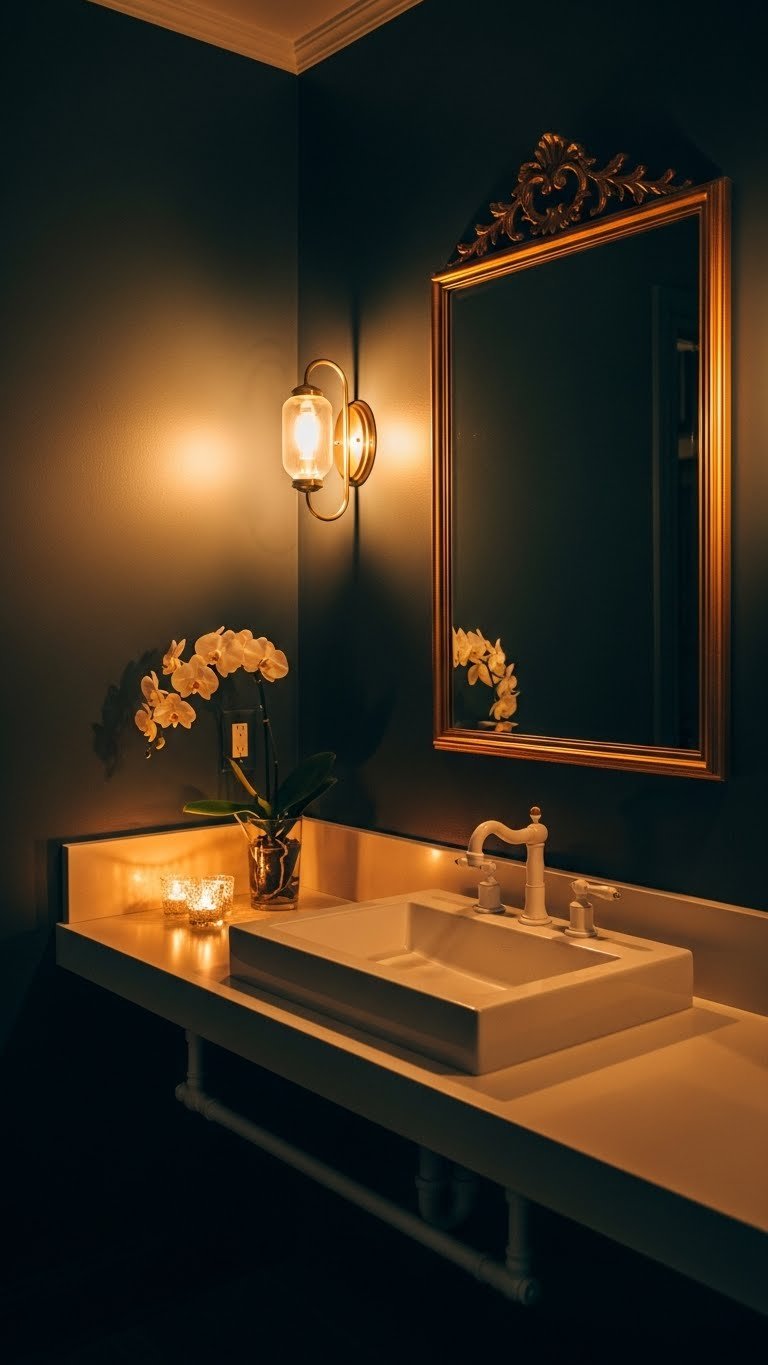
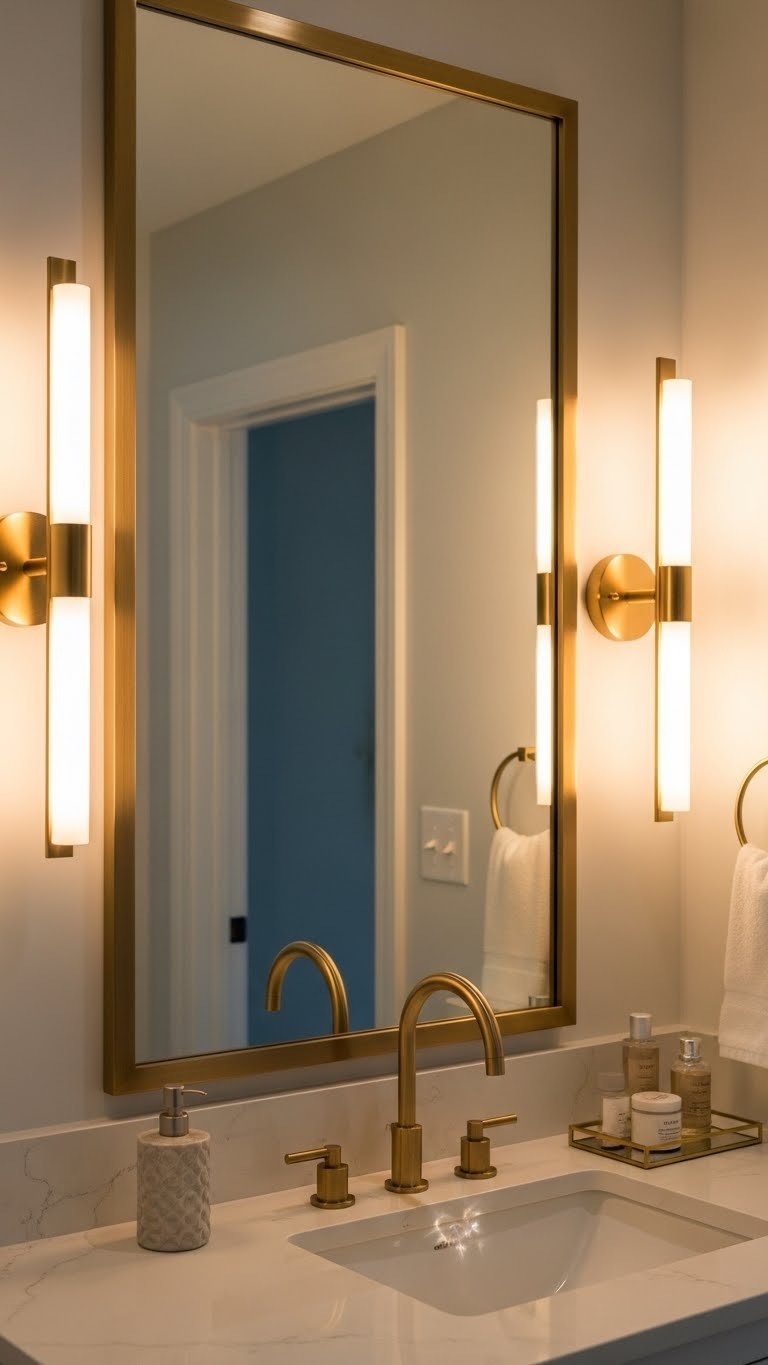
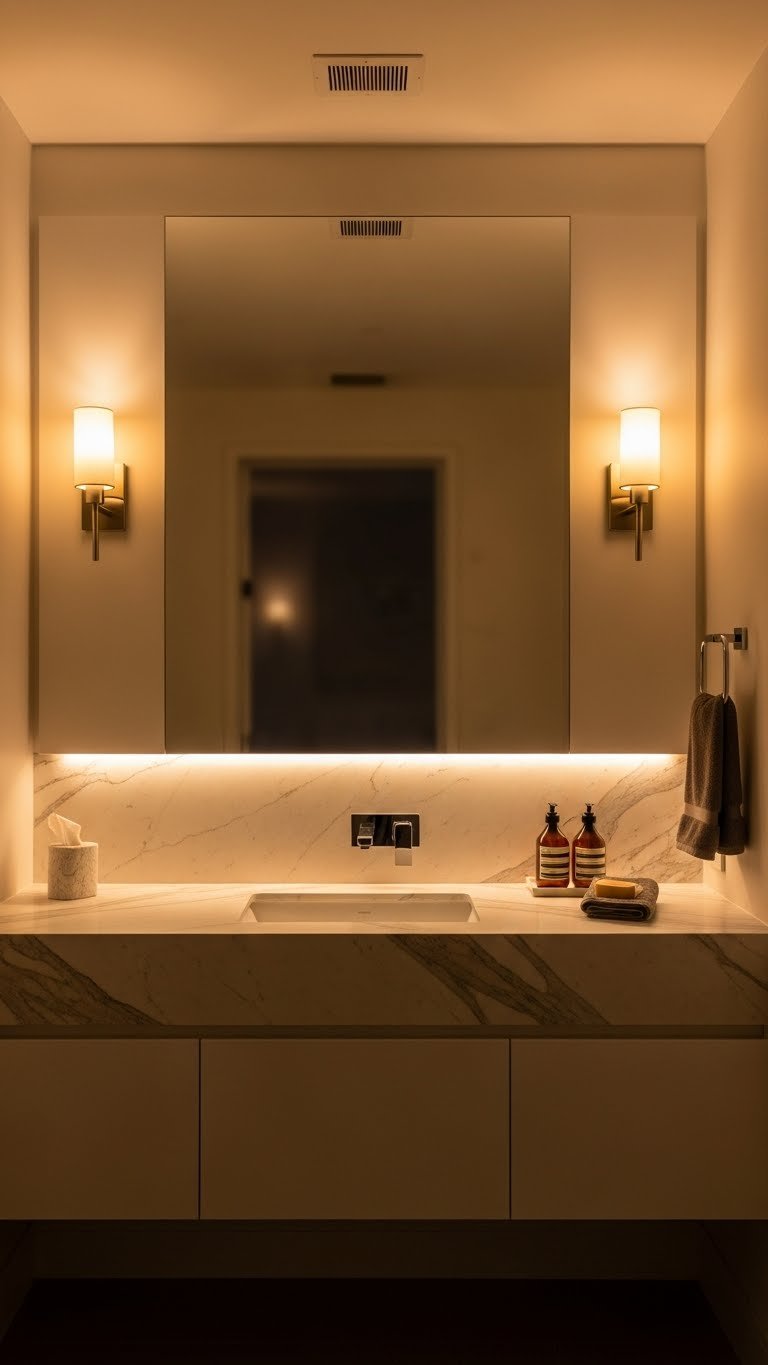
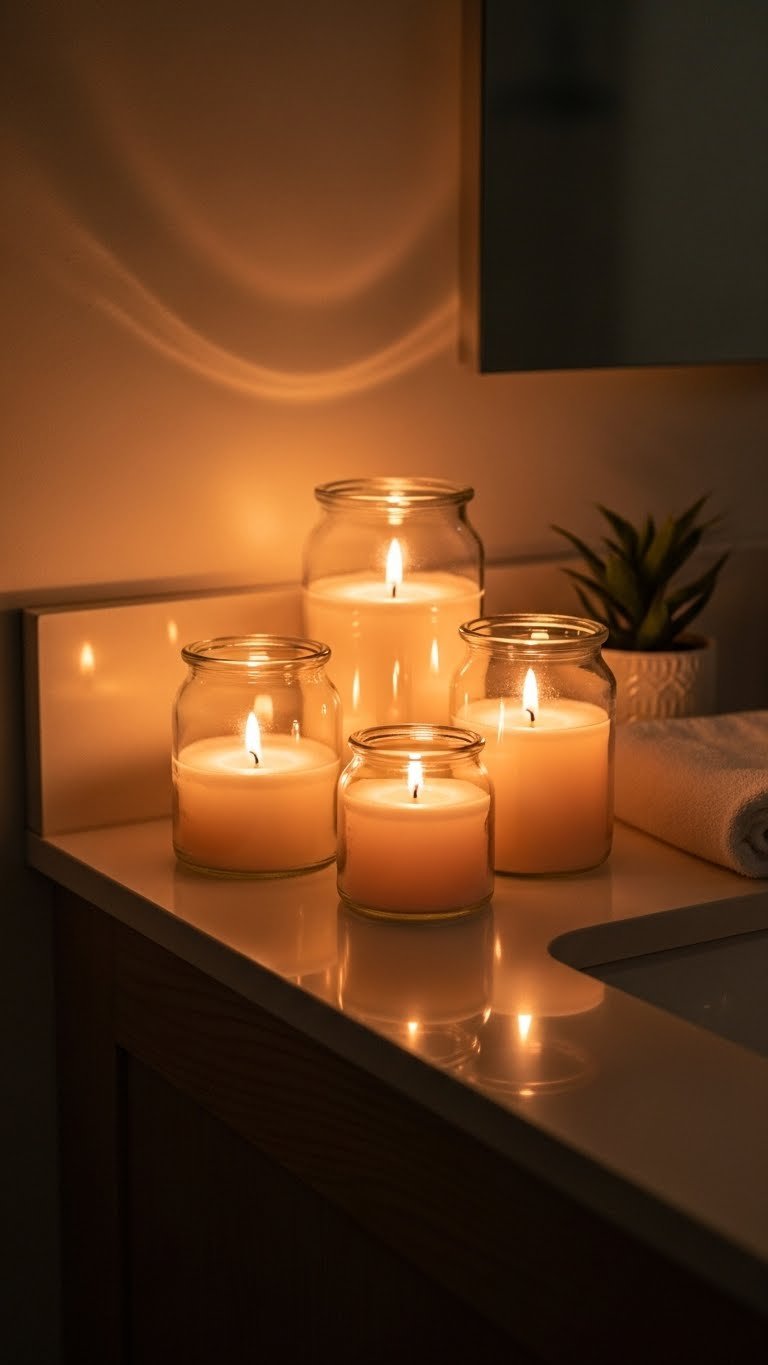
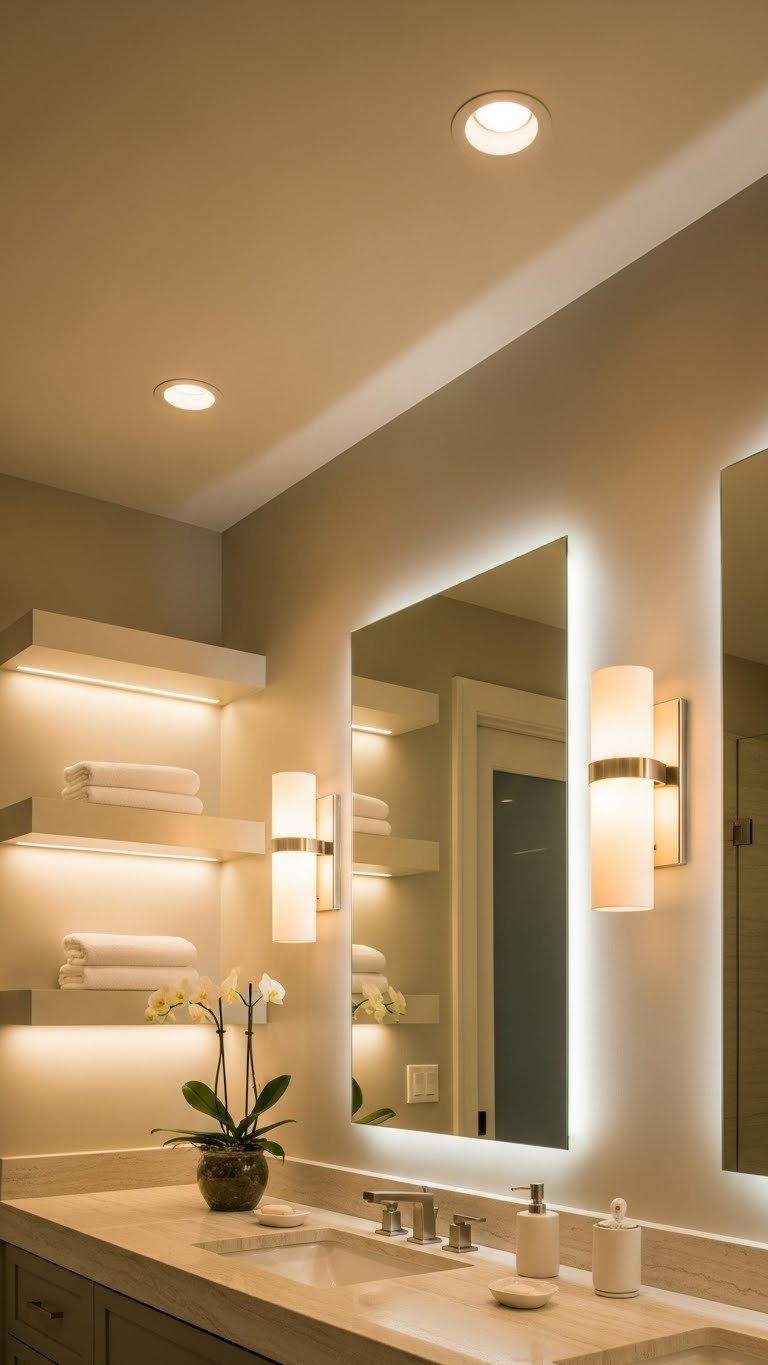
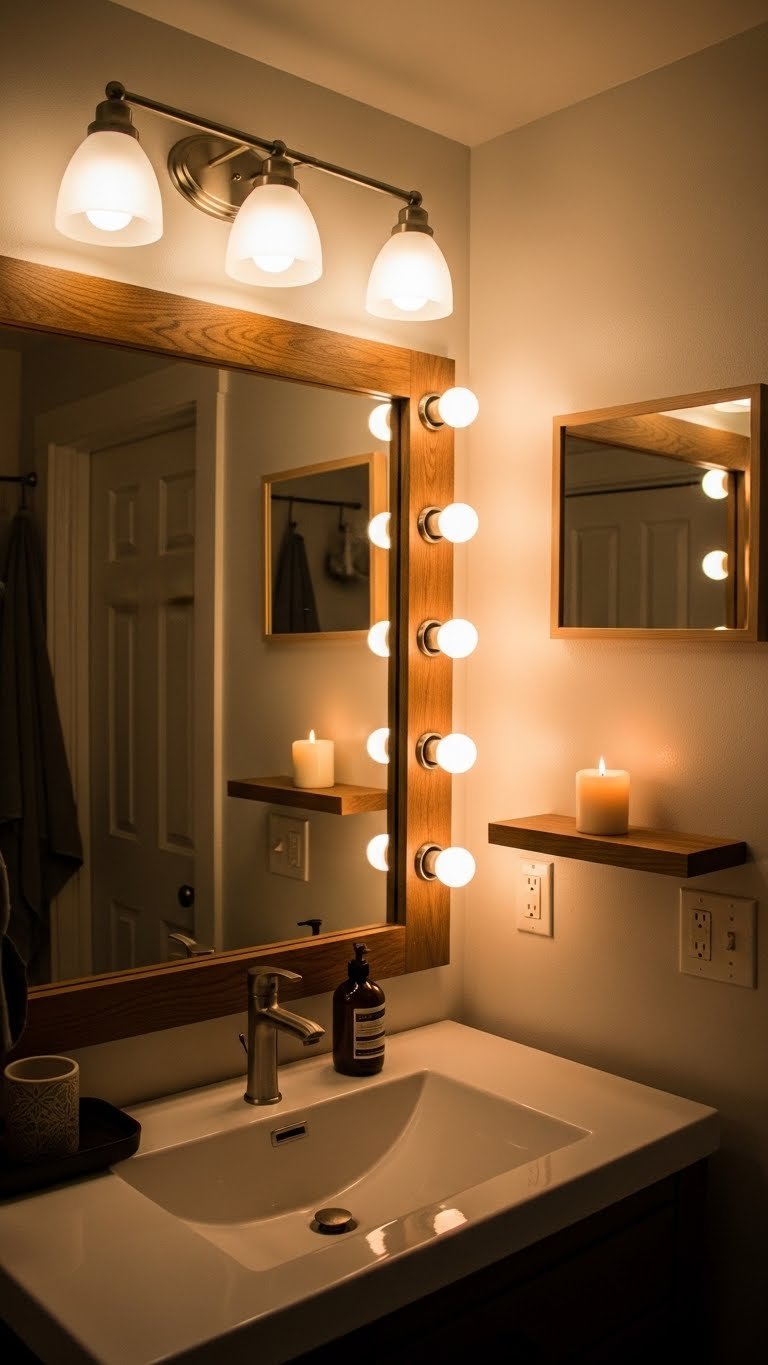
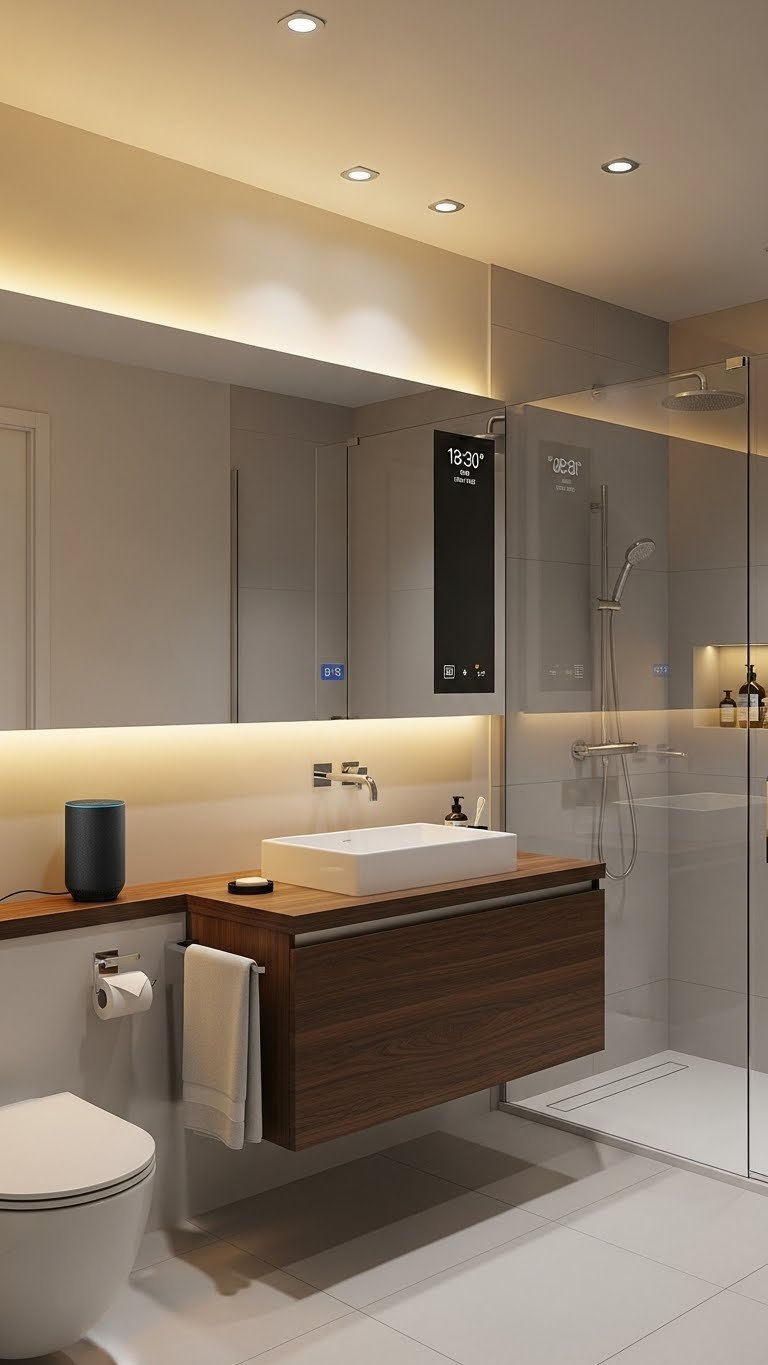
    2. Add Warm Layered Lighting

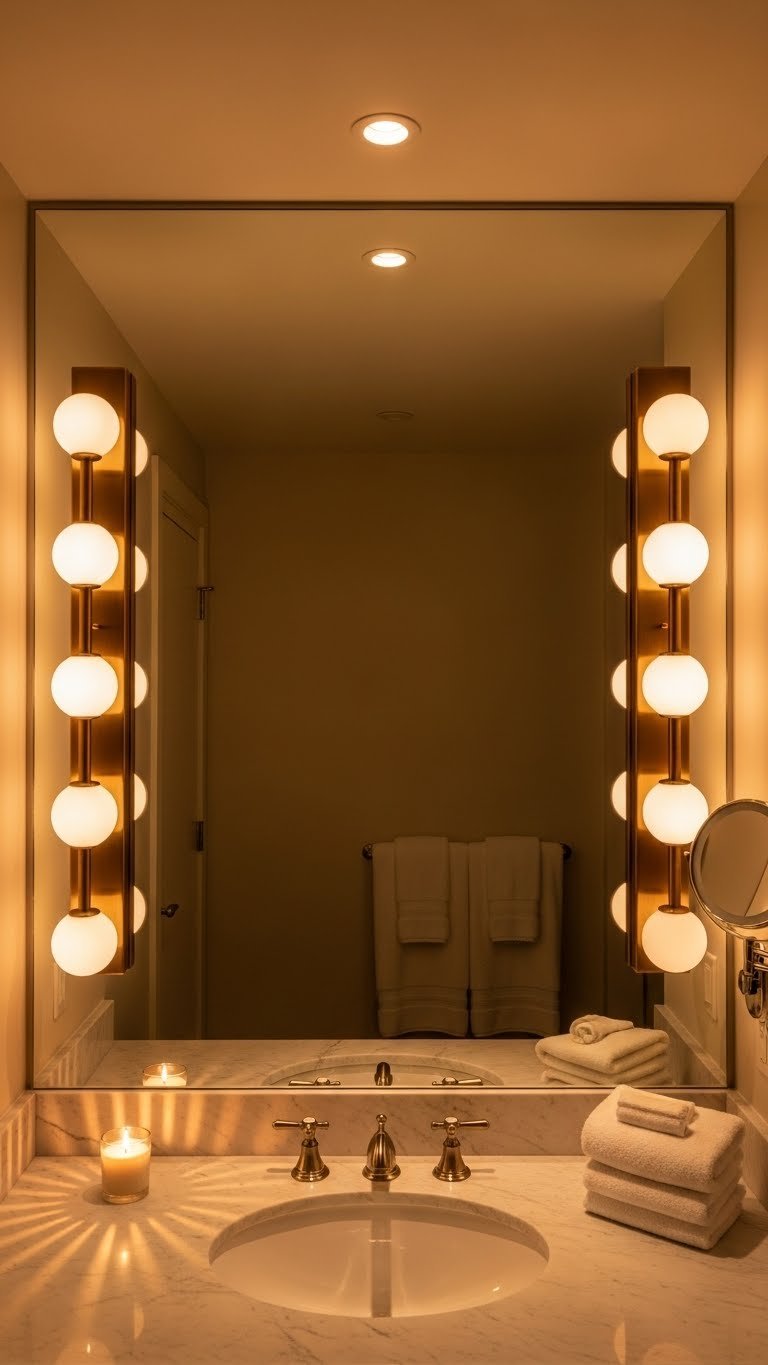
    Harsh overhead lighting ruins spa vibes instantly. Layer your lighting with soft, warm sources at different heights to create a relaxing mood that still lets you get ready.

    Install a dimmer switch (around $15–$30) on your existing overhead light. Add a mirror light fixture with LED bulbs rated 2700K color temperature for warm light ($40–$150 depending on style). If you have counter space, a small LED candle ($5–$15) or real candle adds final warmth. Most fixtures take 30 minutes to install if you’re comfortable with basic wiring; otherwise, hire an electrician ($75–$150 per hour). Renter? Stick with plug-in options and battery candles.

    Layered lighting transforms your bathroom from clinical to cozy. You get bright light when you need it and soft glow when you want to wind down—your bathroom becomes useful and restful.

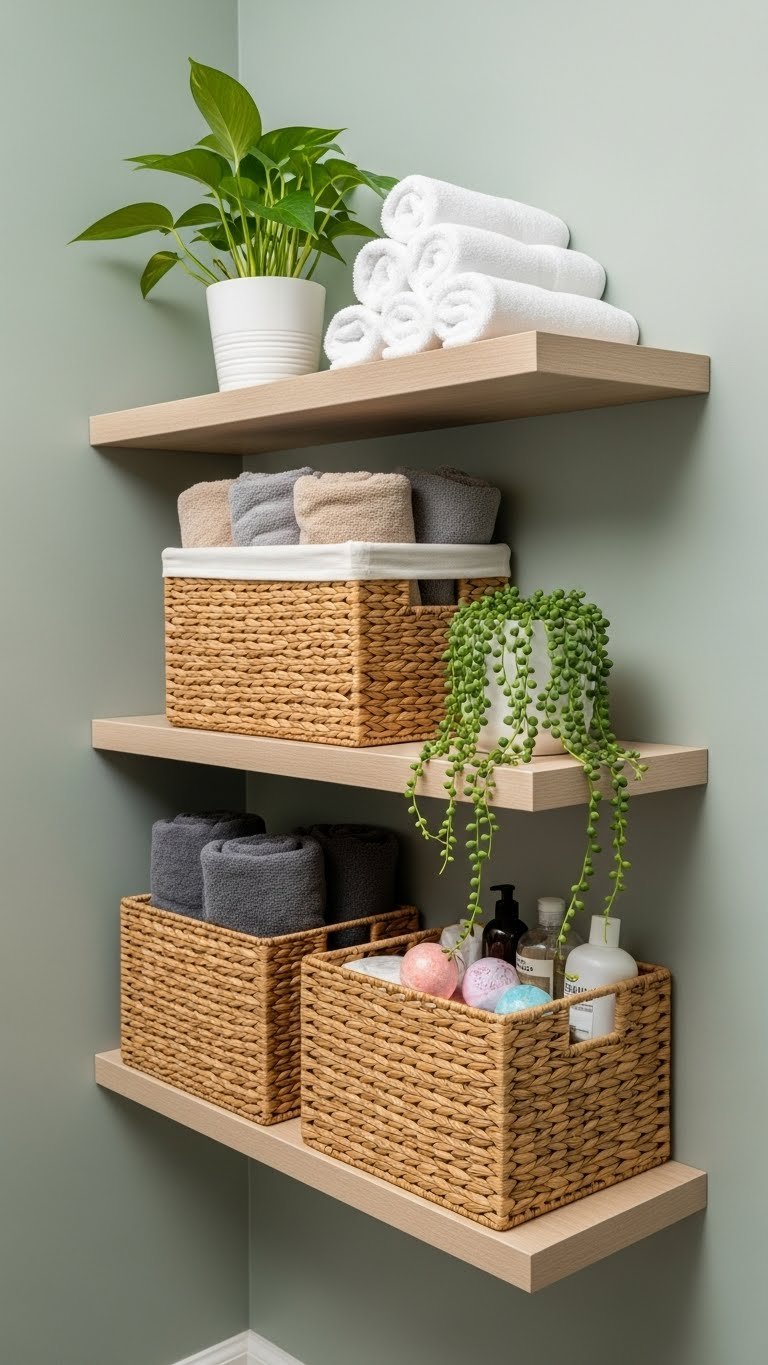
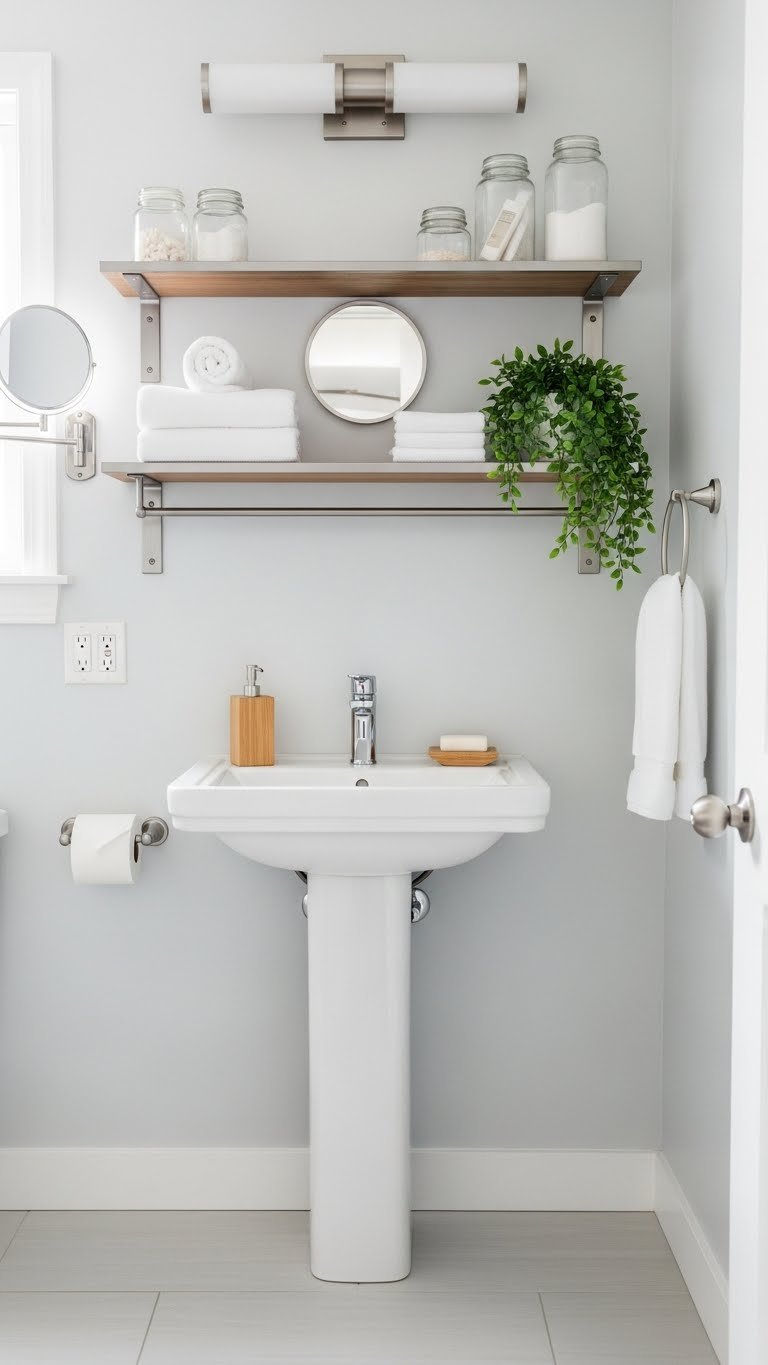
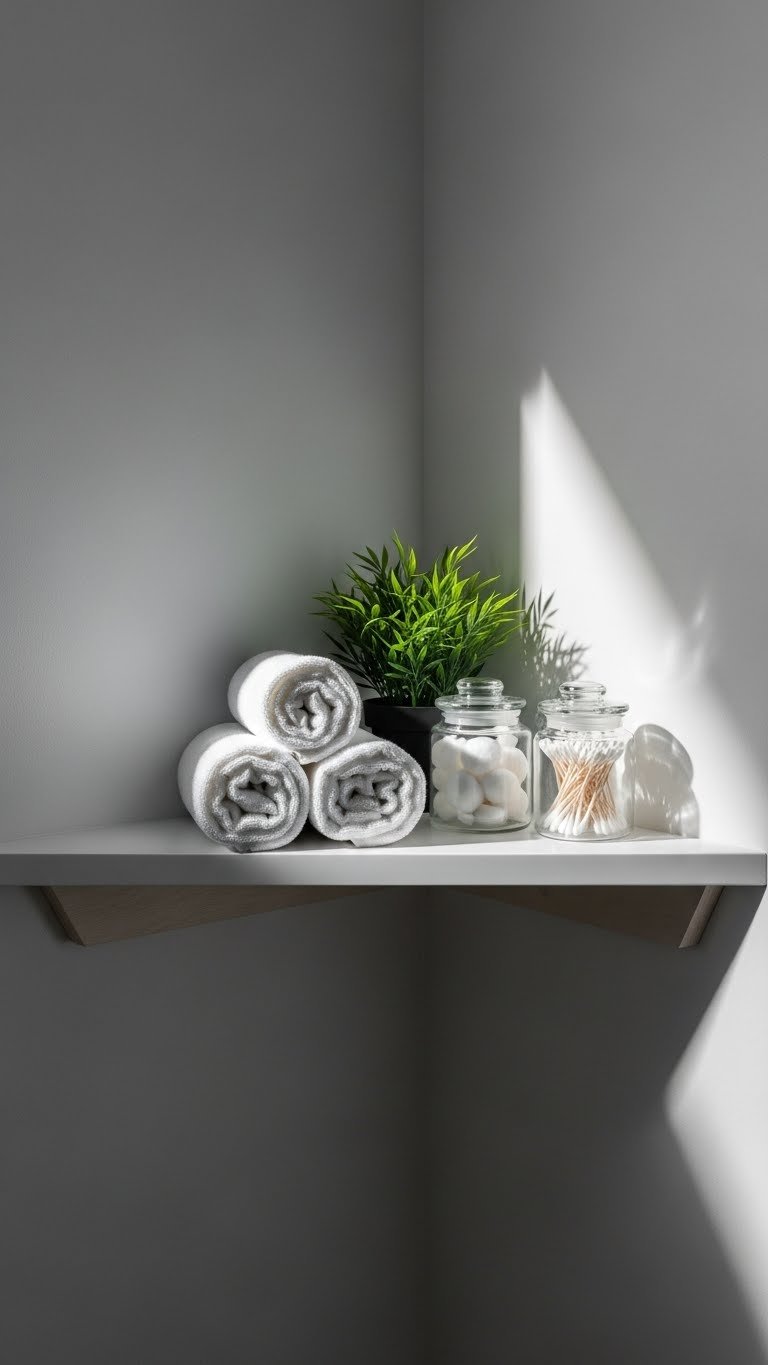
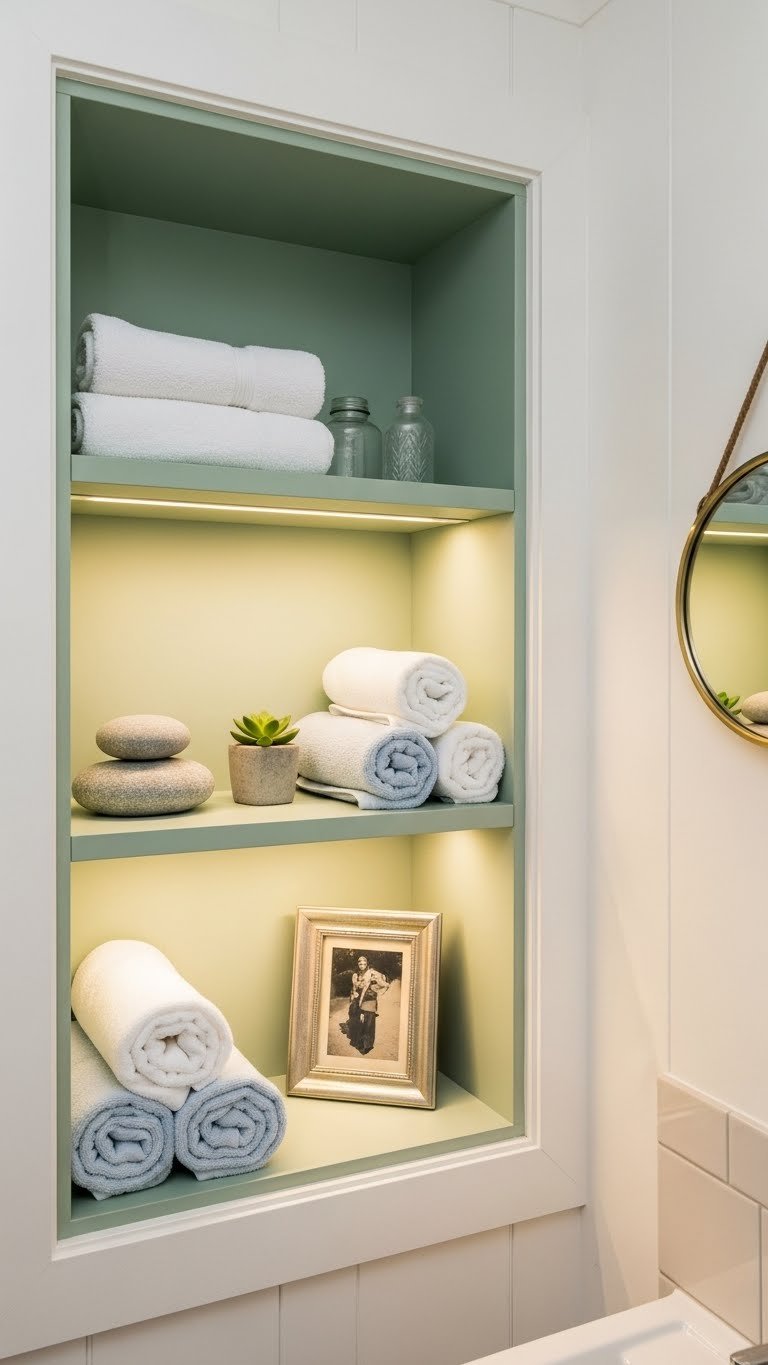
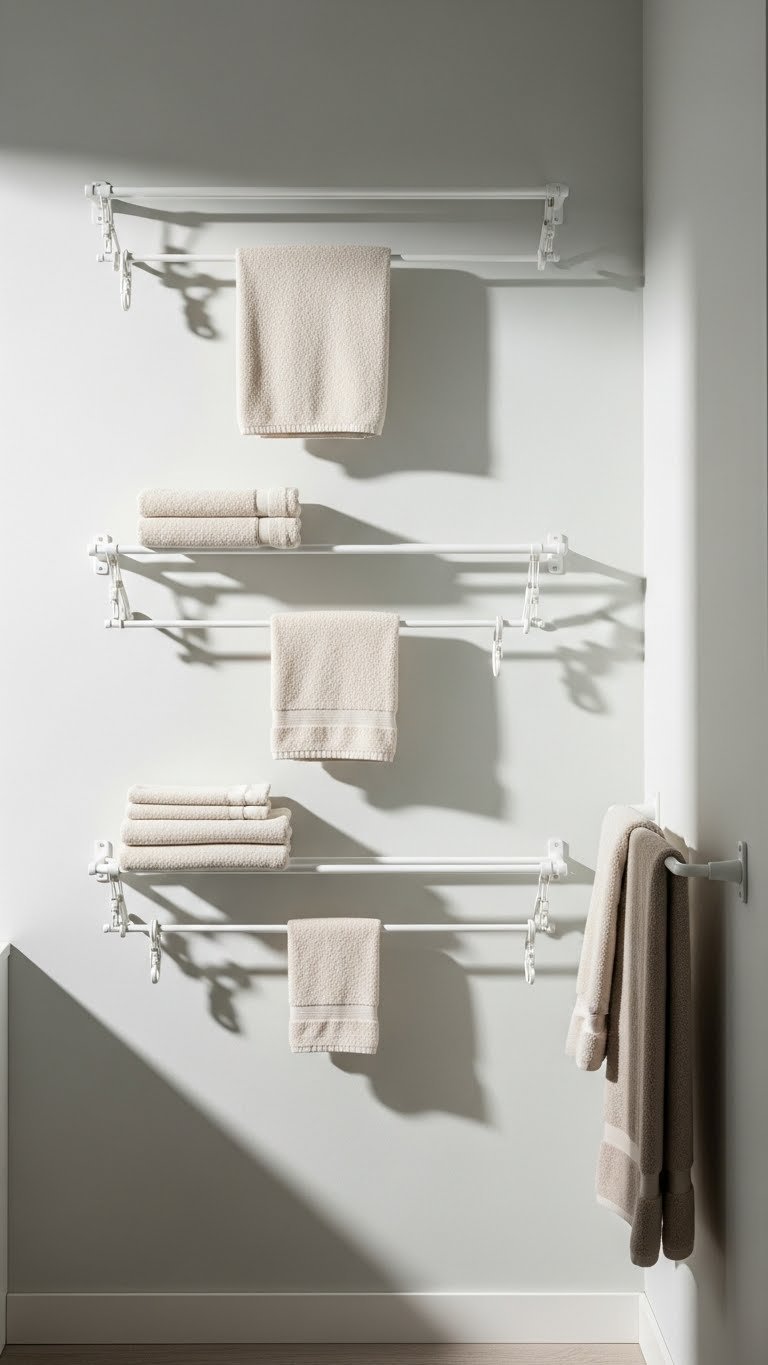
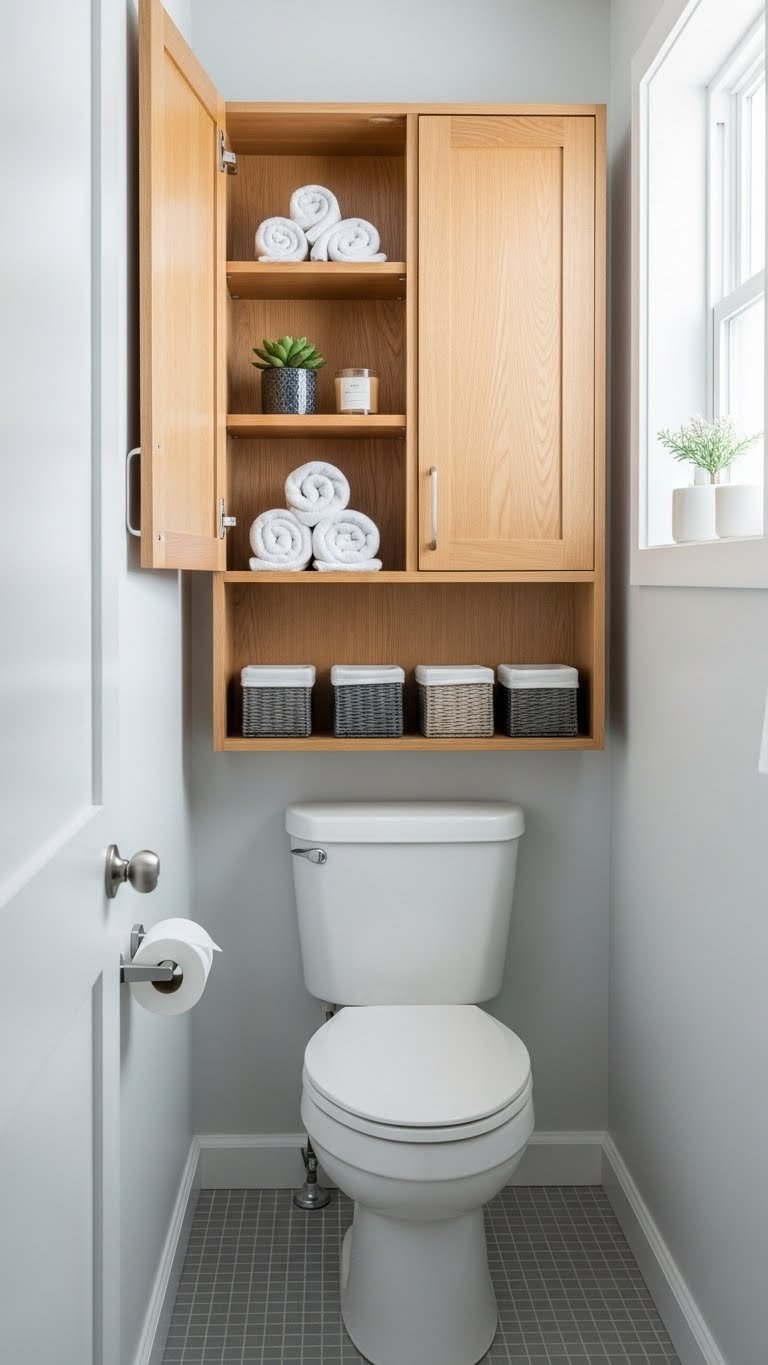
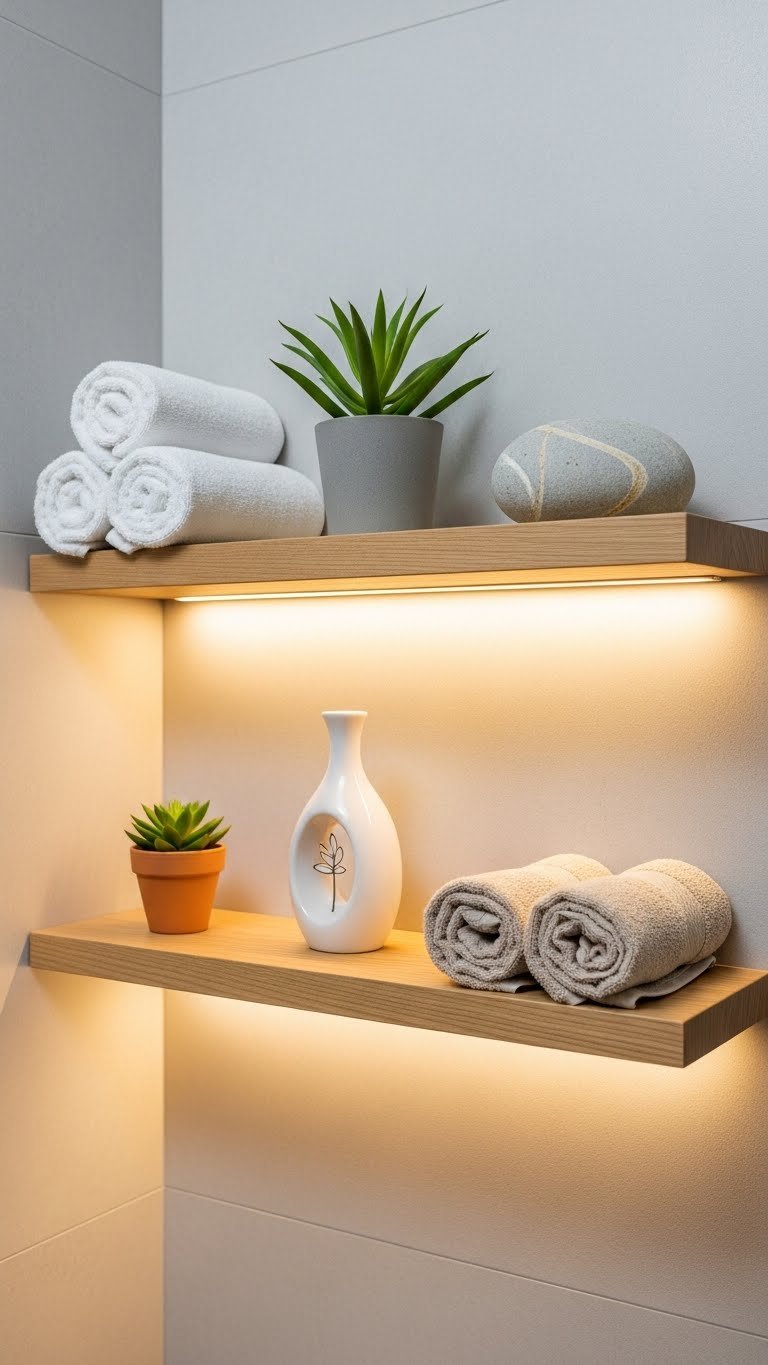
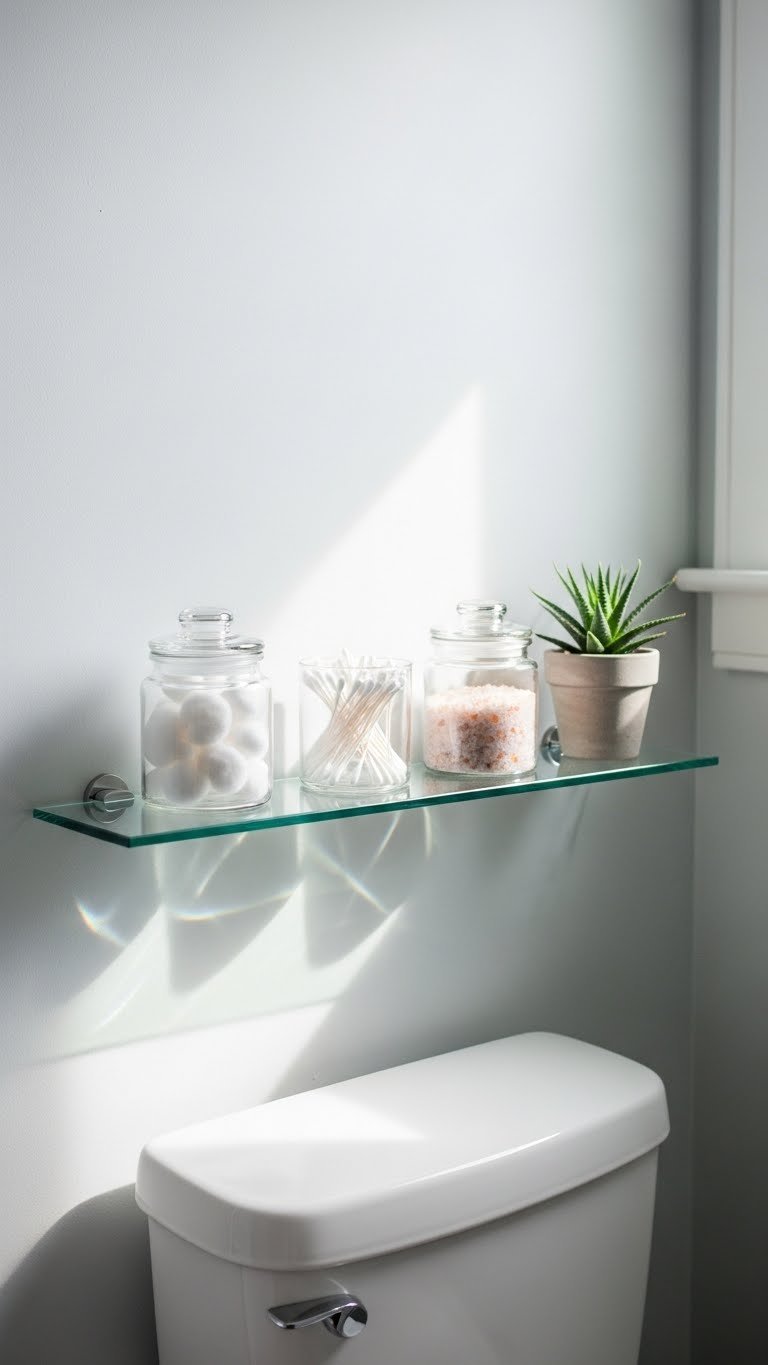
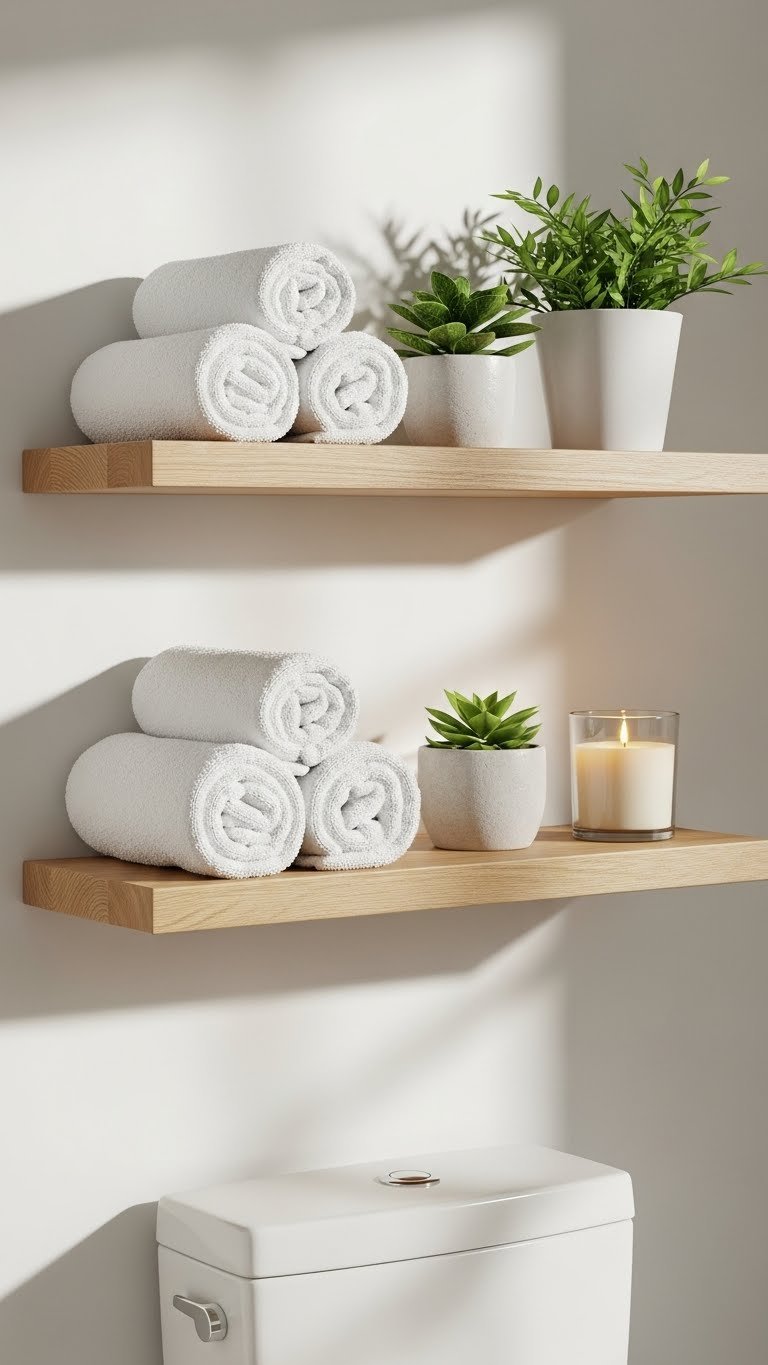
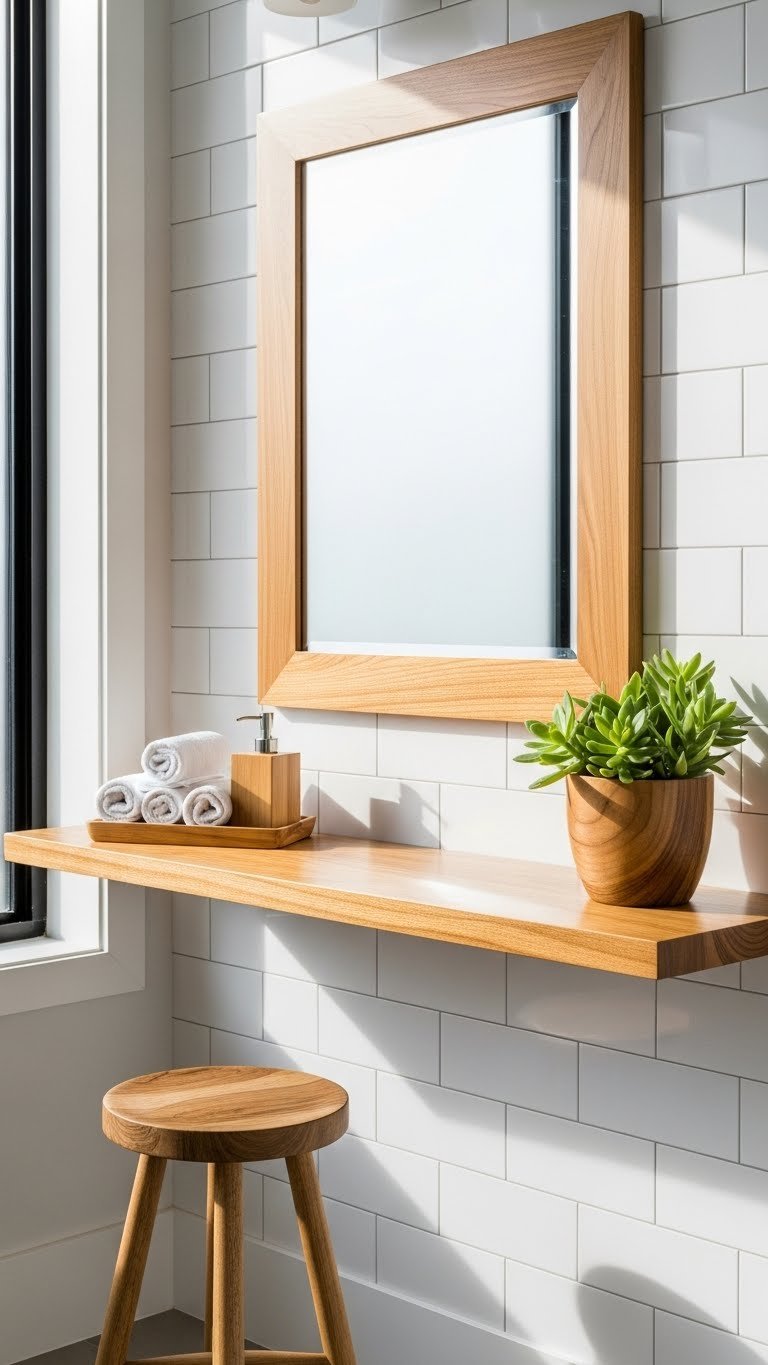
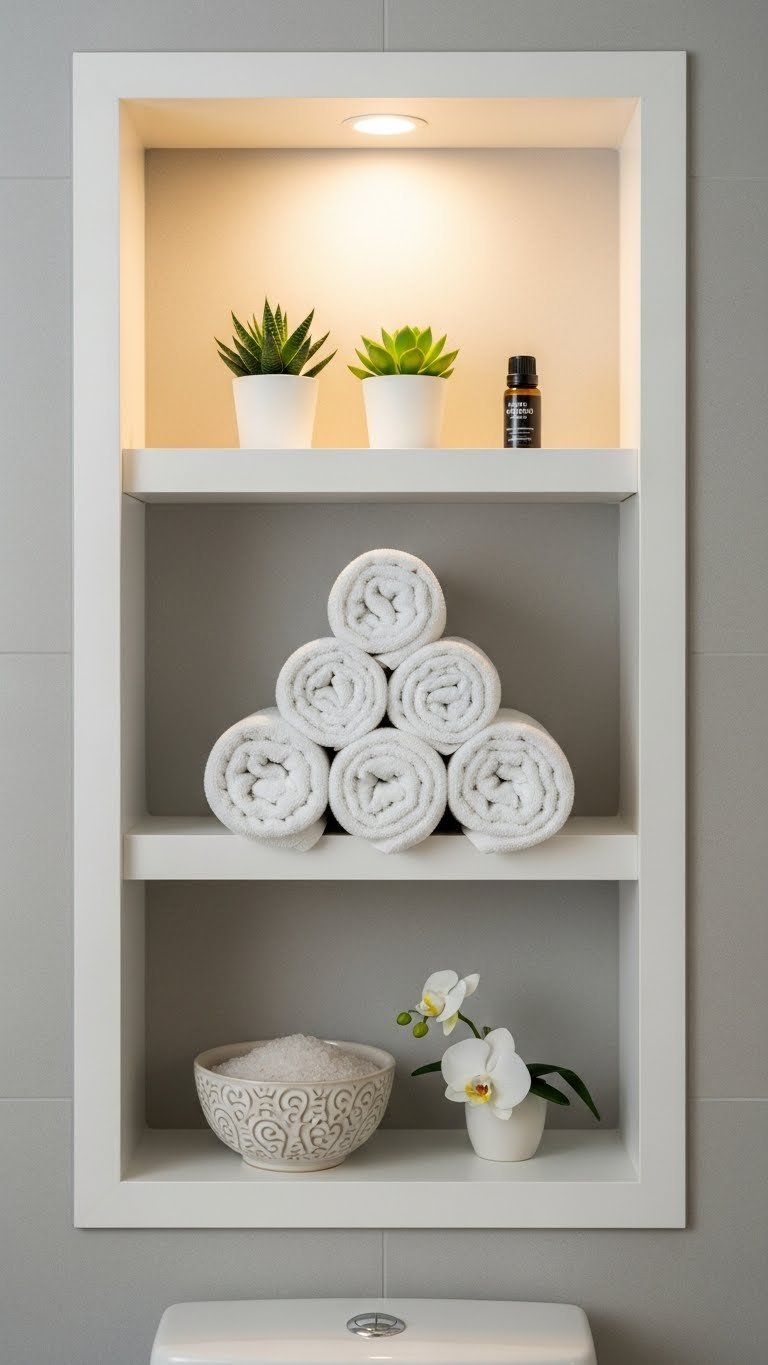
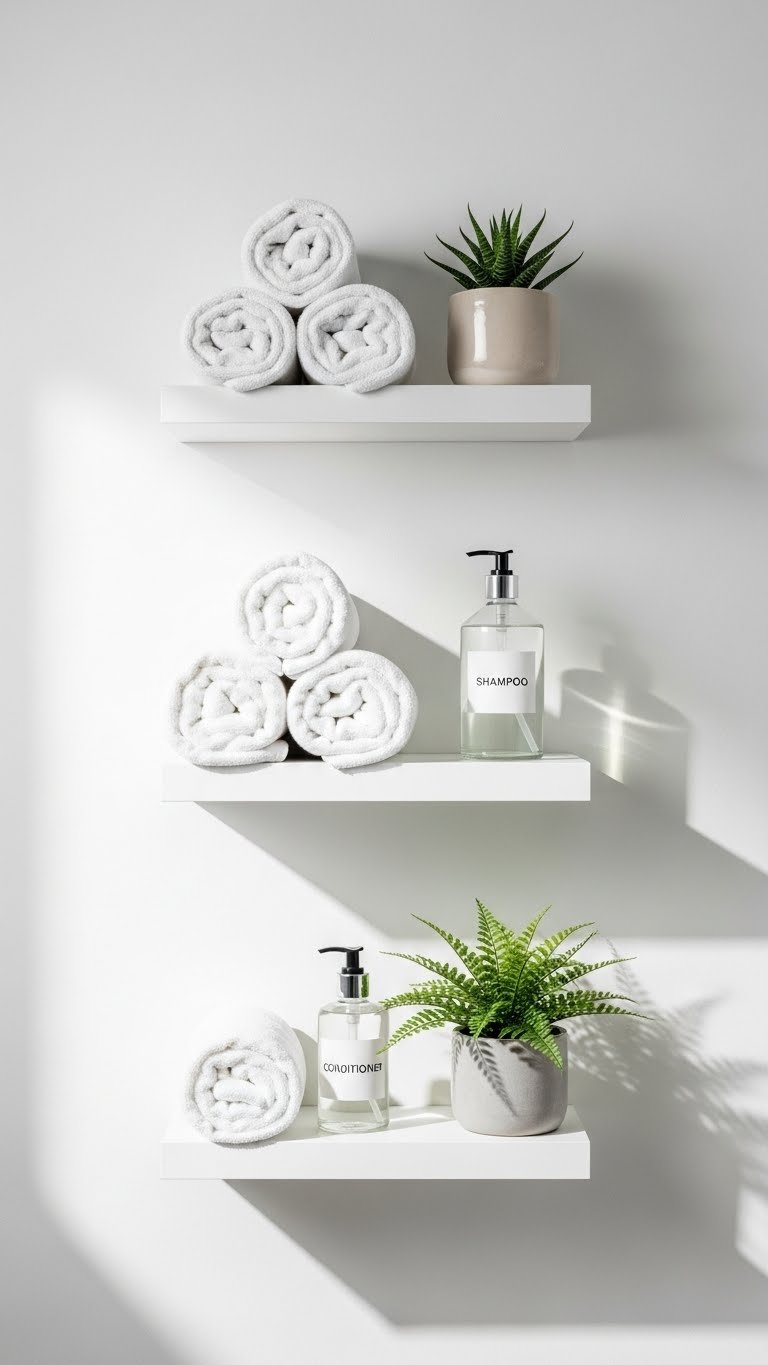
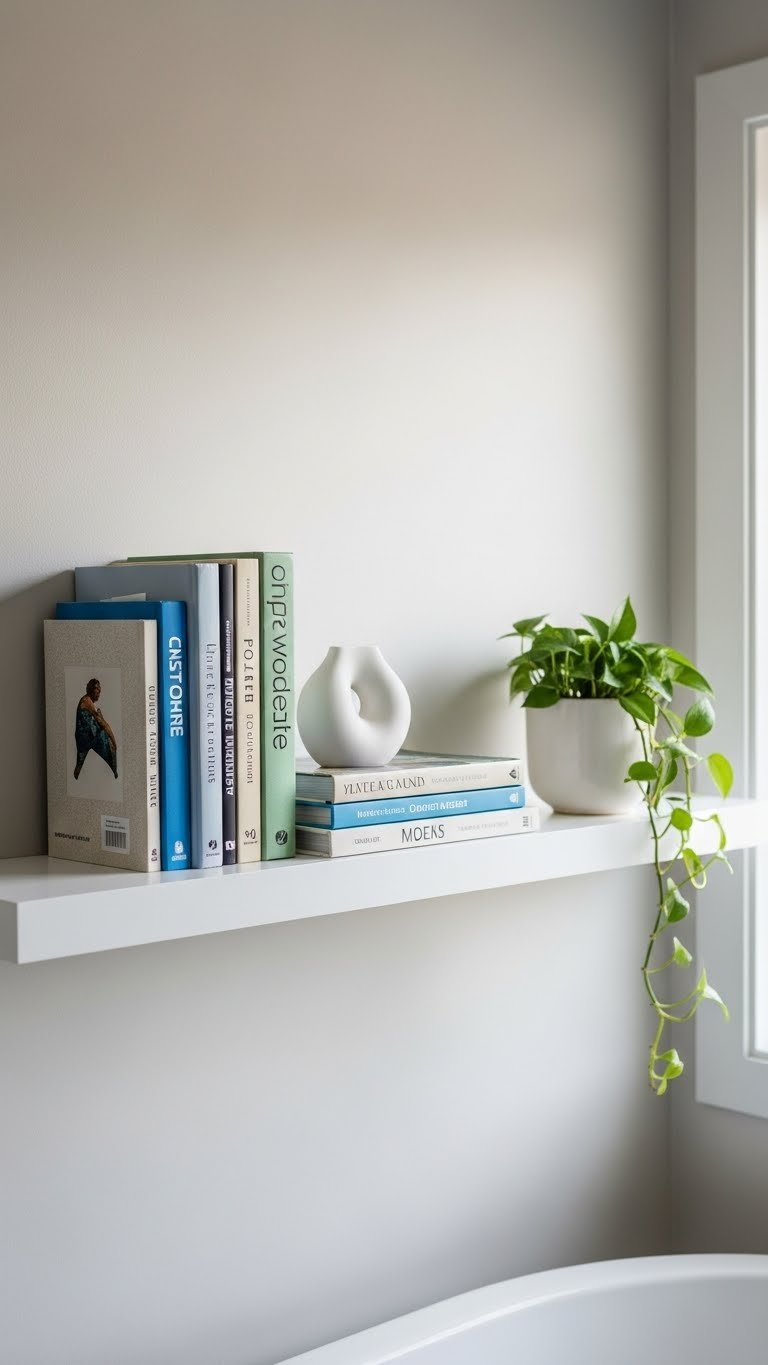
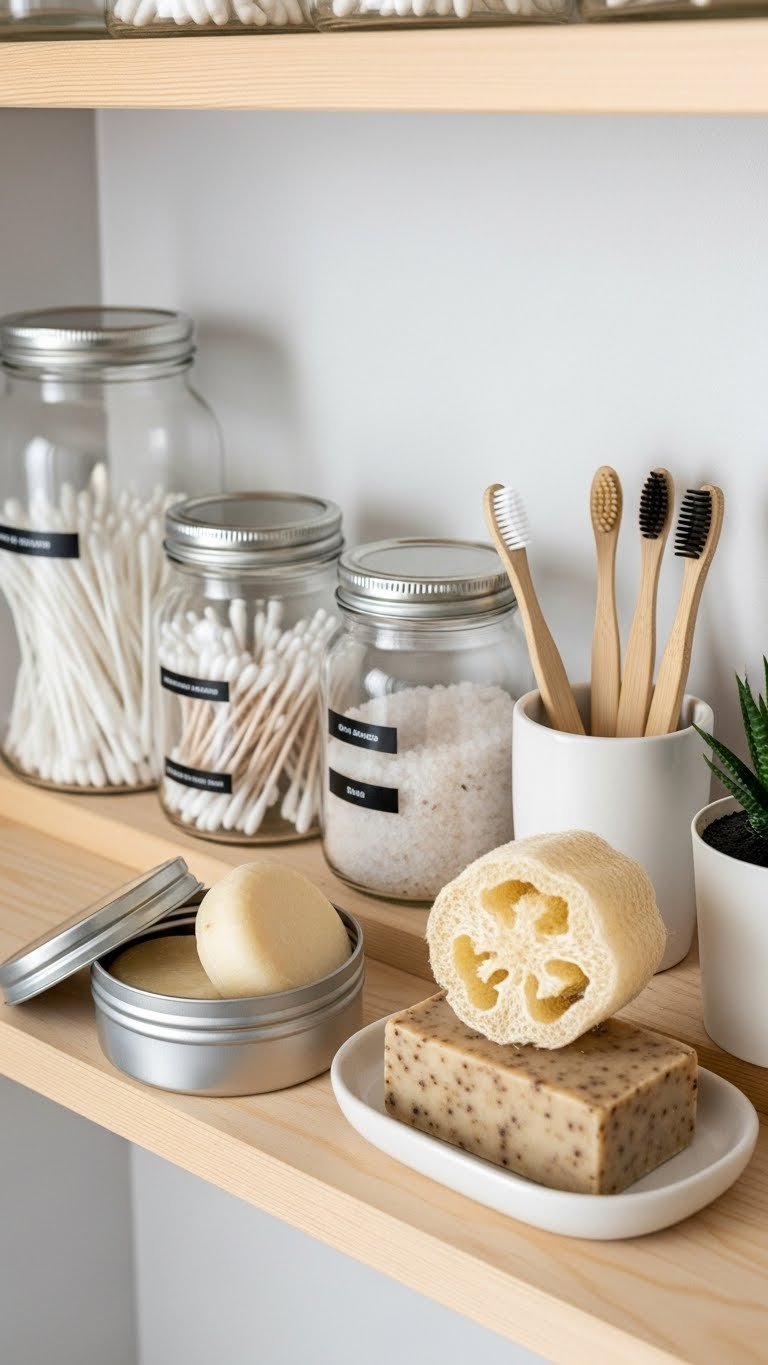
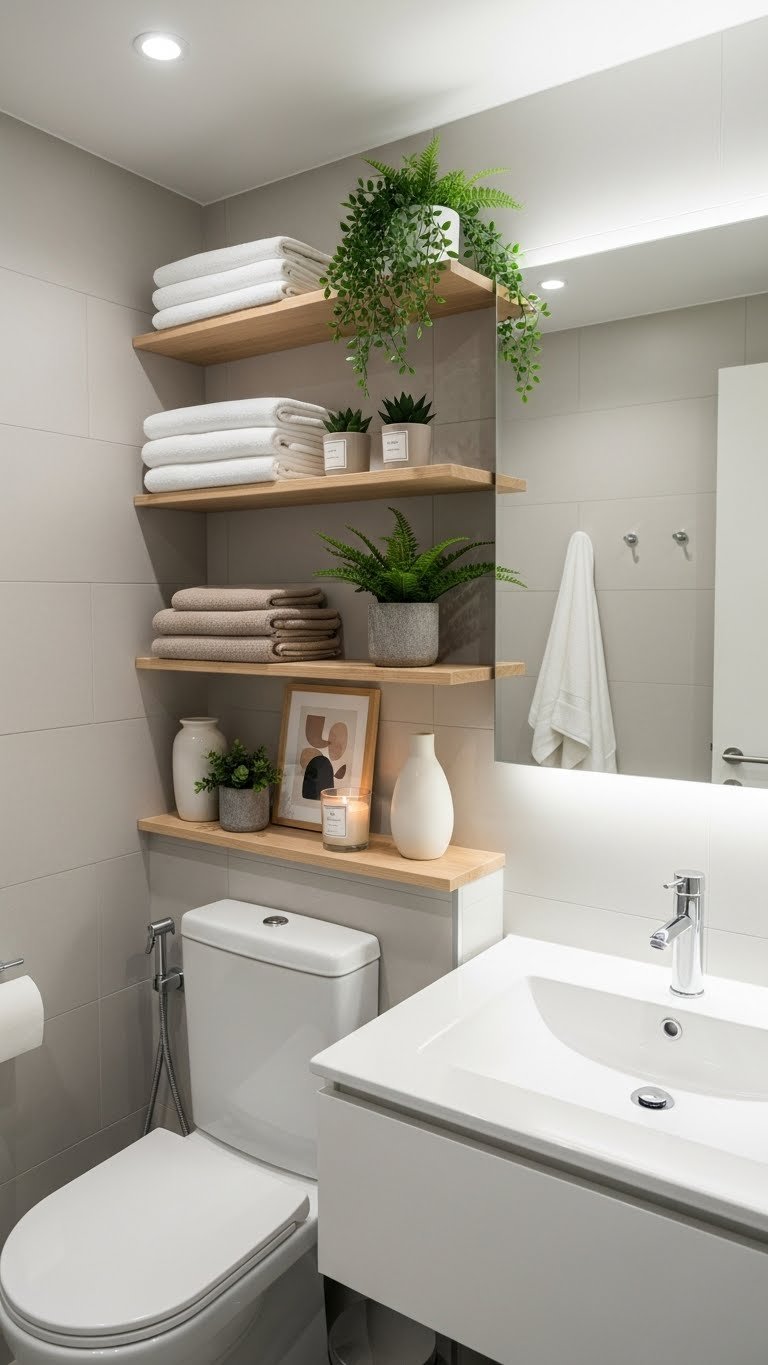
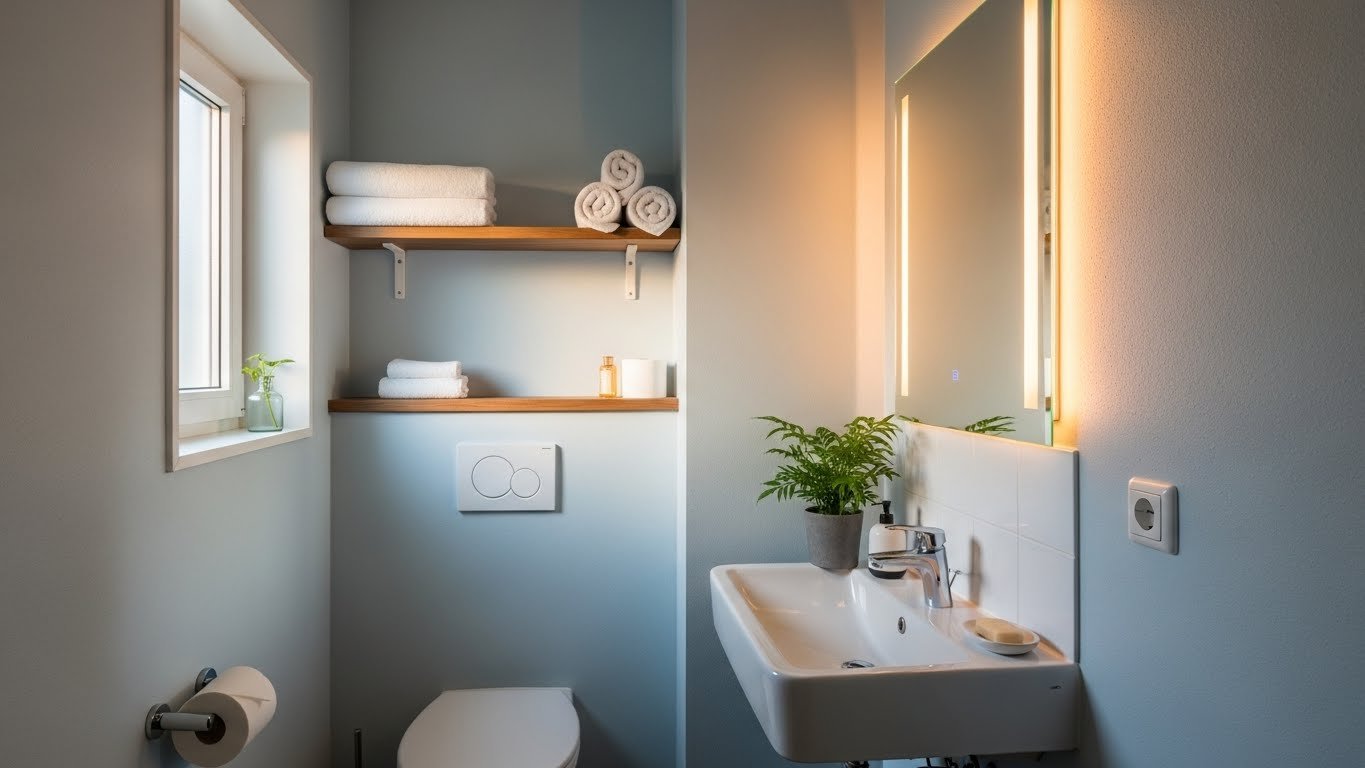
    3. Install Floating Shelves for Open Storage

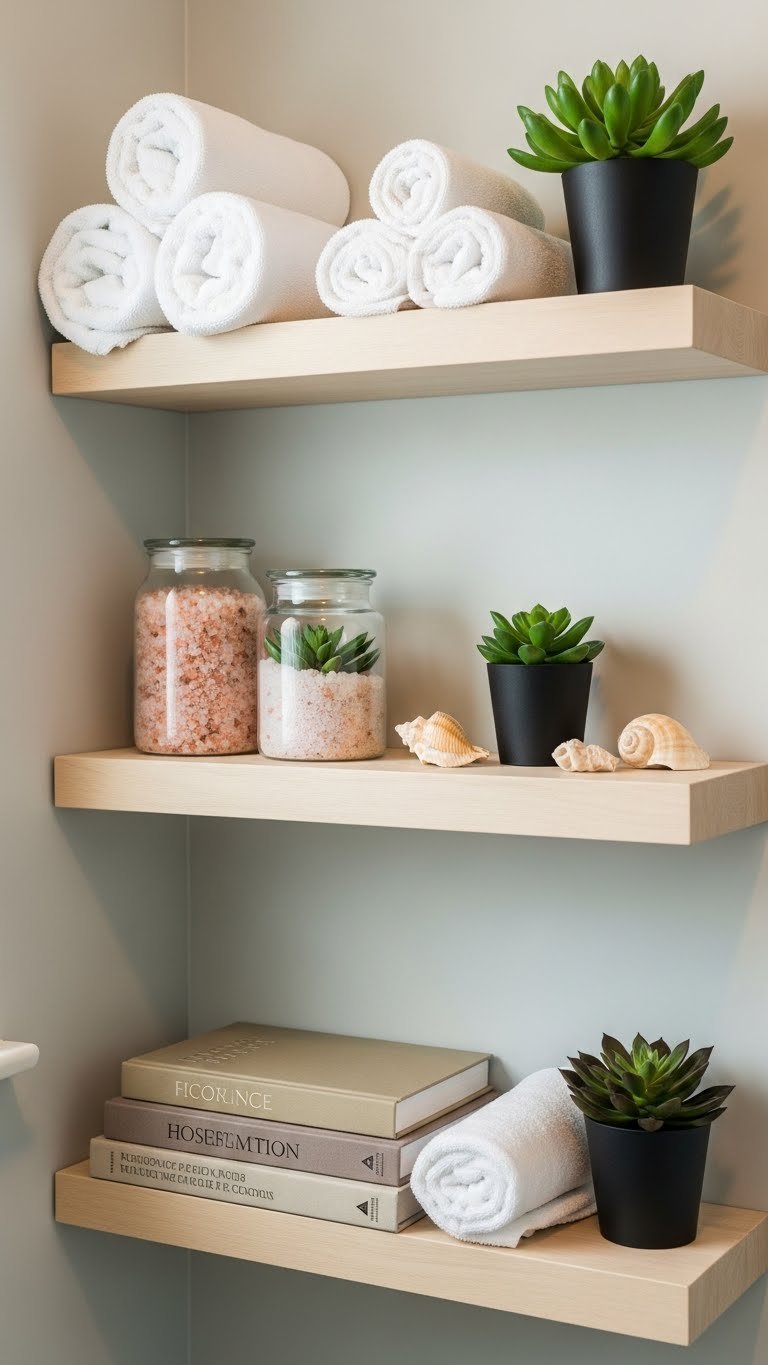
    Open shelving keeps small bathrooms from feeling cramped while giving you stylish storage that’s actually accessible. Floating shelves create the illusion of more floor space and let you display pretty items instead of hiding everything away.

    Floating shelves cost $25–$80 per shelf depending on material (wood, metal, or composite). Installation takes 30–45 minutes with basic tools or a drill. Mount them at varying heights—one above the toilet, one above the sink, one near the shower—for visual interest and function. Fill them with rolled towels, glass jars with cotton balls or bath salts, and a few small plants. Target and IKEA have affordable options; Wayfair and Amazon offer higher-end designs.

    Your bathroom looks curated and intentional instead of cluttered. You can reach what you need, guests see a styled space, and the open feeling makes everything seem bigger.

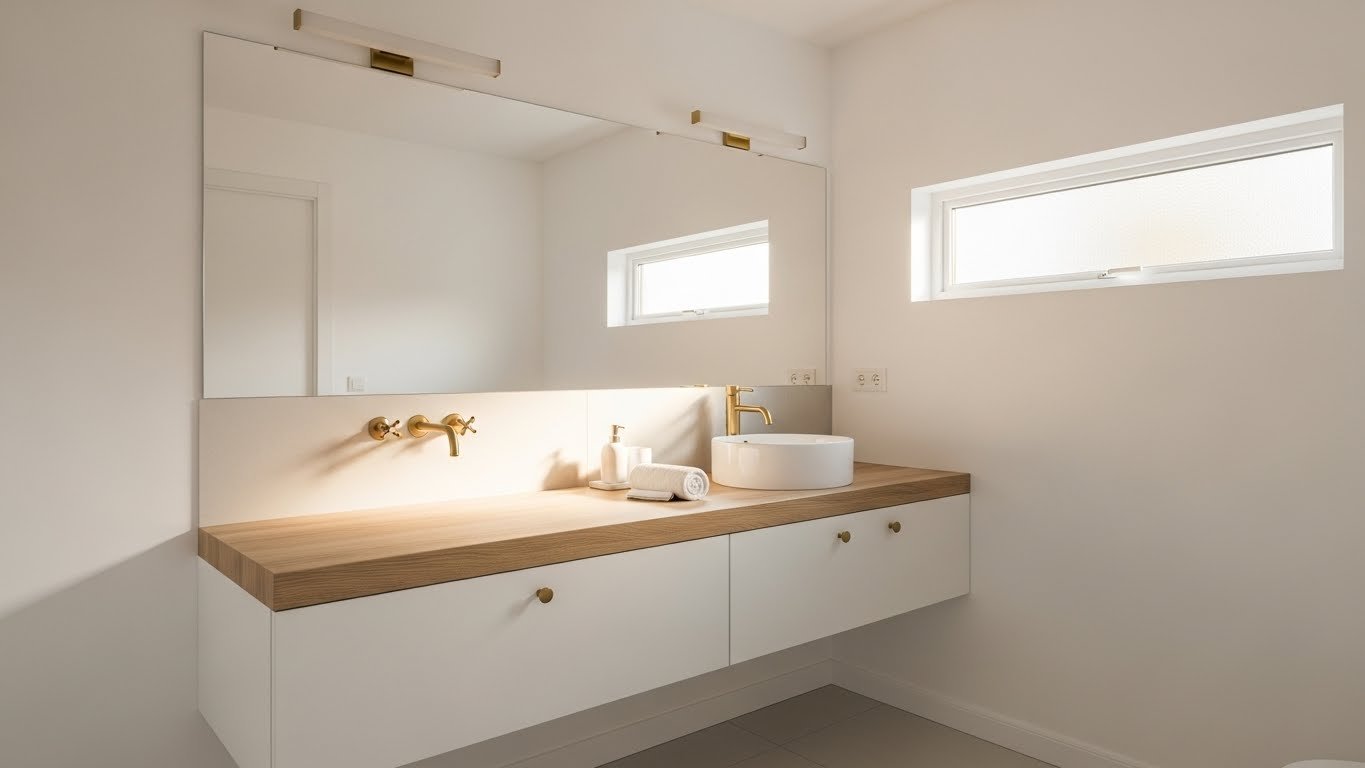
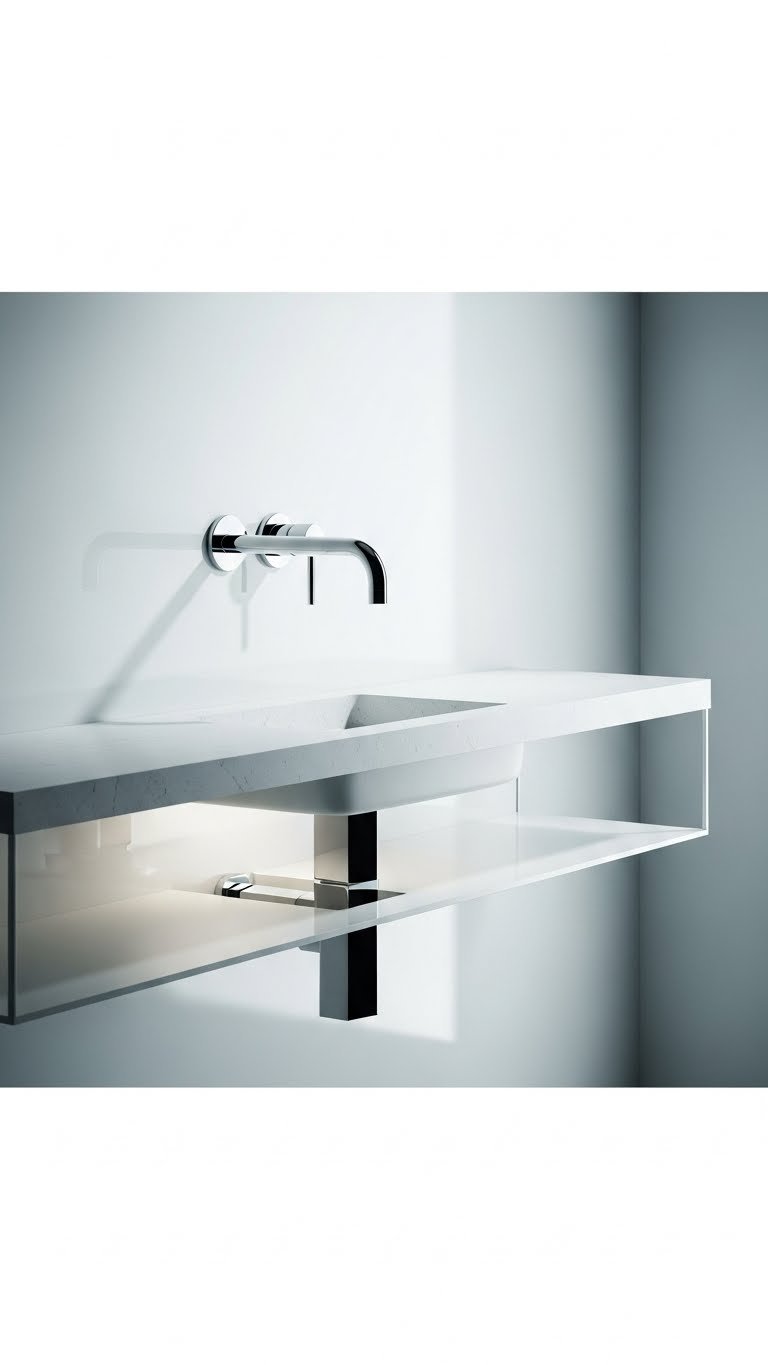
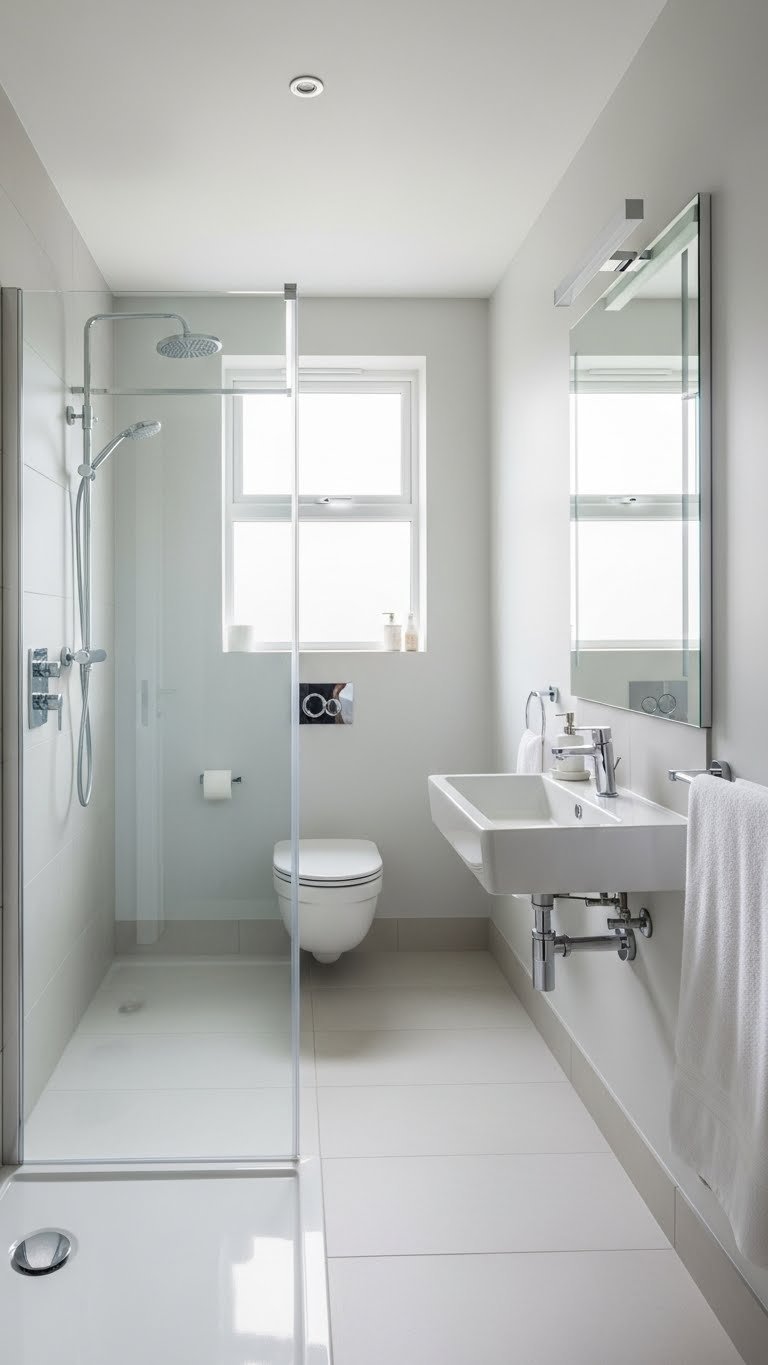
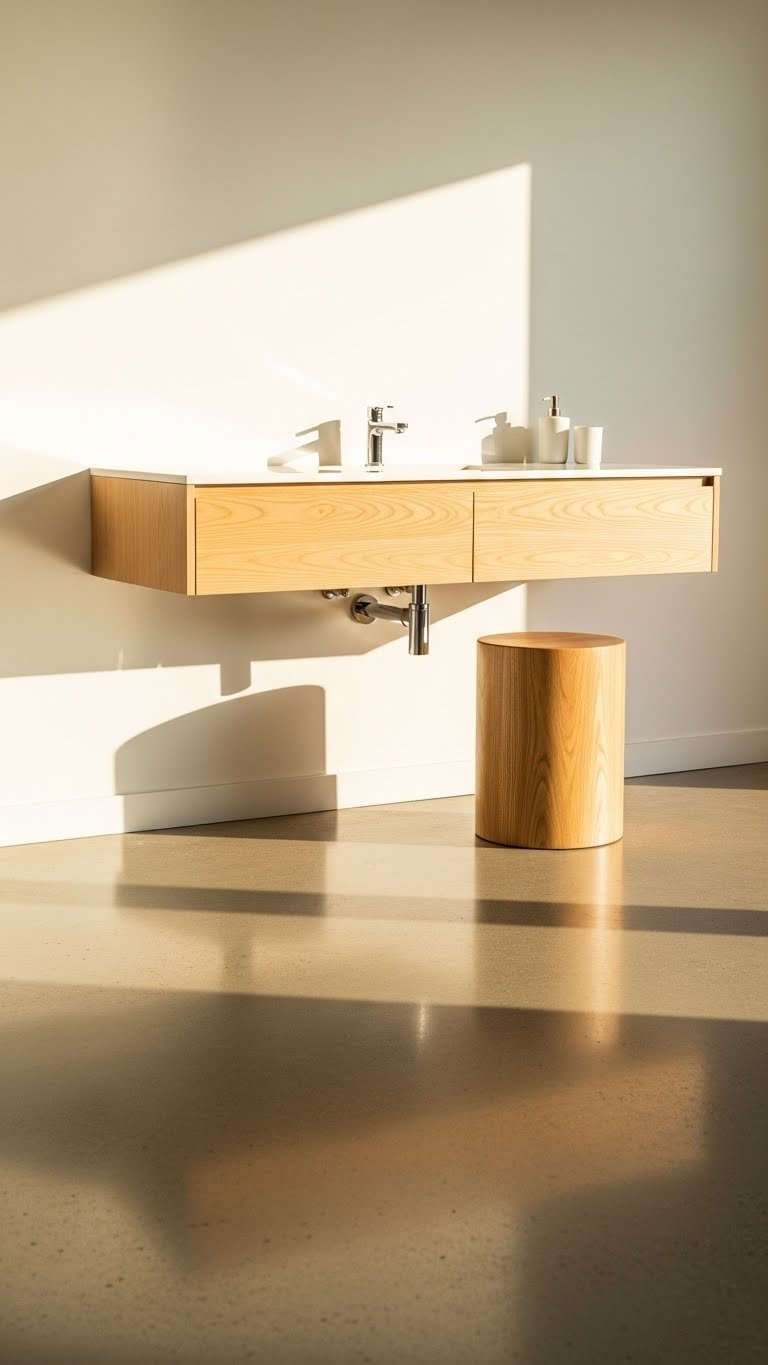
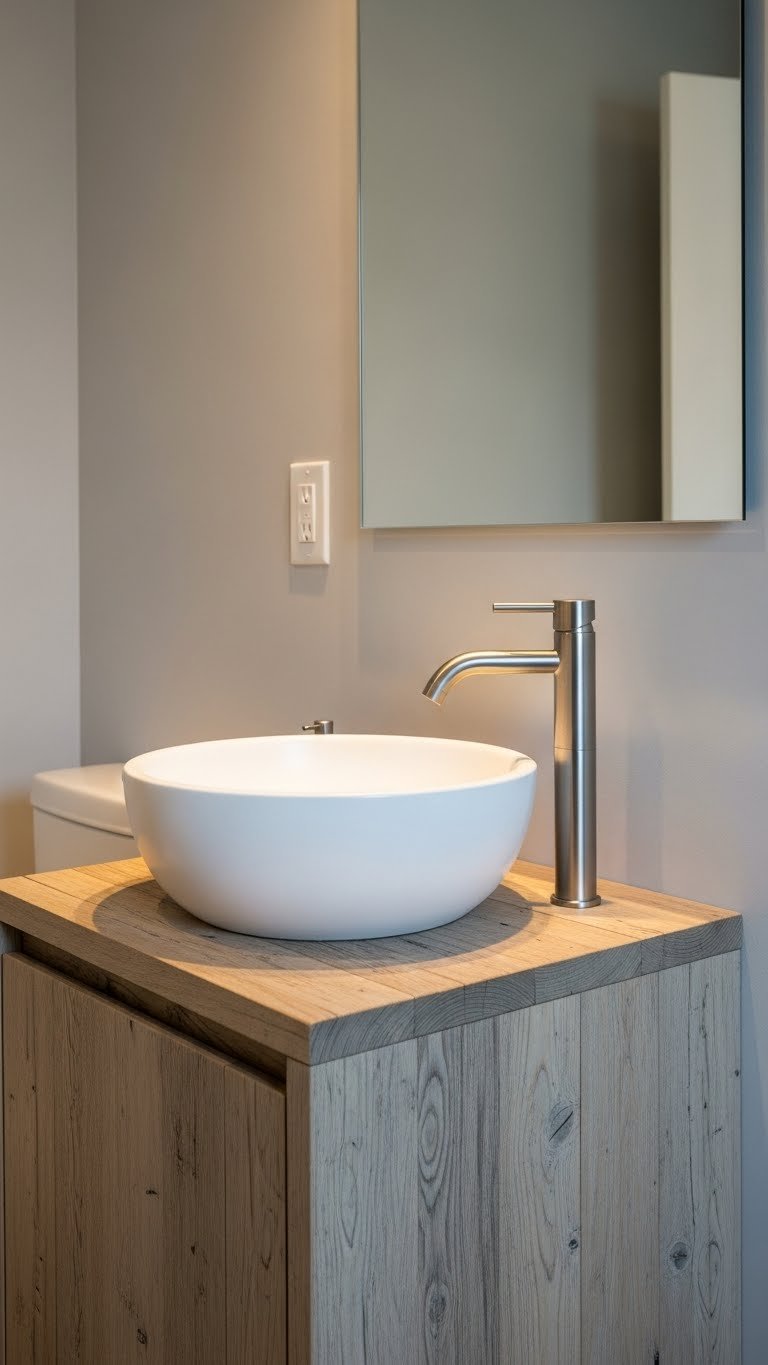
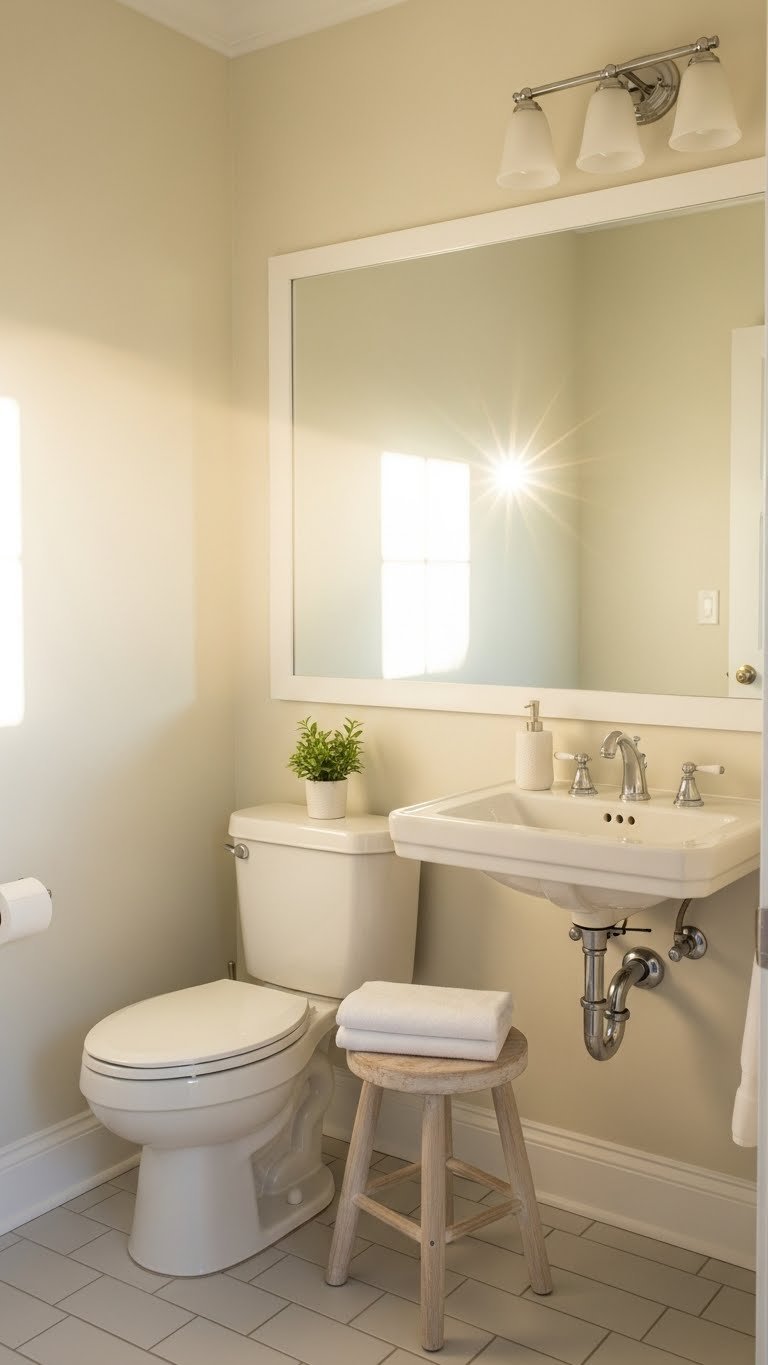
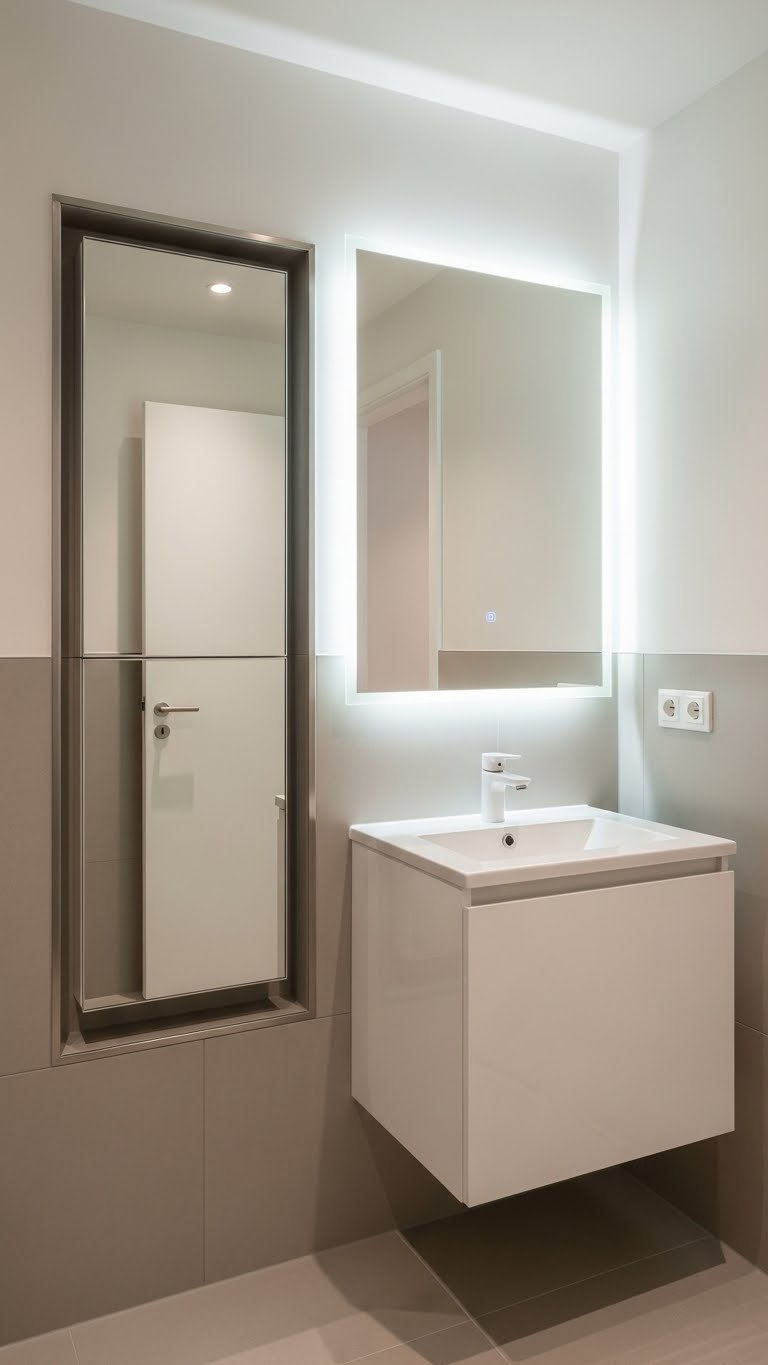
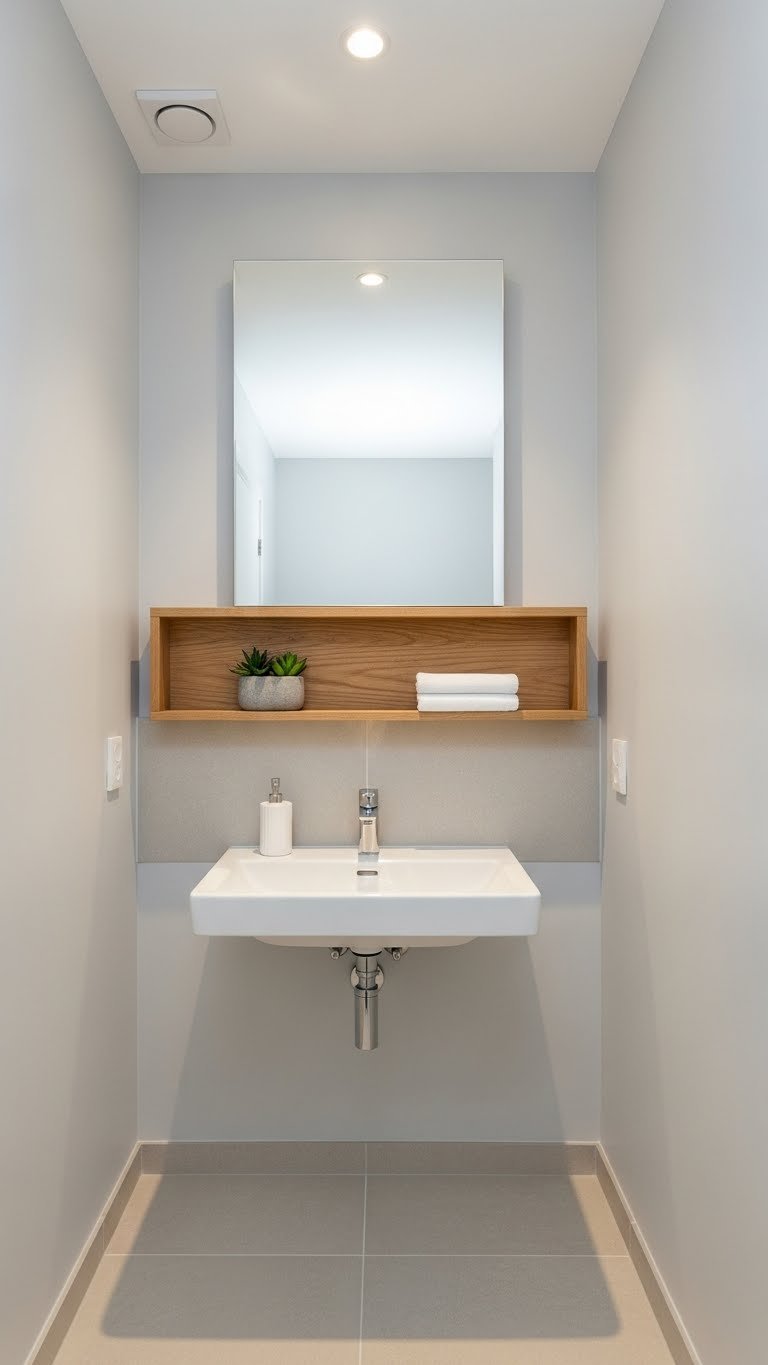
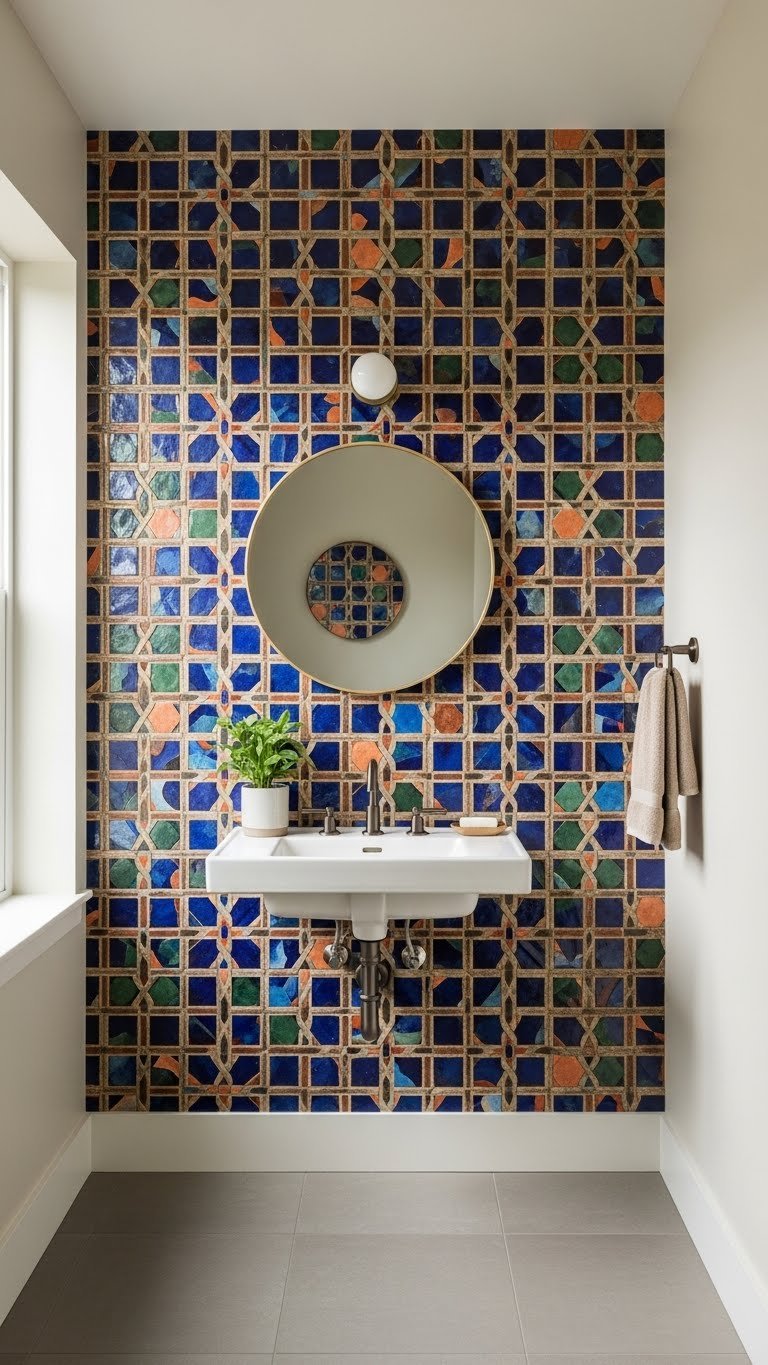
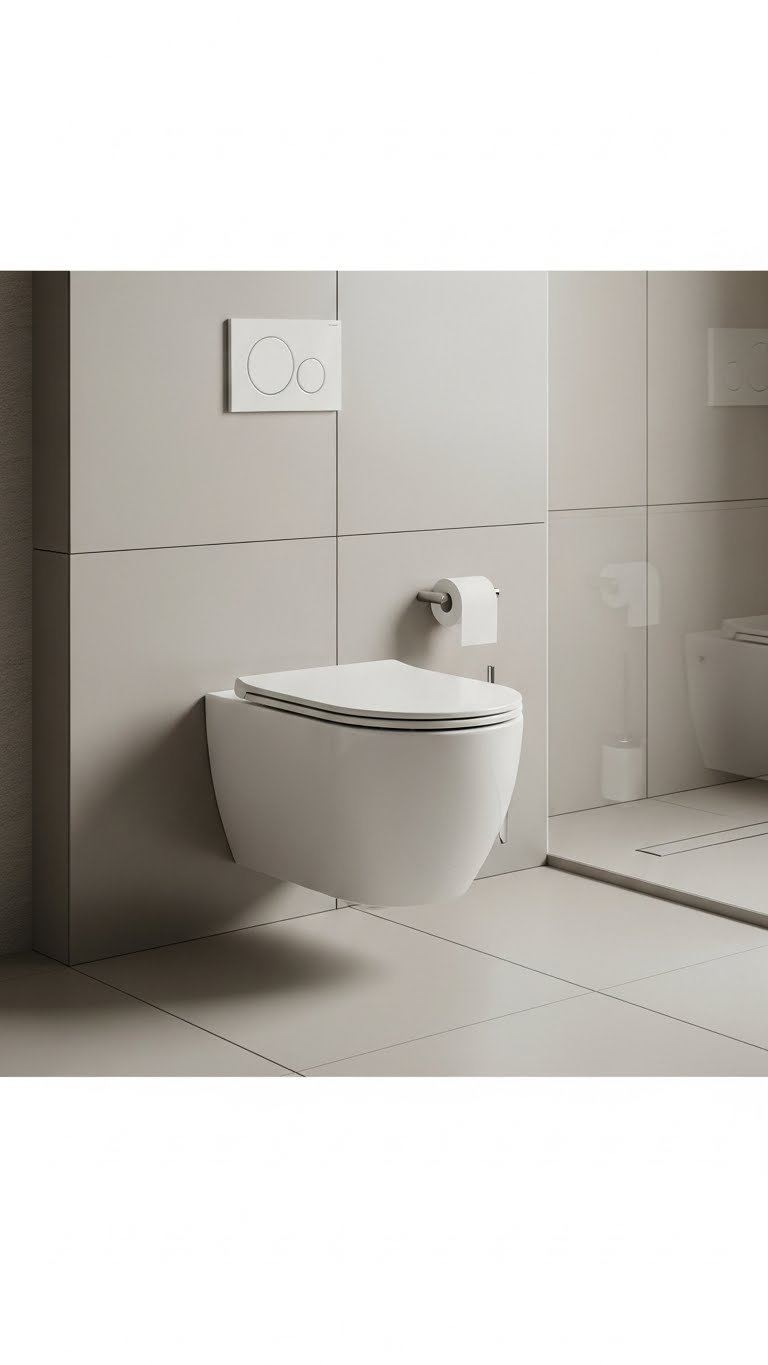
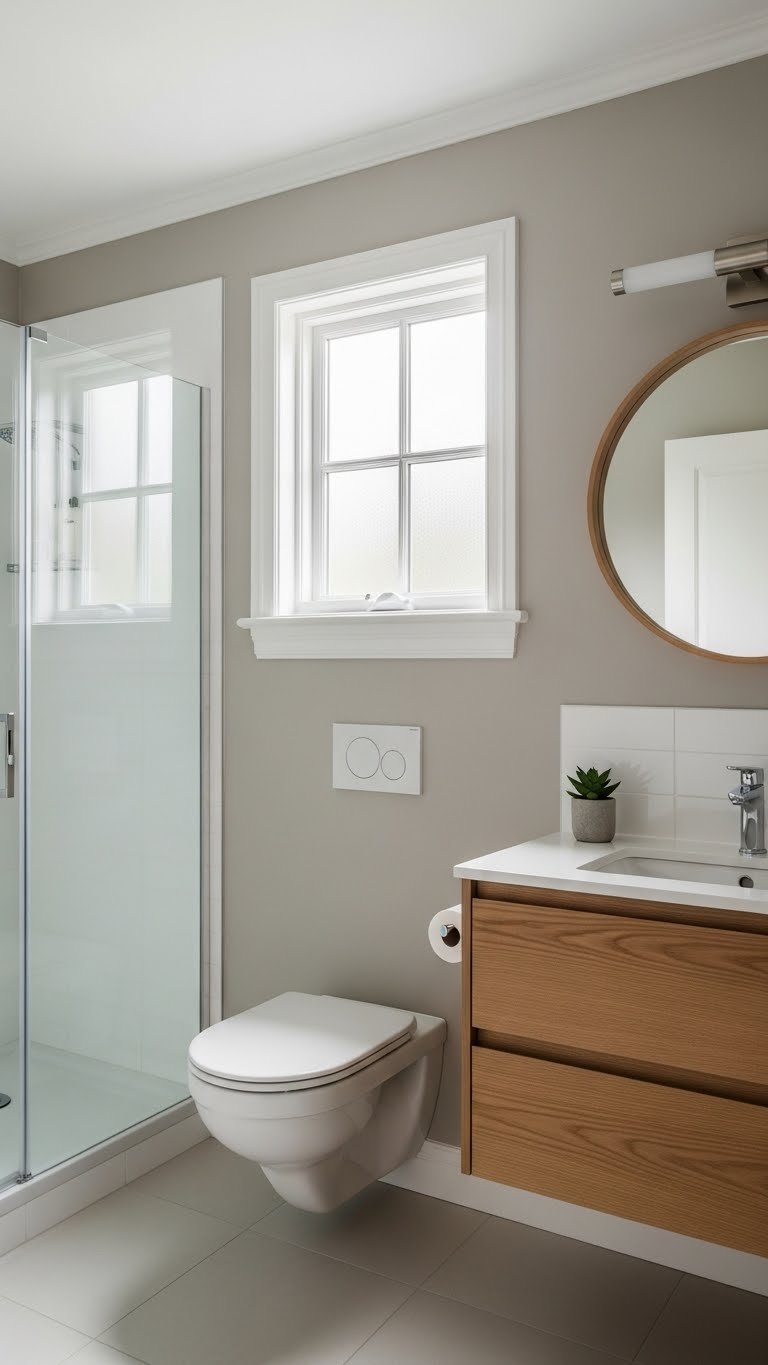
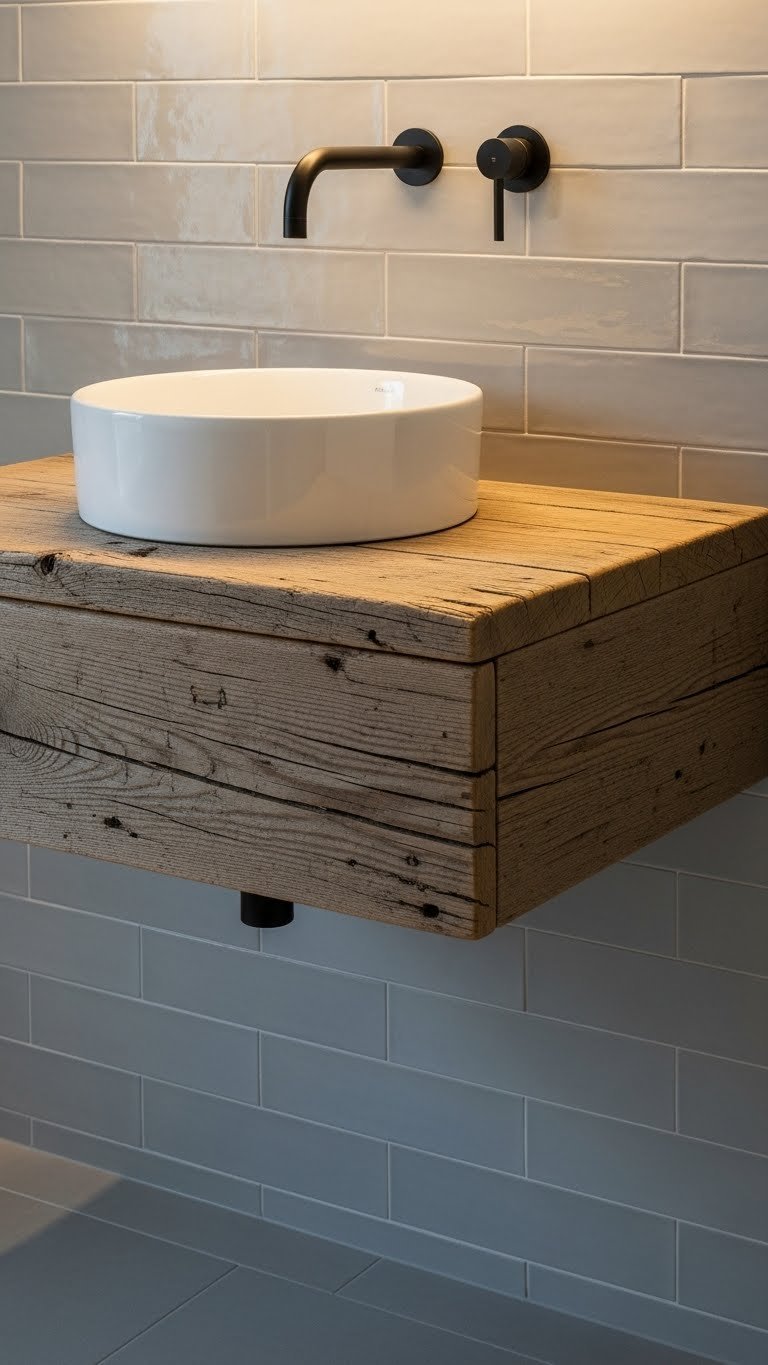
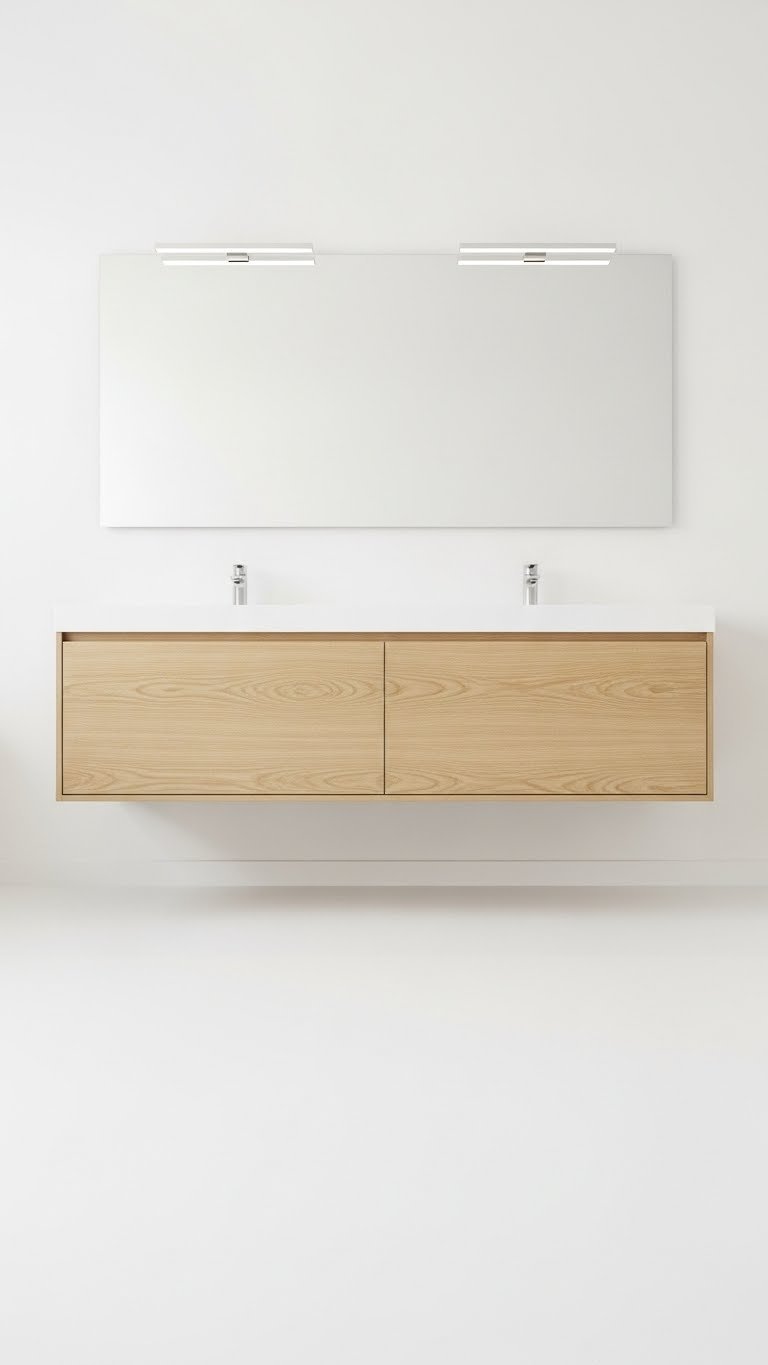
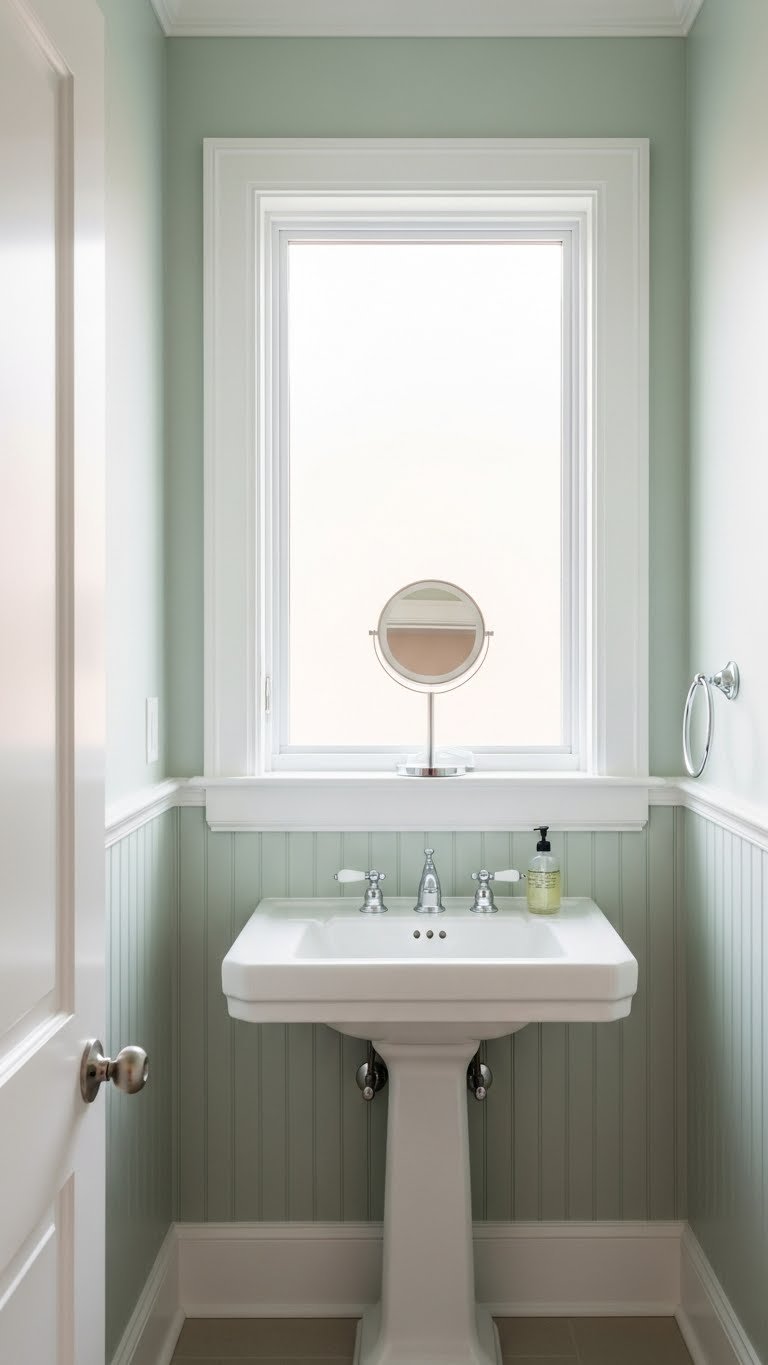
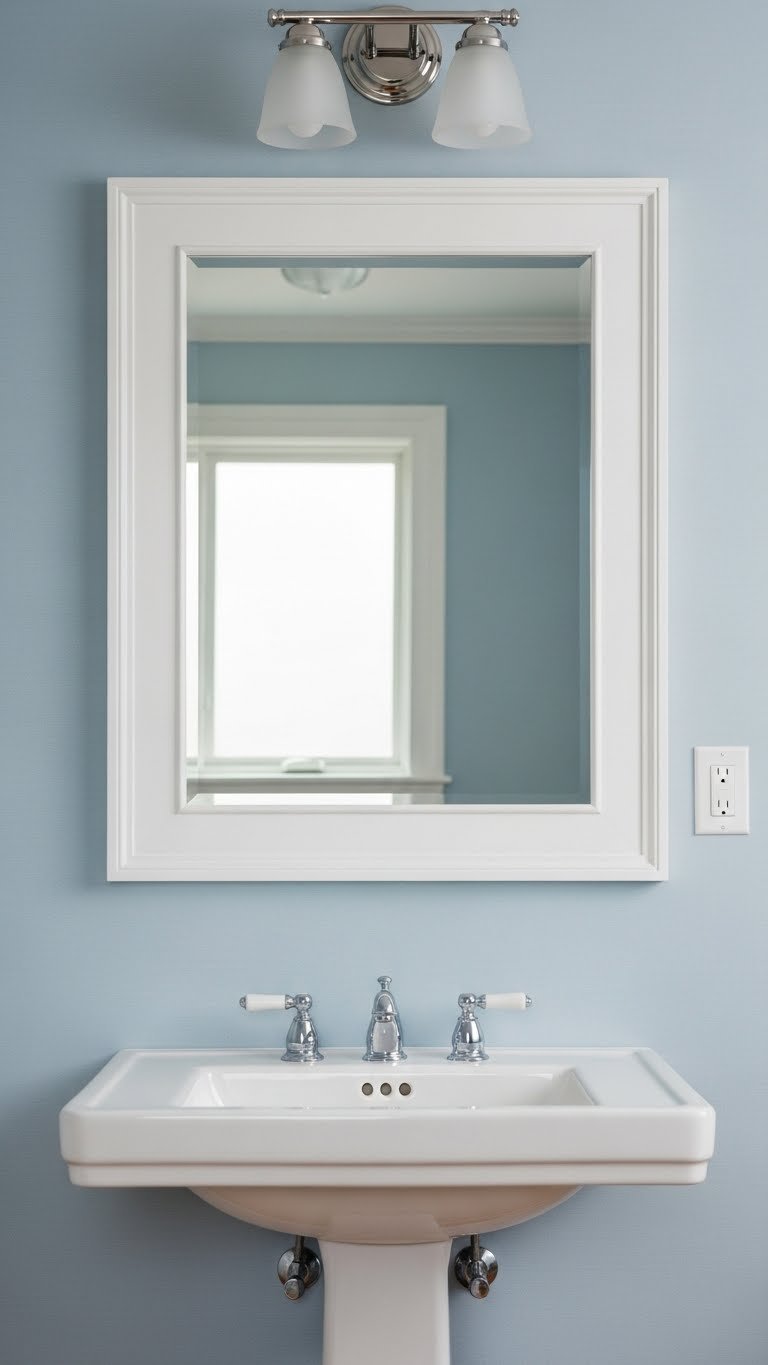
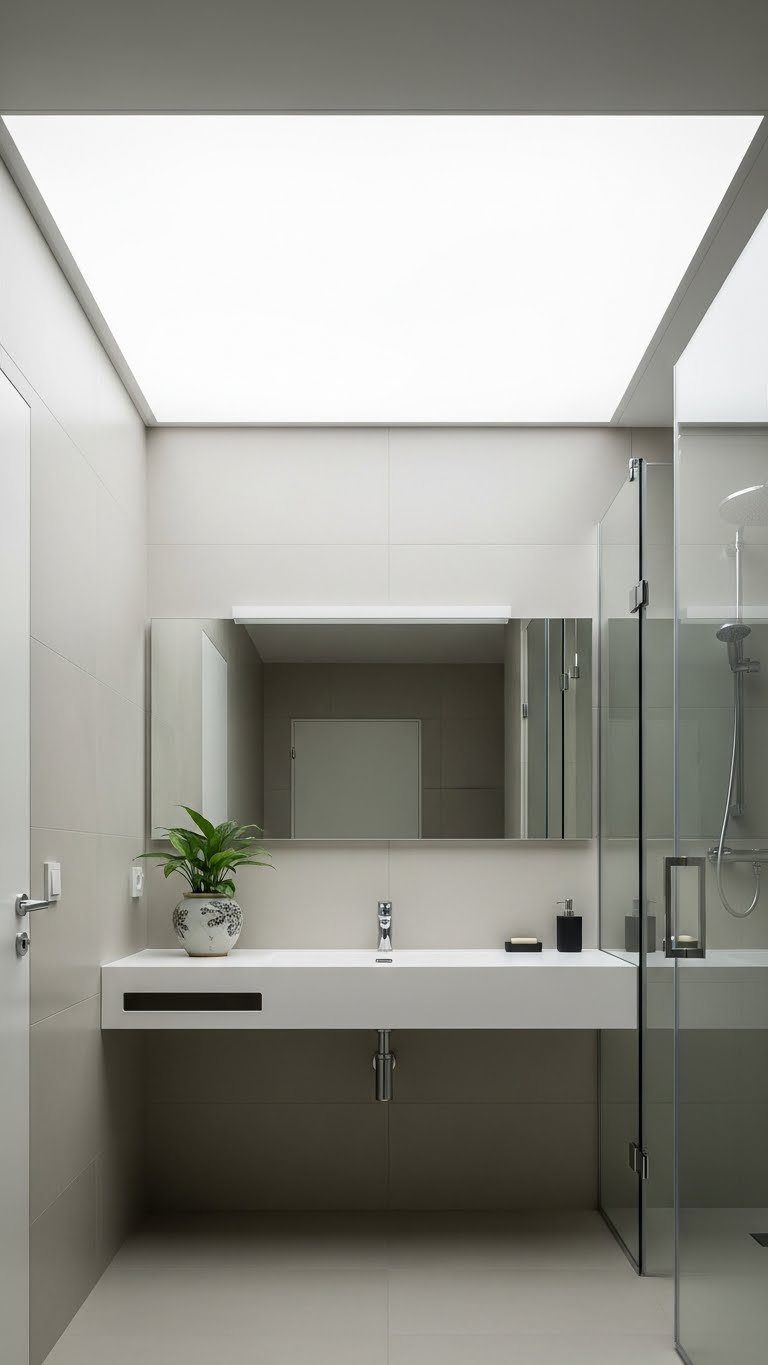
    4. Swap in a Pedestal Sink or Slim Vanity

    If your current vanity hoards visual clutter, switching to a pedestal sink or narrow vanity instantly opens up the room. Less furniture = more breathing room, especially in tight spaces.

    A basic pedestal sink runs $100–$300; a slim wall-mounted vanity (12–18 inches wide) costs $150–$500. Installation typically requires plumbing adjustments ($150–$300 if you hire help). You lose under-sink storage, so pair this idea with #3 (floating shelves) for compensation. Home Depot and Wayfair have good selections. Pedestal sinks work best in rentals since they require fewer modifications than removing cabinetry.

    Your floor becomes visible, light flows freely, and the space stops feeling cluttered the moment you walk in. It’s one of the fastest ways to make a bathroom feel intentional and spa-like.

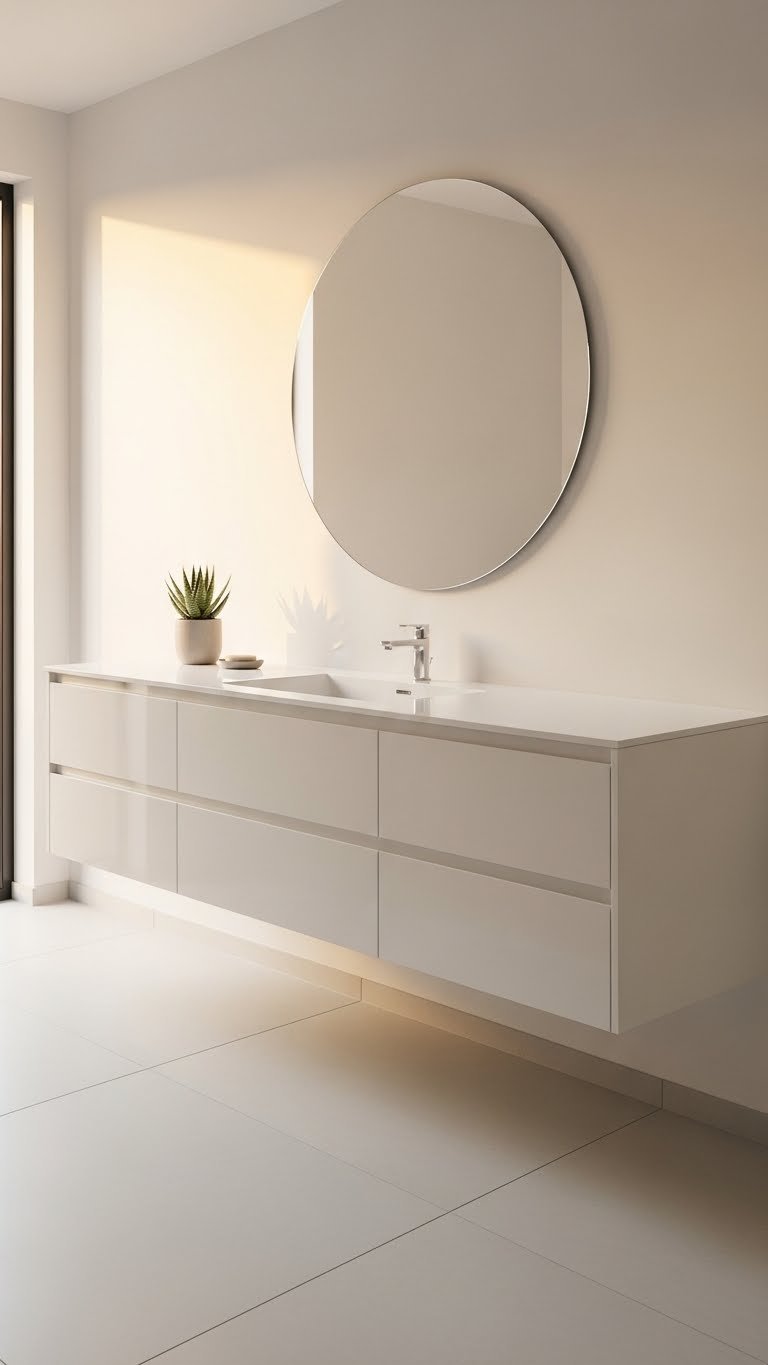
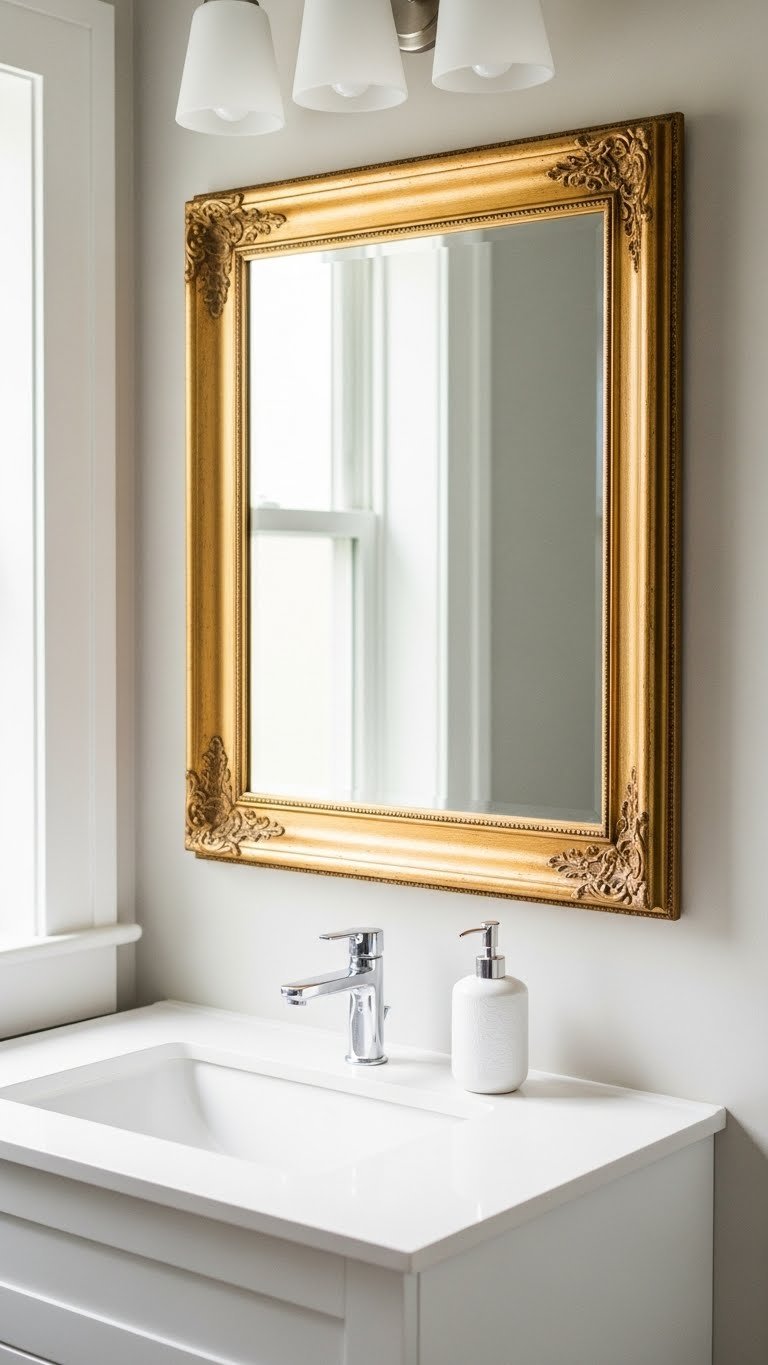
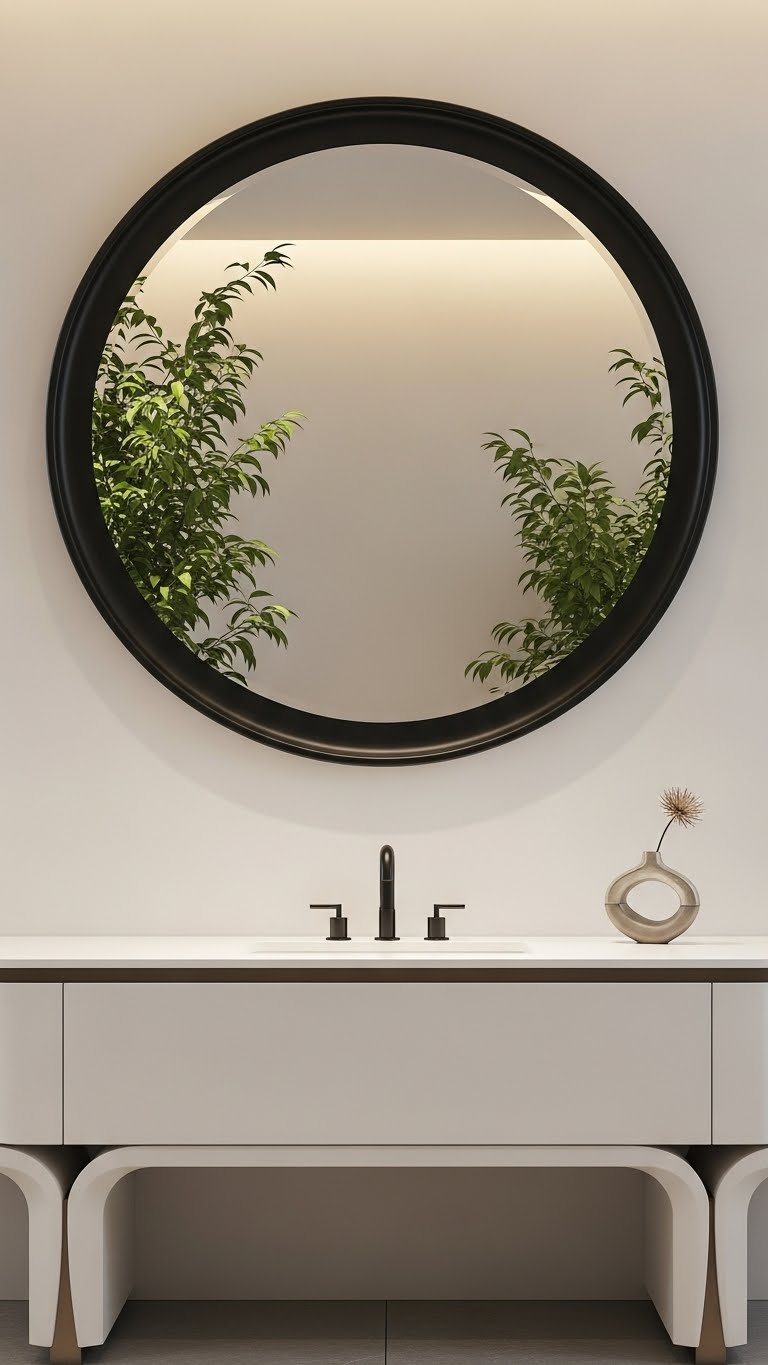
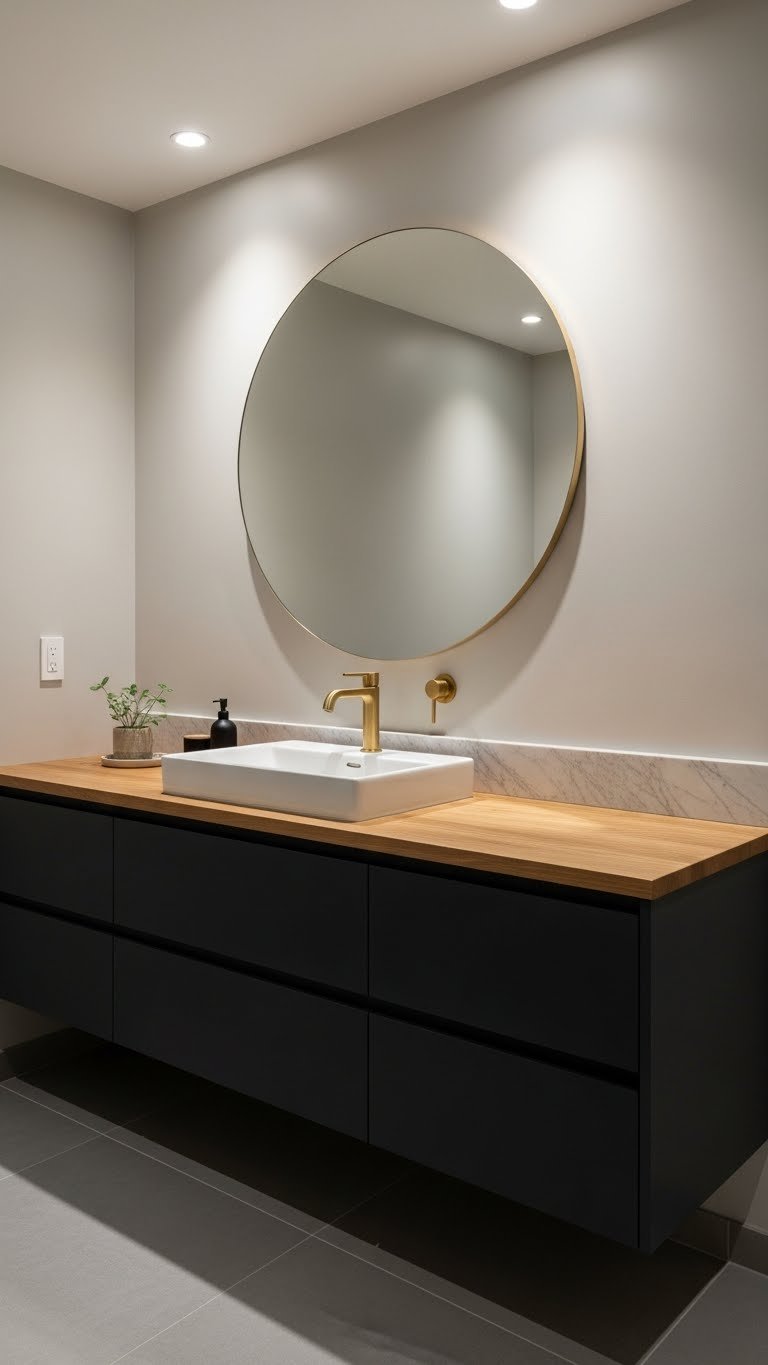
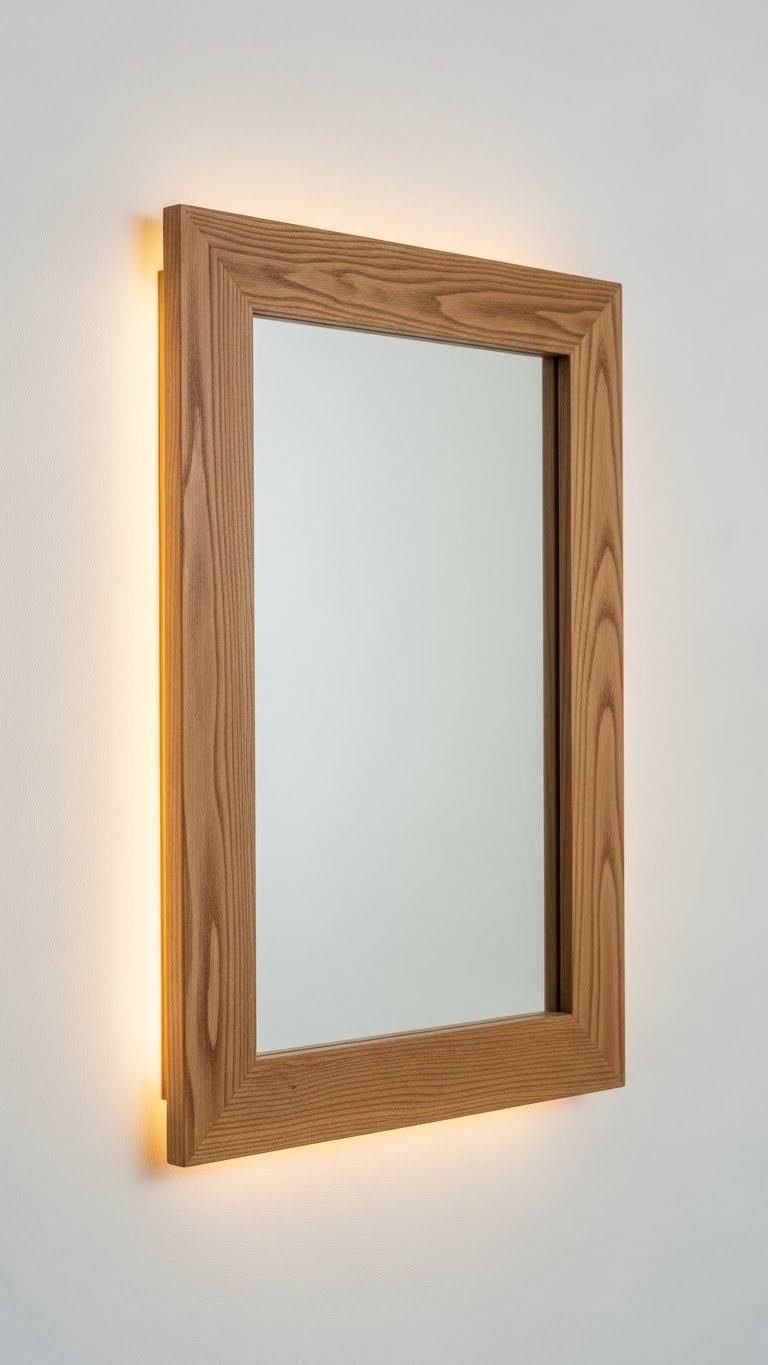
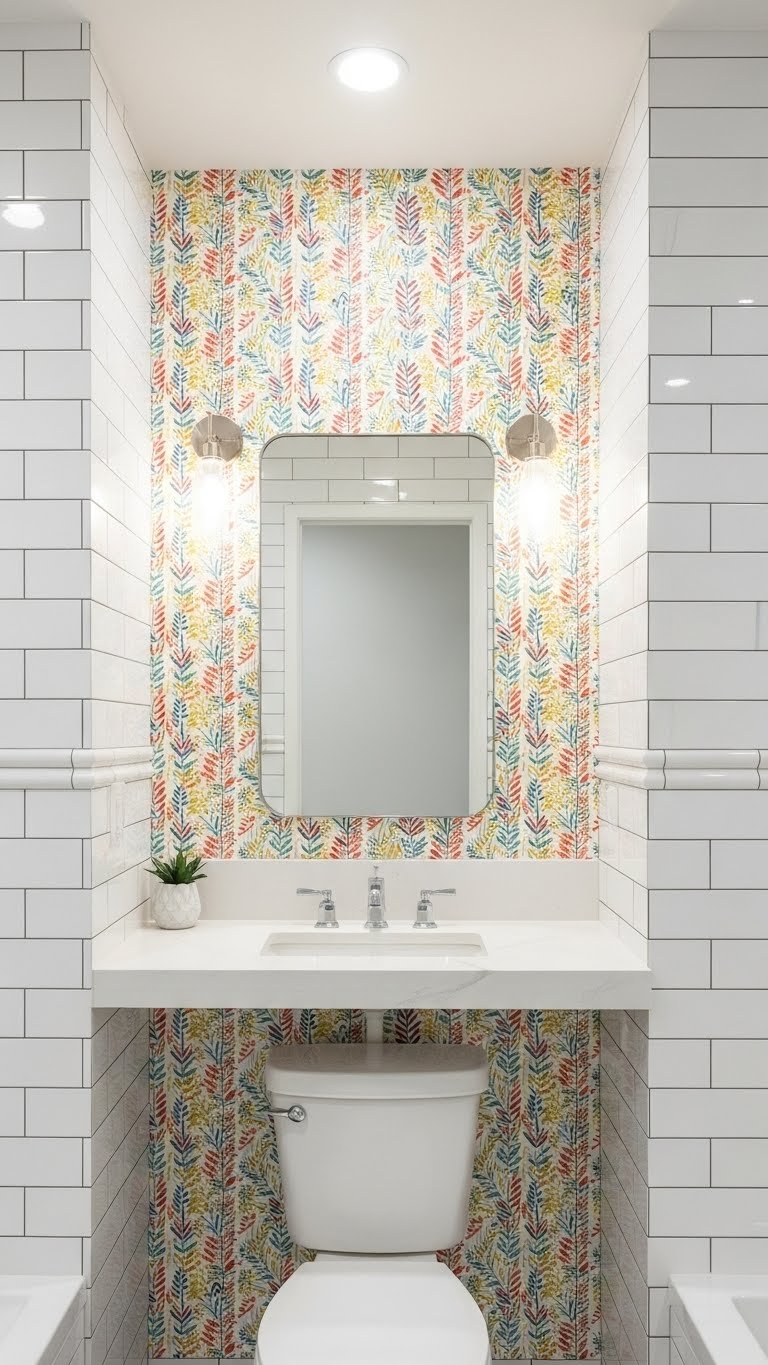
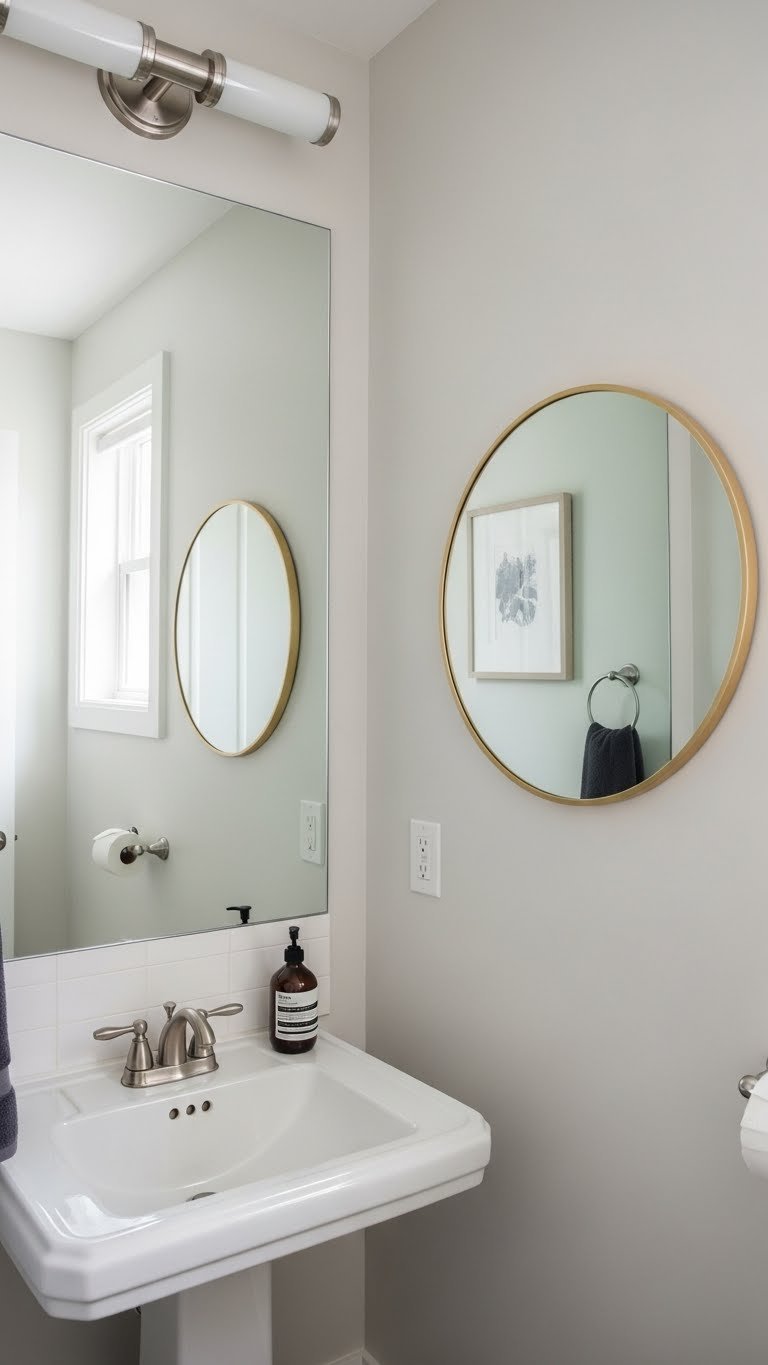
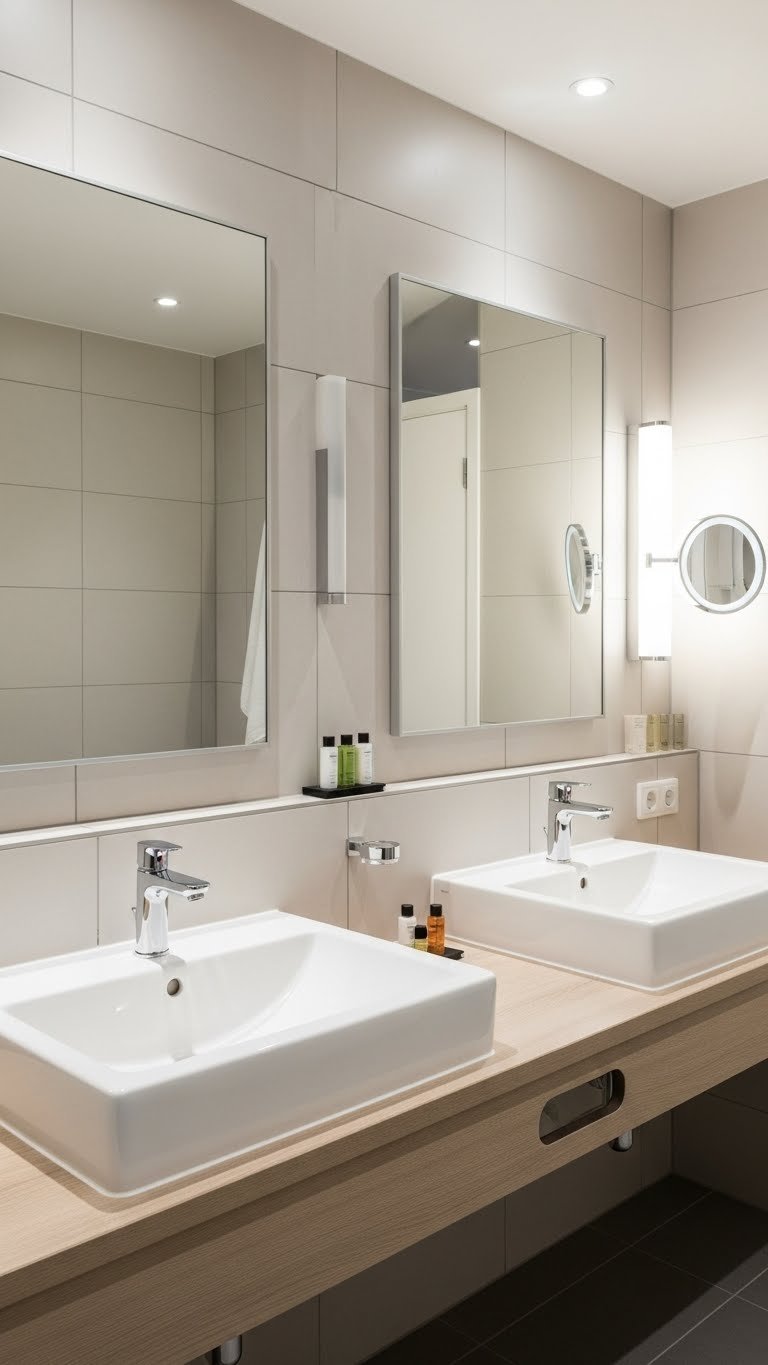
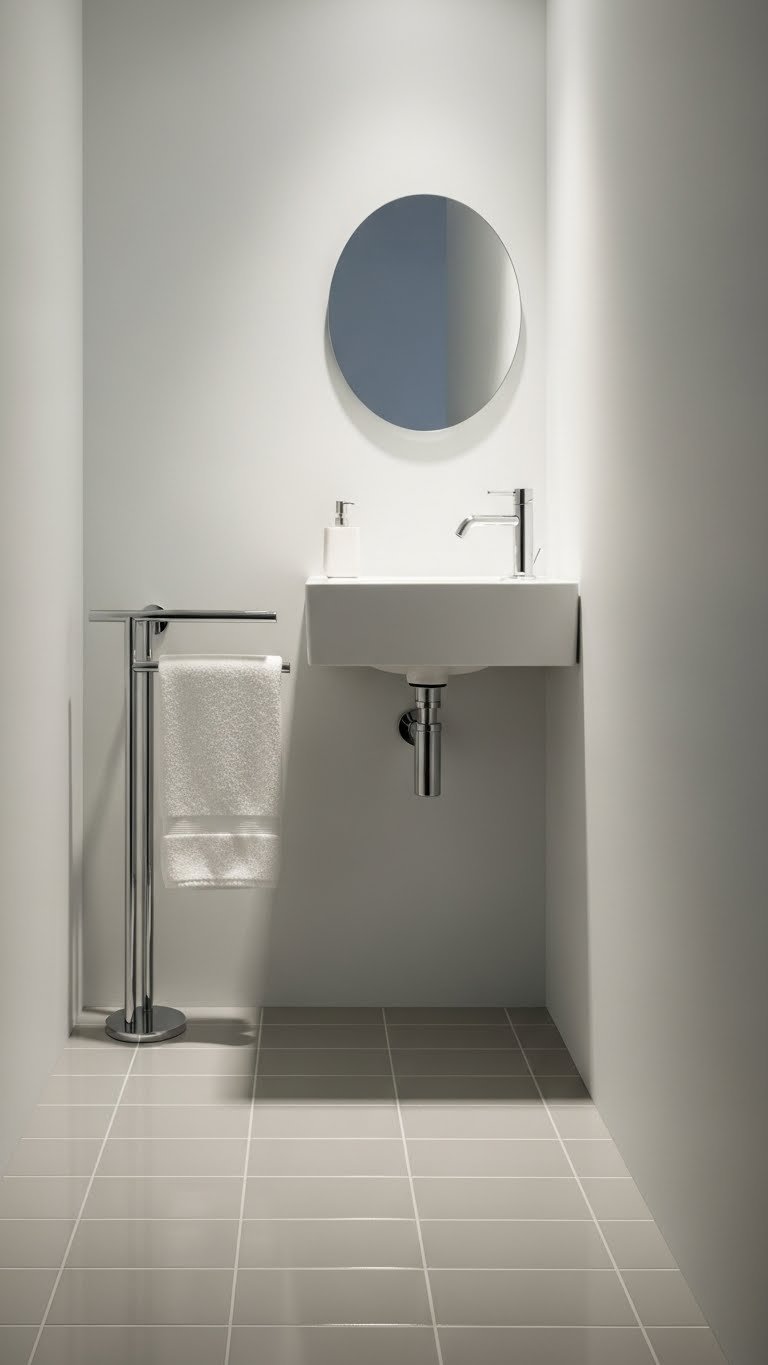
    5. Hang a Large Mirror to Bounce Light

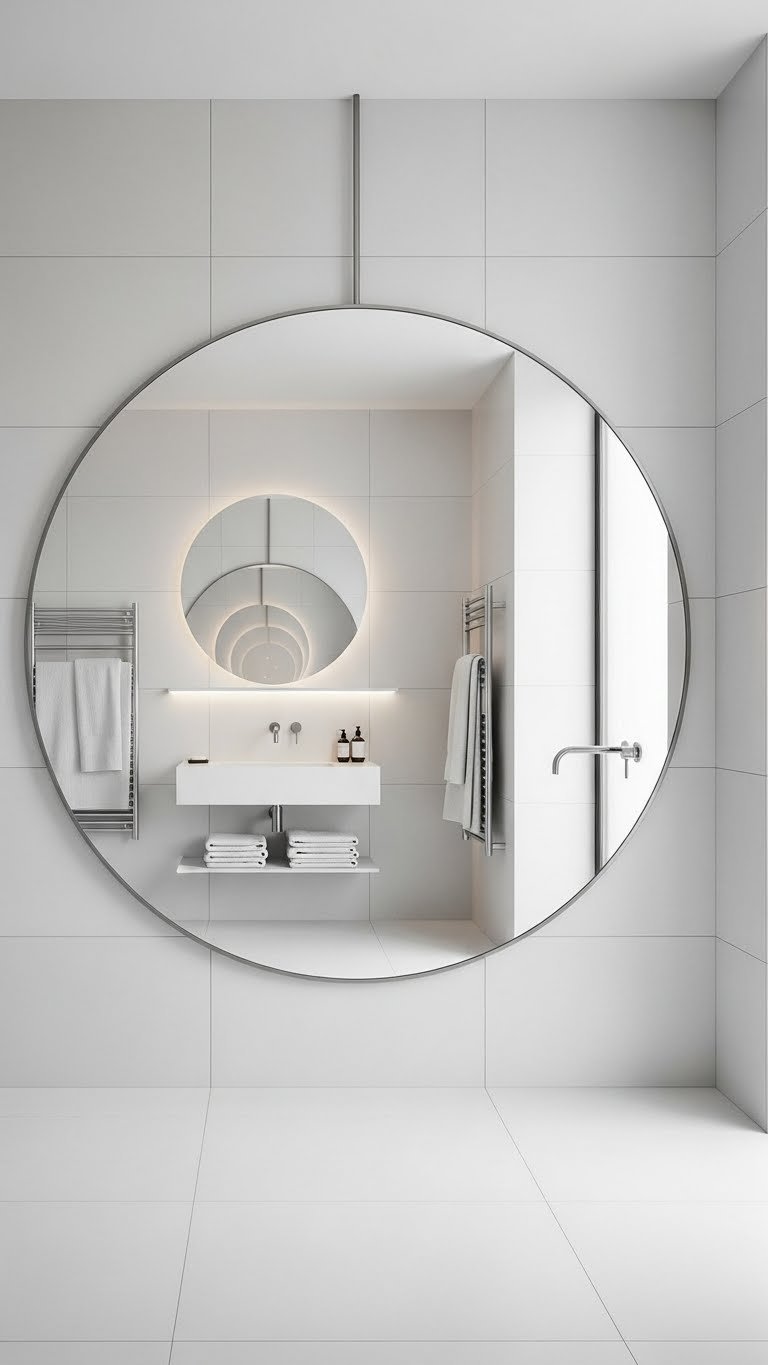
    A large mirror doesn’t just serve a practical purpose—it visually doubles your space by reflecting light and creating depth. This is especially powerful in small or windowless bathrooms.

    An oversized mirror (36–48 inches) costs $40–$200 depending on frame style. Round, arched, or irregular shapes feel more interesting than rectangles. Mount it directly on the wall with heavy-duty adhesive (rental-friendly) or use existing hardware holes if available. Brass, matte black, and natural wood frames work with most aesthetics. Check Target, IKEA, CB2, and Article for affordable statement mirrors.

    Light bounces around the room more effectively, and the mirror creates an optical illusion of depth. Your bathroom feels twice as spacious, and you get better lighting for daily routines without installing new fixtures.

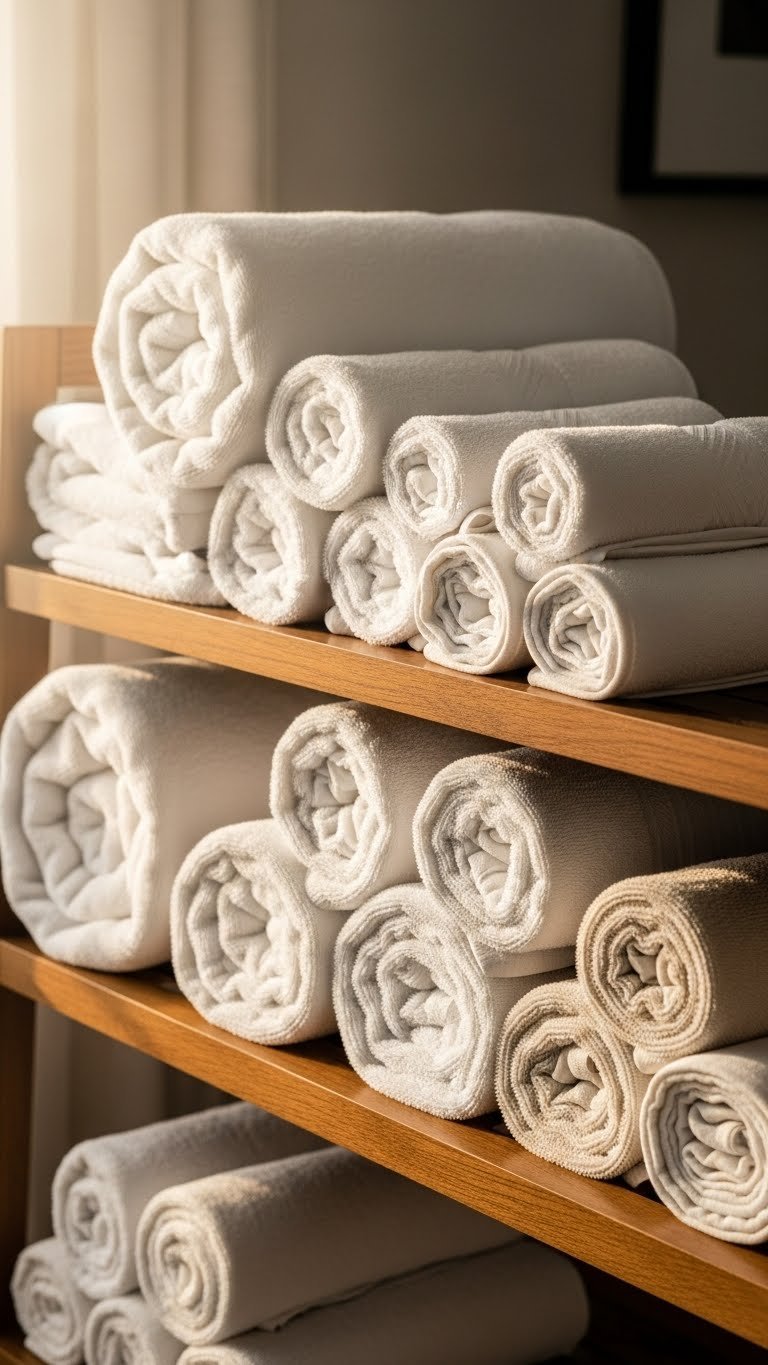
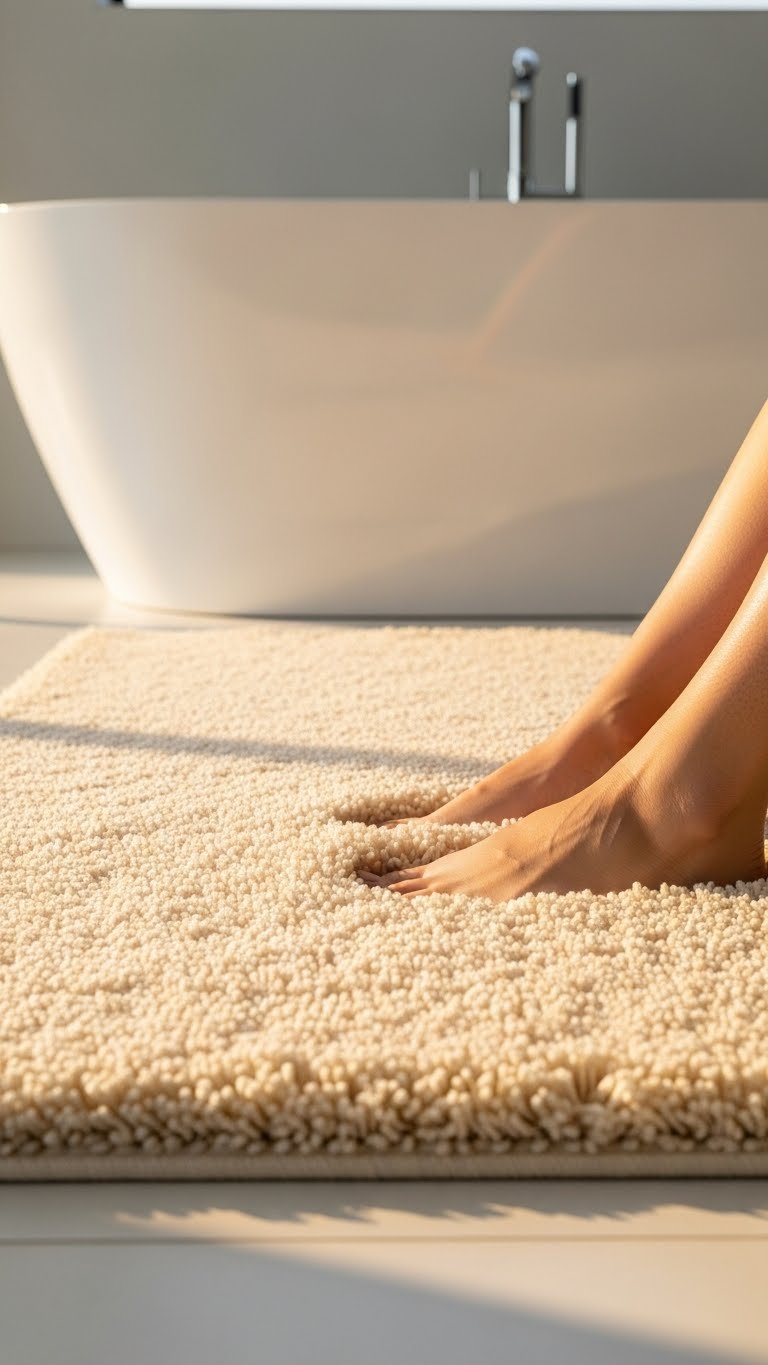
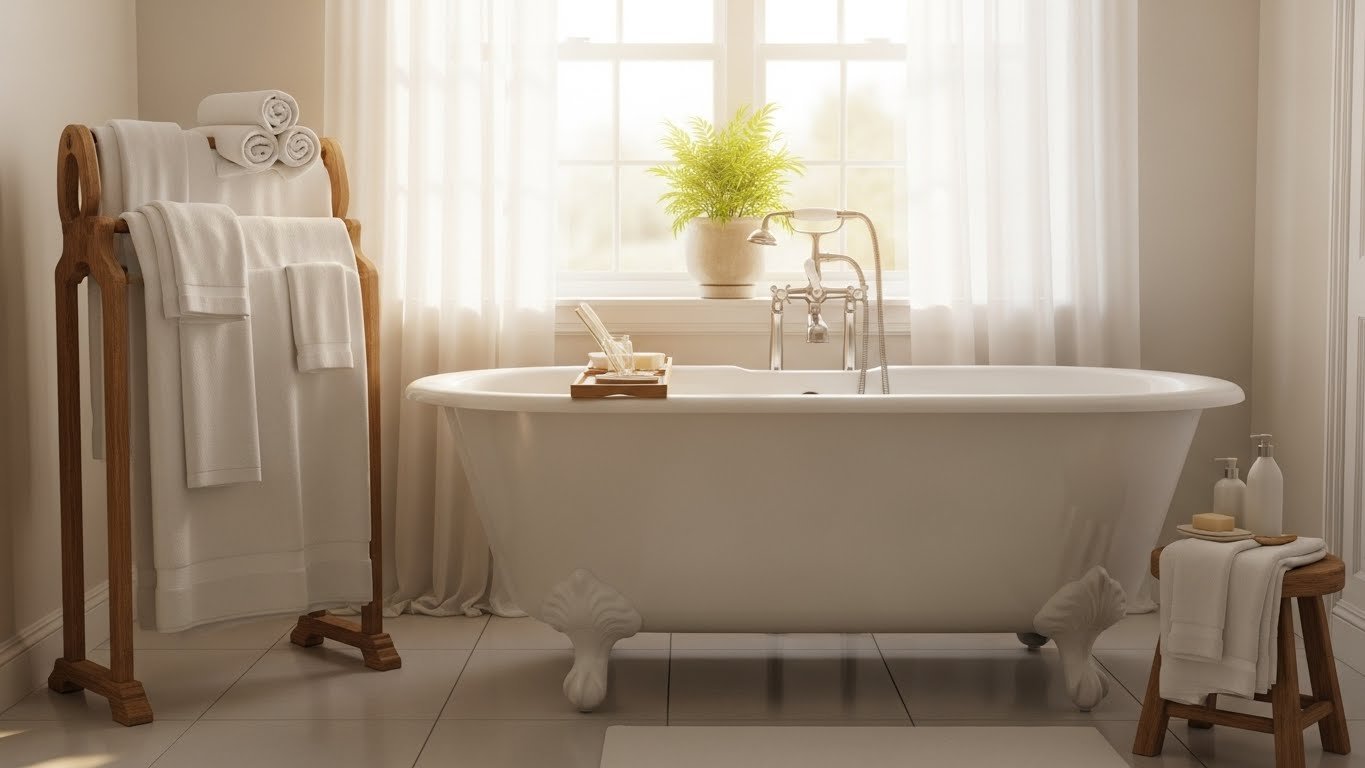
    6. Bring in Soft Textiles and Towels

    Towels, mats, and linens add texture and warmth that makes a bathroom feel like a retreat instead of a utility space. Soft textures are visually soothing and make the room more inviting.

    Invest in 100% cotton or linen towels in neutral or muted tones ($15–$40 per towel set). A plush bath mat ($20–$60) and a small hand towel ($8–$15) complete the look. Roll towels and stack them on open shelves, floating shelves, or in a wooden ladder rack for visual interest. Stores like Bed Bath & Beyond alternatives, Target, West Elm, and Amazon have great options.

    Your bathroom immediately feels warmer and more inviting. Soft textures trigger relaxation, and rolling towels instead of folding them creates that hotel-spa aesthetic that makes daily routines feel special.

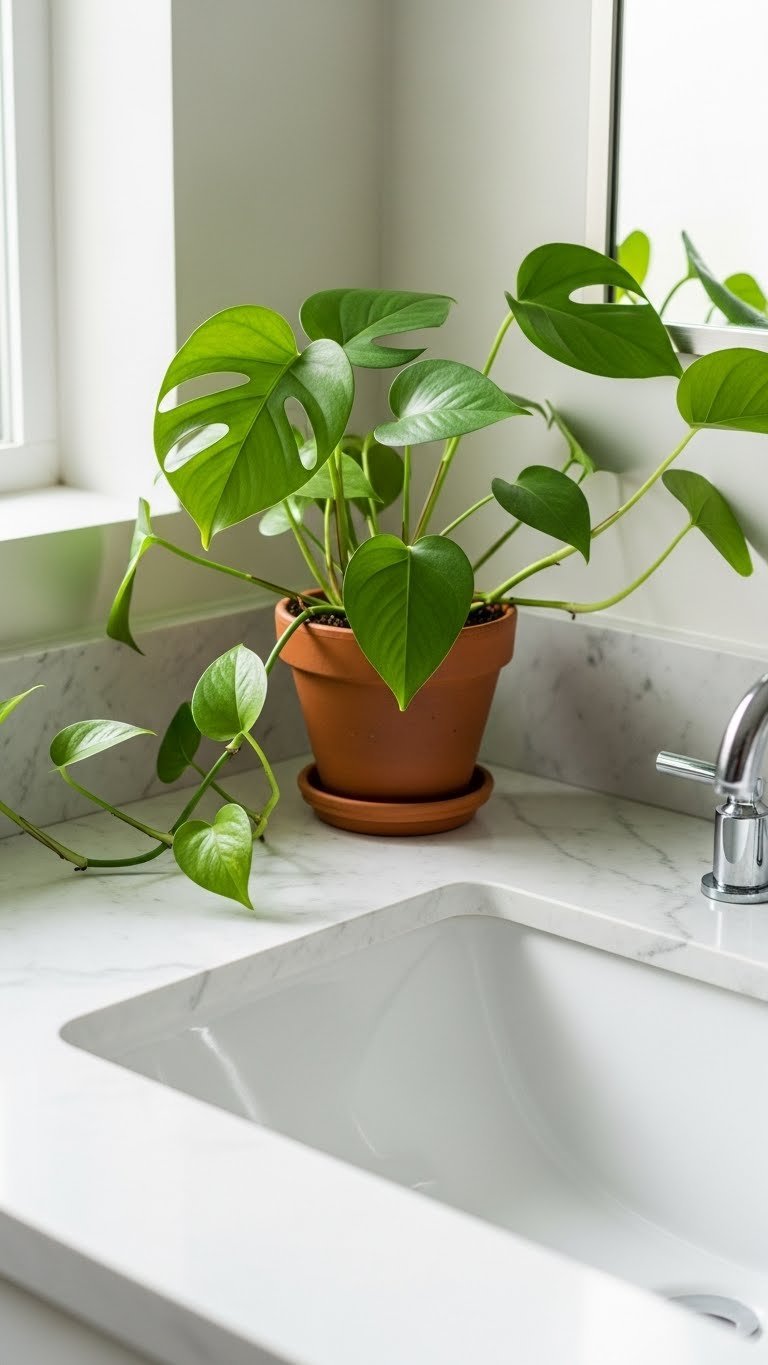
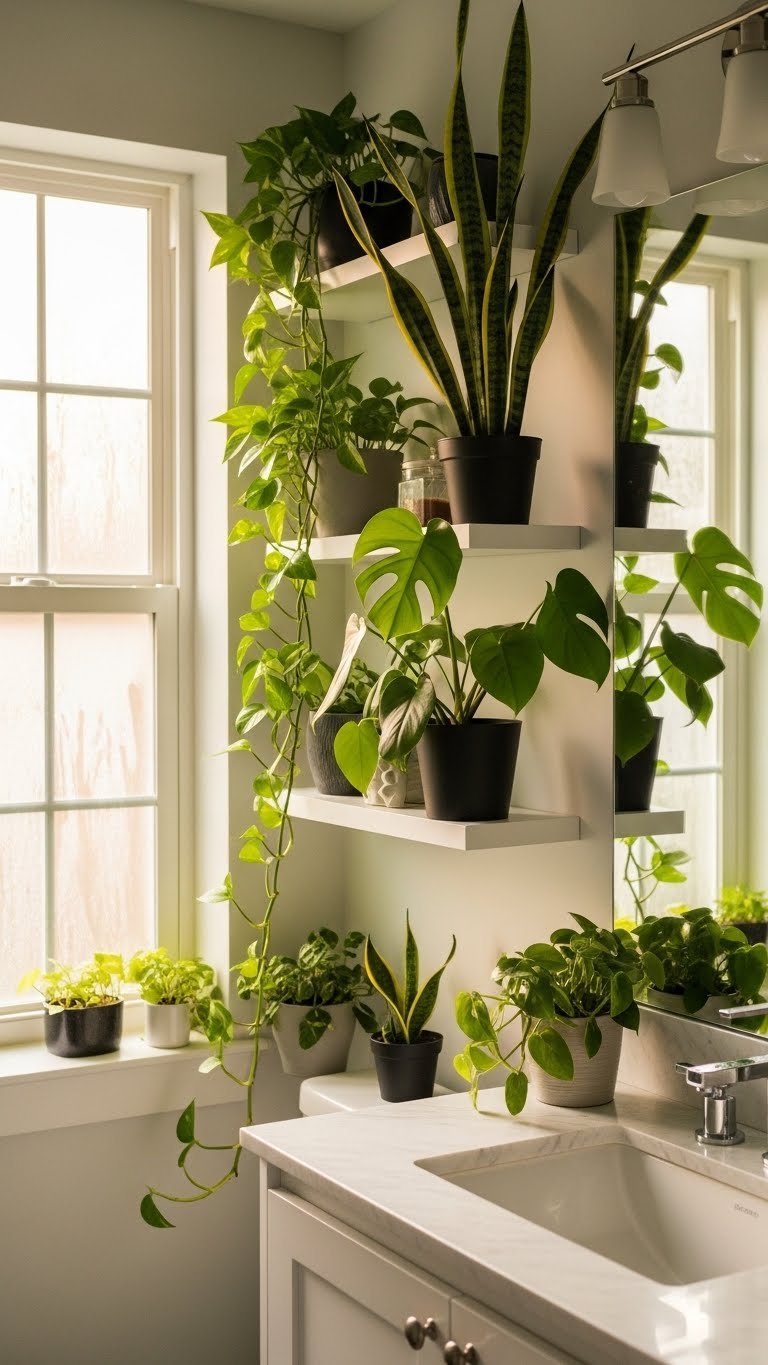
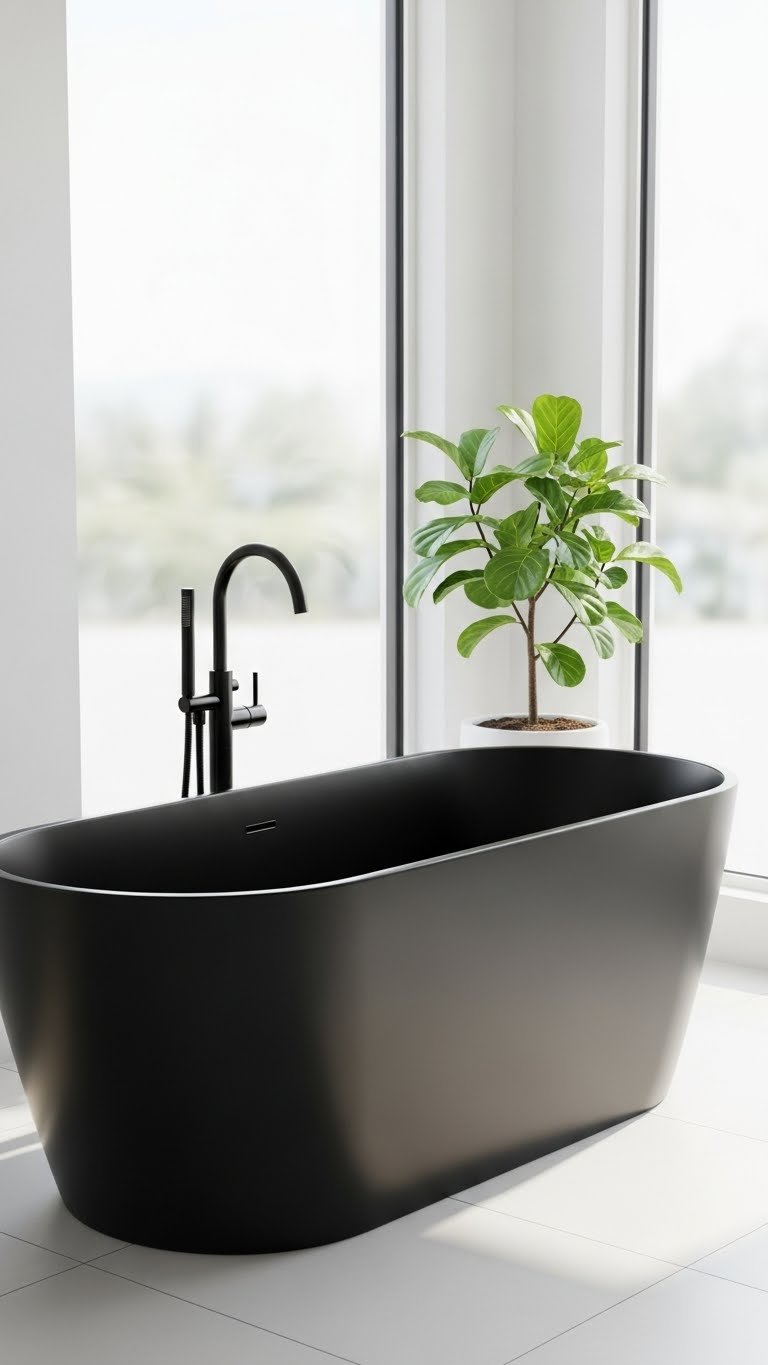
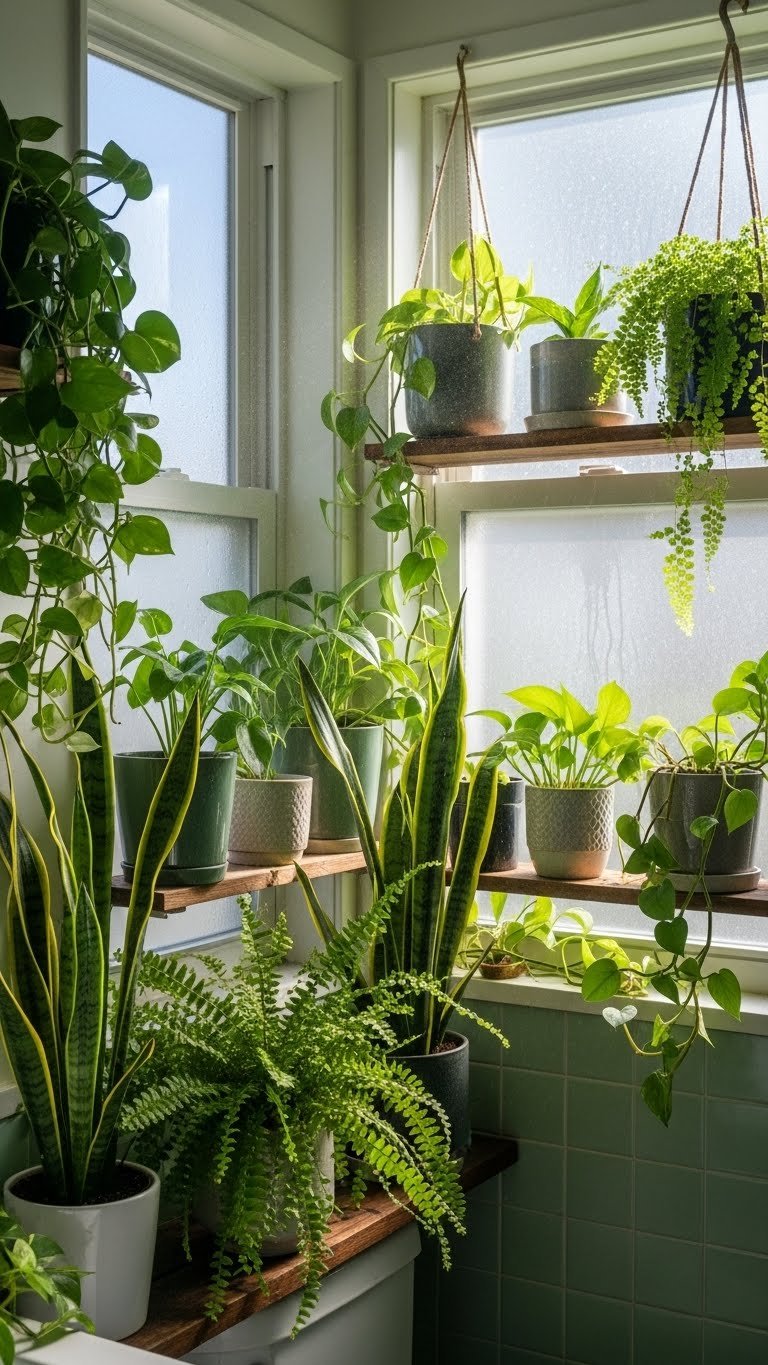
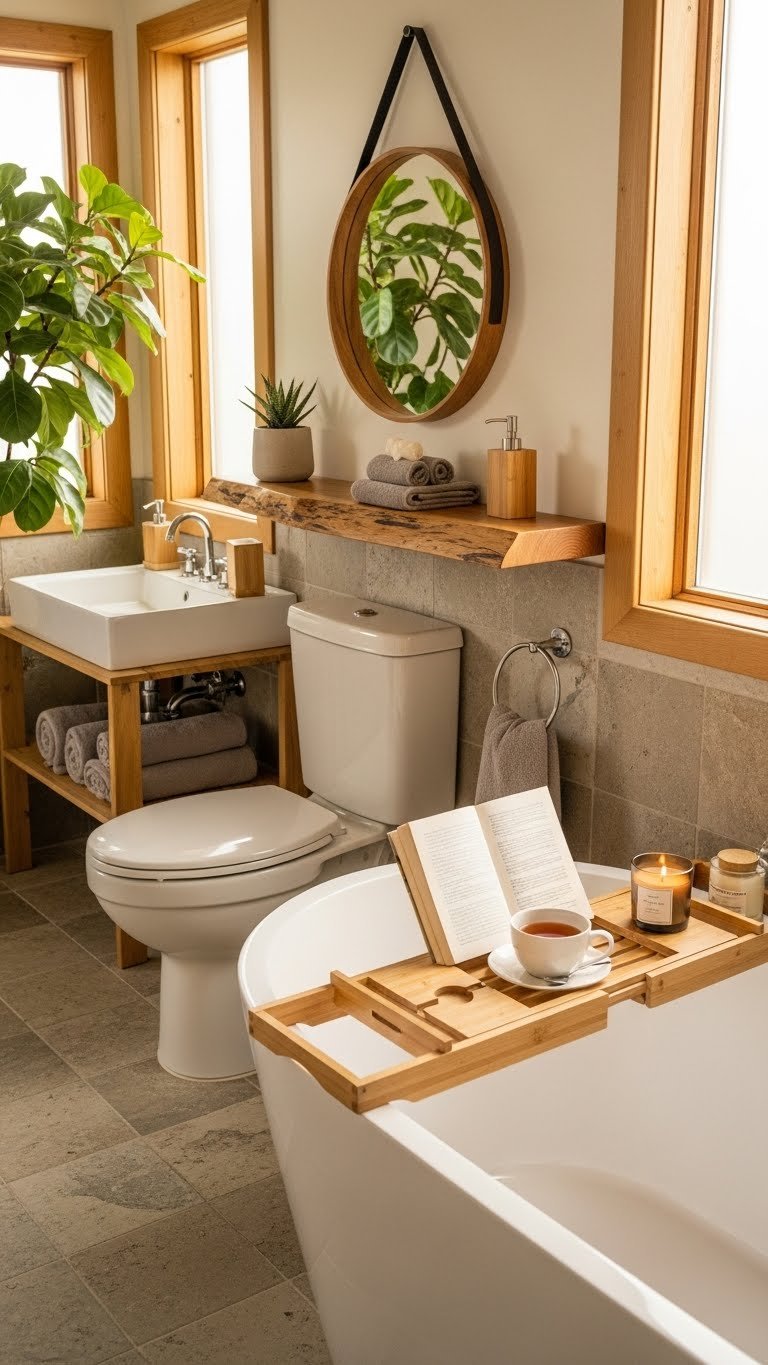
    7. Add Plants for Life and Freshness

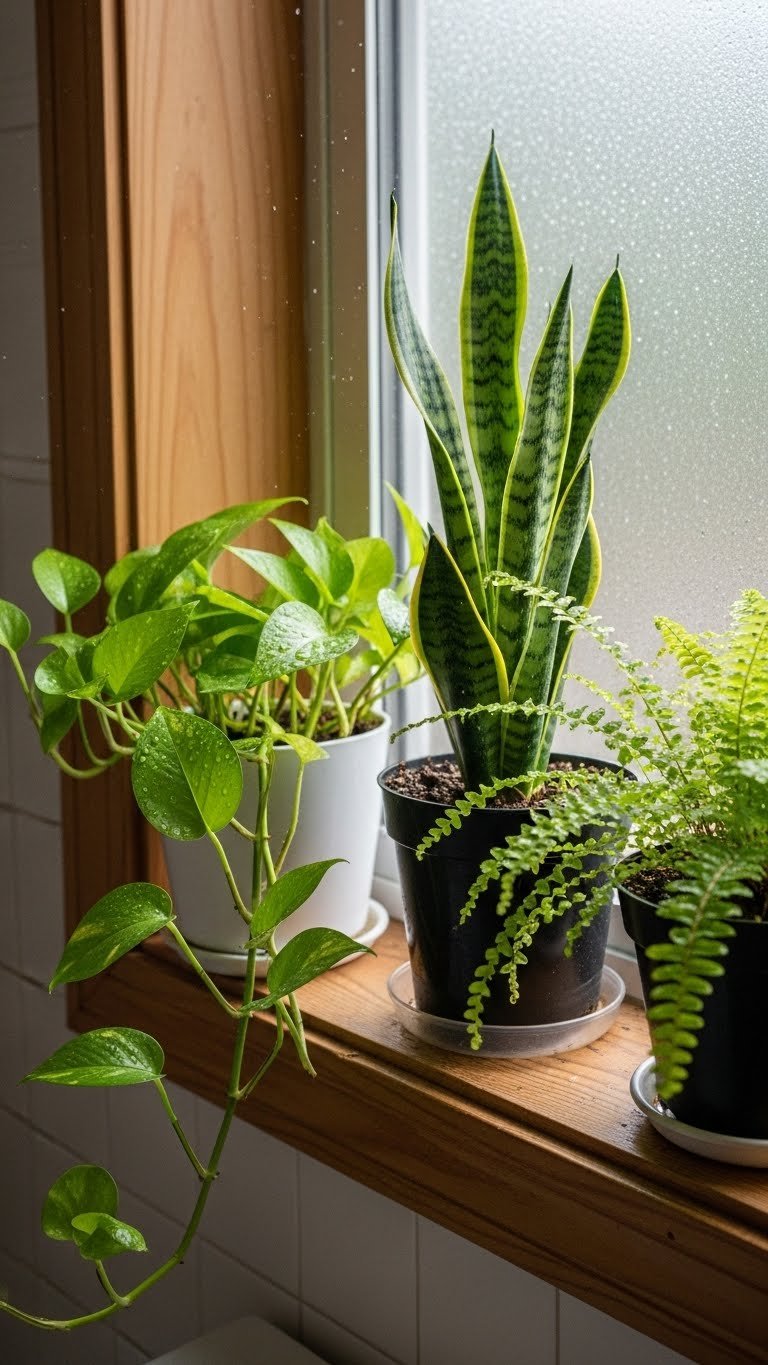
    Plants bring life to small spaces, improve air quality, and create a natural, retreat-like feeling. Even tiny bathrooms have room for 2–3 small plants that thrive in humidity.

    Pick low-light or humidity-loving plants like pothos, snake plant, bamboo palm, or ferns ($5–$20 per plant). Small pots cost $3–$10. Place them on the windowsill, floating shelves, or on the back of the toilet. Most bathroom plants need water only once or twice a week since humidity is high. Home Depot, Lowe’s, and local nurseries have affordable options.

    The moment you add living green, your bathroom stops feeling sterile. Plants create a sense of calm and connection to nature—you’ll notice yourself relaxing more and rushing less through your routine.

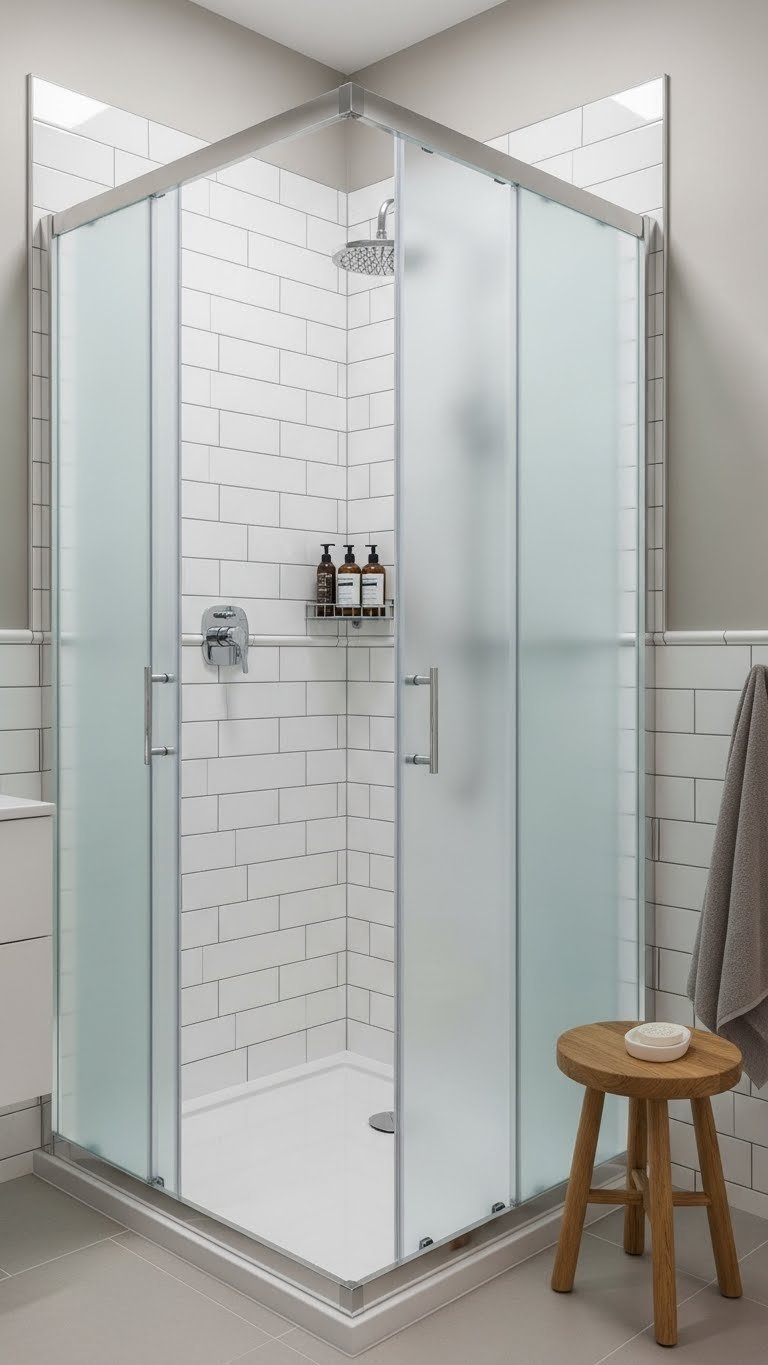
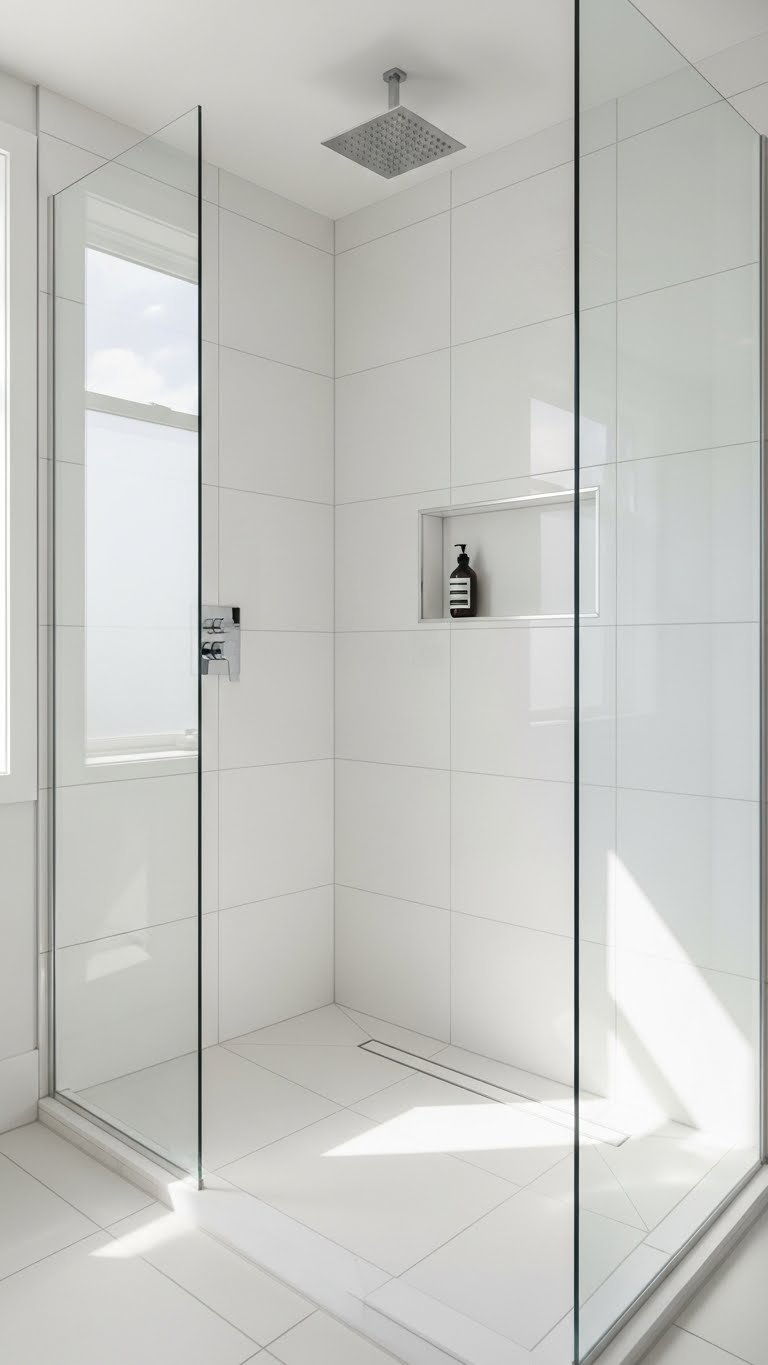
    8. Replace Your Shower Curtain with a Spa-Like Option

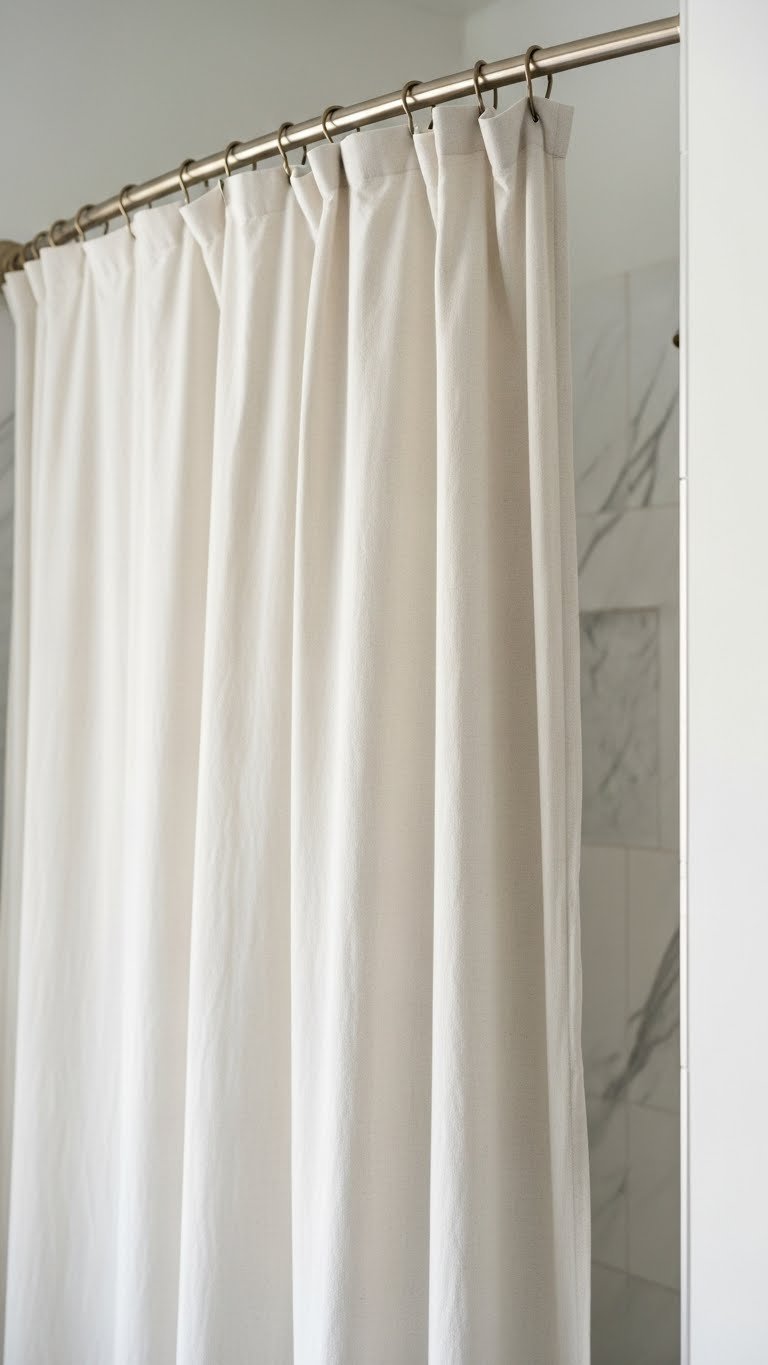
    Your shower curtain sets the tone for the entire room. Swapping a thin plastic one for quality fabric instantly upgrades the whole vibe from utilitarian to spa-like.

    A linen or cotton shower curtain costs $30–$80; pair it with brushed brass or matte black hooks ($2–$8 each) for a cohesive look. Choose neutral, solid colors (cream, soft gray, pale blue) or simple patterns. Most dry-clean only, but you can rinse gently in cool water. Stores like West Elm, Parachute, Amazon, and Anthropologie have beautiful options. Get a liner ($10–$20) to protect your curtain from mildew.

    Your bathroom instantly feels more curated and intentional. A quality shower curtain elevates the entire space and makes you feel like you’re stepping into a boutique hotel every time you shower.

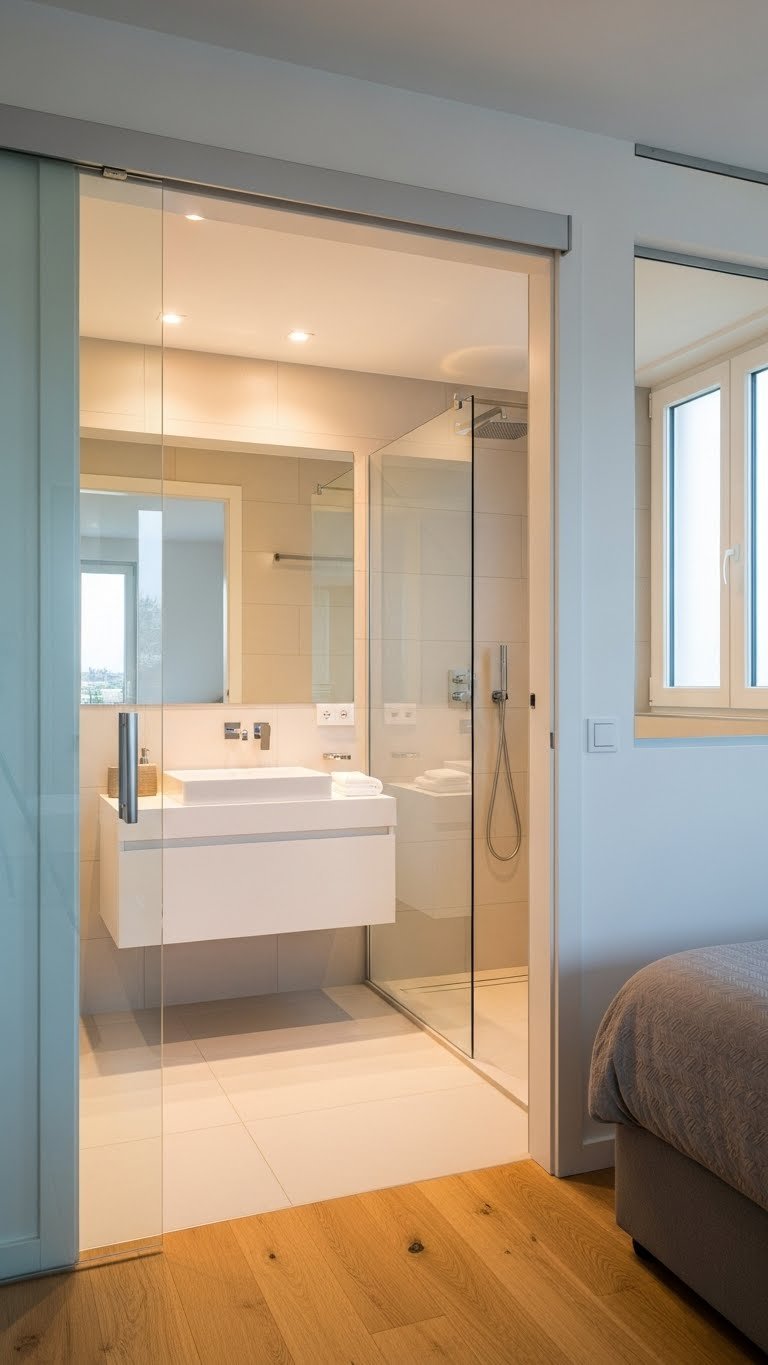
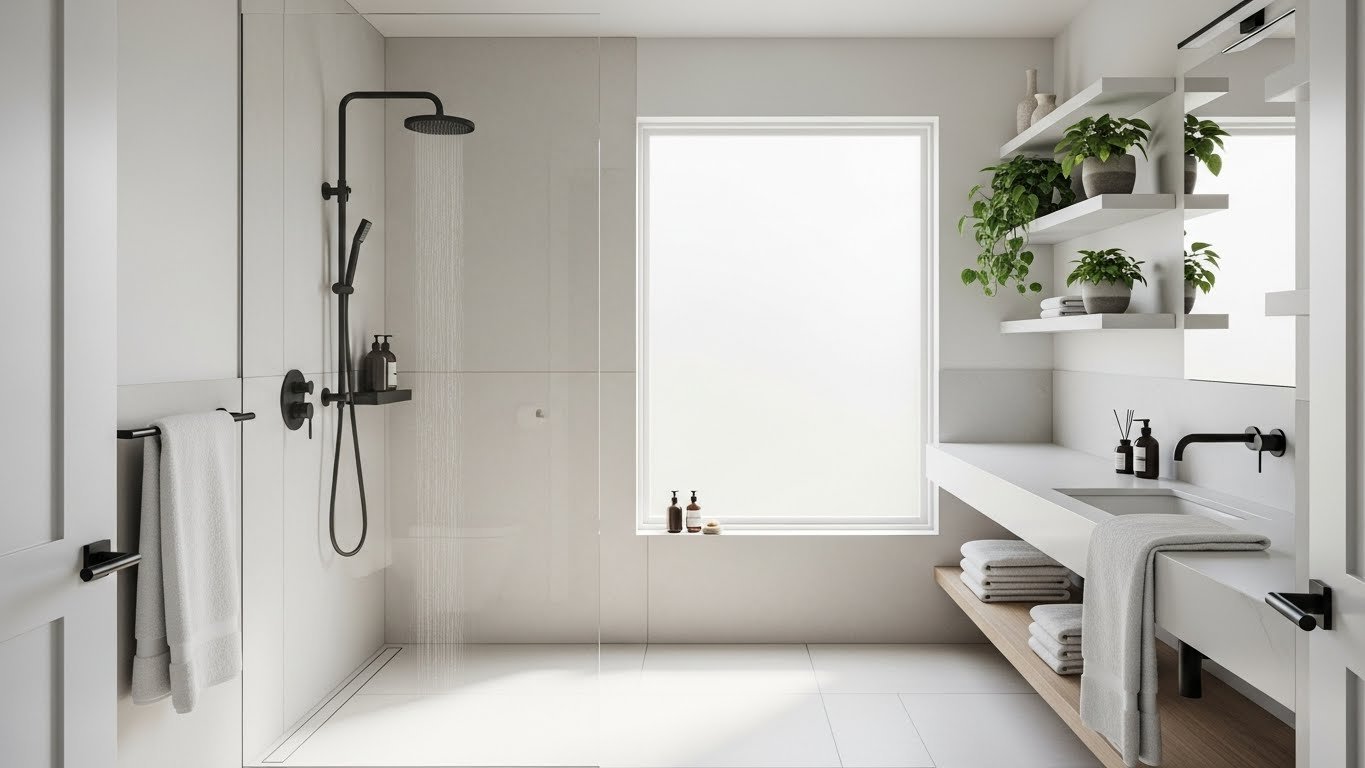
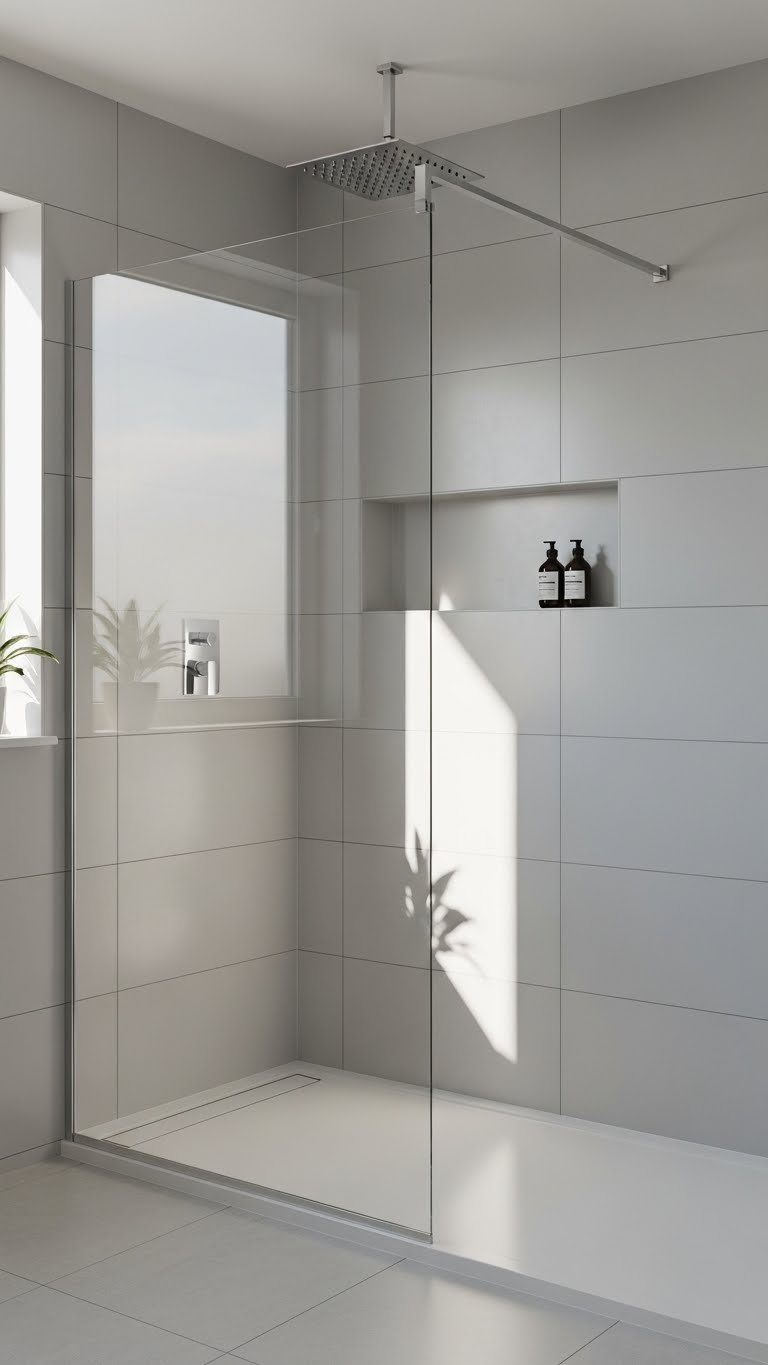
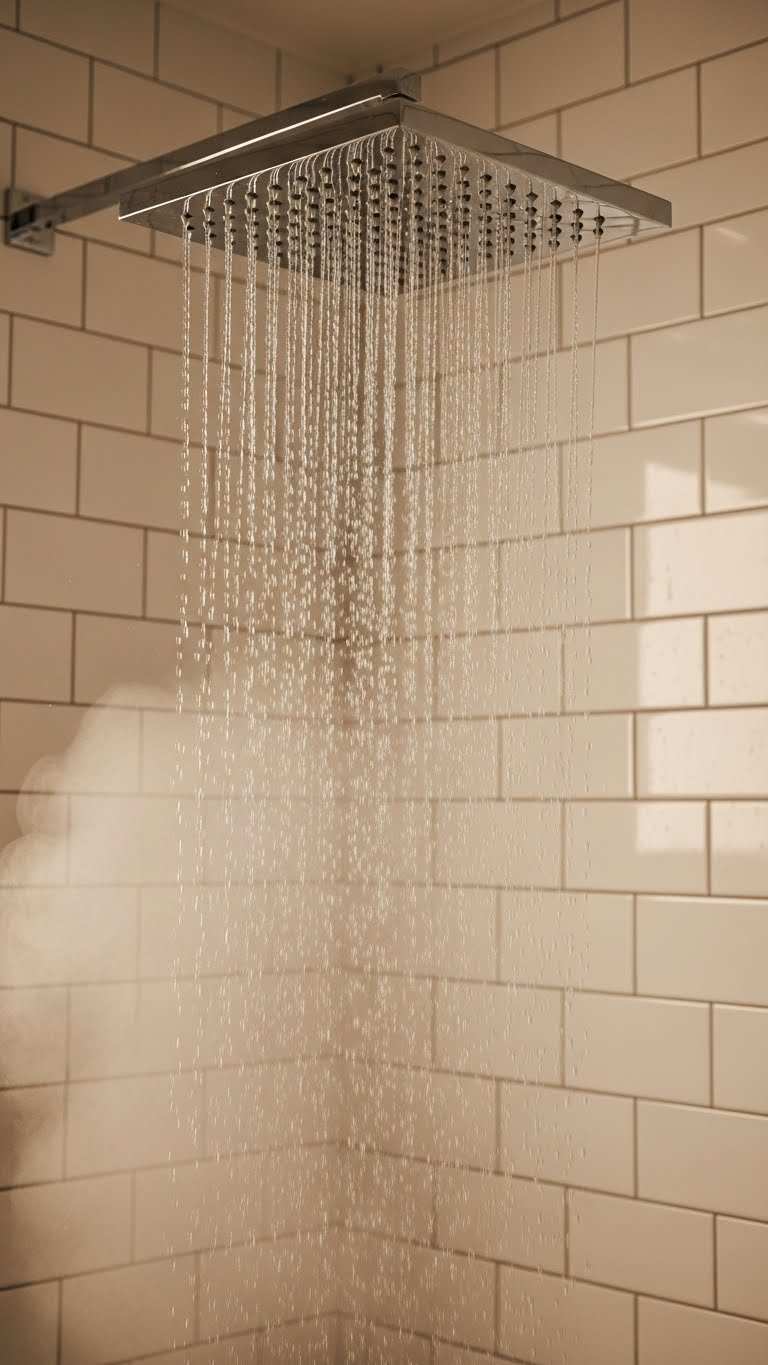
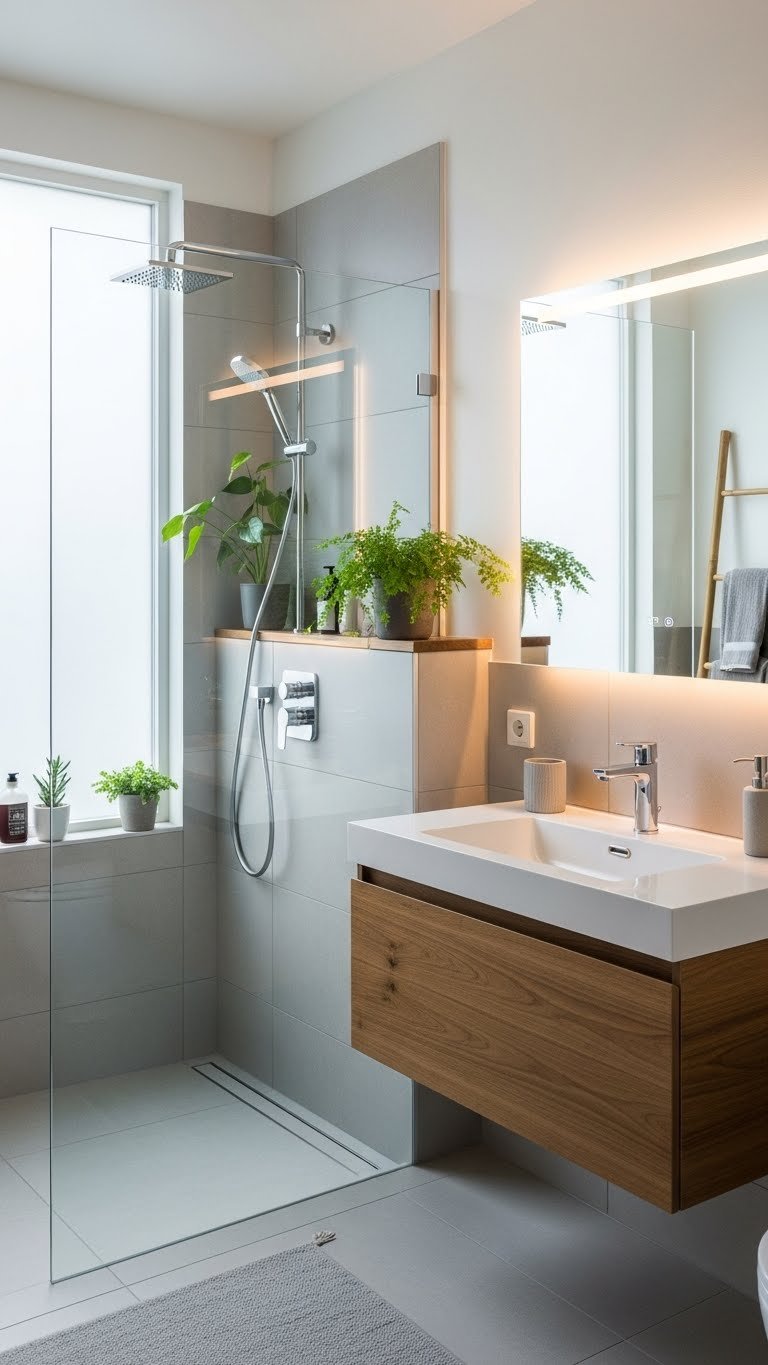
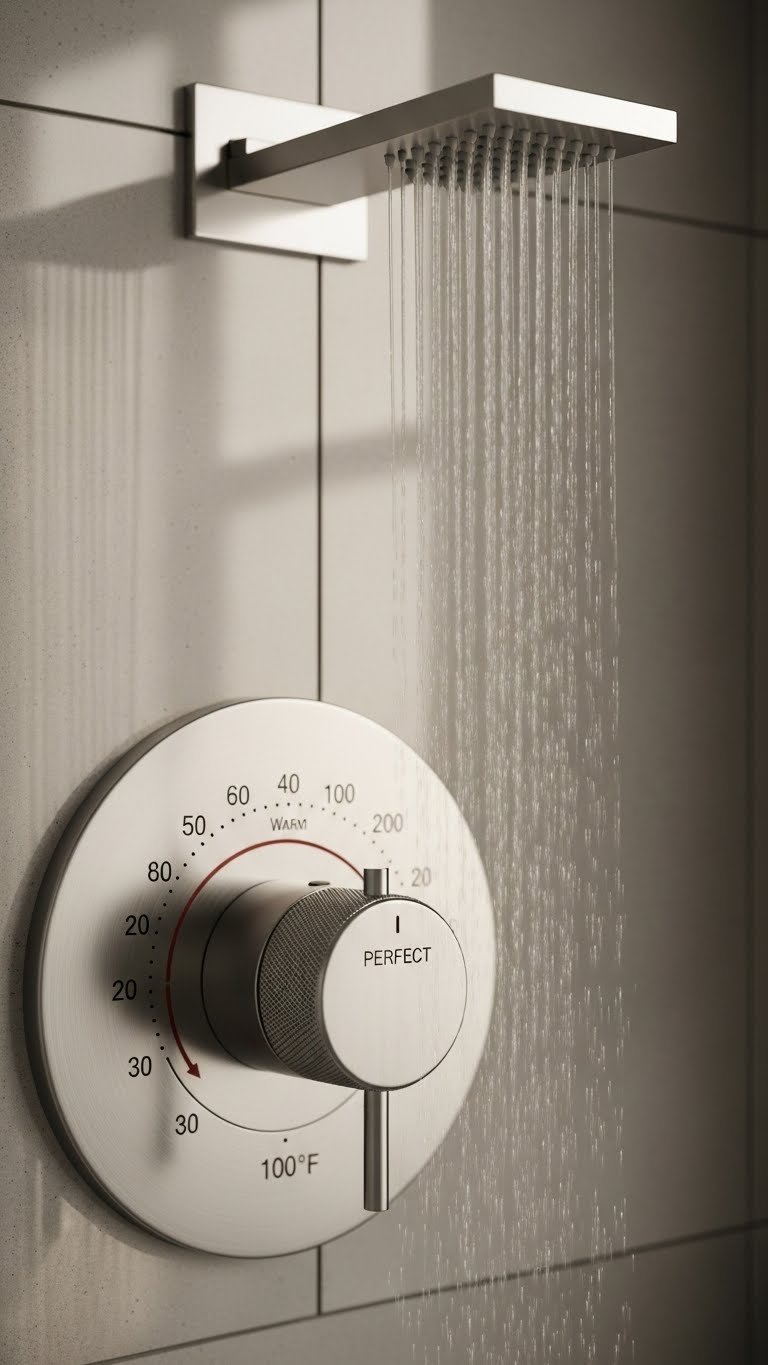
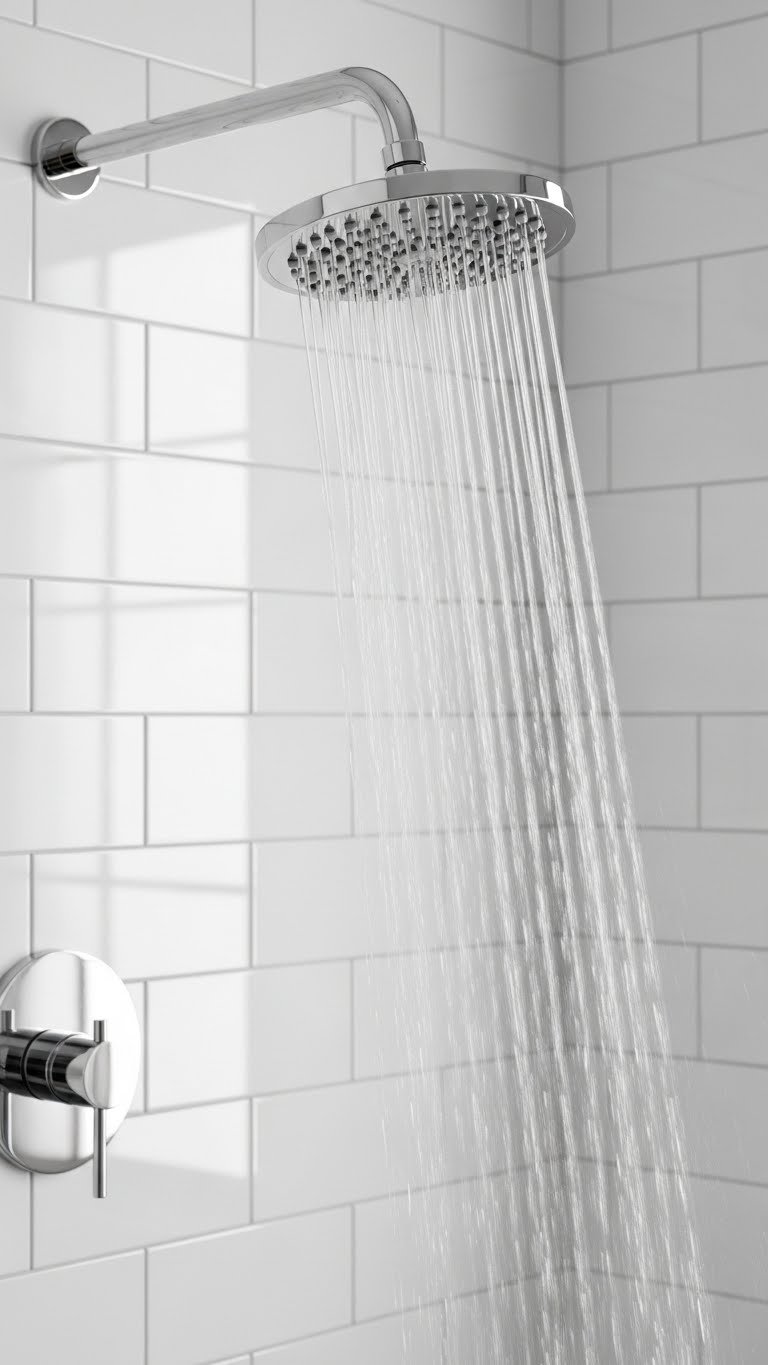
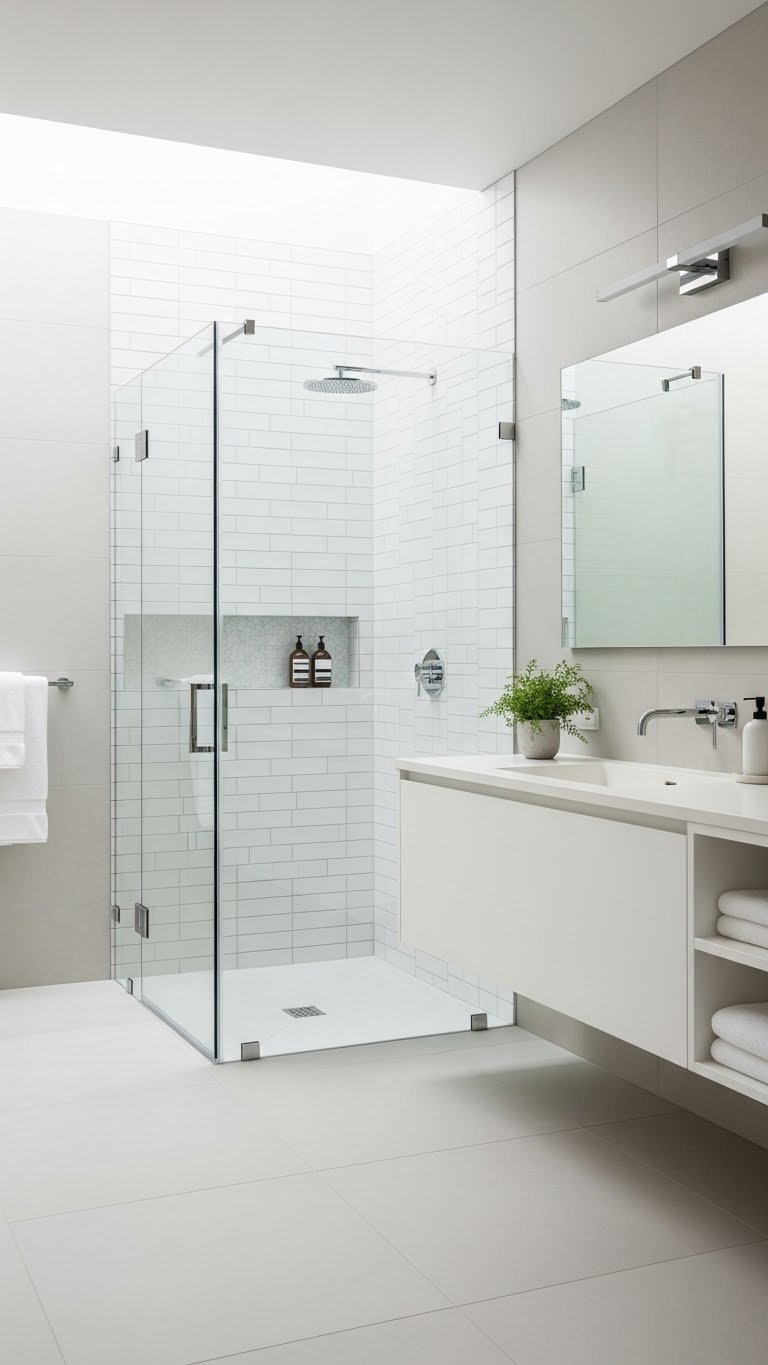
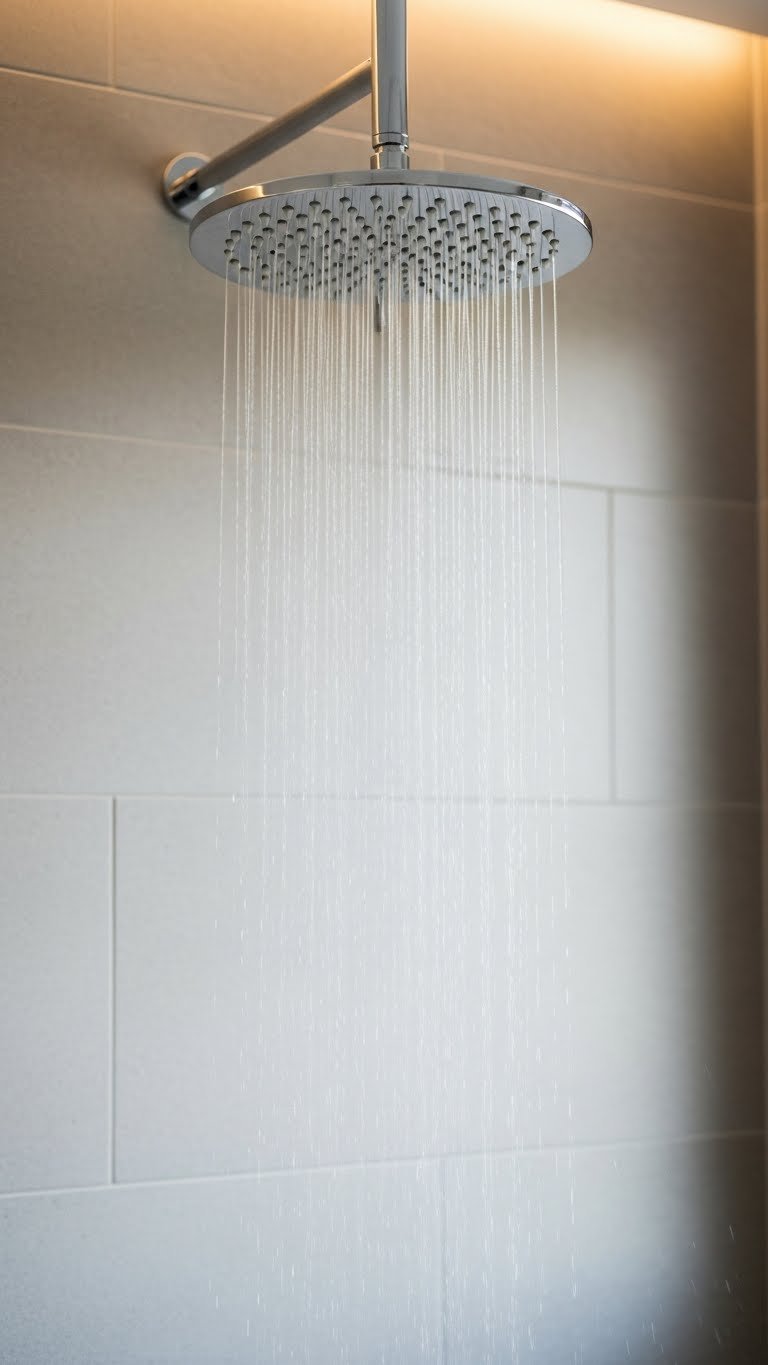
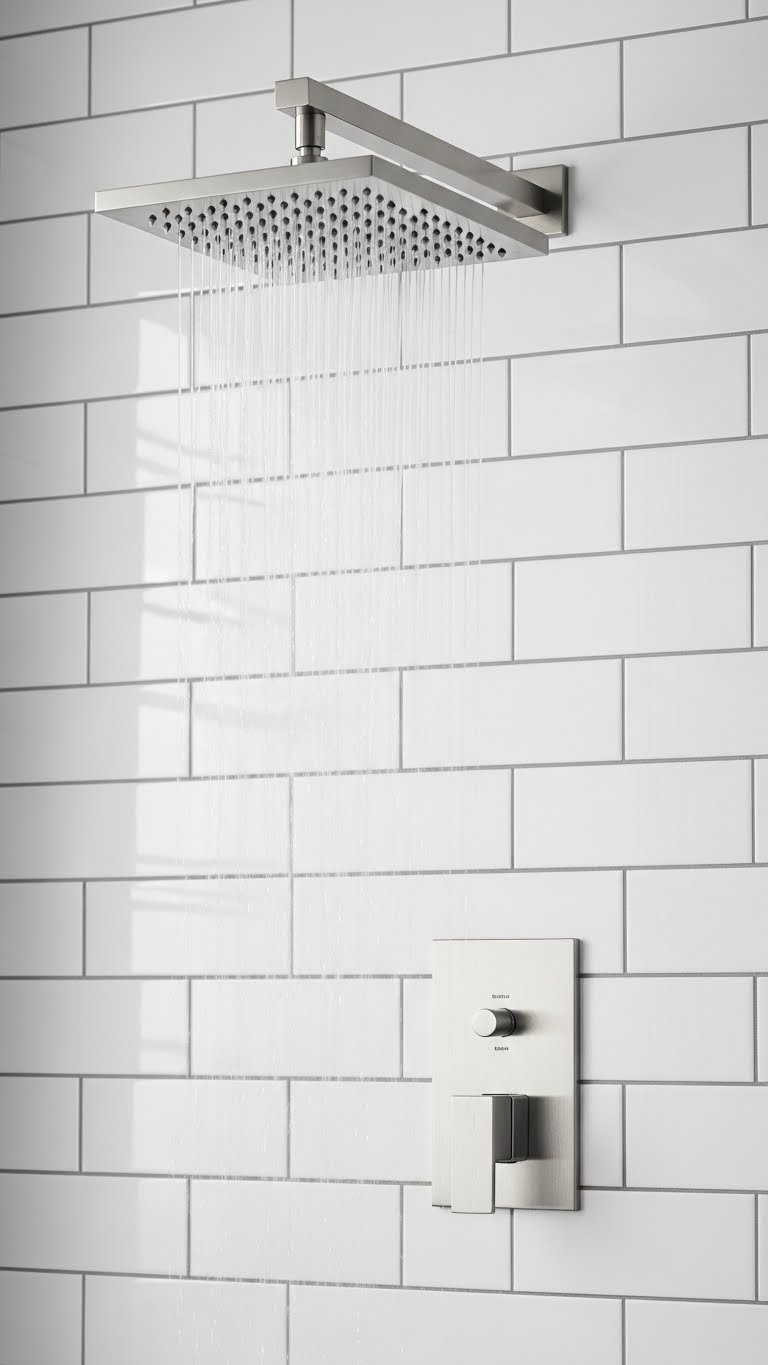
    9. Install a Rainfall Showerhead

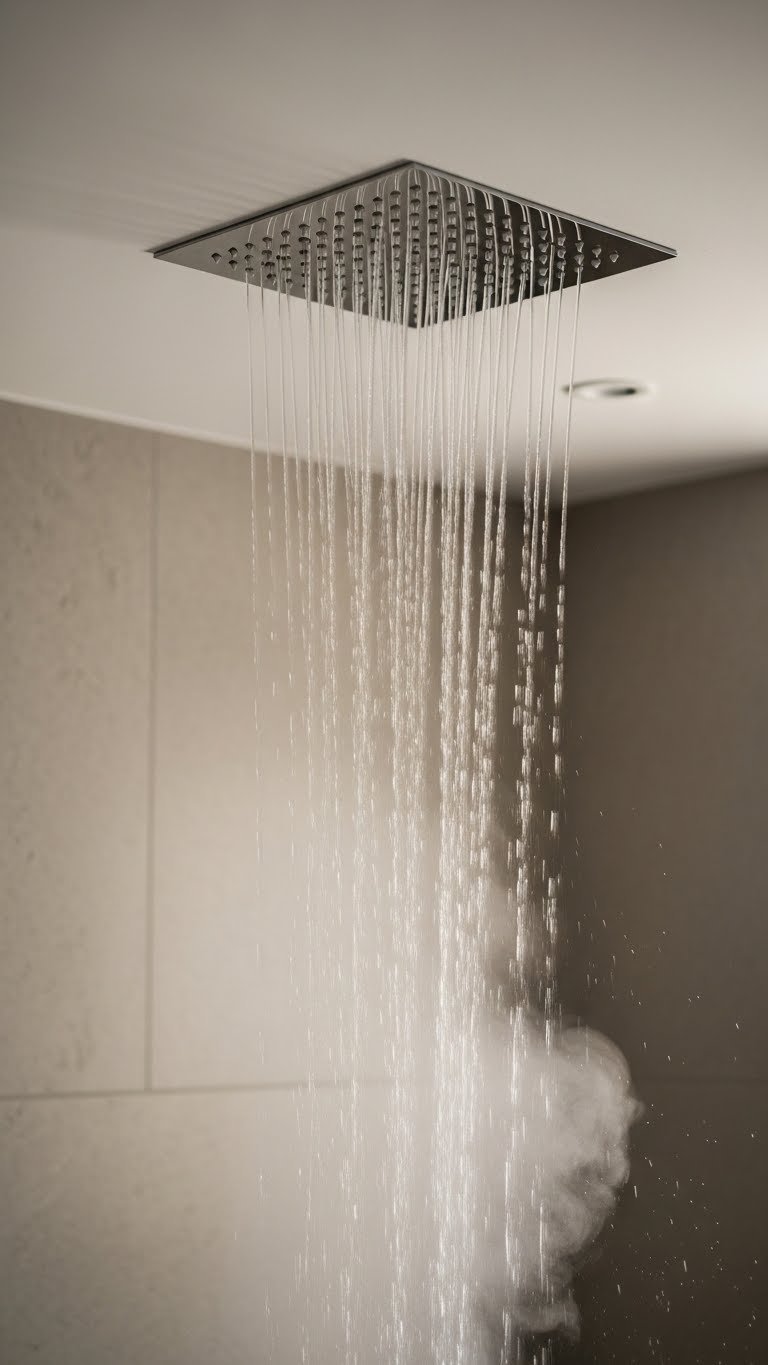
    A rainfall (or rain) showerhead transforms your daily shower into a spa experience. The wider spray coverage and gentle cascade make a small shower feel more luxurious and enveloping.

    Quality rainfall showerheads cost $40–$150; budget options start around $20. Most install in 20–30 minutes by removing the old head and screwing on the new one—no tools or plumbing knowledge needed. Look for water-efficient models (2.0 GPM) to keep your water bill down. Check Amazon, Home Depot, Wayfair, and Hansgrohe for reliable options. Renters should confirm landlord approval first.

    Stepping into a gentle rain of water feels like a retreat instead of a quick rinse. This one upgrade makes your daily shower feel like self-care, not just a chore—you’ll find yourself lingering and actually relaxing.

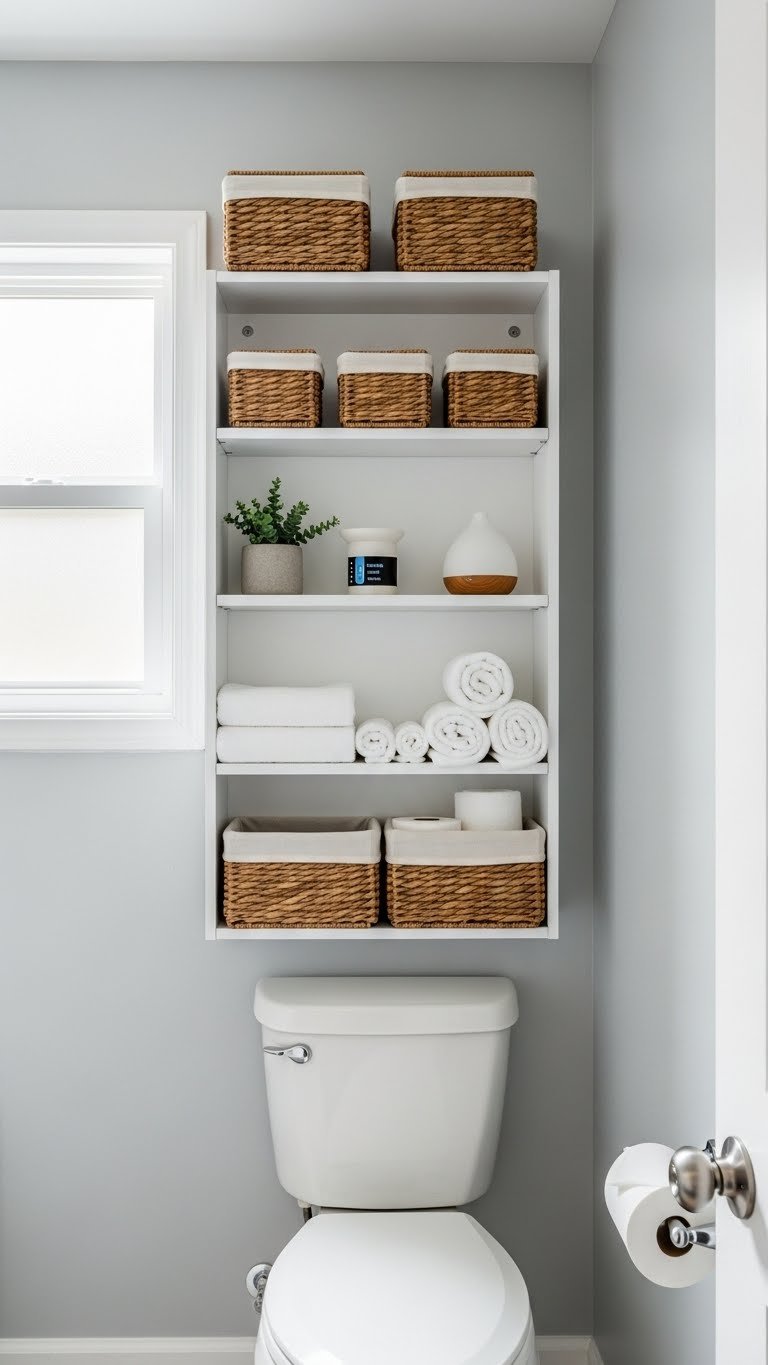
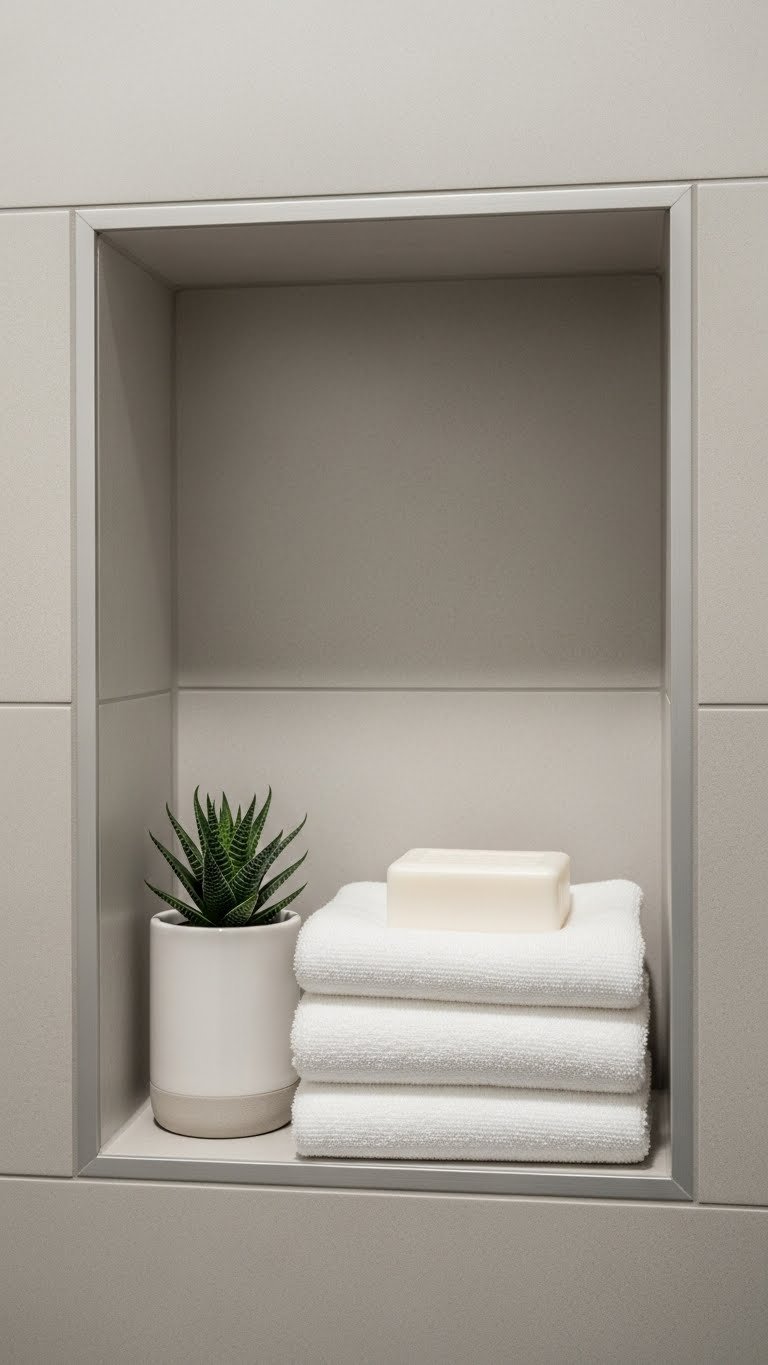
    10. Create Hidden Storage with Floating Cabinets

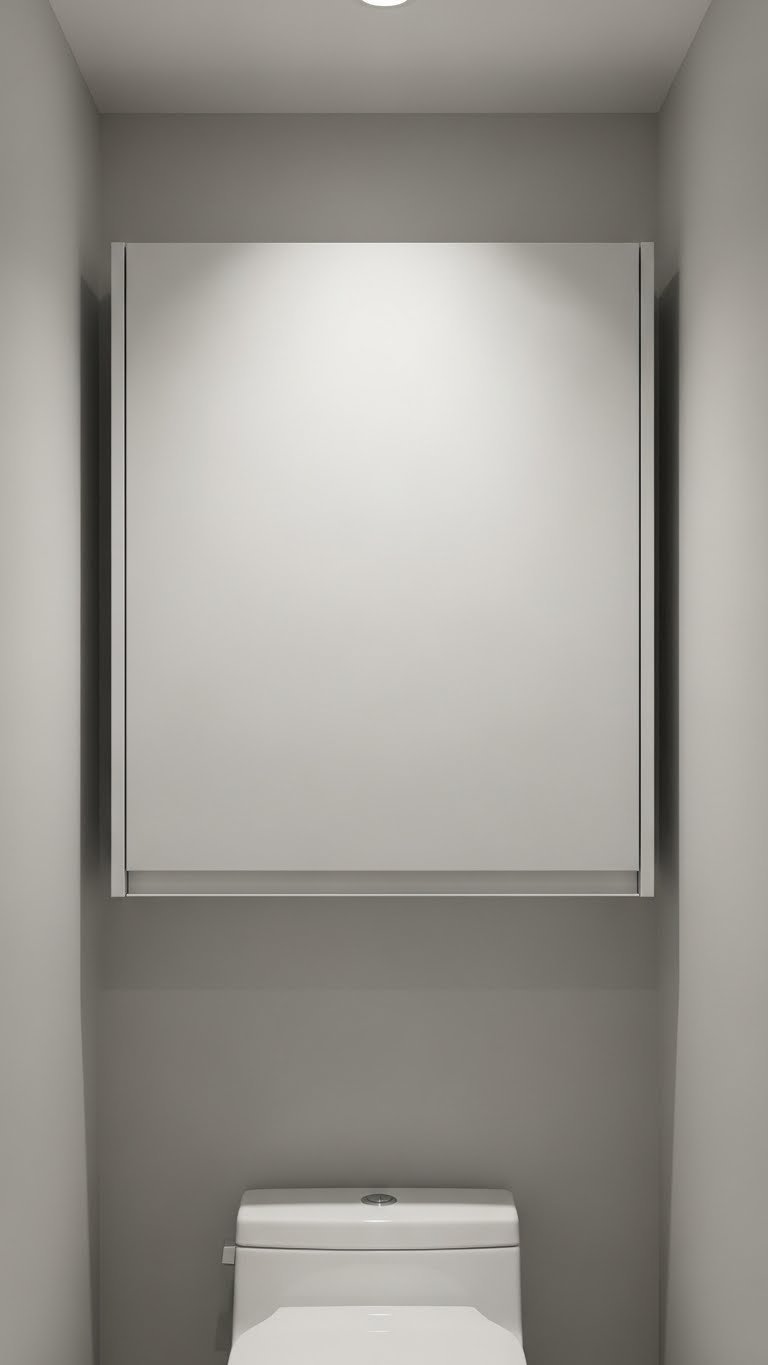
    Storage is everything in small bathrooms. Floating cabinets hide clutter while maintaining an open, airy feel—they look like art but function as storage.

    Floating wall cabinets with doors cost $60–$200 depending on size and material. Install one above the toilet, above a corner, or on unused wall space. Installation takes 30–60 minutes with basic tools. IKEA’s Godmorgon line, Wayfair, and Target have affordable options; Restoration Hardware and West Elm offer high-end designs. Renters can use adhesive mounts if drilling isn’t allowed.

    Everything stays tucked away but accessible, and your bathroom maintains that calm, uncluttered feeling. You get function without sacrificing the spa-like aesthetic you’re building.

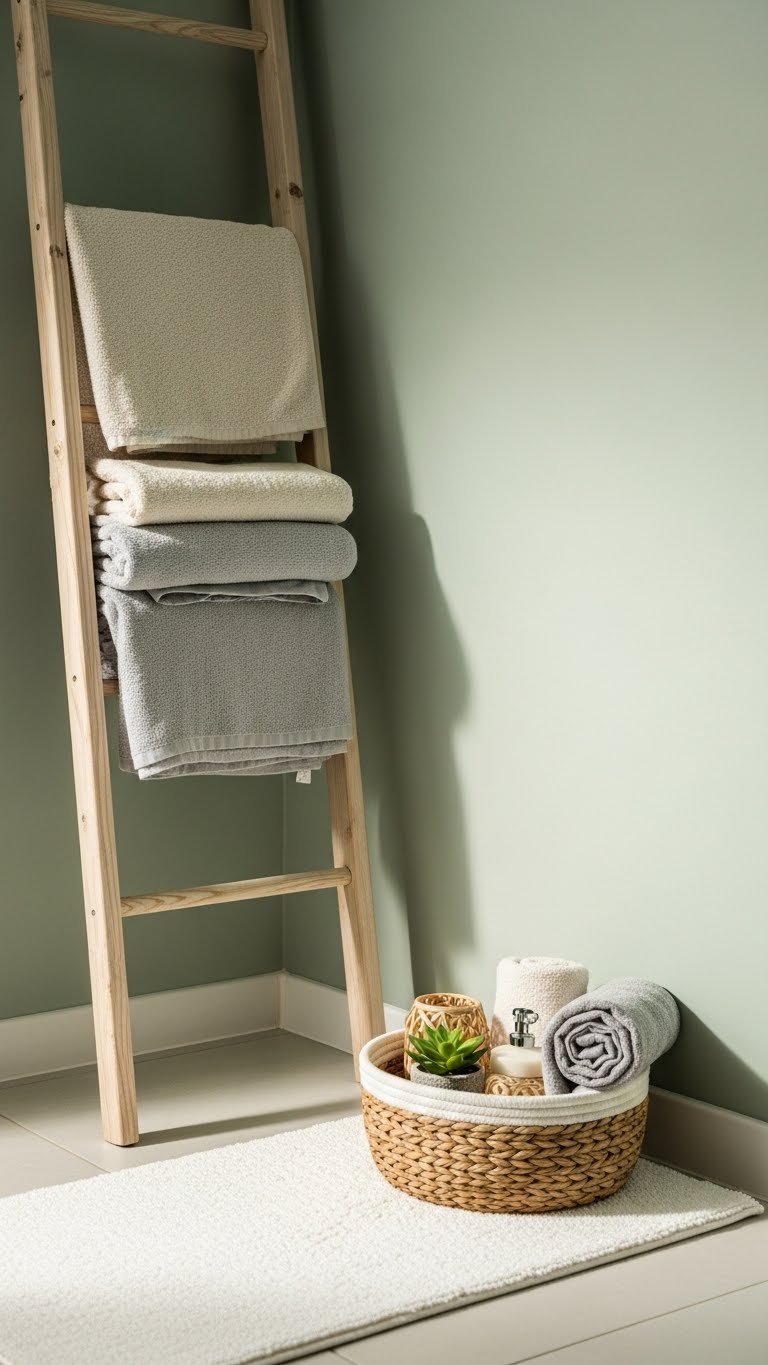
    11. Use a Bathroom Ladder Rack for Towel Display

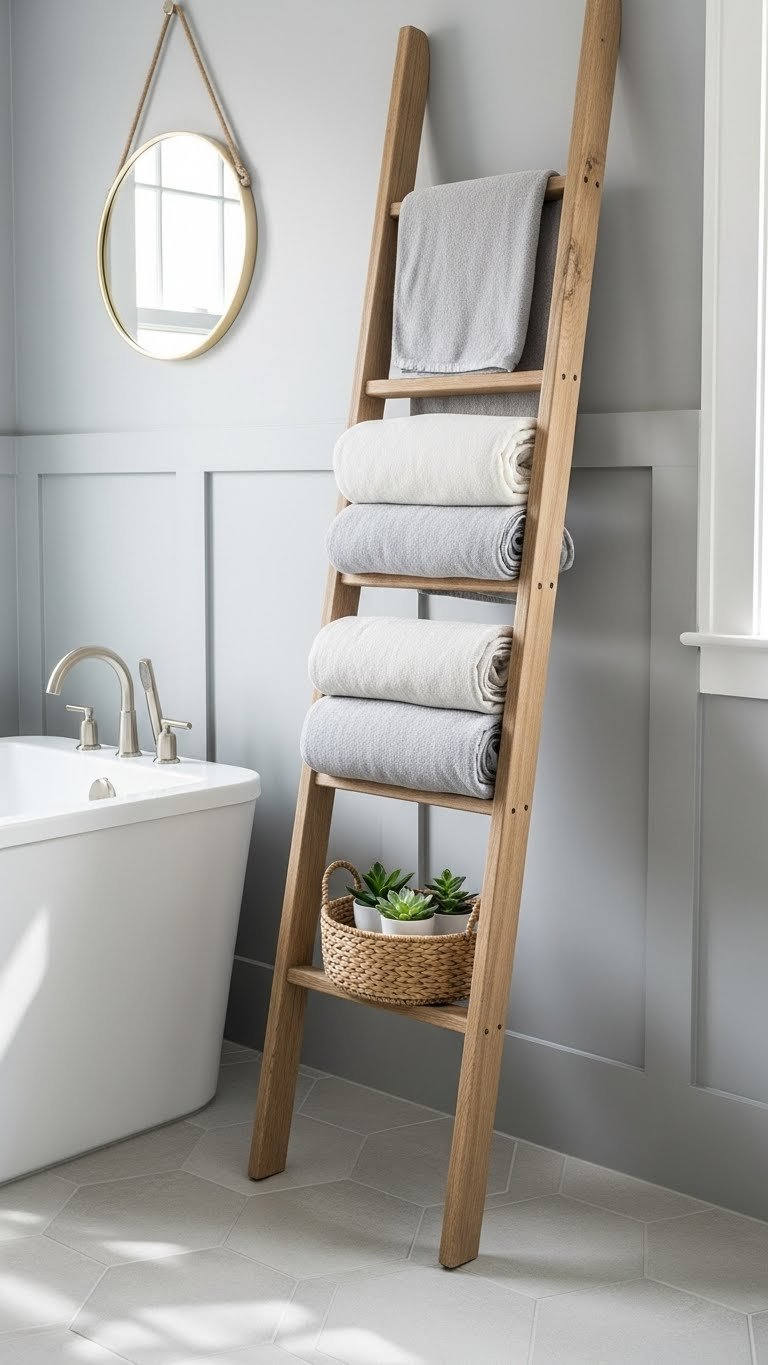
    A ladder rack adds rustic charm, saves wall space compared to traditional racks, and lets you display pretty towels as décor. It’s a budget-friendly way to add height and visual interest to a small room.

    A wooden or metal ladder rack costs $25–$80. You can lean it against a wall (no installation) or secure it for stability. Fill it with rolled towels in neutral tones and tuck a small basket on the bottom rung for extra supplies. IKEA, Target, Wayfair, and HomeGoods have good options. Renters: this is perfect since zero installation is required.

    Your towels become part of the décor instead of hidden away, and the ladder adds vertical visual interest without taking up floor space. Your bathroom immediately looks styled and intentional.

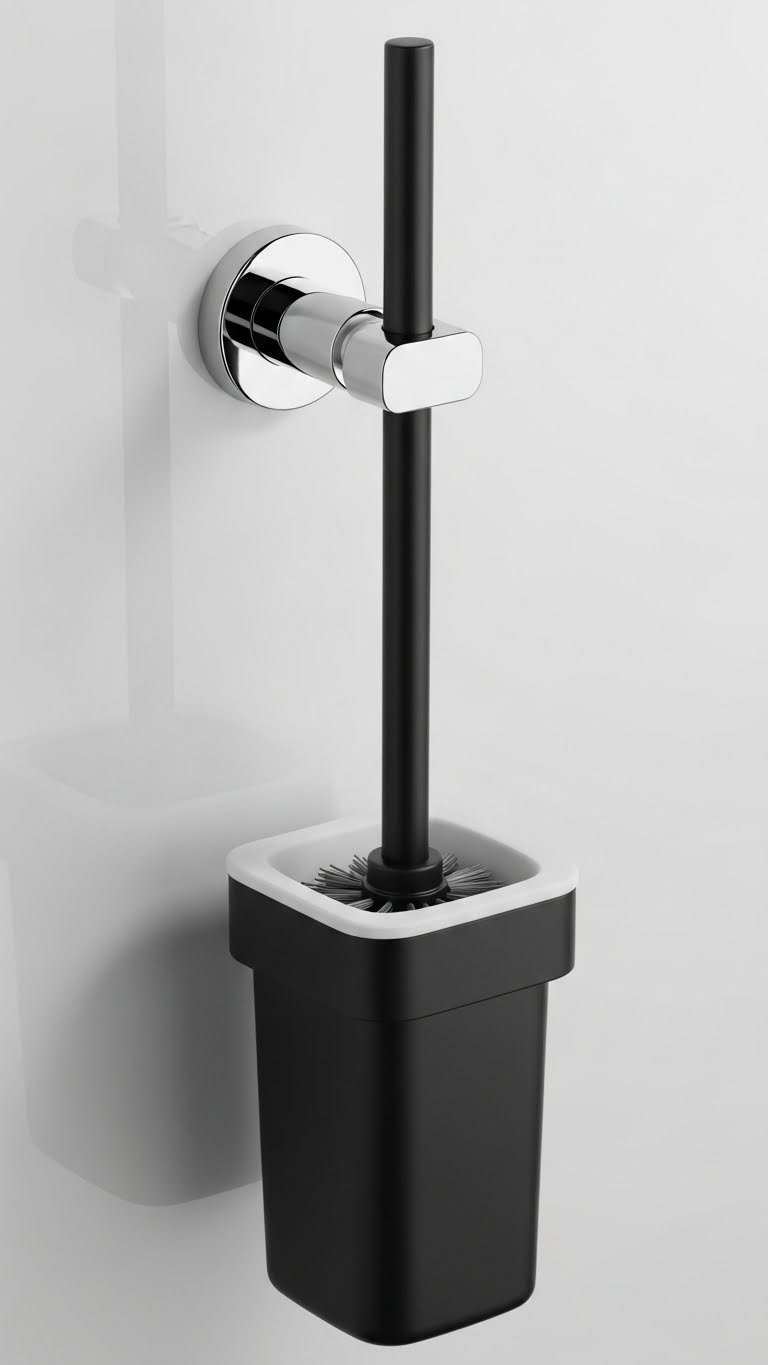
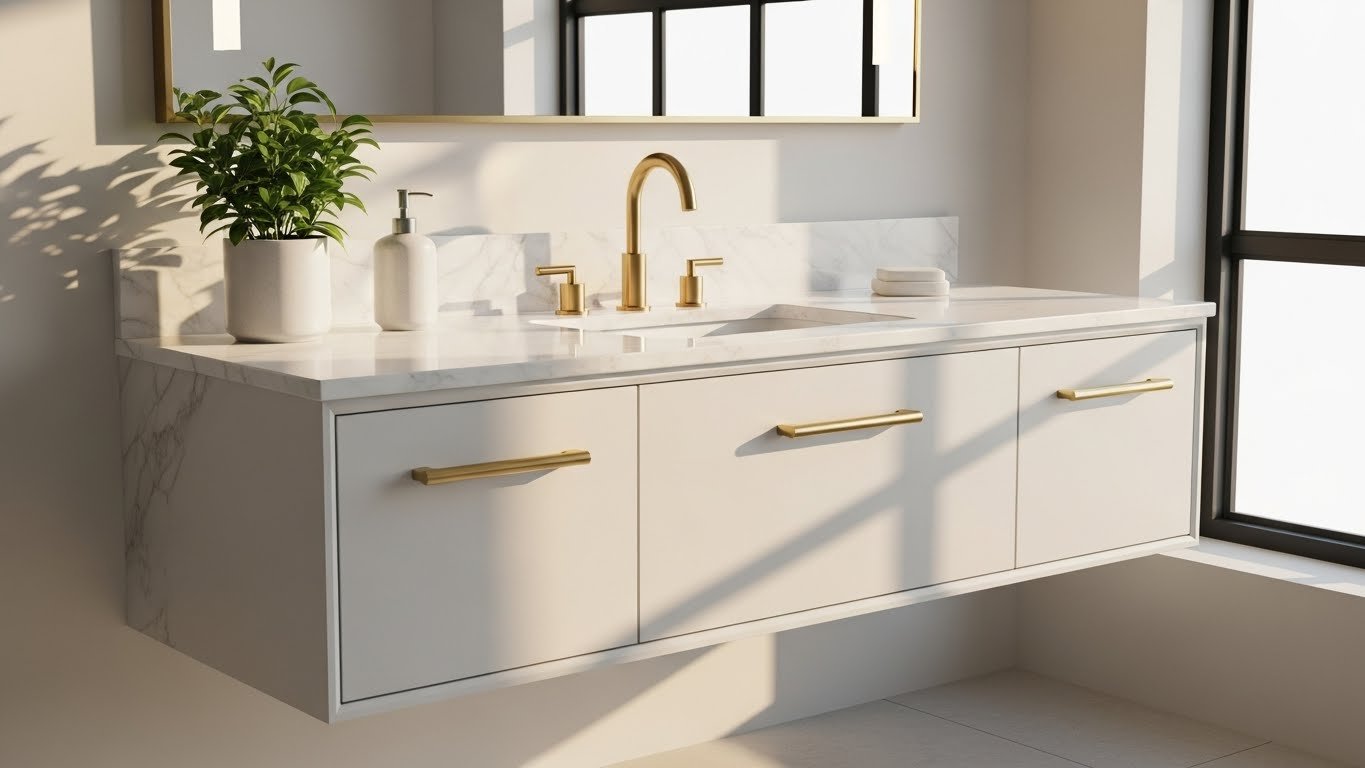
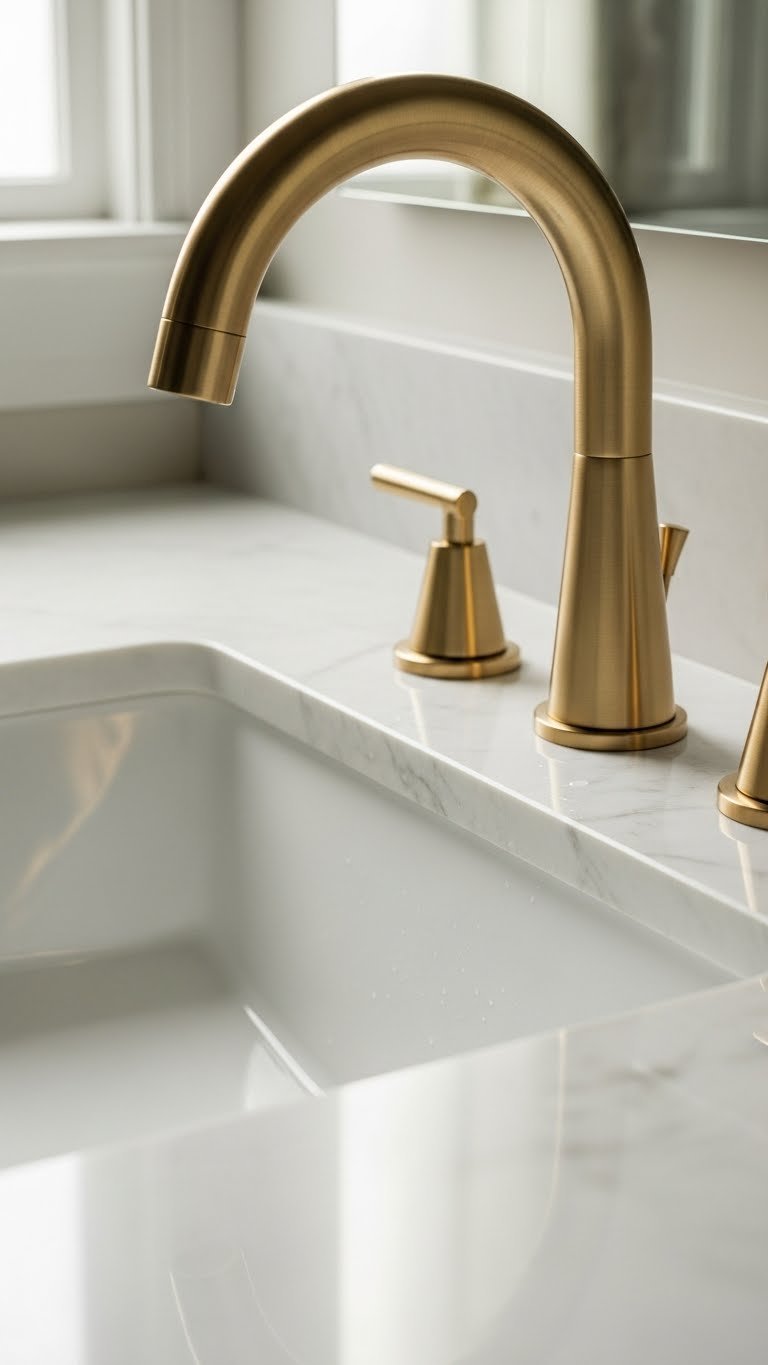
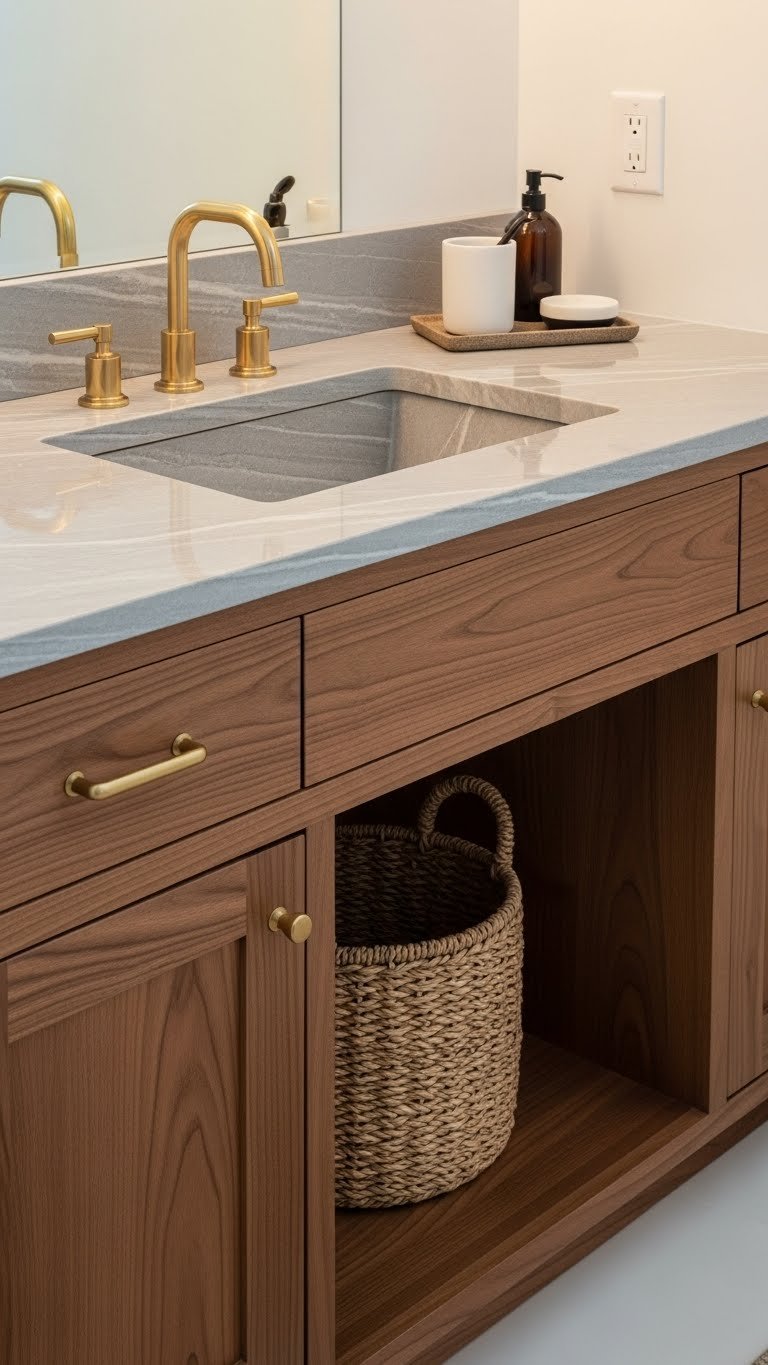
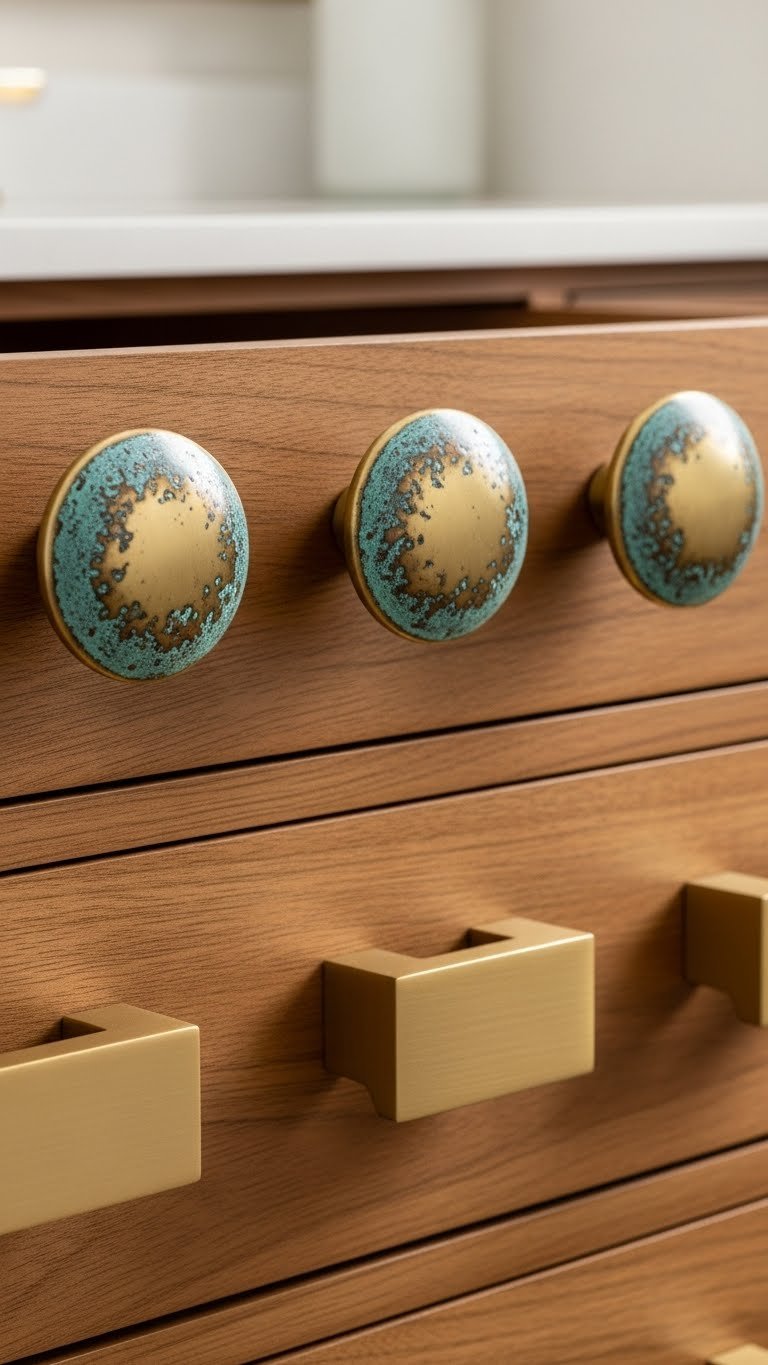
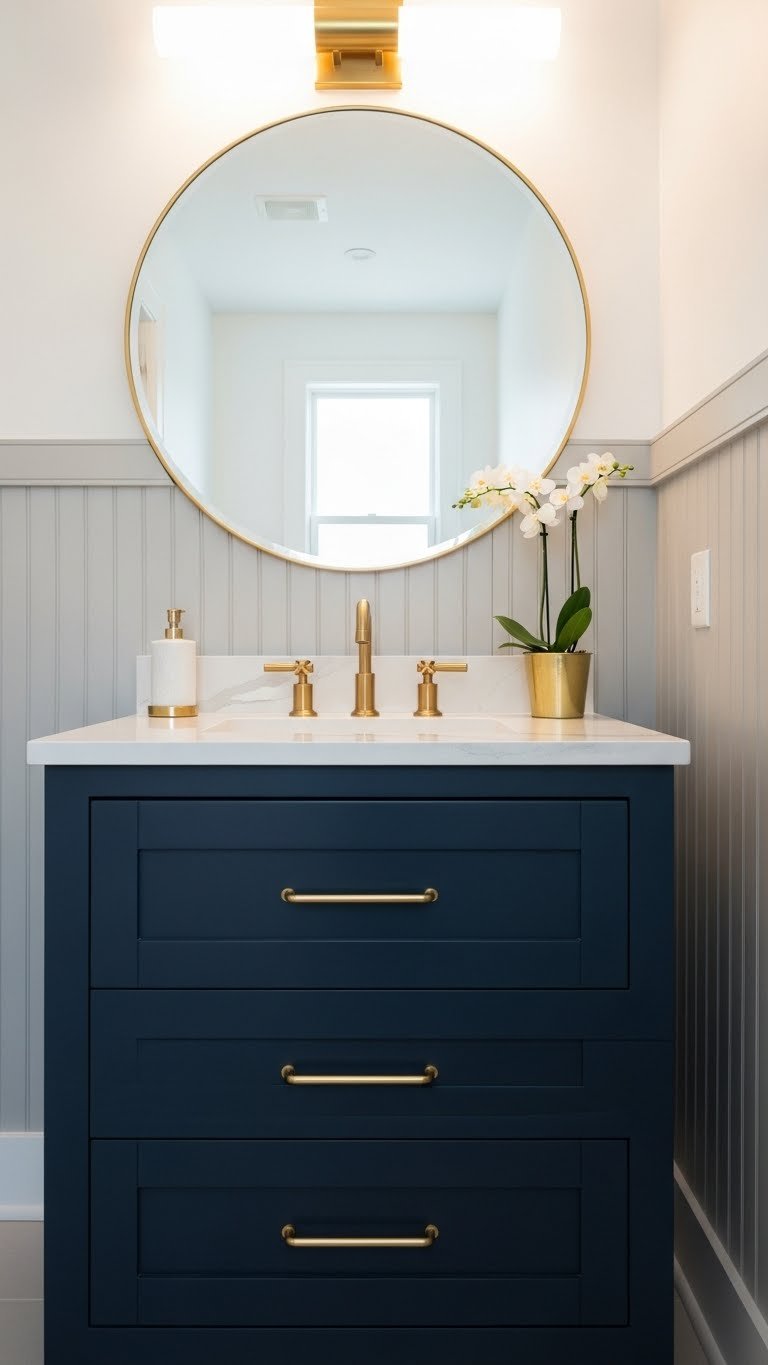
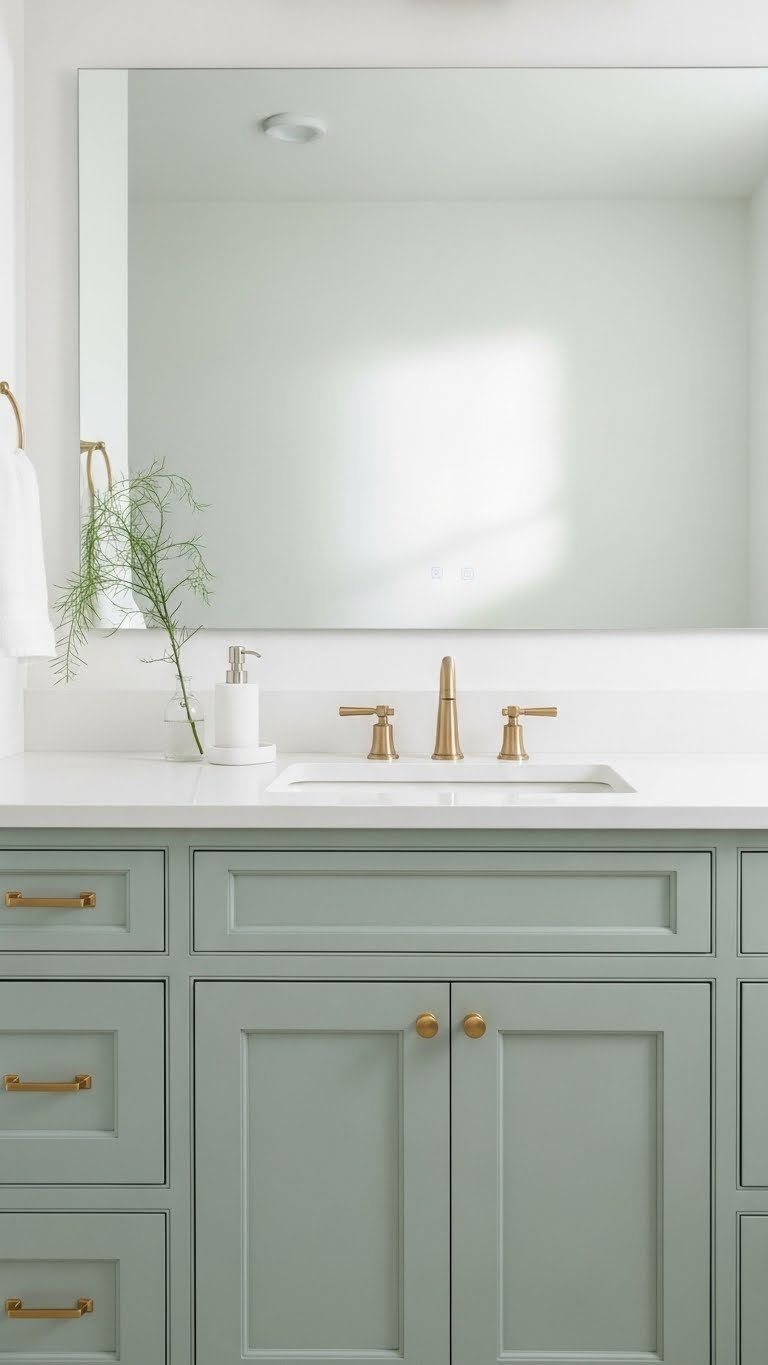
    12. Paint or Update Your Vanity Hardware

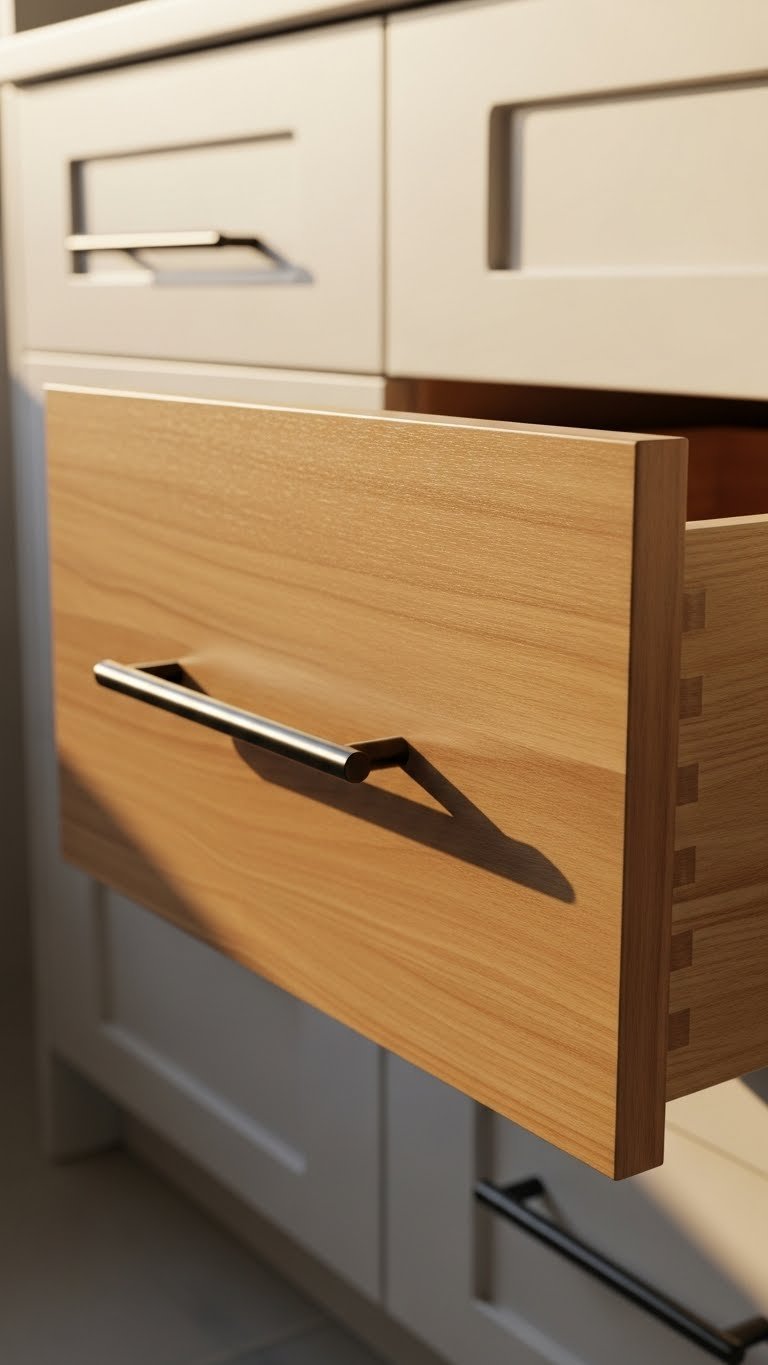
    Tiny hardware changes create disproportionate impact. Swapping cabinet knobs and pulls from basic chrome to brushed brass, matte black, or gold instantly elevates your vanity and ties together your aesthetic.

    Vanity handles cost $3–$15 each depending on material and style. A 30–60 minute DIY project if you have the right screwdriver. Mix metals for visual interest (brass + black, for example) or keep cohesive. Check Wayfair, Amazon, Home Depot, CB2, and Anthropologie for styles that match your vibe. Renter? Many vanities have removable hardware—you can swap it back before moving.

    This small update makes your vanity feel curated and intentional. Upgraded hardware catches light and draws the eye, making your whole bathroom feel more designed and thoughtful.

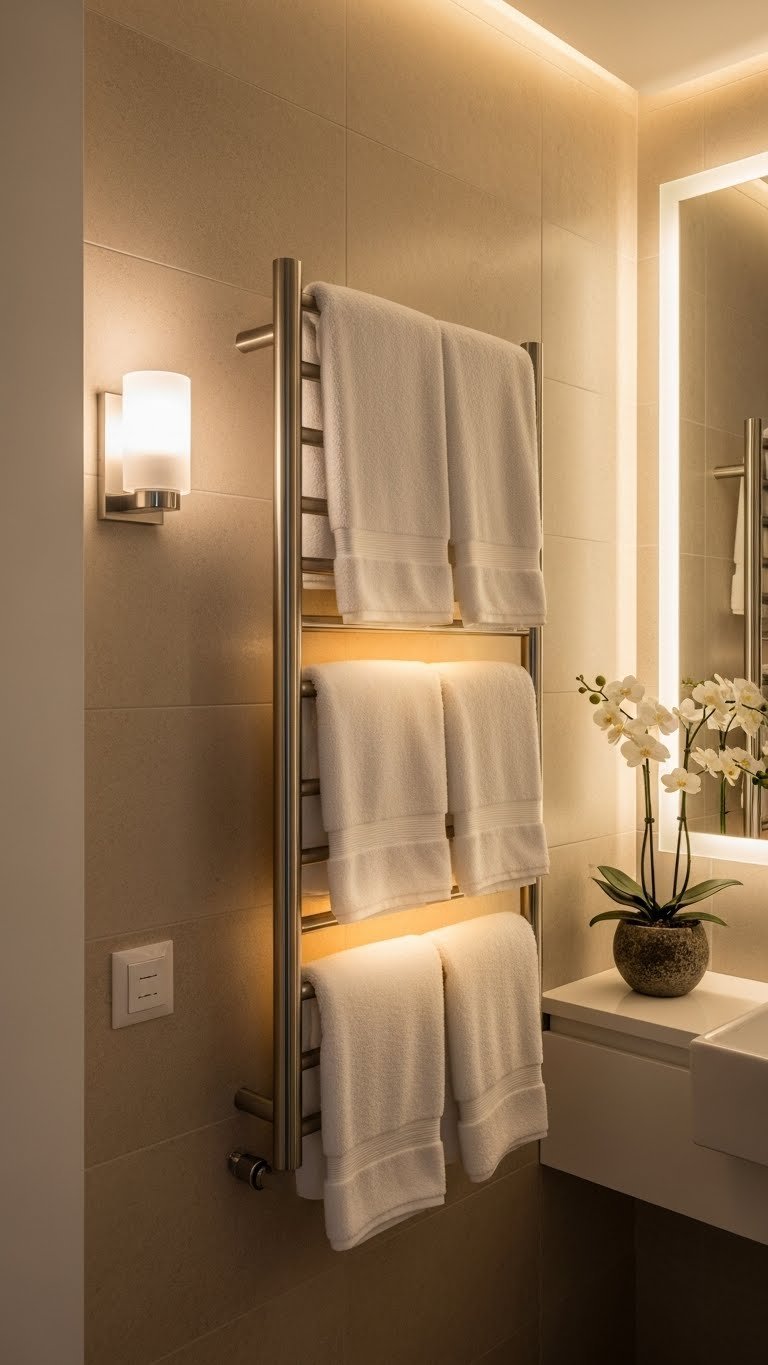
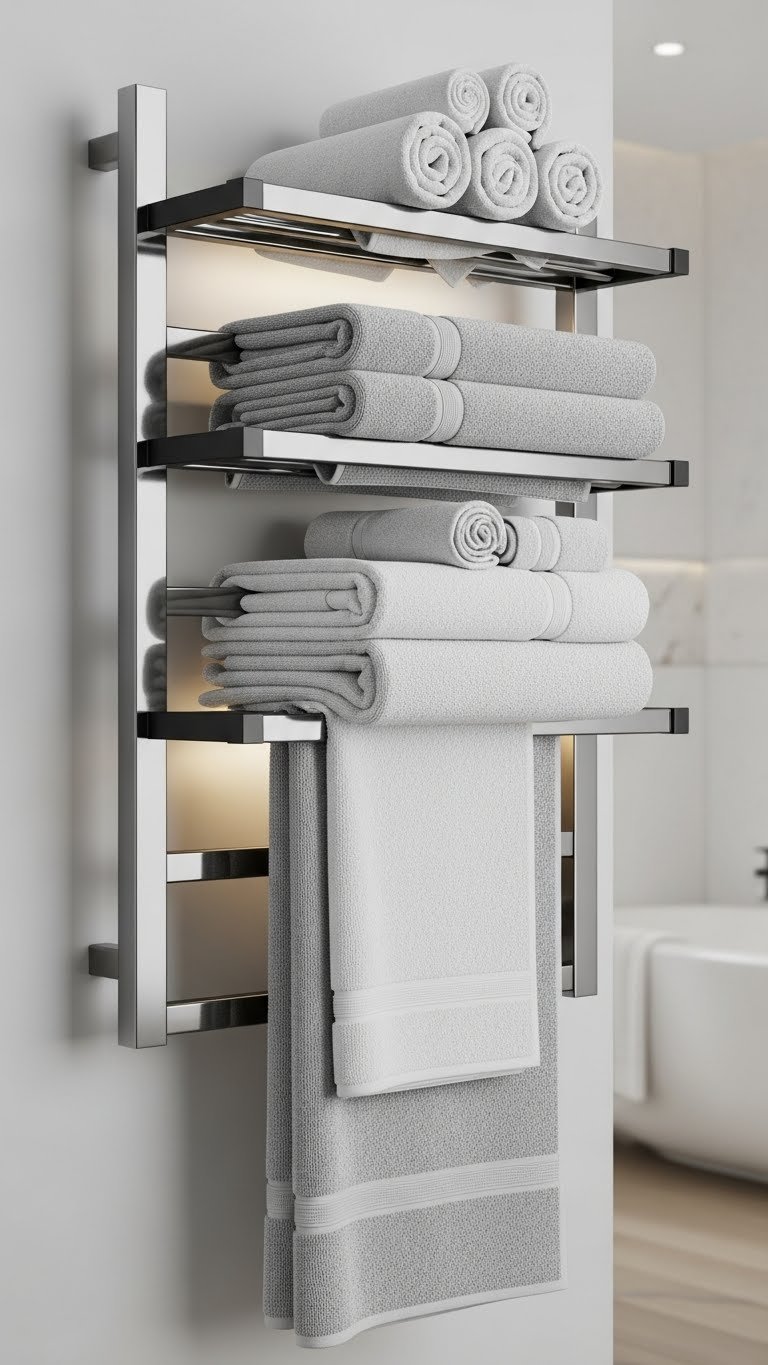
    13. Add a Heated Towel Rack

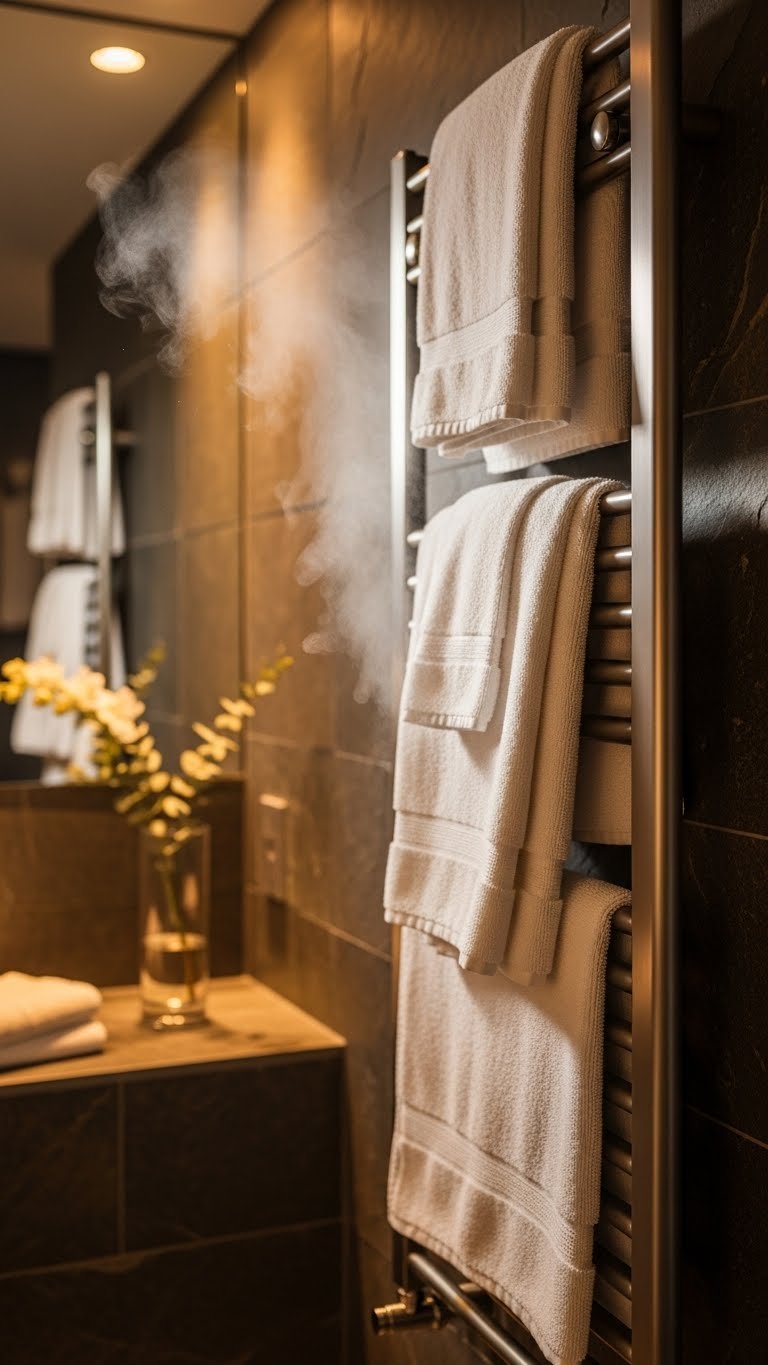
    A heated towel rack is the ultimate comfort upgrade—warm towels feel genuinely spa-like, and the rack doubles as a discreet space heater in chilly bathrooms. It’s a “small luxury” that justifies itself fast.

    Electric heated racks cost $50–$200 depending on size and finish. Most plug into a standard outlet (no installation required), though hardwired options exist. They use minimal electricity—about as much as a lightbulb. Look for models with adjustable heat settings and timers. Amazon, Wayfair, Home Depot, and Rejuvenation have good options. Renters: plug-in versions are perfect.

    Wrapping yourself in a warm towel after a shower feels indulgent and luxurious. This one upgrade makes your daily routine feel like a treat, and guests will notice the spa-like detail immediately.

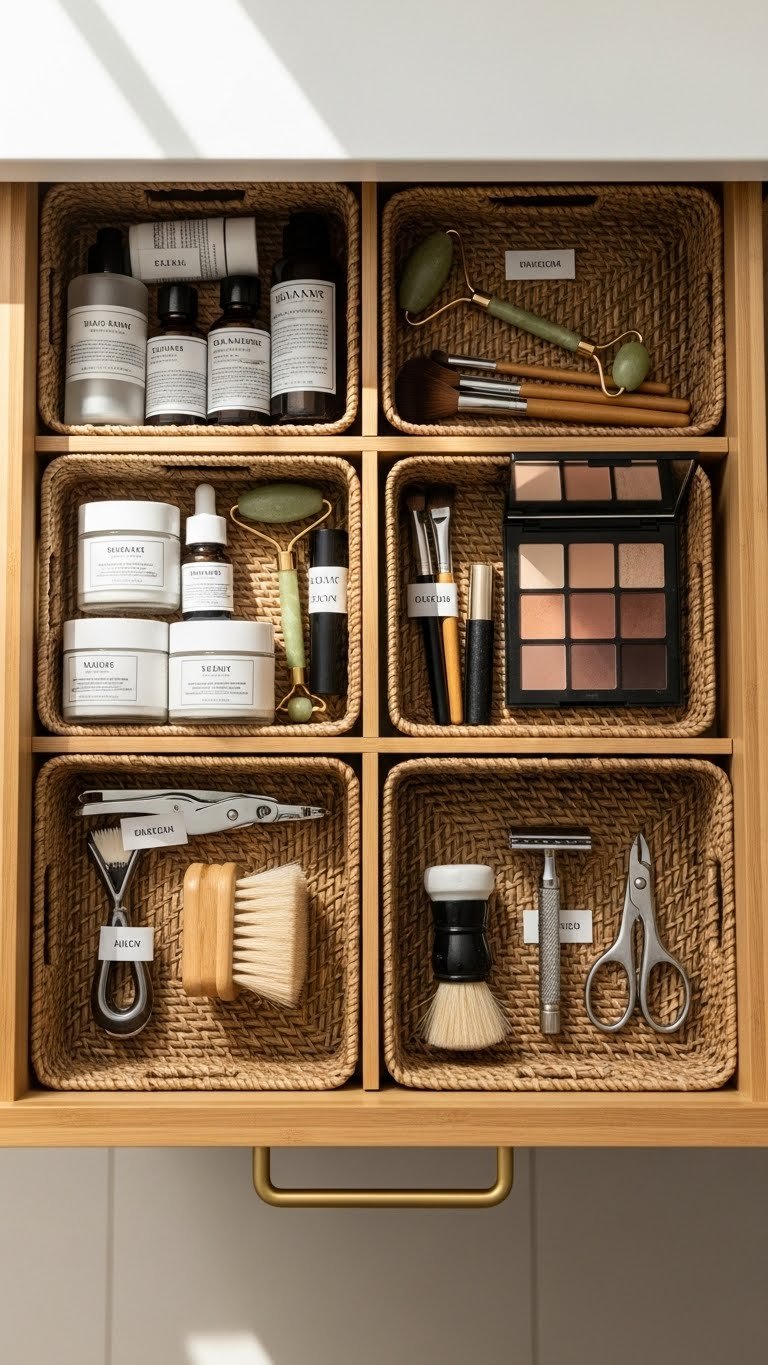
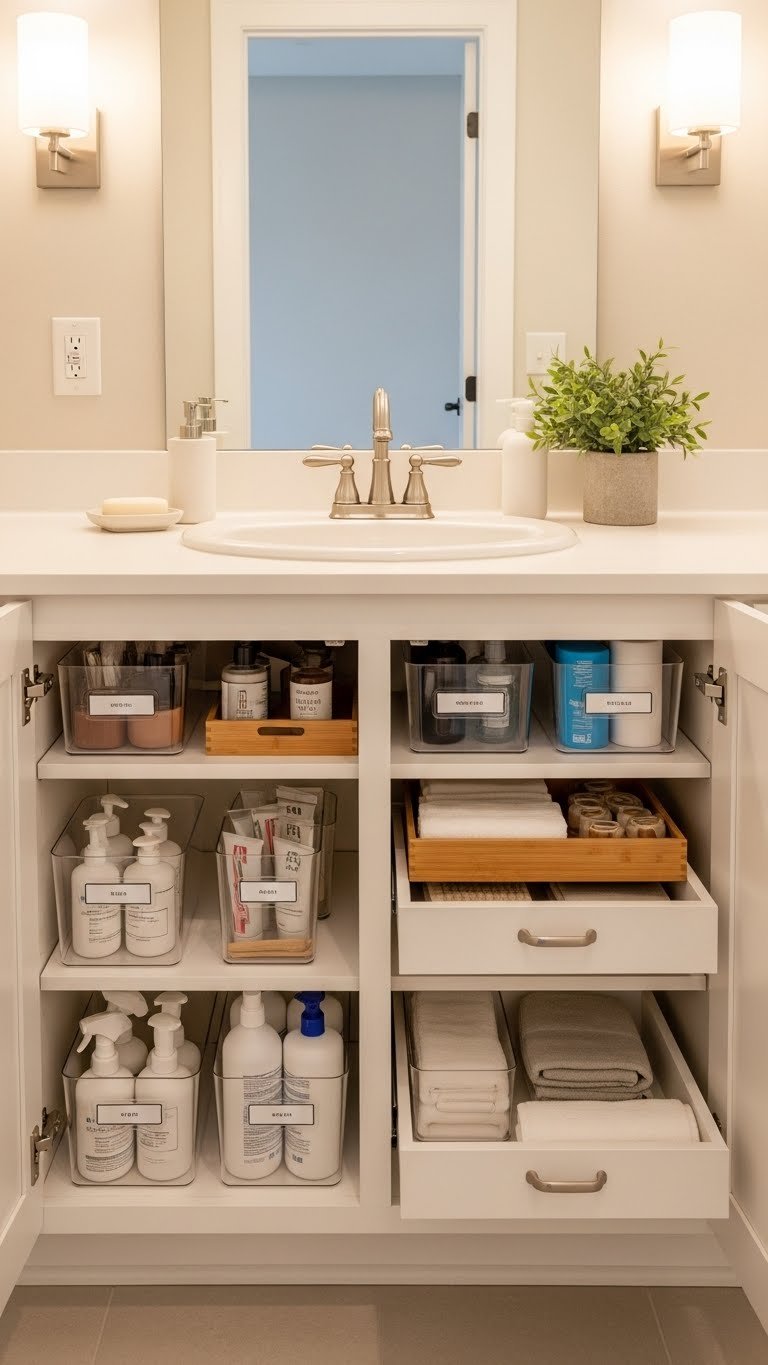
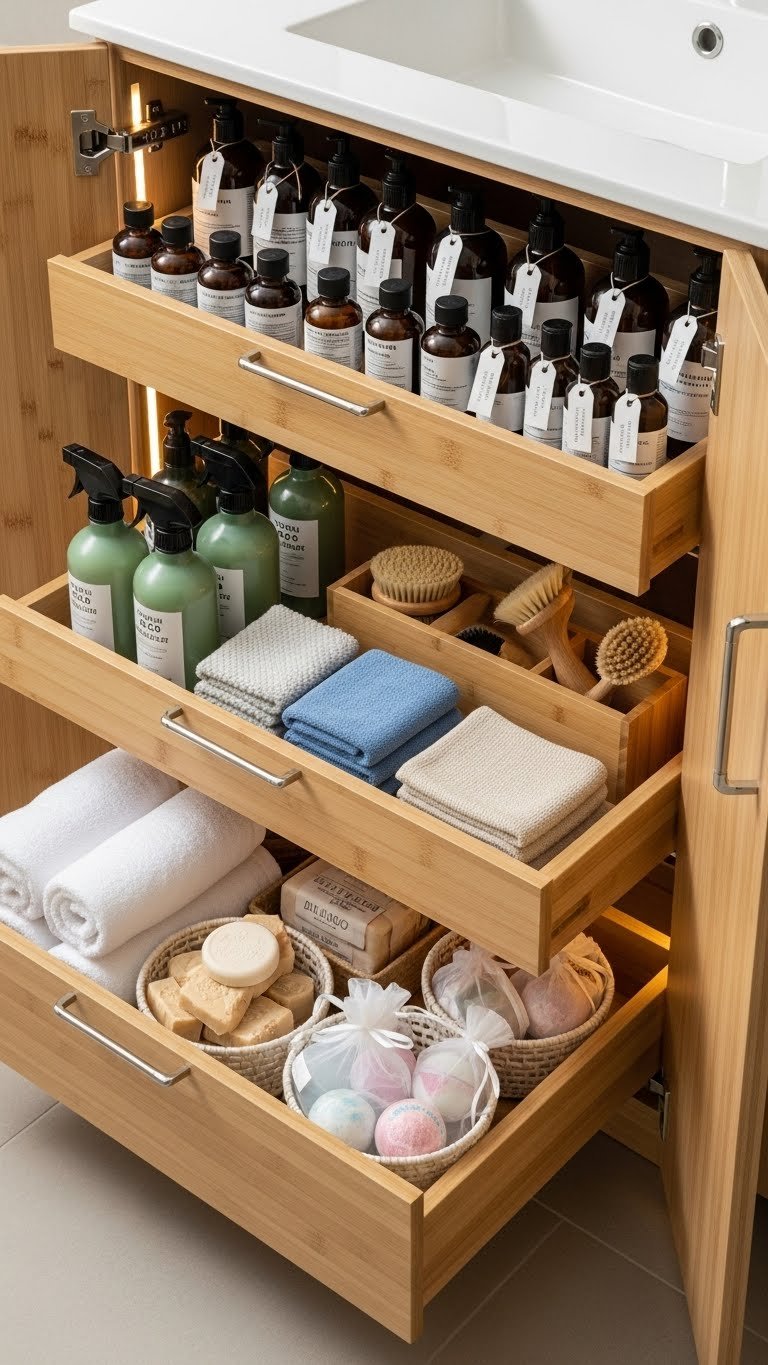
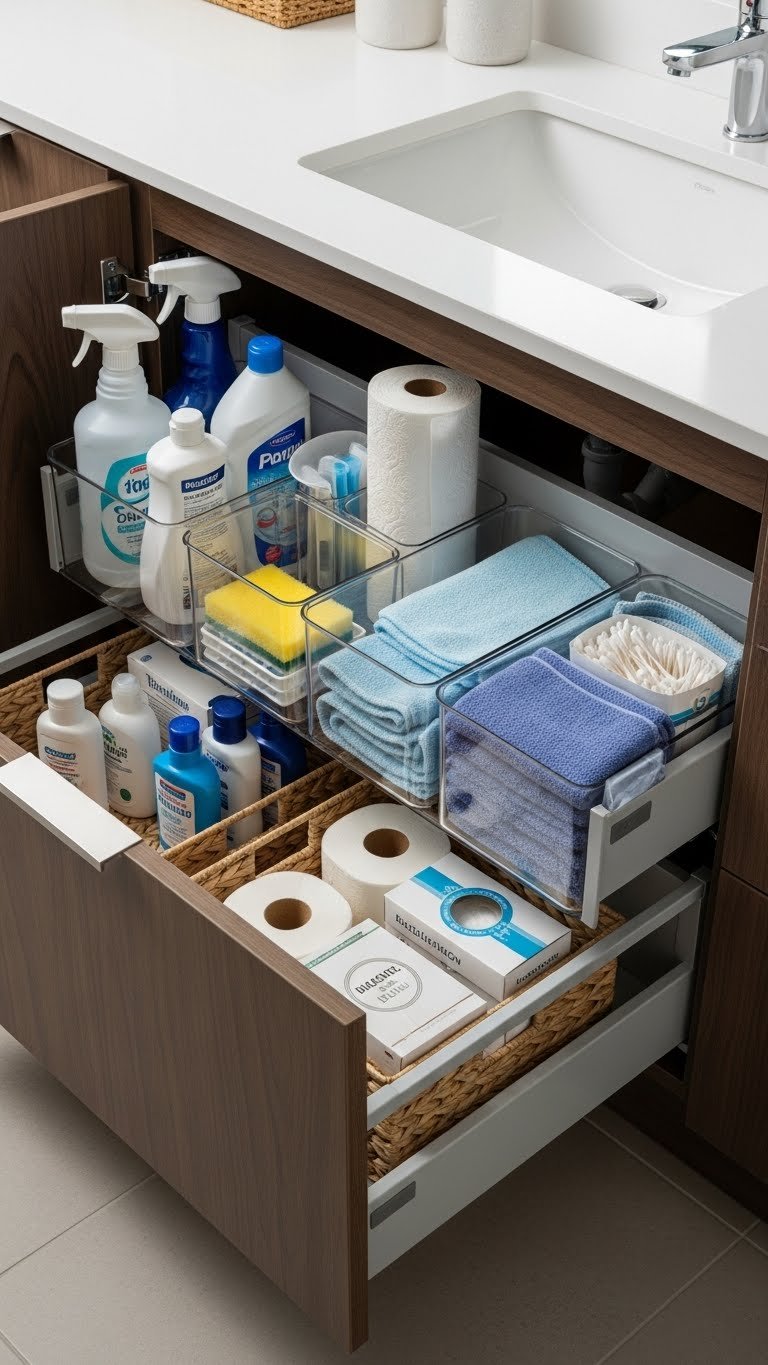
    14. Use Drawer Dividers and Organizers

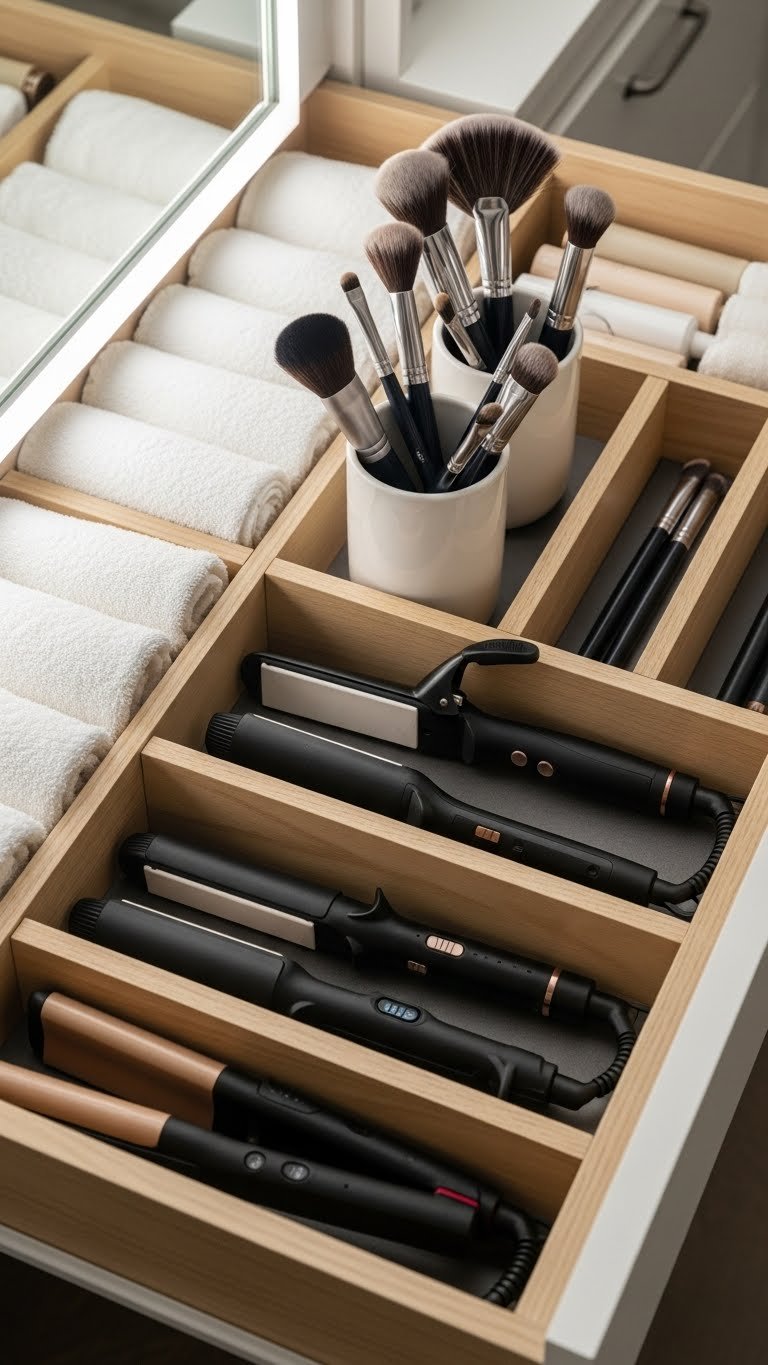
    Organization isn’t glamorous, but it’s the foundation of a calm, retreat-like bathroom. Drawer dividers keep small spaces from descending into chaos and make everything easy to find.

    Bamboo or plastic drawer dividers cost $10–$30 for a set. Small containers and bins ($5–$20) corral loose items. This is a weekend project—empty your drawers, sort items into categories, and install dividers. Adjust as needed. Target, IKEA, Container Store, and Amazon have tons of affordable options. Bonus: organized drawers make your bathroom feel bigger because you’re not visually drowning in clutter.

    Opening a neat drawer is genuinely calming. When everything has its place, your bathroom feels like a sanctuary instead of a storage disaster—you’ll feel more peaceful every time you brush your teeth or do your skincare routine.

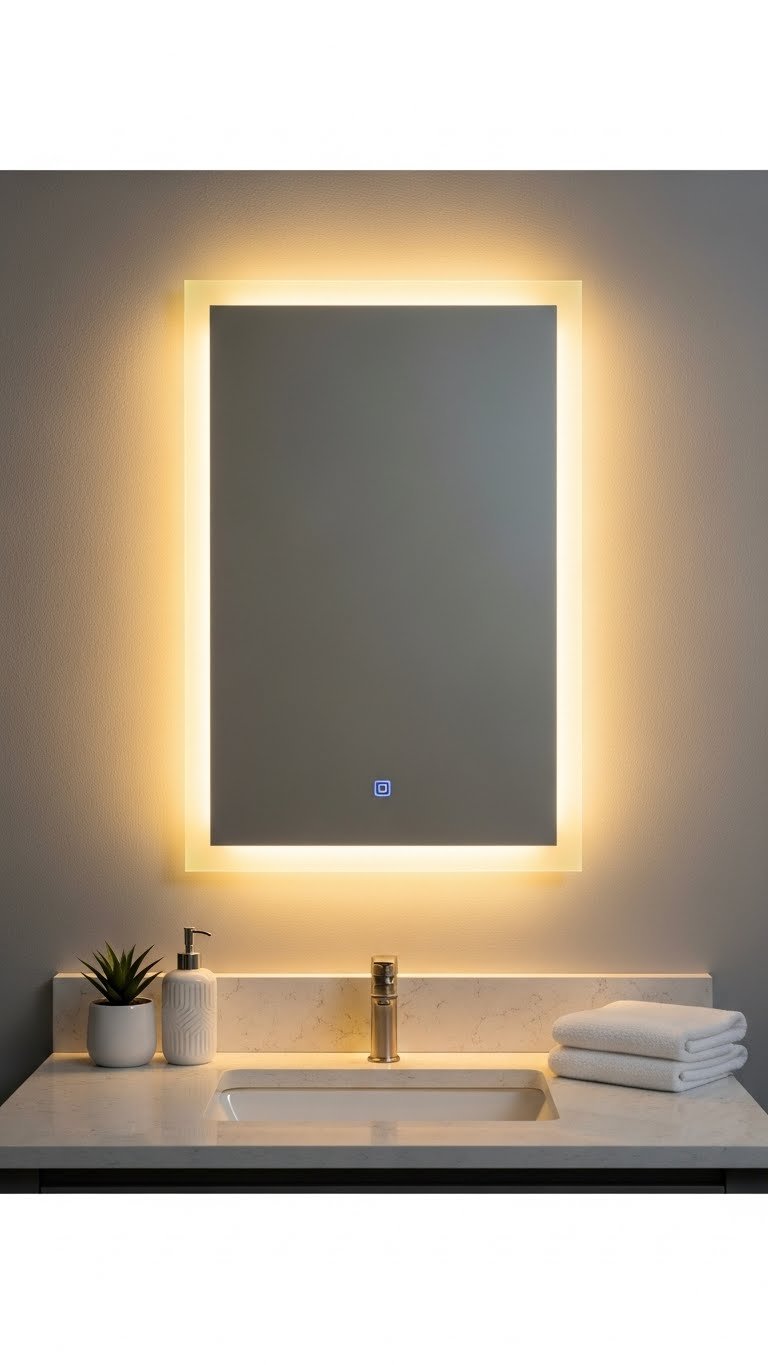
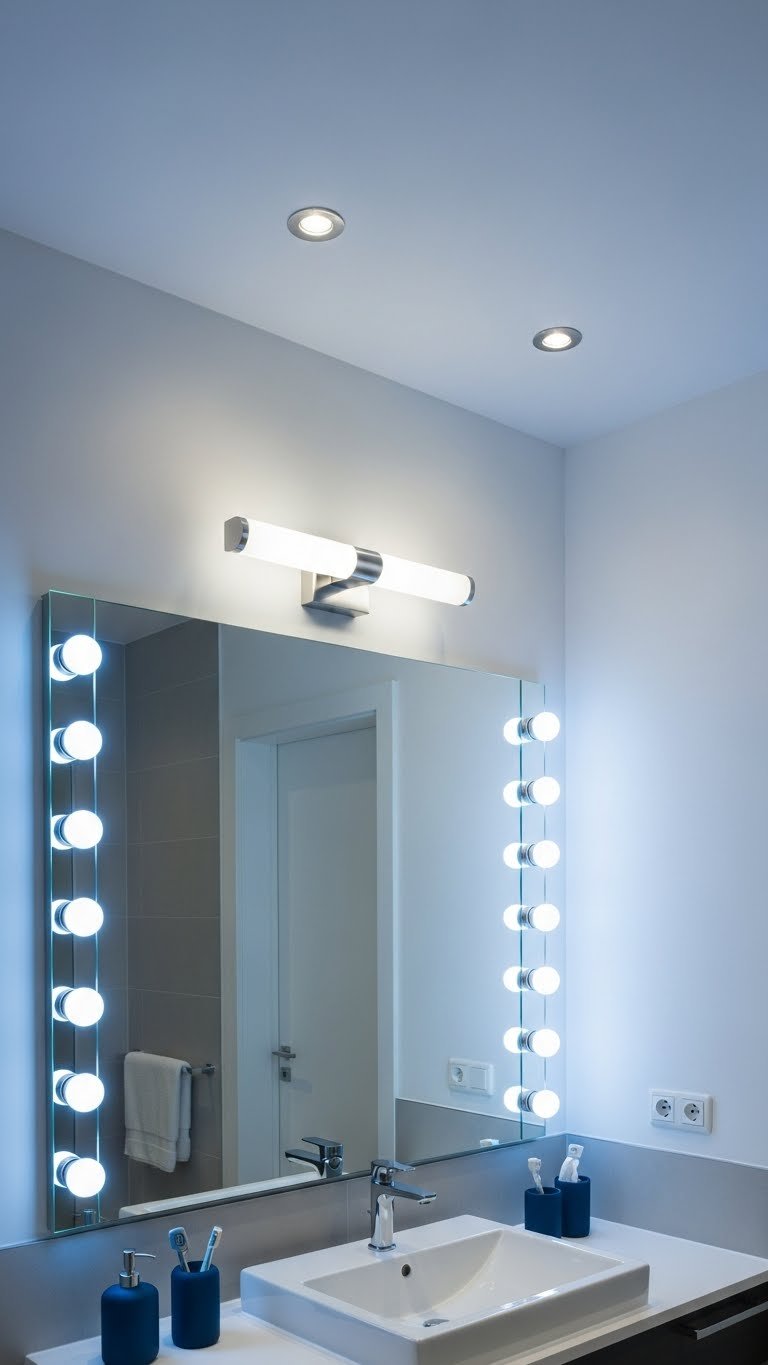
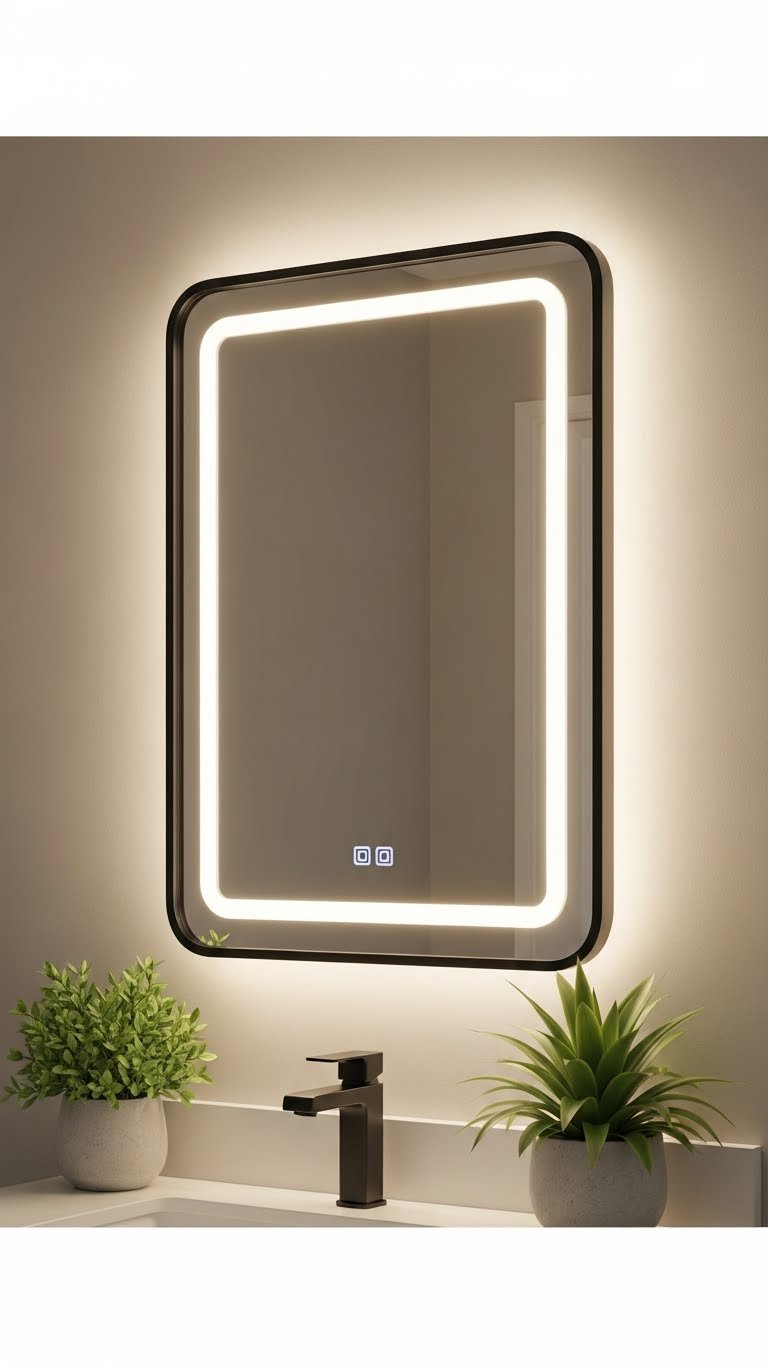
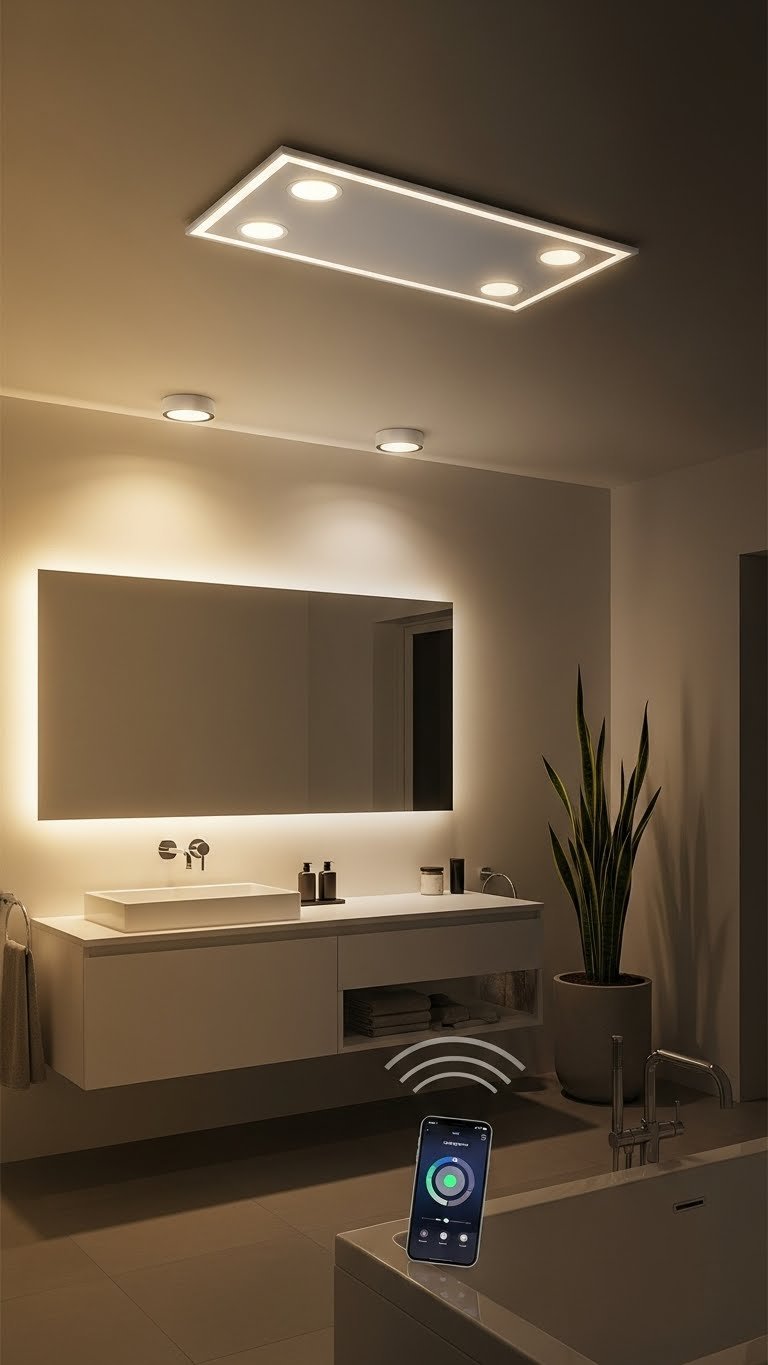
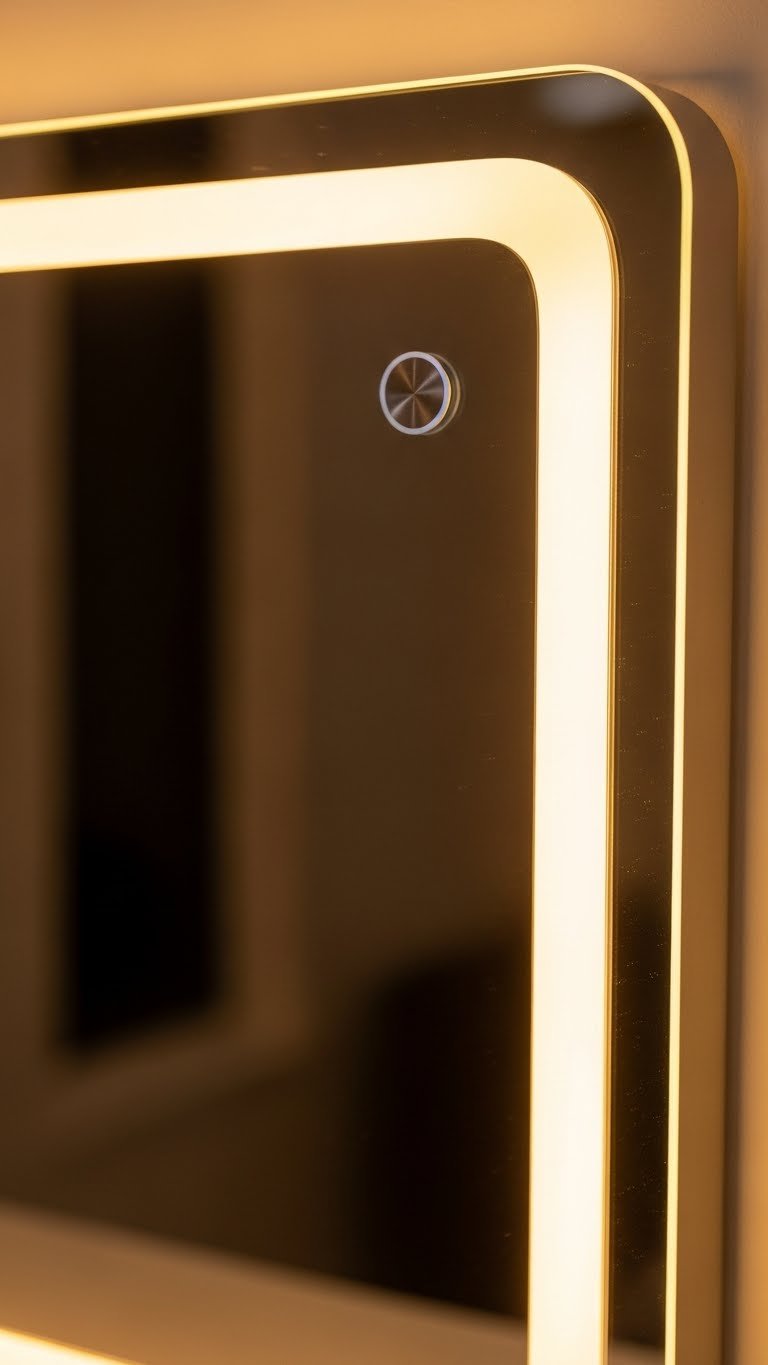
    15. Install LED Strip Lighting Around Your Mirror

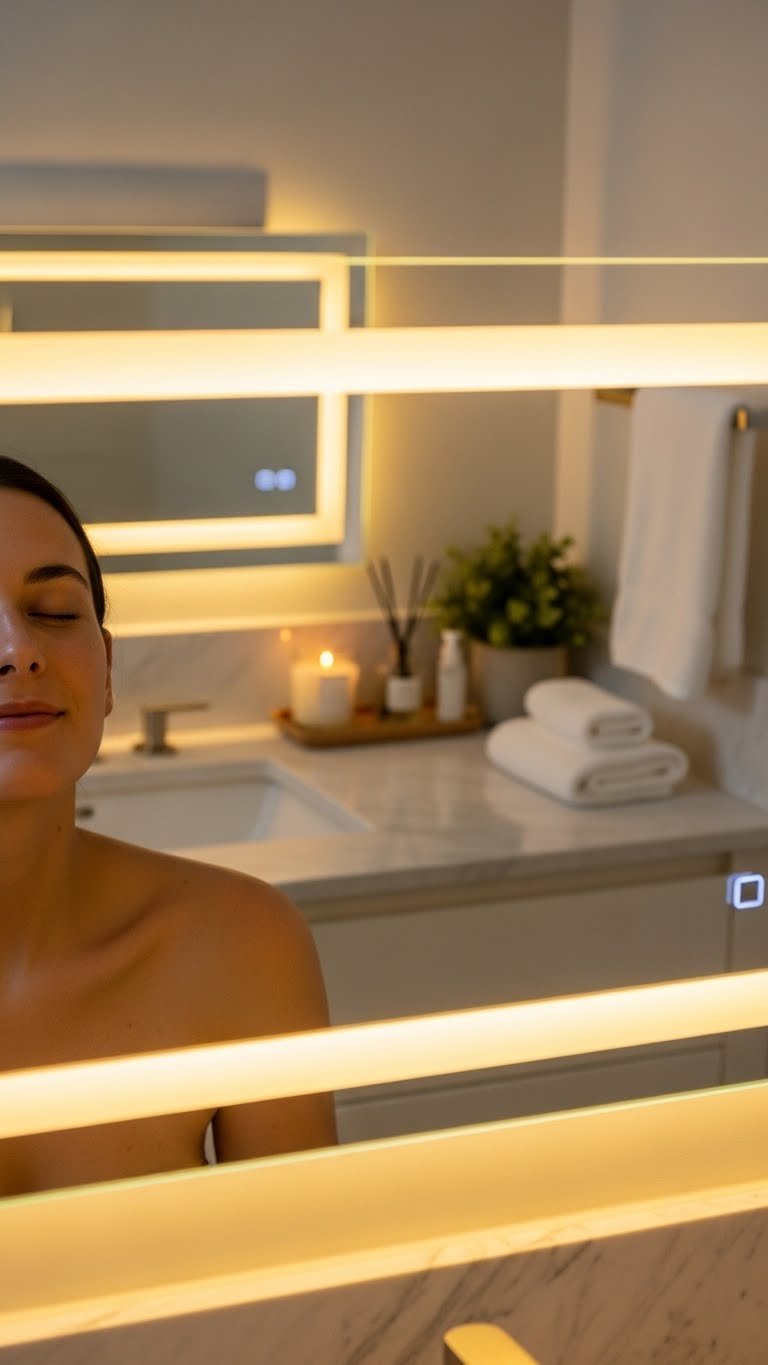
    Mirror lighting is functional and mood-setting. LED strips around your mirror provide flattering light for grooming while adding a modern, high-end feel that’s totally DIY-able.

    LED strip lights cost $15–$50 for a quality set. Most come with adhesive backing—just clean the mirror frame and stick them on. Plug into an outlet and adjust brightness as needed. Many are dimmable and adjustable color temperature. Amazon and LIFX have reliable options. Installation takes 10 minutes. Renters: these stick-on strips are damage-free.

    Your bathroom lighting becomes flattering and adjustable instead of harsh and fixed. You get better light for daily routines, and the subtle glow adds that spa-resort quality everyone’s chasing.

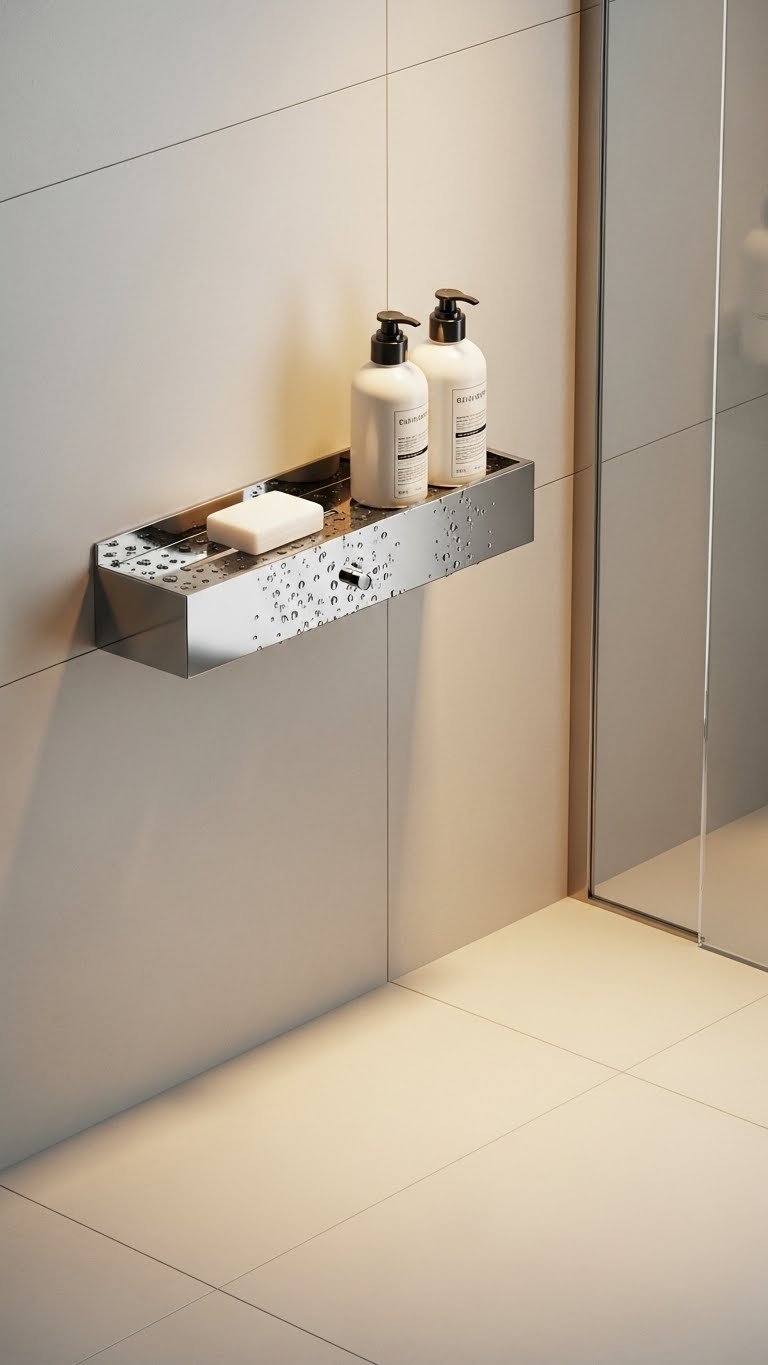
    16. Declutter with a Small Caddy or Shelf Unit

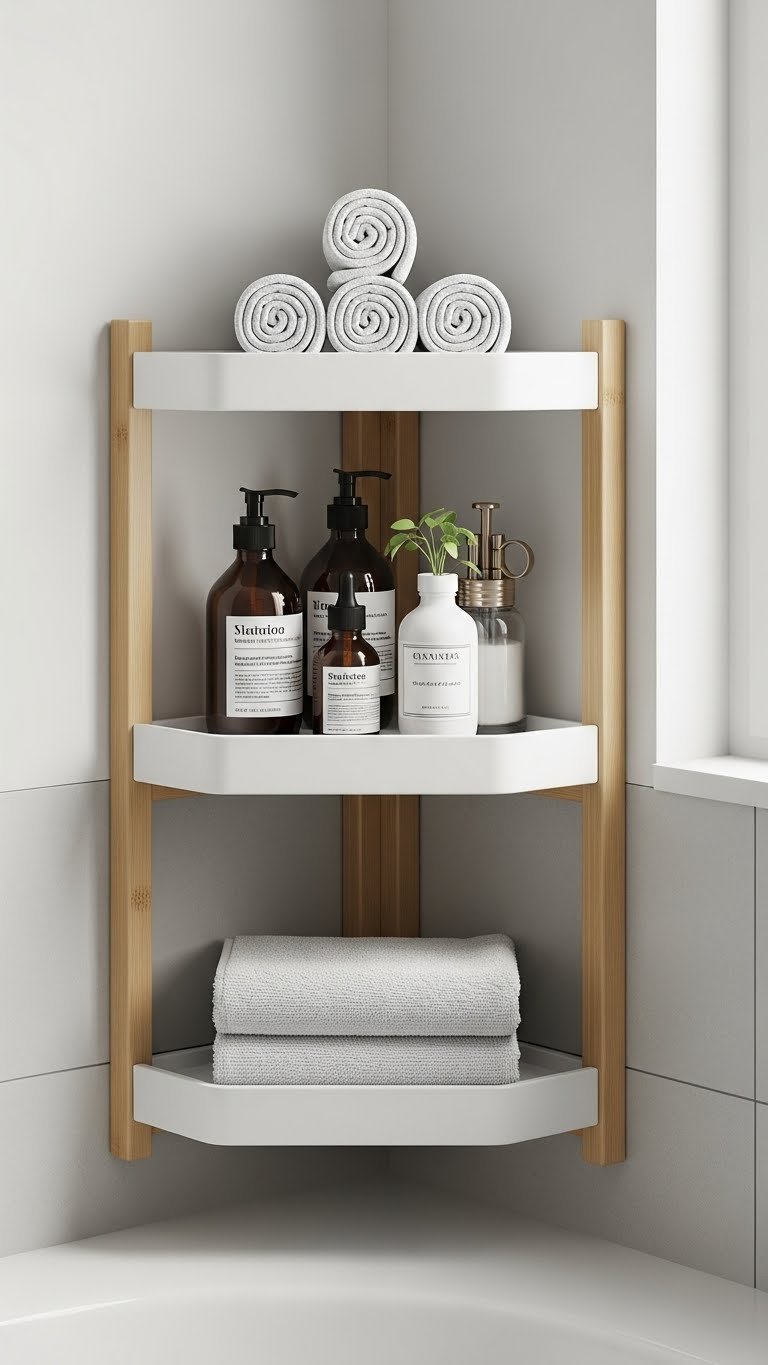
    A narrow shelf unit or corner caddy maximizes vertical space in small bathrooms, keeping daily essentials accessible without counter clutter.

    Slim shelf units cost $30–$100 depending on material (wood, metal, or composite). Corner caddies run $15–$50. Most install with simple brackets or lean against walls. IKEA, Target, Wayfair, and Home Depot have compact options designed specifically for small bathrooms. Renters: freestanding units need zero installation.

    Your countertop opens up, and everything you need is within arm’s reach. A clean counter makes the entire bathroom feel bigger and calmer—you’ll actually look forward to getting ready instead of feeling overwhelmed by clutter.

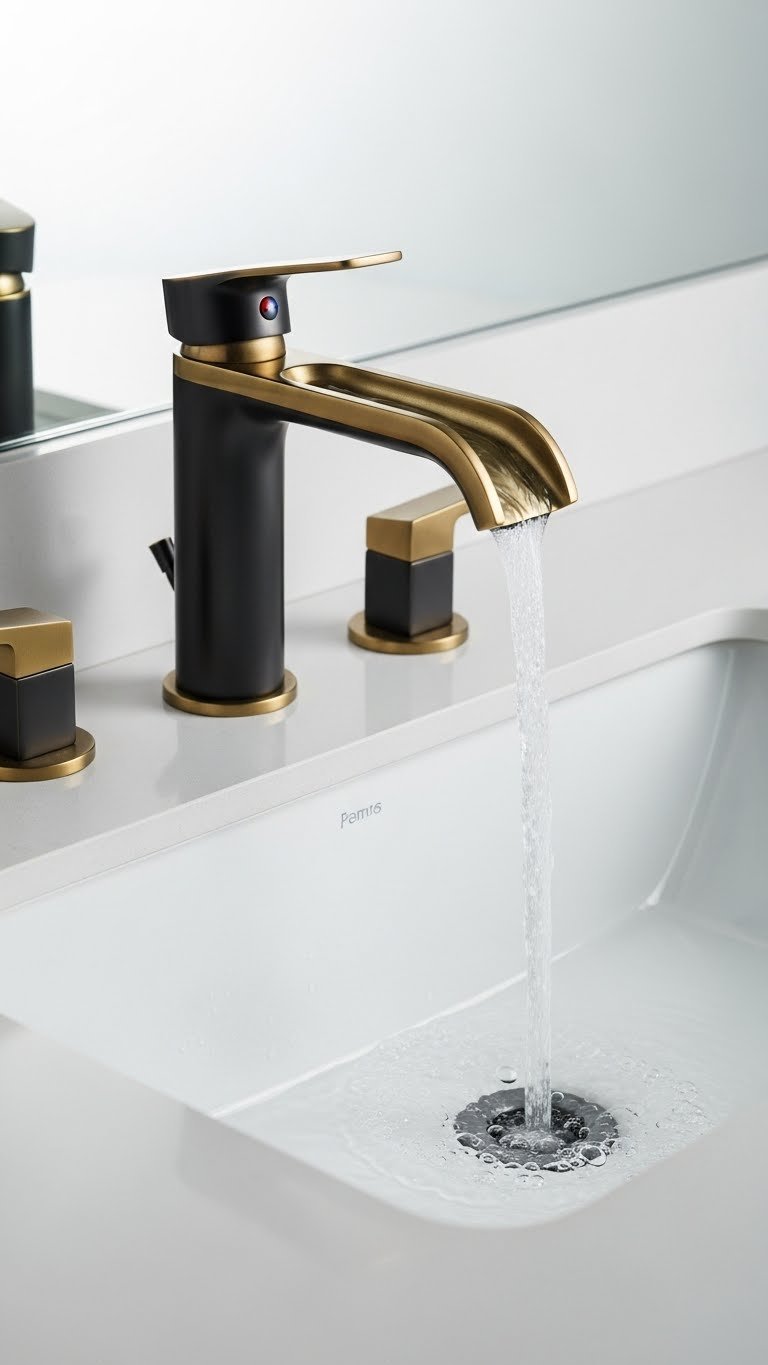
    17. Upgrade to Low-Flow, Water-Saving Fixtures

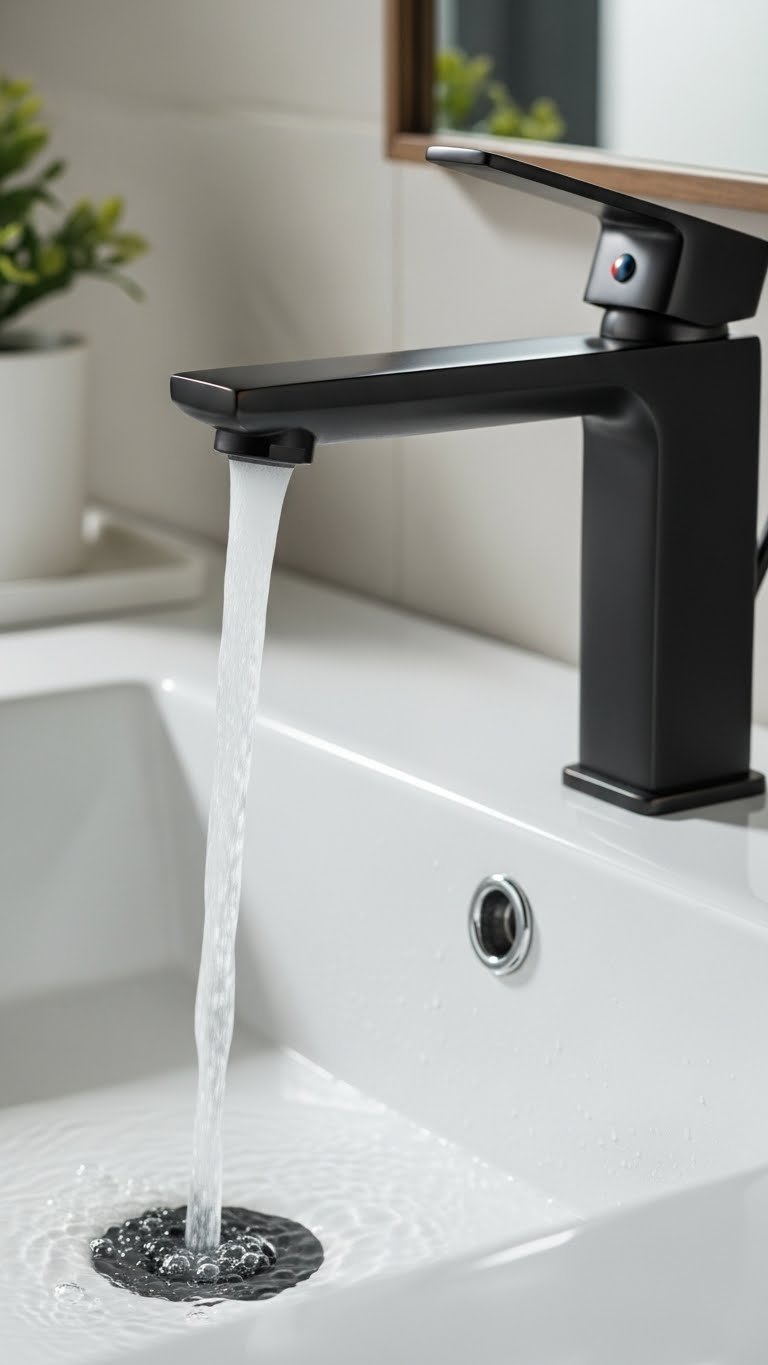
    Water-efficient fixtures cut your bills while supporting your eco-friendly goals. Modern low-flow faucets and showerheads are engineered to feel luxurious while using less water—no sacrifice required.

    Low-flow faucets cost $50–$200; efficient showerheads run $30–$150. Installation takes 20–45 minutes for faucets (or hire a plumber for $75–$200). Look for fixtures labeled WaterSense—they use 20% less water but maintain pressure. Home Depot, Wayfair, Lowe’s, and Hansgrohe have beautiful, efficient options.

    Your water bill drops noticeably, and you’re making an environmental impact without compromising quality. Modern low-flow fixtures deliver impressive pressure—you won’t notice the difference except when the bill arrives.

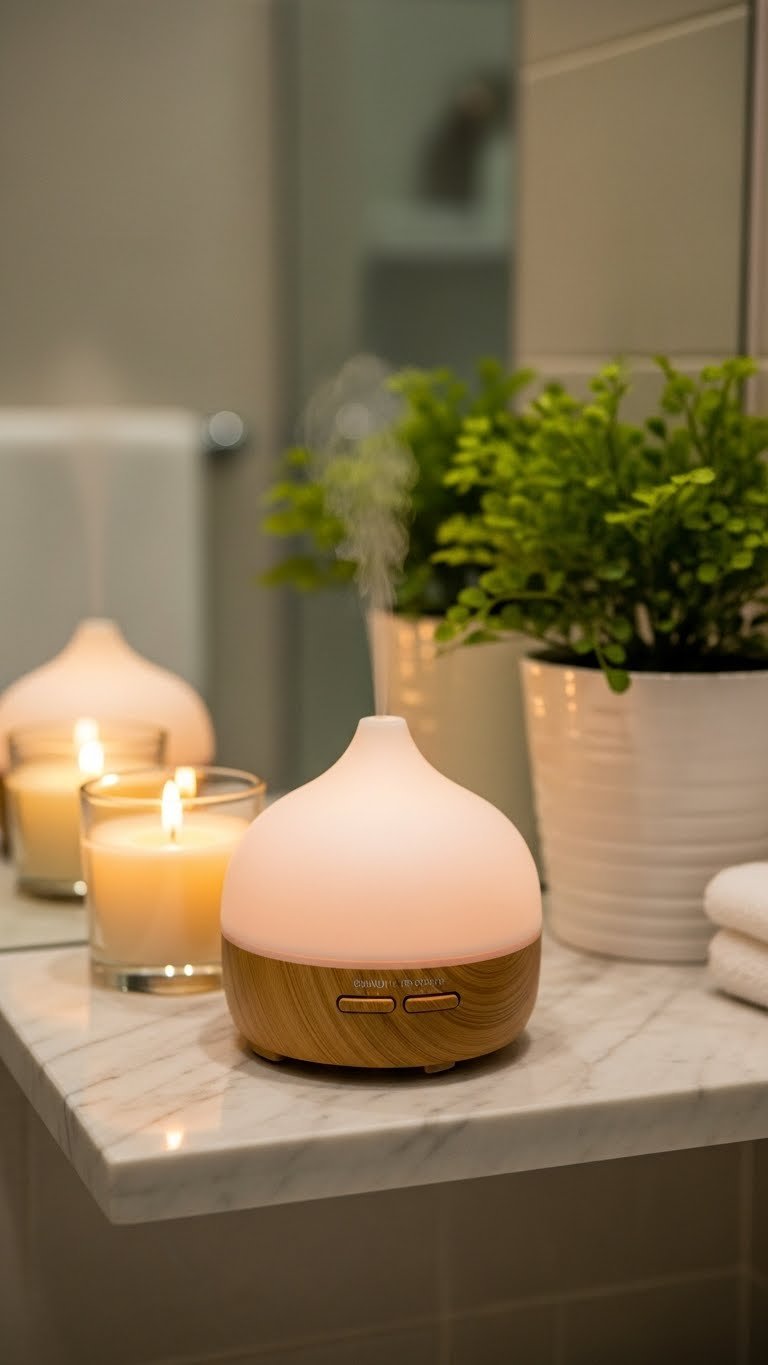
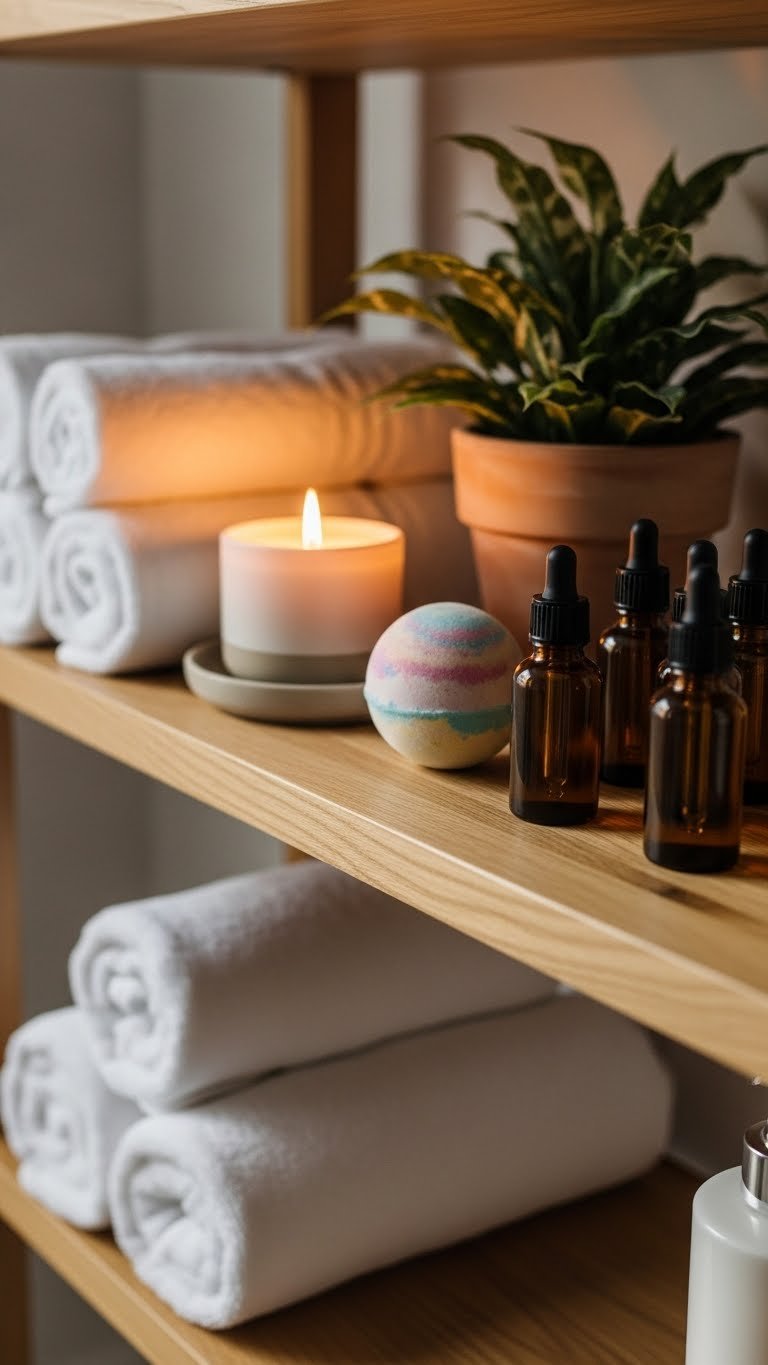
    18. Add Aromatherapy with Essential Oils and a Diffuser

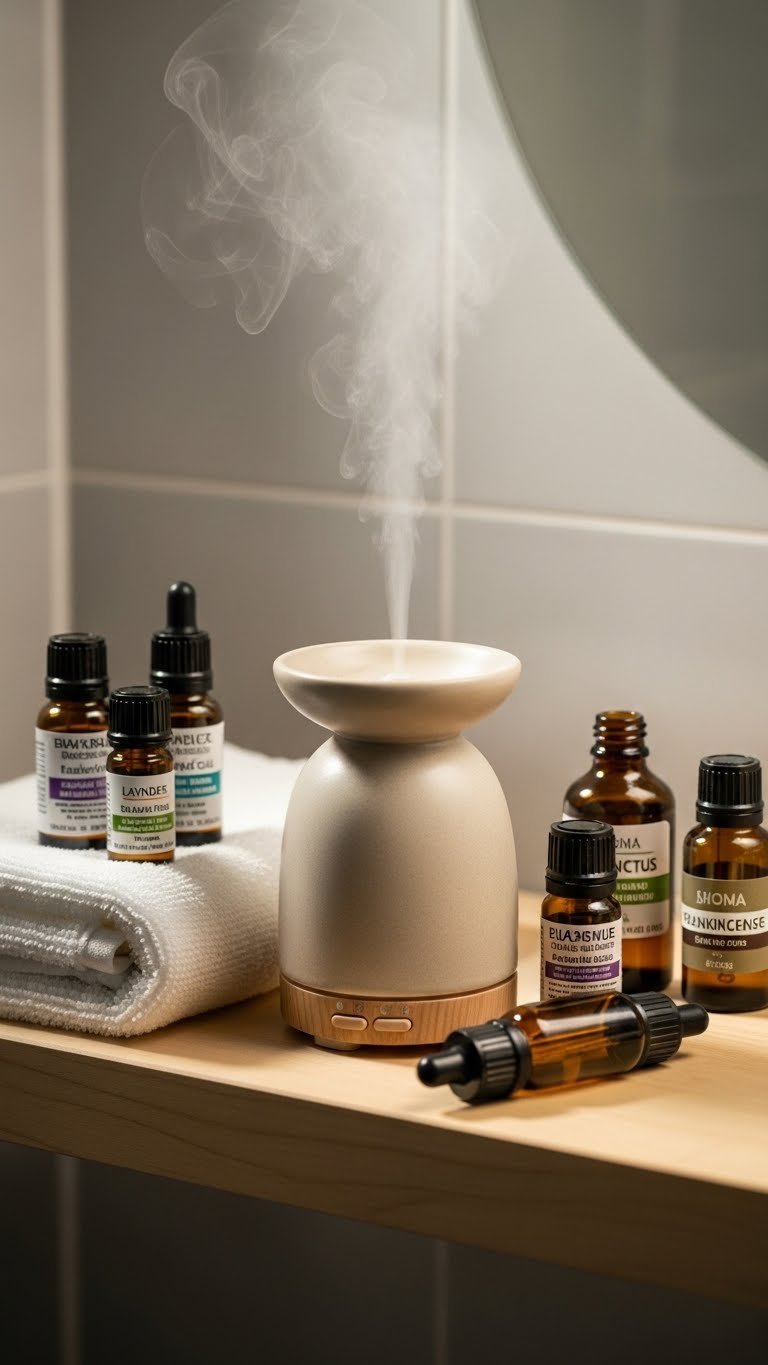
    Scent completes the spa experience. A small essential oil diffuser fills your bathroom with calming aromas—eucalyptus, lavender, or citrus—making every visit feel like a retreat.

    Ultrasonic diffusers cost $15–$50. Essential oils run $8–$20 per bottle (budget longer with a diffuser than candles). Plug it in, add water and a few drops of oil, and let it run. Most have auto-shutoff and run 6–8 hours per tank. Amazon, Target, and specialty stores like Saje have quality options. Pro tip: diffusers also add humidity, which is beneficial for skin and hair.

    The moment you step into your bathroom, calming scents wrap around you. This sensory addition transforms your space from functional to genuinely retreat-like—you’ll catch yourself lingering just for the aroma and calm vibes.

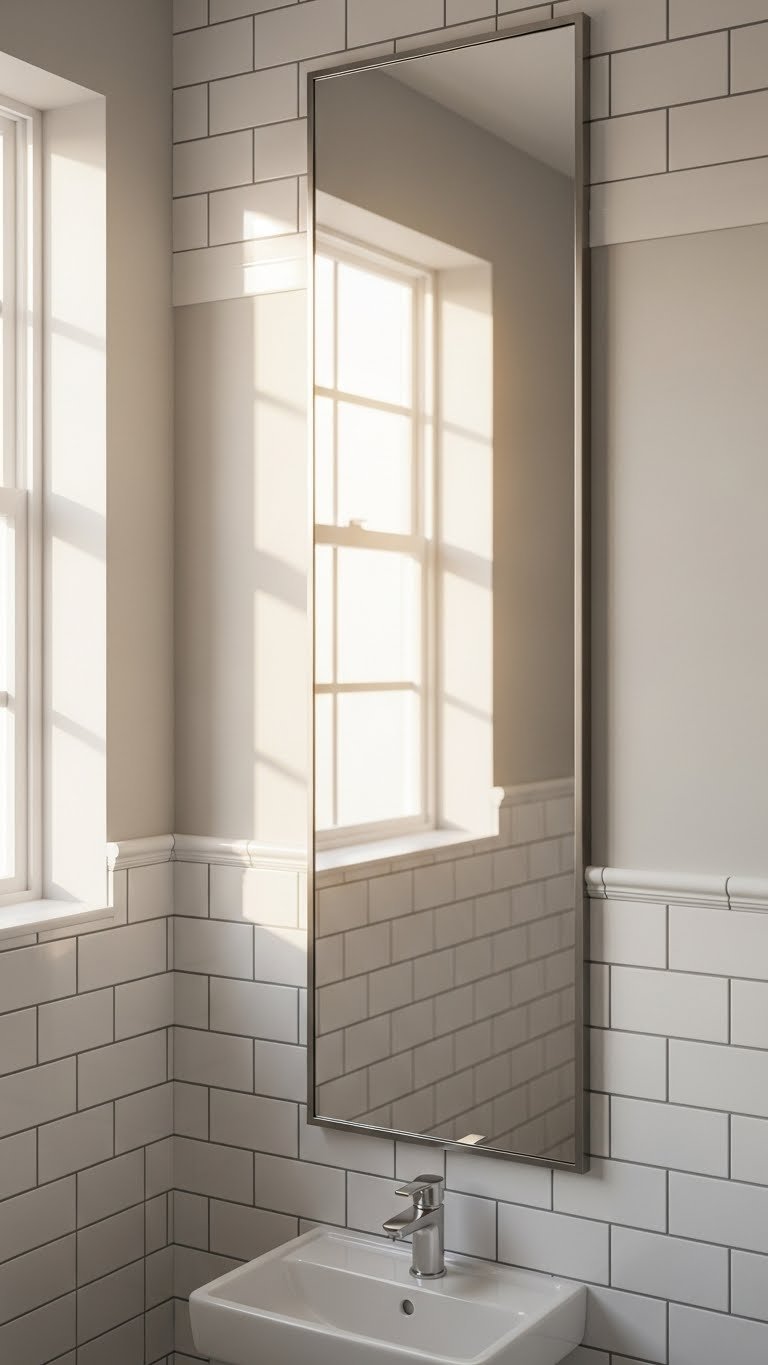
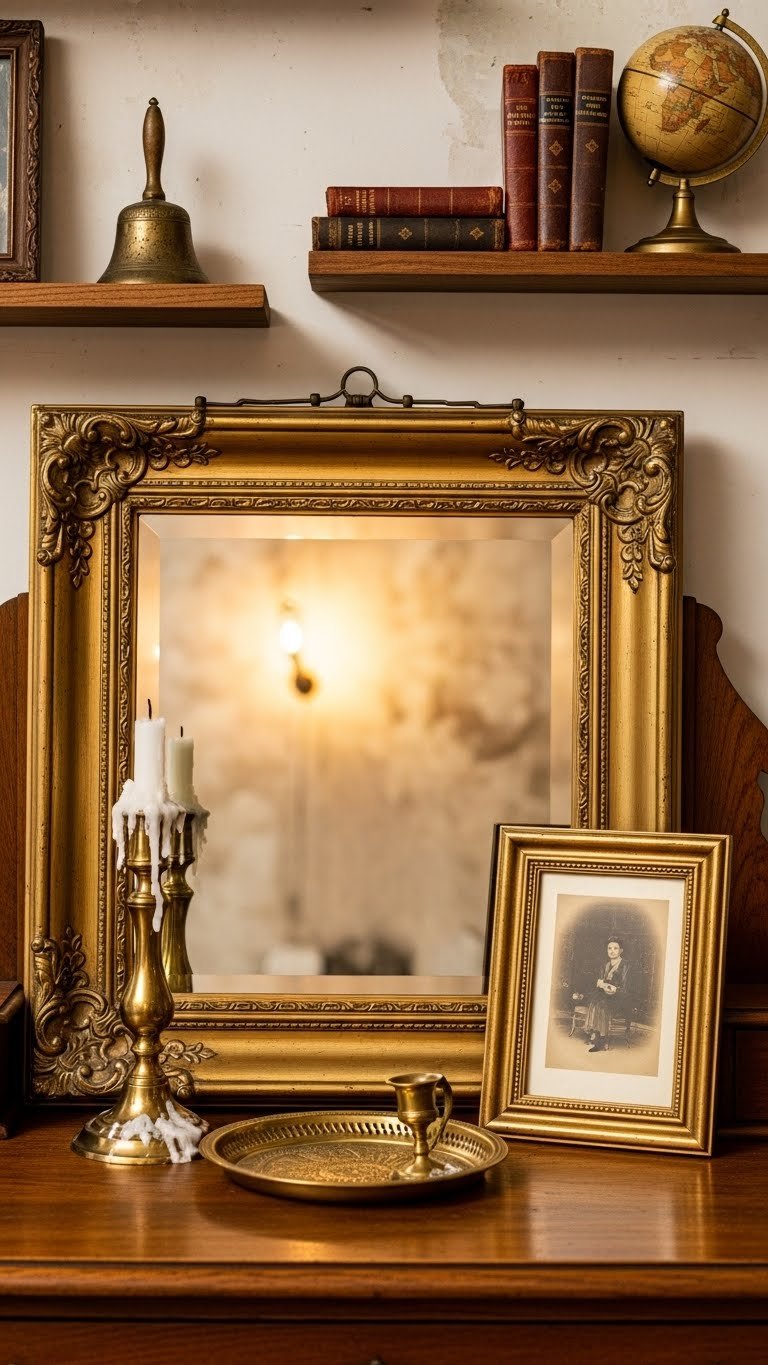
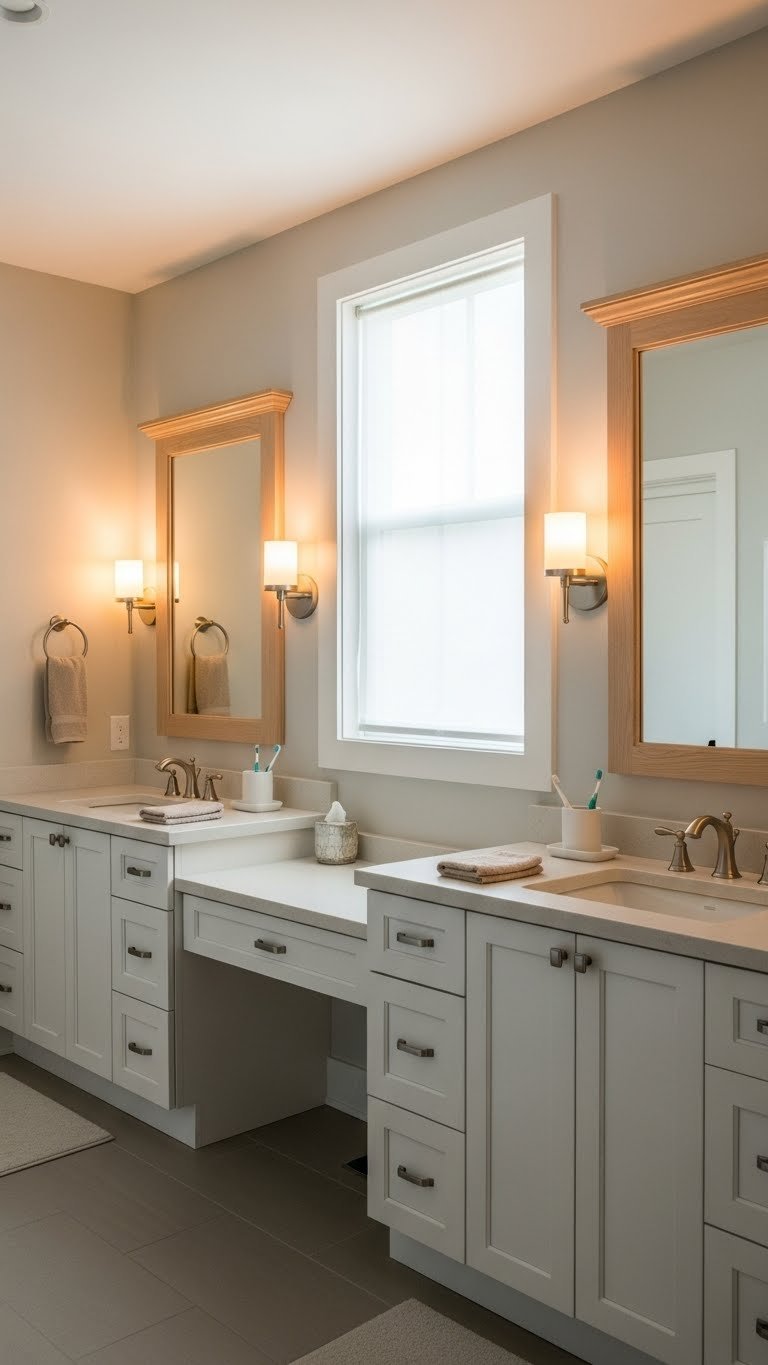
    19. Frame Your Mirror with Molding or a DIY Border

    A framed mirror looks 10 times more intentional and high-end than a bare one. Adding molding or trim is one of the cheapest ways to elevate your bathroom’s entire aesthetic.

    Molding costs $1–$3 per linear foot; a gallon of paint ($30) finishes everything. This is a weekend DIY project: cut molding to size, attach with adhesive or small nails, and paint. You’ll need basic tools like a miter saw (or ask Home Depot for cuts) and a level. YouTube has countless tutorials. Alternatively, peel-and-stick trim ($10–$25 per roll) offers a no-damage option.

    Your mirror suddenly looks architectural and intentional instead of generic. This small detail elevates your entire bathroom aesthetic and makes the space feel more designed and polished.

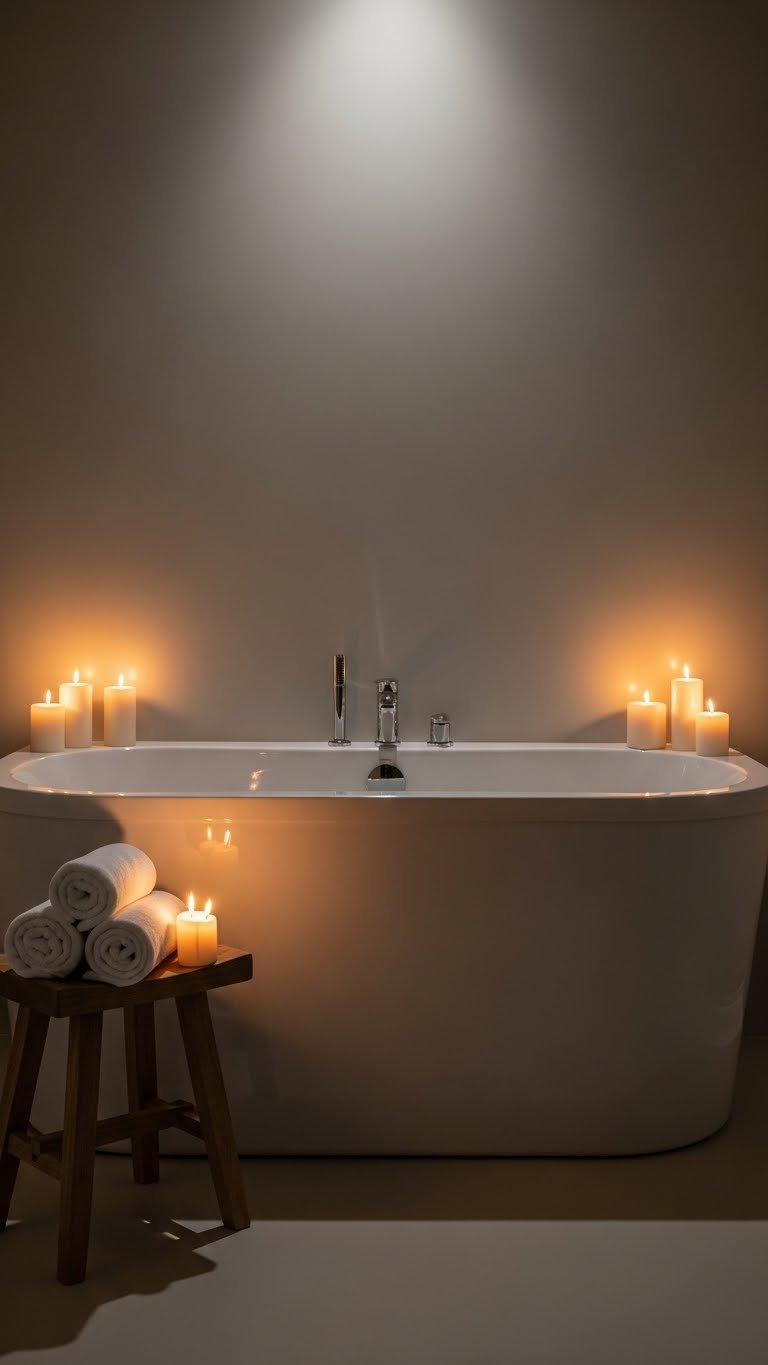
    20. Create a Spa Corner with a Small Stool or Bench

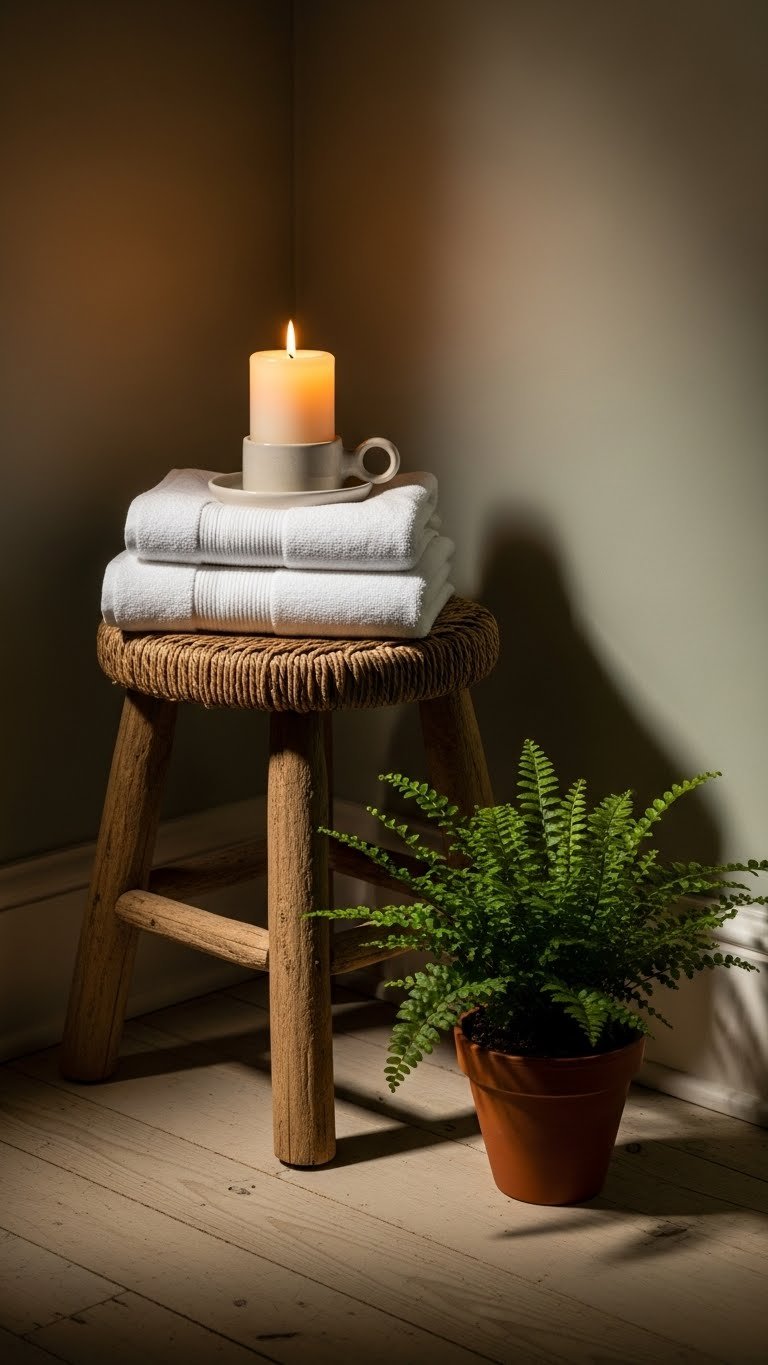
    A small stool or bench creates a spa-corner that’s both functional and aesthetic. It gives you a place to sit, storage for towels, and a focal point that elevates your bathroom’s vibe.

    Compact stools cost $25–$80 depending on material (wood, woven, or upholstered). Look for styles with hidden storage. Place it in a corner, top with rolled towels, a small candle, and a plant. This creates an intentional, spa-like moment. Target, West Elm, IKEA, and CB2 have great compact options.

    Your bathroom gains personality and function. That little corner becomes a visual anchor—a spot you actually want to look at—and guests immediately notice the intentional styling that makes your bathroom feel curated.

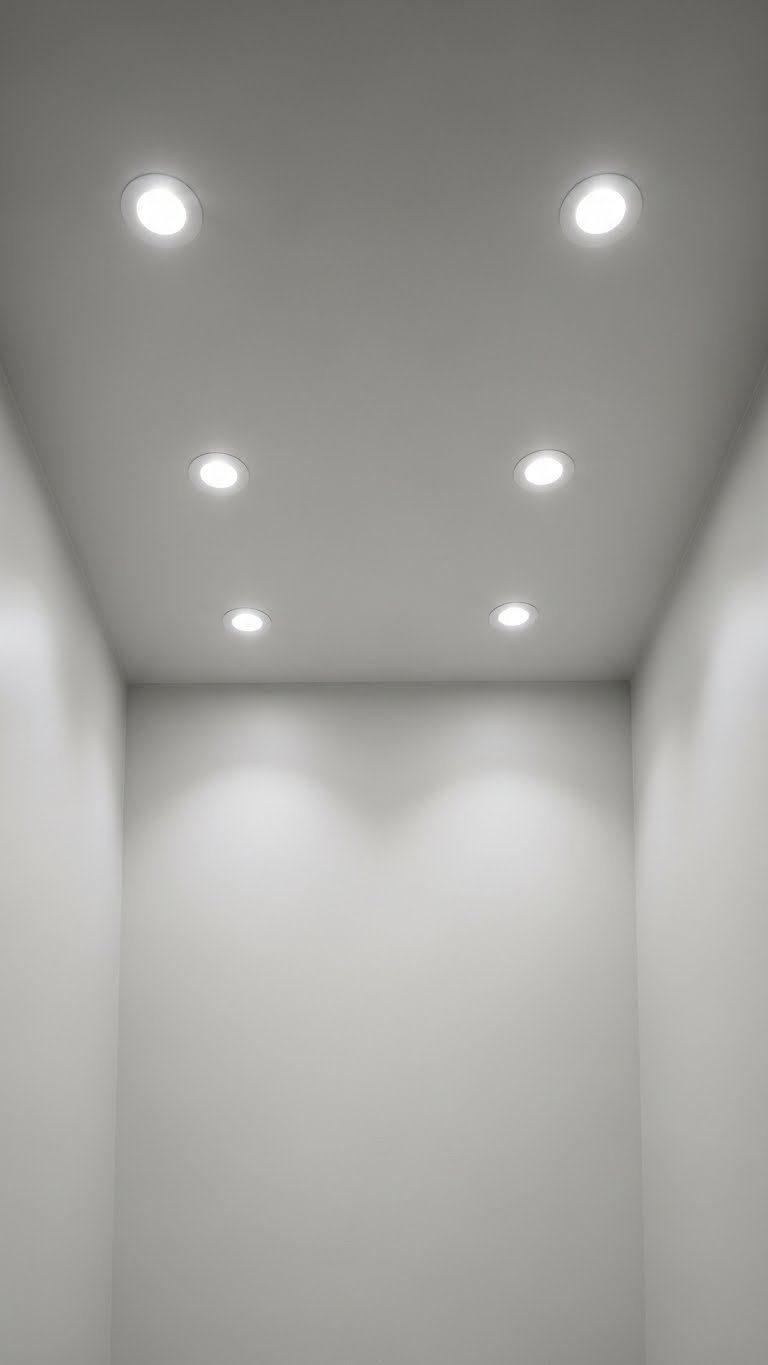
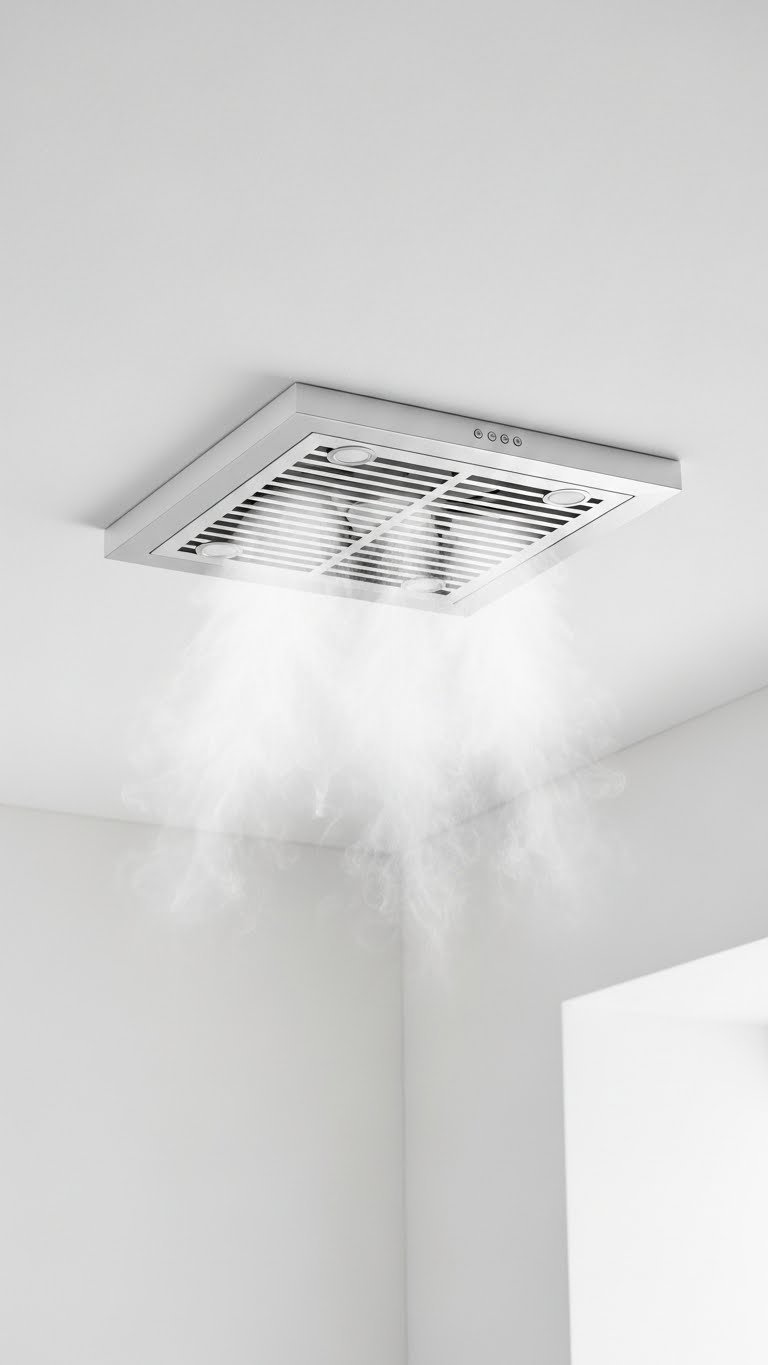
    21. Install a Rainfall Recessed Light or Skylight Alternative

    If your bathroom lacks natural light, recessed ceiling lights or flush-mount fixtures create soft, distributed illumination that makes the space feel bigger and more open.

    Recessed light kits cost $20–$50 per fixture. Installation takes 1–2 hours with basic electrical knowledge or hire an electrician ($150–$300 total). For renters, flush-mount or semi-flush fixtures ($30–$100) attach to existing ceiling hardware with no rewiring needed. Look for warm color temperatures (2700K). Home Depot and Wayfair have tons of affordable options.

    Even-distributed ceiling light eliminates shadows and makes your bathroom feel larger and more open. You get the brightness you need without harsh zones, and the space feels more like a sanctuary than a storage closet.

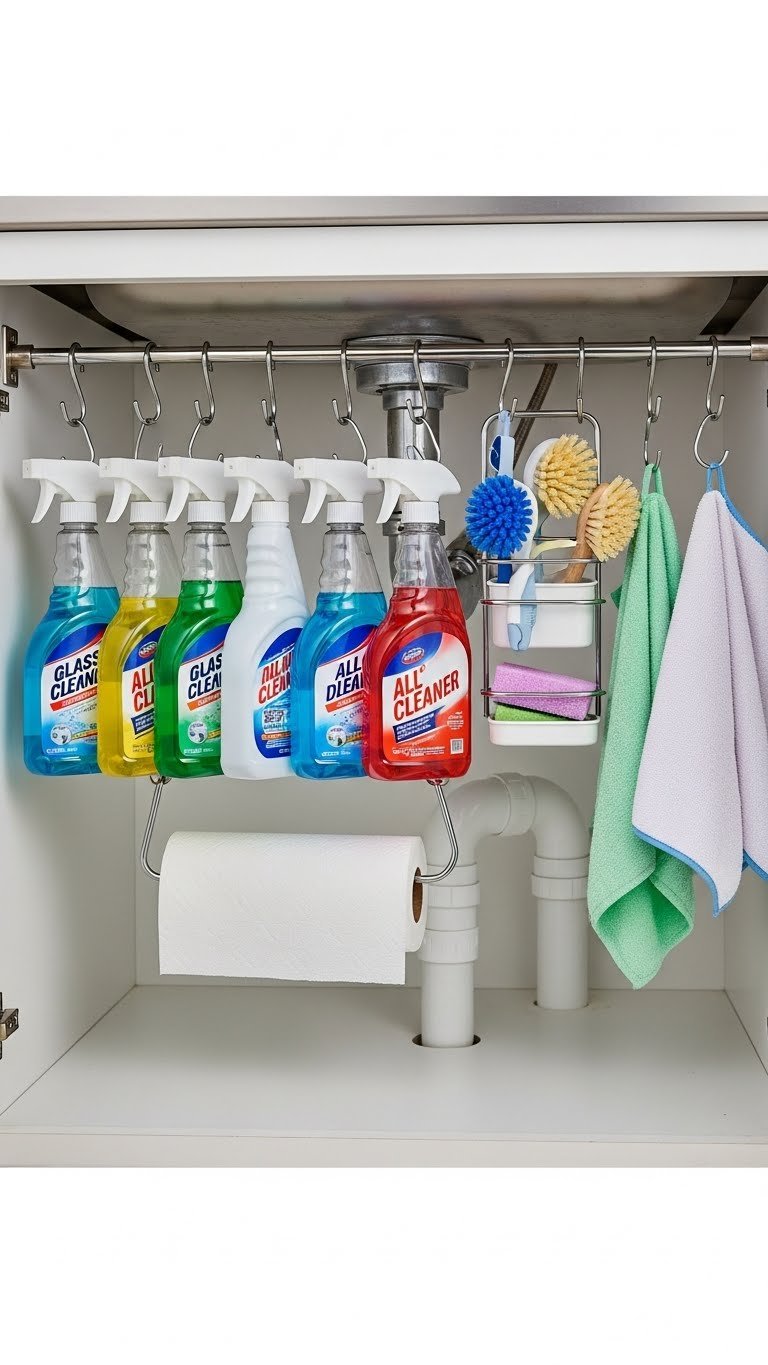
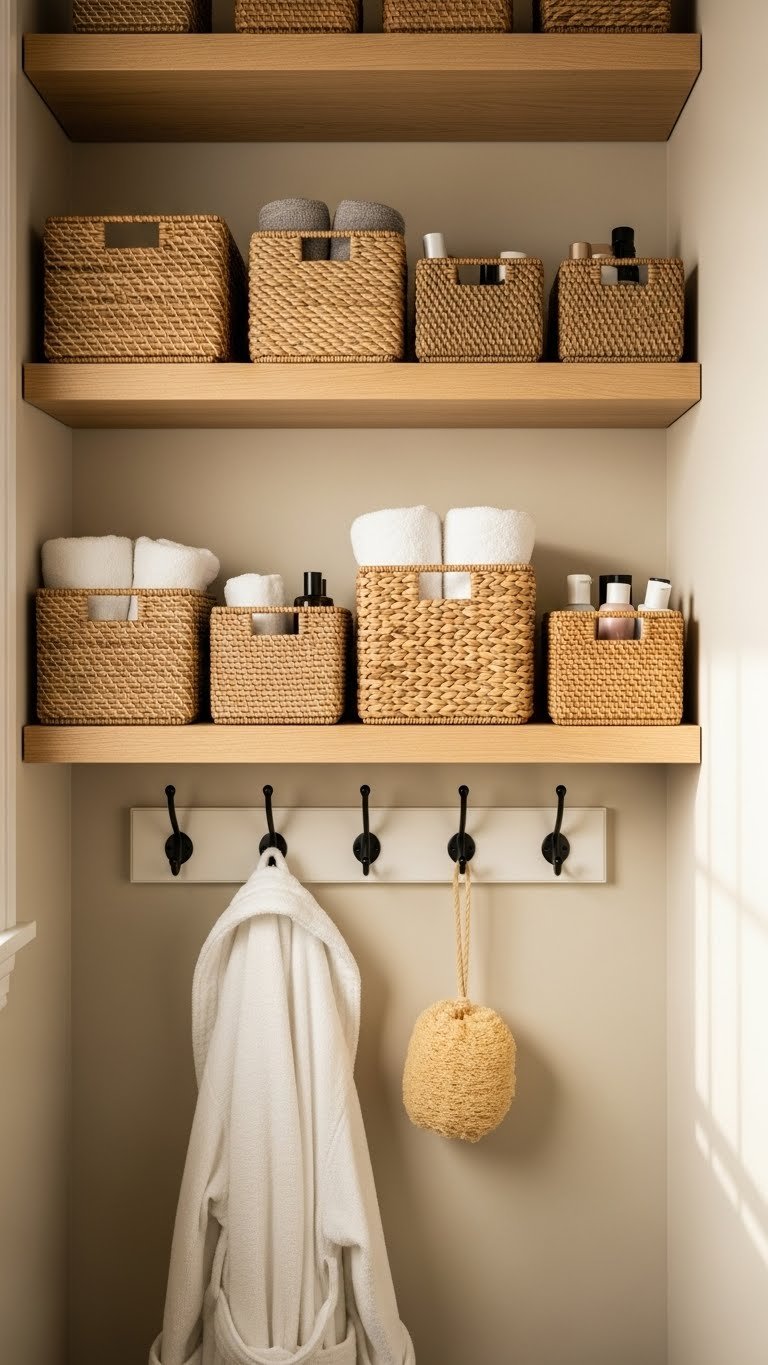
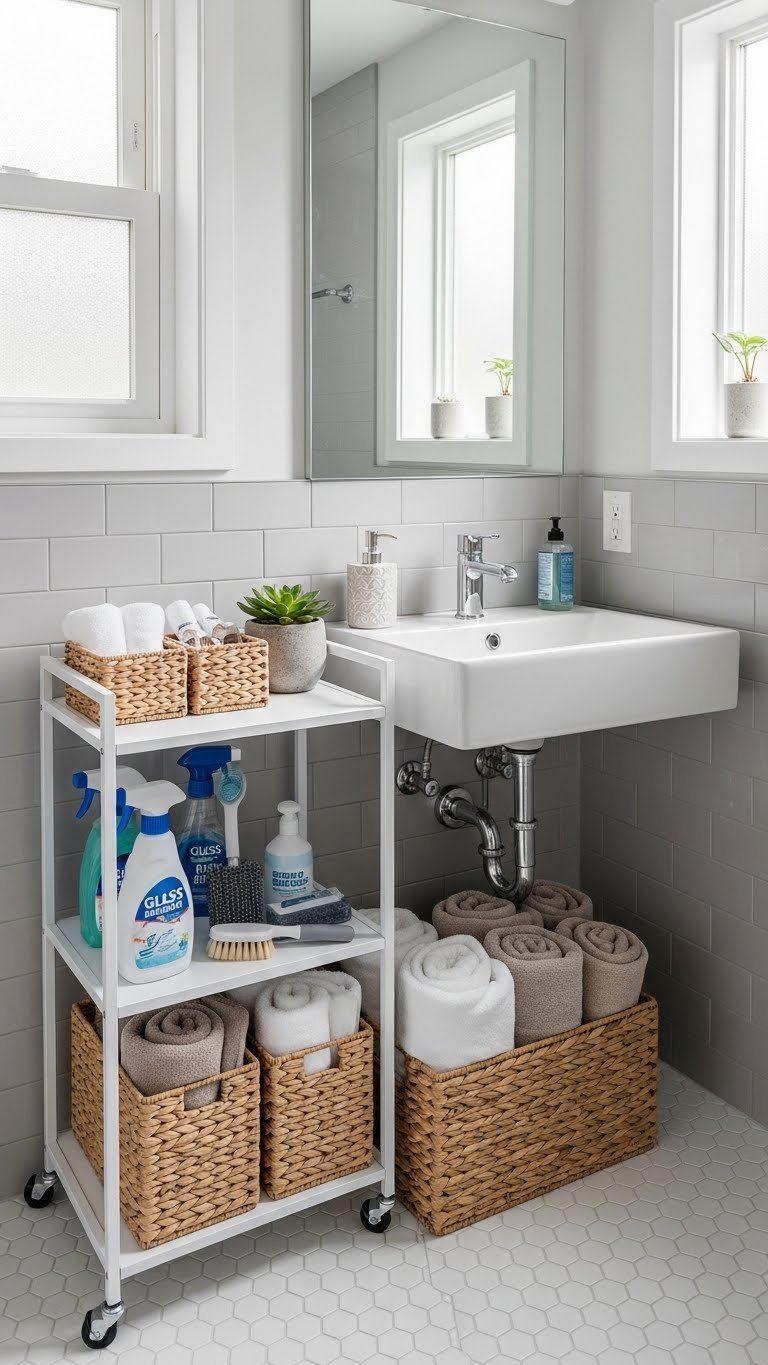
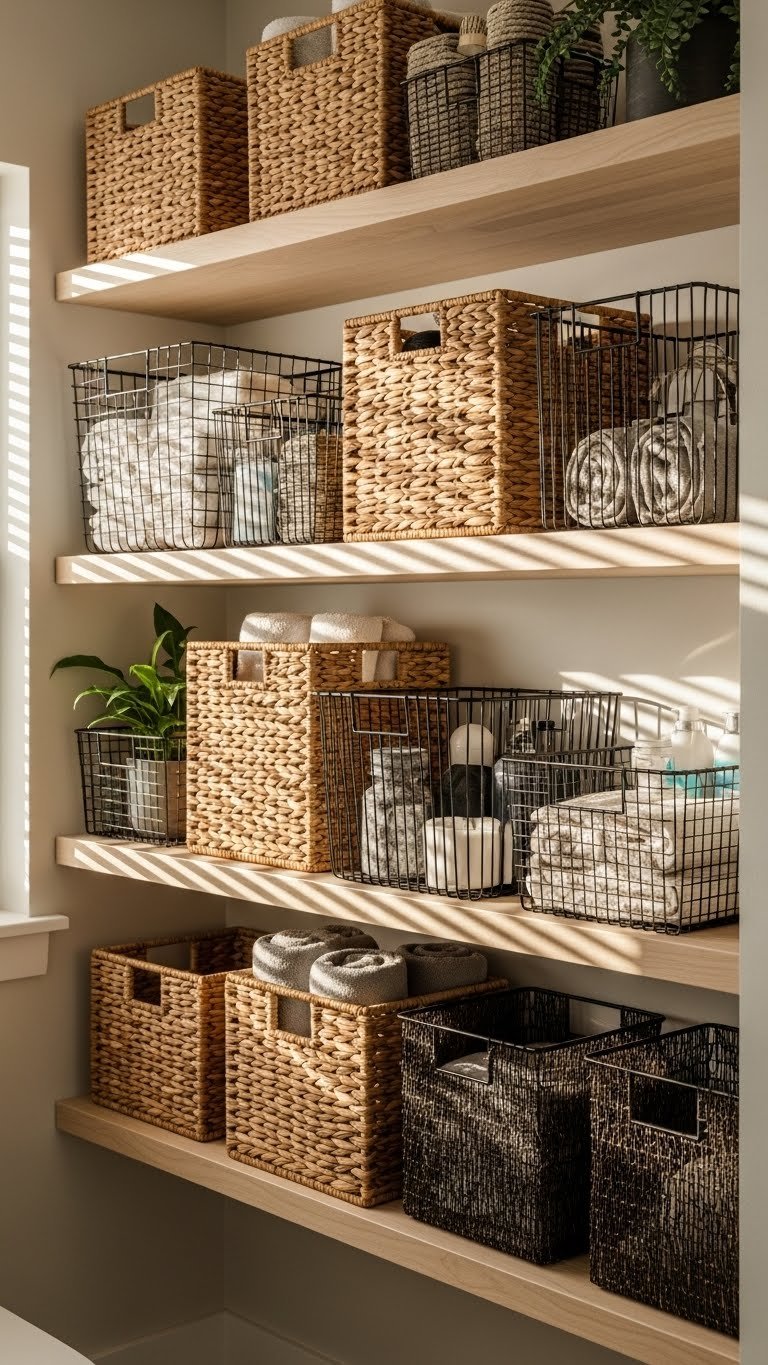
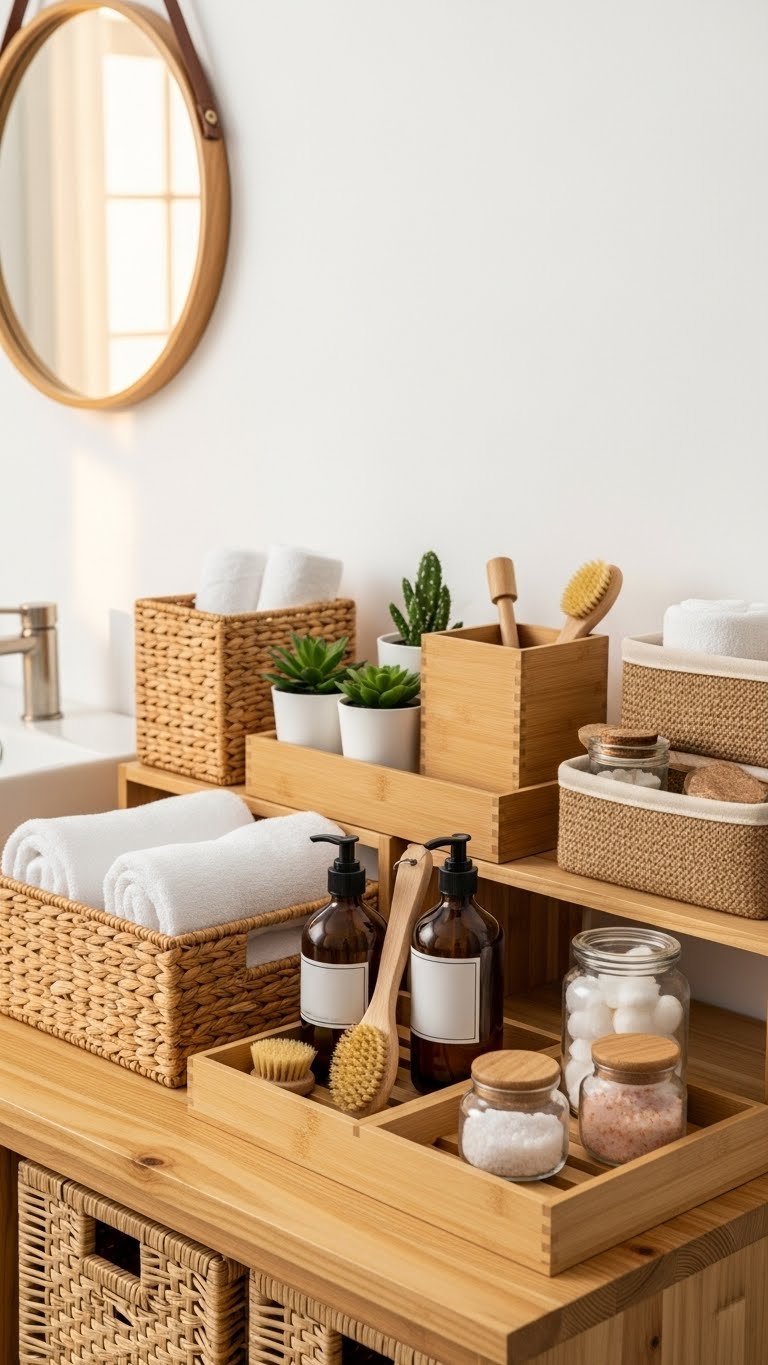
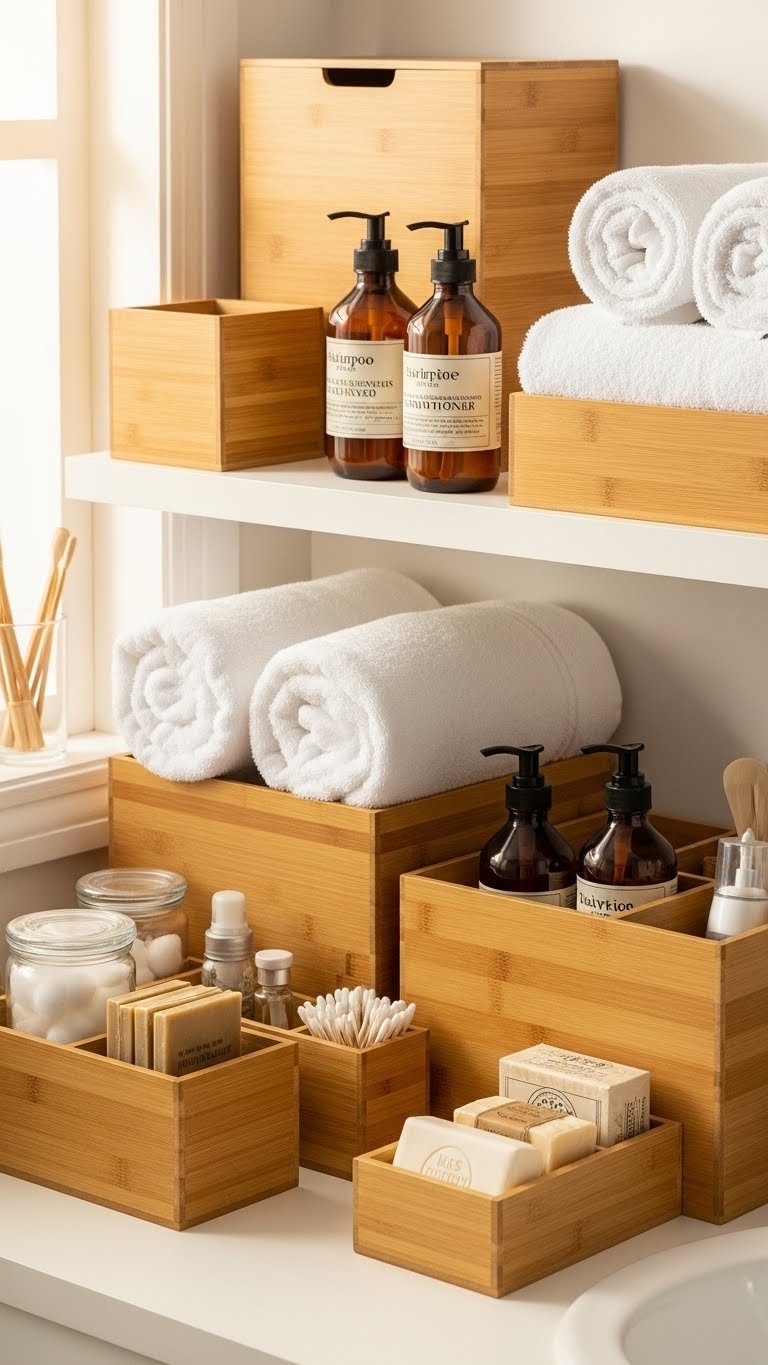
    22. Use Sealed Woven Storage Baskets

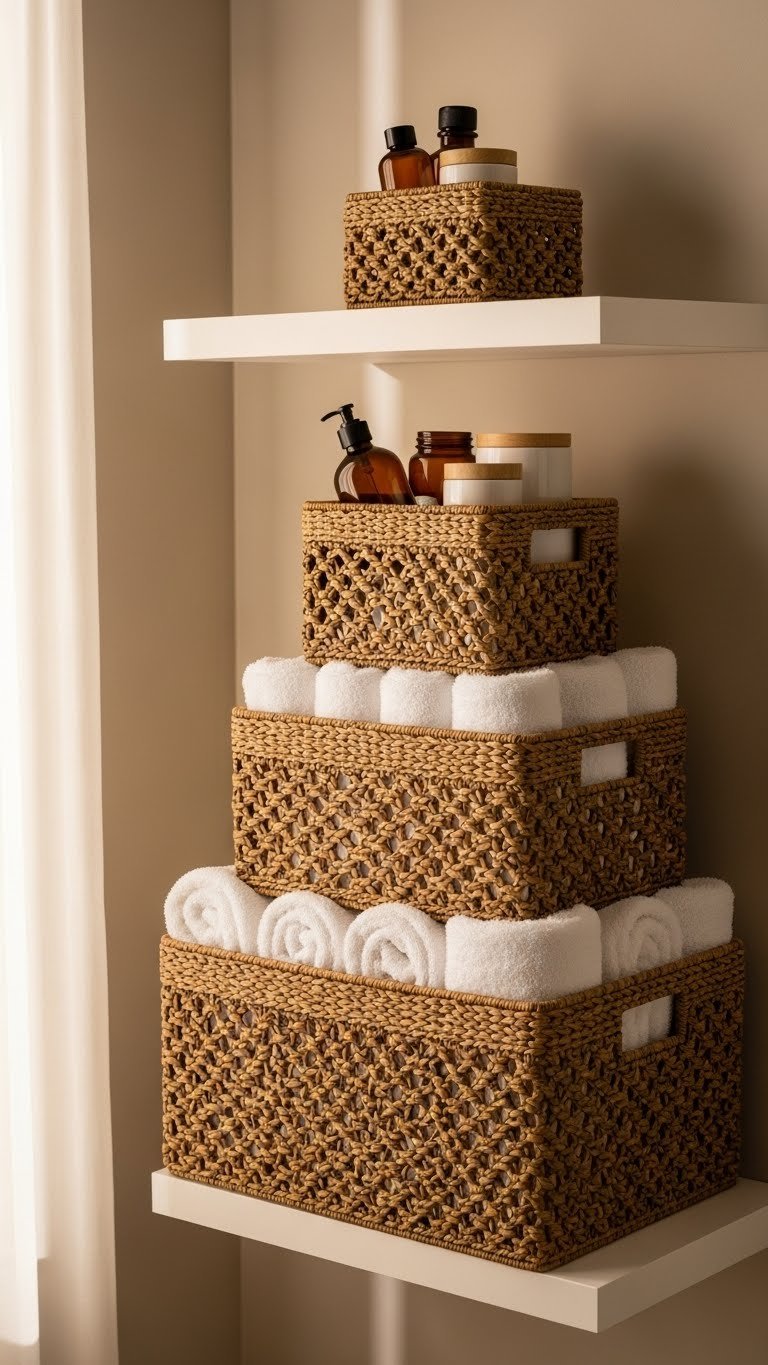
    Woven baskets add texture and warmth while hiding clutter. They’re perfect for small bathrooms where open shelves need organization without looking chaotic.

    Bathroom-safe woven baskets (sealed or waterproof-lined) cost $15–$50 each depending on size. Fill them with extra towels, cleaning supplies, or bath essentials. Stack or line them on open shelves or the floor. Look for seagrass, water hyacinth, or plastic-lined woven options. Target, West Elm, Wayfair, and Container Store have beautiful choices.

    Clutter disappears into pretty baskets, and your bathroom maintains that calm, retreat-like feel. Baskets add warmth and texture without taking up extra space—everything looks intentionally styled instead of randomly stored.

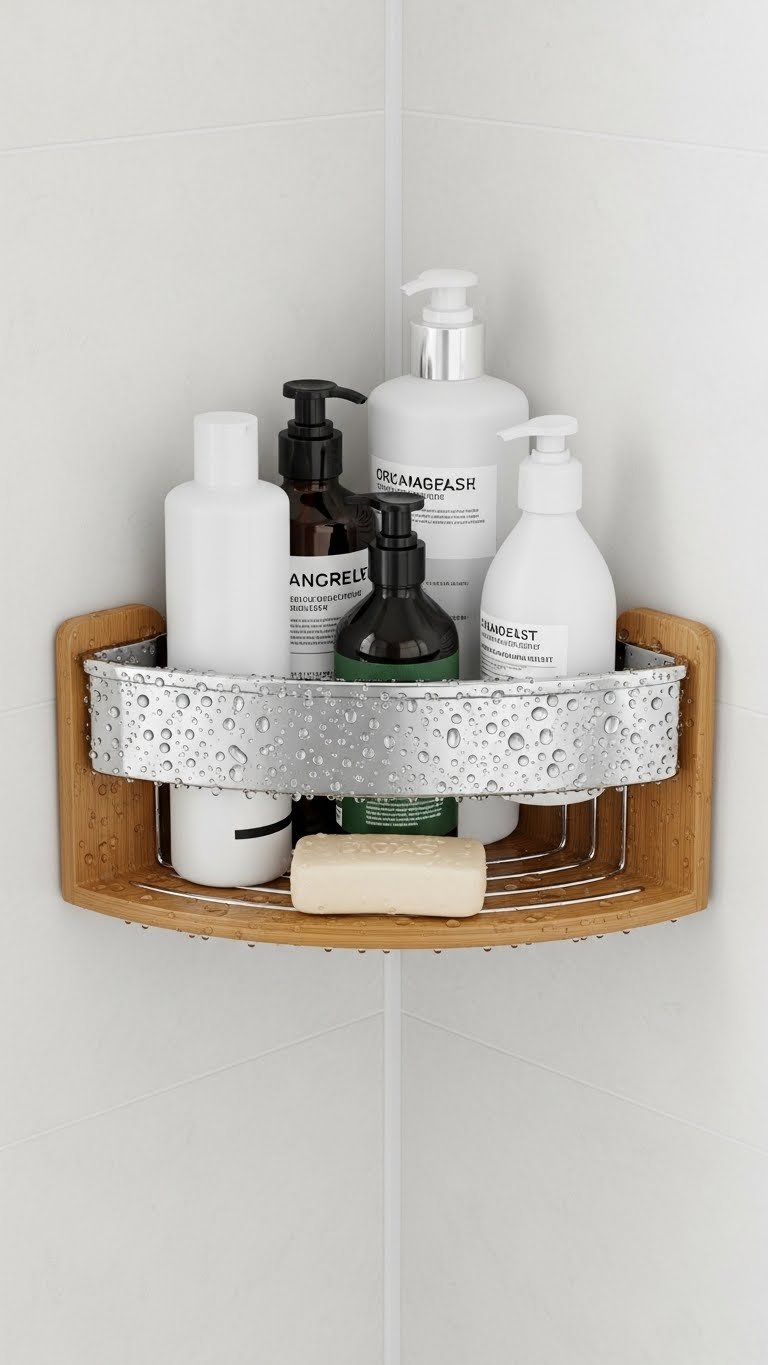
    23. Add a Small Corner Shelf for Plants or Candles

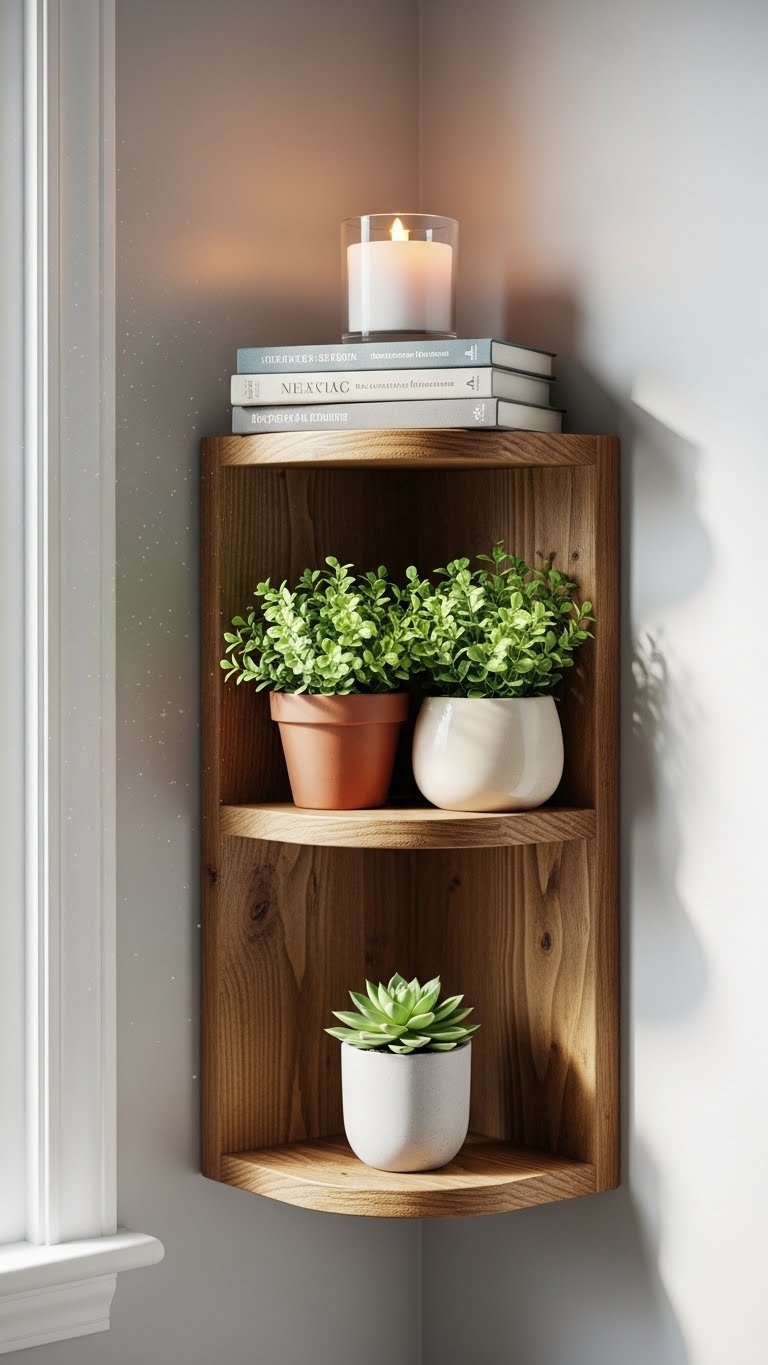
    Corners are usually wasted space in small bathrooms. A simple corner shelf makes use of that area for plants, candles, or styling while adding vertical visual interest.

    Corner shelves cost $20–$60 depending on material and size. Installation takes 15–30 minutes with a drill and level. Fill with small plants, a pillar candle, rolled washcloths, or a stack of design books. IKEA, Target, Wayfair, and Home Depot have affordable options. Renters: adhesive corner shelves exist but work best on tile.

    Your corner transforms from dead space into a styled, functional focal point. Adding life and visual interest to every inch makes your bathroom feel more intentional and spa-like.

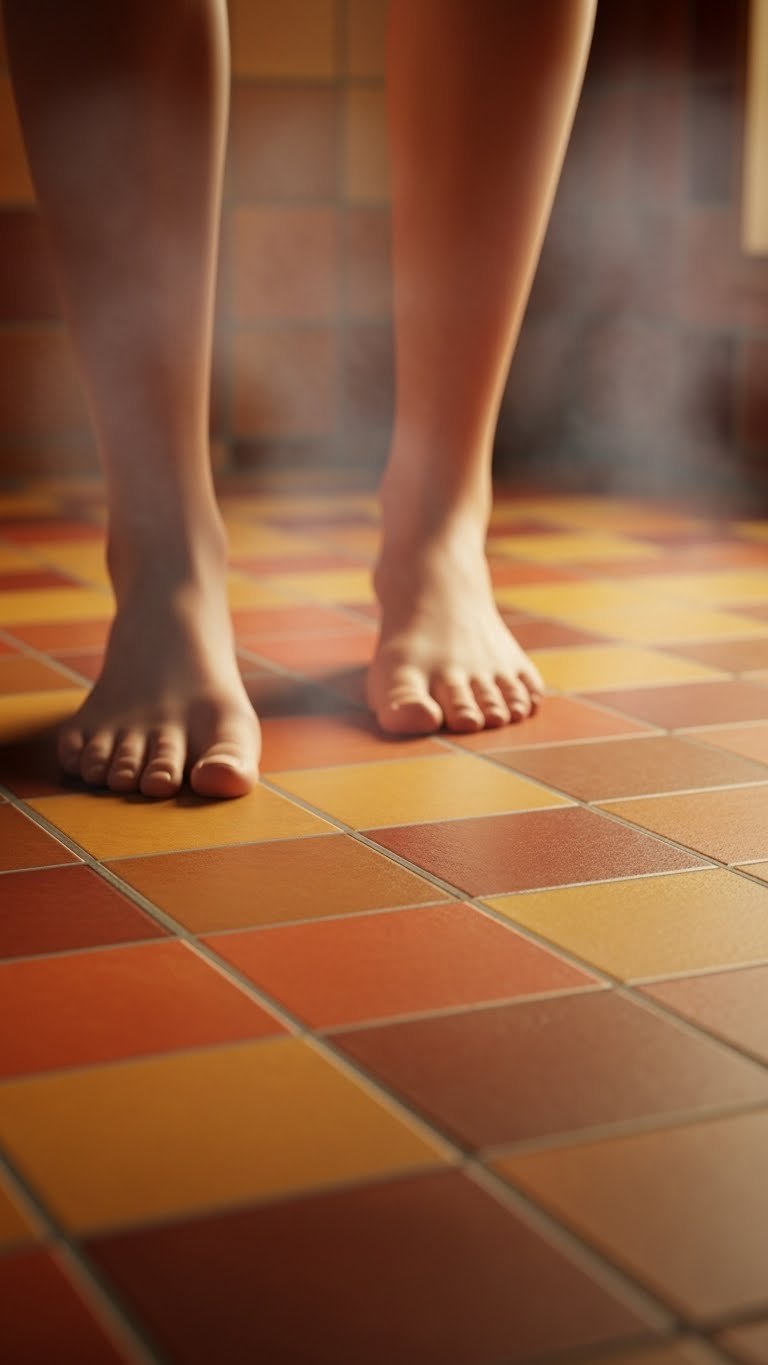
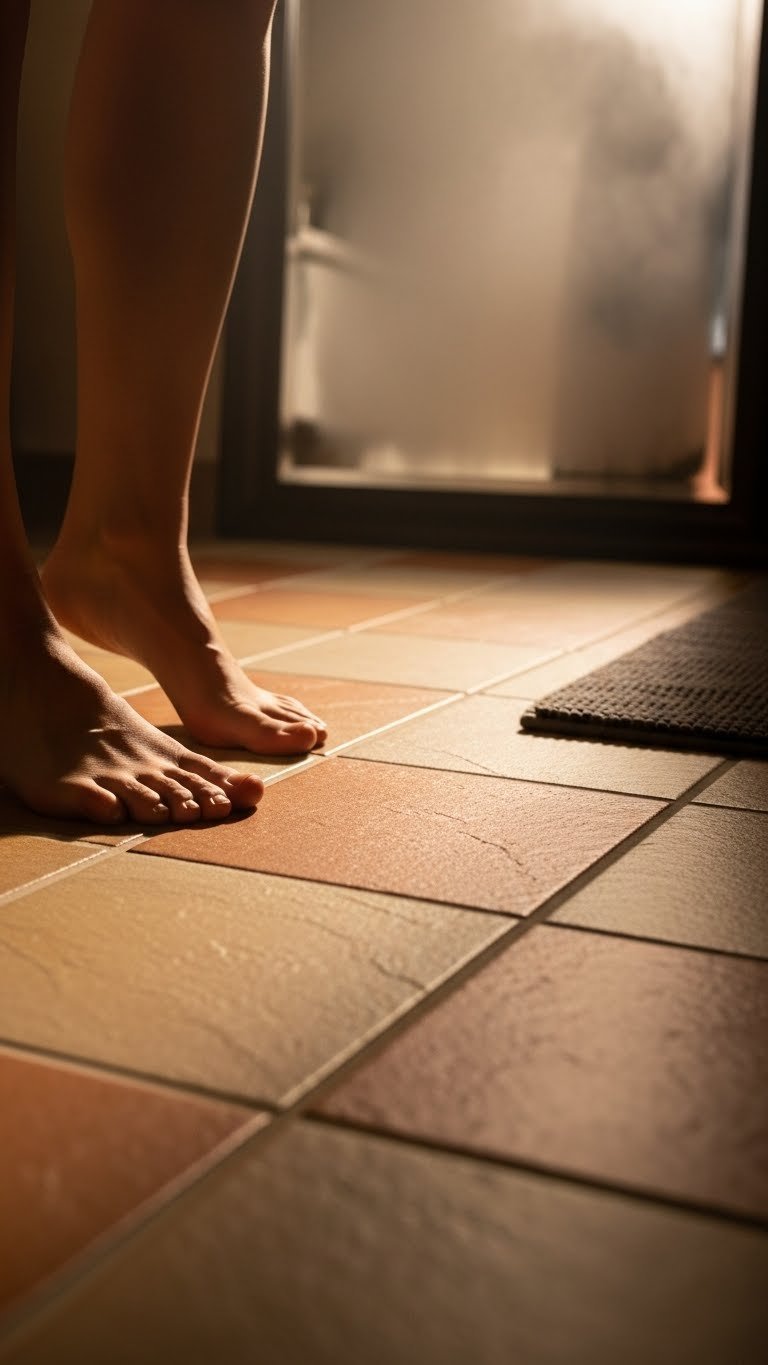
    24. Invest in a Small Heated Floor Mat

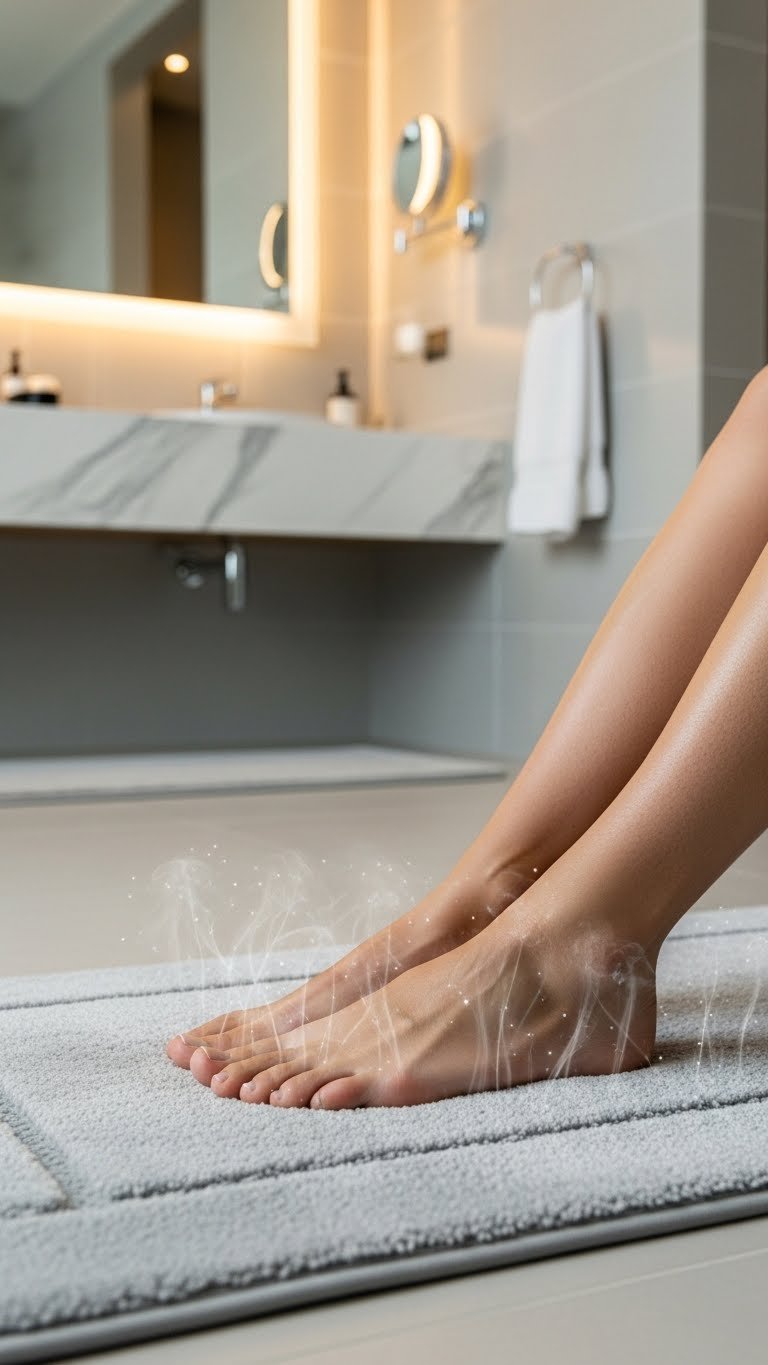
    Stepping onto cold tile is the opposite of spa vibes. A heated floor mat ($50–$150) costs less than most upgrades and delivers outsized comfort—especially in winter or chilly mornings.

    Plug-in heated mats come in various sizes (2×3 feet is standard for bathrooms). Most have auto-shutoff after 30–60 minutes and adjustable heat settings. They use minimal electricity. Place in front of your sink or shower. Amazon, Wayfair, and specialty sites like Radiant Heat have quality options. Installation: none—just plug in.

    The moment your bare feet touch a warm mat after a shower, you’ll feel the luxury of this small upgrade. Warmth signals comfort and care to your brain—this one investment makes your bathroom feel genuinely spa-like.

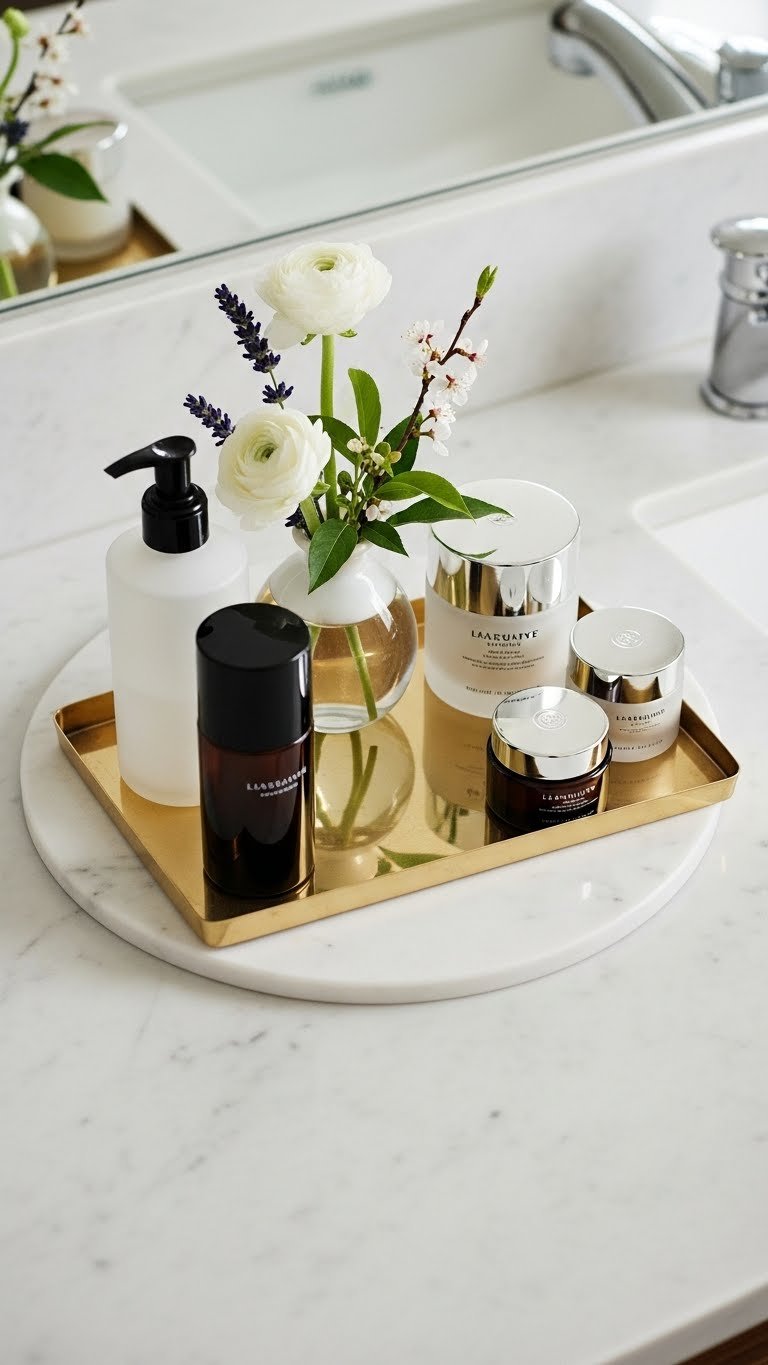
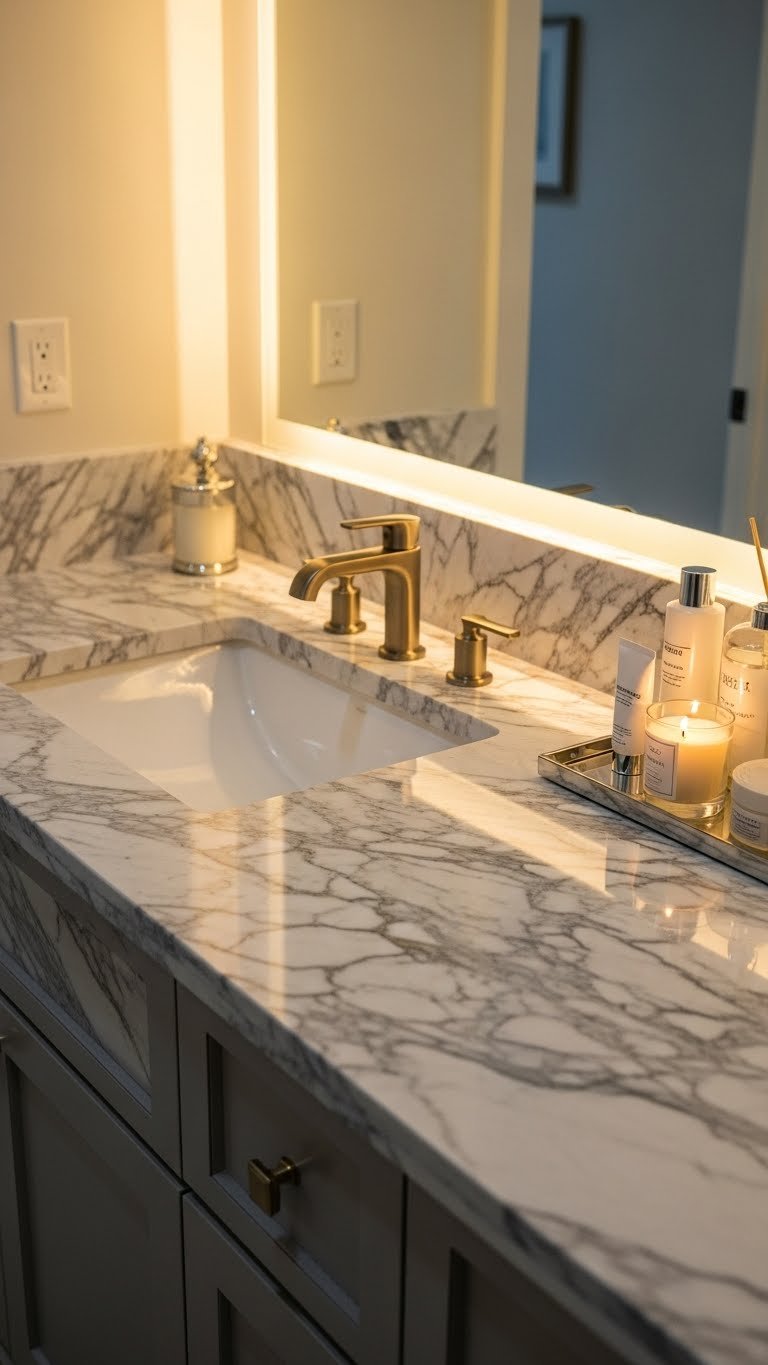
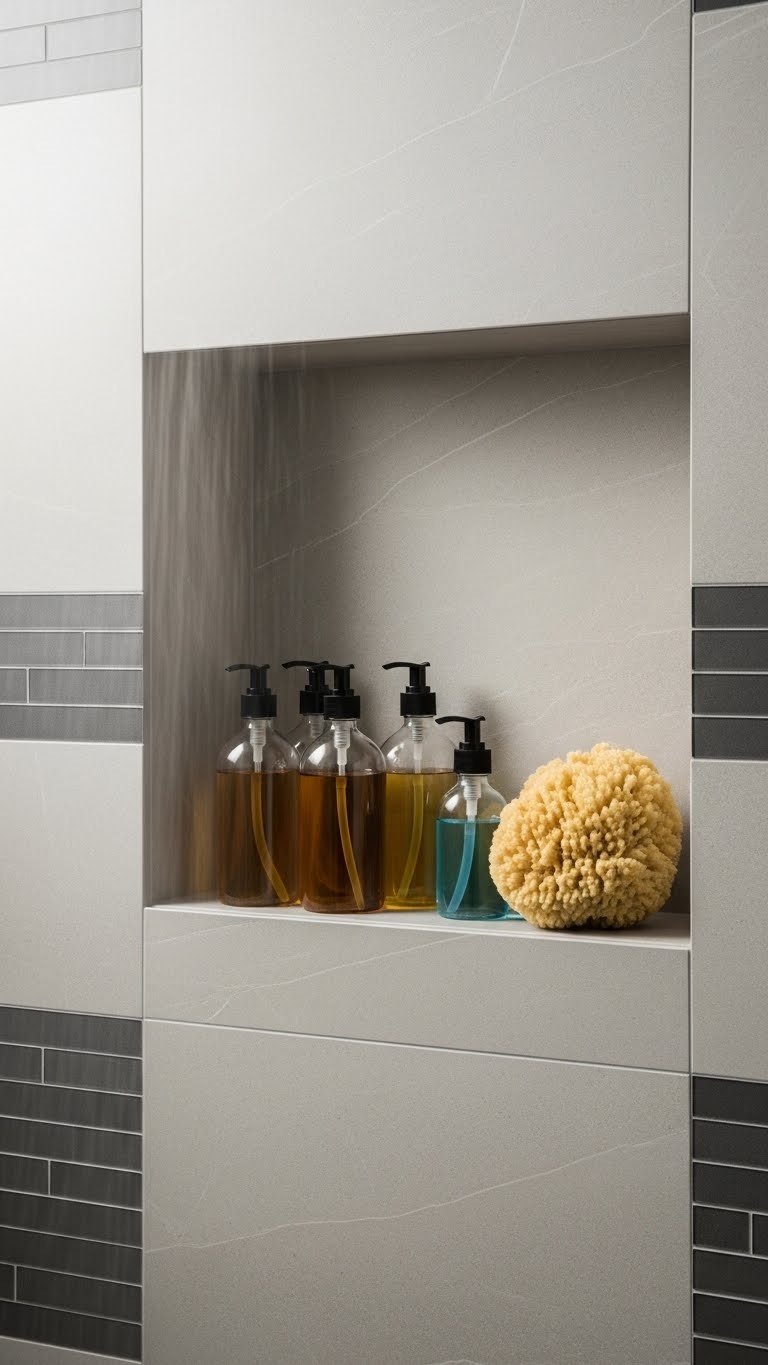
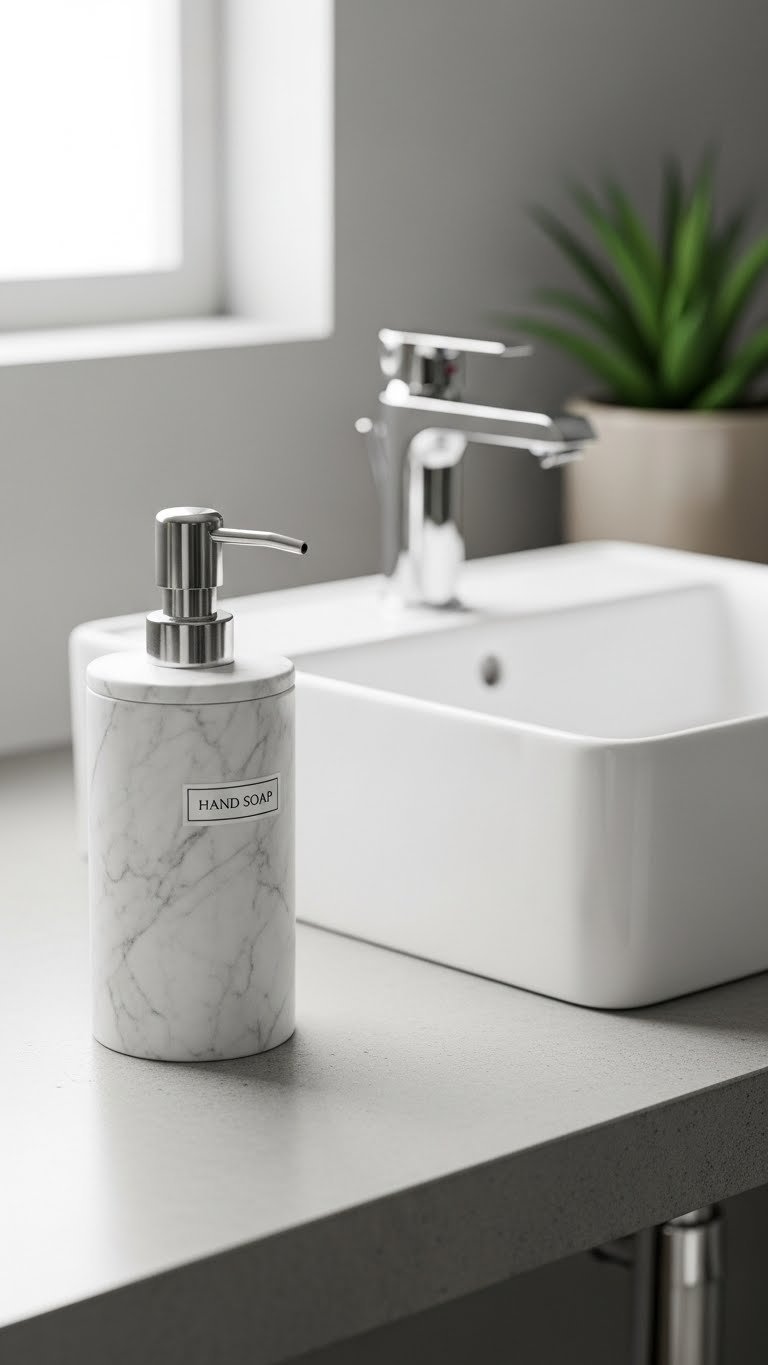
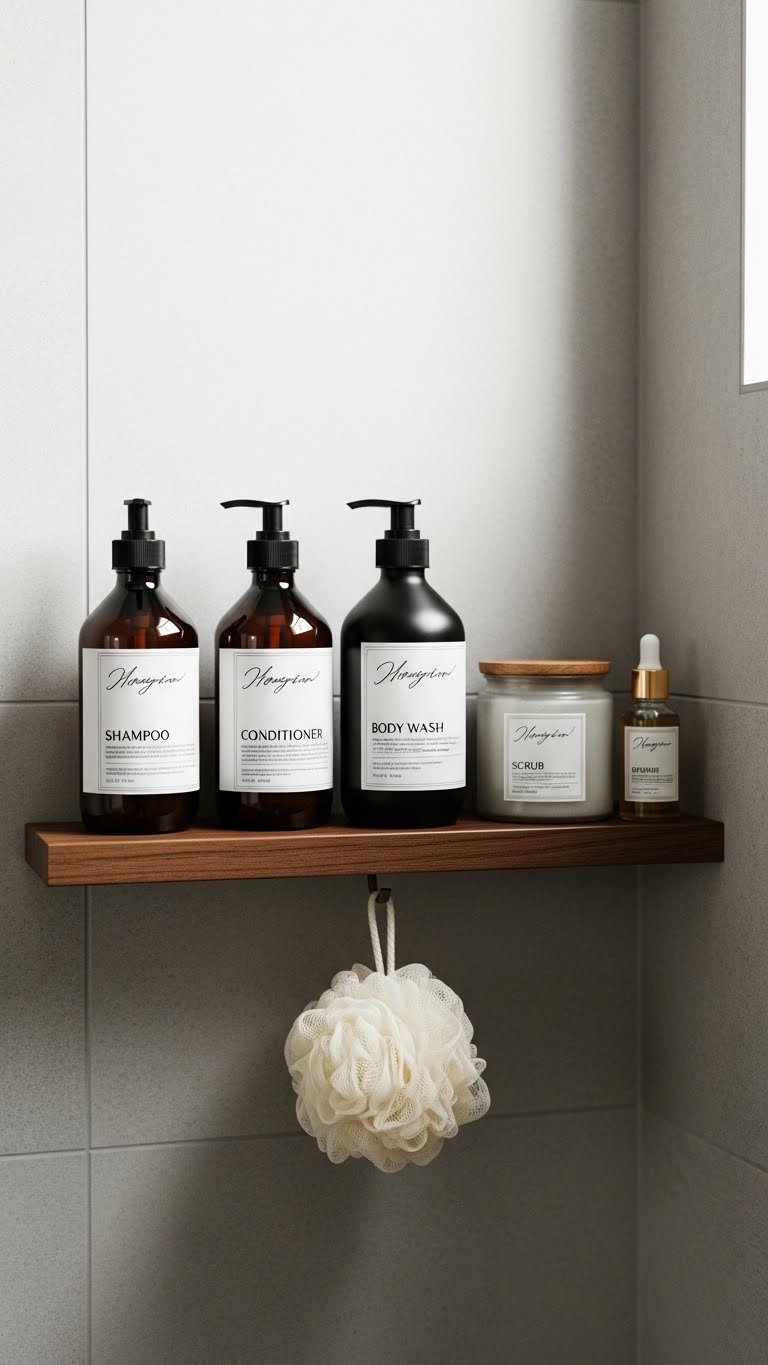
    25. Create a Minimalist Toiletry Station on a Small Tray

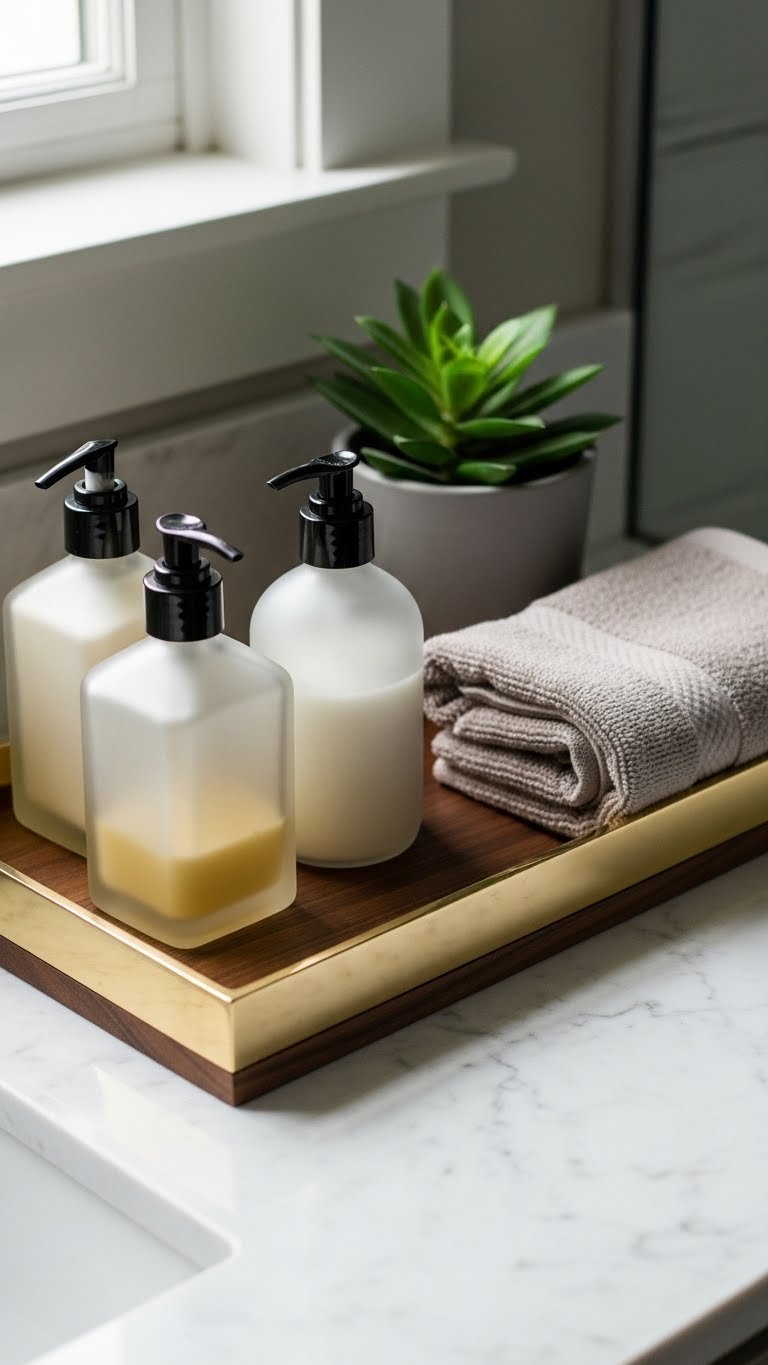
    A small styling tray corrals daily essentials and creates a curated, boutique-hotel look. It makes your bathroom counter feel intentional instead of cluttered, and it’s endlessly adjustable.

    A simple tray costs $10–$40 depending on material (brass, wood, ceramic, or marble). Fill it with your essential bottles (transfer to matching pump bottles for cohesion—$8–$15 each), a small candle, and a rolled washcloth. Swap items seasonally. This takes zero installation and works for renters. Target, West Elm, IKEA, and Anthropologie have beautiful options.

    Your bathroom counter becomes a styled vignette instead of a chaos pile. Everything you need is accessible, intentionally displayed, and ready for use. The moment you see your curated tray, you feel like you’re in a designer space.

    Save this post and pick your first three ideas—maybe lighting, a new shower curtain, and a simple organization hack. Your bathroom refresh can start this weekend, and even one change will shift how your space feels. Which idea are you trying first?

  • 23 Small Bathroom Interior Ideas That Improve Layout & Flow

    23 Small Bathroom Interior Ideas That Improve Layout & Flow

    Small bathrooms don’t need to feel cramped or cluttered. With the right layout tweaks, storage solutions, and design choices, you can create a space that feels bigger, flows better, and actually works for your daily routine. Whether you’re renting, renovating on a budget, or just tired of your current setup, these 23 ideas range from free styling fixes to smart upgrades that maximize every inch. You’ll discover how floating vanities, strategic lighting, and clever corner usage can completely shift how your bathroom functions—without needing to knock down walls. Let’s dig into solutions that make small spaces feel open, organized, and genuinely enjoyable to spend time in.

    1. Install a Floating Vanity to Open Up Floor Space

    Floating vanities instantly make bathrooms feel bigger because you can see the floor underneath, creating visual continuity and real walking room. This is one of the smartest layout tricks for small spaces—it removes that heavy, grounded feeling that traditional pedestals or cabinets create.

    You can find pre-made floating vanity units at IKEA ($150–$400), Wayfair ($200–$600), or Home Depot ($300–$800). Installation takes a weekend with basic tools—you’ll need a stud finder, drill, and wall anchors. If you’re renting, ask your landlord about temporary options or mount-and-patch systems. For a budget hack, grab a reclaimed wood shelf ($40–$100) and pair it with wall-mounted faucet ($50–$150)—total under $200 if you DIY.

    The result? Your bathroom looks and feels 20% larger, movement flows easier, and cleaning underneath becomes simpler. Plus, the open shelving below naturally draws the eye downward, making ceilings seem higher.

    2. Upgrade to a Corner Shower to Reclaim Wall Space

    Corner showers eliminate the clunky bathtub-shower combo that dominates small bathrooms, freeing up an entire wall for storage or movement. By using corner real estate, you’re not sacrificing square footage—you’re redirecting it.

    Compact corner shower kits run $400–$1,200 installed or $200–$600 DIY. Look for models with low or no thresholds (the latest trend) at Home Depot or Wayfair. A standard corner unit fits a 3×3 or 4×4 space. For renters, frameless corner shower doors ($150–$300) can replace existing enclosures without permanent changes. The installation is a weekend project if you’re comfortable with basic plumbing; otherwise, hire a pro ($300–$600 labor).

    You’ll reclaim enough wall space for a medicine cabinet, shelving, or just open breathing room. The geometry of a corner shower also creates a natural visual anchor, making your bathroom layout feel intentional rather than improvised.

    3. Add Open Shelving Above the Toilet

    Toilets sit in the middle of wasted vertical real estate—the wall space above them is perfect for open shelving. This is free or nearly free storage that doesn’t eat floor space and actually looks intentional when styled well.

    Floating shelves cost $20–$80 each at Target, IKEA, or Amazon. Install 2–3 shelves about 12 inches apart using basic wall anchors (takes 30 minutes). Renter-friendly mounting strips like Command ($15–$25) work if walls are smooth. Style with rolled towels, small plants, or storage baskets to keep clutter hidden. A single shelf holds 20–30 pounds safely.

    Your bathroom gains valuable real estate for daily essentials without taking up an inch of floor or counter space. It’s especially smart in smaller bathrooms where wall storage is your only option beyond cabinets.

    4. Use Vertical Mirrors to Bounce Light and Space

    Mirrors are layout magic in small bathrooms—they bounce light around, making the space feel deeper and brighter than it actually is. A large vertical mirror can change how your entire bathroom functions, not just aesthetically.

    Mount a full-height mirror (24″–36″ wide) directly on one wall for $40–$150 at Target, Home Depot, or IKEA. Use a level and wall anchors for renters. If you want to go big, a ceiling-to-counter mirror ($100–$300) creates a stunning illusion of height. Alternatively, lean a frameless mirror against the wall for a temporary, renter-approved option ($50–$150).

    The result is brighter mornings, a visually spacious room, and honestly better selfies. Mirrors also reflect any plants or décor you add, multiplying their visual impact and making your bathroom feel less utilitarian.

    5. Paint Walls in Soft, Light Colors to Expand Perception

    Color sets the tone for how spacious a room feels. Light, muted shades like pale sage, soft gray, warm white, or seafoam trick the eye into perceiving more square footage. Dark colors in small spaces feel suffocating.

    Paint costs $30–$50 per gallon; one gallon covers a small bathroom. Choose eggshell or satin finish (more washable than flat). Brands like Benjamin Moore, Sherwin-Williams, or budget-friendly Behr (at Home Depot) offer hundreds of soft options. Paint it yourself in a Saturday afternoon or hire pros ($200–$400).

    Your small bathroom suddenly feels airier, lighter, and more like a retreat than a closet. This single change often makes people feel like they have more space without moving a single fixture.

    6. Install Recessed Lighting to Hide Fixtures

    Surface-mounted light fixtures and exhaust fans eat visual real estate in small bathrooms. Recessed lighting (can lights) sits flush in the ceiling, opening up sightlines and making ceilings feel higher.

    Recessed light kits cost $15–$40 per fixture; a small bathroom needs 3–4. Installation involves cutting holes in drywall and running wiring—this is a job for electricians ($300–$600 total) or confident DIYers. For renters or budget-conscious folks, stick-on LED ceiling spots ($20–$50) create a similar effect without wiring.

    The transformation is instant: your ceiling feels cleaner, higher, and the room breathes more. Combined with light-colored walls, recessed lighting makes compact bathrooms feel genuinely spacious.

    7. Replace a Bulky Vanity with a Pedestal Sink

    If your current vanity is oversized or cabinet-heavy, a pedestal sink frees up massive visual and physical space. Pedestals work beautifully in small bathrooms where floor space matters more than storage.

    Quality pedestal sinks run $150–$400; budget-friendly options exist at Home Depot or IKEA ($80–$250). Installation requires turning off water, removing the old vanity, and connecting new plumbing—a plumber charges $200–$400, or DIYers can handle it in 2–3 hours. You’ll lose under-sink storage, so pair this with wall cabinets or shelving elsewhere.

    Your bathroom feels 30% more spacious because the entire floor is visible. Pedestal sinks also have a timeless quality that photographs well and works with nearly any style, from vintage to modern.

    8. Add a Ladder Shelf for Stylish Vertical Storage

    Ladder shelves are renter-friendly, affordable, and brilliant for small bathrooms. They provide multiple storage tiers without wall-mounting holes, and they lean rather than hang, making them portable and temporary-friendly.

    Wooden ladder shelves cost $40–$120 at Target, IKEA, or Amazon. They take zero installation—just lean them against a wall or in a corner. Style each rung with rolled towels, small baskets, or plant pots. A standard ladder shelf holds 40–60 pounds across all rungs safely.

    This simple addition creates a focal point, adds storage, and uses awkward corner or wall space that otherwise goes unused. It’s the perfect solution if you’re not ready to commit to permanent shelving.

    9. Install a Wall-Mounted Faucet to Maximize Counter Space

    Countertop faucets eat into precious counter real estate. Wall-mounted faucets free up that space while creating a cleaner, more modern aesthetic. Plus, they’re easier to clean around.

    Wall-mounted faucets run $60–$200 at Home Depot, Wayfair, or Lowe’s (budget to luxury options available). Installation requires turning off water and drilling into tile or drywall—a plumber handles it in 1–2 hours ($150–$300), or confident DIYers can do it themselves. Choose brushed nickel or chrome for timeless appeal.

    You reclaim 6–12 inches of counter space and gain a designer touch that makes your bathroom feel intentional. The open counter feels luxurious and functional, even in the tiniest bathrooms.

    10. Use Drawer Dividers and Baskets for Hidden Organization

    Small bathrooms fill up fast. Drawer dividers and fabric baskets keep clutter contained so your space looks calm and organized. Hidden storage is key when every inch counts.

    Bamboo drawer dividers cost $10–$25; fabric storage baskets run $5–$20 each at Target, IKEA, or Amazon. Spend an hour organizing your existing drawers and cabinets with these tools. No installation needed—just place them in existing storage.

    Your bathroom instantly looks tidier, which makes it feel bigger. When visitors can see open counters and organized spaces, small bathrooms read as intentional and calm rather than cramped.

    11. Mount a Corner Medicine Cabinet for Double Duty Storage

    Corner medicine cabinets maximize space that normally goes unused. They provide storage and a mirror in one compact footprint, perfect for small bathrooms where square footage is precious.

    Recessed corner medicine cabinets cost $80–$250 at Home Depot or Amazon. Installation involves cutting into the wall (between studs in a corner) and securing the cabinet—a weekend project for handy DIYers or a job for a handyperson ($100–$200). The mirror doubles your reflection functionality while keeping essentials organized inside.

    You gain valuable storage without stealing counter or wall space. A single corner cabinet holds medications, skincare, grooming supplies, and first aid—everything out of sight but within arm’s reach.

    12. Add a Tension Rod Under the Sink for Hanging Storage

    The underside of your sink is wasted storage unless you use it strategically. A simple tension rod creates hanging space for spray bottles, cleaning supplies, or cloth towels, doubling your under-sink capacity.

    A tension rod costs $5–$15 at Target, IKEA, or Amazon. Install it under your sink in 5 minutes—just twist it to fit snugly between the cabinet walls. Use small hooks ($2–$5 each) to hang items.

    Your under-sink area transforms from chaotic to organized. Cleaning supplies are accessible but hidden, and spray bottles stay upright instead of rolling around. This $15 hack feels ridiculously effective in small bathrooms.

    13. Swap Out a Full Bathtub for a Shower-Only Layout

    If you rarely take baths, a shower-only layout reclaims 30–50% of your bathroom footprint. This is the single biggest layout shift for small bathrooms that don’t need dual functionality.

    Removing a tub and installing a shower runs $1,500–$4,000 professionally or $500–$1,500 DIY if you’re plumbing-confident. The payoff is enormous: you gain usable floor space, storage opportunities, and a bathroom that feels genuinely open. A simple shower enclosure ($200–$600) plus tile work ($300–$1,000) creates a functional, modern space.

    Your small bathroom becomes an efficient, spa-like retreat. Walking in feels less cramped, cleaning becomes faster, and the layout supports actual movement rather than squeezing around fixtures.

    14. Use a Sliding Barn Door Instead of a Swing Door

    Swing doors steal floor space every time you open them—critical wasted real estate in tiny bathrooms. Sliding doors slide flush against the wall, reclaiming those precious inches.

    Sliding barn door hardware kits run $40–$150 at Home Depot or Amazon; the door itself costs $50–$300 depending on material. Installation takes a weekend with basic tools. If you’re renting, removable track systems ($50–$100) exist but require landlord approval. The total project runs $100–$400 DIY.

    You immediately gain 2–3 feet of floor space because the door no longer swings into the room. Bathrooms with limited square footage feel noticeably more open, and sliding doors have a design appeal that adds character.

    15. Install a Wall Niche for Recessed Shower Storage

    Wall niches are built-in shower storage that doesn’t eat floor space. By recessing shelving into the shower wall itself, you create functional storage that feels like part of the architecture rather than clutter.

    Shower niches cost $60–$200 pre-made or $200–$500 installed if built custom. Installation involves cutting into the wall between studs and framing the niche—a job for plumbers or experienced DIYers. The payoff is huge: no shower caddies cluttering the tub, and bottles stay organized and accessible.

    Your shower looks intentional and organized. No hanging caddies means visual clean lines, making even tiny shower spaces feel luxurious and spa-like.

    16. Hang Towels Vertically on a Bar or Ladder Hook

    How you display towels dramatically changes bathroom perception. Vertical towel storage takes up less space than traditional towel bars and looks intentional rather than utilitarian when styled right.

    A tall vertical towel bar costs $15–$50 at IKEA or Target; ladder hooks run $8–$20. Installation is 15 minutes with basic wall anchors. Roll your towels tightly and stand them upright on a shelf or hang them on hooks. This takes 60% less visual space than draping towels flat.

    Your bathroom looks organized, spa-like, and bigger because rolled towels take up less footprint than traditional towel displays. It’s a simple styling trick that costs almost nothing but changes how your space reads.

    17. Create a Corner Caddy with Baskets and Hooks

    Corners are often dead space in small bathrooms. A targeted corner caddy system (shelves + hooks + baskets) transforms wasted square footage into organized, functional storage.

    Build a DIY corner caddy with two floating shelves ($30–$60), two hooks ($10–$20), and woven baskets ($20–$40). Installation takes 45 minutes with a drill and level. Alternatively, buy a corner shelf unit ($40–$100) at IKEA or Target.

    Your corner transforms from empty to intentional. Baskets hide clutter, hooks hold daily-use items, and the whole system feels designed rather than improvised. Corners suddenly work for you instead of against you.

    18. Install Grab Bars Styled as Towel Racks

    Grab bars serve safety and function, but modern styles now work as intentional design elements that hold towels. This dual-purpose approach saves space while adding a contemporary look.

    Modern grab bars cost $20–$60 each at Home Depot or Wayfair. Mount them at different heights (24″, 36″, 48″) to create a dynamic, interesting look while maintaining safety. Installation takes 30 minutes and requires wall anchors or studs.

    These bars serve multiple purposes—safety, towel storage, and visual interest—in a space where every element needs to earn its keep. They’re practical and look like intentional design, not an afterthought.

    19. Use Glass Shower Enclosures to Maintain Visual Flow

    Opaque shower curtains visually chop small bathrooms in half. Glass enclosures (clear or frosted) maintain sightlines, making the entire space feel bigger and brighter.

    Frameless glass shower doors run $300–$800 installed; semi-frameless units cost $200–$500. Installation is a half-day job for glass professionals. The investment pays off: light flows through the entire bathroom, and the space reads as one cohesive room rather than fragmented zones.

    Your small bathroom feels 20–30% larger because there’s no visual barrier breaking up the space. Frosted glass offers privacy while maintaining that open feel—the best of both worlds.

    20. Mount Shelves at Varying Heights for Visual Interest

    Shelves at the same height feel boring and don’t maximize small spaces. Staggered, varying heights create visual interest while allowing flexible storage for items of different sizes.

    Floating shelves cost $20–$80 each; install 4–6 at varying heights between 12″–72″ from the floor. Use a level and stud finder ($100–$200 total with hardware). Mix shelf sizes: a 24″ shelf below, then 36″ above, creating a dynamic pattern.

    Your bathroom looks intentional and modern rather than standard. The varied heights prevent the space from feeling monotonous and allow you to display items thoughtfully—baskets on lower shelves, decorative items on upper ones.

    21. Add a Small Stool or Bench for Seating and Storage

    A bench or ottoman serves dual purposes: seating (or a place to set items while bathing) and hidden storage. In small bathrooms, multifunctional pieces are non-negotiable.

    Compact storage benches cost $50–$200 at IKEA, Target, or Amazon (search “bathroom storage bench”). A woven stool with hidden storage runs $40–$120. Place it under a window, in a corner, or beside the toilet. Installation is none—just position it.

    You gain a functional, stylish piece that serves multiple needs without taking up dedicated space. It’s especially smart in bathrooms where you shower before bed (a place to set pajamas) or for spa rituals (a place to sit with a foot soak).

    22. Install a Slim, Wall-Mounted Toilet Brush Caddy

    Toilet brush holders on the floor eat space and look clunky. Wall-mounted versions ($10–$30) keep everything organized and off the floor, maintaining that open-air feeling critical to small bathrooms.

    Installation takes 10 minutes with adhesive or small wall anchors. Choose brushed nickel, chrome, or matte black to match your fixtures. The brush stays upright, dries properly, and looks intentional rather than like a necessary evil.

    This small detail keeps your bathroom visually clean and organized. When floor space is precious, keeping every item off it (even toilet brush holders) makes a cumulative difference.

    23. Create an Open-Concept Bathroom-Bedroom Flow with Glass Doors

    If you have an ensuite or walk-through bathroom, glass doors between the bedroom and bath maintain visual flow and light, making both spaces feel bigger. This is a niche upgrade for specific layouts but powerful for small homes.

    Frosted sliding glass doors cost $400–$1,200 installed; clear doors run similar prices depending on hardware. This is a contractor job requiring wall modification and proper framing ($1,000–$2,500 total). The investment opens up your entire suite visually.

    Your small bathroom and bedroom feel like one expanded space rather than separate boxes. Light flows through, visual continuity makes everything feel bigger, and the design feels intentional and modern.


    SAVE THIS FOR YOUR NEXT PROJECT. Pick just one or two ideas and tackle them this weekend—even small changes create a noticeably better bathroom. Which idea speaks to your space?

  • 25 Luxury Vanity Ideas That Elevate Your Bathroom Instantly

    25 Luxury Vanity Ideas That Elevate Your Bathroom Instantly

    Your bathroom vanity is the hardest-working piece in the room—and the most visible. Whether you’re renting, renovating, or just ready for a refresh, a great vanity can completely shift how your whole bathroom feels. The good news? You don’t need a full remodel or a huge budget to get that spa-like, elevated look. We’ve rounded up 25 ideas that range from free styling tricks to investment upgrades, all designed to make your vanity—and your bathroom—feel intentional, organized, and way more luxe than it probably does right now. Let’s find your perfect vanity moment.

    1. Float Your Vanity for Airy, Modern Vibes

    A floating vanity instantly opens up your bathroom by revealing floor space underneath. This modern upgrade works especially well in smaller rooms, making the space feel bigger and easier to clean.

    Floating vanities typically mount 24-30 inches from the floor. Costs range from $150–$600 depending on materials (you’ll find solid options at IKEA, Wayfair, and Home Depot). If you’re renting, wall-mounted shelves with a board on top create a similar effect without permanent installation.

    Installation takes about 2-3 hours with basic tools or a drill—hire a handyperson for $75–$150 if you’re not confident. Pro tip: measure your plumbing before ordering; you may need an adjustable P-trap kit.

    You get an open floor plan that makes morning routines feel less cramped, plus cleaning becomes genuinely easier.

    2. Pair Your Vanity with Task and Ambient Lighting

    Poor bathroom lighting makes everything harder—applying makeup, skincare routines, even shaving. Layered lighting transforms how you actually use your vanity every day.

    Install LED-lit mirrors ($80–$250, find them at Amazon, Restoration Hardware, or CB2) for focused face-brightening light, plus an overhead pendant or recessed light for overall room brightness. Consider adding dimmer switches so you can adjust mood lighting.

    This setup takes 1-2 hours if you hire an electrician (roughly $150–$300). DIY installation is possible if you have existing outlets nearby.

    The difference is dramatic: you’ll see what you’re actually doing, your skin looks better in the mirror, and the whole space suddenly feels curated.

    3. Add Floating Shelves Above for Storage That Looks Intentional

    Wall space above your vanity is valuable real estate. Floating shelves add storage without visual clutter, especially when you style them thoughtfully.

    Wooden floating shelves run $25–$80 per shelf at Home Depot, IKEA, or Target. Install them 12-18 inches apart for reach without crowding. Use storage containers (glass jars, ceramic boxes, $10–$40) to corral small items like cotton balls, hair clips, and skincare.

    Installation takes 30 minutes to 1 hour per shelf with a level and drill. Pro tip: anchor into wall studs for heavy loads, or use heavy-duty wall anchors.

    You now have accessible storage that actually looks organized—no more cluttered countertops or bathroom cabinets overflowing.

    4. Swap Standard Faucets for Brushed Gold or Matte Black

    Hardware is the jewelry of your vanity. A simple faucet swap changes how the entire space reads—instantly elevating it.

    Brushed gold, matte black, or polished chrome faucets cost $60–$300 depending on brand (quality options at Wayfair, Home Depot, or Rejuvenation). Most are direct swap-outs for existing faucets—no new plumbing needed.

    This DIY project takes 30–45 minutes if you’re comfortable with basic wrench work. Shut off water under the sink, unscrew the old faucet, screw in the new one, and test for leaks. If plumbing isn’t your thing, a plumber charges $100–$200 for install.

    The small detail completely changes your vanity’s personality—suddenly it looks intentional and curated.

    5. Use a Tray to Corral Everyday Items

    A vanity tray is a styling trick that makes everything look more cohesive and organized—and it actually works.

    Pick a marble, brass, ceramic, or wood tray ($15–$60 from Target, West Elm, or Amazon). Group your daily essentials—hand soap, skincare, maybe a small plant—on the tray. Leave empty counter space around it so it doesn’t feel cramped.

    Takes 5 minutes to set up. This is completely renter-friendly and takes no installation.

    Suddenly your vanity looks like a hotel bathroom instead of a cluttered counter—plus everything you use regularly stays in one spot.

    6. Invest in Reclaimed Wood Vanity for Earthy Character

    If you’re ready for a bigger investment, reclaimed wood vanities bring organic warmth and sustainability into your bathroom.

    Reclaimed wood vanities run $400–$1,200+ depending on size and finish (check Etsy, Anthropologie, or local furniture makers). They pair beautifully with marble or concrete countertops. Installation requires plumbing connection and often needs professional help.

    Budget $300–$500 for a plumber to handle install. Timeline: order custom pieces in advance (4-8 weeks typical).

    You get a completely unique piece that tells a story—no two reclaimed wood vanities are identical—plus it’s a sustainable choice that actually improves with age.

    7. Install Open Shelving Instead of a Cabinet (for Renters)

    If you’re renting or want a more open layout, replacing a vanity cabinet with open shelving gives flexibility and a modern feel.

    Adhesive or screw-mounted metal shelves cost $30–$80 each (IKEA, Target, Amazon). Pair with a pedestal sink or wall-mounted sink ($100–$300). This setup keeps floors visible and easy to clean.

    Install takes 1-2 hours with a level and drill. For renters, use damage-free adhesive shelves (they come off cleanly).

    Your bathroom suddenly feels bigger and less cluttered, plus cleaning is actually manageable.

    8. Layer Textures with Natural Wood, Stone, and Metal

    Mixing materials prevents your bathroom from feeling flat or sterile—it’s the design secret that makes spaces feel intentional.

    Combine wood (vanity), stone (countertop), and metal (faucet, mirror frame) in complementary finishes. This doesn’t require replacing everything—mix and match gradually. A stone countertop costs $300–$800; adding brass accents ($20–$100 per piece) ties it all together.

    You can do this over time as you refresh different elements. Pro tip: stick to 2-3 finishes max so it feels cohesive, not chaotic.

    The result is a vanity that feels collected and sophisticated—way more interesting than everything matching perfectly.

    9. Add a Decorative Mirror Frame (or Upgrade the Mirror Entirely)

    Your mirror is half the vanity visual. A beautiful frame or new mirror upgrades the whole space without touching the sink or faucet.

    Decorative mirror frames range from $40–$300 (hang over existing mirrors at Target, Wayfair, CB2). Full mirror replacement costs $150–$600 depending on size and frame style. Frameless mirrors feel modern; ornate frames feel collected; wood frames feel organic.

    Installing a new mirror takes 20 minutes (wall anchors and a level). Pro tip: mirrors create the illusion of more light and space, so go as large as your wall allows.

    The reflection becomes a feature instead of an afterthought—suddenly your bathroom feels more designed.

    10. Organize Inside with Drawer Dividers and Small Containers

    A beautiful vanity means nothing if the inside is chaos. Smart organization makes your daily routine faster and the space feel calming.

    Grab drawer organizers and dividers ($15–$40 per set from Container Store, Target, IKEA). Use small containers, jars, or boxes to group similar items (hair products, skincare, makeup brushes, etc.). Clear containers help you see what you need at a glance.

    Takes 30 minutes to set up. This is a renter win—it’s completely removable and you take it with you.

    Opening your vanity drawer becomes satisfying instead of stressful—everything’s where you left it, easy to find, and nothing gets lost.

    11. Paint or Refinish Your Existing Vanity

    Already have a vanity you like? A fresh paint job or refinish can breathe new life into it for a fraction of replacement cost.

    High-quality bathroom paint runs $40–$80 per gallon (Benjamin Moore, Sherwin Williams). Sand the existing finish lightly, prime, and paint with bathroom-safe paint in 1-2 coats. Budget 1-2 days for this project (paint, dry time between coats).

    For refinishing wood, you’ll need stain and polyurethane ($30–$60 total). Takes 2-3 days including dry time.

    Your old vanity looks completely refreshed—and way more updated than spending $500+ on replacement.

    12. Add Under-Sink LED Strip Lighting for Ambient Glow

    Under-vanity lighting adds a spa-like touch and is easier than you’d think. It’s one of those small details that completely changes the vibe.

    Battery or USB-powered LED strips cost $15–$40 (Amazon, Home Depot). Stick them underneath the vanity, edge of shelves, or inside transparent cabinets. Warm white (2700K) feels cozy; cool white (4000K) feels contemporary.

    Installation is literally: peel backing and stick. No wiring, no electrician needed—this takes 5 minutes.

    Your bathroom suddenly has ambient lighting that makes it feel like a high-end hotel, plus you get practical light for under-sink tasks.

    13. Style with Greenery—Fresh Plants or Trailing Vines

    Plants instantly make a space feel alive and spa-like—plus they’re one of the cheapest upgrades available.

    Pick low-maintenance plants like pothos, snake plant, or monstera ($10–$25 from local nurseries, Home Depot, or Etsy). Small pots ($5–$15) in ceramic or terracotta look more curated than plastic. Place on a vanity corner, shelf, or windowsill.

    Takes 10 minutes to pot and place. These plants thrive in bathroom humidity and need minimal care.

    Your vanity now feels like a retreat instead of just a functional space—plus real plants improve air quality and add oxygen to your morning routine.

    14. Upgrade Countertop with Peel-and-Stick Stone or Tile

    If your countertop is dated or damaged, peel-and-stick stone or tile offers a convincing upgrade without full replacement cost.

    Peel-and-stick countertop sheets cost $30–$100 depending on size and pattern (Amazon, Home Depot, Wayfair). Looks like real marble, granite, or concrete. Comes in rolls you cut to size and stick down.

    Installation takes 1-2 hours for a standard vanity. Requires a clean, dry surface and a utility knife. This is completely renter-friendly and removable.

    Your countertop looks like you invested in real stone—at a tenth of the cost and zero permanence if you move.

    15. Create a Spa-Like Setup with Luxury Soap, Candles, and Linens

    Sometimes the vanity upgrade is just styling. Thoughtful everyday items create a high-end spa feeling you’ll enjoy every morning.

    Invest in luxury hand soap ($8–$20), a nice candle ($12–$30), and quality linen towels ($20–$50 each). Display on your tray or shelves. Brands like Aesop, Byredo, and L’Artisan Parfumeur feel premium without being out of reach.

    This costs $50–$100 total and takes 15 minutes to arrange. You use these items anyway, so it’s not extra spending—just intentional shopping.

    Every time you wash your hands, your bathroom feels like a luxury retreat instead of utilitarian.

    16. Install a Marble or Concrete Waterfall Countertop Edge

    A waterfall edge countertop is a design-forward feature that makes even a basic vanity look expensive and contemporary.

    Marble or concrete waterfall countertops run $600–$1,500 installed, depending on material and size. You’ll need a fabricator to custom cut and install. Solid surface options (like Corian) cost less ($400–$800) and are lower maintenance than natural stone.

    This is an investment piece—timeline is typically 2-4 weeks for custom work. Hire a professional fabricator and installer ($300–$600 labor).

    The finished look is stunning and instantly elevates the whole bathroom—it’s the kind of detail that catches everyone’s eye.

    17. Swap Your Sink for a Vessel or Pedestal Upgrade

    Changing your sink style is a bigger upgrade that completely transforms vanity aesthetics—from utilitarian to designed.

    Vessel sinks (bowl-shaped, sitting on top) cost $100–$400. Pedestal sinks (freestanding, traditional) run $150–$500. Installation requires plumbing work ($150–$300 for a plumber). Budget 1-2 days total.

    Pros: vessel sinks and pedestal options look sculptural and high-end. Cons: vessel sinks need more regular cleaning of the outer surface.

    Your vanity becomes an actual focal point—these sink styles are statement pieces that transform the whole bathroom’s design level.

    18. Use Vintage or Thrifted Mirrors and Accessories

    Mixing vintage finds with new pieces creates an eclectic, collected look that’s way more interesting than everything being matchy-matchy.

    Hunt for vintage pieces at thrift stores, Etsy, Facebook Marketplace for $5–$40 per item. Look for brass mirrors, vintage trays, old apothecary jars, or decorative boxes. Pair them with modern fixtures for a curated, intentional vibe.

    Takes time to find pieces, but shopping is free and fun. No installation needed—just styling and arranging.

    Your vanity tells a story instead of looking like it came from one store. It feels collected, personal, and way more luxe than brand-new everything.

    19. Add a Vanity Stool or Bench Underneath for Seating

    A vanity stool or bench adds seating and changes how you use the space. Suddenly your bathroom becomes a place to sit and breathe, not just rush through.

    Vanity stools cost $50–$200 depending on style (Wayfair, West Elm, Article, CB2). Look for styles that fit under your vanity (typically 16-18 inches tall). Upholstered options feel cozy; wood or metal feels modern.

    Takes 2 minutes to place (no assembly needed if pre-assembled). This is a quick win that changes the whole energy of the space.

    Now your morning routine feels less rushed—you have an actual spot to sit and take time with skincare or just breathe before the day starts.

    20. Install a Double Sink Vanity for Shared Bathrooms

    If you share your bathroom, a double vanity eliminates the morning traffic jam and gives everyone dedicated space.

    Double vanities run $400–$1,500 depending on materials and style. Installation requires plumbing for two separate drains ($300–$600). Size: most are 48-60 inches wide, so measure your space first.

    This is an investment project: order custom or semi-custom pieces, hire a plumber and potentially a carpenter. Timeline: 2-6 weeks for ordering, 1-2 days for install.

    Everyone gets their own space to get ready without bumping elbows. The bathroom actually functions better—and looks more intentional.

    21. Create a Wet Bar Setup with Skincare Products Organized by Step

    Organizing skincare by routine step makes your morning flow faster and the vanity feel like a curated spa treatment.

    Transfer products into matching glass bottles or pump dispensers ($2–$5 each from The Container Store, Amazon). Label them or arrange left to right in order: cleanser, toner, serum, moisturizer, sunscreen. Display on a tray or shelf.

    Takes 20 minutes to set up. This works even if you’re still using the original bottles—just arrange them in order.

    Your skincare routine becomes easier to follow, and the organized display makes your vanity look intentional and high-end.

    22. Paint the Walls Behind Your Vanity in a Bold, Moody Color

    A bold paint color behind your vanity creates a feature wall that makes the space feel designed and atmospheric.

    Quality bathroom paint costs $30–$60 per quart. Try deep jewel tones (teal, emerald, navy) or warm neutrals (terracotta, sage, warm gray). Bathroom paint needs mildew resistance and moisture protection.

    Painting takes 1-2 days (primer, paint, dry time). This is a renter option if you use removable peel-and-stick wallpaper instead ($20–$50).

    Suddenly your vanity becomes a statement—the whole bathroom feels more curated and atmospheric.

    23. Add a Decorative Backsplash Behind the Sink

    A backsplash is a smart design move that protects the wall, adds visual interest, and doesn’t require a full tile overhaul.

    Peel-and-stick tiles cost $20–$60 (Home Depot, Amazon, Wayfair). Real tile installation runs $150–$400 depending on size and tile choice. Most backsplashes are only 12-18 inches tall.

    Peel-and-stick takes 30 minutes to apply. Real tile requires grouting and takes 1-2 days.

    You’ve added a designed detail that makes the vanity feel intentional—and it’s easier to clean than bare wall.

    24. Upgrade Vanity Hardware with Vintage or Statement Knobs

    Hardware might sound small, but new knobs or pulls completely change how your vanity looks and feels.

    Statement knobs cost $8–$25 each (Rejuvenation, Anthropologie, Etsy, CB2). Brass, ceramic, leather, or geometric styles all read differently. Pick 2-3 knobs per drawer or cabinet for impact.

    Installation takes 10-15 minutes per knob—just unscrew the old one and screw in the new one (a cordless drill speeds this up).

    Your vanity instantly looks more designed—that detail-oriented, high-end finish that makes people notice the care you’ve put into your space.

    25. Bring in Warm Lighting with Brass or Gold Accents

    Warm metallics in lighting and fixtures tie your whole vanity together and create an inviting, spa-like atmosphere.

    Brass or gold fixtures are trending—swap your faucet ($100–$300), add brass sconces ($80–$200 each), or frame your mirror in gold ($50–$150). These finishes warm up the space and feel more intentional than standard chrome or stainless steel.

    You can update these one piece at a time. Start with the faucet, add mirror frame next, then lighting.

    Your vanity shifts from feeling cold and functional to warm and welcoming—the kind of space that makes mornings feel less rushed.


    Save this post for your next refresh and pick one idea that speaks to you—start with the easiest win and build from there. Your bathroom deserves to feel like a sanctuary, and small changes add up fast.

  • 24 Small Full Bathroom Ideas That Maximize Every Inch

    24 Small Full Bathroom Ideas That Maximize Every Inch

    When your bathroom is on the small side, every decision matters. You’re probably wondering how to make the space feel bigger, more functional, and actually enjoyable to spend time in. The good news? You don’t need a full renovation or a massive budget to transform how your bathroom works and feels. Whether you’re renting, own a tiny home, or just have a compact ensuite, these 24 ideas will show you exactly how to maximize every inch without sacrificing style. You’ll discover budget-friendly hacks, DIY projects you can do in an afternoon, and smart design choices that make a real difference. Let’s get started.

    1. Paint Walls Light to Expand Space

    Light wall colors are the quickest way to make a small bathroom feel bigger. Paint tricks your brain into perceiving more space because light reflects around the room instead of absorbing into dark surfaces.

    Choose soft whites, pale grays, barely-there blues, or warm creams. You can paint this yourself in one afternoon with a roller and quality paint from Home Depot or Lowe’s. Budget: $20–$40 for paint and supplies. Time: 2–3 hours including prep. If you’re renting, ask your landlord or use removable wallpaper as an alternative. Pair light walls with white or light-colored trim for maximum impact.

    Your space instantly looks 20% larger, and you’ll notice how much brighter the bathroom feels, especially if it has limited natural light.

    2. Install a Corner Shelf for Storage Without Floor Space

    Corner shelves are invisible real estate in small bathrooms. You have walls going unused in corners—might as well use them for storage and decor.

    Floating corner shelves cost $20–$60 and mount directly to two walls. IKEA, Target, and Amazon all carry affordable options. You’ll need a drill, level, and wall anchors if you’re not hitting studs. Time: 30 minutes to install. Renters can use adhesive-backed corner shelves or ask permission to install with removable anchors. Style your shelf with rolled towels, small baskets, and a single plant to keep it functional but visually calm.

    You’ve just created storage without eating into precious floor or counter space, and your bathroom suddenly looks intentionally designed.

    3. Swap Out Your Mirror for a Larger One

    A larger mirror is one of the smartest small-space investments. It reflects light, makes the room feel bigger, and is instantly noticeable every time you use the sink.

    Measure your wall space above the sink. If you have room, go with a mirror that’s at least 24–30 inches wide (standard is often just 18–20 inches in smaller bathrooms). Budget: $30–$120 depending on frame style. Home Depot, Wayfair, and IKEA have tons of options. If you’re renting, use adhesive-backed mirrors or ask about temporary installation. The upgrade takes 15 minutes and completely changes how the space functions and feels.

    Your reflection now takes up more wall space, and the expanded mirror bounces light around the entire room, making everything look brighter and more spacious.

    4. Use Vertical Shelving Above the Toilet

    Dead space above the toilet is prime real estate in a compact bathroom. Vertical shelving takes advantage of unused wall space without cluttering your floor or counter.

    Install a 2–3 shelf unit directly above your toilet using standard wall anchors or studs. Budget: $25–$80 for a simple shelving unit. Wayfair, IKEA, and Home Depot all have options that fit standard toilet widths. Time: 45 minutes to install. Stack rolled towels, store extra toiletries in small baskets, and add one decorative item per shelf to keep it balanced. Renters can use adhesive shelves as a non-permanent option.

    You’ve doubled your storage without sacrificing an inch of floor space, and your bathroom suddenly feels more organized and put-together.

    5. Install a Wall-Mounted Faucet to Free Up Counter Space

    Wall-mounted faucets are game-changers for tiny bathrooms because they eliminate the bulky base that takes up precious counter real estate.

    This is a plumbing project best left to a pro unless you’re experienced. Expect $200–$400 for the faucet plus installation labor (usually $150–$250). Call a local plumber for quotes. If you’re renting, this probably isn’t an option unless your landlord approves. However, the payoff is huge: your counter goes from cramped to usable, and the bathroom looks more minimalist and spa-like. If you can’t do this, skip to items that don’t require plumbing changes.

    Suddenly you have actual counter space to set down a toothbrush holder or small candle without feeling crowded.

    6. Add Adhesive Backsplash Tiles for a Refresh (Renter-Friendly)

    Peel-and-stick backsplash tiles give you a design upgrade without damaging walls or requiring tools. They’re perfect if you’re renting or want to test a look before committing.

    Measure the wall behind your sink. Adhesive tiles come in sheets and cost $20–$60 for a small bathroom area. Popular patterns include white subway, marble, or hexagon. Apply them directly to clean, dry walls—no grout or tools needed. Time: 1–2 hours depending on wall size and your patience with straight lines. They’re removable but semi-permanent, so choose a design you’ll love for at least a year. Amazon and Wayfair have tons of styles.

    Your backsplash now looks intentional and designed, and the pattern adds visual interest without overwhelming a small space.

    7. Install a Recessed Medicine Cabinet

    Recessed medicine cabinets nestle into the wall cavity rather than jutting out, so they don’t eat into your already-tight floor space.

    Measure your wall to find the studs, then install between them. Budget: $50–$150 for the cabinet itself, plus $100–$200 if you hire someone (this involves cutting into drywall). Time: 2–4 hours DIY, or a few hours if hiring help. If you’re renting, skip this one—it’s too invasive. Renters should opt for surface-mounted medicine cabinets with mirrors instead. Once installed, this stores all your daily medications, hair products, and medications in one organized spot that doesn’t interfere with mirror or counter space.

    Everything you need is hidden behind one clean door, making your counter and walls look streamlined and uncluttered.

    8. Use a Rolling Cart for Under-Sink Storage

    A rolling cart gives you mobile, flexible storage that works in rentals and doesn’t require installation. You can move it wherever you need it most.

    Purchase a slim 2–3 tier rolling cart (10–15 inches wide) from IKEA, Target, or Amazon for $30–$80. Slide it under or beside your sink, or tuck it into any corner. Fill each tier with small baskets to corral cleaning supplies, extra toilet paper, hair tools, and toiletries. Time: 10 minutes to assemble and position. The beauty of a cart is you can rearrange or relocate it anytime without tools. Add removable labels to each basket so your family knows where things go.

    Your storage is now organized, accessible, and easy to rearrange—plus you can pull it out to clean behind it (no permanent installation mess).

    9. Hang Towels Vertically on a Ladder Rack

    A ladder towel rack takes up minimal floor space while displaying rolled towels as decor. It’s functional and adds visual interest to an otherwise bare corner.

    Look for slim ladder racks 18–24 inches wide at Home Depot, IKEA, or Wayfair. Budget: $30–$100 depending on material (wood vs metal) and quality. Lean-to styles don’t require installation, while wall-mounted versions need 30 minutes and basic tools. Roll your towels tightly and layer them across the rungs—it looks spa-like and keeps towels accessible. Time: 5 minutes to set up a lean-to style, 30 minutes for wall-mounted.

    Your towels are now displayed like a boutique, saving drawer space and adding visual warmth to an otherwise utilitarian corner.

    10. Paint the Inside of Shelves a Contrast Color

    Painting shelf interiors a soft, contrasting color adds depth and interest without cluttering a small space visually.

    If you have open shelving or a medicine cabinet with visible shelves, paint the interior in a soft color—sage, pale blue, or warm taupe work well. Use leftover paint from your walls or grab a small sample pot for $5–$15. A foam brush and 1–2 hours is all you need. This works on floating shelves, open cabinets, or even the inside of your shower niche if you have one. The pop of color draws the eye and makes the shelves look intentionally styled rather than just functional.

    Your shelves now have depth and personality, and the subtle color addition makes your bathroom feel more carefully curated.

    11. Install LED Strip Lighting Around the Mirror

    LED strip lighting around your mirror is affordable, renter-friendly, and creates a spa-like ambiance while improving task lighting for grooming.

    Self-adhesive LED strip lights cost $15–$40 and stick directly to your mirror frame or the wall above and below the mirror. Choose warm white (2700K) for a relaxing feel. Plug them into a standard outlet or use battery-operated options if you’re renting. Time: 10 minutes to install and adjust. They’re dimmable and often come with remote controls, so you can adjust brightness for different times of day. Popular brands include Philips Hue, Govee, and basic Amazon options.

    Your bathroom now has layered lighting that makes applying makeup easier and the overall space feel more upscale and intentional.

    12. Use Tension Rods for Hanging Washcloths and Hand Towels

    Tension rods are cheap, renter-approved, and take up almost no space while keeping towels organized and within reach.

    Install two or three tension rods on an empty wall at waist height using the adjustable tension (no drilling needed). Budget: $10–$25 for a set of rods. Drape folded washcloths and hand towels over them—they stay accessible and look intentional. Time: 5 minutes per rod to install. If you’re renting, these are perfect because they don’t leave any damage. Hang them near the shower or above the toilet for convenient towel access.

    Towels are now organized, visible, and within arm’s reach without taking up cabinet or drawer space.

    13. Declutter and Organize Under-Sink Storage with Trays

    Half the problem with small bathroom storage isn’t lack of space—it’s disorganized under-sink areas. Trays and bins instantly create order and maximize what you already have.

    Pull everything out from under your sink and sort it ruthlessly. Keep only what you actually use. Grab clear acrylic trays from IKEA, Target, or Dollar Tree for $5–$25 total. Group similar items (cleaning supplies, medications, hair products) and slide trays under the sink like drawers. Add labels so everyone knows where things belong. Time: 1–2 hours for the first organization, then 10 minutes weekly to maintain. This costs almost nothing but saves hours of searching and prevents duplicate purchases.

    Your under-sink storage is now a model of organization, and you’ll spend less time hunting for things and more time actually enjoying your bathroom.

    14. Hang a Command Hook Towel Rack on the Back of the Door

    The back of your door is premium real estate that most people forget about. Command hooks are renter-approved and perfect for hanging towels or a small organizer.

    Stick a 4–6 hook command rack on the back of your bathroom door using adhesive strips (no nails). Budget: $10–$20 for a quality command rack. Home Depot and Target stock various styles. Hang hand towels, washcloths, or a small mesh organizer for hair tools. Time: 5 minutes to apply and let adhesive set. These hooks are completely removable and leave no damage when you move out. Renters love this solution because it’s instant and reversible.

    You’ve turned dead space into functional storage, and your towels are now at arm’s reach when you get out of the shower.

    15. Install a Wall-Mounted Soap Dish or Shower Caddy to Clear Counter Space

    Wall-mounted caddies and soap dishes eliminate the need for bottles and bars cluttering your counter or shower floor.

    Suction-cup caddies cost $10–$30 and stick directly to tile or shower walls—no drilling. For a permanent option, adhesive-mounted caddies run $15–$40. Both are renter-friendly. Time: 5 minutes to install a suction-cup version, 15 minutes for an adhesive one. Slide all your shower bottles and soap into the caddy so your shower floor stays clear and looks intentional. Popular options include stainless steel caddies from Amazon or simple plastic versions from Target.

    Your shower floor is now uncluttered, and all your daily products are organized in one spot within arm’s reach.

    16. Use a Corner Caddy in the Shower for Corner Optimization

    Corner caddies nestle into those awkward shower corners that would otherwise go unused. It’s a tiny change that feels surprisingly efficient.

    Adhesive or suction-cup corner caddies cost $12–$35 and fit standard corner angles. Choose rust-resistant stainless steel or bamboo if you want something that feels spa-like. Time: 10 minutes to install. Both renter and homeowner options exist. Stack your bottles vertically, add a soap bar, and suddenly you’ve maximized a corner that was totally wasted. This frees up counter and floor space everywhere else in your bathroom.

    You’ve claimed a corner of valuable real estate, and your shower now feels more organized and less cluttered with product bottles floating around.

    17. Add a Mirrorless Medicine Cabinet Above the Toilet Tank

    If you already have a large mirror elsewhere, a non-mirrored cabinet above the toilet adds storage without visual redundancy.

    Install a simple cabinet or shelving unit (no mirror required) directly above the toilet tank. Budget: $30–$100 depending on material and style. Time: 30–45 minutes. Fill it with rolled towels, extra toilet paper, small baskets for hair products, or decorative items. IKEA has budget-friendly options; Wayfair has higher-end versions. Renters can use adhesive shelving or ask permission for temporary installation.

    You’ve added purposeful storage without cramming another mirror into an already-reflective space, and your bathroom feels more organized and less redundant.

    18. Use Floating Shelves to Display Rolled Towels as Decor

    Rolled towels on floating shelves look like high-end hotel decor while serving as actual storage. It’s functional and beautiful at once.

    Install 1–3 floating shelves (12–18 inches wide) on an empty wall at varying heights for visual interest. Budget: $40–$100 for shelves plus installation hardware. Time: 30–45 minutes per shelf. Roll your towels tightly and stack them by color. Add one small plant or decorative item per shelf to keep the vibe curated rather than cluttered. This works best on walls that don’t have doors or fixtures competing for attention.

    Your towel storage now looks intentionally styled like a high-end bathroom, and visitors will actually notice your thoughtful aesthetic.

    19. Install a Glass Shelf Above the Toilet for a Weightless Look

    Glass shelves feel lighter and less bulky than wood or metal, so they’re ideal when you’re trying to keep a small space from feeling cramped.

    Install a slim glass shelf (8–12 inches deep) above your toilet using standard wall brackets. Budget: $25–$60 depending on glass quality and bracket style. Time: 30 minutes for a confident DIY-er, or hire someone for $50–$100. Style with just a few items: a small plant, a jar of bath salts, or a folded hand towel. The transparency means it doesn’t visually “block” the wall like a wooden shelf would, which keeps the space feeling open.

    Your shelf looks elegant and weightless rather than heavy, and the transparency maintains the airy feeling you’ve worked to create.

    20. Use Peel-and-Stick Wallpaper on One Accent Wall

    Peel-and-stick wallpaper adds personality and visual interest without the commitment or mess of traditional wallpaper or paint.

    Choose one wall (usually the one behind your toilet or sink) for impact. Budget: $25–$60 for a small bathroom area. Select from thousands of patterns at Amazon, Wayfair, or specialty sites like Spoonflower. Time: 2–3 hours for careful application. The beauty is it’s removable, so renters can totally do this—just pull it off when you move out. Start with a smaller accent wall if you’re nervous about the application process. Use a squeegee or credit card to smooth out bubbles as you go.

    One patterned wall now gives your bathroom personality and focal point, while keeping the other walls light so the space still feels open.

    21. Install Recessed Shelving in a Shower Niche

    If you have a shower niche, maximize it with proper shelving or organization. A recessed niche doesn’t eat into floor space like a caddy might.

    If you’re renting or can’t modify walls, skip this one. If you own, this is a permanent upgrade: install a shallow shelf inside your existing niche or cut a new niche if plumbing allows. Budget: $50–$200+ depending on whether you DIY or hire someone. Time: 1–3 hours depending on complexity. Stock the niche with rolled washcloths, a soap bar, and a single decorative item. The result is storage that feels intentional and part of your shower’s architecture rather than an add-on.

    Your shower niche is now a functional design feature that stores products without adding bulk to the shower floor.

    22. Add a Mirror and Shelf Combo Unit Above the Sink

    Combination mirror and shelf units maximize vertical space by doing double duty: reflection plus storage in one footprint.

    Look for mirror units with integrated shelves or small cabinets built in. Budget: $40–$120 depending on style and material. Time: 30–45 minutes to install. These are available at IKEA, Wayfair, Home Depot, and Amazon. If you’re renting, verify you can install it or ask for landlord approval. The integrated design means you’re not wasting wall space on separate pieces—one unit handles both tasks efficiently.

    You now have mirror plus shelf storage in one compact footprint, freeing up wall space for other purposes.

    23. Use Vertical Baskets on Shelves to Maximize Depth

    Tall, narrow baskets on shelves help you use the full depth of your shelving without items getting lost in the back.

    Purchase 2–3 slim vertical baskets (8–10 inches wide, 8–12 inches tall) from IKEA, Target, or Amazon for $5–$20 each. Slide them onto your shelves and use each one to corral a category: hair products, cleaning supplies, extra toilet paper, medications. Time: 10 minutes to organize and place. The vertical orientation means things don’t get shoved to the back and forgotten. Clear or semi-transparent baskets let you see what’s inside without opening them.

    Items are now organized by category and fully accessible instead of buried behind other stuff on crowded shelves.

    24. Paint Your Vanity or Reface Cabinet Doors for a Fresh Look

    Painting or refacing your existing vanity costs a fraction of replacement and gives your bathroom a complete visual reset.

    If your vanity is wood (not laminate), it’s paintable. Choose a soft, timeless color like sage, soft blue, greige, or warm white. Budget: $30–$80 for paint and hardware, plus $100–$300 if you hire a pro for finish and hardware installation. Time: 2–3 days for paint-grade work (accounting for drying between coats). Sand lightly, prime, then apply two coats of bathroom-grade paint. Swap out old hardware for brushed brass or matte black handles to complete the refresh. If your vanity is laminate, refinishing is tricky—consider it an investment piece only if you own the home.

    Your bathroom now has a completely refreshed focal point, and the updated color instantly modernizes the entire space.


    Save this post and tackle one idea this weekend—you’ll be amazed at how quickly a small bathroom can feel bigger, brighter, and more like a retreat. Which tip are you trying first?

  • 27 Modern Bathroom Ideas That Feel Sleek & Luxurious

    27 Modern Bathroom Ideas That Feel Sleek & Luxurious

    Your bathroom doesn’t need a total overhaul to feel like a luxury retreat. Sometimes the most impactful changes are small touches that shift how your space looks and feels every single day. Whether you’re renting, working with a tight budget, or planning a bigger renovation, these 27 ideas mix quick wins with smart upgrades that give you that high-end spa vibe without the six-figure price tag. You’ll find DIY projects you can tackle this weekend, affordable swaps that make a huge difference, and investment pieces worth saving for. Let’s dive into ideas that actually work in real life—no Pinterest-perfect nonsense here.

    1. Install a Low-Threshold Walk-In Shower

    Walk-in showers instantly elevate any bathroom because they look modern and feel more spacious than traditional tubs. A low or no-threshold entry creates an open, luxury feel and makes cleaning a breeze.

    You don’t need a full renovation to achieve this look. If you already have a shower, swap out the threshold strip for a sloped floor pan ($150–$400, Home Depot or local contractors). For renters, consider a removable corner shelving unit designed for walk-in spaces to fake the look. Installation takes a weekend or a professional can handle it in one day.

    Pro tip: Pair your walk-in with a frameless glass partition ($200–$800) instead of a shower curtain—it keeps the space feeling open and architectural.

    The result? Your bathroom instantly grows, and that shower becomes the showstopper of your space.

    2. Switch to a Rainfall Showerhead

    Rainfall showerheads make ordinary showers feel like a wellness experience—and they’re one of the easiest swaps you can make. The wide spray pattern and gentle flow feel indulgent while using water-efficient technology.

    Swap your old showerhead for a water-saving rainfall model ($50–$150 from brands like Hansgrohe, Delta, or Moen available at Lowe’s or Amazon). Most people can unscrew and screw in a new one in 10 minutes—no plumber needed. Look for models with pause features so you can control water usage between rinses.

    Budget hack: Basic rainfall heads start at $30–$40 if you skip the fancy brand names and still deliver that spa experience.

    You’ll notice the difference every time you shower—suddenly your daily routine feels like self-care instead of a chore.

    3. Add Heated Flooring for Winter Mornings

    Cold tile floors are a shock to your system on winter mornings—heated flooring solves that instantly. It’s a game-changer for comfort and adds genuine luxury appeal to any bathroom.

    Electric radiant heating mats range from $200–$1,500 depending on bathroom size (available at Home Depot, Wayfair, or Schluter Systems). DIY installation works if you’re comfortable with basic electrical work, or hire a professional ($500–$1,000 labor). Installation takes 1–2 days. For renters, look for portable heated mats ($30–$80) that sit on top of existing tile.

    Pro tip: Bundle this with a programmable thermostat ($100–$200) so the floors only warm up before your morning routine—saves energy and money.

    Your bare feet touch warm tile every morning, and you’ll wonder how you ever lived without it.

    4. Create a Spa-Inspired Color Palette

    Paint color sets the mood for your entire space—moving away from generic white or beige to soft, intentional tones creates an instant spa atmosphere. Think sage green, soft blue-gray, or warm taupe instead of stark whites.

    Pick one wall or go all-in—either works. Use high-quality bathroom paint with mildew resistance ($30–$60 per gallon, Benjamin Moore or Sherwin-Williams available everywhere). One person can paint a bathroom in a weekend; professional painters charge $500–$1,200 depending on size. Budget option: stick to one accent wall and keep others neutral.

    Pro tip: Pair your new wall color with matching towel sets ($20–$60) and a simple plant or two to anchor the spa vibe without overwhelming the space.

    The shift happens the moment you walk in—suddenly your bathroom feels intentional and calming instead of generic.

    5. Swap Out Harsh Lighting for Layered Options

    Bad lighting makes any bathroom feel uninviting, but layered lighting changes everything. You need bright light for morning routines and softer light for wind-down evenings—one fixture can’t do both.

    Install sconces on either side of your mirror ($40–$150 each, Wayfair or Rejuvenation) instead of a harsh center light. Add a dimmer switch ($15–$40, Home Depot) so you can adjust brightness. Budget $200–$400 total if you DIY, or $500–$800 with professional installation. For renters, try clip-on sconces or renter-friendly peel-and-stick versions ($30–$60).

    Pro tip: Choose warm white bulbs (2700K color temperature) rather than cool white—it’s more flattering and calming.

    Suddenly your bathroom has mood-making power, and your morning and evening routines feel completely different.

    6. Invest in a Statement Mirror

    A great mirror isn’t just functional—it becomes your bathroom’s anchor piece. Oversized, framed mirrors make spaces feel bigger and more designed instantly.

    Replace your basic builder mirror with a statement piece in a bold frame ($100–$400 from West Elm, CB2, or Wayfair). Matte gold, black, or brass frames add personality without being trendy. Mounting takes 30 minutes; rent a stud finder ($5 at Home Depot) if you need one. Budget option: a large round mirror ($50–$100 on Amazon) still makes a huge impact.

    Pro tip: An LED-backlit mirror ($150–$300) doubles as ambient lighting and grooming light—two functions in one piece.

    The right mirror changes how your whole bathroom reads—suddenly it looks intentional and curated instead of basic.

    7. Declutter with Floating Shelves

    Visible clutter makes bathrooms feel cramped—floating shelves create storage that looks like styling. You only display what you actually use or what looks good, so the space stays calm and open.

    Install floating shelves ($30–$80 per shelf, IKEA, Target, or Home Depot). You’ll need a stud finder and basic tools; mounting takes 1–2 hours for 2–3 shelves. Rent professional help if drilling feels intimidating ($100–$200). Fill them thoughtfully: rolled towels, small plants, a nice soap dispenser, and one candle. Less is more.

    Budget hack: IKEA’s basic shelves ($15–$30) look surprisingly sophisticated when styled well.

    Your bathroom instantly looks more open and organized, and you’ll use what’s on display more intentionally.

    8. Upgrade to a Dual Vanity

    Shared mornings become peaceful when each person has their own sink space. Dual vanities eliminate the “who gets to use the sink first” problem and add a high-end resort feel.

    If you have wall space, a ready-made dual vanity ranges $400–$1,500 (Wayfair, Overstock, local retailers). Professional installation adds $300–$800. No wall space? A floating dual vanity ($600–$2,000) uses creative mounting to maximize an small room. For renters or small spaces, a pedestal sink combo ($150–$300 each) in different corners creates the same effect without full cabinetry.

    Pro tip: Choose matching or complementary faucets ($50–$200 each) to tie the look together.

    Morning routines shift from competitive to calm when both people have their own grooming territory.

    9. Bring in Natural Wood Accents

    Hard bathroom materials—tile, chrome, glass—can feel cold. Adding warm wood textures brings coziness and sophistication that makes the space feel less sterile and more like a retreat.

    Introduce wood through a wooden vanity ($300–$1,200, Wayfair or IKEA), floating shelves ($30–$100, IKEA or Home Depot), or smaller pieces like a wooden stool ($30–$80, Target). You can also frame an existing mirror with wooden trim ($20–$50 in materials, a weekend DIY project). Budget-friendly option: a wooden ladder shelf ($40–$100) doubles as decor and storage.

    Pro tip: Stick to light or medium-toned woods (oak, birch, ash) in modern bathrooms—they read cleaner than very dark woods.

    The wood warms up your whole space and makes it feel more like a sanctuary than a utilitarian room.

    10. Install a Towel Warmer

    Wrapping yourself in a warm towel after a shower is one of those tiny luxuries that completely shifts your experience. Towel warmers are more achievable than you think.

    An electric towel warmer costs $50–$300 depending on size (Amazon, Wayfair, Home Depot). Wall-mounted models need a plug ($50–$150) or hardwired installation ($200–$400 with a professional). Freestanding warmers need zero installation—just plug in and place. Look for energy-efficient models with timers so you’re not running it 24/7.

    Budget hack: A basic warmer ($50–$80) does the same job as luxury brands.

    That simple ritual of grabbing a warm towel turns every shower into a small act of self-care.

    11. Go Bold with Patterned Tile

    If your whole bathroom is beige or white, you’re missing a chance to add personality. Bold patterned tile—on a single wall, floor, or even the shower niche—becomes instant visual interest without being overwhelming.

    Install patterned tile as a half-wall accent ($200–$600 in materials, Wayfair, Anthropologie Home, or local tile shops) or create a feature wall behind the toilet ($150–$400). Professional installation adds $400–$800. For renters, consider peel-and-stick tile alternatives ($30–$100 for smaller areas) or a single patterned accent tile framed as art.

    Pro tip: Stick to one bold pattern and keep walls neutral—mix patterns and colors gets chaotic fast.

    You walk in and instantly feel like you chose a space that’s uniquely yours, not a generic builder bathroom.

    12. Add a Statement Vanity in Black or Deep Tone

    Dark vanities anchor a bathroom and make any space feel more curated and high-end. They’re bold without being trendy and pair beautifully with almost any style.

    A ready-made black floating vanity costs $400–$1,500 (Wayfair, Article, or local cabinet makers). If your existing vanity is wood or light colored, you can paint or refinish it ($0 DIY or $300–$600 professionally) for a fraction of the cost. Pair it with a gold or brass faucet ($80–$200) for contrast that feels intentional.

    Budget hack: Paint it yourself with furniture-grade paint ($15–$30) for a custom look.

    The dark vanity becomes the room’s anchor, and suddenly your whole bathroom reads as intentional and grown-up.

    13. Create a Spa-Like Niche in Your Shower

    Shower clutter ruins the spa vibe—a recessed niche is where everything lives, hidden and organized. It looks expensive and keeps your shower feeling serene.

    If you’re renovating, build a recessed niche during tile work ($100–$300 in materials, professional installation $200–$500). For existing showers, a corner shelf with suction cups or adhesive ($15–$40, Amazon) fakes the niche look. Use it only for essentials: shampoo, conditioner, a nice soap, and one natural sponge. Everything else lives under the sink.

    Pro tip: Choose clear or frosted glass bottles ($10–$30) instead of colorful plastic ones—they look more spa-like.

    The organized niche keeps your shower feeling calm and intentional, not like a product graveyard.

    14. Swap Builder Faucets for Matte Black or Brass

    Generic chrome faucets are instantly replaced by style-forward finishes that feel current and thoughtful. Matte black and brushed brass are timeless and pair with nearly every aesthetic.

    Replace your faucet with a matte black or brass option ($60–$250, Delta, Moen, or luxury brands like Kohler available everywhere). If you’re handy, it’s a 30-minute DIY swap. If not, a plumber charges $100–$300 for installation. For renters, look for clip-on faucet aerators ($20–$40) in matte finishes that fake the upgrade temporarily.

    Pro tip: Match your faucet finish to other fixtures (mirror frame, light fixtures) for visual harmony.

    That single swap makes your bathroom look immediately more thoughtful and modern.

    15. Use Sustainable Water-Saving Fixtures

    Sustainability isn’t just good for the planet—it saves you money every month. Water-efficient fixtures cut your bills while looking exactly like regular fixtures.

    Install low-flow showerheads ($30–$100, all major retailers) and faucet aerators ($5–$15) in your sinks. Look for EPA WaterSense-certified products—they use 20–30% less water than standard fixtures without sacrificing pressure. Most installations are DIY (5–10 minutes each). If you’re replacing multiple fixtures, budget $200–$500 total installed.

    Pro tip: Your water bill drops noticeably within the first month—these pay for themselves.

    You save money, reduce waste, and your bathroom still looks sleek and modern.

    16. Install LED Lighting Throughout

    LED bulbs use 75% less energy than incandescent and last years longer. Switching is one of the easiest, highest-impact eco-upgrades you can make—and it saves hundreds annually.

    Replace all bulbs with warm white LED options (2700K, $3–$10 each at any drugstore or Amazon). Most fixtures take 60 seconds per bulb. If you’re upgrading fixtures, specify LED-compatible ones ($40–$150 per fixture). Your energy bill noticeably decreases month one, and you’re not changing bulbs every year.

    Budget hack: Costco and Amazon often have LED bulb multipacks ($10–$20) that beat individual pricing.

    Your bathroom is instantly brighter and more modern, and your electric bill shrinks.

    17. Organize with Under-Sink Pull-Out Drawers

    Under-sink chaos is invisible but stressful—pull-out drawers and organizers make everything accessible and intentional. You actually use what you store when you can see it.

    Install pull-out drawer organizers ($30–$100, IKEA or Container Store) or build custom ones ($100–$300, professional carpenter). DIY versions take 1–2 hours. Fill them with small bins ($10–$30) to corral items by category: hair products, cleaning supplies, first aid. Everything should be visible and accessible at arm’s reach.

    Pro tip: Use clear or frosted containers so you can see what you need without opening each one.

    You’ll spend less time searching for things and more time enjoying your organized, calm space.

    18. Bring in Live Plants and Greenery

    Plants transform a bathroom from sterile to alive. They thrive in humidity, look beautiful, and actually improve air quality—it’s a win on every level.

    Choose humidity-loving plants: pothos, snake plants, monstera, or ferns ($10–$30 each, local nurseries or grocery stores). Place them on shelves, counters, or in corner baskets. Group odd numbers of plants for visual interest. Water once weekly or less depending on plant type and light. Budget: $30–$100 for a solid collection.

    Pro tip: Low-light plants like pothos and snake plants thrive in bathrooms without windows.

    Your bathroom instantly feels more like a retreat, and the air quality noticeably improves.

    19. Upgrade to a Soft-Close Toilet Seat

    Loud slamming toilet seats are a jarring, unnecessary annoyance. A soft-close seat is a tiny upgrade that improves your experience every single day.

    Swap your toilet seat for a soft-close model ($40–$120, Home Depot, Lowe’s, or Amazon). Installation takes 10 minutes—just unbolts the old one and bolts on the new one. No plumber needed. Look for models with quick-release features for easy cleaning.

    Budget hack: Basic soft-close seats cost $30–$50 and work just as well as luxury versions.

    That smooth, quiet closing becomes a small daily pleasure you actually notice.

    20. Create a Spa Experience with Essential Oil Diffuser

    Scent transforms how you experience your bathroom. A diffuser running during your morning or evening routine adds a wellness layer that’s genuinely powerful.

    Place an ultrasonic essential oil diffuser ($25–$80, Amazon or Target) on your vanity or shelf. Add 3–5 drops of essential oil to water and let it run for 20–30 minutes before you shower. Try lavender for evening wind-down or peppermint for morning energy. Budget: $25–$80 for a quality diffuser, then $5–$10 per bottle of oil ($10–$15 for high-quality brands).

    Pro tip: Run it 20 minutes before your routine so the scent is subtle, not overwhelming.

    Suddenly your bathroom routine shifts from functional to ritualistic—it becomes something you actually look forward to.

    21. Install a Thermostatic Mixing Valve

    Temperature fluctuations ruin showers—a thermostatic valve keeps water at your exact chosen temperature. It’s a small upgrade that makes every shower feel intentional and perfect.

    A thermostatic mixing valve costs $150–$400 including installation (plumber or DIY if comfortable). It maintains your preferred temperature even when other fixtures use water, so you never get shocked by hot or cold. More advanced models include LED temperature display ($200–$500).

    Budget hack: A basic thermostatic cartridge ($80–$150) upgrades your existing faucet without full replacement.

    Every shower hits exactly the right temperature, and that consistency feels luxurious.

    22. Frame Your Mirror with Wooden Trim

    A frame transforms a basic mirror into a statement piece without replacing it entirely. Wooden trim adds warmth and intentionality instantly.

    Buy wooden trim or molding ($15–$40 at Home Depot) that fits your mirror size. Use construction adhesive or small nails to attach it directly to the wall around the mirror ($0–$20 in supplies). Takes 30–45 minutes for a clean finish. Paint or stain the trim to match your aesthetic ($5–$10 in paint).

    Pro tip: Light wood (oak, birch) reads modern; darker wood feels more traditional. Choose based on your space.

    That simple frame makes your mirror look curated and custom—suddenly your whole vanity reads as designed.

    23. Add a Freestanding Soak Tub (Even in Small Spaces)

    You don’t need a huge bathroom for a soaking tub—modern compact models fit small spaces and create instant spa energy. Even if you shower most days, a tub for occasional soaking is a luxury that justifies itself.

    A compact freestanding soaking tub (48–60 inches) ranges $800–$3,000 (Wayfair, Overstock, or local showrooms). Professional installation adds $1,000–$2,000. For renters or tight budgets, a portable acrylic soaking tub ($200–$500) sits in any space and drains into your shower or tub. It’s not permanent but delivers the experience.

    Pro tip: Pair it with Epsom salts and candles ($10–$30) for authentic spa vibes.

    Having a dedicated soak spot becomes your go-to relaxation ritual, even if it’s just once a month.

    24. Use Textured or Natural Stone Tile

    Textured stone or natural tile adds organic beauty and sophistication that smooth, uniform tile can’t match. It feels crafted and intentional.

    Install natural stone tile like slate, travertine, or marble ($3–$15 per square foot, plus professional installation $8–$15 per square foot). Or use porcelain that mimics stone ($1–$5 per square foot, cheaper and more durable). For a budget refresh, add just one accent wall or floor area instead of redoing everything ($200–$800 total).

    Pro tip: Textured stone is slippery when wet—pair with slip-resistant grout ($10–$20 per bag) or add a non-slip mat.

    Your bathroom suddenly reads as upscale and naturally beautiful instead of sterile.

    25. Create Mood with Candlelight

    The right candles instantly shift your bathroom from functional to ritualistic. They’re inexpensive but create disproportionate impact on how your space feels.

    Place unscented or lightly scented candles ($5–$20 each, Target, Anthropologie, or local home stores) on your vanity or floating shelves. Group odd numbers (3 or 5) for visual interest. Use them during evening routines or weekend mornings. Budget: $15–$50 for a rotating collection of scents.

    Pro tip: Tall jars prevent dripping and look cleaner than tapered candles in bathrooms.

    That warm, flickering light completely changes how you experience your routine—suddenly it’s self-care, not just cleaning yourself.

    26. Install Adjustable Shelving Above the Toilet

    Toilet storage feels wasted vertical space until you use it smartly. Adjustable shelving lets you customize height and creates a mini spa display that also functions.

    Install 3-tier adjustable shelving ($40–$100, IKEA or Home Depot) above your toilet. Anchor it securely into studs. Fill only 60% of space so it looks intentional, not packed. Style with rolled towels ($20–$50 for quality sets), a plant or two ($10–$30), and one decorative object. Budget: $100–$200 total for shelving and thoughtful styling.

    Pro tip: Leave the middle shelf slightly empty to break up visual weight.

    You’ve suddenly created extra storage and a focal point that looks like you actually designed your bathroom.

    27. Switch to a Wall-Mounted Toilet for Modern Simplicity

    Wall-mounted toilets make bathrooms read as contemporary and intentional—they create visual space and simplify cleaning by eliminating the base ring.

    A wall-mounted toilet costs $400–$1,500 plus $1,000–$2,500 in professional plumbing and installation (this is not a DIY project). It requires in-wall plumbing work, so it’s best for renovations or major updates. For renters or smaller budgets, this may not be feasible—but if you’re already renovating, it’s worth the investment.

    Pro tip: Pair it with a bidet toilet seat ($200–$400) for added luxury and functionality.

    Your floor opens up visually, and your bathroom instantly feels more designed and modern.


    Save this guide and try one idea this weekend—whether it’s swapping a faucet, adding plants, or painting an accent wall. Small changes add up fast, and your bathroom absolutely deserves to feel like a retreat.

  • 28 Bathroom Inspo Ideas That Upgrade Your Home Instantly

    28 Bathroom Inspo Ideas That Upgrade Your Home Instantly

    Your bathroom doesn’t need a six-figure renovation to feel like a retreat. Whether you’re renting, working with a tight budget, or just ready to refresh your space, small upgrades can completely change how you feel when you step inside. We’ve gathered 28 realistic, actionable ideas—from zero-dollar styling tweaks to smart investments—that work in any size bathroom and fit any budget. You’ll find DIY projects you can knock out in an afternoon, simple swaps that take 15 minutes, and statement pieces that are worth every penny. Let’s dig in and find the ideas that fit your space and your style.

    1. Paint Your Walls a Soft, Light Shade

    A fresh coat of paint is one of the fastest ways to shift how a bathroom feels. Light, soft colors—think pale green, warm gray, creamy white, or dusty blue—make even tiny bathrooms feel open and calm. You don’t need to hire a pro; most people can paint a small bathroom in one afternoon with basic supplies.

    Head to Home Depot or Sherwin-Williams to grab a gallon of paint ($25–$45) and basic roller supplies. Choose a moisture-resistant bathroom paint formula to prevent peeling. Prep is simple: clear the space, tape trim, and roll on two coats. Most bathrooms are done in 4–6 hours, plus drying time.

    Pro tip: If you rent, ask your landlord about temporary paint or primer-stain blocker—you might be surprised. When you paint with a calming color, your whole routine feels less rushed and more intentional.

    2. Upgrade Your Shower Head to a Rain Head

    A rain head shower is one of those upgrades that feels like a luxury but costs surprisingly little. Instead of a narrow stream, water flows in a gentle sheet that makes every shower feel more indulgent—and it actually uses less water than traditional shower heads.

    Hansgrohe and similar brands offer quality rain heads for $40–$120. Installation is simple: unscrew your old head, screw on the new one (no tools needed for most models). If you rent, this is a perfect upgrade because you can unscrew it and take it with you. Your showers become longer, more relaxing, and your water bill might even drop.

    Pro tip: Pair it with a thermostatic valve to keep water temperature steady even when someone flushes elsewhere. This small change makes daily showers feel like a retreat.

    3. Add Floating Shelves for Storage That Doesn’t Eat Floor Space

    Floating shelves solve two problems at once: they give you storage without cluttering the counter, and they’re dead simple to install. They look clean, photograph beautifully, and work in rentals if you patch holes when you leave.

    Buy a basic set from IKEA ($15–$30 per shelf) or splurge on wood shelves from a local woodworker ($50–$100 each). Mark studs in your wall, screw in brackets, and slide shelves on. Total time: 30 minutes for three shelves. Roll towels, stack small plants, arrange bottles—suddenly your bathroom looks intentional and spacious.

    Pro tip: Use the shelves to display items you actually use, not just decorative things. Rolled towels, a small plant, and a nice soap dispenser look way better than clutter. This instantly makes your space feel both organized and calm.

    4. Swap Out Your Vanity Mirror for Something with Built-in Lighting

    Bathroom lighting makes a huge difference in how you look and feel. A mirror with built-in LED lighting gives you flattering light without harsh shadows—and it works as both task lighting and ambient light.

    LED mirrors range from $80–$300 depending on size and features. Look for models from brands like Rejuvenation or Amazon Basics that offer dimming options. Most plug into a standard outlet and come with simple wall-mount hardware. Installation takes 20 minutes and requires basic mounting skills.

    Pro tip: Choose warm-tone LED (around 3000K) rather than cool white—it’s gentler on your face early in the morning. You’ll actually want to look in the mirror now, and your whole routine feels better lit.

    5. Introduce a Low-Cost Water-Saving Showerhead

    Water-saving showerheads use 2 gallons per minute instead of the standard 2.5–5 GPM—and you honestly won’t notice the difference in pressure. This is one upgrade where you save money and help the planet at the same time.

    Pick up a WaterSense-certified head from Home Depot for $15–$40. Unscrew your old one, screw on the new one (seriously, one minute). Over a year, your water bill drops noticeably, especially if multiple people shower in your home.

    Pro tip: Combine this with a short timer or a music playlist to keep showers under 10 minutes. Small switches add up fast, and now your bathroom choices reflect your values.

    6. Roll and Display Your Towels Like a Hotel

    This sounds silly, but how you display towels changes how a bathroom feels. Rolled towels look intentional, spa-like, and take up less visual clutter than draped or stacked flat towels. It’s free and takes five minutes.

    Grab your towel collection, roll each one tightly starting from one short end, and stack them on a shelf, in a basket, or on a towel rack. Use white, cream, or neutral colors for a cohesive look. Group by size if you have variety—bath towels separate from hand towels.

    Pro tip: Rotate fresh towels to the top so you’re always using clean ones first. This small styling change makes your bathroom feel more organized and retreat-like without spending a dime.

    7. Paint Your Bathroom Cabinets for a Custom Look

    Painting your cabinets is a bigger project than a wall, but costs way less than replacing them—and the payoff is huge. That old builder-grade vanity suddenly looks custom and intentional.

    Choose a semi-gloss or satin-finish bathroom paint ($30–$50 per gallon), lightly sand your cabinets, apply primer, then two coats of paint. Swap out hardware if budget allows ($20–$60 for new pulls and knobs). Total time: one weekend project with drying time between coats.

    Pro tip: Go bold if you’re feeling brave—sage green, deep blue, even black looks amazing in bathrooms. If you rent, skip this, but if you own, this refresh costs under $150 and transforms your whole space.

    8. Add a Bathroom Accent Wall with Removable Wallpaper

    Removable wallpaper lets you add pattern and personality without the commitment or damage. Peel it off when you move or get tired of it—no landlord drama, no regret.

    Brands like Spoonflower and Tempaper offer thousands of designs for $20–$50 per roll. Measure your wall, order enough, and apply it to a clean, dry surface (watch a two-minute YouTube tutorial first). Takes about an hour for one accent wall, and the impact is immediate.

    Pro tip: Choose one smaller wall—behind the toilet, above the vanity, or one side of the shower—so it feels intentional, not overwhelming. Pattern adds movement and makes the space feel more curated.

    9. Install a Moisture-Fighting Exhaust Fan Upgrade

    Bathrooms are moist. That moisture leads to mold, peeling paint, and that stale smell. A good exhaust fan is one of the smartest investments you can make—and many basic ones are terrible.

    Upgrade to a humidity-sensing fan ($60–$150) that runs automatically when moisture spikes. Brands like Panasonic make quiet, efficient models. If you’re handy, you can install it yourself; otherwise, hire an electrician ($150–$300 for installation). Run it during and for 20 minutes after every shower.

    Pro tip: If you rent, at least open a window during showers and crack the door after to let steam escape. Proper ventilation keeps your bathroom fresher and prevents so many hidden problems.

    10. Swap Plastic Organizers for Natural Wood or Woven Storage

    Plastic organizers work, but they look utilitarian and feel cheap. Natural materials like wood, rattan, and jute are warmer, more durable, and make your bathroom look more intentional.

    Grab woven baskets from IKEA ($5–$20 each), wooden caddies from Target ($8–$25), or upgrade to artisan pieces from small shops ($30–$80 each). Use them to corral hair tools, makeup, cleaning supplies, and daily essentials. The visual payoff is huge—suddenly your bathroom looks styled instead of stocked.

    Pro tip: Label small baskets so everyone in your home knows where things go. This works for renters and owners, and you can take the organizers with you when you move.

    11. Install Soft, Layered Lighting for Different Moods

    Flat overhead lighting is harsh and unflattering. Layered lighting—task light, ambient light, and accent light—makes your bathroom feel spa-like and lets you adjust mood depending on the time of day.

    Add sconces beside your mirror ($30–$100 per fixture), replace overhead lights with dimmable options ($20–$60 per bulb), and consider subtle accent lighting under shelves or behind mirrors ($25–$80 for strip lights). Most of this is DIY if you’re comfortable with basic electrical work.

    Pro tip: Use warm white bulbs (2700K–3000K) for relaxing vibes and cooler white (4000K+) for morning energy. This simple change makes your bathroom feel like a luxury hotel instead of a generic space.

    12. Declutter Your Counter by Moving Daily Items to a Caddy

    Your bathroom counter is prime real estate. When it’s covered in bottles and jars, the whole space feels cramped. A caddy holds everything you need while keeping your counter calm and open.

    Grab a shower caddy ($15–$30) or a sleek counter caddy from a design brand ($25–$50). Gather your daily-use items—toothbrush, face wash, deodorant, medications—and contain them. Everything else lives in drawers or cabinets.

    Pro tip: Use your caddy as a reminder to declutter: if something doesn’t fit, it doesn’t belong on the counter. A clear counter makes the space feel bigger and more peaceful, and your morning routine feels less chaotic.

    13. Add a Statement Freestanding Tub (If Space Allows)

    If you have even moderate bathroom space, a freestanding tub becomes an instant focal point and a reason to relax. It’s an investment, but the ROI in how you feel is real.

    Affordable freestanding tubs start around $400–$800 from brands like Wayfair and Amazon. High-end options run $1,500–$5,000+. Installation requires plumbing work ($500–$2,000), so budget accordingly. This isn’t a quick weekend project, but it completely shifts how you use your bathroom.

    Pro tip: Even if your space is tiny, a small soaking tub ($300–$600) fits in tight spots and gives you that spa feeling. Fill it once a week and suddenly self-care isn’t a luxury—it’s part of your routine.

    14. Switch to Quality Hand Soap and a Nice Dispenser

    This sounds basic, but quality soap and a nice dispenser change how your bathroom smells and feels every single day. It’s a small luxury that costs almost nothing and affects your mood multiple times a day.

    Grab a beautiful dispenser from Target or West Elm ($8–$25) and fill it with quality hand soap from brands like Aesop or Mrs. Meyer’s ($10–$20 per bottle). Every time you wash your hands, your bathroom smells intentional and you feel a little more cared for.

    Pro tip: Match your dispenser to your bathroom’s aesthetic—marble, ceramic, glass, or brass all signal different vibes. This tiny detail makes guests notice your space is thoughtfully put together.

    15. Add a Heated Towel Rack for Luxury That Pays Off

    A heated towel rack dries towels between uses and eliminates that damp towel smell—plus stepping out of a shower to a warm towel feels legitimately luxurious. They’re more affordable than you’d think.

    Entry-level electric towel racks run $60–$150 from brands like Wayfair and Amazon. Plug-in models need no wiring; hardwired versions require an electrician ($200–$400 for installation). Turn it on 20 minutes before your shower and you’ll never go back to cold, damp towels.

    Pro tip: This especially helps if multiple people shower—everyone gets a dry, warm towel. It’s an investment that lasts years and becomes a non-negotiable part of your routine.

    16. Use Strategic Mirrors to Make the Space Feel Bigger

    Mirrors multiply light and make spaces feel bigger—especially in small bathrooms. Strategic mirror placement is free if you already have mirrors, or super cheap if you need to buy.

    If your bathroom has one small mirror, add a second mirror on the opposite wall ($20–$60 for a basic frame) or lean a large mirror against a wall ($30–$100). Position mirrors to reflect natural light or your best lighting fixture. This instantly makes your space feel airier.

    Pro tip: Avoid facing mirrors directly at each other—it can feel disorienting. Instead, angle them to reflect light and create visual depth. Your bathroom suddenly feels bigger without any structural changes.

    17. Switch to a Soft-Close Toilet Seat and Lid

    A soft-close toilet seat eliminates that loud slam that echoes through your whole home—plus it signals that your bathroom is well-maintained and thoughtful. It’s such a small upgrade but makes a big difference in daily quality of life.

    Soft-close seats run $40–$100 from Home Depot or Amazon. Installation is simple: unbolt the old seat, bolt on the new one (10 minutes). This is renter-friendly if you save your old seat.

    Pro tip: This is one of those upgrades that seems like overkill until you experience it, then you can’t imagine going back. No slamming at night, no accidental kid drama—just a gentle, quiet close. Small details matter.

    18. Create a Spa-Like Vibe with Bath Salts and a Candle Display

    You don’t need expensive renovations to create a spa vibe. Bath salts, quality candles, and simple plant styling cost almost nothing and completely shift your bathroom’s atmosphere.

    Grab bath salts ($10–$20 per jar), soy candles ($12–$25 each), and a small potted plant like eucalyptus or snake plant ($5–$15). Arrange them on a shelf or caddy. Light the candle during your bath and suddenly you’re in a spa, not just your bathroom.

    Pro tip: Keep the styling minimal—too many items look cluttered. One beautiful candle, one jar of salts, and one plant is perfect. Your guests will notice, and you’ll feel like you’re taking better care of yourself.

    19. Upgrade Your Shower Curtain (Or Ditch It for Glass)

    A basic plastic shower curtain looks cheap, and glass doors look modern and clean. If you have the budget, glass is worth it; if not, a quality fabric curtain is the next best thing.

    Frameless glass shower doors run $600–$2,000+ installed (requires plumbing work). Budget option: a heavy-duty fabric curtain liner ($15–$30) inside a nice curtain ($25–$60). Fabric feels more spa-like than plastic and lasts longer.

    Pro tip: Wash your curtain monthly and hang it to dry fully to prevent mildew. This small maintenance habit keeps your bathroom looking fresh and clean without extra effort.

    20. Install Smart Lighting That Adjusts to Your Schedule

    Smart bulbs or switches let you adjust brightness and color temperature without getting out of bed. Morning showers get bright, energizing light; evening routines get warm, relaxing light.

    Smart bulbs like Philips Hue or LIFX cost $15–$50 each; smart switches run $25–$60. They pair with your phone or voice assistant. Set routines so your bathroom lights gradually brighten when you wake up or dim in the evening. This isn’t necessary, but once you use it, you’ll wonder how you lived without it.

    Pro tip: This works especially well if your bathroom has no natural light. Bright light in the morning helps your circadian rhythm, and warm light at night supports better sleep.

    21. Add Storage Under the Sink with Pull-Out Drawers or Baskets

    The space under your sink is valuable real estate—but it’s often wasted or chaotic. Pull-out drawers or baskets make it actually functional and accessible.

    Grab pull-out organizers from IKEA or Amazon ($15–$40 each). Install them under your sink to hold cleaning supplies, extra toilet paper, hair tools, and overflow items. Everything is visible and easy to grab.

    Pro tip: Use small bins inside the drawers to keep like items together—hair tools in one, extra soaps in another, cleaning supplies in a third. This system keeps things from getting messy and helps everyone in your home find what they need.

    22. Paint Your Bathroom Door a Bold Accent Color

    Your bathroom door is a blank canvas that nobody thinks to paint. A bold color makes an impact before anyone even enters—and it costs about $25 for paint and an hour of your time.

    Grab a pint of bold paint (forest green, navy, charcoal, even black looks amazing) for $10–$20. Paint your door (not your door frame, just the door itself). Do it while the bathroom is unused, and refresh if it chips.

    Pro tip: This is a renter’s secret weapon—when you move, paint it back white or neutral. Guests notice bold bathroom doors immediately, and it signals that your space is thoughtfully designed, not just default.

    23. Switch to a Water-Resistant, Low-Maintenance Flooring

    Bathroom floors get wet, and wet floors lead to slipping, mold, and maintenance headaches. Upgrading to low-maintenance, water-resistant flooring is one of the smartest long-term investments.

    Large-format ceramic or porcelain tiles ($3–$8 per square foot) installed by a pro ($2,000–$4,000+ for a full bathroom) last decades and resist water. Budget option: peel-and-stick vinyl tiles ($1–$3 per square foot) that you can install yourself.

    Pro tip: Choose light colors with matte finishes for safety (less slippery than polished). Proper grout sealing every 2–3 years keeps moisture out. This upgrade prevents so many future problems.

    24. Add a Small Rug for Warmth and Texture

    A quality bathroom rug feels amazing under your feet and adds warmth to a space. It also reduces water splashes and is way cheaper than constantly replacing grout and tile.

    Grab a plush bathroom rug from Target or Wayfair ($20–$50) in a neutral color that hides water spots. Wash it monthly on gentle cycle and air dry to prevent mildew. Choose a non-slip backing so it stays put on wet floors.

    Pro tip: A rug that actually absorbs water and dries fast (microfiber or cotton) beats thin, cheap rugs. This one detail makes your bathroom feel more like a hotel and more like a space you care about.

    25. Install a Smart Toilet with Bidet Features

    Smart toilets with built-in bidet, heated seats, and deodorizers feel like a luxury from the future—and they actually reduce your paper use and improve hygiene. It sounds extreme until you try one.

    Smart toilet seats start around $150–$400; full smart toilets run $600–$3,000+. Brands like Toto and Kohler are reliable. Installation usually requires plumbing adjustments ($200–$500). This is a “once you go smart, you don’t go back” upgrade.

    Pro tip: If a full smart toilet is too much, consider a smart bidet toilet seat ($150–$300) that fits on your existing toilet. Same hygiene benefits, way less plumbing work.

    26. Display Interesting Bathroom Books and Decor on Floating Shelves

    The books and objects you display in your bathroom say something about you. Thoughtfully curated pieces on open shelves create personality without clutter.

    Grab 2–3 beautiful bathroom or design coffee table books ($20–$40 each), a small ceramic piece or vase ($15–$40), and a small plant. Arrange them with some breathing room—don’t cram things together. Stack books horizontally with one or two standing upright.

    Pro tip: Choose books with covers you actually like looking at. This isn’t about reading; it’s about creating visual interest. Your bathroom becomes a reflection of your taste, and guests definitely notice.

    27. Upgrade Your Shower Caulk and Grout for a Fresh Look

    Old, moldy caulk and grout make your whole bathroom look dingy—even if everything else is clean. Fresh caulk is one of the cheapest updates that has outsized impact.

    Remove old caulk with a caulk removal tool ($5), clean the gap thoroughly, apply new 100% silicone caulk ($8–$15), and let it cure for 24 hours. For grout between tiles, use a grout sealer ($15–$30) to prevent staining. Total cost under $40, but the visual payoff is huge.

    Pro tip: Use white or neutral caulk that matches your tiles. Once you recaulk, you’ll notice how old, dark caulk makes bathrooms look older than they actually are. Crisp caulk makes your bathroom look maintained and intentional.

    28. Create a Luxury Shower Routine with Quality Shower Products

    Your shower is a place where you spend 15–20 minutes every single day. Using quality products makes that time feel like self-care instead of just getting clean.

    Invest in a few good products from brands like Aesop, K18, or even better, local makers ($15–$50 per product). Add a scrub, a hair mask, and maybe a shower oil ($12–$35 each). When you shower with products that smell incredible and feel luxurious, your whole mood shifts.

    Pro tip: Store bottles on a simple shower caddy and use a squeegee to keep everything dry between uses. Quality doesn’t mean expensive; it means things that actually make you feel better. Now your morning shower becomes something you look forward to instead of just checking off your list.


    Save this post and pick one idea to tackle this weekend. Even one small change shifts how your bathroom feels, and when your bathroom feels good, everything else feels better too. Which idea are you trying first?

  • 27 Spa-Style Bathroom Decor Ideas for Daily Relaxation

    27 Spa-Style Bathroom Decor Ideas for Daily Relaxation


    Introduction

    Your bathroom should be the one place in your home where you genuinely want to linger—not rush through. Whether you’re dealing with a cramped apartment bathroom or just craving that resort-like escape, you don’t need a full renovation to make it happen. The best part? Most of these ideas work on any budget, and many take less than an afternoon to implement. We’ve gathered 27 achievable spa-style touches that transform even the most ordinary bathroom into a personal retreat. From lighting tweaks and sustainable upgrades to smart storage and wellness features, you’ll find something that fits your space, your lifestyle, and your wallet. Let’s turn your daily routine into something you actually look forward to.


    1. Layer Your Lighting for Mood Control

    Lighting makes or breaks a spa atmosphere, and most bathrooms rely on one harsh overhead fixture that feels more hospital than haven. Installing layered lighting gives you control over your mood, whether you’re rushing through a morning routine or soaking in relaxation mode.

    Start with a dimmer switch on your main light ($15-$30 at any hardware store, 30 minutes to install if you’re comfortable with basic wiring—or hire an electrician for $75-$150). Add warm LED bulbs rated at 2700K ($8-$15 for a pack) around your vanity mirror to soften shadows on your face. Finish with accent lighting: a small wall sconce ($40-$100) or even battery-operated candle-style lights ($10-$20) for zero-commitment ambiance.

    Pro tip: Skip the cool white (5000K) bulbs entirely—they make everyone look tired and feel clinical. Warm light is your secret weapon.

    Now your bathroom adapts to your needs, and you’ll actually want to spend time in there even when you’re not bathing.


    2. Swap in Low-Flow Showerheads Without Sacrificing Pressure

    You’ve heard the environmental pitch, but here’s what matters: low-flow showerheads can cut your water bill by 25-30% while still delivering that satisfying spray. The old models felt wimpy, but today’s versions actually perform better than standard fixtures.

    Brands like Hansgrohe Raindance, Moen Spot Resist, or even budget-friendly Delta ($30-$80) provide full pressure while using 1.5 gallons per minute instead of the standard 2.5. Installation is genuinely DIY—unscrew the old head, wrap the threads with plumber’s tape, and screw the new one on (5 minutes, no tools needed beyond what you have in a junk drawer).

    The catch? Confirm your water pressure first. If you have low pressure already, choose a model designed for that. Most modern showerheads adapt well.

    You’ll see the savings on your water bill immediately, plus you get that luxe rainfall effect renters love because it leaves zero permanent marks on your walls.


    3. Add a Rainfall Showerhead for Instant Spa Vibes

    Rainfall showerheads aren’t just pretty—they’re the fastest way to make your shower feel like a spa without renovating your entire bathroom. The gentler cascade feels luxe compared to traditional nozzles.

    A quality rainfall head costs $40-$100 on Amazon or Home Depot, and installation takes 10 minutes if you have basic plumbing skills (or 15 minutes with YouTube as your guide). You might need an adjustable shower arm ($20-$40) to position it correctly. Pair it with a handheld wand ($25-$50) for flexibility—this combo gives you the best of both worlds.

    Budget option: AmazonBasics or similar brands ($20-$30) deliver 80% of the luxury feel for half the cost. They won’t last 20 years, but they’re perfectly functional for 5-7 years.

    The difference is noticeable the first time you step under it—suddenly your shower feels intentional and restorative instead of utilitarian.


    4. Paint Walls in Soft, Grounding Neutrals

    Color psychology is real: bold jewel tones energize, but soft neutrals create the calm your nervous system craves. Earthy, muted tones make your bathroom feel larger and more serene.

    Choose taupe, warm gray, soft sage, or creamy off-white—colors that sit between beige and gray rather than pure white. Brands like Sherwin-Williams (Urbane Bronze, Accessible Beige) or Benjamin Moore (Revere Pewter, Hale Navy in a super-light tint) run $30-$45 per gallon. One gallon typically covers a standard bathroom, and the work is a weekend DIY project.

    Pro tip: Buy a sample quart first ($8-$12) and paint it on all four walls to see how it looks at different times of day—natural light changes everything.

    Paint is the cheapest way to reset your space, and suddenly that tired, dated bathroom looks intentional and curated rather than neglected.


    5. Introduce Reclaimed Wood Accents for Warmth

    Reclaimed wood brings organic texture to a room that’s often all hard surfaces and tile. It softens the space, adds visual warmth, and tells a story—especially when you’re working with limited square footage.

    Source reclaimed wood from local salvage yards, Etsy shops ($40-$150 for small pieces), or even Facebook Marketplace for DIY projects. Use it for a floating shelf above the toilet ($60-$120 material + installation), a vanity top ($150-$400 installed), or even frame a mirror. If true reclaimed is pricey, distressed wood-look laminate ($20-$40 per sheet) gives 90% of the aesthetic for a fraction of the cost.

    Fair warning: Real reclaimed wood requires sealing ($20-$40 for sealant, 2 hours work) and occasional care. The laminate version? Wipe-clean forever.

    Your bathroom immediately feels less sterile—that natural grain and weathered patina create a spa lodge vibe no tile can replicate.


    6. Install Floating Vanities for Visual Space

    Floating vanities are the secret to making small bathrooms feel bigger. By lifting the vanity off the ground, you create visual flow and an easier-to-clean floor. It’s both functional and aesthetically premium.

    Stock options from IKEA, Wayfair, or Target ($150-$400) come with mounting hardware and installation guides. If you’re handy, you can install one yourself using wall studs and heavy-duty brackets ($100-$150 hardware). Rent-friendly option: peel-and-stick wall-mounted shelves ($30-$80) give you the look without drilling into walls.

    Installation takes 1-2 hours if you’re drilling into studs, or 30 minutes if you’re using adhesive options. The payoff is immediate: your bathroom feels modern and breathing-room-y instead of cramped.

    Plus, cleaning the floor becomes genuinely easy for the first time in years—you can actually reach beneath the vanity.


    7. Install a Double Vanity (Or Mimic One With Floating Shelves)

    If you share your bathroom or just crave morning counter space, a double vanity eliminates the toothbrush collision chaos. If space is tight, floating shelves with two small sinks create the same vibe.

    Full vanity installation ($400-$1,200 installed) works best in renovations. For renters or tight budgets, mount two narrow floating shelves ($50-$100 total) with two compact pedestal or wall-mounted sinks ($100-$200 each). This combo costs $250-$400 and takes a weekend if you’re comfortable with basic drilling.

    Budget hack: Two inexpensive white ceramic vessel sinks ($40-$80 each) mounted on a single long shelf ($30-$50) still looks intentional and spa-like.

    The best part? No more “is that your toothpaste cap?” moments, and each person has their own dedicated corner to feel calm and unhurried.


    8. Add Heated Floors for Morning Comfort

    Heated floors are a small luxury that transforms your morning routine from “ugh, cold tile” to “I actually want to stand here.” It’s the wellness upgrade that pays dividends year-round.

    Electric heated floor mats ($40-$80) plug in and sit under your existing bath mat—instant, no installation. Professionally installed radiant heating ($800-$2,500 for a full bathroom) is pricier but permanent and worth it if you’re renovating. Mid-range: adhesive-backed electric heating tape ($150-$300) goes under new tile or existing floors with minimal disruption.

    For renters, the plug-in mat is your friend. For homeowners planning a tile refresh, radiant heat is the moment to invest.

    Your feet never touch cold tile again, and this small comfort signals to your brain that this space is special and worth savoring.


    9. Hang Oversized Mirrors to Reflect Light

    Mirrors are the bathroom’s best-kept design secret—they bounce light, make spaces feel bigger, and can become a design focal point if you choose the right one. An oversized mirror transforms a cramped bathroom into something breathable.

    Frameless mirrors ($40-$150) create the most open feeling. Metal-framed options ($60-$200) add personality. Mount it as one large statement piece centered above your vanity, or go salon-style with three or four smaller mirrors ($80-$200 total). Installation is straightforward adhesive or wall-mounted hardware (30 minutes).

    Pro tip: Hang your mirror slightly above eye level to reflect ceiling and upper walls—this tricks the brain into perceiving more vertical space.

    Suddenly your bathroom looks less like a box and more like a deliberate space. The light bouncing around gives you better vanity lighting too, as a bonus.


    10. Switch to Eco-Friendly, Low-Waste Products

    Spa bathrooms feel calming partly because they’re clutter-free, and eco-friendly products help you achieve this while reducing waste. You’re not just tidying—you’re aligning your space with your values.

    Swap liquid soaps and shampoos for solid bars ($6-$15 each, last 2-3x longer), choose bamboo toothbrushes ($3-$8), and invest in refillable glass or metal containers ($15-$30 each). These aren’t more expensive long-term—they’re cheaper and eliminate the visual chaos of plastic bottles.

    Brands like Unwrapped Life, EarthHero, or even Target’s Good & Gather line stock these guilt-free. Over one year, a family of four saves roughly $100-$200 by switching to solid products.

    Your bathroom looks intentionally curated rather than like a convenience store shelf, and every morning you’re reminded that you’re making conscious choices.


    11. Install Dimmer Switches on Vanity Mirrors

    Your vanity lighting should adapt to your needs—bright enough for makeup or shaving, but soft enough for calming evening wind-downs. A dimmer gives you both without rewiring your entire bathroom.

    LED vanity mirror bulbs with built-in dimmers ($30-$60) screw into existing fixtures. Install a dimmer switch on your wall outlet ($15-$30) if you’re plugging in a mirror light. Hardwired installation ($50-$150 labor) takes an electrician 30 minutes.

    Budget option: Stick-on LED strips with remote control ($20-$40) mount directly on your existing mirror frame—zero installation, renter-approved.

    Now your mirror becomes a tool, not just a fixture. Bright for detail work, soft for self-care rituals, and your brain shifts gears accordingly.


    12. Create a Dedicated Shelf for Bath Rituals

    Spa-like spaces have intentional styling, and a dedicated ritual shelf signals to your brain that this bathroom time is sacred. It’s both functional and psychological.

    Mount a floating wooden shelf ($30-$60) above your toilet or beside your tub. Stock it with rolled towels ($20-$40 for soft ones), unscented candles ($8-$15), a small succulent or potted plant ($5-$20), and your favorite bath products. Keep it minimal—three to five items, not a cluttered display.

    Pro tip: Use matching glass or ceramic containers ($10-$30 total) for cotton balls, bath salts, or bath bombs. This unified look feels intentional and prevents visual chaos.

    Your pre-bath ritual becomes a moment—you walk in, see your curated shelf, and signal to yourself: this is my time, not rush time.


    13. Add Live Plants for Natural Air Purification

    Plants do double duty: they purify the air and bring the spa-retreat feeling indoors. Bathrooms are perfect for plants because humidity keeps them thriving, and greenery softens the hard bathroom aesthetic.

    Choose low-light tolerant plants: pothos, snake plants, ZZ plants ($5-$25 each). Bathrooms without windows? Artificial silk plants ($10-$30) look surprisingly realistic these days and require zero care. Water and humidity from your shower actually help real plants, so placement near the tub or shower is ideal.

    Styling tip: Cluster three plants at varying heights on shelves or windowsills for visual interest without clutter.

    Your bathroom suddenly smells fresher, looks less sterile, and creates the psychological effect of being in nature—even if you’re in an apartment bathroom with no window.


    14. Install Smart Lighting for Voice Control

    Smart lighting isn’t just gimmicky—it’s genuinely useful for creating spa ambiance without fumbling for switches. Voice control feels luxe, and programmable routines simplify your morning.

    Smart LED bulbs ($15-$30 each) work with Alexa, Google Home, or Apple HomeKit. Set up routines: “Alexa, spa mode” dims lights to 40%, sets color temperature to warm, and triggers calming music. Installation is as simple as screwing in bulbs (zero wiring needed).

    Starter setup costs $80-$150 for two smart bulbs plus a speaker you might already own. Expand gradually as your budget allows.

    Renter note: These work in any fixture and move with you when you relocate.

    Your morning routine becomes customized to you, and the bathroom adapts to your mood instead of blasting the same harsh light every time.


    15. Create a Rainfall Effect with Ceiling-Mounted Showerheads

    Ceiling-mounted rainfall showerheads create the ultimate spa experience—water rains down from above like you’re standing under a waterfall. It’s the upgrade that justifies skipping lattes.

    Ceiling-mount kits with showerhead ($80-$200) require plumbing access but aren’t as complex as they sound. Professional installation runs $300-$600. For renters or budget constraints, wall-mounted rainfall heads angled downward ($40-$80) deliver 90% of the feeling for 20% of the cost.

    DIY difficulty: Moderate for wall-mount (1-2 hours), complex for ceiling-mount (hire a plumber). Time frame: 2-4 hours professional, or a weekend if you’re tackling it yourself.

    The moment you step under a rainfall showerhead, your stress literally melts. That’s not exaggeration—it’s one of the fastest ways to signal luxury to your nervous system.


    16. Layer Soft Textures with Premium Towels and Rugs

    Luxury bathrooms aren’t just about aesthetics—they’re about what your skin touches. Soft, high-quality towels and rugs create tactile comfort that screams self-care.

    Invest in Turkish cotton or Egyptian cotton towels in white or neutral ($20-$50 per towel, though starter sets cost $60-$120). A plush bath mat ($25-$60) should feel substantial and absorbent. You don’t need dozens—three quality towels beat twelve thin ones.

    Budget option: Target’s Threshold or Opalhouse lines ($15-$30) offer excellent quality for the price. Skip dollar-store towels, which feel terrible and pill immediately.

    Styling: Fold or roll towels neatly and store them on open shelving or a ladder rack. This visual organization adds to the spa feeling.

    Every time you wrap yourself in a soft towel, your body registers comfort and care. That sensory input creates the spa experience far more than any decoration.


    17. Introduce Sustainable Bamboo Storage Solutions

    Sustainable storage isn’t just good for the planet—it looks intentional and spa-like. Bamboo is durable, warm, and fits any aesthetic.

    Bamboo storage boxes ($20-$50), drawer organizers ($15-$35), shelf risers ($10-$25), and soap dispensers ($8-$15) let you declutter while upgrading your decor. Mix these with rattan baskets ($15-$40) for visual texture. One complete setup costs $100-$200 and eliminates visible clutter instantly.

    Pro tip: Choose natural or light bamboo finishes to keep the space feeling airy and spa-like (avoid dark stains).

    Your counter transforms from cluttered chaos to curated calm, and your brain registers the shift immediately. Plus, everything has a home, so your morning routine becomes simpler.


    18. Mount Shelving to Free Up Counter Space

    Open shelving sounds risky if your bathroom is small, but floating shelves mounted high on walls create the illusion of space rather than crowding it. They’re about smart placement, not just stacking stuff.

    Simple floating shelves ($20-$50 each) mount easily with a stud finder and level (30 minutes). Install them above the toilet (standard placement) or above the vanity as a backdrop. One shelf holds rolled towels and plants; don’t overstuff.

    Styling rule: Keep only three to five items per shelf. White or light wood shelves recede visually, making the room feel bigger. Dark shelves ground the space (use for accent).

    Your counter clears, your visual field opens, and your bathroom feels less like a storage closet and more like an intentional retreat.


    19. Use Pebble or Stone Tiles for Texture and Grip

    Pebble or stone tiles add natural texture, visual interest, and safety (better grip than smooth tile). They’re especially great in showers, where slip hazards are real.

    Pebble tile sheets ($15-$30 per square foot, installed by a pro for $5-$15 per sq ft) work on shower floors and lower walls. If full tile replacement isn’t in the budget, pebble-textured bath mat ($25-$50) mimics the look and provides grip without renovation.

    Installation: A tiler completes this in 4-6 hours ($200-$400 labor). For renters, stick with the bath mat option.

    Your shower instantly feels more like a spa resort and less like an apartment bathroom. The texture is practical (gripping power in a wet shower) and beautiful.


    20. Curate a Minimalist Medicine Cabinet

    A cluttered medicine cabinet stresses your nervous system every time you open it. A curated, minimalist version—even if it holds the same items—feels intentional and calm.

    Sort your bathroom products and donate or toss anything expired, separated, or unused (1 hour). Transfer products to matching glass jars or containers ($2-$5 each, label with a label maker $10-$20). Keep only what you use weekly; store seasonal items elsewhere.

    Pro tip: Matching white or glass containers create visual unity and make your cabinet feel like a spa apothecary, not a medicine dumping ground.

    Your cabinet now looks like a design choice rather than chaos. Every morning, you’re greeted with intentionality instead of visual overwhelm.


    21. Add a Soaking Tub (Or Upgrade Your Existing Tub Ritual)

    A freestanding soaking tub is the ultimate spa centerpiece, but if that’s not realistic for your space or budget, elevating your existing tub ritual works just as well.

    Freestanding tubs cost $500-$3,000 and require plumbing access (install cost: $1,000-$3,000). For renters or renters’ budgets: soaking tub trays ($30-$60) that fit over your existing tub, bath pillows ($20-$40), and bath bombs or salts ($8-$20) create luxury without permanent changes.

    Create a ritual: Fill your tub, add Epsom salts ($8-$15), light candles, and commit to 20 minutes weekly. The act becomes meditation, not just hygiene.

    Whether you have a luxury soaking tub or a basic one, intention transforms the experience. Your nervous system registers the ritual as sacred time.


    22. Install Heated Towel Racks for Spa Luxury

    Warm towels feel like the ultimate luxury, and heated racks are more affordable than you’d think. They’re functional (drying towels, preventing mildew) and undeniably spa-like.

    Electric heated towel racks ($60-$200) mount to the wall and plug into an outlet (30 minutes installation). Hydronic heated racks ($400-$800) integrate with your heating system but are permanent and energy-efficient. For budget-conscious folks, heated towel warming bags ($20-$40) heat in the microwave and sit in your cabinet.

    Renter-friendly option: The warming bags, which move with you.

    Your post-shower ritual transforms from “cold towel shock” to “warm, cozy wrap”—a small detail that signals self-care daily.


    23. Design a Spa Color Palette Using Earth Tones

    A cohesive color palette is what separates “spa-like” from “random.” Earth tones—sage, taupe, warm gray, soft white—create visual harmony and psychological calm.

    Choose one primary wall color (soft sage, warm taupe), keep trim and larger surfaces neutral (white, light gray), and add two accent colors through accessories (warm wood, soft blue). This formula works whether you’re painting or just accessorizing.

    Paint costs $30-$45 per gallon; one gallon covers a standard bathroom. If painting isn’t an option, peel-and-stick wallpaper ($15-$35) in earth tones gives the same cohesion.

    Your bathroom suddenly looks intentional, rather than like different design decisions collided. The calm, cohesive palette is what actually makes spaces feel spa-like.


    24. Install a Frameless Glass Shower Enclosure

    Frameless glass showers are expensive but worth the investment if you own—they make bathrooms feel double the size and look undeniably upscale.

    Frameless glass enclosures cost $800-$2,500 installed (includes removal of old setup). Financially prohibitive? Semi-frameless options ($400-$800) offer similar aesthetics for less. Renters: glass adhesive-backed panels ($50-$150) create the illusion without permanent installation.

    The payoff: Your bathroom instantly feels more spacious and modern. Light flows freely, and the clean lines feel premium.

    If you’re renovating anyway, this investment justifies itself in the daily luxury feeling.


    25. Incorporate Natural Wood Elements Beyond Vanities

    Natural wood isn’t just for vanities—small wood accents throughout create warmth and cohesion. These are affordable ways to bring organic texture into a synthetic room.

    Add wooden bath caddies ($15-$40), wooden soap dispensers ($8-$20), wooden shelves ($30-$80), and wood-framed mirrors ($40-$150). Mix wood tones deliberately: light oak, medium walnut, or weathered gray—but stick with two tones max so it feels intentional rather than mismatched.

    These pieces are usually modular, so you can expand slowly as your budget allows.

    Suddenly your bathroom feels like a retreat cabin, not an apartment. That natural element humanizes the space in a way tile alone never can.


    26. Set Up Smart Storage with Drawer Dividers and Organizers

    Visible clutter kills spa vibes. Smart drawer dividers and organizers mean everything has a designated home, making your morning routine faster and your space calmer.

    Invest in expandable drawer dividers ($15-$30 per set), stackable containers ($20-$40 per set), and drawer organizer systems ($30-$50). One drawer typically takes 20 minutes to organize and transform.

    Pro tip: Label your containers ($5 for a label maker) so family members know where things go. This prevents “stuff pile” from reforming.

    Now when you open a drawer, you see organized calm instead of overwhelming chaos. Your brain registers control and ease rather than stress.


    27. Create a Daily Spa Ritual Routine (Free)

    The final piece? Making your spa bathroom part of your actual routine. A gorgeous space you don’t use isn’t a retreat—it’s just pretty.

    Commit to one 15-20 minute ritual weekly: a bath with salts, a slow shower with your new rainfall head, or a skincare routine at your vanity. Consistency matters more than perfection. Set a weekly alarm if you need it. Light your candle, put your phone in another room, and actually be present.

    The magic isn’t in spending money—it’s in using the space intentionally. Your nervous system learns that this time is sacred, and anticipation builds.

    Over two months, this ritual becomes something you crave instead of another task. Your bathroom becomes what it was meant to be: a personal retreat.


    SOFT CTA:

    Save this post and pick one idea to tackle this weekend—whether it’s swapping your lighting, adding plants, or simply lighting a candle and actually using your tub. Small changes stack up fast, and your bathroom deserves to feel like the retreat it could be.