Category: Entryway Decor

  • 23 Frosted Glass Door Ideas That Add Privacy & Soft Light

    23 Frosted Glass Door Ideas That Add Privacy & Soft Light


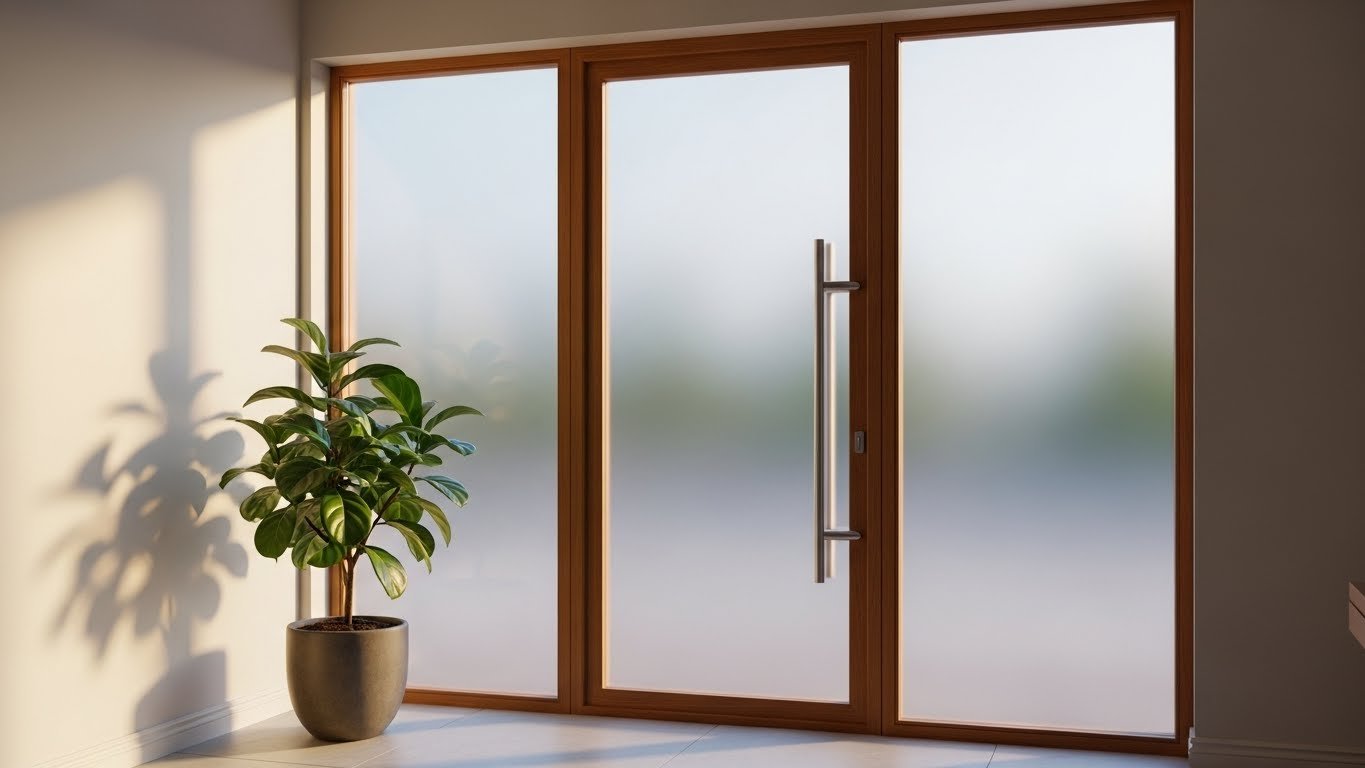
    Privacy doesn’t have to mean giving up natural light—and frosted glass doors prove it. Whether you’re looking to add a spa-like retreat to your bathroom, create separation in an open-concept home, or simply add visual interest to a plain entry, frosted glass offers that perfect balance. You get seclusion without the claustrophobic feel of solid doors. The best part? These ideas work whether you’re renting or own your space, and many cost less than you’d think. Ready to let soft light in while keeping prying eyes out? Here are 23 frosted glass door ideas that do both.


    1. Frosted Film on Existing Glass Doors

    Frosted film is the renter’s dream—no installation required, completely removable, and dramatically changes how light moves through your space. It’s one of the easiest privacy upgrades you can make.

    Brands like 3M Frosted Glass Film and Gila come in rolls you apply with just water and a squeegee. The process takes about 30 minutes per door and costs $15–$40. You smooth it onto existing glass, trim the excess, and you’re done. No tools, no landlord drama. The frosted effect diffuses light beautifully while keeping your view completely private. If you change your mind, peel it off cleanly—most quality films leave no residue.

    Pro tip: Apply film in horizontal strips if you want to maintain some view at eye level from the inside.

    Your door instantly becomes a soft light source instead of a see-through barrier, and guests can’t see directly into your space.


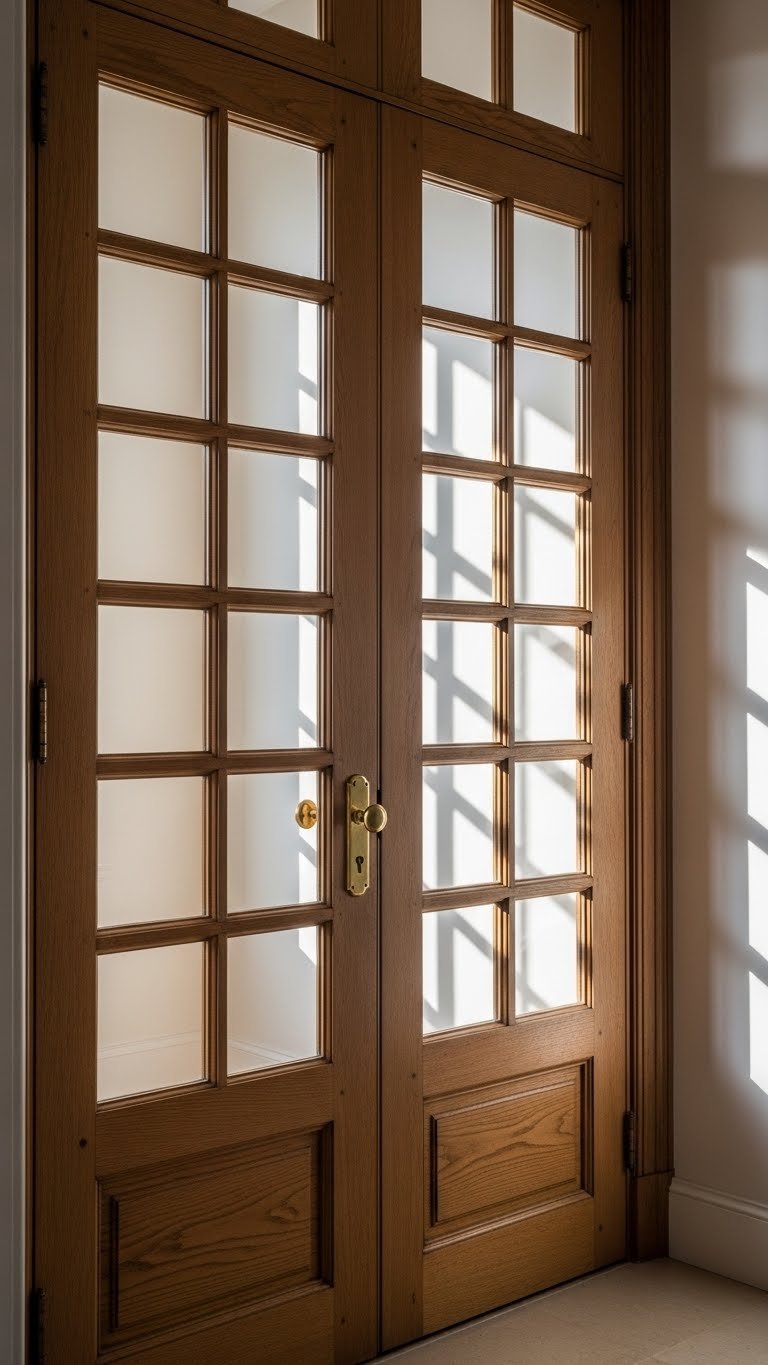
    2. Textured Frosted Glass as Bathroom Entry

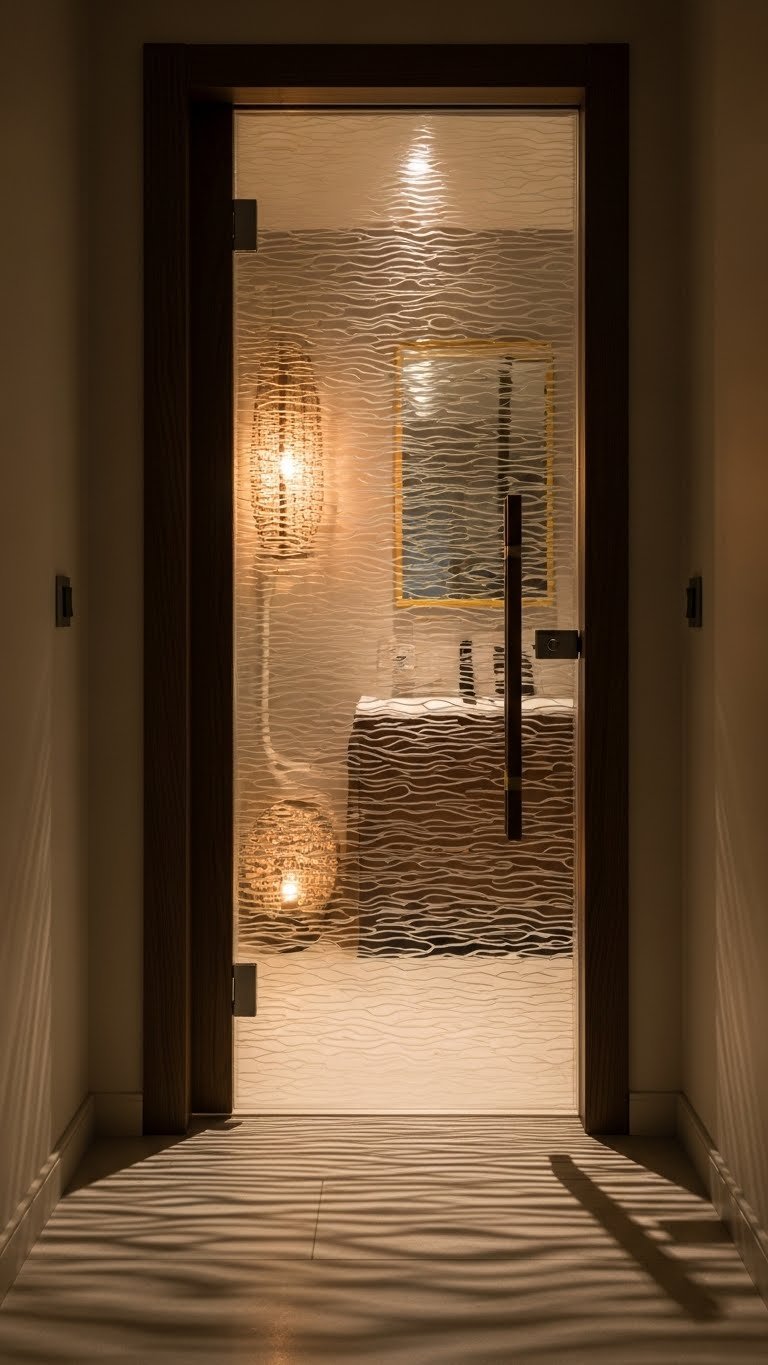
    A textured frosted glass door at your bathroom entrance creates that spa retreat feeling while keeping everything private. The texture adds depth that plain glass can’t match.

    Custom frosted doors from brands like Architectural Depot or local glass suppliers run $200–$600 depending on size and texture pattern. Standard textured patterns include rain, snowflake, and wave designs. Installation takes a professional about 2–3 hours. If you’re renting, you can also buy a pre-made frosted glass interior door from big-box stores for $150–$300 and have it installed temporarily. The textured surface catches light differently depending on the time of day, creating visual interest while maintaining total privacy.

    This update makes your bathroom feel intentional and peaceful—like a real retreat you designed, not just a functional room.


    3. Etched Glass with Custom Patterns

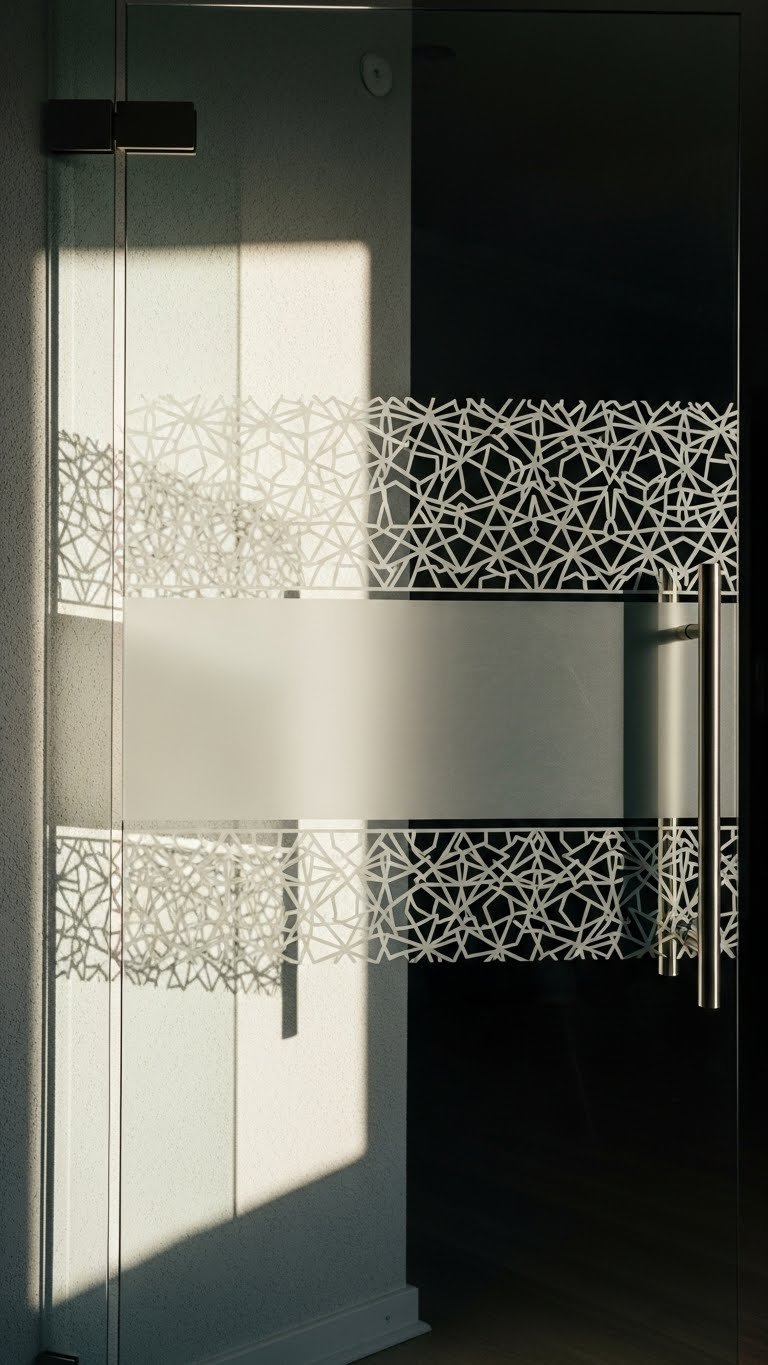
    Custom etched glass takes frosting to an art form. Instead of uniform frosting, you get patterns, designs, or even your initials. It’s a statement piece that feels curated, not just functional.

    Etched glass costs $300–$800 depending on pattern complexity and door size. You can order pre-designed etched doors from suppliers like Wayfair or Home Depot (ready-made options $200–$500), or commission custom work from local glass shops (add $200–$400 for bespoke design). Installation takes 1–2 hours. Popular patterns include geometric lines, botanical motifs, and art deco designs. Some etching is done chemically (permanent), while other options use frosted film with etching detail (removable).

    The difference is immediate—your entry or bathroom stops feeling generic and starts feeling intentional and personal.


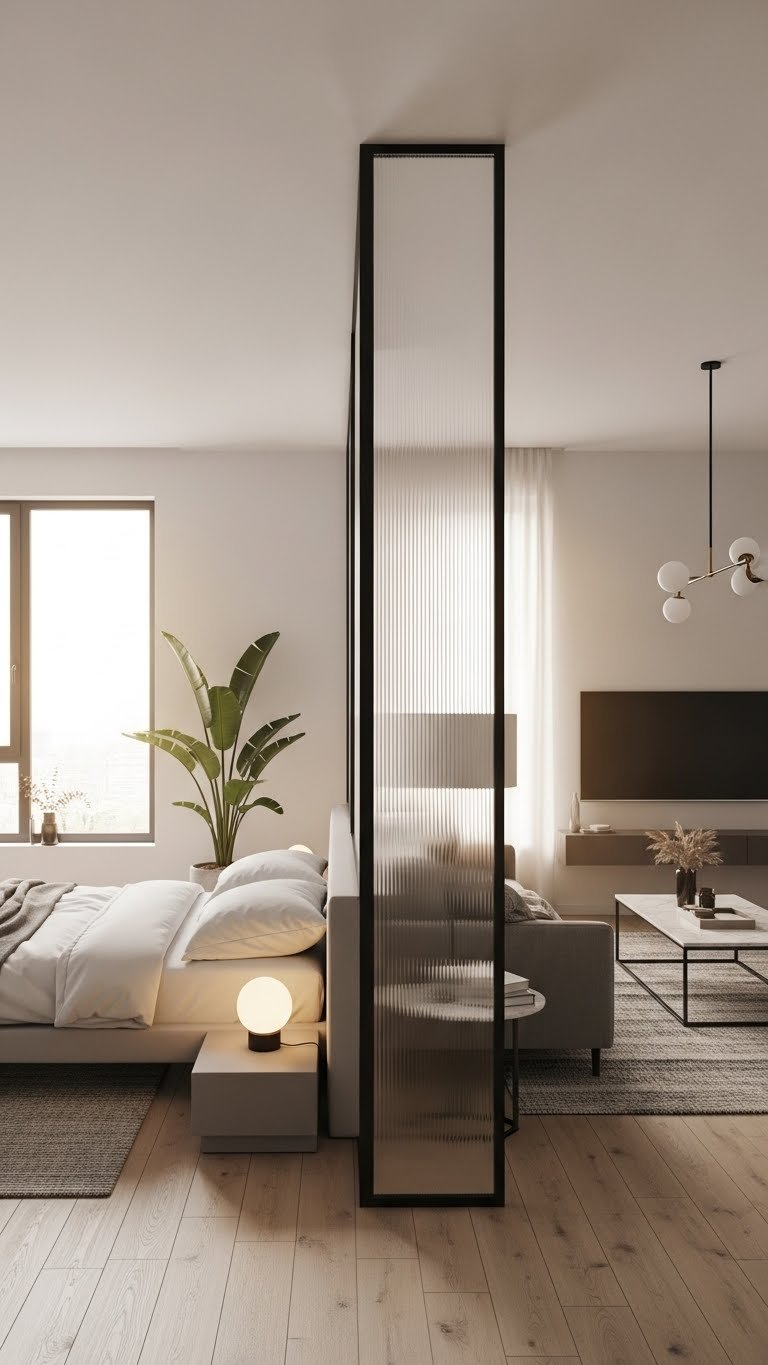
    4. Frosted Glass Pocket Door for Small Spaces

    Pocket doors that slide into walls save precious floor space, and frosted versions let light flow through your home without sight lines. Perfect for studio apartments or tight hallway layouts.

    Frameless frosted glass pocket doors cost $400–$1,200 installed, or opt for budget-friendly framed versions at $200–$500. Brands like Enigma Pocket Doors specialize in glass pocket solutions. Installation takes 3–5 hours and may require wall reinforcement (check with your installer). The door glides silently into a cavity, opening up your space visually and physically. You get privacy without the bulky visual presence of a swinging door.

    You’ll notice how much bigger your space feels when you’re not blocked by a swinging door, and light distributes evenly instead of being cut off.


    5. Partial Frosting for Borrowed Light

    Why frost the entire door when you can keep the top clear for light and frost just the lower half for privacy? This hybrid approach is clever and costs less than full frosting.

    Half-frosted doors can be custom-ordered for $250–$500, or you can apply frosted film to just half of an existing door ($10–$20 for materials). The line between frosted and clear can be straight, stepped, or wavy depending on your style. Application takes 20–30 minutes if you’re using film. This strategy maximizes natural light in dark hallways or entryways while blocking the view from below waist height—perfect if you want privacy from sitting eye level but don’t want to lose overhead light.

    Your hallway or entry becomes noticeably brighter while staying completely private at eye level—the best of both worlds.


    6. Frosted Glass Cabinet Doors for Bathroom Storage

    Frosted glass cabinet doors hide clutter while keeping your bathroom feeling open and airy. You see the mass and shape of items, but not the mess—or the less-attractive bottles.

    Frosted glass cabinet doors run $80–$200 per pair from suppliers like IKEA, Wayfair, or Rejuvenation. If you already have cabinets, you can replace just the doors. Installation is typically a DIY job taking 30–45 minutes with a drill and screwdriver. Alternatively, apply frosted film to existing glass cabinet doors for $15–$30. The frosted surface shows the silhouette of stored items, giving the impression of an organized, curated space without actually demanding perfection inside.

    Your bathroom looks instantly more intentional, and you can hide that pile of half-empty bottles without sacrificing the open-concept vibe.


    7. Frosted Glass Room Dividers for Open Layouts

    Open-concept living doesn’t mean zero privacy. Frosted glass room dividers carve out zones while keeping your space feeling connected and light-filled.

    Frosted glass room dividers cost $150–$400 for standing screens or $600–$2,000 if you’re installing permanent room dividers. Brands like Room Dividers Now offer frosted glass options. Portable screens take zero installation time, while built-in dividers take 2–4 hours. The frosted surface creates visual separation—you can’t see exactly what’s happening on the other side, but light still passes through. This works beautifully for creating a bedroom nook in a studio or separating a home office from a living room.

    Your open space now feels like multiple rooms with purpose, and you gain privacy without the heaviness of solid walls.


    8. Frosted Film with Decorative Borders

    Frosted film on its own looks clean and modern, but adding a decorative border in metallic or colored tape elevates it to intentional design. It’s an easy customization that costs almost nothing extra.

    Full frosted film costs $15–$40, and decorative border tape (metallic, colored, or patterned) adds just $5–$15. Apply the film first, then run the border tape down the edges or frame a section in the middle. Total time: 30–40 minutes. This technique works beautifully on entryways and creates a contemporary look that photographs well. Popular border options include matte black tape, brushed gold, and colored vinyl stripes in navy or forest green.

    The finish feels designer-curated, and guests notice the detail—it looks intentional rather than like a quick privacy fix.


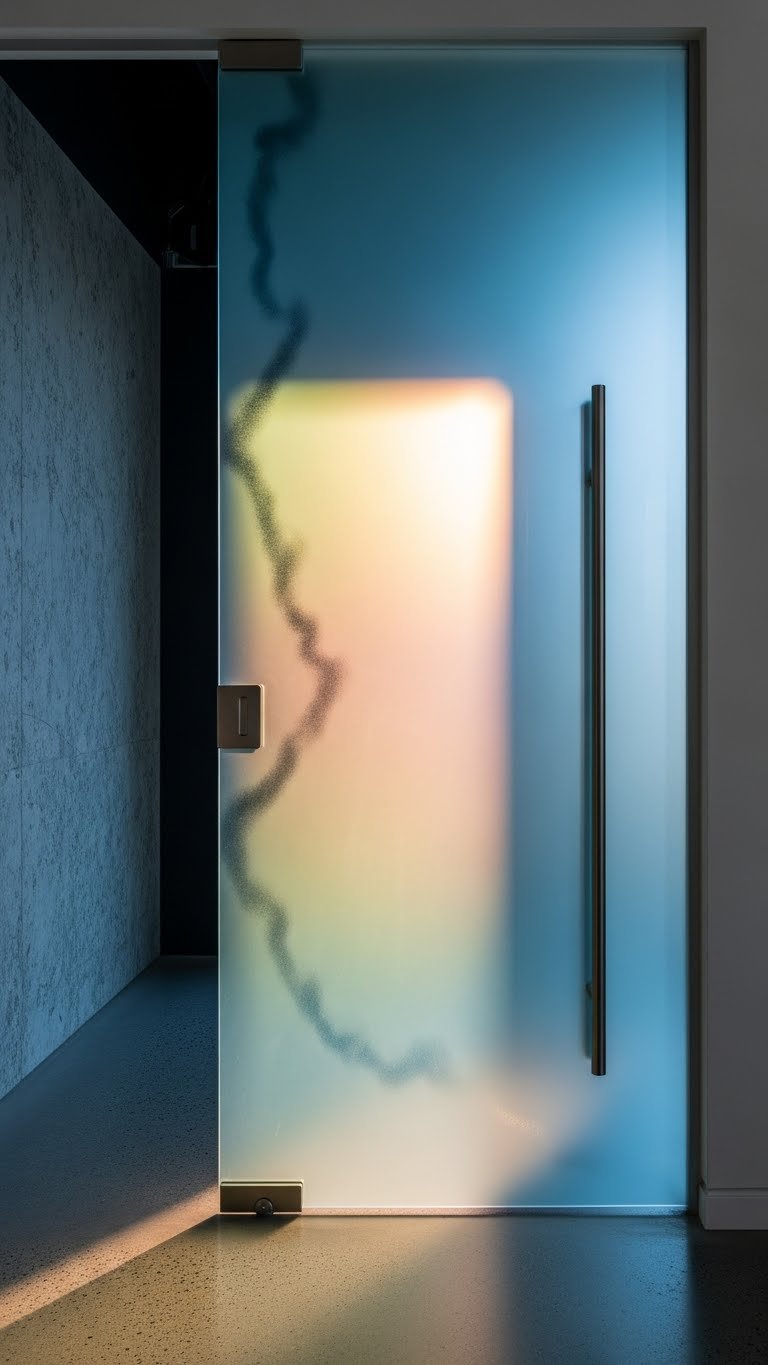
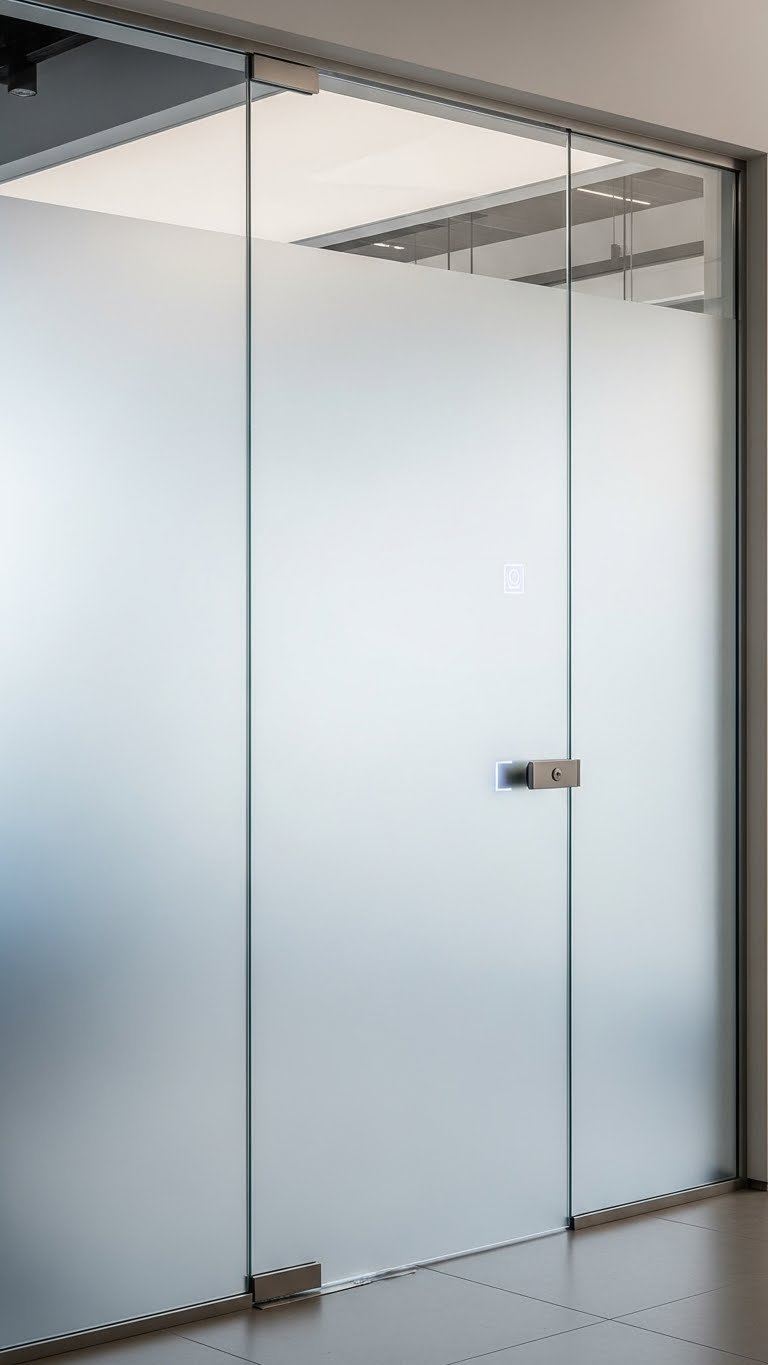
    9. Frosted Glass Sliding Barn Door

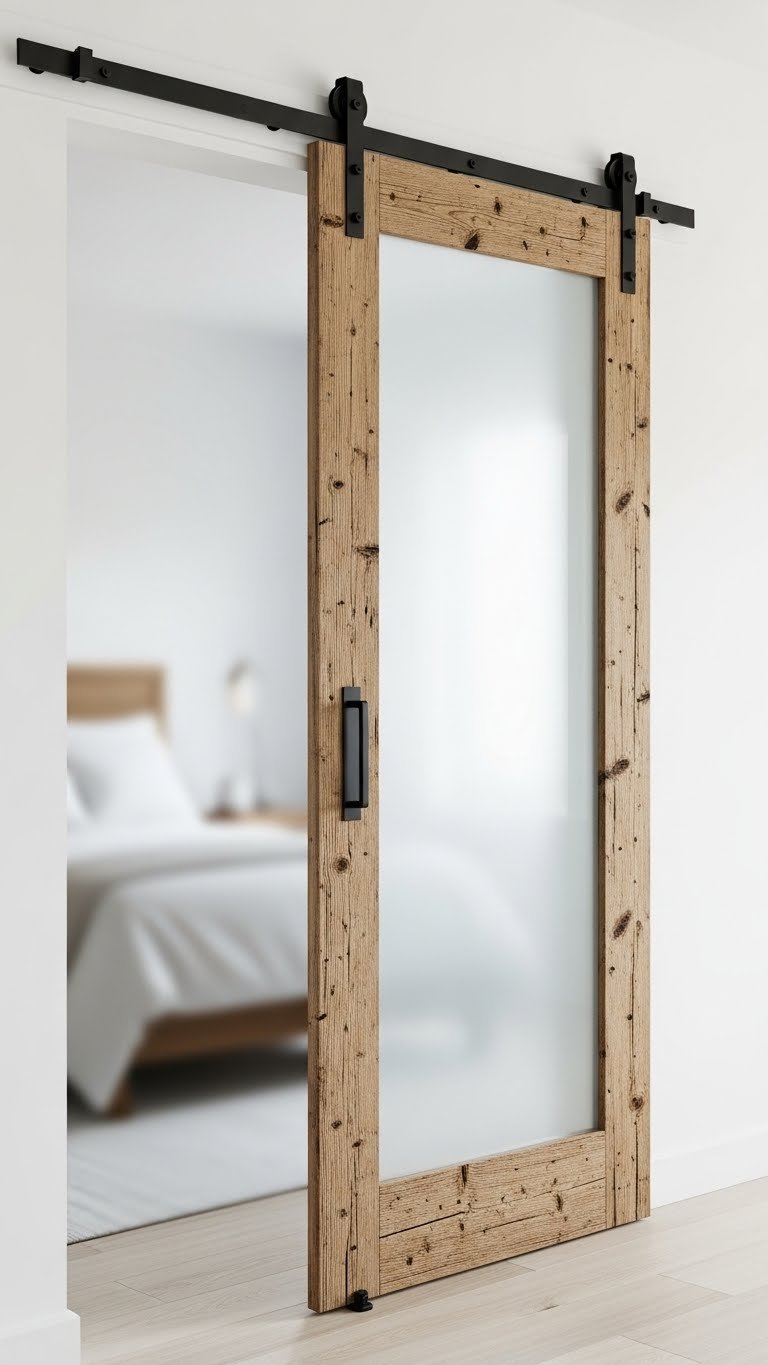
    Frosted glass barn doors combine industrial style with privacy—they’re a statement piece that actually solves a problem. Perfect for bedrooms, bathrooms, or home offices.

    Frosted glass barn doors cost $300–$900 depending on size and frame material. Brands like Wayfair, Home Depot, and Amazon carry ready-made options. Installation requires mounting a track to your wall (about 2–3 hours with basic tools, or hire a handyperson for $150–$250). The glass provides privacy while the black or brushed metal frame reads as contemporary-rustic. Frosted glass with a dark metal frame is especially popular right now and photographs beautifully.

    Your bathroom or bedroom entrance becomes a design feature instead of just a functional door, and you get that Instagram-worthy moment every time you open it.


    10. Frosted Glass Closet Doors

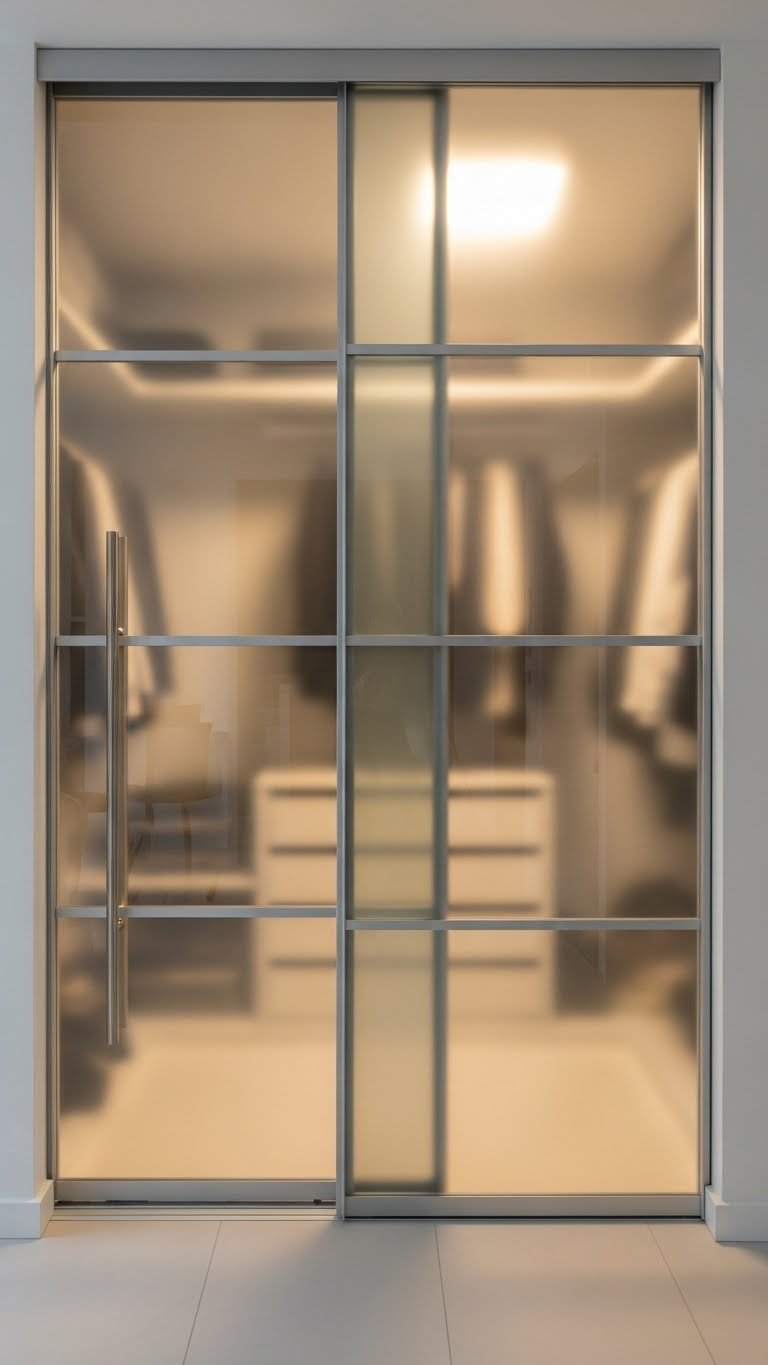
    Frosted glass closet doors let light into your closet while keeping your clothes and storage hidden from view. It’s a small change that makes your bedroom feel bigger and brighter.

    Frosted glass sliding closet doors cost $200–$500 per pair to replace existing doors. IKEA, Home Depot, and Wayfair carry options. If you already have glass closet doors, frosted film ($20–$40) is a free-to-rent alternative. Installation takes 1–2 hours (or 20 minutes with film). You can also request mirrored frosted glass if you want partial reflection with privacy. The frosted surface bounces light while your closet stays beautifully hidden.

    Light penetrates deeper into your bedroom, and the closet feels like part of the overall design rather than a dark, cluttered void.


    11. Frosted Glass Shower Enclosure

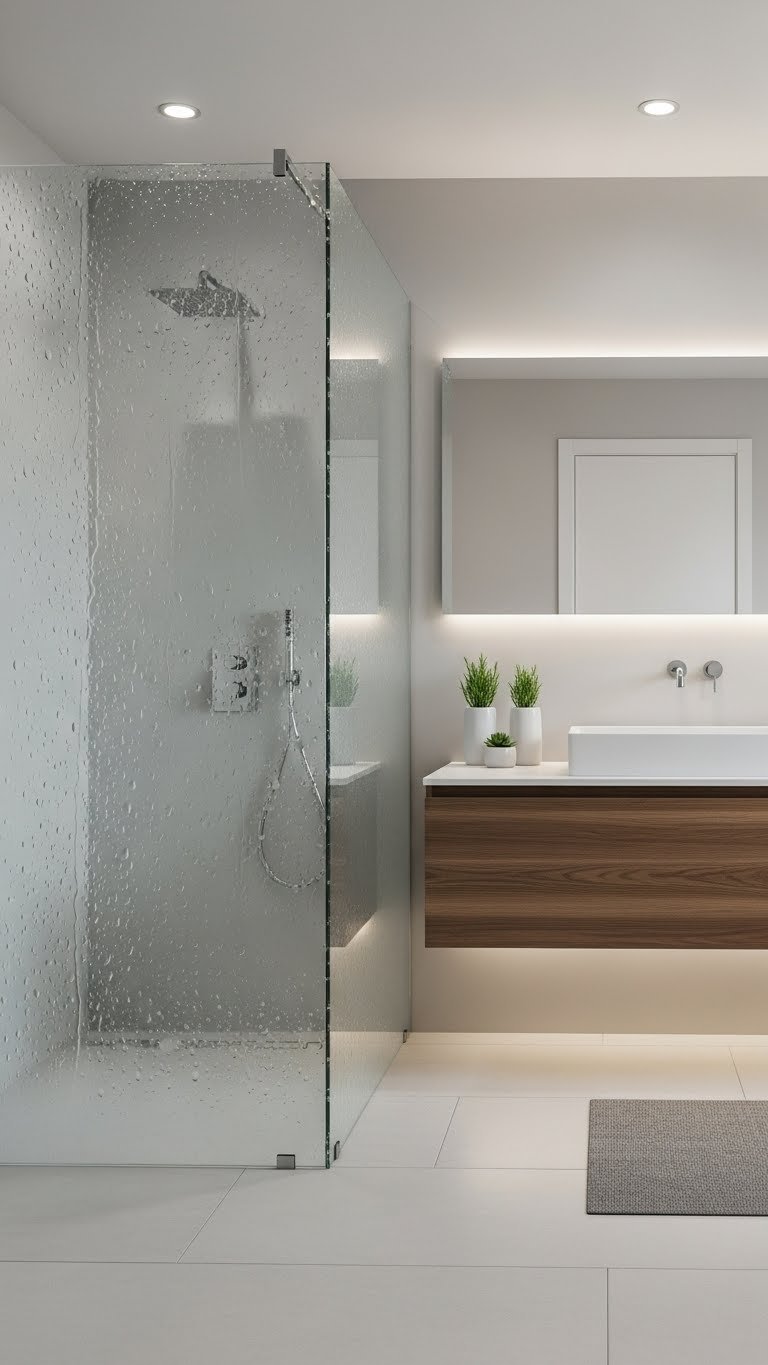
    A frosted glass shower enclosure keeps your bathroom feeling open and bright while you shower privately. It’s functional privacy that looks intentional.

    Frosted glass shower enclosures range from $400–$1,500 depending on whether you’re installing a new one or frosting an existing shower door. Pre-made frosted enclosures from brands like Kohler, American Standard, or Home Depot start around $500–$800. Installation takes 4–6 hours professionally. Alternatively, apply frosted film to an existing clear shower door for $30–$60. The frosted glass prevents fogging better than some clear options and maintains privacy without blocking light or making your bathroom feel enclosed.

    Your shower stays dry-looking even after use, and your bathroom feels spa-like instead of steamy and claustrophobic.


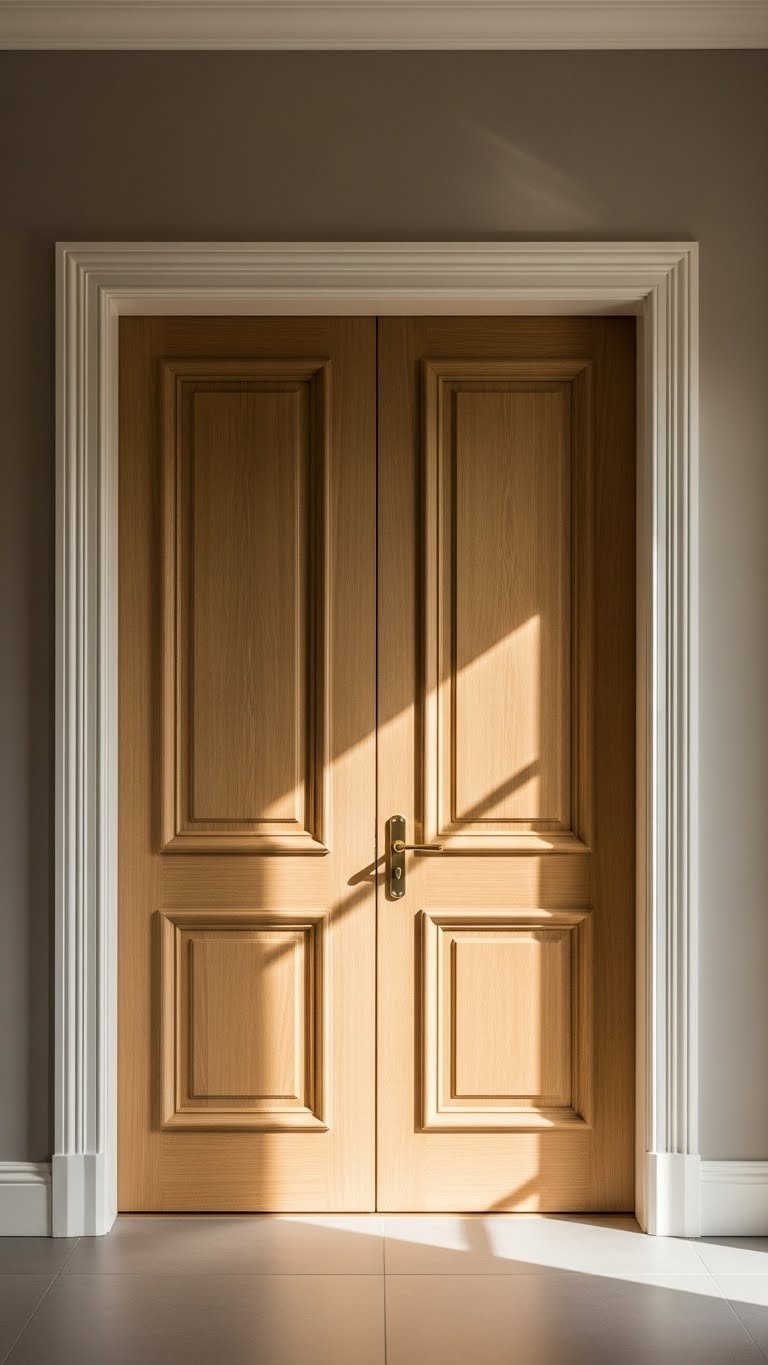
    12. Frosted Glass Interior Doors Throughout a Home

    Replace all your interior solid doors with frosted glass versions to completely change how light and space flow through your home. It’s a bigger project, but the payoff is dramatic.

    Interior frosted glass doors cost $150–$350 per door (or $300–$600 if custom). Budget for 3–5 doors in a typical home: $900–$2,500 total. If you’re renting, this isn’t practical, but homeowners can frame this as a long-term investment. Installation takes about 1–2 hours per door. Pre-made options from Home Depot, Lowe’s, and Wayfair are usually cheaper than custom orders. The entire home becomes cohesive, bright, and flowing—light travels through multiple rooms, and every space feels connected.

    Your home feels up to 30% brighter, and the open feel makes even small spaces read as generous.


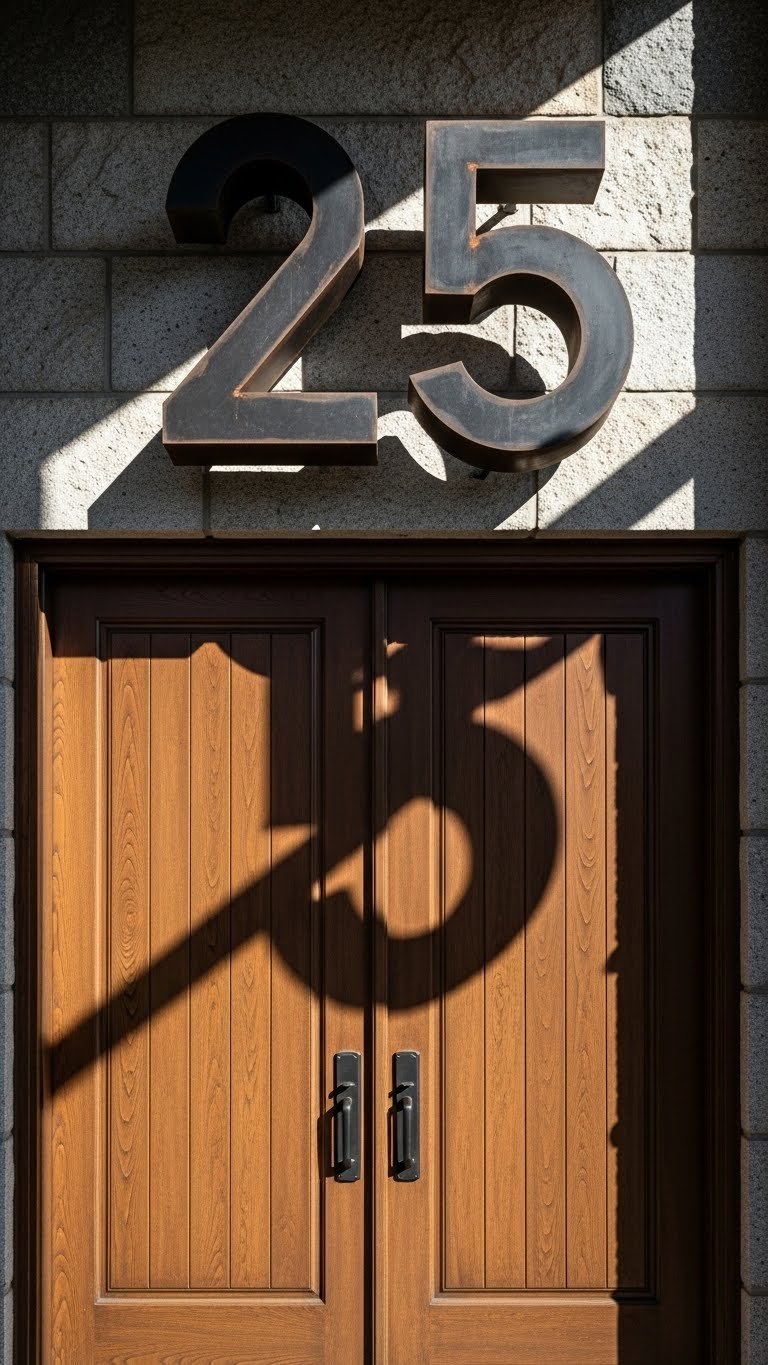
    13. Frosted Glass with Etched Address Numbers

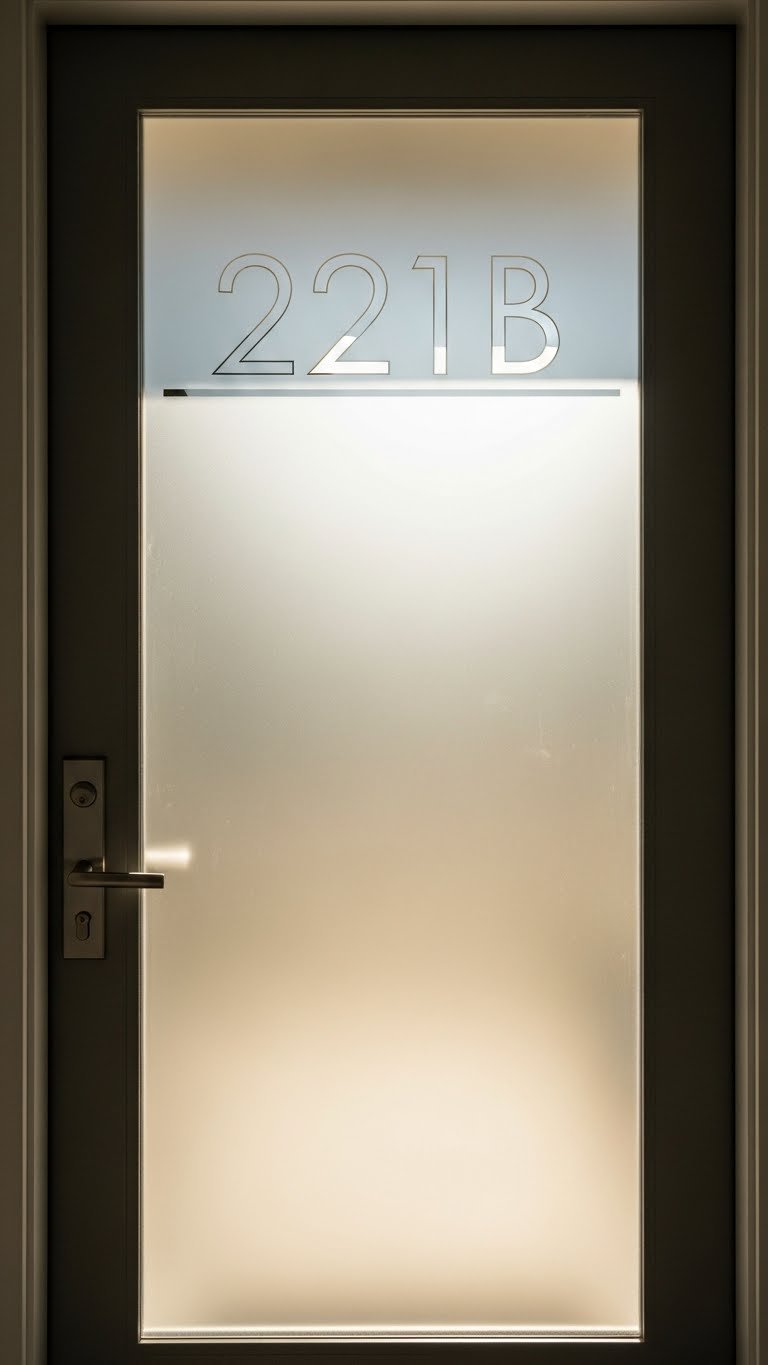
    Etched address numbers on a frosted glass entry door serve double duty—functional wayfinding and artistic detail. It’s a small customization that feels incredibly intentional.

    Etched address numbers on a frosted door add $50–$150 to a custom glass order, or you can use vinyl address stickers ($15–$30) on frosted film-covered doors. Etching is permanent; vinyl is removable. Either approach takes 10–15 minutes. You can opt for modern sans-serif numbers, ornate fonts, or even custom designs. The numbers show up beautifully against frosted glass because the etching catches light differently than the surrounding surface.

    Your entry becomes instantly more welcoming and finished, and guests can actually find your house—no more confusion.


    14. Frosted Glass Between Kitchen and Dining Room

    If you have an open kitchen-dining layout that feels chaotic when you’re cooking, a frosted glass partition solves the problem without closing you off completely.

    A permanent frosted glass partition costs $800–$2,000 installed, but a temporary frosted panel or sliding door system runs $300–$800. Installation for permanent options takes 4–6 hours; temporary systems are quicker. This works especially well if you rent—some removable frosted glass divider panels cost $200–$400 and install in under an hour with tension rods or clips. You stay connected visually and can still chat while cooking, but cooking smells and splashing water stay contained.

    You can finally cook without spraying your dining guests, and the kitchen feels like its own intentional space rather than spilling into your living area.


    15. Frosted Glass with Colored Tints

    Tinted frosted glass goes beyond standard white frosting—subtle colors like soft blue, sage green, or blush add personality while maintaining privacy.

    Tinted frosted glass costs $250–$600 for custom orders, or frosted film in tinted colors runs $20–$50. Popular tint options include pale blue, soft green, and warm gray. Application takes 30–45 minutes for film. Tinted frosting works beautifully in bedrooms or bathrooms where you want calm, spa-like vibes. The tint is subtle enough not to look childish, but distinctive enough to feel intentional and modern.

    Light filtering through tinted frosted glass creates a gentle, colored glow instead of harsh white light—your space feels curated and peaceful.


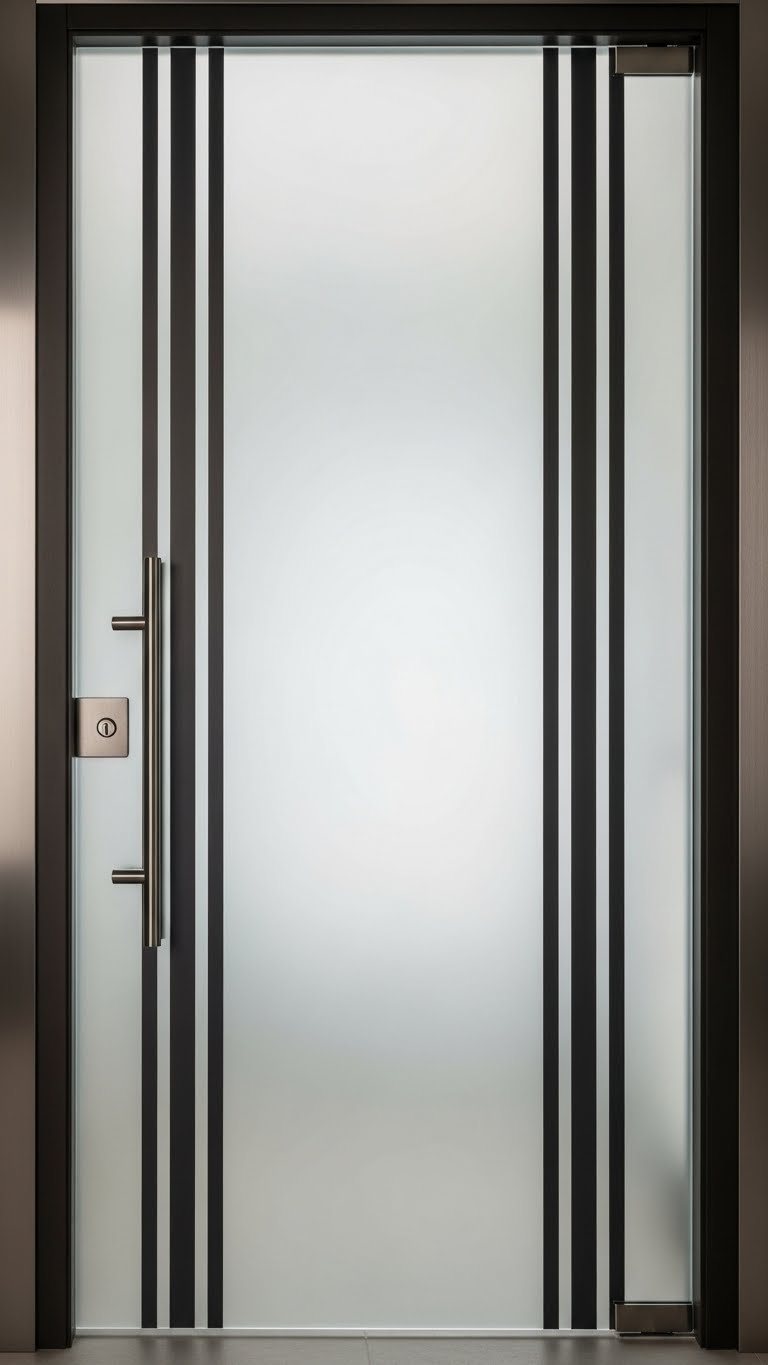
    16. Frosted Glass Door with Clear Glass Panels

    Mix frosted and clear glass panels within a single door for visual interest and strategic light flow. It’s a design choice that catches the eye.

    Mixed frosted-and-clear doors cost $400–$900 custom-ordered, or you can create this effect with frosted film and vinyl clear sections for $25–$50 on an existing glass door. Installation takes 45 minutes for film or 2 hours for a replacement door. Popular patterns include geometric grids, horizontal bands, or random asymmetrical sections. The contrast between frosted and clear creates visual depth and allows you to control where light enters.

    This design detail looks far more expensive and intentional than a fully frosted door, and the light patterns change throughout the day.


    17. Frosted Glass Café Doors (Half-Height Doors)

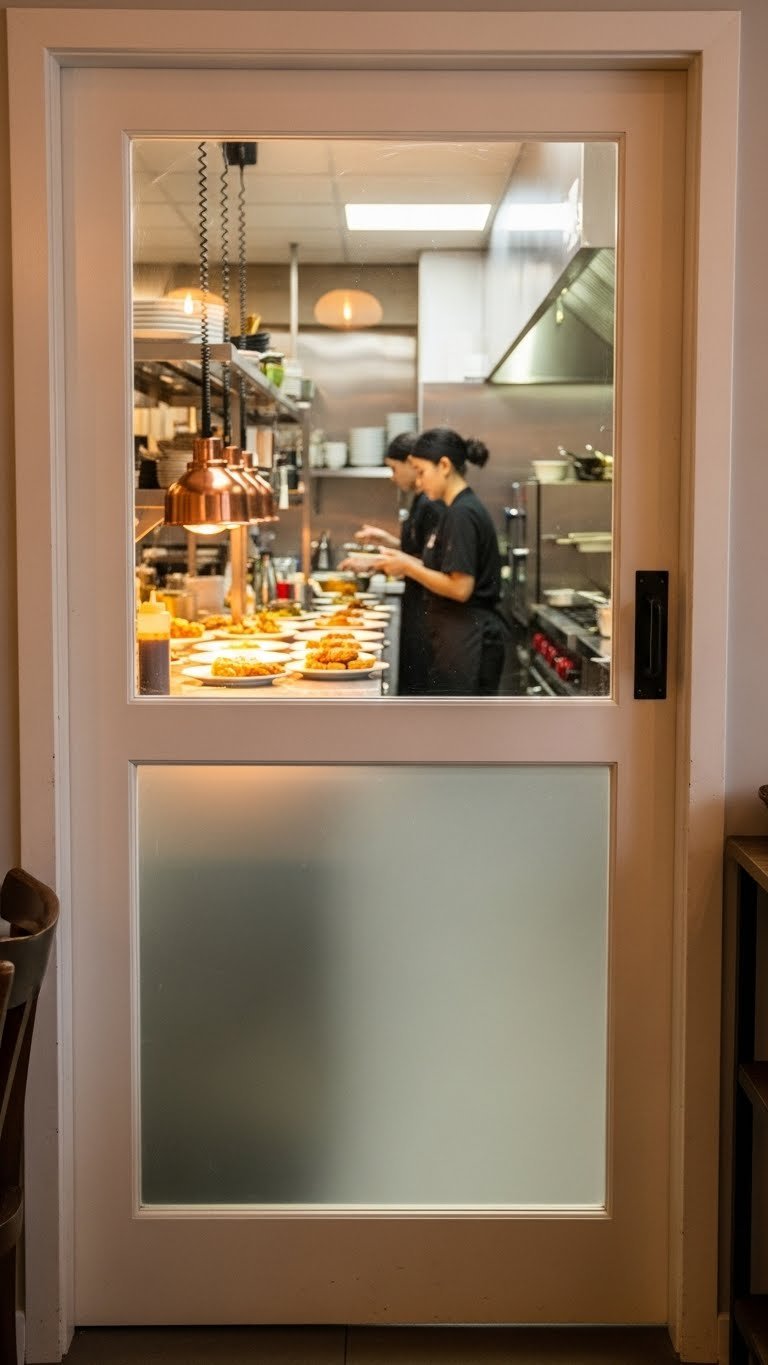
    Frosted glass café doors are half-height doors perfect for kitchens and between open spaces. You get privacy at eye level but maintain visual connection and easy flow.

    Frosted glass café doors or Dutch doors cost $250–$600 custom-ordered. Some ready-made options are available for $200–$400. Installation takes 2–3 hours. The traditional “café door” design lets you control the top and bottom independently, or you can get a fixed half-frosted, half-clear option. This style is both functional and charming—it’s a design choice that’s experiencing a comeback.

    You maintain connection with whoever’s on the other side while keeping cooking clutter hidden and heat contained in the kitchen.


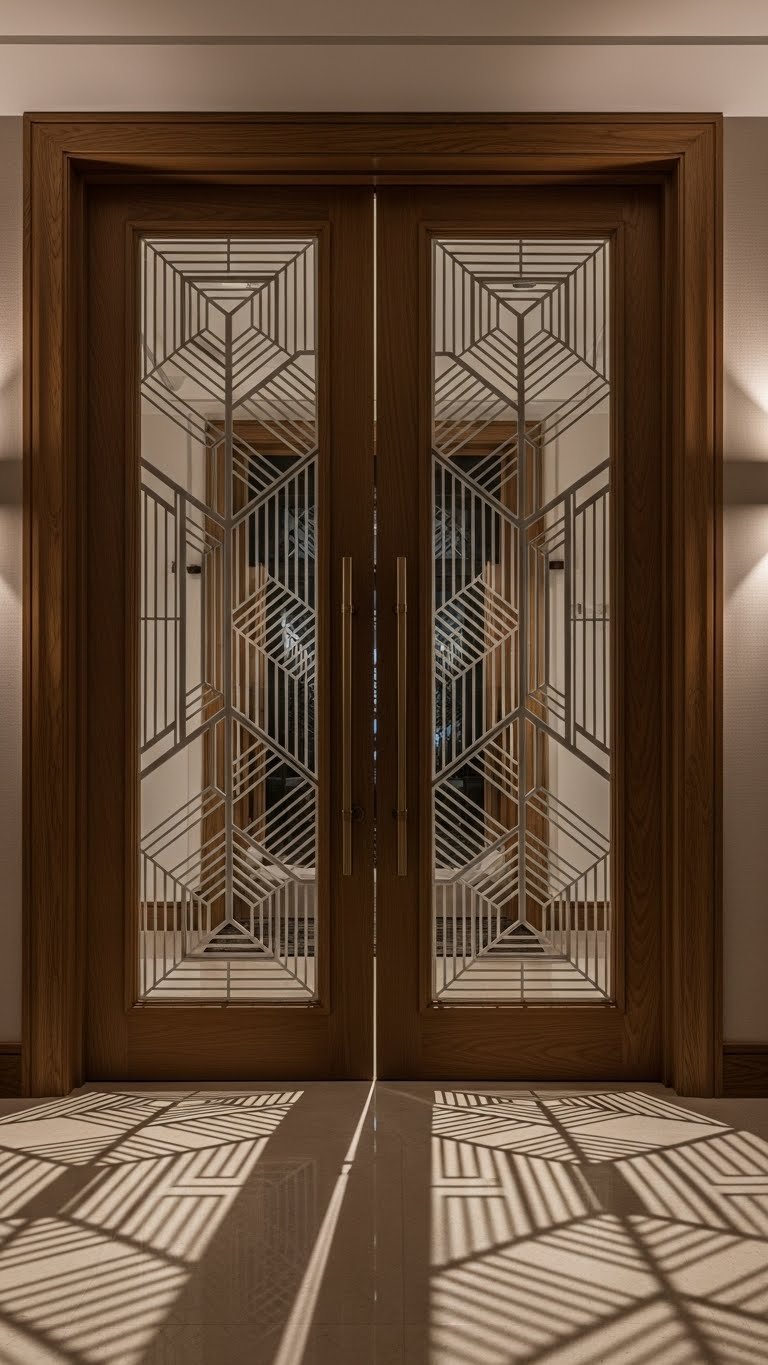
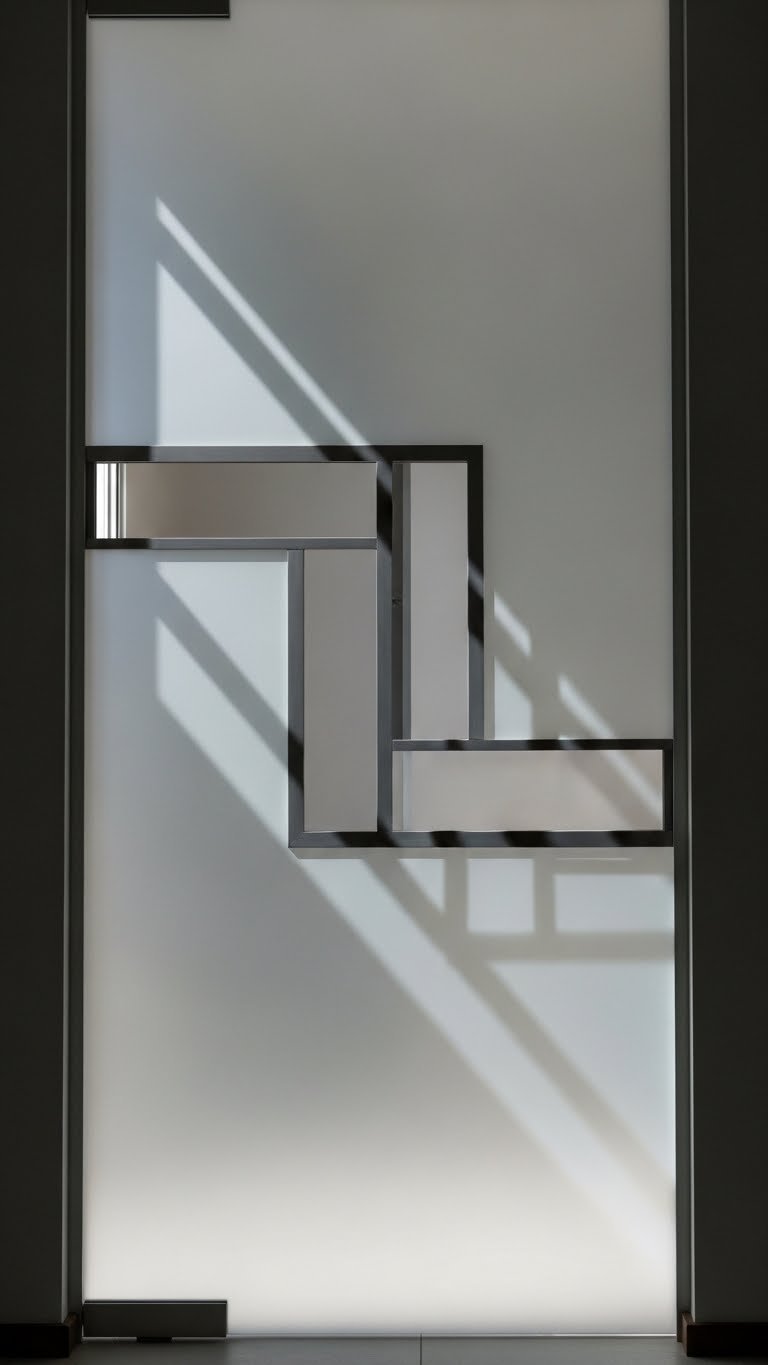
    18. Frosted Glass with Geometric Patterns

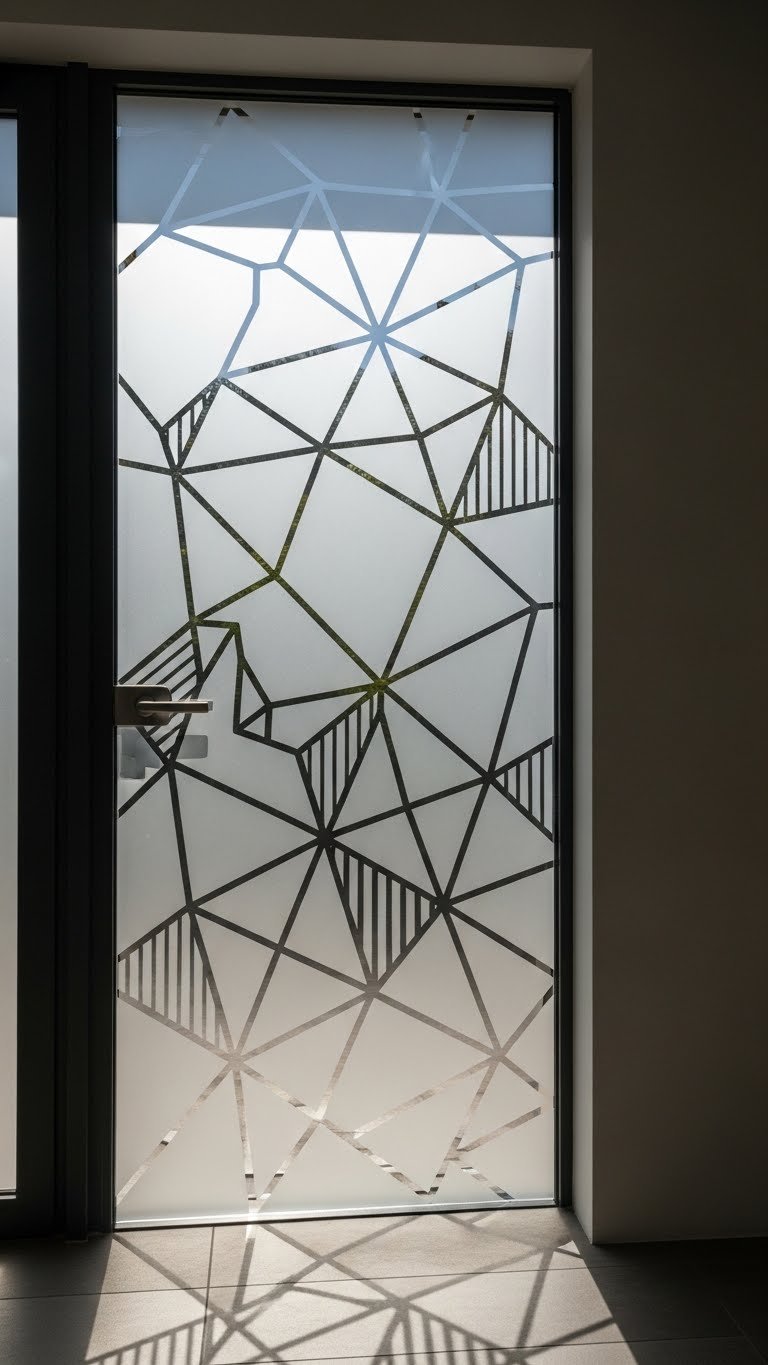
    Geometric etched patterns offer frosted privacy with artistic flair. It’s like functional art on your doors.

    Geometric-patterned frosted glass doors cost $350–$800 for custom orders. Many glass suppliers and online retailers like Etsy have artisans offering geometric designs. Pre-made geometric frosted doors from big-box retailers run $200–$500. Installation takes 1–2 hours. The pattern is permanent if etched, or removable if done with frosted film. Patterns can be symmetrical or random, minimalist or complex. Popular designs include Art Deco lines, modern hexagons, and abstract botanical-inspired geometry.

    The geometry catches light and casts beautiful shadows, turning your door into a light fixture that’s also beautifully functional.


    19. Frosted Glass for Home Office Privacy

    A frosted glass office door or divider lets you close off your work zone visually from the rest of your home while keeping light flowing and maintaining a sense of connection.

    Frosted glass office doors or partitions cost $200–$600. Temporary solutions like frosted panels or removable sliding doors work well for renters ($150–$400). Installation ranges from 30 minutes (removable options) to 3 hours (permanent doors). This setup is especially useful if your office shares a wall with a living area—noise is still somewhat contained, light flows through, and clients on video calls see a professional frosted background rather than your living room chaos.

    You gain professional separation without the heavy, closed-in feeling of solid walls, and your office looks intentional and distinct.


    20. Frosted Glass Transom Windows Above Doors

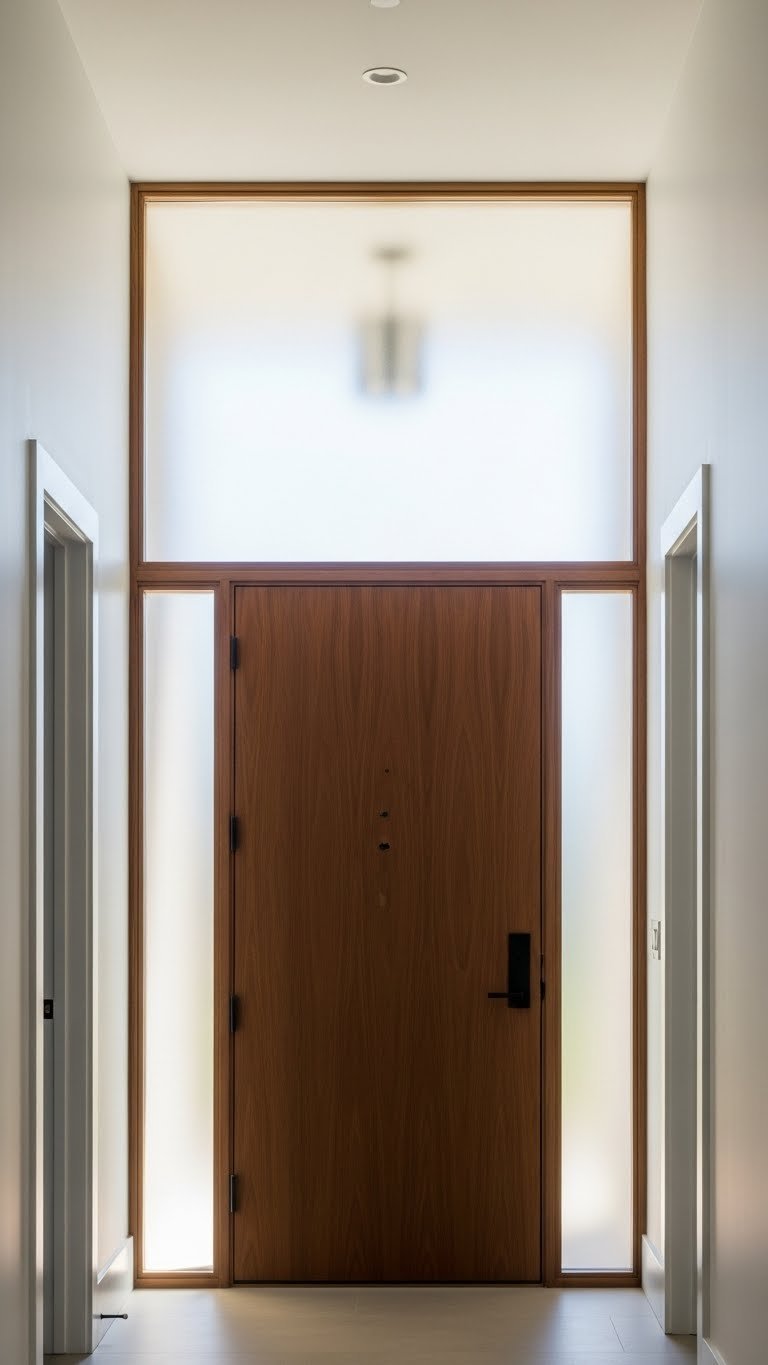
    Add a frosted glass transom (a horizontal window panel) above a solid door to let light in without sacrificing privacy. It’s an architectural detail that feels elevated.

    Frosted glass transoms cost $200–$500 installed and work best with solid doors in interior spaces. Installation takes 2–3 hours and may require framing adjustments. This is especially useful if you want a solid door for soundproofing but don’t want to lose natural light. Transoms are increasingly popular in modern farmhouse and contemporary designs.

    Light penetrates deep into hallways and rooms you’d normally keep dim, and the architectural detail makes your home feel thoughtfully designed.


    21. Frosted Glass Door Film with Motion-Activated Frosting

    Smart frosted glass film changes from clear to frosted with the flip of a switch or a tap on your phone. It’s high-tech privacy that feels futuristic.

    Smart frosted glass film costs $500–$1,500 installed (or up to $3,000 for premium brands like Gauzy or View). It requires a power source and can integrate with your smart home system. Installation takes 3–4 hours. This technology is still premium pricing, but costs are dropping as it becomes more mainstream. You get on-demand privacy without permanent frosting—perfect if you want a clear view sometimes and privacy others. It’s especially popular for bathroom windows and office glass partitions.

    This investment-level technology gives you the best of both worlds: clear glass when you want it, frosted privacy when you need it, all with a button press.


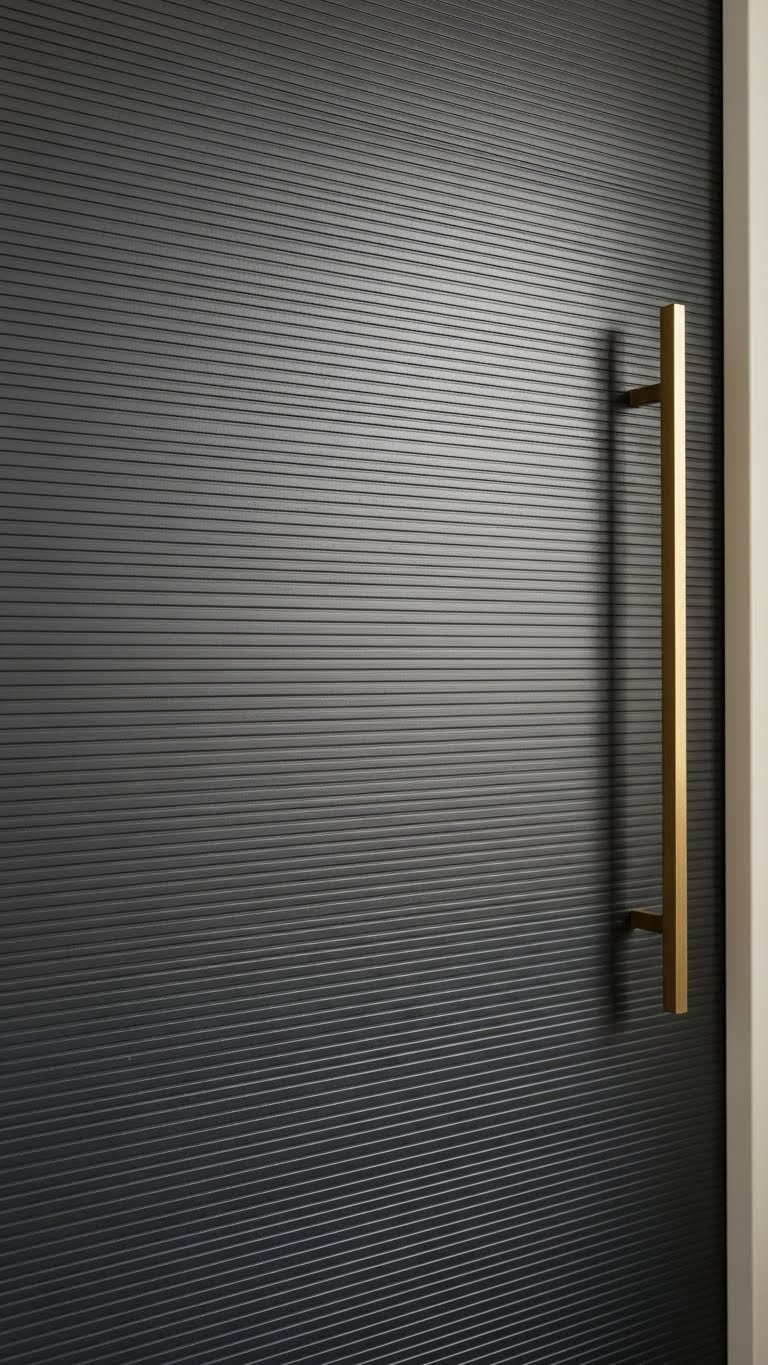
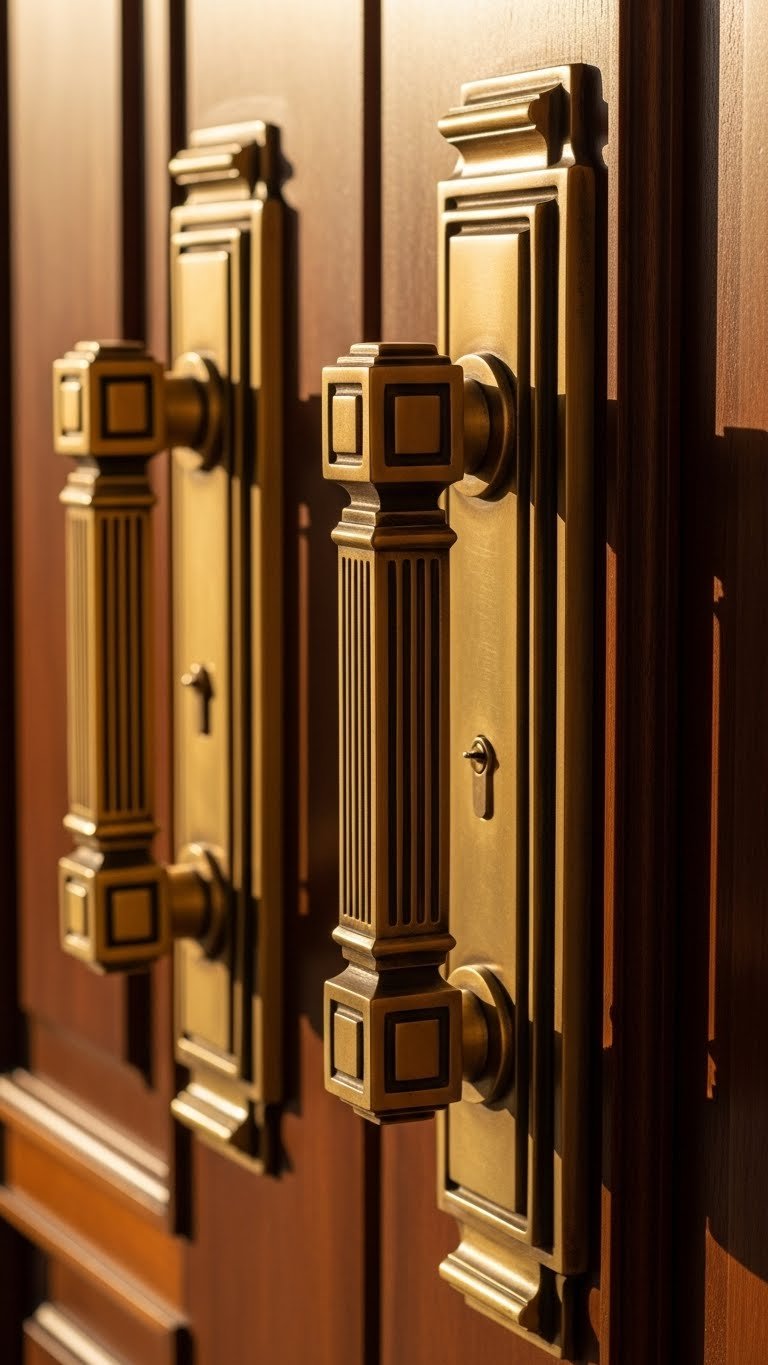
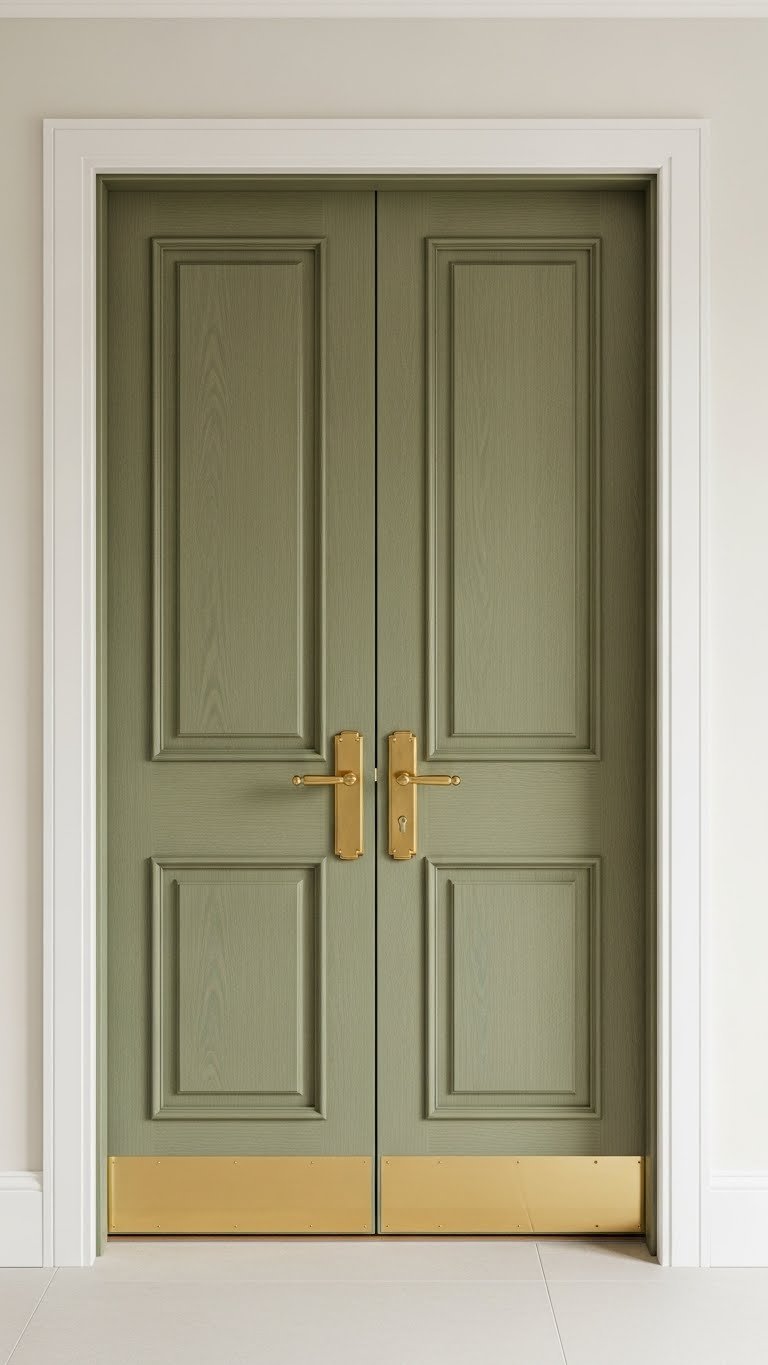
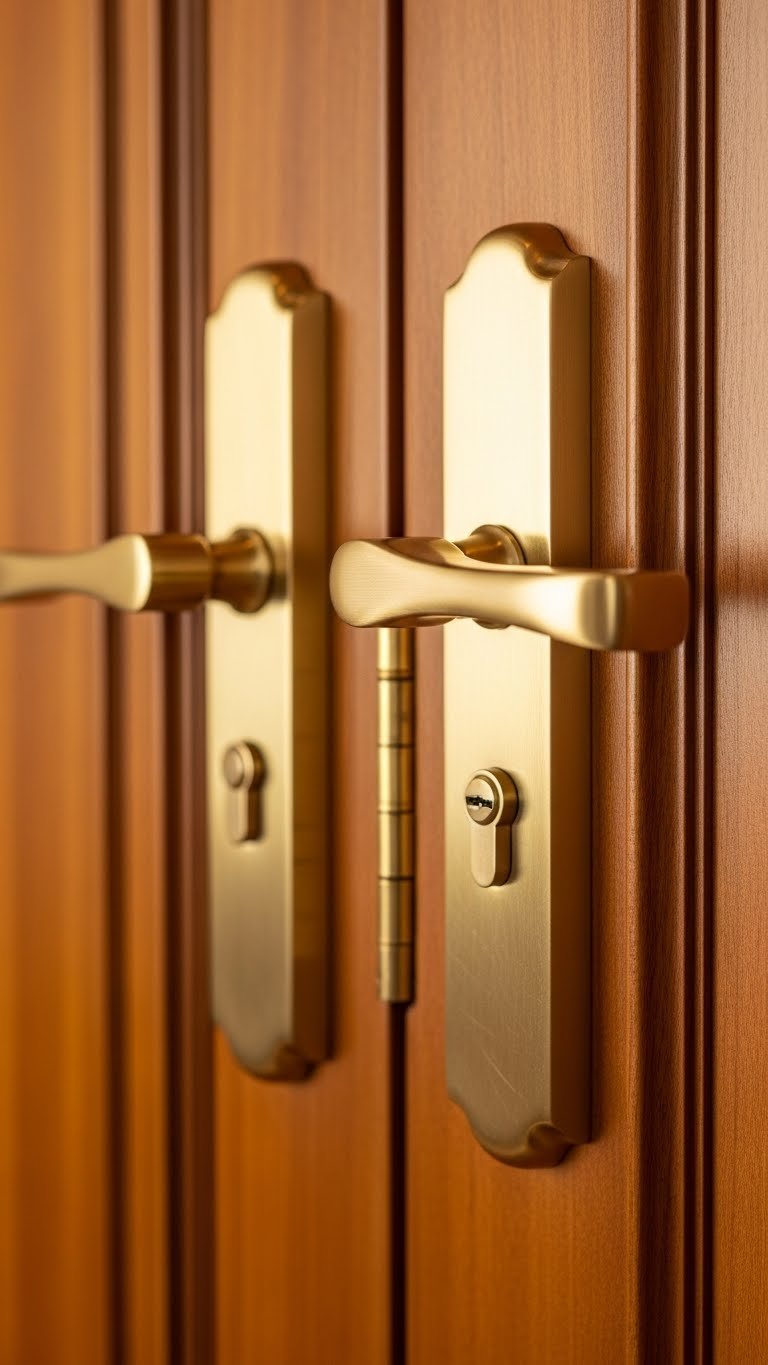
    22. Frosted Glass with Brass or Copper Hardware

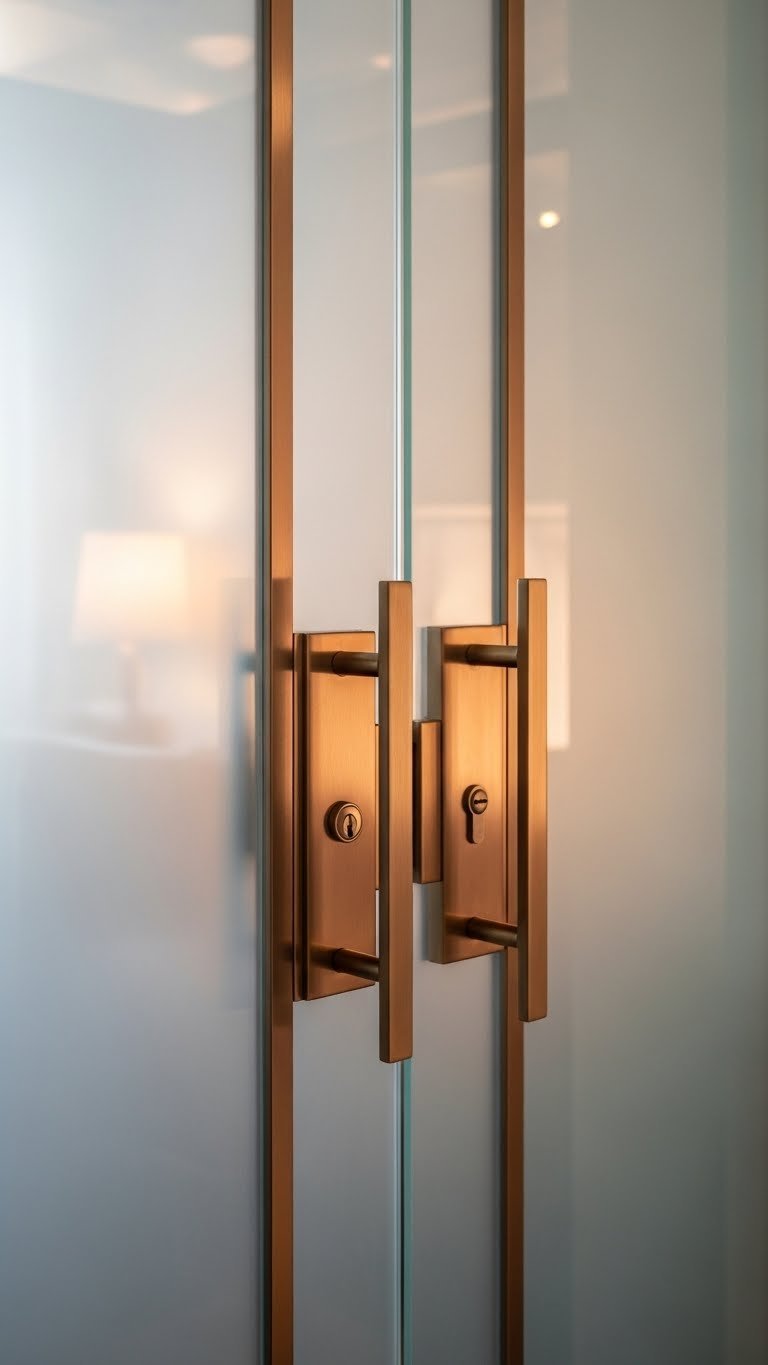
    Elevate a simple frosted glass door with warm metal hardware in brass, copper, or rose gold. The hardware becomes a design accent against the neutral frosted surface.

    Frosted glass doors with metal frames cost $300–$700 when ordered with coordinating hardware. You can also upgrade hardware on existing frosted doors for $50–$150 (replacement handles and hinges). Installation for new hardware takes 30–45 minutes. Popular finishes include brushed brass, matte copper, and rose gold. These warm metals feel contemporary and expensive against the cool frosted glass.

    The hardware turns a functional door into a design moment, and the warmth of the metal balances the coolness of the frosted glass.


    23. Frosted Glass Barn Doors with Sliding Hardware

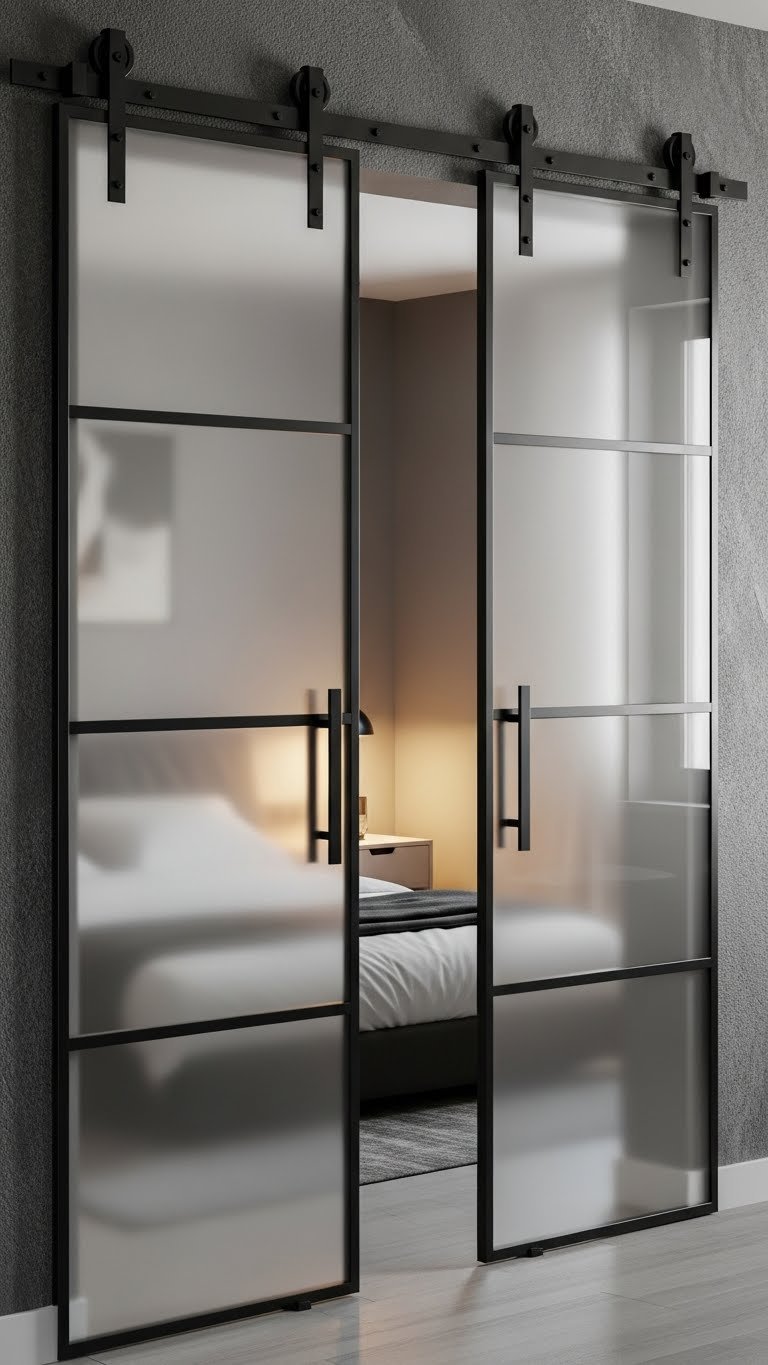
    Frosted glass barn doors on heavy sliding hardware create a dramatic, modern statement while providing total privacy. It’s a design choice that feels intentional and architectural.

    Frosted glass barn doors with sliding hardware cost $600–$1,500 as a set. Installation takes 3–4 hours and requires solid wall mounting (check wall structure first). Brands like Wayfair, Anthropologie, and specialty barn door suppliers carry frosted glass options. The hardware finish—matte black, brushed nickel, or industrial steel—becomes a design element. Frosted glass paired with heavy metal hardware reads as premium and intentional.

    These doors are a statement piece. They’re functional privacy that also serves as art—the kind of detail that makes your space feel thoughtfully designed rather than just decorated.


    Save this post for your next door refresh or privacy upgrade. Try just one idea this weekend—whether it’s frosted film on an existing door or a complete door replacement, even a small change makes a real difference in how your space feels and functions.

  • 27 Veneer Door Design Ideas That Add Texture & Elegance to Any Entryway

    27 Veneer Door Design Ideas That Add Texture & Elegance to Any Entryway

    Your front door is the first thing guests see—and it deserves to be memorable. Whether you’re renting or own your home, a veneer door is your secret weapon for adding texture, warmth, and undeniable elegance without a total overhaul. Veneer doors offer the look of solid hardwood, sustainable materials, and endless design possibilities at a fraction of the cost. From subtle wood grain patterns to bold geometric textures and two-tone finishes, there are so many ways to turn your entryway into something special. In this guide, you’ll discover 27 specific veneer door ideas that work with every style—minimalist, industrial, coastal, or cozy traditional. Pick one that speaks to you, and watch your entryway instantly become the statement piece your home deserves.

    1. Layer Matte Black Veneer with Brushed Gold Hardware

    Matte black veneer creates dramatic sophistication while staying timeless. Pair it with brushed gold or bronze hardware to elevate the look without breaking the bank.

    This combo works because the contrast between dark matte and warm metal feels high-end and intentional. Most veneer doors accept new hardware easily—just drill out the existing holes. Brushed gold handles run $30–$80 from IKEA, Wayfair, or Home Depot. Installation takes 15 minutes with a basic drill. The result? Your door looks like it belongs in an architect’s portfolio. Even renters can swap hardware back before moving.

    Pro tip: Choose geometric or minimalist handle shapes to match the modern vibe of matte finishes.

    2. Go Two-Tone with Warm Wood and Soft White

    Split finishes aren’t just for cabinets anymore. Divide your veneer door horizontally with warm wood on top and crisp white below for visual interest.

    This breaks up a tall entryway and feels intentional rather than trendy. Use painter’s tape to mark your midpoint precisely, then apply two coats of finish. This works best on flat veneer doors. Cost: $15–$40 for quality paint or stain. Time: one weekend including dry time. The two-tone effect adds dimension and makes narrow entries feel wider. You can also do this as a removable temporary look with contact paper for renters.

    Bonus: This styling photograph beautifully on social media and works with almost any home style.

    3. Embrace Natural Wood Grain with Matte Finish

    Skip the paint and let the wood speak. A matte-finish veneer door showcasing natural grain is warm, organic, and endlessly versatile.

    Matte finishes enhance grain visibility and hide fingerprints better than gloss. Most quality veneer doors come pre-finished this way, or you can sand and apply a matte topcoat yourself. If ordering new: $200–$500 installed. If refinishing an existing door: $30–$60 for materials, 4–6 hours labor. The appeal here is authenticity—it looks like real hardwood without the maintenance headaches of solid wood. Your entryway becomes warm and inviting without trying too hard.

    This pairs beautifully with either modern or traditional interiors.

    4. Add Linear Texture with Horizontal Slat Veneer

    Textured veneer doors with linear patterns create visual depth and architectural interest without being fussy. Horizontal slats feel contemporary and calm.

    These doors come from specialty manufacturers or you can commission a custom veneer with routed texture. Cost: $400–$700 for a quality textured veneer door. Pre-made options: $250–$400. Installation: hire a pro, $100–$200. The texture catches light differently throughout the day, so your door never looks flat or boring. It’s a bolder choice than solid color but still sophisticated. Renters: this works if your lease allows door replacement, or you could temporary-install with removable hinges.

    The result is a door that looks like it came from a high-end hotel or boutique retail space.

    5. Combine Vertical Grain with Deep Forest Green

    Deep jewel tones pair perfectly with visible wood grain. Forest green veneer feels earthy, sophisticated, and connects your entryway to nature.

    Forest green works on both modern and traditional homes. Start with a veneer door in natural wood, then stain it with quality wood stain in forest green ($10–$25 per can). Apply two thin coats. Time: 3–4 hours plus drying. You’ll see the grain pattern show through the colored stain beautifully. This finish hides dust and minor scratches well. The color feels intentional and curated, not accidental. Maintenance is minimal—just wipe down occasionally.

    Your guests will comment on this one every single time they visit.

    6. Create a Shiplap-Style Look with Vertical Veneer Segments

    Love the shiplap trend? Get the look with a custom veneer door featuring vertical board patterns without the maintenance of real wood.

    This style works beautifully in coastal, farmhouse, or modern-cottage homes. Order custom from specialty door makers or modify existing veneer with routed channels. Cost: $300–$600 for custom textured veneer. A whitewash or light-stain finish ($10–$30 in product) completes the look. Installation: $100–$150 by a pro. The effect is charming and photograph-worthy. Unlike real shiplap, veneer won’t swell or warp in humidity. Renters might struggle with this one—it’s permanent—but homeowners will love the coastal-cabin vibe.

    This transforms a basic entryway into somewhere guests want to linger.

    7. Mix Dark Wood Veneer with Frosted Glass Panels

    Combine the elegance of dark veneer with glass panels for light without sacrificing privacy. Frosted glass softens the drama of dark wood.

    This hybrid approach gives you the best of both worlds: statement color and brightness. Order semi-custom doors with frosted glass inserts, or retrofit existing veneer with adhesive frosted film ($20–$50 per sheet). Frosted glass diffuses light beautifully while keeping interiors private. Installation time: 30 minutes for film, 2–3 hours if replacing panels professionally. The contrast between matte dark wood and soft frosted glass reads as sophisticated and intentional. This works especially well in narrow entryways where you want to bounce light through without opening the space completely.

    Your door becomes both a practical light source and a design focal point.

    8. Stain Veneer in Warm Honey with Geometric Metal Inlay

    Take veneer texture to the next level with subtle metal inlays. Brass or copper geometric patterns against warm wood feel handcrafted and luxe.

    This is an investment piece, but the payoff is stunning. Commission custom veneer with routed channels, then inlay thin brass or copper stripping (available from specialty woodworkers). Total cost: $600–$900 installed. Alternatively, apply brass geometric tape as a temporary overlay for $30–$50. The metal reflects light and adds visual movement. This approach works best with warm wood tones. It’s not for every home, but if you love architectural details, this is your statement.

    The finished look feels like a piece of functional art rather than just a door.

    9. Use Reclaimed-Look Veneer in Distressed Walnut

    Reclaimed wood vibes without the environmental impact or structural concerns. Distressed walnut veneer captures authenticity with stability.

    Manufacturers now create veneer with hand-scraped texture and color variation that mimics reclaimed wood. Cost: $300–$500 for quality distressed veneer doors. The surface shows knots, grain variation, and subtle color shifts that look genuinely aged. No special maintenance needed—the finish hides wear beautifully. Installation: $100–$150 by a pro. This style pairs perfectly with farmhouse, industrial, or cottage aesthetics. The door looks like it has a story without being fragile or needing constant care.

    Guests will swear it’s authentic reclaimed wood—you’ll just know better.

    10. Paint Veneer in Navy with a High-Gloss Finish

    Navy with high-gloss finish screams polished elegance. The shine adds formality and catches light dramatically.

    High-gloss finishes require prep work: sand the existing finish lightly, apply primer, then two coats of high-gloss paint. Cost: $40–$80 in quality paint. Time: full weekend including drying. Pro tip: use painter’s tape around hardware and trim for clean lines. High-gloss shows fingerprints more than matte, but it’s easier to wipe clean. Navy + gloss works especially well on traditional or coastal homes. Maintain the shine by buffing with a soft cloth occasionally. The result feels formal and timeless.

    Your door becomes an architectural detail people comment on for years.

    11. Layer Soft Greige Veneer with Woven Rattan Hardware

    Greige (gray + beige) is the neutral everyone’s obsessed with. Pair soft greige veneer with organic hardware for understated sophistication.

    Greige veneer works as a universal backdrop—it complements almost every interior style. Most veneer doors come in greige, or stain existing wood with greige-toned stain ($15–$30). Woven rattan handles ($40–$80) add warmth and texture. Time: 20 minutes to swap hardware, 4 hours if staining. The beauty here is that greige feels intentional without being bold. It’s calming and modern. This is perfect if you’re not ready for statement colors but want your door to feel designed.

    The combination of soft color and natural texture creates a welcoming, contemporary entryway.

    12. Create Drama with Black Matte Veneer and Hidden Hardware

    Minimalism taken to its peak: a black veneer door where hardware almost disappears. This reads as architectural and expensive.

    This look requires either a door designed with integrated hardware or careful placement of slim, flush-mount handles. Cost: $350–$600 for doors with design integration. Standard doors + slim hardware addition: $150–$250. Installation: $100–$150 by a pro. The payoff is a clean, gallery-like entryway. This style works best on larger doors where the scale allows hardware to feel intentional. It’s bold and not for everyone, but if you love the minimalist aesthetic, it’s perfect.

    Your entryway becomes an exercise in restraint and contemporary design.

    13. Mix Natural Cherry Veneer with Copper Accents

    Cherry veneer is warm, rich, and naturally sophisticated. Add copper hardware for an unexpectedly modern twist on tradition.

    Cherry wood has been around forever, but pairing it with contemporary copper hardware feels fresh. Order cherry veneer doors ($200–$450) or stain existing veneer with cherry stain ($15–$25). Copper hardware: $50–$100. Installation: $100–$150 for doors, 15 minutes for hardware. The warm reddish tones of cherry look especially beautiful in homes with brass fixtures or warm-toned walls. Copper will develop a patina over time, adding character. This isn’t trendy—it’s timeless with a slightly updated edge.

    The result is a door that feels both classic and subtly sophisticated.

    14. Apply Wood-Grain Contact Paper Over Solid Color Veneer (Renter-Friendly)

    Renters, this is your hack: apply peel-and-stick wood-grain contact paper over existing veneer for instant warmth without damage.

    Contact paper with realistic wood-grain patterns comes from Amazon, Target, or home improvement stores ($15–$30 per roll). Clean the door thoroughly, measure carefully, and apply smoothly using a squeegee. Time: 30–45 minutes. The quality has improved so much that it looks surprisingly authentic from a few feet away. When you move, peel it off—no landlord drama. This works best on flat doors without existing texture. The limitation is durability in high-traffic areas, but for most entryways, it lasts years.

    It’s the fastest, cheapest way to completely change your door’s vibe.

    15. Stain Veneer in Espresso with Tall, Slim Hardware

    Espresso stain is bolder than black—rich and warm with visible grain. Pair it with tall, linear hardware for a gallery-like look.

    Espresso stain ($15–$30) applied over existing light veneer requires light sanding and two coats. Time: 4–6 hours plus drying. The deep color hides dust and shows wood grain beautifully. Tall hardware (like a long bar handle, $40–$80) emphasizes vertical space and feels architectural. This combo transforms basic entryways into design statements. The espresso tone is dark enough for drama but warm enough to feel inviting. Maintenance: occasional dusting, maybe a re-seal every few years.

    Your door stops being background and becomes part of the story.

    16. Layer Light Oak Veneer with Woven Wall Hanging Above

    Veneer doors work with styling too. Light oak veneer + complementary wall decor create a curated entryway that feels intentional.

    Light oak veneer ($180–$350) pairs beautifully with natural materials and bohemian styling. Add woven wall hangings, sculptures, or textile art above ($40–$150). This approach turns your door into part of a larger design story. Time to install: 2 hours for door, 30 minutes for wall styling. The combination of warm wood grain and handmade textiles feels artisanal and thoughtful. This works especially well in homes with eclectic, maximalist, or bohemian aesthetics. You’re not just hanging a door—you’re creating an experience.

    Your entryway becomes an extension of your design personality.

    17. Use Ultra-Slim Profile Veneer with Oversized Clear Glass Panels

    Maximize light while keeping the sophistication of veneer. Use a veneer door with oversized glass panels and slim frame profiles.

    This hybrid approach works best on doors with panel inserts. Order semi-custom doors with minimal wood frame around large glass sections ($400–$700). The veneer frame can be any finish—greige, natural wood, or even matte black. Time: 2–3 hours for installation by a pro. The payoff is an incredibly bright, airy entryway that still feels designed and sophisticated. This style particularly suits modern homes or darker entryways needing more light. You get the visual interest of a designed door without blocking natural light.

    Your entry becomes the brightest, most welcoming room in the house.

    18. Paint Veneer in Warm Terracotta for a Layered Boho Look

    Terracotta isn’t just for pots—it’s a stunning entryway color. Warm, earthy terracotta veneer feels collected and artistic.

    Terracotta stain or paint ($12–$25) applied over existing light veneer creates warmth immediately. The color variation in natural terracotta finishes means no two doors look exactly identical—which adds charm. Time: 4–5 hours including two coats. Pair with rustic hardware or natural materials for a complete bohemian look. Terracotta works beautifully in Southwestern, Mediterranean, or eclectic homes. The warm tone is inviting and feels slightly unexpected. Maintenance is minimal—terracotta hides wear naturally.

    Your entryway instantly transports people to somewhere warm and welcoming.

    19. Create a Colorblocked Door with Painted Veneer Sections

    Colorblocking elevates your door from one-note to architectural. Use painter’s tape to divide veneer doors into geometric sections, then paint each differently.

    Choose 2–3 complementary paint colors and plan your blocks with tape. This requires precision but pays off dramatically. Paint cost: $30–$60 total. Time: full weekend. The trick is choosing colors that feel intentional together—try greige + terracotta, or navy + cream. This approach works best on flat panel doors without existing texture. It’s bold but modern, and unexpected enough that guests will immediately notice. This is perfect if you want statement without going all-in on one color.

    Your door becomes a miniature art installation rather than a background detail.

    20. Combine Blonde Wood Veneer with Sculptural Brass Hardware

    Blonde wood veneer feels Scandinavian and light. Sculptural brass hardware adds unexpected personality and craftsmanship.

    Blonde veneer doors come naturally light or can be achieved with whitewashed or cerused stain. Cost: $200–$400 pre-finished, or $20–$35 in stain product for existing doors. Sculptural hardware (look for artisan pieces on Etsy or specialty hardware sites) runs $60–$150 and becomes a conversation starter. Installation: 30 minutes for hardware, 4 hours if staining. The combination feels collected and thoughtful, not mass-produced. Blonde wood + brass creates warmth without heaviness. This works especially well in minimalist, Scandinavian, or light-filled homes.

    Your door becomes both functional and a small sculpture worthy of a design publication.

    21. Use Weathered Gray Veneer for a Coastal Modern Look

    Weathered gray veneer captures that coastal, driftwood aesthetic without the fragility of real weathered wood. It’s stable, sophisticated, and inherently stylish.

    Weathered gray veneer doors come pre-finished from manufacturers ($250–$450) or you can achieve the look with gray-blue stain over existing veneer ($15–$30). The finish typically includes hand-scraped or varied grain to mimic genuine weathering. Time to apply: 4–5 hours plus drying. Pair with silver or whitewashed hardware ($40–$80). The result feels like a beach cottage or modern coastal home. This color is forgiving—it hides dust and shows character over time. Maintenance is minimal.

    Your entryway instantly communicates calm, collected coastal style.

    22. Apply Geometric Laser-Cut Metal Overlay to Veneer Door

    Take texture to another level with laser-cut metal overlays. Geometric patterns cast shadows and create visual depth beyond the door itself.

    This is a premium option: commission custom laser-cut metal overlays from specialty makers or online platforms ($400–$800 installed). The overlay can be matte black, copper, or brass. Installation requires careful alignment but transforms the door into functional art. Time for installation: 2–3 hours by a pro. Maintenance is minimal—the metal is sealed. This works best on larger doors where the pattern scale reads clearly. It’s an investment piece but absolutely one-of-a-kind. Not for renters, but perfect for homeowners who want architectural drama.

    Your door becomes a sculptural element that changes throughout the day as light shifts.

    23. Pair Warm Walnut Veneer with a Modern Steel Frame

    Industrial-modern: walnut veneer within a steel frame. The contrast between organic wood and industrial metal feels contemporary and collected.

    This requires either ordering a semi-custom door with steel framing or retrofitting existing doors with a metal frame kit. Cost: $500–$800 installed. Walnut veneer ($200–$400) + steel frame ($200–$300) + installation labor ($100–$150). The steel frame emphasizes the door’s scale and creates a gallery-like presentation. This style suits modern, industrial, or loft-style homes. Walnut’s warmth softens the steel’s hardness, creating balance. Maintenance: occasional dust, and wipe the steel frame monthly to prevent dust buildup.

    Your door becomes an architectural statement that reads as intentional and designed.

    24. Stain Veneer in Rich Mahogany with Polished Bronze Hardware

    Mahogany veneer is warm, rich, and inherently elegant. Pair it with polished bronze for a refined, traditional aesthetic that never feels dated.

    Mahogany stain ($15–$30) applied to existing light veneer requires light sanding and two careful coats. Time: 5–6 hours plus dry time. Polished bronze hardware ($50–$120) ages beautifully and develops a darker patina over years. The combination reads as established, refined, and timeless. This works especially well in homes with traditional architecture or dark, moody interiors. Mahogany’s depth hides dust and minor scratches. Maintenance: occasional dusting and maybe a re-seal every few years.

    Your entryway feels like it belongs in a historic home or exclusive private club.

    25. Layer Soft Cream Veneer with Warm Brass Accents Throughout

    Cream veneer is a neutral that reads as soft and intentional. Repeat warm brass accents (hardware, house numbers, lighting) for a layered, curated look.

    Cream veneer ($180–$350) or cream stain ($15–$25) works as a universal backdrop. Layer warm brass throughout: handle ($60–$100), house numbers ($30–$60), porch light ($40–$80). The repeated metal creates visual continuity. Time: 2 hours to install door, 1 hour for coordinating hardware. This approach works with almost every design style. Cream is timeless and doesn’t compete with other design elements. The layered brass feels collected and sophisticated without being loud.

    Your entryway reads as intentionally designed and warm, not accidental.

    26. Use Textured Bark-Look Veneer for Organic Drama

    Bark texture veneer feels raw, organic, and architectural. It’s dramatically textured but still refined—not rustic-rough.

    Bark-textured veneer comes from specialty manufacturers and creates genuine three-dimensional surface variation. Cost: $350–$600 for quality bark-texture doors. Installation: $100–$150 by a pro. The texture photographs beautifully and feels like functional sculpture. This works best in contemporary, industrial, or nature-inspired homes. The surface hides dust and fingerprints naturally. Time commitment: just installation, no staining or painting needed. Maintenance is minimal—occasional dusting.

    Your door becomes a tactile, organic focal point that invites touch.

    27. Paint Veneer in Soft Blush Pink for Unexpected Elegance

    Blush pink is having a moment, and it’s sophisticated, not cutesy. Soft pink veneer feels modern, slightly unexpected, and endlessly elegant.

    Blush pink paint ($20–$35 per gallon) requires primer on existing veneer to ensure even coverage. Two coats recommended. Time: 4–5 hours including prep. The key is choosing a muted, dusty blush rather than bright pink—this reads as refined. Pair with minimal hardware (matte black or brushed nickel, $40–$80) to keep it sophisticated. This color works especially well in contemporary homes with mostly neutral interiors. The door becomes a subtle statement that guests comment on. Blush pink ages gracefully and feels current without being trendy.

    Your entryway becomes an unexpectedly elegant and welcoming introduction to your home.


    Save this post and try one idea this week. Whether you go bold with color, embrace natural wood grain, or layer hardware details, your veneer door is about to become the most-noticed feature in your entryway. Start with what speaks to you, and watch how quickly a single design choice changes everything.

  • 26 Wooden Double Door Design Ideas That Feel Grand & Timeless

    26 Wooden Double Door Design Ideas That Feel Grand & Timeless

    Double doors make a statement the moment you walk through them. Whether you’re designing a new entry, refreshing your home’s focal point, or creating that wow factor for guests, wooden double doors offer warmth, sophistication, and lasting appeal that never goes out of style. The right design can completely reshape how your space feels—more open, more welcoming, more you. We’ve gathered 26 design ideas that range from budget-friendly styling tweaks to investment-worthy architectural upgrades. Each one works with different home styles, budgets, and skill levels. Let’s find the double door design that makes your home feel like the sanctuary you deserve.

    1. Paint Classic Doors in Matte Black

    Matte black doors instantly elevate any entryway with sleek, contemporary appeal while maintaining the warmth of wood underneath. This color works on traditional, modern, and transitional homes alike—it’s the design chameleon that fits everywhere.

    Pick a high-quality exterior paint designed for wood doors (Benjamin Moore’s Aura or Sherwin-Williams Emerald are reliable choices). You’ll need two coats, so plan for a full day of work including drying time between coats. Cost runs $30–$80 for paint plus brushes and primer. The transformation is dramatic: your doors become a bold architectural feature rather than just functional. Pair with warm metallics like brushed gold or antique brass hardware for contrast.

    Your entry instantly looks intentional and curated—the kind of design choice people notice and remember.

    2. Add Glass Panels for Light Flow

    Glass panels divide visual weight while flooding your entryway with natural light, making even small foyers feel open and welcoming. This works beautifully in homes lacking windows near the entry.

    You can retrofit existing solid doors with glass inserts (requires professional installation, $400–$1,200 per pair) or replace with pre-made glass-panel doors from specialty retailers. Frosted or textured glass options provide privacy while maintaining the light benefit. Installation takes one day for professionals. If you’re keeping existing doors, consider temporary peel-and-stick frosted film ($15–$40) for a renter-friendly test run.

    Light streams through your entryway all day, making the space feel bigger and brighter than it actually is.

    3. Install Oversized Hardware for Drama

    Hardware is the jewelry of your doors—oversized or sculptural handles immediately elevate the entire aesthetic. This is an easy, renter-friendly upgrade that changes everything about how your doors look.

    Replace standard handles with larger statement hardware from sources like Anthropologie ($60–$150 per handle), Rejuvenation ($80–$200), or even IKEA ($20–$60 for bold geometric options). Most handware swaps take 20 minutes per door using a basic screwdriver. Keep the old hardware in a labeled bag in case you move. Pro tip: match your hardware finish to other metals in your space (if your light fixtures are brushed gold, choose brushed gold handles too).

    Your doors gain unexpected personality and luxury presence without any structural changes.

    4. Create Symmetry with Identical Side Panels

    Symmetrical sidelights frame your double doors and create formal, balanced architecture that photographs beautifully. This is ideal if you’re renovating your entry or adding architectural interest to a plain facade.

    This requires professional installation ($800–$2,500 depending on size and materials) as it involves structural changes. Sidelights can be frosted, clear, or textured glass. Installation typically takes one to two days. If you’re renting or not ready for commitment, you can achieve similar visual balance by hanging large rectangular mirrors on each side of existing doors ($50–$200 for mirrors).

    The space feels more grand, more intentional, and perfectly framed for that Instagram-worthy entry moment.

    5. Embrace Natural Wood Grain with Clear Finish

    Sometimes the best design is letting the wood speak for itself. Clear finishes (rather than paint or stain) showcase authentic grain patterns, knots, and color variation that add character and warmth.

    Choose doors made from quality wood like mahogany, oak, or walnut where the grain is genuinely beautiful. Seal with water-based polyurethane ($20–$40 per quart) for protection without darkening the wood. Application takes 4–6 hours including drying between coats; easier if you hire someone ($300–$600 labor). Maintenance involves occasional resealing every 3–5 years depending on weather exposure.

    You get authentic, timeless beauty that feels connected to nature and craftsmanship.

    6. Mix Wood with Steel Frames (Industrial Chic)

    Combining wood with steel frames creates that coveted industrial-meets-warm vibe. The thin metal lines add contemporary structure to natural wood, perfect for modern farmhouse or industrial homes.

    This requires custom doors or retrofitting, typically $1,000–$2,500 from specialized fabricators. Check local custom door makers or browse platforms like Etsy for artisan builds. Installation time varies but expect one to two days. This is an investment piece, but the visual impact is worth it—you’re creating a genuine architectural focal point.

    Your doors become a conversation piece that blends warmth and edge in unexpected ways.

    7. Stain Doors in Rich Walnut

    A rich walnut stain deepens the wood’s natural beauty while creating a luxe, grounded aesthetic that works in traditional, transitional, and modern spaces. It’s timeless without feeling dated.

    Sand existing doors lightly (2–3 hours labor, or $100–$200 if hiring someone), then apply walnut stain in 2–3 coats ($15–$30 for stain). Let each coat dry fully between applications. Total project time: one weekend. Seal with polyurethane for protection. Pro tip: test stain on a hidden area first—walnut can range from warm medium brown to deep chocolate depending on the brand.

    Your doors gain depth and richness that makes the entire entry feel more intentional and high-end.

    8. Add Decorative Glass with Geometric Patterns

    Patterned glass combines privacy with artistry. Geometric or Art Deco designs add personality while maintaining light flow and a contemporary edge.

    Install etched, frosted, or decorative glass inserts via professionals ($600–$1,500 depending on pattern complexity). Alternatively, apply frosted film with geometric patterns ($30–$80 per door) for a renter-friendly option. Peel-and-stick films last 5–7 years before needing replacement. Custom etching on existing glass requires sending doors to specialists, which takes 2–3 weeks.

    Your doors become functional art that guests notice and admire immediately.

    9. Paint Doors in Deep Forest Green

    Forest green brings calm sophistication to an entryway while feeling less bold than black. It’s trending in 2025 and pairs beautifully with brass, black, or natural wood hardware.

    Use exterior-grade paint in rich green (Sherwin-Williams Urbane Bronze or Forest Green run $30–$60). Plan two coats with 24-hour drying between them. Total labor: one day. This color grounds a space and feels intentional—not trendy for the sake of trending. It works especially well on homes with white, cream, or gray trim.

    Your entry feels curated, calm, and distinctly you—the kind of color choice that makes people ask, “where did you find that green?”

    10. Install Oversized Door Numbers for Personalization

    Oversized door numbers are functional design that immediately personalize your home’s identity. They’re visible from the street, add architectural interest, and tell visitors exactly where to find you.

    Source statement numbers from Rejuvenation ($40–$80), Etsy artisan sellers ($50–$150), or even hardware stores like Ace ($20–$40). Mount them centered above the doors or on the frame using appropriate hardware for your door material. Installation takes 30 minutes. Choose materials that complement your hardware finish (brass, black steel, copper, or natural wood).

    Your home gains a professional, welcoming presence that says you’ve thought about every detail.

    11. Create a Monochromatic Entry (Black Doors, Black Frame)

    Full monochromatic black creates striking drama—doors, frame, hardware all in coordinated black tones. This works for modern, minimalist, and even traditional homes seeking edge.

    Paint doors and trim in the same matte black finish (same $30–$80 paint investment as before). Choose black hardware to make it disappear into the design rather than contrast. This technique requires precision and clean lines, so be meticulous with painter’s tape. The final look is gallery-like and intentional—very 2025 modern.

    Your entryway becomes a statement space that photographs beautifully and feels deliberately designed.

    12. Add Transom Windows Above Double Doors

    Transom windows sit above doors, maximizing natural light and adding architectural interest. This instantly makes an entry feel taller, brighter, and more grand.

    Retrofitting requires professional installation ($800–$2,000 depending on size) with structural considerations. This is typically a renovation project rather than a quick swap. Installation takes 2–3 days. If you’re renting, recreate the visual effect with a large rectangular mirror or decorative shelf mounted above doors ($50–$200).

    Your entry becomes a light-filled sanctuary that feels bigger than it actually is.

    13. Use Reclaimed or Antique Wood Doors

    Reclaimed doors bring history, character, and environmental consciousness. Each door tells a story through its patina, grain variation, and authentic aging.

    Source reclaimed doors from salvage yards, architectural salvage shops, or online marketplaces like Craigslist, Facebook Marketplace, or specialty retailers ($300–$1,500 per pair depending on age and wood type). Have them inspected for soundness—some antique doors need restoration. Plan $200–$600 for professional conditioning or refinishing. Installation is standard. Pro tip: reclaimed wood is sustainable and unique, so no two doors look identical.

    You get genuinely one-of-a-kind doors that feel connected to heritage and handcraftsmanship.

    14. Install French-Style Doors with Grid Patterns

    French doors featuring grid-patterned glass panels create structured elegance while maintaining light flow. The geometric divisions feel classic and intentional.

    French-style doors run $400–$1,200 per pair depending on glass quality and wood type. Installation is standard door replacement. Muntins (the grid dividers) can be removable for easy cleaning or permanent for authentic aesthetics. This style pairs beautifully with traditional or transitional homes and works surprisingly well in modern settings for contrast.

    Your entry gains refined European influence without feeling costumey—just genuinely elegant.

    15. Paint Doors in Soft Sage Green

    Sage green is the softer, more contemporary cousin of forest green. It brings calm, nature-connection, and subtle sophistication without the boldness of deeper greens.

    Use exterior paint in sage or dusty celadon (Benjamin Moore’s Healing Aloe or equivalent, $30–$60). Two coats recommended for even coverage. This color works beautifully with natural brass, gold, or black hardware. Total time: one weekend for painting and drying.

    Your entry feels peaceful and intentional—a welcoming threshold that sets a calm tone for your home.

    16. Add Brass or Gold Hardware for Warmth

    Hardware finishes dramatically impact overall aesthetic. Brushed gold or warm brass adds luxury and cohesion if coordinated with other metals throughout your home.

    Upgrade handles, hinges, and locks to brushed gold or warm brass ($80–$200 per set depending on quality). Brands like Rejuvenation, Anthropologie, or even Amazon have affordable options. Swapping hardware takes 45 minutes with a basic screwdriver. Match finishes with your light fixtures and kitchen hardware for cohesion.

    Your doors feel curated and high-end—small details create big impact on the overall aesthetic.

    17. Create Contrast with Light Doors and Dark Trim

    Playing contrast between door color and trim color creates visual interest and architectural definition. Light doors with dark (or vice versa) trim structure the space beautifully.

    Keep doors in natural or light-stained wood, paint trim in deep charcoal or navy ($20–$40 for trim paint). Use painter’s tape to ensure crisp lines between door and trim. This technique works in virtually any home style and immediately looks intentional. Total time: one to two days including prep and drying.

    Your entry gains clear architectural definition and visual sophistication.

    18. Install a Door Pediment (Decorative Arch Above)

    A pediment—the decorative arch or triangular element above doors—adds formal, architectural grandeur. This is a signature feature of traditional and colonial-style homes.

    Pedestals can be purchased as additions ($200–$800 depending on ornamentation) or custom-built by a carpenter ($600–$2,000 labor). Installation requires professional mounting. This is an investment piece with significant visual impact. It works best on homes with at least 9-foot ceiling height to maintain proportions.

    Your doors become a true architectural focal point that feels authentically heritage-inspired.

    19. Sand and Seal Doors to Show Natural Beauty

    Sometimes refurbishing existing doors to show their natural beauty beats replacing them. Sanding removes old finishes and surface damage, revealing authentic wood grain underneath.

    Professional sanding and sealing runs $300–$800 depending on door condition. DIY is possible if doors are in decent shape ($30–$60 for sandpaper and sealer, plus 8–10 hours labor). This process takes 2–3 days for professionals including drying time. The result is doors that feel renewed without being replaced.

    Your original doors are restored to museum-quality beauty with rich, lustrous character.

    20. Paint Doors in Deep Navy Blue

    Navy is the bold choice that works everywhere. It’s sophisticated enough for traditional homes but contemporary enough for modern spaces—the color that never goes out of style.

    Choose exterior paint in true navy, not black-navy (Sherwin-Williams Naval or Benjamin Moore’s Hale Navy are standards, $30–$60). Two coats ensure rich color and coverage. Navy pairs beautifully with white trim, brass hardware, or even sculptural black handles. Total time: one weekend.

    Your entry gains confident, timeless appeal that feels both classic and current.

    21. Add Leaded or Beveled Glass Details

    Leaded or beveled glass combines light refraction with traditional craftsmanship. It adds artistic depth and vintage charm while maintaining privacy through texture.

    Custom leaded glass inserts run $800–$2,000 depending on pattern complexity. Beveled glass retrofit costs $400–$1,200. These pieces last indefinitely and increase home value. Pro tip: beveled glass is more durable than leaded glass for high-traffic entries. Installation takes one to two days.

    Light passing through your doors creates moving patterns that make your entry feel like a gallery space.

    22. Install Modern Minimalist Hardware

    Minimalist hardware—thin, geometric, understated—complements modern and transitional doors by letting the doors themselves be the focus.

    Choose simple, well-designed handles from Rejuvenation ($40–$100), Wayfair ($25–$80), or Danish design retailers ($60–$150). These pieces are often easier to install and clean than ornate options. Geometric or D-shaped pulls are current and work well on all wood finishes. Installation: 20 minutes per door.

    Your doors look intentionally designed rather than accessorized—clean, contemporary beauty.

    23. Paint Doors in Rich Plum or Burgundy

    Rich plum or burgundy is the color for homeowners seeking something beyond standard greens and blues. It’s luxe, unexpected, and deeply sophisticated.

    Use exterior paint in deep jewel tones (Benjamin Moore’s Caliente or Sherwin-Williams Red Bay, $35–$65). This color requires meticulous prep and two coats for true saturation. It pairs especially well with brass, natural wood, or warm metallics. Total time: one to two days for painting and drying.

    Your entry becomes genuinely memorable—the kind of bold color choice people ask about and admire.

    24. Create Asymmetrical Visual Interest with Mixed Stains

    Using two subtly different wood stain tones on each door creates organic, artistic variation. This technique works beautifully for custom builds or creative refinishing projects.

    Choose two coordinating stain colors (warm walnut and golden oak, or espresso and natural, $15–$30 for stains). Mask each door to apply different stains, sealing both with matching clear coat. This requires precision but yields genuinely unique results. DIY time: one full day. Professional execution: $300–$600.

    Your doors become subtle works of art—each one slightly different, creating organic, intentional beauty.

    25. Install Textured or Carved Wood Panels

    Carved or textured wooden panels add dimensional craft to doors. Whether geometric, botanical, or abstract, carved details create light-catching depth that reads as bespoke.

    Custom carved doors run $1,500–$4,000 per pair from specialty craftspeople (check Etsy or local carpenters). Pre-made carved panels are available for retrofit ($600–$1,500). This is an investment piece for homeowners seeking genuine handcrafted architecture. Installation takes one to two days.

    Your doors become functional sculpture—the kind of detail that makes guests pause and ask about the craftsmanship.

    26. Layer Multiple Design Elements (Hardware + Paint + Glass)

    The most impactful doors combine multiple elements: color, hardware, glass, and architectural details. Layering creates depth and deliberate sophistication.

    Start with a solid color foundation (matte black or navy), upgrade hardware to statement-making pieces ($100–$200), add glass panels if possible ($400–$1,000), and frame with contrasting trim or transom windows. Budget for multiple upgrades: $800–$2,500 total depending on how many elements you layer. This comprehensive approach requires planning but yields a genuinely magazine-worthy entry.

    The result is an entryway that feels completely intentional and beautifully designed—the focal point everyone notices and admires.


    Pin this guide and start with one element this weekend—maybe it’s fresh hardware or a bold paint color. Small upgrades to your double doors create surprising impact, and your entry deserves to feel as welcoming as the home behind those doors.

  • 23 Outdoor Entryway Styling Ideas That Elevate Curb Appeal

    23 Outdoor Entryway Styling Ideas That Elevate Curb Appeal

    Your front entrance is the first thing people notice about your home—and the good news? You don’t need a major renovation to make it stunning. Whether you’re renting or own, working with a tight budget or ready to invest, these 23 ideas will help you create an entryway that makes guests want to stay and keeps you genuinely excited to come home. We’re mixing quick fixes with statement pieces, all designed to boost curb appeal and set the tone for everything beyond that door. Let’s dive in.

    1. Paint Your Front Door a Bold, Unexpected Color

    A fresh front door color is the fastest way to completely refresh your entryway’s personality. This single change costs under $100 and takes one afternoon, yet feels like a professional upgrade. Choose from trending 2025 shades like deep olive, charcoal gray, or burgundy—these earth tones and moody hues pair beautifully with brick, wood, or neutral siding.

    Pick a quality exterior paint in satin or semi-gloss finish (Benjamin Moore, Sherwin-Williams, or Behr all have excellent options). Prep the door by cleaning and lightly sanding, then apply two coats. Budget: $40–$80 for paint and supplies. Time: 4–6 hours including drying. If you’re renting, check with your landlord first—many allow it if you agree to repaint when you leave.

    The result? Your entire home feels more intentional and cohesive. Suddenly, that dated landscaping and weathered stoop don’t matter as much because your eye goes straight to that gorgeous door.

    2. Add Symmetrical Matching Planters

    Symmetry signals polish, and two matching planters on either side of your door instantly elevate the entire entrance. This works for renters (planters stay with you) and costs $50–$150 depending on size and material. Choose neutral tones like concrete gray, terracotta, or cream—these complement any door color and 2025’s earthy palette.

    Fill with seasonal plants: evergreens for year-round structure, ornamental grasses for movement, or flowering perennials for color. Budget: $80–$150 for two quality planters plus soil and plants. Time: 30 minutes to arrange. Plant nurseries often have sales in spring and fall. This is a renter-friendly hack that makes any temporary space feel intentional and finished.

    Your entryway goes from bare to curated in one afternoon. Guests notice the symmetry and care immediately, and you get the daily pleasure of stepping past something beautiful.

    3. Refresh House Numbers with Modern Hardware

    Old, dusty house numbers are an easy detail to overlook—until you replace them and wonder why you waited so long. Modern house numbers in brushed gold, matte black, or stainless steel cost $30–$80 and take 10 minutes to install. This 2025 trend emphasizes clean lines and mixed metals, so choose a style that echoes your door hardware.

    Remove old numbers, fill any holes, lightly sand the area, and mount new ones with the included hardware. Budget: $30–$80 depending on material and size. Time: 15 minutes. Etsy, Wayfair, and Amazon all have excellent options in various styles—from minimalist geometric to vintage-inspired numbers. This is perfect for renters using damage-free adhesive strips.

    This small change makes your home look well-maintained and intentional. It’s the kind of detail that separates “nice” from “wow, they really care about this place.”

    4. Layer Lighting with Wall Sconces and Uplighting

    Lighting transforms your entryway from day to night and signals that someone thoughtful lives here. Add matching sconces on either side of your door ($60–$200 per pair) and consider uplighting for landscaping ($40–$150 per fixture). This creates depth, safety, and genuine ambiance.

    Choose fixtures that complement your door hardware—if your numbers are matte black, go with matte black sconces. Install sconces at eye level (roughly 60–66 inches from the ground) on both sides of the door. For landscaping, place small solar uplighters to highlight trees or architectural features. Budget: $100–$300 for all lighting. Time: 2–3 hours if wiring; instant if solar. Many sconces work with existing outlet boxes, so check before buying.

    Once the sun sets, your entryway becomes a destination. You’ll love coming home to a lit, welcoming entrance, and visitors will feel the care you’ve invested.

    5. Install a Statement Door Knocker or Handle

    A great door knocker or handle is functional art that says something about your style. Modern options in brass, matte black, or mixed metals cost $30–$100 and take 10 minutes to install. This works especially well if your door is a solid color without visual interest.

    Replace your existing hardware (or add a knocker if you only have a handle) by unscrewing old pieces and installing the new one with provided hardware. Budget: $30–$100 depending on design and material. Time: 10 minutes. Look for vintage-inspired designs on Etsy or modern minimalist styles on Wayfair and West Elm for on-trend options.

    Your entryway gains personality and character. Every time you unlock that door, you interact with something genuinely beautiful—and your guests will definitely notice.

    6. Create a Welcoming Stoop with a Quality Door Mat

    A well-placed door mat grounds your entryway and signals organization. Choose one in natural materials like jute, wool, or cotton in neutral colors ($25–$60) that complements your 2025 earth-tone palette. A 2′ x 3′ size works for most residential doors.

    Position the mat directly centered in front of the door on the stoop. If you’re renting, this is completely portable and adds instant polish. Budget: $25–$60 for a quality mat. Time: instant—just unroll and position. Etsy, Target, and Home Depot all carry stylish options. Look for patterns that hint at biophilic design (leaf motifs, natural textures) for added personality.

    Your entryway immediately feels more intentional and finished. The mat also has a practical benefit: guests know exactly where to wipe their feet.

    7. Mix Materials: Add Wood Accents to Brick or Stone

    Mixing materials—specifically adding warm wood to brick or stone—is one of 2025’s biggest trends and instantly adds depth and richness. Build or buy a wooden planter box, add wooden trim around the door frame, or install a wooden railing. This costs $50–$300 depending on whether you DIY or buy ready-made.

    If building, use cedar or composite wood (weather-resistant) and stain in warm oak or walnut tones. Budget: $50–$150 for materials if DIY; $200–$400 if ordering online. Time: 2–4 hours for installation. If you’re renting, portable wooden planters achieve the same mixed-material effect without permanent changes.

    The combination of wood warmth and brick or stone creates visual interest and feels intentionally designed. Your entryway stops looking flat and gains architectural character.

    8. Add a Living Wall or Vertical Garden

    A vertical garden or living wall brings biophilic design (nature’s calming effect) right to your entryway. This 2025 trend costs $80–$250 for a ready-made system and creates instant visual impact. Choose low-maintenance plants like ivy, ferns, or succulents that thrive in your climate.

    Install a modular wall system (like Woolly Pocket or similar) directly on your siding or use a freestanding trellis with climbing plants. Budget: $80–$200 for system plus plants; $100–$250 if buying pre-planted options. Time: 1–2 hours for installation. Water as needed (systems vary, so check requirements). Even renters can use a trellis system in a large planter for the same effect.

    Your entryway becomes a conversation starter and genuinely improves air quality. You’ll feel the biophilic shift every time you approach your door—suddenly, you’re noticing greenery and growth instead of just concrete.

    9. Paint or Stain Your Front Steps

    Neglected front steps scream “needs maintenance,” while clean, freshly painted ones signal care and attention. Use concrete paint, deck stain, or exterior paint suitable for high-traffic areas. Budget: $30–$80 for paint and supplies. Time: 4–6 hours including prep and drying. Choose a color that complements your door and siding—trending colors include charcoal, olive, cream, or even a soft gray-green.

    Prep by cleaning thoroughly, letting dry completely, then applying two coats with a quality brush or roller. Let cure for 48 hours before heavy foot traffic. If you’re renting, use a removable deck paint or check your lease first.

    Your entryway instantly looks maintained and intentional. Clean, freshly painted steps make the entire home feel more valuable—even if nothing else changes.

    10. Install Black Matte Accents Around the Door Frame

    Black matte accents—trim around the door frame, window frames, or even a painted border—create drama and visual interest without being overwhelming. This 2025 trend works especially well with brick, stone, or neutral siding. Paint the trim or use adhesive-backed metal trim ($30–$100).

    Use a quality matte black exterior paint or pre-made trim pieces. Budget: $30–$80 for paint or trim materials. Time: 2–3 hours for painting. This pairs beautifully with brass or gold hardware for a mixed-metal, upscale look. If you’re renting, focus on portable elements like a black mat or planters instead of painting.

    The matte black draws the eye and creates a curated, intentional entry. Your door becomes a focal point rather than just an opening.

    11. Add Uplighting to Highlight Architectural Features

    Uplighting—ground-level lights pointing upward—highlights your home’s best architectural features (gabled roofs, columns, stonework) and creates a high-end, magazine-quality feel. Solar uplighters cost $40–$100 per fixture; hardwired options run $150–$300 per fixture.

    Position lights 2–3 feet from the base of the feature you want to highlight, angled slightly upward. Budget: $40–$150 for solar; $150–$300 per fixture if hardwired. Time: 30 minutes for solar; 2–3 hours if wiring needed. Solar options are renter-friendly and require no installation beyond positioning.

    At night, your entryway becomes architectural and dramatic. The uplighting signals that someone invested in thoughtful design, and you gain genuine ambiance every evening.

    12. Refresh Your Landscaping with Native Plants

    Native plants align with 2025’s sustainability focus and biophilic design while requiring less water and maintenance than ornamental imports. Replace tired shrubs or add new beds with plants that thrive in your region. Budget ranges from $50–$300 depending on how much you refresh.

    Visit your local native plant nursery to identify species suited to your climate, sun exposure, and soil. Budget: $50–$200 for plants; add $50–$100 for soil and mulch. Time: 2–3 hours for planting. This is a perfect weekend project and truly long-lasting. Ask nursery staff for recommendations specific to your hardiness zone.

    Your landscaping becomes an asset rather than an afterthought. Native plants bloom at predictable times, attract pollinators, and create genuine seasonal interest—plus they practically care for themselves.

    13. Install a Sleek, Modern House Number Planter

    Combine two essential elements—house numbers and planting—into one statement piece. Modern house number planters ($60–$150) serve double duty and look far more intentional than a bare number on the wall. Choose concrete, metal, or composite materials in neutral finishes.

    Position near your door or to one side of the entryway, fill with seasonal plants or greenery, and watch it become a conversation starter. Budget: $60–$150 for the planter. Time: 15 minutes to position and plant. Etsy, Wayfair, and specialty home stores carry excellent options. Renters can use this as a portable, non-permanent way to add polish.

    This single piece communicates “I care about design details” and adds function plus beauty to your entryway.

    14. Create Visual Balance with Dual Accent Chairs or Benches

    If you have porch or stoop space, add matching seating for visual balance and genuine functionality. Two Adirondack chairs or a single bench ($100–$300 total) create an inviting spot and signal hospitality. Choose finishes that complement your door and landscaping—natural wood, painted charcoal, or cream all work beautifully.

    Position symmetrically on either side of the entry or center a bench. Budget: $100–$300 for quality seating. Time: 30 minutes to position and stabilize. Look for weather-resistant options at Target, Wayfair, or West Elm. This is portable and perfect for renters with porch access.

    Your entryway becomes a destination people actually want to linger in. Plus, you get a functional spot to sit while greeting neighbors or waiting for guests.

    15. Mix Textures: Combine Brick, Wood, and Metal

    Layering textures—brick, warm wood, and sleek metal—creates visual interest and prevents your entryway from feeling flat or one-note. This trend dominates 2025 design. If you’re starting from scratch, consider thin brick veneer ($3–$8 per sq. ft.), cedar trim, and matte black hardware. For existing spaces, add wood trim, metal railings, or hardware to what you have.

    Budget: $100–$300 for accent pieces like trim, railings, or hardware. Time: 4–8 hours for installation depending on complexity. Mixed materials work beautifully with 2025’s earth tones and modern-traditional fusion style. Even renters can layer textures using wood planters, metal plant stands, and natural fiber mats.

    The combination of materials prevents visual monotony and creates genuine architectural interest. Your entryway feels curated and intentional rather than default.

    16. Install a Canopy or Awning for Practical Elegance

    A canopy or awning (metal, fabric, or wood) adds shelter, shade, and architectural interest. Modern options cost $200–$600 installed (or $100–$300 DIY). Choose styles that complement your home’s aesthetic—clean-lined metal for modern homes, fabric for traditional, or wood for rustic-modern blends.

    This works especially well if your door faces strong afternoon sun or receives heavy rain. Budget: $100–$300 for DIY installation; $300–$600 for professional install. Time: 2–4 hours for DIY; 1–2 hours for pros. Metal options are low-maintenance; fabric awnings require occasional cleaning. Check if your rental allows this before purchasing.

    The awning immediately makes your entryway feel more finished and intentional. You also gain practical shelter, which makes rainy days or sunny afternoons far more pleasant.

    17. Paint or Stain Your Front Door Frame Contrasting Trim

    High-contrast trim around your door frame emphasizes the door and adds architectural detail. Paint the frame in white, cream, or a complementary shade—this 2025 trend creates visual interest without clashing. Use quality exterior paint ($20–$40) and spend an afternoon refreshing the trim.

    Budget: $20–$50 for paint and supplies. Time: 2–3 hours. This technique works particularly well if you have a bold-colored door. The contrast draws the eye and makes your door appear more intentional and designed. Renters can use painter’s tape to create temporary trim effects if permanent painting isn’t an option.

    The contrasting frame instantly elevates your entryway’s architectural interest. That single detail transforms the entire entry from basic to polished.

    18. Add a Decorative Door Panel or Millwork Detail

    Decorative door panels, arched millwork, or a peaked accent above the door add character and visual depth. This could be an upgrade to your existing door ($300–$800) or a DIY addition using wood trim ($50–$150). Modern-traditional fusion styles blend sleek lines with arched details for a contemporary-classic feel.

    Look for wooden doors with raised panels, arched tops, or geometric details. Budget: $50–$150 for trim accents; $300–$800 for a new decorative door. Time: 2–3 hours for trim DIY; professional door replacement takes a few hours. This is a bigger investment but dramatically elevates your entryway’s architectural impact. Renters might prioritize other options unless you own.

    The added millwork detail transforms a flat door into an architectural focal point. Your entryway suddenly looks considered and designed rather than default.

    19. Frame Your Doorway with Climbing Vines or Trained Plants

    Climbing vines or trained plants frame your doorway naturally and embody 2025’s biophilic design trend. Choose varieties suited to your climate—ivy, clematis, climbing hydrangea, or jasmine. Install trellises ($30–$80 each) and plant ($20–$50 per plant). This takes time to establish (1–2 seasons) but creates stunning visual impact.

    Position trellises on either side of the door or above it, plant vines at the base, and train them upward as they grow. Budget: $80–$200 for trellises and plants. Time: 30 minutes to install; ongoing pruning as vines mature. This is long-lasting and genuinely increases your home’s curb appeal. Even renters can use annual vines (sweet peas, morning glories) for seasonal framing.

    Once established, your door is framed by living greenery. This creates a garden-like, welcoming effect that signals nature and care.

    20. Upgrade Your Door Hardware to Modern Mixed Metals

    Door hardware—handles, locks, and hinges—is functional art that signals design sophistication. Replace standard hardware with modern mixed metals ($80–$250 for a complete set). Trending 2025 options include brushed brass, matte black, or combinations of both. This is one of the highest-impact details people notice.

    Remove old hardware and install new pieces using provided templates and hardware. Budget: $80–$250 for quality handles, locks, and hinges. Time: 30–45 minutes for installation. Brands like Rejuvenation, Schoolhouse Electric, and Etsy offer excellent design-forward options that punch above their price point.

    The moment someone reaches for your door handle, they’re interacting with something genuinely beautiful. High-quality hardware makes your entire entryway feel premium and considered.

    21. Install Modern Garage Door Hardware or Accents

    If your garage faces your entryway, updated garage door hardware ($50–$150) instantly elevates the entire front facade. Matte black handles, hinges, or straps signal intentional design and complement 2025’s dark-accent trend. This small upgrade has outsized visual impact.

    Install new handles or accent straps using provided hardware—most mounts to existing garage door panels. Budget: $50–$150 for quality hardware. Time: 20–30 minutes for installation. This is perfect if you’re moving away from dated “modern farmhouse” white garage doors toward more nuanced, sophisticated looks.

    Your garage door becomes a design feature instead of an afterthought. Even if the door itself is standard, quality hardware instantly upgrades its appearance.

    22. Create a Color-Blocked Entryway Facade

    Color blocking—dividing your facade into geometric sections in complementary colors—is a bold 2025 trend that feels modern and intentional. Choose two or three trending colors like olive + cream, charcoal + warm gray, or burgundy + tan. Use quality exterior paint and painter’s tape to create sharp lines.

    Decide on your division point (waist-height, one-third/two-thirds split, or architectural features as natural dividers). Budget: $60–$120 for exterior paint. Time: 4–6 hours including taping and painting. This technique works beautifully with 2025’s earth-tone palette and modern-traditional fusion aesthetic. Renters should confirm this is acceptable before committing.

    The color blocking immediately modernizes your facade and signals bold design sensibility. Your entryway stops looking like everyone else’s and becomes genuinely distinctive.

    23. Add Sustainable Accents: Solar Lights, Reclaimed Materials, or Green Finishes

    Embracing 2025’s sustainability focus, add eco-friendly details like solar pathway lights ($30–$80), reclaimed wood planters or trim ($50–$200), or water-wise native plants. These choices reduce your environmental footprint while creating genuine visual interest. Green-finished metals, recycled composite materials, and sustainably sourced wood all communicate values while looking beautiful.

    Position solar lights along your walkway (they charge during day, illuminate at night), integrate reclaimed wood as planters or trim accents, and prioritize native plants for your landscaping. Budget: $50–$200 depending on elements you choose. Time: 1–2 hours for installation. These materials often age beautifully and develop character over time, which adds to their appeal.

    Your entryway communicates both design sophistication and environmental consciousness. You’re not just creating curb appeal—you’re making choices that align with your values.


    Pick one idea from this list and tackle it this weekend—you’ll be amazed at how one thoughtful change shifts your entire relationship with your entryway. Save this post for later, and share it with friends who are dreaming of a more welcoming home.