Category: Outdoor Decor

  • 25 Small House Exterior Design Ideas That Maximize Curb Appeal

    25 Small House Exterior Design Ideas That Maximize Curb Appeal

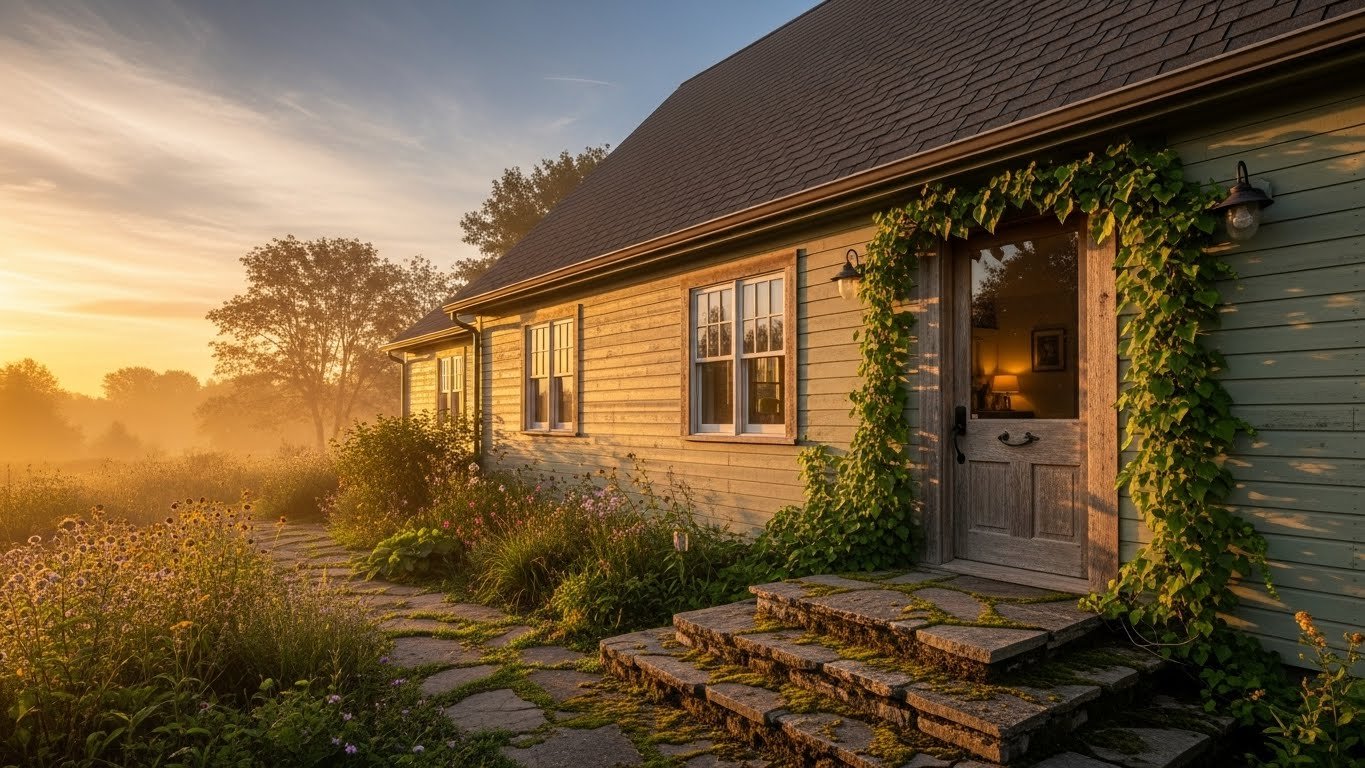
    Your small house’s exterior is the first impression guests get—and honestly, the first impression you get when you pull into your driveway. The good news? You don’t need a major renovation or a huge budget to completely change how your home looks from the street. We’ve rounded up 25 specific, actionable ideas that work for any small home, whether you’re renting or own. You’ll find everything from free refresh tricks to affordable upgrades that take a weekend, plus a few investment pieces that pay dividends for years. Ready to make your neighbors stop and stare? Let’s go.

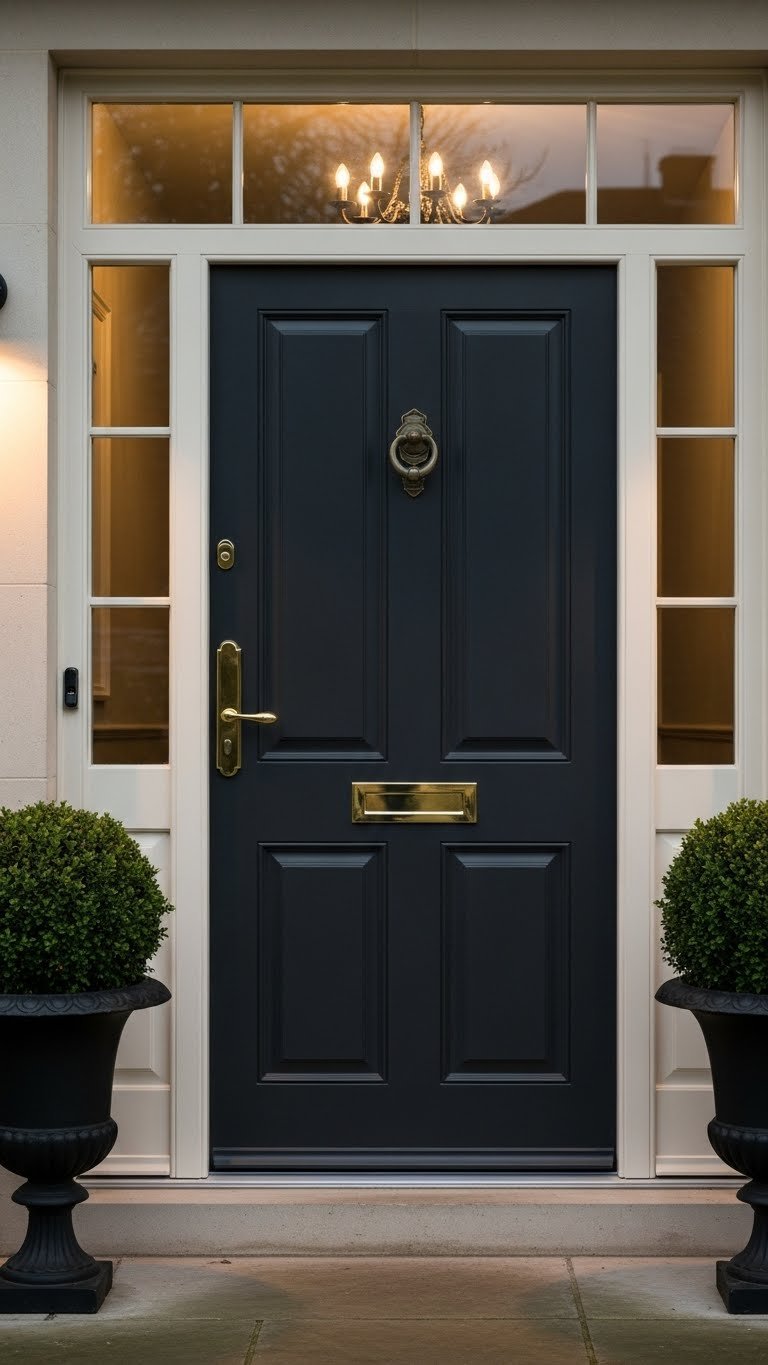
    1. Paint Your Front Door a Bold, Welcoming Color

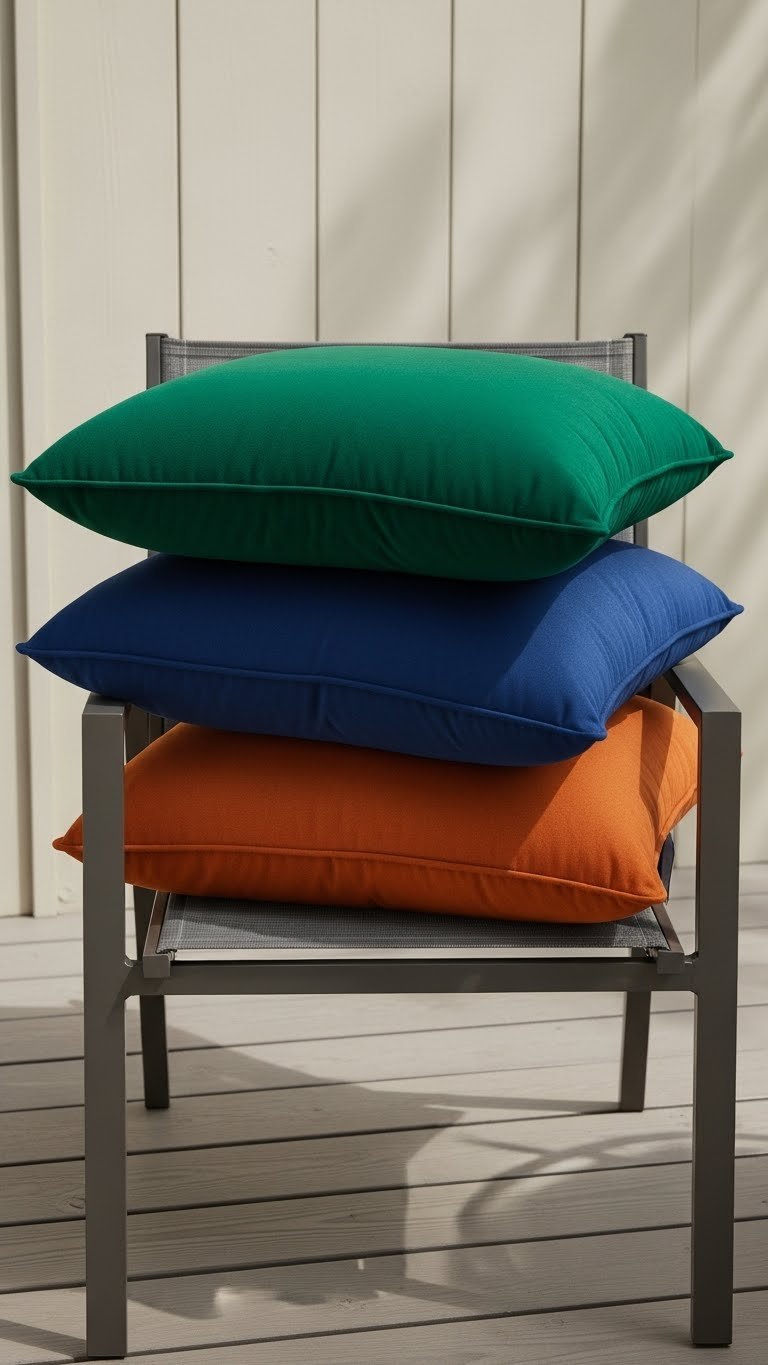
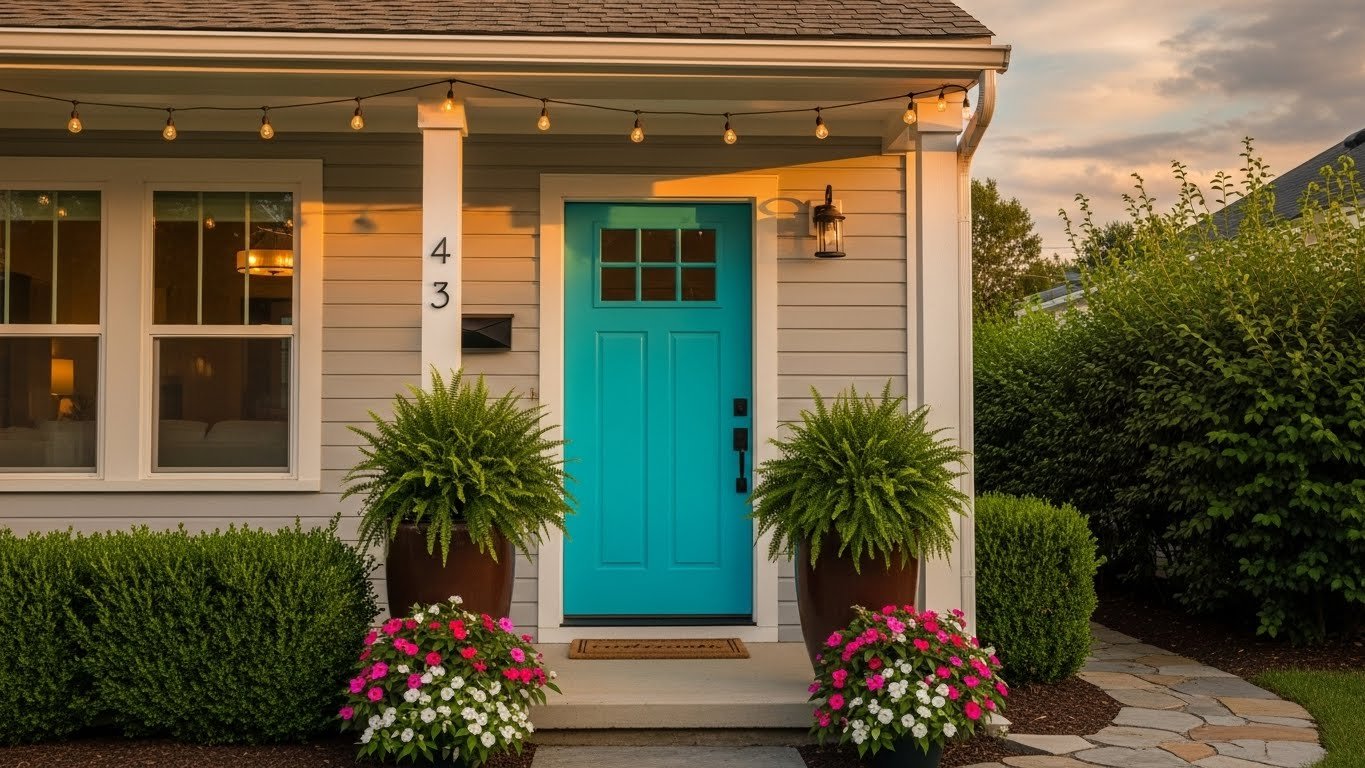
    A fresh coat of paint on your front door is the easiest, most affordable curb appeal upgrade you can make. Colors like emerald green, burnt orange, navy, or even deep plum instantly signal personality and draw the eye.

    Pick a high-quality exterior paint (Benjamin Moore, Sherwin-Williams, or Behr run $35-$50 per quart). A single door needs about one quart. You’ll need a primer coat first—budget $20-$30 total for supplies. The paint job takes 2-3 hours including prep and drying time between coats. Update hardware (hinges, house numbers, knocker) with brass or matte black pieces ($15-$40 on Amazon or Home Depot) for extra polish.

    Pro tip: Test your color on the door with paint samples first. What looks good in the paint store can surprise you in natural light. Your front door becomes the focal point of your entire home’s exterior the moment guests arrive.

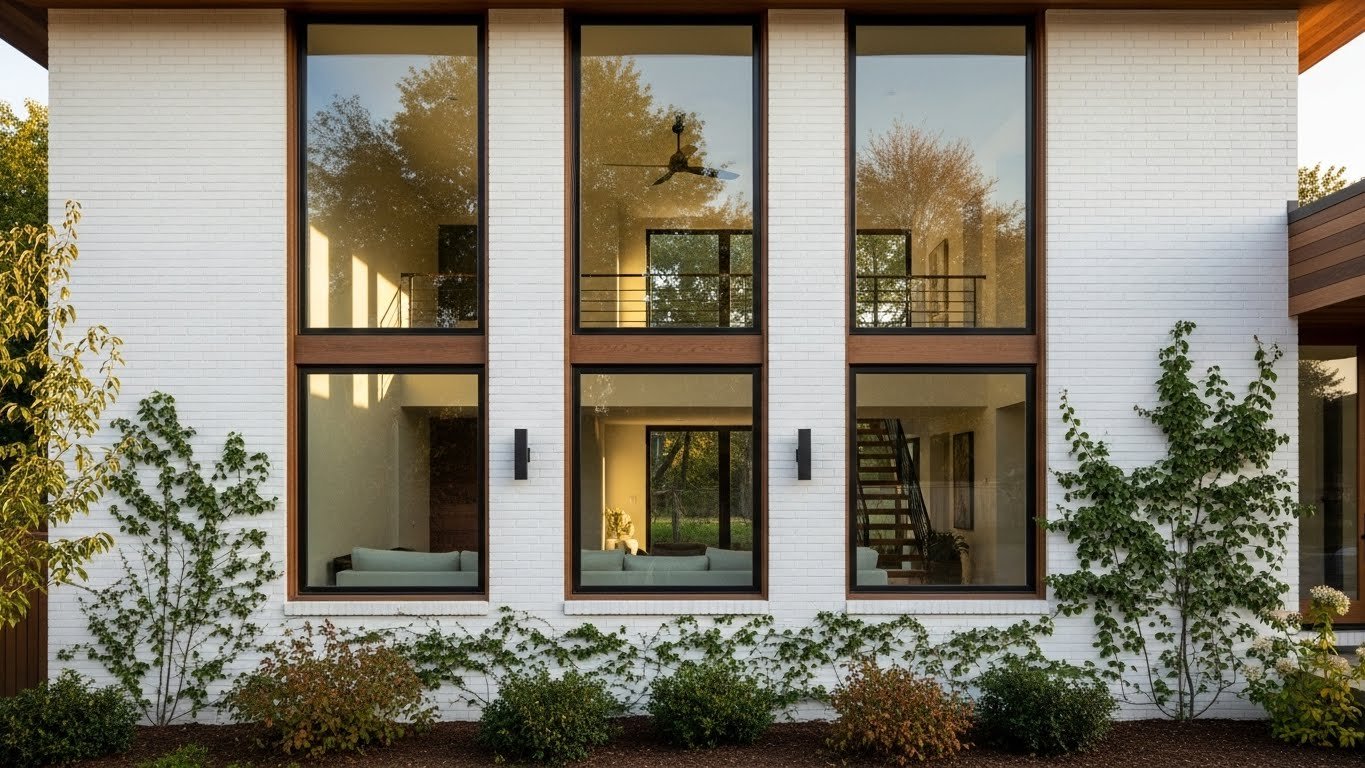
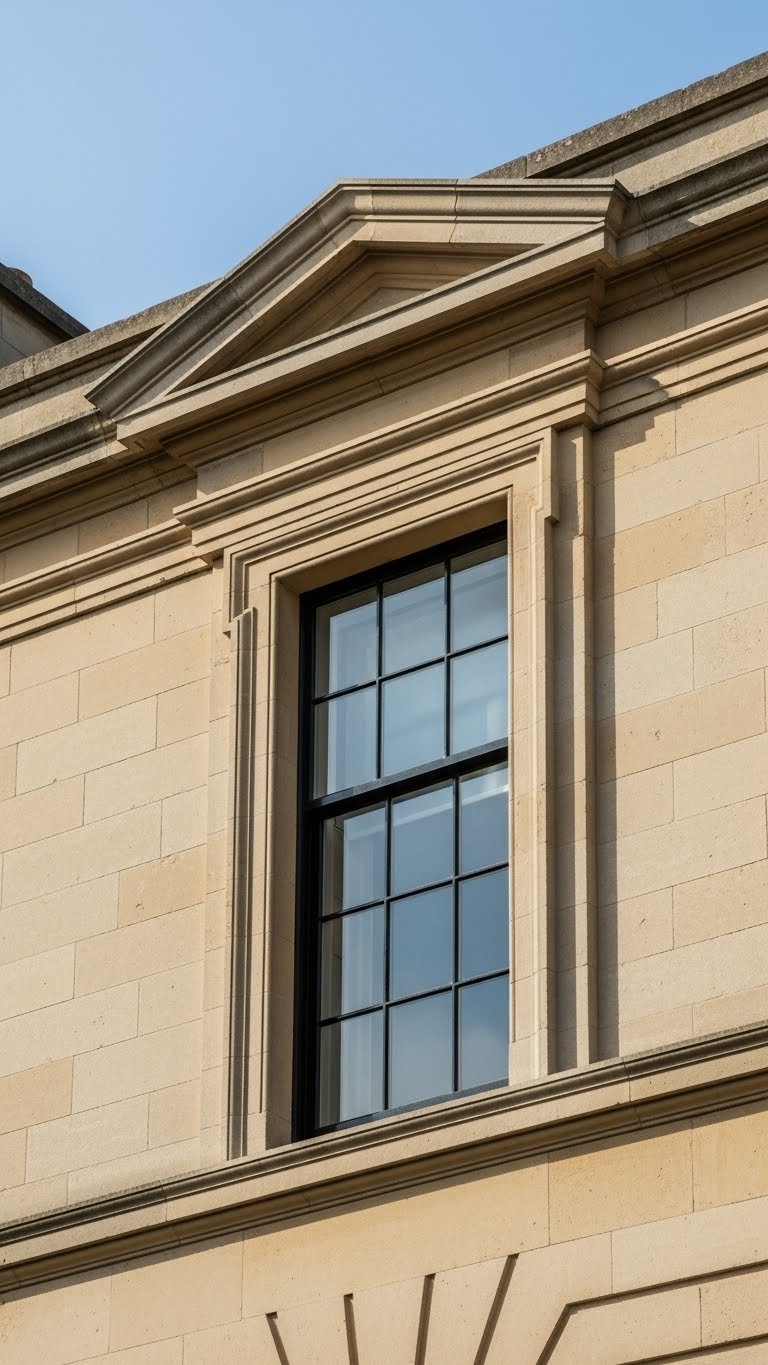
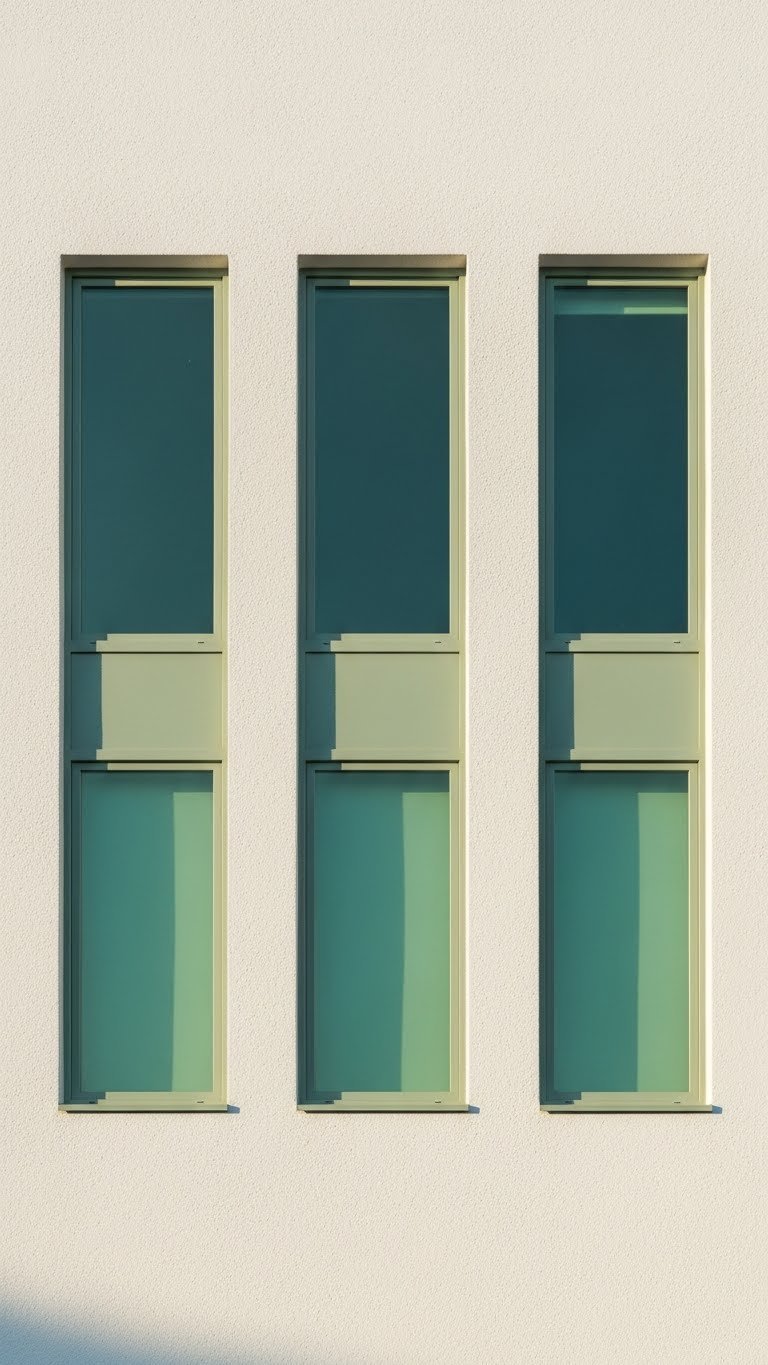
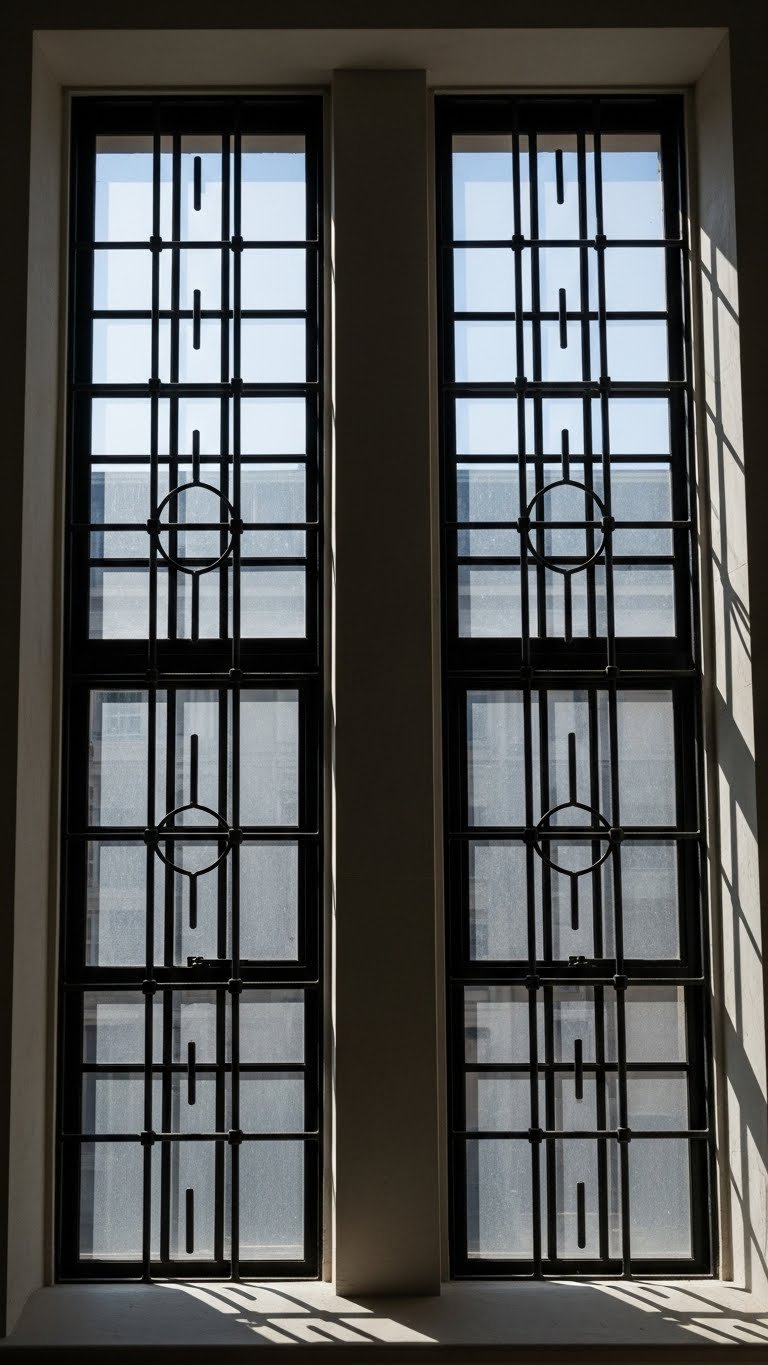
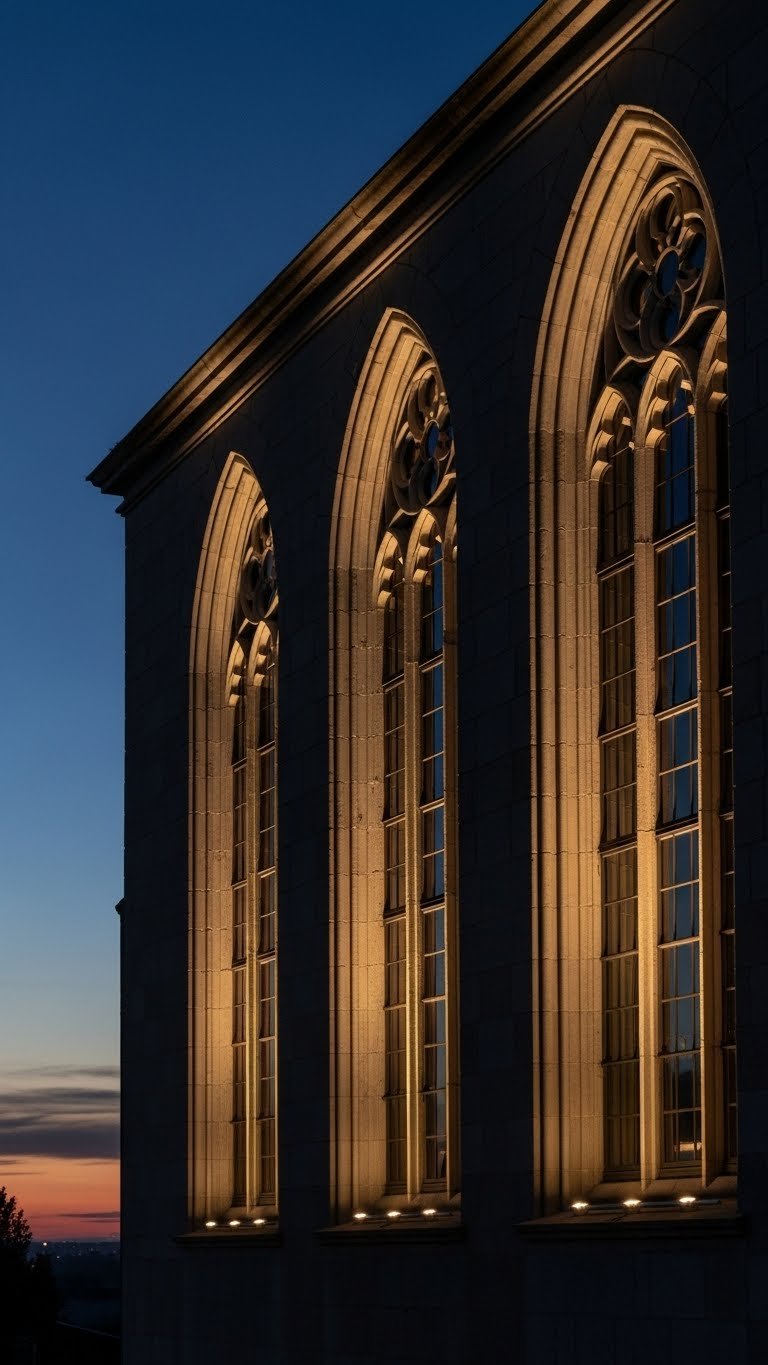
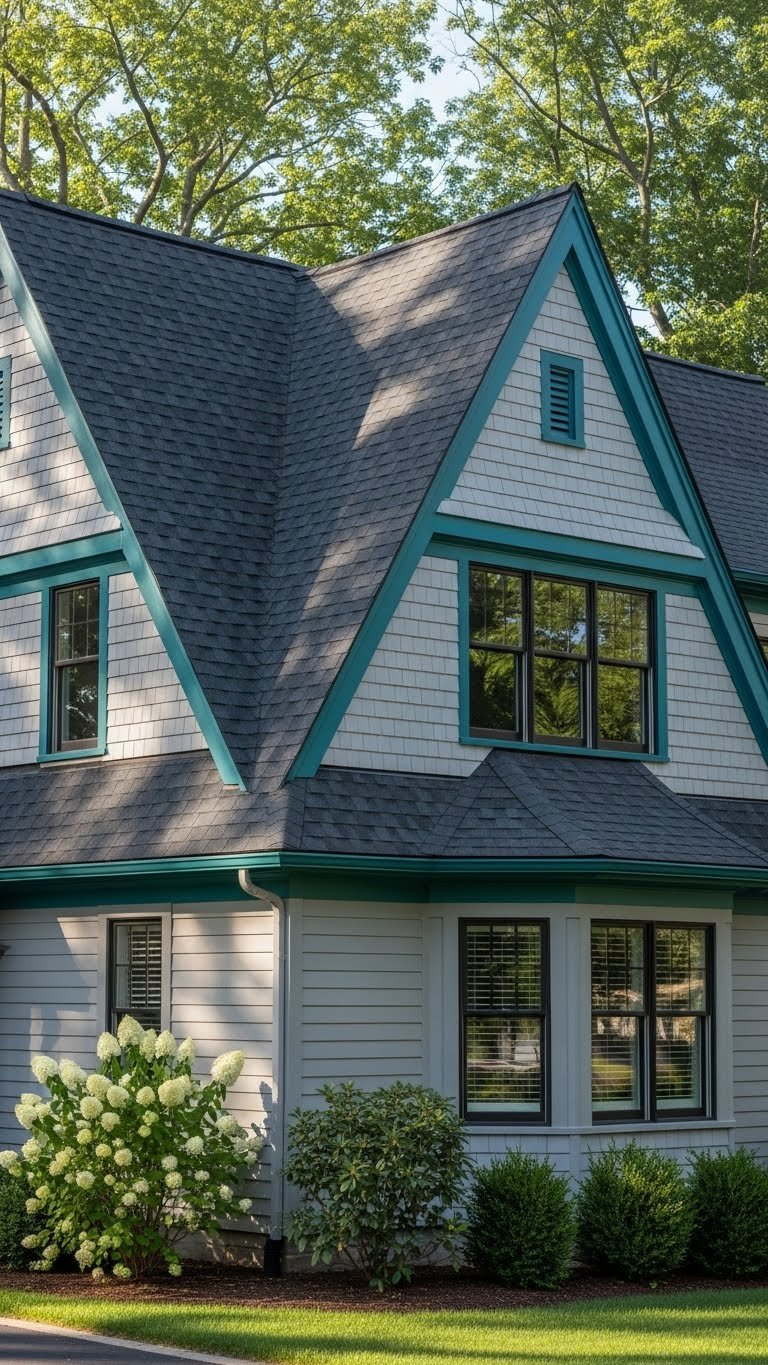
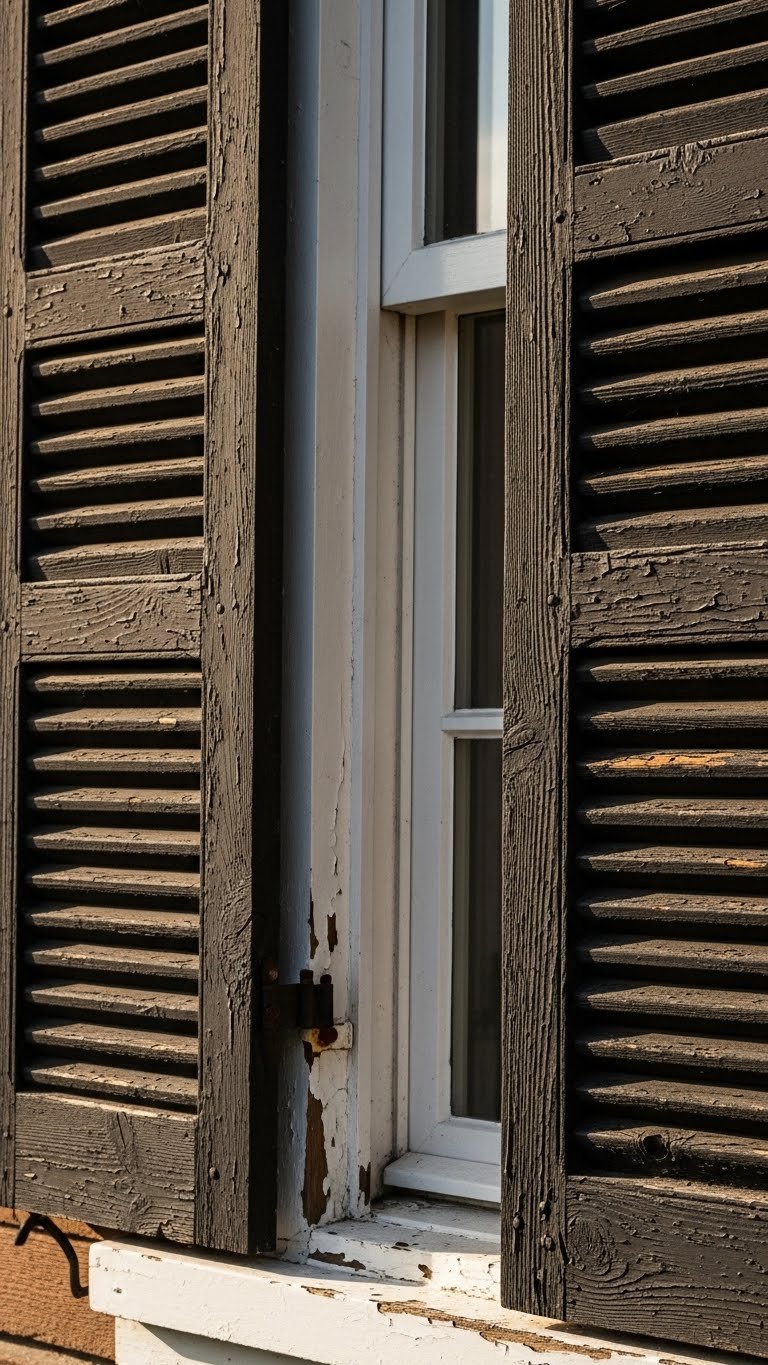
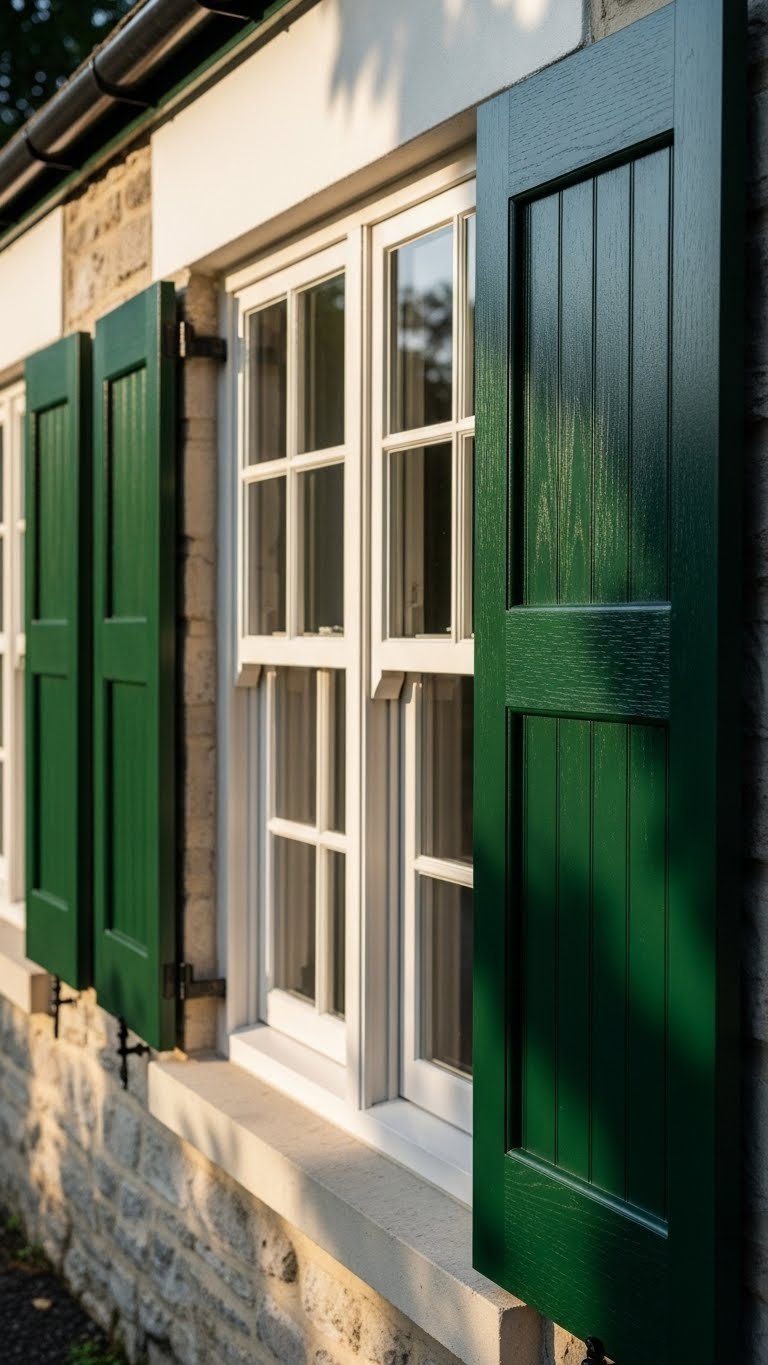
    2. Add Architectural Interest with Window Shutters

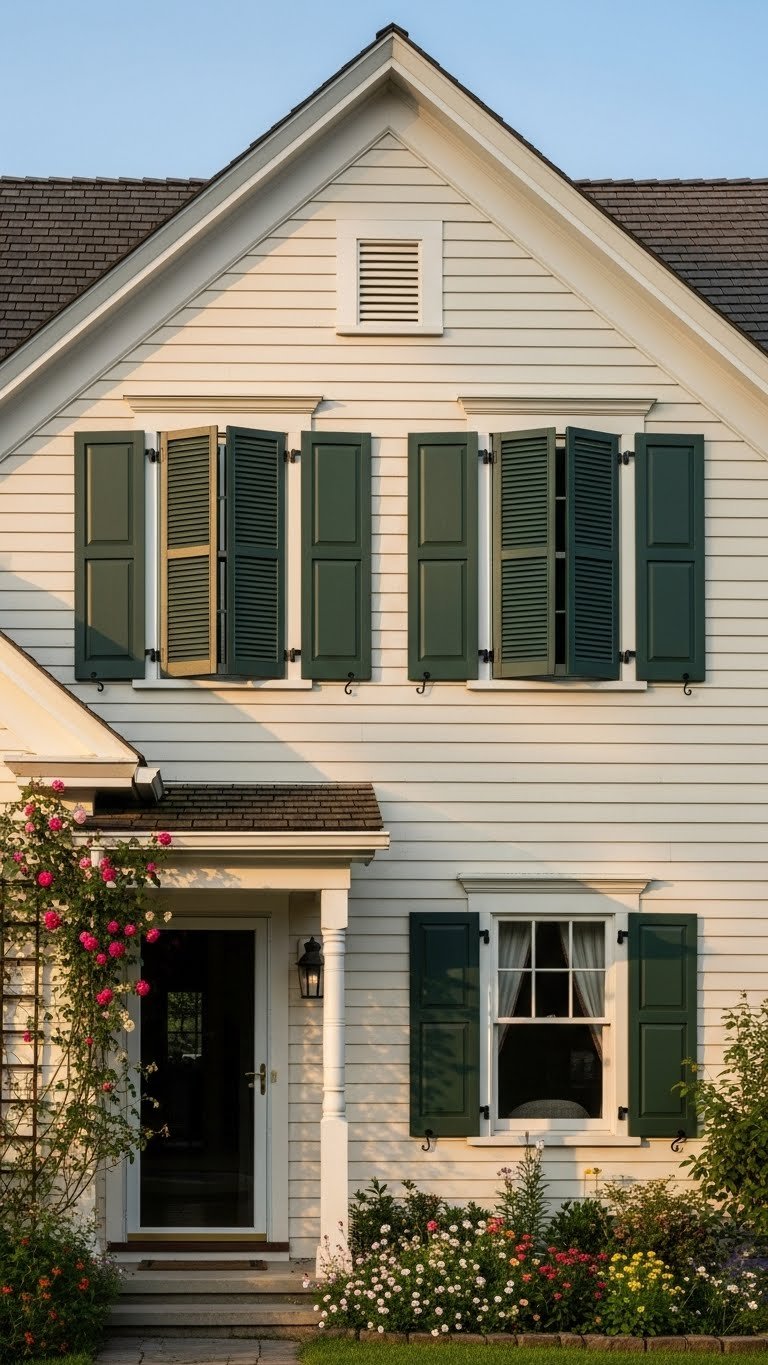
    Shutters add instant architectural depth, especially on homes with plain, flat facades. They create shadow and dimension that photographs beautifully and catches the eye from the street.

    Pre-made vinyl shutters from Home Depot or Lowes cost $20-$50 per pair. If your home needs multiple sets, budget $100-$300 total. Installation involves simple brackets and screws—a 15-minute DIY job per window. For a more custom look, consider composite or wood shutters ($60-$150 per pair) that last longer and weather gracefully. Paint them to match your door or choose a contrasting shade.

    Pro tip: Shutter size matters. They should frame about two-thirds of your window height for proper proportion. Mismatched or too-small shutters cheapen the look. Your windows gain definition and your home suddenly looks intentional and cared-for.

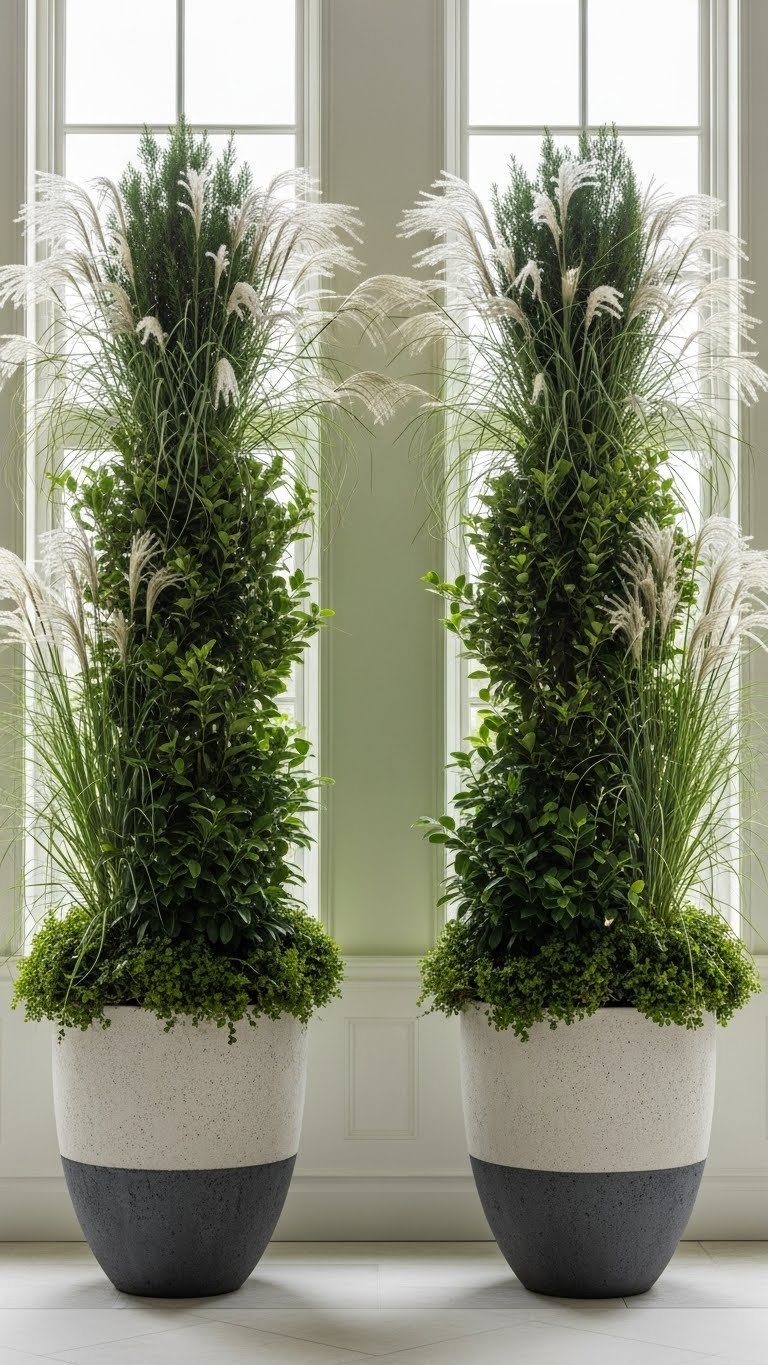
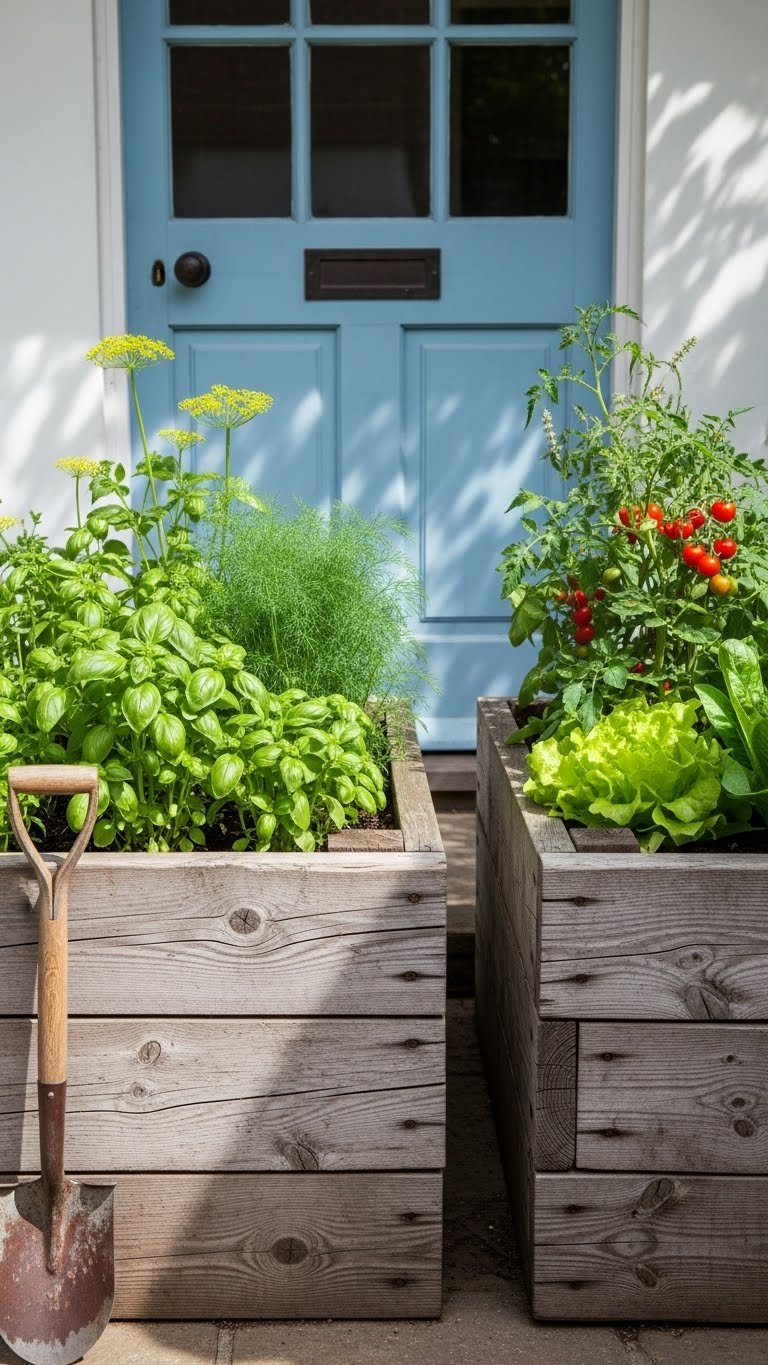
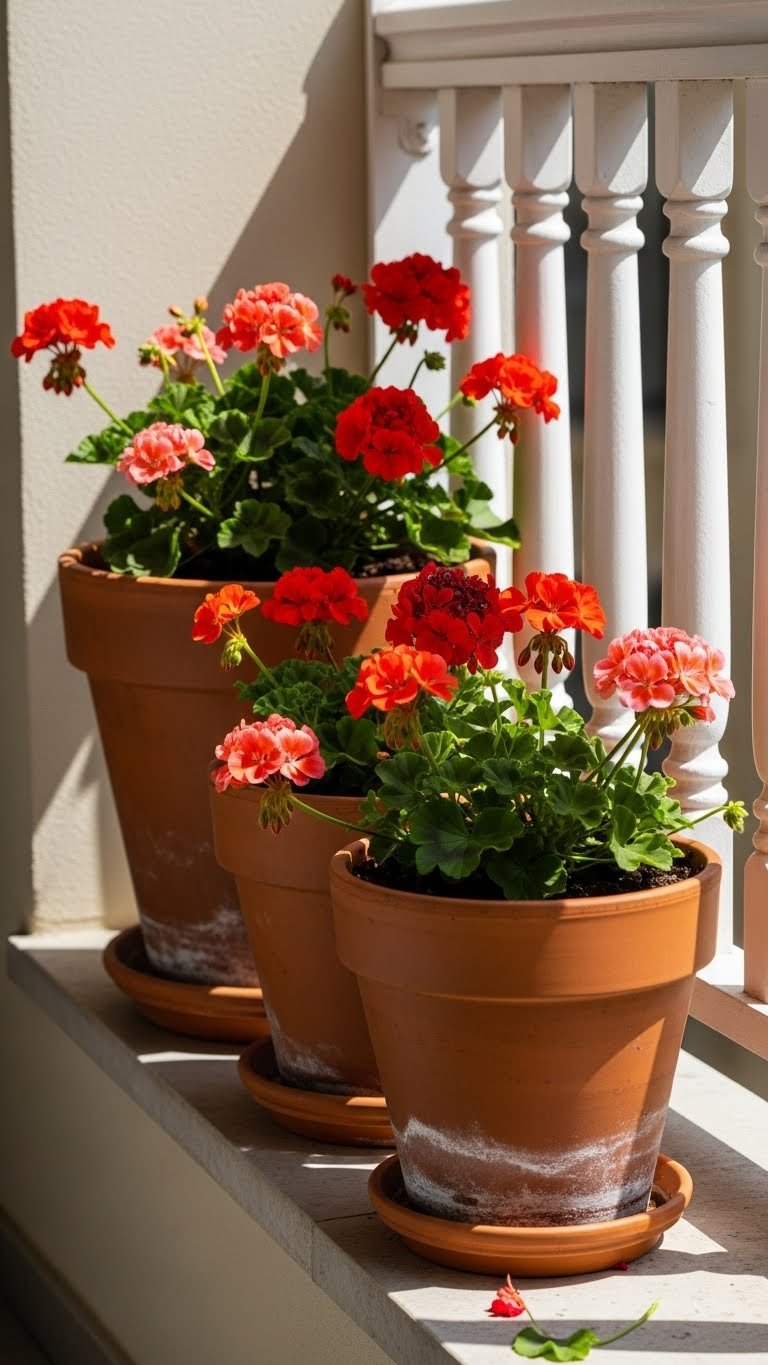
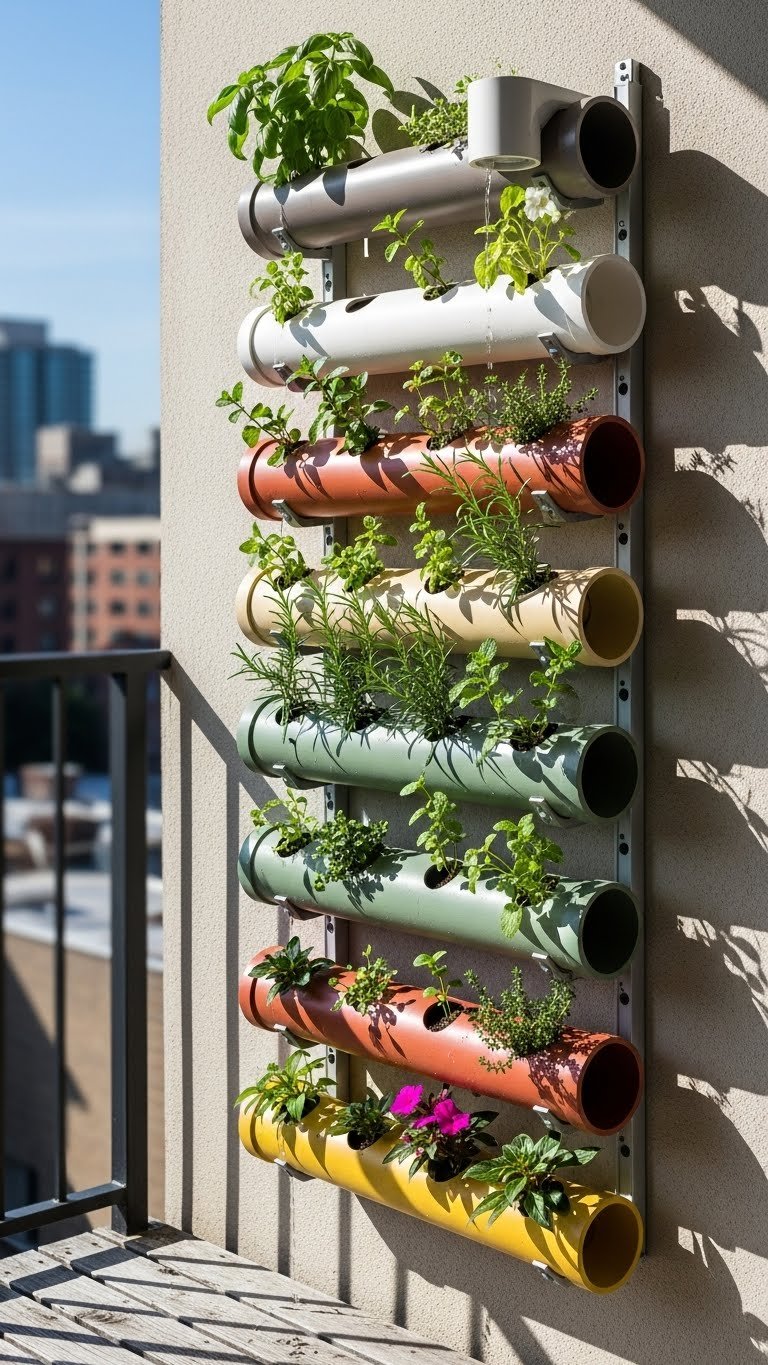
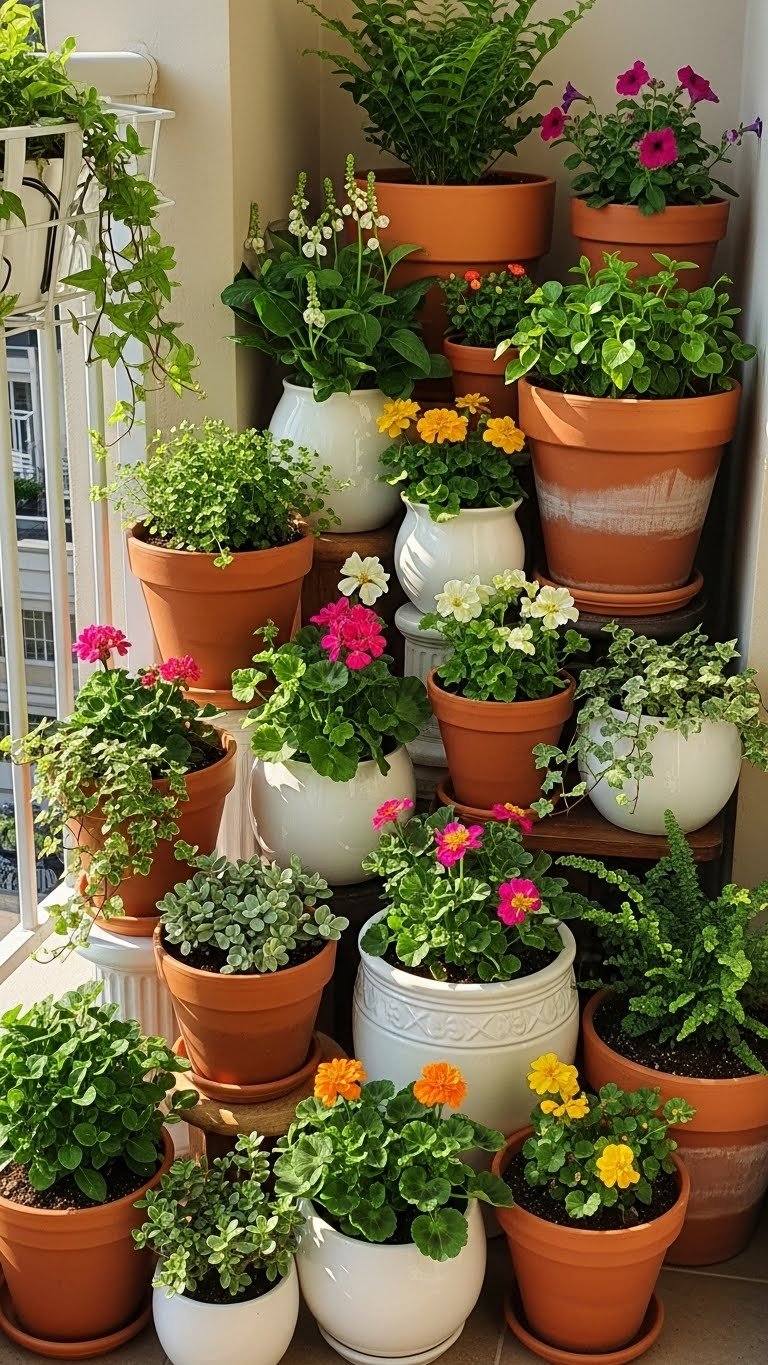
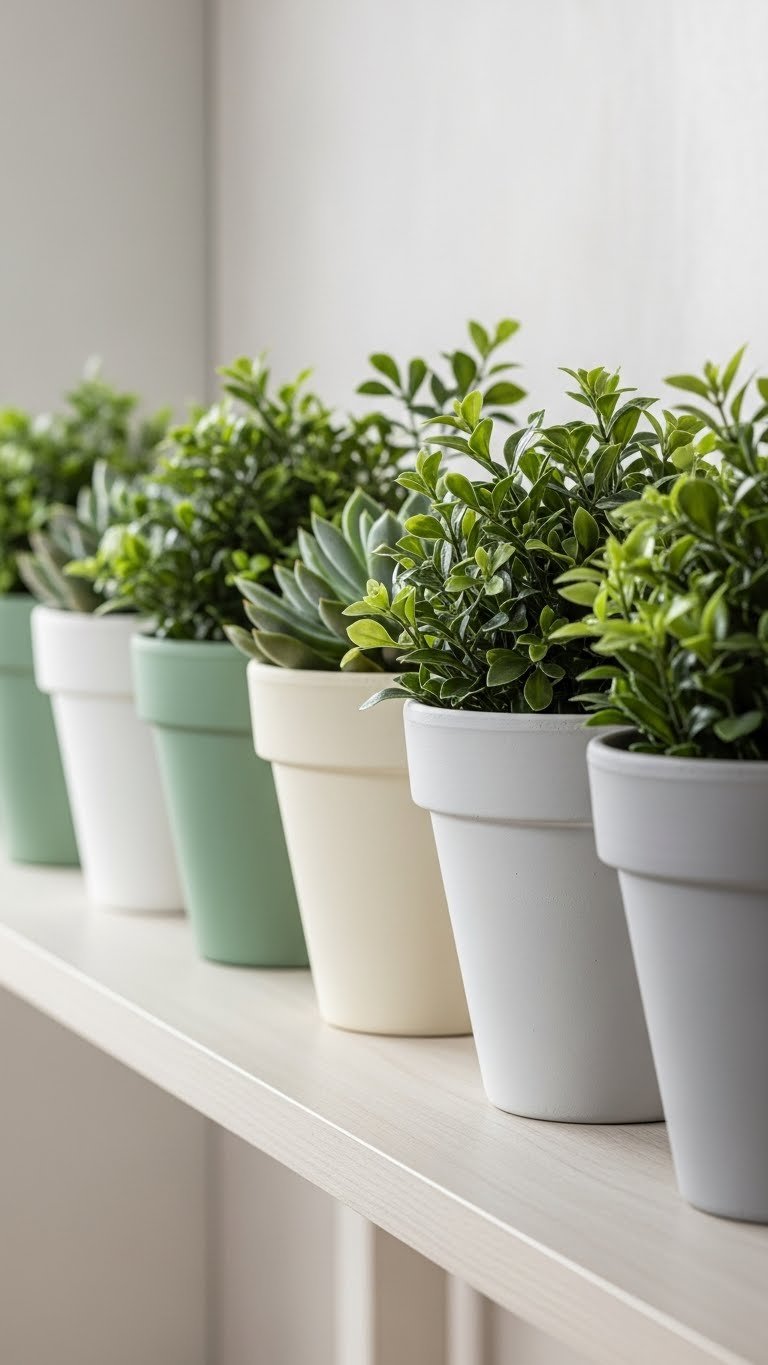
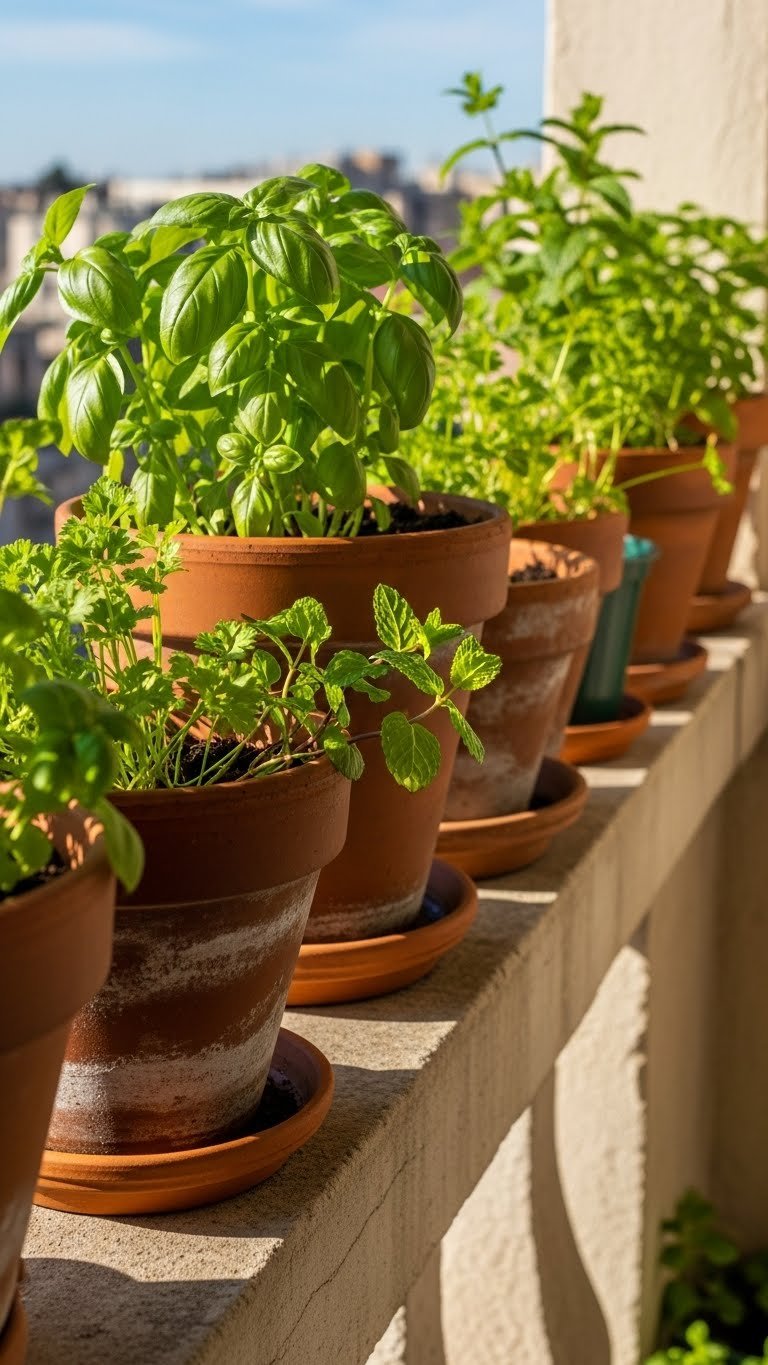
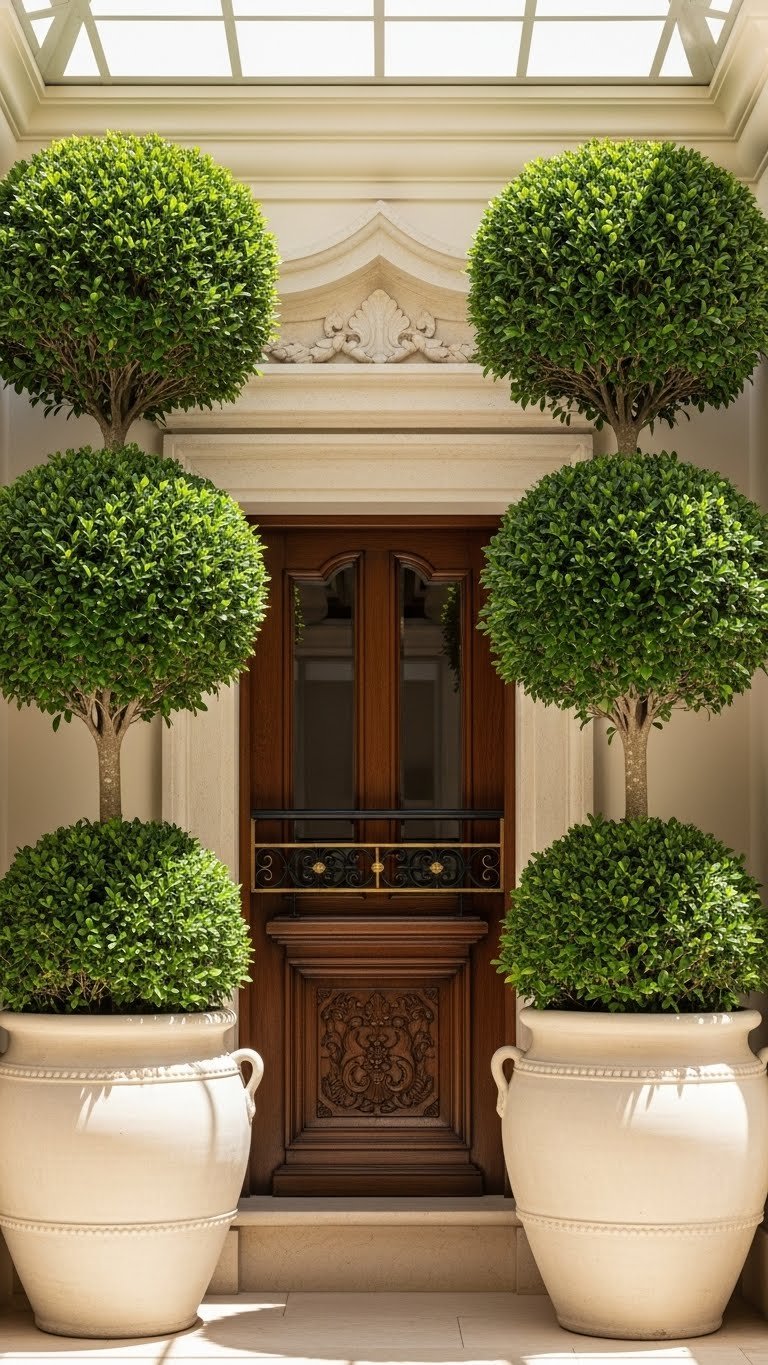
    3. Create a Charming Entryway with Planters and Flowers

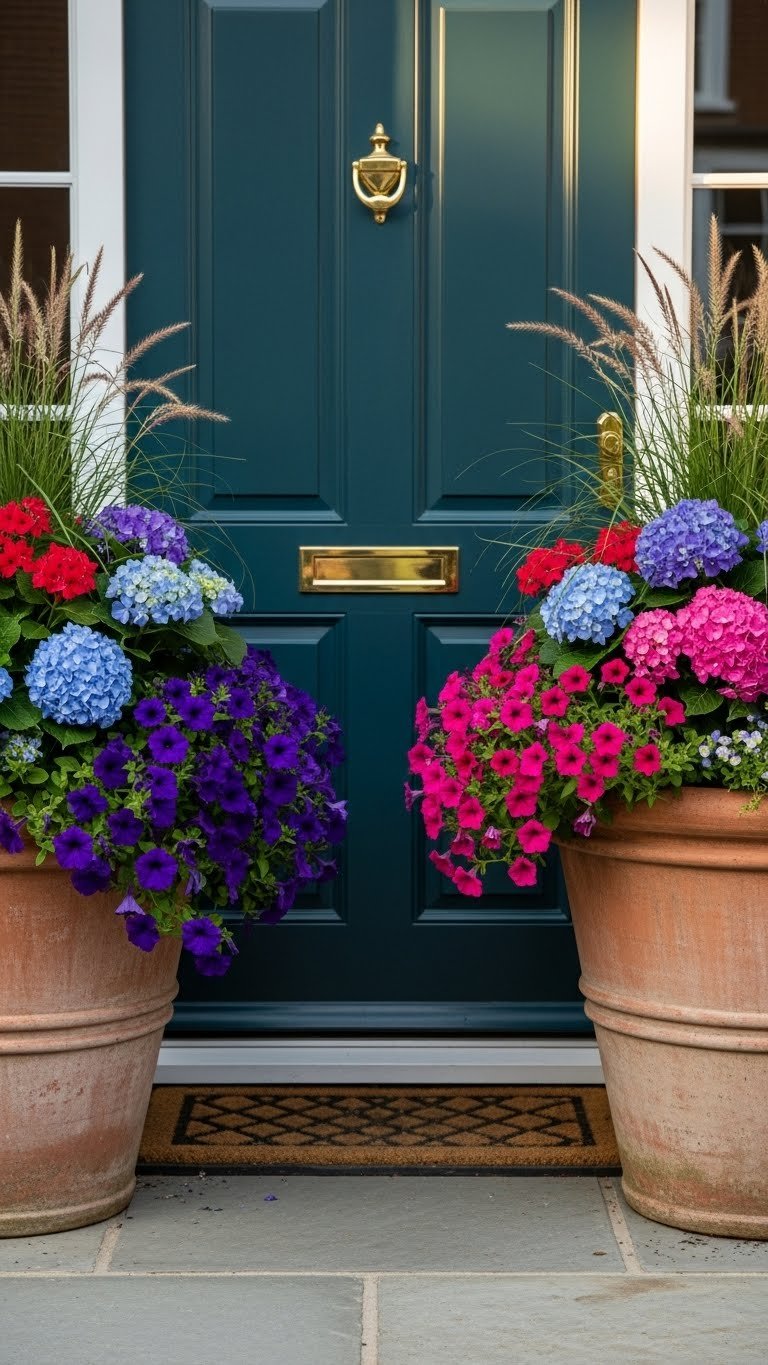
    Nothing says “we take pride in our home” like lush planters flanking your entrance. This works whether you’re renting (portable pots) or own your home.

    Buy two large planters (14-18 inches wide) for $15-$40 each from Target, Wayfair, or a local garden center. Fill them with quality potting soil ($8-$12) and seasonal plants ($5-$10 per plant, 3-4 plants per pot). Total investment: $60-$150 for a show-stopping pair. Refresh seasonally—pansies and mums in fall, petunias in summer, ornamental grasses year-round. Water daily in warm months and deadhead spent blooms weekly.

    Pro tip: Use odd numbers of plants (3 or 5) per pot for visual balance. Vary heights by adding a small shrub or upright plant in the center. Your entryway transforms into an Instagram-worthy welcome space that makes your home feel established and cared-for.

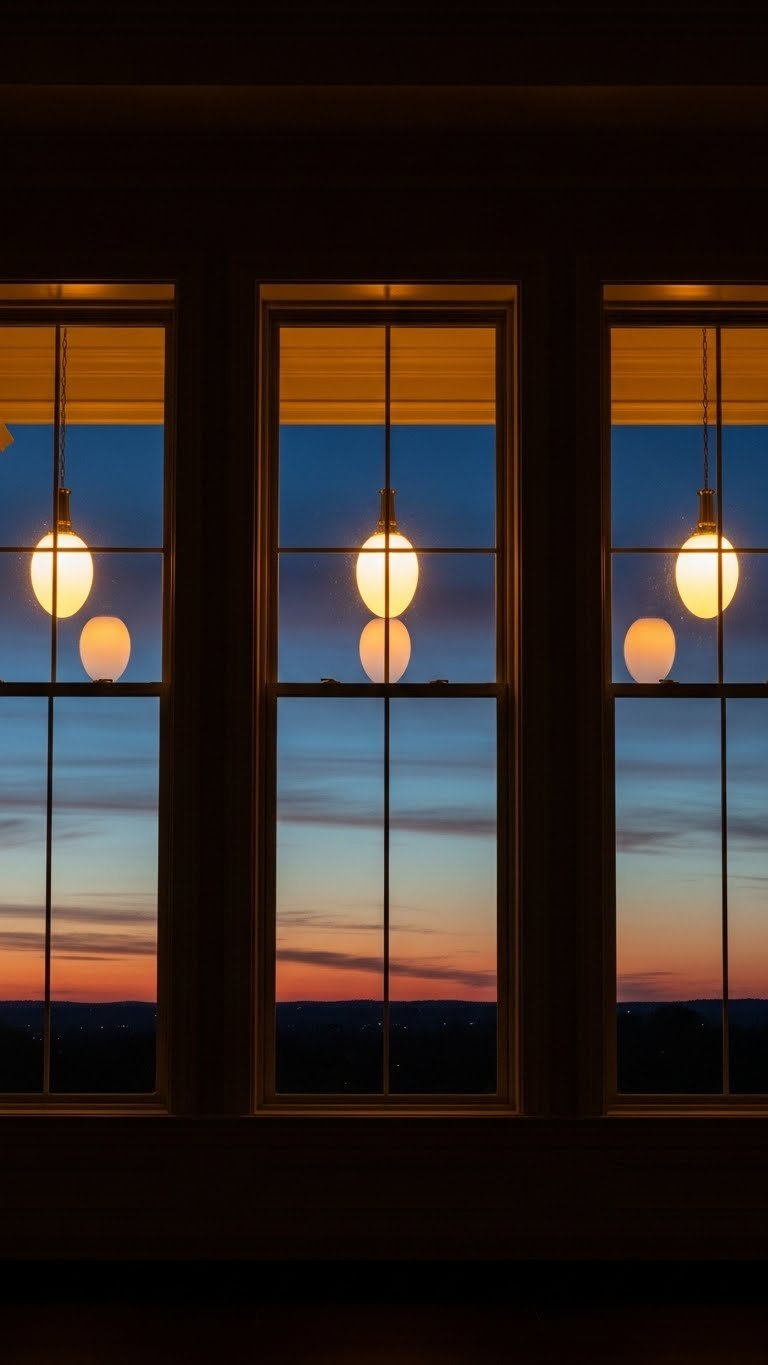
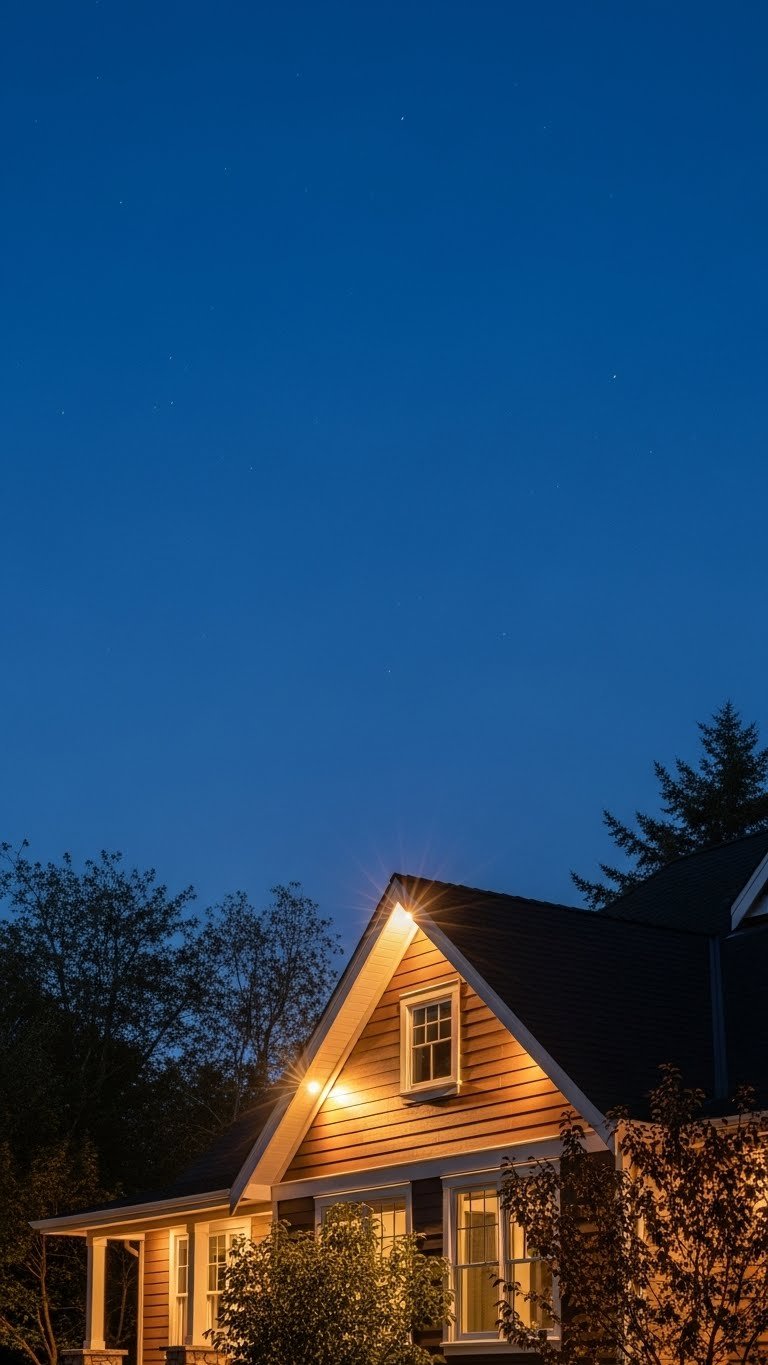
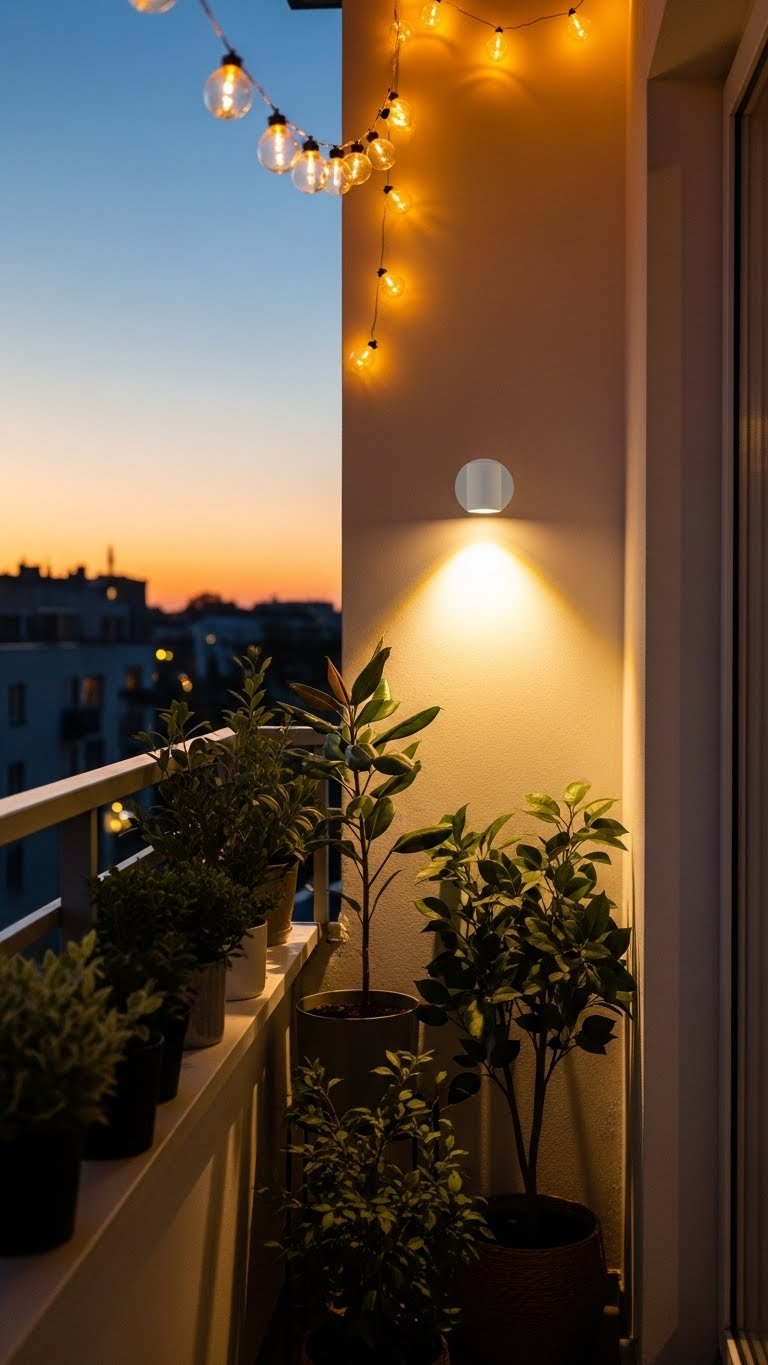
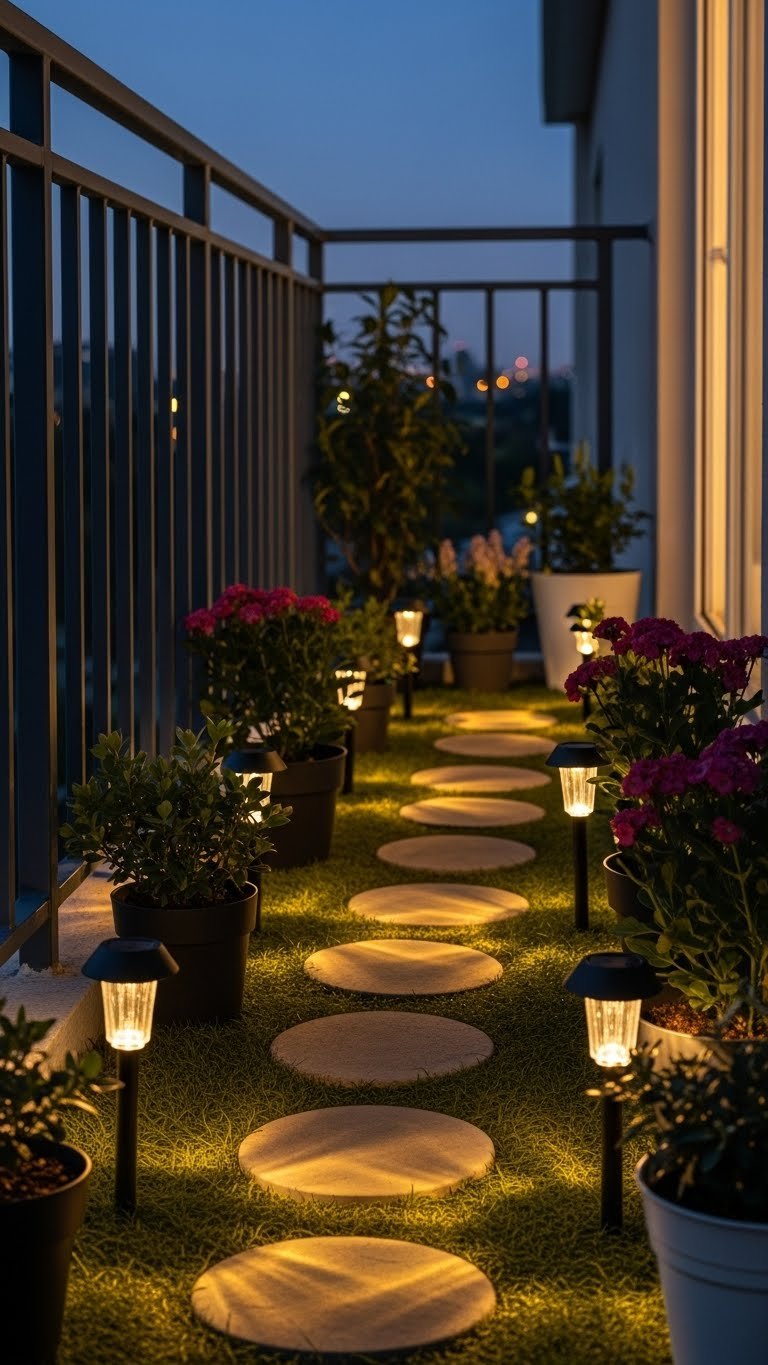
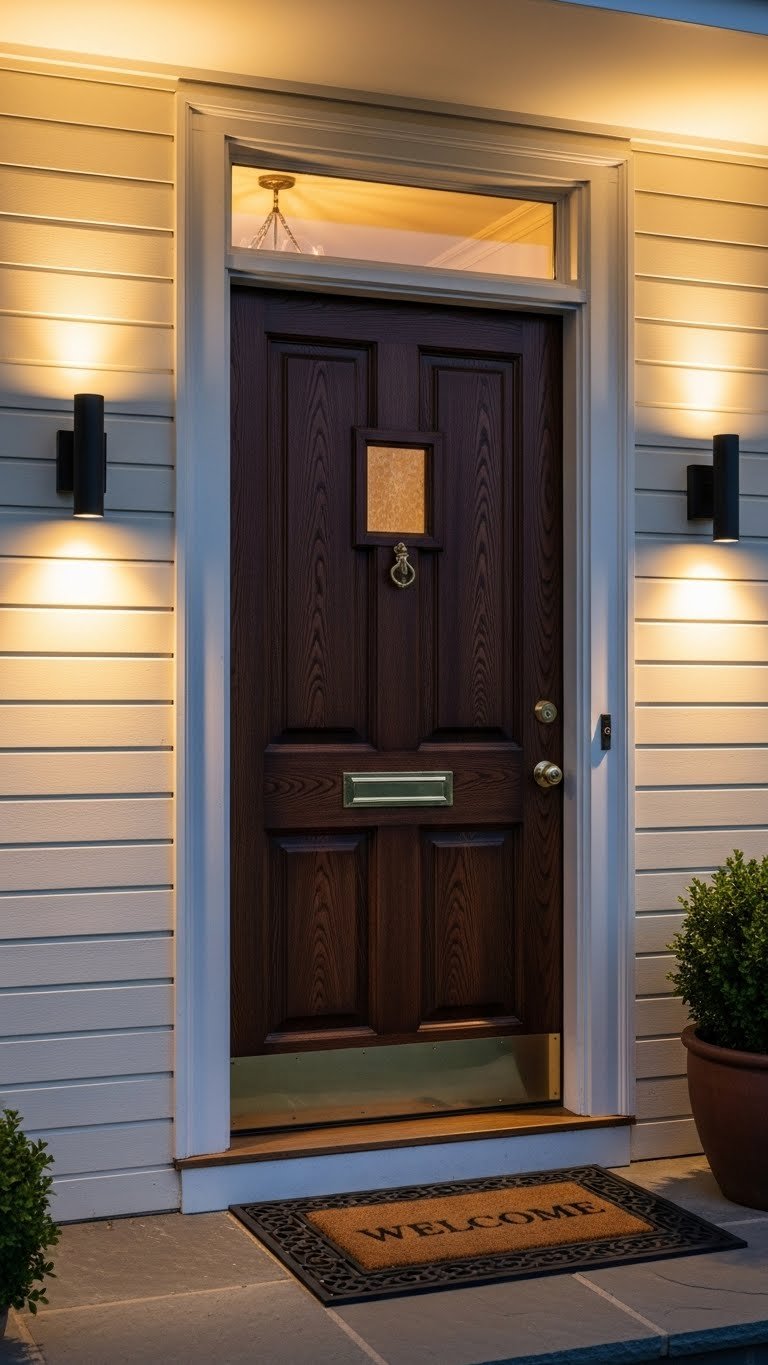
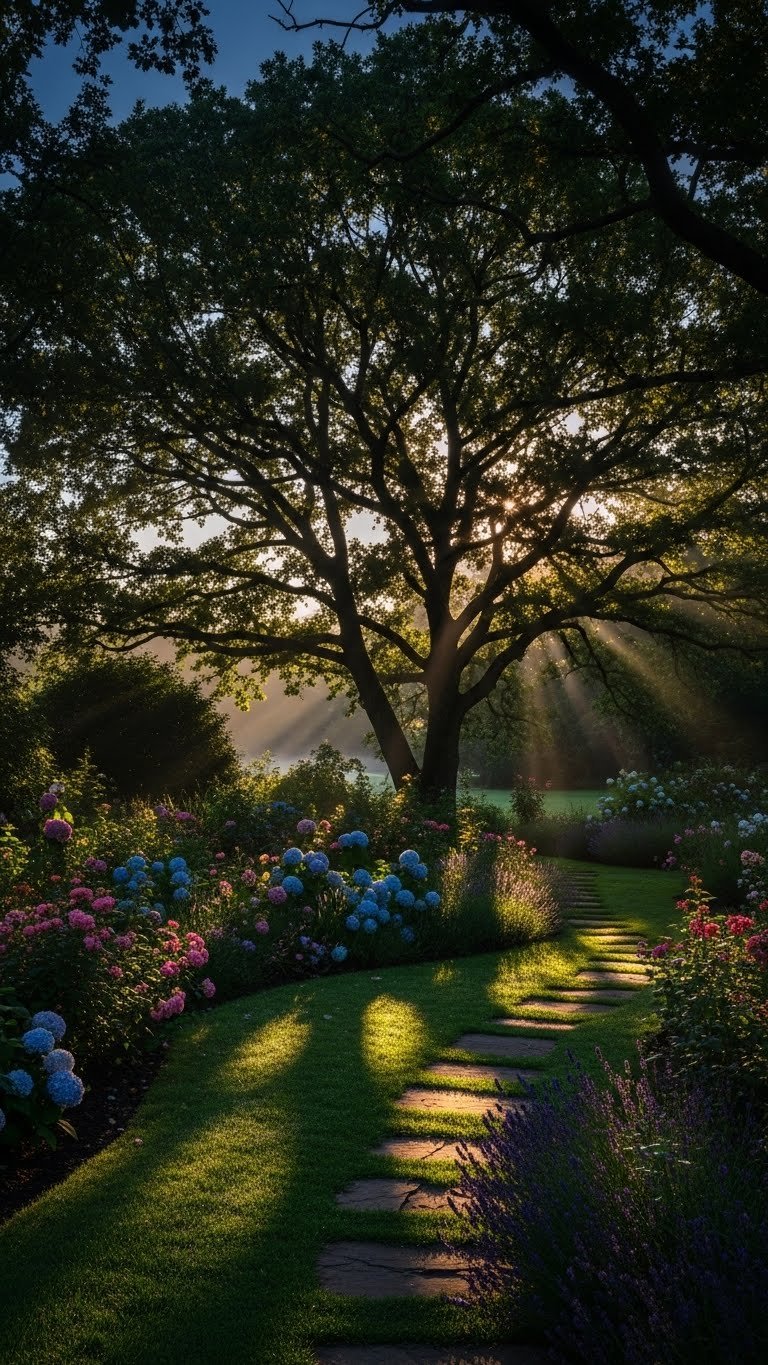
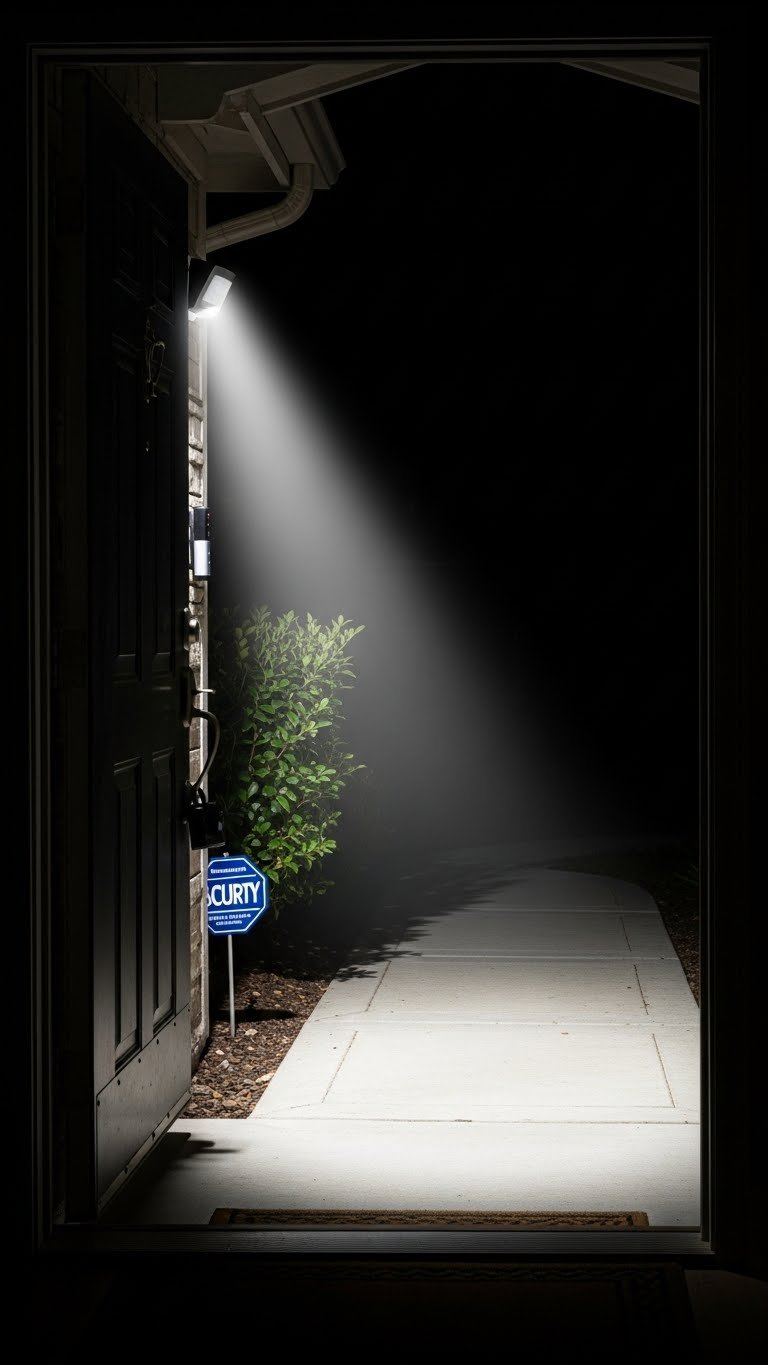
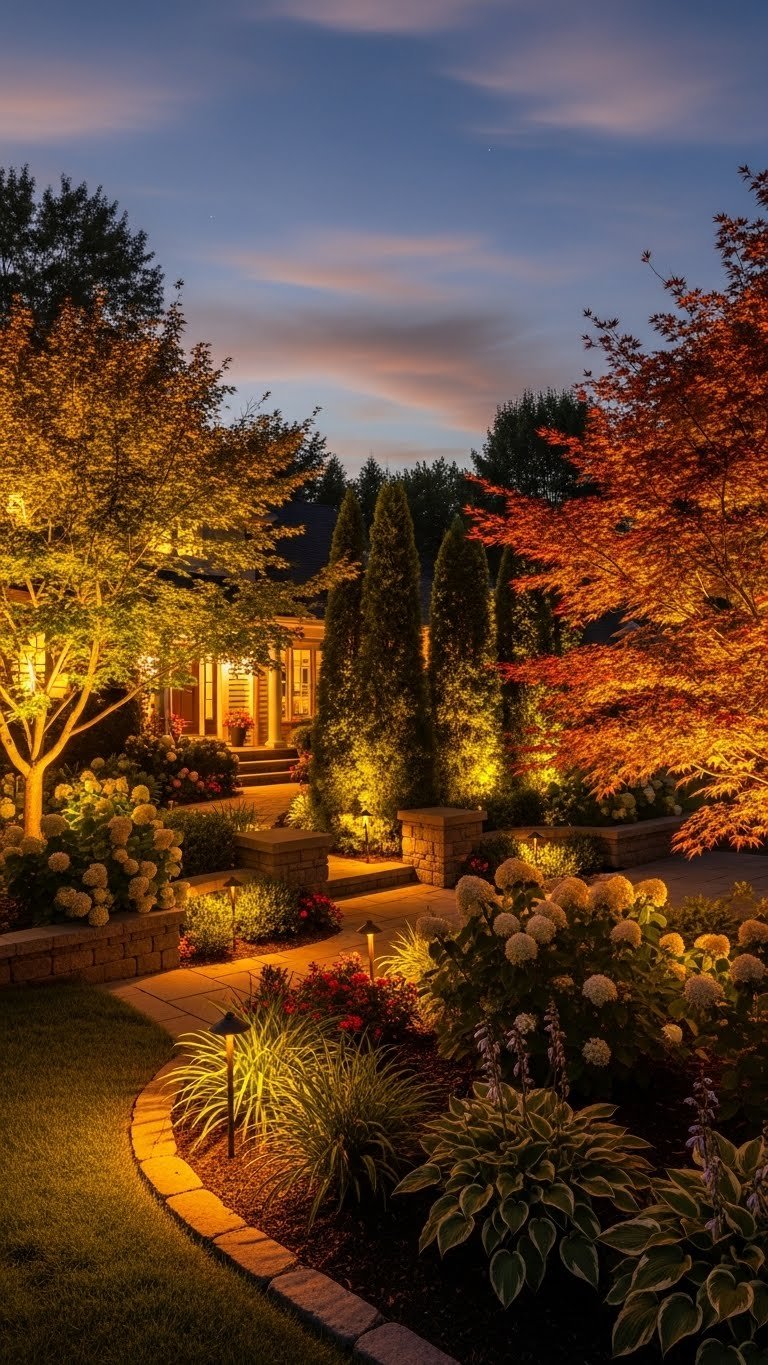
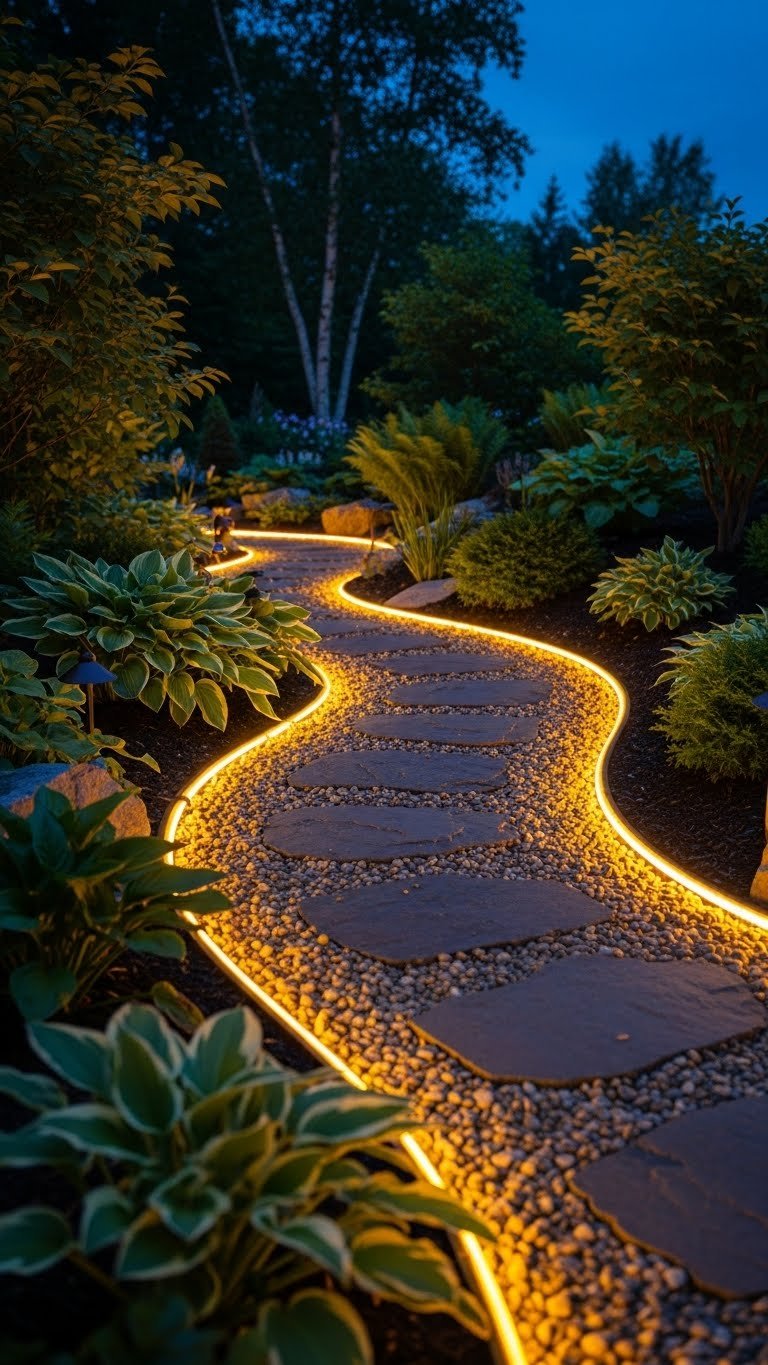
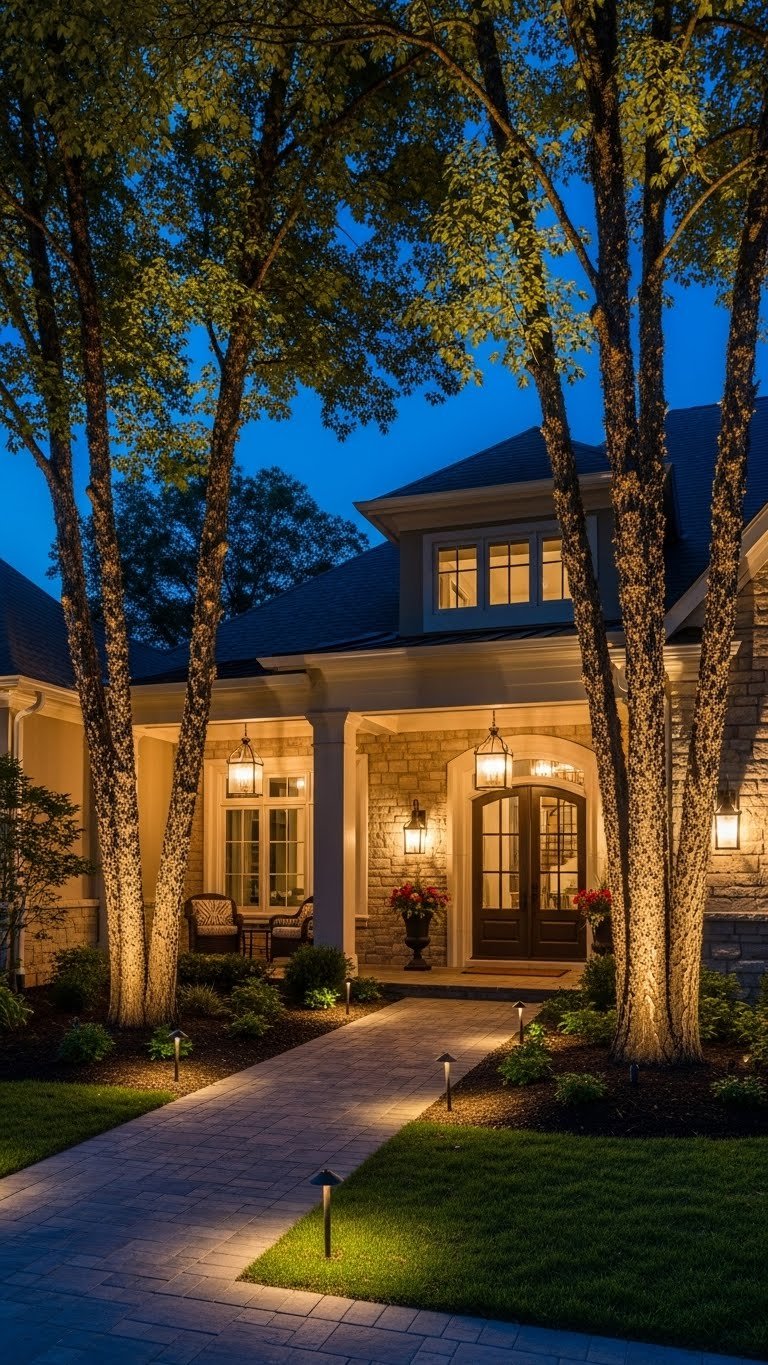
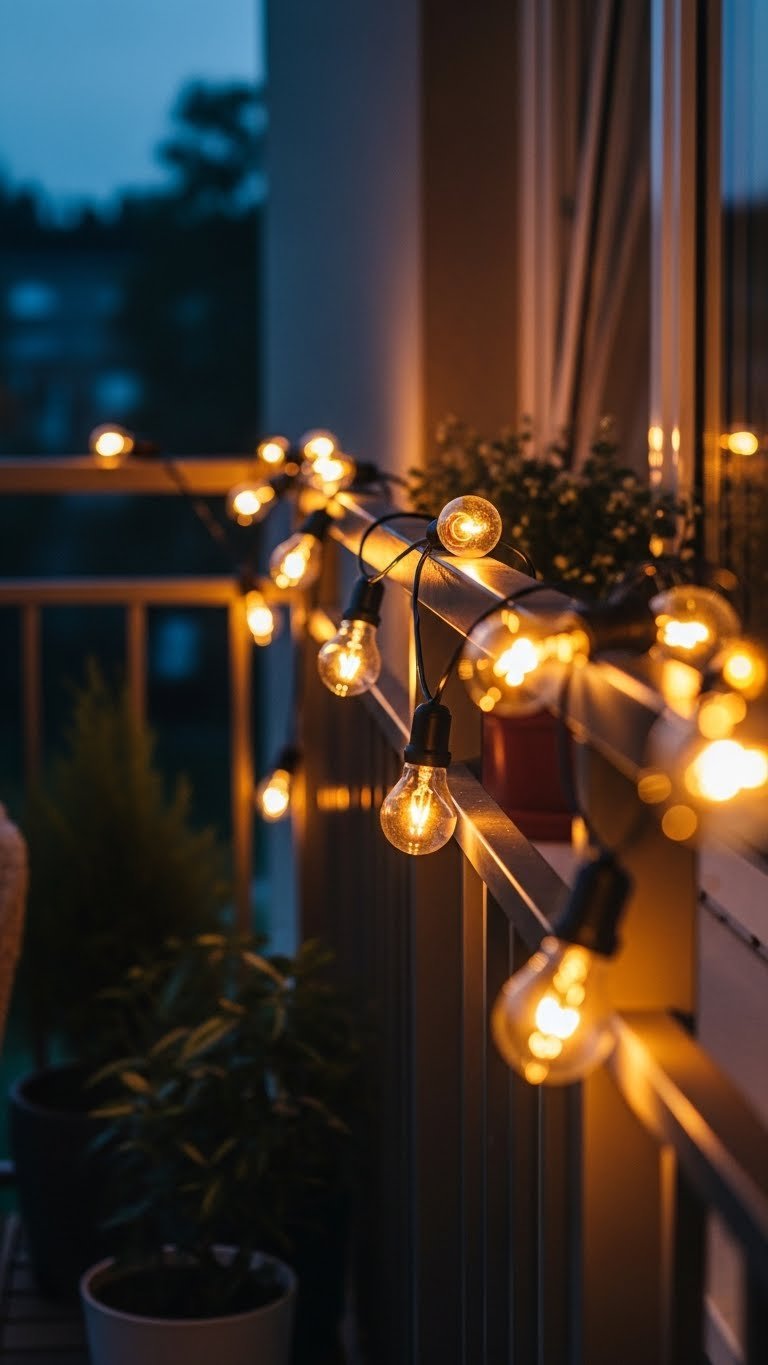
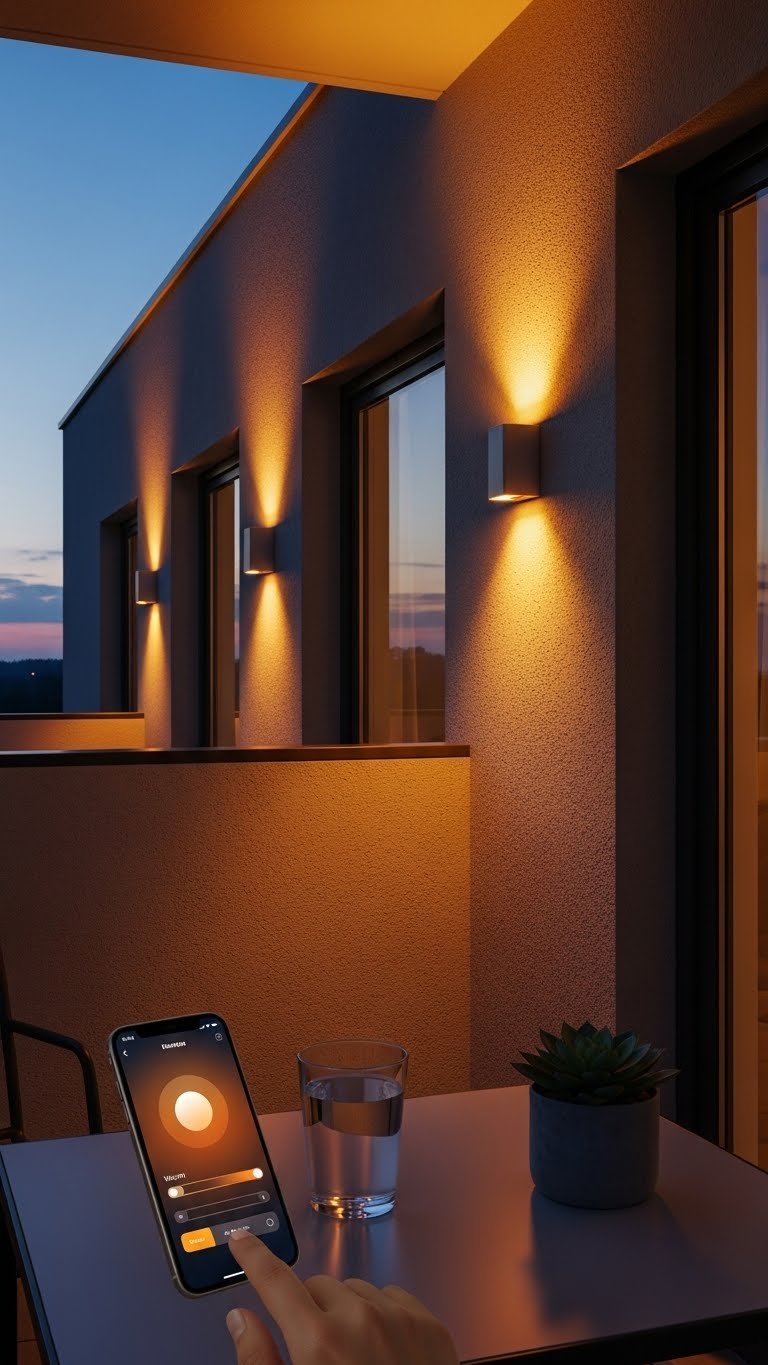
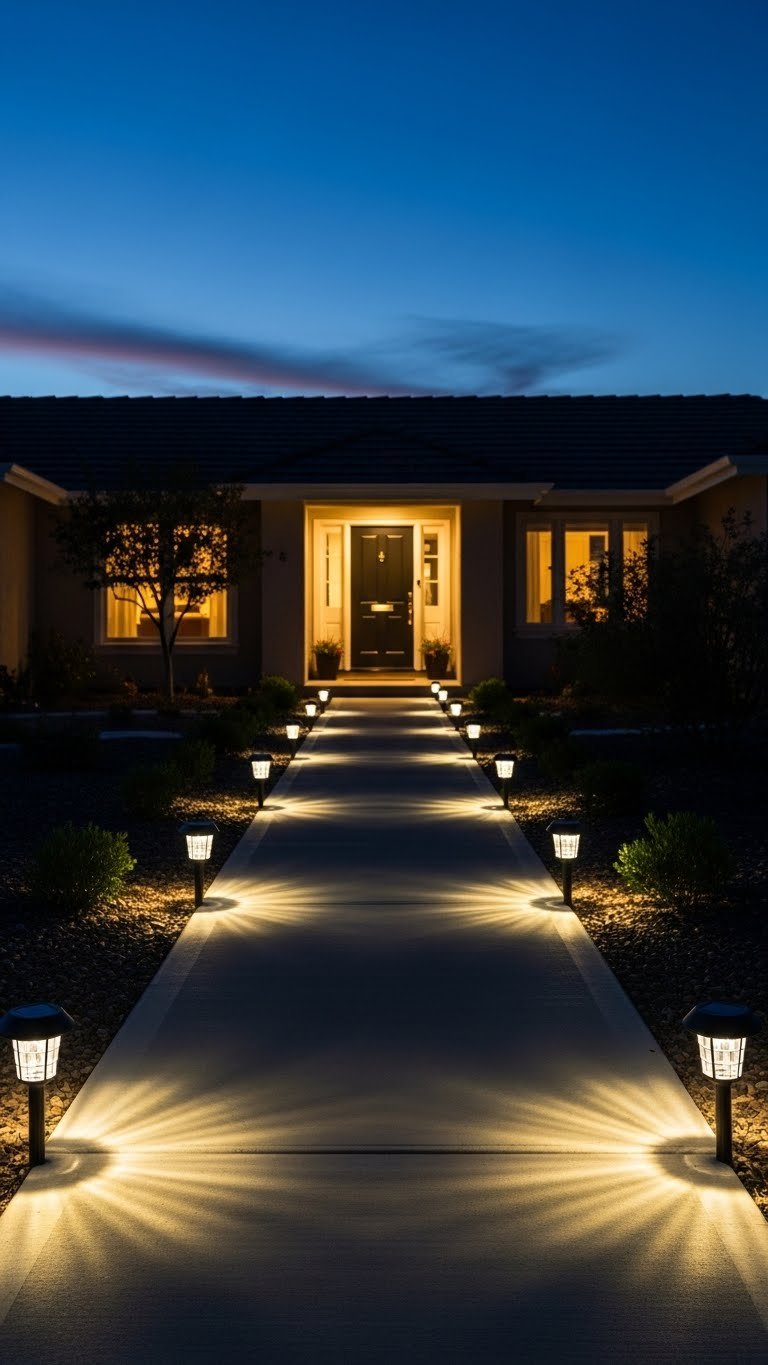
    4. Install Outdoor Lighting That Highlights Key Features

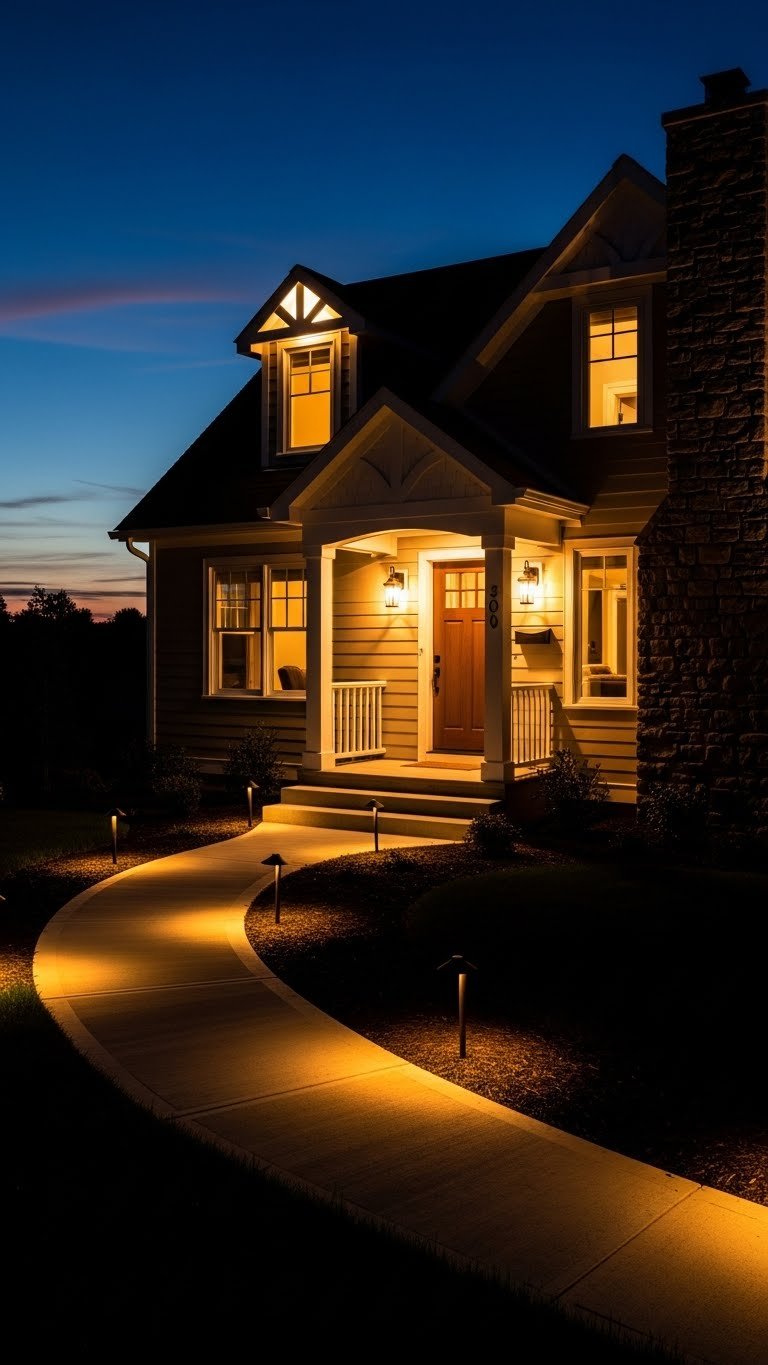
    Strategic outdoor lighting does double duty: it makes your home safer and looks stunning after dark. It’s one of the most underrated curb appeal upgrades.

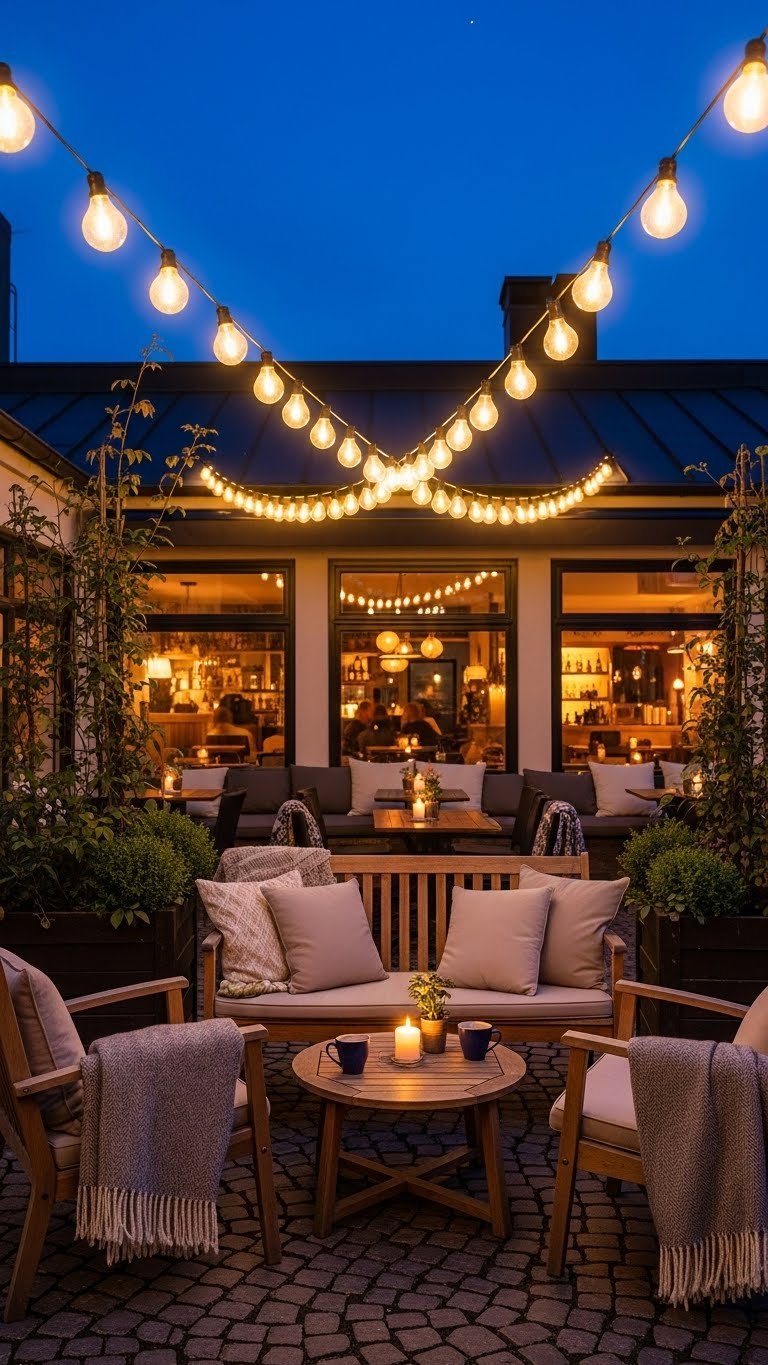
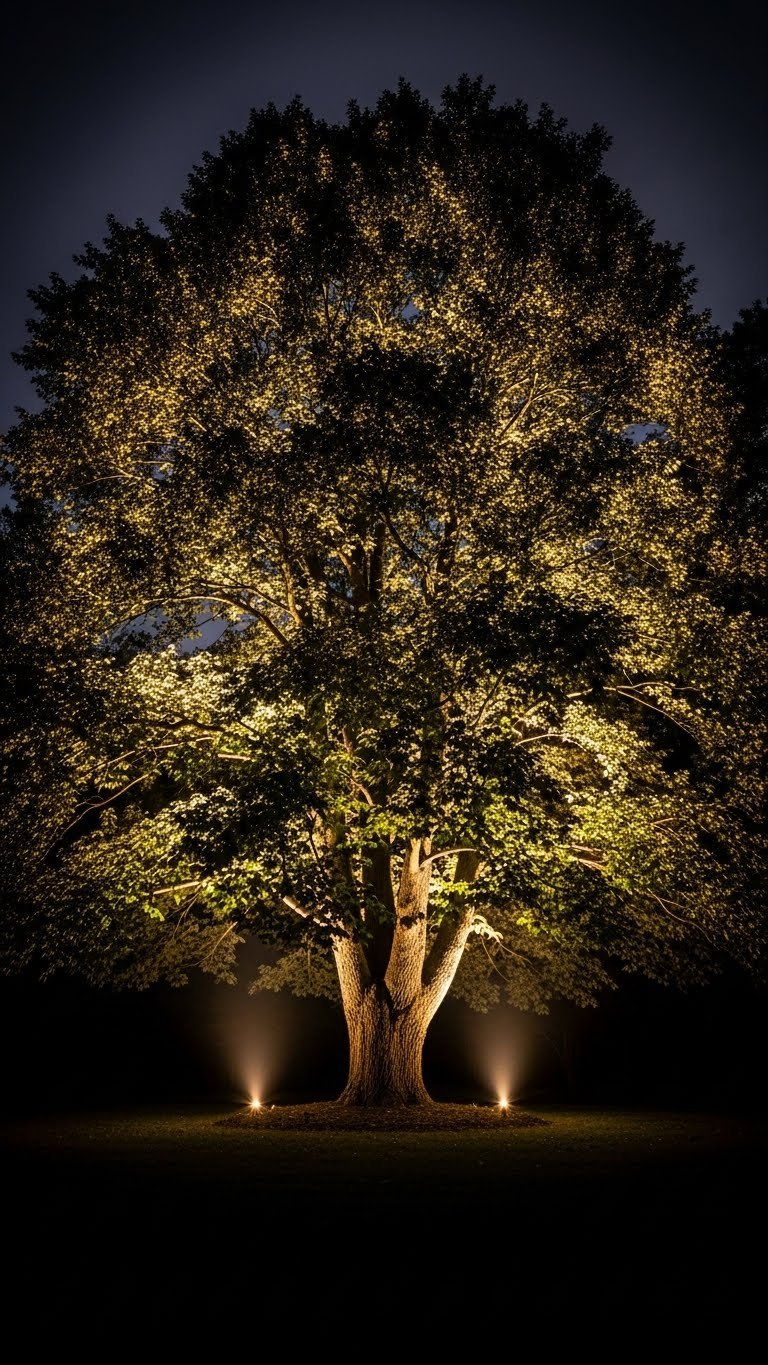
    Install sconces flanking your front door ($25-$60 each), uplights to highlight trees or architectural details ($20-$40 each), and solar path lights ($15-$30 for a set of 8-10). Total budget: $100-$250 depending on scope. Installation is straightforward—sconces take 30-45 minutes and most require basic wiring. Solar lights are the easiest renter option: just push them into soil along your walkway. Choose warm white bulbs (2700K) for a welcoming glow.

    Pro tip: Layer your lighting. Overhead sconces provide general light, uplighting adds drama, and path lights guide safely. Avoid harsh white LEDs that look cold and institutional. Your home gains both function and romance once the sun sets.

    5. Define Your Front Beds with Fresh Mulch and Edging

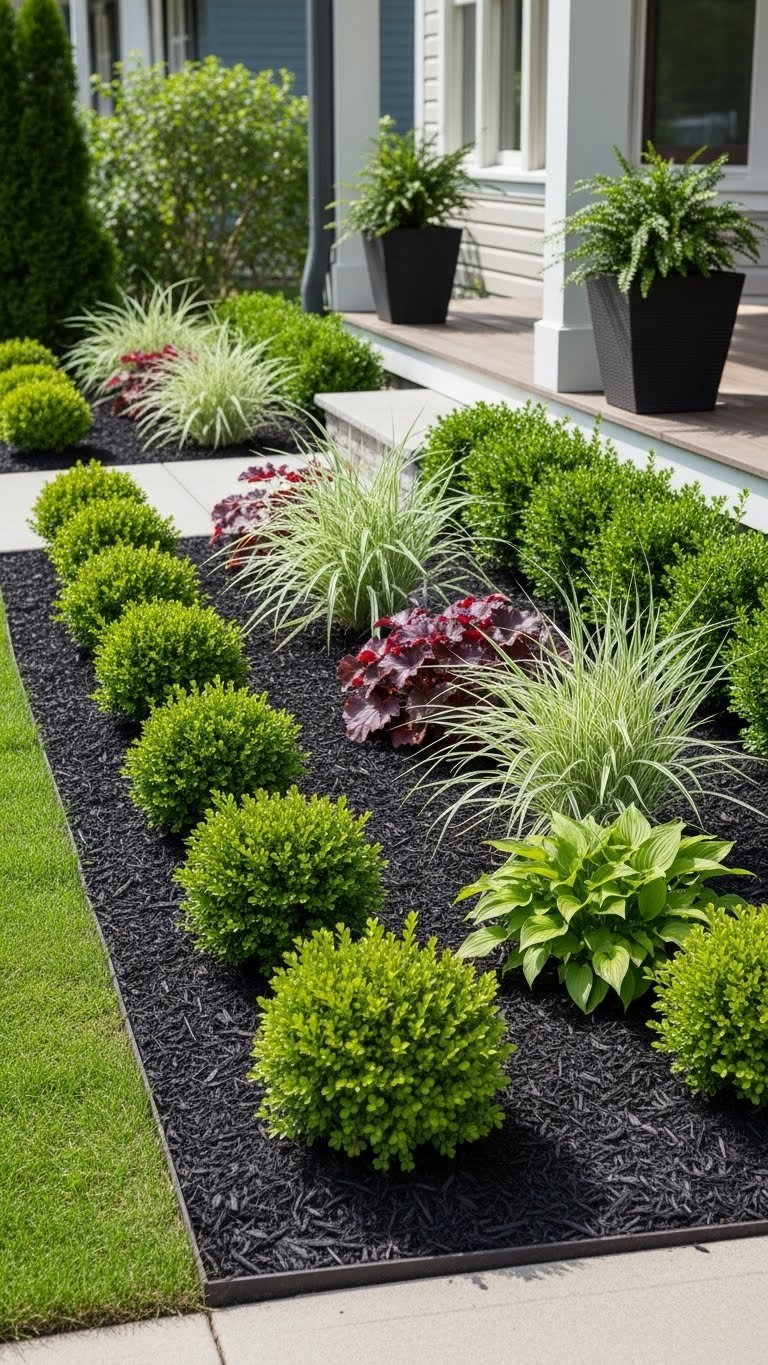
    Messy, overgrown front beds drag down your entire curb appeal. Fresh mulch and clean edging instantly make your landscaping look maintained and intentional.

    Buy bagged mulch ($3-$5 per bag, need 10-15 bags typically) from any garden center. Get a landscape edging kit ($15-$30) to define bed borders. Rent a small mulch spreader or shovel by hand in 2-3 hours for a typical small home front. Remove old weeds and overgrown plants first. Edge the beds sharply—this single move makes everything look manicured.

    Pro tip: Dark mulch recesses the background and makes plants pop; lighter mulch (cedar chips) smells good but shows dirt easily. Keep beds mulch-fresh by reapplying thin layers each spring. Your front yard instantly looks maintained, even if the rest of your landscaping is still a work in progress.

    6. Paint or Stain Your Front Steps and Deck

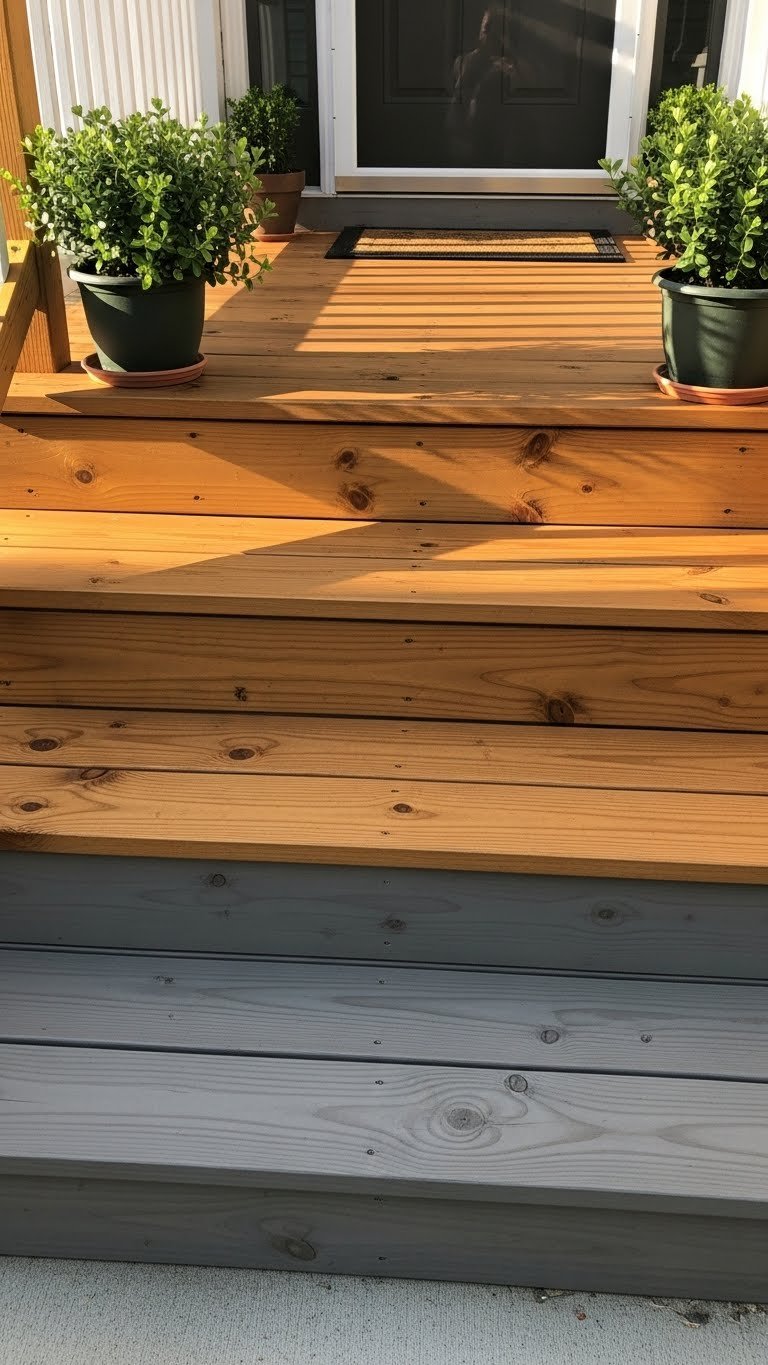
    Weathered, peeling steps send the message that your home isn’t well-cared-for. A fresh stain or paint job transforms them instantly.

    Power wash your steps (rent a washer for $50-$75, or hire someone for $100-$200). Once dry, apply deck stain or exterior paint ($30-$50 per gallon). You’ll need about half a gallon for typical small-home steps. Stain takes 2-4 hours to dry between coats; paint dries faster. Budget one weekend for the full job including prep and multiple coats. Choose warm gray, honey, or charcoal—colors that complement your home’s exterior.

    Pro tip: If your steps are concrete, use concrete paint or stain designed for foot traffic. Skip the slippery finish and add texture for safety. Your entry steps become a genuine invitation rather than an afterthought.

    7. Add House Numbers That Make a Statement

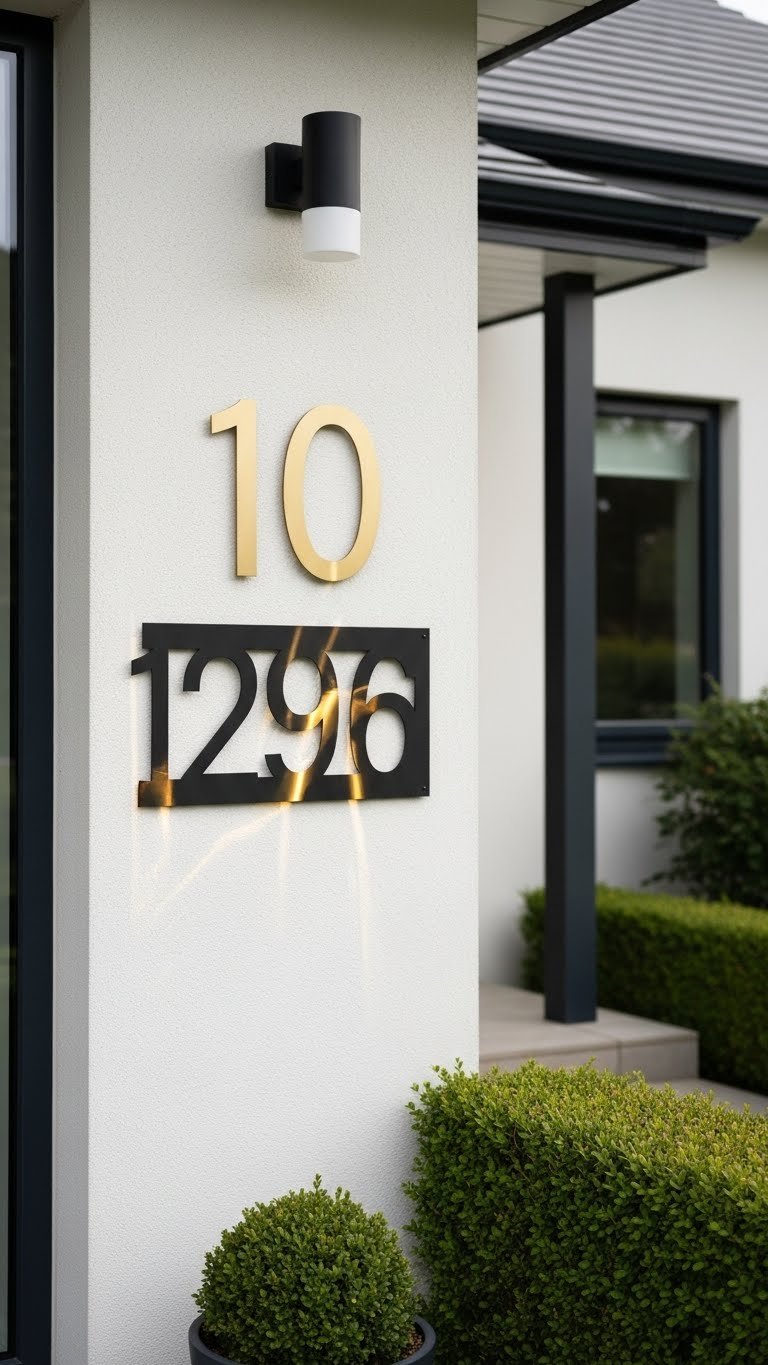
    Visible, stylish house numbers tell the story of how you care about details. Good numbers are functional and decorative.

    Upgrade from plastic stick-on numbers to solid brass, stainless steel, or powder-coated metal numbers ($25-$75) from Wayfair, Amazon, or a hardware store. Install them 4-6 inches from your front door, at eye level, where they’re clearly visible. Most installations take 10 minutes and need just a drill and screws. For renters, look for adhesive-backed options that don’t require drilling.

    Pro tip: Oversize your numbers slightly (4-6 inches tall). Small numbers disappear and look cheap. Mix finishes intentionally—brass numbers with a black door, matte numbers with a colored door. Your home gains polish and people can actually find your house.

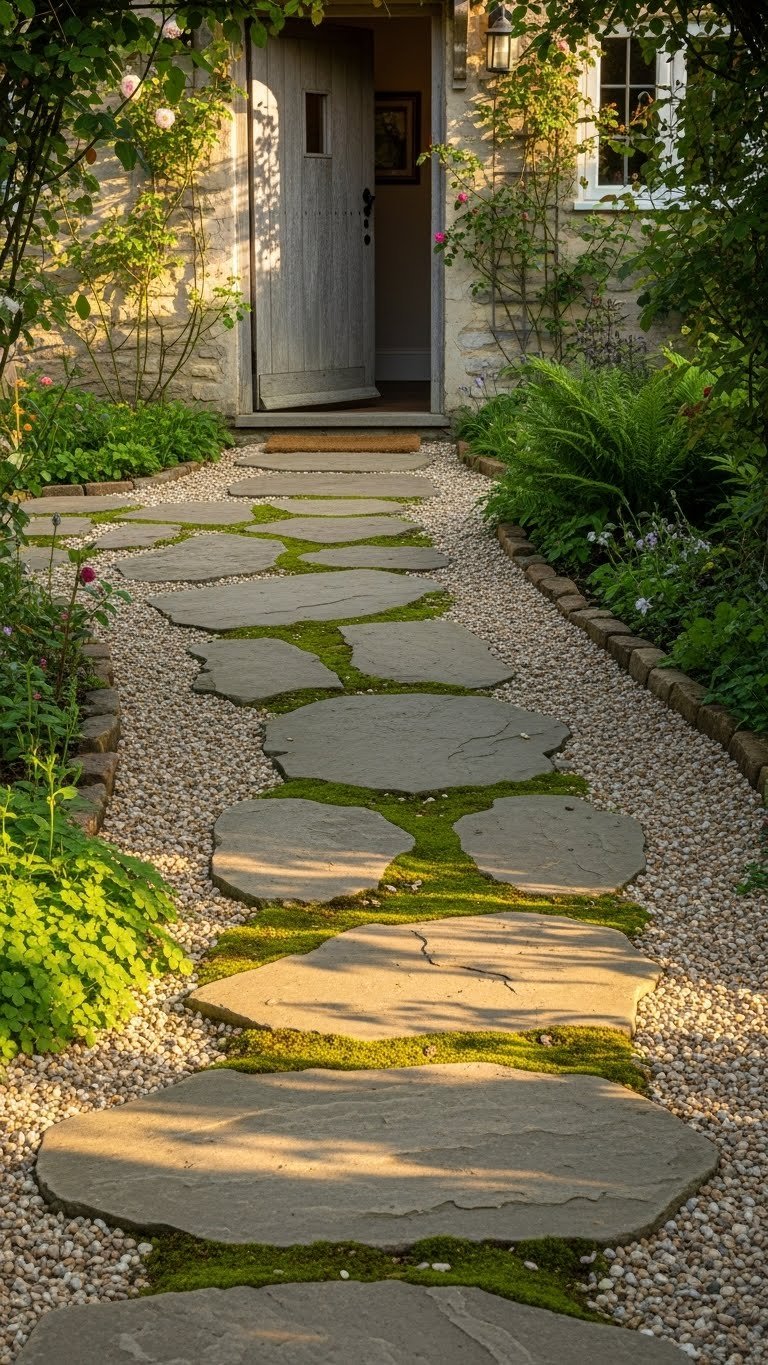
    8. Define Your Walkway With Path Lighting or Edging

    A defined, well-lit walkway guides visitors and makes your home feel established. It’s a small detail that reads as intentional care.

    Install solar path lights every 2-3 feet ($15-$30 for a set of 8-10). Alternative: lay decorative pavers or stepping stones ($1-$3 each) in a curved or straight line. Budget $30-$75 depending on walkway length. If you want year-round definition, edge the walkway with low hedges or ornamental grasses ($10-$20 per plant). No installation needed for solar lights—just push them into soil.

    Pro tip: A curved walkway feels more welcoming than a straight one. Avoid harsh white lights; choose warm solar options that evoke ambient mood. Your walkway becomes a visual throughline that guides people safely and signals “this home is thoughtfully designed.”

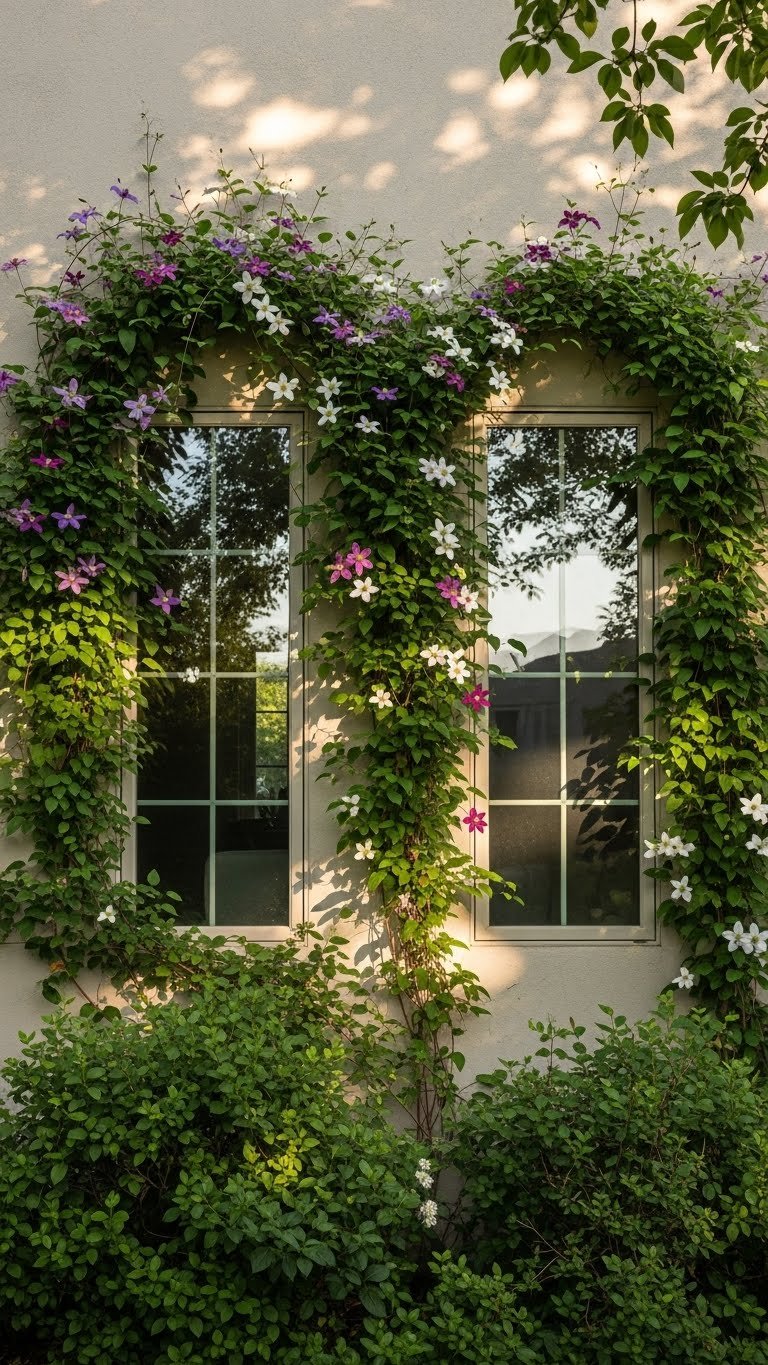
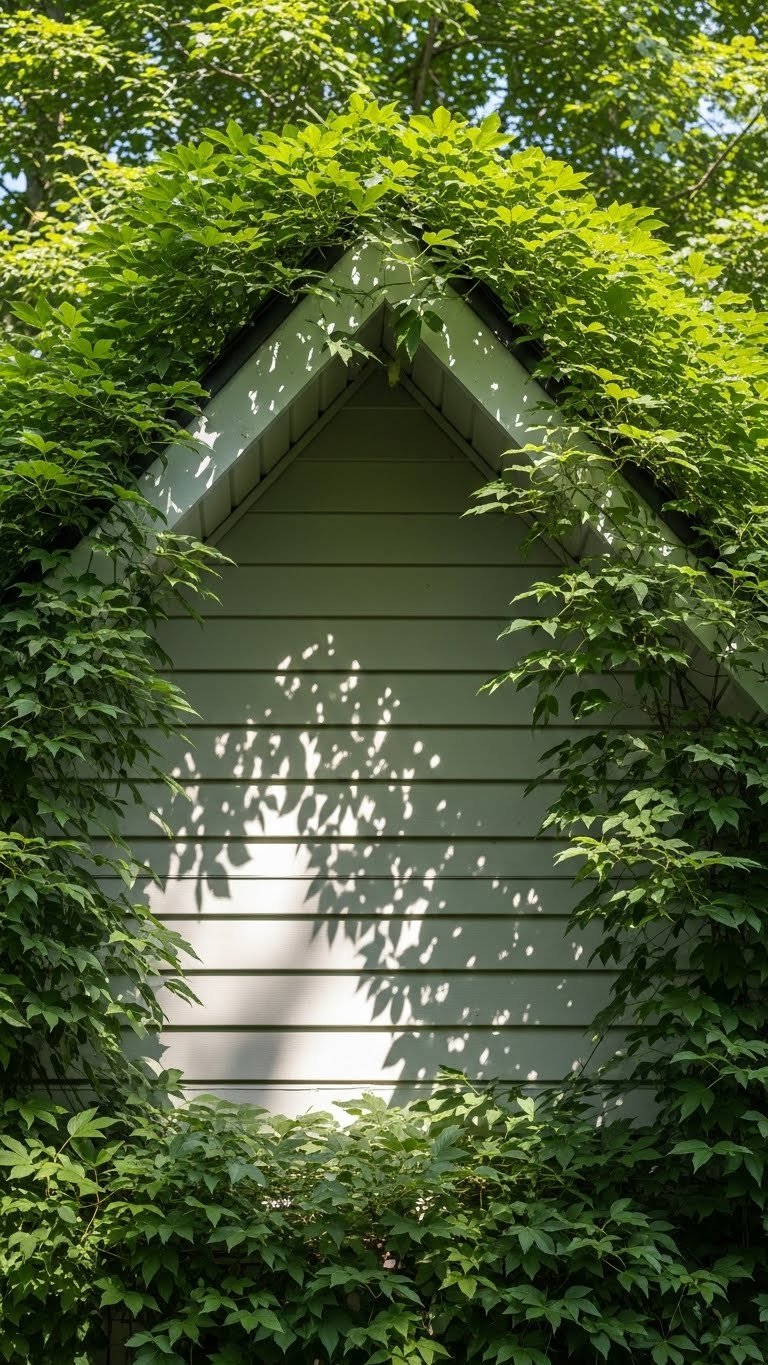
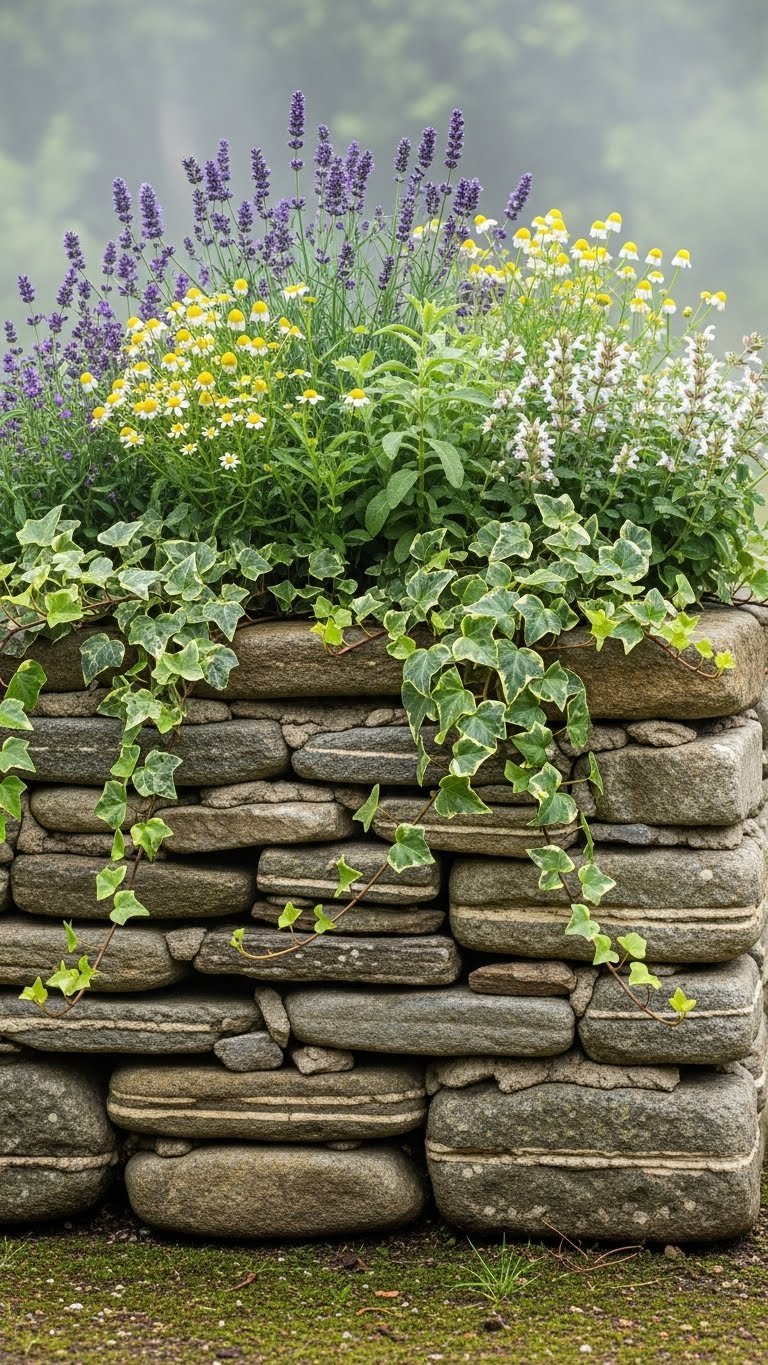
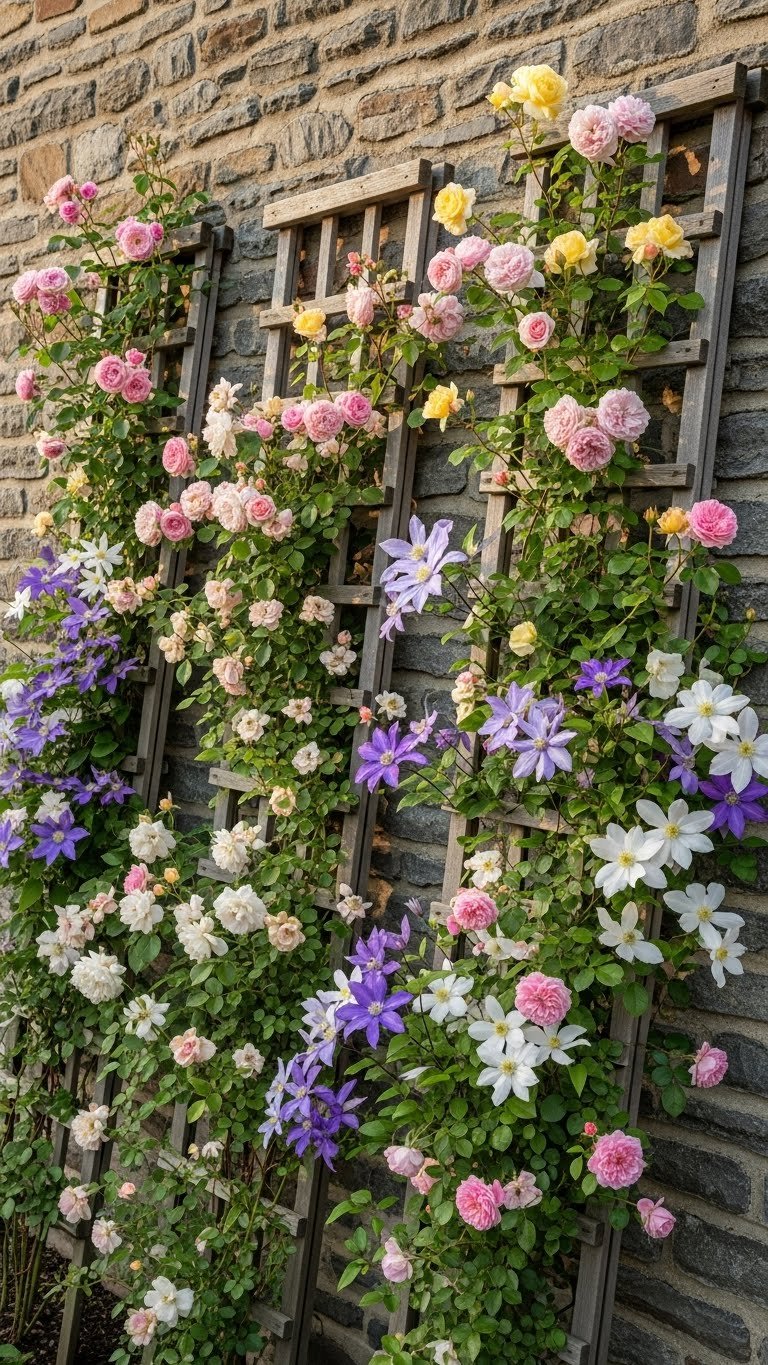
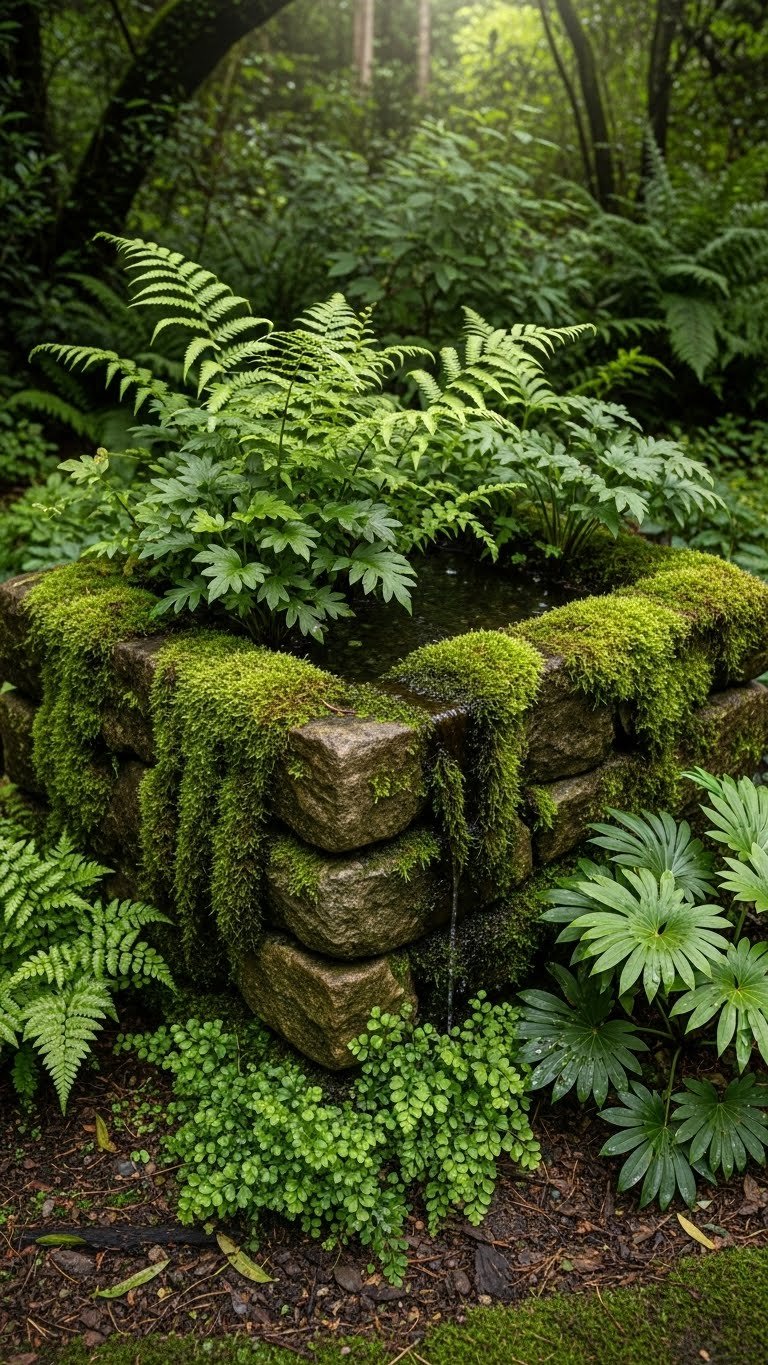
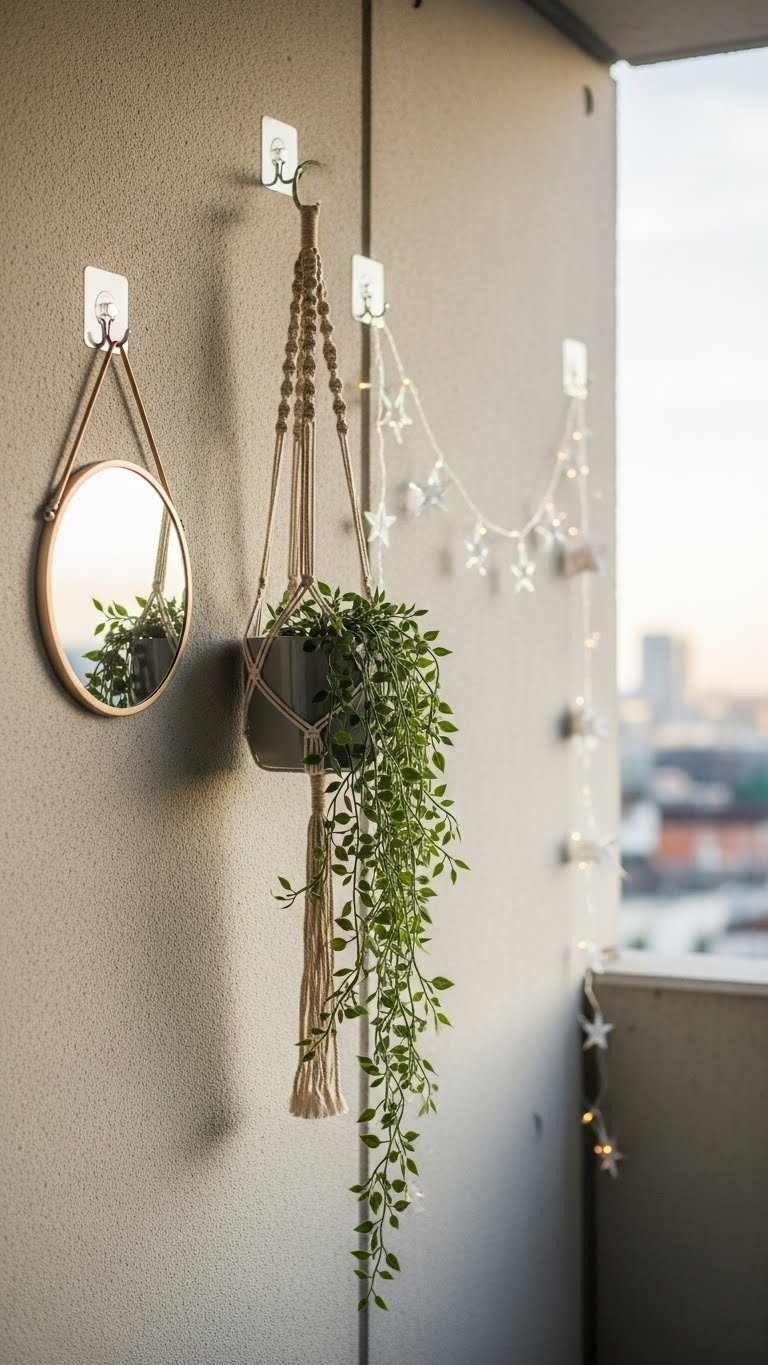
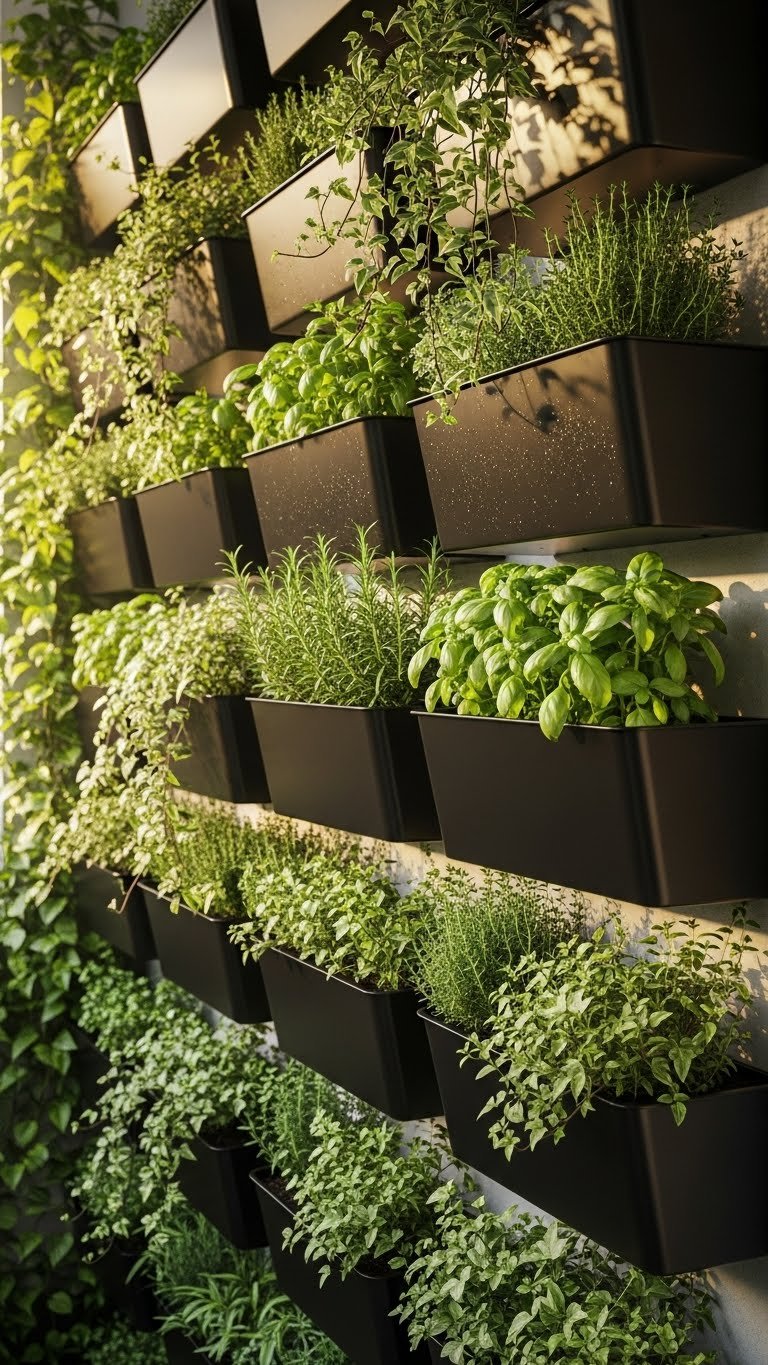
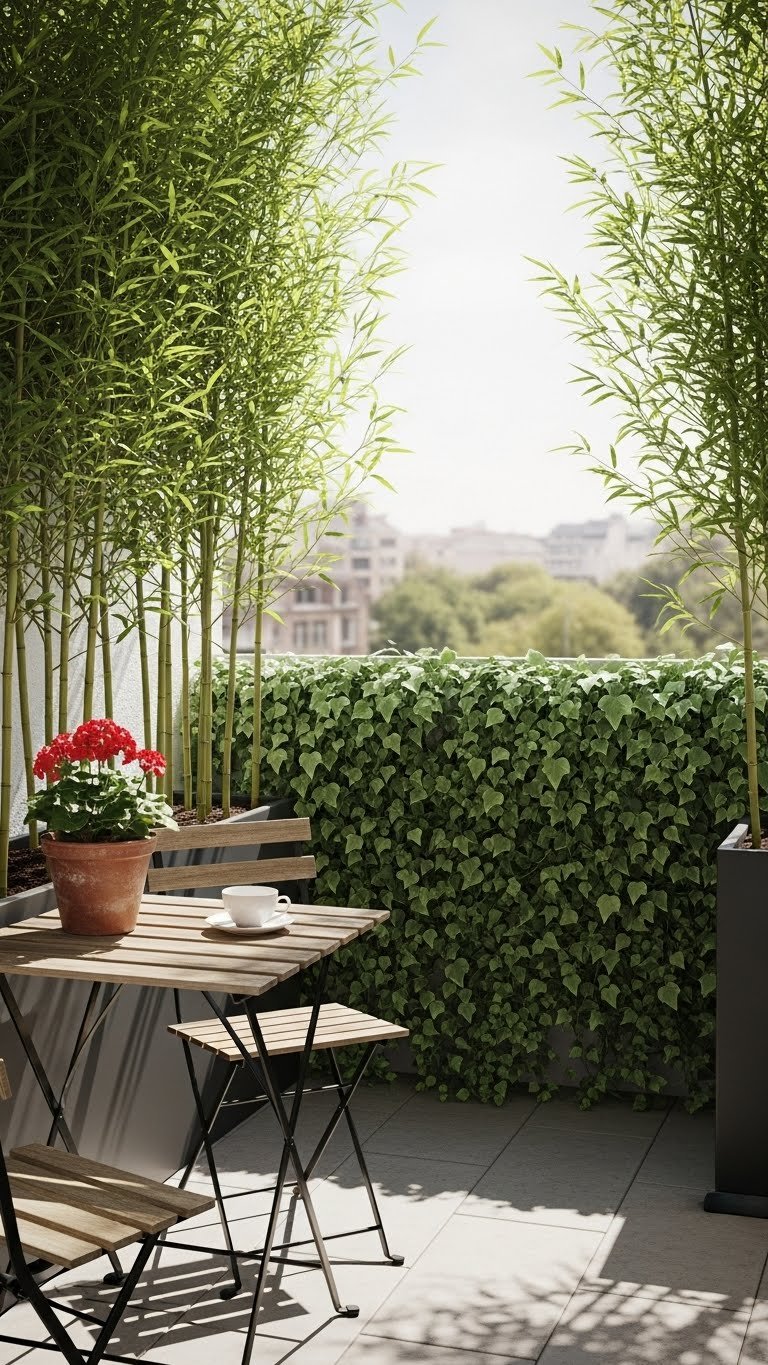
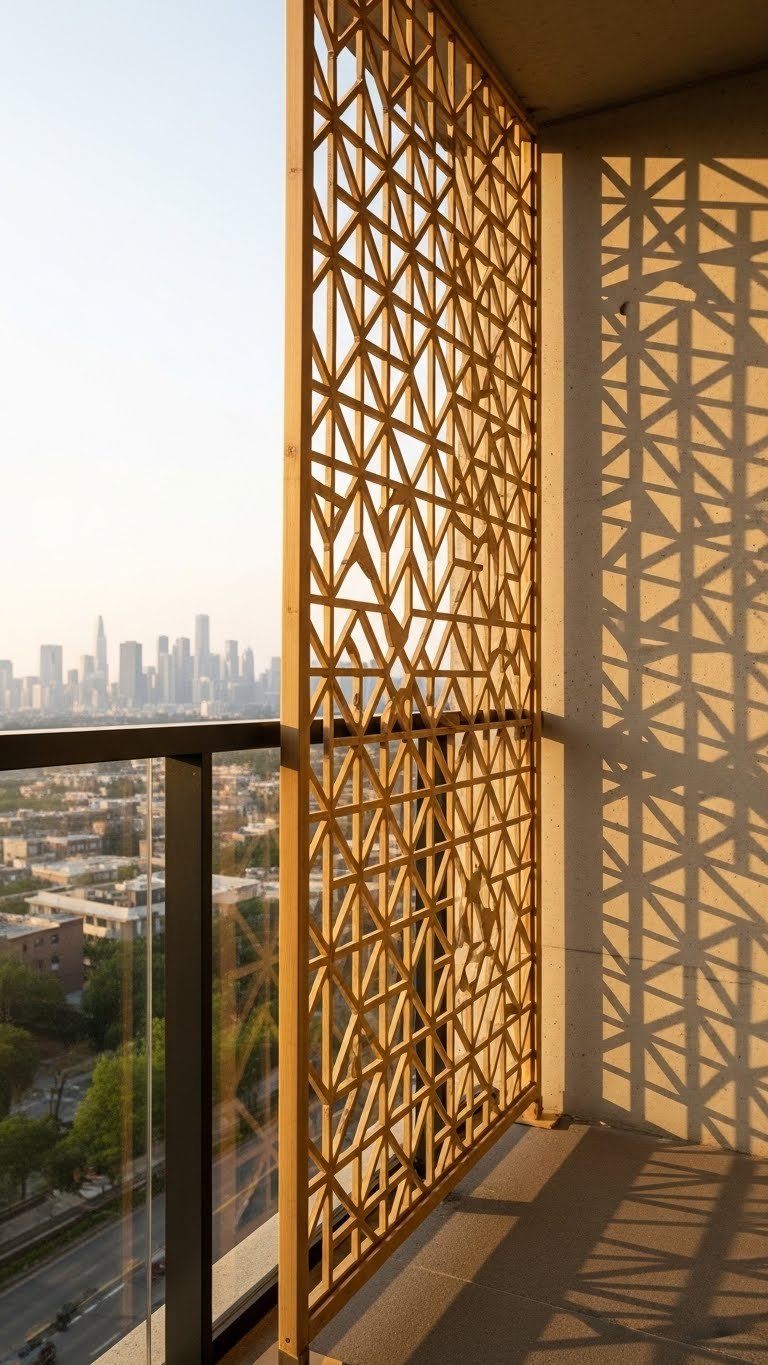
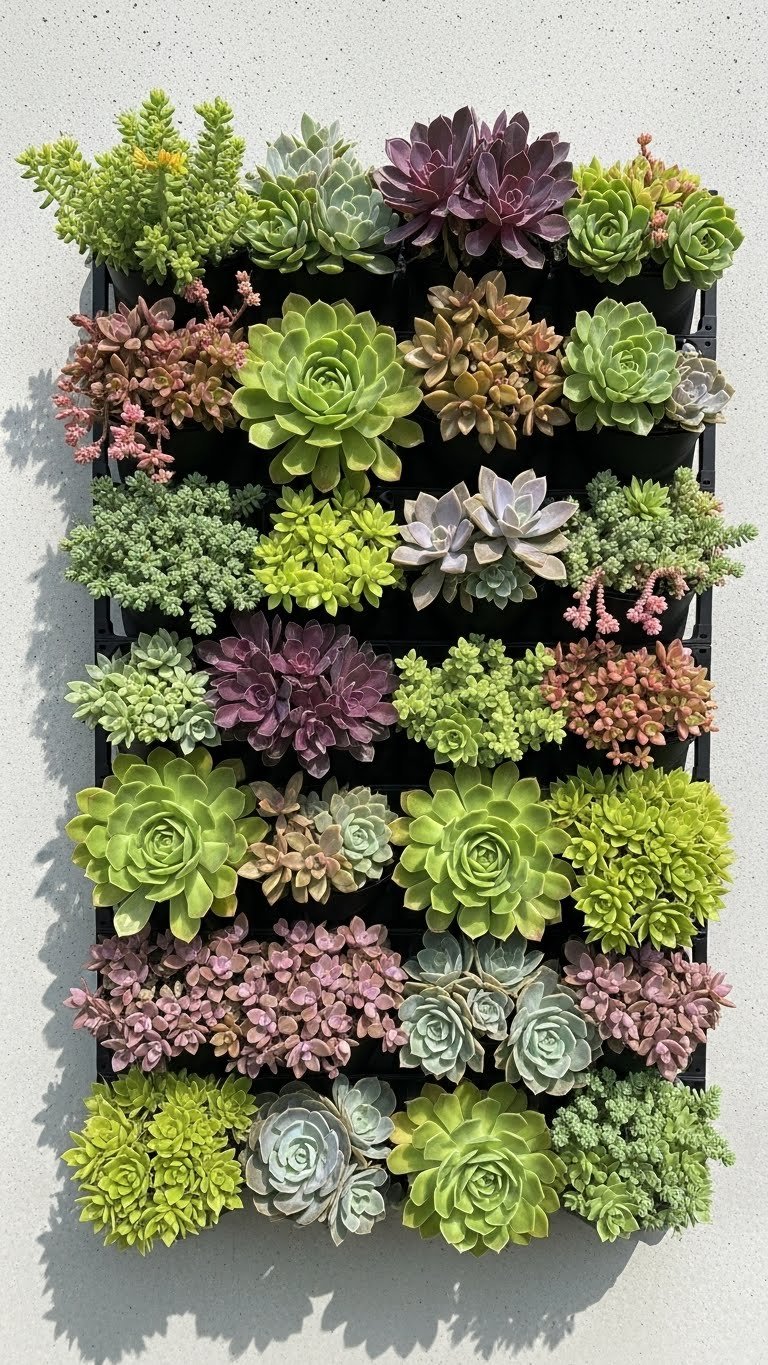
    9. Create a Living Wall With Climbing Vines or Ivy

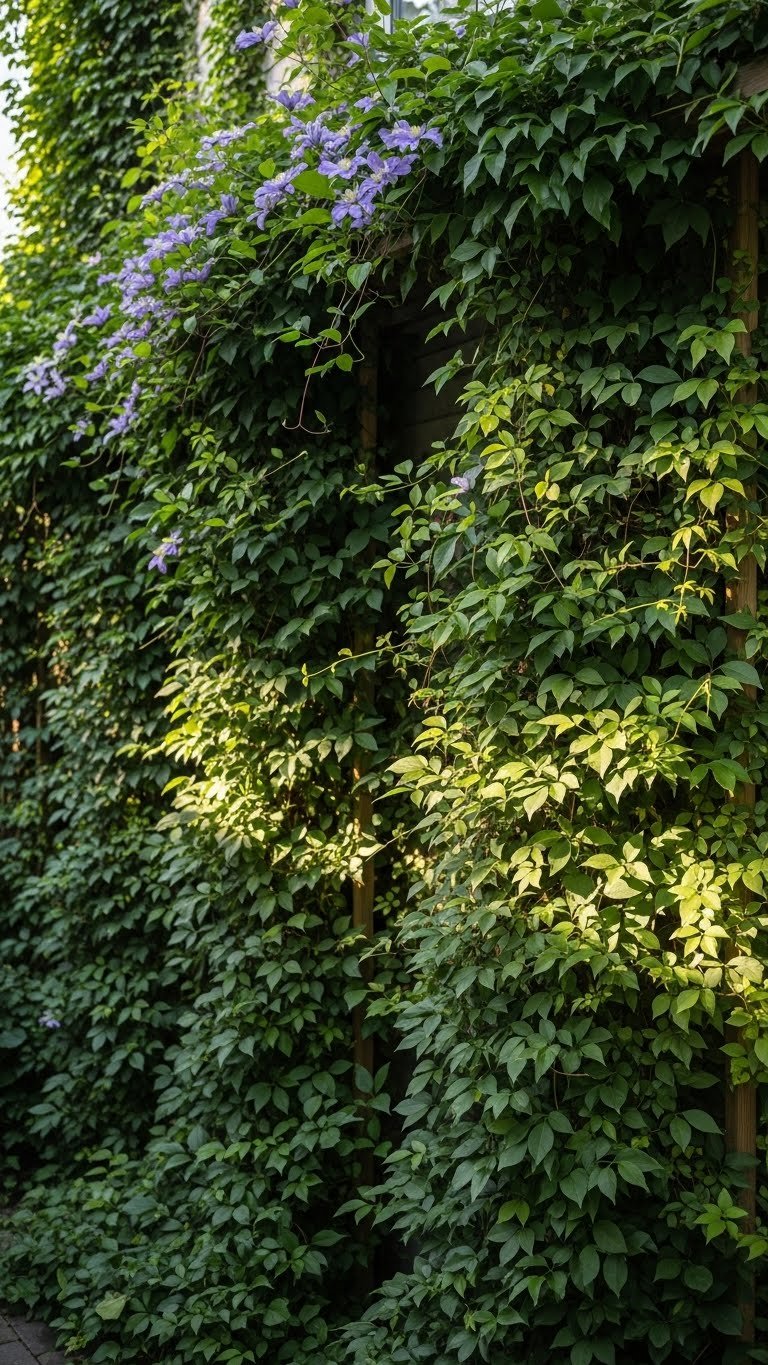
    Climbing vines add softness, texture, and vertical interest to plain walls. They’re living design that requires minimal ongoing care once established.

    Buy a wooden or metal trellis ($20-$50) and climbing vine plants like clematis, ivy, or climbing hydrangea ($15-$30 each). You’ll need 2-3 plants to fill a small trellis. Secure the trellis to your wall with brackets ($10-$20) in 15 minutes. Plant vines at the base, water weekly, and tie stems loosely to the trellis as they grow. Most vines are established and low-maintenance by year two.

    Pro tip: Avoid invasive ivy like English ivy on your home siding—it can damage mortar. Stick with clematis, climbing hydrangea, or trumpet vine instead. Your plain wall softens into a living, breathing feature that changes seasonally.

    10. Refresh Your Front Door Hardware

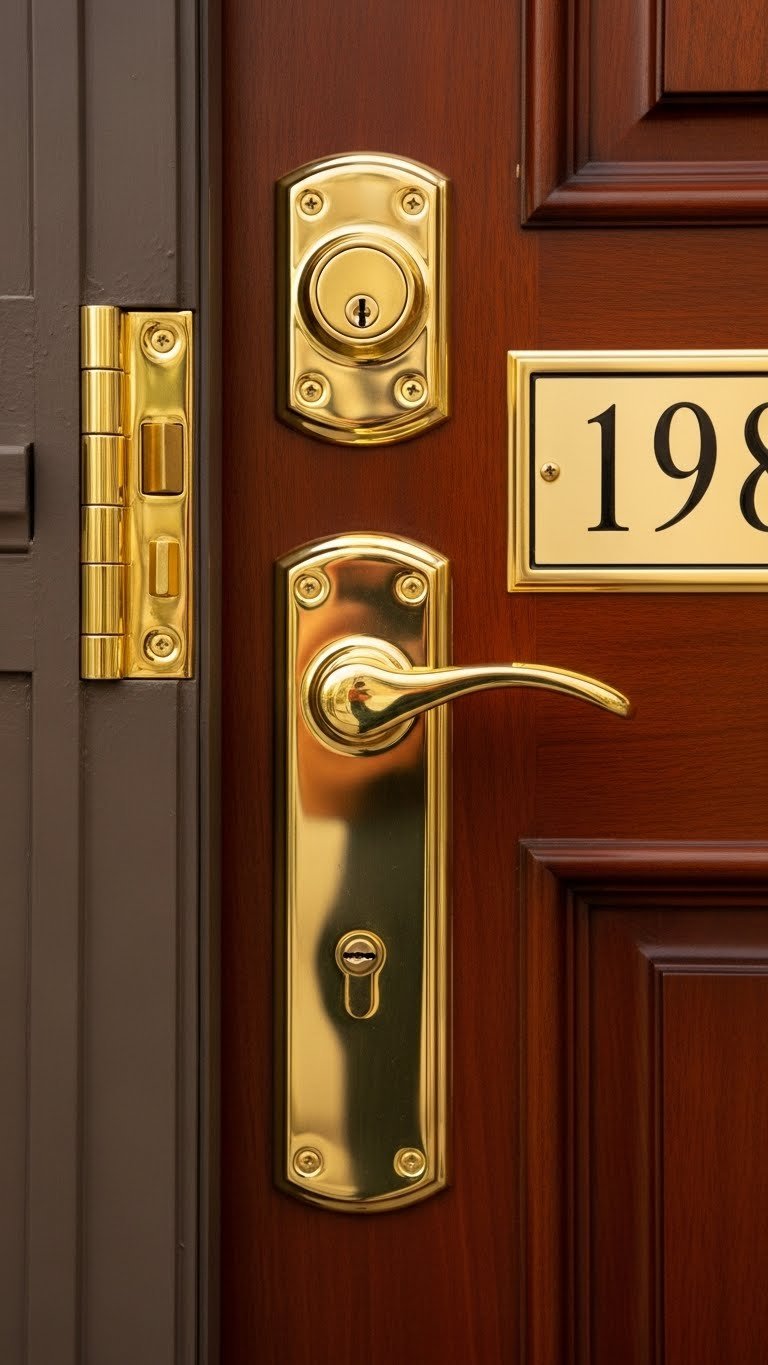
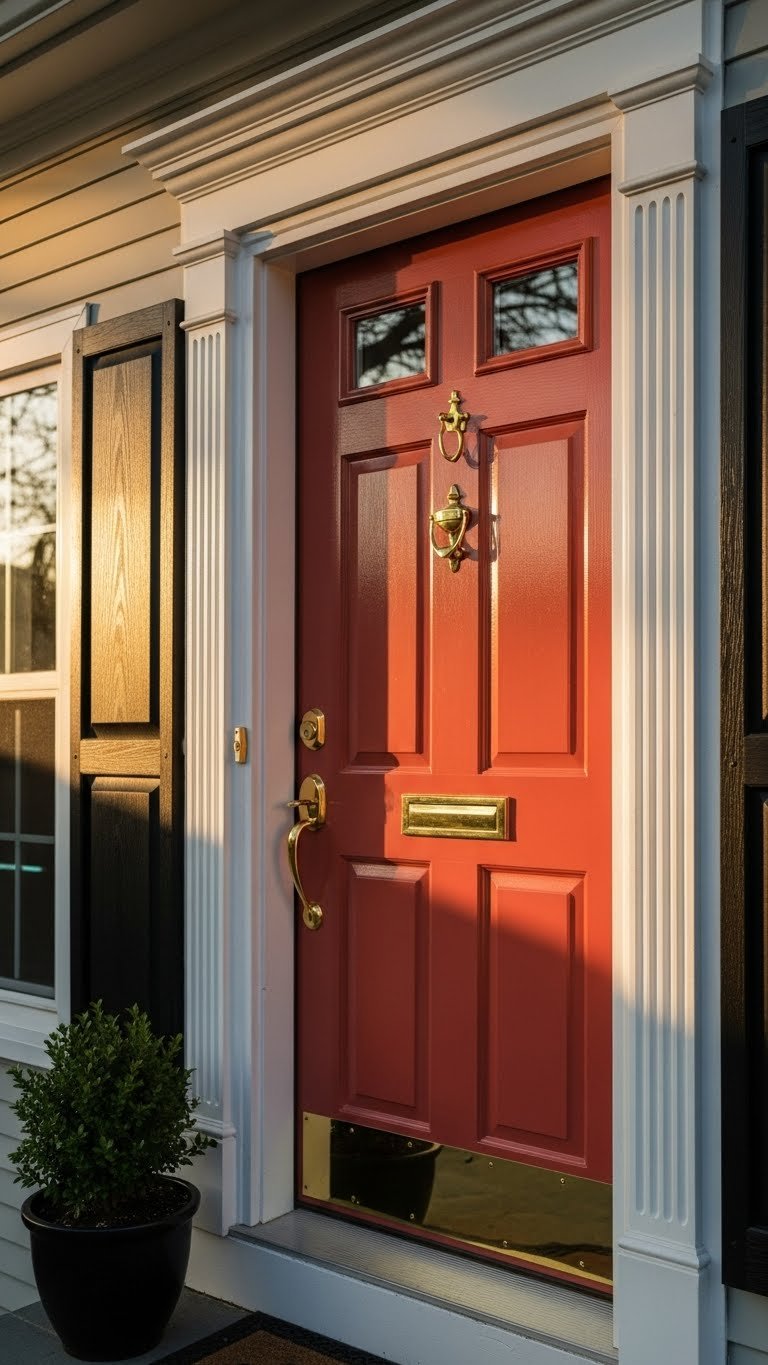
    The little details—hinges, handles, knockers, plates—announce whether your home is loved and maintained. Mismatched or dated hardware cheapens even a beautiful entry.

    Replace door hardware with matching brass, stainless, or matte black pieces ($30-$75 total). A door handle runs $15-$30, hinges are $5-$10 each, a deadbolt $20-$40, and a house number plate $10-$25. Installation takes 30 minutes with a drill and screwdriver. Buy coordinating pieces from the same brand (Baldwin, Rejuvenation, or hardware.com) for cohesion.

    Pro tip: Shiny brass or matte finishes photograph best; avoid chrome or brushed nickel mixes. Cohesive hardware transforms your door from “generic” to “designed.” Your entry hardware catches light and signals intentional attention to detail.

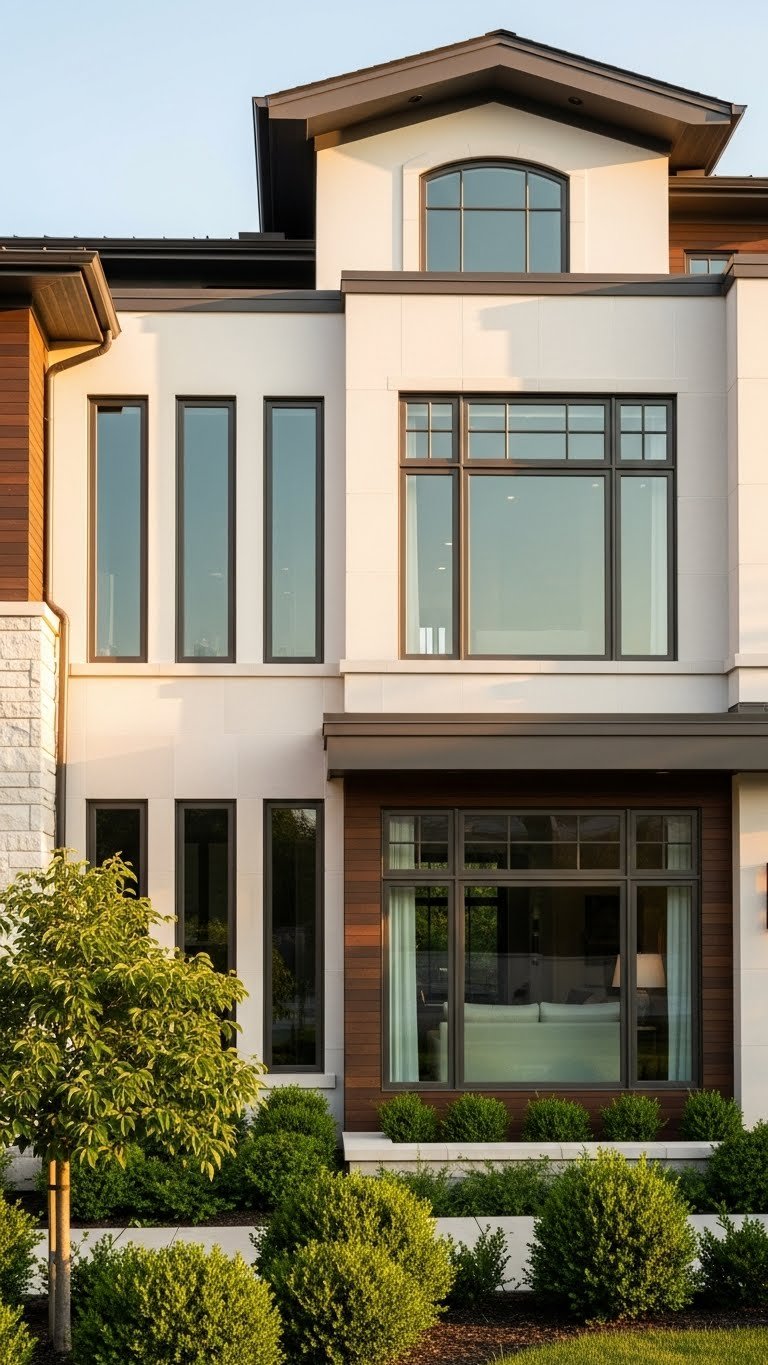
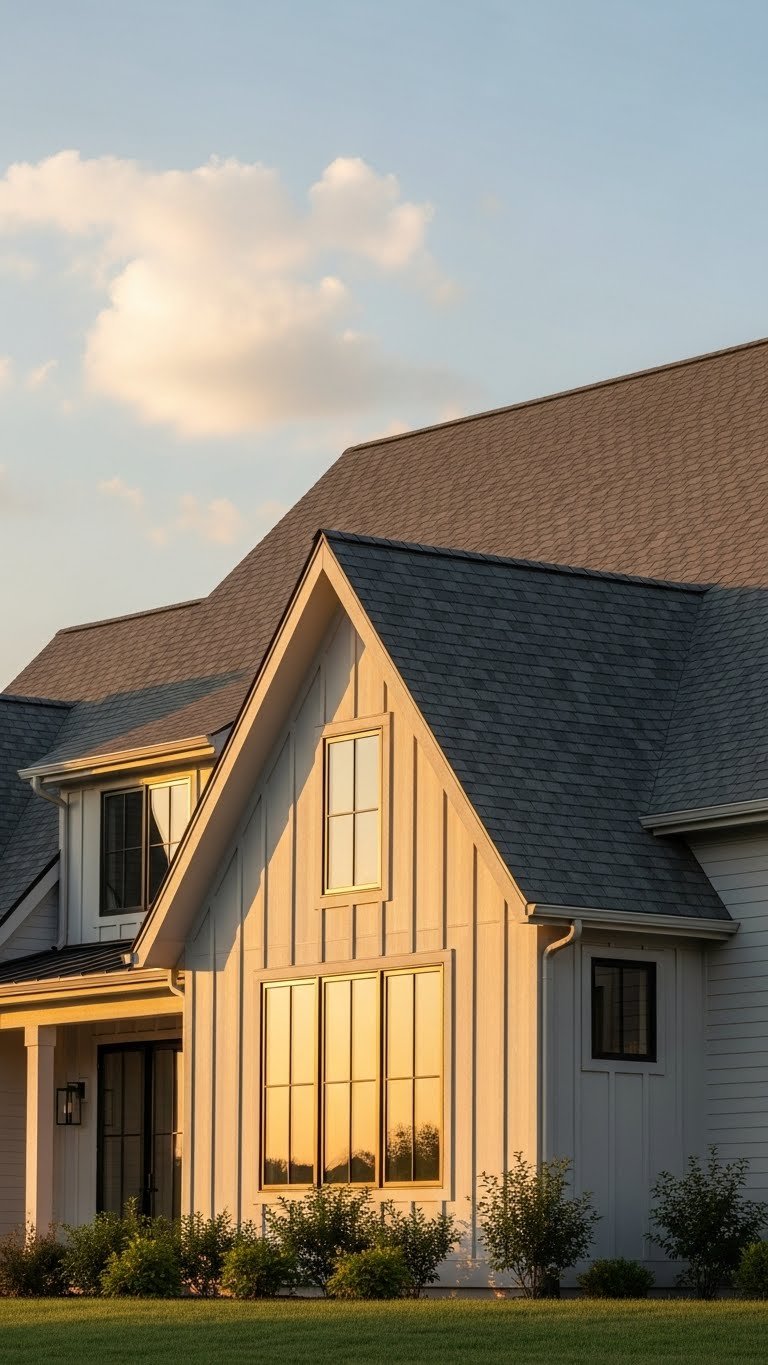
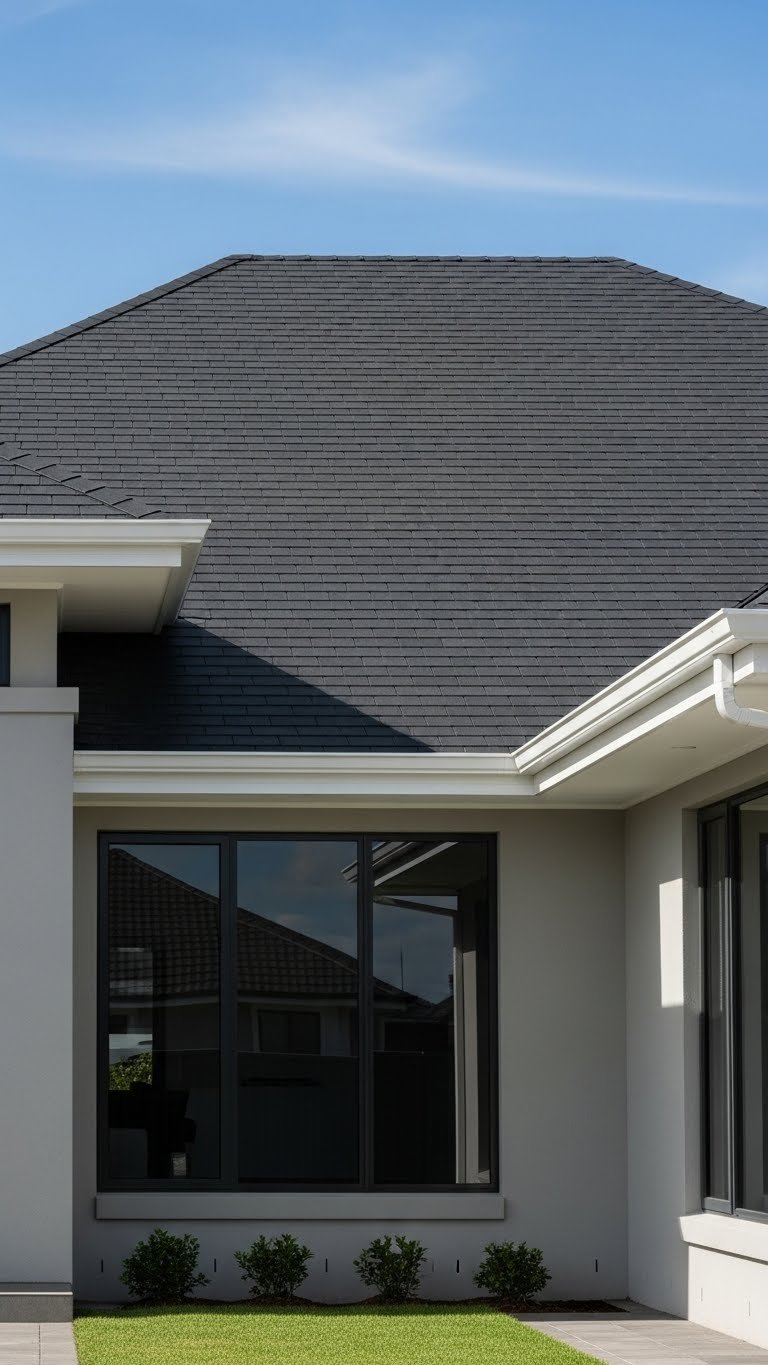
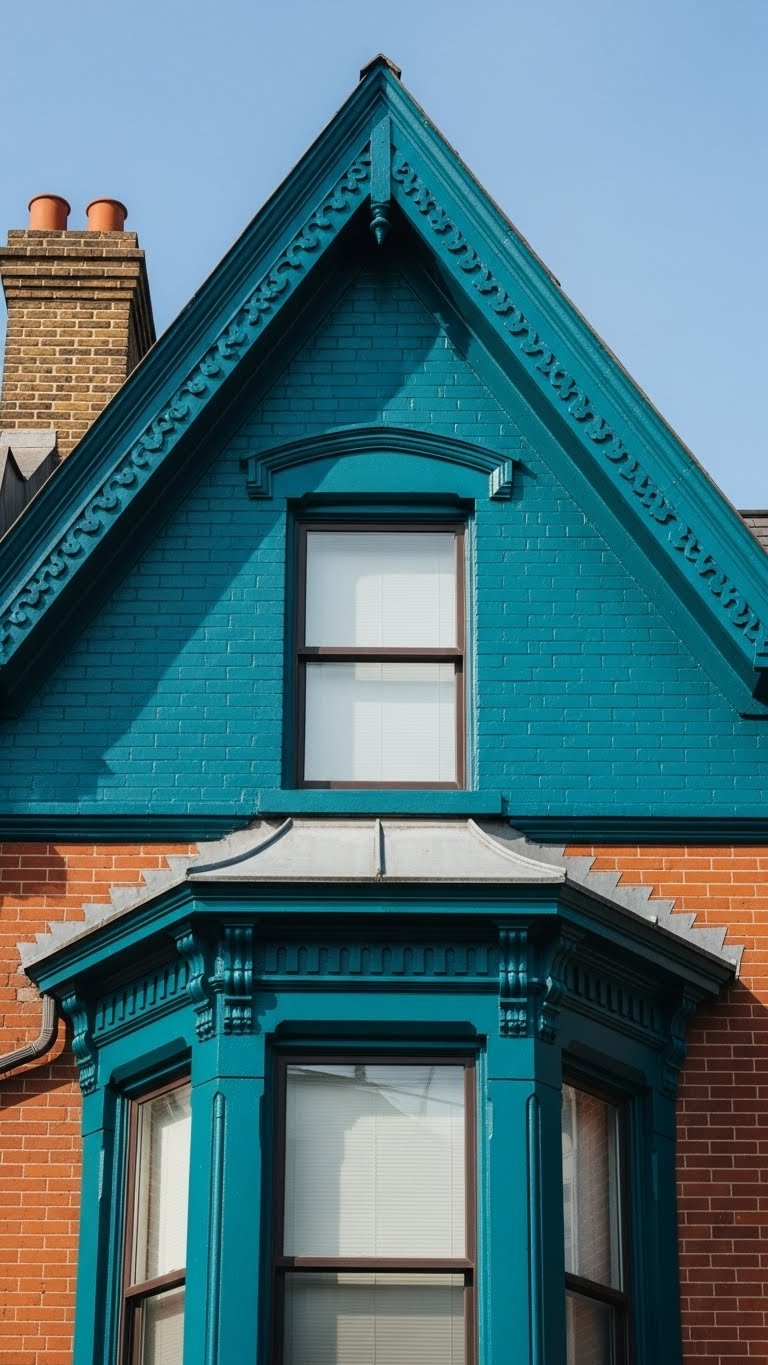
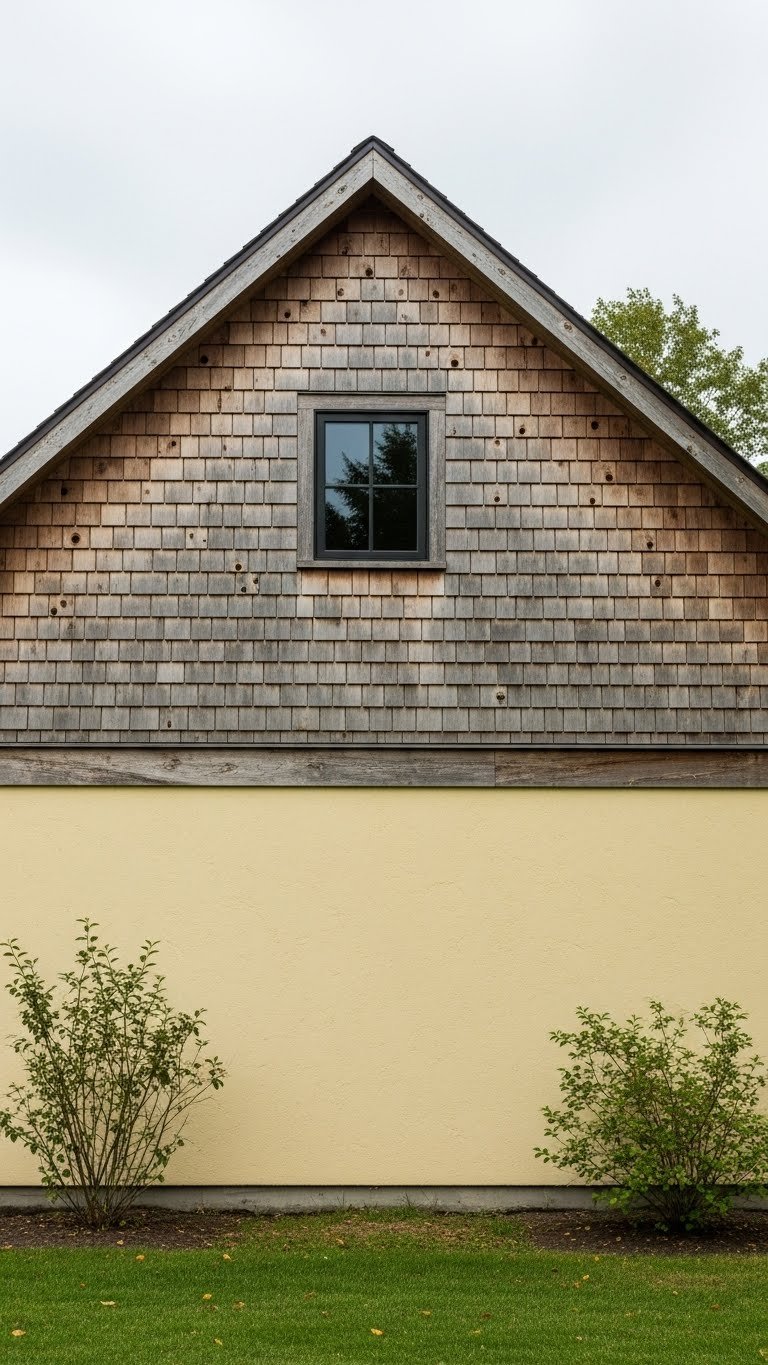
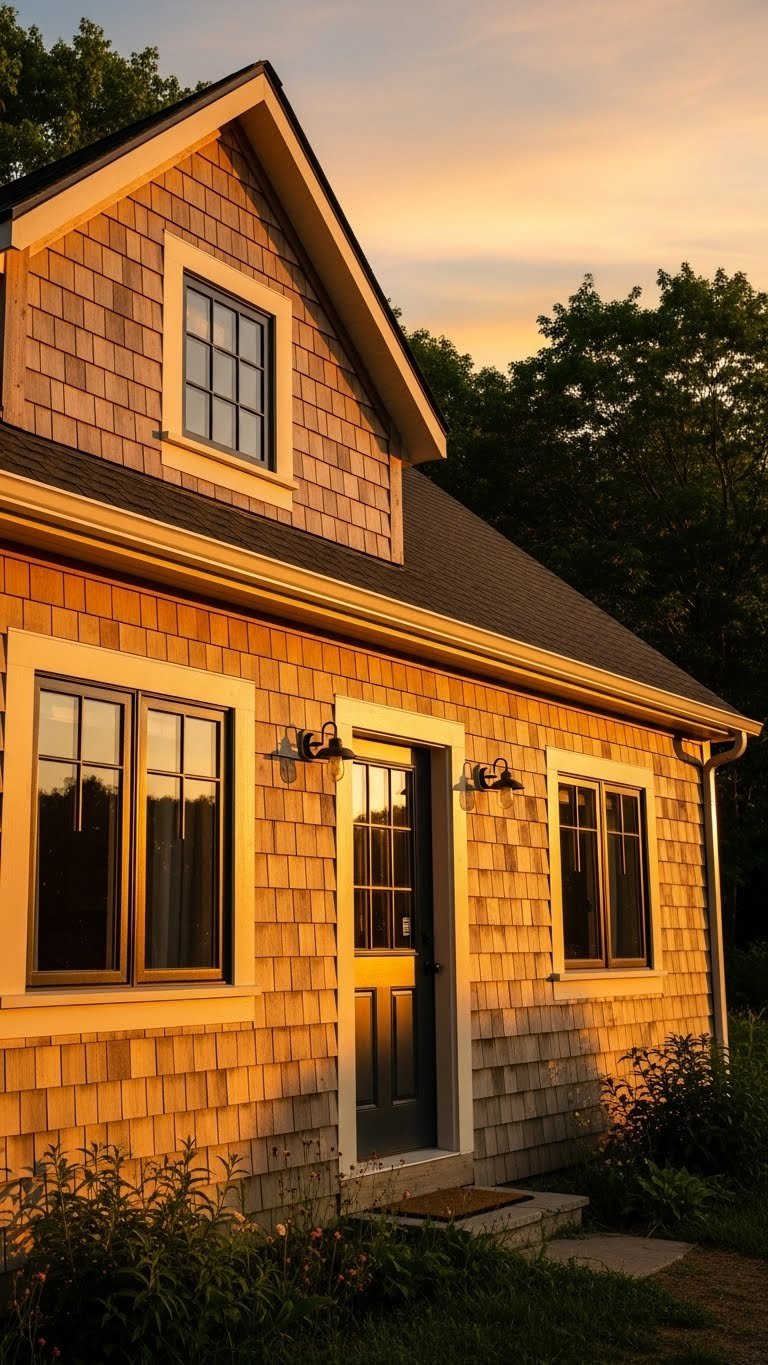
    11. Paint Your Siding or Trim in a Fresh Neutral

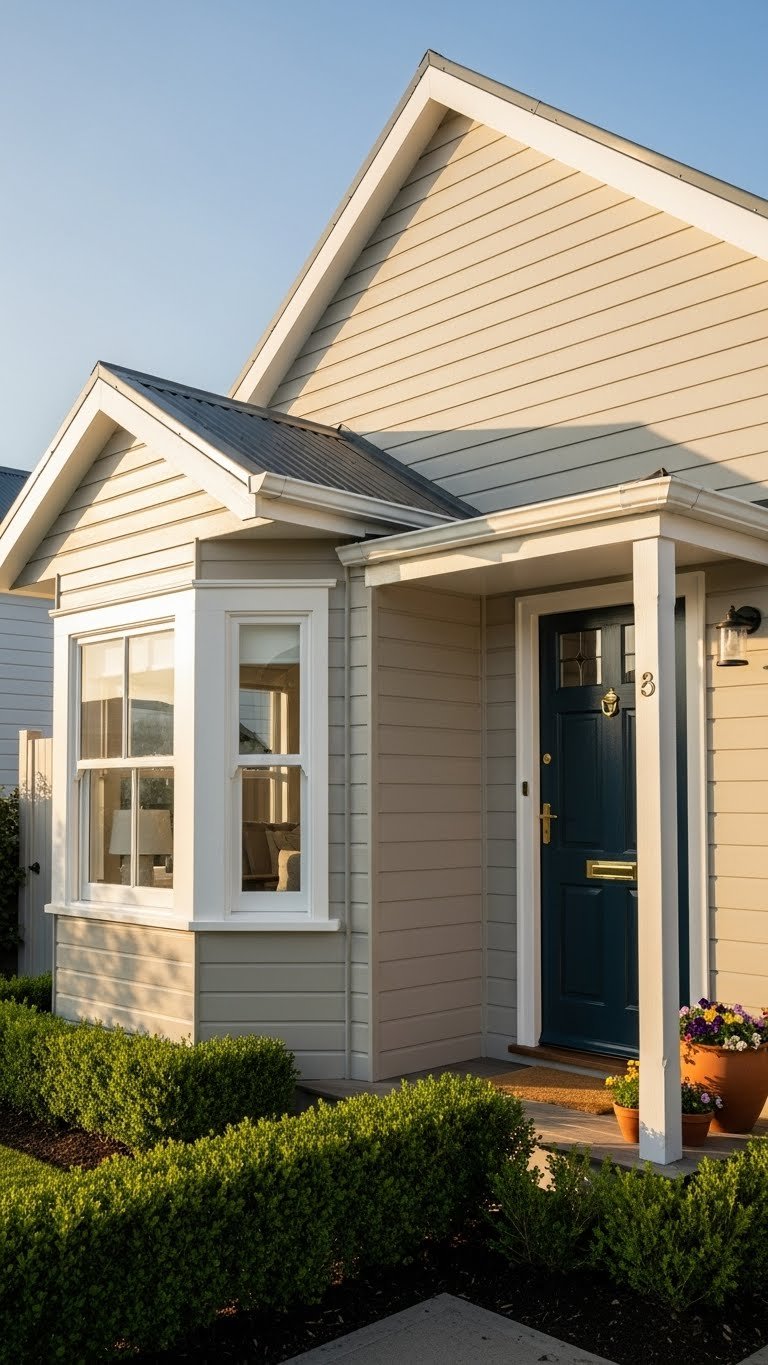
    Faded, dated siding color drags down your entire curb appeal. A fresh coat of paint in a neutral refreshes everything.

    Hire a professional painter ($1,500-$4,000 depending on home size) or DIY with quality exterior paint ($40-$60 per gallon, budget 3-4 gallons). You’ll need primer, roller, brush, and drop cloth ($40-$60). Total DIY: $150-$250 in supplies. If you hire out, the job takes 3-5 days. Choose warm neutrals like cream, soft taupe, greige, or pale gray—colors that complement landscaping and add light.

    Pro tip: Paint your trim a crisp white or fresh gray that contrasts with siding for architectural definition. This simple contrast elevates the entire exterior. Your home reads as newer, fresher, and meticulously maintained.

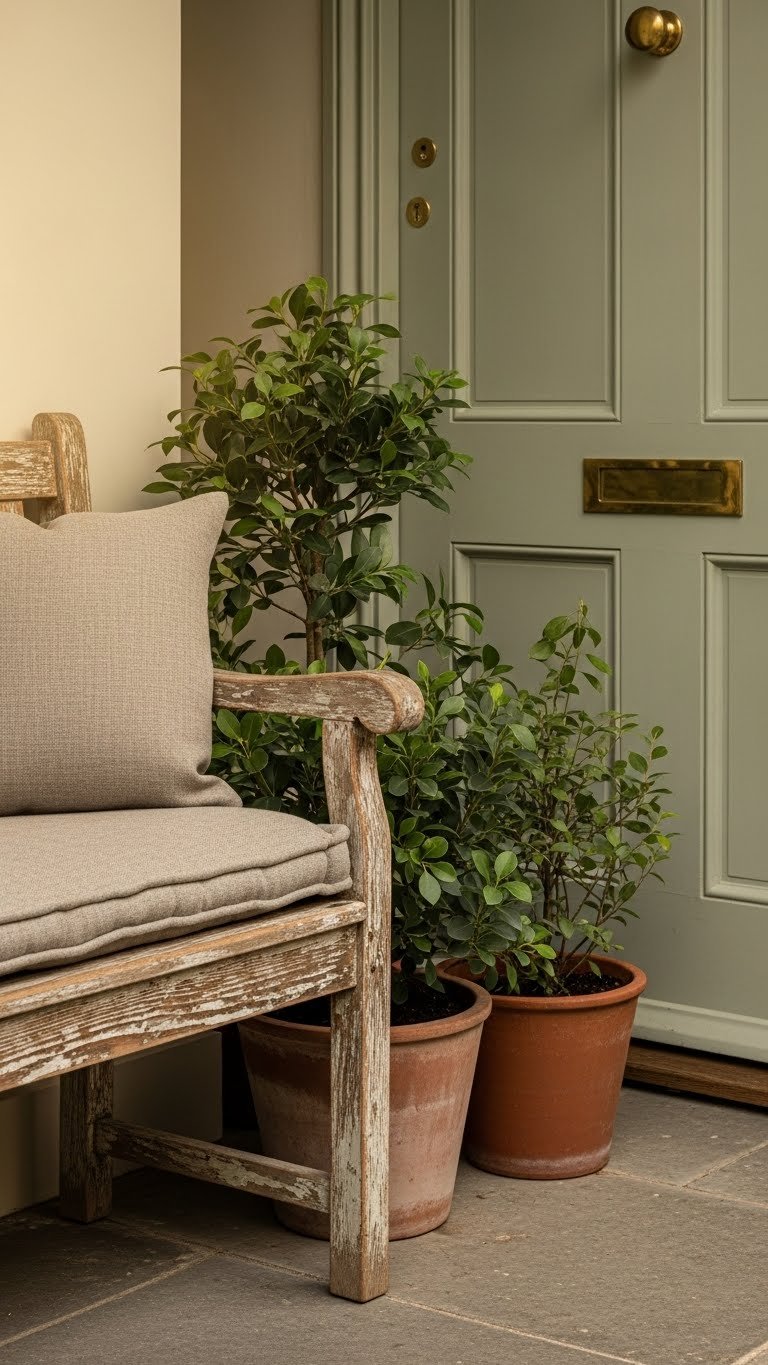
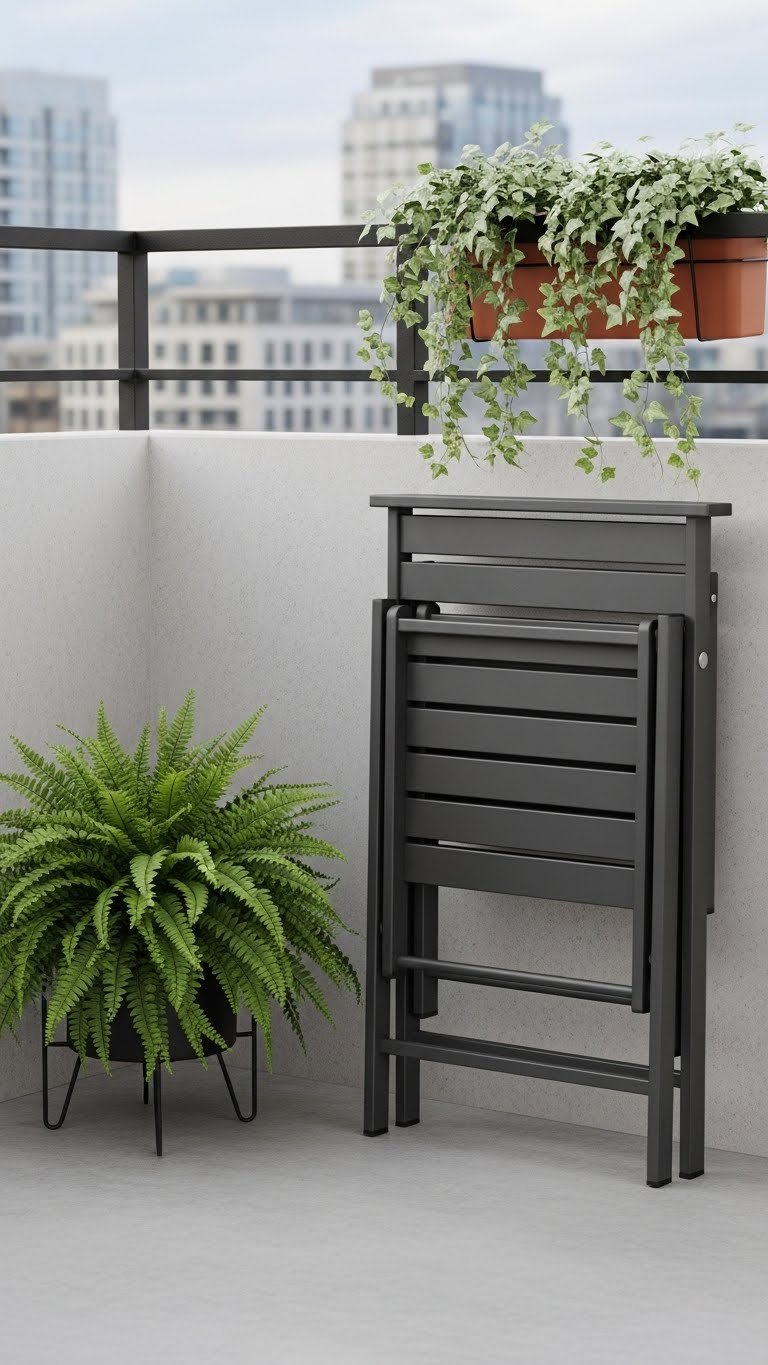
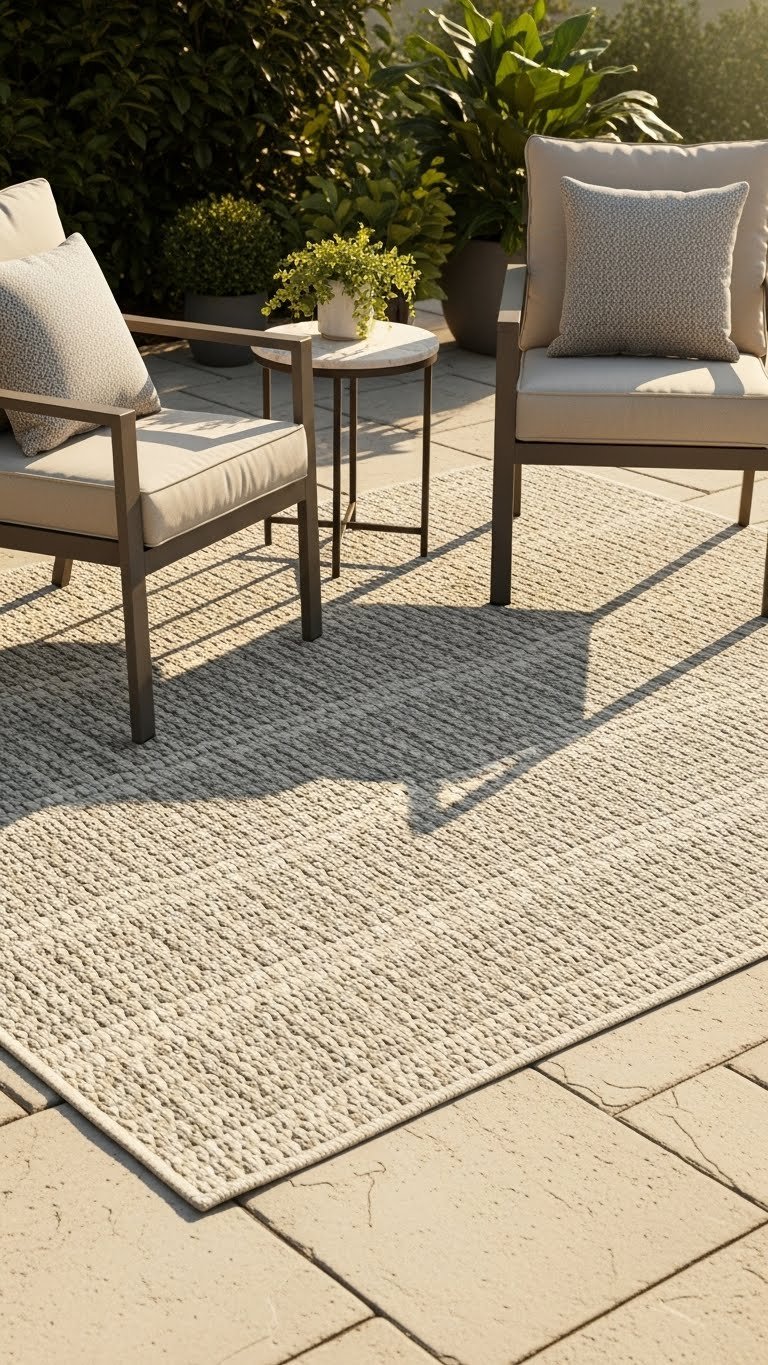
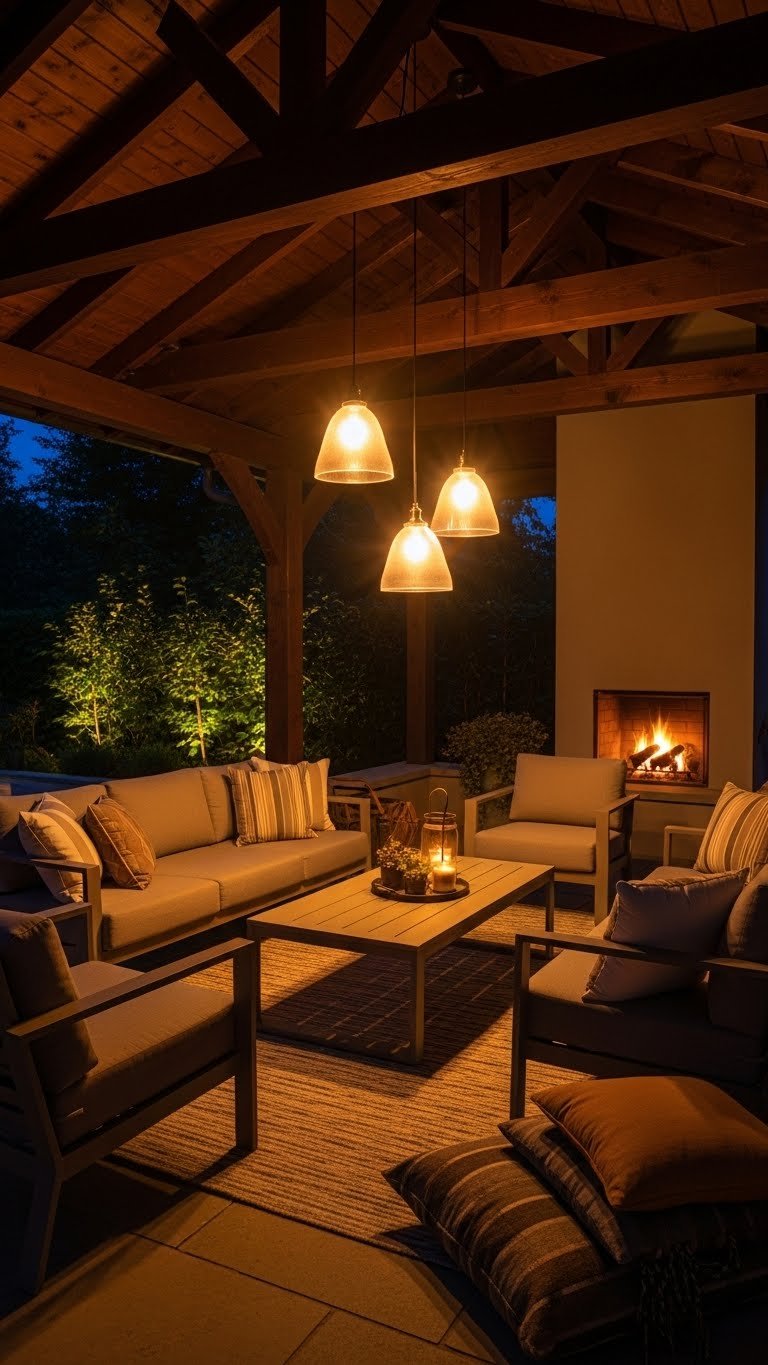
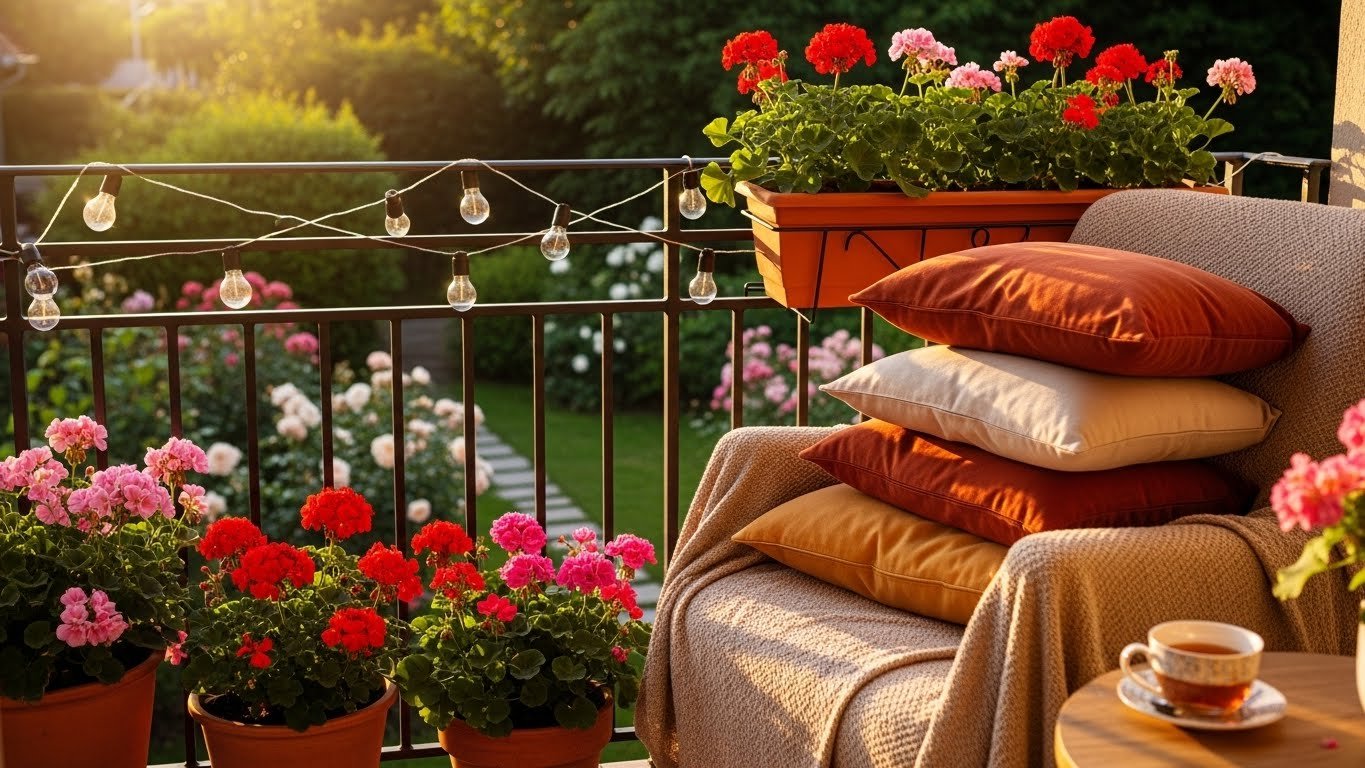
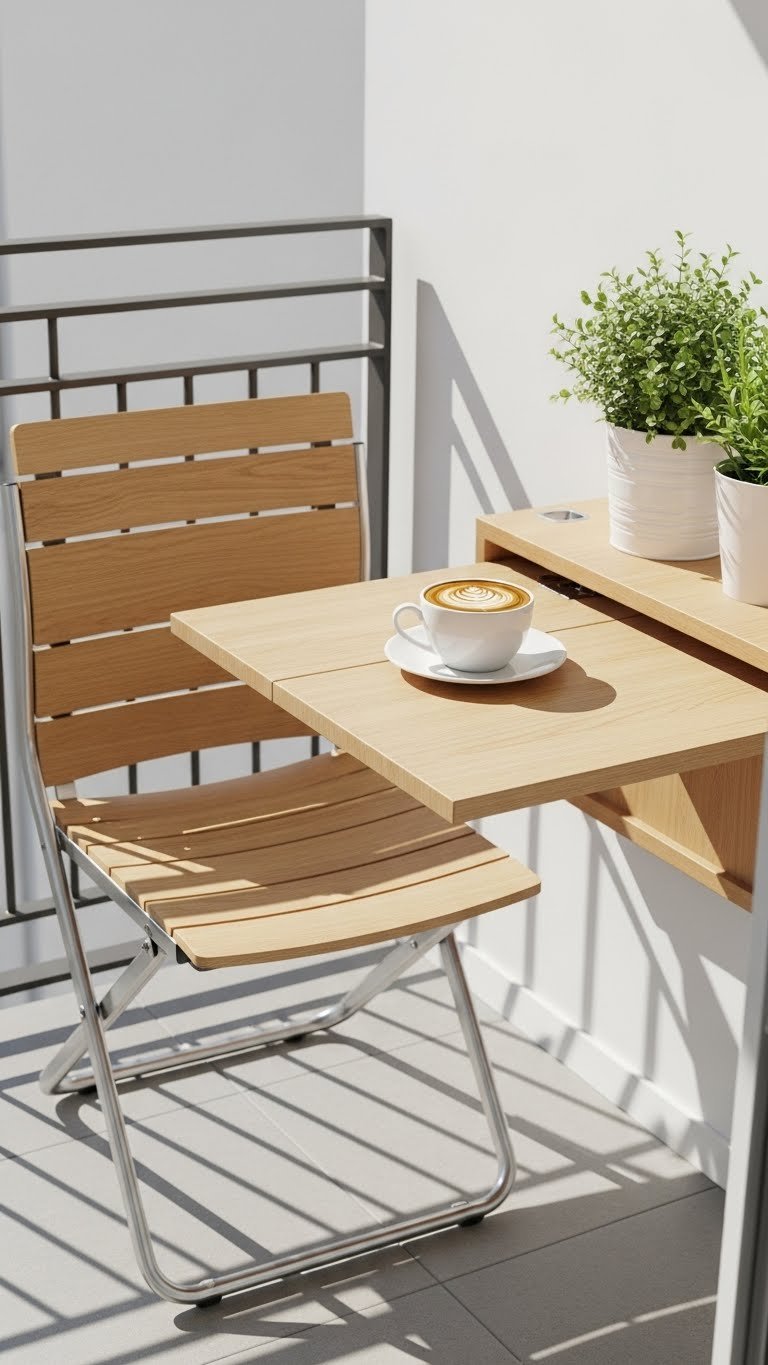
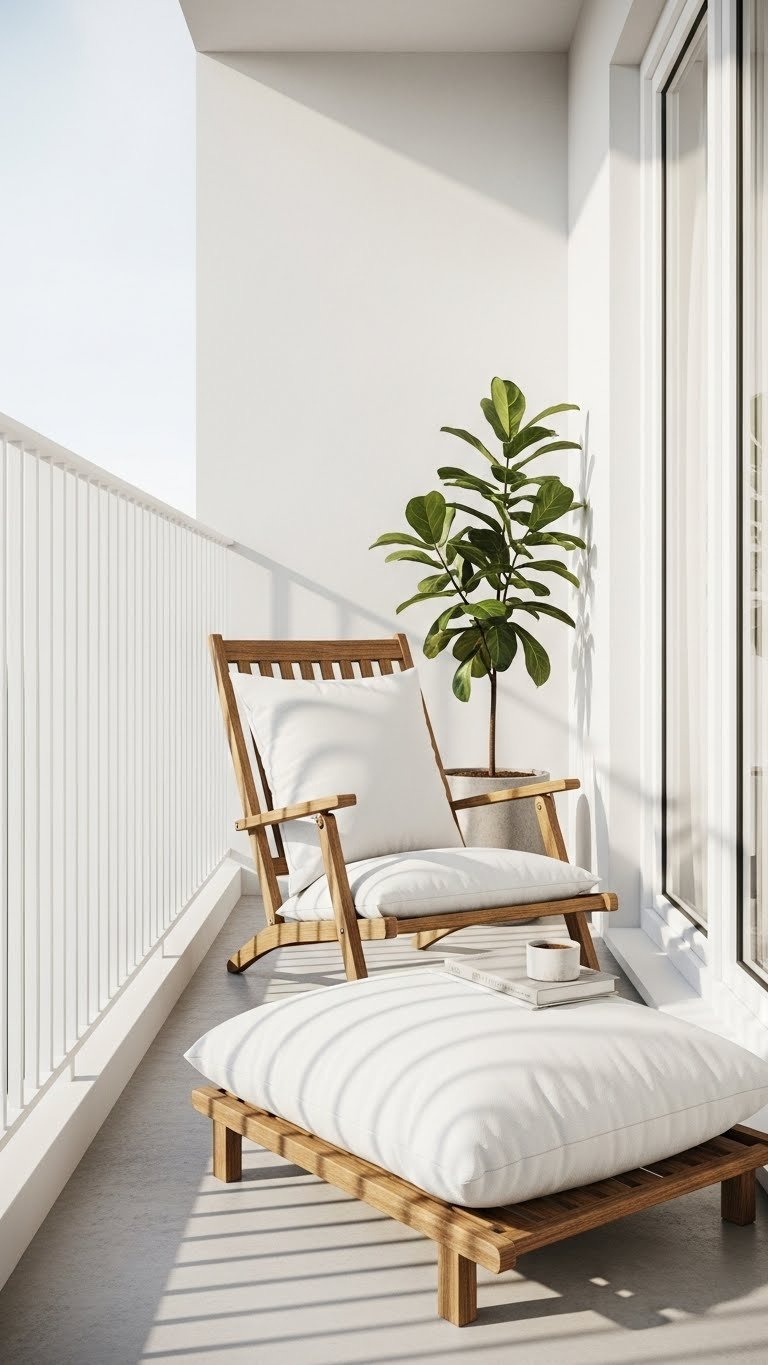
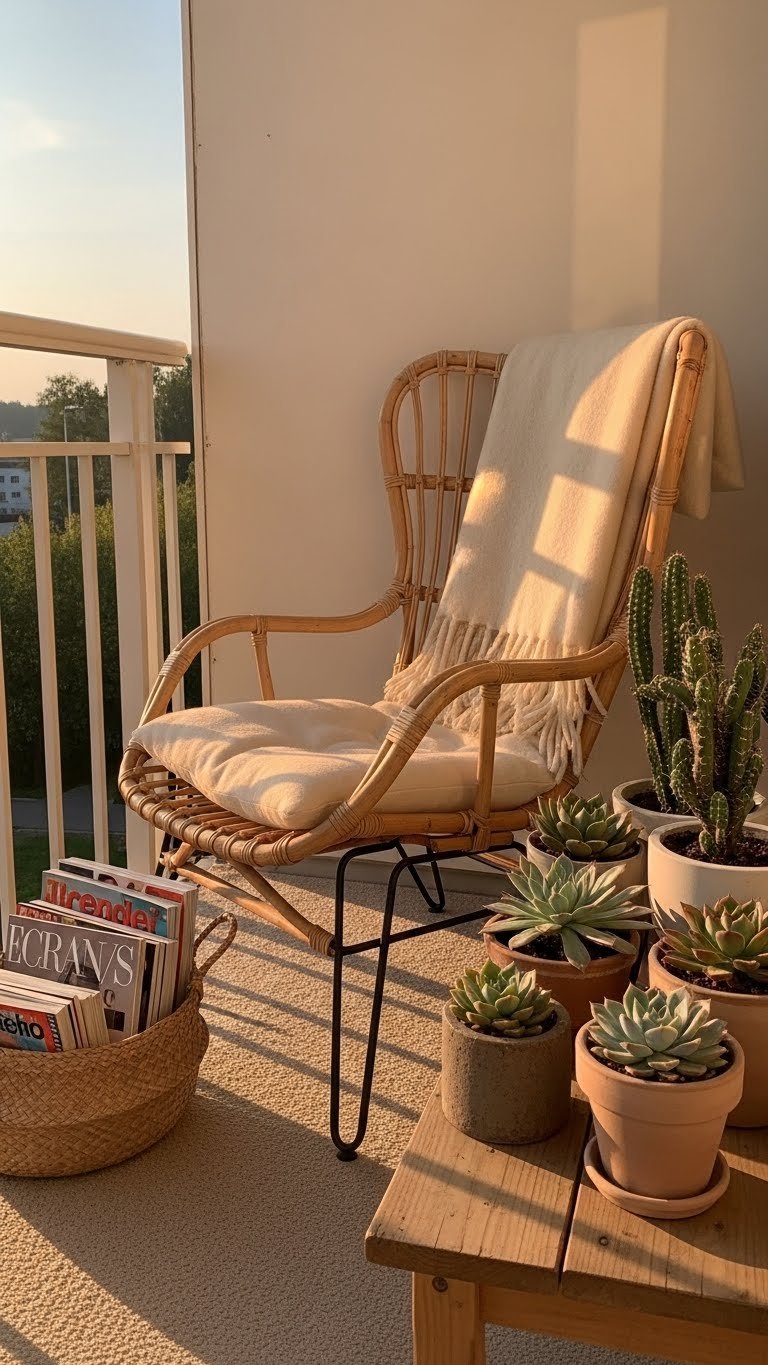
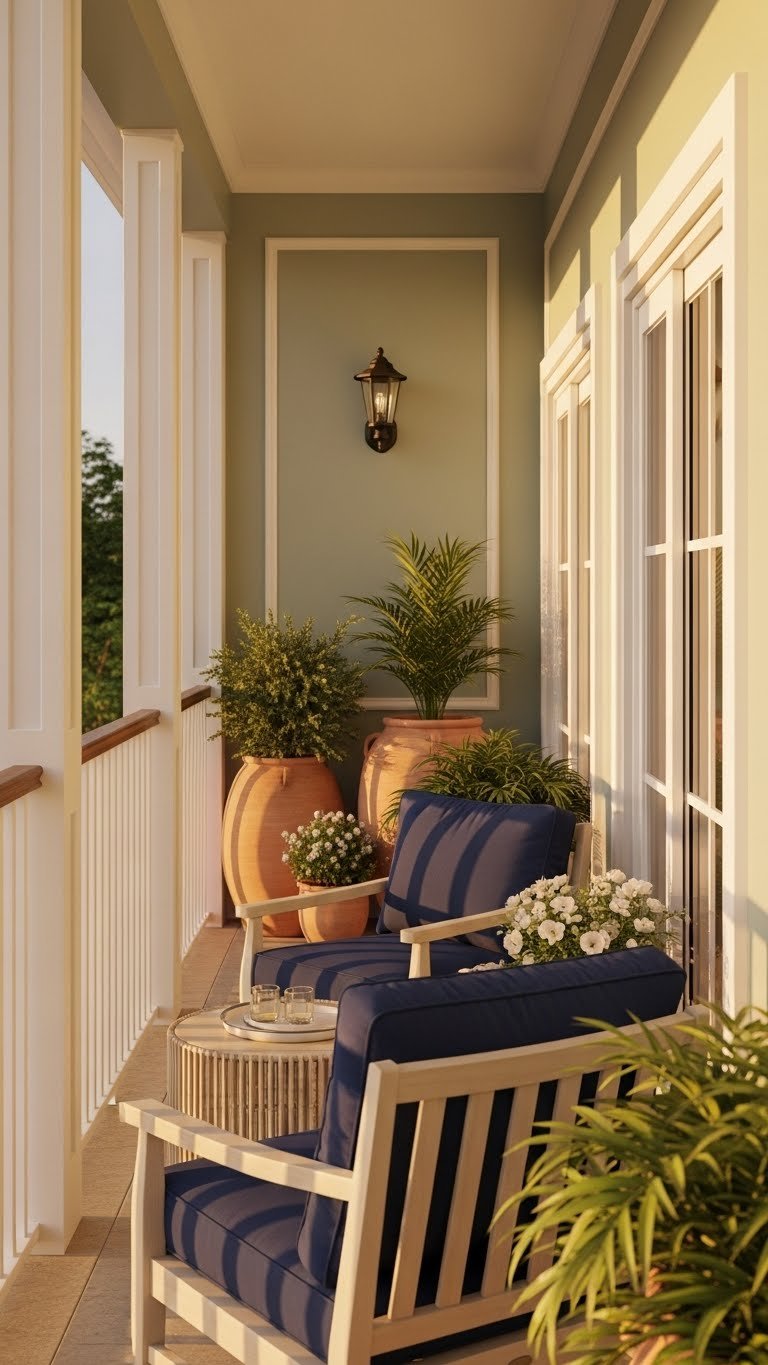
    12. Add a Welcoming Porch Bench or Seating

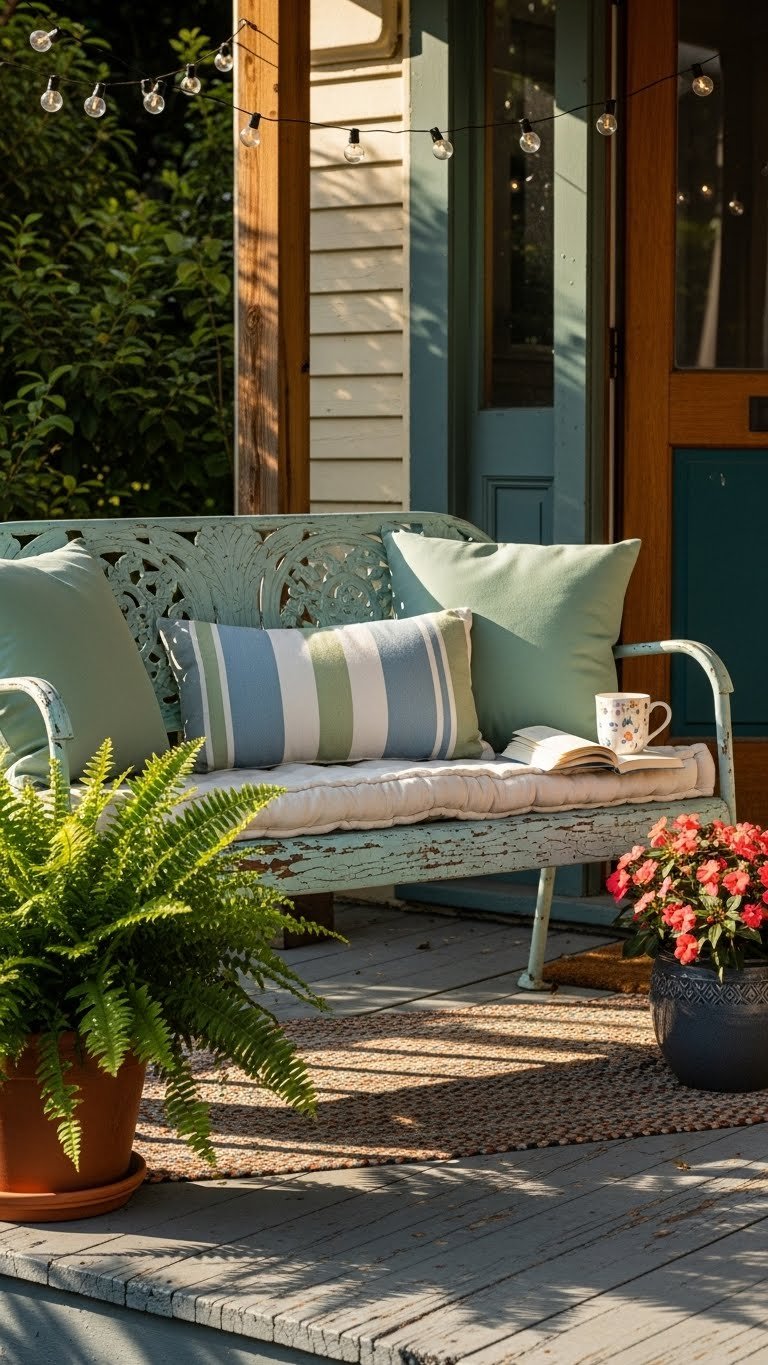
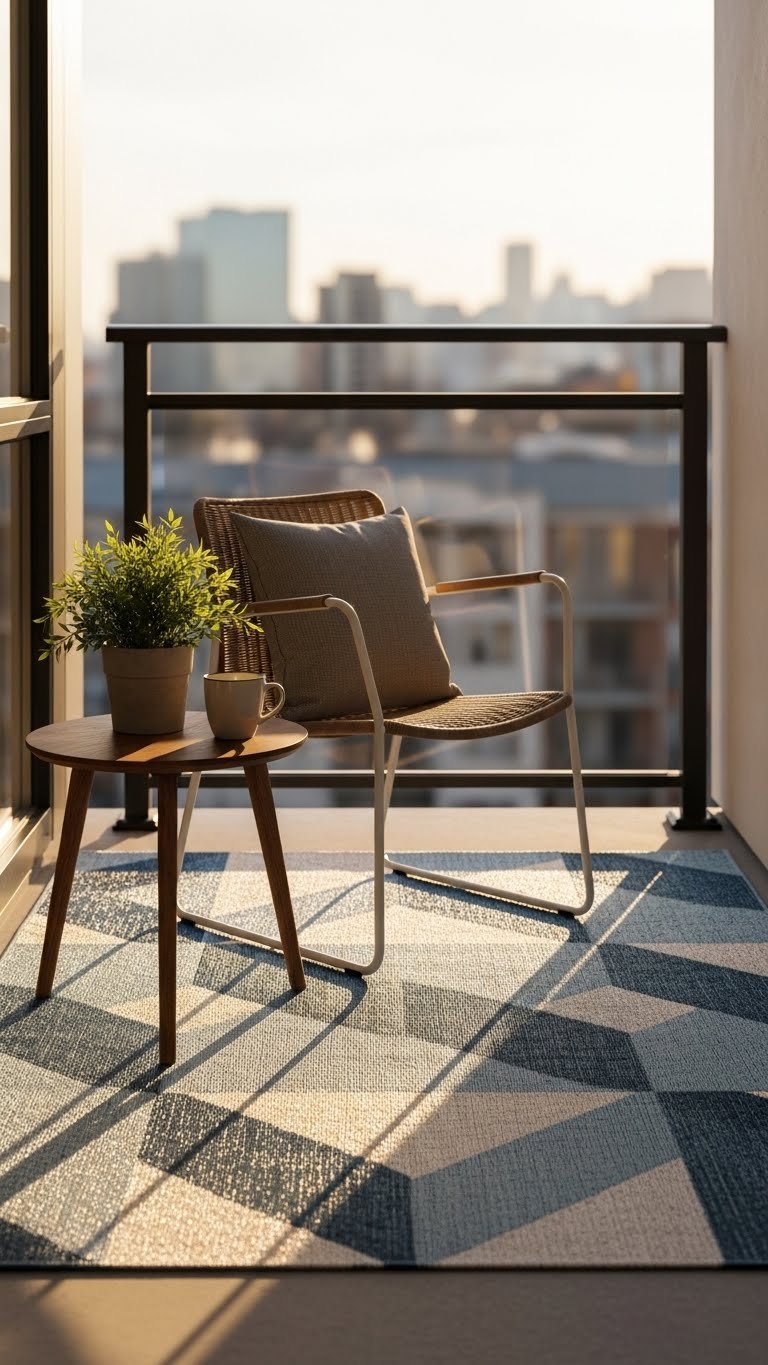
    A porch bench signals that your home is welcoming and meant to be enjoyed. It’s functional décor that invites people to linger.

    Find a simple wooden or metal bench ($50-$150) from Wayfair, Target, or a local antique shop. Add weather-resistant cushions and pillows ($30-$60). Total investment: $80-$210. Bench installation is just placement—no tools needed. Choose a bench that fits your porch scale; oversized looks awkward on a tiny porch. Paint it to match your door or trim for visual cohesion.

    Pro tip: Pair your bench with a small side table ($30-$50) for drinks or decor. Keep cushions fresh and pillows fluffed for a lived-in, inviting look. Your porch becomes an extension of your home’s personality and an actual place people want to sit.

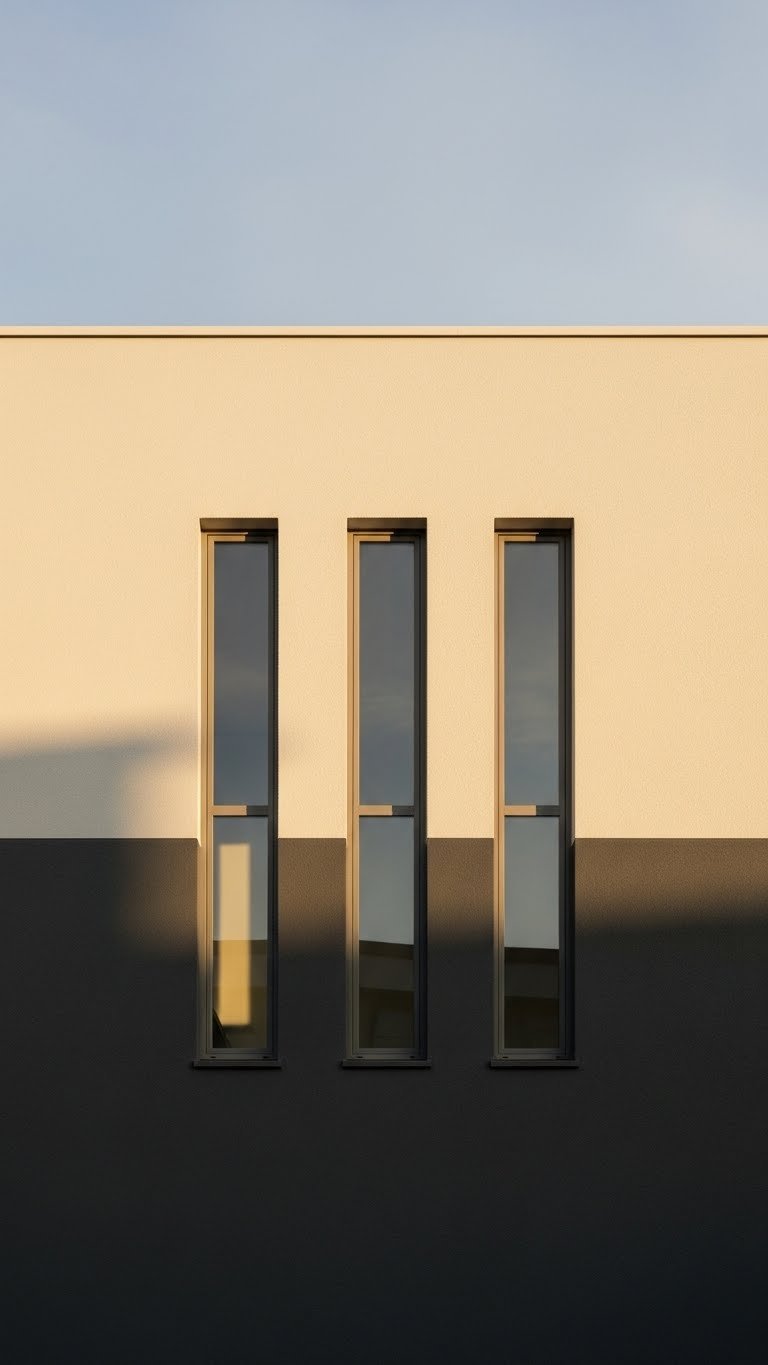
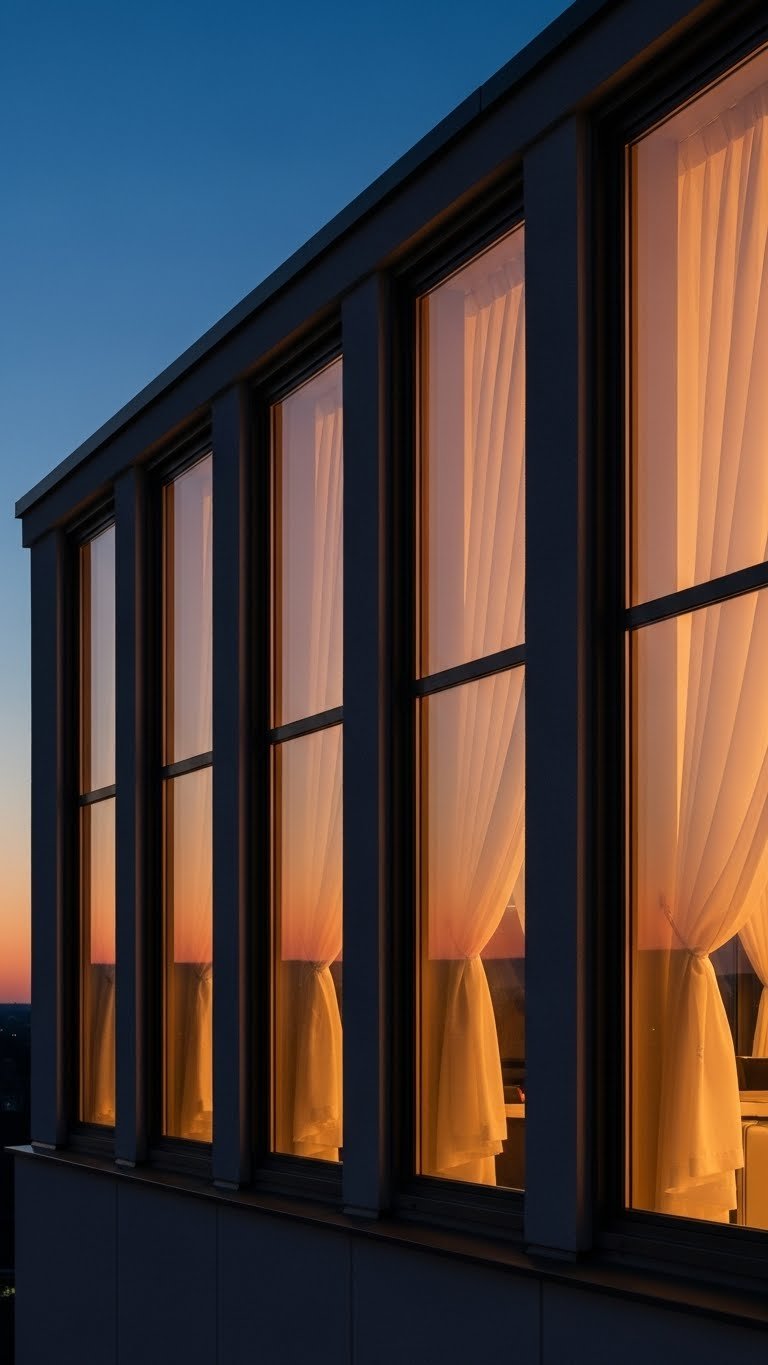
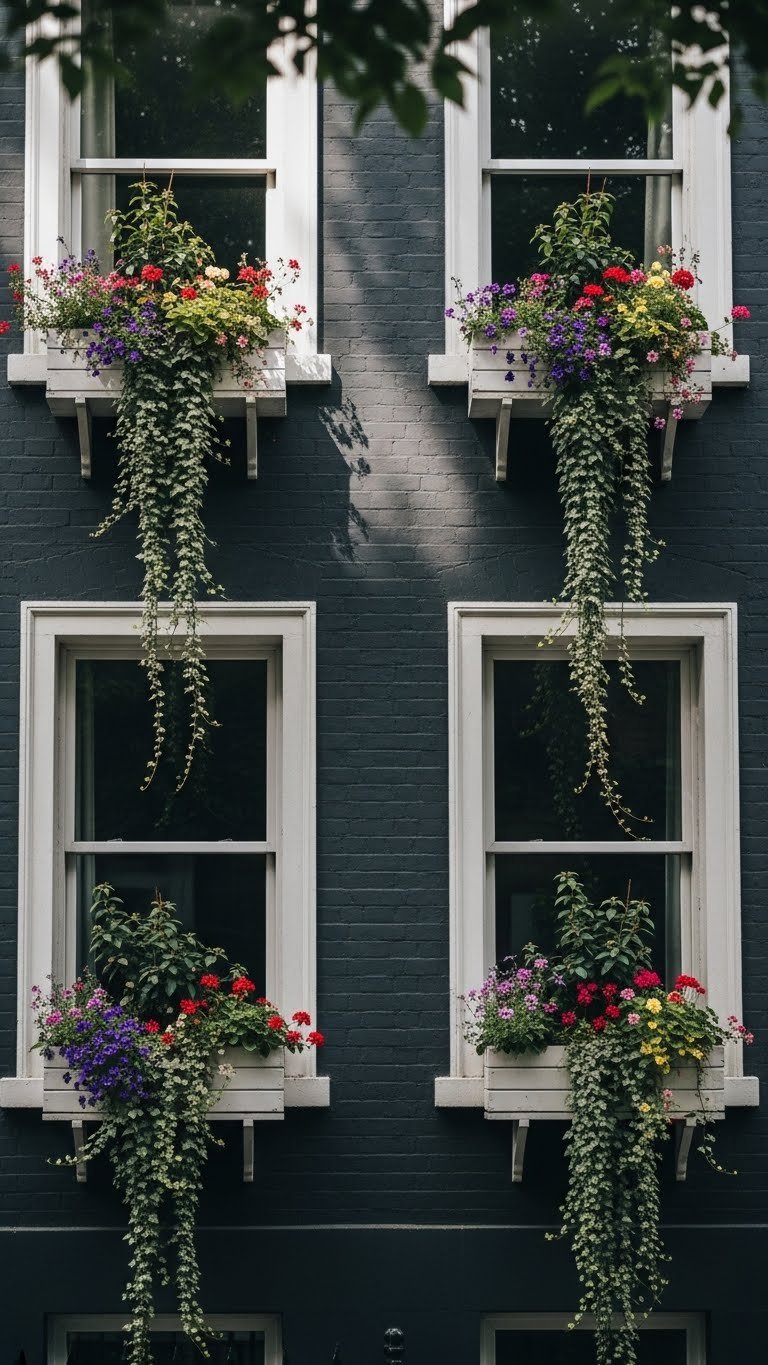
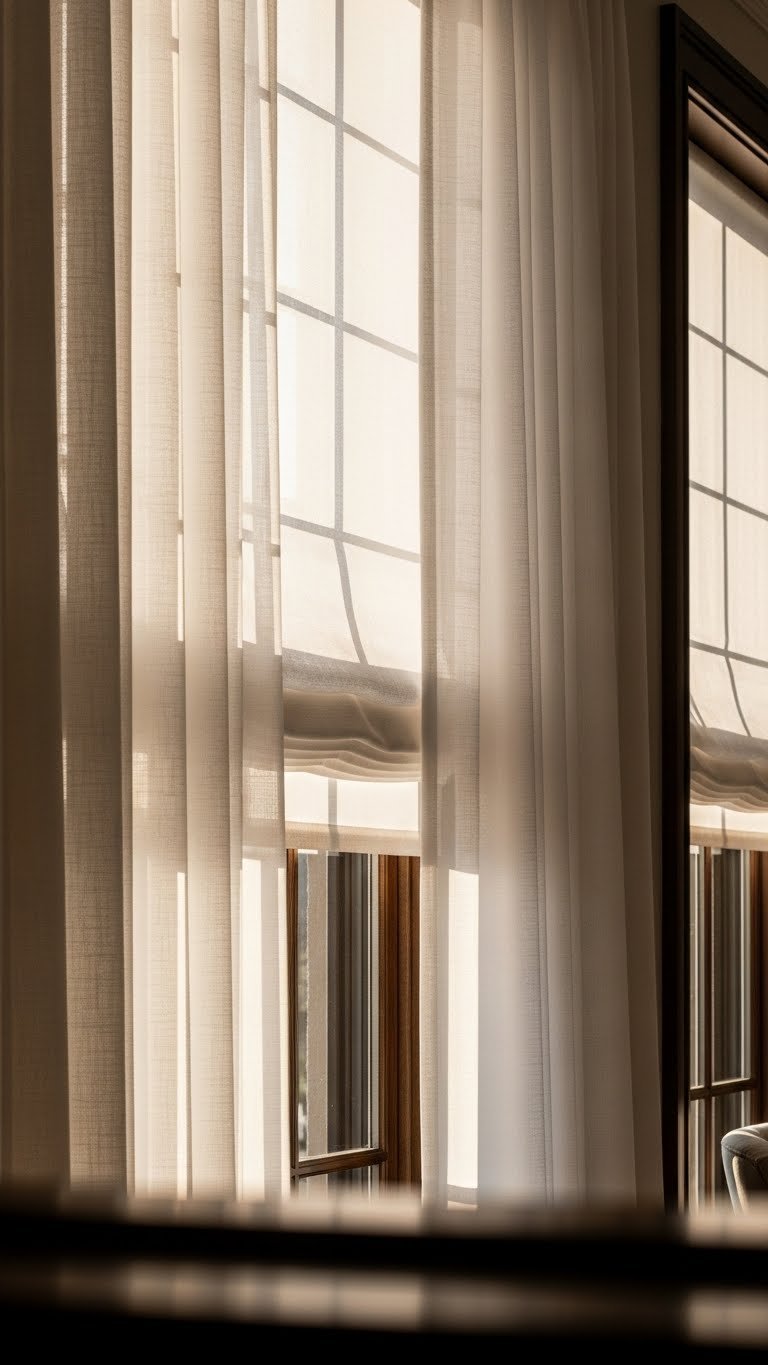
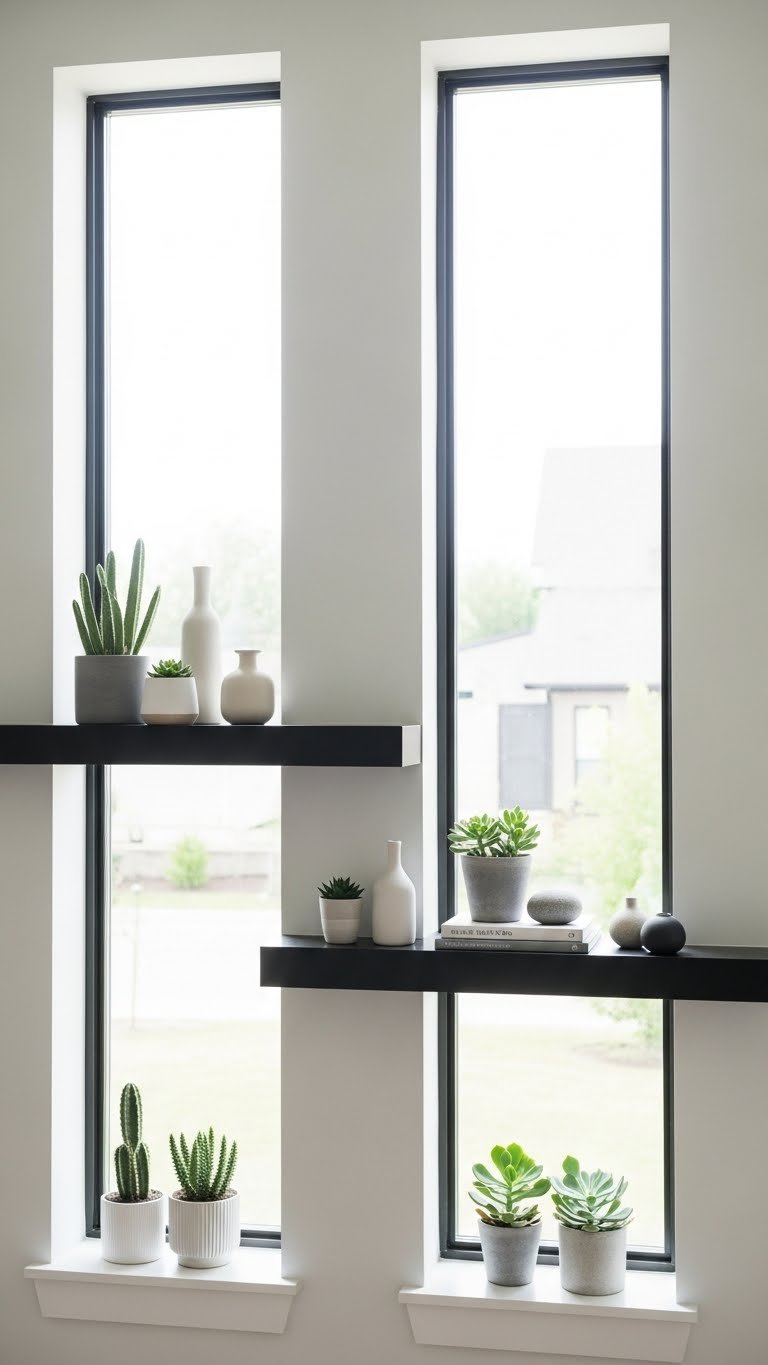
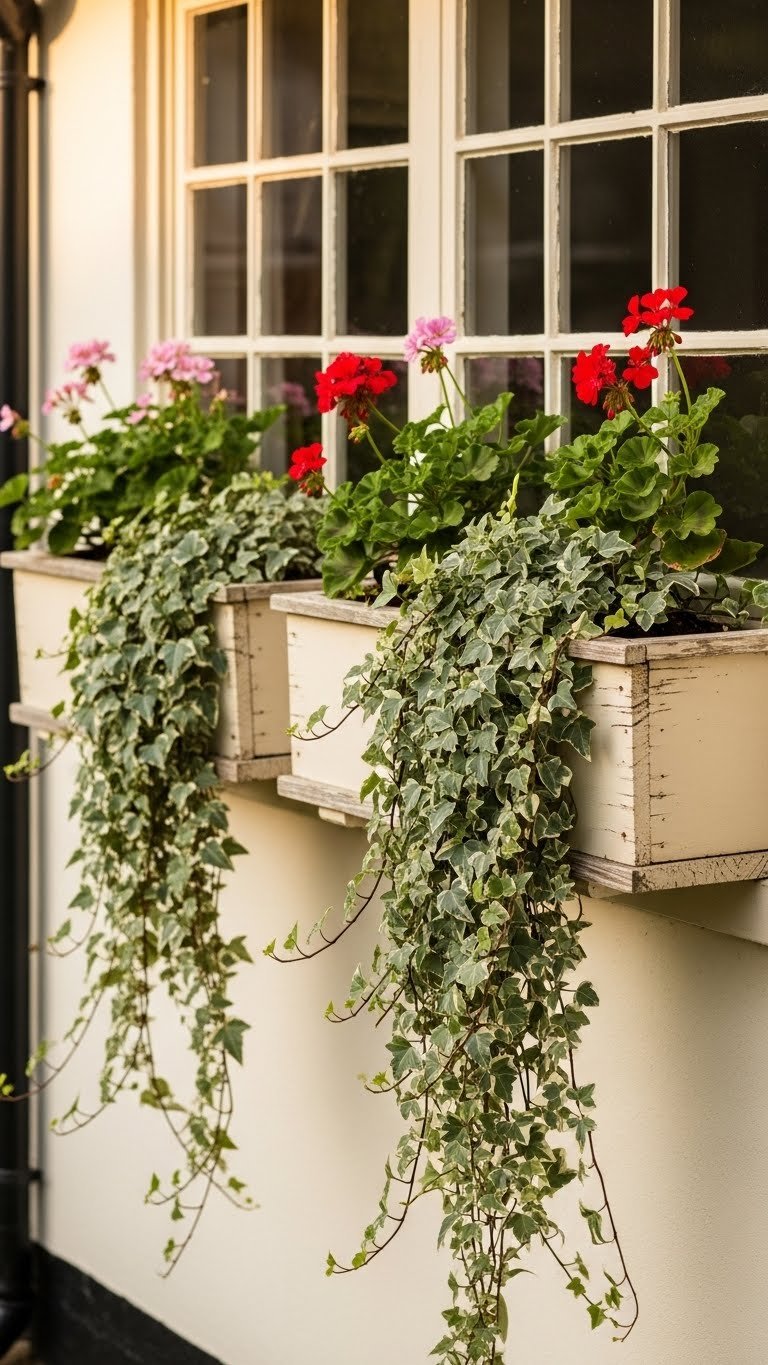
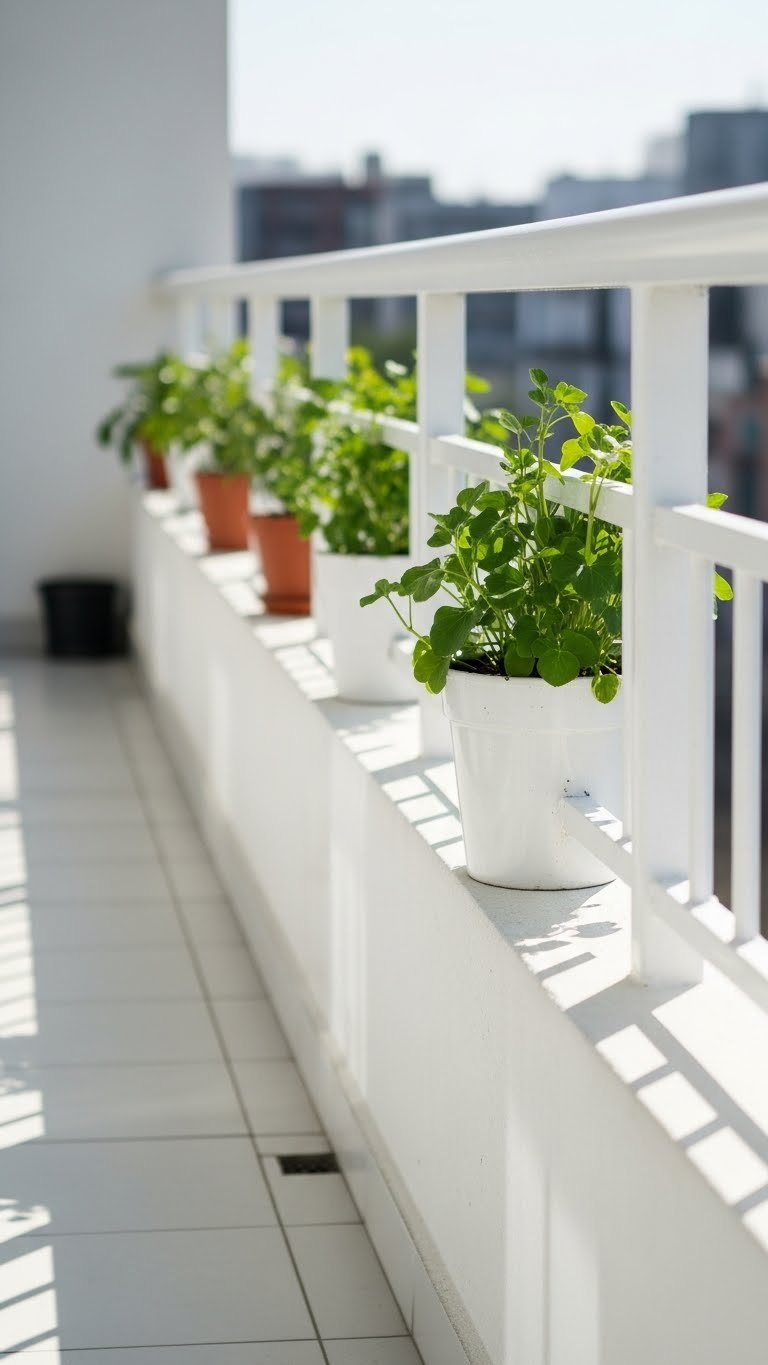
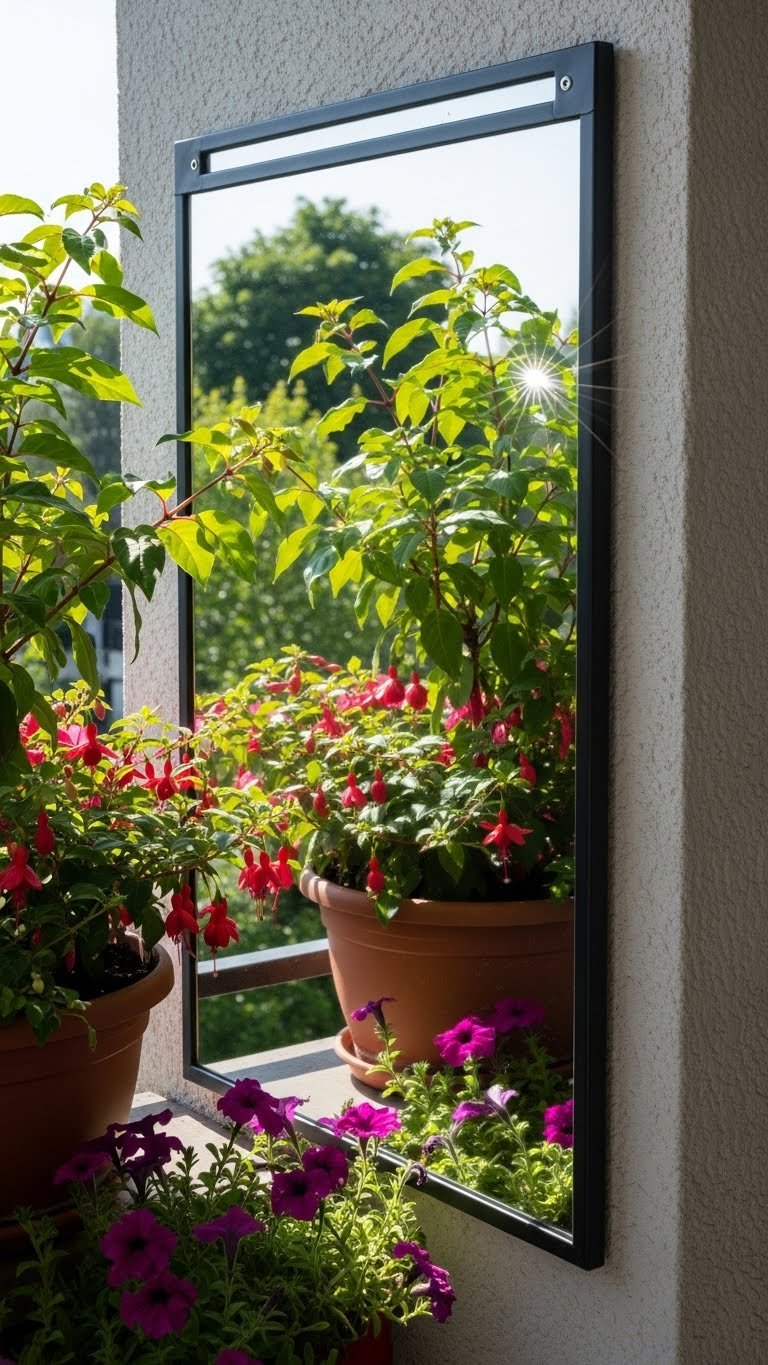
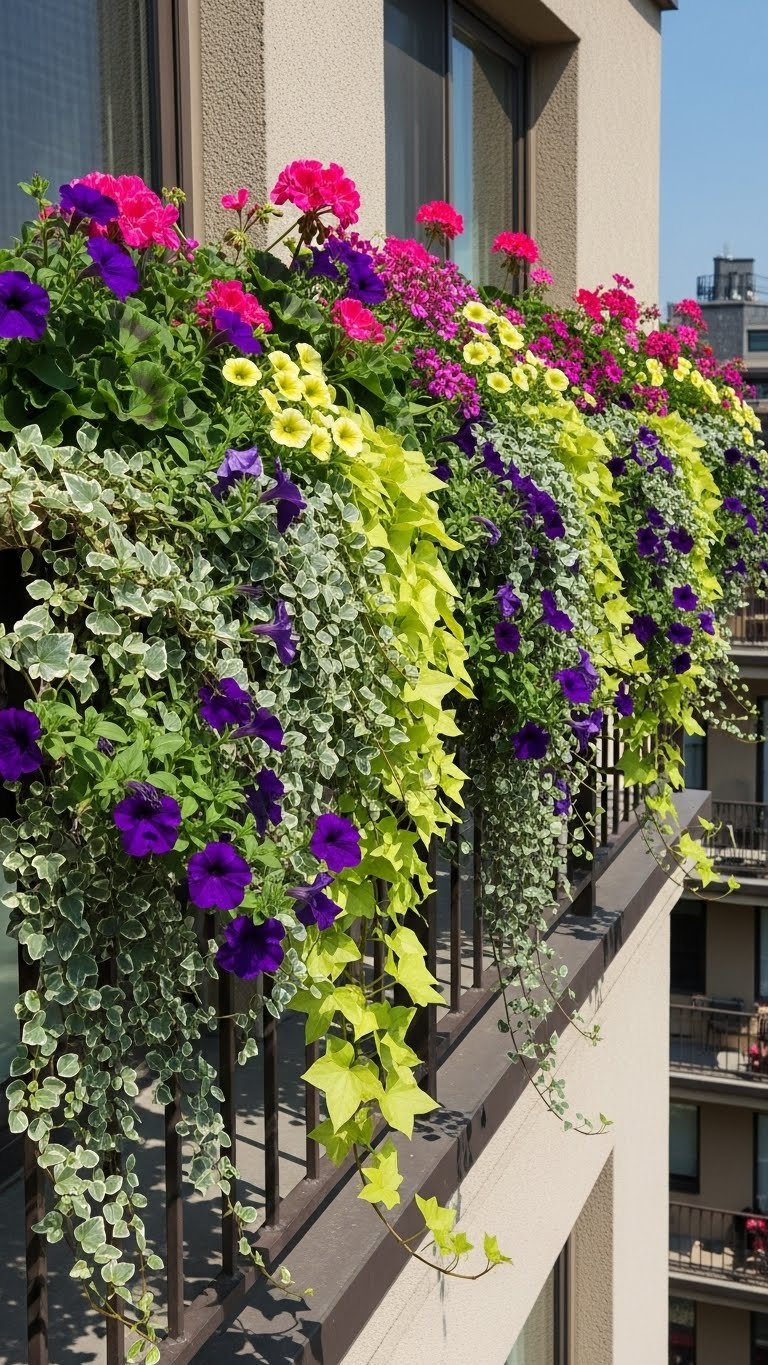
    13. Install Window Boxes for Year-Round Color

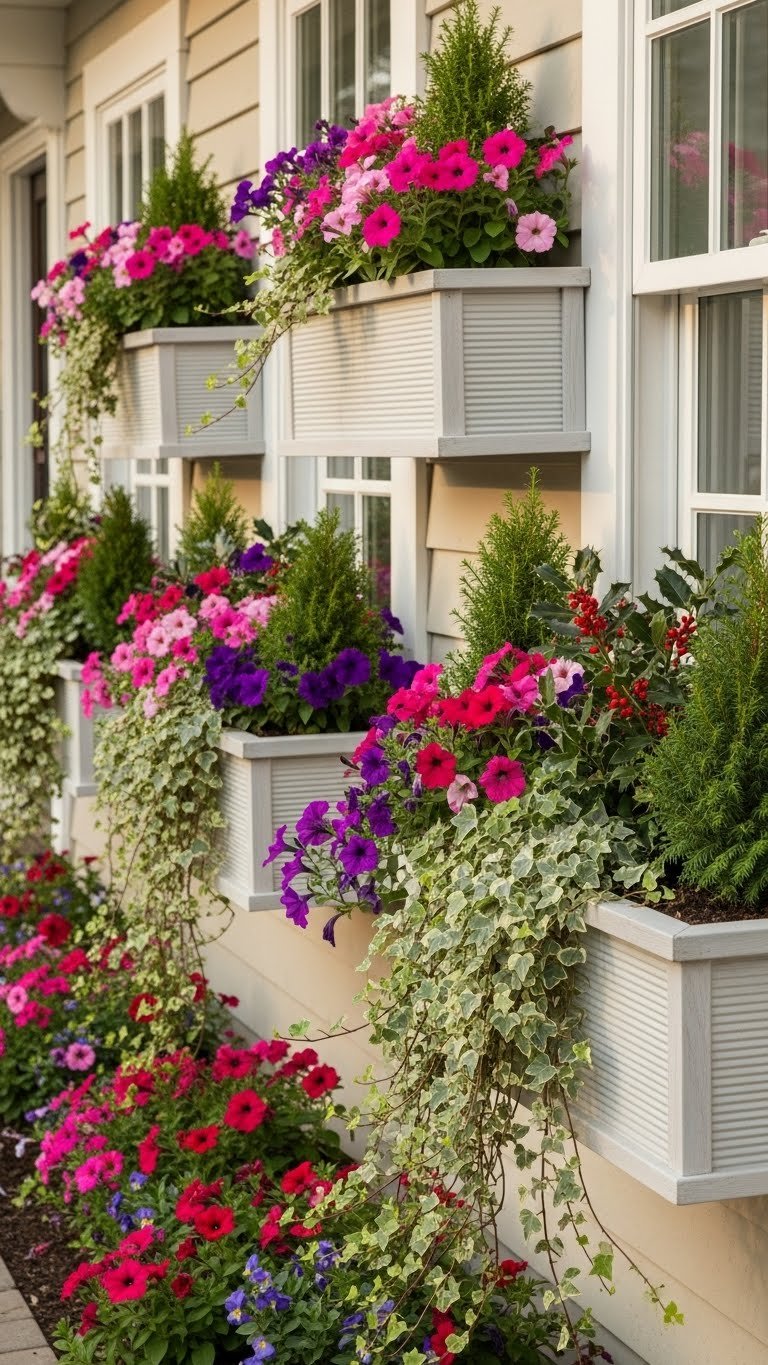
    Window boxes are old-school charm that work on any home. They add softness, color, and intentional detail to your facade.

    Buy ready-made wooden or plastic window boxes ($20-$50 each) and mounting brackets ($10-$15 per pair). You’ll need potting soil and seasonal plants ($20-$30 per box). Installation takes 20 minutes per box and requires a drill and screws. Budget $60-$150 per window for full setup. Change plants seasonally—pansies in cool months, petunias in summer, ornamental kale in fall.

    Pro tip: Paint boxes to match your trim for a finished look. Overwater window boxes slightly in hot months since they dry fast. Your windows gain a layered, intentional appearance that signals care and creativity.

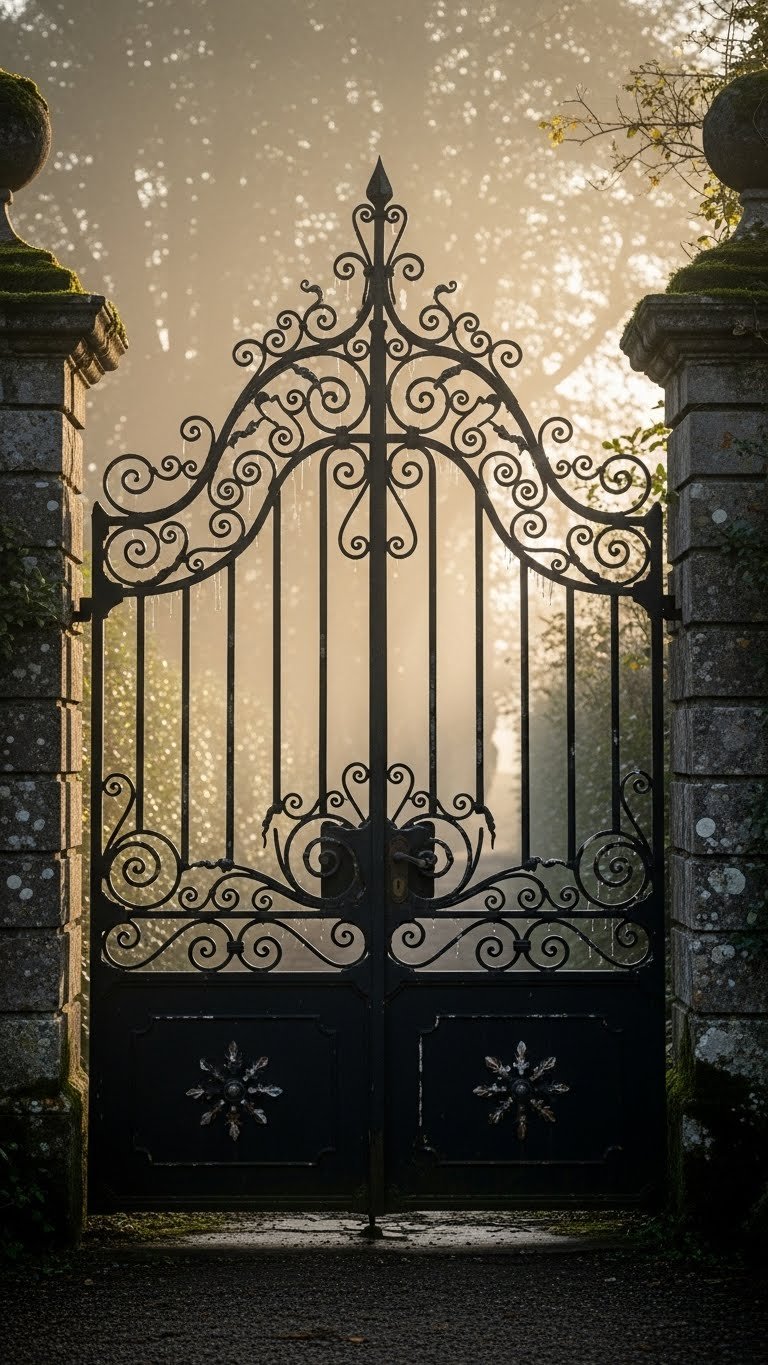
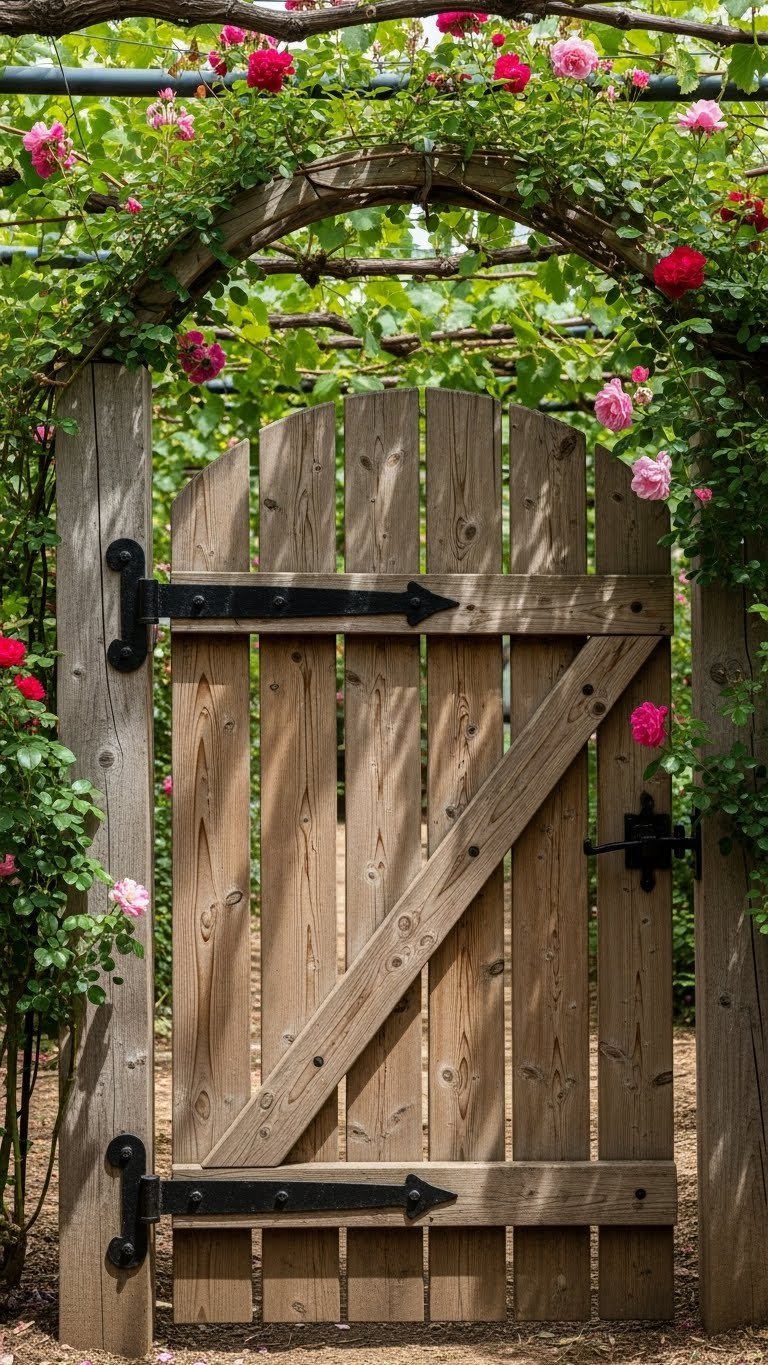
    14. Upgrade Your Front Gate or Entry Arbor

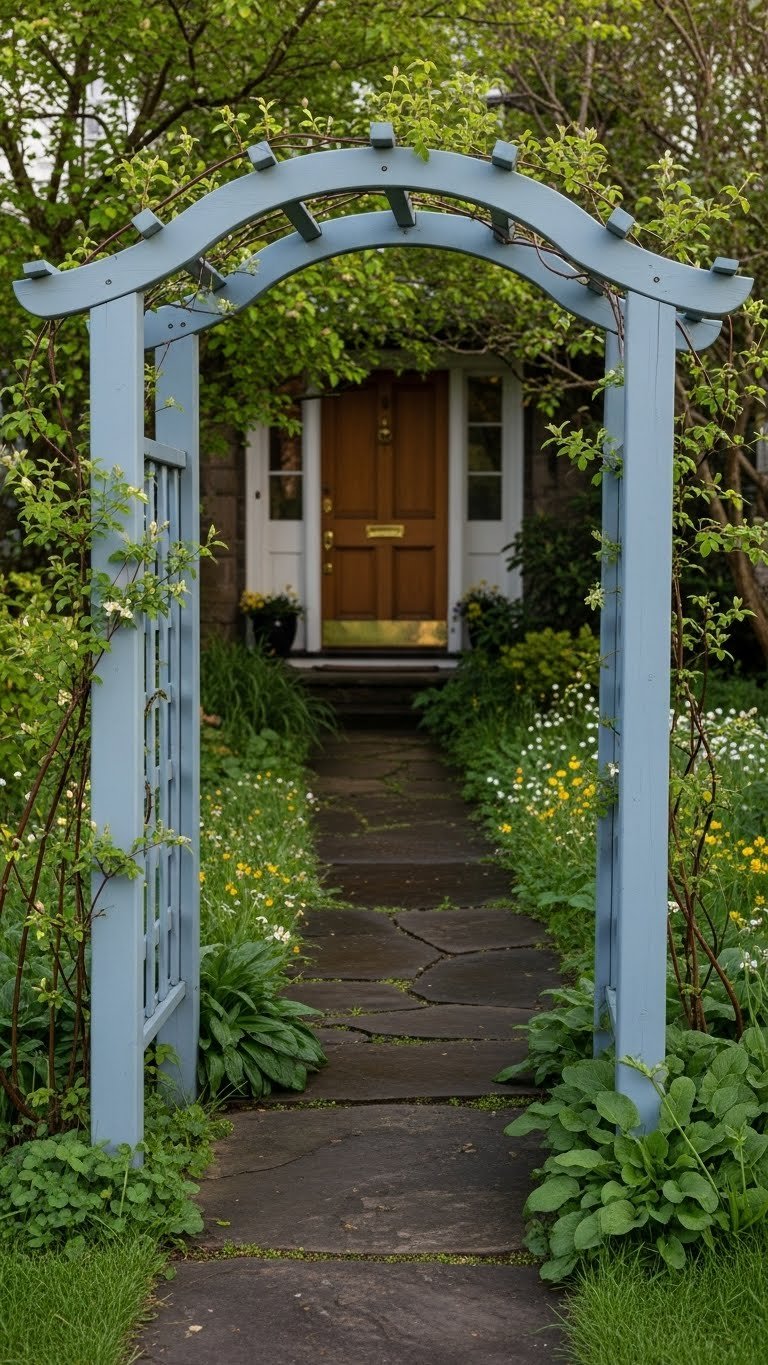
    A gate or arbor creates a visual “wow” moment and signals the boundary between public and private space. It’s surprisingly affordable.

    Buy a prefab wooden or metal arbor ($80-$300) or gate kit ($100-$400) from Amazon, Wayfair, or a garden center. Paint it to match your home’s trim. Installation takes 2-4 hours for a DIY person; hire help if unsure ($200-$400 labor). Plant climbing vines at the base to cover the structure over time. For renters, look for removable arbor kits that don’t require permanent installation.

    Pro tip: An arbor doesn’t need a gate to be beautiful. A simple arch overhead signals arrival and creates a threshold moment. Your entryway gains ceremony and intentionality.

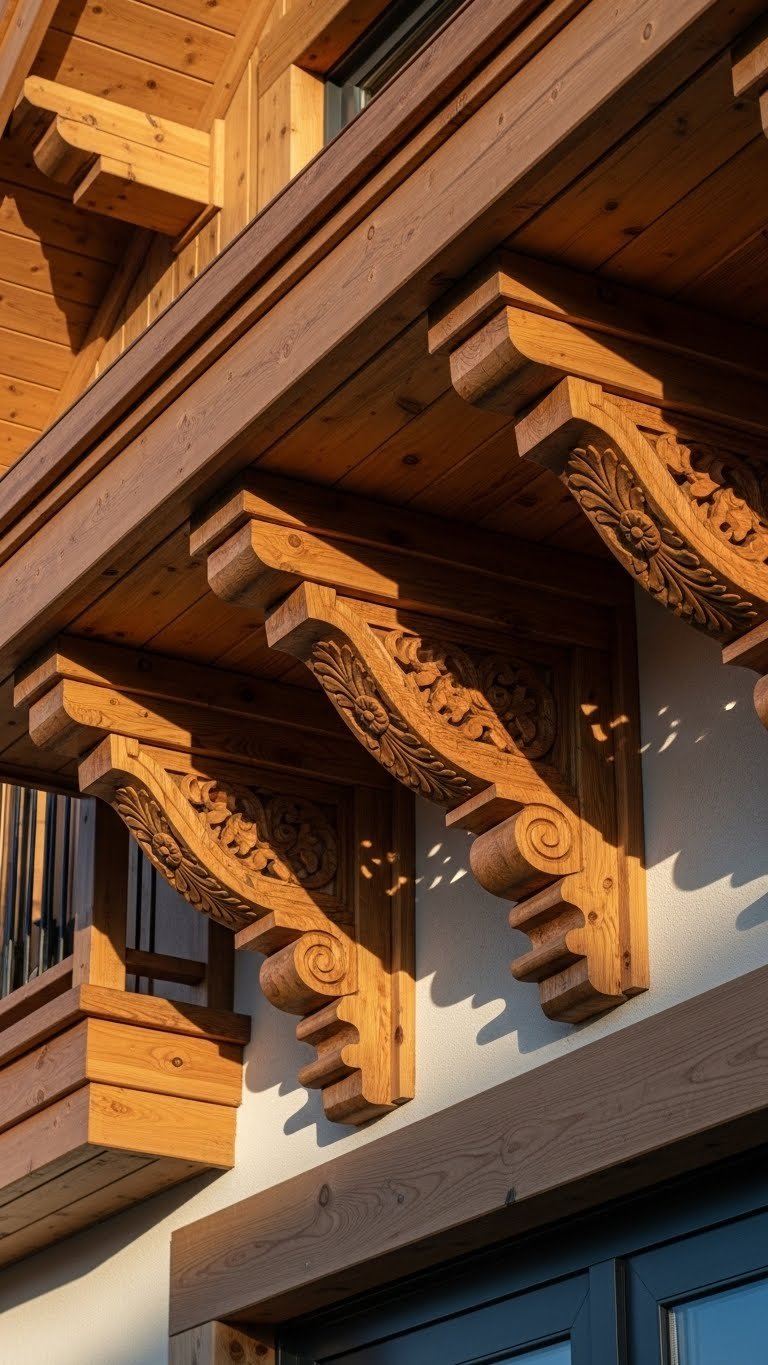
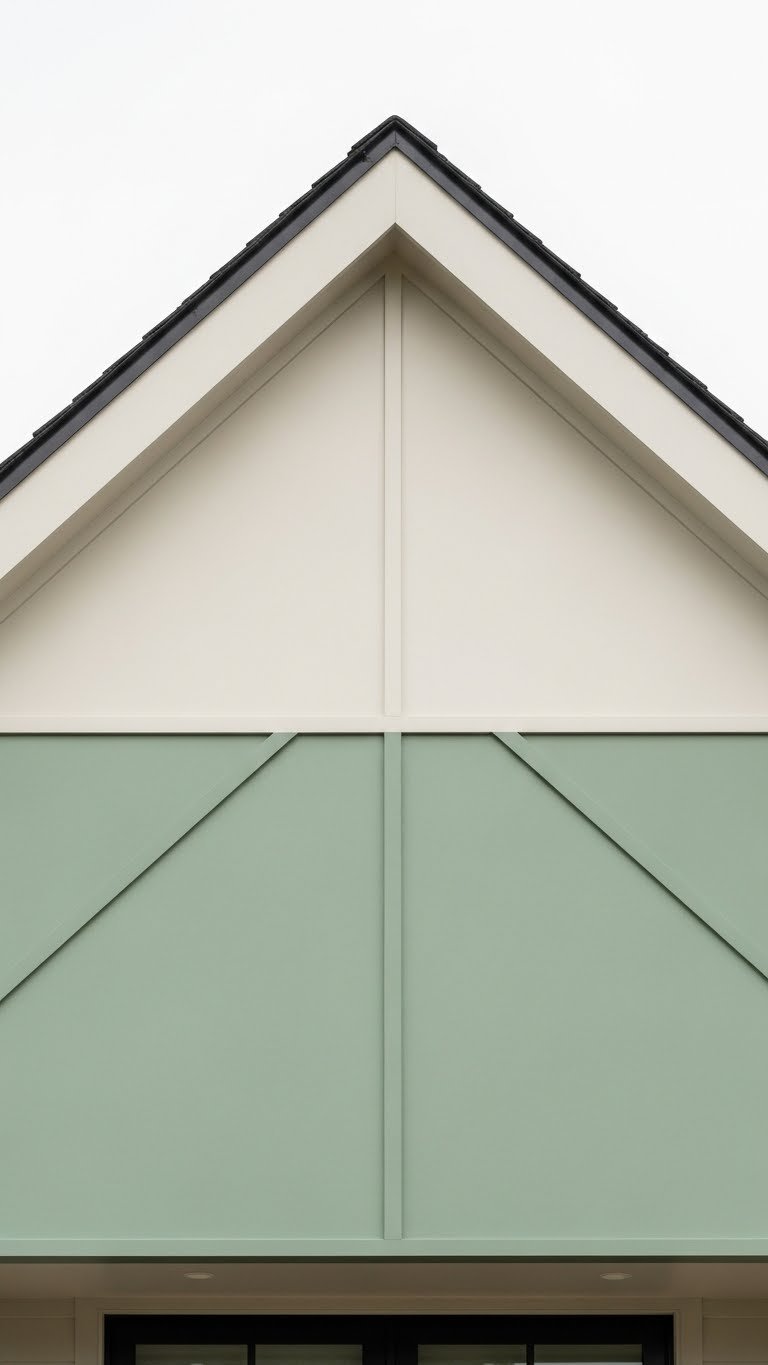
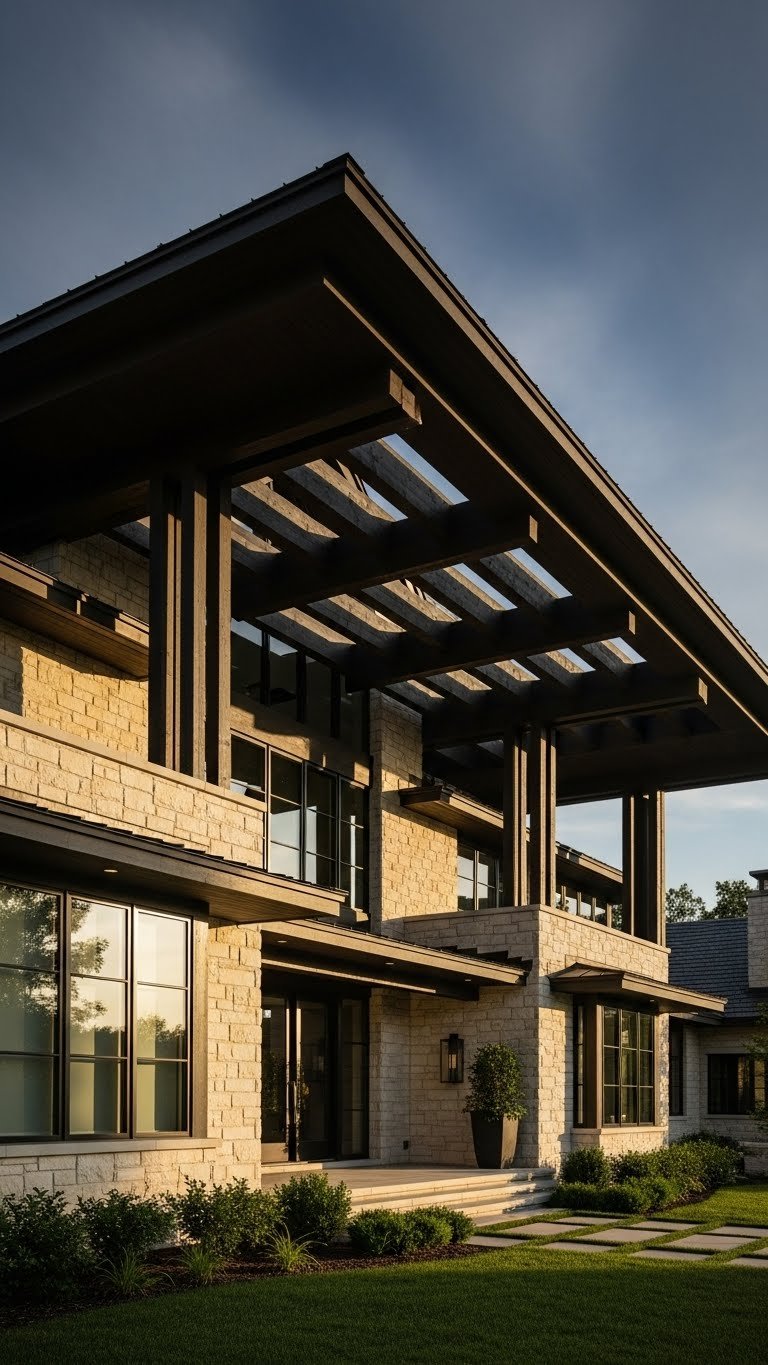
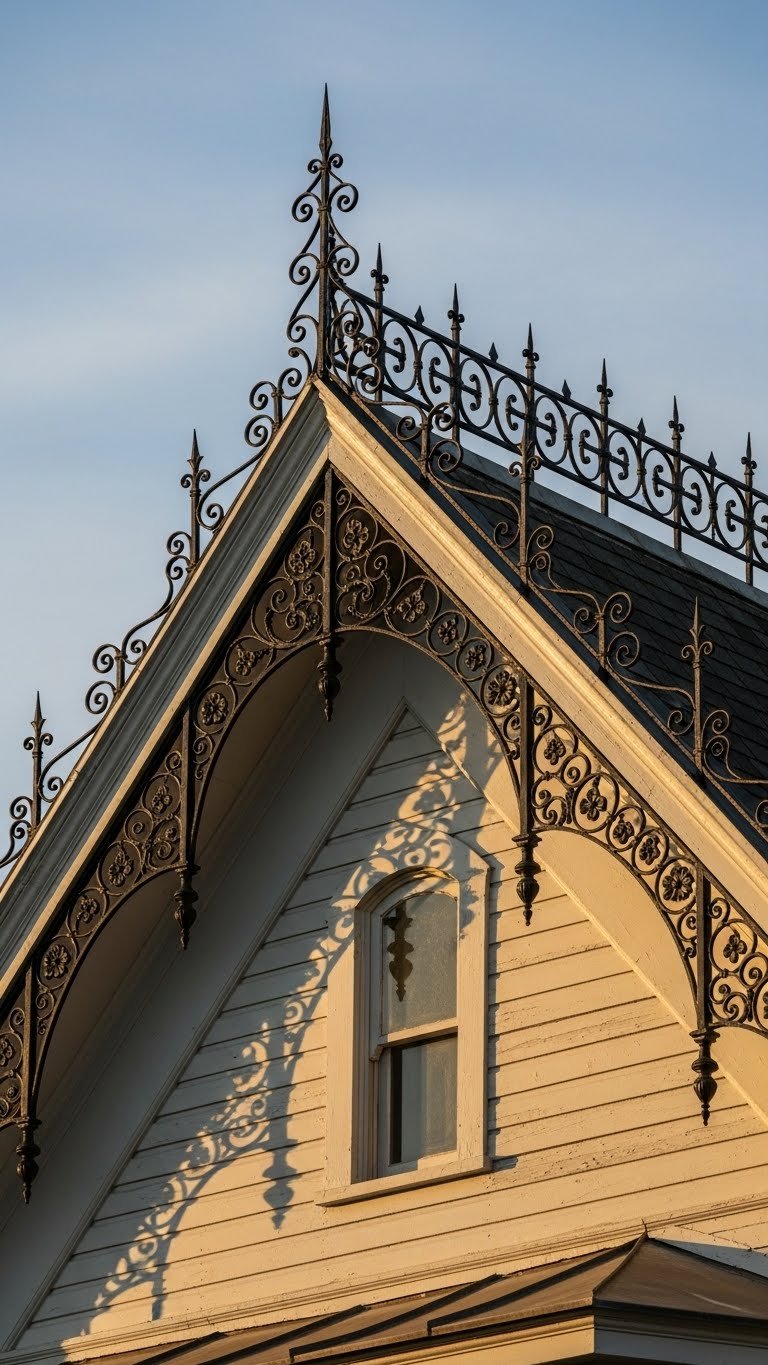
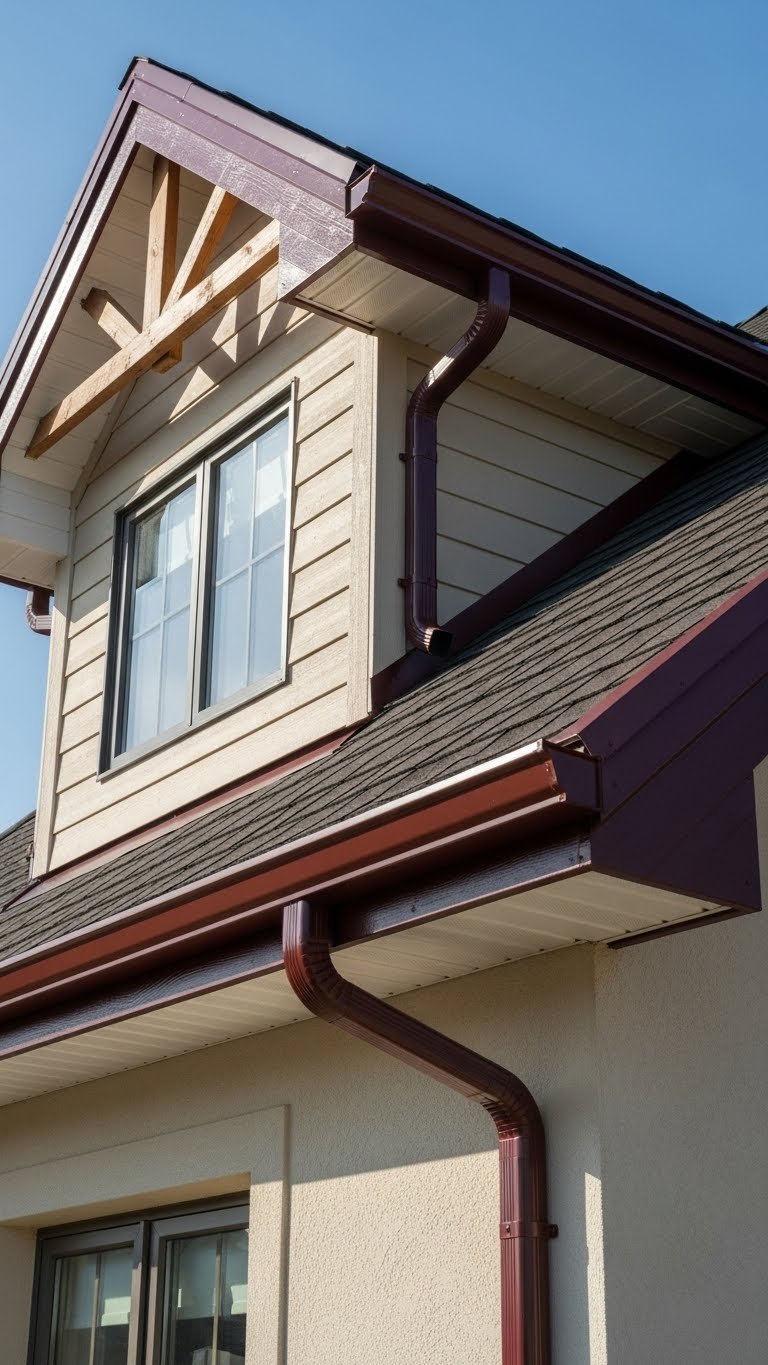
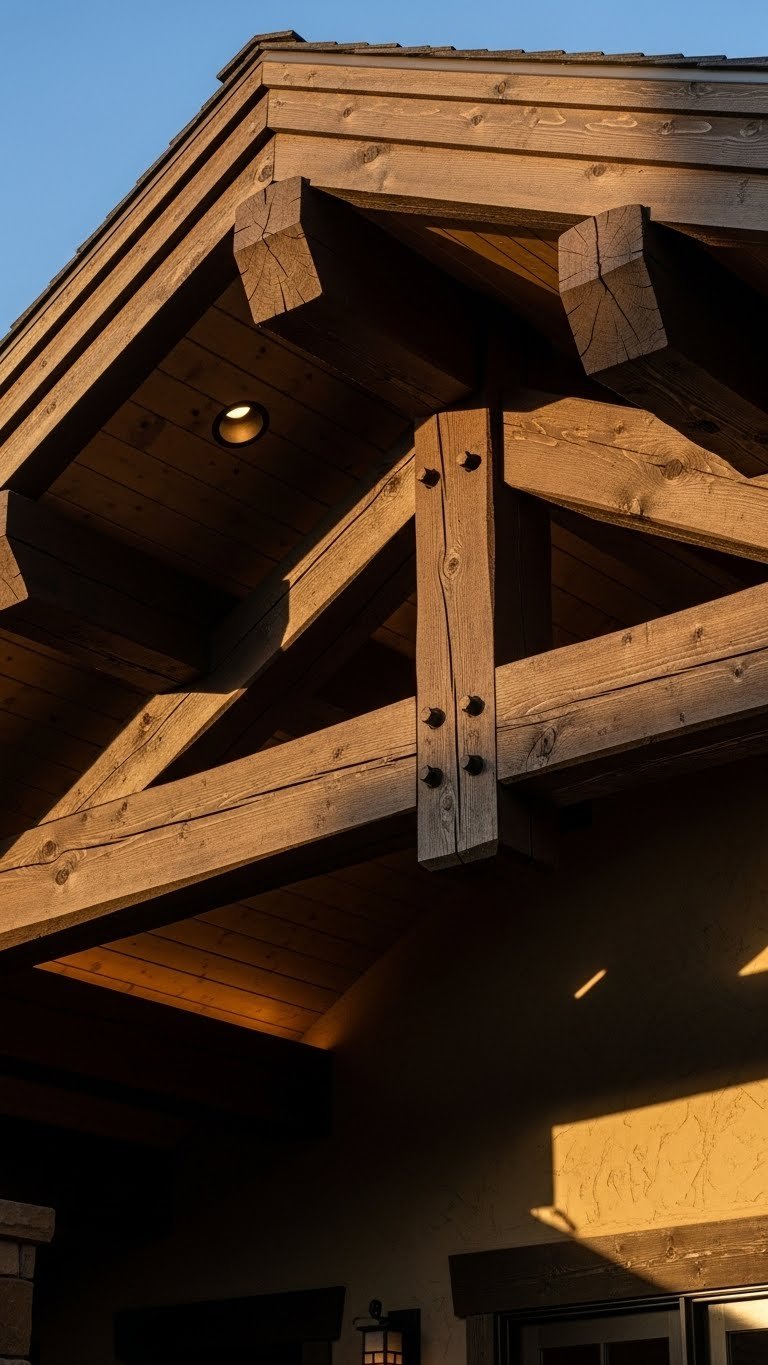
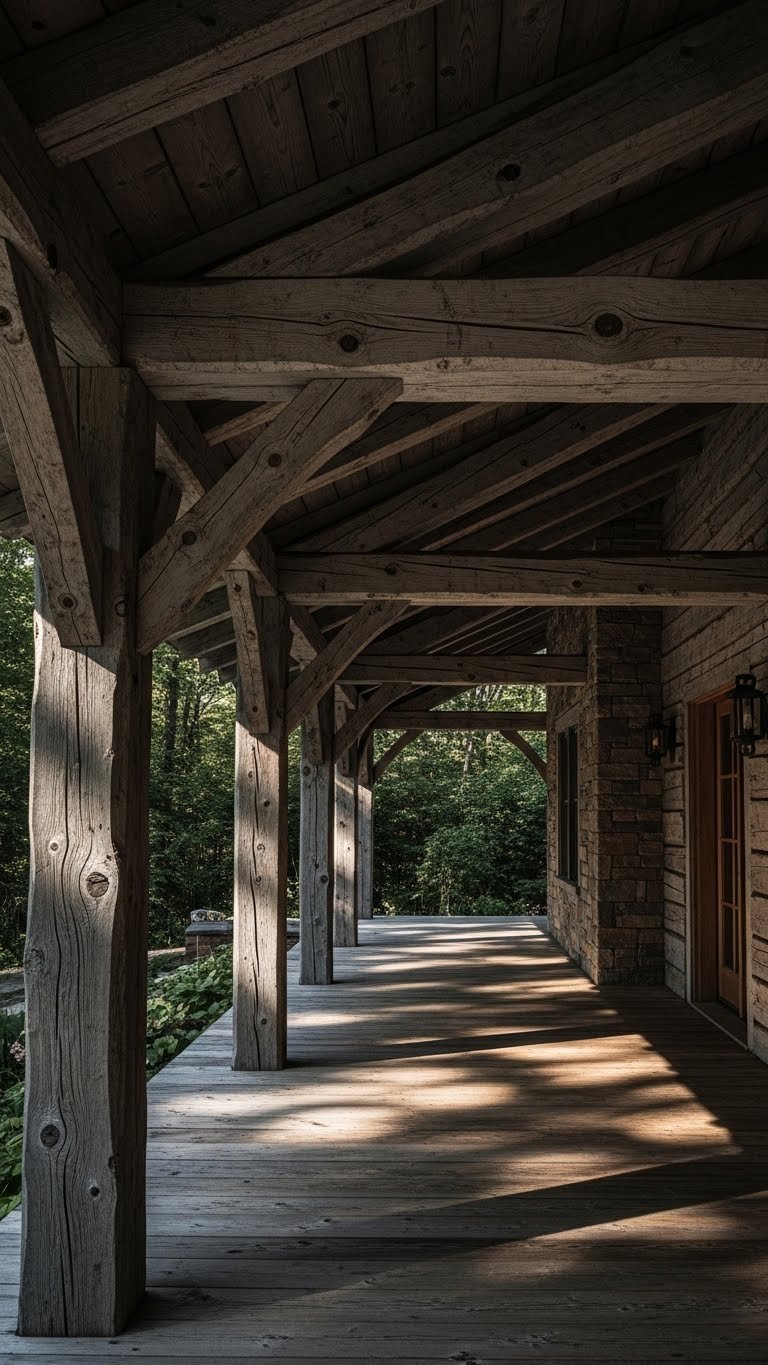
    15. Add Architectural Interest With Exposed Rafter Tails

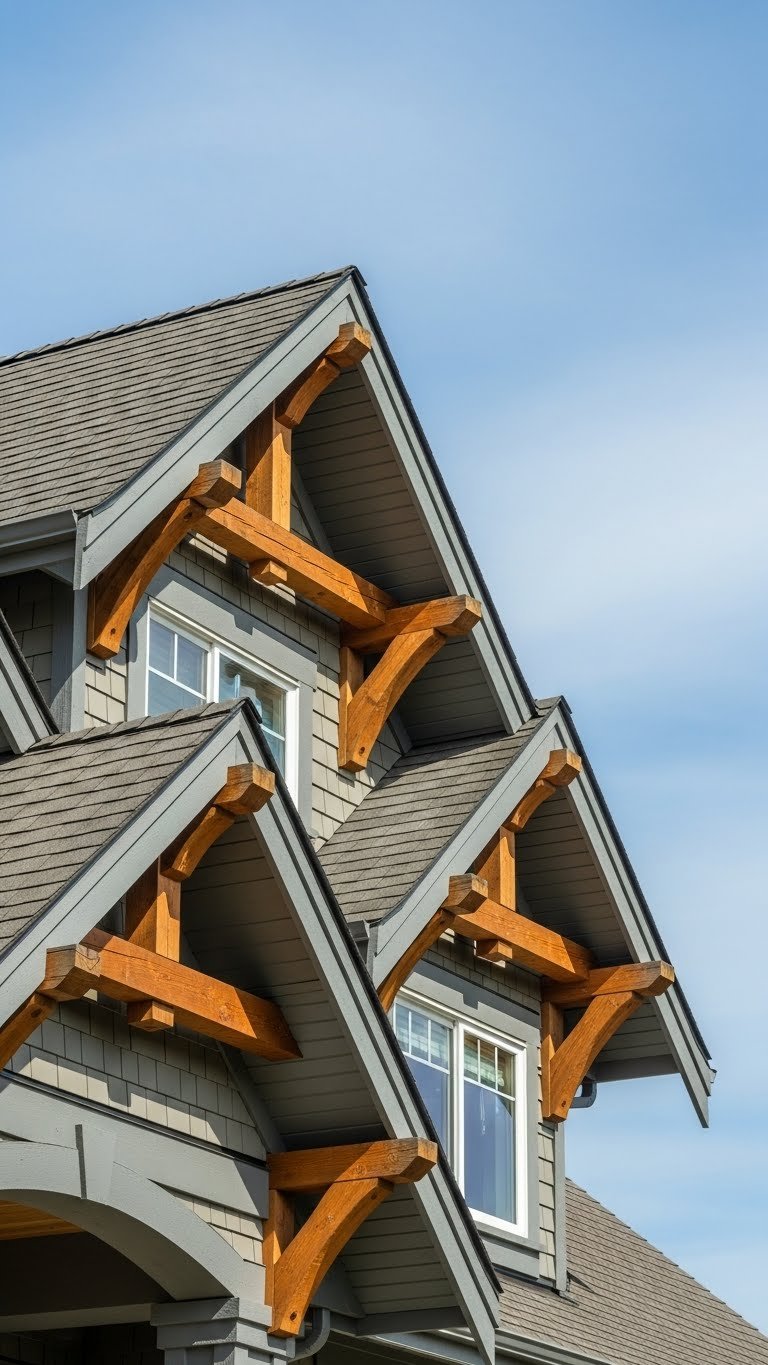
    Exposed rafters add old-world charm and architectural dimension to plain rooflines. This is pricier but creates major curb appeal impact.

    Prefab decorative brackets or rafter tails run $30-$100 each. Most homes need 4-8 pieces depending on roofline ($200-$800 total). Hire a carpenter for installation ($500-$1,500 labor) unless you’re experienced. Once up, they require minimal maintenance. Paint them to match your trim or leave natural wood stained.

    Pro tip: This works best on homes with clean, simple rooflines. On complex rooflines, a few carefully placed brackets create more impact than covering everything. Your roofline gains heritage charm and architectural definition that changes how people perceive your entire home.

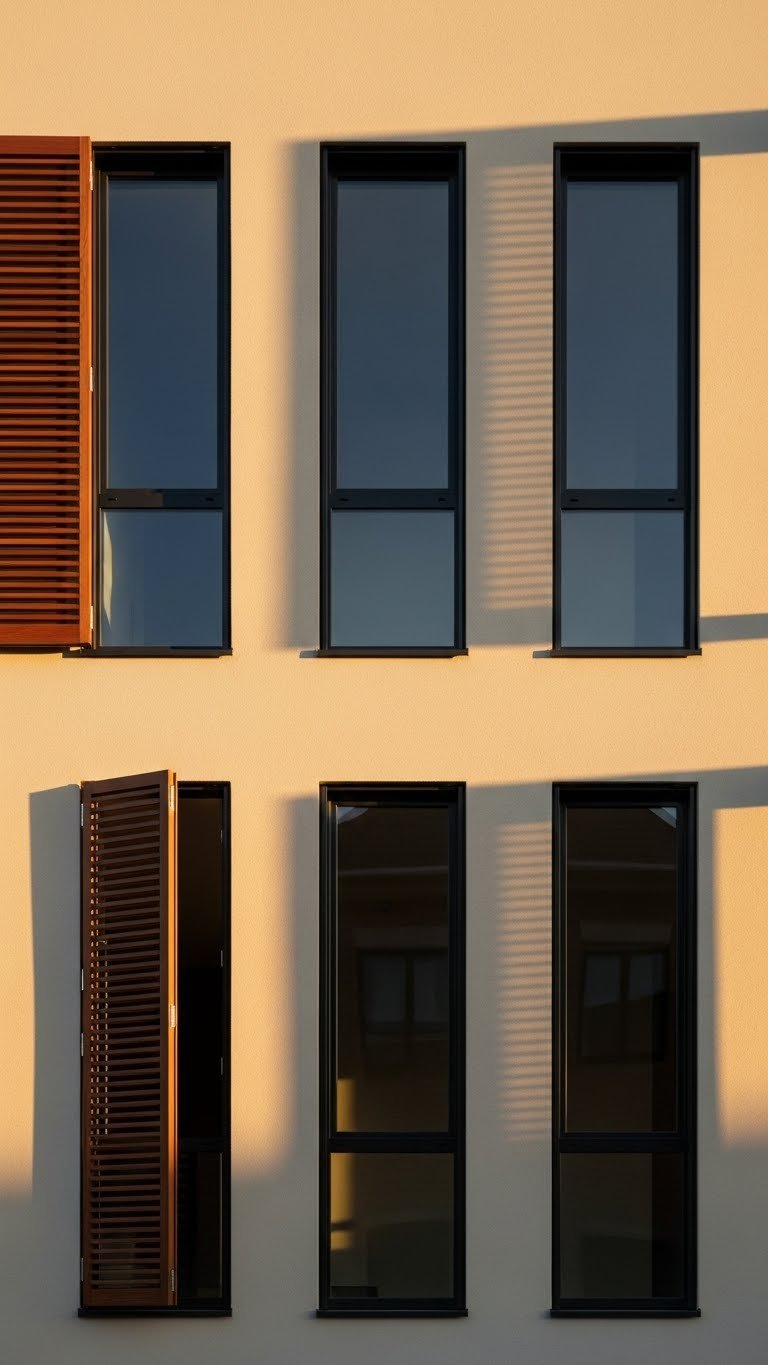
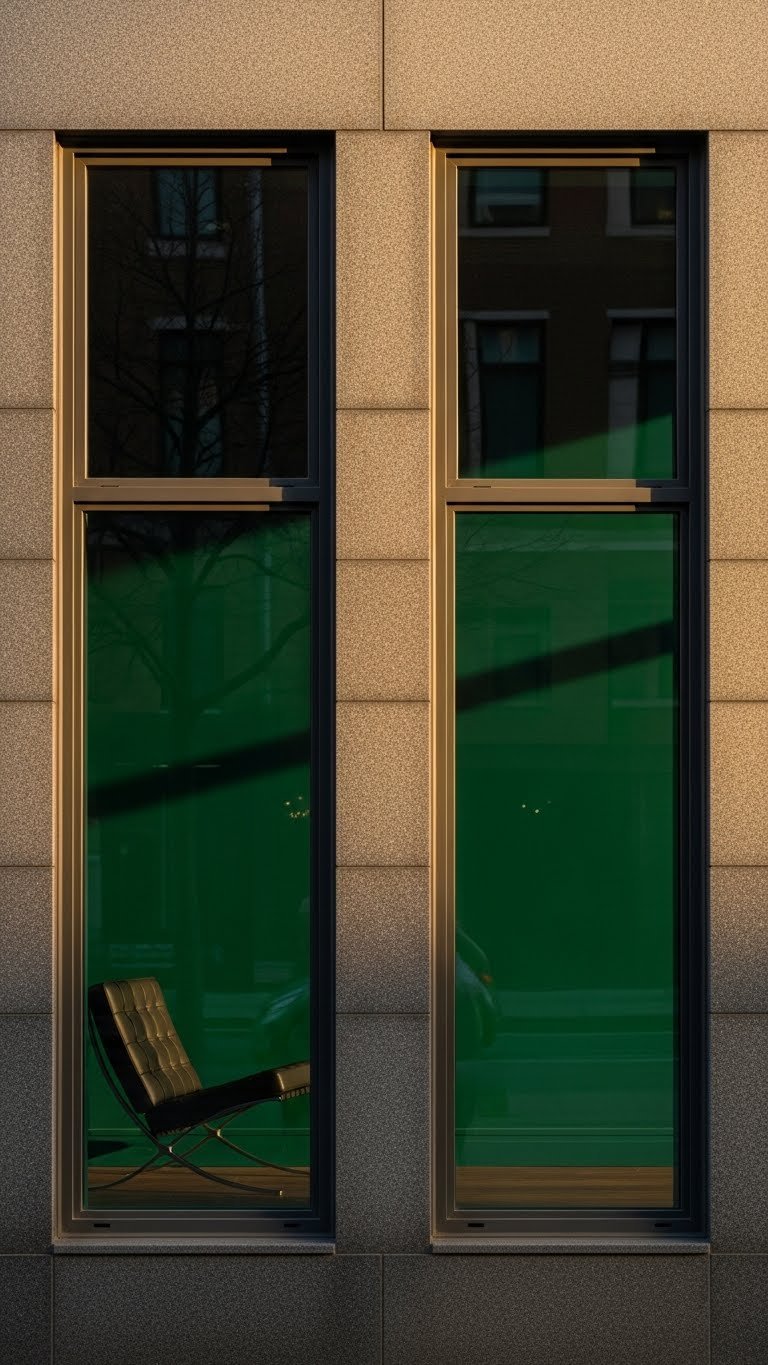
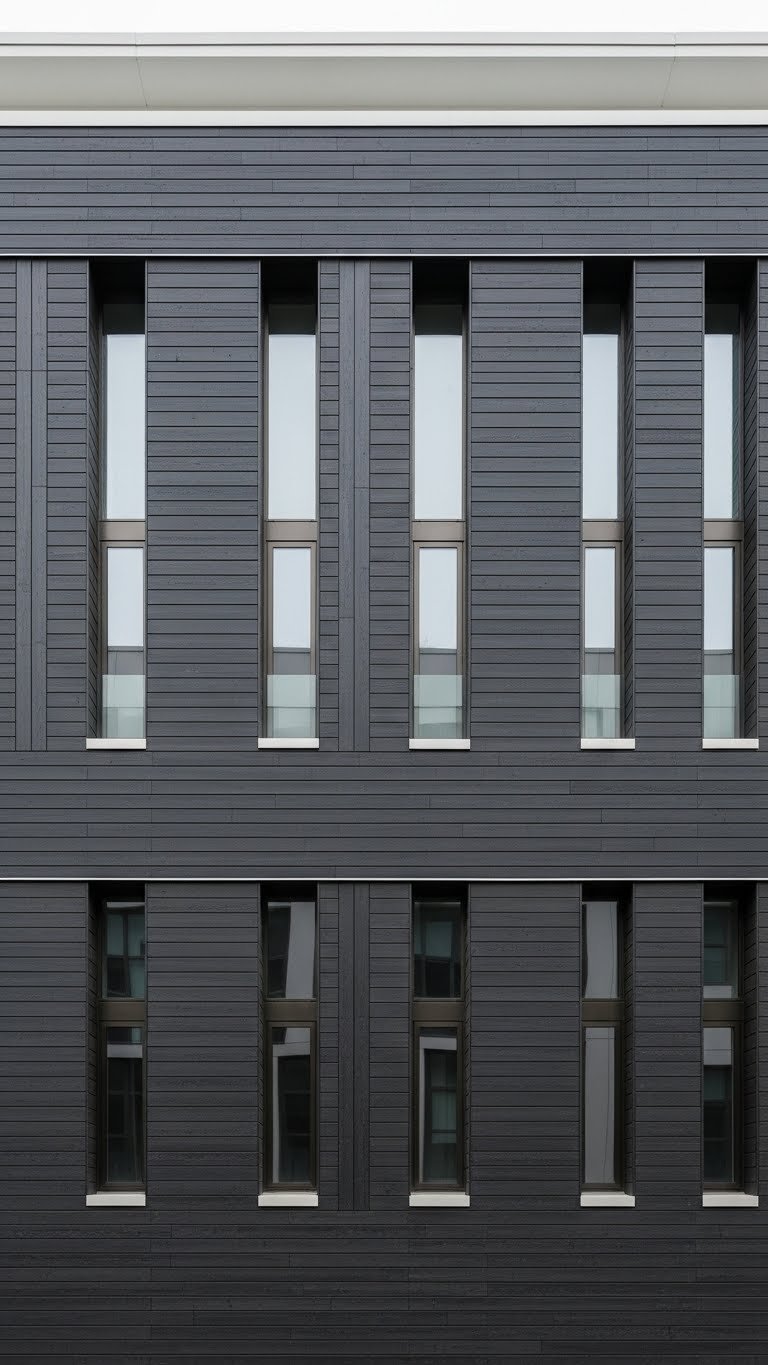
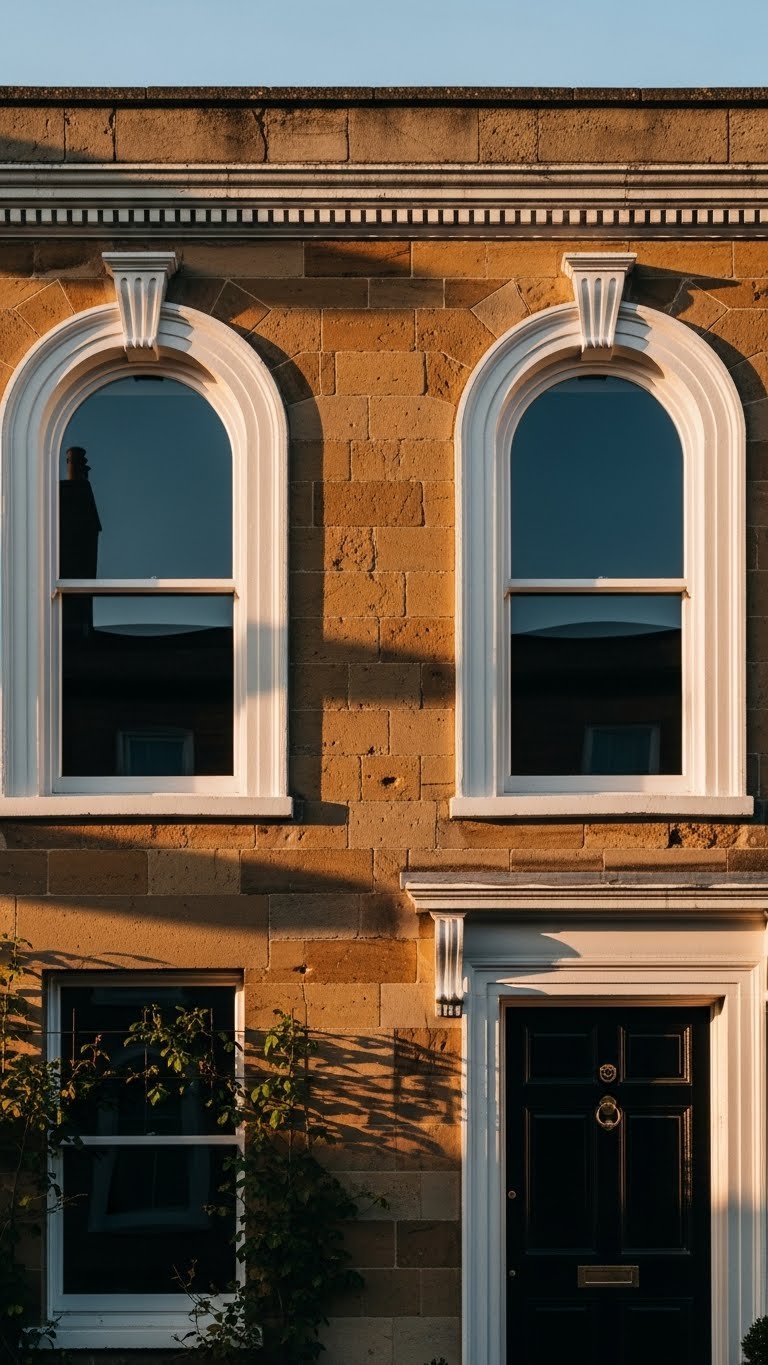
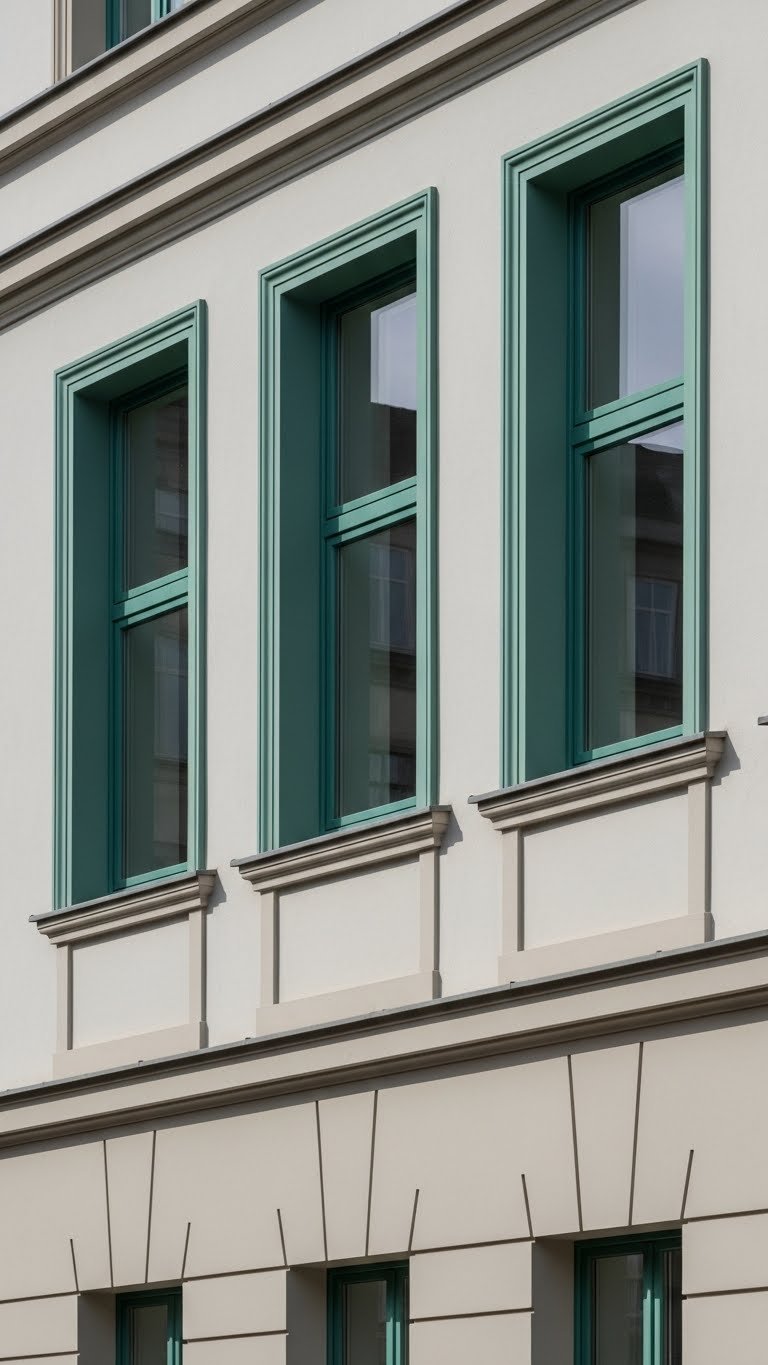
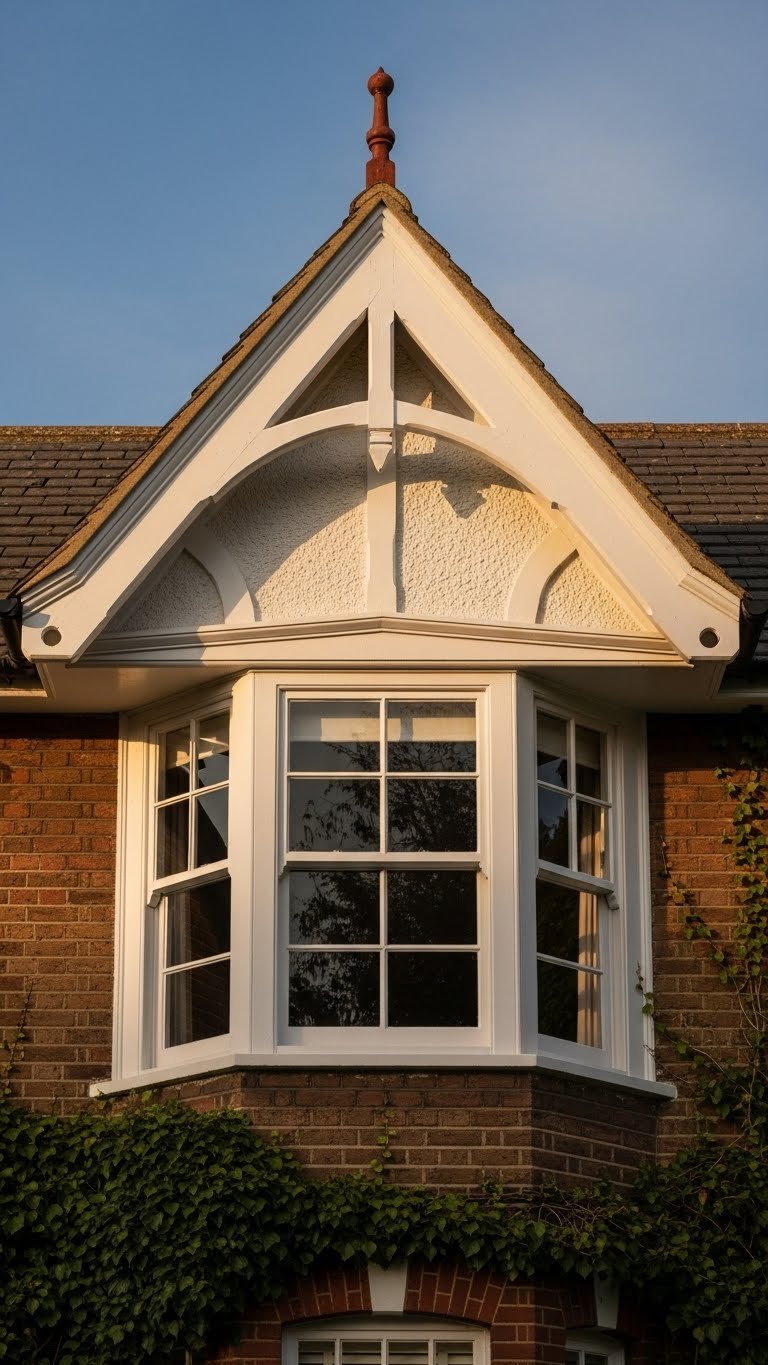
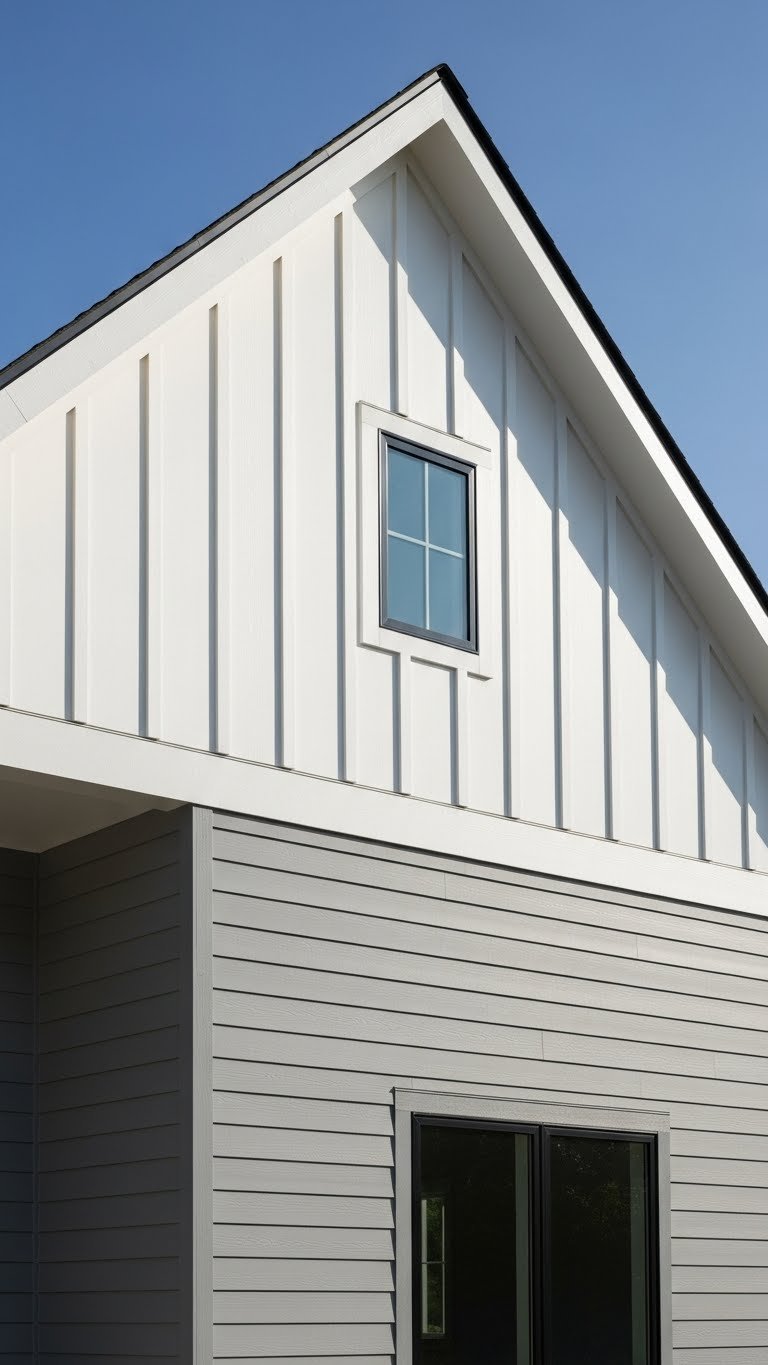
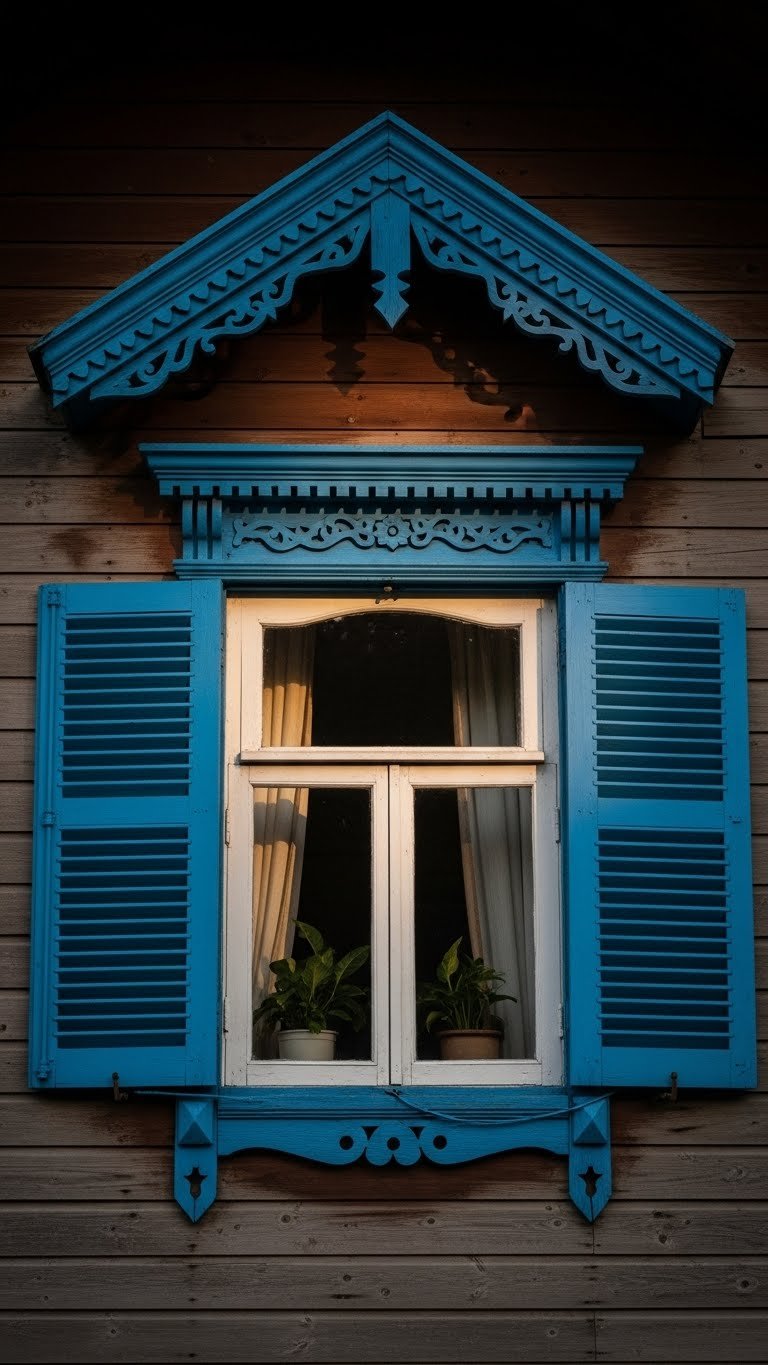
    16. Install Charming Window Shutters With Personality

    Beyond basic shutters, decorative styles like board-and-batten or louvered options add personality and cottage charm.

    Decorative wood or composite shutters run $60-$150 per pair. Budget $300-$800 for a typical small home’s front-facing windows. Installation takes 30-45 minutes per pair with basic tools. Paint them in coordinating colors—navy, forest green, burgundy, or charcoal gray work beautifully against white trim. Choose quality composite shutters if weather is harsh; they outlast wood.

    Pro tip: Mix and match shutter styles on different windows for eclectic charm, or keep them uniform for classic symmetry. Your shutters become a design statement beyond pure function.

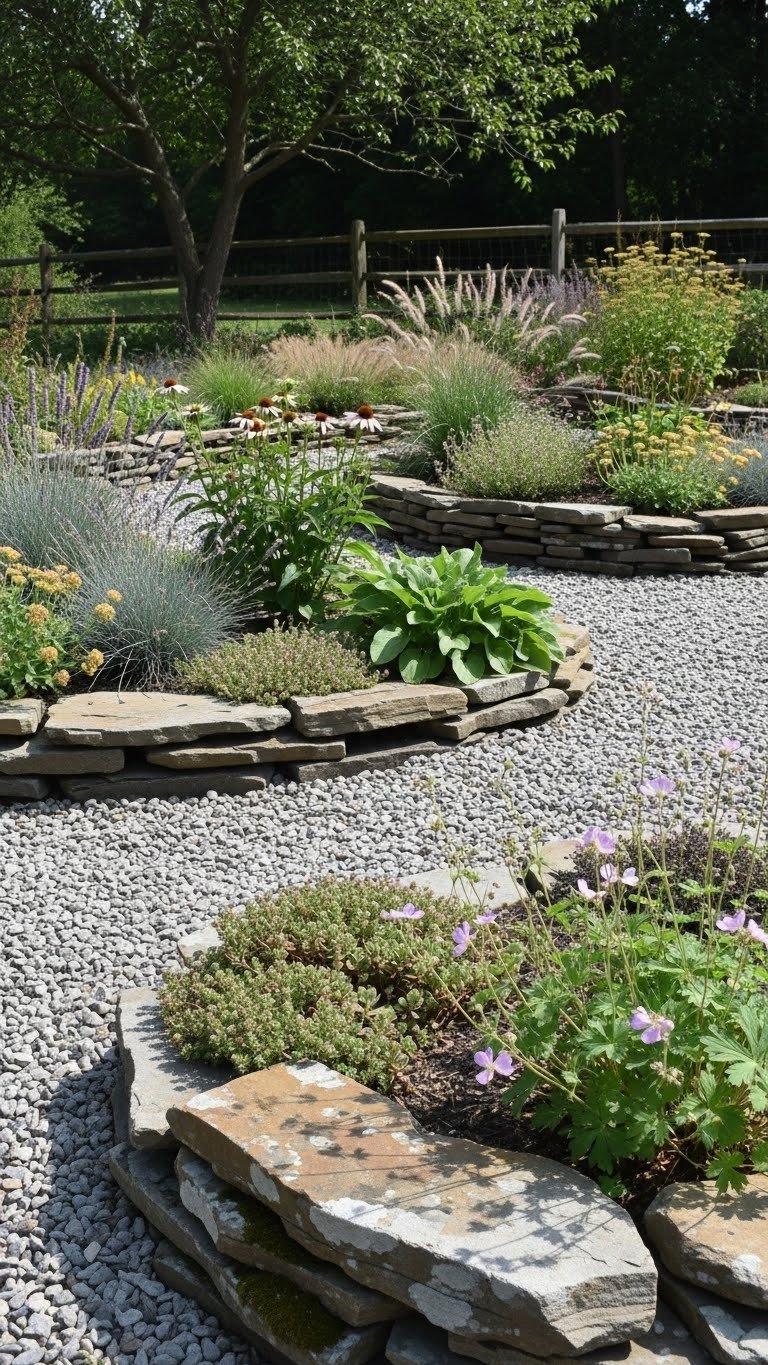
    17. Create Depth With Layered Landscaping and Levels

    Layered, tiered landscaping creates depth that makes small yards appear larger and more designed.

    Plant tall shrubs (3-4 feet) in the back ($15-$40 each), medium evergreens in the middle ($10-$25 each), and low perennials or ornamental grasses in front ($5-$15 each). Budget $100-$300 for a typical small yard. Installation and spacing takes half a day. Water new plants regularly for the first season. Choose evergreens for year-round structure.

    Pro tip: Use odd numbers (3 or 5) of each plant type for natural balance. Avoid crowding; plants need room to mature. Your yard gains visual complexity and maturity that transforms a flat landscape into a designed garden.

    18. Paint Your Garage Door to Match Your Aesthetic

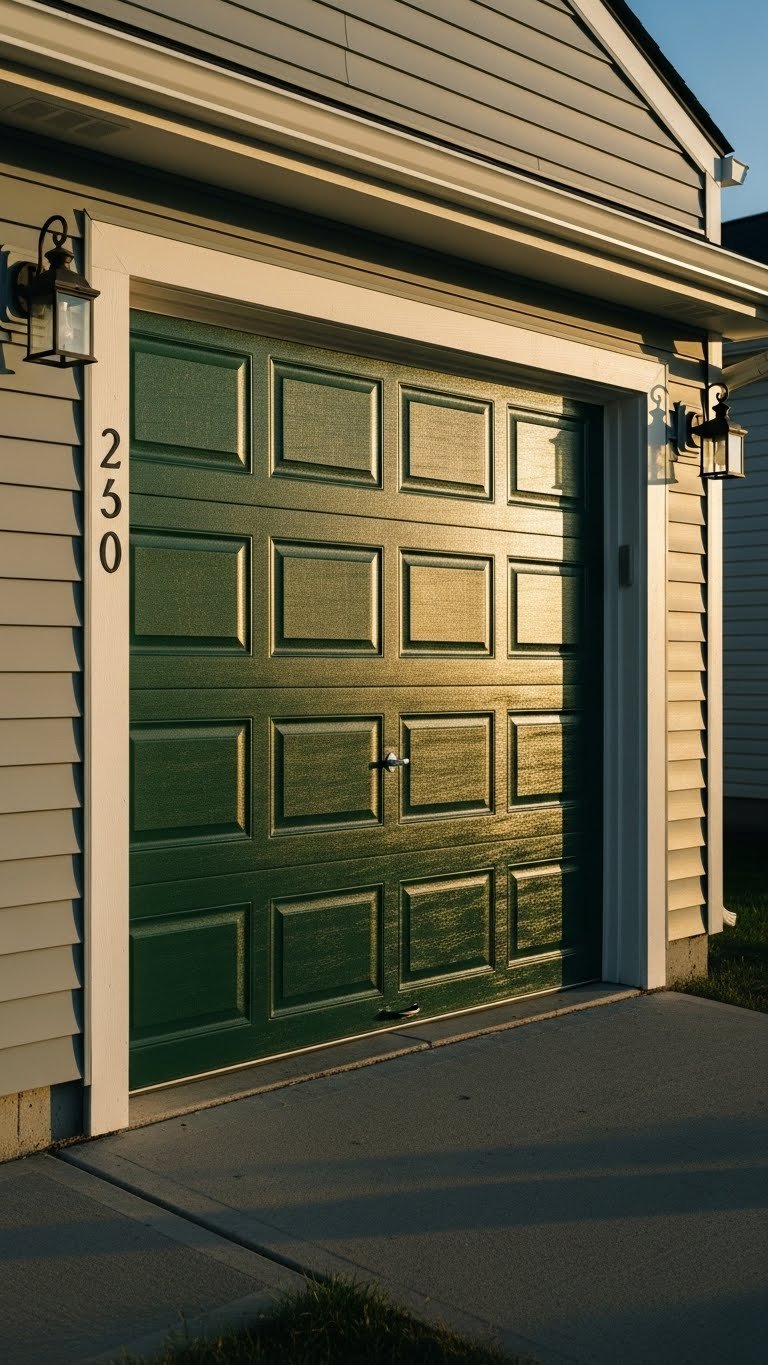
    Your garage door takes up major real estate on your home’s front. Painting it intentionally ties your aesthetic together.

    Use high-quality exterior paint designed for metal ($25-$40 per quart). Most garage doors need 1-2 quarts. Prep takes 2-3 hours (clean, sand, prime). Painting takes 2-3 hours. Total DIY time: one weekend including drying. For large doors or complex colors, hire a painter ($200-$500). Choose colors that complement your door, trim, or landscaping.

    Pro tip: Avoid white or standard beige if they’re already default colors. Bold or coordinating colors show intentionality. Your garage door transforms from a bland necessity into a design statement.

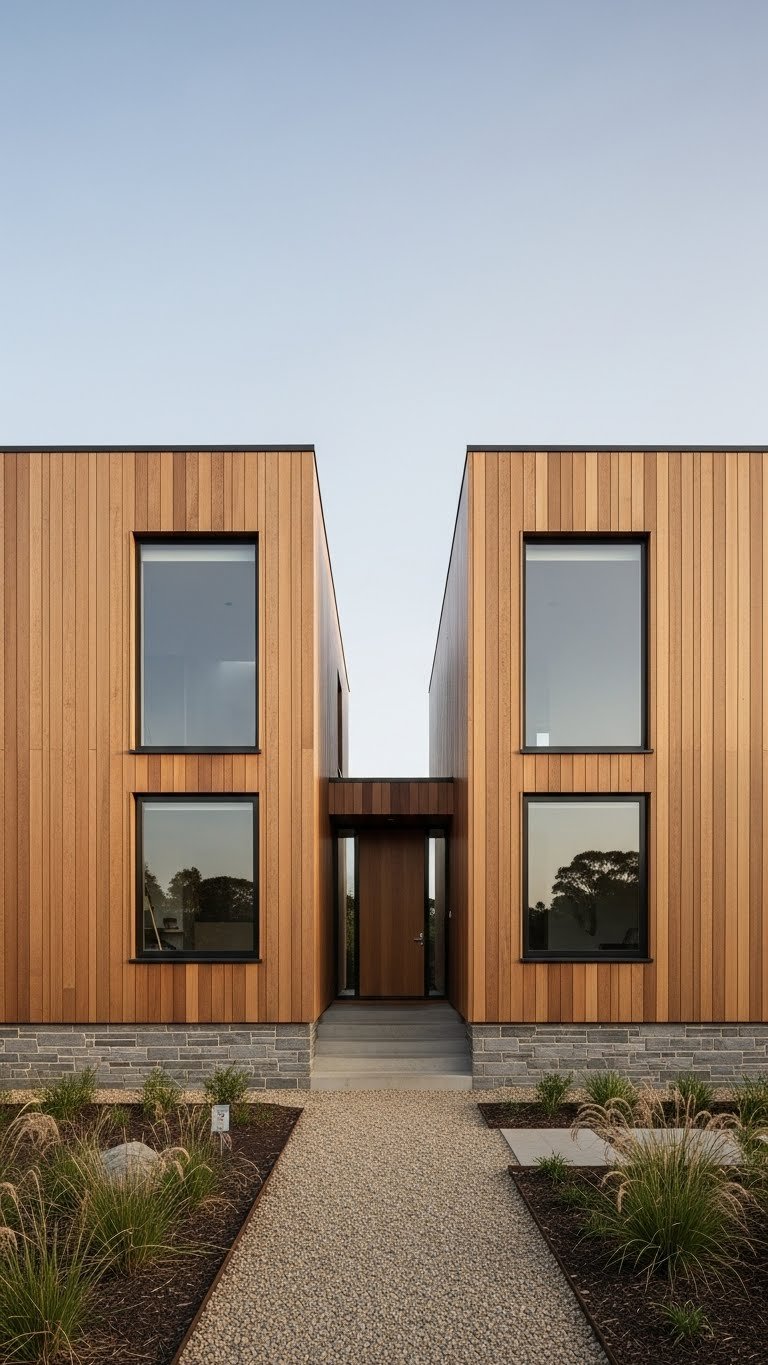
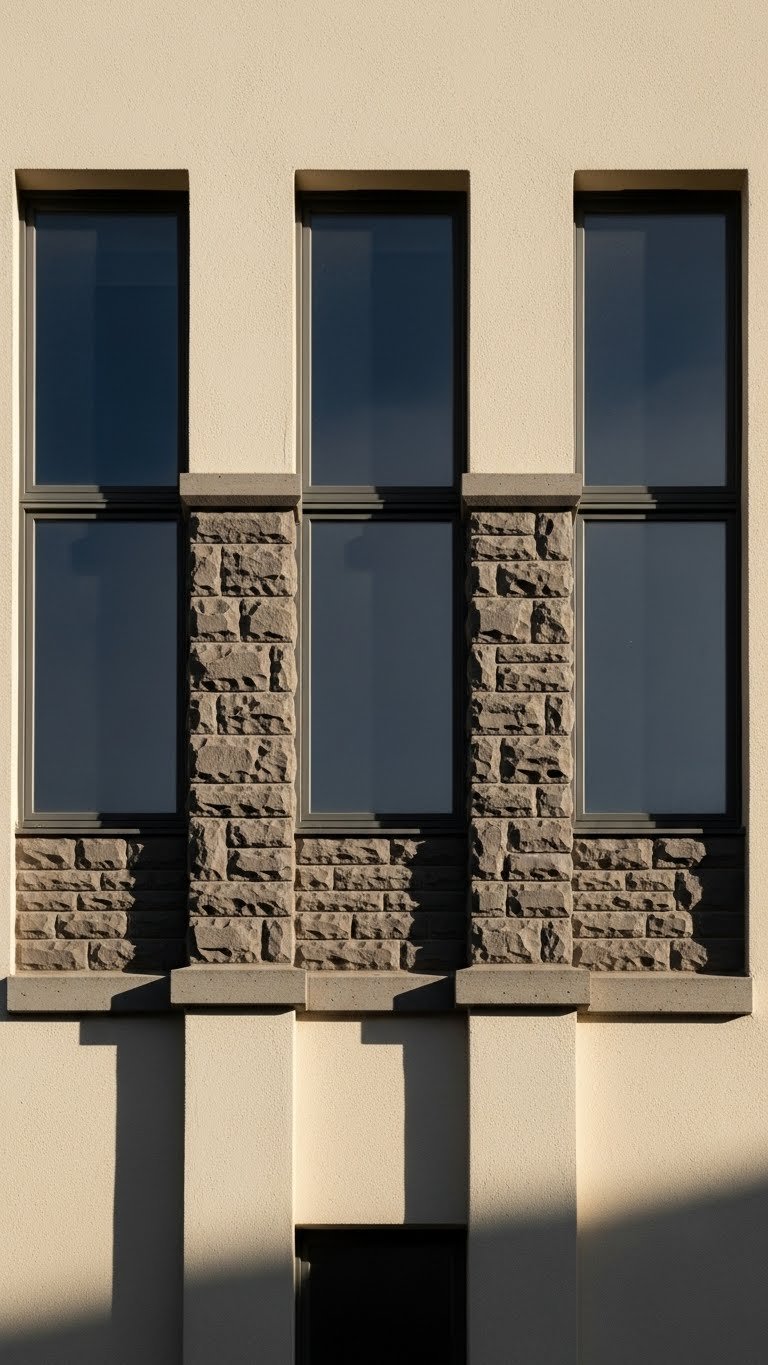
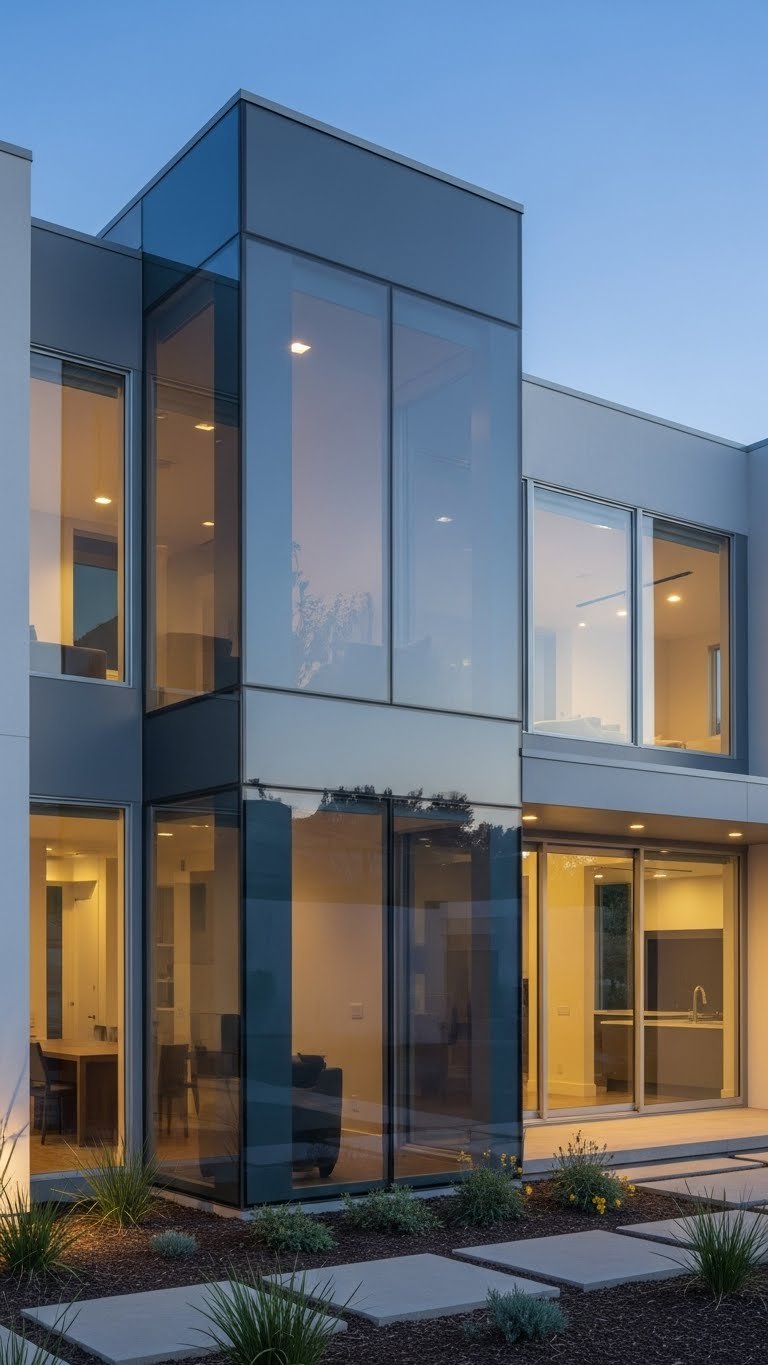
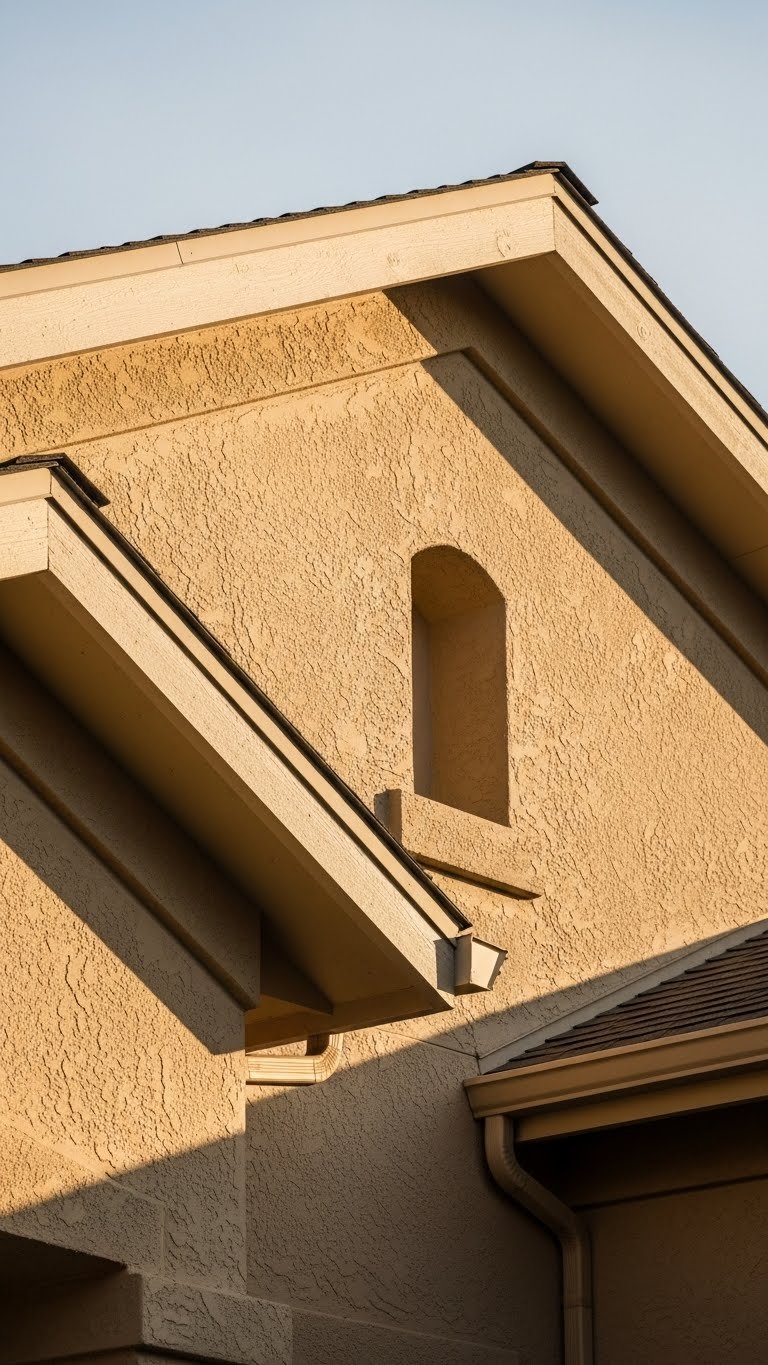
    19. Add Texture With a Stone or Brick Accent Wall

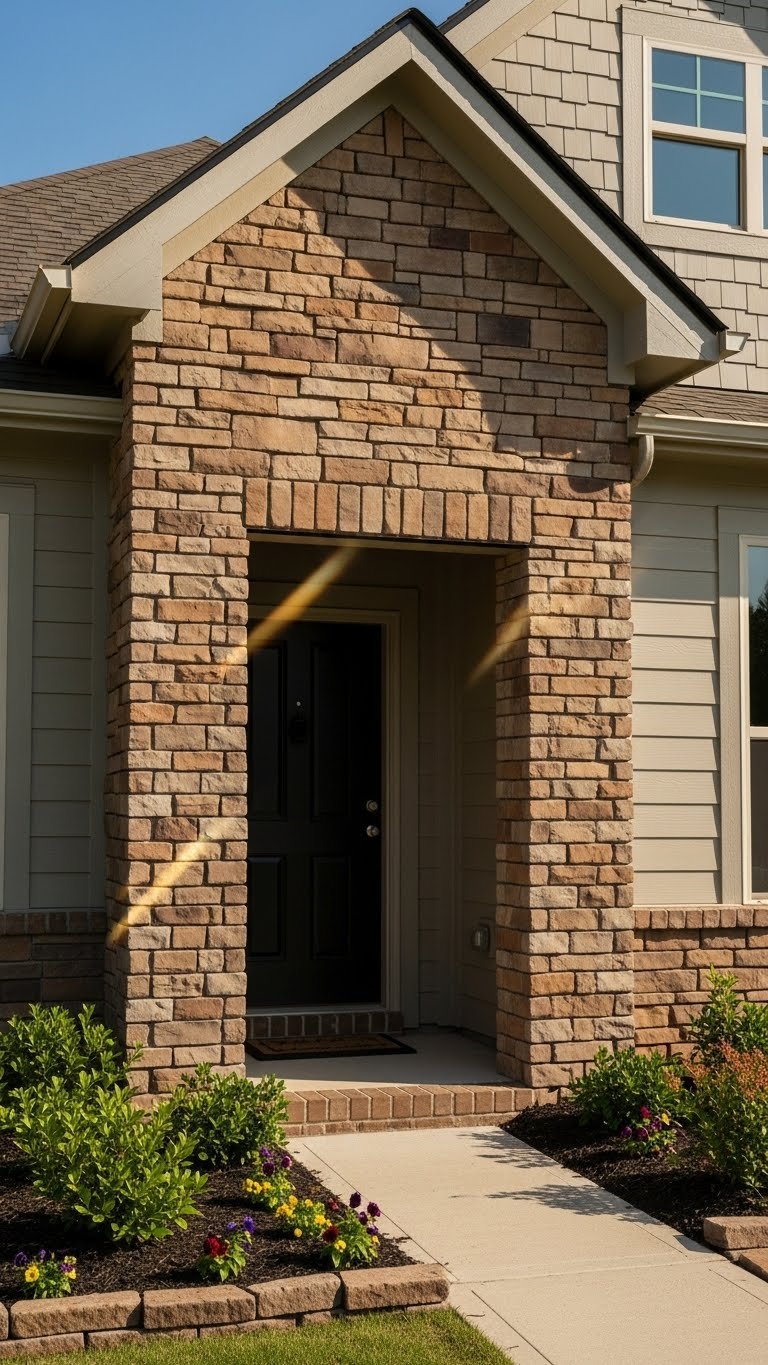
    Stone or brick accents add luxury-looking texture without a full renovation. A small section creates maximum impact.

    Install natural stone veneer ($10-$15 per square foot) or faux stone ($3-$8 per square foot) as an accent on a featured wall. Budget $300-$800 for a small accent area (30-50 square feet). Hire a mason for installation ($1,000-$2,000 labor) or use lightweight faux stone if DIY-comfortable. The result reads as high-end and custom.

    Pro tip: An accent wall around your front door or entryway creates the most impact without overwhelming the facade. Your home gains textural sophistication and architectural weight.

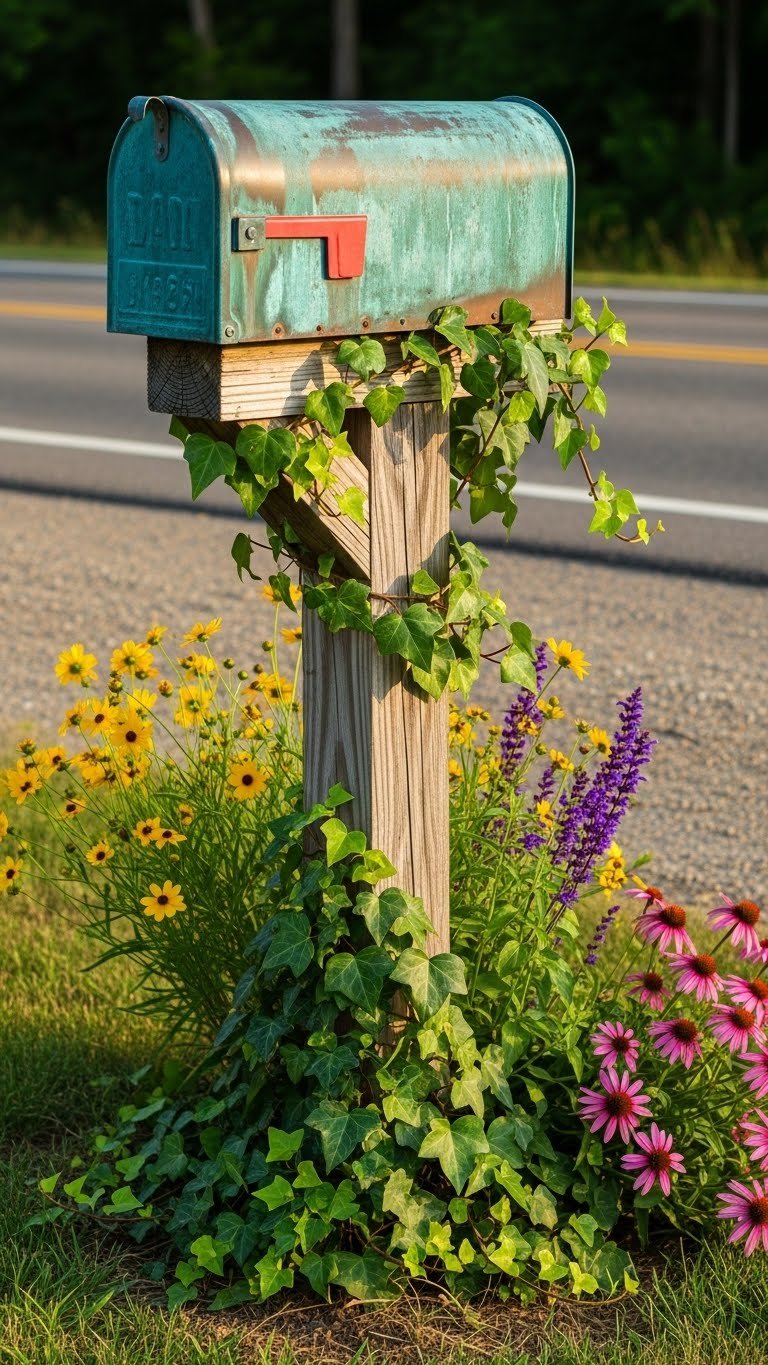
    20. Refresh Your Mailbox With a New Post or Design

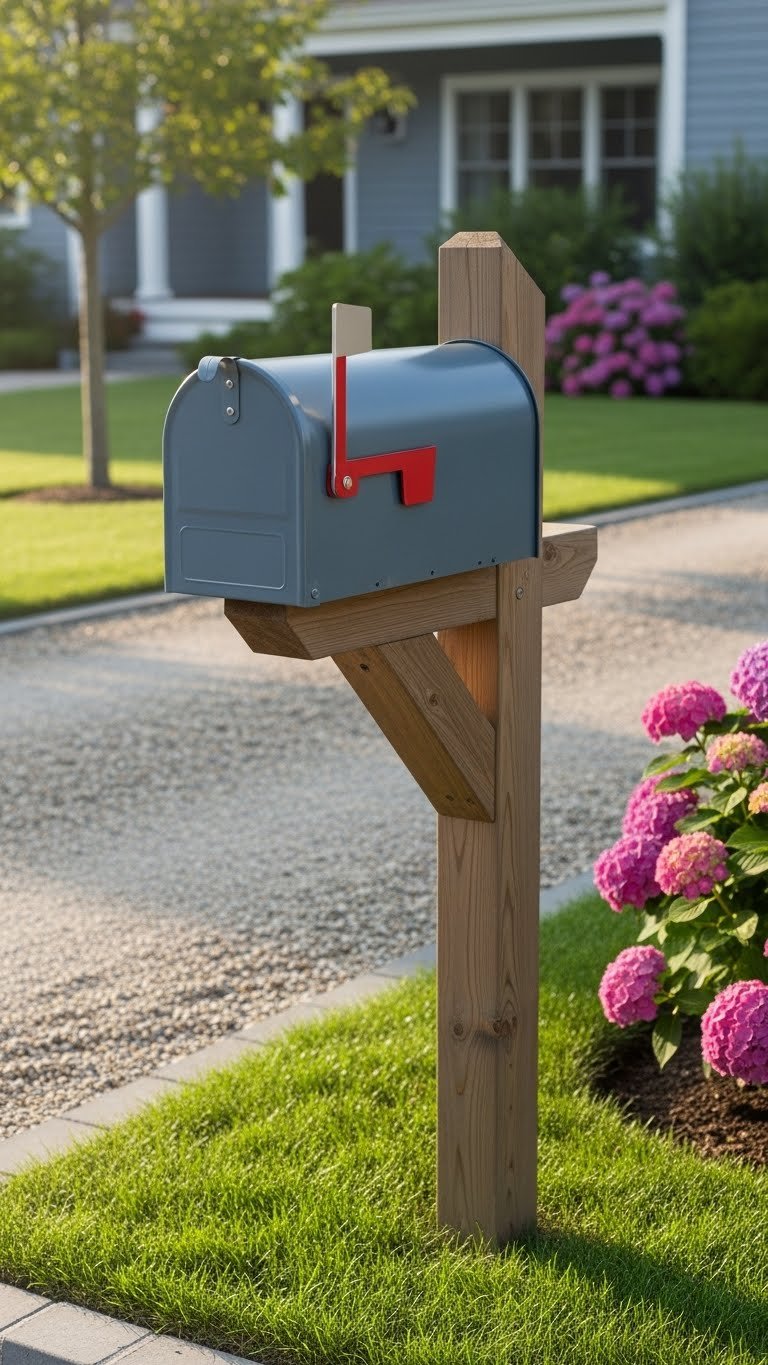
    Your mailbox is a small detail that people see constantly. Upgrading it shows attention to the whole home.

    Replace a worn mailbox with a new style ($30-$100) in matching or contrasting colors. Upgrade the post with painted wood ($15-$50) or metal ($20-$75). Installation takes 30 minutes to an hour. For renters, adhesive mailbox covers ($20-$40) update the look without replacing the fixture. Choose designs that complement your home’s era—modern lines for contemporary homes, vintage styles for cottages.

    Pro tip: A quality mailbox that matches your front door color creates a polished, finished look. Avoid plastic or generic gray defaults. Your mailbox becomes a detail that signals intentional design.

    21. Plant Specimen Trees or Shrubs as Focal Points

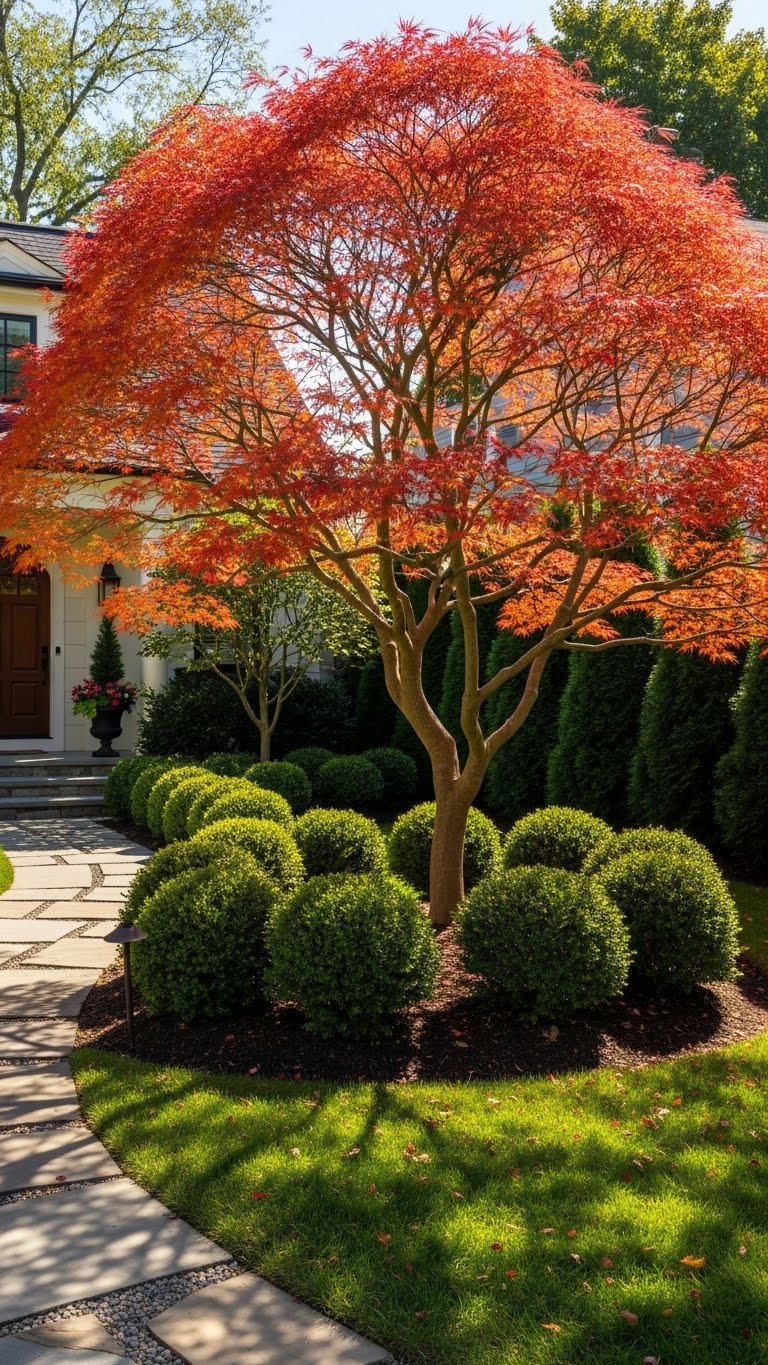
    A single well-chosen specimen tree or shrub creates instant maturity and focal point interest in a small yard.

    Plant a medium-sized specimen tree ($50-$150) like a Japanese maple, serviceberry, or ornamental cherry. Position it front and center as a visual anchor. Choose trees with year-round interest—interesting bark, seasonal color, or sculptural shape. Installation and establishment take one growing season. Water regularly the first year.

    Pro tip: Choose trees sized to your home’s scale. A massive oak overwhelms a small cottage; a petite maple perfectly frames it. Your yard gains a living focal point that photographs beautifully and creates seasonal interest.

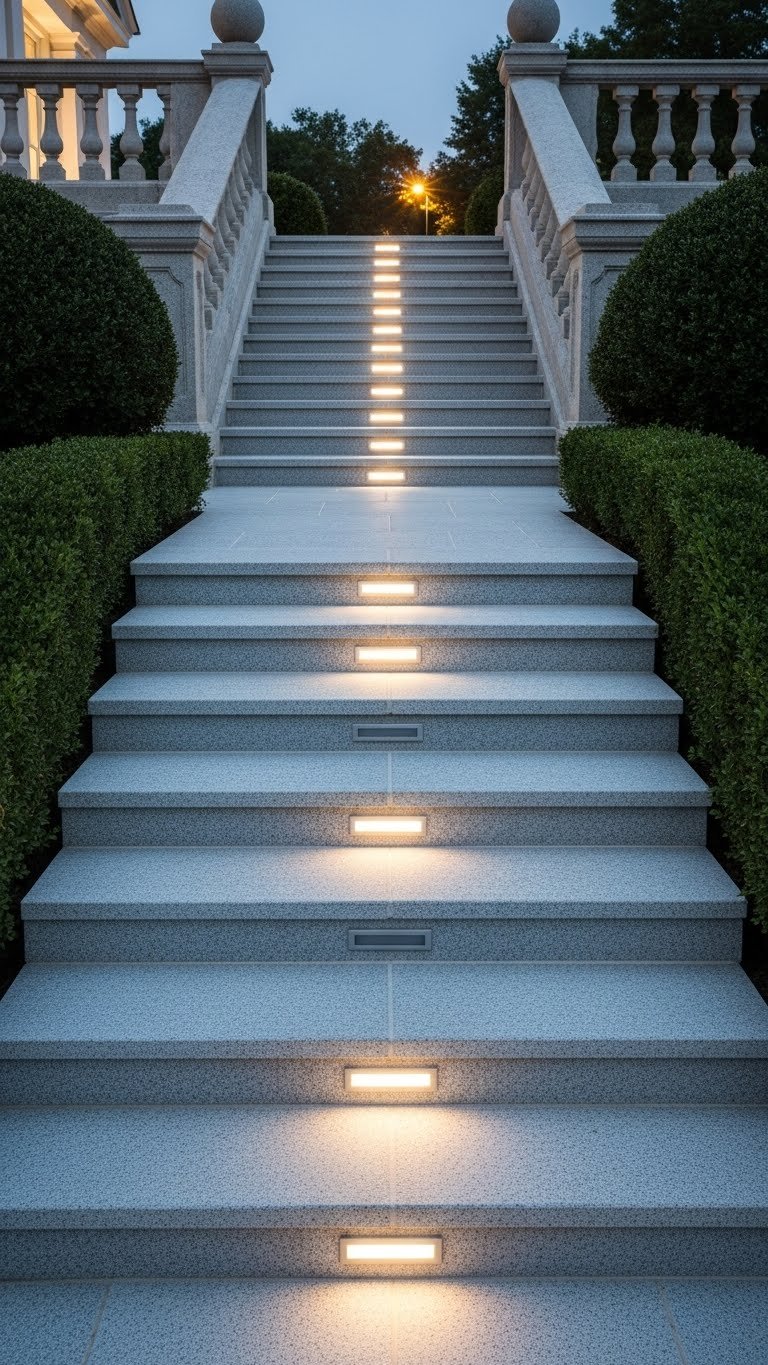
    22. Define Entryway Steps With Contrasting Paint or Stone

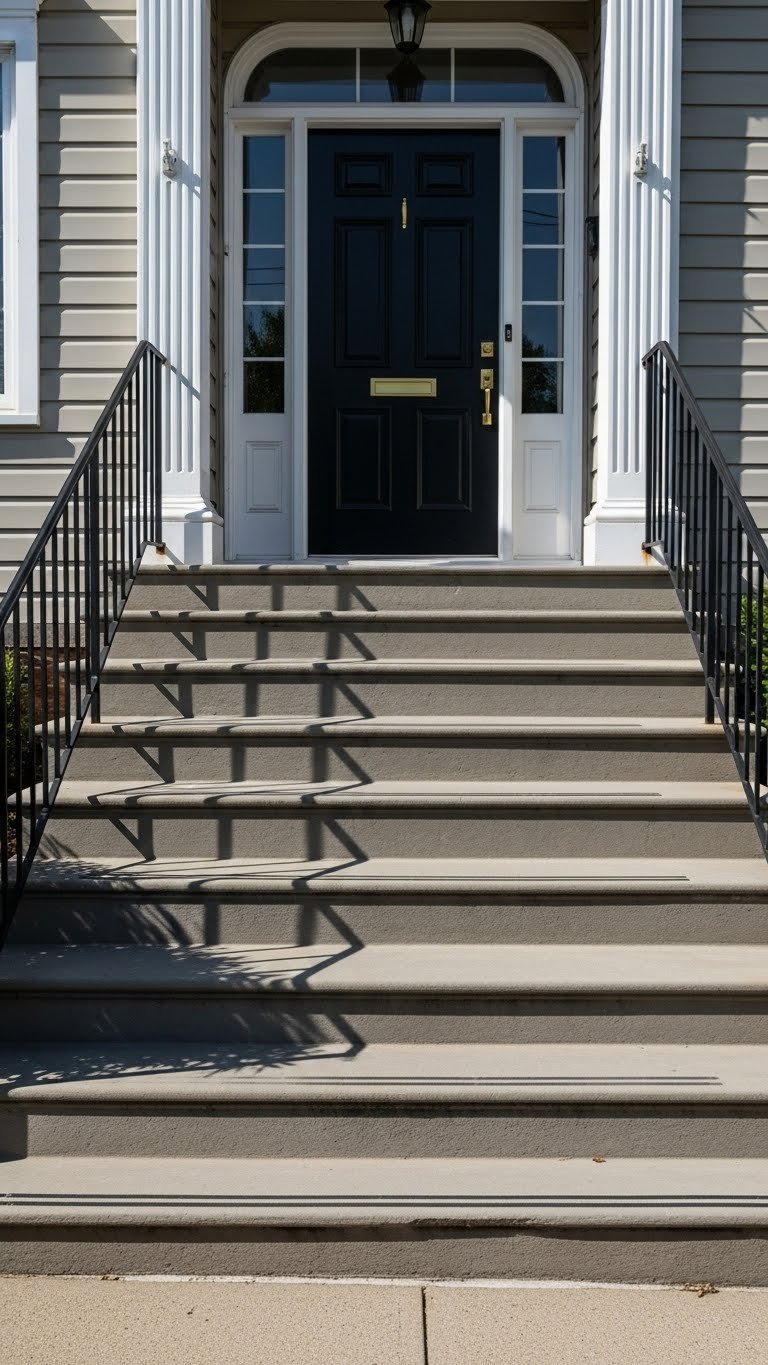
    Contrasting step edges create definition, safety, and visual interest. It’s a small detail with outsized impact.

    Paint your step risers or edges in a contrasting color ($20-$30 in paint). Alternatively, add contrasting stone trim ($100-$300). Painting takes 2-3 hours. The result guides people visually and adds a custom detail that signals thoughtfulness.

    Pro tip: High-contrast paint colors (white edges on dark steps, or vice versa) create the most impact. Your steps gain definition and your entry feels more intentional and professional.

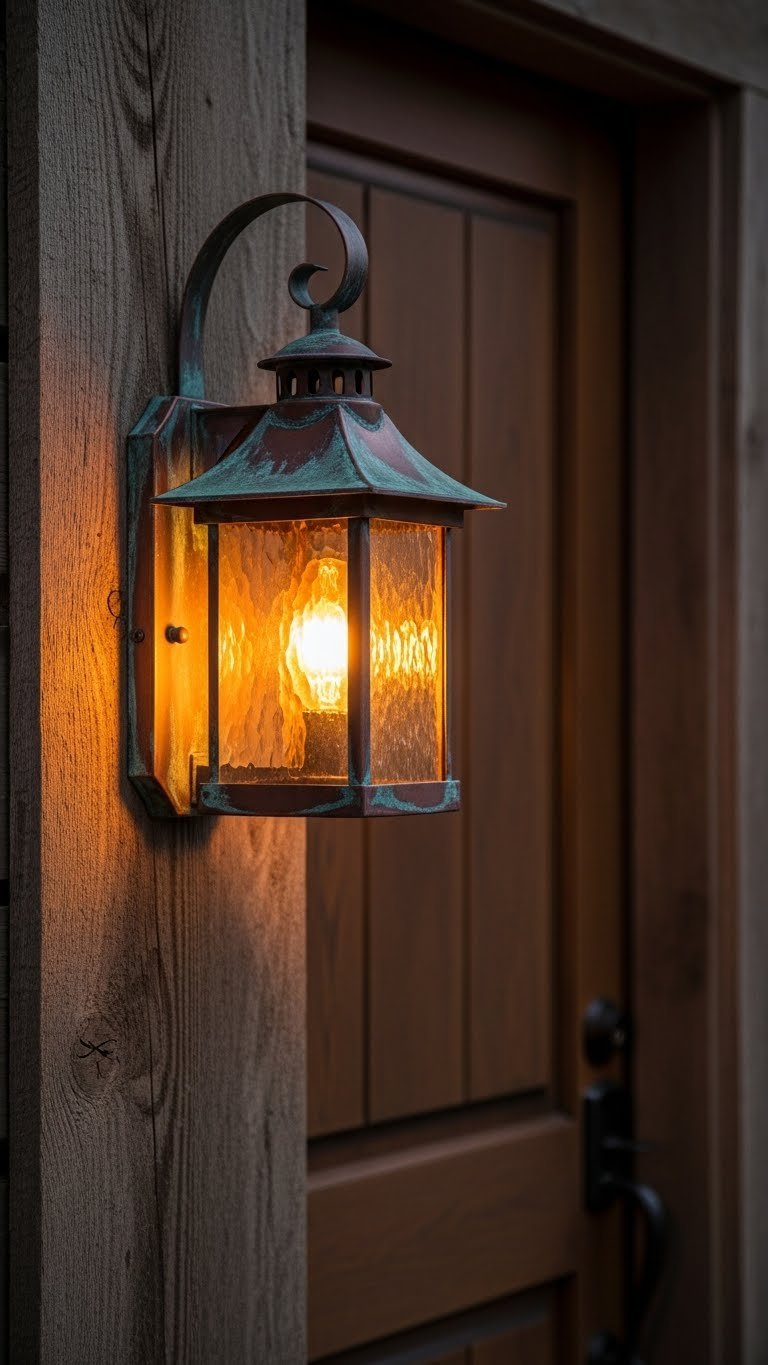
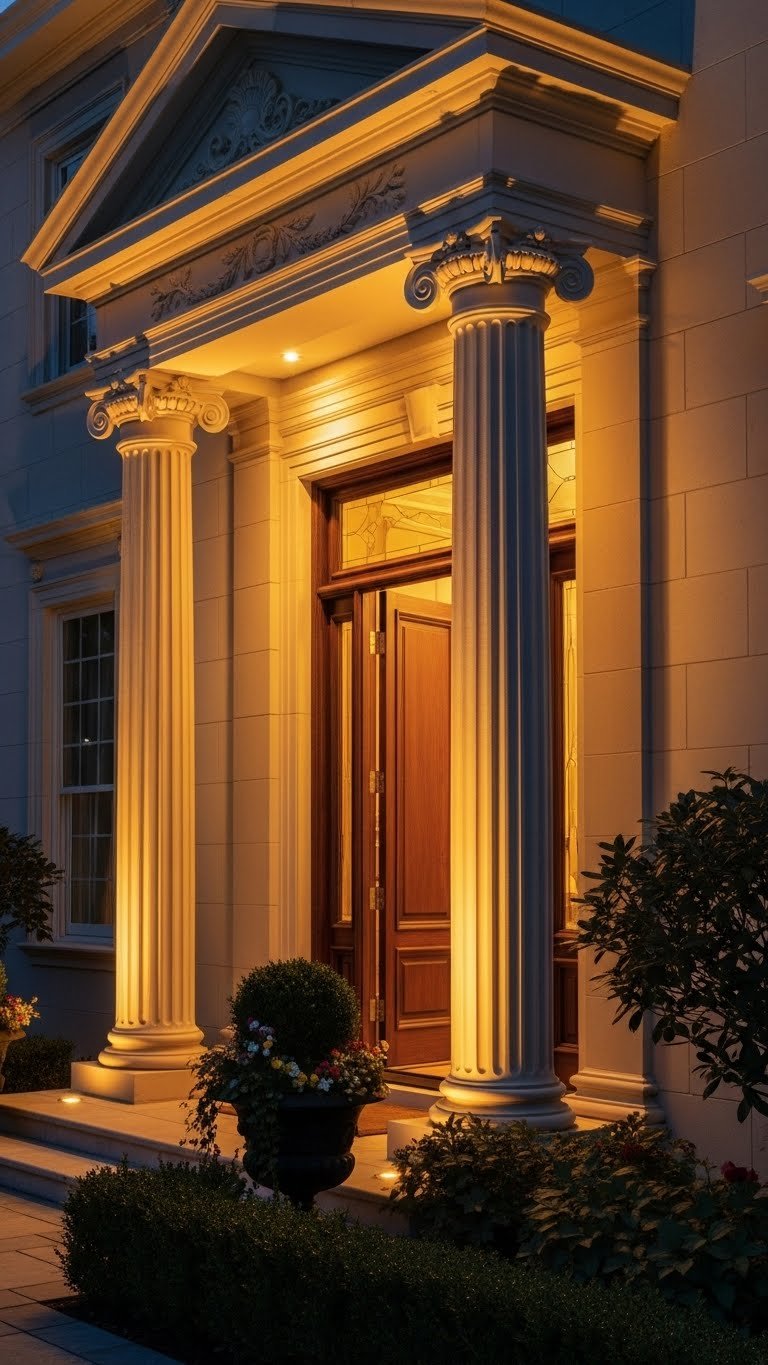
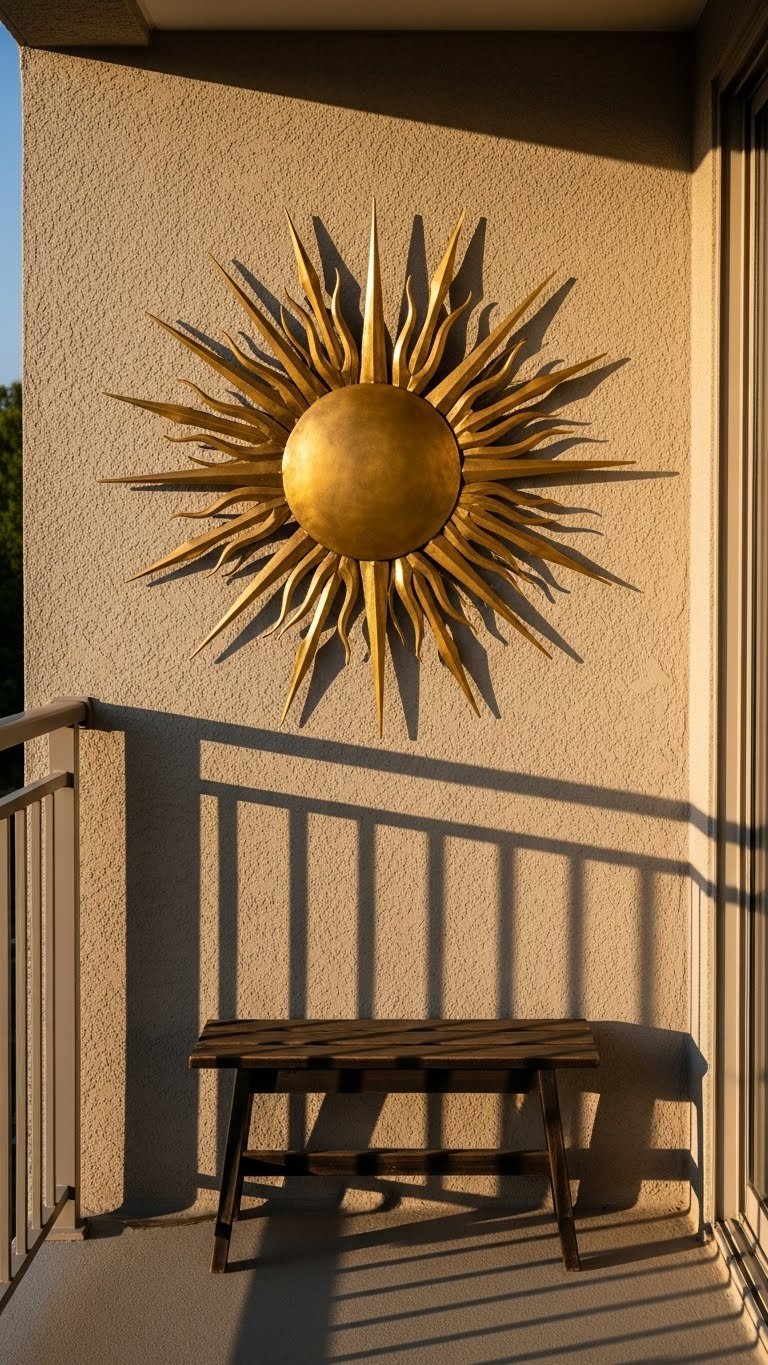
    23. Install Exterior Wall Sconces With Artistic Design

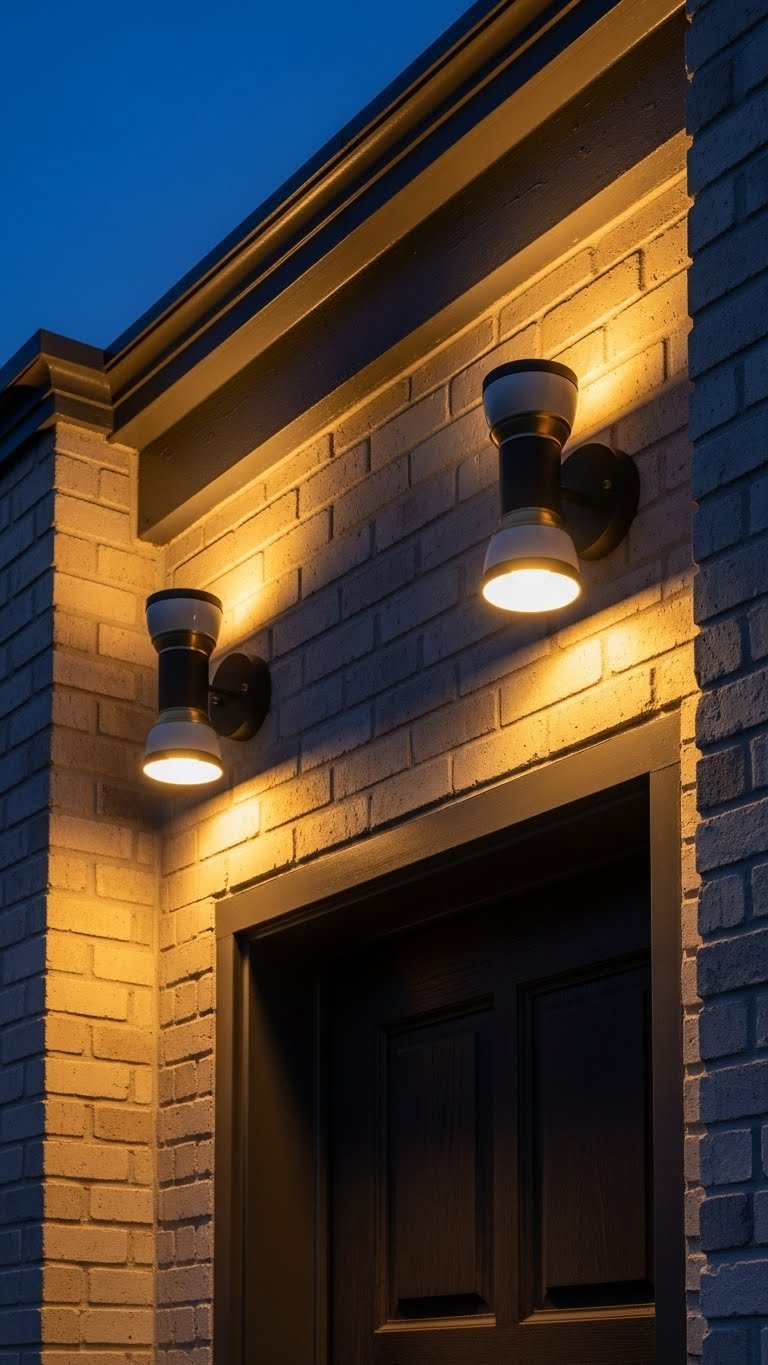
    Quality lighting fixtures are jewelry for your facade. Artistic sconces add sophistication and nighttime drama.

    Choose mid-range sconces ($50-$150 each) from West Elm, Rejuvenation, or Wayfair. Budget $100-$300 for a matching pair. Installation takes 45 minutes to an hour and requires basic wiring (hire an electrician if unsure, $150-$300 labor). Choose designs that complement your home’s style—industrial for modern homes, traditional for classic cottages.

    Pro tip: Mount sconces at eye level (about 60 inches from ground) on either side of your door for symmetry. Add dimmer switches so you control ambiance. Your entry becomes a sophisticated, inviting space that looks beautiful day and night.

    24. Create Privacy With a Living Hedge or Screen

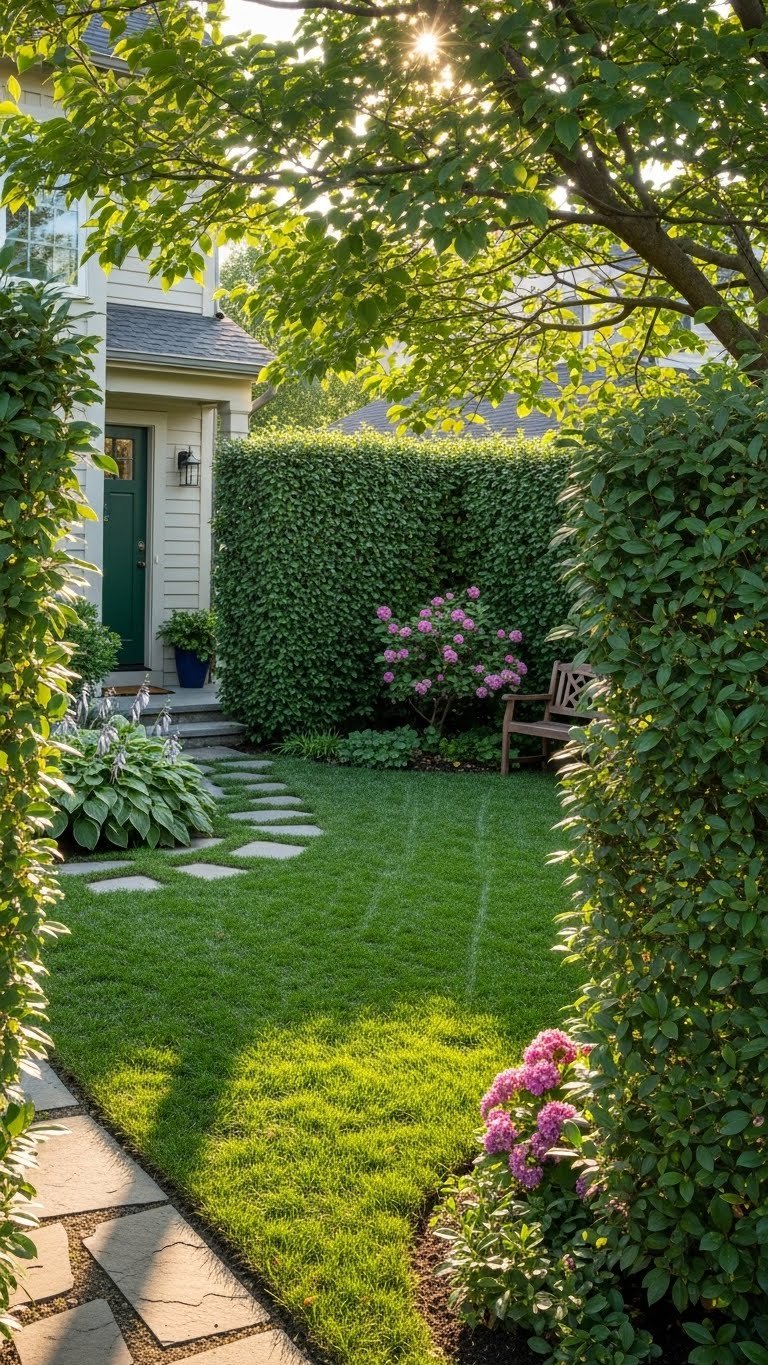
    A hedge or screen creates privacy, defines your yard boundary, and softens your home’s street presence.

    Plant a fast-growing hedge like privet, boxwood, or arborvitae ($10-$25 per plant) spaced 2-3 feet apart. Budget $100-$300 for a small hedge line. Or install a decorative screen or fence ($100-$400). Plants need regular watering and seasonal trimming. Growth takes 1-2 seasons to reach full visual impact.

    Pro tip: Evergreens provide year-round privacy; deciduous options work for seasonal privacy with winter tree views. Your front yard gains boundary, privacy, and intentional design.

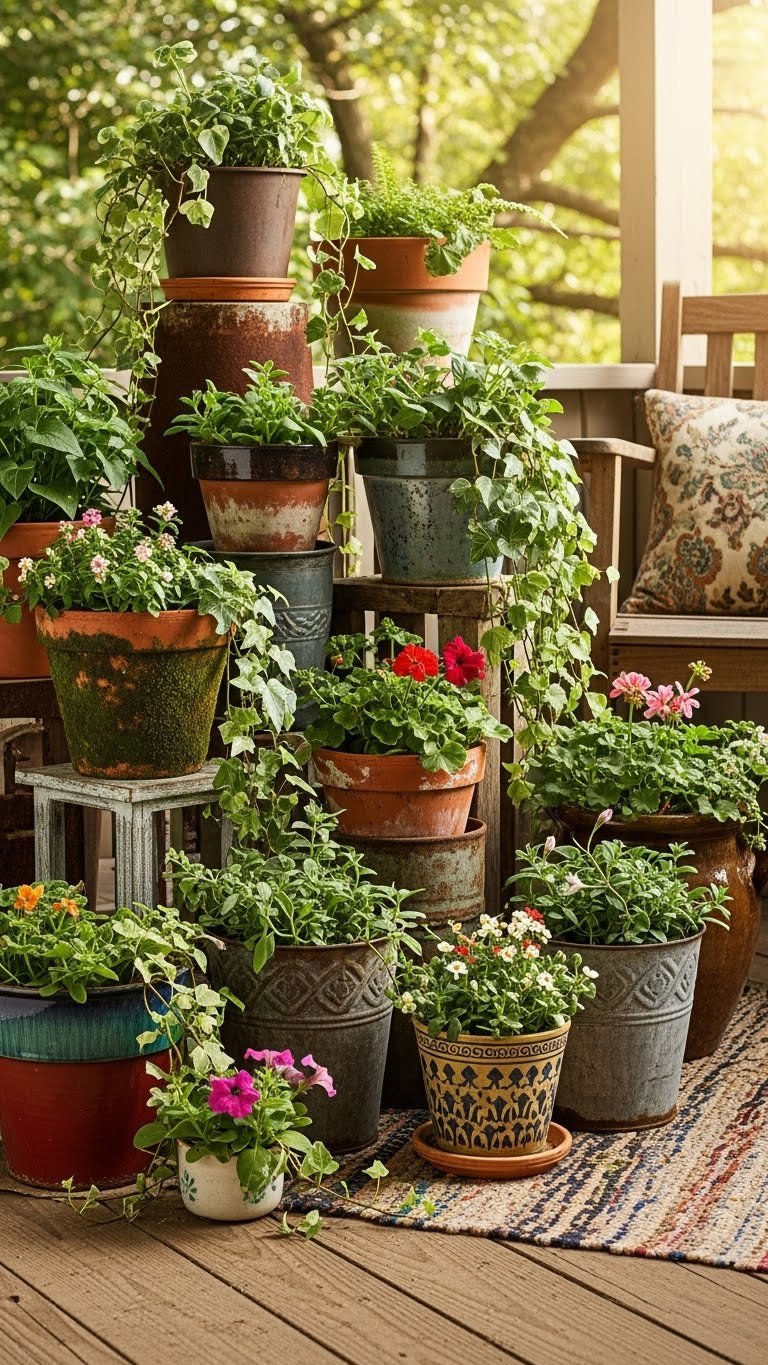
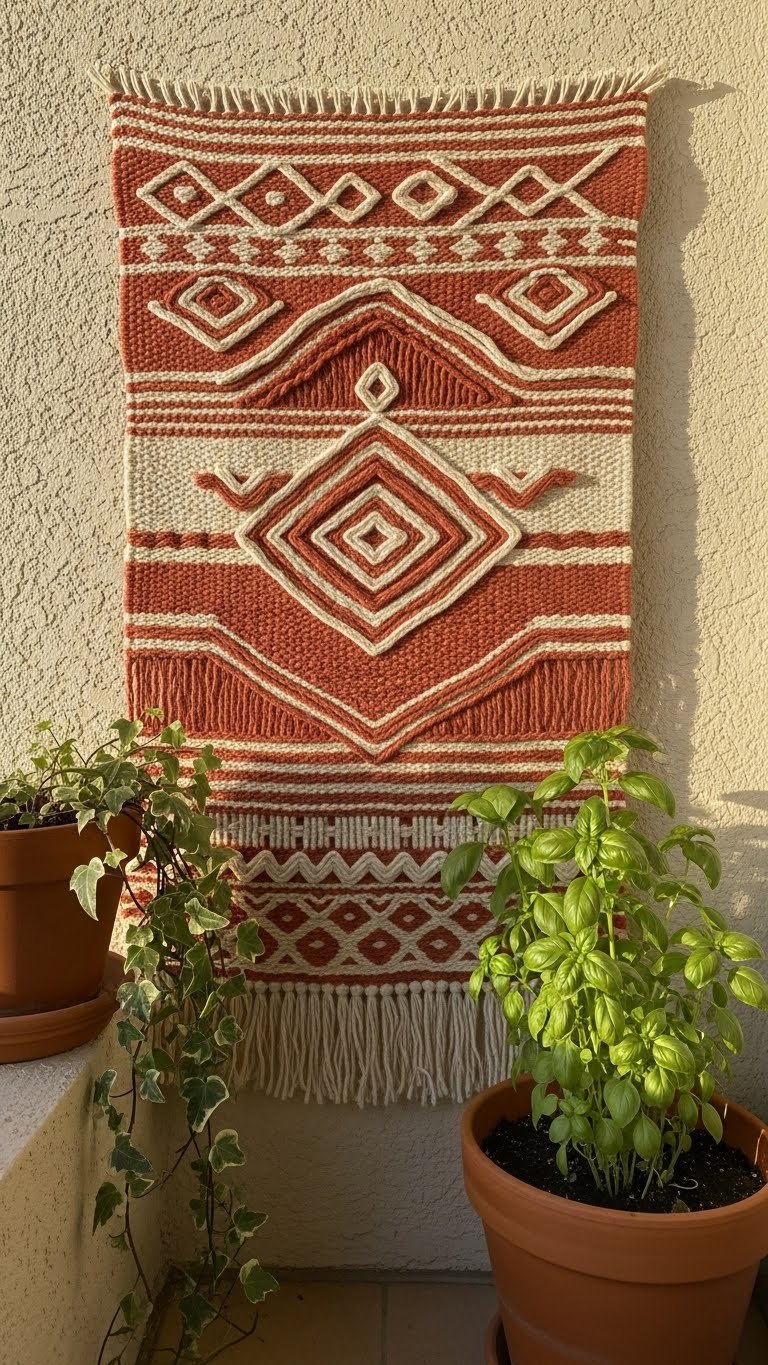
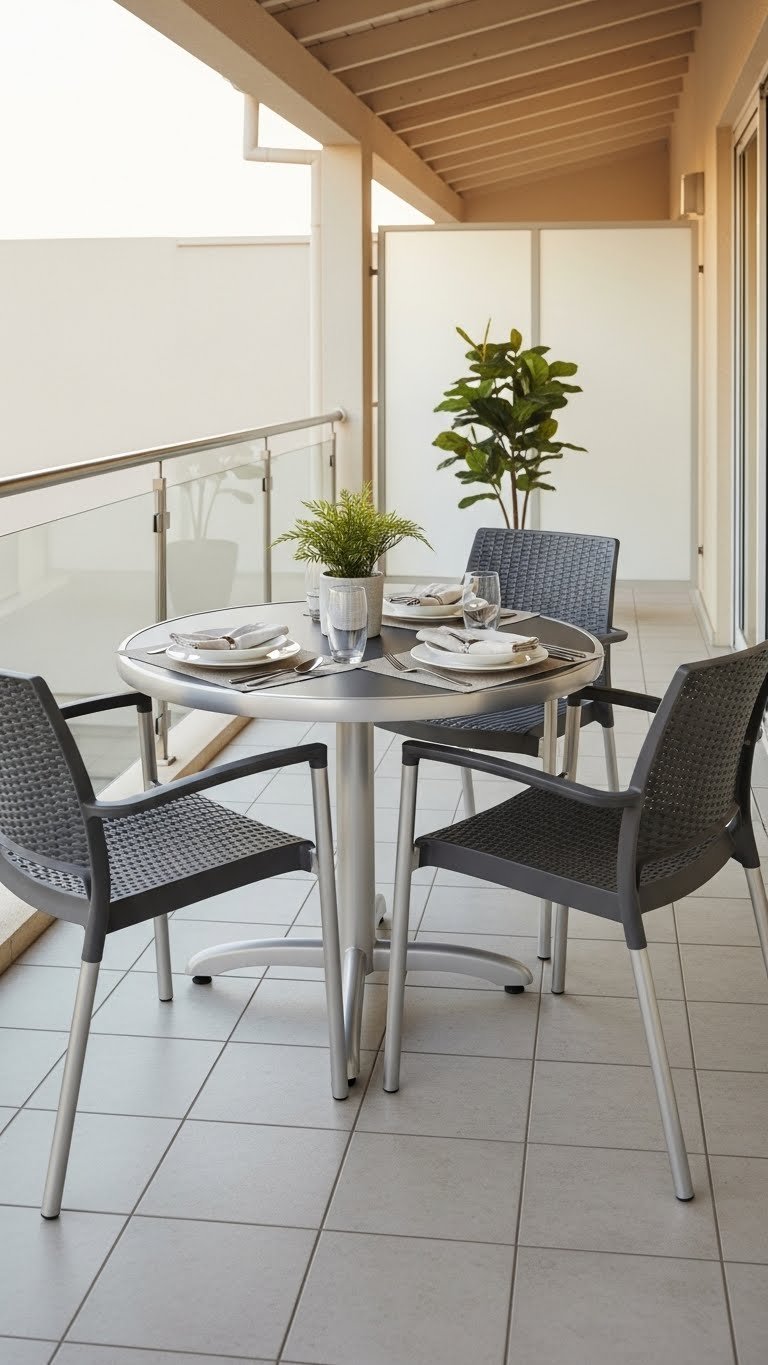
    25. Add Seasonal Décor and Porch Styling

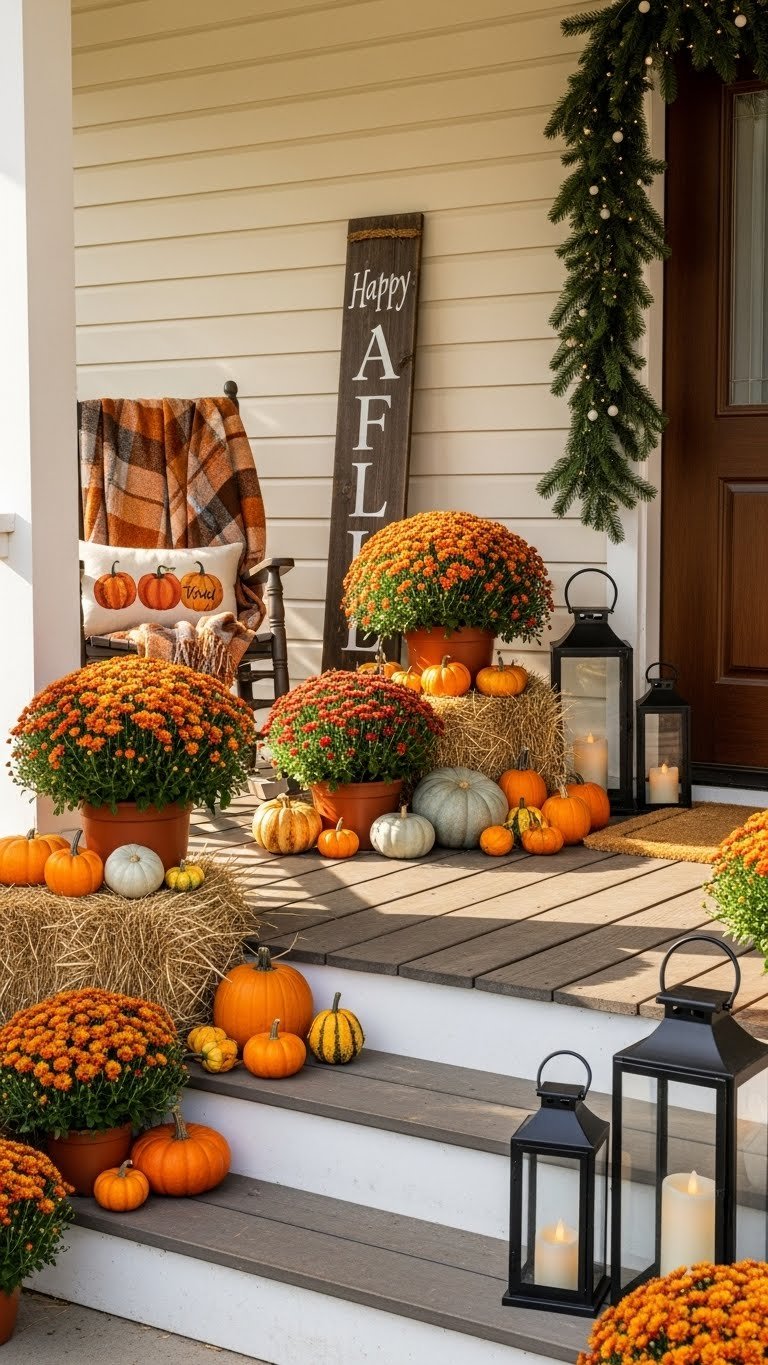
    Seasonal styling signals that your home is loved and actively enjoyed. It keeps your curb appeal fresh and engaging year-round.

    Refresh your porch with seasonal plants ($20-$40), decorative pumpkins or branches ($15-$30), and accent pillows or blankets ($20-$60). Budget $50-$100 per season for fresh looks. Update your planters quarterly, swap pillows seasonally, and add thematic accents like wreaths, lanterns, or garland.

    Pro tip: Keep styling simple and coordinated—avoid cluttered chaos. Choose one seasonal theme (fall harvest, winter evergreen, spring pastels) and execute it cleanly. Your porch transforms quarterly and tells visitors your home is actively enjoyed and cared for.

    26. Define Your Home’s Character With Intentional Landscaping Color

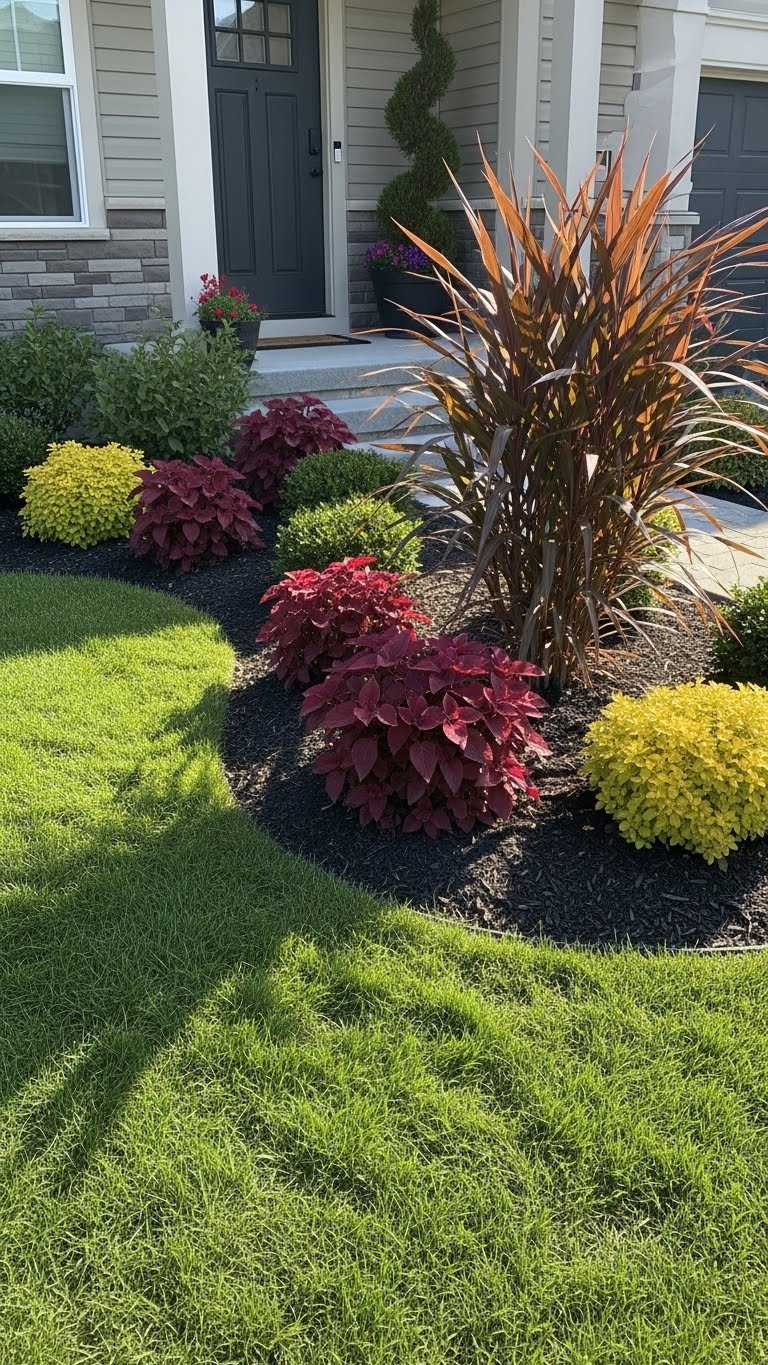
    Coordinated landscaping colors create visual harmony and signal that your yard is thoughtfully designed, not randomly planted.

    Choose a color theme: warm earth tones (burgundy, orange, golden foliage), cool grays (silver foliage, purple blooms), or clean greens (all-evergreen structure). Select plants that fit your palette ($10-$30 each) and arrange them by color and texture. Budget $150-$400 for a cohesive front planting. This approach creates year-round visual interest and sophisticated design.

    Pro tip: Use repetition—plant the same shrub or perennial in 3-5 spots for rhythm and flow. Your front yard reads as designed and intentional rather than randomly assembled plants. The overall effect is maturity, sophistication, and care.


    Save this post and tackle one idea this weekend—you’ll be amazed how quickly one small change refreshes your entire curb appeal. Share this with a friend who’s been talking about updating their front entrance. Which idea are you trying first?

  • 24 Tall Window Exterior Ideas That Add Height & Elegance

    24 Tall Window Exterior Ideas That Add Height & Elegance

    Introduction

    Tall windows aren’t just about letting in light—they fundamentally change how your home looks from the street and feels inside. Whether you’re working with a compact cottage or a sprawling contemporary, strategic window placement and styling can add visual height, create architectural interest, and make your exterior feel intentional and polished. The good news? You don’t need a full renovation to achieve this. We’ve gathered 24 actionable ideas that work whether you’re a renter, a DIYer, or ready to invest in your home’s curb appeal. From budget-friendly styling tricks to larger upgrades, you’ll find solutions that fit your space, timeline, and wallet. Let’s explore how tall windows can become your home’s most striking design feature.


    1. Install Black Window Frames for Instant Contrast

    Black frames create a striking focal point that draws the eye upward and makes windows appear taller. This classic pairing works on any siding—white, stucco, brick, or earth tones—and immediately modernizes a dated exterior.

    Paint existing frames with exterior-grade matte black paint (Benjamin Moore Soot or Sherwin-Williams Iron Ore, $35–$50 per gallon) or upgrade to actual black aluminum frames during a window replacement ($300–$800 per window installed). If you’re renting, removable black frame stickers or adhesive trim tape ($15–$25 per set on Amazon) mimic the look without commitment.

    The time investment depends on your approach: painting takes a weekend for a handy DIYer, while professional installation takes 1–2 days. Pro tip: pair black frames with white or cream siding for maximum contrast, or use them on just the upper windows to emphasize height.

    Now your home looks deliberately styled, not accidental. Passersby will notice the intentional design immediately.

    2. Add Vertical Wood Paneling Around Windows

    Vertical paneling creates the illusion of height by naturally drawing the eye upward, and it adds warmth that pure glass and siding can’t achieve alone. This trend works beautifully on modern farmhouse, contemporary, and transitional homes.

    Install exterior-grade wood paneling or shiplap around your tall windows using weatherproof caulk and stainless steel fasteners. Budget $15–$30 per linear foot for materials plus labor if hiring a contractor ($50–$75/hour). DIY installation on a single window wall takes one full weekend. Alternatively, use pre-made exterior wood trim kits ($200–$400 per set) that bolt on without construction experience.

    Choose cedar, pine, or composite materials that resist rot. Stain in warm grays, natural wood tones, or even paint white or charcoal for contrast. Pro tip: stop the paneling just above the windows to emphasize their height rather than boxing them in.

    Your facade gains architectural depth that photographs beautifully and makes the windows feel like intentional design features, not afterthoughts.

    3. Use Geometric Color Blocking Above & Below Windows

    Horizontal color blocking balances your facade while making tall windows the focal point where the two colors meet. This technique works especially well with earth-tone palettes (olive + cream, brown + tan, charcoal + beige).

    Paint your lower facade in a deeper, saturated color and your upper facade in a lighter tone, allowing the window line to become the natural dividing point. Use exterior-grade paint ($40–$60 per gallon) and painter’s tape to create crisp lines. One full facade typically requires 2–3 gallons and takes a weekend to paint, or hire professionals for $800–$1,500.

    For renters, this doesn’t apply unless you own, but you can achieve a similar effect with vertical landscape staging—darker plantings below, lighter architectural elements above. Pro tip: the color-blocking line should align with your windows’ midpoint to maximize the visual impact.

    Your home looks curated and modern, like you’ve thought through every detail. The windows become the star rather than just functional openings.

    4. Frame Windows with Climbing Vines & Native Plants

    Living frames soften tall windows while adding natural texture and supporting local ecosystems. Climbing vines like clematis, climbing hydrangea, or native varieties draw the eye vertically and make windows feel integrated into your landscape.

    Choose climbing vines suited to your climate—clematis (Zones 3–11), climbing hydrangea (Zones 4–9), or native options like Virginia creeper (check native plant guides for your region, $10–$20 per plant). Plant at the base of windows in spring or fall, secure with lightweight trellising ($30–$50), and water consistently for 6–8 weeks until established.

    This takes one afternoon to plant and costs $50–$150 total. Most climbing vines are low-maintenance once established. Pro tip: plant in clusters of three for visual impact rather than single specimens, and choose non-invasive varieties to protect your siding and gutters.

    Your windows transform from stark architectural elements into organic features that ground your home in its surroundings. The effect becomes richer each growing season.

    5. Install Interior Sheer Curtains Visible from Outside

    Visible interior sheathing adds depth, softness, and an instantly curated appearance. Sheer curtains make windows appear taller by filling the entire glass area with fabric, and they hint at a styled interior that draws viewers’ eyes.

    Hang white, cream, or soft gray linen sheers on a minimalist rod positioned just inside the window frame to maximize visibility from outside. Options include IKEA Räcka rods ($15–$25), Pottery Barn sheers ($50–$100 per panel), or Amazon basics ($20–$40 per pair). This is a renter-friendly solution that takes 30 minutes to install and costs $50–$150 total.

    Choose natural fabrics that diffuse light beautifully—linen and cotton look more intentional than synthetic sheers. Pro tip: pair with outdoor-visible black rods for definition, or go invisible with matching rods to emphasize the fabric.

    Your windows instantly look styled and intentional, suggesting a thoughtfully decorated interior. The effect is especially striking at dusk when interior light warms the glass.

    6. Paint a Tall Accent Wall Behind Windows (Indoor-Visible)

    What’s inside matters too. A bold accent wall visible through tall windows adds mystery and visual interest to your facade. Deep teals, forest greens, charcoal, or burgundy create the most impact.

    Paint the wall directly behind your windows in a saturated, bold color using indoor paint (since it won’t weather). Choose colors like Sherwin-Williams Urbane Bronze, Benjamin Moore HC-172 (Black), or Behr Ultra Premium Plus in deep teal ($30–$50 per gallon). One wall takes 3–4 hours and costs $50–$100 in materials. This works for renters with permission or as a reversible update if using removable paint.

    Keep furniture and decor minimal and intentional on that wall—an art piece, a simple chair, or floating shelves—to give viewers something to appreciate. Pro tip: ensure your windows are clean so the interior view is actually visible (this matters more than you’d think).

    Passersby unconsciously register the curated interior, reading your home as thoughtfully designed and lived-in, not sterile or empty.

    7. Create Layered Window Trim with Wood & Metal

    Layered trim adds dimensional depth that reads as high-end and intentional. The combination of materials—wood with metal accents—reflects the trending mixed-materials aesthetic while emphasizing window height through vertical emphasis.

    Install an outer frame of cedar or composite trim (1.5–2 inches wide, $3–$8 per linear foot) and an inner frame of brushed aluminum or steel ($2–$5 per linear foot). Professional installation runs $200–$400 per window, or DIY with basic carpentry skills ($100–$150 in materials per window, full weekend time commitment).

    For renters or budget constraints, use adhesive trim tape in wood-grain and metal finishes ($15–$25 per set) that creates the layered effect without permanent installation. Pro tip: the outer frame should extend 2–3 inches beyond the window opening to create visual weight and presence.

    Your windows become architectural focal points that suggest investment and thought. The eye catches the interplay of materials and textures, making windows memorable from the street.

    8. Extend Windows Vertically with Architectural Trim

    You can’t always replace windows, but you can make them look taller through strategic trim. An extended pediment above the window or floor-to-sill detailing creates the visual illusion of height without the cost of replacement.

    Install decorative exterior trim (wood or composite) extending 12–18 inches above the window frame and optionally down toward the foundation. Materials cost $30–$100 per window for basic trim, or $150–$300 for ornate options. Professional installation adds $200–$400 per window, or DIY with intermediate carpentry skills ($150–$250 materials, half-day to full-day project).

    Paint trim to match your siding or choose a contrasting color for emphasis. Composite trim ($80–$150 per window) resists rot better than wood, though it costs more upfront. Pro tip: position trim to create vertical lines rather than horizontal ones to maximize the height illusion.

    Now your windows feel like intentional architectural features rather than functional cutouts. The eye travels upward, making your facade feel taller and more sophisticated.

    9. Install Tall Planters at Window Base

    Tall, narrow planters mirror window proportions and frame them beautifully. Positioned on either side, they create symmetry and anchor windows while adding vertical emphasis to your entrance or facade.

    Choose tall planters 24–36 inches high in neutral tones (cream, gray, concrete, black) from retailers like Wayfair ($50–$150 each), Target ($30–$80), or local garden centers. Fill with tall ornamental grasses, evergreens, or bamboo varieties ($15–$30 per plant). This costs $120–$300 for a pair of planted planters and takes one afternoon to arrange and plant.

    Renters can use lightweight resin planters that move easily. Choose plants suited to your climate’s sunlight—full sun, partial shade, or full shade planters are available everywhere. Pro tip: keep planters consistently watered during growing season and deadhead flowers to maintain a polished look.

    Your windows gain architectural grounding and visual weight. The symmetry signals intentional design, making your entrance feel welcoming and curated.

    10. Add Interior Pendant Lights Visible Through Glass

    Pendant lights visible through tall windows add warmth, depth, and a welcoming quality to your facade. At dusk and evening, the glowing fixtures become part of your external aesthetic, suggesting a thoughtfully lit interior.

    Hang pendant lights just inside windows or in rooms directly behind them, positioning them so they’re visible from outside. Choose styles that look attractive from the exterior too—Edison bulbs, sculptural ceramic, or minimalist metal work ($50–$200 per fixture from IKEA, West Elm, or lighting specialty shops). Ensure they’re hung high enough to create vertical emphasis. Installation takes 30 minutes per fixture if you have existing electrical, or hire an electrician for $150–$300 if running new circuits.

    This is renter-friendly if you use clip-on or magnetic fixtures instead of hard-wiring. Pro tip: use warm white bulbs (2700K color temperature) for a welcoming glow that photographs beautifully at dusk.

    Your facade glows with intention, especially appealing to evening viewers or social media photography. The interior light hints at the lifestyle within.

    11. Use Wide Board Exterior Siding with Window Breaks

    Wide siding boards (8–12 inches) create bold horizontal lines, but tall windows break that pattern and create dynamic visual interest. The siding-to-window interplay emphasizes the window’s vertical height through contrast.

    Install exterior wood siding in boards 8–12 inches wide or choose composite siding that mimics wide boards ($8–$15 per square foot installed). Leave windows as negative space, allowing them to interrupt the board pattern. Full facade installation runs $5,000–$15,000 professionally, or $2,000–$4,000 in materials for DIY on a smaller wall. Expect 2–4 weeks for a full home.

    Composite or low-maintenance siding ($10–$18 per square foot) costs more upfront but eliminates painting and rot concerns. Pro tip: ensure window openings align cleanly with siding lines—no boards awkwardly cutting through window frames—for a polished appearance.

    Your facade reads as modern and intentional, with windows as deliberate design breaks rather than random openings. The wide siding creates visual stability while tall windows provide dynamic contrast.

    12. Paint Windows a Contrasting Color (Modern Trend)

    Painting windows themselves (specifically the glass or visible interior frame) is an emerging trend that adds personality and makes windows true design features. Soft greens, blues, grays, and even blush tones work beautifully on contemporary and cottage-style homes.

    Apply exterior-grade glass paint or frost finish ($20–$40 per can from Home Depot or Benjamin Moore) or hire professionals ($300–$600 for multiple windows). The paint adheres to glass and creates a subtle tint visible from outside. Application takes 2–3 hours for multiple windows and is semi-permanent (lasts 2–3 years before repainting). For a less permanent option, use removable glass paint or window film ($15–$30 per roll) that’s renter-friendly.

    Choose muted, natural tones that don’t look garish in daylight—sage, soft gray, dusty blue, or pale blush work best. Pro tip: test a small pane first or apply to one window to ensure you love the effect.

    Your windows become a signature design element, unexpected and memorable. The subtle color glow catches light beautifully and photographs wonderfully on social media.

    13. Install Arched or Curved Window Toppers

    Arched toppers add softness and elegance to tall rectangular windows, creating visual interest that reads as intentional and design-forward. This detail works beautifully on farmhouse, cottage, and transitional exteriors.

    Install curved architectural elements (wood, composite, or PVC) above existing windows, creating an arch that extends 6–12 inches above the frame. Materials cost $50–$150 per window from architectural salvage shops or custom fabricators. Professional installation adds $150–$300 per window, or DIY with carpentry skills ($75–$200 materials, half-day per window).

    Composite arches ($100–$200) resist rot better than wood and require no maintenance. For renters or renters-adjacent situations, temporary arch trims with adhesive backing don’t exist yet, but you could commission a custom painted arch mural above windows for $100–$300 instead. Pro tip: keep arch color and material consistent with your window frames and surrounding trim.

    Your facade gains unexpected elegance and personality. The curved lines break up rectilinear siding and create a focal point that feels intentional and polished.

    14. Frame Windows with Stone or Brick Banding

    Horizontal stone or brick banding around windows creates visual grounding and emphasizes height through contrast. This mixed-material trend adds texture and architectural interest while making tall windows feel integrated into your home’s structure.

    Install a horizontal band of thin brick, stone veneer, or composite stone ($10–$20 per square foot) running continuously through the window frames. Full installation on a facade runs $2,000–$5,000 professionally, or DIY with masonry skills ($1,000–$2,000 materials). Expect 2–3 weeks for professional completion.

    Thin brick ($8–$15/sq ft) and stone veneer ($12–$25/sq ft) are your main options. Composite stone mimics real stone for less ($6–$12/sq ft) and weighs less. Pro tip: ensure the banding aligns with window sill and header lines for a seamless, intentional look.

    Your windows gain architectural weight and sophistication. The banding creates visual continuity that reads as intentional design rather than random features.

    15. Add Exterior Window Boxes (Functional or Decorative)

    Window boxes instantly add charm, color, and verticality to tall windows while being genuinely renter-friendly and affordable. They create visual interest at eye level and make windows feel cared-for and intentional.

    Install painted wooden or metal window boxes ($20–$80 each from Home Depot, Wayfair, or Etsy) using sturdy brackets ($10–$20 per pair). Fill with seasonal flowers, trailing ivy, ornamental grasses, or evergreens depending on your climate and sunlight. Total investment per window: $50–$120. Installation takes 15 minutes per box, and planting takes 30 minutes.

    Choose box colors that complement your facade—white boxes on dark siding, dark boxes on light backgrounds, or natural wood in neutral tones. Renters: look for non-permanent bracket systems or adhesive-backed boxes. Pro tip: use lightweight potting mix and trailing plants to prevent window box sag.

    Your windows instantly look lived-in and cared-for. The color and cascading foliage add organic warmth that pure architecture can’t achieve alone.

    16. Paint Exterior Siding a Deep, Saturated Color

    Deep, saturated facade colors make tall windows stand out and add sophistication that pale or neutral palettes can’t match. This bold approach pairs beautifully with light-framed windows to create maximum contrast.

    Paint your entire facade in a deep, saturated color like forest green (Sherwin-Williams Rookwood Dark Green), charcoal (Benjamin Moore HC-172), deep blue (Sherwin-Williams Naval), or burgundy ($40–$60/gallon for quality exterior paint). Full home exterior painting costs $3,000–$8,000 professionally or $1,500–$3,000 in materials for DIY (2–3 week project). The payoff is enormous for curb appeal and making windows focal points.

    Pair deep facade colors with white, cream, or light gray window frames for maximum contrast. Matte finishes look more sophisticated than glossy. Pro tip: test large paint samples on your facade in different lights before committing, as deep colors shift dramatically with sun angle and time of day.

    Your home reads as intentional and design-forward. Tall windows become natural focal points because they contrast so dramatically with the rich background.

    17. Install Metal Grilles or Muntins in Windows

    Grilles (muntins) add visual complexity, classic charm, or modern geometric interest depending on style. They make windows feel taller by creating visual lines that emphasize verticality, and they add character instantly.

    Install interior or exterior grilles in traditional (9-light, 6-light patterns) or modern (geometric, asymmetrical designs) styles. Options include: adhesive grille tape ($15–$30 per window from Amazon), removable interior grilles ($30–$80 per window), or actual muntins installed by window professionals ($300–$600 per window). Grille tape takes 20 minutes to apply and is renter-friendly; actual installation takes 1–2 days.

    Choose grille styles that match your home’s architecture—traditional grilles for cottage or farmhouse, geometric for modern, industrial styles for contemporary. Pro tip: muntin style should echo other architectural details on your home (railings, door frames) for cohesion.

    Your windows gain instant character and visual depth. The added line work makes windows read as more sophisticated and intentional than plain glass.

    18. Layer Window Treatments Visible from Street

    Layered interior window treatments (sheer curtains + roman shades or shutters) add sophistication and visual depth visible from your street. This styling technique reads as intentional and curated.

    Layer sheer curtains ($40–$100) with roman shades or fold-up shutters ($50–$150) positioned to be visible from outside. Choose materials in white, cream, or soft naturals. Total investment: $100–$250 per window. Installation takes 1–2 hours per window and is entirely renter-friendly if using removable rods.

    Prioritize windows visible from your front entrance or street-facing side only—layering every window in your home can feel visually busy. Pro tip: ensure interior layers are cleanly tailored and wrinkle-free, as external viewers will notice any sloppiness.

    Your windows appear thoughtfully dressed and intentionally styled. The layering creates visual interest and hints at an interior that’s just as well-designed as your curb appeal.

    19. Create Vertical Garden Walls Around Windows

    Vertical gardens frame tall windows in living greenery while supporting biophilic design trends. This dramatic approach creates a wow factor and makes windows feel integrated into a thriving natural environment.

    Install vertical trellises ($50–$150 each) or modular living wall panels ($200–$500 per section) flanking windows. Plant with climbing ivy, clematis, climbing hydrangea, or wall-trained shrubs ($10–$30 per plant). Total cost: $200–$800 for a striking effect. Setup takes one full day, and ongoing care involves monthly watering and seasonal pruning.

    Lighter-weight options include wall-mounted planters arranged vertically ($100–$300 total) filled with trailing succulents or ivy. Pro tip: position vertical gardens to frame windows rather than block them—place them on either side, not directly in front.

    Your facade transforms into a living artwork. The lush framing makes tall windows feel like natural focal points within a thriving ecosystem, adding organic beauty that’s unforgettable.

    20. Upgrade to Energy-Efficient Glass Tinting

    Modern tinted or low-E glass makes windows look contemporary and performs beautifully. The subtle tint visible from outside reads as high-end and intentional while reducing heat and UV damage.

    If upgrading windows, choose low-E or tinted glass options (cost $100–$300 per window additional for quality replacements). For existing windows, apply window film in neutral gray, blue, or bronze ($5–$15 per window from Home Depot or Goo Gone). Film application takes 30 minutes per window and is entirely removable, making it renter-friendly.

    Tinted glass reduces glare, improves energy efficiency (lowers cooling costs by 10–15%), and makes windows feel intentionally designed. Pro tip: test film on one small or obscured window first to ensure you love the effect; mistakes are fixable but require removal.

    Your windows gain a sophisticated, high-tech appearance. The subtle tint catches light beautifully and reads as premium design rather than just functional glass.

    21. Install Cantilevered or Floating Window Shelves

    Floating shelves beneath tall windows create visual interest, break up large window expanses, and provide styling opportunities. They read as contemporary and intentional while being surprisingly functional for displaying plants or outdoor decor.

    Install cantilever shelves (1–2 shelves per window, $30–$150 each from IKEA or specialty hardware stores) using heavy-duty brackets into solid wall studs or masonry. Professional installation runs $100–$200 per window if you’re uncomfortable with drilling, or DIY in 1–2 hours per shelf ($50–$100 in materials). This is permanent but looks polished and intentional.

    Style shelves minimally with potted succulents, sculptural ceramics, or books. Renters can use adhesive corner shelves ($20–$50) for a temporary option. Pro tip: keep shelves uncluttered—3–5 carefully chosen objects per shelf look intentional; cramming feels chaotic.

    Your windows gain architectural interest and purposeful styling. The shelves provide visual breaks in large glass expanses and create Instagram-worthy photo opportunities.

    22. Add Exterior Architectural Lighting Highlighting Windows

    Strategic lighting design makes tall windows dramatic focal points, especially at dusk and evening. Uplighting, spotlighting, or accent lighting highlights architectural details and creates visual interest after sunset.

    Install low-voltage exterior lights ($50–$200 each, available at Home Depot or specialty lighting) positioned to uplight windows, illuminate trim, or wash window surfaces with warm light. Professional installation adds $300–$600, or DIY with low-voltage kits (relatively simple, no electrical experience required). This costs $300–$1,000 total for meaningful impact but transforms evening curb appeal dramatically.

    Choose warm white bulbs (2700K) for welcoming light, avoid overly bright spotlights that read as security-focused, and position lights subtly so you see the effect, not the fixture. Pro tip: use timers or smart home controls to automate lighting—no manual switching needed.

    At dusk and evening, your facade glows with sophistication. The lighting draws attention to windows and makes your home feel intentionally designed and welcoming.

    23. Paint Siding a Neutral Base, Windows Bold Contrast

    Flipping the typical color scheme—neutral siding with bold window frames—makes windows undeniable focal points. This approach works beautifully for modern farmhouse, contemporary, and cottage aesthetics.

    Paint siding in a soft neutral (greige, pale sand, soft gray, $40–$60/gallon) and window frames in a saturated, bold color (teal, sage, charcoal, navy, burgundy, $35–$50/gallon). Siding repainting runs $2,000–$5,000 professionally or $800–$2,000 in materials for DIY. Frames take 1–2 days to paint yourself with careful tape-work or hire professionals for $300–$600.

    Use painter’s tape meticulously to prevent paint bleed on the neutral siding—this detail matters more than you’d think. Pro tip: choose window color from existing architectural inspiration—maybe echoing a stone banding, door color, or landscape accent.

    Your windows become undeniable design features. Passersby’s eyes go directly to the bold frame color, making your home memorable and intentionally designed.

    24. Mix Window Styles Intentionally Across Facade

    Breaking the “all matching windows” rule and mixing styles intentionally creates visual interest and contemporary appeal. Varying window shapes (tall and narrow, wide rectangles, arched tops, porthole windows) unified by consistent frame color reads as design-forward rather than chaotic.

    Replace or upgrade windows with intentional variety—perhaps two tall narrow windows flanking a wider central window, or mixing rectangle and arch-top styles. Window replacement costs $300–$800 per window installed; mixing styles within that budget requires planning during replacement. This is a larger investment ($3,000–$10,000+ for a facade) best done during planned window upgrades.

    Keep all frames in the same color and material to create cohesion despite varied shapes. Pro tip: sketch your facade to plan window arrangement before committing to replacements—visual balance matters.

    Your facade reads as thoughtfully designed with architectural character. The intentional window variety suggests a homeowner who cares about design details, making your home stand out positively.


    Ready to elevate your curb appeal? Pick one idea that speaks to your style and budget, then tackle it this weekend. Whether it’s paint, plants, or architectural details, tall windows deserve to be your home’s showstopper—save this post and refer back as you refresh your exterior.

  • 23 Roofline & Gable Styling Ideas That Boost Architectural Charm

    23 Roofline & Gable Styling Ideas That Boost Architectural Charm

    Your roofline and gable are doing more work than you think—they’re the crown jewel of your home’s exterior. But if they’re looking flat, dated, or lost in the rest of your facade, you’re missing a major opportunity to add character and curb appeal. The good news? You don’t need a full renovation to make them shine. Whether you’re working with a traditional peak, a modern edge, or something in between, small styling tweaks to your roofline and gable can dramatically elevate your whole home’s architectural presence. In this guide, we’re sharing 23 specific, actionable ideas you can start this weekend—from bold paint choices to material upgrades and lighting tricks. Some are free, some cost under fifty bucks, and others are investment pieces that’ll pay dividends for years. Let’s get started.

    1. Paint Your Gable a Contrasting Bold Color

    A contrasting gable color is one of the fastest ways to add architectural drama without touching anything else on your home. This technique draws the eye upward and makes your roofline a design feature instead of an afterthought.

    Choose a bold, saturated shade like deep olive, charcoal, burgundy, or forest green. These earth tones pair beautifully with white, cream, or warm gray siding. You’ll need exterior-grade paint (about $30–$60 per gallon), primer, and basic supplies. A single gable typically takes one to two days if you’re comfortable on a ladder—or hire a painter for $500–$1,000 if you’d rather skip the heights.

    Pro tip: Get paint samples and tape them to your gable for a few days to see how the color looks in different light. What looks perfect on a sunny morning might feel too dark at dusk.

    Your roofline now becomes a statement, drawing attention upward and making your entire facade feel intentionally designed.

    2. Add Architectural Trim or Corbels Under the Gable

    Corbels and trim under your gable add depth, shadow lines, and old-world charm—even on modern homes. These small architectural details catch light and create visual interest that photographs beautifully.

    Pre-made corbels run $30–$150 each from Home Depot or Wayfair (brands like Fypon make durable foam options). Install 2–4 corbels symmetrically under the peak. Installation takes 1–2 hours with basic tools; just make sure they’re rated for exterior use. If you want handcrafted wood corbels, budget $200–$400 per set and hire a carpenter for proper installation.

    Alternative: Use simple painted brackets or metal supports for a modern farmhouse vibe if ornate feels too traditional for your style.

    The shadow lines created by corbels add dimension to your gable, making it look architectural rather than flat—visible from the street in every photo.

    3. Install Lighting to Highlight Your Roofline at Night

    Most people overlook their roofline once the sun sets—but nighttime lighting transforms your exterior into a showcase piece. Uplighting your gable adds drama and extends your curb appeal 24/7.

    Install LED uplights (about $50–$150 per fixture) along the base of your gable, pointing upward. Choose warm white or soft amber tones for a welcoming feel. A basic two-fixture setup takes 1–2 hours and requires outdoor-rated wiring (DIY if you’re comfortable with electricity, or hire an electrician for $200–$400). Solar options exist but are dimmer; hardwired is more reliable.

    Pro tip: Angle lights to graze the texture of your siding or paint, not straight up (which looks too stark).

    At night, your home becomes a focal point in the neighborhood—and every porch photo you take suddenly looks professionally lit.

    4. Swap Out Your Roofing Material for Visual Impact

    Your roof material does more than protect; it defines your home’s aesthetic. Upgrading to a higher-end or textured shingle can shift your whole roofline from “standard” to “standout.”

    Architectural shingles (thicker, dimensional) run $150–$300 per square and last 25+ years. Upgrade to metal roofing ($300–$500 per square) for a modern look that photographs beautifully and lasts 50 years. Installation costs $3,000–$10,000 depending on square footage—this is a hire-a-pro project. Expect 3–7 days.

    Alternative: If full replacement isn’t in the budget, spot-repair visible sections with matching premium shingles (DIY or $200–$500 installed).

    A textured, high-quality roof silhouette reads as “well-maintained” and “intentional” from the curb—instantly raising perceived home value.

    5. Create Geometric Color Blocking on Your Gable

    Geometric color blocking brings contemporary design to traditional rooflines. Split your gable into sections with complementary earth tones for a layered, curated look.

    Paint your lower gable section a warm earth tone (sage green, warm terracotta, or muted ochre) and your upper section cream or white. Use painter’s tape ($5–$10) to mark crisp lines. This takes one full day for a confident DIYer; the key is removing tape carefully while paint is tacky. Paint costs $30–$60, and supplies are minimal.

    Pro tip: Horizontal lines ground the eye; vertical lines elongate. Choose your line direction based on whether you want your gable to feel wider or taller.

    This approach makes your gable look architecturally designed rather than default—and it’s a renter-friendly update if you use quality exterior paint (just plan to repaint before moving).

    6. Frame Your Gable with Arched Windows or Trim

    Arches soften harsh gable angles and add elegance—even to modern homes. A single arched detail above a gable window or doorway becomes an architectural signature.

    Install a preformed arch trim kit ($100–$300 from Fypon or similar) or hire a carpenter to custom-build one ($400–$800 labor). Installation takes 4–8 hours. Paint to match your siding or contrast gently with your gable color. This is a moderate DIY if you’re comfortable with caulk and paint; otherwise, hire help.

    Alternative: Stick with simple rounded trim (cheaper, faster) instead of a full formal arch.

    The curved detail breaks up the severity of peaked rooflines and adds a handcrafted quality that feels intentional and elevated.

    7. Add Solar Panels Integrated Into Your Roof Design

    If sustainability is your priority, integrated solar panels on your roofline become both functional and a design statement. Modern panels are sleeker and less obtrusive than older models.

    Solar panel systems cost $5,000–$15,000 installed (after incentives, often much less). They integrate best with south-facing gables and require professional installation (3–5 days). This is a longer-term investment, but it boosts home value, lowers energy bills, and signals forward-thinking design.

    Pro tip: Choose panels with black frames rather than silver for a more cohesive look against most roof colors.

    Your roofline becomes a functional design element that pays for itself over 5–7 years—plus you’re literally powering your home with style.

    8. Paint Your Roofline Soffit and Fascia White for Clean Contrast

    The soffit (underside of overhang) and fascia (visible trim) frame your roofline—but they’re often overlooked. Painting them white or cream creates instant visual clarity and makes your roofline pop.

    This is a DIY-friendly project: brush or spray exterior trim paint ($15–$30) onto existing fascia and soffit. Takes 4–8 hours for a typical home, depending on height and square footage. No removal needed; just clean and prime first. Alternatively, hire a painter for $300–$800.

    Alternative: If trim needs replacement (rotting wood), install vinyl trim boards ($100–$300 per 10 feet), which never need painting.

    A crisp white roofline frame elevates your whole exterior and makes architectural details look sharper and more defined.

    9. Install a Cupola or Finial Atop Your Gable Peak

    A cupola (small decorative roofed tower) or finial (pointed ornament) at your gable peak adds whimsy, charm, and a focal point for the eye. It’s pure character.

    Pre-made cupolas run $200–$600 from Wayfair or specialty builders; finials are $50–$150. Installation is DIY-able if you’re comfortable on a roof (2–3 hours) or hire a handyperson for $200–$500. Both need to be anchored securely and sealed against weather.

    Pro tip: Match the finish (black, white, natural wood, or metal) to your home’s style. A rustic cupola works on farmhouse; a sleek finial suits modern.

    Your gable now has a true architectural crown—the kind of detail that makes people pause and admire your home’s personality.

    10. Extend Your Gable Overhang for Dramatic Eaves

    A deeper overhang—even an extra 12–24 inches—creates dramatic shadow lines and protects your siding. It’s a subtle but powerful change that shifts your roofline’s entire character.

    This requires reroofing or framing adjustments ($2,000–$5,000+), so it’s an investment-level project best for roof replacement timing. If you’re already re-roofing, ask your contractor about extending the overhang; it often costs less as an add-on than standalone. Expect 1–2 weeks during a full roof project.

    Alternative: Add a gable pergola or extended shade structure ($1,500–$3,000) that sits attached to your existing eave for extended shadow lines without structural work.

    Extended eaves make your roofline feel intentional and substantial—like a home designed thoughtfully for both weather and beauty.

    11. Use Vertical Siding to Draw Eyes Upward on Your Gable

    Directional siding on your gable (vertical lines while the rest of your home uses horizontal) creates visual movement and draws attention upward—instantly making rooflines feel taller and more intentional.

    Install vertical shiplap ($500–$1,500 for a gable) or board-and-batten ($400–$1,200). This is a moderate DIY for confident builders or hire a carpenter for $800–$1,500 labor. Takes 2–4 days. Alternatively, use exterior paint techniques (stripes or color blocking) for $30–$60.

    Pro tip: Vertical lines pair beautifully with horizontal siding below—the contrast reads as intentional, not mismatched.

    Your gable suddenly looks taller, more thoughtfully designed, and visually distinct from the rest of your home—boosting overall architectural impact.

    12. Paint Your Roof Edges in a Bold Accent Color

    Painting your roof’s visible edges—the rake trim and drip edge—in an accent color is a bold but surprisingly sophisticated detail that few people think of.

    Choose a saturated tone that complements your palette: deep teal, burgundy, or forest green. Use exterior metal paint ($20–$40 per gallon). This is a DIY task if you’re comfortable on a ladder or roof edge (3–5 hours); otherwise, hire for $200–$400. Paint carefully and tape carefully to avoid drips.

    Pro tip: The edge paint is most visible from the street and in photos, so this makes a disproportionate design impact.

    Your roofline now has unexpected sophistication—a detail that catches the eye in photos and sets your home apart from cookie-cutter neighbors.

    13. Install Board-and-Batten Siding on Your Gable Only

    Mixed textures on your gable create depth and visual interest. Board-and-batten (vertical boards with thin battens covering seams) on your gable paired with smooth siding below is both modern farmhouse and artisanal.

    Board-and-batten kits run $800–$2,000 installed for a single gable. DIY installation is achievable (8–16 hours) if you own a nail gun and are comfortable with vertical alignment. Hire a carpenter for $600–$1,200 labor. Paint or stain to match your palette.

    Alternative: Use corrugated metal panels ($500–$1,200) for industrial charm, or stick with paint-and-stencil effects ($50–$100) for a texture illusion on existing siding.

    Your gable becomes a textural focal point—visibly elevated and thoughtfully layered compared to flat, single-material facades.

    14. Crown Your Gable with Native Plants or Green Wall Texture

    Biophilic design brings nature to your roofline. Strategically placed climbing plants or a living wall effect frames your gable peak and adds organic softness.

    Plant fast-growing vines like clematis, climbing hydrangea, or ivy near trellises flanking your gable ($20–$50 per plant, plus $100–$300 for trellis installation). Takes weeks to months to fill in visibly. Low-maintenance once established, perfect for biophilic design. Alternatively, install faux green panels ($200–$600) for instant effect without watering.

    Pro tip: Avoid ivy on wood siding directly (it traps moisture); use trellises instead to create a framed effect.

    Your gable softens and connects to nature—creating an inviting, biophilic exterior that feels like a retreat rather than a fortress.

    15. Install Ornamental Metal Railings or Finials Along Your Gable Peak

    Ornamental metalwork along your gable peak adds old-world elegance and catches light beautifully—especially in photography.

    Commission custom wrought iron railings or finials ($300–$1,000+) from a local ironworker for handcrafted charm. Pre-made decorative metal brackets run $100–$300 from architectural suppliers like Wayfair. Installation is DIY with basic tools (2–4 hours) or hire for $200–$400. Metal should be powder-coated for weather resistance.

    Pro tip: Black, bronze, or copper finishes age beautifully and complement most color palettes.

    Ornamental metalwork elevates your home to look artisan-crafted rather than mass-produced—especially striking at sunrise and sunset when light hits the metal.

    16. Paint Your Gutters and Downspouts to Match or Contrast

    Gutters and downspouts are visible from the street but rarely styled—a missed opportunity. Painting them to match your gable or siding creates intentional visual flow.

    Choose to match your gable paint, your siding, or go bold with a contrasting accent. Use exterior metal paint or spray paint for metal ($15–$30). DIY: 4–6 hours of brushing or spraying; hire a painter for $300–$500. Clean gutters thoroughly first for best adhesion.

    Pro tip: If your gutters are stained or mismatched, painting is cheaper than replacement and looks instantly refreshed.

    Coordinated gutters create visual cohesion along your roofline—a detail that reads as “well-maintained” and thoughtfully designed.

    17. Add Layered Wood Beams or Faux Beams Under the Gable

    Exposed or faux beams under your gable add warmth, shadow, and handcrafted character—especially effective on farmhouse or rustic modern styles.

    Real timber beams ($50–$150 per linear foot) require structural support and are best installed during a roof project ($2,000+). Faux beams ($30–$80 per linear foot) look authentic, install faster (6–12 hours DIY or $400–$800 hired), and weigh nothing. Paint them to match your palette or leave natural for contrast.

    Pro tip: Layering 2–3 beams of varying thicknesses looks richer than a single beam.

    Wooden beams warm your roofline instantly, creating shadow lines and artisanal depth that photographs beautifully.

    18. Frame Your Gable Window with Custom Shutters or Trim

    A gable window deserves a frame. Custom shutters or decorative trim around your gable window make it a focal point rather than an afterthought.

    Functional shutters (that actually close) run $200–$600 per pair; decorative stationary shutters cost $100–$300. Pair with trim kit ($50–$150). Installation is DIY-able (2–3 hours) or hire for $200–$400. Paint shutters in a contrasting color: deep green, burgundy, or charcoal reads beautifully against light siding.

    Alternative: Skip shutters and frame the window with simple painted trim bands ($50–$100 materials) for a cleaner, modern look.

    Your gable window becomes an architectural feature people notice—creating balance and intentional detail in your roofline.

    19. Install Skylights or Rooftop Windows in Your Gable

    Functional skylights in your gable aren’t just practical—they’re a visible design element that adds light and modern appeal.

    Skylight installation costs $500–$1,500 per window (materials + labor). Hire a roofer or handyperson; this isn’t a DIY project. Expect 1–2 days. Modern skylights have improved energy efficiency, so you’re not sacrificing insulation. Position them to catch morning light for maximum visual and functional impact.

    Pro tip: One centered skylight in a peaked gable looks more intentional than multiple scattered windows.

    Skylights brighten your interior and add visible contemporary detail to your roofline—signaling that your home has been thoughtfully upgraded.

    20. Use Stucco Finish for Modern-Traditional Texture

    Stucco is a trending, durable material that adds depth and warmth to gables—especially effective with earthy color palettes.

    Stucco finish ($3–$8 per square foot, or $500–$2,000 for a gable) can be applied over existing siding if structurally sound. Hire a stucco contractor; this requires skill and equipment. Takes 3–5 days to apply and cure. Stucco lasts 20+ years and pairs beautifully with warm earth-tone paint.

    Alternative: Use faux stucco paint finish ($100–$200 materials, DIY-able in 1–2 days) for texture without structural changes—less durable but budget-friendly.

    Textured stucco gives your gable sophistication and a Mediterranean or artisan feel—durable and photogenic for years.

    21. Paint Your Gable in Color-Drenched Maximalism

    Color drenching your entire gable in a bold, saturated hue is maximalist but powerful—a trend that reads as intentional luxury.

    Choose deeply pigmented colors: burgundy, teal, forest green, or charcoal. Use premium exterior paint ($40–$70 per gallon) for richer color. Paint your entire gable (1–2 days DIY or $500–$1,200 hired). Keep siding neutral to balance the boldness. This style photographs exceptionally well in warm light.

    Pro tip: Test your color with large sample patches for 3–5 days before committing; bold colors read very differently in different light.

    Your gable becomes a confident design statement—the kind of detail that makes your home memorable and distinctive in your neighborhood.

    22. Layer Mixed Materials: Wood, Metal, Stone on Your Gable

    Mixed materials on your gable create rich texture and visual interest—the hallmark of expensive, custom design.

    Combine vertical wood siding ($800–$1,500) with galvanized metal brackets or railings ($200–$400) and stone or concrete trim ($300–$600). Install over 2–3 days DIY (if confident) or hire a contractor for $1,500–$2,500 labor. The key is balancing materials so they feel intentional, not chaotic.

    Pro tip: Stick to a cohesive color palette (warm wood, bronze metal, neutral stone) so mixed materials read as curated rather than mismatched.

    Layered materials give your gable high-end, artisan appeal—the kind of textural detail that catches eyes and reads as thoughtfully designed.

    23. Install a Standing-Seam Metal Roof for Modern Sleekness

    Standing-seam metal roofing is one of the most visually striking upgrades—sleek, modern, and durable for 50+ years.

    Standing-seam metal roofing costs $300–$500 per square installed (pricier than shingles but lasts longer). This is a full-roof project requiring professional installation: 3–7 days, $5,000–$12,000+ total. Choose charcoal, bronze, or natural copper for maximum visual impact. The clean seams and flat finish read as premium contemporary design.

    Alternative: If full replacement isn’t feasible, metal roof panels in a gable-only accent ($800–$2,000) creates visual interest without replacing your whole roof.

    A metal roofline is instantly recognizable as high-end, modern design—the kind of statement that sets your home apart and photographs beautifully from every angle.


    SOFT CTA:

    Save this post and pick one idea that excites you most—whether it’s a bold paint color this weekend or a bigger project for next season. Your roofline deserves to be noticed, and the best time to start is now. Share this with a friend who’s thinking about their exterior refresh too.

  • 25 Rustic Exterior Ideas That Bring Natural Warmth to Any Home

    25 Rustic Exterior Ideas That Bring Natural Warmth to Any Home

    There’s something about rustic design that makes a house feel like home the moment you walk up to it. Maybe it’s the warmth of natural materials, the honest character of aged wood, or the way earth tones seem to ground everything around them. If your exterior feels too polished, too cold, or just plain boring, you’re probably craving that cozy, lived-in aesthetic that rustic style delivers. The good news? Bringing natural warmth to your home doesn’t require a complete overhaul. In this guide, you’ll discover 25 specific, budget-friendly ideas—from DIY projects you can tackle this weekend to investment pieces that’ll pay off for years. Whether you’re a homeowner ready to commit or a renter looking for temporary touches, these rustic upgrades will transform your curb appeal and create an exterior that genuinely welcomes people in.

    1. Install Reclaimed Wood Shutters

    Reclaimed wood shutters instantly add character and authenticity to any exterior. They signal quality and timelessness better than almost any other single feature.

    Hunt for reclaimed wood at salvage yards, Etsy, or Facebook Marketplace for $30–$150 per pair. Alternatively, new wood shutters stained dark brown run $50–$120. Installation takes about 30 minutes per window with basic tools—just drill pilot holes and use outdoor-grade screws. If your home is rental, lean toward adhesive-mount faux wood options instead. A pro tip: leave the wood slightly weathered rather than sanding it smooth; that aged patina is the whole point.

    Your home suddenly reads as established and intentional, with a lived-in charm that new construction can’t fake. Neighbors will notice the upgrade immediately.

    2. Build a Stacked Stone or Brick Planter Box

    Garden beds don’t have to be simple soil mounds. A stacked stone planter adds architectural interest while containing plantings neatly.

    Stack fieldstone or reclaimed brick without mortar (dry-stack method) for a natural, slightly imperfect look that photographs beautifully. Aim for $40–$100 in materials depending on stone quality and size. Assembly takes 1–2 hours with no special skills required—just stack and level as you go. Fill with soil and plant native grasses, herbs, or low-maintenance perennials. The rustic effect deepens when weathering takes hold over months.

    This creates a focal point near your entry or along a garden path, instantly elevating the entire outdoor space from “generic yard” to “thoughtfully designed landscape.”

    3. Paint Your Front Door in Deep Charcoal or Forest Green

    A bold, dark front door is the easiest way to signal rustic confidence. It breaks up neutral siding and creates immediate visual interest.

    Choose outdoor-grade paint in charcoal, forest green, or deep olive—brands like Sherwin-Williams and Benjamin Moore have excellent rustic options ($35–$60 per gallon). You’ll need roughly half a gallon for one door with two coats. Prep takes 1–2 hours (sand, prime, paint). A weekend project with dramatic results. Pro tip: pair it with warm bronze or oil-rubbed bronze hardware for authenticity.

    Your entryway becomes a statement—the kind of detail people remember. Suddenly your home feels intentional, not default.

    4. Add Weathered Cedar Wood Siding to Gable or Accent Wall

    Cedar siding weathers beautifully over time, developing silver-gray tones that look nothing like fresh wood. It’s the ultimate rustic material.

    Real cedar siding runs $6–$12 per square foot installed, or $2–$5 if you DIY. A gable accent typically costs $300–$800 in materials and takes a skilled DIYer a weekend. If you’re renting, skip this one. For maximum rustic effect, let it weather naturally rather than staining; the gray patina is where the magic happens. Alternatively, stain it in warm honey tones for a more traditional farmhouse look.

    Within months, the wood begins its transformation. By year two, you’ll have that coveted silvery-gray weathered look that cannot be rushed or faked.

    5. Create a Rustic Wood Entry Arbor

    An entry arbor signals that your home is a destination, not just a structure. It’s the perfect framework for climbing vines and soft, natural shade.

    Build one from untreated or naturally weathered timber (roughly $80–$200 in materials). Plans are abundant online; a basic 8×8-foot frame takes a handy DIYer 6–8 hours. Secure it to concrete footings for stability. Plant jasmine, clematis, or climbing roses on either side. As vines grow, the structure becomes more organic and beautiful.

    The shaded entryway drops your porch temperature noticeably in summer while creating a cozy threshold that guests actually want to linger in. It’s both functional and visually stunning.

    6. Use Limewash or Mineral Paint on Exterior Walls

    Limewash and mineral paints create an aged, authentic finish that standard latex paint can never replicate. The slightly chalky, uneven coverage looks intentionally rustic.

    Quality limewash or mineral paint costs $40–$80 per gallon. One cottage typically needs 2–3 gallons. Application requires a 2–3-day project with proper prep and multiple coats. Brands like Farrow & Ball or local artisan suppliers offer excellent options. The finish will develop character over time—not fading, but becoming richer. Expect some variation in color, which is the entire point.

    Your home takes on a European countryside vibe, as if it’s been there for generations. The softness of the finish makes even newer construction look authentically aged.

    7. Install Warm Bronze or Aged Copper Lighting Fixtures

    Lighting hardware sets the tone for your entire exterior. Warm metals age beautifully and feel far more rustic than shiny chrome or brushed nickel.

    Hunt for aged bronze, weathered copper, or oil-rubbed bronze fixtures at $40–$150 each from Home Depot, Wayfair, or specialty shops. Installation is straightforward—most sconces take 30 minutes. Install them flanking your front door or along a porch. Choose styles with lantern shapes, frosted glass, or open metalwork rather than modern geometric designs. The patina deepens over years, adding character.

    Evening and dusk suddenly feel magical. Your home glows warmly, inviting and safe, making the entire exterior feel welcoming even in darkness.

    8. Lay Flagstone or Slate Pathways

    Irregular stone paths feel grounded and authentic—nothing says rustic like walking on materials that could’ve been there for a century.

    Flagstone runs $4–$8 per square foot for material; labor adds $8–$15 per square foot if hiring pros. DIY is possible but physically demanding. A 15-foot pathway costs roughly $200–$400 in stone, taking a weekend of work. Lay stones in sand (not mortar) for a natural, settled appearance. Fill gaps with gravel or let moss grow—it adds to the charm. Pro tip: choose irregular, mismatched thicknesses for maximum rustic character.

    Walking up to your home becomes an experience. The uneven surface and natural stone speak to permanence and authenticity, grounding your entire property.

    9. Build Rustic Window Boxes from Reclaimed Wood

    Window boxes transform a blank facade into something garden-like and personal. Rustic wood versions age beautifully on your walls.

    Reclaimed wood window boxes run $30–$80 each online, or source reclaimed barn wood and build them yourself for $15–$25. DIY construction takes 1–2 hours per box. Leave wood unfinished or stain it in weathered gray. Plant with trailing ivy, sedums, or seasonal flowers. Mount securely with brackets (usually included).

    Within weeks, you’ve created small gardens that soften your windows and add life to the facade. Passersby notice these details immediately—they signal care and horticultural interest.

    10. Install a Rustic Metal Gate or Fence

    A statement gate signals boundaries while adding dramatic rustic charm. Wrought iron or heavy steel feels timeless and substantial.

    Quality wrought iron gates run $200–$600 depending on size and intricacy. Matte black paint or natural rust finish add character. Installation typically requires a handyperson or contractor. If renting, this won’t work. If you own, this investment piece lasts decades and only improves with patina. A budget alternative: purchase a pre-made wrought iron gate section from Etsy ($80–$200) and mount it as an accent rather than a full enclosure.

    Your property line becomes a design feature, not just a boundary. Visitors sense the intentionality immediately, and the gate creates a “threshold” feeling that separates your home from the outside world.

    11. Create Vertical Planting with Weathered Wooden Trellises

    Trellises add vertical interest and allow vines to create living texture on bare walls. Weathered wood looks far more rustic than sleek metal versions.

    Wooden trellises cost $20–$60 each at garden centers or online. Buy three to five and lean or mount them strategically against walls or fences. Plant with climbing roses, jasmine, or honeysuckle—these take one growing season to fill in nicely. The wood weathers to silver-gray naturally. For renters, use large planters at the base to anchor trellises without permanent installation.

    Your once-blank walls become living green features. The texture softens hard lines, and blooming vines add color and fragrance that make your outdoor space feel like a garden sanctuary.

    12. Paint Trim and Accents in Warm Cream or Off-White

    Crisp white trim can feel sterile against rustic materials. Warm cream, ivory, or off-white feels more grounded and authentic.

    Quality exterior paint in warm whites runs $35–$60 per gallon (Sherwin-Williams Alabaster or Benjamin Moore Swiss Coffee are excellent). One gallon covers roughly 350 square feet. A full trim paint typically costs $100–$250 in materials for a modest home and takes a weekend. Prep work (caulking, sanding) matters more than speed. This single change softens the entire exterior and plays beautifully with earth-tone siding.

    Your color palette becomes cohesive rather than jarring. Warm cream trim against deep color creates depth and sophistication that reads as intentionally rustic.

    13. Add a Rustic Mailbox or Planter Post

    A thoughtful mailbox is one of the first things visitors see. Rustic versions in weathered wood or aged metal signal personality.

    Rustic mailbox posts run $50–$150 depending on materials and construction. Build one yourself from reclaimed timber and a simple metal mailbox ($20–$40) for about $30–$60 total and a few hours of work. Install a weathered wood post wrapped in climbing ivy for maximum charm. Alternatively, purchase a statement mailbox in aged copper or wrought iron ($40–$100).

    This small detail becomes a focal point. Neighbors and mail carriers notice craftsmanship, and it sets the tone for the entire home as soon as someone pulls up.

    14. Use Moss or Living Roof Accents on Architectural Details

    Moss-covered surfaces feel ancient and romantic. Encourage moss growth on stone, shaded wood, or planters for biophilic warmth.

    This is essentially free—moss will grow on its own in shade with moisture. No purchase necessary. Simply keep stone or wood damp during dry spells. To encourage moss, you can spray surfaces with a moss spore mixture ($15–$25 online) and wait 4–8 weeks for visible growth. This works best in shaded, humid areas. In dry climates, skip it.

    Over time, your home looks like it’s been sheltering life for generations. Moss softens hard surfaces and creates a storybook quality that feels deeply rustic and authentic.

    15. Install Rough-Hewn Timber Beams on Porch or Eaves

    Exposed timber beams are the ultimate rustic statement. They signal craftsmanship and anchor your entire aesthetic.

    Real timber beams are an investment: $500–$2,000+ depending on size and sourcing. Installation should be handled by a contractor ($1,000–$3,000 in labor. Reclaimed barn beams carry premium prices but look incomparably authentic. Alternatively, faux beams ($100–$300 each) create the visual effect at lower cost—a budget compromise worth considering for renters or budget-conscious homeowners.

    This architectural feature changes everything. Visitors immediately perceive craftsmanship and permanence. The beams cast dramatic shadows, create rhythm, and transform an ordinary porch into a showstopper.

    16. Paint Shutters, Doors, or Trim in Terracotta or Burnt Sienna

    Terracotta and burnt sienna are underrated rustic colors. They warm up neutral palettes and evoke European countryside charm.

    Outdoor-grade paint in terracotta or burnt sienna costs $35–$60 per gallon. Half a gallon covers one door and shutters easily. Prep and painting take a weekend. This color range works beautifully on shutters, front doors, window trim, or accent walls. Pair it with cream or warm white elsewhere for balance. Pro tip: choose a slightly muted terracotta rather than bright orange for authentic rustic vibes.

    The earthy warmth anchors your palette and feels more sophisticated than standard blacks or grays. It’s bold enough to be memorable but grounded enough to age gracefully over years.

    17. Create a Gravel or Mulch Garden Beds with Stone Edging

    Defined garden beds signal intentionality. Edging in stone creates clean lines while the gravel interior keeps maintenance low.

    Slate or stone edging costs $2–$5 per linear foot. A typical border (20 feet) runs $40–$100 in materials. Gravel mulch costs $50–$100 per yard. Total project for one modest bed: $100–$200 and a weekend of work. Lay edging first, fill with landscape fabric, then gravel. This prevents weeds and keeps everything neat. Nestle drought-tolerant plants or native grasses into the mulch.

    Your landscape reads as curated, not neglected. Stone edging creates visual structure, and the low-maintenance planting means your rustic garden actually stays beautiful without constant fussing.

    18. Install a Rustic Wooden Gate or Arbor Entryway

    A homemade or reclaimed gate at your property line creates the ultimate rustic threshold. It signals that beyond this point, magic happens.

    Reclaimed timber gates run $150–$400 depending on size and sourcing. Build one from scratch with weathered lumber ($80–$150 in materials) if you’re handy—a weekend project with basic carpentry skills. Mount on wrought iron hinges ($30–$60). If you rent, lean this against your fence as a visual focal point. Plant vines around the frame for living softness.

    Guests experience a true threshold moment—the gate announces that this is special, that entry means something. It transforms a casual driveway into a deliberate transition.

    19. Use Native Stone Veneer on Foundation or Accent Wall

    Stone veneer on foundations or lower walls creates permanence and texture. Real or faux stone both photograph beautifully and feel authentically rustic.

    Real stone veneer costs $12–$25 per square foot installed. Faux veneer (lightweight, easier to install) runs $6–$12 per square foot. A foundation covering (typically 20–30 linear feet) costs $1,500–$5,000 professionally installed. DIY faux stone is possible with patience. This investment piece transforms your home’s visual weight and grounding.

    Your home looks built on bedrock, literally. The stone creates depth, shadow, and texture that make every other detail more sophisticated. This is the kind of upgrade that multiplies the impact of everything else.

    20. Add a Rustic Wooden Bench or Seating Nook

    A bench signals that your home is a gathering place, not just a structure. Rustic wood versions age beautifully on your porch.

    Weathered wood benches run $100–$300 at furniture and garden retailers. Look for reclaimed barn wood or simply source an old bench from salvage yards ($40–$150). Alternatively, build a simple bench from untreated timber ($30–$60 in materials) as a DIY project taking 4–6 hours. Position it near your entryway or under an arbor. Add a weathered cushion for softness.

    A bench transforms your porch from a utility space into a destination. People naturally linger, and your home becomes known as a place where people gather—a subtle but powerful shift in perception.

    21. Paint Exterior Walls in Muted Earth Tones (Olive, Sage, Taupe)

    Bold, saturated earth tones are trending hard for 2025. Olive, sage, and taupe feel far more rustic than conventional beige or gray.

    Quality exterior paint in these tones costs $40–$70 per gallon (Sherwin-Williams Urbane Bronze, Benjamin Moore HC-172, or Farrow & Ball’s French Gray are excellent). A full house typically needs 3–5 gallons depending on size. Professional painters charge $2,000–$5,000; DIY costs roughly $150–$300 in materials for a weekend of work. The muted saturation is key—avoid bright, neon tones.

    Your home stops receding into the background and becomes distinctive. These colors photograph beautifully and feel grounded, sophisticated, and intentionally rustic without looking dark or cave-like.

    22. Install Vintage-Style Door Hardware and Locks

    Hardware is jewelry for your door. Vintage-style pieces in aged iron or bronze signal craftsmanship and authenticity.

    Vintage-reproduction hardware costs $20–$80 per piece depending on intricacy. A full door set (handle, lock, kick plate) runs $60–$200. Installation is DIY-friendly: remove old hardware and drill new holes if needed (30–45 minutes). Search Etsy, Wayfair, or specialty hardware shops for authentic reproductions. Pro tip: mix and match—a vintage handle with a modern matte finish creates interesting contrast.

    Your door transforms from generic to intentional. The tactile quality of opening a heavy, vintage-inspired handle changes how you experience coming home daily.

    23. Create a Rustic Herb or Vegetable Garden Near Entry

    A kitchen garden near your entry signals self-sufficiency and connects you to your land. It’s deeply rustic and entirely practical.

    Build raised beds from untreated timber ($50–$120 per bed) or reclaimed wood ($20–$60). Assemble in 1–2 hours. Fill with soil and compost ($30–$60). Plant herbs (basil, rosemary, thyme), greens, or cherry tomatoes. Maintenance is minimal for herbs; more involved for vegetables. A small handheld sign marking plantings adds charm ($10–$20).

    You connect with food production daily. Guests see resourcefulness and taste-making. Your entry becomes a statement of lifestyle, not just curb appeal.

    24. Use Antique or Reclaimed Doors as Accent Focal Points

    Repurposed doors become instant focal points. They carry history and authenticity that new construction cannot replicate.

    Antique doors from salvage yards cost $50–$200 depending on condition and quality. Reclaimed doors often run $75–$150. Mount one as an accent gate (minimal hardware, under $30), a garden trellis backing, or even leaning against a wall as sculptural art. No installation needed for the leaning approach; mounting takes 30 minutes.

    This single piece becomes a conversation starter. It tells a story—of reuse, of beauty in imperfection, of intentional design choices. Guests immediately understand that thoughtfulness matters here.

    25. Install a Rustic Metal or Ceramic Planter Collection

    A collection of mismatched, aged planters creates abundance and bohemian charm. The variety in finishes and ages feels intentionally gathered.

    Vintage and reclaimed planters run $10–$50 each depending on rarity. Gather 5–8 planters in varying heights, materials, and patinas (rough ceramic, weathered metal, aged terracotta). Fill with trailing plants, herbs, or seasonal flowers. Total investment: $50–$300 for a curated collection. Arrange on entry steps, porch edges, or tucked into garden beds for layered abundance.

    Your entry becomes a lush, welcoming transition zone. The varied collection signals expertise and collected-over-time charm rather than “I bought everything at once.” It’s the difference between decorated and designed.

    26. Add Texture with Rough-Cut Wood Siding or Shingles

    Rough-cut wood siding or shingles offer texture and authenticity that smooth siding cannot. The tactile quality deepens the rustic effect.

    Cedar shingles or rough-cut siding cost $6–$15 per square foot installed, or $2–$6 for DIY on an accent wall. Reclaimed options run $8–$20 per square foot but carry incomparable authenticity. An accent gable (roughly 100 square feet) costs $600–$1,500 professionally installed, or $200–$600 as a DIY project taking a long weekend. Let it weather naturally for maximum rustic character.

    The dimensional quality transforms your home instantly. Sunlight plays across the texture differently depending on time of day and season. Your exterior becomes alive with subtle variation, making it feel genuinely grounded rather than flat or mass-produced.


    Save this post for your next exterior refresh and pick one idea this weekend—even a single rustic touch shifts how your entire home feels. Which detail speaks to you most?

  • 23 Flat Balcony Ideas Designed for Easy Decorating

    23 Flat Balcony Ideas Designed for Easy Decorating


    A flat balcony doesn’t have to stay bare and boring. Even if you’re working with a tiny space or renting, there are so many ways to turn it into somewhere you actually want to spend time. Whether you dream of a cozy reading nook, a mini garden, or just a prettier backdrop for your morning coffee, these 23 ideas give you real solutions that work on any budget—and most require zero permanent changes. You’ll find free styling tricks, budget-friendly finds under $50, and a few investment pieces worth considering. Ready to make your balcony feel like the best room in your home?


    1. Add Railing Planters for Instant Greenery

    Railing planters solve the biggest small-balcony problem: limited floor space. These clip or hang directly onto your existing railings, turning wasted vertical real estate into a lush living wall without taking up a single square foot you’re already using.

    Grab metal or resin railing planters ($15–$40 per planter) from Home Depot, Amazon, or Wayfair. Pair them with low-maintenance trailing plants like ivy, petunias, or sweet potato vine. Installation is literally just sliding or clipping them on—no tools needed. Fill with quality potting soil and water every 2–3 days during growing season.

    The result? A privacy screen and backdrop that photographs beautifully, all while keeping your balcony floor clear for furniture and movement.


    2. Lay Down Outdoor Decking Tiles for One-Afternoon Refresh

    Your existing balcony floor is probably concrete or worn pavement—decking tiles change that without any permanent installation. These interlocking tiles sit flat and grip each other, so they work great for renters.

    Buy outdoor wood or composite decking tiles ($2–$5 per tile, roughly $50–$150 for a small balcony) from IKEA, Home Depot, or Wayfair. Measure your space, lay tiles out, click them together, and you’re done—really takes about an hour. If you rent, you can remove them anytime.

    Your balcony goes from harsh and industrial to warm and inviting. Plus, the softer surface feels nicer underfoot and makes a huge difference visually.


    3. Create Layered Lighting with String Lights and Sconces

    Lighting changes everything—it’s the difference between a space that feels usable only in daylight and one you’ll actually use at night. Layered lighting means combining overhead, ambient, and accent sources.

    Start with warm-white LED string lights ($20–$40, Amazon or Target), then add a battery-operated wall sconce ($25–$50, Wayfair). Both are renter-friendly—string lights drape over railings or hooks, and battery sconces stick with adhesive (no drilling). For ambiance, add a small solar pathway light ($10, Home Depot) tucked between plants.

    Your balcony becomes a destination in the evening, perfect for unwinding or hosting friends.


    4. Use Foldable Furniture to Maximize Flexibility

    When space is tight, furniture that doubles as storage is non-negotiable. Foldable café-style furniture collapses to nearly nothing, so you can use your balcony for different things on different days.

    Pick up foldable bistro sets ($60–$120, IKEA or Wayfair) or individual wooden folding chairs ($25–$50 each, Target). When you’re done eating or working outside, fold everything up and tuck it in a corner or inside. This approach is gold for renters because nothing is installed.

    You get a dining or work setup that vanishes when you need open floor space for movement or relaxation.


    5. Hang a Tapestry or Outdoor Fabric for a Focal Point

    A large textile adds color, pattern, and personality instantly—and it’s completely removable. Outdoor-grade fabrics resist fading and weather damage better than indoor textiles.

    Buy an outdoor tapestry or wall hanging ($30–$80, Etsy, Amazon, or Wayfair) in a color that matches your vibe (terracotta, sage green, or monochrome are 2025 favorites). Hang it with stainless steel hooks ($5–$10) or adhesive strips rated for outdoor use ($8, available at Home Depot). No drilling required.

    The fabric adds warmth, defines your space, and gives plants a gorgeous backdrop for photos.


    6. Plant Low-Maintenance Flowers in Colorful Pots

    You don’t need a green thumb to grow flowers on a balcony. Geraniums, petunias, and marigolds are nearly bulletproof plants that flower all season with minimal fussing.

    Grab terra cotta or ceramic pots ($5–$20 each, any garden center), potting soil ($8–$15 for a large bag), and starter plants ($3–$8 each, nursery). Plant them, water when soil feels dry (roughly every 2–3 days), and deadhead spent flowers once a week to encourage more blooms. Rotate pots quarterly so all sides get sun.

    Your balcony blooms without requiring daily attention, and the pots themselves add visual interest even when not full.


    7. Install Vertical Shelving for Storage and Display

    Vertical shelves maximize wall space for storage and display without eating into your floor area. Perfect for stashing seasonal cushions, garden tools, and extra potting soil while keeping everything accessible.

    Install wall-mounted metal shelves ($40–$100 per unit, IKEA or Wayfair) using a stud finder and proper anchors. Or go renter-friendly with adhesive-backed shelves ($20–$50, Amazon). Arrange potted plants, decorative objects, and practical storage on different levels.

    Your balcony becomes organized and visually layered instead of cluttered, plus you’ve reclaimed valuable floor real estate.


    8. Roll Out an Outdoor Rug to Define Your Space

    An outdoor rug anchors the space, adds warmth, and makes a cramped balcony feel more intentional and curated. The right rug also protects your feet from cold tile or concrete.

    Buy an outdoor polypropylene or natural fiber rug ($30–$100, Wayfair, Target, or Home Depot) in a neutral or tonal pattern—these materials resist mildew and UV fading. Size it so most of your seating area sits on the rug. Secure corners with outdoor rug tape ($10–$15) so it doesn’t shift in wind.

    Your balcony suddenly feels like a real room instead of an afterthought.


    9. Add a Hanging Chair for a Cozy Reading Spot

    A hanging chair turns a balcony into a personal sanctuary. Even on a small space, one suspended seat takes zero floor room and becomes the focal point everyone notices.

    Install a heavy-duty ceiling mount ($30–$60, Home Depot) rated for your building (verify with your landlord first), then hang a rope or macramé chair ($60–$150, Wayfair or Amazon). Add a throw blanket ($20–$40, Target) and you’re set. If you can’t drill, look for free-standing hanging chair stands ($100–$200) that don’t require installation.

    You get a statement piece that transforms your balcony into somewhere genuinely relaxing and Instagram-worthy.


    10. Use Bamboo Screening for Privacy Without Blocking Light

    Privacy and light are often competing needs on a balcony. Bamboo screening lets both through—it blocks sightlines while still allowing sun and breeze to flow naturally.

    Get bamboo privacy screening panels ($30–$80 per 6-foot panel, Amazon or Home Depot) and secure them to your railing with stainless steel clips or zip ties ($5–$15). Alternatively, plant tall bamboo in containers ($25–$60 per plant, nursery) around your balcony edges for a living privacy wall.

    Your space feels more secluded and peaceful without getting dark or closed-in.


    11. Paint Your Balcony Railing for a Fresh Look

    A new railing color transforms your balcony’s entire vibe—especially if it’s currently weathered or industrial-looking. Fresh paint costs almost nothing and requires minimal effort.

    Buy exterior-grade metal or wood paint in your chosen color ($20–$40 per quart, Home Depot). Clean railings well, apply primer if needed, then paint with a roller or brush. Two coats usually does it, and it dries within a few hours. White, soft gray, or even sage green are on-trend choices for 2025.

    Your balcony instantly looks intentional and cohesive, even if nothing else changes.


    12. Build a Compact DIY Vertical Garden from PVC Pipes

    A budget-friendly vertical garden uses simple PVC pipes and requires only basic tools. You get tons of planting space in minimal footprint, and it’s a satisfying weekend project.

    Grab 4-inch PVC pipes ($10–$20 from a hardware store), wooden backing boards, drill with bits, potting soil, and herb or succulent plants. Drill holes along the pipe, mount everything to your balcony wall, and fill with soil and plants. Total cost: $40–$80, and setup takes 2–3 hours.

    You’ve made a functioning vertical garden that stores small tools, grows herbs for cooking, and looks custom-built—all for less than a single café visit per month.


    13. Incorporate Mirrors to Amplify Light and Space

    Mirrors trick the eye into perceiving more space and bounce light around—perfect for gloomy or cramped balconies. Outdoor mirrors are built to withstand weather better than indoor versions.

    Mount an outdoor-rated mirror ($25–$80, Wayfair or Amazon) on your back wall or one side of your railing, using weatherproof adhesive or stainless steel brackets. Choose a size that feels balanced—usually 18–24 inches wide for small balconies.

    Your balcony looks and feels bigger instantly, plus you get more usable light even on overcast days.


    14. Style with a Mix of Pot Sizes and Heights for Visual Interest

    Grouping pots of different sizes, materials, and heights creates an expensive-looking display without buying anything fancy. Variety beats perfection.

    Collect pots from thrift stores ($1–$5 each), buy new ceramic or terra cotta from Home Depot ($5–$20 each), and plant them with matching plants in different sizes—all geraniums or all trailing ivy works beautifully. Arrange in clusters of 3, 5, or 7 (odd numbers feel more natural). Stagger heights by placing smaller pots in front.

    Your balcony looks professionally styled and collected over time—even though you did it in one afternoon.


    15. Add Removable Solar Lights for Ambiance and Function

    Solar lights are the renter’s dream: free electricity, no wiring, no installation headaches. They charge during the day and glow at night, adding warmth and making your balcony safer to navigate.

    Buy a pack of solar pathway lights ($15–$35 for 4–6, Amazon or Home Depot) and tuck them between pots, along railings, or corners. They come on automatically at dusk. No maintenance beyond occasional cleaning of the solar panel.

    Your balcony has subtle, atmospheric lighting that costs nothing to run and looks intentional.


    16. Create a Coffee or Beverage Station on a Small Cart

    A rolling cart turns your balcony into a beverage destination without permanent installation. Everything you need for morning coffee or afternoon drinks stays in one spot and can be wheeled away when not needed.

    Find a slim rolling cart ($30–$80, IKEA or Target), stock it with outdoor mugs, a small coffee maker, and supplies, and position it in a corner. It holds everything within arm’s reach and takes zero counter space. Perfect for renters because it’s completely portable.

    Your morning ritual feels more special, and guests always appreciate a coffee station that’s ready to go.


    17. Hang Potted Plants from Ceiling Hooks for a Green Canopy

    Hanging plants create visual drama and shade without using any floor or railing space. String them at different heights to create a canopy effect that makes the space feel bigger and greener.

    Install heavy-duty ceiling hooks ($10–$20, Home Depot) rated for your balcony structure, then hang lightweight plastic or fabric hanging planters ($15–$40 each, Wayfair or Amazon) with trailing plants like pothos or string of pearls. Mix in flowering options like fuchsia or calibrachoa for color.

    You’ve created a botanical ceiling that transforms your balcony into a garden room rather than an empty platform.


    18. Paint Existing Pots in Coordinated Colors for Cohesion

    Unified pot colors make a balcony feel more designed and less haphazard. Paint existing pots in a coordinated palette—it costs almost nothing and takes an afternoon.

    Grab exterior paint in 2–3 colors ($20–$40 for 2 quarts, Home Depot), primer, and brushes. Clean and prime pots, then apply two coats of paint. Terracotta, cream, sage green, and soft gray are timeless 2025 choices. Let them cure for 24 hours before planting.

    Suddenly your balcony looks like a styled photo shoot instead of random pots collected over time.


    19. Install Window Boxes Along Your Railing for Extra Planting

    Window boxes (technically railing boxes) give you a garden’s worth of planting space in minimal footprint. They’re perfect for trailing flowers that create a lush, magazine-cover effect.

    Buy long narrow window boxes ($20–$50 each, Home Depot or Lowe’s) and secure them to your railing with stainless steel brackets ($15–$30). Fill with quality potting soil and trailing annuals like petunias, calibrachoa, or ivy. Water daily—they dry out faster than regular pots.

    Your balcony becomes a cascade of color and greenery that transforms it from bare to abundant.


    20. Add a Small Side Table for Drinks, Books, and Décor

    A tiny table (even one that’s just 12–16 inches square) gives you a surface for coffee, drinks, books, or plants without eating up your whole balcony. Look for narrow or triangular styles that tuck into corners.

    Pick a compact outdoor side table ($30–$70, IKEA, Target, or Wayfair) in wood, metal, or weather-resistant materials. Place it next to your seating or in a corner. It holds everything you need within arm’s reach while sitting.

    Your balcony becomes a functional, comfortable space instead of just a place you pass through.


    21. Create a Herb Garden in Small Containers

    Fresh herbs from your own balcony are a game-changer—and growing them requires almost no effort or space. Most herbs thrive in containers and need just regular watering and sunlight.

    Get small terra cotta pots ($3–$8 each), herb seedlings or seeds ($2–$5 per variety, any garden center), and potting soil ($8–$15). Plant basil, parsley, mint, and oregano. Water when soil feels dry. Most herbs need 6+ hours of direct sun daily.

    You’ll have fresh ingredients for cooking, a lovely green display, and the satisfaction of growing something yourself.


    22. Use Removable Adhesive Hooks for Lightweight Décor

    Adhesive hooks mean you can hang all sorts of things without drilling holes—perfect for renters or anyone nervous about permanent changes. They hold surprising amounts of weight when rated correctly.

    Buy outdoor-rated adhesive hooks ($1–$3 each, Amazon or Home Depot) that hold up to 5–10 pounds each. Hang lightweight mirrors, small planters, storage baskets, or fabric. The hooks remove cleanly if you pull slowly and at a low angle.

    You get all the styling benefit of a decorated balcony without the commitment or security deposit drama.


    23. Design a Functional Work Nook with a Slim Desk

    Working from a balcony beats working from inside—fresh air and natural light make everything feel better. A slim, foldable desk means you can set up shop without permanent changes or wasted space.

    Get a folding wall desk ($50–$100, IKEA or Amazon) that mounts to your balcony wall or corner, or a narrow computer desk ($40–$80, Wayfair) that’s designed for small spaces. Pair it with a weatherproof outdoor chair ($50–$120). Everything folds or moves away when you’re done.

    Your balcony becomes a productive retreat where focus comes naturally—beats a stuffy interior office any day.


    Save this post for your next balcony refresh. Start with one idea this weekend—even one small change makes a huge difference in how often you’ll actually use your outdoor space.

  • 25 Exterior Lighting Ideas That Make Homes Shine After Dark

    25 Exterior Lighting Ideas That Make Homes Shine After Dark

    Introduction

    Your home’s exterior transforms at sunset—but only if the lighting is right. After dark, your curb appeal doesn’t disappear; it either shines or fades completely. The good news? Strategic exterior lighting isn’t just about security or seeing your front door. It’s about creating ambiance, highlighting your home’s best architectural features, and making your outdoor space feel intentional and polished. Whether you’re working with a tight budget or ready to invest in a major upgrade, these 25 lighting ideas will help you illuminate your home like a pro. From cheap solar stakes to professional uplighting, you’ll find options that fit your style and wallet.


    1. Install Solar Path Lights Along Walkways

    Solar path lights are the easiest way to add welcoming illumination without rewiring anything. They charge during the day and glow automatically at night, making your walkway safe and visually interesting.

    Stick solar lights into the ground on both sides of your path, spacing them 2–3 feet apart for consistent coverage. You’ll find quality options at Home Depot, Amazon, or Wayfair for $15–$40 for a set of 8–10. Installation takes about 30 minutes—just push them into soil or mulch. Look for models with warm white LED bulbs (not blue or green) for a natural, inviting glow. Renter tip: Use heavy-duty planters with solar lights inside instead of digging directly into the ground.

    Your pathway becomes safer and more visually defined after dark, guiding guests and creating a layered nighttime aesthetic.


    2. Add Matte Black Wall Sconces Flanking Your Front Door

    Paired wall sconces create symmetry and polish while flooding your entryway with functional light. This simple addition makes a huge difference in curb appeal and practicality.

    Mount two matching sconces 12–18 inches above the door handle for proportion. You’ll need hardwired installation (or hire an electrician for $200–$400 total labor), but sconces themselves run $40–$150 each from IKEA, Wayfair, or Home Depot. Choose warm white or soft gold bulbs (2700K) for welcoming light, not harsh white. Set them on a dimmer so you can adjust brightness based on mood or security needs.

    Your entryway looks intentional and finished, plus you’ll actually see your keys and guests clearly at night.


    3. Use Uplighting to Highlight Architectural Features

    Uplighting—shining light upward at a feature—makes ordinary walls look architectural and impressive. It’s a designer trick that feels fancy but is surprisingly simple to execute.

    Place ground-level LED uplights (called “well lights”) 2–3 feet in front of your brick, stone, or siding. Angle them to graze the surface, which creates dramatic shadows and texture. Budget $80–$250 per light from Amazon or Home Depot; a typical front requires two to four fixtures. Wire them to a low-voltage transformer on a timer so they turn on at dusk automatically. Solar uplights exist but are weaker; hardwired versions deliver better results.

    Your home’s most interesting details—texture, color, architectural elements—suddenly feel premium and intentional after dark.


    4. Hang String Lights Over Patios or Entryways

    String lights bring warmth and celebration to outdoor spaces instantly. They’re affordable, flexible, and work for patios, deck railings, or along your front roofline.

    Buy warm white Edison or cafe-style string lights (not cool white) for around $30–$80 for 20–30 feet at Target, Home Depot, or Wayfair. Drape them in gentle curves or geometric patterns between posts, walls, or trees. For renter-friendly setups, use adhesive hooks or zip ties; for permanence, screw in lag bolts and eye hooks. Plug into an outdoor-rated outlet with a timer ($15–$30) so lights activate automatically. Replace bulbs as needed—affordable and simple.

    Your patio becomes an extension of your home’s entertaining space, with ambiance that photographs beautifully.


    5. Install Recessed Step Lights for Deck or Porch Safety

    Recessed step lights embed into your stair risers or deck fascia, creating safe, modern lighting that’s barely visible during the day. Perfect for preventing trips and falls.

    Choose low-profile LED step lights with warm white output. Brands like Trex and Azek make them specifically for composite or wood decks ($8–$15 each, buy 6–12 depending on deck size). Installation takes one afternoon; drill or chisel a small pocket into each step, install the light, and wire to a transformer indoors. Alternatively, adhesive solar step lights exist ($30–$60 for a set) but deliver dimmer results. Hardwired options are brighter and more reliable.

    Walking up your steps after dark feels safer and more sophisticated, with lighting that guides without glare.


    6. Use Landscape Spotlights to Illuminate Trees or Shrubs

    Spotlights highlight specimen trees, tall shrubs, or interesting plantings, making your landscaping work harder after dark. They’re the backbone of professional landscape lighting design.

    Position adjustable LED spotlights 2–4 feet from the base of trees, angled upward to light the canopy without glare. Buy quality fixtures for $40–$100 each; you’ll likely need two to four for a typical front landscape. Wire to a low-voltage transformer (around $60–$150) on an outdoor timer. Install wiring in shallow trenches or along the ground (disguise with mulch). Solar spotlights are cheaper but noticeably dimmer in winter.

    Your landscaping becomes a nighttime focal point, adding depth and dimension to your entire exterior.


    7. Add a Programmable Smart Outdoor Timer

    A smart timer or home automation system lets you control outdoor lights from your phone—turning them on before you arrive home, creating away-from-home appearance patterns, or adjusting brightness.

    Install a WiFi-enabled outdoor timer ($25–$60) from Amazon, Home Depot, or Best Buy, or upgrade to a full smart system like Lutron or Philips Hue outdoor gear ($100–$300+). Most plug directly into existing outdoor outlets or wire into your exterior lighting circuit. Download the app, set schedules, and toggle lights remotely. Many systems integrate with Alexa or Google Home for voice control.

    You’ll save energy, enhance security, and gain flexibility—dimming lights for ambiance or brightening them when you’re away.


    8. Create Moonlighting with High-Mounted Lights in Trees

    Moonlighting mimics natural moonlight by placing lights high in trees, letting light filter through foliage and cast shadows below. It’s a subtle, elegant technique.

    Mount small adjustable spotlights 8–12 feet high in sturdy tree branches, angled downward and slightly outward. Use LED fixtures rated for outdoor use ($30–$80 each). You’ll need two to four fixtures around your property for convincing moonlighting effect. Wire to a low-voltage system for safety and easy installation. A professional electrician can help; expect $300–$600 for full installation including transformer and timer.

    Light filters naturally through leaves and branches, creating soft, romantic shadows that feel organic rather than installed.


    9. Paint Your Exterior to Reflect Light Better

    Lighter exterior paint colors—creams, pale grays, soft whites—naturally reflect ambient and artificial light, making your home appear brighter and more welcoming after dark.

    Choose light, warm-toned paint in 55–60% LRV (light reflectance value) for maximum light bounce. Brands like Sherwin-Williams, Benjamin Moore, and Behr offer great options ($35–$65 per gallon). You’ll need two coats; plan $1,500–$3,000 for professional painting or DIY for half the cost over a long weekend. Matte finishes look better than glossy, which can appear washed out. Pair with warm-toned accent lighting to amplify the effect.

    Your home appears naturally brighter and more inviting after dusk, with better light distribution across the facade.


    10. Install Motion-Sensor Lights for Security

    Motion-sensor lights turn on only when movement is detected, providing security without constant electricity use. Ideal for side yards, garages, or back entrances.

    Buy LED motion-sensor fixtures ($25–$80) from Home Depot or Amazon. Hardwired versions are brighter ($50–$150 installed); plug-in or solar options are cheaper but less powerful. Adjust the sensor range (typically 20–30 feet) and duration (15–30 seconds) to match your needs. Position lights above doorways or along pathways where intruders might approach. Mount them 8–10 feet high for optimal coverage.

    Intruders avoid well-lit entryways, and you won’t waste energy lighting empty spaces all night long.


    11. Use Accent Lighting on Your Front Door Color

    If your front door is a bold color—deep green, burgundy, navy—accent lighting makes it a true focal point. This works especially well with modern or traditional-modern homes.

    Mount two small uplights or picture lights directly above and below your door frame (or flanking it). Choose warm white LEDs ($30–$80 each) and position them to graze the door’s surface. Alternatively, install a single picture light ($40–$100) centered above the door. These need hardwiring or a plug-in option; professional install runs $150–$300. Adjust brightness with dimmers or timers to suit different occasions.

    Your bold door color becomes a stunning nighttime feature, drawing the eye and signaling that your home is thoughtfully designed.


    12. Line Your Driveway with Solar Lights

    Driveway solar markers create a luxury hotel feel while improving safety and visibility. They’re solar-powered, so zero ongoing electricity cost.

    Buy durable solar driveway lights ($1–$5 each; plan for 20–40 depending on length) from Amazon, Home Depot, or Target. Space them 4–6 feet apart along both edges of your driveway. Stick them into soil, gravel, or asphalt (some adhesive models for asphalt). Quality matters here; cheap lights dim quickly. Brands like Sunforce or Brightech offer reliable options ($40–$80 for a set of 12). Replace batteries annually for peak brightness.

    Your driveway becomes defined and safe, while the lighting adds an unexpectedly upscale touch to your nighttime arrival experience.


    13. Install Wall Washers to Highlight Siding or Stonework

    Wall washers spread light evenly across a large wall surface, emphasizing texture and color without harsh shadows. They’re professional-grade but achievable for DIYers.

    Mount adjustable LED wall washers 2–3 feet from the wall you want to illuminate, angled to graze the surface evenly. Choose fixtures rated for outdoor use ($60–$150 each); you’ll likely need two to four. Wire to a low-voltage transformer on a timer. Alternatively, solar wall washers exist ($40–$80 each) but are noticeably dimmer and less even. Hardwired versions deliver professional results and are worth the installation investment.

    Your home’s texture—whether brick, stone, or shiplap—becomes a dramatic architectural feature after dark.


    14. Use Colored Accent Lights Sparingly for Seasonal Drama

    Colored lights (amber, soft blue, or green) can add drama and personality without looking garish—but use restraint. One strategic colored fixture is striking; too many overwhelm.

    Buy one or two programmable color-change LED spotlights ($40–$100) from Philips Hue or similar brands. Position them to highlight a tree, architectural detail, or landscaping element. Use the app to change colors seasonally: warm amber for fall, soft blue for winter, green for spring. Stick with warm tones most of the year; save fun colors for holidays or parties.

    Your exterior gains a playful, dynamic quality without ever looking overdone or tacky.


    15. Mount Downlights in Your Soffit or Fascia

    Soffit and fascia downlights shine downward along your home’s upper exterior, creating even illumination without visible fixtures. This is high-end exterior lighting done subtly.

    Install recessed LED downlights in your soffit (the underside of roof overhang) or fascia board. Hire an electrician for this; expect $400–$800 total for materials and labor (typically four to six fixtures). This work requires roof access and wiring, so DIY is not recommended. Once installed, these lights create a polished, professional look that’s nearly invisible during the day.

    Your home’s facade glows evenly and sophisticatedly at night, with lighting that feels integrated rather than added.


    16. Add Pendant Lights Over an Outdoor Bar or Seating Area

    Hanging pendants bring restaurant-quality lighting to entertaining spaces. They’re especially effective over outdoor bars, dining tables, or seating areas.

    Choose weather-rated pendant lights ($30–$100 each) from Wayfair, West Elm Outdoor, or Restoration Hardware. Hang them 24–36 inches above your bar or table surface using sturdy chains or rods. You’ll need hardwiring; hire an electrician for $250–$500. Use warm white bulbs (2700K) and consider installing a dimmer ($50–$100) so you can adjust ambiance during dinner or parties. Alternatively, plug-in pendant options exist for renters or temporary setups.

    Your entertaining space becomes a destination after dark, with lighting that encourages lingering and gathering.


    17. Install Bollard Lights Along Pathways or Garden Edges

    Bollard lights are short, cylindrical fixtures that emit low-level light, perfect for defining pathways, garden edges, or separating entertaining zones without creating harsh overhead light.

    Buy durable LED bollards ($20–$60 each) from Home Depot, Amazon, or landscape suppliers. Space them 3–4 feet apart along walkways or garden borders. Hardwired bollards are brighter and more reliable; solar versions are cheaper but dimmer. Installation depth is typically 12–18 inches; bury wiring in shallow trenches and disguise with mulch. A typical front pathway needs six to ten bollards.

    Your landscape becomes clearly defined and safe to navigate at night, while the lighting enhances rather than dominates the space.


    18. Create Silhouette Lighting by Backlighting Focal Points

    Backlighting—shining light behind an object—creates dramatic silhouettes that draw the eye. Perfect for statement trees, sculptures, or architectural details.

    Position a strong LED light (100+ watts equivalent) directly behind your focal point, shining toward the viewer. Use uplights or spotlights angled away from the home. Budget $80–$200 per fixture; you’ll typically need one to two. This is dramatic, so use restraint—one powerful backlighting effect is more impactful than multiple scattered lights. Pair with uplighting on other elements for balanced design.

    Your most striking architectural or landscape feature becomes a nighttime focal point, creating depth and visual interest.


    19. Use Warm-Toned Landscape Lighting Throughout

    Consistency matters: if all your landscape lights are warm-toned (2700K or 3000K color temperature), your entire yard feels cohesive and intentional. Avoid mixing warm and cool tones.

    Audit all your exterior lights and replace any cool-white (5000K+) bulbs with warm alternatives. Budget $2–$5 per bulb; a typical property needs eight to fifteen. When shopping for new fixtures, always specify warm white or soft gold. This single decision—warm color temperature—makes your nighttime exterior feel premium and curated rather than random.

    Your entire landscape glows harmoniously after dark, with light that feels intentional rather than mismatched.


    20. Install a Recessed Light Above Your Garage Door

    Garage door lighting is often overlooked but impacts nighttime curb appeal and safety. A single recessed light above the door transforms this utility feature.

    Install a recessed LED downlight in your soffit or fascia directly above the garage door. Choose warm white, dimmable options ($40–$80). Hire an electrician to hardwire it; expect $150–$300 total labor. This light should illuminate the door and driveway below without creating glare in your eyes. Consider a motion sensor add-on ($50–$100) so the light activates only when someone approaches.

    Your garage door becomes visible and intentional at night, plus you can see safely when arriving or leaving.


    21. Add Subtle Pathway Markers with Rope or Tube Lights

    Rope lights or tube lights create a gentle, continuous glow along pathways or garden beds. They’re more modern and flowing than individual markers.

    Buy outdoor-rated LED rope lights ($15–$40 for 16–33 feet) from Amazon or Home Depot. Mount them along pathway edges using clips or adhesive tracks. Plug into an outdoor outlet with a timer ($15–$30) or hardwire to a transformer for permanent installation. Warm white is essential; blue or multicolored options look cheesy. Rope lights work especially well in modern, minimalist landscapes where clean lines matter.

    Your pathways glow continuously and invitingly, with lighting that feels architectural rather than cluttered.


    22. Illuminate Architectural Details Like Columns or Corbels

    Columns, corbels, and other architectural details deserve their own lighting. Highlighting these elements makes your home look custom-designed.

    Position small adjustable spotlights or uplights directly below or beside your architectural details, angled to emphasize their three-dimensional form. Choose low-glare, warm-toned fixtures ($30–$80 each). You’ll likely need two to four depending on how many details you want to highlight. Wire them to a low-voltage system or install hardwired for permanent, reliable light. This detail work signals that your home is thoughtfully designed.

    Your home’s craftsmanship and architectural character shine literally—elevated details become visually significant at night.


    23. Use Uplighting on Landscaping for Depth and Dimension

    Multiple uplights on different landscape layers—ground-level plantings, mid-height shrubs, tall trees—create depth that makes your yard feel larger and more interesting after dark.

    Start with a foundation of ground-level uplights ($30–$60 each) on low shrubs closest to the home. Add mid-level uplights ($40–$100 each) on taller plantings. Top it with tree uplighting ($60–$150 each) on specimen trees or tall specimens. Space lights 2–4 feet apart and vary angles so light doesn’t feel uniform or artificial. Budget $500–$1,500 for a typical front with professional installation.

    Your landscape transforms into a layered, dimensional composition, with depth that draws visitors in and signals you care about your outdoor space.


    24. Install Recessed Tread Lights in Stone Steps or Walkways

    Recessed tread lights embed directly into hardscape, creating seamless, high-end lighting with zero tripping hazards. These are particularly stunning on stone or formal walkways.

    Choose low-profile LED tread lights designed for hardscape installation ($10–$25 each). Install them by cutting shallow pockets into stone or concrete and setting lights flush with the surface. This is precision work; hire a hardscape contractor or skilled DIYer. Budget $400–$800 for a typical front walkway (materials plus installation). Alternatively, adhesive surface-mounted lights exist ($30–$60 each) but are less polished-looking.

    Your walkway glows seamlessly, with lighting that’s nearly invisible until nightfall—ultimate sophistication.


    25. Layer Lighting at Multiple Heights for Visual Interest

    Professional outdoor lighting always uses multiple light sources at different heights and distances. This layering creates depth, interest, and a polished look that single-source lighting can’t achieve.

    Plan your lighting in layers: ground level (path and landscape lights), mid-level (wall sconces, bollards), high level (tree uplighting, roof-mounted lights). Choose a consistent warm color temperature (2700K) across all fixtures. Install lights on separate switches or circuits so you can adjust ambiance—bright for entertaining, dimmed for evening relaxation. Start with budget items (solar path lights, string lights) and add investment pieces (hardwired uplighting, architectural lighting) over time.

    Your home glows with intentional, sophisticated lighting that looks like it was designed by professionals—and feels welcoming every single night.


    Save this post and start with one idea this weekend—path lights are the easiest entry point and deliver immediate impact. Which lighting style speaks to you?

  • 26 Balcony Design Ideas That Upgrade Any Home

    26 Balcony Design Ideas That Upgrade Any Home

    Your balcony doesn’t have to be an afterthought. Whether you’re working with a postage-stamp space or a sprawling terrace, these 26 ideas prove that outdoor rooms are prime real estate for relaxation, entertaining, and daily joy. From budget-friendly styling hacks to showstopping upgrades, you’ll find concrete steps—not vague inspiration—to make your balcony a place you actually want to spend time. Ready to turn that overlooked corner into your favorite room in your home? Let’s get started.

    1. Add Vertical Planters to Maximize Green Space

    Vertical gardens free up precious floor space while adding layers of greenery that make small balconies feel lush and intentional. Instead of crowding your floor with pots, wall-mounted planters climb upward and create a living backdrop.

    Grab metal wall planters ($20–$50 per set) from IKEA, Target, or Amazon and hang them 12 inches apart. Fill with trailing ivy, herbs, or small flowering plants. Installation takes about 30 minutes with a drill and basic anchors. Pro tip: Choose lightweight fabric planters if you’re in a rental—they hang on tension rods instead of permanent brackets.

    Your balcony gains a garden-inspired focal point without eating floor space, and you’ll have fresh herbs steps away when cooking.

    2. Swap Out Standard Lighting With String Lights

    Standard outdoor lights feel institutional. String lights instantly shift your balcony’s vibe from utilitarian to resort-style, turning sunset into event time.

    Invest in weatherproof Edison or warm LED string lights ($25–$60) from Home Depot, Wayfair, or Amazon. Drape them loosely along railings, overhead wires, or tent-pole style for coverage. Look for solar-powered options ($40–$80) to skip outlet hunting. Setup takes 20 minutes, and no wiring knowledge needed. Pair with a smart plug to control brightness from inside.

    Suddenly your balcony becomes the destination for evening wind-downs or gathering with friends—mood lighting works that magic.

    3. Use Folding Furniture to Reclaim Floor Space

    Every inch counts on small balconies. Folding furniture solves the “I want somewhere to sit and somewhere to stand” problem without compromise.

    Pick up a folding wooden chair ($30–$80 from IKEA or Target) and pair it with a fold-down railing table ($40–$100 from Amazon or Wayfair). When not in use, collapse the chair and tuck it inside; flip the table flat against the railing. Takes seconds to deploy and takes zero permanent footprint. Works great for renters—no mounting required for the chair.

    You get a functional seating area for morning coffee that vanishes when you need open space for yoga or stretching.

    4. Install a Railing Planter for Double-Duty Storage

    Railing planters hold flowers and act as subtle privacy screens—genius for tiny balconies where every accessory must earn its place.

    Grab tiered railing planters ($35–$75 per pair) from Home Depot, Lowe’s, or online retailers. They hook over standard railings without tools and hold up to 20 pounds of soil and plants. Hang petunias or trailing ivy for a cascading effect. Installation is literally hook-and-go—takes two minutes.

    Your railing blooms with color and texture while creating a soft edge that makes the space feel intentional rather than cramped.

    5. Create a Mini Bar on Your Balcony

    A balcony bar transforms your space into an entertainment hub without requiring kitchen space or permanent construction—perfect for small apartments.

    Find a compact side table or rolling cart ($30–$90 from IKEA, Target, or Wayfair) and stock it with glassware, a cocktail kit, and your favorite spirits. Use a tiered tray ($15–$30) to organize bottles neatly. If space is tight, use a fold-down wall shelf ($20–$50) instead. Takes 30 minutes to set up, and you can break it down anytime.

    Your balcony becomes a gathering spot for friends, and you look seriously put-together when offering a drink—no Costco trip through your living room required.

    6. Paint Outdoor Cushions in Vibrant Colors

    Outdoor cushions age fast in sun, but you don’t need to replace them entirely. A fresh coat of fabric paint revives tired pieces and lets you inject personality into your space.

    Buy outdoor fabric paint ($12–$20 per can from Amazon or craft stores) in shades that match your vision—rich teals, warm terracottas, or soft pastels. Lay cushions flat, apply two thin coats per instructions, and let dry 48 hours. Costs less than $50 to refresh an entire set. DIY project takes two hours active time plus drying overnight.

    Your seating suddenly feels intentional and curated, and the visual impact makes your whole balcony look more cohesive and designed.

    7. Layer Your Flooring With an Outdoor Rug

    Flooring shapes how a space feels. A good outdoor rug anchors your balcony, defines the seating area, and adds warmth that bare tile or concrete lacks.

    Choose a weather-resistant outdoor rug in polypropylene or wool ($40–$150 from Wayfair, Ruggable, or Amazon). Smaller balconies look best with 5×7 or 6×9 sizes. Look for geometric patterns or muted colors that hide dirt. Lay it flat, use non-slip rug pads underneath ($10), and you’re done—no installation needed.

    Instantly the space feels more like an extension of your home rather than a utility area, and you’ve created a visual boundary that makes even tiny balconies feel intentional.

    8. Grow Geraniums for Easy, Blazing Color

    Geraniums are balcony heroes—compact, vibrant, heat-loving, and nearly impossible to kill. They’re the easiest way to add color without overthinking your plant selection.

    Grab potted geraniums ($5–$12 each from garden centers, Home Depot, or local nurseries) in reds, pinks, or white. Plant them in terracotta pots ($2–$8 each) with drainage holes. Water when soil feels dry—once or twice weekly depending on heat. They need full sun and minimal fuss. Cost per pot setup: under $25 total.

    Your balcony blooms with reliable color all season, and you get the dopamine hit of a thriving garden without being a plant expert.

    9. Use Hammocks for Maximalist Relaxation

    Hammocks turn underused balcony space into a napping paradise. They’re surprisingly compact when not in use and infinitely more relaxing than a regular chair.

    Install a portable hammock with stand ($50–$120 from Amazon or REI) if you can’t drill into railings—no permanent damage, renter-friendly. Alternatively, use a hammock chair with ceiling mount ($40–$100) for a single-point anchor. Setup takes 20 minutes with a screwdriver or zero time with a stand model. Add a weatherproof throw ($20–$40) for coziness.

    You’ve created an actual retreat space where midday naps, reading, or just swaying becomes your new favorite balcony activity.

    10. Choose Weatherproof, Multi-Functional Furniture

    Balcony furniture takes a beating from sun, rain, and temperature swings. Investing in truly weatherproof pieces means your seating lasts years instead of seasons.

    Prioritize resin or aluminum furniture ($100–$400 for a two-piece set) from Wayfair, West Elm, or Restoration Hardware. These materials won’t rust, crack, or fade like cheaper alternatives. A compact aluminum dining set ($150–$300) gives you eating space that doubles as a work surface. No assembly time for pre-assembled pieces; flat-pack takes 45 minutes.

    Your investment pieces survive winters outside (if needed) or simply age beautifully with minimal maintenance—worth every penny for balconies with extreme weather.

    11. Embrace Minimalism With Clean Lines and Neutral Tones

    Minimalist balconies feel sophisticated and larger than they actually are. Limiting your palette and furniture count creates breathing room and intentionality.

    Start with one quality piece ($150–$400)—a wooden chaise, metal bench, or stone table—in neutral tones. Add simple potted plants in matching sizes and natural finishes. Stick to a color scheme: whites, grays, warm wood tones. Avoid clutter. Cost depends on your anchor piece; minimal updates run $100–$300 total.

    Your balcony becomes a zen retreat rather than a crowded storage zone, and visitors immediately notice the thoughtful design.

    12. Install Privacy Plants Like Bamboo or Climbing Ivy

    Street-facing or shared-wall balconies lose their appeal when neighbors peer in. Privacy plants create living walls that look beautiful while solving the exposure problem.

    Plant bamboo in large containers ($80–$150 per planter with soil; bamboo stalks $15–$30 each) or train climbing ivy on a simple wooden trellis ($30–$60). Bamboo grows tall fast; ivy takes a season to fill in. Both are low-maintenance once established. Placement takes an hour; growth does the rest. Renter-friendly: everything stays in containers.

    Now your balcony feels secluded and personal—you can relax without an audience, and the greenery adds textural beauty.

    13. Add a Statement Art Piece Built to Last

    Most balcony décor is functional. One striking art piece signals that you’ve put thought into the space and creates an instant focal point.

    Hunt for weatherproof metal art ($40–$200 from etsy.com, wayfair.com, or local artists) in shapes that speak to you—geometric patterns, nature-inspired forms, or abstract sculptures. Mount with sturdy outdoor brackets ($15–$30) and corrosion-resistant fasteners. Installation takes 30 minutes with a drill. Alternatively, a large potted sculptural plant ($30–$100) like a tree-form topiary adds living art.

    Your balcony stops feeling like an afterthought and starts looking intentionally designed—visitors genuinely notice and compliment the effort.

    14. Install Smart Lighting You Control From Your Phone

    Smart lighting gives you restaurant-quality ambiance at the touch of a button—and the ability to control brightness and color from inside when it’s cold.

    Get weatherproof smart LED sconces ($60–$150 per fixture from Amazon or Philips Hue outdoor line) that sync to your phone via WiFi. Install two or three around your railing, 4–6 feet apart. Setup takes 45 minutes and requires basic electrical work or a handy friend—no hardwiring needed if you grab plug-in models ($40–$100).

    Suddenly your balcony has restaurant-level lighting you adjust from the couch—dimmer for intimate evenings, brighter for entertaining or evening reading.

    15. Create a Scandi Boho Vibe With Woven Textures

    Scandi Boho blends Nordic minimalism with boho warmth—it’s effortless, cozy, and works in any size space.

    Layer woven rattan or wicker pieces ($50–$150 from IKEA, World Market, or Wayfair), cream linen cushions ($15–$40), and natural fiber rugs or throws ($20–$60). Add potted plants in simple ceramic pots ($10–$30 each). Keep the palette neutral with pops of soft green or warm terracotta. Styling takes two hours and requires zero installation.

    Your balcony becomes a magazine-worthy retreat that feels both calm and rich—the perfect spot for tea, reading, or just existing peacefully.

    16. Upgrade Your Flooring With Wooden Decking or Artificial Grass

    Bare concrete or dated tile dates your entire balcony. Affordable decking solutions give the illusion of a high-end renovation without the price tag.

    Install click-together composite deck tiles ($1–$3 per tile; 20-tile set covers 36 sq ft for $40–$80 from Home Depot or Amazon). No tools needed—simply click them together in a grid pattern over existing flooring. Takes 30 minutes for a small balcony. Alternatively, roll out artificial grass tiles ($30–$70 per set) for a garden-like feel. Both are temporary—no landlord approval needed.

    Your balcony instantly looks more intentional and finished, like you’ve invested real thought into the space rather than left it bare.

    17. Mix Terracotta Pots in Graduated Sizes for Visual Interest

    Terracotta is having a major moment, and for good reason—it’s affordable, photogenic, and pairs beautifully with almost anything you plant in it.

    Buy terracotta pots in three sizes ($3–$15 each depending on size) from garden centers or Home Depot. Group them together in odd numbers (three or five looks better than pairs). Fill with geraniums, marigolds, or trailing ivy in colors that complement each other. Total cost: $30–$60 for a stunning arrangement. Takes 45 minutes to plant and position.

    Your balcony gains layered depth and abundant color—the terracotta gives everything a warm, curated, slightly rustic feel that photographs beautifully.

    18. Hang Wicker Chairs for Boho Coziness

    A hanging chair is the ultimate small-space luxury—it’s functional seating that becomes a focal point and a cozy retreat.

    Install a hanging wicker or macramé chair ($80–$250 from Amazon, Target, or World Market) with a sturdy ceiling mount or over-beam hang. If you can’t drill, grab a freestanding hanging chair stand ($100–$200) that requires zero installation. Add a patterned pillow ($15–$30) and cozy throw ($20–$50). Setup takes 20 minutes for ceiling mount or five minutes for the stand.

    You’ve created an Instagram-worthy focal point that invites hours of daydreaming, reading, or just gentle swaying—a genuine retreat.

    19. Build a Workstation That Folds Into Minimalist Storage

    Remote work balconies are a game-changer for mental health and productivity. A fold-down desk solves the problem without eating your entire space.

    Mount a fold-down wall desk ($40–$120 from IKEA, Amazon, or Wayfair) at seated elbow height—36 inches from the floor is standard. Pair with a simple wooden stool ($30–$60) that tucks underneath when not in use. Everything collapses against the wall when you’re done. Installation takes one hour with a drill; using it is instant.

    Your balcony becomes a productive office by day and a retreat by night—no separate work/home boundary needed.

    20. Layer Cushions in Complementary Patterns and Textures

    Layered cushions transform basic furniture into something magazine-worthy while adding comfort and coziness that makes people actually want to sit.

    Mix three to four outdoor cushions ($15–$35 each) in complementary colors, patterns, and textures. Arrange largest to smallest, back to front. Brands like Sunbrella, Frontgate, and Budget options from Target work great. Total cost: $60–$140 for a full stack. Takes 10 minutes to arrange and rearrange until it feels right.

    Your seating becomes a visual statement piece, and suddenly people gravitate toward your balcony because it looks impossibly inviting.

    21. Introduce Industrial Accents With Metal and Concrete Elements

    Industrial design brings edge and sophistication to balconies, especially in urban settings. Metal and concrete create visual weight and a designer feel.

    Add metal accent pieces like a small metal mesh table ($40–$100 from CB2, West Elm, or Wayfair), concrete planters ($30–$80), or metal wall shelves ($20–$50). Paint existing railing details or add a metal fire bowl ($50–$150) as a statement feature (check local fire codes first). Styling takes an hour; installation depends on whether you’re drilling.

    Your balcony gains an intentional, moody aesthetic that reads mature and thoughtfully designed rather than colorfully cluttered.

    22. Plant an Exotic Jungle-Inspired Garden

    A balcony jungle transforms underutilized corners into a thriving green sanctuary that boosts mood and air quality—plus it’s a serious eye-catcher.

    Start with 2–3 large statement plants ($30–$80 each like Monsteras or Ficuses), then fill in gaps with smaller foliage plants ($10–$20 each like Pothos or Ferns). Use varied pot sizes and materials to add depth. Group plants by height for a natural look. Cost for a full jungle: $150–$300 total. Takes two hours to arrange; ongoing care is weekly watering and occasional dusting.

    Your space becomes a private botanical refuge that’s calming to be in and stunning to photograph—plus you’re absorbing oxygen from all that foliage.

    23. Create Privacy With a Decorative Bamboo Screen

    Bamboo screens hide eyesores and neighbors while adding architectural interest and a design-forward aesthetic.

    Get a folding bamboo screen ($50–$150 from World Market, Amazon, or Wayfair) and position it along the railing or one wall. Look for ones with geometric or decorative lattice patterns. No installation needed—just lean it against the railing or use small L-brackets ($5) to secure it. Takes five minutes to set up and seconds to adjust.

    Your balcony gains privacy, visual interest, and a hotel-lobby-level design detail that makes the space feel intentionally curated.

    24. Mix Mediterranean Riviera Colors in an Outdoor Palette

    Riviera style—vibrant yet harmonious Mediterranean colors—creates the feeling of a European vacation without leaving home. It’s joyful, cohesive, and surprisingly sophisticated.

    Choose a base color palette: soft blues, greens, terracotta, and cream. Paint cushions, add terracotta pots, use blue or green outdoor rugs ($50–$120), and keep furniture in natural wood or white. Integrate vintage-inspired ceramic planters ($15–$40 each) in blues and whites. Total investment: $200–$400 for a full refresh. Styling takes a weekend.

    Your balcony channels European ease—visitors instantly feel transported, and you escape to a resort vibe whenever you step outside.

    25. Use Potted Topiaries for Structured, Elegant Greenery

    Topiaries add architectural interest and a formal elegance that transforms balconies into curated garden rooms rather than cluttered plant collections.

    Buy pre-formed topiaries ($30–$80 each from garden centers or online) in ball, pyramid, or spiral shapes. Place in large ceramic or stone pots ($25–$60 each) and position symmetrically. Water when soil dries; clip lightly quarterly to maintain shape. Cost per topiary pair: $120–$280. Zero assembly—just unwrap and position.

    Your balcony gains a polished, intentional look that reads expensive and thoughtful, even though you’ve simply grouped existing elements strategically.

    26. Install a Living Wall Planter for Maximum Green Impact

    A living wall is the ultimate statement piece—it transforms an empty wall into a living artwork while maximizing your plant count in zero floor space.

    Install a modular living wall system ($80–$200 from etsy.com, Amazon, or specialized outdoor retailers). Fill pockets with succulents or small plants ($2–$5 each; you’ll need 12–20 depending on pocket count). Secure to wall studs with a handy friend or contractor ($50–$100 labor if not DIY). Takes two hours to install; planting takes another hour.

    You’ve created a showstopping focal point that’s the first thing people notice when visiting—and it’s genuinely impressive without requiring you to be a plant expert.


    Save this post for your next balcony refresh and try one idea this weekend. Whether you’re starting with vertical planters or going full jungle mode, these changes stack up fast—and your balcony will finally feel as thoughtful as the inside of your home.