Category: Uncategorized

  • 25 Shared Space Organization Tips Perfect for Student Living

    25 Shared Space Organization Tips Perfect for Student Living

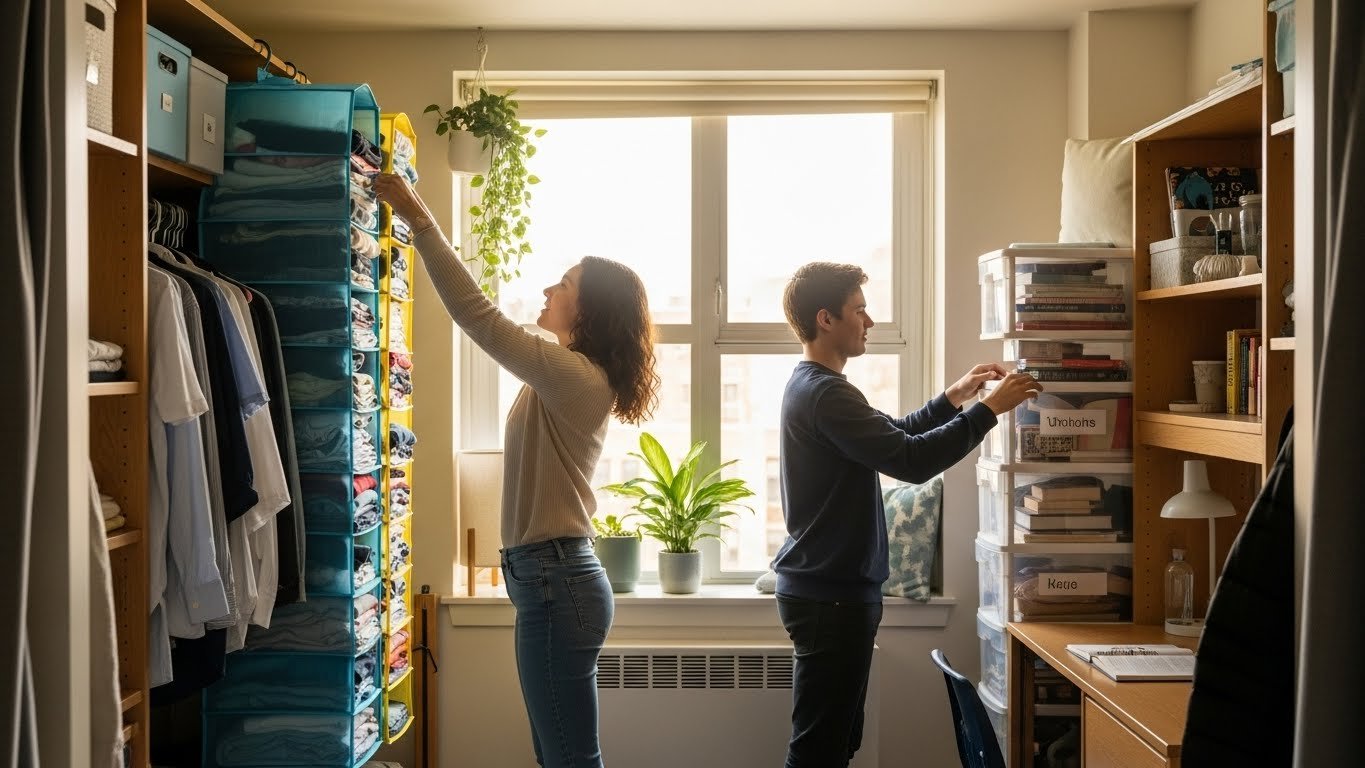
    Living with a roommate means sharing limited square footage, and keeping that space organized can feel like a puzzle. Between two sets of belongings, conflicting styles, and the constant juggle of study time and downtime, shared dorm rooms get cluttered fast. The good news? You don’t need a bigger room—you need smarter systems. These 25 organization tips are designed specifically for roommate dynamics, tight budgets, and the reality of student life. You’ll discover renter-friendly solutions, DIY hacks that cost almost nothing, and strategic furniture choices that make sharing easier. Let’s turn your dorm into a space where both of you can actually breathe.


    1. Create Vertical Storage to Reclaim Floor Space

    Vertical storage is your secret weapon in small rooms—it keeps things off the ground where they pile up and become trip hazards. Install over-the-door shoe organizers, wall-mounted shelving, or tension rods across corners to hang bags and belts instead of draping them on chairs.

    Budget options: Over-the-door organizers run $15–$30 and require zero tools. Wall-mounted shelves from IKEA cost $20–$50 per unit and take about 30 minutes to hang with a basic drill. Target and Container Store also stock floating shelves in $35–$80 ranges.

    Pro tip: Measure your walls before buying anything. Many dorms restrict drilling, so stick with command strips and tension rods first—they’re damage-free and removable.

    With everything climbing upward, your floor suddenly looks twice as spacious, and you’ll actually see the carpet beneath all the chaos.


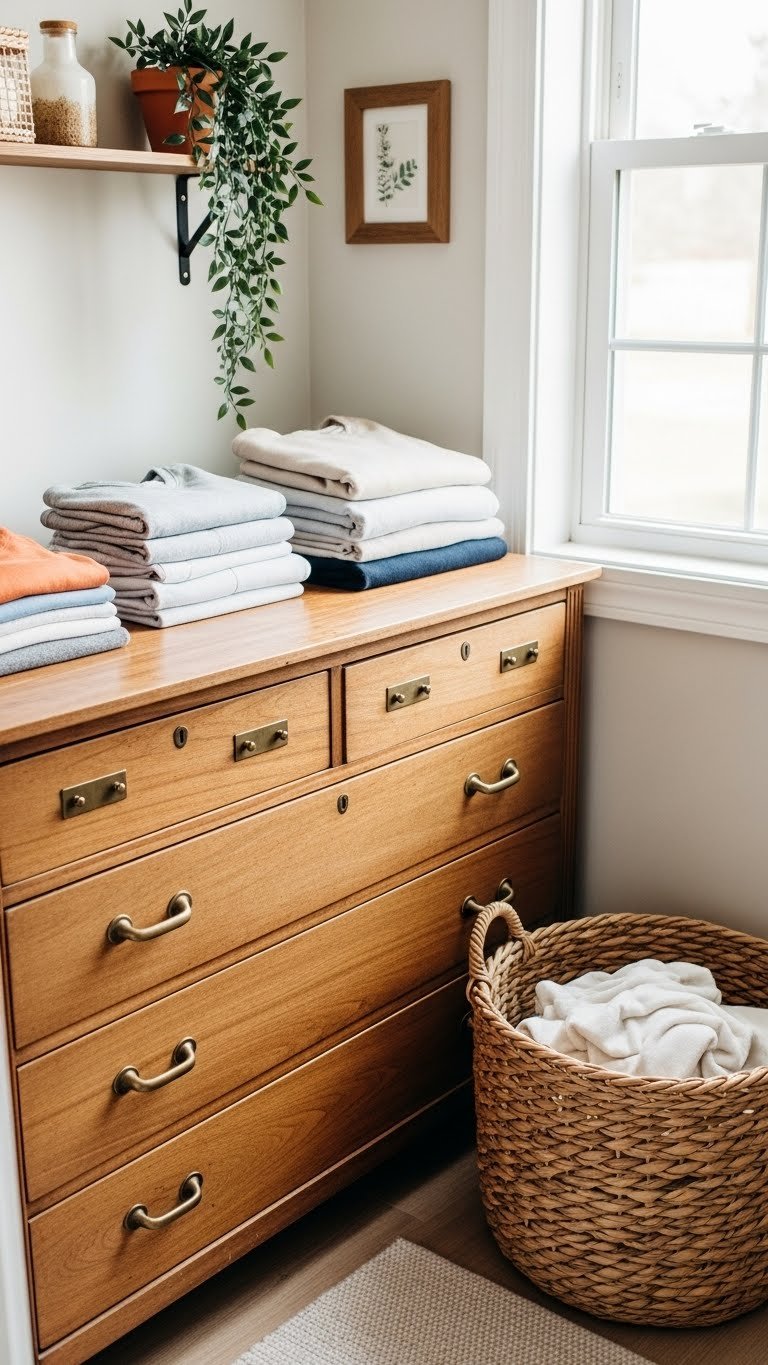
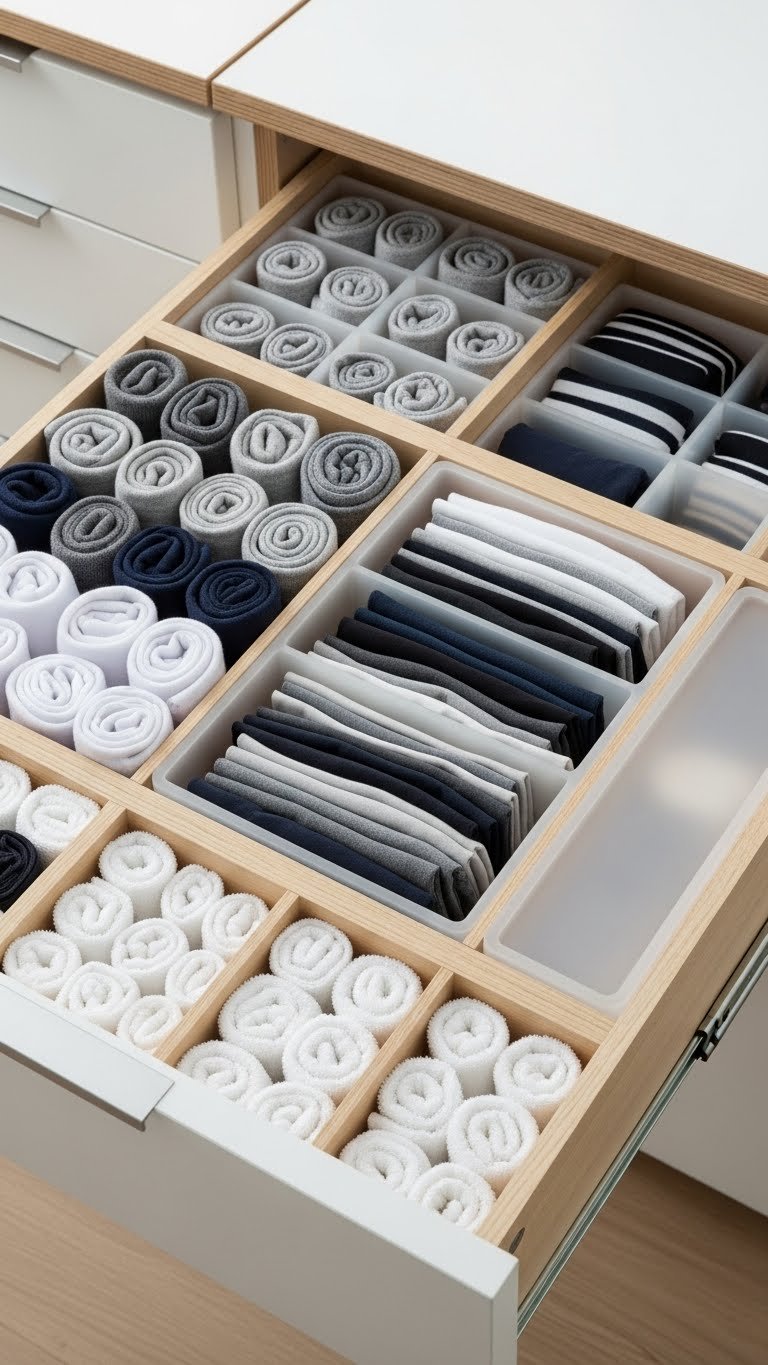
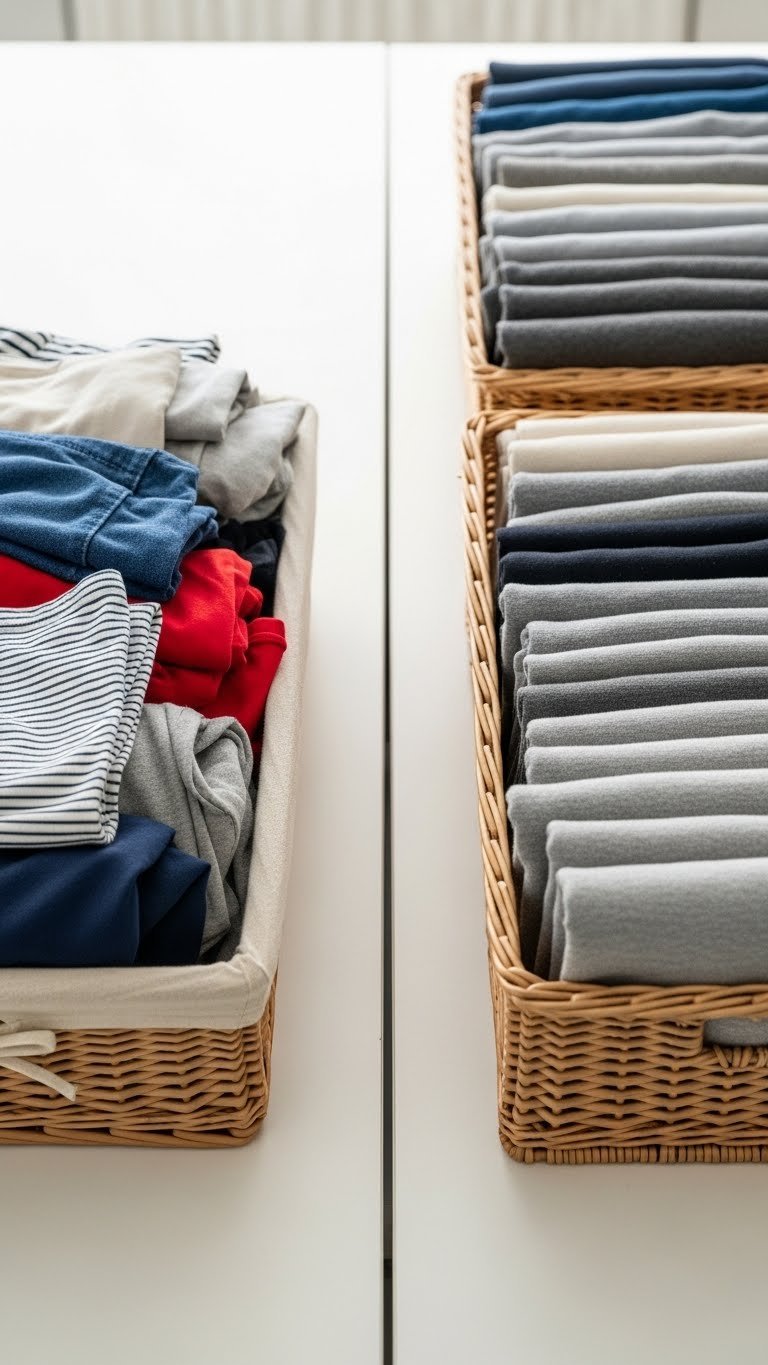
    2. Use Drawer Dividers to Prevent Chaos Creep

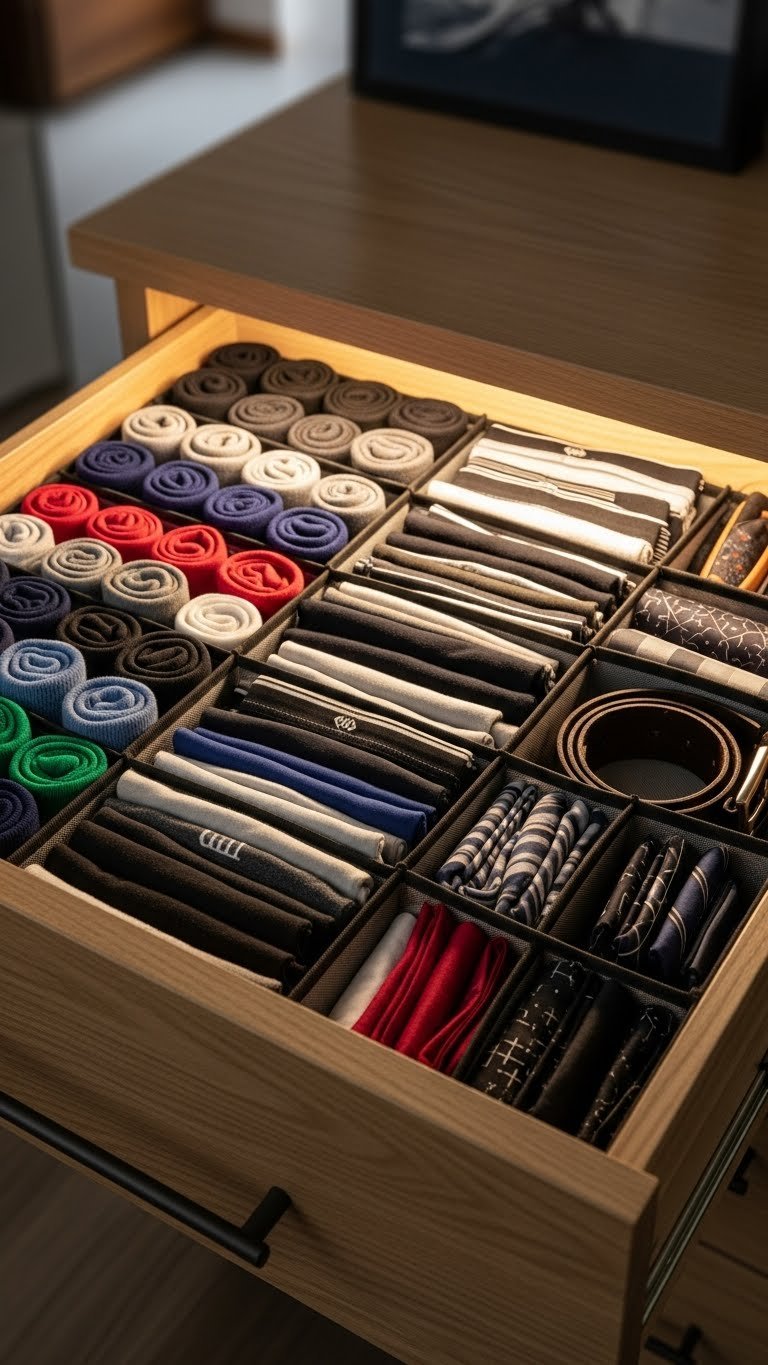
    Drawers are where organization goes to die, especially when you’re sharing a room and both grabbing clean clothes in a rush. Drawer dividers force everything into sections so nothing mingles or gets lost.

    Buy fabric drawer organizers for $10–$25 per set (Amazon, Target, Home Depot). They fit standard dorm dressers and take 10 minutes to set up. Alternatively, fold sturdy cardboard boxes to create free dividers—it sounds DIY-basic but genuinely works.

    Pro tip: Use the KonMari method for folding—vertical stacks in each section let you see every item at once instead of hunting through piles.

    You’ll spend less time digging for matching socks and more time doing literally anything else. Plus, your roommate can’t accidentally borrow something they can’t see.


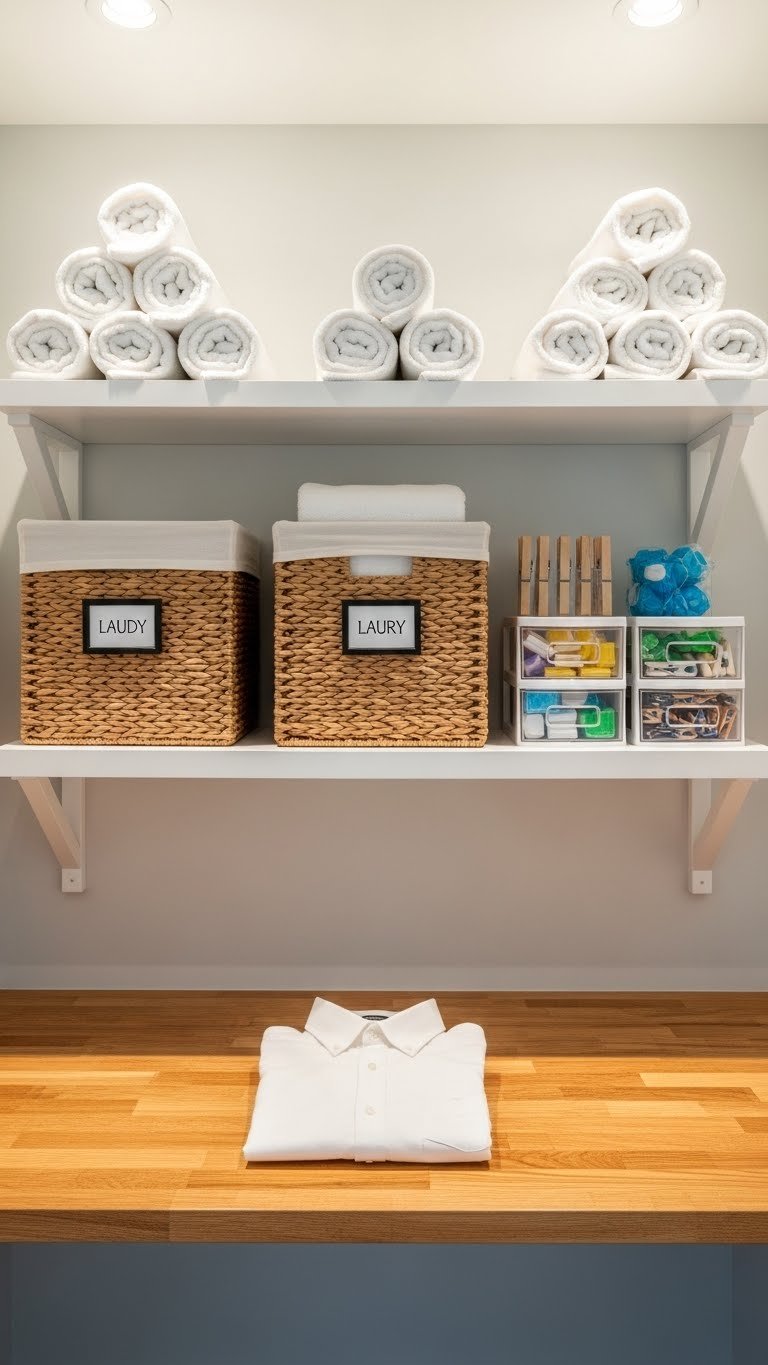
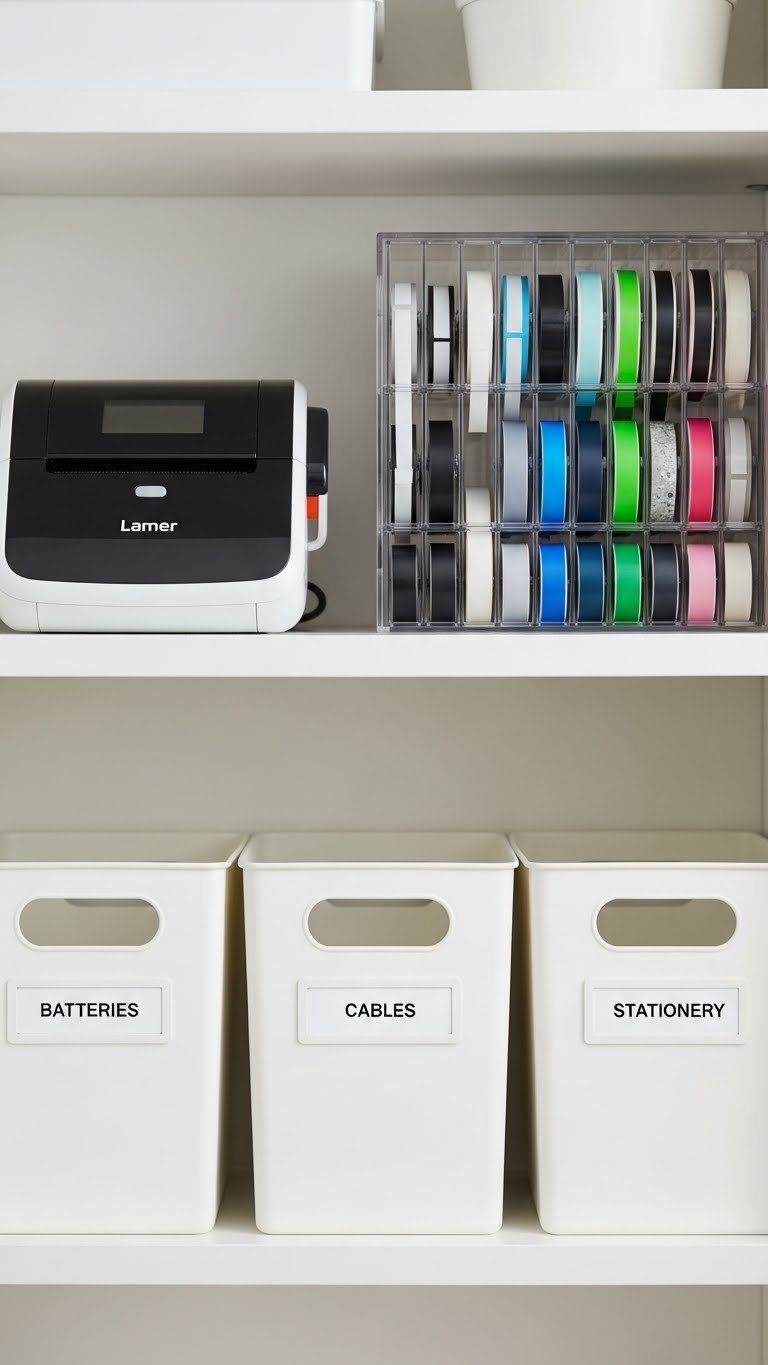
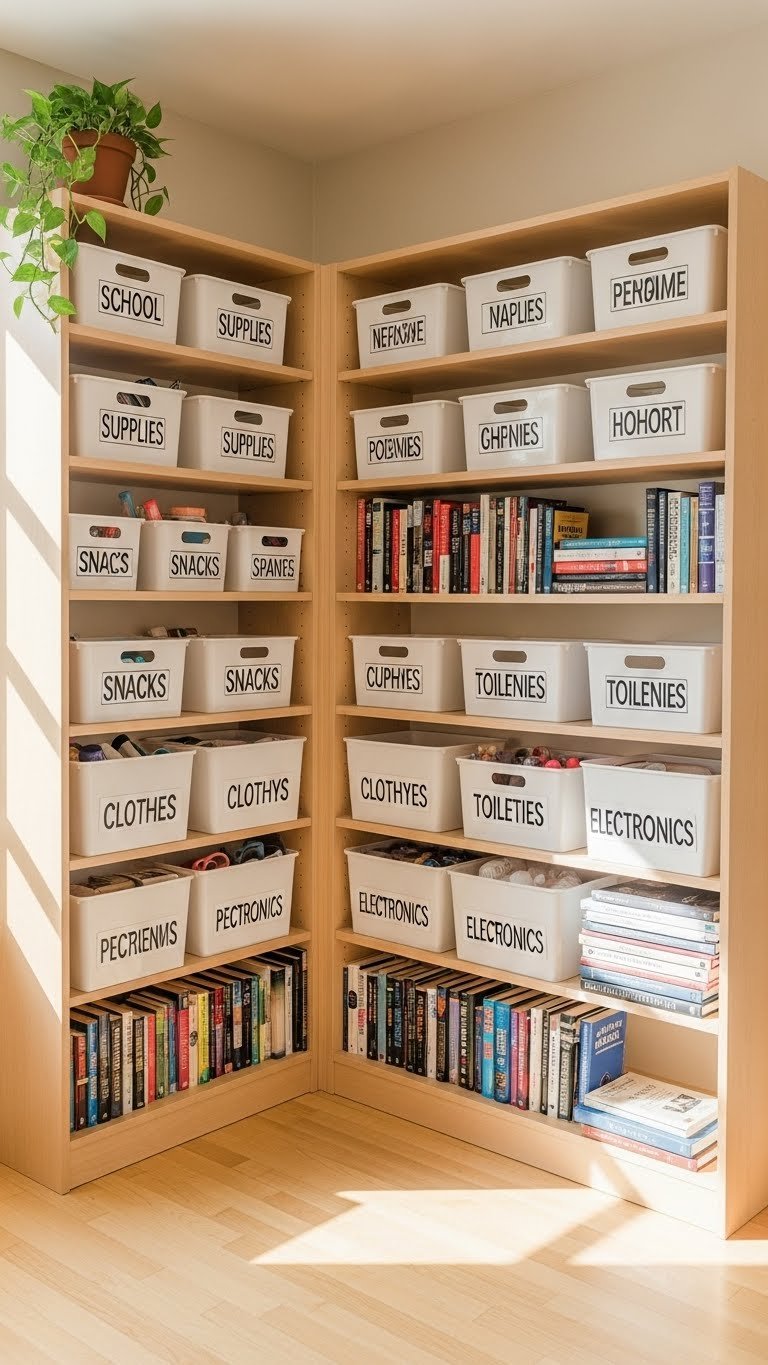
    3. Label Everything (Even the Obvious Stuff)

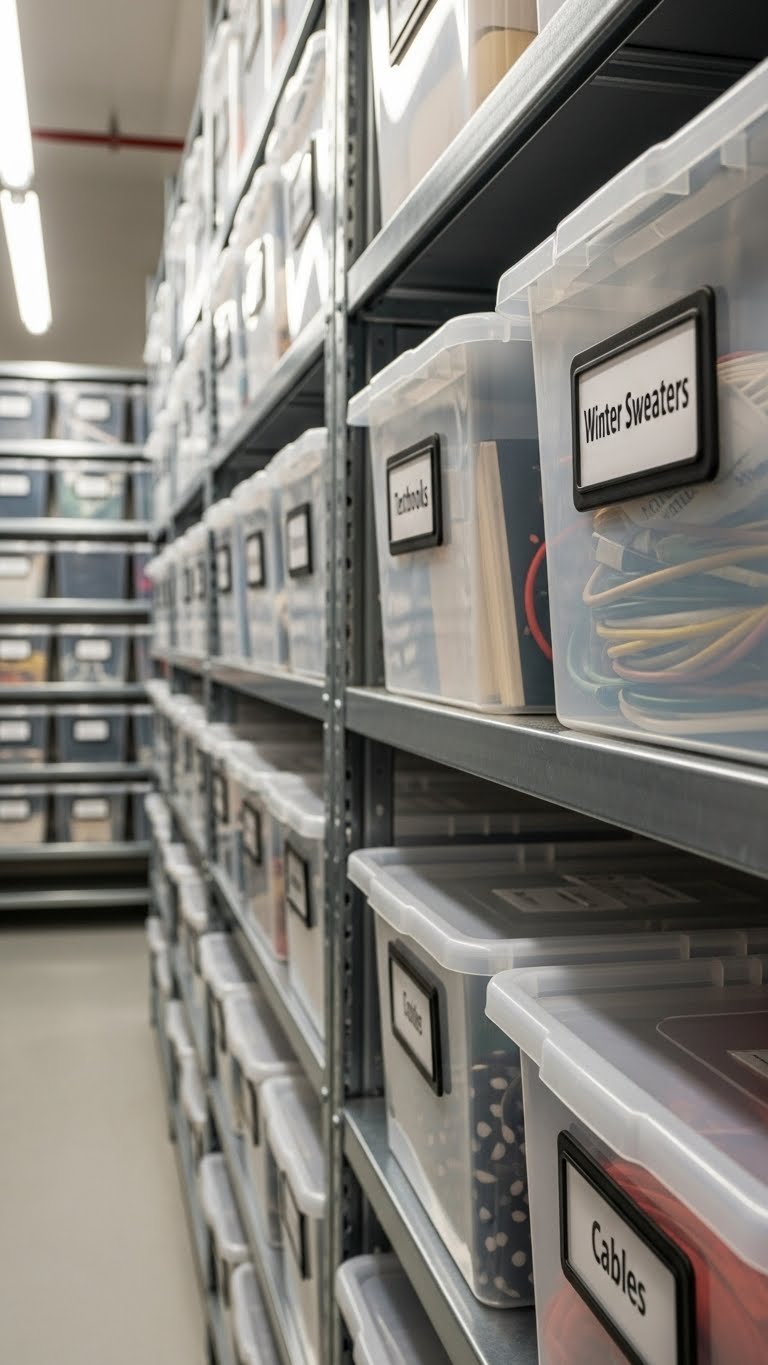
    Labels sound trivial until you open a mystery bin at 2 a.m. and can’t remember if it’s winter clothes or bedding. Labels eliminate roommate conflicts about whose stuff is where and make tidying faster because everyone knows exactly where things go.

    A label maker costs $20–$35 (Brother P-touch from Amazon) or use a $3 roll of label tape and a marker. Print or hand-write labels and stick them on bins, shelves, and drawers. Takes about 5 minutes per room zone.

    Pro tip: Use a color-coding system too—one roommate’s bins are blue labels, the other’s are green. Visual cues speed up cleanup even more.

    When both of you can instantly identify where something belongs, tidying up becomes a quick task instead of a guessing game.


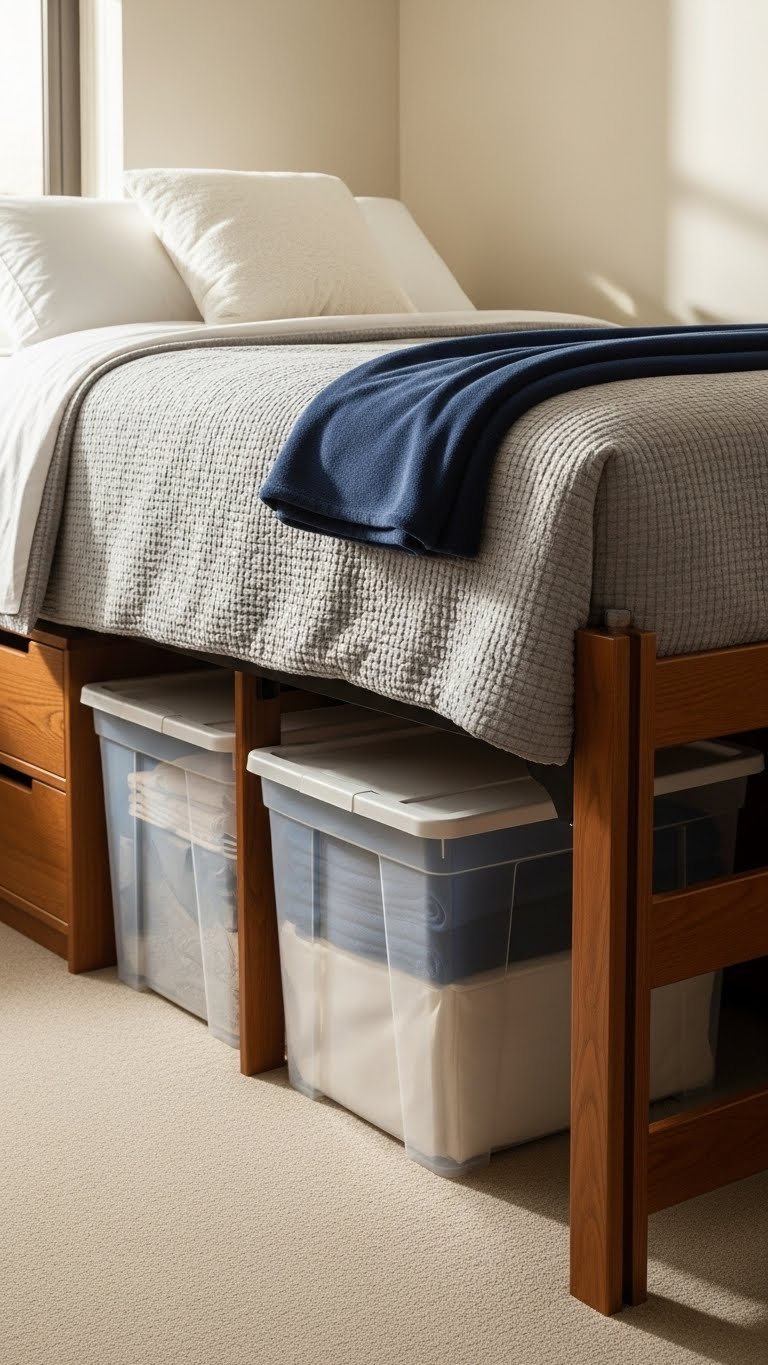
    4. Invest in Under-Bed Storage Bins for Dead Space

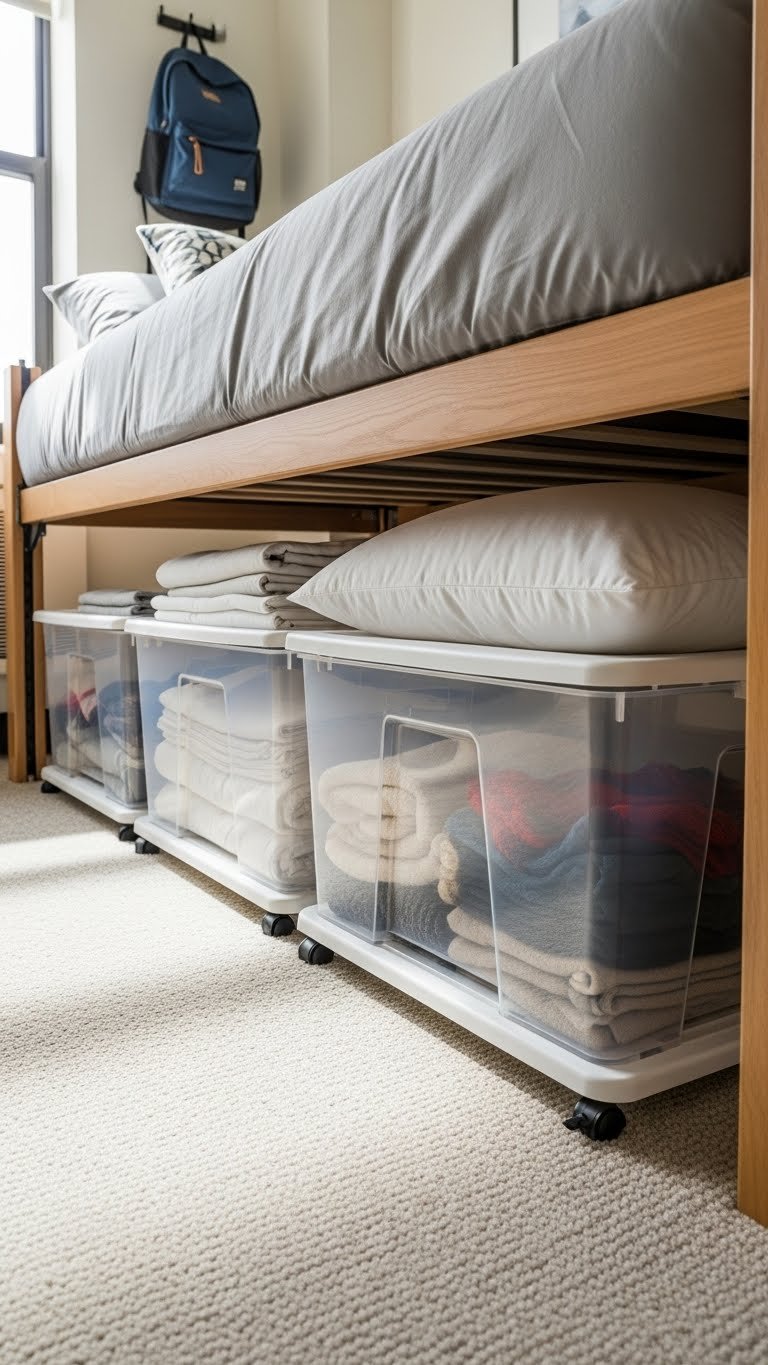
    The space under a dorm bed is prime real estate that most students ignore. Rolling storage bins slide underneath and pull out easily, storing off-season clothes, extra linens, or supplies without taking up closet or shelf space.

    Buy plastic rolling bins for $30–$60 per pair from Target, Amazon, or IKEA (look for 23-gallon sizes). Measure your bed height first—you need at least 8 inches of clearance. Rolling wheels make access easy, and the bins are stackable if you’re stashing them elsewhere.

    Budget hack: Clear bins let you see what’s inside without opening them, so you can actually remember what you stored down there.

    This trick alone frees up 30–40% of your closet space by moving bulky seasonal items out of daily rotation.


    5. Maximize Closet Space with a Double Hanging Rod

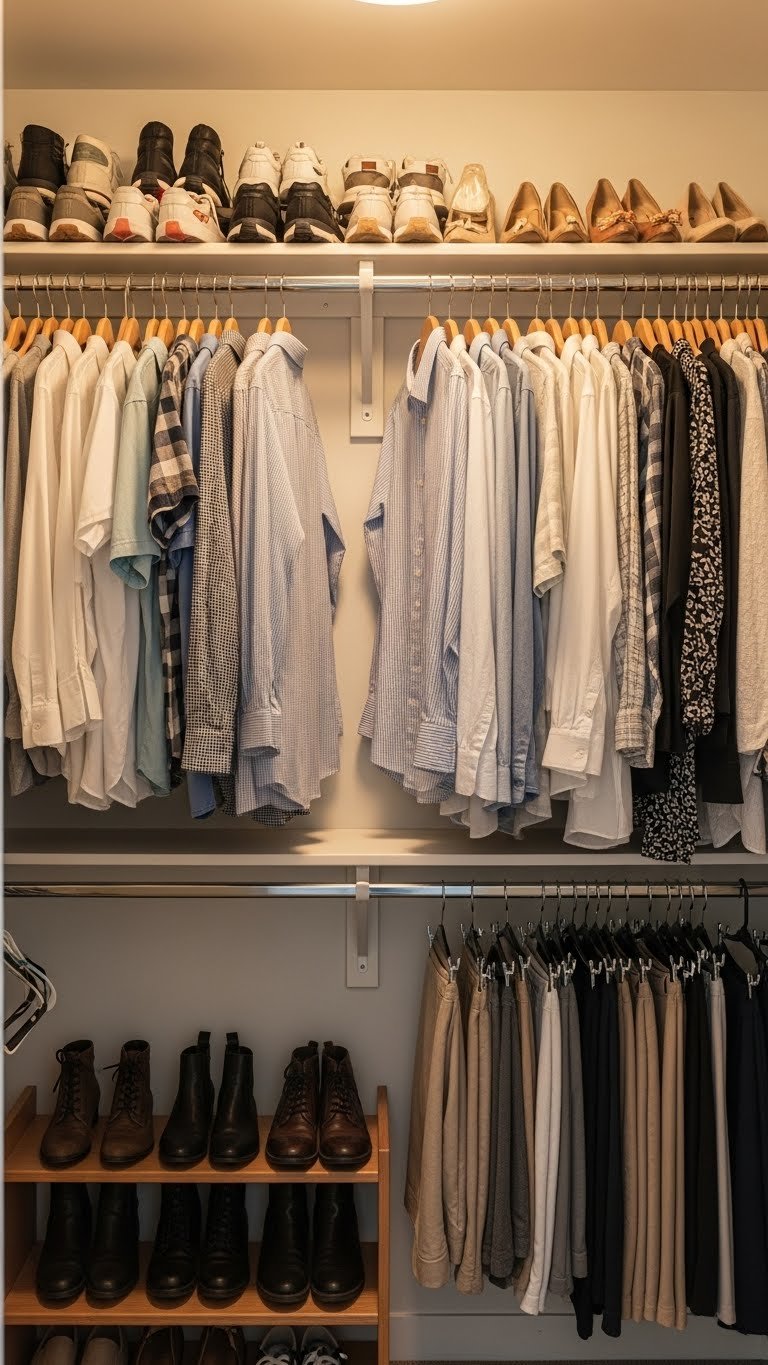
    Most dorm closets have a single rod that wastes vertical space. A second hanging rod doubles your hanger capacity, and it’s so simple to install you’ll wonder why you didn’t do it on move-in day.

    Buy an adjustable tension rod (no drilling needed) for $15–$30 from Home Depot or Amazon, and hang it about 36–42 inches below the existing rod. Takes 5 minutes to install and works perfectly in rented spaces. Pair it with slim velvet hangers (pack more per rod than plastic ones) from Target ($12 for 20).

    Pro tip: Hang longer items (dresses, coats) on top and shorter tops/shirts on bottom so nothing gets bent or wrinkled.

    Your roommate won’t be jealous of your closet anymore—they’ll ask you how you fit so much in there.


    6. Use Vacuum Storage Bags for Seasonal Rotation

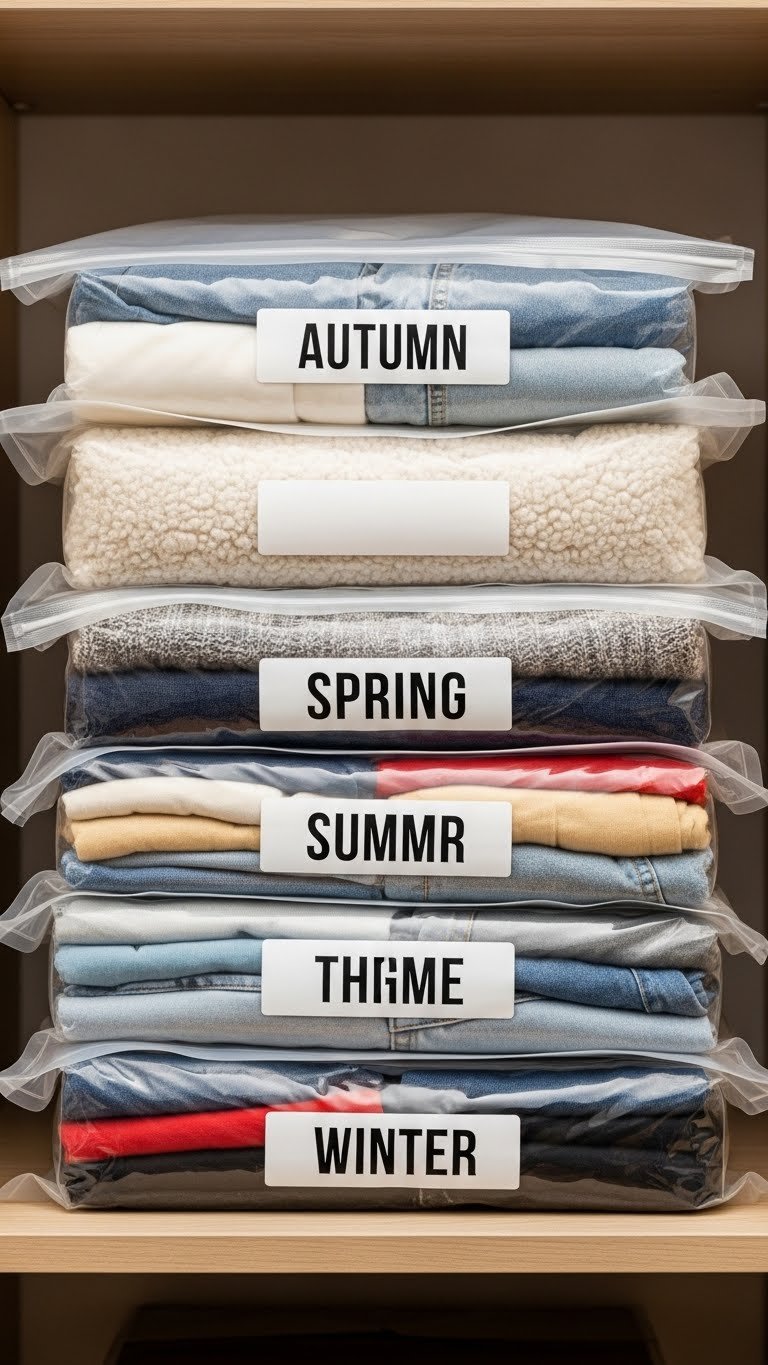
    Bulky coats and winter gear take up enormous amounts of precious closet real estate during spring and summer. Vacuum bags compress winter clothes down to a fraction of their size and keep them dust-free.

    Buy a vacuum storage bag set for $12–$25 (Amazon has multi-packs), seal up your off-season clothes, and stack them flat on a high closet shelf or under the bed. One coat takes up about 1 inch of space instead of 8 inches when hanging. No special equipment needed—most bags come with a hand pump.

    Renter note: This is a temporary solution, so it’s perfect if you rotate wardrobes seasonally and don’t want permanent closet modifications.

    You’ll recover an entire shelf or closet section, suddenly making your storage feel genuinely spacious.


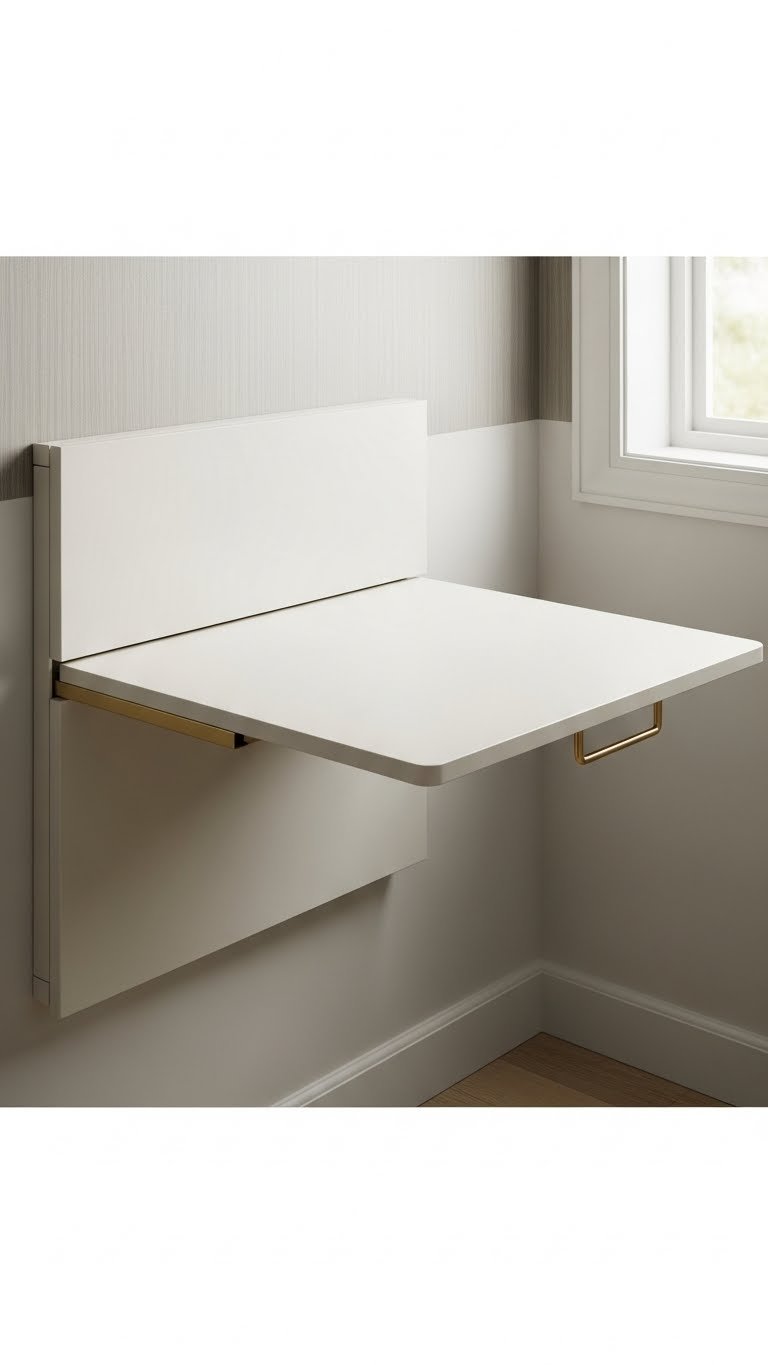
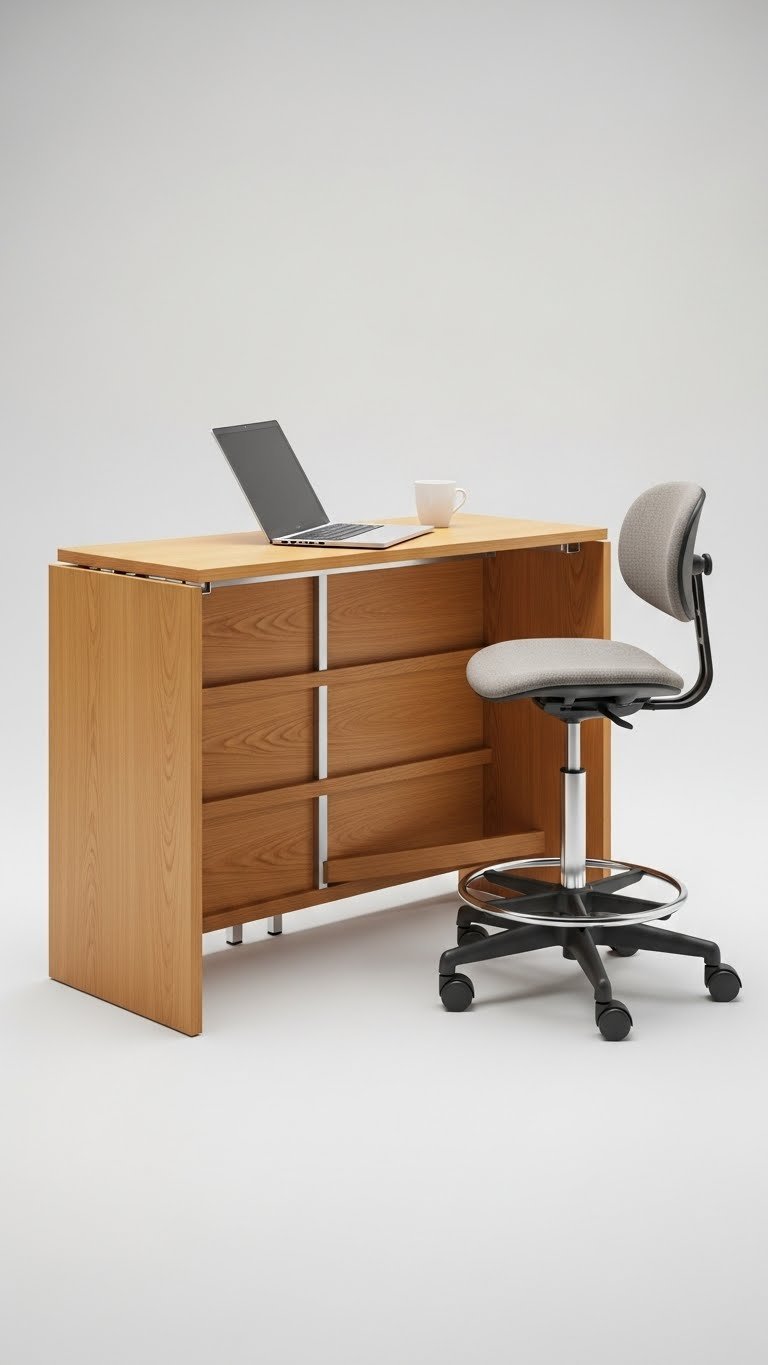
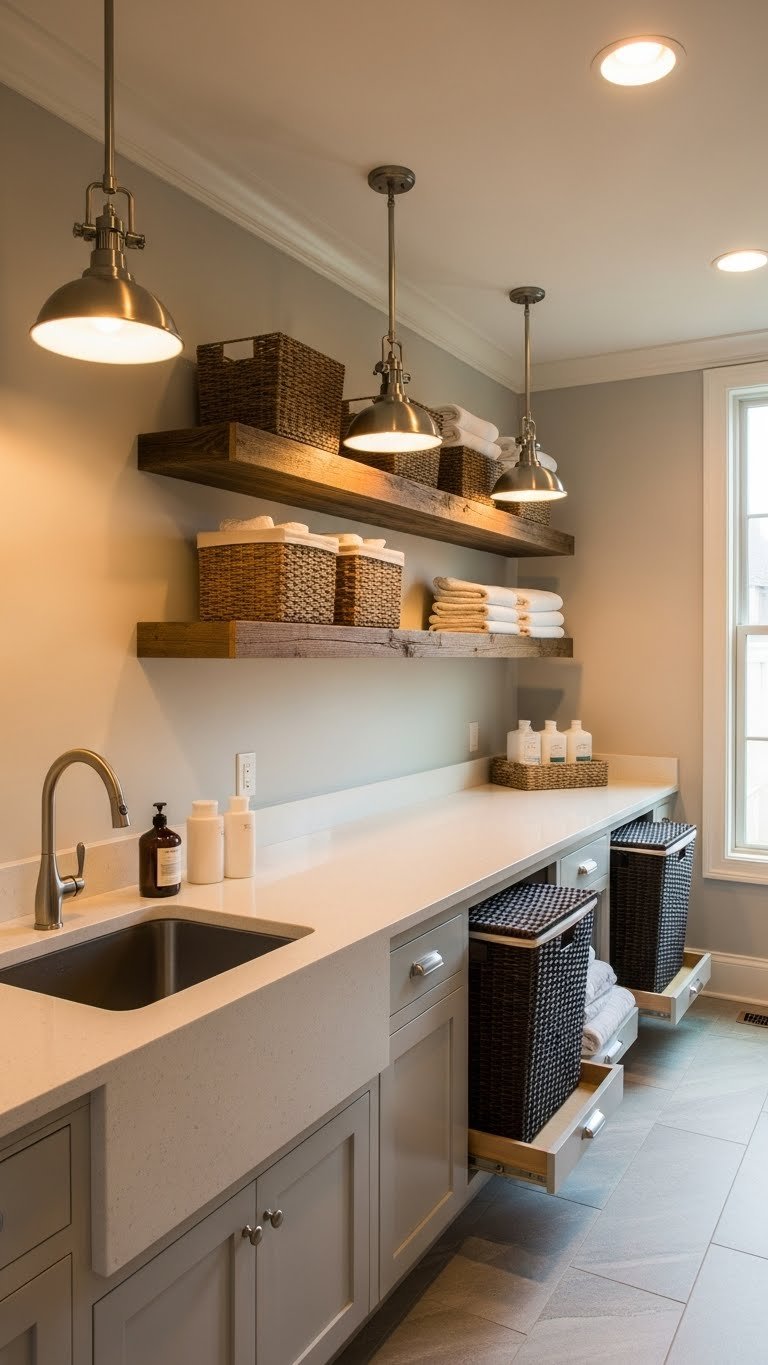
    7. Install Shelving Above the Desk for Work Zone Organization

    Dorm desks are tiny—they barely fit a laptop and notebook without clutter taking over. Mounting a small shelf or tension shelves directly above your desk puts supplies and textbooks within reach without eating into desktop real estate.

    Wall-mounted shelving from IKEA costs $25–$50 and takes about 45 minutes to install with basic tools. If drilling isn’t allowed, command strips can hold lightweight tension shelves ($15–$30). Keep it narrow—12–18 inches deep—so it doesn’t block light or feel cramped.

    Pro tip: Use small containers and desk organizers on the shelf to corral pens, sticky notes, chargers, and paper clutter. Everything vertical, nothing horizontal.

    Your actual desk surface becomes a calm, usable workspace instead of a pile of books and cables.


    8. Designate Zones with Area Rugs to Define Shared Spaces

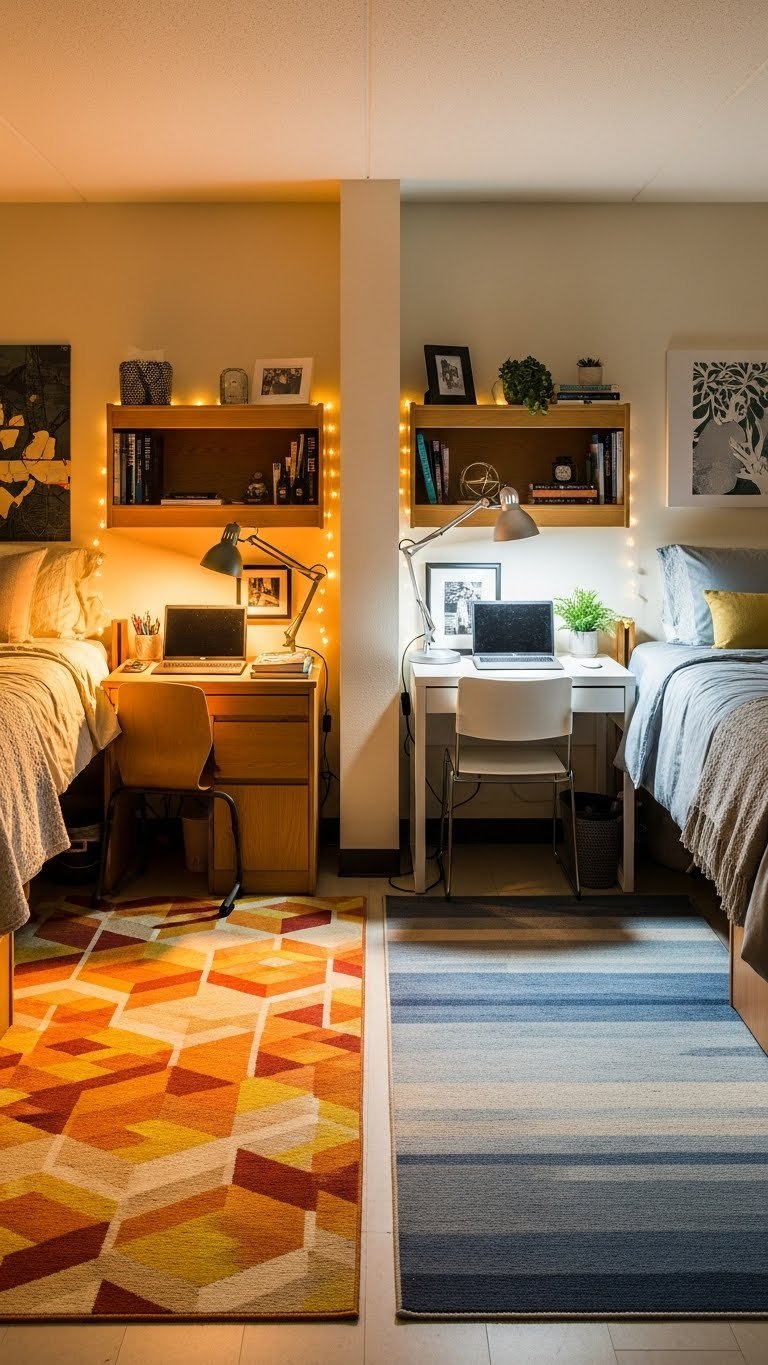
    When you share a room, clear boundaries help prevent stuff from migrating into each other’s spaces. An area rug under each person’s bed and desk zone creates psychological separation and makes organization easier because each person owns their corner.

    Budget rugs cost $30–$80 from Target, Amazon, or Wayfair (look for dorm-friendly 5×7 or 6×9 sizes). Choose stain-resistant, spill-proof options since dorm rugs get messy fast. Avoid light colors unless you’re ultra-tidy.

    Renter hack: Rugs are totally temporary and add zero damage to walls or floors, making them perfect for renters who need to reset between semesters.

    Suddenly your room stops looking like shared chaos and starts looking like two organized personal zones.


    9. Use Over-Door Hooks to Hang Bags, Jackets, and Robes

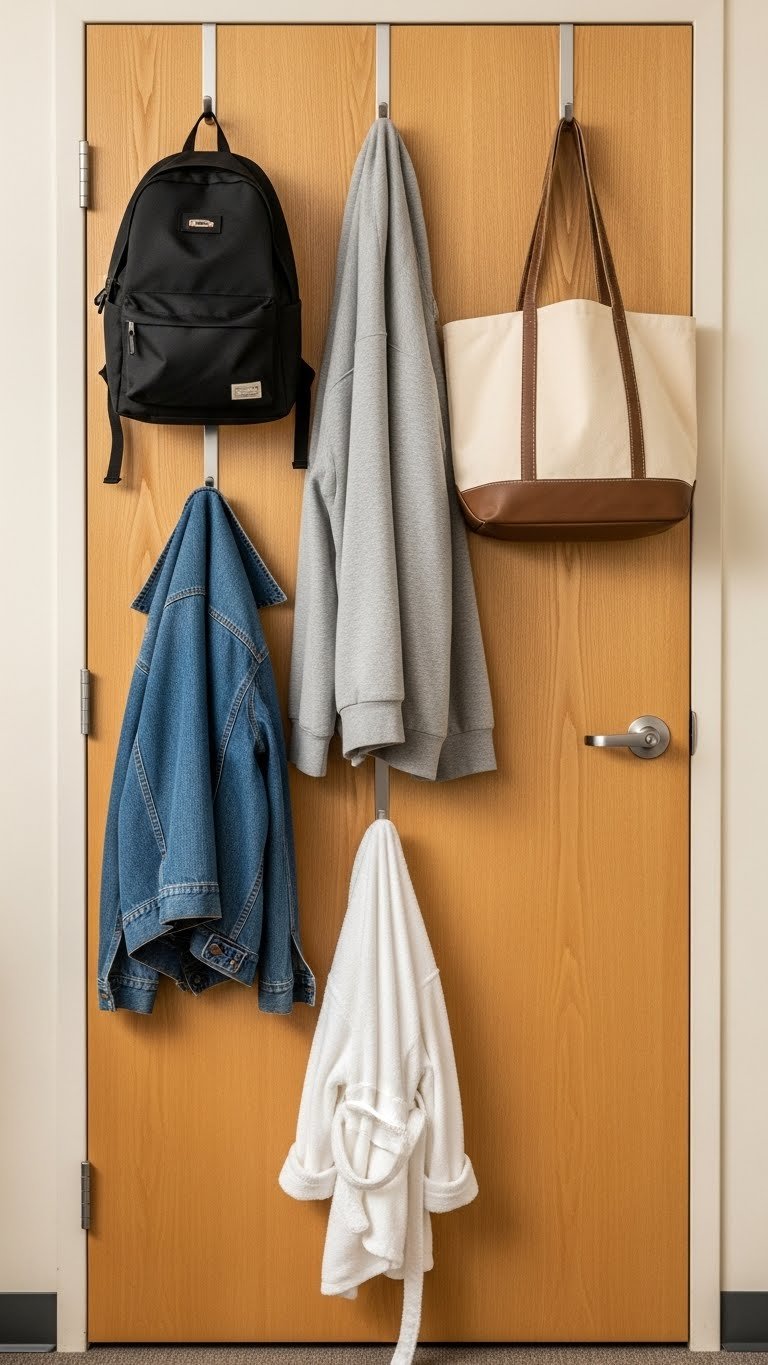
    Hooks are the fastest way to get stuff off chairs, beds, and the floor. A single over-the-door hook rack stops backpacks and jackets from becoming floor piles and keeps outfits-in-progress contained.

    Buy an over-door hook rack for $10–$20 (Amazon, Target, IKEA) and hang it on the inside of your dorm door. No tools needed, and it holds roughly 8–10 pounds. Takes 2 minutes to hang.

    Pro tip: Buy duplicate racks for both the inside and outside of your door—inside for robes and casual stuff, outside for daily bags and coats.

    You and your roommate can each grab your jacket without excavating a pile, and your floor suddenly looks like an actual room instead of a clothing donation pile.


    10. Create a Cable Management Station to Tame Tech Clutter

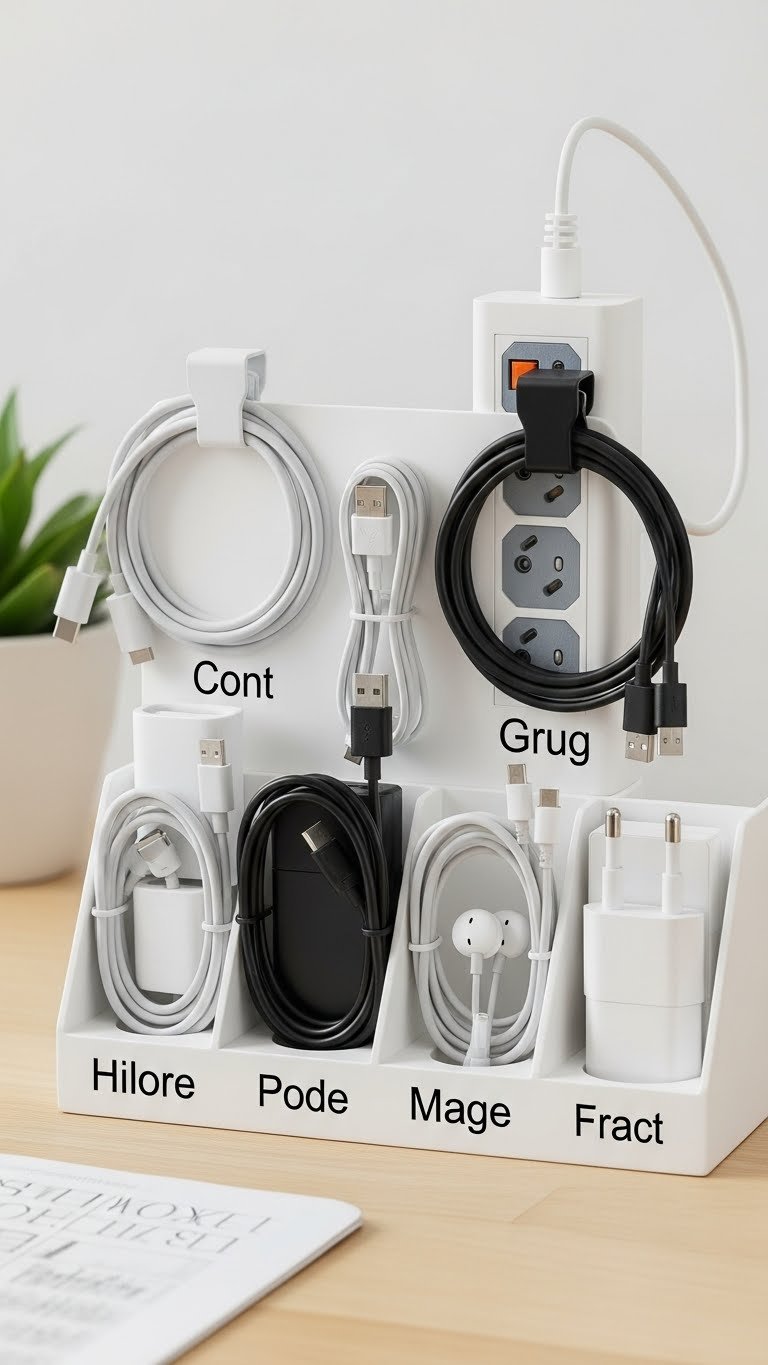
    Between two laptops, phones, earbuds, and chargers, dorm rooms devolve into a cable mess that looks chaotic and makes finding your charger impossible. A simple cable organizer keeps everything sorted and prevents tangling.

    Buy a desk cable organizer box or divider for $12–$25 (Amazon, Target) or DIY it by repurposing a small drawer organizer. Label each slot by device, coil cables loosely (tight coils damage them), and keep chargers plugged into a power strip anchored behind the organizer.

    Time estimate: 10 minutes to set up, saves you 5+ minutes daily hunting for chargers.

    Pro tip: Use velcro cable wraps ($5–$10 for a pack) to bundle cords and prevent mysterious knots.

    Your desk goes from looking like an IT department exploded to looking intentional and clean.


    11. Install Wall-Mounted Command Hooks for Quick Access

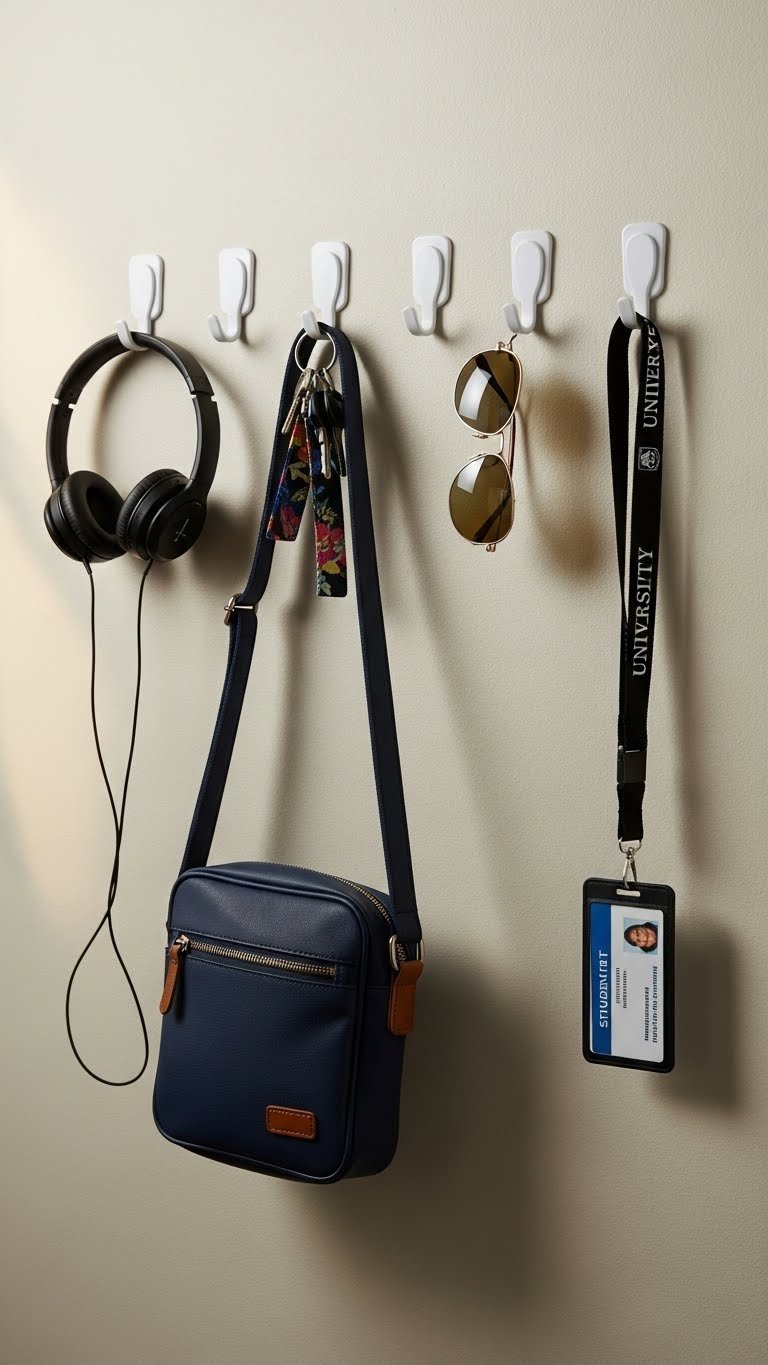
    Command hooks are renter-safe, damage-free, and perfect for hanging daily-use items within arm’s reach so they don’t end up on the floor or bed. Each person gets hooks for their essentials.

    Buy a command hook variety pack for $8–$15 (any hardware store or Target). They hold up to 5 pounds and take 1 minute to stick on. No nails, no drilling, and they peel off cleanly when you move out.

    Renter note: This is literally the most renter-friendly organization hack in existence—totally reversible, leaves zero damage.

    Your keys, sunglasses, and daily bag are always in the same spot, and you stop wasting time searching for them.


    12. Use Hanging Shelf Dividers to Prevent Toppling Stacks

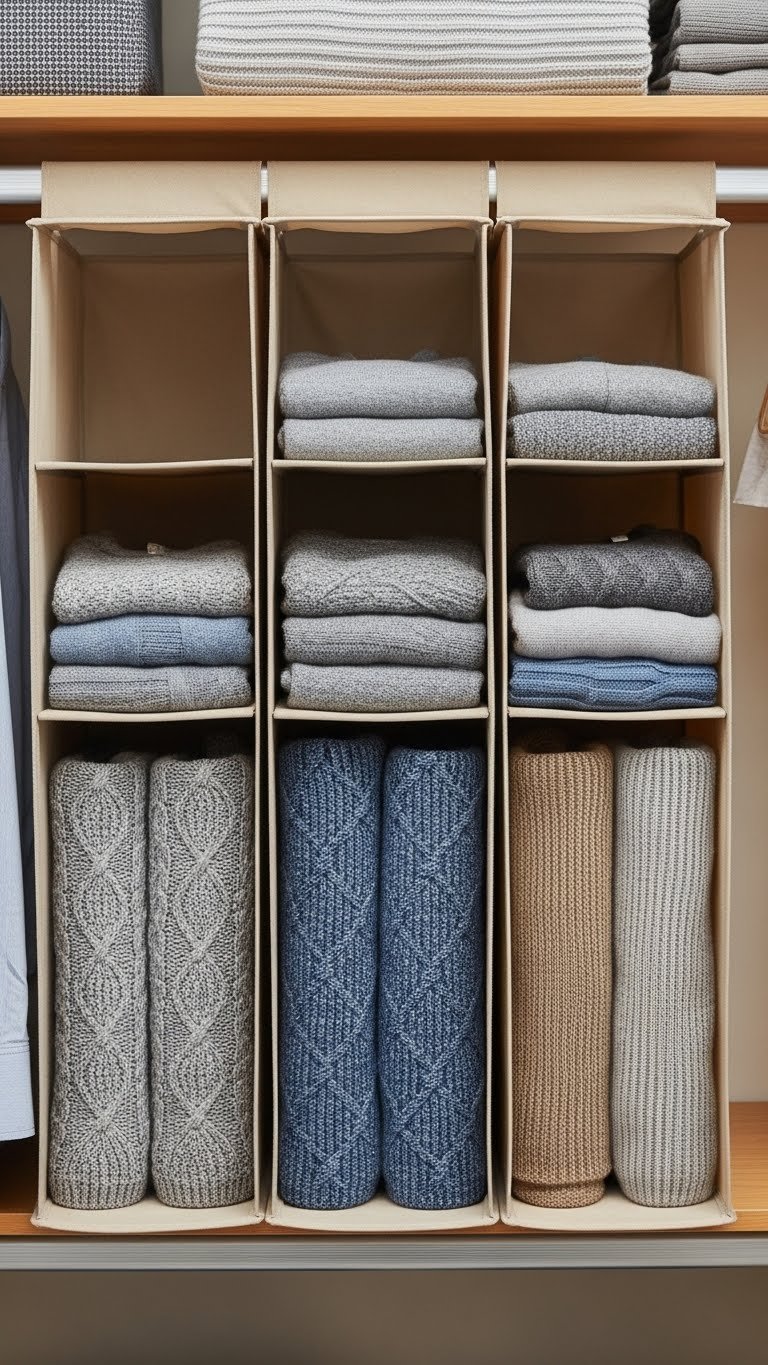
    If your closet has shelves (instead of just hanging rods), stacks of folded clothes slide around and topple over constantly. Shelf dividers create sections that hold stacks upright and prevent everything from morphing into one chaotic pile.

    Buy hanging shelf dividers for $15–$25 per pair (IKEA, Target, Amazon). They work on any existing shelf and take 5 minutes to position. They’re lightweight and removable, so renters can use them worry-free.

    Organizing method: Use the vertical fold method (like KonMari)—fold items so you can see every piece when you open the shelf.

    Your shelves stop looking like an avalanche waiting to happen and become genuinely organized.


    13. Set Up a Shared Snack Station with Clear Containers

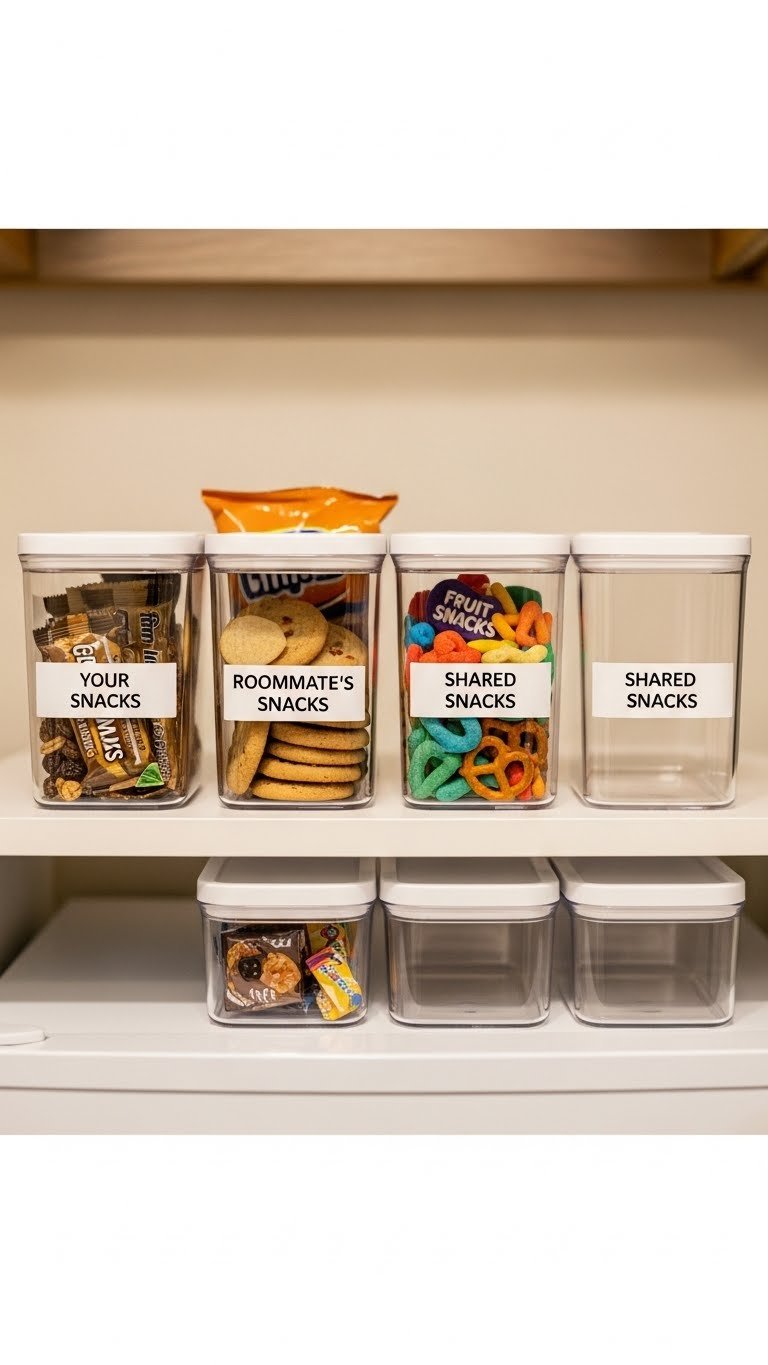
    Snack clutter and ownership confusion happens in every shared dorm. A dedicated snack zone with clearly labeled containers prevents arguments about whose granola bars got eaten and keeps food organized instead of scattered across the room.

    Buy clear food storage containers for $15–$30 per set (Target, IKEA, Container Store). Label them with a label maker or tape. Takes 10 minutes to set up initially, then 5 minutes weekly to restock.

    Pro tip: Include a shared “community snack” container where both roommates contribute, so there’s always something available for either of you.

    You’ll know exactly whose snacks are whose, reduce waste, and stop the “did you eat my…?” accusations.


    14. Use Desktop Drawer Organizers for Supplies

    Desk drawers become junk drawers within days if you don’t give supplies a home. Small drawer organizers keep pens, highlighters, sticky notes, and paper clips separated so you can find what you need without dumping the entire drawer.

    Buy a desk organizer insert for $10–$25 (IKEA, Target, Container Store) or use a small utensil tray as a DIY version. Takes 5 minutes to fill and position. Choose one that fits your drawer width exactly.

    Budget option: Repurpose small boxes or cups to create compartments instead of buying an organizer.

    Your desk becomes actually usable for studying instead of wasting time digging through a pen graveyard.


    15. Hang a Door-Mounted Shoe Rack to Save Closet Floor

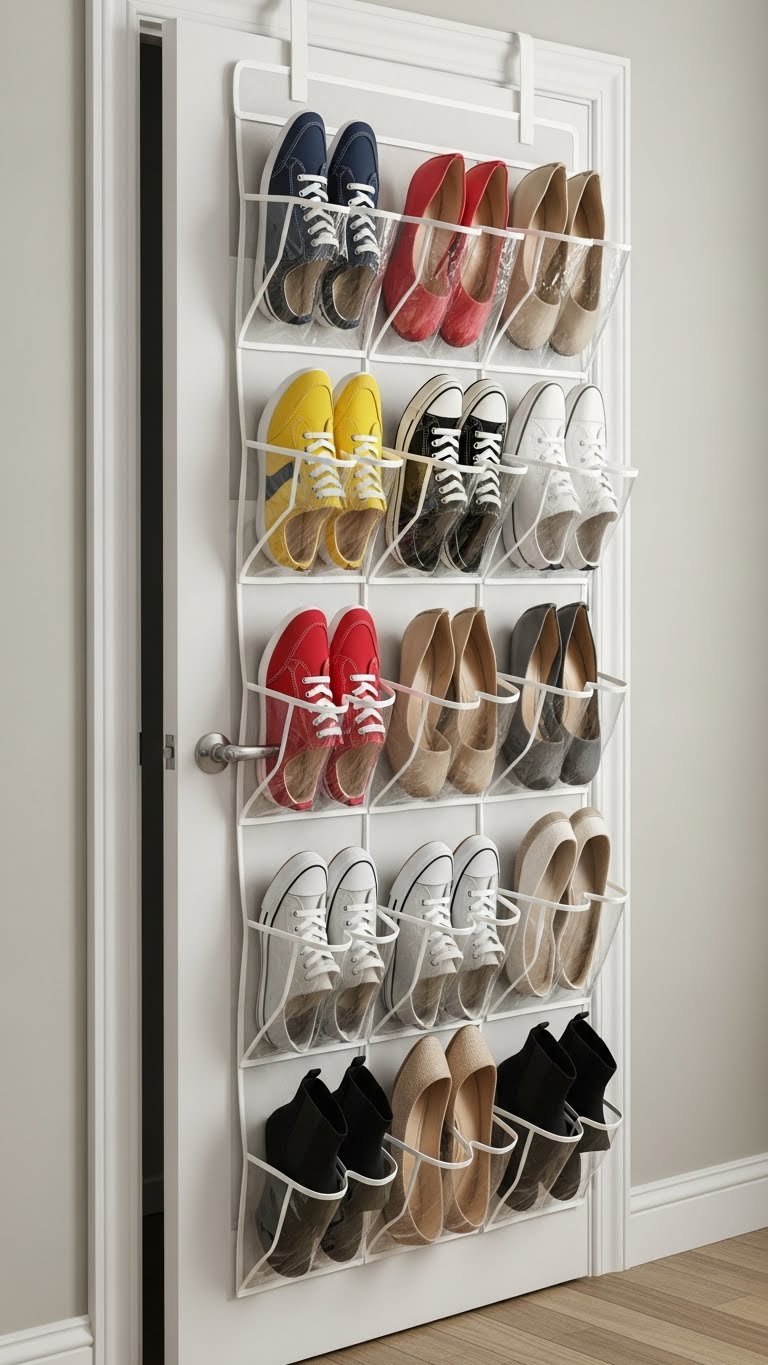
    Shoes are bulky and end up scattered on closet floors, eating space and making the room look messy. An over-the-door shoe organizer holds 8–12 pairs vertically in pockets, keeping them off the floor and visible so you can see your options.

    Buy an over-the-door shoe organizer for $15–$35 (Amazon, Target, IKEA). Hang it on the inside of your closet door or dorm room door. Takes 3 minutes to hang and doesn’t damage anything.

    Pro tip: Stuff each pocket with a small dryer sheet to keep shoes smelling fresh and preventing odor buildup.

    You get back a huge chunk of closet floor space and can actually see all your shoes instead of digging through a pile.


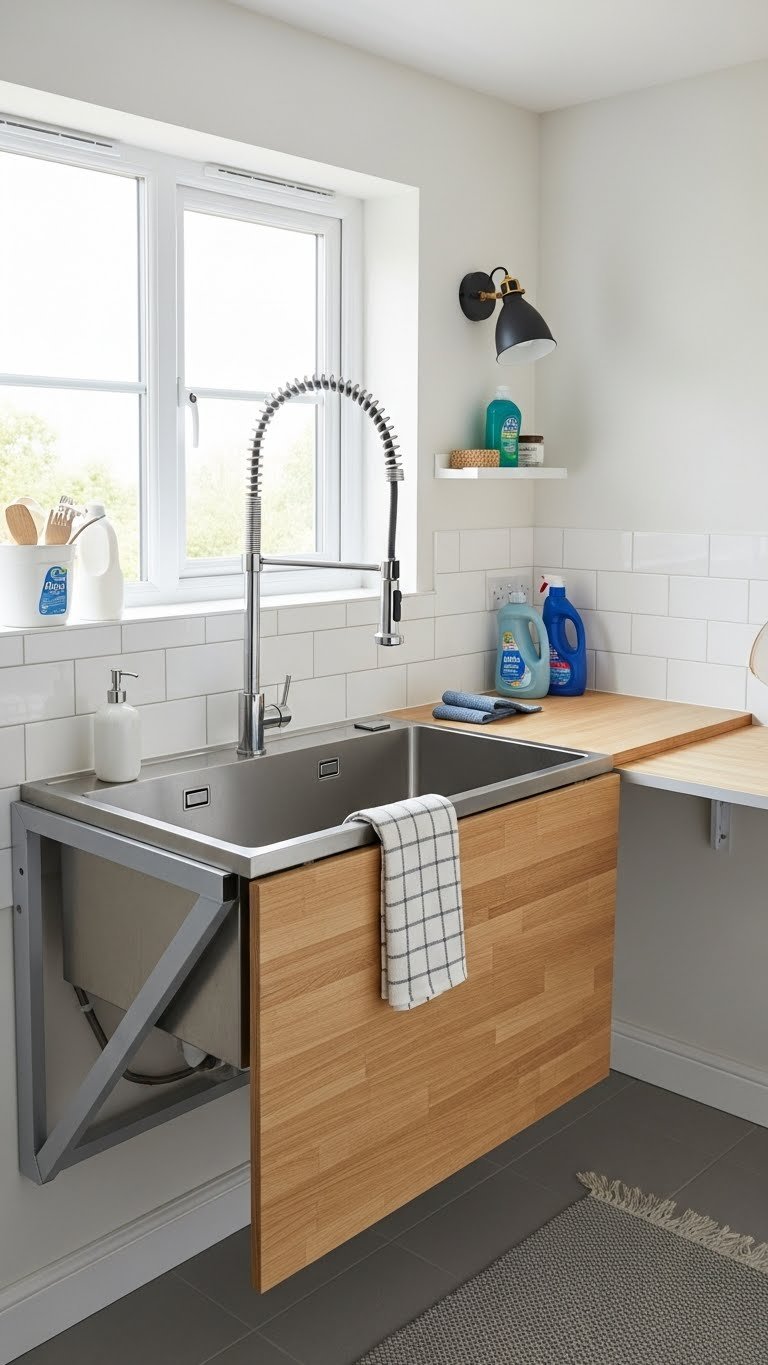
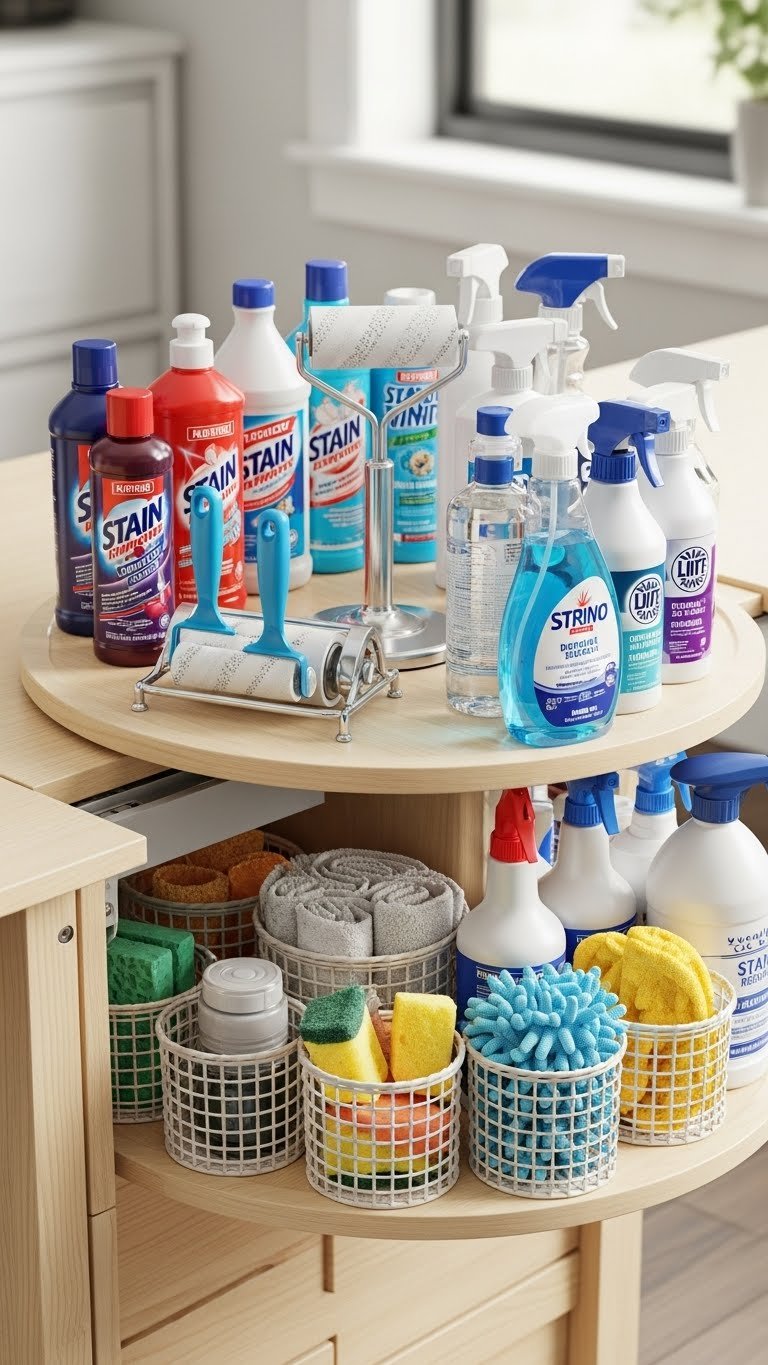
    16. Create a Cleaning Supply Caddy with a Designated Home

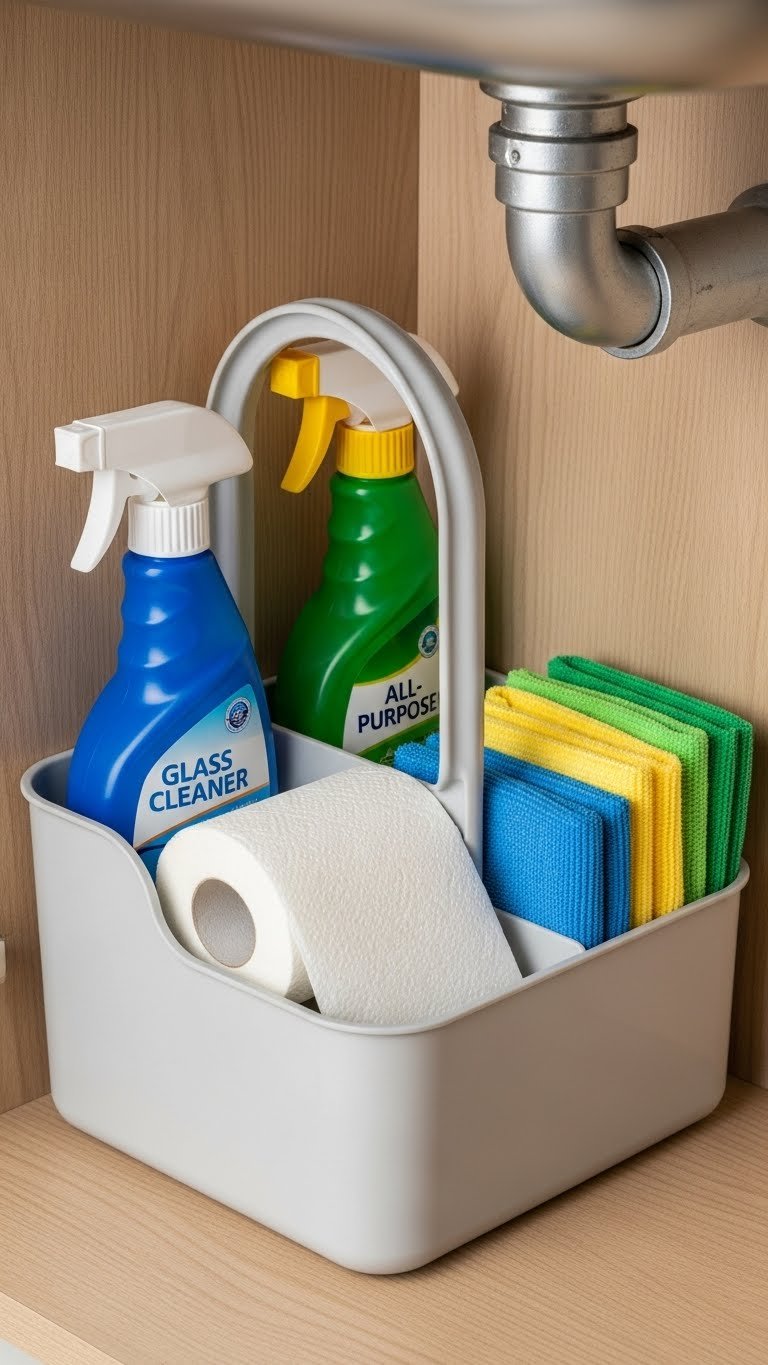
    Cleaning supplies scatter everywhere—under sinks, behind doors, in random corners. A single caddy keeps everything together so when it’s time to clean (which should be weekly with a roommate), you grab one thing instead of hunting down supplies.

    Buy a cleaning caddy for $8–$15 (Target, Dollar Tree, Home Depot) and fill it with roommate-approved supplies. Takes 5 minutes to assemble. Keep it in a corner or under a sink so it’s out of sight but easy to grab.

    Pro tip: Both roommates should contribute to the supply cost and cleaning, so make this a shared responsibility from day one.

    Cleaning day becomes faster because supplies are already gathered, and you’re both more likely to actually tidy up when it takes less effort.


    17. Use Bed Risers to Create Under-Bed Storage Zones

    Raising your bed 8–12 inches with risers creates enough clearance for large storage bins underneath. It’s a double win: more storage space plus the psychological effect of more room in a tiny dorm.

    Bed risers cost $20–$40 per set (Amazon, IKEA, Wayfair) and take 15 minutes to install. Most dorm beds are on frames that risers slip onto without tools. Make sure your mattress doesn’t shift by checking fit first.

    Renter note: Risers are totally reversible—just unscrew them when you move out.

    You’ve effectively gained several cubic feet of storage, and your room suddenly feels less cramped because of the visual space.


    18. Designate a Donation/Giveaway Box for Regular Purging

    The biggest reason dorm rooms get cluttered isn’t too much stuff—it’s that you never get rid of anything. A permanent donation bin makes purging a habit instead of a one-time event, preventing junk from accumulating.

    Grab a clear bin and label it “Donation” or “Sell.” Keep it in a corner or under a desk. Throughout the semester, whenever you realize you don’t use something, drop it in. When it’s full, donate to a thrift store or sell on Facebook Marketplace (easy money for college students). Takes 2 minutes weekly to toss items in.

    Pro tip: Set a monthly purge reminder so you both stay honest about what you actually need.

    Your room stays clutter-free all semester instead of building up until spring break when you finally clean out.


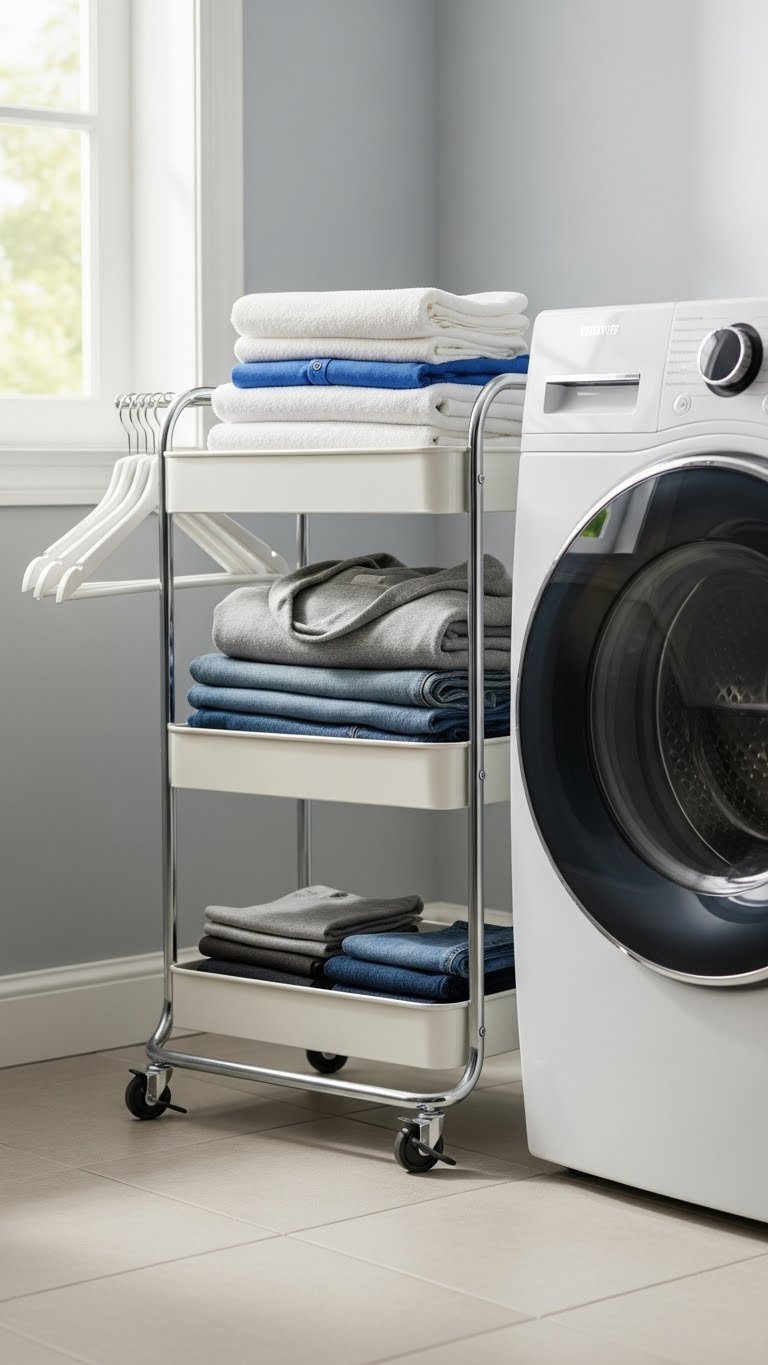
    19. Use a Rolling Cart as a Mobile Organizer for Shared Supplies

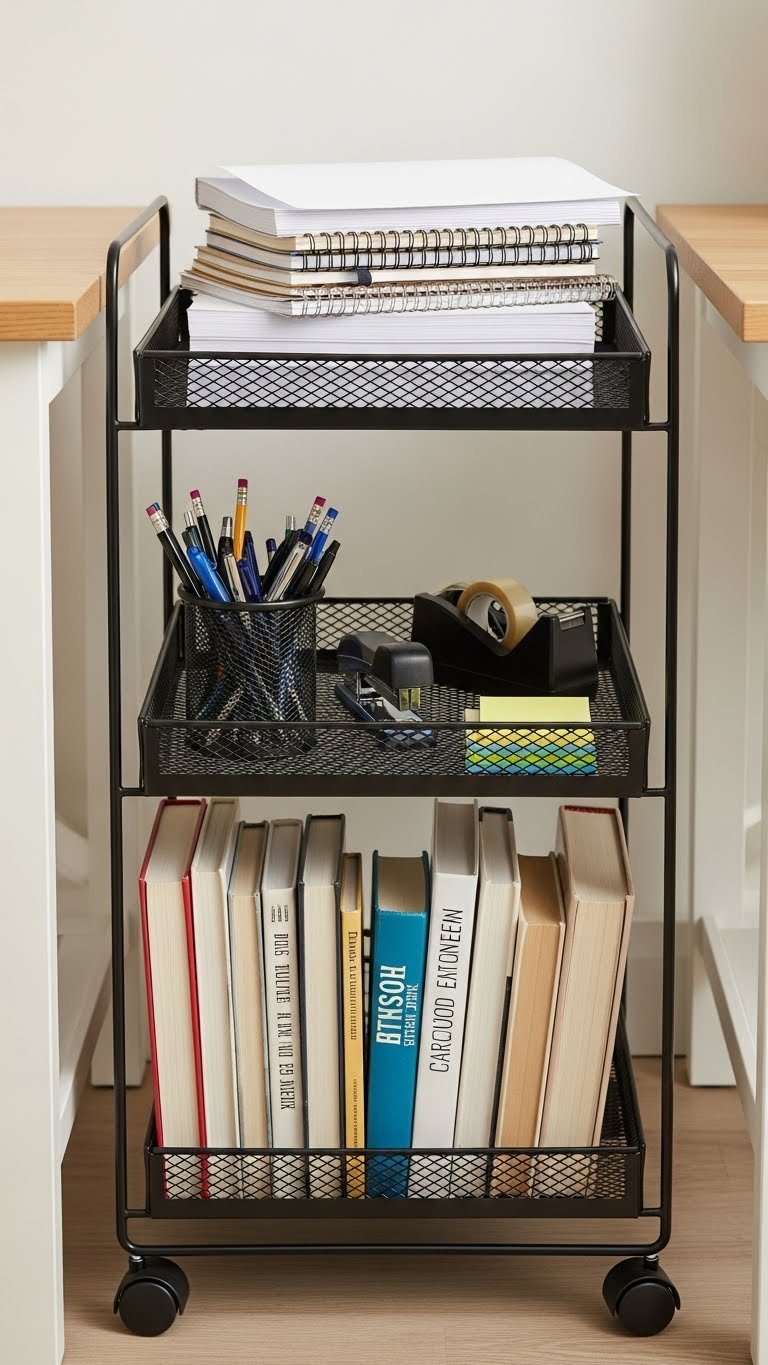
    One rolling cart positioned between desks creates a neutral zone for shared supplies (printer paper, highlighters, sticky notes, textbook stacks). It’s mobile, so you can roll it wherever you need it, and everything lives in one place instead of scattered across two desks.

    Buy a 3-tier rolling cart for $25–$50 (IKEA Alex Cart, Amazon, Target). Takes 5 minutes to unbox and position. Both roommates should contribute supplies to keep it stocked.

    Pro tip: Label each tier by category so you both know where things go. When it’s someone’s turn to restock, they know exactly what’s needed.

    You’ve eliminated the “where’s the paper?” argument and created a shared system that works for both of you.


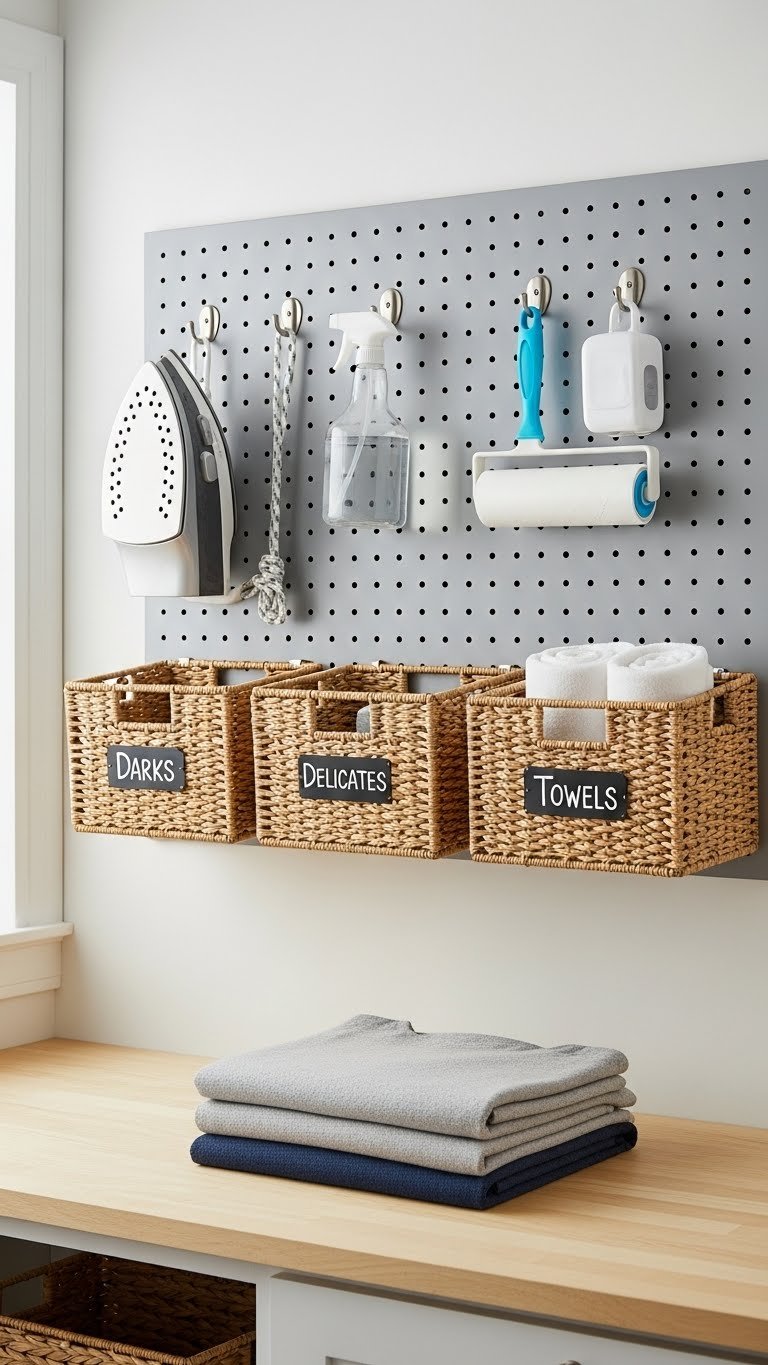
    20. Install Pegboard Walls for Customizable Storage and Display

    Pegboards let you create a totally customizable storage system using hooks, baskets, and shelves that you can rearrange anytime. Plus, they look way better than random wall clutter and photograph well if you’re into room pics.

    Buy a 2×3 ft pegboard and hooks kit for $30–$60 (Home Depot, Lowe’s, IKEA, Amazon). Installation requires drilling or uses damage-free options (check rental rules first). Takes about 1 hour to mount and organize. Use it for headphones, bags, keys, art supplies, or decorative baskets.

    Renter option: Some pegboards come with command strip backing to avoid drilling—costs $50–$80 but zero permanent damage.

    You’ve created a gorgeous storage focal point that actually looks intentional and lets you display your style.


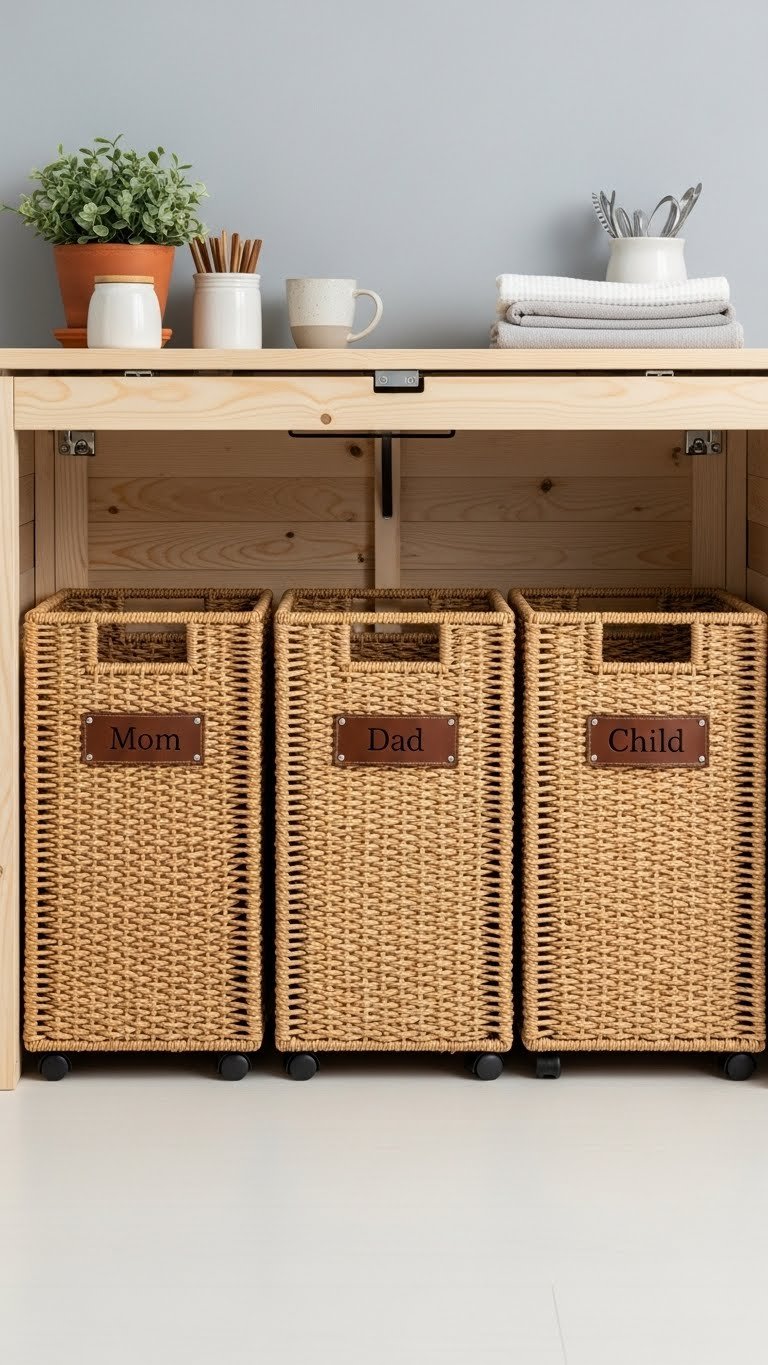
    21. Color-Code Belongings to Prevent Roommate Mix-Ups

    Color-coding isn’t just for elementary school—it prevents constant “is this yours?” confusion in shared rooms. Assign each roommate a color and use stickers, markers, or colored labels on items that could get mixed up: textbooks, chargers, headphones, water bottles, anything portable.

    Buy colored sticky dots or label stickers for $3–$8 per pack (Target, Dollar Tree, Amazon). Takes 10 minutes to label items initially, then seconds to identify ownership going forward.

    Pro tip: Include your color code in a shared note or group chat so you’re both clear on the system from day one.

    Ownership is instantly visible, and you stop accidentally grabbing your roommate’s stuff or vice versa.


    22. Use a Hanging Jewelry Organizer as a Catch-All for Small Items

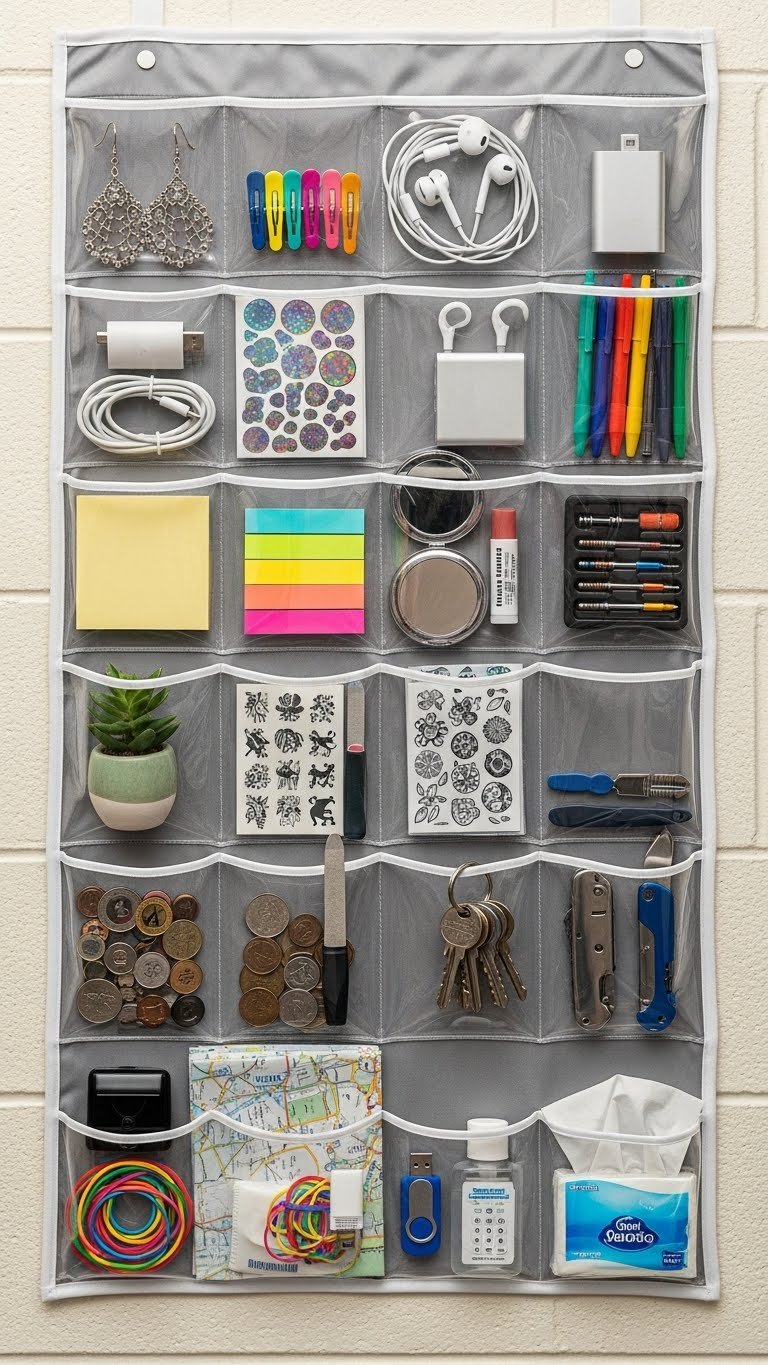
    Jewelry organizers with multiple pockets aren’t just for jewelry—they’re perfect for corralling small items that otherwise disappear into the chaos: hair clips, earbuds, stickers, sunglasses, lip balm, charging cables. Everything’s visible and instantly accessible.

    Buy a hanging jewelry organizer for $12–$25 (Amazon, Target, Container Store). Hang it on a wall or the back of your door using hooks or command strips. Takes 5 minutes to hang and fill. Both of you can use separate pockets or share sections.

    Budget hack: Check Dollar Tree or Walmart for cheap alternatives—they work just as well for organization.

    You’ll stop losing tiny items and know exactly where your essentials are without opening multiple drawers.


    23. Create a “Shared Responsibility” Cleaning Chart on a Whiteboard

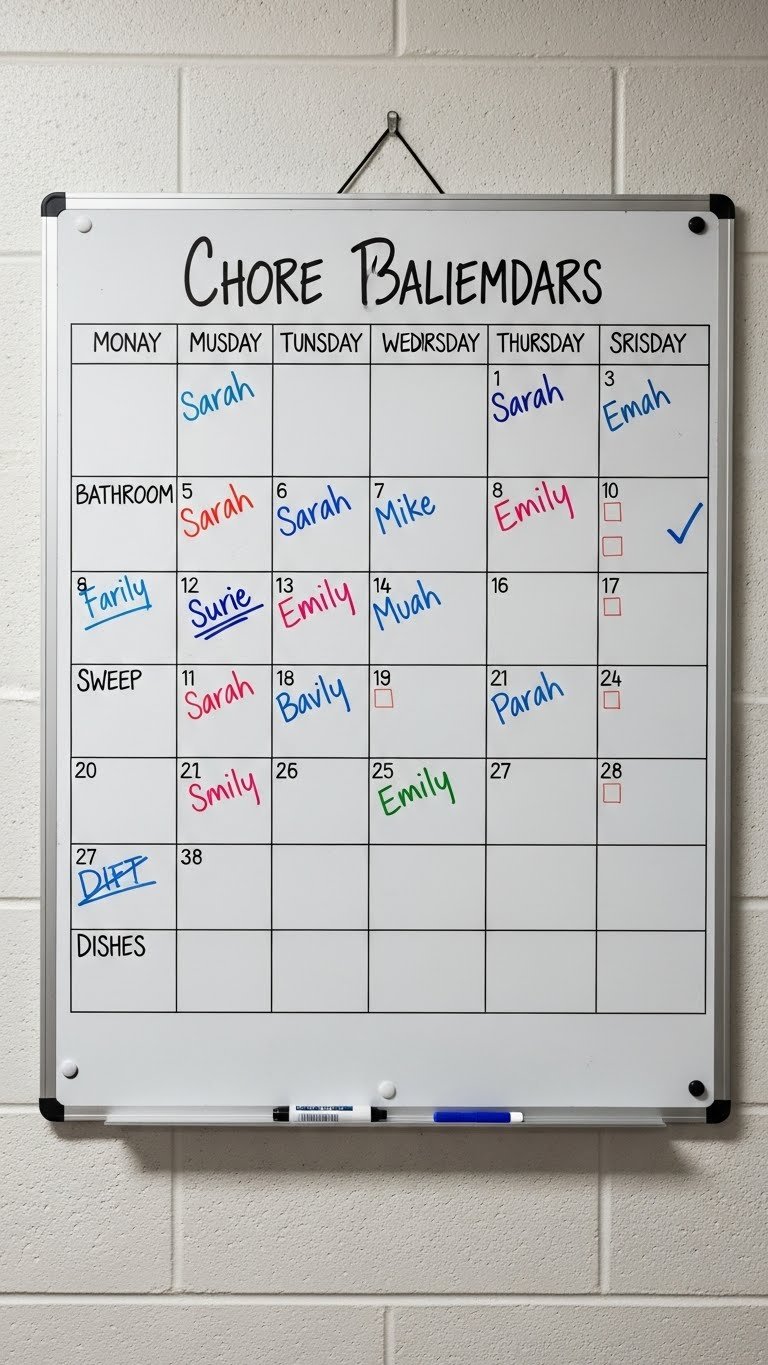
    The number one roommate conflict? Cleanliness disputes. A visible cleaning chart removes ambiguity about whose turn it is to clean what, making the whole process faster and fairer.

    Buy a dry-erase whiteboard for $8–$20 (Target, Amazon, Office Depot) and mount it with command strips. Create a simple weekly rotation: one roommate handles bathroom/floors one week, the other handles it the next. Takes 5 minutes to create, and you update it in 30 seconds weekly.

    Pro tip: Include daily microclean tasks (dishes, wiping counters) and weekly deep tasks so nothing gets ignored until it’s disgusting.

    You go from vague resentment about cleaning to a clear system where both of you know exactly what’s expected.


    24. Hang a Small Shelf Unit Above Your Bed for Personal Storage

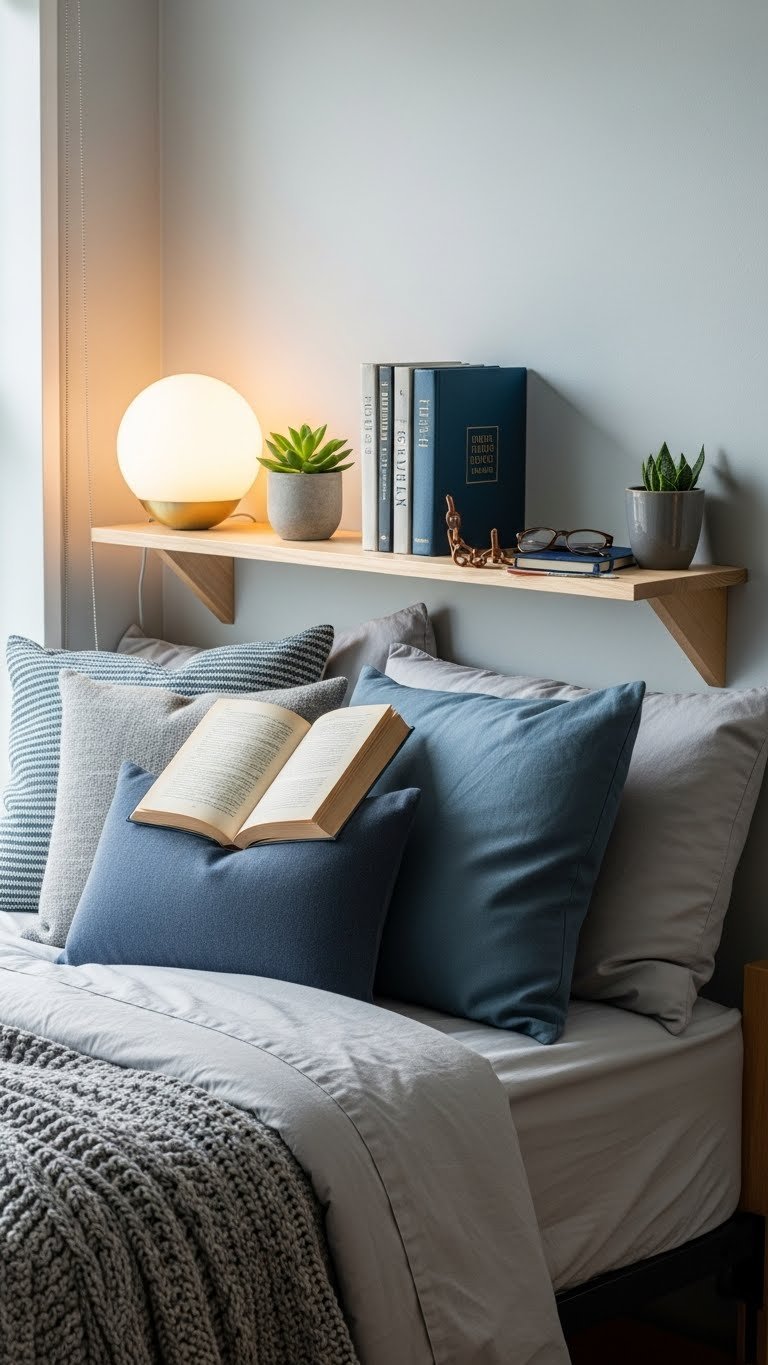
    The wall space above your bed is often totally unused but perfect for a small shelf that holds personal items, books, and a reading lamp without eating into any floor or closet space.

    Install a small floating shelf (12–18 inches) for $20–$40 (IKEA, Target, Wayfair). Mount it about 12 inches above the bed headboard. Takes about 30 minutes with basic tools. Make sure you’re not violating your dorm’s drilling rules—use command strips shelf hooks if necessary.

    Pro tip: Keep things lightweight on the shelf and make sure nothing is directly above your pillows for safety reasons.

    Your bed becomes a little reading nook with everything you need within arm’s reach, and you’ve reclaimed valuable ground-level real estate.


    25. Use Tension Rods Inside Your Closet for Thin Item Storage

    Tension rods create extra hanging space for scarves, belts, tank tops, or even small laundry bags without any tools or damage. They’re perfect for renters and take literally seconds to adjust.

    Buy tension rods for $8–$15 each (IKEA, Target, Amazon, Hardware stores). Install them horizontally at different heights in your closet in about 2 minutes per rod. They’re adjustable and removable, so renters can use them without worry.

    Pro tip: Use S-hooks on the rods to hang multiple items per rod if you need extra capacity.

    You’ve essentially created two or three extra shelves’ worth of hanging space for minimal cost and zero permanent installation.


    Save this post for your next dorm setup. Try even just one of these ideas this weekend—you’ll be amazed how much smoother sharing a space becomes when things actually have a home. Share this with any roommates stressed about clutter!

  • 25 Laundry Folding Station Ideas for Faster, Easier Chore Days

    25 Laundry Folding Station Ideas for Faster, Easier Chore Days


    Laundry day doesn’t have to be a rushed chore squeezed into your evening. With the right folding station setup, you can actually make this task faster, easier, and even enjoyable. A dedicated folding space transforms how you approach laundry—giving your back relief, keeping clothes organized, and making the whole process less chaotic. Whether you’re working with a sprawling laundry room or a compact apartment corner, these 25 ideas will help you build a folding station that fits your space, your budget, and your lifestyle. Let’s get started.


    1. Install a Wall-Mounted Drop-Down Folding Table

    A wall-mounted drop-down table is a game-changer for renters and homeowners with tight spaces. When folded up, it takes up almost no room; pulled down, it gives you a full-sized work surface at perfect elbow height.

    You can find sturdy options at IKEA, Home Depot, or Amazon starting around $80–$150. Installation takes about 30 minutes with basic tools (drill, wall studs, level). Look for tables that lock securely in both open and closed positions—safety matters. Pro tip: Mount it at 34–36 inches high to minimize strain on your back while standing.

    Once closed, your wall looks clean and minimal, but you’ve got a professional-grade folding station ready whenever you need it.


    2. Create a Floating Countertop Over Your Washer and Dryer

    If your washer and dryer are stacked or positioned side-by-side, a floating countertop turns dead space into a useful folding area. This is an investment piece but worth every penny for convenience.

    Solid wood or laminate countertops range from $200–$600 depending on depth and finish. You’ll need a handyperson or carpenter to install (budget $150–$300 for labor). The surface should extend at least 24 inches deep to give you real working room. Some people pair this with open shelving underneath for basket storage.

    You gain a dedicated folding zone without eating into floor space, plus a spot to rest clean laundry baskets while you sort.


    3. Use a Large Dresser as a Folding Station

    This is the budget-friendly hack that actually works. A dresser—thrifted, inherited, or from a secondhand store—becomes the perfect folding surface with built-in storage underneath for linens and seasonal items.

    Hunt for one at thrift stores, Facebook Marketplace, or Craigslist for $30–$150. Look for sturdy wood construction and a flat, smooth top surface (avoid heavily textured finishes). A quick wipe-down and maybe a coat of paint or stain takes an afternoon. Pro tip: Roll it on lockable caster wheels ($20–$40) so you can move it when you need floor space.

    You’ve created a charming, functional folding station with serious storage underneath—and paid a fraction of what new furniture costs.


    4. Mount Floating Shelves Above Your Folding Counter

    Vertical storage keeps supplies within arm’s reach and makes your station feel intentional rather than cluttered. Floating shelves above your folding counter hold rolled towels, stain treatments, lint rollers, and baskets.

    Install 2–3 shelves at 12–18 inches apart using a wall stud finder and heavy-duty brackets. IKEA, Target, and Home Depot have basic options for $20–$50 per shelf, with installation taking about 1–2 hours. Load-bearing capacity matters—check limits before loading. Pro tip: Use matching bins or woven baskets on shelves to contain small items and look visually cohesive.

    Now everything you need is visible and reachable without leaving your folding station, cutting your chore time significantly.


    5. Add LED Task Lighting Directly Above Your Work Surface

    Poor lighting makes folding harder and strains your eyes. LED task lighting positioned directly above your folding counter changes everything—you see stains, colors, and wrinkles clearly, and you work faster.

    Pendant lights ($40–$120 per fixture) or under-cabinet LED strips ($25–$60) both work well. Installation depends on whether you have electrical access; if not, battery-operated LED strips ($15–$30) are renter-friendly. Use 4000K–5000K bulb temperature for natural, energizing light that won’t cast shadows. Time to install: 30 minutes to 2 hours depending on wiring.

    You’ll notice the difference immediately—sorting is faster, you catch stains you’d miss in dim light, and the space feels more purposeful.


    6. Invest in an Adjustable-Height Folding Table

    An adjustable-height table lets you customize your working comfort. If you fold sitting down sometimes and standing other times, or if multiple household members are different heights, this solves the problem.

    Electric adjustable tables run $300–$800 (brands like FlexiSpot make laundry-room versions), while manual crank models cost $150–$300. Look for weight capacity of at least 150–200 lbs and smooth adjustment mechanisms. Installation takes 30–45 minutes and mostly involves assembling the base. Pro tip: Set your ideal standing height at 30–34 inches and remember it for future reference.

    You get a personalized folding experience that reduces back strain and adapts to however you prefer to work.


    7. Hang a Fold-Down Wall Desk Above Appliances

    Similar to a drop-down table, but smaller and more minimal—a wall desk creates a folding surface where you had none. Ideal for apartments and studios where floor space is precious.

    Wall-mounted desks cost $60–$180 from IKEA, Wayfair, or Amazon. They’re lighter than full folding tables, so installation with wall anchors (if not hitting studs) is often simpler—20–30 minutes. Maximum surface area is usually 24–36 inches wide, so it’s perfect for one person folding at a time. Pro tip: Add a cushioned mat on top to make standing more comfortable during longer sessions.

    You transform an unused wall into a functional work zone that disappears when not in use.


    8. Create a Pull-Out Hamper-to-Basket System

    Having separate baskets for clean, folded, and ready-to-put-away items keeps your folding station organized and speeds up the whole process. Pull-out hampers built into cabinetry make sorting effortless.

    You can buy ready-made pull-out basket systems ($80–$250 per set of 2–3) from Container Store, Wayfair, or Home Depot, or have a carpenter build custom drawers into existing cabinetry ($300–$600 labor). The baskets should be at least 18–20 inches wide so clothes don’t get jammed. Installation takes 1–3 hours depending on whether you’re retrofitting existing cabinets or building new.

    Now folding flows into organization—one basket catches clean items, another holds folded clothes, and a third waits for socks and underthings to pair.


    9. Paint Your Folding Wall a Soft, Energizing Color

    A fresh paint color makes your folding station feel intentional and even pleasant—and it costs almost nothing. Soft greens, warm taupes, or pale blues are trending and make the space feel less utilitarian.

    A gallon of quality paint costs $20–$40, and you’ll need 1 gallon for most rooms. Paint the wall yourself over a weekend—about 2–4 hours for a small space. Use low-VOC or zero-VOC paint for better air quality in a room where you’re working regularly. Pro tip: Paint just the wall behind your folding counter if doing the whole room feels like too much.

    Suddenly your folding station has personality and feels less like a chore zone and more like a personal project space.


    10. Set Up a Stain-Treatment Station Next to Folding Area

    Treating stains before folding saves time and prevents you from missing marks. A dedicated stain station right next to your folding counter means you catch problems immediately.

    You need about 2–3 linear feet of counter or shelf space. Stock it with stain remover spray ($5–$12), a soft brush ($3–$8), white cloths, and a small spray bottle of water. A small rolling cart ($40–$80) from IKEA or Target gives you mobile storage that rolls between laundry and folding areas. Setup takes 30 minutes and costs under $50 if you’re starting from scratch.

    You’ll catch and treat stains while they’re fresh, making your clothes last longer and reducing frustration when you find mysterious marks later.


    11. Use a Rolling Cart as a Mobile Folding Station

    A rolling cart with multiple tiers gives you a folding station that moves where you need it. Perfect for small spaces, apartments, or if you fold in different rooms (laundry room, bedroom, living room).

    Metal or wood rolling carts range from $40–$150 depending on size and material. Look for sturdy construction with lockable wheels (non-locking carts are frustrating). IKEA’s PINNIG cart is popular at $40–$60, while fancier versions from Container Store run higher. Assembly takes 15–30 minutes. Pro tip: Use each tier for different categories—bottom tier for folded items, middle for items being worked on, top for small accessories.

    You get a portable folding station that adapts to your space and can tuck into a corner when not in use.


    12. Install Pull-Out Drying Racks Below Folding Counter

    Integrating drying space into your folding station means delicate items air-dry within arm’s reach of where you sort. Pull-out racks are sleek and don’t dominate your space when closed.

    Wall-mounted pull-out drying racks cost $60–$150 and take 1–2 hours to install (may need a handyperson if complex plumbing is involved). You can also use hinged racks ($30–$80) that swing out from under cabinetry. Pro tip: Position racks at chest height for easy reach and good air circulation. Some people stack multiple racks for volume.

    Now sweaters, delicates, and air-dried items have a permanent home near your folding zone—no more hunting for hangers or draping clothes over chairs.


    13. Add a Pegboard for Tool and Supply Organization

    A pegboard keeps small tools and supplies visible and within reach, reducing clutter on your folding counter itself. This is especially useful if you iron, use stain remover frequently, or need quick access to lint rollers.

    A pegboard costs $15–$30, hooks are $10–$25 for a set, and paint is $20–$40 if you customize the look. Installation takes 1–2 hours and involves marking studs, drilling, and securing the board. You can rearrange hooks anytime to fit your workflow. Pro tip: Use labeled containers on the pegboard for socks, hair ties, or small items that disappear.

    Everything has a visible home, your counter stays clear, and you work more efficiently because nothing’s buried in drawers.


    14. Pair Your Folding Counter with a Deep Utility Sink

    A utility sink lets you rinse stains, soak delicates, and dampen clothes for stubborn wrinkles—all without leaving your laundry zone. It’s a legitimate upgrade that saves countless trips.

    Utility sinks cost $150–$400 depending on material and size; installation with plumbing runs $200–$500 (call a plumber). If you rent, this isn’t an option, but homeowners find it worth the investment. Faucets are separate ($50–$150). Installation takes a half-day to a full day depending on existing plumbing. Pro tip: Choose a 24–30 inch wide sink with at least 12 inches of depth.

    You’ve created a complete laundry processing center—washing, treating, folding, and drying all in one zone.


    15. Use Tension Rods to Hang Folded Clothes Temporarily

    Tension rods strung across a wall or between shelves create temporary hanging space for items waiting to be put away or for pieces that don’t need to be folded (like button-ups or sweaters).

    Tension rods cost $10–$25 each, and you’ll need 2–3 for a functional system. Installation takes 15 minutes with no tools—they wedge between studs or shelves. Add some basic wooden hangers ($20–$40 for a set of 10) and you’re done. Pro tip: Use this system for sorting—delicates that need careful folding on one rod, everyday items on another.

    Clothes have a holding zone instead of piling on your counter, so your work surface stays clear and organized.


    16. Create a Label-Maker Station Within Arm’s Reach

    Labeling baskets, shelves, and drawers for socks, underwear, seasonal items, and delicates makes it faster to sort and put away—and keeps the whole family on the same page. A label maker feels small but changes everything.

    A basic label maker costs $15–$30 (Brother and Dymo make affordable ones), and label tape is $5–$15 per roll. The label maker sits on your folding counter or nearby shelf and takes seconds per label. Setup time: 10 minutes. Pro tip: Use color-coded label tape for different room categories or family members.

    Now sorting transitions smoothly to putting away because everyone knows exactly where things belong.


    17. Mount a Fold-Down Ironing Board Above or Behind Your Counter

    An integrated fold-down ironing board means you can press wrinkled items without leaving your laundry zone. This is especially useful if you’re someone who likes crisp clothes but doesn’t have a separate ironing space.

    Wall-mounted ironing boards cost $80–$200 depending on size and quality. Installation takes 45 minutes to 1 hour and requires wall studs or heavy-duty anchors. Some are reversible or have mesh surfaces for better airflow. Pro tip: Mount it at chest height so you’re not straining to reach, and position it perpendicular to your folding counter if space allows.

    Pressing and folding happen in the same zone, cutting your laundry workflow time by eliminating transitions.


    18. Add a Small Counter-Top Steamer Station

    A compact steamer offers a quick alternative to ironing for delicate fabrics and touch-ups. Many people find it faster and gentler than traditional pressing.

    Handheld steamers cost $30–$80 and take up minimal space (about 12 inches tall). Small tabletop steamers run $50–$120 but have slightly more power. They need only 5–10 minutes to heat up, and you can use tap water. Setup involves storing the steamer and a small container for water on your counter or nearby shelf—takes 5 minutes. Pro tip: Keep a microfiber cloth nearby to smooth fabric after steaming.

    You now have a quick wrinkle-removal option that’s faster than ironing for many fabrics and lighter to use.


    19. Design an Accessible Folding Station for Mixed Heights

    If your household includes kids, elderly family members, or anyone with mobility concerns, an accessible folding station works for everyone. A combination of standing and sitting options ensures comfort for all.

    Your base counter stays at 30–34 inches for standing comfort. Add an adjustable stool ($40–$100 from IKEA, Amazon, or Target) so people can sit if needed. Ensure counter depth is at least 24 inches for comfortable reach. A cushioned mat underneath reduces fatigue while standing. Setup time: 30 minutes, cost is under $150 if you’re adding seating only.

    Everyone in your household can participate in laundry without strain, and the setup encourages shared responsibility.


    20. Use Drawer Dividers to Keep a Folding Drawer Organized

    If your folding counter has drawers underneath, dividers turn them into organized sorting zones. This keeps your work surface clear and prevents items from shifting during the fold.

    Wooden or plastic drawer dividers cost $15–$40 per set, and you can customize lengths. Installation takes 15 minutes (most are just wedged in place or stick on). Use one drawer for socks and small items, another for towels, another for delicates. Pro tip: Choose adjustable dividers so you can reconfigure as needs change.

    Your workflow streamlines because sorted items have designated homes, and your counter stays a clear work surface instead of a staging area.


    21. Install a Countertop Carousel for Small Supplies

    A lazy Susan or rotating carousel keeps small supplies organized and within a rotation’s reach. Everything’s visible, nothing gets lost in the back of a shelf, and you use floor or counter space efficiently.

    Small carousels cost $15–$40 and take seconds to place on your counter. Stock it with stain remover, lint rollers, wrinkle spray, hair-tie holders, or sock bins. Metal or wood versions match different styles. Pro tip: Use small containers or baskets on the carousel so items don’t roll around and everything looks intentional.

    Your supplies are always accessible and visible, meaning you work faster and nothing disappears into the clutter.


    22. Build a Rolling Basket System for Multi-Person Households

    For households with multiple people, personalized rolling baskets turn the folding station into a distribution hub. Each person’s clean laundry goes into their basket, ready to take to their room.

    Rolling baskets cost $20–$60 each from Target, IKEA, or Container Store. Get 3–5 depending on household size. Label each basket with names or use color-coding. Total investment: $60–$300. Setup takes 20 minutes. Pro tip: Keep baskets under the counter when not in use so your folding space stays open.

    Folding becomes sorting, and everyone knows where to grab their clean clothes—reducing the “where’s my shirt?” chaos.


    23. Add a Fold-Down Changing Station for Households with Small Children

    If you have young children, a fold-down changing station next to your folding counter lets you fold and dress kids without carrying loads of laundry to bedrooms. It’s efficient and makes sorting by child easy.

    Wall-mounted changing pads cost $80–$180 and installation takes 1–2 hours (requires wall studs). Fold them up when not in use to reclaim counter space. Some parents add a small shelf above for commonly grabbed items like diapers or wipes. Pro tip: Position it low enough (20–24 inches) so you’re not straining to reach.

    Your laundry zone becomes a one-stop station for processing, folding, and dressing little ones—cutting multiple steps out of your routine.


    24. Create a Before-and-After Staging System

    A visual system where one side of your counter holds unfolded clothes and the other holds folded items keeps you on track and gives you a sense of progress. This sounds simple but genuinely speeds up the process.

    You need two baskets or containers ($15–$40 combined) and about 3–4 feet of counter space. Place your unfolded basket on the left, folded basket on the right. As you finish items, they move to the right—instant visual proof of progress. Setup time: 5 minutes. Pro tip: Use different colored baskets for even clearer visual separation.

    You’ll work faster because you can see progress, and the system keeps you focused instead of letting your mind wander.


    25. Install Ambient Lighting to Make the Space Feel Inviting

    Beyond task lighting, ambient light makes your folding station feel less like a chore zone and more like a pleasant space. Warm lighting specifically improves mood and makes you more likely to fold promptly.

    Warm LED strip lights ($20–$50), battery-operated sconces ($25–$60 each), or even small string lights ($15–$40) work beautifully. Choose bulbs in the 2700K range for warm tone. Installation takes 30 minutes to 1 hour depending on type. Pro tip: Install dimmers so you can adjust brightness based on time of day or your energy level.

    Your laundry room stops feeling utilitarian and starts feeling like a space where you actually want to spend time—making chores feel lighter.


    26. Combine All Systems: Design Your Complete Folding Station

    The magic happens when you layer these ideas into a cohesive system tailored to your space and workflow. Your perfect folding station combines storage, lighting, accessibility, and organization into one streamlined zone.

    Start with your base: counter at 32–36 inches high, at least 24–30 inches deep. Layer in task lighting overhead ($50–$150), floating shelves above for supplies ($60–$100), pull-out storage below ($100–$300), and ambient lighting for mood ($30–$80). Add a utility sink if you can ($300–$800 with installation) and organizational accessories like label makers and dividers ($50–$100). Total time to design and install: 1–4 weeks depending on complexity. Total budget: $500–$2,000 for a full setup (scale up or down based on your priorities).

    You’ve created a personalized laundry command center that makes every step smoother and faster—transforming a dreaded chore into an efficient, almost pleasant part of your routine.


    Save this post and start with just one idea this weekend. Whether it’s better lighting, a simple shelving system, or a rolling cart, even one upgrade will make your folding station work harder for you. Share this with anyone drowning in laundry piles—we could all use a little laundry room inspiration.