Category: Wall Decor

  • 25 Mirror Wall Art Ideas That Instantly Transform Blank Walls

    25 Mirror Wall Art Ideas That Instantly Transform Blank Walls


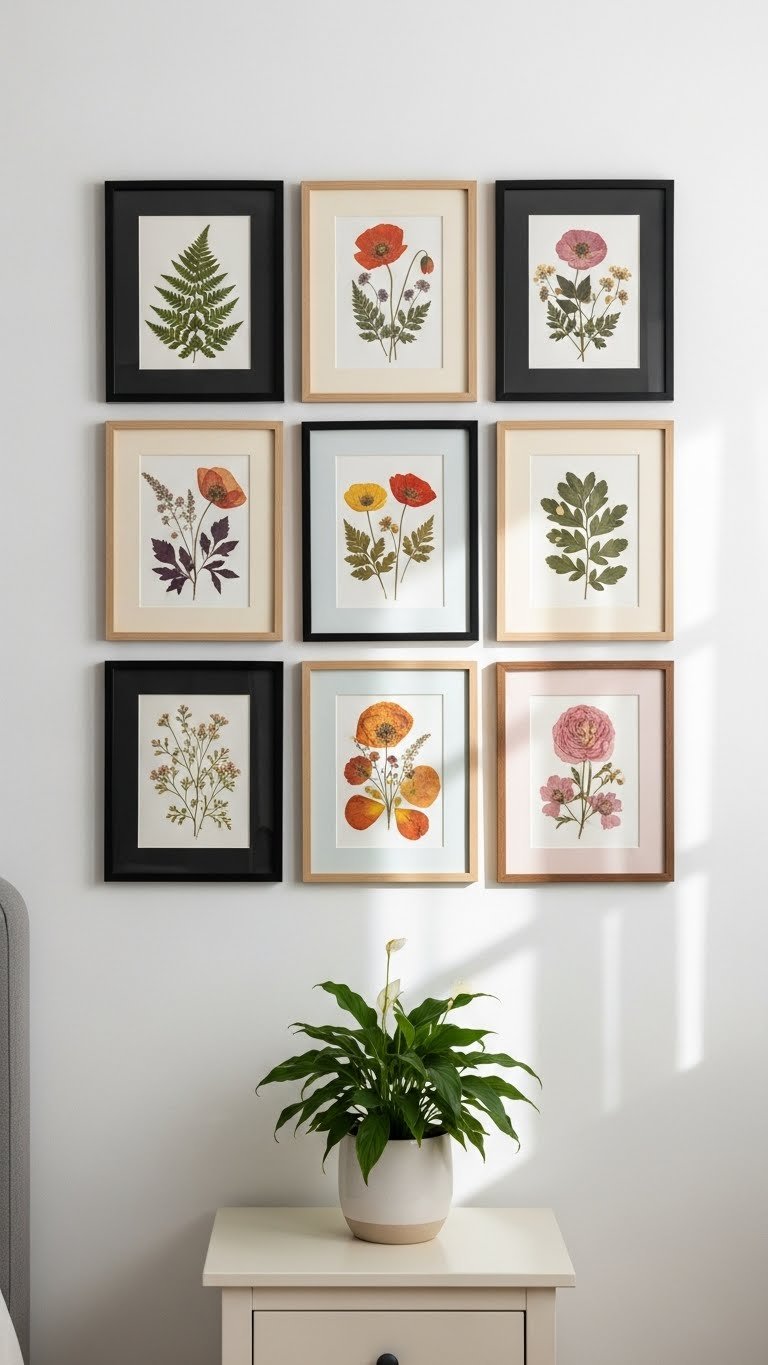
    Your blank walls don’t have to stay blank. A well-chosen mirror does so much more than just reflect your face—it bounces light around your room, opens up tight spaces, and adds instant personality to any wall. Whether you’re renting, decorating on a budget, or ready to invest in a statement piece, there’s a mirror idea here that fits your space and style. From bold geometric shapes to subtle natural wood frames, gallery wall clusters to full-wall installations, we’ve rounded up 25 creative ways to use mirrors as wall art. You’ll find free ideas, DIY hacks, and investment pieces that actually work. Let’s dive in and find the perfect mirror moment for your home.


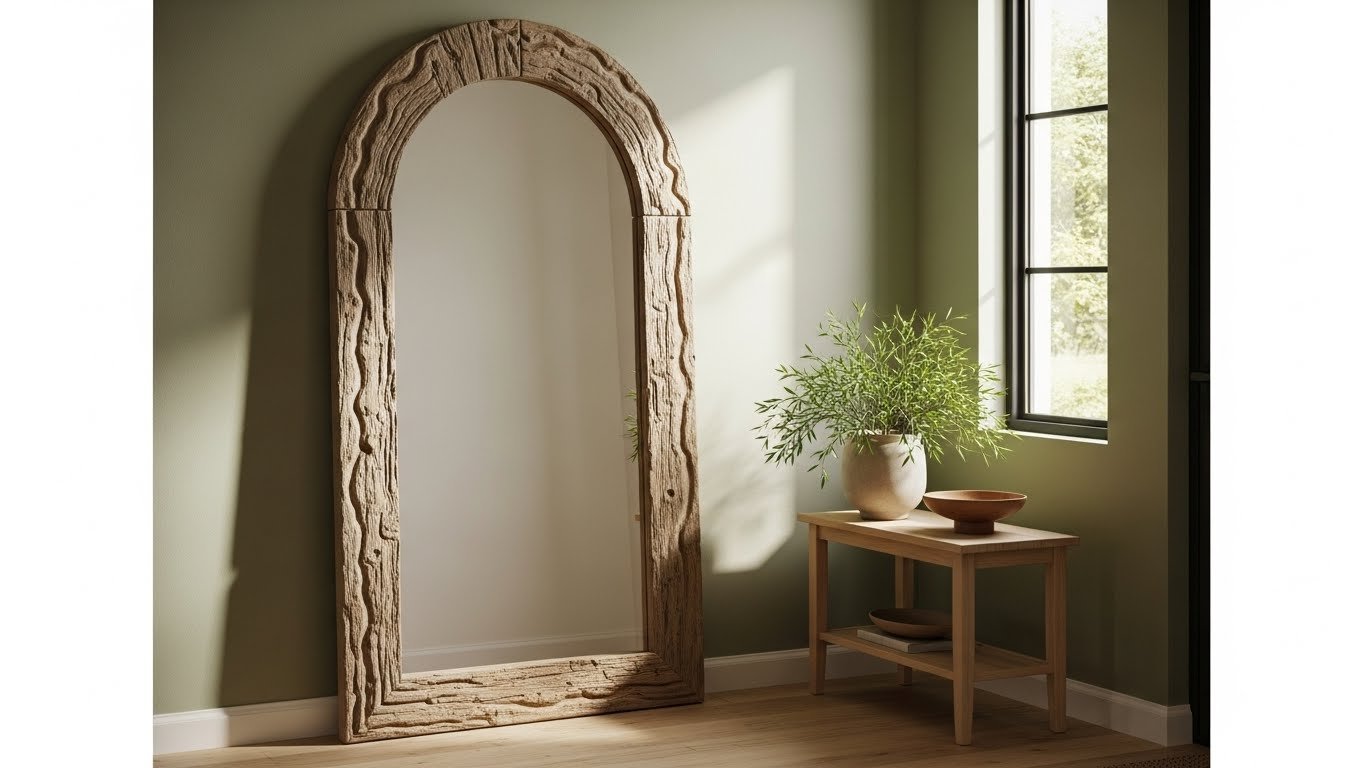
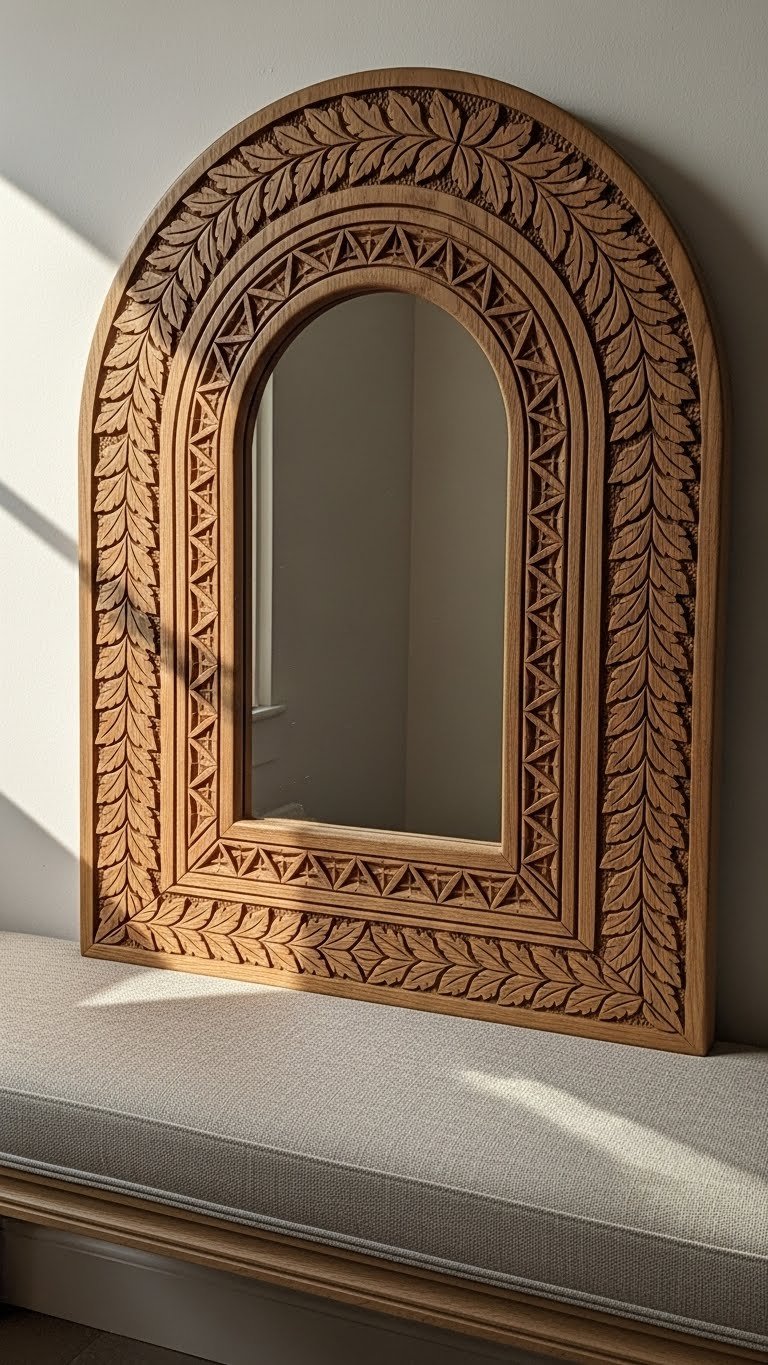
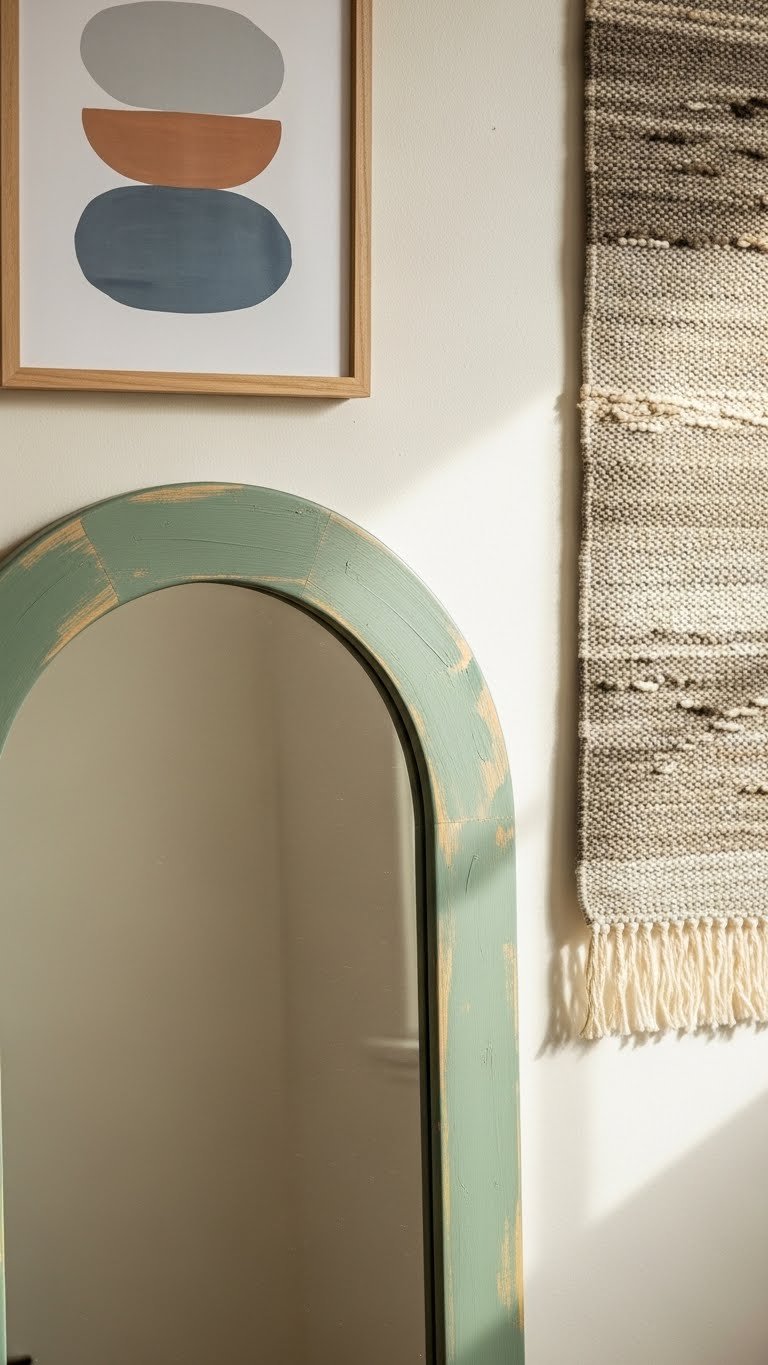
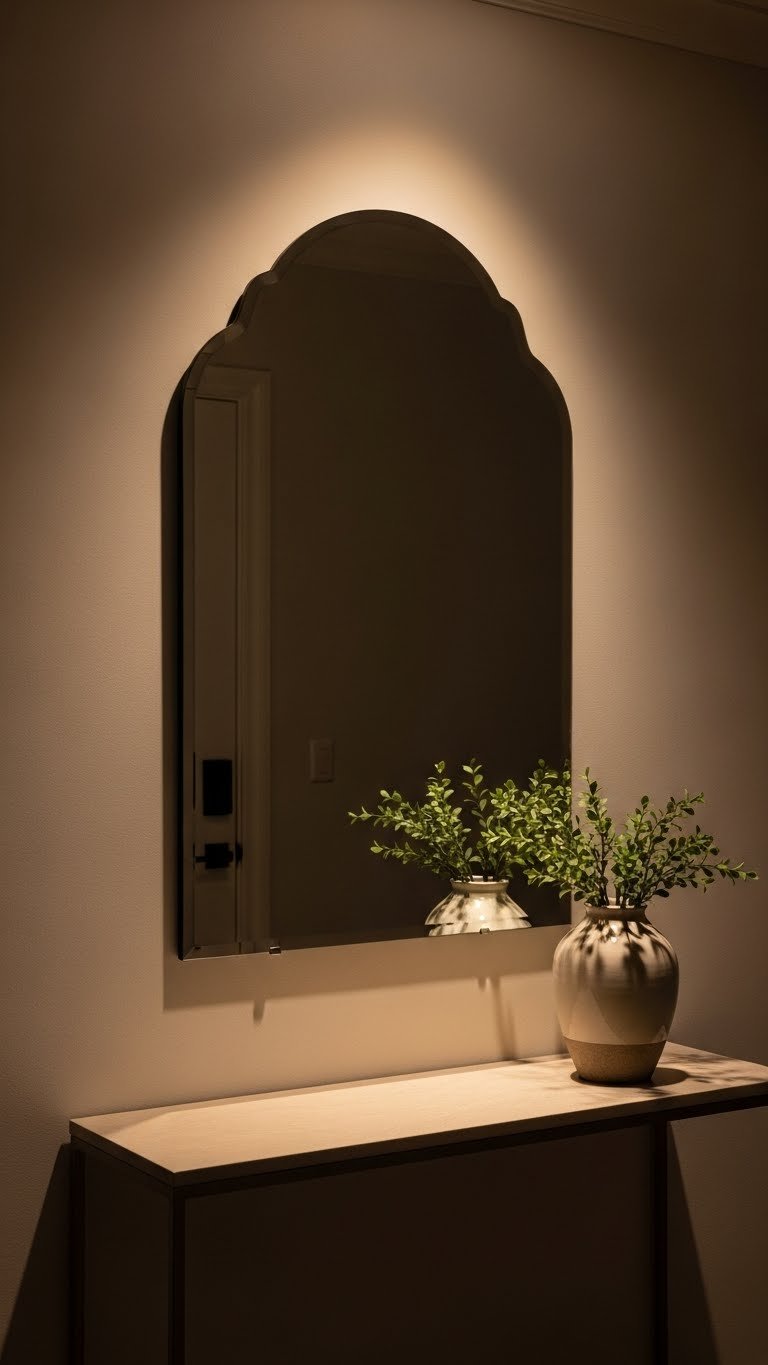
    1. Lean an Oversized Arched Mirror for Instant Height

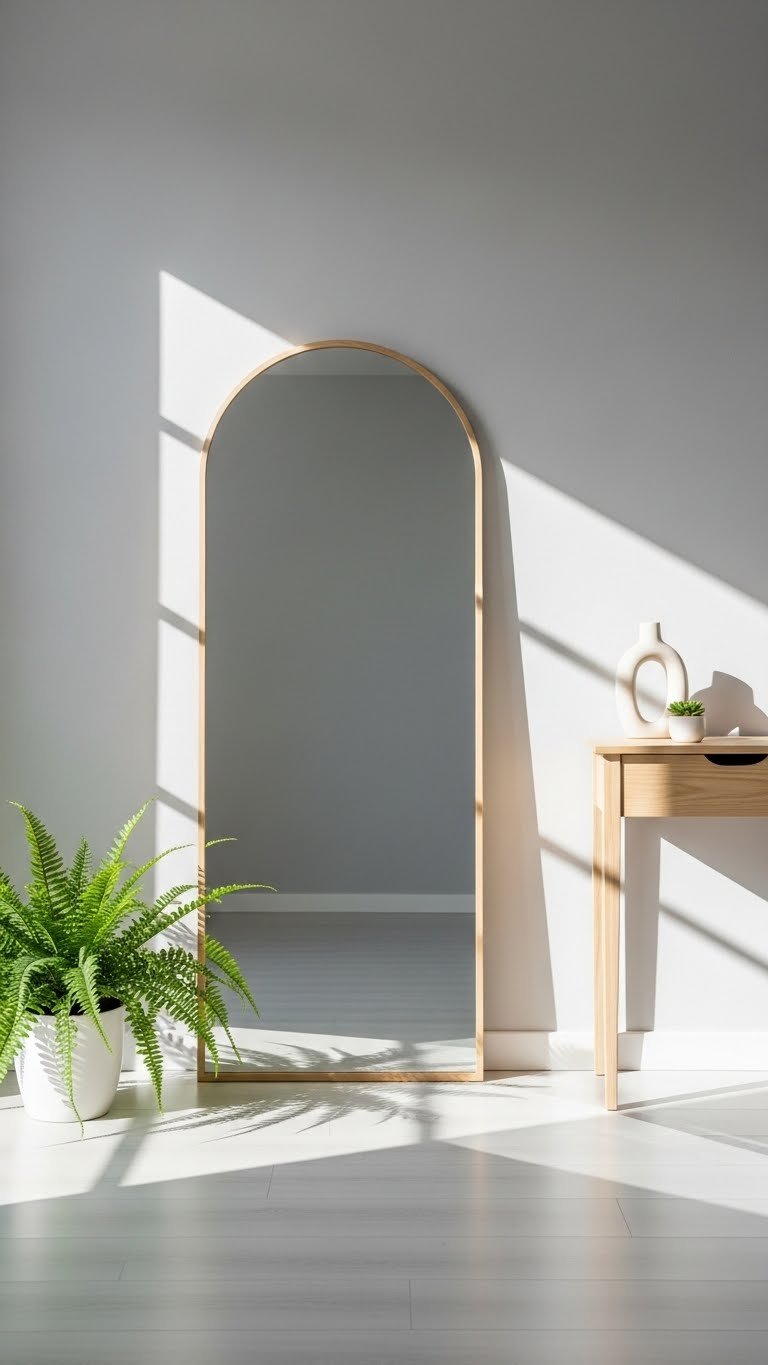
    An arched mirror adds soft elegance and makes your ceiling feel higher than it actually is. Leaning (rather than hanging) gives you a renter-friendly option that still reads as intentional and styled.

    Oversized arched mirrors come in many materials—wood, metal, rattan. Look for options $80–$300 at IKEA, Wayfair, or Amazon. Choose one that’s at least 4 feet tall for maximum impact. The best part? No drilling required. Just lean it against the wall on a console, dresser, or straight on the floor. Takes zero minutes to set up, but looks like you spent the whole weekend styling.

    This approach opens up your room without permanent commitment, making it perfect for renters and anyone who loves flexibility.


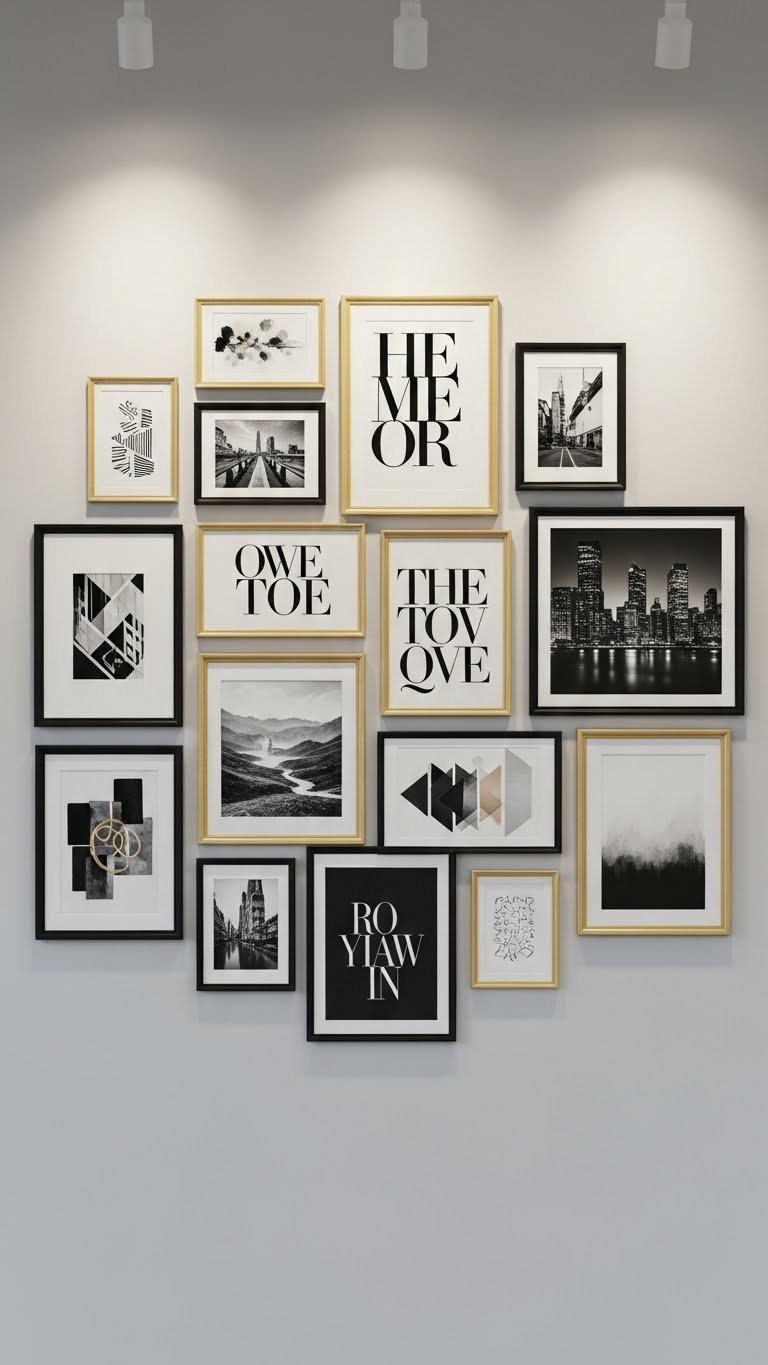
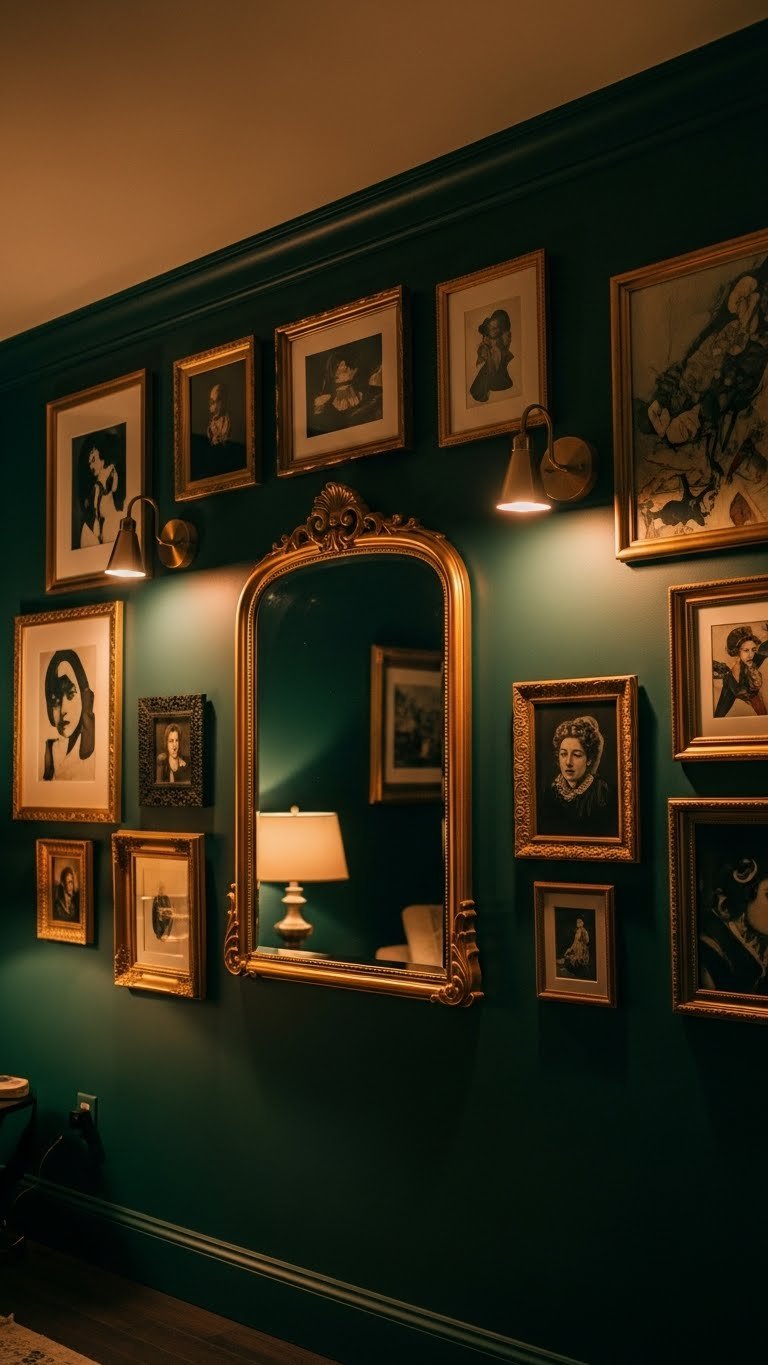
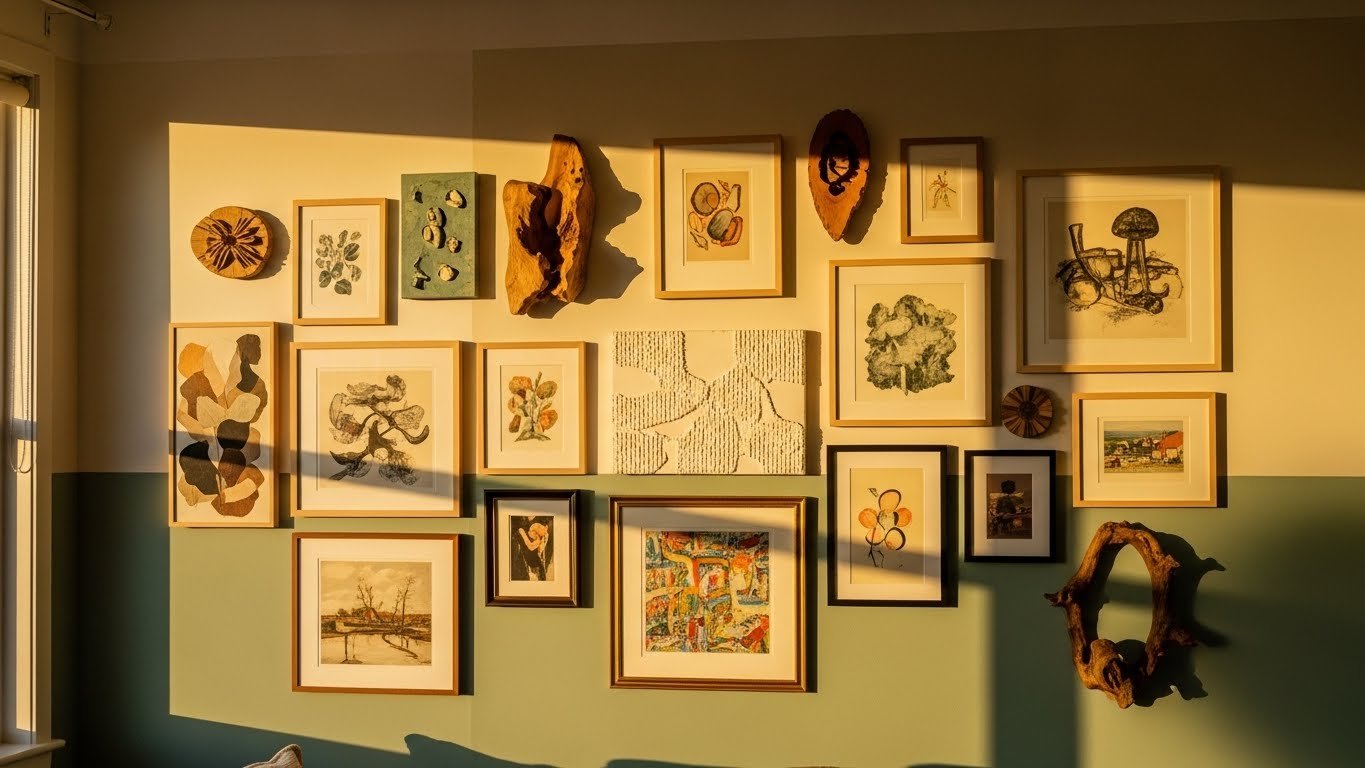
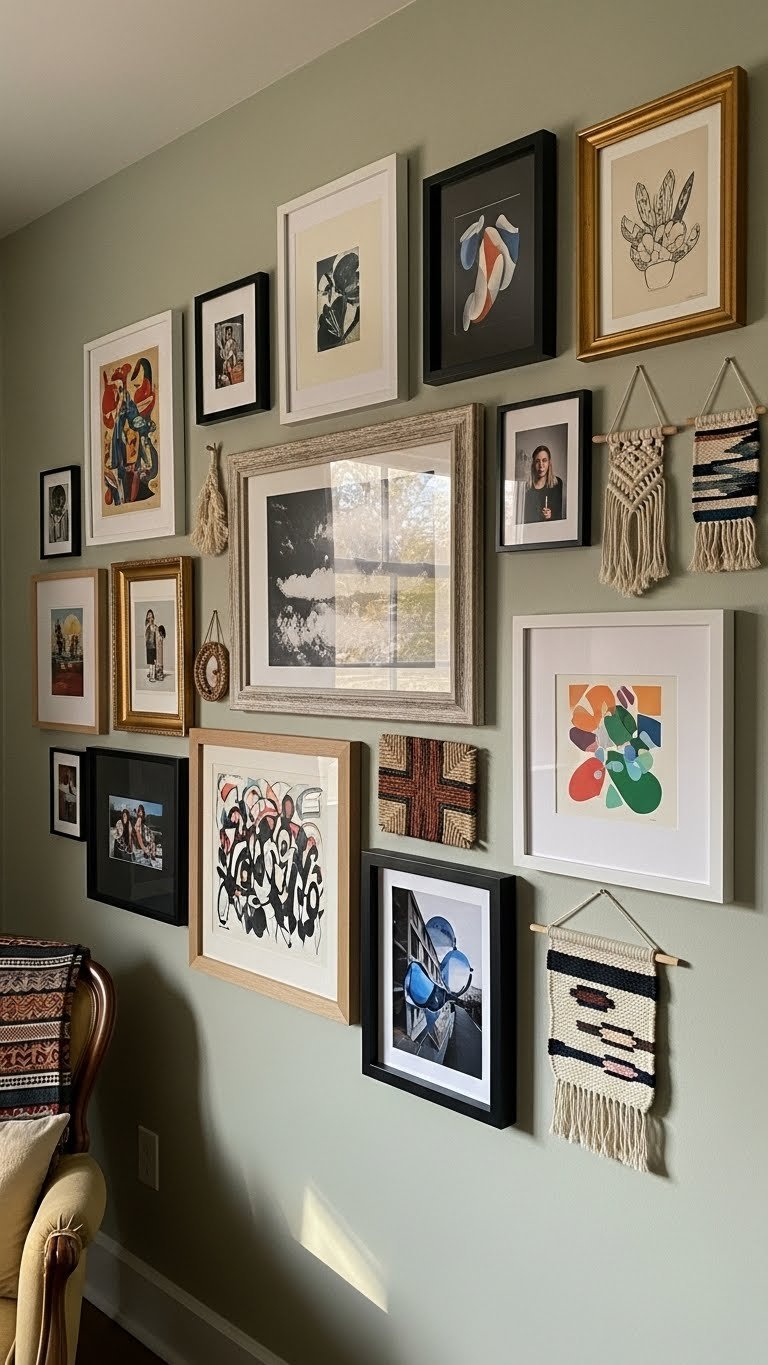
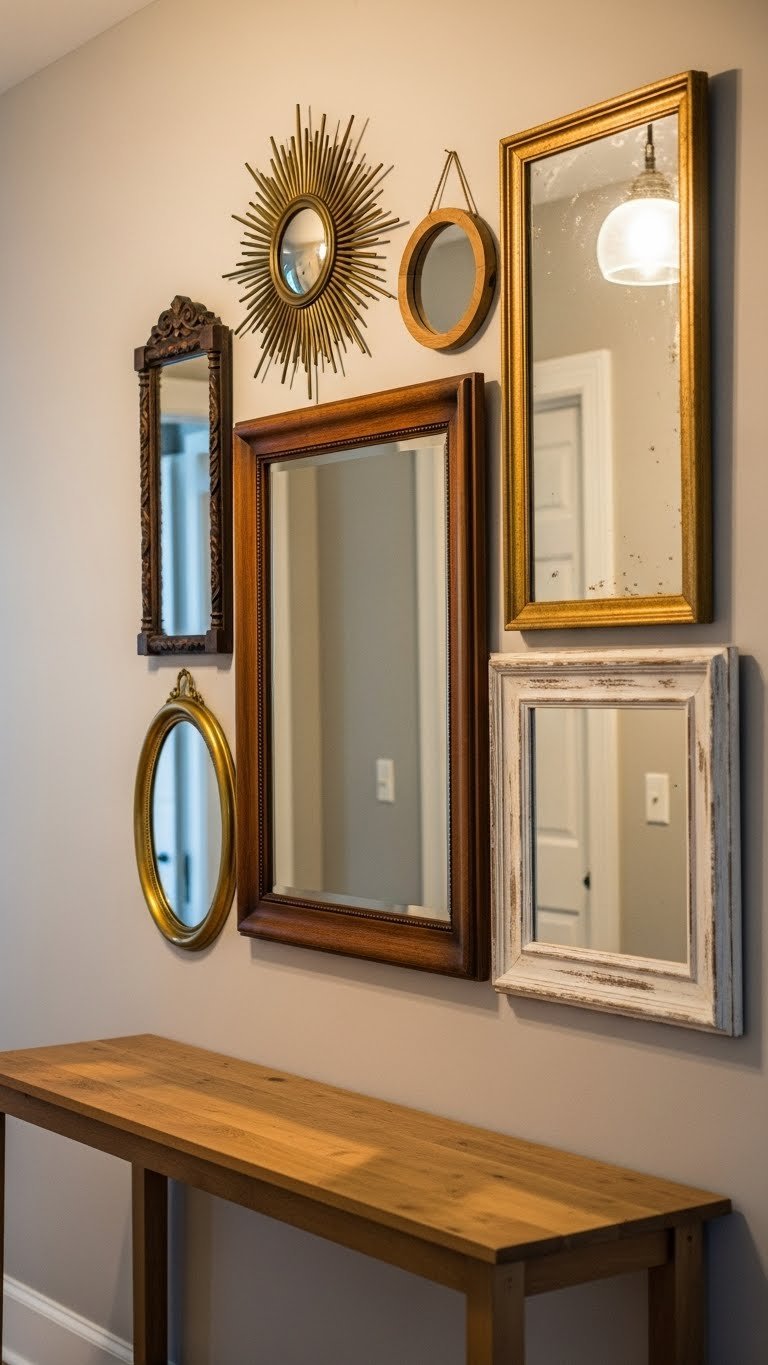
    2. Create a Mismatched Mirror Gallery Wall

    Mixing mirror shapes, sizes, and frames creates visual interest and reads like you have genuine style taste—not like you bought one thing and called it done.

    Map out your arrangement on paper first or use painter’s tape on the wall to plan spacing. Combine styles: a round gold-framed mirror next to a square wooden one, then an arched black metal frame. Prices vary wildly—grab affordable options at Target, IKEA, or thrifted, ranging $15–$150 per piece. Space them 4–6 inches apart for a curated look. Installation takes a few hours but pays off visually for months.

    You get a custom-gallery feeling without custom pricing, and it’s genuinely hard to mess up.


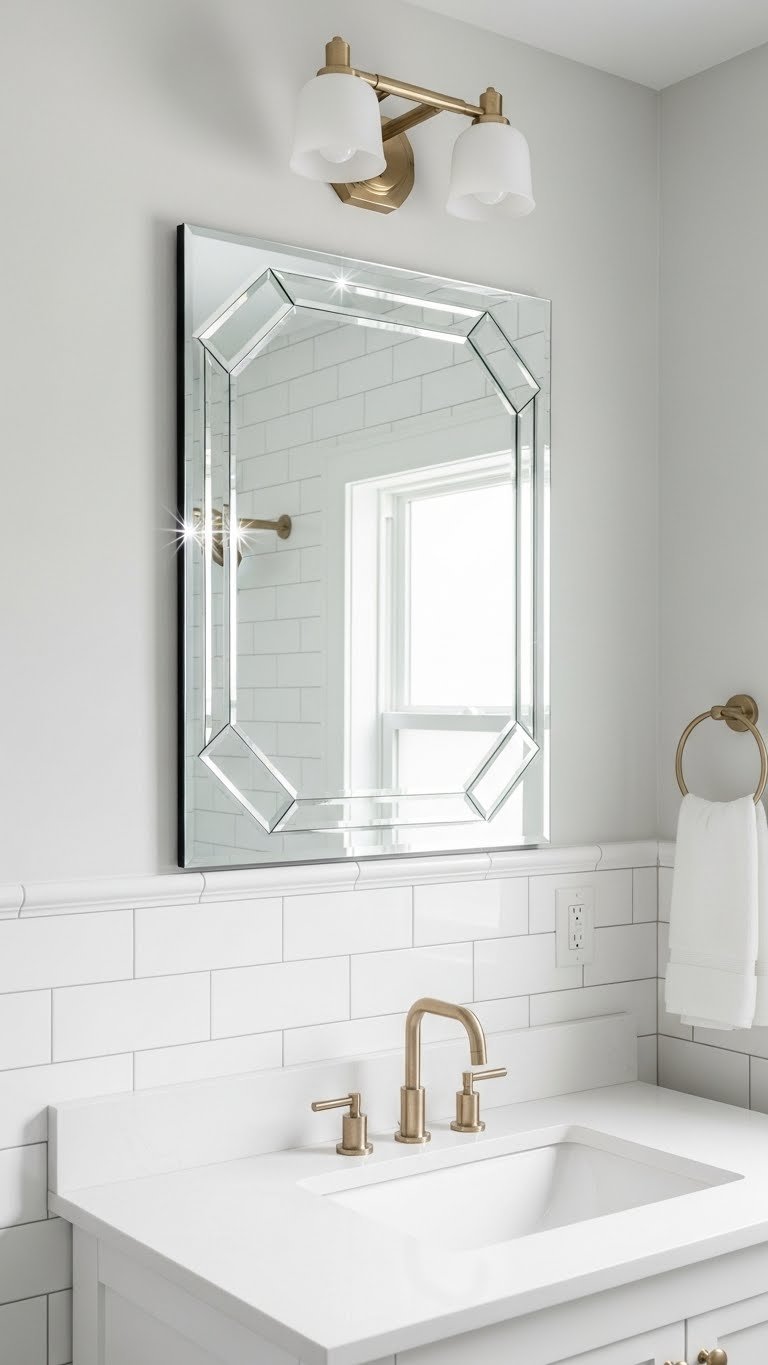
    3. Use Frameless Mirrors with Beveled Edges

    Frameless mirrors with beveled edges look expensive and high-end but cost way less than you’d think. The beveled edge catches light beautifully and adds dimension without visual bulk.

    Hunt for frameless beveled mirrors at Home Depot, Wayfair, or Amazon—sizes range $25–$120. The key is making sure your wall can support the weight (drywall anchors are your friend, or drill into studs). Install two or three at varying heights in a bathroom or entryway for modern appeal. Takes about 30 minutes with a level and basic tools.

    Your space automatically feels more polished, and guests will assume you paid way more than you did.


    4. Paint a Circular Mirror to Match Your Color Palette

    A basic round mirror with a plain wood frame is your blank canvas. A coat of paint ties it directly into your room’s color story and costs almost nothing.

    Grab a cheap round mirror at IKEA or thrifted ($10–$30). Choose paint that matches your wall trim, accent color, or textiles. Use spray paint for smooth results (30 minutes dry time) or brush-on acrylic for control. Prime if needed, then seal with matte or satin topcoat for durability. Total cost: under $30. Installation: 15 minutes with a nail or D-ring hanger.

    This tiny change makes the mirror feel custom-made for your space, not like a generic store piece.


    5. Hang a Sunburst Mirror for Sculptural Drama

    Sunburst mirrors read as sculptural art, not functional décor—they’re the kind of piece people stop and stare at. Gold-toned rays are classic, but black metal and wood versions offer modern alternatives.

    Browse Wayfair, Amazon, or Etsy for sunburst styles, ranging $60–$250. Sizes go from 24 inches to 48 inches—choose based on your wall scale. Mount above a console, sofa, or bed to anchor the room. Hanging takes 20 minutes if you use a stud (or toggle bolts for drywall). The finished look feels intentional and high-end instantly.

    This one piece does heavy lifting in any room, especially if your decor is neutral or minimal.


    6. Lean a Large Round Mirror Against a Gallery Wall

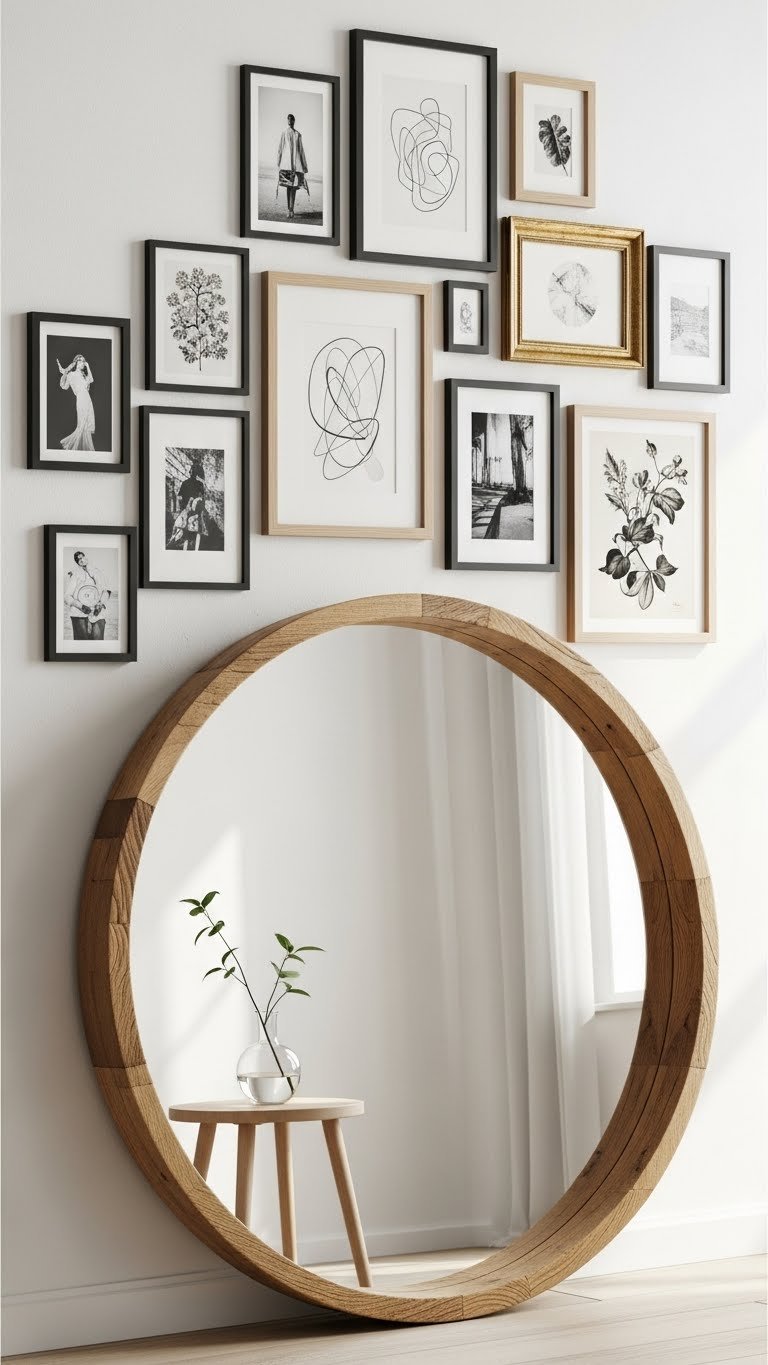
    Leaning a large round mirror creates depth and layering—it looks styled without looking fussy, and you can move it whenever you want.

    Find round mirrors $40–$150 at IKEA, Target, or West Elm. Pair it with smaller framed prints or photos hung above at different heights. The mirror and art together create a cohesive focal point that reads expensive. Arrangement takes 30 minutes. Renter bonus: no wall damage since the mirror just leans.

    The combination feels collected and intentional, like you’ve been decorating your space for years.


    7. Install a Floor-to-Ceiling Mirror Wall in a Narrow Room

    A mirror accent wall optically doubles your room’s width—game-changing for narrow hallways, small bedrooms, or compact bathrooms. Full-wall installations read ultra-modern and a little bit luxe.

    Order custom-cut mirror panels or buy mirror tiles in 18×24-inch or 24×24-inch sizes ($3–$8 per tile via Home Depot or Wayfair). A typical wall might need 8–12 tiles, totaling $50–$150. Hire a professional for clean installation ($300–$800 labor) or DIY with strong adhesive and a level if you’re confident. Installation takes a few hours professionally.

    Your tight space feels airy and twice as big—people will ask how you made that happen.


    8. Mount a Statement Scalloped Mirror

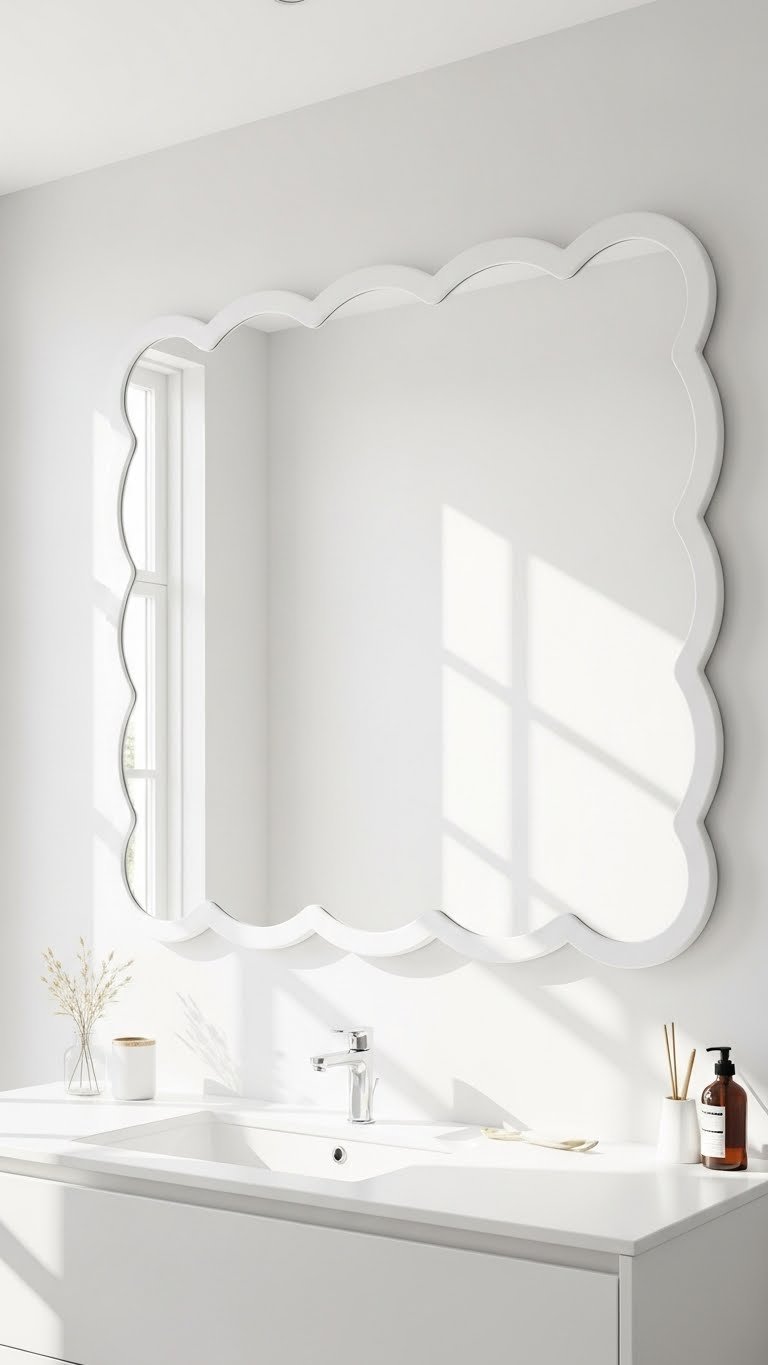
    Scalloped edges soften a space and feel current without being trendy enough to date quickly. The curved silhouette adds movement to any wall.

    Hunt for scalloped mirrors on Etsy, Wayfair, or Amazon, typically $70–$180 for larger statement sizes. Wood or painted metal frames keep the vibe fresh. Center above a bathroom vanity or console for maximum visual impact. Mounting takes 15 minutes with a French cleat or standard D-ring hanger.

    The gentle curves make your space feel more intentional and less corporate or stark.


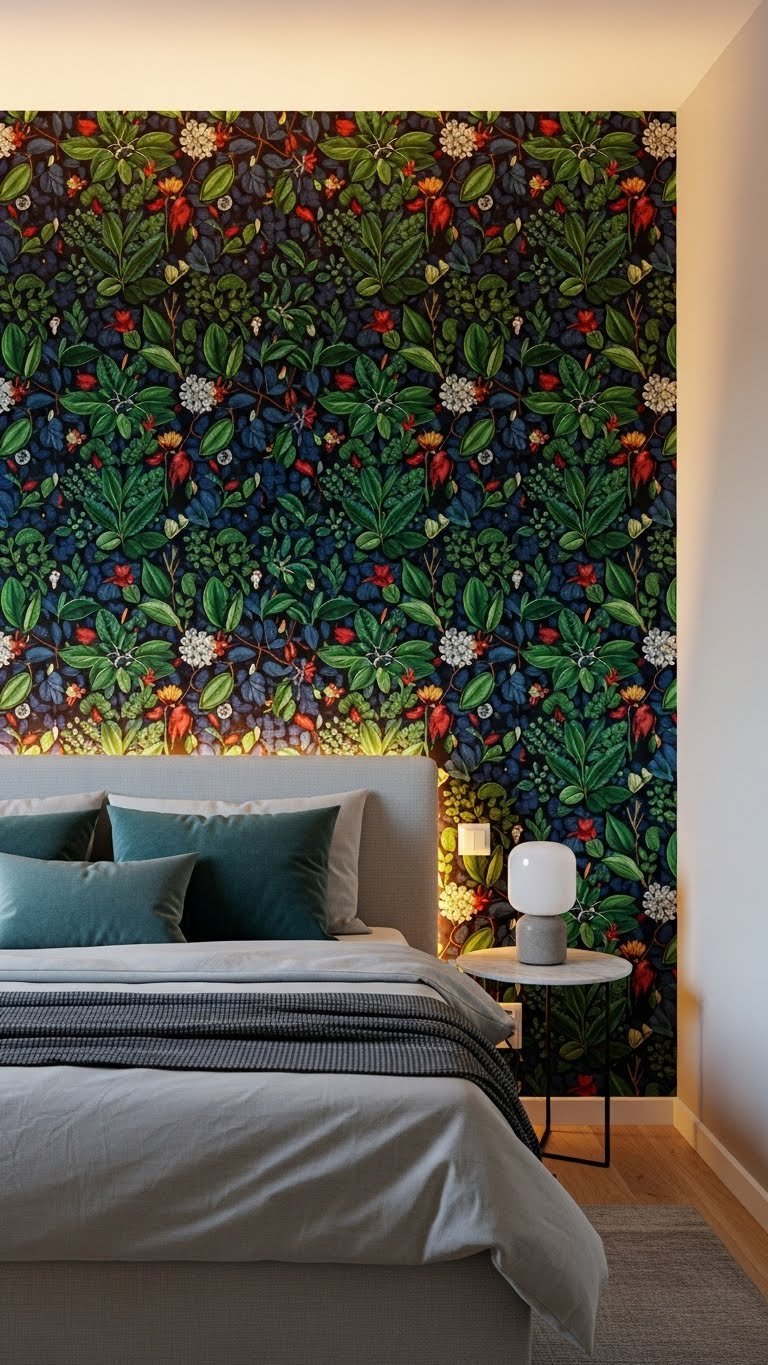
    9. Layer Mirrors Over Wallpaper for Depth

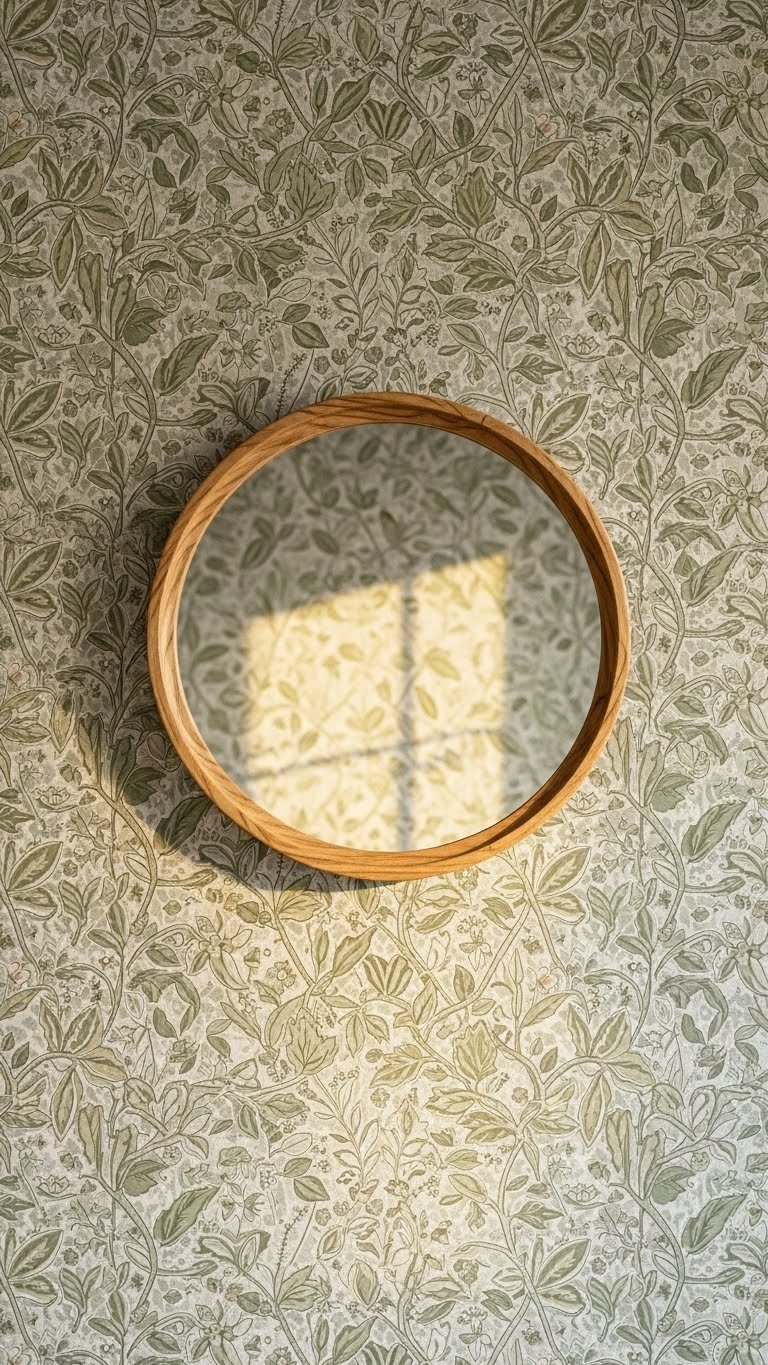
    Hanging a mirror over patterned or textured wallpaper adds visual interest and breaks up a busy wall—it creates focal points that balance the pattern.

    Choose a wallpaper with small repeating patterns (geometric, botanical, or subtle texture work best). Mount a round or oval mirror directly over it using standard hardware. Mirror cost: $30–$100. Wallpaper: $20–$50 per roll depending on quality. Takes one afternoon to wallpaper and one hour to hang the mirror.

    The combination feels more curated and layered than walls alone, and the mirror pulls the eye exactly where you want it.


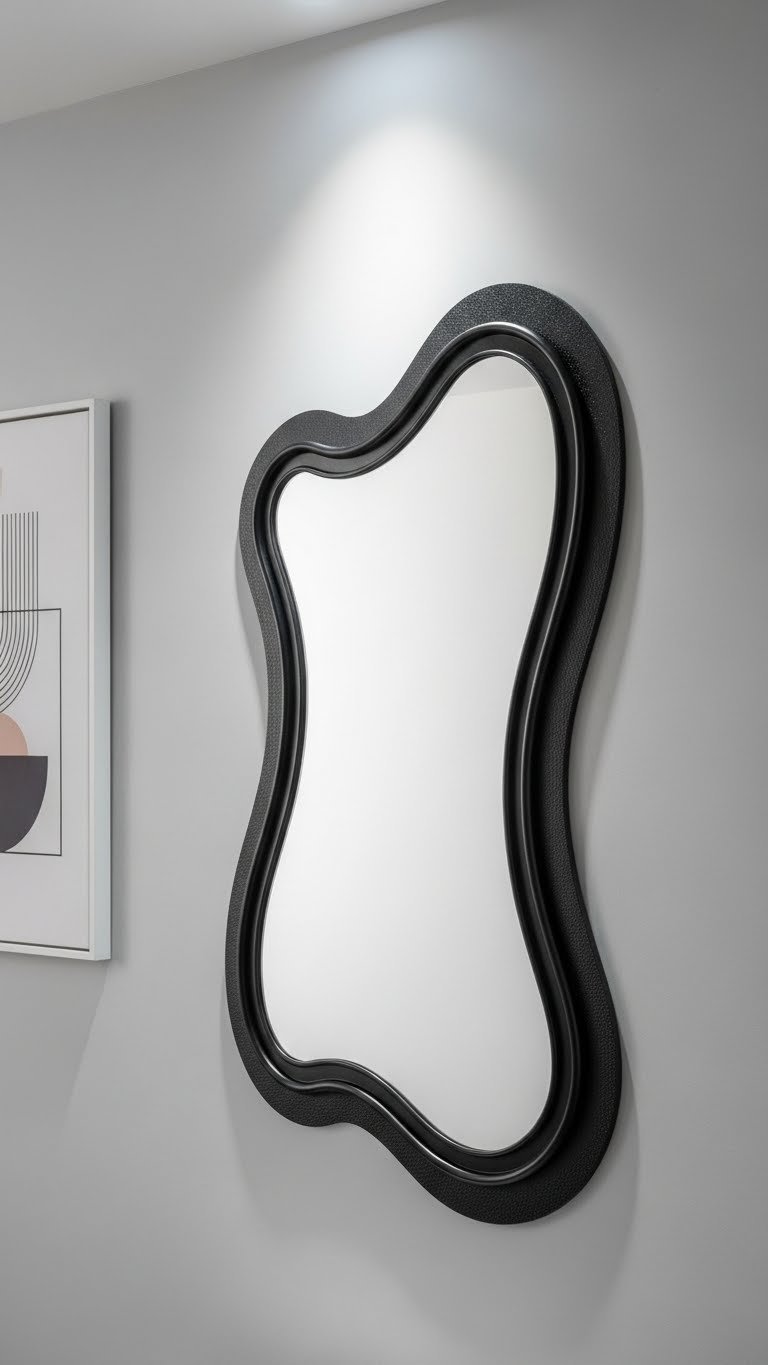
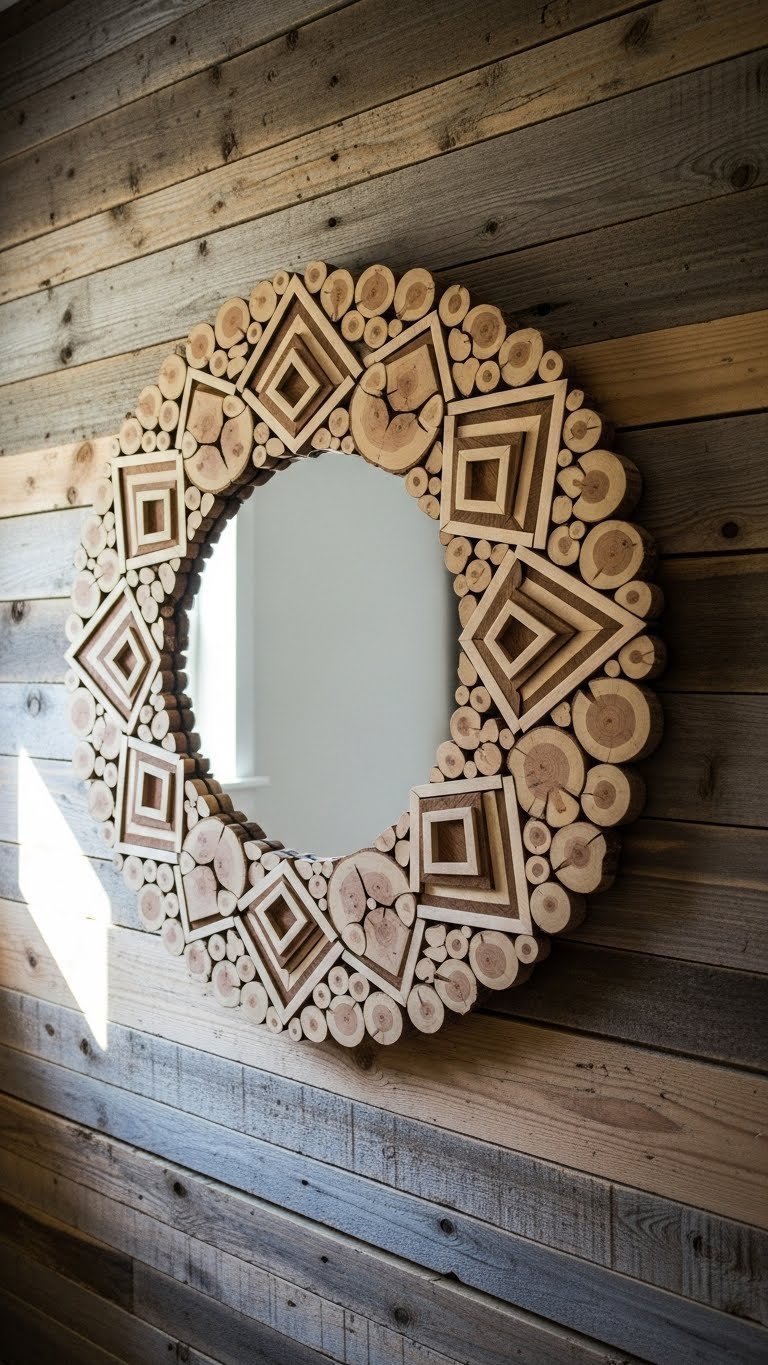
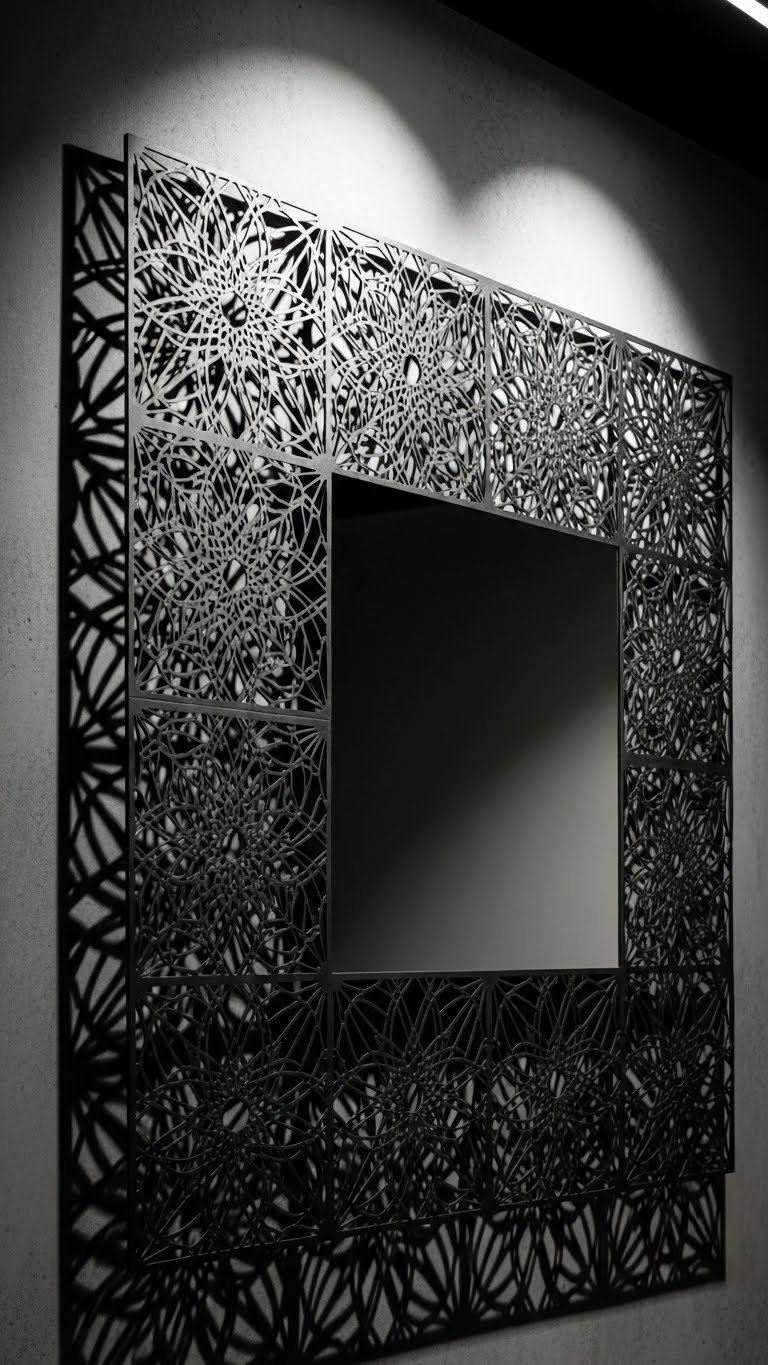
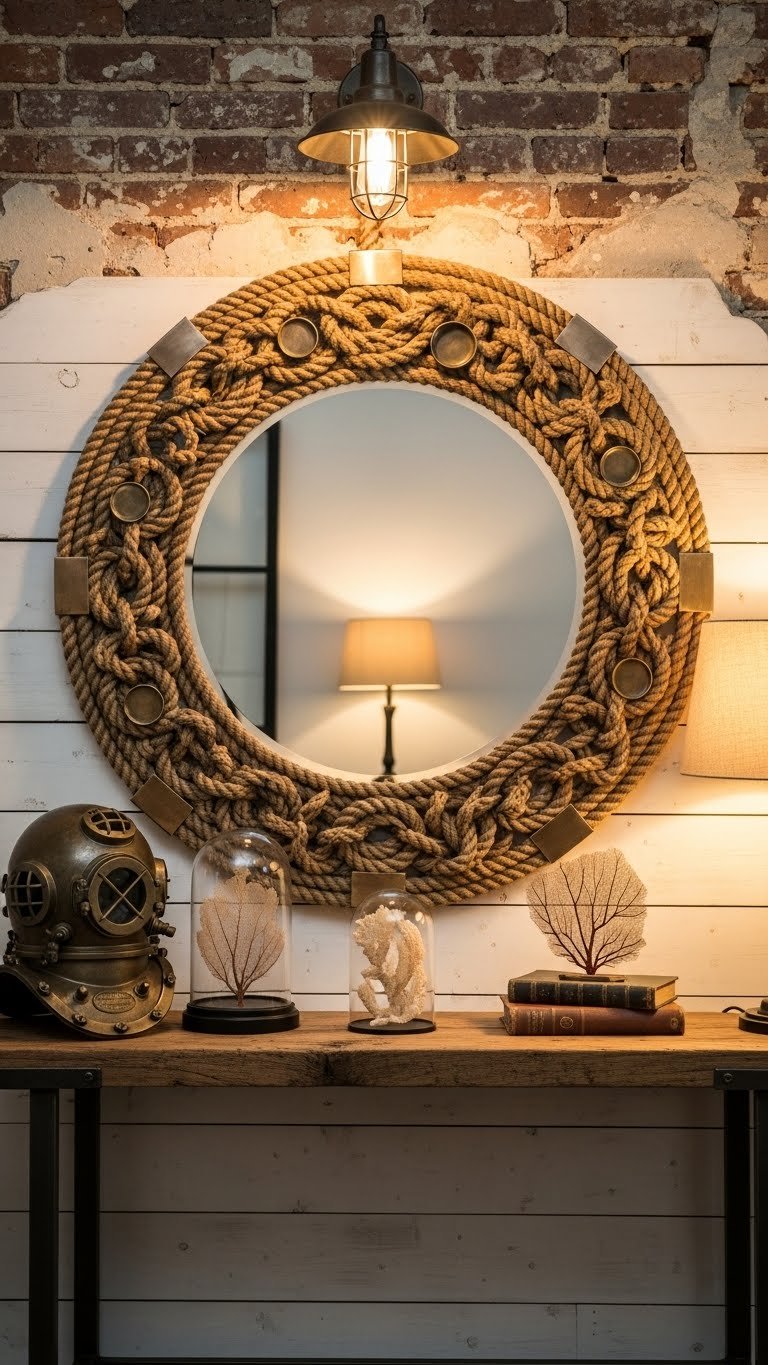
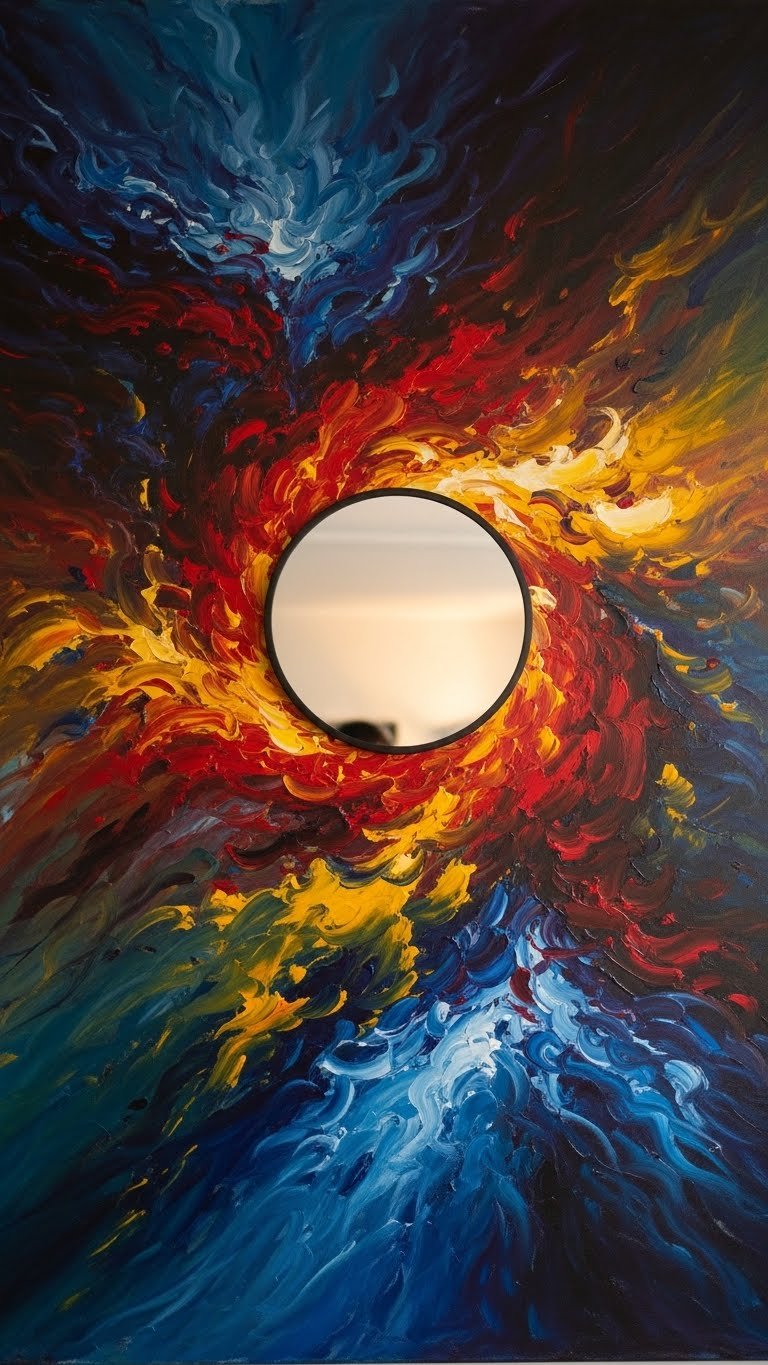
    10. Use Asymmetrical Mirrors as Sculptural Wall Art

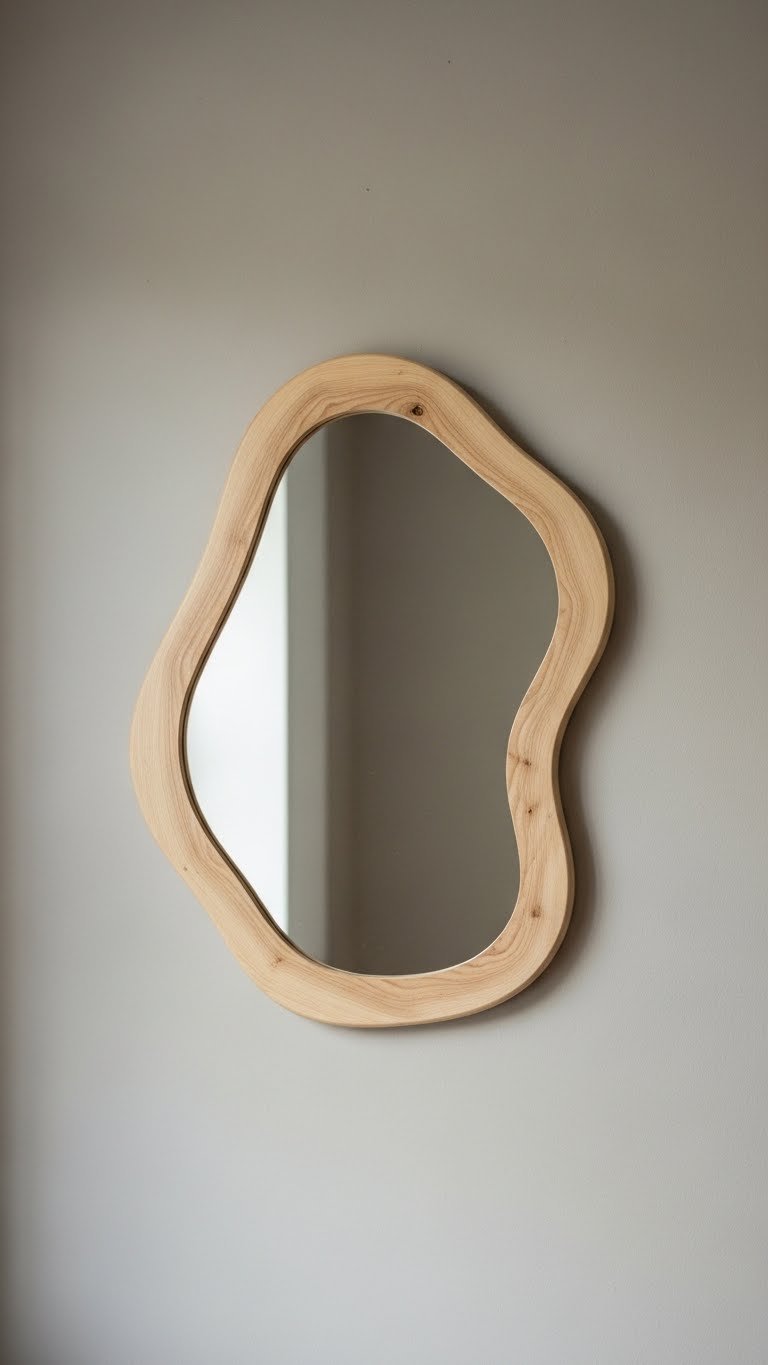
    Asymmetrical shapes read as art, not utility—they’re for people who want their mirrors to be conversation starters.

    Browse artisan mirrors on Etsy or specialty retailers like Margo Venetian Mirror or local glass studios. Expect to spend $150–$400 for quality handmade pieces. Sizes range from 24 to 48 inches. Mount in a prominent place: above a sofa, on a bedroom wall, or in an entryway. Installation: 20 minutes once you’ve found your piece.

    These mirrors function as actual art—they elevate the entire room’s design narrative.


    11. Create a Renter-Friendly Peel-and-Stick Mirror Tile Wall

    Peel-and-stick mirror tiles mean zero drilling, zero damage, and zero landlord drama—they’re perfect for renters who want real mirror impact without the commitment.

    Order peel-and-stick tiles from Amazon, Home Depot, or Wayfair ($1–$4 per tile, so a 12-tile wall runs $12–$48). They come in square and rectangular sizes. Clean your wall, peel backing, and press tiles in a grid or staggered pattern. Rearrange whenever you want. Installation: 30 minutes total.

    You get a designer accent wall without any permanent changes—exactly what renters dream about.


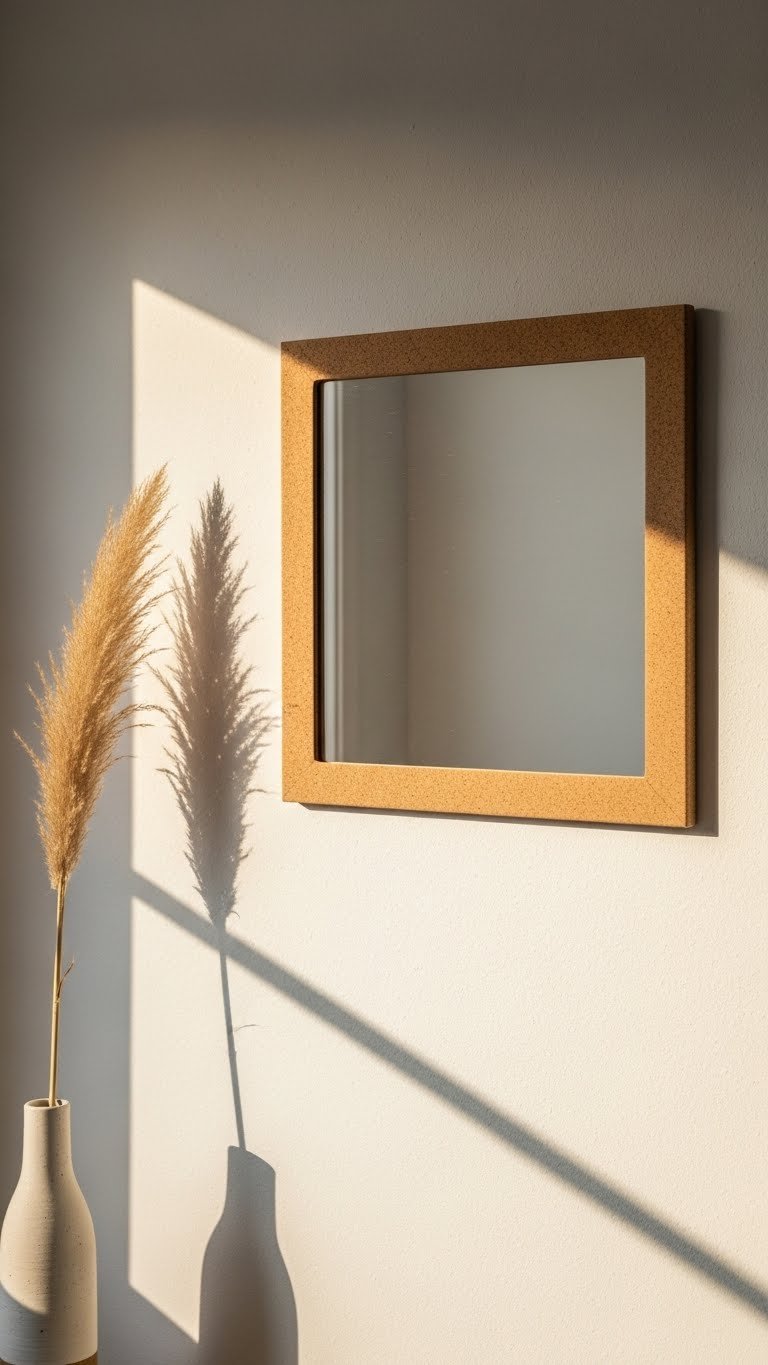
    12. Combine Wood and Brass Frames for Japandi Elegance

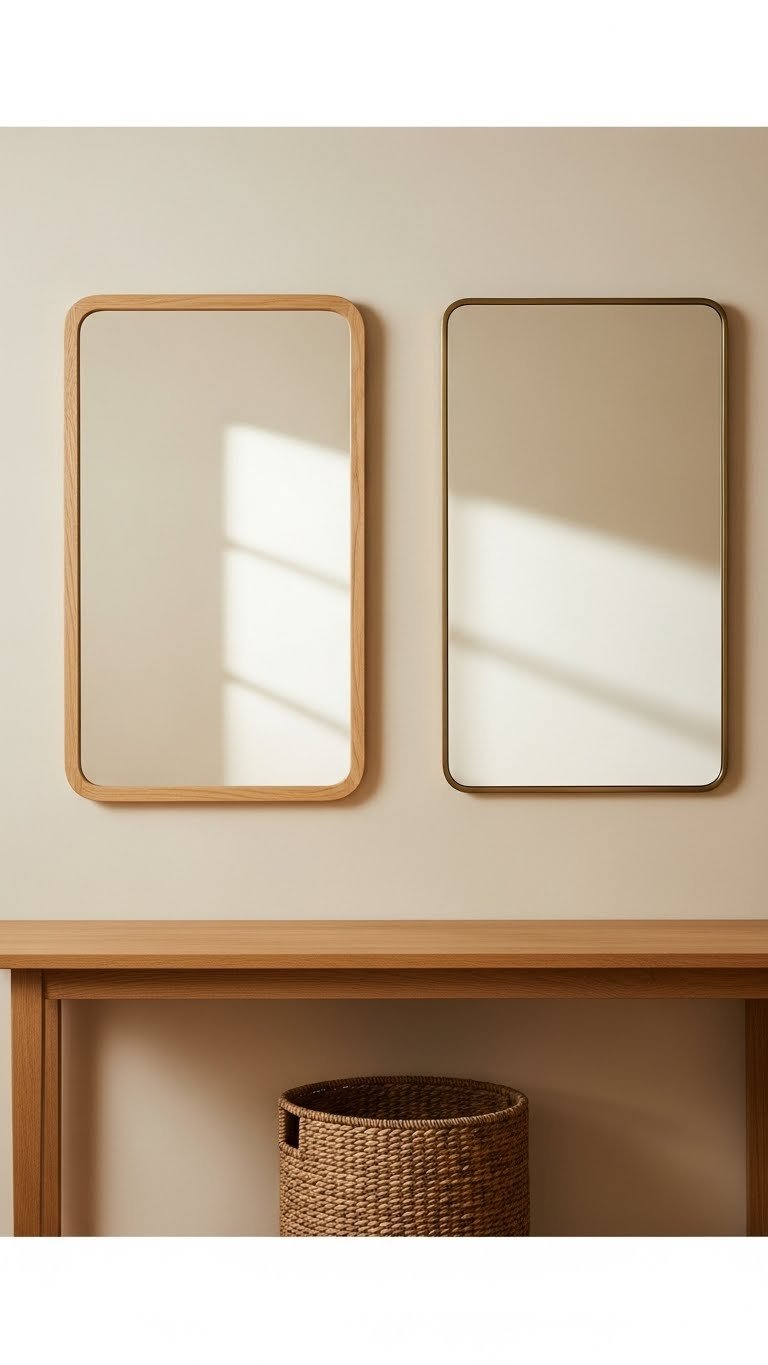
    Mixing warm wood and subtle brass creates the effortless elegance of Japandi design—it feels both natural and intentional.

    Choose simple rectangular or slightly rounded mirrors in both materials. Find them at IKEA, Wayfair, or West Elm, typically $40–$120 each. The clean lines matter more than exact size—varied widths (18 inches and 24 inches) look better together. Mount at the same height, 2–4 inches apart. Takes 30 minutes to hang both securely.

    The combination feels expensive and collected, but you’ll spend under $250 total.


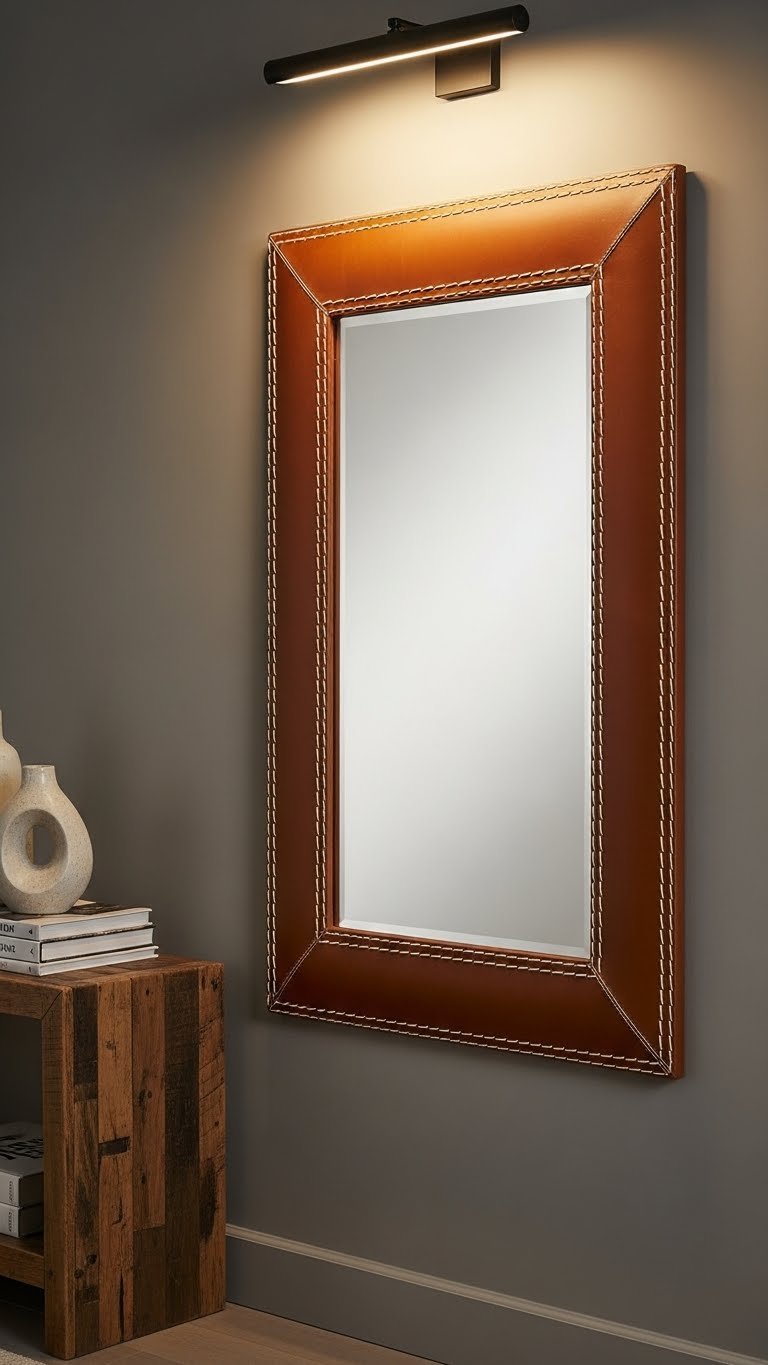
    13. Install Backlit LED Mirrors for Bathroom Function and Glow

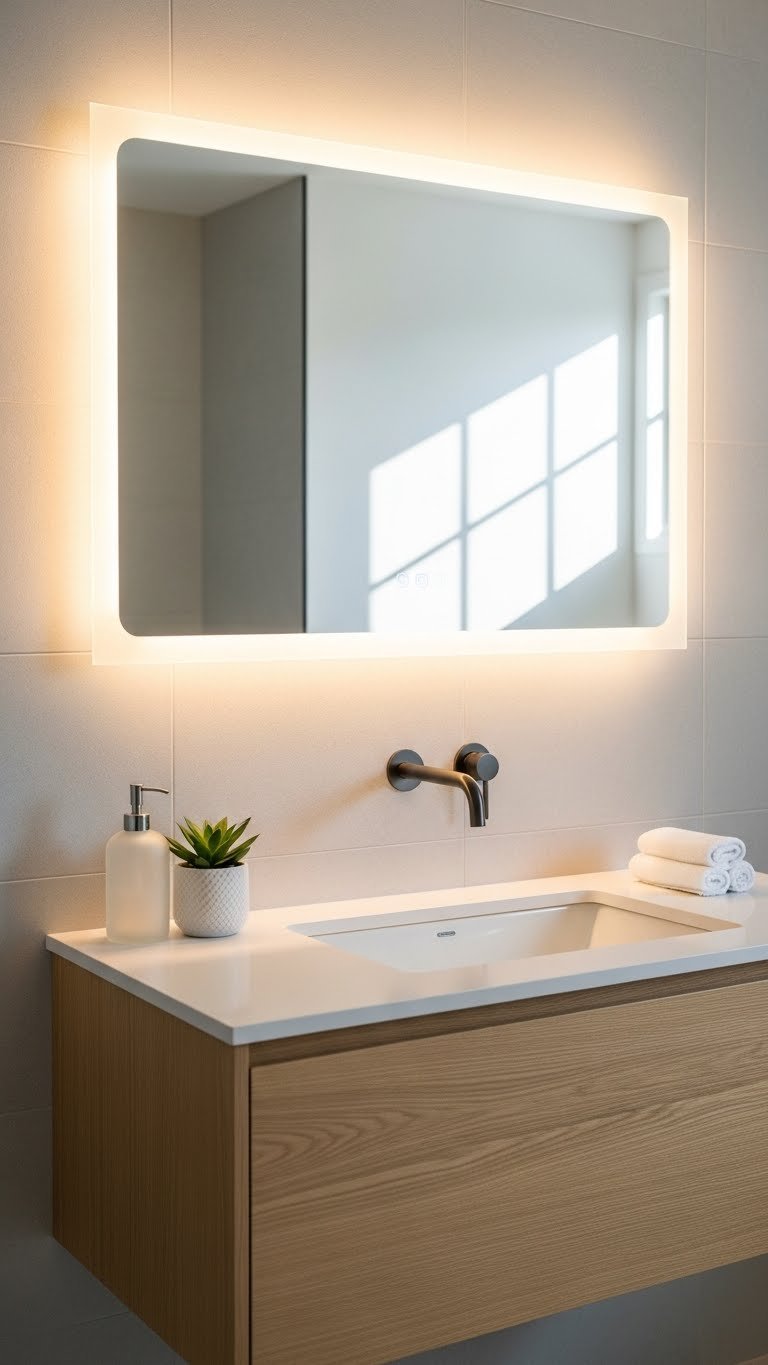
    LED backlit mirrors serve double duty: they light your face perfectly for grooming and create ambiance that makes your bathroom feel like a spa.

    Search for backlit LED mirrors on Amazon or specialized retailers like Harper & Harlow. Expect $120–$350 depending on size and features (anti-fog, touch controls, dimmable options). Sizes range 24–36 inches for vanities. Installation requires a plug nearby or basic wiring (hire an electrician if you’re unsure). Setup takes 30 minutes to an hour.

    Your bathroom suddenly feels premium, and the lighting is genuinely better for everyday use.


    14. Mount Multiple Small Mirrors in a Diagonal Pattern

    Diagonal arrangements feel more creative than grids—they guide your eye and add movement to a flat wall without needing one large statement piece.

    Source small mirrors (8–12 inch sizes) from IKEA, Target, or thrifted ($8–$30 each). Six to eight mirrors creates impact without overwhelming. Plan your diagonal with painter’s tape first, starting from a corner or center. Hang with secure wall anchors. Total cost: $50–$200. Installation: one to two hours.

    The unexpected arrangement makes your wall memorable and shows personality beyond a basic single mirror.


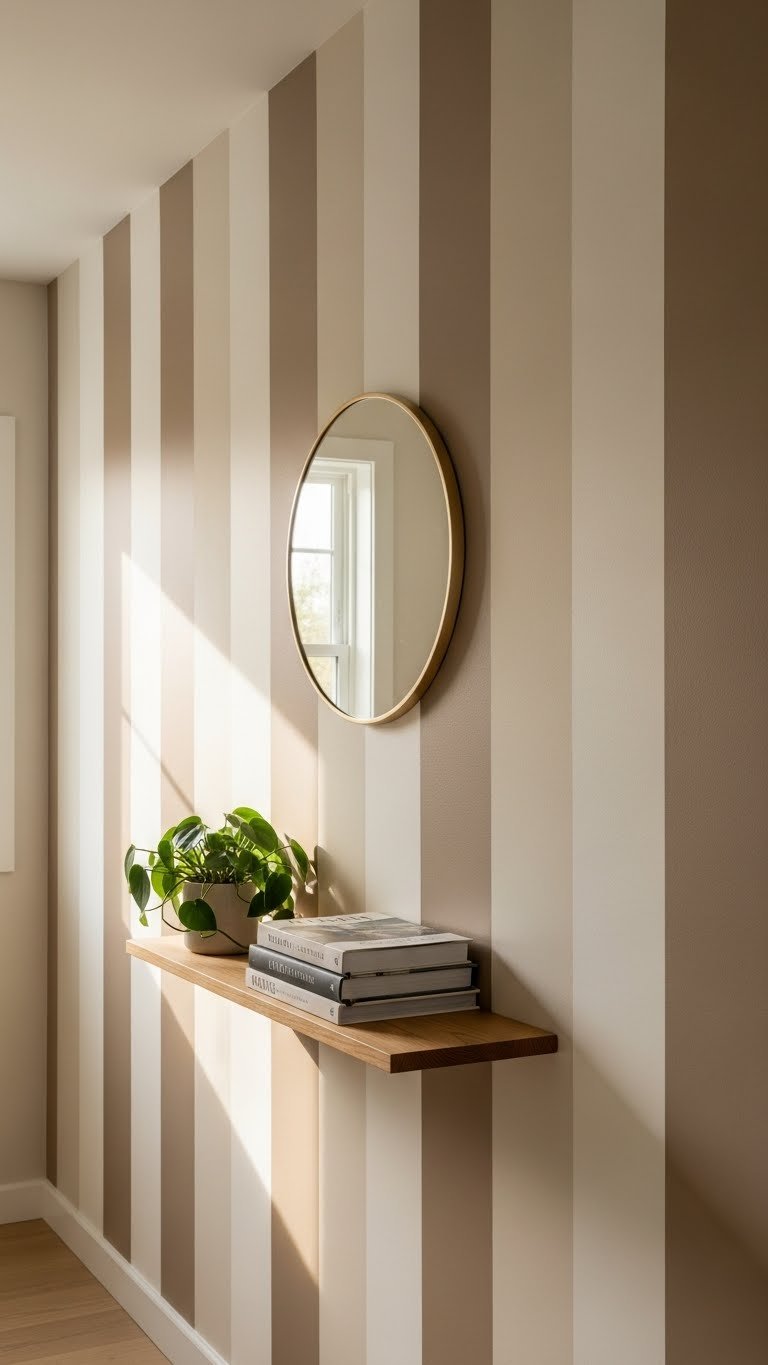
    15. Paint Your Mirror Frame to Match Trim or Accent Wall

    Matching your mirror frame to existing trim or an accent wall color creates visual cohesion—it ties the whole room together.

    Buy any plain mirror frame (wood or basic metal) at IKEA, Target, or thrifted ($15–$60). Paint it to match your trim, ceiling, or accent wall using quality brush-on paint or spray. Primer first if switching colors dramatically. Takes one to two hours with drying time. Cost: under $30 total (including paint).

    The result feels designed-on-purpose, not like you grabbed whatever was available.


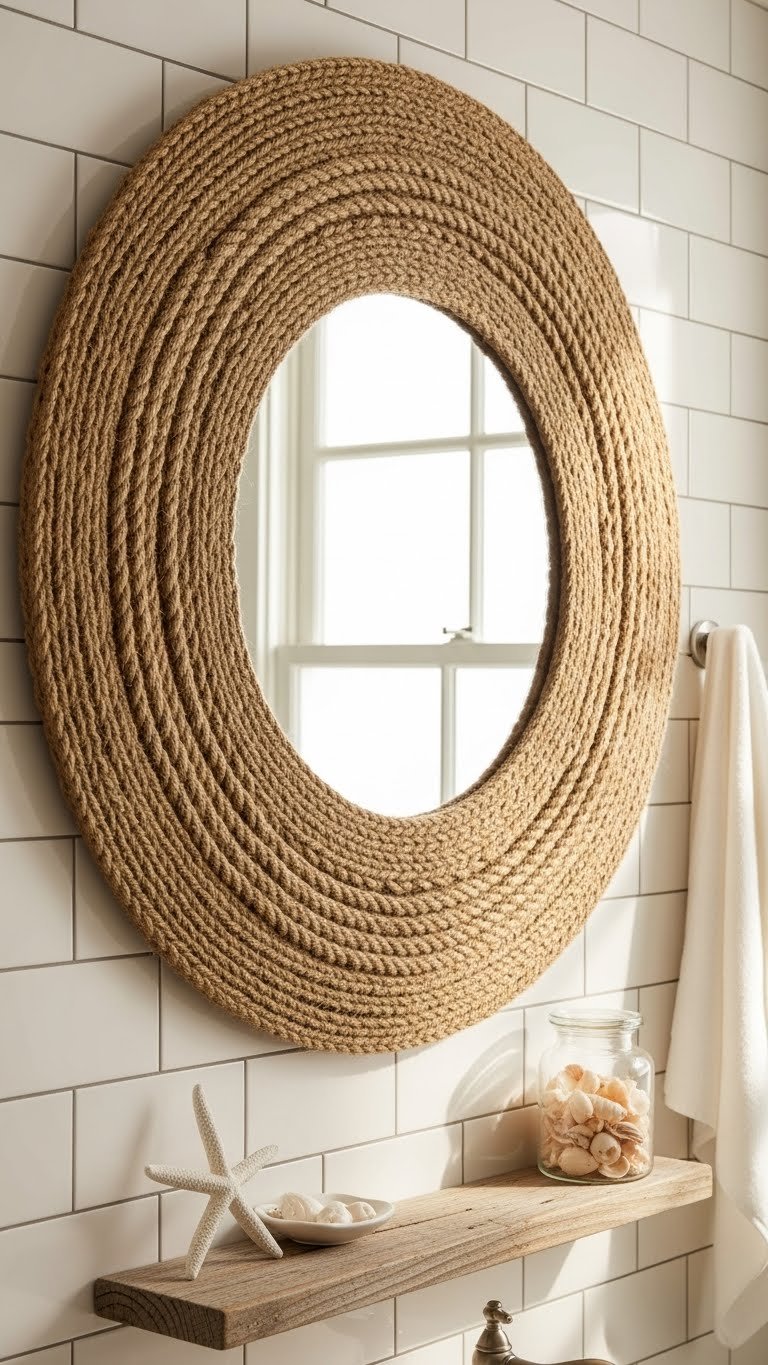
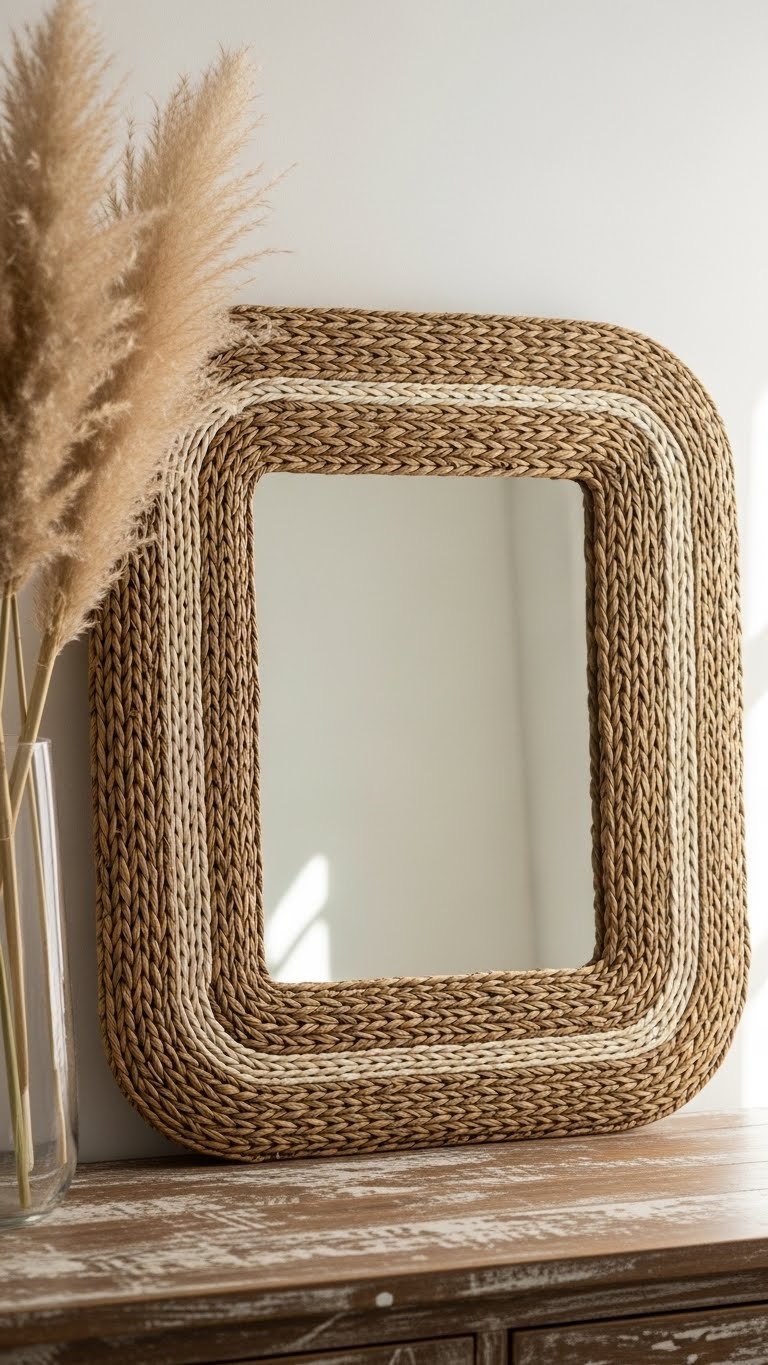
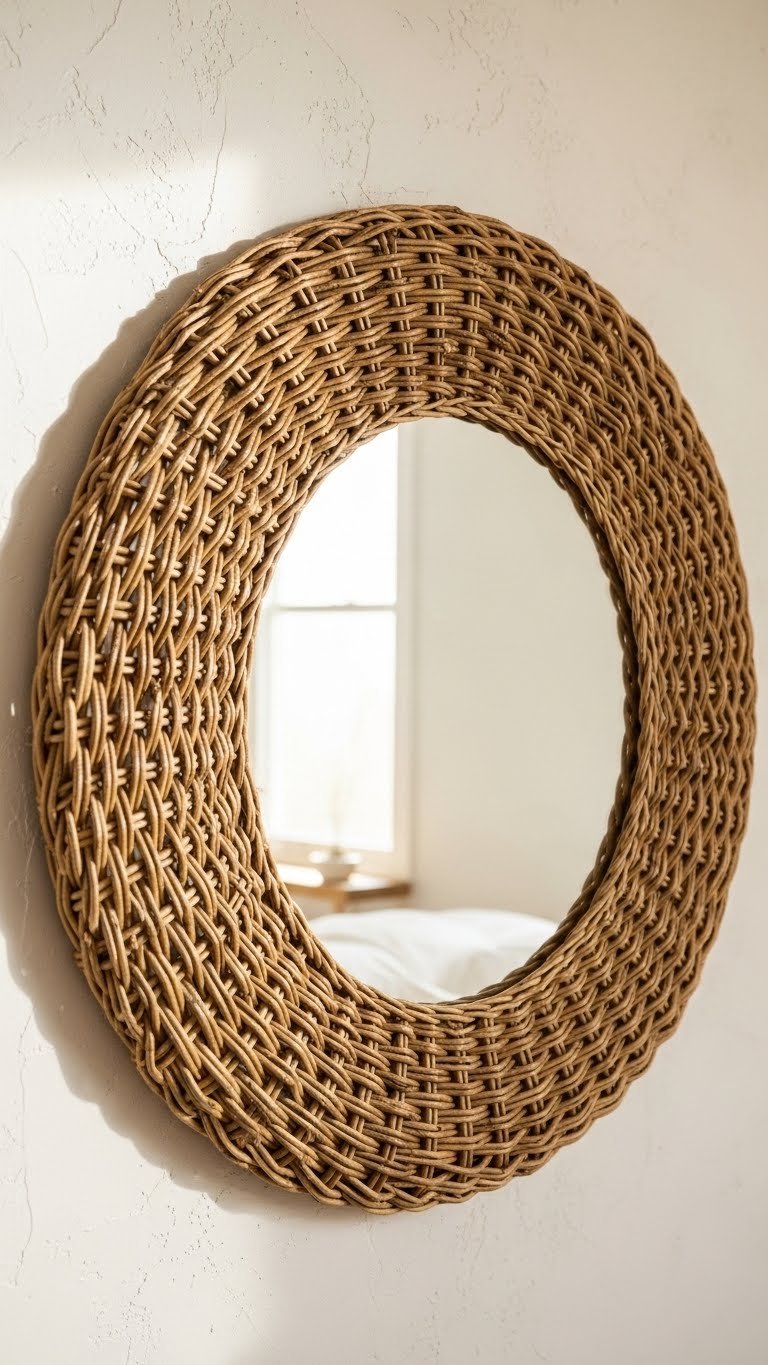
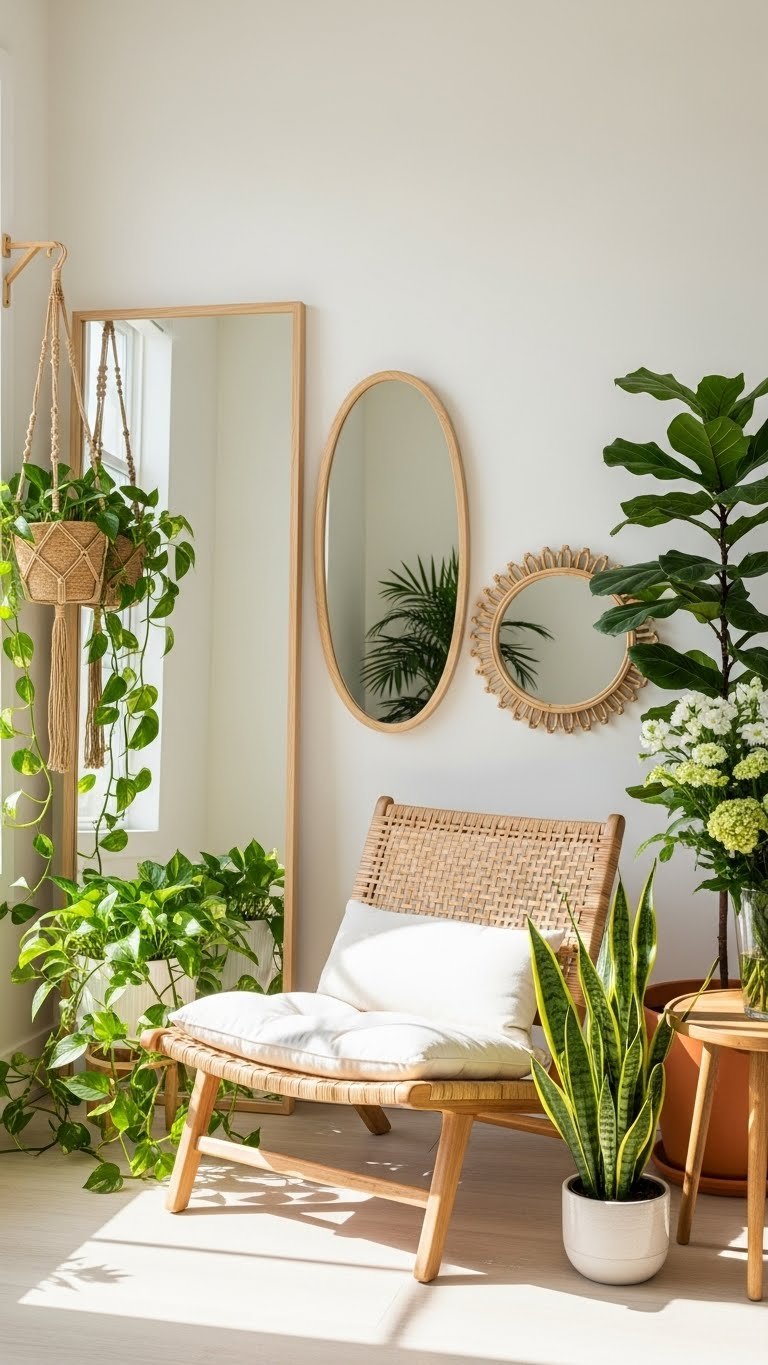
    16. Hang a Rattan-Framed Mirror for Coastal Vibes

    Rattan frames bring natural texture and coastal energy to any room—they’re warm, unpretentious, and photograph beautifully.

    Look for rattan-framed mirrors at IKEA, West Elm, Wayfair, or Etsy, ranging $60–$180. Round shapes work best with rattan, but rectangular options exist too. The woven texture pairs well with other natural elements—wood, plants, woven baskets. Mount securely (rattan frames are deceptively heavy). Takes 15 minutes to hang.

    Your space instantly feels more relaxed and beachy, even if you live nowhere near the coast.


    17. Create a Minimalist Double Mirror Moment

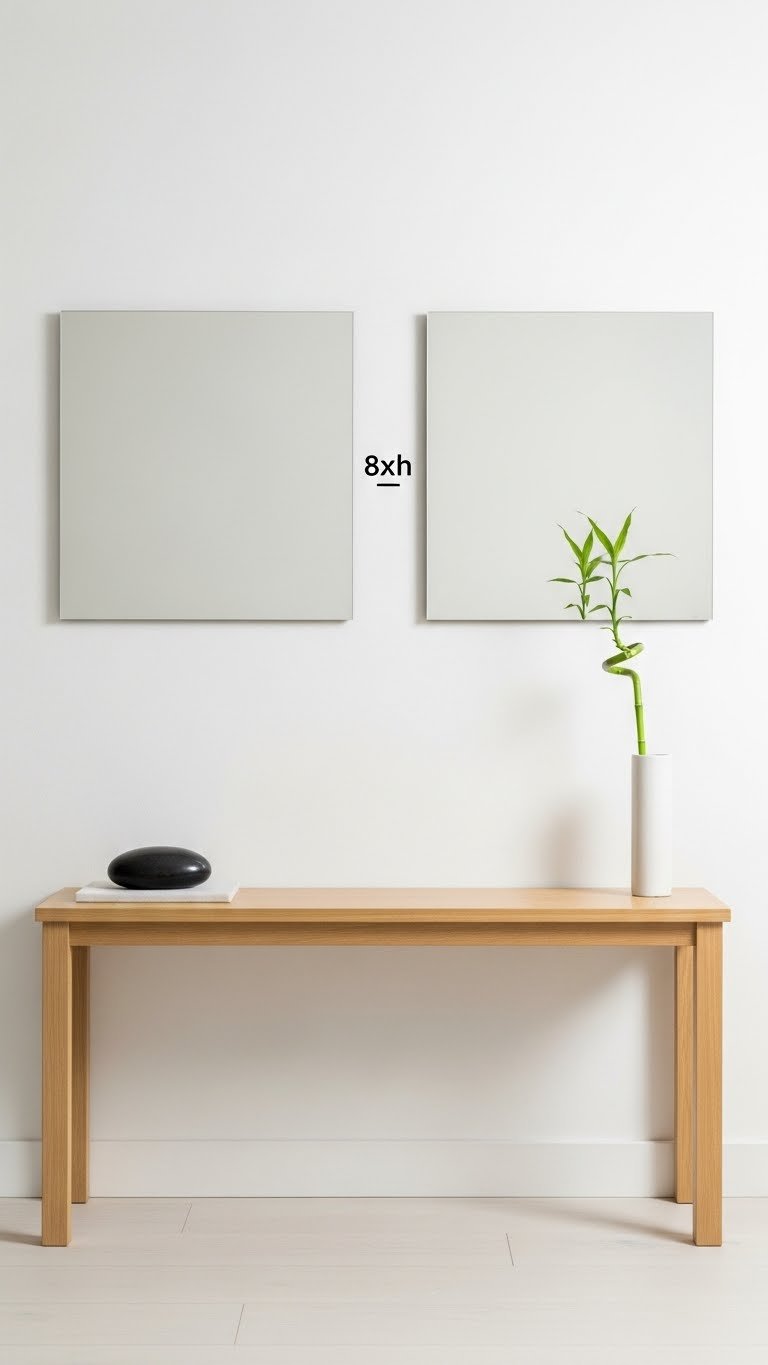
    Two identical mirrors create rhythm and balance without fussiness—they’re minimalist enough to feel modern but impactful enough to matter.

    Select matching frameless or subtly framed mirrors in size 24–30 inches. Find them at IKEA, Wayfair, or design retailers. Cost: $50–$150 each, so $100–$300 total. Mount at the same height, spaced 12–18 inches apart. Use a level to ensure they’re perfectly aligned. Installation: 30 minutes.

    The symmetry feels intentional and calming—you’ve created visual order without clutter.


    18. Layer a Small Mirror Over Large Artwork

    Layering a small mirror over a large artwork adds dimension and an unexpected twist—it breaks up the monotony of one piece alone.

    Find affordable abstract art or prints at IKEA, Target, or HomeGoods ($20–$80). Add a small mirror (8–12 inches, $15–$40) mounted slightly off-center in front. The reflection bounces light around the room and creates visual interest. Takes 30 minutes to plan and hang both pieces.

    The combination feels intentional and artistic—like you’re a creative who thinks about spatial composition.


    19. Mount a Black Metal Frame Mirror for Graphic Impact

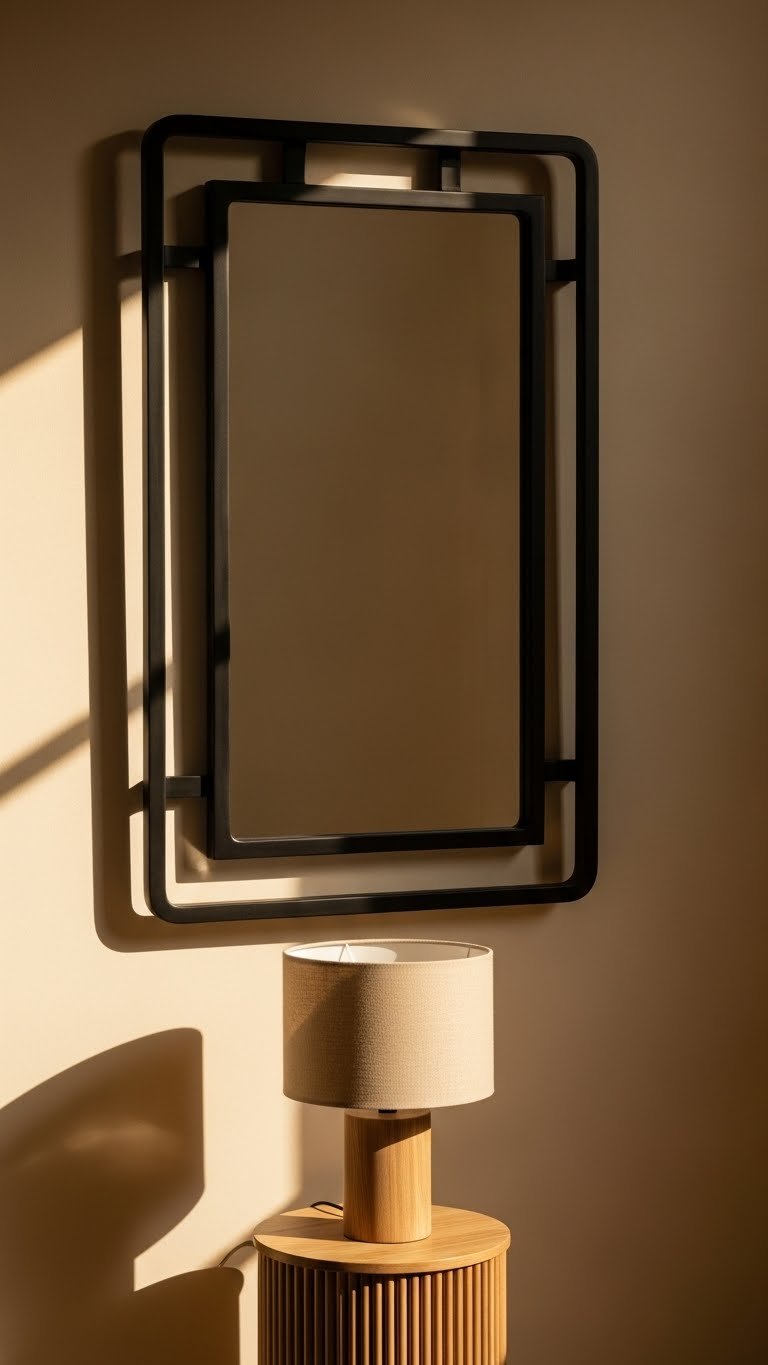
    Black metal frames add graphic punch and modern credibility—they read as intentional design choices, not afterthoughts.

    Search for black metal frame mirrors at Wayfair, Target, or Amazon, typically $40–$150 depending on size. Rectangular and arched shapes work beautifully in black. Mount on neutral or warm-toned walls for maximum contrast. Takes 20 minutes to install securely.

    The graphic silhouette anchors your room and makes everything around it feel more designed.


    20. Create a Sunroom Vignette with Leaning Mirrors

    Leaning multiple mirrors creates a collected vignette feel—like you’ve gathered beautiful things over time rather than buying one cohesive set.

    Mix mirror sizes (24″, 30″, 36″) and styles (round wood, rectangular metal, arched frame). Gather from IKEA, Wayfair, thrifted stores, or Instagram small businesses. Budget $80–$250 total. Lean them in a corner with natural light, then style around them with plants or a chair. Rearrange as often as you want (zero installation required).

    This approach feels effortlessly stylish and is genuinely renter-approved.


    21. Paint an Ombre Gradient on Mirror Frame

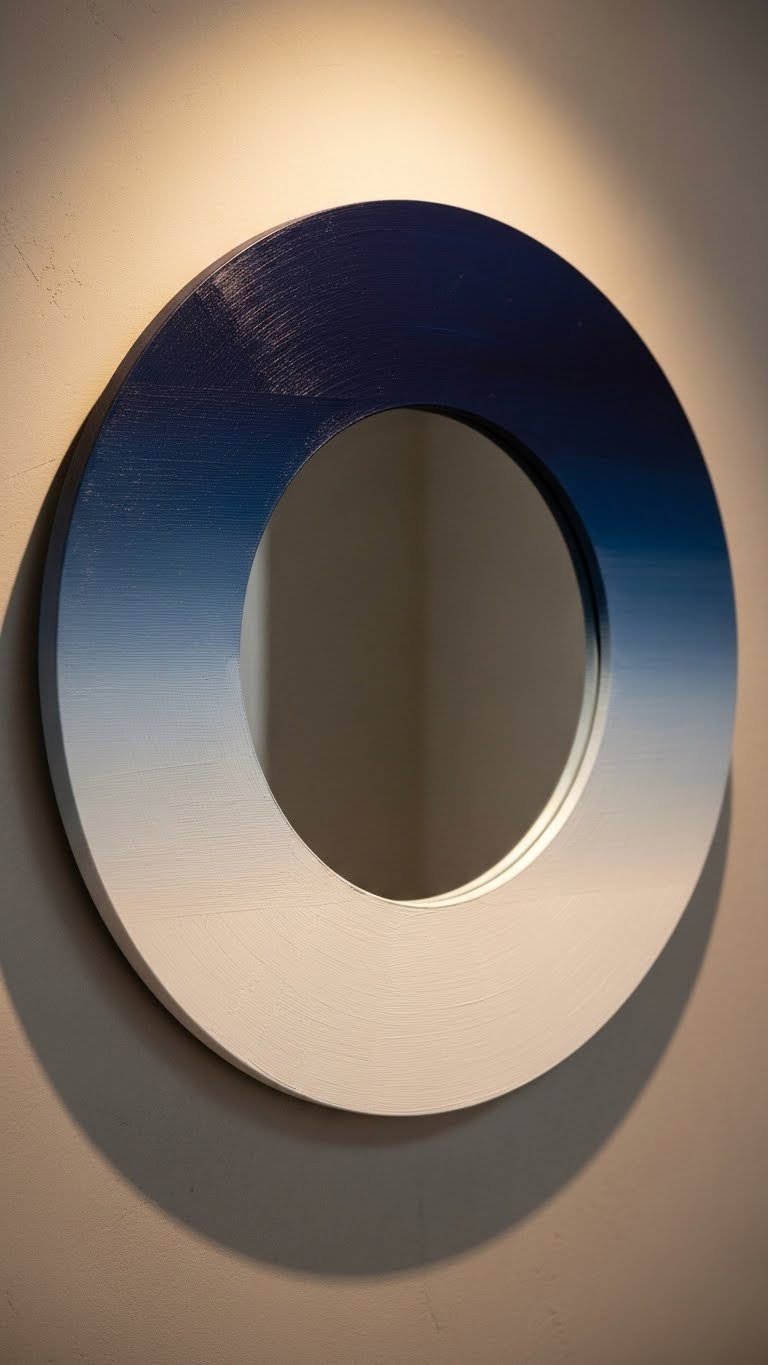
    An ombre or gradient-painted frame is the kind of custom detail that makes people think you hired a designer—but you just spent an afternoon with paint.

    Grab a plain wood-framed mirror. Sketch your gradient lightly in pencil. Use two to three paint colors and blend with a damp brush or dry-brush technique. Seal with clear coat for durability. Takes two to three hours with drying time. Paint cost: under $20.

    You end up with a one-of-a-kind piece that looks far more expensive than it is.


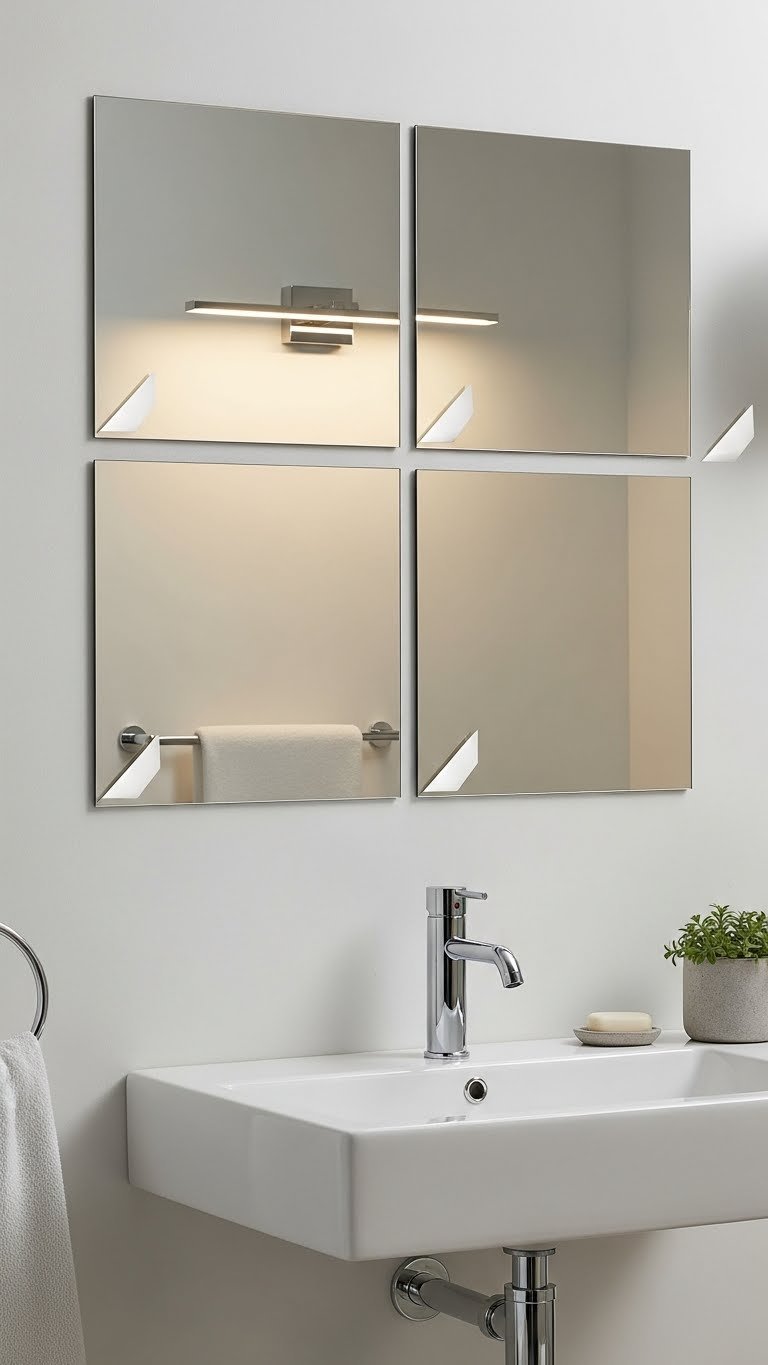
    22. Use Beveled Mirror Tiles for a Retro-Modern Accent Wall

    Beveled tiles aren’t just for grandma’s house anymore—they’re having a serious design comeback as retro-modern statement walls.

    Order beveled mirror tiles from Home Depot, Amazon, or specialty tile sites ($2–$5 per tile). A 15-tile wall (for a 5×3 grid) runs $30–$75. Install with construction adhesive or thin-set mortar for a permanent look. Takes two to three hours for DIY installation. For professional help, budget $300–$600 labor.

    Your space reads vintage-meets-contemporary, and the sparkly finish catches light beautifully.


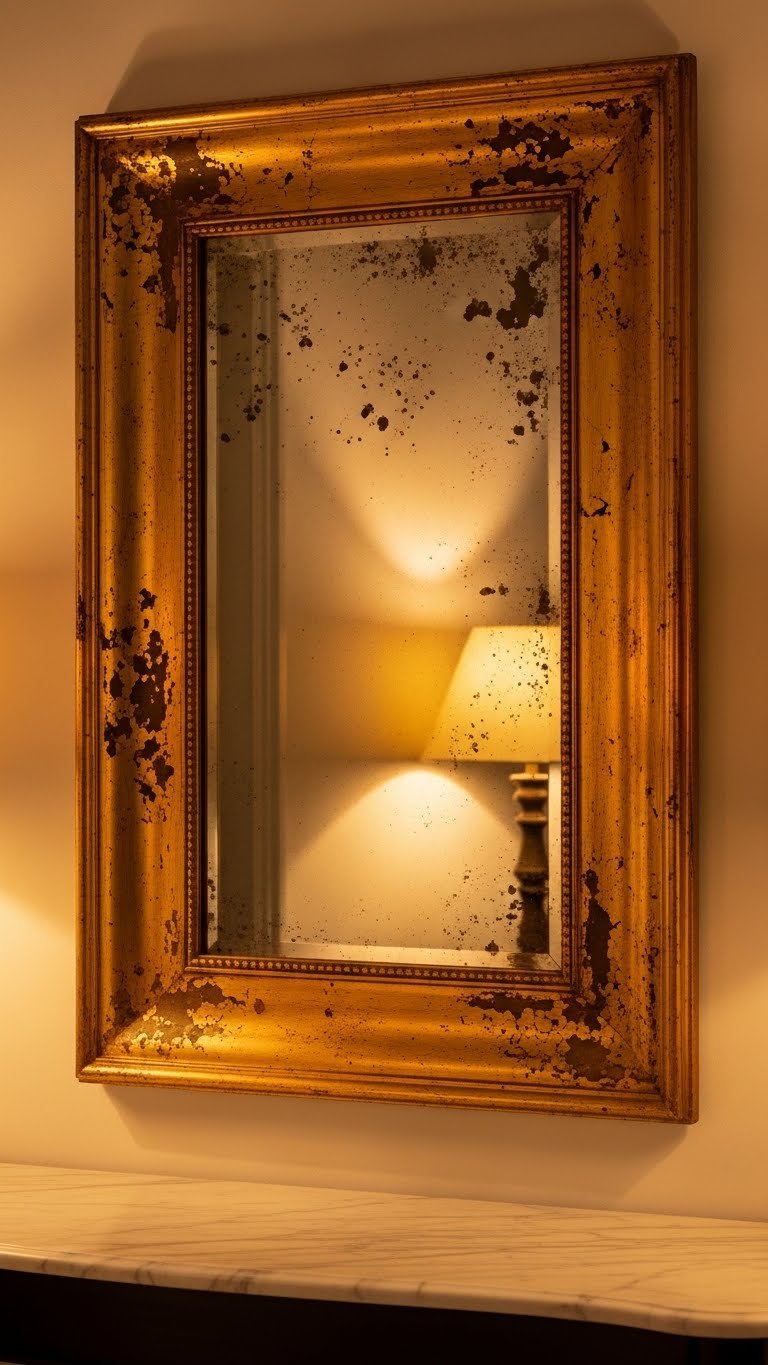
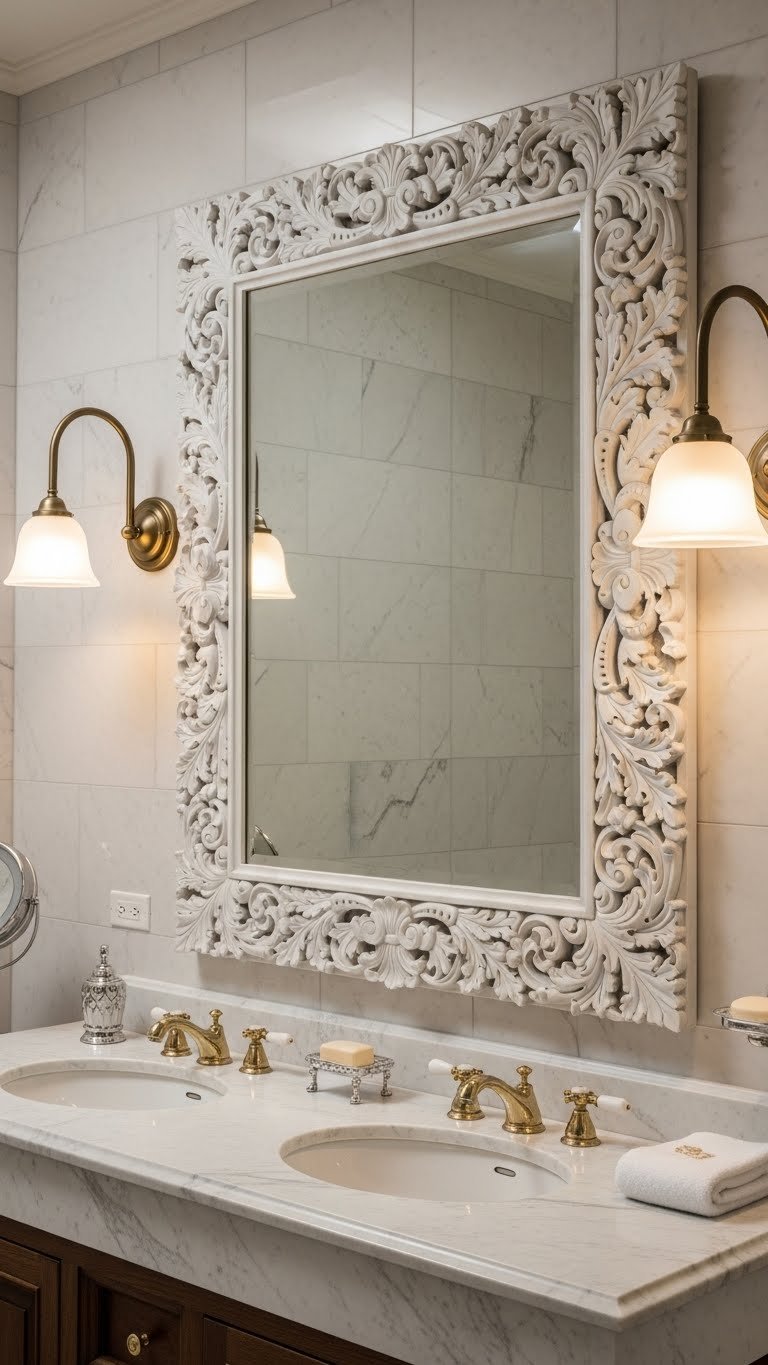
    23. Hang an Ornate Gold Frame Mirror for Glam

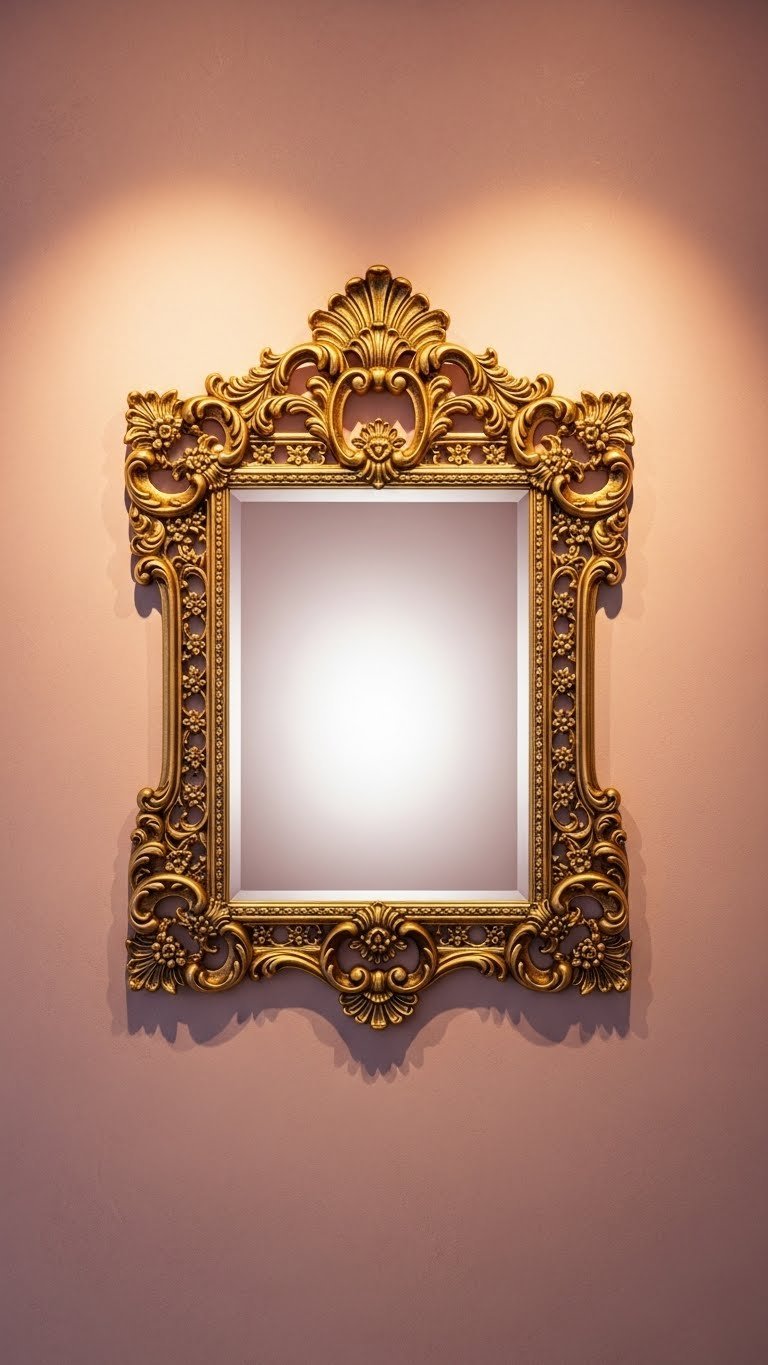
    An ornate gold frame brings instant elegance—you don’t need to change anything else in your room for the whole space to feel more polished.

    Browse Wayfair, Home Goods, Etsy, or thrift stores for ornate gold mirrors, typically $60–$200. Sizes 24–30 inches work best. The frame detail matters more than size. Mount it as a standalone statement or pair it with simpler mirrors. Takes 15 minutes to hang.

    The ornate detail makes your room feel intentional and a little bit fancy without screaming “trying too hard.”


    24. Create a Staggered Mirror Wall Behind Your Bed

    A mirror wall behind your bed is the ultimate statement—it feels high-end hotel energy and makes your bedroom the focal point it deserves to be.

    Select three to six mirrors in mixed sizes (18″ to 36″) and shapes. Find them at IKEA, Wayfair, West Elm, or etsy. Plan your layout on the floor first, then mark walls with painter’s tape. Mount with secure anchors, spacing mirrors 3–6 inches apart. Total cost: $150–$400. Installation: two to three hours.

    You’ve created an architectural feature that makes your bed feel like the room’s centerpiece—it’s genuinely stunning.


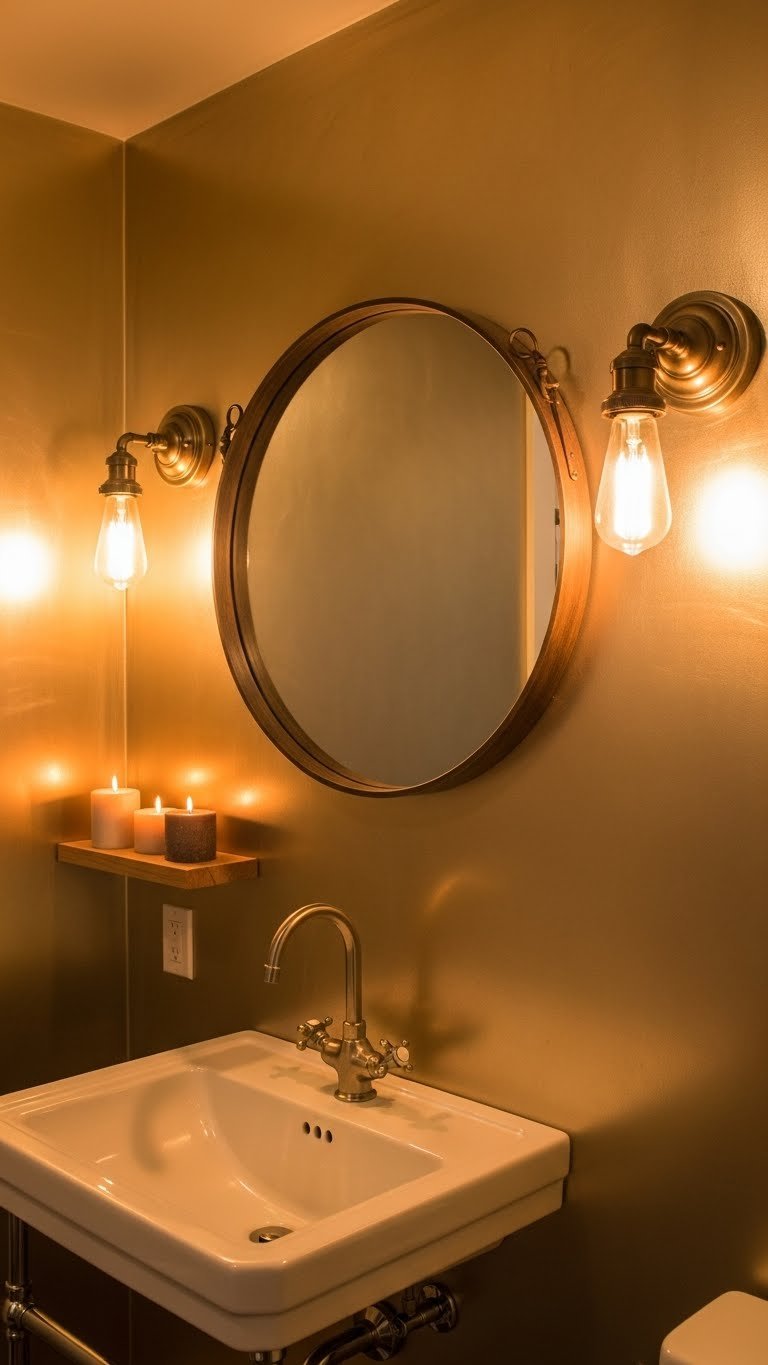
    25. Mount Adjustable Mirrors in a Small Bathroom

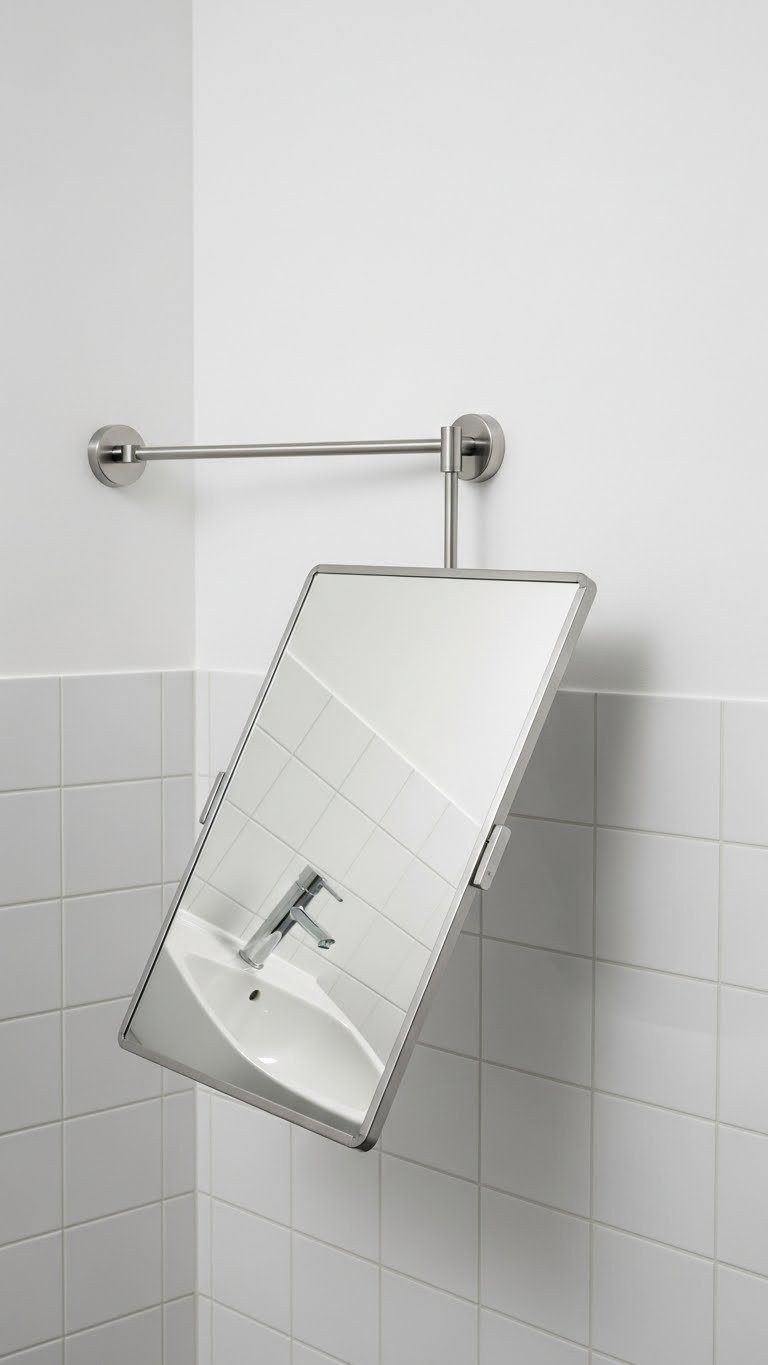
    An adjustable mirror solves the classic problem of mirrors mounted for someone else’s height—brilliant for households with varying heights or renters who want flexibility.

    Look for mirrors with articulating or swing-arm mounts at Amazon, Home Depot, or specialty bath sites ($40–$120). Mount at roughly shoulder height, then adjust as needed. Installation takes 30 minutes with basic tools.

    Everyone in your home can angle it perfectly for their needs—this tiny detail solves major annoyances.


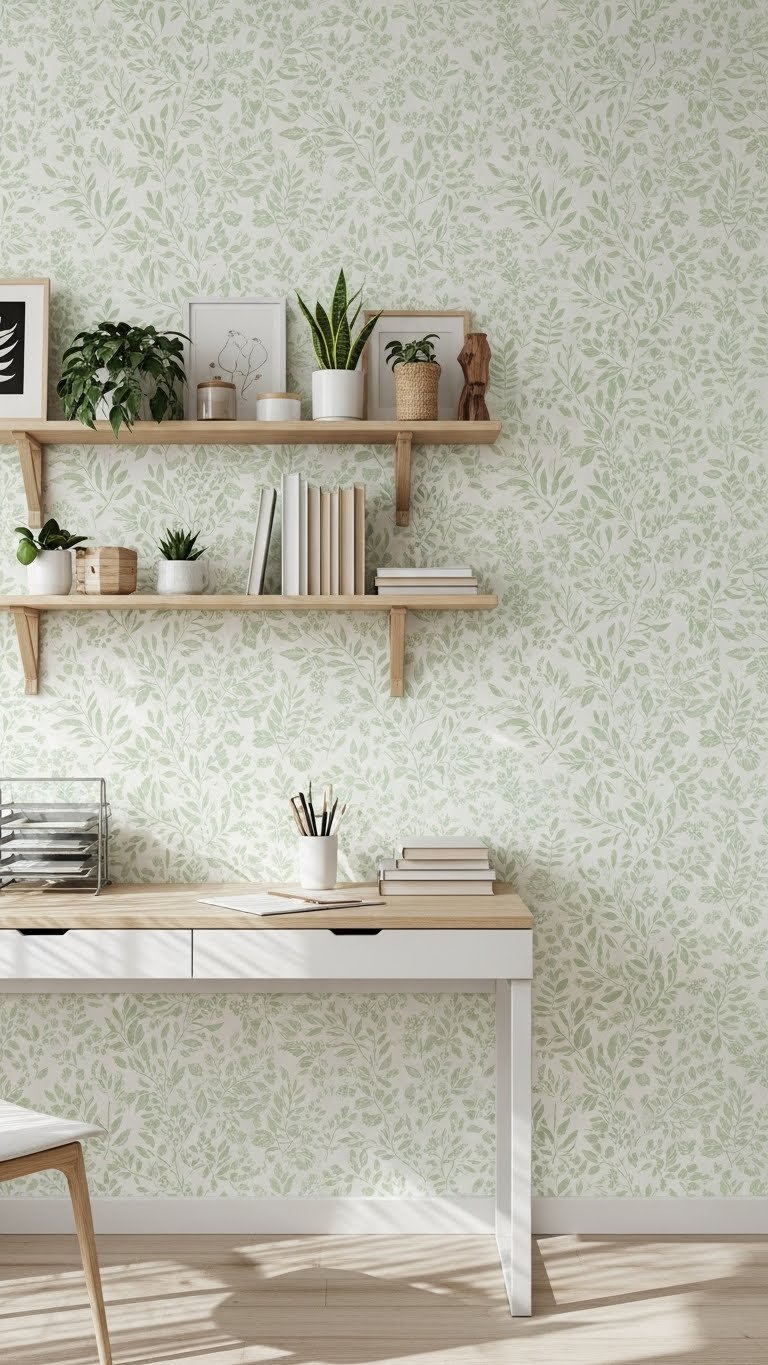
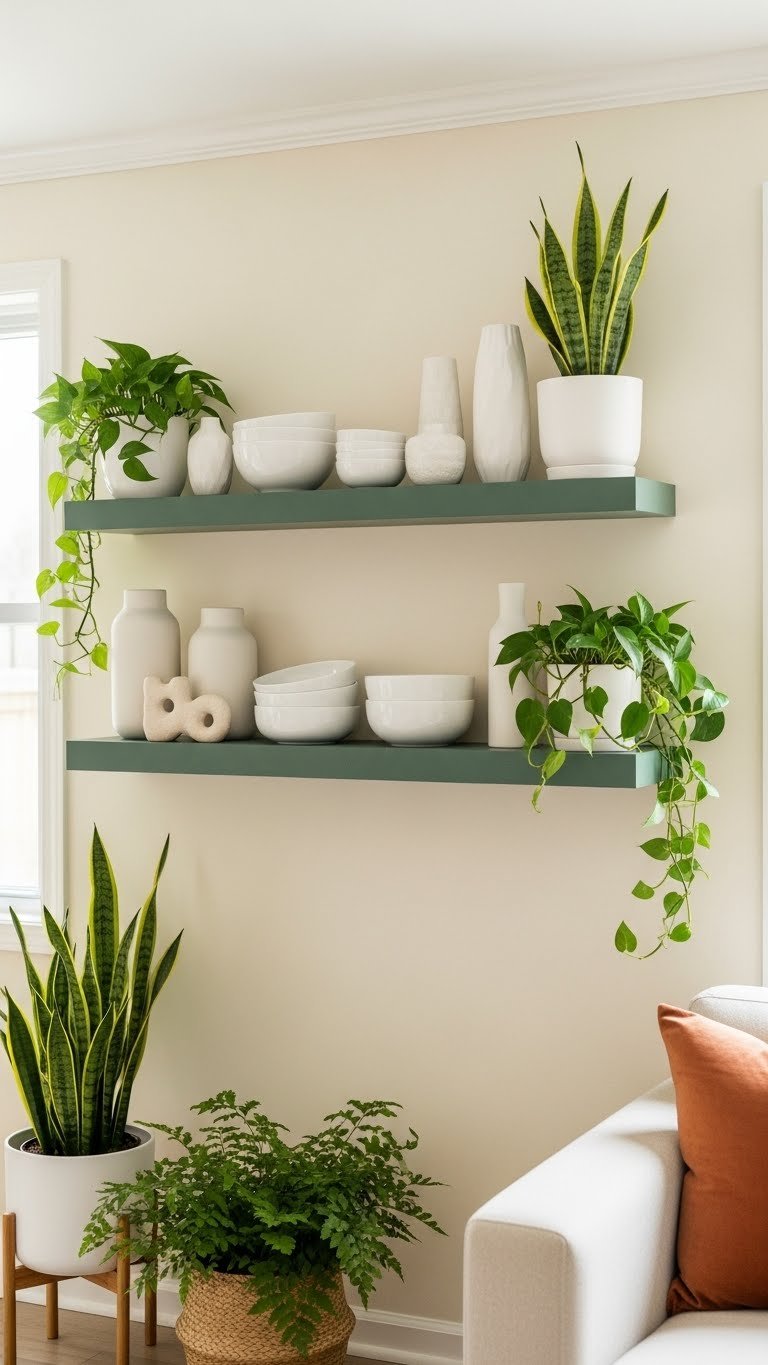
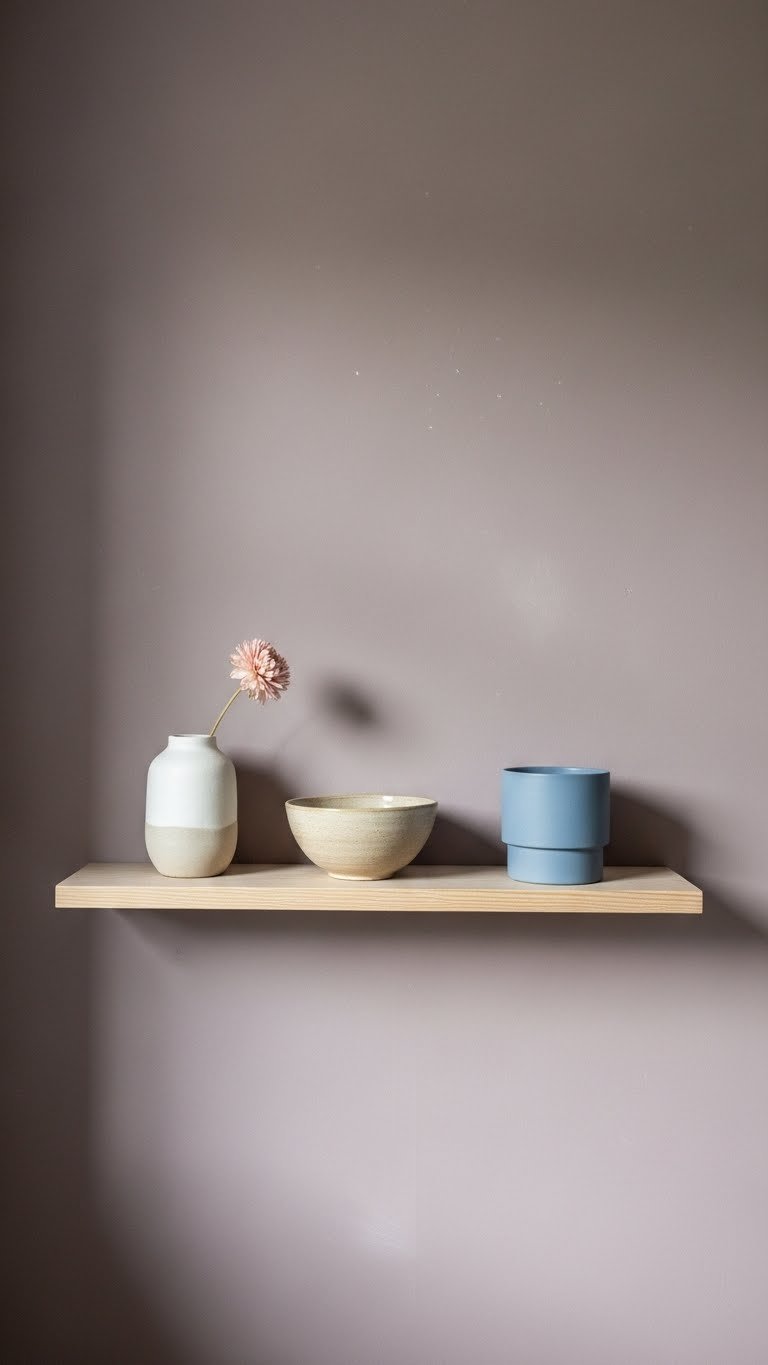
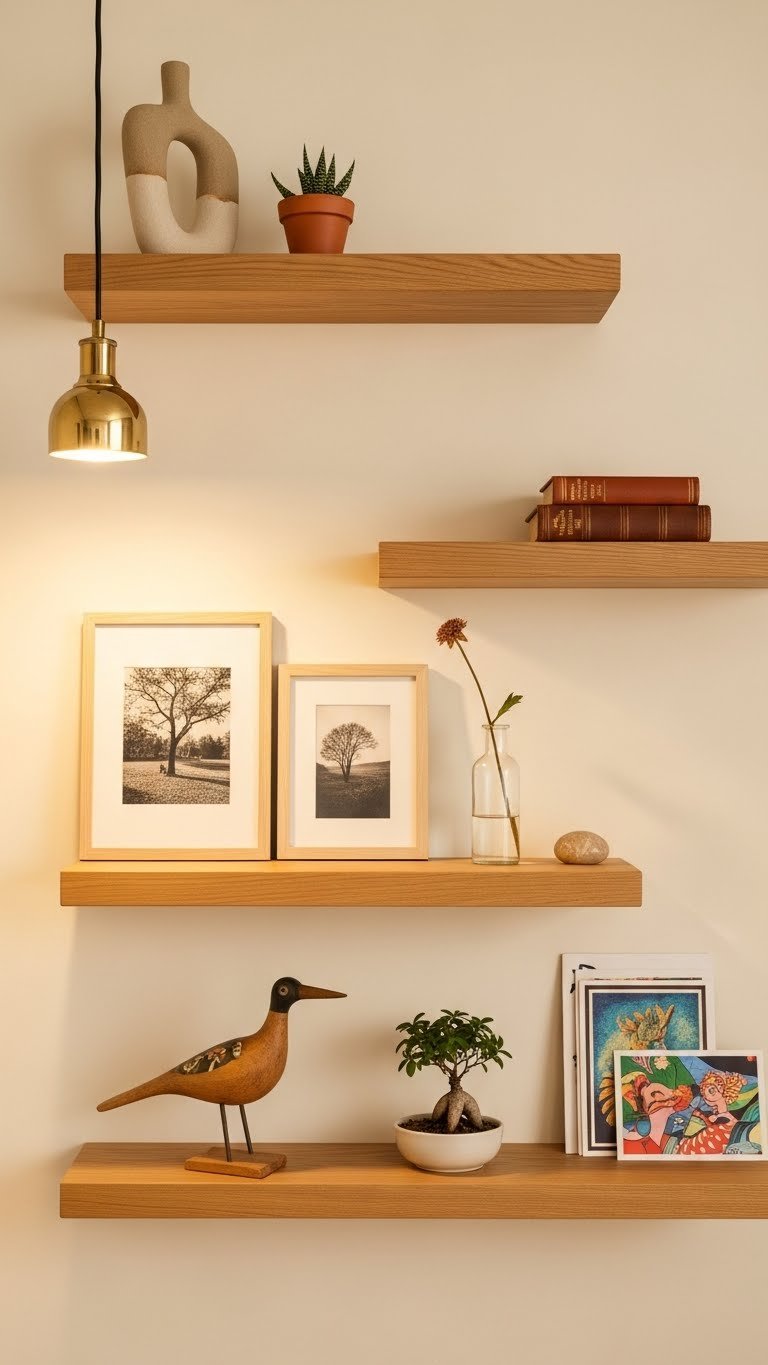
    26. Layer Mirrors Over Existing Wall Shelves

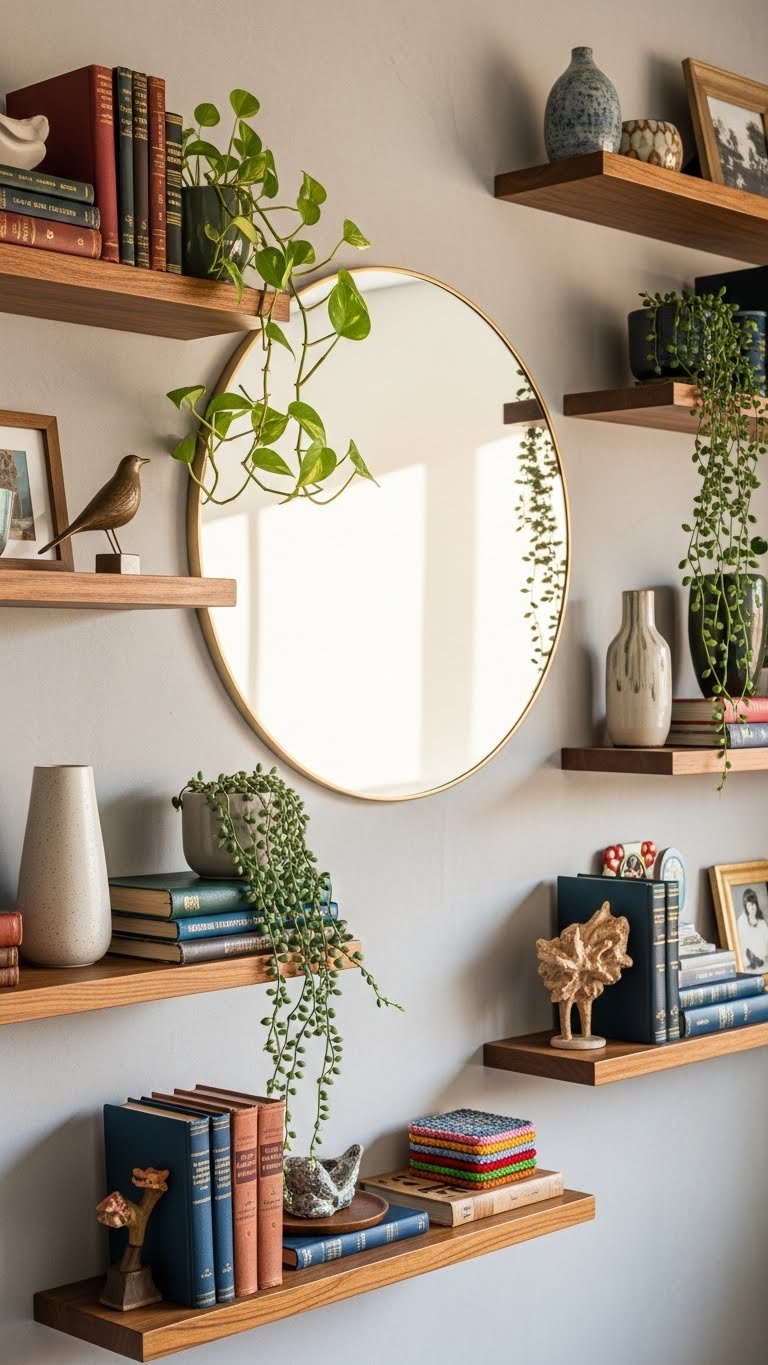
    A mirror breaks up shelf styling and reflects light across your collection—it prevents your shelves from feeling too dense or cluttered.

    Mount a simple mirror above or between shelves using standard hardware. Choose one that complements your shelf styling. Cost: $20–$80. Takes 15 minutes to install and style around existing shelf objects.

    The mirror opens up your display, adds light, and makes your shelves feel more curated and intentional.


    Save this post for your next décor refresh, and try at least one idea this weekend. You’ll be amazed how much personality a well-placed mirror brings to a blank wall—and how much bigger and brighter your space suddenly feels.

  • 23 Wall Closet Ideas That Add Storage Without Taking Space

    23 Wall Closet Ideas That Add Storage Without Taking Space


    Your closet doesn’t need to be huge to work hard for you. Whether you’re dealing with a tiny reach-in, awkwardly shaped nook, or just lack of usable wall space, smart storage solutions can double what you can fit—without renovating. We’ve gathered 23 practical wall closet ideas that layer storage, style, and function into every inch. From no-cost organizing tricks to investment pieces that last years, you’ll find something that fits your budget and skill level. Let’s dig in and see how much room you’ve actually been missing.


    1. Install Floating Shelves Above the Rod

    Floating shelves grab dead space you’re probably ignoring right now. By mounting shelves 12–18 inches above your existing rod, you create premium real estate for off-season items, accessories, or folded inventory.

    Use a stud finder (around $15–$25) to locate wall supports, then install floating shelves with heavy-duty brackets. IKEA’s LACK shelves run $15–$25 each; Home Depot carries custom options up to $100+. This takes about 30 minutes per shelf with a drill and level. If walls scare you, lean-to shelving units ($40–$150) work for renters and offer similar storage without drilling.

    The payoff? You’ll reclaim 25–30% more storage in the same footprint, and everything stays visible and within reach. No more forgotten items shoved in the back.


    2. Use Pull-Out Baskets on Wall-Mounted Rails

    Pull-out baskets solve the frustration of rummaging through stacks. Wall-mounted rails let you slide baskets in and out smoothly, so nothing gets lost behind other items.

    Install metal rail systems (around $50–$150 depending on depth and width) using a drill and level. Options include wire baskets from Elfa ($30–$60 per basket) or woven styles from Wayfair ($40–$80). This weekend project takes 1–2 hours and transforms how you access folded clothes, scarves, or seasonal gear. Renter-friendly alternative: lean-in basket carts with wheels offer the same mobility without wall mounting.

    You’ll spend less time digging and more time getting dressed. Items stay organized and easy to grab, even in narrow spaces.


    3. Paint an Accent Wall with Deep Color

    A moody wall color makes your closet feel like an intentional retreat, not just a storage box. Deep greens, navy, or charcoal create a boutique-like backdrop without eating space.

    Choose a semi-gloss or satin finish paint from Sherwin-Williams, Benjamin Moore, or budget option Behr (all $30–$60 per gallon). You’ll need about 1 quart for most reach-ins. Paint one wall in 1–2 hours with a roller and brush. The color doesn’t shrink space; it makes it feel curated. Renters can use removable peel-and-stick wallpaper ($20–$50 for the same vibe).

    This simple refresh makes getting dressed feel special. Your eye naturally focuses on organized shelves against moody color, creating an almost spa-like atmosphere.


    4. Add a Valet Rod for Daily Outfit Planning

    A valet rod lets you curate tomorrow’s outfit tonight, cutting morning decision time from 15 minutes to 30 seconds. It’s the single smartest accessory for busy lives.

    Mount a rod ($25–$60 from IKEA, Target, or Amazon) at about 60 inches high using heavy-duty brackets. Installation takes 15 minutes with a drill. Pair it with hooks or leave it bare for draping. Use this spot to hang weekly outfits or showcase a special piece you want to wear. This costs almost nothing and works in closets of any size.

    You’ll notice the difference immediately—mornings feel calmer, and you wear more of what you actually own. Plus, that rod becomes a tiny gallery for pieces you love.


    5. Install Matte Black Hardware for Instant Personality

    Swapping out basic hardware to matte black or gold gives custom-closet vibes with a $30–$100 investment. It’s one of the top requested upgrades for 2025 and works because it’s visible and tactile.

    Purchase knobs and pulls from Wayfair, Amazon, or Home Depot (usually $1–$3 each). A typical reach-in needs 8–12 pieces. Swap them out in 30 minutes with just a screwdriver; keep original hardware in case you move. Pair matte black with natural wood shelves or mix it with gold accents for a two-tone look that creates visual interest without clutter.

    This tiny change makes your closet look intentional and high-end. Every time you open a drawer, you’ll feel that upgrade.


    6. Create Zones with Adjustable Shelving

    Zoning turns chaotic storage into a logical system where everything has a spot. By giving tops, bottoms, accessories, and shoes each their own area, you cut search time and prevent avalanches.

    Install adjustable shelving systems from Elfa, ClosetMaid, or IKEA (around $100–$300 for a small closet) over a weekend. Assign zones by category: hanging on one side, folded items on shelves, and drawers or baskets for accessories. Label each zone with small tags or labels ($5–$15). If building from scratch feels overwhelming, start with one zone and expand as you go.

    You’ll spend less mental energy searching and grab what you need automatically. Spaces like this keep working long-term because the system matches how you actually dress.


    7. Use Vertical Dividers for Stacked Clothing

    Vertical dividers prevent the topple effect where grabbing one shirt tumbles the whole stack. They’re invisible space-savers that feel smart and look polished.

    Buy acrylic or wood dividers from Container Store, Muji, or Amazon ($2–$8 each); you’ll need 2–4 per shelf depending on width. Place them every 4–6 inches and stack folded items between them. Takes 10 minutes to set up. This method (sometimes called KonMari-style) works best with medium-weight items like sweaters, jeans, and tees. Lighter fabrics can shift, so use clips or velcro dots ($5–$10) if needed.

    Grabbing anything won’t cause a domino effect. You see every item at once, so you actually wear everything in that stack.


    8. Mount Hooks for Accessories and Bags

    Hooks are the unsung heroes of closet space—they’re free real estate if you use wall areas that aren’t prime shelf or rod space. One wall of hooks frees up shelves for larger items.

    Install adhesive hooks ($0.50–$2 per hook from Target or Dollar Store) for a renter-friendly option, or screw-mounted hooks ($1–$5 from Home Depot) for permanent solutions. Space them 6–8 inches apart and group by type: belts together, bags together, scarves together. Spend 20 minutes hanging them once you decide placement. Avoid overloading—hooks work best with 1–2 items each so nothing wrinkles.

    This approach makes frequently worn accessories impossible to forget. Your bags and belts become display pieces instead of buried somewhere.


    9. Add LED Strip Lighting Along Shelves

    Lighting is the secret ingredient that transforms a closet from purely functional to something you want to open. LED strips cost almost nothing and make everything easier to see and access.

    Install warm white LED strip lights ($15–$40 per 16-foot roll) from Amazon, Home Depot, or IKEA. Peel off the adhesive backing and run them along the underside of shelves so light shines down on items below. Takes 15 minutes total. Plug into an outlet or run a battery pack (around $10–$20). Warm white (2700K) creates a spa-like feel; cooler tones work better for color-matching outfits.

    The difference is immediately visible—you’ll see every item clearly and spend less time squinting or pulling out your phone flashlight. Getting dressed feels easier.


    10. Install a Notched or Angled Shelf for Sloped Ceilings

    Sloped ceilings and alcoves waste tons of space unless you customize. A notched shelf designed to fit your roof line reclaims that awkward area above eye level.

    Measure your ceiling slope carefully (height at the wall and at the furthest point). Order custom shelves from Organized Living, Elfa, or hire a local carpenter ($100–$300 depending on complexity). If DIY-curious, buy basic shelving and trim it with a circular saw ($50–$100 tool investment). Installation is 30 minutes to 2 hours depending on brackets and angle. This only works if you have a sloped or angled area; otherwise skip this one.

    Suddenly that wasted corner becomes functional storage. You’ll feel clever using every angle of your space.


    11. Use a Tiered Shelf Organizer for Shoes

    Shoes are space killers when laid flat—they hide and pile up. A tiered organizer makes them visible, protects them from dust, and actually doubles the shoes you can store per shelf.

    Buy a tiered organizer ($20–$50 from Container Store, Target, or Wayfair) that sits on one shelf and holds 8–15 pairs depending on size. Some are metal; others are fabric-covered plastic. Takes 5 minutes to place. This works best for everyday shoes; special occasion or seasonal pairs can stay in dust bags on a separate shelf. Renters can use this on the floor under hanging items too.

    You’ll actually see all your shoes and wear more of them. No more forgotten pairs hiding in the back.


    12. Hang Fabric Door Organizers on Inside Walls

    Fabric door organizers aren’t just for doors—hang them on interior walls to create pocketful of storage for small items like scarves, socks, belts, and folded tees.

    Mount a hanging organizer ($15–$40 from Amazon or Target) using hooks or a tension rod. Choose ones with 9–16 pockets for best use of space. This takes 10 minutes and works even in small reach-ins. Fill pockets with rolled items (takes up 30% less space than folded), and you’ve created vertical storage without eating shelf room. Renters can use command strips instead of nails.

    You’ll free up drawer space and make small items easy to locate. This setup keeps frequently used accessories visible and organized.


    13. Install a Slim Drawer Unit Between Shelf Supports

    That gap between vertical supports looks like wasted space, but it’s perfect for a slim 3–4 drawer unit. You’re using space that can’t otherwise hold anything.

    Measure your gap width and depth, then order or build a narrow drawer unit ($50–$150 depending on quality). IKEA’s FLYSTA ($50–$70) or similar options work well. Install it level using shims and anchors; takes about 1 hour. Fill drawers with socks, underwear, accessories, or seasonal items. If walls are textured or odd, check measurements twice before ordering.

    You’ll reclaim 2–3 cubic feet of dead space with minimal effort. These drawers become the home for items that usually disappear.


    14. Paint Shelves a Contrasting Color to the Walls

    Painting shelves a different color than walls creates visual breaks that make the space feel organized and designed. It also helps you see shelf edges clearly, making items easier to find.

    Paint shelves (or shelf edges) in white, cream, or a complementary color to your wall shade ($10–$30 for paint, $1–$5 in brushes). Use semi-gloss or satin finish so it wipes clean. Let paint dry fully before loading items (24 hours). Takes 2 hours plus drying time. If you rent, you can paint removable shelf liners instead of the actual shelf ($10–$20).

    The contrast makes your closet feel intentional and curated. You’ll notice how much more put-together everything looks with that visual separation.


    15. Create a Declutter Station on One Shelf

    A dedicated declutter shelf keeps items you’re unsure about from taking over your whole space. It’s a holding area that forces decisions and prevents “maybe piles.”

    Assign one shelf (or half shelf) and place 2–3 labeled bins there ($10–$25 for bins and labels). Categories: “giveaway,” “repair,” “donate,” or “try on again.” Set a monthly review date and act on decisions—don’t let this bin become permanent storage. This costs almost nothing and takes 20 minutes to set up.

    You’ll process clothing faster and keep your main closet clean. This simple system makes decluttering feel manageable instead of overwhelming.


    16. Install a Tension Rod Between Shelves for Seasonal Items

    A tension rod between shelves doubles vertical storage without additional mounting hardware. It’s perfect for hanging items temporarily or creating a second “rod” for off-season pieces.

    Buy a tension rod ($10–$25 from IKEA, Target, or hardware stores) that fits snugly between your shelves. No tools needed—just twist to expand. Install it 6–8 inches below a shelf so clothes hang without touching items above. Use this for off-season coats, dresses, or holiday items you only wear monthly. It takes 2 minutes to install or remove.

    This clever hack reclaims space without drilling or permanent changes. Perfect for renters or anyone wanting flexible storage.


    17. Use Woven Baskets to Soften Shelves and Hide Clutter

    Woven baskets blend storage and style so shelves look intentional instead of utilitarian. They also hide items that don’t look good on display while keeping them accessible.

    Buy natural woven baskets ($15–$50 per basket depending on size) from Wayfair, CB2, or Target. Choose sizes that fit your shelf depth, and stack them where possible. Fill with off-season items, accessories, or folded pieces. Spend 20 minutes arranging baskets for balance—mix heights and sizes for visual interest. Label basket edges with small tags if storing multiple categories. Renters can use them on the floor too.

    Shelves instantly look more designed. Baskets soften hard shelving and create a space that feels warm, not sterile or overstuffed.


    18. Mount a Slim Hamper on the Wall for Laundry

    Pull-out or wall-mounted hampers hide dirty laundry while keeping it accessible. They’re a game-changer for small closets where floor space is precious.

    Install a wall-mounted hamper ($30–$80 from Wayfair, Amazon, or home goods stores) using brackets and a drill (15-minute job). Choose one with a removable mesh liner so laundry goes straight from bin to washer. Alternatively, use adhesive hooks ($1–$5) to hang a fabric hamper bag ($15–$30). Space it near your entry or far corner depending on your flow. Add a small bin beside it for delicates or items needing hand-wash.

    Your floor stays clear, and laundry stays contained. No more piles sneaking out from under hanging clothes.


    19. Install Glass-Front Cabinets to Display Collections

    Glass-front cabinets let you display special pieces—designer bags, luxury knits, or jewelry—while keeping them dust-free. They make your closet feel more retail and less storage room.

    Purchase pre-made glass-front cabinets ($80–$300 from IKEA, Target, or custom sources) or retrofit existing shelves with glass doors ($50–$150 for frame and glass). Installation takes 1–3 hours depending on complexity. Use this for 8–12 special pieces maximum so the display doesn’t feel cluttered. Lighting inside enhances the boutique effect ($20–$50 for LED strips). Renters can use open shelves with a beautiful backdrop instead.

    Special pieces suddenly feel important and worthy of care. This style choice makes your closet feel curated, not just packed.


    20. Add a Slim Shelf Above the Door Frame

    The space above a door is totally usable. A narrow shelf there (8–12 inches deep) captures space that otherwise disappears.

    Measure the width and depth above your door, then mount a slim shelf ($15–$40) using heavy-duty brackets rated for the weight you’ll store. Ideal for off-season items, keepsakes, or decorative boxes—anything light enough to safely access. Takes 30 minutes with a drill and level. If you rent, a tension rod and hanging baskets ($20–$40) offer a similar effect without drilling.

    You’ll reclaim 2–3 square feet of storage right at the top of your closet. It’s the kind of space people forget exists.


    21. Use Color-Blocking to Organize and Style

    Organizing by color doesn’t just look gorgeous—it speeds outfit selection and makes you more likely to wear items you’d otherwise miss. It’s functional styling.

    Sort all clothing into rainbow order: whites and neutrals, then yellows, pinks, reds, oranges, blues, greens, purples, grays, blacks. Takes 1–2 hours depending on wardrobe size. Keep this system by folding or hanging in color sequence. Take a photo of your color-organized closet for reference when shopping—you’ll naturally pick pieces that coordinate. No products needed, just intention and time.

    Getting dressed becomes so much faster when you see how pieces relate to each other. Suddenly you wear more combinations because the system shows possibilities.


    22. Install Angled Shelves for Shoe Storage

    Angled shelves let you see every shoe at once without hunting through piles. They’re especially smart for reach-in closets where depth is limited.

    Buy angled shelf risers or tiered shoe stands ($20–$50 from Container Store, Amazon, or Wayfair). Place them on shelves to instantly display shoes facing forward. No tools needed; this takes 10 minutes. You’ll fit 10–15 pairs per shelf depending on shoe size and riser height. This method works best for everyday shoes; formal or seasonal pairs can stay boxed and stored elsewhere.

    Your shoe collection becomes visible and accessible. You’ll reach for favorites more often because you remember you own them.


    23. Create a Rotating Seasonal Rail System

    A two-rod system lets you keep current and off-season pieces separated without crazy storage. You rotate access seasonally instead of digging through buried boxes.

    Install two hanging rods at the same height using the same bracket system ($30–$60 per rod from IKEA or Home Depot). One holds active-season items; the other holds off-season pieces. Swap them out every 3 months (takes 1 hour). Use the space below off-season rod for bins or baskets. Label each rod with removable tags ($5–$10). This costs minimal extra money and takes about 1 hour to set up.

    Seasonal swaps feel intentional instead of chaotic. You’ll dress more seasonally and protect winter pieces from summer crushing.


    SOFT CTA:

    Save this post for your next closet refresh and pick one idea to start this weekend. You don’t need a huge space or a huge budget—small, smart changes add up fast. Share this with a friend who’s drowning in closet chaos, and let’s all spend less time searching and more time loving what we wear.

  • 25 Picture Wall Ideas That Add Personality to Any Room

    25 Picture Wall Ideas That Add Personality to Any Room

    Picture walls don’t have to be perfect—they should be personal. Whether you’re working with a tiny studio apartment or a sprawling family home, a well-curated wall of images, art, and mementos instantly makes your space feel lived-in and uniquely yours. The best part? You don’t need to be a designer or spend a fortune to pull it off. In this guide, we’re sharing 25 picture wall ideas that work for every style, budget, and skill level. From gallery wall layouts that look effortlessly cool to creative ways to display photos you actually love, these ideas help you build a wall that tells your story.

    1. Create a Black-and-White Gallery Wall Frame Set

    Black frames instantly add sophistication and make a gallery wall feel intentional. This approach works because matching frames create visual cohesion even when your prints are completely different styles and subjects.

    Pick frames in one color (black is foolproof) in 3-4 different sizes. Mix black-and-white photography, vintage posters, typography prints, and family photos—the unified frames tie everything together. Target, IKEA, and Amazon sell affordable matching frame sets; expect to spend $40–$80 for 8-10 frames. Layout tools like Framebridge’s free wall planner or even Pinterest mock-ups help you visualize before hanging anything.

    This approach works beautifully in living rooms, bedrooms, or home offices because the neutral color palette doesn’t compete with other décor. You’ll feel the pull-it-together effect immediately.

    2. Mix Frame Styles for an Eclectic Salon Wall

    If perfect symmetry feels boring, go intentionally mismatched. Salon-style walls celebrate chaos in the best way—they feel collected over time, not designed all at once.

    Hunt through thrift stores, Target, West Elm, and Facebook Marketplace for frames in different materials: wood, brass, black metal, white enamel. Mix widths, depths, and finishes. Hang 15-20 pieces in a loose cluster, letting them overlap slightly. Spend $50–$120 for a thrifted collection, or $100–$200 for new frames. Use a level and blue painter’s tape to map out your arrangement before drilling holes—most people change their layout 2-3 times before hanging.

    The visual richness of this style makes small apartments feel curated and sophisticated. Renter tip: Use damage-free hanging strips like 3M Command hooks ($8-$12 for a pack) instead of drilling.

    3. Display Pressed Flowers and Botanicals Behind Glass

    Pressed flowers bring organic texture and a gallery-quality feel without the expense of original art. They’re also surprisingly easy to create yourself or source affordably.

    Press flowers from your garden or buy pre-pressed botanicals on Etsy ($5-$15 per print). Frame them in basic glass frames from IKEA or Michaels (use a 40% coupon to cut costs). Group 3-5 vertically or in a grid. Total cost: $15-$40 if using pressed flowers you’ve collected, or $40-$80 with pre-made prints. Project time: 10 minutes to arrange and hang.

    This creates a peaceful focal point that works especially well in bedrooms, home offices, or bathrooms. The lightweight nature means you can hang them on apartment walls without worrying about weight capacity.

    4. Create an Inspiration Board with Washi Tape

    If you’re not ready to commit to permanent holes, washi tape offers a renter-friendly way to build a picture wall. It’s also a great way to rotate pieces seasonally or as your taste evolves.

    Gather magazine clippings, postcards, photos, and printed quotes. Use washi tape ($1-$3 per roll from Target or Amazon) to secure them to a wall in a loose grid or freeform cluster. Rearrange whenever the mood strikes. Cost: $10-$30 total. The whole project takes 30 minutes.

    Your wall becomes a living mood board that reflects what’s inspiring you right now. No guilt about changing it up—that’s the whole point.

    5. Frame Fabric Swatches and Textile Art

    Textile art adds dimension and warmth to a gallery wall in a way flat prints can’t. This idea works beautifully if you’re into textiles, weaving, or simply want to add tactile interest.

    Find small woven pieces, embroidered fabric, or textile samples at thrift stores or Etsy. Frame them in simple shadow boxes (which add depth). Mix solid colors with patterned fabrics for visual interest. Cost: $30-$80 depending on whether you source thrifted or new textiles. Time: 20 minutes to frame.

    The texture creates an instantly curated, collected-over-time feel. Works brilliantly in living rooms, bedrooms, or offices where you want conversation-starting décor.

    6. Hang a Grid of Matching Prints in Pastel Frames

    A grid layout is satisfying because it’s organized and visually calm. Pastel frames add color without the visual weight of bold hues.

    Choose 9-16 frames in matching sizes but different soft colors. Fill them with prints in a similar color palette: watercolors, line drawings, or abstract work. Wayfair, Target, and Minted offer affordable options. Budget: $60-$150 for frames and prints. Use a grid layout tool on your phone or Canva to plan spacing (typically 2-3 inches between frames works well).

    This approach feels modern and intentional. Perfect for bedrooms, nurseries, or any space where you want calm sophistication without chaos.

    7. Display Oversized Canvas Prints Above a Console

    One statement canvas beats 20 smaller prints if you want impact without clutter. This works especially well above furniture where you want a major focal point.

    Print your favorite oversized photo on canvas using Artifact Uprising, Minted, Printful, or Shutterfly ($25-$80 per print depending on size). Hang 1-3 canvases in a horizontal or stacked arrangement. This approach costs $30-$200 depending on your choices but delivers professional gallery feel.

    Your eye lands here first when entering the room—it sets the entire tone. Renter-friendly if you use adhesive backing strips instead of nails.

    8. Create a Floating Photo Grid Using Fishing Line

    This sculptural approach adds serious wow-factor and works beautifully in entryways, above desks, or as a room divider. It’s especially striking if you have a low ceiling height to play with.

    Attach photos or small prints to fishing line ($3-$5 for a spool at Amazon or craft stores) using small screw hooks. Suspend from ceiling at varying heights. Cost: $10-$30 plus photo printing. Time: 45 minutes to set up. The tricky part is getting the heights balanced—test your layout on the floor first.

    This creates a contemporary art installation feel that transforms a boring wall into an experience. Definitely plan this project as weekend-worthy.

    9. Mix Photos with Woven Wall Hangings

    Combining photos with textured wall art creates depth and visual interest that flat prints alone can’t achieve. This feels especially current with the return to maximalist, collected-over-time aesthetics.

    Hang 8-12 framed photos alongside 2-3 woven pieces (macramé, rattan, or woven wall hangings from Urban Outfitters, West Elm, or Etsy). Mix frame colors and sizes. Budget: $80-$200 depending on mix of thrifted and new items. Layout first with blue tape before committing.

    Your wall becomes a textile experience—people will notice the dimension and texture. Works beautifully in living rooms, bedrooms, or bohemian-leaning spaces.

    10. Display a Chronological Photo Timeline

    A timeline wall tells your family’s story in a way that scattered photos can’t. It’s personal, sentimental, and actually gets people talking when they visit.

    Select 8-15 significant photos spanning years or decades. Arrange vertically or in a staggered pattern, oldest to newest (or vice versa). Use similar-toned frames to keep it unified. Cost: $40-$100 for frames and printing. Time: 30 minutes to select photos and arrange.

    Visitors immediately grasp your family’s journey—it’s one of the most emotionally resonant wall arrangements you can create. Perfect for hallways, stairwells, or family rooms.

    11. Frame Your Favorite Typography and Quote Prints

    Quote prints are affordable, impactful, and completely customizable to your values. They make your space feel intentional and meaningful without requiring original art investment.

    Design custom prints using Canva ($0 free or $10+ for premium templates) or buy pre-made from Minted, Etsy, or Society6 ($10-$25 per print). Frame in black, white, or wood frames. Mix font styles and sizes for visual variety. Total budget: $30-$70 for 4-6 prints and frames. Print at Costco or CVS for the cheapest option ($0.20-$0.50 per print).

    Your walls now reinforce what matters to you. Great for bedrooms, offices, or any space where you want daily positive messaging.

    12. Create a Polaroid Wall with Clips and String

    Polaroid-style arrangements feel youthful, casual, and changeable. Perfect if you take lots of photos or want a low-commitment picture wall.

    Print photos in Polaroid format ($0.50-$1.50 per print from Shutterfly or Walmart) or use actual instant film if you love the aesthetic. Attach to strings using small clips ($5-$10 for a pack) or clothespins. String can be secured to walls using nails or Command strips. Budget: $20-$50. Setup takes 30-45 minutes.

    This approach lets you rotate photos constantly. Renter-friendly and playful—works best in bedrooms, dorms, or creative spaces.

    13. Hang Personal Collections in Shadow Boxes

    Shadow boxes elevate personal collections into legitimate wall art. If you’re a collector or sentimental keeper, this approach celebrates what you already own.

    Select shadow boxes online (Michaels, Amazon, Wayfair; $15-$30 each). Fill with: vintage keys, ticket stubs, fabric scraps, buttons, travel souvenirs, or dried flowers. Arrange in a grid or cluster. Total cost: $40-$100 depending on box size and number. Project time: 1-2 hours to arrange (this is meditative and fun).

    Your wall now displays memories and objects that mean something to you. Guests will find this incredibly interesting. Perfect for living rooms, offices, or any space with good natural light to show off the objects inside.

    14. Design a Minimal Black-and-White Photo Wall

    Black-and-white photography feels timeless and sophisticated. This approach works if you want a gallery-quality look without spending gallery prices.

    Take or source quality B&W photos from Unsplash, Pexels, or your own photography. Print at various sizes (5×7, 8×10, 11×14 inches) from Costco ($0.50-$3 each). Frame in uniform black frames or mix frame colors. Budget: $40-$100 including frames. Spacing matters here—aim for 2-3 inches between pieces.

    The simplicity reads as intentional and curated. Works beautifully in living rooms, offices, or bedrooms where you want calm focus without visual chaos.

    15. Layer Prints on a Cork Board Wall

    Cork boards offer a practical, changeable alternative to permanent picture walls. Perfect if you like switching things up or aren’t ready to commit.

    Install a large cork board or cork wallpaper ($30-$80 from Amazon or Wayfair) on one wall section. Layer prints, postcards, ticket stubs, and handwritten notes using small clips, pins, or washi tape. Cost: $30-$100. Time: 30 minutes to install and arrange.

    You get the visual richness of a gallery wall with zero permanent commitment. Renter-approved and instantly editable.

    16. Create a Seasonal Rotating Picture Wall

    Rotating your picture wall seasonally keeps your space feeling fresh and gives you four excuses to redecorate without major effort. It’s also a fun way to collect prints throughout the year.

    Invest in 2-3 seasonal print sets ($15-$30 per set from Minted, Society6, or Etsy). Use the same frames year-round; just swap the prints. Total investment: $50-$100 plus frames. Each rotation takes 15-20 minutes.

    Your space feels intentional and responsive to the season. Works especially well if you have a statement wall in a high-traffic area.

    17. Display Travel Posters and Maps in Matching Frames

    Travel posters are affordable, beautiful, and tell a story about your adventures or dreams. This approach works if you love travel or want to create a wanderlust-filled wall.

    Source travel posters from Etsy, Minted, Society6, or The Printed Image ($5-$20 per print). Frame uniformly in wood or black frames. Budget: $60-$150 for 6-8 pieces with frames. Grid layout feels most intentional here.

    Your wall becomes a map of where you’ve been or want to go. Great for living rooms, home offices, or anywhere you need a shot of inspiration.

    18. Mix Framed Art with Floating Shelves

    Floating shelves add dimension and function to a picture wall. You get visual interest plus practical display space for books, plants, or objects.

    Install 2-3 floating shelves ($20-$50 each from IKEA, Target, or Amazon). Arrange framed prints around them in a thoughtful pattern. Style shelves with small objects—books, plants, sculptures, or candles. Total investment: $80-$200. Installation takes 1-2 hours if you’re not experienced with wall anchors.

    This creates a sophisticated, lived-in look that feels more curated than a standard picture wall. Perfect for living rooms, offices, or bedrooms where you want personality plus function.

    19. Create a Gallery Wall Around an Important Mirror

    An ornate mirror becomes the centerpiece, and pictures surround it like a frame within a frame. This approach adds light and visual interest while keeping the arrangement intentional.

    Find a statement mirror ($40-$120 at West Elm, Wayfair, or Target). Arrange 8-12 smaller framed prints symmetrically around it. The key is balance—mirror size determines surrounding print scale. Total budget: $100-$250. Layout this carefully before hanging—asymmetry doesn’t work well here.

    The mirror bounces light while your pictures add color and personality. Works beautifully above dressers, console tables, or in entryways.

    20. Display Textile Art and Woven Placemats

    Textile pieces add cultural richness and three-dimensional interest. This approach celebrates global craftsmanship and feels more elevated than traditional prints.

    Frame woven placemats, textile samples, or fabric pieces in simple frames. Source from thrift stores, Etsy, or travel experiences ($2-$10 per piece). Frame cost: $10-$20 each. Total project: $50-$150 for 6-9 pieces. Time: 45 minutes to arrange.

    Your wall becomes a celebration of craftsmanship and cultural diversity. Perfect for living rooms or hallways where you want sophisticated, travel-inspired décor.

    21. Build a Kids’ Artwork Display Wall

    Kids’ artwork deserves a proper gallery—it’s often more interesting than expensive art, and it means the world to them. This builds confidence while making your space feel full of life.

    Rotate artwork from a portfolio or folder. Frame favorites in inexpensive frames or use clips ($5-$10 for a set). Arrange in a loose grid or gallery style. Budget: $15-$40 (most materials are free—just framing). Update quarterly as new masterpieces emerge.

    Your kids see their work celebrated, and your space feels fun and creative. Perfect for family rooms, playrooms, or hallways.

    22. Frame Vintage Handkerchiefs or Scarves

    Vintage textiles are affordable, beautiful, and unique. This approach works if you collect scarves or handkerchiefs or love vintage finds with visual interest.

    Source vintage pieces from Etsy ($3-$15 each) or thrift stores. Frame in shadow boxes to add dimension. Cost: $30-$80 for 4-6 pieces with frames. Time: 30-40 minutes to arrange and hang.

    Each piece tells a story about vintage craftsmanship. Your wall becomes a subtle celebration of textile art and history. Works especially well in bedrooms or vintage-leaning rooms.

    23. Create an Abstract Art Wall with Mixed Media

    Abstract art offers freedom—you’re not literal, so it works with any aesthetic. Mixed media keeps it interesting visually and feels more like a real art collection.

    Mix purchased prints with DIY creations, textured pieces, and unconventional frames. Shop Etsy, Society6, Minted, or local artists. Budget: $60-$200 depending on mix of affordable prints and investment pieces. Salon-style arrangement takes planning—sketch first.

    This wall becomes a bold statement about your aesthetic. It photographs beautifully and makes your space feel creative and intentional. Best in living rooms or bold-minded bedrooms.

    24. Display Botanical Illustrations in a Cohesive Grid

    Botanical art is timeless, calming, and works with almost any décor. The grid keeps it organized while the subject matter feels organic and natural.

    Source botanical prints from Etsy, Minted, or Prints of Plants ($5-$15 each). Frame uniformly in wood or black frames. Budget: $50-$120 for 9 prints with frames. Grid layout is straightforward using a level and measuring tape.

    Your wall becomes a natural focal point with educational appeal. Works especially well in kitchens, home offices, or bedrooms where you want calm sophistication.

    25. Build a Memory Wall with Washi-Taped Photos

    Washi tape offers a low-commitment, playful approach to photo display. Perfect if you take lots of digital photos and want a casual, evolving wall.

    Print favorite photos in various sizes ($0.25-$0.50 each from Costco or CVS). Secure with washi tape ($1-$3 per roll). Arrange casually—the imperfection is the appeal. Budget: $15-$40. This takes 20-30 minutes and can be redone instantly.

    Your memory wall evolves as you take new photos. Completely renter-friendly and quick to update. Perfect for bedrooms, dorm rooms, or creative spaces.

    26. Create a Sophisticated Black-and-Gold Gallery Mix

    Black and gold is a color combo that feels inherently sophisticated. This approach combines the organizing power of matching frame colors with visual richness through varied artwork.

    Mix black frames (roughly 60% of pieces) with gold accents (40%). Fill with a range of subjects: photography, abstract art, typography, and botanical prints. Budget: $80-$180 for frames and prints. This layout needs planning—sketch your arrangement on paper first to ensure balance.

    The result feels professionally curated and timeless. Works beautifully in living rooms, dining rooms, or master bedrooms where you want elevated sophistication.


    SAVE THIS POST AND TACKLE ONE IDEA THIS WEEKEND. Start with whichever approach feels most natural to you—whether that’s a simple grid of prints or a creative collections wall. Your space will feel more intentional instantly, and the best part? You’ll actually enjoy looking at your walls every day.

  • 26 Nature-Inspired Painting Ideas for Peaceful Spaces

    26 Nature-Inspired Painting Ideas for Peaceful Spaces

    Your walls have so much power over how you feel in a space. When they’re the wrong color or feel flat and uninspired, even a beautiful room can feel off. The good news? Nature-inspired painting ideas are easier to pull off than you think—and they work in any room, from bedrooms to living rooms to home offices.

    We’ve rounded up 26 specific ideas you can start this weekend. You’ll find everything from soft earth tones that calm your mind to deeper greens that anchor a space with intention. Some are free styling tricks, others are budget-friendly paint jobs, and a few are investment pieces that’ll last years. Whether you’re renting or own, skilled with a paintbrush or completely new to this, there’s something here for you. Let’s make your space feel like a retreat.


    1. Paint Accent Wall in Soft Sage

    Sage green has staying power because it feels calming without being boring. One accent wall gives you the nature vibe without overwhelming the whole room.

    Measure your wall and grab paint in Benjamin Moore HC-123 (Healing Aloe) or Sherwin-Williams 9205 (Evergreen Fog)—both run $35-$50 per gallon. Plan for 2-3 hours if you’re new to painting (tape, primer, two coats). You’ll need a roller, brush, and painter’s tape from any hardware store. Pro tip: Paint a test swatch and live with it for a few days first. Different lighting shows different sides of the same color.

    One accent wall makes the whole room feel intentional, and you’ll catch yourself just staring at it—in the best way.


    2. Create Ombre Gradient Using Two Paint Shades

    Ombre walls create subtle depth without feeling gimmicky. The gradient draws the eye and makes rooms feel more curated.

    Pick two coordinating colors (like cream fading to soft clay or pale blue to deeper teal). Benjamin Moore has matching palettes for this—around $35-$50 each. Divide your wall into horizontal thirds with light pencil marks. Paint the top section in your lighter shade (2 coats), bottom section in darker (2 coats), then blend the middle with a sponge or dry brush. This takes about 4-5 hours and is easier than it sounds—mistakes blend naturally. YouTube has great visual tutorials if you’re nervous.

    The result feels sophisticated and way more personal than a flat wall. Plus, your room photographs better for future design inspo.


    3. Stencil a Botanical Pattern on One Wall

    Stenciled botanicals add texture and personality without the mess of a full mural. They’re perfect if you love detail but want something manageable.

    Grab a botanical stencil from Etsy ($15-$30) or Amazon—there are hundreds. Tape it to your wall with painter’s tape, then use a stencil brush with a dabbing motion (don’t drag). One or two coats of your paint usually works. Expect 3-6 hours depending on how detailed the pattern is and wall size. You can do a single accent wall or repeat the pattern across multiple walls. Start small—even one wall makes a huge difference.

    Your guests will ask where you bought the wallpaper. Bonus: renters can do this and take it down cleanly later.


    4. Layer Warm White Base with Natural Wood Accents

    Warm whites have replaced cool grays, and pairing them with natural wood creates an instantly cohesive look. This works in any room and feels timeless, not trendy.

    Paint walls in Sherwin-Williams 7015 (Repose Gray) or Benjamin Moore 2108-70 (Pale Oak)—both are warm whites around $35-$40. Keep trim and shelving in natural wood tones (oak, walnut, or pine). One weekend for a full room paint job. The key is layering: light walls + warm wood + natural fiber accessories (jute rugs, linen curtains). This combination reads as thoughtful and expensive without being complicated.

    Spaces with warm whites and wood just feel warmer—literally and emotionally. It’s the easiest way to make a room feel like a retreat.


    5. Paint Ceiling in Soft Peach or Blush Tone

    A painted ceiling surprises people—and changes how a whole room feels. Soft peachy tones make spaces cozy and romantic without feeling childish.

    Choose Benjamin Moore 1304 (Pink Eraser) or Sherwin-Williams 7606 (Creamy)—both soft peachy neutrals around $30-$40 per gallon. You’ll need a 4-6 foot ladder and an extension pole. Plan 2-3 hours for an average bedroom ceiling. Primer first, then two coats. Yes, it’s a little awkward painting overhead, but the payoff is huge. Bonus: lighter ceilings make rooms feel taller, darker ceilings feel cozier—pick based on your space.

    Visitors always notice a painted ceiling first. It’s the kind of detail that makes a space feel designed and intentional.


    6. Use Deep Emerald Green for Drama and Depth

    Deep greens are having a major moment because they’re bold but timeless. Unlike trendy accent colors, emerald feels sophisticated and grounded.

    Try Benjamin Moore 2049-10 (Hunter Green) or Sherwin-Williams 6258 (Evergreen) around $40-$50 per gallon. These work best in rooms with good natural or artificial light—dining rooms, libraries, entryways. You’ll need 2-3 coats and quality primer ($25-$35) because deep colors require coverage. Budget a weekend for a full room. Pair with warm metallics (gold frames, brass fixtures) and natural wood. The combination feels expensive and collected.

    This color stops people in their tracks—in the best way. It makes your space feel like somewhere people want to spend time.


    7. Create a Mural with Watercolor Landscape Vibes

    Murals used to feel intimidating, but watercolor-style ones are forgiving and beautiful. You don’t need perfect technique—loose and blended is the point.

    Sketch your scene lightly in pencil first. Use acrylic paint in blues, greens, and whites ($15-$30 total). Grab a soft brush set from Amazon ($10-$15) and work in layers: light colors first, then deepen. Plan a full day or split across two sessions—no rush. YouTube has tons of watercolor mural tutorials. If you’re nervous, start with a small wall or practice on poster board first. Many people find it meditative once they start.

    Living with a mural you made yourself hits different. It becomes a conversation piece and a quiet source of pride every time you see it.


    8. Paint Trim and Woodwork in Contrasting Warm White

    Crisp trim against softer wall colors creates visual interest and makes rooms feel more intentional. This trick works in any color scheme.

    Keep walls in your chosen color (sage, soft blue, terracotta). Paint all trim, doors, and baseboards in Sherwin-Williams 7005 (Pure White) or Benjamin Moore 2121-70 (Cloud White) around $25-$35. You’ll need painter’s tape, a smaller brush, and patience—trim takes longer than walls because of the detail. Budget half a day to full day depending on room size. Quality tape prevents bleeding. Pro tip: paint two thin coats rather than one thick coat for a cleaner finish.

    Clean white trim makes every wall color pop. Suddenly your whole room looks more polished and intentional.


    9. Apply Textured Plaster Finish for Dimensional Walls

    Textured plaster adds luxury without renovation. It catches light beautifully and hides imperfections—perfect if your walls aren’t perfectly smooth.

    You have options: hire a pro (typically $400-$800 per room) or DIY with pre-mixed plaster products like Venetian plaster from Home Depot ($50-$80 per can). DIY takes 4-6 hours and a learning curve, but it’s doable. Watch tutorials first. You’ll use a trowel to apply thin, overlapping layers. Prime and seal after. The texture works in any color—try warm creams, soft grays, or pale sage.

    Textured walls photograph beautifully and feel more expensive than they are. Plus, the dimension changes throughout the day as light shifts.


    10. Paint a Feature Wall in Dusty Cinnamon or Clay

    Cinnamon and clay tones are the warm neutrals everyone’s moving toward. Cinnamon Slate (Benjamin Moore’s 2025 Color of the Year) is the perfect example—it’s sophisticated and works everywhere.

    Try Benjamin Moore 2113-40 (Cinnamon Slate) around $40-$50 per gallon, or Sherwin-Williams 7598 (Rookwood Dark Green) for a similar vibe. These warm earthy tones pair beautifully with natural wood, cream, and soft linens. Two coats, standard timeline—about 3-4 hours for one wall. The beauty of these colors is they work in bedrooms, living rooms, home offices, even bathrooms. They never feel dated because they’re rooted in nature.

    This color makes you slow down. Spaces painted in cinnamon and clay become the rooms you want to retreat to.


    11. Mix Paint Techniques: Stripes Using Painters’ Tape

    Stripes add structure and visual interest without being overwhelming. You can go subtle (alternating between two similar tones) or bold (contrasting colors).

    Pick two coordinating colors—try soft sage and cream, or pale blue and white. Measure your wall and mark stripes every 8-12 inches with a pencil and level. Use painter’s tape to create straight edges ($3-$5 per roll). Paint alternating stripes, removing tape while paint is still slightly wet for crisp lines. Plan 4-5 hours including tape work. Vertical stripes make rooms feel taller. Pro tip: wider stripes (12+ inches) feel more modern; thin stripes feel more traditional.

    Striped walls add energy and structure to any room. Kids’ rooms love this idea, but it works beautifully in grown-up spaces too.


    12. Install Wallpaper in Nature Prints (Removable Option)

    Removable wallpaper gives you pattern without commitment—perfect for renters or anyone hesitant about going bold. Quality options look just like real wallpaper.

    Brands like Spoonflower, Peel-and-Stick brands from Target/Amazon ($25-$60 per roll) offer gorgeous nature prints. Prep your wall (clean, smooth, prime if needed). Measure, cut panels with a utility knife, and slowly peel and stick, smoothing as you go. Allow 2-3 hours for a small room, longer for whole walls. Most removable options last 2-5 years before needing replacement. They peel off cleanly when you’re ready for a change.

    Patterned walls make small spaces feel expensive and designed. Plus, you can change it up whenever you want without guilt.


    13. Paint Lower Half in Darker Tone, Upper Half in Light

    Wainscoting effect with paint is affordable and makes rooms feel more formal and intentional. No carpentry skills required.

    Choose your colors—try terracotta and cream, or deep green and pale gray. Mark the division point about one-third up from the floor (or adjust based on your ceiling height). Tape a straight line using a level. Paint the lower section first, let dry, then paint the upper section. Add a painted stripe or trim at the division line for polish ($10-$20 for trim materials). Plan a full day for a room. This trick works especially well in dining rooms, entryways, and bathrooms.

    Split-color walls make ordinary rooms feel professionally designed. It’s a classic look that never dates.


    14. Use Botanical Stickers as Temporary Wall Decor

    Wall decals are the lazy person’s stencil—zero painting skill required, totally removable, and genuinely beautiful. Great if you want nature vibes without commitment.

    Search Amazon, Target, or Etsy for botanical wall decals ($15-$40 depending on size and quality). High-quality vinyl decals stick smoothly and peel off without damage. Choose your arrangement, clean the wall, then peel and stick. Takes about 20-30 minutes and looks instantly intentional. You can layer multiple decals for more impact or keep it minimal. Renters love these because they’re completely non-damaging.

    Your wall gets a nature-inspired upgrade instantly. Decals work in bedrooms, offices, living rooms—anywhere you want a subtle boost of personality.


    15. Paint Walls in Warm Greige for Balanced Neutral

    Greige is the sweet spot between gray and beige—warm enough to feel cozy but neutral enough to pair with anything. It’s the new “safe” neutral that doesn’t feel boring.

    Try Sherwin-Williams 7015 (Repose Gray) or Benjamin Moore HC-172 (Pale Oak) around $35-$40 per gallon. These bridge the gap perfectly. Two coats, standard timeline—3-4 hours for an average room. The beauty of greige is it works with cool and warm accents, so you’re not locked into a color scheme. Add warmth with wood and textiles, coolness with metallics and blues. It’s the most flexible neutral out there.

    Greige walls make every other design decision easier. You can add bold accents without the walls fighting back.


    16. Create a Nature Gallery Wall with Framed Botanical Prints

    A gallery wall of nature prints costs less than a single large painting but has way more impact. Mix frame styles and mat colors for visual interest.

    Collect framed prints from Etsy, Minted, or local artists ($20-$60 each). Mix frame colors (natural wood, black, white) for a curated feel. Arrange on the floor first to test layout, then use a level and painter’s tape to mark placement ($5-$10 total). Hang systematically. Plan 2-3 hours including arrangement and hanging. Pro tip: vary mat sizes and colors for depth. Odd numbers (5, 7, 9) feel more natural than even numbers.

    Gallery walls make spaces feel collected and intentional. People always assume you’re way more design-savvy than you are.


    17. Paint Shelves in Contrasting Color to Walls

    Painted shelves create visual separation and make small items pop. The contrast adds structure and personality.

    If you have floating shelves, remove items and paint them separately in your chosen accent color. Benjamin Moore deep greens, blues, or warm terracottas ($30-$40 per gallon) all work beautifully. You’ll need two coats and a small brush. If your shelves are built-in, this is a commitment, but it’s worth it. Allow 4-6 hours including drying time. Reassemble carefully so paint doesn’t chip during reinstallation.

    Colored shelves turn functional storage into a design feature. Your books and plants suddenly look like intentional styling.


    18. Blend Two Paint Colors on Same Wall for Subtle Ombre

    A more subtle ombre uses colors that are closer in tone. The effect is sophisticated and less obvious than traditional ombre.

    Pick two colors in the same family but slightly different depths—like two greens, or two warm whites. Benjamin Moore offers color families that work perfectly ($30-$40 each). Paint the left section in color A, right section in color B, then use a damp sponge or dry brush to blend the middle section. Work with a light hand. Plan 4-5 hours. The blend looks intentional, not accidental, when done slowly. Practice on a test wall or poster board first.

    This technique adds sophistication without feeling experimental. Rooms with blended walls photograph beautifully.


    19. Add Metallic Gold Accents Over Green Paint

    Metallics with deep nature colors create instant luxury. Gold especially feels warm and collected against greens and earth tones.

    Paint your walls in deep green ($40-$50). Then layer with gold accessories: frames from Target/Amazon ($20-$60), mirror from IKEA ($30-$80), brass fixtures from hardware stores ($40-$120). You don’t need to paint the metallics yourself—just style them intentionally. Budget $100-$200 total for materials and a few hours to arrange. Gold reflects light beautifully and makes small spaces feel bigger and warmer.

    The combination of deep green and gold feels like interior design without the interior designer price tag. Guests will definitely notice.


    20. Paint Accent Wall Behind Bed in Soothing Color

    The wall behind your bed becomes your focal point every night—make it count. Soft, soothing colors create a calming effect before sleep.

    Choose soft blues, pale greens, or warm neutrals that support rest. Try Benjamin Moore 1633 (Pale Oak) for warmth or 1402 (Palladian Blue) for cool calm around $35-$40. This accent wall works especially well because you’re not seeing the whole room while lying down—just this one, intentional backdrop. One weekend project, 2-3 hours. If your bed isn’t against the wall, this still works—any wall you see from bed becomes your visual anchor.

    A calming accent wall behind your bed improves sleep quality more than you’d expect. It’s the first thing you see waking up and the last thing before sleep.


    21. Create a Sunset-Inspired Gradient (Orange to Pink to Purple)

    Sunset-gradient walls feel whimsical without being childish. They’re perfect for creative spaces, kids’ rooms, or anyone wanting something unique and uplifting.

    Choose three coordinating colors that blend naturally—think apricot, dusty rose, and lavender. Divide your wall into thirds and paint each section, then blend the transitions with a damp sponge or blending brush ($5-$10). Plan a full day—this takes patience and careful blending. Layering colors matters: lightest on top, darkest on bottom. Pro tip: these look stunning with warm string lights or sunset photography.

    Sunset walls create instant mood and energy. Every photo in that room looks amazing.


    22. Paint Ceiling and Upper Walls in Pale Blue, Lower in Cream

    This reverse wainscoting makes rooms feel taller and brings sky into your interior. It works beautifully in bedrooms, bathrooms, and living rooms.

    Paint ceiling and upper wall section in pale blue ($35-$40) like Benjamin Moore 1413 (Palladian Blue). Paint lower section in cream ($30-$35). Divide with a light stripe of trim or tape. The upper section should be about 2/3 of wall height to create proportion. Budget a full day—ceiling painting takes time. This technique works especially well with crown molding or simple trim for polish.

    Rooms with sky-blue ceilings feel open and calming. It’s like bringing outdoor space inside.


    23. Use Washable Paint in Earthy Tones for Flexibility

    Washable paint lets you go bolder in spaces with potential mess (offices, kitchens, bathrooms). You can touch up easily or change colors later.

    Brands like Sherwin-Williams ProClassic or Benjamin Moore Aura offer washable finishes ($45-$60 per gallon). These handle soap and water beautifully. Choose warm earth tones like terracotta, clay, or warm brown for nature vibes. Same timeline as regular paint—3-4 hours for a room. Washable paint costs a bit more but lasts longer in high-traffic areas. Perfect for renters too—you can repaint when you move out.

    Washable paint removes the anxiety of “ruining” your walls. You can go bolder knowing you can refresh anytime.


    24. Create Tree Silhouettes Using Dark Paint or Stencils

    Tree silhouettes add drama while staying nature-focused. They work in minimalist and eclectic spaces alike.

    Option one: DIY stencil from Etsy ($20-$35) + dark paint. Option two: freehand sketch, then paint carefully with a small brush. Option three: vinyl decals ($30-$60)—easiest but less customizable. Choose your method based on your confidence level. Plan 2-4 hours depending on complexity. Dark silhouettes pop against light walls but feel moody against dark walls. Group them in a forest arrangement or spread them across the whole wall.

    Tree silhouettes make spaces feel grounded and artistic. People always ask if they’re intentional art or if you hired someone.


    25. Paint Walls in Warm Taupe for Sophisticated Simplicity

    Warm taupe is quietly sophisticated—it bridges warm and cool tones and works with almost any accent color. It’s less trendy than greige but equally timeless.

    Try Benjamin Moore 2111-50 (Accessible Beige) or Sherwin-Williams 7037 (Urbane Bronze) around $35-$40 per gallon. Taupe works beautifully in bedrooms, living rooms, and home offices. Standard painting timeline—3-4 hours for one room. Pair with natural wood, cream textiles, and warm metals for a cohesive feel. Taupe stays current because it’s rooted in earth tones rather than trendy colors.

    Taupe walls create a calm backdrop for life. They fade into the background so your furniture and art become the stars.


    26. Combine Painted Walls with Living Moss or Plant Wall Installation

    If you want nature ON your walls beyond paint, living moss walls bring biophilic design to life. They’re low-maintenance and genuinely beautiful.

    Preserved moss wall panels cost $150-$500 depending on size (Etsy has options). Paint surrounding walls in soft creams, pale greens, or warm neutrals ($35-$40). Moss walls don’t need water or sunlight—they’re preserved, not living. Installation takes 1-2 hours (usually just mounting). Pair with minimal paint so the moss becomes the focal point. This is an investment piece but one that lasts years.

    A moss wall transforms a space instantly. It becomes the centerpiece everyone notices first, and it stays beautiful long-term.


    Ready to refresh your walls? Save this post for your next paint project and pick just one idea to start with this weekend. Small changes add up fast, and your space deserves to feel peaceful. Which idea speaks to you most?

  • 24 Double-Rod Curtain Styling Ideas for Beautiful Layered Looks

    24 Double-Rod Curtain Styling Ideas for Beautiful Layered Looks

    Double-rod curtain setups might seem intimidating, but they’re actually your secret weapon for creating layered, designer-worthy windows without the designer price tag. Whether you want to control light, add depth, or mix textures and patterns, hanging curtains on two rods gives you endless styling possibilities. The beauty? You can change your look seasonally, hide problem areas, or simply add that extra touch of polish that makes a room feel complete. In this guide, you’ll discover 24 creative ways to style double rods—from budget-friendly hacks to investment pieces that’ll make your windows the focal point everyone notices. Let’s get started.

    1. Pair Sheer and Blackout for Light Control

    Layering sheers with blackout curtains solves the age-old problem of wanting both privacy and natural light. The sheer panels hang on your front rod to filter light beautifully, while blackout panels on the back rod give you complete darkness when you need it.

    This setup works in bedrooms, home offices, or any space where you need flexibility. Sheers typically cost $15–$40 per panel from Target or IKEA, while blackout curtains run $30–$80 depending on fabric quality. Installation takes about 30 minutes and requires no tools beyond a ladder. You’ll want to ensure both rods are installed at similar heights for a cohesive look. The best part? You get movie-theater darkness at night and soft, diffused daylight during the day without sacrificing style.

    2. Layer Neutral Linen with Earthy Velvet

    Mixing natural fabrics with luxe textures adds sophistication and sustainability to your space. Linen’s breathable, earthy feel pairs beautifully with velvet’s depth—and both fabrics are having a major moment in 2025.

    Hang lightweight linen sheers on your front rod (these run $25–$50 per panel from Wayfair or West Elm) and rich velvet drapes on the back rod ($60–$150 per panel depending on brand). Both fabrics work well with motorized rods if you want to add tech later. Linen wrinkles naturally, so don’t stress about perfection—that’s part of the charm. The velvet adds gravitas and softness, making the room feel both cozy and intentional. You’ll notice the textures catch light differently throughout the day, creating visual interest even when the curtains are closed.

    3. Create Height Drama with Floor-to-Ceiling Drapes

    Floor-to-ceiling curtains are one of the quickest ways to make any room feel more luxurious and spacious. Even in modest-height rooms, this styling trick visually pulls your eye upward, adding drama and grandeur.

    Mount your rods as high as possible—ideally 4–6 inches below the ceiling—and choose panels that puddle slightly on the floor (about 2–4 inches of extra fabric). This works on both rods for maximum impact. Most standard panels are 96 or 108 inches long; you can hem them yourself with fabric glue ($5–$10) or take them to a tailor ($15–$30 per panel). The extra length costs nothing if you DIY, or about $20–$40 per panel if you buy pre-made extra-long options from places like Pottery Barn or IKEA. Installation takes about 45 minutes for both rods. The transformation is noticeable—suddenly your ceiling feels higher and your space feels grander.

    4. Mix Patterns with a Neutral Backdrop

    Bold patterns are trending hard for 2025, but mixing them requires a strategy—that’s where your double rod becomes your best friend. Keep one layer simple and neutral so your patterned layer gets all the attention.

    Hang solid-colored sheers or lightweight curtains on your front rod (cream, soft gray, or warm white in $20–$40 panels) and let a statement pattern take center stage on your back rod. Plaid, vintage floral, or retro geometric designs create visual interest without clashing when they have breathing room. Patterned curtain panels typically cost $30–$70 per panel from online retailers like Etsy, Wayfair, or specialty fabric stores. This setup takes about 45 minutes to hang and style. Pro tip: If the pattern feels too bold, you can adjust how far back you pull the rear curtains to control how much shows. The result? A room that feels curated and intentional, not chaotic.

    5. Go Monochromatic with Texture Play

    Monochromatic schemes are having a major resurgence, especially when you layer different textures in the same color family. This approach feels calm, cohesive, and far more elevated than it sounds.

    Choose one neutral shade you love—cream, soft gray, warm beige, or taupe—then find two different fabric textures in that same hue. Lightweight linen or cotton voile for the front ($25–$45 per panel) and textured velvet, linen blend, or jacquard for the back ($50–$120 per panel). Both pieces should be the same color but different tactile experiences. Installation takes about 30 minutes, and no hemming is needed if you buy ready-made panels. The beauty of this approach? Your room feels intentional and designed without relying on color contrast. Soft light will catch the different textures throughout the day, creating subtle visual movement and depth.

    6. Add Jewel Tones for Drama and Warmth

    Jewel tones—ruby red, sapphire blue, emerald green, amethyst purple—are the color trend everyone’s embracing in 2025. Double rods let you showcase these bold hues without committing your entire window wall to drama.

    Layer pale cream or white sheers on your front rod ($15–$40) with jewel-toned velvet, linen blend, or heavy cotton on your back rod ($60–$150 per panel). The pale layer underneath keeps the space from feeling cave-like, while the jewel tone adds luxury and personality. Brands like Anthropologie, West Elm, and online fabric sellers offer gorgeous options. Hanging both rods takes about 40 minutes. These colors photograph beautifully for social media, so your space instantly becomes more inspiring. The interplay between light sheers and deep jewel tones creates a sophisticated, gallery-like quality.

    7. Use Motorized Rods for Modern Convenience

    If you want luxury without the manual work, motorized double-rod systems are worth the investment. Control both rods separately from your phone, set schedules, and integrate with your smart home—all while looking incredibly chic.

    Motorized rod systems typically start at $200–$400 for basic setups from brands like IKEA Fyrtur, Lutron, or Switchbot, climbing to $600–$1,500+ for premium systems from companies like Silent Gliss or Hunter Douglas. Installation can be DIY (1–2 hours) or professional ($100–$300 labor). You’ll need a power source near your window, so check your outlet placement before purchasing. The convenience is real—open curtains with your morning alarm, close them remotely for movie night, or schedule them to adjust with sunset. This setup pairs especially well with minimalist or modern interiors where clean lines matter. You’ll feel like you’re living in the future.

    8. Layer Lightweight Cotton with Statement Silk

    Mixing humble cotton with luxe silk creates an interesting aesthetic contrast—everyday practicality meets special-occasion elegance. This pairing works beautifully in bedrooms, dining rooms, or living spaces.

    Hang lightweight cotton voile or cotton linen blend on your front rod ($20–$40 per panel from Target, IKEA, or Amazon). Add silk or silk-blend drapes to your back rod ($80–$200 per panel from Anthropologie, Wayfair, or specialty fabric shops). Cotton is easy-care and casual; silk adds glamour and catches light in sophisticated ways. Setup takes about 30 minutes. Both fabrics are forgiving—cotton wrinkles naturally, and silk actually looks better with subtle imperfections. The combination says “I’m put-together but not fussy,” which resonates with how most people actually want to feel in their homes. You’ll appreciate the texture contrast when light hits the windows throughout the day.

    9. Employ Color Drenching for Immersive Depth

    Color drenching—matching your curtains to your wall color—creates a cocooning effect that feels intentional and spa-like. With double rods, you can layer different shades of the same hue for even more depth.

    Paint your walls in a soft earthy tone like sage, olive, warm gray, or muted terracotta ($30–$50 per gallon). Hang a slightly lighter shade on your front rod and a slightly deeper shade on your back rod, both in the same color family. Panels range $25–$80 each depending on where you shop. This technique works best in bedrooms and calm spaces; it can feel overwhelming in small rooms or high-traffic areas. Installation takes about 45 minutes for both rods. The payoff? Your room becomes a cohesive, intentional space that photographs beautifully and feels incredibly relaxing. The color drenching approach removes decision fatigue—everything coordinates by design.

    10. Mix Vintage Austrian Blinds with Modern Sheers

    Austrian blinds are experiencing a romantic revival, especially when paired with contemporary elements. This blend of old and new creates visual interest without feeling like a costume.

    Hang minimalist sheers on your front rod ($20–$40 per panel) and opt for Austrian blinds on your back rod ($80–$200 depending on customization). Brands like Hillarys and local blinds shops can custom-make these with elegant scalloped edges and gentle fabric folds. The blinds add texture and detail without overwhelming the space. Installation requires professional help for the blinds ($50–$150), but sheers hang easily yourself (15 minutes). This pairing works beautifully in master bedrooms, dining rooms, or feminine-leaning spaces. The result feels curated and personal—like you discovered a sophisticated trick. The soft light filtering through both layers creates a dreamy, intentional mood.

    11. Layer Crisp White for Maximum Light Reflection

    If your goal is maximum brightness and visual spaciousness, white curtains on both rods are your answer. This classic approach never goes out of style because it actually works.

    Choose crisp white cotton voile or linen for your front rod ($20–$45 per panel) and ivory or bright white linen or linen blend for your back rod ($35–$80 per panel). The slight shade variation (pure white vs. ivory or natural linen) adds depth while keeping everything light and airy. Panels from IKEA, Target, and Wayfair are $15–$50 and budget-friendly. Hanging takes about 30 minutes. White reflects light beautifully, making even smaller rooms feel larger and brighter. The minimalist aesthetic appeals to modern and traditional tastes alike. You’ll notice that rooms with white double-layered curtains feel more spacious and peaceful—plus they photograph incredibly well.

    12. Try Plaid Sheers Over Solid Neutrals

    Plaid patterns are trending, but subtle versions feel more sophisticated than bold takes. Plaid sheers offer pattern without heaviness, especially when layered over solid neutrals.

    Hunt for lightweight plaid sheers in cream with subtle blue, green, or pink checks ($25–$50 per panel from Etsy, Wayfair, or specialty online retailers). Layer them over solid warm gray, greige, or taupe linen on your back rod ($40–$90 per panel). The pattern reads gently through the sheers while the solid backdrop keeps things grounded. Installation takes about 40 minutes. This combination works beautifully in traditional, cottage, or eclectic spaces. The plaid adds personality without feeling trendy or overly thematic. Soft light highlights the plaid pattern beautifully, especially in afternoon hours, creating subtle visual interest that doesn’t exhaust your eyes.

    13. Combine Gauzy Drapes with Deep Moody Backdrops

    If your walls or furniture lean moody or dark, gauzy, lightweight drapes on your front rod prevent the space from feeling heavy. This pairing balances drama with airiness.

    Hang breezy gauze or cotton voile in cream, ivory, or pale gray on your front rod ($20–$40 per panel). Layer deep charcoal, navy, or rich gray linen or linen blend on your back rod ($60–$130 per panel). The gauzy layer softens the moody backdrop while maintaining the sophisticated, deep-toned aesthetic. Brands like West Elm, Pottery Barn, and Wayfair carry options. Setup takes about 40 minutes. This technique prevents deep-toned rooms from feeling claustrophobic or dark. Instead, you get the elegance of jewel-tone or moody styling with the lightness and softness that makes spaces feel open. The interplay between the two layers creates a hotel-like quality.

    14. Go Full Luxury with Matching Silk Panels

    When budget allows, silk on both rods creates undeniable luxury and visual sophistication. This investment pays dividends in how your room feels and photographs.

    High-quality silk panels start at $100–$200 per panel and can reach $300–$500+ from premium brands like Restoration Hardware, Anthropologie, or high-end fabric stores. Consider brands like Etsy sellers specializing in luxury fabrics for slightly lower prices ($80–$180 per panel). Silk requires professional cleaning (budget $10–$20 per panel annually) and should be hung away from direct intense sunlight to prevent fading. Installation takes about 45 minutes, but professional hanging ($75–$150) ensures proper care. The payoff is immense—silk creates an undeniable sense of polish and refinement. Your room automatically feels more curated, and the way silk catches and reflects light is genuinely beautiful. This is a genuine investment that lasts decades.

    15. Layer Embroidered Sheers with Solid Drapes

    Embroidered sheers transform your windows into artwork, especially when backed by solid panels that let the detailing shine. This approach feels personal and curated.

    Search for embroidered linen or cotton sheers with botanical, geometric, or celestial patterns ($40–$90 per panel from Etsy, specialty online retailers, or brands like Anthropologie). Back them with simple solid linen or cotton in cream, white, or pale gray ($30–$70 per panel). The embroidery shows beautifully when backlit by natural light. Installation takes about 35 minutes. This pairing works especially well in bedrooms, home offices, or spaces where you want to inject personality without bold color. The embroidery catches attention during the day when light streams through, becoming a subtle focal point. It’s a designer detail that feels more special than standard curtains.

    16. Use Tie-Back Tricks to Shape Your Layers

    Tie-backs are an underrated styling tool that adds polish and visual interest while controlling how your layers hang. They’re affordable, easy to change, and instantly elevate your look.

    Purchase simple fabric tie-backs ($5–$20 per pair from Target, IKEA, or Amazon) or make your own using ribbon, fabric strips, or even decorative cord. Install tie-back hooks ($3–$8 each at hardware stores) about one-third down from the rod. Pull both your front and back curtains to the sides and secure with tie-backs, creating elegant diagonal lines. This approach takes about 20 minutes and requires just a drill or picture hooks. Tie-backs serve a double purpose—they shape your layers and keep curtains from blocking light when you want it. The architectural lines created by tie-backs make your window look more intentional and designed. You can change tie-backs seasonally or for different moods without replacing the curtains themselves.

    17. Embrace Two-Toned Layering for Subtle Contrast

    Two-tone layering adds visual interest and depth without committing to bold patterns or extreme contrast. It’s sophisticated and surprisingly forgiving.

    Choose two related colors in the same warm or cool family—cream and warm gray, ivory and sage, pale blue and dusty blue. Front panels run $25–$50, back panels $40–$90 per panel depending on fabric and retailer. Both layers should feel equally important, so avoid pairing a dark with a light (instead, go light with medium, or medium with slightly deeper medium). Installation takes about 40 minutes. This approach works beautifully in spaces where you want design intention without personality risk. The two tones catch light differently, creating subtle movement throughout the day. Your space feels thoughtfully styled without looking like you’re trying too hard.

    18. Mix Prints Carefully with a Solid Separator Layer

    Mixing two different prints requires a trick—add a solid separator layer between them. Your front rod holds a simple solid, while patterns appear on both your window frame and your back rod.

    Hang basic white or cream cotton voile on your front rod ($20–$40 per panel). On your back rod, combine two complementary prints in related colors—perhaps a small floral with a geometric, or a plaid with a botanical. Each panel should feature one print. Patterned panels range $35–$80 per panel from places like Etsy, Wayfair, or fabric specialty shops. Installation takes about 50 minutes and requires confidence in styling (test your selections side by side before committing). The solid layer acts as a visual buffer, preventing the patterns from competing or creating visual noise. The result feels eclectic but intentional, not chaotic. This is perfect for maximalists who love pattern but worry about cohesion.

    19. Create Hybrid Style with Pleats and Minimalist Hardware

    Hybrid styling blends traditional and modern elements—think structured pleats with minimalist hardware and neutral colors. It’s elegant without feeling fussy or ornate.

    Select panels with subtle pleating or inverted pleats in white or cream ($50–$100 per panel from brands like Pottery Barn, West Elm, or online specialists). Pair with ultra-minimal hardware—thin matte black or brushed nickel rods and rings. Back panels should be simple, flat linen or cotton in gray, taupe, or warm white ($35–$80 per panel). Installation requires careful rod placement and takes about 60 minutes (professional help is recommended, $75–$150). The pleats add architectural interest while the minimal hardware keeps the look contemporary and uncluttered. This approach appeals to people who love traditional craftsmanship but live modern lives. The result feels designed by someone with excellent taste.

    20. Layer Metallic Accents with Understated Fabrics

    Hardware is often overlooked, but metallic accents can elevate basic panels instantly. Pair neutral fabrics with surprising, luxe hardware for maximum impact.

    Stick with simple white, cream, or gray linen on both rods ($25–$60 per panel), then invest in statement hardware in champagne gold, antique brass, or matte bronze ($30–$80 per rod set). Ring details and finials catch light and add glamour without changing fabric choices. Brands like Wayfair, West Elm, and specialty hardware shops offer gorgeous options. Installation takes about 50 minutes and doesn’t require tools beyond a drill. This approach is perfect if you already own curtains you love but want to refresh your look. Swapping hardware is one of the quickest design updates available. The metallic accents create focal points and add sophistication without clashing with any décor style.

    21. Go Full Blackout for Media Rooms or Bedrooms

    If you need theatrical darkness, full blackout layering ensures zero light sneaks through. Both rods can support blackout fabrics for maximum coverage.

    Hang blackout-lined panels or full blackout curtains on both rods in black, deep gray, or charcoal ($40–$100 per panel depending on quality). Look for brands offering 100% blackout certifications from Wayfair, Amazon, or specialty blackout retailers. Ensure your rods are sturdy enough for the weight (blackout fabric is heavier, so check rod ratings). Installation takes about 45 minutes, though you may want to add a third rod or blackout shade system. Professional installation ($100–$250) ensures proper coverage and light blocking. This setup is essential for media rooms, shift-worker bedrooms, or light-sensitive sleepers. Complete darkness allows better sleep and more realistic movie experiences. The trade-off is that rooms feel cave-like in daytime, so consider this setup only if darkness is your priority.

    22. Add Tassels and Trim for Ornate Elegance

    Ornate details like tassels, fringe, and trim transform basic panels into statement pieces. This approach revives neo-classical style with modern sensibility.

    Select solid velvet, linen, or heavy cotton in jewel tones or warm neutrals ($60–$150 per panel). Add bullion fringe, tassel trim, or decorative ribbon along the hem or top ($10–$30 per panel). Tassels for tie-backs run $8–$25 per pair. Install decorative finials ($25–$75 per set) on your rods for added elegance. Assembly and hanging takes about 60 minutes (professional installation recommended for alignment and balance, $100–$200). This look works beautifully in formal dining rooms, living rooms, or bedrooms where you want undeniable elegance. The ornate details photograph beautifully and create a sense of refined luxury. This is for people who love maximalist style and aren’t afraid of bold choices.

    23. Employ Sheer-Only Layering for Minimalist Interiors

    Sometimes less is more—two layers of sheers create depth and interest without any heavy fabric. This approach feels calm, airy, and endlessly sophisticated.

    Choose lightweight white or cream cotton voile or linen for your front rod ($20–$40 per panel) and a slightly heavier or more textured sheer for your back rod ($30–$60 per panel). The slight difference in fabric weight or weave creates visual layering without blocking light. Both panels hang open at all times, working as a permanent soft filter. Installation takes about 25 minutes. This approach is perfect for minimalist spaces, open-concept homes, or sunny rooms where light control matters less than aesthetic. The dual-sheer approach creates a sophisticated, gallery-like quality. Soft light throughout the day creates gentle movement and interest while maintaining the peaceful, uncluttered aesthetic.

    24. Mix Budget and Splurge with Strategic Layering

    You don’t need to spend heavily on both layers. Smart layering lets you invest in one statement layer while keeping the other affordable and practical.

    Grab inexpensive white or cream cotton panels from IKEA or Target for your front rod ($15–$30 per panel). Splurge on gorgeous velvet, silk, or high-end linen for your back rod ($100–$300 per panel from premium brands). This approach lets your investment piece shine while keeping overall costs manageable. Budget for both layers: roughly $150–$400 for a two-panel window (two panels per rod). Installation takes about 40 minutes. This strategy is perfect if you have one statement color or fabric you’re passionate about but don’t want to commit your entire window budget. The affordable front layer does its job quietly while the splurge layer gets to show off. This is smart budgeting that still delivers designer impact.

    25. Style Seasonal Swap-Outs for Flexibility

    Your double-rod setup is perfect for seasonal changes. Swap your back or front panels seasonally without touching your hardware—instant refreshes, minimal work.

    Keep your rods permanently installed, then swap out panels seasonally. Summer: lightweight linen or cotton voile ($25–$50 per panel). Winter or fall: velvet, wool blend, or heavy linen ($60–$150 per panel). Store off-season panels in vacuum bags or garment bags (approximately $10–$30 for storage supplies). Swapping takes about 20 minutes per rod once you develop a rhythm. This approach extends your budget—you’re effectively buying multiple looks from one setup. Your space feels fresh and intentional with each season. It’s also perfect for people who like variety or follow décor trends. The flexibility means you’re never locked into one aesthetic.

    26. Layer Linen with Affordable Blackout for Dark Mornings

    Practical doesn’t have to mean boring. Pair beautiful natural linen on your front rod with affordable blackout panels on your back rod for the best of both worlds—style and function.

    Choose natural linen in cream or warm white for your front rod ($30–$60 per panel from West Elm, Wayfair, or online specialists). Back it with budget-friendly blackout panels from IKEA or Amazon ($15–$40 per panel) in matching cream, tan, or neutral gray. The linen adds beauty and texture while the blackout layer stays hidden, doing its job quietly. Total investment per two-panel window: roughly $90–$200, and installation takes about 35 minutes. This combination works beautifully in bedrooms where you want morning softness but need the option for dark, restorative sleep. The approach feels intentional rather than purely functional. You get a designer aesthetic with practical light control—the dream combination.


    Save this post for your next window project and pick at least one idea to try this weekend. The best part? Most of these setups take under an hour, and you’ll immediately feel the difference in how your space looks and functions. Share with anyone who’s been hesitating about double rods—this is your permission to make it happen.

  • 26 Textured Edge Mirror Designs That Add Character & Detail

    26 Textured Edge Mirror Designs That Add Character & Detail


    Textured edges on mirrors are the design detail that makes people stop and say, “Where did you get that?” Whether it’s carved wood, scalloped edges, or woven rattan, these designs add craftsmanship and character to any room—without looking overdone or trendy. If you’re tired of flat, frameless mirrors that blend into the background, you’re in for a treat. We’ve rounded up 26 specific textured edge mirror designs that work in bedrooms, bathrooms, entryways, and living spaces. Each one includes where to find it, what it costs, and how to style it. Ready to add some visual interest to your walls? Let’s go.


    1. Carved Wood Arch Mirror with Hand-Tooled Details

    Carved wood frames catch light differently than smooth finishes, creating shadow patterns that make your mirror look like functional art. This style works especially well in entryways or bedrooms where you want a focal point that isn’t a wall color.

    Look for pieces at West Elm ($250–$500) or artisan shops on Etsy ($150–$400 for smaller sizes). If you’re handy, you can also DIY this by buying an unfinished wooden arch frame and adding shallow carved details with wood carving tools—takes about 2–3 hours plus drying time.

    Pro tip: Pair a carved wood arch with a simple wooden console table below to echo the texture and create a styled vignette.

    The carved details become even more noticeable when light hits them at different times of day, turning your mirror into a constantly changing design element.


    2. Scalloped Edge Mirror in Soft Pastels

    Scalloped edges bring instant personality without being loud—they’re the sweet spot between minimalist and decorative. This style reads as both playful and sophisticated, making it perfect for bedrooms, bathrooms, or powder rooms.

    Hunt for these at Target ($40–$100), Wayfair ($80–$150), or Etsy ($100–$250). The softly curved edges come in whites, pinks, greens, or natural wood. Most are easy to hang on existing wall hardware—plan about 10 minutes for installation.

    Budget hack: If you find a basic round mirror you love, you can buy a separate scalloped frame overlay or have a local framer create a custom scalloped mat around it for $60–$100.

    You’ll notice how the soft curved edges make hard walls feel friendlier, and the mirror becomes a conversation starter rather than something people overlook.


    3. Rattan Woven Frame with Organic Irregular Shape

    Woven rattan frames bring texture and a relaxed coastal energy that makes any space feel instantly more layered. Unlike smooth frames, the weaving pattern catches your eye and adds visual interest without feeling cluttered.

    IKEA carries several rattan options ($30–$60), or go larger at Wayfair ($80–$200) and West Elm ($150–$300). For a truly custom piece, search Etsy for artisan weavers ($120–$350). These are lightweight and easy to hang with standard wall anchors.

    Renter-friendly: Lean a large rattan mirror against your wall instead of hanging it—same impact, zero wall damage.

    The natural fibers add warmth that metal or plastic frames can’t match, and the texture photographs beautifully on Instagram-style vignettes.


    4. Beveled Edge Mirror with Subtle Geometric Facets

    Beveled edges catch and refract light in multiple directions, creating a subtle sparkle effect. It’s more understated than ornate but infinitely more interesting than a flat edge.

    Shop Home Depot ($50–$150), Lowe’s ($60–$180), or Wayfair ($100–$250). Beveled mirrors tend to be pricier because of the finishing process, but they’re a one-time investment that works in any style. Installation takes 20 minutes with basic hardware.

    Pro tip: A beveled mirror in a small bathroom amplifies light and makes the space feel bigger without any visual clutter.

    The subtle sparkle catches light at different times of day, making your mirror do double duty as a statement piece and a light reflector.


    5. Distressed Gold Leaf Frame with Antique Patina

    Distressed gold leaf frames blend old-world elegance with modern styling. The intentional imperfections make the frame feel collected rather than brand-new, which reads as more sophisticated.

    Find these at Anthropologie ($200–$500), Wayfair ($150–$400), or specialty home shops. For a budget version, buy a basic frame at Michaels or Hobby Lobby and apply gold leaf yourself ($15–$30 in supplies, 1–2 hours of work plus drying time).

    DIY shortcut: Spray paint a wooden frame with metallic gold spray paint, then use steel wool to distress the edges for an aged effect ($10–$15, 30 minutes).

    Your entryway or bedroom instantly reads as more curated and intentional with this frame style, especially when styled with other vintage or eclectic accessories.


    6. Macramé-Wrapped Frame with Knotted Edges

    Macramé-wrapped frames bring handmade texture and bohemian character. The knotted edges add tactile interest and work beautifully in bedrooms, living rooms, or yoga spaces.

    Etsy has tons of macramé-wrapped mirrors ($50–$150), or DIY with a basic round mirror and macramé cord ($20–$40, 2–3 hours to knot). You can also take an existing mirror to a local craftsperson and have them wrap it for $30–$60.

    Renter-friendly: These are lightweight and the wrapping won’t damage walls. You can even re-wrap a mirror with new cord if you want to refresh your décor.

    The handmade quality makes your space feel more personal and artisan-crafted, which is the opposite of generic home store energy.


    7. Wavy Asymmetrical Frame in Matte Black Metal

    Wavy asymmetrical frames read as modern art and architectural detail combined. Matte black keeps it from feeling too whimsical, grounding the organic shape with an edgy finish.

    West Elm, Article, and Wayfair carry these ($150–$350). For a bolder, more artistic piece, check independent design studios on Etsy ($200–$500). These tend to be conversation starters, so plan on people asking where you found it.

    Pro tip: Hang a wavy black mirror in a hallway or entryway where it can be a bold focal point without overwhelming a smaller room.

    The irregular edges and dark finish make your space feel intentionally designed and more gallery-like than conventional.


    8. Rope or Cord-Wrapped Frame with Nautical Detail

    Rope-wrapped frames bring coastal charm and textured warmth. Unlike smooth frames, the layered wrapping creates depth and catches light differently depending on the angle.

    Find these at Wayfair ($60–$140), Target ($40–$80), or craft your own with a wooden frame and natural rope from Home Depot ($5–$15 for rope, 1–2 hours wrapping time). It’s one of the easiest DIY frame upgrades.

    Budget hack: Use 100% jute rope from any hardware store and wrap it around a basic frame yourself using hot glue or wood glue. Cost: under $20.

    The texture softens hard bathroom walls and adds visual interest without looking fussy or overdone.


    9. Carved Marble or Stone Frame with Ornate Edge

    Carved stone or marble frames scream luxury without being showy. The ornate edges have old-world charm and feel like they belong in a curated home.

    These are investment pieces: expect $400–$1,000+ from specialty shops or high-end retailers like Neiman Marcus or independent design stores. For budget alternatives, check Wayfair or Overstock for marble-look frames ($150–$300).

    Pro tip: A marble-framed mirror in a bathroom makes the entire space feel spa-like, especially when paired with matching marble or stone accessories.

    The weight and permanence of a stone frame makes your space feel grounded and thoughtfully designed, not hastily decorated.


    10. Woven Seagrass Frame with Natural Texture

    Seagrass frames offer a softer weave than rattan with a more delicate appearance. The natural material adds warmth and reads as intentionally styled rather than generic.

    Wayfair ($70–$150), West Elm ($100–$250), and Etsy ($80–$200) all carry seagrass mirrors. They’re lightweight and easy to hang. Installation takes about 15 minutes with standard wall hardware.

    Eco-bonus: Seagrass is sustainable and biodegradable, so you’re choosing a material with minimal environmental impact.

    The fine weave makes your space feel more layered and considered, especially in bedrooms or living areas where you want warmth without heaviness.


    11. Embossed Geometric Pattern Frame in Soft Matte Finish

    Embossed geometric patterns add visual texture without adding bulk. The raised pattern catches light subtly and reads as more sophisticated than a flat finish.

    Look at CB2 ($80–$200), Article ($120–$250), and Design Within Reach ($200–$400). For a budget version, IKEA sometimes carries embossed options ($40–$80). These are straightforward to hang and come with standard hardware.

    Design hack: An embossed frame in a monochromatic finish (all white, all black, or all natural wood) looks even more refined and less trendy.

    The raised pattern creates subtle shadows that change throughout the day, making your mirror more dynamic than a flat-finish piece.


    12. Carved Arch with Floral or Botanical Relief

    Botanical relief carving brings nature indoors and adds artistic detail that sparks conversation. Unlike solid carved frames, relief carving creates shadows that make the design pop.

    Etsy is your best bet ($150–$400 for quality carved pieces), though West Elm occasionally carries botanical designs ($250–$500). You can also commission a custom carving from a woodworker for $200–$600.

    Pro tip: Style a botanical-carved mirror with actual plants nearby—hanging vines, potted plants, or fresh flowers—to echo the frame’s theme and create a cohesive vignette.

    The nature-inspired carving makes your space feel more connected to the outdoors and less sterile or corporate.


    13. Stacked Wood Slice Frame with Rustic Texture

    Stacked wood slice frames are rustic, handmade-looking, and surprisingly easy to DIY. Each slice adds texture and dimension that a smooth frame can’t achieve.

    You can find these on Etsy ($80–$200) or make one yourself with reclaimed wood slices and a basic mirror ($40–$80 in materials, 3–4 hours assembly time). Wood slices are sold at craft stores or online by the bulk.

    DIY route: Hot glue or wood glue wood slices around a cardboard backing, then attach your mirror. It’s forgiving and very customizable.

    The varied wood tones and layered texture make your space feel collected and handcrafted—the opposite of mass-produced and generic.


    14. Brushed Metal Frame with Hammered Edge Detail

    Brushed metal with hammered details bridges industrial and artisanal design. The hammered edge isn’t smooth, so it catches light and reads as more handmade and less factory-produced.

    Shop Schoolhouse Electric ($200–$500), Rejuvenation ($150–$350), or Wayfair ($100–$250). These mirrors work beautifully in kitchens, bathrooms, or living spaces with modern or eclectic décor.

    Splurge-worthy: A quality brushed metal mirror lasts decades and only looks better as the patina develops over time.

    The textured metal surface adds warmth and sophistication, making your space read as more carefully curated than a basic frame could.


    15. Wickerwork or Wattle Frame with Interwoven Pattern

    Wickerwork frames offer tighter, more intricate weaving than rattan or seagrass. The interlocking pattern reads as more sophisticated and less casual-beach-vibes than looser weaves.

    Anthropologie ($150–$300), West Elm ($120–$280), and Etsy ($100–$250) carry quality wickerwork mirrors. These are medium-weight and need sturdy wall anchors—plan about 20 minutes for installation.

    Pro tip: A wickerwork mirror works beautifully in vintage, bohemian, or eclectic spaces. Pair it with rattan furniture or woven baskets to create a cohesive textured aesthetic.

    The intricate weave makes your mirror feel like an investment piece rather than a quick décor purchase.


    16. Cork-Wrapped or Bamboo Veneer Frame

    Cork and bamboo frames appeal to eco-conscious decorators and work beautifully in Japandi or minimalist spaces. The natural grain adds subtle texture without looking overly ornate.

    Etsy carries sustainably-made cork and bamboo mirrors ($80–$180). IKEA sometimes has bamboo options ($40–$100). These are lightweight and often come with minimal hardware since they’re designed to feel simple and integrated.

    Sustainability bonus: Cork and bamboo are renewable resources, making these frames an environmentally conscious choice without sacrifice on style.

    The natural material feels grounding and connects your space to nature in a subtle, intentional way.


    17. Laser-Cut Metal Frame with Intricate Geometric Pattern

    Laser-cut metal frames offer precision and intricacy that hand-carving can’t always achieve. The cut-out patterns cast shadows that change as light shifts throughout the day.

    These are typically higher-end: Design Within Reach ($300–$600), specialty metal workers on Etsy ($200–$500), or Made.com ($250–$450). They’re statement pieces, so invest if you love the design.

    Pro tip: A laser-cut frame works best as a standalone focal point—keep walls around it simple so the frame doesn’t compete with other patterns.

    The precision of the laser-cut design makes your space feel modern and intentionally artistic without being chaotic.


    18. Leather-Wrapped Frame with Stitched Edge Detail

    Leather-wrapped frames bring unexpected texture and sophistication. The stitching adds handcrafted detail and reads as more upscale than standard frames.

    Etsy has artisan leather mirrors ($150–$350), or check Made.com ($200–$400) and specialty home retailers. These are typically lightweight despite their rich appearance, so standard wall hardware works fine.

    Professional vibe: A leather-framed mirror in a home office or bedroom reads as more intentional and considered than generic décor.

    The tactile quality of leather makes your mirror feel like something you’d want to touch, turning it into functional art rather than just reflective utility.


    19. Painted Wood Frame with Hand-Brushed Texture

    Hand-brushed painted frames read as more artisanal than machine-finished pieces. The visible brush strokes and slight color variations add character and authenticity.

    Buy an unfinished wooden frame at Michaels or Hobby Lobby ($15–$40) and paint it yourself with quality acrylic or furniture paint ($10–$20). Takes 1–2 hours plus drying time. Or find painted frames on Etsy ($80–$200) or Wayfair ($60–$150).

    Color hack: Choose a paint color that echoes your wall color but is slightly lighter or darker to create subtle dimension.

    The visible imperfections make your mirror feel collected and authentic rather than mass-produced and sterile.


    20. Rope and Metal Hybrid Frame with Mixed Materials

    Mixing rope with metal frames bridges styles—it reads as both nautical and industrial while being more interesting than either material alone. The texture variation adds visual complexity.

    Look on Etsy ($120–$280) for handmade rope-and-metal combinations, or West Elm ($150–$300) for curated options. You can also DIY by wrapping rope around a basic frame and adding metal corner brackets ($40–$80 in materials, 2 hours assembly).

    Design flexibility: This hybrid style works in transitional, eclectic, or modern spaces because it doesn’t commit too heavily to one aesthetic.

    The mixed materials read as more sophisticated and curated, signaling that your décor is thoughtfully layered rather than hastily assembled.


    21. Carved Bone or Antler Frame with Artisanal Finish

    Carved bone or antler frames scream handcrafted and collected—they’re not something everyone has, which makes them special. The natural variations in material mean each piece is unique.

    These are typically found through specialty artisans on Etsy ($200–$500+) or high-end home shops. They’re investment pieces, but the uniqueness justifies the cost. Installation requires careful wall anchoring due to weight—plan 30 minutes.

    Collector’s note: These frames feel like something you found while traveling, even if you ordered them online.

    The primitive texture and natural material make your space read as more collected and less decorated-for-show, which reads as more sophisticated.


    22. Plaster or Cement Frame with Raw, Unfinished Texture

    Plaster or cement frames embrace imperfection as design. The rough texture reads as deliberately artistic rather than looking unfinished—it’s a statement about valuing raw materials over polish.

    Etsy ($150–$400) and independent designers are your best sources for these. You can also commission a local concrete artist to create a custom frame ($200–$600).

    Pro tip: Pair a raw plaster frame with minimalist or industrial décor. The texture reads better in spaces that embrace unpolished materials and negative space.

    The intentional imperfection makes your space feel more gallery-like and artistic than traditionally decorated.


    23. Appliqué or Relief Tile Frame with Ceramic Texture

    Ceramic tile or appliqué frames bring handcrafted global charm. The raised relief and glazed finish add depth and color variation that painted frames can’t match.

    Etsy has artisan ceramic mirrors ($150–$400), and you can find Moroccan or Spanish-inspired versions at World Market ($100–$250). For a major DIY project, source adhesive tiles and arrange around a mirror frame yourself ($50–$100, 2–3 hours).

    Style versatility: This works beautifully in bohemian, Mediterranean, or maximalist spaces where pattern and texture are celebrated.

    The handmade quality and cultural inspiration make your space feel more traveled and worldly, less cookie-cutter interior-design magazine.


    24. Punched or Perforated Metal Frame with Shadow Play

    Perforated metal frames cast dynamic shadow patterns that change as light shifts. It’s functional art—the mirror reflects while the frame creates shadow theater on your wall.

    Find these on Etsy ($120–$300), Design Within Reach ($250–$400), or through metal workers and sculptors. These are statement pieces that work best as focal points.

    Light timing: The shadow patterns are most dramatic during golden hour light—perfect for photos and definitely Instagram-worthy.

    The moving shadows make your mirror more than static décor; it becomes a living artwork that changes throughout the day.


    25. Embroidered or Textile-Wrapped Frame with Fiber Art Detail

    Embroidered or textile-wrapped frames blur the line between mirror and fiber art. The stitched patterns and fabric textures read as more gallery-quality than decorative.

    These are typically one-of-a-kind pieces from fiber artists on Etsy ($150–$400) or craft fairs. Some makers offer commissions where you can choose fabric or pattern ($250–$600).

    Conversation starter: A textile-wrapped mirror is unique enough that guests will ask about it—it becomes a story piece, not just décor.

    The handmade textile quality makes your space read as more artistically curated and less commercially decorated.


    26. Layered Wood Frame with Recessed Depth and Shadow Lines

    Layered wooden frames create visual depth through simple stacking and recessing. The shadow lines add dimension without ornate carving—it’s minimalist sophistication.

    Hunt for these at Article ($120–$280), Schoolhouse Electric ($180–$350), or custom woodworkers on Etsy ($150–$400). They’re straightforward to hang and work in almost any style.

    Craftsmanship detail: The recessed layers show the maker’s attention to proportion and spacing—this is about refined simplicity, not decorative maximalism.

    The subtle depth makes your mirror feel intentionally designed by someone who understands proportion and restraint.


    Save this list and try just one mirror this month. Whether you go for carved, woven, or mixed materials, you’ll be surprised how much a textured edge changes a room’s personality. Which style calls to you?

  • 27 Blackout Curtain Ideas That Make Any Space Cozy & Light-Controlled

    27 Blackout Curtain Ideas That Make Any Space Cozy & Light-Controlled


    Introduction

    Let’s be honest: finding the right blackout curtains is harder than it should be. You want light control without sacrificing style. You need privacy but don’t want your room to feel like a cave. And if you’re renting? You definitely can’t drill holes everywhere. The good news is that blackout curtains have evolved way beyond heavy, industrial-looking panels. Whether you’re tackling a bedroom, nursery, home office, or living room, these 27 ideas show you exactly how to get cozy light-blocking coverage that actually matches your décor. From smart motorized options to budget-friendly hacks, you’ll find solutions for every room, every budget, and every design style. Let’s dive into how to control your light like a pro.


    1. Layer Blackout With Sheer Curtains for Maximum Flexibility

    Sheer curtains alone won’t block light, but paired with blackout panels they give you total control. You get gentle daytime filtering when you want it, complete darkness when you need sleep, and the sheers hide the blackout layer when pulled open—keeping things looking intentional rather than fortress-like.

    Install a second curtain rod (about 4–6 inches behind your main rod, roughly $15–$30) and hang lightweight sheers in front. Add your blackout curtains on the outer rod using tension rods (renter-friendly, $10–$20) or permanent brackets ($15–$40). This takes about 20 minutes to install and zero permanent damage if you use tension rods. You’ll find both at Target, IKEA, or Amazon.

    The payoff? You control exactly how much light enters—no compromise between style and function. Your room adapts to your mood and schedule instead of staying stuck in one lighting zone.


    2. Paint Your Walls a Warm Neutral to Amplify Blackout Effect

    When your walls and curtains live in the same color family, blackout panels don’t stand out as heavy or oppressive—they read as intentional design. Warm neutrals like taupe, warm gray, or soft greige paired with blackout curtains in complementary tones create a unified, restful space.

    Choose a warm-neutral paint (try Sherwin-Williams Accessible Beige or Benjamin Moore Revere Pewter, roughly $30–$50 per gallon) and pair it with blackout curtains in a slightly deeper or slightly lighter shade. One gallon covers most bedrooms. DIY painting takes 4–6 hours including prep; hiring a pro costs $300–$800 depending on room size. Renter? Use removable peel-and-stick wallpaper ($20–$40) instead—it achieves the same grounding effect.

    Your entire room becomes a cohesive retreat that feels intentional, not chaotic. The blackout panels fade into the background while still doing their job perfectly.


    3. Choose Thermal-Lined Blackout Curtains for Energy Savings

    Thermal linings don’t just block light—they insulate your windows and lower heating and cooling costs by 10–15%. The extra layer traps air and creates a barrier between outdoor temperatures and your interior, meaning your HVAC system works less hard.

    Look for Thermal Insulated Blackout Curtains from brands like Nicetown ($60–$90 per panel), ECLIPSE ($50–$80), or AmazonBasics Thermal ($40–$70). They’re heavier than regular blackout panels (expect 2–3 pounds per panel) so you’ll need sturdy rods rated for 10+ pounds ($20–$40). Hang them on a standard rod—takes 15 minutes. Check energy-efficient labels (many carry ENERGY STAR ratings) for added accountability.

    By winter, you’ll notice your room stays warmer longer. By summer, you’re keeping heat out. Over a year, the energy savings often offset the higher upfront cost. Plus, they’re genuinely silent—no light leaks, no drafts.


    4. Install Tension Rods for Renter-Friendly Blackout Setup

    Renters rejoice: tension rods hold blackout curtains securely without drilling holes, mounting brackets, or landlord approval. They work by creating pressure between two fixed points, holding curtains taut and in place.

    Buy adjustable tension rods (usually $12–$25 per rod) from Target, Walmart, or Home Depot. Measure your window’s interior width and choose a rod rated for your curtain weight—blackout panels are heavy, so grab one rated for 8+ pounds (check the packaging). Install the rod by twisting the tension knob until the rod expands and sits snugly between the window frame sides. Install time: 5 minutes. No tools needed. Renter tip: you can take the rods with you when you move.

    Your blackout curtains stay put without any wall damage. On move-out day, untwist the rod, slip it out, and you leave nothing behind. It’s genuinely that simple.


    5. Go Extra-Dark With Triple-Weave Blackout Fabric

    Standard blackout curtains block 95% of light. Triple-weave blackout fabric blocks 99–100%, making your room almost completely dark—perfect for shift workers, light-sensitive sleepers, or anyone needing true darkness.

    Triple-weave panels cost $80–$150 per panel versus $40–$70 for standard blackout, but the upgrade is worth it if light sensitivity affects your sleep. Brands like NICETOWN Triple Weave and Eclipse Total Blackout deliver nearly zero light leaks. Pair with a blackout tape ($8–$15, available at Amazon) to seal any tiny gaps where panels meet. Installation is identical to standard blackout curtains—same rods, same time, 15 minutes.

    You’ll actually notice the difference immediately: your room goes from “pretty dark” to “nighttime dark” no matter the time of day. Shift workers and light-sensitive sleepers report better, longer sleep within the first week.


    6. Match Curtain Color to Your Accent Wall for Unified Design

    Instead of defaulting to white, gray, or navy, match your blackout curtains to an existing accent wall. This approach makes your room feel designed rather than random, turning blackout panels into an intentional design element.

    Pick your accent wall color first (try jewel tones like emerald, sapphire, or ruby for drama, or warm earth tones like olive or terracotta for calm). Then, source blackout curtains in that same shade—$50–$100 per panel at retailers like Wayfair, West Elm, or Anthropologie. You might need to order custom or semi-custom panels to get the exact match (2–3 week turnaround, $100–$150 per panel). Installation is standard—20 minutes.

    Your room looks like you hired a designer. The blackout panels become part of your aesthetic story, not an afterthought. Guests will actually comment on how “put-together” your space feels.


    7. Use Magnetic Blackout Panels for Renter-Approved Flexibility

    Magnetic blackout panels stick to metal window frames using strong neodymium magnets—zero drilling, zero adhesive, zero landlord drama. They’re faster to install than traditional curtains and you can remove or reposition them in seconds.

    Purchase magnetic blackout panel kits like Sleepout Portable Blackout ($60–$100) or Nicetown Magnetic Blackout ($40–$70). Confirm your window frame is metal before buying (aluminum and steel frames work; wooden frames don’t). Attach the included magnetic strips to the panel’s top corners and sides, then snap it onto your window frame. Install time: 2 minutes. No tools required.

    You can take blackout coverage on and off instantly. Travel with them, move between apartments, or use them seasonally. They’re the most flexible blackout solution on the market, and renters especially love them because they leave zero trace.


    8. Pair Blackout Curtains With Cellular Shades for Layered Insulation

    Cellular shades have built-in air pockets that provide insulation, and when combined with blackout curtains, they create an insulating barrier that traps heat and blocks light from multiple angles. This combo is unbeatable for light control and energy efficiency.

    Install cellular shades (cordless preferred, $40–$80 from IKEA, Target, or Home Depot) inside your window frame, then hang blackout curtains on a rod beyond the frame ($50–$100). Both take 15–20 minutes to install. The cellular shades provide the first layer of light-blocking and insulation, while curtains handle the gaps and add style. Renter option: use tension rods for both for zero permanent installation.

    Light literally cannot find a way in. Your room stays insulated year-round. You’re paying less to heat and cool while sleeping better—a win on every front.


    9. Install Blackout Curtains on a Smart Motorized Rod

    Motorized blackout curtains open and close via app, voice command, or preset schedules. You wake up to gradual light, work without glare, and sleep to complete darkness—all without leaving bed.

    Smart motorized rods cost $200–$600 (brands like IKEA Fyrtur, Eve Motorized, Switchbot) and integrate with Alexa, Google Home, or Apple Home. DIY installation varies—some use existing rods, others require brackets ($50–$100). Setup takes 30–60 minutes for first-timers. You’ll need a stable WiFi connection and a smartphone to control. Not a tech person? Hire a smart-home installer ($150–$300).

    Once installed, you control your light environment from bed, work, or your phone across town. Schedules mean blackout happens automatically—no more forgetting to close curtains. It’s the most convenient option available, especially if you have mobility challenges or irregular sleep schedules.


    10. Choose Blackout Curtains in a Bold Color for Statement Style

    Blackout curtains don’t have to be boring neutrals. Bold jewel tones (sapphire, emerald, ruby) or warm saturated colors (mustard, burnt orange, deep plum) make a design statement while doing the same light-blocking job. This works especially well in rooms with neutral walls where you want one focal point.

    Look for blackout curtains in bold colors at Wayfair, West Elm, or Etsy ($60–$120 per panel). Options are limited compared to neutral palettes, so start shopping early—popular colors sell out. Hang on standard rods ($15–$40) using regular brackets ($10–$25). Installation is standard—20 minutes. Pro tip: pair with neutral walls and minimal other patterns to let your curtains be the star.

    Your bedroom becomes a design statement, not just a place to sleep. The bold color energizes the space while the blackout function keeps it practical. Everyone who visits will ask where you got them.


    11. Use Blackout Curtain Liners for Existing Curtains

    If you love your current curtains but need blackout function, skip replacing them entirely. Blackout liners attach to the back of existing panels, giving you darkness without losing your original style.

    Buy blackout liner fabric by the yard ($8–$15 per yard) from fabric stores or Amazon, or purchase pre-made blackout curtain liners ($20–$40 per panel) that hook onto existing curtains. If sewing, measure your curtains, cut liner to size, and hand-stitch or use fabric glue along the top and sides—takes 1–2 hours for a pair. If using pre-made liners, just clip or hook them on—5 minutes. No sewing skills required for hook-on versions.

    Your existing curtains stay exactly as they are, but now they block light and insulate. You get a free upgrade without the expense or waste of replacing perfectly good panels. It’s the most budget-conscious approach if you already own curtains you like.


    12. Seal Gaps With Blackout Tape or Velcro Strips

    Even perfectly hung blackout curtains leak a little light around edges and sides. Blackout tape or Velcro strips seal those gaps, trapping light and bumping your darkness from 95% to nearly 100%.

    Buy blackout adhesive tape ($8–$15 per roll, available at Amazon and Target) or heavy-duty Velcro strips ($6–$12). Clean the window frame with a dry cloth, then press the tape or Velcro along the top and sides where curtains meet the frame. Install time: 10 minutes per window. Remove using a hairdryer to soften the adhesive, then rub off residue. Renter-friendly: adhesive tape leaves minimal residue, but test on a small spot first.

    You’ve now achieved movie-theater darkness without spending $200 on triple-weave panels. The tape is nearly invisible, especially if it matches your curtain color or frame finish.


    13. Hang Curtains Floor-to-Ceiling for Maximum Drama and Height

    Floor-to-ceiling curtains visually expand your room’s height and add a layer of luxury. By hanging your rod near the ceiling rather than at the window frame, you trick the eye into perceiving taller ceilings while maximizing light-blocking coverage.

    Install your curtain rod 6–12 inches below the actual ceiling (not at the window frame). Use sturdy brackets rated for your curtain weight ($20–$50). Measure from rod to floor, then add 1–2 inches so curtains just kiss the ground—creates a polished pool effect. Hem or order floor-length blackout panels ($80–$150 per panel). Installation takes 20–30 minutes, or hire a pro ($50–$150). Renter concern? Use a tension rod at the ceiling (the highest point in your room) plus floor-length panels for non-permanent installation.

    Your room instantly feels grander and more intentional. The vertical lines draw eyes upward, and complete light coverage becomes achievable—plus you get that aspirational, designer-decorated vibe.


    14. Mix Blackout Curtains With Decorative Tiebacks for Polished Styling

    Blackout curtains don’t have to look utilitarian. Pairing them with decorative tiebacks (brass rings, beaded straps, macramé cords) upgrades their visual impact and makes them feel like a designed choice rather than a functional necessity.

    Purchase decorative curtain tiebacks ($15–$40 per pair) from Target, Wayfair, or local boutique home stores. Options include brass rings, beaded straps, macramé, or even fabric ribbon. Install tieback holders or hooks ($5–$15 each) on your wall or window frame—5 minutes. Drape open curtains and secure with tiebacks during the day. No permanent changes: use removable adhesive hooks (renter-friendly, $8–$12) instead of screws.

    Your blackout panels suddenly look intentional and designed. Tiebacks add texture, visual interest, and a polished finish that makes the whole window feel curated.


    15. Choose Linen-Blend Blackout Curtains for a Softer Look

    Not all blackout curtains feel heavy and stiff. Linen-blend blackout fabrics combine the breathability and texture of linen with blackout performance, giving you light control without the harsh industrial vibe.

    Search for linen-blend blackout curtains (often marketed as “linen-look” blackout, $70–$130 per panel) from Wayfair, West Elm, or Article. These typically contain 30–50% linen mixed with polyester for durability. The linen content gives a softer drape and visible weave texture. Installation is standard—20 minutes. Care: vacuum regularly to reduce dust, and wash according to fabric-care tags (usually cold water, gentle cycle).

    Your room feels softer and more refined. The linen-blend fabric looks intentional, not purely functional. Light-blocking happens quietly in the background while your curtains actually look good.


    16. Layer Blackout With Semi-Sheer Curtains in the Same Color

    Matching your blackout layer with a semi-sheer in the same color creates a monochromatic look that reads as intentional design rather than functional band-aids. When you pull back the sheers during the day, the blackout layer hides behind but stays accessible.

    Install two rods (inner and outer, $15–$50 each) using adjustable brackets, then hang semi-sheer panels ($30–$60) on the inner rod and blackout panels ($50–$100) on the outer rod. Both should be the same color—search “matching blackout and sheer sets” for simplicity. Installation takes 25–30 minutes. Renter tip: use tension rods for both layers.

    Your window has sculptural, intentional styling while maintaining total light control. It looks designed and functions perfectly. Win-win.


    17. Install a Valance Above Blackout Curtains to Hide the Rod

    Blackout curtains don’t always have visible hardware in designer-decorated rooms. A valance hung above the blackout panels hides the rod and brackets while adding a decorative element that elevates the entire window treatment.

    Purchase a pre-made fabric valance ($25–$60 from Target, Wayfair, or HomeGoods) in a color or pattern that complements your blackout curtains. Install using a valance rod ($15–$30) mounted 1–2 inches above your blackout curtain rod. Takes 15 minutes. Alternatively, make a simple DIY fabric valance by sewing a rectangular piece of fabric and attaching it to a tension rod—costs $15–$30 for fabric and 1–2 hours to construct.

    Your window looks polished and intentionally decorated, not just “blocked with blackout curtains.” The valance adds visual interest and sophistication while hiding all the mechanical bits.


    18. Use Blackout Curtains to Create a Home Theater Vibe

    Home theater rooms and media spaces need absolute darkness to minimize glare and maximize screen visibility. Blackout curtains deliver theater-level light control and actually improve picture quality by reducing ambient light interference.

    Install blackout curtains in deep colors ($70–$130 per panel) from the ceiling to floor, covering the entire wall behind or around your screen if possible. Use motorized rods ($200–$600) for convenience—press a button and your theater transforms from living space to screening room. Pair with blackout tape on any gaps ($8–$15). Total installation: 30–60 minutes for standard setup, longer if adding motorization.

    Your screen image improves dramatically—colors pop, blacks are truly black, and no distracting ambient light washes out your picture. Movie night becomes a genuinely immersive experience.


    19. Choose Velvet Blackout Curtains for Luxury Texture

    Velvet blackout curtains combine luxury texture with light-blocking performance. The fabric has inherent glamour and depth, making your window treatment feel high-end while delivering functional darkness. Jewel tones (emerald, sapphire, ruby) pair especially well with the velvet finish.

    Search for velvet blackout curtains ($100–$180 per panel, higher if custom) at West Elm, Anthropologie, or Etsy. Quality matters here—real velvet with a blackout lining performs best. Installation is standard—use heavy-duty brackets rated for 15+ pounds since velvet is dense ($20–$40). Hang on a sturdy rod ($25–$50). Takes 20 minutes. Care: vacuum regularly to maintain pile, and avoid washing (dry cleaning preferred, $15–$25 per panel).

    Your window becomes a textural focal point. The velvet catches light beautifully and feels luxurious to touch. Your bedroom instantly looks more curated and sophisticated.


    20. Combine Blackout Curtains With Roller Shades for Dual Control

    Roller shades inside your window frame plus blackout curtains on a rod outside gives you redundant light control and a sleeker look if you prefer not to show traditional curtain panels.

    Install blackout roller shades ($30–$80 per window, available at IKEA, Home Depot, or Wayfair) inside your frame, then add blackout curtains on a rod mounted on the wall beyond the frame ($50–$100). Installation takes 25–30 minutes total. You can operate them independently—raise the shade but close the curtains for different looks, or close both for maximum darkness. Renter tip: use adhesive-mounted roller shades (temporary blackout shades, $20–$50) plus tension-rod curtains for zero permanent damage.

    You have precise control over light levels. Lower the shade halfway while curtains stay fully closed, or vice versa. It’s the most customizable light-control setup available.


    21. Install Blackout Curtains Over French Doors or Sliding Glass Doors

    Glass doors are notoriously hard to insulate and light-block. Blackout curtains mounted on rods extending beyond the door frame solve both problems while looking intentional and designed rather than temporary.

    Measure the entire door width plus 12 inches on each side for full coverage. Install a sturdy rod ($30–$60) using heavy-duty brackets ($25–$50) mounted to the wall (not the door itself). Hang floor-length blackout panels ($80–$150 per panel)—you may need multiple panels depending on door width. Installation takes 30–45 minutes. Professional installation ($100–$250) ensures brackets are secure and balanced.

    Your glass doors now provide complete light and privacy control. The room feels more secure at night, better insulated, and more intentionally decorated. No more light pouring through glass at 6 AM.


    22. Use Blackout Curtains in a Child’s Room for Nap-Time Success

    Children sleep better in dark rooms, and blackout curtains make nap schedules actually work. Choose a fun color or pattern that fits your child’s room aesthetic so the curtains don’t feel clinical or gloomy.

    Select blackout curtains in fun colors or subtle patterns ($50–$100 per panel, available at Target, IKEA, or Wayfair). Avoid harsh black if it feels too stark; instead try soft blues, purples, greens, or patterns with stars and clouds. Install on a standard rod at a safe height (children can’t pull down: use brackets rated for your curtain weight, $15–$40). Installation takes 15 minutes. Safety note: avoid drawstring tiebacks; use magnetic or ring-style tiebacks to prevent entanglement.

    Your child naps through afternoon light. Bedtime comes earlier because the room actually gets dark. You get quiet afternoon hours back. It’s a game-changer for parents and kids alike.


    23. Layer Blackout With Acoustic Panels for Sound + Light Control

    If you need light and sound control (home office, bedroom next to traffic, podcasting studio), combining blackout curtains with acoustic treatment solves both problems at once.

    Mount acoustic foam panels inside your window frame ($40–$100, available at Amazon and music stores), then hang blackout curtains on an exterior rod ($50–$100). The acoustic material absorbs sound while the blackout layer blocks light. Installation takes 30–40 minutes. Renter option: use removable adhesive-backed acoustic tiles ($30–$70) instead of screwing panels to the wall.

    Your window now controls both light and noise. Outside traffic, sirens, or neighbor activity becomes muffled. Your sleep improves and your focus deepens—especially useful if you work from home or live in a busy area.


    24. Stagger Blackout Curtain Panels for a Layered, Modern Look

    Instead of matching pairs, hang blackout panels at different lengths for a modern, intentionally asymmetrical look. This works especially well if you have multiple windows or want a contemporary design statement.

    Order floor-length blackout panels for some positions ($80–$150 per panel) and window-length panels for others ($50–$100 per panel). Install using a single rod with multiple panels hung at staggered heights. Takes 25–30 minutes. Tie back one side with a decorative tiebacks ($15–$30) to frame the stagger intentionally. Plan your spacing first—sketch it on paper to avoid mistakes.

    Your window treatment becomes an art installation. It looks contemporary and designed, not thrown together. Guests notice the intentional asymmetry and ask about it.


    25. Go Blackout-Free With Blackout Paint on Your Walls Instead

    If you love the look of lightweight curtains but need darkness, blackout paint applied to your walls can absorb ambient light and create a dark room without heavy blackout panels. It’s unconventional but works beautifully in the right spaces.

    Use blackout or black-body wall paint (technically dark, light-absorbing paint like Valspar Black Onyx or Sherwin-Williams Tricorn Black, $30–$50 per gallon). Paint your entire room or an accent wall for depth. Pair with lightweight curtains ($30–$60) that you prefer aesthetically. Paint application takes 6–10 hours DIY or $300–$600 for professional painters. Paint dark walls to create the illusion of zero light even with non-blackout curtains.

    Your room looks moody and sophisticated while maintaining lightweight, stylish curtains. Unconventional, but it delivers the darkness you need with the aesthetic you want.


    26. Install Blackout Curtains on a Command Rail System for Renter Flexibility

    Command rail systems use adhesive (not drilling) to mount tracks and slides that curtains glide on. It’s the most flexible hardware option for renters and anyone wanting to swap curtains seasonally.

    Purchase a Command rail system ($25–$50 per kit, available at Target and Amazon) designed for heavy-duty use (curtain weight rating required). Mount according to instructions using 3M Command strips (included)—clean wall with rubbing alcohol first, press firmly, wait 24 hours before hanging curtains. Hang your blackout panels ($50–$100) on the gliding hooks. Total installation: 15 minutes. Removal: pull gently to detach, then use adhesive remover ($5–$8) to clean residue.

    You can take the entire system with you when you move. Swap curtains seasonally without adding new holes. It’s genuinely renter-proof and works beautifully.


    27. Create a “Blackout” Effect With Light-Blocking Spray for Window Glass

    If you want light control without fabric curtains entirely, light-blocking spray applied directly to your window glass reduces light transmission while maintaining window aesthetics. It’s perfect for rental apartments where you can’t install hardware or want a minimal look.

    Buy window privacy spray like Frost King Window Film or frosted glass spray ($10–$20 per can, available at hardware stores and Amazon). Clean window glass thoroughly, tape off frames, and apply spray in light, even coats per instructions—takes 20–30 minutes. It reduces light by 50–70% depending on application thickness. To remove, scrape carefully or use rubbing alcohol. Renter note: this leaves minimal residue if removed carefully, but test on a small window first.

    Your window maintains its look while blocking significant light. No curtain rods, no fabric, no installation headaches. It’s the most minimal light-control option available, though not quite as effective as full blackout panels.


    Save this guide for your next project and try just one layering combo this weekend—your sleep (or your work-from-home productivity) will thank you. Which idea will you tackle first?

  • 23 Accent Wall Painting Styles That Instantly Refresh Any Room

    23 Accent Wall Painting Styles That Instantly Refresh Any Room


    Your bedroom, bathroom, or living room doesn’t need a complete overhaul to feel brand new. A single accent wall—painted in the right color, texture, or style—can completely shift the energy of your space. Whether you’re renting, working with a tight budget, or ready to invest in something bold, there’s an accent wall idea here that fits your style and timeline. We’re walking through 23 approaches—from classic color plays to textured finishes, geometric patterns, and mixed-media designs. Most take a weekend or less, and many cost under $100. Ready to refresh your space? Let’s dive in.


    1. Paint a Moody Jewel Tone for Instant Depth

    Jewel tones like emerald, sapphire, and deep plum make a room feel instantly grown-up and sophisticated. They work especially well in bedrooms, dining rooms, or home offices where you want to feel grounded and focused.

    Choose a paint finish that matters: eggshell or matte ($25–$40 per gallon from Sherwin-Williams or Benjamin Moore) looks more refined than flat. You’ll need about one gallon for most accent walls. Application takes 2–3 hours including drying time between coats. Pro tip: pair jewel tones with white or cream trim to make the color pop without overwhelming the space.

    The payoff is real. Dark, saturated colors make rooms feel intentional and designed, and they photograph beautifully—perfect if you love styling your space on social media.


    2. Create a Warm Accent with Cinnamon or Terracotta

    Warm, earthy tones bring comfort and coziness without feeling heavy. Cinnamon, rust, and terracotta work beautifully in kitchens, living rooms, and entryways where you want guests to feel welcomed.

    These warm neutrals pair perfectly with natural wood and brass accents. A gallon of quality paint runs $25–$40; one coat usually covers well since these colors tend to have great pigmentation. Plan for 2–3 hours of painting time. Home Depot and Lowe’s stock budget-friendly versions ($15–$20 per gallon) if you’re testing the look first.

    This approach grounds a room without feeling trendy or temporary. You’ll find yourself gravitating toward that wall for photos and gatherings.


    3. Go Soft with Warm White or Cream Trim Effect

    A barely-there cream or warm white accent wall becomes dramatic when you add simple white trim work or paneling lines. This is the renter-friendly approach to adding architectural interest without commitment.

    Paint the wall a soft cream ($20–$35 per gallon) then add removable wallpaper trim lines, peel-and-stick wainscoting ($30–$60 from Amazon or Wayfair), or even just paint thin vertical stripes freehand if you’re feeling brave. This takes 3–4 hours and costs under $75 total. The optical effect is that your room suddenly looks taller and more curated.

    You get high-design impact from a subtle color change. Renters love this approach because it reads “intentional” without permanent damage.


    4. Use Metallic Paint for Glam Accents

    Metallic finishes—gold, silver, or rose gold—add glamour without screaming “party house.” These work best on one small wall (bathroom, behind a bed, or beside a mirror) where light can hit and reflect off the finish.

    Metallic paints cost $30–$50 per gallon and need a smooth base coat first. Plan for 2–3 hours total, including a primer layer. Application requires a high-quality sponge or stipple technique ($8–$15 for good tools) to avoid visible brush strokes. Pro tip: apply a clear gloss coat after drying for extra shimmer and durability.

    The result feels spa-like and intentional. Lighting becomes part of your design—afternoon sun hits the wall differently than evening lamplight, creating mood throughout the day.


    5. Paint Horizontal Stripes for Visual Width

    Horizontal stripes make a room feel wider and more spacious. They work in bedrooms, kids’ rooms, or any space where you want a playful but polished vibe without overwhelming boldness.

    Paint the wall a base color, then use painter’s tape and a second color to create even stripes. You’ll need two paint colors ($25–$40 each) and quality painter’s tape ($10–$15). Allow 4–5 hours for taping, painting, and drying—the taping step takes patience but pays off in clean lines. Home Depot staff can help you find tape width recommendations based on how bold you want the stripes.

    Stripes create visual movement and make a simple wall feel intentional. The color combination you choose sets the mood: soft grays feel calming, while navy and white feels classic and grounded.


    6. Try Geometric Shapes with Stencils

    Geometric patterns add personality without committing to wallpaper. Triangles, diamonds, hexagons, or circles let you play with color and design in a way that feels modern and considered.

    Download or purchase stencil templates ($15–$40 from Etsy, Amazon, or craft stores). You’ll need two paint colors, stencil adhesive spray ($5–$10), foam rollers or sponges ($8–$15), and patience. Expect 6–8 hours for a full wall, depending on pattern complexity. Start small—maybe just the upper half of the wall—if this is your first time.

    The payoff is a unique, personalized space that looks more expensive than it cost. Geometric walls photograph beautifully and give your room instant character.


    7. Create an Ombre or Gradient Effect

    Ombre walls blend two or more colors smoothly from top to bottom (or side to side), creating depth and visual interest. This technique works especially well in calm, restful spaces like bedrooms.

    Choose two colors in the same family (light to dark blue, pale to deep green, etc.). You’ll need both paint colors ($25–$40 each), two rollers, and a sponge for blending ($10–$15 total). The technique: paint the darker color on the bottom half, lighter on top, then use a damp sponge to blend the middle while paint is wet. Plan 4–6 hours. It’s more forgiving than you’d think—slight variation adds to the organic feel.

    The result is calming and sophisticated. An ombre wall becomes a focal point without looking fussy or childish.


    8. Add a Mural or Hand-Painted Design

    A mural transforms a room into something uniquely yours. You don’t need to be an artist—simple silhouettes, abstract shapes, or botanical scenes all work beautifully.

    For DIY murals, sketch your design lightly in pencil first, then paint using acrylics ($20–$60 total for supplies). Expect 8–15 hours over a few days. If hiring a professional muralist, budget $300–$1,500 depending on size and complexity; local artists often charge $25–$75 per hour. Search “muralist near me” on Google or Instagram to find talent.

    A mural makes your space completely personal. It’s the one accent idea that absolutely cannot be replicated elsewhere—this wall becomes yours alone.


    9. Use Textured Plaster for Dimension

    Venetian plaster, stucco, or textured finishes add tactile dimension that flat paint cannot achieve. These finishes catch light beautifully and hide wall imperfections better than smooth paint.

    Textured finishes cost $40–$80 per gallon and require application with a trowel or sponge—not a roller. If you’re inexperienced, hire a pro ($400–$800 for one wall). DIY application takes 4–6 hours plus drying time. Many home improvement stores offer application tutorials; watch a few before starting.

    Textured walls feel luxe and collected. They photograph dramatically and make a room feel intentionally designed rather than default.


    10. Paint a Botanical or Nature-Inspired Mural

    Biophilic design—bringing nature indoors through imagery and color—is having a huge moment. Botanical murals in greens, sage, and natural tones create a calming, connected feeling.

    Simple botanical designs are beginner-friendly. Sketch light pencil outlines, then paint with watercolor or acrylic. Budget $25–$50 for supplies and 6–10 hours of painting time over a few days. Alternatively, purchase botanical wall decals ($40–$100 from Etsy or Amazon) if you want the look without the hand-painting commitment.

    The result feels organic and intentional. A botanical wall pairs beautifully with real plants, making your space feel alive and peaceful.


    11. Try a Subtle Color-Block Design

    Color-blocking divides a wall into sections (usually two large rectangular areas) with a clean line between them. This approach is modern, balanced, and surprisingly easy to execute.

    Choose two complementary colors and use painter’s tape to mark your dividing line precisely. A chalk line ($5) helps create straight guidelines. You’ll need both paint colors ($25–$40 each) and quality painter’s tape ($10). Painting takes 3–4 hours plus tape removal time. For a polished finish, remove tape while paint is slightly tacky to avoid peeling.

    Color-blocking feels intentional and designed. It’s bold enough to impact your room but structured enough to work with most decor styles.


    12. Create a Stone or Brick Texture Effect

    Faux stone or brick textures add character and warmth without the expense or weight of real materials. These effects work beautifully in entryways, bedrooms, or living rooms with rustic or industrial vibes.

    You’ll need 2–3 paint colors in similar families, sponges, and a tutorial ($0 from YouTube or $10–$20 for a detailed course). DIY application takes 6–10 hours depending on detail level. Alternatively, peel-and-stick stone wallpaper ($40–$80 from Amazon or Wayfair) delivers similar results in 2–3 hours with zero paint mess.

    Faux textures add depth and visual interest. Your wall suddenly looks like it has history and story behind it.


    13. Paint a Dark Accent Wall to Make Other Colors Pop

    Dark accent walls are underrated. They make artwork, furniture, and other colors in your room stand out dramatically. This works beautifully in bedrooms behind beds or in living rooms behind gallery walls.

    Dark colors ($25–$40 per gallon) need two coats for even coverage. Plan 3–4 hours. The key: use a quality interior paint—cheaper formulas can look muddy. Pair the dark wall with lots of white, cream, or light-colored furniture so the room doesn’t feel cave-like.

    Dark backgrounds make everything else in your room look intentional and curated. Art pops, furniture feels grounded, and the whole space reads more sophisticated.


    14. Add Metallic Accents with Paint and Stencils

    Combine stencils with metallic paint for glam without covering the entire wall. Small metallic accents feel elevated and artistic rather than overwhelming.

    You’ll need one metallic paint ($30–$50), stencil templates ($15–$40), painter’s tape, and sponge applicators. Plan 4–6 hours. The metallic paint catches light beautifully if you use a sponge-stippling technique rather than rolling. Test on cardboard first to get the feel.

    Metallic accents feel intentional and expensive. They catch light throughout the day, adding subtle glamour to an otherwise understated room.


    15. Use Removable Wallpaper for Pattern Without Commitment

    If you’re renting or uncertain about permanent paint, peel-and-stick wallpaper delivers pattern and color without damage to your security deposit. Modern options look expensive and sophisticated.

    Quality peel-and-stick wallpaper runs $30–$80 per roll depending on design. You’ll need 1–3 rolls for a standard accent wall ($50–$150 total). Application takes 2–3 hours—watch installation videos first because smooth application requires patience and a squeegee ($5–$10). Removal is damage-free if you peel slowly.

    Wallpaper creates instant pattern and personality. Removal is guilt-free when you move, making this perfect for renters or anyone hesitant about permanent changes.


    16. Paint Vertical Stripes for Height

    Vertical stripes draw the eye upward, making ceilings feel taller. They work beautifully in rooms with lower ceilings or any space where you want to add height perception.

    Use painter’s tape and two paint colors ($25–$40 each) to create even stripes. Narrow stripes (2–3 inches) feel modern and subtle; wider stripes (6–8 inches) feel bolder. Plan 4–5 hours for taping and painting. Quality painter’s tape is essential—cheap tape bleeds and creates messy lines.

    Vertical stripes shift how your eye moves through a room. They instantly add sophistication and can make a small bedroom feel airier.


    17. Create a Soft Gradient Using Multiple Paint Colors

    A multi-color gradient uses three to four colors blended smoothly for a sophisticated, layered effect. This is more complex than simple ombre but creates stunning results.

    Choose 3–4 colors in the same family ($25–$40 per gallon). Paint horizontal bands, then blend each transition zone with a damp sponge while paint is wet. Plan 8–10 hours over 1–2 days. This technique requires patience and practice—watch YouTube tutorials before starting.

    The result feels curated and artistic. A gradient wall becomes a focal point that feels both calming and intentional.


    18. Add a Two-Tone Design with a Horizontal Divide

    A clean horizontal line splitting two colors is modern, balanced, and easier than color-blocking. This works in any room and pairs well with simple, contemporary furniture.

    Use painter’s tape to mark a straight horizontal line (usually at chair-rail height, around 36 inches). Paint one color above, the other below. Two paint colors cost $50–$80 total. Plan 3–4 hours. Remove tape while paint is slightly tacky for crisp edges.

    Two-tone walls feel intentional and designed. The horizontal line creates visual balance and can make spaces feel either cozier (dark on bottom) or airier (light on bottom).


    19. Use Chalk Paint for a Matte, Velvety Finish

    Chalk paint creates a matte, ultra-soft finish that feels sophisticated and contemporary. It’s more forgiving than glossy finishes and hides minor wall imperfections beautifully.

    Chalk paint costs $35–$60 per gallon (brands like Annie Sloan or Rust-Oleum). One coat usually covers well. Plan 2–3 hours of painting time. This finish is durable for accent walls but may need occasional touch-ups in high-traffic areas. Many paint stores can mix chalk paint in any color you want.

    Chalk finishes feel intentional and collected. They photograph beautifully because the matte surface absorbs light naturally, creating a warm, inviting feel.


    20. Paint a Half-Wall or Wainscoting Effect

    Wainscoting or half-wall painting adds architectural interest without expensive millwork. You simply paint the lower half a deeper color and leave the upper half light.

    You’ll need two paint colors ($50–$80 total). Mark your line at 36 inches using a level and chalk line ($5). Paint both sections—plan 3–4 hours. If you want a trim line between colors, use thin painter’s tape for clean edges or purchase pre-made wall trim ($20–$50 from home improvement stores).

    Half-wall painting feels sophisticated and intentional. It adds visual interest while keeping the upper wall light and airy.


    21. Create a Cosmic or Starry Night Effect

    A starry night wall brings wonder and whimsy to children’s rooms, nurseries, or creative studios. It’s simpler to execute than you’d think and deeply personal.

    Paint the wall a deep navy or charcoal ($25–$40). Use white paint and a small brush or sponge to dot stars in varying sizes. Add glow-in-the-dark paint ($8–$15 per jar) if you want nighttime magic. Plan 4–6 hours of dotting and drying. This project is genuinely fun—kids enjoy helping, and slight imperfection adds charm.

    A starry wall creates a dreamy, magical space. It’s whimsical without being babyish, and it grows with your child.


    22. Paint a Watercolor Wash for an Artistic Look

    A watercolor wash mimics the soft, blended quality of watercolor painting. It’s modern, artistic, and forgiving—imperfection is part of the charm.

    You’ll need 2–3 colors in a complementary palette ($50–$100 total). Apply one color, then blend the second color into it with a damp sponge while wet. Continue layering until you achieve the effect you want. Plan 5–8 hours over 1–2 days because this works best with multiple thin layers. Watch tutorial videos to see the blending technique in action.

    Watercolor walls feel artistic and intentional. They make a room feel creative and collected without being overwhelming or too trendy.


    23. Add Dimensional Wall Art with Paint and Mixed Media

    Mix paint with textured elements—wood shapes, fabric panels, or metal accents—to create a truly unique dimensional wall. This approach combines color with sculpture for maximum impact.

    Paint the wall a solid base color ($25–$40). Attach pre-made wooden geometric shapes ($30–$100 from Etsy, Amazon, or craft stores) using strong adhesive or a nail gun. Alternatively, use fabric panels ($20–$50 each) to add soft dimension. Plan 4–6 hours plus drying time. This works beautifully in modern, eclectic, or contemporary spaces.

    Dimensional walls feel artistic and designed. They catch light and shadow differently throughout the day, creating constantly shifting visual interest in your space.


    Save this post for your next room refresh—you’ll find at least one idea that matches your style and budget. Pick one and tackle it this weekend. The best part about an accent wall? If it doesn’t work, it’s a single wall to paint over. Most of the time, though, you’ll be amazed at how much one change transforms how a room feels.

  • 26 Artistic Wall Installation Ideas That Turn Interiors Into Galleries

    26 Artistic Wall Installation Ideas That Turn Interiors Into Galleries


    Your walls don’t have to be blank canvases. Whether you’re renting or own your space, there are countless ways to turn ordinary walls into gallery-worthy displays that spark conversation and reflect your personality. From DIY stenciling to statement murals, floating installations to textile art, you have options for every budget, skill level, and aesthetic. This guide shows you 26 specific wall installation ideas that go beyond basic framed prints—each one transforming how your space feels and looks. You’ll discover affordable hacks, investment pieces that last, and projects you can tackle this weekend. Let’s turn those empty walls into the artistic backdrop your home deserves.


    1. Hand-Stenciled Geometric Patterns for Custom Depth

    Hand stenciling lets you create personalized patterns without hiring a muralist. You control the design, placement, and color—making this an affordable way to add artistic depth and visual movement to any wall.

    Start with stencil templates (search “geometric stencil” on Etsy or Amazon, $15–$35). Use painter’s tape to mark your wall and ensure straight lines. Apply acrylic or latex paint with a sponge brush in tapping motions rather than rolling. Work section by section for consistency. Most DIYers complete a 10×10 wall in 4–6 hours. Pro tip: test your stencil on cardboard first to avoid mistakes on the wall.

    The result feels intentional and crafted—way more interesting than flat paint. Stenciled walls photograph beautifully and give renters a customizable option if you use removable stencils and washable paint.


    2. Floating Wooden Shelves as Living Wall Art

    Floating shelves do double duty: they’re both functional storage and dynamic wall art when styled intentionally. Mix heights, textures, and objects to create visual interest that changes your wall from empty to curated.

    Install shelves at varying heights using a stud finder and heavy-duty brackets (floating shelf kits cost $40–$120 per shelf at IKEA, Home Depot, or Amazon). Space them 12–18 inches apart. Style with a mix of objects: books turned sideways, small plants, sculptures, candles, and framed photos. Group items in odd numbers for visual balance. Installation takes 30–45 minutes per shelf if you’re handy with a drill.

    Your wall becomes a rotating gallery where you can swap out seasonal pieces or rearrange whenever you want a fresh look. It’s rental-friendly too if you use damage-free adhesive strips and removable brackets.


    3. Textured Plaster Wall Finish for Organic Richness

    Textured plaster transforms flat drywall into something tactile and gallery-like. The shadows created by texture catch light beautifully and add sophistication without relying on patterns or bright colors.

    Hire a plasterer for professional results ($200–$600 depending on wall size), or DIY with plaster texture kits ($20–$50 from hardware stores). For a beginner approach, use a trowel to apply plaster in loose, organic sweeps rather than perfectly smooth strokes. Work in sections and let dry completely between coats. Alternatively, consider textured wallpaper designed to mimic plaster ($15–$30 per roll) as a renter-friendly option.

    Once complete, the wall catches light differently throughout the day, creating constantly changing visual interest. It’s subtle but powerful—the kind of detail that makes a room feel designed and intentional.


    4. Color-Drenched Accent Wall for Immersive Mood

    Color drenching—painting an entire wall and ceiling in one bold or muted hue—creates an immersive, gallery-like experience. It’s bold enough to feel artistic yet affordable to execute.

    Choose a color that speaks to your mood: deep chocolate brown, soft sage, dusty terracotta, or moody navy. Use high-quality paint ($30–$50 per gallon) to avoid streaking and ensure coverage. Paint both the wall and ceiling for maximum impact (some skip the ceiling if budget is tight). One wall typically needs one gallon of paint. This is a straightforward DIY project taking 4–8 hours depending on wall size.

    The saturated color becomes the backdrop for everything else in your room—photos, art, and objects pop against it. Renters can use removable wallpaper in solid colors for a similar effect ($20–$60 per roll).


    5. Arched Doorway Accents for Playful Softness

    Arches soften hard architectural lines and add instant character. They’re sculptural and artistic without requiring much skill or budget to install.

    Buy arch molding kits from home improvement stores ($60–$200 depending on size) or work with a carpenter. For renters, faux archways using removable wood trim or painted curved lines create the illusion without permanent changes. Installation takes 2–4 hours with basic tools. Paint the arch to match your wall or contrast it with trim color for more drama.

    Your home feels more thoughtfully designed with curved transitions. Arches draw the eye and create visual flow, especially in transitional spaces. It’s an overlooked detail that designers use to add sophistication and warmth.


    6. Textile Art Wall Hangings for Softness and Texture

    Woven textiles, macramé, and fabric art add warmth, texture, and movement to walls. They’re functional art pieces that soften hard surfaces and absorb sound naturally.

    Shop Etsy, West Elm, or Urban Outfitters for handmade or artisan pieces ($50–$400+). DIY option: make macramé wall hangings using cord ($10–$20) and YouTube tutorials. Hang using a simple dowel or wooden rod attached with picture hooks. Pieces typically measure 2–4 feet wide and make bold statements without overwhelming a room.

    These hangings add layers of visual interest and feel handcrafted. They’re especially effective in bedrooms and living spaces where softness creates a welcoming atmosphere. Renter-friendly and easy to move when you change rooms.


    7. Grooved Paneling in Bold Colors for Modern Drama

    Grooved paneling adds architectural interest and visual depth. Painting it in bold colors creates a modern, gallery-like statement that goes way beyond basic paint.

    Install tongue-and-groove or shiplap paneling ($1–$3 per square foot) and paint in a saturated color like forest green, charcoal, or burgundy ($40–$60 for quality paint). For renters, use removable paneling or opt for grooved wallpaper ($20–$50 per roll). Professional installation runs $500–$1,500; DIY with basic tools takes a weekend. The grooves naturally catch light and shadow, creating constant visual movement.

    Your wall becomes dimensional and sophisticated. The grooved texture makes the space feel more designed than standard flat paint. This works beautifully in entryways, bedrooms, or home offices where you want impact.


    8. Abstract Mural Paint for Artistic Expression

    Murals don’t require perfect skill—abstract murals celebrate imperfection and personal expression. They’re DIY-friendly and create a one-of-a-kind focal point that no print can replicate.

    Sketch your design lightly in pencil first (no need to be perfect). Use acrylic paint ($2–$5 per bottle) and large brushes to apply sweeping strokes, organic shapes, or color blocking. Work with 3–5 colors in your home’s palette for cohesion. Most DIYers complete a 6×8 wall in 6–10 hours. Pro tip: watch abstract painting tutorials to build confidence—YouTube creators like Bob Ross have inspired thousands of wall murals.

    Your mural becomes a conversation starter and deeply personal to your home. No two abstract murals are alike, so you’re creating genuine art on your walls. It’s also perfect for renters if you use washable paint and document it for your security deposit.


    9. Wainscoting Installation for Timeless Elegance

    Wainscoting adds architectural sophistication and gallery-like framing to your space. It creates natural sections for hanging art while protecting walls from scuffs.

    Install beadboard or shaker-style wainscoting 36–48 inches up from the floor ($2–$5 per square foot plus installation). Rent a contractor ($800–$2,000) or DIY over a weekend with basic carpentry skills. Paint wainscoting in white or cream and the upper wall in a soft color for classic contrast. This creates a natural frame for artwork hung in the upper section.

    Wainscoting makes your home feel like a designed space with intention. It’s timeless—the kind of detail that adds value and character for years. Works beautifully in dining rooms, entryways, and bathrooms.


    10. Curved Mirror Wall Installation for Light and Flow

    Curved or scalloped mirrors are sculptural art pieces that reflect light and create the illusion of more space. They’re functional and visually striking.

    Shop Wayfair, Article, or West Elm for arched mirrors ($100–$500+). Install using wall anchors rated for mirror weight. A 30×40-inch curved mirror takes 15 minutes to hang and becomes an instant focal point. For budget options, target or IKEA offer smaller arched mirrors ($30–$80) that work equally well.

    Mirrors bounce light around your room and create visual interest. A sculptural frame becomes art itself. Pair with floating shelves below for a gallery-like entry or bedroom statement. It photographs beautifully too—perfect for documenting your home updates.


    11. Botanical Print Gallery Wall for Organic Beauty

    Gallery walls of botanical prints feel curated and artistic without requiring an expensive art collection. Prints are affordable, accessible, and deeply on-trend.

    Search Etsy, Minted, or print marketplaces for botanical designs ($10–$30 each). Mix frame styles—try wood, black, and cream finishes together for visual interest. Arrange in a grid pattern or salon style before hanging. Frames cost $10–$50 each depending on quality. Total investment for 6–9 prints: $100–$400. Hanging takes 1–2 hours with a level and picture hooks.

    Your gallery wall feels intentional and nature-inspired. It’s a complete room update that costs way less than one large piece of art. Totally renter-friendly if you use damage-free picture hooks.


    12. Sculptural Wall-Mounted Objects for Three-Dimensional Art

    Three-dimensional wall art creates depth and sophistication. Sculptures aren’t limited to pedestals—mounting them on walls creates gallery impact.

    Source pieces from local artists, craft fairs, or online (Etsy, individual artist websites: $50–$500+ per piece). Use heavy-duty picture hooks rated for the weight of each piece. Arrange asymmetrically rather than in a grid for organic flow. Invest in good track or museum lighting ($100–$300) to highlight shadows and form.

    Sculptural walls feel museum-quality and personal. The 3D objects catch light differently throughout the day, creating constantly changing visual interest. It’s an investment but transforms your space into a genuine gallery.


    13. Wallpaper Accent Wall with Bold Patterns

    Patterned wallpaper creates instant visual drama and artistic interest. Modern removable options make it renter-friendly and low-commitment.

    Choose patterned wallpaper ($20–$60 per roll) from Spoonflower, Anthropologie, Wayfair, or Etsy. Removable peel-and-stick wallpaper costs $15–$40 per roll and requires no tools or professional installation. A standard 10×10 wall needs 2–3 rolls. Apply over 2–3 hours if you’re careful. Non-removable wallpaper lasts longer and handles better but requires professional application ($500–$1,200 for a room).

    Pattern wallpaper transforms a room instantly. It’s art you can change whenever you want a fresh look. Removable versions mean renters get a designer-quality update without landlord concerns.


    14. Hand-Painted Stripe Details for Timeless Pattern

    Painted stripes add movement and artistic flair without relying on prints or heavy decoration. They’re timeless because they work with almost any aesthetic.

    Measure and mark stripe width with painter’s tape (2–6 inches wide works well). Paint alternate stripes in your second color using a quality paint roller ($20–$40 for supplies). Most DIYers complete a 10×10 wall in 3–4 hours. Use contrasting colors for drama or tone-on-tone for subtlety.

    Stripes create visual flow and make rooms feel taller or wider depending on direction. They’re affordable, doable, and endlessly versatile. A simple painted stripe detail elevates your space significantly—it’s the kind of thing gallery owners use to add sophistication.


    15. Mixed-Media Collage Wall for Eclectic Personality

    Collage walls celebrate personality and visual abundance. Mix prints, photos, textiles, and objects for a truly unique, artistic display.

    Gather pieces you love—prints, family photos, vintage finds, fabric scraps, even pressed flowers. Mix frame styles, sizes, and materials for eclectic appeal. Arrange on the floor first, then photograph your layout before hanging. Use a mix of picture hooks, adhesive strips (for textiles), and wire to achieve your design. Budget $100–$500+ depending on quantity and whether you DIY framing.

    Your collage wall becomes a visual story of your life and taste. It’s unpretentious, personal, and genuinely artistic. This approach works beautifully in bedrooms, offices, and living rooms where personality matters most.


    16. Floating Wooden Frames for Minimalist Gallery Feel

    Floating frames without glass create clean, modern gallery aesthetics. They’re sophisticated and work with any art style or subject matter.

    Purchase floating frame kits ($30–$100+ each depending on size) from IKEA, CB2, or West Elm. Hang at eye level, spacing them 6–12 inches apart. Arrange artwork inside—prints, fabric, pressed botanicals, or pages from books. No glass means art feels more immediate and tactile. Installation takes 15–30 minutes per frame.

    Floating frames create breathing room while showcasing art beautifully. They’re modern without feeling cold, and they highlight whatever you place inside. Perfect for rotating seasonal art or changing pieces frequently.


    17. String Art Geometric Designs for Budget Artistry

    String art combines geometry with texture and is incredibly budget-friendly and customizable. It’s perfect for renters and adds handmade character to any space.

    Buy a wooden board ($10–$30), nails ($5), and colored string or yarn ($5–$15). Sketch your design lightly on the wood. Hammer nails around the perimeter of your design and wrap string between nails to create patterns. Most projects take 2–4 hours depending on complexity. Hang on your wall with picture hooks—no damage to walls.

    String art feels handcrafted and intentional. It’s affordable enough to try multiple designs and swap them out seasonally. Great for dorm rooms, kids’ spaces, or anywhere you want artistic flair without commitment.


    18. Large-Scale Canvas Paintings for Statement Art

    Oversized canvas paintings create instant focal points and don’t require gallery walls or complex arrangements. One large piece often makes more impact than multiple small ones.

    Commission an artist on Etsy ($200–$1,000+ depending on size and artist) or buy from galleries and online art marketplaces. Pre-made large canvas prints (24×36 inches or bigger) cost $50–$300 depending on quality. Hang at eye level, centered on the wall, leaving 12–18 inches of space around it. Professional installation is optional—most DIYers can hang with stud anchors.

    One large canvas creates drama and sophistication without effort. It becomes the statement piece your room needs. This approach works beautifully in minimalist spaces where you want intentional focus.


    19. Vintage Mirrors Collection for Architectural Interest

    Vintage mirrors serve function and art simultaneously. Different shapes and finishes create visual interest while reflecting light throughout your space.

    Hunt estate sales, thrift stores (Goodwill, local shops: $5–$50 each), or Etsy for vintage mirrors. Mix round, rectangular, and ornate shapes. Vary finishes—wood, painted, brass, and patina work together beautifully. Arrange on walls in salon style for maximum impact. Hanging takes 1–2 hours with proper picture hooks rated for mirror weight.

    A collection of vintage mirrors feels curated and timeless. They add light and apparent space while creating genuine artistic impact. This works especially well in entryways and bathrooms.


    20. Ceiling-to-Floor Wallpaper for Immersive Drama

    Taking wallpaper all the way to the ceiling creates a fully immersive gallery feeling. It’s bolder than standard accent walls but incredibly impactful.

    Choose a pattern you love ($20–$60 per roll). Calculate yardage from ceiling to baseboard. Peel-and-stick removable wallpaper ($25–$50 per roll) is renter-friendly and DIY-able over a Saturday. Traditional wallpaper requires professional installation ($500–$1,500 for a room). The intensity of color and pattern felt from floor to ceiling creates genuine design impact.

    Your room becomes a designed space that photographs beautifully. The immersive color creates mood and personality instantly. It’s bold but works because the pattern is intentional and high-quality.


    21. Personalized Family Photo Wall for Memory Curation

    Photo walls celebrate memory and connection while creating deeply personal art. They feel warm and lived-in without requiring purchased art.

    Frame photos using affordable frames from Target, IKEA, or Walmart ($8–$25 each). Mix black and natural wood for visual interest. Arrange in a grid or salon style. Get photos printed at Costco or CVS ($0.50–$2 each). Total investment for 12 photos: $100–$300 with frames. Hanging takes 1–2 hours with a level and picture hooks.

    Your photo wall tells your story. It’s personal in a way that purchased art never is. Guests connect with it immediately, and it brings warmth to any space. Perfect for entryways, living rooms, or hallways where you spend transitional time.


    22. Hand-Lettered Signs for Artistic Personalization

    Hand-lettered typography becomes art when it’s intentional and beautifully executed. It adds personality and meaning to walls without relying on imagery.

    DIY option: learn hand lettering via YouTube tutorials and paint a meaningful quote directly on your wall using acrylic paint ($10–$20). Use a pencil to sketch lightly first. Alternatively, hire a lettering artist from Etsy ($100–$500 for custom work). Removable vinyl lettering ($20–$50) works for renters who want custom quotes without permanence.

    Hand-lettered signs create meaning and intentionality. Whether it’s a favorite quote, your family name, or a simple word that resonates, lettering adds soul to a room. It’s more personal than any purchased print.


    23. Macramé and Rope Installations for Textural Drama

    Large-scale macramé installations create texture and visual drama. They’re sculptural and artistic while adding warmth and organic appeal.

    Purchase pre-made macramé wall hangings ($75–$400+) from Etsy or shops like Urban Outfitters. For DIY, buy macramé cord ($15–$40) and learn knots via YouTube—most beginners create simple geometric patterns successfully. Mount to wall using a wooden dowel or rod attached with picture hooks. A 4-5 foot installation makes a genuine statement.

    Macramé adds texture and movement without visual harshness. It’s warm and inviting—perfect for bedrooms or living spaces where comfort matters. The knotted texture catches light beautifully and creates depth on otherwise flat walls.


    24. Art Deco Geometric Stencils for Vintage Glamour

    Art Deco geometry blends vintage elegance with modern sophistication. Metallic stencils add glamour while maintaining cohesion with warm color palettes.

    Purchase Art Deco stencil templates ($15–$40 on Etsy or Amazon) featuring angular, geometric patterns. Use metallic acrylic paint or paint pens ($8–$15) for shimmer. Apply with sponge brushes in tapping motions. Work slowly for clean lines. Most walls complete in 4–6 hours. Pro tip: metallic finishes photograph beautifully but can look streaky—use quality supplies and thin coats.

    Your wall gains vintage glamour and artistic sophistication. Metallic touches catch light and create subtle shimmer that plain paint never does. This works beautifully in bedrooms and entryways where you want elegance.


    25. Floating Rope or Twine Wall Art for Organic Movement

    Rope installations create three-dimensional organic art that feels natural and artisan-made. They’re sculptural and surprisingly achievable as DIY projects.

    Buy rope or thick twine ($10–$30 for substantial lengths) from hardware stores. Sketch a simple design on your wall in pencil—flowing curves or geometric loops work well. Use adhesive anchors or small nails to secure rope to the wall, creating loops and movement. Work in sections, stepping back frequently to check balance. Most projects take 2–4 hours depending on complexity.

    Rope art feels handcrafted and warm. The organic curves soften modern spaces and create visual flow. It’s affordable, renter-friendly if done carefully, and uniquely yours. Perfect for living rooms or bedrooms where you want texture and movement.


    26. Curated Shelf Styling as Rotating Wall Art

    Thoughtful shelf styling becomes wall art when you approach it with intentionality. Rotating seasonal displays keep your walls feeling fresh and alive.

    Install floating shelves (see item #2) and commit to intentional styling. Group objects in threes: stack books, prop framed photos, add small sculptures or plants. Leave breathing room—don’t overcrowd. Change displays seasonally or monthly to keep your space feeling fresh. Budget $50–$150 total for styling objects (thrifted, budget shops, or things you already own work perfectly).

    Styled shelves become living art galleries in your home. They tell stories and invite closer inspection. This approach celebrates curation and personal taste more than any fixed installation. Renters love this because it’s completely non-permanent.


    Save this post and pick one idea to tackle this weekend. Whether you start with paint, prints, or textiles, adding intentional wall art transforms how your space feels. Your walls are waiting to become the gallery you’ve imagined.

  • 27 Geometric Wall Painting Patterns for Modern, Artistic Homes

    27 Geometric Wall Painting Patterns for Modern, Artistic Homes

    Geometric wall patterns sound intimidating—but they’re actually one of the easiest ways to add personality without major commitment. Whether you’re renting, own your space, or just want to experiment, these 27 ideas range from no-paint stencil solutions to stunning hand-painted designs that’ll make your home feel intentional and artistic. You’ll discover budget-friendly techniques, product recommendations under $50, and step-by-step approaches that work for beginners. From geometric triangles and hexagons to modern color-blocking and ombré patterns, these ideas work in any room—bedrooms, living areas, entryways, even bathrooms. By the end, you’ll have plenty of options to choose from, and you’ll know exactly how to execute each one. Let’s dive in.

    1. Paint Triangles for Instant Texture

    Triangle patterns add visual interest without feeling chaotic or too bold. This design works beautifully in bedrooms, nurseries, or home offices where you want energy without overwhelm.

    Start by sketching light pencil lines dividing your wall into a grid. Use painter’s tape to section off triangular shapes, then fill alternating triangles with your chosen paint colors. Benjamin Moore’s Cinnamon Slate pairs perfectly with cream or soft whites for a modern, earthy vibe. You’ll need two paint colors, painter’s tape, a pencil, and 4-6 hours for a standard wall. Budget $20-$40 for supplies if you already have paint. Pro tip: Use a level and measuring tape to keep your triangles proportional—imperfect geometry reads as intentional, but wildly crooked shapes feel unfinished.

    Once dry, the depth these triangles create makes your room feel layered and designed. You get that gallery-wall aesthetic without any commitment beyond paint.

    2. Stencil Geometric Borders for Renters

    Borders are renter gold—they add personality without covering large wall areas, and you can remove them or paint over them easily when you move. Geometric borders work in hallways, bedrooms, or above shelving.

    Purchase a geometric border stencil from Target ($8-$15) or Amazon ($12-$25) and use removable painter’s tape to map your line. Apply with a stencil brush and acrylic paint in colors like navy, forest green, or warm taupe. Budget 2-3 hours for a standard hallway. Pro tip: Do a test section first to get comfortable with the pressure needed—too heavy and paint bleeds under the stencil, too light and coverage is patchy.

    The beauty here? You get professional-looking detail without permanent commitment. Your rental feels curated, and you’re not losing your security deposit.

    3. Create Color-Blocked Geometric Shapes

    Color-blocking combines abstract geometry with bold, confident color choices. This approach works for large, statement-making walls or accent spaces where you want serious visual impact.

    Sketch your layout lightly in pencil, then use painter’s tape to create clean edges between color zones. Use Sherwin-Williams colors like Cavern Clay or Benjamin Moore’s Caramelized for that warm, sun-baked look trending in 2025. Paint one color at a time, removing tape while paint is slightly tacky for cleaner edges. Budget $40-$80 for paint and supplies. Expect 5-8 hours spread over a weekend, depending on wall size and color count. Pro tip: Odd numbers of color blocks (3 or 5) feel more balanced than even numbers.

    Your wall becomes functional art that grounds the entire room. Guests will assume you hired a designer—and you’ll know it took just one weekend.

    4. Paint Hexagons in a Honeycomb Pattern

    Hexagons feel geometric but approachable, making them perfect for kids’ rooms, nurseries, or creative spaces. The honeycomb pattern is surprisingly forgiving since slight variations feel intentional.

    Download a hexagon template online, print and tape copies to your wall to mark placement with light pencil marks. Use painter’s tape to outline each hexagon, then fill with your color choices. For playful energy, try Benjamin Moore’s Lilac and sunshine yellows—both trending for 2025. Two paint colors, tape, and 6-8 hours for a full wall. Budget $25-$50 for supplies. Pro tip: Leave small gaps between hexagons so each shape reads distinctly rather than blurring together.

    The result feels whimsical and modern without reading as babyish. Years later, you can refresh with different colors and the pattern still works.

    5. Use Metallic Paint for Geometric Accents

    Metallic geometric accents add sophistication without overwhelming the space. The shimmer catches light differently throughout the day, creating depth that flat paint can’t achieve.

    Paint your base wall color first, then sketch geometric outlines and fill with metallic paint. Use gold, copper, or rose gold metallic finishes from Rust-Oleum or Krylon ($8-$15 per can). You need minimal metallic paint since you’re using it as accent detail. Budget $30-$60 total. Takes 4-5 hours including drying time. Pro tip: Metallic paint looks best in well-lit spaces and performs better in bathrooms and entryways than bedrooms.

    The shimmer catches light when people enter your space, creating an unexpectedly luxe moment. It’s subtle enough to feel intentional but impressive enough to change the whole vibe.

    6. Paint Diagonal Stripes for Modern Movement

    Diagonal stripes create movement and draw the eye upward, making rooms feel taller and more dynamic. This pattern works especially well in narrow spaces or rooms where you want visual energy.

    Measure and mark diagonal lines using a laser level (rent one from Home Depot for $5-$10 if you don’t own one). Use painter’s tape to create stripes about 8-12 inches wide. Alternate paint colors—try deep greens paired with warm neutrals or navy with cream. Budget $35-$60 for paint and tape. Plan 6-8 hours for a standard wall. Pro tip: Stripes read cleaner if you keep them at a consistent angle—45 degrees feels modern and intentional.

    The diagonal pull makes your space feel curated and architectural. Even in a small room, this pattern adds sophistication and movement without crowding.

    7. Stencil a Geometric Mural in Corners

    Corner murals maximize visual impact while keeping the commitment manageable—you’re not covering an entire wall, just adding a dramatic accent. This works beautifully in bedrooms, home offices, or living room corners.

    Sketch your geometric design directly on the wall or project an image and trace lightly in pencil. Use multiple paint colors and finishes (matte, metallic, or even a touch of shimmer) for depth. Budget depends on complexity—$40-$100 for supplies if you DIY. Plan one full weekend day for a 4×4 corner mural. Pro tip: Keep geometric shapes clean and connected so the mural reads as intentional rather than abstract scribbles.

    A corner mural becomes the story of your room. People notice immediately, and it transforms a blank corner into genuine art that reflects your style.

    8. Paint Overlapping Circles for Soft Geometry

    Overlapping circles feel geometric but approachable and dreamy—perfect if you want pattern without sharp angles. This design works in bedrooms, bathrooms, or any space where you want softness with style.

    Use circular templates or trace bowls of various sizes to create your overlapping pattern. Paint each circle with 2-3 overlapping circles creating layered color effects. Try soft rose tones, sage greens, or warm taupes for a calming palette. Budget $25-$45 for supplies. Takes 5-7 hours depending on circle count. Pro tip: Overlap circles so they create new colors where they intersect—this adds dimension without extra effort.

    The soft geometry feels artistic without being intimidating. Your room becomes a peaceful retreat that still reads as intentionally designed.

    9. Create a Geometric Ombré Wall

    Ombré geometry combines two trends—gradual color shifts and geometric patterns. The result feels sophisticated and much more complex than it actually is to execute.

    Divide your wall into geometric sections (triangles, hexagons, or rectangles work well). Paint each section in progressively lighter or darker variations of your chosen color. Start with your darkest shade at the bottom and lighten as you move up. Budget $30-$60 for paint. Takes 8-10 hours due to multiple paint layers. Pro tip: Keep geometric shapes consistent in size so the color transition is the star rather than uneven proportions.

    The gradient effect creates depth that makes your wall feel three-dimensional. Rooms with ombré geometry read as thoughtfully designed and incredibly current.

    10. Paint Geometric Lines for Minimalist Style

    Minimal geometric lines appeal to those who love modern design but worry about bold patterns feeling overwhelming. Thin lines create interest without visual chaos.

    Use a ruler or level to sketch light pencil guidelines. Paint thin lines in black, charcoal, or dark navy using a thin brush or paint pen. You can create connected geometric shapes or scattered lines for an abstract feel. Budget $10-$20 for paint. Takes 3-4 hours including drying time. Pro tip: Thinner lines read as more intentional—try 1/4 to 1/2 inch width for a clean, modern look.

    The minimalist approach gives your room a gallery-like calm. Even in a small space, thin line work reads as sophisticated without creating visual overwhelm.

    11. Combine Geometric Shapes with Wallpaper

    Peel-and-stick geometric wallpaper offers pattern complexity without the paint commitment, and it’s completely renter-friendly. Layer it with hand-painted accents for a custom look.

    Choose from brands like RoomMates ($15-$35), Spoonflower ($25-$50), or Wayfair ($20-$40). Apply to a clean, dry wall following package directions. Consider adding hand-painted geometric details on top using metallic or contrasting paint for extra dimension. Budget $30-$70 total. Installation takes 2-3 hours depending on wall size. Pro tip: Use a squeegee or credit card to smooth out bubbles as you apply.

    Wallpaper plus hand-painted accents create a custom look without custom pricing. Your entryway becomes a statement moment that makes the whole home feel designed.

    12. Paint Geometric Shapes with Texture Finishes

    Combining smooth paint with textured finishes (limewash, Venetian plaster, or matte) adds dimension that flat paint alone can’t achieve. This trend aligns with 2025’s focus on tactile, nature-inspired interiors.

    Divide your wall into geometric sections. Paint some with standard paint and fill others with Romabio Limewash or Venetian plaster finishes ($20-$50 per container). The texture catches light differently, creating dynamic depth. Budget $60-$100 total. Takes 6-8 hours plus texture drying time. Pro tip: Test texture finishes in inconspicuous areas first—they have learning curves for application.

    The textured geometry becomes a focal point people naturally gravitate toward. Your wall gains sophisticated depth that photographs beautifully and feels amazing to touch.

    13. Create a Geometric Gallery Wall Pattern

    Geometric gallery walls work with existing frames you already own—no painting required. Arrange frames in geometric patterns that break traditional gallery-wall rules.

    Arrange frames in triangular clusters, hexagonal groups, or diagonal lines rather than straight grids. Mix frame colors and sizes intentionally. Frame sets from IKEA ($3-$15 each) or Target ($5-$20) work beautifully for this. You can fill with artwork, geometric prints, or even fabric swatches. Budget $30-$80 depending on frame count. Takes 2-3 hours including layout and hanging. Pro tip: Use painter’s tape to map your arrangement before drilling—this prevents costly wall damage.

    A geometric gallery arrangement feels intentional and artistic. Your wall becomes a conversation piece that reflects your aesthetic without any painting skills required.

    14. Paint Chevron or Zigzag Patterns

    Chevron patterns feel modern and energetic. While they look complex, they’re actually manageable with painter’s tape and a bit of planning.

    Map out your chevron pattern using light pencil lines and a level. Use painter’s tape to create angled stripes, then paint alternating colors. Try Benjamin Moore’s warm tones like Caramelized paired with cream for trending 2025 vibes. Budget $30-$50 for paint and supplies. Takes 6-8 hours depending on wall size and pattern complexity. Pro tip: Keep your angle consistent (usually 45 degrees) so the chevrons read as intentional rather than random.

    Chevron patterns make smaller rooms feel more dynamic and interesting. The movement catches your eye naturally, creating energy without overwhelming the space.

    15. Paint Concentric Geometric Shapes

    Concentric shapes (circles or squares within circles or squares) create an optical effect that draws the eye inward. This works beautifully in bedrooms or meditation spaces.

    Start with your largest shape and work inward, using painter’s tape for clean edges. Each ring gets progressively smaller. Use 4-5 graduating shades of the same color family for cohesion. Try deep greens progressing to pale sage for biophilic vibes. Budget $25-$45 for paint. Takes 5-7 hours including tape work and drying between layers. Pro tip: Use a compass or template to keep circles perfectly round—even slight wobbles affect the overall optical effect.

    Concentric shapes create a mesmerizing focal point that grounds the room. Guests often find themselves staring at the wall—it’s meditative and genuinely beautiful.

    16. Combine Geometric Painting with Fabric Wall Panels

    Mixing geometric paint with fabric panels adds texture and breaks the monotony of flat paint. This approach works especially well in creative spaces, studios, or eclectic bedrooms.

    Paint geometric sections on half your wall, then stretch fabric across wooden frames for the other half. Choose fabrics in complementary geometric patterns. Budget $50-$100 depending on fabric choices and frame size. Takes 4-6 hours for installation and paint. Pro tip: Use batting or foam backing behind fabric so it reads as intentional wall feature rather than random fabric scraps.

    The mixed-media approach creates a gallery-like space that’s deeply personal. People immediately sense you’ve put thought into your design, and the tactile elements invite interaction.

    17. Paint Geometric Stripes in Corners and Edges

    Instead of covering an entire wall, paint geometric stripes only along edges—top, bottom, or corners. This approach adds detail without overwhelming the space.

    Use painter’s tape to create geometric sections along wall perimeters. Paint 2-3 colors in geometric patterns, leaving the wall center white or neutral. Budget $20-$35 for paint and supplies. Takes 3-4 hours. Pro tip: This technique works beautifully in small spaces where full-wall patterns might feel cramped.

    Framing your wall with geometric detail draws the eye up and around the room. Your space feels designed and architectural without the visual weight of full-wall coverage.

    18. Use Geometric Stencils for Repeating Patterns

    Stencil patterns allow perfect repetition without freehand painting. Choose geometric stencils in sizes and patterns that resonate with your aesthetic.

    Purchase reusable stencils (Stencil Revolution or Cutting Edge Stencils, $15-$35) and apply using a stencil brush with acrylic paint. Plan your repeat spacing with light pencil marks. Budget $30-$60 for stencils and paint. Takes 5-8 hours depending on pattern complexity. Pro tip: Do a test section first to dial in the pressure needed for even coverage—too heavy causes bleeding, too light leaves gaps.

    Repeating patterns create rhythm that feels organized and intentional. Your room gets visual consistency that reads as professionally designed.

    19. Paint Geometric Gradients Between Shapes

    Gradients within geometric shapes create depth and visual interest without adding complexity. Each shape becomes a mini-ombré effect.

    Paint geometric shapes, then blend two colors within each shape using a damp brush or sponge. Start with your darker shade on one side, feather toward your lighter shade on the other. Budget $30-$50 for paint. Takes 6-8 hours due to blending time and drying between layers. Pro tip: Practice blending on cardboard first—you need a light touch to avoid muddy colors.

    Geometric shapes with gradients look complex and high-design. Your wall becomes genuine art that transforms the entire room’s energy.

    20. Create a Geometric Accent Using Painter’s Tape Alone

    What if you kept the tape? Leave painter’s tape on your wall to create geometric line patterns, filling sections with varied paint colors. The tape becomes the art.

    Paint your wall in base color, apply painter’s tape in geometric patterns, then paint additional colors over the tape. Leave tape on to create defined geometric lines. Budget $15-$25 for tape and paint. Takes 4-5 hours. Pro tip: Use various tape widths (1/4 inch, 1/2 inch, 1 inch) for visual variety. Flat painter’s tape photographs much better than blue painter’s tape.

    The graphic result looks minimal and intentional. It’s conversation-starting but still feels sophisticated and modern.

    21. Paint Geometric Diamond Patterns

    Diamond patterns feel timeless yet trendy—they work in traditional, modern, and eclectic spaces. Large diamonds read softer than smaller geometric shapes.

    Sketch diamond outlines using a level and light pencil marks. Use painter’s tape to outline each diamond shape, then fill with your chosen colors. Try Sherwin-Williams colors like Cavern Clay paired with cream for a warm, inviting feel. Budget $30-$50 for supplies. Takes 6-8 hours depending on wall size. Pro tip: Space diamonds evenly—use a measuring tape to ensure consistency.

    Diamond patterns add charm without reading as busy. Even small rooms feel styled and thoughtfully curated with this pattern choice.

    22. Combine Geometric Painting with Peel-and-Stick Decals

    Layer hand-painted geometry with peel-and-stick metallic decals for maximum visual interest with minimal complexity. The decals add detail without additional painting effort.

    Paint your geometric shapes first using acrylic paint. Once dry, apply geometric peel-and-stick decals ($10-$25) from Amazon or Target over your painted shapes. Overlap and layer for visual complexity. Budget $40-$70 total. Takes 4-5 hours including paint drying time. Pro tip: Apply decals to the painted surface for better adhesion—smooth paint surfaces hold them better than textured finishes.

    The mixed-media approach creates depth and visual interest that looks professionally executed. Your wall becomes art that catches light and reflects your creativity.

    23. Paint a Geometric Feature Wall with Warm Undertones

    2025 emphasizes earth tones and nature-inspired colors. Use geometric shapes to showcase warm, grounding tones like terracotta, warm browns, and ochre.

    Choose Benjamin Moore’s Cinnamon Slate as your hero color, pairing it with cream and warm taupe geometric shapes. Paint defined geometric sections allowing each color to showcase independently. Budget $35-$60 for paint. Takes 6-8 hours. Pro tip: Earth-tone palettes feel more forgiving than bright colors—slight variation in tone adds character rather than looking like mistakes.

    The warm geometry grounds your space emotionally. Even in small rooms, this palette creates calm sophistication that makes you feel more relaxed.

    24. Create Geometric Murals with Nature Elements

    Combine geometric shapes with organic botanical elements for a hybrid design that feels current and meaningful. This bridges geometric design with biophilic trends.

    Paint geometric shapes as your base framework. Within shapes, add delicate botanical line drawings using a thin brush. Try deep greens outlined with cream botanical sketches for a modern, nature-connected look. Budget $30-$55 for supplies. Takes 8-10 hours due to detailed line work. Pro tip: Keep botanical lines loose and sketchy—overly perfect drawings feel stiff. Embrace imperfection.

    The marriage of geometric structure with organic elements feels deeply intentional. Your wall becomes a meditation on nature and design—beautiful enough to frame.

    25. Paint Geometric Patterns with Matte and Gloss Finishes

    Combining matte and gloss finishes within geometric shapes creates texture and dimension without texture products. The finish change catches light dramatically.

    Paint geometric shapes in matte finish first. Once dry, paint alternating shapes with gloss finish in the same or complementary color. The finish variation creates visual separation even with similar colors. Budget $40-$70 for specialized paint products. Takes 6-8 hours including drying between coats. Pro tip: Matte and gloss in the same color family feels more sophisticated than stark contrasts.

    The finish play creates dimension that changes throughout the day as light shifts. Your wall becomes genuinely artistic—a study in how materials interact with light.

    26. Paint Hexagon Tiles for a Bathroom Accent

    Hexagons mimic tile patterns, making them perfect for bathrooms where you want the look of geometric tiles with paint’s affordability. This approach costs a fraction of actual tile installation.

    Sketch hexagon templates and mark placement with light pencil. Use painter’s tape to outline hexagons and fill with bathroom-safe paint. Try soft blues paired with cream for a spa-like feel. Budget $25-$45 for supplies. Takes 5-7 hours for a standard bathroom wall. Pro tip: Bathroom humidity means using quality paint and primer—moisture-resistant finishes last longer.

    You get that high-end geometric tile look without tile installation costs or commitment. Your bathroom feels spa-like and designer-curated.

    27. Create a Geometric Headboard Wall

    Skip expensive headboards and paint an oversized geometric feature instead. Paint the geometric design directly on the wall behind your bed for maximum impact.

    Design an oversized geometric pattern that extends from floor to ceiling behind your bed. Think large diamonds, triangles, or abstract shapes. Use deep jewel tones with metallic accents for luxury vibes. Budget $45-$80 for paint and supplies. Takes one full weekend day. Pro tip: Center your design on the bed so it balances visually—the headboard should frame your bed, not fight it.

    The custom geometric headboard becomes your room’s anchor. You get bespoke bedroom design that looks high-end without furniture investment—and you can change it whenever you want.


    Save this post and pick one pattern to try this weekend. Start with something low-stakes like a small accent wall or corner mural. You’ll be amazed how much personality emerges once you add geometric detail. Which pattern’s calling your name?