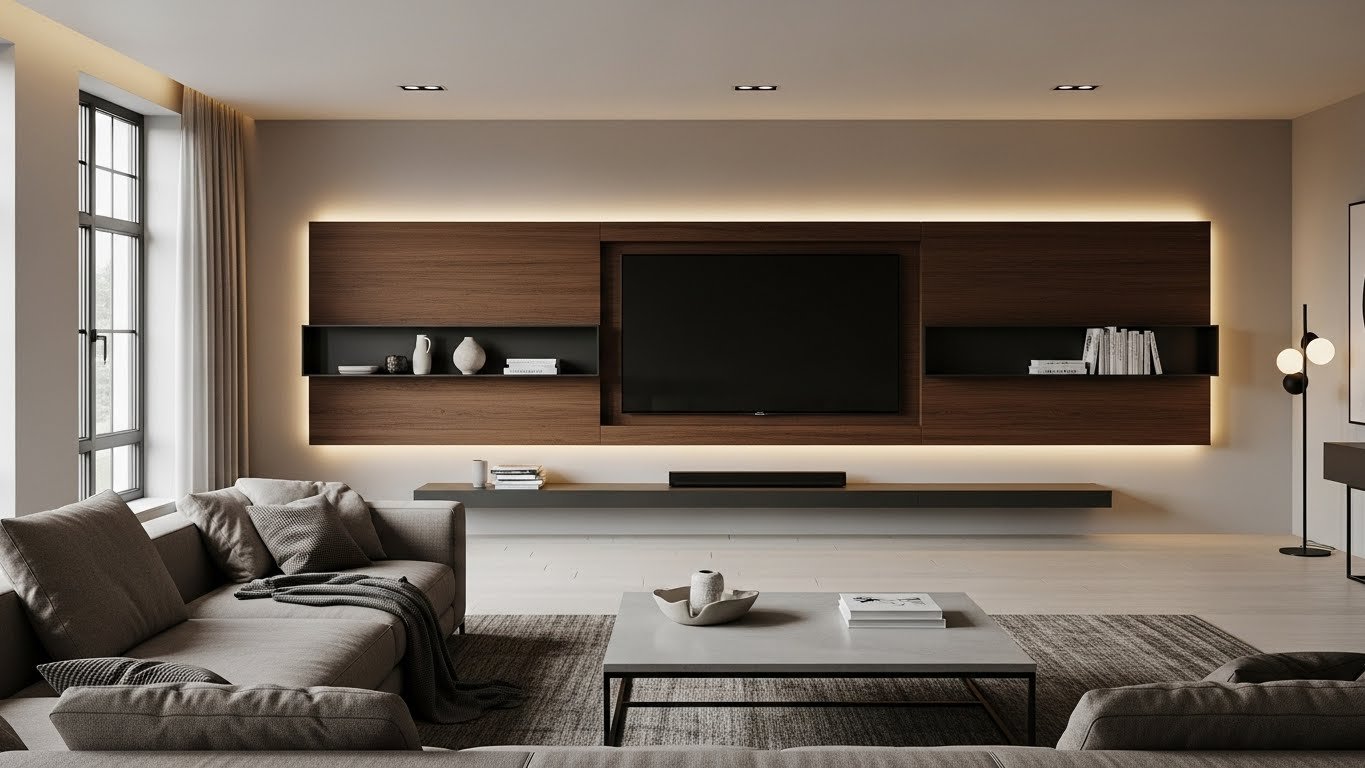
Floating TV walls are the future of modern living rooms—and they’re easier to create than you think. If you’re tired of bulky entertainment centers and tangled cables visible behind your screen, a floating system offers the ultimate in clean, contemporary design. These setups combine minimalist aesthetics with smart functionality, letting your TV become part of the wall rather than sitting in front of it. Whether you’re renting, renovating, or just refreshing your space, we’ve rounded up 26 floating TV wall ideas that work for every budget, skill level, and room size. From DIY tricks to professional-grade upgrades, you’ll find practical solutions that make your entertainment area feel spacious, organized, and genuinely futuristic. Let’s dive in.
1. Mount Your TV on a Floating Bracket Without a Backing Panel
A floating bracket mount is the simplest path to a streamlined look. Unlike traditional stands, a floating bracket attaches directly to wall studs, letting your TV appear to hover with nothing underneath. This approach saves floor space and looks incredibly modern without any added materials.
Installation takes 1–2 hours if you locate studs and have basic tools. Prices range from $30–$80 for the bracket itself (VESA-compatible models at Home Depot or Amazon). For drywall reinforcement, add a $15–$25 backing plate to safely support heavier TVs. Run all cables behind the wall using a low-voltage cable channel ($20–$40) that tucks along the baseboard. Drill one small hole behind the TV to feed wires into the wall cavity if possible—this keeps things completely hidden.
The real magic happens when you paint the wall a warm neutral. Your TV becomes an integral part of your decor, not a black rectangle imposing on the room. Renters can use a removable bracket system and fill the holes when they move.
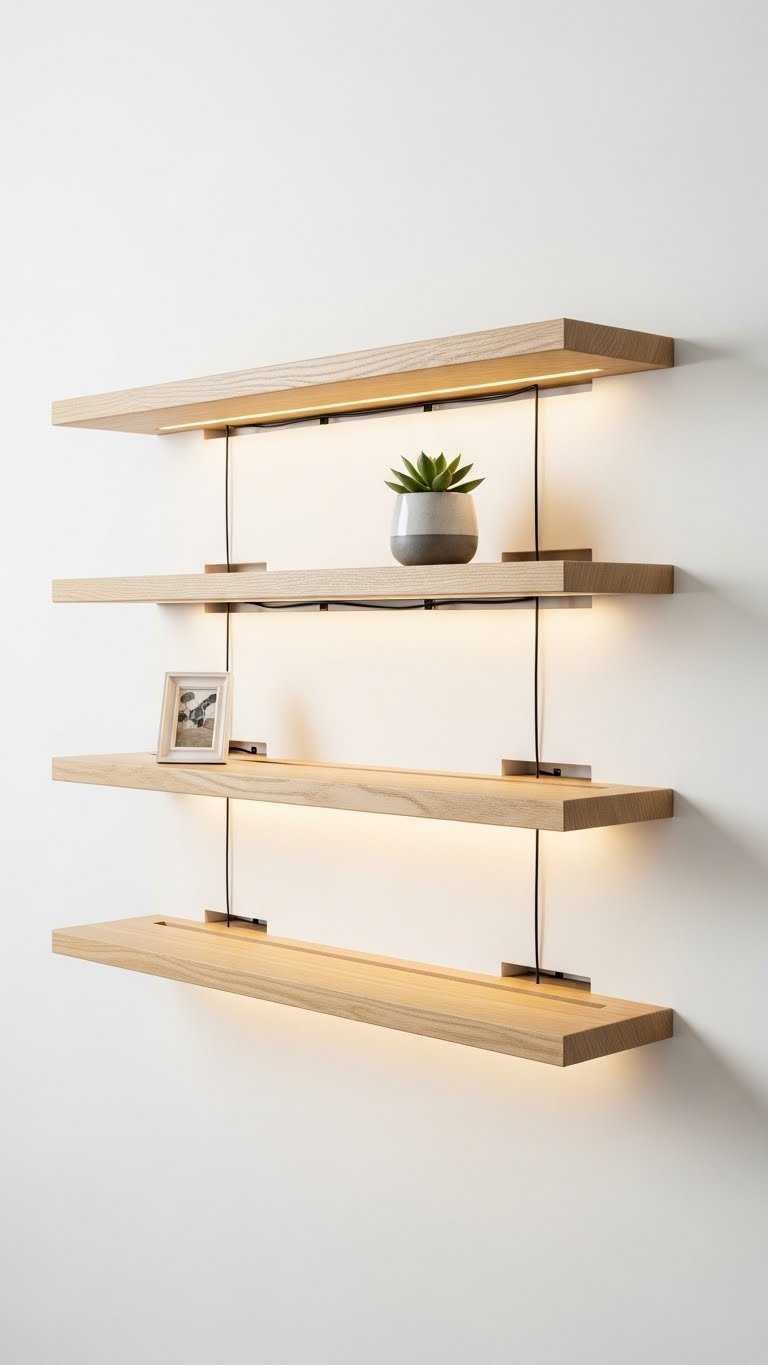
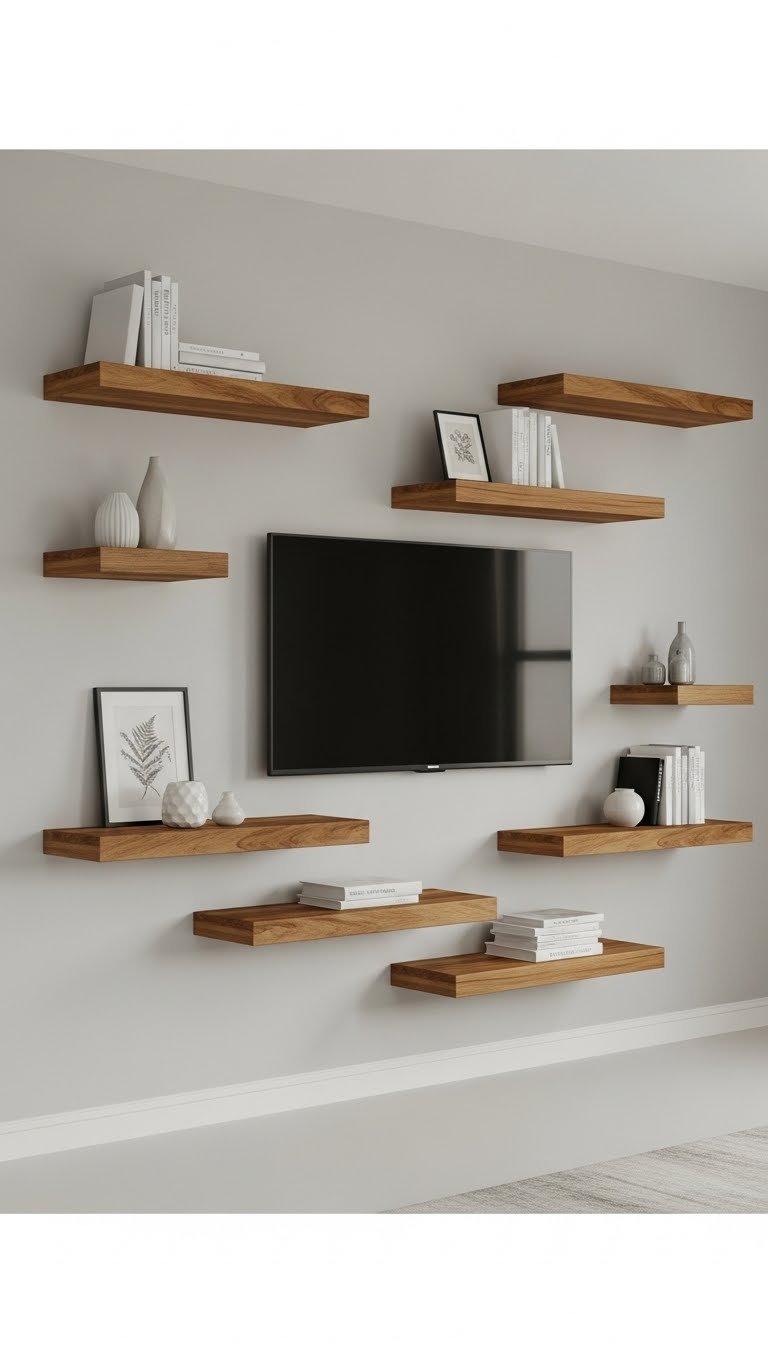
2. Build a Floating Shelf System Around Your TV
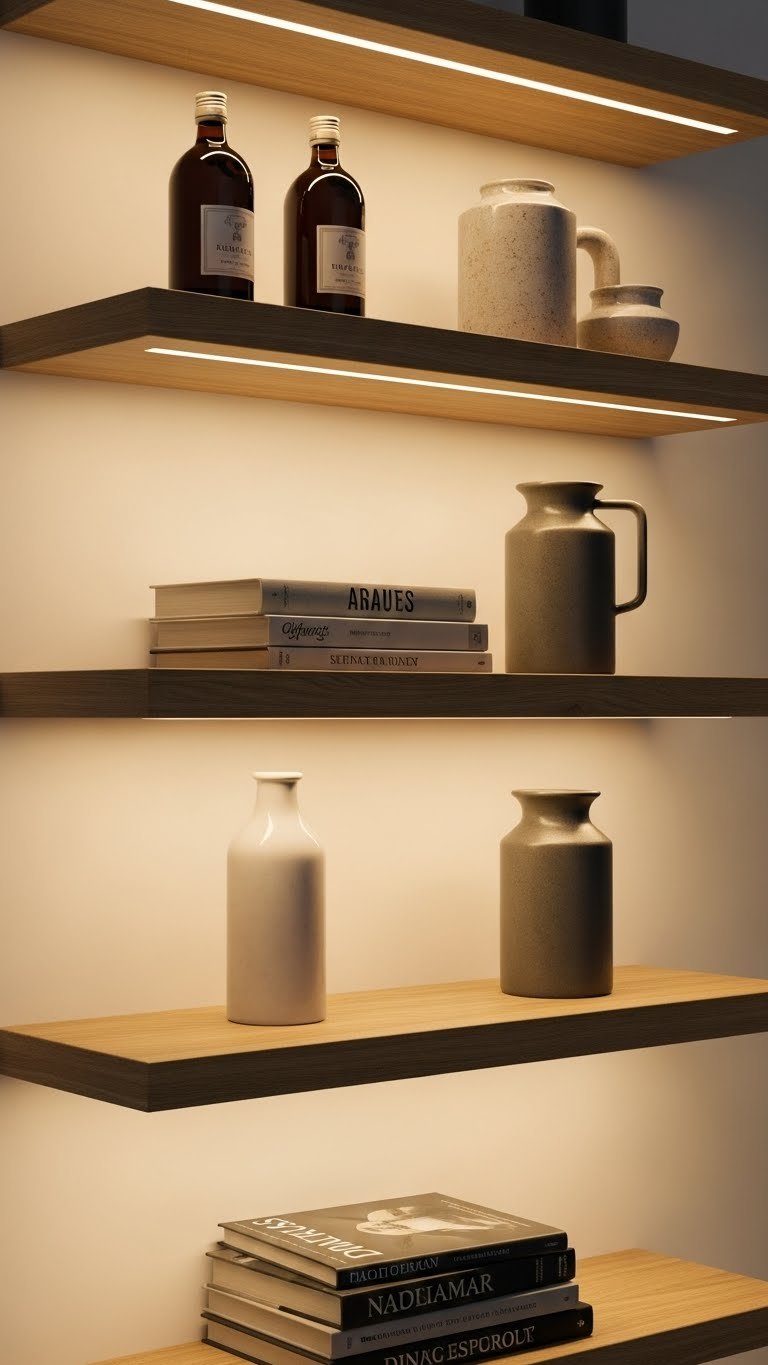
Floating shelves are the fastest way to turn a bare wall into a styled feature. By adding shelves above, beside, and below your TV, you create a gallery-like display that feels intentional and curated without overwhelming the space.
Pick shelves in a material that matches your room—white painted wood ($40–$70 per shelf), natural oak ($60–$100 per shelf), or budget-friendly particleboard options from IKEA or Wayfair ($20–$50 each). Most floating shelves mount to hidden brackets secured into studs, so installation is straightforward with a drill and level. Arrange shelves asymmetrically to avoid a boxy look—stagger heights and widths for visual interest.
Style your shelves with a mix of decor: small plants, framed photos, sculptural objects, and a few coffee table books. Keep the styling loose; too many items compete with your TV. The beauty is that you can rearrange seasonally or whenever you want a refresh without reinstalling anything.
This approach works perfectly for renters using removable adhesive strips on shelves, though floating shelves typically need stud mounting for safety.
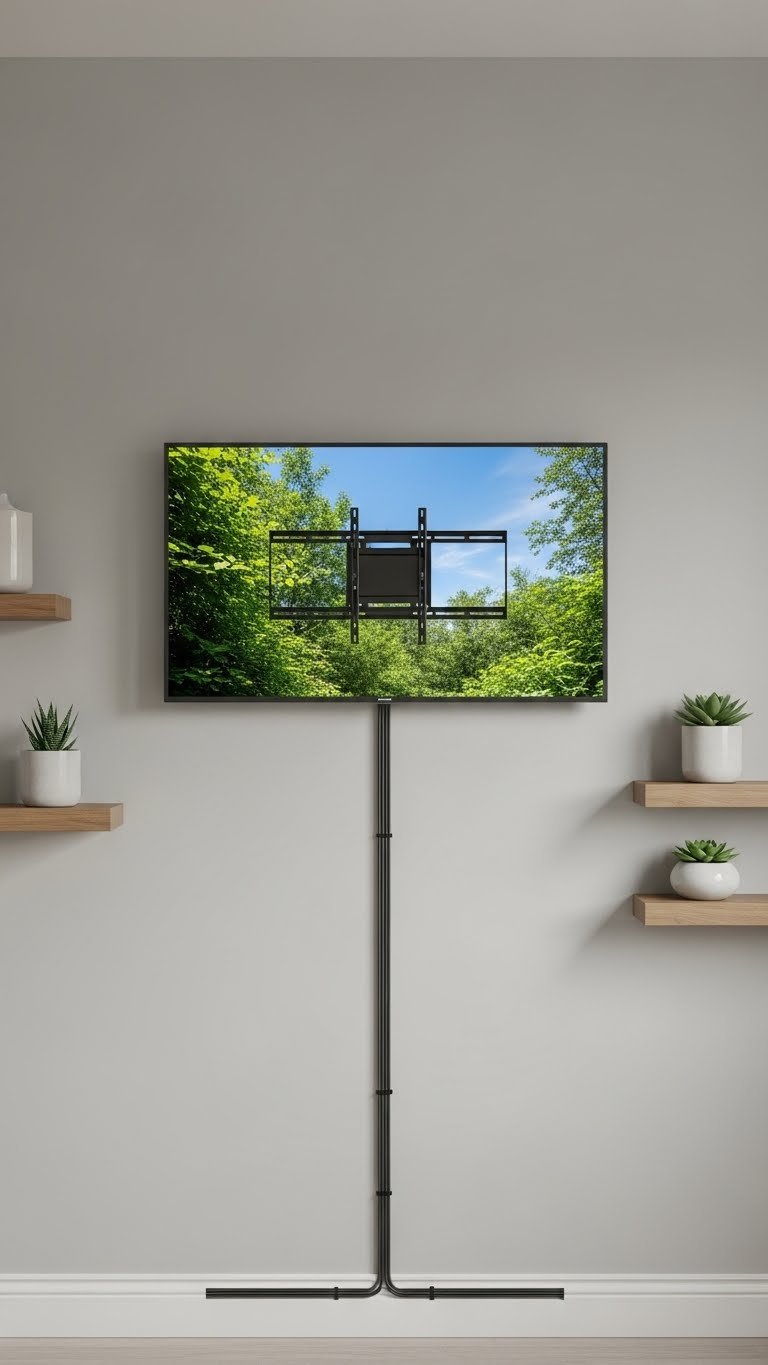
3. Hide Cables in a Conduit Channel
Visible cables are the enemy of a clean floating wall—and a conduit channel solves this instantly. These slim plastic or aluminum channels run along your wall (usually vertically) and contain all your HDMI, power, and audio cables inside.
Low-voltage conduit channels cost $20–$50 depending on length and finish (paintable, white, or black). Installation is simple: measure your wall, run adhesive strips or small nails to secure the channel, feed cables inside, and paint if needed. For extra polish, choose a channel color that matches your wall or go with brushed metal for a high-end look.
Route the channel from behind your TV down to your media console or outlet below. At the bottom, cables emerge into your receiver and power strip, all hidden from view. This single upgrade makes even a basic TV mount setup feel premium and intentional.
For renters, adhesive-backed channels come off cleanly without wall damage, and you can touch up paint spots if needed.
4. Use a Textured Wood Accent Wall Behind Your TV

A textured wood wall transforms your TV into a design statement rather than a black void. Fluted or slatted wood panels add depth and visual interest, making the entire wall feel like intentional architecture.
Fluted wood paneling runs $3–$8 per square foot, so a 10×8-foot wall costs $240–$640 in materials. Installation requires mounting panels horizontally or vertically onto a frame, which takes a weekend for a DIYer or one day for a professional. Paint them white, cream, or natural wood stain depending on your aesthetic.
The grooves in fluted panels naturally hide cables and cords running vertically—another bonus. If you’re renting, removable peel-and-stick wood panels now exist ($40–$80 per panel) that adhere without damage, though they won’t cover as large an area.
Beyond the visual impact, textured walls also improve acoustics slightly by breaking up sound reflections, so your TV audio sounds less harsh bouncing off flat drywall.
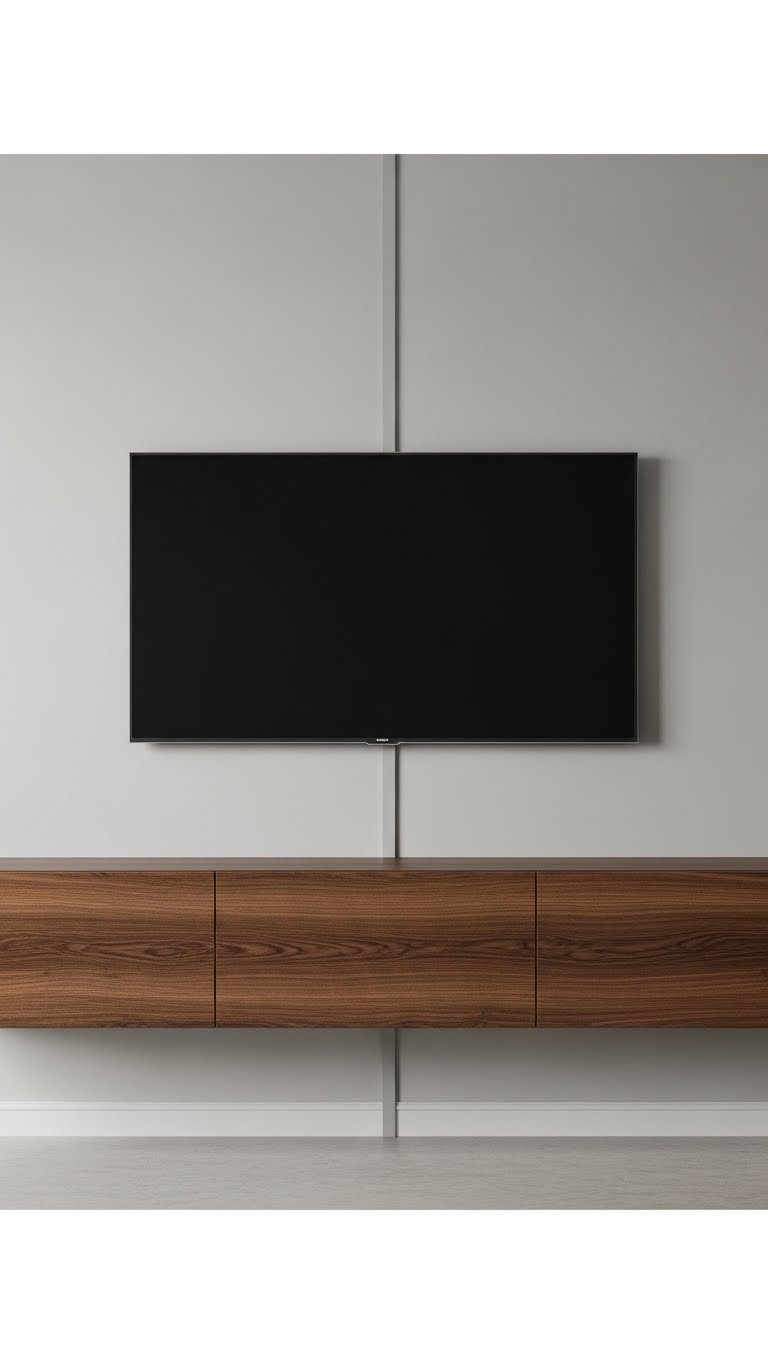
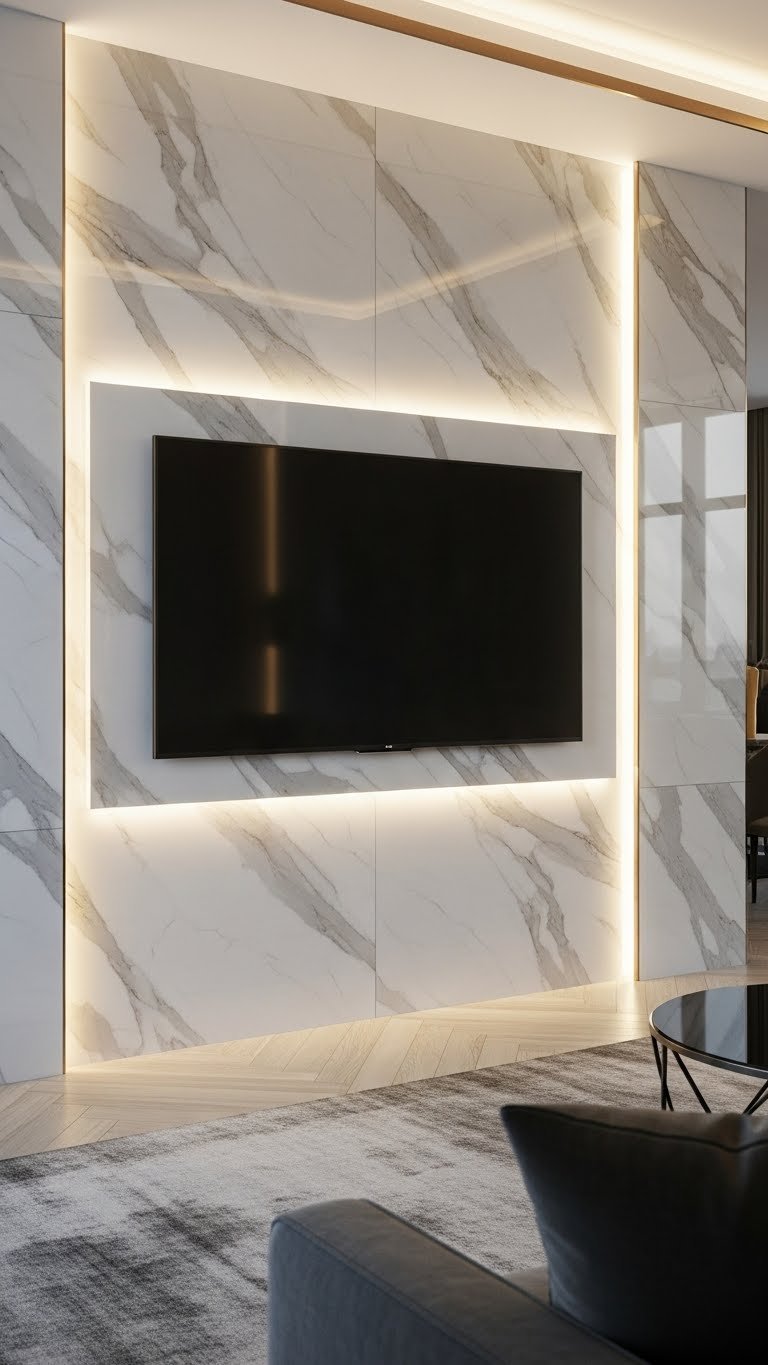
5. Embrace the “Disappearing TV” with Dark Matte Panels
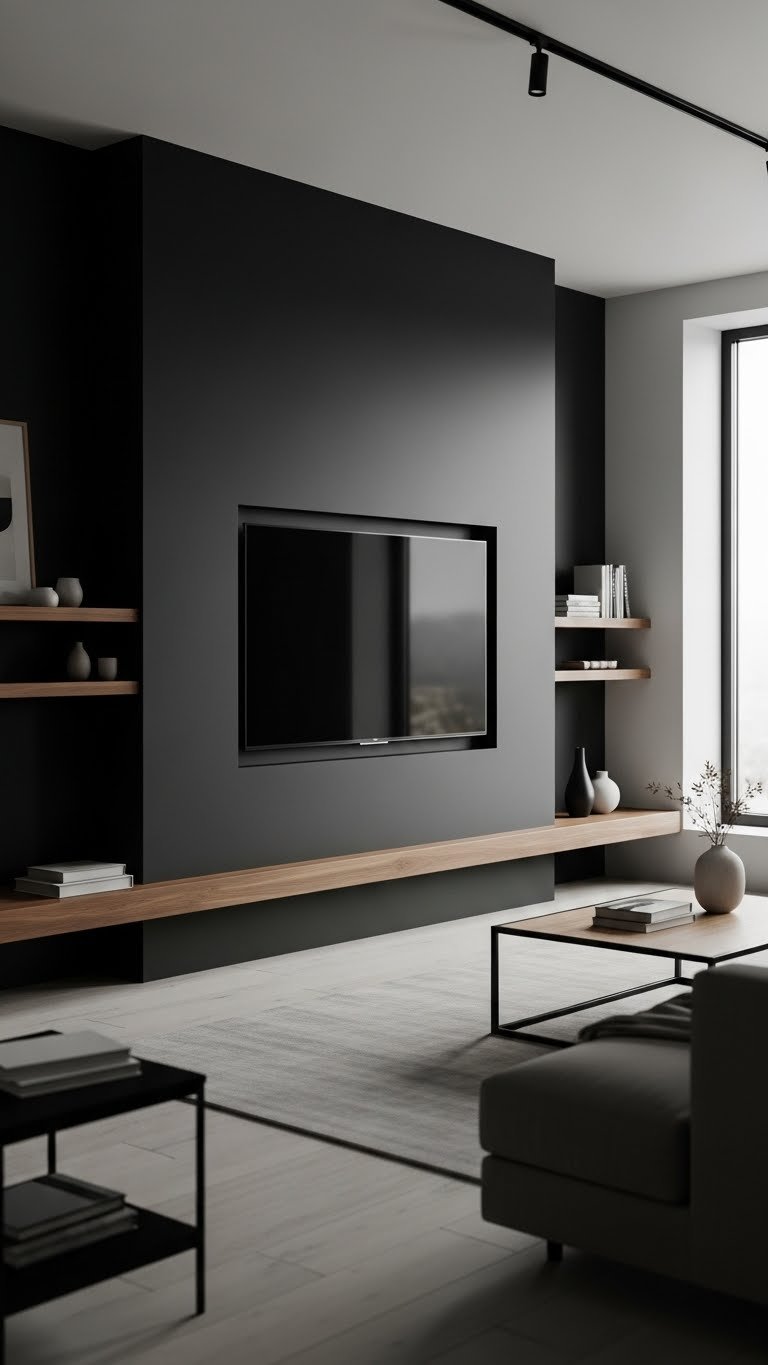
The “disappearing TV” trend uses dark, light-absorbing panels to camouflage your screen when it’s off. This approach appeals to people who don’t want their living room to revolve around a black rectangle.
Install matte black or charcoal panels behind and around your TV (peel-and-stick options at $30–$80 for a large area, or permanent panels at $100–$300). The dark color absorbs light instead of reflecting it, so your powered-off TV blends seamlessly into the wall. When the screen turns on, it obviously becomes visible, but the effect is subtle and sophisticated.
Pair this with minimal floating shelves and warm wood tones elsewhere in the room to keep things from feeling too cave-like. Add warm LED strip lighting ($20–$50) above or below shelves to counterbalance the dark wall and prevent the space from feeling dim.
This technique works beautifully in modern, minimalist, or even eclectic interiors where the TV isn’t the main decorative focus.
6. Install Floating Shelves with Hidden Cable Management Backs
Some premium floating shelves feature built-in cable management channels routed into the underside—a game-changer for a truly wire-free look.
These engineered shelves cost $100–$300 each from specialized retailers (check Design Within Reach, CB2, or custom woodworkers on Etsy), but they’re worth it for the seamless appearance. The groove accommodates cables and keeps them perfectly hidden beneath the shelf surface. Installation is identical to standard floating shelves—secure brackets to studs and attach the shelf.
If custom shelves aren’t in your budget, a DIY alternative: buy standard floating shelves and use adhesive-backed cable clips underneath to organize wires neatly. It’s less hidden but costs under $20 in materials.
The payoff is a media wall that genuinely looks cable-free and meticulously designed, elevating your entire room’s perception of intentionality.
7. Add LED Backlighting Behind Your TV Wall
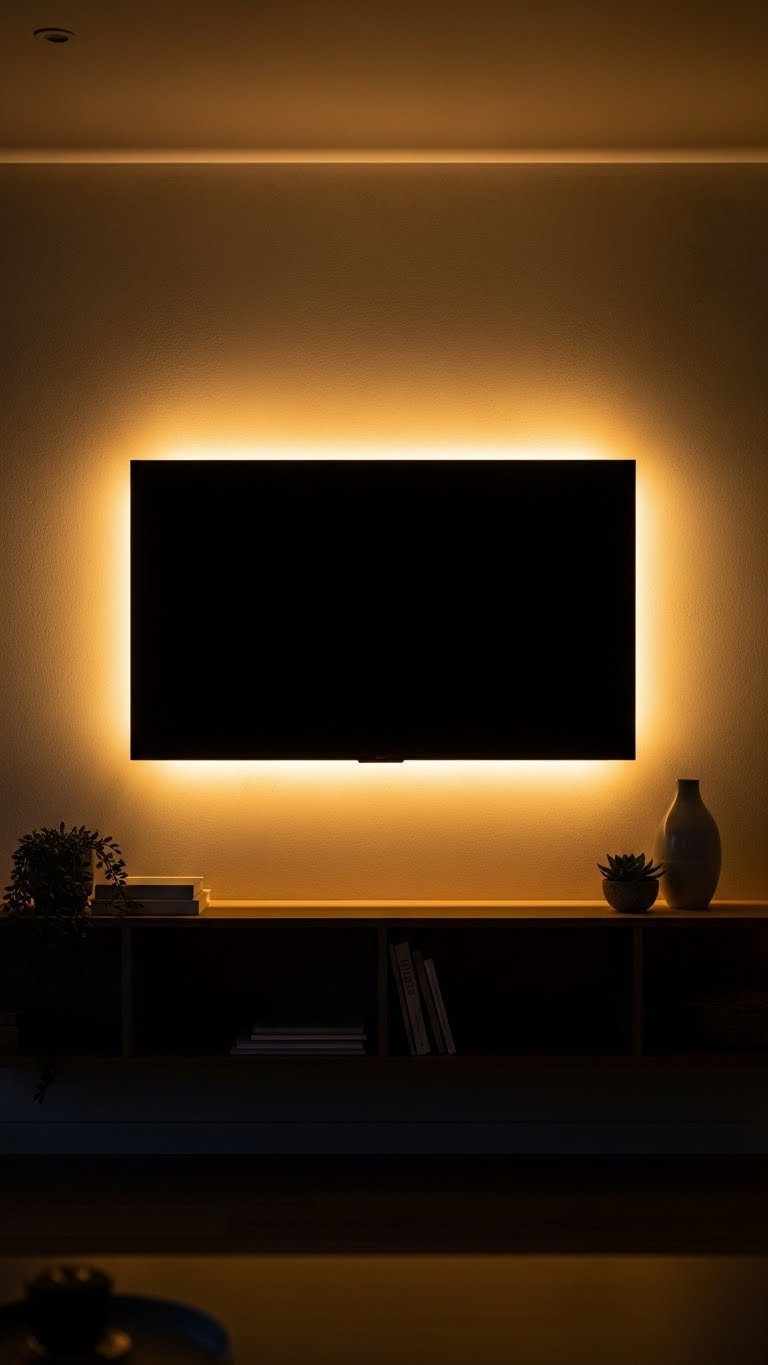
LED backlighting adds luxury ambiance and makes your floating wall feel like a high-end installation in a showroom. The light sits behind your TV or shelf system, casting a gentle glow onto the wall.
LED strip lighting costs $20–$80 depending on quality and color options (RGB strips let you change colors; warm white is most popular). Installation takes 30 minutes: clean the wall, peel and stick the strip behind your shelving, connect to a power source (often a USB plug or low-voltage transformer), and hide the cord in your cable channel.
Choose warm white LEDs (2700K color temperature) for a cozy feel, or go adjustable RGB if you like options. Smart bulbs that sync to music or adjust brightness via remote add another layer of sophistication. The effect instantly makes your setup look professional and layered.
This upgrade is renter-friendly since strips peel off without damage, and the power cord hides easily behind your media console.
8. Create a Floating Media Console Beneath Your TV
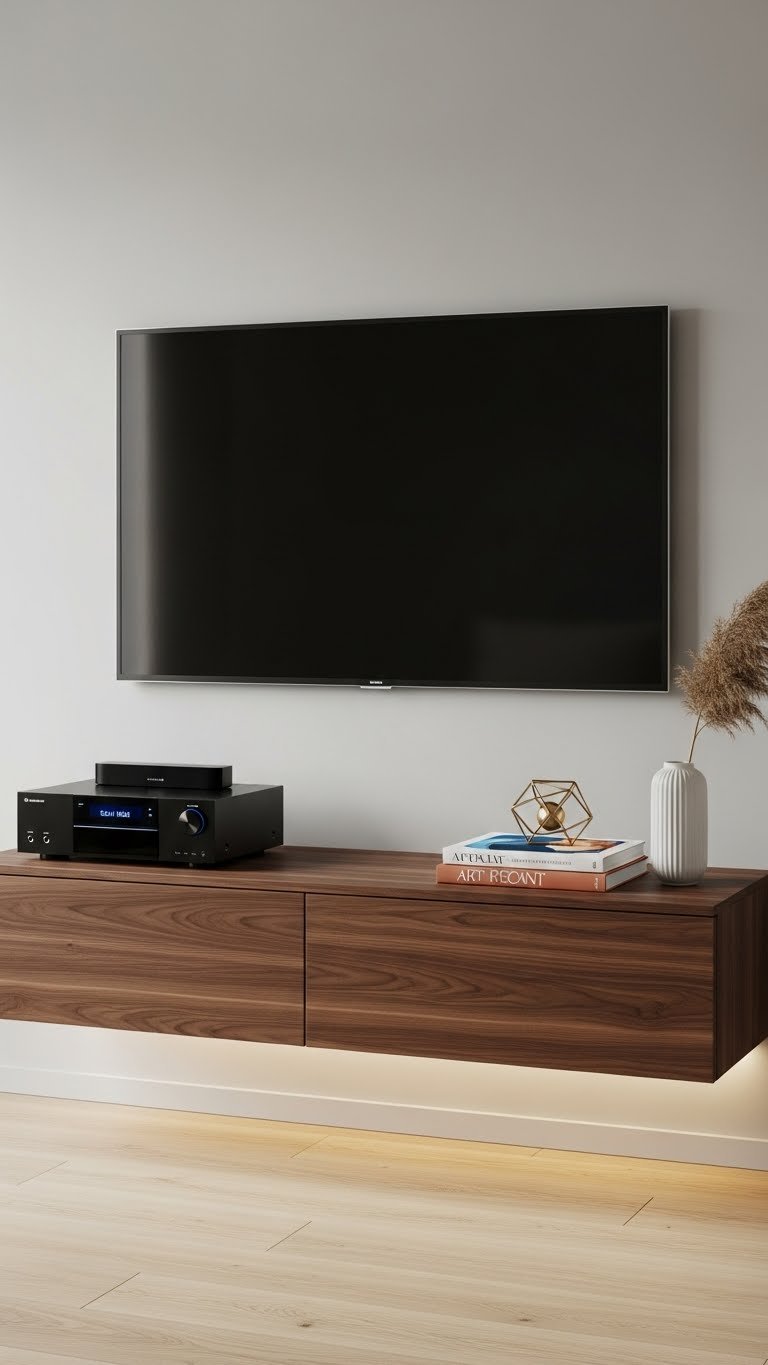
A floating media console anchors your TV wall while keeping the floor visible beneath—maximizing the sense of space and height in any room.
Floating media consoles range from $200–$800 depending on size, material, and finish (IKEA has budget options; West Elm and CB2 offer mid-range styles; custom wood pieces run pricier). Mount the console 18–24 inches below your TV using heavy-duty brackets attached to wall studs. Ensure your studs are properly anchored to support a receiver, soundbar, and decorative items.
The console houses your cable box, streaming device, receiver, and power strip—all hidden behind a closed cabinet or beneath a tabletop. Open shelving on a console lets you display a plant or coffee table book for a styled look.
Floating consoles instantly make a room feel larger because you see floor space underneath, not a bulky furniture base. This is one of the most impactful upgrades for a floating wall system.
9. Mount Your TV on a Motorized, Rotating Bracket
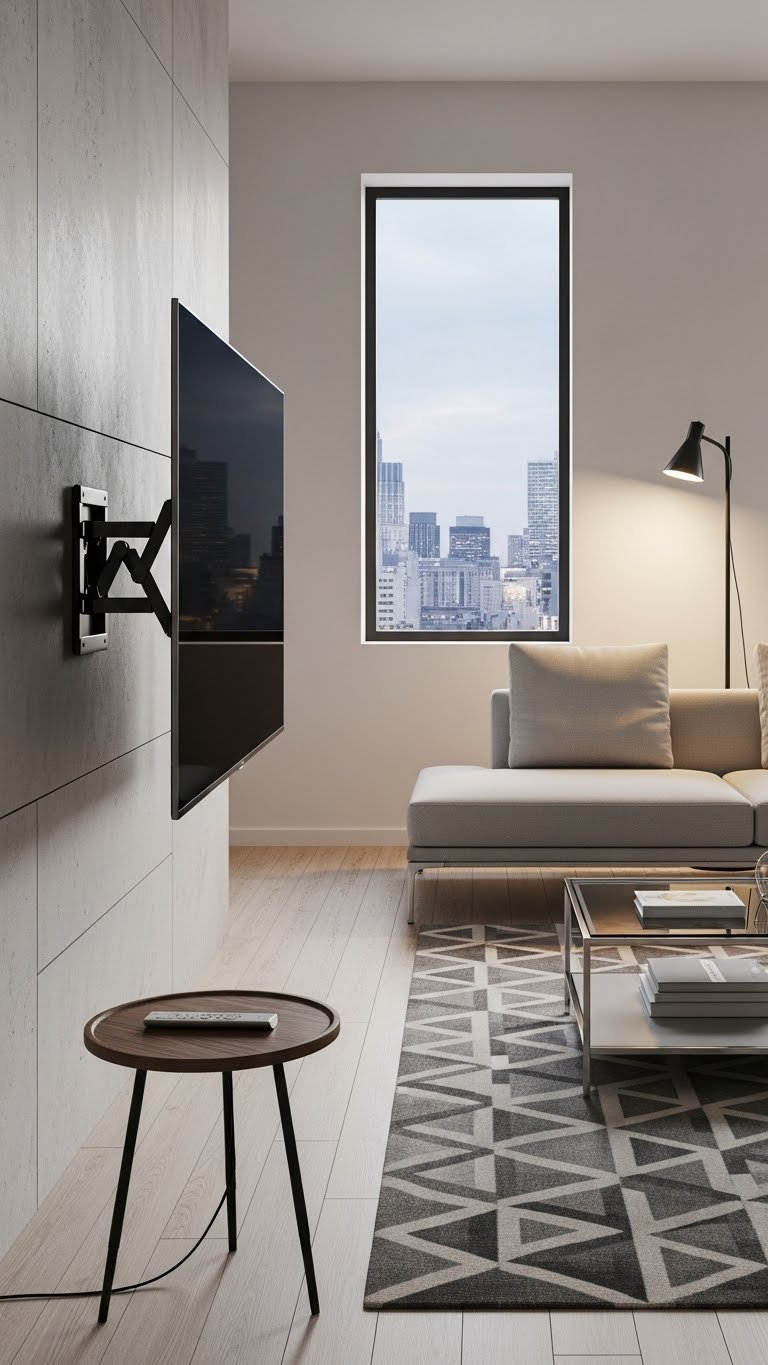
A motorized TV bracket lets your screen angle and rotate at the push of a button—perfect for open-concept homes or rooms where seating isn’t centered on the TV.
Motorized brackets cost $150–$500 depending on the brand and weight capacity (check specs before purchasing). Installation requires a stud-mounted bracket and a low-voltage power connection run behind the wall. Brands like Vogel’s, Sanus, and Amazon Basics all offer motorized options. Some sync with smart home systems, so you can control positioning via voice or app.
This setup is ideal if you watch TV from multiple angles—pull it out when you’re using that wall, angle it away when you’re not. It’s also a solution for rooms where wall space is limited; the TV can tuck almost flat when not in use.
The investment pays off in flexibility and the wow factor of showing guests your TV’s capabilities.
10. Paint Your Wall in a Soft, Neutral Tone to Frame Your TV
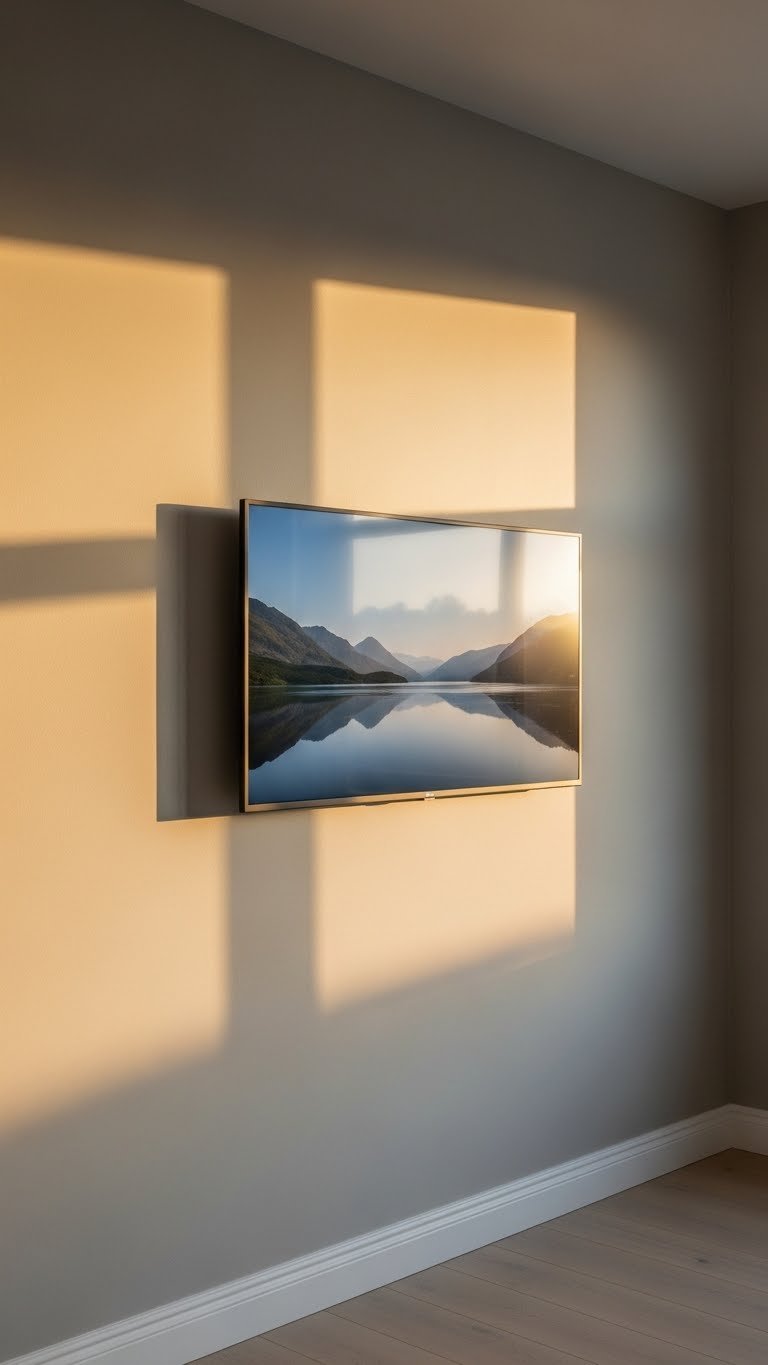
Sometimes the simplest floating wall upgrade is the most effective: a fresh paint color that frames your TV without competing for attention.
Paint costs $30–$80 per gallon, and a standard living room wall needs 1–2 gallons. Choose soft neutrals like greige, warm whites, pale taupe, or soft sage—colors that recede visually and let your TV and decor shine. Avoid stark white, which makes dark screens feel harsh, and avoid bold colors that compete with your entertainment.
A high-quality matte or eggshell finish minimizes glare and reflects less light than glossy paint, which is important behind a screen. Hire a painter ($300–$600 for a room) or DIY with proper prep work.
The color change alone transforms how your TV wall feels—more intentional, polished, and designed rather than an afterthought. This is one of the cheapest, highest-impact upgrades you can make.
11. Install a Recessed TV Mount to Flush Your Screen With the Wall
A recessed TV mount sinks your screen slightly into the wall, so the screen sits flush or nearly flush with the wall surface—the ultimate “disappearing TV” approach.
This requires cutting into drywall and installing a recessed frame ($100–$300) plus a specialized mounting bracket ($80–$150). It’s not a renter-friendly project and demands fairly advanced DIY skills or professional installation ($400–$800 in labor). The payoff is extraordinary: your TV looks integrated into the architecture itself, not mounted on top of it.
Recessed mounts work best if you’re planning a comprehensive wall renovation anyway (adding paneling, updating paint, etc.) because the installation is somewhat invasive.
If a full recess isn’t possible, a semi-recessed bracket that sits halfway into the wall is a compromise—easier to install but still creates the floating effect.
12. Use a Combination of Floating Shelves and Modular Storage Units

Mixing open floating shelves with hidden modular storage creates the ideal balance of display and function on a floating wall.
Combine floating shelves ($40–$100 each) with modular storage boxes or wall-mounted cubes ($60–$150 each). Stagger them across your wall so the visual rhythm feels interesting—open shelves for decor, closed storage for clutter. This approach is especially helpful if you have a lot of media, gaming systems, or cables to hide.
Brands like IKEA (Kallax series), Wayfair, and CB2 offer modular wall-mounting systems that make this easy to plan and install. Map out your wall on paper first, then secure brackets and components following the manufacturer’s guide.
The result is a wall that looks organized, styled, and intentional rather than like you’re showing off everything you own. You control what’s visible and what’s hidden.
13. Mount Your TV Horizontally and Create a Gallery Wall Beside It
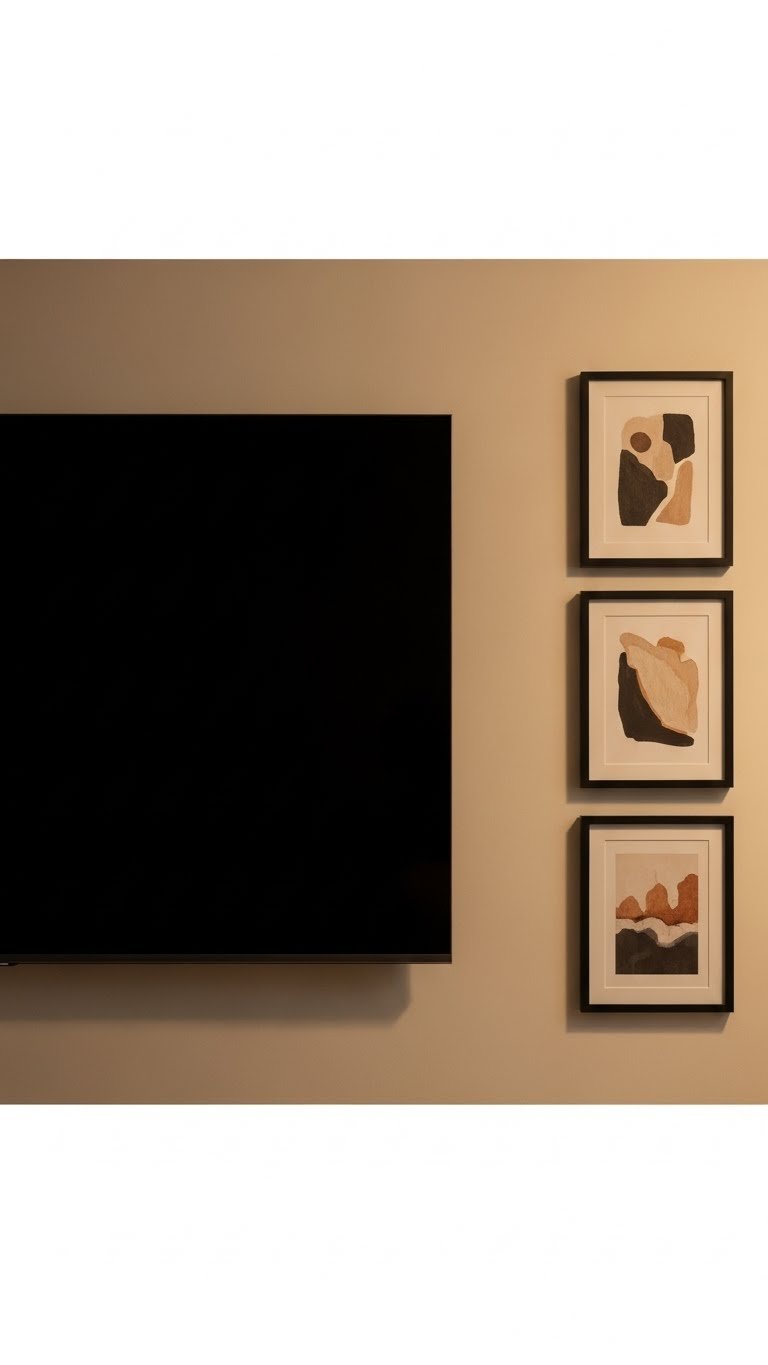
Instead of centering your TV alone, mount it horizontally and surround it with a gallery wall of framed art. This “art wall” approach makes your TV feel like part of a curated collection rather than a separate element.
Frame your TV with 4–6 framed prints or photographs ($30–$100 each, depending on frame quality and whether you print originals). Arrange them salon-style—asymmetrically clustered with varying sizes and orientations. This layout feels intentional and museum-like.
Plan your layout on paper (or use painters tape on the wall) before hanging anything. Stagger frames at slightly different heights and distances from the TV. The gallery doesn’t have to match perfectly; eclectic is more interesting than uniform.
When your TV is off, the wall reads as an art collection. When it’s on, the screen becomes part of the composition rather than dominating it. This approach works beautifully in eclectic, traditional, or artistic interiors.
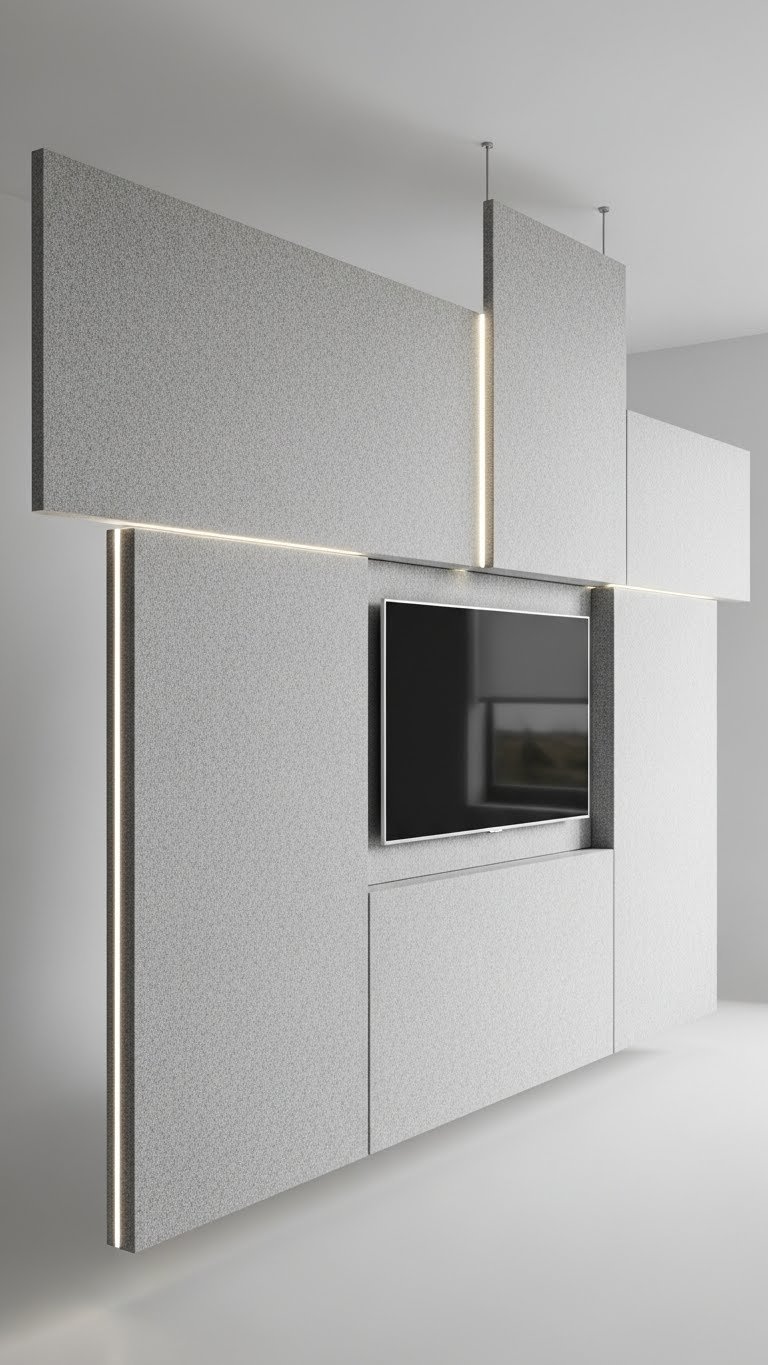
14. Integrate Your TV into a Floating Wall System with Built-In Lighting

A full floating wall system combines your TV mount, shelving, storage, and lighting into one cohesive design—the premium approach to floating TV walls.
These custom systems start at $2,000–$5,000 (and go much higher for high-end installations) and typically require professional design and installation. Modular systems from brands like Ligne Roset, String Shelving, and Hay offer premium floating setups with integrated lighting options.
For a budget version, design your own system by combining separate floating shelves, LED strips, and a recessed mount. This DIY approach costs $500–$1,500 in materials and takes 2–3 weekends.
The payoff is a wall that feels like it was designed by an architect—everything is proportionally balanced, functionally optimized, and visually stunning. This is the “investment piece” version of a floating wall.
15. Use Stone or Marble Veneer Behind Your TV for Luxury Feel
Real or faux marble veneer instantly elevates your floating wall to luxury status. The natural veining adds sophistication and texture without requiring the commitment of a full stone wall.
Marble veneer runs $10–$30 per square foot depending on whether it’s real stone or engineered faux marble. A 10×8-foot wall costs $800–$2,400 in materials. Installation requires mortar or adhesive and grout, making this a professional job ($800–$1,500 in labor). Faux marble options are lighter and easier to install if you’re working with drywall that can’t handle real stone weight.
Backlit marble (LED strips behind the veneer) costs an additional $100–$300 but creates an incredibly high-end effect. The light brings out the veining and creates depth.
This is the ultimate splurge for a floating wall, and it genuinely transforms your space into something that feels like a luxury hotel or high-end home.
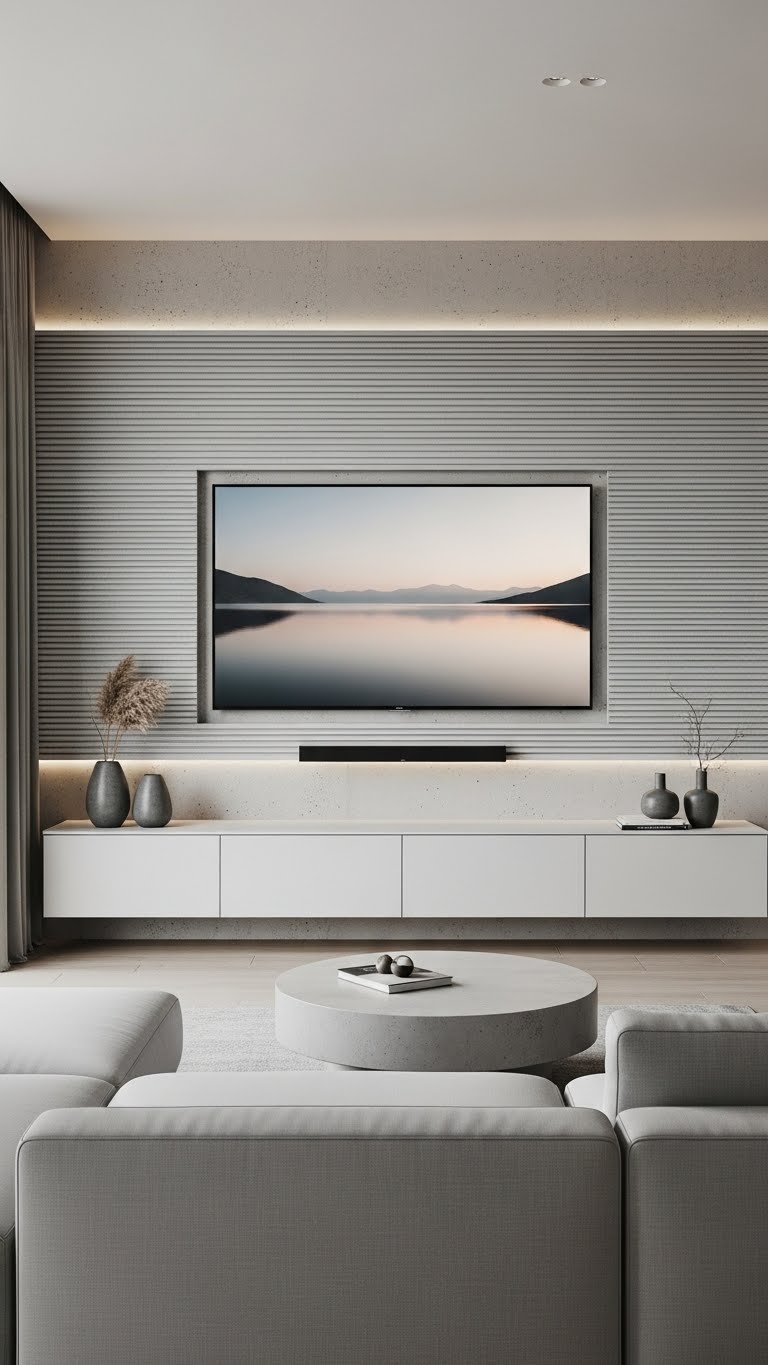
16. Choose Micro-Cement Finish for a Smooth, Modern Accent Wall

Micro-cement is a modern finish that creates a sleek, textured appearance somewhere between concrete and plaster—perfect for a minimalist floating wall.
Micro-cement costs $15–$40 per square foot in materials and labor (professional application is recommended since the technique requires skill). A standard TV wall costs $1,200–$3,000 to professionally apply. The finish is durable, stain-resistant, and can be sealed in matte or satin for different aesthetics.
If you’re handy, some DIY micro-cement kits exist ($200–$500 for smaller areas), though the learning curve is steep. The payoff is a custom, high-end look that feels contemporary and spa-like.
Micro-cement pairs beautifully with warm wood tones, black accents, or minimalist steel shelving. It’s an especially smart choice if you want a neutral backdrop for a floating wall system that highlights other elements.
17. Mount Your TV on a Slatted Wood Panel Wall

Horizontal slatted wood panels create a rhythmic, calming backdrop for your floating TV—a softer alternative to fluted wood.
Slatted wood panels cost $5–$12 per square foot, so a 10×8-foot wall runs $400–$960 in materials. Installation involves creating a framework on the wall and fastening slats (or mounting pre-made panel sections). This is a DIY-able weekend project if you’re comfortable with basic construction, or hire a professional ($500–$1,000 in labor).
Space slats 1–2 inches apart for visual rhythm and shadow play. The gaps also naturally accommodate cables running vertically, making cable management effortless. Paint slats white, natural wood, or a soft color to match your room.
Horizontal slats feel more relaxed than vertical fluting—they work beautifully in modern farmhouse, Scandinavian, or contemporary interiors.
18. Create a Floating Corner TV Wall for Compact Spaces
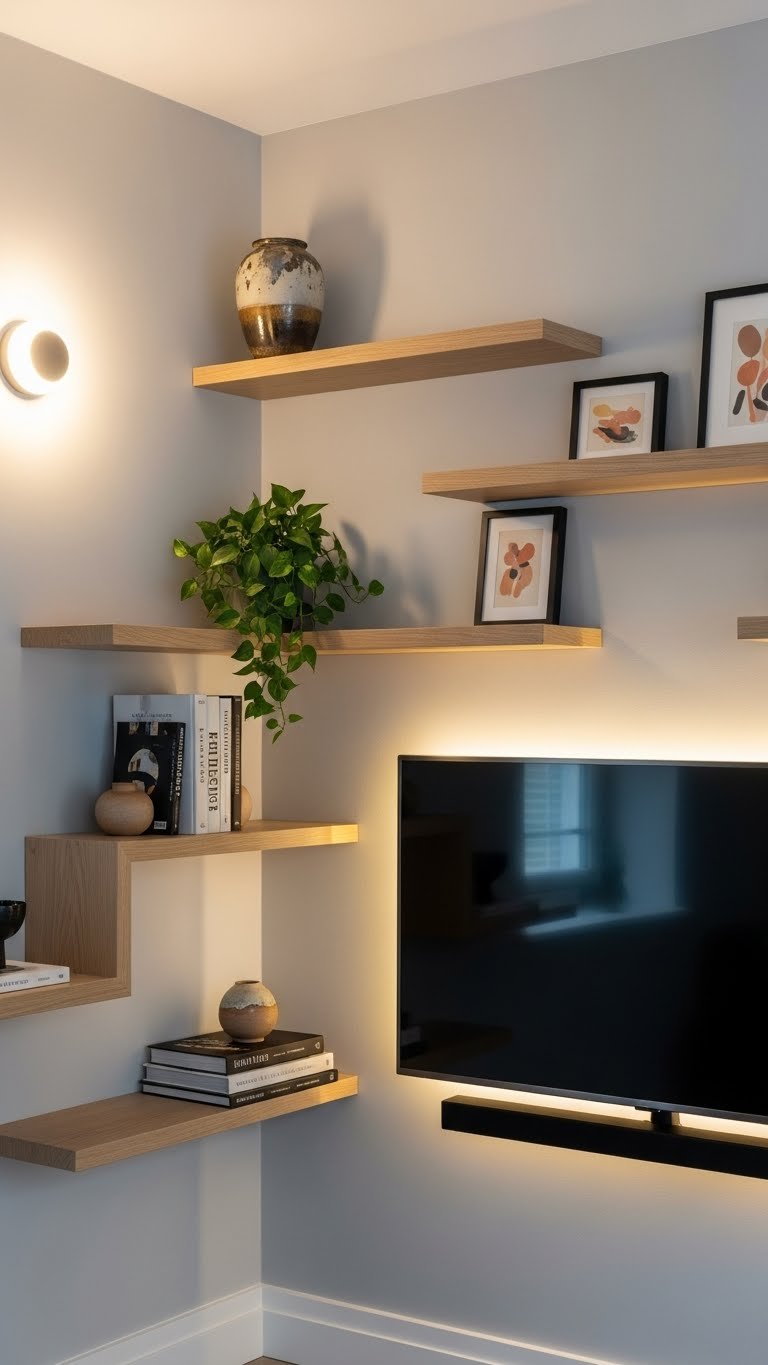
If your room is small or oddly shaped, a corner TV wall maximizes the floating aesthetic while solving the space challenge beautifully.
Mount your TV on a corner bracket ($40–$80) at the junction of two walls. Add floating shelves to both adjacent walls, creating an asymmetrical display around the TV. This arrangement tricks the eye into feeling more spacious because it breaks up the corner and draws the eye upward.
A corner setup is especially practical for renters and small apartments because it solves a tricky design problem without committing to a specific room layout.
Add warm corner lighting ($30–$60) to emphasize the cozy nook and prevent the corner from feeling dark. The result is a corner that feels intentionally designed rather than like a leftover dead space.
19. Use Peel-and-Stick Shiplap or Wallpaper for a Quick Floating Wall Refresh
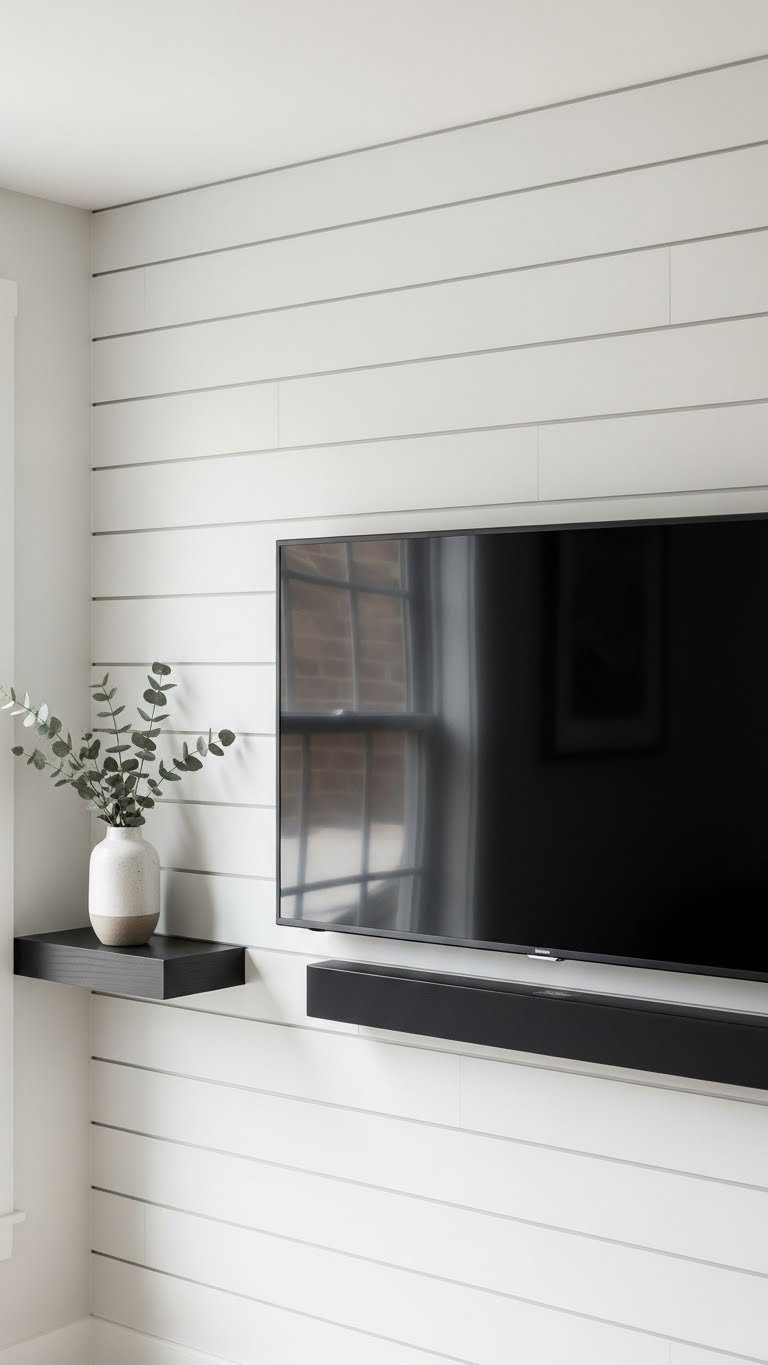
Peel-and-stick shiplap or textured wallpaper offers the floating wall look without damage or permanent commitment—perfect for renters and budget-conscious refreshes.
Peel-and-stick shiplap costs $30–$80 per roll (one roll covers roughly 28 sq. ft.). A 10×8-foot wall needs 3–4 rolls ($90–$320 total). Installation takes one weekend: measure carefully, apply adhesive sheets (usually pre-applied), smooth out bubbles, and cut around outlets and TV bracket.
The finish isn’t quite as premium as real shiplap or textured panels, but the payoff in ease and affordability is massive. Remove it whenever you want without wall damage—adhesive leaves no residue if applied correctly.
Some peel-and-stick options even mimic fluted wood, marble, or micro-cement for a custom look at a fraction of the cost.
20. Install a Floating TV Wall with Integrated Speaker Shelves
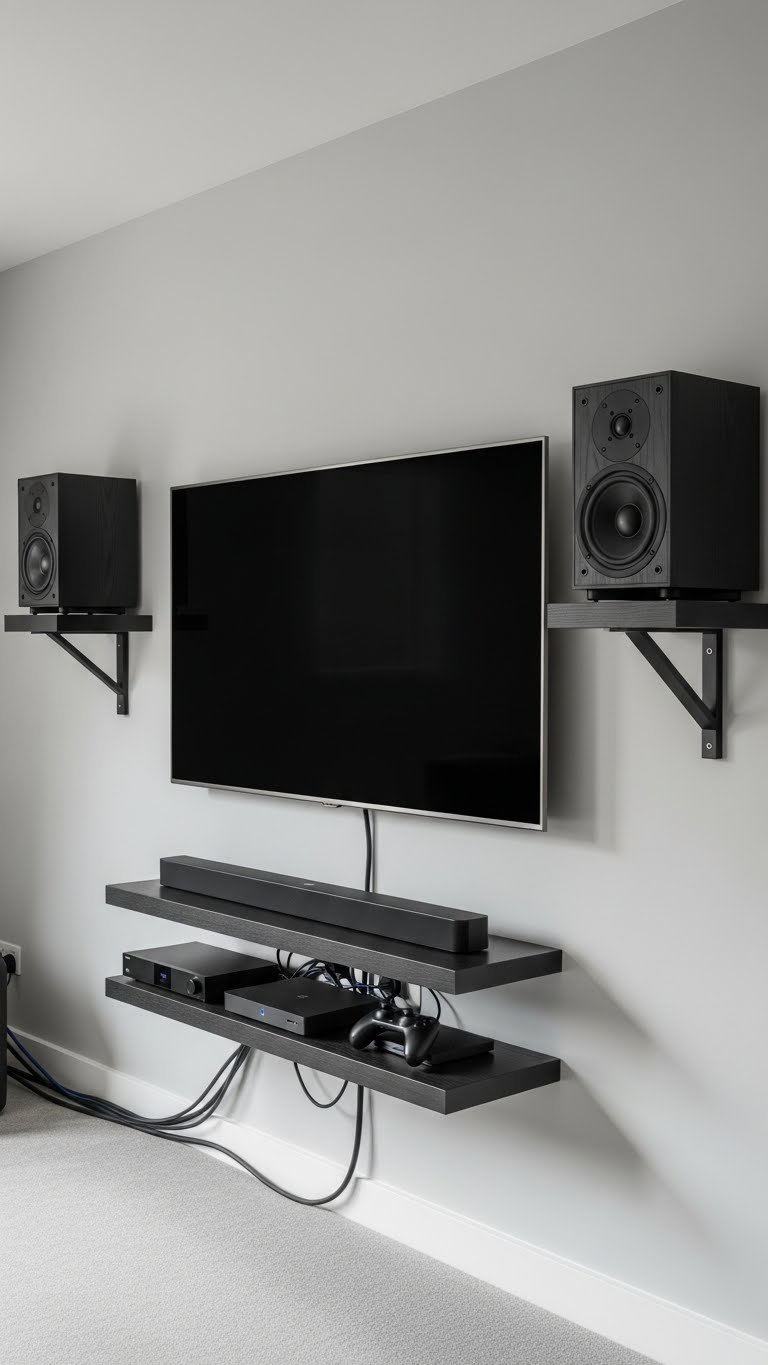
If you take your audio seriously, design your floating wall shelves to perfectly house high-quality speakers at ear level—flanking your TV for optimal stereo sound.
Mount speaker shelves on both sides of your TV at ear height (roughly 42–48 inches from the floor). Choose shelf depth that matches your speakers exactly so they don’t overhang or look awkward. Premium floating speaker shelves cost $80–$200 each; combine with quality bookshelf speakers ($300–$1,500 depending on brand).
Position shelves so sound projects directly at your seating area. This setup eliminates the need for speaker stands, saving floor space and creating a seamless visual presentation.
The technical benefit is obvious (better audio), but the design payoff is equally important: a symmetric, intentional wall that clearly prioritizes both visual and audio quality. This approach signals that you’ve thought carefully about your entertainment experience.
21. Add a Floating Desk Below Your TV for a Media + Work Wall

A floating desk beneath your TV creates a hybrid media and work wall—smart for home offices or media rooms that double as productivity spaces.
Floating desks cost $200–$600 depending on size and material. Mount one 36–48 inches below your TV (allowing comfortable sight lines for both activities). The desk hides a power strip and cable management underneath via a recessed channel or cord cover.
This setup lets you work by day and relax with your TV by night in the same space. It’s especially practical for smaller homes where rooms need to multitask. Position your monitor at eye level when seated so you’re not craning your neck.
The visual payoff is a wall that feels purposeful and layered—not just a TV, but a thoughtfully designed entertainment and productivity zone.
22. Incorporate Floating Open Shelving to Display Media Collections
If you collect books, vinyl, movies, or media, floating shelves let you display your collection as part of your wall design instead of storing it in a cabinet.
Open shelving encourages curation—you’ll display only items you genuinely love because they’re visible. Mix media with decor: books spine-out, vinyl records leaned vertically, framed photos, small plants, and sculptural objects.
Shelves cost $40–$100 each; plan for 4–8 shelves depending on your collection size. Arrange them asymmetrically around your TV for visual interest. Keep styling loose; perfectly uniform arrangements feel sterile.
The beauty of this approach is that your media wall becomes a reflection of your taste and interests, not just a utilitarian TV setup. Guests notice and appreciate a thoughtfully styled collection wall far more than a hidden media center.
23. Choose a Floating Media Wall with Integrated Acoustic Panels
If your room has echo or sound bounces off hard surfaces, integrate acoustic panels into your floating wall design to improve audio clarity without sacrificing aesthetics.
Acoustic floating panels cost $100–$300 each depending on whether they’re premium designer pieces or basic sound-dampening boards. Fabric-wrapped acoustic panels integrate seamlessly into a modern wall while absorbing excess sound reflections that make TV audio sound harsh.
Mount acoustic panels on 2–3 sections of your wall (typically behind and beside the TV) to trap sound reflections. This improves both your TV’s audio quality and the room’s overall acoustics.
The practical benefit is noticeable—dialogue sounds clearer, and the space feels less echo-y. The design benefit is equally important: fabric-wrapped acoustic panels can be stylishly neutral or a statement color, adding depth to your floating wall without looking like functional sound equipment.
24. Build a Floating Wall with a Hidden Door or Cabinet Access
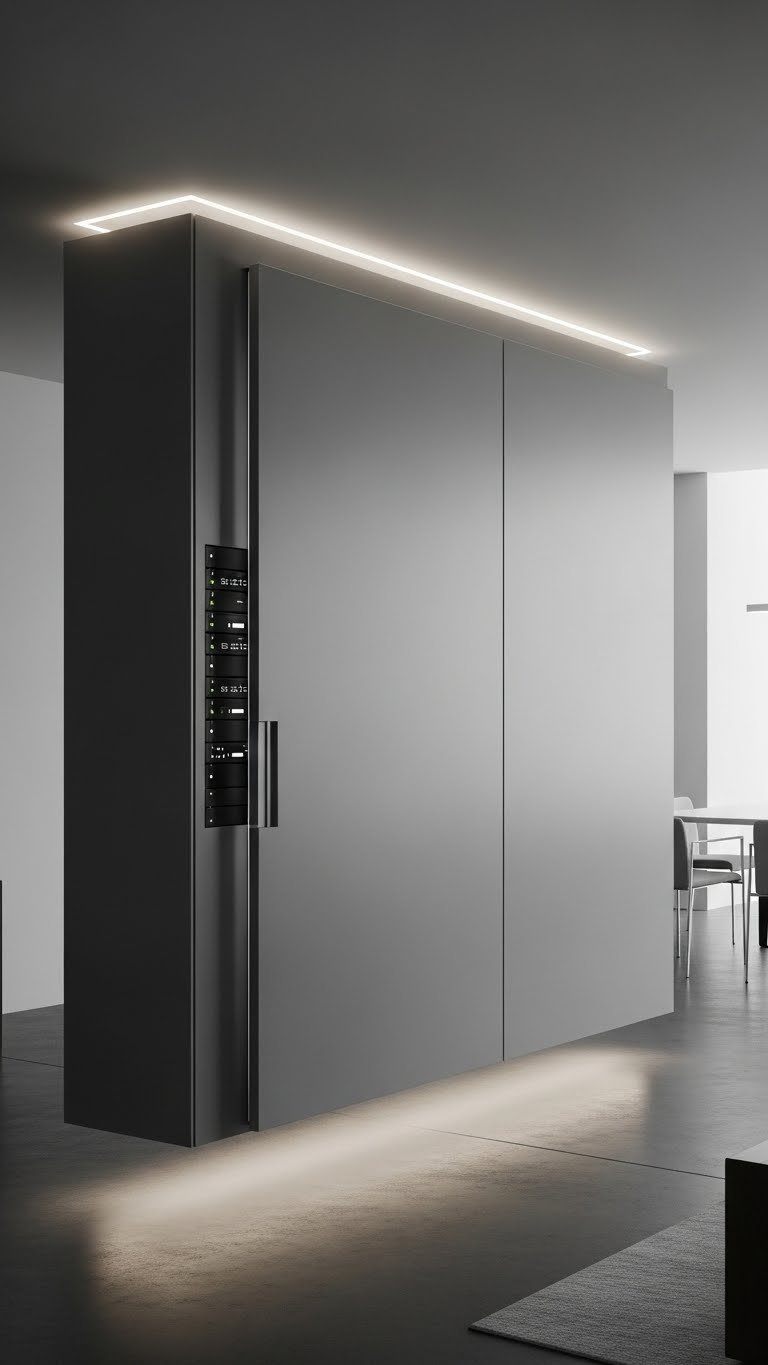
For tech enthusiasts or homes with lots of hidden equipment, a floating wall with a concealed access door offers ultimate stealth storage.
This requires custom carpentry ($1,500–$3,500) to build cabinetry with a hidden-hinge door that blends seamlessly into your wall design. Inside, store your server, backup power supply, network router, and other tech equipment that you want hidden from view.
The access door can be magnetic, push-to-open, or hinge-operated depending on your preference. When closed, the wall looks completely seamless.
This is the luxury version of a floating wall system, best for homes where you want everything hidden but need regular access to manage it.
25. Combine Your Floating TV Wall With a Floating Bench or Seating Nook
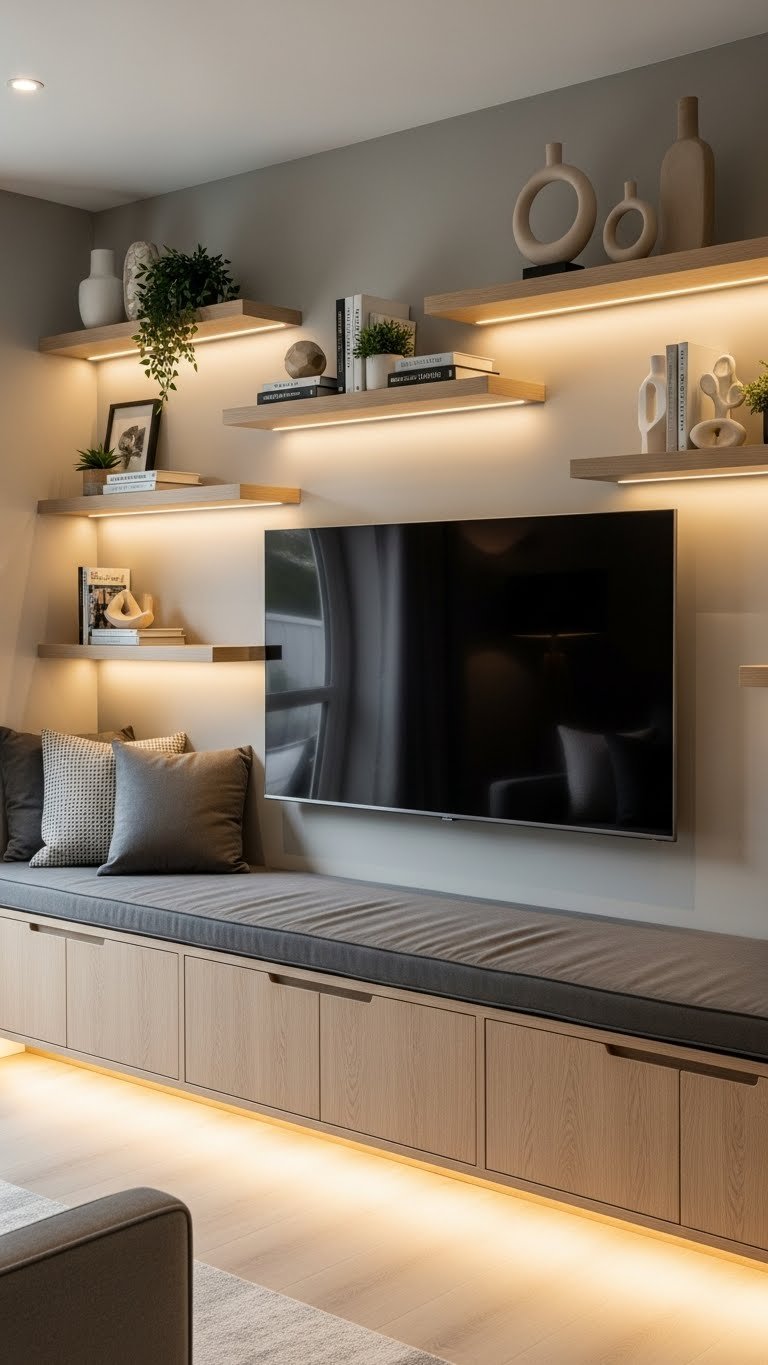
A floating bench below your TV wall creates a dedicated media-watching perch while maintaining the clean, floating aesthetic above.
Floating benches cost $300–$800 depending on material and whether you add storage underneath. Mount one 16–18 inches above the floor using the same bracket system as your shelving. Cushion it for comfort, or leave it bare for a minimalist look.
A storage bench ($400–$1,000) hides media remotes, blankets, and throw pillows underneath—practical and stylish.
This design move anchors your entire wall and creates a clear media-watching zone without clunky furniture. It’s especially smart for open-concept homes where you want to define a space without walls.
26. Use a Combination of Warm Wood, Matte Black, and Brass Accents for a Collected Floating Wall

The most sophisticated floating walls mix materials thoughtfully—combining wood, metal, and color for a look that feels collected and designed rather than matchy.
Start with natural wood shelves ($60–$100 each), add matte black storage ($80–$150 each), and use brass or gold brackets ($20–$50 per pair) to tie it together. Paint your wall a soft neutral and add warm LED lighting ($30–$60) to emphasize the material variety.
This approach works because each element serves a visual and functional purpose. Brass catches light and adds warmth; matte black provides contrast and definition; natural wood grounds everything in approachability.
Style your shelves with a mix of materials too: ceramic objects, wooden decor, metal sculptures, plants, and books. The collected, eclectic look is far more interesting than a single, uniform material.
Save this post for your next living room refresh—pick one or two ideas to start, and you’ll be surprised how quickly your TV wall transforms from a basic screen to a genuinely designed feature. Which approach speaks to you?
Leave a Reply