Blog

  • 26 Textured Edge Mirror Designs That Add Character & Detail

    26 Textured Edge Mirror Designs That Add Character & Detail


    Textured edges on mirrors are the design detail that makes people stop and say, “Where did you get that?” Whether it’s carved wood, scalloped edges, or woven rattan, these designs add craftsmanship and character to any room—without looking overdone or trendy. If you’re tired of flat, frameless mirrors that blend into the background, you’re in for a treat. We’ve rounded up 26 specific textured edge mirror designs that work in bedrooms, bathrooms, entryways, and living spaces. Each one includes where to find it, what it costs, and how to style it. Ready to add some visual interest to your walls? Let’s go.


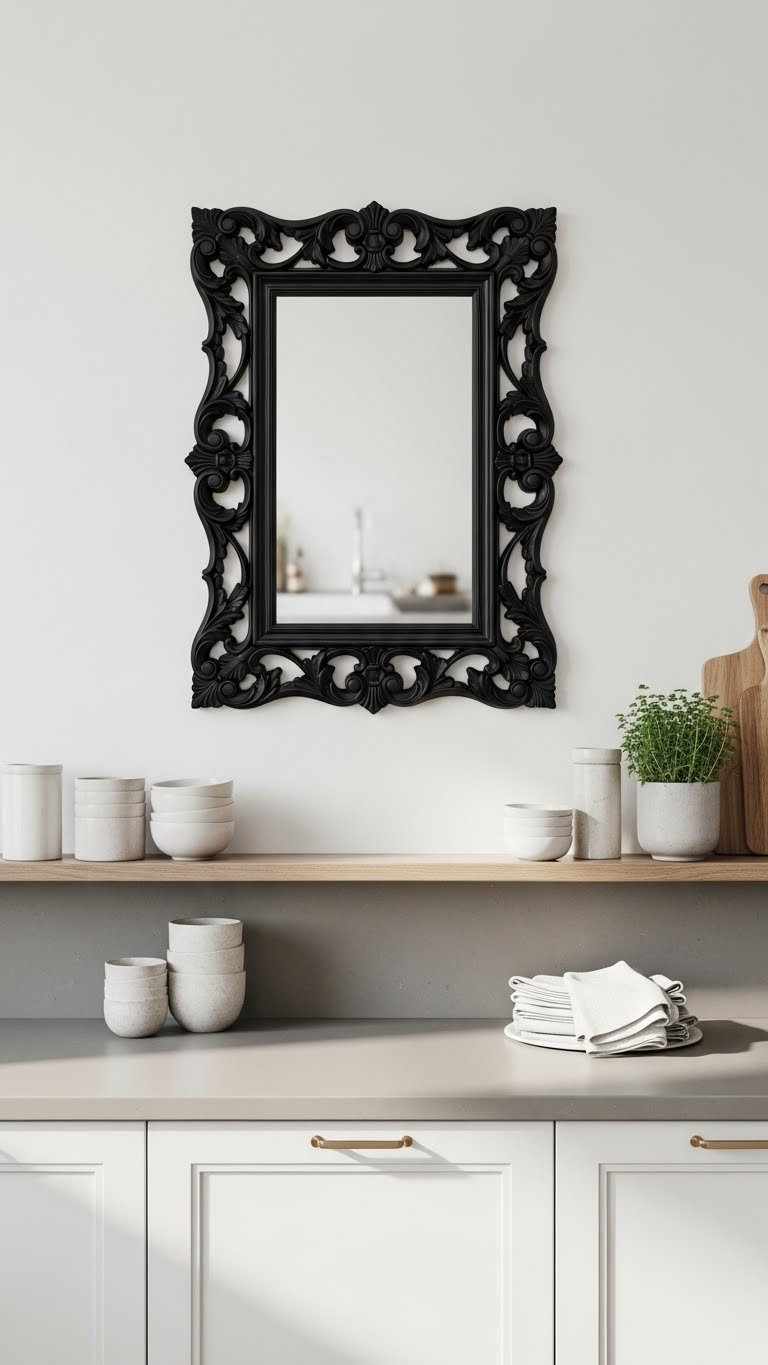
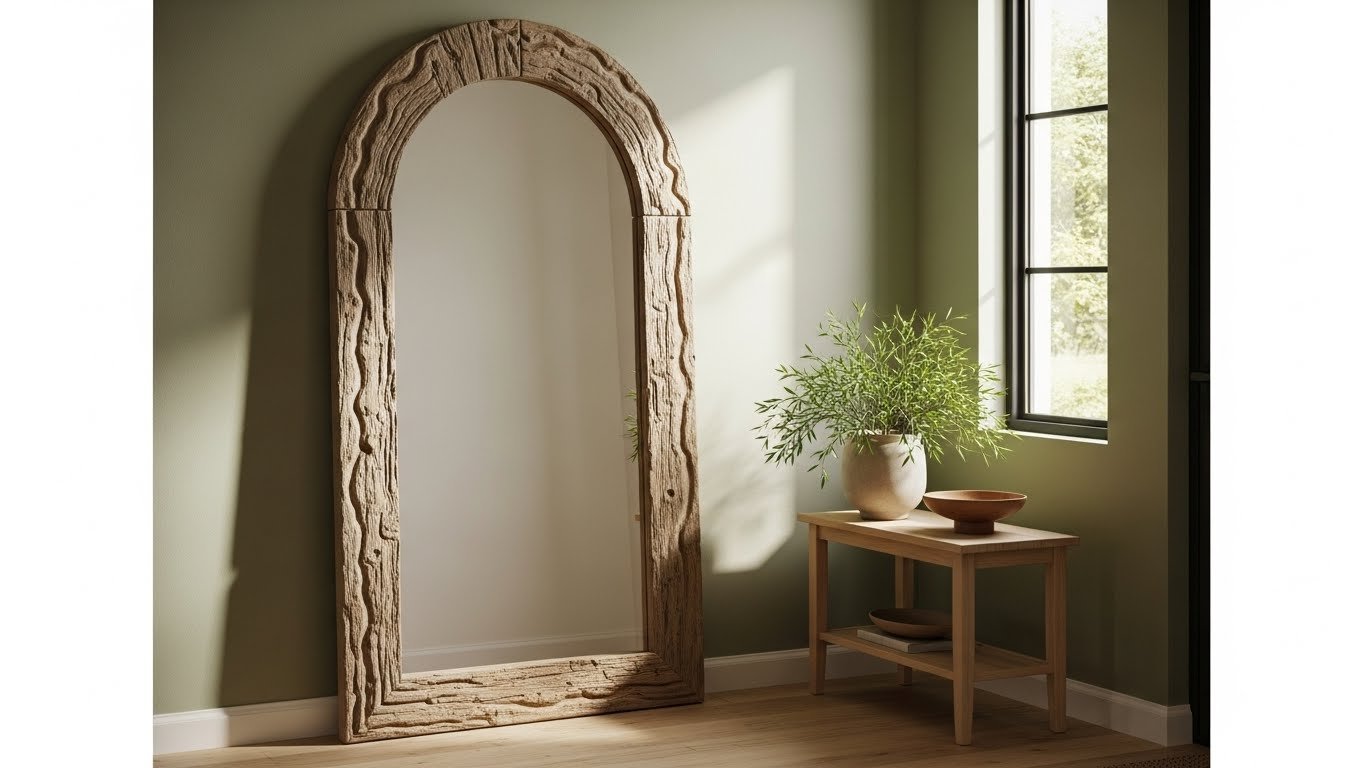
    1. Carved Wood Arch Mirror with Hand-Tooled Details

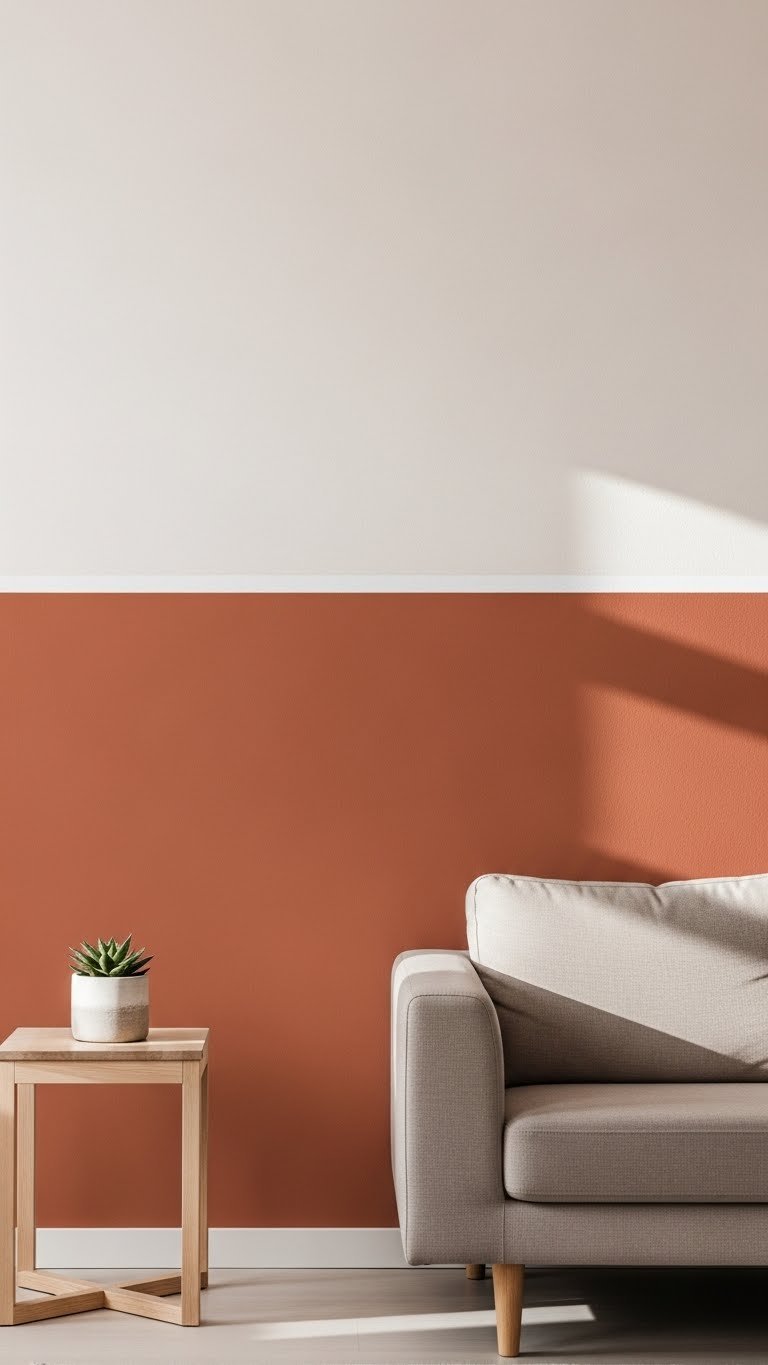
    Carved wood frames catch light differently than smooth finishes, creating shadow patterns that make your mirror look like functional art. This style works especially well in entryways or bedrooms where you want a focal point that isn’t a wall color.

    Look for pieces at West Elm ($250–$500) or artisan shops on Etsy ($150–$400 for smaller sizes). If you’re handy, you can also DIY this by buying an unfinished wooden arch frame and adding shallow carved details with wood carving tools—takes about 2–3 hours plus drying time.

    Pro tip: Pair a carved wood arch with a simple wooden console table below to echo the texture and create a styled vignette.

    The carved details become even more noticeable when light hits them at different times of day, turning your mirror into a constantly changing design element.


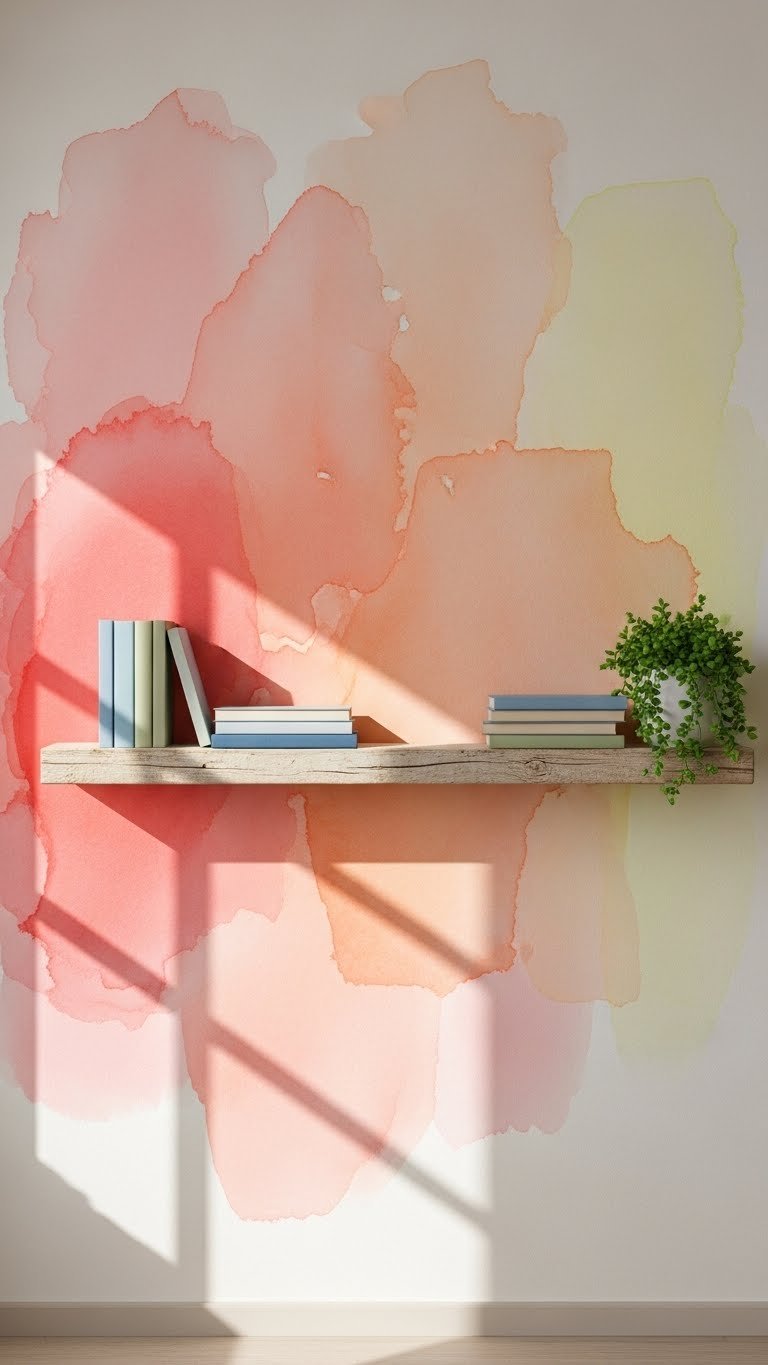
    2. Scalloped Edge Mirror in Soft Pastels

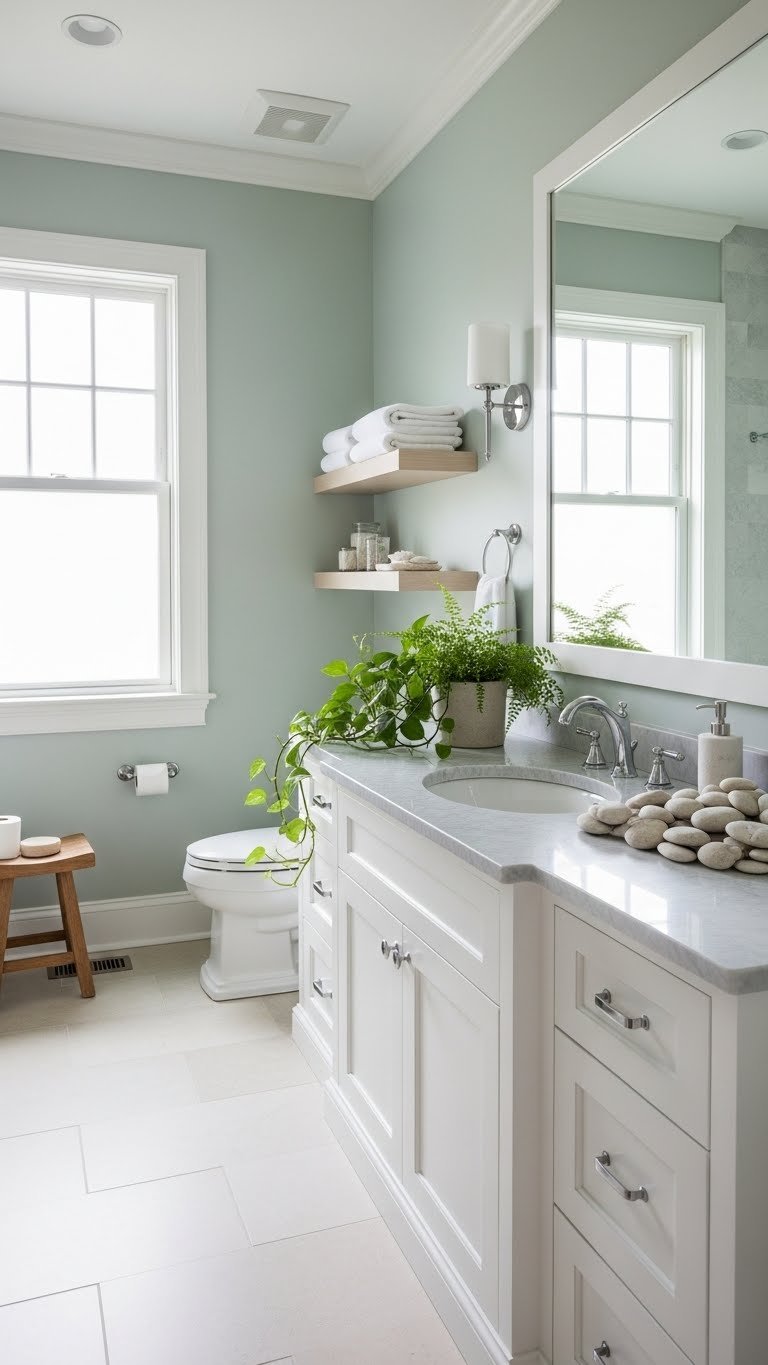
    Scalloped edges bring instant personality without being loud—they’re the sweet spot between minimalist and decorative. This style reads as both playful and sophisticated, making it perfect for bedrooms, bathrooms, or powder rooms.

    Hunt for these at Target ($40–$100), Wayfair ($80–$150), or Etsy ($100–$250). The softly curved edges come in whites, pinks, greens, or natural wood. Most are easy to hang on existing wall hardware—plan about 10 minutes for installation.

    Budget hack: If you find a basic round mirror you love, you can buy a separate scalloped frame overlay or have a local framer create a custom scalloped mat around it for $60–$100.

    You’ll notice how the soft curved edges make hard walls feel friendlier, and the mirror becomes a conversation starter rather than something people overlook.


    3. Rattan Woven Frame with Organic Irregular Shape

    Woven rattan frames bring texture and a relaxed coastal energy that makes any space feel instantly more layered. Unlike smooth frames, the weaving pattern catches your eye and adds visual interest without feeling cluttered.

    IKEA carries several rattan options ($30–$60), or go larger at Wayfair ($80–$200) and West Elm ($150–$300). For a truly custom piece, search Etsy for artisan weavers ($120–$350). These are lightweight and easy to hang with standard wall anchors.

    Renter-friendly: Lean a large rattan mirror against your wall instead of hanging it—same impact, zero wall damage.

    The natural fibers add warmth that metal or plastic frames can’t match, and the texture photographs beautifully on Instagram-style vignettes.


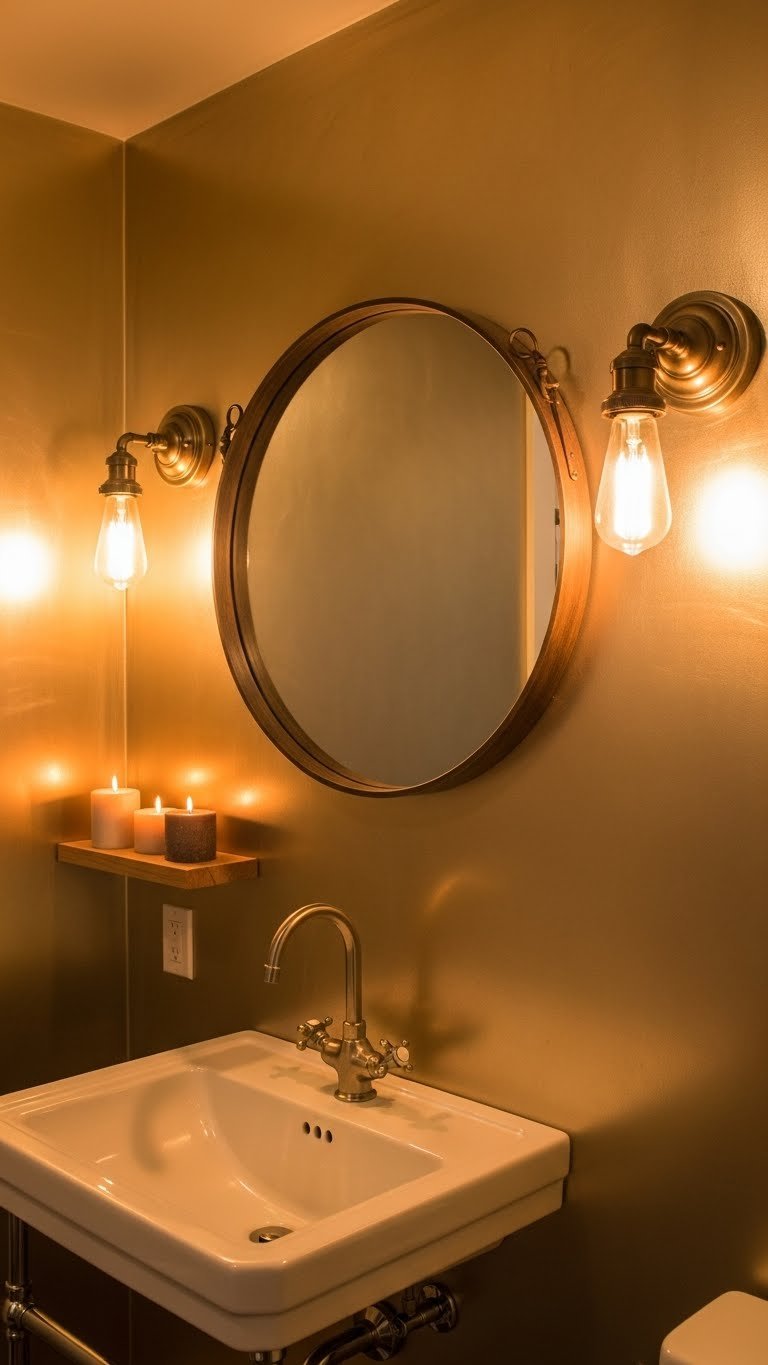
    4. Beveled Edge Mirror with Subtle Geometric Facets

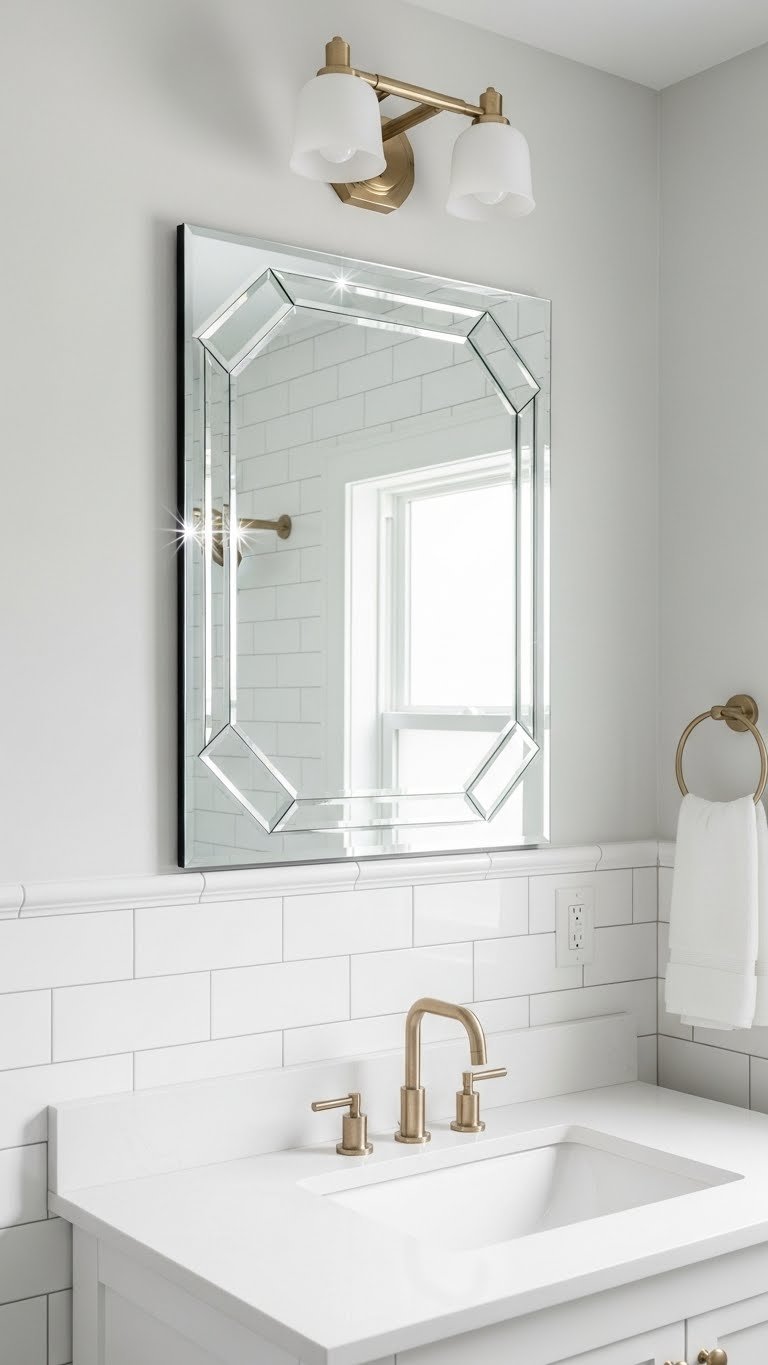
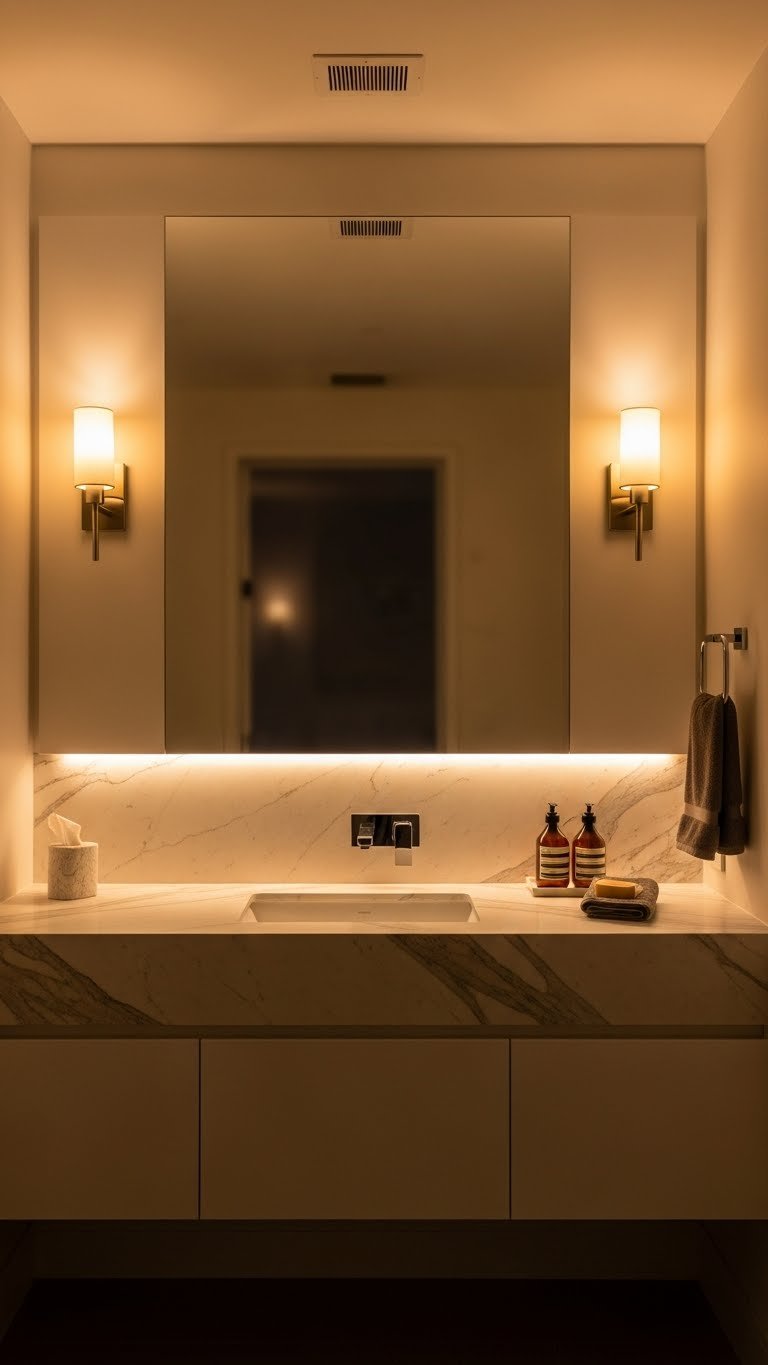
    Beveled edges catch and refract light in multiple directions, creating a subtle sparkle effect. It’s more understated than ornate but infinitely more interesting than a flat edge.

    Shop Home Depot ($50–$150), Lowe’s ($60–$180), or Wayfair ($100–$250). Beveled mirrors tend to be pricier because of the finishing process, but they’re a one-time investment that works in any style. Installation takes 20 minutes with basic hardware.

    Pro tip: A beveled mirror in a small bathroom amplifies light and makes the space feel bigger without any visual clutter.

    The subtle sparkle catches light at different times of day, making your mirror do double duty as a statement piece and a light reflector.


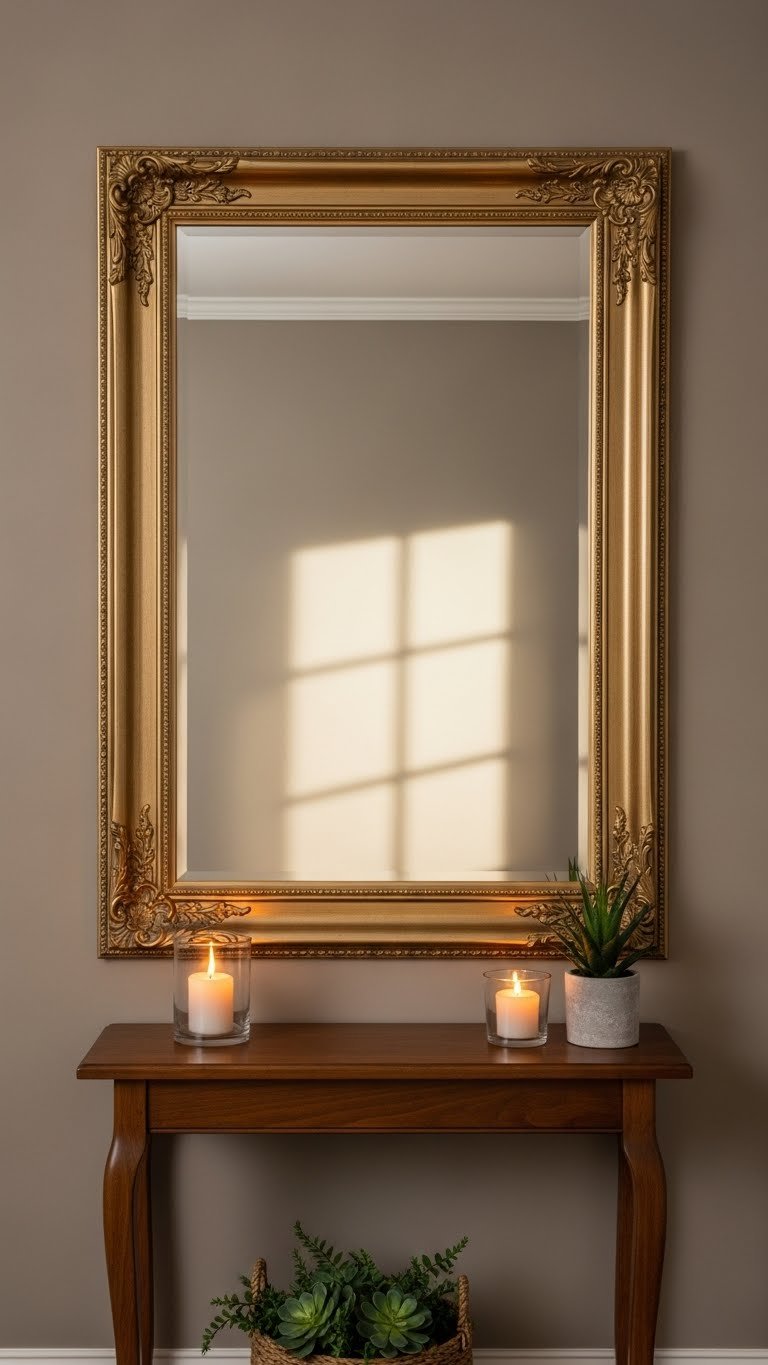
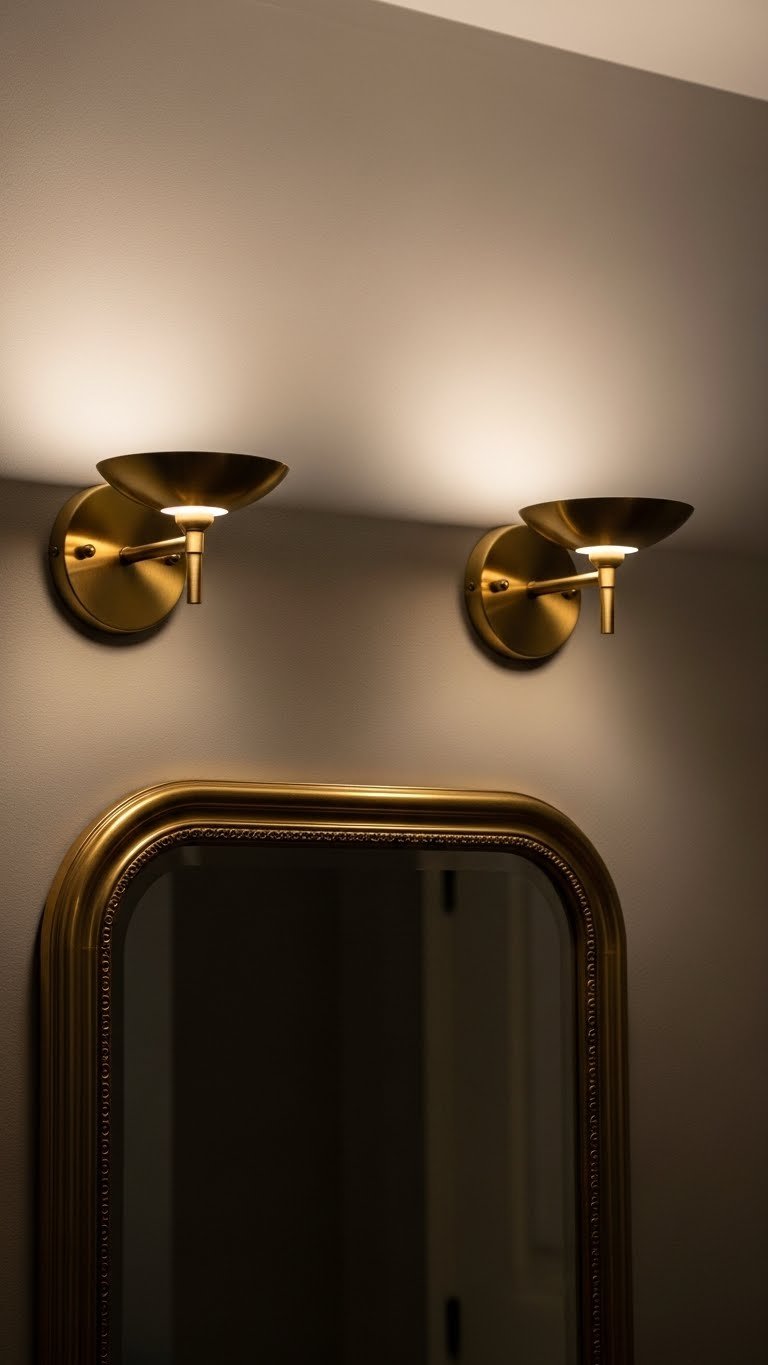
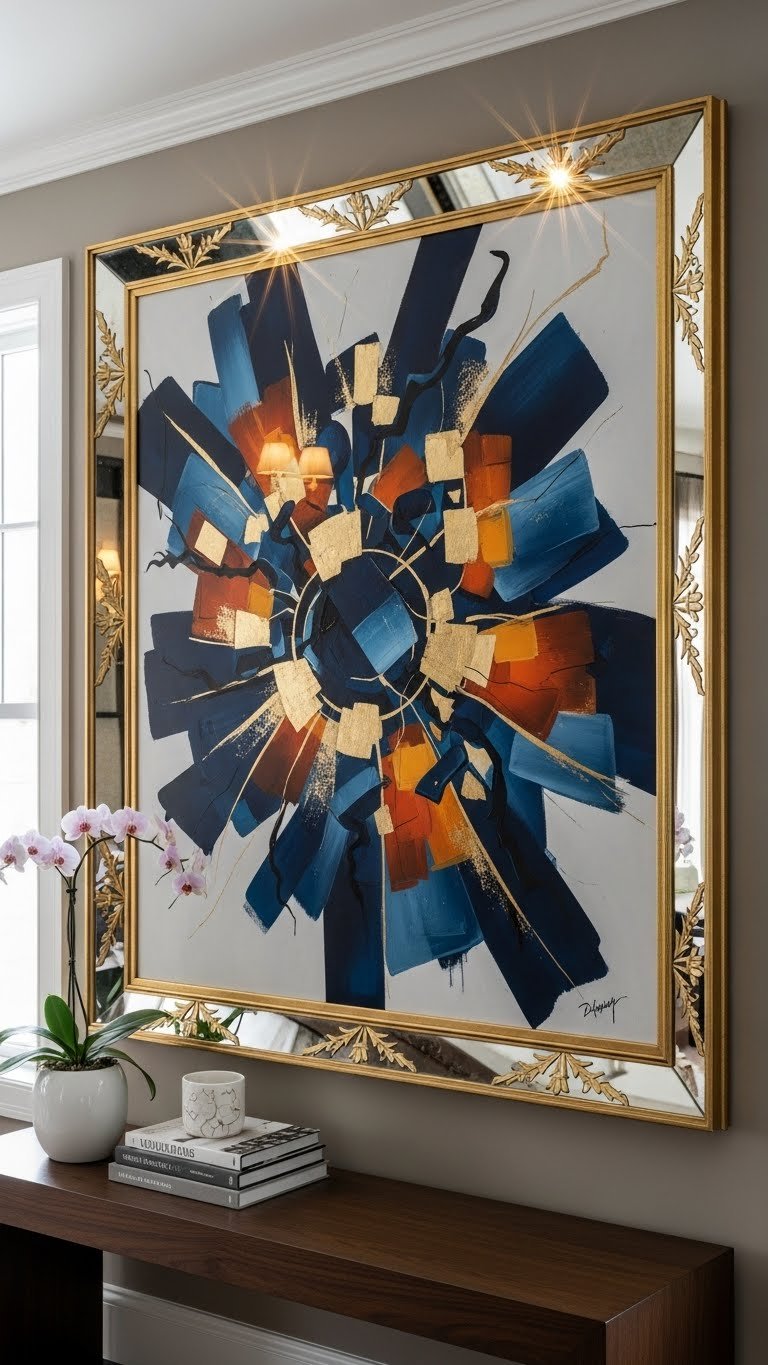
    5. Distressed Gold Leaf Frame with Antique Patina

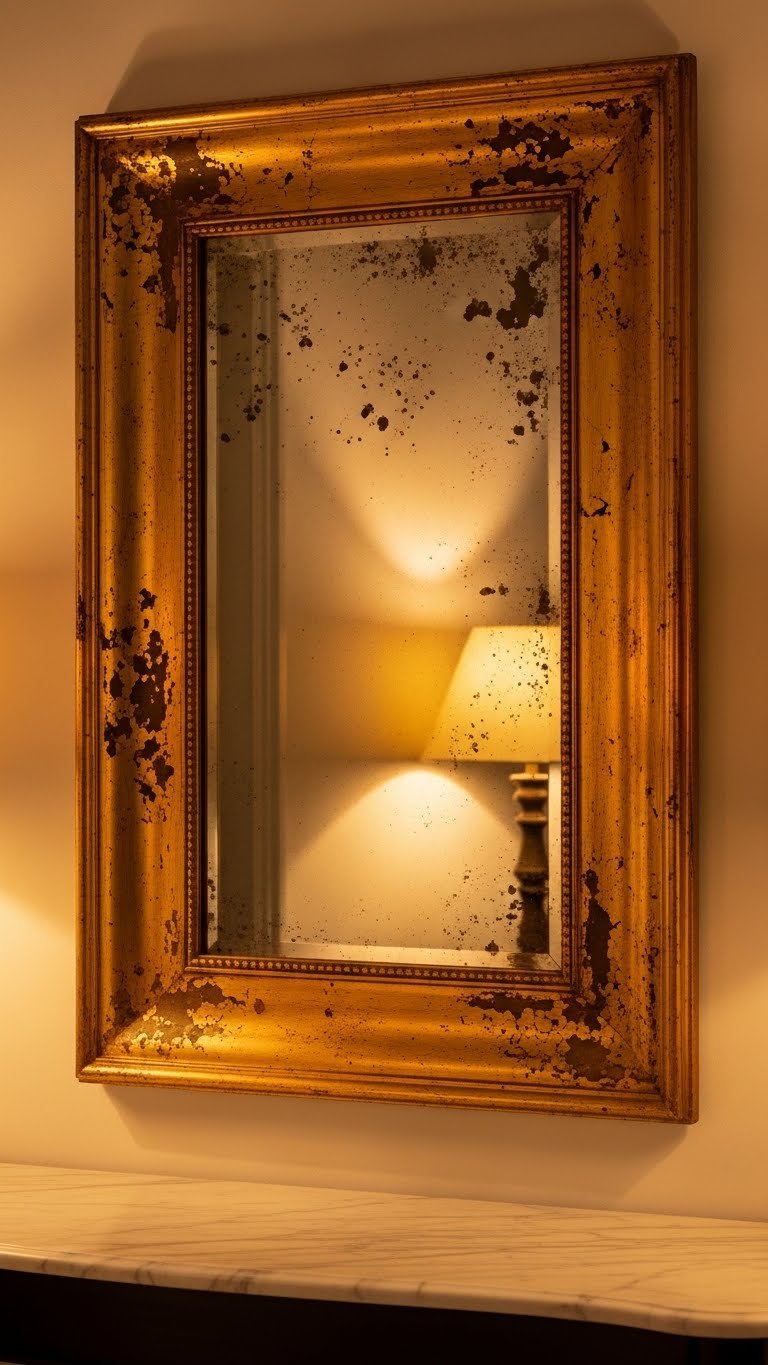
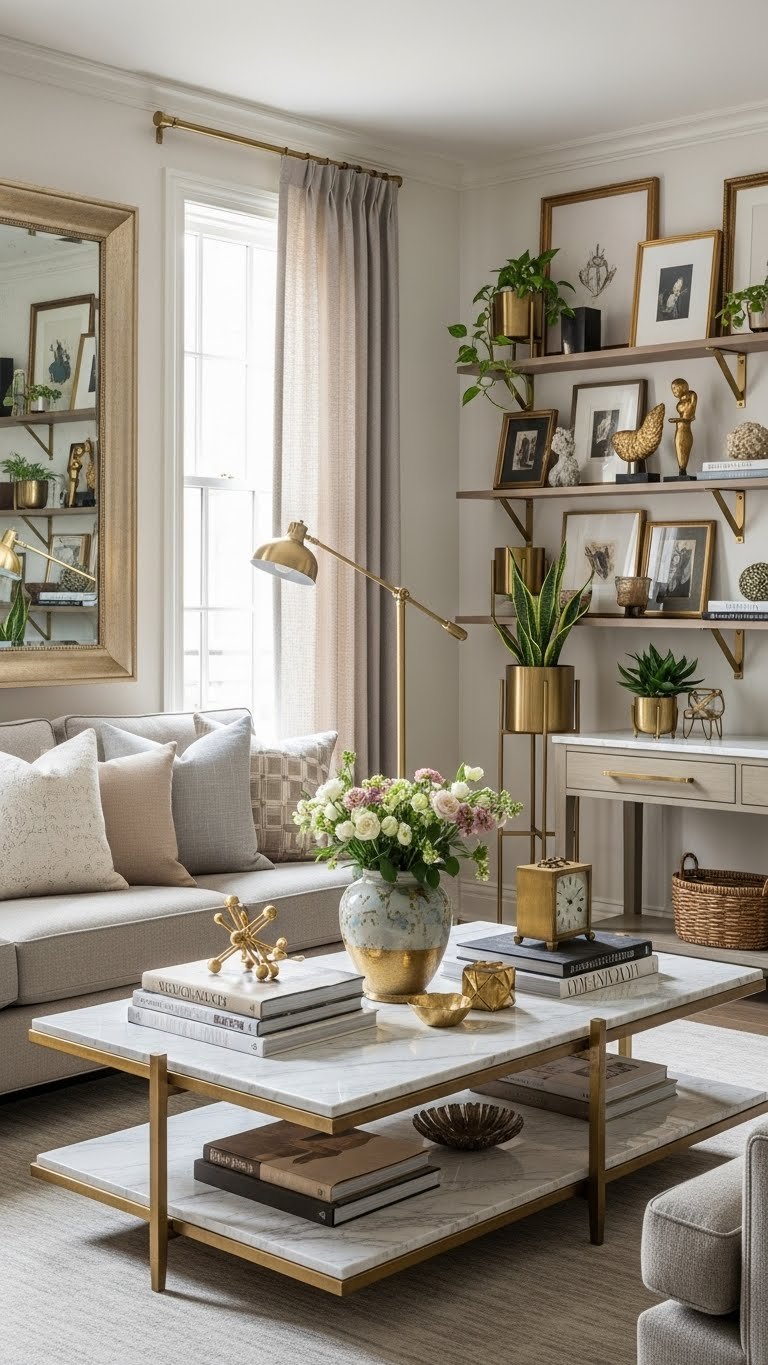
    Distressed gold leaf frames blend old-world elegance with modern styling. The intentional imperfections make the frame feel collected rather than brand-new, which reads as more sophisticated.

    Find these at Anthropologie ($200–$500), Wayfair ($150–$400), or specialty home shops. For a budget version, buy a basic frame at Michaels or Hobby Lobby and apply gold leaf yourself ($15–$30 in supplies, 1–2 hours of work plus drying time).

    DIY shortcut: Spray paint a wooden frame with metallic gold spray paint, then use steel wool to distress the edges for an aged effect ($10–$15, 30 minutes).

    Your entryway or bedroom instantly reads as more curated and intentional with this frame style, especially when styled with other vintage or eclectic accessories.


    6. Macramé-Wrapped Frame with Knotted Edges

    Macramé-wrapped frames bring handmade texture and bohemian character. The knotted edges add tactile interest and work beautifully in bedrooms, living rooms, or yoga spaces.

    Etsy has tons of macramé-wrapped mirrors ($50–$150), or DIY with a basic round mirror and macramé cord ($20–$40, 2–3 hours to knot). You can also take an existing mirror to a local craftsperson and have them wrap it for $30–$60.

    Renter-friendly: These are lightweight and the wrapping won’t damage walls. You can even re-wrap a mirror with new cord if you want to refresh your décor.

    The handmade quality makes your space feel more personal and artisan-crafted, which is the opposite of generic home store energy.


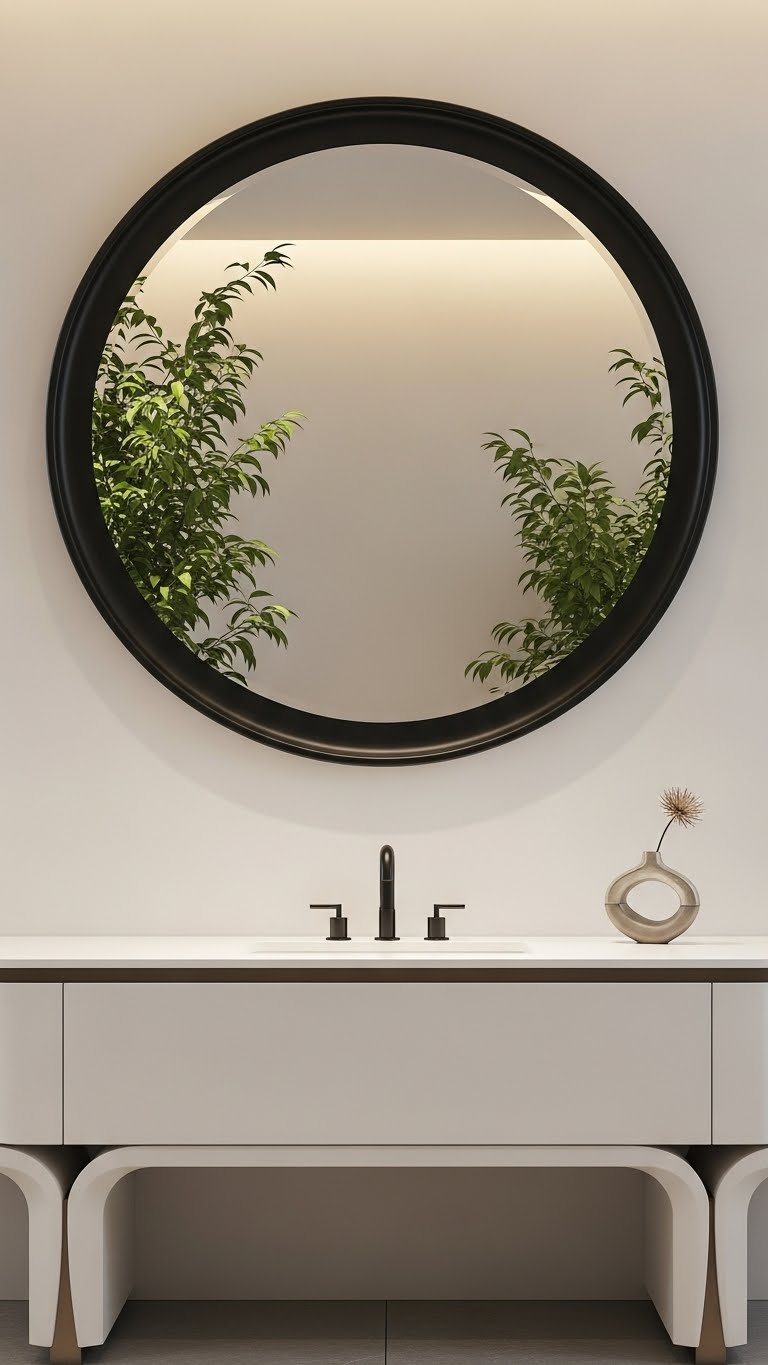
    7. Wavy Asymmetrical Frame in Matte Black Metal

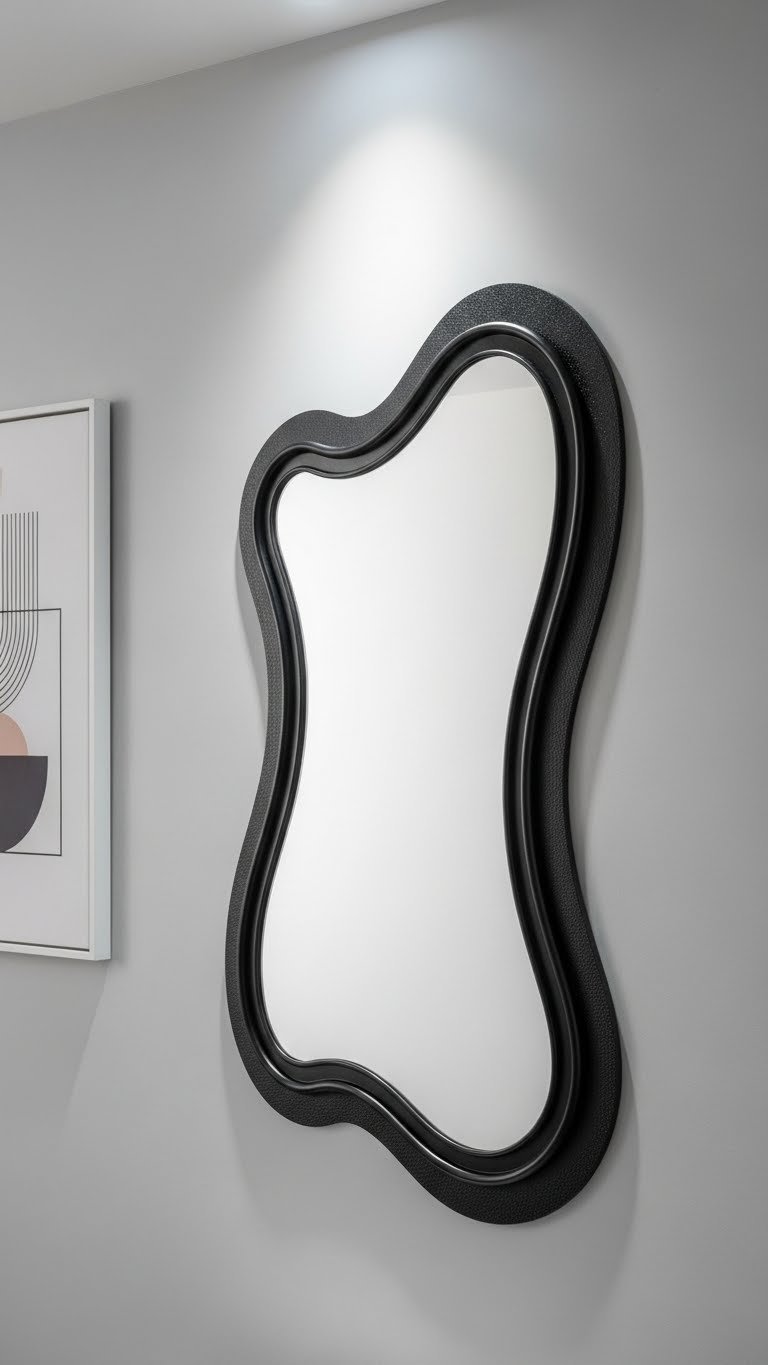
    Wavy asymmetrical frames read as modern art and architectural detail combined. Matte black keeps it from feeling too whimsical, grounding the organic shape with an edgy finish.

    West Elm, Article, and Wayfair carry these ($150–$350). For a bolder, more artistic piece, check independent design studios on Etsy ($200–$500). These tend to be conversation starters, so plan on people asking where you found it.

    Pro tip: Hang a wavy black mirror in a hallway or entryway where it can be a bold focal point without overwhelming a smaller room.

    The irregular edges and dark finish make your space feel intentionally designed and more gallery-like than conventional.


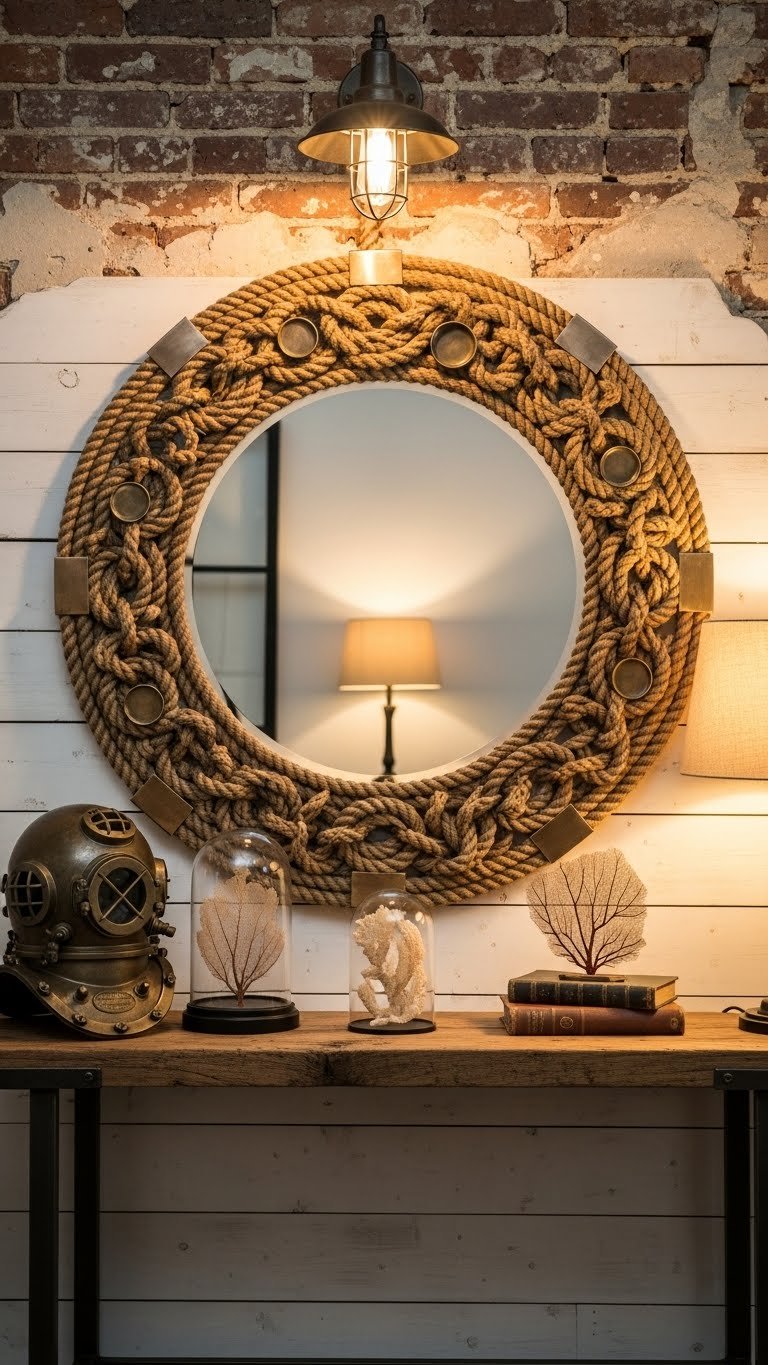
    8. Rope or Cord-Wrapped Frame with Nautical Detail

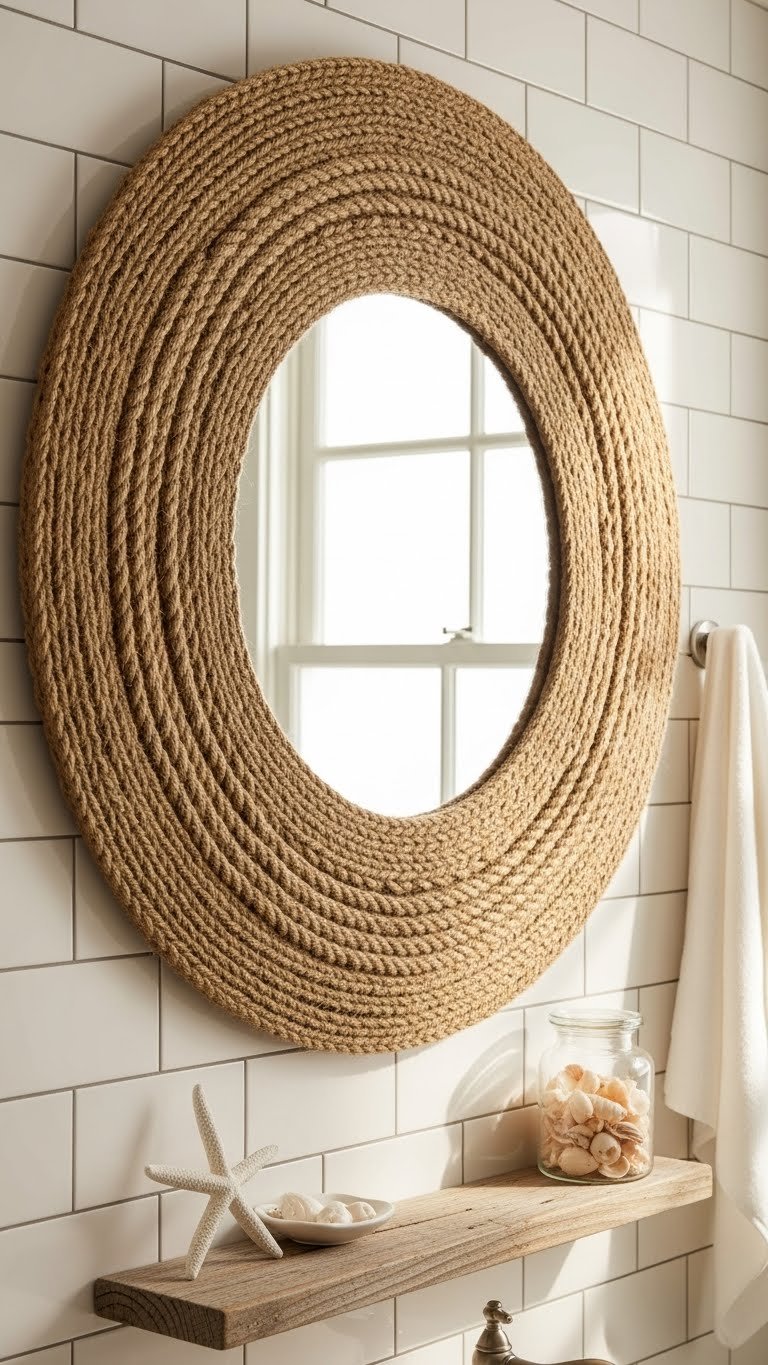
    Rope-wrapped frames bring coastal charm and textured warmth. Unlike smooth frames, the layered wrapping creates depth and catches light differently depending on the angle.

    Find these at Wayfair ($60–$140), Target ($40–$80), or craft your own with a wooden frame and natural rope from Home Depot ($5–$15 for rope, 1–2 hours wrapping time). It’s one of the easiest DIY frame upgrades.

    Budget hack: Use 100% jute rope from any hardware store and wrap it around a basic frame yourself using hot glue or wood glue. Cost: under $20.

    The texture softens hard bathroom walls and adds visual interest without looking fussy or overdone.


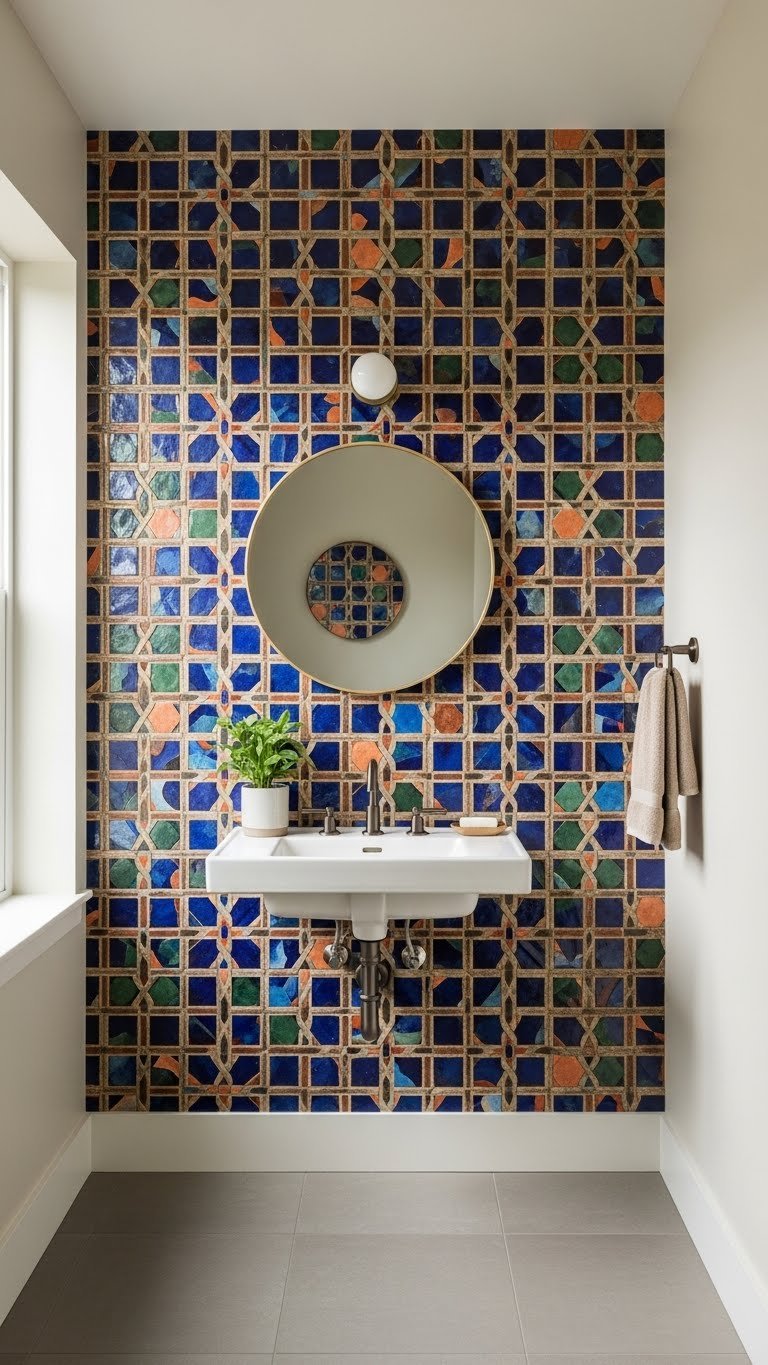
    9. Carved Marble or Stone Frame with Ornate Edge

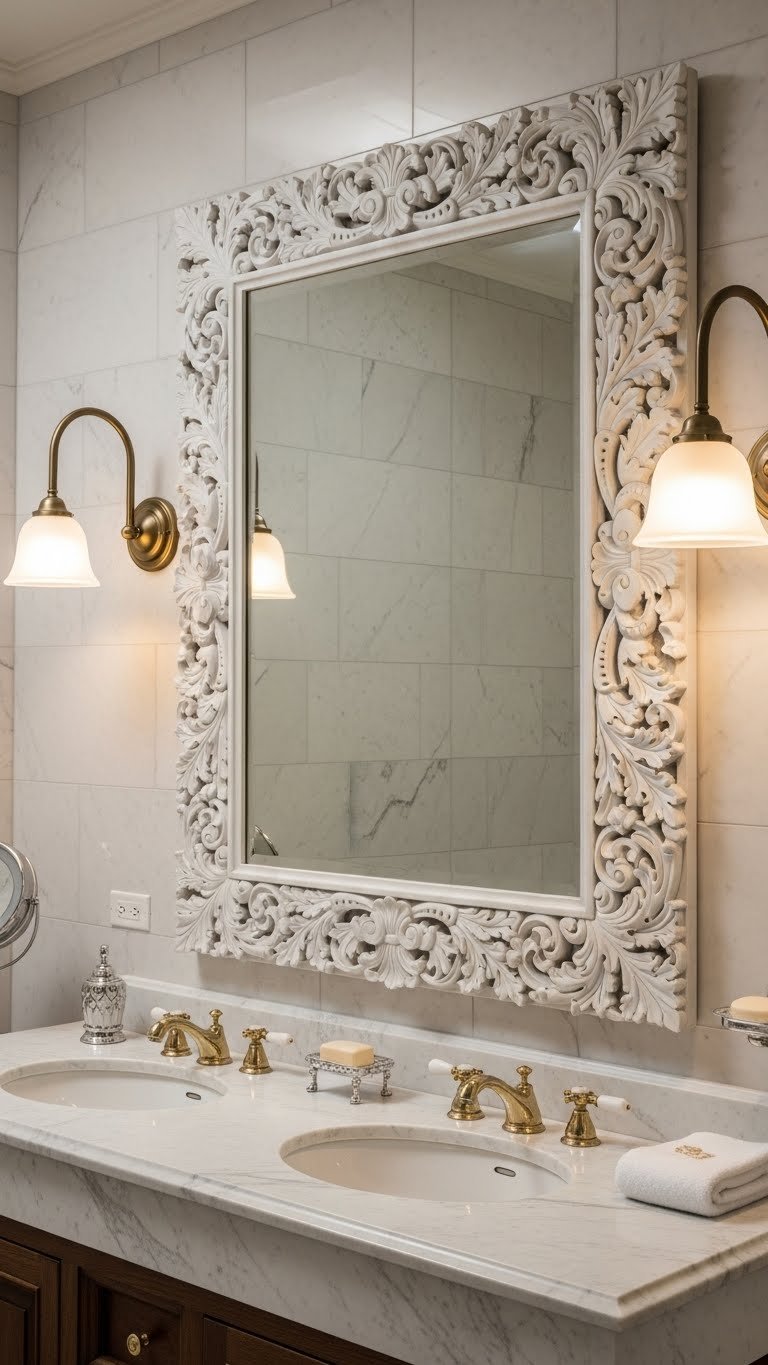
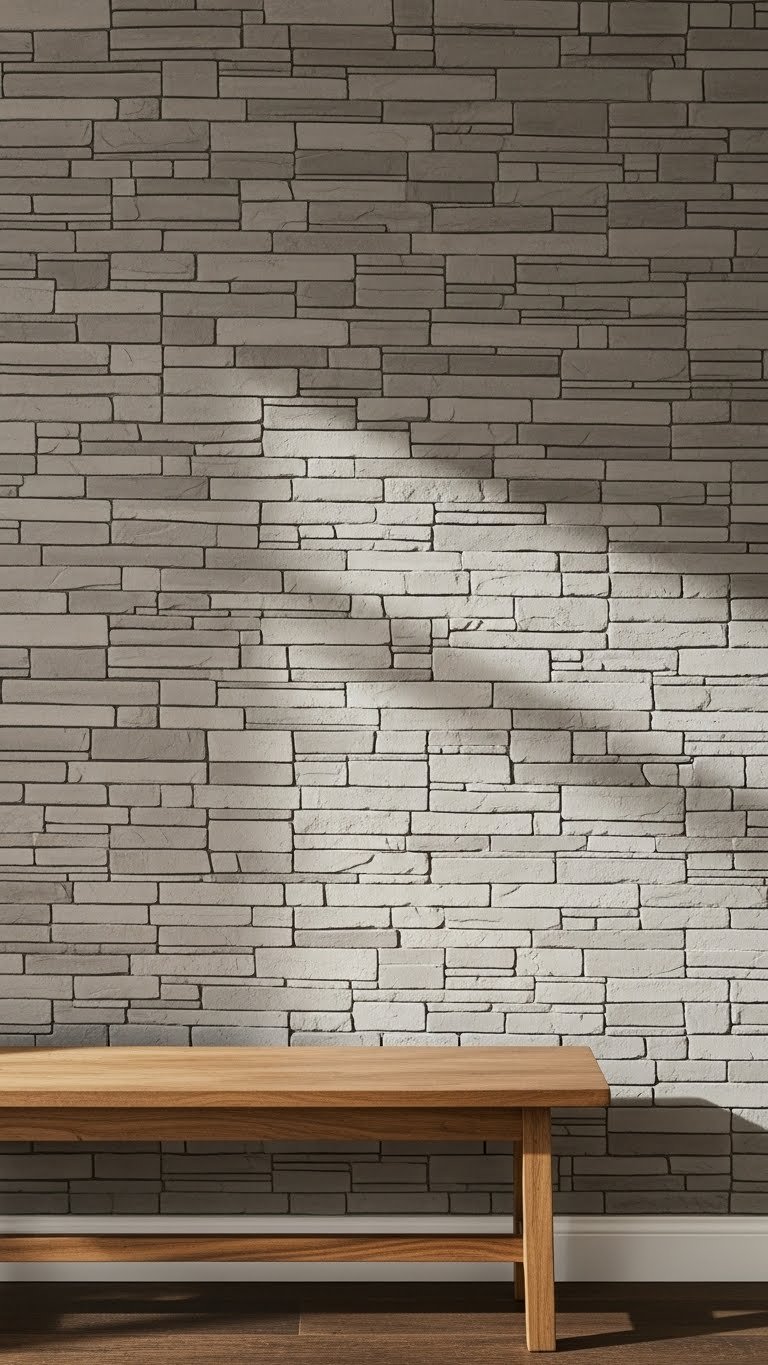
    Carved stone or marble frames scream luxury without being showy. The ornate edges have old-world charm and feel like they belong in a curated home.

    These are investment pieces: expect $400–$1,000+ from specialty shops or high-end retailers like Neiman Marcus or independent design stores. For budget alternatives, check Wayfair or Overstock for marble-look frames ($150–$300).

    Pro tip: A marble-framed mirror in a bathroom makes the entire space feel spa-like, especially when paired with matching marble or stone accessories.

    The weight and permanence of a stone frame makes your space feel grounded and thoughtfully designed, not hastily decorated.


    10. Woven Seagrass Frame with Natural Texture

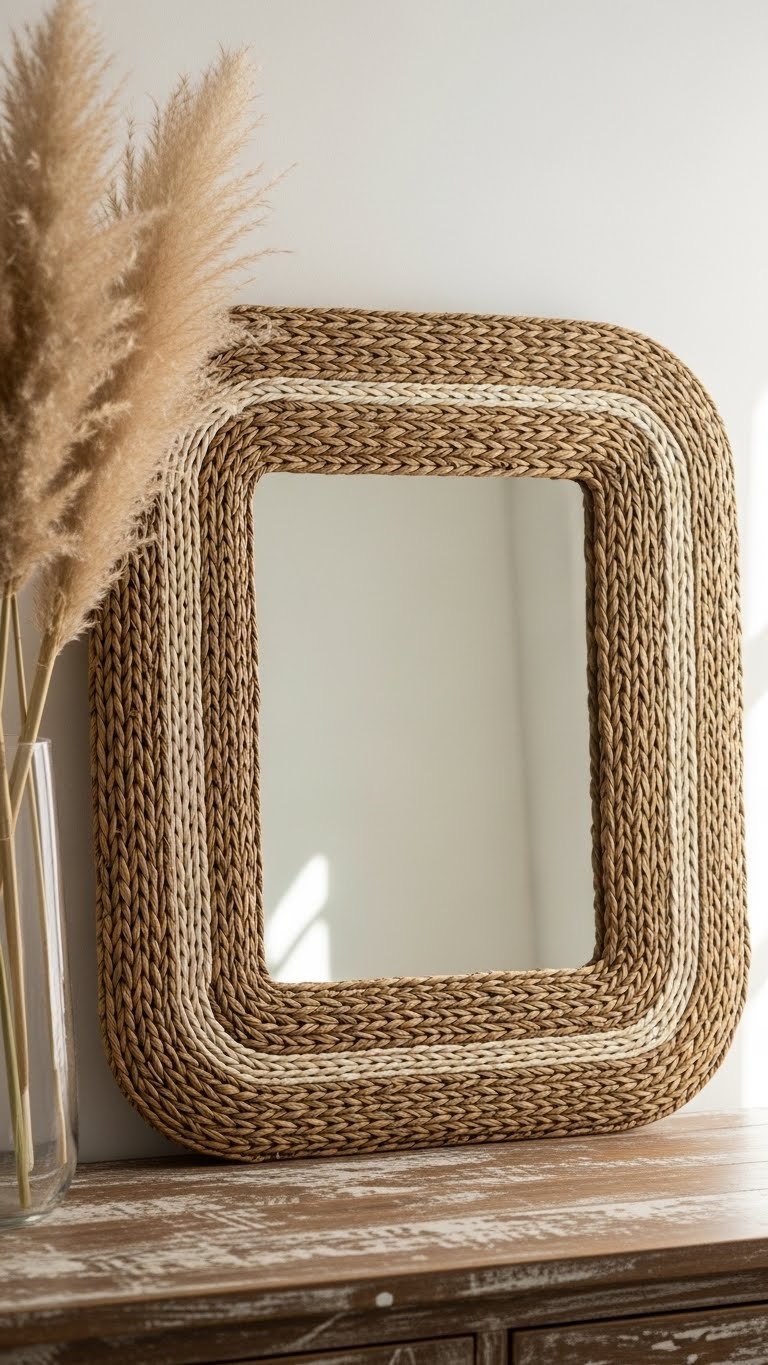
    Seagrass frames offer a softer weave than rattan with a more delicate appearance. The natural material adds warmth and reads as intentionally styled rather than generic.

    Wayfair ($70–$150), West Elm ($100–$250), and Etsy ($80–$200) all carry seagrass mirrors. They’re lightweight and easy to hang. Installation takes about 15 minutes with standard wall hardware.

    Eco-bonus: Seagrass is sustainable and biodegradable, so you’re choosing a material with minimal environmental impact.

    The fine weave makes your space feel more layered and considered, especially in bedrooms or living areas where you want warmth without heaviness.


    11. Embossed Geometric Pattern Frame in Soft Matte Finish

    Embossed geometric patterns add visual texture without adding bulk. The raised pattern catches light subtly and reads as more sophisticated than a flat finish.

    Look at CB2 ($80–$200), Article ($120–$250), and Design Within Reach ($200–$400). For a budget version, IKEA sometimes carries embossed options ($40–$80). These are straightforward to hang and come with standard hardware.

    Design hack: An embossed frame in a monochromatic finish (all white, all black, or all natural wood) looks even more refined and less trendy.

    The raised pattern creates subtle shadows that change throughout the day, making your mirror more dynamic than a flat-finish piece.


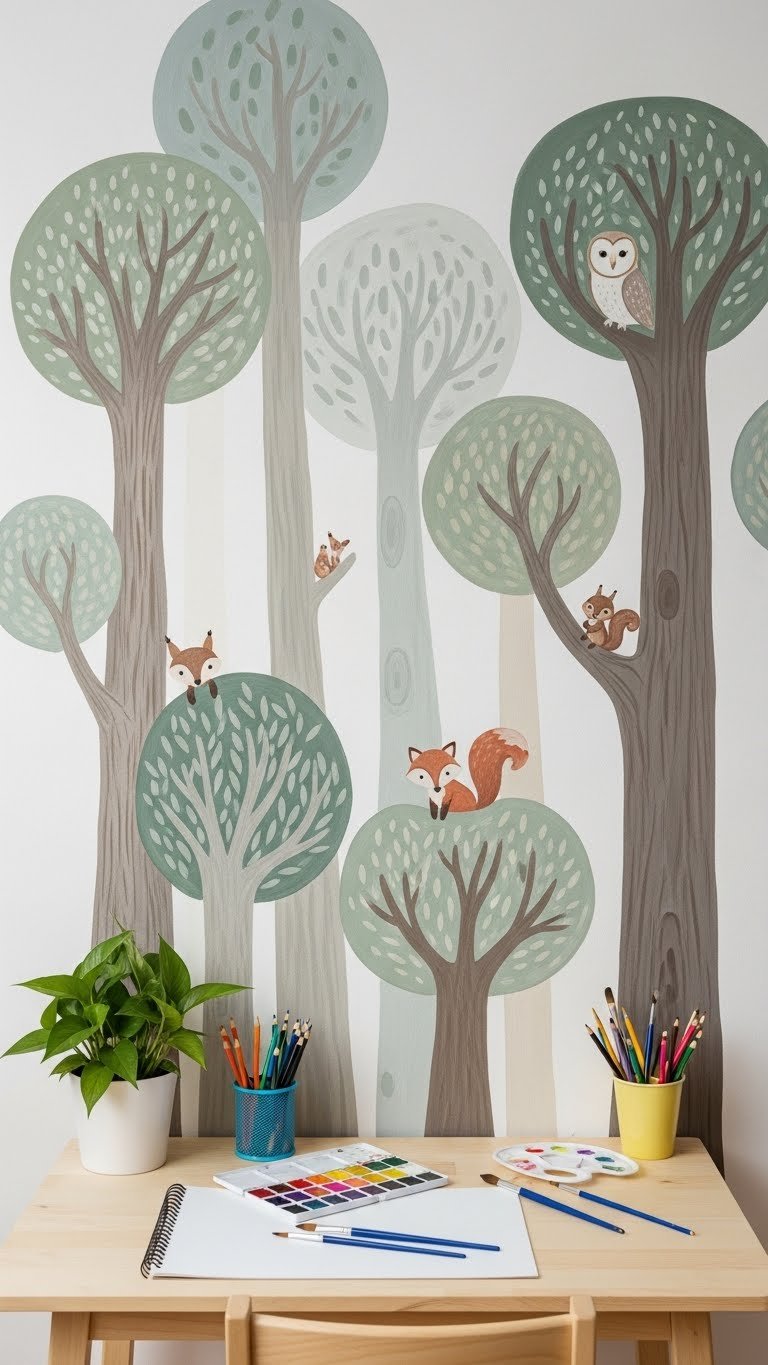
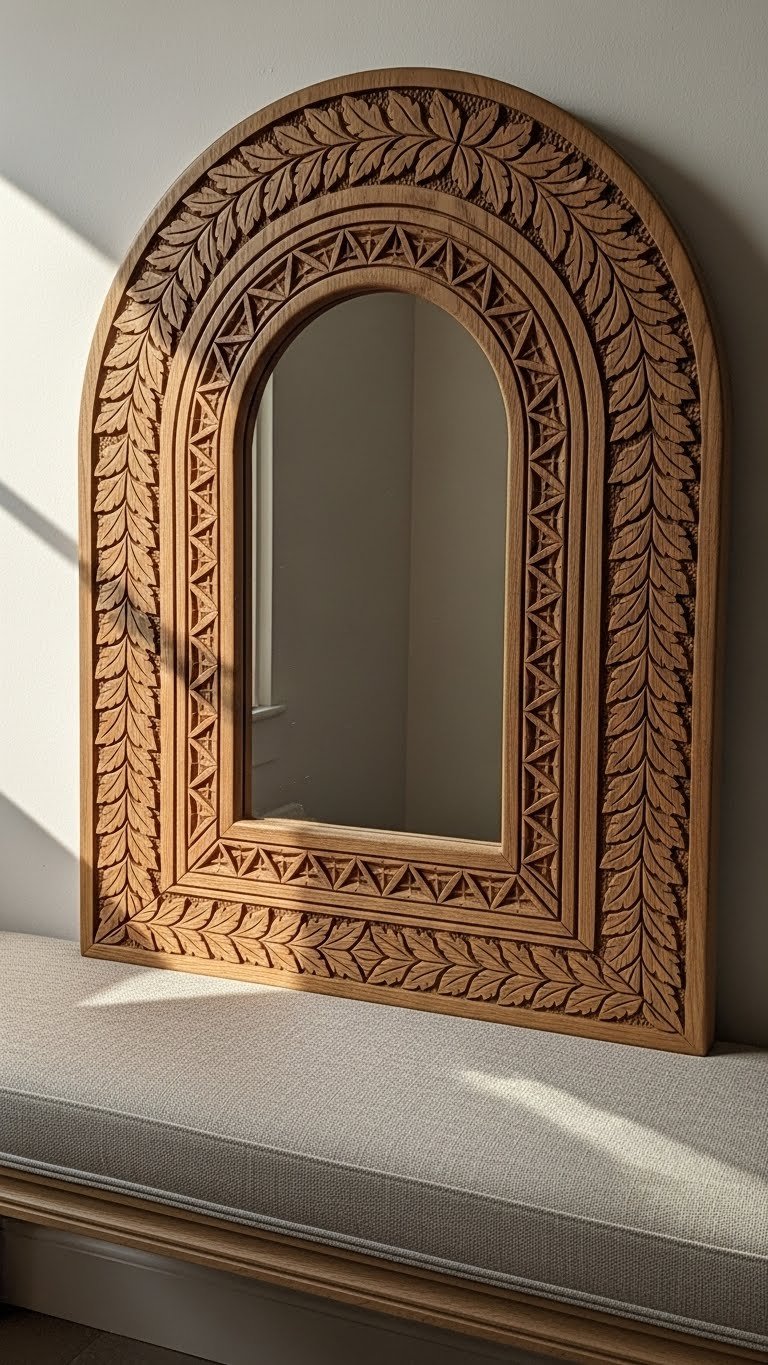
    12. Carved Arch with Floral or Botanical Relief

    Botanical relief carving brings nature indoors and adds artistic detail that sparks conversation. Unlike solid carved frames, relief carving creates shadows that make the design pop.

    Etsy is your best bet ($150–$400 for quality carved pieces), though West Elm occasionally carries botanical designs ($250–$500). You can also commission a custom carving from a woodworker for $200–$600.

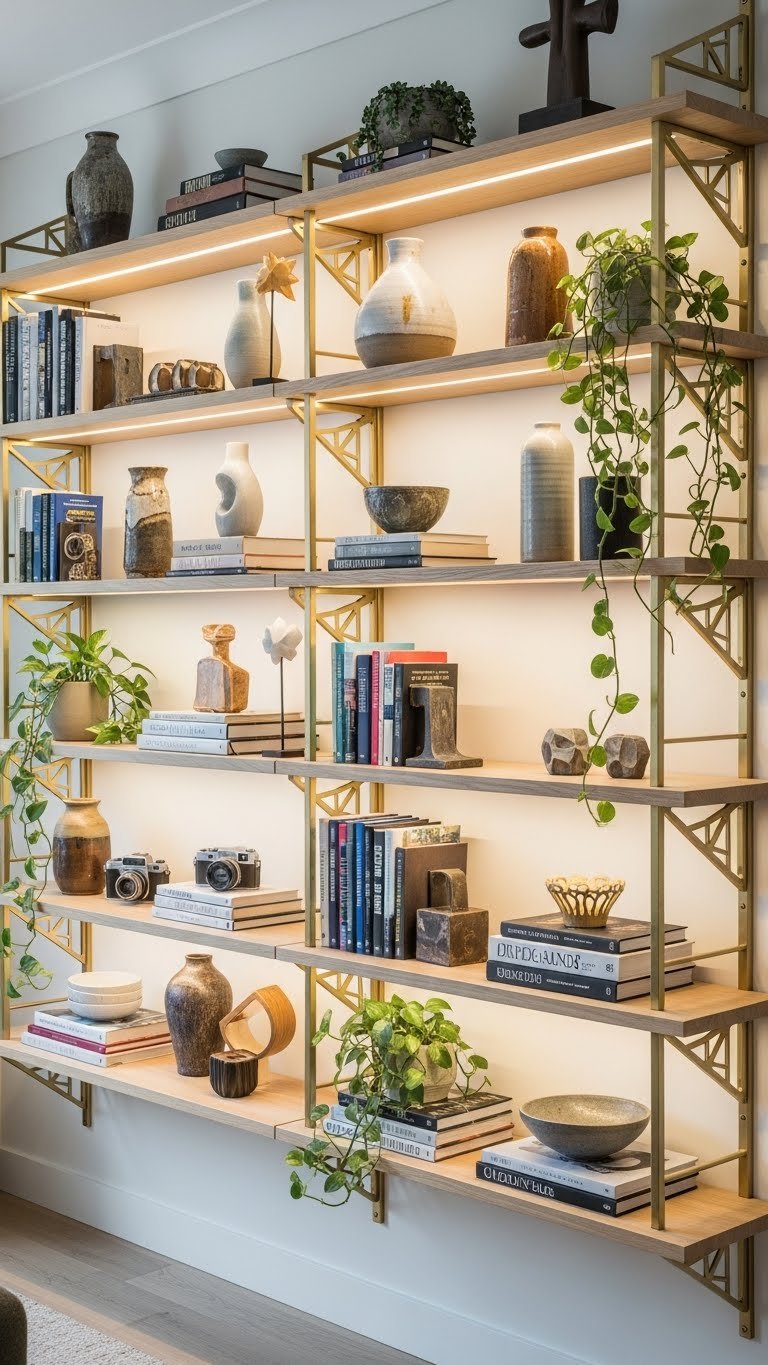
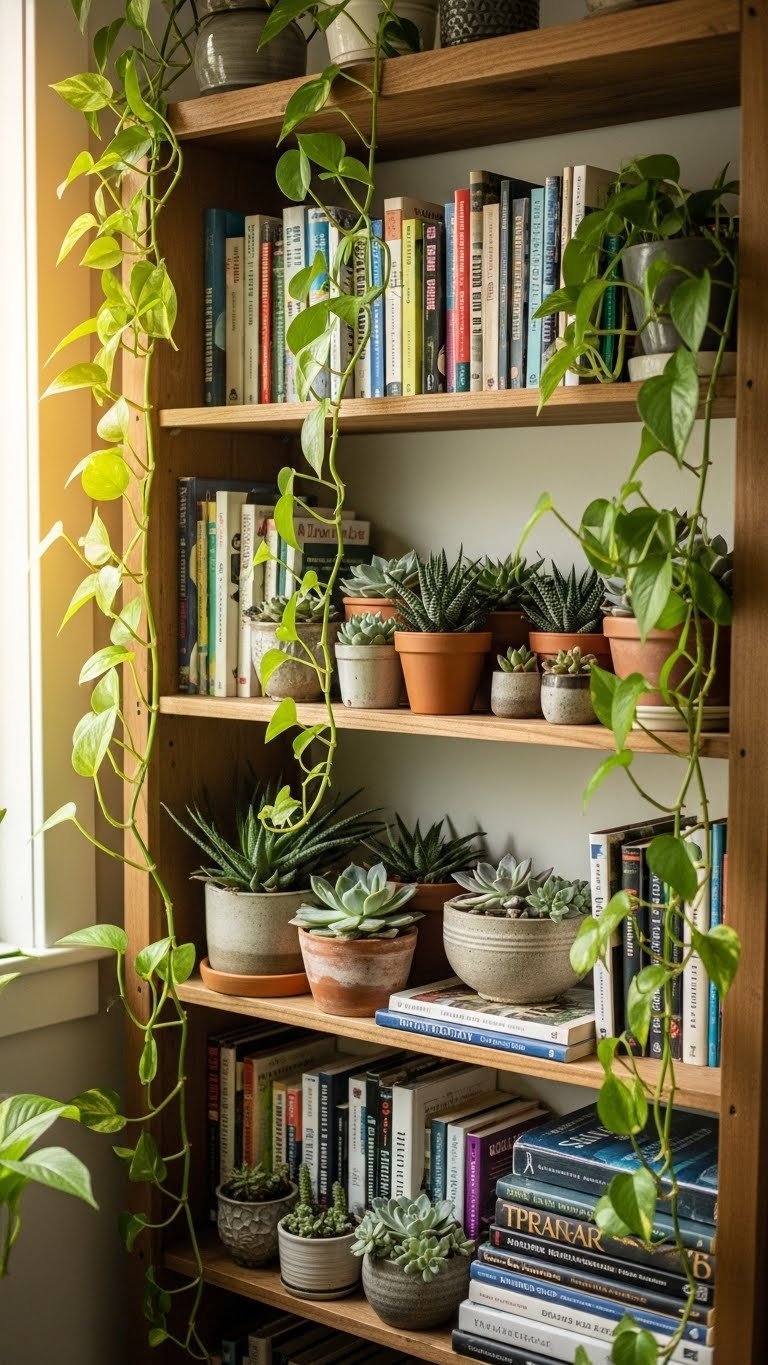
    Pro tip: Style a botanical-carved mirror with actual plants nearby—hanging vines, potted plants, or fresh flowers—to echo the frame’s theme and create a cohesive vignette.

    The nature-inspired carving makes your space feel more connected to the outdoors and less sterile or corporate.


    13. Stacked Wood Slice Frame with Rustic Texture

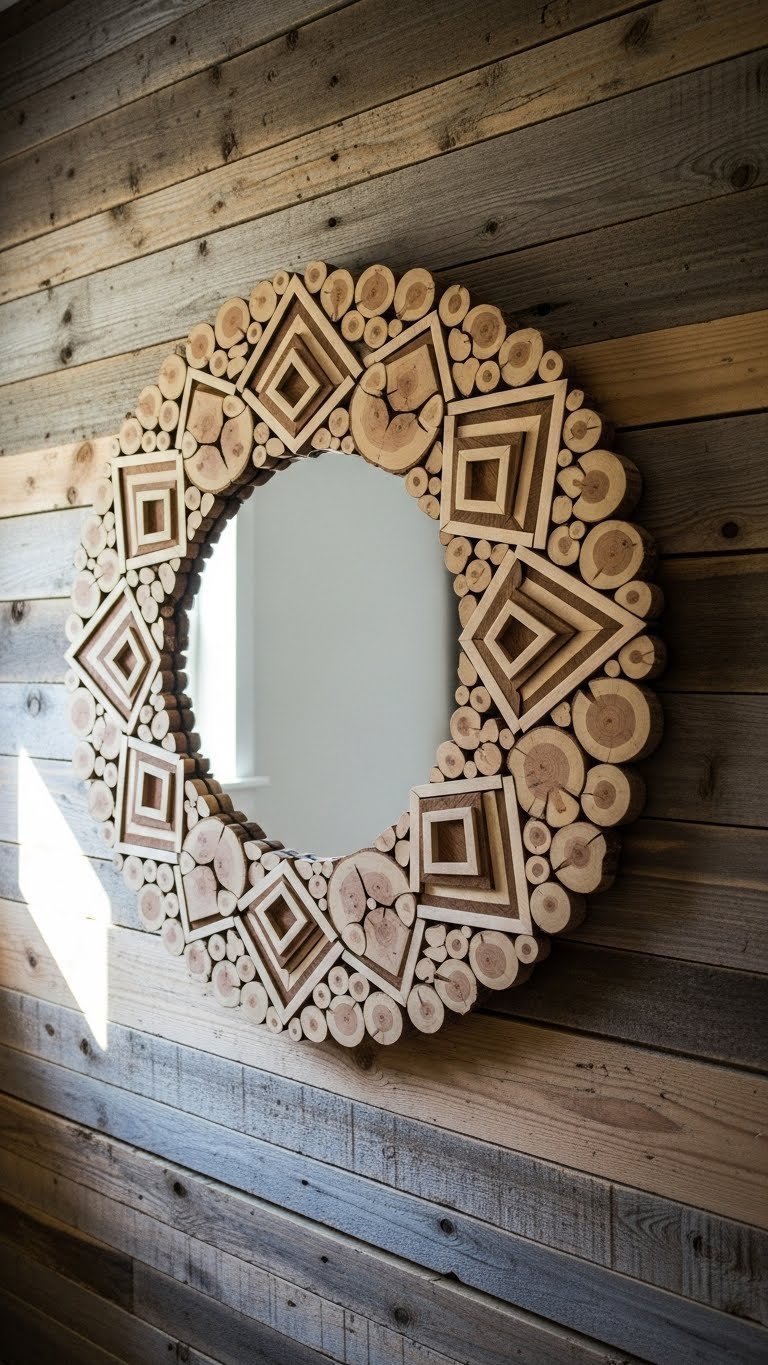
    Stacked wood slice frames are rustic, handmade-looking, and surprisingly easy to DIY. Each slice adds texture and dimension that a smooth frame can’t achieve.

    You can find these on Etsy ($80–$200) or make one yourself with reclaimed wood slices and a basic mirror ($40–$80 in materials, 3–4 hours assembly time). Wood slices are sold at craft stores or online by the bulk.

    DIY route: Hot glue or wood glue wood slices around a cardboard backing, then attach your mirror. It’s forgiving and very customizable.

    The varied wood tones and layered texture make your space feel collected and handcrafted—the opposite of mass-produced and generic.


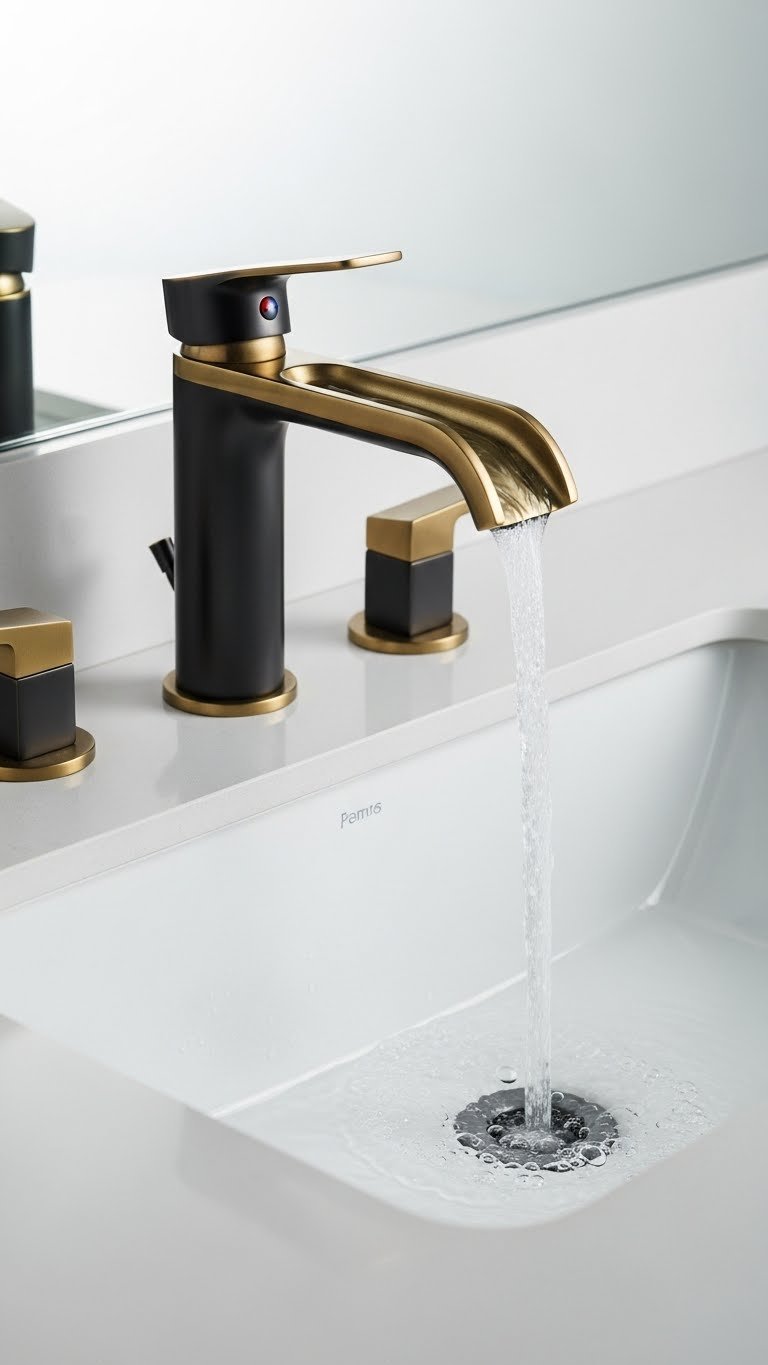
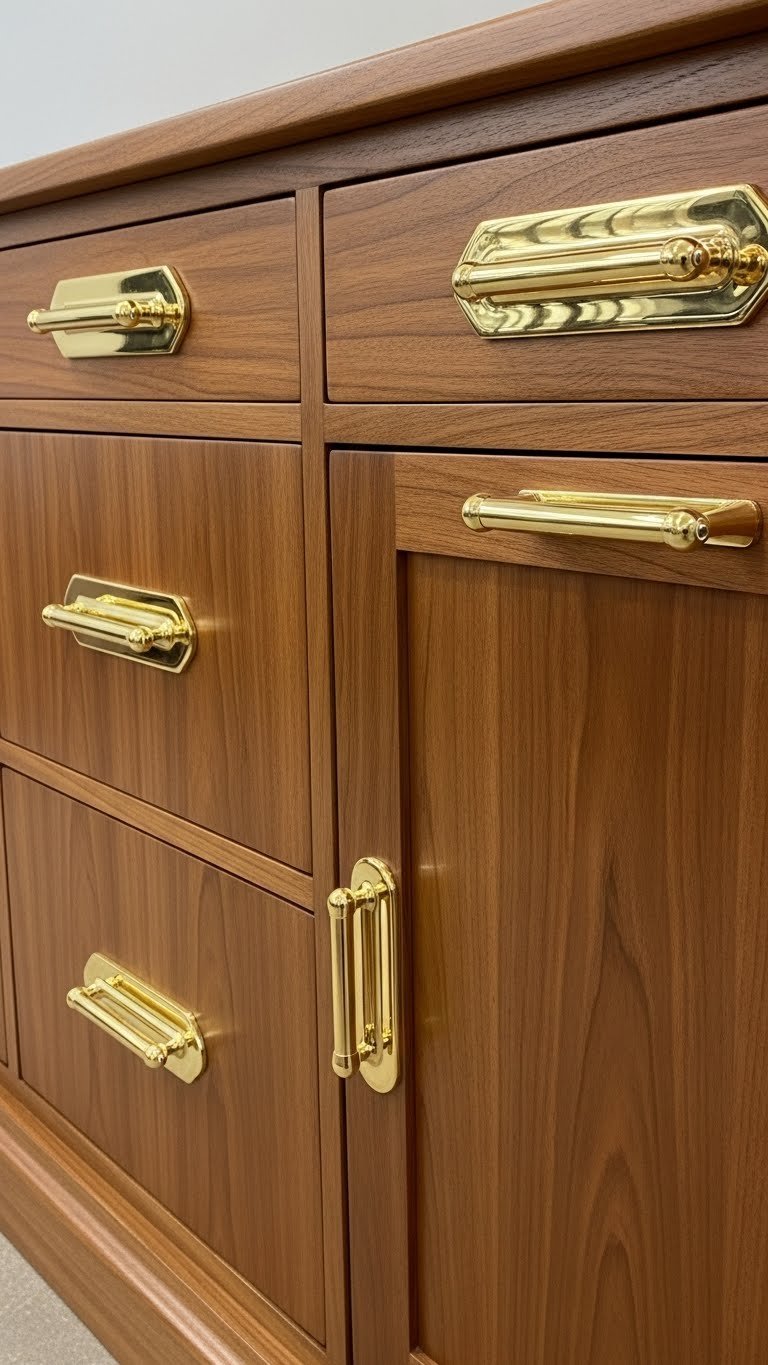
    14. Brushed Metal Frame with Hammered Edge Detail

    Brushed metal with hammered details bridges industrial and artisanal design. The hammered edge isn’t smooth, so it catches light and reads as more handmade and less factory-produced.

    Shop Schoolhouse Electric ($200–$500), Rejuvenation ($150–$350), or Wayfair ($100–$250). These mirrors work beautifully in kitchens, bathrooms, or living spaces with modern or eclectic décor.

    Splurge-worthy: A quality brushed metal mirror lasts decades and only looks better as the patina develops over time.

    The textured metal surface adds warmth and sophistication, making your space read as more carefully curated than a basic frame could.


    15. Wickerwork or Wattle Frame with Interwoven Pattern

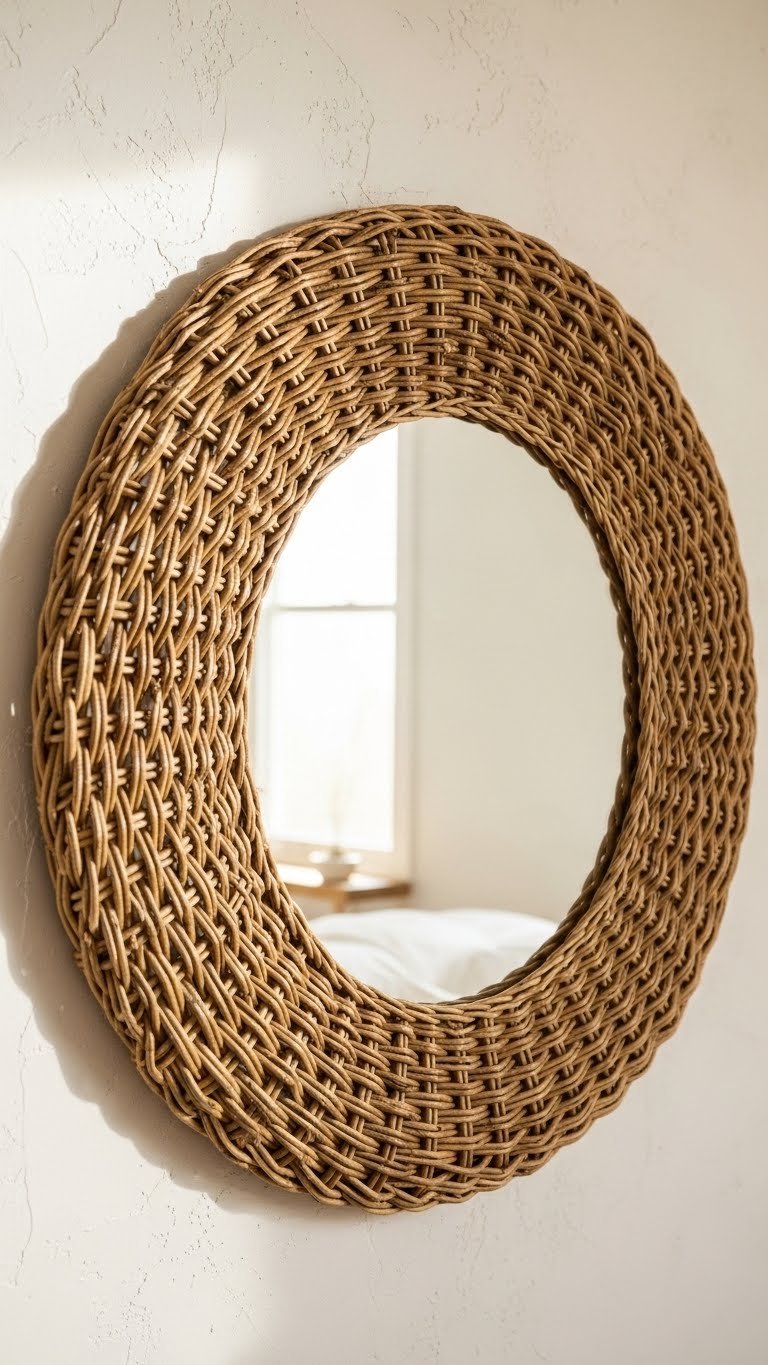
    Wickerwork frames offer tighter, more intricate weaving than rattan or seagrass. The interlocking pattern reads as more sophisticated and less casual-beach-vibes than looser weaves.

    Anthropologie ($150–$300), West Elm ($120–$280), and Etsy ($100–$250) carry quality wickerwork mirrors. These are medium-weight and need sturdy wall anchors—plan about 20 minutes for installation.

    Pro tip: A wickerwork mirror works beautifully in vintage, bohemian, or eclectic spaces. Pair it with rattan furniture or woven baskets to create a cohesive textured aesthetic.

    The intricate weave makes your mirror feel like an investment piece rather than a quick décor purchase.


    16. Cork-Wrapped or Bamboo Veneer Frame

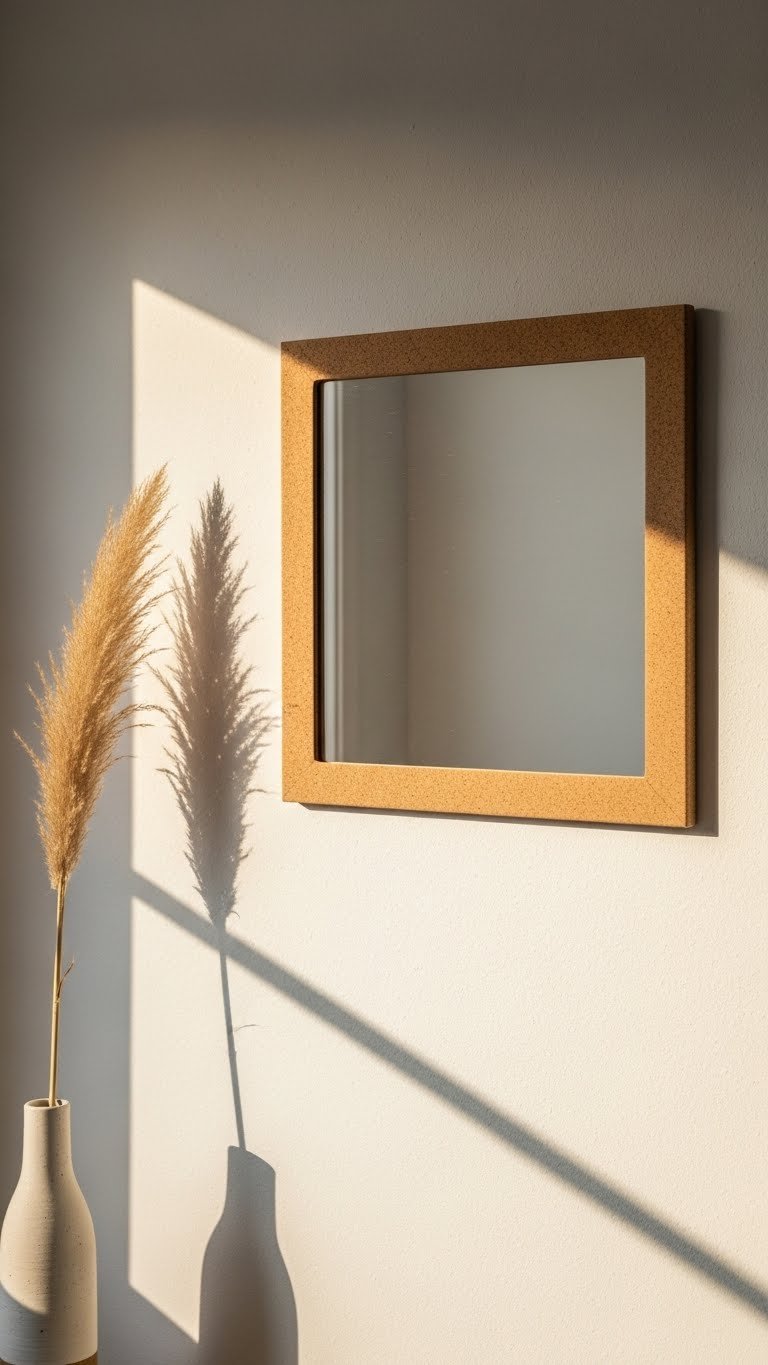
    Cork and bamboo frames appeal to eco-conscious decorators and work beautifully in Japandi or minimalist spaces. The natural grain adds subtle texture without looking overly ornate.

    Etsy carries sustainably-made cork and bamboo mirrors ($80–$180). IKEA sometimes has bamboo options ($40–$100). These are lightweight and often come with minimal hardware since they’re designed to feel simple and integrated.

    Sustainability bonus: Cork and bamboo are renewable resources, making these frames an environmentally conscious choice without sacrifice on style.

    The natural material feels grounding and connects your space to nature in a subtle, intentional way.


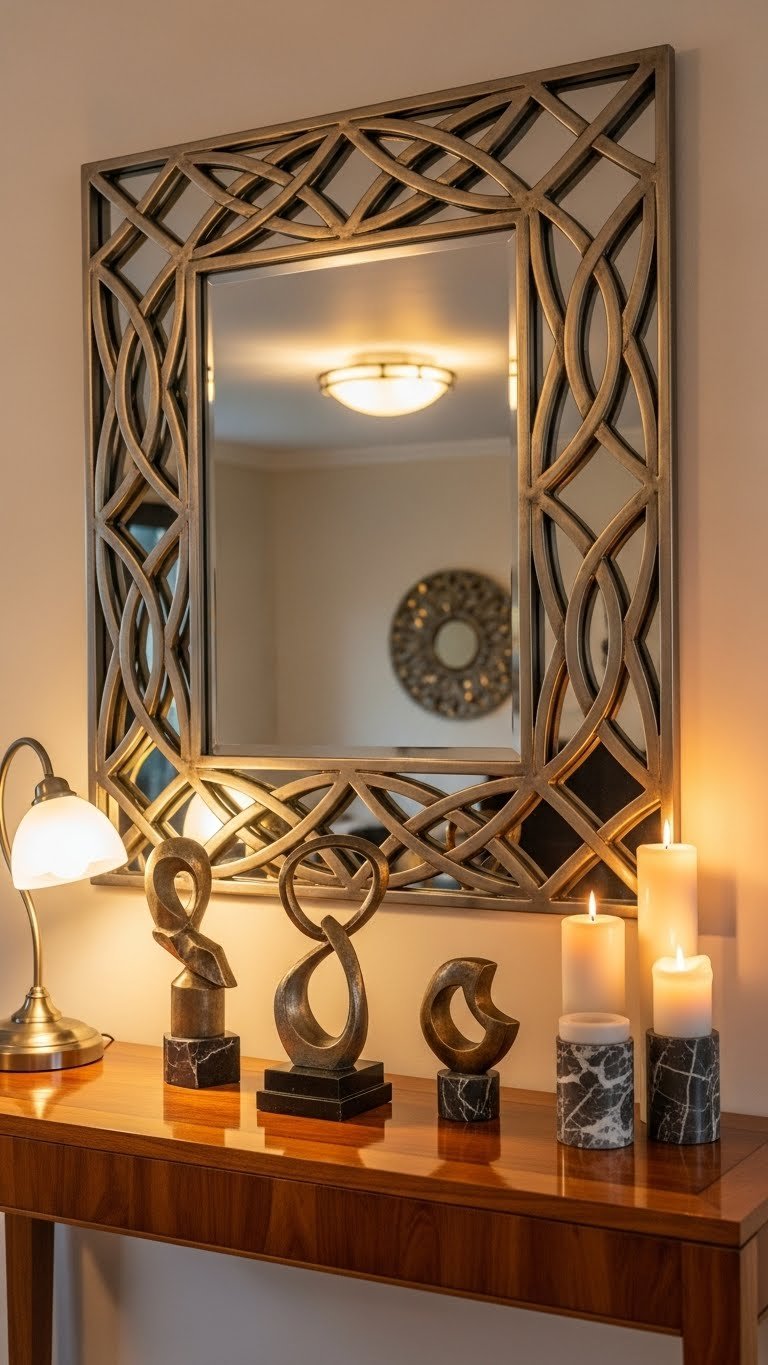
    17. Laser-Cut Metal Frame with Intricate Geometric Pattern

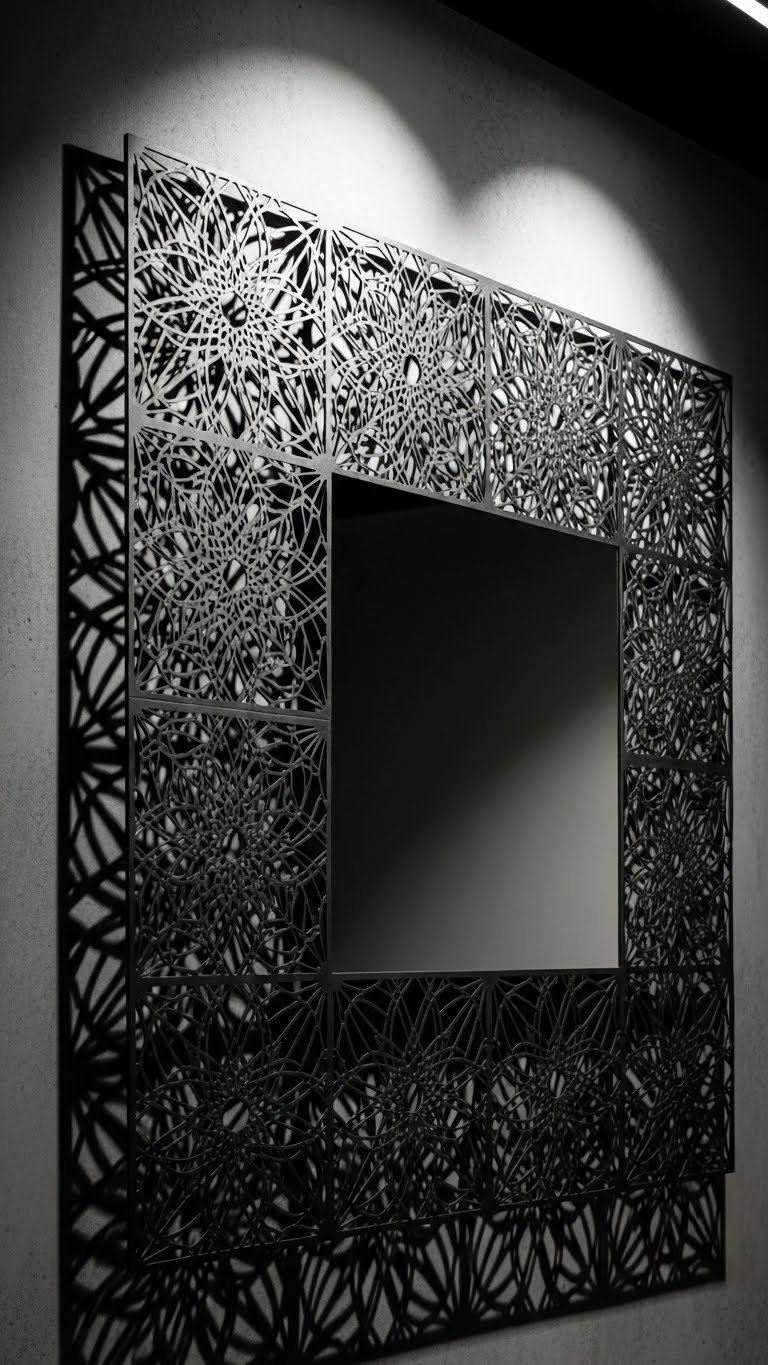
    Laser-cut metal frames offer precision and intricacy that hand-carving can’t always achieve. The cut-out patterns cast shadows that change as light shifts throughout the day.

    These are typically higher-end: Design Within Reach ($300–$600), specialty metal workers on Etsy ($200–$500), or Made.com ($250–$450). They’re statement pieces, so invest if you love the design.

    Pro tip: A laser-cut frame works best as a standalone focal point—keep walls around it simple so the frame doesn’t compete with other patterns.

    The precision of the laser-cut design makes your space feel modern and intentionally artistic without being chaotic.


    18. Leather-Wrapped Frame with Stitched Edge Detail

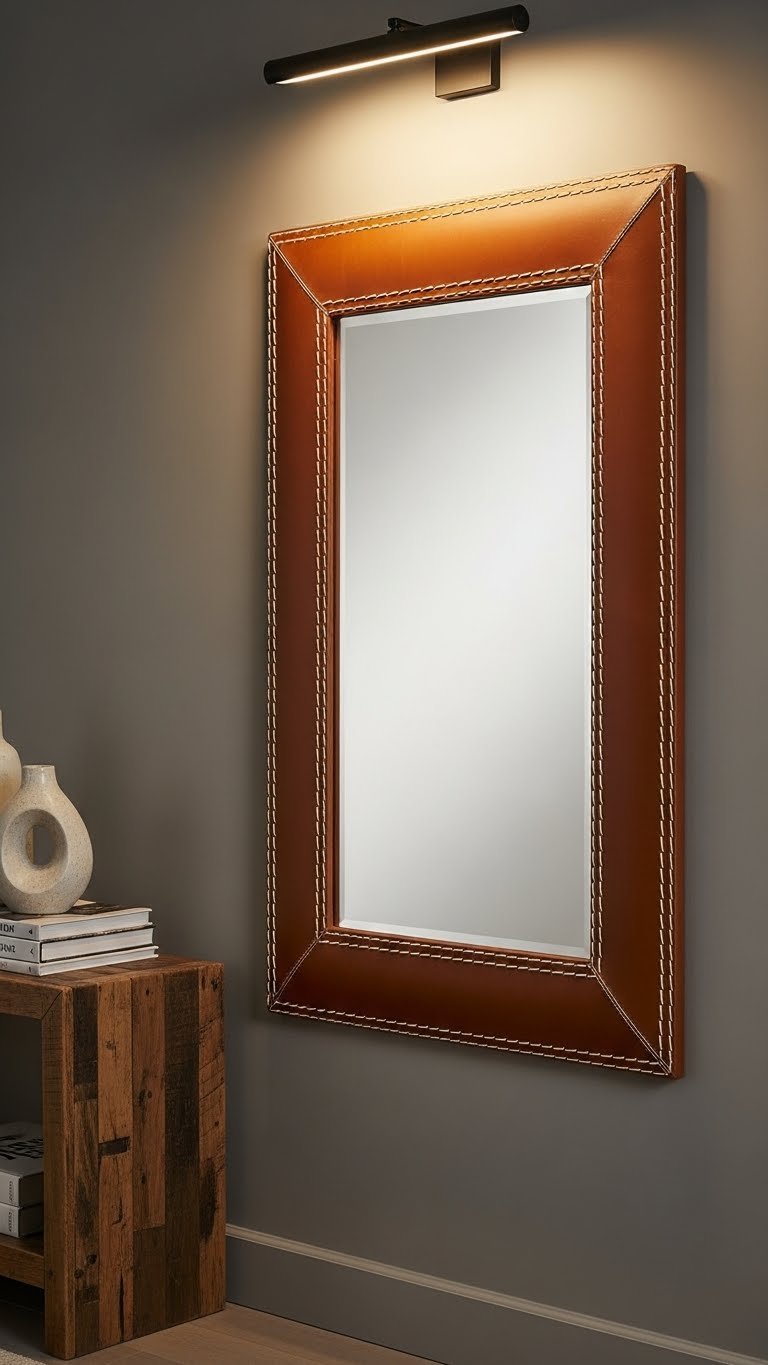
    Leather-wrapped frames bring unexpected texture and sophistication. The stitching adds handcrafted detail and reads as more upscale than standard frames.

    Etsy has artisan leather mirrors ($150–$350), or check Made.com ($200–$400) and specialty home retailers. These are typically lightweight despite their rich appearance, so standard wall hardware works fine.

    Professional vibe: A leather-framed mirror in a home office or bedroom reads as more intentional and considered than generic décor.

    The tactile quality of leather makes your mirror feel like something you’d want to touch, turning it into functional art rather than just reflective utility.


    19. Painted Wood Frame with Hand-Brushed Texture

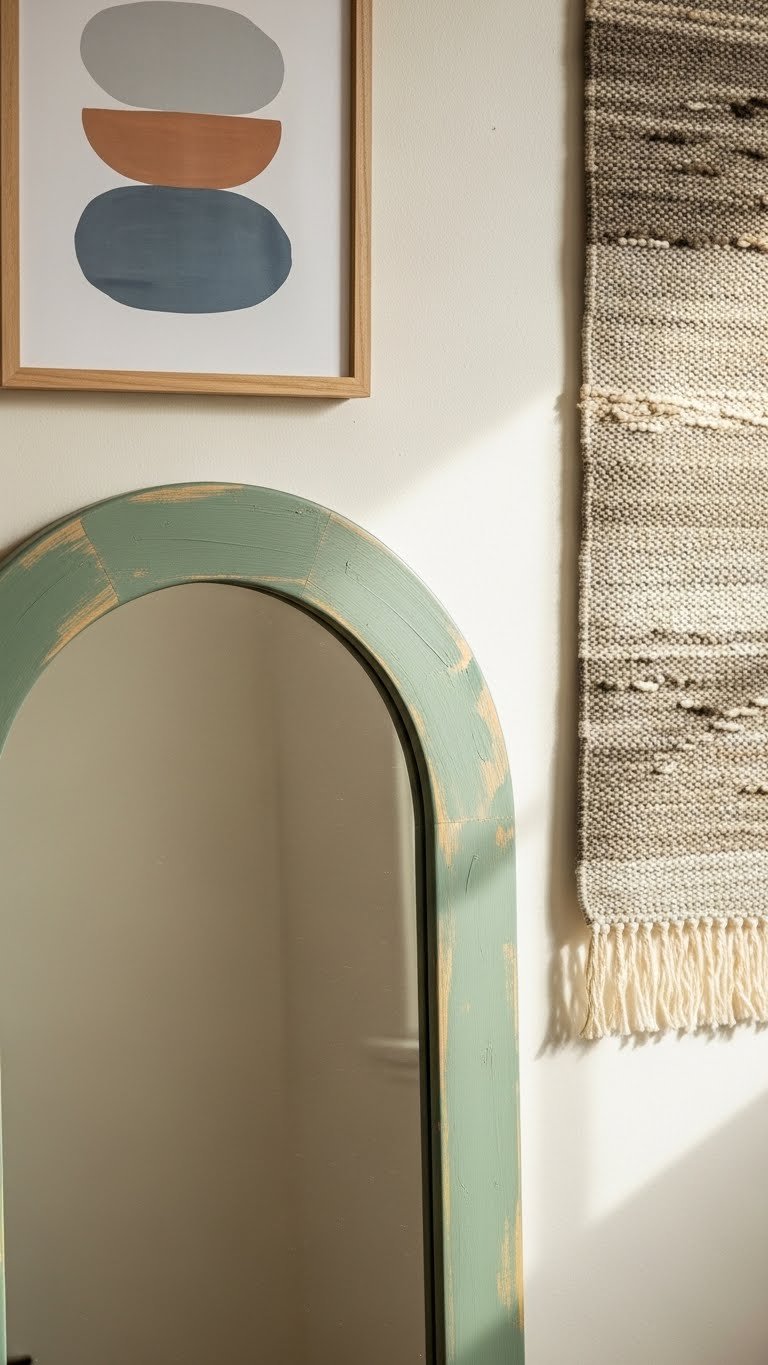
    Hand-brushed painted frames read as more artisanal than machine-finished pieces. The visible brush strokes and slight color variations add character and authenticity.

    Buy an unfinished wooden frame at Michaels or Hobby Lobby ($15–$40) and paint it yourself with quality acrylic or furniture paint ($10–$20). Takes 1–2 hours plus drying time. Or find painted frames on Etsy ($80–$200) or Wayfair ($60–$150).

    Color hack: Choose a paint color that echoes your wall color but is slightly lighter or darker to create subtle dimension.

    The visible imperfections make your mirror feel collected and authentic rather than mass-produced and sterile.


    20. Rope and Metal Hybrid Frame with Mixed Materials

    Mixing rope with metal frames bridges styles—it reads as both nautical and industrial while being more interesting than either material alone. The texture variation adds visual complexity.

    Look on Etsy ($120–$280) for handmade rope-and-metal combinations, or West Elm ($150–$300) for curated options. You can also DIY by wrapping rope around a basic frame and adding metal corner brackets ($40–$80 in materials, 2 hours assembly).

    Design flexibility: This hybrid style works in transitional, eclectic, or modern spaces because it doesn’t commit too heavily to one aesthetic.

    The mixed materials read as more sophisticated and curated, signaling that your décor is thoughtfully layered rather than hastily assembled.


    21. Carved Bone or Antler Frame with Artisanal Finish

    Carved bone or antler frames scream handcrafted and collected—they’re not something everyone has, which makes them special. The natural variations in material mean each piece is unique.

    These are typically found through specialty artisans on Etsy ($200–$500+) or high-end home shops. They’re investment pieces, but the uniqueness justifies the cost. Installation requires careful wall anchoring due to weight—plan 30 minutes.

    Collector’s note: These frames feel like something you found while traveling, even if you ordered them online.

    The primitive texture and natural material make your space read as more collected and less decorated-for-show, which reads as more sophisticated.


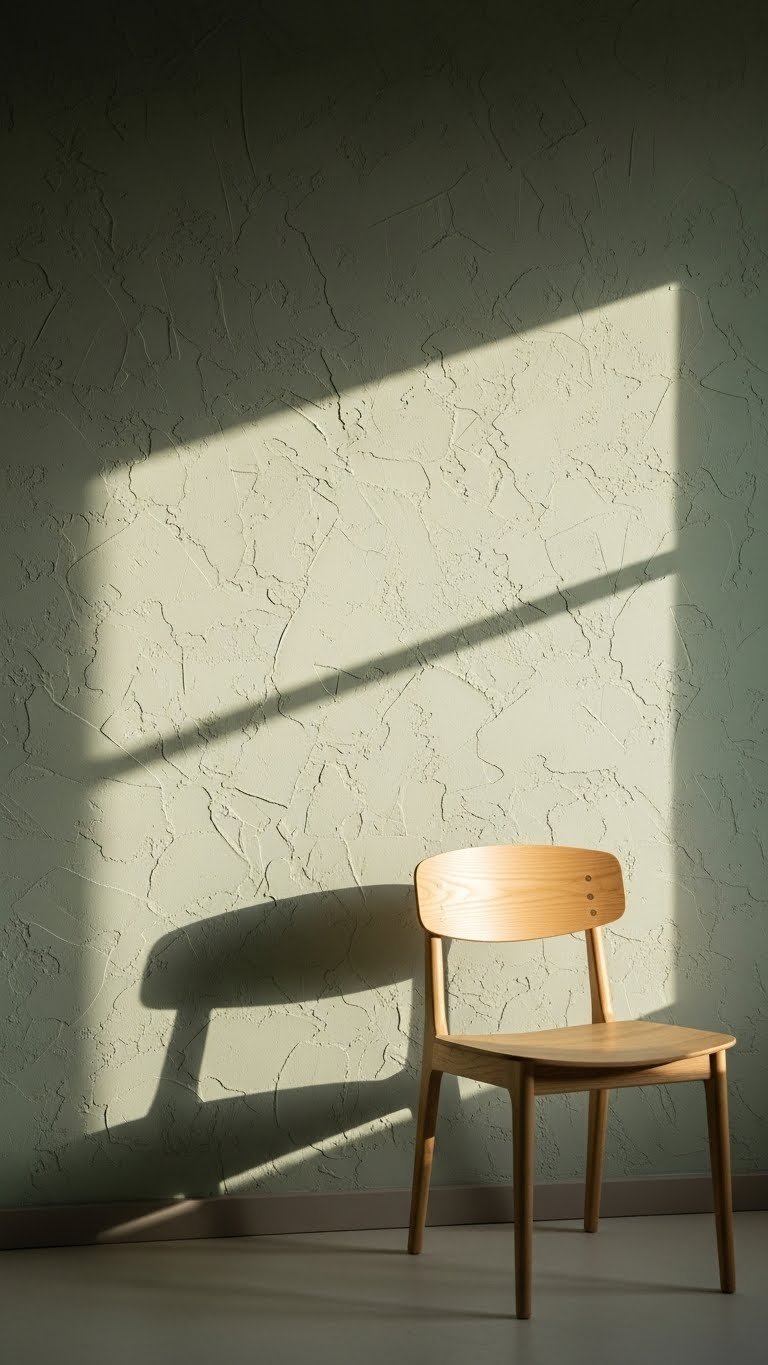
    22. Plaster or Cement Frame with Raw, Unfinished Texture

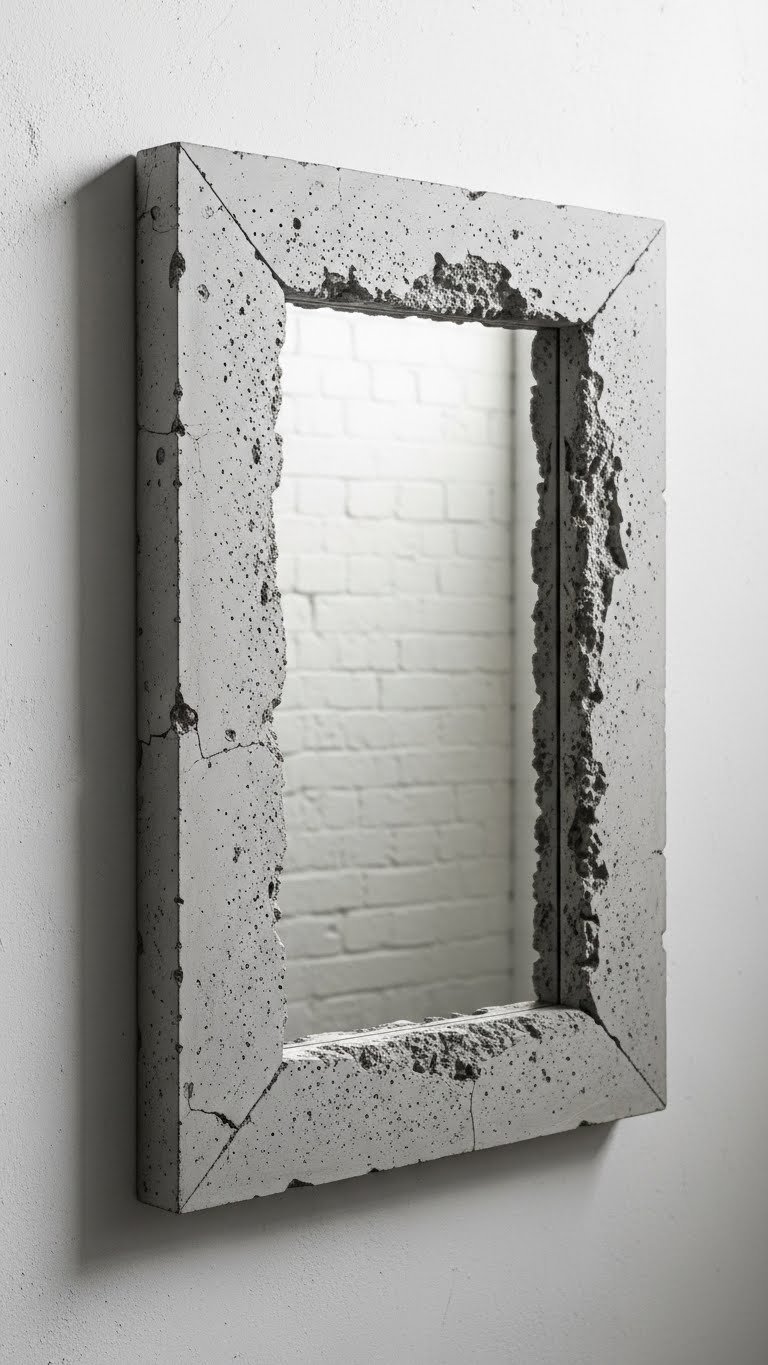
    Plaster or cement frames embrace imperfection as design. The rough texture reads as deliberately artistic rather than looking unfinished—it’s a statement about valuing raw materials over polish.

    Etsy ($150–$400) and independent designers are your best sources for these. You can also commission a local concrete artist to create a custom frame ($200–$600).

    Pro tip: Pair a raw plaster frame with minimalist or industrial décor. The texture reads better in spaces that embrace unpolished materials and negative space.

    The intentional imperfection makes your space feel more gallery-like and artistic than traditionally decorated.


    23. Appliqué or Relief Tile Frame with Ceramic Texture

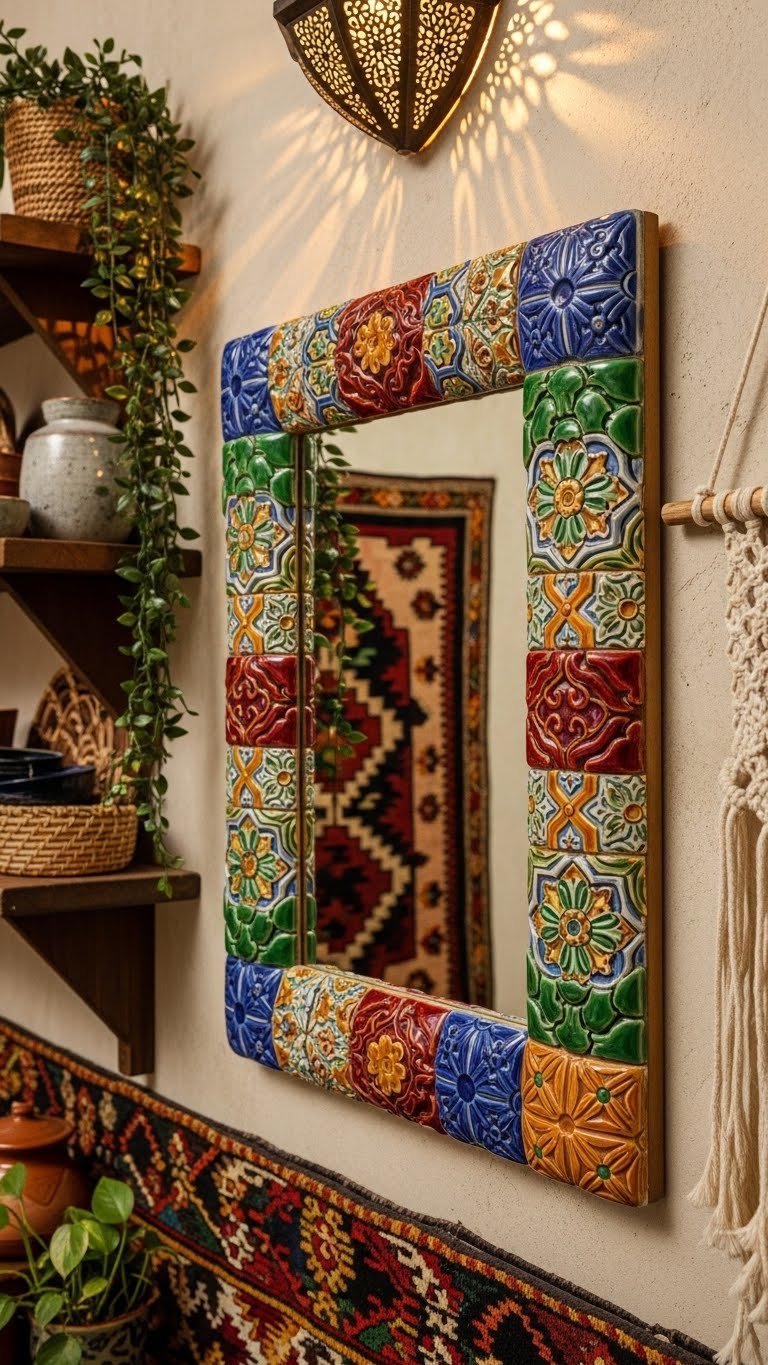
    Ceramic tile or appliqué frames bring handcrafted global charm. The raised relief and glazed finish add depth and color variation that painted frames can’t match.

    Etsy has artisan ceramic mirrors ($150–$400), and you can find Moroccan or Spanish-inspired versions at World Market ($100–$250). For a major DIY project, source adhesive tiles and arrange around a mirror frame yourself ($50–$100, 2–3 hours).

    Style versatility: This works beautifully in bohemian, Mediterranean, or maximalist spaces where pattern and texture are celebrated.

    The handmade quality and cultural inspiration make your space feel more traveled and worldly, less cookie-cutter interior-design magazine.


    24. Punched or Perforated Metal Frame with Shadow Play

    Perforated metal frames cast dynamic shadow patterns that change as light shifts. It’s functional art—the mirror reflects while the frame creates shadow theater on your wall.

    Find these on Etsy ($120–$300), Design Within Reach ($250–$400), or through metal workers and sculptors. These are statement pieces that work best as focal points.

    Light timing: The shadow patterns are most dramatic during golden hour light—perfect for photos and definitely Instagram-worthy.

    The moving shadows make your mirror more than static décor; it becomes a living artwork that changes throughout the day.


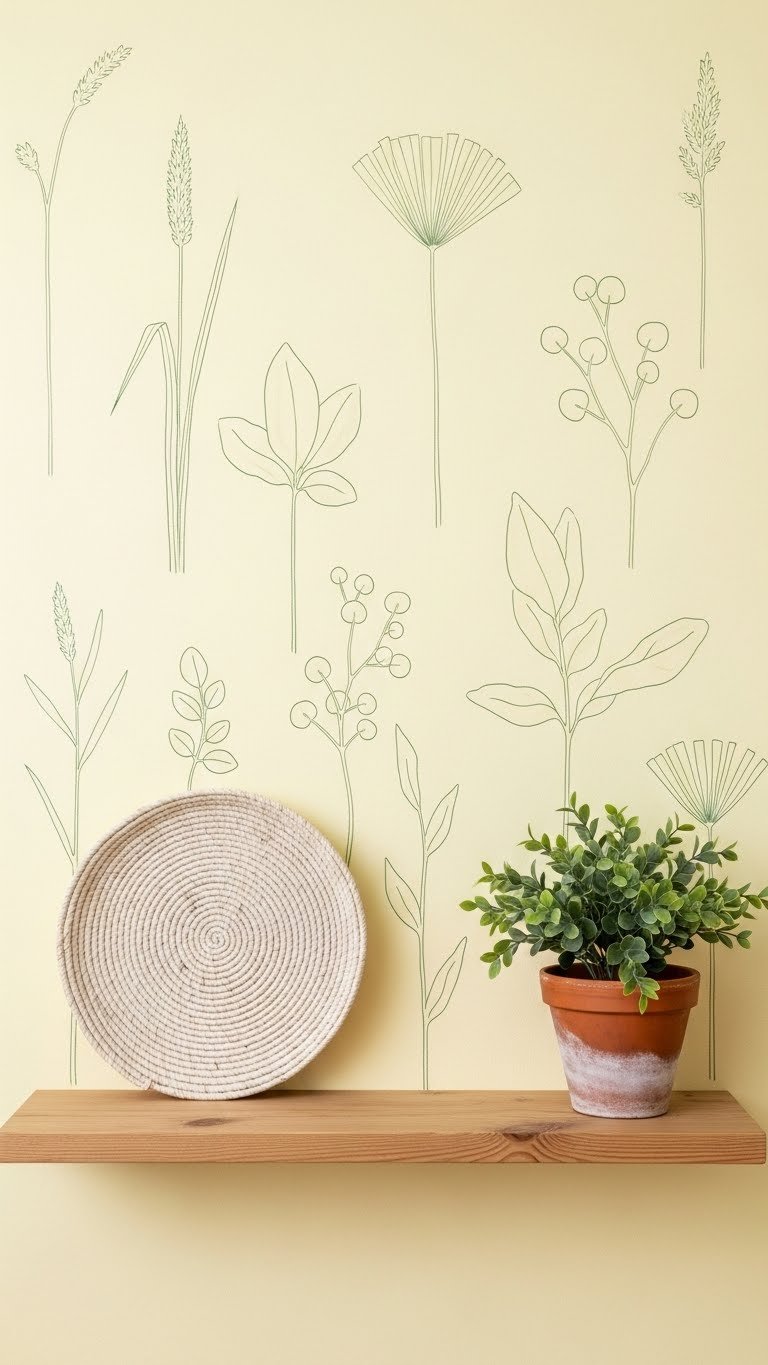
    25. Embroidered or Textile-Wrapped Frame with Fiber Art Detail

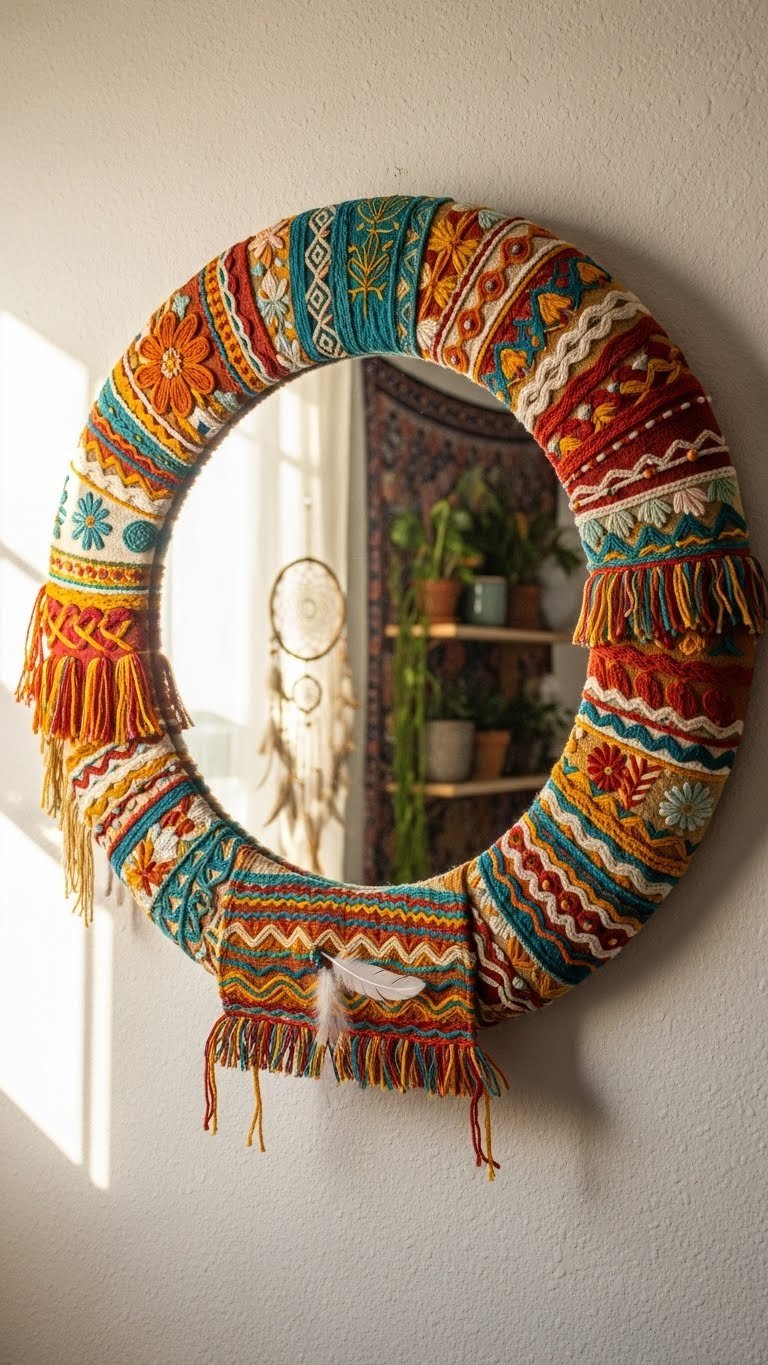
    Embroidered or textile-wrapped frames blur the line between mirror and fiber art. The stitched patterns and fabric textures read as more gallery-quality than decorative.

    These are typically one-of-a-kind pieces from fiber artists on Etsy ($150–$400) or craft fairs. Some makers offer commissions where you can choose fabric or pattern ($250–$600).

    Conversation starter: A textile-wrapped mirror is unique enough that guests will ask about it—it becomes a story piece, not just décor.

    The handmade textile quality makes your space read as more artistically curated and less commercially decorated.


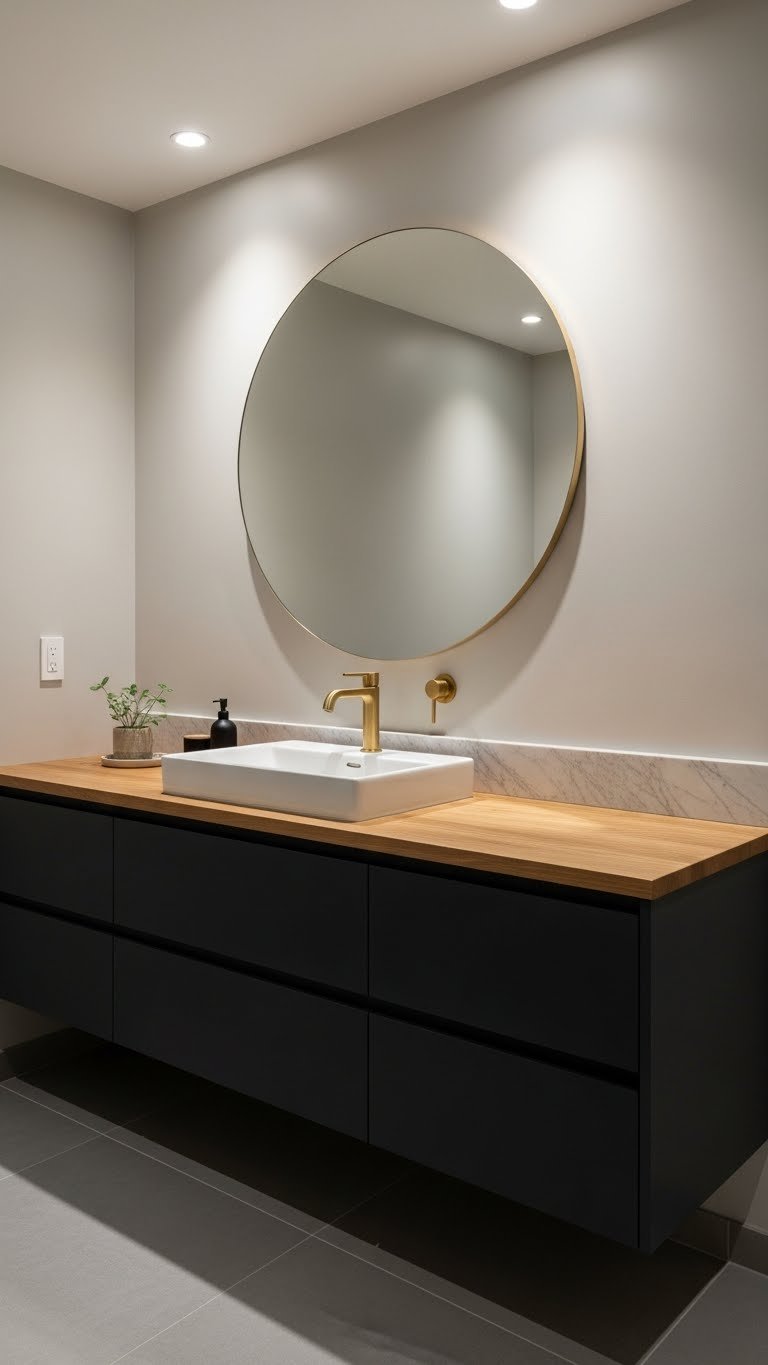
    26. Layered Wood Frame with Recessed Depth and Shadow Lines

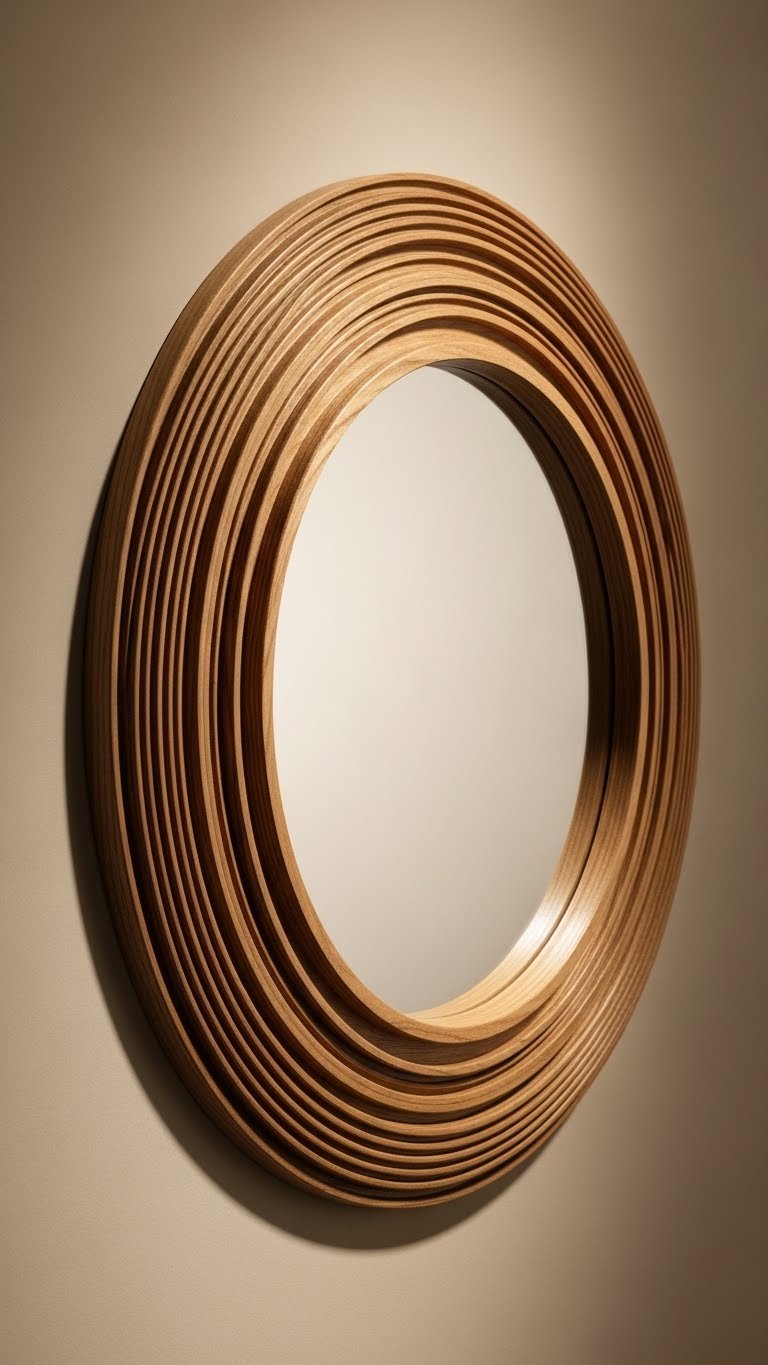
    Layered wooden frames create visual depth through simple stacking and recessing. The shadow lines add dimension without ornate carving—it’s minimalist sophistication.

    Hunt for these at Article ($120–$280), Schoolhouse Electric ($180–$350), or custom woodworkers on Etsy ($150–$400). They’re straightforward to hang and work in almost any style.

    Craftsmanship detail: The recessed layers show the maker’s attention to proportion and spacing—this is about refined simplicity, not decorative maximalism.

    The subtle depth makes your mirror feel intentionally designed by someone who understands proportion and restraint.


    Save this list and try just one mirror this month. Whether you go for carved, woven, or mixed materials, you’ll be surprised how much a textured edge changes a room’s personality. Which style calls to you?

  • 23 Thermal Curtain Ideas That Look Stylish & Save Energy

    23 Thermal Curtain Ideas That Look Stylish & Save Energy

    Winter heating bills climbing? You’re not alone. Most people don’t realize that windows are one of the biggest sources of heat loss in homes—but the right curtains can actually make a measurable difference in both comfort and energy costs. The best part? You don’t need to sacrifice style to stay warm. These 23 thermal curtain ideas blend 2025’s trendiest designs with serious energy-saving functionality, whether you’re renting an apartment or own your home. From DIY budget hacks to investment pieces that look like designer finds, you’ll discover practical solutions that keep heat in, cold out, and your spaces looking intentional. Ready to save money without compromising on aesthetics? Let’s dive in.

    1. Layer Sheer and Thermal Blackout Pairs

    Layering isn’t just a design trend—it’s one of the most effective ways to control both light and temperature. Pair lightweight linen sheers over thermal blackout curtains for maximum flexibility: let natural light in during the day, then close the heavier panels at night to trap heat and block drafts.

    Search for blackout curtain liners (IKEA, Target, or Amazon) and pair them with any curtains you already own—around $15-$30 per liner. If you’re starting fresh, a quality thermal blackout pair runs $80-$150. The combination takes about 30 minutes to hang if you have basic hardware installed. Pro tip: thermal fabrics work best when they touch the window frame and extend to the floor, sealing off gaps where warm air escapes.

    You’ll notice the temperature difference in your room within a few days—your heating system won’t have to work as hard, which shows up on your next utility bill.

    2. Install Cellular Honeycomb Shades Behind Curtains

    Honeycomb shades trap air in their cellular structure, creating an insulating barrier that curtains alone can’t match. Install them inside the window frame (behind your curtains) for a clean, minimalist look that still provides serious thermal benefits.

    Honeycomb shades cost $40-$100 depending on window size, and you can find them at Home Depot, Wayfair, or Lowe’s. Most install in about 20-30 minutes with just a screwdriver. Pair them with lightweight thermal curtains in front for a layered approach that looks intentional, not overdone. For renters, spring-loaded cellular shades require no drilling and cost around $30-$50 per window.

    The double-barrier system means warm air literally has nowhere to go, making these shades one of the highest-ROI upgrades for energy savings.

    3. Choose Linen Thermal Curtains in Earthy Tones

    Natural linen is having a major moment because it looks luxe but performs like a champion insulator. Thermal linen curtains have a thicker weave than regular linen, providing insulation without the heavy velvet weight—perfect if you want breathability and style.

    Quality thermal linen curtains range from $60-$180 per panel (check Wayfair, West Elm, or Amazon). Look for fabrics labeled “thermal linen” or “heavyweight linen blend.” At 40-50% thicker than standard linen, they’ll block drafts while still allowing soft, diffused light. Hang them floor-to-ceiling to maximize the insulating effect—every inch of coverage counts. These curtains machine wash on gentle cycles, so they’re practical for everyday living.

    The natural texture photographs beautifully for social media, and the subtle earthy vibe makes your space feel grounded and sophisticated all at once.

    4. Add Thermal Curtain Liners to Existing Curtains

    If you love your current curtains but want added insulation, thermal liners are your secret weapon. They attach to the back of any curtain with simple sewing or iron-on bonding, giving you energy savings without replacing what you already own.

    Thermal liners cost $15-$35 per panel and are available at IKEA, Joann Fabric, and Amazon. For a two-panel window, plan 45 minutes to 2 hours if you’re hand-sewing or using an iron-on method—no special skills required. Alternatively, many dry cleaners offer curtain alteration and can attach liners for around $20-$40 per panel, which is worth the investment if sewing isn’t your thing. The liners sit flush against the back of your curtains, so they’re completely hidden from the front.

    This budget hack lets you keep the aesthetic you love while dropping your winter heating bills noticeably—a rare win-win.

    5. Opt for Velvet Thermal Curtains in Jewel Tones

    Velvet is back, and thermal velvet is where luxury meets function. Heavier velvet fabrics naturally insulate and look like a splurge even when they’re mid-range. The fabric’s density blocks both light and cold air effectively.

    Thermal velvet curtains range from $100-$250 per panel, depending on quality. Jewel tones like emerald, sapphire, and deep plum are trending hard in 2025. Shop Wayfair, Williams Sonoma, or high-end retailers. Velvet requires gentle care—dry cleaning recommended—but it’s a worthwhile investment if you’re looking for something that feels special every time you look at it. The rich texture photographs beautifully and becomes a statement piece rather than “just” window dressing.

    Hanging velvet panels instantly elevates your space while keeping you toasty through cold months—plus the fabric becomes softer and more beautiful the more you use it.

    6. Create a Double-Rod Setup for Air Pockets

    Professional interior designers use double rods to create air pockets between curtain layers—that trapped air is an incredibly effective insulator. Mount one rod closer to the window and another about 6-8 inches in front, then hang different curtain weights on each.

    Two quality rods and hardware cost $40-$80 total (find them at Home Depot or IKEA). Installation takes about 1-2 hours if you’re comfortable with a drill; otherwise, hire a handyperson for $100-$150. This setup works beautifully with sheer liners inside and thermal blackout panels outside. The visual layering also looks intentional and designer-approved, not like you’re just trying to stay warm.

    The air gap between layers acts as insulation, meaning your heating system gets real help from your window treatment—and your rooms feel noticeably warmer.

    7. Use Deep Pleats for Maximum Fullness

    Pleats aren’t just decorative—they create depth and density that improves insulation. More fabric = more air pockets = better temperature control. Deep pleats (2-4 inches) give you both functionality and a polished, high-end look.

    When ordering custom or semi-custom curtains, request pinch pleats or French pleats with 2-inch depth. Expect to spend $100-$250 per panel for quality thermal fabrics with this level of detailing. If you’re handy, you can add pleats to existing curtains using pleat tape (around $10-$15 per panel) and an iron—roughly 30-45 minutes per panel. The deeper the pleat, the more insulation and the more dramatic your window becomes.

    The result is a polished, architectural window treatment that looks museum-quality while working overtime to keep your heating costs down.

    8. Go Full-Length to the Floor for Better Sealing

    This is simple but crucial: floor-length curtains seal the bottom gap where warm air escapes. Many people hang curtains just above the windowsill or baseboard, leaving a critical heat-loss zone open. Going full-length is one of the most effective energy moves you can make.

    Measure from your rod to the floor and add 0.5-1 inch for a subtle pool effect (which also looks intentional, not like a mistake). When ordering curtains, specify “floor-length” or give exact measurements—this prevents costly returns. The extra fabric typically costs only $5-$15 more per panel compared to standard lengths. Hang your curtains as close to the window frame as possible to minimize gaps on the sides.

    Those few extra inches of fabric create a significant temperature difference—your room will feel warmer, and you’ll notice reduced drafts from day one.

    9. Select Blackout Thermal Blends for Complete Coverage

    Blackout thermal blends combine multiple technologies: a light-blocking layer sandwiched between two fabric layers with thermal insulation built in. These are the heavy hitters of the curtain world.

    Quality blackout thermal blends cost $70-$200 per panel, depending on brand (Wayfair, Amazon, and Target carry excellent options). They block 99-100% of light while providing thermal resistance ratings—look for an R-value rating if available (higher numbers mean better insulation). These curtains are heavier and require sturdy hardware rated for weight (standard rods may sag). The trade-off: they’re not very breathable and can feel heavy if your space is already dark. For bedrooms, home theaters, or shift workers, they’re perfect. For living rooms, consider pairing with sheer daytime curtains instead.

    When closed, these panels create a nearly sealed environment—no light leaks, no cold drafts, and seriously effective climate control.

    10. Try Motorized Thermal Curtains for Hands-Free Control

    Smart motorized curtains seem luxury, but affordable options have arrived. Motorized thermal curtains open and close on timers or remote commands, and the consistent movement helps circulate air (keeping warm air from pooling), while closed panels trap heat overnight.

    Motorized curtain kits cost $200-$400 per window for reliable brands like Lutron or IKEA’s FYRTUR line. Installation takes 2-4 hours and may require an electrician ($100-$200 additional). The IKEA option is most budget-friendly at $150-$200 for basic motorization. The real value? Set them to close automatically at sunset and open at sunrise—no more remembering, and your heating system gets consistent help throughout the day.

    Programmable curtains feel futuristic while actually being functional, and they photograph beautifully for anyone documenting their home.

    11. Layer Gauzy Sheers Over Thermal Panels

    Gauzy sheers let light through during the day while maintaining visual privacy and softening harsh sunshine. Layer them over thermal panels to get daytime brightness without sacrificing nighttime insulation.

    Gauze sheers cost $20-$60 per pair, while thermal panels behind them run $80-$150 per pair. Hang the sheers on a lower rod (or use clips at a lower height) with thermal curtains on a standard rod above. This setup takes about 1-2 hours to install. The sheer layer adds almost no insulating value on its own but protects your thermal panels from dust and extends their lifespan. The combination looks layered and intentional—very 2025.

    Your space gets soft, diffused light during daylight hours, then thermal protection clicks in when you close the heavier panels at night.

    12. Choose Bamboo Thermal Curtains for Eco-Friendly Warmth

    Bamboo fabric is sustainable, thermal-efficient, and getting easier to find. Bamboo viscose or bamboo linen blends offer insulation comparable to pure linen while being gentler on the environment.

    Thermal bamboo curtains range from $80-$160 per panel—comparable to quality linen. Search brands like Parachute, Schoolhouse Electric, or sustainable retailers on Etsy and Amazon. Bamboo fabric is naturally antimicrobial and temperature-regulating, so it adapts to seasonal changes without getting stuffy. The texture is slightly silkier than linen, giving a more refined appearance. These work beautifully in eco-conscious spaces without compromising on warmth or style.

    You get the insulation benefits of natural fiber while knowing your purchase supports sustainable farming practices—that’s a feel-good win that’s also functional.

    13. Add Valances to Seal Heat Loss at the Top

    The area above curtains is often overlooked as a major heat-loss zone. A thermal valance or cornice board seals warm air from escaping above your curtain rod, significantly improving insulation.

    Fabric valances cost $30-$80 (IKEA, Wayfair, or DIY with basic sewing); cornice boards run $50-$150. Installation time is 30-60 minutes for a valance. The valance mounts directly above your curtain rod and extends to the wall, blocking the gap completely. Pair with floor-length thermal panels for maximum sealing. For renters, removable adhesive-backed valances exist (around $20-$40) and don’t require installation.

    That simple addition at the top of your window transforms your setup from “somewhat insulated” to “seriously sealed”—you’ll feel the difference immediately.

    14. Mix Patterns with Thermal Liners for Statement Style

    Want thermal protection without looking boring? Patterned thermal curtains let you make a design statement while getting serious energy performance. Plaids, botanicals, and retro prints are trending hard in 2025.

    Patterned thermal curtains run $90-$180 per panel (check Wayfair, John Lewis, or designer retailers). The pattern sits on top of the thermal layer, so you get full insulation with visual interest. These panels work best as a focal point—don’t be shy about letting them show. Pair with simple walls or neutral furniture so the curtains become “the thing.” The bold pattern photographs beautifully and instantly makes your space feel curated.

    Your windows become functional art that keeps you warm—no compromise between style and substance required.

    15. Use Swag and Tassel Details for Layered Insulation

    Classic swags and tassels aren’t just decorative—they actually create additional fabric layers and air pockets at the top of your window where heat escapes. When done right, they look romantic and intentional, not dated.

    Custom swags and tassel holdbacks typically cost $80-$200 installed, or $30-$60 for DIY versions using fabric remnants. This is a weekend project if you’re comfortable with basic sewing or glue-gun work. Pair swags with thermal panels below for maximum effect. The beauty of this approach: swags become a focal point, so you’re not fighting “it looks old-fashioned”—instead, it looks curated and deliberate.

    The result is a window that looks like it belongs in a design magazine while actually performing serious thermal work.

    16. Install Thermal Insulation Rods for Extra Performance

    Heavy-duty thermal rods aren’t just for hanging weight—they’re designed with insulation features built in. Some brands create rods with thermal barriers that prevent heat transfer through the rod itself.

    Thermal-engineered rods cost $40-$100 compared to standard rods at $15-$30. Brands like Ivilon and specialty hardware retailers carry them. They’re typically heavier and require solid wall anchors—installation might need a handyperson if your walls are delicate. The difference is subtle but real: you’re closing yet another pathway where heat can escape. Pair with quality thermal curtains and liners for compounding benefits.

    It’s a detail-oriented upgrade that most people never think about—but your heating system will notice the difference.

    17. Layer in a Thermal Roman Shade for Day and Night

    Roman shades provide customizable coverage and, when made from thermal fabric, offer independent temperature control separate from your curtains. Raise them during the day for light, lower them at night for insulation.

    Thermal Roman shades cost $60-$150 per shade (Wayfair, blinds specialty retailers). Custom ordering takes 2-3 weeks but ensures perfect fit. DIY kits are available around $40-$80 if you’re handy. Installation takes 1-2 hours with a drill. The shade works alongside (not instead of) thermal curtains, giving you precise control. This setup looks clean and modern while offering maximum flexibility.

    You get day-long privacy and light control, plus nighttime insulation—essentially two window treatments working in harmony.

    18. Choose Wool Thermal Panels for Winter Heavyweight Appeal

    Wool is naturally insulating, regulates temperature, and feels supremely luxe. Wool thermal panels are perfect if you live in a cold climate and want something that looks as substantial as it performs.

    Wool thermal curtains run $120-$250 per panel (explore Restoration Hardware, Anthropologie, or specialty fabric retailers). Wool is durable and gets softer with age, so it’s a genuine long-term investment. Dry cleaning is recommended ($3-$8 per panel annually), which is the trade-off. Wool naturally resists dust and wrinkles, so panels look polished even without pressing. These curtains make a bold statement and perform like champions in cold weather.

    If you’re in a climate with serious winters, wool thermal panels are the ultimate splurge—they look expensive because they kind of are, but they’ll outlast lesser fabrics and keep you warm for years.

    19. Create a Color-Drenched Thermal Room for Immersion

    Color drenching—matching your walls, curtains, and soft furnishings in the same hue—is huge in 2025, and it works beautifully with thermal curtains. When everything matches, the room feels intentional, sophisticated, and the thermal panels blend rather than compete.

    Paint walls and hang thermal curtains in the same earthy tone (olive, taupe, terracotta, warm gray). Paint runs $30-$60 per gallon; thermal curtains in matching colors are $80-$180 per panel. This approach takes 1-2 weekends (paint + curtain installation). The beauty: your thermal panels disappear into the room visually, so you’re not constantly aware of their functional purpose. The monochromatic effect actually makes spaces feel larger and calmer.

    Your window treatment becomes part of the room’s architecture rather than a separate element—a sophisticated approach that also delivers serious warmth.

    20. Invest in Temperature-Regulating Hybrid Fabrics

    New hybrid fabrics combine wool, linen, and synthetic fibers engineered specifically for thermal performance. These blend the best properties of multiple materials into one super-fabric.

    Hybrid thermal blends cost $100-$200 per panel, available from premium retailers and specialty fabric suppliers (check Etsy or Wayfair for brands like Restoration Hardware). These fabrics often have R-value ratings, so you know exactly how much insulation you’re getting. They typically regulate temperature better than single-fiber fabrics, staying comfortable year-round. Installation is standard but panels may be heavy—ensure your rods are rated.

    You’re paying more upfront but getting a fabric engineered specifically for energy efficiency—not a traditional curtain repurposed as thermal treatment.

    21. Use Sheer Thermal Blends for Lightweight Insulation

    For rooms where you want both light and insulation (kitchens, living rooms), sheer thermal blends offer a middle ground. These are less dense than blackout thermmals but more insulating than standard sheers.

    Sheer thermal blends run $50-$120 per panel (search “thermal voile” or “semi-sheer thermal”). They block 20-40% of light while providing modest insulation and maintaining visual openness. Layer two panels for more coverage, or pair one sheer thermal with a heavier blackout panel you close at night. Installation is simple—they’re lightweight and work with standard rods. This option works beautifully in minimal or Scandinavian-inspired spaces where heavy curtains would feel out of place.

    You get soft light during the day with enough thermal benefit to make a real difference—a smart compromise for open-concept spaces.

    22. Add Thermal Bottom Weights for Gap Sealing

    Sometimes the problem isn’t the curtain fabric—it’s gaps at the bottom where cold air sneaks in. Thermal weights sewn into the bottom hem keep panels pressed flat and sealed to the floor.

    Thermal weights cost $10-$25 per pair (IKEA, Joann Fabric, Amazon). If your curtains already exist, a seamstress can add them for $15-$30 per panel (takes about 30 minutes). DIY option: sew weights by hand (takes 1-2 hours per panel if you’re a beginner). The weights pull the fabric down and keep it from billowing, which both looks intentional and serves the purpose of sealing gaps. This is an overlooked upgrade that costs almost nothing but makes a measurable difference.

    Your thermal curtains now sit completely flat on the floor with zero drafts sneaking underneath—a small detail that genuinely impacts warmth.

    23. Mix Textures with Linen-Velvet Blends for Luxury Function

    Linen-velvet blends offer the breathability of linen with the insulation and softness of velvet. These hybrid fabrics look expensive and perform like champions, and they’re showing up everywhere in 2025 design.

    Linen-velvet blends cost $90-$180 per panel (check Wayfair, West Elm, or specialty retailers). The texture is refined without being heavy, making these work in both traditional and modern spaces. The blend regulates temperature well and the varied texture photographs beautifully with natural light. Installation is straightforward—just ensure your rods can handle the weight.

    You get the best of both worlds: the casualness of linen with the luxury feel of velvet, all while keeping your space warm and your utility bills lower.


    Pick one of these ideas and give it a try this weekend—you’ll be shocked at how much warmer your space feels and how much better your next heating bill looks. Share this guide with friends who rent or are tight on heating budgets; everyone deserves a warm, beautiful home.

  • 27 Blackout Curtain Ideas That Make Any Space Cozy & Light-Controlled

    27 Blackout Curtain Ideas That Make Any Space Cozy & Light-Controlled


    Introduction

    Let’s be honest: finding the right blackout curtains is harder than it should be. You want light control without sacrificing style. You need privacy but don’t want your room to feel like a cave. And if you’re renting? You definitely can’t drill holes everywhere. The good news is that blackout curtains have evolved way beyond heavy, industrial-looking panels. Whether you’re tackling a bedroom, nursery, home office, or living room, these 27 ideas show you exactly how to get cozy light-blocking coverage that actually matches your décor. From smart motorized options to budget-friendly hacks, you’ll find solutions for every room, every budget, and every design style. Let’s dive into how to control your light like a pro.


    1. Layer Blackout With Sheer Curtains for Maximum Flexibility

    Sheer curtains alone won’t block light, but paired with blackout panels they give you total control. You get gentle daytime filtering when you want it, complete darkness when you need sleep, and the sheers hide the blackout layer when pulled open—keeping things looking intentional rather than fortress-like.

    Install a second curtain rod (about 4–6 inches behind your main rod, roughly $15–$30) and hang lightweight sheers in front. Add your blackout curtains on the outer rod using tension rods (renter-friendly, $10–$20) or permanent brackets ($15–$40). This takes about 20 minutes to install and zero permanent damage if you use tension rods. You’ll find both at Target, IKEA, or Amazon.

    The payoff? You control exactly how much light enters—no compromise between style and function. Your room adapts to your mood and schedule instead of staying stuck in one lighting zone.


    2. Paint Your Walls a Warm Neutral to Amplify Blackout Effect

    When your walls and curtains live in the same color family, blackout panels don’t stand out as heavy or oppressive—they read as intentional design. Warm neutrals like taupe, warm gray, or soft greige paired with blackout curtains in complementary tones create a unified, restful space.

    Choose a warm-neutral paint (try Sherwin-Williams Accessible Beige or Benjamin Moore Revere Pewter, roughly $30–$50 per gallon) and pair it with blackout curtains in a slightly deeper or slightly lighter shade. One gallon covers most bedrooms. DIY painting takes 4–6 hours including prep; hiring a pro costs $300–$800 depending on room size. Renter? Use removable peel-and-stick wallpaper ($20–$40) instead—it achieves the same grounding effect.

    Your entire room becomes a cohesive retreat that feels intentional, not chaotic. The blackout panels fade into the background while still doing their job perfectly.


    3. Choose Thermal-Lined Blackout Curtains for Energy Savings

    Thermal linings don’t just block light—they insulate your windows and lower heating and cooling costs by 10–15%. The extra layer traps air and creates a barrier between outdoor temperatures and your interior, meaning your HVAC system works less hard.

    Look for Thermal Insulated Blackout Curtains from brands like Nicetown ($60–$90 per panel), ECLIPSE ($50–$80), or AmazonBasics Thermal ($40–$70). They’re heavier than regular blackout panels (expect 2–3 pounds per panel) so you’ll need sturdy rods rated for 10+ pounds ($20–$40). Hang them on a standard rod—takes 15 minutes. Check energy-efficient labels (many carry ENERGY STAR ratings) for added accountability.

    By winter, you’ll notice your room stays warmer longer. By summer, you’re keeping heat out. Over a year, the energy savings often offset the higher upfront cost. Plus, they’re genuinely silent—no light leaks, no drafts.


    4. Install Tension Rods for Renter-Friendly Blackout Setup

    Renters rejoice: tension rods hold blackout curtains securely without drilling holes, mounting brackets, or landlord approval. They work by creating pressure between two fixed points, holding curtains taut and in place.

    Buy adjustable tension rods (usually $12–$25 per rod) from Target, Walmart, or Home Depot. Measure your window’s interior width and choose a rod rated for your curtain weight—blackout panels are heavy, so grab one rated for 8+ pounds (check the packaging). Install the rod by twisting the tension knob until the rod expands and sits snugly between the window frame sides. Install time: 5 minutes. No tools needed. Renter tip: you can take the rods with you when you move.

    Your blackout curtains stay put without any wall damage. On move-out day, untwist the rod, slip it out, and you leave nothing behind. It’s genuinely that simple.


    5. Go Extra-Dark With Triple-Weave Blackout Fabric

    Standard blackout curtains block 95% of light. Triple-weave blackout fabric blocks 99–100%, making your room almost completely dark—perfect for shift workers, light-sensitive sleepers, or anyone needing true darkness.

    Triple-weave panels cost $80–$150 per panel versus $40–$70 for standard blackout, but the upgrade is worth it if light sensitivity affects your sleep. Brands like NICETOWN Triple Weave and Eclipse Total Blackout deliver nearly zero light leaks. Pair with a blackout tape ($8–$15, available at Amazon) to seal any tiny gaps where panels meet. Installation is identical to standard blackout curtains—same rods, same time, 15 minutes.

    You’ll actually notice the difference immediately: your room goes from “pretty dark” to “nighttime dark” no matter the time of day. Shift workers and light-sensitive sleepers report better, longer sleep within the first week.


    6. Match Curtain Color to Your Accent Wall for Unified Design

    Instead of defaulting to white, gray, or navy, match your blackout curtains to an existing accent wall. This approach makes your room feel designed rather than random, turning blackout panels into an intentional design element.

    Pick your accent wall color first (try jewel tones like emerald, sapphire, or ruby for drama, or warm earth tones like olive or terracotta for calm). Then, source blackout curtains in that same shade—$50–$100 per panel at retailers like Wayfair, West Elm, or Anthropologie. You might need to order custom or semi-custom panels to get the exact match (2–3 week turnaround, $100–$150 per panel). Installation is standard—20 minutes.

    Your room looks like you hired a designer. The blackout panels become part of your aesthetic story, not an afterthought. Guests will actually comment on how “put-together” your space feels.


    7. Use Magnetic Blackout Panels for Renter-Approved Flexibility

    Magnetic blackout panels stick to metal window frames using strong neodymium magnets—zero drilling, zero adhesive, zero landlord drama. They’re faster to install than traditional curtains and you can remove or reposition them in seconds.

    Purchase magnetic blackout panel kits like Sleepout Portable Blackout ($60–$100) or Nicetown Magnetic Blackout ($40–$70). Confirm your window frame is metal before buying (aluminum and steel frames work; wooden frames don’t). Attach the included magnetic strips to the panel’s top corners and sides, then snap it onto your window frame. Install time: 2 minutes. No tools required.

    You can take blackout coverage on and off instantly. Travel with them, move between apartments, or use them seasonally. They’re the most flexible blackout solution on the market, and renters especially love them because they leave zero trace.


    8. Pair Blackout Curtains With Cellular Shades for Layered Insulation

    Cellular shades have built-in air pockets that provide insulation, and when combined with blackout curtains, they create an insulating barrier that traps heat and blocks light from multiple angles. This combo is unbeatable for light control and energy efficiency.

    Install cellular shades (cordless preferred, $40–$80 from IKEA, Target, or Home Depot) inside your window frame, then hang blackout curtains on a rod beyond the frame ($50–$100). Both take 15–20 minutes to install. The cellular shades provide the first layer of light-blocking and insulation, while curtains handle the gaps and add style. Renter option: use tension rods for both for zero permanent installation.

    Light literally cannot find a way in. Your room stays insulated year-round. You’re paying less to heat and cool while sleeping better—a win on every front.


    9. Install Blackout Curtains on a Smart Motorized Rod

    Motorized blackout curtains open and close via app, voice command, or preset schedules. You wake up to gradual light, work without glare, and sleep to complete darkness—all without leaving bed.

    Smart motorized rods cost $200–$600 (brands like IKEA Fyrtur, Eve Motorized, Switchbot) and integrate with Alexa, Google Home, or Apple Home. DIY installation varies—some use existing rods, others require brackets ($50–$100). Setup takes 30–60 minutes for first-timers. You’ll need a stable WiFi connection and a smartphone to control. Not a tech person? Hire a smart-home installer ($150–$300).

    Once installed, you control your light environment from bed, work, or your phone across town. Schedules mean blackout happens automatically—no more forgetting to close curtains. It’s the most convenient option available, especially if you have mobility challenges or irregular sleep schedules.


    10. Choose Blackout Curtains in a Bold Color for Statement Style

    Blackout curtains don’t have to be boring neutrals. Bold jewel tones (sapphire, emerald, ruby) or warm saturated colors (mustard, burnt orange, deep plum) make a design statement while doing the same light-blocking job. This works especially well in rooms with neutral walls where you want one focal point.

    Look for blackout curtains in bold colors at Wayfair, West Elm, or Etsy ($60–$120 per panel). Options are limited compared to neutral palettes, so start shopping early—popular colors sell out. Hang on standard rods ($15–$40) using regular brackets ($10–$25). Installation is standard—20 minutes. Pro tip: pair with neutral walls and minimal other patterns to let your curtains be the star.

    Your bedroom becomes a design statement, not just a place to sleep. The bold color energizes the space while the blackout function keeps it practical. Everyone who visits will ask where you got them.


    11. Use Blackout Curtain Liners for Existing Curtains

    If you love your current curtains but need blackout function, skip replacing them entirely. Blackout liners attach to the back of existing panels, giving you darkness without losing your original style.

    Buy blackout liner fabric by the yard ($8–$15 per yard) from fabric stores or Amazon, or purchase pre-made blackout curtain liners ($20–$40 per panel) that hook onto existing curtains. If sewing, measure your curtains, cut liner to size, and hand-stitch or use fabric glue along the top and sides—takes 1–2 hours for a pair. If using pre-made liners, just clip or hook them on—5 minutes. No sewing skills required for hook-on versions.

    Your existing curtains stay exactly as they are, but now they block light and insulate. You get a free upgrade without the expense or waste of replacing perfectly good panels. It’s the most budget-conscious approach if you already own curtains you like.


    12. Seal Gaps With Blackout Tape or Velcro Strips

    Even perfectly hung blackout curtains leak a little light around edges and sides. Blackout tape or Velcro strips seal those gaps, trapping light and bumping your darkness from 95% to nearly 100%.

    Buy blackout adhesive tape ($8–$15 per roll, available at Amazon and Target) or heavy-duty Velcro strips ($6–$12). Clean the window frame with a dry cloth, then press the tape or Velcro along the top and sides where curtains meet the frame. Install time: 10 minutes per window. Remove using a hairdryer to soften the adhesive, then rub off residue. Renter-friendly: adhesive tape leaves minimal residue, but test on a small spot first.

    You’ve now achieved movie-theater darkness without spending $200 on triple-weave panels. The tape is nearly invisible, especially if it matches your curtain color or frame finish.


    13. Hang Curtains Floor-to-Ceiling for Maximum Drama and Height

    Floor-to-ceiling curtains visually expand your room’s height and add a layer of luxury. By hanging your rod near the ceiling rather than at the window frame, you trick the eye into perceiving taller ceilings while maximizing light-blocking coverage.

    Install your curtain rod 6–12 inches below the actual ceiling (not at the window frame). Use sturdy brackets rated for your curtain weight ($20–$50). Measure from rod to floor, then add 1–2 inches so curtains just kiss the ground—creates a polished pool effect. Hem or order floor-length blackout panels ($80–$150 per panel). Installation takes 20–30 minutes, or hire a pro ($50–$150). Renter concern? Use a tension rod at the ceiling (the highest point in your room) plus floor-length panels for non-permanent installation.

    Your room instantly feels grander and more intentional. The vertical lines draw eyes upward, and complete light coverage becomes achievable—plus you get that aspirational, designer-decorated vibe.


    14. Mix Blackout Curtains With Decorative Tiebacks for Polished Styling

    Blackout curtains don’t have to look utilitarian. Pairing them with decorative tiebacks (brass rings, beaded straps, macramé cords) upgrades their visual impact and makes them feel like a designed choice rather than a functional necessity.

    Purchase decorative curtain tiebacks ($15–$40 per pair) from Target, Wayfair, or local boutique home stores. Options include brass rings, beaded straps, macramé, or even fabric ribbon. Install tieback holders or hooks ($5–$15 each) on your wall or window frame—5 minutes. Drape open curtains and secure with tiebacks during the day. No permanent changes: use removable adhesive hooks (renter-friendly, $8–$12) instead of screws.

    Your blackout panels suddenly look intentional and designed. Tiebacks add texture, visual interest, and a polished finish that makes the whole window feel curated.


    15. Choose Linen-Blend Blackout Curtains for a Softer Look

    Not all blackout curtains feel heavy and stiff. Linen-blend blackout fabrics combine the breathability and texture of linen with blackout performance, giving you light control without the harsh industrial vibe.

    Search for linen-blend blackout curtains (often marketed as “linen-look” blackout, $70–$130 per panel) from Wayfair, West Elm, or Article. These typically contain 30–50% linen mixed with polyester for durability. The linen content gives a softer drape and visible weave texture. Installation is standard—20 minutes. Care: vacuum regularly to reduce dust, and wash according to fabric-care tags (usually cold water, gentle cycle).

    Your room feels softer and more refined. The linen-blend fabric looks intentional, not purely functional. Light-blocking happens quietly in the background while your curtains actually look good.


    16. Layer Blackout With Semi-Sheer Curtains in the Same Color

    Matching your blackout layer with a semi-sheer in the same color creates a monochromatic look that reads as intentional design rather than functional band-aids. When you pull back the sheers during the day, the blackout layer hides behind but stays accessible.

    Install two rods (inner and outer, $15–$50 each) using adjustable brackets, then hang semi-sheer panels ($30–$60) on the inner rod and blackout panels ($50–$100) on the outer rod. Both should be the same color—search “matching blackout and sheer sets” for simplicity. Installation takes 25–30 minutes. Renter tip: use tension rods for both layers.

    Your window has sculptural, intentional styling while maintaining total light control. It looks designed and functions perfectly. Win-win.


    17. Install a Valance Above Blackout Curtains to Hide the Rod

    Blackout curtains don’t always have visible hardware in designer-decorated rooms. A valance hung above the blackout panels hides the rod and brackets while adding a decorative element that elevates the entire window treatment.

    Purchase a pre-made fabric valance ($25–$60 from Target, Wayfair, or HomeGoods) in a color or pattern that complements your blackout curtains. Install using a valance rod ($15–$30) mounted 1–2 inches above your blackout curtain rod. Takes 15 minutes. Alternatively, make a simple DIY fabric valance by sewing a rectangular piece of fabric and attaching it to a tension rod—costs $15–$30 for fabric and 1–2 hours to construct.

    Your window looks polished and intentionally decorated, not just “blocked with blackout curtains.” The valance adds visual interest and sophistication while hiding all the mechanical bits.


    18. Use Blackout Curtains to Create a Home Theater Vibe

    Home theater rooms and media spaces need absolute darkness to minimize glare and maximize screen visibility. Blackout curtains deliver theater-level light control and actually improve picture quality by reducing ambient light interference.

    Install blackout curtains in deep colors ($70–$130 per panel) from the ceiling to floor, covering the entire wall behind or around your screen if possible. Use motorized rods ($200–$600) for convenience—press a button and your theater transforms from living space to screening room. Pair with blackout tape on any gaps ($8–$15). Total installation: 30–60 minutes for standard setup, longer if adding motorization.

    Your screen image improves dramatically—colors pop, blacks are truly black, and no distracting ambient light washes out your picture. Movie night becomes a genuinely immersive experience.


    19. Choose Velvet Blackout Curtains for Luxury Texture

    Velvet blackout curtains combine luxury texture with light-blocking performance. The fabric has inherent glamour and depth, making your window treatment feel high-end while delivering functional darkness. Jewel tones (emerald, sapphire, ruby) pair especially well with the velvet finish.

    Search for velvet blackout curtains ($100–$180 per panel, higher if custom) at West Elm, Anthropologie, or Etsy. Quality matters here—real velvet with a blackout lining performs best. Installation is standard—use heavy-duty brackets rated for 15+ pounds since velvet is dense ($20–$40). Hang on a sturdy rod ($25–$50). Takes 20 minutes. Care: vacuum regularly to maintain pile, and avoid washing (dry cleaning preferred, $15–$25 per panel).

    Your window becomes a textural focal point. The velvet catches light beautifully and feels luxurious to touch. Your bedroom instantly looks more curated and sophisticated.


    20. Combine Blackout Curtains With Roller Shades for Dual Control

    Roller shades inside your window frame plus blackout curtains on a rod outside gives you redundant light control and a sleeker look if you prefer not to show traditional curtain panels.

    Install blackout roller shades ($30–$80 per window, available at IKEA, Home Depot, or Wayfair) inside your frame, then add blackout curtains on a rod mounted on the wall beyond the frame ($50–$100). Installation takes 25–30 minutes total. You can operate them independently—raise the shade but close the curtains for different looks, or close both for maximum darkness. Renter tip: use adhesive-mounted roller shades (temporary blackout shades, $20–$50) plus tension-rod curtains for zero permanent damage.

    You have precise control over light levels. Lower the shade halfway while curtains stay fully closed, or vice versa. It’s the most customizable light-control setup available.


    21. Install Blackout Curtains Over French Doors or Sliding Glass Doors

    Glass doors are notoriously hard to insulate and light-block. Blackout curtains mounted on rods extending beyond the door frame solve both problems while looking intentional and designed rather than temporary.

    Measure the entire door width plus 12 inches on each side for full coverage. Install a sturdy rod ($30–$60) using heavy-duty brackets ($25–$50) mounted to the wall (not the door itself). Hang floor-length blackout panels ($80–$150 per panel)—you may need multiple panels depending on door width. Installation takes 30–45 minutes. Professional installation ($100–$250) ensures brackets are secure and balanced.

    Your glass doors now provide complete light and privacy control. The room feels more secure at night, better insulated, and more intentionally decorated. No more light pouring through glass at 6 AM.


    22. Use Blackout Curtains in a Child’s Room for Nap-Time Success

    Children sleep better in dark rooms, and blackout curtains make nap schedules actually work. Choose a fun color or pattern that fits your child’s room aesthetic so the curtains don’t feel clinical or gloomy.

    Select blackout curtains in fun colors or subtle patterns ($50–$100 per panel, available at Target, IKEA, or Wayfair). Avoid harsh black if it feels too stark; instead try soft blues, purples, greens, or patterns with stars and clouds. Install on a standard rod at a safe height (children can’t pull down: use brackets rated for your curtain weight, $15–$40). Installation takes 15 minutes. Safety note: avoid drawstring tiebacks; use magnetic or ring-style tiebacks to prevent entanglement.

    Your child naps through afternoon light. Bedtime comes earlier because the room actually gets dark. You get quiet afternoon hours back. It’s a game-changer for parents and kids alike.


    23. Layer Blackout With Acoustic Panels for Sound + Light Control

    If you need light and sound control (home office, bedroom next to traffic, podcasting studio), combining blackout curtains with acoustic treatment solves both problems at once.

    Mount acoustic foam panels inside your window frame ($40–$100, available at Amazon and music stores), then hang blackout curtains on an exterior rod ($50–$100). The acoustic material absorbs sound while the blackout layer blocks light. Installation takes 30–40 minutes. Renter option: use removable adhesive-backed acoustic tiles ($30–$70) instead of screwing panels to the wall.

    Your window now controls both light and noise. Outside traffic, sirens, or neighbor activity becomes muffled. Your sleep improves and your focus deepens—especially useful if you work from home or live in a busy area.


    24. Stagger Blackout Curtain Panels for a Layered, Modern Look

    Instead of matching pairs, hang blackout panels at different lengths for a modern, intentionally asymmetrical look. This works especially well if you have multiple windows or want a contemporary design statement.

    Order floor-length blackout panels for some positions ($80–$150 per panel) and window-length panels for others ($50–$100 per panel). Install using a single rod with multiple panels hung at staggered heights. Takes 25–30 minutes. Tie back one side with a decorative tiebacks ($15–$30) to frame the stagger intentionally. Plan your spacing first—sketch it on paper to avoid mistakes.

    Your window treatment becomes an art installation. It looks contemporary and designed, not thrown together. Guests notice the intentional asymmetry and ask about it.


    25. Go Blackout-Free With Blackout Paint on Your Walls Instead

    If you love the look of lightweight curtains but need darkness, blackout paint applied to your walls can absorb ambient light and create a dark room without heavy blackout panels. It’s unconventional but works beautifully in the right spaces.

    Use blackout or black-body wall paint (technically dark, light-absorbing paint like Valspar Black Onyx or Sherwin-Williams Tricorn Black, $30–$50 per gallon). Paint your entire room or an accent wall for depth. Pair with lightweight curtains ($30–$60) that you prefer aesthetically. Paint application takes 6–10 hours DIY or $300–$600 for professional painters. Paint dark walls to create the illusion of zero light even with non-blackout curtains.

    Your room looks moody and sophisticated while maintaining lightweight, stylish curtains. Unconventional, but it delivers the darkness you need with the aesthetic you want.


    26. Install Blackout Curtains on a Command Rail System for Renter Flexibility

    Command rail systems use adhesive (not drilling) to mount tracks and slides that curtains glide on. It’s the most flexible hardware option for renters and anyone wanting to swap curtains seasonally.

    Purchase a Command rail system ($25–$50 per kit, available at Target and Amazon) designed for heavy-duty use (curtain weight rating required). Mount according to instructions using 3M Command strips (included)—clean wall with rubbing alcohol first, press firmly, wait 24 hours before hanging curtains. Hang your blackout panels ($50–$100) on the gliding hooks. Total installation: 15 minutes. Removal: pull gently to detach, then use adhesive remover ($5–$8) to clean residue.

    You can take the entire system with you when you move. Swap curtains seasonally without adding new holes. It’s genuinely renter-proof and works beautifully.


    27. Create a “Blackout” Effect With Light-Blocking Spray for Window Glass

    If you want light control without fabric curtains entirely, light-blocking spray applied directly to your window glass reduces light transmission while maintaining window aesthetics. It’s perfect for rental apartments where you can’t install hardware or want a minimal look.

    Buy window privacy spray like Frost King Window Film or frosted glass spray ($10–$20 per can, available at hardware stores and Amazon). Clean window glass thoroughly, tape off frames, and apply spray in light, even coats per instructions—takes 20–30 minutes. It reduces light by 50–70% depending on application thickness. To remove, scrape carefully or use rubbing alcohol. Renter note: this leaves minimal residue if removed carefully, but test on a small window first.

    Your window maintains its look while blocking significant light. No curtain rods, no fabric, no installation headaches. It’s the most minimal light-control option available, though not quite as effective as full blackout panels.


    Save this guide for your next project and try just one layering combo this weekend—your sleep (or your work-from-home productivity) will thank you. Which idea will you tackle first?

  • 27 Modern Bathroom Ideas That Feel Sleek & Luxurious

    27 Modern Bathroom Ideas That Feel Sleek & Luxurious

    Your bathroom doesn’t need a total overhaul to feel like a luxury retreat. Sometimes the most impactful changes are small touches that shift how your space looks and feels every single day. Whether you’re renting, working with a tight budget, or planning a bigger renovation, these 27 ideas mix quick wins with smart upgrades that give you that high-end spa vibe without the six-figure price tag. You’ll find DIY projects you can tackle this weekend, affordable swaps that make a huge difference, and investment pieces worth saving for. Let’s dive into ideas that actually work in real life—no Pinterest-perfect nonsense here.

    1. Install a Low-Threshold Walk-In Shower

    Walk-in showers instantly elevate any bathroom because they look modern and feel more spacious than traditional tubs. A low or no-threshold entry creates an open, luxury feel and makes cleaning a breeze.

    You don’t need a full renovation to achieve this look. If you already have a shower, swap out the threshold strip for a sloped floor pan ($150–$400, Home Depot or local contractors). For renters, consider a removable corner shelving unit designed for walk-in spaces to fake the look. Installation takes a weekend or a professional can handle it in one day.

    Pro tip: Pair your walk-in with a frameless glass partition ($200–$800) instead of a shower curtain—it keeps the space feeling open and architectural.

    The result? Your bathroom instantly grows, and that shower becomes the showstopper of your space.

    2. Switch to a Rainfall Showerhead

    Rainfall showerheads make ordinary showers feel like a wellness experience—and they’re one of the easiest swaps you can make. The wide spray pattern and gentle flow feel indulgent while using water-efficient technology.

    Swap your old showerhead for a water-saving rainfall model ($50–$150 from brands like Hansgrohe, Delta, or Moen available at Lowe’s or Amazon). Most people can unscrew and screw in a new one in 10 minutes—no plumber needed. Look for models with pause features so you can control water usage between rinses.

    Budget hack: Basic rainfall heads start at $30–$40 if you skip the fancy brand names and still deliver that spa experience.

    You’ll notice the difference every time you shower—suddenly your daily routine feels like self-care instead of a chore.

    3. Add Heated Flooring for Winter Mornings

    Cold tile floors are a shock to your system on winter mornings—heated flooring solves that instantly. It’s a game-changer for comfort and adds genuine luxury appeal to any bathroom.

    Electric radiant heating mats range from $200–$1,500 depending on bathroom size (available at Home Depot, Wayfair, or Schluter Systems). DIY installation works if you’re comfortable with basic electrical work, or hire a professional ($500–$1,000 labor). Installation takes 1–2 days. For renters, look for portable heated mats ($30–$80) that sit on top of existing tile.

    Pro tip: Bundle this with a programmable thermostat ($100–$200) so the floors only warm up before your morning routine—saves energy and money.

    Your bare feet touch warm tile every morning, and you’ll wonder how you ever lived without it.

    4. Create a Spa-Inspired Color Palette

    Paint color sets the mood for your entire space—moving away from generic white or beige to soft, intentional tones creates an instant spa atmosphere. Think sage green, soft blue-gray, or warm taupe instead of stark whites.

    Pick one wall or go all-in—either works. Use high-quality bathroom paint with mildew resistance ($30–$60 per gallon, Benjamin Moore or Sherwin-Williams available everywhere). One person can paint a bathroom in a weekend; professional painters charge $500–$1,200 depending on size. Budget option: stick to one accent wall and keep others neutral.

    Pro tip: Pair your new wall color with matching towel sets ($20–$60) and a simple plant or two to anchor the spa vibe without overwhelming the space.

    The shift happens the moment you walk in—suddenly your bathroom feels intentional and calming instead of generic.

    5. Swap Out Harsh Lighting for Layered Options

    Bad lighting makes any bathroom feel uninviting, but layered lighting changes everything. You need bright light for morning routines and softer light for wind-down evenings—one fixture can’t do both.

    Install sconces on either side of your mirror ($40–$150 each, Wayfair or Rejuvenation) instead of a harsh center light. Add a dimmer switch ($15–$40, Home Depot) so you can adjust brightness. Budget $200–$400 total if you DIY, or $500–$800 with professional installation. For renters, try clip-on sconces or renter-friendly peel-and-stick versions ($30–$60).

    Pro tip: Choose warm white bulbs (2700K color temperature) rather than cool white—it’s more flattering and calming.

    Suddenly your bathroom has mood-making power, and your morning and evening routines feel completely different.

    6. Invest in a Statement Mirror

    A great mirror isn’t just functional—it becomes your bathroom’s anchor piece. Oversized, framed mirrors make spaces feel bigger and more designed instantly.

    Replace your basic builder mirror with a statement piece in a bold frame ($100–$400 from West Elm, CB2, or Wayfair). Matte gold, black, or brass frames add personality without being trendy. Mounting takes 30 minutes; rent a stud finder ($5 at Home Depot) if you need one. Budget option: a large round mirror ($50–$100 on Amazon) still makes a huge impact.

    Pro tip: An LED-backlit mirror ($150–$300) doubles as ambient lighting and grooming light—two functions in one piece.

    The right mirror changes how your whole bathroom reads—suddenly it looks intentional and curated instead of basic.

    7. Declutter with Floating Shelves

    Visible clutter makes bathrooms feel cramped—floating shelves create storage that looks like styling. You only display what you actually use or what looks good, so the space stays calm and open.

    Install floating shelves ($30–$80 per shelf, IKEA, Target, or Home Depot). You’ll need a stud finder and basic tools; mounting takes 1–2 hours for 2–3 shelves. Rent professional help if drilling feels intimidating ($100–$200). Fill them thoughtfully: rolled towels, small plants, a nice soap dispenser, and one candle. Less is more.

    Budget hack: IKEA’s basic shelves ($15–$30) look surprisingly sophisticated when styled well.

    Your bathroom instantly looks more open and organized, and you’ll use what’s on display more intentionally.

    8. Upgrade to a Dual Vanity

    Shared mornings become peaceful when each person has their own sink space. Dual vanities eliminate the “who gets to use the sink first” problem and add a high-end resort feel.

    If you have wall space, a ready-made dual vanity ranges $400–$1,500 (Wayfair, Overstock, local retailers). Professional installation adds $300–$800. No wall space? A floating dual vanity ($600–$2,000) uses creative mounting to maximize an small room. For renters or small spaces, a pedestal sink combo ($150–$300 each) in different corners creates the same effect without full cabinetry.

    Pro tip: Choose matching or complementary faucets ($50–$200 each) to tie the look together.

    Morning routines shift from competitive to calm when both people have their own grooming territory.

    9. Bring in Natural Wood Accents

    Hard bathroom materials—tile, chrome, glass—can feel cold. Adding warm wood textures brings coziness and sophistication that makes the space feel less sterile and more like a retreat.

    Introduce wood through a wooden vanity ($300–$1,200, Wayfair or IKEA), floating shelves ($30–$100, IKEA or Home Depot), or smaller pieces like a wooden stool ($30–$80, Target). You can also frame an existing mirror with wooden trim ($20–$50 in materials, a weekend DIY project). Budget-friendly option: a wooden ladder shelf ($40–$100) doubles as decor and storage.

    Pro tip: Stick to light or medium-toned woods (oak, birch, ash) in modern bathrooms—they read cleaner than very dark woods.

    The wood warms up your whole space and makes it feel more like a sanctuary than a utilitarian room.

    10. Install a Towel Warmer

    Wrapping yourself in a warm towel after a shower is one of those tiny luxuries that completely shifts your experience. Towel warmers are more achievable than you think.

    An electric towel warmer costs $50–$300 depending on size (Amazon, Wayfair, Home Depot). Wall-mounted models need a plug ($50–$150) or hardwired installation ($200–$400 with a professional). Freestanding warmers need zero installation—just plug in and place. Look for energy-efficient models with timers so you’re not running it 24/7.

    Budget hack: A basic warmer ($50–$80) does the same job as luxury brands.

    That simple ritual of grabbing a warm towel turns every shower into a small act of self-care.

    11. Go Bold with Patterned Tile

    If your whole bathroom is beige or white, you’re missing a chance to add personality. Bold patterned tile—on a single wall, floor, or even the shower niche—becomes instant visual interest without being overwhelming.

    Install patterned tile as a half-wall accent ($200–$600 in materials, Wayfair, Anthropologie Home, or local tile shops) or create a feature wall behind the toilet ($150–$400). Professional installation adds $400–$800. For renters, consider peel-and-stick tile alternatives ($30–$100 for smaller areas) or a single patterned accent tile framed as art.

    Pro tip: Stick to one bold pattern and keep walls neutral—mix patterns and colors gets chaotic fast.

    You walk in and instantly feel like you chose a space that’s uniquely yours, not a generic builder bathroom.

    12. Add a Statement Vanity in Black or Deep Tone

    Dark vanities anchor a bathroom and make any space feel more curated and high-end. They’re bold without being trendy and pair beautifully with almost any style.

    A ready-made black floating vanity costs $400–$1,500 (Wayfair, Article, or local cabinet makers). If your existing vanity is wood or light colored, you can paint or refinish it ($0 DIY or $300–$600 professionally) for a fraction of the cost. Pair it with a gold or brass faucet ($80–$200) for contrast that feels intentional.

    Budget hack: Paint it yourself with furniture-grade paint ($15–$30) for a custom look.

    The dark vanity becomes the room’s anchor, and suddenly your whole bathroom reads as intentional and grown-up.

    13. Create a Spa-Like Niche in Your Shower

    Shower clutter ruins the spa vibe—a recessed niche is where everything lives, hidden and organized. It looks expensive and keeps your shower feeling serene.

    If you’re renovating, build a recessed niche during tile work ($100–$300 in materials, professional installation $200–$500). For existing showers, a corner shelf with suction cups or adhesive ($15–$40, Amazon) fakes the niche look. Use it only for essentials: shampoo, conditioner, a nice soap, and one natural sponge. Everything else lives under the sink.

    Pro tip: Choose clear or frosted glass bottles ($10–$30) instead of colorful plastic ones—they look more spa-like.

    The organized niche keeps your shower feeling calm and intentional, not like a product graveyard.

    14. Swap Builder Faucets for Matte Black or Brass

    Generic chrome faucets are instantly replaced by style-forward finishes that feel current and thoughtful. Matte black and brushed brass are timeless and pair with nearly every aesthetic.

    Replace your faucet with a matte black or brass option ($60–$250, Delta, Moen, or luxury brands like Kohler available everywhere). If you’re handy, it’s a 30-minute DIY swap. If not, a plumber charges $100–$300 for installation. For renters, look for clip-on faucet aerators ($20–$40) in matte finishes that fake the upgrade temporarily.

    Pro tip: Match your faucet finish to other fixtures (mirror frame, light fixtures) for visual harmony.

    That single swap makes your bathroom look immediately more thoughtful and modern.

    15. Use Sustainable Water-Saving Fixtures

    Sustainability isn’t just good for the planet—it saves you money every month. Water-efficient fixtures cut your bills while looking exactly like regular fixtures.

    Install low-flow showerheads ($30–$100, all major retailers) and faucet aerators ($5–$15) in your sinks. Look for EPA WaterSense-certified products—they use 20–30% less water than standard fixtures without sacrificing pressure. Most installations are DIY (5–10 minutes each). If you’re replacing multiple fixtures, budget $200–$500 total installed.

    Pro tip: Your water bill drops noticeably within the first month—these pay for themselves.

    You save money, reduce waste, and your bathroom still looks sleek and modern.

    16. Install LED Lighting Throughout

    LED bulbs use 75% less energy than incandescent and last years longer. Switching is one of the easiest, highest-impact eco-upgrades you can make—and it saves hundreds annually.

    Replace all bulbs with warm white LED options (2700K, $3–$10 each at any drugstore or Amazon). Most fixtures take 60 seconds per bulb. If you’re upgrading fixtures, specify LED-compatible ones ($40–$150 per fixture). Your energy bill noticeably decreases month one, and you’re not changing bulbs every year.

    Budget hack: Costco and Amazon often have LED bulb multipacks ($10–$20) that beat individual pricing.

    Your bathroom is instantly brighter and more modern, and your electric bill shrinks.

    17. Organize with Under-Sink Pull-Out Drawers

    Under-sink chaos is invisible but stressful—pull-out drawers and organizers make everything accessible and intentional. You actually use what you store when you can see it.

    Install pull-out drawer organizers ($30–$100, IKEA or Container Store) or build custom ones ($100–$300, professional carpenter). DIY versions take 1–2 hours. Fill them with small bins ($10–$30) to corral items by category: hair products, cleaning supplies, first aid. Everything should be visible and accessible at arm’s reach.

    Pro tip: Use clear or frosted containers so you can see what you need without opening each one.

    You’ll spend less time searching for things and more time enjoying your organized, calm space.

    18. Bring in Live Plants and Greenery

    Plants transform a bathroom from sterile to alive. They thrive in humidity, look beautiful, and actually improve air quality—it’s a win on every level.

    Choose humidity-loving plants: pothos, snake plants, monstera, or ferns ($10–$30 each, local nurseries or grocery stores). Place them on shelves, counters, or in corner baskets. Group odd numbers of plants for visual interest. Water once weekly or less depending on plant type and light. Budget: $30–$100 for a solid collection.

    Pro tip: Low-light plants like pothos and snake plants thrive in bathrooms without windows.

    Your bathroom instantly feels more like a retreat, and the air quality noticeably improves.

    19. Upgrade to a Soft-Close Toilet Seat

    Loud slamming toilet seats are a jarring, unnecessary annoyance. A soft-close seat is a tiny upgrade that improves your experience every single day.

    Swap your toilet seat for a soft-close model ($40–$120, Home Depot, Lowe’s, or Amazon). Installation takes 10 minutes—just unbolts the old one and bolts on the new one. No plumber needed. Look for models with quick-release features for easy cleaning.

    Budget hack: Basic soft-close seats cost $30–$50 and work just as well as luxury versions.

    That smooth, quiet closing becomes a small daily pleasure you actually notice.

    20. Create a Spa Experience with Essential Oil Diffuser

    Scent transforms how you experience your bathroom. A diffuser running during your morning or evening routine adds a wellness layer that’s genuinely powerful.

    Place an ultrasonic essential oil diffuser ($25–$80, Amazon or Target) on your vanity or shelf. Add 3–5 drops of essential oil to water and let it run for 20–30 minutes before you shower. Try lavender for evening wind-down or peppermint for morning energy. Budget: $25–$80 for a quality diffuser, then $5–$10 per bottle of oil ($10–$15 for high-quality brands).

    Pro tip: Run it 20 minutes before your routine so the scent is subtle, not overwhelming.

    Suddenly your bathroom routine shifts from functional to ritualistic—it becomes something you actually look forward to.

    21. Install a Thermostatic Mixing Valve

    Temperature fluctuations ruin showers—a thermostatic valve keeps water at your exact chosen temperature. It’s a small upgrade that makes every shower feel intentional and perfect.

    A thermostatic mixing valve costs $150–$400 including installation (plumber or DIY if comfortable). It maintains your preferred temperature even when other fixtures use water, so you never get shocked by hot or cold. More advanced models include LED temperature display ($200–$500).

    Budget hack: A basic thermostatic cartridge ($80–$150) upgrades your existing faucet without full replacement.

    Every shower hits exactly the right temperature, and that consistency feels luxurious.

    22. Frame Your Mirror with Wooden Trim

    A frame transforms a basic mirror into a statement piece without replacing it entirely. Wooden trim adds warmth and intentionality instantly.

    Buy wooden trim or molding ($15–$40 at Home Depot) that fits your mirror size. Use construction adhesive or small nails to attach it directly to the wall around the mirror ($0–$20 in supplies). Takes 30–45 minutes for a clean finish. Paint or stain the trim to match your aesthetic ($5–$10 in paint).

    Pro tip: Light wood (oak, birch) reads modern; darker wood feels more traditional. Choose based on your space.

    That simple frame makes your mirror look curated and custom—suddenly your whole vanity reads as designed.

    23. Add a Freestanding Soak Tub (Even in Small Spaces)

    You don’t need a huge bathroom for a soaking tub—modern compact models fit small spaces and create instant spa energy. Even if you shower most days, a tub for occasional soaking is a luxury that justifies itself.

    A compact freestanding soaking tub (48–60 inches) ranges $800–$3,000 (Wayfair, Overstock, or local showrooms). Professional installation adds $1,000–$2,000. For renters or tight budgets, a portable acrylic soaking tub ($200–$500) sits in any space and drains into your shower or tub. It’s not permanent but delivers the experience.

    Pro tip: Pair it with Epsom salts and candles ($10–$30) for authentic spa vibes.

    Having a dedicated soak spot becomes your go-to relaxation ritual, even if it’s just once a month.

    24. Use Textured or Natural Stone Tile

    Textured stone or natural tile adds organic beauty and sophistication that smooth, uniform tile can’t match. It feels crafted and intentional.

    Install natural stone tile like slate, travertine, or marble ($3–$15 per square foot, plus professional installation $8–$15 per square foot). Or use porcelain that mimics stone ($1–$5 per square foot, cheaper and more durable). For a budget refresh, add just one accent wall or floor area instead of redoing everything ($200–$800 total).

    Pro tip: Textured stone is slippery when wet—pair with slip-resistant grout ($10–$20 per bag) or add a non-slip mat.

    Your bathroom suddenly reads as upscale and naturally beautiful instead of sterile.

    25. Create Mood with Candlelight

    The right candles instantly shift your bathroom from functional to ritualistic. They’re inexpensive but create disproportionate impact on how your space feels.

    Place unscented or lightly scented candles ($5–$20 each, Target, Anthropologie, or local home stores) on your vanity or floating shelves. Group odd numbers (3 or 5) for visual interest. Use them during evening routines or weekend mornings. Budget: $15–$50 for a rotating collection of scents.

    Pro tip: Tall jars prevent dripping and look cleaner than tapered candles in bathrooms.

    That warm, flickering light completely changes how you experience your routine—suddenly it’s self-care, not just cleaning yourself.

    26. Install Adjustable Shelving Above the Toilet

    Toilet storage feels wasted vertical space until you use it smartly. Adjustable shelving lets you customize height and creates a mini spa display that also functions.

    Install 3-tier adjustable shelving ($40–$100, IKEA or Home Depot) above your toilet. Anchor it securely into studs. Fill only 60% of space so it looks intentional, not packed. Style with rolled towels ($20–$50 for quality sets), a plant or two ($10–$30), and one decorative object. Budget: $100–$200 total for shelving and thoughtful styling.

    Pro tip: Leave the middle shelf slightly empty to break up visual weight.

    You’ve suddenly created extra storage and a focal point that looks like you actually designed your bathroom.

    27. Switch to a Wall-Mounted Toilet for Modern Simplicity

    Wall-mounted toilets make bathrooms read as contemporary and intentional—they create visual space and simplify cleaning by eliminating the base ring.

    A wall-mounted toilet costs $400–$1,500 plus $1,000–$2,500 in professional plumbing and installation (this is not a DIY project). It requires in-wall plumbing work, so it’s best for renovations or major updates. For renters or smaller budgets, this may not be feasible—but if you’re already renovating, it’s worth the investment.

    Pro tip: Pair it with a bidet toilet seat ($200–$400) for added luxury and functionality.

    Your floor opens up visually, and your bathroom instantly feels more designed and modern.


    Save this guide and try one idea this weekend—whether it’s swapping a faucet, adding plants, or painting an accent wall. Small changes add up fast, and your bathroom absolutely deserves to feel like a retreat.

  • 24 Very Small Kitchen Ideas That Maximize Tight Spaces

    24 Very Small Kitchen Ideas That Maximize Tight Spaces


    Small kitchens don’t have to feel cramped or frustrating. With the right design choices, you can make every inch work harder—and feel bigger—without a major renovation. Whether you’re renting, living in a studio, or working with a galley kitchen, these 24 ideas combine practical storage solutions, visual tricks, and smart styling to maximize your tight space. You’ll learn budget-friendly hacks alongside investment pieces, plus renter-approved options that don’t require landlord permission. Let’s turn your small kitchen into a space that’s both functional and genuinely enjoyable to cook in.


    1. Paint Walls Light to Expand Space

    Paint is the fastest way to make a small kitchen feel bigger—light colors literally bounce light around and create visual openness. Choose whites, soft grays, or pale cream for walls; these shades make the room breathe without feeling sterile.

    Go for a flat or eggshell finish to hide imperfections (glossy finishes can highlight flaws in small spaces). Benjamin Moore’s “Cloud White” or Sherwin-Williams’ “Alabaster” work beautifully and cost $25–$40 per gallon. A single-wall project takes 2–4 hours including prep. If you’re renting, peel-and-stick wallpaper in light tones offers the same effect without landlord pushback ($15–$30 per roll).

    The payoff is immediate: your kitchen opens up visually, and cooking feels less like working in a box.


    2. Install Open Shelving Instead of Upper Cabinets

    Open shelving removes visual weight and makes small kitchens feel airier—plus you gain easy access to everyday dishes without door swings. This works especially well if you don’t have tons of clutter or if you’re willing to display only items you love.

    Replace one or both upper cabinet runs with floating shelves (6–12 inches deep). Expect to pay $50–$150 per shelf installed, or $20–$60 for DIY floating shelves from IKEA or Home Depot. Installation takes 1–2 hours if you’re comfortable with a level and screws; hire help if you need wall studs located. Style with white dishes, a few cookbooks, and small plants—gaps matter here. Renter? Lean large shelves against walls and secure them with earthquake-proof brackets instead.

    You’ll instantly see how this opens up the room and makes daily cooking more streamlined.


    3. Add a Narrow Rolling Cart for Extra Storage

    Rolling carts slide into gaps that cabinets can’t fit—between the fridge and a wall, next to the stove, or in a corner. They’re mobile, affordable, and perfect for small spaces because you move them around seasonally.

    Pick a 3-tier slim cart (12–16 inches wide) from IKEA Råskog ($30–$40), Target, or Amazon. Stock the top tier with frequently used items like oils and spices, the middle with canned goods, and the bottom with bulkier appliances like a slow cooker. Costs just $30–$60 and needs no installation. If you move or redecorate, take it with you—totally renter-friendly.

    This small addition gives you functional storage without eating into precious counter or cabinet real estate.


    4. Use Vertical Wall Space for Magnetic Knife Strips

    Knives taking up drawer space are wasted real estate in a small kitchen. A magnetic strip on the wall frees up drawer storage while keeping knives accessible and safely organized.

    Mount a stainless steel magnetic strip (18–24 inches) at eye level on your backsplash or wall. Zwilling J.A. Henckels or Victorinox strips run $20–$50 and install with two screws in 10 minutes (renter-friendly if you use removable adhesive strips instead, $8–$15). Only knives with metal blades stick, so stainless steel works best. Avoid mounting above a stove where heat might affect the magnet.

    You reclaim drawer space while giving knives a styled, functional home that looks great in photos.


    5. Go Vertical with Wall-Mounted Pot Racks

    Pots and pans are bulky; wall-mounted or ceiling racks keep them visible and accessible without devouring cabinet space. This especially helps if your cabinets are already maxed out.

    Choose a wall-mounted or ceiling-hanging pot rack in black iron or brushed nickel ($40–$120 from IKEA, Home Depot, or Wayfair). Installation takes 1–2 hours with basic tools (or hire help for ceiling work—$100–$200 labor). Only hang cookware you use regularly; aesthetics matter since it’s visible. Renter? Adhesive wall hooks ($15–$30) can hold a few pans without drilling.

    Your cooking gear becomes décor while freeing up valuable cabinet inches below.


    6. Install Pocket Doors to Save Swing Space

    In tight kitchens, a door swing eats precious floor space. Pocket doors slide into walls instead, reclaiming inches.

    If your kitchen leads to another room via a traditional door, consider a pocket door installation ($500–$1,500 installed, depending on wall type). Installation takes a full day or two. This is a bigger project (not renter-friendly without landlord approval) but pays off immediately in how the space flows. Alternatively, replace a swinging door with a barn door on a track ($100–$300 DIY, 4–6 hours) for similar results with less structural work.

    The space you gain feels surprising—suddenly the kitchen opens up to the next room without a door constantly blocking your path.


    7. Choose Compact Appliances Sized for Small Spaces

    Standard appliances are too big for many small kitchens. Compact versions (24 inches instead of 30+) are designed for apartments and small homes and work just as well.

    Replace oversized appliances with 24-inch refrigerators ($600–$1,200), compact dishwashers ($400–$800), or slimline microwaves. Brands like GE, LG, and Samsung make quality compact lines. Measure your space first—this isn’t a quick project (budget half a day to a full day for removal and installation), and you’ll need professional help for gas or complex electrical ($200–$500 labor). Buying used saves money ($300–$700).

    Trading bulky appliances for right-sized ones changes everything—suddenly there’s actual counter space and the kitchen doesn’t feel like appliances with a sink attached.


    8. Layer Lighting to Brighten Dark Corners

    Small kitchens often feel dark because they have fewer windows and less natural light. Layered lighting (overhead, task, and accent) makes the space feel bigger and more welcoming.

    Start with LED under-cabinet strips ($25–$60 for a kit, 20 minutes to install). Add track lighting or recessed lights overhead ($40–$100 per fixture, plus $200–$400 installation). Finish with pendant lights over an island or counter ($50–$150 each). All together, budget $300–$600 for a full lighting refresh. Use warm LED bulbs (2700K color temp) to keep the space feeling cozy rather than clinical.

    Better lighting makes counters visible, hides shadows, and transforms how spacious the kitchen feels.


    9. Use Corner Organizers to Capture Wasted Space

    Corner cabinets are notorious storage black holes where things get lost. Organizers make that dead space actually useful.

    Install a lazy Susan turntable ($15–$30) or pull-out corner organizer ($40–$80) in existing corner cabinets. For upper cabinets, try stackable shelves or tiered risers ($20–$50). Most install in 15–30 minutes with no tools needed. Works for renters since you’re not modifying anything permanent. Stores like Target, Amazon, and The Container Store stock multiple options.

    Suddenly that useless corner becomes your go-to spot for spices, canned goods, or small appliances—no more reaching to the back of a dark cavity.


    10. Paint Cabinets a Bold Earth Tone

    All-white cabinets feel impersonal and, honestly, bland in 2025. A bold, warm color adds personality and surprisingly makes the space feel intentional rather than cramped.

    Choose forest green, sage, deep navy, or warm brown for cabinets. Brands like Benjamin Moore, Farrow & Ball, or Sherwin-Williams have excellent earth-tone options ($30–$50 per quart). Paint takes a full day to a weekend depending on cabinet count and your skill level. Hire a painter for a polished finish ($800–$1,500). Renter? Use peel-and-stick cabinet film instead ($50–$150).

    Color choice makes your kitchen feel curated—like it actually has character—while keeping the space from feeling sterile or too small.


    11. Install a Fold-Down Wall-Mounted Table

    Small kitchens often lack dining space. A fold-down table gives you seating when needed and disappears when you don’t, freeing up floor space.

    Mount a wall-folding table (24–36 inches wide) at elbow height above a counter or against a wall. Options like IKEA Norberg cost $60–$80 and install in 1–2 hours with a level and basic tools. Sturdier wood versions run $100–$200. It seats two comfortably and folds flat against the wall. Perfect for renters using heavy-duty adhesive strips to avoid drilling.

    Suddenly you have dining seating that doesn’t take up real estate—you eat at a proper table instead of balancing bowls on the counter.


    12. Add Glass-Front Cabinet Doors for Openness

    Glass-front cabinet doors let light pass through and create visual openness—even though there’s stuff inside, you see through rather than at solid wood.

    Replace some solid cabinet doors with glass-front doors. Custom doors run $50–$150 each, but IKEA has budget options ($25–$40 each). Handles or hinges often need upgrading ($10–$30 per piece. Installation takes 2–4 hours depending on your skill level. Only do this if you’re happy with what’s inside—style matters. You must keep dishes and items organized and visually appealing.

    The kitchen opens up visually while you gain the ability to see what you have at a glance—less fumbling through cabinets.


    13. Use Tiered Shelf Risers to Double Cabinet Space

    Tall stacks of plates and bowls waste vertical cabinet space. Tiered risers let you store more in the same footprint.

    Buy stackable shelf risers ($15–$40 per set) from The Container Store, Target, or Amazon. These sit inside existing cabinets and create a second tier—no installation needed, takes 5 minutes to arrange. Works for dishes, glasses, bowls, and canned goods. Renters love these since you’re not modifying anything.

    You’ll store roughly twice as much in the same cabinet space, opening up drawers and lower cabinets for other items.


    14. Install a Backsplash with Texture or Pattern

    A textured or patterned backsplash adds visual depth to a small space—it’s like wall art but functional. Tile also protects against splashes.

    Choose small tiles like subway tiles, hexagons, or mosaics in whites, soft grays, or pale greens ($2–$8 per square foot. DIY tiling takes 6–10 hours for a small kitchen; hire pros for $800–$2,000 installed. Budget $300–$600 total materials and labor for a basic backsplash. Peel-and-stick tile alternatives exist ($30–$80) if you’re renting and want a temporary upgrade.

    A detailed backsplash draws the eye upward and creates visual interest, making the kitchen feel intentional rather than sparse.


    15. Create Pull-Out Pantry Shelves for Deep Cabinets

    Deep cabinets hide things at the back where you forget about them. Pull-out shelves bring everything forward.

    Install pull-out or sliding shelf kits ($40–$100 per set) inside existing cabinets. These take 2–4 hours to install with basic tools and create multiple accessible storage levels. Brands like Rev-A-Shelf or Knape & Vogt offer durable options. Renters can use pull-out shelving trays ($15–$40 each) that sit inside cabinets without modification.

    Everything you store becomes visible and reachable—no more digging to the back or forgetting about half-full containers.


    16. Mount a Pegboard for Hooks and Hanging Storage

    Pegboard is affordable, customizable, and visually interesting—perfect for small kitchens where wall space is the only space left.

    Buy a pegboard sheet (4’x2′ or 4’x4′, $15–$30) and hooks ($10–$25 for a set) from Home Depot or Lowe’s. Paint or stain it first for a finished look. Installation takes 1–2 hours with basic wall anchors (no studs needed for light items). Style with cooking utensils, measuring cups, kitchen towels, and small baskets. Super renter-friendly if you use adhesive strips to avoid drilling.

    You reclaim wall space for storage while creating a styled, industrial-chic feature that works harder than regular walls.


    17. Choose a Slim Island with Open Shelving Below

    Islands can overwhelm small kitchens, but a slim version with open storage underneath works. You get counter space and storage without blocking sightlines.

    Opt for 24–30-inch-wide islands (narrower than standard) with open shelving or legs instead of solid bases ($200–$600 from IKEA, Wayfair, or local builders). This costs more than a cart but feels more permanent and built-in. Leaves 36+ inches on either side so you can move around. Renter? Skip the island; use a narrow cart instead ($40–$80).

    An open-base island adds counter workspace and storage without making the kitchen feel cramped—you can still see across the room.


    18. Add a Narrow Wine Rack or Beverage Cooler

    Beverage storage often overflows cabinets. A compact wine rack or small cooler handles it while adding a style accent.

    Choose a narrow wine rack (6–12 inches wide, $30–$60) or compact beverage cooler (18–24 inches, $150–$400). Both install in corner gaps or under counters. Wine racks attach to walls or sit on counters (no installation). Coolers need an outlet but fit where standard cabinets won’t. Budget accordingly based on style and size.

    Your everyday bottles stay accessible, out of cabinets, and on display—turning a functional item into a décor accent.


    19. Install a Narrow Open Shelf Above the Sink

    Above the sink is prime real estate—easy access to water for rinsing and watering, plus it catches natural light if you have a window.

    Mount a 12–18 inch floating shelf ($20–$40) directly above the sink at comfortable reach height. Installation takes 1–2 hours. Style with small potted herbs, a soap dispenser, and glasses. This makes the mundane space feel intentional and garden-like. Renter? Use adhesive strips ($10–$15) instead of drilling into walls.

    You gain functional storage in a spot you use constantly, and herbs on the shelf feel fresh and inviting—plus you water them while washing dishes.


    20. Paint the Ceiling a Soft Color to Feel Taller

    White ceilings can make small kitchens feel boxed-in. A soft, subtle color on the ceiling draws the eye upward and creates perceived height.

    Paint the ceiling the same color as walls but 20% lighter, or try soft gray, pale blue, or warm cream. Use ceiling paint (it hides imperfections better than wall paint) from Benjamin Moore or Sherwin-Williams ($25–$40 per gallon). Painting takes 2–4 hours depending on room size. Renter? Skip this; it’s too involved.

    This small color choice makes the room feel less compressed—your eye travels up instead of stopping at the ceiling.


    21. Use Magnetic Spice Jars on the Fridge

    Spices take up significant drawer and cabinet space. Magnetic containers on the fridge put them inches away while cooking.

    Buy magnetic spice jars (20–30 count sets, $30–$60) from Amazon or specialty kitchen stores. Fill with your most-used spices and label clearly. Installation takes 10 minutes—just stick them on the fridge side. Works only if your fridge has a metal surface (most do). Budget-friendly and renter-perfect.

    Your most-grabbed spices become instantly accessible at eye level, freeing up tons of cabinet or drawer space.


    22. Install a Dish Rack Drawer Organizer

    Plates, baking sheets, and cutting boards slide around in cabinets and waste space. Vertical dividers keep them organized and maximize storage.

    Buy a vertical divider shelf organizer ($20–$50) from IKEA, Target, or The Container Store. Install inside a cabinet or large drawer—takes 10 minutes with no tools. Fits plates, cutting boards, baking sheets, and serving platters upright so you see what you have and grab what you need easily.

    This single purchase makes one cabinet feel twice as organized, and you stop digging through stacks.


    23. Add a Under-Sink Sliding Drawer Organizer

    The under-sink cabinet is usually a chaotic jumble of supplies. A sliding drawer organizer brings everything forward and out of the way.

    Install a under-sink sliding drawer organizer ($30–$60) designed to work around plumbing. Brands like Rev-A-Shelf make versions specifically for this space. Installation takes 20–30 minutes. Store cleaning supplies, sponges, trash liners, and extra soap here. Renter-friendly if you choose adhesive-mount options.

    You’ll actually know what you have under there instead of a mystery zone where bottles disappear.


    24. Float Your Microwave on a Shelf Above Counter

    Microwaves dominate counters in small kitchens. A floating shelf mounts it at a comfortable height and reclaims real estate.

    Install a floating shelf ($20–$40) at elbow to shoulder height and place a compact microwave on top. Budget 1–2 hours installation time. Only works if you have wall space and the shelf can support the microwave weight (most can, but verify). This frees up significant counter space below for prep work or appliances. Make sure it’s accessible but not dangerously high—you don’t want to reach past your head.

    You reclaim several linear feet of counter space while keeping the microwave at a comfortable working height.


    Save this for your next kitchen refresh. Pick one idea this weekend—even the smallest change makes a surprising difference in how your space works and feels.

  • 24 Bed Back Wall Decor Ideas That Create a Stunning Focal Point

    24 Bed Back Wall Decor Ideas That Create a Stunning Focal Point

    Your bed’s back wall is prime real estate—it’s the first thing you see when you wake up and the focal point of your entire room. Yet so many of us leave it blank or default to boring paint. This is your chance to create a stunning backdrop that sets the tone for your whole space. Whether you’re renting, working with a small budget, or ready to invest in something special, these 24 ideas blend 2025’s hottest trends—textured layers, warm earth tones, biophilic touches, and personal style—with practical solutions you can actually execute. From DIY projects that take an afternoon to shopping-list upgrades, you’ll find inspiration to make your wall something you genuinely love. Ready to turn that blank space into your bedroom’s hero? Let’s dive in.

    1. Layer Textured Wallpaper With Woven Wall Hangings

    Textured wallpaper alone is beautiful, but layering a woven piece on top adds unexpected dimension and personality. This combo is huge in 2025 design—it’s how you get that cozy, lived-in look without feeling chaotic.

    Start with a subtle textured wallpaper in cream, terracotta, or sage ($15–$40 per roll from Wayfair or Peel and Stick Wallpaper brands). Once it’s up, hang a large macramé or woven wall hanging (12–24 inches) dead center or slightly off-center above your headboard. Brands like Urban Outfitters, Etsy, and Article have options ranging from $30–$120. The installation takes about two hours for wallpaper (very renter-friendly if you use peel-and-stick), plus 10 minutes for the hanging.

    Pro tip: Choose a wall hanging in a complementary neutral tone—think cream, natural jute, or soft gray—so it enhances rather than competes with your wallpaper.

    This layering approach gives you textural depth that photographs beautifully and makes your wall feel intentional and curated.

    2. Paint a Warm Accent Wall in Deep Earth Tones

    Cool grays are officially out in 2025. Instead, designers are embracing warm earth tones that make you feel wrapped in comfort rather than cold minimalism.

    Choose a warm, saturated tone like terracotta, burnt sienna, forest green, or aubergine. Brands like Benjamin Moore, Sherwin-Williams, and Behr have color-match tools online (free) so you can preview before committing. Buy 2–3 cans of quality paint ($15–$30 per can) and painter’s tape ($5–$8). A single accent wall takes 4–6 hours for a first-timer, including prep and drying time between coats. If painting isn’t your style, hire a pro for $200–$400.

    Pro tip: Test your color choice on a large poster board first and place it on your wall at different times of day—colors shift with light.

    A rich accent wall creates instant drama and becomes a background so stunning you’ll want to keep your bedding simple and let the wall steal the show.

    3. Install Floor-to-Ceiling Curtains for Drama and Light Control

    Floor-to-ceiling curtains add architectural drama and solve a huge problem: light control without the harsh look of blinds. They also work beautifully for renters since you can hang them on tension rods.

    Measure from your ceiling (or 6 inches above your window frame) all the way to the floor. Buy heavy linen, velvet, or blackout fabric in cream, warm gray, or charcoal ($12–$25 per yard from Fabric.com or Joann). You’ll need roughly 4–6 yards depending on width. Add a quality tension rod or standard curtain rod ($20–$80 from IKEA or Target). Total cost: $80–$200 for a professional look. Installation takes 1–2 hours, mostly hanging the rod and hemming (or use iron-on hem tape for a quick fix).

    Alternative: Skip custom sewing and order pre-made floor-to-ceiling panels from Wayfair or West Elm ($100–$300 per pair).

    Your wall gains height, sophistication, and the ability to control your sleep environment—plus the layered fabric adds texture that ties into 2025’s tactile trends.

    4. Create a Gallery Wall of Oversized Art Prints

    Art-led design is dominating 2025. Instead of one small print, go bold with a collection of larger pieces that tell a story and command attention.

    Decide on your layout using a digital tool like Canva (free) or by taping kraft paper cutouts to your wall first. Choose 5–7 prints (8×10″ to 11×14″) in a cohesive color palette: think botanical prints, abstract art, or vintage photography. Sources: Etsy ($15–$40 per print), Minted ($20–$50), or even print-at-home options from Adobe Stock. Frames from IKEA, Target, or Wayfair cost $10–$30 each. Total investment: $150–$300. Hanging takes 1–2 hours, and it’s completely renter-friendly with removable wall anchors.

    Pro tip: Print larger-format pieces than you think—they create more impact and feel more intentional.

    A curated gallery wall becomes the conversation starter of your room and reflects your personality in a way a single poster never could.

    5. Add Raw Wood Floating Shelves With Natural Materials

    Raw wood shelves tap into 2025’s biophilic and organic modernism trend while giving you functional display space that looks intentional, not cluttered.

    Install 2–3 floating shelves in untreated or lightly finished wood (12–18 inches deep, $40–$100 each from IKEA, Home Depot, or Etsy). Use a level and wall studs for secure installation—this takes 1–2 hours if you’re handy, or hire someone for $50–$150. Style each shelf sparsely: a small potted plant, a stack of 2–3 books, a candle, a framed photo. The beauty is in negative space.

    Alternative: Use salvaged wood shelves from Etsy or reclaimed wood retailers for a more rustic, authentic feel ($60–$150 each).

    Your wall gains visual interest and a place to display objects that matter to you—plus real wood instantly warms up the space and connects to nature-inspired design.

    6. Hang a Large Woven Wall Tapestry as a Headboard Alternative

    A statement tapestry does the job of an expensive headboard at a fraction of the cost and brings serious texture and warmth to your wall.

    Search for large woven tapestries (40–60 inches wide) on Etsy, Urban Outfitters, or Anthropologie in neutral or warm tones ($50–$150). Hang it using a tapestry rod (looks like a curtain rod but sturdier, $15–$30 from Amazon) or simple picture hooks. Installation takes 15 minutes. For renters, tension rods work too (though tapestries are heavy, so use appropriate anchors).

    Pro tip: Layer a smaller woven piece off to one side for visual interest without looking too “matchy.”

    A large tapestry becomes an instant focal point that adds warmth, texture, and bohemian elegance—plus it’s one of the easiest wall upgrades you can make.

    7. Install Shiplap or Peel-and-Stick Wooden Panels for Texture

    Shiplap adds architectural interest and that cozy farmhouse warmth that pairs beautifully with 2025’s comfort-focused trends. The good news: peel-and-stick versions make it renter-friendly.

    Install real shiplap (labor-intensive, $200–$600 for one wall) or go the renter route with peel-and-stick wooden panels ($50–$150 for a 10×10 wall from Amazon, Home Depot, or Wayfair). The panels come pre-finished in white, light gray, or natural wood. Installation takes 3–4 hours for DIY; you just stick and trim to fit. No nails, no permanent damage.

    Alternative: Paint horizontal stripes to mimic shiplap for a budget-friendly ($20–$40 in paint) but less textured option.

    Your wall gains depth, character, and that cottage-core warmth that makes a bedroom feel like a retreat instead of just a sleeping space.

    8. Stencil a Botanical or Geometric Pattern

    Hand-stenciling lets you create a custom, artistic wall without the commitment of wallpaper or the cost of a mural artist. It’s also totally doable as a weekend DIY project.

    Buy a reusable stencil ($10–$30 from Etsy or Michaels) in a botanical, geometric, or mandala design. Choose one or two wall colors: a neutral base and an accent color for the stencil. Pick up stencil paint or regular acrylic paint ($5–$15 per pot). Apply painter’s tape to map out your pattern, then stencil one repeat at a time using a foam roller or brush. The entire wall takes 6–8 hours but is deeply meditative and totally customizable.

    Pro tip: Start with one accent wall to build confidence before committing to all four walls.

    A stenciled wall becomes a one-of-a-kind artistic backdrop that costs way less than hand-painted murals and feels like you commissioned something special.

    9. Mount a Statement Mirror With a Decorative Frame

    A large, decorative mirror serves triple duty: it reflects light (making your room feel bigger), adds visual interest, and creates a practical getting-ready spot without taking up floor space.

    Find a statement mirror with a frame that matches your aesthetic—think black metal, natural wood, rattan, or ornate gold ($60–$250 from Article, West Elm, Wayfair, or Etsy). Mount it using heavy-duty wall anchors or into a stud. Hang a console table below it ($100–$300 from IKEA or Wayfair) and style with small plants, a candle, or trinket dishes.

    Alternative: Use a large round mirror for a softer look, or a rectangular one for a modern edge.

    Your wall becomes a functional beauty station that also opens up the entire room visually and adds another layer of style and sophistication.

    10. Commission or DIY a Large Canvas Painting

    An oversized canvas painting makes a statement without the gallery-wall complexity. Whether you paint it yourself or commission an artist, it becomes a deeply personal focal point.

    DIY option: Grab a large canvas (30×40″ or bigger, $30–$80 from Michaels or Blick Art Materials) and acrylic paint ($2–$5 per pot). Follow a YouTube tutorial or just let your creativity flow—abstract or nature-inspired work is forgiving. Cost: $50–$100. Time: 2–4 hours, plus drying time.

    Commission option: Hire an artist on Etsy or Fiverr to create a custom piece based on your style ($150–$500 depending on size and complexity).

    Hang using a large picture frame or wire and nails ($10–$30). Installation takes 15 minutes.

    A personally created or commissioned canvas makes your wall feel curated and artful—like you know exactly who you are and what you love.

    11. Layer Fabric Headboard With Decorative Throw Pillows

    An upholstered headboard instantly softens your wall and creates a cozy focal point. Pair it with layered pillows for textural richness that ties into 2025’s “layered comfort” trend.

    Buy a fabric headboard ($150–$400 from Wayfair, Article, or West Elm) or DIY one using plywood, batting, and fabric ($50–$100 in materials). Mount it behind your bed using a standard bed frame bracket or wall anchors. Add 3–5 throw pillows in varying sizes and textures: a large lumbar pillow, smaller decorative pillows, and maybe a faux fur or velvet accent. Mix patterns like florals, stripes, and solids in warm neutrals ($15–$60 each from Target, Anthropologie, or Etsy).

    Pro tip: Choose a mix of fabrics—linen, velvet, wool, cotton—to maximize texture without looking overdone.

    Your wall becomes an inviting focal point that says “this room is for rest and comfort,” and the layers give your space depth and personality.

    12. Install Statement Lighting Flanking the Headboard

    Strategic lighting isn’t just functional—it’s a decor statement that frames your bed and creates instant ambiance. 2025 is all about warm, human-scale lighting, so skip the harsh overhead fixture.

    Choose wall-mounted sconces in a material that matches your aesthetic: brass, matte black, natural wood, or ceramic ($40–$100 each from IKEA, West Elm, or Wayfair). Install them at eye level (roughly 60–66 inches from the floor) on either side of your headboard. This requires drilling into studs and running simple wiring—hire an electrician for $100–$300, or DIY if you’re comfortable with wiring (watch tutorials first).

    Alternative: Use plug-in sconces with cord covers for a renter-friendly option ($30–$80 each).

    The right lighting transforms your entire room’s mood and gives your wall a layered, designed look that feels intentional rather than ad hoc.

    13. Hang a Vintage Quilt or Textile as Wall Art

    Vintage quilts bring warmth, storytelling, and handmade authenticity—all huge in 2025’s “grandmillennial” trend that blends nostalgia with modern style. Hanging one elevates your wall instantly.

    Hunt on Etsy, estate sales, local thrift shops, or your grandmother’s closet for a quilt with colors and patterns that complement your room ($20–$100 for vintage, $50–$200 for handmade). Install a slim quilt hanging rod ($15–$25 from Amazon) or use museum-quality hanging clips ($30–$50 from conservation suppliers) to preserve the textile. Mounting takes 30 minutes and is totally renter-friendly.

    Pro tip: Pair your quilt with a small placard or card below explaining its origin—this adds storytelling to your space.

    A vintage quilt becomes a deeply personal focal point that honors craftsmanship and tells your story in a way new decor never could.

    14. Create a Warm Minimalist Wall With Creamy Textured Paint

    Not all minimalism is cold. 2025’s “warm minimalism” trend keeps things simple but adds soul through color, texture, and thoughtful spacing.

    Paint your wall in a creamy, warm neutral: off-white, cream, warm greige, or soft taupe. Use quality paint with a subtle texture finish (matte, eggshell, or suede finish) that catches light and adds dimension. Benjamin Moore, Sherwin-Williams, and Behr all offer warm neutrals ($15–$30 per can). One coat of quality paint over a prepped wall takes 2–3 hours. Keep decorations minimal: maybe one framed piece, a small shelf, or a single plant. The beauty is in restraint.

    Pro tip: Use different sheens on trim versus walls to add subtle visual interest without clutter.

    A warm, textured neutral wall becomes a calming backdrop that lets you sleep better and frees up mental space—minus the soullessness of cool grays.

    15. Add Climbing Ivy or Large Potted Plants for Biophilic Design

    Biophilic design—bringing nature indoors—is booming in 2025. Live plants on your wall transform it into a breathing, living focal point that improves air quality and well-being.

    Install a wooden trellis ($30–$80 from Home Depot or Etsy) and mount it using wall anchors. Choose low-maintenance climbing plants like pothos, philodendron, or climbing fig. Alternatively, mount multiple potted plants on shelves or use adhesive plant hangers ($10–$30 from Amazon). Water weekly and trim as needed.

    Alternative: Opt for faux plants ($20–$100 per plant) if you don’t have time for real plants—modern faux greenery is incredibly realistic now.

    Your wall becomes a living, breathing focal point that cleans the air, soothes the mind, and gives your bedroom the calm, retreat-like quality everyone craves.

    16. Paint a Mural or Geometric Wall Mural (DIY or Commissioned)

    A mural is the ultimate personalization—it’s 100% yours and becomes the conversation starter of your entire room. The good news: you don’t need to be an artist.

    DIY option: Sketch or project a design onto your wall using painter’s tape, grid method, or a projector. Paint freehand or by-numbers style using acrylics. Cost: $30–$80 in supplies. Time: 4–8 hours depending on complexity.

    Commission option: Hire a mural artist ($400–$1,500 depending on size and detail) on Etsy or through local artist networks. Most artists will work with you on design.

    Alternative: Use a large decal (essentially a sticker mural, $50–$150 from Etsy or Amazon) for instant art without painting.

    A mural transforms your wall from blank to bold and becomes a daily reminder of your creativity and individuality.

    17. Install Curved or Sculptural Wall-Mounted Shelving

    Curved furniture replaces harsh lines in 2025—and that includes wall shelves. Sculptural shelving adds softness, visual interest, and storage without rigidity.

    Hunt for curved shelves on Etsy, Article, or Design Within Reach ($80–$200 each). Mount 2–3 shelves at varying heights using a level and wall studs. Style each shelf sparsely with 2–3 meaningful items: a small plant, a book, a ceramic piece. The curves themselves are the statement; don’t overcrowd.

    Alternative: Buy straight shelves and add curved brackets underneath ($30–$60 per bracket) to soften the look.

    Curved shelving adds organic, sculptural beauty that makes your wall feel designed and intentional—plus it’s a subtle nod to 2025’s move away from rigid minimalism.

    18. Drape a Vintage Fabric Scarf or Runner Across the Wall

    A draped textile is the easiest, most renter-friendly way to add color, pattern, and luxury to your wall. Zero commitment, maximum impact.

    Find a large silk scarf, vintage runner, or fabric piece ($10–$50 from thrift shops, Etsy, or Goodwill). Use removable wall hooks or sticky adhesive strips ($5–$15 from Amazon) to anchor the corners. Drape it loosely for an effortless, artful look. Installation takes 10 minutes.

    Pro tip: Choose a fabric in warm tones or bold patterns that complement your bedding and paint color.

    A draped textile adds instant bohemian elegance and warmth—and if you want to change it, you simply swap it out. Zero regrets, maximum flexibility.

    19. Apply Removable Wallpaper in Floral or Geometric Patterns

    Floral wallpapers are having a moment in 2025, blending nostalgia with modern minimalism. Peel-and-stick versions make them renter-approved and commitment-free.

    Choose a peel-and-stick wallpaper in a design you love: botanical florals, geometric patterns, or even abstract art ($15–$40 per roll from Wayfair, Amazon, or Spoonflower). Measure your wall, prep the surface (clean, smooth, and dry), then carefully apply one panel at a time. For a 10×10 wall, you’ll need 2–3 rolls. Total time: 2–3 hours for a first-timer.

    Pro tip: Order a sample first ($5–$10) to see how the pattern and colors look in your actual light.

    Your wall gains instant pattern and personality—and if you move or get tired of it, you simply peel it off with zero damage.

    20. Mount a Wooden Art Ledge for Rotating Display

    An art ledge lets you rotate decor seasonally or as your mood shifts—it’s a gallery wall that doesn’t require commitment to every piece.

    Install a wooden ledge ($40–$100 from Etsy, IKEA, or West Elm) using wall studs and screws. The lip should be at least 2 inches deep to hold items safely. Arrange a mix of framed photos, small prints, small plants, and objects you rotate seasonally. Update your display every few weeks or months.

    Alternative: Use multiple narrow ledges (12 inches each) for a staggered, modern look ($30–$50 each).

    A ledge gives you permission to play with decor without committing—plus it displays items that might be lost in a crowded shelf.

    21. Paint Color Blocking or Geometric Panels Behind the Bed

    Color blocking is a 2025-approved way to add visual interest and warmth without pattern overload. It’s graphic, modern, and totally doable with painter’s tape.

    Choose two warm, complementary colors: perhaps cream and terracotta, or soft green and cream. Use painter’s tape to create a clean horizontal, diagonal, or geometric division. Paint each section with quality paint ($15–$30 per can). The tape ensures crisp lines. Total cost: $40–$70. Time: 3–4 hours including tape removal (remove tape while paint is slightly tacky for best results).

    Pro tip: Use a laser level to ensure your line is perfectly straight.

    Color blocking adds intentional, modern style that photographs beautifully and makes your bedroom feel like you actually have a design plan.

    22. Hang a Leather or Macramé Wall Hanging With Shelf Space

    Macramé and leather wall hangings are seeing a resurgence—but instead of chaotic boho, look for edited, sculptural pieces with built-in storage pockets.

    Search Etsy, Anthropologie, or Urban Outfitters for a macramé or leather wall hanging with integrated shelf pockets ($60–$150). These often have 2–4 pockets perfect for small plants, journals, or trinkets. Hang using a sturdy rod or hooks ($15–$30). Installation takes 20 minutes.

    Pro tip: Keep the hanging itself uncluttered and style with just 3–5 minimal items—that’s how you avoid boho overload.

    A sculptural wall hanging with storage adds functional beauty that doesn’t scream “cluttered bedroom”—it reads as intentional and edited.

    23. Layer Raw Wood Tones With Cork or Jute Accents

    Raw, natural materials are defining 2025’s biophilic trend. Combining raw wood with cork or jute adds texture, warmth, and a connection to nature.

    Install raw wood shelves or paneling ($50–$150 per shelf or $100–$300 for a wall treatment). Add a cork bulletin board or cork accessories ($20–$60 from IKEA or Etsy). Incorporate jute rope detailing ($10–$30 from craft stores) as a shelf edge or as a wall divider. Mix wood tones—raw, light, and dark—for visual interest.

    Pro tip: Let the raw materials be the star; keep decor minimal so their natural beauty shines.

    Your wall becomes a tactile, nature-inspired focal point that makes you feel grounded and connected—exactly what a bedroom should feel like.

    24. Create a Statement Headboard Wall With Texture and Lighting

    Go all-in with a layered headboard wall that combines texture, lighting, and structure. This is the “investment” option that becomes the absolute hero of your room.

    Combine elements: textured wallpaper ($40–$80 for the wall) + a fabric or wood headboard ($200–$500) + wall sconces on either side ($80–$200 for the pair) + a floating shelf above for plants or decor ($50–$100). Total investment: $400–$900. Hire professionals for installation ($300–$600) or tackle it yourself over a weekend if you’re confident.

    Alternative: Build this over time, starting with wallpaper, then adding the headboard, then lighting.

    A complete headboard wall becomes the focal point of your entire bedroom—the kind of statement that makes you slow down, breathe, and appreciate your space every single day.


    Save this post and pick just one idea to start with this weekend. Whether you go simple (a draped textile, 15 minutes) or ambitious (a full headboard wall, a weekend project), your back wall deserves to be as thoughtful as the rest of your room. You’ll be amazed at how one wall can shift everything.

  • 25 Glam Living Room Decor Ideas for a Luxe, Sparkling Look

    25 Glam Living Room Decor Ideas for a Luxe, Sparkling Look


    If you scroll through your feed and see those enviable living rooms that somehow glow from within, you’re probably wondering: how do they do that? The secret isn’t expensive—it’s strategic sparkle, the right metals, and layers of texture that catch light beautifully. Whether your living room currently feels flat or you’re just ready for an upgrade, these 25 ideas will help you build a space that feels both glamorous and genuinely livable. From budget-friendly swaps to investment pieces, you’ll find options at every price point. Ready to make your living room the room you actually want to spend time in? Let’s dive in.


    1. Swap in a Jewel-Toned Velvet Sofa

    A velvet sofa is the anchor piece that instantly signals “I have my life together”—and it’s actually easier to afford than you’d think. Velvet catches light beautifully, making even a modest-sized living room feel more dynamic. Deep jewel tones (emerald, sapphire, charcoal, or burgundy) hide wear better than lighter shades and pair seamlessly with both modern and traditional styles.

    Search Article Insight #2 for bold color momentum: consider brands like Article ($600–$1,200), West Elm ($1,200–$1,800), or Wayfair ($400–$900) for quality pieces. If a sofa feels too permanent, a velvet armchair or sectional works just as well. Look for fabric with a slight nap—it’ll reflect light more dramatically. Pro tip: pair it with metallic accents to amplify the glamorous effect.

    You’ll feel the difference the moment you sit down. The moment guests walk in, they’ll notice the upgrade.


    2. Layer in a Gold or Brass Floor Lamp

    Lighting is the most underrated tool for creating glam, and a gold or brass floor lamp does double duty: it illuminates and acts as sculptural decor. These metals have become mainstream enough that you’ll find options everywhere, making them accessible on any budget.

    Target and IKEA have brass options starting at $30–$60. Mid-range finds live at Wayfair ($80–$150) and CB2 ($120–$200). Splurge-worthy pieces from West Elm or Article run $200–$400. Position it beside a chair or sofa corner for layered lighting—which is essential for a sophisticated look. Arc lamps are especially photogenic and work in smaller spaces since they don’t take up floor real estate.

    Skip the harsh overhead light, and suddenly your room feels like a hotel lobby in the best way. Warm lighting transforms how your space photographs and how you feel in it.


    3. Add a Mirrored Accent Table

    Mirrors multiply light and create the illusion of more space—but a full wall mirror can feel obvious. An accent table with mirrored or brass sides does the same job more subtly, and it’s functional too. You get storage and display space while boosting the room’s luminosity.

    Shop IKEA ($50–$80), Target ($60–$120), or Wayfair ($80–$200) for budget options. West Elm and CB2 have mid-range choices at $150–$300. Brass-trimmed options feel more elevated than all-mirror. Pair it with a table lamp to amplify reflections. Renters: these are easy to move if you change your mind.

    Your space will feel airier and brighter without knocking down walls. The subtle shimmer reads as intentional design, not decoration.


    4. Hang Statement Drapes in Metallic or Jewel Tones

    Heavy, floor-length curtains frame a room and add instant formality. Metallic fabrics (champagne, gold, silver) or jewel tones feel more interesting than basic neutrals, and they’re easier to work with than you’d expect. They also block light and add sound dampening, which feels luxurious.

    Fabric from Joann Stores ($8–$15 per yard, plus rod) or ready-made curtains from Target ($40–$100), Wayfair ($60–$150), or West Elm ($120–$250). If sewing intimidates you, many dry cleaners or local seamstresses will hem curtains for $15–$40. Hang rods as high as possible to make ceilings feel taller. Choose a finish that matches your lighting (brass rods with warm-toned fabrics; chrome with cool tones).

    The moment you draw these open and closed, your room feels like a real home. That fabric movement catches light and creates visual interest constantly.


    5. Place a Decorative Mirror Above a Console Table

    A mirrored console vignette creates a focal point that looks curated without being fussy. It’s also renter-friendly and changes easily with the seasons. The mirror itself—whether ornate, geometric, or minimalist—becomes a design statement.

    Find mirrors at Target ($30–$80), IKEA ($25–$60), Wayfair ($40–$200), or West Elm ($120–$350). Pair with a simple console table (IKEA $50–$150 or Wayfair $80–$250). Style the surface with: a pair of sculptural objects, a table lamp, candles in varying heights, and a small plant or book stack. Anchor it all with a runner rug if the console is in an entryway.

    This vignette becomes a conversation starter and a visual anchor for the whole room. Guests will compliment it before they even sit down.


    6. Swap Out Throw Pillows for Textured Versions

    Pillows are the quickest (and reversible) way to shift your room’s vibe. Textured fabrics like velvet, linen, knit, and performance fabric add dimension that reads as expensive, even at budget price points. Mix finishes—matte, shiny, ribbed—to catch light in different ways.

    Target ($15–$30 each), IKEA ($10–$25), and Wayfair ($20–$50) have solid options. Splurge on one or two statement pillows from West Elm ($50–$100) and build around them with budget finds. Aim for 4–6 pillows on a sofa, layered in odd numbers and varying sizes. Color palette: stick to 2–3 main colors plus metallics for cohesion.

    Pro tip: add a metallic accent pillow or one with beading to catch light. One weekend and your sofa looks completely redesigned—no sewing required.


    7. Install Gold or Brass Wall Sconces

    Sconces provide layered lighting and look unquestionably upscale. They’re especially impactful around mirrors, artwork, or above console tables. Unlike pendant lights, sconces feel more intimate and sophisticated. For renters, plug-in versions exist, but hardwired sconces look more polished.

    Plug-in options: Brightech on Amazon ($20–$50 per pair), IKEA ($40–$80). Hardwired sconces: Wayfair ($60–$120), West Elm ($100–$200), or local lighting shops ($100–$300). Installation takes 1–2 hours if you’re comfortable with basic wiring; otherwise, hire an electrician ($100–$200 for a simple install). Position them 36 inches apart or flanking a mirror at eye level.

    Your space suddenly feels like a boutique hotel or upscale apartment. That warm upward glow transforms the entire room’s sophistication level.


    8. Layer in a Statement Area Rug with Metallic Threading

    Rugs ground a room and add visual interest underfoot. Metallic threading (gold, silver, or copper) catches light and feels more luxe than a solid rug, but it’s subtle enough not to overwhelm. Geometric patterns, traditional motifs, or abstract designs all work depending on your style.

    Wayfair ($100–$300), Ruggable ($80–$200, bonus: washable), Overstock ($80–$250), or West Elm ($200–$500). Size matters: 8×10 for large seating areas, 5×8 for smaller zones. Metallic threading adds only $20–$50 to the price of a regular rug, so it’s a smart upgrade. Layer a smaller rug on top if you want extra texture (called a “rug layer”).

    Your seating zone instantly feels intentional and defined. The metallic details shimmer differently throughout the day as light shifts.


    9. Create a Floating Shelf Display with Gold Brackets

    Floating shelves are affordable architecture that gives you display space without bulk. Gold or brass brackets feel more intentional than basic metal ones. They’re a great solution if you rent, since they’re removable and don’t require major commitment.

    Shelf + brackets from IKEA ($15–$40), Target ($20–$50), or Wayfair ($30–$80). For a more upscale look, splurge on brass brackets from Anthropologie ($40–$80) or West Elm ($50–$100). Installation takes 30 minutes with a level and drill. Keep the top clear of clutter—aim for 5–7 carefully chosen objects. Mix heights: stack books, stand a small plant, angle a sculpture.

    Your walls go from blank to gallery-quality in one afternoon. This one upgrade changes how finished the entire room feels.


    10. Switch to Brass or Gold Hardware on Existing Furniture

    If you have existing furniture you love but it feels dated, swap the hardware. This is a 15-minute fix that costs under $30 and completely shifts the vibe. Brass and gold hardware feel current and luxe without requiring a furniture overhaul.

    Hardware from Amazon ($2–$5 per handle), Wayfair ($3–$8), or local hardware stores ($3–$6). Measure your current holes, unscrew old handles, screw in new ones—done. If holes don’t align, a furniture refinisher or handyperson can drill new ones for $50–$100. This trick works on dressers, nightstands, credenzas, or media consoles.

    Pro tip: mixing old furniture with new brass hardware instantly modernizes it. Your existing pieces look like intentional vintage-modern hybrids, not hand-me-downs.


    11. Add a Beaded or Sequined Throw Blanket

    Textured blankets that catch light feel more expensive than plain knit. Beading, sequins, or metallic thread all work. You get warmth plus visual shimmer—and it’s renter-friendly since it’s completely removable.

    Target ($30–$60), IKEA ($25–$50), Wayfair ($40–$100), or West Elm ($80–$150). Look for blankets with subtle embellishment rather than all-over sequins (which can feel costume-y). Drape it asymmetrically over one sofa arm for a styled look. Machine-wash versions exist if you’re worried about care.

    The moment you drape this over your sofa, your living room shifts from functional to styled. That gentle shimmer reads as effort and intention.


    12. Hang Artwork with a Metallic or Mirrored Frame

    Framing matters more than people realize. A beautiful print in a basic black frame reads differently than the same print in metallic or mirrored glass. The frame itself becomes part of the decor. Metallic finishes tie into your brass lamp and hardware for cohesion.

    Frame your own art: Michaels or JOANN ($15–$40 for frame + mat), or pay a framer ($50–$150 per piece). Buy pre-framed artwork from West Elm ($100–$400), Anthropologie ($80–$300), or Etsy ($50–$250). Position artwork at eye level (57 inches to the center is standard) and ensure it’s properly lit by a sconce or nearby lamp.

    Your art stops looking like decoration and starts looking like investment. That metallic frame ties the whole room together visually.


    13. Style Bookshelves with Metallic Bookends

    Bookends are functional sculpture. Metallic ones ground a shelf and make the entire arrangement feel curated. This is an easy win for anyone who has bookshelves but isn’t sure how to style them. Article Insight #9 (from the brief) highlights how architectural detail and designed spaces matter more than “stuff”—bookends demonstrate this perfectly.

    Brass or gold bookends from Target ($15–$30), IKEA ($10–$20), Wayfair ($20–$50), or West Elm ($30–$80). Arrange books in groups of 3–5, alternate spine-out and stacked, and tuck in small objects (plants, sculptures, boxes) between groups. Keep the shelf about 70% full—negative space feels more intentional than clutter.

    Your shelves transform from a book storage problem into a styled focal point. Guests will actually stop and look instead of walking past.


    14. Introduce a Brass or Gold Plant Stand

    Plants add life and color, but placing one on a brass stand elevates it. Metal stands work in small spaces since they’re open underneath, and the metallic finish ties into your lighting and hardware. This is especially effective in a corner that otherwise feels empty.

    Brass plant stands from Target ($30–$60), IKEA ($25–$50), Wayfair ($40–$120), or West Elm ($80–$180). Pair with a healthy plant (ask your local garden center for low-maintenance options like pothos, monstera, or snake plant). Water once a week, and rotate it 90 degrees weekly for even growth.

    Your empty corner becomes a visual anchor and a conversation starter. The combination of living green and gleaming metal feels both natural and sophisticated.


    15. Layer Candles in Varying Heights and Metallics

    Candles create ambiance, but displayed strategically, they’re also decor. Mix holders (brass, silver, glass) and heights (taper, pillar, votive) for visual interest. Scent is the bonus—but even unscented candles work for styling if you prefer.

    Candles and holders from Target ($2–$8 each), Wayfair ($5–$20), or West Elm ($10–$30). Group candles in odd numbers (3, 5, or 7) on a console, coffee table, or fireplace mantel. Light them during evening hours to create instant coziness. Soy or beeswax candles burn cleaner and last longer than paraffin.

    Pro tip: burn candles for 2 hours at a time to prevent tunneling (wax burning only down the middle). The flickering light and subtle scent transform your space into a sanctuary. It’s the small luxury detail that makes people say, “This is so nice.”


    16. Install Wallpaper on the Ceiling (“Fifth Wall”)

    Most people ignore the ceiling—which means it’s a smart place to make a statement. Metallic, patterned, or textured ceiling wallpaper feels daring but reads beautifully, especially in smaller rooms where the ceiling feels closer. This trend (Insight #6 from the brief) is having a major moment.

    Peel-and-stick wallpaper from Spoonflower ($20–$40 for a roll) or Wayfair ($15–$35). Permanent wallpaper requires an installer ($200–$500 for labor). Metallic, geometric, or subtle damask patterns work best. Pair with recessed lighting or subtle sconces to highlight the pattern.

    This one move transforms the entire room’s personality. Every person who visits will look up and comment on it immediately.


    17. Add a Glass and Brass Coffee Table

    Glass tables feel lighter and less bulky than solid wood, making small rooms airier. Brass frames anchor the look and connect to your other metallic accents. This feels intentional and layered without looking busy. Article Insight #12 speaks to this—furniture as architecture, with intentional gaps and visibility.

    Glass + brass coffee tables from Wayfair ($100–$250), West Elm ($200–$400), Article ($150–$350), or IKEA ($60–$120 for simpler styles). Style the surface with 3–4 objects: a coffee table book, a small plant, candles, or a decorative box. Keep it about 60% clear for an uncluttered, intentional look.

    Your room feels more open and sophisticated instantly. The ability to see through the table makes tight spaces feel less cramped.


    18. Hang a Chandelier or Pendant in Mixed Metals

    A statement light fixture is jewelry for your ceiling. Mixed-metal designs (brass + glass, gold + marble, chrome + velvet) feel more contemporary and less “matchy” than single-metal options. It’s a splurge, but it lasts for years and transforms the room instantly.

    Statement fixtures from Wayfair ($150–$400), West Elm ($200–$600), Article ($250–$500), or local lighting shops ($300–$800). Installation: $150–$300 for an electrician if you’re changing an existing fixture. Position it 30–36 inches above a dining or coffee table, or center it in the room. Pair with a dimmer switch (add $50–$100) for flexibility.

    Everyone notices the first time they walk in. That overhead focal point tells a story about how intentional you are about your space.


    19. Accessorize with Metallic Decorative Objects

    Small decorative objects in coordinating metals create visual rhythm without requiring major changes. Think brass bowls, gold sculptures, silver frames, or vintage brass candlesticks. These tie your room together and give you something to collect over time.

    Mix vintage finds (thrift stores, $5–$20), new options (Target, $10–$40), and investment pieces (Anthropologie, West Elm, $30–$150). Group 5–7 objects in odd numbers on a shelf or console. Vary heights and shapes so nothing feels too uniform.

    Pro tip: brass patina (greenish aging) is beautiful—don’t polish it away. These small touches accumulate to create a room that feels like you, not a catalog.


    20. Swap Lampshades for Metallic or Textured Versions

    If you already have lamps but they feel bland, new shades are a $20–$50 fix. Pleated, linen, metallic, or silk shades change how light diffuses through the room. Metallic shades bounce light outward; linen diffuses it softly.

    Replacement shades from Target ($15–$30), Wayfair ($20–$50), IKEA ($10–$25), or specialty shops ($30–$80). Measure your current lamp’s harp (the metal part the shade clips to) to ensure fit. Pleated shades in cream, gold, or champagne feel especially luxe. Upgrading two lamps takes 10 minutes total.

    Your existing lamps immediately feel curated rather than generic. The light quality shifts—suddenly it’s ambient rather than utilitarian.


    21. Create a Statement Wall with Textured Wallpaper

    One patterned or textured wall becomes a focal point without overwhelming the room. Modern textures (fluting, grasscloth, embossed patterns) feel more sophisticated than outdated florals. This strategy (Insight #5) of textured finishes is trending for 2025. Go bold or subtle—both work.

    Wallpaper from Spoonflower ($30–$60 per roll), Wayfair ($20–$45), or Sherwin-Williams ($40–$70). Peel-and-stick is renter-friendly and easier to install yourself (DIY weekend, 3–4 hours). Permanent wallpaper requires an installer ($200–$500). Choose one wall behind a sofa, headboard, or console for maximum impact.

    Your room instantly has depth and personality. That textured wall becomes the conversation starter—and the room’s anchor point.


    22. Add Metallic Trim or Beading to Existing Lampshades

    If replacing entire shades feels like too much, add beading or trim to the bottom of existing ones. It’s a $10–$15 detail that feels high-end and is surprisingly easy to DIY. Hot glue, fabric glue, or needle and thread all work.

    Metallic trim, beading, or fringe from craft stores like Michaels or JOANN ($3–$8). Attach with fabric glue (no-sew) or hand-stitch for durability. Takes 20–30 minutes per shade. This works especially well on existing neutral shades—cream, white, or soft gray.

    Your lamps suddenly look intentionally styled rather than off-the-shelf. That small detail reads as luxury without being obvious.


    23. Layer a Patterned Runner Over a Solid Area Rug

    Rug layering (Insight #10 mentions pattern-mixing) is a designer trick that feels intentional. Start with a solid base rug, then layer a patterned or smaller rug on top. This creates visual interest and defines zones without overwhelming the space. Article Insight #7 highlights defined spaces as a return trend.

    Solid rug from Wayfair or Overstock ($80–$200), patterned runner from Ruggable ($60–$150) or Wayfair ($50–$150). Layer the runner at an angle or centered on top. This works especially well if you have an open-plan room—the layered rug visually defines your seating zone.

    Your floor goes from simple to styled instantly. That extra layer adds texture and visual complexity that reads as intentional design.


    24. Display Collections on Open Shelving with Brass Supports

    If you have open shelving already, styled it thoughtfully. If not, open shelving with visible brass supports creates the architectural interest (Insight #13) that’s trending. Mix what you display: books, plants, ceramics, and personal objects. The key is balance—not crammed, not empty.

    Shelving + brass brackets from IKEA ($30–$80), Wayfair ($50–$150), or custom from local builders ($200–$500). Style using the “rule of thirds”: one-third books (spine-out), one-third decorative objects, one-third empty space. Rotate seasonal items to keep it fresh.

    Pro tip: group like objects together and use odd numbers (3 vases, 5 books). Your shelves become a personality showcase rather than storage. Guests see who you are through what you display.


    25. Install Picture Lights Above Artwork

    Picture lights are a gallery-world secret that instantly elevates any artwork. They cast warm light directly on pieces and create a focal point. The light itself becomes an accent—small brass picture lights feel especially upscale.

    Picture lights from Wayfair ($40–$100), West Elm ($60–$150), or specialty lighting shops ($80–$200). Installation: 30 minutes for a handyperson or DIYer. Mount the light 10–12 inches above the top of the frame, angled downward slightly. Pair with dimmable fixtures for flexibility.

    Your artwork becomes a gallery piece. That spotlight transforms even modest prints into focal points. Suddenly your walls tell a story.


    26. Layer Metallic Accents Throughout Using a Cohesive Finish

    The secret to a room feeling designed? Repeating your metal finish throughout. If you choose brass, echo it in lamps, hardware, frames, plant stands, and accessories. This repetition creates cohesion that reads as intentional luxury. You’re not randomly adding shiny things—you’re creating a design narrative.

    Audit your room: count how many different metal finishes you have (chrome, stainless, brushed nickel, etc.). Replace or add pieces that match your chosen finish. Brass and gold are currently trending (Article Insights #2, #15). Most updates under $50 each, so the cost spreads over time as you replace items naturally.

    When all your metals coordinate, the room suddenly feels sophisticated and intentionally designed. That cohesion is what separates “decorated” from “designed.” Everything feels like it belongs.


    Save this post and choose one idea to tackle this weekend—whether it’s swapping out hardware, adding candles, or hanging a new sconce. Small changes add up fast, and your living room will thank you.

  • 24 Black & White Kitchen Ideas That Look Bold & Timeless

    24 Black & White Kitchen Ideas That Look Bold & Timeless

    Black and white kitchens never go out of style—but they don’t have to feel cold or sterile either. Whether you’re renovating or renting, these 24 ideas prove that a monochromatic palette can feel warm, sophisticated, and totally livable. From bold accent walls to subtle hardware swaps, you’ll find inspiration at every budget level. These ideas work in tiny apartments, sprawling farmhouses, and everything in between. Ready to create a kitchen that’s both timeless and unmistakably yours? Let’s dive in.

    1. Paint Your Island a Statement Black

    A black island instantly becomes the focal point without requiring a full kitchen overhaul. Paint existing cabinetry with high-quality cabinet paint like Sherwin-Williams Tricorn Black ($30–$40 per quart) or Benjamin Moore Onyx ($28–$35 per quart). You’ll need 2–3 quarts depending on size, plus primer. This is a renter-friendly option if you use peel-and-stick contact paper designed for furniture instead.

    The whole project takes one weekend. Prep is everything—sand, prime, then apply two coats with 24 hours between. Home Depot and Lowes stock all supplies. Add new hardware in brass, matte black, or brushed gold ($15–$60 per set of handles) to complete the look. Your kitchen gains instant polish and a perfect place to gather.

    2. Install Black Grout for Dramatic Tile Work

    Black grout transforms standard white subway tiles into something architectural and intentional. Choose epoxy or urethane-based grout—it resists staining better than unsanded grout ($20–$50 per bag). Grout sealer ($15–$25) is essential for keeping it pristine.

    If you’re tiling yourself, budget one full weekend for backsplash work. Hire a pro if you’d rather skip the learning curve ($300–$600 for materials and labor on a standard backsplash). The contrast creates visual interest without adding color chaos. Your eye naturally follows those clean lines, making the kitchen feel more intentional and modern even if everything else stays simple.

    3. Add Black Window Frames for Architectural Pop

    Black window frames or pella frames create instant architectural interest and frame your view like art. If you have existing windows, painting the trim ($60–$150 in paint plus materials) is doable. True black window frame installation runs $200–$500 per window depending on size and whether you replace or overlay existing frames.

    This project is best left to a pro—improper installation leads to drafts and leaks. But the payoff is huge. Every time sunlight hits those frames, they create clean geometric lines that ground the entire space. It’s a designer touch that costs far less than other major updates.

    4. Swap Hardware to Matte Black or Brushed Brass

    Hardware might seem small, but it completely changes how a kitchen reads. Swap builder-grade silver handles for matte black ($8–$25 per handle) or mix black with brushed brass ($12–$30 per handle). A typical kitchen needs 15–25 handles and knobs.

    Shop Wayfair, Amazon, or Home Depot for budget options; West Elm and CB2 carry higher-end pieces. Installation takes 1–2 hours with just a power drill. No drilling needed if new holes align with old ones. This renter-friendly swap costs $120–$500 total but feels like a full renovation. Suddenly everything looks intentional and current.

    5. Create a Black and White Striped Accent Wall

    Stripes sound bold but read sophisticated in a black and white kitchen. Measure your wall and plan stripes 4–6 inches wide (easier to execute than thinner stripes). Tape off sections with painter’s tape ($5 per roll), then paint alternating stripes in white and black.

    Two days of work, one quart of each color ($30–$40 each). The result is a geometry lesson that makes your kitchen memorable. It photographs beautifully and works especially well on the wall behind open shelving or your dining area. This idea is totally renter-approved if you use removable wallpaper in stripe patterns instead ($20–$50 per roll).

    6. Install Open Shelving with Black Metal Brackets

    Open shelving with black brackets creates that expensive, boutique kitchen feel for way less than built-ins. Floating shelves run $30–$80; quality black steel brackets cost $20–$60 per pair. You’ll need 2 pairs per shelf for proper support.

    Installation requires a stud finder ($20) and a drill. One afternoon of work if you’re comfortable with basic tools; hire a handyperson for $100–$150 if not. The beauty is flexibility—easy to remove if you rent, easy to adjust if you rearrange. Style shelves with white dishware, glass jars, and minimal green plants. You get storage that’s functional and Instagram-worthy.

    7. Paint Your Lower Cabinets Black While Keeping Uppers White

    Two-tone cabinetry feels modern without being trendy-dated. Keep uppers white and paint lowers black (or vice versa) to break up visual weight and add definition. Black cabinet paint: $30–$50 per quart, primer included. You’ll need 2–3 quarts.

    This is a solid weekend project or a $400–$700 investment from a pro painter. The line where colors meet becomes a visual anchor—place your most-used appliances there for practical appeal. Two-tone also makes tall kitchens feel less towering. It’s the perfect amount of drama without committing to full black cabinetry.

    8. Use Black Peel-and-Stick Tile to Refresh Backsplash Without Renovation

    Peel-and-stick tiles are game-changers for renters and commitment-phobes. Patterns like black hexagons with white grout detail ($25–$50 per pack) instantly mature a basic kitchen. One pack typically covers 10–15 square feet.

    Simply clean your wall, measure carefully, and apply tiles straight. Zero experience needed. Most stick-on tiles last 3–5 years before peeling, but you can refresh by reapplying. They peel off cleanly without damage, making them renter-perfect. Suddenly your backsplash is a design statement instead of an afterthought.

    9. Frame Your Mirror or Artwork in Black

    A single black-framed mirror or art piece becomes an accent without overwhelming the space. Look for 24–36 inch mirrors with black metal frames ($40–$120 at Wayfair, Target, or IKEA). Abstract black and white kitchen art runs $30–$80.

    Hanging takes 10 minutes and a level. Choose a prominent wall—above the sink, open shelving, or against a blank expanse. That single focal point ties together your color story and makes the kitchen feel curated. It’s especially effective in smaller kitchens where one strong visual anchor feels intentional rather than cluttered.

    10. Add Black Metal Bar Stools to Your Island

    Bar stools in matte black metal ($60–$150 each at West Elm, CB2, or IKEA) add function and style simultaneously. Choose seats in light wood, white, or natural linen to keep the palette open. For a kitchen island, budget $180–$450 for three stools.

    Pick stools with foot rails for stability and comfort. Counter height (24–26 inches) works for most standard islands; measure your overhang first. Black metal legs ground the kitchen and tie into other black accents you’ve added. Suddenly your island feels like a gathering spot, not just counter space.

    11. Install Black Pendant Lights Over Your Sink or Island

    Statement lighting is where black and white kitchens get personality. Matte black pendant lights ($40–$150 each) create drama without shouting. Pair them with frosted, clear, or white glass shades for visual softness.

    Installation requires basic electrical knowledge or a licensed electrician ($200–$400). Buy fixtures from IKEA ($50–$80), Wayfair ($60–$120), or CB2 ($100–$200). Hanging lights over an island creates visual rhythm and makes the space feel intentional. Bonus: they’re one of the few elements every guest notices and remembers about your kitchen.

    12. Create a Black and White Checkerboard Floor (Peel-and-Stick Option)

    A checkerboard floor is playful yet timeless. Peel-and-stick vinyl tiles ($30–$60 per pack) let you achieve this look without permanent commitment. Most packs cover 25–30 square feet.

    Calculate your floor size, find your starting center point, and work outward in both directions. Lay tiles straight and use a roller to seal edges ($5–$10). Full installation takes 3–5 hours depending on floor size. The payoff is massive—a checkerboard reads as intentional design and breaks up the monotony of solid color floors. It photographs beautifully and works in both modern and vintage kitchen styles.

    13. Paint Cabinet Interiors Black for a Surprise Element

    This is the designer move nobody sees coming. Paint interior cabinet walls black ($15–$25 in paint per cabinet) to create depth and drama when doors open. It works especially well if you remove a few cabinet doors to create open shelving.

    One afternoon of work. You’re only painting interior surfaces, so it’s forgiving. The payoff is subtle but impactful—anyone opening a cabinet gets a small design moment. It also makes dishware and glassware pop visually. This detail reads expensive and intentional even though it costs almost nothing.

    14. Add a Black Leather or Linen Barstool Cushion

    Cushions soften hard bar stools and add comfort plus visual warmth. Black linen or faux leather cushions ($20–$60 each) tie into your color story while feeling different from solid metal. Choose 2–4 inches thick for comfort.

    Buy cushions pre-made from Wayfair or Amazon, or have them custom-made by a local upholsterer ($40–$80 per cushion). Installation is as simple as placing them on the seat—most have non-slip bottoms. Suddenly your island seating feels inviting rather than purely utilitarian. Bonus: if they get worn, swap them out for fresh ones.

    15. Install Black Faucet and Sink Hardware

    A matte black faucet ($80–$250) is a signature piece that ties your whole aesthetic together. Brands like Moen, Delta, and Kohler all make stylish black options at various price points. Higher-end faucets from design brands run $250–$500.

    Installation requires a plumber if you’re replacing existing fixtures ($150–$300 in labor). It’s worth it—faucets are one of the most-touched surfaces in your kitchen, so they need to work perfectly. Black hardware catches the eye and makes your kitchen feel considered and current. Every time you wash dishes, you’ll notice the upgrade.

    16. Use Black Caulk to Define Tile Edges and Seams

    Black caulk ($5–$10 per tube) is the secret weapon of polished kitchens. Apply it along backsplash edges, where tile meets counter, and between tile and cabinet. It’s cheaper than regrout and way easier to apply.

    One afternoon project with a caulk gun ($8–$15) and a wet finger for smoothing. Select paintable silicone caulk—it stays flexible and resists mildew. The result is visual precision that makes your entire backsplash read as intentional. It’s the kind of detail that makes people think you hired a professional designer.

    17. Paint Your Kitchen Door in Glossy Black

    A single painted door becomes a statement piece. Choose glossy black paint ($25–$40 per quart) to catch light and add sophistication. One quart covers most standard doors.

    Remove the door, sand, prime, and paint in two coats—one full day project. Glossy finish shows drips and dust more than matte, so work in a clean environment and use quality brushes. The result is a perfectly framed entryway that announces your style before anyone even enters. If you rent, this might not be an option—but check with your landlord; many allow paint if you use renter-friendly primer.

    18. Add Black Steel Pot Rack or Wall Hooks

    A black steel pot rack ($50–$150) or a simple row of black hooks ($3–$8 each) keeps cookware accessible and turns it into décor. Wall-mounted racks work great for small kitchens that lack cabinet space.

    Installation requires wall studs and heavy-duty anchors. Rent a stud finder ($20) or hire someone for $50–$100. The payoff is twofold: you free up cabinet space and create a functional design element. Choose cookware you love—stainless steel pots and copper-bottomed pans look beautiful displayed.

    19. Mix Black Textured Countertop Materials

    Mixing black countertop materials creates visual depth without chaos. Combine matte black quartz ($60–$120 per square foot installed) with textured black tile ($25–$60 per square foot) or concrete sections ($40–$100 per square foot). The cost is comparable to solid counters but way more interesting.

    This is definitely a pro-installer project ($400–$1,200 depending on kitchen size). The result is a counter that feels custom and intentional. Texture catches light differently, making the kitchen feel less flat and two-dimensional. It’s a solid middle ground between totally bold and completely safe.

    20. Paint or Stain Wooden Floating Shelves Black

    Black-stained or painted floating shelves create drama without overwhelming if you keep styling minimal. Stain ($8–$15 per can) soaks into wood grain; paint ($12–$20 per quart) sits on top for a more modern finish. Either way, one coat is usually enough.

    DIY: sand shelves, apply stain or paint, dry 24 hours, then install with brackets. Installation takes 2–3 hours total. The advantage of dark shelves is they hide dust and make styling easier—white dishes and clear glass look perfect against them. It’s an affordable way to add luxury without breaking the bank.

    21. Install a Black Range Hood or Vent Cover

    A matte black range hood ($300–$800 for stainless steel with black exterior) becomes your kitchen’s star. Brands like IKEA offer budget options ($200–$400); design brands like Zephyr or Electrolux run $600–$1,200.

    Installation requires ventilation work—hire a pro ($300–$500). The result is a show-stopping focal point that handles odors and steam. If you rent or want to avoid installation, stick-on black vent covers ($30–$60) fake the look temporarily. A statement hood grounds the kitchen and tells everyone you take cooking seriously.

    22. Use Black Grout Pen to Refresh Existing Grout Lines

    If replacing grout sounds overwhelming, a black grout pen ($8–$15 per pen) refreshes tired grout lines instantly. Brands like Grout Eez or similar make pens specifically for this.

    Simply apply along grout lines like a marker—takes one hour for a backsplash. Results last 1–2 years before fading, then you reapply. This renter-friendly option costs under $20 total and transforms dated-looking tile into something current. It’s the easiest way to test-drive the black grout trend.

    23. Paint Kitchen Cabinet Kickboards or Toe Kicks Black

    The toe kick (space at the bottom of cabinets) is often overlooked but super impactful. Painting it black ($10–$15 in paint) creates a grounding visual line that makes cabinetry feel intentional.

    One afternoon project. Sand lightly, prime, and paint two coats. This detail is seen in high-end kitchens but costs almost nothing. Suddenly your cabinetry looks built-in and designed rather than builder-grade. It’s one of those sneaky tricks that makes everything feel more polished.

    24. Add a Black Chalkboard or Magnetic Board for Kitchen Organization

    A black chalkboard ($20–$50) or magnetic board ($30–$80) serves both function and design. Brands like Pottery Barn, CB2, and IKEA have stylish options that don’t feel purely utilitarian.

    Mount it on a blank wall with basic hardware—10 minutes of work. Use white chalk pens or magnetic letters to write your meal plan, shopping list, or notes. It’s a perfect place for practical information that doesn’t clutter your counters. Guests love having a functional art piece, and you love the organization. Win-win.


    Save this guide and pick one idea to tackle this week. Start small—a hardware swap or grout pen refresh takes an afternoon but completely shifts how your kitchen reads. Which black and white upgrade speaks to you?

  • 25 Creative Bookshelf Ideas That Turn Storage Into Art

    25 Creative Bookshelf Ideas That Turn Storage Into Art

    Your bookshelf doesn’t have to be just about storing books. It’s one of the most visible pieces in your home, so why not make it work as hard as your decor does? Whether you’re renting, decorating a small apartment, or refreshing a full library, these 25 ideas will show you how to turn basic shelving into a display that actually reflects who you are. From budget-friendly styling tricks to investment-worthy upgrades, you’ll find solutions for every space and skill level. Let’s make your shelves worth showing off.

    1. Layer Books Horizontally and Vertically for Visual Balance

    Mixing book orientations breaks up the visual monotony of a straight row. This simple styling technique makes shelves look intentional and curated without spending a dime.

    Stack three to four books flat, then stand five to six upright. This creates natural visual breaks and lets your eye move across the shelf. You can group books by color for extra impact or mix them by size for organic flow. No special tools needed—just spend 30 minutes reorganizing what you already own.

    The result? Your shelves instantly look more styled and designed, even if nothing changed except the book arrangement.

    2. Install Floating Shelves for a Modern, Minimalist Look

    Floating shelves create the illusion of extra space while giving your room a contemporary edge. They’re renter-friendly if you use damage-free mounting strips or are easily installed by a handyperson for about $75–$150 total per shelf (including hardware and labor).

    Choose shelves in materials like wood, metal, or composite depending on your aesthetic. Mount them at varying heights rather than straight lines for visual interest. Installation takes one to two hours with basic tools. Target, IKEA, and Wayfair all carry affordable options ($20–$60 per shelf before installation).

    You’ll notice how much lighter your space feels. High shelves draw the eye upward, making even small rooms seem taller and more open.

    3. Use Bookends as Decorative Statement Pieces

    Instead of generic metal bookends, choose ones that match your style. This $15–$40 investment adds personality while keeping books upright and organized.

    Look for ceramic bookends with patterns, brass sculptural pieces, or marble blocks. You can find unique options on Amazon, Etsy, or at Home Goods. Space books 6–8 inches apart and position your bookends to create visual “zones” on each shelf. Pair books with plants or photos for extra dimension.

    Your shelves instantly look more curated. Bookends become part of your design story, not just functional hardware.

    4. Add Small Plants to Break Up Book Density

    Greenery humanizes shelves and introduces organic shapes that books alone can’t provide. A few small plants ($5–$15 each) transform static shelving into something alive and breathing.

    Choose low-maintenance varieties like pothos, snake plants, or succulents that tolerate lower light if your shelf isn’t near a window. Arrange them at varying heights rather than a straight line. Water sparingly—once every two weeks for most shelf-plants. Rotate them outside monthly for better health.

    This change makes your space feel calmer. Visitors notice the greenery before the books, which says “I live here” instead of “I’m just storing things.”

    5. Create a Colorful Book Rainbow for Instagram-Worthy Appeal

    Rainbow shelves are a huge social media trend that actually works in real life. It takes two to three hours but costs nothing—you’re just rearranging what you own.

    Sort books by spine color and arrange them left to right following the spectrum. Start with warm tones on one end and cool tones on the other. You don’t need perfect color matching; approximate groupings look intentional. This works especially well for one accent shelf rather than your entire bookcase.

    Your bookshelf becomes the focal point of the room. It’s the first thing people photograph, and it’s proof that organization can be beautiful.

    6. Mix in Empty Negative Space for Breathing Room

    An overcrowded shelf feels chaotic, but empty space feels intentional and restful. The trick is balance: fill about 60–70% of each shelf, leaving 30–40% open.

    This works best when you combine books with decorative objects, plants, or framed photos in the empty zones. Vary shelf fullness—make some busier and others more sparse for visual interest. You won’t need to buy anything new; just remove a few books and relocate them to another shelf.

    Your room instantly looks larger and less cluttered. The eye rests on empty space, which makes the entire room feel calmer and more organized.

    7. Display Coffee Table Books Horizontally for Designer Appeal

    Coffee table books have gorgeous spines and covers worth showing off. Stacking them horizontally uses their visual appeal while filling shelf space efficiently.

    Choose three to five art, design, or photography books with covers that match your aesthetic. Stack them at the front edge of a shelf, leaving room behind for other items. Layer smaller decor on top—candles, sculptures, or small plants. These books cost $15–$50 each but last years and spark conversation.

    This approach makes your shelves look magazine-worthy. Guests see thoughtful curation instead of random storage.

    8. Paint Your Bookshelf a Bold Accent Color

    A fresh coat of paint ($20–$50 for quality interior paint) completely changes your shelf’s personality. This works especially well for built-ins or wood bookcases you own.

    Choose colors that complement your walls but feel distinct—think deep teal, forest green, warm charcoal, or even cream against darker walls. Use primer first, then two coats of interior paint. Allow 24 hours to dry. The project takes three to four hours spread across a weekend.

    Your bookshelf becomes an architectural feature. Books and decor now pop against the backdrop instead of blending into the wall.

    9. Install Adjustable Shelving for Flexibility

    Adjustable shelving lets you customize shelf heights based on your collection. This $80–$200 investment pays off if you rent or plan to use the unit long-term.

    Look for modular systems like IKEA’s Kallax, Ivar, or Elvarli lines, which offer flexibility without permanent installation. Adjust shelves every six months as your collection changes. Renter-friendly options use tension rods or damage-free brackets rather than permanent mounting.

    You’ll stop struggling with awkward spacing. Tall books, magazines, and decorative objects finally fit where you need them instead of forcing everything to standard heights.

    10. Combine Books with Framed Artwork for Gallery Wall Vibes

    Mixing framed art into shelving creates a gallery feel without committing to wall space. Lean smaller frames against the back of the shelf or stand them upright between book clusters.

    Use frames of varying sizes and finishes—wood, metal, acrylic—for visual interest. Rotate artwork seasonally or based on mood. Affordable frames start at $5–$15 from IKEA, Target, or thrift stores. This costs almost nothing if you use existing photos and prints.

    Your shelf transforms into a personal gallery. Instead of just storing books, you’re displaying memories and art that matter to you.

    11. Use Baskets to Corral Clutter and Add Texture

    Open baskets hide clutter while adding warmth and texture. This $15–$50 upgrade instantly organizes anything you’re embarrassed to display.

    Choose baskets that fit your shelf depth and complement your style—seagrass, woven rattan, or fabric bins work equally well. Use them to store extra books, blankets, office supplies, or anything you want hidden but accessible. Label them lightly for easy finding.

    Your shelves become more functional and visually soft. The eye sees intentional organization instead of scattered items.

    12. Lean Books at an Angle for Relaxed, Curated Appeal

    Leaning books creates movement and visual interest that rigid rows can’t achieve. This free styling trick makes shelves look less formal and more approachable.

    Select a few books with covers you love and lean them against the shelf wall or other books at slight angles. Don’t overthink it—the imperfection is the point. Mix leaned books with upright stacks for balance. This takes 10 minutes to rearrange.

    Your shelves look more relaxed. This subtle change suggests someone actually lives here and uses these books, not just displays them perfectly.

    13. Incorporate Vintage or Thrifted Finds for One-of-a-Kind Character

    Vintage and thrifted pieces add personality books alone can’t provide. Thrift stores and antique markets offer one-of-a-kind items for $2–$20 each, making this affordable character-building.

    Scout estate sales, Goodwill, and local antique shops for items that speak to you—vintage cameras, brass sculptures, old books with beautiful spines, decorative boxes. Mix these treasures among your books for a collected aesthetic. The randomness and history are what make this work.

    This approach transforms your shelves into a conversation starter. Every item has a story, and visitors notice the personal touches more than the books themselves.

    14. Create a Mini Library for Children’s Books with Lower Shelf Access

    Lower shelves at kid-height with forward-facing display make reading accessible and inviting. This costs nothing if you already have books; it’s just strategic placement and perhaps a small step stool ($15–$30).

    Arrange picture books with covers showing forward on lower shelves so kids can see and grab them easily. Stand chapter books spine-out above. Add a small bench or cushion nearby for reading. This encourages independent book selection.

    Kids see this as their shelf, which means they’re more likely to read and care for books. You’re building a reading habit while keeping children’s books organized and visible.

    15. Install LED Strip Lighting for Subtle Ambient Glow

    Shelf lighting adds ambiance and highlights your display. This $20–$50 upgrade makes shelves look professionally styled, especially in evening hours.

    Choose warm white LED strips (avoid cool blue unless matching a modern aesthetic) and install them under shelf edges or along the top back. Most are adhesive-backed and battery or USB-powered. Installation takes 15 minutes. Brands like Nanoleaf and simple Amazon strips work well.

    Your shelves become a design feature, not just storage. The soft lighting makes reading easier and adds sophistication to your entire room.

    16. Group Similar Items Together in Visual Clusters

    Grouping similar items creates visual order and makes spaces feel more intentional. This free organizing principle takes 30 minutes to implement.

    Dedicate shelf sections to themes: one for cookbooks, one for fiction, one for art and plants, one for family photos. Keep each cluster contained within a zone rather than spreading items randomly. Leave breathing room between zones.

    Your shelves tell a story. Instead of appearing randomly filled, they reflect how you actually live and what you care about.

    17. Display Decorative Books with Coordinated Spines

    Decorative books (whether you read them or not) add visual weight and color coordination. Quality options cost $10–$30 each from bookstores or online retailers.

    Look for books with beautiful typography, photography, or coordinating colors—coffee table books, art books, or design books work perfectly. Arrange them by color or size to create cohesion. Stack them at varying heights with a few standing upright.

    This approach takes your shelves from “storage” to “designed space.” Visitors see intention and style, not just random books.

    18. Use Shelf Dividers or Metal Rods to Prevent Books from Slumping

    Shelf dividers prevent books from tipping and sliding while adding visual structure. Options range from $5–$25 each depending on style.

    Choose dividers that complement your aesthetic—simple metal, decorative brass, or natural wood work best. Space them about 10–12 inches apart to create sections. Arrange books vertically between dividers. This also creates visual stopping points across the shelf.

    Your shelves maintain organization without constant adjustment. Books stay upright, and the dividers add another layer of intentional design.

    19. Rotate Your Display Seasonally for Constant Freshness

    Seasonal rotation keeps your shelves from feeling stale and lets you use display space efficiently. This costs nothing but takes two to three hours per refresh.

    Every three months, swap out 20–30% of your displayed books and decor. In spring, bring forward bright colors and fresh plants. Summer calls for travel books and lighter reads. Fall welcomes jewel tones. Winter feels good with cozy books and warm lighting. Rotate items between shelves and storage.

    Your space feels intentionally refreshed without redecoration. This practice keeps shelves interesting and prevents the “same old shelf” feeling.

    20. Pair Tall Vertical Shelves with Low Horizontal Stacks for Depth

    Layering tall and short stacks creates three-dimensional depth that flat rows can’t achieve. This costs nothing—pure strategic arrangement of existing books.

    Place a tall stack of books in the back or middle of a shelf, then layer a horizontal stack in front. This creates depth and visual interest while maximizing space. Vary the pattern across different shelves to avoid repetition.

    Your shelves look more sophisticated and magazine-worthy. The layering draws the eye through the display instead of stopping at the surface.

    21. Create a Reading Nook with Matching Pillows and Throws

    Pairing your shelf with a reading zone makes the display functional and inviting. A comfortable chair and soft textiles cost $100–$300 but create an entire lifestyle moment.

    Choose a chair that fits your space—a full armchair, accent chair, or even a large cushion works. Layer it with pillows and a throw blanket in colors that complement your shelf. Add a small table for beverages and books in progress. Position it where natural light reaches the shelf.

    Your bookshelf becomes more than decoration—it becomes the centerpiece of a personal retreat. This is where people actually spend time instead of just looking.

    22. Mix Upright and Tilted Frames for Dynamic Art Display

    Mixing frame orientations creates movement on shelves. Use existing frames or invest $5–$15 per frame from budget-friendly retailers.

    Stand some frames upright between books, lean others at angles against the shelf back, and prop a few in front of stacks. Vary frame sizes and materials for visual interest. This arrangement feels collected and intentional rather than perfectly styled.

    Your display becomes more dynamic. The varied heights and angles draw the eye across the entire shelf instead of landing on one spot.

    23. Install a Bookshelf on a Rental Apartment Wall with Damage-Free Methods

    Renters deserve stylish storage too. Damage-free mounting systems cost $30–$80 and allow you to decorate without losing your security deposit.

    Use adhesive command strips for lightweight shelving, or look into tension rods and bracketing systems designed for rental walls. Weight limits vary, so stick with books and light decor rather than heavy items. Installation takes 30 minutes.

    You get shelving that moves with you. When you leave, peel off strips and fill any small holes. This frees you to style confidently.

    24. Curate Books by Spine Color to Match Your Interior Palette

    Coordinating book spines by color creates a cohesive, designed look. This takes two hours to arrange but costs nothing.

    Review your collection and display books whose spines match or complement your interior palette. Group warm tones together, cool tones together, or create a gradient. Store books with clashing spines in boxes or different shelves. This selective display approach works especially well for visible shelves.

    Your space feels intentionally designed rather than randomly filled. Visitors notice the thought behind every choice.

    25. Add a Small Workspace Shelf for Books and Office Supplies

    Combining shelving with workspace maximizes functionality in small spaces. A desktop unit with shelves above costs $100–$250 and serves double duty.

    Look for ladder-style shelves or desktop organizers that provide storage and workspace simultaneously. Position books you reference frequently at arm’s reach. Keep supplies in labeled containers below the work surface. This setup is perfect for remote work or creative hobbies.

    You’ve created a focused work zone that feels organized and inspired. Books are literally within reach, and your space serves multiple purposes without feeling cramped.

    26. Make Your Bookshelf a Reflection of Your Personality Through Styling Choices

    Your shelf should tell your story. There’s no “right” way to style it; what matters is that it feels authentically you. Every item costs nothing if you’re using things you already own.

    Choose books you’ve actually read and loved. Display objects that bring you joy or hold meaning. Include photos of people and places that matter. Don’t worry about perfect symmetry or matching aesthetics. The imperfection and personality are what make it beautiful.

    This creates a space that feels genuinely lived-in. When people visit, they see you in your shelf—your interests, your memories, your taste. That’s so much more powerful than a perfectly styled but generic display.


    Save this post for your next weekend refresh, and pick just one idea to try first. You’ll be amazed how one small change transforms your entire space from storage-focused to style-forward.

  • 23 Accent Wall Painting Styles That Instantly Refresh Any Room

    23 Accent Wall Painting Styles That Instantly Refresh Any Room


    Your bedroom, bathroom, or living room doesn’t need a complete overhaul to feel brand new. A single accent wall—painted in the right color, texture, or style—can completely shift the energy of your space. Whether you’re renting, working with a tight budget, or ready to invest in something bold, there’s an accent wall idea here that fits your style and timeline. We’re walking through 23 approaches—from classic color plays to textured finishes, geometric patterns, and mixed-media designs. Most take a weekend or less, and many cost under $100. Ready to refresh your space? Let’s dive in.


    1. Paint a Moody Jewel Tone for Instant Depth

    Jewel tones like emerald, sapphire, and deep plum make a room feel instantly grown-up and sophisticated. They work especially well in bedrooms, dining rooms, or home offices where you want to feel grounded and focused.

    Choose a paint finish that matters: eggshell or matte ($25–$40 per gallon from Sherwin-Williams or Benjamin Moore) looks more refined than flat. You’ll need about one gallon for most accent walls. Application takes 2–3 hours including drying time between coats. Pro tip: pair jewel tones with white or cream trim to make the color pop without overwhelming the space.

    The payoff is real. Dark, saturated colors make rooms feel intentional and designed, and they photograph beautifully—perfect if you love styling your space on social media.


    2. Create a Warm Accent with Cinnamon or Terracotta

    Warm, earthy tones bring comfort and coziness without feeling heavy. Cinnamon, rust, and terracotta work beautifully in kitchens, living rooms, and entryways where you want guests to feel welcomed.

    These warm neutrals pair perfectly with natural wood and brass accents. A gallon of quality paint runs $25–$40; one coat usually covers well since these colors tend to have great pigmentation. Plan for 2–3 hours of painting time. Home Depot and Lowe’s stock budget-friendly versions ($15–$20 per gallon) if you’re testing the look first.

    This approach grounds a room without feeling trendy or temporary. You’ll find yourself gravitating toward that wall for photos and gatherings.


    3. Go Soft with Warm White or Cream Trim Effect

    A barely-there cream or warm white accent wall becomes dramatic when you add simple white trim work or paneling lines. This is the renter-friendly approach to adding architectural interest without commitment.

    Paint the wall a soft cream ($20–$35 per gallon) then add removable wallpaper trim lines, peel-and-stick wainscoting ($30–$60 from Amazon or Wayfair), or even just paint thin vertical stripes freehand if you’re feeling brave. This takes 3–4 hours and costs under $75 total. The optical effect is that your room suddenly looks taller and more curated.

    You get high-design impact from a subtle color change. Renters love this approach because it reads “intentional” without permanent damage.


    4. Use Metallic Paint for Glam Accents

    Metallic finishes—gold, silver, or rose gold—add glamour without screaming “party house.” These work best on one small wall (bathroom, behind a bed, or beside a mirror) where light can hit and reflect off the finish.

    Metallic paints cost $30–$50 per gallon and need a smooth base coat first. Plan for 2–3 hours total, including a primer layer. Application requires a high-quality sponge or stipple technique ($8–$15 for good tools) to avoid visible brush strokes. Pro tip: apply a clear gloss coat after drying for extra shimmer and durability.

    The result feels spa-like and intentional. Lighting becomes part of your design—afternoon sun hits the wall differently than evening lamplight, creating mood throughout the day.


    5. Paint Horizontal Stripes for Visual Width

    Horizontal stripes make a room feel wider and more spacious. They work in bedrooms, kids’ rooms, or any space where you want a playful but polished vibe without overwhelming boldness.

    Paint the wall a base color, then use painter’s tape and a second color to create even stripes. You’ll need two paint colors ($25–$40 each) and quality painter’s tape ($10–$15). Allow 4–5 hours for taping, painting, and drying—the taping step takes patience but pays off in clean lines. Home Depot staff can help you find tape width recommendations based on how bold you want the stripes.

    Stripes create visual movement and make a simple wall feel intentional. The color combination you choose sets the mood: soft grays feel calming, while navy and white feels classic and grounded.


    6. Try Geometric Shapes with Stencils

    Geometric patterns add personality without committing to wallpaper. Triangles, diamonds, hexagons, or circles let you play with color and design in a way that feels modern and considered.

    Download or purchase stencil templates ($15–$40 from Etsy, Amazon, or craft stores). You’ll need two paint colors, stencil adhesive spray ($5–$10), foam rollers or sponges ($8–$15), and patience. Expect 6–8 hours for a full wall, depending on pattern complexity. Start small—maybe just the upper half of the wall—if this is your first time.

    The payoff is a unique, personalized space that looks more expensive than it cost. Geometric walls photograph beautifully and give your room instant character.


    7. Create an Ombre or Gradient Effect

    Ombre walls blend two or more colors smoothly from top to bottom (or side to side), creating depth and visual interest. This technique works especially well in calm, restful spaces like bedrooms.

    Choose two colors in the same family (light to dark blue, pale to deep green, etc.). You’ll need both paint colors ($25–$40 each), two rollers, and a sponge for blending ($10–$15 total). The technique: paint the darker color on the bottom half, lighter on top, then use a damp sponge to blend the middle while paint is wet. Plan 4–6 hours. It’s more forgiving than you’d think—slight variation adds to the organic feel.

    The result is calming and sophisticated. An ombre wall becomes a focal point without looking fussy or childish.


    8. Add a Mural or Hand-Painted Design

    A mural transforms a room into something uniquely yours. You don’t need to be an artist—simple silhouettes, abstract shapes, or botanical scenes all work beautifully.

    For DIY murals, sketch your design lightly in pencil first, then paint using acrylics ($20–$60 total for supplies). Expect 8–15 hours over a few days. If hiring a professional muralist, budget $300–$1,500 depending on size and complexity; local artists often charge $25–$75 per hour. Search “muralist near me” on Google or Instagram to find talent.

    A mural makes your space completely personal. It’s the one accent idea that absolutely cannot be replicated elsewhere—this wall becomes yours alone.


    9. Use Textured Plaster for Dimension

    Venetian plaster, stucco, or textured finishes add tactile dimension that flat paint cannot achieve. These finishes catch light beautifully and hide wall imperfections better than smooth paint.

    Textured finishes cost $40–$80 per gallon and require application with a trowel or sponge—not a roller. If you’re inexperienced, hire a pro ($400–$800 for one wall). DIY application takes 4–6 hours plus drying time. Many home improvement stores offer application tutorials; watch a few before starting.

    Textured walls feel luxe and collected. They photograph dramatically and make a room feel intentionally designed rather than default.


    10. Paint a Botanical or Nature-Inspired Mural

    Biophilic design—bringing nature indoors through imagery and color—is having a huge moment. Botanical murals in greens, sage, and natural tones create a calming, connected feeling.

    Simple botanical designs are beginner-friendly. Sketch light pencil outlines, then paint with watercolor or acrylic. Budget $25–$50 for supplies and 6–10 hours of painting time over a few days. Alternatively, purchase botanical wall decals ($40–$100 from Etsy or Amazon) if you want the look without the hand-painting commitment.

    The result feels organic and intentional. A botanical wall pairs beautifully with real plants, making your space feel alive and peaceful.


    11. Try a Subtle Color-Block Design

    Color-blocking divides a wall into sections (usually two large rectangular areas) with a clean line between them. This approach is modern, balanced, and surprisingly easy to execute.

    Choose two complementary colors and use painter’s tape to mark your dividing line precisely. A chalk line ($5) helps create straight guidelines. You’ll need both paint colors ($25–$40 each) and quality painter’s tape ($10). Painting takes 3–4 hours plus tape removal time. For a polished finish, remove tape while paint is slightly tacky to avoid peeling.

    Color-blocking feels intentional and designed. It’s bold enough to impact your room but structured enough to work with most decor styles.


    12. Create a Stone or Brick Texture Effect

    Faux stone or brick textures add character and warmth without the expense or weight of real materials. These effects work beautifully in entryways, bedrooms, or living rooms with rustic or industrial vibes.

    You’ll need 2–3 paint colors in similar families, sponges, and a tutorial ($0 from YouTube or $10–$20 for a detailed course). DIY application takes 6–10 hours depending on detail level. Alternatively, peel-and-stick stone wallpaper ($40–$80 from Amazon or Wayfair) delivers similar results in 2–3 hours with zero paint mess.

    Faux textures add depth and visual interest. Your wall suddenly looks like it has history and story behind it.


    13. Paint a Dark Accent Wall to Make Other Colors Pop

    Dark accent walls are underrated. They make artwork, furniture, and other colors in your room stand out dramatically. This works beautifully in bedrooms behind beds or in living rooms behind gallery walls.

    Dark colors ($25–$40 per gallon) need two coats for even coverage. Plan 3–4 hours. The key: use a quality interior paint—cheaper formulas can look muddy. Pair the dark wall with lots of white, cream, or light-colored furniture so the room doesn’t feel cave-like.

    Dark backgrounds make everything else in your room look intentional and curated. Art pops, furniture feels grounded, and the whole space reads more sophisticated.


    14. Add Metallic Accents with Paint and Stencils

    Combine stencils with metallic paint for glam without covering the entire wall. Small metallic accents feel elevated and artistic rather than overwhelming.

    You’ll need one metallic paint ($30–$50), stencil templates ($15–$40), painter’s tape, and sponge applicators. Plan 4–6 hours. The metallic paint catches light beautifully if you use a sponge-stippling technique rather than rolling. Test on cardboard first to get the feel.

    Metallic accents feel intentional and expensive. They catch light throughout the day, adding subtle glamour to an otherwise understated room.


    15. Use Removable Wallpaper for Pattern Without Commitment

    If you’re renting or uncertain about permanent paint, peel-and-stick wallpaper delivers pattern and color without damage to your security deposit. Modern options look expensive and sophisticated.

    Quality peel-and-stick wallpaper runs $30–$80 per roll depending on design. You’ll need 1–3 rolls for a standard accent wall ($50–$150 total). Application takes 2–3 hours—watch installation videos first because smooth application requires patience and a squeegee ($5–$10). Removal is damage-free if you peel slowly.

    Wallpaper creates instant pattern and personality. Removal is guilt-free when you move, making this perfect for renters or anyone hesitant about permanent changes.


    16. Paint Vertical Stripes for Height

    Vertical stripes draw the eye upward, making ceilings feel taller. They work beautifully in rooms with lower ceilings or any space where you want to add height perception.

    Use painter’s tape and two paint colors ($25–$40 each) to create even stripes. Narrow stripes (2–3 inches) feel modern and subtle; wider stripes (6–8 inches) feel bolder. Plan 4–5 hours for taping and painting. Quality painter’s tape is essential—cheap tape bleeds and creates messy lines.

    Vertical stripes shift how your eye moves through a room. They instantly add sophistication and can make a small bedroom feel airier.


    17. Create a Soft Gradient Using Multiple Paint Colors

    A multi-color gradient uses three to four colors blended smoothly for a sophisticated, layered effect. This is more complex than simple ombre but creates stunning results.

    Choose 3–4 colors in the same family ($25–$40 per gallon). Paint horizontal bands, then blend each transition zone with a damp sponge while paint is wet. Plan 8–10 hours over 1–2 days. This technique requires patience and practice—watch YouTube tutorials before starting.

    The result feels curated and artistic. A gradient wall becomes a focal point that feels both calming and intentional.


    18. Add a Two-Tone Design with a Horizontal Divide

    A clean horizontal line splitting two colors is modern, balanced, and easier than color-blocking. This works in any room and pairs well with simple, contemporary furniture.

    Use painter’s tape to mark a straight horizontal line (usually at chair-rail height, around 36 inches). Paint one color above, the other below. Two paint colors cost $50–$80 total. Plan 3–4 hours. Remove tape while paint is slightly tacky for crisp edges.

    Two-tone walls feel intentional and designed. The horizontal line creates visual balance and can make spaces feel either cozier (dark on bottom) or airier (light on bottom).


    19. Use Chalk Paint for a Matte, Velvety Finish

    Chalk paint creates a matte, ultra-soft finish that feels sophisticated and contemporary. It’s more forgiving than glossy finishes and hides minor wall imperfections beautifully.

    Chalk paint costs $35–$60 per gallon (brands like Annie Sloan or Rust-Oleum). One coat usually covers well. Plan 2–3 hours of painting time. This finish is durable for accent walls but may need occasional touch-ups in high-traffic areas. Many paint stores can mix chalk paint in any color you want.

    Chalk finishes feel intentional and collected. They photograph beautifully because the matte surface absorbs light naturally, creating a warm, inviting feel.


    20. Paint a Half-Wall or Wainscoting Effect

    Wainscoting or half-wall painting adds architectural interest without expensive millwork. You simply paint the lower half a deeper color and leave the upper half light.

    You’ll need two paint colors ($50–$80 total). Mark your line at 36 inches using a level and chalk line ($5). Paint both sections—plan 3–4 hours. If you want a trim line between colors, use thin painter’s tape for clean edges or purchase pre-made wall trim ($20–$50 from home improvement stores).

    Half-wall painting feels sophisticated and intentional. It adds visual interest while keeping the upper wall light and airy.


    21. Create a Cosmic or Starry Night Effect

    A starry night wall brings wonder and whimsy to children’s rooms, nurseries, or creative studios. It’s simpler to execute than you’d think and deeply personal.

    Paint the wall a deep navy or charcoal ($25–$40). Use white paint and a small brush or sponge to dot stars in varying sizes. Add glow-in-the-dark paint ($8–$15 per jar) if you want nighttime magic. Plan 4–6 hours of dotting and drying. This project is genuinely fun—kids enjoy helping, and slight imperfection adds charm.

    A starry wall creates a dreamy, magical space. It’s whimsical without being babyish, and it grows with your child.


    22. Paint a Watercolor Wash for an Artistic Look

    A watercolor wash mimics the soft, blended quality of watercolor painting. It’s modern, artistic, and forgiving—imperfection is part of the charm.

    You’ll need 2–3 colors in a complementary palette ($50–$100 total). Apply one color, then blend the second color into it with a damp sponge while wet. Continue layering until you achieve the effect you want. Plan 5–8 hours over 1–2 days because this works best with multiple thin layers. Watch tutorial videos to see the blending technique in action.

    Watercolor walls feel artistic and intentional. They make a room feel creative and collected without being overwhelming or too trendy.


    23. Add Dimensional Wall Art with Paint and Mixed Media

    Mix paint with textured elements—wood shapes, fabric panels, or metal accents—to create a truly unique dimensional wall. This approach combines color with sculpture for maximum impact.

    Paint the wall a solid base color ($25–$40). Attach pre-made wooden geometric shapes ($30–$100 from Etsy, Amazon, or craft stores) using strong adhesive or a nail gun. Alternatively, use fabric panels ($20–$50 each) to add soft dimension. Plan 4–6 hours plus drying time. This works beautifully in modern, eclectic, or contemporary spaces.

    Dimensional walls feel artistic and designed. They catch light and shadow differently throughout the day, creating constantly shifting visual interest in your space.


    Save this post for your next room refresh—you’ll find at least one idea that matches your style and budget. Pick one and tackle it this weekend. The best part about an accent wall? If it doesn’t work, it’s a single wall to paint over. Most of the time, though, you’ll be amazed at how much one change transforms how a room feels.