Blog

  • 24 Calm Color Palette Ideas for a Restful Sleep Environment

    24 Calm Color Palette Ideas for a Restful Sleep Environment


    Introduction

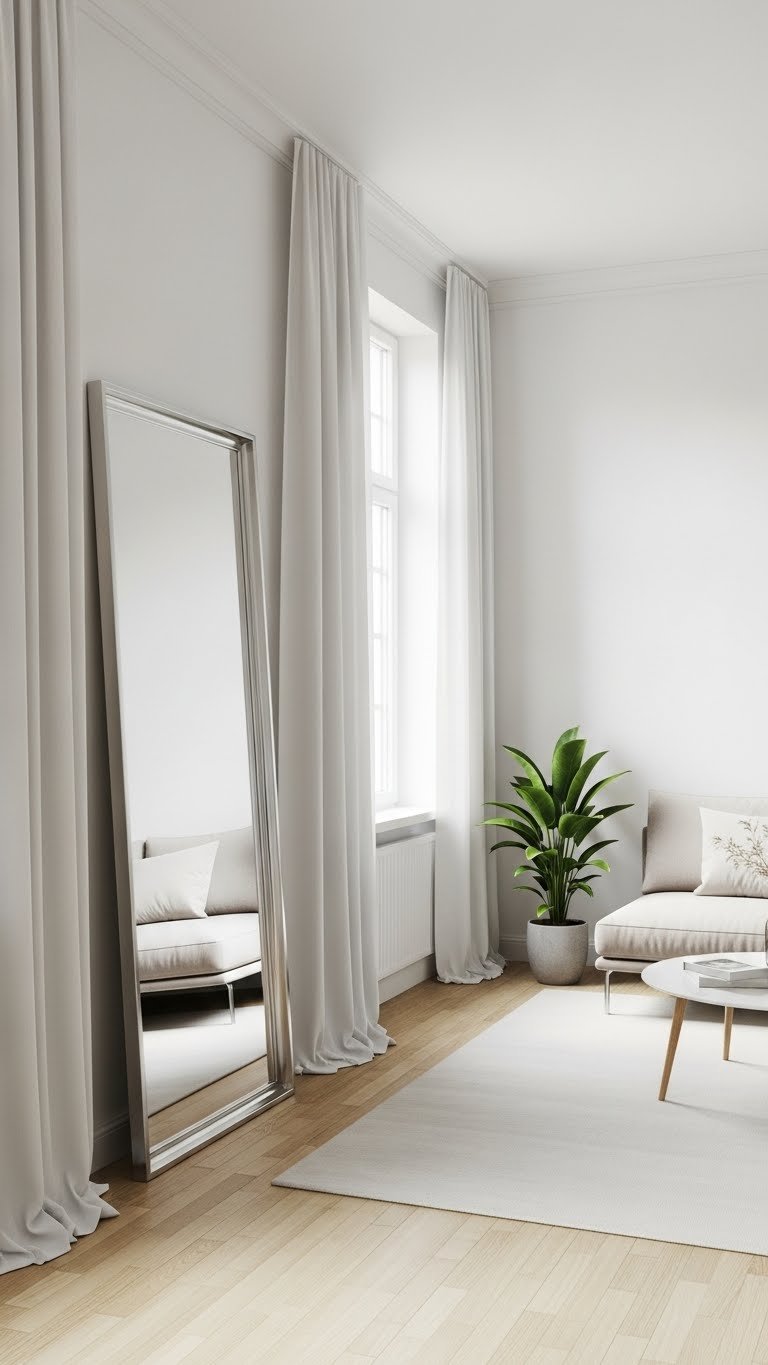
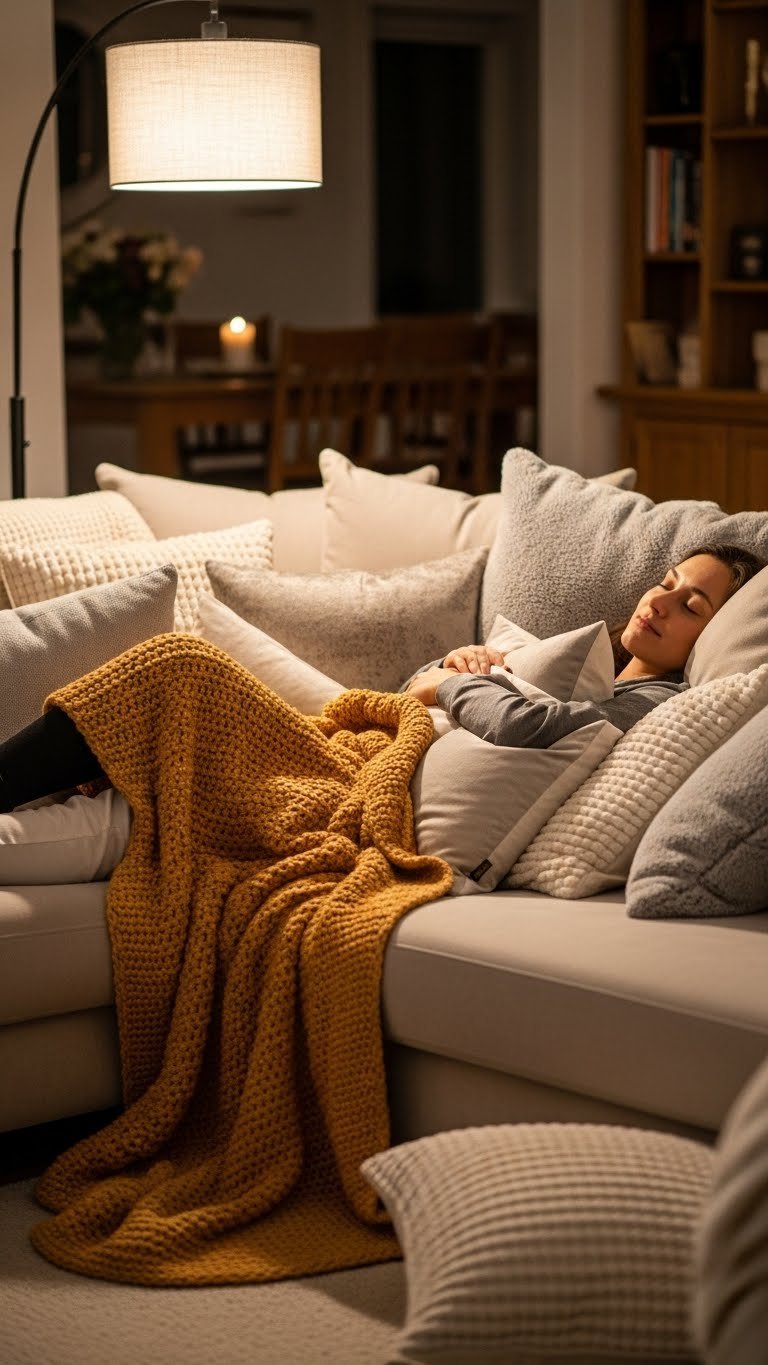
    Color sets the emotional tone for your entire bedroom—it’s the first thing you feel when you wake up and the last thing you see before sleep. If you’re waking tired or struggling to wind down, your walls might be working against you instead of for you. The right palette doesn’t have to be boring beige; it’s about choosing hues that actually support rest and make you want to linger.

    We’ve gathered 24 color combinations that research backs up and real people have tested in their own homes. These aren’t trendy one-year wonders—they’re timeless, achievable palettes that work in apartments and houses, with budget pieces and investment finds. Whether you’re repainting this weekend or planning a slower refresh, you’ll find options that fit your style, your timeline, and your wallet. Let’s find the colors that make your bedroom feel like the retreat it should be.


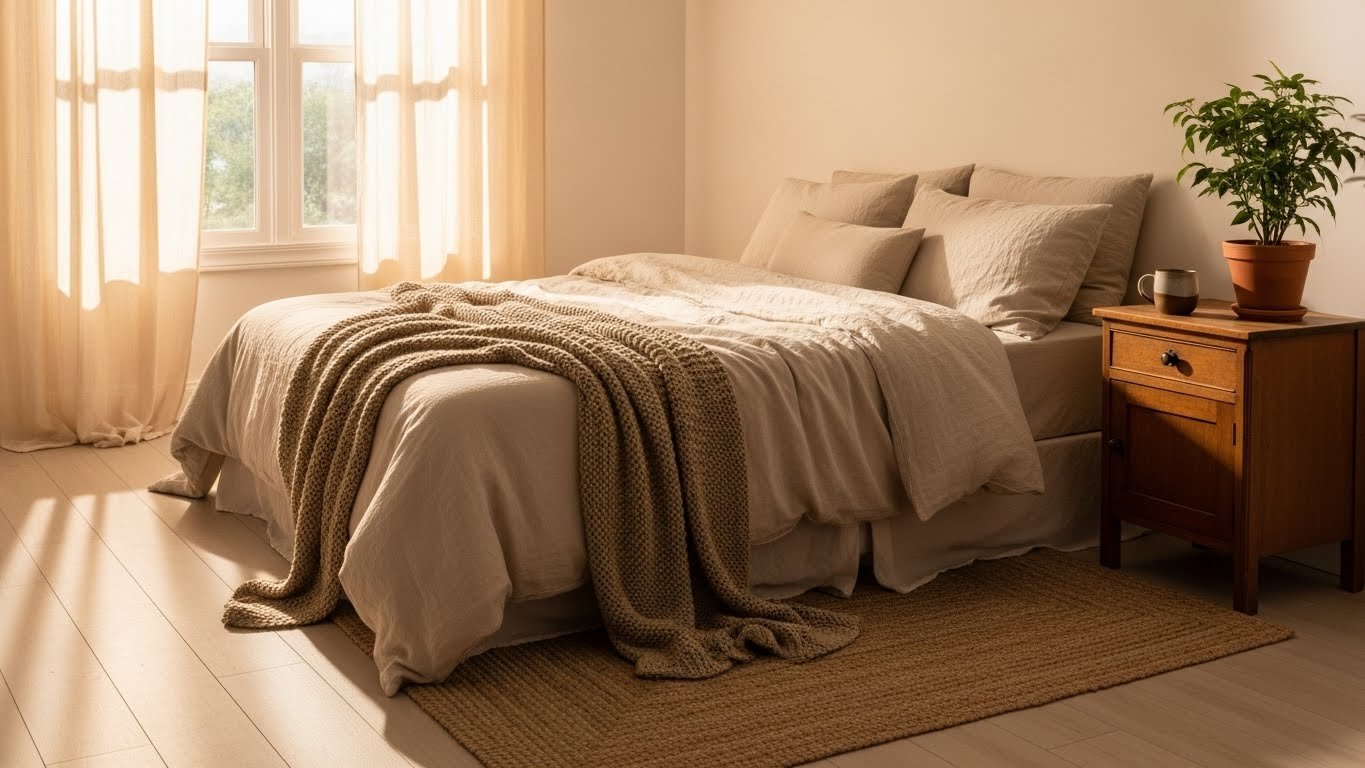
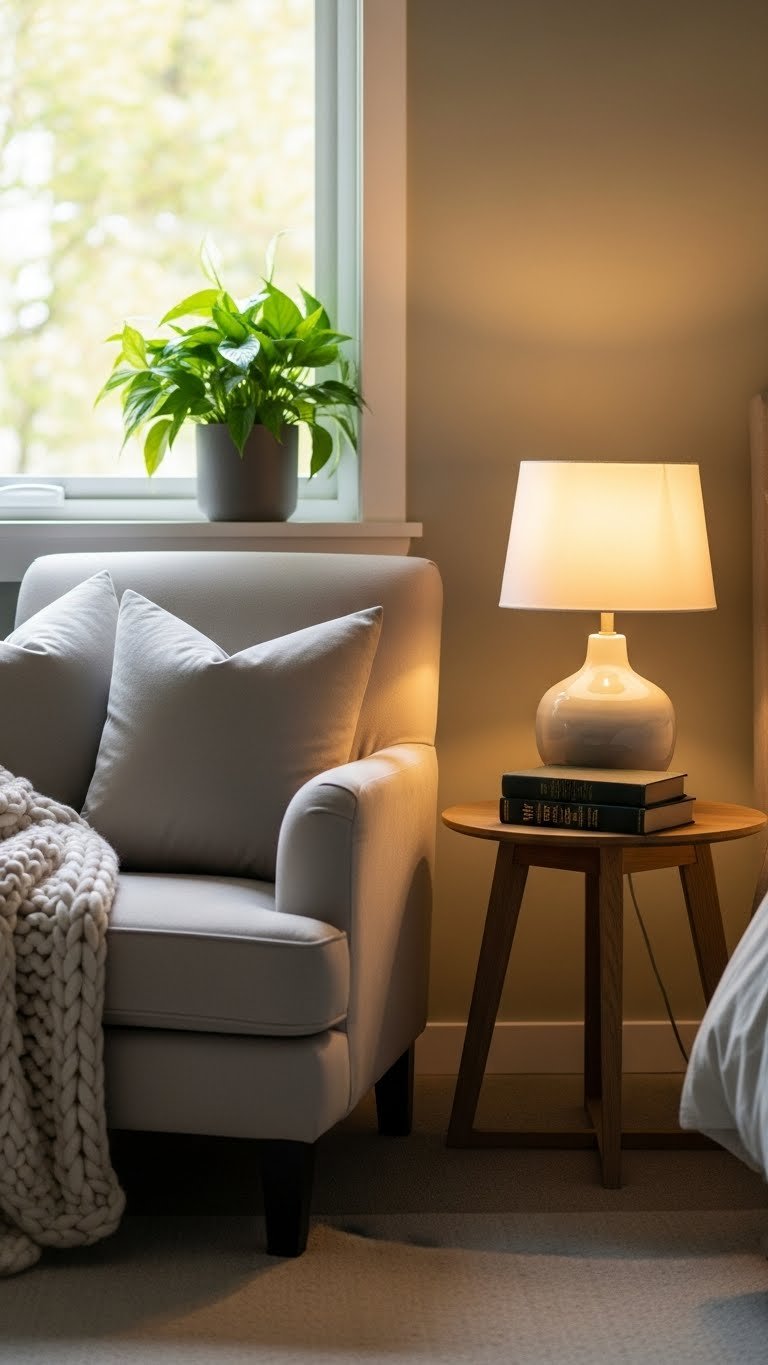
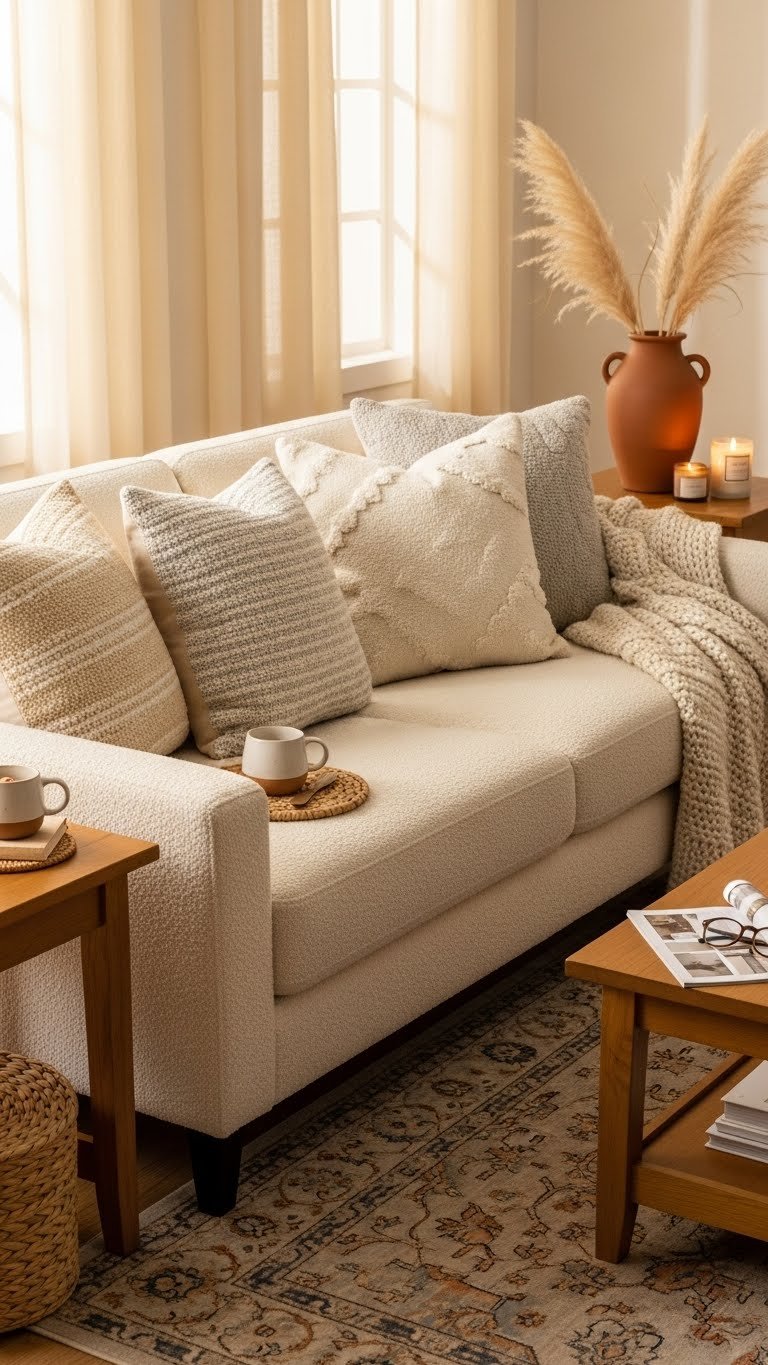
    1. Pair Warm White Walls with Soft Taupe Bedding

    Warm whites feel nothing like clinical hospital rooms—they create a neutral canvas that never feels cold or stark. Taupe bedding adds just enough warmth without introducing a distracting color, making it easier for your brain to settle down.

    Paint your walls a warm white like Benjamin Moore’s “Swiss Coffee” or Sherwin-Williams’ “Alabaster” (around $30–$40 per gallon). Layer a taupe linen duvet ($80–$200 depending on quality) over neutral sheets. The combination takes 30 minutes to style and works in any size room. Taupe hides stains better than white and doesn’t require constant washing, which means less stress about keeping it pristine.

    This pairing gives you a blank slate for adding personality through pillows, throws, or wall art without overstimulating your senses.


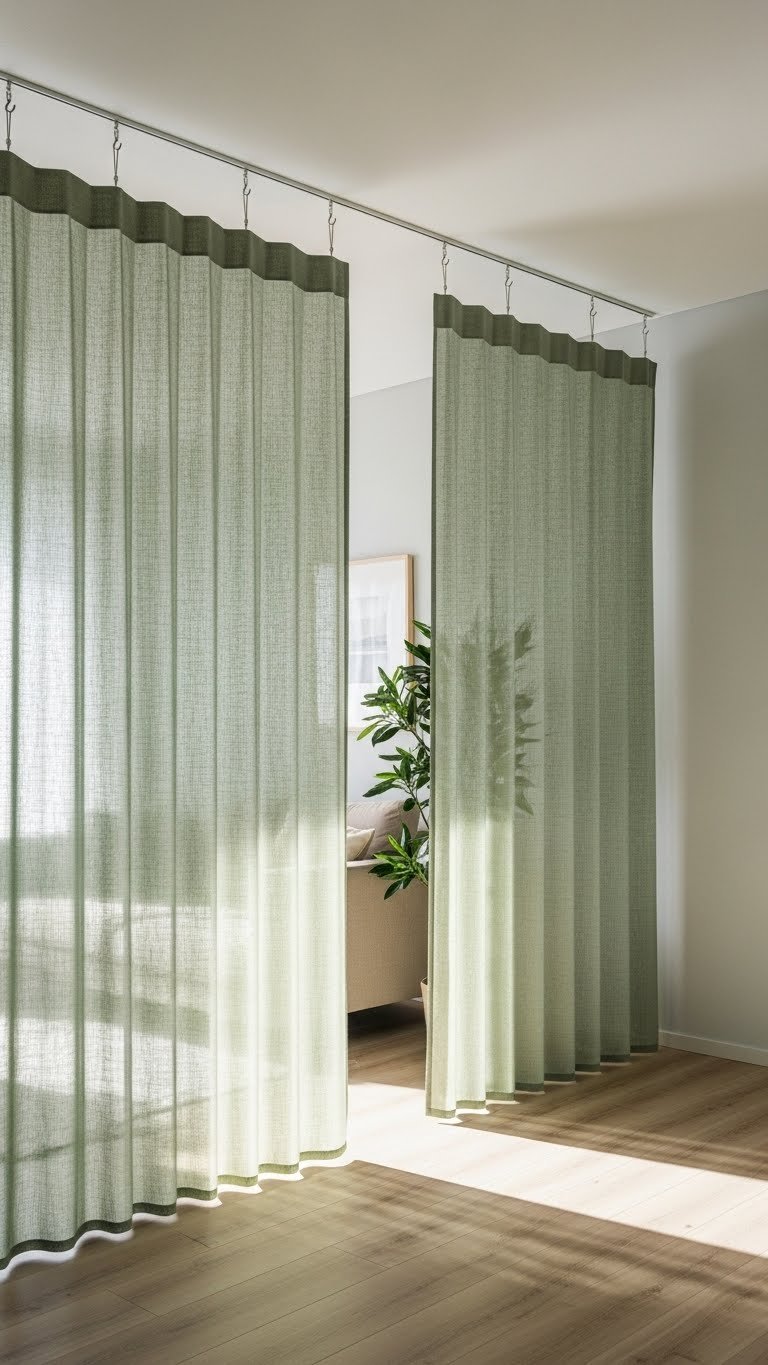
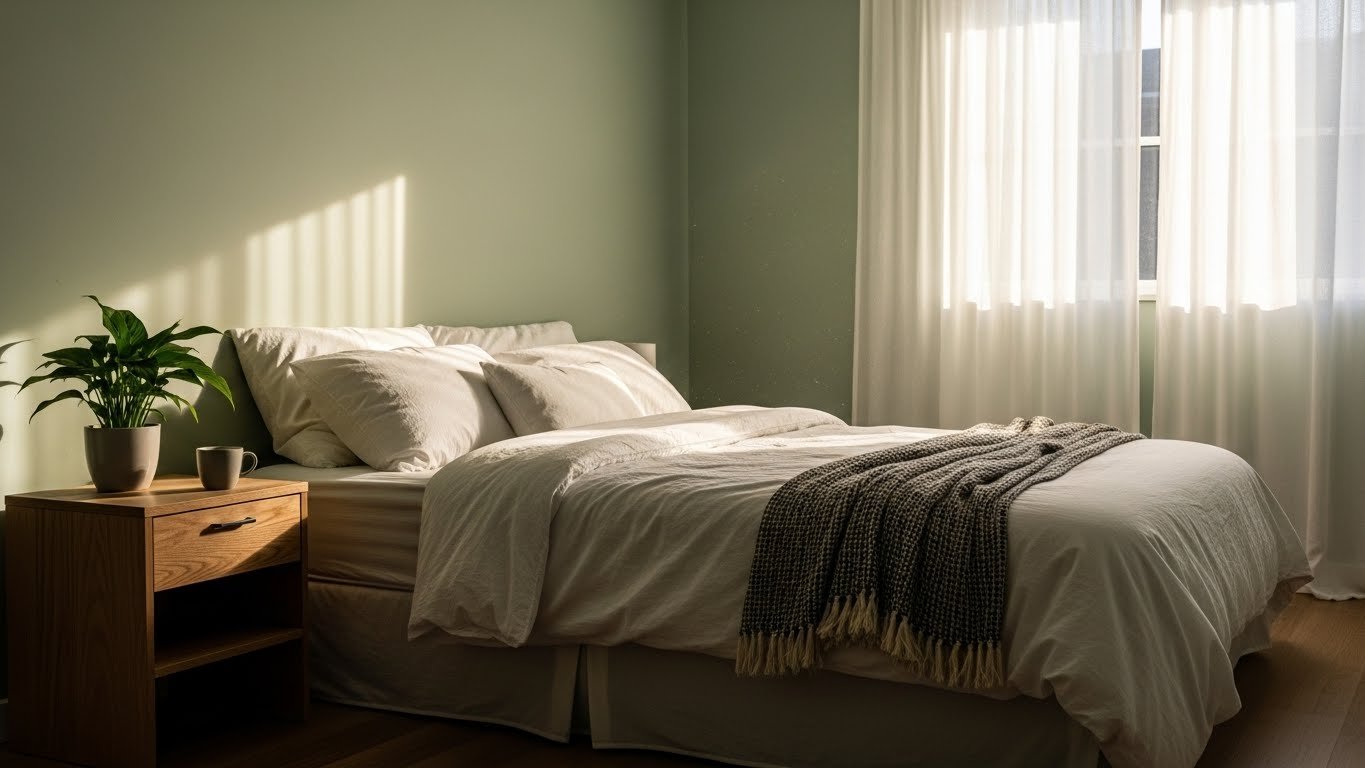
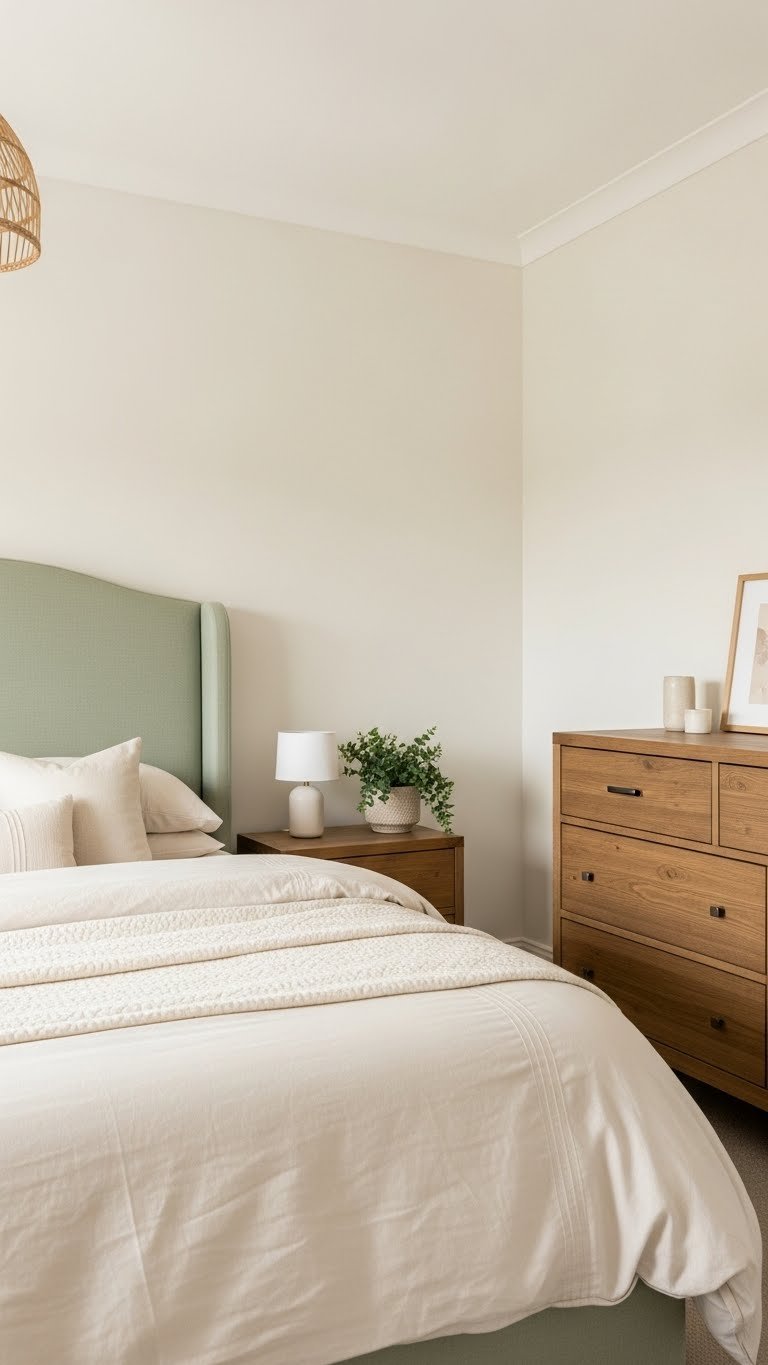
    2. Soft Sage Green with Creamy Ivory Accents

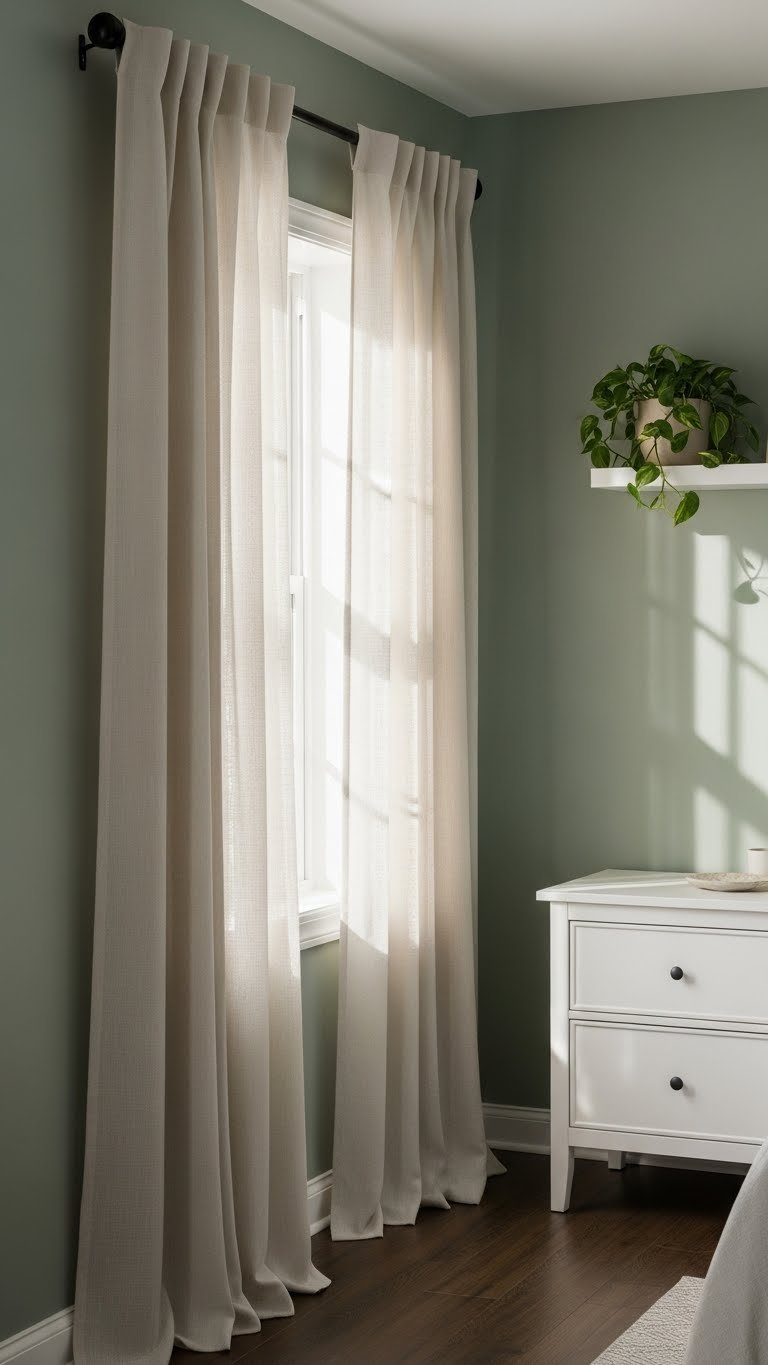
    Sage green sits somewhere between gray and green—it pulls in nature’s calming effect without feeling like you’re sleeping in a forest. Studies show green reduces stress and lowers heart rate, making it one of the most sleep-friendly colors available.

    Choose a muted sage like Sherwin-Williams “Sea Salt” or Benjamin Moore “Healing Aloe” ($35–$45 per gallon). Pair it with ivory or cream bedding to prevent the room from feeling too monochromatic. Paint one weekend afternoon (3–4 hours for a standard bedroom). Add ivory linen curtains ($60–$150) to diffuse morning light. The soft contrast keeps the room interesting without jarring your nervous system awake.

    Sage works brilliantly in renters’ apartments when used with removable wallpaper as an alternative to painting.


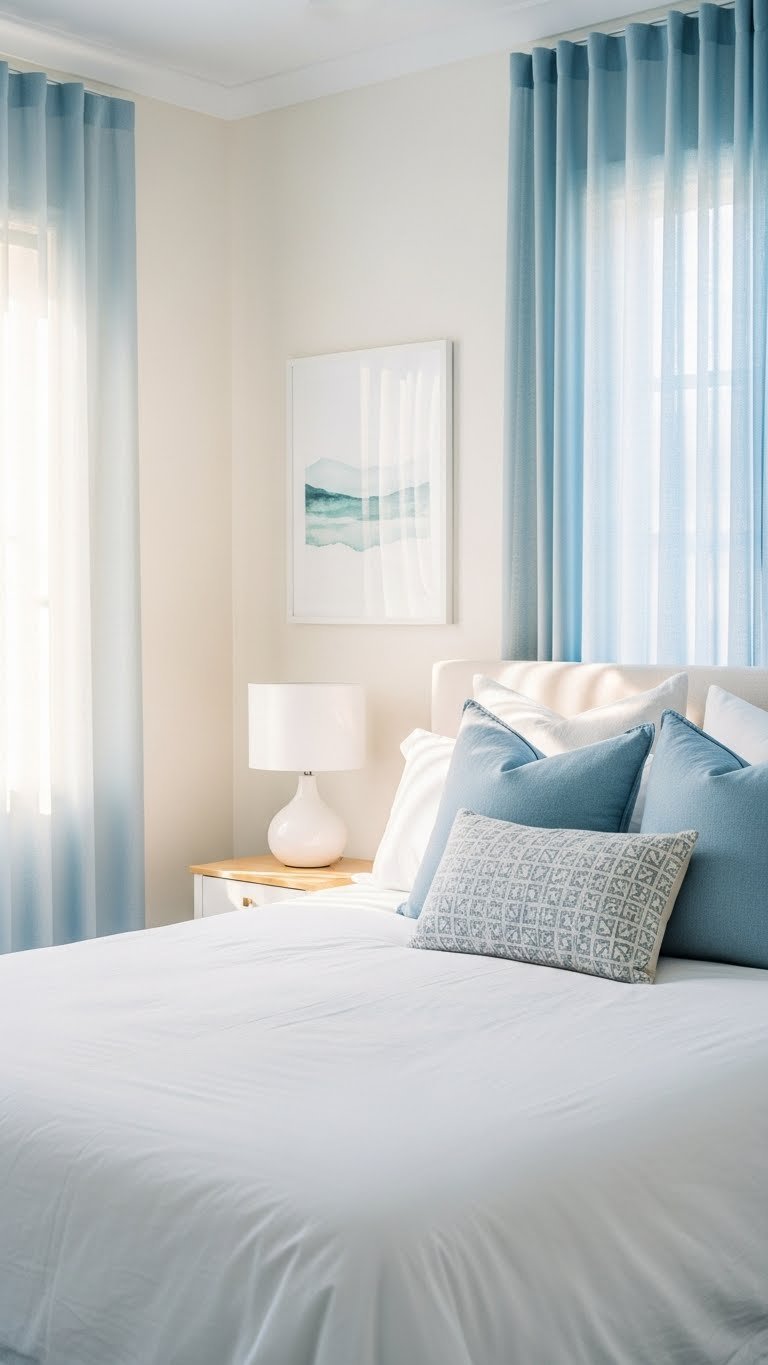
    3. Pale Blue Base with White Trim and Gray Accents

    Pale blue taps into the psychology of water and sky—both associated with calm and safety. The white trim keeps it from feeling too cool or sad, while gray grounds the palette and prevents it from feeling babyish.

    Paint walls a soft blue like Farrow & Ball “Parting” or Benjamin Moore “Palladian Blue” ($40–$50 per gallon, premium brands). Add white trim or baseboards if your budget allows, or keep existing trim as-is. Layer in gray bedding ($100–$250) and you’re done. The palette costs under $200 to implement and takes one weekend.

    Light blues photograph beautifully and create that sought-after “magazine room” feeling without requiring designer-level expertise.


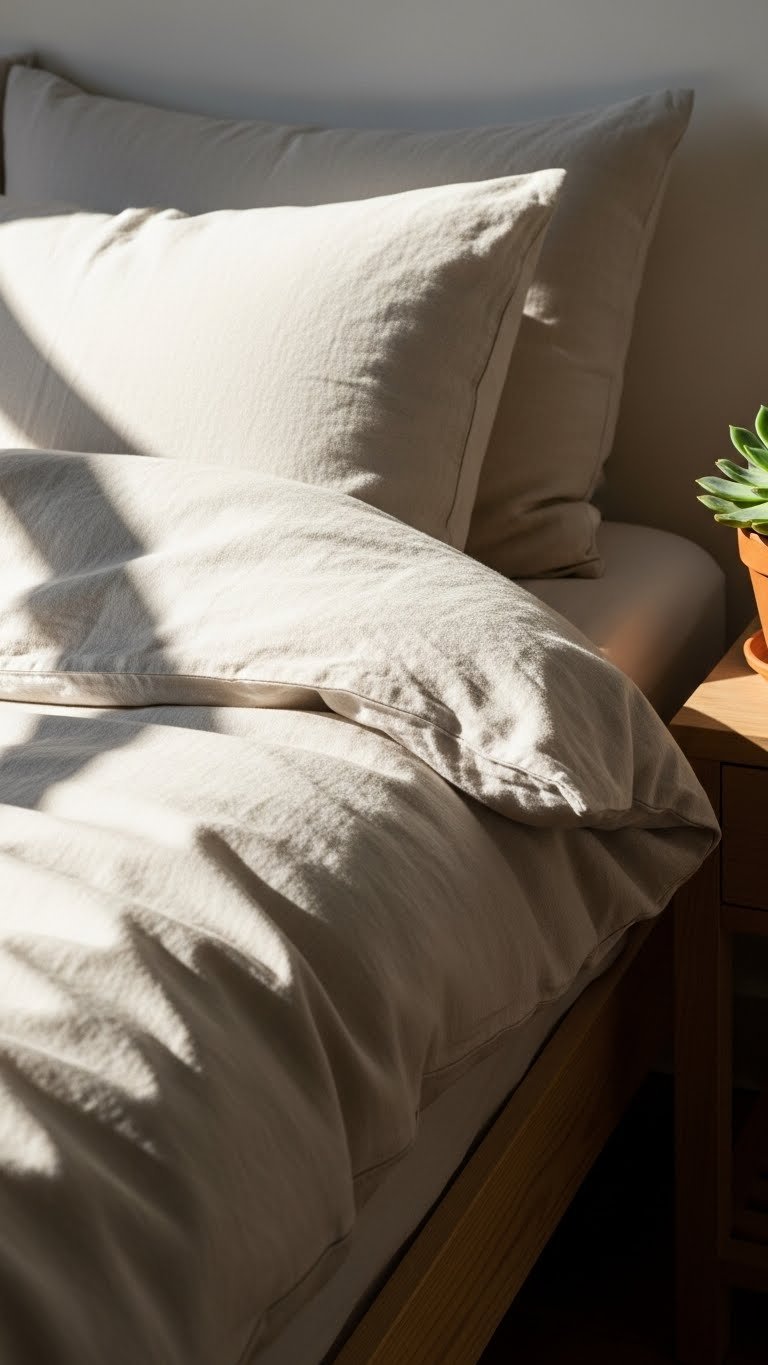
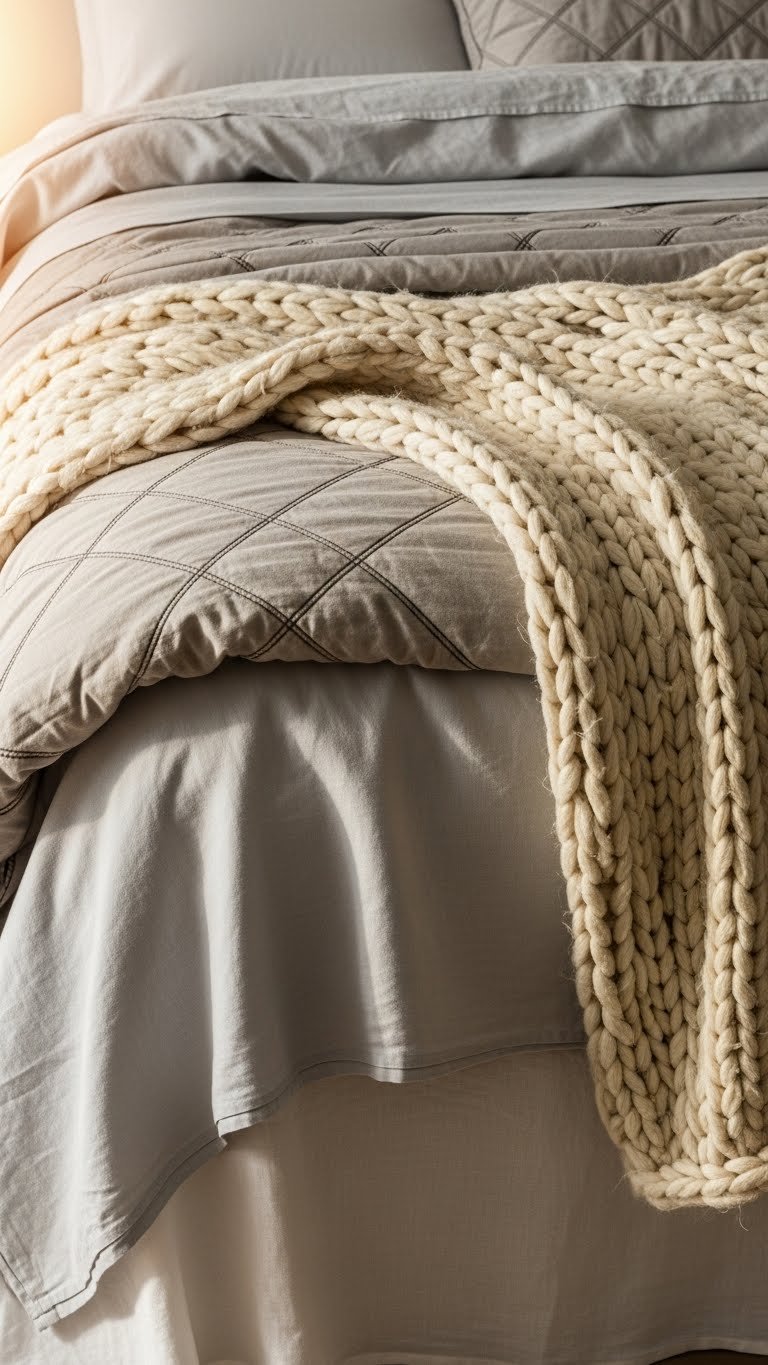
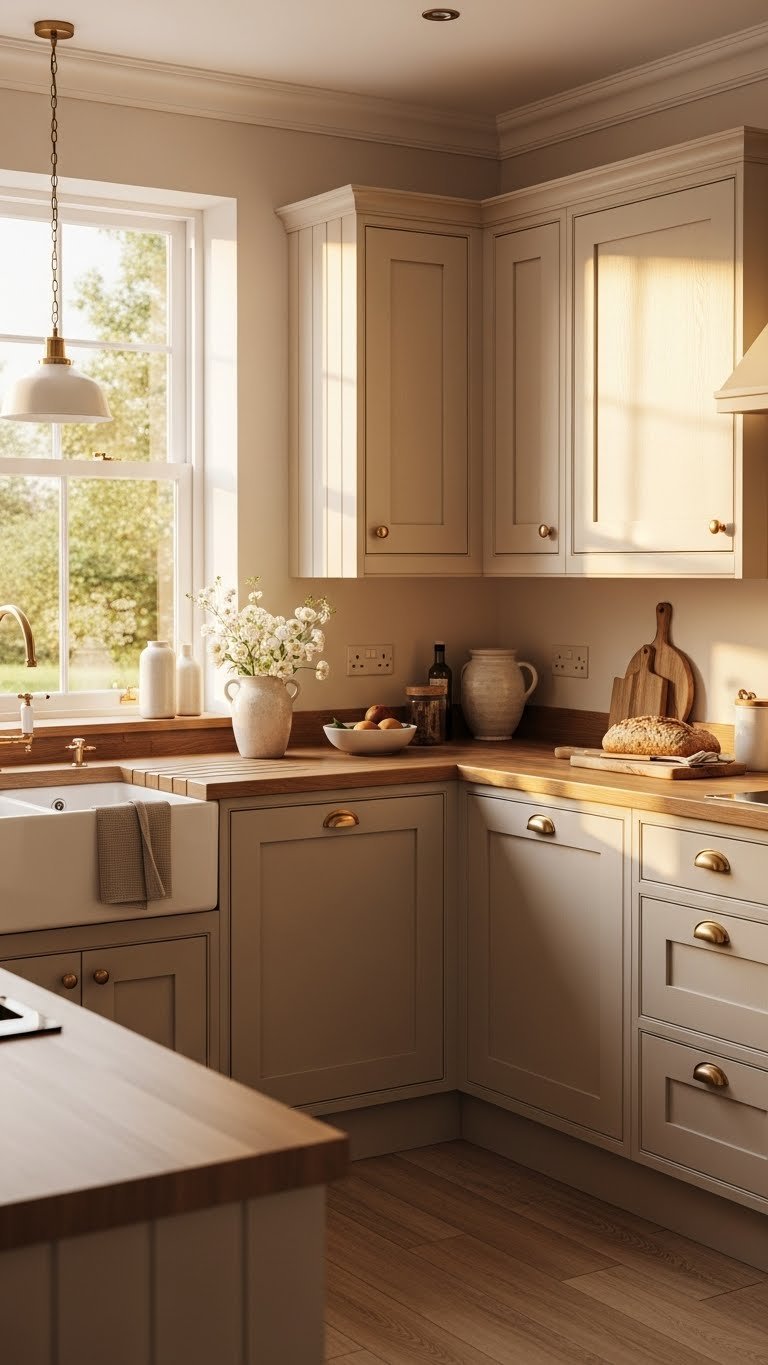
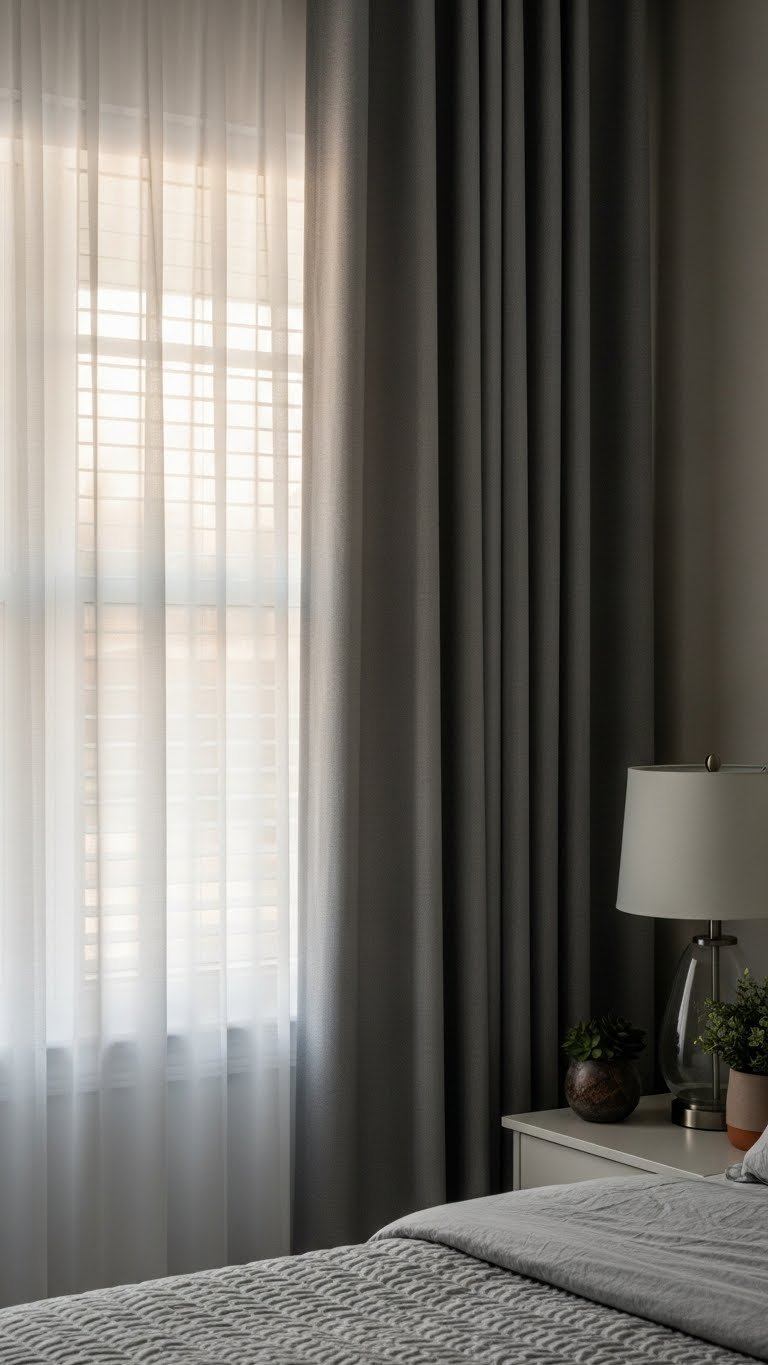
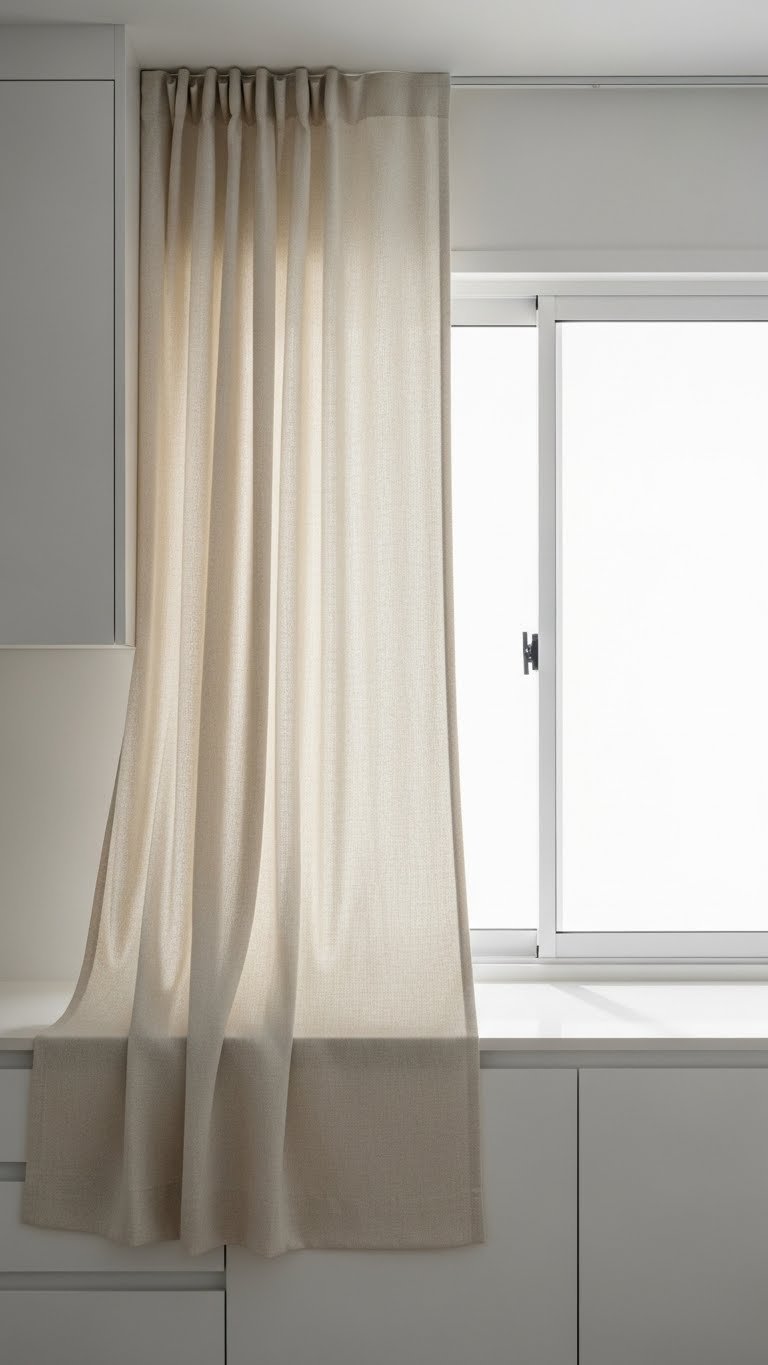
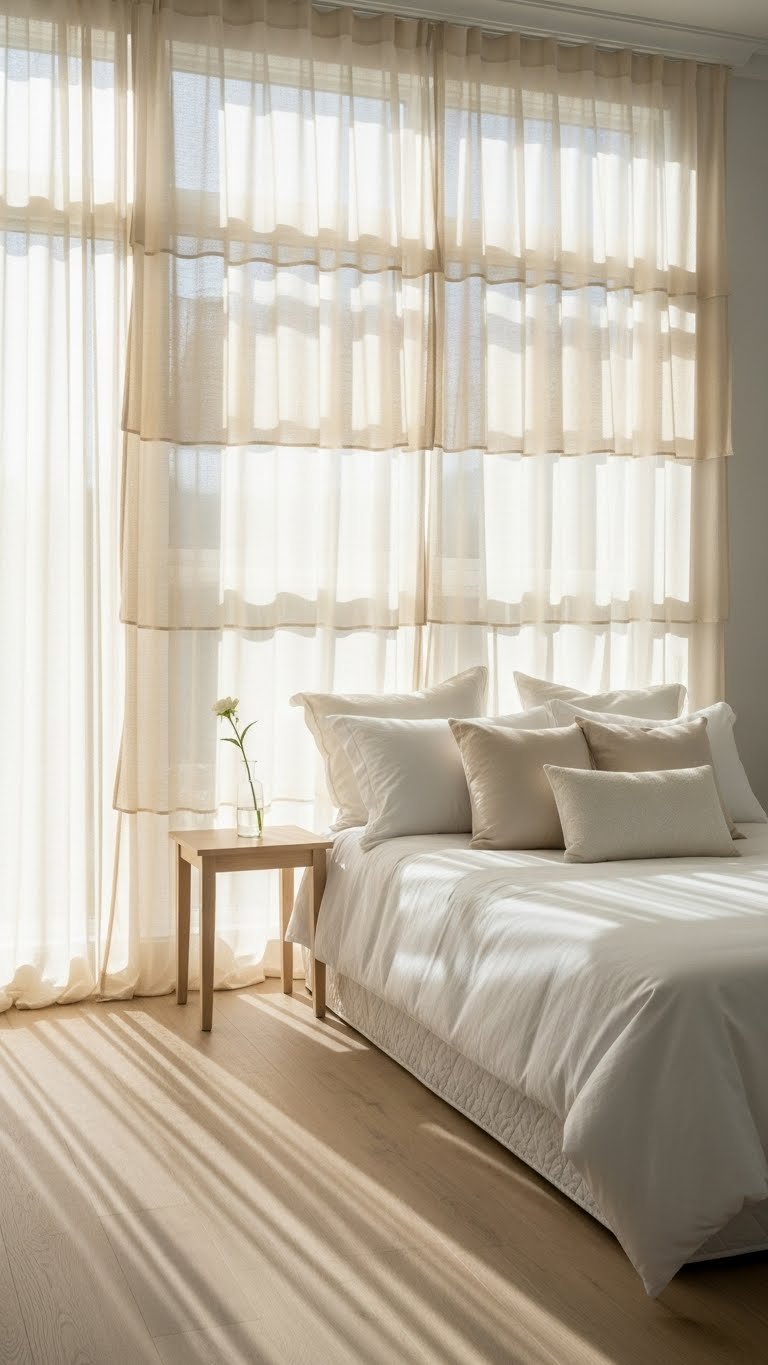
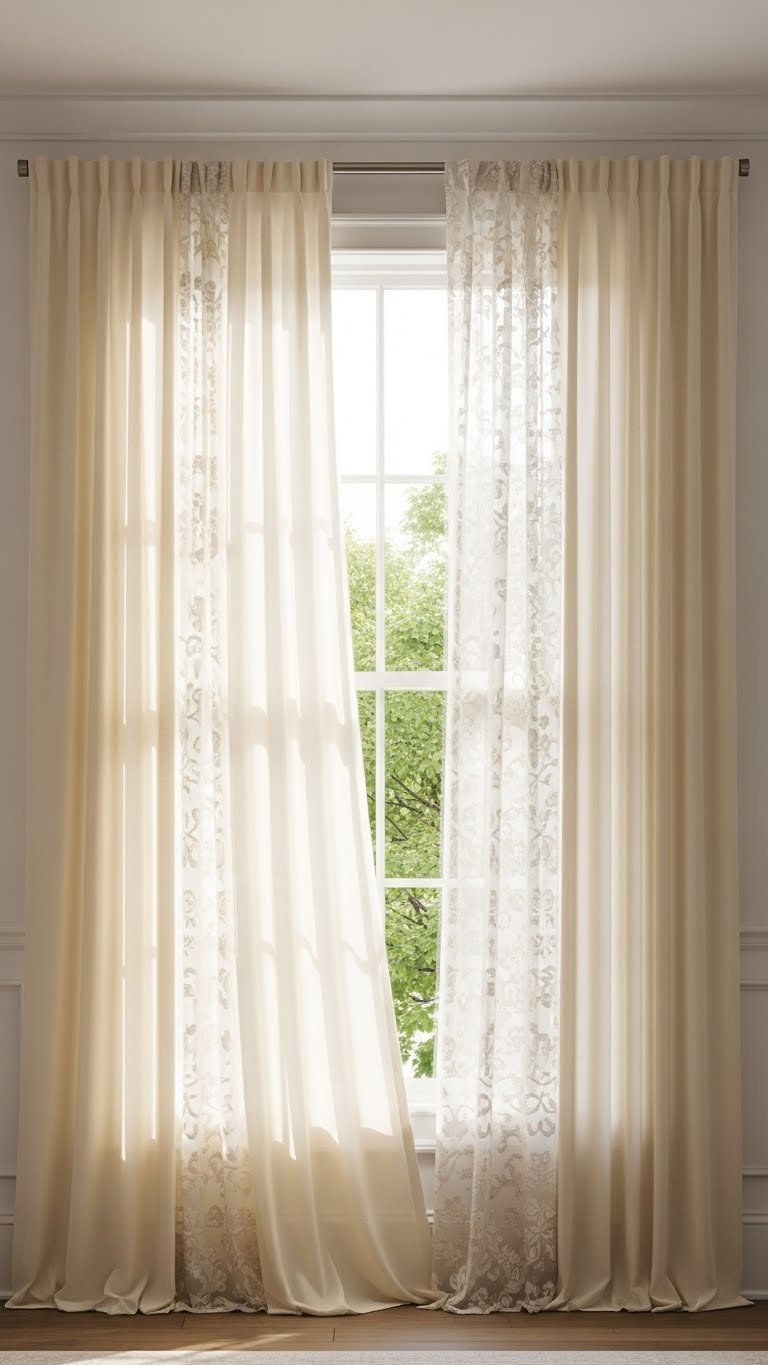
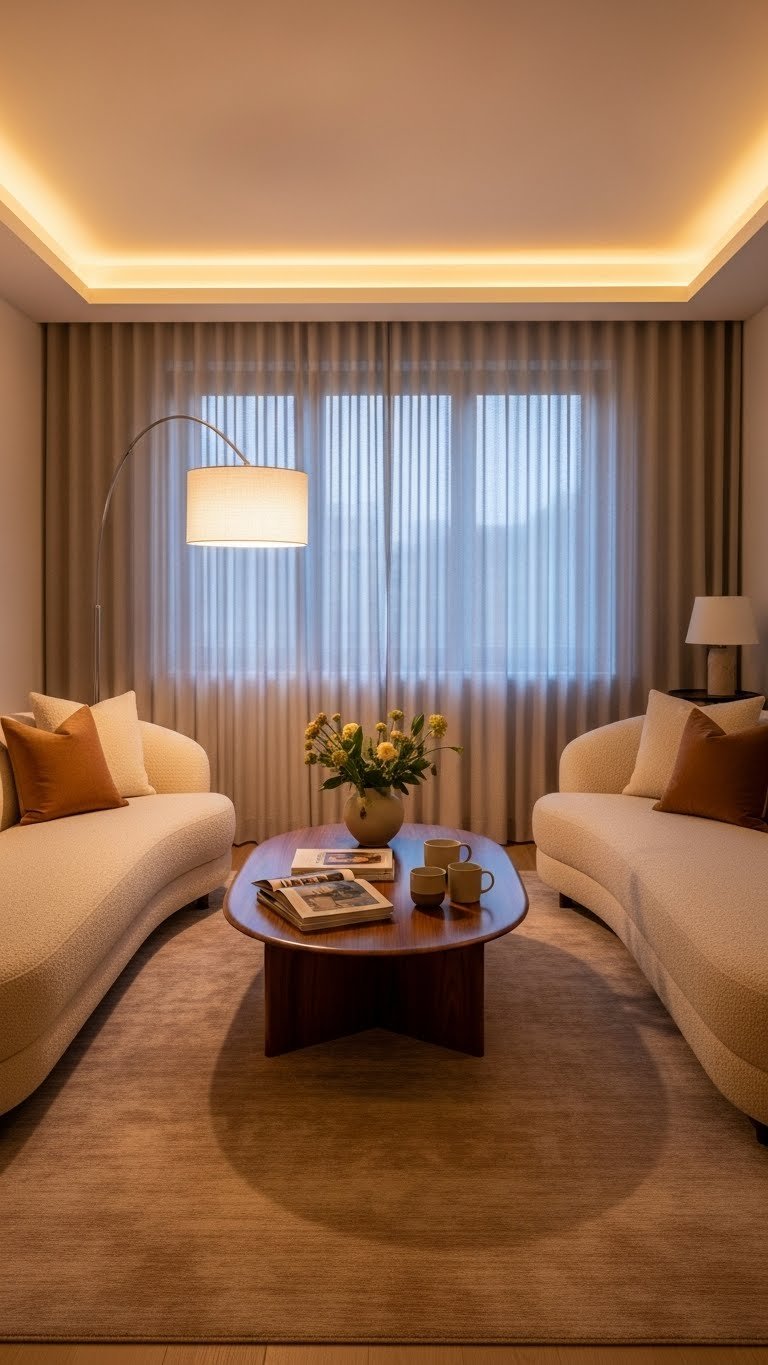
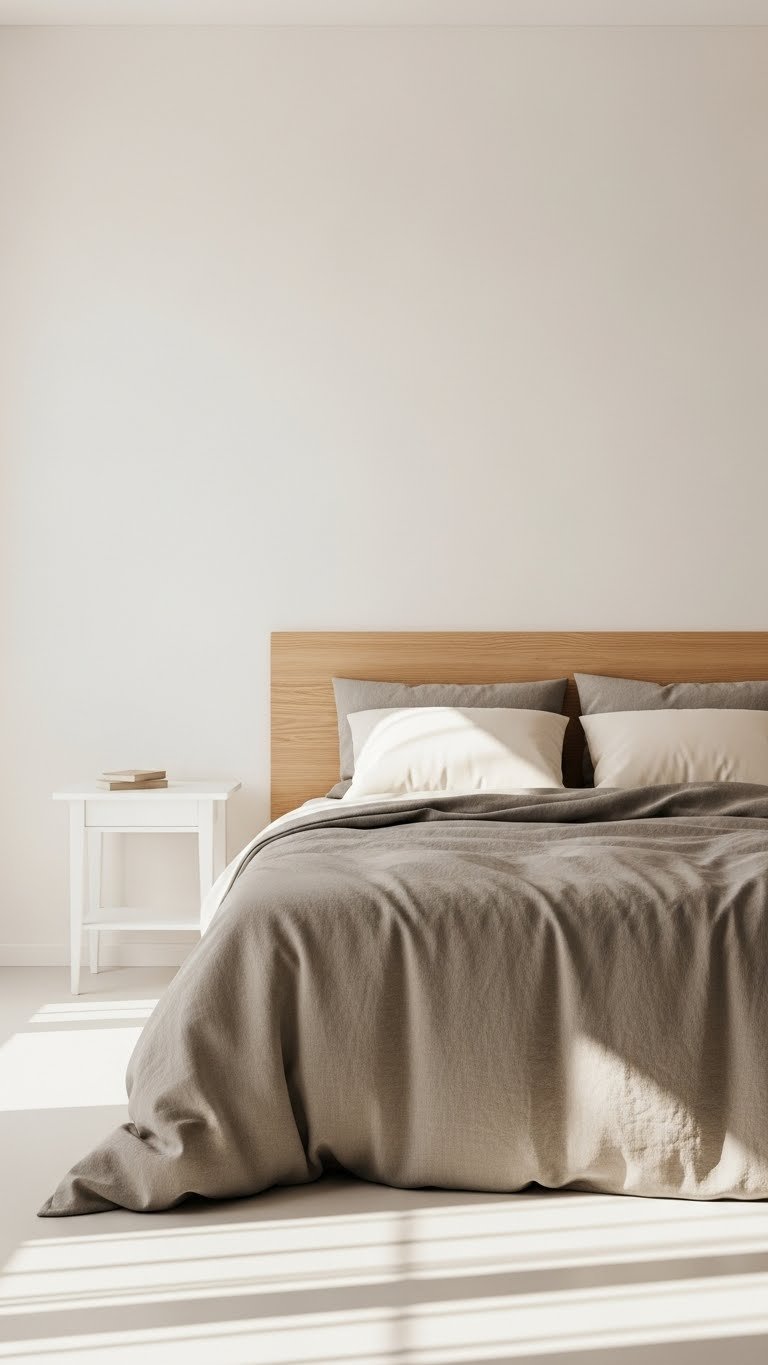
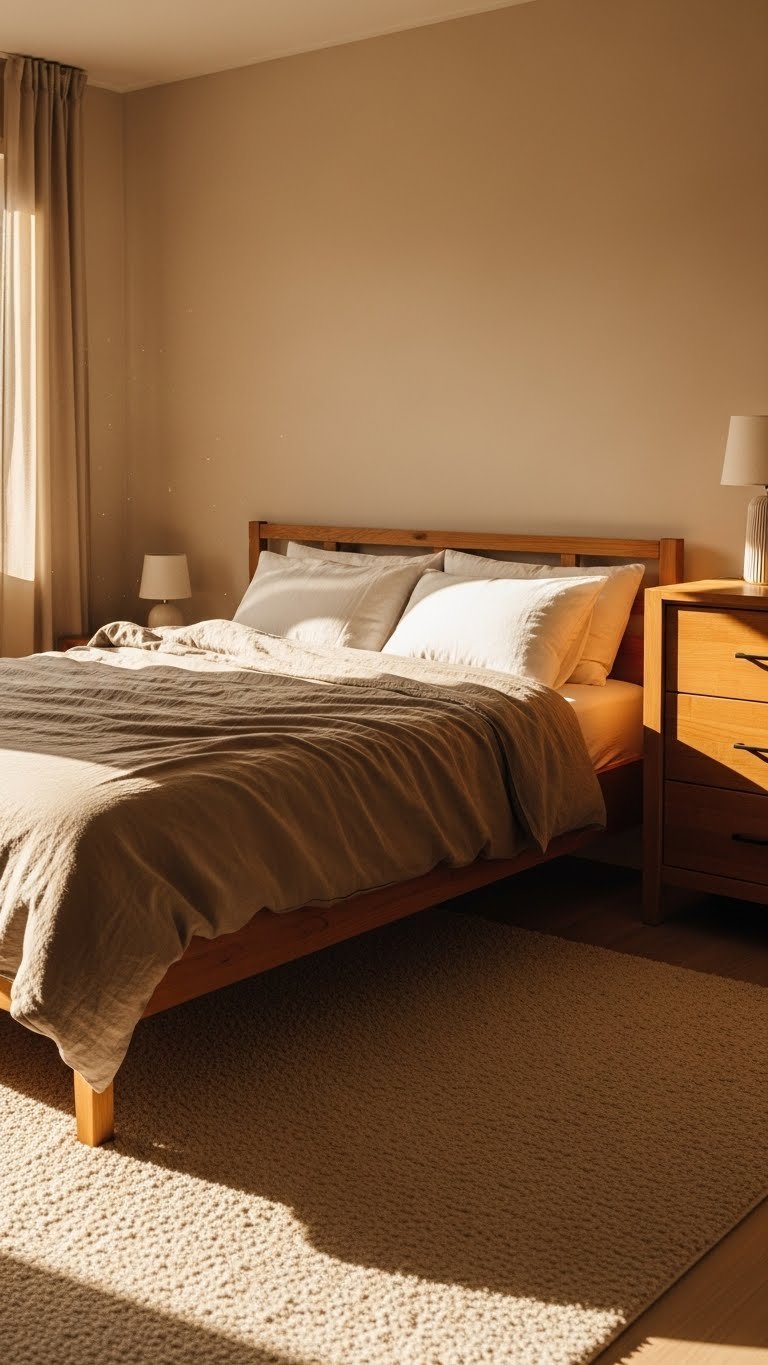
    4. Warm Gray Walls with Linen White Bedding

    Warm gray (not cool gray) sits between beige and true gray, offering sophistication without the cold sterility that cool grays sometimes bring. Linen white bedding adds texture and movement to what could otherwise feel flat.

    Select a warm gray like Sherwin-Williams “Accessible Beige” (yes, it reads as gray here) or Benjamin Moore “Revere Pewter” ($35–$40 per gallon). Pair with natural linen bedding in cream or white ($120–$300 depending on thread count and brand). The combination works in any lighting and doesn’t show dust or slight discoloration the way pure white does.

    This palette creates a “lived-in luxury” feeling that makes you feel hotel-calm without the sterile perfection.


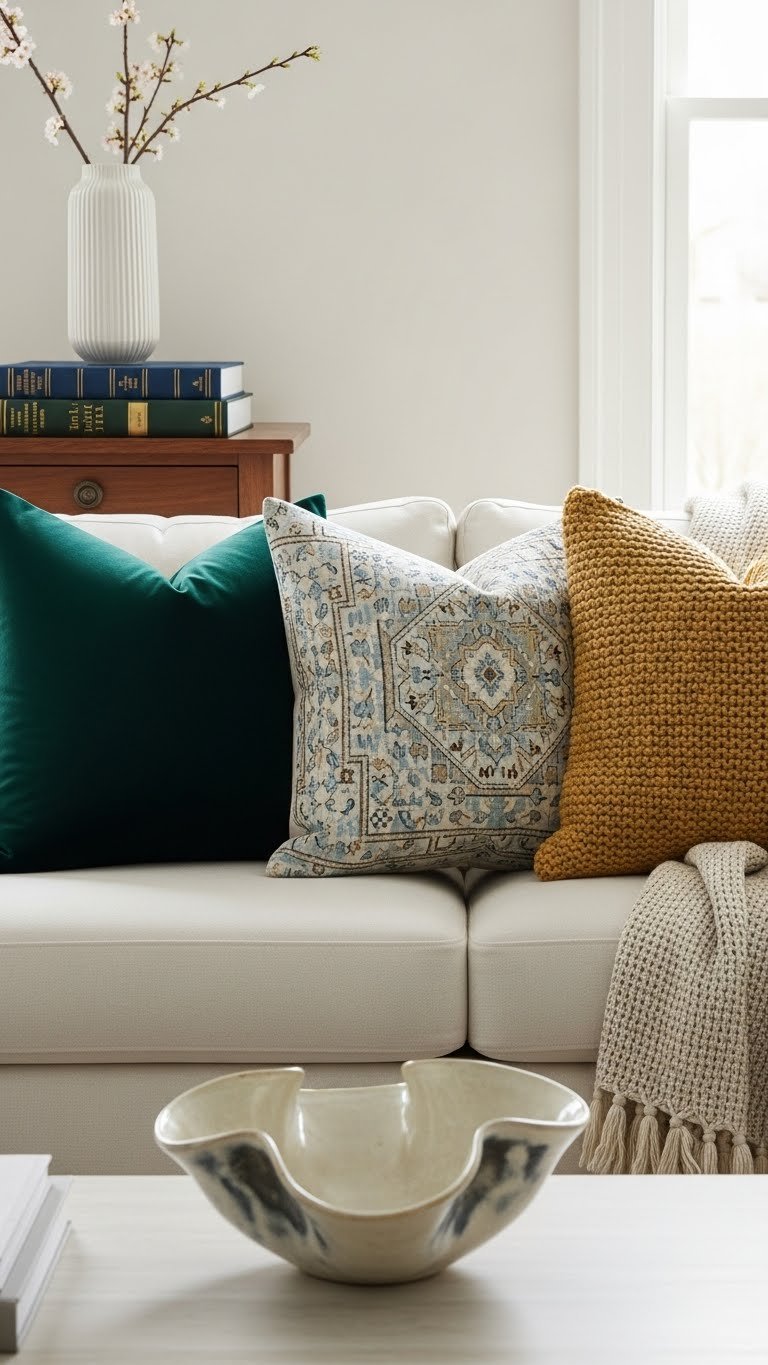
    5. Soft Blush Pink with Warm Gray Walls

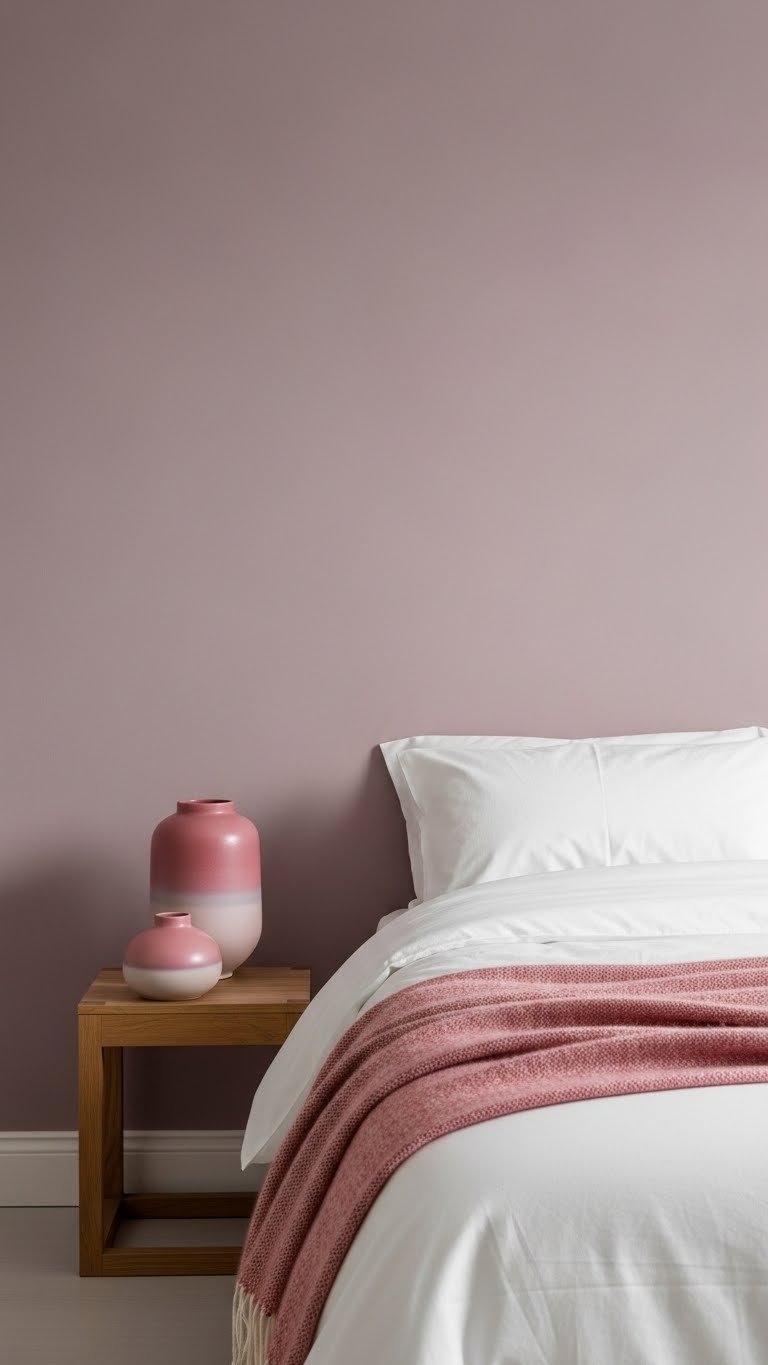
    Blush pink has moved beyond girly stereotypes—it’s become a sophisticated choice for adults seeking warmth without aggression. Combined with gray, it feels curated rather than cutesy.

    Paint three walls in warm gray ($35–$40 per gallon) and one accent wall in blush pink like Benjamin Moore “Pale Oak” with a drop of rose added, or use a pre-mixed option like Sherwin-Williams “Rosy Outlook” ($35–$40). Add white or cream bedding as your base. The blush picks up on pillows, throws, or artwork. This update costs $80–$120 and transforms the room in one Saturday.

    Renter-friendly? Use blush pink removable wallpaper ($25–$60) on just one wall instead of painting.


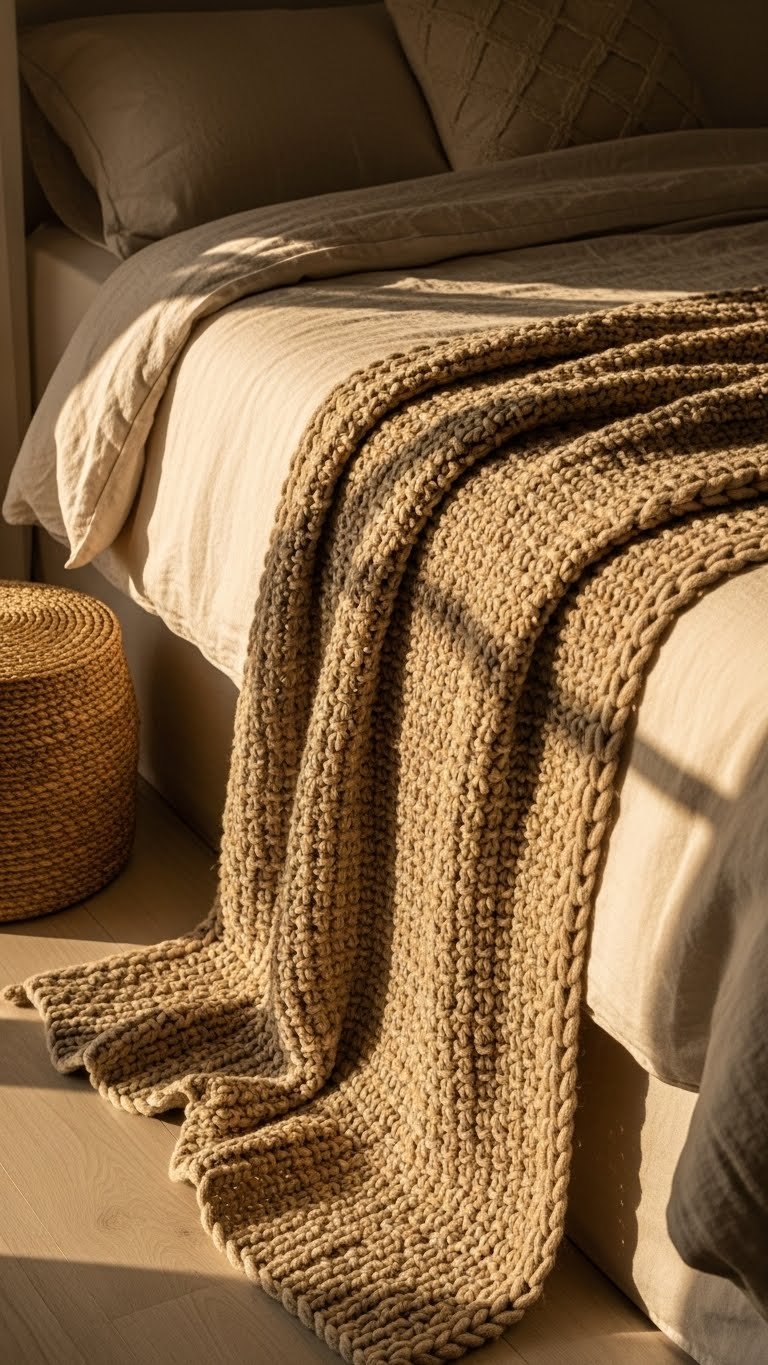
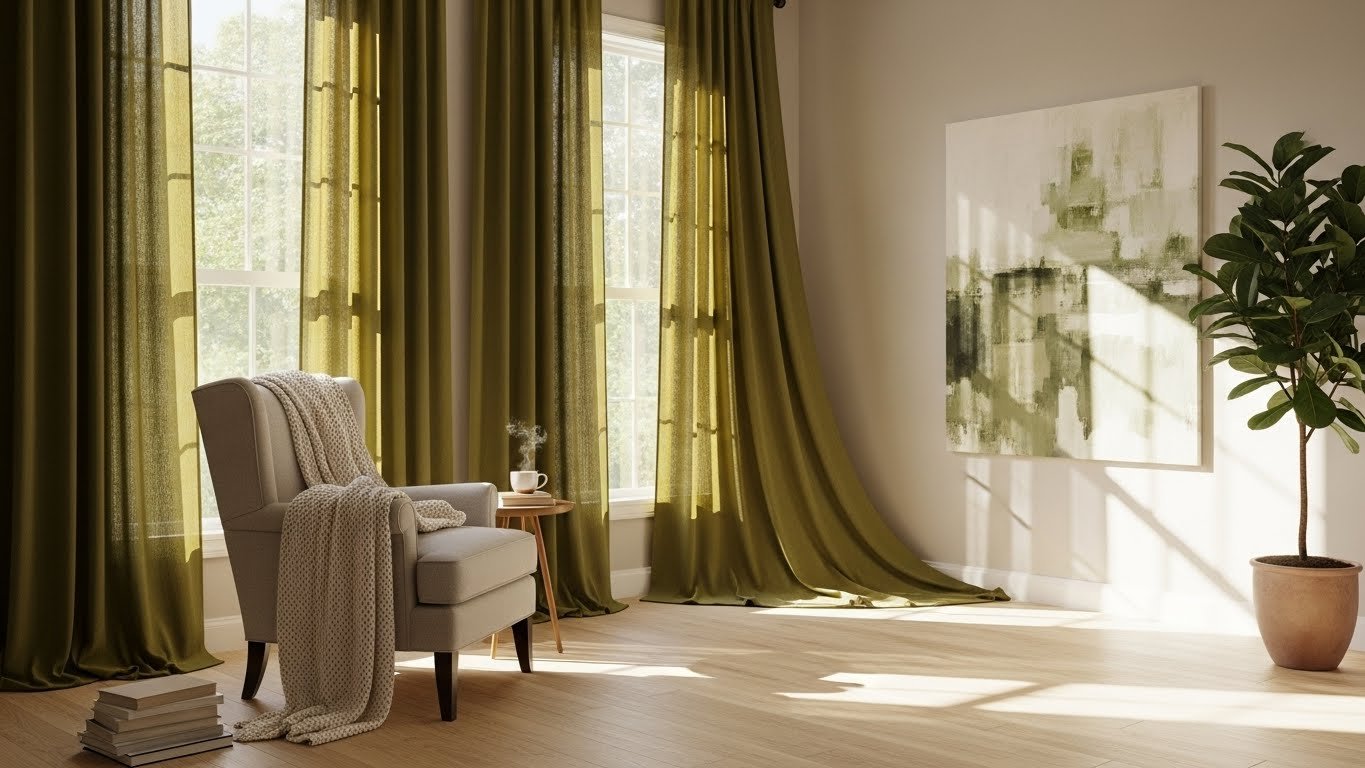
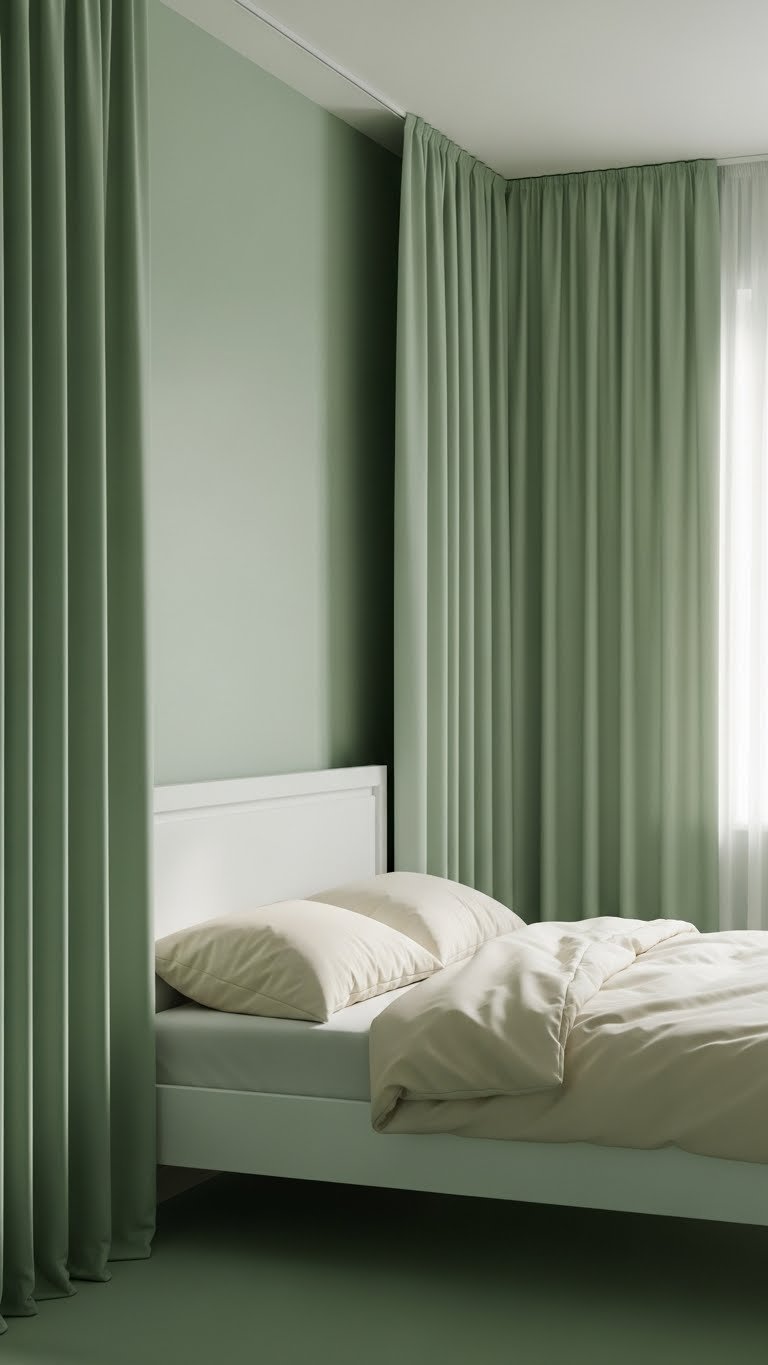
    6. Soft Sage with Warm Beige and Natural Wood

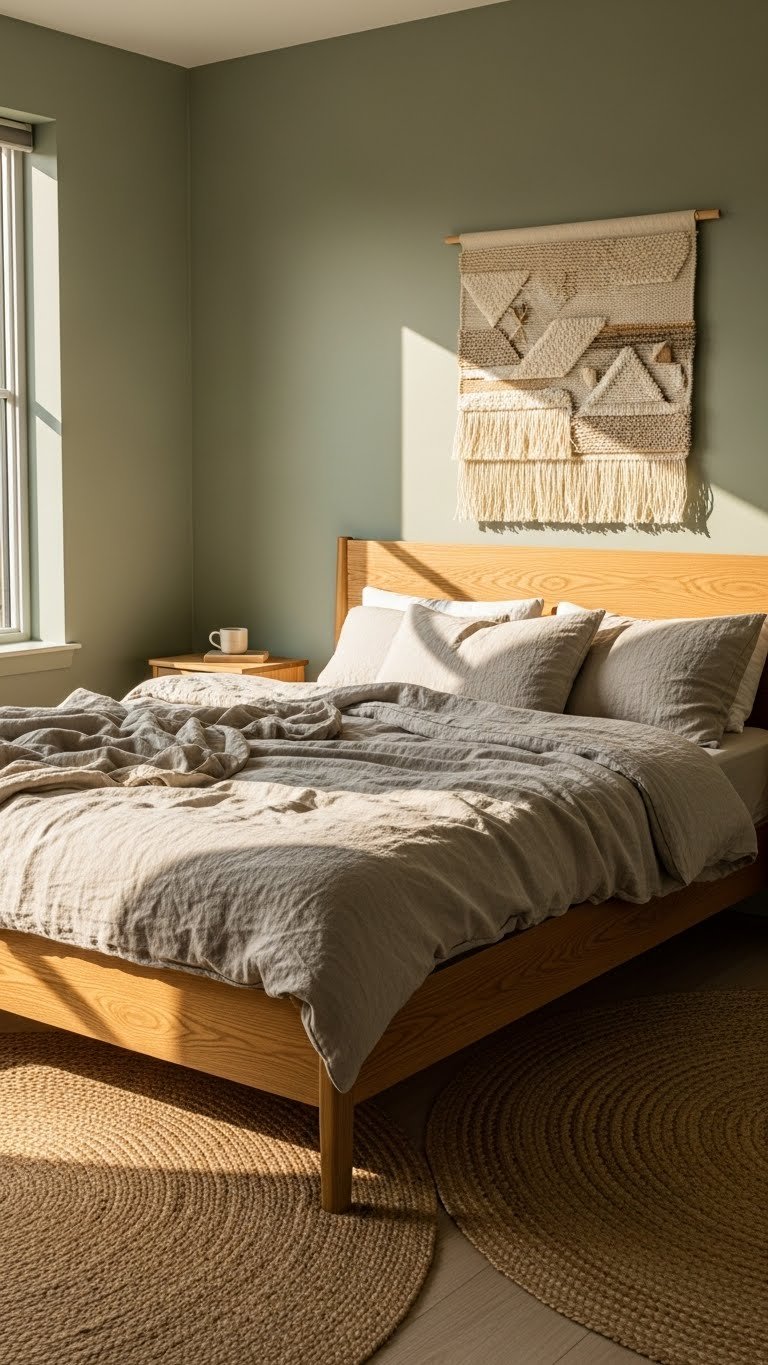
    This palette brings together biophilic design elements—wood, green, and earth tones—that genuinely calm your nervous system. The combination feels organic without requiring an interior design degree.

    Paint walls sage green ($35–$40 per gallon). If you don’t have natural wood furniture, prioritize a wooden nightstand or bed frame ($150–$500 depending on style and quality). Layer beige bedding ($80–$200) and a jute or sisal rug ($60–$150). The room naturally invites slower living. You can build this palette over time, adding pieces as budget allows.

    The natural materials actually improve air quality, a bonus benefit most color palettes can’t claim.


    7. Charcoal Gray with Cream and Soft White

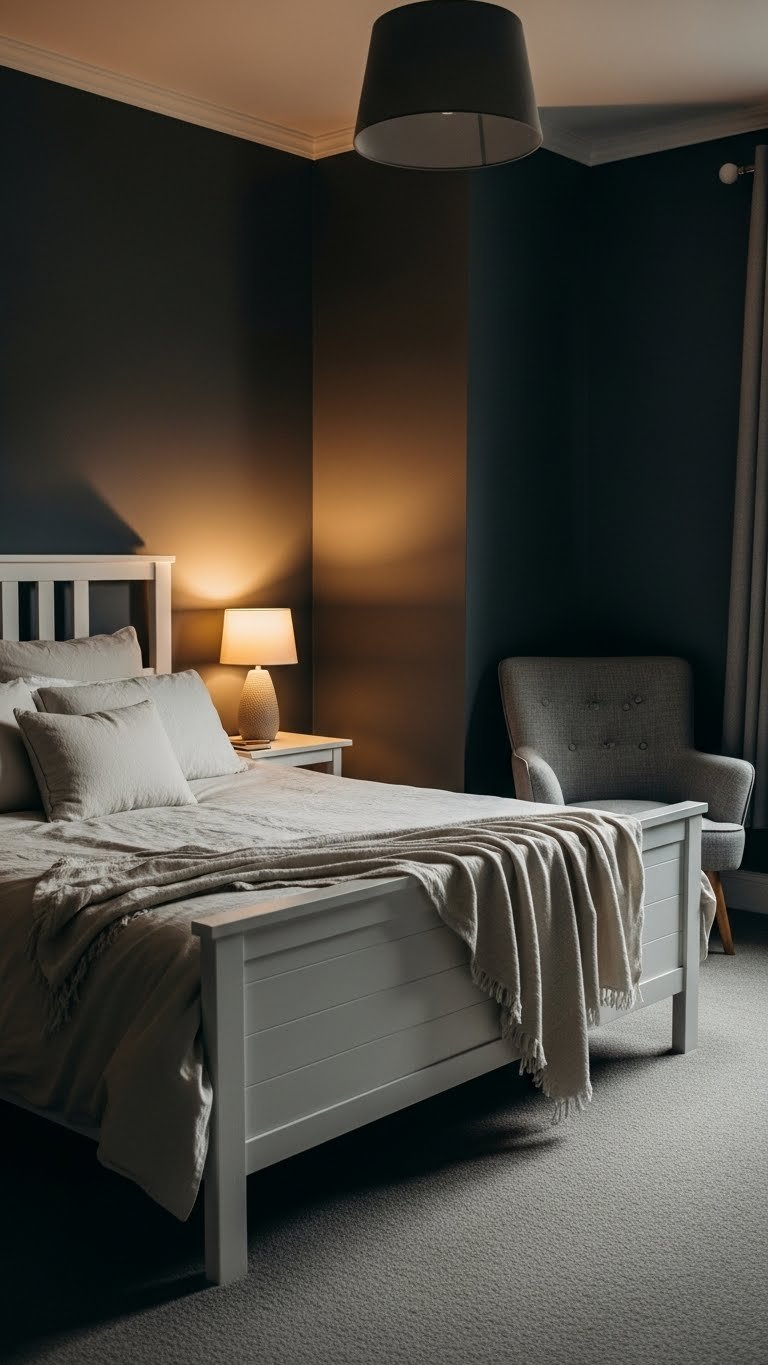
    Charcoal gray feels intimate and enveloping—like your room is giving you a hug. The light bedding prevents it from feeling cave-like or depressing. This is cozy without being trendy.

    Choose a true charcoal like Sherwin-Williams “Iron Ore” or Benjamin Moore “Cavern Clay” ($35–$45 per gallon). Pair with cream or white bedding ($100–$250) to maintain brightness and balance. The contrast is what makes this work; don’t go too dark on both walls and bedding or you’ll overshadow the restfulness. Paint one weekend and watch the room instantly develop atmosphere.

    Charcoal hides dust and marks better than lighter colors, so maintenance is lower.


    8. Pale Lavender with Soft Gray Accents

    Lavender is science-backed for sleep—lavender oil is widely recommended for relaxation, and the color itself carries those associations. A pale, grayish lavender reads more sophisticated than typical lavender and works in grown-up spaces.

    Paint walls a muted lavender like Sherwin-Williams “Potentially Purple” or Benjamin Moore “Provence” ($35–$40 per gallon). These read almost gray in certain light, so they won’t feel overly purple. Add gray or white bedding to keep the room balanced. Curtains in soft gray ($50–$150) tie the palette together. The total investment is $150–$300 for walls, bedding, and curtains.

    This palette works especially well if you’re sensitive to stimulation—lavender naturally reduces alertness.


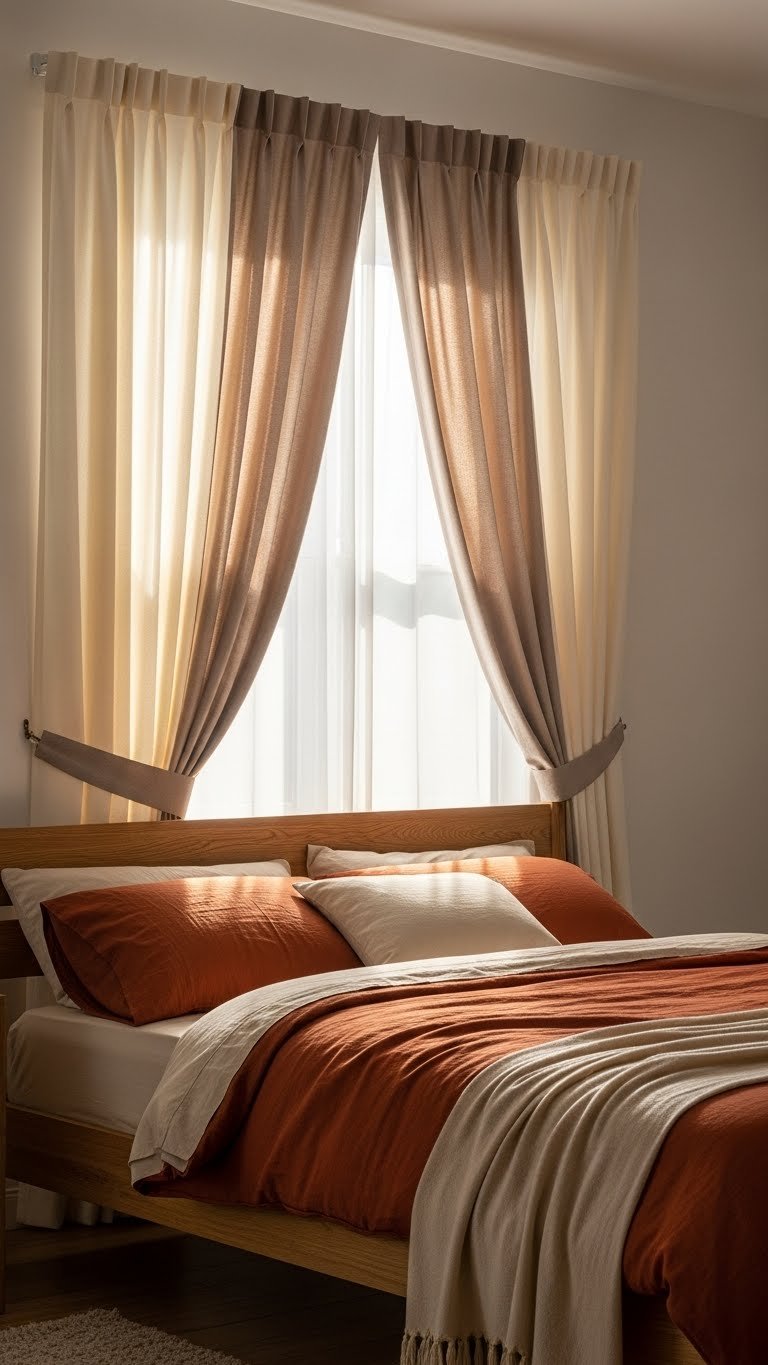
    9. Warm White with Terracotta Accents

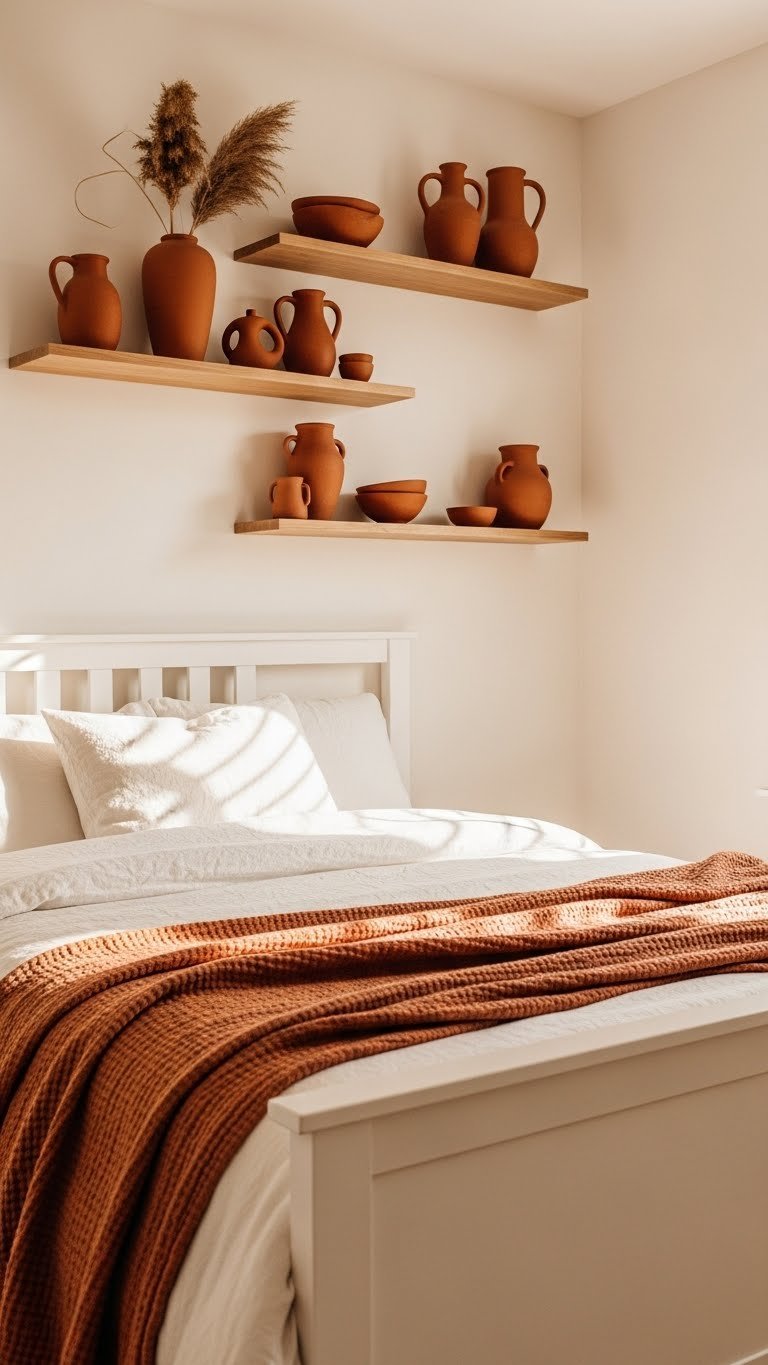
    Terracotta brings earth-grounded warmth without the heaviness of deeper oranges or reds. Used as an accent rather than a wall color, it adds personality while keeping the room restful.

    Keep walls a warm white ($30–$40 per gallon). Introduce terracotta through a linen throw blanket ($40–$100), decorative pillows ($20–$60 each), or small pottery pieces ($15–$100). A terracotta area rug ($80–$200) anchors the palette. You can layer these in over time, so the initial cost can be as low as $80–$150. This approach is perfect for renters—no painting required.

    The earth-tone accent makes the room feel rooted and warm, especially during cooler months.


    10. Pale Yellow with Soft Gray Walls

    Pale yellow brings subtle happiness without overstimulation—think soft butter, not neon. The gray headboard and accents prevent it from feeling too cheerful or children’s-room-like.

    Paint walls a soft yellow like Benjamin Moore “Pale Oak” (yes, it reads as soft yellow here) or Sherwin-Williams “Buttercream” ($35–$40 per gallon). Add a gray upholstered headboard ($200–$600) or use a removable headboard decal ($30–$80). Layer with white bedding and gray accents. The room gains warmth and subtle light without sacrificing calm. Total cost: $100–$400 depending on whether you DIY the headboard or buy pre-made.

    Pale yellow naturally reflects light, making small rooms feel slightly larger.


    11. Soft Greige (Gray-Beige Mix) Throughout

    Greige is the chameleon of paint colors—it reads differently depending on your lighting, shifting between gray and beige. This adaptability means it feels right in any season or time of day, which keeps it from becoming monotonous.

    Choose a true greige like Sherwin-Williams “Urbane Bronze” (warmer than it sounds) or Benjamin Moore “Accessible Beige” ($35–$45 per gallon). Paint all walls in this single color to create a cocoon effect—your eye rests because there’s no jarring contrast. Add layers through bedding ($100–$250), throws, and pillows in cream, white, or warm taupe. The simplicity is the strength here; you’re decorating around a perfect neutral base.

    Greige works beautifully in any natural light, which means the room never feels “off” or dated.


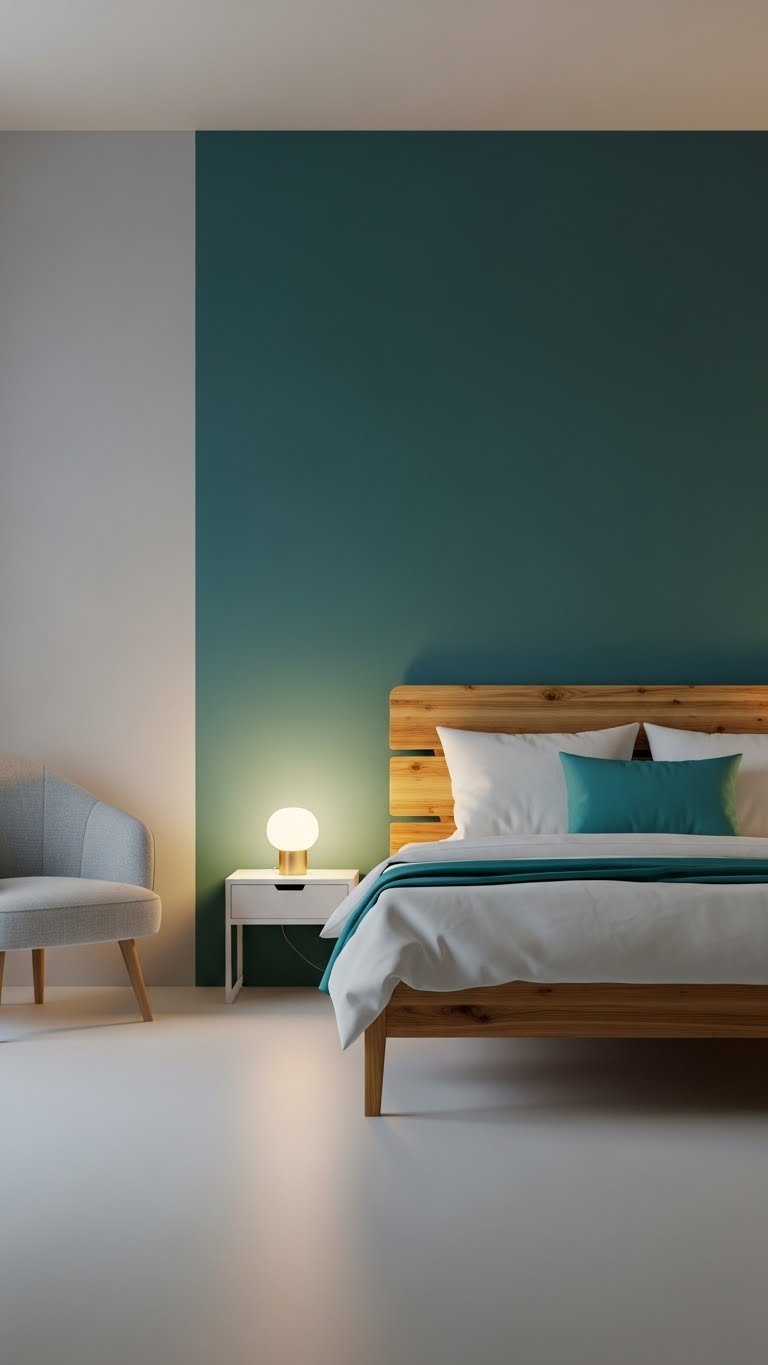
    12. Soft Teal with Cream and Wood Tones

    Teal sits between blue and green, capturing the calming properties of both. A muted, dusty teal (not bright or saturated) feels sophisticated and grounding rather than trendy.

    Paint walls a soft teal like Sherwin-Williams “Sea Salt” or Benjamin Moore “Palladian Blue” with a touch of green added ($35–$45 per gallon). Pair with cream bedding ($100–$200), natural wood furniture, and a cream or jute area rug ($60–$150). The palette costs $200–$400 to implement. If painting feels like too much commitment, use teal removable wallpaper ($25–$60) on one or two walls instead.

    The wood tones ground the teal and prevent the room from feeling cold or clinical.


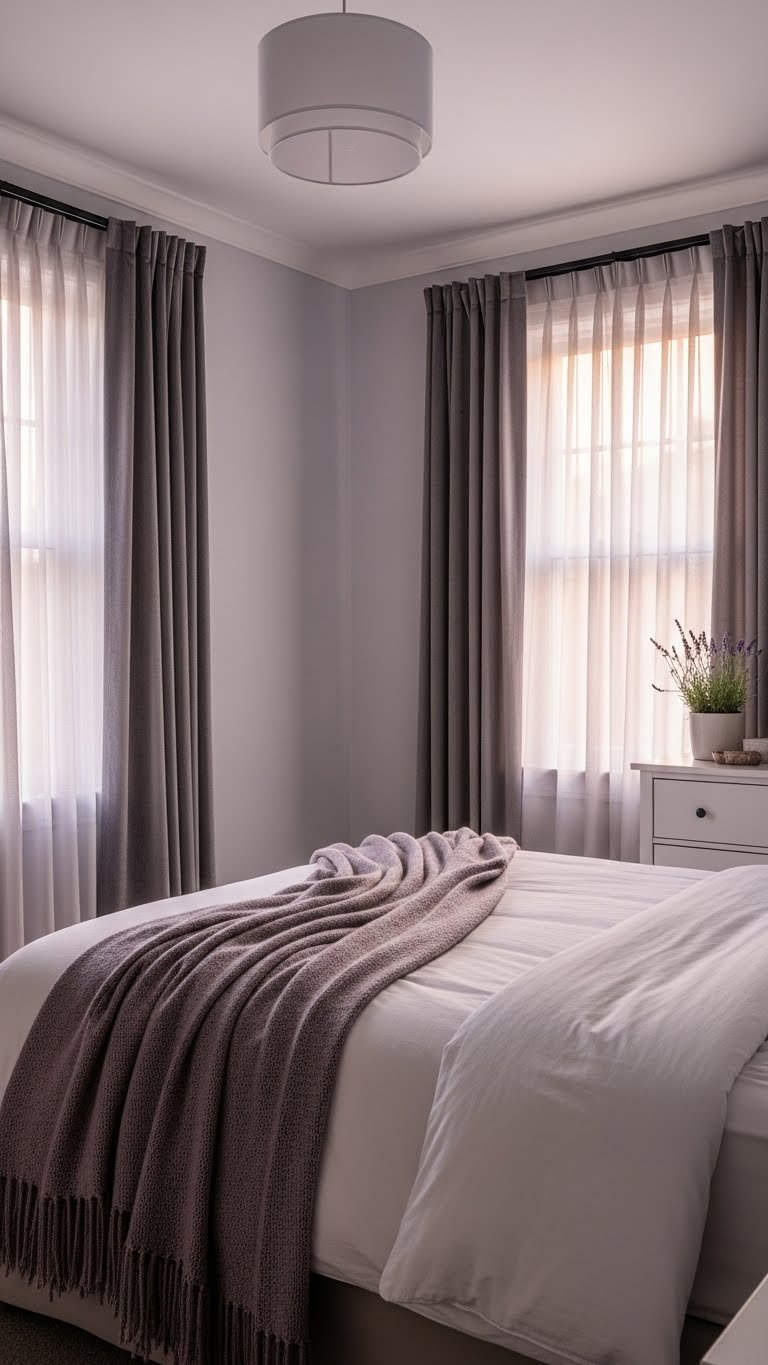
    13. Soft Blush with Pale Blue Walls

    Color-blocking two gentle hues creates visual interest without chaos. Both pale blue and soft blush are calming on their own, so combining them maintains the restful vibe while adding sophistication.

    Paint two adjacent walls pale blue ($35–$40 per gallon) and two in soft blush ($35–$40 per gallon). Keep bedding white or cream as your anchor. Add accents in both colors through pillows, throws, or artwork ($30–$100). The painting takes a full Saturday but creates a unique, curated look. This approach costs $100–$200 for paint alone.

    Color-blocking photographs beautifully and gives your room a high-design appearance without hiring a professional.


    14. Warm White with Muted Sage Accents

    This reverses the typical sage-walls approach—keeping walls neutral and bringing green in through larger furniture pieces or textiles. It gives you the biophilic benefits while maintaining flexibility.

    Paint or keep walls warm white ($30–$40 per gallon if painting). Source a sage upholstered headboard or bed frame ($300–$800) or use removable fabric panel wallpaper in sage ($30–$80) behind your existing bed. Add a sage linen throw ($40–$100) and white bedding. The total investment is $150–$400, but you’re getting the calming effect of green without committing walls to the color.

    This setup works beautifully in rentals—remove the fabric panel when you leave, and you’ve left no permanent changes.


    15. Deep Gray with Warm Cream Everything Else

    Deep gray as an accent wall (rather than all-over) gives you drama and coziness without making the room feel cave-like. The cream everywhere else balances the darkness and keeps it feeling open.

    Paint one accent wall (behind the bed is classic) in deep charcoal ($35–$40 per gallon). Keep other walls creamy white ($30–$35 per gallon). Layer cream and white bedding ($100–$250). Add a cream area rug ($80–$200). The cost is $200–$400, but the visual impact is significant. Painting one wall takes 2–3 hours on a Saturday morning.

    One accent wall is a renter-friendly approach—you’re making a statement without overwhelming your space.


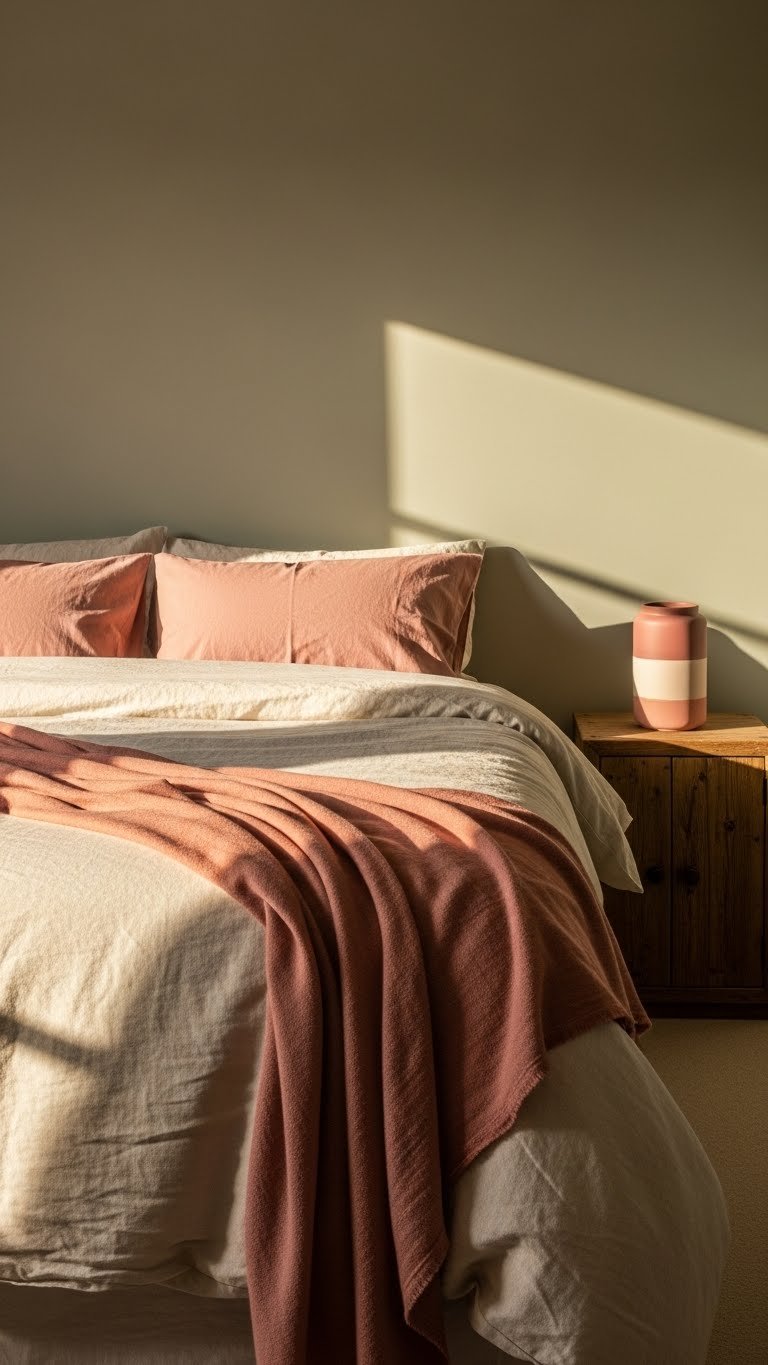
    16. Pale Peach with Soft Gray and Natural Materials

    Pale peach is warm and inviting without being loud or childish. When paired with grays and natural wood, it feels timeless and layered rather than dated or trendy.

    Paint walls a soft peach like Benjamin Moore “Peach Beige” or a custom pale peach ($35–$40 per gallon). Add gray bedding ($100–$200), a peach linen throw ($40–$100), natural wood furniture, and a jute rug ($60–$150). The entire palette costs $250–$400. The warm peach feels particularly good in rooms that get afternoon light, as it glows without needing artificial warmth.

    Peach is underrated—it brings warmth without the aggression of orange or coral.


    17. Soft Charcoal with White Bedding and Gold Accents

    Charcoal creates a dramatic, adult backdrop. White bedding keeps it from feeling heavy, and gold accents add warmth and a touch of luxury without feeling costumer or overdone.

    Paint walls soft charcoal like Sherwin-Williams “Urbane Bronze” ($35–$45 per gallon). Layer white bedding ($100–$250), then add gold-finish lighting ($30–$100 per lamp), a gold-framed mirror ($40–$150), and possibly gold drawer pulls or hardware ($10–$30 each). The palette costs $250–$500 depending on how many gold accents you add. Start with just lighting and mirror, then add more if it feels right.

    Gold feels warm and grounded against charcoal—not cold or sterile.


    18. Pale Green-Gray with Soft White and Natural Textures

    Green-gray is a newer neutral that combines the calming properties of green with the sophistication of gray. Natural textures amplify the grounded, biophilic feeling.

    Paint walls a pale green-gray like Sherwin-Williams “Sea Salt” or Benjamin Moore “Palladian Blue” with an extra touch of gray added ($35–$45 per gallon). Prioritize natural materials: a wood or rattan headboard ($150–$500), natural wood nightstands ($80–$300), and a jute area rug ($60–$200). Layer with white or cream bedding ($100–$250). The total investment is $350–$700 for a fully cohesive room, but you can build it over time.

    Natural textures are worth the investment—they actually improve how you feel in the space.


    19. Warm Beige Walls with Taupe Bedding and Wood Accents

    Warm beige is the safe, timeless choice—and there’s nothing wrong with that. It creates a backdrop that lets you add personality through other elements without the walls competing for attention.

    Paint walls a warm beige like Benjamin Moore “Accessible Beige” or Sherwin-Williams “Kilim Beige” ($30–$40 per gallon). Add taupe bedding ($100–$250), warm wood furniture in honey or oak tones ($200–$1000+ depending on quality), and a cream area rug ($60–$200). This palette costs $300–$500 to build. Warm beige works in any lighting and never feels dated, making it ideal if you’re not sure about bold color choices.

    The beauty of this palette is its flexibility—you can decorate it neutrally or add color through pillows and artwork.


    20. Soft Blue-Gray with Cream Linens and Brass Details

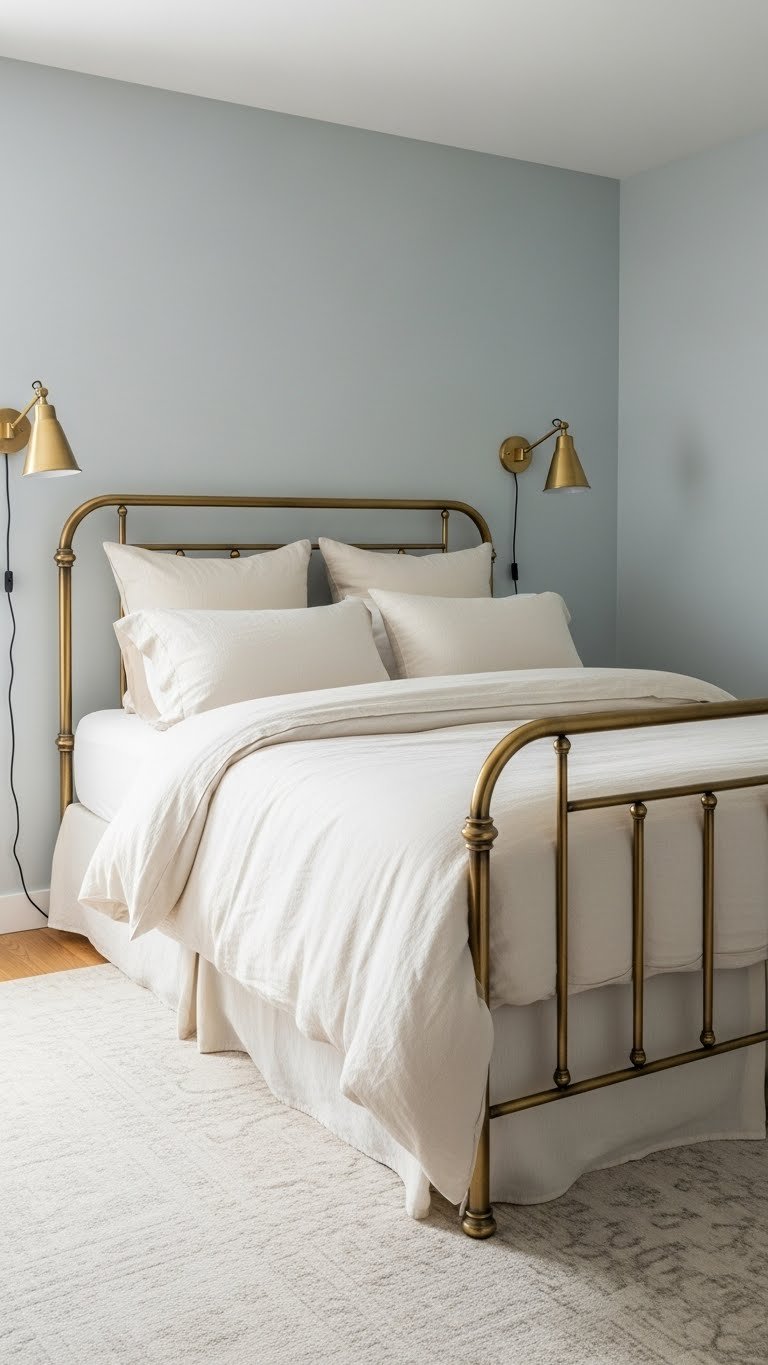
    Blue-gray (called “greige” with a blue lean) feels calming and slightly elevated. Cream linens keep it soft, and brass details add warmth and a subtle luxury feel.

    Paint walls a soft blue-gray like Farrow & Ball “Calluna” or Benjamin Moore “Pale Oak” with blue undertones added ($35–$50 per gallon, premium brands). Layer with cream linen bedding ($100–$250), and add brass-finish lighting ($40–$150 per fixture) or a brass-frame mirror ($50–$200). A cream area rug ($80–$200) ties it together. Total investment: $300–$600. If brass is outside your budget, use gold or even matte black for a different vibe.

    Blue-gray feels sophisticated and works beautifully in both traditional and modern spaces.


    21. Soft Sage with Cream and Touches of Dusty Rose

    This palette combines green’s calming effect with rose’s subtle warmth. The muted dusty rose (not bright pink) keeps the room feeling grown-up and thoughtful.

    Paint walls soft sage ($35–$40 per gallon). Keep bedding cream or white as your anchor ($100–$200). Add dusty rose through throw blankets ($40–$80), pillows ($20–$50 each), or small decorative objects ($15–$100). A rose-tinted ceramic piece on your nightstand ($20–$60) ties the color through. The total cost is $200–$350. You can start with just green walls and cream bedding, then add rose accents over time as budget allows.

    The combination feels botanical and curated, like you’ve thought through every choice.


    22. Pale Warm White with Soft Mushroom Accents

    Mushroom (a soft, warm brown) is having a moment as a sophisticated neutral. Paired with pale white, it creates subtle contrast without visual noise.

    Paint walls pale warm white ($30–$40 per gallon) or keep existing white walls. Introduce mushroom through a linen throw ($40–$100), pillows ($20–$60 each), an upholstered bench ($150–$400), or even a removable wallpaper accent ($25–$80). Wooden furniture in honey or natural tones ($100–$500+) echoes the mushroom without repeating it exactly. The palette costs $150–$400 depending on how many pieces you add.

    Mushroom feels cozy without the heaviness of true brown, making it perfect for all seasons.


    23. Deep Teal Feature Wall with Pale Gray Everywhere Else

    Deep teal as a feature wall gives you color and sophistication without overwhelming the entire room. Pale gray walls keep the space feeling open and calm.

    Paint one feature wall (behind the bed is standard) in deep teal like Sherwin-Williams “Sea Salt” or a custom deep teal ($35–$40 per gallon). Paint other walls pale gray ($30–$35 per gallon). Layer white or pale bedding ($100–$250), add a teal accent pillow ($20–$50), and include natural wood furniture. Total cost: $200–$400. The feature wall gives you the benefit of bold color without committing the entire room.

    This approach works for people who like color but worry about commitment—one wall is a test run.


    24. Soft Cream with Muted Green and Wooden Elements

    This final palette brings together calm color (cream), biophilic design (green), and natural materials (wood) into one cohesive, research-backed approach to bedroom serenity.

    Paint walls soft cream ($30–$40 per gallon). Source a sage or soft green upholstered headboard ($200–$600) or bed frame if that fits your budget, or use a removable fabric panel ($30–$80). Layer cream bedding ($100–$250), prioritize wooden furniture ($150–$500+), and add a live plant ($15–$50). The entire palette costs $350–$600 to build thoughtfully. You can start with cream walls and cream bedding, then add the green and wood elements over time.

    This combination taps into everything research shows makes bedrooms restorative—natural materials, soft colors, and biophilic elements working together.


    Save this post for your next bedroom refresh. Pick one palette and live with it for a few days before committing—paint samples on your walls or order fabric swatches to see how colors read in your specific light. You’ll be amazed at how the right palette makes falling asleep easier and waking up gentler.

  • 24 Romantic Soft Bedroom Decor Ideas That Feel Dreamy & Warm

    24 Romantic Soft Bedroom Decor Ideas That Feel Dreamy & Warm

    There’s a difference between a bedroom that looks nice and one that actually feels like a sanctuary. If your space feels sterile, cold, or just… blah, you’re not alone. The good news? You don’t need a complete overhaul to create that dreamy, warm bedroom you’ve been craving. Whether you’re working with a tiny studio or renting in a no-paint apartment, these 24 ideas blend the 2025 trends everyone’s loving—organic shapes, rich earth tones, textural layers, and vintage touches—into practical, achievable upgrades. Most of these you can do this weekend, many cost under $50, and all of them prioritize comfort without clutter. Ready to turn your bedroom into a retreat that actually feels like yours? Let’s get started.

    1. Swap Hard Angles for a Curved Headboard

    Harsh lines and sharp angles can unconsciously keep your nervous system on alert—not ideal for a sleep space. A curved headboard signals safety and calm, and it photographs beautifully too.

    Replace your existing headboard or shop IKEA’s curved options (around $150–$300), Wayfair’s upholstered styles ($200–$500), or go DIY by padding an existing headboard with foam and fabric for under $80. The real magic? A rounded top edge makes the whole room feel softer. Installation is straightforward—most mount directly to your bed frame in about 30 minutes.

    This one change makes bedtime feel less utilitarian and more like stepping into a hug. You’ll notice the difference the first night you look at it before sleep.

    2. Layer in a Chunky Knit Throw (Not Just for Winter)

    Texture is the secret ingredient that makes minimalist rooms feel cozy. A chunky knit throw adds visual interest, warmth, and that lived-in feeling without taking up real estate.

    Woolroom, Etsy, or Target stock quality chunky knits for $60–$150. Look for natural wool or linen blends that feel substantial in your hands. Drape it across the foot of your bed or fold it over one corner—the casual styling actually enhances the dreamy vibe. Pro tip: cream, beige, and soft gray are easier to style than bold colors, and they work year-round.

    You get instant texture and a functional layer you’ll actually use on cooler evenings. The casual drape also makes your bed look styled without effort.

    3. Introduce Warm Earth Tones Through Paint or Peel-and-Stick Wallpaper

    Cool grays have had their moment. Warm neutrals—terracotta, caramel, sage, warm taupe—are having a major moment in 2025, and they instantly make a room feel like home instead of a showroom.

    Paint is the investment route ($30–$100 in supplies for a DIY job or $300–$800 hired out). For renters, peel-and-stick wallpaper from Spoonflower or Amazon ($40–$100 per roll) gives you the same warmth without permanence. One accent wall is enough; you don’t need to commit to the whole room. Most paint jobs take one to two evenings.

    The psychological shift is real. Warm walls make you feel held. Your bedroom becomes the cozy refuge you imagined, and the color shift elevates every piece of furniture inside it.

    4. Add a Woven Wall Hanging for Organic Texture

    A statement wall hanging grounds the room, adds softness, and replaces harsh blank walls without the permanence of wallpaper. It’s the 2025 answer to minimalist wall art.

    Shop Etsy, West Elm, or Anthropologie for woven pieces in the $40–$250 range. Macramé hangs easily (just needs a hook), and most pieces work well above the bed or on a feature wall. Installation takes five minutes. Look for natural fibers—jute, wool, cotton—that complement your color palette. A 24″–36″ width is usually perfect for above a standard bed.

    This adds layers and interest while staying true to the warm, organic aesthetic. Your walls become part of the cozy feeling, not just backdrop.

    5. Invest in Quality Linen Bedding That Actually Feels Good

    Cold, slippery polyester sheets won’t cut it if you’re building a sanctuary. Natural linen feels like luxury and gets softer with every wash.

    Quality linen runs $150–$350 for a full set, but it lasts for years—Brooklinen, Parachute, and Etsy sellers all offer excellent options. The wrinkled texture is part of the charm, not a flaw. You literally just pull them out of the wash and put them on; no ironing required. Budget option: start with one set and invest as you can afford it.

    You’ll sleep differently on linen. It breathes, it feels sensual, and it changes how you feel getting into bed. This is one investment that pays dividends every single night.

    6. Display Quilts Over Your Dresser or Bed Rail

    Quilts are having a major comeback as an alternative to duvets, and they tell a story in a way store-bought bedding never can. They’re practical and deeply soulful.

    Thrift quilts for $10–$50 (check Etsy, Facebook Marketplace, local antique shops), or commission a custom one from Etsy makers for $200–$600. Hang one on a simple wooden quilt rack ($30–$80 from IKEA or Wayfair), drape it over a bed rail, or fold it at the foot of your bed. Each quilt has history and personality baked right in.

    This approach makes your bedroom feel like a family heirloom space, not a hotel. The visual layering also adds dimension and warmth that mass-produced bedding can’t match.

    7. Hang Floor-to-Ceiling Curtains on Budget

    Floor-to-ceiling curtains create instant luxury and drama without actually requiring an expensive layout or professional installation. They’re a renter’s secret weapon too.

    Skip the pricey versions from Restoration Hardware ($300–$800). Instead, grab affordable options from IKEA ($20–$50), Target ($30–$70), or Amazon ($25–$60 per panel). Pair them with a tension rod ($15–$30) from any hardware store for truly renter-friendly installation—no holes, no landlord drama. You need two to four panels depending on your window width. Measurement and hanging takes about an hour.

    The visual effect is transformational. Your room immediately feels more curated and intentional. Bonus: sheer curtains filter harsh morning light, which improves sleep quality.

    8. Create a Gallery Wall with Personal Art and Prints

    Generic art or bare walls don’t invoke feeling. A personal gallery wall—even a small one—tells visitors (and you) exactly who you are and what you love.

    Start with affordable prints from Etsy ($8–$25 each), Minted ($12–$30), or even download and print your own from local print shops ($2–$5 per print). Frame them yourself using simple wood frames from IKEA or Michael’s ($5–$15 each). Mix frame styles, sizes, and finishes. Lay everything on the floor first to plan your layout, then hang with a level. Budget: $50–$150 for a 5–7 piece wall. Time: one evening.

    Your art becomes the visual anchor of your room. Waking up to images you actually love makes your bedroom feel purposeful and uniquely yours.

    9. Add Vintage or Thrifted Nightstands for Personality

    Mass-produced nightstands are forgettable. Thrifted pieces add character, are often better-built, and cost a fraction of retail price.

    Hunt Facebook Marketplace, Craigslist, local thrift stores, and Etsy for wooden nightstands in the $20–$80 range per piece. Don’t worry if they’re slightly different—mismatched pairs are hugely on-trend. A fresh coat of paint ($10 in supplies) updates them instantly if needed, or embrace the patina. Look for pieces with one or two drawers and sturdy legs. Delivery or DIY transport takes planning but is worth it.

    Your nightstands become conversation starters with real history. Plus, they’re built to last, unlike flat-pack alternatives. You get durability and soul in one purchase.

    10. Layer Rugs to Define Your Sleep Zone and Add Warmth

    A single rug can feel cold and institutional. Layering two—a natural base layer plus a softer accent—creates intimacy and visual warmth without clutter.

    Start with a jute base rug ($60–$200 from IKEA, Wayfair), then layer a smaller wool or vintage rug on top ($40–$150 from Etsy, thrift stores). Your top layer should be slightly smaller so both are visible. This combo adds insulation (floors feel warmer), visual interest, and a nested feeling. Takes five minutes to arrange once you have both pieces.

    The layering technique makes your sleep zone feel intentionally designed, not accidental. Plus, it’s cozy underfoot during those first steps out of bed in the morning.

    11. Install Warm Lighting with Dimmable Bulbs and Layered Fixtures

    Harsh overhead lighting tanks your bedroom’s coziness factor. Warm, dimmable lighting is the fastest way to create that sanctuary feeling.

    Replace all bulbs with warm-toned (2700K) LED bulbs ($5–$15 each from any hardware store). Swap your overhead fixture for a dimmer switch ($15–$30 at Home Depot) or add layered task lighting: a bedside lamp ($30–$100), a wall sconce ($40–$120), even string lights ($15–$30). Use bulbs that dim together for maximum control. Installation varies (dimmer is 30 minutes for handy folks; sconce might need an electrician at $150–$300).

    The difference is immediate. Warm light makes your room feel like a resort, not an office. Dimming options mean you can adjust the mood for reading, winding down, or just cozying up.

    12. Use Velvet or Textured Accent Pillows to Add Softness

    Flat, basic pillows miss the chance to add texture. Tactile pillows make your bed an actual place you want to sink into.

    Shop Etsy ($20–$60), West Elm ($40–$80), or Target ($15–$40) for pillows in velvet, linen, corduroy, or knit textures. Aim for three to five pillows in coordinating neutral tones—cream, taupe, dusty sage, soft gray. Mix sizes and shapes (square, rectangular, round). Takes five minutes to style; no additional setup needed.

    The tactile experience transforms how you feel about your bed. You’ll actually want to lounge there, not just sleep in it. Texture also photographs beautifully, which means your room looks intentional on camera too.

    13. Add a Statement Mirror to Reflect Light and Expand Space

    Mirrors reflect light, make small spaces feel bigger, and add architectural interest. A statement mirror is a non-permanent way to completely shift your room’s energy.

    Look for mirrors with wood frames ($60–$250 from IKEA, West Elm, Wayfair) or hunt thrifted ornate mirrors for $20–$80. Go oversized—a 24″–36″ width makes the biggest impact. Lean it against the wall (renter-friendly, no hanging required) or mount it with brackets ($20–$40). Either way, installation is straightforward and takes under an hour.

    Your room instantly feels brighter, bigger, and more refined. The light bounce also makes your space feel more energized during the day without any electrical changes.

    14. Introduce Fresh Flowers or Faux Botanicals Weekly

    Living (or beautiful faux) plants add life, improve air quality, and create that biophilic connection everyone craves. Fresh flowers change the mood instantly and cost less than you’d think.

    Fresh grocery store flowers ($5–$15 from Whole Foods, farmer’s markets) last a week. Dried botanicals ($3–$15 per bunch from Etsy, Trader Joe’s) last months and look endlessly chic. Faux botanicals ($10–$30 from Target, IKEA) require zero maintenance and work if you travel. Invest in a few ceramic or glass vases ($10–$30 each) that you can reuse. Arrange fresh flowers on Sunday for an easy weekly refresh—takes five minutes.

    A bedroom with greenery feels alive and nurturing instead of sterile. It’s a small weekly ritual that shifts your whole mood when you walk into the room.

    15. Layer Sheers with Heavier Curtains for Control and Romance

    Sheer alone lets in harsh light and kills privacy. Layering sheers with blackout or heavier curtains gives you total control over light, mood, and your sanctuary feeling.

    Buy sheer curtains ($20–$60 from IKEA, Target) and heavier linen curtains ($40–$150 from Wayfair, CB2). Hang sheers on one rod, heavier curtains on another (two rods side-by-side cost $30–$60 total). Use a tension rod for renter-friendly install (no holes). You now have complete light control without sacrificing softness. Setup takes about an hour.

    This layering approach makes your room feel intentionally designed and gives you agency over your environment. You can wake to soft light or sleep in complete darkness—your choice.

    16. Style Your Dresser Top Like a Hotel Nightstand

    A cluttered dresser stresses you out. A styled dresser—even a simple one—makes your whole room feel more intentional and calming.

    Keep your dresser top to five objects maximum: a lamp ($30–$80), a small plant ($5–$20), a stack of books ($0, from your shelf), a decorative dish or tray ($10–$30), and one candle ($5–$15). Swap items seasonally or monthly for freshness without clutter. Takes 10 minutes to style and makes your brain feel more at ease.

    This small curation makes your room feel like a deliberate, adult space instead of a place where stuff accumulates. It’s also the easiest way to make your bedroom photograph well.

    17. Hang a Fabric Canopy Above Your Bed for Dreamy Drama

    A fabric canopy instantly makes your bedroom feel like a retreat. No commitment needed—it’s installed in minutes and renter-friendly.

    DIY Canopy: Hang sheer fabric or muslin ($20–$50 from fabric stores, Amazon) from adhesive hooks ($10 for a set of 4) or command strips ($5). No drilling, no damage. Or buy a pre-made bed canopy frame ($80–$250 from IKEA, Wayfair) if you want structure. Installation takes 20–30 minutes and requires zero tools.

    The canopy creates a cocooning effect that signals safety to your nervous system. You literally sleep better under one. It’s also the most Instagram-worthy bedroom detail for minimal effort.

    18. Replace Metal Furniture with Warm Wood Pieces

    Metal furniture—especially chrome or industrial styles—feels cold in a bedroom. Warm wood creates the organic, grounding energy that 2025 is all about.

    Gradually swap out metal pieces for wood versions from IKEA ($150–$500 for bed frames), Facebook Marketplace ($50–$300 thrifted), or invest in one statement piece like a wood dresser ($300–$800 new). You don’t have to replace everything at once; even swapping a metal nightstand for wood shifts the room’s vibe significantly. No installation needed beyond what you’d do anyway.

    Wood grounds a room instantly. It feels stable, warm, and connected to nature—all things your nervous system craves before sleep. Plus, it ages beautifully instead of looking dated.

    19. Create a Reading Nook with a Small Chair and Good Light

    Your bed shouldn’t be your only place to relax. A cozy reading nook gives your bedroom function beyond sleep and adds visual interest.

    Shop IKEA’s armchairs ($150–$300), Target ($100–$250), thrifted wooden chairs ($30–$100), or invest in a mid-century lounge chair ($300–$800 from Article, West Elm). Add a side table ($40–$100), a task lamp ($30–$80), and a throw. Position near a window if possible. Setup takes an afternoon.

    This creates a secondary purpose for your bedroom—a place to journal, read, or simply sit with your thoughts. It also makes the room feel more layered and less like a furniture showroom.

    20. Swap Your Comforter for Layered Bedding (Duvet + Throw)

    A single thick comforter looks flat and isn’t as flexible as layered bedding. Layers let you adjust warmth, look more intentional, and photograph better.

    Start with fitted and flat sheets ($40–$80), add a lightweight duvet ($100–$250), then layer a throw blanket or quilt on top ($50–$150). Use a duvet cover so you can wash everything without destroying the duvet itself. This approach gives you flexibility for temperature changes and adds visual texture. Setup takes five minutes—literally just arrange pieces on the bed.

    Your bed becomes a design focal point instead of just a place to sleep under one blanket. The visual layers also make your room feel more luxurious and intentional.

    21. Add Cork or Rattan Drawer Pulls for Organic Details

    It’s the small details that make a room feel cohesive. Swapping out basic hardware for cork or rattan pulls takes five minutes and costs under $30.

    Buy cork or rattan drawer pulls ($15–$30 for a set of 4–6 from Anthropologie, Etsy, Schoolhouse Electric). Unscrew your existing pulls and screw in the new ones—literally takes five minutes with a screwdriver. No other skill needed. Look for natural wood, cork, or rattan materials to match your warm aesthetic.

    These small touches make your dresser look curated and intentional. They’re also completely reversible if you rent or change your mind down the line.

    22. Bring in Warm Metallics (Brass, Copper) Instead of Silver

    Cool silver and chrome metallics are out. Warm brass and copper metallics play beautifully with earth tones and add subtle luxury.

    Replace light fixtures with brass versions ($50–$150), add brass wall sconces ($40–$120), swap your picture frames to copper or brass ($10–$30 each). Even small metal accents—a brass plant stand ($30–$60) or copper trinket dish ($15–$40)—shift your room’s warmth factor. Look for authentic brass or brass-plated options that won’t tarnish quickly.

    These warm metallics catch light beautifully and make your space feel refined without trying too hard. They tie together all your warm wood and earth tone choices.

    23. Display Books Horizontally and Stack with a Decorative Object

    Open book stacks look messy. Horizontal stacks topped with a decorative object look intentional and take up less visual space.

    Gather books you actually love ($0, from your shelf), find a small sculptural object ($10–$50 from Etsy, thrift stores, or home goods stores), and stack. Keep stacks to three to five books maximum and top with one object. This works on nightstands, dressers, or shelves. Takes five minutes to arrange and adds instant sophistication.

    Book styling tells a story about who you are without feeling showy. It’s an easy way to add personality without clutter, and it invites conversation.

    24. Install Blackout Curtain Liners to Improve Sleep Quality (Without Sacrificing Style)

    Dark rooms improve sleep quality significantly. Blackout liners let you keep your beautiful sheer or linen curtains while still getting complete darkness.

    Buy blackout curtain liners ($20–$50 from IKEA, Amazon, Target) that attach to your existing curtains with tape or clips. No sewing required. Install takes 15 minutes and completely blocks light without changing the look of your curtains. Alternatively, use thermal-backed curtains ($60–$150 from Wayfair, West Elm) that look good and block light.

    Sleep quality improves noticeably when your room is genuinely dark. This is a science-backed upgrade that feels luxurious and functional at the same time.


    Save this post and pick one idea to tackle this week. You’ll be surprised how one small change shifts how you feel when you walk into your bedroom. Which one will you try first?

  • 26 Sliding Partition Door Ideas Great for Open-Concept Homes

    26 Sliding Partition Door Ideas Great for Open-Concept Homes

    Introduction

    Open-concept living sounds amazing until you need privacy—or want to hide last night’s dishes. Sliding partition doors give you the best of both worlds: the spacious, connected feel of an open home plus the flexibility to close off noise, cooking smells, or that home office chaos when life gets real. Whether you’re renting or own your place, work from home or just crave better sound control, these 26 sliding partition door ideas will help you maximize your space without knocking down walls or committing to permanent changes. From sleek glass installations to DIY barn door hacks, you’ll find budget-friendly solutions and investment pieces that actually work in modern homes. Let’s find the option that fits your lifestyle and your wallet.


    1. Install Floor-to-Ceiling Crittall-Style Glass Doors

    Crittall-style doors bring that trendy industrial vibe while keeping your open concept connected. The narrow metal frames maximize glass and light—meaning you can close off a workspace or bedroom without the room feeling caved in.

    These typically cost $400–$1,200 per pair for quality versions from brands like Crittall, Crittal UK, or similar suppliers. Installation is usually a weekend project if you’re handy, though you might hire a glass installer for precision. The payoff? You get the Instagram-worthy aesthetic plus real sound dampening that makes your home office actually feel separate from the living room.

    Pro tip: If you rent or don’t want to commit, look for temporary Crittall-style screens or folding partitions under $300.

    You’ll notice the difference immediately—the space feels curated, intentional, and way more polished than before.


    2. Opt for Minimalist Frameless Sliding Glass Panels

    Frameless glass doors take minimalism to the extreme—almost like the wall disappeared, but you get the sound barrier when you need it. Ultra-slim profiles mean maximum light and that clean, contemporary vibe everyone’s craving right now.

    Expect to spend $600–$2,000 for quality frameless systems from brands like Möller, Technal, or premium options through Wayfair. These usually require professional installation ($300–$500) since precision is everything. The result? Your space feels bigger, brighter, and way more modern. Plus, zero visual clutter when the doors are open.

    If you’re on a tighter budget, temporary clear acrylic sliding panels exist but won’t offer the same durability or sound control.

    The clean lines make every room feel calm and organized—even when life’s a little messy behind the glass.


    3. Use Matte Black Steel Frames for Bold Impact

    Matte black frames are having a major moment, and for good reason—they photograph beautifully and add instant sophistication to any space. The contrast pops against light walls, brick, or even natural wood, giving your home that high-end gallery feel.

    Hunt for these on Amazon, Wayfair, or Home Depot in the $300–$900 range for sliding glass doors with matte black aluminum frames. Some brands offer pre-made sizes, while custom orders run higher. Installation typically takes a weekend for confident DIYers, or hire a pro for $250–$400. The payoff is huge: your home suddenly looks intentionally designed, not hodgepodge.

    The beauty of matte black is it works with almost every style—industrial, modern, farmhouse, even traditional.

    Your space gets that “professionally decorated” feeling without the designer price tag.


    4. Try Budget-Friendly Tension Rod Curtain Partitions

    Not ready to commit to glass? Fabric partitions hung from tension rods are a $20–$80 solution that feels way more expensive. Grab white, sage green, or neutral linen-look fabric from Target, IKEA, or Amazon, plus tension rods that don’t require installation.

    Just measure your ceiling-to-floor height, grab your fabric, tension rods, and optional curtain rings. Takes 30 minutes, zero damage to walls (hello, renters). Swap the fabric whenever you want a refresh—this isn’t permanent, which is the whole point.

    You get privacy, sound dampening, and the flexibility to open everything back up when you’re hosting or want that spacious vibe.

    The layered, soft look makes your home feel intentional and gives you design control on a shoestring budget.


    5. Add Sleek Barn Door Sliders in Matte Black

    Barn doors scaled down and modernized? Yes. Matte black barn door sliders give you that farmhouse charm with contemporary edge, and they’re way more budget-friendly than glass alternatives.

    Expect $150–$400 per set from Home Depot, Wayfair, or IKEA. The hardware typically costs another $50–$150, and installation is a solid weekend project (or hire help for $200–$300). They’re great for bedrooms, home offices, or pantries because they take up zero swing space—just slide them open and closed.

    Pro tip: Matte black barn doors hide fingerprints better than glass, making maintenance easier for busy households.

    You get that stylish, expensive-looking aesthetic with the practicality of a sliding door that actually works.


    6. Create a Frosted Glass Privacy Wall

    Frosted glass gives you the best of both: you see light and shadows but no details. It’s perfect when you want privacy without fully closing yourself off, and it’s way more interesting than plain glass.

    Order frosted sliding glass panels from Wayfair ($400–$900) or visit a local glass shop for custom frosting on existing doors ($200–$400). DIY frosted glass film from Amazon ($15–$40) works temporarily and is renter-approved—just apply, smooth out bubbles, and peel it off when you leave.

    The light still flows through, so your space never feels cramped, but people can’t see what’s happening on the other side.

    Your home gets privacy without sacrificing the airy, open feeling that makes open-concept homes so appealing.


    7. Install Track-Mount Sliding Wooden Doors

    Wooden sliding doors add warmth that glass can’t match, and they’re excellent for sound dampening. Solid wood absorbs noise way better than glass, making this ideal if you have a noisy household.

    Budget $250–$800 for pre-made wooden sliding door kits from Home Depot, Wayfair, or specialty sites. The track hardware runs $80–$200. Installation is doable over a weekend, though you’ll want to be comfortable with measuring and leveling. If you’re hiring help, budget $300–$500.

    Look for sustainable options like FSC-certified walnut or reclaimed oak to feel good about your choice—you’ll reduce carbon footprint by choosing responsible wood sources.

    The warmth and natural grain bring coziness that makes your space feel like a real home, not a showroom.


    8. Use Accordion-Style Folding Glass Doors

    Accordion doors are genius for maximum flexibility—fully open your space when you’re hosting, or close multiple sections for privacy and climate control. They’re compact when folded and look surprisingly modern.

    Accordion sliding glass door systems run $800–$2,200 from brands like NanaWall or Wayfair. Installation typically requires a pro ($500–$800). They’re a bigger investment, but the payoff is huge if you host frequently or run a home business where you need on-demand privacy.

    Pro tip: These fold to the side completely, so they don’t block any wall space when open—perfect for awkward layouts.

    You’re investing in flexibility that actually changes how you use your home, making it adapt to your life instead of the other way around.


    9. Paint Existing Walls with Contrasting Colors to Define Zones

    Sometimes you don’t need a door—you just need visual separation. Painting one zone a different color (especially jewel tones or soft pastels) signals “this is a different space” without closing anything off.

    Paint costs $20–$50, and you’ll spend a weekend doing two walls (or hire a painter for $300–$600). Pick calming colors like sage green, dusty blue, or warm taupe to define zones without feeling overwhelming.

    This is renter-friendly if you use removable paint or get landlord permission. It’s also the cheapest way to psychologically divide your space.

    The color shift makes your brain register different rooms, which gives you psychological privacy even though the space is technically open.


    10. Mount Sliding Shoji-Style Doors for Zen Aesthetics

    Shoji doors bring Zen-like calm to any space—the translucent rice paper panels filter light beautifully while giving you privacy. It’s a sophisticated look that feels intentional and curated.

    Pre-made shoji door kits cost $200–$600 from specialty home stores or Amazon. Custom options run higher. Installation is straightforward—basically mounting lightweight panels on tracking. DIY-friendly, takes 2–3 hours.

    If you rent, temporary shoji screens ($80–$200) give you the same aesthetic without permanence.

    The soft, diffused light and clean lines create a calming effect that makes your whole home feel more serene.


    11. Install Operable Glass Walls That Double as Room Dividers

    Operable glass walls are the ultimate flexibility investment—slide them all the way open for full connection, or position them partway to divide the room without full commitment. It’s like having two rooms that can become one.

    These high-end systems run $2,000–$5,000+ installed, but some mid-range options exist around $1,200–$2,500. Brands like NanaWall and Wayfair Premium have options. Installation is professional-only territory, so budget $800–$1,500 for experts.

    This is an investment piece, but it completely changes how you can use your space—perfect for busy households or people who work from home sometimes.

    You’re buying flexibility and the ability to customize your space daily based on what you need that day.


    12. Add Sliding Screens with Geometric Patterns

    Geometric screens combine privacy with visual interest—they’re functional room dividers that work as art. Perfect if your style is contemporary or minimalist.

    Sliding screens with patterns run $200–$600 from Wayfair, IKEA, or etsy artisans. Installation takes an afternoon with basic tools. If you’re handy, you can DIY a lattice screen from wood slats and paint ($60–$120).

    These block the direct line of sight while still allowing light and air to flow through—you get privacy without the closed-off feeling.

    The geometric patterns add visual interest that makes your space feel designed and intentional, not like an afterthought.


    13. Use Sliding Fabric Panels on Ceiling Tracks

    Ceiling-mounted fabric panels give you sound dampening plus the flexibility to open or close instantly. They’re lighter than barn doors, more stylish than curtains, and work in modern or minimalist spaces.

    Heavy-duty track systems cost $200–$500, and fabric panels run $100–$300 depending on material and size. Total project is usually a day’s work if you’re comfortable with basic installation (or hire help for $250–$400).

    Choose acoustic fabric for extra sound control, or go with linen-look cotton for aesthetics.

    You get a soft, sophisticated look that feels way more designed than regular curtains while keeping your budget reasonable.


    14. Install Sliding Louvered Doors for Adjustable Privacy

    Louvered doors let you control privacy and light simultaneously—adjust the slats to let light through while blocking the view, or close them fully for complete separation. It’s genius.

    Louvered sliding door kits cost $300–$800 from Home Depot or Wayfair. Track and installation runs another $100–$300. You can usually DIY this over a weekend if you’re comfortable with basic tools.

    The adjustability means you’re never stuck with one configuration—morning light? Open the slats. Movie time? Close them fully.

    The ability to customize your privacy and light situation by simply adjusting slats gives you control without the commitment of permanent walls.


    15. Create a Lightweight Steel-Frame Partition

    Lightweight steel frames are the sweet spot between durability and visual lightness—they look more substantial than aluminum while staying sleek and modern.

    Steel-frame sliding glass systems cost $500–$1,500 from industrial-style home stores or Wayfair. Installation requires either DIY expertise or professional help ($300–$600). The payoff is industrial chic that actually looks intentional and well-built.

    Pro tip: Powder-coated steel resists rust better in humid climates, so if you live near water or in a damp area, spend the extra $100–$200 for the upgrade.

    The refined industrial look makes your home feel thoughtfully designed while the steel construction promises real durability.


    16. Hang Sliding Japanese Noren Curtains

    Noren curtains are gorgeous fabric dividers with cultural charm—they hang loose and layered, creating separation without blocking airflow. Super affordable and easy to switch out for different seasons or moods.

    Authentic noren curtains cost $30–$100 from specialty stores or Etsy. Basic wooden mounting hardware is $20–$40. Install in 15 minutes—drill two holes, mount the rod, hang the curtains. Done.

    This is incredibly renter-friendly and budget-conscious. Swap them seasonally or whenever you want a design refresh.

    The soft, fabric-based approach makes your home feel welcoming and artistic while giving you flexible, easy-to-adjust privacy.


    17. Install Opaque Sliding Polycarbonate Panels

    Polycarbonate is incredibly durable, affordable, and industrial-chic—it filters light beautifully while hiding what’s behind it. Great for home offices that need privacy but not darkness.

    Polycarbonate sliding panel kits run $200–$600 with track hardware included. Installation is DIY-friendly, taking 2–3 hours. This material is also incredibly sustainable, making it a smart eco-conscious choice.

    The translucent quality means light keeps flowing, so you never feel boxed in, but you’ve still got clear boundaries between spaces.

    You’re getting industrial-modern aesthetics with practical durability and a smart price point.


    18. Use Sliding Pegboard Walls for Open Storage + Privacy

    Pegboard sliding doors are brilliant if you need privacy plus storage—the perforated design lets light through while blocking sightlines, and the pegboard itself becomes functional storage.

    DIY this for $80–$200 using plywood, pegboard sheets from Home Depot ($20–$40), track hardware ($60–$100), and some assembly. It’s a fun weekend project that saves you money while adding actual utility. Pre-made options run $300–$700.

    Perfect for hiding a messy home office, mudroom, or craft space while keeping light and air flowing.

    You’re not just getting privacy—you’re gaining storage and a modern design feature that actually serves your daily life.


    19. Mount Sliding Blackout Panels for Media Rooms or Bedrooms

    Blackout sliding panels are essential if you have a media room, bedroom, or need light control for a night shift schedule. They block light completely while looking sleek when open.

    Blackout fabric sliding systems cost $150–$400 for decent quality from Wayfair or Amazon. Installation is straightforward—track mounts to ceiling, panels hang on simple runners. DIY-friendly, takes 1–2 hours.

    The complete light control makes sleep better and movie watching actually enjoyable—this is an investment in comfort that actually pays dividends.

    You’re solving a real problem (light control) while keeping your space flexible and maintaining that open-concept vibe during the day.


    20. Create a Rolling Library Divider with Glass and Wood

    A rolling library divider gives you partition + storage + the ability to move it around. Genius for spaces where you don’t want a permanent wall but need flexible separation.

    Rolling shelf units run $300–$800 from Wayfair, IKEA, or furniture stores. You can also DIY this using shelving units, glass panels, and furniture casters ($40–$80). Total DIY cost: $150–$400. Takes a weekend to assemble and customize.

    Best part? When you need your space open, just roll it to the side or another room. Zero permanence.

    You’re combining storage, design, and flexibility into one functional piece that actually makes your home more organized.


    21. Install Sliding Stained Glass Panels for Artistic Privacy

    Stained glass sliding panels are statement pieces that turn functional room dividers into art installations. The colored light filtering through creates an instantly elegant, gallery-like vibe.

    Stained glass panels run $400–$1,200+ depending on custom design complexity. Order from artisans on Etsy or specialty glass shops. Installation is professional-recommended ($200–$400). This is an investment, but you’re literally art-collecting while solving a design problem.

    The play of colored light throughout your day changes the entire feeling of your home—it’s like living with constantly shifting mood lighting.

    You’re not just dividing spaces; you’re creating something beautiful that makes people stop and stare.


    22. Use Magnetic Sliding Panels for Easy Reconfiguration

    Magnetic panel systems let you reposition your dividers instantly without tools—just slide, snap, and you’re done. Perfect for people who like to rearrange their space frequently.

    Magnetic modular wall systems cost $300–$800 and are available from design-forward retailers like Wayfair Premium or specialty stores. Installation is DIY-simple—basically assembling modular pieces and securing to floor and ceiling. Takes 2–3 hours.

    You can reconfigure your space in minutes, which is perfect if your needs change or you just get bored.

    The flexibility means your home actually evolves with your lifestyle instead of staying locked into one configuration forever.


    23. Add Sliding Acoustic Panels for Soundproofing

    Acoustic panels aren’t just for studios—they’re brilliant for open-concept homes where you need serious sound control. They absorb noise while looking intentional and designed.

    Sliding acoustic panel systems run $250–$700 depending on size and coverage area. Brands like Audimute and GIK Acoustics have options, plus Wayfair carries budget versions. Installation is usually DIY-simple or hire help for $200–$400.

    The sound dampening is noticeable immediately—phone calls sound clearer, music doesn’t echo through the whole house, and ambient noise gets swallowed.

    You’re solving a real problem (noise in open spaces) while keeping the space visually interesting and professionally finished.


    24. Install Sliding Doors with Integrated Smart Controls

    Smart sliding doors with app-controlled locks, automated open-close, and sensors are the future—and they’re actually getting affordable. Perfect for tech-forward homes or those managing multiple spaces.

    Smart sliding door systems start around $800–$2,000 with brands exploring this space through Wayfair Tech, Amazon Smart Home, or specialized retailers. Installation typically runs $400–$800 because wiring and setup matter here.

    The automation means you can lock down privacy remotely, set doors to close at specific times, and integrate with your overall smart home system.

    You’re getting convenience, security, and that “future home” feeling while keeping your spaces flexible and responsive to your life.


    25. Create a DIY Sliding Barn Door from Reclaimed Wood

    DIY barn doors from reclaimed wood are budget-friendly, sustainable, and incredibly satisfying to build. You’re literally creating a custom piece that no one else has.

    Reclaimed wood costs $100–$300 depending on source, black track hardware runs $60–$150, and you need basic tools. Total project: $200–$500 and a solid weekend of work. You’ll have the satisfaction of building something real and unique.

    This option keeps carbon footprint low—you’re reusing existing materials instead of buying new. Bonus: reclaimed wood often looks better than new wood anyway.

    The handmade quality means your space feels personal and authentic, not like you ordered it from a catalog.


    26. Install Sliding Doors with Built-In LED Lighting in Frames

    This is the pinnacle of modern design—sliding doors with integrated LED lighting that illuminates edges, creates ambiance, and serves as wayfinding at night. It’s sophisticated and functional.

    LED-integrated sliding glass systems run $1,200–$2,500 installed from premium brands and specialty retailers. Installation is professional-only since it involves electrical work ($600–$1,000). This is definitely an investment piece, but the ambiance is unmatched.

    The warm lighting creates an upscale hotel-like feeling in your home while solving the practical problem of nighttime navigation.

    You’re transforming a functional divider into a design feature that changes how your home feels, especially after dark—this is where form and function truly merge.


    Save this post and pick one idea to tackle this month—even the budget-friendly options make a surprising difference in how your space feels and functions. Which style speaks to you?

  • 27 Spa-Style Bathroom Decor Ideas for Daily Relaxation

    27 Spa-Style Bathroom Decor Ideas for Daily Relaxation


    Introduction

    Your bathroom should be the one place in your home where you genuinely want to linger—not rush through. Whether you’re dealing with a cramped apartment bathroom or just craving that resort-like escape, you don’t need a full renovation to make it happen. The best part? Most of these ideas work on any budget, and many take less than an afternoon to implement. We’ve gathered 27 achievable spa-style touches that transform even the most ordinary bathroom into a personal retreat. From lighting tweaks and sustainable upgrades to smart storage and wellness features, you’ll find something that fits your space, your lifestyle, and your wallet. Let’s turn your daily routine into something you actually look forward to.


    1. Layer Your Lighting for Mood Control

    Lighting makes or breaks a spa atmosphere, and most bathrooms rely on one harsh overhead fixture that feels more hospital than haven. Installing layered lighting gives you control over your mood, whether you’re rushing through a morning routine or soaking in relaxation mode.

    Start with a dimmer switch on your main light ($15-$30 at any hardware store, 30 minutes to install if you’re comfortable with basic wiring—or hire an electrician for $75-$150). Add warm LED bulbs rated at 2700K ($8-$15 for a pack) around your vanity mirror to soften shadows on your face. Finish with accent lighting: a small wall sconce ($40-$100) or even battery-operated candle-style lights ($10-$20) for zero-commitment ambiance.

    Pro tip: Skip the cool white (5000K) bulbs entirely—they make everyone look tired and feel clinical. Warm light is your secret weapon.

    Now your bathroom adapts to your needs, and you’ll actually want to spend time in there even when you’re not bathing.


    2. Swap in Low-Flow Showerheads Without Sacrificing Pressure

    You’ve heard the environmental pitch, but here’s what matters: low-flow showerheads can cut your water bill by 25-30% while still delivering that satisfying spray. The old models felt wimpy, but today’s versions actually perform better than standard fixtures.

    Brands like Hansgrohe Raindance, Moen Spot Resist, or even budget-friendly Delta ($30-$80) provide full pressure while using 1.5 gallons per minute instead of the standard 2.5. Installation is genuinely DIY—unscrew the old head, wrap the threads with plumber’s tape, and screw the new one on (5 minutes, no tools needed beyond what you have in a junk drawer).

    The catch? Confirm your water pressure first. If you have low pressure already, choose a model designed for that. Most modern showerheads adapt well.

    You’ll see the savings on your water bill immediately, plus you get that luxe rainfall effect renters love because it leaves zero permanent marks on your walls.


    3. Add a Rainfall Showerhead for Instant Spa Vibes

    Rainfall showerheads aren’t just pretty—they’re the fastest way to make your shower feel like a spa without renovating your entire bathroom. The gentler cascade feels luxe compared to traditional nozzles.

    A quality rainfall head costs $40-$100 on Amazon or Home Depot, and installation takes 10 minutes if you have basic plumbing skills (or 15 minutes with YouTube as your guide). You might need an adjustable shower arm ($20-$40) to position it correctly. Pair it with a handheld wand ($25-$50) for flexibility—this combo gives you the best of both worlds.

    Budget option: AmazonBasics or similar brands ($20-$30) deliver 80% of the luxury feel for half the cost. They won’t last 20 years, but they’re perfectly functional for 5-7 years.

    The difference is noticeable the first time you step under it—suddenly your shower feels intentional and restorative instead of utilitarian.


    4. Paint Walls in Soft, Grounding Neutrals

    Color psychology is real: bold jewel tones energize, but soft neutrals create the calm your nervous system craves. Earthy, muted tones make your bathroom feel larger and more serene.

    Choose taupe, warm gray, soft sage, or creamy off-white—colors that sit between beige and gray rather than pure white. Brands like Sherwin-Williams (Urbane Bronze, Accessible Beige) or Benjamin Moore (Revere Pewter, Hale Navy in a super-light tint) run $30-$45 per gallon. One gallon typically covers a standard bathroom, and the work is a weekend DIY project.

    Pro tip: Buy a sample quart first ($8-$12) and paint it on all four walls to see how it looks at different times of day—natural light changes everything.

    Paint is the cheapest way to reset your space, and suddenly that tired, dated bathroom looks intentional and curated rather than neglected.


    5. Introduce Reclaimed Wood Accents for Warmth

    Reclaimed wood brings organic texture to a room that’s often all hard surfaces and tile. It softens the space, adds visual warmth, and tells a story—especially when you’re working with limited square footage.

    Source reclaimed wood from local salvage yards, Etsy shops ($40-$150 for small pieces), or even Facebook Marketplace for DIY projects. Use it for a floating shelf above the toilet ($60-$120 material + installation), a vanity top ($150-$400 installed), or even frame a mirror. If true reclaimed is pricey, distressed wood-look laminate ($20-$40 per sheet) gives 90% of the aesthetic for a fraction of the cost.

    Fair warning: Real reclaimed wood requires sealing ($20-$40 for sealant, 2 hours work) and occasional care. The laminate version? Wipe-clean forever.

    Your bathroom immediately feels less sterile—that natural grain and weathered patina create a spa lodge vibe no tile can replicate.


    6. Install Floating Vanities for Visual Space

    Floating vanities are the secret to making small bathrooms feel bigger. By lifting the vanity off the ground, you create visual flow and an easier-to-clean floor. It’s both functional and aesthetically premium.

    Stock options from IKEA, Wayfair, or Target ($150-$400) come with mounting hardware and installation guides. If you’re handy, you can install one yourself using wall studs and heavy-duty brackets ($100-$150 hardware). Rent-friendly option: peel-and-stick wall-mounted shelves ($30-$80) give you the look without drilling into walls.

    Installation takes 1-2 hours if you’re drilling into studs, or 30 minutes if you’re using adhesive options. The payoff is immediate: your bathroom feels modern and breathing-room-y instead of cramped.

    Plus, cleaning the floor becomes genuinely easy for the first time in years—you can actually reach beneath the vanity.


    7. Install a Double Vanity (Or Mimic One With Floating Shelves)

    If you share your bathroom or just crave morning counter space, a double vanity eliminates the toothbrush collision chaos. If space is tight, floating shelves with two small sinks create the same vibe.

    Full vanity installation ($400-$1,200 installed) works best in renovations. For renters or tight budgets, mount two narrow floating shelves ($50-$100 total) with two compact pedestal or wall-mounted sinks ($100-$200 each). This combo costs $250-$400 and takes a weekend if you’re comfortable with basic drilling.

    Budget hack: Two inexpensive white ceramic vessel sinks ($40-$80 each) mounted on a single long shelf ($30-$50) still looks intentional and spa-like.

    The best part? No more “is that your toothpaste cap?” moments, and each person has their own dedicated corner to feel calm and unhurried.


    8. Add Heated Floors for Morning Comfort

    Heated floors are a small luxury that transforms your morning routine from “ugh, cold tile” to “I actually want to stand here.” It’s the wellness upgrade that pays dividends year-round.

    Electric heated floor mats ($40-$80) plug in and sit under your existing bath mat—instant, no installation. Professionally installed radiant heating ($800-$2,500 for a full bathroom) is pricier but permanent and worth it if you’re renovating. Mid-range: adhesive-backed electric heating tape ($150-$300) goes under new tile or existing floors with minimal disruption.

    For renters, the plug-in mat is your friend. For homeowners planning a tile refresh, radiant heat is the moment to invest.

    Your feet never touch cold tile again, and this small comfort signals to your brain that this space is special and worth savoring.


    9. Hang Oversized Mirrors to Reflect Light

    Mirrors are the bathroom’s best-kept design secret—they bounce light, make spaces feel bigger, and can become a design focal point if you choose the right one. An oversized mirror transforms a cramped bathroom into something breathable.

    Frameless mirrors ($40-$150) create the most open feeling. Metal-framed options ($60-$200) add personality. Mount it as one large statement piece centered above your vanity, or go salon-style with three or four smaller mirrors ($80-$200 total). Installation is straightforward adhesive or wall-mounted hardware (30 minutes).

    Pro tip: Hang your mirror slightly above eye level to reflect ceiling and upper walls—this tricks the brain into perceiving more vertical space.

    Suddenly your bathroom looks less like a box and more like a deliberate space. The light bouncing around gives you better vanity lighting too, as a bonus.


    10. Switch to Eco-Friendly, Low-Waste Products

    Spa bathrooms feel calming partly because they’re clutter-free, and eco-friendly products help you achieve this while reducing waste. You’re not just tidying—you’re aligning your space with your values.

    Swap liquid soaps and shampoos for solid bars ($6-$15 each, last 2-3x longer), choose bamboo toothbrushes ($3-$8), and invest in refillable glass or metal containers ($15-$30 each). These aren’t more expensive long-term—they’re cheaper and eliminate the visual chaos of plastic bottles.

    Brands like Unwrapped Life, EarthHero, or even Target’s Good & Gather line stock these guilt-free. Over one year, a family of four saves roughly $100-$200 by switching to solid products.

    Your bathroom looks intentionally curated rather than like a convenience store shelf, and every morning you’re reminded that you’re making conscious choices.


    11. Install Dimmer Switches on Vanity Mirrors

    Your vanity lighting should adapt to your needs—bright enough for makeup or shaving, but soft enough for calming evening wind-downs. A dimmer gives you both without rewiring your entire bathroom.

    LED vanity mirror bulbs with built-in dimmers ($30-$60) screw into existing fixtures. Install a dimmer switch on your wall outlet ($15-$30) if you’re plugging in a mirror light. Hardwired installation ($50-$150 labor) takes an electrician 30 minutes.

    Budget option: Stick-on LED strips with remote control ($20-$40) mount directly on your existing mirror frame—zero installation, renter-approved.

    Now your mirror becomes a tool, not just a fixture. Bright for detail work, soft for self-care rituals, and your brain shifts gears accordingly.


    12. Create a Dedicated Shelf for Bath Rituals

    Spa-like spaces have intentional styling, and a dedicated ritual shelf signals to your brain that this bathroom time is sacred. It’s both functional and psychological.

    Mount a floating wooden shelf ($30-$60) above your toilet or beside your tub. Stock it with rolled towels ($20-$40 for soft ones), unscented candles ($8-$15), a small succulent or potted plant ($5-$20), and your favorite bath products. Keep it minimal—three to five items, not a cluttered display.

    Pro tip: Use matching glass or ceramic containers ($10-$30 total) for cotton balls, bath salts, or bath bombs. This unified look feels intentional and prevents visual chaos.

    Your pre-bath ritual becomes a moment—you walk in, see your curated shelf, and signal to yourself: this is my time, not rush time.


    13. Add Live Plants for Natural Air Purification

    Plants do double duty: they purify the air and bring the spa-retreat feeling indoors. Bathrooms are perfect for plants because humidity keeps them thriving, and greenery softens the hard bathroom aesthetic.

    Choose low-light tolerant plants: pothos, snake plants, ZZ plants ($5-$25 each). Bathrooms without windows? Artificial silk plants ($10-$30) look surprisingly realistic these days and require zero care. Water and humidity from your shower actually help real plants, so placement near the tub or shower is ideal.

    Styling tip: Cluster three plants at varying heights on shelves or windowsills for visual interest without clutter.

    Your bathroom suddenly smells fresher, looks less sterile, and creates the psychological effect of being in nature—even if you’re in an apartment bathroom with no window.


    14. Install Smart Lighting for Voice Control

    Smart lighting isn’t just gimmicky—it’s genuinely useful for creating spa ambiance without fumbling for switches. Voice control feels luxe, and programmable routines simplify your morning.

    Smart LED bulbs ($15-$30 each) work with Alexa, Google Home, or Apple HomeKit. Set up routines: “Alexa, spa mode” dims lights to 40%, sets color temperature to warm, and triggers calming music. Installation is as simple as screwing in bulbs (zero wiring needed).

    Starter setup costs $80-$150 for two smart bulbs plus a speaker you might already own. Expand gradually as your budget allows.

    Renter note: These work in any fixture and move with you when you relocate.

    Your morning routine becomes customized to you, and the bathroom adapts to your mood instead of blasting the same harsh light every time.


    15. Create a Rainfall Effect with Ceiling-Mounted Showerheads

    Ceiling-mounted rainfall showerheads create the ultimate spa experience—water rains down from above like you’re standing under a waterfall. It’s the upgrade that justifies skipping lattes.

    Ceiling-mount kits with showerhead ($80-$200) require plumbing access but aren’t as complex as they sound. Professional installation runs $300-$600. For renters or budget constraints, wall-mounted rainfall heads angled downward ($40-$80) deliver 90% of the feeling for 20% of the cost.

    DIY difficulty: Moderate for wall-mount (1-2 hours), complex for ceiling-mount (hire a plumber). Time frame: 2-4 hours professional, or a weekend if you’re tackling it yourself.

    The moment you step under a rainfall showerhead, your stress literally melts. That’s not exaggeration—it’s one of the fastest ways to signal luxury to your nervous system.


    16. Layer Soft Textures with Premium Towels and Rugs

    Luxury bathrooms aren’t just about aesthetics—they’re about what your skin touches. Soft, high-quality towels and rugs create tactile comfort that screams self-care.

    Invest in Turkish cotton or Egyptian cotton towels in white or neutral ($20-$50 per towel, though starter sets cost $60-$120). A plush bath mat ($25-$60) should feel substantial and absorbent. You don’t need dozens—three quality towels beat twelve thin ones.

    Budget option: Target’s Threshold or Opalhouse lines ($15-$30) offer excellent quality for the price. Skip dollar-store towels, which feel terrible and pill immediately.

    Styling: Fold or roll towels neatly and store them on open shelving or a ladder rack. This visual organization adds to the spa feeling.

    Every time you wrap yourself in a soft towel, your body registers comfort and care. That sensory input creates the spa experience far more than any decoration.


    17. Introduce Sustainable Bamboo Storage Solutions

    Sustainable storage isn’t just good for the planet—it looks intentional and spa-like. Bamboo is durable, warm, and fits any aesthetic.

    Bamboo storage boxes ($20-$50), drawer organizers ($15-$35), shelf risers ($10-$25), and soap dispensers ($8-$15) let you declutter while upgrading your decor. Mix these with rattan baskets ($15-$40) for visual texture. One complete setup costs $100-$200 and eliminates visible clutter instantly.

    Pro tip: Choose natural or light bamboo finishes to keep the space feeling airy and spa-like (avoid dark stains).

    Your counter transforms from cluttered chaos to curated calm, and your brain registers the shift immediately. Plus, everything has a home, so your morning routine becomes simpler.


    18. Mount Shelving to Free Up Counter Space

    Open shelving sounds risky if your bathroom is small, but floating shelves mounted high on walls create the illusion of space rather than crowding it. They’re about smart placement, not just stacking stuff.

    Simple floating shelves ($20-$50 each) mount easily with a stud finder and level (30 minutes). Install them above the toilet (standard placement) or above the vanity as a backdrop. One shelf holds rolled towels and plants; don’t overstuff.

    Styling rule: Keep only three to five items per shelf. White or light wood shelves recede visually, making the room feel bigger. Dark shelves ground the space (use for accent).

    Your counter clears, your visual field opens, and your bathroom feels less like a storage closet and more like an intentional retreat.


    19. Use Pebble or Stone Tiles for Texture and Grip

    Pebble or stone tiles add natural texture, visual interest, and safety (better grip than smooth tile). They’re especially great in showers, where slip hazards are real.

    Pebble tile sheets ($15-$30 per square foot, installed by a pro for $5-$15 per sq ft) work on shower floors and lower walls. If full tile replacement isn’t in the budget, pebble-textured bath mat ($25-$50) mimics the look and provides grip without renovation.

    Installation: A tiler completes this in 4-6 hours ($200-$400 labor). For renters, stick with the bath mat option.

    Your shower instantly feels more like a spa resort and less like an apartment bathroom. The texture is practical (gripping power in a wet shower) and beautiful.


    20. Curate a Minimalist Medicine Cabinet

    A cluttered medicine cabinet stresses your nervous system every time you open it. A curated, minimalist version—even if it holds the same items—feels intentional and calm.

    Sort your bathroom products and donate or toss anything expired, separated, or unused (1 hour). Transfer products to matching glass jars or containers ($2-$5 each, label with a label maker $10-$20). Keep only what you use weekly; store seasonal items elsewhere.

    Pro tip: Matching white or glass containers create visual unity and make your cabinet feel like a spa apothecary, not a medicine dumping ground.

    Your cabinet now looks like a design choice rather than chaos. Every morning, you’re greeted with intentionality instead of visual overwhelm.


    21. Add a Soaking Tub (Or Upgrade Your Existing Tub Ritual)

    A freestanding soaking tub is the ultimate spa centerpiece, but if that’s not realistic for your space or budget, elevating your existing tub ritual works just as well.

    Freestanding tubs cost $500-$3,000 and require plumbing access (install cost: $1,000-$3,000). For renters or renters’ budgets: soaking tub trays ($30-$60) that fit over your existing tub, bath pillows ($20-$40), and bath bombs or salts ($8-$20) create luxury without permanent changes.

    Create a ritual: Fill your tub, add Epsom salts ($8-$15), light candles, and commit to 20 minutes weekly. The act becomes meditation, not just hygiene.

    Whether you have a luxury soaking tub or a basic one, intention transforms the experience. Your nervous system registers the ritual as sacred time.


    22. Install Heated Towel Racks for Spa Luxury

    Warm towels feel like the ultimate luxury, and heated racks are more affordable than you’d think. They’re functional (drying towels, preventing mildew) and undeniably spa-like.

    Electric heated towel racks ($60-$200) mount to the wall and plug into an outlet (30 minutes installation). Hydronic heated racks ($400-$800) integrate with your heating system but are permanent and energy-efficient. For budget-conscious folks, heated towel warming bags ($20-$40) heat in the microwave and sit in your cabinet.

    Renter-friendly option: The warming bags, which move with you.

    Your post-shower ritual transforms from “cold towel shock” to “warm, cozy wrap”—a small detail that signals self-care daily.


    23. Design a Spa Color Palette Using Earth Tones

    A cohesive color palette is what separates “spa-like” from “random.” Earth tones—sage, taupe, warm gray, soft white—create visual harmony and psychological calm.

    Choose one primary wall color (soft sage, warm taupe), keep trim and larger surfaces neutral (white, light gray), and add two accent colors through accessories (warm wood, soft blue). This formula works whether you’re painting or just accessorizing.

    Paint costs $30-$45 per gallon; one gallon covers a standard bathroom. If painting isn’t an option, peel-and-stick wallpaper ($15-$35) in earth tones gives the same cohesion.

    Your bathroom suddenly looks intentional, rather than like different design decisions collided. The calm, cohesive palette is what actually makes spaces feel spa-like.


    24. Install a Frameless Glass Shower Enclosure

    Frameless glass showers are expensive but worth the investment if you own—they make bathrooms feel double the size and look undeniably upscale.

    Frameless glass enclosures cost $800-$2,500 installed (includes removal of old setup). Financially prohibitive? Semi-frameless options ($400-$800) offer similar aesthetics for less. Renters: glass adhesive-backed panels ($50-$150) create the illusion without permanent installation.

    The payoff: Your bathroom instantly feels more spacious and modern. Light flows freely, and the clean lines feel premium.

    If you’re renovating anyway, this investment justifies itself in the daily luxury feeling.


    25. Incorporate Natural Wood Elements Beyond Vanities

    Natural wood isn’t just for vanities—small wood accents throughout create warmth and cohesion. These are affordable ways to bring organic texture into a synthetic room.

    Add wooden bath caddies ($15-$40), wooden soap dispensers ($8-$20), wooden shelves ($30-$80), and wood-framed mirrors ($40-$150). Mix wood tones deliberately: light oak, medium walnut, or weathered gray—but stick with two tones max so it feels intentional rather than mismatched.

    These pieces are usually modular, so you can expand slowly as your budget allows.

    Suddenly your bathroom feels like a retreat cabin, not an apartment. That natural element humanizes the space in a way tile alone never can.


    26. Set Up Smart Storage with Drawer Dividers and Organizers

    Visible clutter kills spa vibes. Smart drawer dividers and organizers mean everything has a designated home, making your morning routine faster and your space calmer.

    Invest in expandable drawer dividers ($15-$30 per set), stackable containers ($20-$40 per set), and drawer organizer systems ($30-$50). One drawer typically takes 20 minutes to organize and transform.

    Pro tip: Label your containers ($5 for a label maker) so family members know where things go. This prevents “stuff pile” from reforming.

    Now when you open a drawer, you see organized calm instead of overwhelming chaos. Your brain registers control and ease rather than stress.


    27. Create a Daily Spa Ritual Routine (Free)

    The final piece? Making your spa bathroom part of your actual routine. A gorgeous space you don’t use isn’t a retreat—it’s just pretty.

    Commit to one 15-20 minute ritual weekly: a bath with salts, a slow shower with your new rainfall head, or a skincare routine at your vanity. Consistency matters more than perfection. Set a weekly alarm if you need it. Light your candle, put your phone in another room, and actually be present.

    The magic isn’t in spending money—it’s in using the space intentionally. Your nervous system learns that this time is sacred, and anticipation builds.

    Over two months, this ritual becomes something you crave instead of another task. Your bathroom becomes what it was meant to be: a personal retreat.


    SOFT CTA:

    Save this post and pick one idea to tackle this weekend—whether it’s swapping your lighting, adding plants, or simply lighting a candle and actually using your tub. Small changes stack up fast, and your bathroom deserves to feel like the retreat it could be.

  • 23 Simple Kitchen Cabinet Ideas That Make Small Spaces Feel Bigger

    23 Simple Kitchen Cabinet Ideas That Make Small Spaces Feel Bigger

    Small kitchens don’t have to feel cramped. With the right cabinet strategies, smart storage solutions, and clever design choices, you can make your limited space feel open, functional, and beautiful. Whether you’re renting, renovating, or just tired of kitchen clutter, these 23 ideas will help you maximize every inch. From budget-friendly hacks to game-changing upgrades, you’ll discover exactly how to refresh your cabinets and transform your cooking space into something that feels bigger, brighter, and more organized than ever before.

    1. Go Frameless for a Seamless Look

    Frameless cabinets eliminate the visual clutter that framed doors create, making your kitchen appear wider and more open. They’re also easier to clean and offer more interior storage space since there’s no frame taking up room.

    Choose frameless styles with simple, flat-front doors and minimal hardware. Brands like IKEA, Home Depot, and Wayfair offer frameless options starting around $200-$400 per cabinet or go high-end with custom frameless builds at $800-$1,500+. Installation takes one weekend with a handy friend or a professional. If you’re renting, look for stick-on door fronts that swap onto existing cabinets (around $100-$300).

    The result is a kitchen that looks intentionally minimal and surprisingly spacious, even if your actual square footage hasn’t changed.

    2. Paint Cabinets Light Colors to Expand Space

    Light cabinet colors bounce light around your kitchen, creating an illusion of openness that dark or bold colors simply can’t match. This works especially well in kitchens with limited windows.

    Use semi-gloss or satin-finish cabinet paint in whites, soft grays, or pale creams. Quality cabinet paint costs $50-$150 per gallon and covers multiple cabinets. You’ll need primer, paint, and 2-3 days for prep, painting, and drying time. Pro tip: Paint just the visible cabinet doors first to test the color before committing to everything. Renter? Use removable contact paper in light colors as a temporary alternative (under $20).

    You’ll immediately notice how much brighter and more spacious your kitchen feels, even without adding a single square foot.

    3. Install Open Shelving to Break Up Density

    Solid cabinet banks visually weigh down small spaces. Open shelving breaks up that heaviness and makes the room feel less cluttered, even if you’re storing the same amount.

    Floating shelves in wood or metal cost $40-$150 per shelf from IKEA, Home Depot, or Wayfair. Installation takes 1-2 hours with a drill and level. Mix open and closed storage—use shelves for beautiful pieces (dishes, plants, cookbooks) and keep cabinets for less attractive items (pots, pantry overflow). Pro tip: Keep shelves less than 75% full; empty space is your friend in small kitchens.

    Your kitchen now has visual breathing room, making it feel less boxed-in and more curated.

    4. Use Two-Tone Cabinets for Visual Interest Without Overwhelming

    Two-tone cabinets (different colors on uppers and lowers) add visual depth and interest without making the space feel chaotic. This trend works beautifully in compact kitchens because it creates intentional focal points.

    Paint lower cabinets a neutral tone (white, cream, or soft gray) and upper cabinets a complementary color—think pale green, dusty blue, or warm taupe. Cabinet paint runs $50-$150 per color plus primer. DIY painting takes 3-4 days with proper drying time; hire a pro for $400-$800. Start with just one color group to test before committing. Renter-friendly: Use removable peel-and-stick wallpaper or contact paper for a no-commitment trial.

    The contrast keeps your eye moving and makes the kitchen feel more intentional and designed, even in tight quarters.

    5. Choose Handleless Cabinets for Clean Lines

    Handleless cabinets eliminate visual clutter by removing hardware entirely. Your eye travels smoothly across the cabinet fronts, making the space feel more organized and spacious.

    Push-to-open cabinets use spring mechanisms or finger grooves (no handles needed). Budget options from IKEA or Amazon start around $150-$300 per cabinet; high-end handleless builds run $600-$1,200+. Installation is straightforward if replacing existing doors (1-2 hours). Pro tip: Make sure you test the push mechanism—some are sensitive, others require firm pressure. If handleless feels too risky for your style, minimalist bar handles (thin, recessed profiles) offer similar clean aesthetics.

    You’ll appreciate how much sleeker your kitchen looks without visual hardware clutter competing for attention.

    6. Add LED Under-Cabinet Lighting for Practical Brightness

    Small kitchens often lack adequate task lighting, making them feel darker and smaller. Under-cabinet LED strips add brightness to work surfaces while creating an ambiance that makes the space feel intentional.

    Adhesive LED strip kits cost $30-$80 from Home Depot, Lowes, or Amazon and install in 15-20 minutes—just peel, stick, and plug in. Choose warm white (2700K) for cozy vibes or daylight white (5000K) for maximum brightness. Hardwired options run $100-$200 and require an electrician but look more polished. Pro tip: Dimmable LEDs add flexibility for different moods.

    Your kitchen instantly becomes brighter and more functional, while cooking prep becomes significantly easier on your eyes.

    7. Maximize Vertical Space with Tall Cabinets

    Most small kitchens waste vertical space. Tall cabinets that reach the ceiling draw the eye upward, making ceilings feel higher and spaces feel taller.

    Invest in or DIY a tall pantry cabinet (24″-36″ wide, floor-to-ceiling) for $300-$800 depending on material and customization. IKEA’s PAX system ($400-$600) works beautifully for renters. Installation takes 2-4 hours and is easier than it looks. Reserve top shelves for seasonal items or décor; keep everyday items at eye level. Renter tip: Leaning tall cabinets against walls (secured to studs) offer similar benefits without permanent installation.

    Suddenly your kitchen has storage you forgot existed, and your ceiling appears dramatically higher.

    8. Install Adjustable Shelving for Flexible Storage

    Fixed shelves waste space when your items vary in size. Adjustable shelving lets you customize spacing to fit what you actually own.

    Adjustable shelf kits cost $40-$100 per cabinet from Home Depot or Lowes and install in 30-45 minutes. Measure your cabinet interior carefully before ordering. Metal adjustable shelves hold more weight than plastic and look more intentional. Start with fewer, wider shelves to make the space feel less compartmentalized. Pro tip: Leave at least one completely empty shelf to avoid visual overload.

    You’ll fit significantly more in the same cabinet space, and everything stays accessible because it’s customized to your actual needs.

    9. Use Glass-Front Doors to Display and Expand

    Glass-front cabinets create visual transparency, making even packed spaces feel less dense. Your eye travels through to the back wall, expanding the sense of depth.

    Replace cabinet doors with glass-front versions ($150-$400 per door from Home Depot, Wayfair, or custom shops) or use stick-on frosted glass film for renters ($20-$50 per sheet). Installation takes 1-2 hours for door swaps or 30 minutes for film. Only display your prettiest items—use solid doors for clutter. Frosted or seeded glass creates visual interest while hiding less attractive contents. Pro tip: Back your glass cabinets with wallpaper or light-colored paint for added depth.

    Your small kitchen suddenly feels more open because light passes through instead of stopping at solid doors.

    10. Go Modular and RTA for Budget Flexibility

    Ready-to-assemble (RTA) cabinets cost 30-50% less than stock or custom options, and they’re often better quality than people expect. You can upgrade gradually as budget allows.

    RTA brands like IKEA, Amazon Basics, and Overstock offer complete kitchen setups starting around $1,500-$3,000 for a full kitchen. Individual cabinets run $80-$300 depending on size and finish. Assembly takes one weekend with basic tools and patience. Start with your most-used cabinets and expand over time. Pro tip: Many stores offer assembly services for $50-$150 per cabinet if DIY feels overwhelming.

    You get designer-quality cabinets at a fraction of the cost, and the satisfaction of building them yourself is a bonus.

    11. Paint Inside Cabinet Walls Light Colors

    Most cabinet interiors are dark or unfinished. Painting them light colors bounces light into the cabinet and makes contents more visible.

    Use semi-gloss cabinet paint or peel-and-stick wallpaper in white or pale colors. Budget paint runs $15-$30 per quart; stick-on wallpaper costs $20-$50 per roll. Prep takes 30 minutes per cabinet, paint dries overnight. This subtle move has an outsized impact on how spacious interiors feel. Renter? Wallpaper is your best bet since it’s completely removable.

    Opening your cabinets now reveals bright, organized interiors that make the space feel more curated and intentional.

    12. Remove a Few Cabinet Doors for Open Display

    You don’t have to commit to all-open shelving—removing just one or two cabinet doors creates visual openness while keeping the rest of your storage hidden.

    This costs nothing if you already have the cabinets. Simply unscrew hinges and set doors aside (keep them in case you change your mind). Takes 15 minutes per door. Display only items you love and use daily. Pro tip: Paint the inside back wall a contrasting or complementary color to add intentional depth.

    Your kitchen instantly looks less fortress-like, and you’ve created a styling opportunity without renovating.

    13. Install a Corner Carousel or Lazy Susan Cabinet

    Corner cabinets are notoriously hard to access and often become black holes. A rotating carousel system makes corner storage actually usable.

    Lazy Susan cabinet inserts cost $80-$200 and install in 30-45 minutes with a drill. IKEA and Home Depot carry affordable options. This is transformative for corner dead space—suddenly everything is accessible without reaching to the back. Pro tip: Use tiered carousels for maximum storage in narrow corners.

    You’ll reclaim storage real estate you’ve been wasting, and your kitchen feels better organized overnight.

    14. Use Shallow Wall Cabinets Above Narrow Counters

    Deep wall cabinets can feel heavy and oppressive in small spaces. Shallow cabinets (8-10 inches) provide storage without visual bulk.

    Shallow wall cabinets cost $150-$400 from IKEA, Home Depot, or custom builders. Mounting takes 1-2 hours. These work beautifully above narrow counters or in tight corners where standard-depth cabinets would jut into your workspace. Pair with open shelving for variety. Pro tip: Keep contents minimal—empty space is more valuable than extra storage in small kitchens.

    Your walls gain storage without closing off the space, and the kitchen maintains an open, breathing aesthetic.

    15. Paint Walls Around Cabinets in Contrasting Colors

    Instead of white-on-white, paint walls a subtle, complementary color. This makes your cabinets the focal point while creating depth through color layering.

    Interior paint costs $30-$60 per gallon; two coats take one day with a roller. Choose soft, muted tones (sage, dusty blue, warm gray) rather than bold colors in a small space. Pair light cabinets with slightly deeper walls, or vice versa. Renter? Removable wallpaper in soft tones works beautifully ($20-$50 per roll).

    Your small kitchen suddenly feels designed rather than generic, and the color contrast adds intentional depth.

    16. Add Drawer Dividers for Visible Organization

    Messy drawers make cabinets feel chaotic and smaller. Dividers create order, which mentally expands your perceived space.

    Drawer divider kits cost $15-$40 from Target, Container Store, or Amazon and install in 10-15 minutes—just drop them in or use adhesive pads. Customize compartment sizes to match what you store. This is the cheapest way to transform cabinet interiors. Pro tip: Use this as motivation to declutter—if something doesn’t fit your new organized system, it can probably go.

    Opening your drawers reveals pleasing organization, which makes your entire kitchen feel more controlled and spacious.

    17. Go Minimalist with Natural Wood Finishes

    Solid natural wood creates visual warmth and feels less clinical than painted cabinets, making small spaces feel cozier rather than cramped. The grain adds visual interest without clutter.

    Solid wood semi-custom cabinets from brands like Kraftmaid or Wellborn run $200-$500 per cabinet. Full custom wood kitchens range $500-$1,500+ per cabinet. RTA wood options are available around $100-$300 per cabinet. Keep hardware simple (minimal or recessed knobs) to avoid visual clutter. Pro tip: Lightly sand and restain existing wood cabinets for $200-$400 in materials.

    Your kitchen feels warmer and more intentionally designed, with organic materials that age beautifully rather than looking dated.

    18. Install Sliding Barn Doors Instead of Swing Doors

    Swing-out cabinet doors take up floor space. Sliding doors open horizontally, saving precious clearance in tight kitchens while adding farmhouse or modern aesthetic.

    Sliding door hardware kits cost $80-$200 per door set from Amazon, Etsy, or Home Depot. Converting existing doors takes 2-3 hours with basic tools. This works beautifully for one or two statement cabinets (not every cabinet). Go natural wood or matte black for timeless style. Pro tip: Hang a small sign or label on the door to add personality.

    Your kitchen gains floor space and a design feature that people actually notice and comment on.

    19. Use Vertical Dividers in Base Cabinets

    Baking sheets and cutting boards stacked flat waste space and become hard to access. Vertical dividers let you stand items up, maximizing storage and making everything grabbable.

    DIY vertical dividers from wood strips cost $20-$40 in materials and take 45 minutes to cut and install. Pre-made kits run $30-$70 from Amazon or Container Store. Measure your cabinet depth precisely before installing. This simple hack transforms useless horizontal space into highly functional vertical storage. Pro tip: Label dividers so everyone knows what goes where.

    You’ll fit three times as many items in the same space, and everything stays accessible instead of buried.

    20. Choose Warm, Muted Cabinet Colors Over Stark White

    Pure white cabinets can feel cold and clinical in small spaces. Warm neutrals like cream, soft taupe, or greige create a cohesive, inviting environment that feels more spacious.

    Cabinet paint in warm tones costs the same as white ($50-$150 per gallon). If you’re buying new cabinets, brands offer warm neutral finishes as standard options. DIY painting takes 3-4 days with drying time. The warmth makes the space feel intentional rather than institutional. Pro tip: Match cabinet color to your countertop undertones for maximum cohesion.

    Your kitchen feels warmer and more inviting, which paradoxically makes tight spaces feel more comfortable and spacious.

    21. Install Inside-Cabinet Lighting for Hidden Storage

    Most cabinet interiors are dark black holes where items disappear. Interior lighting makes everything visible and accessible, plus it’s safer when reaching into dark spaces.

    Stick-on battery LED pucks cost $15-$40 for a set of 3-4 from Amazon or Target; hardwired strips run $80-$150 installed by a pro. Battery pucks install in 5 minutes with just an adhesive strip. Choose warm white for ambiance. Even if you rarely use this feature, it makes the interior feel intentional and designed. Renter? Battery pucks are completely portable.

    You’ll use your cabinets more efficiently because you can actually see what’s inside, and searching for items becomes effortless.

    22. Mix Cabinet Finishes for Intentional Variety

    Matching cabinet finish throughout can feel monotonous in small spaces. Mixing finishes (matte and gloss, two paint colors, wood and white) creates visual interest while maintaining cohesion.

    Paint or order multi-finish cabinetry—budget an extra $50-$150 if mixing finishes on the same order. The mix should follow a pattern (uppers one color, lowers another; or solid cabinets with open shelving variety). Avoid more than three finishes or it feels chaotic. Pro tip: Use a color wheel or Pinterest board to ensure finishes feel intentional.

    Your kitchen looks more curated and designed, like someone thought through every detail rather than grabbing whatever was available.

    23. Create a Floating Pantry Cabinet for Extra Storage

    Small kitchens often lack dedicated pantry space. A single tall floating cabinet tucked in a corner or beside the fridge adds serious storage without eating floor space.

    Floating pantry cabinets cost $200-$600 from IKEA, Wayfair, or custom builders. Professional installation runs $100-$300. A 24-36″ wide cabinet holds remarkable amounts of dry goods, oils, and small appliances. Mount to wall studs carefully—pantry cabinets are heavy when full. Renter? Tall freestanding cabinets ($300-$500) slide into tight spaces and don’t require wall mounting.

    You’ve essentially added a pantry without renovating, gaining storage that makes your daily cooking infinitely easier.


    Save this for your next kitchen refresh and try at least one idea this month. Small spaces deserve thoughtful design, and these cabinet upgrades prove that big impact doesn’t require big renovations—just smart choices. Share this with anyone tackling a compact kitchen project. Which idea are you trying first?

  • 26 Stylish Curtain Ideas Trending in Modern Homes

    26 Stylish Curtain Ideas Trending in Modern Homes

    Your curtains deserve to be more than functional—they’re the largest canvas in your room, and the right choice can completely change how your space looks and feels. Whether you’re drawn to calming earthy tones, making a bold statement with jewel-toned velvet, or solving the eternal light-and-privacy puzzle, 2025’s curtain trends offer something for every style and budget. We’ve gathered 26 achievable ideas that work for renters and homeowners alike, from quick styling fixes to investment pieces that’ll last years. Some are free tweaks you can do today, others are weekend projects, and a few are worth splurging on. By the end of this guide, you’ll know exactly which curtain approach matches your space—and your lifestyle.

    1. Layer Sheer and Blackout for Perfect Light Control

    Layering gives you the best of both worlds: soft diffused light during the day and total darkness at night. This classic combo solves the frustration of choosing between privacy and natural light—you don’t have to pick just one anymore.

    Install a blackout curtain rod behind your existing curtain rod (or use a tension rod for renters). Pair lightweight linen or cotton sheers ($15–$40 from IKEA or Target) with blackout panels ($30–$80 from Wayfair or Amazon). Takes about 30 minutes to hang. The sheer layer filters harsh sunlight beautifully, while the blackout panel hides behind it until evening when you need it.

    Pro tip: Match your sheer to your wall color for a seamless, cohesive look. Keep the blackout layer in a complementary neutral.

    You get complete control over your environment without the bulky, all-or-nothing feeling of single curtains. Your mornings feel brighter, your nights darker, and your room works harder for you.

    2. Go Floor-to-Ceiling for Instant Height

    Hanging curtains all the way to the floor (or even pooling slightly) creates an optical illusion that tricks your eye into seeing higher ceilings. This is one of the fastest, most impactful upgrades you can make—and renters can do it too.

    Mount your curtain rod 3–6 inches below the ceiling rather than at the typical window frame height. Measure from ceiling to just above the baseboards (add 2 inches for pooling). Custom lengths run $50–$150, but ready-made 108-inch panels ($20–$50) work fine if your ceilings are standard 8–9 feet. Hanging takes 20 minutes and zero damage if you use damage-free hooks.

    Pro tip: Light or white curtains amplify this effect more than dark colors.

    Your room immediately looks more spacious and intentional. That small bedroom or cramped living room suddenly feels airier, and the whole vibe shifts from “utilitarian” to “designed.”

    3. Embrace Earthy Olive Green for a Grounded Vibe

    Earthy tones like olive green are everywhere in 2025 because they create calm without feeling boring. This shade works in bedrooms, living rooms, and even kitchens—it’s just neutral enough to live with long-term.

    Look for olive green linen or linen-blend curtains ($40–$120 from brands like Etsy small shops, Wayfair, or H&M Home). If you already have white or cream curtains, a fabric dye project ($8 for dye, 1–2 hours) gives you custom color for nearly free. For renters, try removable curtain panels from Amazon ($25–$60).

    Pro tip: Pair olive with warm whites, warm grays, or terracotta accents for a cohesive earthy palette.

    The room takes on a naturally soothing quality that makes you want to spend more time there. You get that expensive, curated interior design feel without overthinking it.

    4. Add Texture with Velvet in Deep Jewel Tones

    Velvet curtains are having a major moment in luxury homes—they photograph beautifully and feel incredibly high-end. Deep jewel tones like emerald, sapphire, and ruby work in formal spaces where they’ll really shine.

    Velvet panels typically run $60–$150 per panel from brands like Anthropologie, West Elm, or Etsy. A single velvet panel layered over a sheer works if budget is tight. Installation is basic (velvet isn’t heavier than regular curtains), and dry cleaning costs $15–$30 per pair annually. Consider this an investment piece—quality velvet lasts 7–10 years.

    Pro tip: Lighter walls and metallic accents (brass rods, gold mirrors) make velvet feel intentional rather than heavy.

    You instantly elevate the formality and luxury of your room. Guests notice, and you notice every time you draw them—there’s something genuinely special about that tactile, rich texture.

    5. Try Monochromatic Color Drenching for Immersion

    Color drenching—matching your curtains to your walls in the same shade—sounds risky but creates a cohesive, high-design look that feels intentional. Your room becomes a sanctuary in one color family.

    Choose your wall color first, then find curtains in the exact same shade or one shade lighter ($30–$100 depending on fabric). Brands like Sherwin-Williams and Benjamin Moore offer paint-matching services; use those paint chips to find fabric matches at fabric stores or Etsy. Requires no special hanging technique—just standard installation.

    Pro tip: Add texture contrast with pillows, throws, or artwork in complementary colors so the room doesn’t feel flat.

    The result is a deeply cohesive, meditative space that feels more expensive than it probably was. Your eye rests, your mind settles, and the room feels like a sanctuary rather than a collection of mismatched pieces.

    6. Mix Bold Patterns Without Clashing

    Bold patterned curtains can overwhelm a room or become a showstopper—it’s all about what you pair them with. The key is anchoring them with neutrals and scale.

    Choose one large-scale pattern (florals, paisleys, retro prints) from retailers like Anthropologie, Etsy, or even Target ($25–$80). Keep walls, sofas, and other major pieces neutral or solid—cream, gray, white, or soft beige. Limit additional patterns to small accents (pillows, artwork) that pull colors from your curtains. Hanging takes standard time; no special considerations.

    Pro tip: If you’re nervous, buy one panel first and see how it feels in your space for a few weeks.

    Your curtains become artwork rather than background, and your room gains personality instantly. You’re not just decorating—you’re expressing something about your taste without the space feeling chaotic.

    7. Install Smart Motorized Curtains for Luxury Living

    Smart curtains are moving from luxury hotels into homes—they’re quieter and easier to install than they used to be. If you’re building a smart home, this is the upgrade that actually improves daily life.

    Budget around $200–$600 for a motorized rod system (brands like Eve, SOMA, or Lutron), plus standard curtain panels ($40–$100). Installation requires basic electrical work or professional help ($200–$400), so factor that in. Voice control through Alexa or Google Home means you open and close them hands-free. Requires WiFi connection and monthly app access.

    Pro tip: Motorized systems work best with heavier fabrics that won’t get tangled.

    You wake up to curtains opening automatically, adjusting light throughout the day without you thinking about it. It’s one of those features that sounds silly until you have it, then you can’t imagine living without it.

    8. Layer Neutrals with Two-Toned Curtain Panels

    Two-toned panels give you the visual interest of a bold choice with the safety of neutrals. This approach works for anyone hesitant about committing to strong color.

    Look for split-color or colorblocked curtains on Etsy or Wayfair ($40–$90 per panel), or create the effect by hanging two different neutral panels side by side. Pair a cream outer panel with a taupe or warm gray center, or reverse it. Installation is standard; this works as well as any other panel.

    Pro tip: Choose colors that sit next to each other on the color wheel (like cream and warm gray) rather than high-contrast opposites.

    You get design sophistication with zero risk. The curtains feel like a deliberate choice rather than “I couldn’t decide,” and the layered visual effect makes your window feel more intentional and styled.

    9. Use Sheer Curtains for Minimalist Breathing Room

    Sheer curtains alone create that minimalist, breathable aesthetic—perfect if you want softness without heaviness. This works especially well in small spaces where blackout curtains would feel oppressive.

    Choose 100% linen or linen-blend sheers ($20–$60 from IKEA, Etsy, or Target). These filter light beautifully without looking plastic-y like polyester sheers. You’ll still have soft privacy during the day; nighttime privacy requires strategic room placement or a roller shade underneath. Hanging takes 15 minutes.

    Pro tip: Layer a simple roller shade underneath for nighttime privacy without adding visual bulk.

    Your space feels open, calm, and intentionally minimal. Morning light feels softer and more pleasant, and the room breathes in a way heavy curtains can’t match. You’re not sacrificing privacy—just rethinking how you achieve it.

    10. Create Drama with Full-Length Linen Panels

    Linen’s casual drape and texture reads as expensive and thoughtful. Full-length panels that pool slightly on the floor amplify this effect—it’s like the curtains are part of your furniture collection.

    Buy linen or linen-blend panels specifically marketed as full-length ($40–$120 from Etsy, West Elm, or Wayfair). Hanging them only 2–3 inches below the ceiling maximizes the height illusion. Natural linen wrinkles are part of the charm—don’t iron them smooth. Installation takes 20 minutes.

    Pro tip: Cream and warm white linen works in almost any design style and never feels dated.

    You get that effortless, “I’ve always had this” feeling. The room looks styled without looking fussy, and the natural texture adds warmth that flat fabrics can’t achieve.

    11. Refresh with Pastel Blues and Greens for Calm

    Soft pastels are having a comeback—they’re calming without being boring, and they work across almost any design aesthetic. Pale blue and sage green are the top choices right now.

    Hunt for pastel linen or cotton at IKEA ($20–$40), Target ($25–$50), or Wayfair ($30–$70). These softer shades work beautifully in bedrooms and nurseries. Pair with white or cream walls and accessories for maximum calm. Standard hanging; takes 20 minutes.

    Pro tip: Avoid trendy millennial pink and lean into classic powder blue or sage green for something that’ll feel fresh for years.

    Your bedroom becomes a retreat instead of just a room where you sleep. You notice the difference in how quickly you relax there—soft color does more work than you’d expect.

    12. Make a Statement with Ruby Red or Sapphire Blue Velvet

    Jewel-toned velvet reads as bold, intentional, and genuinely luxurious. This works if you’re ready to commit to drama and want your window to be the room’s focal point.

    Jewel-toned velvet curtains range from $80–$200 per panel depending on quality (brands like Anthropologie, West Elm, or Etsy). These aren’t subtle—pair them with neutral everything else (walls, furniture, large pieces). Avoid busy patterns that compete. Professional dry cleaning is recommended; budget $20–$30 annually.

    Pro tip: Deep jewel tones work best in rooms with good natural light—otherwise they feel cave-like.

    Your room shifts from “nice” to “designed”—there’s a confidence that comes with committing to bold color. You’re not apologizing for your taste; you’re celebrating it.

    13. Layer Austrian Blinds for Romantic Ornate Details

    Austrian blinds and swags feel nostalgic in the best way—ornate and romantic without being overdone if you choose quality pieces. This approach works in traditional, eclectic, or maximalist spaces.

    Austrian blind kits or custom orders run $80–$250 per window depending on fabric and detail level (available from Etsy, specialty curtain shops, or custom upholsterers). Installation requires a steady hand and patience—30–45 minutes—or professional help ($100–$150). These need gentle cleaning; factor in occasional professional care.

    Pro tip: Pair with solid walls and minimal other window dressing so the ornate details shine.

    You get vintage charm that feels intentional, not accidental. The romantic details give your room character and make you smile every time you look at them—that’s what good design does.

    14. Mix Modern and Traditional with Pleated Headers and Minimalist Tiebacks

    Blending old-school details (pleats, structured headers) with minimalist elements (simple tiebacks, clean rods) creates a sophisticated, balanced look that feels current without being trendy.

    Start with high-quality curtains featuring pencil or pinch pleats ($50–$120 from Etsy, John Lewis, or Wayfair). Add minimalist tiebacks in simple brass, black metal, or fabric ($10–$30 from Target or Amazon). Pair with a sleek rod in matte black or brushed brass. Installation takes 30 minutes.

    Pro tip: Keep the color palette neutral (creams, soft grays, whites) so the hybrid styling stands out rather than competing with bold color.

    You get the tailored sophistication of traditional design with the clean, modern feel of today’s aesthetics. It’s refined without looking stuffy or dated.

    15. Brighten Small Spaces with White Curtains and Reflective Styling

    White curtains aren’t boring—they’re secretly the best tool for making tight spaces feel open and airy. Pair them with reflective elements and they work double-duty.

    Choose white linen, cotton, or linen-blend ($15–$50 from IKEA, Target, or Wayfair). Keep walls white or cream. Add a metallic mirror ($25–$80) on an adjacent wall to reflect light around the room. Hang curtains high and full-length to maximize height. Installation takes 20 minutes.

    Pro tip: White curtains show dust—keep a lint roller nearby for quick maintenance.

    Your tiny space suddenly feels three times larger. Light bounces around differently, the walls appear higher, and you get the open-concept feeling without the financial investment of renovating.

    16. Use Retro Patterns and Trims for 2025 Nostalgia

    Retro patterns (geometric, florals, plaids) are cool again, especially when paired with period-appropriate trim and accessories. This works if you love a bit of personality and aren’t afraid of pattern.

    Hunt for retro-inspired curtains on Etsy ($40–$100) or vintage shops, or find reproduction patterns from brands like Spoonflower ($20 for fabric, plus sewing costs if you DIY panels). Add coordinating trim ($5–$15 per yard from fabric stores) to the bottom or sides for extra visual interest. Sewing trim takes 1–2 hours if you’re handy; otherwise hire someone ($50–$100).

    Pro tip: Let the retro pattern be your statement—keep everything else relatively neutral so it doesn’t feel chaotic.

    Your room tells a story. It’s not following every 2025 trend mindlessly; it’s celebrating a specific era and style that matters to you. That authenticity is always in style.

    17. Install Recycled or Sustainable Linen for Eco-Conscious Decorating

    Sustainable materials matter—they look beautiful, perform well, and align with your values. Recycled or certified sustainable linen is increasingly available and affordable.

    Look for certified organic or recycled linen curtains from eco-brands like Parachute, Etsy sellers, or sustainable retailers ($50–$150). Check for GOTS (Global Organic Textile Standard) or similar certifications. The fabric quality and drape is identical to conventional linen, but you know the production was ethical. Installation is standard.

    Pro tip: Sustainable doesn’t mean sacrificing aesthetics—these fabrics are genuinely beautiful.

    You decorate your home while supporting practices that matter to you. It feels good knowing where your curtains came from, and that confidence shows in how you style your space.

    18. Layer Textured Blackout with Lightweight Linen for Seasonal Flexibility

    Textured blackout fabrics (often woven linen-look blends) are softer and more forgiving than plasticky polyester. Layering them with lightweight linen gives you flexibility to adjust your room’s vibe seasonally.

    Buy heavyweight textured linen-blend blackout ($40–$80) paired with lightweight sheer linen ($20–$40) from Wayfair, Target, or Etsy. Install on two rods (inner and outer). In summer, use mostly sheer for airiness. In winter, close the blackout for warmth and darkness. Takes 30 minutes to hang both layers.

    Pro tip: Choose textures that coordinate—solid linen pairs beautifully with woven textures.

    You get a system that adapts to your needs rather than one static solution. Your room feels fresh when you adjust the layers, and the texture adds visual interest year-round.

    19. Add Embroidered Details for Handmade Character

    Hand-embroidered or embellished curtains turn your window into art. This works if you love handmade details and are willing to pay slightly more for uniqueness.

    Find embroidered curtains on Etsy from artisan sellers ($60–$180 depending on detail level), or commission custom embroidery ($150–$400 total project cost). Alternatively, add embroidery trim yourself ($15–$30) using a sewing machine if you’re comfortable with basic sewing, or hire a seamstress ($30–$75 per panel).

    Pro tip: Keep the base curtain simple and neutral so the embroidery is the star.

    Your window becomes a conversation piece. The handmade quality is obvious, and guests notice the care you’ve put into your space. It’s the kind of detail that makes a room feel genuinely personalized.

    20. Use Bold Geometric Prints as Living Room Focal Points

    Geometric patterns are timeless and read as intentional rather than trendy. One pair of bold geometric curtains can anchor an entire room’s design.

    Source geometric-patterned curtains from Wayfair ($40–$100), Etsy ($50–$120), or even IKEA ($30–$60). Choose a bold, confident scale—small patterns get lost. Keep surrounding colors minimal: walls, sofa, and other major pieces should be solid neutrals. Installation is basic; takes 20 minutes.

    Pro tip: The larger your geometric scale, the bolder the statement. Test it first if you’re nervous.

    Your room gains sophistication through pattern rather than color. The geometric print becomes an artwork that you enjoy looking at daily, and it makes the space feel cohesive and designed.

    21. Install Thermal Lining for Winter Insulation and Year-Round Efficiency

    Thermal linings aren’t visible but work hard—they insulate, reduce outside noise, and cut heating costs. This is a practical upgrade that’s also environmentally responsible.

    Add thermal lining to existing curtains via a tailor or sewing professional ($50–$100 per panel), or buy pre-lined thermal curtains ($60–$150 from Wayfair, Amazon, or specialty curtain shops). Linings add minimal bulk but reduce heat loss by 30–40%. Installation is standard; no extra steps needed.

    Pro tip: Thermal linings work best with heavier fabrics like linen or cotton—lightweight sheers won’t benefit much.

    You notice lower heating bills and a quieter room. The curtains block street noise and maintain indoor temperature, which is practical magic you feel every day.

    22. Try Asymmetrical or One-Sided Curtain Arrangements

    Asymmetrical curtain styling feels intentional and modern—it breaks the “match everything” rule in a good way. This works in modern, eclectic, or minimalist spaces.

    Use one full-length panel instead of matching pairs ($20–$60). Hang it on one side or let it puddle in one corner. Works best on windows where you don’t need both sides covered, like kitchen windows or accent windows in hallways. Takes 15 minutes to hang.

    Pro tip: Pair with a wall-mounted rod so there’s visual interest above the window even when the curtain’s open.

    Your window feels like a deliberate design choice, not a default setup. The asymmetry is subtle enough to feel modern but bold enough that it’s clearly intentional—that confidence reads as good design.

    23. Layer Gauze for Soft Diffusion Without Blocking Light

    Gauze layers create that dreamy, soft-focus quality while maintaining transparency. This works if you want all the visual interest of layering without blocking natural light.

    Buy lightweight gauze panels ($15–$30 each from Target, IKEA, or Etsy) and hang 2–3 layers on the same rod or separate tension rods. Gauze is inexpensive enough to experiment. Installation takes 20 minutes for multiple layers. These don’t need special washing—throw them in the delicate cycle when dusty.

    Pro tip: Varying the spacing between layers creates more visual depth than bunching them together.

    The soft, ethereal quality instantly creates a peaceful mood. Your room feels like it’s slightly out of focus in the best way—calm, dreamy, and genuinely relaxing.

    24. Add Statement Tassels or Tie-Back Trims for Vintage Glamour

    Statement tassels and trims elevate basic curtains into something special. This works as a finishing touch that costs little but makes a big visual impact.

    Source coordinating tassels and trim from fabric stores ($5–$20 per yard for trim, $10–$30 for statement tassels) or Etsy. Sew or glue them to basic curtains following simple tutorials (DIY, 1–2 hours) or hire a seamstress ($30–$75). The customization feels expensive but costs far less than replacing the curtains.

    Pro tip: Gold and silver tassels work with almost everything; jewel tones are riskier but stunning with the right palette.

    Your basic curtains suddenly feel custom and high-end. The trims catch light and add visual interest that transforms “adequate” into “designed.” It’s one of those small touches that makes people ask where you bought the curtains.

    25. Use Sheer Overlay Patterns to Create Custom Designs

    Sheer patterned overlays (especially embroidered or damask designs) let you customize basic curtains without commitment. This is a renter-friendly way to add intricate visual interest.

    Layer a sheer patterned panel ($25–$60 from Etsy or specialty curtain shops) over your basic curtains. Attach with clips, tension rods, or magnetic strips—zero permanent installation. The overlay creates depth and visual texture without hiding your base layer. Takes 15 minutes to install.

    Pro tip: Keep your base curtains neutral so the overlay pattern reads clearly.

    Your window gains sophisticated detail and visual interest without the commitment of replacing curtains. It’s an affordable way to experiment with ornate designs before you invest in patterned curtains.

    26. Install Café-Style Curtains for Vintage Farmhouse Charm

    Café curtains (covering only the bottom half of the window) are vintage-charming and practical for kitchens and bathrooms where you need privacy below but light above. This style is having a major comeback.

    Look for café curtain kits or sets ($20–$60 from Target, Etsy, or IKEA), or make your own by hemming standard fabric to half-window height. Mount a simple rod halfway up the window frame. Takes 20 minutes. These are perfect for kitchens where you want to see out while maintaining privacy from street level.

    Pro tip: Pair with simple brass or black metal rods and basic tiebacks for authentic farmhouse vibes.

    Your kitchen or bathroom gains instant vintage charm without sacrificing light or views. The style feels intentional and cozy—it’s that farmhouse aesthetic that never actually goes out of style.


    SOFT CTA:

    Save this post for your next window refresh, and pick just one idea to try this month—whether it’s adding a thermal lining, testing a bold color, or layering your first sheer-and-blackout combo. Small curtain changes create surprisingly big room transformations.

  • 23 Outdoor Entryway Styling Ideas That Elevate Curb Appeal

    23 Outdoor Entryway Styling Ideas That Elevate Curb Appeal

    Your front entrance is the first thing people notice about your home—and the good news? You don’t need a major renovation to make it stunning. Whether you’re renting or own, working with a tight budget or ready to invest, these 23 ideas will help you create an entryway that makes guests want to stay and keeps you genuinely excited to come home. We’re mixing quick fixes with statement pieces, all designed to boost curb appeal and set the tone for everything beyond that door. Let’s dive in.

    1. Paint Your Front Door a Bold, Unexpected Color

    A fresh front door color is the fastest way to completely refresh your entryway’s personality. This single change costs under $100 and takes one afternoon, yet feels like a professional upgrade. Choose from trending 2025 shades like deep olive, charcoal gray, or burgundy—these earth tones and moody hues pair beautifully with brick, wood, or neutral siding.

    Pick a quality exterior paint in satin or semi-gloss finish (Benjamin Moore, Sherwin-Williams, or Behr all have excellent options). Prep the door by cleaning and lightly sanding, then apply two coats. Budget: $40–$80 for paint and supplies. Time: 4–6 hours including drying. If you’re renting, check with your landlord first—many allow it if you agree to repaint when you leave.

    The result? Your entire home feels more intentional and cohesive. Suddenly, that dated landscaping and weathered stoop don’t matter as much because your eye goes straight to that gorgeous door.

    2. Add Symmetrical Matching Planters

    Symmetry signals polish, and two matching planters on either side of your door instantly elevate the entire entrance. This works for renters (planters stay with you) and costs $50–$150 depending on size and material. Choose neutral tones like concrete gray, terracotta, or cream—these complement any door color and 2025’s earthy palette.

    Fill with seasonal plants: evergreens for year-round structure, ornamental grasses for movement, or flowering perennials for color. Budget: $80–$150 for two quality planters plus soil and plants. Time: 30 minutes to arrange. Plant nurseries often have sales in spring and fall. This is a renter-friendly hack that makes any temporary space feel intentional and finished.

    Your entryway goes from bare to curated in one afternoon. Guests notice the symmetry and care immediately, and you get the daily pleasure of stepping past something beautiful.

    3. Refresh House Numbers with Modern Hardware

    Old, dusty house numbers are an easy detail to overlook—until you replace them and wonder why you waited so long. Modern house numbers in brushed gold, matte black, or stainless steel cost $30–$80 and take 10 minutes to install. This 2025 trend emphasizes clean lines and mixed metals, so choose a style that echoes your door hardware.

    Remove old numbers, fill any holes, lightly sand the area, and mount new ones with the included hardware. Budget: $30–$80 depending on material and size. Time: 15 minutes. Etsy, Wayfair, and Amazon all have excellent options in various styles—from minimalist geometric to vintage-inspired numbers. This is perfect for renters using damage-free adhesive strips.

    This small change makes your home look well-maintained and intentional. It’s the kind of detail that separates “nice” from “wow, they really care about this place.”

    4. Layer Lighting with Wall Sconces and Uplighting

    Lighting transforms your entryway from day to night and signals that someone thoughtful lives here. Add matching sconces on either side of your door ($60–$200 per pair) and consider uplighting for landscaping ($40–$150 per fixture). This creates depth, safety, and genuine ambiance.

    Choose fixtures that complement your door hardware—if your numbers are matte black, go with matte black sconces. Install sconces at eye level (roughly 60–66 inches from the ground) on both sides of the door. For landscaping, place small solar uplighters to highlight trees or architectural features. Budget: $100–$300 for all lighting. Time: 2–3 hours if wiring; instant if solar. Many sconces work with existing outlet boxes, so check before buying.

    Once the sun sets, your entryway becomes a destination. You’ll love coming home to a lit, welcoming entrance, and visitors will feel the care you’ve invested.

    5. Install a Statement Door Knocker or Handle

    A great door knocker or handle is functional art that says something about your style. Modern options in brass, matte black, or mixed metals cost $30–$100 and take 10 minutes to install. This works especially well if your door is a solid color without visual interest.

    Replace your existing hardware (or add a knocker if you only have a handle) by unscrewing old pieces and installing the new one with provided hardware. Budget: $30–$100 depending on design and material. Time: 10 minutes. Look for vintage-inspired designs on Etsy or modern minimalist styles on Wayfair and West Elm for on-trend options.

    Your entryway gains personality and character. Every time you unlock that door, you interact with something genuinely beautiful—and your guests will definitely notice.

    6. Create a Welcoming Stoop with a Quality Door Mat

    A well-placed door mat grounds your entryway and signals organization. Choose one in natural materials like jute, wool, or cotton in neutral colors ($25–$60) that complements your 2025 earth-tone palette. A 2′ x 3′ size works for most residential doors.

    Position the mat directly centered in front of the door on the stoop. If you’re renting, this is completely portable and adds instant polish. Budget: $25–$60 for a quality mat. Time: instant—just unroll and position. Etsy, Target, and Home Depot all carry stylish options. Look for patterns that hint at biophilic design (leaf motifs, natural textures) for added personality.

    Your entryway immediately feels more intentional and finished. The mat also has a practical benefit: guests know exactly where to wipe their feet.

    7. Mix Materials: Add Wood Accents to Brick or Stone

    Mixing materials—specifically adding warm wood to brick or stone—is one of 2025’s biggest trends and instantly adds depth and richness. Build or buy a wooden planter box, add wooden trim around the door frame, or install a wooden railing. This costs $50–$300 depending on whether you DIY or buy ready-made.

    If building, use cedar or composite wood (weather-resistant) and stain in warm oak or walnut tones. Budget: $50–$150 for materials if DIY; $200–$400 if ordering online. Time: 2–4 hours for installation. If you’re renting, portable wooden planters achieve the same mixed-material effect without permanent changes.

    The combination of wood warmth and brick or stone creates visual interest and feels intentionally designed. Your entryway stops looking flat and gains architectural character.

    8. Add a Living Wall or Vertical Garden

    A vertical garden or living wall brings biophilic design (nature’s calming effect) right to your entryway. This 2025 trend costs $80–$250 for a ready-made system and creates instant visual impact. Choose low-maintenance plants like ivy, ferns, or succulents that thrive in your climate.

    Install a modular wall system (like Woolly Pocket or similar) directly on your siding or use a freestanding trellis with climbing plants. Budget: $80–$200 for system plus plants; $100–$250 if buying pre-planted options. Time: 1–2 hours for installation. Water as needed (systems vary, so check requirements). Even renters can use a trellis system in a large planter for the same effect.

    Your entryway becomes a conversation starter and genuinely improves air quality. You’ll feel the biophilic shift every time you approach your door—suddenly, you’re noticing greenery and growth instead of just concrete.

    9. Paint or Stain Your Front Steps

    Neglected front steps scream “needs maintenance,” while clean, freshly painted ones signal care and attention. Use concrete paint, deck stain, or exterior paint suitable for high-traffic areas. Budget: $30–$80 for paint and supplies. Time: 4–6 hours including prep and drying. Choose a color that complements your door and siding—trending colors include charcoal, olive, cream, or even a soft gray-green.

    Prep by cleaning thoroughly, letting dry completely, then applying two coats with a quality brush or roller. Let cure for 48 hours before heavy foot traffic. If you’re renting, use a removable deck paint or check your lease first.

    Your entryway instantly looks maintained and intentional. Clean, freshly painted steps make the entire home feel more valuable—even if nothing else changes.

    10. Install Black Matte Accents Around the Door Frame

    Black matte accents—trim around the door frame, window frames, or even a painted border—create drama and visual interest without being overwhelming. This 2025 trend works especially well with brick, stone, or neutral siding. Paint the trim or use adhesive-backed metal trim ($30–$100).

    Use a quality matte black exterior paint or pre-made trim pieces. Budget: $30–$80 for paint or trim materials. Time: 2–3 hours for painting. This pairs beautifully with brass or gold hardware for a mixed-metal, upscale look. If you’re renting, focus on portable elements like a black mat or planters instead of painting.

    The matte black draws the eye and creates a curated, intentional entry. Your door becomes a focal point rather than just an opening.

    11. Add Uplighting to Highlight Architectural Features

    Uplighting—ground-level lights pointing upward—highlights your home’s best architectural features (gabled roofs, columns, stonework) and creates a high-end, magazine-quality feel. Solar uplighters cost $40–$100 per fixture; hardwired options run $150–$300 per fixture.

    Position lights 2–3 feet from the base of the feature you want to highlight, angled slightly upward. Budget: $40–$150 for solar; $150–$300 per fixture if hardwired. Time: 30 minutes for solar; 2–3 hours if wiring needed. Solar options are renter-friendly and require no installation beyond positioning.

    At night, your entryway becomes architectural and dramatic. The uplighting signals that someone invested in thoughtful design, and you gain genuine ambiance every evening.

    12. Refresh Your Landscaping with Native Plants

    Native plants align with 2025’s sustainability focus and biophilic design while requiring less water and maintenance than ornamental imports. Replace tired shrubs or add new beds with plants that thrive in your region. Budget ranges from $50–$300 depending on how much you refresh.

    Visit your local native plant nursery to identify species suited to your climate, sun exposure, and soil. Budget: $50–$200 for plants; add $50–$100 for soil and mulch. Time: 2–3 hours for planting. This is a perfect weekend project and truly long-lasting. Ask nursery staff for recommendations specific to your hardiness zone.

    Your landscaping becomes an asset rather than an afterthought. Native plants bloom at predictable times, attract pollinators, and create genuine seasonal interest—plus they practically care for themselves.

    13. Install a Sleek, Modern House Number Planter

    Combine two essential elements—house numbers and planting—into one statement piece. Modern house number planters ($60–$150) serve double duty and look far more intentional than a bare number on the wall. Choose concrete, metal, or composite materials in neutral finishes.

    Position near your door or to one side of the entryway, fill with seasonal plants or greenery, and watch it become a conversation starter. Budget: $60–$150 for the planter. Time: 15 minutes to position and plant. Etsy, Wayfair, and specialty home stores carry excellent options. Renters can use this as a portable, non-permanent way to add polish.

    This single piece communicates “I care about design details” and adds function plus beauty to your entryway.

    14. Create Visual Balance with Dual Accent Chairs or Benches

    If you have porch or stoop space, add matching seating for visual balance and genuine functionality. Two Adirondack chairs or a single bench ($100–$300 total) create an inviting spot and signal hospitality. Choose finishes that complement your door and landscaping—natural wood, painted charcoal, or cream all work beautifully.

    Position symmetrically on either side of the entry or center a bench. Budget: $100–$300 for quality seating. Time: 30 minutes to position and stabilize. Look for weather-resistant options at Target, Wayfair, or West Elm. This is portable and perfect for renters with porch access.

    Your entryway becomes a destination people actually want to linger in. Plus, you get a functional spot to sit while greeting neighbors or waiting for guests.

    15. Mix Textures: Combine Brick, Wood, and Metal

    Layering textures—brick, warm wood, and sleek metal—creates visual interest and prevents your entryway from feeling flat or one-note. This trend dominates 2025 design. If you’re starting from scratch, consider thin brick veneer ($3–$8 per sq. ft.), cedar trim, and matte black hardware. For existing spaces, add wood trim, metal railings, or hardware to what you have.

    Budget: $100–$300 for accent pieces like trim, railings, or hardware. Time: 4–8 hours for installation depending on complexity. Mixed materials work beautifully with 2025’s earth tones and modern-traditional fusion style. Even renters can layer textures using wood planters, metal plant stands, and natural fiber mats.

    The combination of materials prevents visual monotony and creates genuine architectural interest. Your entryway feels curated and intentional rather than default.

    16. Install a Canopy or Awning for Practical Elegance

    A canopy or awning (metal, fabric, or wood) adds shelter, shade, and architectural interest. Modern options cost $200–$600 installed (or $100–$300 DIY). Choose styles that complement your home’s aesthetic—clean-lined metal for modern homes, fabric for traditional, or wood for rustic-modern blends.

    This works especially well if your door faces strong afternoon sun or receives heavy rain. Budget: $100–$300 for DIY installation; $300–$600 for professional install. Time: 2–4 hours for DIY; 1–2 hours for pros. Metal options are low-maintenance; fabric awnings require occasional cleaning. Check if your rental allows this before purchasing.

    The awning immediately makes your entryway feel more finished and intentional. You also gain practical shelter, which makes rainy days or sunny afternoons far more pleasant.

    17. Paint or Stain Your Front Door Frame Contrasting Trim

    High-contrast trim around your door frame emphasizes the door and adds architectural detail. Paint the frame in white, cream, or a complementary shade—this 2025 trend creates visual interest without clashing. Use quality exterior paint ($20–$40) and spend an afternoon refreshing the trim.

    Budget: $20–$50 for paint and supplies. Time: 2–3 hours. This technique works particularly well if you have a bold-colored door. The contrast draws the eye and makes your door appear more intentional and designed. Renters can use painter’s tape to create temporary trim effects if permanent painting isn’t an option.

    The contrasting frame instantly elevates your entryway’s architectural interest. That single detail transforms the entire entry from basic to polished.

    18. Add a Decorative Door Panel or Millwork Detail

    Decorative door panels, arched millwork, or a peaked accent above the door add character and visual depth. This could be an upgrade to your existing door ($300–$800) or a DIY addition using wood trim ($50–$150). Modern-traditional fusion styles blend sleek lines with arched details for a contemporary-classic feel.

    Look for wooden doors with raised panels, arched tops, or geometric details. Budget: $50–$150 for trim accents; $300–$800 for a new decorative door. Time: 2–3 hours for trim DIY; professional door replacement takes a few hours. This is a bigger investment but dramatically elevates your entryway’s architectural impact. Renters might prioritize other options unless you own.

    The added millwork detail transforms a flat door into an architectural focal point. Your entryway suddenly looks considered and designed rather than default.

    19. Frame Your Doorway with Climbing Vines or Trained Plants

    Climbing vines or trained plants frame your doorway naturally and embody 2025’s biophilic design trend. Choose varieties suited to your climate—ivy, clematis, climbing hydrangea, or jasmine. Install trellises ($30–$80 each) and plant ($20–$50 per plant). This takes time to establish (1–2 seasons) but creates stunning visual impact.

    Position trellises on either side of the door or above it, plant vines at the base, and train them upward as they grow. Budget: $80–$200 for trellises and plants. Time: 30 minutes to install; ongoing pruning as vines mature. This is long-lasting and genuinely increases your home’s curb appeal. Even renters can use annual vines (sweet peas, morning glories) for seasonal framing.

    Once established, your door is framed by living greenery. This creates a garden-like, welcoming effect that signals nature and care.

    20. Upgrade Your Door Hardware to Modern Mixed Metals

    Door hardware—handles, locks, and hinges—is functional art that signals design sophistication. Replace standard hardware with modern mixed metals ($80–$250 for a complete set). Trending 2025 options include brushed brass, matte black, or combinations of both. This is one of the highest-impact details people notice.

    Remove old hardware and install new pieces using provided templates and hardware. Budget: $80–$250 for quality handles, locks, and hinges. Time: 30–45 minutes for installation. Brands like Rejuvenation, Schoolhouse Electric, and Etsy offer excellent design-forward options that punch above their price point.

    The moment someone reaches for your door handle, they’re interacting with something genuinely beautiful. High-quality hardware makes your entire entryway feel premium and considered.

    21. Install Modern Garage Door Hardware or Accents

    If your garage faces your entryway, updated garage door hardware ($50–$150) instantly elevates the entire front facade. Matte black handles, hinges, or straps signal intentional design and complement 2025’s dark-accent trend. This small upgrade has outsized visual impact.

    Install new handles or accent straps using provided hardware—most mounts to existing garage door panels. Budget: $50–$150 for quality hardware. Time: 20–30 minutes for installation. This is perfect if you’re moving away from dated “modern farmhouse” white garage doors toward more nuanced, sophisticated looks.

    Your garage door becomes a design feature instead of an afterthought. Even if the door itself is standard, quality hardware instantly upgrades its appearance.

    22. Create a Color-Blocked Entryway Facade

    Color blocking—dividing your facade into geometric sections in complementary colors—is a bold 2025 trend that feels modern and intentional. Choose two or three trending colors like olive + cream, charcoal + warm gray, or burgundy + tan. Use quality exterior paint and painter’s tape to create sharp lines.

    Decide on your division point (waist-height, one-third/two-thirds split, or architectural features as natural dividers). Budget: $60–$120 for exterior paint. Time: 4–6 hours including taping and painting. This technique works beautifully with 2025’s earth-tone palette and modern-traditional fusion aesthetic. Renters should confirm this is acceptable before committing.

    The color blocking immediately modernizes your facade and signals bold design sensibility. Your entryway stops looking like everyone else’s and becomes genuinely distinctive.

    23. Add Sustainable Accents: Solar Lights, Reclaimed Materials, or Green Finishes

    Embracing 2025’s sustainability focus, add eco-friendly details like solar pathway lights ($30–$80), reclaimed wood planters or trim ($50–$200), or water-wise native plants. These choices reduce your environmental footprint while creating genuine visual interest. Green-finished metals, recycled composite materials, and sustainably sourced wood all communicate values while looking beautiful.

    Position solar lights along your walkway (they charge during day, illuminate at night), integrate reclaimed wood as planters or trim accents, and prioritize native plants for your landscaping. Budget: $50–$200 depending on elements you choose. Time: 1–2 hours for installation. These materials often age beautifully and develop character over time, which adds to their appeal.

    Your entryway communicates both design sophistication and environmental consciousness. You’re not just creating curb appeal—you’re making choices that align with your values.


    Pick one idea from this list and tackle it this weekend—you’ll be amazed at how one thoughtful change shifts your entire relationship with your entryway. Save this post for later, and share it with friends who are dreaming of a more welcoming home.

  • 26 Trending Sofa Design Ideas Everyone Is Saving Right Now

    26 Trending Sofa Design Ideas Everyone Is Saving Right Now

    If you’ve been scrolling through design feeds lately, you’ve probably noticed sofas are having a major moment. Gone are the days of cold, minimal shapes—today’s sofas are curvy, colorful, and built for actually living. Whether you’re working with a tiny apartment or a sprawling open floor plan, there’s a sofa style that fits your life right now. We’ve rounded up 26 trending ideas that everyone’s saving, from bold jewel tones to modular game-changers that adapt as your needs do. Ready to refresh your space? These ideas will inspire you to rethink what your sofa can be.

    1. Embrace Soft Curves Over Sharp Corners

    Curved sofas are replacing boxy designs because they make rooms feel warmer and more intimate instantly. The rounded silhouette softens hard lines in modern spaces and creates a natural gathering spot that actually encourages conversation. Look for sofas with gently curved arms and organic shapes—brands like Article and Article+Madison offer curved sectionals ranging from $1,200–$2,500. If you’re renting, curved loveseats ($600–$1,000 at Wayfair or Article) give you the vibe without the commitment. The beauty here? Curved sofas photograph beautifully, so your living room becomes the kind of space friends want to hang out in.

    2. Go Modular for Life’s Changes

    Modular sectionals are the adult equivalent of building blocks—they grow with your life whether you’re downsizing, expanding, or just rearranging. You can start with a simple two-piece and add chaise lounges, corner units, or ottomans as your space and budget allow. Brands like What A Room and Article specialize in customizable options starting around $1,500 for a base, with additional pieces running $300–$800 each. Most offer a free consultation to help you measure and plan. The game-changer? When life shifts—new job, new family member, new apartment—your sofa adapts instead of becoming expensive dead weight.

    3. Choose Performance Fabric for Real Families

    Performance fabrics look and feel luxurious but are built to handle spills, pet accidents, and daily chaos without staining or pilling. These aren’t the cheap, plastic-feeling materials of old—brands like Ethan Allen and Restoration Hardware now use high-tech weaves that repel liquids while keeping that soft, premium touch. Expect to pay $200–$400 more than standard upholstery, but the durability pays dividends over 5–10 years. Look for fabrics labeled as “crypton” or “solution-dyed”—they’re treated at the fiber level, not the surface. Your sanity is worth the upgrade, especially if you have kids, pets, or anyone who drinks wine on your sofa.

    4. Explore Earth Tones Beyond Beige

    Earth tones like camel, clay, terracotta, and warm taupe are replacing cool grays because they feel more inviting and forgiving of everyday wear. These colors ground a room while pairing beautifully with both minimalist and maximalist décor. Brands like Bellona USA and Interior Define offer rich earth-tone sofas in the $1,000–$2,000 range. The secret to styling them? Add one bold accent pillow or artwork to prevent the space from feeling flat—a jewel-tone pillow or emerald throw blanket makes earth tones sing. Your living room becomes a warm retreat instead of a showroom, and you’ll actually want to spend time there.

    5. Try Oversized, Sink-In Comfort

    Oversized sofas with extra-deep seats (24–28 inches versus the standard 20–22 inches) are having a moment because people finally prioritized napping over impressing guests. These aren’t just bigger—they’re built for real relaxation with deeper seat depths and thicker cushioning. Look for sofas with seat depths listed explicitly; brands like Lovesac, Article, and IKEA’s Strandmon collection offer deep options starting at $800 and going up to $3,000+ depending on customization. Pair it with a good ottoman ($200–$600) to fully recline. The trade-off? They take up more floor space, so measure carefully. The payoff is 100% worth it—your sofa becomes your favorite place to be.

    6. Layer Textures With Linen and Natural Fibers

    Natural fabrics like linen and cotton are trending because they age beautifully and feel authentic in a way synthetic materials don’t. Linen wrinkles slightly with use, but that lived-in quality is exactly what makes it feel real and approachable. Expect to pay $100–$300 more than synthetic blends, but linen lasts decades when cared for properly. Brands like Etsy vintage shops and contemporary makers like Schoolhouse Electric offer stunning linen sofas in the $1,200–$2,500 range. Pro tip: Linen can absorb spills, so pair it with a protective fabric spray ($15–$25) if you have kids or pets. Natural textures make your space feel intentional and grounded—like it was styled by someone with taste, not a catalog.

    7. Add Jewel Tones for Moody Drama

    Jewel tones like emerald, sapphire, rich plum, and deep teal are replacing cautious neutrals because bold color makes a statement without being trendy or dated. These colors work best as a sofa statement piece paired with neutral walls and layered with gold or brass accents. Budget $1,500–$2,800 for a quality jewel-tone sofa from brands like Lulu & Georgia or Interior Define. Lighting matters—jewel tones need warm, ambient lighting to glow rather than feel dark. If you’re nervous about commitment, start with a jewel-tone velvet accent chair ($400–$800) to test the vibe. The transformation is immediate: your living room becomes a sophisticated retreat instead of a generic space.

    8. Invest in Velvet for Tactile Luxury

    Velvet is having a luxury renaissance because it feels incredible and photographs beautifully without being impractical for daily use—contrary to what people think. Modern velvet blends are more durable than you’d expect, especially if you choose solution-dyed options. Expect to invest $1,800–$3,500 for a quality velvet sofa from brands like Lulu & Georgia, Restoration Hardware, or Article. The color matters: chocolate brown, sage green, and warm charcoal hide wear better than lighter shades. Layer it with soft pillows and a chunky knit throw to balance the fabric’s richness. The payoff? Every time you sit down, you get a little hit of luxury. Your sofa becomes a comfort object and a conversation piece simultaneously.

    9. Scale Sofas Properly for Your Space

    Choosing the right sofa size is crucial and often gets overlooked—too big and it dominates the room; too small and it looks lost and uncomfortable. Measure your doorways, hallways, and room dimensions before ordering anything. Most sofas need at least 18 inches clearance on all sides for comfortable walking and furniture arrangement. A good rule: your sofa shouldn’t take up more than one-third of your room’s total floor space. Free tools like Modsy and Wayfair’s augmented reality app let you visualize sofas in your actual space—use them. If you’re buying online, confirm that delivery includes assembly and placement (often free with purchases over $1,000). Proper sizing means your space feels open and livable instead of cramped or scattered.

    10. Go Low-Profile for Open, Airy Rooms

    Low-profile sofas with visible legs and lower seat heights (typically 16–18 inches versus standard 20–22 inches) make rooms feel larger and more open—perfect for small apartments or minimalist aesthetics. They also look more contemporary and photograph beautifully. Brands like Article, IKEA (Kivik collection), and Blu Dot specialize in low-profile styles starting around $600 and going up to $2,200 for higher-end options. The trade-off? They’re not ideal for elderly people or anyone with mobility issues—consider a standard height if that matters. The benefit is enormous: even a small living room feels spacious and intentionally designed when your sofa doesn’t visually weigh the space down.

    11. Style Neutral Bases With Bold Pillow Accents

    A neutral sofa is a wise investment, but styling it with strategic pillow accents makes it feel current and personal without the commitment of bold upholstery. Start with a neutral base sofa ($800–$2,000), then layer 2–3 accent pillows in jewel tones, patterns, or rich textures ($30–$100 each). Brands like Etsy, Schoolhouse Electric, and even Target’s Project 62 line offer gorgeous pillow options in all price ranges. Mix textures: pair a silk pillow with linen and velvet for depth. The genius move? When you want a refresh, swap the pillows instead of replacing the sofa. Your space stays current for the cost of a few pillows, and you keep your investment piece stable.

    12. Bring Back Skirted Sofa Designs

    Skirted sofas are experiencing a revival because they bring relaxed elegance and a touch of traditional style that feels fresh against modern minimalism. The skirt hides the legs and any under-sofa dust, making it feel more intentional and polished. Brands like Ethan Allen, Room & Board, and Restoration Hardware offer skirted options starting around $1,500 and going up to $3,500+ depending on fabric choice. The styling difference is noticeable—a skirted sofa feels more curated and old-school-cool than sleek legs. Pro tip: Match your skirt fabric to your upholstery for a seamless look, or choose a contrasting linen for visual interest. The result is a sofa that feels intentional and sophisticated, not trendy or disposable.

    13. Mix Curved and Straight Lines Strategically

    Pairing curved sofas with straight-edged furniture creates visual tension that’s interesting and modern without being chaotic. A curved sofa needs grounding—balance it with a rectangular coffee table, straight shelving, and linear artwork. This approach works best in open-concept layouts where the curved sofa becomes the focal point. Start with your curved sofa ($1,200–$2,500), then layer in a sleek coffee table ($200–$600) and straight-edged side tables ($100–$400 each). The mix prevents your space from feeling too soft or too sterile. Your room becomes visually dynamic while remaining functional and comfortable—the sweet spot between cozy and contemporary.

    14. Choose Sustainable, Made-to-Order Options

    Made-to-order sofas from sustainable brands are becoming mainstream as people prioritize longevity over disposability. Brands like Maiden Home, Burrow, and Etsy makers produce sofas with responsibly sourced materials and lower environmental impact. You pay $1,500–$3,000 for a custom-built sofa that arrives in 4–8 weeks, but you get exactly what you want and you’re supporting ethical manufacturing. Many offer transparent pricing that breaks down materials and labor. The payoff extends beyond the environment—a made-to-order sofa is an investment piece you’ll keep for decades, not a fast-furniture impulse. Knowing your sofa was built by people paid fairly for skilled work adds genuine value to your daily comfort.

    15. Create Conversation Pits With Curved Arrangements

    Curved sofas arranged in opposing arcs naturally create conversation zones and boost intimacy in open-concept spaces. This layout works beautifully in lofts or large living rooms where a single sofa might feel lost. Pair two curved sectionals ($2,400–$5,000 combined) with a round coffee table ($300–$800) for the ultimate conversation setup. The round shape echoes the sofa curves and keeps sight lines open. This arrangement screams intentional design—your space becomes purpose-built for connection instead of looking like furniture was just placed randomly. If two full sofas aren’t realistic, try one curved sofa paired with a curved accent chair ($500–$1,200) for similar effect on a smaller scale. The intimacy is immediate: guests actually face each other instead of staring at a TV.

    16. Play With Pattern Strategically

    Patterned sofas are trending, but the key is choosing designs that feel timeless rather than trendy. Subtle geometric prints, botanical florals, and classic stripes work better than busy or overly colorful patterns. Look for sofas where the pattern is scaled proportionally to your space—large rooms handle bigger patterns; small rooms need smaller scales. Brands like Article, Schoolhouse Electric, and Interior Define offer patterned options starting around $1,000 and going up to $2,500. The styling rule: keep everything else neutral and let your patterned sofa be the focal point. Wall color, area rug, and accessories should recede. The effect is sophisticated and intentional—you’ve clearly thought about your space, not just accepted whatever showed up.

    17. Layer Textured Throw Pillows for Depth

    Layering pillows in different textures—bouclé, velvet, chunky knit, linen, and silk—creates visual depth and makes your sofa feel collected and intentional. This works best on oversized or sectional sofas where you have room to play. Start with a neutral base sofa (any price point) and invest in 4–6 quality pillows ranging from $25–$75 each. Mix textures rather than coordinating everything—the contrast is what creates visual interest. Hit brands like Etsy, Wayfair, and Article for texture variety. Pro tip: arrange pillows in odd numbers and vary heights for a styled-but-not-staged look. The transformation is immediate: your sofa looks like it belongs in a magazine instead of a furniture showroom.

    18. Invest in Quality Cushion Cores

    Cushion quality determines whether your sofa stays comfortable for five years or five months, yet most people overlook this crucial detail. High-density foam (at least 2.5 density rating) or down-wrapped cores outperform cheap polyester filling that compresses quickly. When shopping, ask about cushion specifications—good brands list them proudly. You might pay $200–$500 more for quality cushions, but they’ll maintain their shape for a decade versus losing support in 2–3 years. Brands like Article, Restoration Hardware, and Ethan Allen are transparent about cushion construction. Request this information upfront; if a retailer won’t share it, that’s a red flag. Quality cushions mean your investment actually feels good to sit on for years, not just looks good in photos.

    19. Add Functional Ottomans for Flexibility

    Ottomans are the underrated MVP of sofa styling—they provide extra seating, a footrest, hidden storage, or a makeshift side table depending on your needs. A storage ottoman ($200–$600) gives you hidden space for blankets, pillows, and clutter. A cube ottoman ($150–$400) works as a coffee table or extra seat. A tray-topped ottoman ($300–$800) becomes a functional coffee table with personality. Layer a tray on top and rotate seasonal decor for a styled look. Pair it with your sofa purchase or shop brands like Article, Wayfair, or West Elm. The genius move? An ottoman lets you adapt your living room’s function—cozy movie night becomes a footrest situation; friends visit and you’ve got extra seating. Flexibility like this makes your sofa investment more valuable.

    20. Explore Arm-Optional and Legless Designs

    Legless or low-arm sofas are trending for minimalist spaces because they blur the line between furniture and architecture. These designs feel more like built-in pieces and work beautifully in tight spaces or modern interiors. Expect to pay a premium—$1,500–$3,000—because these sofas require thoughtful engineering to maintain support. Brands like Blu Dot, Hay, and Muuto specialize in architectural sofa designs. The styling challenge is real: legless sofas need minimal styling around them to avoid looking cluttered. The payoff is huge: your space feels open, intentional, and contemporary—not crowded or dated. This works best if you genuinely love minimalist design, not just because it’s trendy.

    21. Try Cream and Bouclé for Forgiving Neutrals

    Cream and bouclé fabrics have quietly become favorites because they hide wear better than smooth finishes while remaining timelessly neutral. Bouclé’s nubby texture camouflages dust and pet hair while feeling textured and interesting—not flat or boring. Pair a cream or bouclé sofa ($1,000–$2,200) with warm wood tones for instant warmth. Brands like Article, Schoolhouse Electric, and Interior Define offer cream bouclé options. The styling secret? Add one jewel-tone accessory or artwork to prevent the space from feeling washed out. You get a neutral that works with almost any aesthetic while forgiving real-life dirt and mess. It’s the grown-up equivalent of choosing a color that just works.

    22. Consider Sectionals for Open Floor Plans

    Sectionals are designed for open-concept living because they create zone definition without walls. An L-shaped or U-shaped sectional tells guests “this is the living area” while keeping sight lines open and maintaining flow. Look for sectionals with two feet of clearance on all sides for walkability. Budget $1,500–$3,500 depending on size and quality from brands like Article, West Elm, or Interior Define. Modular sectionals ($1,500–$2,500 for a base) offer flexibility if your layout needs change. The styling benefit is huge: your open space looks intentional and organized, not like furniture is just scattered around. An open floor plan with the right sectional becomes a luxury—you get spaciousness and defined zones simultaneously.

    23. Add Rounded Corners for Safety and Softness

    Rounded corners on sofa arms and frames are becoming standard in family-focused designs because they eliminate sharp edges that hurt when you bump your head or shins. This is particularly important if you have young kids or pets. Many modern sofas now prioritize safety without sacrificing style—brands like Article, Schoolhouse Electric, and Wayfair’s family collections all offer rounded designs. There’s no price premium; this is just smarter design. Pro tip: Look for sofas with generous arm heights (at least 8 inches) if you have kids who tend to climb. The effect is subtle but significant: your sofa becomes a safe gathering spot instead of a furniture hazard. Safety and style go hand-in-hand in 2025 design.

    24. Build Your Own Sofa for Perfect Customization

    Build-your-own sofa tools from brands like Burrow, Article, and Interior Define let you customize everything—size, fabric, color, leg style, and cushion firmness—so you get exactly what you want. This eliminates the compromise of accepting “close enough” when the perfect sofa is achievable. Most offer free virtual consultations to help you navigate options. Budget $1,200–$3,500 depending on customization and quality. The process takes 4–8 weeks from order to delivery, so plan ahead. Online tools show you fabric colors, leg options, and configurations in real-time—there’s no guessing. The payoff is that your sofa is built for your exact space and needs, not a generic compromise. You get a piece that feels genuinely yours.

    25. Mix Neutrals and Jewel Tones Fearlessly

    The best-designed spaces of 2025 mix rich neutrals (cream, warm taupe, light gray) with bold jewel-tone accents—it’s the Goldilocks zone between boring and overwhelming. Start with your neutral sofa as the foundation ($1,000–$2,500), then add jewel-tone paint, artwork, or textiles as accents. Layer in brass or gold hardware and warm lighting to tie it together. Brands like Bellona USA provide color guides for this exact combination. The styling rule: keep jewel tones to 20% of your visual space (one accent wall, several pillows, a bold artwork) while neutrals occupy the remaining 80%. The result is a sophisticated space that feels intentional and current without being trendy or dated. You’ve got visual interest and calm balance simultaneously.

    26. Prioritize Sofa Placement for Maximum Impact

    Where you place your sofa matters as much as which sofa you choose—it should anchor the room and create natural traffic flow. The best placement usually faces a window (for natural light and views), the TV, or a fireplace, depending on your priorities. Measure your doorways, windows, and architectural features before delivery day to avoid the awkward shuffle of moving a heavy sofa post-arrival. Pro tip: Place sofas 18–24 inches from a wall to create breathing room and prevent a cramped look. If you’re in a rental or uncertain about placement, get a furniture placement consultation (many designers offer virtual sessions for $50–$150). Perfect placement means your sofa becomes the natural gathering spot instead of just fitting in somewhere. Your space finally makes sense and your sofa investment looks intentional.


    Save this post and pick one idea to act on this week. Whether it’s swapping pillows for instant impact or planning a bigger sofa investment, these trends prove that your living room doesn’t need a full renovation to feel current and comfortable. Share this with anyone ready to upgrade their sofa situation—starting today.