Blog

  • 25 Kitchen Cabinet Design Ideas That Transform Your Entire Space

    25 Kitchen Cabinet Design Ideas That Transform Your Entire Space

    Your kitchen cabinets set the tone for your entire home—but updating them doesn’t have to mean a full renovation or breaking the bank. Whether you’re renting, working with a small space, or ready to invest in custom pieces, these 25 ideas range from free styling tricks to smart upgrades that’ll make your kitchen feel brand new. You’ll discover budget hacks that take an afternoon, trending color combos that actually work, and storage solutions that’ll change how you use your space. The best part? Most of these ideas work whether you own or rent, and you can start with just one. Let’s dig in.

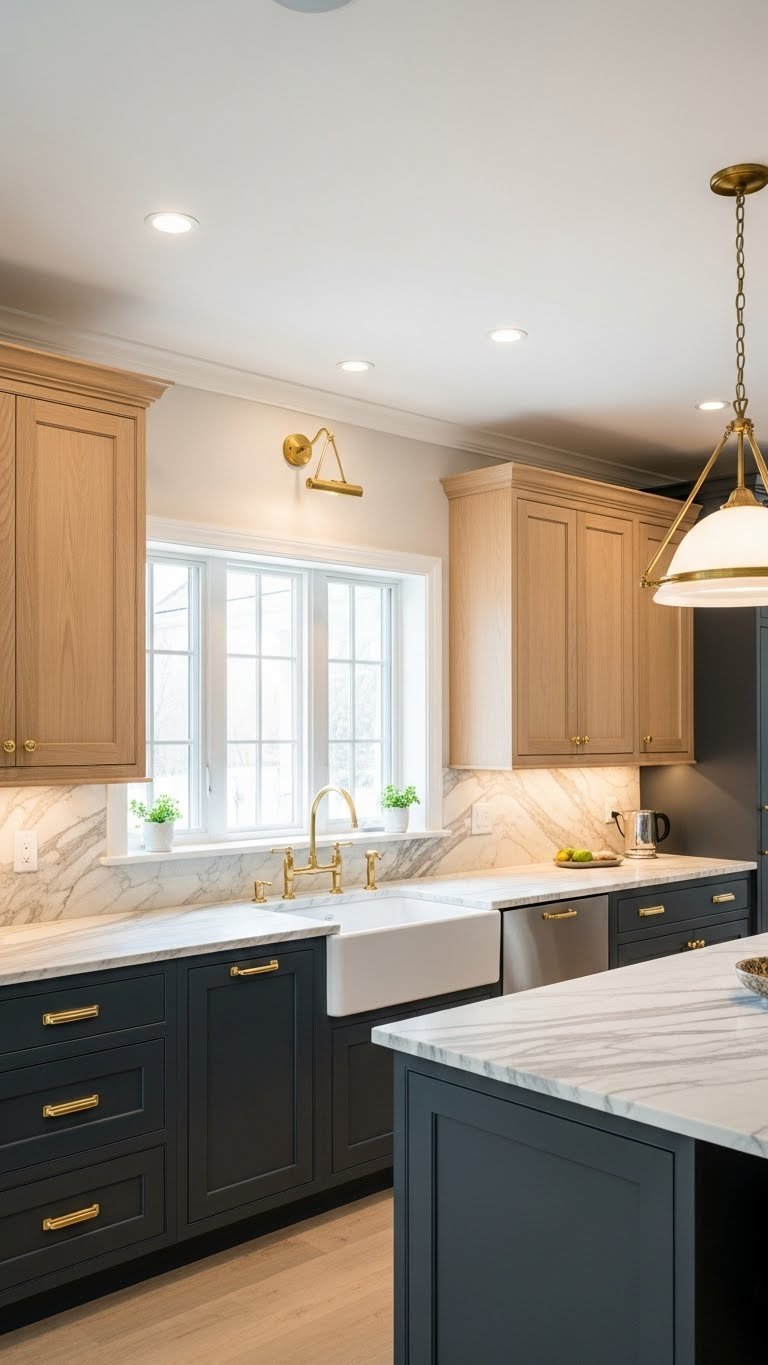
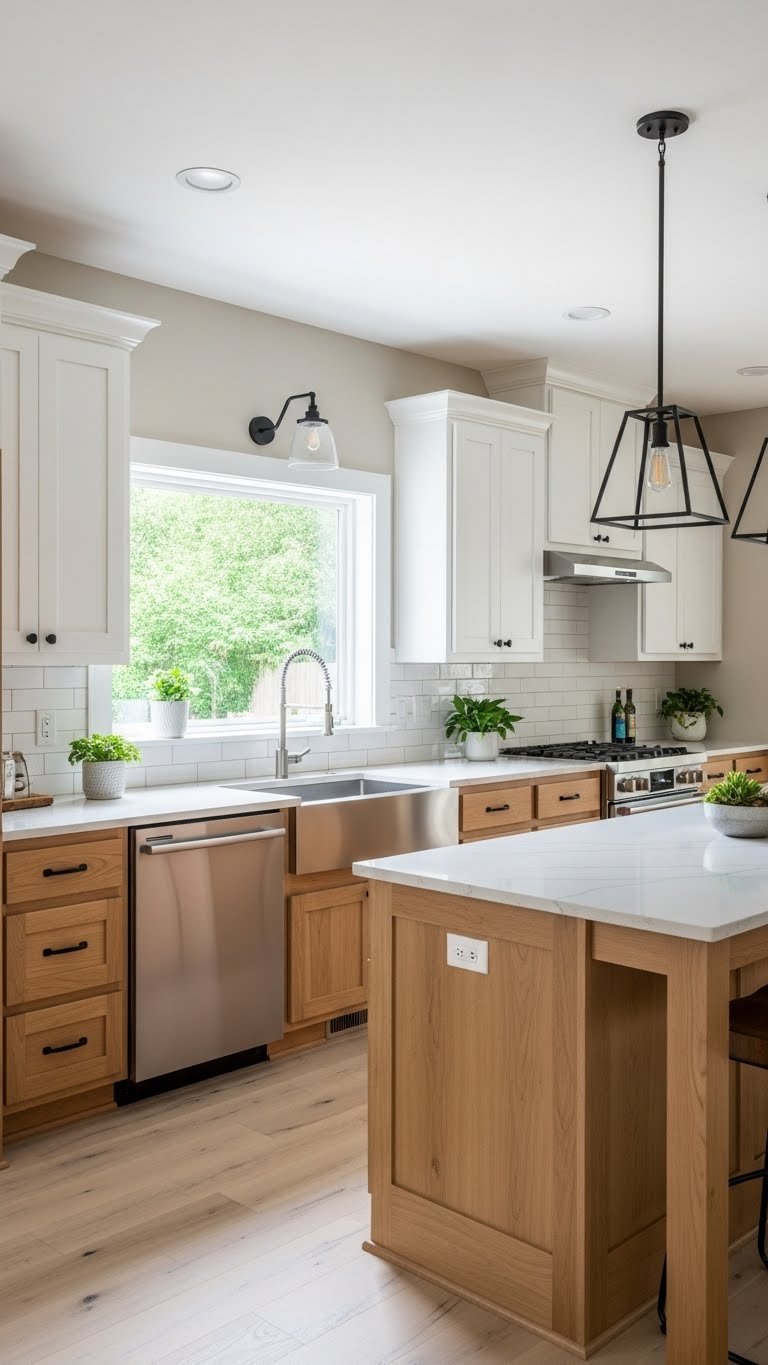
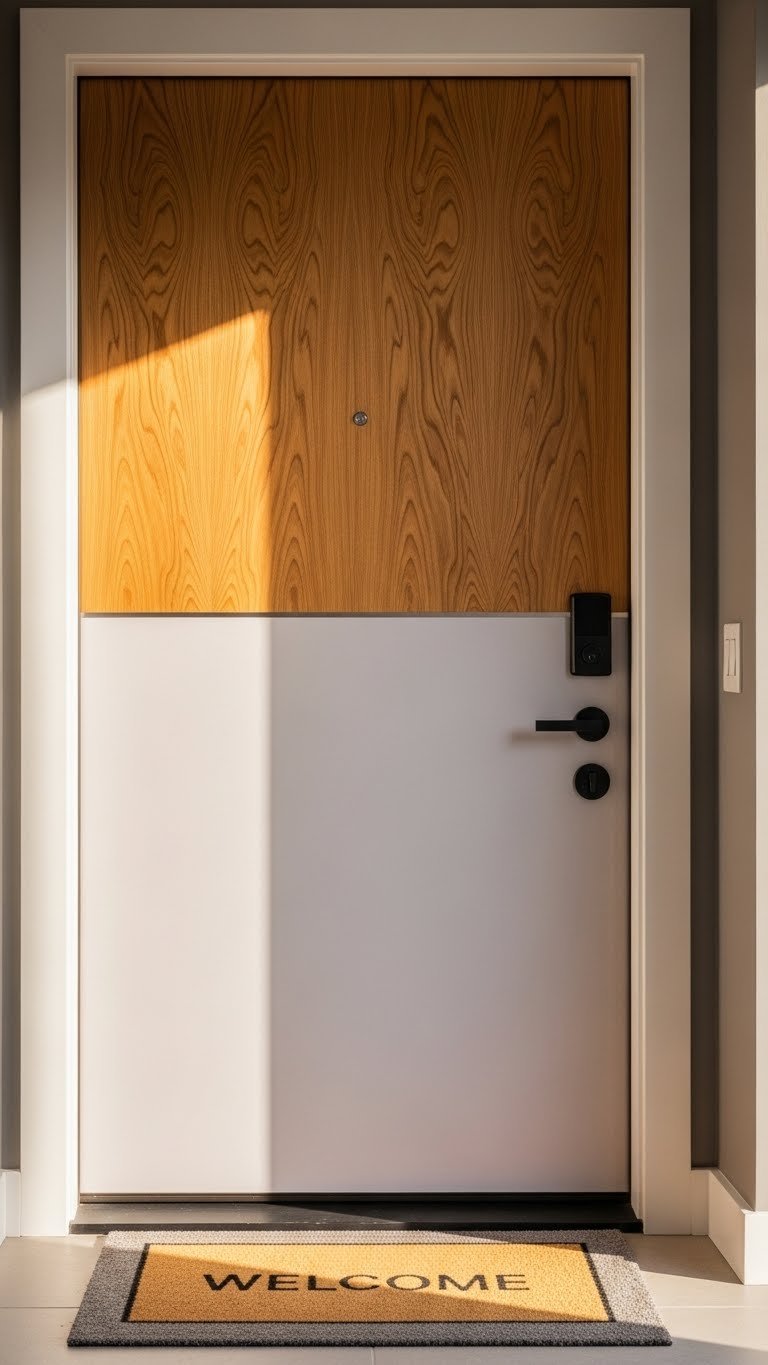
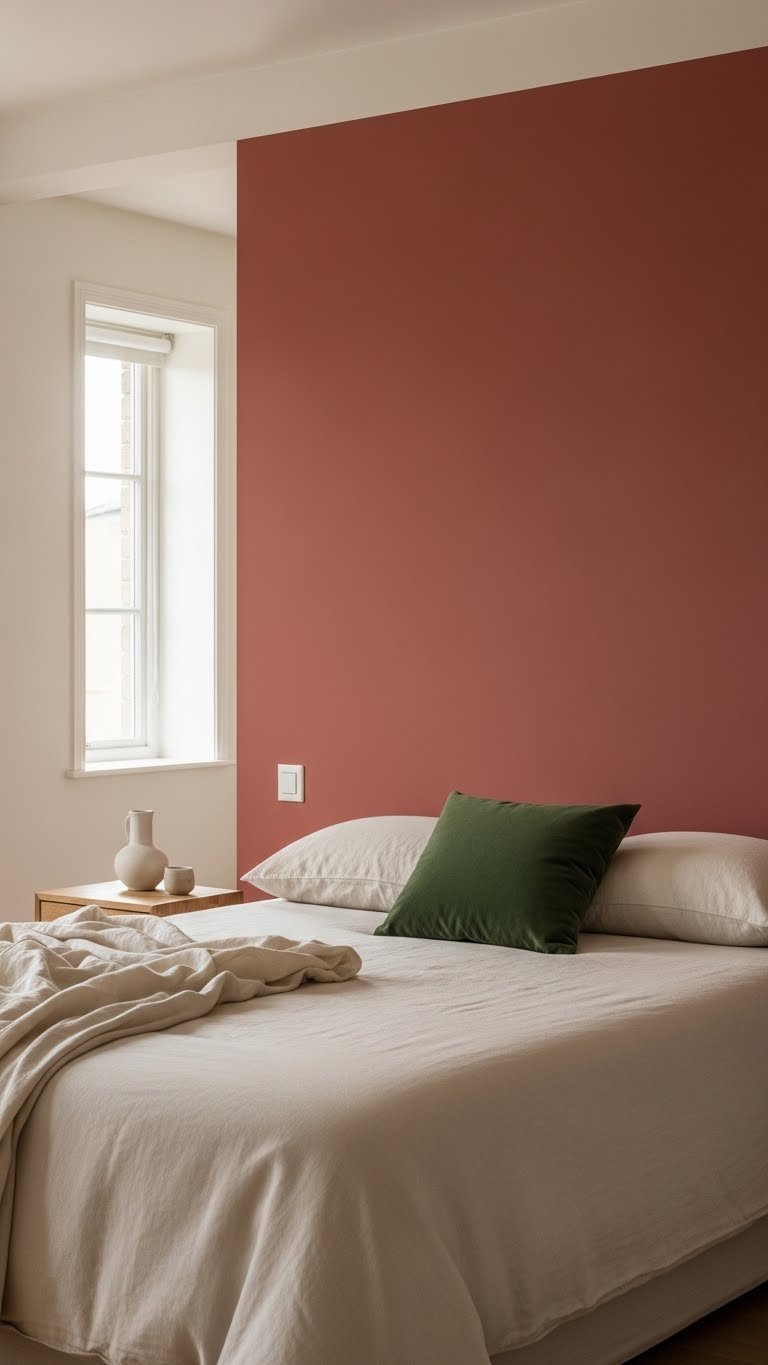
    1. Pair Two-Tone Cabinets for Visual Impact

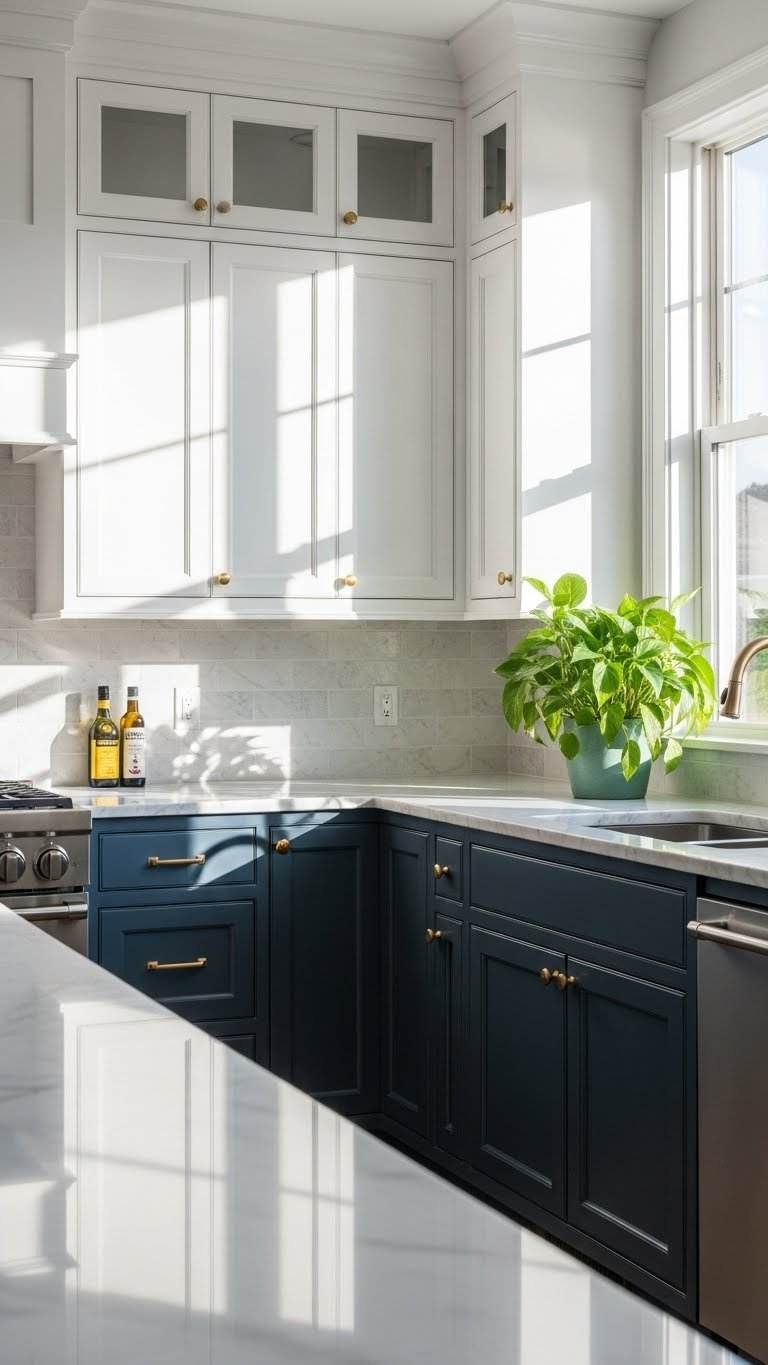
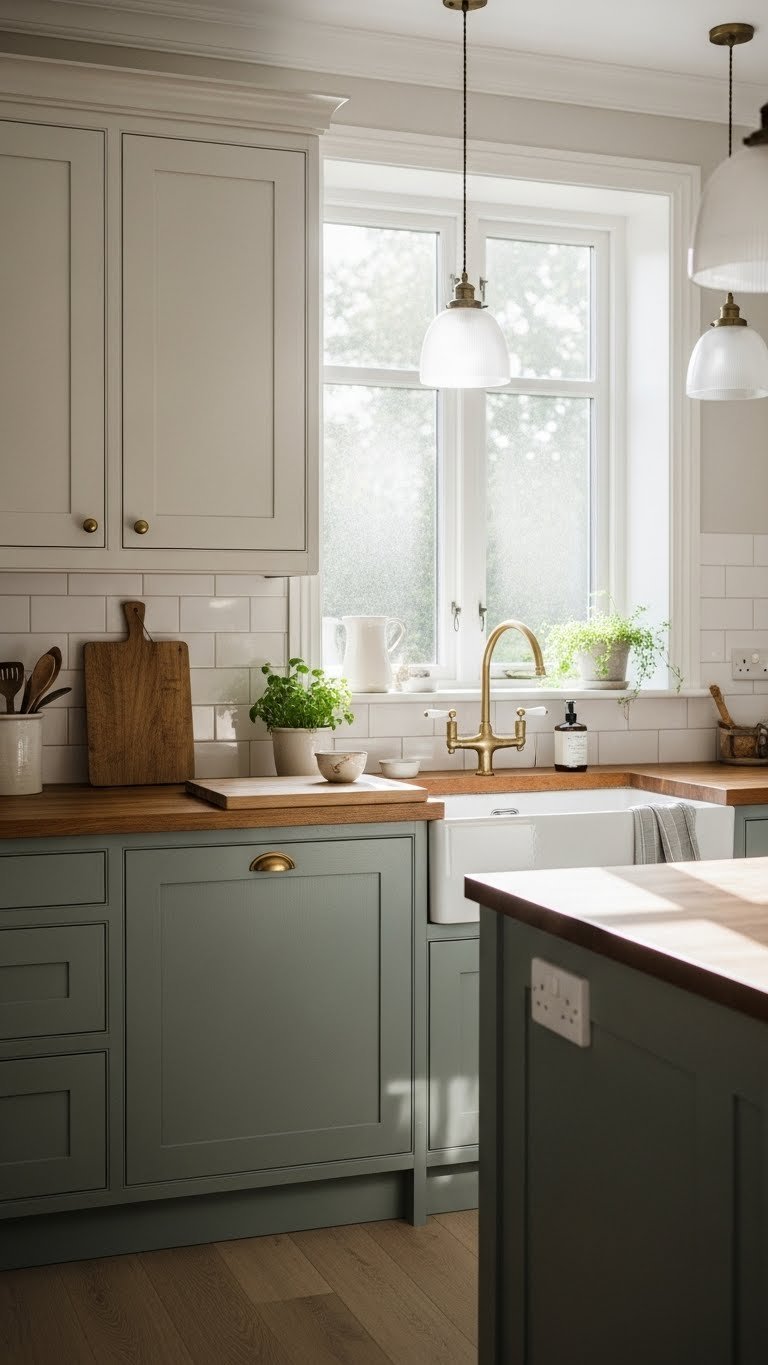
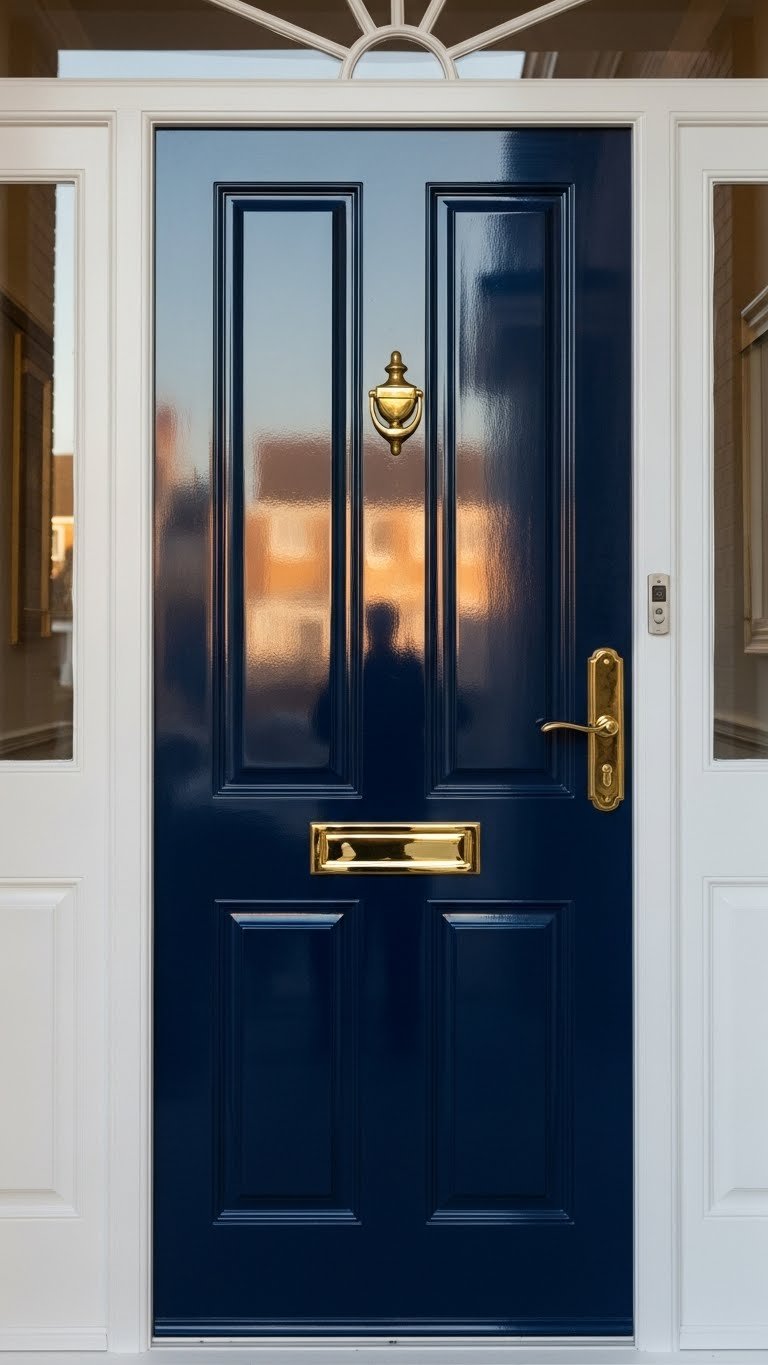
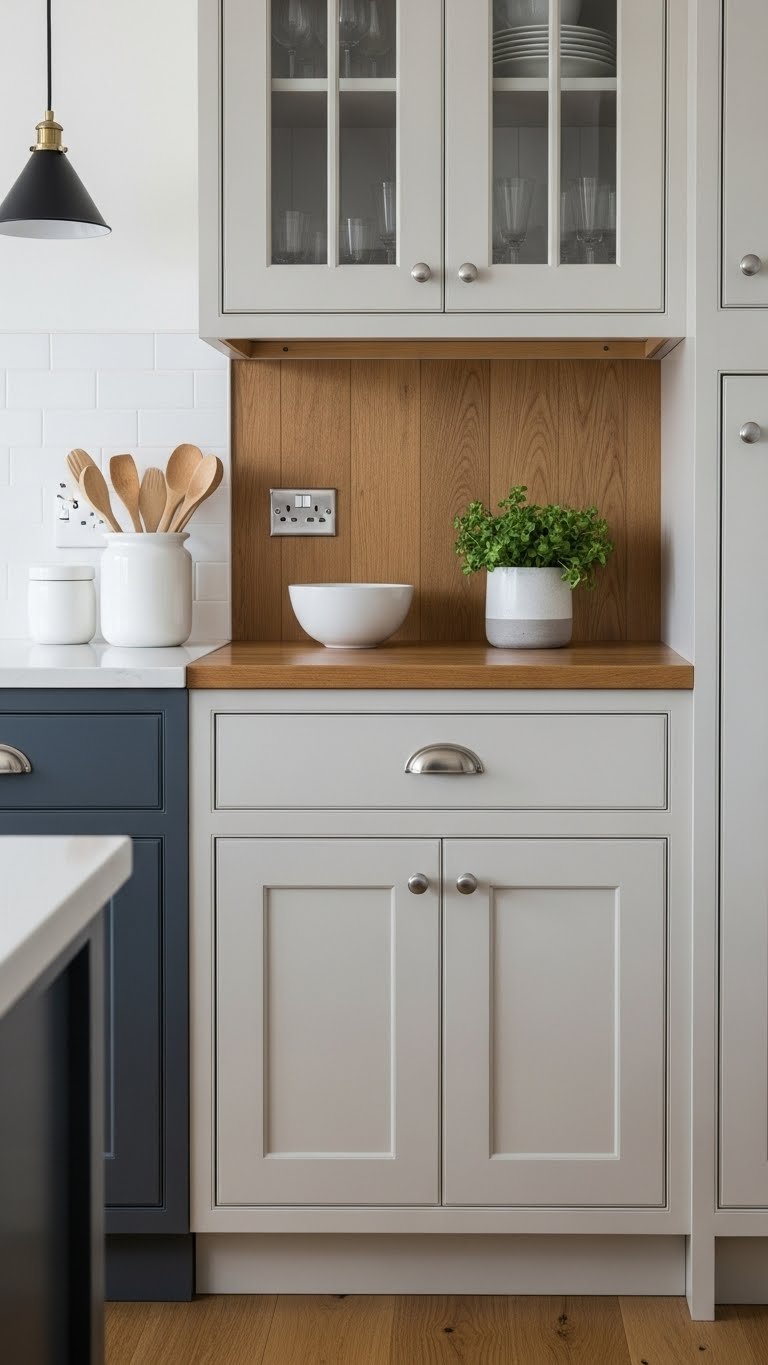
    Two-tone cabinets instantly add personality and depth without a complete overhaul. Pairing a light shade on top with a darker base (or vice versa) creates visual interest and makes your kitchen feel intentional and curated.

    You can achieve this look in several ways: paint existing cabinets if you own, use peel-and-stick contact paper for a renter-friendly option ($20–$40 per roll from Target or Amazon), or swap out cabinet doors if you’re ready to invest ($200–$500 total). The contrast draws the eye upward, making ceilings seem higher in small spaces. Choose complementary colors like white + sage, cream + charcoal, or even pale yellow + deep green.

    Pro tip: Start with lower cabinets in bold color—they hide spills better and feel less committal than painting everything.

    This combo makes your kitchen feel designed and polished. You’ll notice how much more personality your space gains from this one change alone.

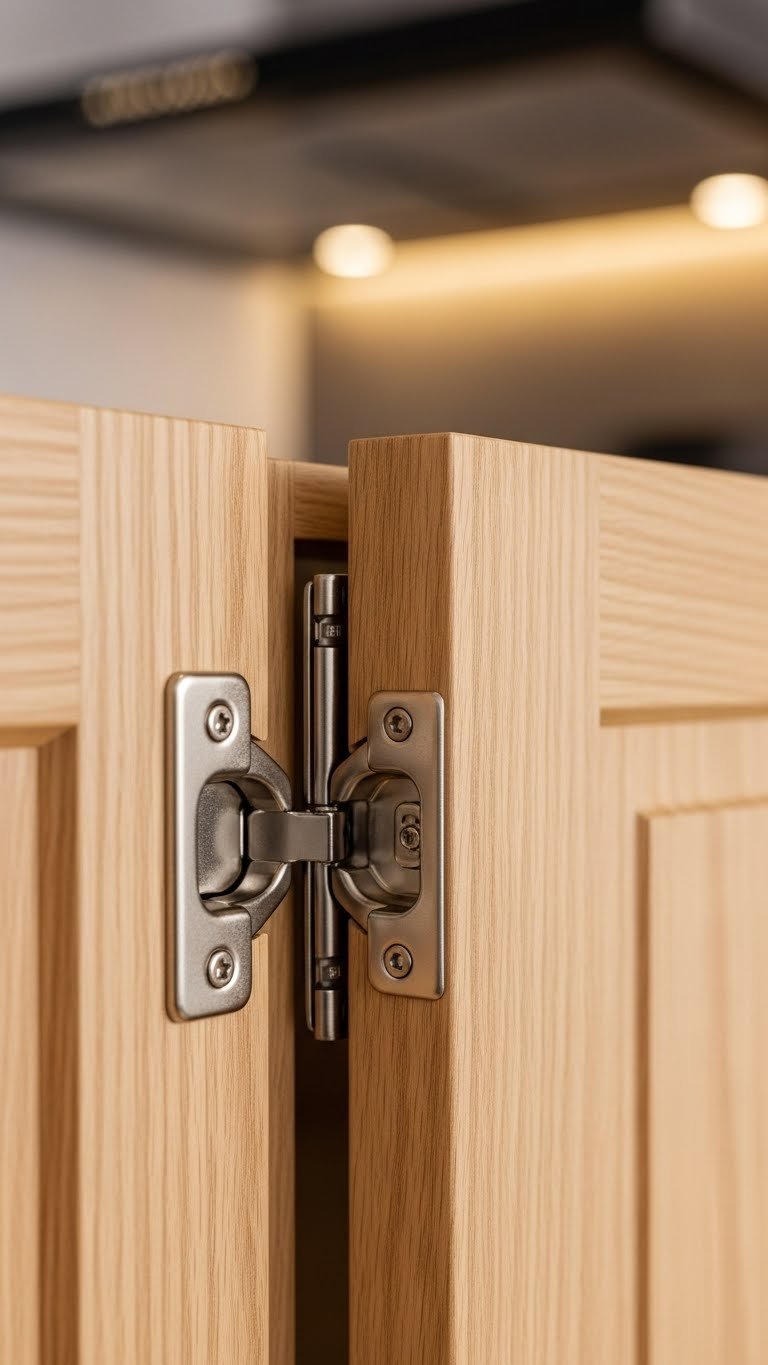
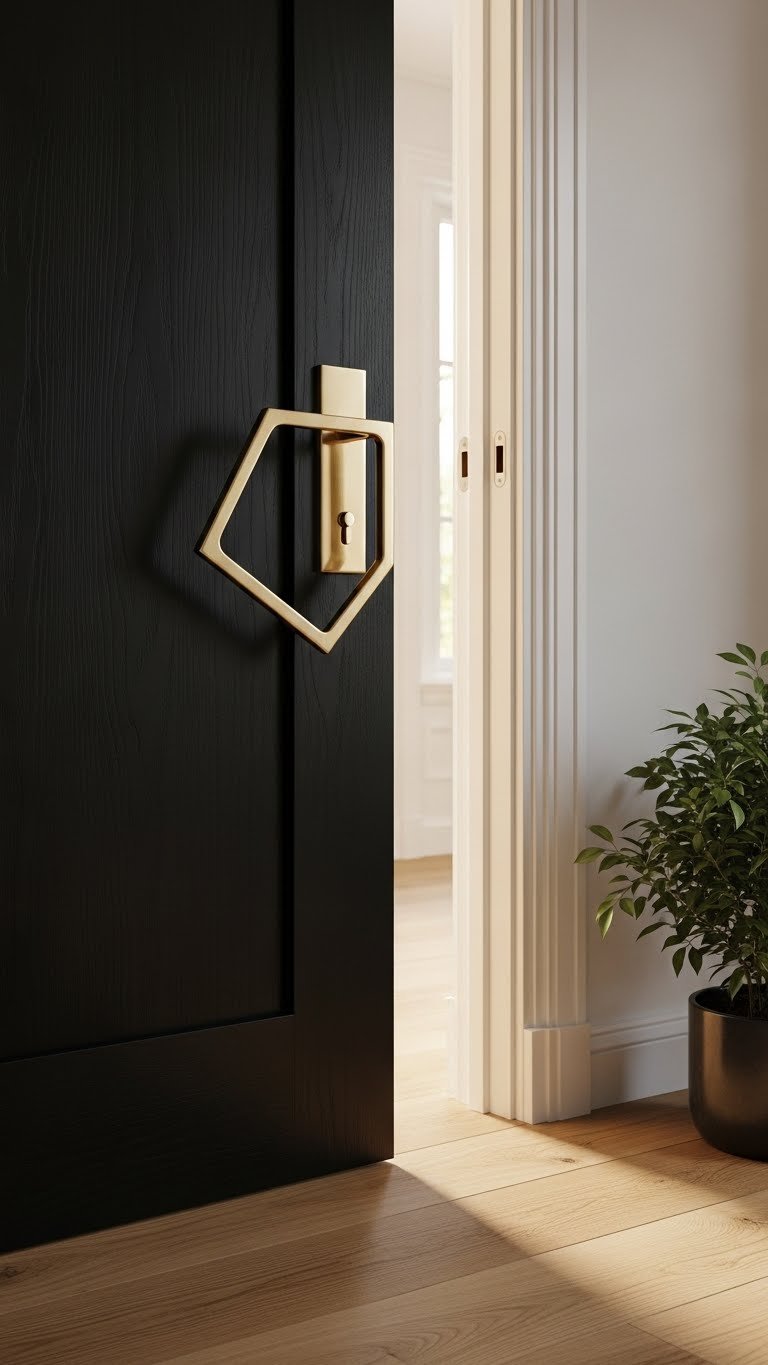
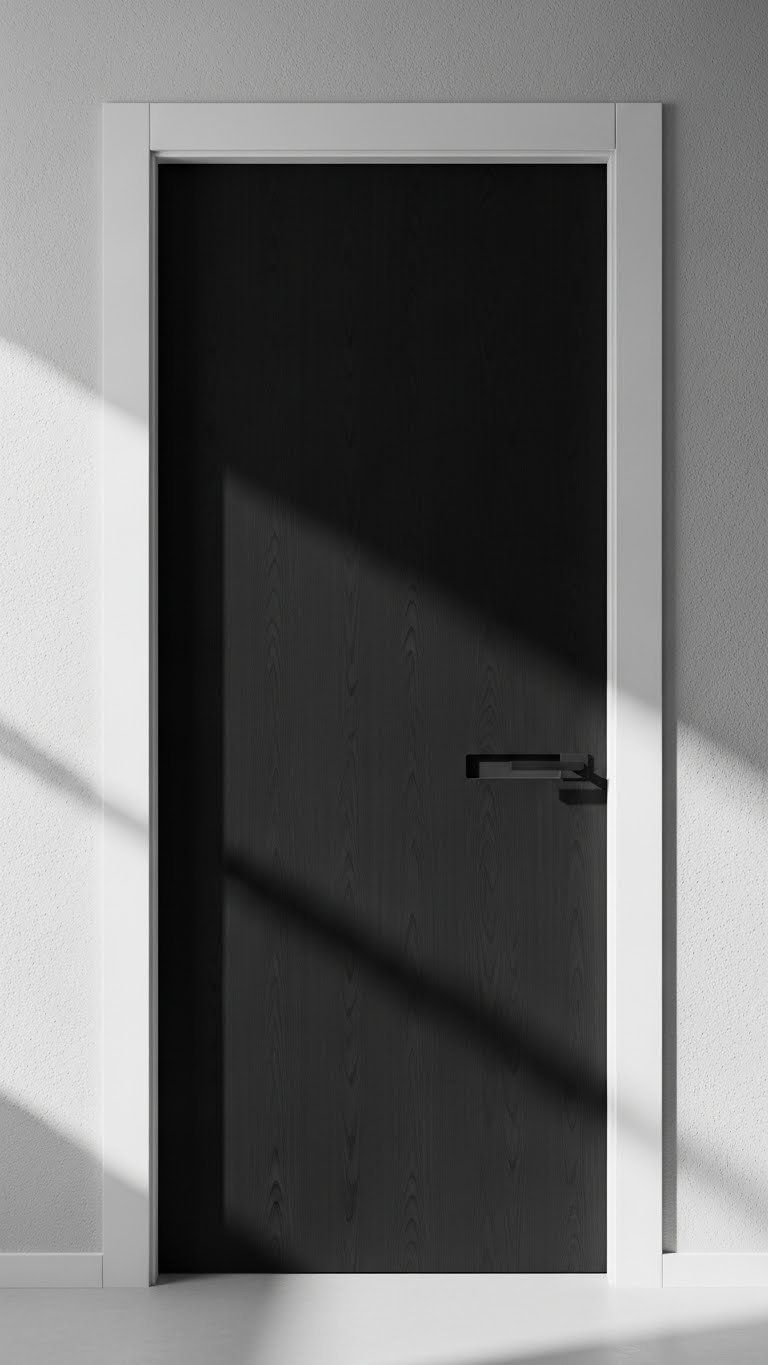
    2. Install Handleless Push-to-Open Cabinets

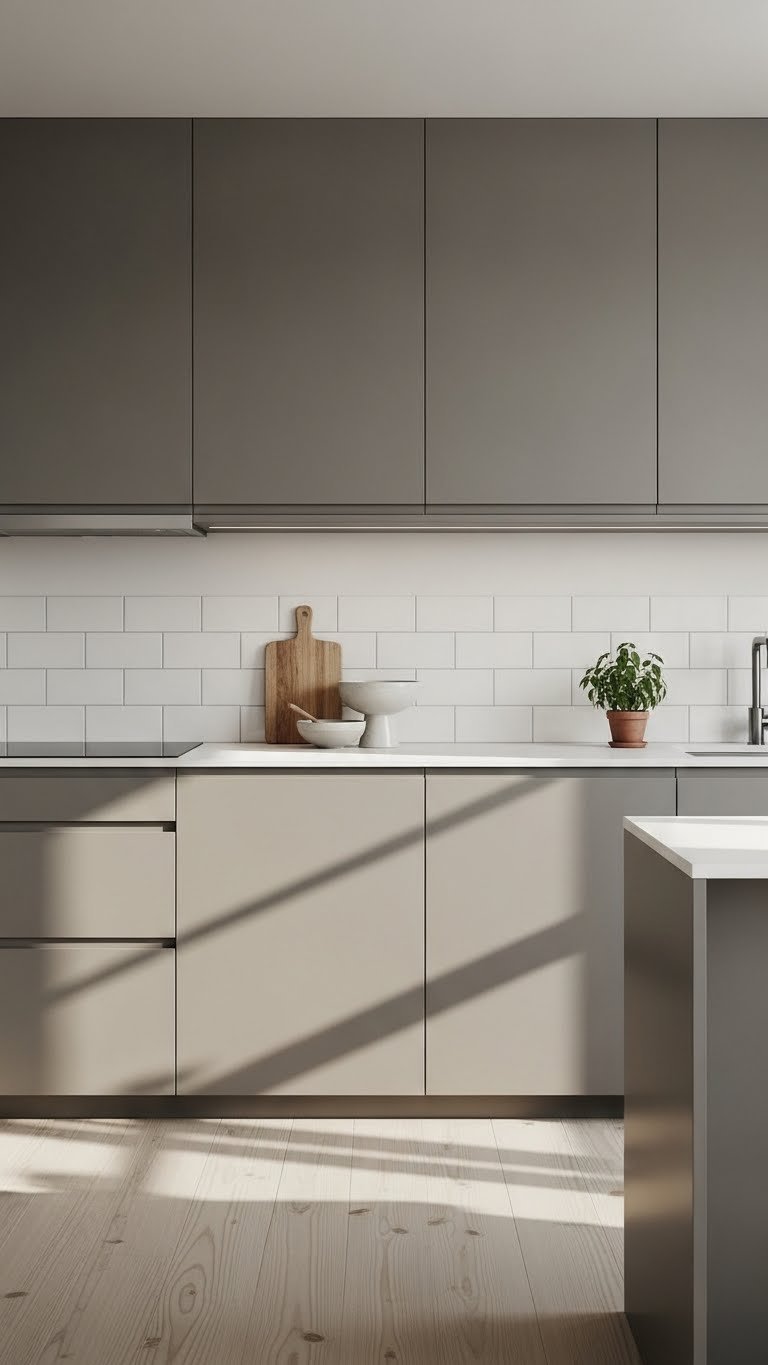
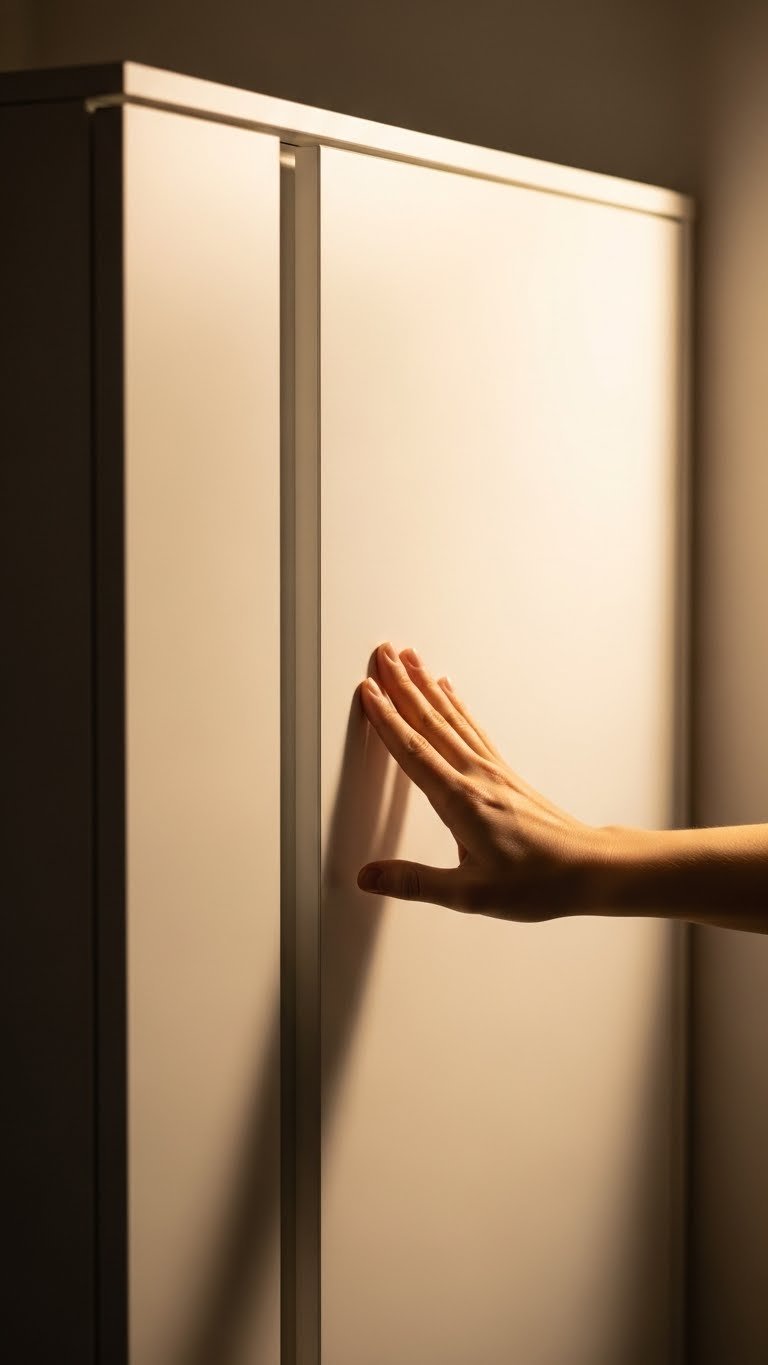
    Handleless cabinets create that seamless, spa-like look trending everywhere—and they actually reduce visual clutter. By removing hardware, you get clean lines and a more spacious feel, even in tiny kitchens.

    If you own, replacing cabinet doors with handleless options costs $300–$800 depending on your cabinet count. For renters, this isn’t viable, but you can remove existing hardware and fill holes with wood filler and paint for a smoother appearance. Handleless cabinets use a soft-close push mechanism or finger indent design, so they’re surprisingly practical—no more handles to grab with wet hands or bump into.

    Look for these at IKEA (budget-friendly), Wayfair, or Home Depot for mid-range options.

    Pro tip: Pair handleless cabinets with motion-sensor LED lighting inside to make them feel high-tech and functional.

    Your kitchen instantly looks more modern and intentional. Daily use becomes easier, and you’ll love how uncluttered the visual feel becomes.

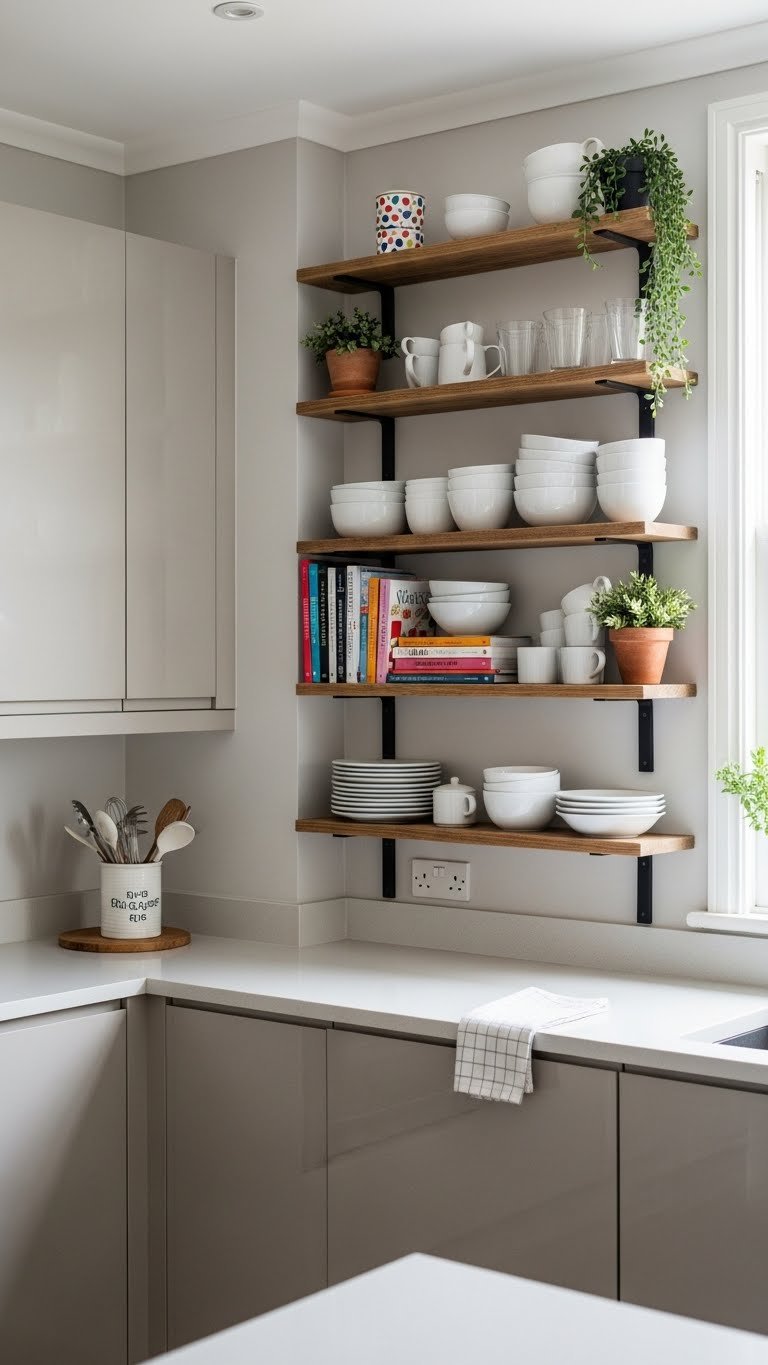
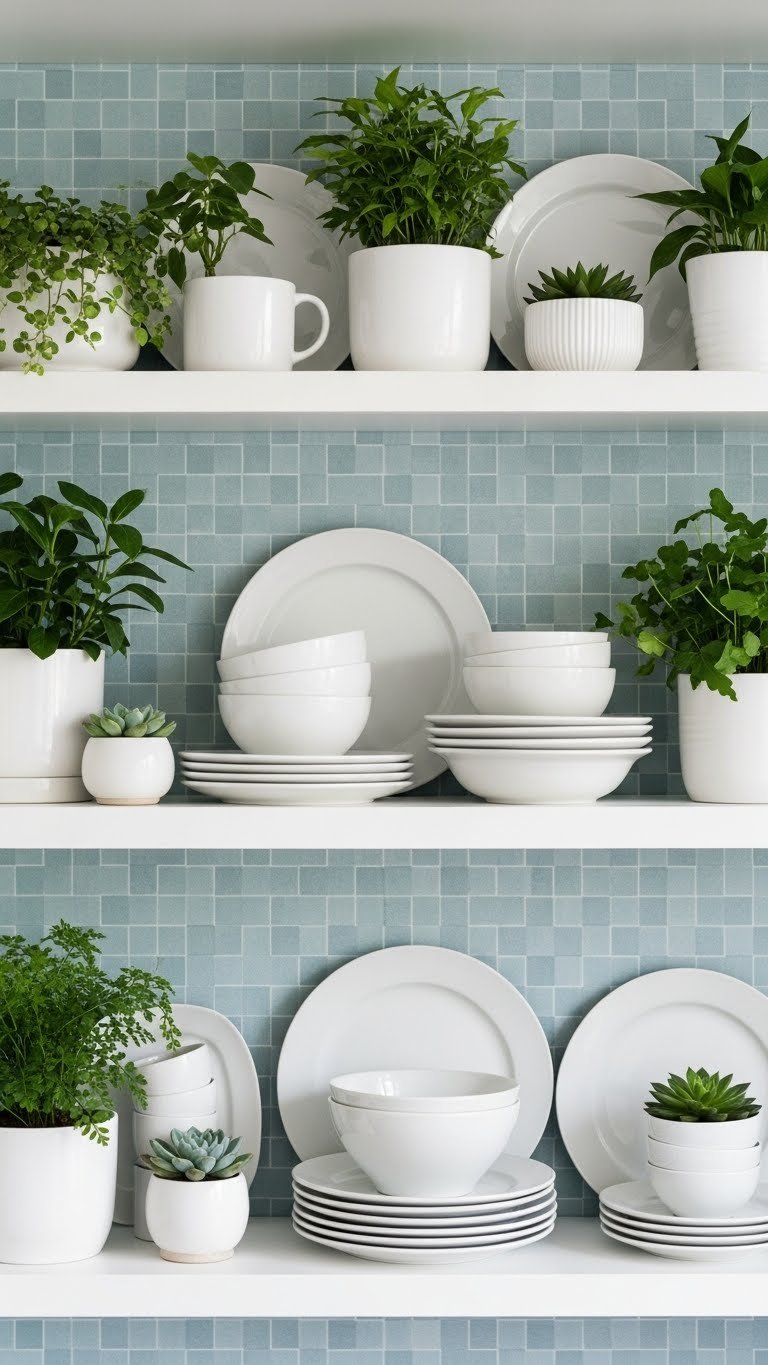
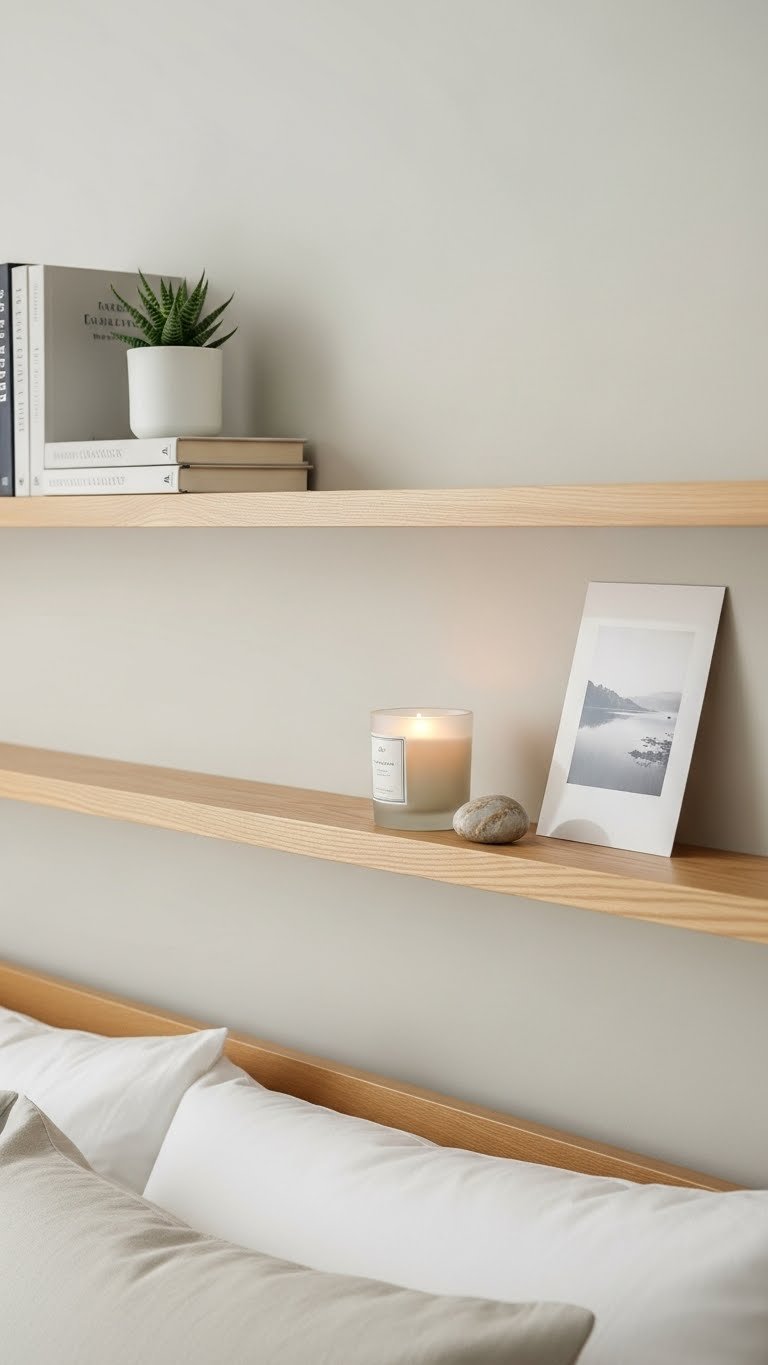
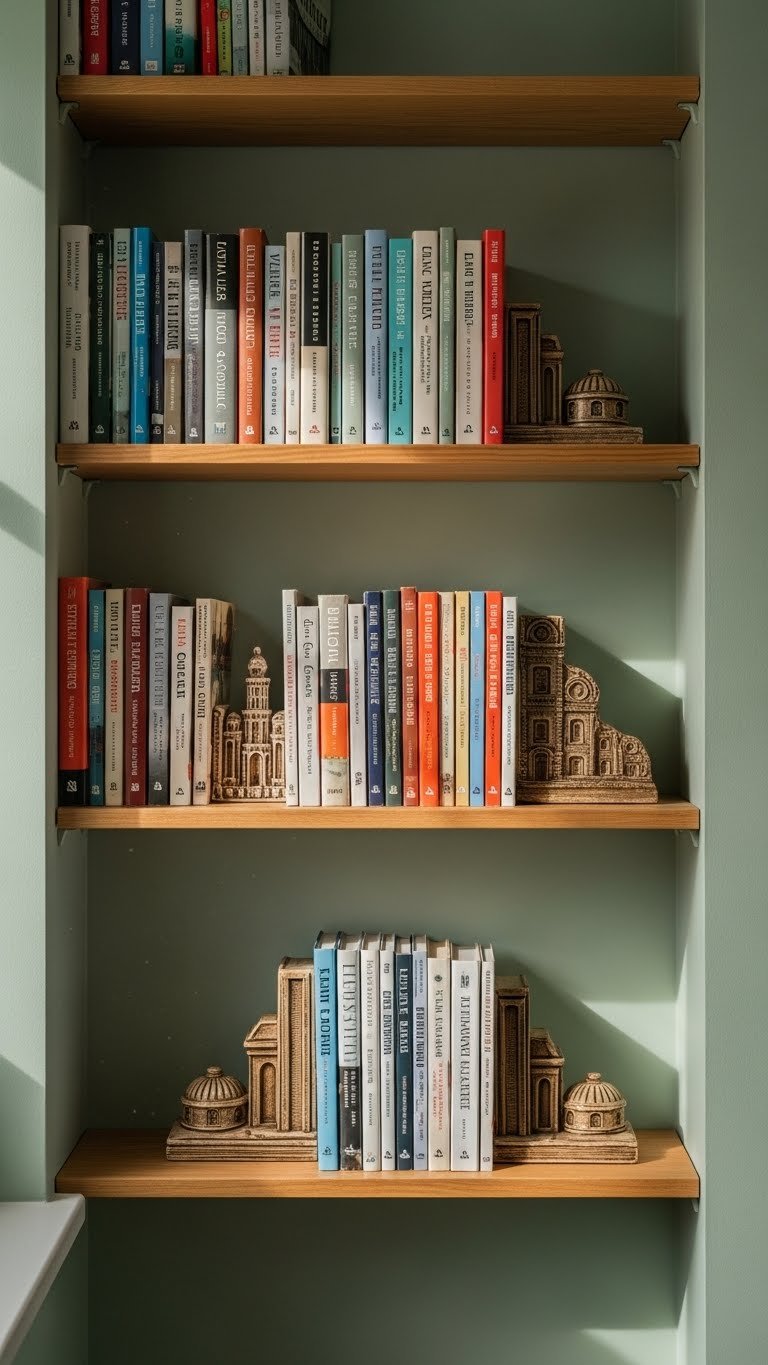
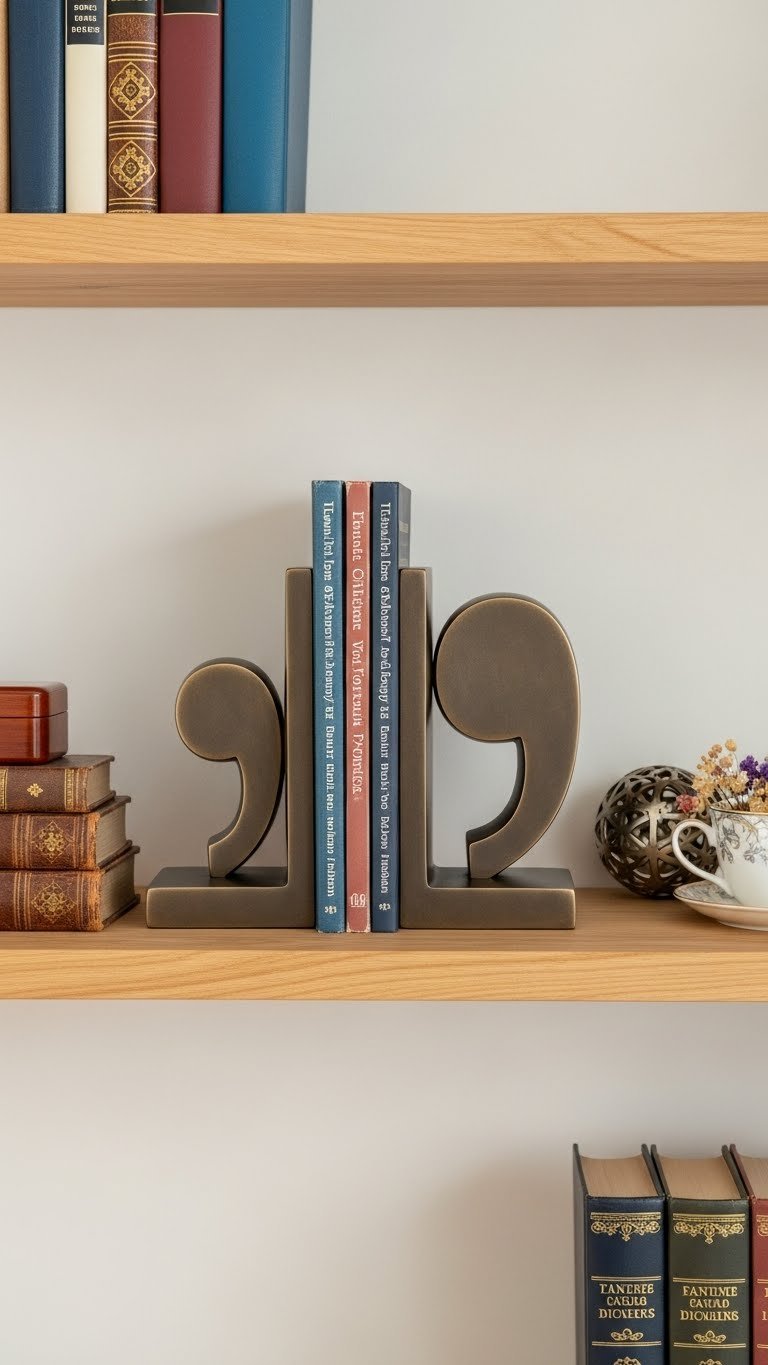
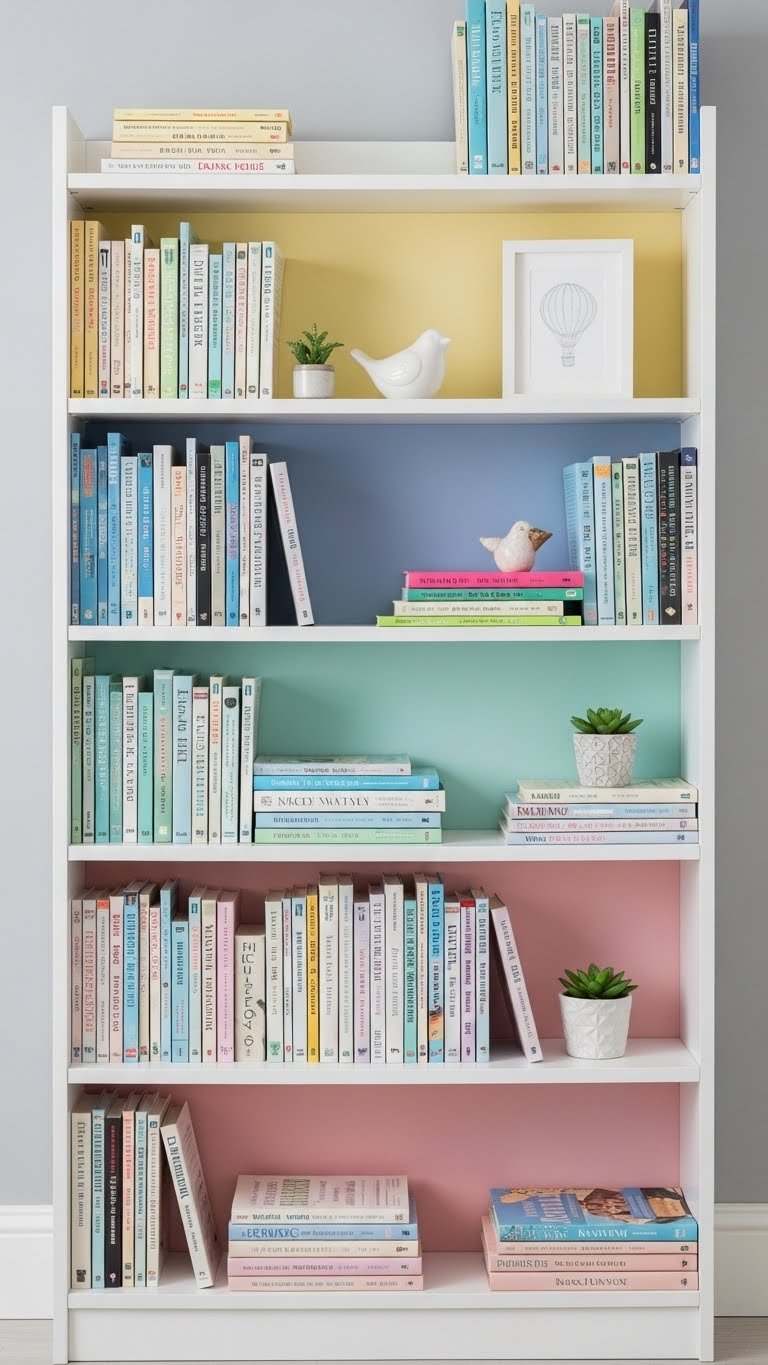
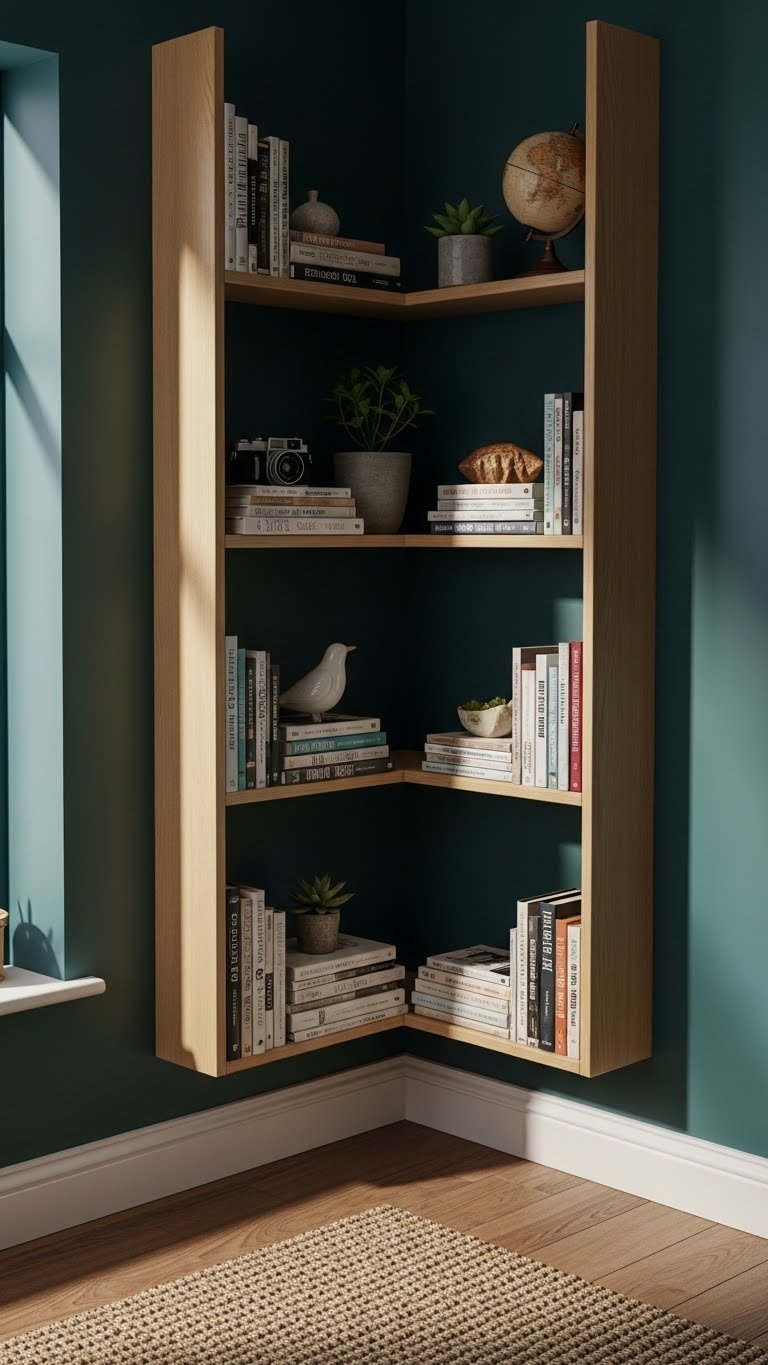
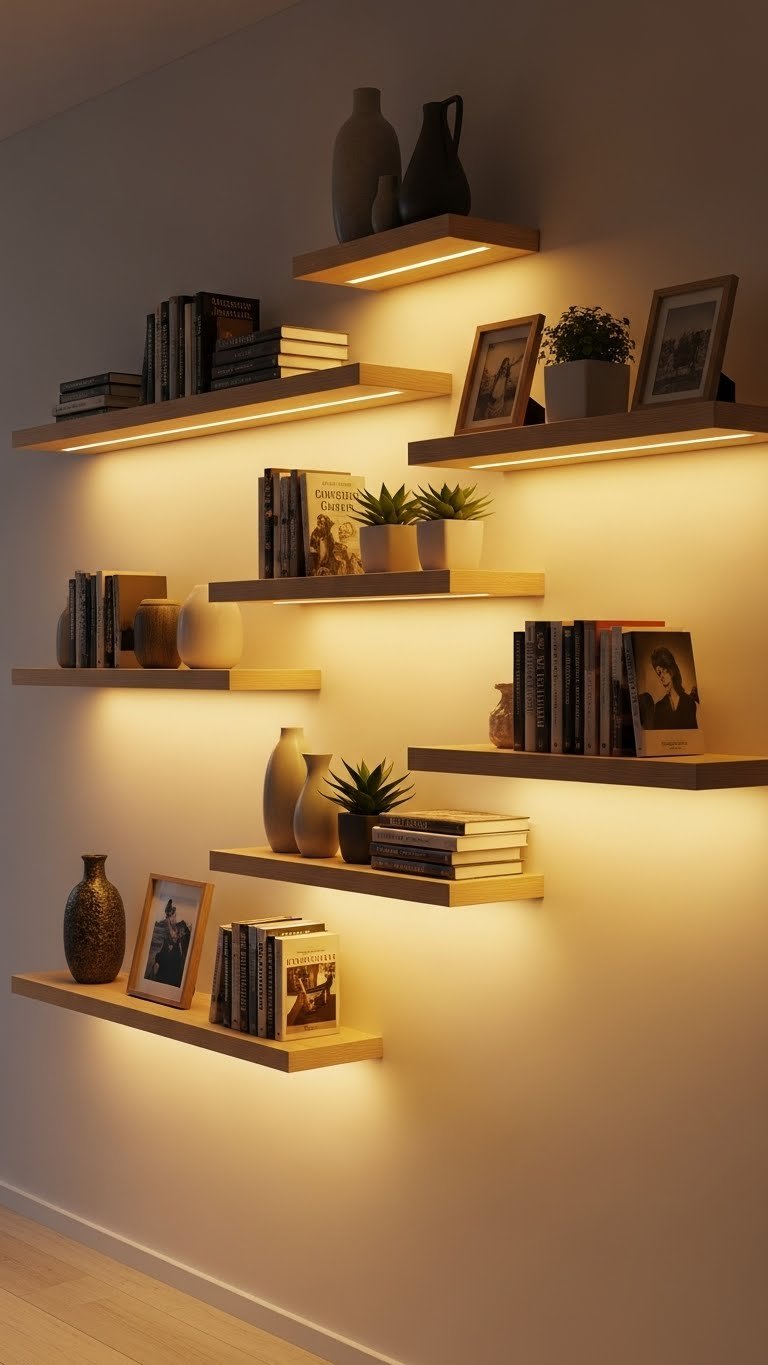
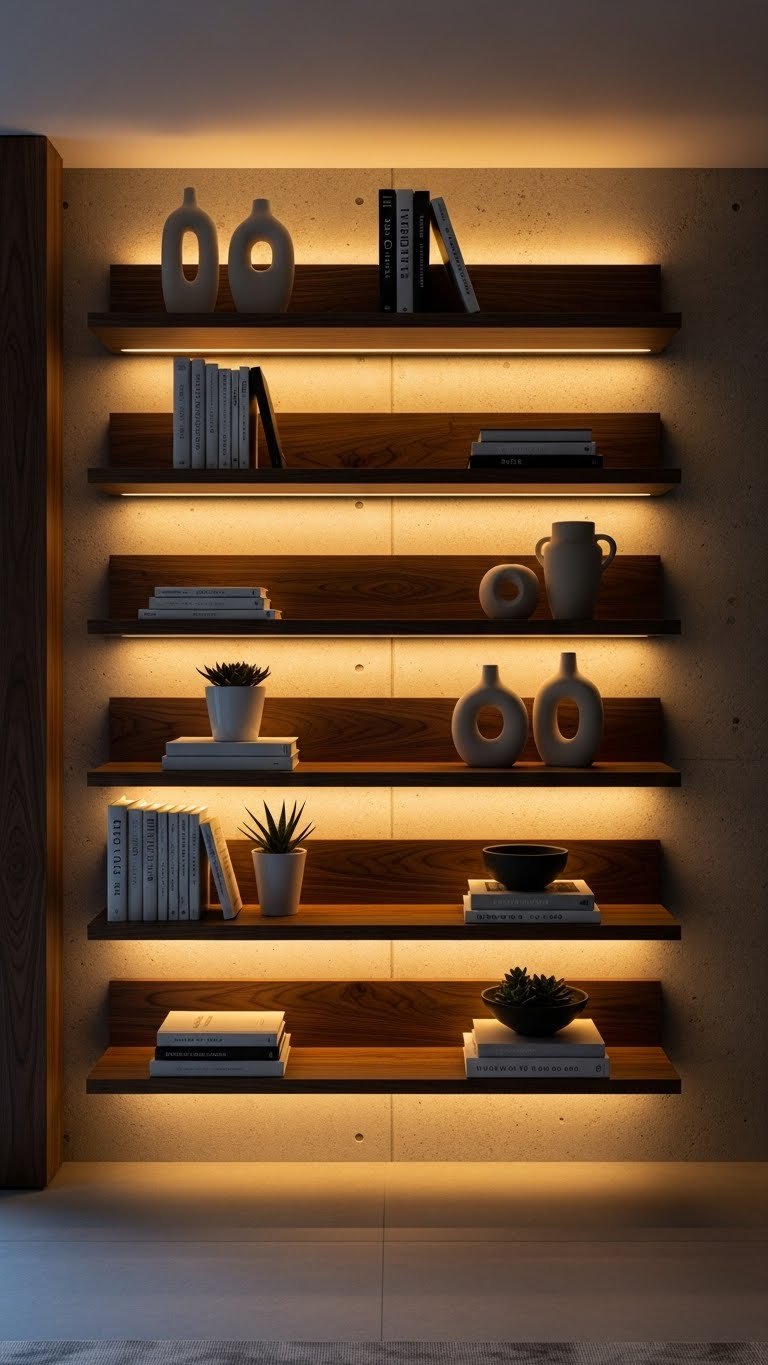
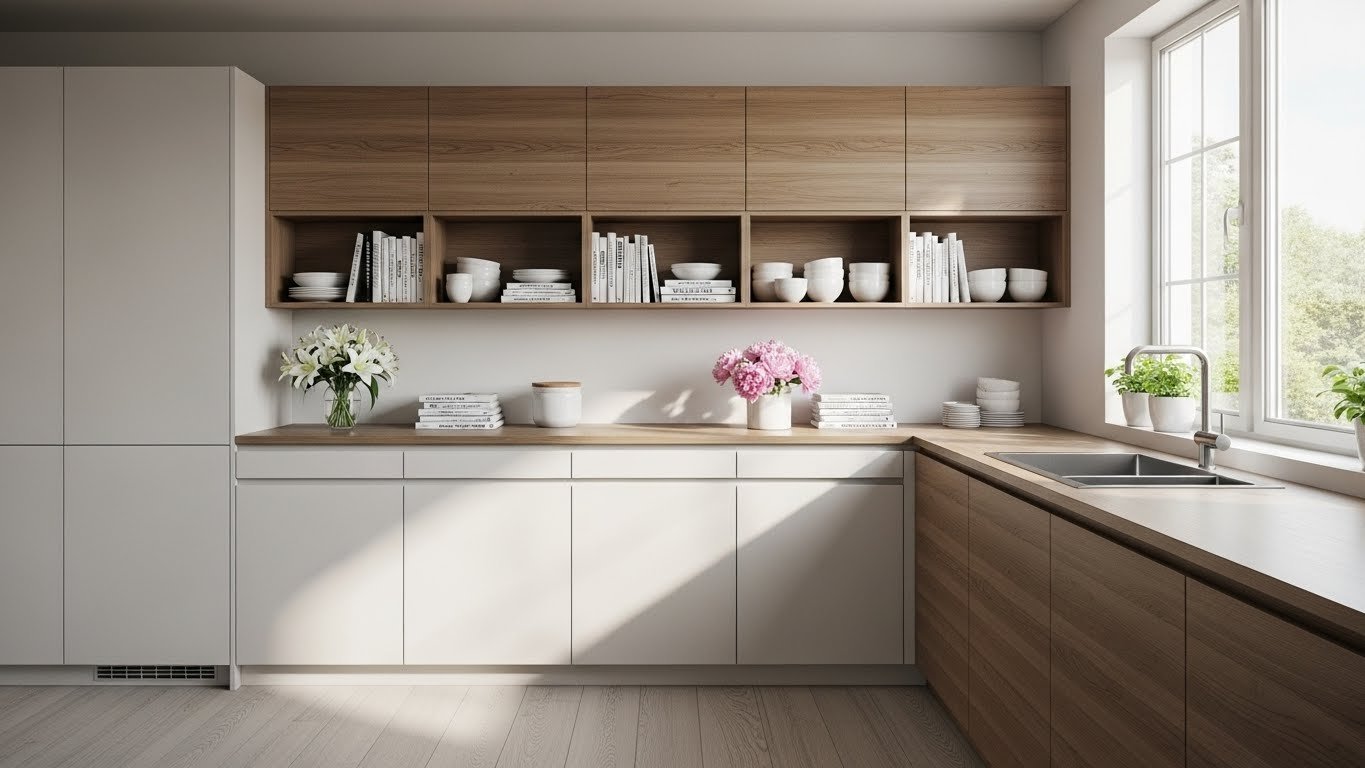
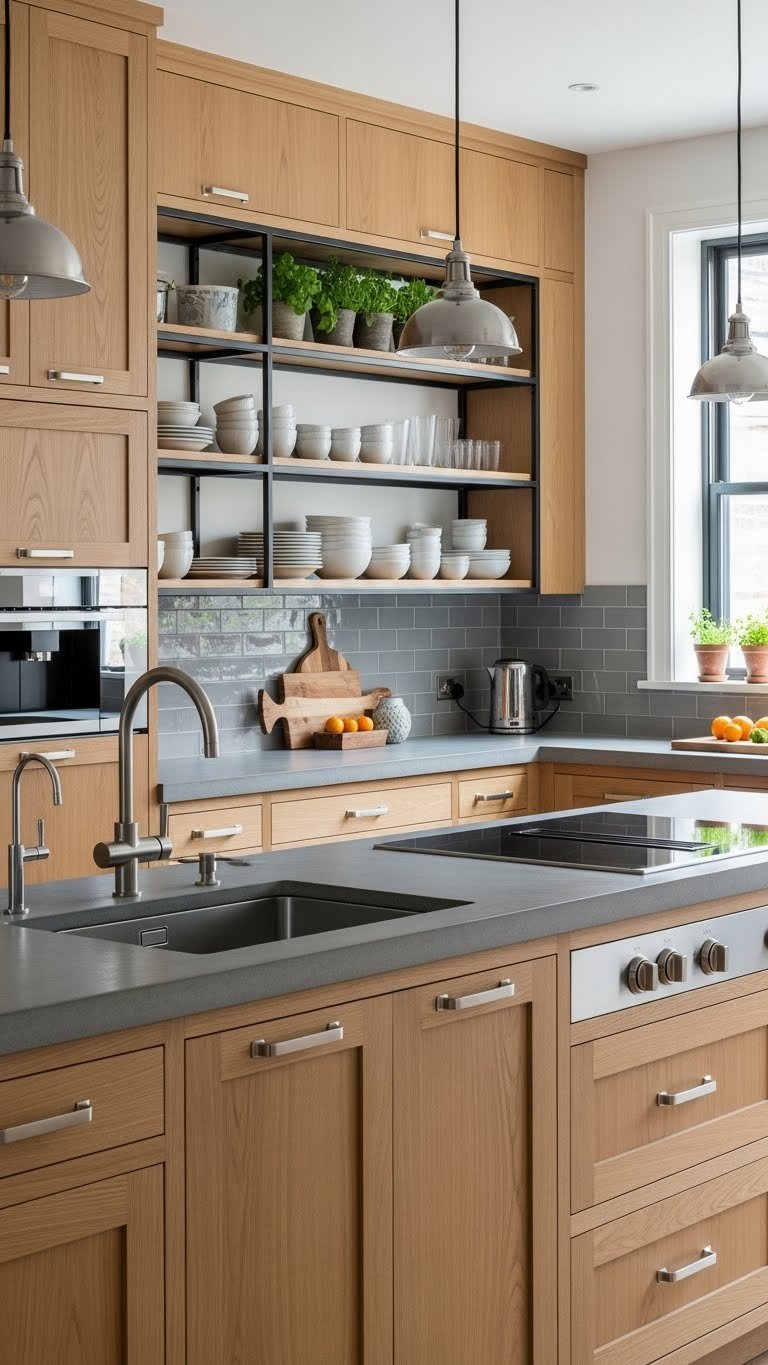
    3. Add Open Shelving in One Accent Spot

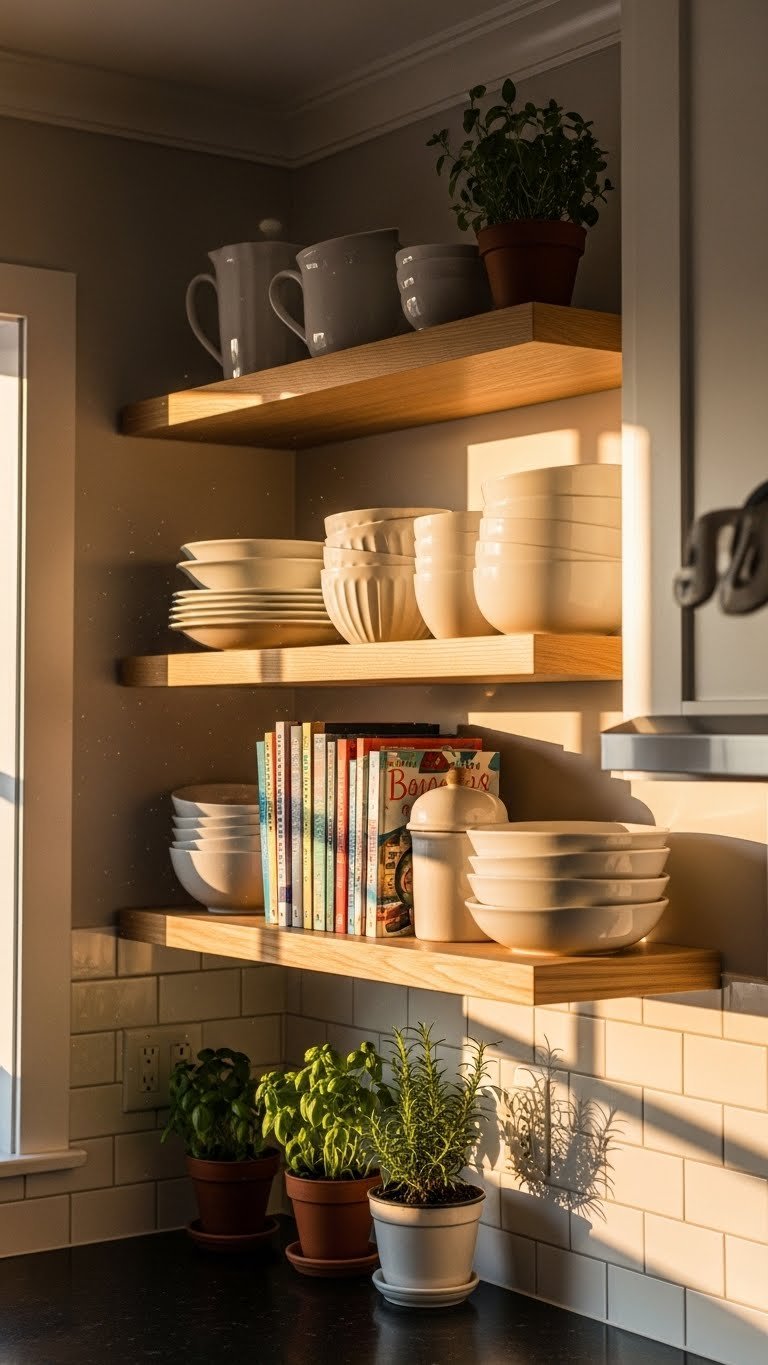
    Open shelving makes kitchens feel airier and gives you a chance to display items you actually love. Instead of replacing all cabinets, try adding open shelves to just one wall—it’s a designer trick that costs way less.

    Floating shelves run $40–$150 per shelf depending on materials and length. Installation is DIY-friendly if you have a stud finder and drill ($30–$50 total for tools you’ll use forever), or hire a handyperson for $100–$200. The key: style intentionally with cookbooks, plants, and dishware you’d want photographed. Keep clutter-prone items behind closed doors.

    Measure your wall space and choose shelves that match your cabinet finish (walnut, white, natural oak) for cohesion.

    Pro tip: This works beautifully as a renter if you use removable adhesive shelf brackets—no wall damage.

    Your kitchen instantly feels more luxe and personal. You’ve created an Instagram-worthy focal point without the cost of a full cabinet refresh.

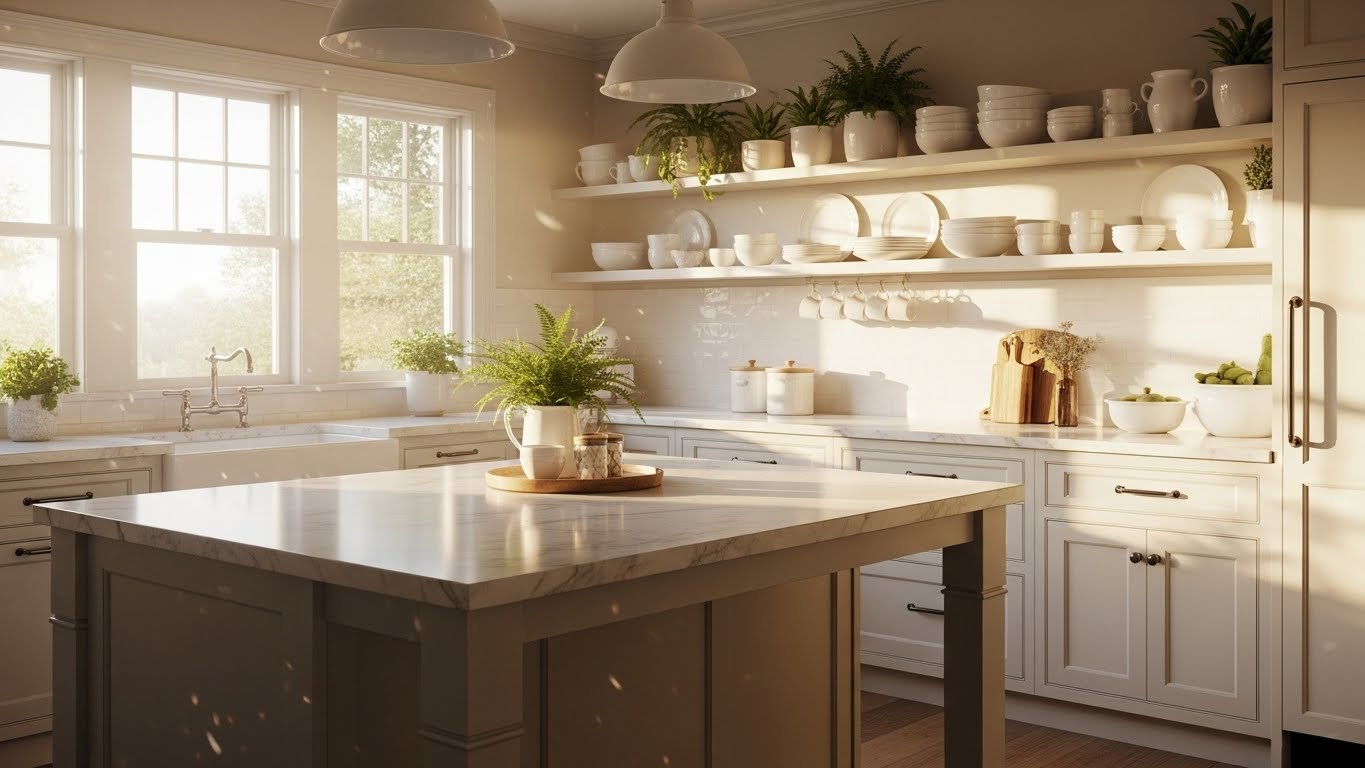
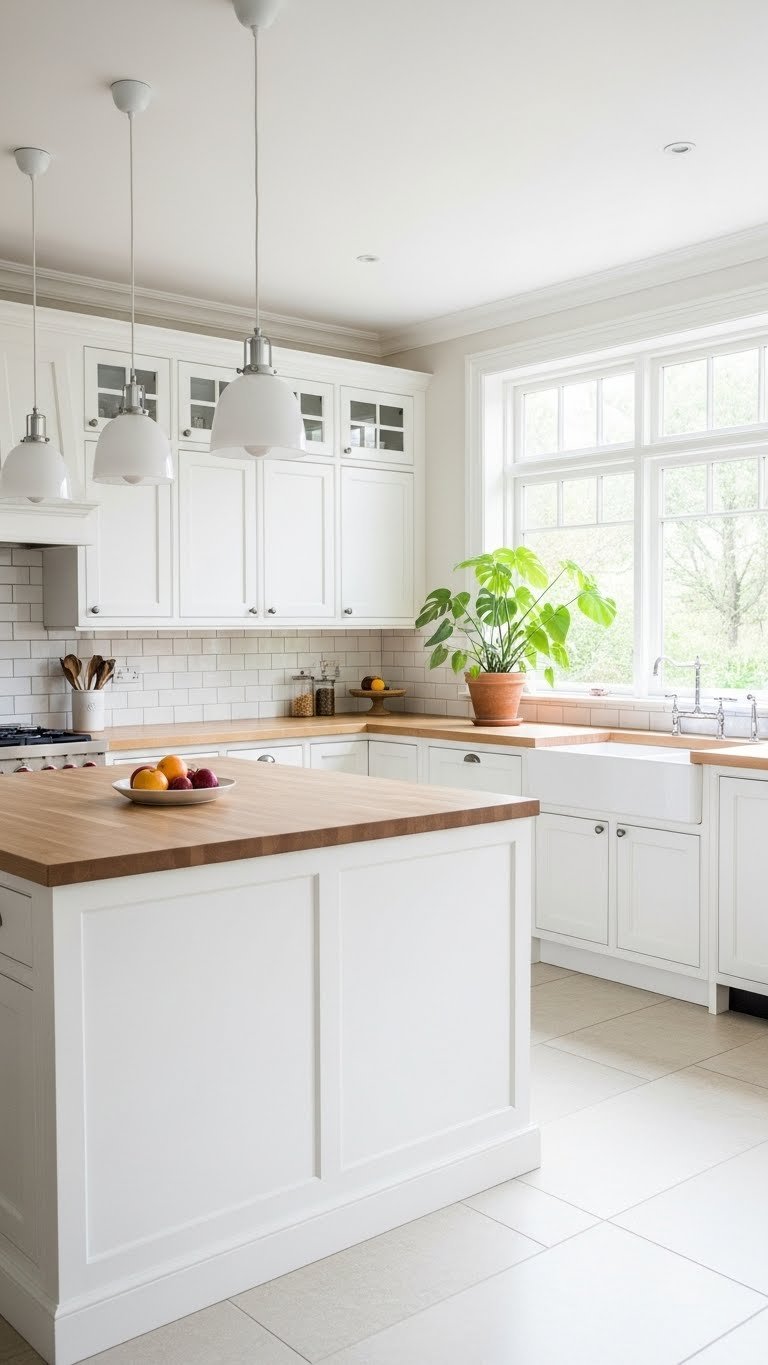
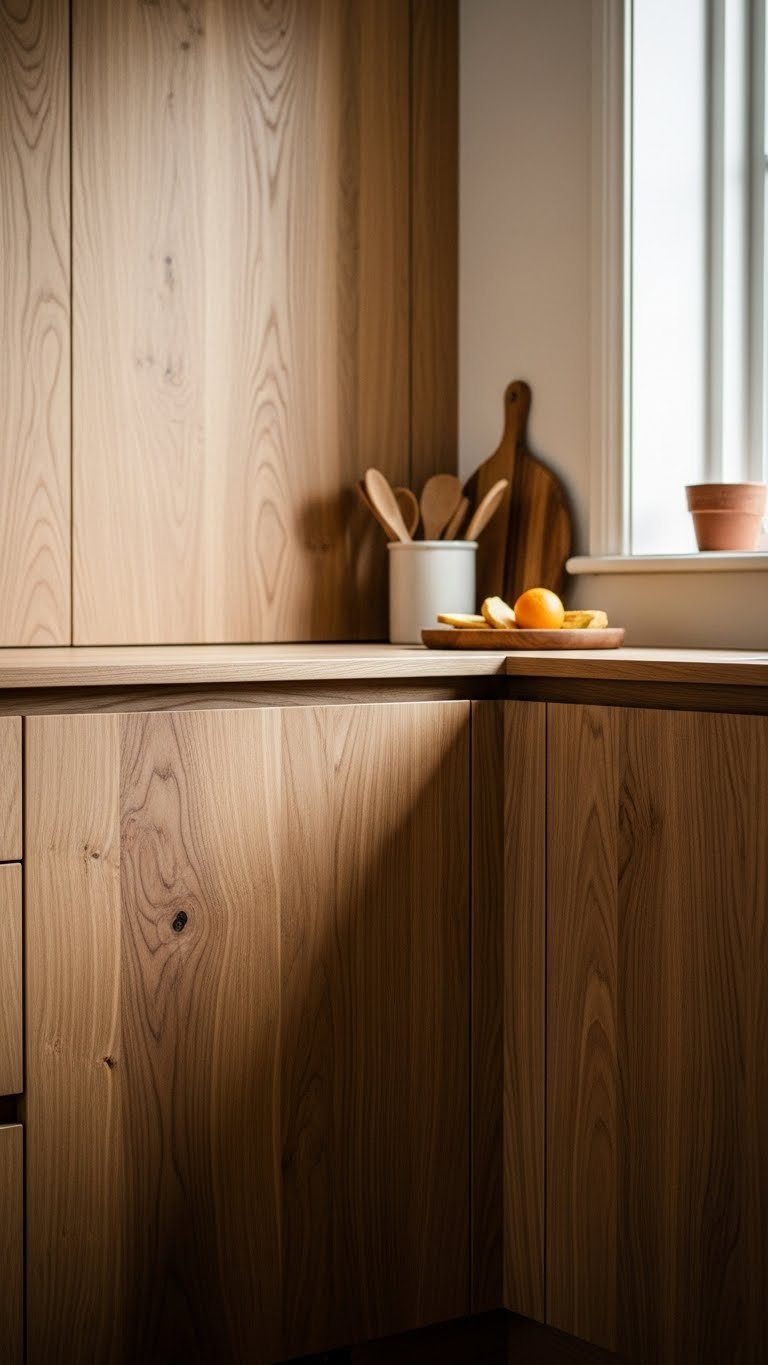
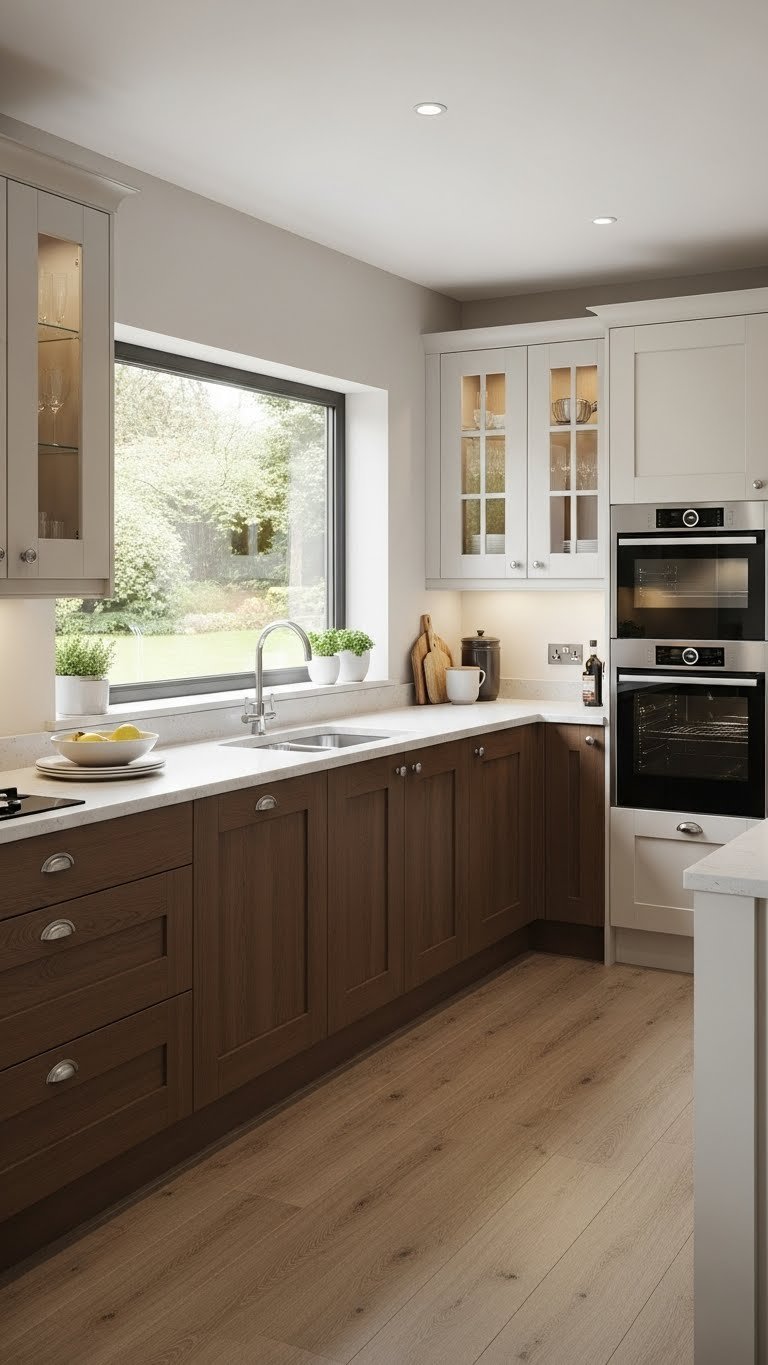
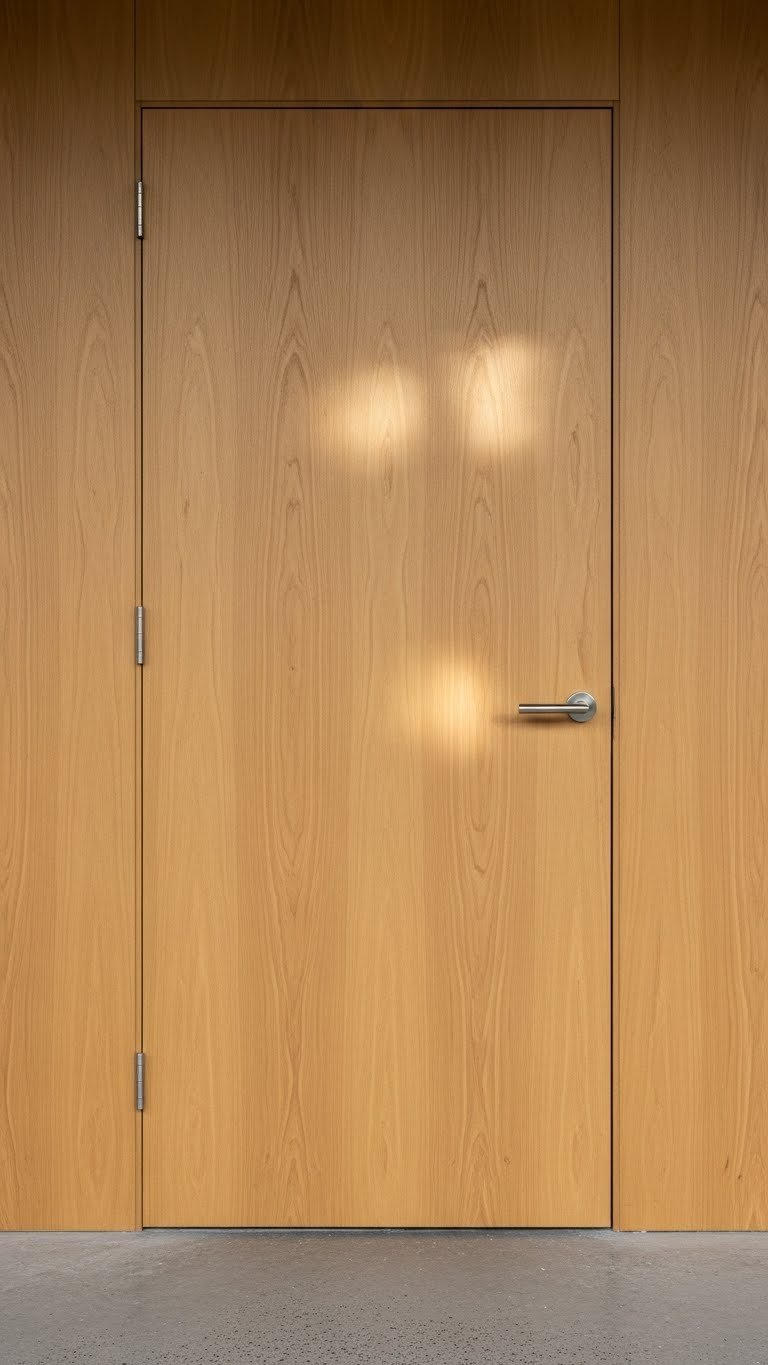
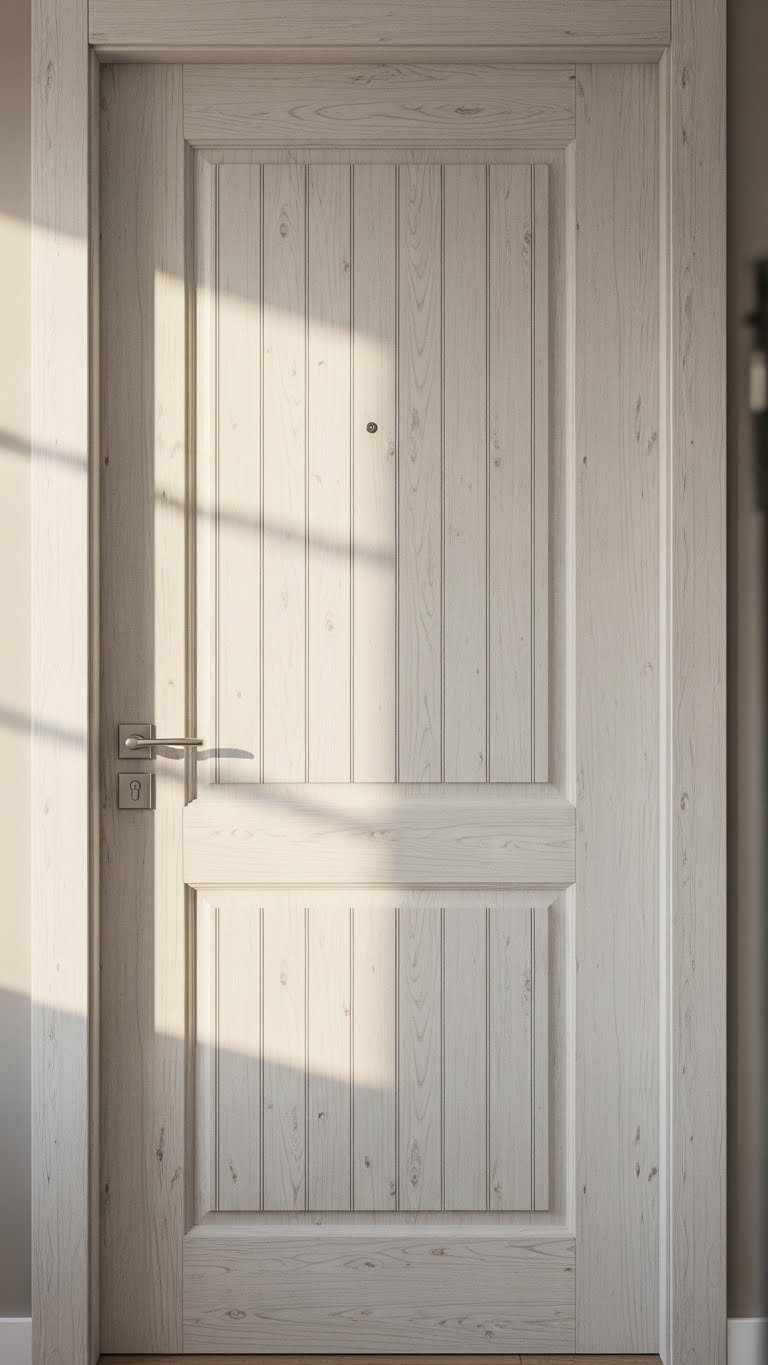
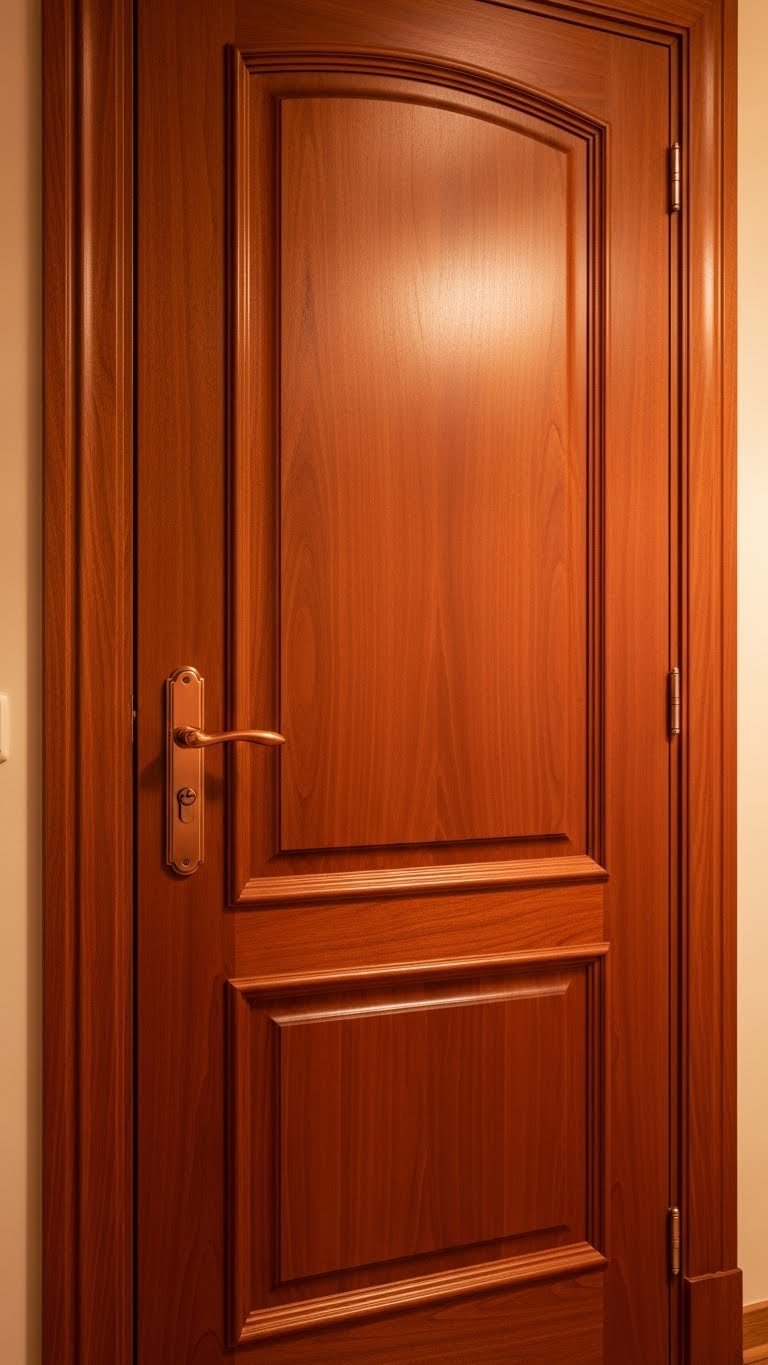
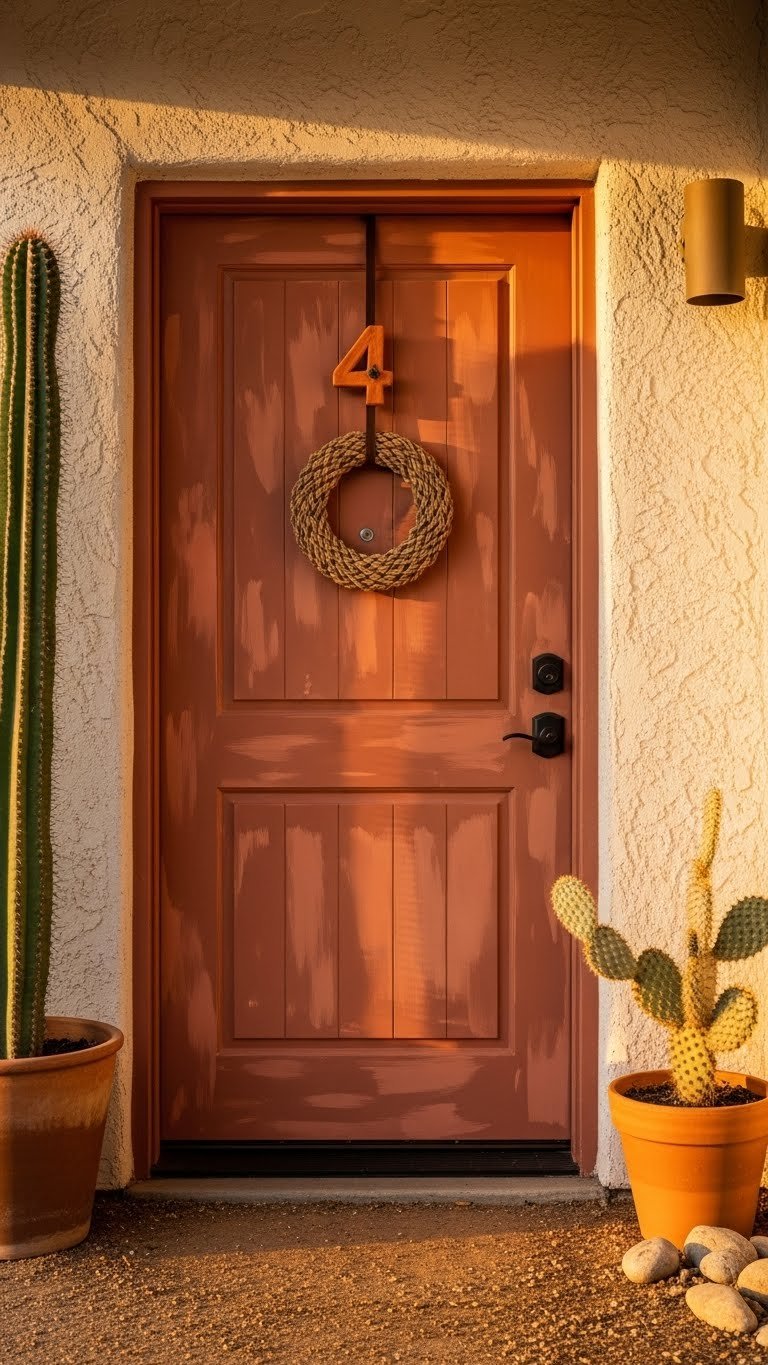
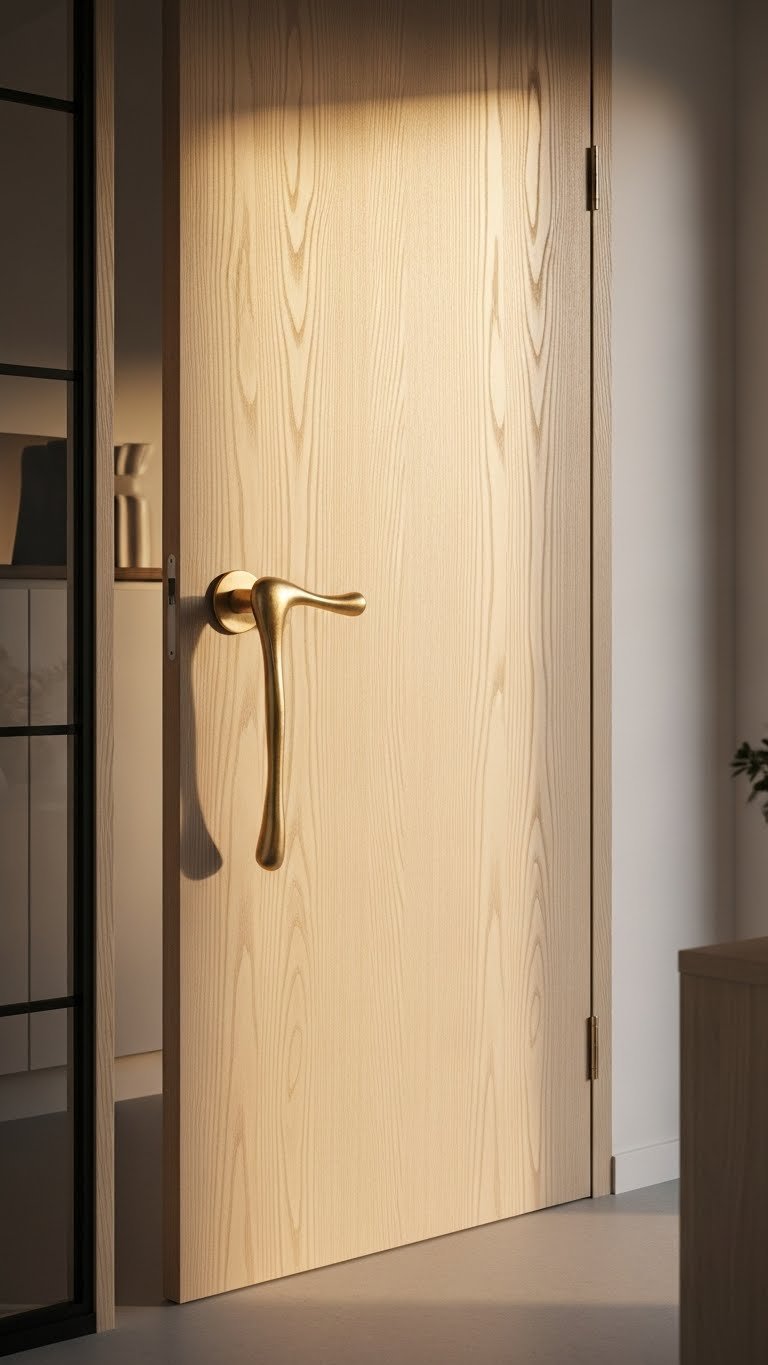
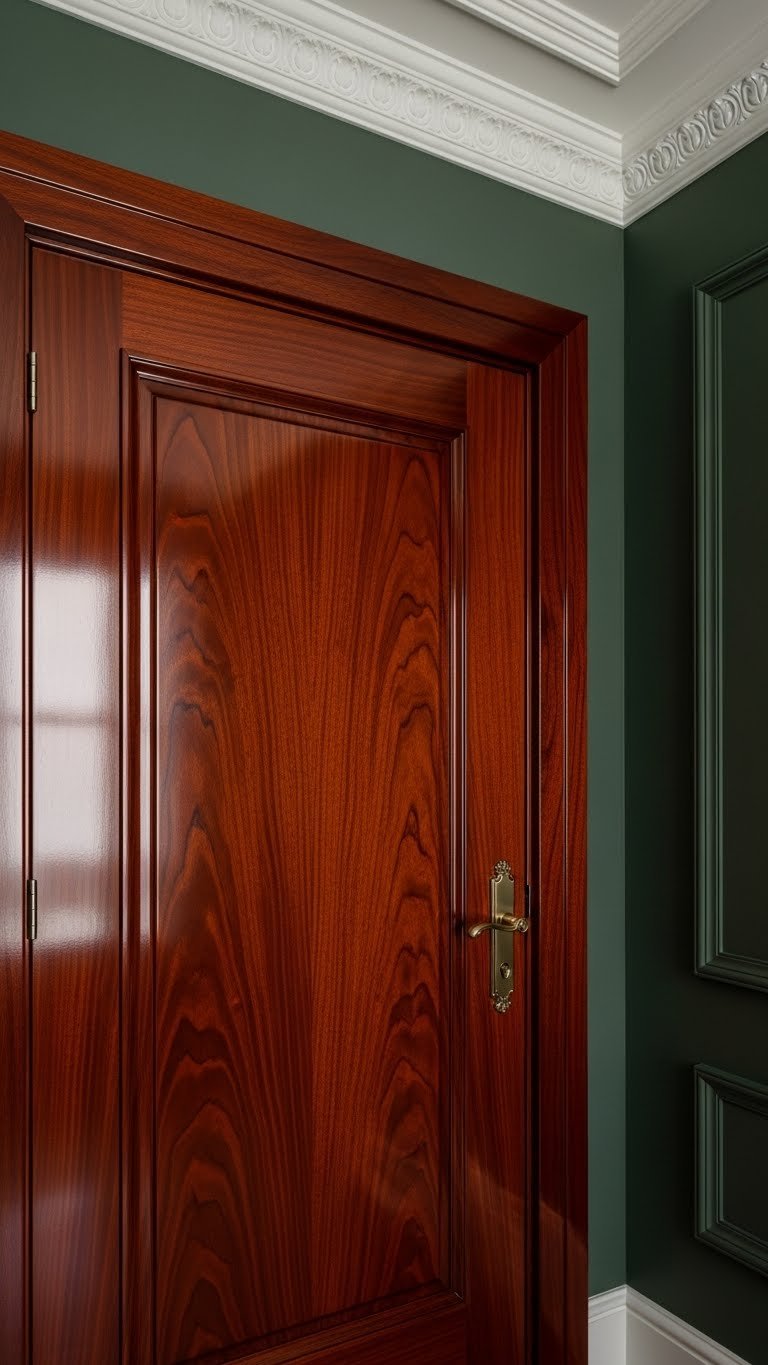
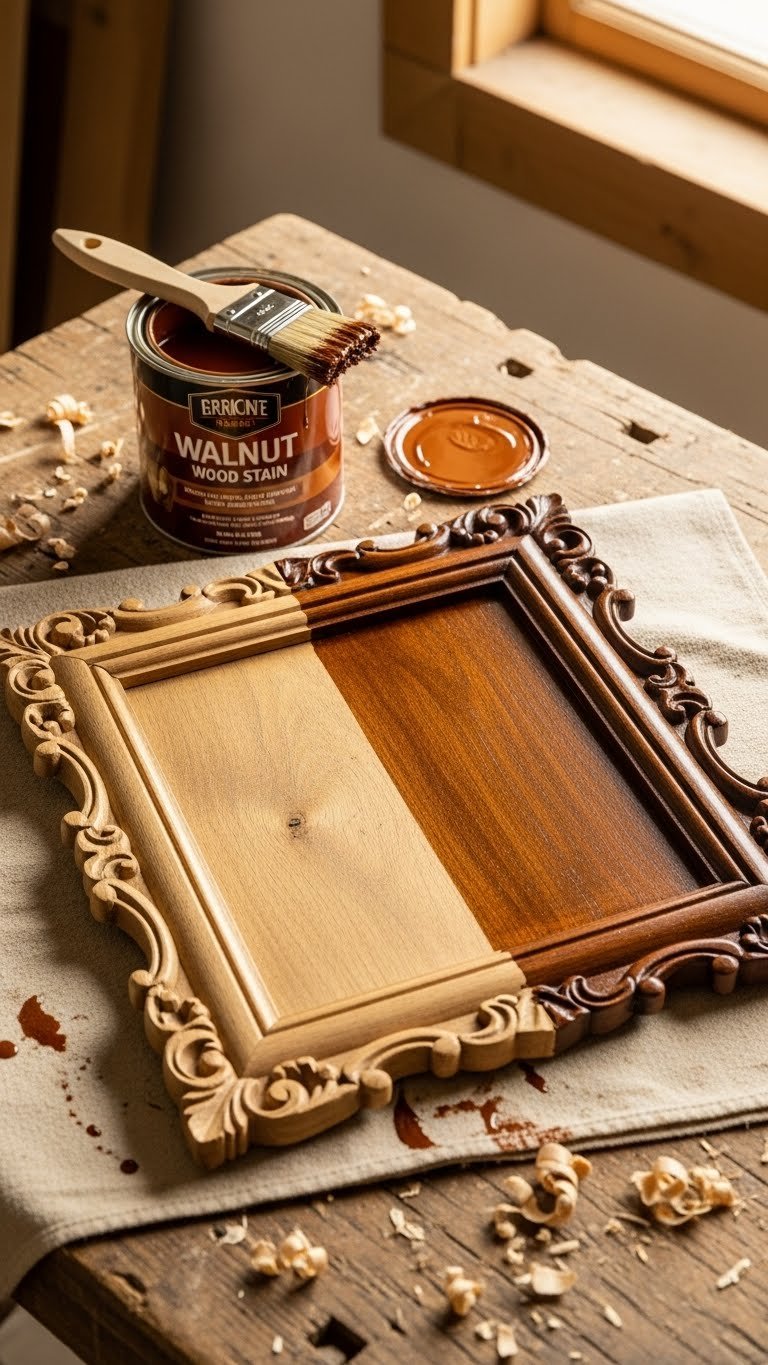
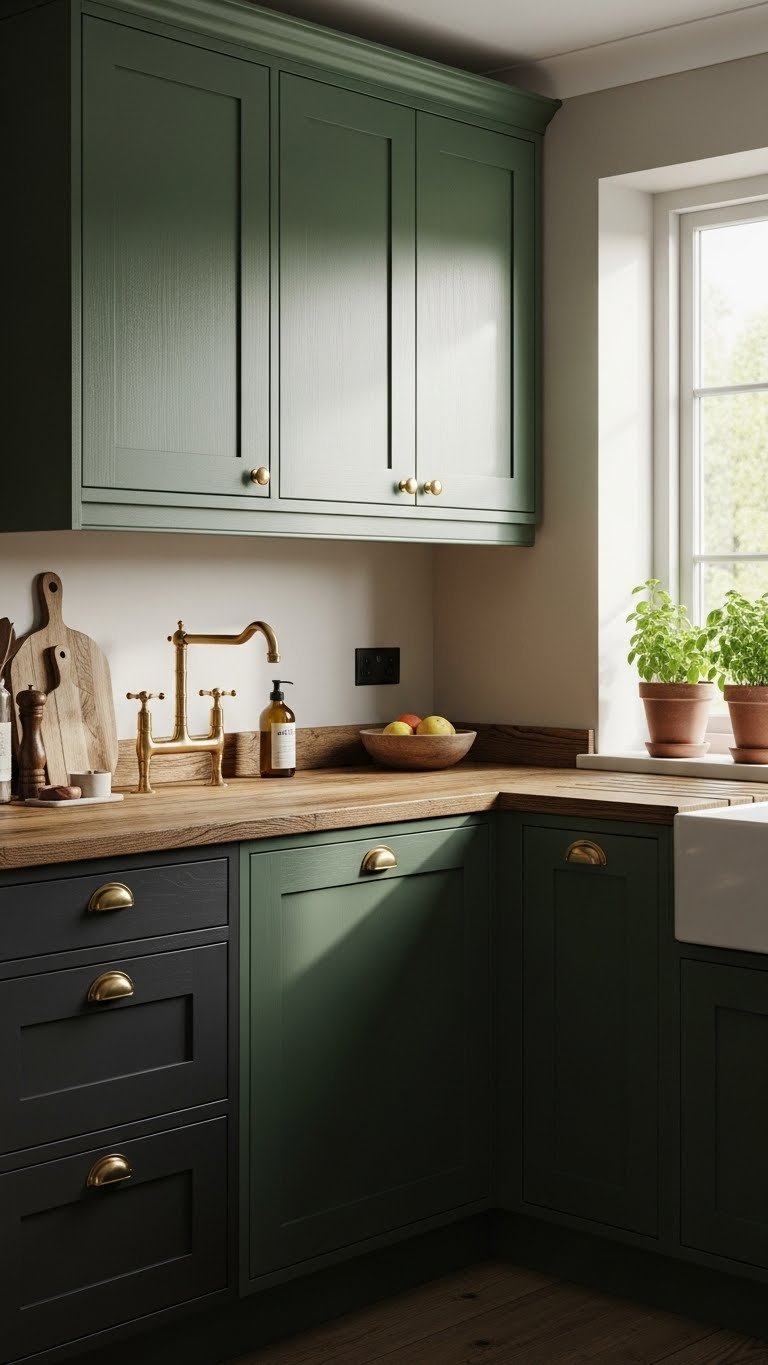
    4. Choose Warm Wood Tones Over Cool Whites

    The shift from stark white to warm woods (oak, walnut, cherry) is one of 2025’s biggest trends—and for good reason. These tones feel cozier, more connected to nature, and hide wear better than white over time.

    If you’re ordering new cabinets, specify warm wood finishes; custom options run $3,000–$8,000+. Already have cabinets? Staining or refinishing costs $400–$1,200 and can be DIY if you’re patient. MINWAX or Varathane stains ($15–$25 per can) work well on existing wood—test on a hidden area first. This change pairs beautifully with gold or brushed brass hardware for an elevated look.

    Warm woods work in modern, farmhouse, transitional, and traditional styles, making them incredibly versatile.

    Pro tip: Pair warm cabinets with light countertops to keep the space feeling open and balanced.

    Your kitchen gains warmth and character instantly. The space feels more inviting, and you’ve tapped into biophilic design principles that make kitchens feel like retreats.

    5. Use Budget-Friendly RTA (Ready-to-Assemble) Cabinets

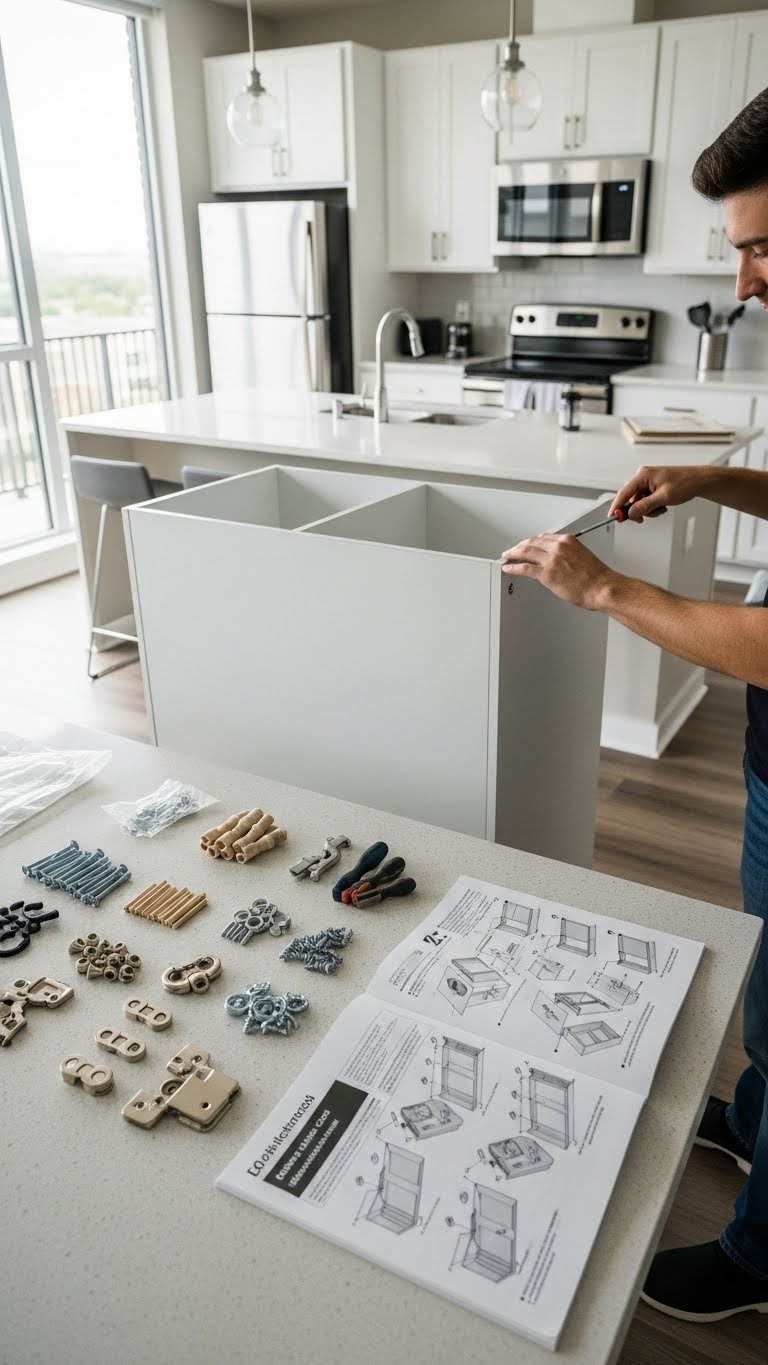
    Ready-to-assemble cabinets have become seriously good—and they’re often 40–50% cheaper than semi-custom or custom options. RTA cabinets arrive flat-packed and ready for you to assemble, making them perfect for renters, budget-conscious homeowners, and quick updates.

    Quality RTA brands like IKEA, Wayfair, and Amazon Basics run $50–$200 per cabinet box depending on size and finish. Assembly takes 30–90 minutes per cabinet with basic tools (a drill is helpful but not required). You can DIY completely or hire a handyperson for $50–$100 per cabinet to handle assembly. The styles have evolved dramatically—you’ll find handleless, two-tone, and even textured options.

    Pro tip: Measure twice before ordering. RTA cabinets typically can’t be returned after assembly.

    You get a fresh kitchen look without the years-long wait or five-figure price tag. This option makes cabinet updates accessible for anyone, which is why it’s surging in popularity.

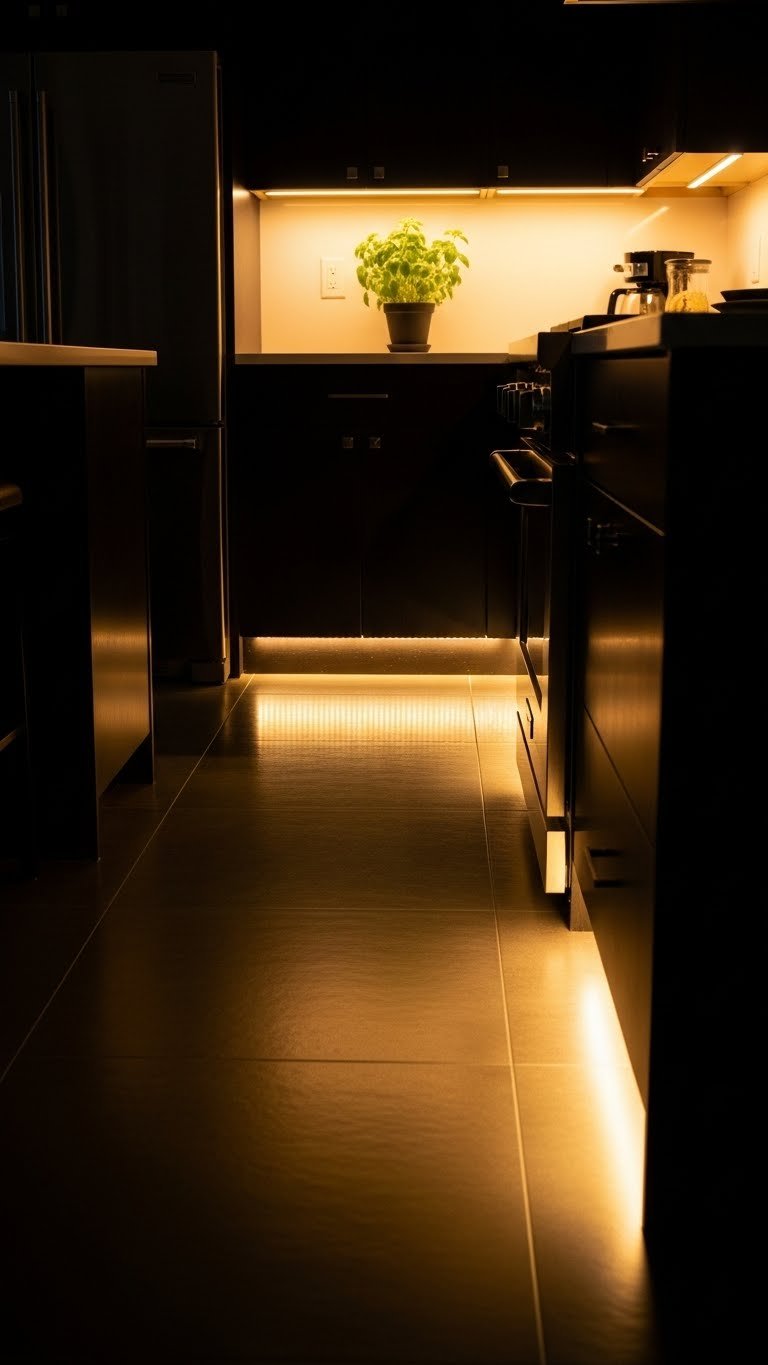
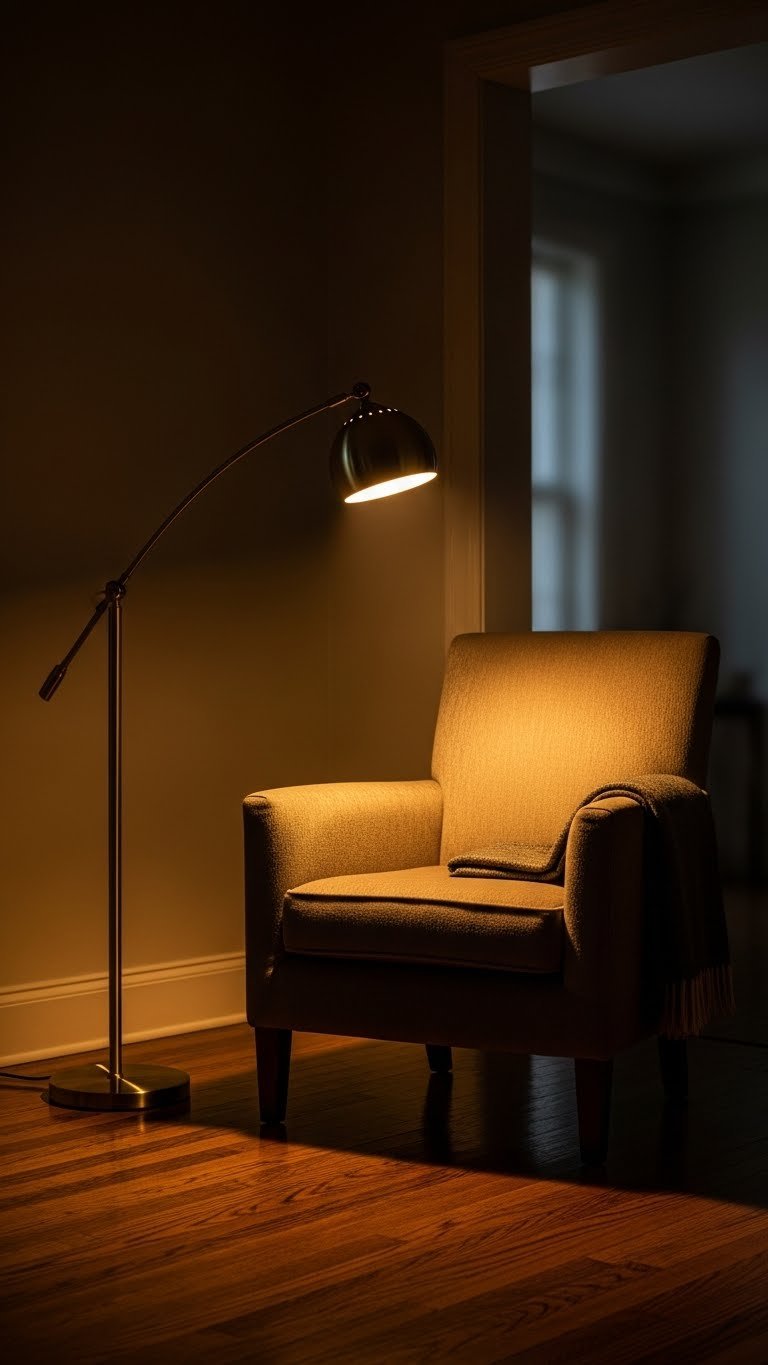
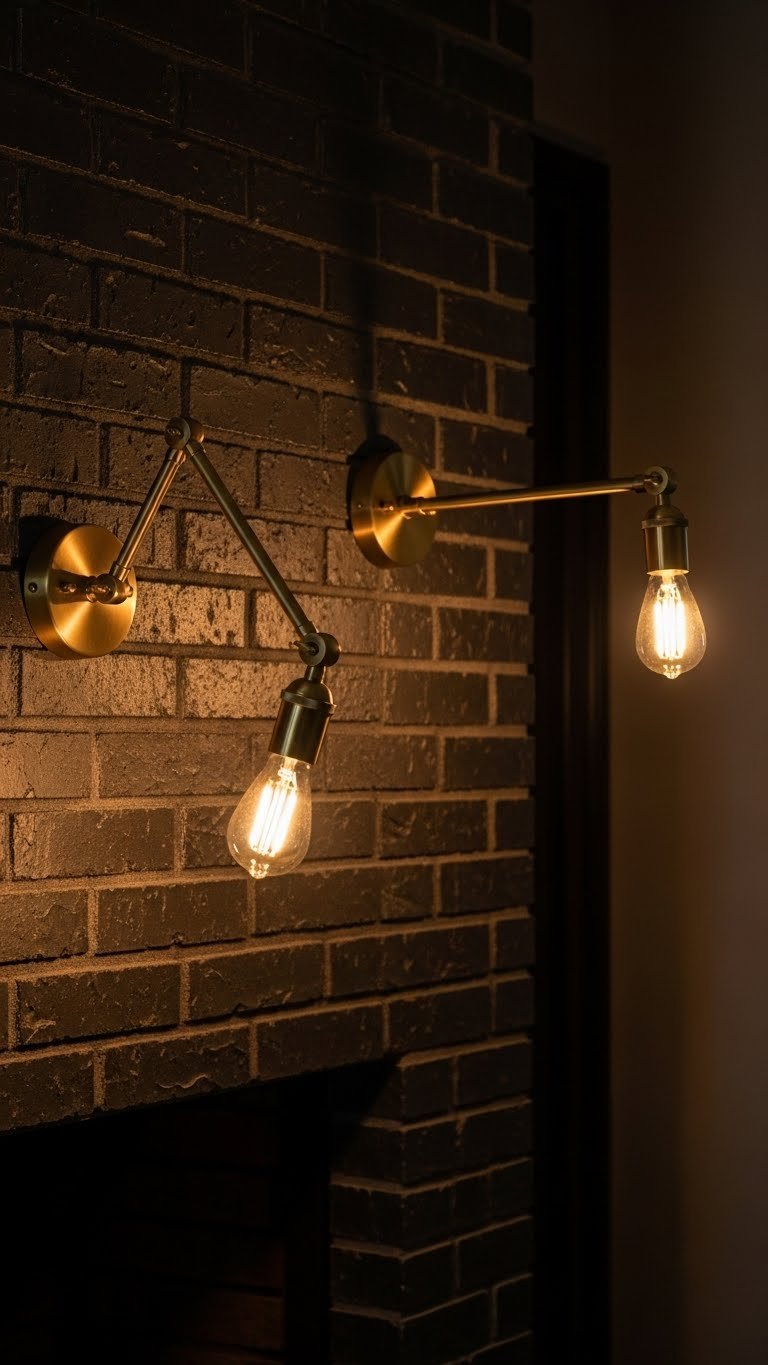
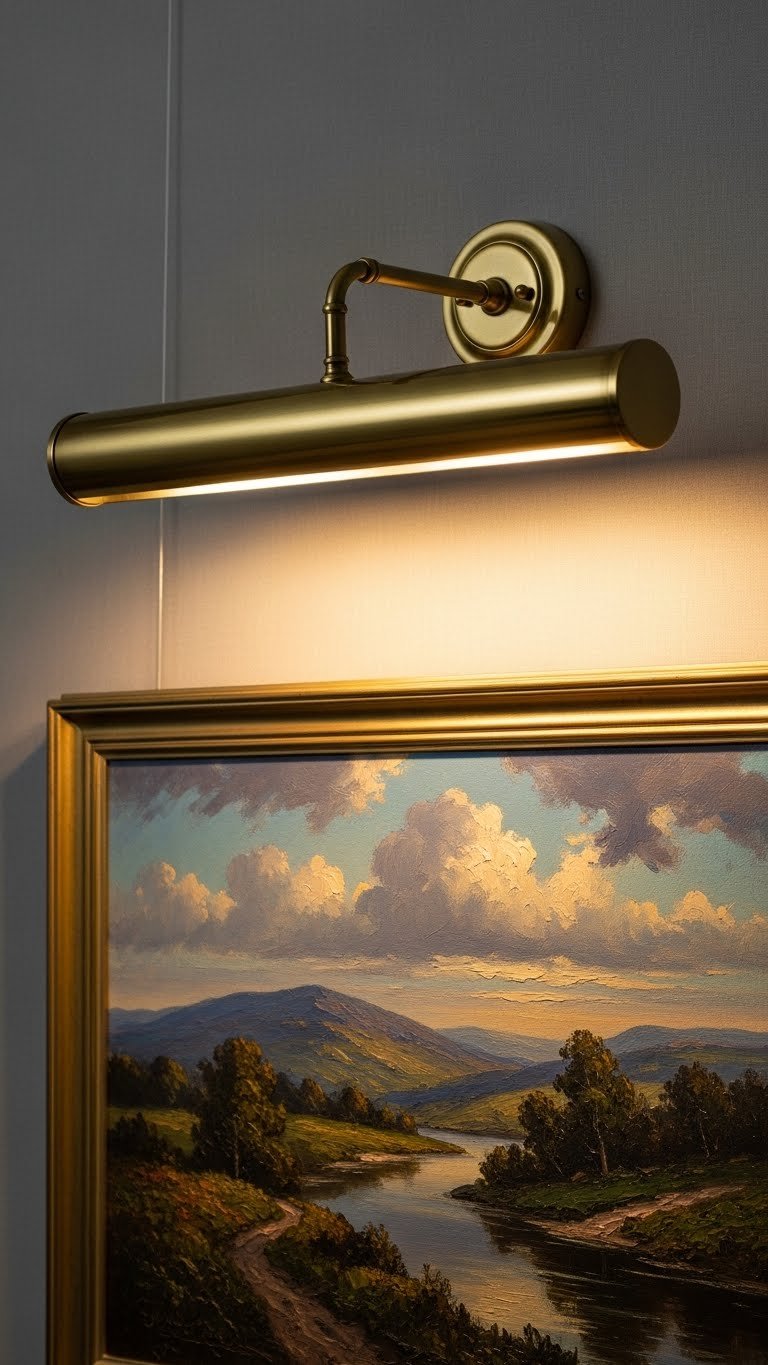
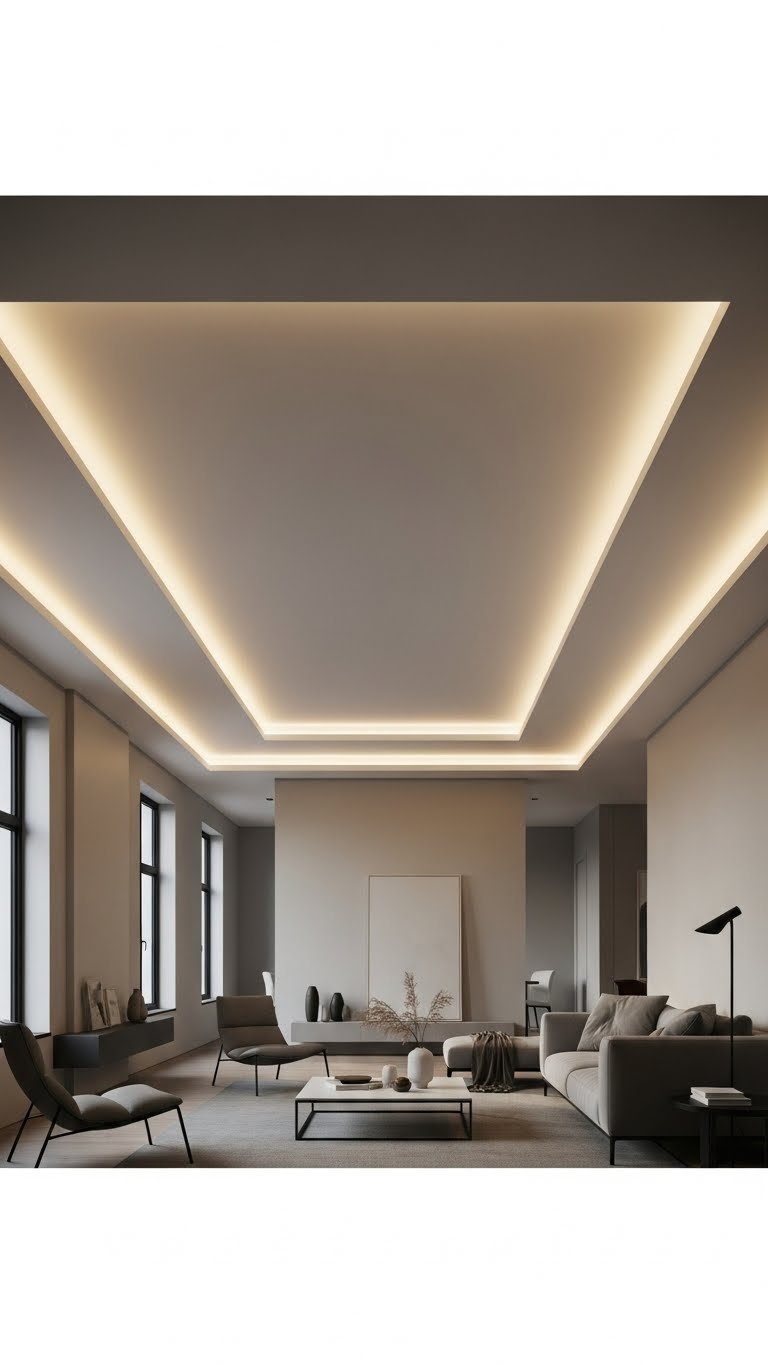
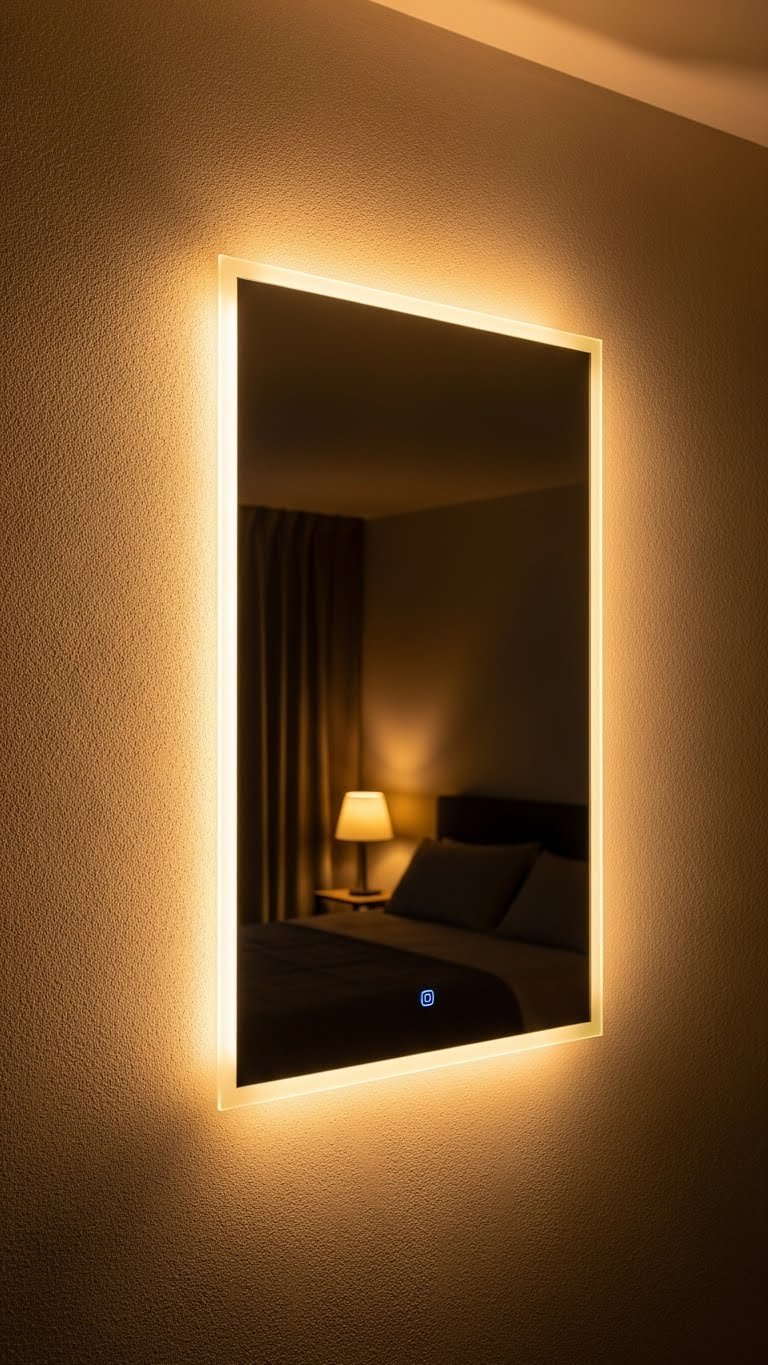
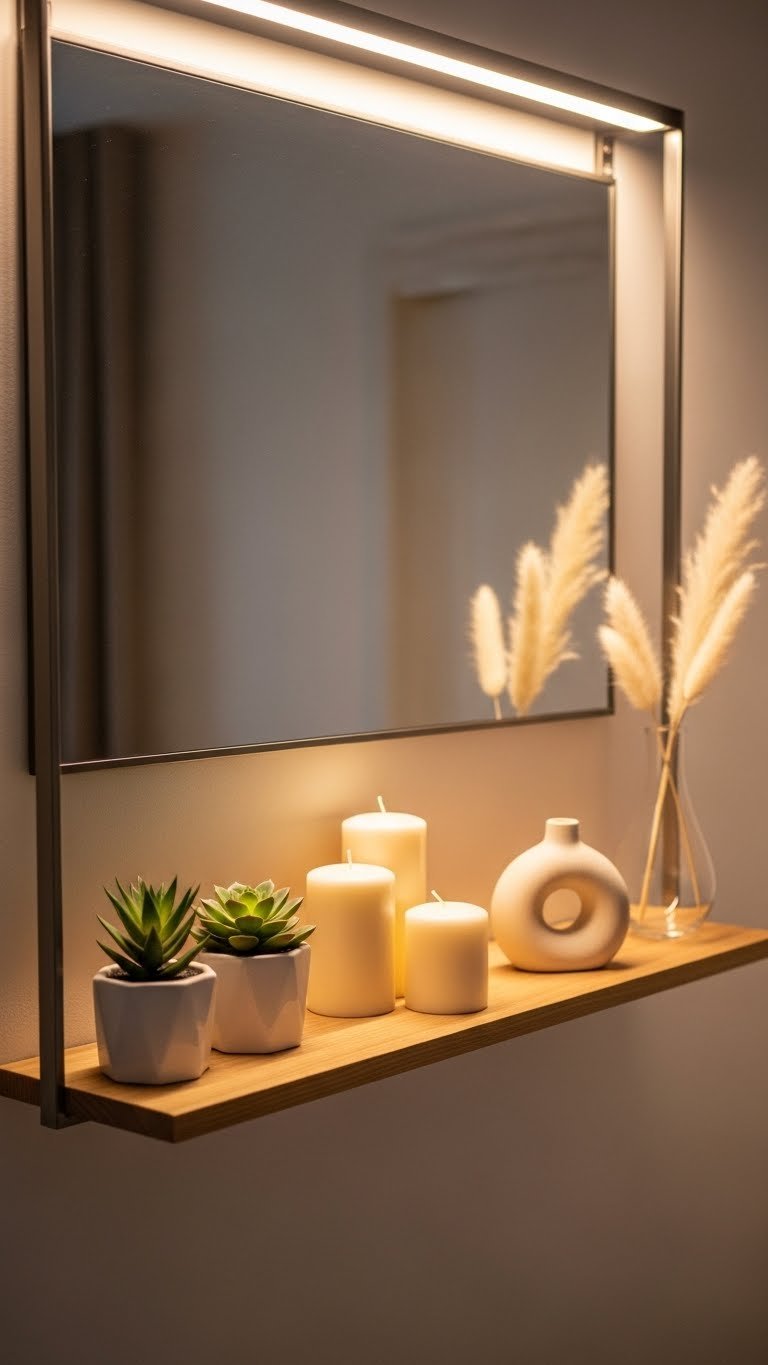
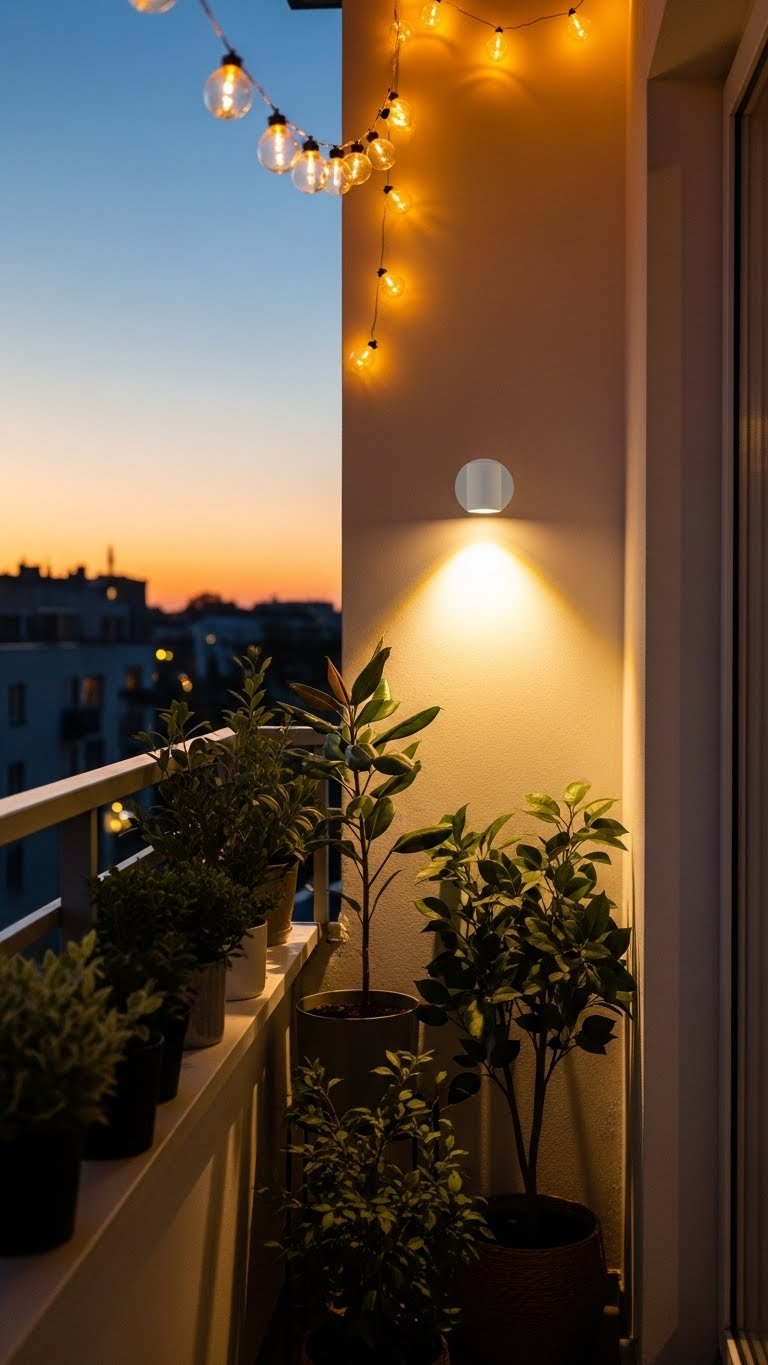
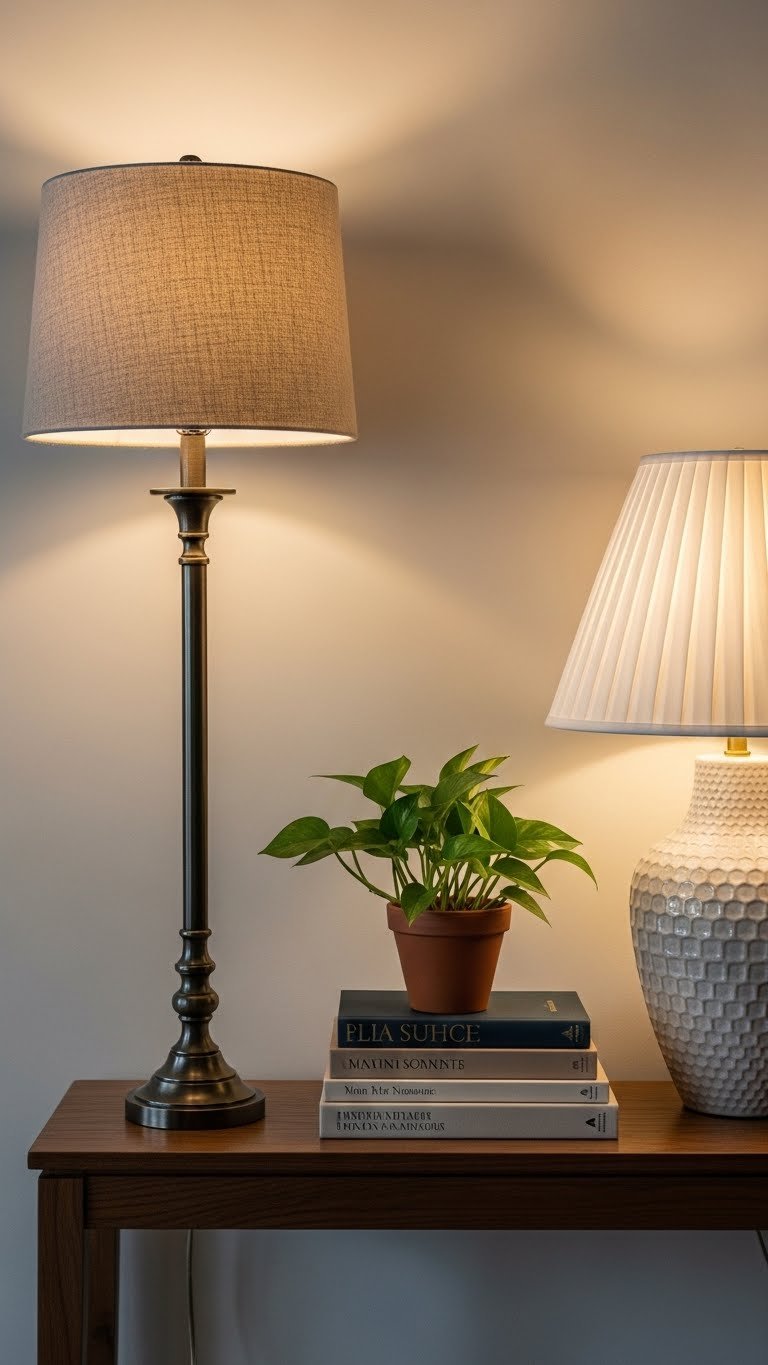
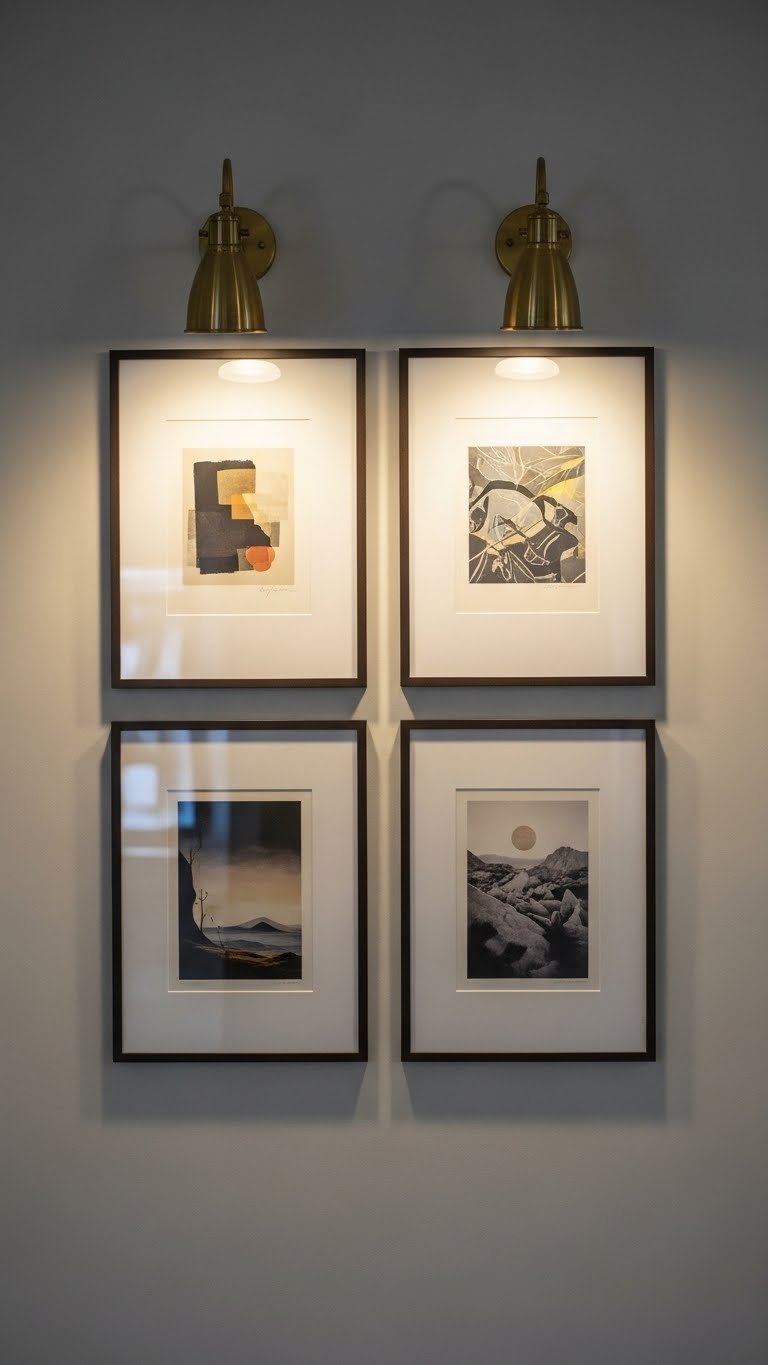
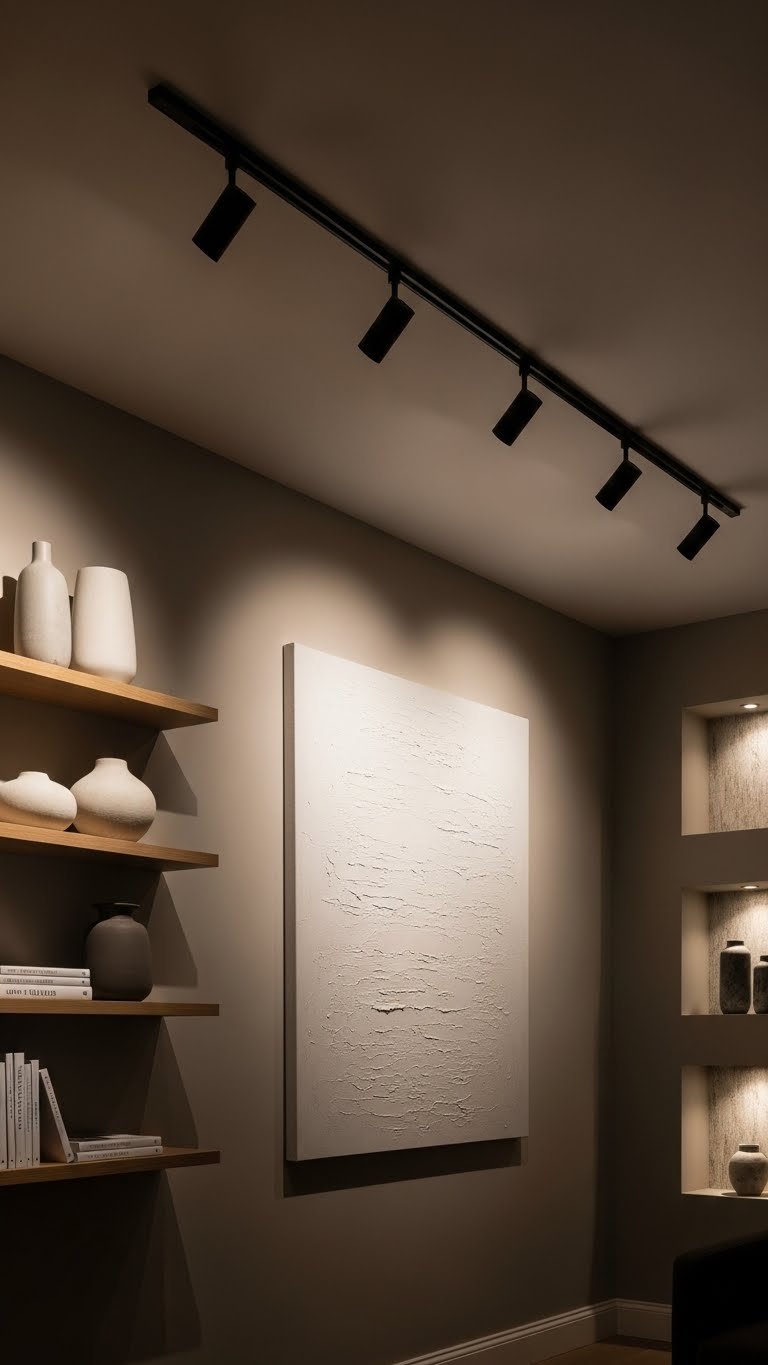
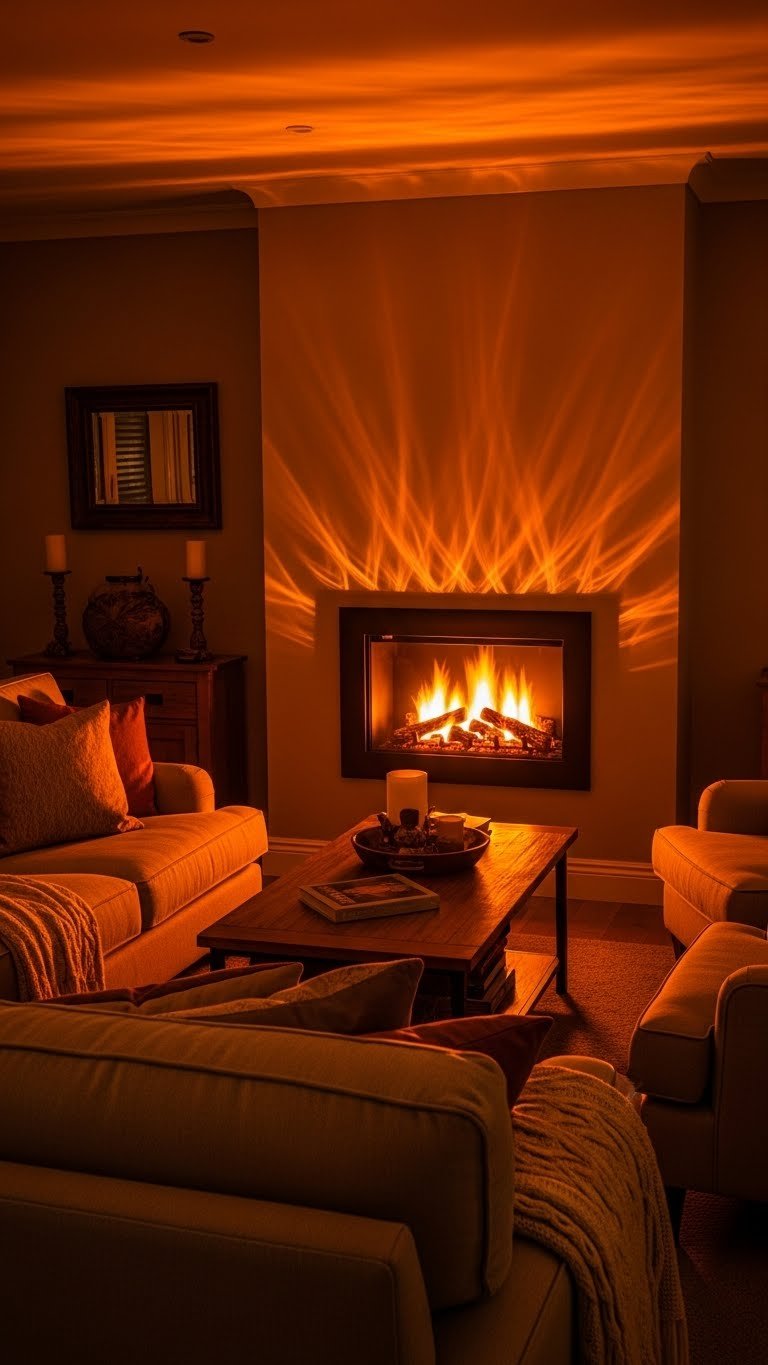
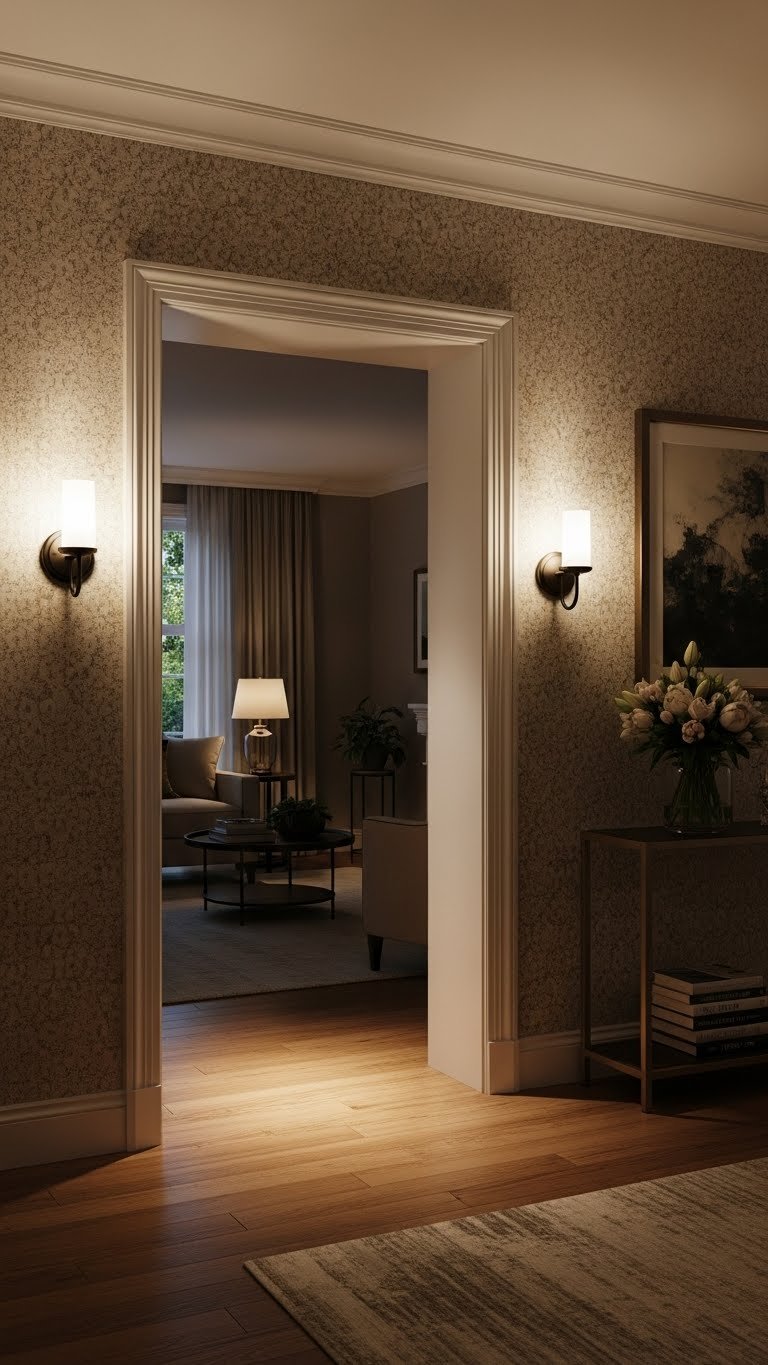
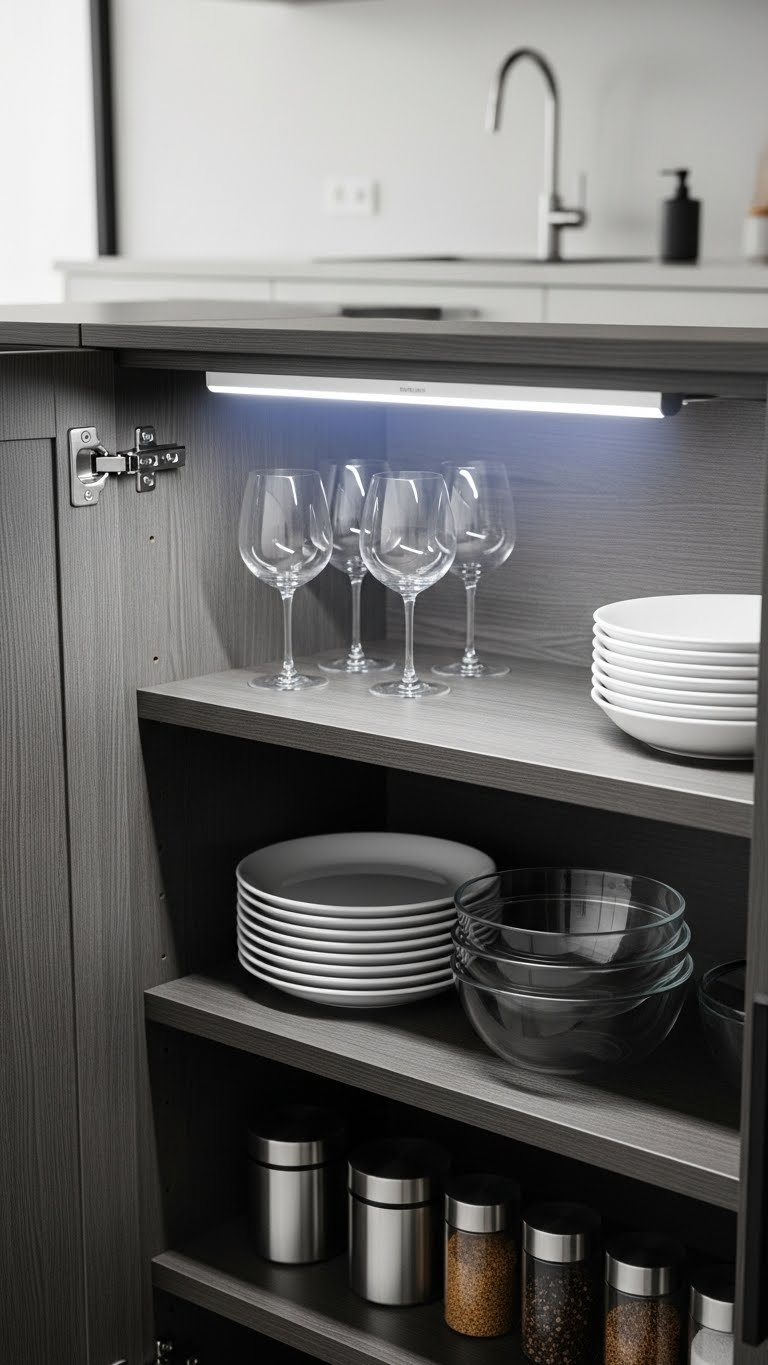
    6. Install LED Under-Cabinet Lighting for Function & Ambiance

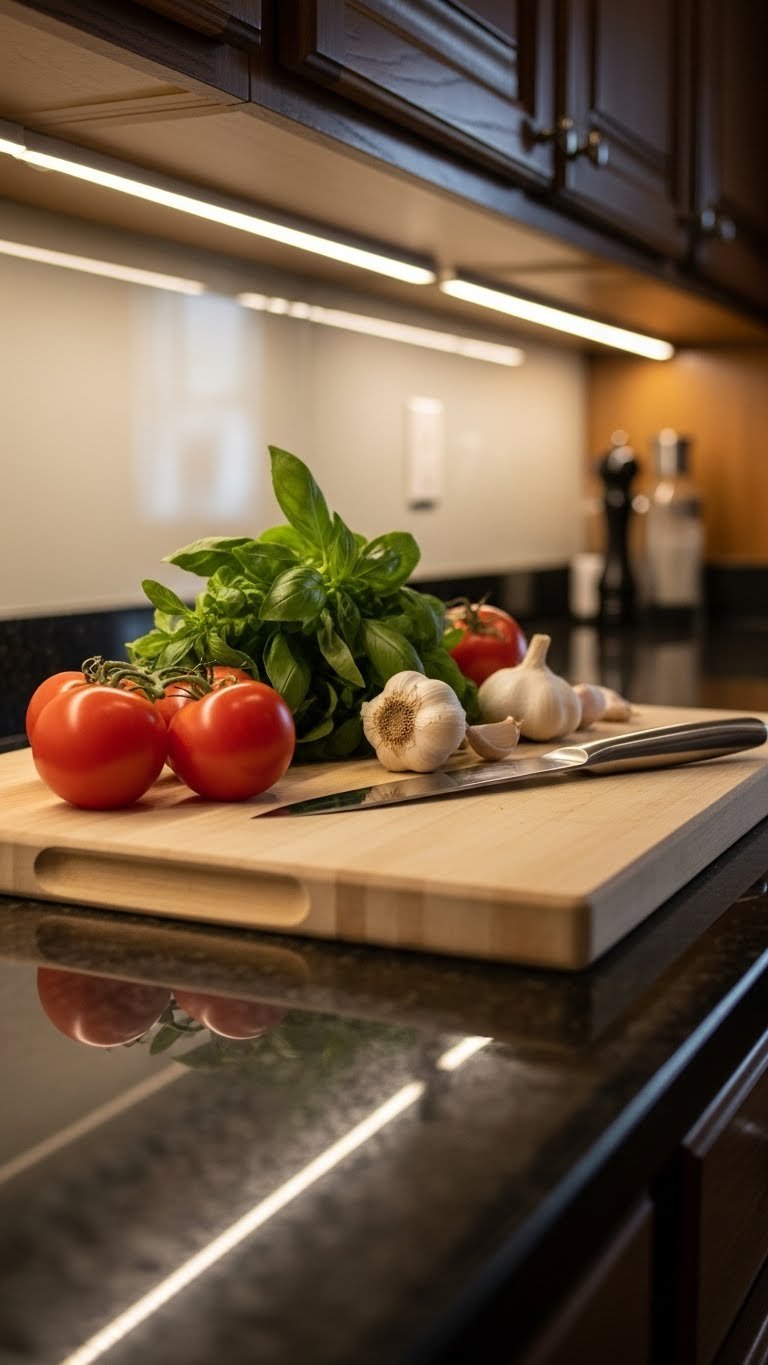
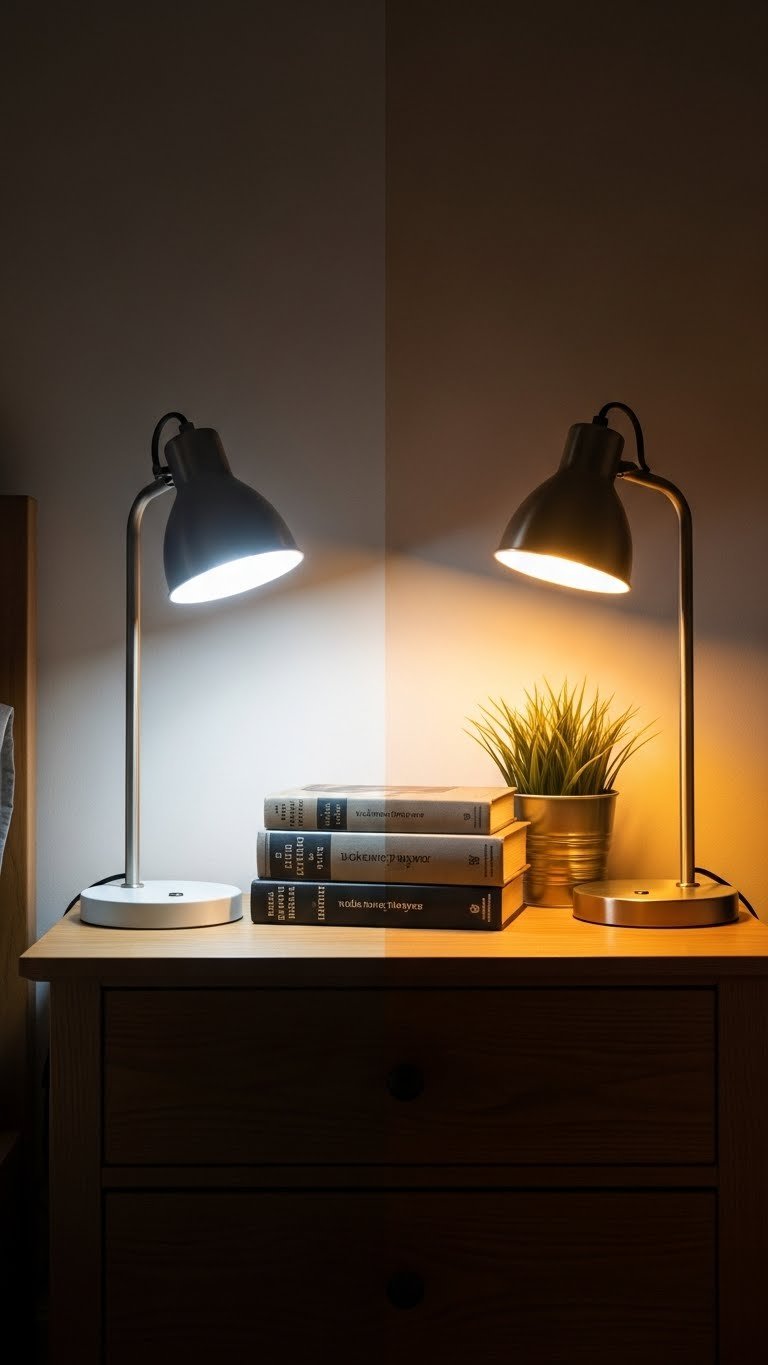
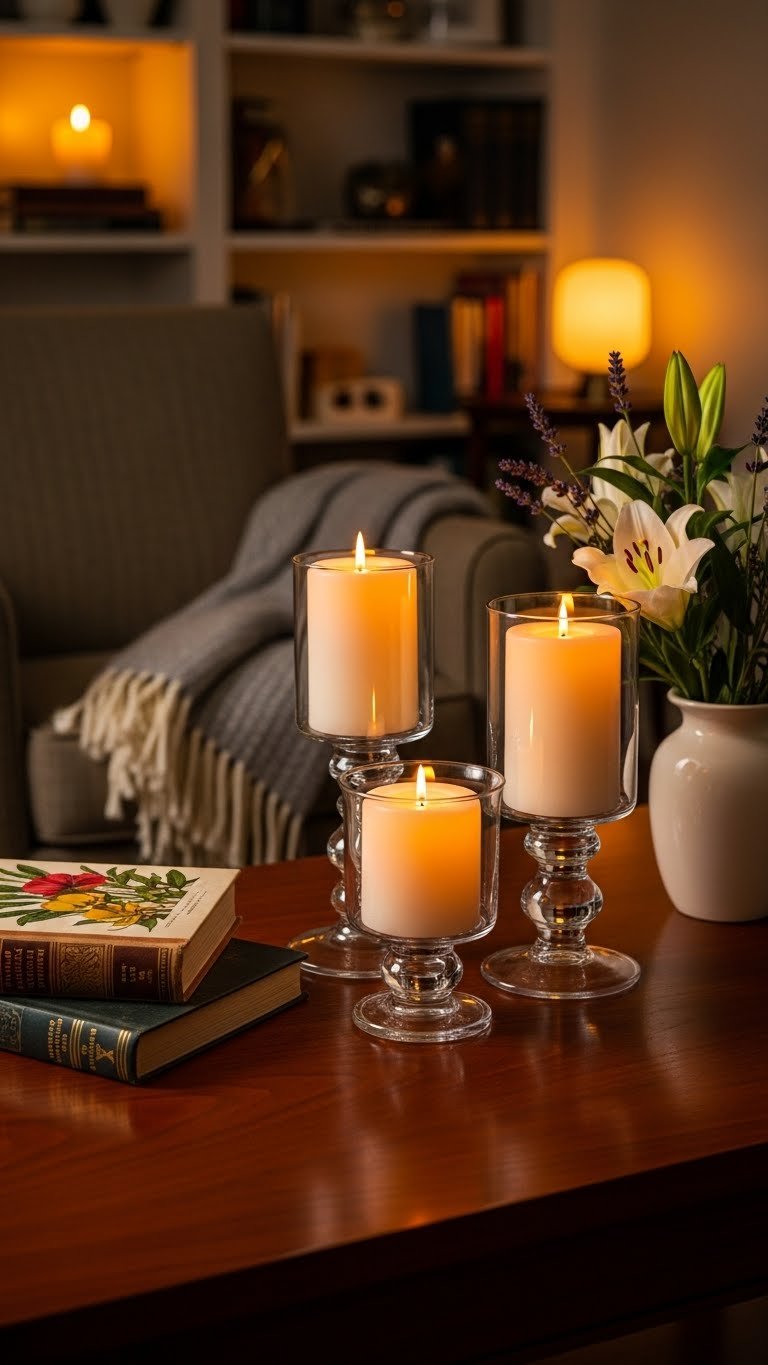
    Under-cabinet lighting does double duty: it makes cooking easier and completely changes your kitchen’s mood at night. This is one of the highest-ROI upgrades you can make, and it’s surprisingly affordable.

    LED strip lights cost $15–$60 per kit and install in minutes with adhesive backing (no wiring needed for plug-in versions). Hardwired options ($100–$300 professionally installed) look cleaner and work with smart dimming. Warm white (2700K) creates ambiance while bright white (4000K) is better for prep work. Many versions are now motion-activated, turning on when you approach the counter.

    Check Amazon, Home Depot, or IKEA for popular brands like Philips Hue or basic stick-on options.

    Pro tip: Pair motion-sensor lighting with handleless cabinets for a kitchen that feels genuinely high-tech.

    Your counter becomes properly lit for cooking, and you’ve created restaurant-quality ambiance for evening entertaining. You’ll wonder how you ever cooked without this.

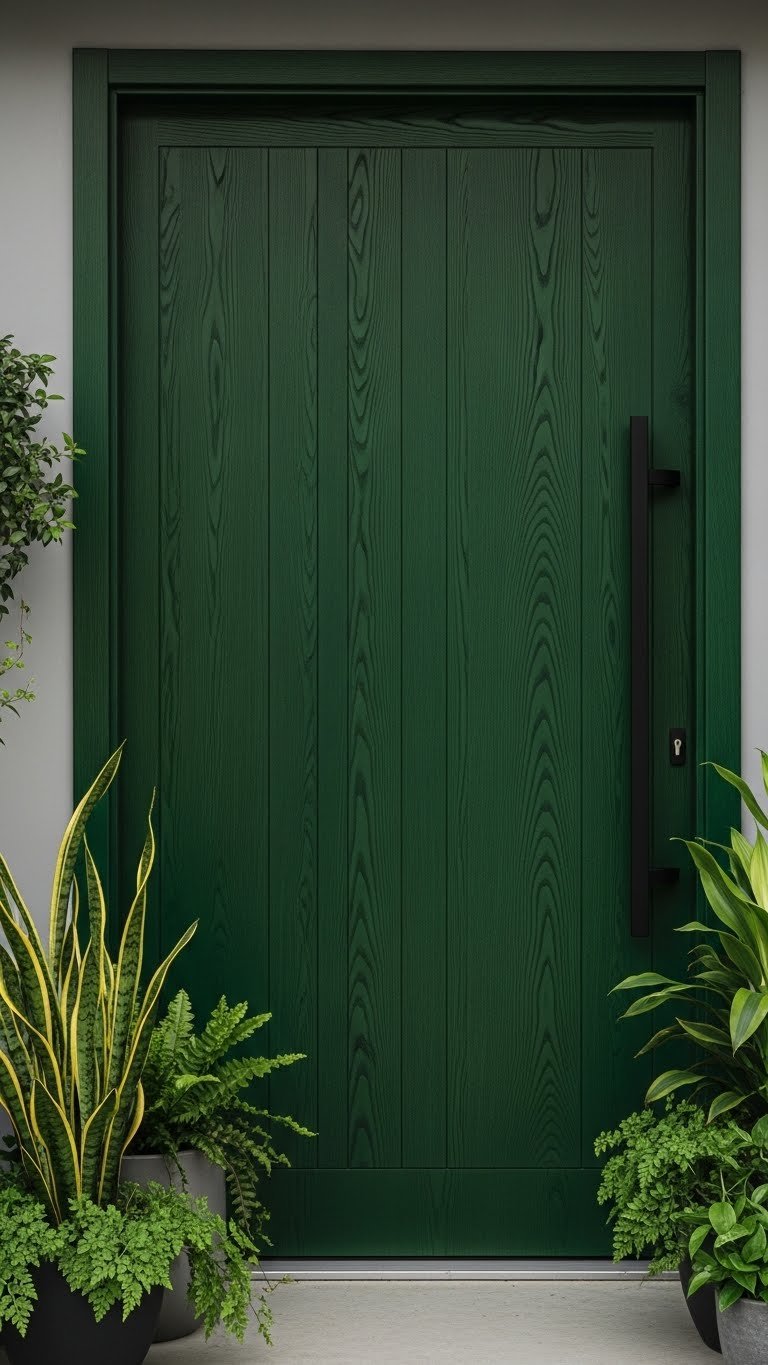
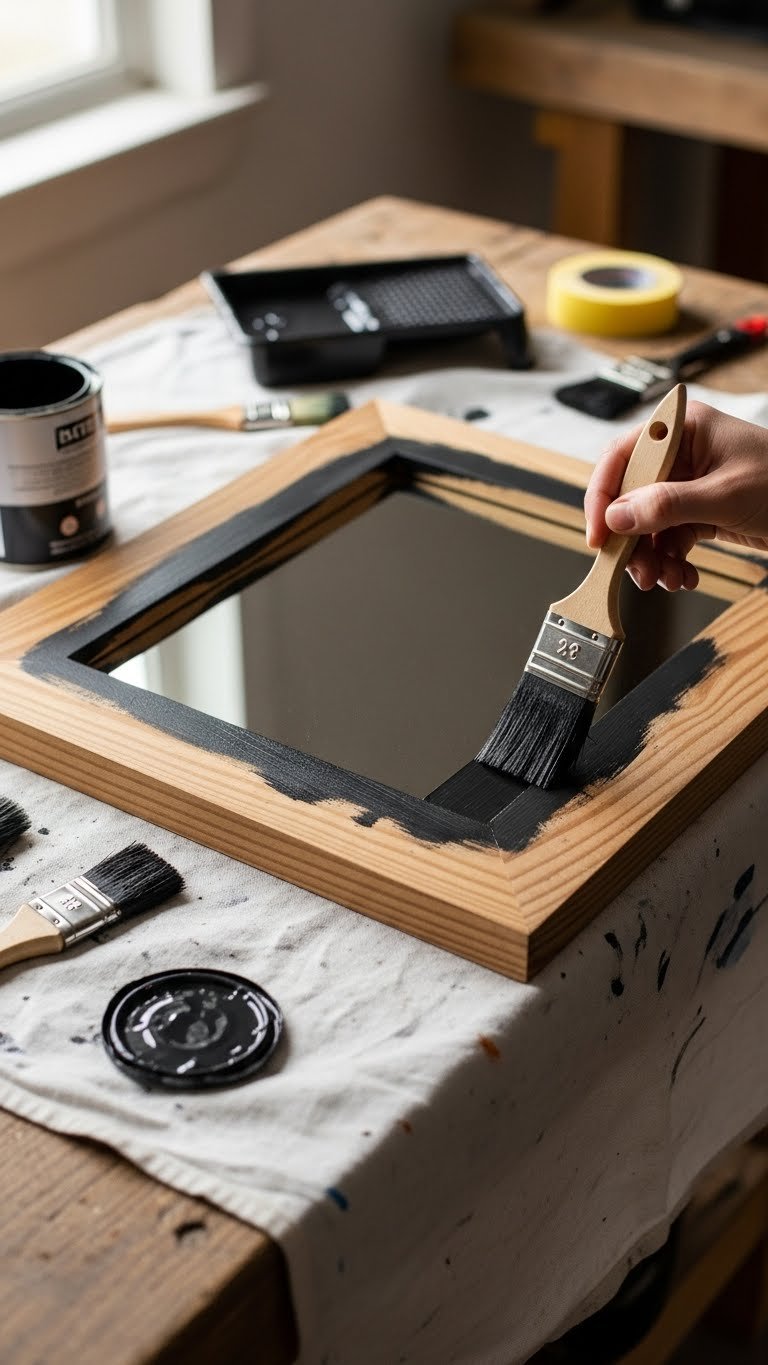
    7. Paint Cabinet Doors a Bold Moody Color

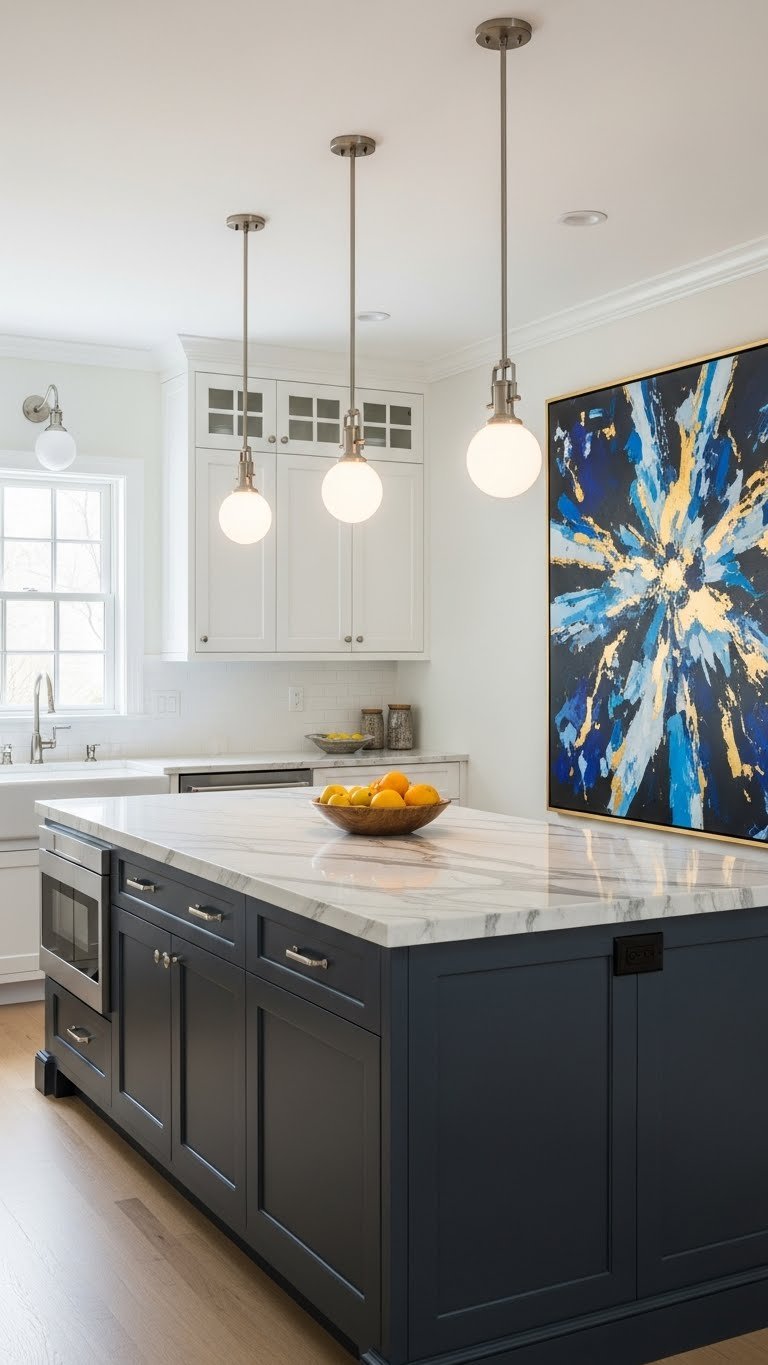
    Matte and moody finishes (deep greens, charcoals, navy, eggplant) are everywhere—and they photograph beautifully. A bold paint color transforms your kitchen’s personality without structural changes.

    Cabinet-grade paint costs $20–$50 per quart; you’ll typically need 1–2 quarts depending on cabinet size. Remove doors (takes 30 minutes), prime with bonding primer, then apply two coats of paint designed for cabinets (Benjamin Moore, Sherwin-Williams, or BEHR Cabinet & Trim Paint). Plan for 3–5 days total with drying time. This is totally doable as a weekend DIY project or hire a painter ($400–$800 for full kitchen).

    Pro tip: Stick with matte or satin finishes for cabinets—they’re more forgiving than gloss finishes for hiding imperfections.

    Your kitchen becomes a statement-maker. Friends and family will immediately notice how intentional and designed your space feels.

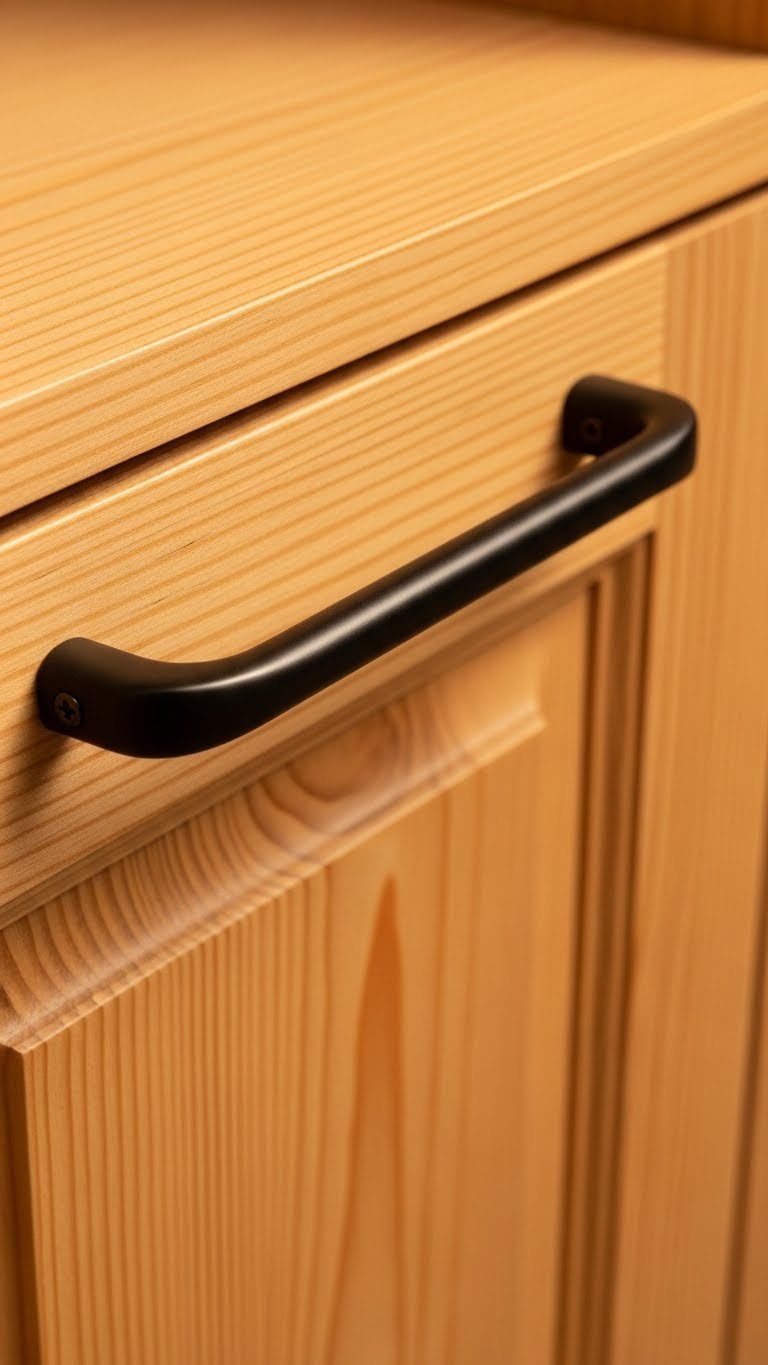
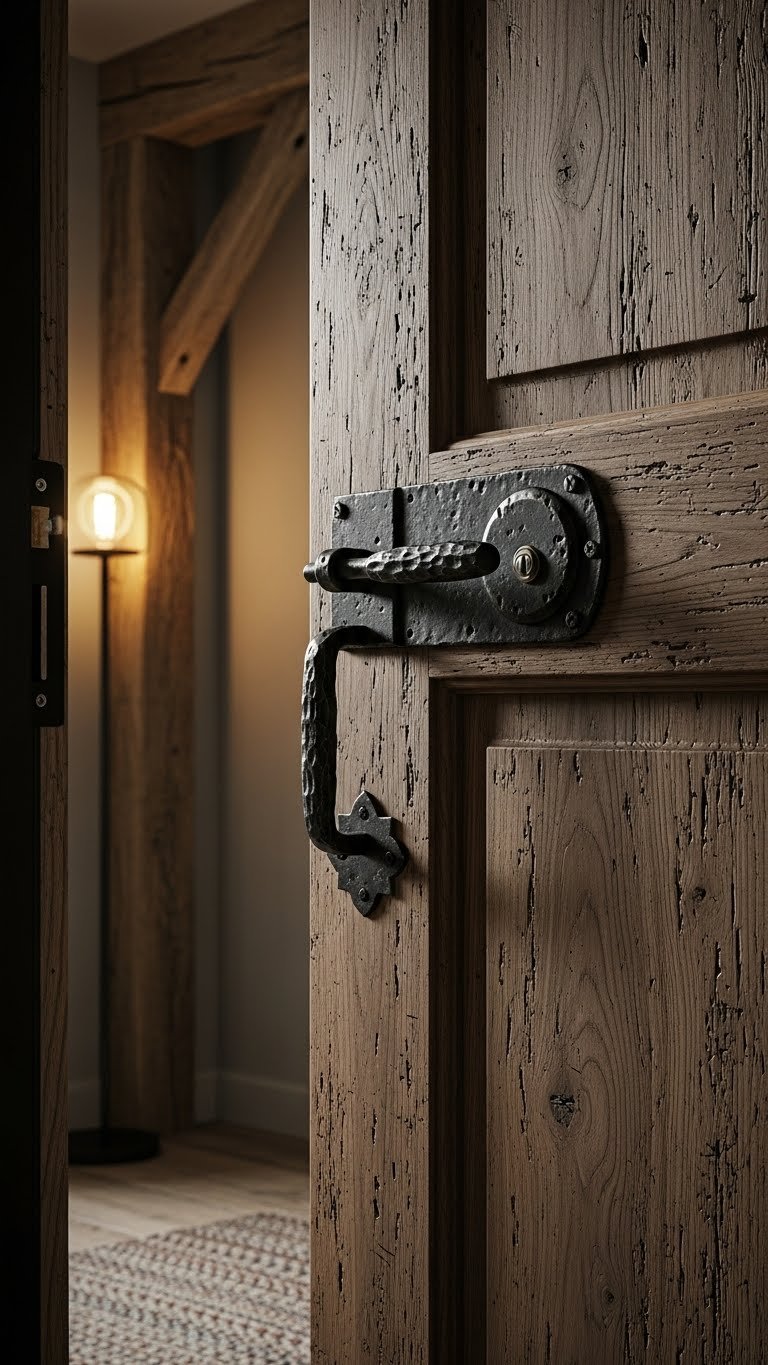
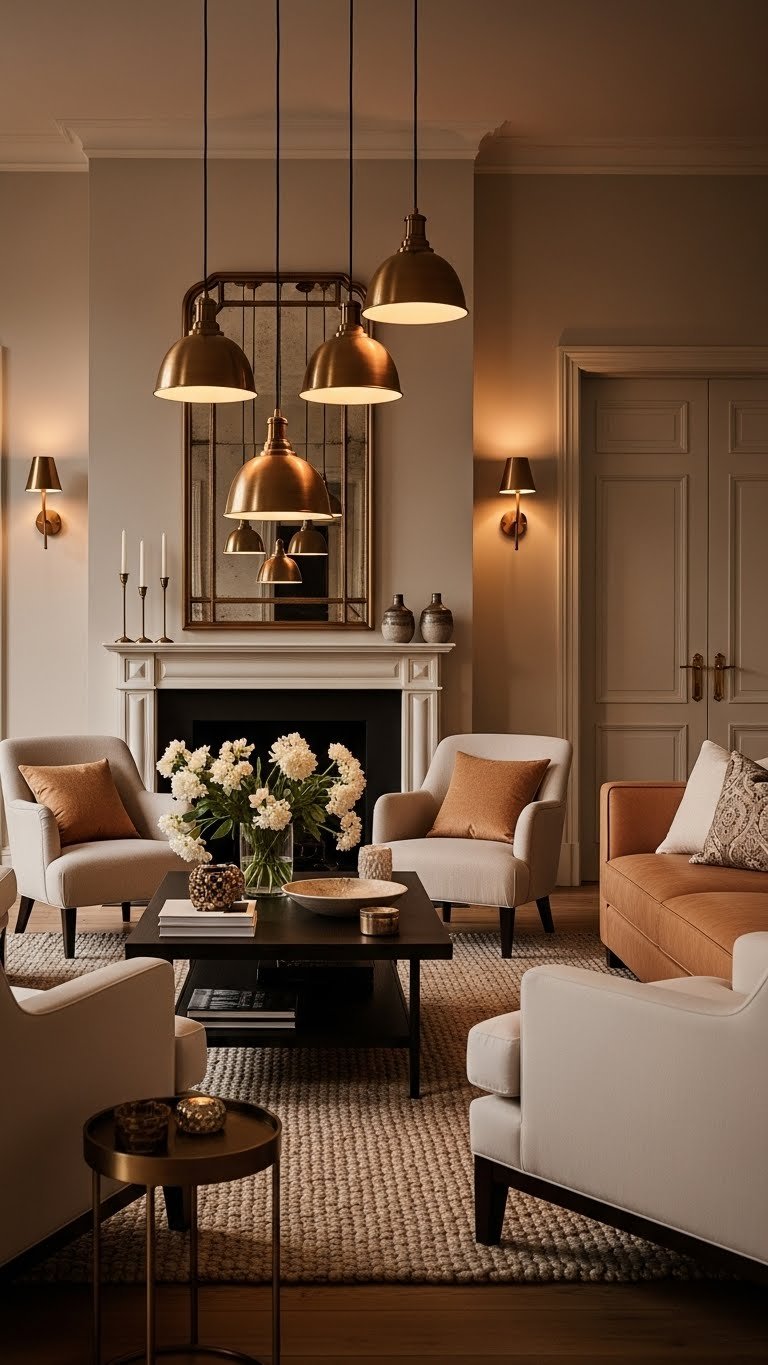
    8. Swap Handles & Hardware for an Instant Refresh

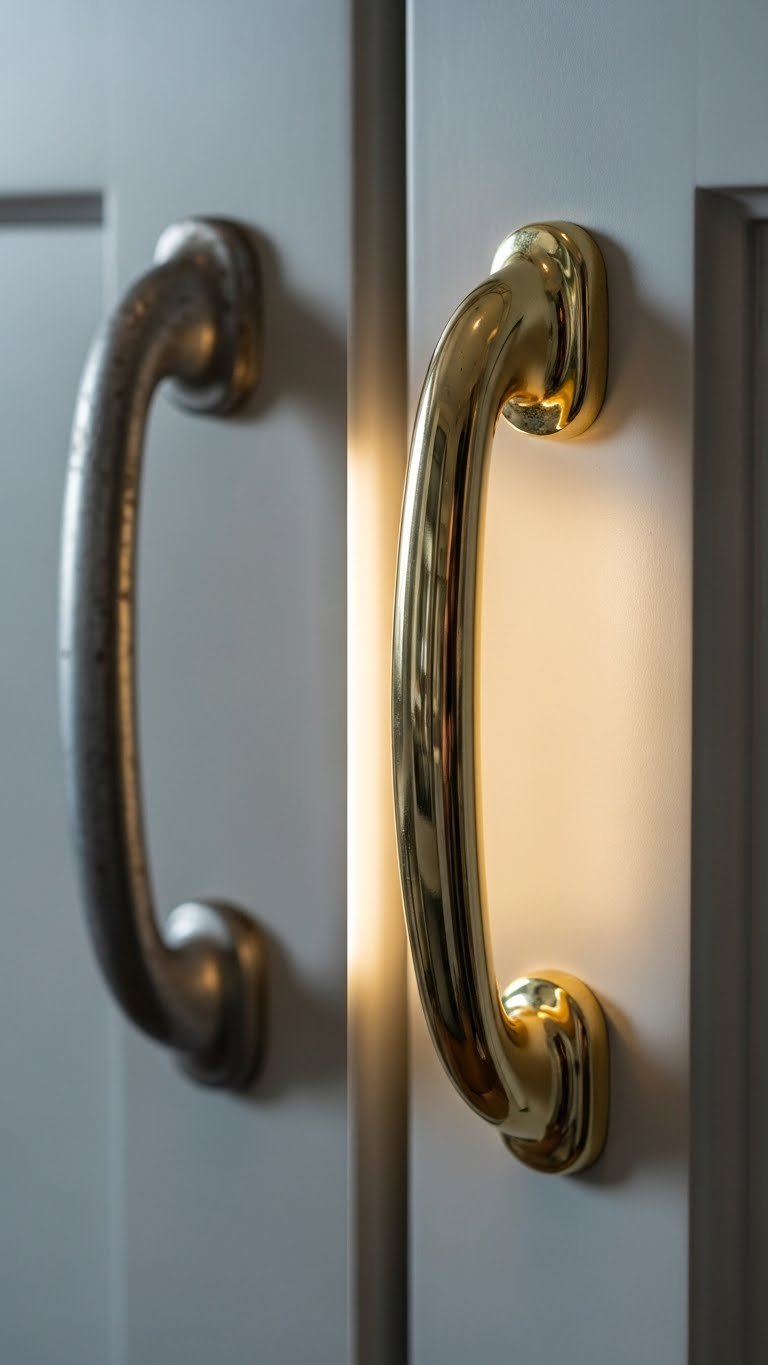
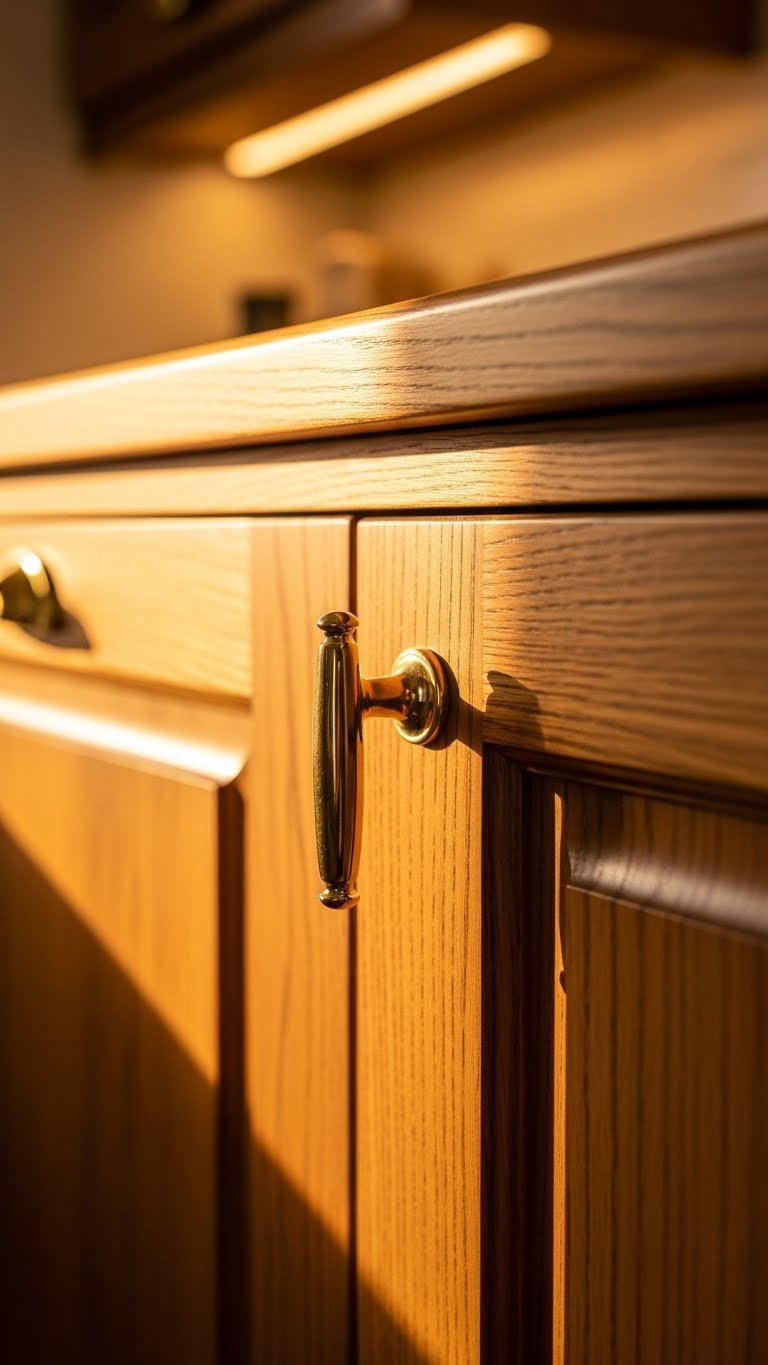
    Sometimes the cheapest update that creates the biggest change is swapping out hardware. New handles and knobs shift your kitchen’s entire vibe in minutes.

    Cabinet hardware costs $3–$15 per piece; a full kitchen refresh (20–40 pieces) runs $100–$400. It’s a 15-minute DIY project with just a screwdriver—no special skills needed. Brass and gold tones feel warm and elevated, while matte black hardware adds modern edge. Mix and match metals (brass on upper cabinets, matte black on lower) for contemporary style.

    Shop Wayfair, Amazon, Rejuvenation, or even Target for budget-friendly options.

    Pro tip: Keep old hardware in a labeled bag—you might need it if you move or want to restore original cabinets later.

    Your cabinets look refreshed without any real effort. This small change proves that sometimes the biggest design impact comes from thoughtful details.

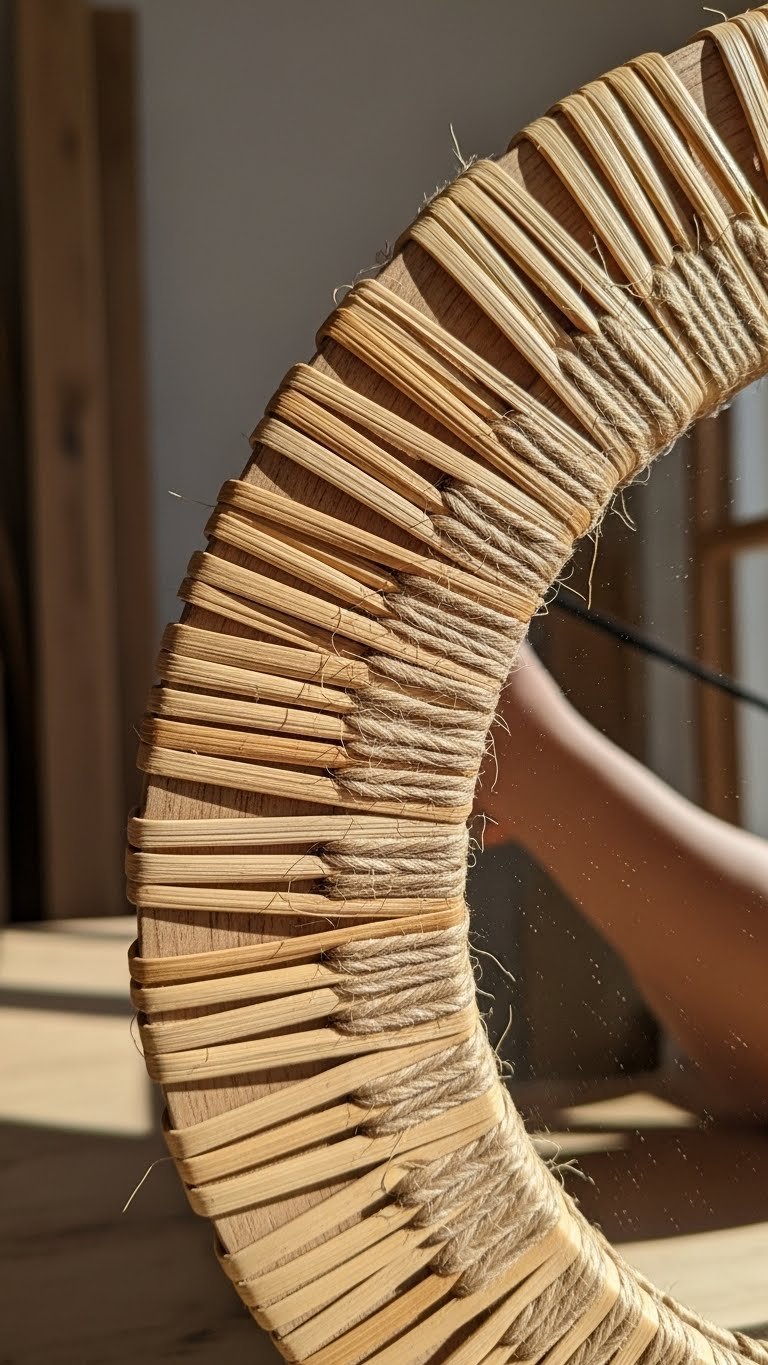
    9. Incorporate Eco-Friendly Bamboo Cabinets

    Bamboo cabinets have surged 34% in preference as homeowners seek sustainable options—and bamboo is genuinely better for the planet (it regrows in 3–5 years versus 25+ years for hardwood trees). It’s also naturally antimicrobial, making it hygiene-friendly for kitchens.

    Bamboo cabinets cost slightly more than standard wood—expect $2,500–$6,000 for semi-custom or $4,000–$10,000+ for custom options. Full kitchen cabinet projects typically require contractor installation ($1,500–$3,000). If you’re updating existing cabinets, bamboo veneer sheets ($30–$50 per sheet) can cover cabinet boxes as a renter-friendly option (though results vary).

    Look for FSC-certified bamboo—it guarantees sustainable harvesting practices.

    Pro tip: Bamboo works especially well with modern or minimalist kitchen designs due to its clean grain lines.

    You’re making an eco-conscious choice without sacrificing style or durability. Your kitchen becomes part of a larger commitment to sustainable living.

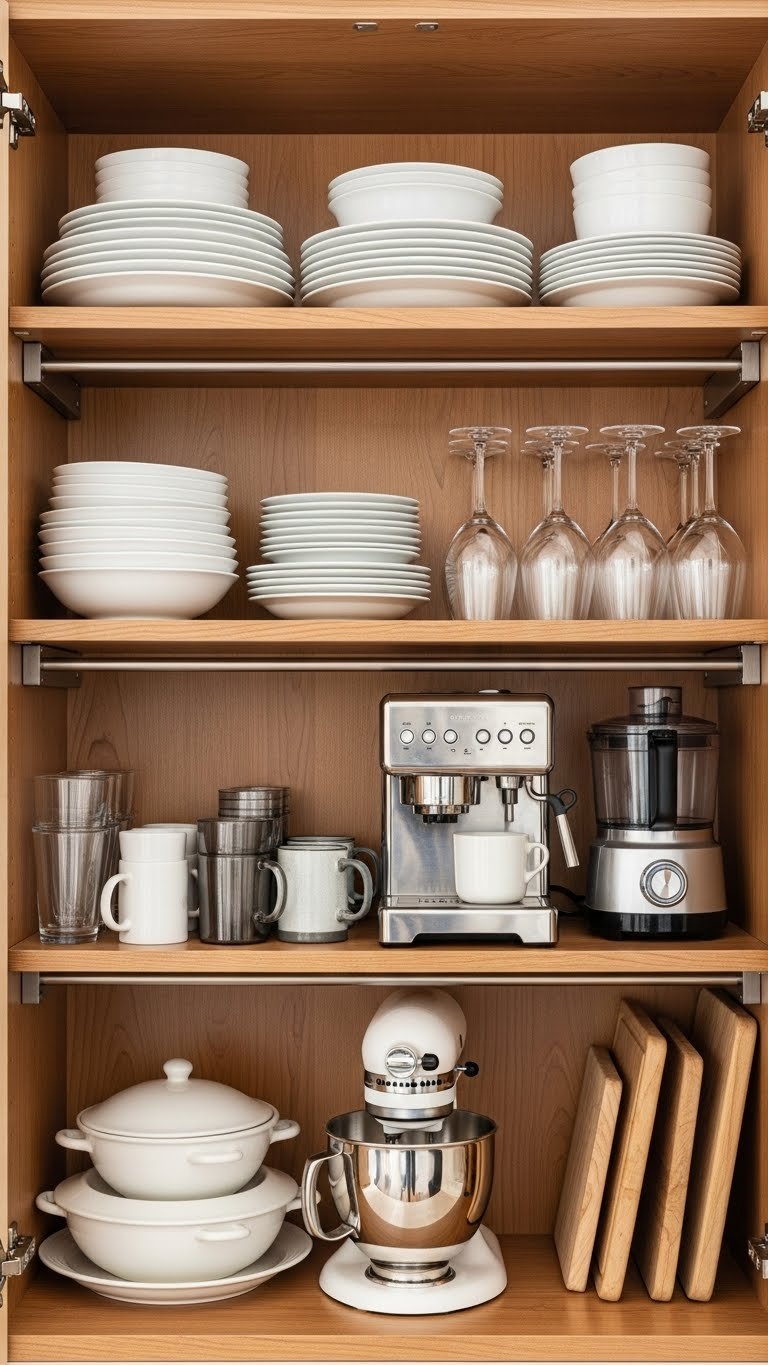
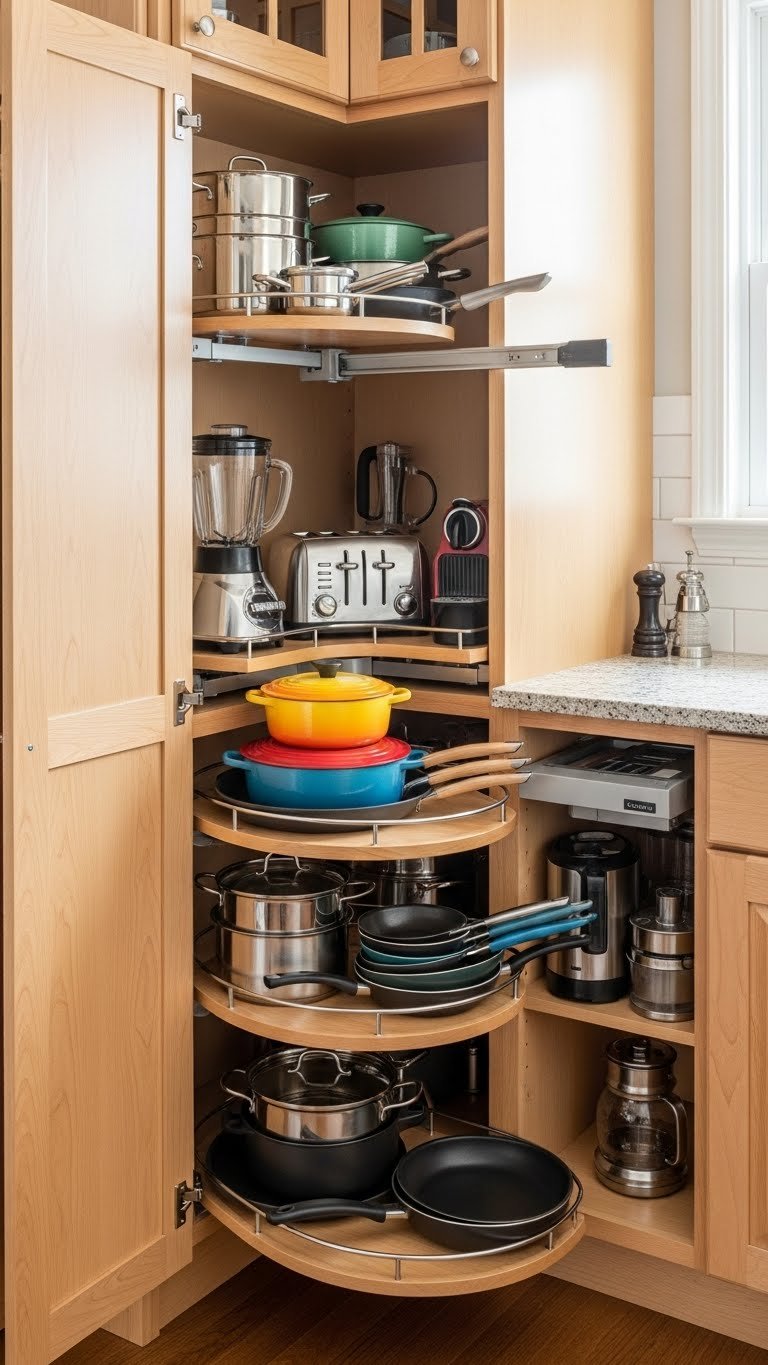
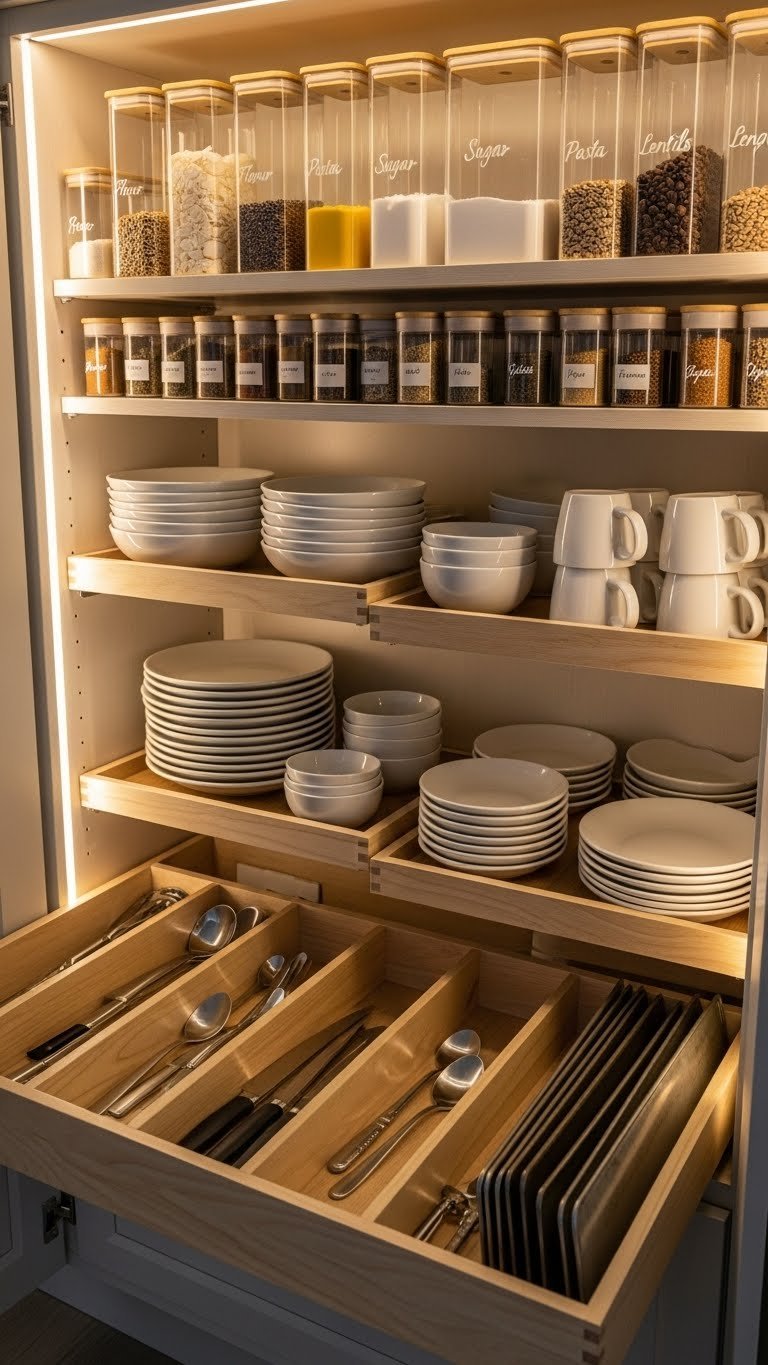
    10. Create a Hidden Pantry Behind Cabinet Doors

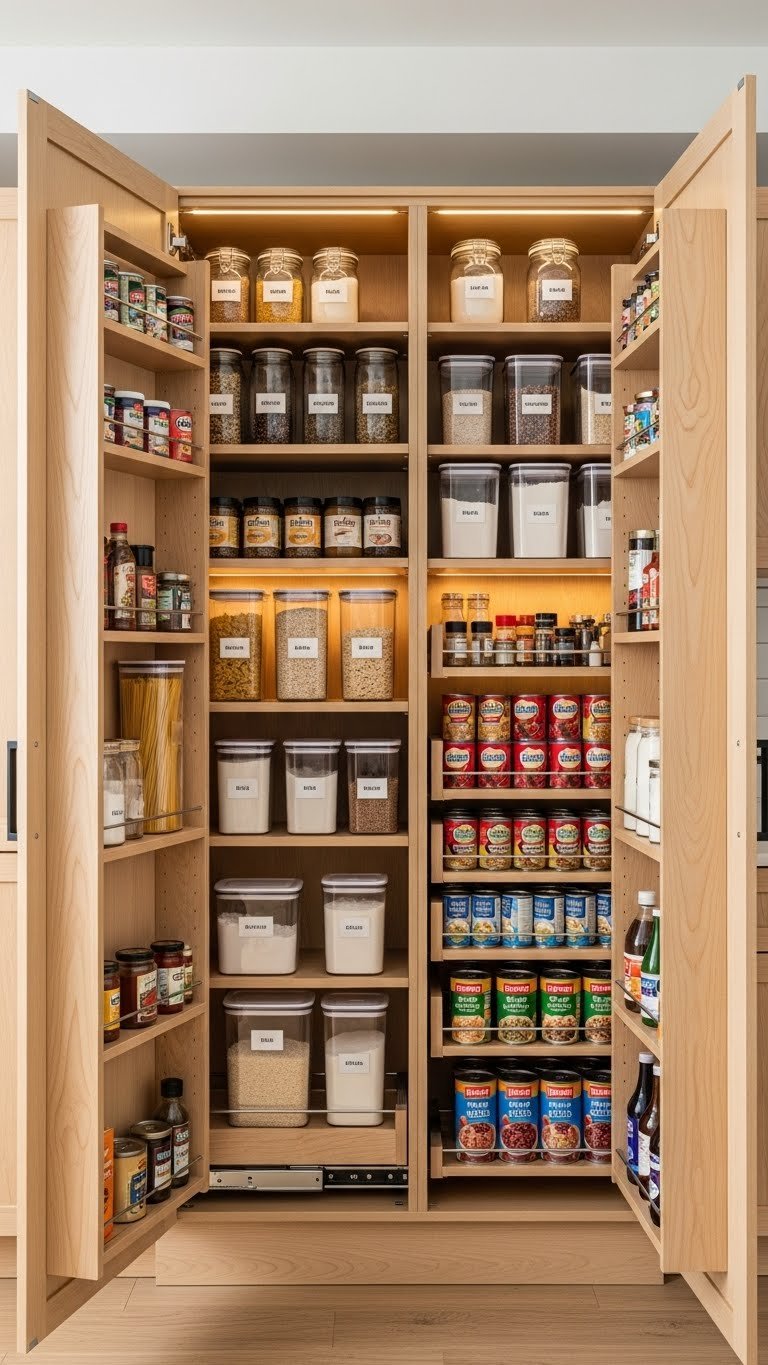
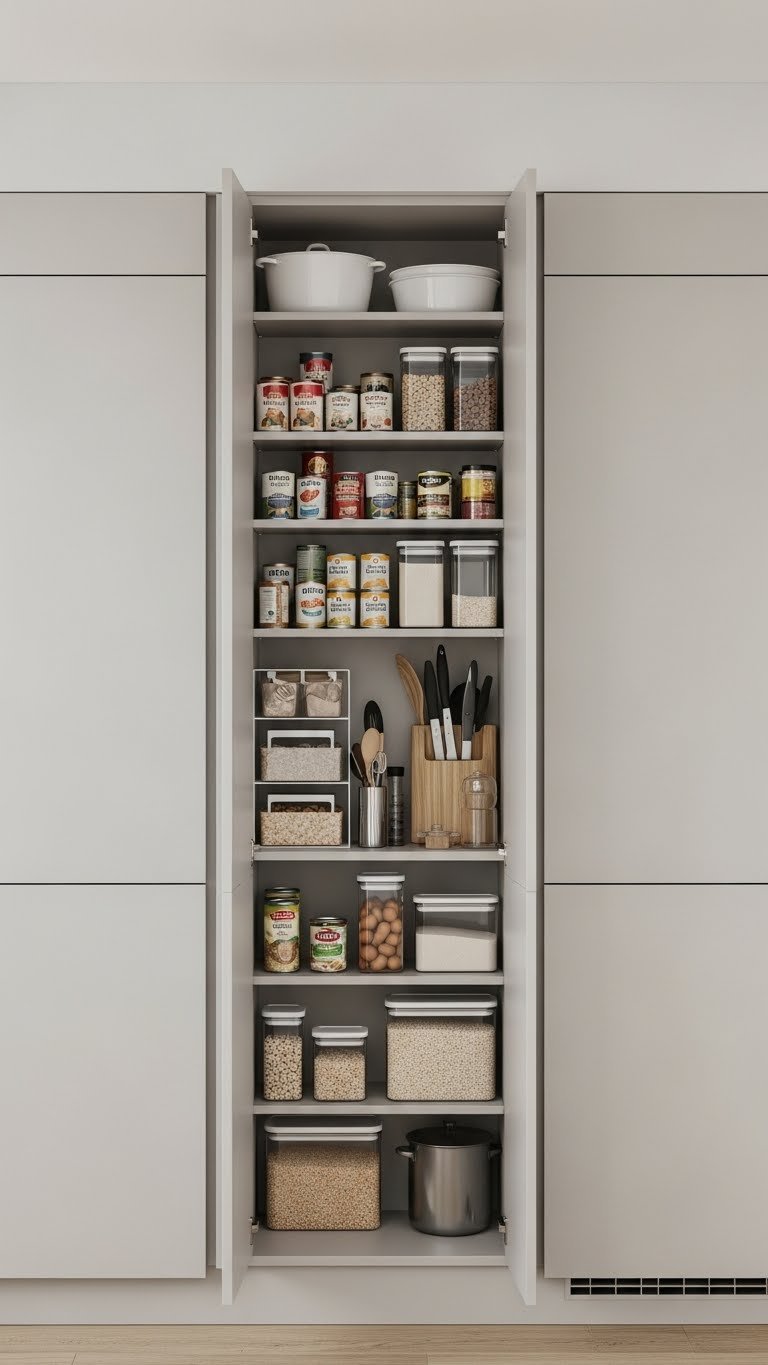
    Hidden pantries keep clutter completely out of sight while maximizing storage—perfect for small spaces or open-concept kitchens where you want everything looking clean. This is a game-changer for maintaining visual serenity while storing way more than you’d think.

    A single tall cabinet with pull-out shelves costs $300–$600 installed, or DIY pull-out organizers ($30–$80 from IKEA or Amazon) work in existing cabinets. Add interior LED lighting ($20–$50) so you can actually see everything inside. Use clear labeled containers to maximize visibility and prevent forgotten items.

    This works brilliantly as a renter if you use removable adhesive-backed shelving organizers.

    Pro tip: Measure your cabinet depth precisely—pull-out shelves need at least 16–18 inches of space to function smoothly.

    Your kitchen looks perpetually clean and organized. You’ll love opening a cabinet to find everything you need without visual chaos.

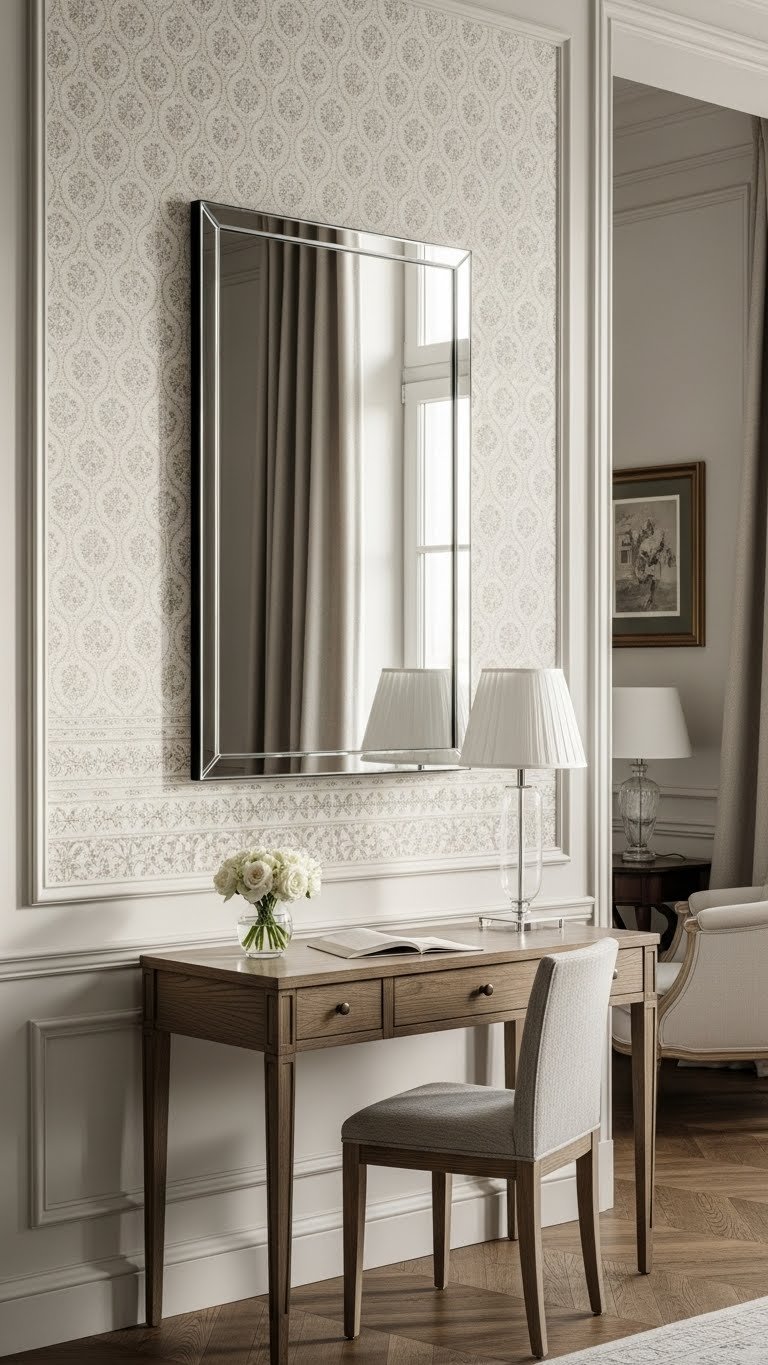
    11. Mix Cabinet Styles (Shaker + Frameless Fusion)

    Blending classic Shaker style (inset doors, raised panel detail) with modern frameless elements creates a hybrid look that feels both timeless and contemporary. This trend appeals to homeowners who want personality without commitment to one era.

    Custom cabinets combining styles run $4,000–$10,000+. Semi-custom options through Wayfair or Home Depot let you mix-and-match styles for $2,000–$5,000. If you’re DIY-inclined, you can paint existing Shaker cabinets in two tones and add frameless open shelving in one spot ($100–$400 total for materials).

    Pro tip: Keep the color palette cohesive when mixing styles—it prevents the look from feeling chaotic.

    You get a personalized kitchen that reflects your design taste. The combination feels intentional and creates visual rhythm throughout your space.

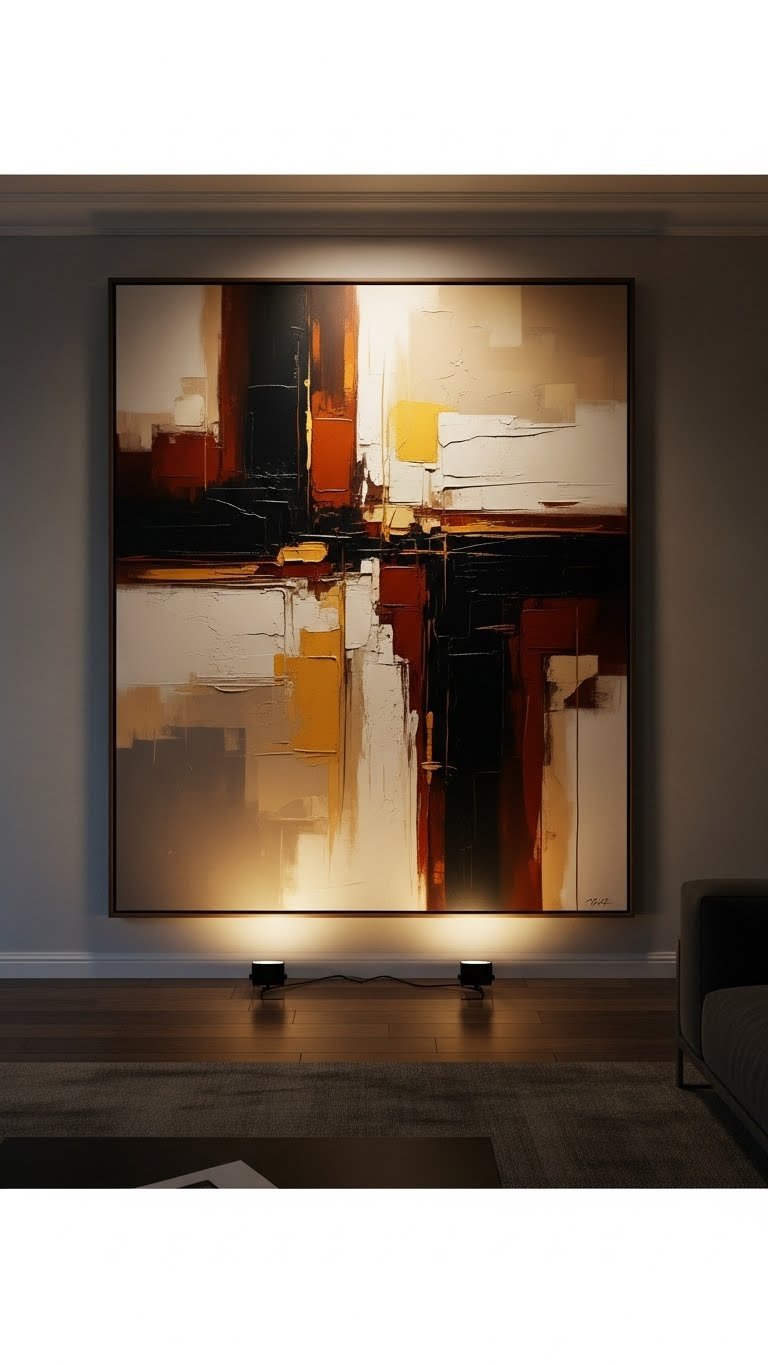
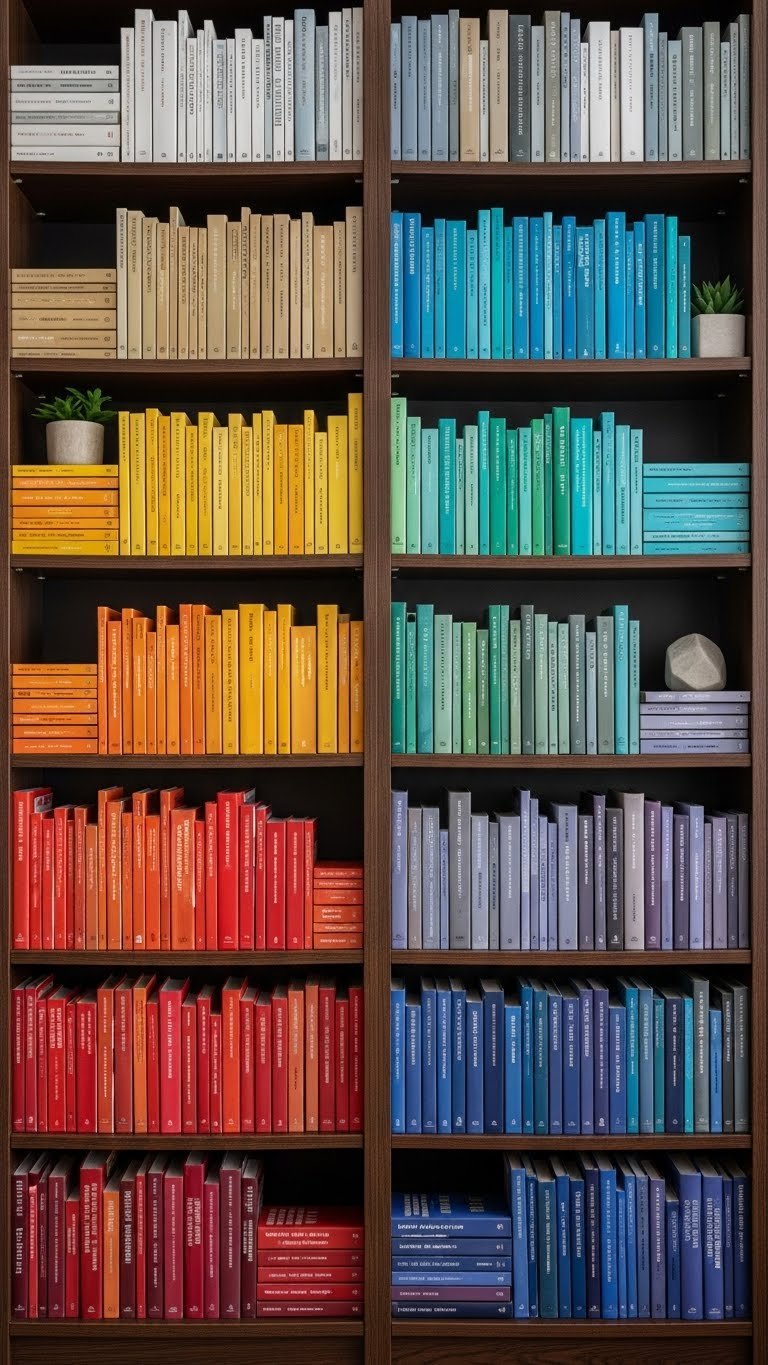
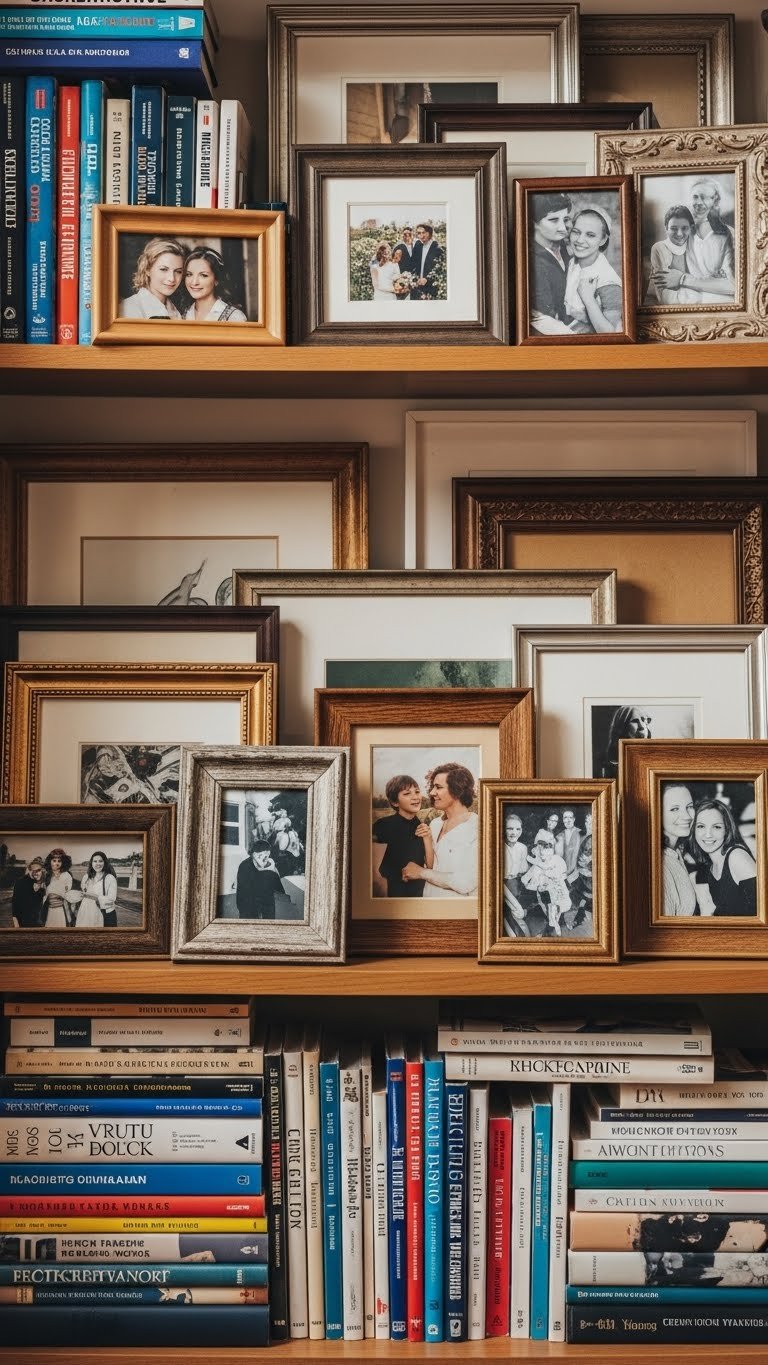
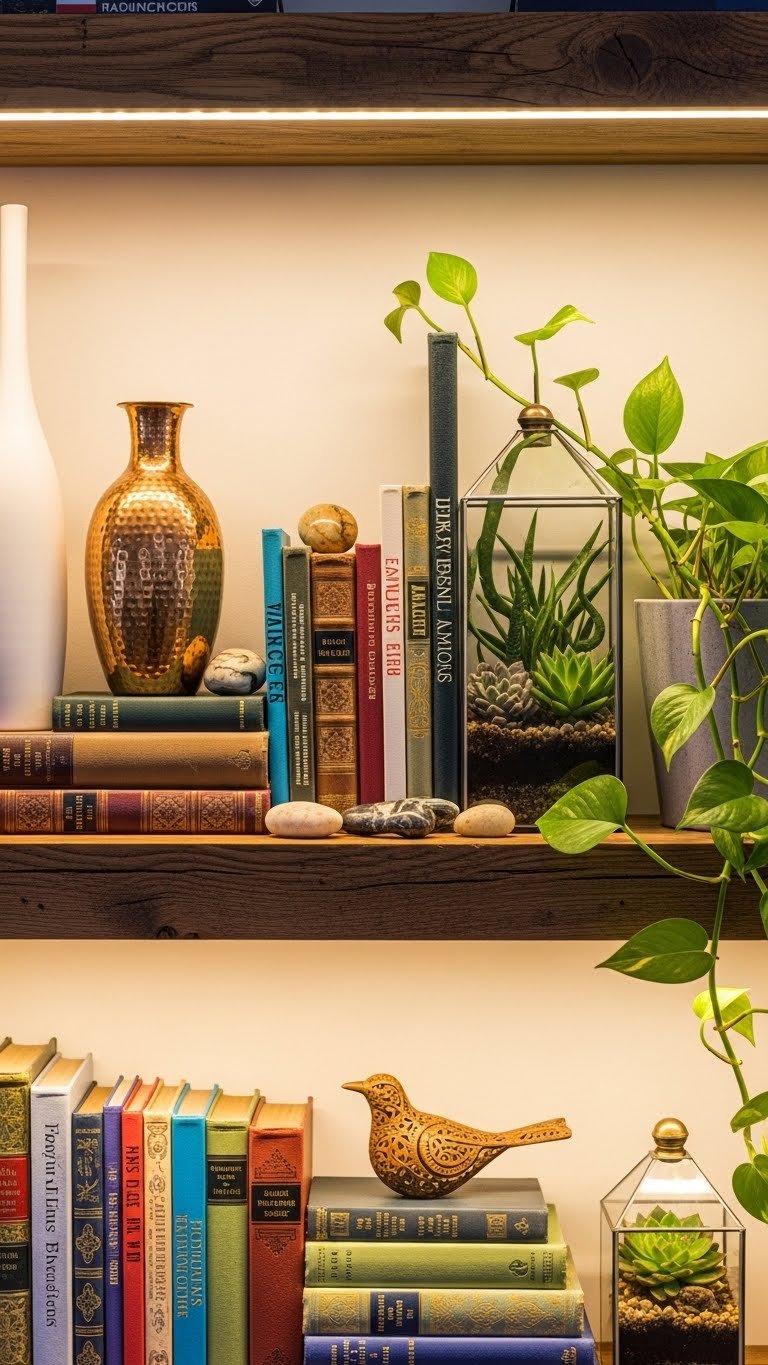
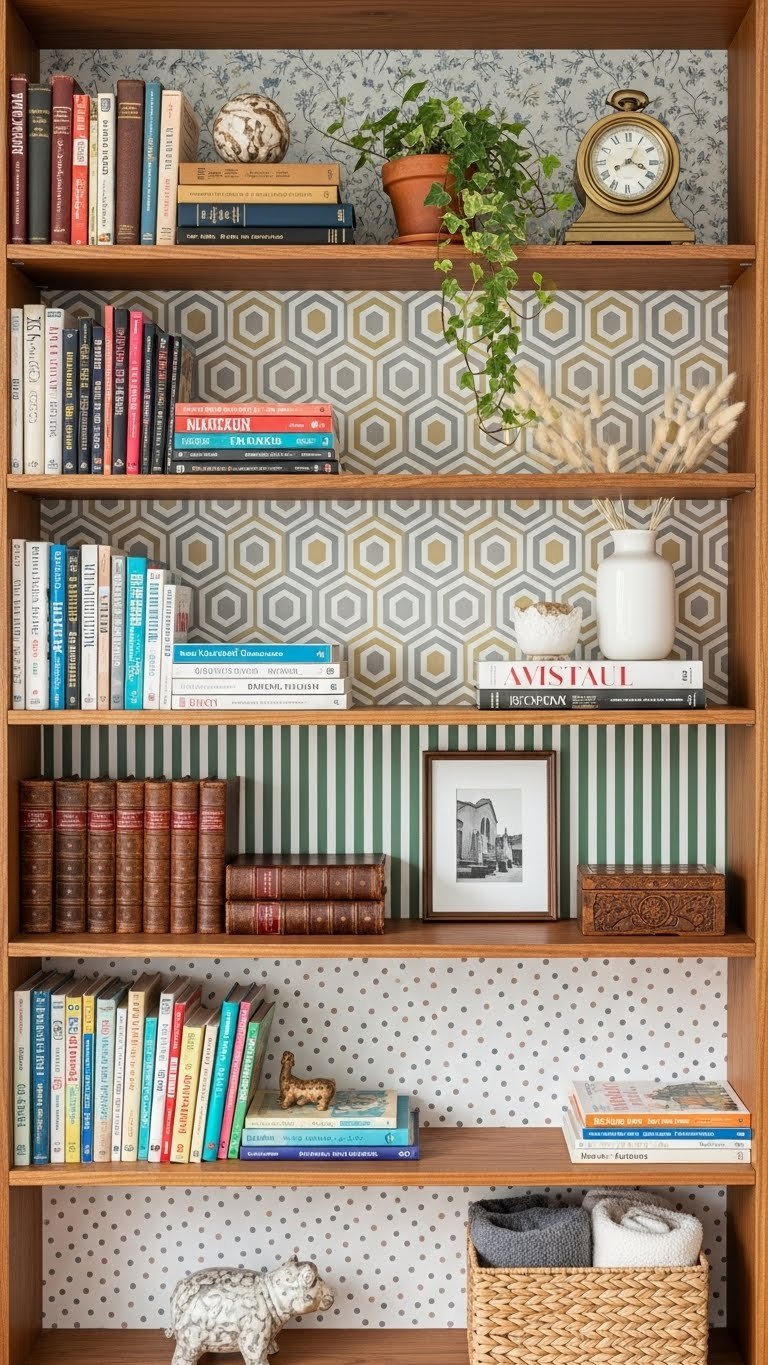
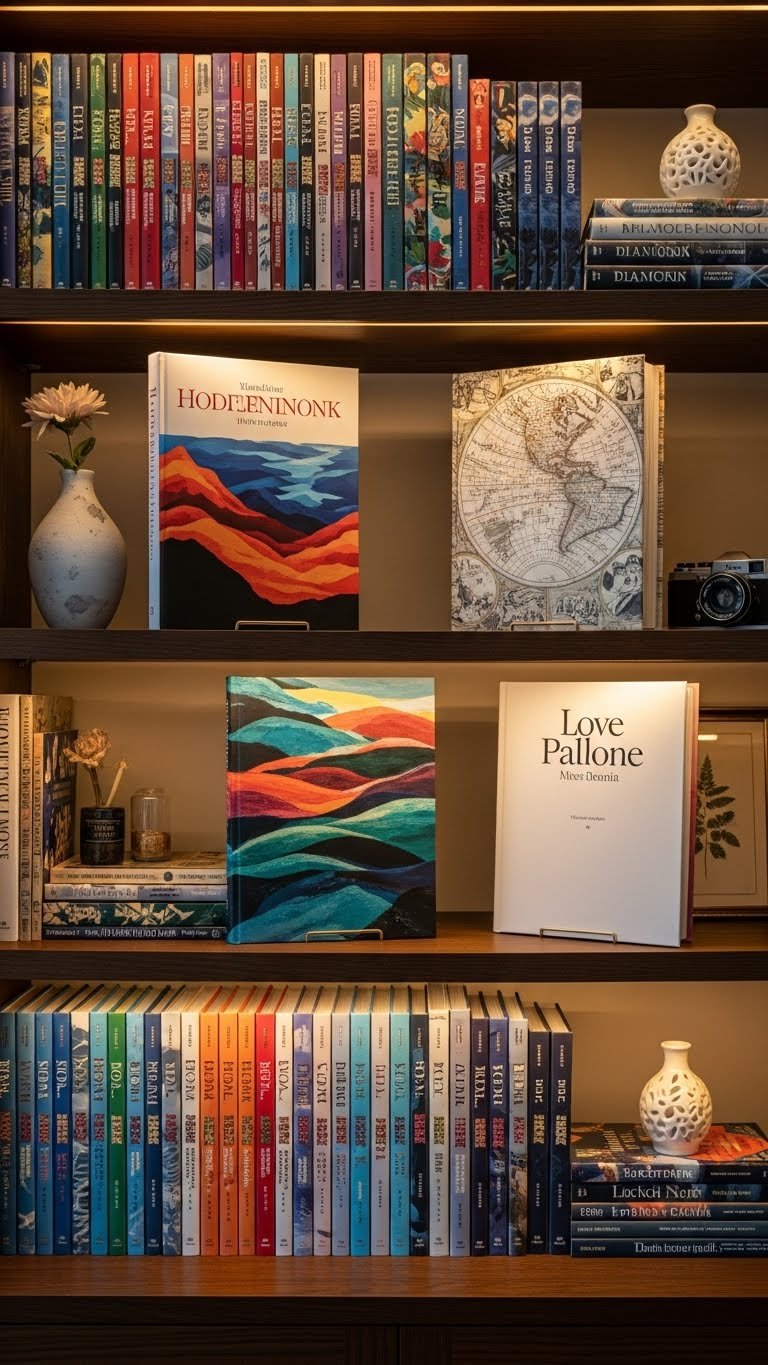
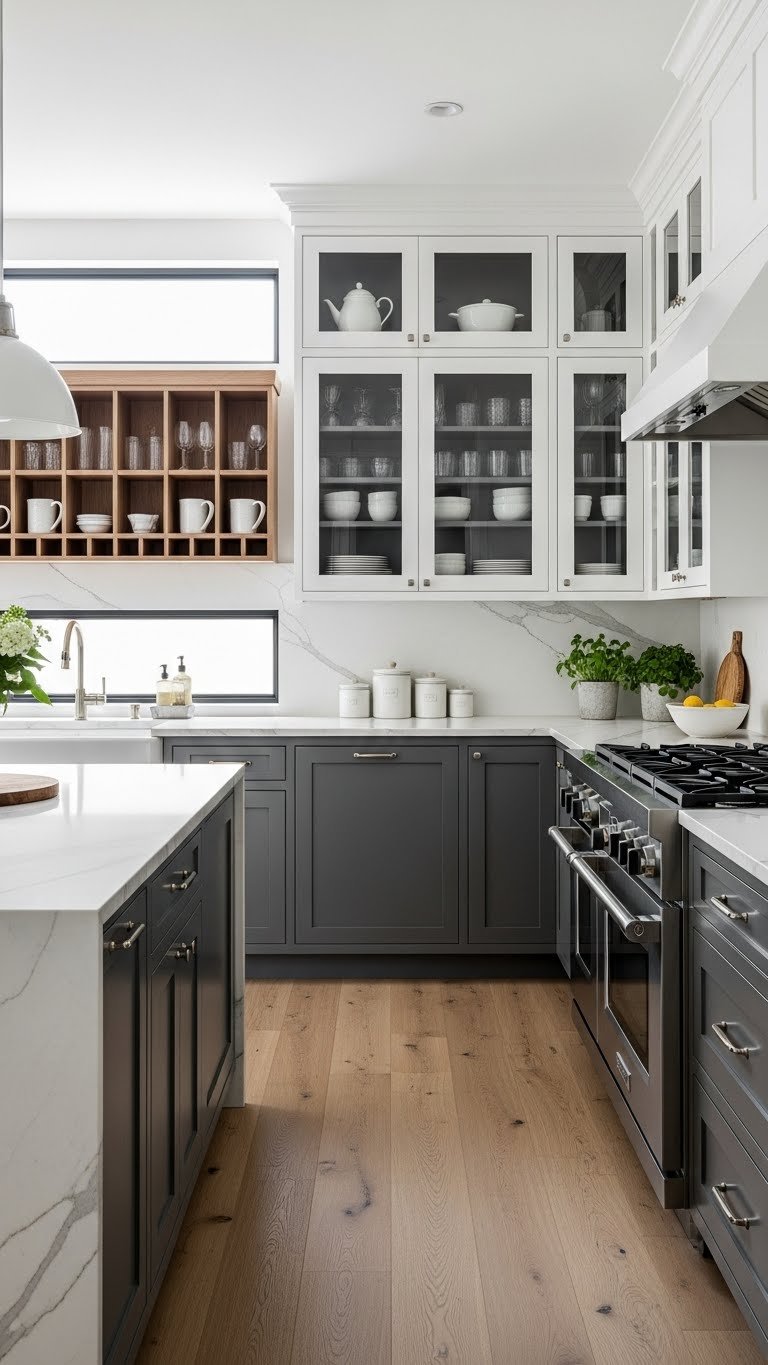
    12. Add Glass Front Cabinet Doors for Display

    Glass-front cabinets transform your kitchen into a gallery—they work especially well for displaying dishware you love or creating visual interest in minimalist kitchens. The openness feels airy while still keeping dust off your items.

    Replacing standard doors with glass-front options costs $100–$300 per door depending on material (basic glass versus beveled or frosted). Full kitchen might run $1,500–$4,000. DIY-friendly alternative: stick adhesive frosted film ($10–$20 per roll from Amazon) on lower cabinet sections for privacy while maintaining the glass-door aesthetic.

    Choose interior LED lighting to make displays glow softly at night.

    Pro tip: Style displays intentionally with matching dishware, cookbooks turned spine-out, and a few decorative items—not everything you own.

    Your kitchen becomes a mini gallery that celebrates your style. Guests notice the design intention immediately.

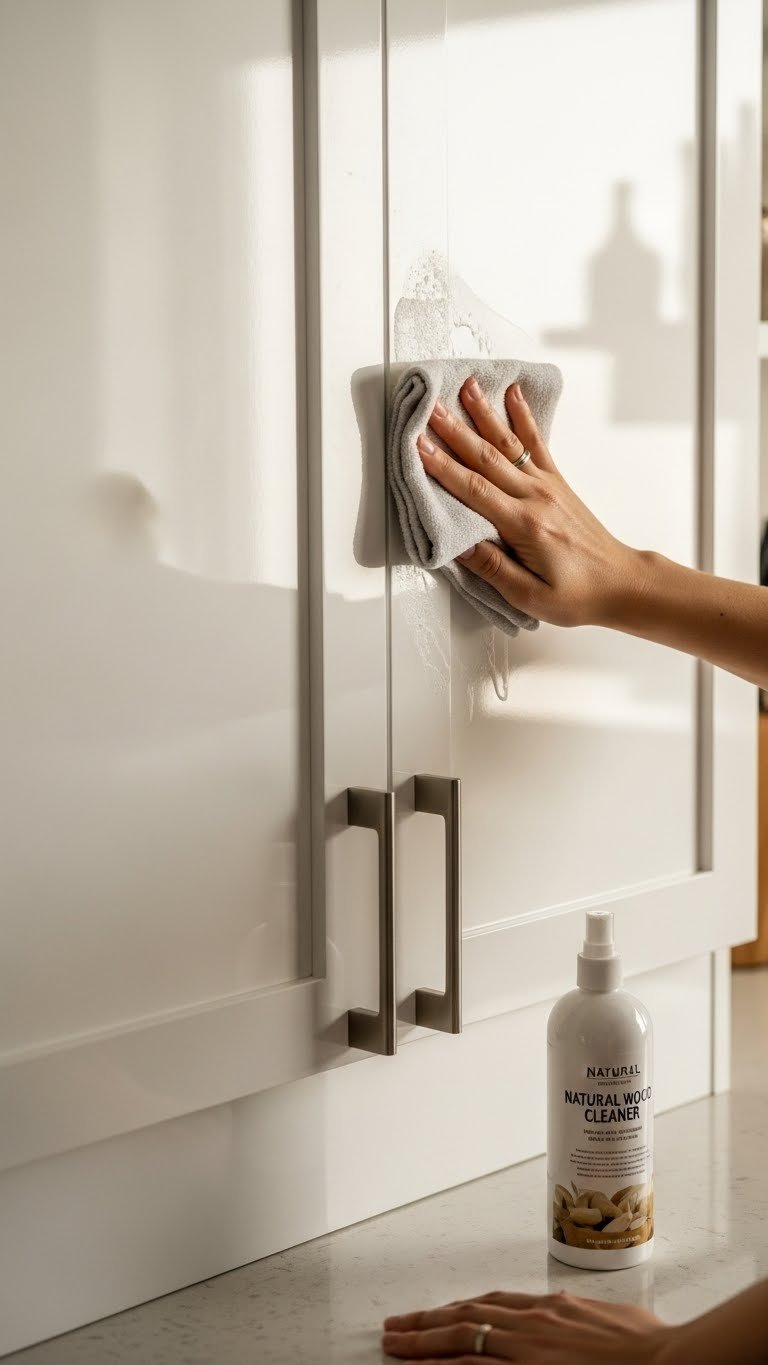
    13. Refinish Cabinets With Cabinet Paint Systems

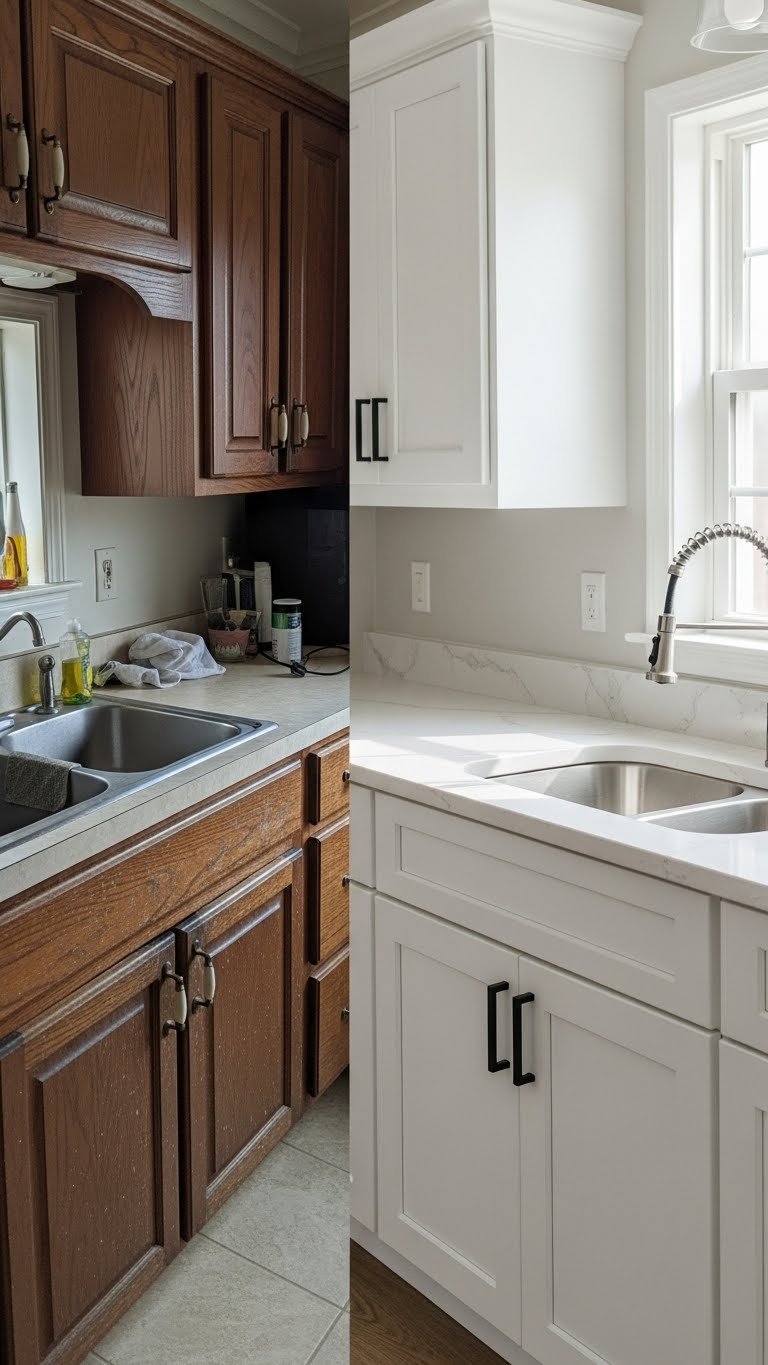
    Cabinet refinishing (not replacing doors, actually repainting existing cabinets) has become wildly popular because it costs a fraction of full replacement. Modern cabinet paint systems create durable, professional-looking finishes in any color you want.

    DIY refinishing costs $200–$500 in materials and takes a weekend (or two). Professional cabinet painters charge $800–$2,500 for a full kitchen. SHERWIN-WILLIAMS Cabinet & Trim Paint or BENJAMIN MOORE Advance are industry standards. The process: light sanding, primer, two paint coats, then hardware installation. Results last 7–10+ years with proper care.

    Pro tip: Hire professionals if you don’t have good ventilation or steady painting technique—results matter here.

    Your cabinets look freshly renovated for a fraction of replacement cost. You can’t tell these aren’t new cabinets unless you look closely.

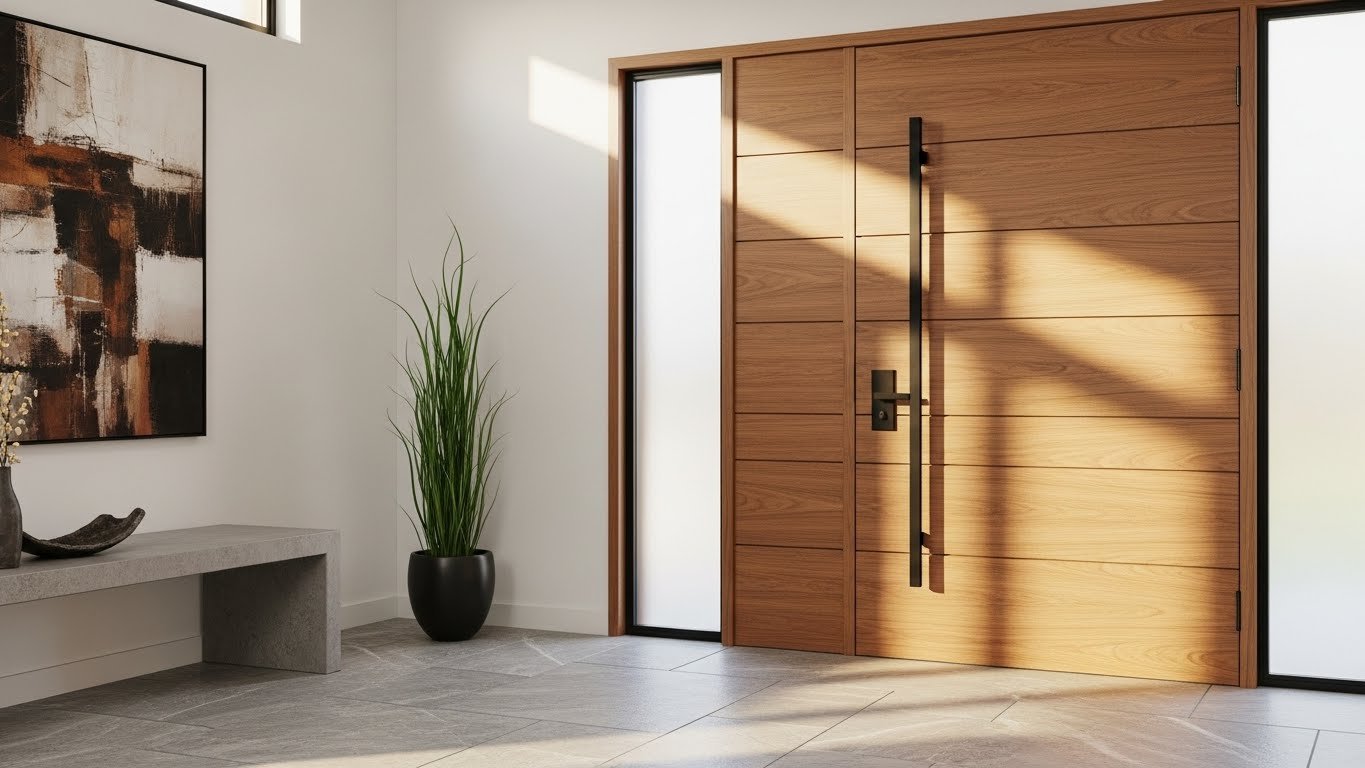
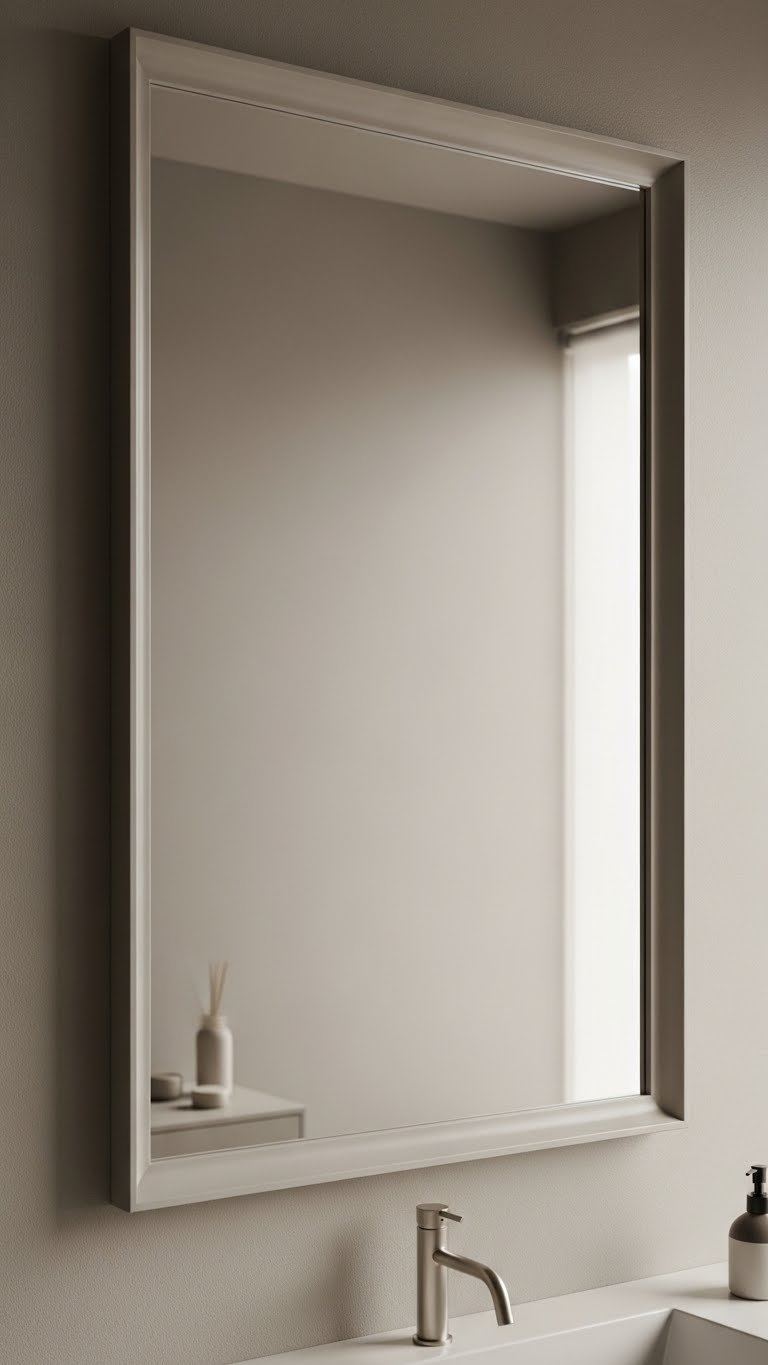
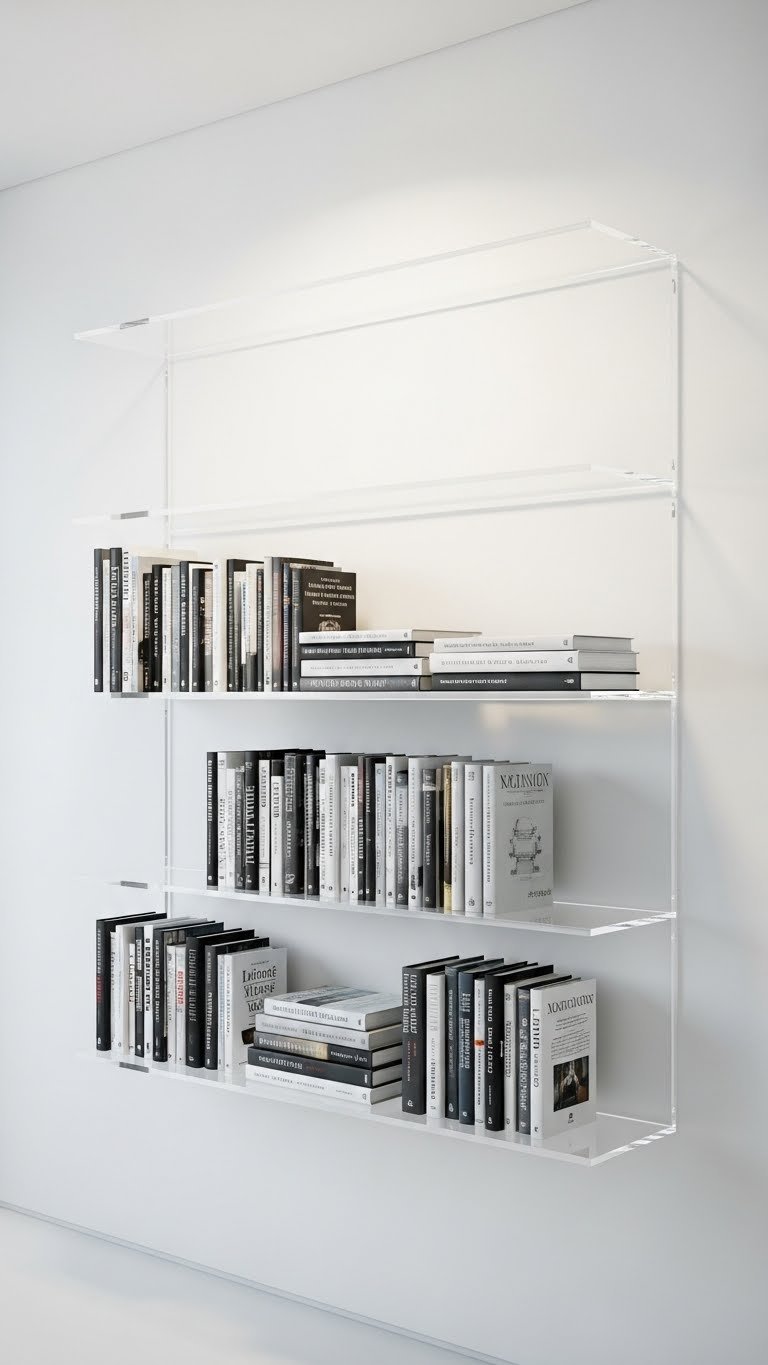
    14. Go Frameless for Seamless Modern Minimalism

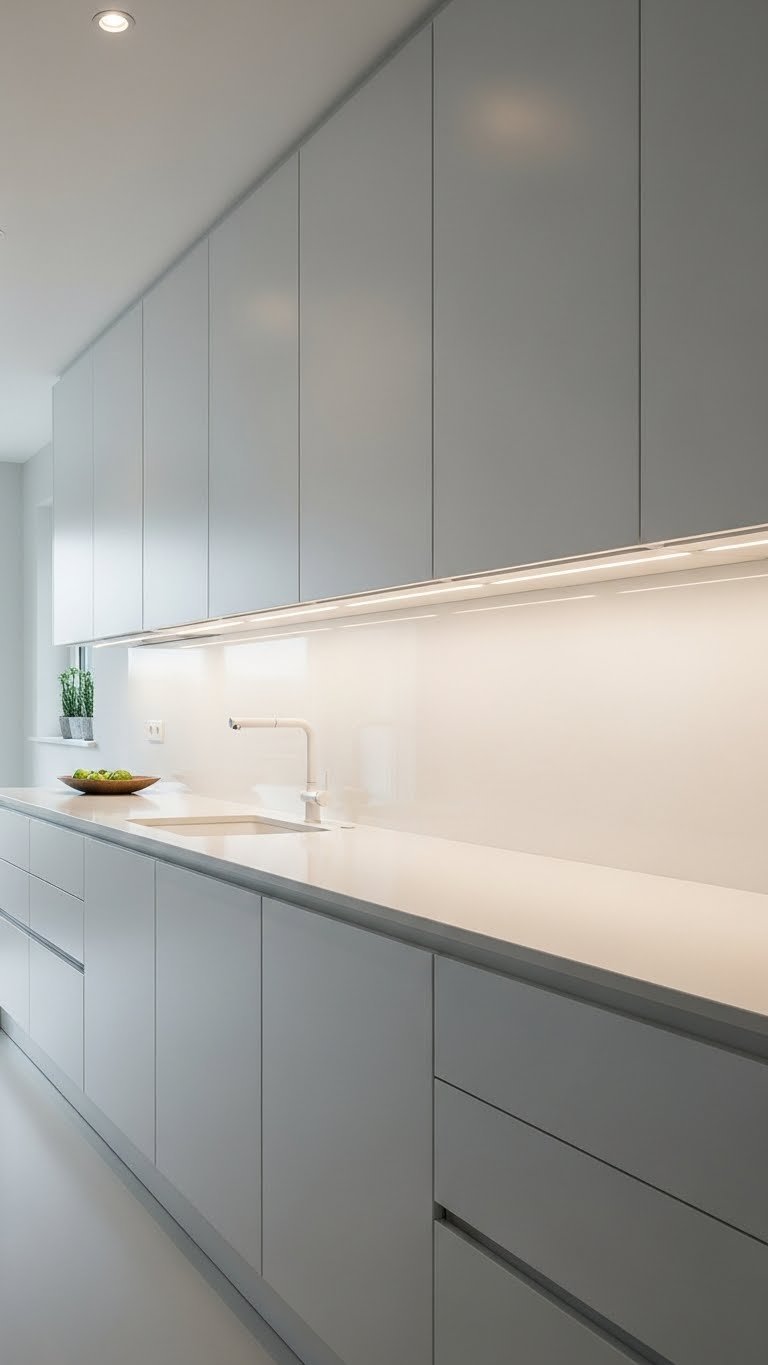
    Frameless cabinets (also called European-style) eliminate the face frame that sits between cabinet boxes and doors, creating that seamless, ultra-modern look. They maximize interior storage space by about 10% and feel incredibly clean.

    Frameless cabinets are typically higher-quality options: expect $3,000–$8,000 for semi-custom or $5,000–$15,000+ for fully custom kitchens. IKEA’s SEKTION line offers budget frameless options around $1,500–$3,000 for smaller kitchens. Quality matters here—frameless cabinets need excellent construction to hang properly and align perfectly.

    Look for soft-close hinges and quality hardware when shopping.

    Pro tip: Pair frameless cabinets with handleless design for the ultimate minimalist kitchen.

    Your space looks sleekly designed and intentional. The seamless cabinet lines create visual calm in your kitchen.

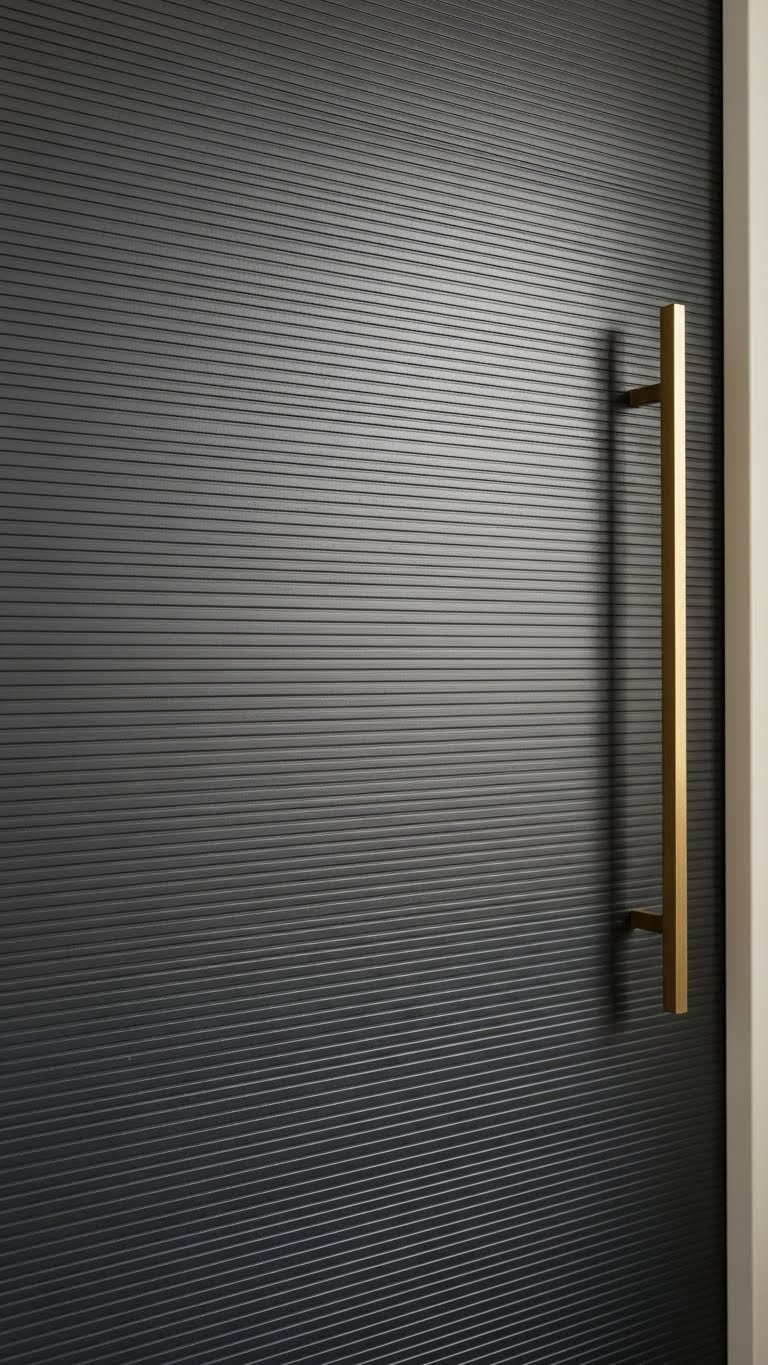
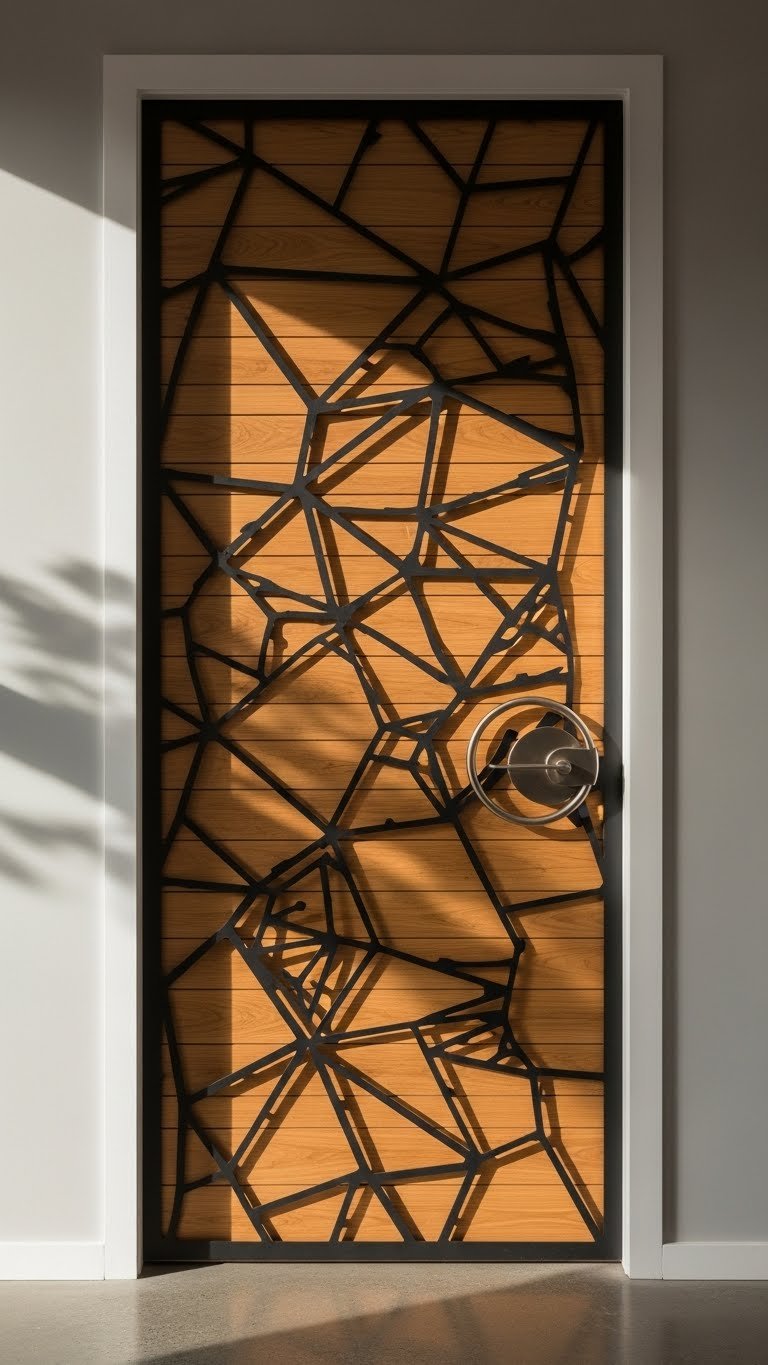
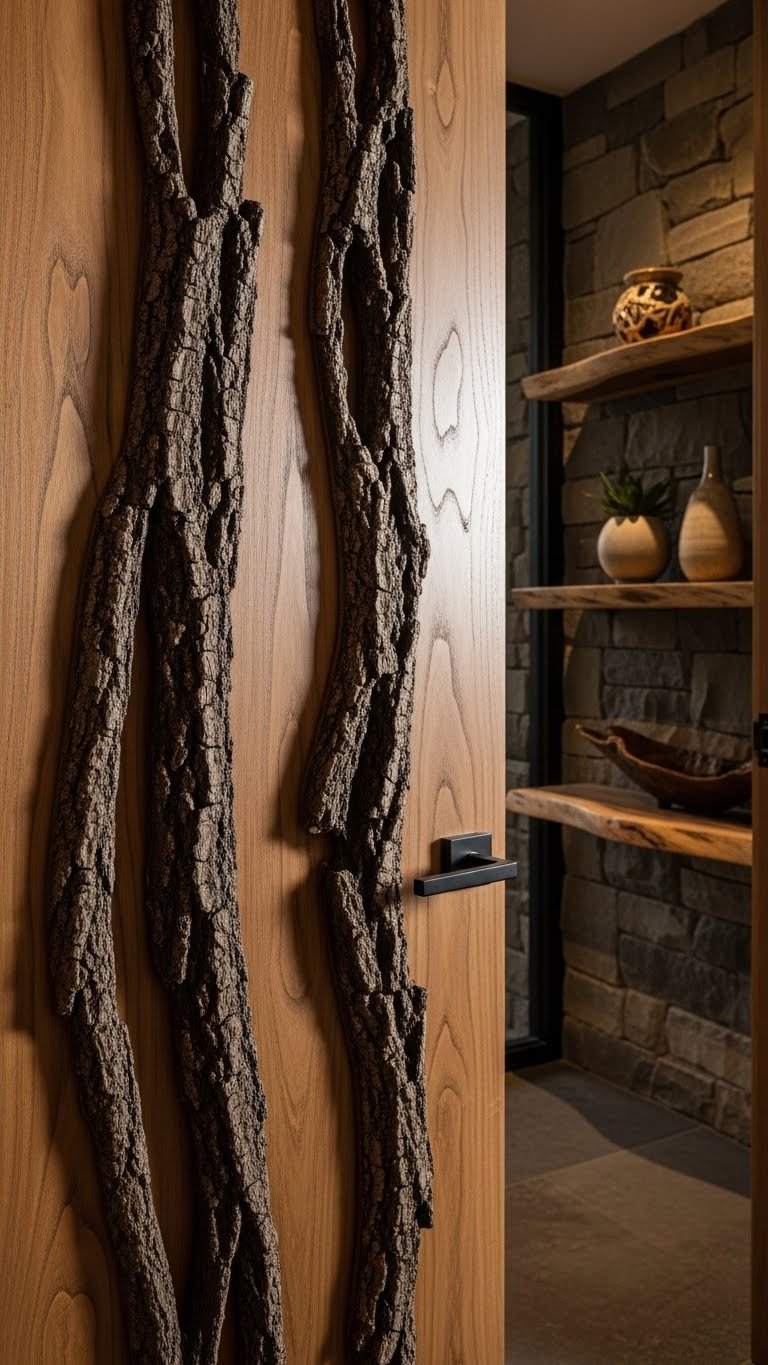
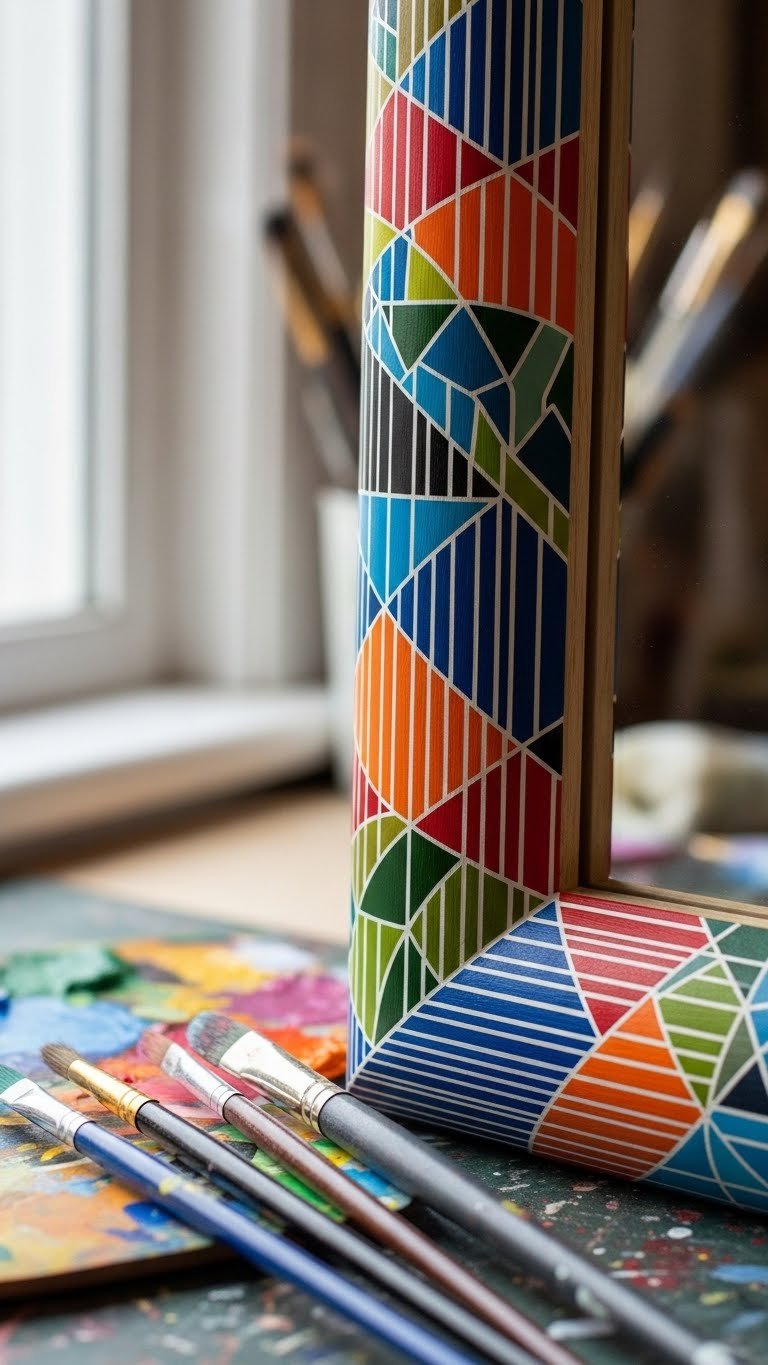
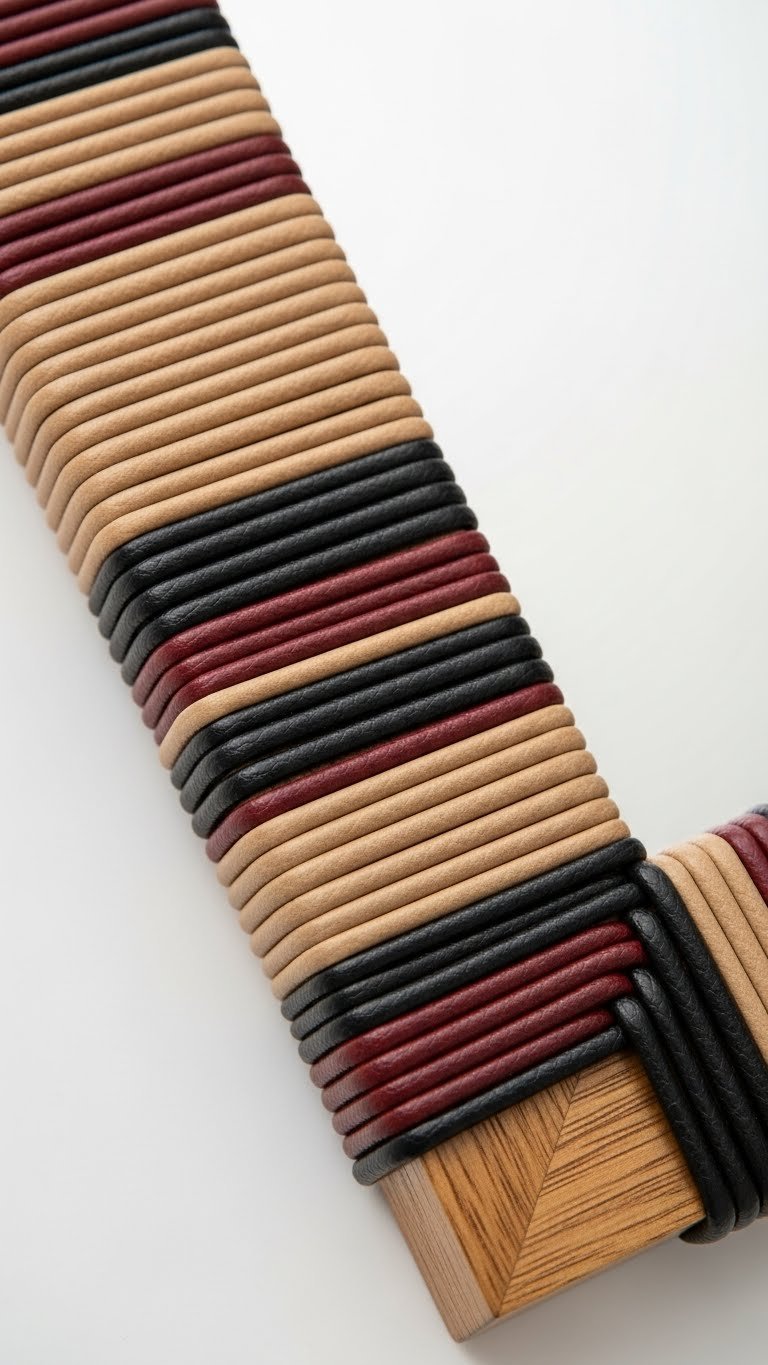
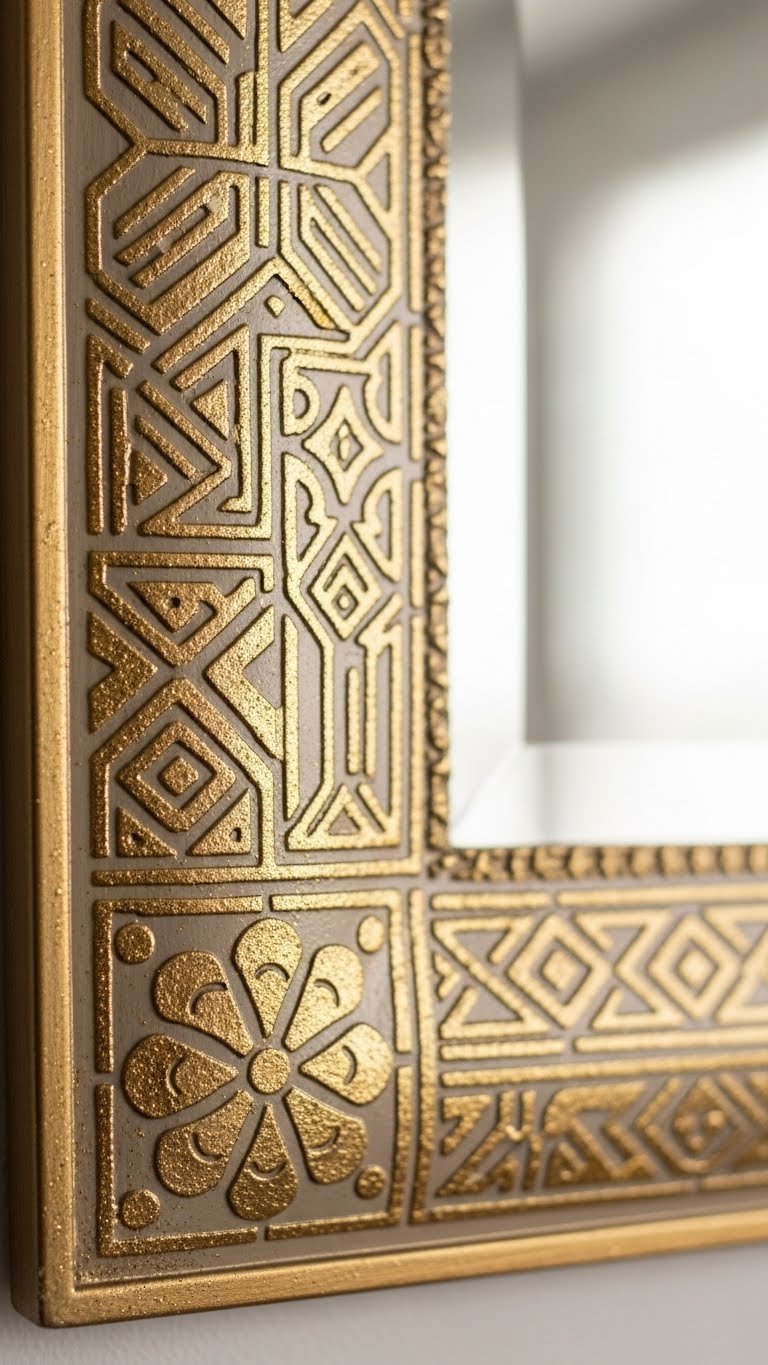
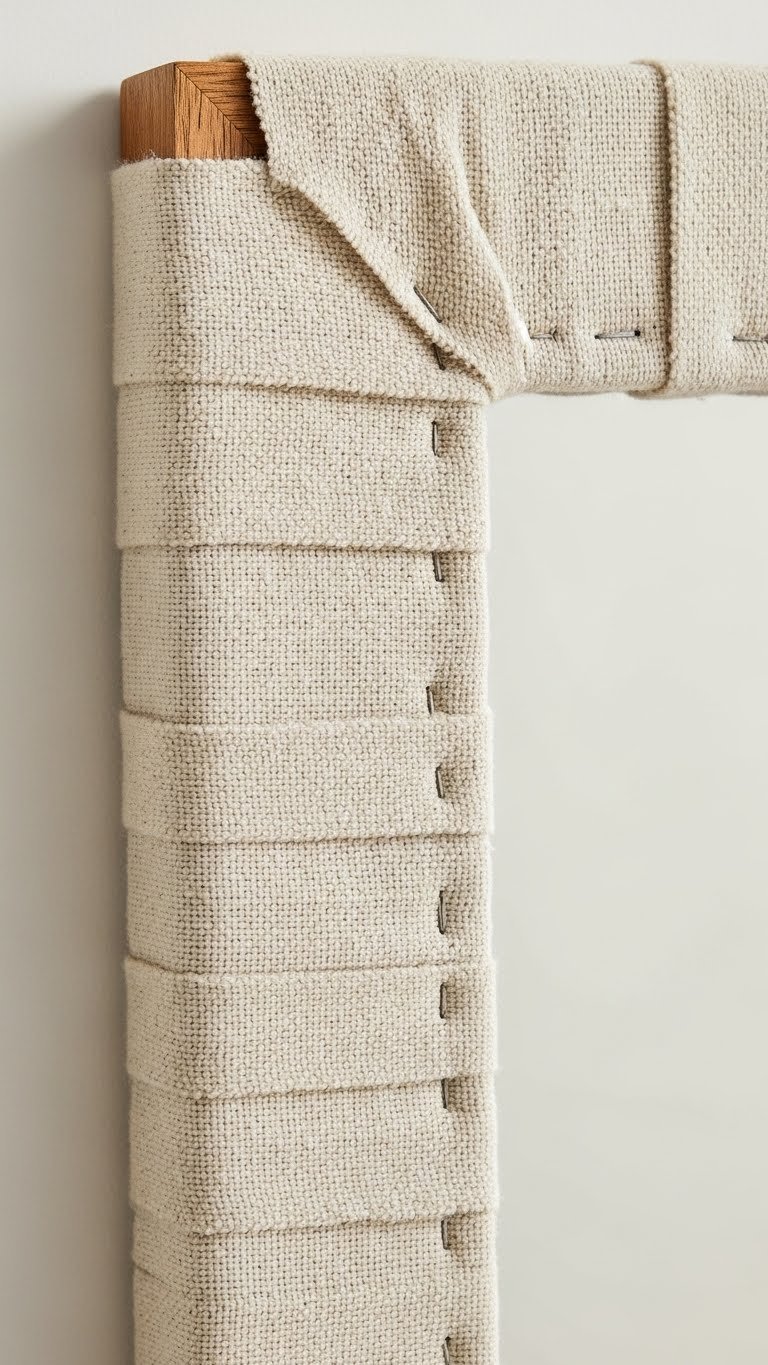
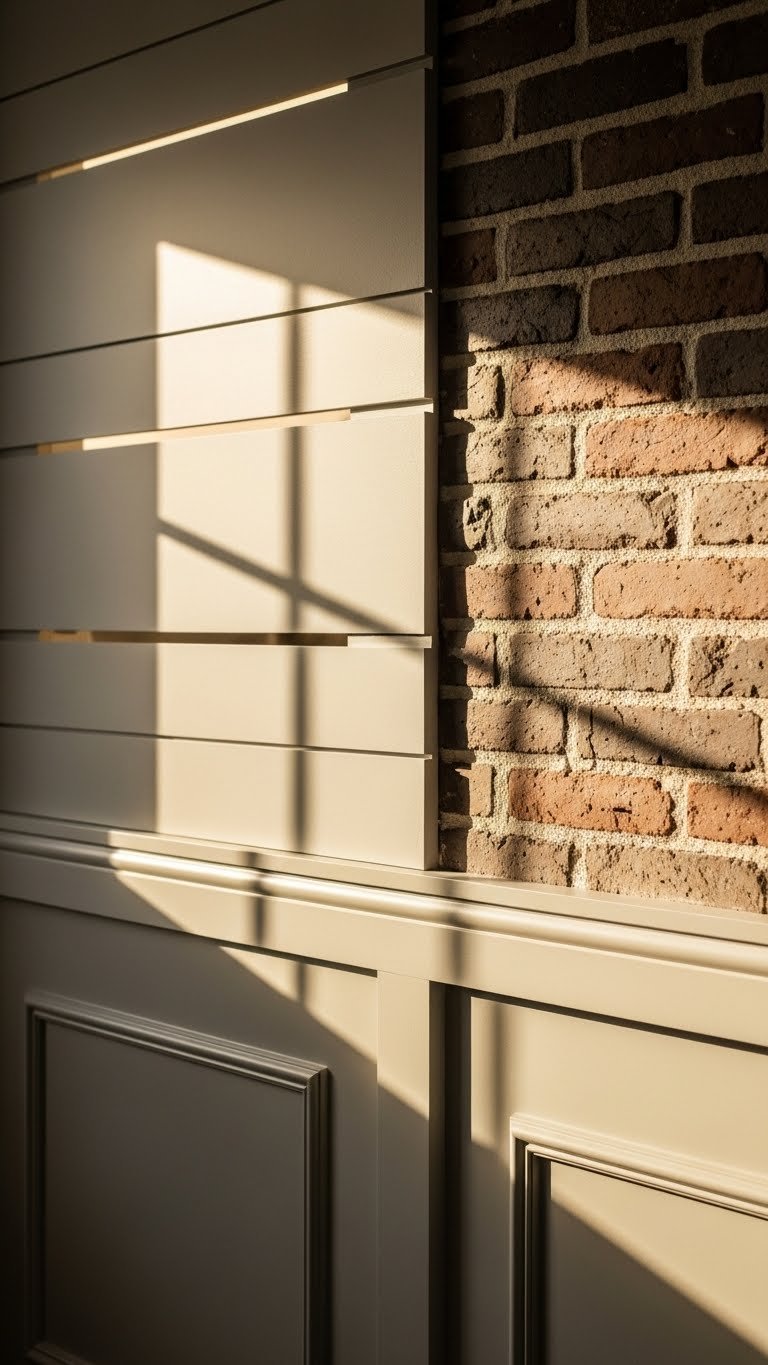
    15. Use Fluted & Textured Finishes for Tactile Appeal

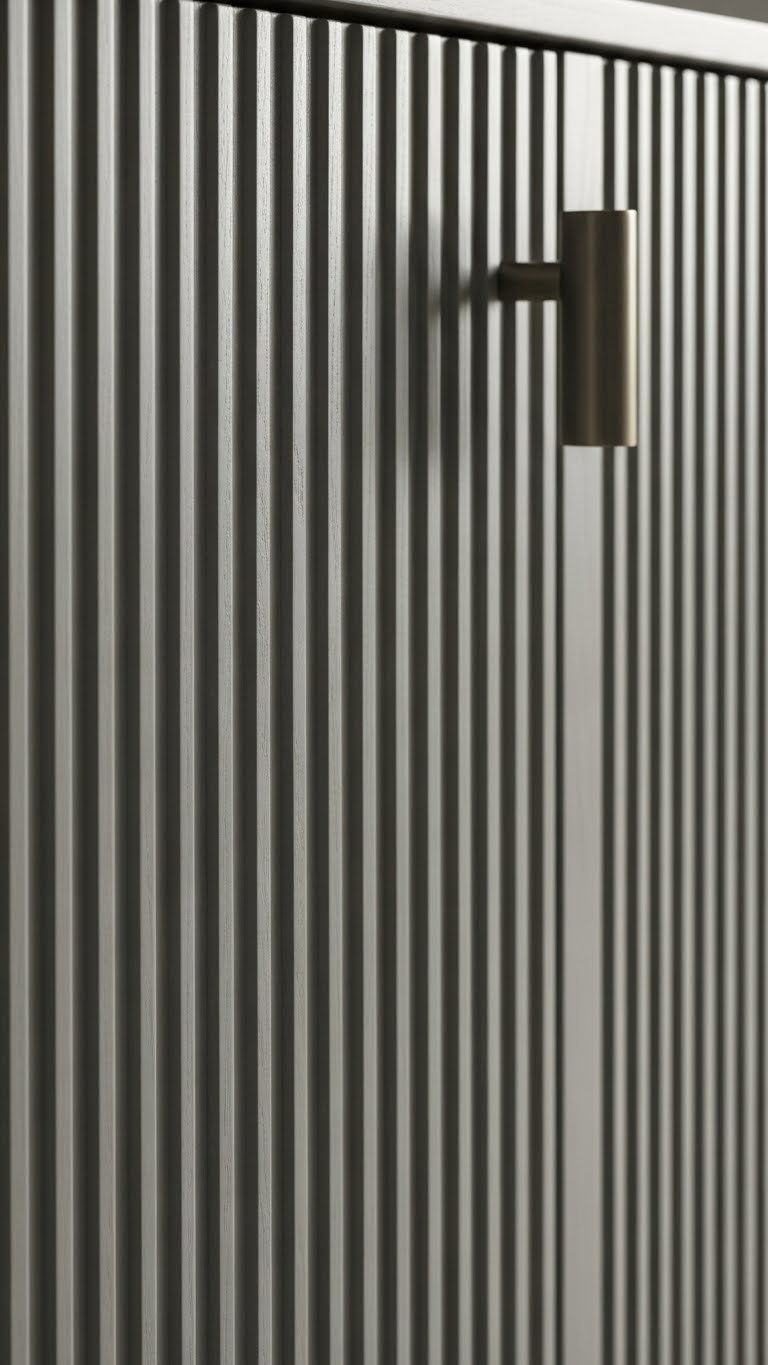
    Fluted and textured cabinet finishes add sophistication and dimension without clashing with minimalist design. These details make cabinets feel more expensive and interesting while staying visually clean.

    Fluted cabinet doors typically cost $150–$300 per door depending on material and depth of texture. You can also add fluting with adhesive-backed panels ($20–$50 per sheet from specialty suppliers) on existing cabinets. Textured finishes include everything from subtle grain patterns to hand-carved details—each adds tactile interest that photographs beautifully.

    Popular textures: vertical fluting, subtle waves, or linear patterns that complement modern interiors.

    Pro tip: Texture works best on large cabinet faces—don’t over-texture smaller cabinet sections or it feels busy.

    Your cabinets gain visual interest and high-end appeal. The tactile quality makes people want to touch and explore your kitchen design.

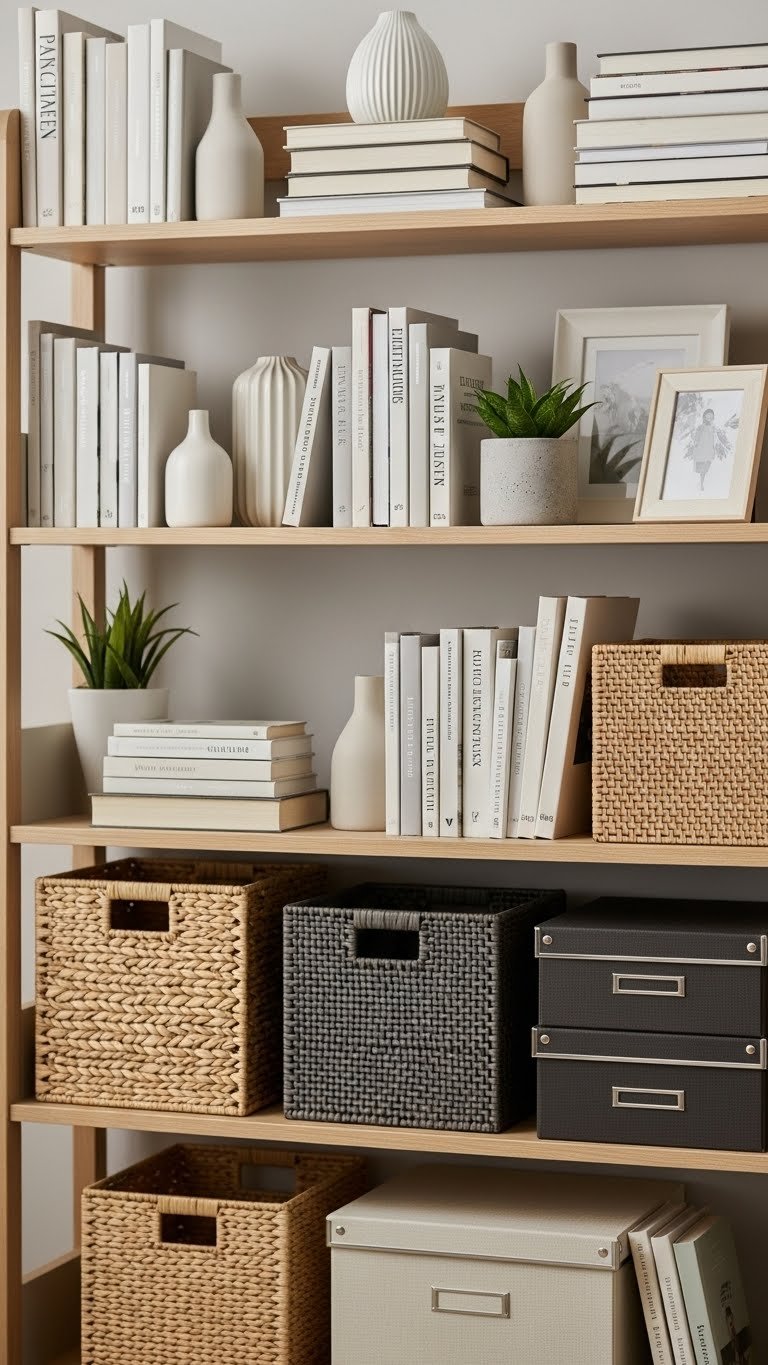
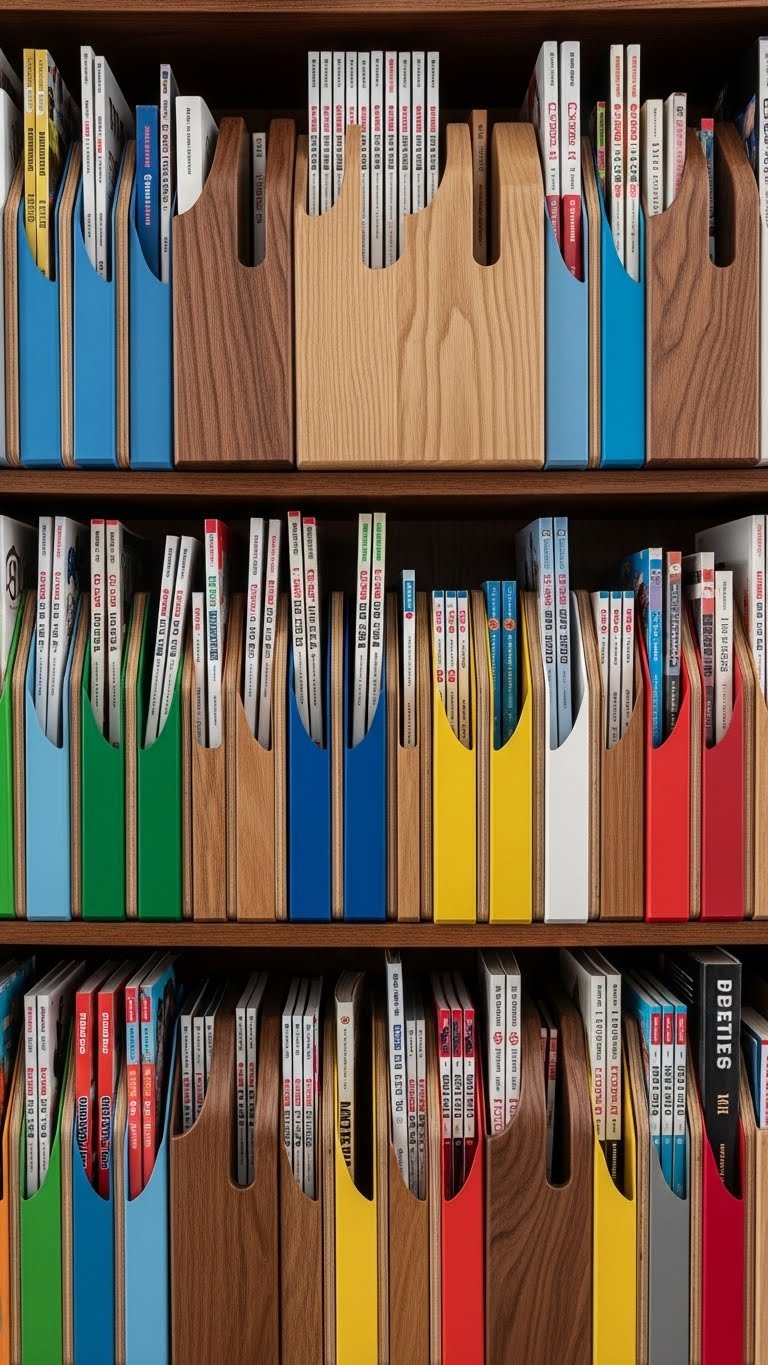
    16. Invest in Smart Storage Solutions & Dividers

    Smart storage isn’t just about looking neat—it’s about actually using your cabinet space efficiently. Dividers, pull-out shelves, and tiered organizers make your daily life easier while maximizing every inch.

    Quality pull-out organizers ($40–$120 per unit) and cabinet dividers ($15–$50 each) transform chaos into function. Popular solutions: pull-out spice racks, tiered shelf raisers, utensil dividers, and deep drawer organizers. These work in existing cabinets—no installation required for many options. Brands like Rev-A-Shelf, Hafele, and even IKEA’s VARIERA series offer excellent solutions under $30–$60 per item.

    Pro tip: Measure your cabinet interior precisely before ordering organizers—sizing is everything.

    You’ll actually know what you have and where to find it. Cooking becomes faster because ingredients and tools are organized logically.

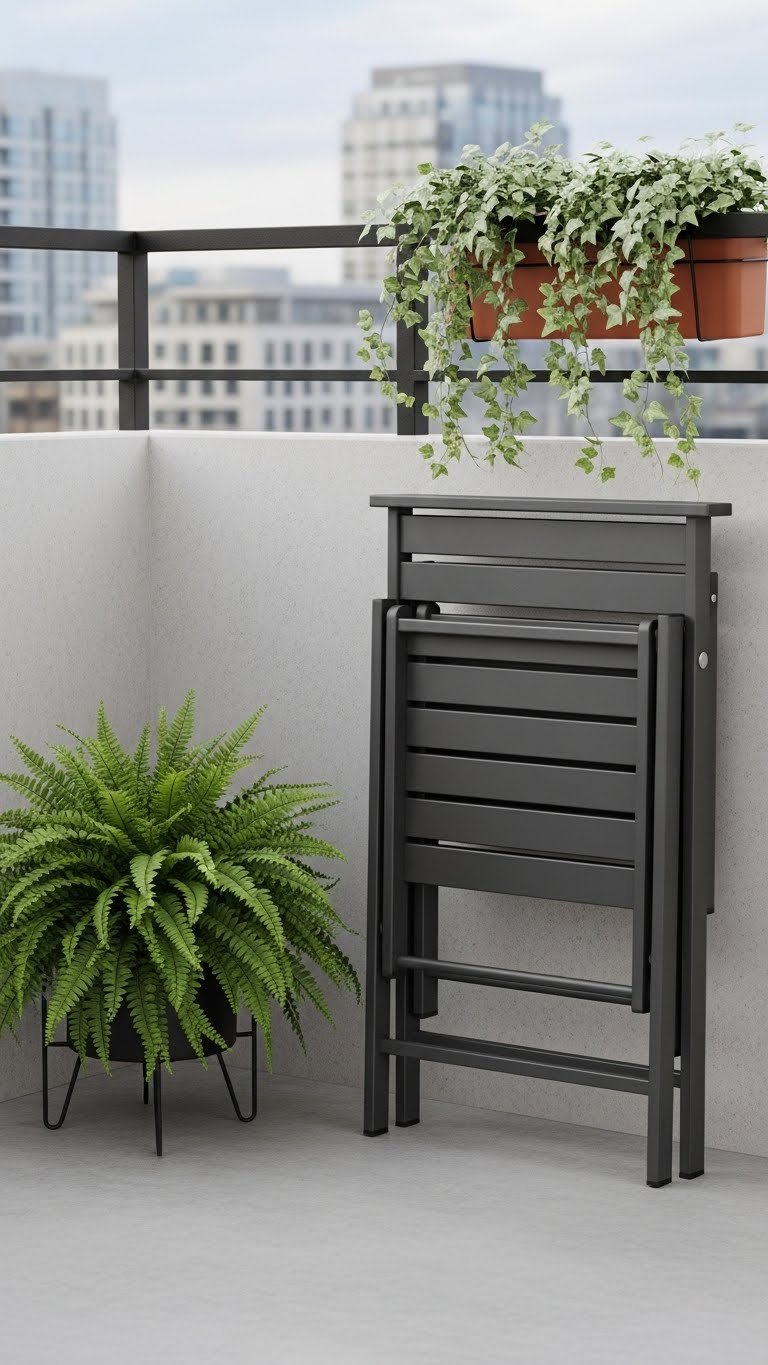
    17. Create Indoor-Outdoor Cabinet Continuity

    Extending your cabinet style outdoors creates a sophisticated flow between spaces. Matching or complementary outdoor kitchen cabinetry makes your home feel designed as a complete environment.

    Outdoor kitchen cabinets cost more ($150–$400+ per cabinet) because they require weather-resistant finishes and materials. TEAK, marine-grade plywood, and specially treated woods resist moisture and UV damage. You can start small: add a single outdoor cabinet or bar unit ($500–$1,500) that echoes your kitchen’s style. Paint, hardware, and color should coordinate even if materials differ slightly due to weather requirements.

    Pro tip: Work with an outdoor kitchen specialist if building from scratch—weatherproofing is crucial.

    Your home gains a resort-like feel. You’ve created an intentional design through both spaces that makes entertaining seamless and stylish.

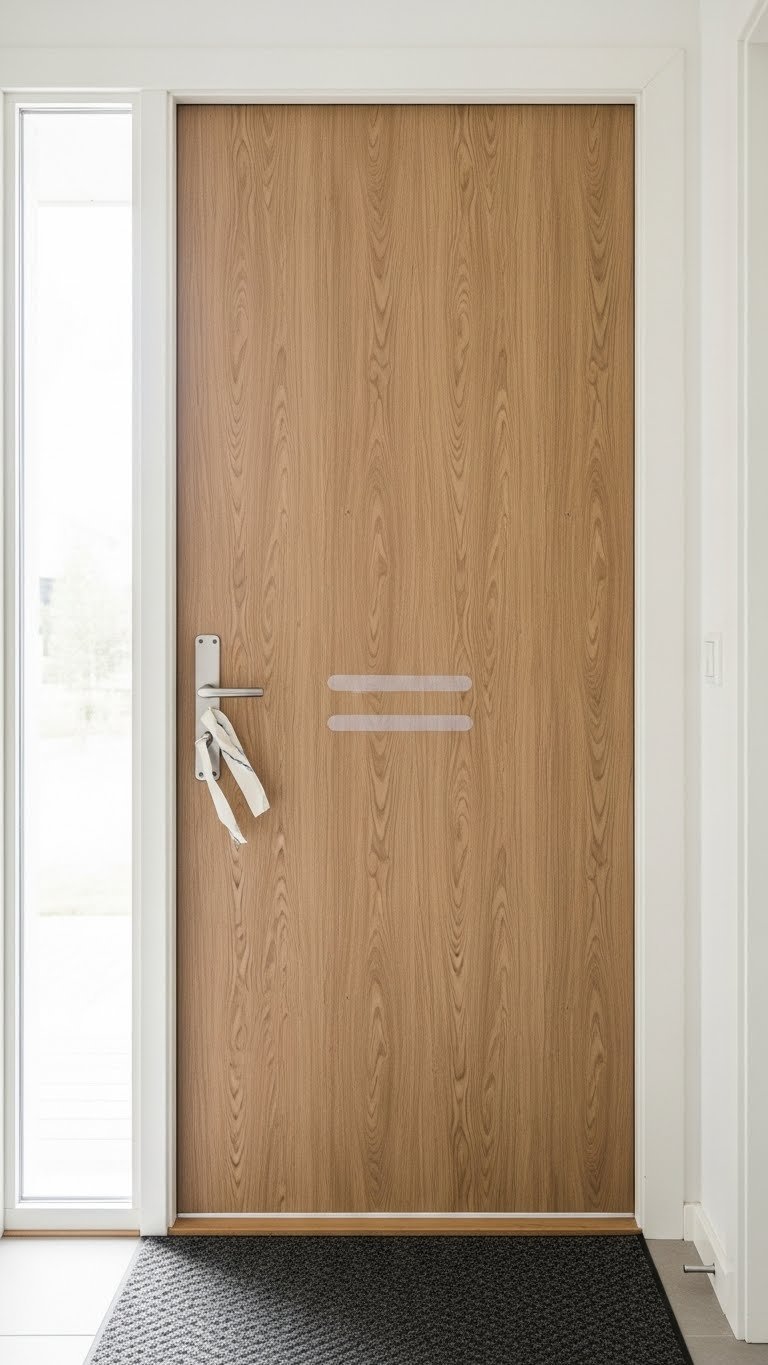
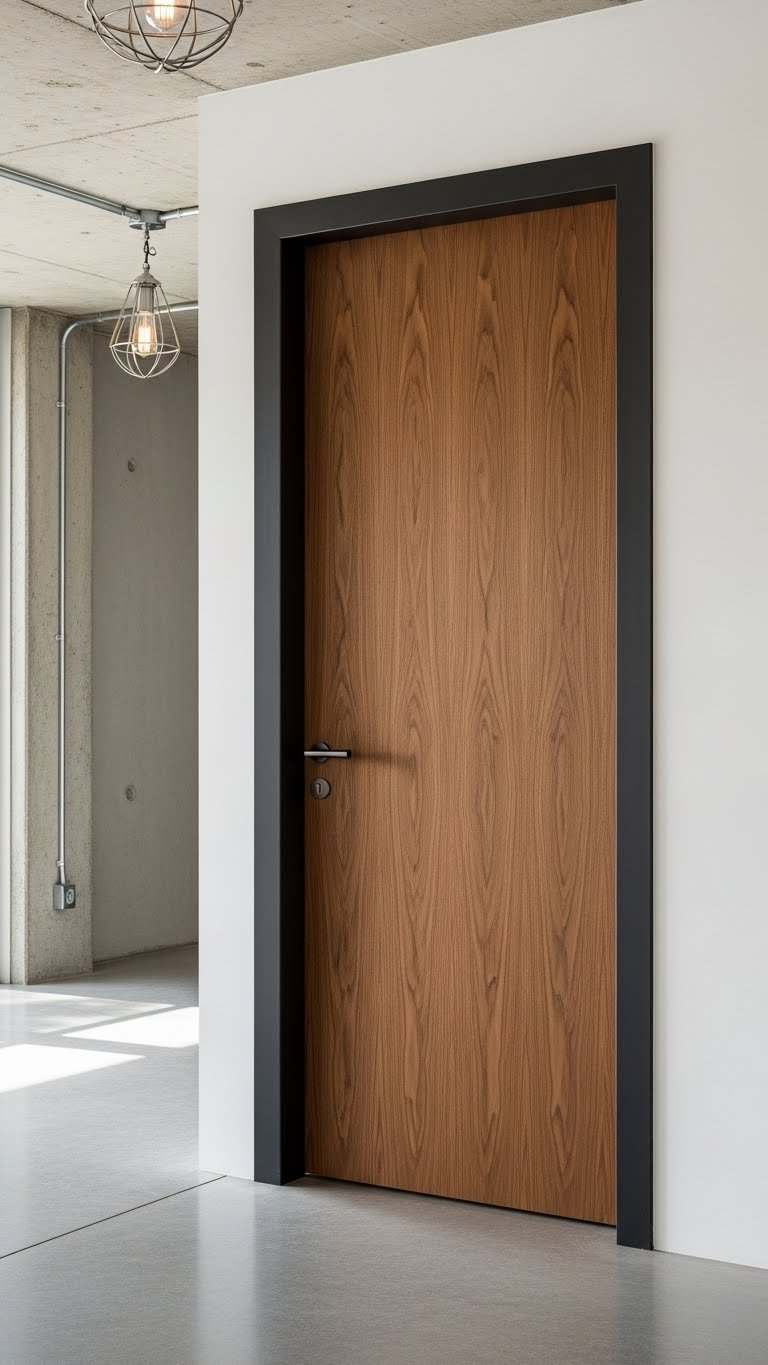
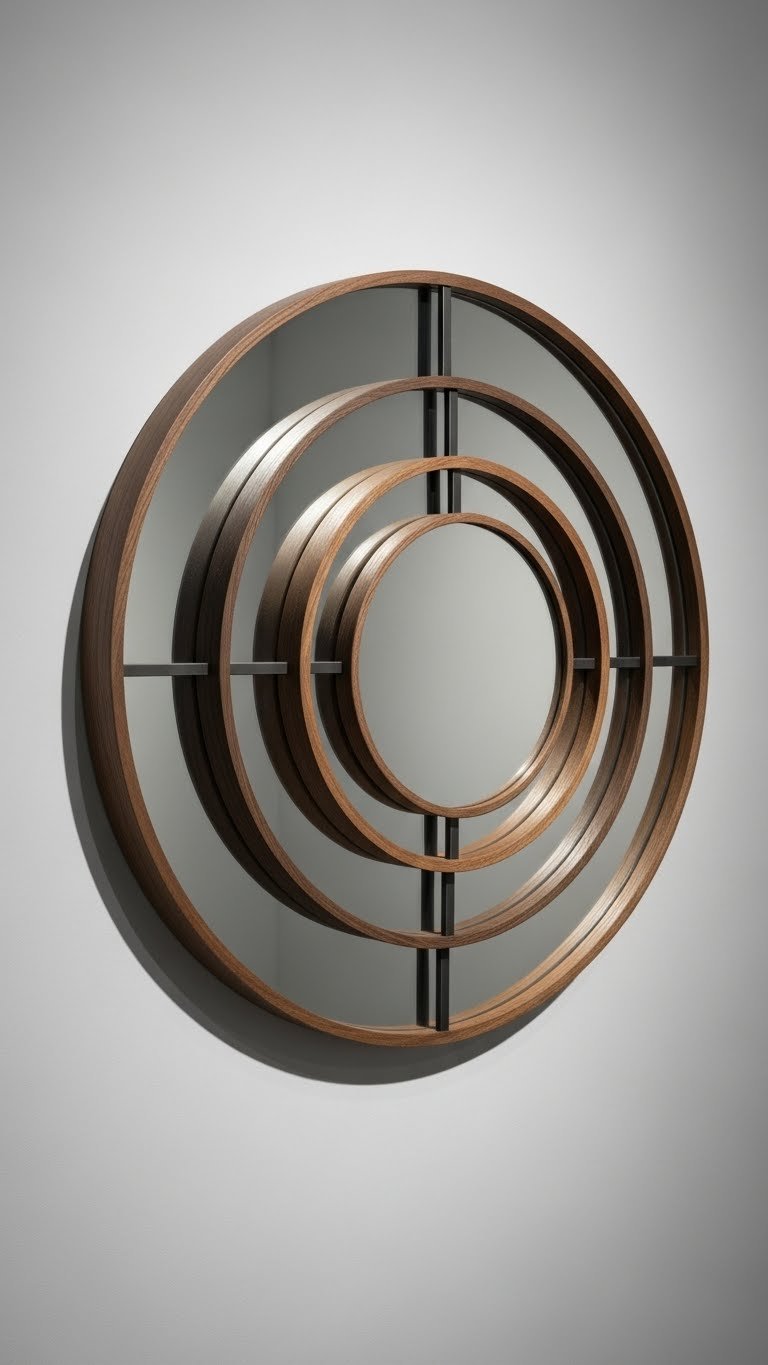
    18. Experiment With Horizontal Grain & Soft Minimalism

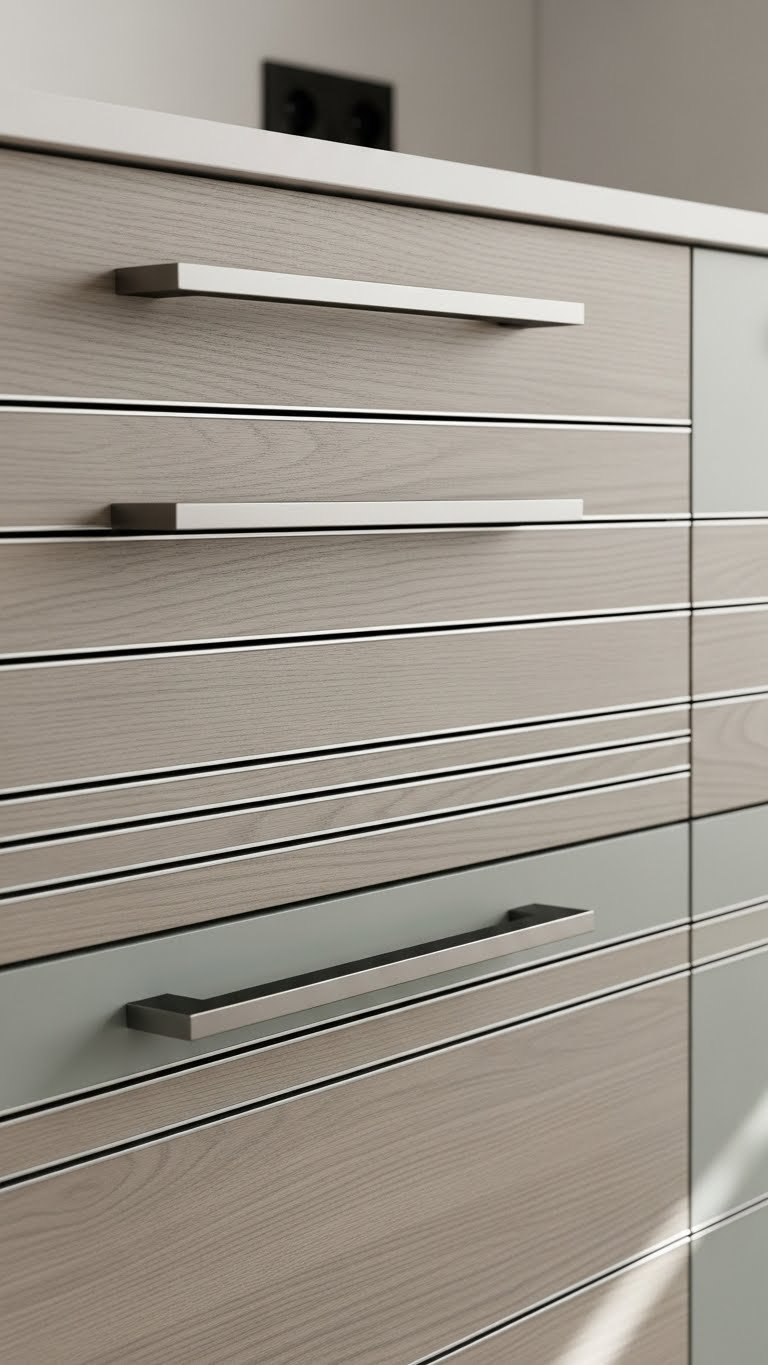
    Horizontal grain patterns and linear details create calm, grounded energy—perfect for contemporary kitchens seeking sophistication over fussiness. This subtle detail shifts a kitchen from plain to purposeful.

    Custom cabinets with horizontal grain details run $3,500–$9,000+ for full kitchens. Budget option: use peel-and-stick wood veneer sheets ($15–$30 per sheet) featuring horizontal patterns on cabinet fronts. Paint cabinets in soft, muted colors (greige, pale blue, warm gray) and add thin linear hardware for that seamless horizontal effect.

    This works beautifully with minimalist or Scandinavian design aesthetics.

    Pro tip: Balance horizontal elements with vertical open shelving or tall glass cabinets for visual variety.

    Your kitchen gains zen-like calm and modern sophistication. The subtle linear details make your space feel consciously designed.

    19. Customize With AI-Designed & CNC-Cut Cabinetry

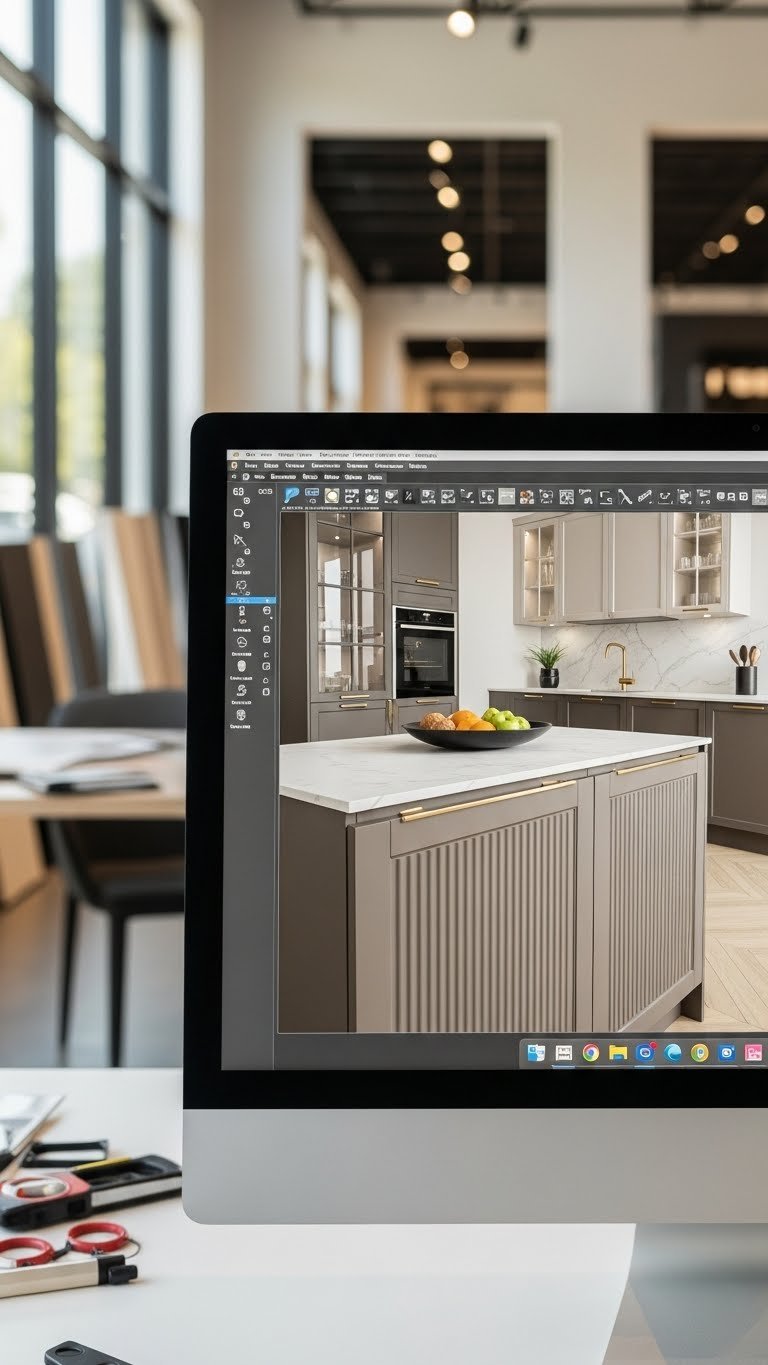
    Cutting-edge technology like AI design tools and CNC (computer numerical control) machining create hyper-customized cabinets with precision you can’t achieve by hand. This is the future of personalized kitchen design—and it’s becoming more accessible.

    AI design platforms (like those offered by some custom cabinet makers) typically cost $200–$500 for design consultation, then cabinet pricing depends on complexity ($4,000–$12,000+). CNC-cut details add $300–$1,000+ depending on intricacy. The advantage: you get exactly what you envision, with zero guesswork or expensive mistakes.

    Brands like Blum and Hafele integrate smart technology into hardware, while designers use AI visualization for perfect layouts before production.

    Pro tip: Use digital design tools to preview your exact cabinet layout before ordering—it prevents expensive errors.

    You’re getting genuinely custom cabinetry tailored to your exact specifications. This technology makes high-end customization more efficient and more affordable than ever.

    20. Apply Low-VOC & Non-Toxic Cabinet Finishes

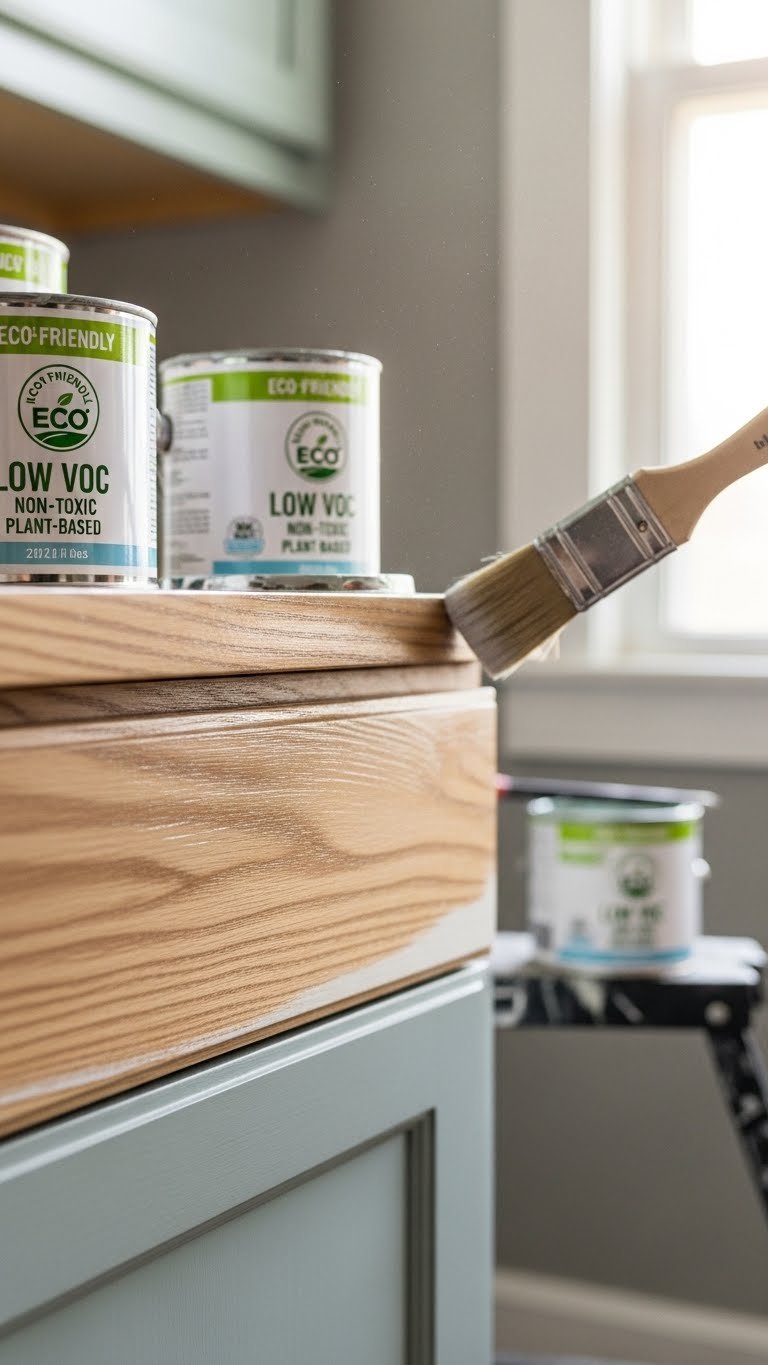
    Low-VOC (volatile organic compound) and non-toxic finishes protect your family’s health while respecting the environment. These finishes have improved dramatically—they now perform as well as traditional finishes without off-gassing.

    Low-VOC paints cost $30–$60 per gallon (similar to standard paint) and work in all cabinet applications. Brands like AFM, Ecos, and even BENJAMIN MOORE’s eco-friendly line offer excellent durability. Finish your existing cabinets with these paints for zero additional cost beyond the paint itself. Finishes cure faster now (3–7 days instead of weeks), so your kitchen is back in action quickly.

    Look for Green Guard Gold or similar certifications when shopping.

    Pro tip: Proper ventilation during application is crucial—crack windows and use fans even with low-VOC products.

    You’ve made a health-conscious choice for your family. Your kitchen smells fresh, not chemically sharp, and you’re reducing indoor air pollution.

    21. Design a Shaker Variation With Modern Twists

    Shaker cabinets are timeless for a reason—their clean lines and inset panels work with virtually any design style. Modern interpretations add two-tone color, minimalist hardware, or textured panels for contemporary appeal.

    Custom Shaker cabinets run $3,000–$8,000 for full kitchens; semi-custom options through Wayfair or Home Depot start around $1,500–$4,000. You can update existing Shaker cabinets by painting doors ($50–$200 in materials), swapping hardware ($100–$300), and adding interior lighting ($50–$150). This blend of classic form and modern updates feels instantly elevated.

    Pro tip: Pair traditional Shaker style with contemporary hardware (brass knobs or long pulls) for a hybrid aesthetic.

    Your cabinets feel timeless yet current. You’ve chosen a style that will remain appealing for years, not just this season.

    22. Use Negative Space & Open Floor Plans Intentionally

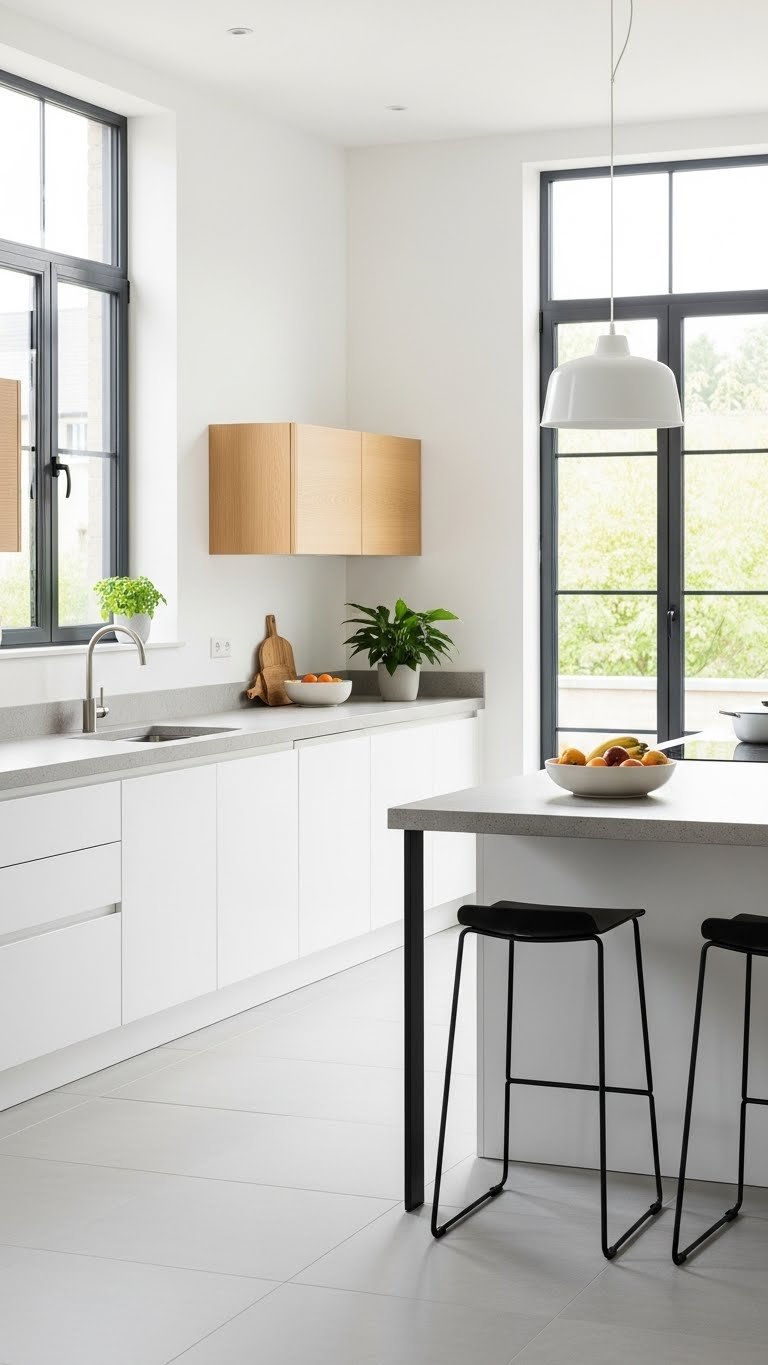
    Embracing negative space—leaving parts of your kitchen intentionally open—creates visual calm and makes small spaces feel larger. This contrasts beautifully with traditional full-cabinet kitchens.

    You don’t need to buy anything for this approach—it’s about rethinking what stays versus what goes. If you’re ordering new cabinets, choose fewer base cabinets and more open shelving or counter space. This saves money ($500–$2,000 compared to full cabinetry) while creating a gallery-like aesthetic. Open counters also make kitchens easier to clean and less cluttered-feeling.

    Pro tip: When using negative space, ensure remaining countertops are organized and visually clean.

    Your kitchen becomes a calm, intentional space rather than a cluttered workspace. The openness makes your kitchen feel twice its actual size.

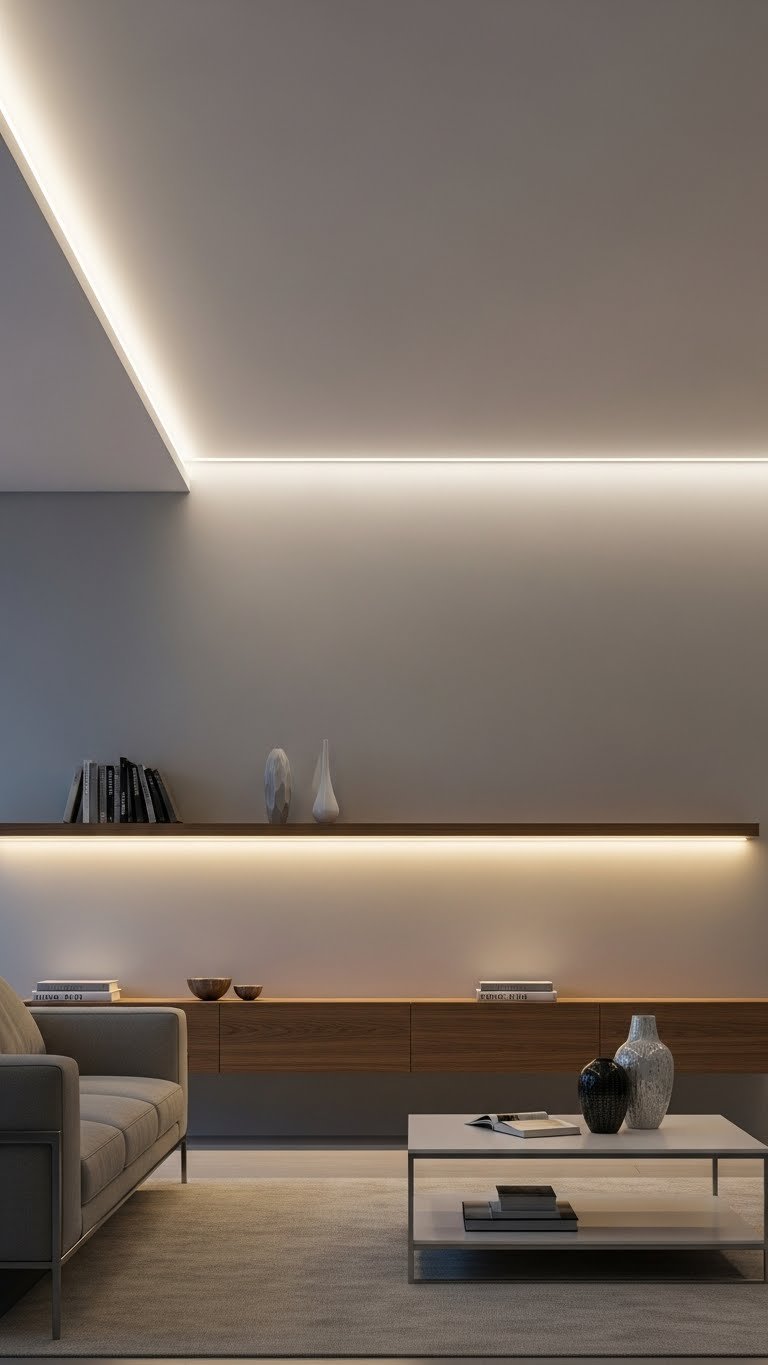
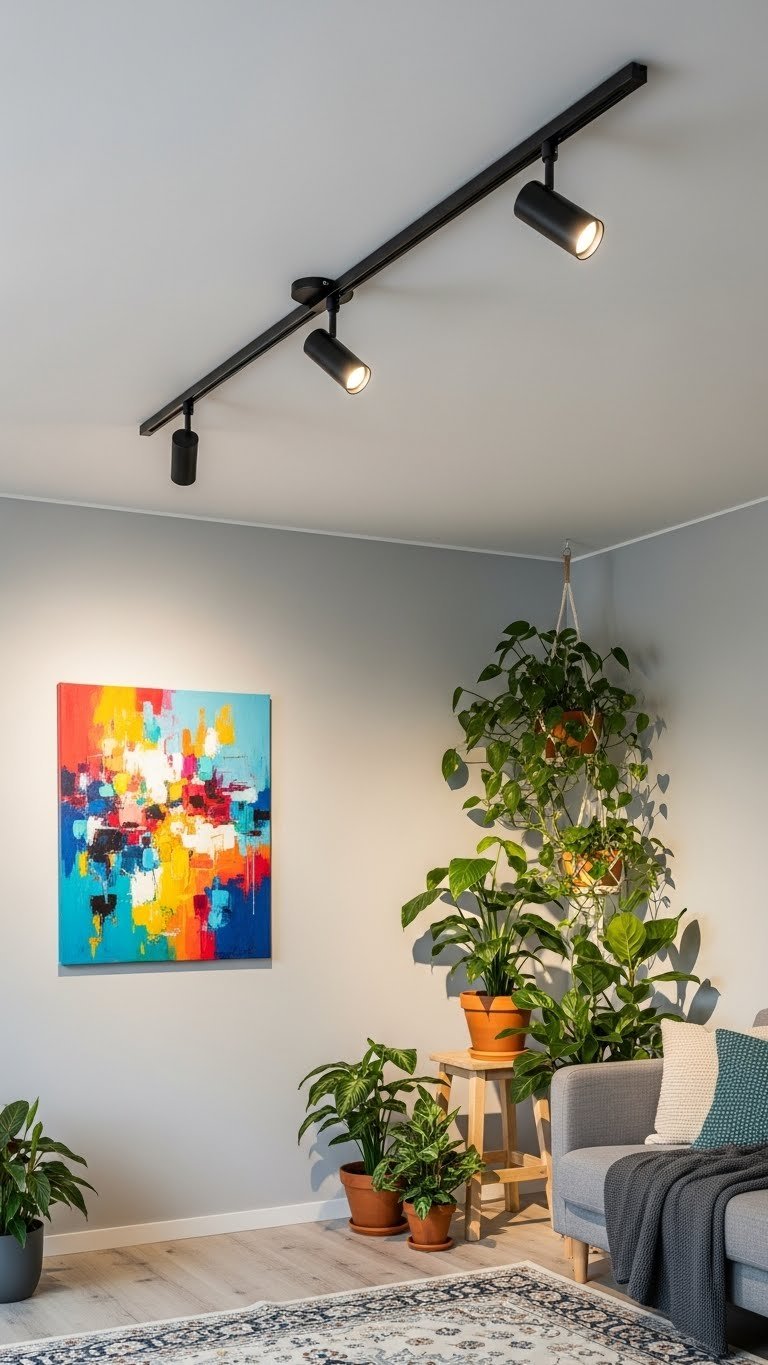
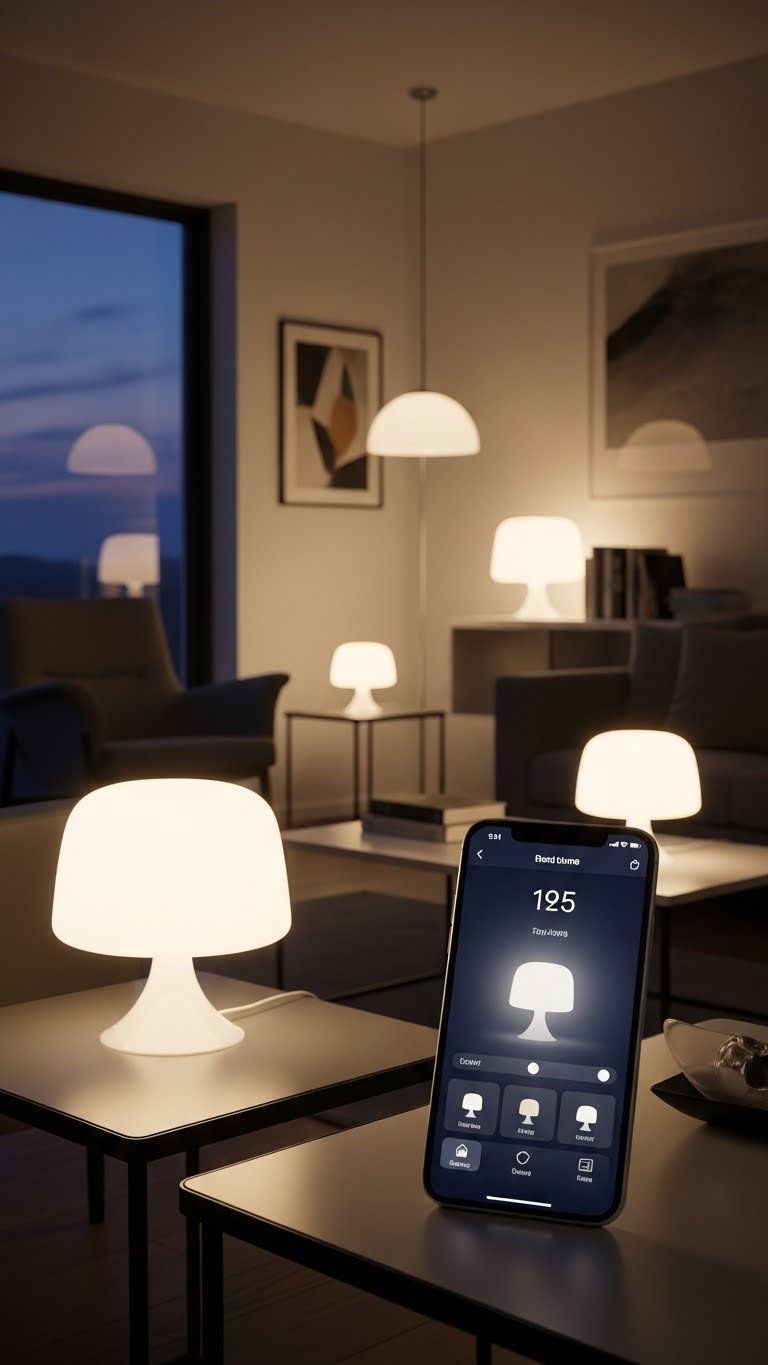
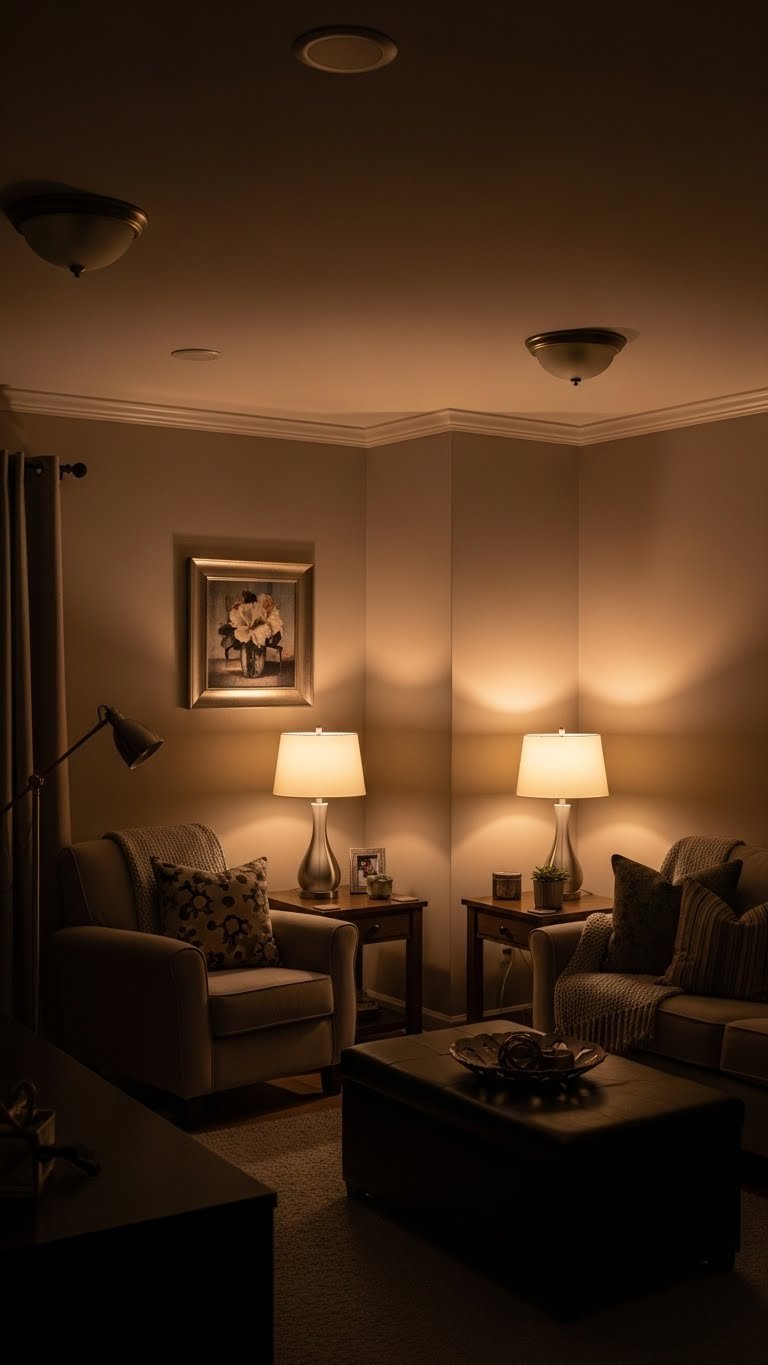
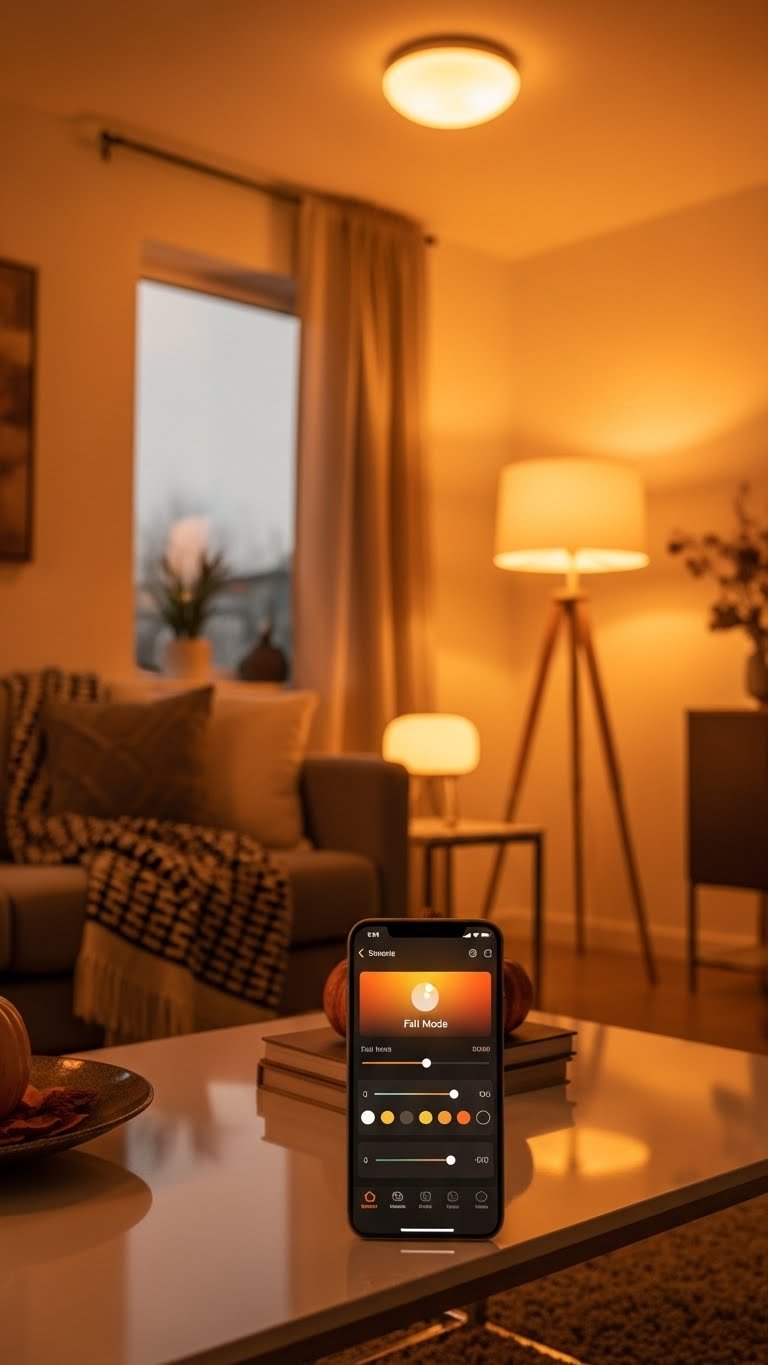
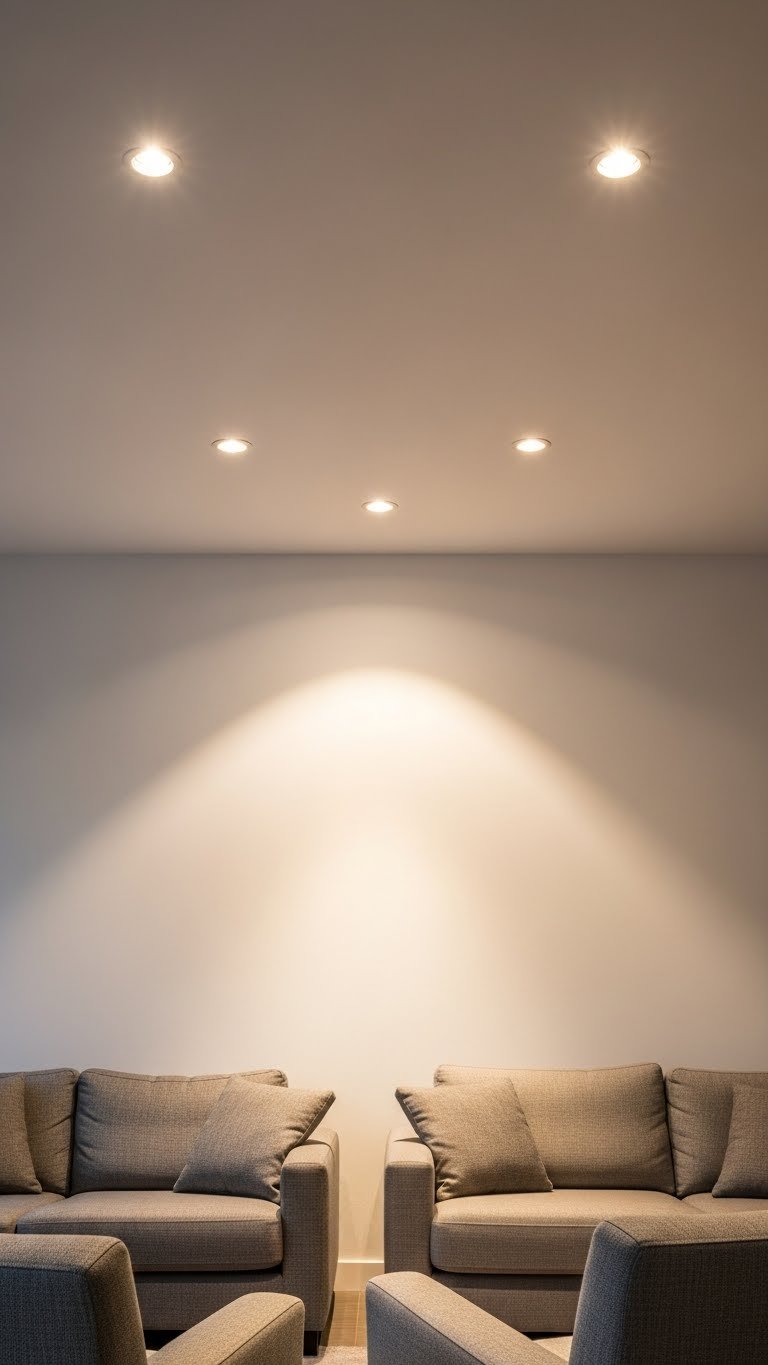
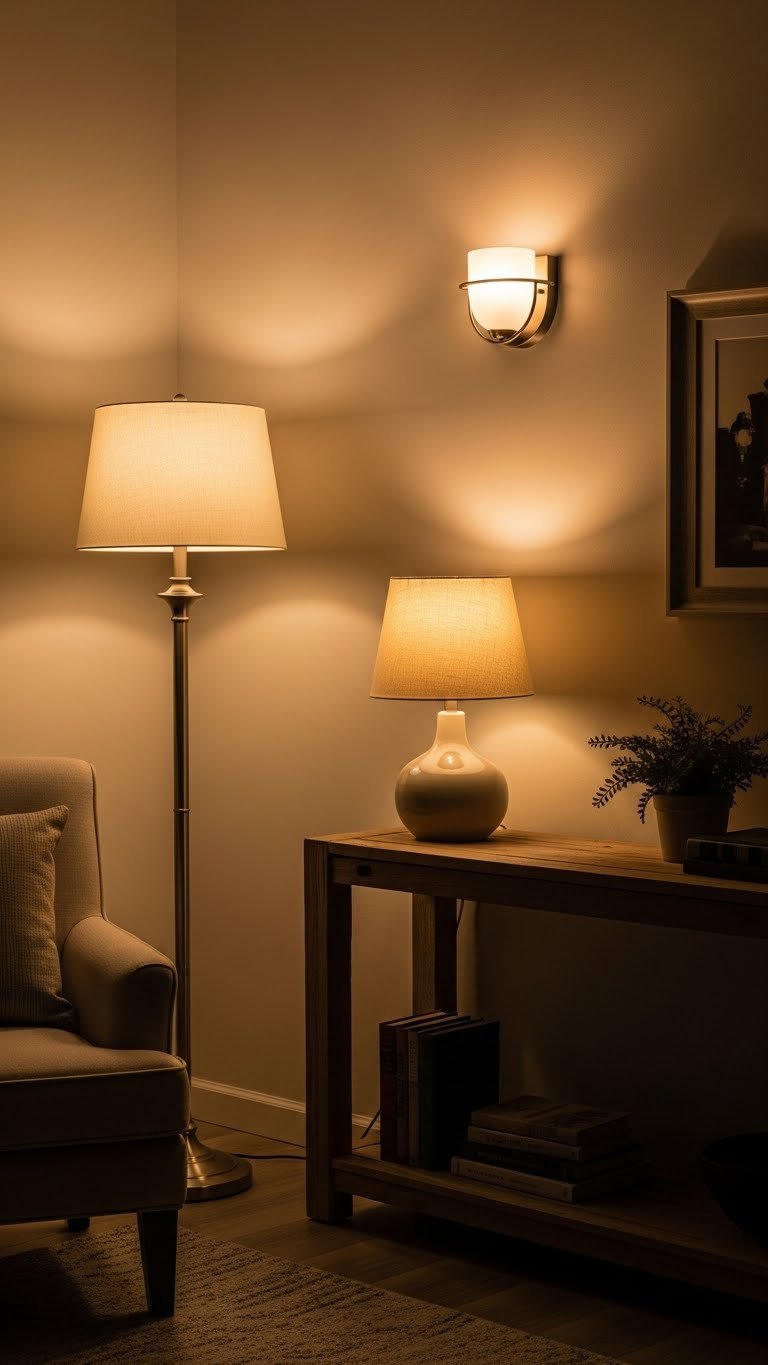
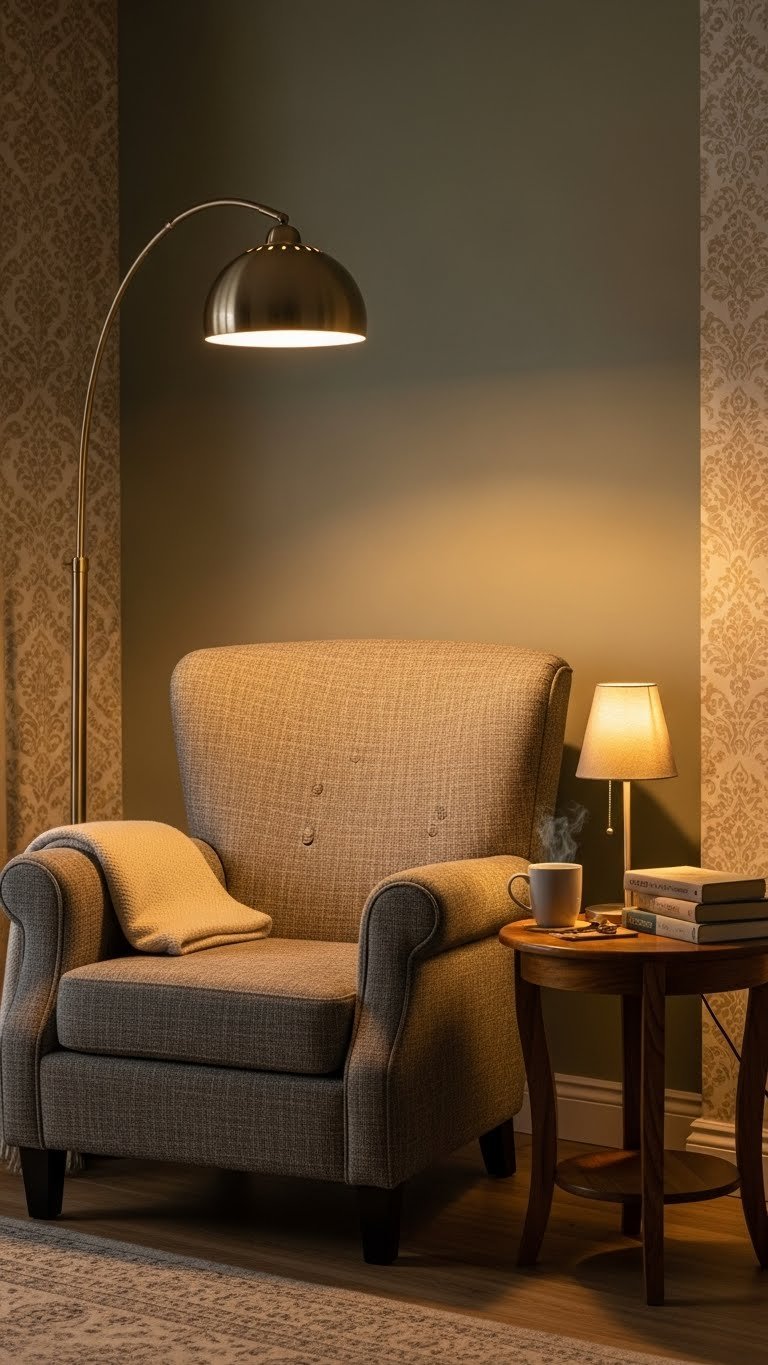
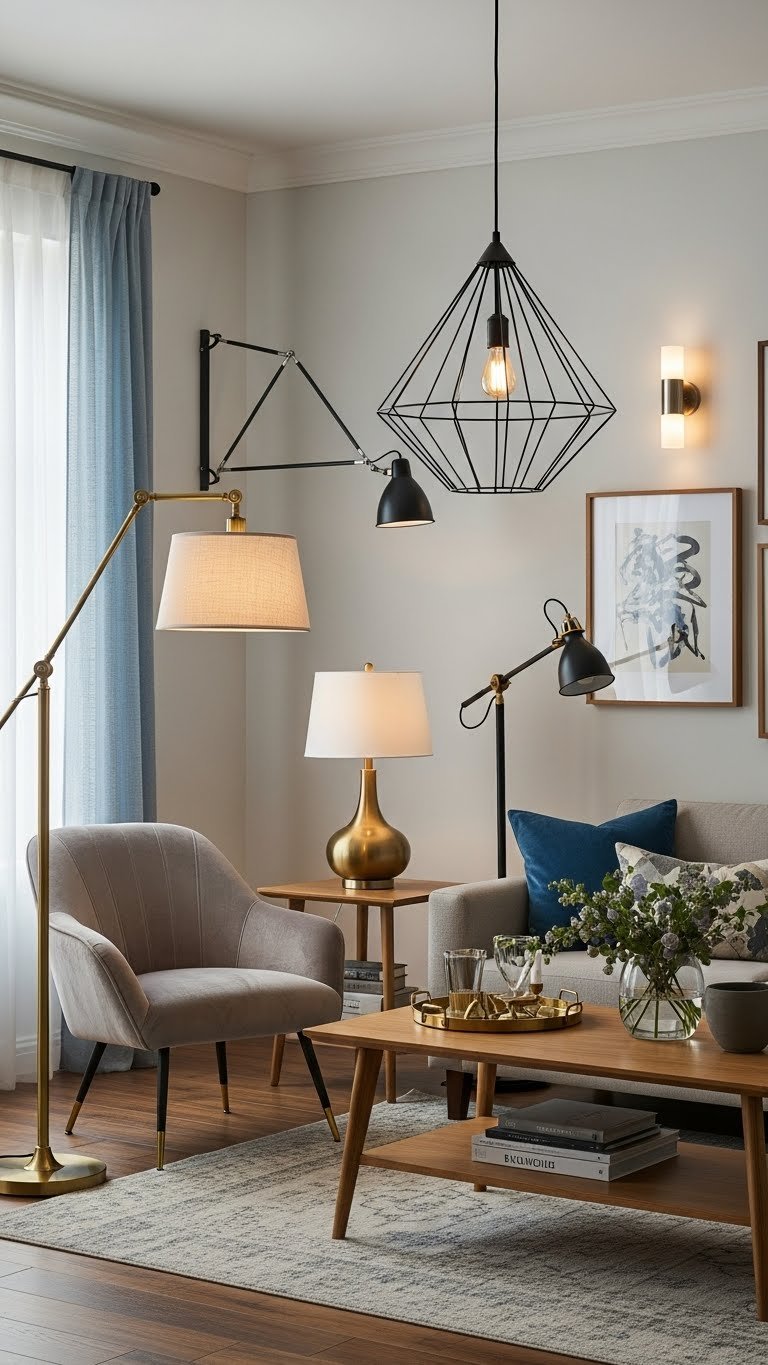
    23. Incorporate Motion-Sensor Lighting & Gadget Upgrades

    Motion-activated lighting transforms your kitchen into a genuinely smart space—lights turn on as you approach and turn off automatically, saving energy while creating hands-free convenience.

    Motion-sensor LED systems run $100–$300 depending on how many cabinets you’re outfitting. Installation takes 1–2 hours if you’re handy, or pay $150–$300 for professional setup. Pair this with other smart upgrades: voice-activated spice racks ($60–$120), soft-close hinges with built-in dampers ($40–$80 per hinge), or smart fridge-integrated cabinet systems ($500–$1,500 high-end options).

    These gadgets make your kitchen feel futuristic without being complicated.

    Pro tip: Start with motion lighting in one cabinet to test before committing to your entire kitchen.

    Your kitchen feels genuinely high-tech and responsive. You’ll appreciate the convenience every time you cook.

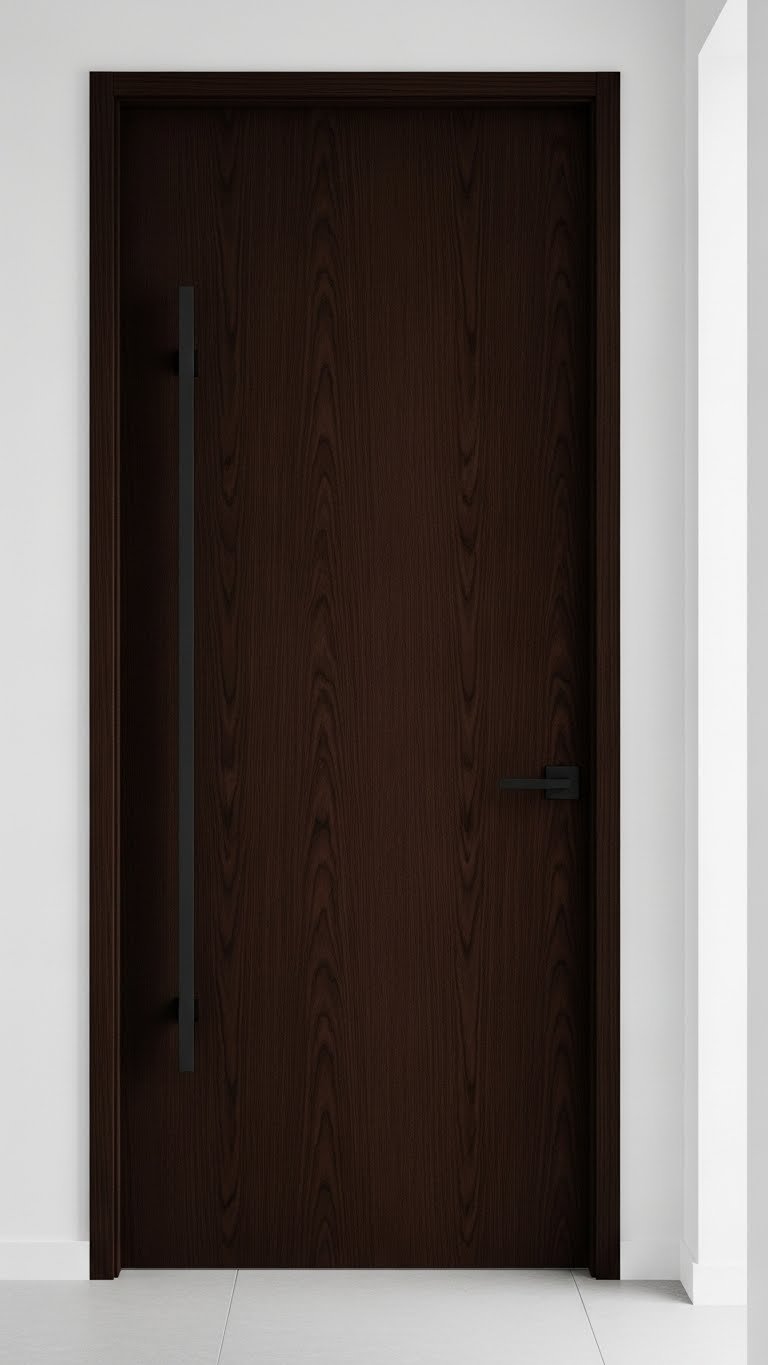
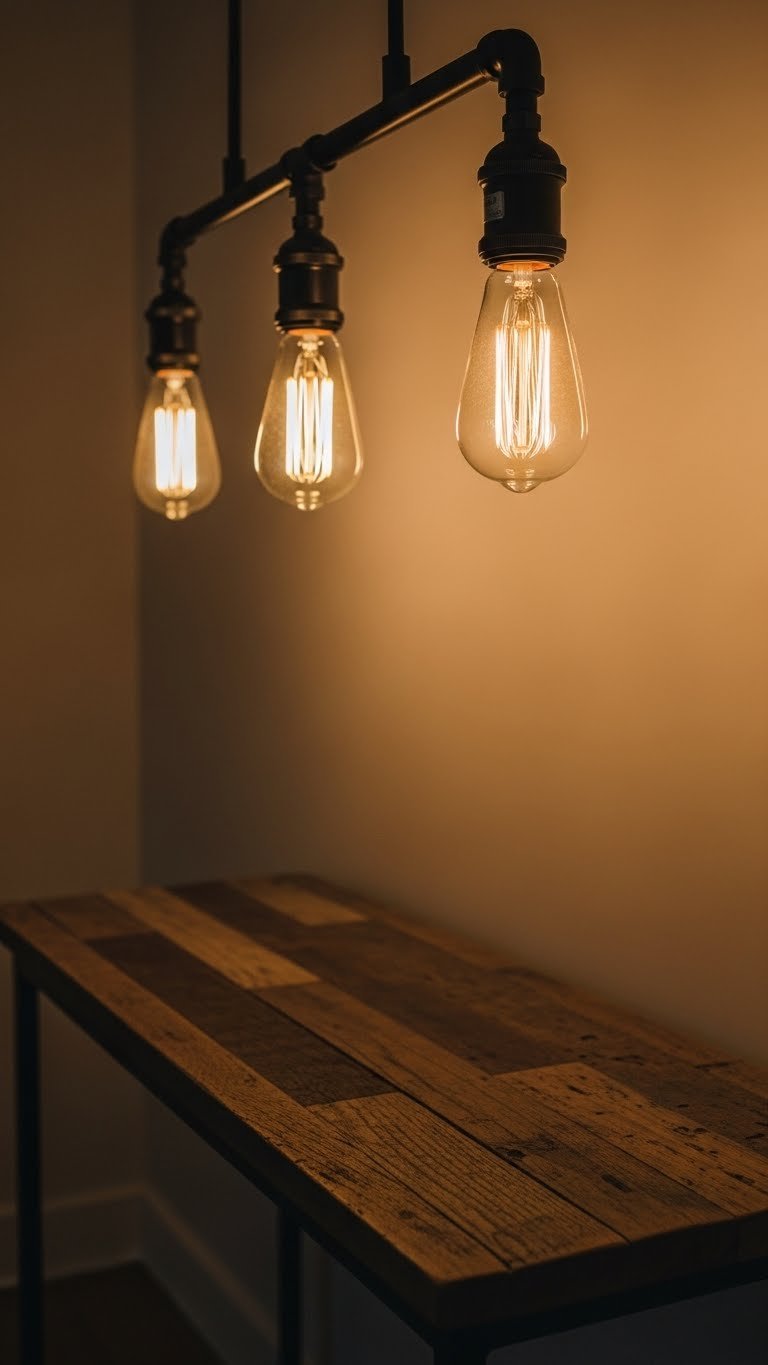
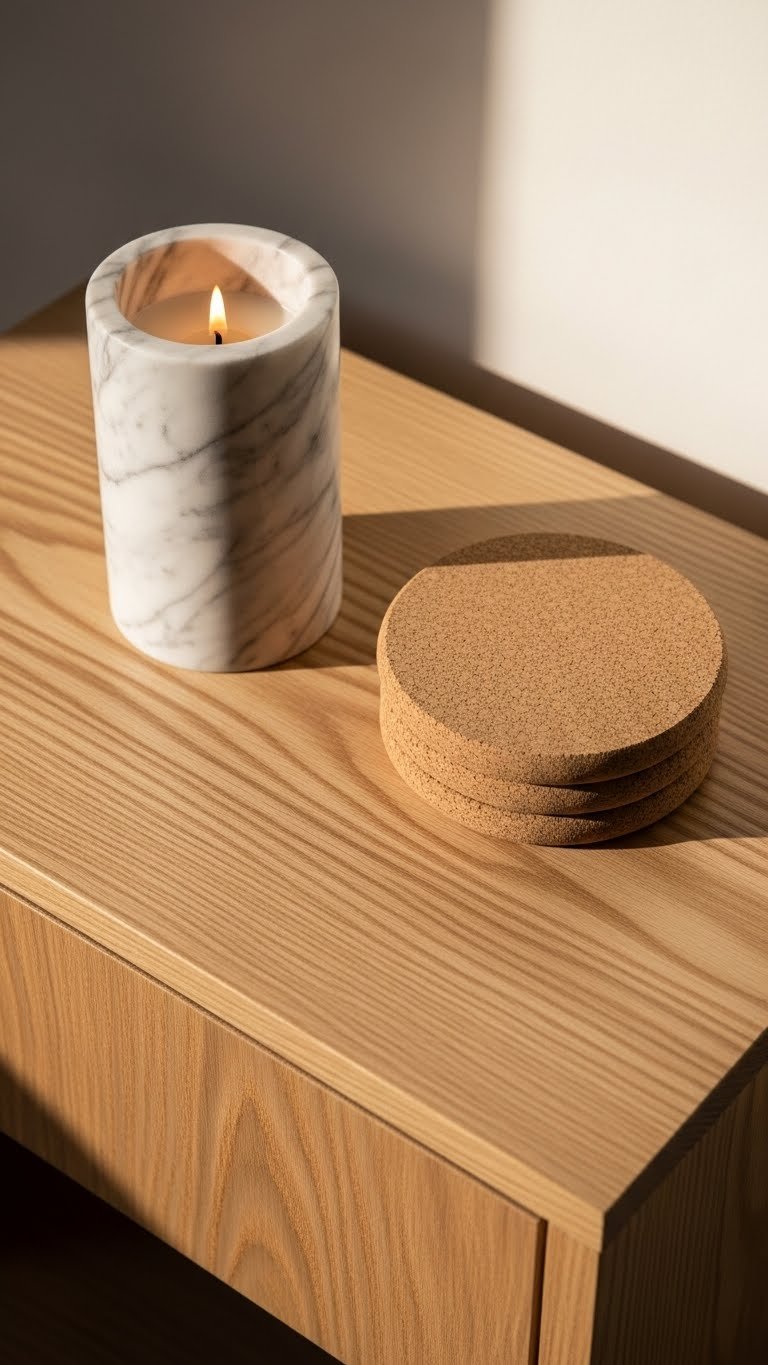
    24. Blend Materials (Wood + Concrete + Metal) for Texture

    Mixing materials (wood, concrete, metal, matte finishes) adds sophistication and depth—it’s the secret to kitchens that feel designed by professionals. This approach prevents your space from feeling one-note.

    Material blending happens naturally through cabinet colors, countertops, hardware, and open shelving. A natural wood cabinet with matte black hardware, concrete countertops, and metal shelving creates instant visual interest. You don’t need to spend extra for this—it’s about intentional choices. Mix warm and cool tones, glossy and matte finishes, and natural and industrial materials.

    Pro tip: Choose three primary materials and stick to them—more becomes chaotic instead of curated.

    Your kitchen gains sophisticated depth and personality. Visitors notice the thoughtful design immediately.

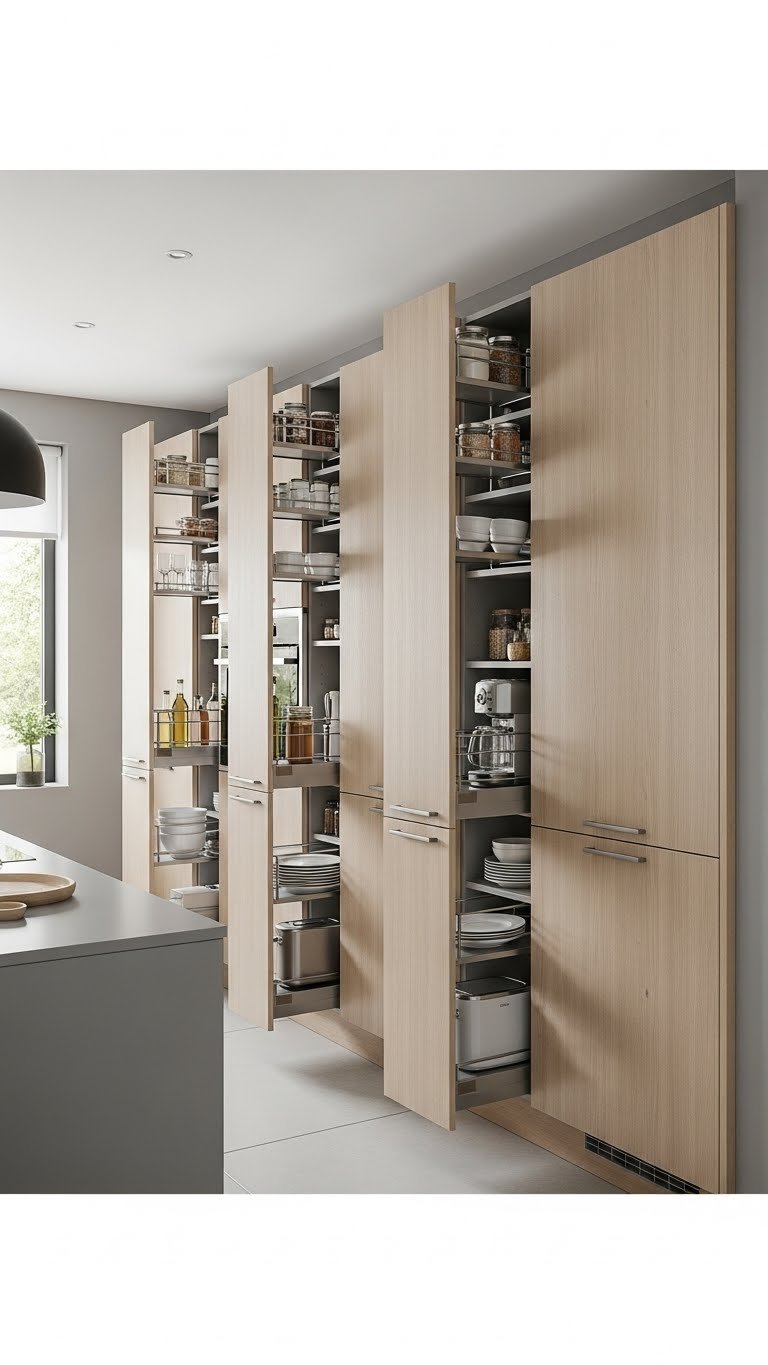
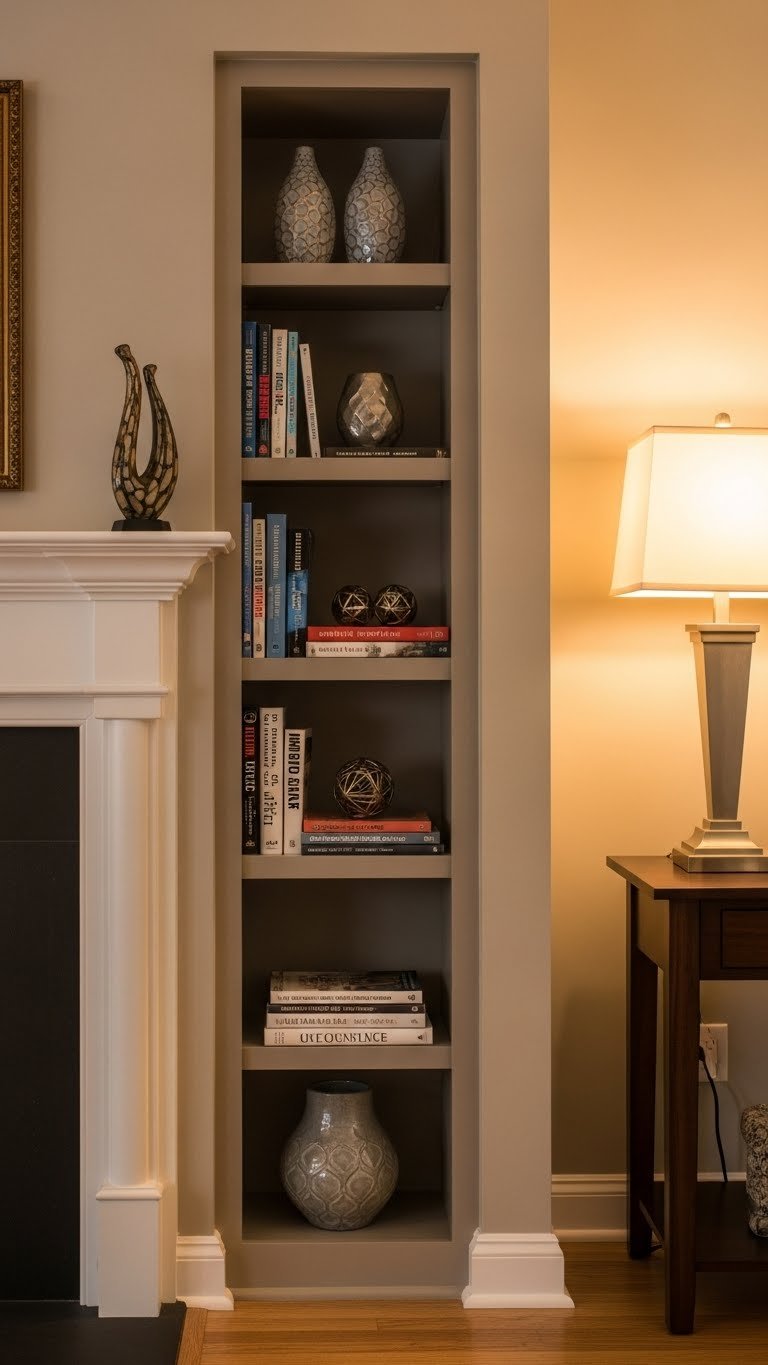
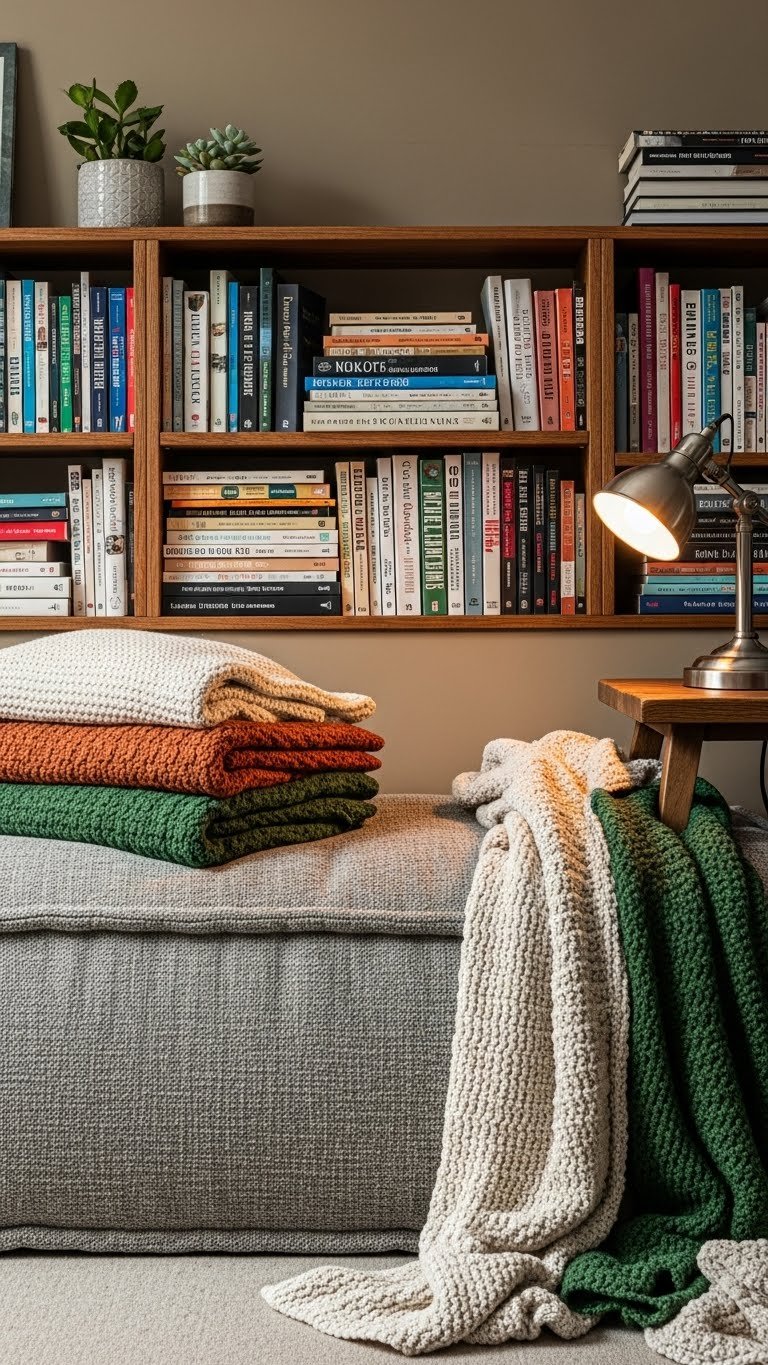
    25. Maximize Vertical Storage With Floor-to-Ceiling Cabinetry

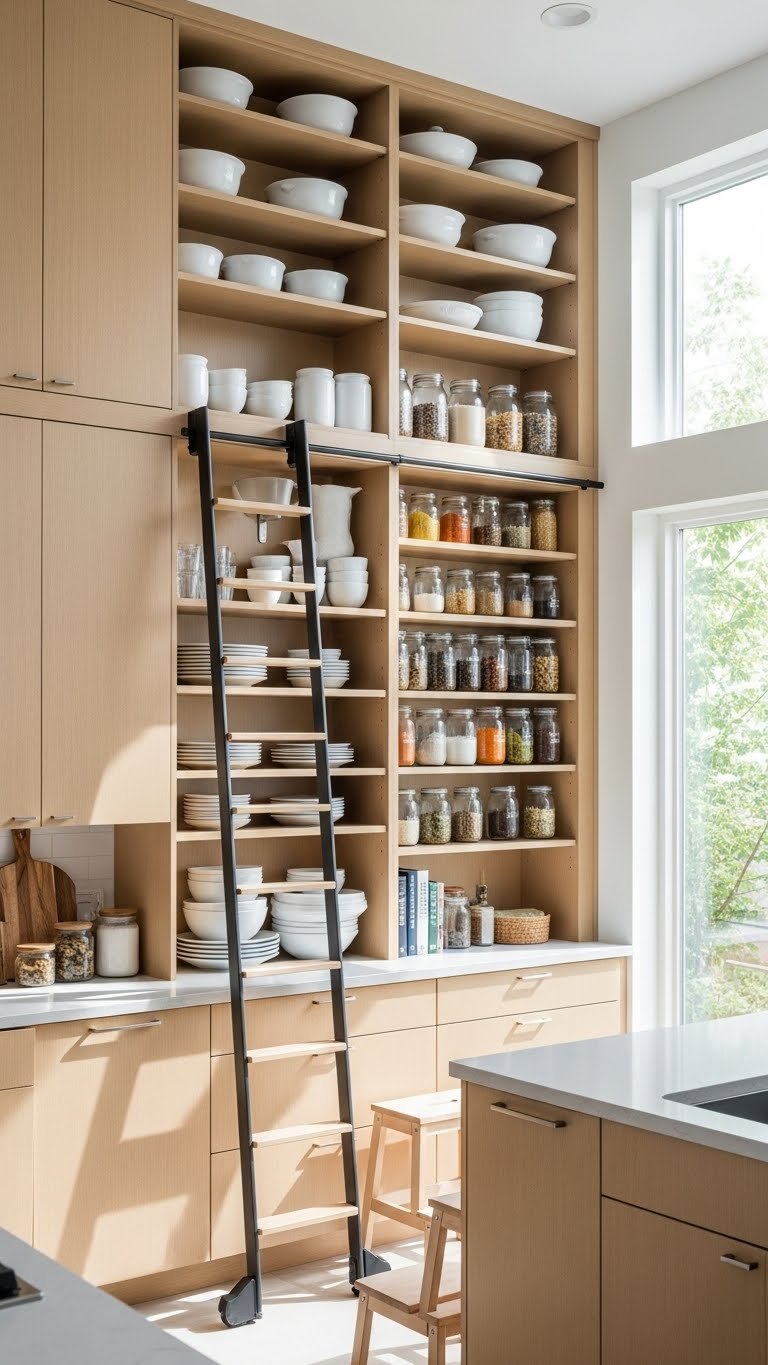
    Floor-to-ceiling cabinets eliminate wasted space above standard cabinets while making kitchens feel intentional and complete. This maximizes storage without expanding square footage—perfect for small spaces.

    Full-height cabinet systems run $2,000–$6,000+ depending on your kitchen size and materials. The investment pays off immediately through added storage—you can store everything from everyday dishes to seasonal items. Measure ceiling height precisely; some kitchens need custom tops to fit correctly. Add a decorative ladder or pull-down shelves to access high areas safely and stylishly.

    Pro tip: Reduce visual heaviness by using glass doors or open shelving in upper cabinets—it keeps the look light.

    You’ve reclaimed wasted vertical space and created a complete, polished kitchen design. Storage becomes abundant without sprawling cabinets throughout your home.

    26. Start Small With a Single Cabinet Accent Piece

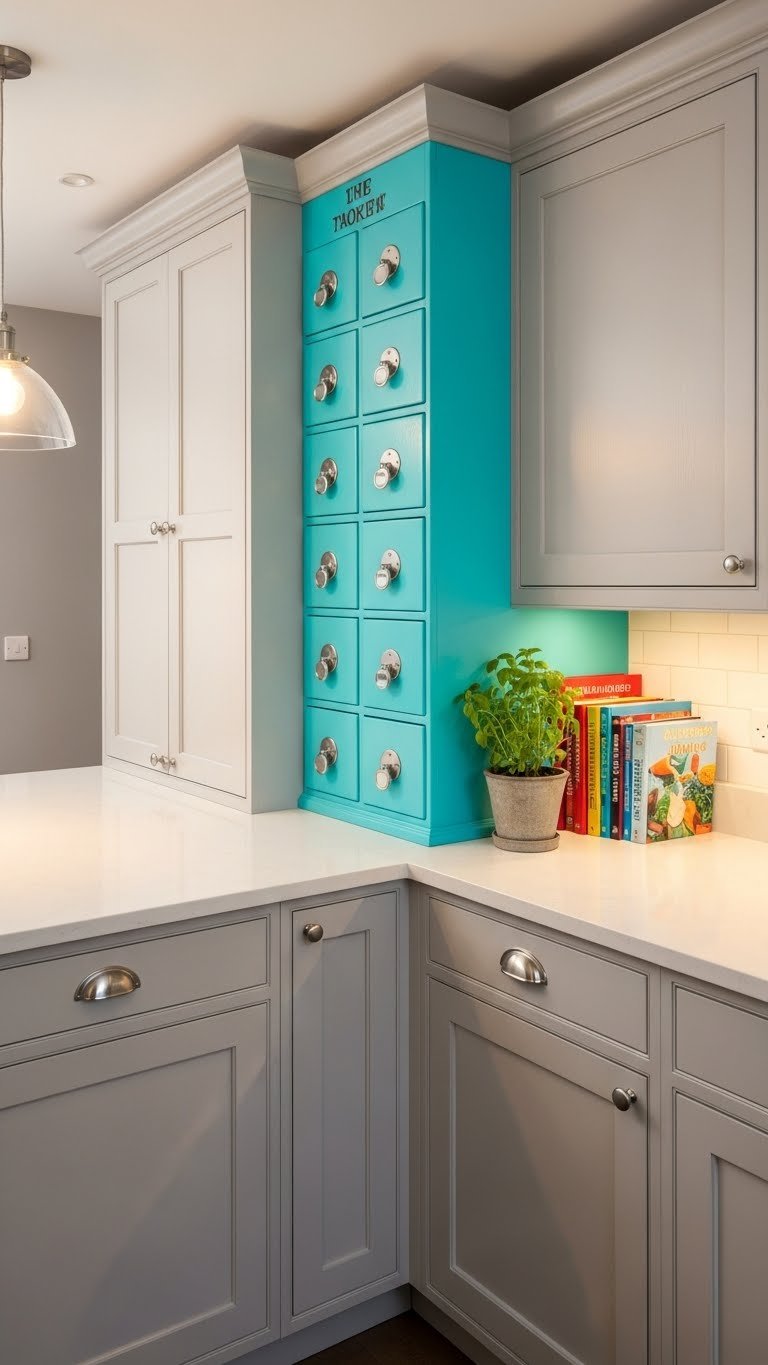
    Sometimes the best approach is starting small: update just one cabinet or section to test colors, styles, or trends before committing to a full refresh. This reduces financial risk while letting you explore new directions.

    A single statement cabinet costs $100–$500 depending on whether you’re painting existing cabinetry or swapping one door. Test bold colors, textures, or finishes on a smaller scale before full commitment. Use this piece as a creative outlet—it’s where you can take design risks. A painted pantry cabinet, textured island base, or two-tone section works as an accent that makes your entire kitchen feel updated.

    Pro tip: This is the perfect strategy for renters testing colors before investing in permanent changes.

    You’ve made a bold design move at minimal cost. If you love it, you know exactly how to move forward. If not, you’ve learned something valuable.

    Ready to transform your kitchen? Save this post and pick just one idea to tackle this weekend—start small or go big, whatever fits your space and budget. Share this with anyone planning a kitchen refresh; I’d love to know which idea inspires you most.

  • 27 Timeless Kitchen Cabinet Ideas That Never Go Out of Style

    27 Timeless Kitchen Cabinet Ideas That Never Go Out of Style

    Your kitchen cabinets are one of the biggest investments in your home—so it makes sense that you’d want them to look good for years to come. The good news? Timeless cabinet styles never go out of style, which means you won’t feel that regret creeping in three years later when trends shift. In this guide, we’re breaking down 27 cabinet ideas that blend classic appeal with modern practicality. Whether you’re planning a full remodel, refreshing your current setup, or just looking for inspiration, you’ll find budget-friendly tweaks, DIY hacks, and investment-worthy upgrades that will genuinely last. Let’s dig in.

    1. Go Classic with Shaker Cabinet Doors

    Shaker cabinets are the vanilla ice cream of kitchen design—and that’s a compliment. These five-panel doors with their simple, geometric frames work in farmhouse, modern, transitional, and traditional kitchens alike.

    The reason Shaker cabinets endure? They’re straightforward and honest. No busy details or ornamental trim to collect dust or feel dated. You can find them pre-made at home improvement stores like Home Depot or Lowe’s for $40–$100 per cabinet, or invest in custom builds from brands like iCabinetry Direct ($150–$400 per cabinet). Installation takes a weekend if you’re replacing existing cabinets. Paint them white for farmhouse charm, stain them walnut for warmth, or go bold with navy or charcoal for modern edge.

    The best part? Shaker doors pair beautifully with nearly any countertop, backsplash, or hardware style you choose later. Your kitchen stays relevant through multiple design cycles.

    2. Embrace White Cabinetry for Brightness

    White cabinets make kitchens feel larger, brighter, and more open—a benefit that doesn’t fade with trends. This is especially smart if you’re in a smaller space or a home with limited natural light.

    White cabinets are available everywhere and in every price tier. Home Depot and Wayfair carry stock options starting at $30–$50 per cabinet, while custom makers run $150–$350. Choose semi-gloss or satin finishes over high-gloss to hide fingerprints and reduce that slick, dated look. Pair white cabinets with warm wood countertops, open shelving, or mixed hardware materials to avoid an overly sterile feel. Pro tip: If you already have white cabinets, consider painting just the island a contrasting color instead of replacing everything.

    You’ll notice how white cabinets absorb less visual clutter, making your kitchen feel calmer and more intentional. They’re a safe bet that works across decades.

    3. Invest in Inset Shaker Doors for Warmth

    Inset Shaker doors are the cousin of standard Shaker cabinets—the doors sit inside the frame rather than flush against it, creating subtle shadow lines and dimension. This style bridges farmhouse and transitional design beautifully.

    Inset cabinetry is more time-intensive to build, so expect to invest $200–$500+ per cabinet from custom makers like RTG Cabinets or local woodworkers. Stock options with inset styling are rare but available through specialty retailers ($100–$150 per cabinet). A full kitchen typically costs $8,000–$20,000+ depending on size and finish. The craftsmanship is visible in the detail, and that extra investment translates to durability and a more premium feel.

    The result? Your kitchen feels intentional and high-quality without screaming trendy. These cabinets work in homes that are decades old and homes built today.

    4. Mix Wood Stain and Paint for Two-Tone Drama

    Two-tone cabinets represent 40% of new kitchen installations, according to industry data—and for good reason. Pairing a painted color with natural wood (or two contrasting paint colors) adds personality without overwhelming the space.

    The classic combo: white or cream uppers with dark walnut or charcoal lowers. Start with your existing cabinets if you have them—painting is $30–$100 per cabinet depending on prep and can be a DIY project over two to three weekends. Pre-made two-tone cabinet sets from Wayfair, IKEA, or iCabinetry run $3,000–$12,000 for a full kitchen. Custom two-tone builds cost $8,000–$25,000+. Hire a pro painter if you want a polished finish (adds $500–$2,000 in labor).

    You’ll immediately feel how two-tone cabinets add sophistication and visual interest. They draw the eye and make your kitchen feel more intentional than a single color ever could.

    5. Choose Matte or Satin Finishes Over Gloss

    High-gloss cabinet finishes look slick and dated by now. Matte and satin finishes feel modern, hide fingerprints better, and work with nearly every style from minimal to traditional.

    If you’re painting existing cabinets, choose Benjamin Moore, Sherwin-Williams, or Behr cabinet paint in matte or satin ($35–$60 per quart). For a full kitchen of cabinets, plan on 3–4 quarts and $200–$400 in paint alone. Professional refinishing runs $2,000–$5,000. Pro tip: Satin finishes are more durable than matte for high-traffic areas like lower cabinets and around the stove.

    The finish you choose affects how light reflects in your kitchen. Matte and satin finishes feel calmer and more sophisticated than the glossy look from the early 2000s.

    6. Add Open Shelving Alongside Closed Cabinets

    Open shelving looks too trendy when it’s all you have, but mixing open shelves with closed cabinets gives you the best of both worlds: display space for beautiful items and hidden storage for clutter.

    Install floating shelves from Amazon, Home Depot, or IKEA ($20–$80 per shelf), or have custom shelves built by a carpenter ($150–$400 per shelf installed). A typical kitchen might add 2–4 shelves for $100–$400 DIY or $800–$2,000 installed. Pro tip: Keep open shelves styled with white dishes, cookbooks, and plants—save bulky small appliances for closed storage below. This takes about a day to install if you’re comfortable with a drill.

    Your kitchen immediately feels more open and personalized when open shelving breaks up solid cabinetry. Guests see beautiful items you’re proud of instead of closed boxes everywhere.

    7. Go Frameless (Euro-Style) for Clean Minimalism

    Frameless cabinets (also called “European-style”) eliminate the frame around each door, creating a seamless look. This style is perfect if you love minimalist design and clean lines.

    Frameless cabinets require more precise installation but offer a contemporary look that feels current. iCabinetry Direct, Ultracraft, and local custom makers build frameless cabinetry starting at $150–$400 per cabinet. Stock options from IKEA and Wayfair run $50–$150 per cabinet. A full kitchen averages $6,000–$20,000+. Pair with handle-free push-to-open doors for maximum sleekness. Installation takes 2–3 days for a full remodel.

    You’ll notice how frameless cabinets make your kitchen feel larger and more contemporary. There’s no visual clutter from frames and trim lines.

    8. Paint Cabinets in Warm Earthy Tones

    Earthy tones like sage green, warm gray, soft taupe, and buttery cream are trending right now because they feel grounded and cozy without being dark or moody. These colors work in homes ranging from farmhouse to modern.

    Paint existing cabinets yourself with cabinet-specific paint in your chosen color ($40–$80 per quart). A full cabinet set takes 3–4 quarts and costs $150–$300 in paint alone plus your weekend. Hire a professional for $2,000–$4,500. Pro tip: Test samples on cardboard first—paint color looks different depending on your kitchen’s lighting. Soft greens are especially forgiving and timeless.

    Your kitchen becomes a retreat rather than just a functional room. Warm earthy tones create an atmosphere that feels intentional without trying too hard.

    9. Incorporate Hidden Pantry Cabinets

    Hidden pantry cabinets solve the storage problem that 78% of homeowners prioritize during remodels. Instead of exposed open shelving, a closed pantry hides mess and maximizes vertical space.

    Install a full-height cabinet (typically $200–$500 pre-made or $400–$1,000 custom) against one wall or in an awkward corner. Add adjustable shelving inside ($30–$100) to customize storage. This is a DIY-friendly project if you have basic carpentry skills—plan for a long weekend. Pro tip: Add a door-mounted spice rack or small baskets inside for extra organization.

    The transformation is immediate: your kitchen looks less cluttered while you gain serious storage capacity. You’ll notice you actually know what groceries you have because they’re organized in one place.

    10. Install Handle-Free Push-to-Open Doors

    Handle-free cabinets are growing in popularity with minimalist design lovers because they eliminate visual clutter and create a truly seamless look. The door opens with a gentle push and closes with a soft click.

    Retrofit existing cabinets with push-to-open hardware ($15–$40 per door from Amazon or specialty hardware sites). This is a DIY-friendly upgrade taking about 30 minutes per cabinet. Alternatively, order new frameless cabinets with push-to-open already installed (add $20–$60 per door). A full kitchen retrofit costs $300–$600 in hardware alone, or build new with the feature included for $150–$400 per cabinet.

    You’ll love how your kitchen feels less cluttered visually. Without handles, the eye moves to the cabinets’ color and finish instead of interrupting hardware lines.

    11. Use Natural Bamboo for Eco-Friendly Durability

    Bamboo cabinets are having a moment because bamboo grows rapidly (harvestable in 3–5 years versus 10–20 years for traditional hardwoods) and offers natural antimicrobial properties. Plus, it’s incredibly strong and beautiful.

    Custom bamboo cabinets start at $200–$500 per cabinet from makers like GoldenHome Global or local craftspeople. Stock bamboo options from Wayfair or iCabinetry Direct run $80–$200 per cabinet. A full kitchen averages $8,000–$20,000+. Bamboo has a warm, honey tone that works in modern, transitional, and Asian-inspired kitchens. Seal it properly to prevent water damage in humid climates.

    Choosing bamboo means your cabinets have a story—they’re sustainable, durable, and genuinely beautiful. You feel good about the environmental impact while enjoying a kitchen that looks premium.

    12. Create Visual Interest with Fluted or Textured Doors

    Fluted texture and mixed materials (like wood veneer mixed with painted panels) add sophisticated dimension without changing your cabinet layout. This works beautifully in modern and transitional kitchens.

    Pre-made fluted cabinet doors are harder to find but available through specialty retailers ($100–$250 per door). Custom fluted cabinets cost $250–$500 per cabinet. DIY texture can be added with paint techniques or specialty finishes ($50–$100 per cabinet in materials). This typically requires professional application for a polished look (add $500–$1,500 in labor). Pro tip: Fluting catches dust, so plan for slightly more frequent cleaning.

    Your kitchen immediately feels more high-end and thoughtfully designed. Textured surfaces add depth that solid flat panels can’t replicate.

    13. Mix Glass Fronts with Solid Cabinet Doors

    Glass-front cabinets are tempting but can look cluttered if overused. The solution: mix them strategically with solid doors to create visual rhythm and keep the space organized.

    Pre-made cabinets with glass fronts cost $60–$150 each from IKEA, Home Depot, or Wayfair. Retrofit existing cabinet doors with glass inserts ($30–$80 per door) through specialty hardware sites. A balanced mix might be 30–40% glass and 60–70% solid in your kitchen. Pro tip: Reserve glass fronts for beautiful dishware or cookbooks; hide food storage and bulky appliances behind solid doors. DIY glass inserts take about 20 minutes per door.

    You achieve the best of both worlds: display space for items you love and hidden storage for everyday clutter. Your kitchen looks curated, not chaotic.

    14. Paint an Island a Contrasting Color

    If replacing all your cabinets feels too big, paint just your island a contrasting color. This adds personality and visual interest without a full overhaul—and it’s completely reversible if you change your mind.

    Cabinet paint in a bold color costs $30–$60 per quart, and you’ll need 1–2 quarts for an island ($40–$120 total). This is a perfect DIY weekend project: prep with sanding and primer, then paint two coats. A professional painter charges $500–$1,500 for island painting. Go bold with charcoal, navy, forest green, or aubergine—these colors feel timeless rather than fleeting.

    Your kitchen instantly gains a focal point that feels intentional. Guests notice the thoughtful design detail, and you get a personalized touch without major expense.

    15. Install Adjustable Shelving Inside Cabinets

    Standard cabinet shelving is often fixed, which means wasted space if you need different heights for various items. Adjustable shelving lets you customize interior space to match what you actually store.

    Install adjustable shelf clips and rods ($20–$50 per cabinet from hardware stores) as a DIY project in about 30 minutes per cabinet. Alternatively, order new cabinets with adjustable shelving pre-installed (included in most modern cabinet builds). Pro tip: Use the shelves strategically—taller gaps for small appliances, smaller gaps for dishes and glasses. This maximizes usable storage and keeps everything accessible.

    You’ll immediately notice how much easier it is to store items efficiently. Adjustable shelves adapt to your actual kitchen needs instead of forcing you into fixed layouts.

    16. Add Soft-Close Hinges for Quiet, Smooth Closing

    Soft-close hinges eliminate the loud bang and last longer than standard hinges because they use hydraulics instead of a slam-and-stop mechanism. They feel luxurious and are surprisingly practical.

    Retrofit existing cabinets with soft-close hinges ($15–$40 per hinge). A kitchen with 20–30 cabinet doors needs 20–30 hinges ($300–$1,200 total). Installation takes about 10 minutes per door if you’re comfortable with a screwdriver. New cabinet builds typically include soft-close hinges at no extra cost or a $20–$50 upgrade per cabinet. Pro tip: Soft-close hinges extend cabinet lifespan by reducing wear on standard hinges.

    The difference is noticeable every single day. No more slamming cabinet doors, which is especially nice in the morning or when kids are cooking. Your kitchen feels quieter and more refined.

    17. Create a Warm Natural Wood Finish

    Natural wood cabinets never go out of style because they’re warm, organic, and improve with age. A walnut, oak, or cherry stain creates timelessness that paint colors can’t match.

    Pre-made wood cabinets start at $60–$150 per cabinet from Home Depot, Lowe’s, or IKEA. Custom wood cabinetry costs $200–$500 per cabinet from local makers or specialty retailers like RTG Cabinets. A full kitchen averages $6,000–$25,000+ depending on wood type and customization. Seal and protect with matte or satin polyurethane ($30–$60 per can). Maintenance includes occasional oiling or refinishing every 5–10 years.

    Your kitchen feels warm and grounded rather than cold or clinical. Wood cabinets age beautifully, developing character rather than looking dated.

    18. Combine Natural Wood with Painted Panels

    Mixing natural wood with painted cabinet doors combines the warmth of wood with the brightness of paint. This hybrid approach feels contemporary and balanced, not trendy.

    Natural wood lower cabinets with painted uppers is the classic combo. Paint existing wood cabinets with cabinet-specific paint ($40–$80 per quart) as a DIY project, or hire a pro ($1,500–$3,000). Alternatively, buy pre-made cabinet sets that already mix wood and paint ($150–$400 per cabinet). A full kitchen might run $8,000–$18,000+. Pro tip: Keep paint color neutral (white, cream, soft gray) so natural wood is the star.

    You get the best of both worlds: wood’s warmth and paint’s brightness. This combination feels sophisticated without being overly designed.

    19. Install Maximized Corner Storage Solutions

    Corner cabinets are notoriously hard to access and often waste space. Solutions like pull-out shelves, lazy Susans, or corner carousels make these tricky spots functional.

    Retrofit existing corner cabinets with pull-out shelf kits ($100–$300 per cabinet from Wayfair or Home Depot) or install a lazy Susan ($30–$80). Both are DIY-friendly and take about 1–2 hours per cabinet. Pre-made corner cabinets with built-in solutions cost $150–$400. This upgrade transforms wasted corner space into prime real estate for storing pots, pans, or small appliances.

    You’ll actually use your corner cabinets now instead of shoving items in there and forgetting them. Corner storage becomes the most organized part of your kitchen.

    20. Choose Warm Hardware That Complements Your Style

    Hardware is jewelry for cabinets—it’s one of the easiest ways to add personality and tie your kitchen’s style together. Warm metals like brass, gold, and copper feel timeless.

    Swap out existing hardware yourself in about 30 minutes with a screwdriver. New hardware costs $3–$15 per handle from Amazon, Wayfair, or specialty hardware stores. A kitchen with 25–40 cabinet doors needs 25–40 pieces ($75–$600 total). Pro tip: Mix metals intentionally (brass with matte black, or two-tone combinations) for a curated look rather than random mixing. Warm metals automatically feel more sophisticated than shiny silver.

    The right hardware transforms how your cabinets look and feel. You don’t need new cabinets—just the right finishing touches.

    21. Add Toe-Kick Lighting for Ambiance

    Under-cabinet lighting (also called toe-kick lighting) adds warmth and functionality. Warm LED strips create ambiance while making it easier to navigate your kitchen at night or early morning.

    Install LED strip lighting kits ($30–$100 from Amazon or hardware stores) as a DIY project in about 2–3 hours. Pre-made cabinet builds can include this wiring at the factory ($200–$500 add-on). Pro tip: Choose warm white (2700K) over cool white for coziness. Battery-operated LED options avoid electrical work if you’re renting ($20–$50).

    Your kitchen transforms at night with ambient lighting that feels upscale. This small addition creates atmosphere without major renovation costs.

    22. Use Tall Cabinets to Maximize Vertical Space

    Floor-to-ceiling cabinets maximize storage in ways standard cabinet heights can’t. This is especially smart in smaller kitchens or homes where storage is premium real estate.

    Full-height cabinet towers cost $200–$600 per unit pre-made or $400–$1,200 custom. A typical kitchen might use 2–4 tall cabinet towers ($1,600–$4,800 total). Installation is straightforward if you have existing wall space—add it to your next remodel or as a standalone upgrade. Pro tip: Use tall cabinets for items you don’t access daily (seasonal cookware, bulk pantry items) and lower cabinets for frequent-use items.

    You gain valuable storage without expanding your kitchen’s footprint. Tall cabinetry makes kitchens feel organized and intentional rather than cramped or cluttered.

    23. Install a Butcher Block or Wood Countertop

    A wood or butcher block countertop pairs beautifully with both painted and natural wood cabinets, adding warmth and grounding the space. Wood counters age beautifully when maintained properly.

    Butcher block countertops cost $30–$60 per linear foot pre-made ($800–$2,000 for a typical kitchen) or $50–$150 per linear foot custom. Installation adds $500–$1,500. Plan to reseal or refinish every 1–2 years with food-grade oil. Pro tip: Wood looks best paired with warm cabinet finishes (natural wood or warm paint colors like cream or green).

    Your cabinets and counters create a cohesive, warm aesthetic together. Wood surfaces make kitchens feel less clinical and more like gathering spaces.

    24. Paint or Wallpaper the Interior Walls Behind Open Shelving

    If you have open shelving, the wall behind it becomes decor. Painting or wallpapering that surface adds personality and makes displayed items look more intentional.

    Paint costs $30–$60 per quart, and you’ll need 1 quart ($30–$60 total) for a small wall section. Wallpaper runs $20–$50 per roll ($80–$200 for a typical shelf wall). This is a weekend DIY project: prep the wall, paint or wallpaper, and style. Pro tip: Choose colors that complement your cabinet color—soft sage with white cabinets, pale blue with wood tones, or classic white-on-white.

    Your open shelving immediately becomes a styled display rather than just storage. The background color makes everything you display look more curated and intentional.

    25. Mix Cabinet Heights and Door Configurations

    Instead of uniform cabinet doors across your kitchen, mixing heights and door configurations creates visual interest and works better for actual storage needs. A custom layout looks thoughtfully designed rather than cookie-cutter.

    This requires custom cabinet design or strategic shopping for mixed pre-made options. Work with a designer ($500–$2,000 design consultation) or use IKEA’s planning tool (free online). Custom cabinetry naturally includes varied heights and configurations ($200–$500 per cabinet). A custom kitchen with mixed elements runs $10,000–$30,000+.

    Your kitchen looks more interesting and personalized. Varied heights and door styles feel intentional rather than one-size-fits-all.

    26. Add Decorative Molding or Crown Trim

    Crown molding on top of cabinets adds architectural detail and finishes the look. It’s especially impactful in traditional or transitional kitchens but works in modern spaces too when kept minimal.

    Pre-made crown molding costs $2–$5 per linear foot ($50–$150 for a typical kitchen) from hardware stores. Custom millwork runs $10–$30 per linear foot. Installation takes a weekend and is DIY-friendly if you have basic carpentry skills, or hire a pro ($500–$1,500 labor). Pro tip: Paint molding to match cabinets for seamless integration or contrast it for architectural emphasis.

    Crown molding instantly adds polish and sophistication. Your kitchen feels finished and architectural rather than basic or incomplete.

    27. Maintain and Refresh Your Existing Cabinets

    Sometimes the most timeless choice is maintaining what you have. Cleaning, hardware swaps, and small refinishes extend cabinet life and save thousands compared to replacement.

    Clean cabinets monthly with wood cleaner or white vinegar solution ($5–$15). Annual maintenance includes checking hinges, tightening hardware, and addressing any water damage (DIY or $200–$500 pro tune-up). Small repairs like re-staining worn edges or touching up paint cost $30–$200 and extend cabinet life by years. Pro tip: Prevent damage with coasters, trivets, and proper ventilation around the stove.

    Well-maintained cabinets age gracefully. You’ll be surprised how much longer your cabinets can serve you with basic care instead of immediate replacement.


    Pin this for your next kitchen project. Whether you’re planning a full remodel or just refreshing what you have, pick one idea and try it this weekend. Small changes add up fast—save this post and come back to it as your kitchen evolves.

  • 27 Veneer Door Design Ideas That Add Texture & Elegance to Any Entryway

    27 Veneer Door Design Ideas That Add Texture & Elegance to Any Entryway

    Your front door is the first thing guests see—and it deserves to be memorable. Whether you’re renting or own your home, a veneer door is your secret weapon for adding texture, warmth, and undeniable elegance without a total overhaul. Veneer doors offer the look of solid hardwood, sustainable materials, and endless design possibilities at a fraction of the cost. From subtle wood grain patterns to bold geometric textures and two-tone finishes, there are so many ways to turn your entryway into something special. In this guide, you’ll discover 27 specific veneer door ideas that work with every style—minimalist, industrial, coastal, or cozy traditional. Pick one that speaks to you, and watch your entryway instantly become the statement piece your home deserves.

    1. Layer Matte Black Veneer with Brushed Gold Hardware

    Matte black veneer creates dramatic sophistication while staying timeless. Pair it with brushed gold or bronze hardware to elevate the look without breaking the bank.

    This combo works because the contrast between dark matte and warm metal feels high-end and intentional. Most veneer doors accept new hardware easily—just drill out the existing holes. Brushed gold handles run $30–$80 from IKEA, Wayfair, or Home Depot. Installation takes 15 minutes with a basic drill. The result? Your door looks like it belongs in an architect’s portfolio. Even renters can swap hardware back before moving.

    Pro tip: Choose geometric or minimalist handle shapes to match the modern vibe of matte finishes.

    2. Go Two-Tone with Warm Wood and Soft White

    Split finishes aren’t just for cabinets anymore. Divide your veneer door horizontally with warm wood on top and crisp white below for visual interest.

    This breaks up a tall entryway and feels intentional rather than trendy. Use painter’s tape to mark your midpoint precisely, then apply two coats of finish. This works best on flat veneer doors. Cost: $15–$40 for quality paint or stain. Time: one weekend including dry time. The two-tone effect adds dimension and makes narrow entries feel wider. You can also do this as a removable temporary look with contact paper for renters.

    Bonus: This styling photograph beautifully on social media and works with almost any home style.

    3. Embrace Natural Wood Grain with Matte Finish

    Skip the paint and let the wood speak. A matte-finish veneer door showcasing natural grain is warm, organic, and endlessly versatile.

    Matte finishes enhance grain visibility and hide fingerprints better than gloss. Most quality veneer doors come pre-finished this way, or you can sand and apply a matte topcoat yourself. If ordering new: $200–$500 installed. If refinishing an existing door: $30–$60 for materials, 4–6 hours labor. The appeal here is authenticity—it looks like real hardwood without the maintenance headaches of solid wood. Your entryway becomes warm and inviting without trying too hard.

    This pairs beautifully with either modern or traditional interiors.

    4. Add Linear Texture with Horizontal Slat Veneer

    Textured veneer doors with linear patterns create visual depth and architectural interest without being fussy. Horizontal slats feel contemporary and calm.

    These doors come from specialty manufacturers or you can commission a custom veneer with routed texture. Cost: $400–$700 for a quality textured veneer door. Pre-made options: $250–$400. Installation: hire a pro, $100–$200. The texture catches light differently throughout the day, so your door never looks flat or boring. It’s a bolder choice than solid color but still sophisticated. Renters: this works if your lease allows door replacement, or you could temporary-install with removable hinges.

    The result is a door that looks like it came from a high-end hotel or boutique retail space.

    5. Combine Vertical Grain with Deep Forest Green

    Deep jewel tones pair perfectly with visible wood grain. Forest green veneer feels earthy, sophisticated, and connects your entryway to nature.

    Forest green works on both modern and traditional homes. Start with a veneer door in natural wood, then stain it with quality wood stain in forest green ($10–$25 per can). Apply two thin coats. Time: 3–4 hours plus drying. You’ll see the grain pattern show through the colored stain beautifully. This finish hides dust and minor scratches well. The color feels intentional and curated, not accidental. Maintenance is minimal—just wipe down occasionally.

    Your guests will comment on this one every single time they visit.

    6. Create a Shiplap-Style Look with Vertical Veneer Segments

    Love the shiplap trend? Get the look with a custom veneer door featuring vertical board patterns without the maintenance of real wood.

    This style works beautifully in coastal, farmhouse, or modern-cottage homes. Order custom from specialty door makers or modify existing veneer with routed channels. Cost: $300–$600 for custom textured veneer. A whitewash or light-stain finish ($10–$30 in product) completes the look. Installation: $100–$150 by a pro. The effect is charming and photograph-worthy. Unlike real shiplap, veneer won’t swell or warp in humidity. Renters might struggle with this one—it’s permanent—but homeowners will love the coastal-cabin vibe.

    This transforms a basic entryway into somewhere guests want to linger.

    7. Mix Dark Wood Veneer with Frosted Glass Panels

    Combine the elegance of dark veneer with glass panels for light without sacrificing privacy. Frosted glass softens the drama of dark wood.

    This hybrid approach gives you the best of both worlds: statement color and brightness. Order semi-custom doors with frosted glass inserts, or retrofit existing veneer with adhesive frosted film ($20–$50 per sheet). Frosted glass diffuses light beautifully while keeping interiors private. Installation time: 30 minutes for film, 2–3 hours if replacing panels professionally. The contrast between matte dark wood and soft frosted glass reads as sophisticated and intentional. This works especially well in narrow entryways where you want to bounce light through without opening the space completely.

    Your door becomes both a practical light source and a design focal point.

    8. Stain Veneer in Warm Honey with Geometric Metal Inlay

    Take veneer texture to the next level with subtle metal inlays. Brass or copper geometric patterns against warm wood feel handcrafted and luxe.

    This is an investment piece, but the payoff is stunning. Commission custom veneer with routed channels, then inlay thin brass or copper stripping (available from specialty woodworkers). Total cost: $600–$900 installed. Alternatively, apply brass geometric tape as a temporary overlay for $30–$50. The metal reflects light and adds visual movement. This approach works best with warm wood tones. It’s not for every home, but if you love architectural details, this is your statement.

    The finished look feels like a piece of functional art rather than just a door.

    9. Use Reclaimed-Look Veneer in Distressed Walnut

    Reclaimed wood vibes without the environmental impact or structural concerns. Distressed walnut veneer captures authenticity with stability.

    Manufacturers now create veneer with hand-scraped texture and color variation that mimics reclaimed wood. Cost: $300–$500 for quality distressed veneer doors. The surface shows knots, grain variation, and subtle color shifts that look genuinely aged. No special maintenance needed—the finish hides wear beautifully. Installation: $100–$150 by a pro. This style pairs perfectly with farmhouse, industrial, or cottage aesthetics. The door looks like it has a story without being fragile or needing constant care.

    Guests will swear it’s authentic reclaimed wood—you’ll just know better.

    10. Paint Veneer in Navy with a High-Gloss Finish

    Navy with high-gloss finish screams polished elegance. The shine adds formality and catches light dramatically.

    High-gloss finishes require prep work: sand the existing finish lightly, apply primer, then two coats of high-gloss paint. Cost: $40–$80 in quality paint. Time: full weekend including drying. Pro tip: use painter’s tape around hardware and trim for clean lines. High-gloss shows fingerprints more than matte, but it’s easier to wipe clean. Navy + gloss works especially well on traditional or coastal homes. Maintain the shine by buffing with a soft cloth occasionally. The result feels formal and timeless.

    Your door becomes an architectural detail people comment on for years.

    11. Layer Soft Greige Veneer with Woven Rattan Hardware

    Greige (gray + beige) is the neutral everyone’s obsessed with. Pair soft greige veneer with organic hardware for understated sophistication.

    Greige veneer works as a universal backdrop—it complements almost every interior style. Most veneer doors come in greige, or stain existing wood with greige-toned stain ($15–$30). Woven rattan handles ($40–$80) add warmth and texture. Time: 20 minutes to swap hardware, 4 hours if staining. The beauty here is that greige feels intentional without being bold. It’s calming and modern. This is perfect if you’re not ready for statement colors but want your door to feel designed.

    The combination of soft color and natural texture creates a welcoming, contemporary entryway.

    12. Create Drama with Black Matte Veneer and Hidden Hardware

    Minimalism taken to its peak: a black veneer door where hardware almost disappears. This reads as architectural and expensive.

    This look requires either a door designed with integrated hardware or careful placement of slim, flush-mount handles. Cost: $350–$600 for doors with design integration. Standard doors + slim hardware addition: $150–$250. Installation: $100–$150 by a pro. The payoff is a clean, gallery-like entryway. This style works best on larger doors where the scale allows hardware to feel intentional. It’s bold and not for everyone, but if you love the minimalist aesthetic, it’s perfect.

    Your entryway becomes an exercise in restraint and contemporary design.

    13. Mix Natural Cherry Veneer with Copper Accents

    Cherry veneer is warm, rich, and naturally sophisticated. Add copper hardware for an unexpectedly modern twist on tradition.

    Cherry wood has been around forever, but pairing it with contemporary copper hardware feels fresh. Order cherry veneer doors ($200–$450) or stain existing veneer with cherry stain ($15–$25). Copper hardware: $50–$100. Installation: $100–$150 for doors, 15 minutes for hardware. The warm reddish tones of cherry look especially beautiful in homes with brass fixtures or warm-toned walls. Copper will develop a patina over time, adding character. This isn’t trendy—it’s timeless with a slightly updated edge.

    The result is a door that feels both classic and subtly sophisticated.

    14. Apply Wood-Grain Contact Paper Over Solid Color Veneer (Renter-Friendly)

    Renters, this is your hack: apply peel-and-stick wood-grain contact paper over existing veneer for instant warmth without damage.

    Contact paper with realistic wood-grain patterns comes from Amazon, Target, or home improvement stores ($15–$30 per roll). Clean the door thoroughly, measure carefully, and apply smoothly using a squeegee. Time: 30–45 minutes. The quality has improved so much that it looks surprisingly authentic from a few feet away. When you move, peel it off—no landlord drama. This works best on flat doors without existing texture. The limitation is durability in high-traffic areas, but for most entryways, it lasts years.

    It’s the fastest, cheapest way to completely change your door’s vibe.

    15. Stain Veneer in Espresso with Tall, Slim Hardware

    Espresso stain is bolder than black—rich and warm with visible grain. Pair it with tall, linear hardware for a gallery-like look.

    Espresso stain ($15–$30) applied over existing light veneer requires light sanding and two coats. Time: 4–6 hours plus drying. The deep color hides dust and shows wood grain beautifully. Tall hardware (like a long bar handle, $40–$80) emphasizes vertical space and feels architectural. This combo transforms basic entryways into design statements. The espresso tone is dark enough for drama but warm enough to feel inviting. Maintenance: occasional dusting, maybe a re-seal every few years.

    Your door stops being background and becomes part of the story.

    16. Layer Light Oak Veneer with Woven Wall Hanging Above

    Veneer doors work with styling too. Light oak veneer + complementary wall decor create a curated entryway that feels intentional.

    Light oak veneer ($180–$350) pairs beautifully with natural materials and bohemian styling. Add woven wall hangings, sculptures, or textile art above ($40–$150). This approach turns your door into part of a larger design story. Time to install: 2 hours for door, 30 minutes for wall styling. The combination of warm wood grain and handmade textiles feels artisanal and thoughtful. This works especially well in homes with eclectic, maximalist, or bohemian aesthetics. You’re not just hanging a door—you’re creating an experience.

    Your entryway becomes an extension of your design personality.

    17. Use Ultra-Slim Profile Veneer with Oversized Clear Glass Panels

    Maximize light while keeping the sophistication of veneer. Use a veneer door with oversized glass panels and slim frame profiles.

    This hybrid approach works best on doors with panel inserts. Order semi-custom doors with minimal wood frame around large glass sections ($400–$700). The veneer frame can be any finish—greige, natural wood, or even matte black. Time: 2–3 hours for installation by a pro. The payoff is an incredibly bright, airy entryway that still feels designed and sophisticated. This style particularly suits modern homes or darker entryways needing more light. You get the visual interest of a designed door without blocking natural light.

    Your entry becomes the brightest, most welcoming room in the house.

    18. Paint Veneer in Warm Terracotta for a Layered Boho Look

    Terracotta isn’t just for pots—it’s a stunning entryway color. Warm, earthy terracotta veneer feels collected and artistic.

    Terracotta stain or paint ($12–$25) applied over existing light veneer creates warmth immediately. The color variation in natural terracotta finishes means no two doors look exactly identical—which adds charm. Time: 4–5 hours including two coats. Pair with rustic hardware or natural materials for a complete bohemian look. Terracotta works beautifully in Southwestern, Mediterranean, or eclectic homes. The warm tone is inviting and feels slightly unexpected. Maintenance is minimal—terracotta hides wear naturally.

    Your entryway instantly transports people to somewhere warm and welcoming.

    19. Create a Colorblocked Door with Painted Veneer Sections

    Colorblocking elevates your door from one-note to architectural. Use painter’s tape to divide veneer doors into geometric sections, then paint each differently.

    Choose 2–3 complementary paint colors and plan your blocks with tape. This requires precision but pays off dramatically. Paint cost: $30–$60 total. Time: full weekend. The trick is choosing colors that feel intentional together—try greige + terracotta, or navy + cream. This approach works best on flat panel doors without existing texture. It’s bold but modern, and unexpected enough that guests will immediately notice. This is perfect if you want statement without going all-in on one color.

    Your door becomes a miniature art installation rather than a background detail.

    20. Combine Blonde Wood Veneer with Sculptural Brass Hardware

    Blonde wood veneer feels Scandinavian and light. Sculptural brass hardware adds unexpected personality and craftsmanship.

    Blonde veneer doors come naturally light or can be achieved with whitewashed or cerused stain. Cost: $200–$400 pre-finished, or $20–$35 in stain product for existing doors. Sculptural hardware (look for artisan pieces on Etsy or specialty hardware sites) runs $60–$150 and becomes a conversation starter. Installation: 30 minutes for hardware, 4 hours if staining. The combination feels collected and thoughtful, not mass-produced. Blonde wood + brass creates warmth without heaviness. This works especially well in minimalist, Scandinavian, or light-filled homes.

    Your door becomes both functional and a small sculpture worthy of a design publication.

    21. Use Weathered Gray Veneer for a Coastal Modern Look

    Weathered gray veneer captures that coastal, driftwood aesthetic without the fragility of real weathered wood. It’s stable, sophisticated, and inherently stylish.

    Weathered gray veneer doors come pre-finished from manufacturers ($250–$450) or you can achieve the look with gray-blue stain over existing veneer ($15–$30). The finish typically includes hand-scraped or varied grain to mimic genuine weathering. Time to apply: 4–5 hours plus drying. Pair with silver or whitewashed hardware ($40–$80). The result feels like a beach cottage or modern coastal home. This color is forgiving—it hides dust and shows character over time. Maintenance is minimal.

    Your entryway instantly communicates calm, collected coastal style.

    22. Apply Geometric Laser-Cut Metal Overlay to Veneer Door

    Take texture to another level with laser-cut metal overlays. Geometric patterns cast shadows and create visual depth beyond the door itself.

    This is a premium option: commission custom laser-cut metal overlays from specialty makers or online platforms ($400–$800 installed). The overlay can be matte black, copper, or brass. Installation requires careful alignment but transforms the door into functional art. Time for installation: 2–3 hours by a pro. Maintenance is minimal—the metal is sealed. This works best on larger doors where the pattern scale reads clearly. It’s an investment piece but absolutely one-of-a-kind. Not for renters, but perfect for homeowners who want architectural drama.

    Your door becomes a sculptural element that changes throughout the day as light shifts.

    23. Pair Warm Walnut Veneer with a Modern Steel Frame

    Industrial-modern: walnut veneer within a steel frame. The contrast between organic wood and industrial metal feels contemporary and collected.

    This requires either ordering a semi-custom door with steel framing or retrofitting existing doors with a metal frame kit. Cost: $500–$800 installed. Walnut veneer ($200–$400) + steel frame ($200–$300) + installation labor ($100–$150). The steel frame emphasizes the door’s scale and creates a gallery-like presentation. This style suits modern, industrial, or loft-style homes. Walnut’s warmth softens the steel’s hardness, creating balance. Maintenance: occasional dust, and wipe the steel frame monthly to prevent dust buildup.

    Your door becomes an architectural statement that reads as intentional and designed.

    24. Stain Veneer in Rich Mahogany with Polished Bronze Hardware

    Mahogany veneer is warm, rich, and inherently elegant. Pair it with polished bronze for a refined, traditional aesthetic that never feels dated.

    Mahogany stain ($15–$30) applied to existing light veneer requires light sanding and two careful coats. Time: 5–6 hours plus dry time. Polished bronze hardware ($50–$120) ages beautifully and develops a darker patina over years. The combination reads as established, refined, and timeless. This works especially well in homes with traditional architecture or dark, moody interiors. Mahogany’s depth hides dust and minor scratches. Maintenance: occasional dusting and maybe a re-seal every few years.

    Your entryway feels like it belongs in a historic home or exclusive private club.

    25. Layer Soft Cream Veneer with Warm Brass Accents Throughout

    Cream veneer is a neutral that reads as soft and intentional. Repeat warm brass accents (hardware, house numbers, lighting) for a layered, curated look.

    Cream veneer ($180–$350) or cream stain ($15–$25) works as a universal backdrop. Layer warm brass throughout: handle ($60–$100), house numbers ($30–$60), porch light ($40–$80). The repeated metal creates visual continuity. Time: 2 hours to install door, 1 hour for coordinating hardware. This approach works with almost every design style. Cream is timeless and doesn’t compete with other design elements. The layered brass feels collected and sophisticated without being loud.

    Your entryway reads as intentionally designed and warm, not accidental.

    26. Use Textured Bark-Look Veneer for Organic Drama

    Bark texture veneer feels raw, organic, and architectural. It’s dramatically textured but still refined—not rustic-rough.

    Bark-textured veneer comes from specialty manufacturers and creates genuine three-dimensional surface variation. Cost: $350–$600 for quality bark-texture doors. Installation: $100–$150 by a pro. The texture photographs beautifully and feels like functional sculpture. This works best in contemporary, industrial, or nature-inspired homes. The surface hides dust and fingerprints naturally. Time commitment: just installation, no staining or painting needed. Maintenance is minimal—occasional dusting.

    Your door becomes a tactile, organic focal point that invites touch.

    27. Paint Veneer in Soft Blush Pink for Unexpected Elegance

    Blush pink is having a moment, and it’s sophisticated, not cutesy. Soft pink veneer feels modern, slightly unexpected, and endlessly elegant.

    Blush pink paint ($20–$35 per gallon) requires primer on existing veneer to ensure even coverage. Two coats recommended. Time: 4–5 hours including prep. The key is choosing a muted, dusty blush rather than bright pink—this reads as refined. Pair with minimal hardware (matte black or brushed nickel, $40–$80) to keep it sophisticated. This color works especially well in contemporary homes with mostly neutral interiors. The door becomes a subtle statement that guests comment on. Blush pink ages gracefully and feels current without being trendy.

    Your entryway becomes an unexpectedly elegant and welcoming introduction to your home.


    Save this post and try one idea this week. Whether you go bold with color, embrace natural wood grain, or layer hardware details, your veneer door is about to become the most-noticed feature in your entryway. Start with what speaks to you, and watch how quickly a single design choice changes everything.

  • 26 Statement Lighting Living Room Ideas That Transform the Entire Room

    26 Statement Lighting Living Room Ideas That Transform the Entire Room

    Introduction

    Lighting does more than illuminate your living room—it sets the entire mood of your space. The right fixtures and layering strategies can make a small room feel expansive, a dated layout feel contemporary, and a boring corner become your favorite gathering spot. Whether you’re working with natural light, struggling with dark corners, or just ready to upgrade basic overhead fixtures, statement lighting is one of the fastest ways to refresh your living room without major renovation.

    In this guide, you’ll discover 26 specific lighting ideas that work for renters and homeowners, tight budgets and investment pieces, and every skill level in between. Each idea includes exactly where to shop, how much it costs, and how long it takes to install. By the end, you’ll know exactly which lighting solutions match your space and style.


    1. Layer with Warm Pendant Lights Over Seating Areas

    Pendant lights create defined zones and add visual interest above seating clusters without needing ceiling work. They’re particularly effective over sofas or accent chairs because they provide task lighting for reading while adding a design statement.

    Look for brass, matte black, or frosted glass options at IKEA ($15-$40 per fixture), Wayfair ($30-$150), or West Elm ($80-$200). Installation takes 20-30 minutes with a basic socket adapter if you’re renting—no hardwiring required. Choose bulbs in warm white (2700K color temperature) to keep the mood cozy.

    Pro tip: Hang three pendants at staggered heights for visual depth, or use a single oversize pendant for bold simplicity. The key is positioning them low enough to create pools of light but high enough to see around comfortably.

    You’ll immediately notice how the room becomes more intentional and functional—plus reading actually becomes pleasant instead of eye-straining.


    2. Install Arc Floor Lamps to Reach Dark Corners

    Arc lamps solve the “dead corner” problem by casting light exactly where you need it without taking up wall or table space. They’re especially useful for reading nooks or spaces next to seating where floor lamps would get in the way.

    Budget options start at $40-$60 (Amazon, Target); mid-range brass or marble-base arcs run $80-$150 (West Elm, CB2). Investment pieces from Schoolhouse Electric or Apparatus ($200-$400) last decades and become instant focal points. Setup is plug-and-play—10 minutes with no installation needed. Choose a dimmable bulb (60-75W equivalent LED) for flexibility.

    The weighted base keeps the lamp stable even in high-traffic areas. If you’re renting, arc lamps are perfect because you just unplug and take them with you.

    This simple addition transforms a shadowy corner into an inviting retreat and instantly makes your room feel more designed and layered.


    3. Add Recessed Lighting with Peel-and-Stick LED Strips

    LED strip lights mimic recessed lighting without any permanent installation—perfect for renters and budget-conscious updates. They provide ambient background lighting that makes the whole room feel more intentional.

    Adhesive LED strips cost $15-$40 (Amazon, Home Depot). Installation takes 20-30 minutes and requires only a clean ceiling edge and an outlet or power strip nearby. Choose warm white (2700K) or tunable white strips that let you adjust color temperature via remote.

    Hide the power cord along your crown molding or behind furniture. Many strips are dimmable and controllable via smartphone app, so you can adjust brightness without getting up.

    The effect? Your room instantly gains depth and sophistication. Even a basic space with standard furniture looks more curated when you add this subtle ambient layer.


    4. Hang Brass Swing-Arm Wall Sconces for Flexible Task Light

    Swing-arm sconces let you direct light exactly where you need it—beside a reading chair, flanking a console table, or highlighting artwork. The adjustable arm means you control the light direction without moving the fixture.

    Expect to pay $50-$100 per sconce (IKEA, CB2, West Elm) for quality options, or $150-$300 (Restoration Hardware, Circa Lighting) for designer versions. Installation requires basic wall mounting—45 minutes to 1 hour if you’re comfortable with a drill, or hire an electrician ($100-$150) for hardwiring. Renter-friendly plug-in versions exist ($60-$120) but have visible cords.

    Pair matching sconces on either side of a fireplace or sofa for balanced style. The adjustability means they adapt as your room changes.

    You’ll notice how much easier reading becomes, and how the directional light creates dimension and drama in ways ceiling fixtures can’t.


    5. Create Warm Ambient Glow with Table Lamps on Dimmers

    Dimmers transform basic table lamps into a whole lighting system—you can go bright for cleaning or entertaining, then dial down to 30% for a relaxing evening. Multiple dimmers on different circuits give you complete control over mood.

    Budget table lamps with built-in dimmers start at $25-$50 (Target, Wayfair). For $15-$40, install smart bulbs (Philips Hue, LIFX) in any existing lamp—these let you dim via app or voice command. Hardwired dimmer switches cost $20-$50 at hardware stores; installation takes 1-2 hours if you’re comfortable with electrical work, or hire a pro ($200-$400 for multiple rooms).

    The simplest approach? Buy dimmable LED bulbs and plug lamps into basic smart plugs ($10-$15 each) that you control from your phone.

    This flexibility means your room adapts to every occasion, and you’ll sleep better thanks to the dimmer’s ability to reduce blue light in the evening.


    6. Use Uplighting Behind Artwork for Gallery Drama

    Uplighting behind or below artwork creates gallery-style drama and makes even modest prints feel museum-worthy. This technique also adds layers of visual interest to blank walls.

    Small uplighting fixtures run $20-$50 (Amazon, hardware stores) and plug into standard outlets. Position them on the floor or a low shelf, pointing upward. Installation is instant—5 minutes—just unplug and move anytime. Use warm white 2700K bulbs to match your other lights.

    This works especially well with textured paintings, black-and-white photography, or bold graphics. Adjust the angle to highlight the piece without creating glare.

    Your artwork instantly becomes a focal point, and guests will assume you’ve invested way more in design than you actually have.


    7. Install Floating Shelves with Integrated LED Lighting

    Lit shelves serve double duty—they organize your space and provide accent lighting that highlights decorative objects. The underlit effect is particularly flattering and creates visual depth.

    Floating shelves with built-in LED kits cost $30-$80 per shelf (IKEA, Target, Wayfair). Installation takes 1-2 hours for basic wall mounting with brackets (no electrical work required if you choose battery-powered LED strips). If you want hardwired options, expect 2-3 hours and possibly a pro installer ($150+).

    Style your shelves with plants, books, and small objects that photograph well and create interesting silhouettes when backlit.

    The result is a space that looks collected and intentional, with lighting that serves both function and aesthetic.


    8. Try Adjustable Track Lighting for Flexible Accent Light

    Track lighting gives you flexibility to highlight different zones without multiple permanent fixtures. Each light can rotate and adjust, perfect for emphasizing artwork, plants, or architectural details.

    Budget track systems start at $40-$80 (IKEA, Home Depot); mid-range designer options run $150-$300 (CB2, West Elm). Installation takes 2-3 hours with basic tools or about $200-$400 with a professional. The advantage? You can move the lights anytime without patching walls.

    Choose warm white LED bulbs (2700K) and dimmable options for maximum flexibility. Renter-friendly stick-on track options exist ($60-$100) but offer fewer adjustment possibilities.

    Once installed, you have control over which areas get highlighted, making your space feel intentional and gallery-like.


    9. Add Candlelight with Flameless LED Candles

    Flameless candles deliver cozy ambiance without fire hazard—perfect for living rooms where real candles feel risky or impractical. They layer beautifully with other lighting for special occasions or everyday coziness.

    LED candles cost $1-$5 per candle (Target, Amazon, Dollar stores) or splurge on designer versions with realistic flame effects ($15-$40 from CB2, Wayfair). Battery-powered options last 50-100+ hours per set of batteries. Set them out in minutes—0 setup time.

    Place them on console tables, mantels, or shelves. The key is grouping them in odd numbers (3, 5, 7) for visual interest.

    Your living room instantly feels more intentional and welcoming, with the warmth of candlelight without any of the worry.


    10. Mount Picture Lights Above Artwork for Museum Effect

    Picture lights are mounted directly above framed art and cast adjustable light down the piece—a timeless solution that makes any artwork feel important. This is especially effective with oil paintings or textured prints.

    Picture lights range from $40-$100 (Rejuvenation, Schoolhouse Electric, higher-end options) to budget versions at $20-$40 (Wayfair). Installation takes 30-45 minutes with basic wall mounting and wiring. Most hardwire into your wall power or plug into nearby outlets; professional installation costs $100-$200 if you’re not comfortable.

    The light should be positioned about 12-18 inches above the frame, angled slightly downward. Use warm white bulbs (2700K) to keep it gallery-appropriate.

    Your artwork becomes a true focal point, and the whole room gains a collected, curated feeling.


    11. Use Smart Bulbs for Customizable Color and Brightness

    Smart bulbs let you adjust brightness and sometimes color temperature (or even color) from your phone—no rewiring or new fixtures required. This is the easiest way to add lighting flexibility to any existing lamp.

    Quality smart bulbs cost $10-$25 per bulb (Philips Hue, LIFX, Wyze) with app control. Basic setup takes 5 minutes per bulb—just screw them in. Budget-friendly options like GE Cync ($8-$15) work similarly. Most connect via Wi-Fi or Bluetooth and let you set schedules, dimmers, and color temperatures via smartphone.

    Start with one smart bulb in your main reading lamp to test the system before investing in more.

    This flexibility means you can adjust your light for morning alertness, afternoon focus, or evening relaxation—all from your couch.


    12. Install a Statement Pendant Cluster Above Your Seating

    A cluster of varied pendant shapes and sizes creates drama and visual interest while providing functional task lighting over seating. This approach works especially well over large sofas or sectionals.

    Individual pendants range from $20-$100 each. A complete cluster of 5 might cost $100-$400 total depending on quality. Installation takes 1-2 hours with a basic plug adapter for renters or 2-3 hours for hardwiring. Choose 2-3 complementary styles rather than matching exactly—mix brass, matte black, and frosted glass for visual richness.

    Hang them at staggered heights (roughly 24-36 inches above seating) and use warm white bulbs for cohesion.

    The visual impact is striking and makes an otherwise basic living room feel intentional and designed.


    13. Create Ambient Light with Bias Lighting Behind Your TV

    Bias lighting behind a TV reduces eye strain during viewing, adds ambient light to the room, and creates a modern, sophisticated look. It’s a subtle but noticeable upgrade.

    LED bias light kits cost $15-$40 (Amazon, Best Buy, IKEA) and include adhesive strips plus a power adapter. Installation takes 15-20 minutes—just stick the LED strip to the back of your TV stand or directly behind the TV, then plug in. Most kits come with remote dimming.

    Choose warm white (2700K) for evening viewing; cooler white (4000K) works for daytime if you prefer brighter light.

    The result is a living room that looks more polished, plus your eyes feel less tired after longer TV sessions.


    14. Add Vintage Edison Bulbs for Cozy Industrial Aesthetic

    Edison bulbs with visible filaments add warmth and vintage character to any fixture. They work beautifully in pendant lights, chandeliers, or exposed-bulb fixtures and make a space feel intentionally curated.

    Quality Edison bulbs cost $8-$20 each (filament style) at hardware stores or online. Standard LED Edison bulbs ($5-$10) mimic the look with modern efficiency. Screw them into any existing fixture in 2 minutes. They work in everything from antique brass fixtures to modern minimalist designs.

    Choose 2200-2700K color temperature for authentic warm glow. The bulbs themselves become part of the design, so visible fixtures make sense.

    Your living room instantly gains character and warmth, with lighting that feels intentional rather than purely functional.


    15. Install Wall-Mounted Swing Lights for Reading

    Swing-arm wall lights clip light sources exactly where you need them for reading or detail work without taking up table or floor space. They’re perfect for tight corners and add a design accent simultaneously.

    Quality swing arms range from $40-$120 (CB2, West Elm, Rejuvenation) to budget options at $20-$50 (IKEA, Amazon). Installation takes 30-45 minutes with basic wall mounting. Plug-in versions ($50-$80) skip hardwiring but have visible cords.

    The adjustable arm swings out of the way when not in use, and the light reaches exactly where a book or project sits. Choose dimmable bulbs for comfort during evening reading.

    Reading becomes genuinely enjoyable again, and the fixture adds a subtle design touch beside your chair.


    16. Layer Light with Linen Lampshades for Softness

    Lampshade material dramatically affects how light spreads—linen and fabric shades diffuse light beautifully, while harder materials create sharper pools. Upgrading shades is one of the cheapest ways to improve your lighting quality.

    Replacement shades cost $15-$60 (IKEA, Target, Wayfair, specialty shade shops). Installation takes 5 minutes—just swap the old shade for the new one. Choose cream, white, or natural linen in sizes matching your lamp base. Avoid dark or metallic shades unless you want spotlighting rather than ambient light.

    This small change completely transforms how light distributes through your room, making it softer and more welcoming.

    The difference is noticeable immediately—your whole space feels warmer and less harsh.


    17. Use Dimmer Switches to Control Multiple Fixtures

    A single dimmer switch controlling multiple fixtures (ceiling lights, chandeliers, or track lights) gives you one-touch flexibility. This is more sophisticated than having all lights at full brightness.

    Dimmer switches cost $15-$40 at hardware stores. Installation takes 30-45 minutes if you’re comfortable with basic electrical work (turn off power, swap the switch), or hire an electrician ($100-$150 per switch). Most standard light fixtures work with dimmers, but check compatibility.

    Install in your main living area and any room where you want mood control. Quality dimmers have smooth sliders rather than toggles, for better control.

    You’ll immediately notice how much better your room looks at 60-70% brightness compared to blasting lights at full strength.


    18. Add Accent Lighting to Highlight Architectural Details

    Strategic accent lighting highlights your room’s best features—crown molding, exposed brick, built-in shelving, or interesting wall textures. This creates dimension and makes basic spaces feel more architectural.

    Small accent lights or LED strips cost $15-$50 and take 20-30 minutes to position and plug in. Choose warm white for traditional details, cool white for modern elements. Position lights to create shadows and depth rather than uniform brightness.

    This technique works especially well in rooms with interesting architecture that usually goes unnoticed.

    The result is a space that feels more designed and intentional, with visual interest that makes rooms appear larger and more expensive.


    19. Install a Chandelier for Instant Drama and Focal Point

    A chandelier transforms a basic room into a designed space instantly. It works in any style—from modern minimalist to maximalist—as long as scale and finish match your aesthetic.

    Chandeliers range from $50-$150 (IKEA, Wayfair) for simple styles to $300-$800+ (CB2, West Elm) for designer pieces. Installation takes 2-3 hours for hardwiring (or hire a pro for $150-$300). Plug-in swag chandeliers ($40-$100) work for renters but show a visible cord.

    Choose one with dimmable bulbs and ensure it’s proportional to your room size. A room that’s 12’x14′ works best with a chandelier roughly 24-30 inches in diameter.

    The dramatic focal point immediately elevates the entire room’s design, making it feel more intentional and sophisticated.


    20. Create Floating Light with Recessed Ceiling Fixtures

    Recessed lighting (downlights) creates the illusion of light floating from nowhere—a contemporary, clean look that works in minimalist and modern spaces. It also opens up visual ceiling space.

    Recessed light kits cost $80-$200 for 3-4 fixtures plus installation materials. Installation takes 3-4 hours with basic tools (drywall saw, wiring); hiring an electrician costs $300-$600 total depending on complexity. This requires ceiling access and is permanent, so best for homeowners rather than renters.

    Space fixtures 4-6 feet apart for even coverage. Use dimmable LED bulbs (2700K) that last 25,000+ hours.

    The result is sophisticated, gallery-like lighting that makes your ceiling feel higher and your room more contemporary.


    21. Use Lantern-Style Lights for Transitional Warmth

    Lantern-style lights blend traditional and contemporary aesthetics, working in transitional rooms where you want timeless appeal. They provide focused light while adding architectural interest.

    Lantern pendants cost $30-$80 (IKEA, Target, Wayfair) or $100-$250 (CB2, West Elm) for designer versions. Installation takes 20-30 minutes with a plug adapter (renter-friendly) or 1-2 hours hardwired. Hang them at eye level (about 72 inches from floor) on either side of a fireplace or console table.

    Glass panels allow light to spread while creating visual interest. Choose warm white bulbs for authentic charm.

    This lighting style adds elegance and works beautifully in rooms that mix old and new elements.


    22. Install Ribbon Lights for Subtle Overhead Glow

    Ribbon or tape lights create continuous ambient glow without individual fixtures—a contemporary alternative to recessed lighting. They’re renter-friendly and plug directly into outlets.

    Ribbon light kits cost $20-$60 and installation takes 30-45 minutes to stick around ceiling edges or behind crown molding. Use warm white (2700K) for living rooms. Most are dimmable via remote control ($5-$15 extra).

    This creates a base layer of ambient light that makes your room feel more designed. Pair it with task lighting for a complete system.

    Your space immediately feels more contemporary and intentional, with sophisticated lighting that goes beyond basic ceiling fixtures.


    23. Add Brass or Gold Fixtures to Warm Up Cool Spaces

    Metal finishes dramatically affect room temperature. Brass, gold, and copper add warmth, while chrome and nickel read as cool and contemporary. Warming up your fixtures instantly makes a space feel more inviting.

    Brass fixtures cost $20-$150 depending on style and source (IKEA, Target, West Elm, specialty shops). To warm up existing fixtures, you can paint metal with brass metallic spray paint ($8-$15 per can, Home Depot) or simply replace shades with warmer materials.

    Coordinate your metal finish across the room—mix brass wall sconces, pendants, and table lamp bases for cohesion. This doesn’t mean everything matches exactly, but the warm tone ties everything together.

    The warmth instantly makes your room feel more welcoming and sophisticated.


    24. Layer Light with Tiered Brightness Zones

    Creating different brightness zones—overhead layer, mid-level task lights, and accent lighting—gives you complete control over ambiance. This professional technique works in any room size.

    This requires no additional purchases if you already have fixtures; you just control them separately via different switches or dimmers ($15-$40 per switch). Setup takes 1-2 hours if adding new dimmer switches, or minutes if using smart bulbs ($15-$25 each).

    Layer your brightness: dim overhead lights to 50%, keep task lamps at full brightness, and add accent lights at 70-80% for reading areas.

    This sophisticated approach means your room looks good in every lighting situation—morning, evening, entertaining, or relaxing.


    25. Install Brass Or Matte Black Sconces Flanking a Mirror

    Sconces flanking a mirror or artwork create perfect symmetry and provide both functional and accent lighting. This arrangement works especially well in entryway-adjacent living rooms or behind a console table.

    Pairs of sconces cost $50-$150 or invest $200-$400 for designer options. Installation takes 1-2 hours with basic wall mounting or hire a pro ($150-$250 for hardwiring). Plug-in versions ($60-$120 per pair) work for renters.

    Position sconces roughly 60-72 inches from the floor, roughly 24-36 inches apart on either side of your mirror or focal point. Use matching finishes for intentional balance.

    The symmetry creates an instant sense of order and design, making even a basic console look like a styled magazine photograph.


    26. Use Color-Changing Smart Bulbs for Seasonal Mood Shifts

    Color-changing smart bulbs let you adjust not just brightness but actual color temperature or even RGB color—perfect for seasonal refreshes without any physical changes. In autumn use warm amber; in summer try crisp white; for cozy evenings dial down to 2200K.

    Quality color-changing smart bulbs cost $20-$40 per bulb (Philips Hue Color, LIFX Color). Setup takes 5 minutes per bulb—just screw them in and connect to your app. Basic options start at $15-$20. You control everything from your phone with preset scenes for different moods.

    Start with one smart bulb in your most-used lamp to test the system. Many apps let you create custom presets—”Movie Night,” “Reading,” “Party,” etc.

    This flexibility means your lighting adapts to your mood and the season without any physical changes to your space.


    Ready to brighten your living room? Pick one lighting idea this weekend—even a single new fixture or LED strip makes a noticeable difference. Save this post for whenever you need that next upgrade, and share it with anyone else who’s stuck with basic ceiling lights and flat lighting.

  • 27 Minimalist Bedroom Ideas That Create Calm & Clarity

    27 Minimalist Bedroom Ideas That Create Calm & Clarity


    Introduction

    Minimalism gets a bad rap for feeling cold and sterile, but it doesn’t have to be that way. The key to a calming bedroom isn’t about emptiness—it’s about thoughtful choices that let you breathe. You need a space that supports better sleep, reduces decision fatigue, and makes you actually want to be there. This guide walks you through 27 ideas that strip away the noise while keeping the warmth and personality. From free organizing tricks to smart furniture swaps, you’ll discover how to create a bedroom that feels like a real sanctuary, not a showroom. Ready to design a space where you can finally relax?


    1. Choose Creamy Neutrals Over Stark White

    Stark white walls can feel clinical and unwelcoming, even when you’re trying to keep things simple. Creamy beige, warm taupe, and soft greige create the calm you’re after without the bleakness.

    Paint your walls one of these warmer neutrals to anchor the room in comfort. Benjamin Moore’s Swiss Coffee or Sherwin-Williams’ Accessible Beige ($30–$50 per gallon) work beautifully and apply in a weekend afternoon. The shift is subtle but noticeable—your space goes from feeling bare to feeling intentional.

    Pro tip: Test samples on your walls for 48 hours to see how they shift with natural light at different times of day.

    Your bedroom now feels serene instead of sterile, and better sleep usually follows when you’re surrounded by warmth.

    2. Invest in Quality Basics Over Quantity

    Filling your bedroom with cheap multiples won’t relax you—quality staples will. One beautiful sheet set, two good pillows, and a lightweight throw beat a closet full of mediocre options.

    Spend $150–$300 on organic cotton or linen sheets (Parachute, Brooklinen, or Etsy makers offer solid options). Add pillows that actually support your neck ($80–$150 each) and a natural fiber throw. These pieces live on your bed every day, so they’re worth the investment.

    The trade-off: You’ll have less to choose from, which actually speeds up bedtime and reduces decision fatigue.

    Waking up and touching quality fabric changes how you feel about your space immediately.

    3. Embrace Raw Wood Nightstands

    Sleek nightstands are fine, but raw wood brings organic warmth that fits minimalism without coldness. Look for reclaimed or natural wood pieces that show grain and imperfections—that’s the point.

    Hunt thrift stores, Facebook Marketplace, or Etsy for used wood nightstands ($40–$150). If budget allows, West Elm or Article sell modern wood options ($200–$400). Refinish if needed, or leave patina as-is for character.

    One lamp, one small plant, one photo—that’s all your nightstand needs.

    The subtle texture grounds your minimal space in nature while keeping surfaces clear and calm.

    4. Install Floating Shelves Above Your Headboard

    Floating shelves give you storage without bulk and add visual interest to a plain wall. This works even in rentals with removable options.

    Mount 1–2 shelves 12–18 inches above your headboard using wall anchors or studs ($20–$40 for hardware). Keep them sparse: a few books you actually read, a small plant, maybe one candle. The rule is “fewer is better” in minimalism.

    Renters: Use Command shelves ($15–$25) that stick-and-peel without damage.

    Your bedroom gains function and style while walls stay visually calm and uncluttered.

    5. Use Under-Bed Storage to Hide Seasonal Items

    Minimalism isn’t about having nothing—it’s about storing what you have thoughtfully. Keep bulky seasonal items invisible by using under-bed storage.

    Buy flat plastic bins from IKEA or Target ($15–$30 each) that fit your bed height. Label them clearly and rotate contents with seasons. This keeps your bedroom clear of clutter while protecting linens and off-season clothes.

    Pro tip: Use a low bed frame (8–12 inches high) designed for storage, or add rolling bed risers ($20–$40) to old frames.

    Everything has a home, your floor stays clear, and your space stays visually minimal year-round.

    6. Install a Single Statement Light Fixture

    One well-chosen light fixture beats a clutter of lamps. A single statement piece becomes focal point and conversation starter without feeling busy.

    Skip the typical ceiling light and install a modern pendant or sculptural brass fixture ($80–$300 from IKEA, Article, or West Elm). Position it at the foot of your bed or off-center for visual interest. Add a dimmer switch ($15–$30) for mood control.

    Time: Professional installation ($100–$200) or DIY if comfortable with electrical.

    Your room gains sophistication and functionality through one intentional choice instead of scattered fixtures.

    7. Layer Raw Textures Like Marble and Cork

    Minimalism doesn’t mean texture-free—quite the opposite. Raw materials like marble, cork, and stone add warmth and interest while keeping the palette clean.

    Add a marble tray or small sculpture ($30–$80 from Anthropologie, CB2, or Etsy) and cork coasters ($10–$20). Layer a natural jute rug under your bed ($60–$150 from Rugs USA or West Elm). Each piece brings organic interest without visual chaos.

    These materials age beautifully and work with any minimal palette.

    Touching and seeing raw textures makes your calm space feel grounded and real, not sterile or cold.

    8. Add Soft Curves With Rounded Furniture

    Sharp lines feel tense; curves feel safe. Swap angular furniture for pieces with soft edges—this shift makes a major difference in how relaxed your space feels.

    Hunt for curved nightstands, oval mirrors, and round side tables ($100–$400 from IKEA, Article, West Elm, or vintage sources). A curved headboard ($200–$600) can become your room’s anchor. Even arc floor lamps ($80–$200) replace harsh straight lines softly.

    Mix curves with straight lines (like shelving) to keep things modern, not overly retro.

    Rounded shapes work on your nervous system—your bedroom becomes naturally more calming just through geometry.

    9. Choose One Accent Color and Stick With It

    Too many colors overwhelm; one accent color adds personality while keeping calm intact. Think forest green, warm terracotta, or soft aubergine—not neon.

    Paint one accent wall or add your color through one throw pillow, a small rug, or artwork ($20–$200 depending on choice). Repeat it nowhere else—let it breathe. This restraint is what makes minimalism feel intentional.

    Pro tip: Pair your accent color with creamy neutrals so it pops without competing.

    Your bedroom gains character and visual interest while staying serene and uncluttered.

    10. Declutter Your Closet as the Foundation

    You can’t have a calm bedroom if your closet is chaotic—visual chaos bleeds into mental space. Start here before decorating anything else.

    Keep only clothes that fit now and align with your actual life. Use slim velvet hangers ($20–$40 per set) to maximize space and organize by category. Donate or sell items you haven’t worn in a year.

    Time: A weekend project, but transformative.

    Your closet becomes functional, your bedroom stays uncluttered, and your mornings get simpler.

    11. Hang Large Artwork or One Focal Print

    One large, meaningful piece beats a gallery wall cluttered with tiny prints. Minimalism can be artistic—just edit ruthlessly.

    Choose one 36″ x 48″ print or canvas from Minted, Etsy, or a local artist ($60–$300). Frame it beautifully and hang it where it anchors the room—usually above a dresser or opposite your bed. Leave plenty of white wall space around it.

    Renters can use removable adhesive strips ($5–$10) on lightweight frames.

    Your space gains sophistication and creative energy without feeling overstimulated or busy.

    12. Minimize Lighting to One or Two Sources

    Harsh overhead lights and too many lamps create anxiety. Pare it down to one warm overhead light and one bedside lamp for reading.

    Install a warm-bulb dimmer switch ($15–$30) on your main light and choose a soft linen lampshade ($30–$80) for your nightstand lamp. Use warm white bulbs (2700K, $5–$15 each) that support sleep cycles.

    Dim lighting signals your body that it’s time to rest.

    Your bedroom becomes a retreat instead of a workspace, and your sleep quality often improves within days.

    13. Use Linen Curtains for Softness Without Fuss

    Heavy, patterned curtains feel fussy; simple linen diffuses light gently and adds texture without clutter. They also look effortlessly chic when slightly rumpled.

    Buy floor-to-ceiling linen curtains from IKEA, Target, or Etsy ($40–$120 per panel). Mount them on a simple rod ($20–$50) and let them puddle slightly on the floor. Minimal styling required—that’s the point.

    Pro tip: Layered sheer linen with a blackout lining ($80–$150 per panel) gives you light control without extra visual bulk.

    Your windows soften light while your room stays calm and clutter-free.

    14. Add One Small Plant for Life and Air Quality

    One plant brings life, color, and air-purifying benefits without overwhelming a minimal space. Choose something low-maintenance so it doesn’t create stress.

    Pick a snake plant, pothos, or monstera in a simple ceramic or concrete pot ($15–$40 total). Place it on a windowsill or in a corner where it catches indirect light. Water weekly or every two weeks depending on the plant.

    Avoid clutter: one plant, not a jungle.

    Your room gains a living element that improves air quality while adding subtle visual warmth.

    15. Invest in a High-Quality Mattress

    You can’t have a calm bedroom if you’re not sleeping well. Your mattress is the foundation of everything—don’t skimp here.

    Spend $800–$2000 on a quality mattress from Helix, Tuft & Needle, or Saatva. Online options often come with trial periods (60–100 nights). This is the one splurge worth making in a minimal bedroom.

    A good mattress lasts 7–10 years, so divide the cost across years and the investment shrinks.

    Better sleep transforms everything—your mood, energy, and ability to enjoy your calm space.

    16. Organize Nightstand Drawers With Dividers

    A cluttered nightstand drawer ruins the calm of a minimal bedroom. Use dividers to keep essentials organized and visible.

    Buy fabric drawer organizers ($10–$25 per set) from IKEA, Container Store, or Target. Keep only what you use nightly: phone charger, reading glasses, one notebook. Everything else lives elsewhere.

    Time: 15 minutes to organize.

    Your nightstand drawer stays functional and hidden, keeping your bedroom’s visual calm intact.

    17. Choose a Low-Profile Bed Frame

    High bed frames with thick frames feel heavy and cluttered; low platforms ground a room visually and make it feel larger.

    Buy a low platform bed from IKEA, Article, or West Elm ($300–$800). Look for designs with simple legs that let light pass beneath—this keeps the room airy. Skip ornate headboards unless that’s your focal point.

    Pro tip: A low bed also makes organization and under-bed storage easier to access.

    Your bedroom instantly appears larger and more restful without feeling like furniture dominates the space.

    18. Use Door Hooks to Hide What Doesn’t Belong

    Bedroom doors are perfect for one or two items you need quick access to. This keeps surfaces clear and makes your room look uncluttered.

    Install 2 simple hooks ($5–$15) on your door or wall for a robe, light jacket, or bag. That’s it—not a coat rack. Limit to one item per hook.

    Renters can use adhesive hooks ($3–$10) that peel off cleanly.

    What used to clutter your chair or floor now has a functional home, and your room stays peaceful.

    19. Create a Reading Nook With One Chair

    You don’t need much for a calming reading space—just one good chair, a small table, and light. This becomes your retreat within your retreat.

    Find a vintage armchair or modern accent chair ($150–$500 from thrift stores, Article, or West Elm). Add a small wooden side table ($50–$150) and a floor or clip lamp ($30–$80). Position near a window for natural light.

    Pro tip: Add a single linen throw ($30–$80) draped over the chair for warmth and texture.

    You’ve created a functional, intentional space that encourages rest and reading instead of screen time.

    20. Store Books Vertically on One Shelf

    Books add visual weight if scattered everywhere; shelf them intentionally on one display shelf to keep them calm and accessible.

    Keep only books you’ve read or genuinely plan to read on display—store the rest or donate them. Use a floating shelf or low bookcase ($50–$300) and arrange books vertically with spines facing out. Add one small object (plant, sculpture) for visual break.

    The rule: If it doesn’t add to your life, it doesn’t deserve shelf space in a minimal room.

    Your books become decor instead of clutter, and you’re more likely to actually read when they’re beautifully displayed.

    21. Use a Bedroom-Only Scent Strategy

    Multiple scents compete and overwhelm; one scent anchors your bedroom’s calm. This is a sensory anchor that costs almost nothing.

    Choose one candle scent (lavender, cedarwood, or unscented if you prefer) and burn it only in your bedroom, 1–2 evenings weekly. Or use a simple diffuser ($15–$40 from Target or Amazon) with a single essential oil. Keep scent subtle—you should barely notice it.

    Pro tip: Unscented is minimalist too—silence is a valid choice.

    A consistent bedroom scent trains your body to relax the moment you enter, improving sleep quality over weeks.

    22. Swap Duvets for Quality Quilts

    Heavy duvets feel suffocating; a lightweight quilt or two layered lets you adjust temperature and adds texture without bulk. Plus, quilts have stories—they’re inherently more personal.

    Hunt thrift stores or Etsy for vintage quilts ($30–$150) or invest in new artisan quilts ($200–$500 from makers on Etsy). Layer 1–2 depending on season instead of fighting with a duvet and cover.

    Washing is easier, and maintenance is simpler over time.

    Your bed looks softer, more lived-in, and honestly more inviting—while staying minimal and intentional.

    23. Paint Inside Closet Doors

    Inside closet doors rarely get noticed, so painting them a subtle contrast color adds personality without breaking minimalism. It’s a tiny detail that makes you smile.

    Paint your closet door interior in a color 1–2 shades different from your bedroom walls. Use the same quality paint ($30–$50 per gallon). This takes 2–3 hours and creates a small hidden joy every time you open the closet.

    Pro tip: Match it to your accent color for subtle reinforcement.

    You’ve added personality and thoughtfulness that only you fully appreciate—which is exactly what minimal design should do.

    24. Install Dimmer Switches on All Light Sources

    Bright light disrupts sleep cycles; dimmers let you adjust lighting to your circadian rhythm and mood. Install them on every fixture that matters.

    Add dimmer switches ($15–$30 each) to your main overhead light and bedside lamp. Pair with warm white bulbs (2700K). Use the lowest setting 1–2 hours before bed to signal your body it’s sleep time.

    Pro tip: Some smart bulbs ($15–$20 each) let you adjust light color from your phone—useful for gradual evening dimming.

    Your sleep quality improves, and you’ll use your bedroom more intentionally when lighting supports rest.

    25. Keep Only One Throw Blanket

    One quality throw beats a pile of mediocre blankets. This is minimalism with warmth and texture.

    Choose a merino wool, linen, or organic cotton throw in cream, gray, or your accent color ($60–$150 from **Parachute, Etsy, or *Woolroom*). Drape it at the foot of your bed or over a reading chair. That’s your only throw blanket.

    Real minimalism means owning fewer, better things—not refusing comfort.

    You have what you actually use, less decision fatigue, and a cozier room than you’d get from five cheap blankets.

    26. Create a Minimal Bedside Tray

    Trays corral nightstand clutter into one intentional arrangement. This keeps your space organized and styled without effort.

    Buy a simple brass, wood, or ceramic tray ($20–$60 from Target, IKEA, or CB2). Place it on your nightstand and keep only three items on it: lamp, water glass, and one current book. Everything else lives in the drawer.

    Time: 5 minutes to set up, then maintenance is automatic.

    Your nightstand looks intentionally styled and calm, and you know exactly where essentials are without hunting.


    Save this post and pick one or two ideas to tackle this weekend. Minimalism doesn’t mean cold or empty—it means choosing carefully what stays. Start small, and you’ll notice how even one change creates more room to breathe.

  • 23 Stylish Mirror Frame Ideas That Elevate Your Home Aesthetic

    23 Stylish Mirror Frame Ideas That Elevate Your Home Aesthetic

    Your mirror frames do more than reflect—they set the entire mood for a room. Whether you’re drawn to soft curves, bold geometry, or natural textures, the right frame can turn a functional piece into a statement that ties your whole aesthetic together. But here’s the catch: finding 23 genuinely different ideas that actually work in real homes (not just design magazines) takes time. We’ve pulled together actionable frame styles, budget hacks, and styling tricks that work for renters, homeowners, and everyone in between. From DIY painting projects to investment pieces, you’ll find options at every price point. Let’s dive in and find the frame that makes your space feel like you.

    1. Paint an Old Frame in Matte Black

    Matte black frames add instant modern edge to any room without the price tag. If you have an old mirror collecting dust in your garage or attic, this is your answer.

    Grab some matte black spray paint or brush-on acrylic (both around $8–$15 at hardware stores) and give your frame a fresh coat. It takes about 30 minutes plus drying time. Pro tip: Use a primer first if your frame is glossy or stained—it helps the paint stick. Once dry, the matte finish softens the industrial vibe, making it less harsh than a shiny black frame.

    You’ve just created a custom frame for under $20 that looks intentionally designed, not thrifted.

    2. Add Thin Gold Trim to Frameless Mirrors

    Frameless mirrors can feel a bit cold, but adding a thin gold outline transforms them into something special. This costs almost nothing and works in modern, glam, or even coastal spaces.

    Pick up metallic paint markers or gold leaf tape ($5–$12 from craft stores like Michaels or Joann). Carefully outline your mirror’s edge, or apply tape as a thin frame border. You can do this in about 15 minutes. If you prefer a more permanent option, use thin adhesive gold trim ($10–$20) available on Amazon—just stick it on. The slight shimmer catches light beautifully and makes your mirror feel intentional.

    Your bare mirror now has personality without committing to a full frame.

    3. Layer Wooden Frames for a Gallery Wall Effect

    One mirror is nice, but a cluster tells a story. This renter-friendly approach uses no wall damage and creates instant visual interest.

    Hunt for wooden-framed mirrors at thrift stores or IKEA (ranging from $8–$50 each depending on size). Choose 3–5 mirrors in varying sizes and wood tones—warm honey, natural, weathered oak, or even light pine. Lean them against your wall at different heights, overlapping slightly for that curated feel. You can also hang them if your lease allows. This project costs $30–$150 total, takes about an hour to arrange, and zero construction skills required.

    Suddenly, that empty wall becomes a curated focal point that photographs beautifully.

    4. Wrap a Frame in Rattan or Woven Seagrass

    Coastal vibes don’t require a beach house—add rattan wrapping to any existing frame. This DIY hack brings warmth and texture without replacing the whole piece.

    Grab rattan or seagrass ribbon ($8–$15 from craft stores) and some clear-drying adhesive or hot glue. Wrap it around your frame’s edges, overlapping slightly as you go. Takes about 30–45 minutes depending on frame size. The natural material softens harder finishes and adds organic interest. If rattan feels too boho for your space, try jute twine for a more subtle texture.

    Your mirror now whispers “relaxed elegance” instead of “just functional.”

    5. Create a Sunburst Frame with Wooden Dowels

    Sunburst mirrors are trending hard, but designer versions cost $300+. Make your own for under $40 with dowels and spray paint.

    Purchase wooden dowels ($15–$20 at Home Depot), a round mirror ($10–$20 from IKEA or Target), and gold or black spray paint ($8–$10). Cut dowels to varying lengths (from about 6 to 12 inches), arrange them in a circle, and hot-glue them to the mirror’s back or frame. Paint everything in one go using spray paint. This weekend project costs $35–$50 and creates a statement piece that rivals store-bought versions costing triple.

    You’ll have a dramatic focal point that anchors any room and sparks conversations.

    6. Use Wallpaper or Fabric Behind a Frameless Mirror

    Create the illusion of a frame without hardware by treating the wall behind your mirror. This works beautifully in renters’ spaces since the mirror does the hiding.

    Install your frameless mirror as usual, then apply peel-and-stick wallpaper or fabric ($15–$40) around it in a contrasting color or pattern. The wallpaper peeks out as a “frame.” Takes about 20 minutes and zero damage to walls when you use removable adhesive. This trick also works if you’re renting—just peel it off when you move.

    Now your mirror feels layered and intentional, like it was designed as part of the wall itself.

    7. Stain or Refinish a Thrifted Wood Frame

    Thrift stores are treasure troves of cheap mirror frames that just need a refresh. A little stain transforms them into custom pieces.

    Find a wooden-framed mirror at Goodwill or Facebook Marketplace ($3–$15). Pick up wood stain in your desired shade—walnut, ebony, or honey ($8–$12 at hardware stores). Sand the frame lightly with 120-grit sandpaper, apply stain with a brush, and let it dry per instructions (usually 24 hours). Total investment: $15–$30. Time: about 1 hour active work plus drying. You’ve essentially created a custom frame for the price of a coffee.

    That dated thrifted find is now a curated piece that matches your decor perfectly.

    8. Add Tassel or Rope Details Around the Frame Edge

    Tassels and rope add dimension and personality to plain frames in minutes. This is pure styling without commitment.

    Purchase decorative tassel trim or braided rope ($12–$25 per yard from fabric stores like Joann or online from Amazon). Use fabric glue or hot glue to attach it around your frame’s perimeter. Choose gold tassels for glam, cream for soft elegance, or jewel tones for drama. Takes about 20–30 minutes depending on frame size. If you change your mind later, peel it off and try something new.

    Your frame now has that handcrafted, intentional-looking detail that costs pennies but reads like luxury.

    9. Spray Paint a Metal Frame in Unexpected Colors

    Metal frames are durable and perfect for spray paint experiments. Go bold with color instead of sticking to neutrals.

    Find a metal-framed mirror you own or grab one used ($5–$20). Pick spray paint in jewel tones, dusty rose, sage green, or even terracotta ($8–$12 per can). Mask off the mirror glass with painter’s tape, and spray 2–3 thin coats in a well-ventilated area. Total cost: $15–$35. Takes about 1 hour including drying time. The finish is permanent and hardwearing, perfect for bathrooms and high-traffic spaces.

    An unexpected color choice turns a standard mirror into a design focal point that reflects your personality.

    10. Create a Faux Scalloped Edge with Trim

    Love the scalloped trend but don’t want to commit? Glue decorative trim to create the look instantly.

    Hunt for adhesive scalloped trim, ribbon, or lace ($10–$20 per roll on Amazon or craft stores). Clean your mirror frame thoroughly, then carefully glue the trim around all edges. This takes about 30 minutes and costs $10–$25. For a modern take, use thin geometric trim instead of traditional lace. If your mirror is frameless, build up a thin base layer of foam trim first, then add the scallops.

    Your mirror now has playful personality that photographs beautifully and feels intentionally styled.

    11. Mosaic Tile or Broken Glass Frame Border

    This DIY project adds serious artistic flair if you’re willing to spend a weekend on it. Upcycled glass or tiles make it more affordable.

    Collect small mosaic tiles, sea glass, or broken ceramic pieces (free if you salvage, $8–$15 for a premade mosaic kit). Use tile adhesive and grout ($10–$15). Arrange your pieces around the frame edges, glue them down, and grout the gaps. Takes 2–3 hours plus drying time. This one requires patience but results in a genuinely one-of-a-kind piece. Perfect if you’re artistic or enjoy mindful crafting.

    You’ve created a conversation piece that feels handmade and special, with zero factory-produced feel.

    12. Paint a Geometric Pattern Directly on the Frame

    If you’re handy with a paintbrush, go full artist and design your own pattern. This one’s pure creative expression.

    Use acrylic paint in 2–3 complementary colors ($8–$15 total). Sketch a light pencil design first, then paint in your pattern—stripes, triangles, checkerboard, or abstract shapes. Seal it with clear matte or glossy sealant ($6–$10) to protect from moisture. Takes 2–3 hours depending on complexity. This works best on wood frames with good surface area. Bonus: it’s totally renter-friendly since paint stays on the frame, not the wall.

    You now own a custom art piece that’s completely unique and matches no one else’s decor.

    13. Install LED Lighting Inside a Floating Frame

    Combine function and aesthetics with LED lights integrated into or around your frame. This elevates bathrooms and small bedrooms instantly.

    Purchase adhesive LED strip lights ($20–$40 from Amazon or Best Buy—look for warm white, dimmable options) and a thin-framed or frameless mirror ($30–$80). Install the LED strips inside the frame’s lip or directly on the wall around the mirror’s perimeter. Most are plug-in or battery-powered, taking 15 minutes to install. This is renter-friendly if you use removable strips and avoid permanent wiring.

    Your mirror becomes a functional light source and atmospheric focal point—practical and pretty.

    14. Wrap the Frame in Leather or Faux Leather Cord

    Leather wrapping adds sophistication and texture, especially in masculine or modern spaces. This looks more expensive than it costs.

    Get leather or faux leather cord ($8–$15 from craft stores) and contact cement or hot glue ($3–$8). Wrap the cord tightly around your frame starting at one corner, overlapping slightly as you go. Use glue at the start and end to secure. Takes about 45 minutes for a standard mirror. The result feels designer-quality with that structured, intentional look. Faux leather is cheaper and equally effective.

    Your mirror now has a sophisticated, grown-up aesthetic that anchors any room beautifully.

    15. Create a Double-Frame Look with Two Mirrors

    Double frames create visual depth without major construction. This architectural trick works in modern and eclectic spaces.

    Find two mirrors in similar or complementary styles ($20–$60 total). Use thin wood strips or metal spacers ($8–$15) to create distance between them. Attach the smaller mirror to the spacers, then attach that assembly to the back of the larger frame using strong adhesive or small brackets. Takes about 1 hour. This creates an intentional, layered look that reads expensive and curated.

    Your mirror now has architectural interest that makes the wall feel designed, not just decorated.

    16. Stencil a Border Pattern Around the Frame

    Stenciling lets you add pattern and detail without free-hand painting skills. Perfect for adding custom flair to plain frames.

    Purchase a decorative stencil ($5–$12 from craft stores) and metallic or acrylic paint ($6–$10). Tape the stencil around your frame’s edge and carefully paint through the cutouts using a stencil brush or sponge. Takes 30–45 minutes and dries quickly. Dozens of patterns exist—geometric, floral, Art Deco, boho. Choose one that matches your style.

    You’ve added custom detail that looks like it was always part of the design.

    17. Use Brass or Copper Leaf for a Luxury Finish

    Metal leaf creates a high-end, handcrafted look that costs far less than it appears. This technique works on wood frames best.

    Grab adhesive brass or copper leaf ($15–$25 from art supply stores), a sizing glue (usually included), and a soft brush. Apply sizing according to package directions, then carefully press leaf onto the frame surface. It adheres instantly and looks like real metal coating. Takes about 1–2 hours depending on frame size. The result rivals expensive designer frames, and the material is durable and long-lasting.

    Your mirror frame now has that handcrafted, gallery-quality finish that elevates your entire space.

    18. Add a Floating Shelf Below or Above the Mirror

    A floating shelf isn’t technically a frame modification, but it completes the frame’s visual impact by creating a styled vignette below or above.

    Install a thin floating shelf ($20–$50 depending on material—wood, metal, or composite) using heavy-duty wall anchors ($5–$10 for a renter option) or wall studs if permanent. Takes 30 minutes to 1 hour to install depending on your comfort level. Style it with small potted plants, candles, or curated objects. This trick makes your mirror feel intentional and gallery-like.

    Now your mirror isn’t just a reflection—it’s part of a designed vignette that brings the whole wall to life.

    19. Paint the Frame to Match Your Wall (Monochromatic Frame)

    This minimalist approach hides the frame while highlighting the mirror’s reflection. Perfect for keeping walls clean and uncluttered.

    Paint your frame with the same paint color as your wall ($20–$30 for a quart of paint). This might seem counterintuitive, but it creates a serene, intentional look where the frame “disappears” and your reflected room becomes the focal point. Takes about 1 hour including drying. Best on matte or eggshell finishes for true blending.

    Your space feels calmer and more cohesive, with the mirror functioning as a subtle design element rather than a statement.

    20. Attach Dried Flowers or Branches to a Frame

    Dried botanicals are trending, and they transform frames into organic art pieces. Plus, they’re wallet-friendly and won’t wilt.

    Collect or purchase dried flowers, pampas grass, or branches ($10–$25 from craft stores like Michaels or online). Use hot glue or floral adhesive to attach them around your frame’s perimeter or in corner clusters. Takes about 30–45 minutes. The dried materials last indefinitely and create a cottagecore or bohemian vibe. Great for renters since nothing damages walls.

    Your mirror now doubles as botanical art, bringing organic warmth to any room.

    21. Wrap the Frame in Linen or Canvas Fabric

    Fabric wrapping adds tactile softness and texture while maintaining a natural aesthetic. This works for any style from farmhouse to modern.

    Choose natural linen or canvas fabric ($15–$25 per yard from fabric stores) in a color that complements your space. Wrap it tightly around your frame, stapling it securely on the back side (nobody sees that). Use fabric glue to seal edges if preferred. Takes about 45 minutes. If you’re renting or want flexibility, use removable fabric glue instead of staples.

    Your frame now has organic softness that catches light beautifully and adds depth to your wall.

    22. Create a Statement Frame with Oversized Molding

    Oversized molding creates impact without spending a fortune. This architectural approach works in any style when you choose the right profile.

    Buy thick wooden molding ($30–$60 for 8–10 linear feet from Home Depot) in a profile that matches your style—ornate for traditional, sleek for modern. Cut it to frame your mirror, miter the corners, and attach with wood glue and nails ($5–$10). Paint or stain to finish. This is a weekend project if you’re handy or have access to a chop saw. If not, hire a handyperson ($100–$200).

    You’ve created a custom frame that looks built-in and substantially elevated your mirror’s presence.

    23. Use Removable Adhesive Decorative Borders

    For maximum flexibility, use removable adhesive borders. This is the ultimate renter hack and costs almost nothing.

    Purchase peel-and-stick decorative borders ($8–$18 from Target, Amazon, or IKEA) in your desired pattern. Clean your frame thoroughly, then carefully apply the border around all edges, smoothing out bubbles as you go. Takes 15 minutes and requires zero tools. When you move or want to refresh, peel it off cleanly. Endless options exist—gold stripes, geometric, floral, minimalist.

    Your mirror gets an instant upgrade that you can change anytime without commitment or damage.


    SAVE THIS POST for your next decorating refresh and try just one idea this weekend. Whether you’re on a shoestring budget or ready to invest, there’s a frame solution here that’ll make you smile every time you look in that mirror.

  • 23 Bookshelf Ideas Perfect for Any Style or Space

    23 Bookshelf Ideas Perfect for Any Style or Space


    Bookshelves are so much more than just book storage—they’re a chance to showcase your personality and make your space feel intentional. Whether you’re working with a small apartment, a sprawling home office, or you just want to refresh what you already have, there’s a bookshelf idea here for you. We’ve gathered 23 creative approaches that work for every style, budget, and living situation. From clever DIY projects to smart shopping strategies and styling tricks that make your shelves look professionally designed, you’ll find solutions for both renters and homeowners. Let’s dive into ideas that actually solve real space challenges while looking gorgeous doing it.


    1. Layer Your Books Horizontally and Vertically

    Stacking books both ways creates visual rhythm and makes your shelf feel curated rather than crowded. This simple styling trick prevents the “wall of spines” look that can feel monotonous and gives you more flexibility with shelf height variations.

    Start by grouping 3-5 books and laying them flat, then stand other volumes upright against them. Add a small plant or candle on top of the stack to anchor the arrangement. You can do this with books you already own—no shopping required. The key is experimenting with different proportions until it feels balanced. Some shelves might be 60% horizontal and 40% vertical, while others flip that ratio depending on your book collection.

    This approach makes your shelves photograph beautifully and gives you that “bookshelf wealth” aesthetic without buying anything new.


    2. Add Peel-and-Stick Wallpaper to the Back Panel

    A patterned or solid-colored back panel instantly elevates a basic bookshelf and draws attention to your collection. Peel-and-stick wallpaper makes this project completely renter-friendly and reversible.

    Measure your shelf’s back panel carefully, then apply peel-and-stick wallpaper in a pattern that complements your room (geometric, botanical, or solid jewel tones all work beautifully). Brands like Spoonflower and Temporary Wallpaper Co. offer removable options starting around $15-$40 per roll. Installation takes about 30 minutes and requires only a utility knife and ruler. You can layer subtle geometric prints, go bold with florals, or choose a rich jewel tone for sophistication.

    The result? Your books pop forward, the shelf becomes a focal point, and you’ve just upgraded your entire room’s aesthetic with one small change.


    3. Use Floating Shelves to Create a Gallery Wall

    Floating shelves give you flexible storage without the commitment of a full bookcase, making them perfect for renters or anyone still figuring out their layout. They’re especially effective when arranged asymmetrically.

    Install 2-4 floating shelves at varying heights using a level and wall studs (or toggle bolts for drywall). Target brands like IKEA, Wayfair, and Home Depot offer $20-$80 per shelf. Space them close enough to create visual connection but far enough apart that books don’t look cramped. Arrange books with spines out on some shelves, lay flat on others, and mix in framed photos or small artwork to create gallery-like appeal.

    This setup works brilliantly in awkward corners, above desks, or in small apartments where a traditional bookcase won’t fit.


    4. Paint Your Bookcase to Match Your Walls

    Painting a bookcase the same color as your walls creates a sophisticated, gallery-like backdrop that lets your books and objects become the main attraction rather than the furniture itself.

    Choose a paint shade that matches or complements your walls—soft whites, warm grays, or muted colors work best. Pick up paint samples first and test them on your shelf in natural light. Use interior latex paint ($15-$30 per quart) and a quality brush or foam roller. Two coats usually does it, with drying time around 2-3 hours between coats. The whole project takes about one afternoon.

    Your books now become the focal point, and the shelf feels like an intentional design element rather than a piece of furniture sitting against the wall.


    5. Add LED Strip Lighting Inside or Under the Shelf

    Strategic lighting transforms a bookshelf from functional storage into a dramatic focal point that looks sophisticated and creates mood lighting for your entire room. This upgrade works especially well for bookshelves in bedrooms or living rooms.

    Purchase adhesive LED strip lights (warm white works best—around $15-$30 for a 16-foot kit from Amazon, Target, or hardware stores). Install them on the underside of each shelf, pointing down, or on the back panel for a subtle glow behind your books. Most come with remote controls or app connectivity. Installation takes 20-30 minutes and requires zero tools—just clean the shelf surface and stick them on. Use the dimmer function to adjust brightness based on time of day.

    Your bookshelf now looks like a designer showpiece, and you’ve added ambient lighting that makes your entire space feel more polished.


    6. Incorporate Plants for Natural Color and Texture

    Plants break up long lines of books and add life to any bookshelf while also improving air quality in your space. They’re especially effective at softening the look of a packed shelf.

    Choose low-maintenance plants like pothos, snake plants, or philodendrons (around $8-$15 each from any garden center or grocery store). Place smaller pots on shelves between book stacks, and let trailing varieties cascade slightly over the edge. Ensure your shelf gets adequate indirect light, and water plants every 1-2 weeks depending on the type. No green thumb required—these plants are forgiving and actually thrive on minimal attention.

    Your shelf now has organic movement and color that photographs beautifully, plus the added bonus of fresher air in your room.


    7. Create a Color-Blocked Bookshelf Arrangement

    Color-blocking your books creates a visually striking, organized look that works especially well if you have a large collection. This approach transforms chaos into calm.

    Spend an afternoon organizing your books by spine color, grouping similar hues together—warm tones (reds, oranges, yellows), cool tones (blues, purples), and neutrals (blacks, whites, grays). You don’t need to buy anything—just rearrange what you have. If you’re short on certain colors, you can add books from thrift stores or dollar sections, but it’s completely optional. Stand books upright to showcase spines clearly, or create small stacks to break up the color sections.

    The result is a bookshelf that looks carefully curated and Instagram-ready, and honestly, much easier to find specific books since they’re organized by color rather than scattered randomly.


    8. Mix Books with Framed Art and Photographs

    Mixing personal photographs and artwork among your books creates a more intimate, lived-in aesthetic that tells your story and adds personality beyond just displaying books.

    Gather your favorite photographs or inexpensive framed prints from places like Minted, Urban Outfitters, or IKEA ($10-$40 per frame). Lean frames against the back of the shelf for an effortless, non-committal look, or install small picture ledges above shelf sections. Mix frame styles and sizes—mismatched frames feel more intentional than matching sets. Include 3-4 frames per shelf depending on depth. Add small three-dimensional objects like figurines, travel souvenirs, or objects d’art between frames.

    Your bookshelf becomes a personal gallery that reflects your life, travels, and memories while still functioning as storage.


    9. Install Shelves in an Awkward Alcove or Nook

    Tucking a bookshelf into an awkward nook or alcove makes that dead space functional and creates a cozy reading area. This works brilliantly in apartments with unusual layouts.

    Measure your space precisely, accounting for baseboards and any uneven walls. For renters, leaning shelves (like IKEA’s ladder-style units at around $50-$100) work perfectly. For homeowners, floating shelves or custom built-ins start around $200-$500 for materials and tools. Most installations take a weekend project. Fill the space with books grouped by color or theme, add a small lamp above the shelf, and include a comfortable chair nearby for a reading nook.

    What was previously wasted or awkward space becomes the coziest corner of your home—perfect for morning coffee or evening wind-down.


    10. Create a Bookshelf Headboard for Extra Storage

    A bookshelf headboard combines storage with design, turning your bed into a statement piece while maximizing limited floor space. It’s especially smart for small bedrooms.

    Install a tall, narrow bookshelf (or multiple shelves stacked) directly behind your bed. IKEA’s Billy bookcase (around $60-$100 each) stacks beautifully when secured to the wall. For renters, lean two tall shelves against the wall behind your bed—no installation needed. Fill the top sections with books and decorative objects, keep the middle sections lighter, and use lower sections for storage baskets. Include soft lighting with small battery-operated LED strips for a spa-like ambiance.

    Your bedroom gains character, you’ve maximized vertical space, and you now have a gorgeous focal point that makes your bed feel intentional and designed.


    11. Use Decorative Bookends to Add Visual Interest

    Bookends serve a practical purpose while also acting as mini decorative objects that add personality and help organize your collection into digestible sections.

    Hunt for interesting bookends at thrift stores ($5-$15 each), HomeGoods, or Target ($15-$40 new). Mix styles—marble bookends on one shelf, wooden on another, or even DIY bookends using stacked books wrapped in fabric. Place them at regular intervals along a shelf to create visual breaks and contain groups of books. This approach also actually helps keep books from leaning and slipping.

    Bookends become quiet design elements that elevate the entire shelf and make organization feel intentional rather than accidental.


    12. Style Shelves with Varying Heights of Objects

    Arranging objects at varying heights creates visual movement and prevents the flat, predictable look of a shelf where everything sits at the same level.

    Play with height by grouping books into stacks of different heights (3 books, 5 books, 7 books), then placing taller vases, lamps, or sculptures beside shorter stacks. Include some objects that are tilted or leaning slightly for even more dynamic composition. Aim for an uneven skyline—highest point on one side, medium in the middle, lower on the other, then repeat. This creates rhythm that your eye naturally enjoys following.

    The result is a bookshelf that feels curated and visually engaging rather than flat and one-note.


    13. Add a Decorative Ladder for Extra Display Space

    A decorative ladder leans against your bookshelf, adding accessible storage for frequently read books while creating visual interest and farmhouse or rustic charm.

    Find wooden decorative ladders at HomeGoods, Wayfair, or IKEA ($40-$100). Lean it casually against your bookshelf (it doesn’t need to be installed). Drape throw blankets over the rungs, hang reading glasses on a rung, or lean your most beautiful coffee table books there. This gives you extra storage without installation and adds a casual, approachable feel to your shelf setup.

    Your bookshelf becomes more functional and textured, and you’ve added an element that makes the entire vignette feel warm and intentionally styled.


    14. Use Clear Acrylic Shelves for a Floating Effect

    Clear or glass shelves create the illusion that your books are floating, offering a modern, minimalist aesthetic that works especially well in smaller spaces since they don’t visually “take up” space.

    Install clear acrylic or glass shelves ($30-$80 each from hardware stores or online retailers like Amazon). These require proper wall anchors to handle book weight safely—don’t skimp on installation. Arrange books with spines visible, but leave negative space around them so the floating effect remains clear. This look works best with fewer books organized thoughtfully rather than packed shelves.

    Your space feels more open and modern, and the books become sculptural objects rather than just storage.


    15. Create a Reading Nook with Cushions Below the Shelf

    Placing a cushion or small bench directly below your bookshelf creates a dedicated reading nook that’s both functional and inviting—you’ve created an entire vignette that encourages use.

    Position a meditation cushion, bench cushion, or small chair ($20-$80) directly in front of a low bookshelf. Add a side table for tea or coffee, drape a soft blanket nearby, and position a reading lamp at eye level. Choose a corner with natural light if possible. This takes about 15 minutes to arrange and requires zero installation.

    You’ve now created a cozy, intentional reading space that makes your bookshelf functional and social rather than just decorative.


    16. Paint Individual Shelves Different Colors

    Painting each shelf a different complementary color creates a playful, gallery-like effect that’s surprisingly sophisticated when color choices are coordinated well.

    Choose 3-5 coordinating colors—soft pastels, jewel tones, or a mix of neutrals and one bold accent. Paint each shelf with interior latex paint ($15-$25 per quart). Two coats per shelf, with drying time around 2 hours between coats. The entire project takes about one full day. Arrange books so spine colors complement the shelf color they’re on (warm-toned books on warm shelves, etc.).

    Your bookshelf becomes a conversation piece and a reflection of your personality, instantly making your room feel more thoughtfully designed.


    17. Mix Closed Storage Baskets with Open Shelving

    Combining open book storage with closed baskets creates a balanced look that manages visual clutter while maintaining an airy feel. This approach works brilliantly in any style home.

    Place woven baskets, storage boxes, or containers ($15-$50 each from Target, IKEA, or HomeGoods) on lower shelves or to one side of your bookshelf. Fill them with items you use frequently but don’t necessarily want on display—extra journals, office supplies, blankets, or magazines. Keep upper shelves more open and visible. This balance prevents the space from feeling either too cluttered or too empty.

    You get functional storage that stays hidden while maintaining a curated, designed appearance.


    18. Lean Oversized Coffee Table Books Horizontally

    Large art, photography, or design books stacked flat create visual weight and anchor your shelf while their covers become mini artwork pieces—design magazines call this “architectural shelving.”

    Identify your oversized books (art books, photography collections, travel guides—usually 10×12 inches or larger). Stack 2-4 of them horizontally on one or two shelves, then stand regular books vertically beside them. This draws the eye and creates visual breaks that make packed shelves feel intentional. No shopping needed if you already own these books, but thrift stores often have beautiful oversized books for $2-$8.

    Your shelf now has visual hierarchy and depth that makes the entire arrangement feel professionally styled.


    19. Add Wallpaper Inside Open Shelving Units

    Wallpaper or patterned contact paper inside shelf boxes creates depth and frames your book displays beautifully, especially effective if your bookshelf is itself very visible.

    Measure each shelf’s interior back panel. Apply peel-and-stick wallpaper or decorative contact paper ($10-$30 per roll) to create a subtle backdrop for books. You can coordinate patterns across shelves or mix complementary designs. Installation takes 20-40 minutes depending on shelf count. Step back and arrange books on top—they now pop forward with interesting color or pattern behind them.

    Your bookshelf gains sophistication and intentionality with this small styling move.


    20. Display Books Spine-Out and Cover-Out Strategically

    Mixing spine-forward and cover-forward displays creates rhythm while letting you highlight your most beautiful or currently reading books. This is the professional bookstore approach.

    Arrange most books with spines showing for space efficiency, then select 2-4 books per shelf with particularly striking covers to display face-out using a small shelf ledge or by creating space. These become focal points. Rotate cover-forward displays seasonally or when you want to highlight new reads. No cost beyond what you already own. This approach takes about 30 minutes to arrange and rearrange.

    Your shelf feels more curated and gallery-like, and you’re constantly refreshing the display without buying anything new.


    21. Install Corner Shelves to Maximize Unused Space

    Corner shelves turn wasted corner space into functional, attractive storage. They’re especially smart in small apartments or awkward room layouts where every inch matters.

    Install two tall, narrow shelves along perpendicular walls in a corner using corner shelf brackets ($20-$50 for a pair from hardware stores). These don’t need wall studs since corner shelves work with specialized brackets. Installation takes about 30 minutes with a level and screwdriver. Fill with books arranged by height (tallest on bottom shelf), add small plants, or display treasured objects. For renters, lean two tall, narrow bookcases in the corner at slight angles to each other—they’ll stay stable against both walls.

    You’ve instantly added storage and created an interesting architectural feature in what was previously just a corner.


    22. Create a Rainbow Bookshelf with a DIY Paint Frame Around It

    A rainbow-organized bookshelf becomes even more striking when you paint a matching rainbow border around the shelf’s perimeter. This elevated styling approach works especially well for book lovers with visible book collections.

    Organize books by spine color in rainbow order (or gradient order if that appeals more). Using painter’s tape and interior latex paint ($20-$30 total), paint a 2-3 inch rainbow stripe around the bookshelf’s frame. This takes about 2-3 hours including drying time. Use the same colors as your book arrangement to create a cohesive design. This is perfect for a statement wall or visible bookshelf that’s a focal point of your room.

    You’ve created a one-of-a-kind design feature that immediately signals your personality and love of books.


    23. Use Magazine Holders or File Organizers for Thin Book Storage

    Magazine holders and file organizers solve the problem of thin books that look awkward standing alone. They corral paperbacks, graphic novels, or magazines into tidy, space-efficient bundles.

    Purchase magazine holders or file organizers in natural wood, metal, or colored plastic ($5-$20 each from Target, IKEA, or office supply stores). Stand them upright on your shelf and fill them with slim books, graphic novels, or magazines organized by category, color, or author. This keeps thin books from toppling and makes use of vertical space very efficiently. No installation needed—just place and fill.

    Your shelf stays organized, skinny books gain their own dedicated space, and you’ve added another design element that breaks up the visual monotony.


    Save this post for your next bookshelf refresh, and try one styling idea this weekend—you’ll be shocked at how much personality a single change brings to your space. Which idea are you tackling first?

  • 23 Flat Balcony Ideas Designed for Easy Decorating

    23 Flat Balcony Ideas Designed for Easy Decorating


    A flat balcony doesn’t have to stay bare and boring. Even if you’re working with a tiny space or renting, there are so many ways to turn it into somewhere you actually want to spend time. Whether you dream of a cozy reading nook, a mini garden, or just a prettier backdrop for your morning coffee, these 23 ideas give you real solutions that work on any budget—and most require zero permanent changes. You’ll find free styling tricks, budget-friendly finds under $50, and a few investment pieces worth considering. Ready to make your balcony feel like the best room in your home?


    1. Add Railing Planters for Instant Greenery

    Railing planters solve the biggest small-balcony problem: limited floor space. These clip or hang directly onto your existing railings, turning wasted vertical real estate into a lush living wall without taking up a single square foot you’re already using.

    Grab metal or resin railing planters ($15–$40 per planter) from Home Depot, Amazon, or Wayfair. Pair them with low-maintenance trailing plants like ivy, petunias, or sweet potato vine. Installation is literally just sliding or clipping them on—no tools needed. Fill with quality potting soil and water every 2–3 days during growing season.

    The result? A privacy screen and backdrop that photographs beautifully, all while keeping your balcony floor clear for furniture and movement.


    2. Lay Down Outdoor Decking Tiles for One-Afternoon Refresh

    Your existing balcony floor is probably concrete or worn pavement—decking tiles change that without any permanent installation. These interlocking tiles sit flat and grip each other, so they work great for renters.

    Buy outdoor wood or composite decking tiles ($2–$5 per tile, roughly $50–$150 for a small balcony) from IKEA, Home Depot, or Wayfair. Measure your space, lay tiles out, click them together, and you’re done—really takes about an hour. If you rent, you can remove them anytime.

    Your balcony goes from harsh and industrial to warm and inviting. Plus, the softer surface feels nicer underfoot and makes a huge difference visually.


    3. Create Layered Lighting with String Lights and Sconces

    Lighting changes everything—it’s the difference between a space that feels usable only in daylight and one you’ll actually use at night. Layered lighting means combining overhead, ambient, and accent sources.

    Start with warm-white LED string lights ($20–$40, Amazon or Target), then add a battery-operated wall sconce ($25–$50, Wayfair). Both are renter-friendly—string lights drape over railings or hooks, and battery sconces stick with adhesive (no drilling). For ambiance, add a small solar pathway light ($10, Home Depot) tucked between plants.

    Your balcony becomes a destination in the evening, perfect for unwinding or hosting friends.


    4. Use Foldable Furniture to Maximize Flexibility

    When space is tight, furniture that doubles as storage is non-negotiable. Foldable café-style furniture collapses to nearly nothing, so you can use your balcony for different things on different days.

    Pick up foldable bistro sets ($60–$120, IKEA or Wayfair) or individual wooden folding chairs ($25–$50 each, Target). When you’re done eating or working outside, fold everything up and tuck it in a corner or inside. This approach is gold for renters because nothing is installed.

    You get a dining or work setup that vanishes when you need open floor space for movement or relaxation.


    5. Hang a Tapestry or Outdoor Fabric for a Focal Point

    A large textile adds color, pattern, and personality instantly—and it’s completely removable. Outdoor-grade fabrics resist fading and weather damage better than indoor textiles.

    Buy an outdoor tapestry or wall hanging ($30–$80, Etsy, Amazon, or Wayfair) in a color that matches your vibe (terracotta, sage green, or monochrome are 2025 favorites). Hang it with stainless steel hooks ($5–$10) or adhesive strips rated for outdoor use ($8, available at Home Depot). No drilling required.

    The fabric adds warmth, defines your space, and gives plants a gorgeous backdrop for photos.


    6. Plant Low-Maintenance Flowers in Colorful Pots

    You don’t need a green thumb to grow flowers on a balcony. Geraniums, petunias, and marigolds are nearly bulletproof plants that flower all season with minimal fussing.

    Grab terra cotta or ceramic pots ($5–$20 each, any garden center), potting soil ($8–$15 for a large bag), and starter plants ($3–$8 each, nursery). Plant them, water when soil feels dry (roughly every 2–3 days), and deadhead spent flowers once a week to encourage more blooms. Rotate pots quarterly so all sides get sun.

    Your balcony blooms without requiring daily attention, and the pots themselves add visual interest even when not full.


    7. Install Vertical Shelving for Storage and Display

    Vertical shelves maximize wall space for storage and display without eating into your floor area. Perfect for stashing seasonal cushions, garden tools, and extra potting soil while keeping everything accessible.

    Install wall-mounted metal shelves ($40–$100 per unit, IKEA or Wayfair) using a stud finder and proper anchors. Or go renter-friendly with adhesive-backed shelves ($20–$50, Amazon). Arrange potted plants, decorative objects, and practical storage on different levels.

    Your balcony becomes organized and visually layered instead of cluttered, plus you’ve reclaimed valuable floor real estate.


    8. Roll Out an Outdoor Rug to Define Your Space

    An outdoor rug anchors the space, adds warmth, and makes a cramped balcony feel more intentional and curated. The right rug also protects your feet from cold tile or concrete.

    Buy an outdoor polypropylene or natural fiber rug ($30–$100, Wayfair, Target, or Home Depot) in a neutral or tonal pattern—these materials resist mildew and UV fading. Size it so most of your seating area sits on the rug. Secure corners with outdoor rug tape ($10–$15) so it doesn’t shift in wind.

    Your balcony suddenly feels like a real room instead of an afterthought.


    9. Add a Hanging Chair for a Cozy Reading Spot

    A hanging chair turns a balcony into a personal sanctuary. Even on a small space, one suspended seat takes zero floor room and becomes the focal point everyone notices.

    Install a heavy-duty ceiling mount ($30–$60, Home Depot) rated for your building (verify with your landlord first), then hang a rope or macramé chair ($60–$150, Wayfair or Amazon). Add a throw blanket ($20–$40, Target) and you’re set. If you can’t drill, look for free-standing hanging chair stands ($100–$200) that don’t require installation.

    You get a statement piece that transforms your balcony into somewhere genuinely relaxing and Instagram-worthy.


    10. Use Bamboo Screening for Privacy Without Blocking Light

    Privacy and light are often competing needs on a balcony. Bamboo screening lets both through—it blocks sightlines while still allowing sun and breeze to flow naturally.

    Get bamboo privacy screening panels ($30–$80 per 6-foot panel, Amazon or Home Depot) and secure them to your railing with stainless steel clips or zip ties ($5–$15). Alternatively, plant tall bamboo in containers ($25–$60 per plant, nursery) around your balcony edges for a living privacy wall.

    Your space feels more secluded and peaceful without getting dark or closed-in.


    11. Paint Your Balcony Railing for a Fresh Look

    A new railing color transforms your balcony’s entire vibe—especially if it’s currently weathered or industrial-looking. Fresh paint costs almost nothing and requires minimal effort.

    Buy exterior-grade metal or wood paint in your chosen color ($20–$40 per quart, Home Depot). Clean railings well, apply primer if needed, then paint with a roller or brush. Two coats usually does it, and it dries within a few hours. White, soft gray, or even sage green are on-trend choices for 2025.

    Your balcony instantly looks intentional and cohesive, even if nothing else changes.


    12. Build a Compact DIY Vertical Garden from PVC Pipes

    A budget-friendly vertical garden uses simple PVC pipes and requires only basic tools. You get tons of planting space in minimal footprint, and it’s a satisfying weekend project.

    Grab 4-inch PVC pipes ($10–$20 from a hardware store), wooden backing boards, drill with bits, potting soil, and herb or succulent plants. Drill holes along the pipe, mount everything to your balcony wall, and fill with soil and plants. Total cost: $40–$80, and setup takes 2–3 hours.

    You’ve made a functioning vertical garden that stores small tools, grows herbs for cooking, and looks custom-built—all for less than a single café visit per month.


    13. Incorporate Mirrors to Amplify Light and Space

    Mirrors trick the eye into perceiving more space and bounce light around—perfect for gloomy or cramped balconies. Outdoor mirrors are built to withstand weather better than indoor versions.

    Mount an outdoor-rated mirror ($25–$80, Wayfair or Amazon) on your back wall or one side of your railing, using weatherproof adhesive or stainless steel brackets. Choose a size that feels balanced—usually 18–24 inches wide for small balconies.

    Your balcony looks and feels bigger instantly, plus you get more usable light even on overcast days.


    14. Style with a Mix of Pot Sizes and Heights for Visual Interest

    Grouping pots of different sizes, materials, and heights creates an expensive-looking display without buying anything fancy. Variety beats perfection.

    Collect pots from thrift stores ($1–$5 each), buy new ceramic or terra cotta from Home Depot ($5–$20 each), and plant them with matching plants in different sizes—all geraniums or all trailing ivy works beautifully. Arrange in clusters of 3, 5, or 7 (odd numbers feel more natural). Stagger heights by placing smaller pots in front.

    Your balcony looks professionally styled and collected over time—even though you did it in one afternoon.


    15. Add Removable Solar Lights for Ambiance and Function

    Solar lights are the renter’s dream: free electricity, no wiring, no installation headaches. They charge during the day and glow at night, adding warmth and making your balcony safer to navigate.

    Buy a pack of solar pathway lights ($15–$35 for 4–6, Amazon or Home Depot) and tuck them between pots, along railings, or corners. They come on automatically at dusk. No maintenance beyond occasional cleaning of the solar panel.

    Your balcony has subtle, atmospheric lighting that costs nothing to run and looks intentional.


    16. Create a Coffee or Beverage Station on a Small Cart

    A rolling cart turns your balcony into a beverage destination without permanent installation. Everything you need for morning coffee or afternoon drinks stays in one spot and can be wheeled away when not needed.

    Find a slim rolling cart ($30–$80, IKEA or Target), stock it with outdoor mugs, a small coffee maker, and supplies, and position it in a corner. It holds everything within arm’s reach and takes zero counter space. Perfect for renters because it’s completely portable.

    Your morning ritual feels more special, and guests always appreciate a coffee station that’s ready to go.


    17. Hang Potted Plants from Ceiling Hooks for a Green Canopy

    Hanging plants create visual drama and shade without using any floor or railing space. String them at different heights to create a canopy effect that makes the space feel bigger and greener.

    Install heavy-duty ceiling hooks ($10–$20, Home Depot) rated for your balcony structure, then hang lightweight plastic or fabric hanging planters ($15–$40 each, Wayfair or Amazon) with trailing plants like pothos or string of pearls. Mix in flowering options like fuchsia or calibrachoa for color.

    You’ve created a botanical ceiling that transforms your balcony into a garden room rather than an empty platform.


    18. Paint Existing Pots in Coordinated Colors for Cohesion

    Unified pot colors make a balcony feel more designed and less haphazard. Paint existing pots in a coordinated palette—it costs almost nothing and takes an afternoon.

    Grab exterior paint in 2–3 colors ($20–$40 for 2 quarts, Home Depot), primer, and brushes. Clean and prime pots, then apply two coats of paint. Terracotta, cream, sage green, and soft gray are timeless 2025 choices. Let them cure for 24 hours before planting.

    Suddenly your balcony looks like a styled photo shoot instead of random pots collected over time.


    19. Install Window Boxes Along Your Railing for Extra Planting

    Window boxes (technically railing boxes) give you a garden’s worth of planting space in minimal footprint. They’re perfect for trailing flowers that create a lush, magazine-cover effect.

    Buy long narrow window boxes ($20–$50 each, Home Depot or Lowe’s) and secure them to your railing with stainless steel brackets ($15–$30). Fill with quality potting soil and trailing annuals like petunias, calibrachoa, or ivy. Water daily—they dry out faster than regular pots.

    Your balcony becomes a cascade of color and greenery that transforms it from bare to abundant.


    20. Add a Small Side Table for Drinks, Books, and Décor

    A tiny table (even one that’s just 12–16 inches square) gives you a surface for coffee, drinks, books, or plants without eating up your whole balcony. Look for narrow or triangular styles that tuck into corners.

    Pick a compact outdoor side table ($30–$70, IKEA, Target, or Wayfair) in wood, metal, or weather-resistant materials. Place it next to your seating or in a corner. It holds everything you need within arm’s reach while sitting.

    Your balcony becomes a functional, comfortable space instead of just a place you pass through.


    21. Create a Herb Garden in Small Containers

    Fresh herbs from your own balcony are a game-changer—and growing them requires almost no effort or space. Most herbs thrive in containers and need just regular watering and sunlight.

    Get small terra cotta pots ($3–$8 each), herb seedlings or seeds ($2–$5 per variety, any garden center), and potting soil ($8–$15). Plant basil, parsley, mint, and oregano. Water when soil feels dry. Most herbs need 6+ hours of direct sun daily.

    You’ll have fresh ingredients for cooking, a lovely green display, and the satisfaction of growing something yourself.


    22. Use Removable Adhesive Hooks for Lightweight Décor

    Adhesive hooks mean you can hang all sorts of things without drilling holes—perfect for renters or anyone nervous about permanent changes. They hold surprising amounts of weight when rated correctly.

    Buy outdoor-rated adhesive hooks ($1–$3 each, Amazon or Home Depot) that hold up to 5–10 pounds each. Hang lightweight mirrors, small planters, storage baskets, or fabric. The hooks remove cleanly if you pull slowly and at a low angle.

    You get all the styling benefit of a decorated balcony without the commitment or security deposit drama.


    23. Design a Functional Work Nook with a Slim Desk

    Working from a balcony beats working from inside—fresh air and natural light make everything feel better. A slim, foldable desk means you can set up shop without permanent changes or wasted space.

    Get a folding wall desk ($50–$100, IKEA or Amazon) that mounts to your balcony wall or corner, or a narrow computer desk ($40–$80, Wayfair) that’s designed for small spaces. Pair it with a weatherproof outdoor chair ($50–$120). Everything folds or moves away when you’re done.

    Your balcony becomes a productive retreat where focus comes naturally—beats a stuffy interior office any day.


    Save this post for your next balcony refresh. Start with one idea this weekend—even one small change makes a huge difference in how often you’ll actually use your outdoor space.

  • 27 Layered Lighting Ideas That Make Your Living Room Glow

    27 Layered Lighting Ideas That Make Your Living Room Glow

    Your living room probably feels either too bright and sterile, or dark and gloomy—rarely just right. The secret? Layered lighting. It’s not about one overhead fixture or a single lamp; it’s about combining different light sources at various heights and intensities to create warmth, flexibility, and visual interest. Whether you’re working with natural light, task lighting, accent fixtures, or ambient glow, the right combination makes your space feel intentional, cozy, and actually usable for everything from movie nights to morning coffee. This guide gives you 27 specific, actionable ideas—from free rearrangements to investment pieces—so you can customize your living room’s lighting to match your lifestyle and mood.

    1. Map Your Three Lighting Layers First

    Understanding the foundation makes everything else click into place. Professional designers use three categories: ambient (overall room brightness), task (focused light for reading or working), and accent (highlights specific objects or areas). Most living rooms default to one ceiling light, which creates flat, unflattering shadows.

    Start by identifying where you need each type. Ambient fills the whole room; task lighting clusters near seating and desks; accent lighting adds drama to artwork or architectural features. Spend an hour walking through your room at different times of day to notice where shadows fall and where you naturally reach for a lamp.

    The beauty of this framework? Once you know your three layers, every other upgrade makes sense and fits together cohesively. You’ll stop buying random lamps and start building a system.

    2. Install Dimmer Switches for Mood Control

    Dimmers are the cheapest way to multiply your lighting options without buying anything new. A single overhead fixture becomes three different moods: bright for cleaning, medium for entertaining, and low for unwinding.

    Installation takes 15–30 minutes if you’re comfortable with basic electrical work; hire a handyman for $75–$150 if not. A basic dimmer switch costs $15–$40 from Home Depot or Lowe’s. Smart dimmers (like Lutron or GE Cync) run $40–$80 and let you adjust brightness from your phone—game-changing if your light switches are far from your seating area.

    The pro tip: pair dimmers with warm-toned bulbs (2700K color temperature) for a naturally cozy feel even at high brightness. You’ll discover you actually use that overhead light instead of always defaulting to lamps.

    3. Layer Table Lamps at Varying Heights

    Table lamps create pools of light that feel intimate and let you control brightness in specific zones. The key is using at least two different heights per room section to avoid a flat, repetitive look.

    Place one taller lamp (30–36 inches) on a console or side table to bounce light upward and outward. Pair it with a shorter accent lamp (18–24 inches) on a low table or shelf nearby. This creates visual rhythm and functional flexibility—you can turn on just the tall one for ambient glow or both for task lighting. Target, IKEA, and Wayfair have great options in the $30–$80 range; splurge on a designer piece ($150–$400) if it’s a visible focal point.

    Mix materials too: ceramic, wood, metal, and textured bases all photograph beautifully and add tactile interest. Now you have flexibility to adjust brightness and warmth based on your activity.

    4. Use Warm Bulbs (2700K) Everywhere Possible

    This single swap makes the biggest immediate difference in how your room feels. Cool white bulbs (4000K–5000K) feel clinical and bright; warm bulbs (2700K) feel like candlelight and make everything look better.

    Switch out all your living room bulbs to warm 2700K LEDs from Amazon or any hardware store—a full room costs $20–$40 for a 10-pack. LEDs last 25,000+ hours, so you’re not replacing them for years. Avoid anything labeled “daylight” or “cool white” in your living room.

    This works because warm light flatters skin tone, wood furniture, and fabric textures. You’ll notice friends and family looking healthier and your space feeling more welcoming. Combined with dimming, you create professional-caliber lighting in minutes.

    5. Add Recessed Ceiling Lights for Subtle Ambiance

    Recessed lighting gives you ambient brightness without visible bulky fixtures cluttering your aesthetic. Install these along the ceiling perimeter or in a grid pattern, and they essentially disappear while providing steady, even light.

    Installation requires drywall cutting and electrical work—budget $400–$800 for a professional to install 4–6 fixtures, or $100–$200 if your ceiling already has framing space. LED retrofit kits exist for renters ($50–$100 per fixture, magnetic mount to existing ceiling holes). Use warm 2700K, dimmable LED bulbs for maximum control.

    The payoff: your room feels intentionally lit without lamp clutter. Pair these with task lamps for complete flexibility—recessed lights handle ambient brightness while table lamps give you focused task lighting when needed.

    6. Hang a Statement Pendant Over a Coffee Table

    A stylish pendant makes a decorative statement while solving your lighting puzzle. Unlike traditional chandeliers, modern pendants feel current and work in any décor style—from mid-century to minimalist to cottagecore.

    Hang it 30–36 inches above your coffee table or seating cluster. Installation involves basic electrical work; hire an electrician for $150–$300 or DIY if you’re confident ($30 for hardware, 1–2 hours). Pendant styles range from $40–$60 (IKEA, Target) to $300+ (Rejuvenation, Design Within Reach). Choose one that complements your color palette and doesn’t overwhelm your room proportions.

    The benefit extends beyond light: a pendant becomes a sculptural focal point that grounds your furniture arrangement and adds personality. When paired with dimming, you control whether it feels subtle or dramatic.

    7. Position Reading Lamps Behind Seating

    Task lighting positioned behind or beside your seating prevents shadows across your face and book when reading. This is essential if you spend evenings reading or working in your living room.

    An arc floor lamp (flexible arm that extends over seating) costs $50–$150 and works in tight spaces; a traditional tall lamp next to an armchair is cheaper ($30–$80). Position the light so it shines over your shoulder, not directly in your eyes. Adjustable, swiveling heads give you control to direct light exactly where you need it.

    You’ll immediately notice the difference when reading or doing detailed work—no more squinting or shifting positions to catch light. This also prevents eye strain from reading in shadows, making evening relaxation actually relaxing.

    8. Install Wall Sconces Flanking Artwork

    Sconces are decorative AND functional—they light artwork while adding sculptural interest. Flanking a mirror, gallery wall, or console with matching sconces creates instant sophistication.

    Installation means drilling into studs and running electrical wire; professional installation costs $200–$400 per pair. Sconces themselves range from $40–$150 each (Target, West Elm) to designer pieces at $300+. Choose styles that echo your décor: industrial metal for modern spaces, ceramic or brass for traditional rooms.

    Position sconces at eye level (around 60 inches high) for flattering light angles. The glow highlights texture on artwork and creates depth on your walls. This also reduces dependence on overhead lighting—two sconces over a console with a table lamp nearby gives you complete flexibility.

    9. Create Layered Corner Lighting with Multiple Sources

    Corners are often forgotten dark zones. Grouping multiple light sources transforms a dead space into an inviting reading nook or display area.

    Use a combination: a tall floor lamp (back corner), a smaller table lamp on a side table or console (mid-height), and optionally a wall sconce above for accent lighting. This creates depth and layering. Total investment: $80–$250 depending on fixture quality. Budget 2–3 hours for installation if adding a sconce; otherwise just plug in lamps.

    The result is a multi-dimensional corner that feels intentional and usable. You can adjust which lights are on based on mood or task—one lamp for subtle glow, all three for functional brightness.

    10. Use LED Strip Lighting Behind Floating Shelves

    LED strip lighting is cheap, easy, and transforms how shelves feel. The downward glow highlights displayed objects while adding ambient brightness without visible fixtures.

    Self-adhesive LED strips cost $15–$40 and stick directly under shelf edges; no wiring required for battery or USB versions. Plug-in versions need a nearby outlet but offer brighter output. Installation takes 10 minutes. Choose warm white (2700K) and look for dimmable options for more control.

    The payoff: your shelves become a glowing display rather than a dark shadow. Books, plants, and décor look curated and gallery-like. This layers beautifully with overhead and table lighting to create sophisticated depth.

    11. Add Candles for Warmth Without Electricity

    Real or faux candles instantly add coziness and cost nothing. Candles create ambient glow that feels impossible to replicate with electric light alone.

    Real candles are safest in groups on fire-safe surfaces like coffee tables, mantels, or shelves. Flameless LED candles ($3–$15 each, Amazon or Target) solve the safety concern and last years. Buy 5–10 and scatter them across your room at varying heights for maximum impact.

    The magic is the flickering effect and warm tone—your brain registers candlelight as peaceful and comforting. Layer candles with electric lighting, and you create a spa-like atmosphere. This is also a renterfriendly hack that requires zero installation.

    12. Install a Modern Chandelier for Dramatic Ambient Light

    If you have ceiling height (9+ feet), a statement chandelier anchors your room and provides serious ambient light. Modern chandeliers feel less formal than traditional crystal versions—think sculptural brass, geometric lines, or woven materials.

    Costs range from $100–$300 (Target, Wayfair, CB2) to $800+ (high-end showrooms). Professional installation runs $200–$400. Using dimmable bulbs and warm color temperature ensures it feels warm, not harsh.

    A chandelier becomes your room’s visual centerpiece while solving your ambient lighting needs. It photographs beautifully and elevates the entire space—especially in living rooms with good ceiling proportions.

    13. Position Task Lighting at Your Desk or Console

    If you work or do hobbies in your living room, dedicated task lighting prevents eye strain and keeps brightness localized. This prevents glare on screens and shadows on your workspace.

    A quality desk lamp with an adjustable head costs $40–$120 and sits on your desk or console. Look for features like USB ports, adjustable color temperature, and dimming. Brands like TaoTronics and BenQ offer excellent mid-range options. Positioning is key: place the light to your side or slightly behind to avoid screen glare.

    You’ll notice less fatigue during work sessions and enjoy evening hobbies more comfortably. This also means you don’t need to keep overhead lights blazing while working.

    14. Bounce Light Off Mirrors to Amplify Glow

    Mirrors multiply light by reflecting it deeper into your room. Position mirrors opposite windows for daytime light amplification, or behind lamps to intensify their glow at night.

    A large mirror costs $50–$200 depending on frame style. Installation takes 30 minutes. Smaller accent mirrors ($20–$80) also work on shelves or consoles. The key is opposite placement: mirror facing your light source bounces brightness deeper into dark corners.

    This is a free trick if you already own mirrors—just reposition them. The visual impact of doubled light makes your room feel brighter without adding electricity or mess.

    15. Use Uplighting to Highlight Ceiling and Walls

    Uplighting (directing light upward) bounces illumination off ceilings and upper walls, creating indirect ambient glow. This makes rooms feel larger and prevents harsh shadows on faces.

    An uplight floor lamp or an adjustable floor lamp angled toward the ceiling costs $60–$150. Position it in corners or beside furniture so the light source isn’t directly visible. This works beautifully paired with dimmers for mood control.

    The effect is subtle but dramatic—your room feels more expansive and the light feels softer. This technique is beloved by hotel designers and works especially well in smaller living rooms.

    16. Add a Plug-In Pendant Light for Renters

    Renters rejoice: plug-in pendant lights give you pendant style without drilling. They hang from adhesive hooks and plug into nearby outlets—zero permanent damage.

    Options cost $30–$100 and are available everywhere (Amazon, Target, IKEA). Swag-style pendants look especially intentional hanging off a hook. Installation takes 5 minutes and reverses instantly.

    This hack lets renters create layered, professional-looking lighting. Pair it with table lamps and you match the aesthetic of a permanently lit space without violating lease terms.

    17. Install Track Lighting for Flexible Accent Brightness

    Track lighting lets you direct light exactly where you need it. Adjustable spots move along a rail to highlight different areas—perfect for art collections, architectural features, or display shelves.

    Installation varies by system; some surface-mount (easier, $100–$300 for a 4-light kit) while others recess into ceilings (more complex, $300–$600 professional install). Products range from basic builder-grade to designer options. Costs: $80–$250 for fixtures, plus installation.

    The flexibility is unmatched—you can adjust spotlights as your décor changes. This also works beautifully in transitional or modern cottage spaces where you want to highlight specific textures and objects.

    18. Place Lamps at Different Heights to Avoid Shadows

    Shadows on faces and furniture flatten your room and make spaces feel uncomfortable. Varying lamp heights eliminates this by distributing light from multiple angles.

    Use one tall lamp (30–36 inches), one medium (24–30 inches), and one shorter accent piece (12–18 inches) in each seating area. This sounds like a lot but creates the layered look designers charge thousands for. Total investment: $80–$200 depending on style preferences.

    You’ll notice your room photographs better, feels more welcoming, and your seating areas become genuinely functional. Guests naturally want to sit in well-lit areas, so you’re basically designing circulation with light.

    19. Try Backlit Wall Shelving for Modern Ambiance

    Backlit shelves create a contemporary vibe that photographs like a magazine. Light hidden behind shelving creates an architectural glow that draws the eye.

    This requires either LED strip lights (battery or plug-in, $20–$50) attached to shelf undersides, or professional installation of recessed lights behind shelves ($300–$600). DIY strip lights are renter-friendly and reversible; professional work requires commitment.

    The effect is striking and modern—your shelf display becomes a focal point. This pairs beautifully with mid-century modern or minimalist living rooms where you want clean lines and subtle luxury feel.

    20. Combine Floor and Table Lamps in a Reading Nook

    Dedicated reading nooks need dual task lighting to prevent eye strain. Combining a floor lamp and table lamp creates flexibility and eliminates shadows.

    The arc lamp provides general task lighting; the side table lamp offers secondary brightness. Together, they cost $80–$180 depending on style. Positioning is key: one light over each shoulder ensures even illumination across your book without harsh shadows.

    You’ll actually use your reading nook instead of abandoning it for the bedroom. This is essential if reading is part of your evening routine.

    21. Use Warm-Toned Rope Lighting for Subtle Ambiance

    Rope lighting (continuous flexible tubing with built-in LEDs) offers gentle, unobtrusive ambient glow. It disappears into décor while adding warmth.

    LED rope costs $20–$50 for 32 feet and easily wraps around shelves, baseboards, or architectural features. Installation is adhesive-backed, reversible, and renter-friendly. Choose dimmable, warm white (2700K) options.

    The effect is subtle but transformative—your room gains ambient warmth without visible fixtures. This works beautifully in modern cottage or minimalist spaces where you want cozy vibes without statement lighting.

    22. Add a Fireplace—Real or Faux—for Focal Point Warmth

    Fireplaces create psychological warmth and visual interest that’s impossible to replicate. Real fireplaces offer actual heat; faux electric inserts provide ambiance for renters.

    Real fireplace installation costs $2,000–$5,000+ and requires professional work. Electric fireplace inserts run $300–$1,500 depending on realism and heat function. Tabletop bioethanol fireplaces ($200–$400) work in any room without installation. Wall-mounted electric fireplaces ($400–$800) offer modern aesthetics.

    The payoff is massive: a fireplace instantly becomes your room’s focal point, and the glow creates cozy ambiance that electric lighting alone can’t achieve. Layer this with other lighting for complete flexibility.

    23. Install Wall Washers to Highlight Texture

    Wall washers are lights positioned to graze wall surfaces, highlighting texture and creating dramatic dimension. They work beautifully on accent walls, shiplap, or architectural features.

    Recessed wall washers cost $150–$400 for professional installation plus fixtures ($50–$100 each). LED strip options ($20–$50) work for renters if adhered carefully. Position lights at a low angle so they skim across texture rather than hitting it straight-on.

    Your accent wall becomes a design hero instead of a flat backdrop. This technique separates professional-looking spaces from amateur ones—especially in modern cottage or transitional rooms.

    24. Layer Dimmers with Smart Bulbs for App Control

    Smart bulbs let you adjust brightness and color temperature from your phone—perfect if your light switches are far from your seating or you’re too comfortable to get up.

    Smart bulbs (Philips Hue, LIFX, Wyze) cost $15–$25 per bulb. A 4-bulb starter kit runs $40–$80. Apps offer scheduling, color adjustments, and integration with voice assistants. Dimmers work alongside smart bulbs for maximum flexibility.

    You can set scenes (movie mode = 20% brightness, warm; morning mode = 80% brightness, cool) and adjust from your couch. This feels indulgent but genuinely improves your daily life—especially for people with mobility concerns or minimal switches.

    25. Mix Metallic Finishes for Visual Interest

    Mixing metals (brass, black, silver, copper) feels intentional and modern versus matchy-matchy spaces. Varied finishes add sophistication and personality.

    When buying lamps, sconces, and fixtures, choose finishes based on your décor rather than matching everything. A brass floor lamp with a black pendant and silver table lamp feels collected and curated. Mix freely—it looks intentional.

    This approach prevents your space from feeling sterile or overdone. Designers use this trick constantly; now you can too.

    26. Position Accent Lights to Frame Entryways

    Framing doorways with lighting (via sconces or picture lights) creates visual hierarchy and guides circulation. This works beautifully for both functional entryways and decorative archways.

    Install sconces at eye level (60 inches high) on either side of the opening. Costs run $40–$150 per sconce plus installation ($100–$200). The payoff is significant: your entryway looks intentional and gallery-like, and guests immediately understand the room’s focal points.

    This technique works in every style—from modern minimalist to cottagecore—and instantly elevates your space aesthetically.

    27. Create a Lighting Plan Before Buying Anything

    Before adding another lamp, sketch your room and map where you need ambient, task, and accent lighting. This prevents impulse buys and ensures cohesion.

    Walk through your room at different times of day. Note shadows, dark corners, and areas where you actually read or work. Measure ceiling height, seating positions, and wall features. Sketch placement ideas—no art skills needed, just notes and rough positioning.

    With a plan, every fixture you buy solves a real problem instead of adding clutter. You’ll also spend less overall because you’re intentional rather than reactive.

    Save this guide and tackle one lighting layer this weekend. Start with the easiest wins—warm bulbs, dimmers, or repositioning mirrors—then layer in more ambitious fixes. You’ll be amazed how much a thoughtful lighting plan transforms your living room from flat and uninviting into genuinely functional and beautiful.

  • 25 Deep-Seat Sofa Ideas That Bring Cloud-Level Comfort

    25 Deep-Seat Sofa Ideas That Bring Cloud-Level Comfort


    If you’re tired of perching on the edge of your couch instead of actually relaxing on it, you’re not alone. Most sofas today prioritize looks over comfort—but they don’t have to. A deep-seat sofa changes everything. It invites you to kick off your shoes, sprawl out, and genuinely unwind. Whether you’re shopping for your first quality investment piece or refreshing an old sofa situation, this guide walks you through 25 concrete ways to find, style, and maximize cloud-level comfort. You’ll discover specific sofas that deliver, styling tricks that boost coziness, and budget hacks that work for renters and homeowners alike. Let’s build you a living room that actually feels like a retreat.


    1. Choose a Deep Seat Depth Between 38–42 Inches

    A standard sofa sits around 30–32 inches deep, which feels more like sitting upright than relaxing. The magic number for true comfort is 38–42 inches—deep enough to recline fully or curl up with your legs tucked underneath.

    When shopping online or in-store, always ask the retailer for exact seat depth measurements before buying. Many brands like Article ($600–$1,200), Room & Board ($1,200–$2,000), and Wayfair ($400–$900) list these specs clearly. If you’re buying secondhand, bring a tape measure. Deep-seat sofas cost slightly more upfront—usually $100–$300 extra—but last longer because you’re not replacing them every few years when you realize they’re uncomfortable.

    Pro tip: If a sofa fits your space but sits a bit shallow, layer a quality floor cushion or bolster pillow ($40–$80) at the back to gain extra depth without losing functionality.

    Once you add a deep seat to your living room, you’ll actually use your sofa instead of migrating to the bed. Comfort changes behavior.


    2. Prioritize High-Density Foam in the Seat Cushions

    Budget foam ($30–$50 per cushion) compresses after six months, leaving you sinking to the frame. High-density foam holds its shape for years, which is why it matters more than thread count or fabric type.

    Look for sofas that specify HD foam with a density of 2.5–3.0 lbs per cubic foot. This is the sweet spot between firmness and sink-in comfort. Brands like Restoration Hardware ($3,000–$5,000), West Elm ($800–$2,200), and Article list foam quality in product descriptions. If a brand won’t disclose foam specs, that’s a red flag—move on.

    If you already own a sofa with tired cushions, you can replace just the foam ($200–$400 for a full set) instead of replacing the whole sofa. Many local upholsterers offer this service within one to two weeks.

    You’ll notice the difference immediately when you sit down. A firm, supportive cushion means you’re truly cradled, not bottoming out after a few months.


    3. Add a Layered Throw Blanket Bar to Your Sofa Arm

    When blankets are folded in a basket across the room, you never actually use them. Store them directly on your sofa arm where they’re one reach away from cozy.

    Grab a wooden blanket ladder or bar ($30–$80 on Amazon or Target) and place it against the sofa arm or back. Layer three to four throws in coordinating neutrals (cream, gray, camel) or add one bold pop. Quality throws run $20–$60 each. The visual layers also photograph beautifully, which is why this styling trick gets saved constantly on Pinterest.

    If you don’t have wall space for a ladder, simply drape throws over the sofa arm in a casual, accessible way. It looks intentional and keeps comfort within arm’s reach.

    This one change makes your sofa feel infinitely more inviting. People actually sit longer when layers are nearby and ready to grab.


    4. Invest in a Curved Sofa Shape for Organic Flow

    Straight-line sofas can feel sterile and formal. A curved sofa—whether it’s a subtle arc or dramatic serpentine shape—softens your entire room and invites conversation.

    Curved sofas are trending hard in 2025 for good reason. Options like Blu Dot’s Standard ($1,500–$2,200), Article’s Sven with its rounded arms ($700–$1,400), and Wayfair’s Room by Iko curved sectional ($900–$1,600) range from gentle bends to dramatic curves. These aren’t just beautiful; they arrange people naturally around a center point instead of facing a wall.

    If a full curved sofa doesn’t fit your budget or space, start with a curved corner piece or chaise ($400–$800) to introduce the shape. Pair it with a rounded coffee table ($300–$600) to amplify the organic feel.

    You’ll be amazed how a curved line changes the energy. People gravitate toward the sofa more often, and your space feels less boxy and more designed.


    5. Select Performance Fabric for Durability Without Sacrifice

    Performance fabrics sound technical, but they’re basically fancy durability. They resist stains, pet claws, and spills while still looking and feeling high-end.

    Brands like Crypton, Sunbrella, and Dyenamide are woven to repel liquids and resist fading. Sofas upholstered in these fabrics cost about $200–$400 more than standard fabric versions, but they last twice as long if you have kids or pets. Look for sofas at Article, Wayfair, and Living Spaces that specifically mention performance fabric in the product details.

    A performance fabric sofa ($700–$1,500) with kid-proof credibility actually saves money long-term because you’re not replacing it when juice spills happen. Simply blot with a damp cloth and move on—no guilt required.

    When you can stop stressing about spills, you actually relax. The sofa becomes a place to live in, not just look at.


    6. Mix Neutral Base with One Bold Accent Pillow

    A completely neutral sofa can feel safe but boring. A single bold accent pillow adds personality without committing to a color you might tire of.

    Start with a neutral sofa in cream, camel, or soft gray ($600–$1,200). Then add one statement pillow in deep teal, burnt orange, or jewel purple ($25–$60). Keep everything else—remaining pillows, throws, walls—in warm neutrals. This combination feels intentional and high-design without being risky.

    Pillows are easy to swap seasonally, so you can change your accent color from winter to spring without guilt. Brands like Etsy, Schoolhouse, and CB2 have incredible statement pillows in the $30–$80 range that justify the splurge.

    This simple styling move makes your sofa feel curated and personal. It’s the difference between a furniture showroom look and an actual home.


    7. Layer a Low-Profile Metal Frame Under Your Sofa

    Deep-seat sofas can feel grounded but also heavy. Elevating it slightly on low-profile metal legs makes the room feel airier and makes cleaning underneath actually possible.

    If you’re shopping new, choose a sofa with legs (vs. a skirted base) starting around $600 for budget options and up to $2,000+ for high-end pieces. The visual lift is worth it. If you already have a skirted sofa, you can retrofit legs ($80–$150 from hardware stores) or place a thin storage frame under the front ($40–$70) to add height and functionality.

    Metal legs also make your sofa feel modern and less “stationary furniture” and more “collected over time.” Pair with a flatweave rug to further define the zone.

    This small adjustment completely changes how your sofa sits in the room. It looks intentional, feels lighter, and actually reveals your floor instead of hiding it.


    8. Add an Ottoman or Pouf for Extended Lounging

    A deep sofa seat is perfect, but without a place to extend your legs, you’re still sitting upright. An ottoman changes that equation completely.

    Match your ottoman to your sofa for visual flow (same fabric, similar style) or go contrasting for interest. A quality ottoman runs $200–$500 at brands like Article, West Elm, or Wayfair. Budget options like IKEA or Target offer solid ottomans for $80–$200 that work perfectly fine for lounging. Choose one with storage ($150–$350) if space is tight—you get comfort plus hidden organization.

    Pro tip: Look for ottomans on wheels or lightweight designs ($100–$200) so you can move them around based on how you want to lounge. Sometimes it’s feet-forward relaxation; sometimes it’s side-perching.

    Once you have somewhere to stretch out, your sofa time extends naturally. You’ll sit longer, relax deeper, and actually use your living room as intended.


    9. Upgrade Your Sofa Legs to Mid-Century or Brass

    Standard black plastic legs are invisible—and that’s the problem. Good sofa legs anchor the whole piece and say “I invested in quality.”

    If you’re buying new, specify legs you love when ordering. Many brands like Room & Board, Article, and Blu Dot offer walnut, brass, or tapered wooden legs at no extra cost. If you already own a sofa with sad legs, replaceable leg kits ($40–$100) are available online; installation takes 15 minutes with a hex wrench.

    Brass legs ($60–$150 to retrofit) feel expensive even when they’re not. Mid-century wooden legs ($50–$120 to replace) ground the sofa and tie it to other furniture effortlessly.

    Visible, quality legs make your sofa look designed, not generic. It’s a detail no one consciously notices, but everyone feels.


    10. Use Bouclé or Boucled Texture for Lived-In Luxury

    Bouclé feels expensive because it is expensive, but it also looks like you live in a relaxed, beautiful home—not a decorated show house.

    Bouclé sofas in cream, sand, or warm gray are trending because the texture hides dirt (kids, pets, living) while the neutral tone stays timeless. A bouclé sofa typically costs $800–$2,000 depending on depth and customization. If that’s outside your budget, bouclé throw covers ($80–$150) over a plain sofa fake the look convincingly. Brands like Etsy sellers and Schoolhouse sell stunning bouclé covers that transform anything underneath.

    Pair bouclé with natural wood accents and brass hardware for a coordinated, intentional look. The texture does the heavy lifting stylistically, so everything else can stay simple.

    People will comment on how luxe and comfortable your sofa looks. Bouclé is the shortcut to that “I have excellent taste” vibe.


    11. Customize Your Sofa Fill Weight to Your Preference

    Some people want firm support; others want to sink in like a cloud. Custom sofas let you choose the fill weight to match how you actually relax.

    Brands specializing in custom sofas—like What A Room, Joybird, and Maiden Home—let you select firmness levels (usually “down,” “down-blend,” or “high-density foam”) during ordering. This typically adds $200–$400 to the price but ensures the sofa feels exactly right for your body. Direct-to-consumer brands like Burrow ($800–$1,200) and Article also offer some customization at mid-range prices.

    If custom ordering feels overwhelming, ask retailers for firmness specs before purchasing. Test in-store if possible, or choose brands with hassle-free returns (most online retailers offer 30–60 day returns).

    Getting to choose your sofa’s exact feel means you’ll actually love it years later instead of wishing you’d gone firmer or softer. It’s worth the decision-making effort.


    12. Add Rolled Pillows to the Sofa Arm for Support

    When you’re lounging sideways on the sofa (which everyone does), a rolled pillow gives your back and neck crucial support without requiring a full body pillow.

    Place one to two bolster pillows ($30–$70 each) or rolled lumber pillows ($20–$50) along the sofa arm. These cylindrical shapes are specifically designed for this purpose. Natural linen or cotton options ($40–$80) feel crisp and luxe, while polyester ($20–$40) is more casual. Customize by choosing colors that coordinate with your sofa or throws.

    Rolled pillows also create visual interest and depth when styled correctly. Lean them at angles for a relaxed, gathered look that photographs beautifully.

    You’ll notice the difference the first time you lounge sideways. Proper support means you can actually rest, not just recline uncomfortably until your neck hurts.


    13. Choose a Sofa in Sage or Muted Green for Wellness

    Color psychology is real, and muted greens are proven to calm the nervous system. If you’re ready to move beyond neutral, soft green is the perfect investment.

    Muted greens like sage, olive, and celadon are trending precisely because they feel both trendy and timeless. A sage sofa ($800–$1,800) pairs beautifully with warm wood, white walls, and brass accents. Brands like Article, West Elm, Crate and Barrel, and Room & Board all offer green options in various depths.

    If committing to green feels too bold, start with a green throw pillow ($30–$50) or green sectional chaise ($400–$800) to test the color in your space first. You can always add more green later.

    A calming sofa color actually makes you want to spend time in your living room. You’ll sit more, relax more, and notice the subtle stress-relief that comes with the right color surrounding you.


    14. Incorporate Modular Pieces for Open-Plan Homes

    Open-plan homes need furniture that zones spaces without walls. Modular sofas do exactly that by creating visual and functional separation.

    A modular sectional like IKEA’s Kivik ($400–$600), Article’s Oskar ($900–$1,400), or Living Spaces’ sectionals ($800–$1,600) lets you arrange pieces to fit your exact layout. You can build an L, a U, or a straight line depending on your needs. Most modular pieces are delivered within two weeks and arrive in manageable-size boxes (usually weighable by one person).

    If you rent, modular sofas are lifesavers because you can rearrange or downsize easily. Move to a smaller apartment? Sell a few modules and keep the essentials.

    With modular, you’re not locked into one configuration. Change your layout seasonally or whenever the mood strikes—flexibility that standard sofas simply don’t offer.


    15. Layer a Textured Throw Blanket in Linen for Relaxed Style

    Linen throws look expensive and intentional while actually being simple and low-maintenance. Unlike velvet throws ($40–$100) that show wrinkles, linen wrinkles beautifully—they’re part of the charm.

    A quality linen throw runs $50–$120 from brands like Etsy, Minted, Schoolhouse, or Restoration Hardware. Natural linen ($60–$100) breathes and ages gorgeously. Linen-blend ($30–$60) offers affordability. Wash on gentle and hang dry to keep the texture crisp.

    Drape your linen throw casually—never too-neat, never too-messy. The goal is “I grabbed this for a nap” not “this was photostyled by a designer.”

    A linen throw transforms a basic sofa into one that says “I care about comfort and aesthetics.” It’s the finishing touch that makes the whole room feel considered.


    16. Pair Your Sofa with a Rounded Coffee Table

    If your sofa is curved or soft-edged, a boxy coffee table breaks the design momentum. Round and curved tables complete the look.

    Shop for rounded coffee tables ($150–$600) at Article, Wayfair, CB2, or Target. Look for shapes that aren’t completely circular—slightly oblong or free-form ($200–$400) feel more interesting than perfect rounds. Materials like marble ($400–$800), wood ($150–$400), or travertine ($500–$1,200) age beautifully and tie to other room elements.

    If you rent or want to swap easily, peel-and-stick rounded table wraps ($30–$60) transform boxy tables temporarily. Budget-conscious? IKEA’s Gladom table ($30–$50) looks surprisingly intentional with the right styling.

    Rounded shapes reflect and absorb light differently than hard corners, making your entire sitting zone feel softer and more inviting. One table change influences how the whole room feels.


    17. Select a Deep-Seat Sectional for Conversation

    A sectional—especially a deep-seat version—naturally encourages people to stay longer and spread out. It’s not formal; it’s functional and cozy.

    A deep-seat sectional like Article’s Sven ($1,100–$1,800), Wayfair’s Sectionals ($600–$1,500), or Living Spaces’ custom sectionals ($900–$2,000) seat more people comfortably than a standard sofa and chaise combo. Choose one with at least 38-inch seat depth and a chaise component for leg-stretching.

    Sectionals do require more space, so measure your room before buying. Some brands offer free returns within 60 days if it doesn’t work, which takes pressure off the decision.

    Pro tip: Many sectionals come with removable cushions ($50–$100 each as add-ons) so you can customize comfort over time.

    A sectional transforms your living room from “place people visit” to “place where gatherings naturally happen.” People stay, linger, and actually relax together.


    18. Invest in a Quality Mattress Topper for Guest Comfort

    If your sofa doubles as a guest bed, a mattress topper transforms it from “uncomfortable air mattress vibe” to “actually restful sleep.” This is a game-changer investment.

    A 4–6 inch memory foam or latex mattress topper ($150–$350) turns even a mediocre sofa bed into something guests won’t dread. Top with quality bedding ($80–$200 for sheets and pillows) and suddenly you have a legitimate guest bed. Brands like Helix, Purple, and Amazon Basics ($100–$250) offer solid toppers.

    If your sofa bed is old and lumpy, a topper ($200–$300 with quality bedding) is way cheaper than replacing the whole sofa ($800–$2,000).

    Guests actually sleep well instead of waking stiff and resentful. When your sofa bed is genuinely comfortable, people are more likely to visit—and you’ll feel generous hosting them.


    19. Use Coordinated Throw Pillow Covers for Easy Refreshes

    Throw pillow covers ($15–$40 each) let you refresh your sofa’s look without buying new pillows every season. This is the budget hack that actually works.

    Buy solid-colored pillow covers in bulk from Etsy ($12–$30 each), Target ($15–$25), or Wayfair ($20–$40), then coordinate them with throws and art. Swap covers seasonally or whenever you want a change—wash on gentle cycle and rehang. Keep 4–6 covers on rotation so you always have something clean.

    Pro tip: Buy pillow inserts separately ($5–$15 each) so you’re only replacing covers, not entire pillows. This approach costs $40–$100 for four quality covers instead of $150–$200 for complete new pillows.

    You’ll feel less committed to one sofa look when you know covers are easily swappable. This freedom means you’ll actually experiment with styling instead of settling.


    20. Add a Sofa Console Table Behind for Beverage Storage

    If your sofa doesn’t sit against a wall, a console table behind it ($100–$300) creates a functional bar zone and defines the seating space. This works particularly well with curved or sectional sofas positioned in open rooms.

    Choose a narrow console ($80–$200 at IKEA, Target, or Wayfair) that’s roughly the sofa’s width. Natural wood, metal, or a hybrid finish ($120–$250) keeps it feeling light and intentional. This surface holds drinks, a lamp, decorative objects, and remote controls—everything you’d actually use while lounging.

    Renter-friendly tip: A console positioned behind a sofa (not attached) works with rental agreements and moves when you do.

    This simple addition makes your sofa feel more finished and functional. You’ll use the space more intentionally when there’s actual surface area for living.


    21. Choose a Sofa with Removable, Washable Cushion Covers

    If you have kids, pets, or just don’t love stressing about spills, removable cushion covers ($20–$50 extra per cover when ordering) are non-negotiable.

    Brands like Article, Joybird, Maiden Home, and Burrow all offer removable, washable covers as standard or a low-cost upgrade. When something spills, simply unzip, remove, and wash on gentle—usually ready to rehang within 24 hours. This feature alone justifies choosing one brand over another.

    If you already have a sofa without removable covers, universal cushion covers ($30–$70) are available on Amazon and Etsy that fit most standard cushion sizes. They won’t be perfect, but they’re better than nothing.

    Living with young kids or pets becomes infinitely less stressful when you know spills aren’t permanent. Your sofa stays looking decent instead of developing mysterious stains over time.


    22. Layer a Vintage or Heirloom Rug Under Your Sofa

    A rug grounds your sofa and defines the seating zone, especially in open-concept spaces. Vintage or heirloom-style rugs add character that feels collected over time.

    Layer a larger neutral base rug ($150–$400 in natural jute or cotton) with a smaller patterned or vintage rug ($200–$800) layered on top. This approach creates visual depth and feels more intentional than a single rug. Budget options at IKEA ($40–$120), Wayfair ($80–$300), and Rugs USA ($100–$400) offer solid starting points. Investment pieces from Etsy vintage sellers ($300–$1,000) age beautifully and feel unique.

    The layered approach also hides stains—pattern and multiple rugs mean accidents disappear into the design.

    Your sofa instantly feels anchored and designed once it has a rug underneath. The furniture looks intentional rather than randomly placed.


    23. Add a Sofa Arm Tray for Drinks and Small Objects

    A sofa arm tray ($25–$60) solves the “where do I put my drink?” problem elegantly. These slim trays sit flush on the sofa arm and hold a mug, small plate, phone, or remote without looking cluttered.

    Shop for wooden or woven arm trays at Target ($20–$40), IKEA ($15–$30), Wayfair ($30–$50), or Etsy ($30–$70). Choose sizes that match your sofa arm width. Natural wood ($30–$50) or woven rattan ($25–$45) coordinates with most aesthetics.

    If you’re renting or prefer not to commit, woven placemats ($8–$15) can temporarily sit on the arm for the same effect—just less structured.

    You’ll suddenly notice how much easier it is to enjoy your sofa when there’s a designated spot for your beverage. Small conveniences change how much time you actually spend there.


    24. Mix Velvet Accent Pieces with Your Neutral Deep-Seat Sofa

    Velvet feels luxe but can overwhelm a whole sofa. As accents on a neutral base, velvet adds richness without taking over.

    Add one velvet pillow ($30–$70) or velvet ottoman ($150–$350) in a jewel tone (emerald, sapphire, deep burgundy) to your neutral sofa. Velvet catches light differently than other fabrics, so it reads as intentional and high-design even in small quantities. Brands like Article, CB2, Schoolhouse, and West Elm offer stunning velvet accents ($40–$150).

    Pro tip: Choose performance velvet ($50–$100 for accents) over standard velvet if you’re worried about durability. It resists wear and pilling.

    This combination reads as “curated and intentional” while staying practical and comfortable. You get the luxe factor without any of the fussiness.


    25. Arrange a Reading Nook Within Your Sofa Space

    Instead of spreading across the entire sofa, designate one corner or end as your personal reading sanctuary. This gives you permission to claim the space and actually use it intentionally.

    Gather 3–5 throw pillows ($15–$40 each) in complementary textures and colors, stack them in one corner, and drape a throw blanket ($30–$70) nearby. Position a small side table ($50–$150) with a lamp ($40–$100) and a stack of books. Use a corner shelf ($30–$80) if wall space allows, or simply keep books on the table surface.

    The goal is: everything you need for a reading session is within arm’s reach. No getting up, no searching for your bookmark, no distractions.

    This tiny interior design decision completely changes your relationship with the sofa. Suddenly it’s not just a place to collapse—it’s a destination where you intentionally go to rest.


    26. Invest in Professional Sofa Cleaning Annually

    A deep-seat sofa that you actually live on will eventually look lived-in. Professional cleaning ($150–$300 annually) keeps it looking fresh without replacing it.

    Many dry cleaners and upholstery specialists offer annual or bi-annual deep cleaning ($150–$400 depending on sofa size and fabric). They use specialized equipment that doesn’t leave it soaking wet—usually dry within 24 hours. Some premium services ($200–$400) include fabric conditioning, stain treatment, or odor removal.

    If professional cleaning feels expensive, at-home upholstery cleaning rentals ($25–$50 for a day) from grocery stores or hardware shops are solid budget alternatives. You’ll be surprised how much cleaner it looks with proper equipment versus your vacuum.

    Your sofa will look intentionally lived-in rather than neglected. Regular care extends its life by years and keeps it feeling fresh without requiring replacement.


    Save this post for your next sofa shopping trip or refresh project. Pick one idea to try this week—whether it’s measuring for seat depth, adding a throw pillow, or testing a rounded coffee table shape. Small comfort upgrades add up fast, and your living room deserves to feel like the sanctuary you actually want to use.