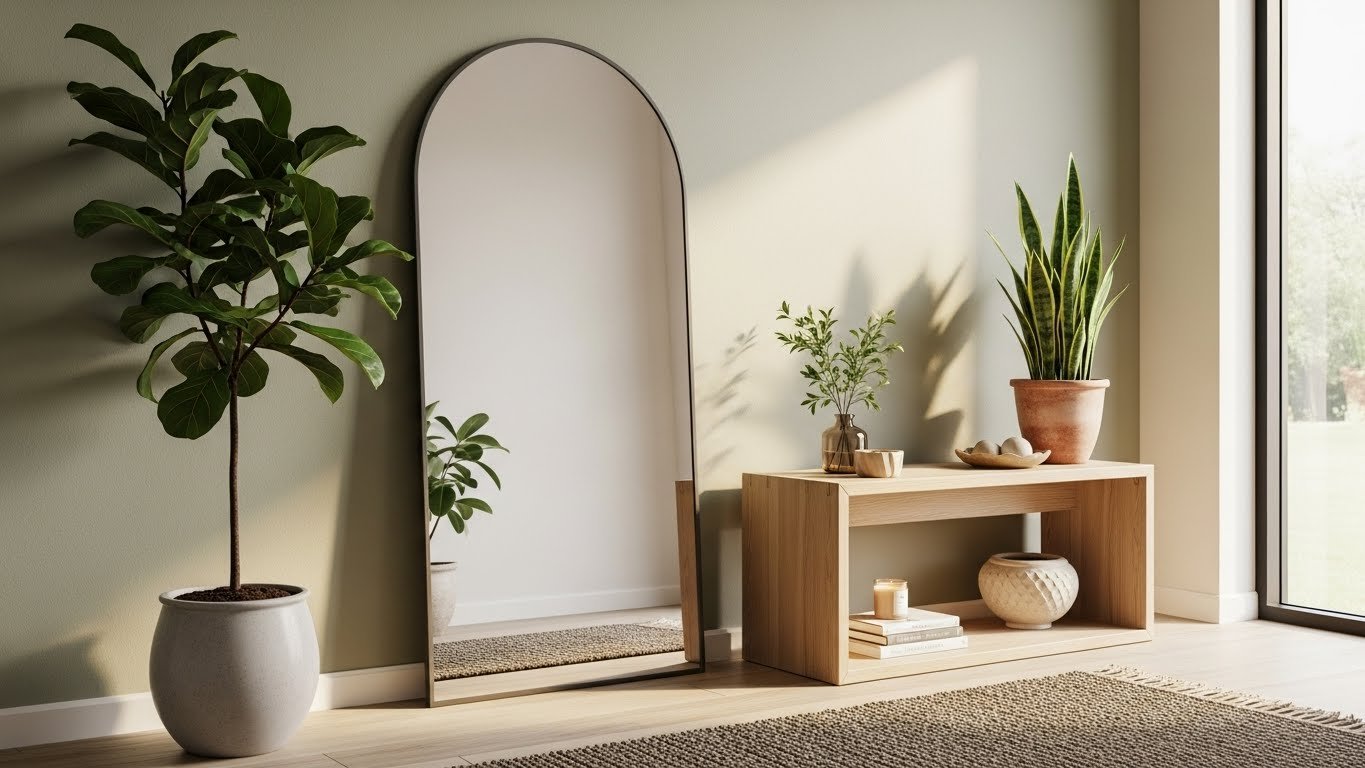
Your mirror frames do more than reflect—they set the entire mood for a room. Whether you’re drawn to soft curves, bold geometry, or natural textures, the right frame can turn a functional piece into a statement that ties your whole aesthetic together. But here’s the catch: finding 23 genuinely different ideas that actually work in real homes (not just design magazines) takes time. We’ve pulled together actionable frame styles, budget hacks, and styling tricks that work for renters, homeowners, and everyone in between. From DIY painting projects to investment pieces, you’ll find options at every price point. Let’s dive in and find the frame that makes your space feel like you.
1. Paint an Old Frame in Matte Black
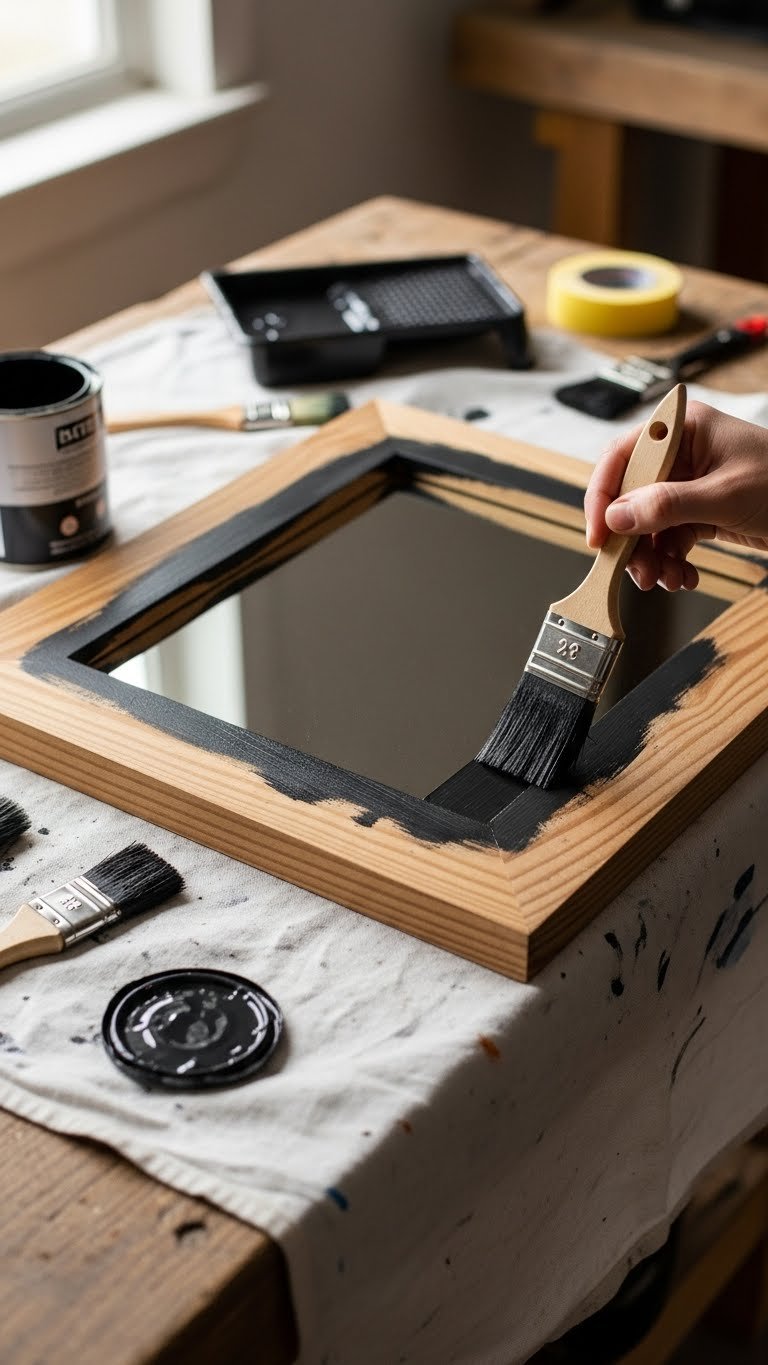
Matte black frames add instant modern edge to any room without the price tag. If you have an old mirror collecting dust in your garage or attic, this is your answer.
Grab some matte black spray paint or brush-on acrylic (both around $8–$15 at hardware stores) and give your frame a fresh coat. It takes about 30 minutes plus drying time. Pro tip: Use a primer first if your frame is glossy or stained—it helps the paint stick. Once dry, the matte finish softens the industrial vibe, making it less harsh than a shiny black frame.
You’ve just created a custom frame for under $20 that looks intentionally designed, not thrifted.
2. Add Thin Gold Trim to Frameless Mirrors
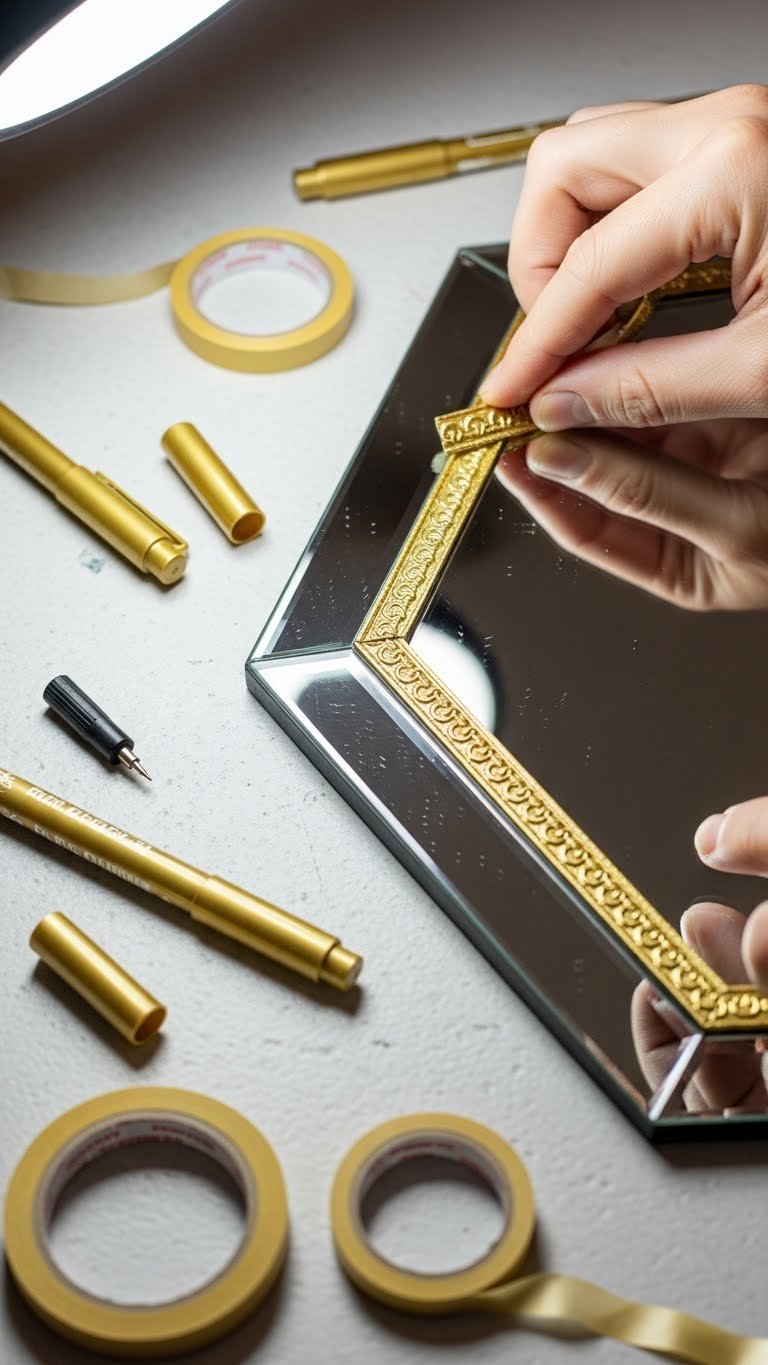
Frameless mirrors can feel a bit cold, but adding a thin gold outline transforms them into something special. This costs almost nothing and works in modern, glam, or even coastal spaces.
Pick up metallic paint markers or gold leaf tape ($5–$12 from craft stores like Michaels or Joann). Carefully outline your mirror’s edge, or apply tape as a thin frame border. You can do this in about 15 minutes. If you prefer a more permanent option, use thin adhesive gold trim ($10–$20) available on Amazon—just stick it on. The slight shimmer catches light beautifully and makes your mirror feel intentional.
Your bare mirror now has personality without committing to a full frame.
3. Layer Wooden Frames for a Gallery Wall Effect
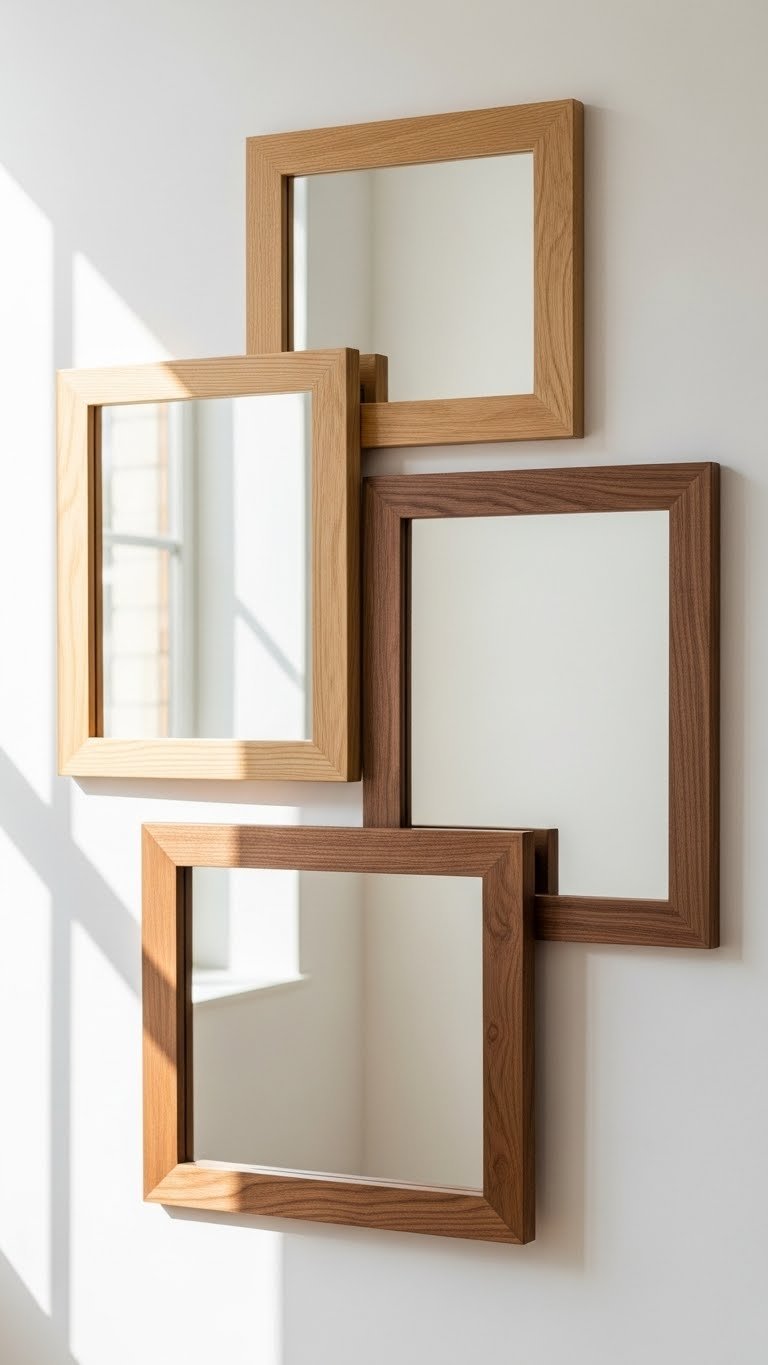
One mirror is nice, but a cluster tells a story. This renter-friendly approach uses no wall damage and creates instant visual interest.
Hunt for wooden-framed mirrors at thrift stores or IKEA (ranging from $8–$50 each depending on size). Choose 3–5 mirrors in varying sizes and wood tones—warm honey, natural, weathered oak, or even light pine. Lean them against your wall at different heights, overlapping slightly for that curated feel. You can also hang them if your lease allows. This project costs $30–$150 total, takes about an hour to arrange, and zero construction skills required.
Suddenly, that empty wall becomes a curated focal point that photographs beautifully.
4. Wrap a Frame in Rattan or Woven Seagrass
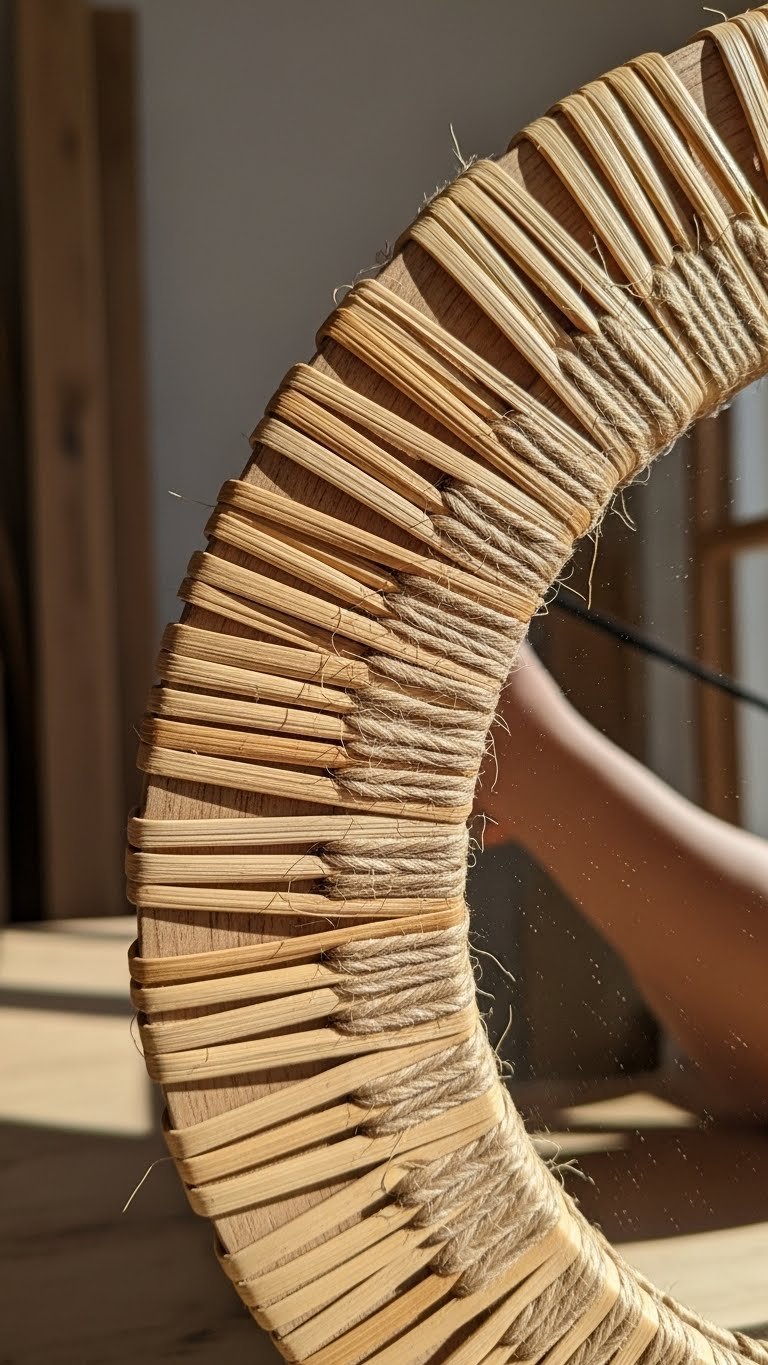
Coastal vibes don’t require a beach house—add rattan wrapping to any existing frame. This DIY hack brings warmth and texture without replacing the whole piece.
Grab rattan or seagrass ribbon ($8–$15 from craft stores) and some clear-drying adhesive or hot glue. Wrap it around your frame’s edges, overlapping slightly as you go. Takes about 30–45 minutes depending on frame size. The natural material softens harder finishes and adds organic interest. If rattan feels too boho for your space, try jute twine for a more subtle texture.
Your mirror now whispers “relaxed elegance” instead of “just functional.”
5. Create a Sunburst Frame with Wooden Dowels
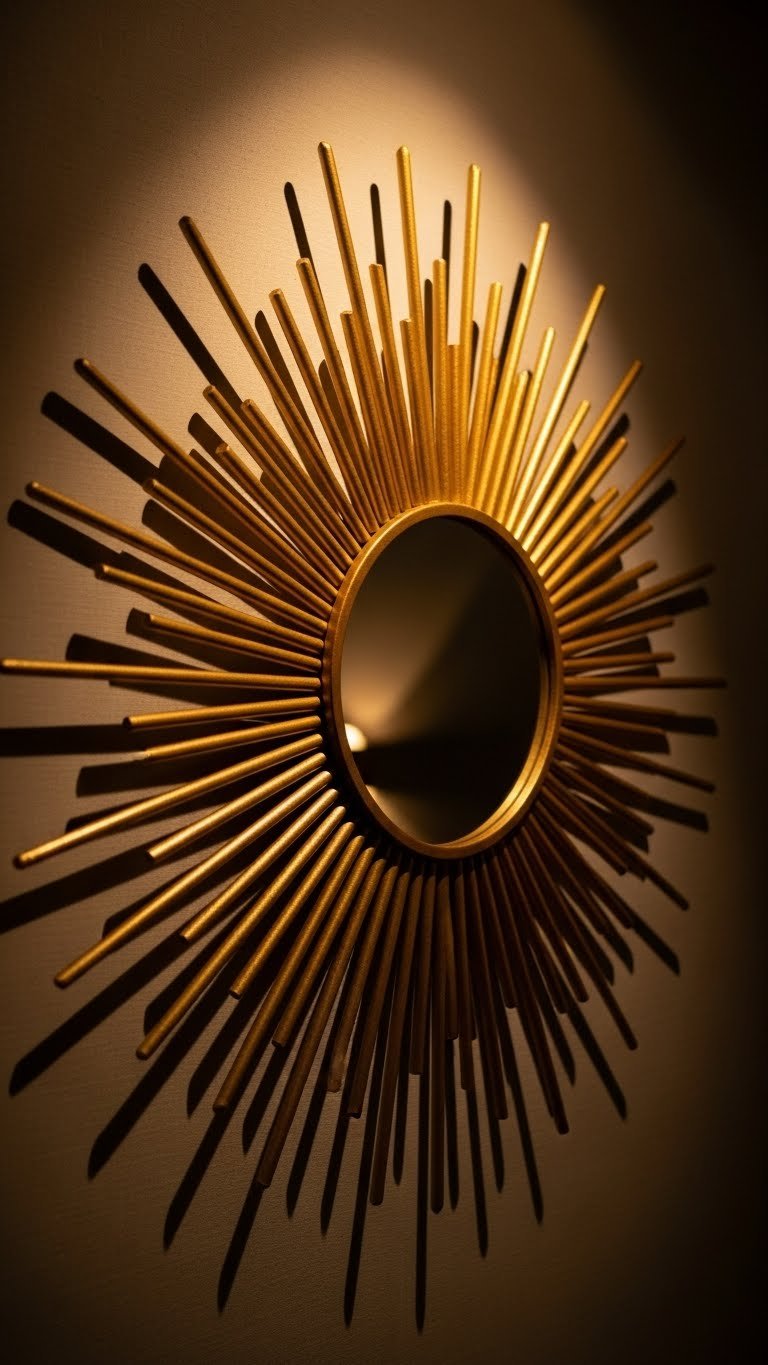
Sunburst mirrors are trending hard, but designer versions cost $300+. Make your own for under $40 with dowels and spray paint.
Purchase wooden dowels ($15–$20 at Home Depot), a round mirror ($10–$20 from IKEA or Target), and gold or black spray paint ($8–$10). Cut dowels to varying lengths (from about 6 to 12 inches), arrange them in a circle, and hot-glue them to the mirror’s back or frame. Paint everything in one go using spray paint. This weekend project costs $35–$50 and creates a statement piece that rivals store-bought versions costing triple.
You’ll have a dramatic focal point that anchors any room and sparks conversations.
6. Use Wallpaper or Fabric Behind a Frameless Mirror
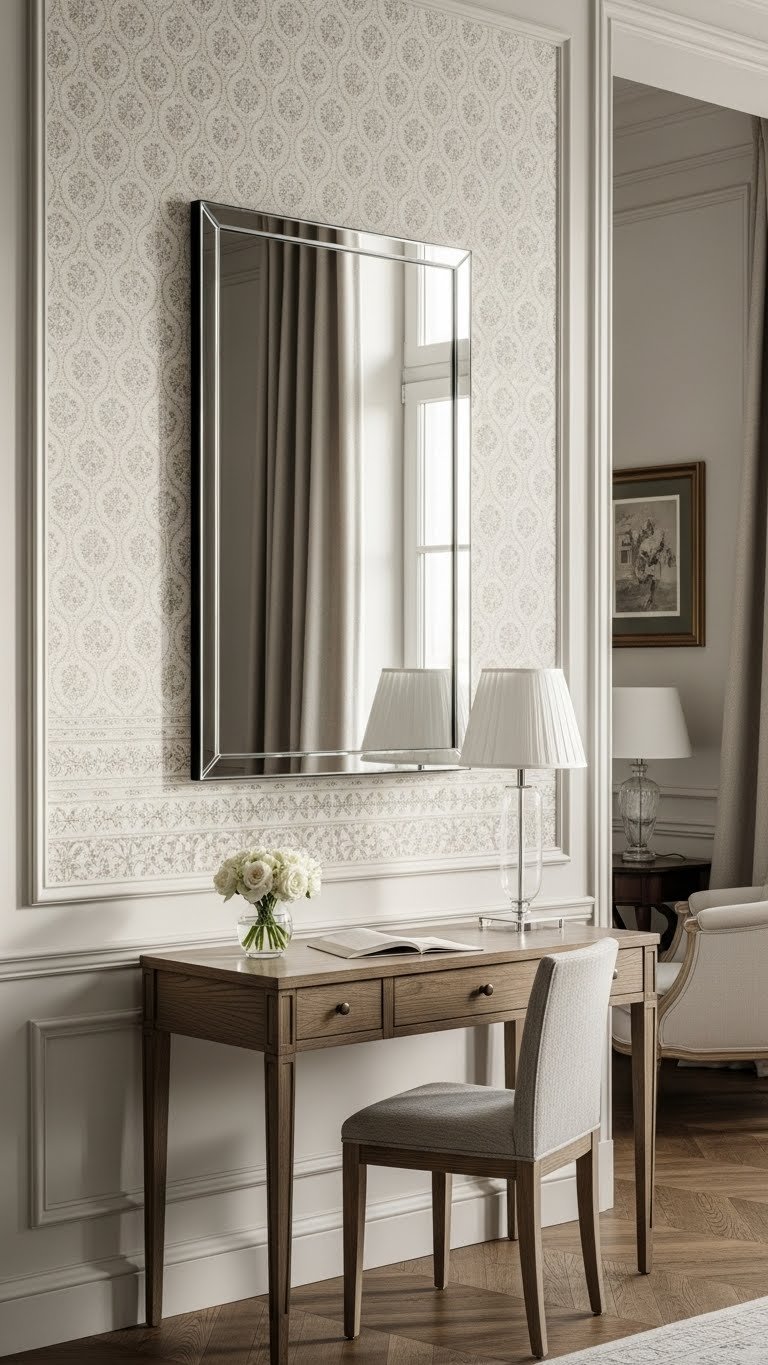
Create the illusion of a frame without hardware by treating the wall behind your mirror. This works beautifully in renters’ spaces since the mirror does the hiding.
Install your frameless mirror as usual, then apply peel-and-stick wallpaper or fabric ($15–$40) around it in a contrasting color or pattern. The wallpaper peeks out as a “frame.” Takes about 20 minutes and zero damage to walls when you use removable adhesive. This trick also works if you’re renting—just peel it off when you move.
Now your mirror feels layered and intentional, like it was designed as part of the wall itself.
7. Stain or Refinish a Thrifted Wood Frame
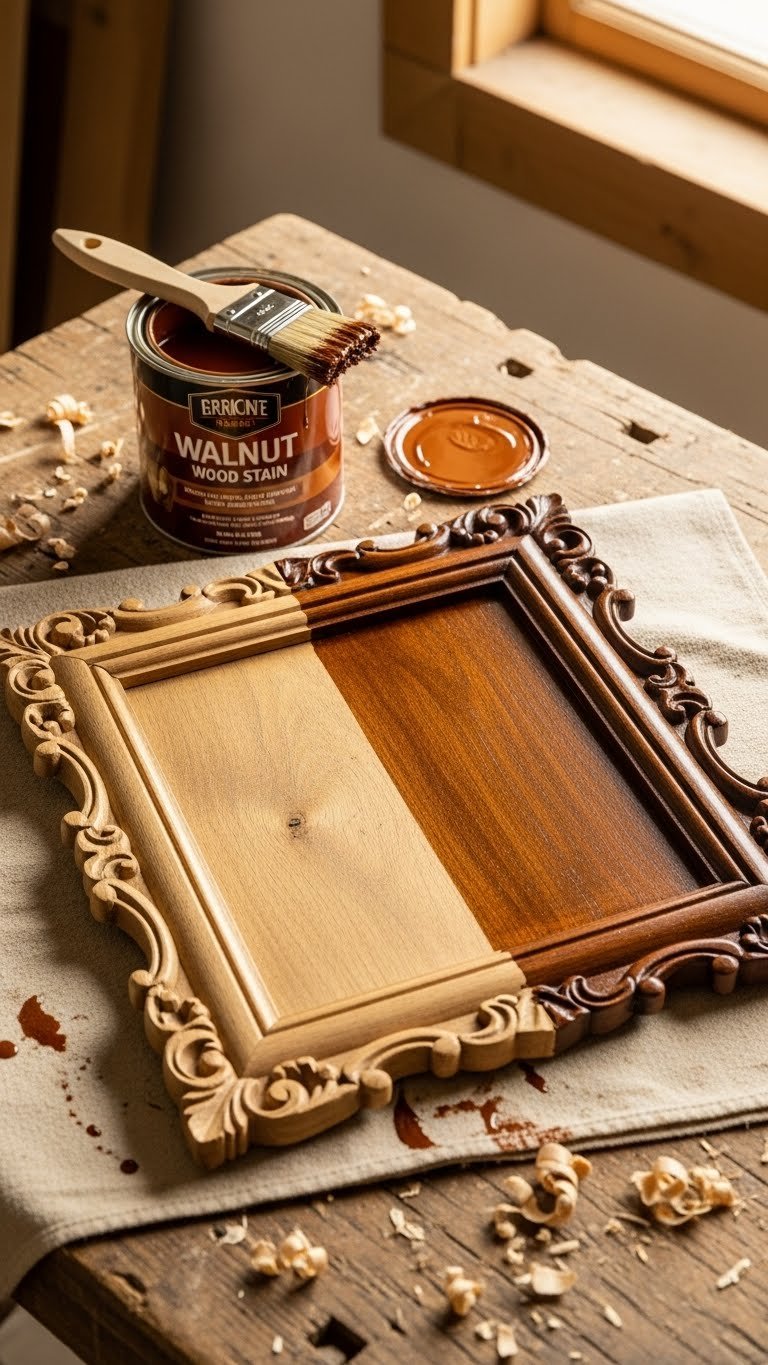
Thrift stores are treasure troves of cheap mirror frames that just need a refresh. A little stain transforms them into custom pieces.
Find a wooden-framed mirror at Goodwill or Facebook Marketplace ($3–$15). Pick up wood stain in your desired shade—walnut, ebony, or honey ($8–$12 at hardware stores). Sand the frame lightly with 120-grit sandpaper, apply stain with a brush, and let it dry per instructions (usually 24 hours). Total investment: $15–$30. Time: about 1 hour active work plus drying. You’ve essentially created a custom frame for the price of a coffee.
That dated thrifted find is now a curated piece that matches your decor perfectly.
8. Add Tassel or Rope Details Around the Frame Edge
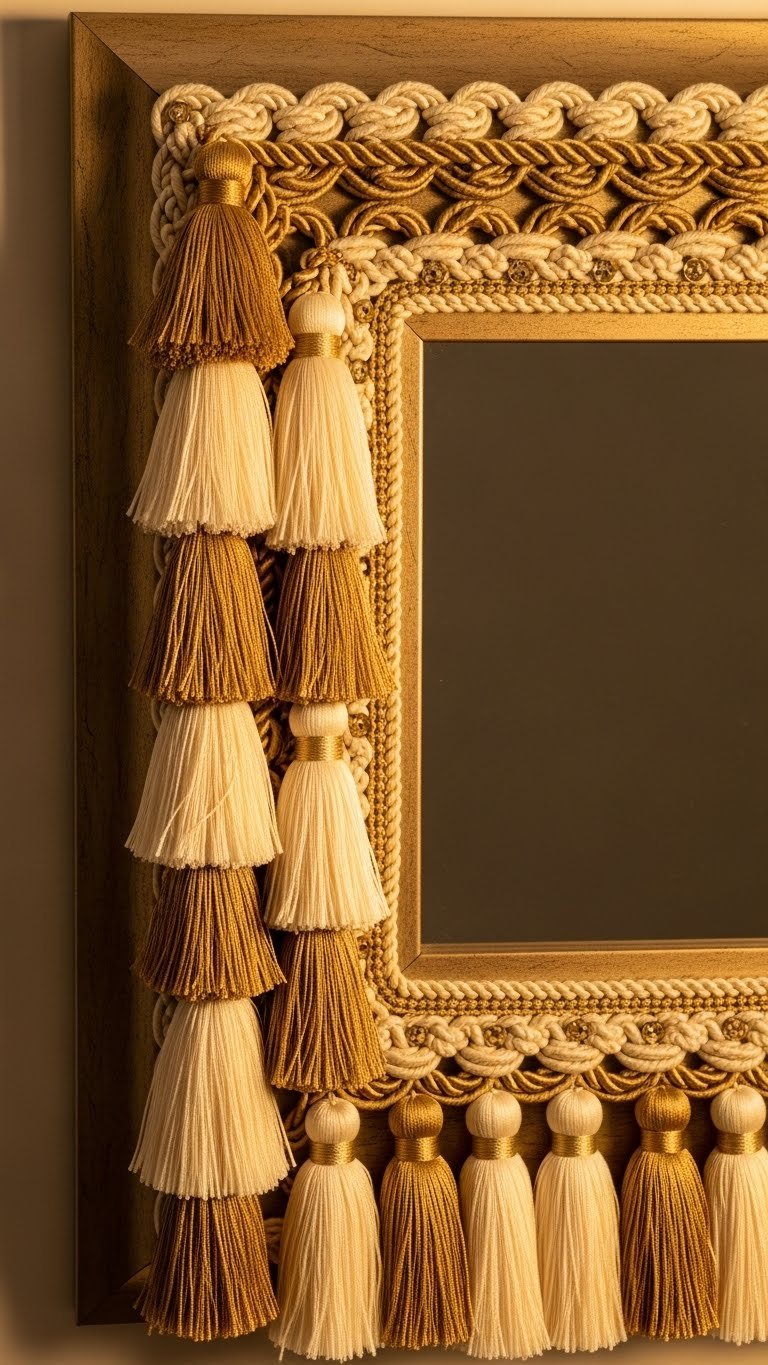
Tassels and rope add dimension and personality to plain frames in minutes. This is pure styling without commitment.
Purchase decorative tassel trim or braided rope ($12–$25 per yard from fabric stores like Joann or online from Amazon). Use fabric glue or hot glue to attach it around your frame’s perimeter. Choose gold tassels for glam, cream for soft elegance, or jewel tones for drama. Takes about 20–30 minutes depending on frame size. If you change your mind later, peel it off and try something new.
Your frame now has that handcrafted, intentional-looking detail that costs pennies but reads like luxury.
9. Spray Paint a Metal Frame in Unexpected Colors
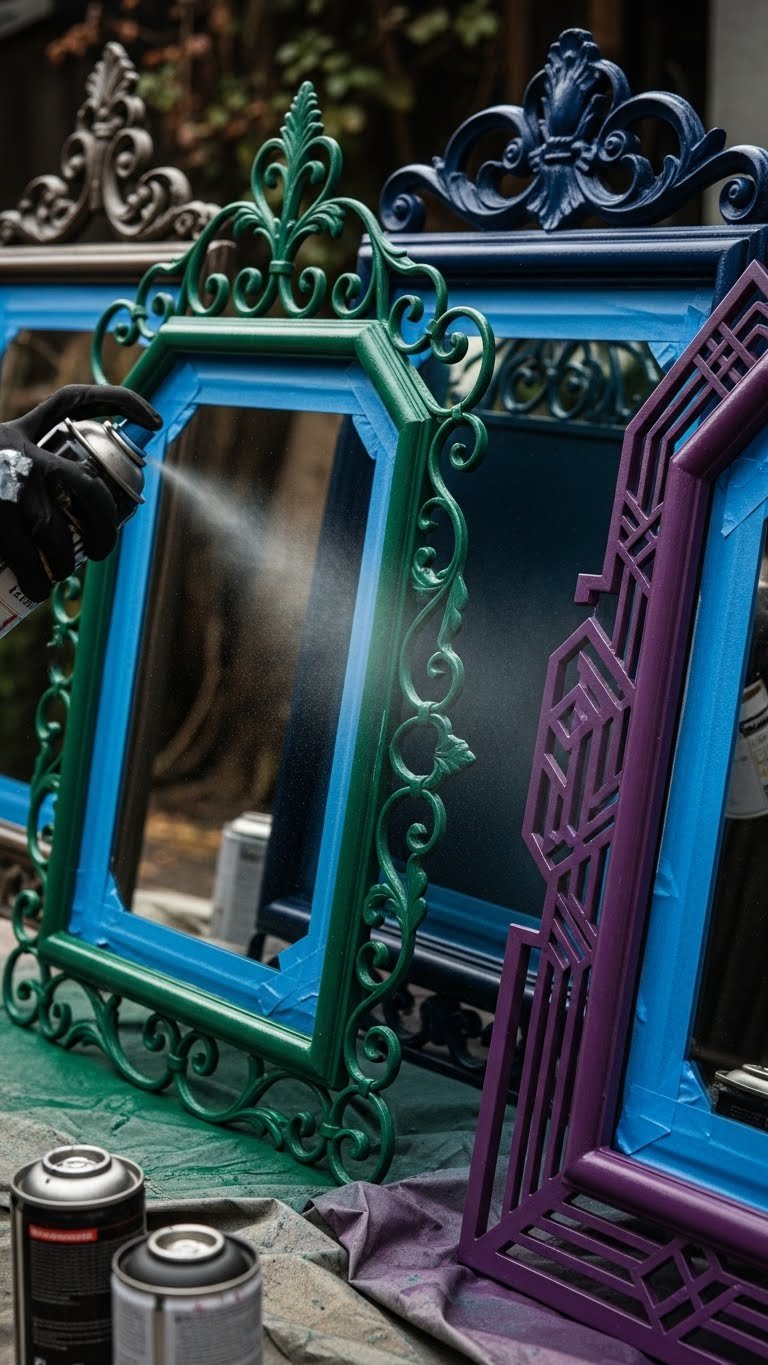
Metal frames are durable and perfect for spray paint experiments. Go bold with color instead of sticking to neutrals.
Find a metal-framed mirror you own or grab one used ($5–$20). Pick spray paint in jewel tones, dusty rose, sage green, or even terracotta ($8–$12 per can). Mask off the mirror glass with painter’s tape, and spray 2–3 thin coats in a well-ventilated area. Total cost: $15–$35. Takes about 1 hour including drying time. The finish is permanent and hardwearing, perfect for bathrooms and high-traffic spaces.
An unexpected color choice turns a standard mirror into a design focal point that reflects your personality.
10. Create a Faux Scalloped Edge with Trim
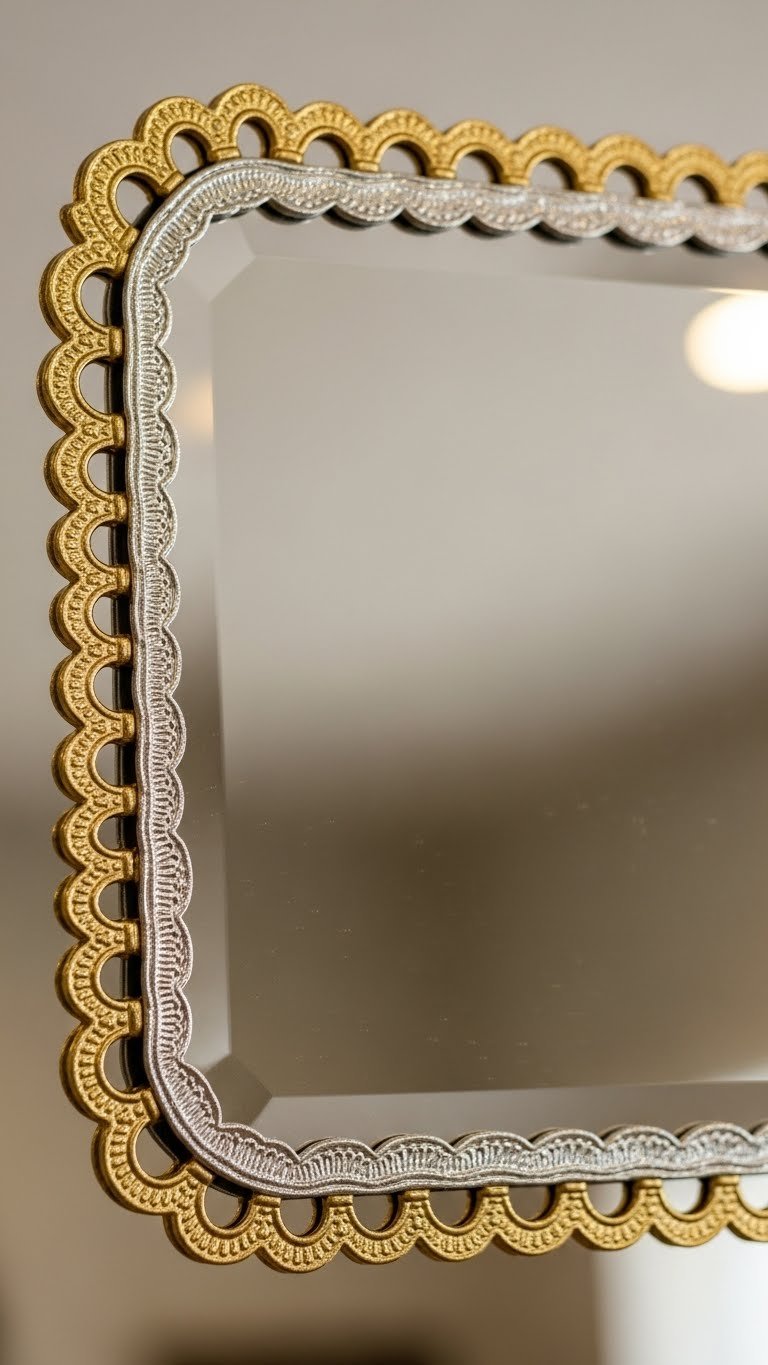
Love the scalloped trend but don’t want to commit? Glue decorative trim to create the look instantly.
Hunt for adhesive scalloped trim, ribbon, or lace ($10–$20 per roll on Amazon or craft stores). Clean your mirror frame thoroughly, then carefully glue the trim around all edges. This takes about 30 minutes and costs $10–$25. For a modern take, use thin geometric trim instead of traditional lace. If your mirror is frameless, build up a thin base layer of foam trim first, then add the scallops.
Your mirror now has playful personality that photographs beautifully and feels intentionally styled.
11. Mosaic Tile or Broken Glass Frame Border
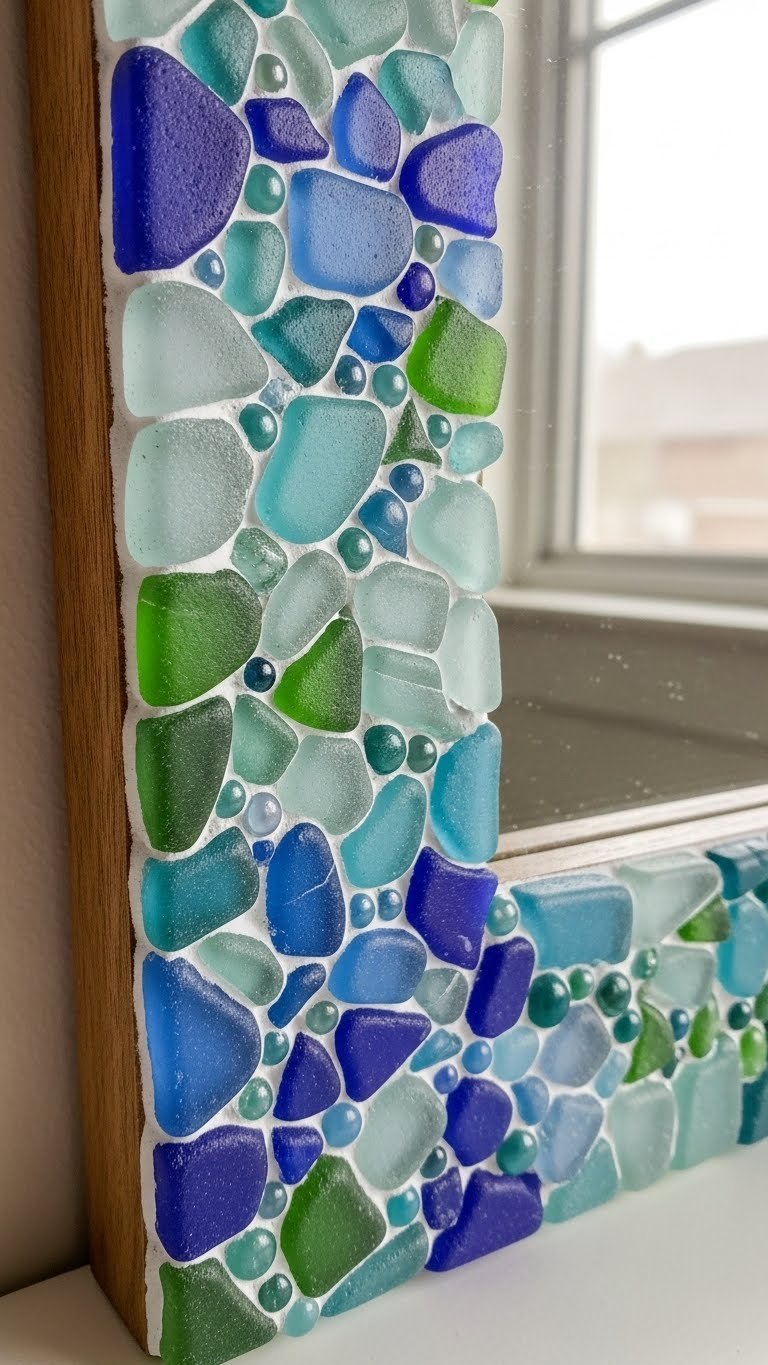
This DIY project adds serious artistic flair if you’re willing to spend a weekend on it. Upcycled glass or tiles make it more affordable.
Collect small mosaic tiles, sea glass, or broken ceramic pieces (free if you salvage, $8–$15 for a premade mosaic kit). Use tile adhesive and grout ($10–$15). Arrange your pieces around the frame edges, glue them down, and grout the gaps. Takes 2–3 hours plus drying time. This one requires patience but results in a genuinely one-of-a-kind piece. Perfect if you’re artistic or enjoy mindful crafting.
You’ve created a conversation piece that feels handmade and special, with zero factory-produced feel.
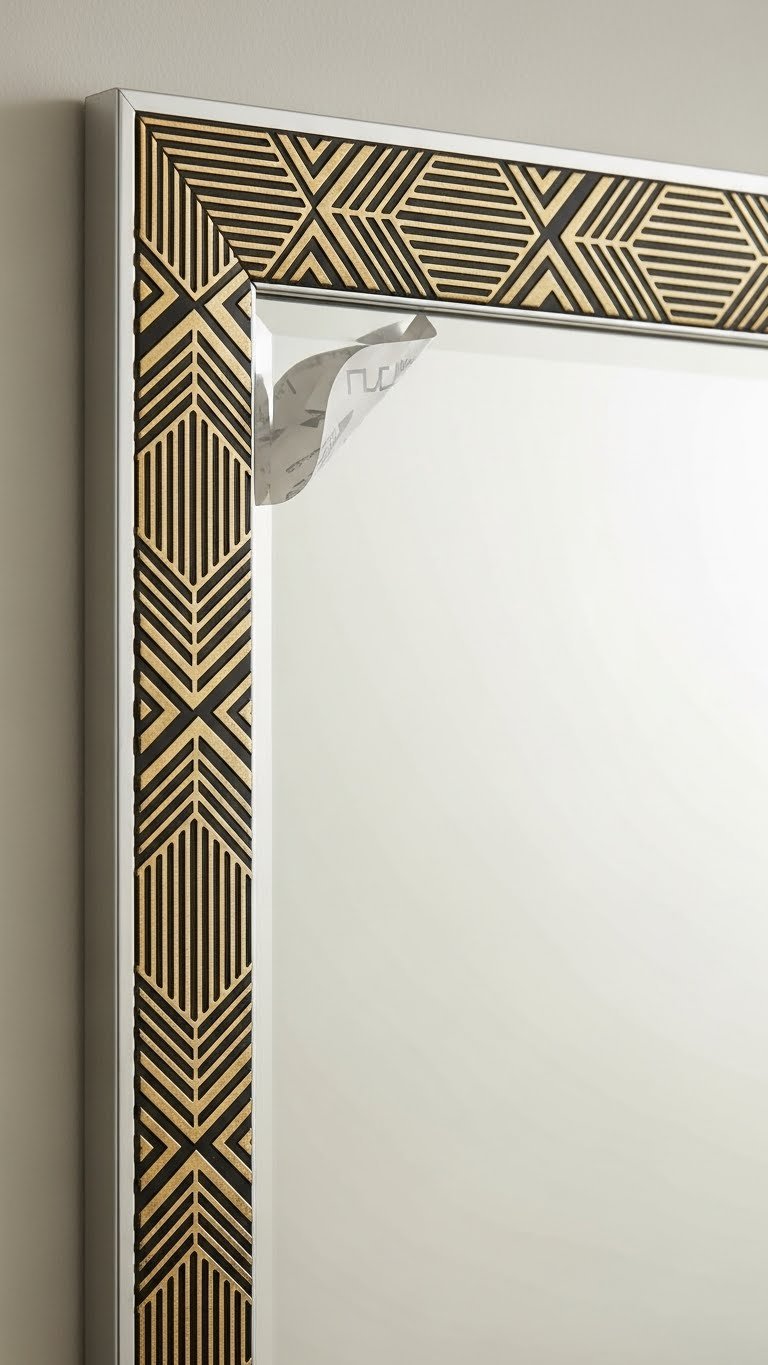
12. Paint a Geometric Pattern Directly on the Frame
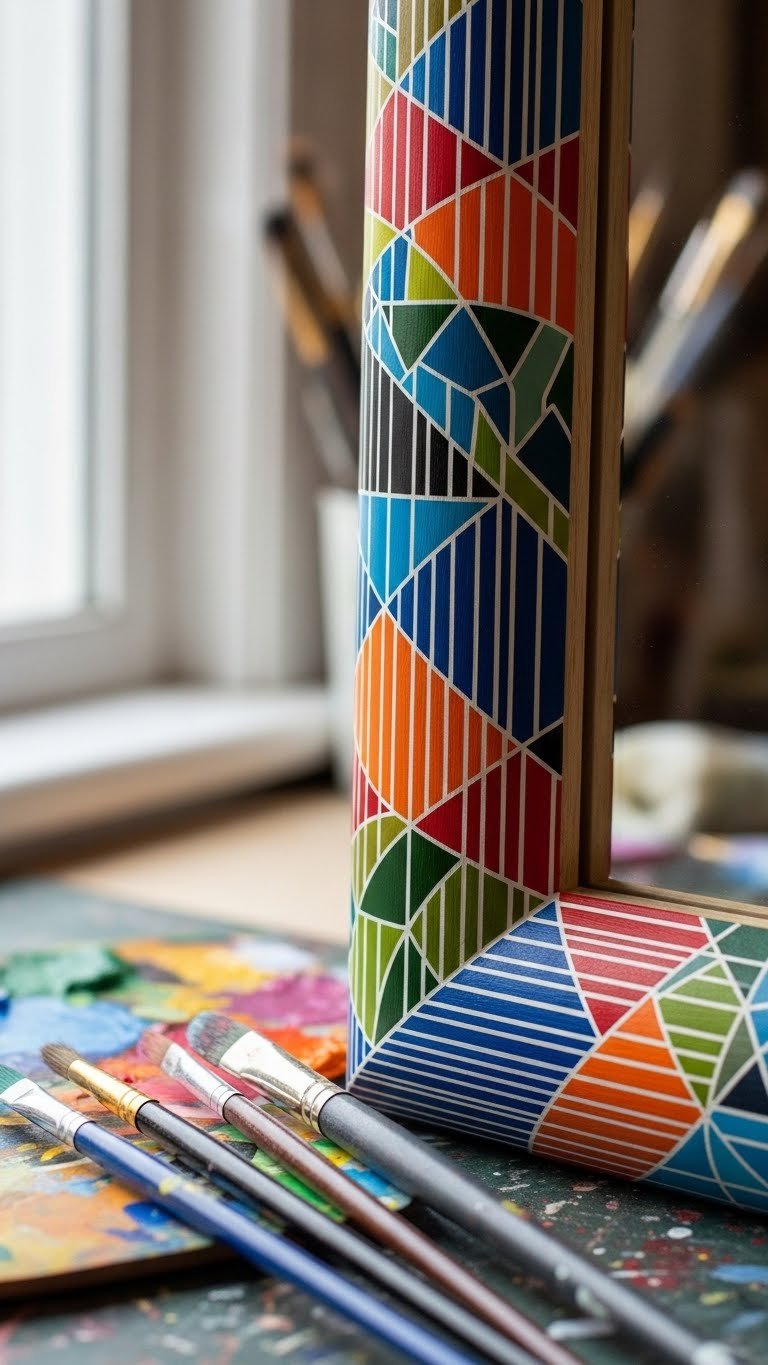
If you’re handy with a paintbrush, go full artist and design your own pattern. This one’s pure creative expression.
Use acrylic paint in 2–3 complementary colors ($8–$15 total). Sketch a light pencil design first, then paint in your pattern—stripes, triangles, checkerboard, or abstract shapes. Seal it with clear matte or glossy sealant ($6–$10) to protect from moisture. Takes 2–3 hours depending on complexity. This works best on wood frames with good surface area. Bonus: it’s totally renter-friendly since paint stays on the frame, not the wall.
You now own a custom art piece that’s completely unique and matches no one else’s decor.
13. Install LED Lighting Inside a Floating Frame
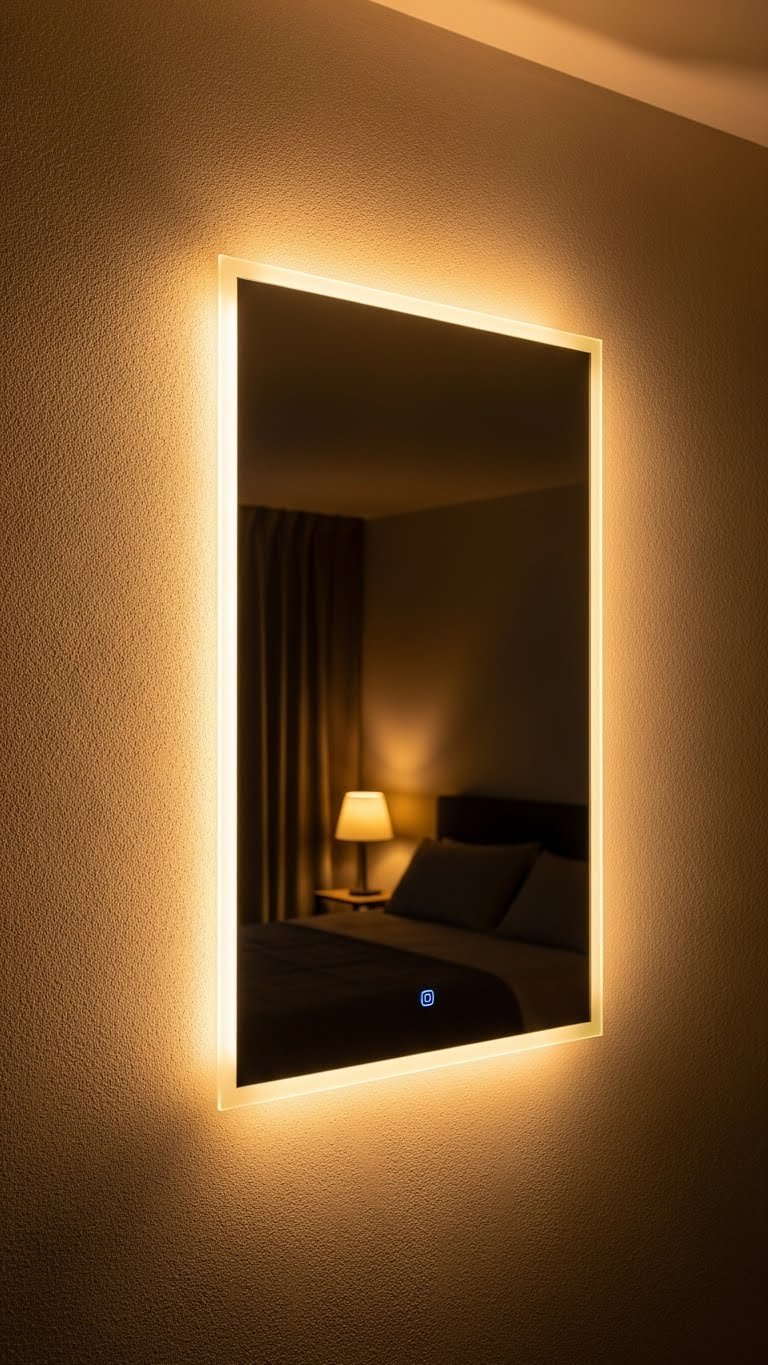
Combine function and aesthetics with LED lights integrated into or around your frame. This elevates bathrooms and small bedrooms instantly.
Purchase adhesive LED strip lights ($20–$40 from Amazon or Best Buy—look for warm white, dimmable options) and a thin-framed or frameless mirror ($30–$80). Install the LED strips inside the frame’s lip or directly on the wall around the mirror’s perimeter. Most are plug-in or battery-powered, taking 15 minutes to install. This is renter-friendly if you use removable strips and avoid permanent wiring.
Your mirror becomes a functional light source and atmospheric focal point—practical and pretty.
14. Wrap the Frame in Leather or Faux Leather Cord
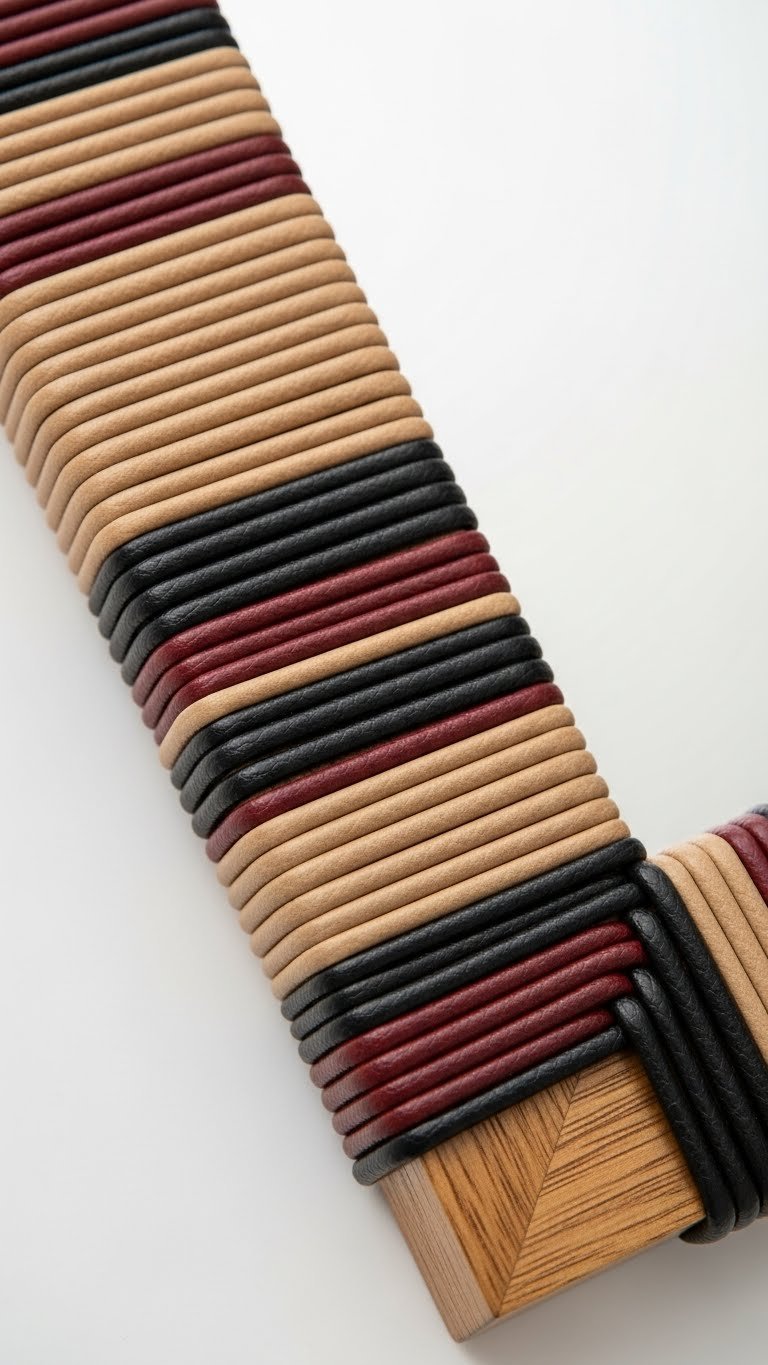
Leather wrapping adds sophistication and texture, especially in masculine or modern spaces. This looks more expensive than it costs.
Get leather or faux leather cord ($8–$15 from craft stores) and contact cement or hot glue ($3–$8). Wrap the cord tightly around your frame starting at one corner, overlapping slightly as you go. Use glue at the start and end to secure. Takes about 45 minutes for a standard mirror. The result feels designer-quality with that structured, intentional look. Faux leather is cheaper and equally effective.
Your mirror now has a sophisticated, grown-up aesthetic that anchors any room beautifully.
15. Create a Double-Frame Look with Two Mirrors
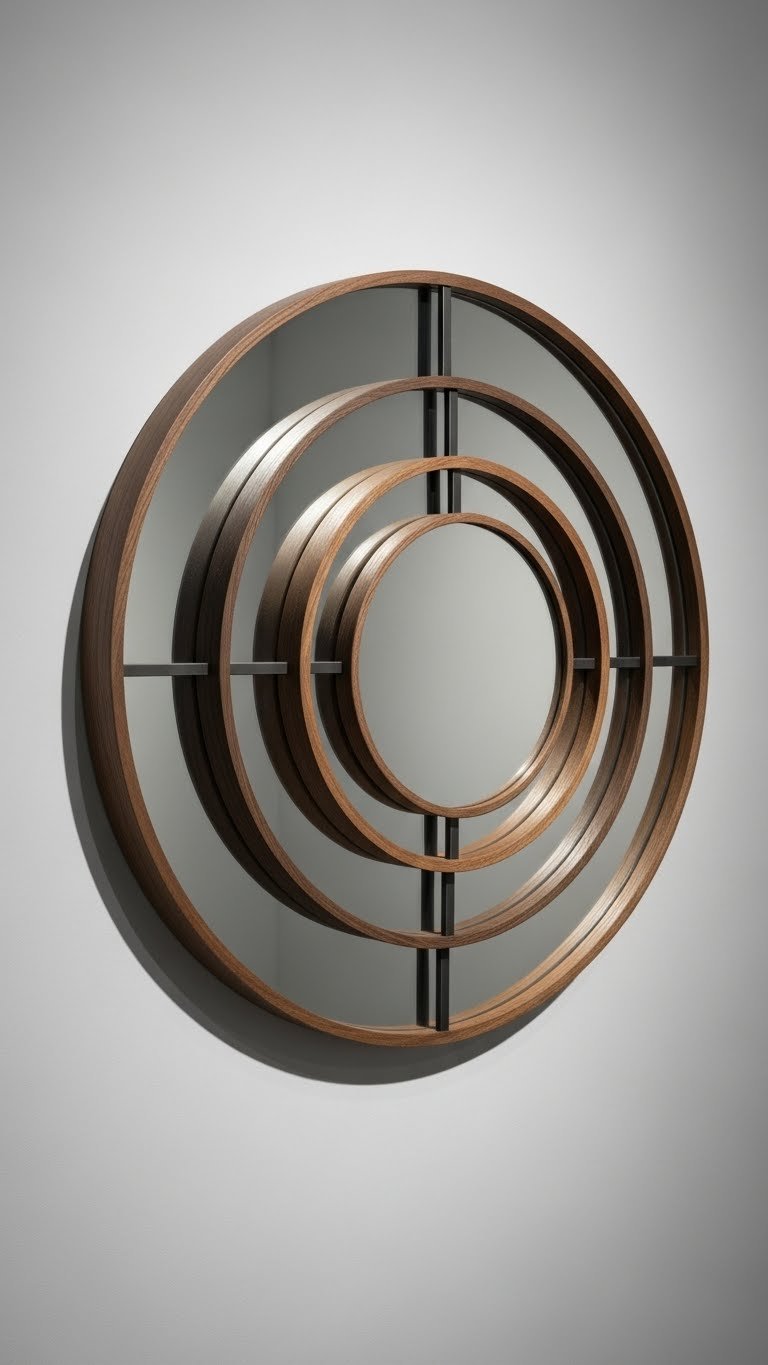
Double frames create visual depth without major construction. This architectural trick works in modern and eclectic spaces.
Find two mirrors in similar or complementary styles ($20–$60 total). Use thin wood strips or metal spacers ($8–$15) to create distance between them. Attach the smaller mirror to the spacers, then attach that assembly to the back of the larger frame using strong adhesive or small brackets. Takes about 1 hour. This creates an intentional, layered look that reads expensive and curated.
Your mirror now has architectural interest that makes the wall feel designed, not just decorated.
16. Stencil a Border Pattern Around the Frame
Stenciling lets you add pattern and detail without free-hand painting skills. Perfect for adding custom flair to plain frames.
Purchase a decorative stencil ($5–$12 from craft stores) and metallic or acrylic paint ($6–$10). Tape the stencil around your frame’s edge and carefully paint through the cutouts using a stencil brush or sponge. Takes 30–45 minutes and dries quickly. Dozens of patterns exist—geometric, floral, Art Deco, boho. Choose one that matches your style.
You’ve added custom detail that looks like it was always part of the design.
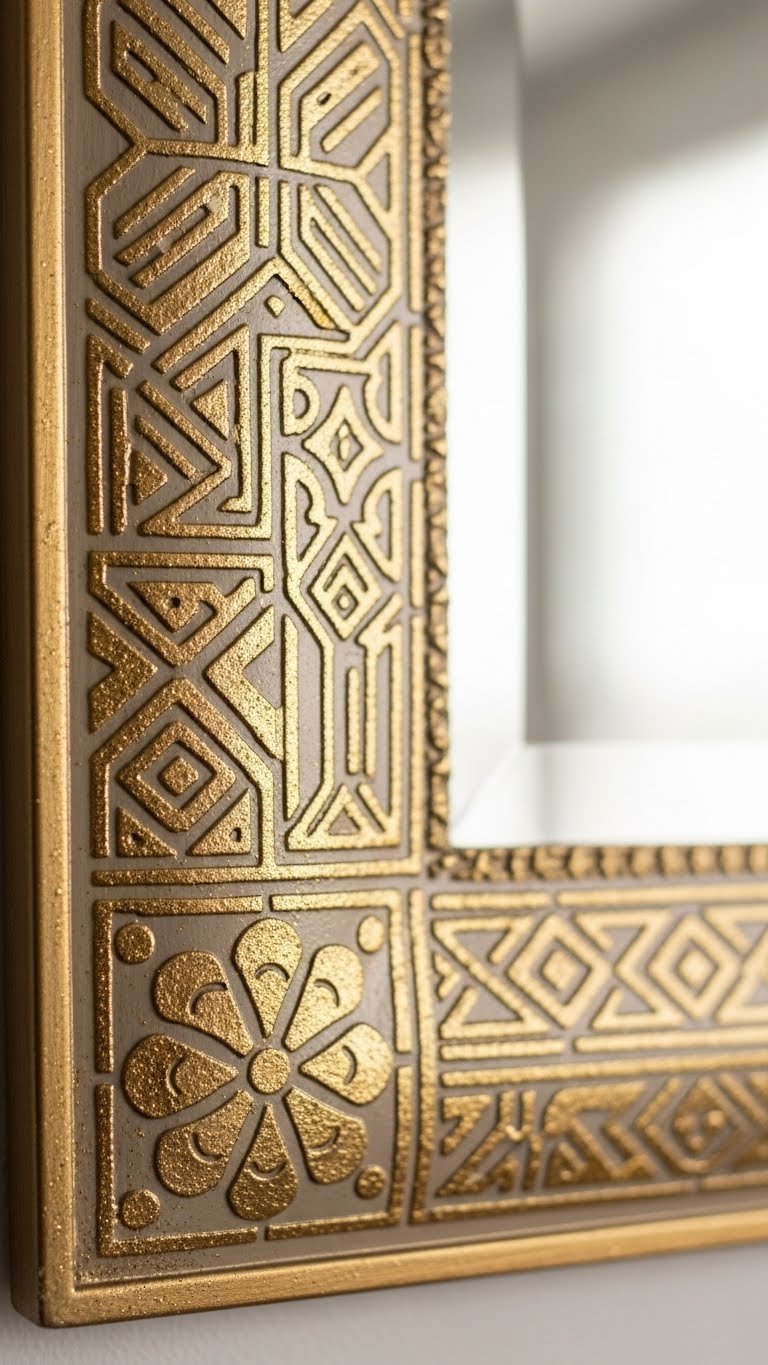
17. Use Brass or Copper Leaf for a Luxury Finish

Metal leaf creates a high-end, handcrafted look that costs far less than it appears. This technique works on wood frames best.
Grab adhesive brass or copper leaf ($15–$25 from art supply stores), a sizing glue (usually included), and a soft brush. Apply sizing according to package directions, then carefully press leaf onto the frame surface. It adheres instantly and looks like real metal coating. Takes about 1–2 hours depending on frame size. The result rivals expensive designer frames, and the material is durable and long-lasting.
Your mirror frame now has that handcrafted, gallery-quality finish that elevates your entire space.
18. Add a Floating Shelf Below or Above the Mirror
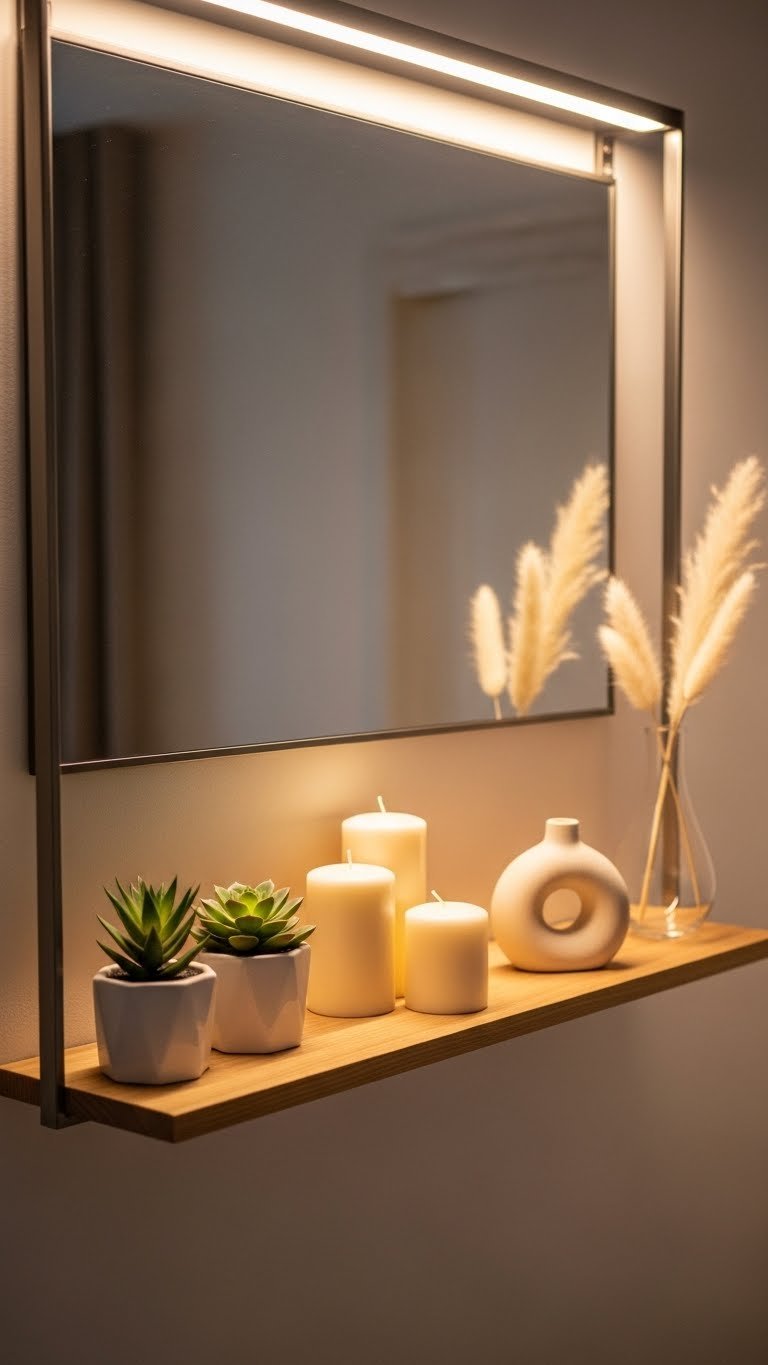
A floating shelf isn’t technically a frame modification, but it completes the frame’s visual impact by creating a styled vignette below or above.
Install a thin floating shelf ($20–$50 depending on material—wood, metal, or composite) using heavy-duty wall anchors ($5–$10 for a renter option) or wall studs if permanent. Takes 30 minutes to 1 hour to install depending on your comfort level. Style it with small potted plants, candles, or curated objects. This trick makes your mirror feel intentional and gallery-like.
Now your mirror isn’t just a reflection—it’s part of a designed vignette that brings the whole wall to life.
19. Paint the Frame to Match Your Wall (Monochromatic Frame)
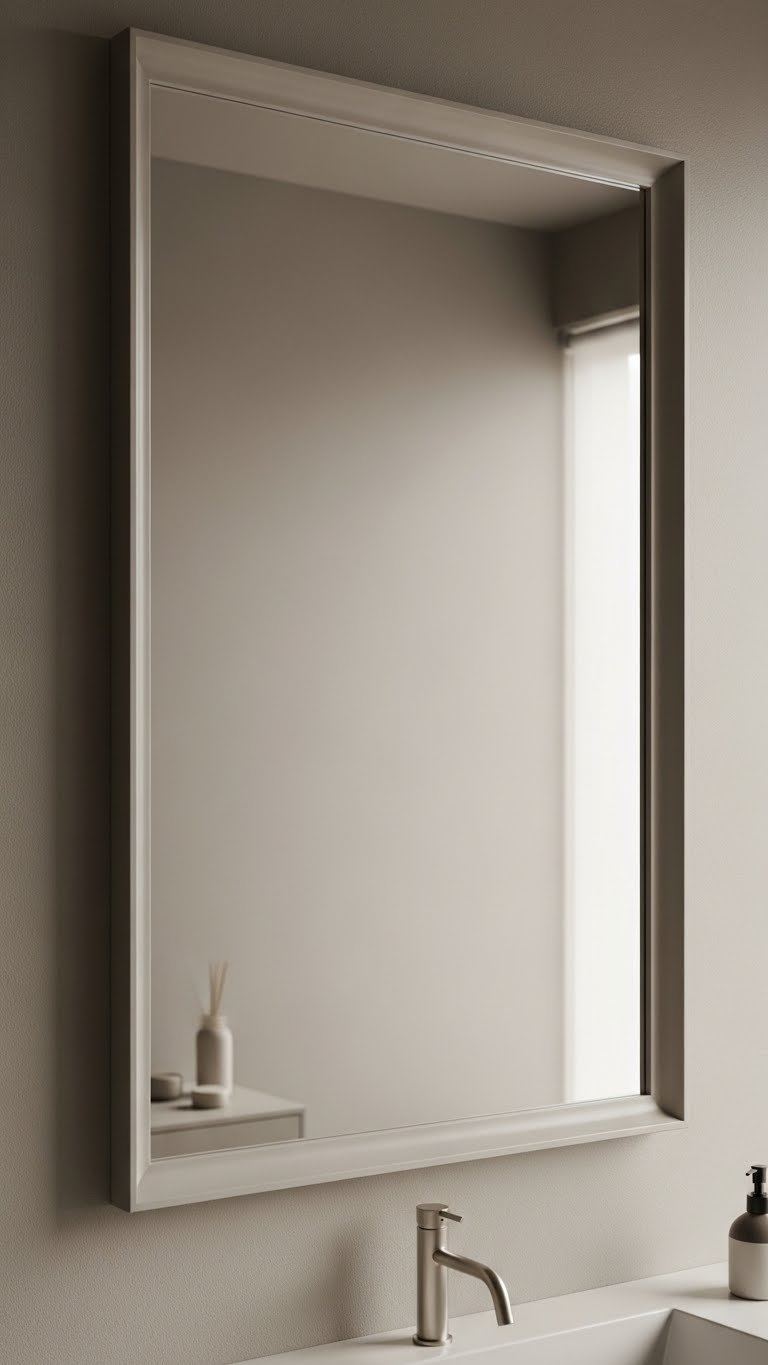
This minimalist approach hides the frame while highlighting the mirror’s reflection. Perfect for keeping walls clean and uncluttered.
Paint your frame with the same paint color as your wall ($20–$30 for a quart of paint). This might seem counterintuitive, but it creates a serene, intentional look where the frame “disappears” and your reflected room becomes the focal point. Takes about 1 hour including drying. Best on matte or eggshell finishes for true blending.
Your space feels calmer and more cohesive, with the mirror functioning as a subtle design element rather than a statement.
20. Attach Dried Flowers or Branches to a Frame

Dried botanicals are trending, and they transform frames into organic art pieces. Plus, they’re wallet-friendly and won’t wilt.
Collect or purchase dried flowers, pampas grass, or branches ($10–$25 from craft stores like Michaels or online). Use hot glue or floral adhesive to attach them around your frame’s perimeter or in corner clusters. Takes about 30–45 minutes. The dried materials last indefinitely and create a cottagecore or bohemian vibe. Great for renters since nothing damages walls.
Your mirror now doubles as botanical art, bringing organic warmth to any room.
21. Wrap the Frame in Linen or Canvas Fabric
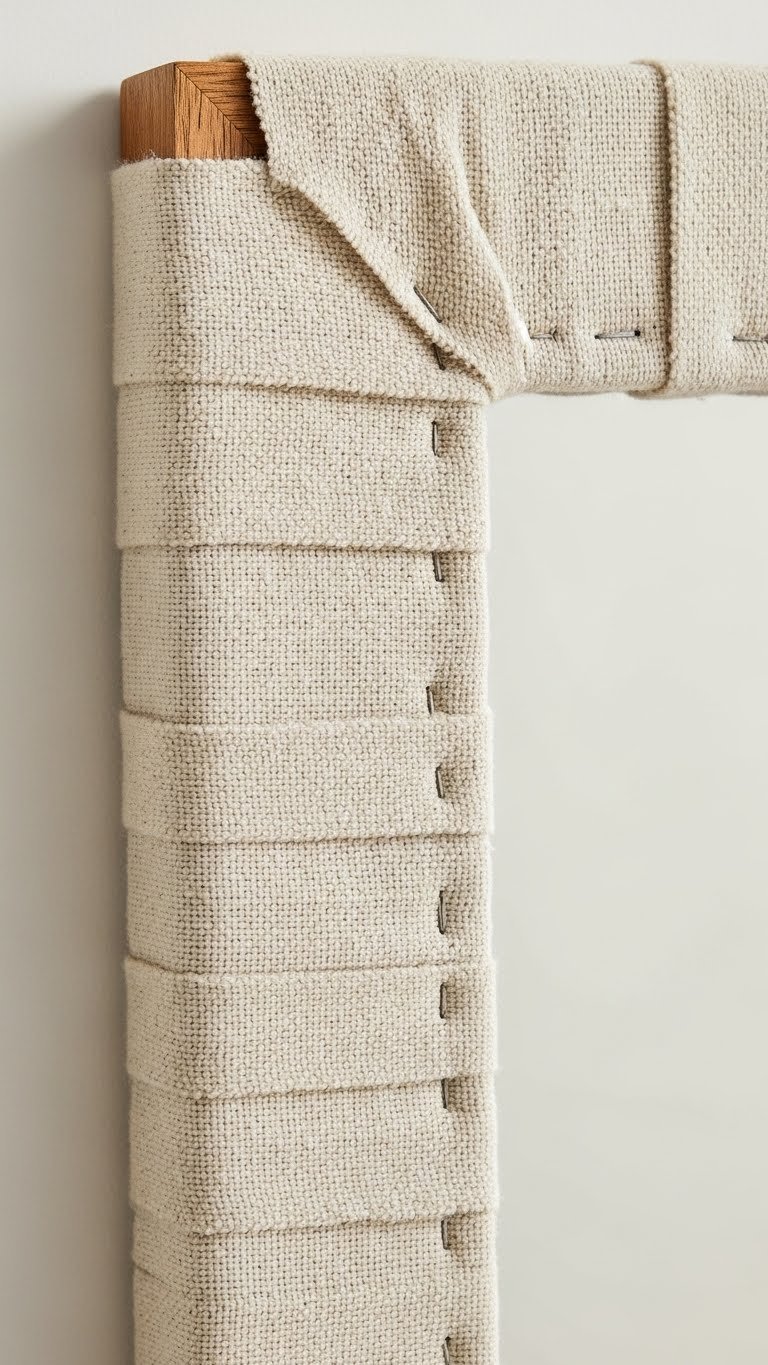
Fabric wrapping adds tactile softness and texture while maintaining a natural aesthetic. This works for any style from farmhouse to modern.
Choose natural linen or canvas fabric ($15–$25 per yard from fabric stores) in a color that complements your space. Wrap it tightly around your frame, stapling it securely on the back side (nobody sees that). Use fabric glue to seal edges if preferred. Takes about 45 minutes. If you’re renting or want flexibility, use removable fabric glue instead of staples.
Your frame now has organic softness that catches light beautifully and adds depth to your wall.
22. Create a Statement Frame with Oversized Molding

Oversized molding creates impact without spending a fortune. This architectural approach works in any style when you choose the right profile.
Buy thick wooden molding ($30–$60 for 8–10 linear feet from Home Depot) in a profile that matches your style—ornate for traditional, sleek for modern. Cut it to frame your mirror, miter the corners, and attach with wood glue and nails ($5–$10). Paint or stain to finish. This is a weekend project if you’re handy or have access to a chop saw. If not, hire a handyperson ($100–$200).
You’ve created a custom frame that looks built-in and substantially elevated your mirror’s presence.
23. Use Removable Adhesive Decorative Borders
For maximum flexibility, use removable adhesive borders. This is the ultimate renter hack and costs almost nothing.
Purchase peel-and-stick decorative borders ($8–$18 from Target, Amazon, or IKEA) in your desired pattern. Clean your frame thoroughly, then carefully apply the border around all edges, smoothing out bubbles as you go. Takes 15 minutes and requires zero tools. When you move or want to refresh, peel it off cleanly. Endless options exist—gold stripes, geometric, floral, minimalist.
Your mirror gets an instant upgrade that you can change anytime without commitment or damage.
SAVE THIS POST for your next decorating refresh and try just one idea this weekend. Whether you’re on a shoestring budget or ready to invest, there’s a frame solution here that’ll make you smile every time you look in that mirror.
Leave a Reply