Your TV wall doesn’t have to be boring—and it definitely shouldn’t scream “look at me.” The best TV walls feel intentional, layered, and like they belong in a designer’s home, but they’re actually way easier to achieve than you’d think. Whether you’re renting, renovating, or just ready to stop staring at a blank wall, these 26 ideas blend modern aesthetics with real-world budgets. You’ll find everything from zero-dollar styling tweaks to investment pieces that’ll make your space feel like it belongs in a magazine. By the end, you’ll have the blueprint to create a TV wall that’s clean, sophisticated, and totally yours.
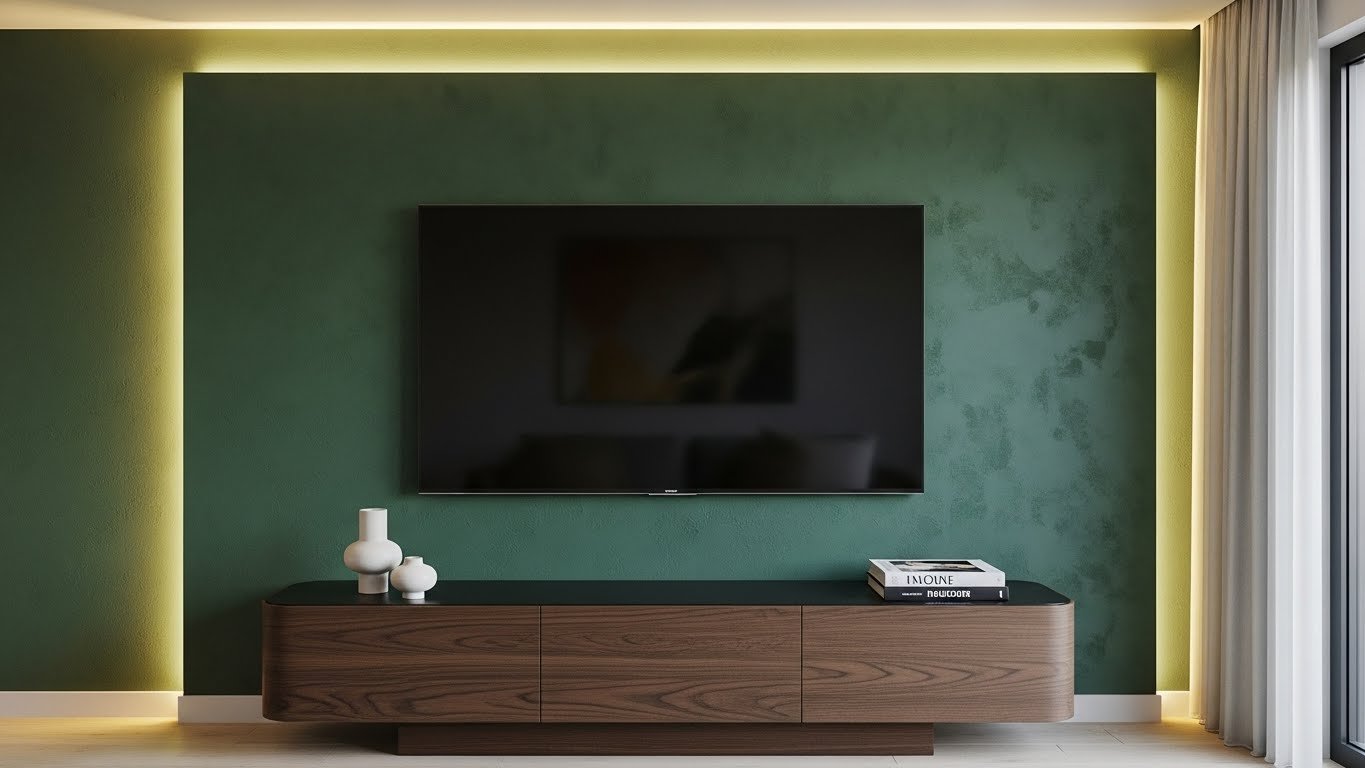
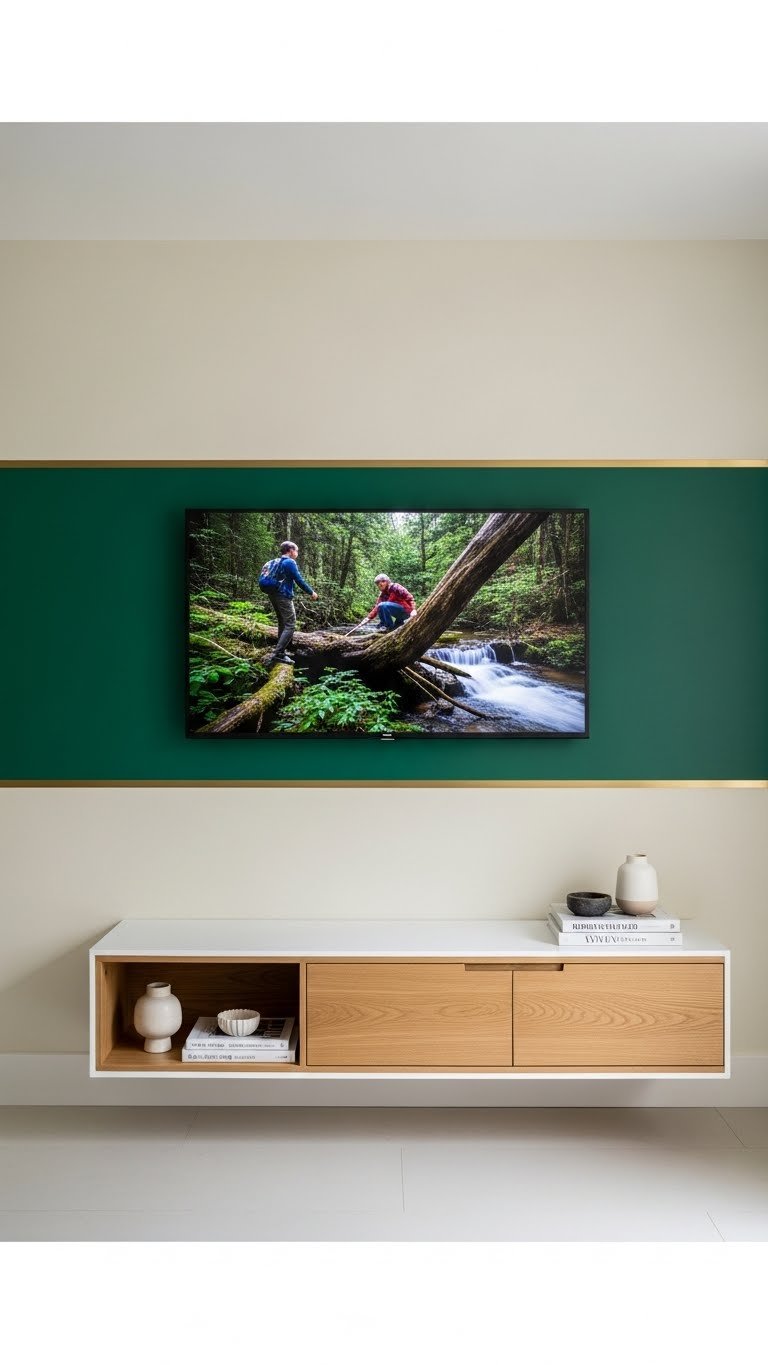
1. Go Deep with Jewel-Tone Paint

Paint is the fastest way to anchor a TV wall and make it feel intentional. Deep emerald, burgundy, or navy create visual richness without clutter—2025’s biggest color shift. You’ll need two coats of quality paint ($30–$60 per gallon), a weekend afternoon, and basic supplies from Home Depot or Lowes.
The trick is choosing a paint with good undertones. Emerald (currently 22% of designer preference) reads warmer than you’d expect, while true burgundy grounds a space without feeling dated. Test samples on your wall first and observe them at different times of day.
Pair your jewel tone with a lighter wall color for contrast—this stops the room from feeling cave-like. Renter? Removable wallpaper in the same tone gives you the same impact for about $40–$80 per roll, with zero commitment.
The result is instant sophistication. Your TV disappears into the background, and the wall becomes a design feature people actually notice.
2. Layer Wallpaper with Unexpected Patterns

Pattern drenching—covering your TV wall in a cohesive design—is having a massive moment. Geometric patterns, checks, and even subtle animal prints are seeing +194% and +5000% search spikes, which means people are ready to be bold.
Choose a wallpaper with a pattern that feels balanced visually (not too chaotic). Peel-and-stick options from Spoonflower or Ruggable ($50–$150) are renter-approved and removable. Traditional wallpaper from Wayfair or Farrow & Ball ($35–$150 per roll) offers more texture but requires professional installation ($200–$400).
Installation takes a weekend or a few hours if hired out. Pro tip: use a pattern that echoes your furniture or rug colors to avoid visual chaos.
The payoff is a room that feels curated and intentional. You’re not just hiding your TV—you’re making a design statement.
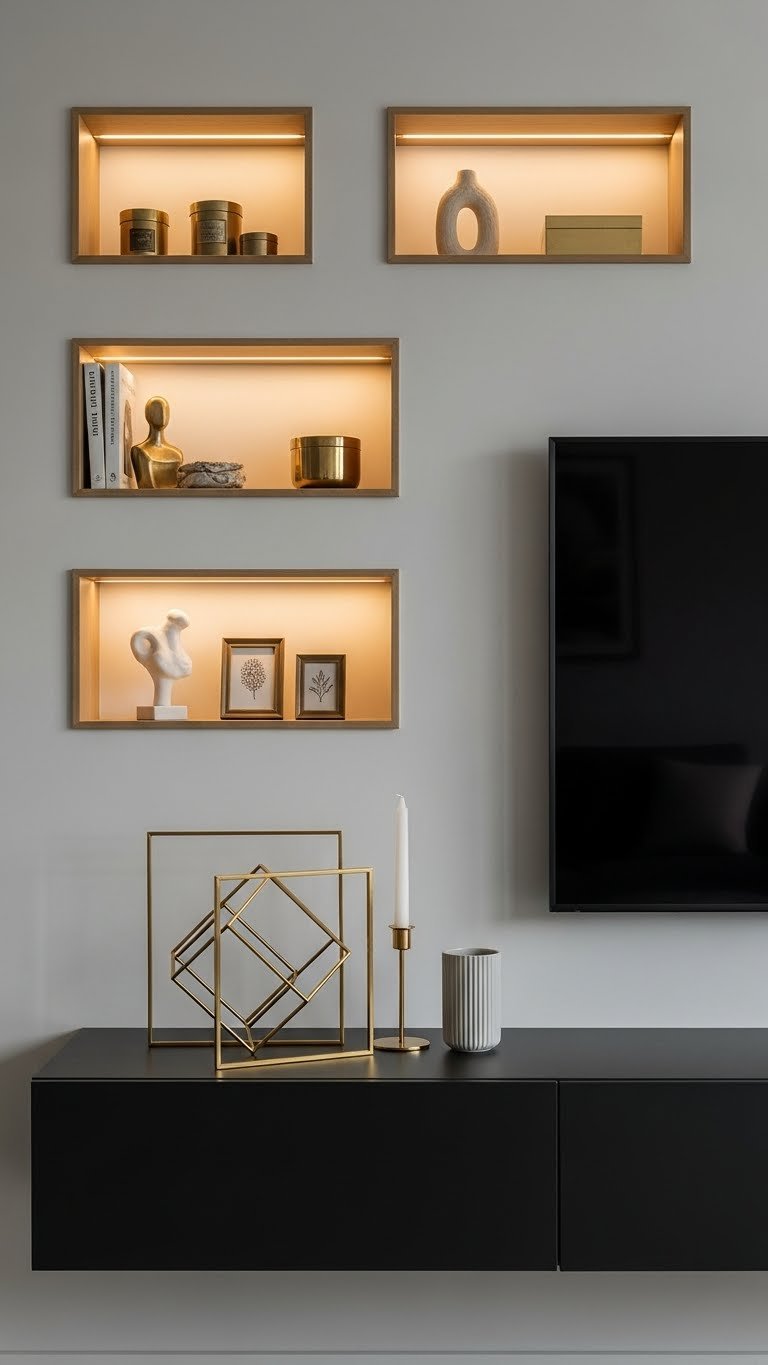
3. Install Floating Wood Shelving Above the TV

Floating shelves serve double duty: storage and styling. They make a TV wall feel less like a theater and more like a curated gallery. Mount 2–3 shelves ($20–$80 each for quality wood) at varying heights using heavy-duty brackets from Home Depot.
Installation typically takes 1–2 hours if you’re handy with a drill. Style them with books, small sculptures, and trailing plants—keep items to odd numbers and leave breathing room. This prevents the “cluttered shelf syndrome.”
Renter-friendly alternative: adhesive shelves (under $30 each) work on most walls and leave no damage. Just don’t overload them with weight.
Your TV wall now reads as a design feature rather than a tech necessity. Guests notice the thoughtful styling instead of the screen.
4. Use a Textured Accent Wall (No Paint)
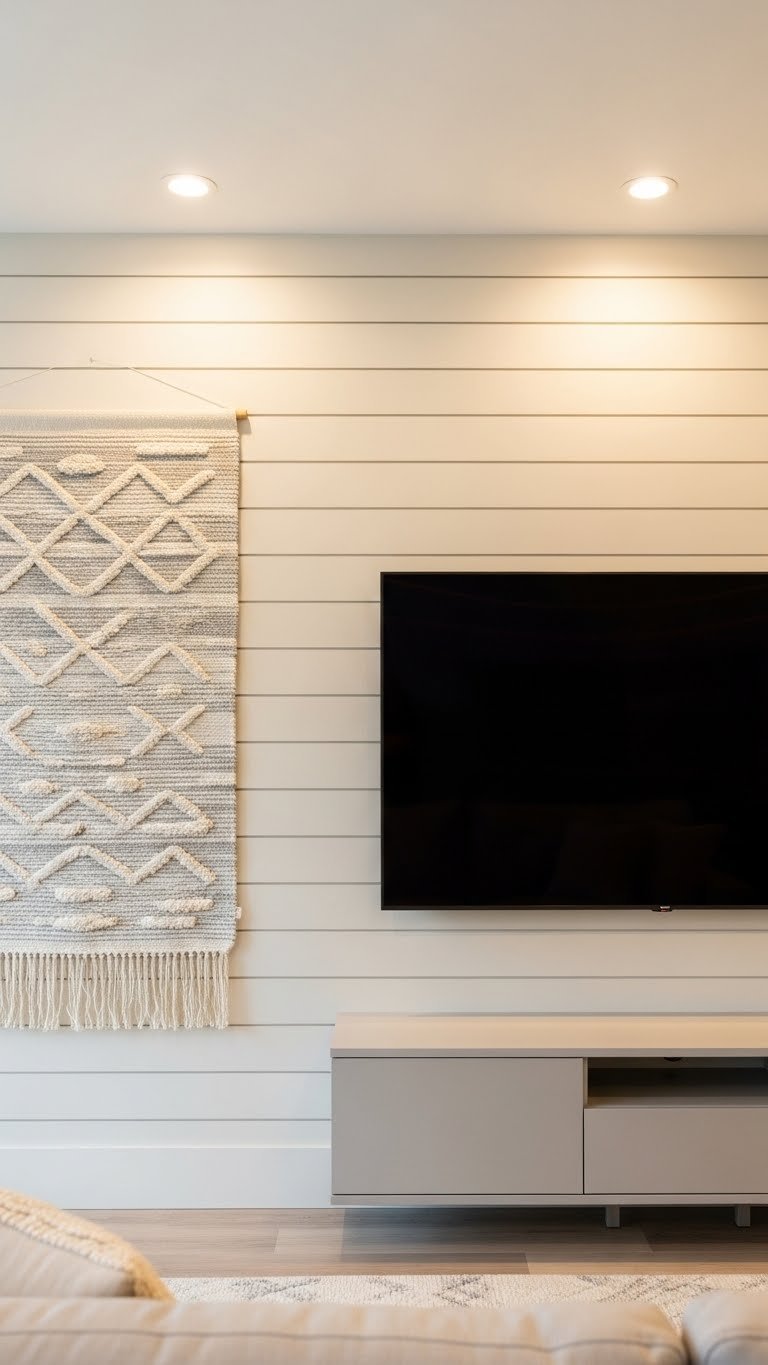
Shiplap, textured wallpaper, or 3D wall panels add visual interest and dimension without color commitment. These materials cost $1–$3 per square foot and can be installed over a weekend (or professionally for $500–$1200).
Shiplap boards from Home Depot are peel-and-stick or nailable. Textured wallpaper (like grasscloth or linen-look) offers a subtler impact at $30–$100 per roll. 3D wall panels (from companies like Art3D) run $20–$50 per panel and create dramatic shadow play.
The texture catches light beautifully and hides minor wall imperfections. It also photographs incredibly well, which matters if you ever share your space on social media.
This approach gives you design depth without feeling trendy or temporary. Your space looks intentional and finished.
5. Mount Your TV Higher and Add Art Below
Breaking the rule of TV-at-center-eye-level actually works beautifully. Mount your TV higher (around 60–65 inches from floor to screen center) and use the wall below for rotating art, a sculptural console, or architectural interest.
This requires a sturdy VESA mount ($50–$150) and potentially professional installation if electrical rewiring is needed ($150–$300). The benefit: your TV doesn’t dominate the room visually.
Add a large art piece, mirror, or sculptural object below to fill the space. You can rotate seasonal art or swap it seasonally. This transforms your TV wall into a flexible design canvas.
The room feels more sophisticated because your TV becomes just one element of a larger composition, not the focal point.
6. Create a Minimalist Wood Frame Around the TV

A wooden frame built around your TV—often called a “TV nook”—sounds high-end but is surprisingly achievable. You’re essentially creating a border from 1×4 or 1×6 boards ($1–$2 per foot from Home Depot).
Install the frame flush to the wall using studs and brackets ($50–$150 total materials). Stain or paint it to match your room’s palette. Time: 4–6 hours DIY, or $400–$800 professionally.
The frame gives your TV a gallery-piece presence. It also provides a visual break if your wall is otherwise bare. Bonus: you can hide cables inside the frame or run lighting around it.
Your TV now reads as intentional architecture rather than an appliance bolted to the wall.
7. Add LED Backlighting Behind the TV

LED strips ($15–$50 from Amazon or Best Buy) mounted behind your TV create ambient light that reduces eye strain and adds a spa-like quality. They come in warm white, cool white, and RGB options.
Installation is simple: stick the adhesive strips behind your TV, plug in (or hard-wire for a cleaner look), and adjust the brightness via remote. Takes 15 minutes. If you want them hidden, hire an electrician ($150–$250) to hard-wire everything into your wall.
Warm white light (2700K) feels cozy; cool white (4000K+) feels modern. Most people prefer warm for living rooms.
The result is a room that feels like a hotel or high-end lounge. This detail alone makes your space feel thoughtfully designed.
8. Style with Brass or Gold Accents
Chrome and brass are having their moment in 2025. Incorporate metallic accents through shelving brackets, console legs, picture frames, or decorative objects.
Shop for brass-legged media consoles ($200–$600 from West Elm or Article), brass shelving brackets ($20–$50 each), and decorative objects from HomeGoods, Target, or Amazon. Mixing metallics (brass + matte black, or chrome + gold) feels intentional, not matchy.
Budget: $100–$300 to add brass accents across your TV wall. Time: 30 minutes to swap out existing hardware or rearrange accessories.
Metallic accents catch light and draw the eye around your TV wall, creating visual rhythm. Your space feels curated and modern.
9. Hang a Large Mirror to Reflect Light

A statement mirror (36–48 inches) beside or above your TV bounces light around the room and creates the illusion of more space. Hang it asymmetrically for contemporary feel, or centered for balanced geometry.
Quality mirrors start at $80–$300 from Article, CB2, or Wayfair. IKEA’s affordable options ($40–$100) work beautifully too. Installation is simple: find a stud, use a quality bracket, and hang.
Brass or wood-framed mirrors feel more upscale than minimalist black frames. Choose based on your room’s existing metals and finishes.
A mirror reflects light and makes your TV wall less “tech-focused” and more design-forward. It also visually softens the hard rectangle of your screen.
10. Paint Your Media Console to Match Your Wall

Color drenching—using the same hue on your wall AND furniture—is evolving from paint-only to mixed materials. Match your wall color by painting or staining your media console the same tone (or 1–2 shades lighter).
Use quality furniture paint ($15–$30 per can from Home Depot or Benjamin Moore) and a primer designed for furniture ($10–$20). Time: 2–3 coats over a weekend. Or buy a console already in your wall color ($200–$600 from Article, CB2, or Target).
This approach reads incredibly high-end because it shows intentional design thinking. Your TV wall becomes one unified composition.
The result is a sophisticated, gallery-like appearance. Your space feels calm and intentionally curated.
11. Install Ceiling Wallpaper for Extra Drama

Ceiling wallpaper is the 2025 trend that separates boring from “wow.” Apply patterned paper to the ceiling above your TV wall for unexpected drama and visual depth.
Choose a bold geometric or pattern-drenched design ($40–$150 per roll from Ruggable, Spoonflower, or specialty wallpaper shops). Professional installation runs $300–$600; DIY takes an afternoon on a ladder. Peel-and-stick makes it renter-friendly.
Pro tip: pattern on the ceiling draws the eye upward, making rooms feel taller. Pair it with a simpler wall color or complementary wallpaper below.
This detail signals that your space is thoughtfully designed. It’s a showstopper move that guests always ask about.
12. Add Architectural Trim or Molding

Trim work—crown molding, picture rails, or wainscoting—adds architectural interest and makes a space feel finished and intentional. Install pre-made trim ($1–$3 per foot from Home Depot) for budget-friendly height and visual polish.
DIY installation takes a weekend and costs $100–$300 in materials. Professional installation runs $400–$800. Peel-and-stick trim ($20–$60 per kit from Amazon or Wayfair) works for renters but reads less permanent.
Paint trim white, black, or a contrasting color to your wall for definition. This creates visual boundaries and draws attention to your TV wall’s architecture rather than the screen itself.
Your space instantly feels more elevated and professionally designed. Trim is one of those details that people notice subconsciously but can’t quite name.
13. Build Open Shelving That Leaves Space Above Cabinets
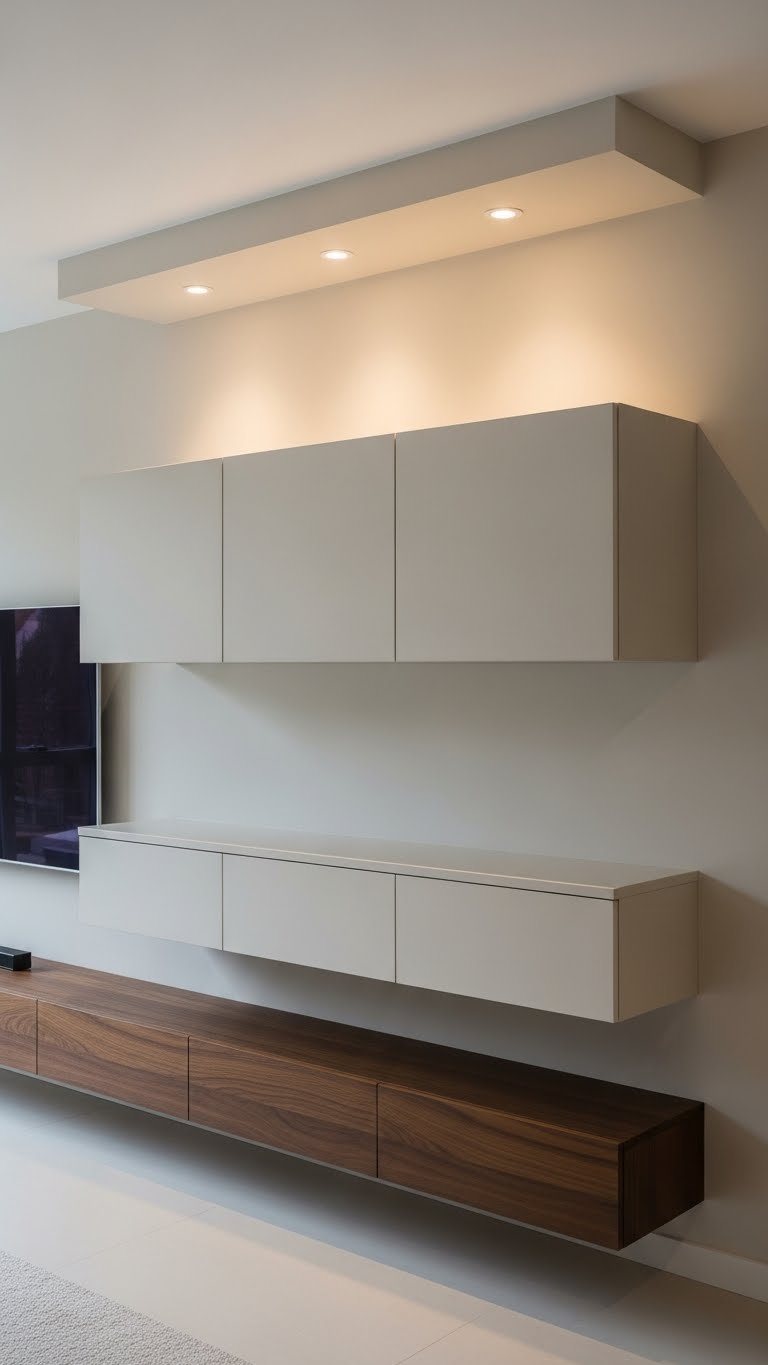
Instead of floor-to-ceiling built-ins, end your cabinets a foot below the ceiling. This “floating” effect feels less heavy and more contemporary. It also prevents dust buildup and feels cleaner.
Build or buy modular cabinets ($300–$800 from IKEA, Article, or custom makers) and have them installed to end 12 inches below the ceiling. DIY costs $200–$400 plus installation ($300–$600). Time: 1–2 days.
The gap above makes the wall breathe. You can leave it empty (minimalist), add decorative objects on top of the cabinets, or hide lighting up there.
This small detail reads incredibly high-end because it shows design restraint and planning. Your TV wall feels curated, not cluttered.
14. Layer Artwork Around Your TV

Turn your TV into the centerpiece of a gallery wall. Arrange 5–9 framed pieces around your screen in a mix of sizes (8×10, 11×14, 16×20). Mix frame colors: black, brass, natural wood.
Art prints cost $5–$30 each from Etsy or Minted; framing adds $20–$80 per piece. Gallery wall kits (from Framebridge or Artifact Uprising, $200–$400) are pricier but include everything matted and ready to hang. Total budget: $150–$500.
Arrange on the floor first to get spacing right, then install. Asymmetrical layouts feel more modern; symmetrical feels classic. Mix genres: botanical, abstract, black-and-white photography.
Your TV becomes part of a larger design story rather than the focal point. Guests see curated art, not a tech setup.
15. Install Patterned Tile or Shiplap Accent Wall
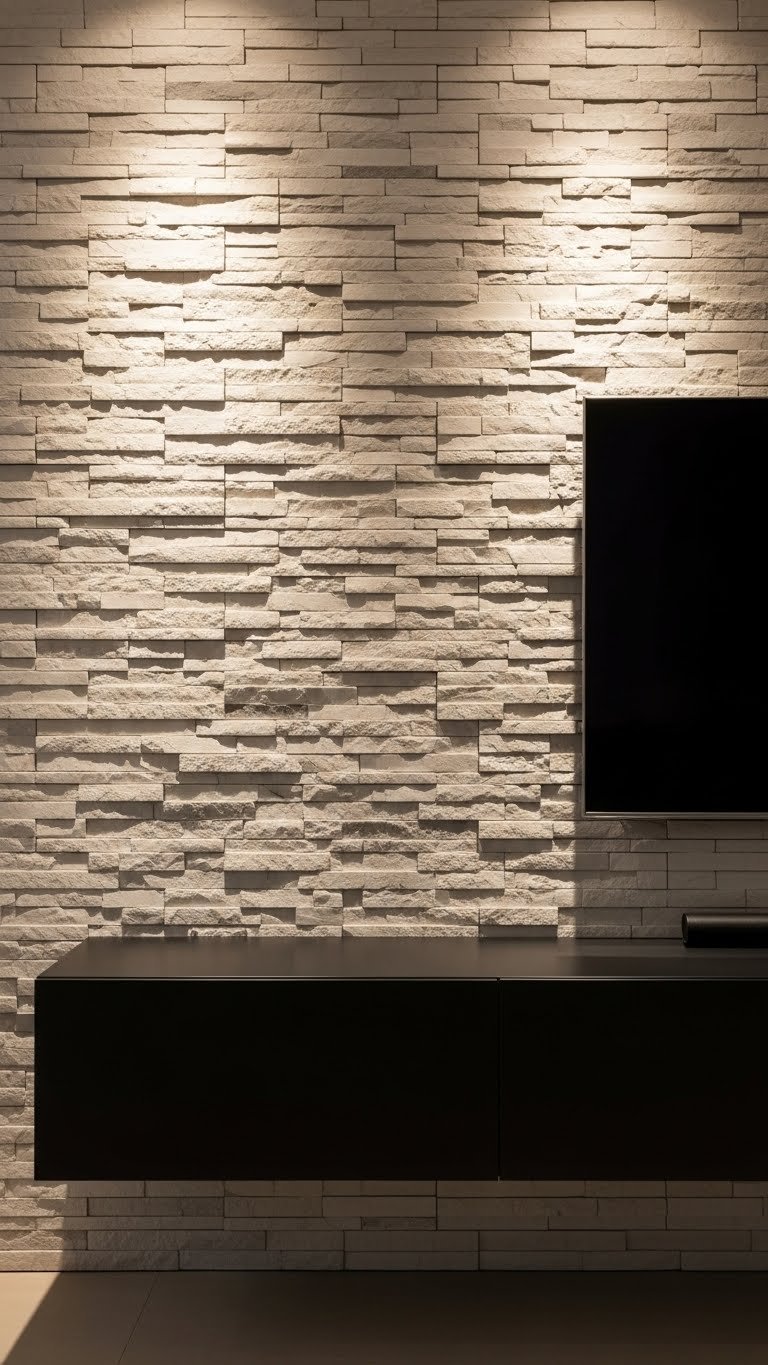
Patterned tile, stacked stone, or shiplap adds tactile richness without requiring new furniture or decor. These materials run $2–$5 per square foot and create instant architectural interest.
DIY installation is moderate difficulty ($200–$400 in materials). Professional installation costs $800–$2000 depending on pattern complexity and wall size. Peel-and-stick tile ($20–$80 per pack from Home Depot or Amazon) works for renters and takes 4–6 hours.
Choose neutral colors (cream, gray, warm white) so the texture—not color—dominates. This keeps your space clean and modern.
Texture catches light beautifully and hides minor wall flaws. Your TV wall feels curated and architectural.
16. Style Your Console with Intentional Objects
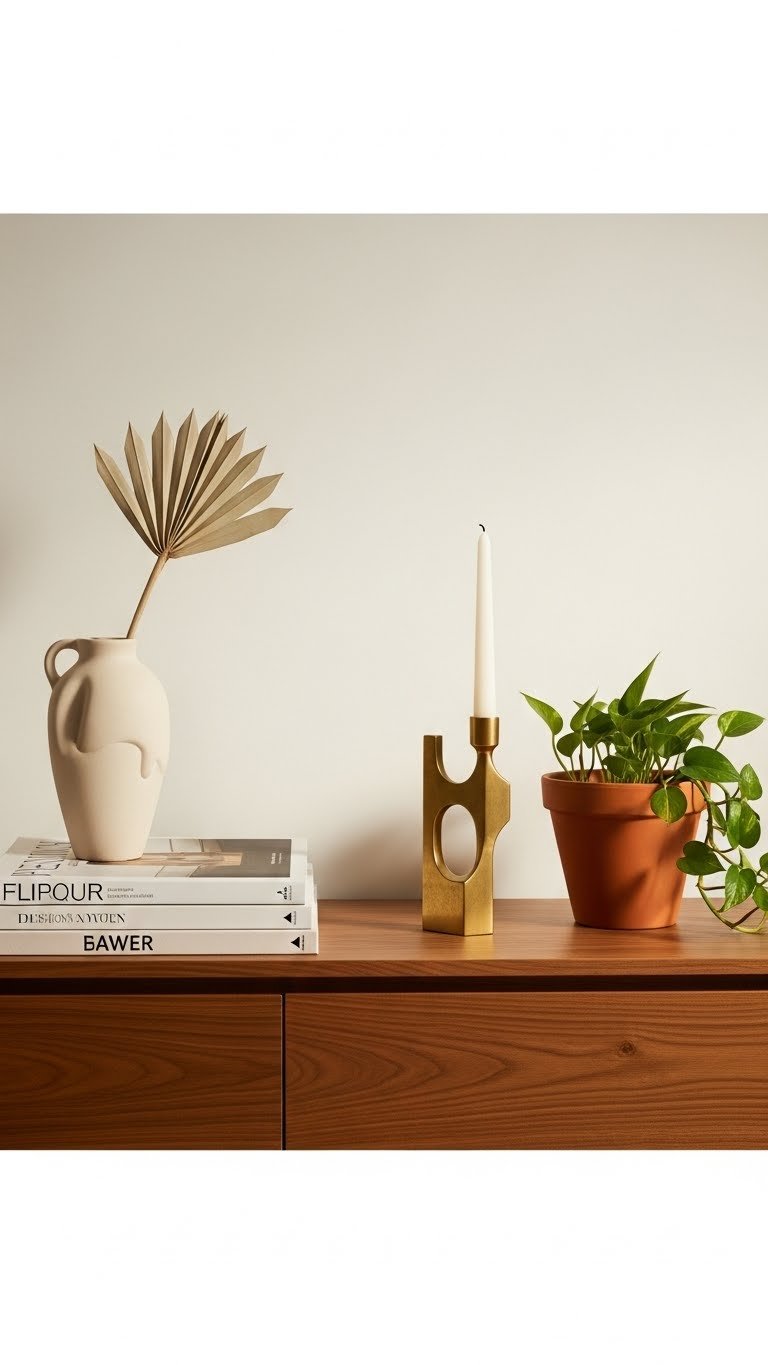
Your console styling makes or breaks the entire TV wall. The trick: three-object rule with intentional negative space. Odd numbers feel natural; even numbers feel staged.
Invest in one quality object per section: a sculptural vase ($40–$100), a stack of art books ($20–$50 total), a plant ($10–$30), and a statement candle ($15–$40). Mix materials and heights.
Spend 15 minutes arranging. Leave breathing room between pieces. Remove anything that doesn’t serve a design or functional purpose (no remote clutter visible).
The result is a console that looks intentional and calm. Your TV wall reads as designed, not just functional.
17. Add a Textured or Lacquered Finish on Your Console

Lacquered or high-gloss finishes on your media console add retro glamour and read expensive instantly. A lacquered finish catches light and adds visual interest even when minimally styled.
Buy a lacquered console ($300–$800 from CB2, Article, or West Elm), or have your existing console professionally refinished ($400–$700). High-gloss paint ($20–$40 per quart from Benjamin Moore) works for DIY updates—just use primer and 2–3 coats.
Installation or paint time: 1–2 days. The glossy finish requires regular dusting but looks worth it.
The shine makes your TV wall feel gallery-like and sophisticated. Light reflects off the surface, creating visual depth and movement.
18. Create Negative Space with a Bare Wall
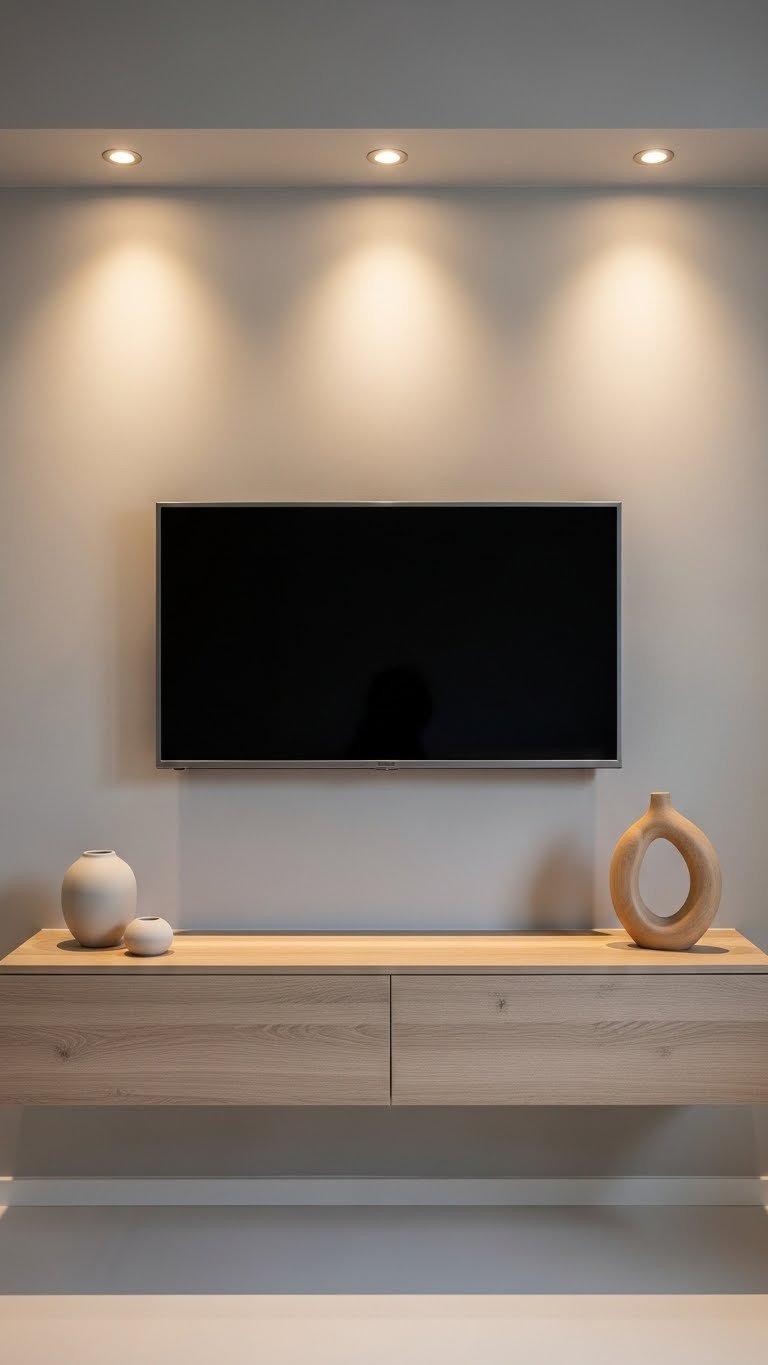
Sometimes the best TV wall is a calm, bare wall. In contrast to clutter culture, negative space reads incredibly intentional and high-end in 2025.
Paint your wall a soft, neutral tone ($20–$60 for quality paint). Mount your TV and add one floating console ($200–$500) with minimal styling. That’s it.
This approach works beautifully if your room already has visual interest elsewhere (busy rug, statement furniture, or artwork elsewhere). It prevents your space from feeling overwhelming.
The simplicity signals confidence and intentional design. Less becomes your statement.
19. Incorporate a Statement Chandelier or Pendant Above

Hanging a statement light above your TV (off to the side, not directly above) adds drama without interfering with viewing. Choose a sculptural pendant ($100–$400 from Article, Rejuvenation, or CB2) that complements your room’s style.
Professional electrician installation: $150–$250. DIY installation (if you’re comfortable with electrical work): 30–60 minutes. You’ll need a light fixture rated for your ceiling height and electrical box location.
Pro tip: position the pendant asymmetrically for modern feel, or directly above for classic symmetry.
This detail draws the eye upward and adds personality. Your TV wall becomes part of a larger lighting design story.
20. Use Colorful Cabinetry to Frame Your TV

Colorful built-in cabinetry (not white or natural wood) is the 2025 shift in TV wall design. Paint cabinets in emerald, burgundy, navy, or muted sage to create richness without clutter.
Build or buy modular units ($400–$1200 from IKEA, Wayfair, or custom carpenters) and paint with quality furniture paint ($20–$40). Or invest in pre-built colored cabinets ($600–$1500) from Article or CB2.
Installation time: 1–2 days DIY or 1 day professionally ($300–$600). Pro tip: mix glass doors (upper shelves) with closed storage (lower shelves) for visual interest without overwhelming display.
Deep-toned cabinetry is having a moment because it feels intentional, curated, and slightly bold without being risky. Your TV wall becomes design-forward.
21. Mount Your TV on an Articulating Arm
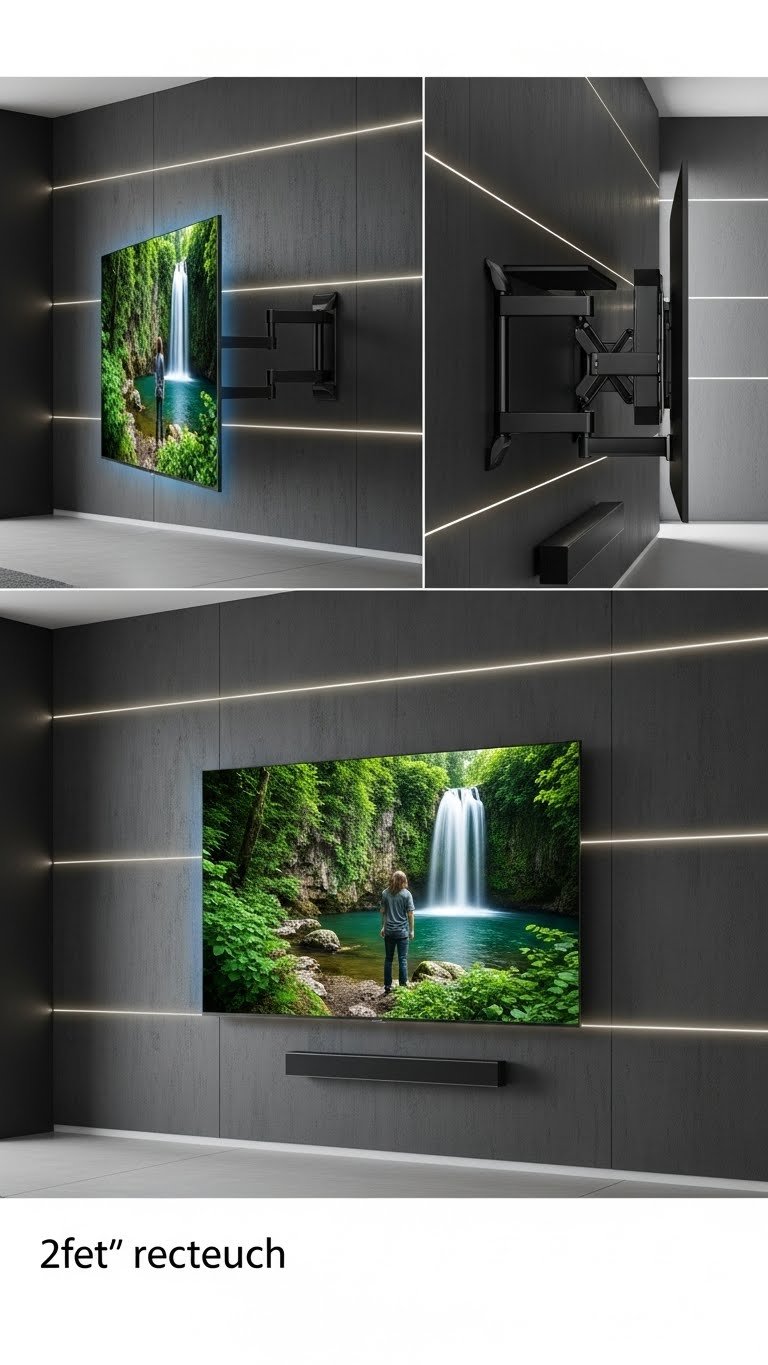
An articulating (or full-motion) TV mount lets you angle and pull your TV away from the wall, making it functional and less permanently fixed. These run $100–$300 from Amazon, Best Buy, or Monoprice.
Professional installation adds $150–$250; DIY takes 1–2 hours with basic tools. The arm becomes nearly invisible when your TV is flat to the wall, but adds flexibility for viewing from different angles.
This option works beautifully if your TV wall is also a work-from-home or multipurpose space. You’re not committed to one viewing angle.
The arm adds a subtle high-tech element that feels intentional. Your TV becomes flexible rather than permanently anchored.
22. Create a Two-Tone Wall with Contrasting Trim
Split your TV wall into two colors with contrasting trim dividing them. Paint lower third in a neutral tone and upper in jewel tone (or reverse). Add a trim stripe between for architectural detail.
Paint costs: $30–$60 for two colors. Trim paint: $10–$20. Painter’s tape ($5) and basic supplies complete it. DIY time: 4–6 hours. Professional painter: $400–$800.
This technique makes your wall feel taller and adds visual interest. It’s grown up than a single color and feels intentional without being trendy.
The two-tone approach reads magazine-quality. You’ve clearly thought about proportion and color.
23. Add a Woven Wall Hanging or Macramé Accent
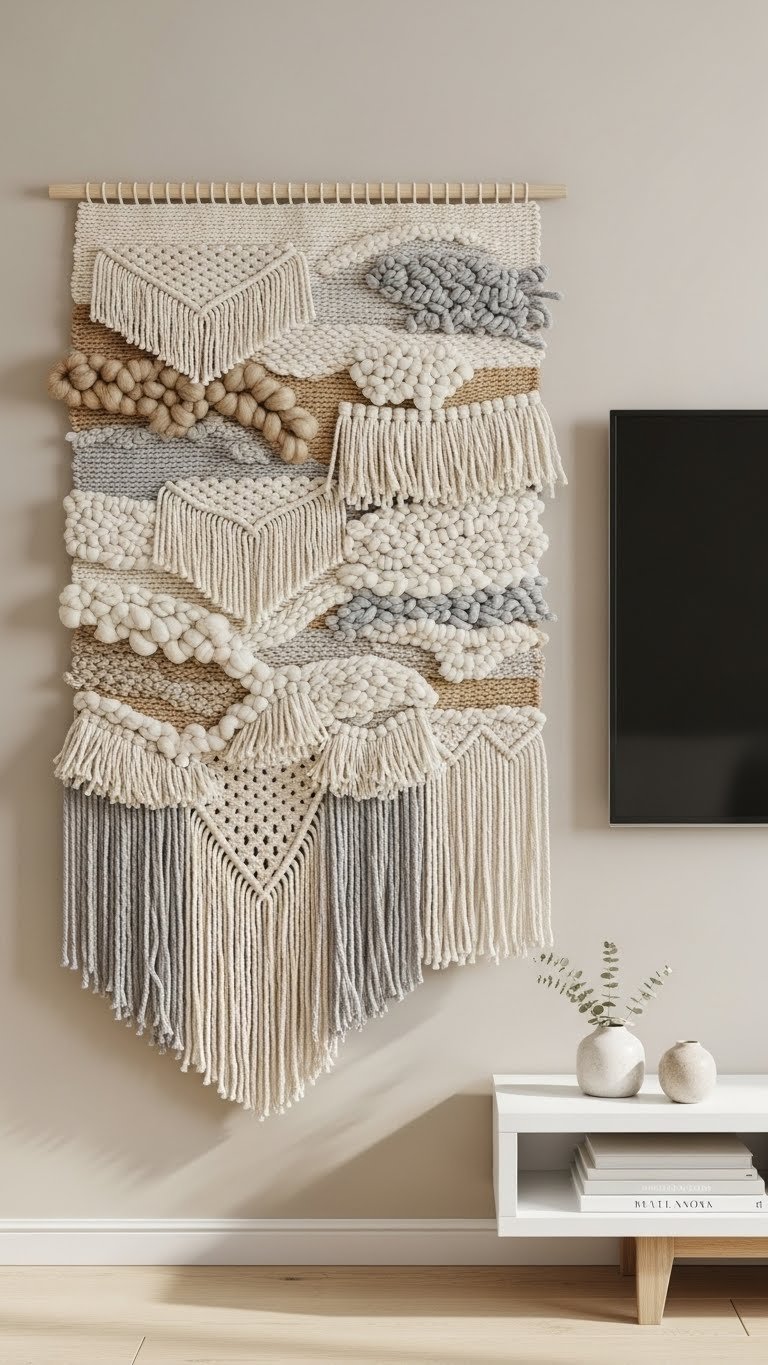
A large woven accent (macramé, jute, or woven wool) adds warmth and softness to a modern TV wall. Hang it asymmetrically beside or above your TV for balance.
Shop for weavings on Etsy, West Elm ($50–$200), or Anthropologie ($60–$150). DIY macramé kits ($20–$50) from Amazon let you create one. Installation: 15 minutes with a simple hook or nails.
Woven textiles add “dopamine decor” vibes—joyful, personal, and tactile. They soften hard edges and prevent your space from feeling sterile.
The weaving makes your TV wall feel more like a home and less like a showroom. It adds personality and warmth without clutter.
24. Install a Room Divider or Bookcase Beside the TV

A tall bookcase or room divider beside your TV defines the space and adds functional storage. This works beautifully in open-concept homes where you want to create visual separation.
Buy a tall open bookcase ($150–$400 from IKEA, West Elm, or Wayfair) or a folding divider ($50–$200). Position it perpendicular to your TV wall to create a sense of boundary.
Style the bookcase with books, plants, and objects. The divider becomes part of your TV wall’s design rather than just storage.
This approach solves two problems at once: it styles your TV wall AND creates spatial definition in an open room.
25. Use Textured Curtains or Pleated Fabric as a Backdrop

Floor-to-ceiling curtains or fabric panels flanking your TV add theatrical drama and softness. Hang lightweight linen or patterned fabric from a minimal rod on either side of your TV.
Fabric costs $15–$30 per yard from Joann or online. A pair of curtains (36–48 inches wide): $60–$150. Rod ($30–$100 from Target, IKEA, or specialty hardware stores). Sewn or hung: 1–2 hours DIY or $100–$200 professionally.
This approach is renter-friendly if you use tension rods. It adds elegance without feeling fussy.
Fabric softens the rectangular hardness of a TV and adds color or pattern flexibility. Your space feels more interior-design-forward.
26. Pair Your TV Wall with Matching Side Tables
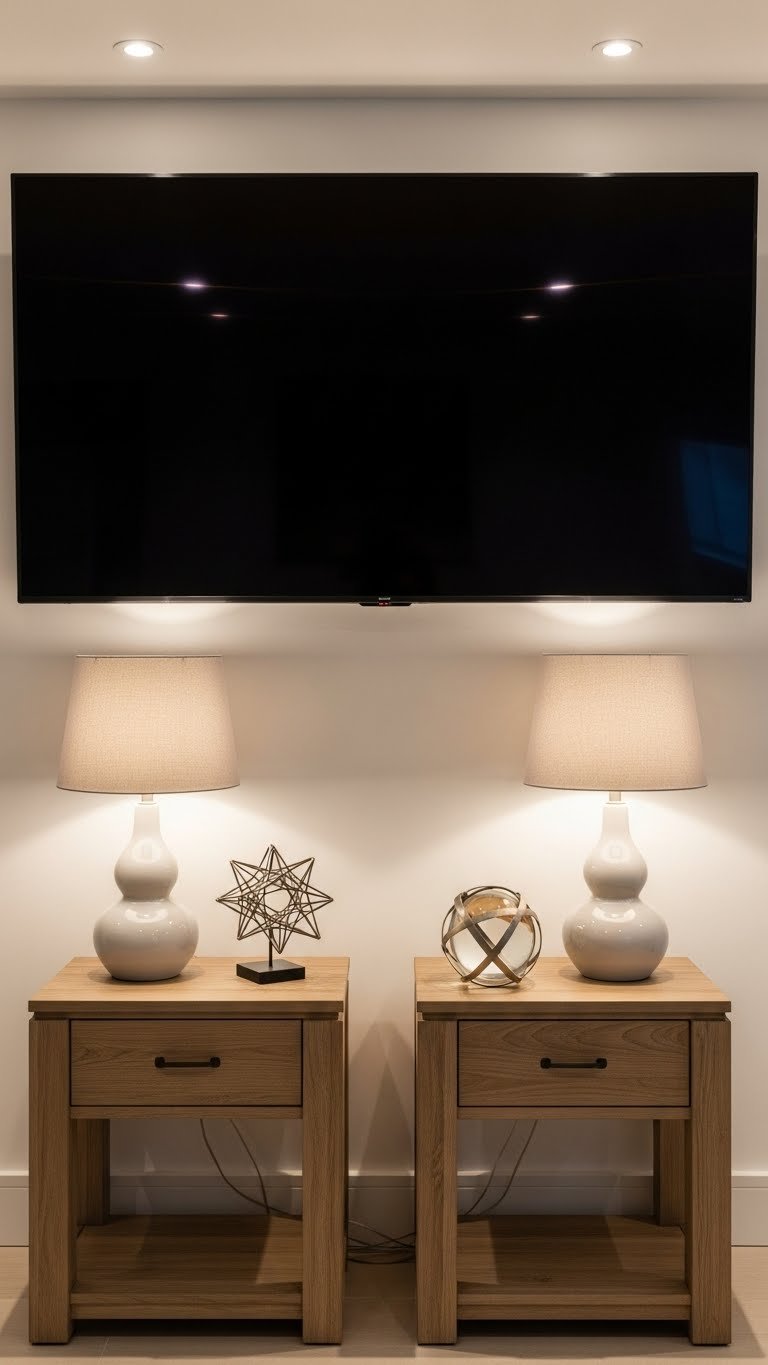
Matching side tables flanking your TV create visual balance and functionality. They give you surfaces for lamps, plants, or decorative objects without making your TV wall look cluttered.
Invest in a pair of tables ($200–$500 total from Article, CB2, IKEA, or Wayfair) in matching or complementary finishes. Height should be roughly 24–28 inches. Position them symmetrically on either side of your TV wall.
Top each table with a small lamp ($20–$80 each) and one object (plant, sculpture, or book stack). This adds layered lighting and visual interest.
Matching tables feel intentional and polished. They give your TV wall structure and purpose beyond just viewing.
Save this post and pick just one idea to start with this weekend. Whether you go bold with color, add architectural details, or keep it minimal, you’ll be amazed how a intentional TV wall changes the feel of your entire room.
Leave a Reply