Your closet doesn’t need to be huge to work hard for you. Whether you’re dealing with a tiny reach-in, awkwardly shaped nook, or just lack of usable wall space, smart storage solutions can double what you can fit—without renovating. We’ve gathered 23 practical wall closet ideas that layer storage, style, and function into every inch. From no-cost organizing tricks to investment pieces that last years, you’ll find something that fits your budget and skill level. Let’s dig in and see how much room you’ve actually been missing.
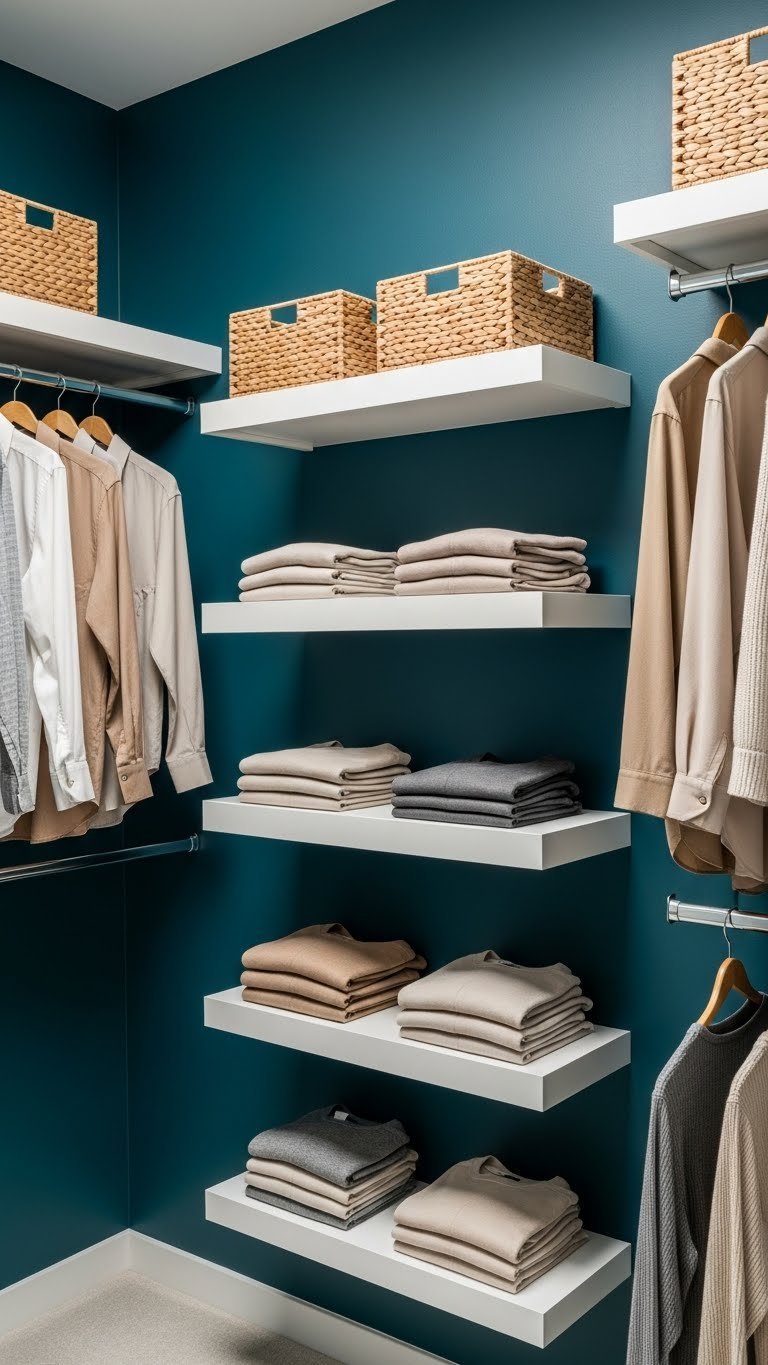
1. Install Floating Shelves Above the Rod

Floating shelves grab dead space you’re probably ignoring right now. By mounting shelves 12–18 inches above your existing rod, you create premium real estate for off-season items, accessories, or folded inventory.
Use a stud finder (around $15–$25) to locate wall supports, then install floating shelves with heavy-duty brackets. IKEA’s LACK shelves run $15–$25 each; Home Depot carries custom options up to $100+. This takes about 30 minutes per shelf with a drill and level. If walls scare you, lean-to shelving units ($40–$150) work for renters and offer similar storage without drilling.
The payoff? You’ll reclaim 25–30% more storage in the same footprint, and everything stays visible and within reach. No more forgotten items shoved in the back.
2. Use Pull-Out Baskets on Wall-Mounted Rails

Pull-out baskets solve the frustration of rummaging through stacks. Wall-mounted rails let you slide baskets in and out smoothly, so nothing gets lost behind other items.
Install metal rail systems (around $50–$150 depending on depth and width) using a drill and level. Options include wire baskets from Elfa ($30–$60 per basket) or woven styles from Wayfair ($40–$80). This weekend project takes 1–2 hours and transforms how you access folded clothes, scarves, or seasonal gear. Renter-friendly alternative: lean-in basket carts with wheels offer the same mobility without wall mounting.
You’ll spend less time digging and more time getting dressed. Items stay organized and easy to grab, even in narrow spaces.
3. Paint an Accent Wall with Deep Color
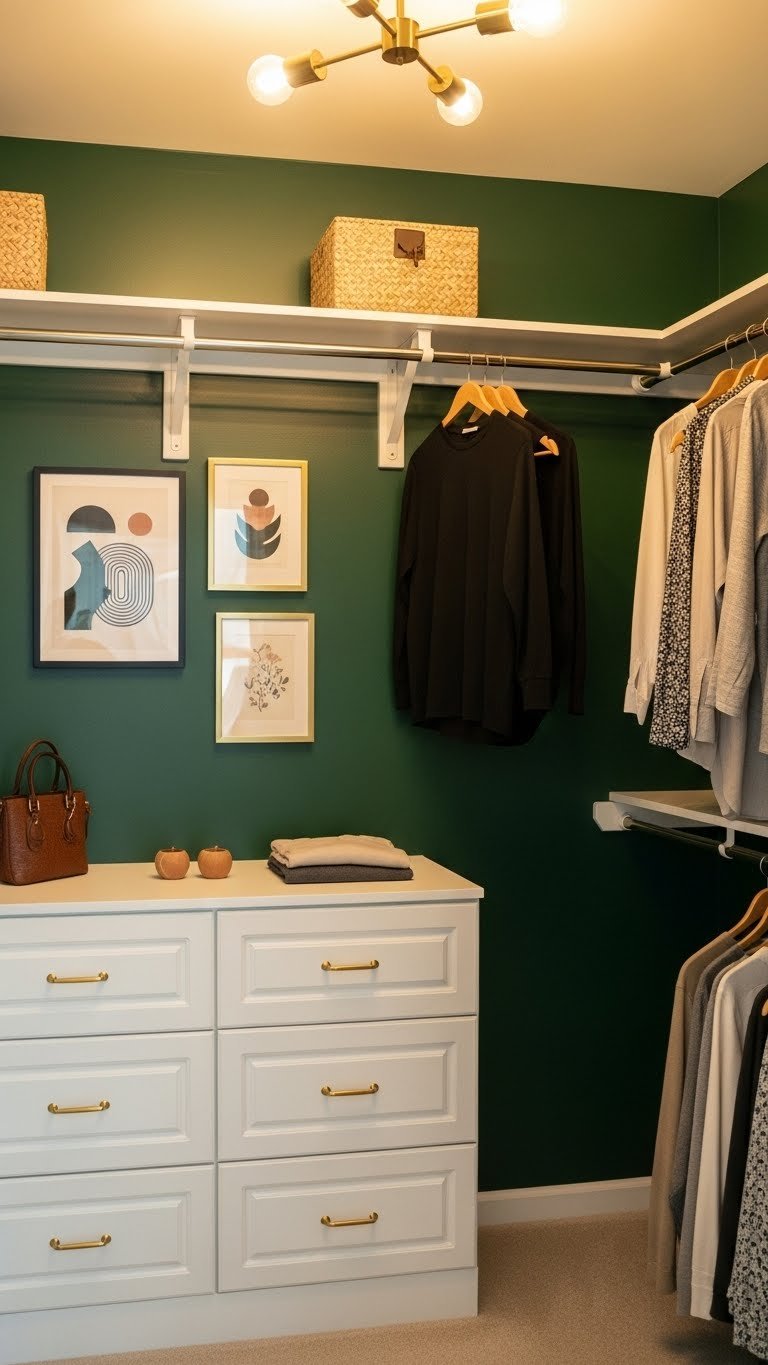
A moody wall color makes your closet feel like an intentional retreat, not just a storage box. Deep greens, navy, or charcoal create a boutique-like backdrop without eating space.
Choose a semi-gloss or satin finish paint from Sherwin-Williams, Benjamin Moore, or budget option Behr (all $30–$60 per gallon). You’ll need about 1 quart for most reach-ins. Paint one wall in 1–2 hours with a roller and brush. The color doesn’t shrink space; it makes it feel curated. Renters can use removable peel-and-stick wallpaper ($20–$50 for the same vibe).
This simple refresh makes getting dressed feel special. Your eye naturally focuses on organized shelves against moody color, creating an almost spa-like atmosphere.
4. Add a Valet Rod for Daily Outfit Planning
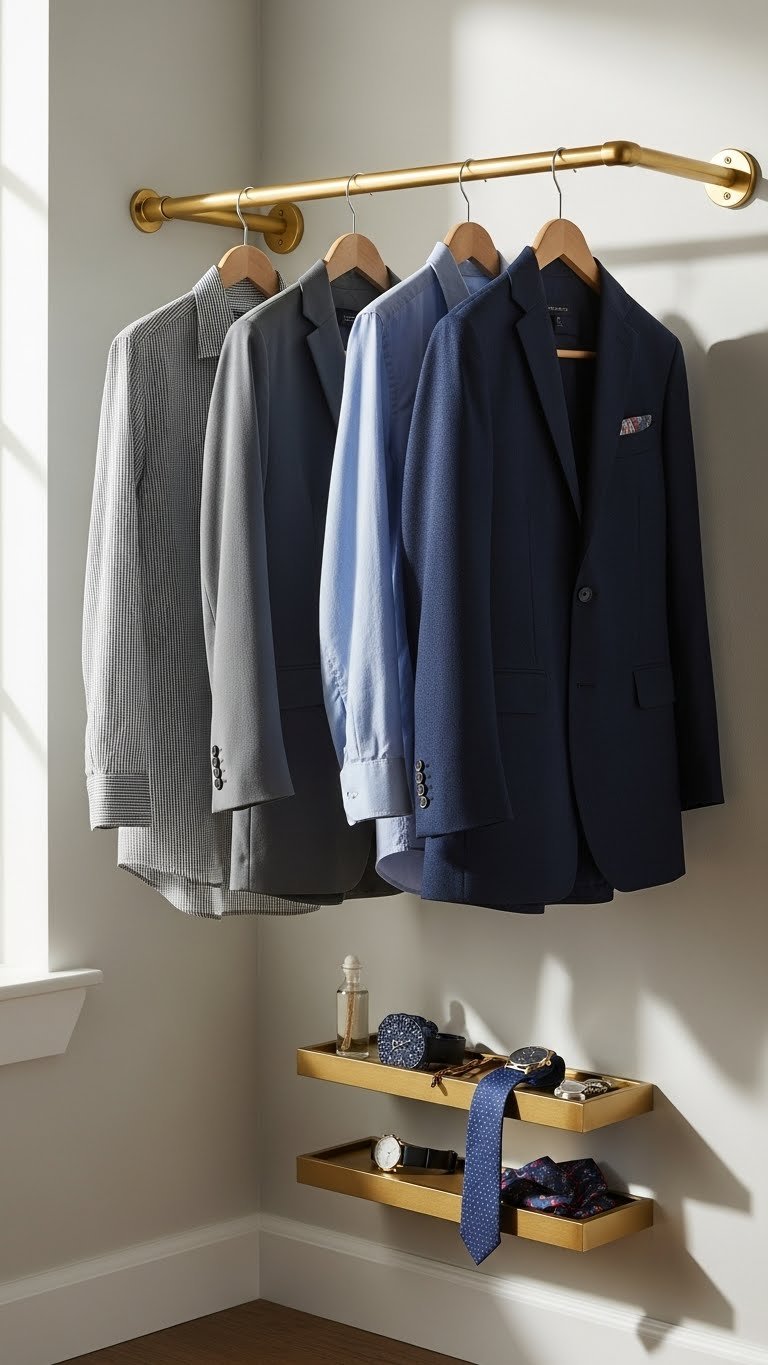
A valet rod lets you curate tomorrow’s outfit tonight, cutting morning decision time from 15 minutes to 30 seconds. It’s the single smartest accessory for busy lives.
Mount a rod ($25–$60 from IKEA, Target, or Amazon) at about 60 inches high using heavy-duty brackets. Installation takes 15 minutes with a drill. Pair it with hooks or leave it bare for draping. Use this spot to hang weekly outfits or showcase a special piece you want to wear. This costs almost nothing and works in closets of any size.
You’ll notice the difference immediately—mornings feel calmer, and you wear more of what you actually own. Plus, that rod becomes a tiny gallery for pieces you love.
5. Install Matte Black Hardware for Instant Personality
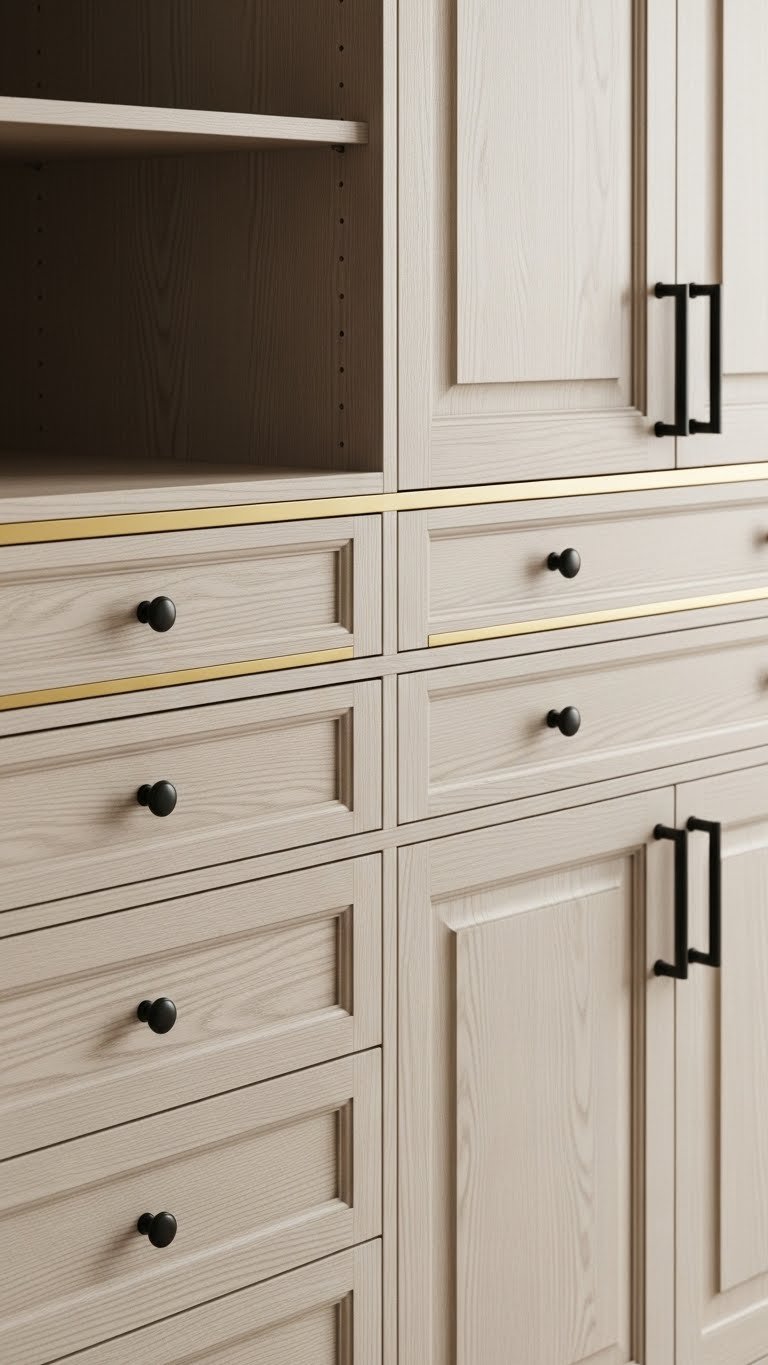
Swapping out basic hardware to matte black or gold gives custom-closet vibes with a $30–$100 investment. It’s one of the top requested upgrades for 2025 and works because it’s visible and tactile.
Purchase knobs and pulls from Wayfair, Amazon, or Home Depot (usually $1–$3 each). A typical reach-in needs 8–12 pieces. Swap them out in 30 minutes with just a screwdriver; keep original hardware in case you move. Pair matte black with natural wood shelves or mix it with gold accents for a two-tone look that creates visual interest without clutter.
This tiny change makes your closet look intentional and high-end. Every time you open a drawer, you’ll feel that upgrade.
6. Create Zones with Adjustable Shelving
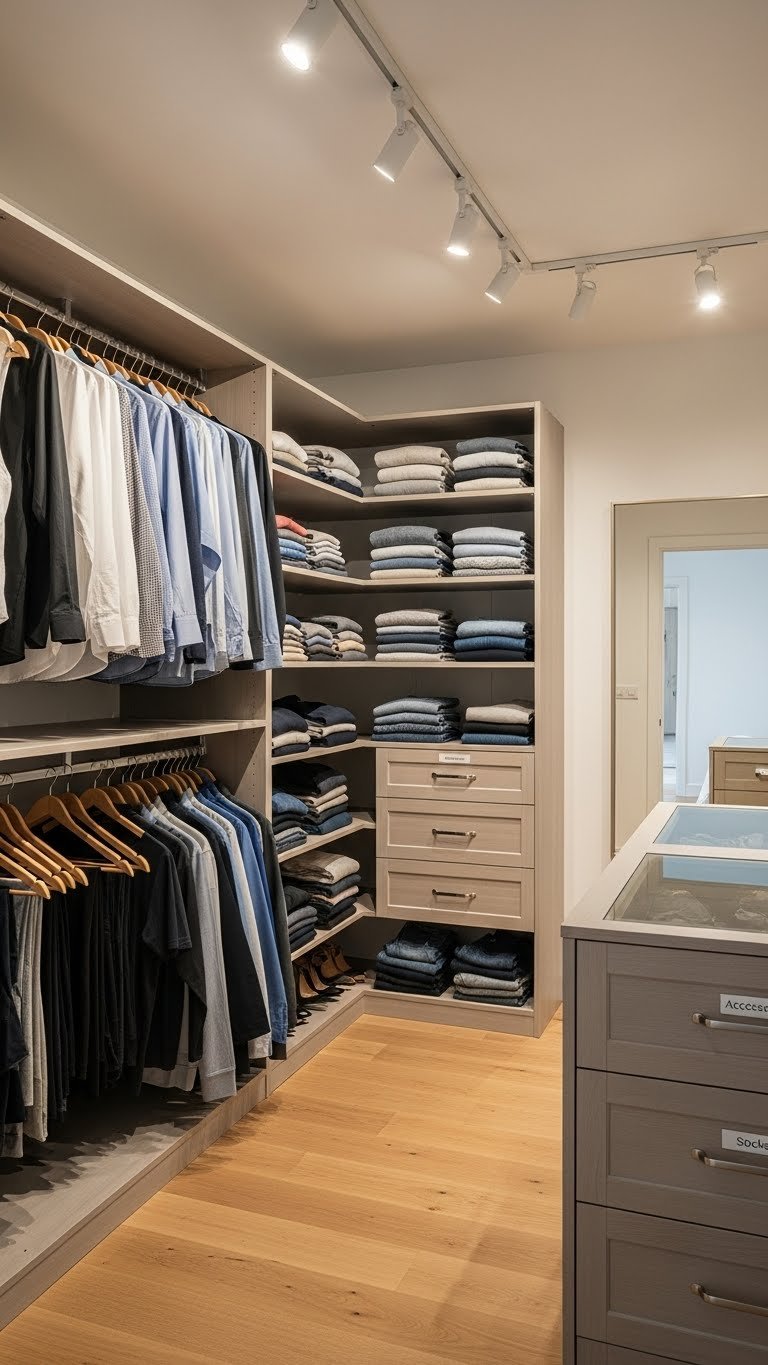
Zoning turns chaotic storage into a logical system where everything has a spot. By giving tops, bottoms, accessories, and shoes each their own area, you cut search time and prevent avalanches.
Install adjustable shelving systems from Elfa, ClosetMaid, or IKEA (around $100–$300 for a small closet) over a weekend. Assign zones by category: hanging on one side, folded items on shelves, and drawers or baskets for accessories. Label each zone with small tags or labels ($5–$15). If building from scratch feels overwhelming, start with one zone and expand as you go.
You’ll spend less mental energy searching and grab what you need automatically. Spaces like this keep working long-term because the system matches how you actually dress.
7. Use Vertical Dividers for Stacked Clothing
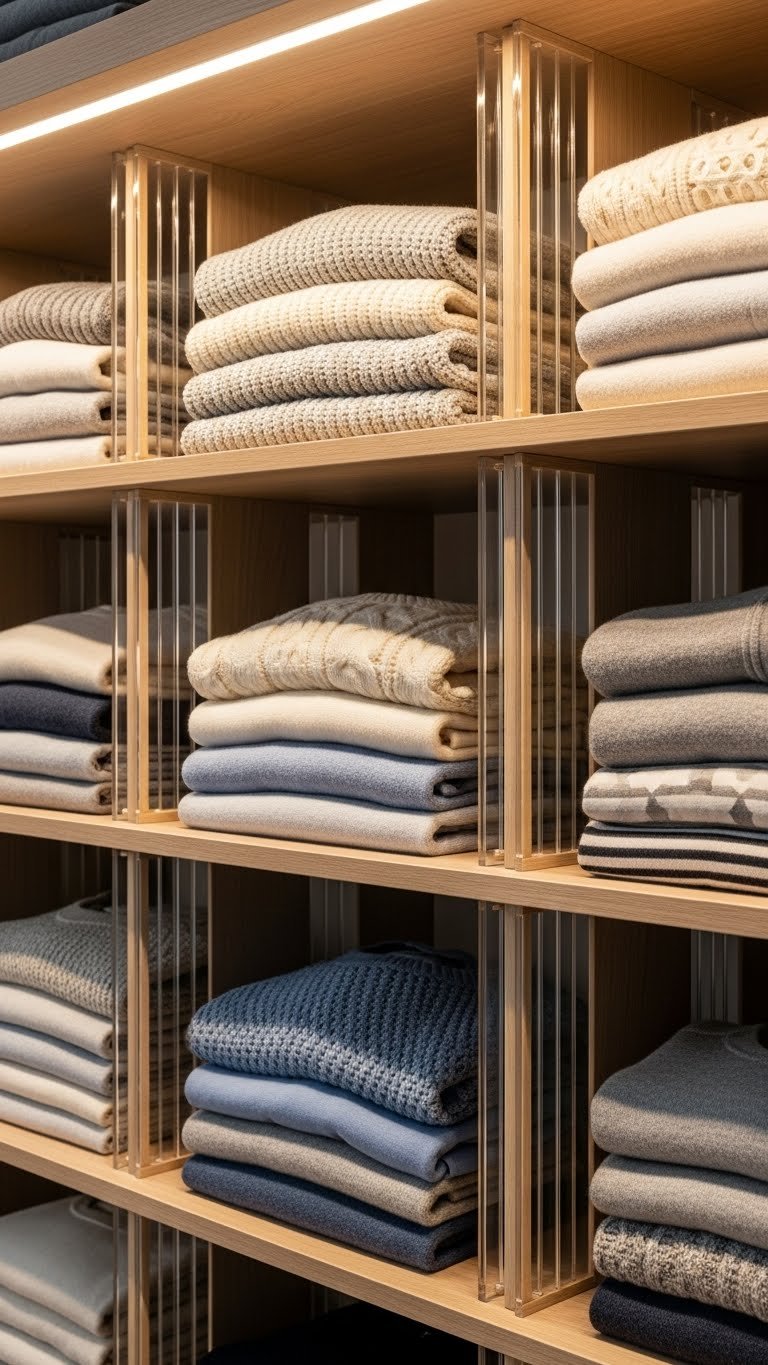
Vertical dividers prevent the topple effect where grabbing one shirt tumbles the whole stack. They’re invisible space-savers that feel smart and look polished.
Buy acrylic or wood dividers from Container Store, Muji, or Amazon ($2–$8 each); you’ll need 2–4 per shelf depending on width. Place them every 4–6 inches and stack folded items between them. Takes 10 minutes to set up. This method (sometimes called KonMari-style) works best with medium-weight items like sweaters, jeans, and tees. Lighter fabrics can shift, so use clips or velcro dots ($5–$10) if needed.
Grabbing anything won’t cause a domino effect. You see every item at once, so you actually wear everything in that stack.
8. Mount Hooks for Accessories and Bags
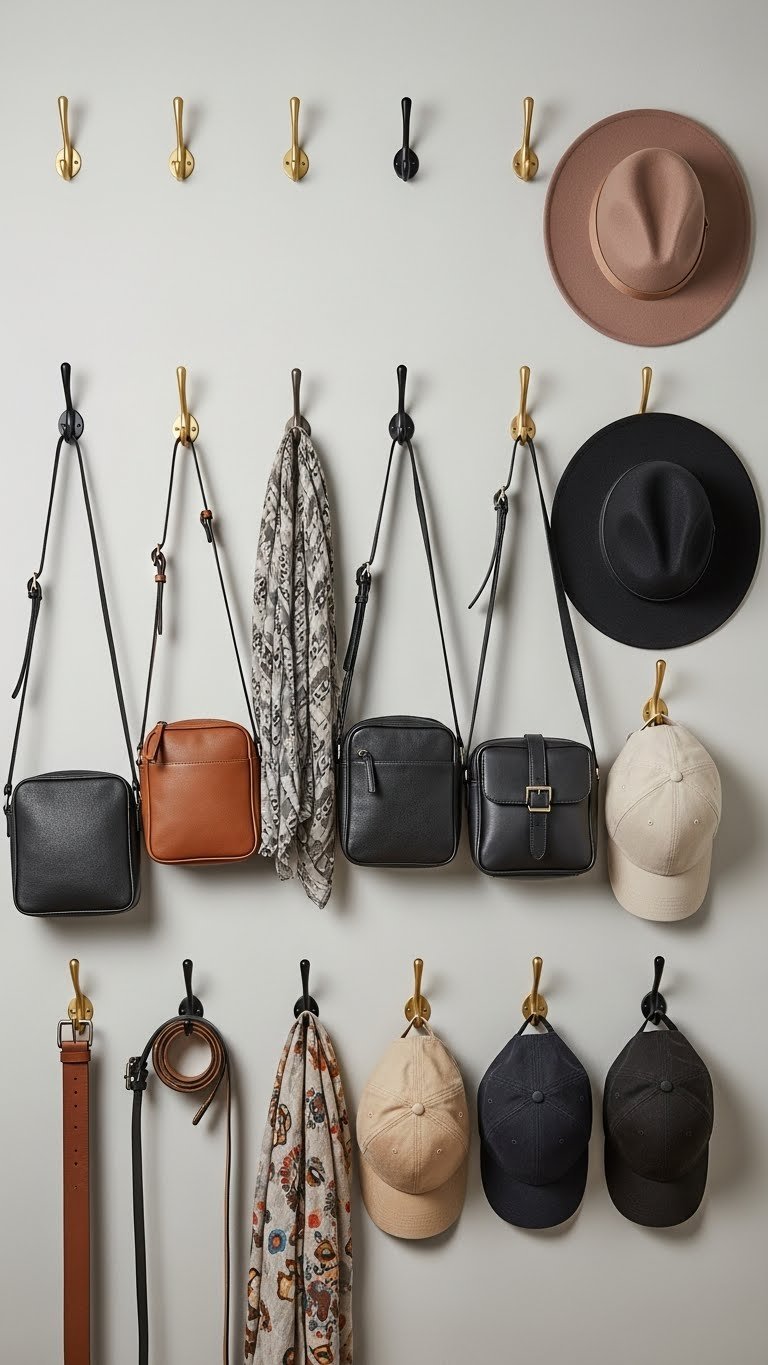
Hooks are the unsung heroes of closet space—they’re free real estate if you use wall areas that aren’t prime shelf or rod space. One wall of hooks frees up shelves for larger items.
Install adhesive hooks ($0.50–$2 per hook from Target or Dollar Store) for a renter-friendly option, or screw-mounted hooks ($1–$5 from Home Depot) for permanent solutions. Space them 6–8 inches apart and group by type: belts together, bags together, scarves together. Spend 20 minutes hanging them once you decide placement. Avoid overloading—hooks work best with 1–2 items each so nothing wrinkles.
This approach makes frequently worn accessories impossible to forget. Your bags and belts become display pieces instead of buried somewhere.
9. Add LED Strip Lighting Along Shelves
Lighting is the secret ingredient that transforms a closet from purely functional to something you want to open. LED strips cost almost nothing and make everything easier to see and access.
Install warm white LED strip lights ($15–$40 per 16-foot roll) from Amazon, Home Depot, or IKEA. Peel off the adhesive backing and run them along the underside of shelves so light shines down on items below. Takes 15 minutes total. Plug into an outlet or run a battery pack (around $10–$20). Warm white (2700K) creates a spa-like feel; cooler tones work better for color-matching outfits.
The difference is immediately visible—you’ll see every item clearly and spend less time squinting or pulling out your phone flashlight. Getting dressed feels easier.
10. Install a Notched or Angled Shelf for Sloped Ceilings
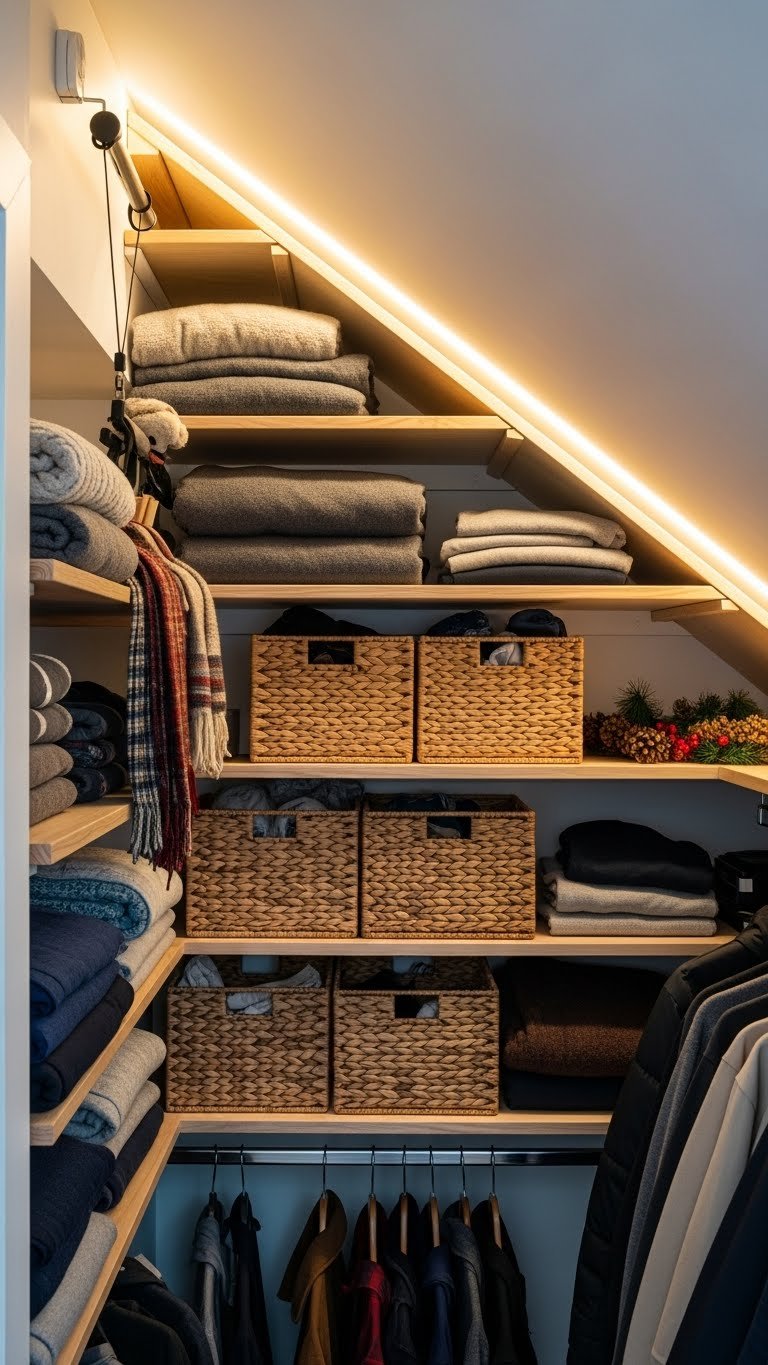
Sloped ceilings and alcoves waste tons of space unless you customize. A notched shelf designed to fit your roof line reclaims that awkward area above eye level.
Measure your ceiling slope carefully (height at the wall and at the furthest point). Order custom shelves from Organized Living, Elfa, or hire a local carpenter ($100–$300 depending on complexity). If DIY-curious, buy basic shelving and trim it with a circular saw ($50–$100 tool investment). Installation is 30 minutes to 2 hours depending on brackets and angle. This only works if you have a sloped or angled area; otherwise skip this one.
Suddenly that wasted corner becomes functional storage. You’ll feel clever using every angle of your space.
11. Use a Tiered Shelf Organizer for Shoes
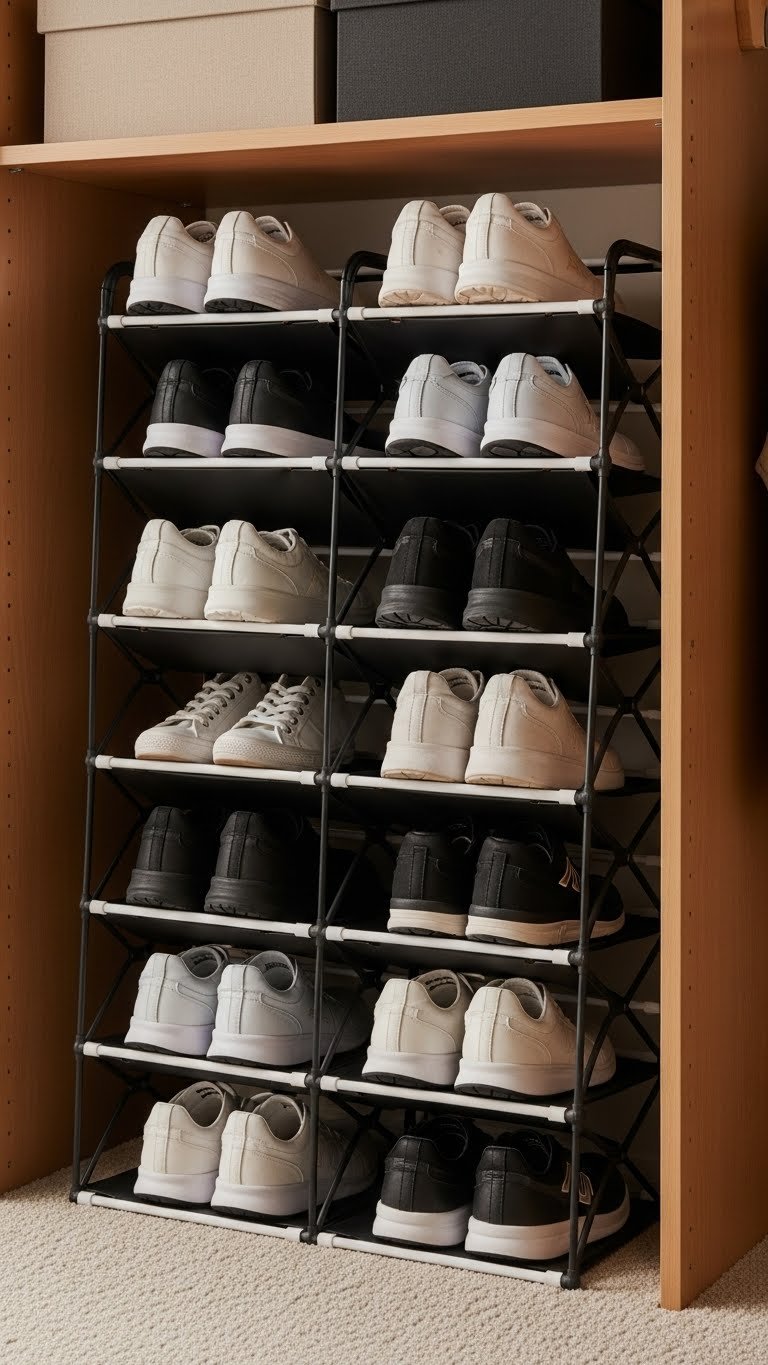
Shoes are space killers when laid flat—they hide and pile up. A tiered organizer makes them visible, protects them from dust, and actually doubles the shoes you can store per shelf.
Buy a tiered organizer ($20–$50 from Container Store, Target, or Wayfair) that sits on one shelf and holds 8–15 pairs depending on size. Some are metal; others are fabric-covered plastic. Takes 5 minutes to place. This works best for everyday shoes; special occasion or seasonal pairs can stay in dust bags on a separate shelf. Renters can use this on the floor under hanging items too.
You’ll actually see all your shoes and wear more of them. No more forgotten pairs hiding in the back.
12. Hang Fabric Door Organizers on Inside Walls

Fabric door organizers aren’t just for doors—hang them on interior walls to create pocketful of storage for small items like scarves, socks, belts, and folded tees.
Mount a hanging organizer ($15–$40 from Amazon or Target) using hooks or a tension rod. Choose ones with 9–16 pockets for best use of space. This takes 10 minutes and works even in small reach-ins. Fill pockets with rolled items (takes up 30% less space than folded), and you’ve created vertical storage without eating shelf room. Renters can use command strips instead of nails.
You’ll free up drawer space and make small items easy to locate. This setup keeps frequently used accessories visible and organized.
13. Install a Slim Drawer Unit Between Shelf Supports
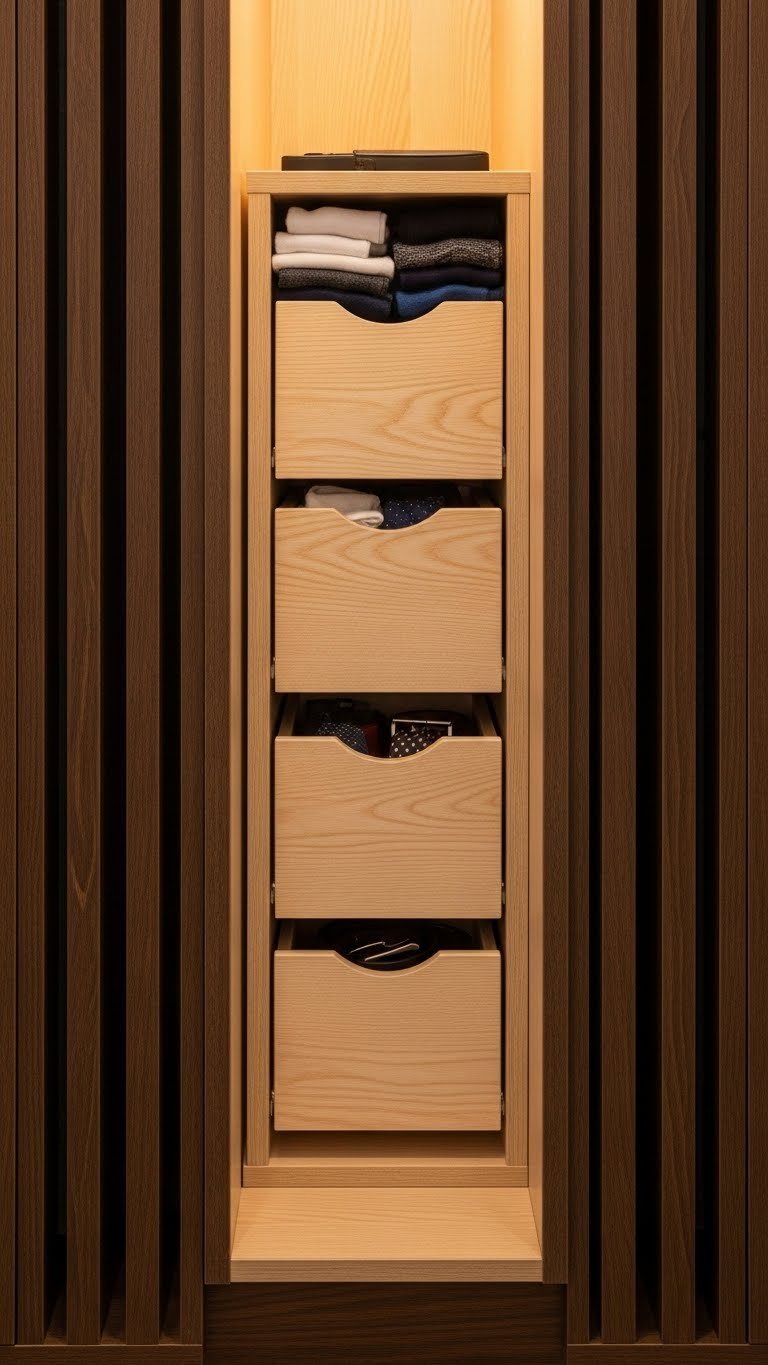
That gap between vertical supports looks like wasted space, but it’s perfect for a slim 3–4 drawer unit. You’re using space that can’t otherwise hold anything.
Measure your gap width and depth, then order or build a narrow drawer unit ($50–$150 depending on quality). IKEA’s FLYSTA ($50–$70) or similar options work well. Install it level using shims and anchors; takes about 1 hour. Fill drawers with socks, underwear, accessories, or seasonal items. If walls are textured or odd, check measurements twice before ordering.
You’ll reclaim 2–3 cubic feet of dead space with minimal effort. These drawers become the home for items that usually disappear.
14. Paint Shelves a Contrasting Color to the Walls
Painting shelves a different color than walls creates visual breaks that make the space feel organized and designed. It also helps you see shelf edges clearly, making items easier to find.
Paint shelves (or shelf edges) in white, cream, or a complementary color to your wall shade ($10–$30 for paint, $1–$5 in brushes). Use semi-gloss or satin finish so it wipes clean. Let paint dry fully before loading items (24 hours). Takes 2 hours plus drying time. If you rent, you can paint removable shelf liners instead of the actual shelf ($10–$20).
The contrast makes your closet feel intentional and curated. You’ll notice how much more put-together everything looks with that visual separation.
15. Create a Declutter Station on One Shelf
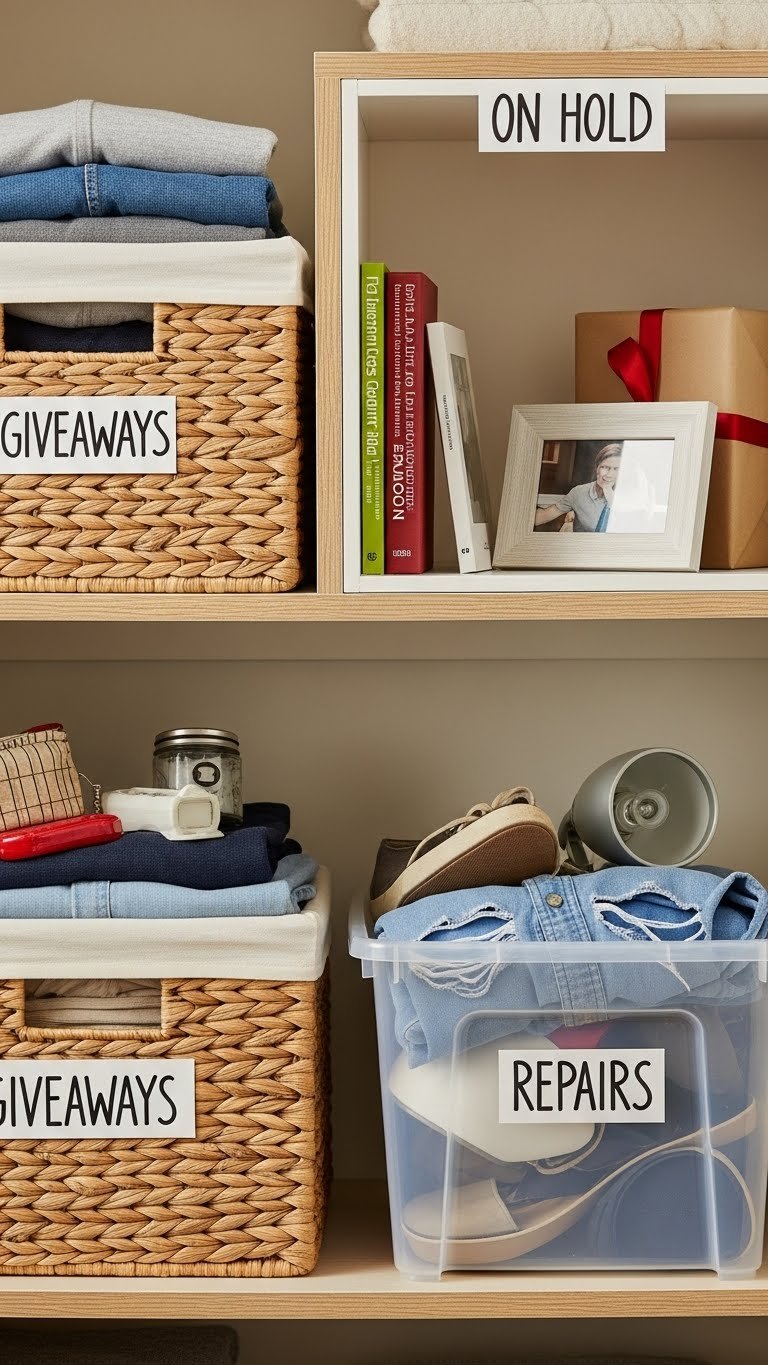
A dedicated declutter shelf keeps items you’re unsure about from taking over your whole space. It’s a holding area that forces decisions and prevents “maybe piles.”
Assign one shelf (or half shelf) and place 2–3 labeled bins there ($10–$25 for bins and labels). Categories: “giveaway,” “repair,” “donate,” or “try on again.” Set a monthly review date and act on decisions—don’t let this bin become permanent storage. This costs almost nothing and takes 20 minutes to set up.
You’ll process clothing faster and keep your main closet clean. This simple system makes decluttering feel manageable instead of overwhelming.
16. Install a Tension Rod Between Shelves for Seasonal Items
A tension rod between shelves doubles vertical storage without additional mounting hardware. It’s perfect for hanging items temporarily or creating a second “rod” for off-season pieces.
Buy a tension rod ($10–$25 from IKEA, Target, or hardware stores) that fits snugly between your shelves. No tools needed—just twist to expand. Install it 6–8 inches below a shelf so clothes hang without touching items above. Use this for off-season coats, dresses, or holiday items you only wear monthly. It takes 2 minutes to install or remove.
This clever hack reclaims space without drilling or permanent changes. Perfect for renters or anyone wanting flexible storage.
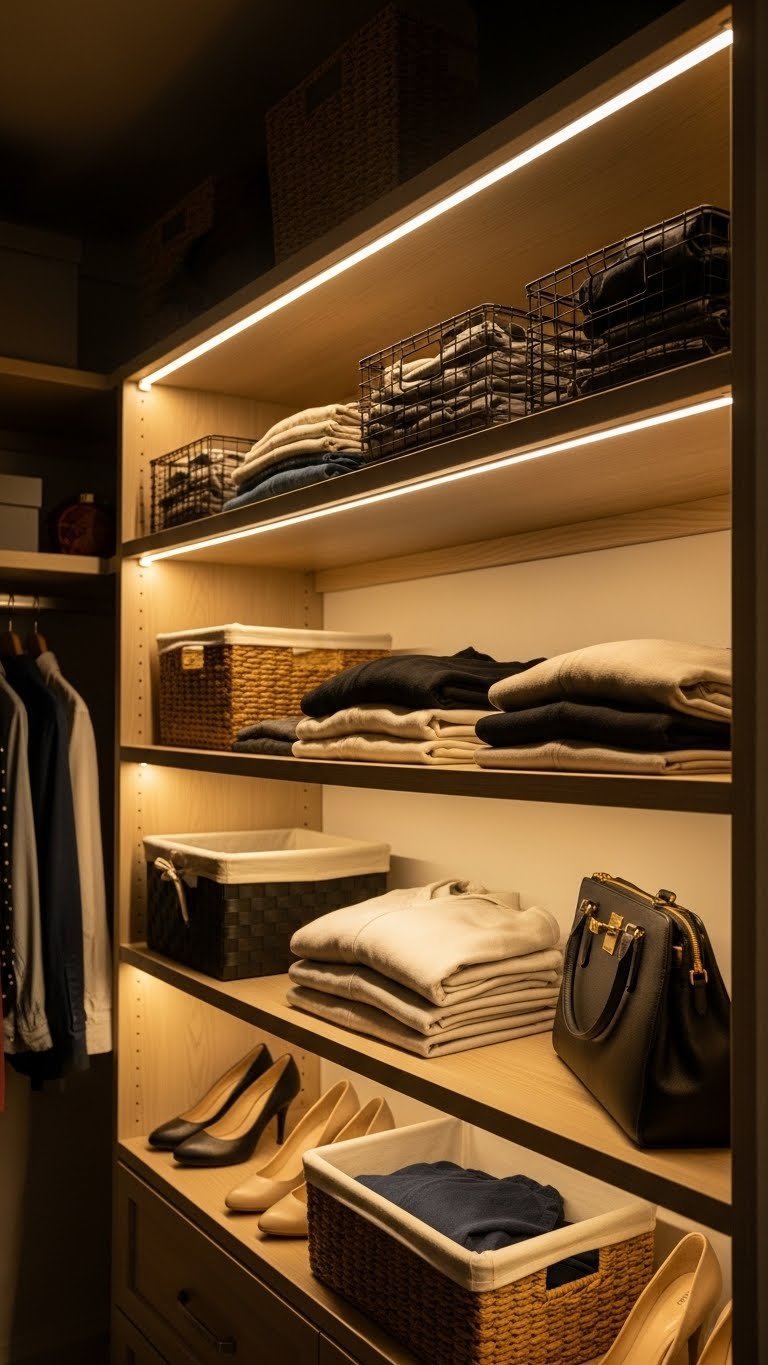
17. Use Woven Baskets to Soften Shelves and Hide Clutter
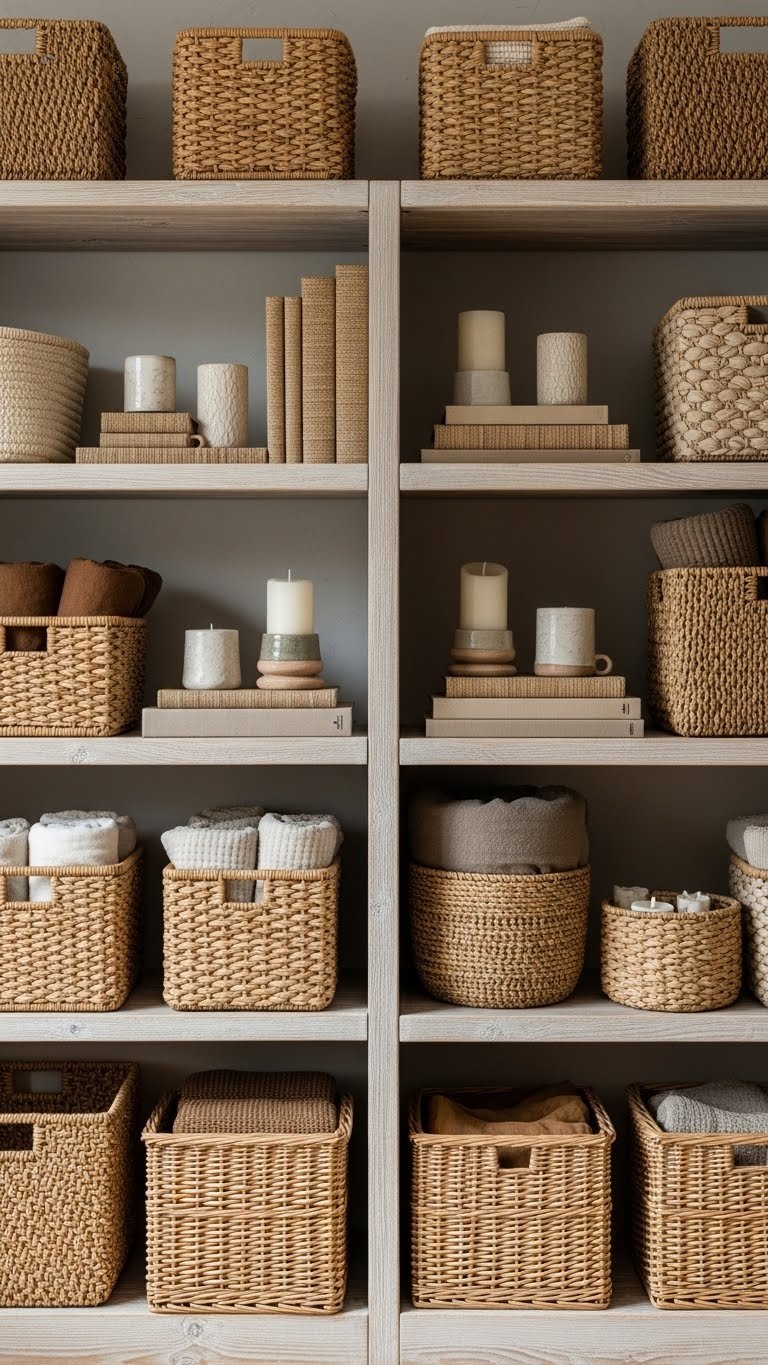
Woven baskets blend storage and style so shelves look intentional instead of utilitarian. They also hide items that don’t look good on display while keeping them accessible.
Buy natural woven baskets ($15–$50 per basket depending on size) from Wayfair, CB2, or Target. Choose sizes that fit your shelf depth, and stack them where possible. Fill with off-season items, accessories, or folded pieces. Spend 20 minutes arranging baskets for balance—mix heights and sizes for visual interest. Label basket edges with small tags if storing multiple categories. Renters can use them on the floor too.
Shelves instantly look more designed. Baskets soften hard shelving and create a space that feels warm, not sterile or overstuffed.
18. Mount a Slim Hamper on the Wall for Laundry
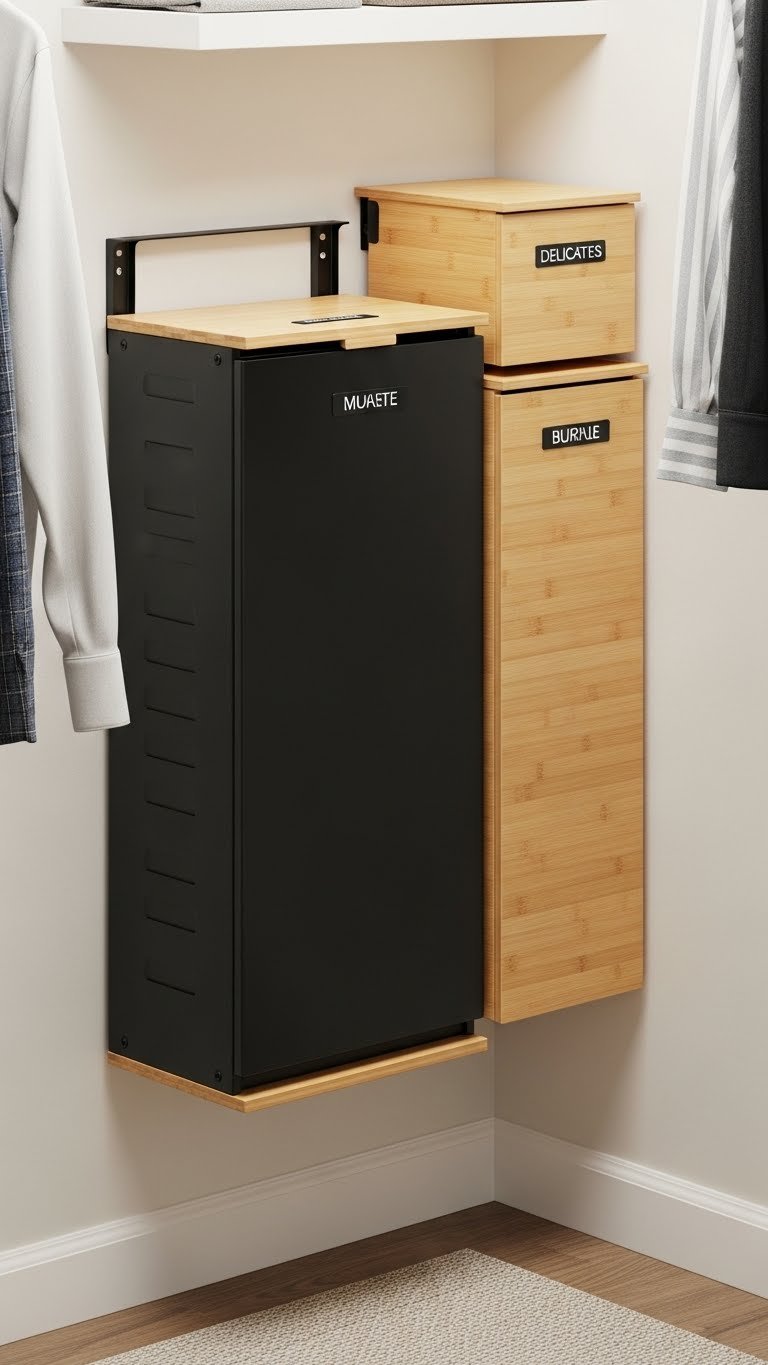
Pull-out or wall-mounted hampers hide dirty laundry while keeping it accessible. They’re a game-changer for small closets where floor space is precious.
Install a wall-mounted hamper ($30–$80 from Wayfair, Amazon, or home goods stores) using brackets and a drill (15-minute job). Choose one with a removable mesh liner so laundry goes straight from bin to washer. Alternatively, use adhesive hooks ($1–$5) to hang a fabric hamper bag ($15–$30). Space it near your entry or far corner depending on your flow. Add a small bin beside it for delicates or items needing hand-wash.
Your floor stays clear, and laundry stays contained. No more piles sneaking out from under hanging clothes.
19. Install Glass-Front Cabinets to Display Collections
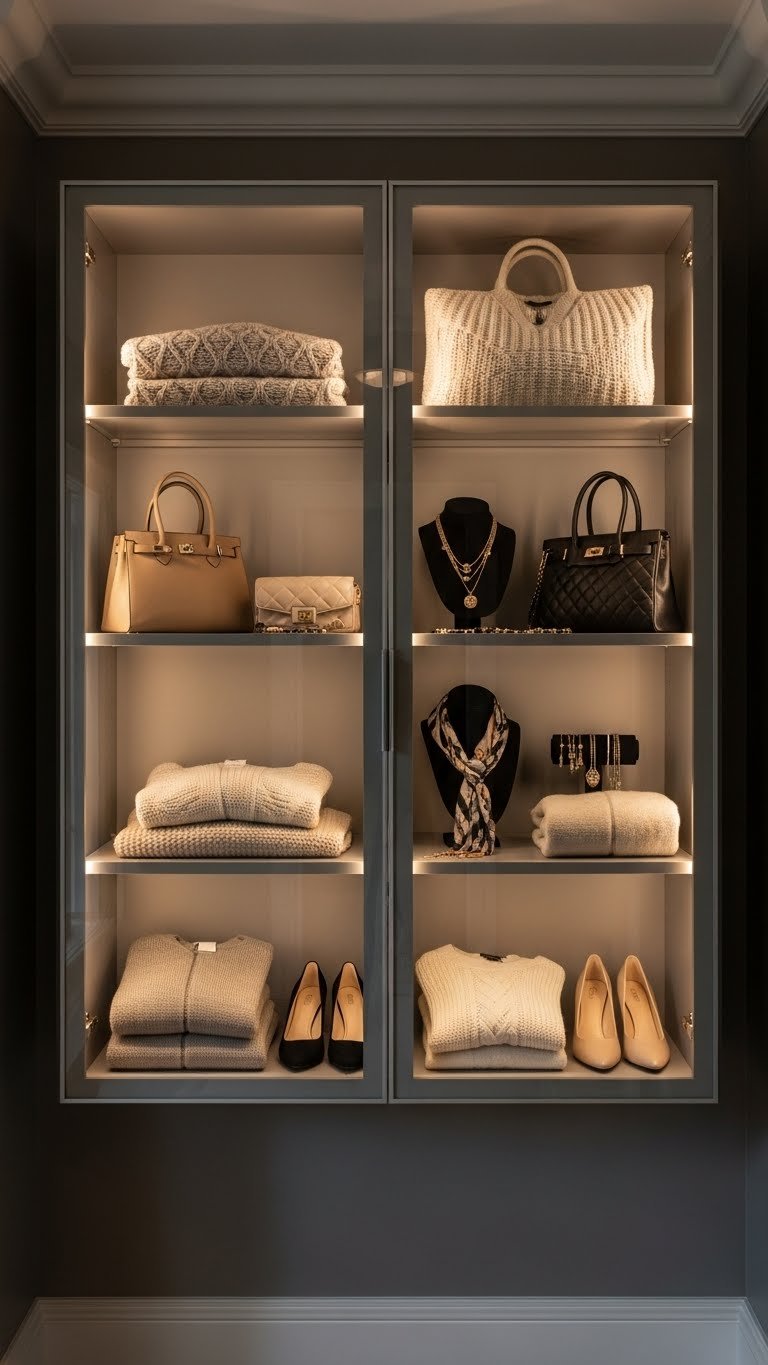
Glass-front cabinets let you display special pieces—designer bags, luxury knits, or jewelry—while keeping them dust-free. They make your closet feel more retail and less storage room.
Purchase pre-made glass-front cabinets ($80–$300 from IKEA, Target, or custom sources) or retrofit existing shelves with glass doors ($50–$150 for frame and glass). Installation takes 1–3 hours depending on complexity. Use this for 8–12 special pieces maximum so the display doesn’t feel cluttered. Lighting inside enhances the boutique effect ($20–$50 for LED strips). Renters can use open shelves with a beautiful backdrop instead.
Special pieces suddenly feel important and worthy of care. This style choice makes your closet feel curated, not just packed.
20. Add a Slim Shelf Above the Door Frame

The space above a door is totally usable. A narrow shelf there (8–12 inches deep) captures space that otherwise disappears.
Measure the width and depth above your door, then mount a slim shelf ($15–$40) using heavy-duty brackets rated for the weight you’ll store. Ideal for off-season items, keepsakes, or decorative boxes—anything light enough to safely access. Takes 30 minutes with a drill and level. If you rent, a tension rod and hanging baskets ($20–$40) offer a similar effect without drilling.
You’ll reclaim 2–3 square feet of storage right at the top of your closet. It’s the kind of space people forget exists.
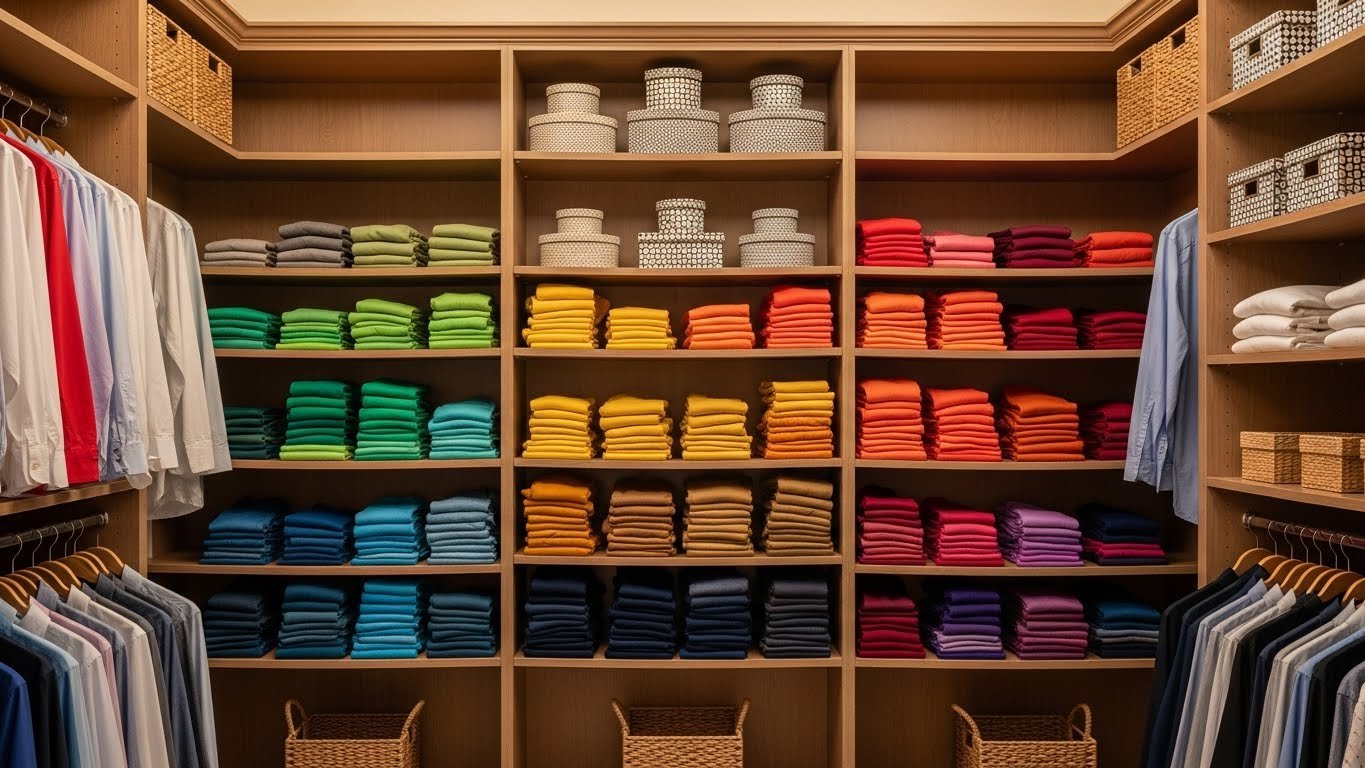
21. Use Color-Blocking to Organize and Style
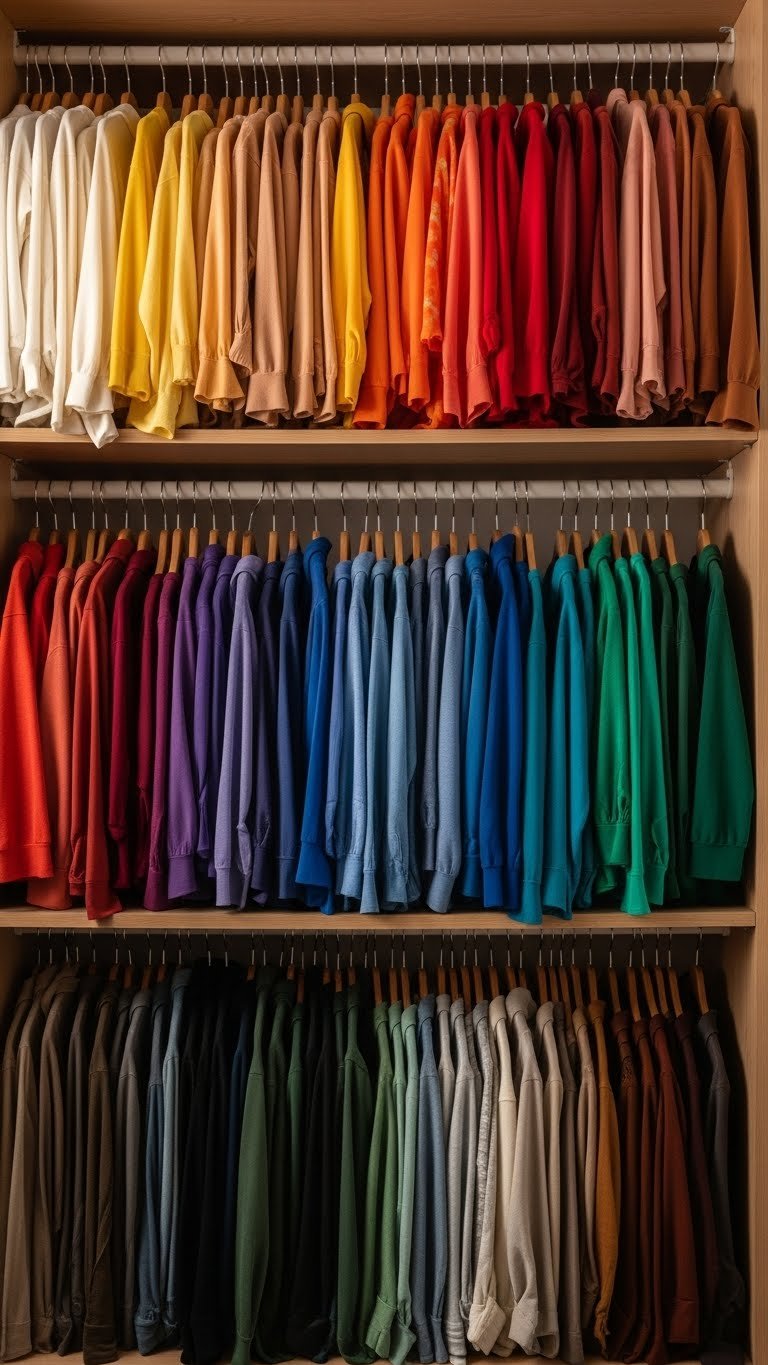
Organizing by color doesn’t just look gorgeous—it speeds outfit selection and makes you more likely to wear items you’d otherwise miss. It’s functional styling.
Sort all clothing into rainbow order: whites and neutrals, then yellows, pinks, reds, oranges, blues, greens, purples, grays, blacks. Takes 1–2 hours depending on wardrobe size. Keep this system by folding or hanging in color sequence. Take a photo of your color-organized closet for reference when shopping—you’ll naturally pick pieces that coordinate. No products needed, just intention and time.
Getting dressed becomes so much faster when you see how pieces relate to each other. Suddenly you wear more combinations because the system shows possibilities.
22. Install Angled Shelves for Shoe Storage
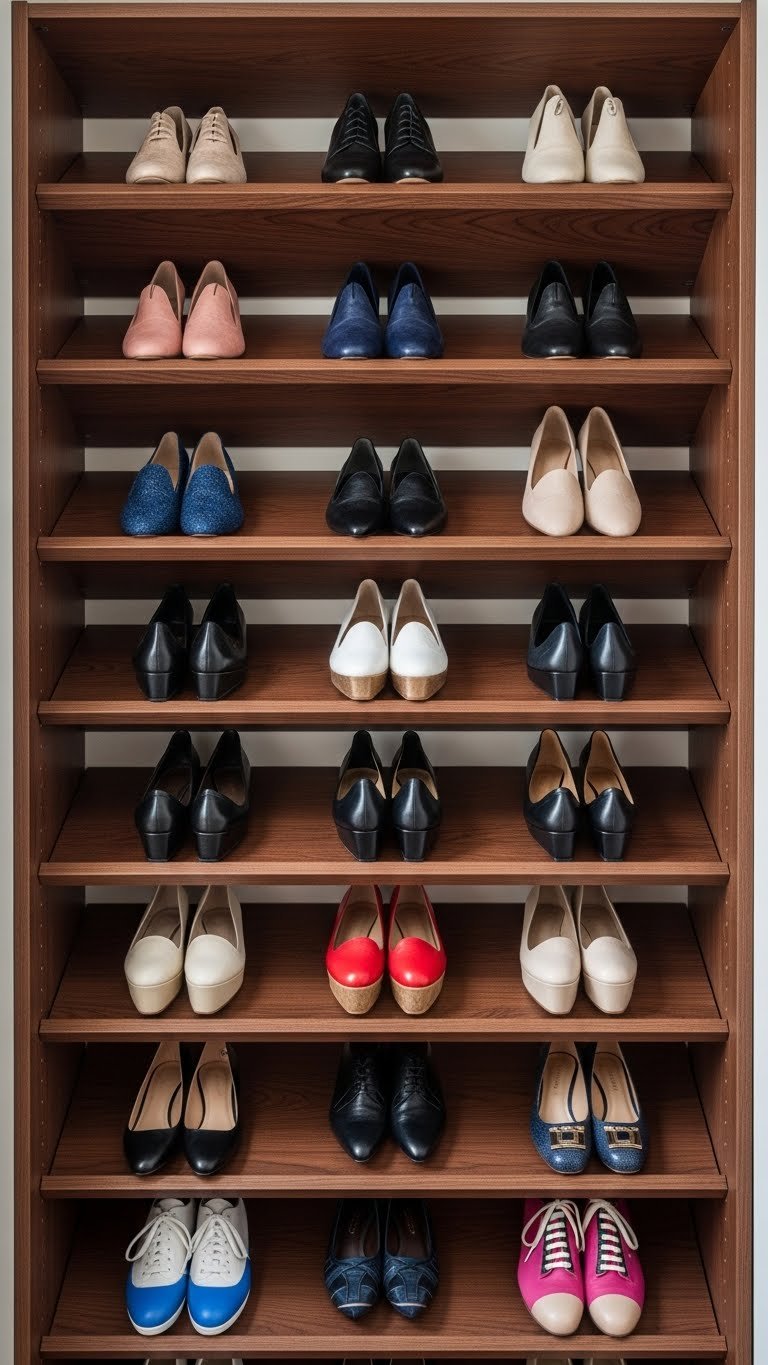
Angled shelves let you see every shoe at once without hunting through piles. They’re especially smart for reach-in closets where depth is limited.
Buy angled shelf risers or tiered shoe stands ($20–$50 from Container Store, Amazon, or Wayfair). Place them on shelves to instantly display shoes facing forward. No tools needed; this takes 10 minutes. You’ll fit 10–15 pairs per shelf depending on shoe size and riser height. This method works best for everyday shoes; formal or seasonal pairs can stay boxed and stored elsewhere.
Your shoe collection becomes visible and accessible. You’ll reach for favorites more often because you remember you own them.
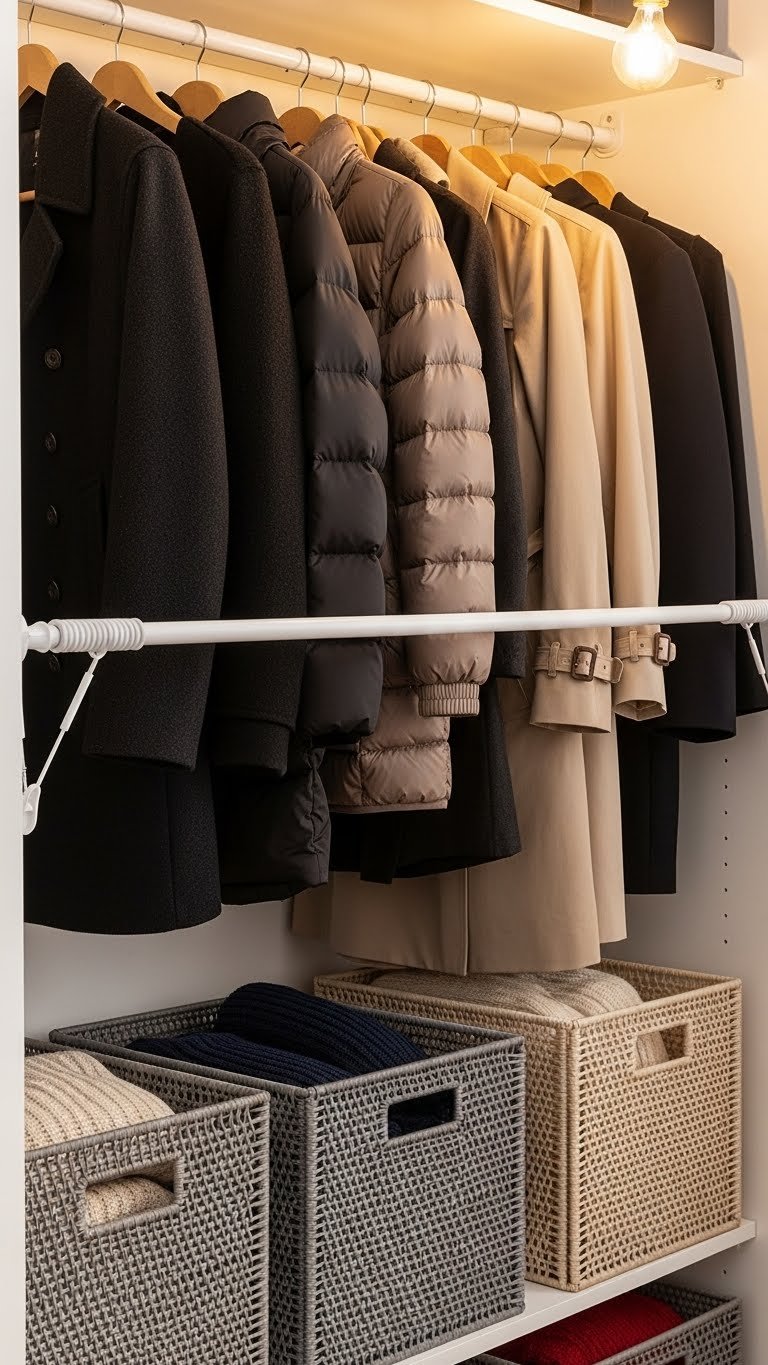
23. Create a Rotating Seasonal Rail System
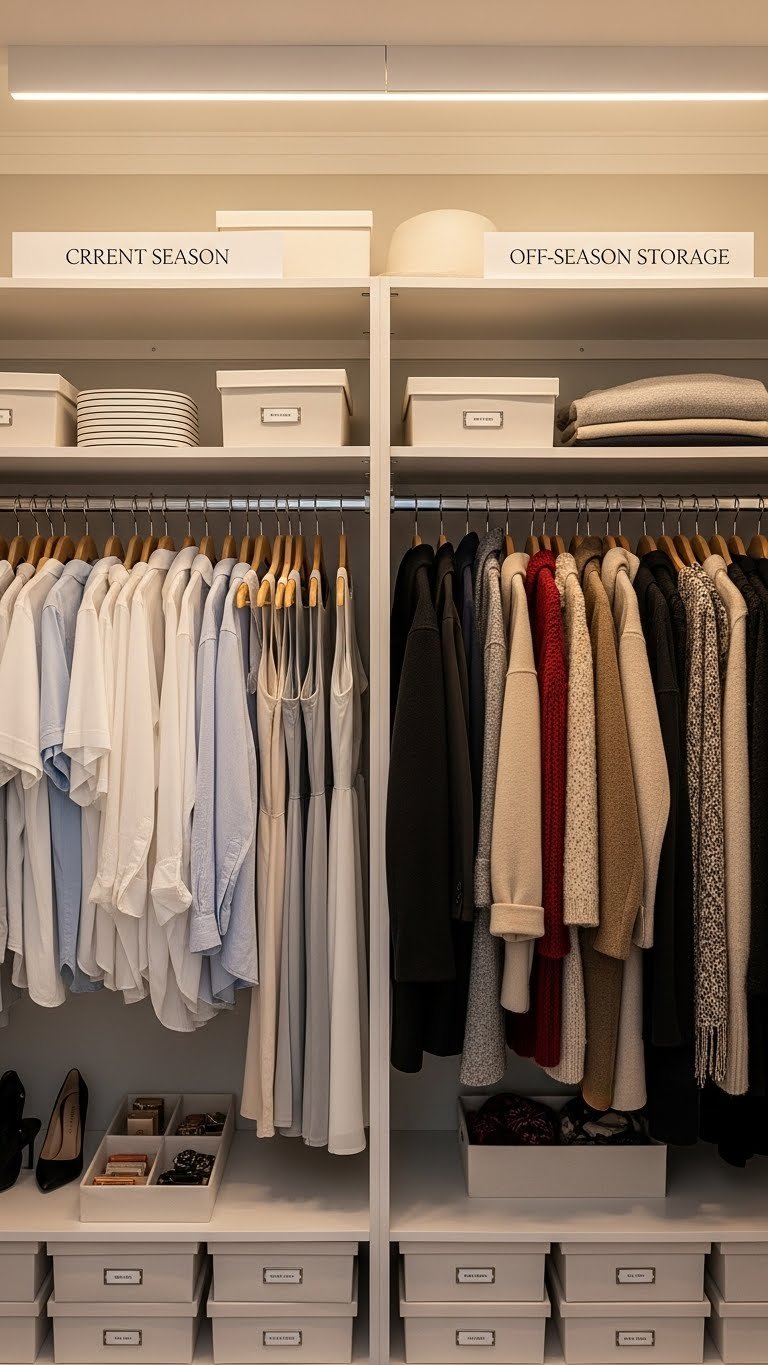
A two-rod system lets you keep current and off-season pieces separated without crazy storage. You rotate access seasonally instead of digging through buried boxes.
Install two hanging rods at the same height using the same bracket system ($30–$60 per rod from IKEA or Home Depot). One holds active-season items; the other holds off-season pieces. Swap them out every 3 months (takes 1 hour). Use the space below off-season rod for bins or baskets. Label each rod with removable tags ($5–$10). This costs minimal extra money and takes about 1 hour to set up.
Seasonal swaps feel intentional instead of chaotic. You’ll dress more seasonally and protect winter pieces from summer crushing.
SOFT CTA:
Save this post for your next closet refresh and pick one idea to start this weekend. You don’t need a huge space or a huge budget—small, smart changes add up fast. Share this with a friend who’s drowning in closet chaos, and let’s all spend less time searching and more time loving what we wear.
Leave a Reply