If your TV wall looks boring and flat, you’re not alone. Most living rooms have blank drywall behind the screen—nothing special, nothing memorable. But here’s the thing: wooden slat walls are one of the easiest ways to add texture, warmth, and visual interest without a full renovation. Whether you rent, own, or love DIY projects, there are solutions at every budget and skill level. In this guide, you’ll discover 27 specific wooden slat TV wall ideas—from affordable peel-and-stick options to custom installations, plus styling tricks that make the whole room feel more intentional. Let’s get started.
1. Install Horizontal Shiplap for Classic Warmth
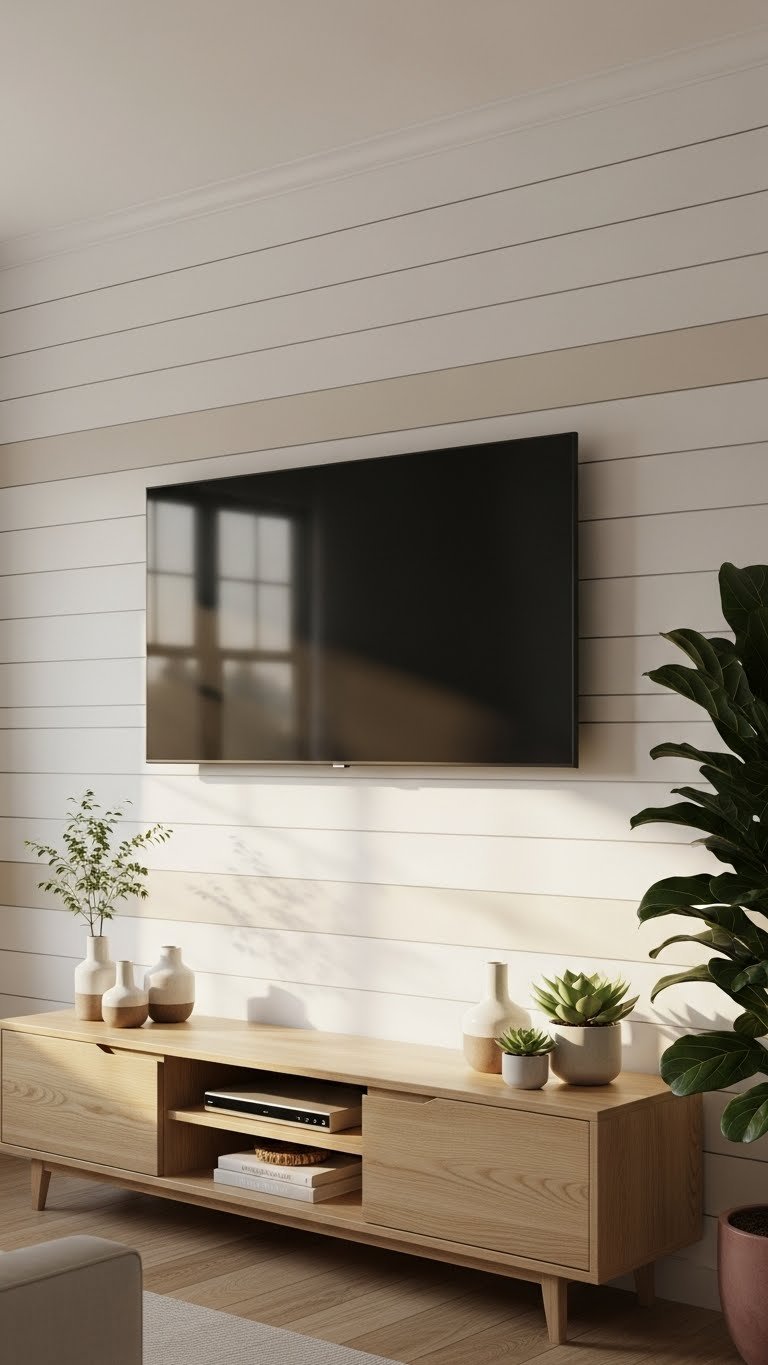
Shiplap is the easiest slat style to install and instantly adds rustic charm. The overlapping boards create depth without requiring advanced carpentry skills.
You can find shiplap boards at Home Depot, Lowes, or specialty lumber yards for $0.50–$2 per linear foot. Installation takes a full weekend if you DIY, or hire a handyman for $300–$800. Start by prepping your wall (remove outlet covers, locate studs), then cut boards to size and nail or adhesive-mount them horizontally from floor to ceiling. Most shiplap comes prefinished, but you can paint it any color after installation.
The pro move? Leave small gaps between boards so they look authentic—don’t squeeze them too tight. Renters can use temporary adhesive-backed shiplap panels instead ($60–$150 per panel).
Once installed, your TV becomes the secondary focal point. The wall itself becomes the star, framing everything beautifully.
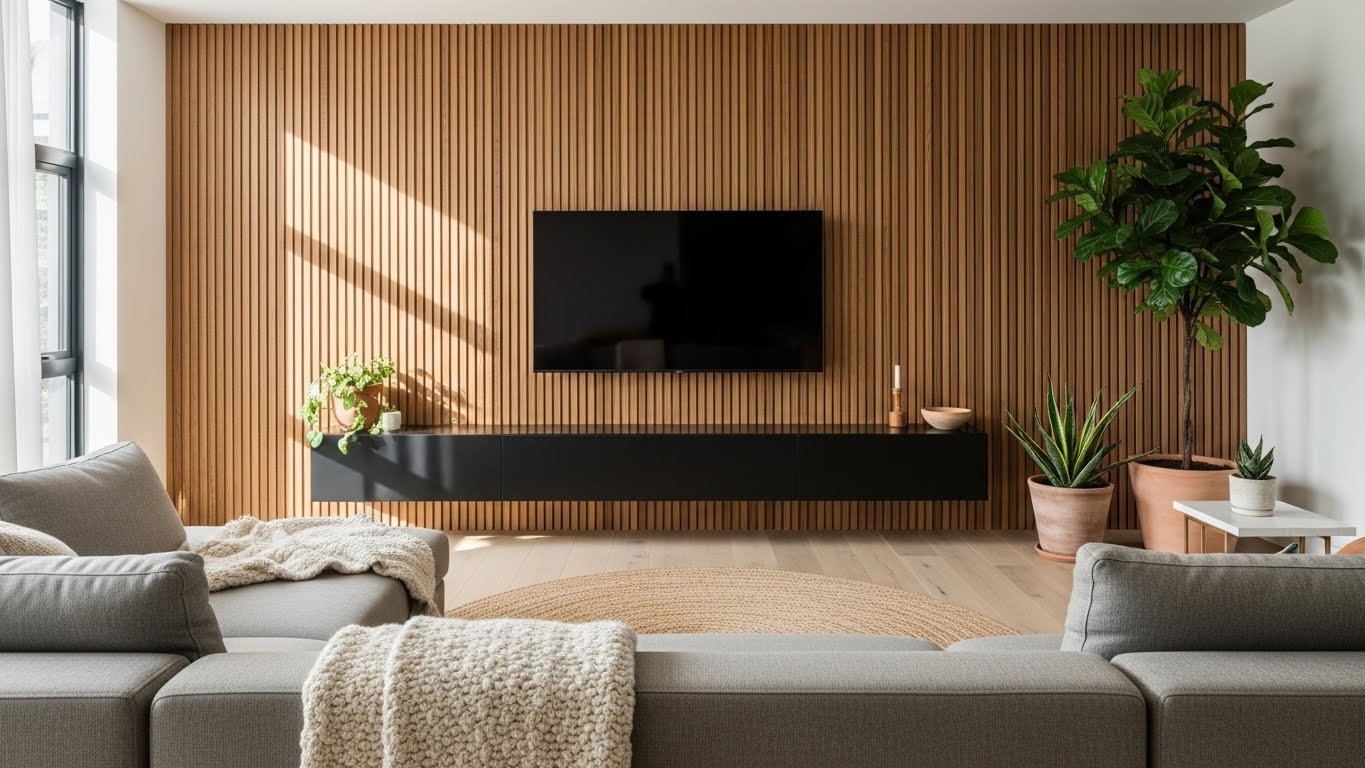
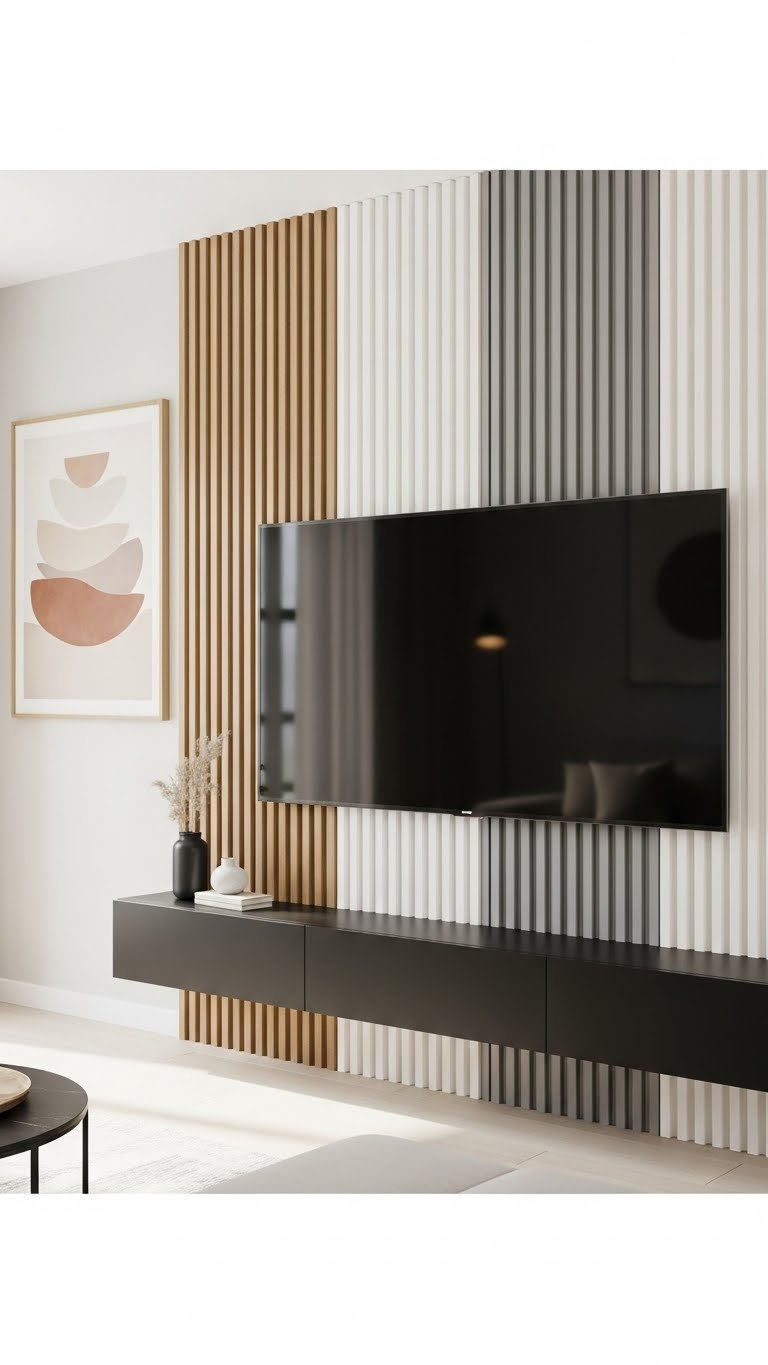
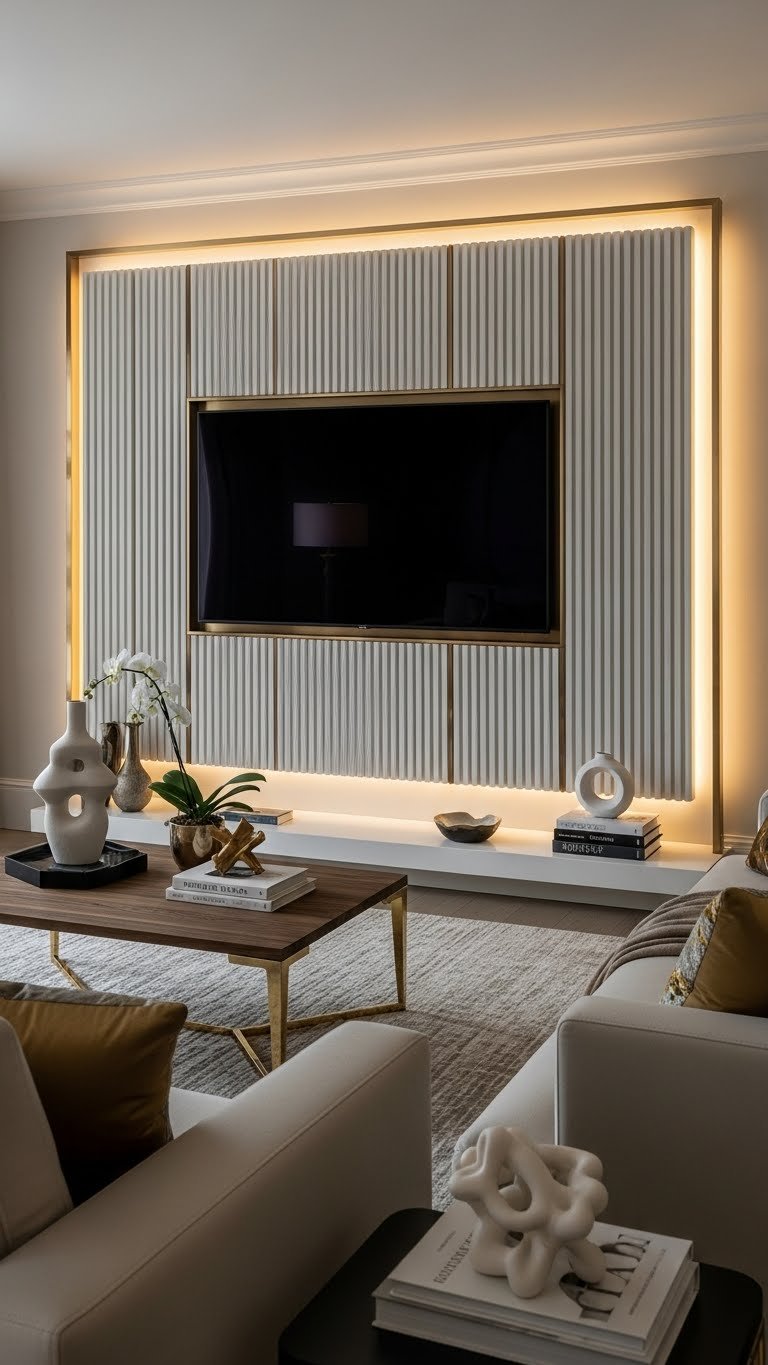
2. Go Vertical with Modern Slat Paneling
Vertical slats feel more contemporary than horizontal options and make rooms look taller. They’re ideal if you have lower ceilings or want a modern, gallery-like vibe.
Install vertical slats using the same stud-finding and mounting method as shiplap. Costs range $1–$3 per linear foot depending on wood type (pine, oak, or engineered wood). Spacing matters here—gaps of 1–3 inches between slats create visual rhythm and prevent a heavy, solid look. Use a spacer block to keep gaps consistent as you install.
Leave accent lighting off initially to see how natural light plays across the slats. Add LED strip lighting later if you want to highlight texture at night.
The result? A space that feels intentional and modern, like something from a design magazine—without the design magazine price tag.
3. Create a Budget DIY Slat Wall with Trim Boards
Don’t have thousands for premium paneling? Regular trim boards and wood strips from your local hardware store cost a fraction of prefab systems.
Buy 1×3 or 1×4 pine boards for $1–$2 each and arrange them horizontally or vertically on your wall. Use construction adhesive and finish nails to attach them to studs. Sand lightly if you want a smooth finish, then stain or paint. A full wall (12–15 feet) costs about $80–$150 in materials. Install time: 4–6 hours for a DIYer.
This approach gives you total control over spacing, stain color, and final look. It’s also fully removable if you rent or change your mind later.
Your wall goes from blank to boutique-quality, and guests will be impressed by how put-together it looks.
4. Use Peel-and-Stick Wooden Slat Panels (Renter-Friendly)

Renters, this is your answer. Peel-and-stick wood panels look like real wood but apply like wallpaper—no nails, no damage, no landlord drama.
Brands like Nextwall, RoomMates, and Stick On Tiles offer self-adhesive slat panels for $30–$80 per panel (each covers about 10–30 square feet). Installation takes 1–2 hours solo. Clean your wall, measure carefully, peel the backing, and press panels in place. Trim edges with a utility knife for a custom fit.
The honest truth? These look good but feel slightly less premium than real wood. They’re perfect for rentals or if you love changing your space seasonally.
After six months or two years, peel them off without residue and start fresh with a new design.
5. Mix Wood Tones for Visual Interest
One wood tone can feel boring. Combining light and dark slats creates movement and depth that photographs beautifully.
Use two complementary woods—like natural pine mixed with dark walnut or ebony-stained boards. Arrange them in a striped pattern (alternating light-dark-light), herringbone, or chevron design. Plan your layout on paper first to avoid mistakes. Mixed-wood projects run $150–$400 depending on wall size and wood selection. Installation takes one full weekend.
The trick is staining lighter wood darker or sanding dark wood lighter to ensure both woods coordinate. Test stain samples on scrap pieces first.
The depth and visual movement turn a simple slat wall into a statement piece that grounds the entire room.
6. Add Floating Shelves Within Slat Sections
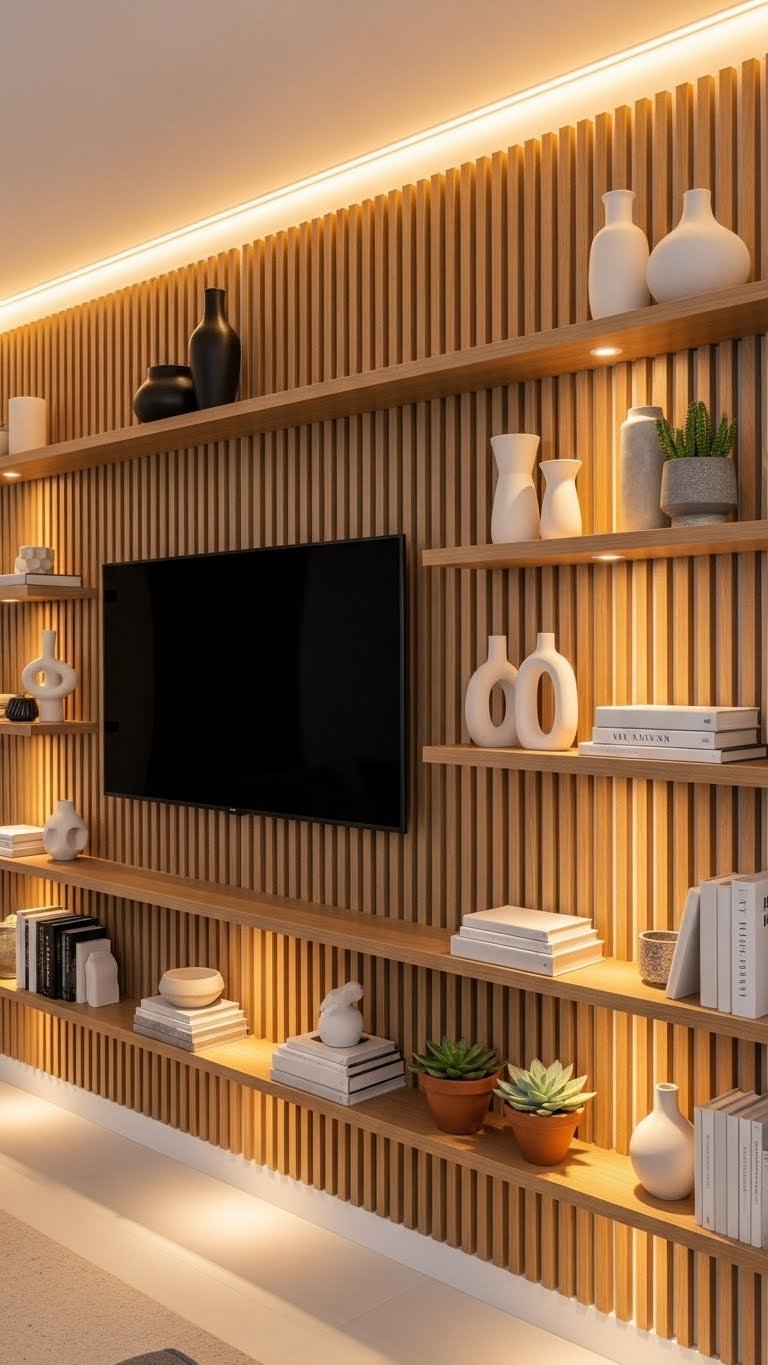
Don’t make the slat wall a one-note background. Break it up with floating shelves for storage, plants, or decor display.
Mount 2–4 floating shelves (12–24 inches wide each) within your slat wall design. Shelves attach directly to studs with heavy-duty brackets (hidden inside the shelf). Shelves cost $40–$120 each, and installation takes an afternoon. This combo solves the “where do I store stuff?” problem while keeping your TV area looking curated.
Style your shelves intentionally: plants on one, books on another, decorative boxes on the third. Leave some breathing room—don’t cram every inch.
Now your TV wall isn’t just decorative—it’s functional and personal, reflecting your actual lifestyle.
7. Stain Your Slats a Bold Color for Drama

If you want drama, skip light wood and go dark. Deep charcoal, forest green, or navy stains create luxury vibes and make your TV pop visually.
Install natural wood slats first, then apply stain in your chosen color. Quality interior stain costs $15–$30 per quart and covers about 400 square feet. Two coats give depth; three coats create richness. Staining takes 2–3 days total (including drying time between coats). Budget $200–$400 for a full wall if hiring a pro.
Dark walls absorb light, so add accent lighting (recessed lights above, LED strips behind shelves) to prevent the room from feeling gloomy. Pair with light-colored furniture to maintain balance.
The result? A moody, sophisticated space that feels high-end and intentional. Your TV area becomes a focal point that commands attention.
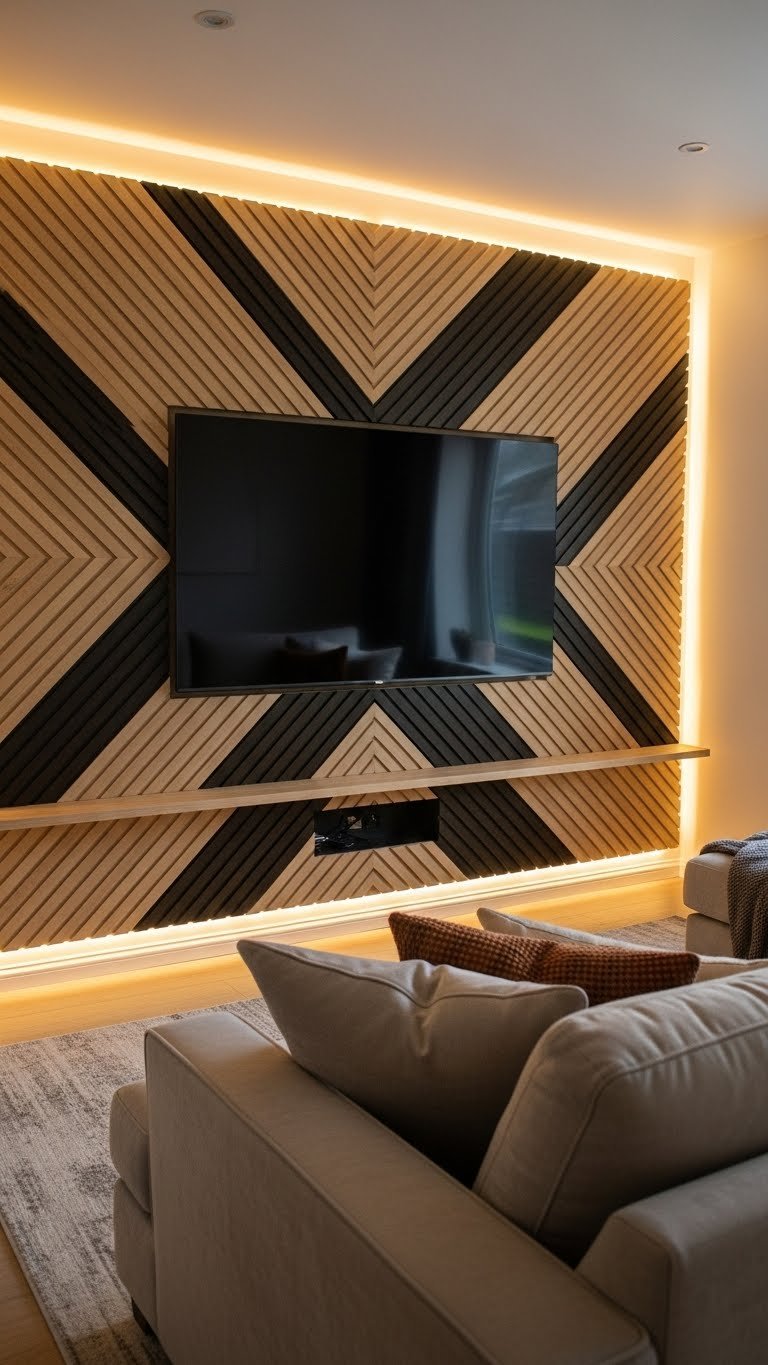
8. Create a Geometric Slat Pattern (Herringbone or Chevron)
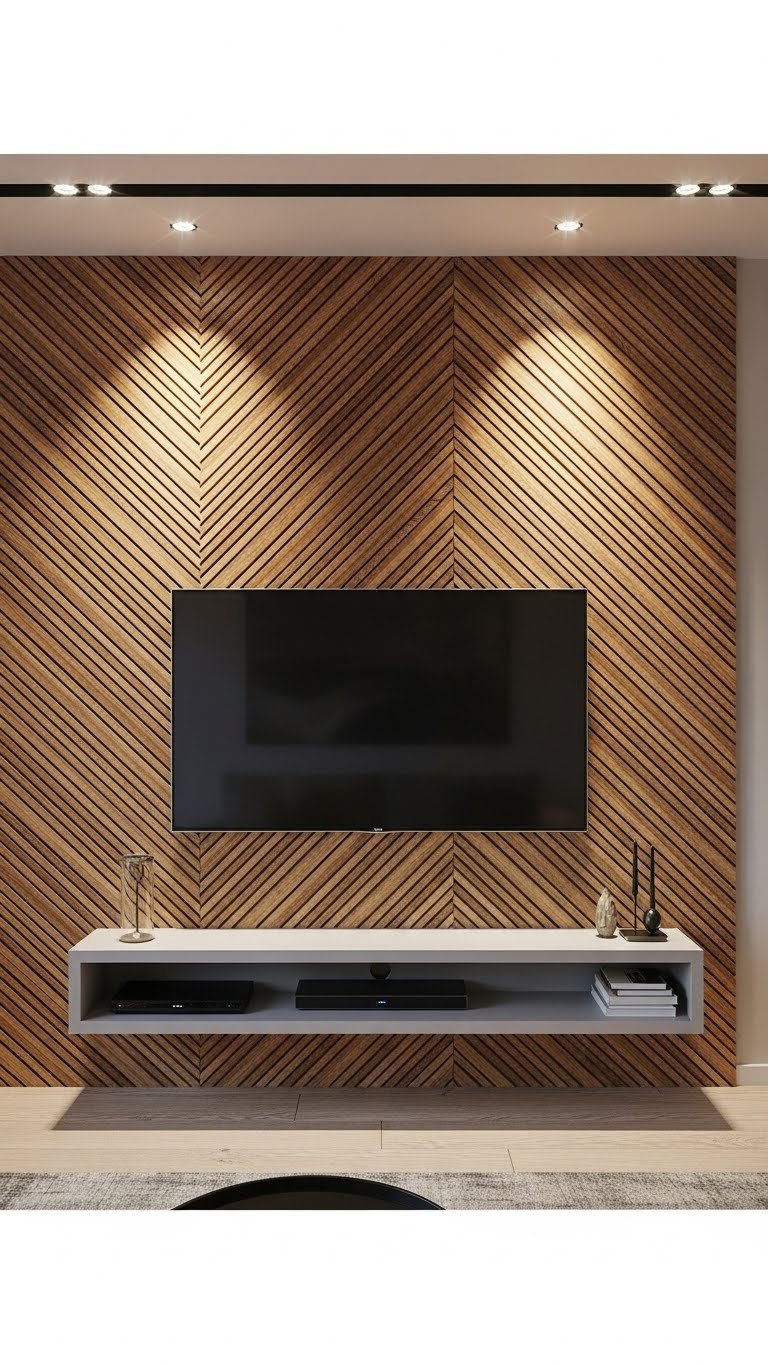
Herringbone and chevron patterns cost more to install but create eye-catching geometry that’s pure art.
Layout your pattern on paper before cutting a single board. Use 1×4 or 1×6 boards and cut them at 45-degree angles. Arrange them in a diagonal zig-zag (chevron) or brick-like offset pattern (herringbone). Materials cost $200–$500, and installation takes 2–3 full days. If you’re not confident with angled cuts, hire a handyman ($400–$800 labor).
Pro tip: Start from the center and work outward to ensure symmetry. You’ll have slivers at the edges—that’s normal and actually looks intentional.
The geometric flow naturally draws the eye to your TV, making the entire setup feel designed by a professional.
9. Install Slats Behind Shelving for Open Shelving Walls

Not ready for a full slat wall? Install slats only in specific sections behind shelves for a hybrid look that’s less commitment.
Build or buy 2–3 floating shelves, mount them to your wall, then install slats in the visible gaps between and behind them. This approach uses fewer materials ($100–$250), takes one weekend, and looks polished. The shelves become the focal point while slats add texture underneath.
This works great if you love displaying books, plants, or collections. Your decor tells a story on the shelves while the slats provide visual structure.
You get the textured look you want with way more flexibility and less wall coverage.
10. Use Reclaimed or Rustic Wood for Authentic Character
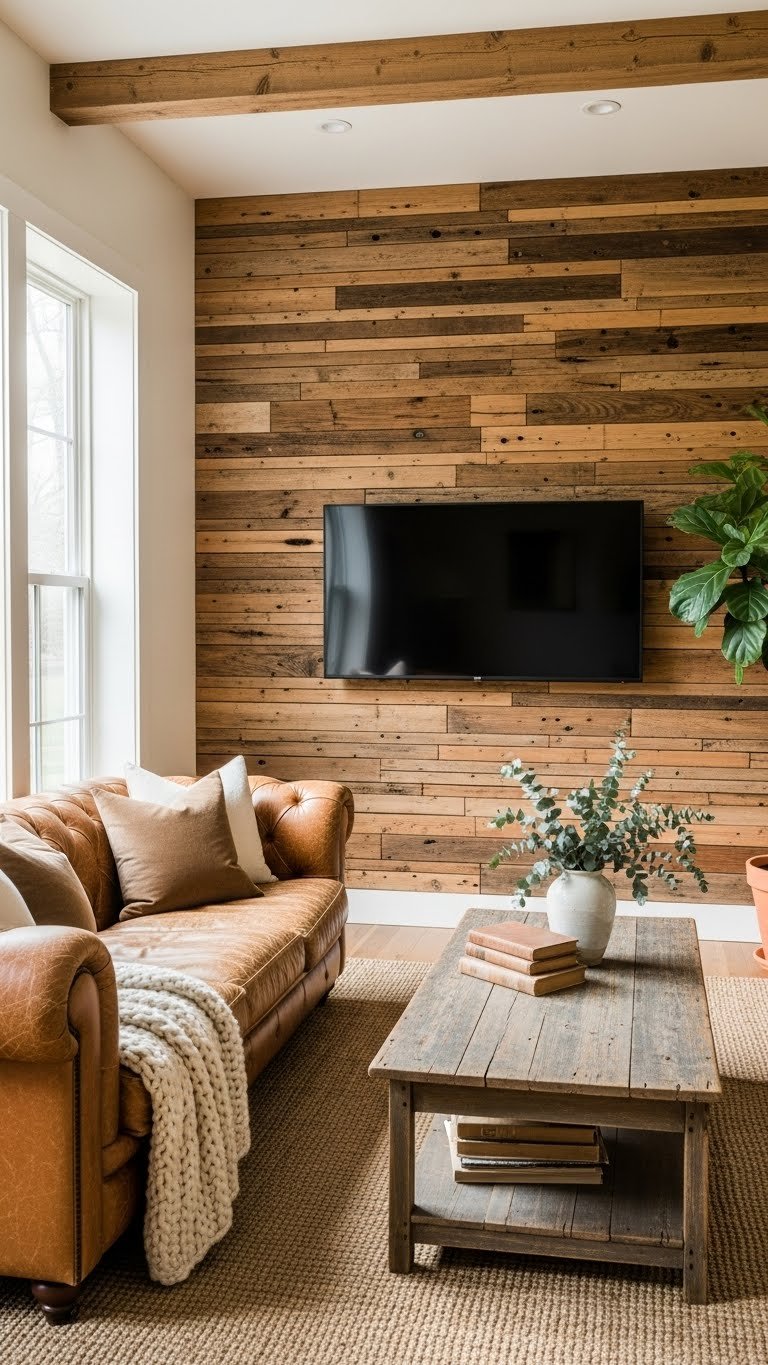
Reclaimed wood has history, character, and irreplaceable warmth that new wood can’t match. Each board tells a story with its knots, grain variation, and natural weathering.
Source reclaimed wood from salvage yards, specialty suppliers, or online retailers like Etsy or Reclaimed.com. Expect to pay $3–$8 per linear foot depending on wood species and age. These boards vary in width and finish, which is the whole charm. Installation follows standard mounting but takes longer due to irregular sizes. Budget one full weekend for DIY or $500–$1,200 for professional installation.
The honest trade-off? Reclaimed wood requires more prep work (cleaning, potentially replacing damaged sections) and may have slight imperfections. That’s the appeal.
Your wall becomes a conversation starter—authentic, warm, and undeniably special.
11. Paint Slats Two Different Colors for a Modern Look
Give your slats a fresh, modern twist by painting them in two complementary colors. Think soft white + warm gray, or cream + sage green.
Install your slats first in natural wood, then mask off alternating boards with painter’s tape. Paint one color, let it dry fully, then paint the alternating boards the second color. Use quality interior paint ($20–$40 per gallon) in a matte or eggshell finish for a sophisticated look. Painting adds 2–3 days to your project timeline.
This approach works especially well with wider spacing between slats. You’ll see both the wood grain and the paint, creating layered visual interest.
The two-tone effect makes your wall feel intentional and gallery-like—modern without trying too hard.
12. Install Acoustic Slat Panels for Sound Improvement
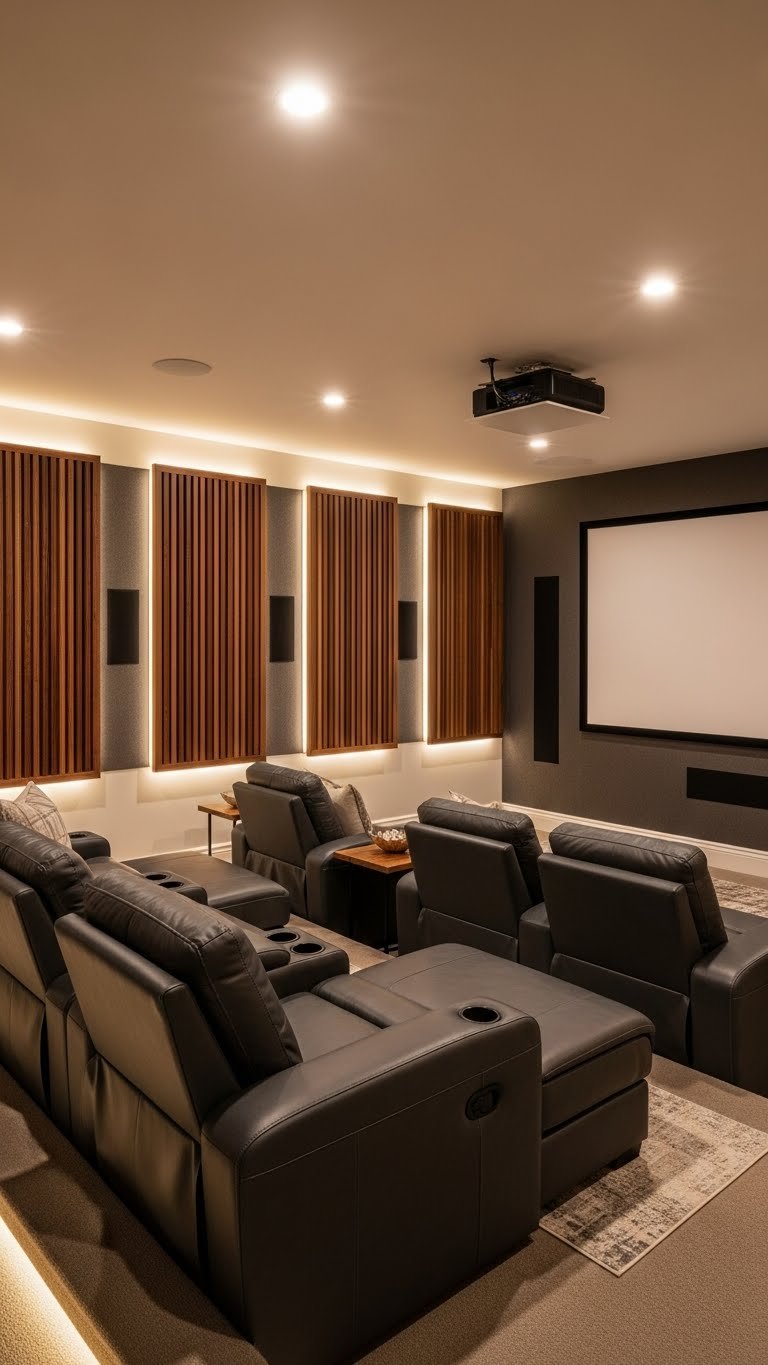
Beyond looks, wooden slat walls can improve your room’s acoustics. Acoustic slats absorb sound and reduce echoes, making your TV experience actually better.
Purchase acoustic wooden slat panels (brands like Auralex or Real Wood Acoustic Panels, $60–$150 per panel). These combine solid wood with sound-dampening materials inside. Install them like regular slats, spacing them slightly apart for maximum acoustic benefit. A full wall costs $300–$800 in materials. Install time: one weekend for DIY.
Most people notice the difference immediately—your TV sounds richer, less echo-y, and more immersive. Bonus: the room feels quieter overall.
Now your feature wall is beautiful and functional, improving your viewing experience every single day.
13. Create a Curved or Arched Slat Design
Straight lines are predictable. A curved or arched slat arrangement adds organic flow and modern sophistication.
This requires planning and careful angling. Sketch your curve on the wall first using a chalk line or pencil. Cut slats at varying angles to follow the arc, then install them progressively along the curve. It’s a moderate DIY project or ideal for hiring a carpenter ($600–$1,500 labor). Materials run $150–$400 depending on complexity.
Start small if this is your first curve—maybe a simple arch above the TV rather than a full wall curve.
The curved design makes your TV wall feel like a focal point art installation, not just a functional screen mount.
14. Space Slats Wide Apart for a Minimalist Look

Less is more. Instead of covering your wall completely, space slats far apart to create breathing room and a gallery-like aesthetic.
Mount slats horizontally or vertically with 4–6 inches of spacing between each board. This minimalist approach uses fewer materials ($60–$150 for a full wall) and makes your space feel more open. Installation is actually easier since you’re mounting fewer boards. Takes one afternoon to a half day.
The negative space matters here—it’s part of the design, not a mistake. Your wall becomes a study in balance and restraint.
The result is refined and modern, less busy than a fully covered slat wall but still visually interesting.
15. Mix Wood Slats with Concrete or Stone Sections
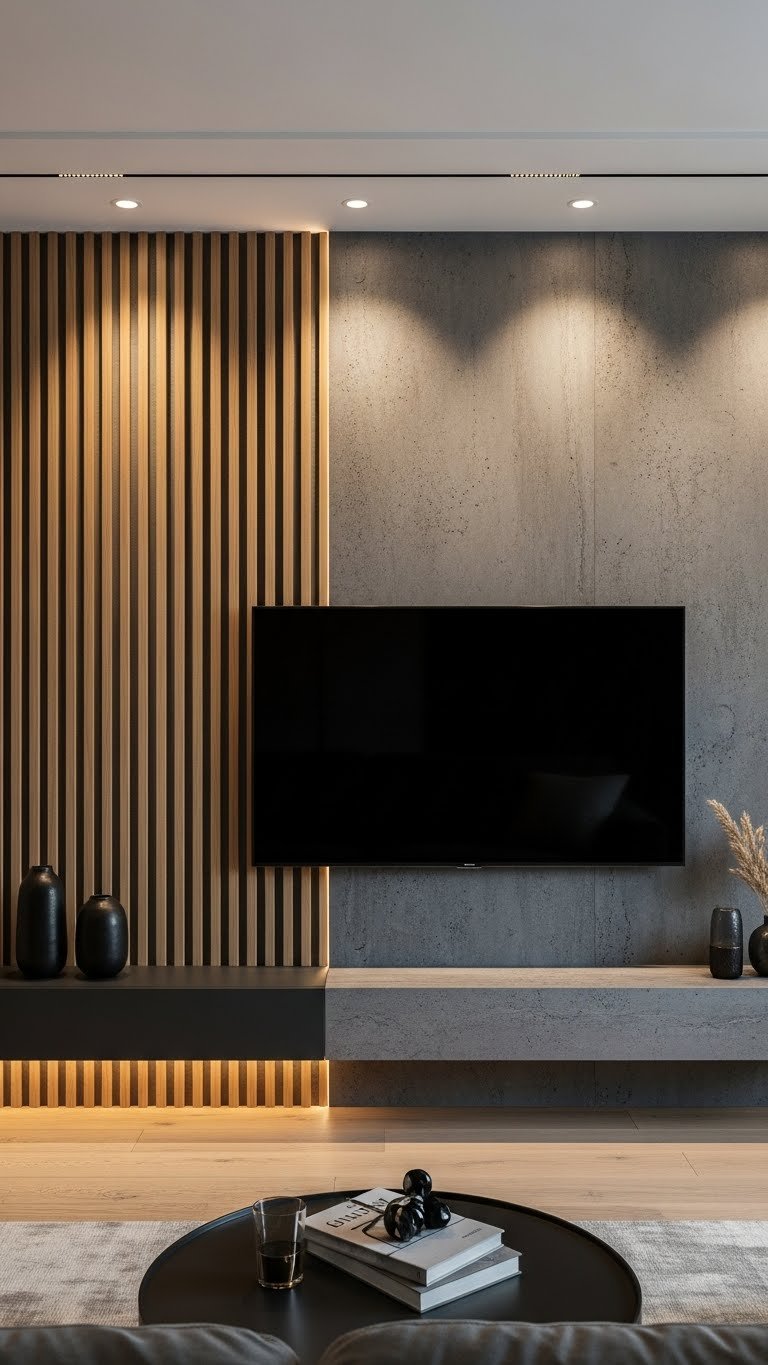
Combine wood with contrasting materials like concrete, stone, or shiplap sections for a high-design split-wall look.
Install wooden slats on the left half of your wall, then add concrete panels, stone veneer, or shiplap sections on the right. Each material costs differently: wood ($100–$300), concrete or stone panels ($200–$500), shiplap ($80–$200). The combination takes one full weekend to complete. This mixed-material approach is trendy in 2025.
Align materials at a natural visual dividing line—often at the TV’s horizontal center or slightly off-center for asymmetrical design.
The contrast tells a story: natural meets industrial, warm meets cool. Your wall becomes genuinely design-forward.
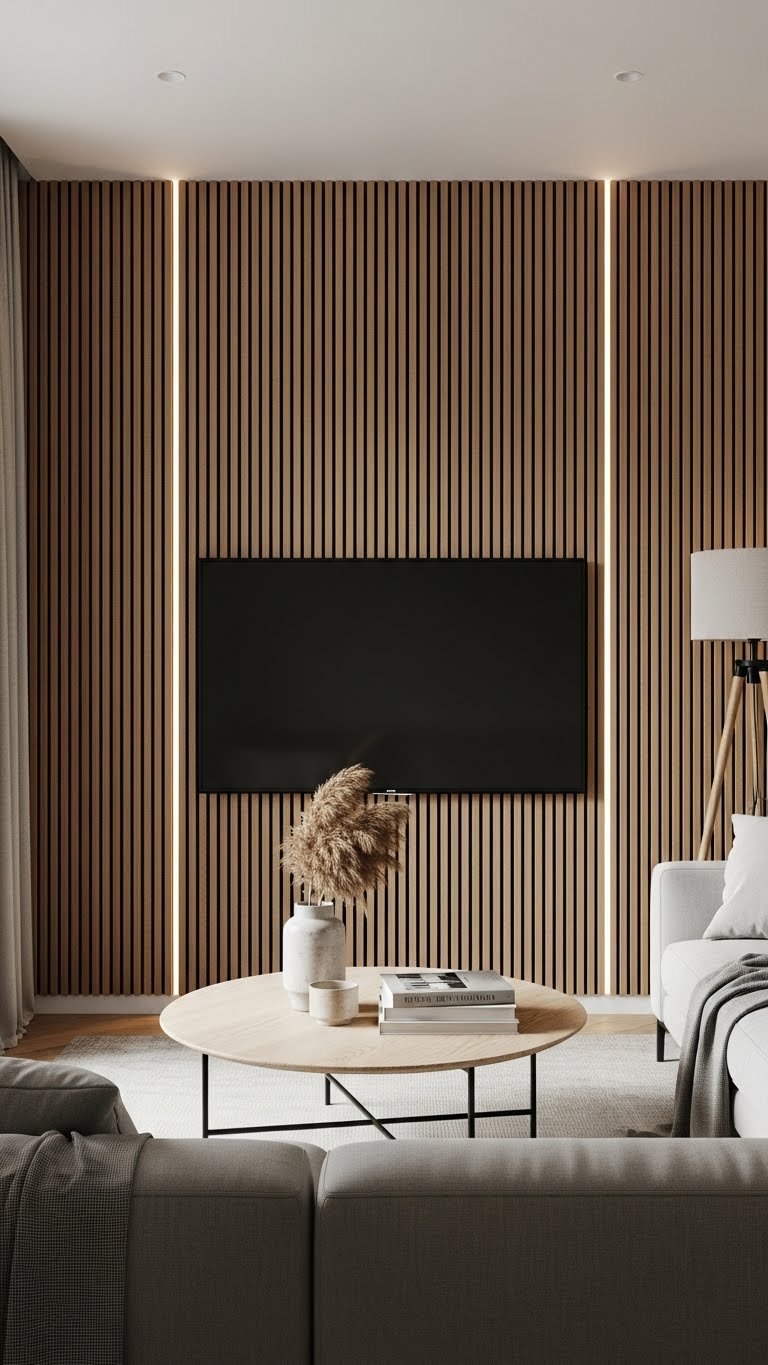
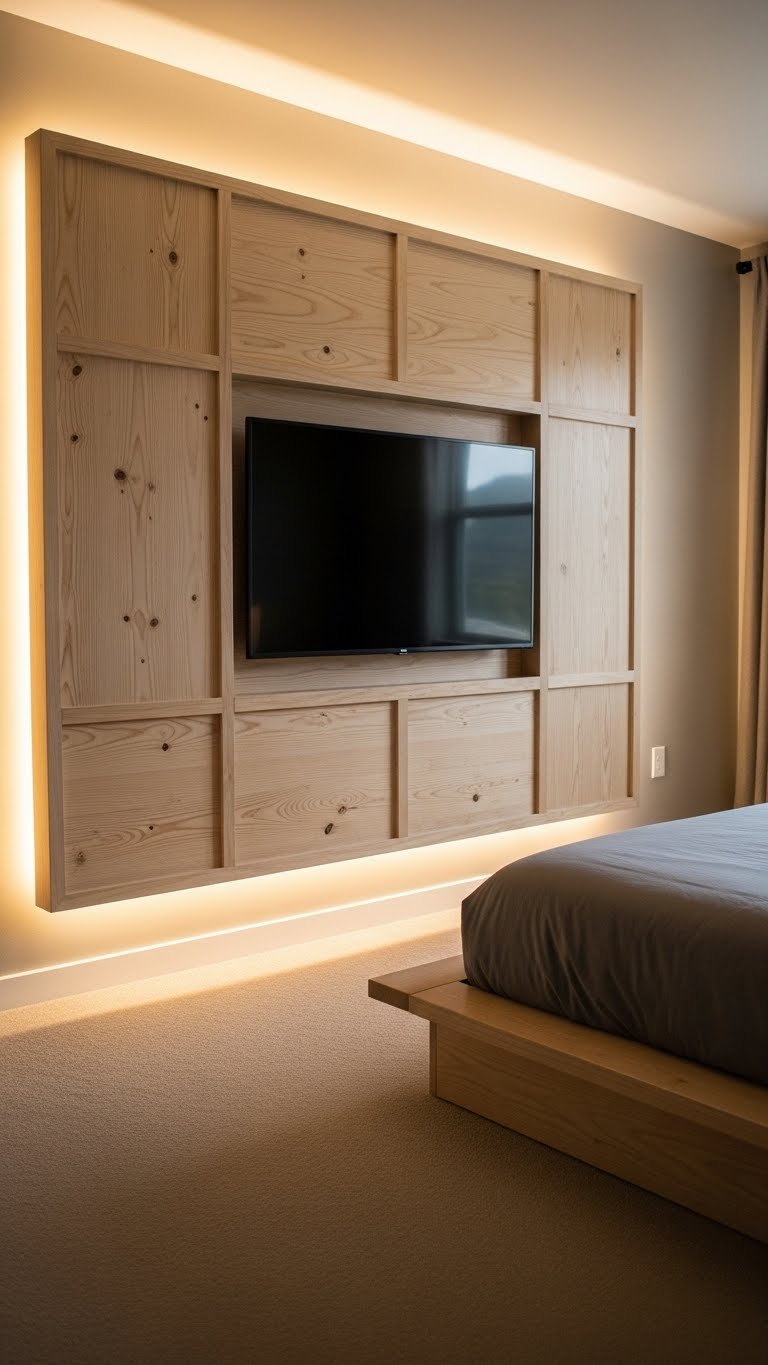
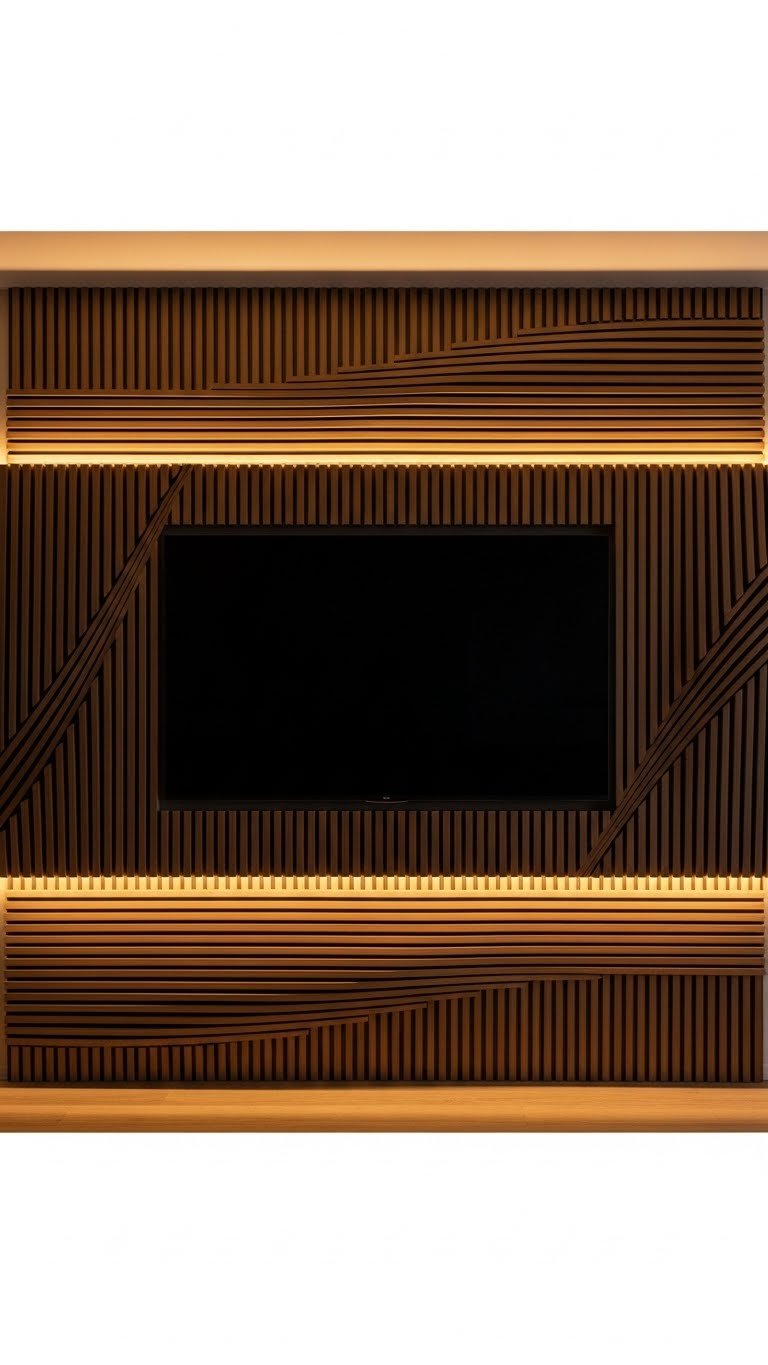
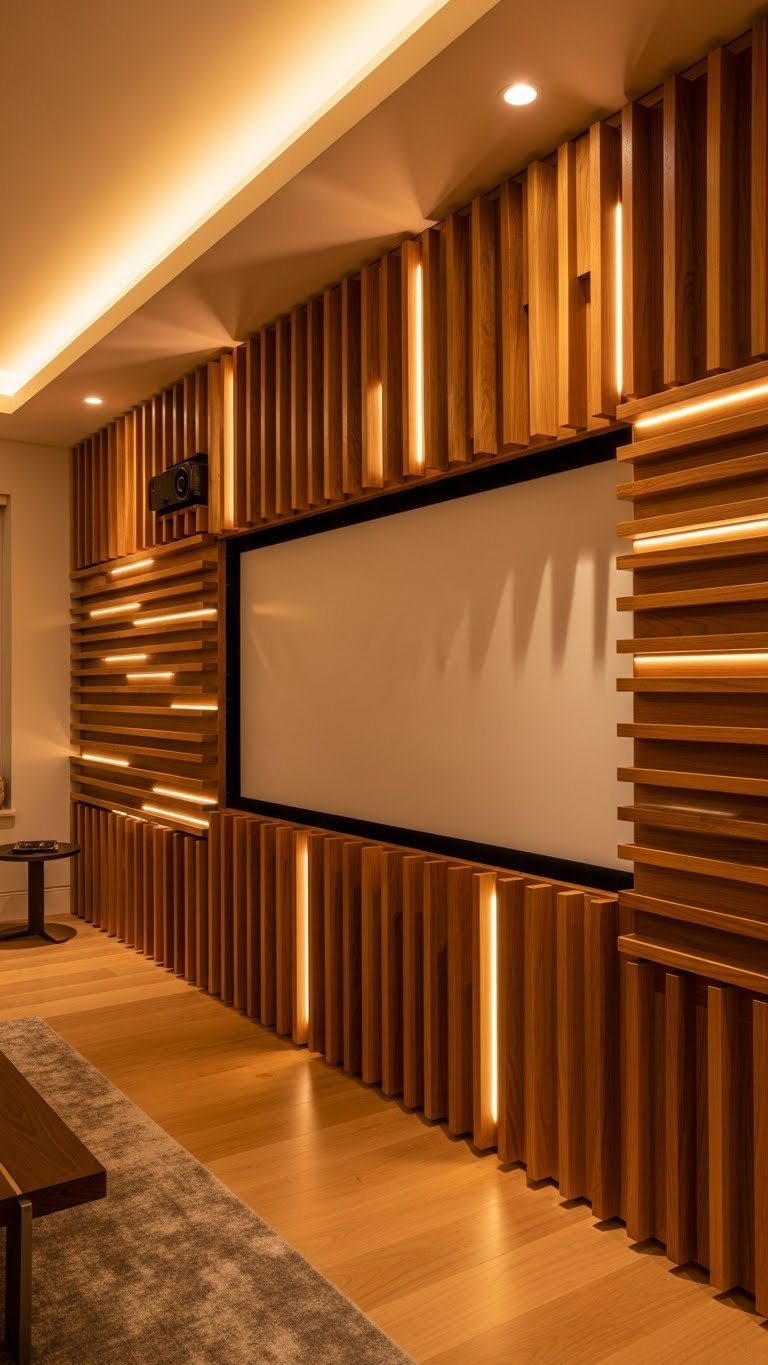
16. Install Slats With Hidden LED Lighting Behind Them
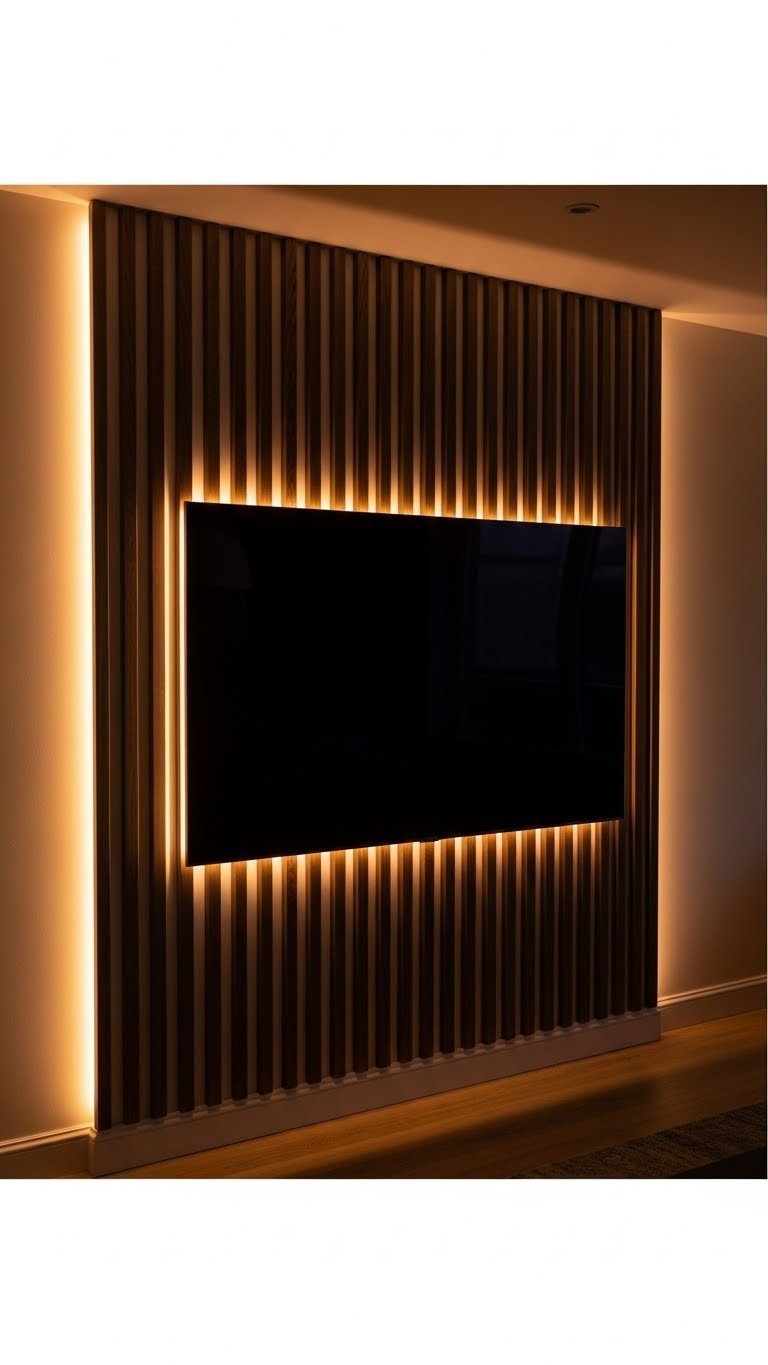
Hidden LED strips behind slats add ambient lighting that creates atmosphere and makes your TV feel like it’s floating.
Install slats as usual, then run LED strip lights ($10–$30 per 16-foot strip) along the top edge of each board, tucking the lights behind the wood. Use a dimmable remote-controlled system so you can adjust brightness for movie nights. Installation requires basic wiring knowledge or a handyman (add $150–$300 labor). Total cost: $150–$400 for materials and installation.
Connect strips to a dimmer switch so you control the mood. Warm white (2700K) looks cozier than cool white.
When the lights are on, your wall glows. When they’re off, it’s just beautiful wood texture. Both looks are Instagram-worthy.
17. Use Bamboo Slats for an Eco-Friendly Japandi Vibe
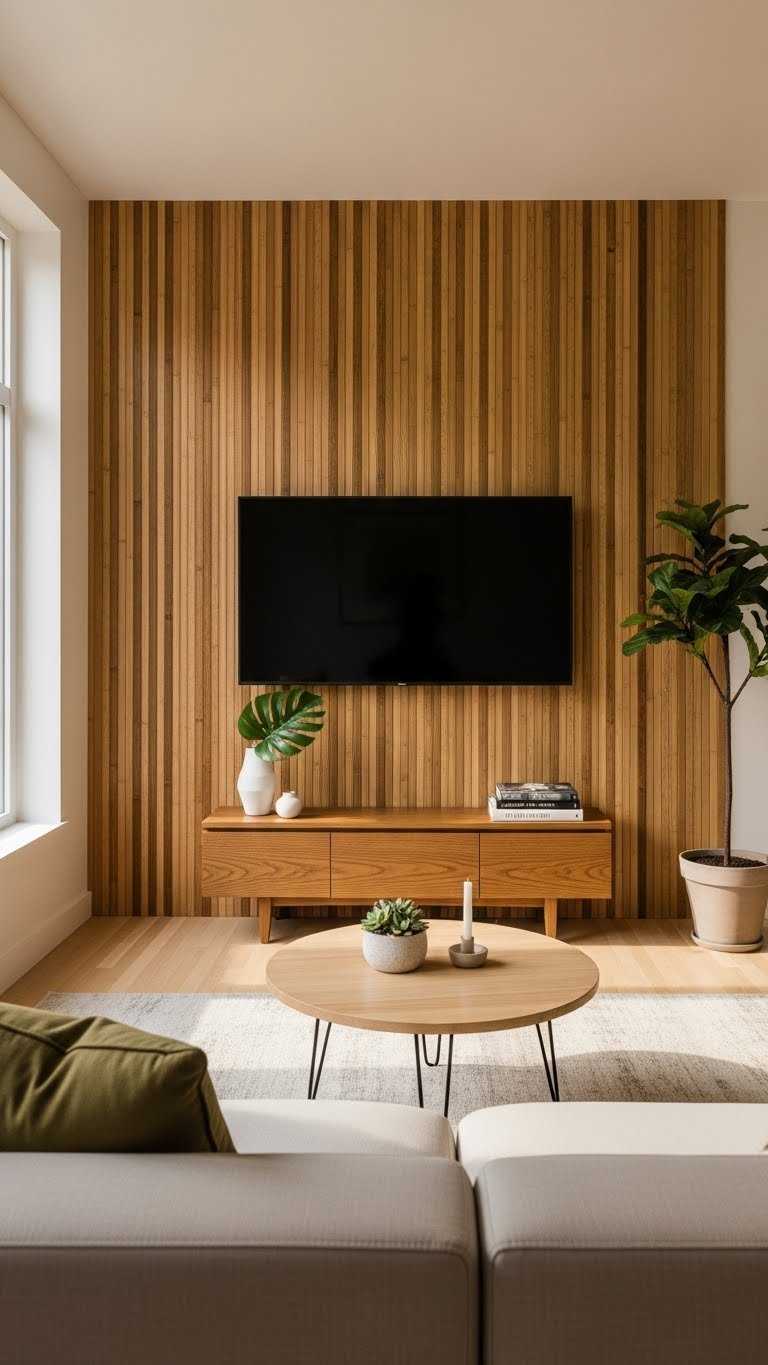
Bamboo is sustainable, beautiful, and pairs perfectly with minimalist or Japandi design aesthetics. It’s also surprisingly affordable.
Source bamboo slats or panels from eco-focused retailers like Etsy, Wayfair, or specialty bamboo suppliers for $1–$3 per linear foot. Bamboo installs identically to wood slats but has a lighter, more organic feel. Full wall installation costs $100–$250 and takes one weekend.
Bamboo is naturally harder than most softwoods, so it’s more durable long-term. It also shows minimal wear and ages beautifully.
Your wall becomes a meditation on simplicity and nature—perfect if you love calm, collected interiors.
18. Create a Feature Frame Around Your TV Using Slats

Don’t cover your entire wall with slats. Instead, create a frame effect—build a slat border around your TV to make the screen look like framed art.
Measure your TV and build a frame about 12–18 inches wider on all sides. Use 1×3 or 1×4 boards arranged horizontally, vertically, or in a mixed pattern just around the screen. Cost: $80–$180 in materials. Install time: 3–4 hours. The rest of your wall stays blank, keeping the space open and gallery-like.
Center your TV carefully so the frame looks intentional and balanced. Add shelving or decor above the frame for additional visual interest.
Your TV becomes a design focal point without the commitment of covering the entire wall. It’s polished and modern.
19. Stagger Slats at Different Heights for Artistic Flair
Forget uniform spacing and heights. Stagger your slats at different vertical positions to create dynamic, artistic movement.
Plan your stagger pattern on graph paper first—maybe slats at 12 inches, then 18 inches, then 15 inches, repeating the pattern. Cut and install each slat at its designated height. This approach uses the same materials ($100–$300) but requires more precision. Install time: full day to one weekend.
This technique works best with horizontal slat orientation. The irregular heights create rhythm without feeling chaotic.
The staggered effect makes your wall feel intentional and artistic—like something from a modern art gallery, not a standard home.
20. Use Thick Slats (2x4s or 2x6s) for Bold Impact

Go bold with thick, chunky slats instead of thin boards. Thick timber creates dramatic shadow play and serious visual impact.
Use 2×4 or 2×6 lumber (true thickness, not finished boards) and space them 6–12 inches apart for maximum shadow definition. Materials cost $150–$400 depending on wood type and wall size. Installation is identical to thin slats, just heavier—take a friend to help lift boards. Takes one full day.
The thick timber casts deeper shadows and looks more substantial, almost sculptural. This approach pairs well with industrial or rustic design aesthetics.
Your wall becomes a statement piece that defines the entire room’s character.
21. Install Slats Diagonally for Maximum Visual Movement

Diagonal slats are bold and dynamic—they create visual movement and make your eye travel across the wall.
Install slats at a 45-degree angle instead of horizontal or vertical. This requires cutting slats at angles and careful layout planning. Use a full-size template on paper or cardboard first to plan cuts. Materials: $150–$350, install time: one full weekend for DIY. The complexity means hiring professional help isn’t a bad call ($600–$1,200).
Diagonal slats work best if you plan the pattern to be symmetrical around your TV, so the diagonals frame the screen naturally.
The diagonal flow transforms your TV wall into a dynamic design statement that feels intentional and gallery-worthy.
22. Combine Slats With Wallpaper or Paint Behind Sections
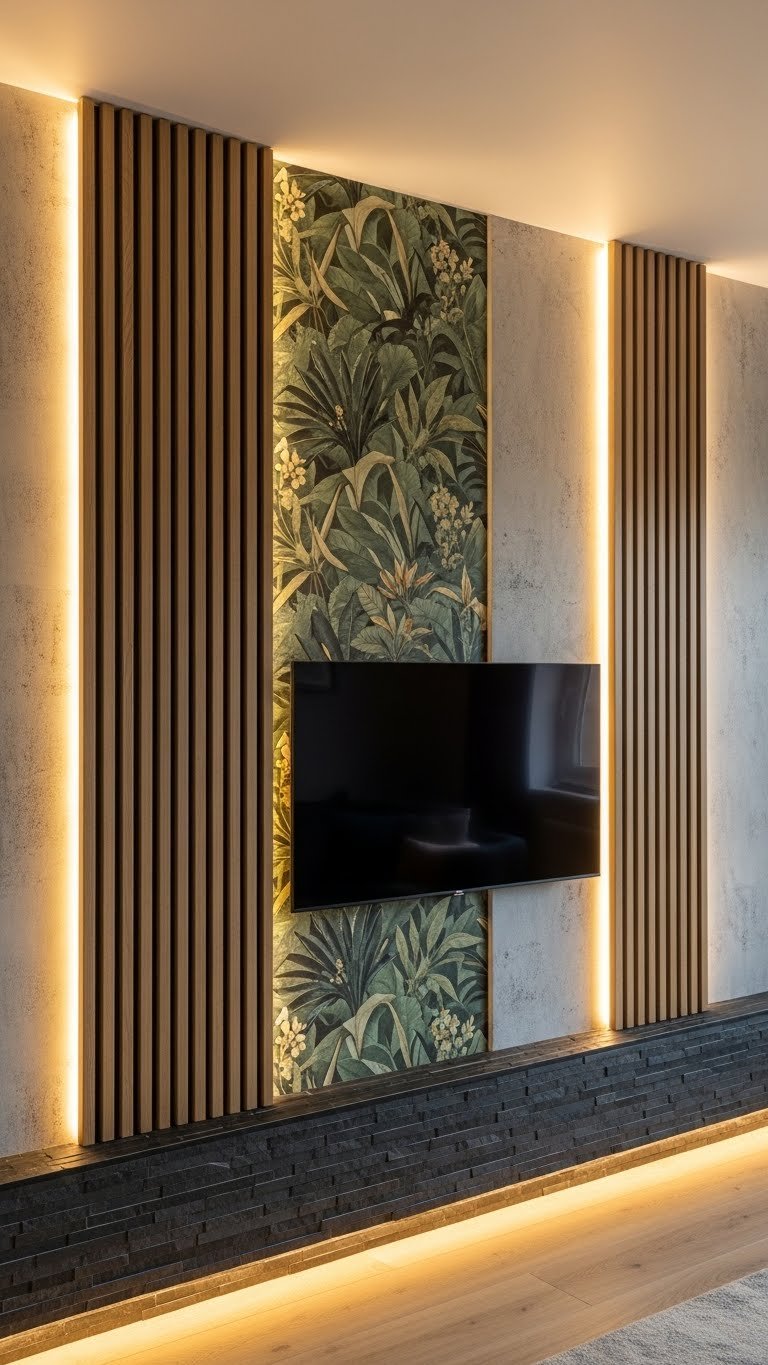
Mix materials: install slats in some sections while leaving other areas for wallpaper, bold paint, or textured finishes.
Divide your wall into quadrants or sections. Install slats in two opposite sections, then add complementary wallpaper or paint color in the other sections. Choose colors and patterns that coordinate with your wood tone (warm neutrals, earthy tones). Combined costs: $150–$400 depending on your material choices. Full weekend installation for the mixed approach.
This hybrid strategy gives you visual interest without the commitment of a full slat wall, and you can update the painted sections easily when trends change.
Your wall becomes a mixed-media canvas—more artful and intentional than any single treatment alone.
23. Install Slats on Just One Wall (Not the Full Media Wall)

You don’t need to cover your entire wall with slats to get the effect. Install them on just the upper half or one side for a sophisticated, balanced look.
Measure and mark where you want your slats to end—perhaps halfway up the wall, or in the upper third only. Install slats in that section only, leaving the lower area plain or painted. This uses fewer materials ($80–$180), takes one afternoon to one day, and feels modern rather than overwhelming.
The visual balance between slats and negative space creates breathing room, especially important in smaller rooms or open-concept spaces.
Your wall feels designed and intentional without consuming every inch of the space.
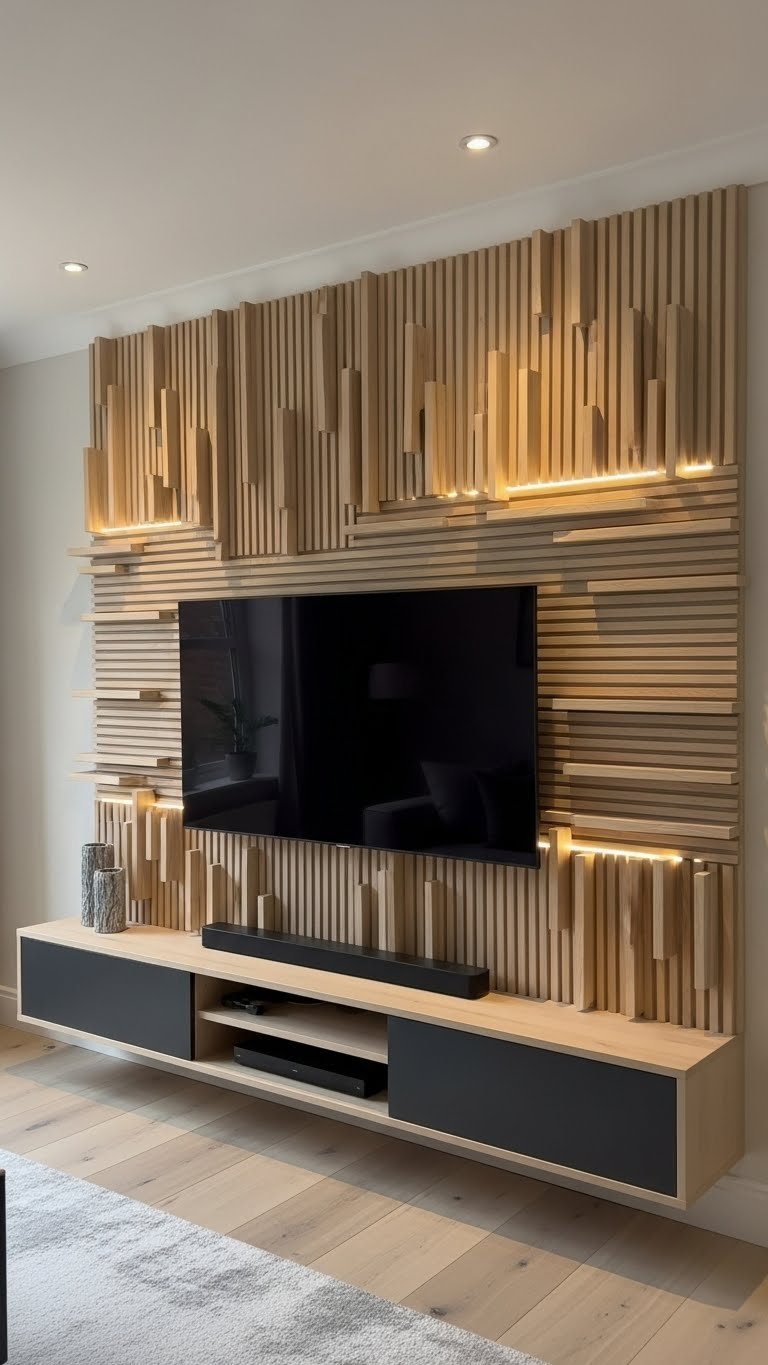
24. Create a 3D Texture Effect With Slats of Varying Depths

For serious sculptural impact, mount slats at different depths. Some sit flush to the wall, others protrude outward, creating 3D texture and shadow play.
Use shims, spacers, or mounting brackets to control how far each slat projects from the wall. Plan your depth pattern before installing—maybe alternating deep and shallow, or random placement. This adds complexity but creates genuinely artistic impact. Materials: $150–$400, install time: full weekend to 1.5 days.
The varying depths mean lights cast complex shadows, creating a living piece of art that changes throughout the day.
Your TV wall becomes truly sculptural and deserves to be photographed—it’s that visually striking.
25. Use Slats as a Frame Within a Frame (Slats + Shelving Surround)

Create nested visual interest by building a slat frame around your TV, then surrounding that with floating shelves for a layered, gallery-wall effect.
Build a slat frame 12–18 inches around your TV (see idea #18), then install floating shelves above, below, or beside the slat frame. This creates a layered, collected look that’s more visual dimension than any single treatment. Total cost: $250–$500. Install time: full weekend to 1.5 days. Style shelves with plants, books, and decor for a curated gallery-wall vibe.
This approach works best if your TV isn’t your only focal point—your wall becomes a style statement.
The nested frames and layered shelving create depth and personality that reflects your actual life and interests.
26. Install Slats and Hide a Projector Screen Behind Them
Take the “disappearing TV” trend to the next level: hide a motorized projector screen behind movable wooden slat panels.
Install motorized slat panels on tracks that slide horizontally to reveal a projector screen behind them. Brands like Salamander Designs or custom installers offer these systems for $2,000–$5,000+ installed. When the screen is hidden, your wall looks like beautiful art. When you want to watch, press a button and slats slide away.
This is an investment piece, ideal if you’re passionate about design and have the budget. It’s also rental-unfriendly.
Your media wall becomes furniture and art combined—a true statement piece that wows every single person who sees it.
27. Paint Slats White and Add Metallic Accents for Glam
Go glam by painting your slats in crisp white or cream, then adding metallic trim frames or hardware accents for luxury polish.
Install slats first, paint them in high-quality white paint ($20–$40 per gallon), then add gold or brass trim frames ($50–$150) around your TV or shelves. Metallic accents catch light beautifully and instantly elevate the look. Total cost: $150–$300. Painting adds 2–3 days to your timeline.
This combination reads as high-end without being overdone. It works especially well in modern, transitional, or glam interiors.
Your TV wall feels like a luxury hotel feature—polished, intentional, and impossibly sophisticated.
PIN THIS FOR YOUR NEXT WEEKEND: Save this post and pick one wooden slat idea to tackle this weekend—whether it’s a quick peel-and-stick update or a full DIY installation. Your TV wall deserves to be gorgeous, and the best part? You’ve got options at every budget and skill level. Let us know which idea you try first—we love seeing transformations.
Leave a Reply