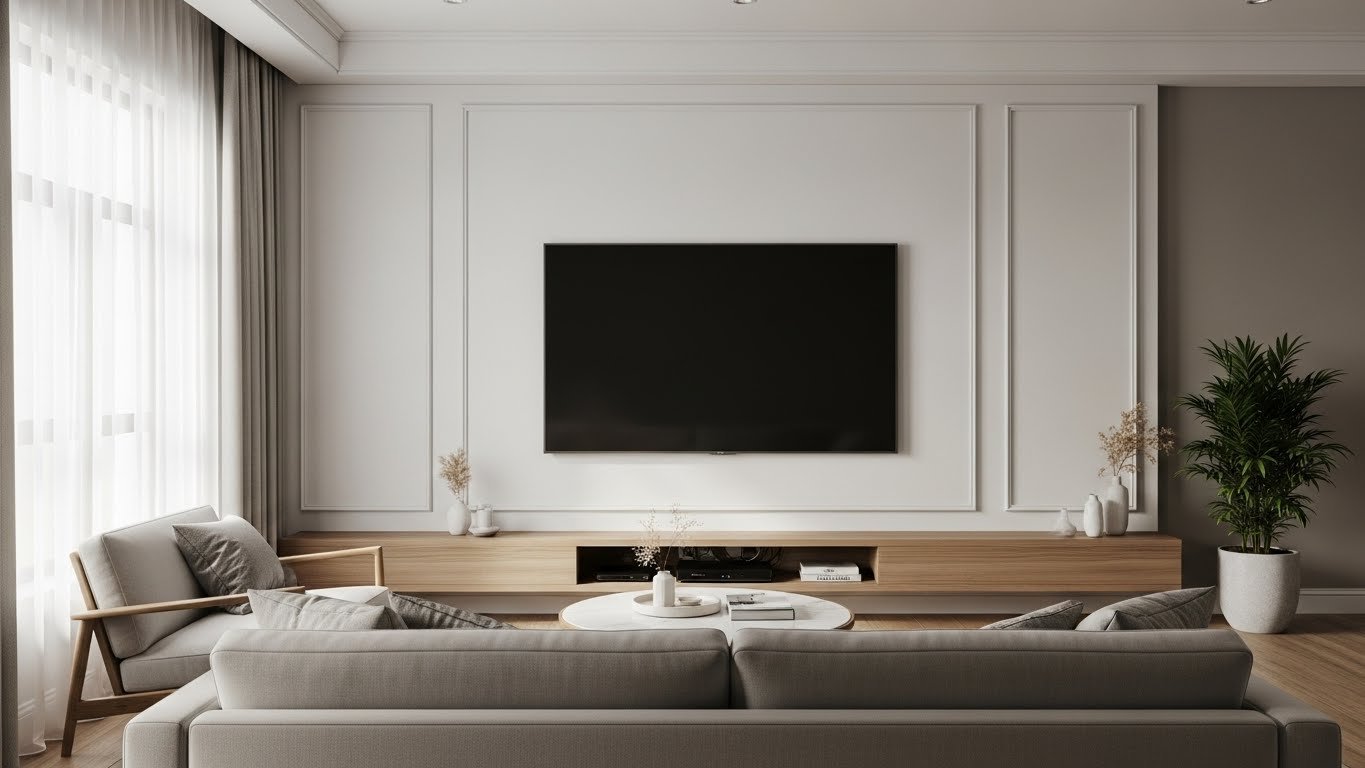
Minimalist TV styling doesn’t mean boring—it means intentional. Your living room is probably the heart of your home, yet visible cables, clunky stands, and mismatched tech can make the space feel chaotic instead of calm. You want your TV setup to disappear into the background while still looking thoughtfully designed.
Whether you’re renting, decorating on a budget, or ready to invest in a permanent refresh, these 24 ideas show you how to create a seamless media wall that actually enhances your space instead of dominating it. From hidden storage solutions and floating designs to smart frame styling and cable management hacks, you’ll find options for every skill level and budget. By the end, you’ll have a TV area that looks clean, feels intentional, and photographs beautifully—all without the chaos.
1. Mount Your TV in a Thin Frame Box
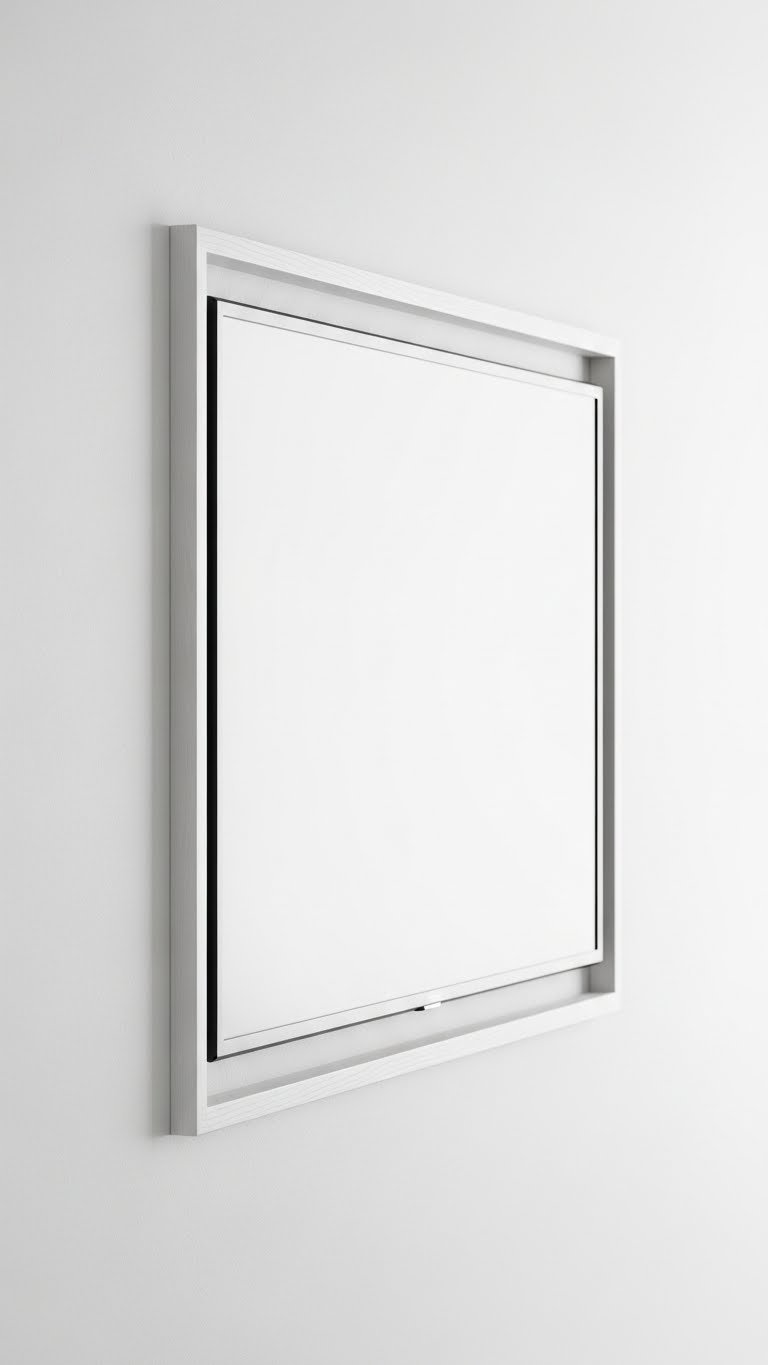
A frame box creates the illusion that your TV is part of the wall itself rather than a protruding object. This approach works especially well with neutral wall colors and keeps the focus on your content, not the hardware.
Build or buy a shallow wooden box frame (4-6 inches deep) that matches your wall color. Mount your TV inside so only the screen edge shows the frame. This costs $80-$200 for a custom frame or $40-$100 for a pre-made option from IKEA or Amazon. Takes about 2 hours to install if you’re mounting it yourself. The frame disappears visually, making your TV feel like it’s floating within the wall rather than sitting on top of it.
This approach looks gallery-like and high-end without the luxury price tag. Your guests will notice the thoughtful design before they even realize there’s a TV in the room.
2. Hide Cables Behind a Cord Management Box
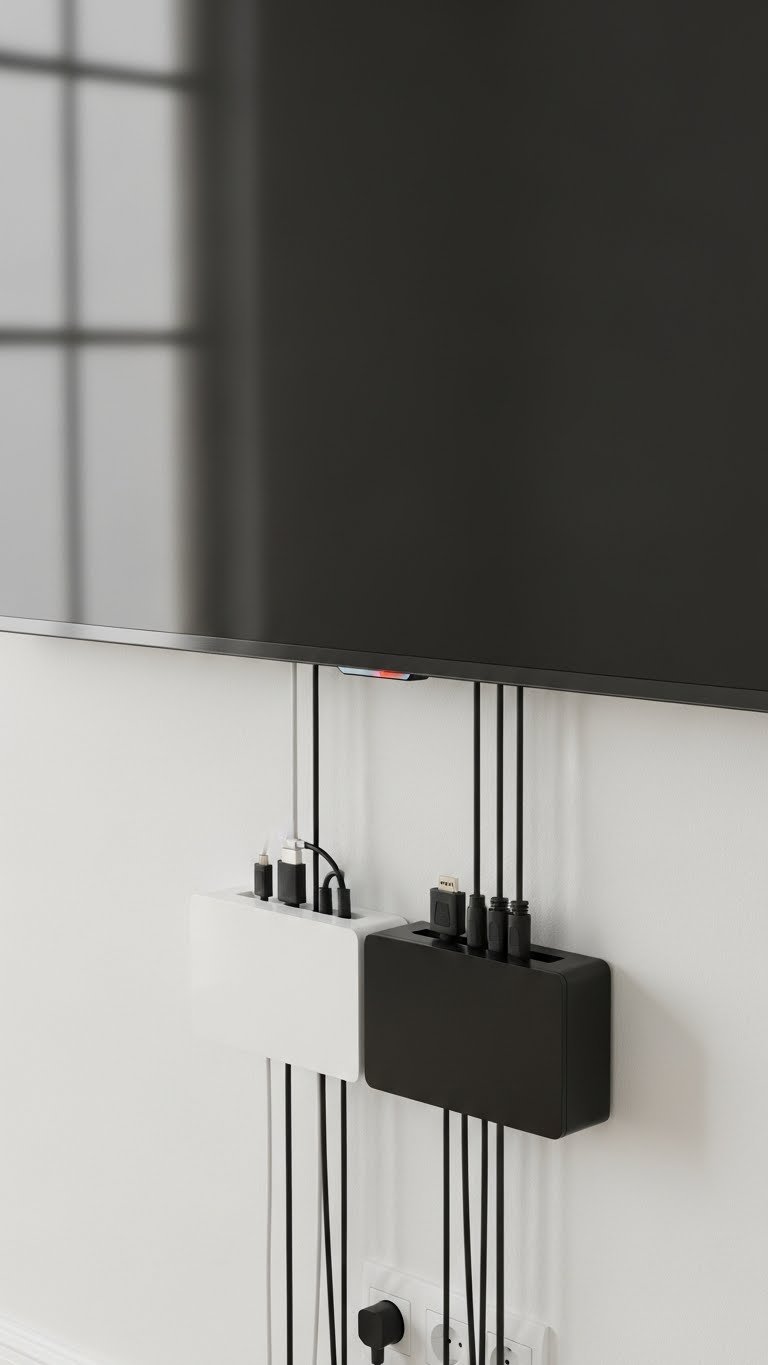
Visible cables are the enemy of minimalist styling, and one box solves the entire problem. A cord management box catches all your messy cables and hides them completely behind a finished cover.
Mount a $15-$40 cable management box (available at Target, Best Buy, or Amazon) directly under your TV. Feed all cables through the top, and they’ll exit at the back to your devices. Paint the box to match your wall or leave it black if your wall is dark. Installation takes 15 minutes and requires only a drill and wall anchors.
You’ll immediately see the difference—your TV wall goes from looking tangled to completely intentional. Rearranging cables later becomes easy since they’re all contained in one accessible spot.
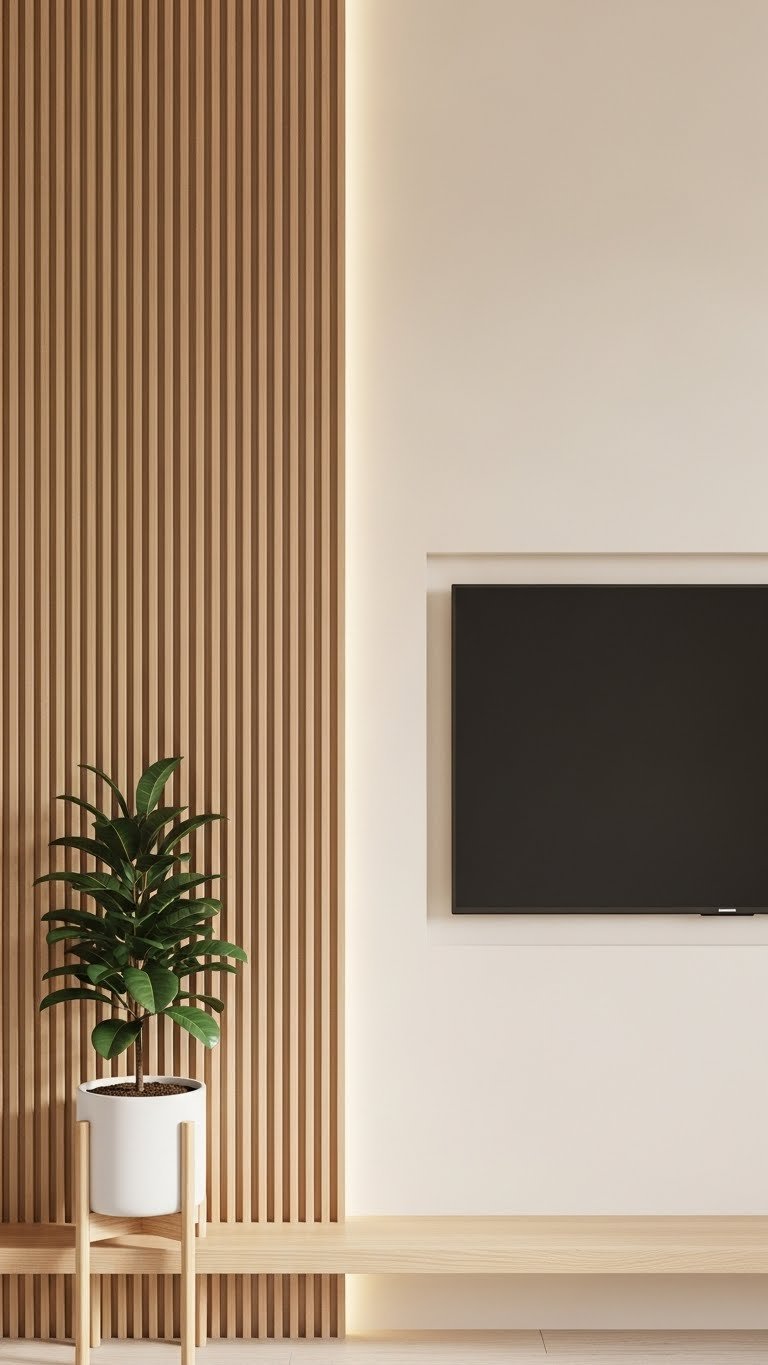
3. Use Slatted Wood Paneling for Acoustic Texture
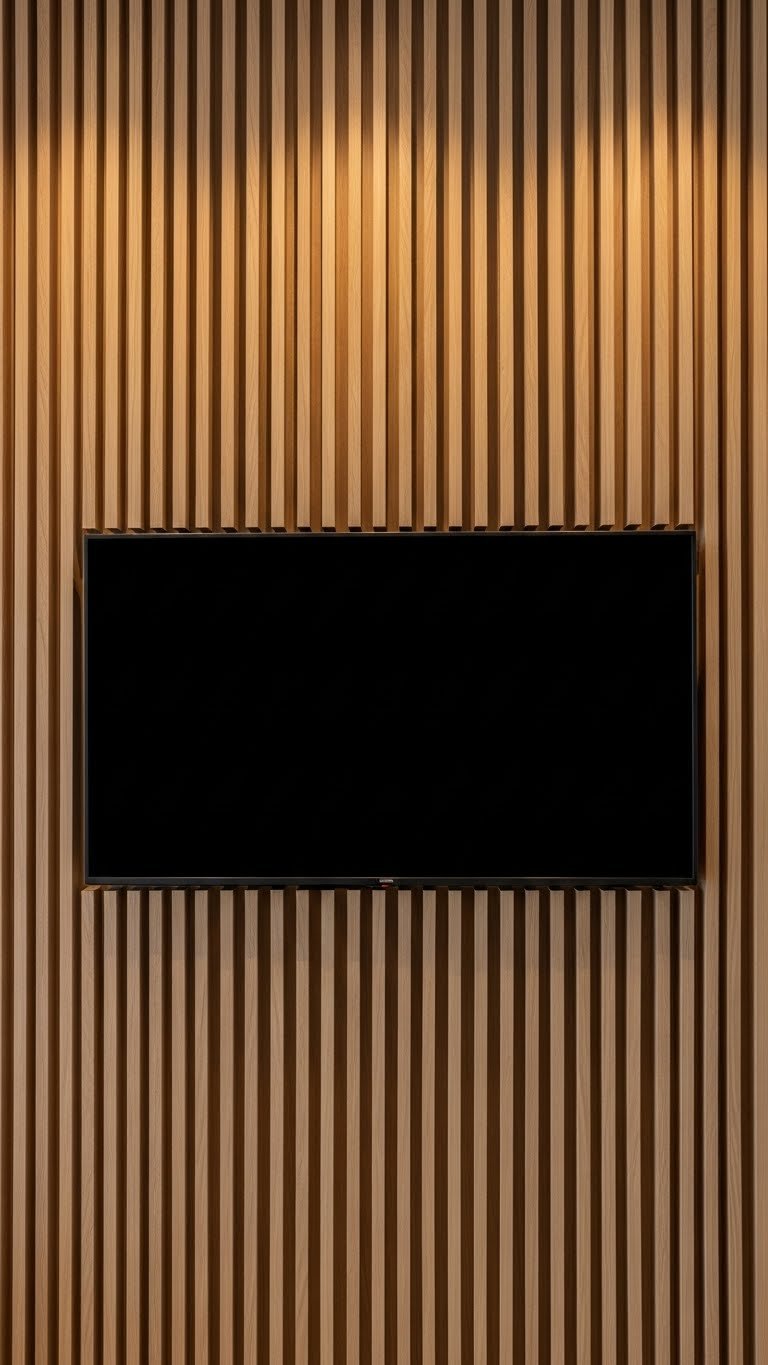
Slatted wood does double duty: it looks elegant while actually improving your room’s acoustics. The gaps between slats absorb sound, making your TV experience feel less echoey and more refined.
Install vertical wooden slats (oak, walnut, or pine) with 2-3 inch gaps between each board. Budget $150-$400 for materials and tools, or hire help for $300-$600 in labor. This is a solid weekend project for DIYers, or a half-day job for a professional. The slats hide cables routed behind them and create a warm focal point that feels architectural.
Your room suddenly feels more intentional and gallery-like. The acoustic benefit means your TV doesn’t feel as loud or jarring, and the wood brings natural warmth that neutral walls alone can’t achieve.
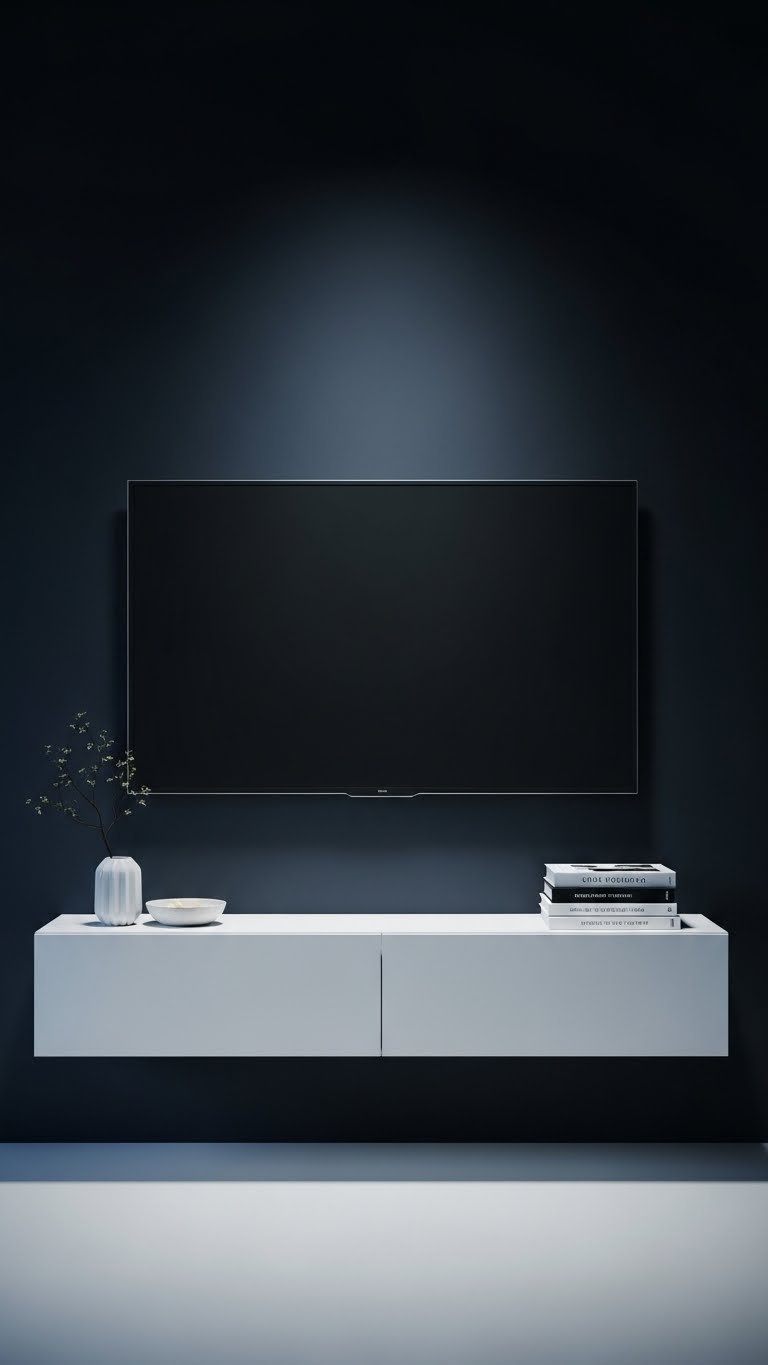
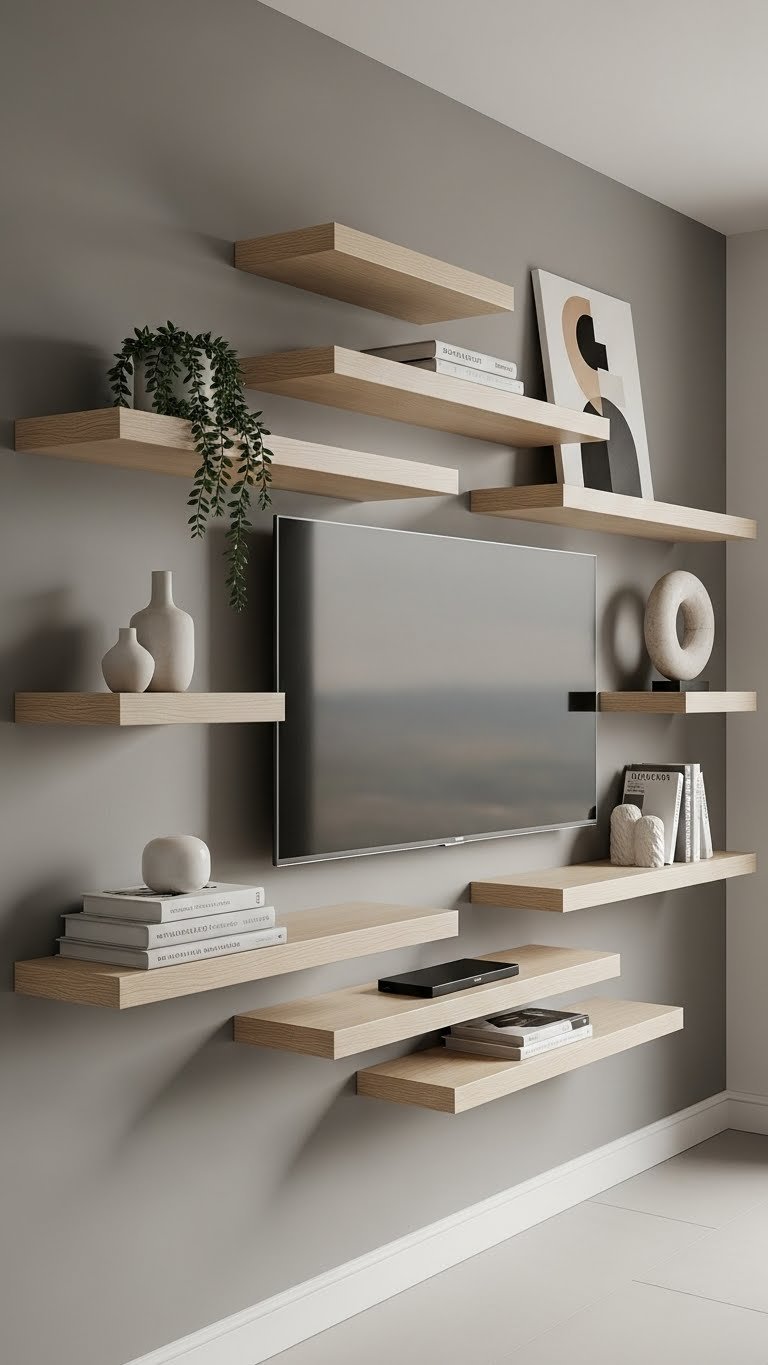
4. Install a Floating Media Console for Zero Visual Weight
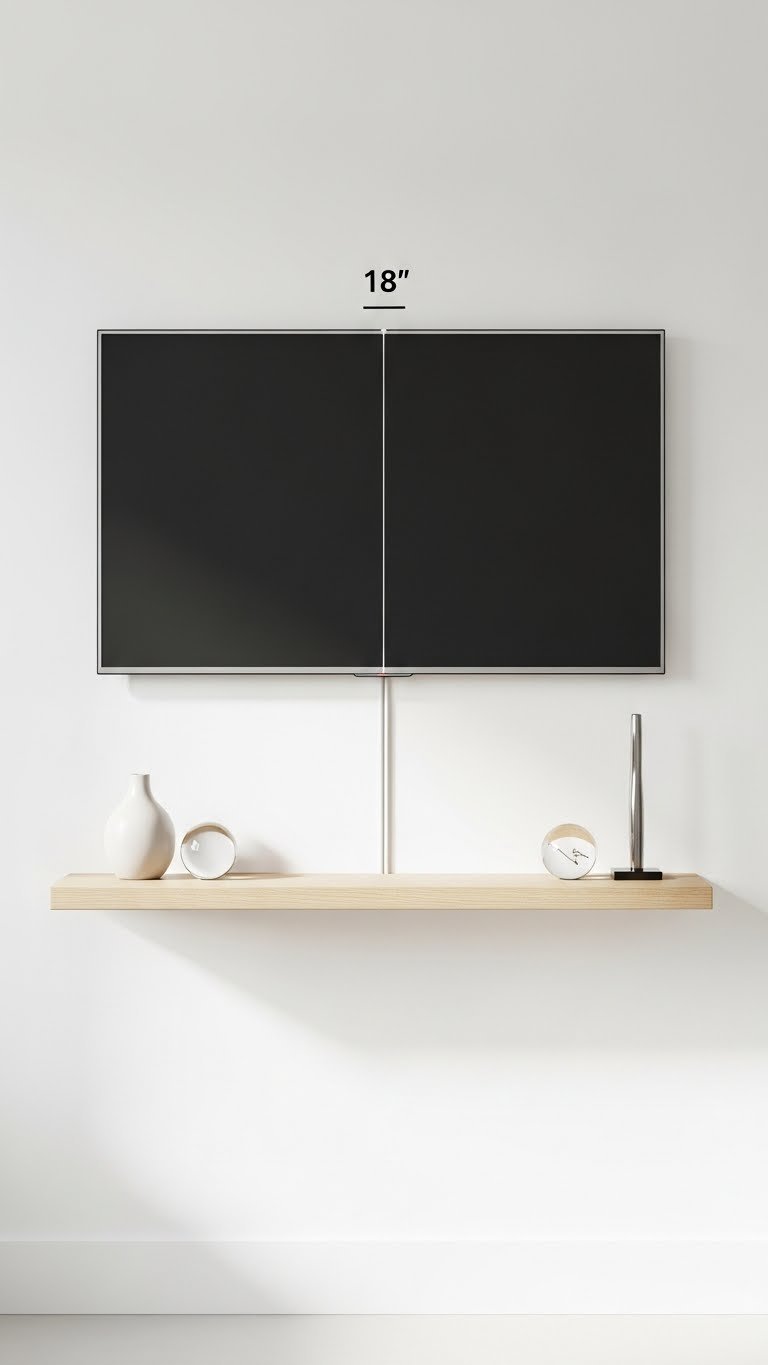
Floating consoles free up floor space and make rooms feel bigger while keeping everything organized and hidden. No bulky TV stand means no visual clutter at eye level.
Mount a $60-$150 floating shelf from IKEA, Wayfair, or a local carpenter directly below your TV. Choose one that’s 36-48 inches wide to align with your TV. Hide a cable management box behind it or route cables through drilled holes in the back. Install takes 1-2 hours with a drill, level, and wall anchors.
Your floor suddenly opens up, making the room feel more spacious. Electronics stay hidden in drawers below, and the shelf surface stays clear except for one or two intentional objects. Small spaces benefit most from this approach.
5. Paint the TV Wall a Soft Neutral Tone
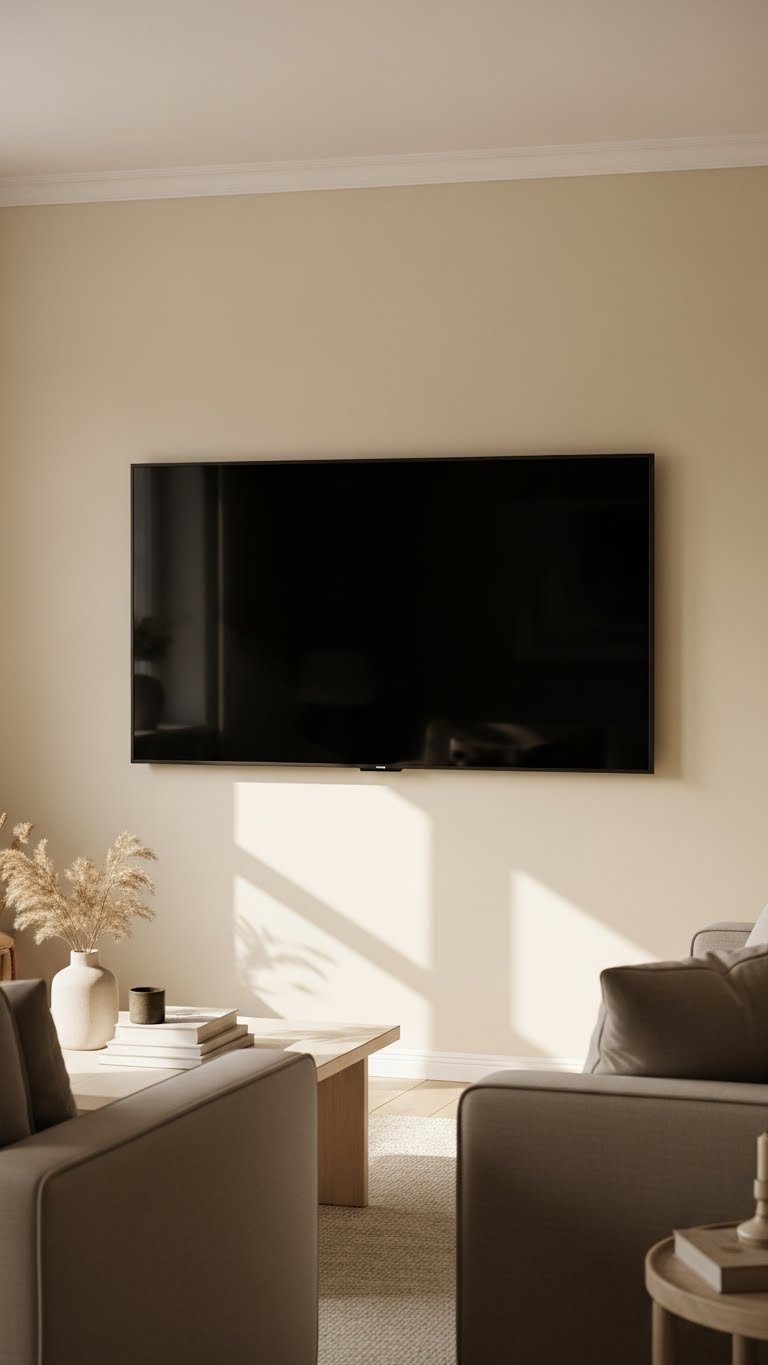
Color makes a huge difference in how “designed” your TV wall feels. A soft, cohesive paint color makes the wall recede rather than demand attention.
Choose greige, warm white, or soft taupe and paint just the TV wall (or the whole room for $0 if you’re doing it yourself with paint you already have, or $150-$300 if hiring a painter). One coat with a primer-paint combo takes 2-3 hours DIY. This is the cheapest way to make the biggest impact.
The unified color makes your TV disappear into a calm backdrop instead of sitting against a stark white that makes it pop out. Your entire room feels more cohesive and thoughtfully planned.
6. Add Thin Stacked Stone for Modern Texture
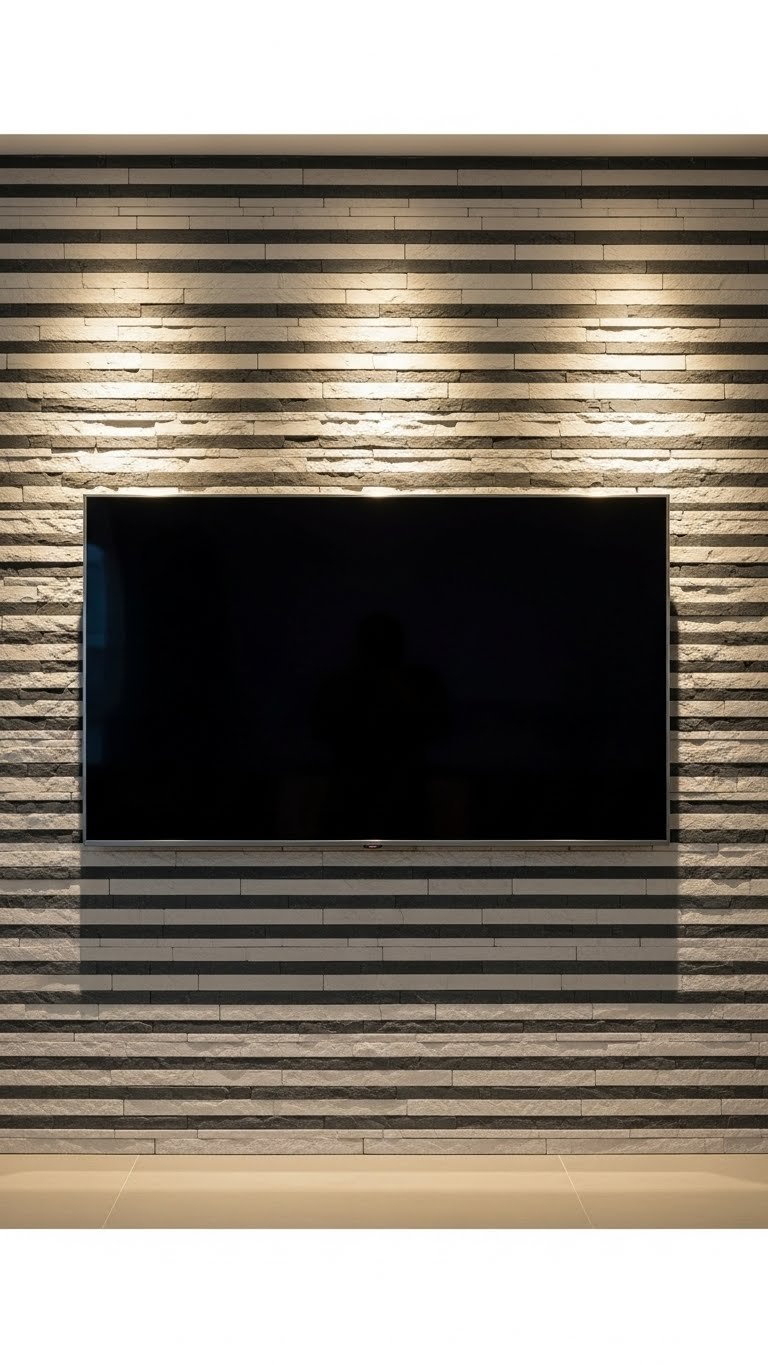
Stone brings organic texture and visual interest without heaviness. Thin stacked stone veneer is lightweight, rental-friendly (with landlord permission), and surprisingly affordable.
Install thin stacked stone veneer ($80-$200 for materials to cover a wall) using stone adhesive and grout. This weekend project takes 4-6 hours and requires no special tools. You can also rent this job out to a mason for $300-$600 total. Stone hides cables easily and creates natural shadows that add depth.
Your TV wall becomes an architectural feature that elevates the entire room. The texture catches light in a way that makes your space feel designed, not just “decorated.”
7. Create a Gallery Wall Above or Beside the TV
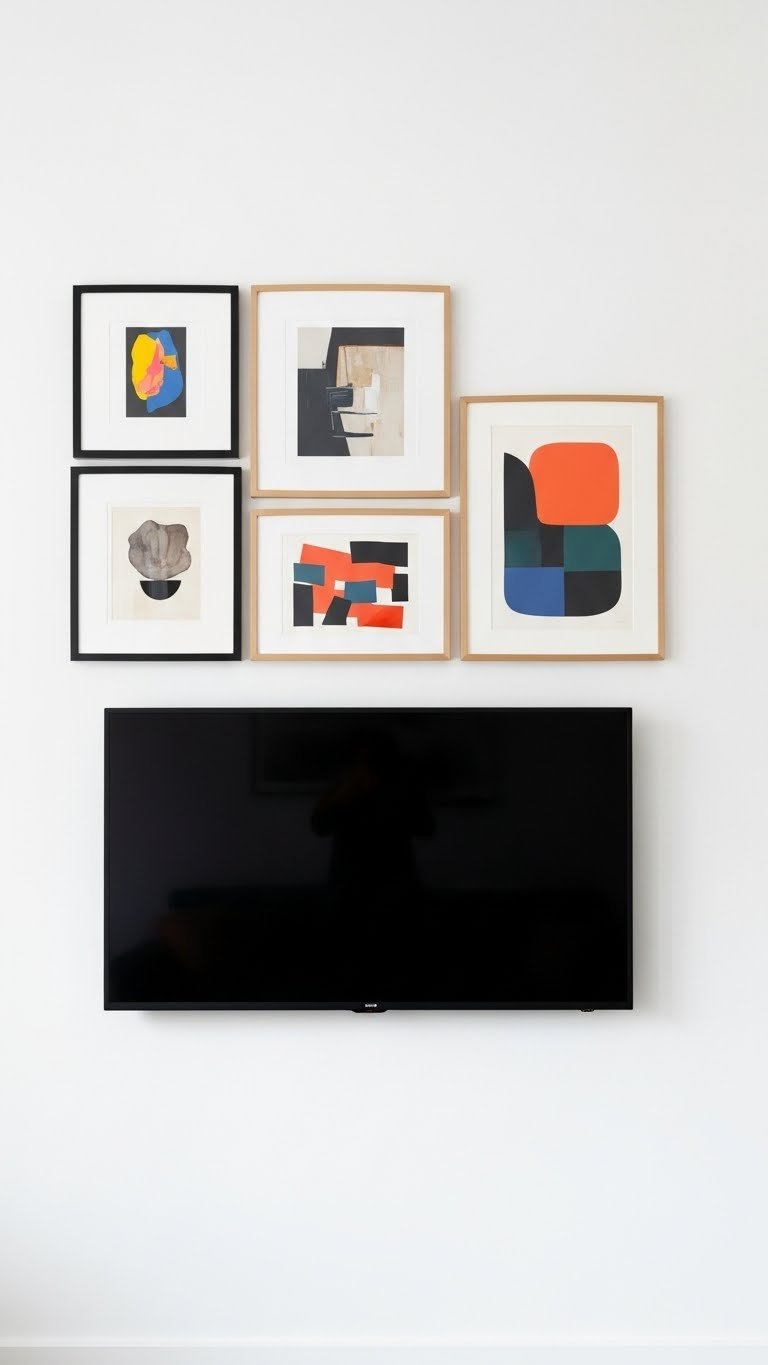
Framed art around your TV transforms it from an electronic into part of your décor story. This approach acknowledges the TV as a functional element while styling around it.
Select 4-6 matching or complementary frames ($15-$40 each at Target, IKEA, or thrift stores) and arrange them above your TV in a grid or salon-style layout. Add simple artwork or black-and-white prints ($10-$30 each). Arrange and hang takes 1-2 hours. The frames and art become as much a focal point as the TV itself.
Suddenly your TV isn’t the only thing pulling your eye. The curated art display makes the space feel intentional and gallery-like, and guests see thoughtful design before they register that there’s a TV.
8. Install Recessed Shelving Behind Your TV
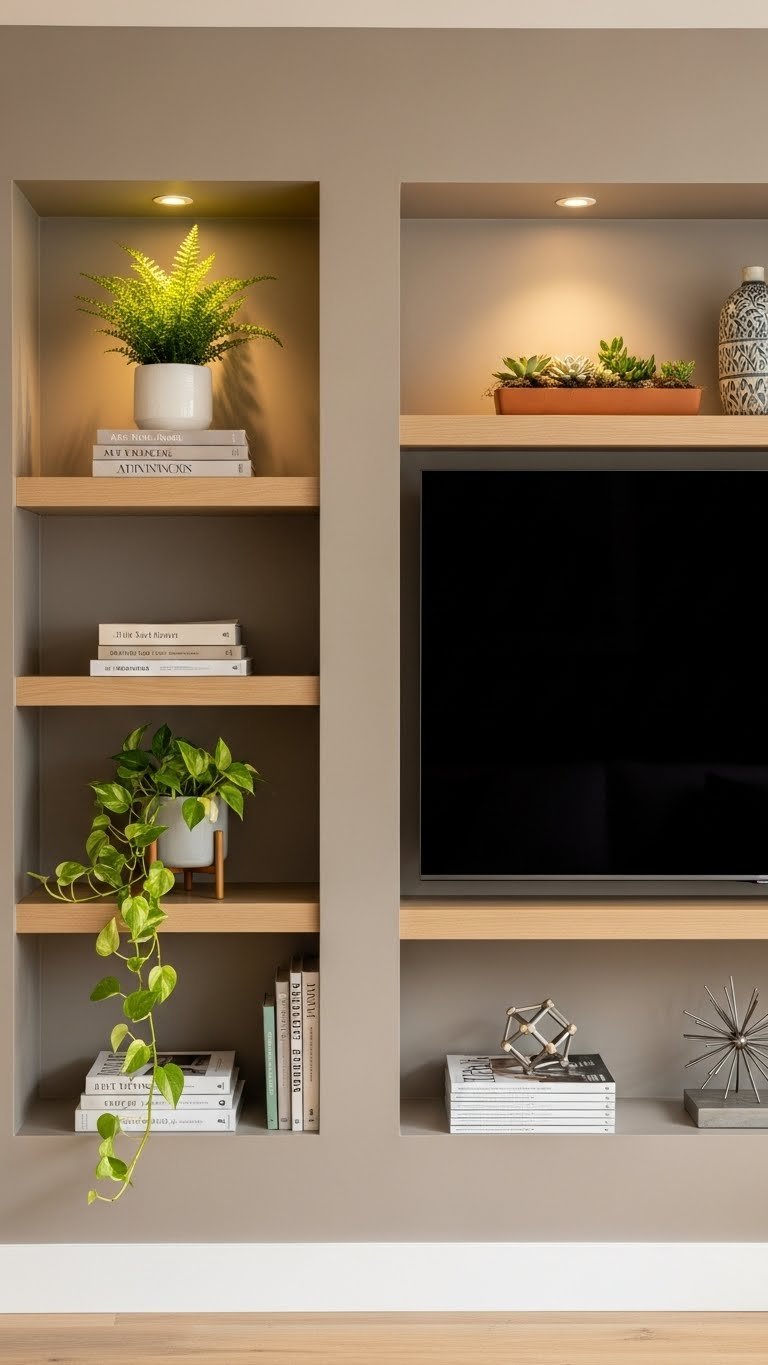
Built-in shelving makes a TV wall feel custom and high-end while providing functional storage. Recessing the TV means it doesn’t protrude into your room.
Cut a recessed opening in your drywall, add a backing board, and install $50-$150 worth of simple shelving materials (wood, brackets, paint). This requires carpentry skills or hiring a pro ($400-$800 in labor). Takes a full weekend DIY or one day with a professional. The shelves hide cables and create a curated display area.
Your TV becomes part of an intentional design moment rather than a standalone object. The recessed effect makes your room feel more spacious, and the surrounding shelves give you flexible styling options.
9. Use Micro Cement for a Seamless Luxury Finish
Micro cement creates a seamless, high-end look similar to polished concrete but way more approachable. It’s an emerging luxury finish that feels intentional.
Apply micro cement ($200-$500 in materials or $400-$800 with professional installation) following product instructions or hiring a pro. The finish cures for 48 hours before your TV can go back up. This is a one-time investment that lasts forever. Micro cement hides imperfections and creates zero visual breaks—your wall is completely seamless.
The result feels modern and gallery-like, like you’ve designed a professional art installation. This finish works especially well with minimalist frames and makes any TV look elevated.
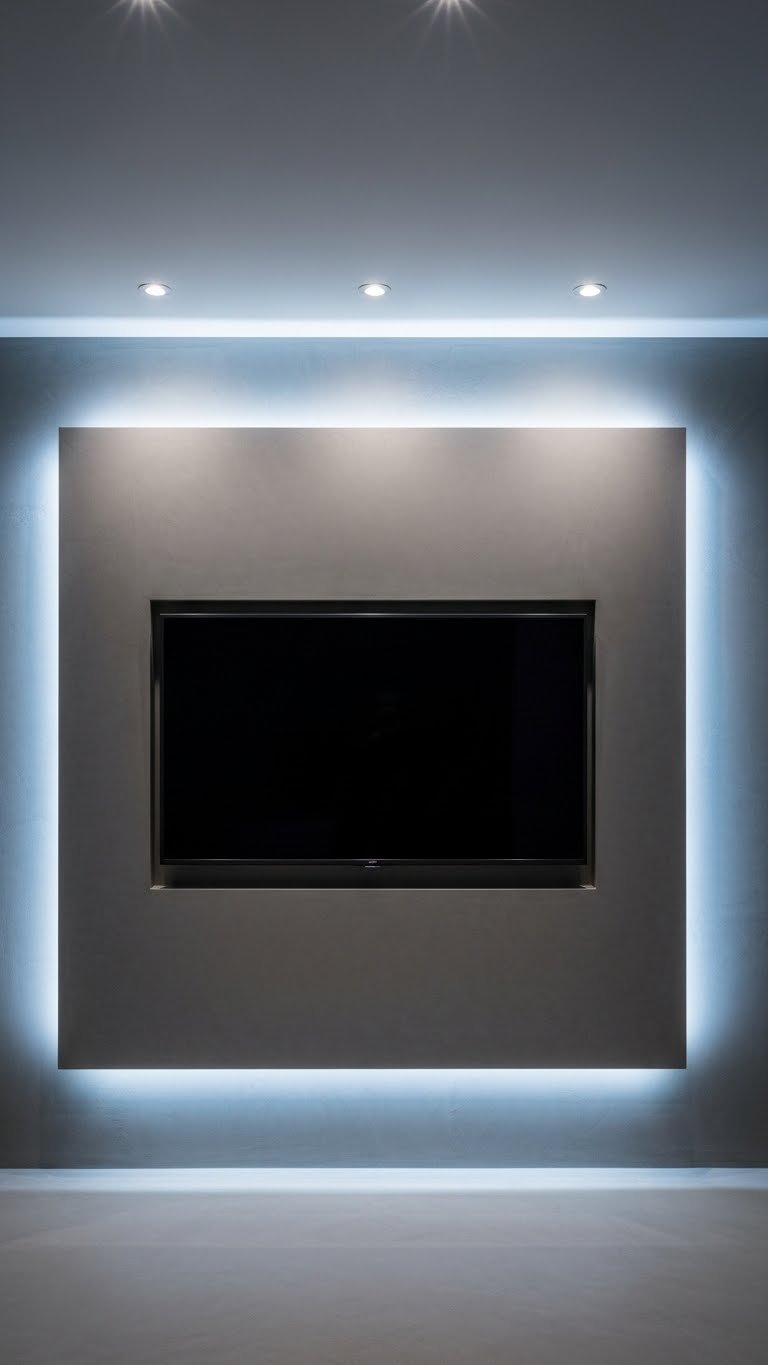
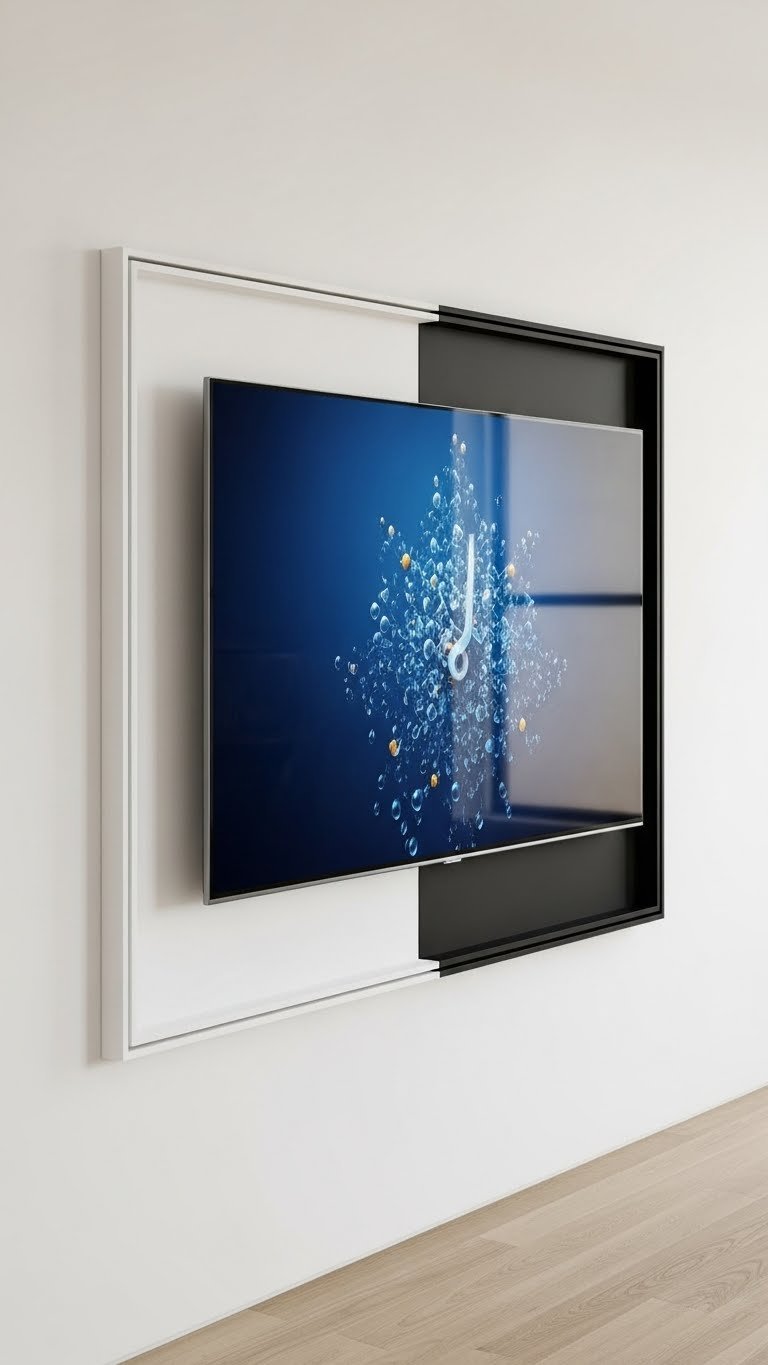
10. Mount Your TV on a Motorized Swing Arm
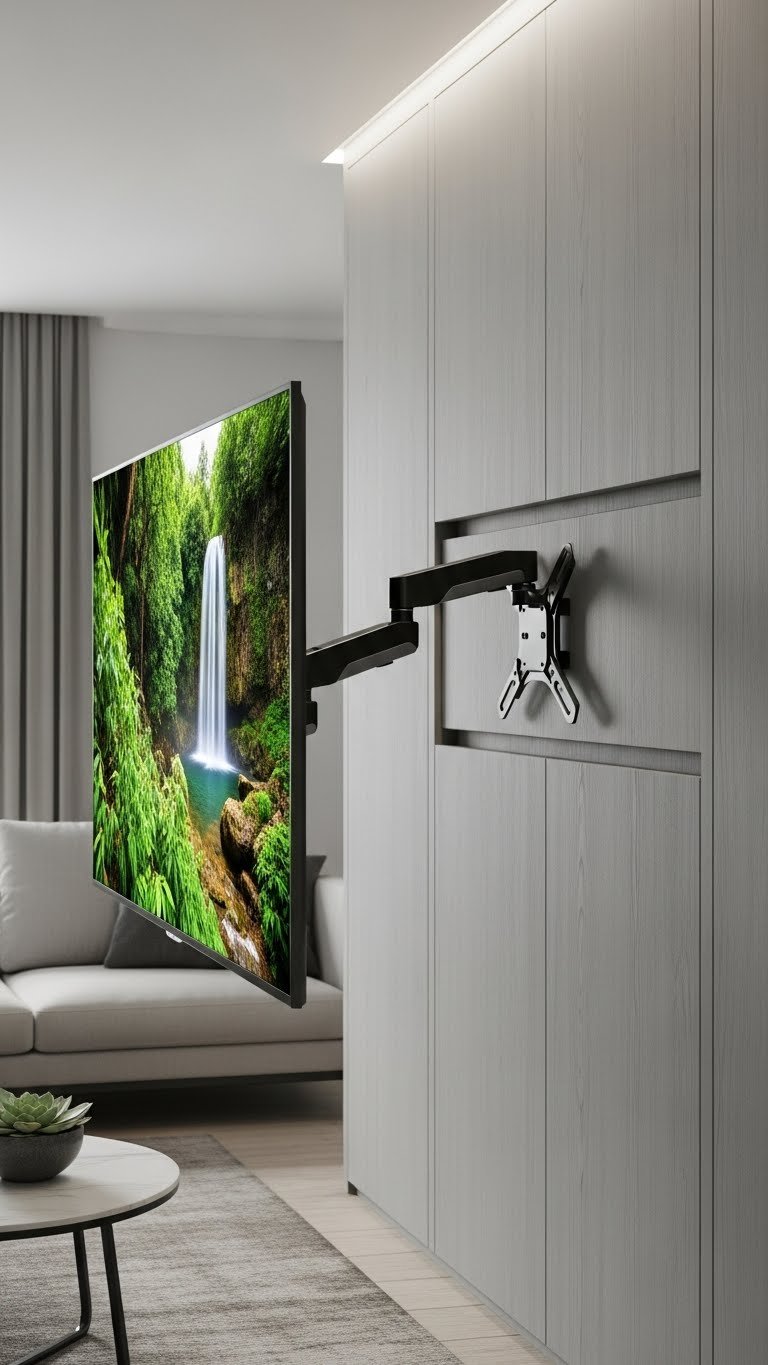
A motorized arm lets you hide your TV completely when you’re not using it. This is the ultimate minimalist move for anyone who doesn’t want their TV to be the room’s focal point.
Install a $150-$400 motorized swing arm (available at Best Buy, Amazon, or Wayfair) and run power and cables through the wall behind it. Installation takes 2-3 hours and may require an electrician ($200-$300). When you’re done watching, press a button and your TV slides flush against the wall, completely disappearing from view.
Your room transforms depending on how you’re using it. During the day, your wall is a clean, uninterrupted surface. At night, your TV emerges for entertainment. This speaks to the most intentional version of minimalist living.
11. Paint a Bold Feature Wall Behind Floating Furniture
A bold, solid color behind your TV doesn’t clutter—it defines. Used strategically with minimal accessories, it feels intentional rather than busy.
Choose one bold but sophisticated color (charcoal, deep navy, warm black, or rich green) and paint the TV wall. Buy premium paint ($25-$40 per quart) for durability and color depth. Two coats takes 3-4 hours DIY or costs $200-$300 with a pro. Keep everything else on that wall minimal—just the TV and console.
The bold backdrop makes your TV area feel like a distinct room “zone” without crowding the space. Dark colors recede, so the wall feels like a frame rather than a wall pushing in on you.
12. Arrange Floating Shelves in a Custom Grid
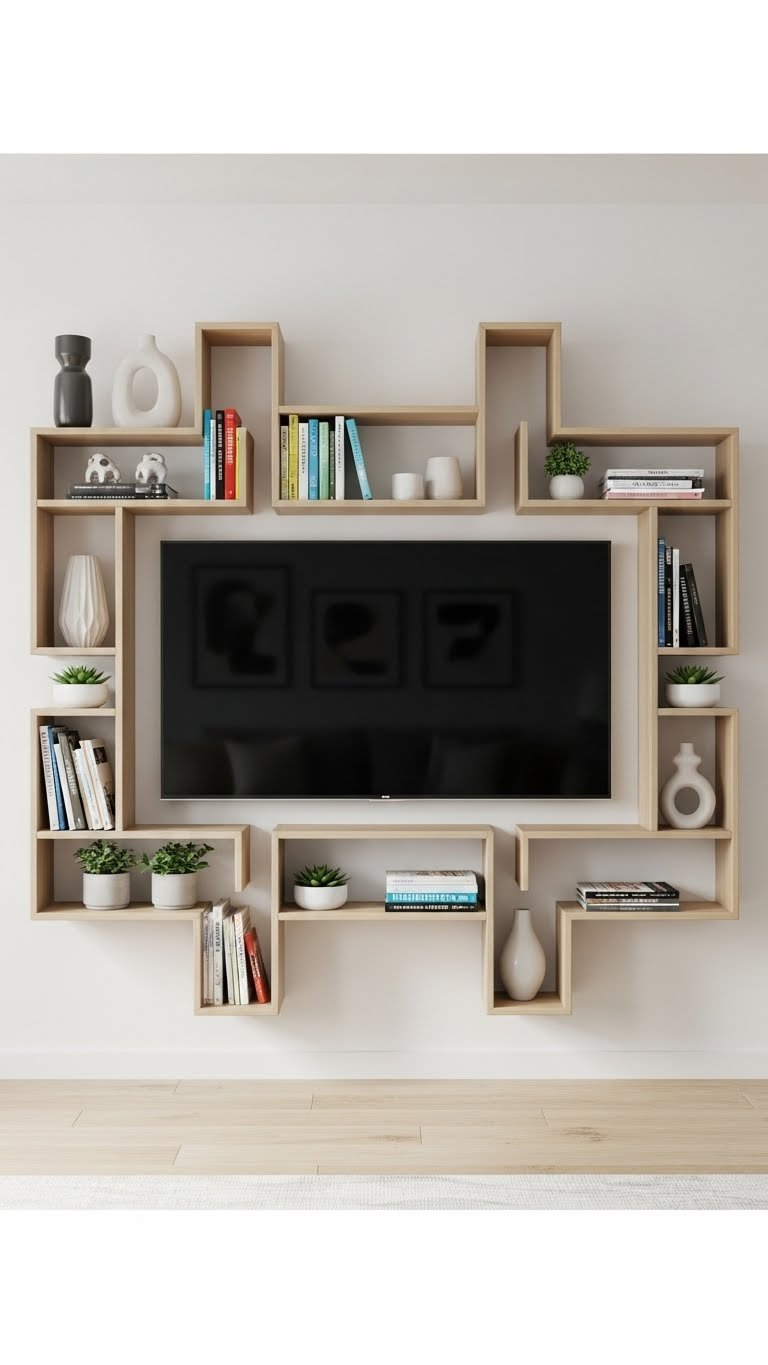
Floating shelves in a grid layout create visual structure without solid wall coverage. You get open storage and style flexibility simultaneously.
Install 6-8 floating shelves ($30-$60 each from IKEA, Wayfair, or Amazon) in a balanced grid. Use a level and stud finder (basic $20-$40 if you don’t have them) to ensure accuracy. Layout takes 2-3 hours, installation takes another 2-3 hours. Leave 60% of each shelf empty and style the rest with books, plants, and a few meaningful objects.
Your wall feels organized and intentional rather than scattered. The negative space is just as important as what’s displayed, giving the wall breathing room while keeping you organized.
13. Hide Your Cable Box in a Wooden Console Drawer

Cable boxes are visual clutter that serve zero aesthetic purpose. A simple drawer hides everything while keeping it accessible.
Mount a low console with at least one deep drawer ($80-$200 from IKEA, Wayfair, or Target) directly below your TV. Place your cable box, power strips, and surge protectors inside the drawer. Drill small holes in the back of the drawer or console to route cables through. Setup takes 30 minutes once the console is installed.
Your TV setup suddenly looks clean and professional. The drawer keeps tech hidden but within reach, so you’re not hunting for remotes or fumbling with cables.
14. Use Fluted Wall Panels for Textured Luxury

Fluted panels are having a major moment and for good reason—they add luxury texture that feels high-end without being visually busy. The vertical lines are subtle but impactful.
Install pre-made fluted wall panels ($200-$500 for a TV wall, or hire installation for $300-$600). Options include MDF panels, 3D wall tiles, or custom wood fluting. DIY installation takes 4-6 hours; professional takes 4-8 hours. Fluted panels hide cables routed behind them and create visual depth through light and shadow play.
Your TV wall transforms into a textured architectural feature that photographs beautifully and feels intentionally designed. The subtle ridges catch light in a way that makes the space feel premium.
15. Create a Japandi TV Wall with Natural Materials
Japandi blends Japanese minimalism with Scandinavian warmth—the perfect framework for a serene TV area. It’s about intentional simplicity with natural materials.
Mix light wood slats or paneling ($150-$300) with a warm neutral paint ($50 in paint or $150-$250 with a pro painter). Add one or two large potted plants ($30-$80 each) nearby. No decorative clutter—just clean lines and natural textures. Setup takes one weekend for the walls, then ongoing styling as you add plants.
Your TV becomes part of a cohesive, calming environment rather than the focal point. The combination of natural materials and negative space makes the room feel peaceful and intentional.
16. Install an Electric Fireplace Below Your TV

An electric fireplace under your TV adds warmth and a second focal point without the mess of a real fireplace. It’s functional heating and aesthetic ambiance combined.
Install a wall-mounted electric fireplace ($150-$400) directly below your TV using the manufacturer’s mounting hardware. These plug into standard outlets, so no venting required. Installation takes 30 minutes to 1 hour and just needs a drill and level. The fireplace creates ambient warmth and adds visual interest below the TV.
You’ve created two focal points instead of just one, and the room feels cozier during cooler months. Evening gatherings feel warmer and more inviting with the glow of flames below your TV.
17. Mount LED Strips Behind Floating Shelves

LED strips add indirect lighting that creates ambiance while highlighting your styling. They’re affordable, easy to install, and completely transformative.
Purchase adhesive LED strips ($20-$50 at Home Depot, Amazon, or Target) and attach them to the underside of each floating shelf surrounding your TV. Run the power cord behind shelves and plug into a nearby outlet or use a wireless remote-controlled option ($40-$80). Installation takes 20 minutes. Choose warm white light for a cozy feel or adjustable color if you like flexibility.
Your TV wall becomes a design feature even when you’re not watching. The soft lighting adds depth and makes the entire wall feel curated and intentional. It’s the difference between a TV wall and a designed media installation.
18. Use a Decorative Room Divider to Frame Your TV

A room divider frames your TV and defines the media area as its own zone. This works especially well in open-concept spaces where you want to visually separate the TV area.
Position a $80-$250 room divider (wood, rattan, or metal options at IKEA, Wayfair, or Amazon) to one side of your TV. Choose one that coordinates with your wall color and style. No installation needed—just position it. This instantly signals “this is the TV zone” without building a wall.
Your open-concept space suddenly feels more intentional and organized. The TV doesn’t dominate the entire room; instead, it’s a defined area within your larger space. Guests immediately understand the room’s layout.
19. Style Your Console with Intentional Negative Space
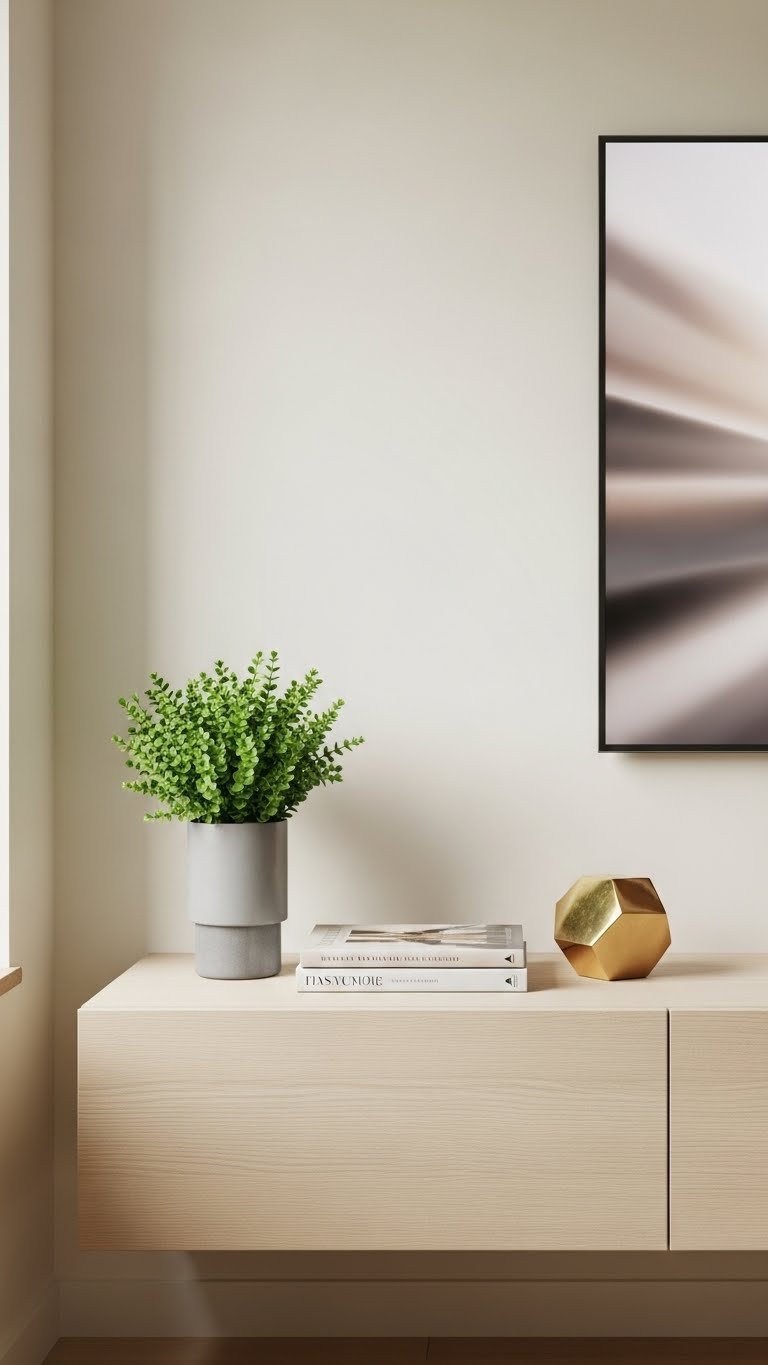
The styling around your TV matters as much as the wall itself. Intentional negative space makes everything you do display feel purposeful.
Choose only 3-5 objects maximum for your console: a small plant ($15-$30), stacked books you actually read ($0 if you use ones you own), one meaningful decorative piece ($20-$60). Arrange them on one side or in a small cluster. Dust and refresh monthly as needed.
Your console becomes a curated moment rather than a catch-all shelf. Guests notice the intentional styling and assume you’re more organized everywhere (which makes you want to be). Negative space is just as powerful as what you display.
20. Paint Cables to Match Your Wall
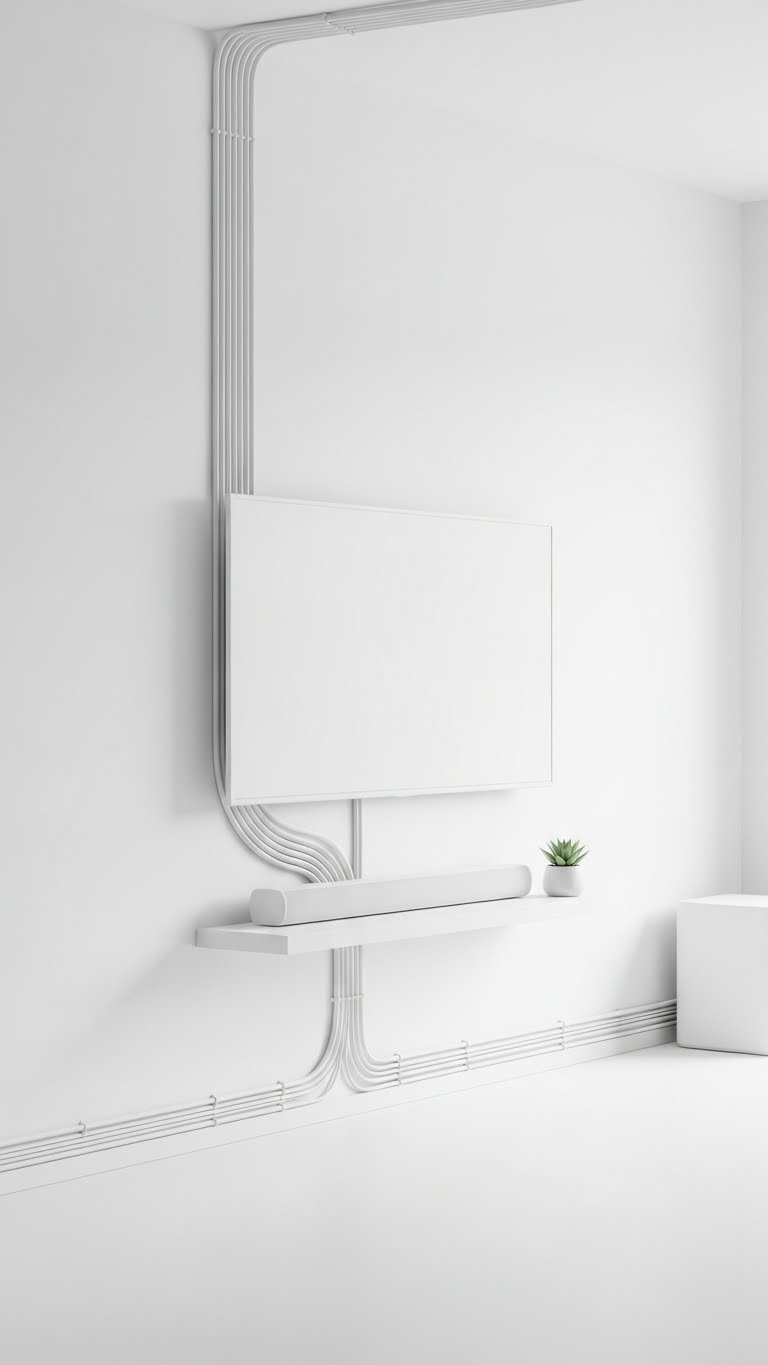
If you can’t hide cables completely, camouflage them. This budget hack makes visible cords disappear visually.
Use spray paint designed for plastic ($8-$15 per can at Home Depot or Amazon) to paint cables the exact color of your wall. Tape off connectors with painter’s tape, then spray in light coats. This takes 15 minutes plus dry time (check paint instructions). The cables remain visible but become invisible to the eye because they match the wall.
This approach works when cable routing isn’t possible (renters, specific room layouts). From across the room, your wall looks clean. It’s the most affordable cable management solution available.
21. Install Modular Floating Shelves You Can Rearrange
Modular shelf systems let you customize your layout and change it later. They’re perfect if you like flexibility or frequently rearrange.
Purchase modular floating shelf systems ($150-$400 total from IKEA, Wayfair, or Amazon) with adjustable brackets. You can move shelves up, down, or remove them entirely. Install takes 3-4 hours; reconfiguring later takes 30 minutes. Mix shelf sizes for visual interest—different widths feel more intentional than uniform rows.
You’re not locked into one design forever. As your styling evolves, your shelves can evolve too. This flexibility is perfect for renters or anyone who likes to refresh their space regularly.
22. Use Venetian Plaster for Sophisticated Texture

Venetian plaster creates a luxury finish with subtle shimmer and depth. It’s more sophisticated than flat paint and more affordable than many texture options.
Apply Venetian plaster finish ($300-$600 in materials or $400-$900 with professional application) following product instructions or hiring a specialist. This multi-step process takes several hours per coat and requires drying time. The result is a seamless, sophisticated surface with subtle movement and light-catching properties.
Your TV wall becomes an art piece itself. The subtle shimmer and depth make the space feel premium and intentionally designed. This finish works beautifully under accent lighting.
23. Create a Two-Tone Wall with a Horizontal Dividing Line

A horizontal color block creates visual interest and breaks up wall space without clutter. It’s a surprisingly elegant design move.
Paint your TV wall in two complementary colors, divided by a horizontal line at roughly 60% up the wall. Use painter’s tape to mark the line perfectly. Paint takes 3-4 hours DIY or $200-$300 with a pro. Mount your TV at the color dividing line for maximum impact. The proportions feel balanced and intentional.
The two-tone approach creates visual structure and makes your wall feel designed rather than blank. It works especially well in taller spaces where a single color might feel overwhelming.
24. Mount Your TV on a Minimalist White or Black Frame
A slim frame gives your TV a finished, gallery-like appearance. It looks intentionally designed rather than just mounted.
Order a custom-cut frame ($60-$150 from local framers or online services) in your preferred finish (matte white, black, natural wood, or metallic). Mount your TV so the frame sits just outside the TV bezels. Installation takes 1-2 hours once the frame arrives. The frame transforms your TV from an electronic into a designed element.
Your TV suddenly looks like intentional décor rather than a functional necessity. Guests notice the thoughtful framing before they even realize it’s a TV. The frame signals that your space is designed, not just furnished.
Pin this post and try one idea this weekend. Whether you go minimal or textured, hidden cables or gallery-styled, your TV wall can become a designed feature that elevates your entire room. Start with what feels most doable—even one small change makes a surprising difference.
Leave a Reply