Category: Living Room Decor

  • 27 Natural Stone Living Room Ideas That Add Luxury & Texture

    27 Natural Stone Living Room Ideas That Add Luxury & Texture

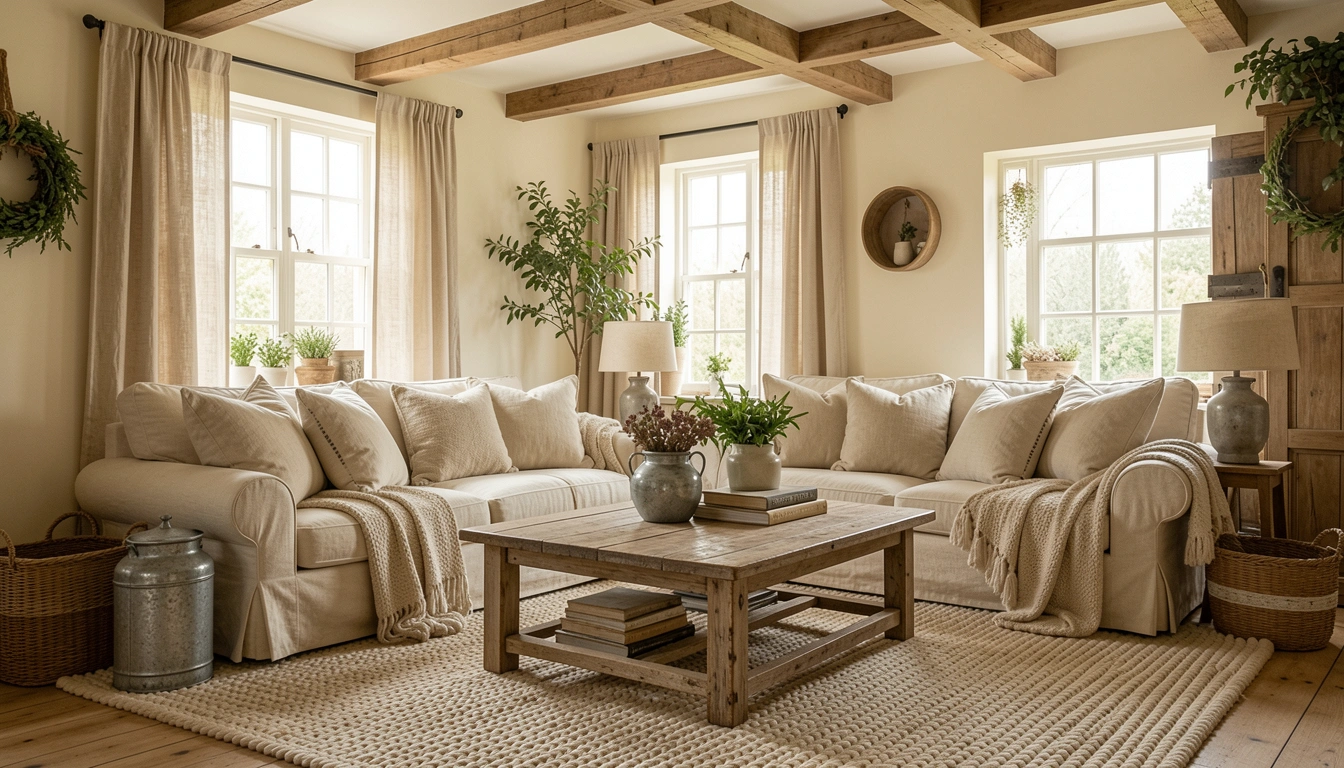
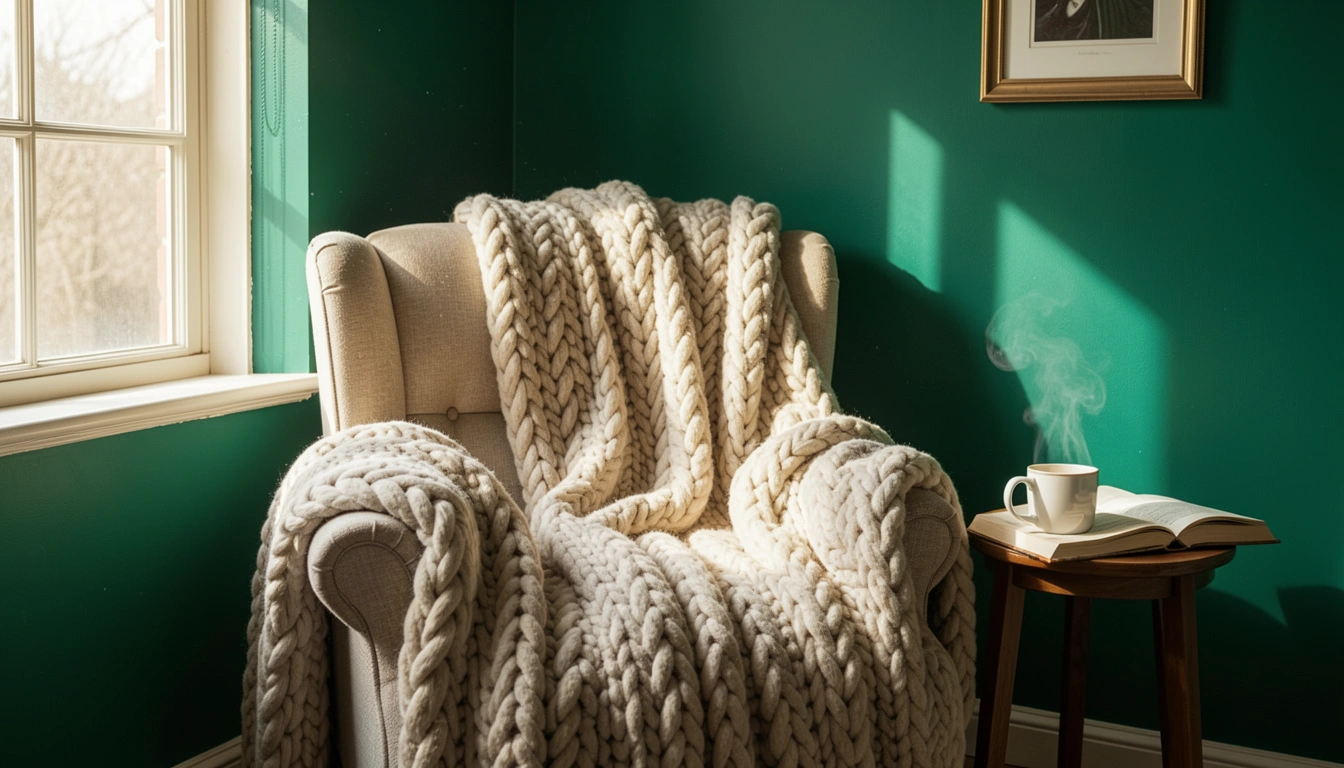
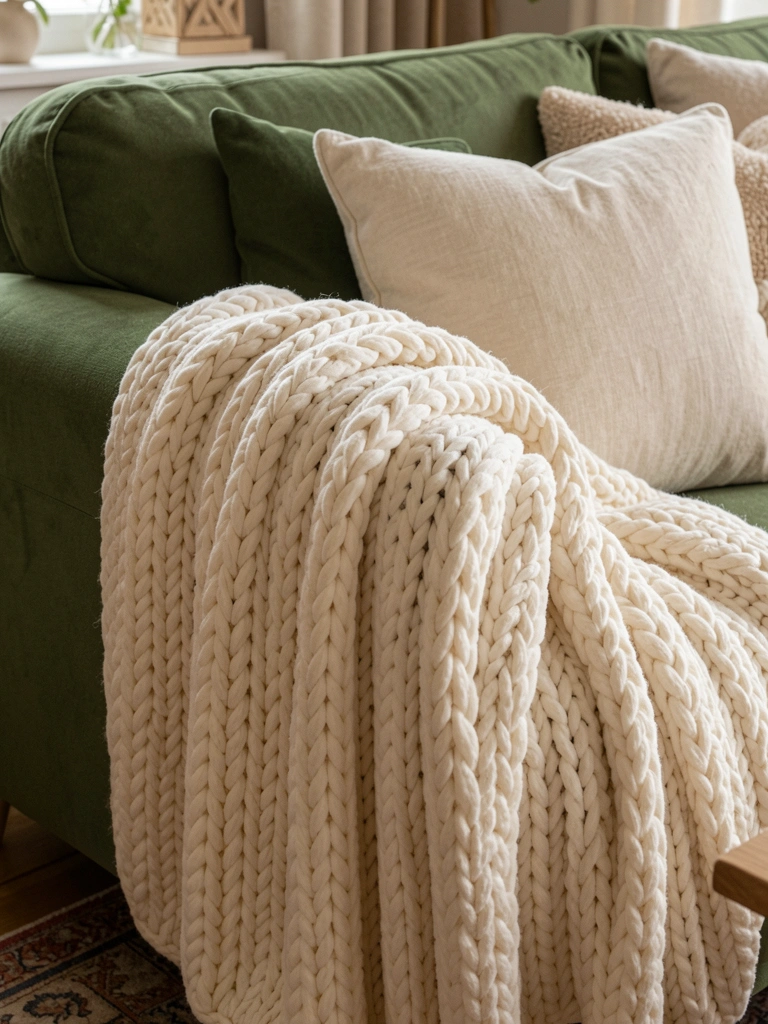
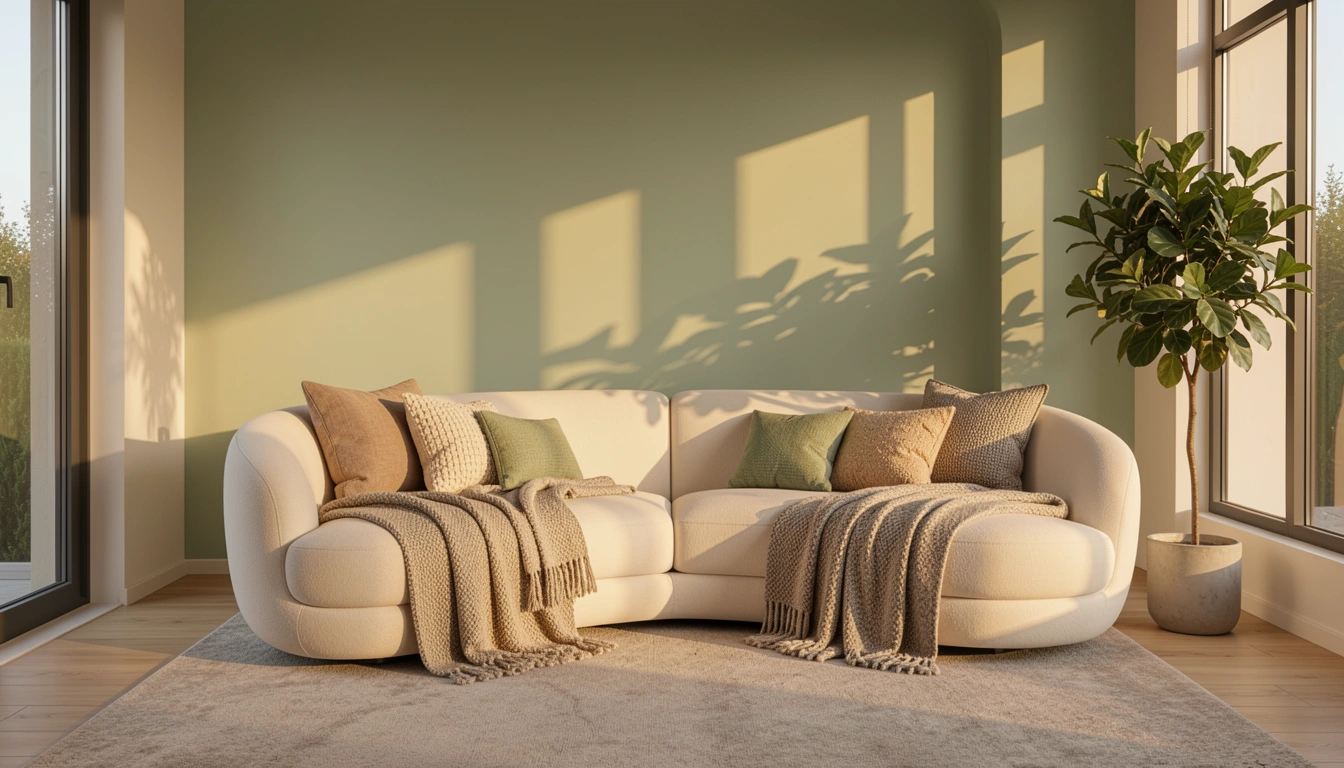
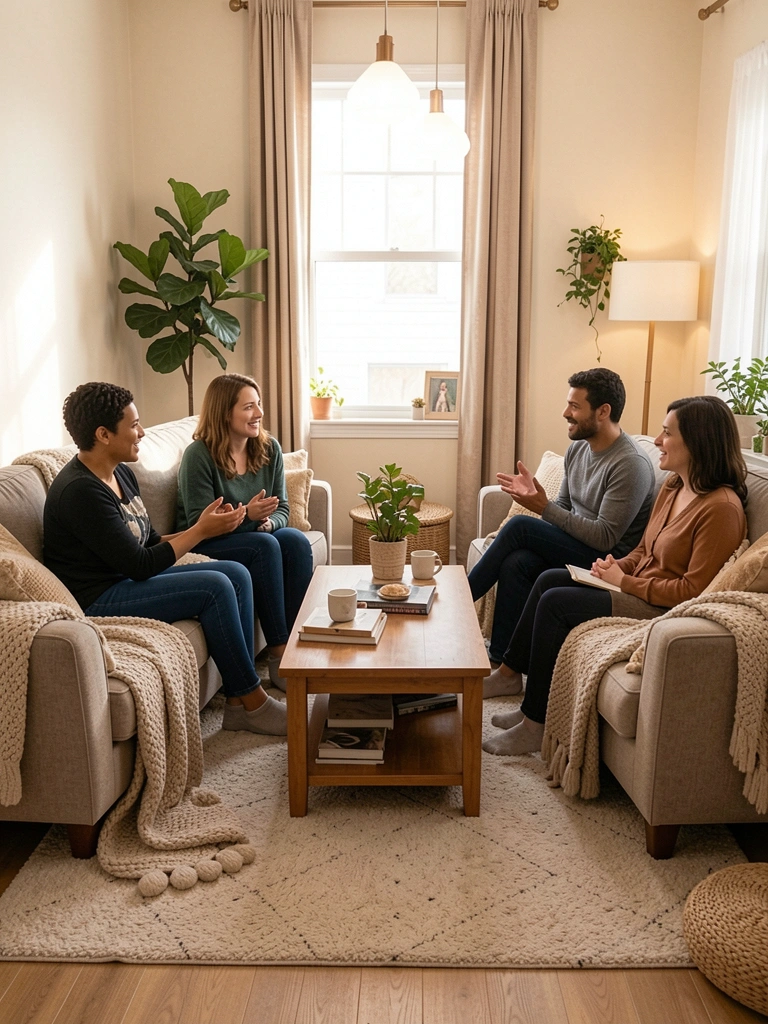
    Your living room deserves to feel like a retreat—a place where texture and luxury meet everyday comfort. Natural stone brings that high-end spa vibe without requiring a full renovation, and the best part? It works whether you’re renting or own. Stone adds depth, visual interest, and tactile appeal that makes your space feel intentional and curated. From accent walls to fireplace surrounds, stone creates anchor points that make everything else in your room look better. In this guide, you’ll discover 27 specific ways to weave natural stone into your living room—from budget-friendly peel-and-stick options to investment pieces that’ll last decades. Ready to elevate your space? Let’s dive in.

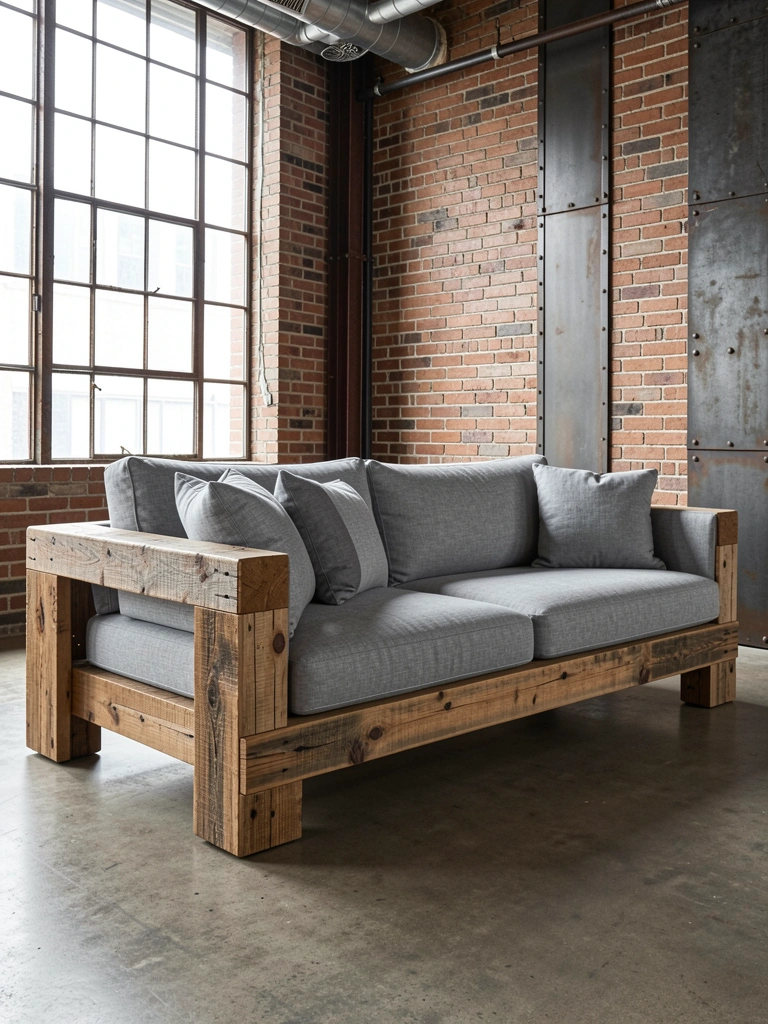
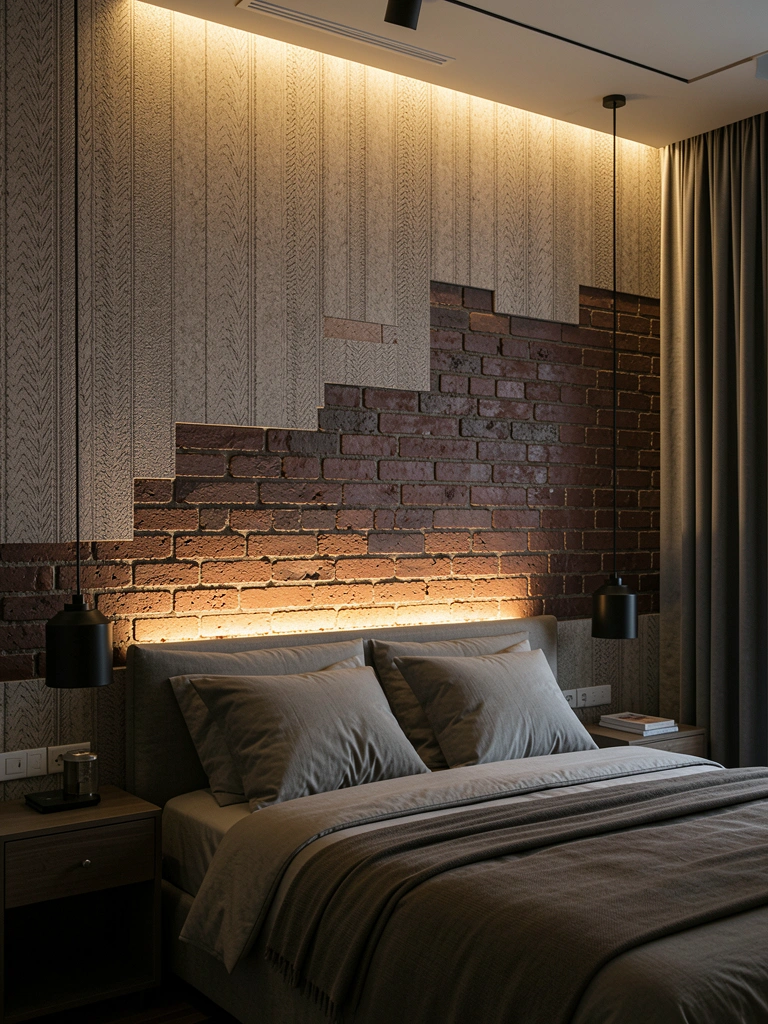
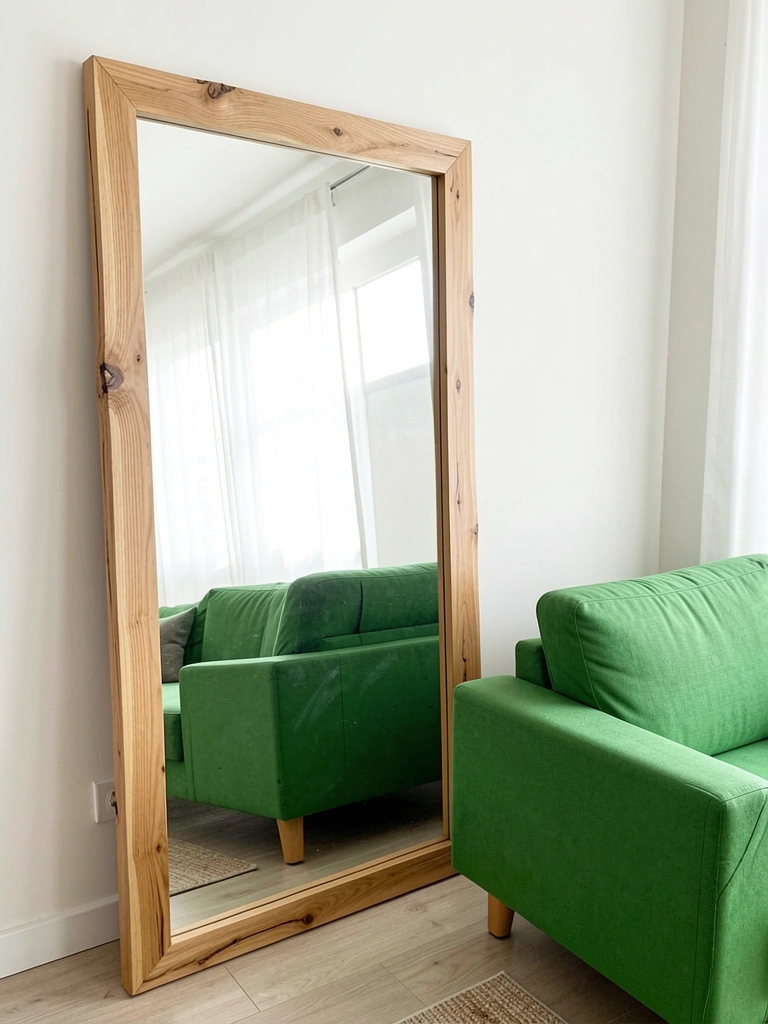
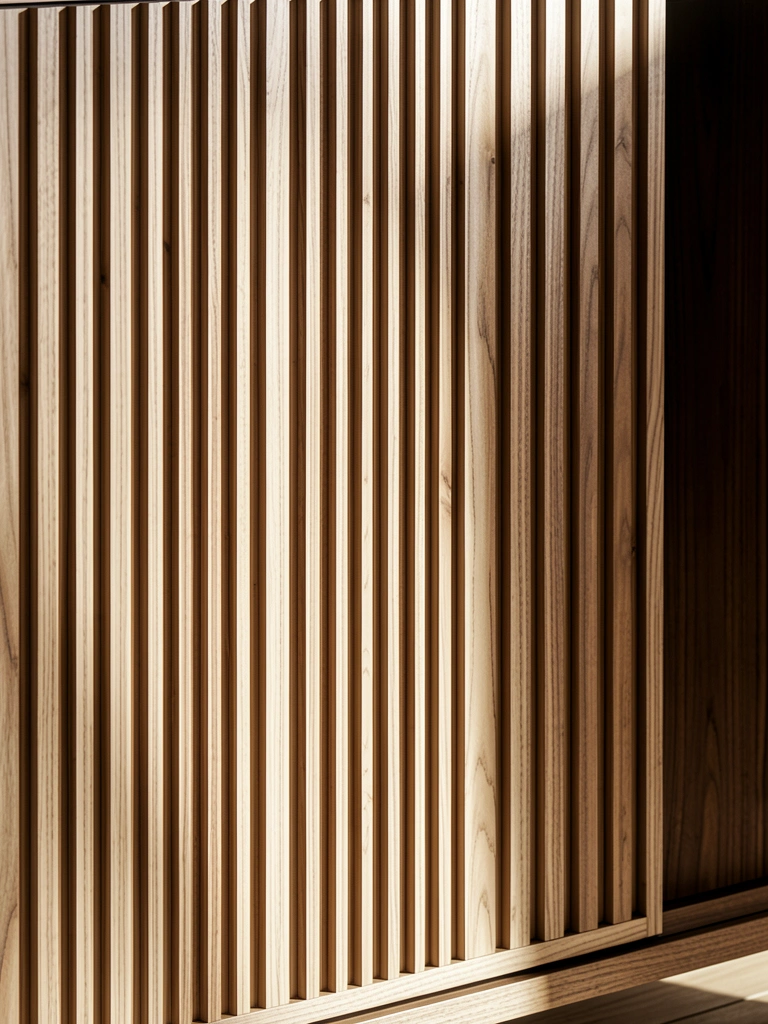
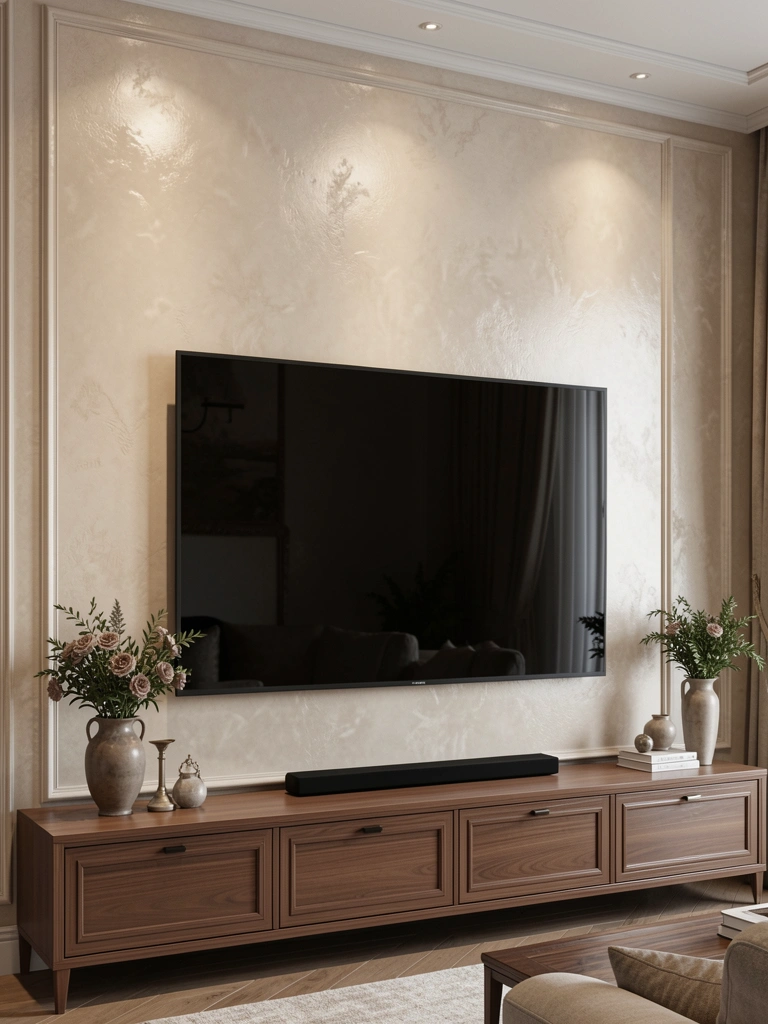
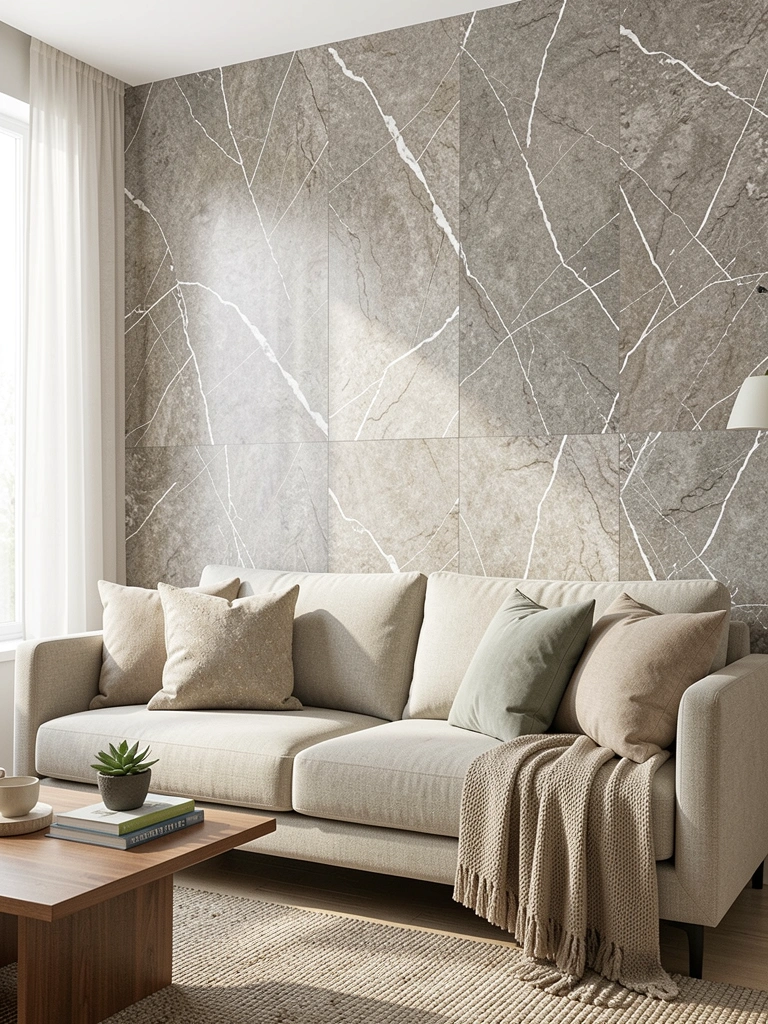
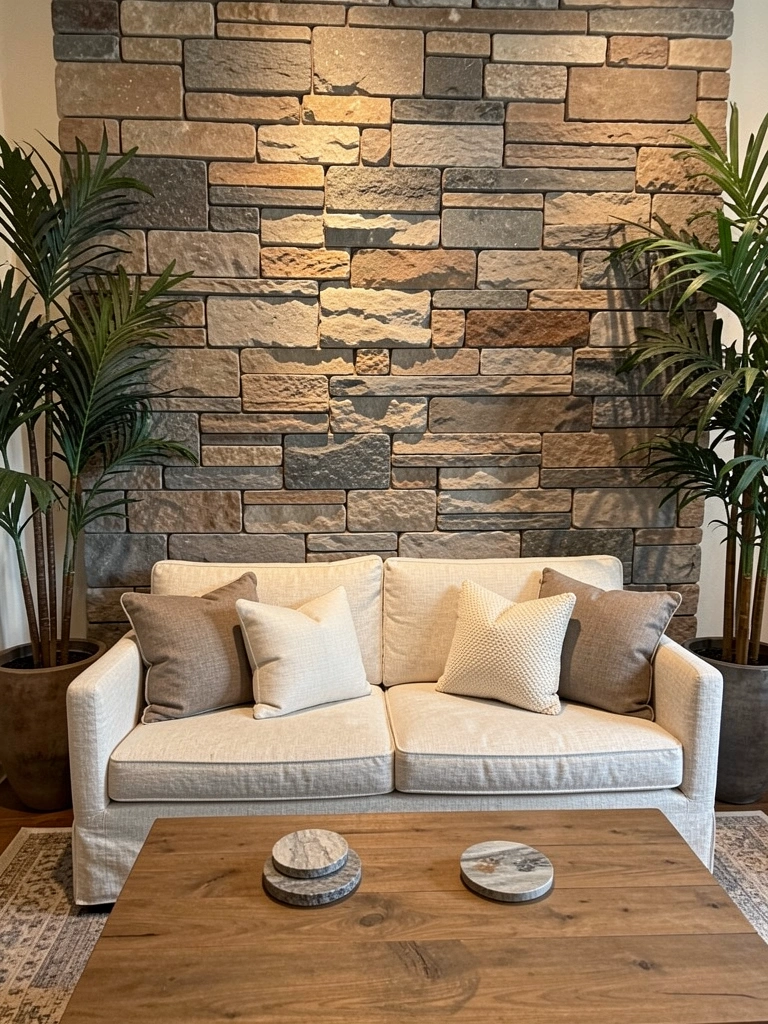
    1. Install a Stacked Stone Accent Wall

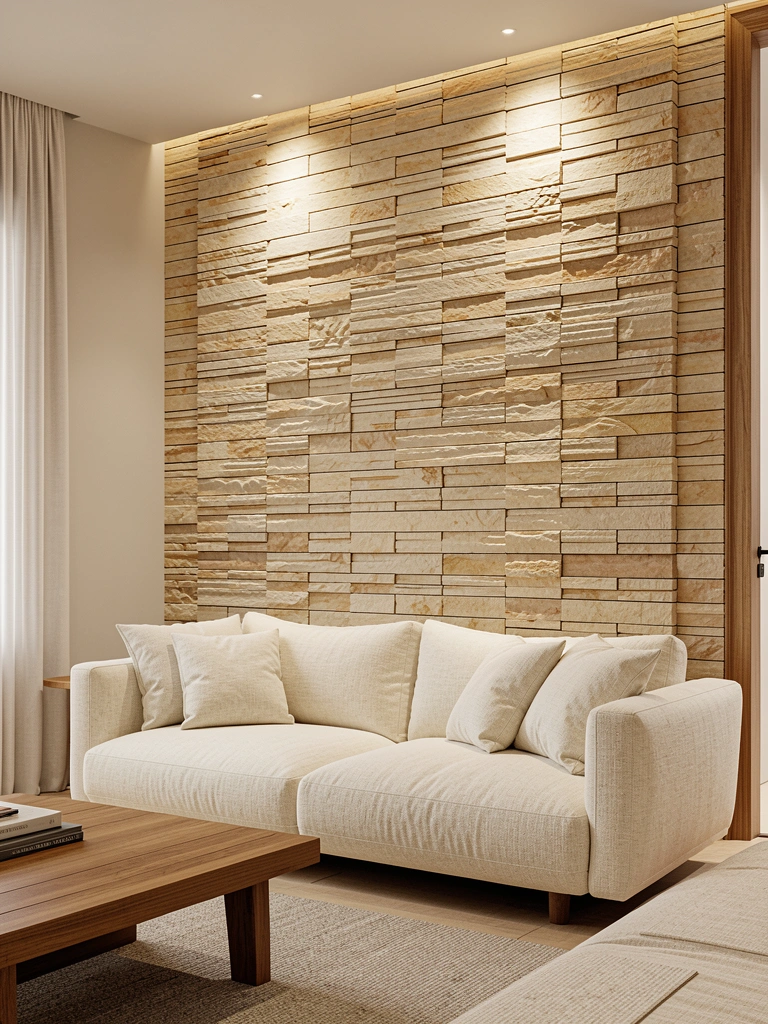
    Stacked stone accent walls create an instant focal point that draws the eye and adds architectural depth. This is the statement-maker that anchors your entire room design.

    You have two main routes here: hire a contractor for permanent installation ($2,000–$5,000) or go the DIY route with faux stacked stone panels ($300–$800 for a 10×12 wall). Real stone requires mortar, grout, and professional skills—definitely hire for this. Faux panels are renter-friendly, lightweight, and surprisingly realistic. Look for brands like smart tiles or stone veneer at Home Depot. Installation takes a weekend with proper prep and the right adhesive.

    The payoff is major. This one element makes your living room look professionally designed, and guests will immediately notice the upgrade. Your space becomes more sophisticated with minimal effort.

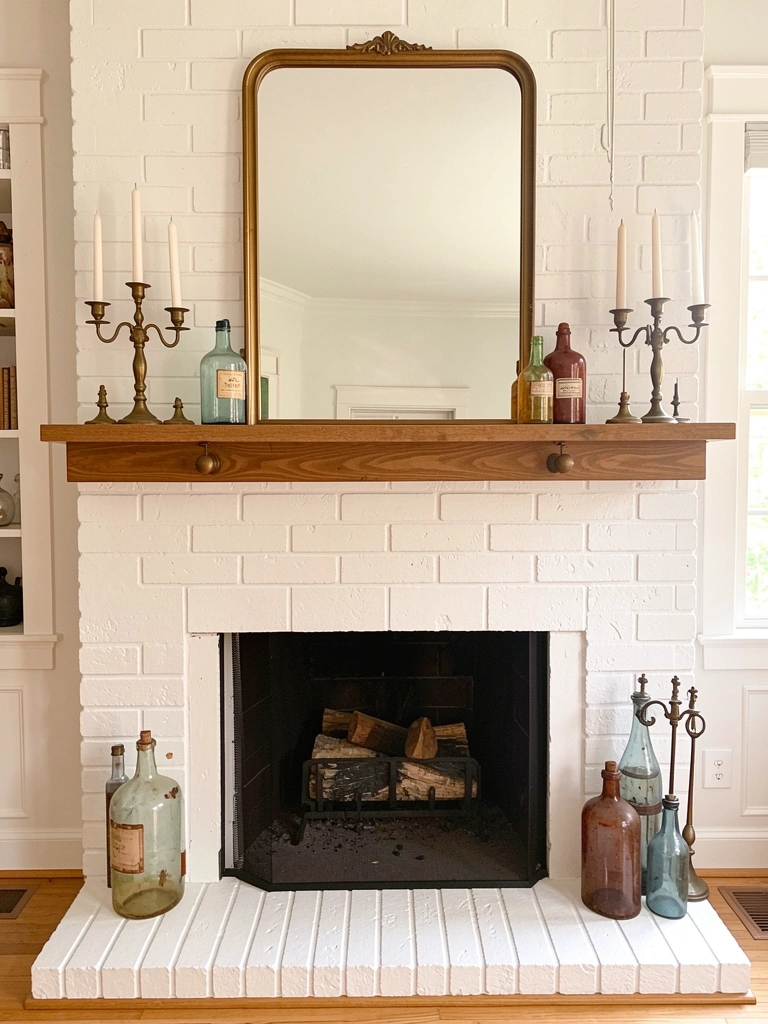
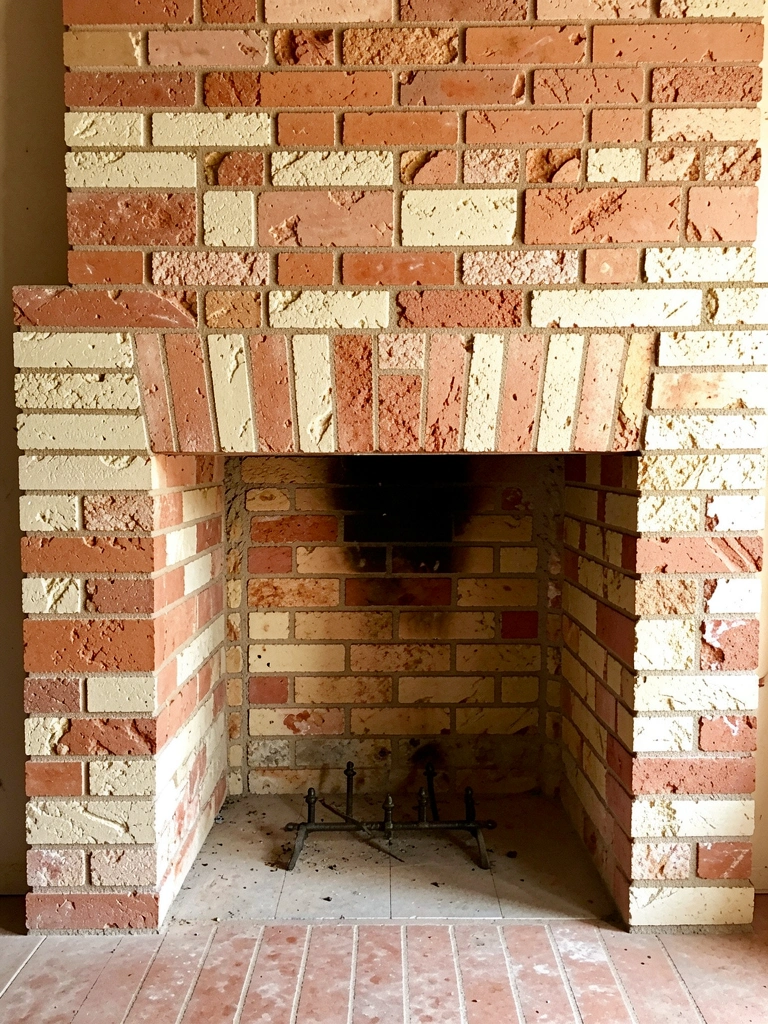
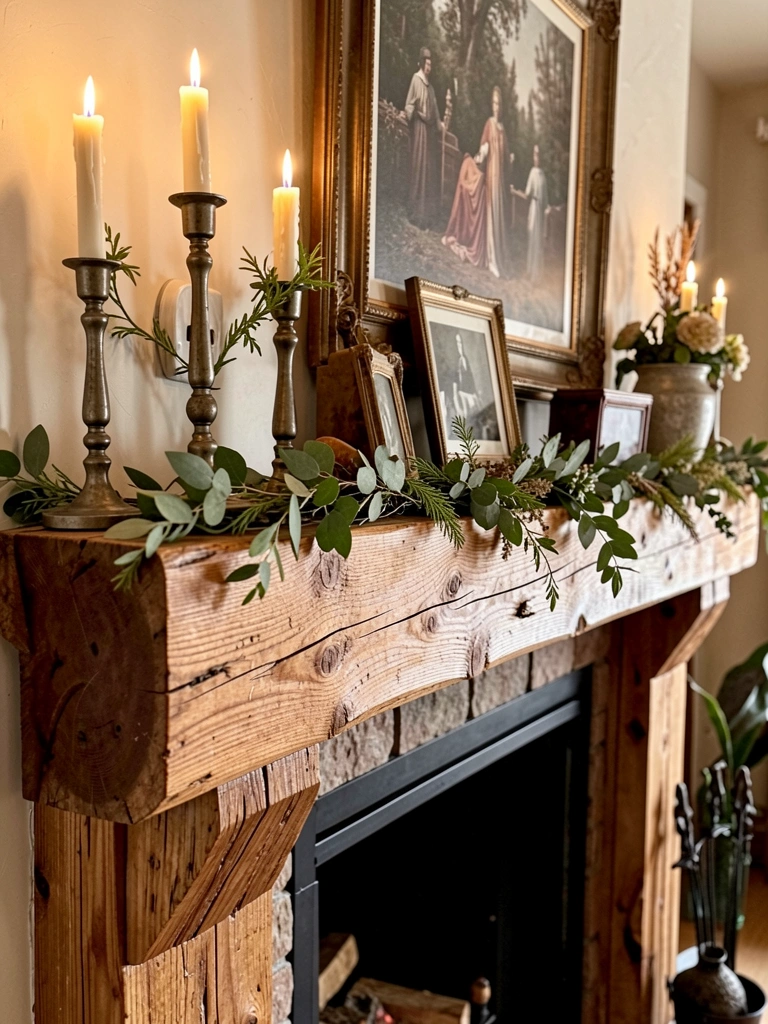
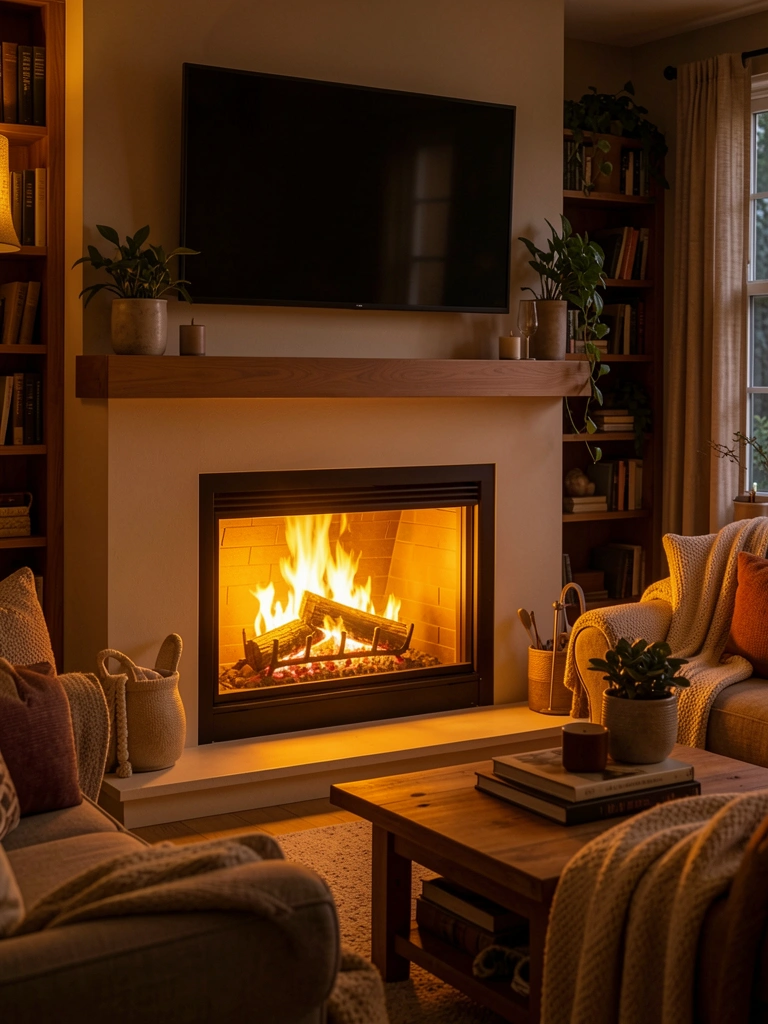
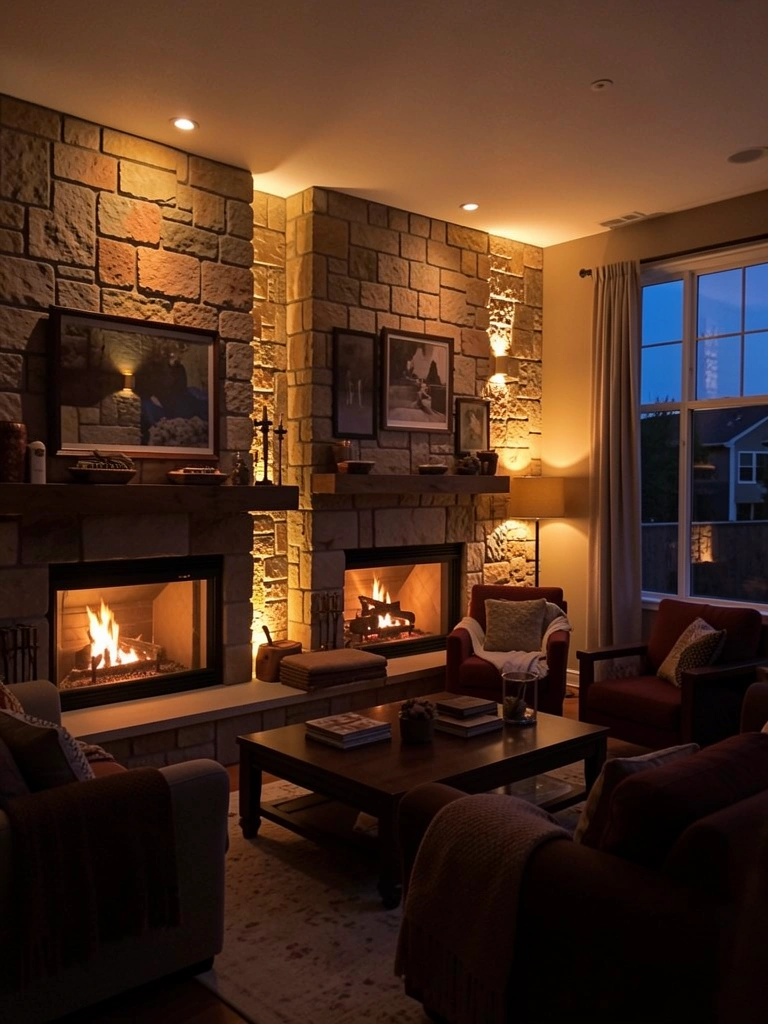
    2. Anchor Your Fireplace with Stone Surround

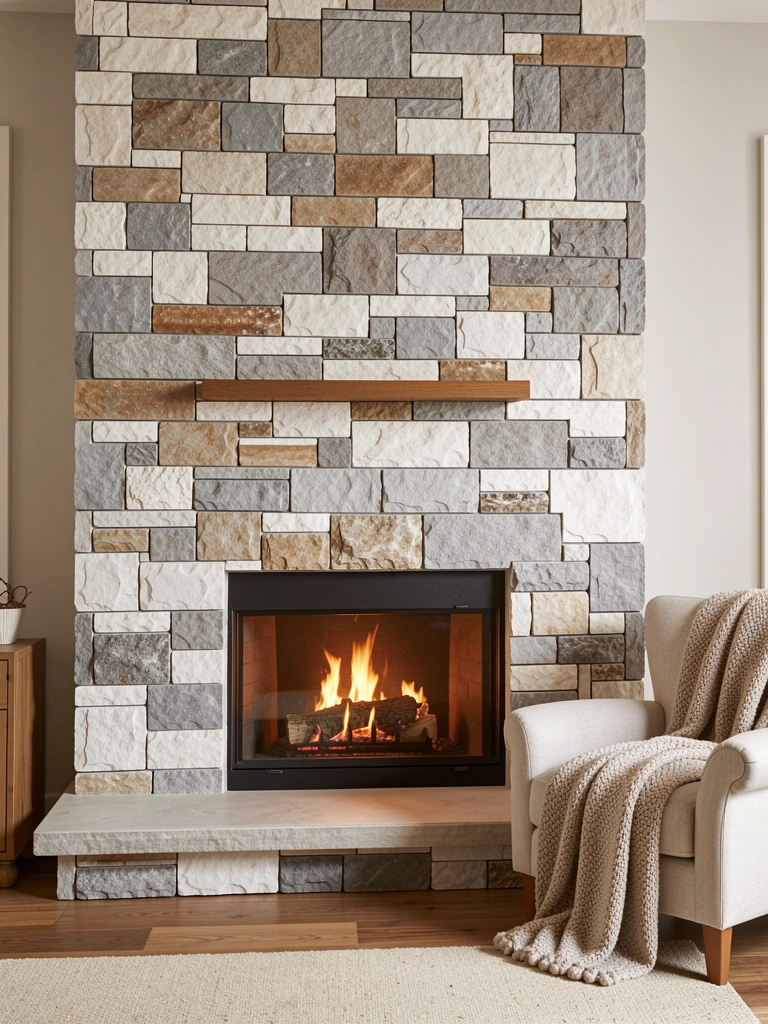
    A stone fireplace surround transforms your hearth into the heart of your home—warm, inviting, and undeniably luxe. This becomes the gathering point everyone gravitates toward.

    If you already have a fireplace, you can update the surround with stone veneer ($800–$2,500 installed) or DIY peel-and-stick stone panels ($400–$700). For renters or temporary solutions, removable faux stone panels work beautifully and require no permanent damage. Installation typically takes 3–5 days for professional work, or a weekend for DIY panels. You’ll need construction adhesive, grout (if permanent), and patience with measurements.

    The transformation is stunning. A stone fireplace becomes the natural focal point that makes your entire living room feel more cohesive and grounded. Winter nights suddenly feel more luxurious when you’re sitting in front of beautiful stone.

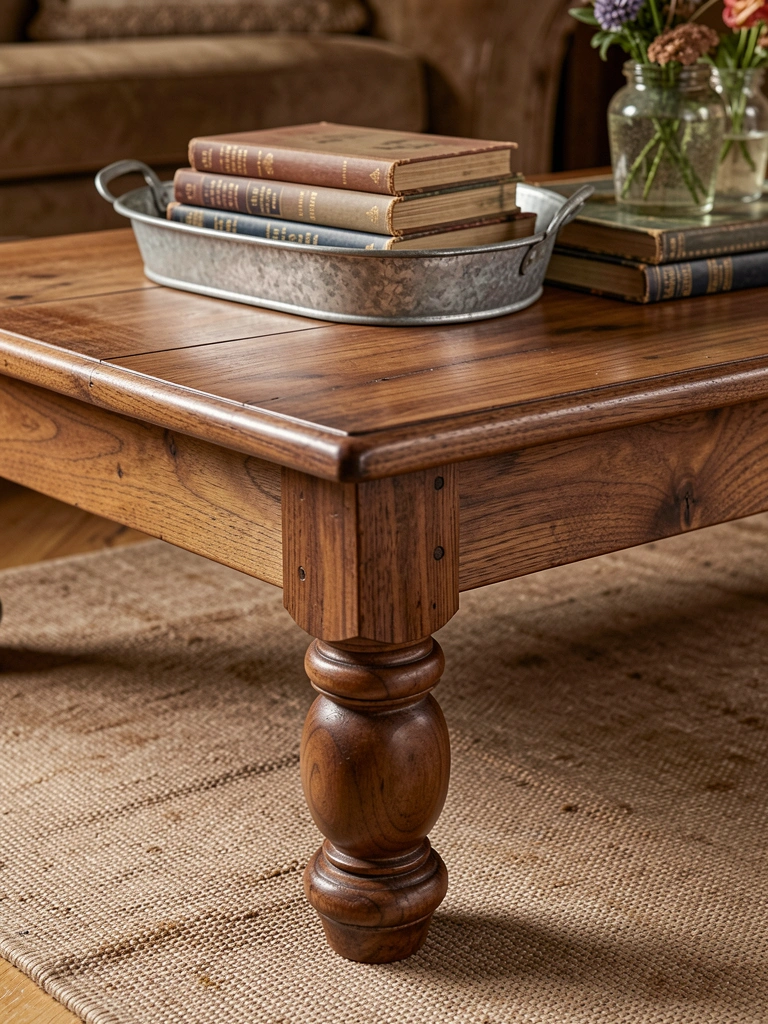
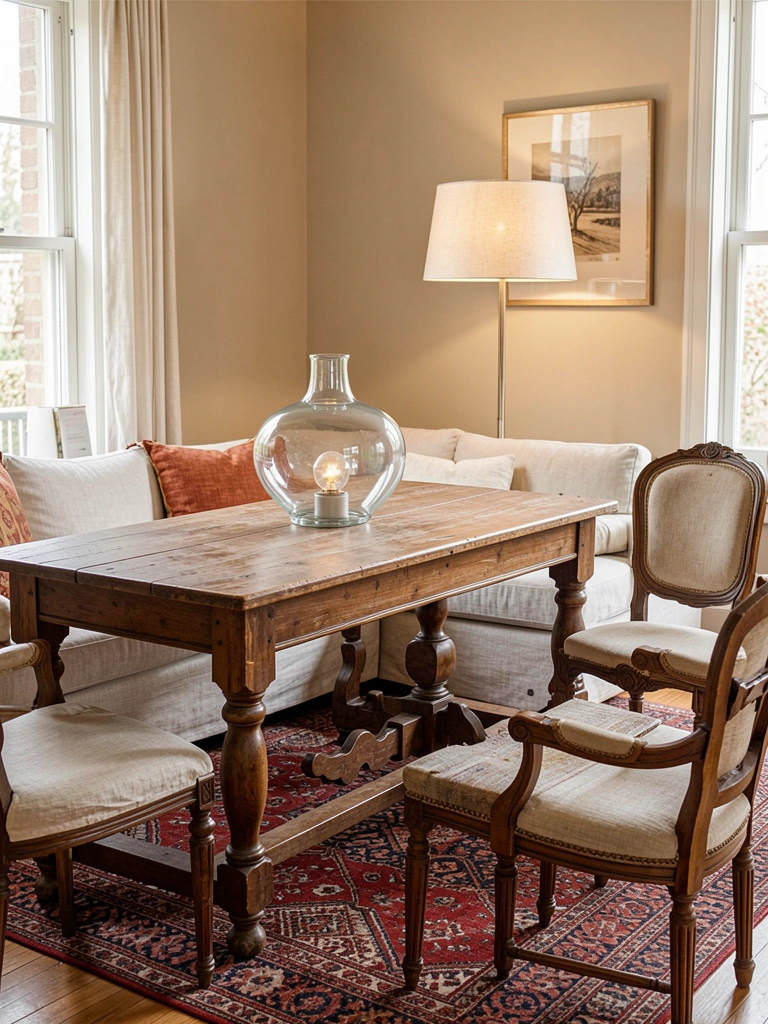
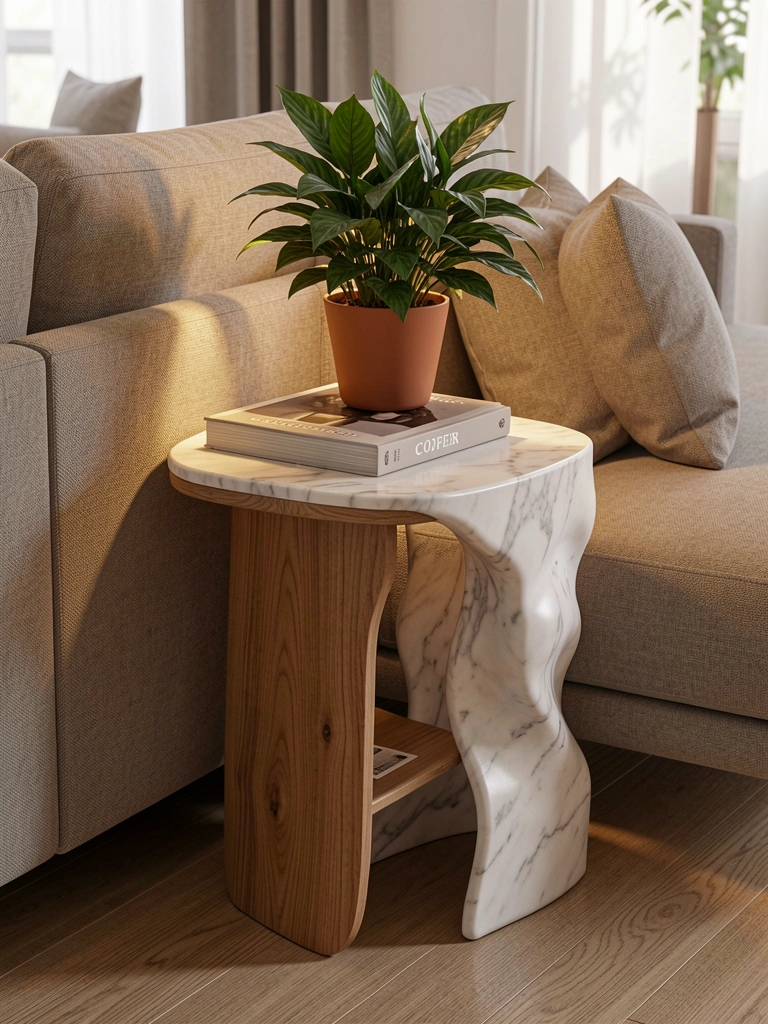
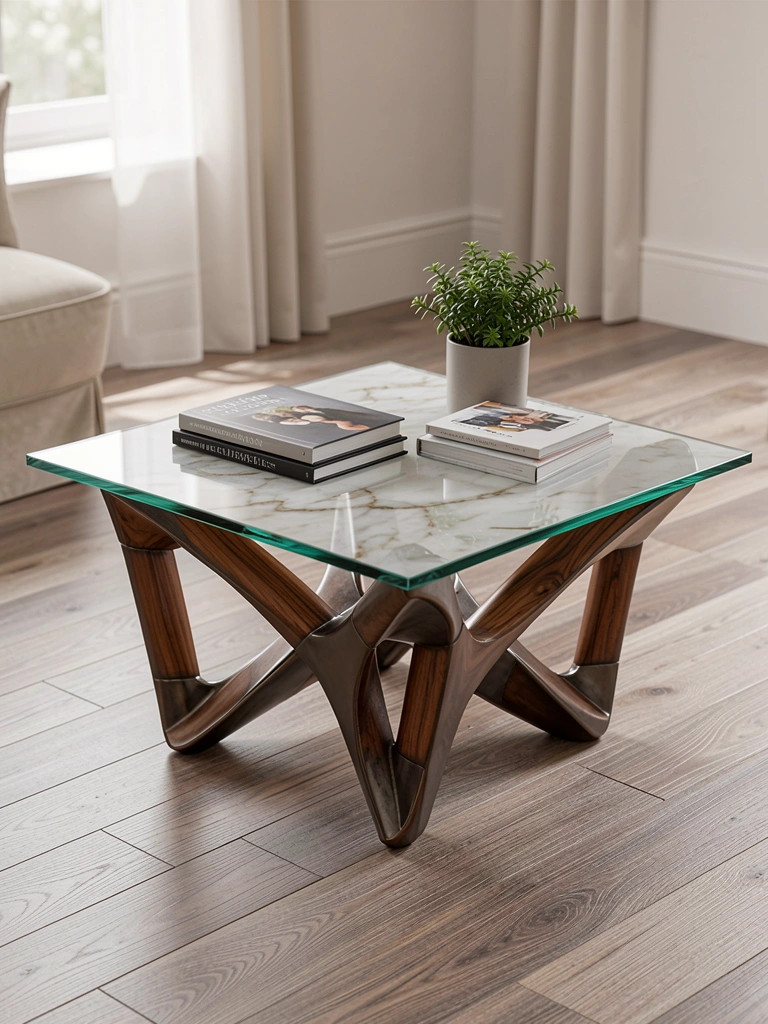
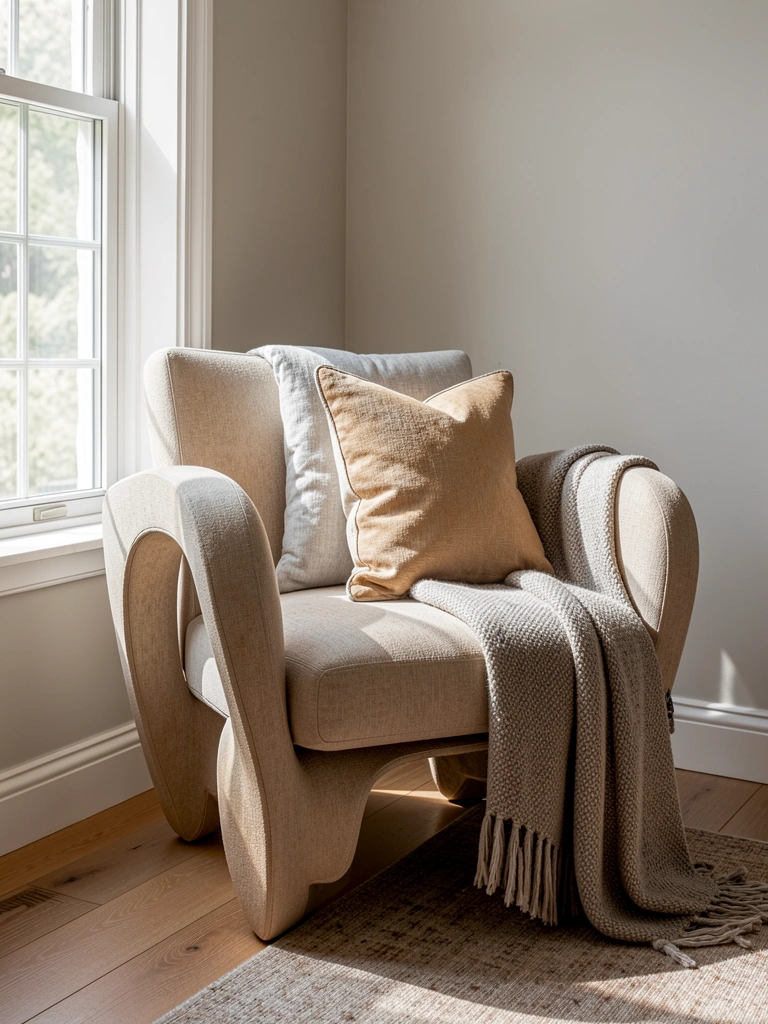
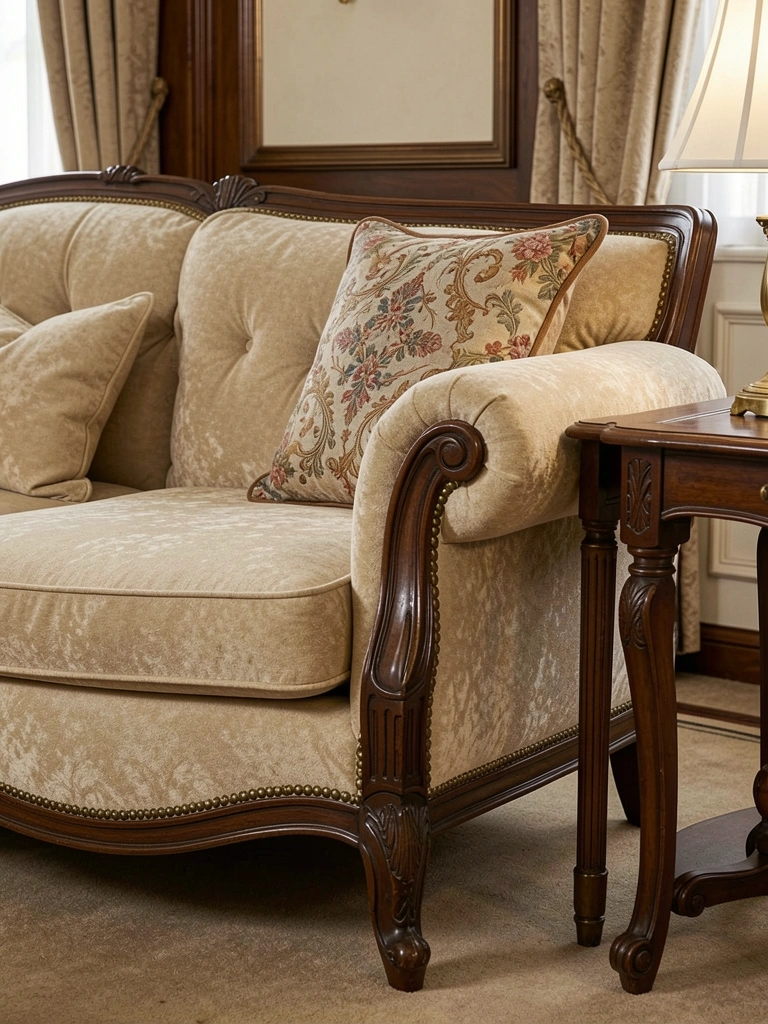
    3. Layer Stone Tiles as a Coffee Table Top

    Stone coffee tables combine durability with visual sophistication—they’re functional art pieces that actually last. Plus, they photograph beautifully, which means your living room always looks styled.

    Hunt for stone-top tables at Wayfair, Article, or Facebook Marketplace ($200–$800 new, or $50–$200 secondhand). Look for marble, slate, or granite tops paired with wood or metal bases for that modern-nostalgia vibe. If you already have a table, you can top it with a large stone tile ($30–$100) sealed with clear epoxy for a DIY refresh. Installation takes 30 minutes if you’re just placing it, or a few hours if you’re adhering and sealing a tile top.

    What you get: a surface that resists stains, scratches, and the wear of daily life while looking intentionally curated. Every time you set down your coffee, you’re reminded that your space is special.

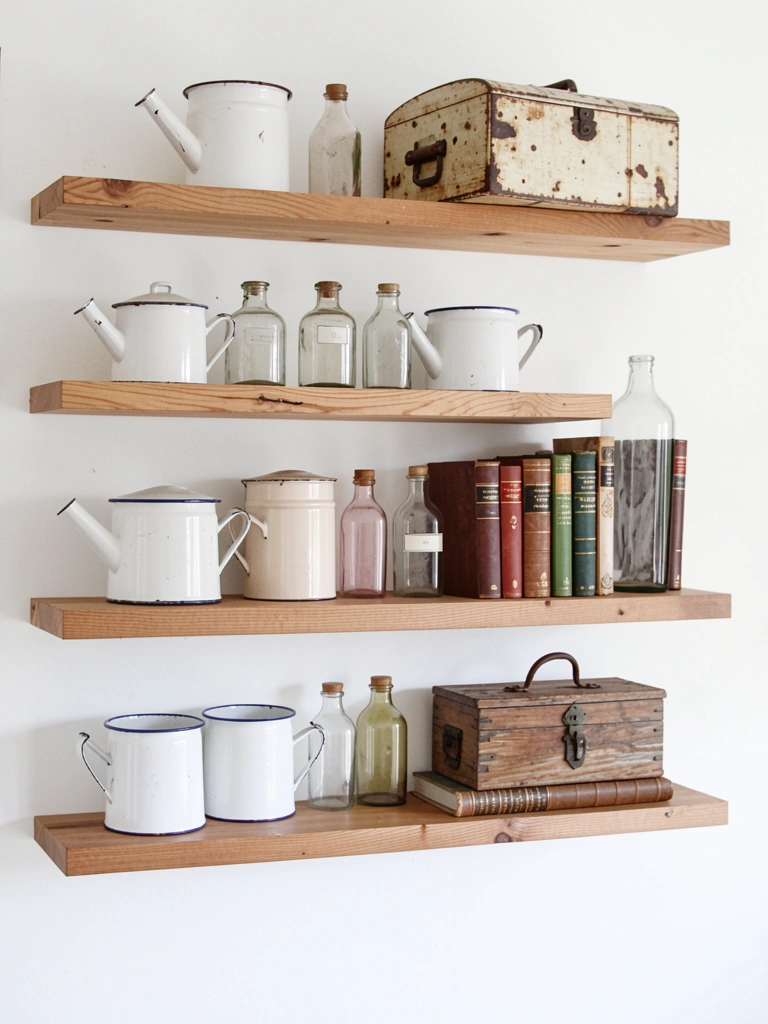
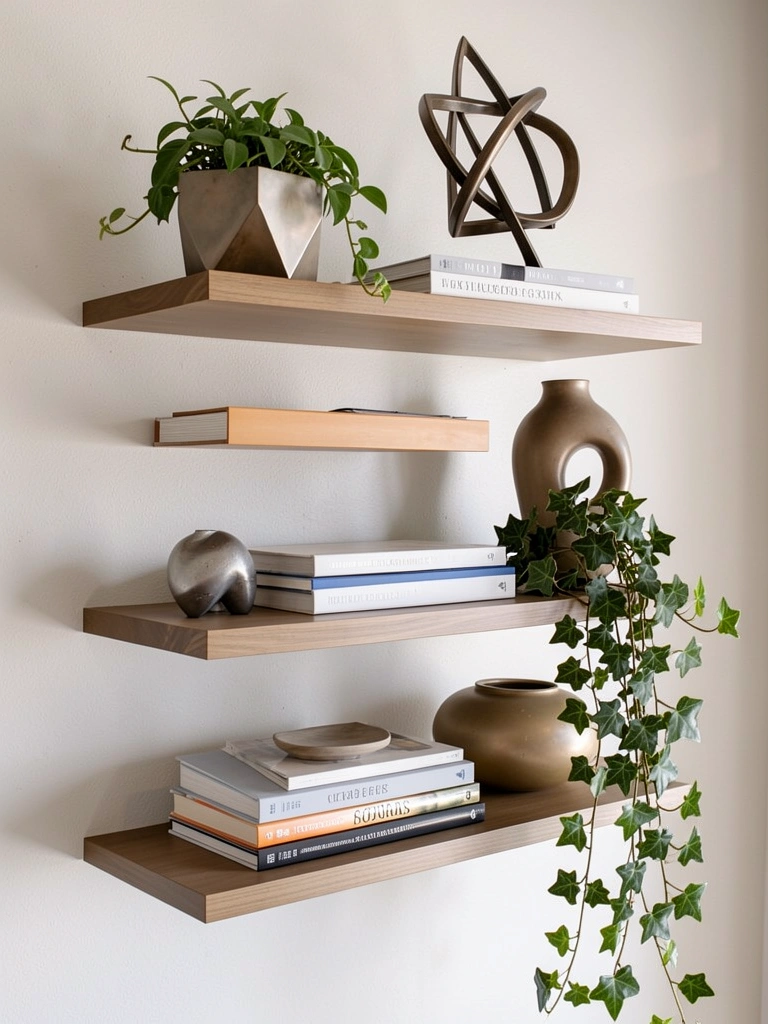
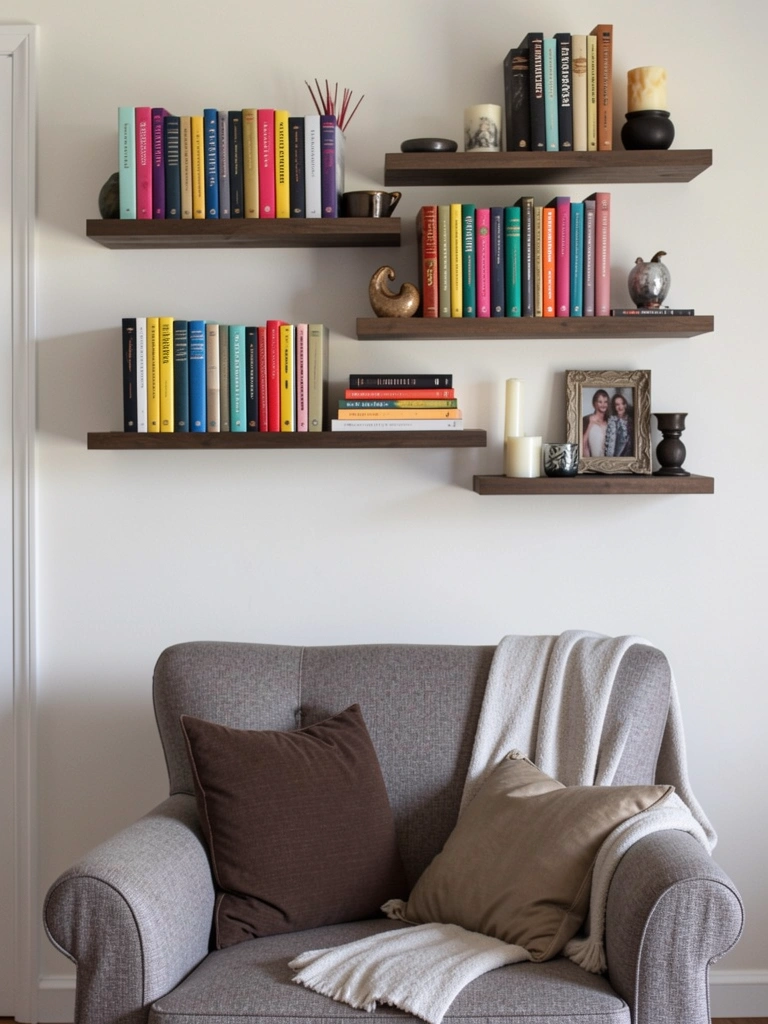
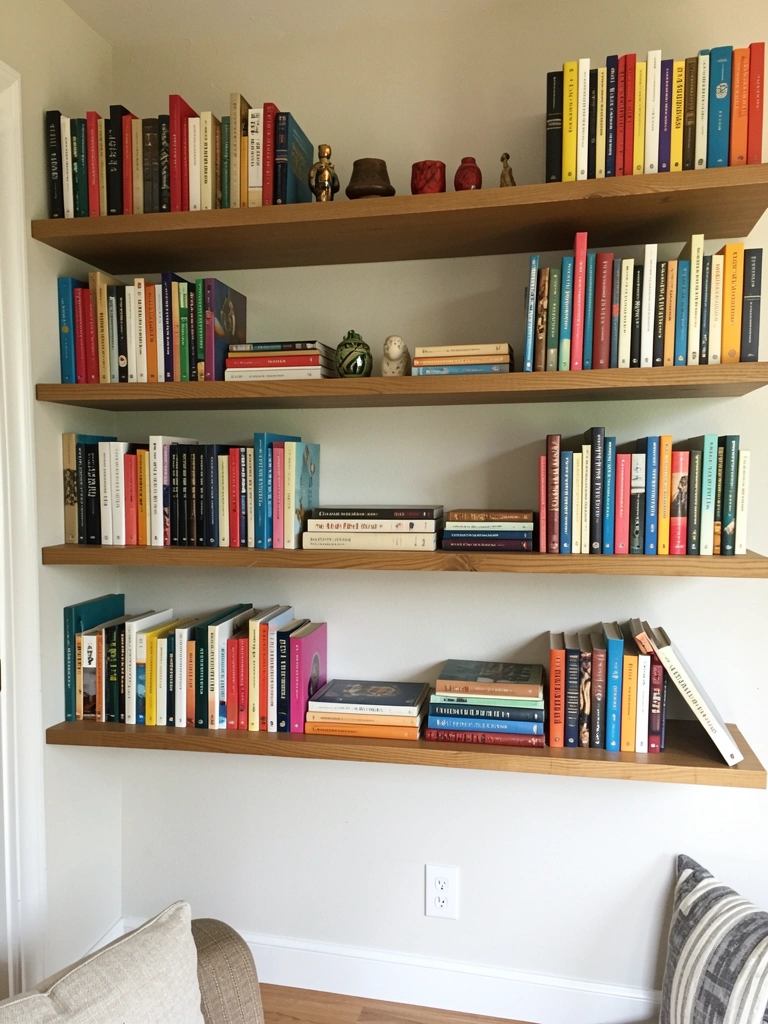
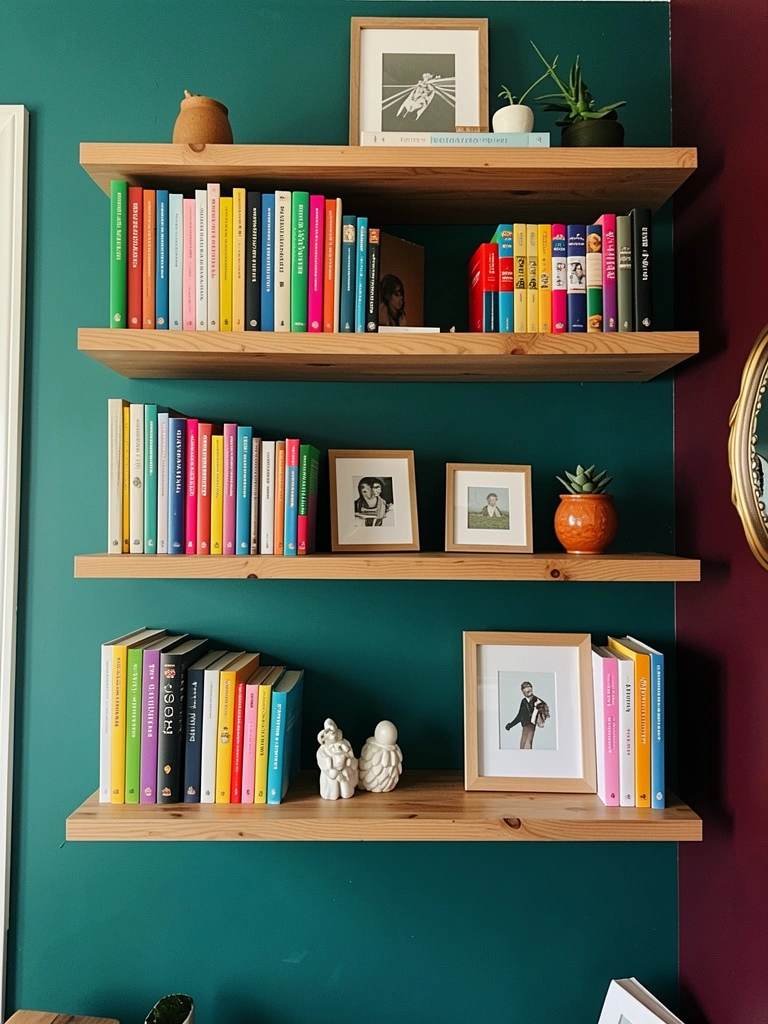
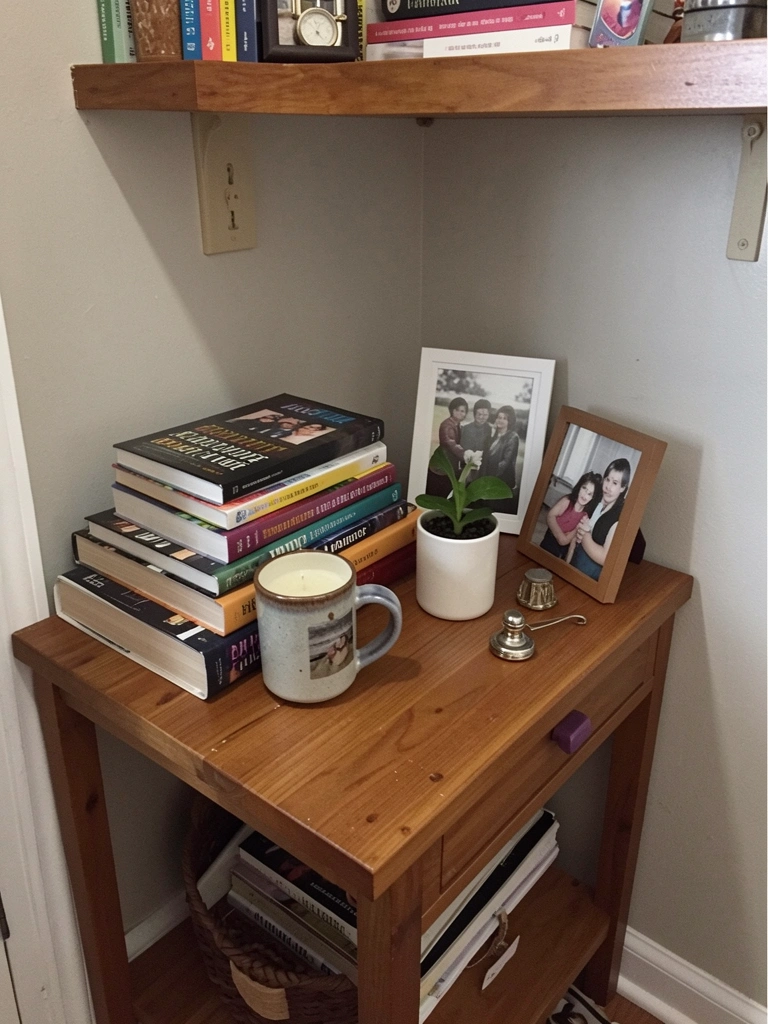
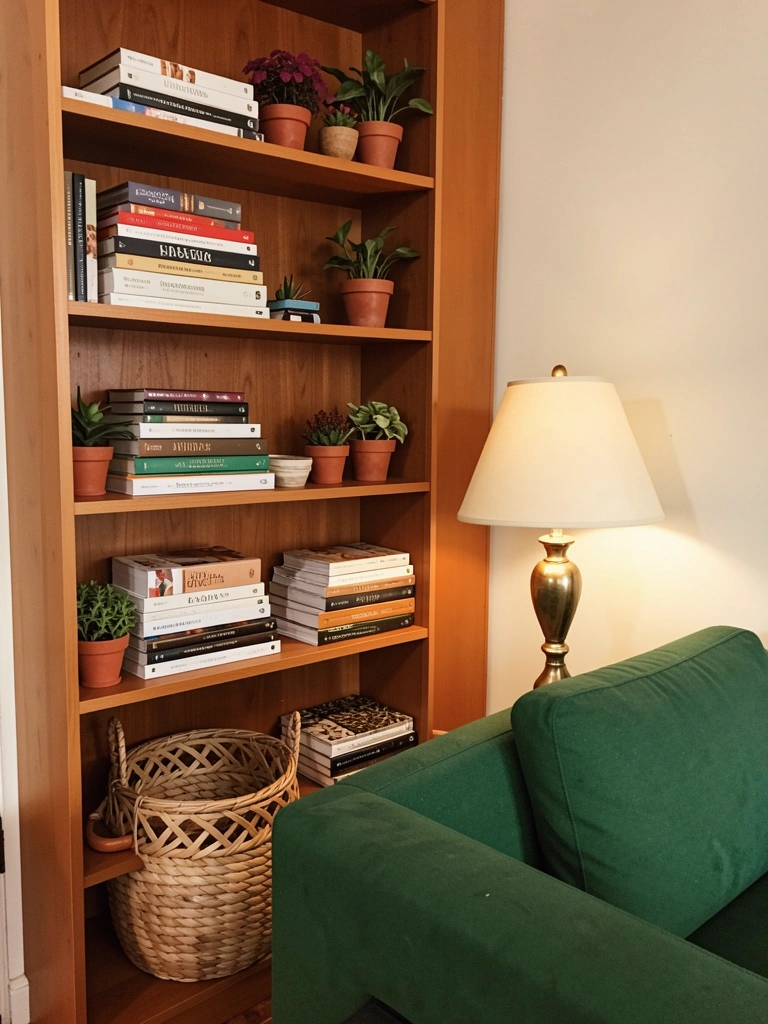
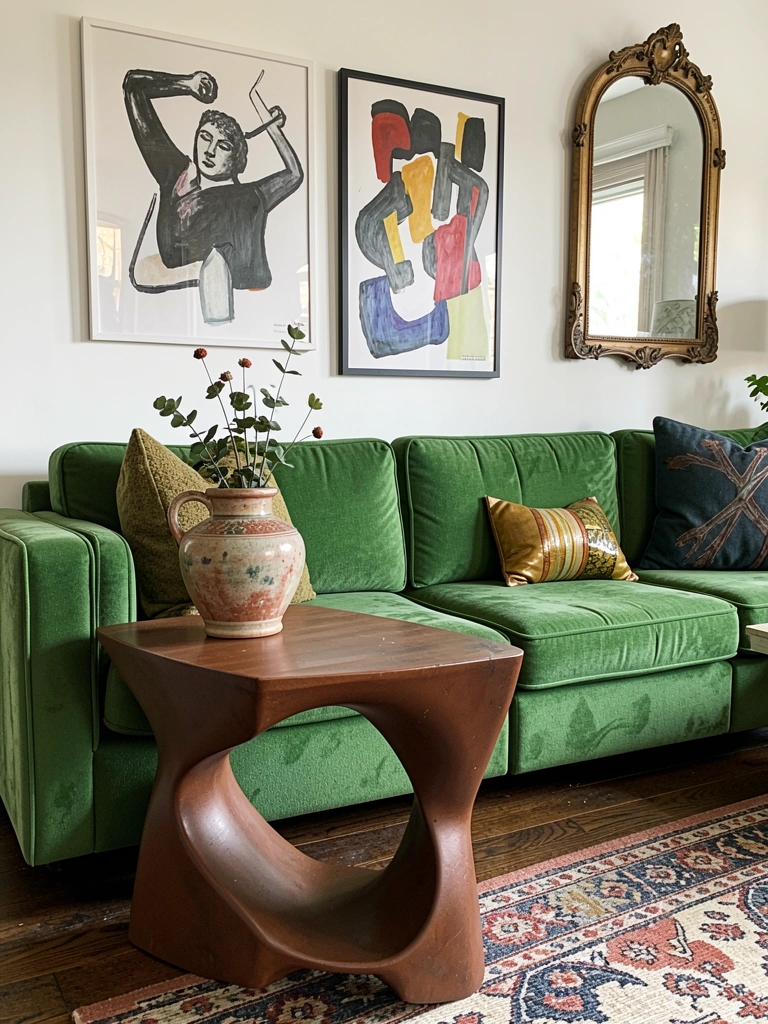
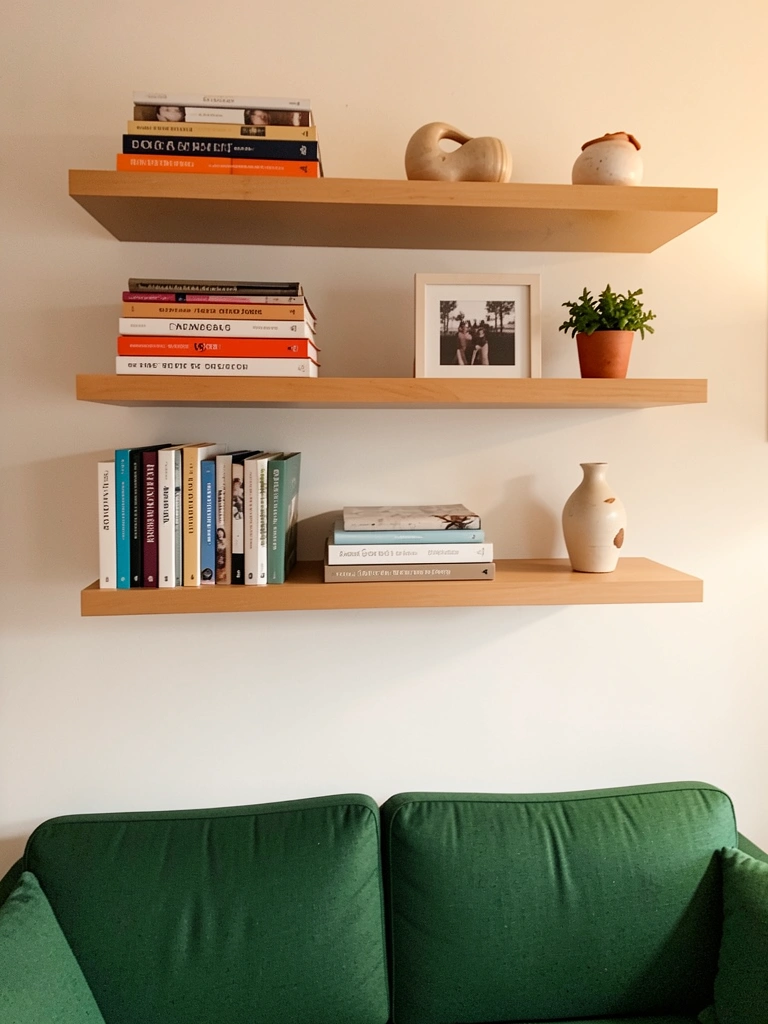
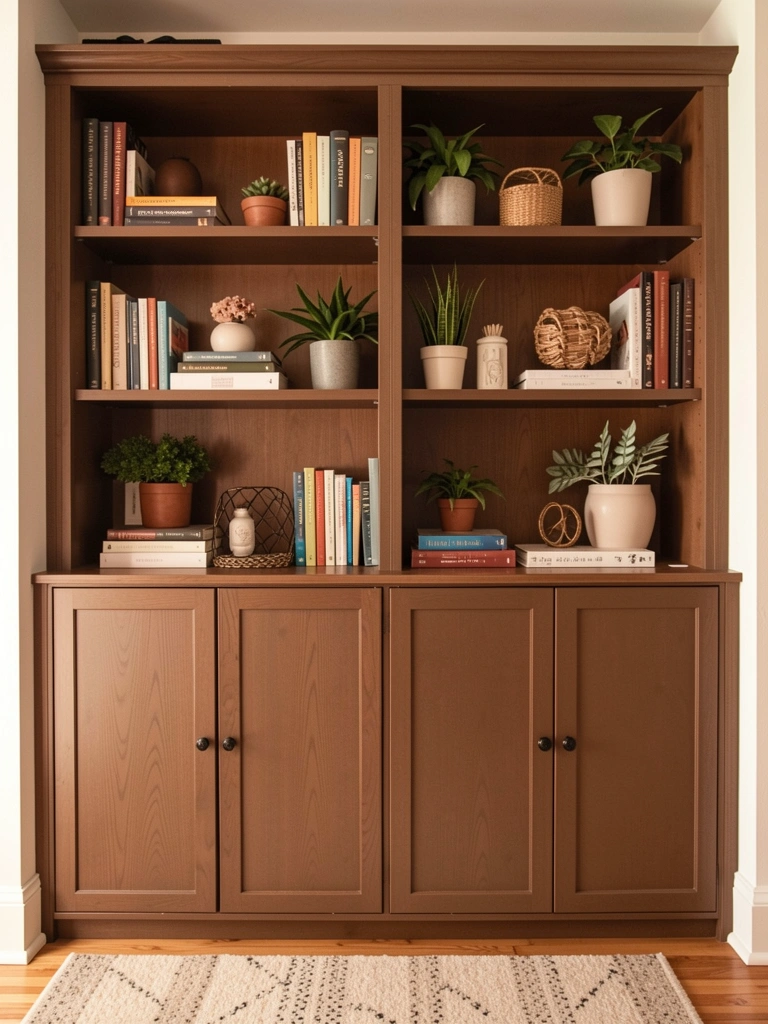
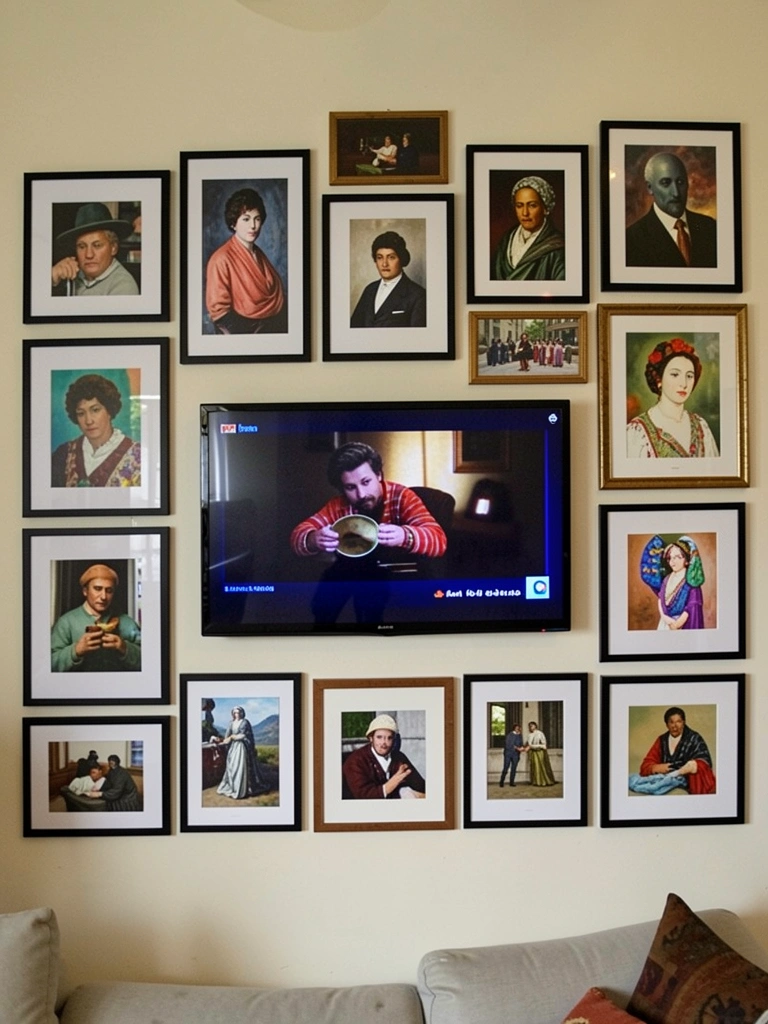
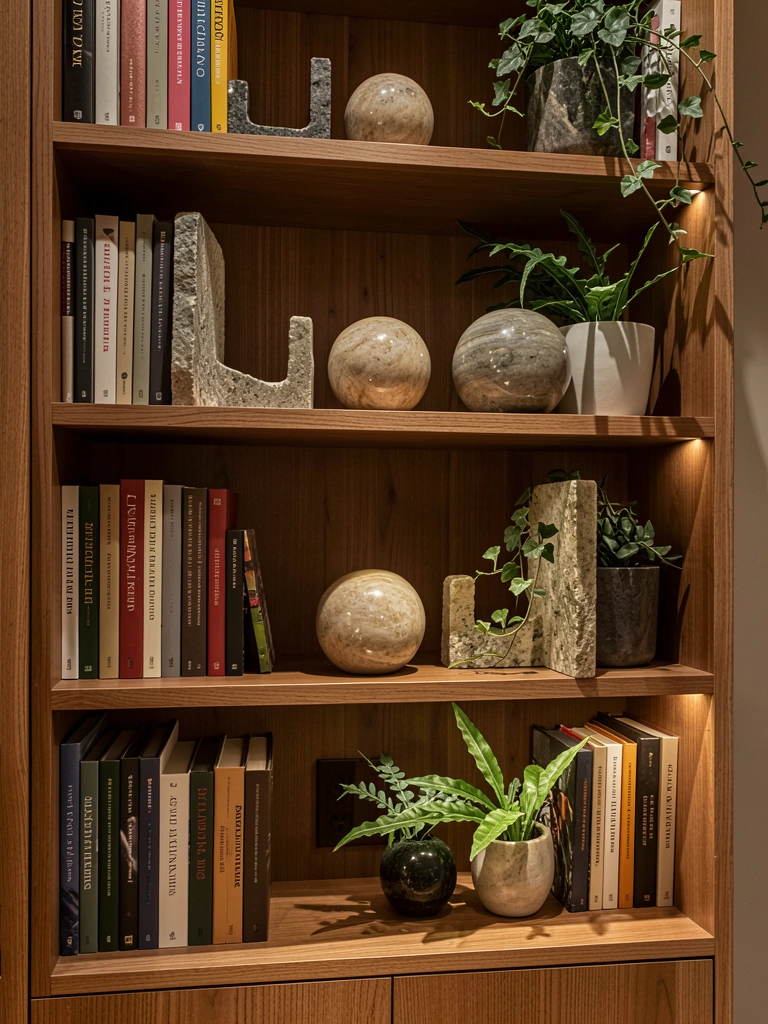
    4. Use Marble or Slate Bookshelf Styling

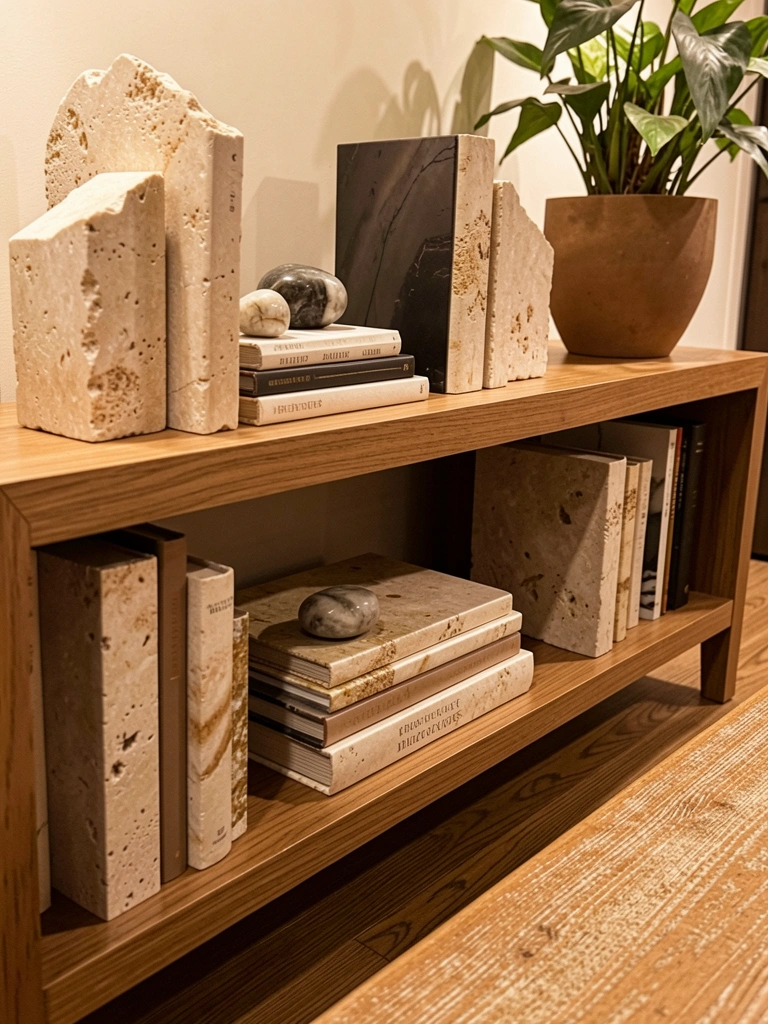
    Stone bookends and accessories ground your shelves and add that gallery-like quality to your styling. This is a subtle way to weave natural materials throughout your space without major commitment.

    Marble and slate bookends run $15–$50 per pair from Target, CB2, or online retailers. Mix them with books, plants, and other accessories for a curated look. You can also add polished stone spheres, geodes, or coasters ($5–$30 each). Styling takes 30 minutes and costs under $200 for a full shelf refresh.

    Your shelves immediately feel more intentional and less random. Visitors notice the thoughtful curation, and you’ll enjoy looking at them every day. This works for renters too—no installation required, just strategic placement.

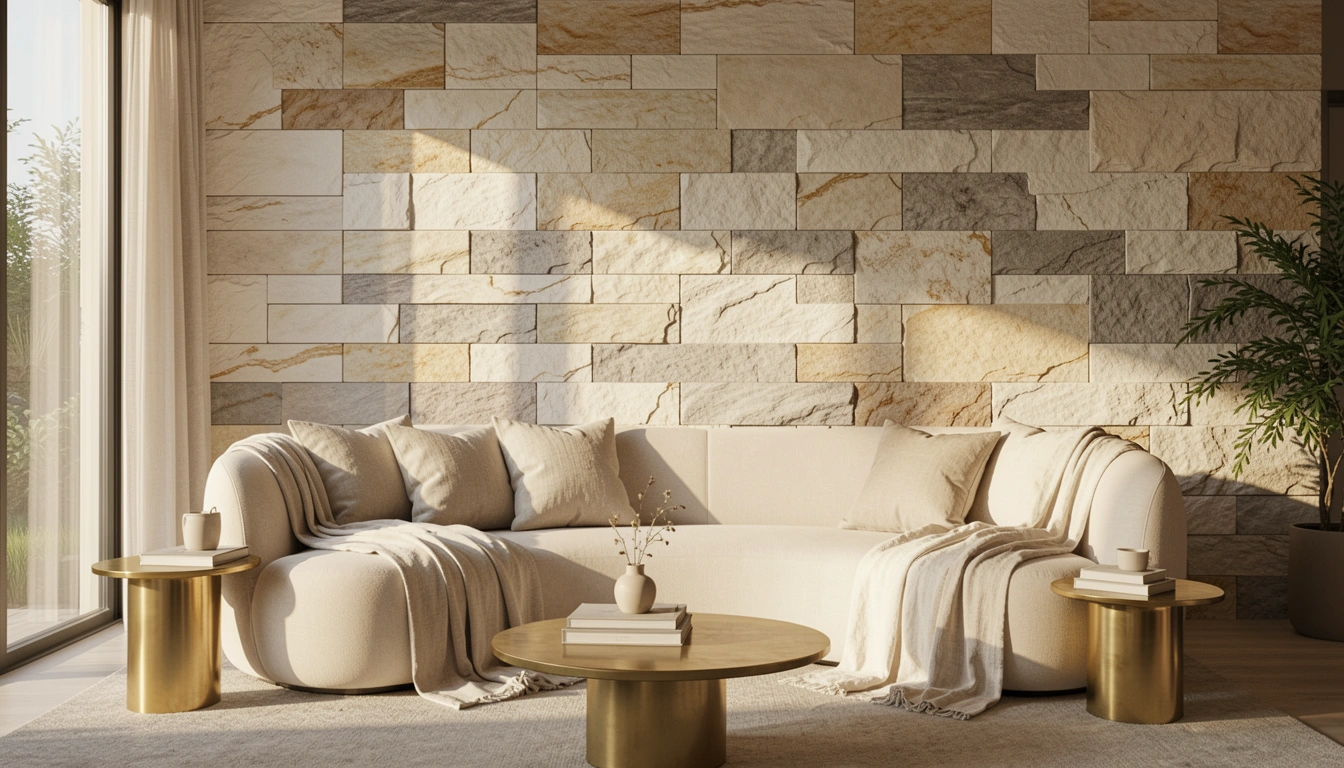
    5. Create a Stone Feature Wall with Waterfall Edge

    Waterfall edge stone creates movement and visual flow on a wall—it’s a design detail that looks expensive but is easier than you’d think. This technique makes a basic accent wall feel gallery-worthy.

    Large-format stone tiles with waterfall edges cost $30–$50 per square foot installed, or $500–$1,500 for a 10×12 wall. You’ll need a professional for this due to the precision required. Alternatively, some peel-and-stick options mimic the waterfall effect at half the cost ($300–$700). Plan for 3–5 days of installation.

    The result is a living room that looks like it belongs in a design magazine. The waterfall pattern adds sophistication and visual interest that makes your whole space feel elevated. This detail is the kind of thing that makes people ask, “Did you hire a designer?”

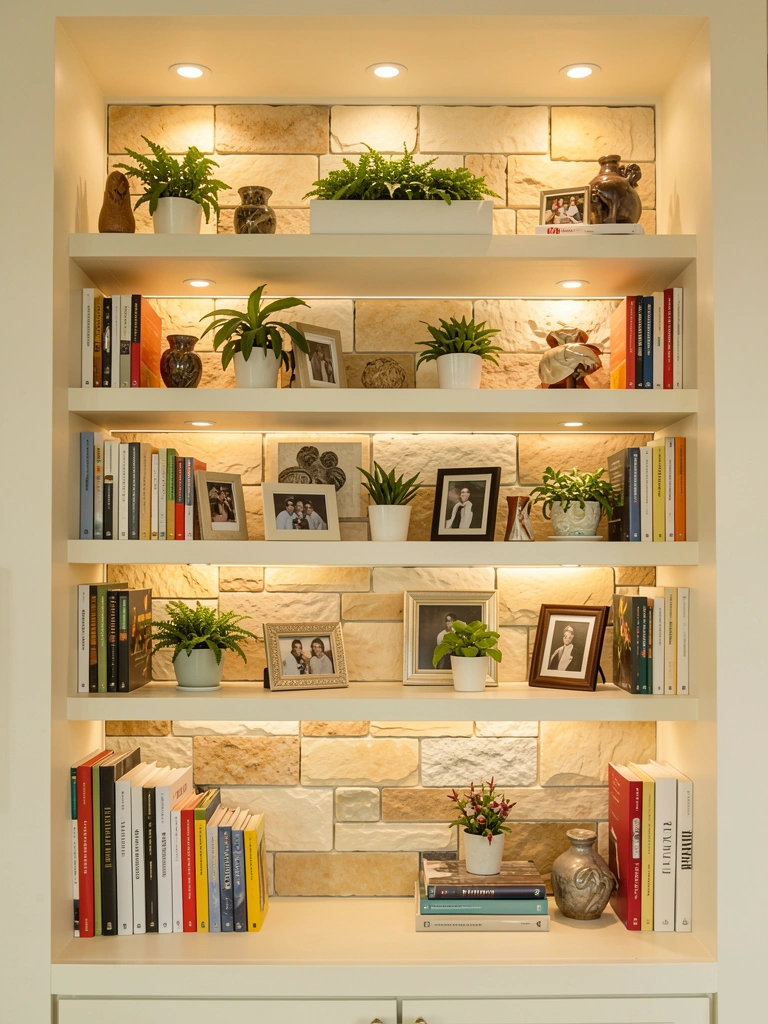
    6. Line Your Shelving with Stone Backing

    Stone backing on shelves adds depth and makes floating shelves look more finished and intentional. It’s the background detail that ties your whole styling scheme together.

    Stone backing panels cost $100–$300 per 4×8 sheet and can be cut to size. Peel-and-stick options run $50–$150 and require zero installation skills. Installation takes 1–2 hours with proper measurement and adhesive application. Pair with floating shelves ($50–$200 each from IKEA, Wayfair, or local hardware stores).

    Your shelves go from looking sparse to looking like a curated gallery. The stone backing creates contrast and draws attention to whatever you’re displaying. Styling becomes easier because the stone does the heavy lifting visually.

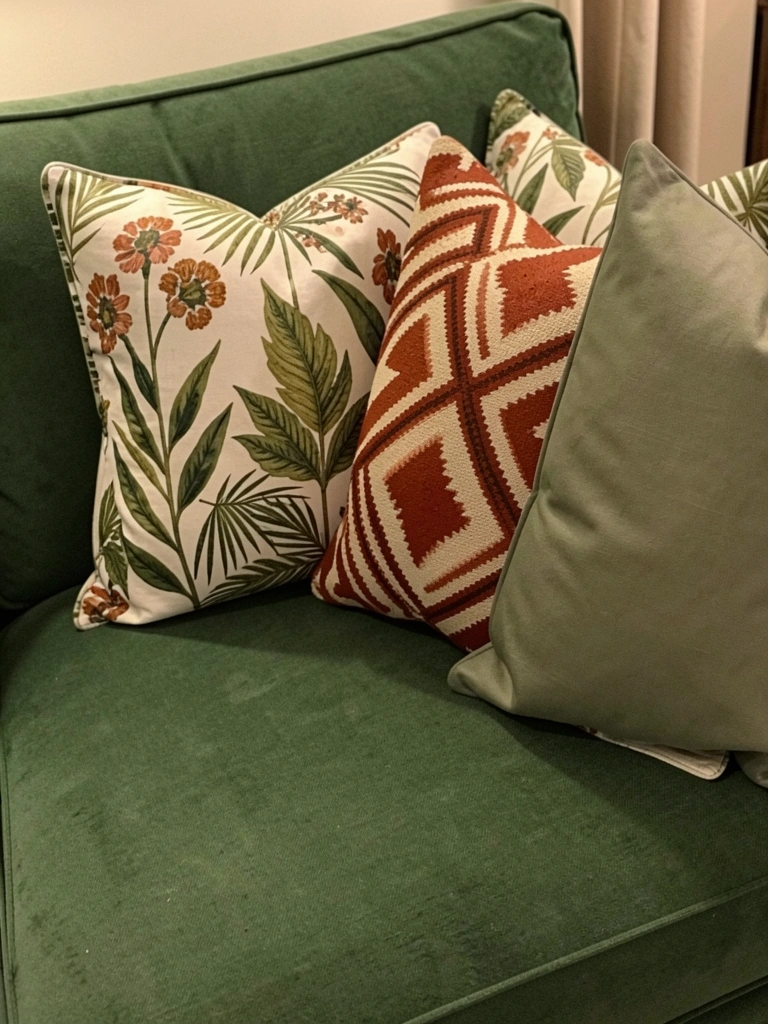
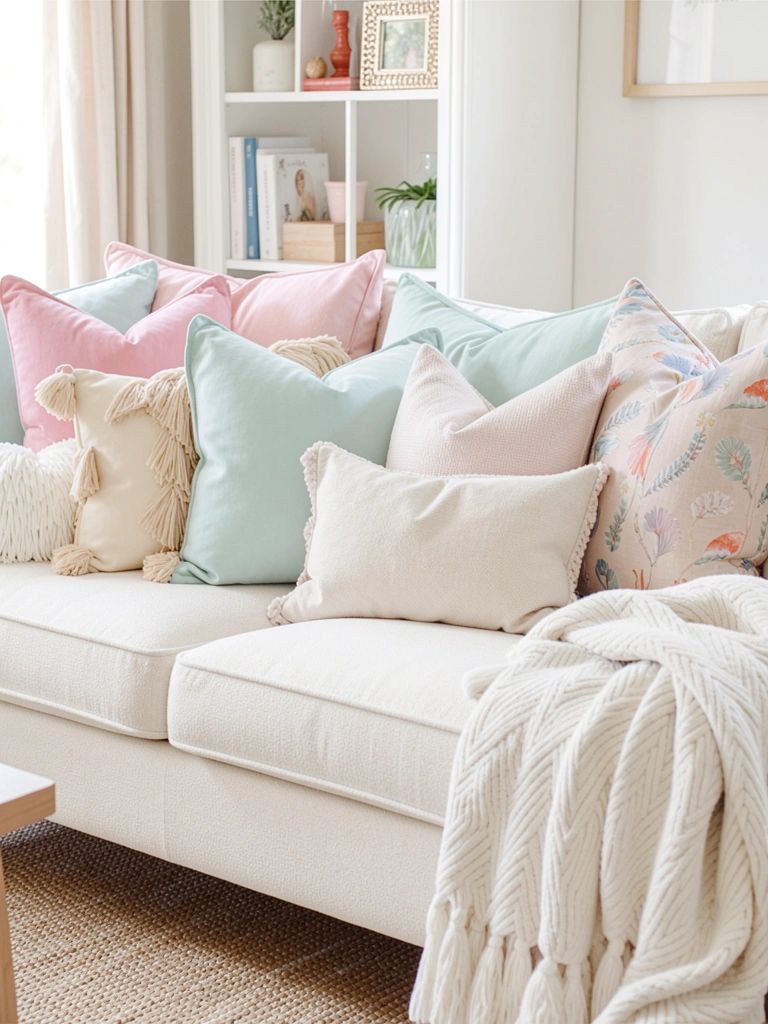
    7. Pair Stone Coasters with Your Coffee Table Styling

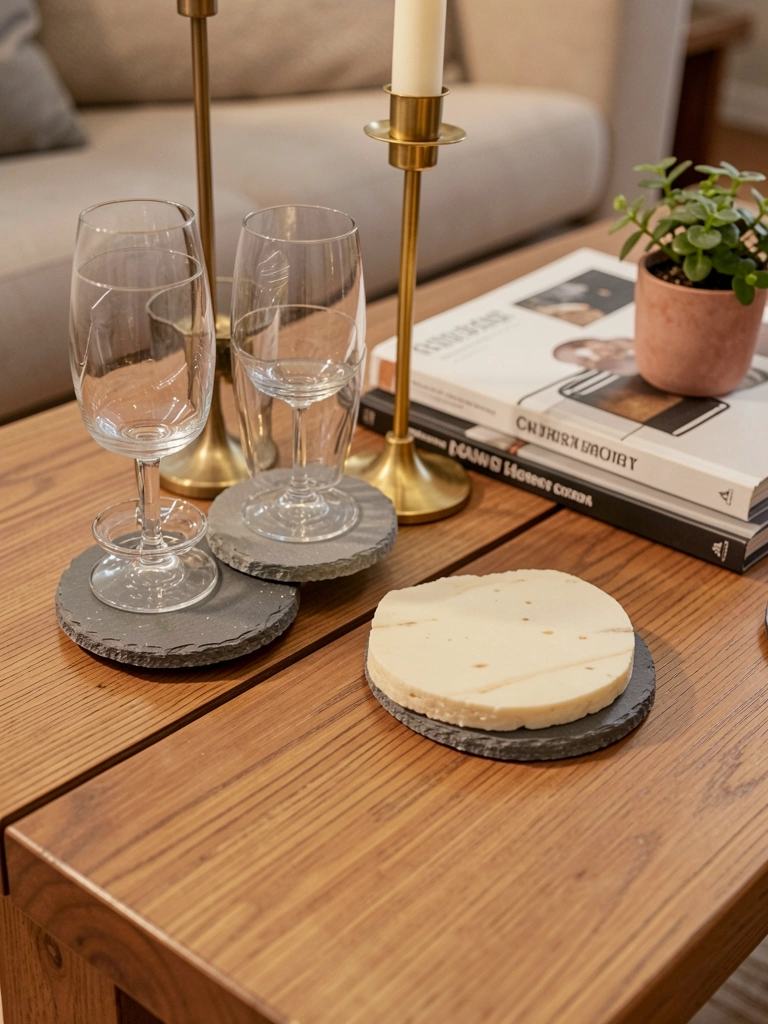
    Stone coasters are practical and decorative—they protect your table while adding subtle texture to your styling. This is an affordable way to incorporate stone into your everyday design.

    Natural stone coasters cost $8–$25 per set from Target, CB2, Etsy, or Amazon. Marble, slate, and granite options all work beautifully. Buy 2–3 sets ($25–$75 total) to have enough for styling and actual use. No installation required—just place them strategically on your table. Styling takes 5 minutes.

    Your coffee table looks more intentional and put-together instantly. You’re also protecting your surfaces, which means less stress about spills and water rings. Plus, they become a conversation piece because people notice the thoughtful details.

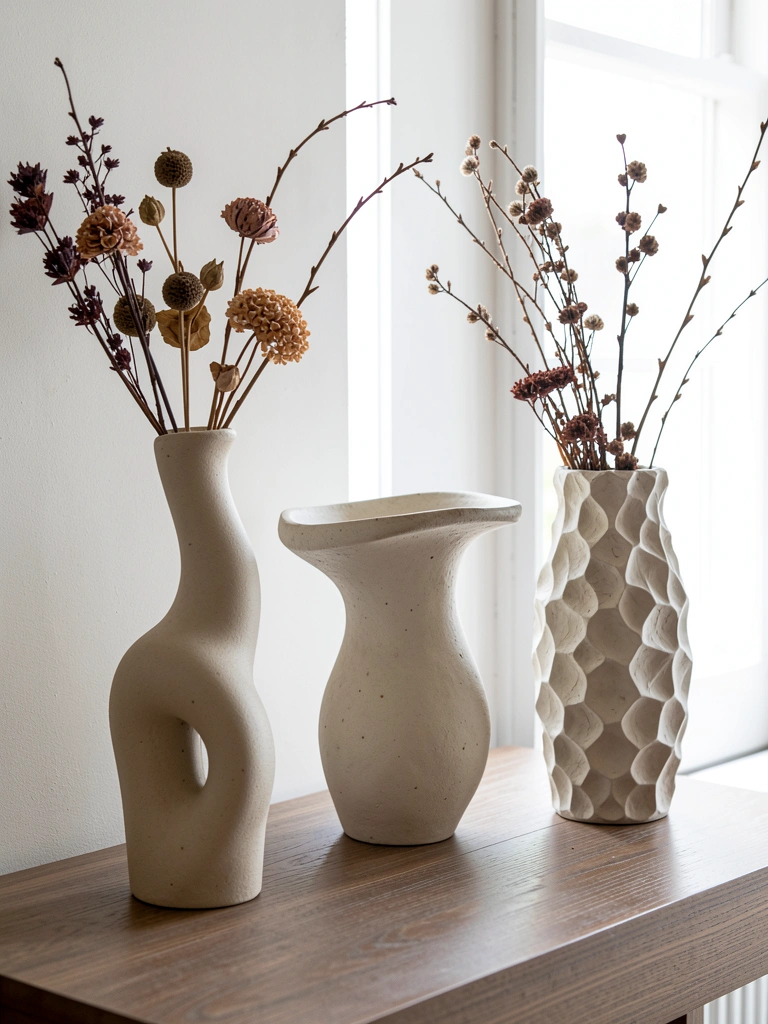
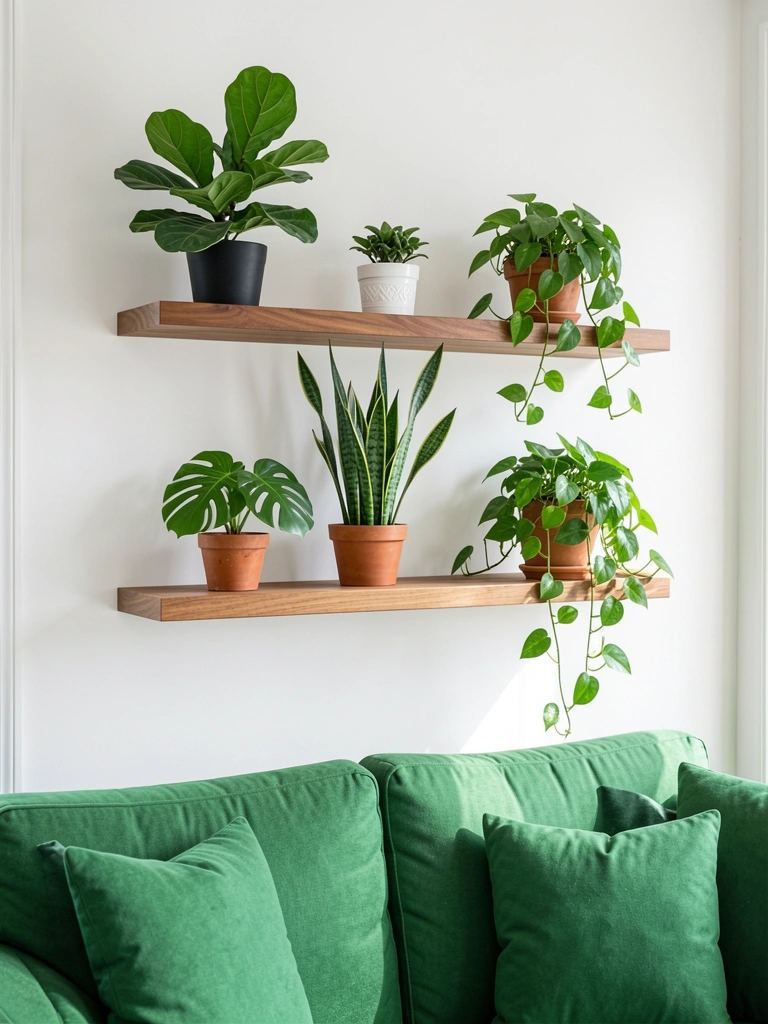
    8. Add Stone Planters for Greenery Display

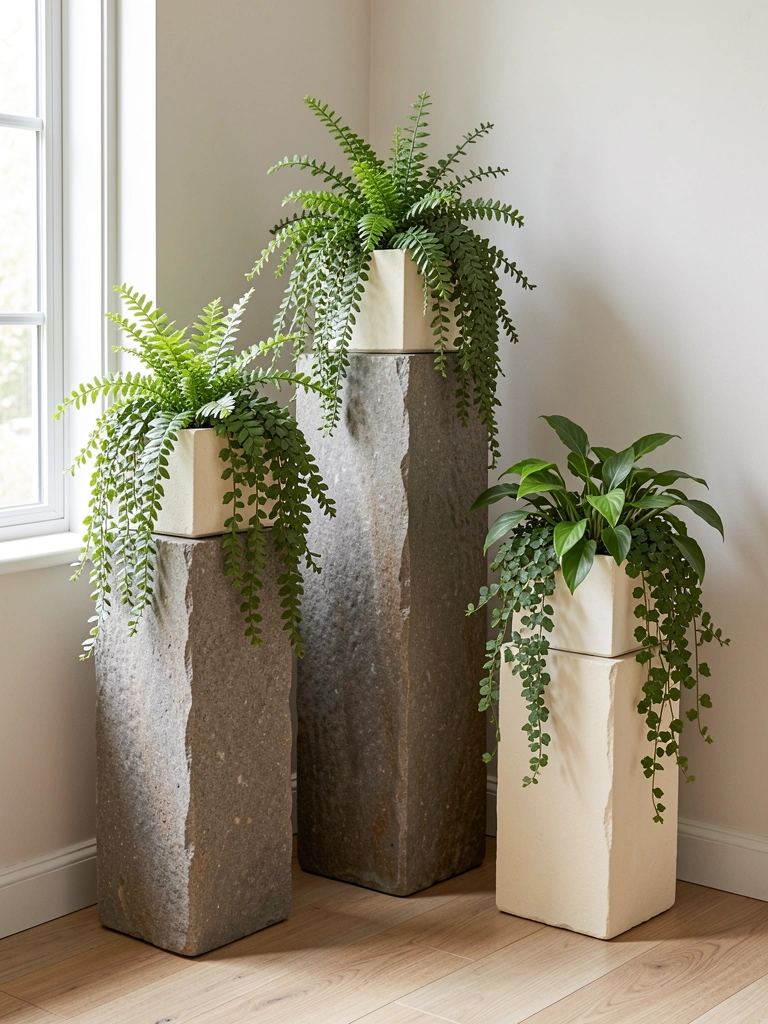
    Stone planters combine the biophilic trend (nature connection) with texture and visual interest. They’re functional decor that brings life into your space while adding that organic luxury feel.

    Stone planters range from $20–$150 per piece depending on size and stone type. Find them at Target, Home Depot, Wayfair, or specialty garden stores. Buy 2–3 planters in complementary sizes ($50–$250 total) and fill with plants like pothos, monstera, or snake plants. Styling takes 30 minutes including plant placement.

    Your living room suddenly feels more connected to nature and less sterile. Stone planters elevate even basic grocery-store plants into display-worthy pieces. The combination of texture, greenery, and natural materials creates that aspirational spa-like atmosphere.

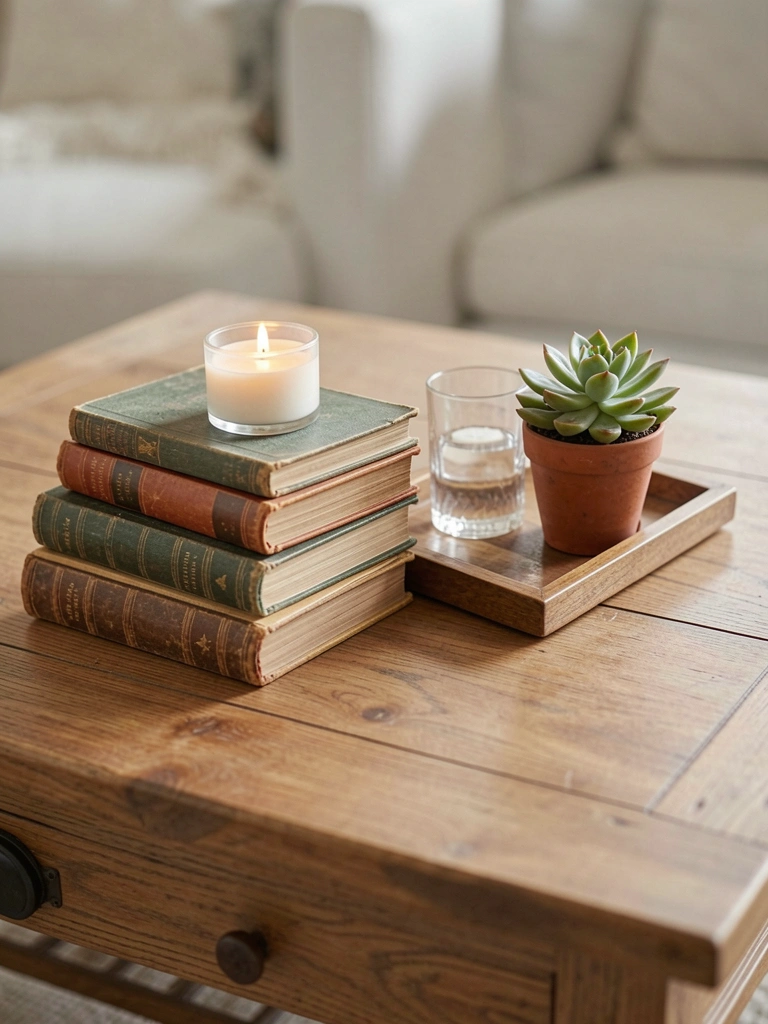
    9. Use Stone Tiles as a Decorative Tray

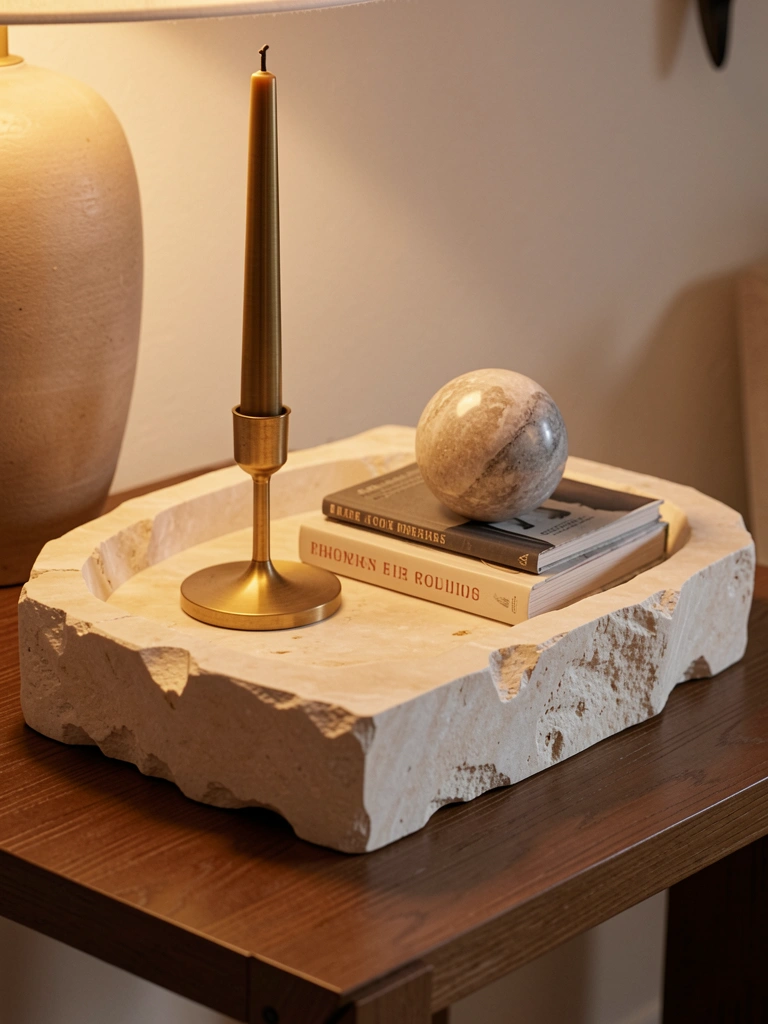
    A stone tile or decorative tray becomes a styling foundation that organizes your space while adding visual interest. This is an easy way to create a vignette that looks intentionally curated.

    Stone trays cost $25–$80 from CB2, Schoolhouse Electric, or Etsy, or you can DIY one from a large slate tile ($10–$20) sealed with clear epoxy. Place on your coffee table, side table, or console and style with books, candles, and decorative objects. Styling takes 20 minutes and costs $30–$80 for the tray plus items.

    Your table instantly looks more organized and intentional. The stone tray grounds the styling and creates a focal point that draws the eye. Guests will notice the thoughtful arrangement, and you’ll enjoy the aesthetic daily.

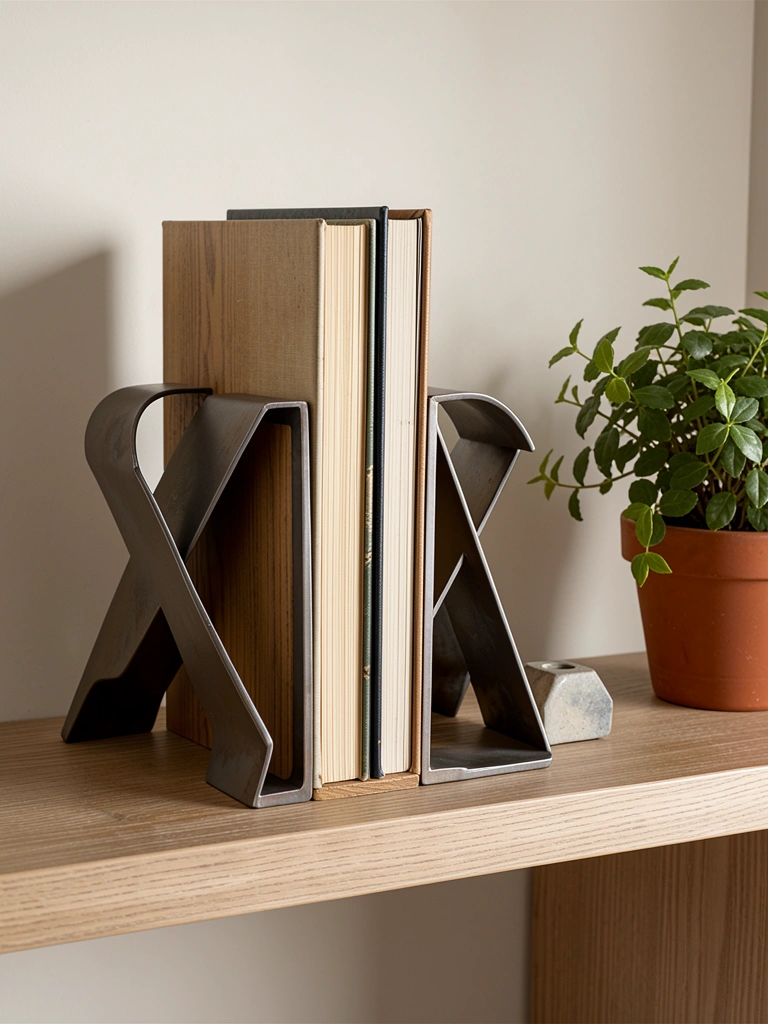
    10. Create Stone Bookends for Your Collection

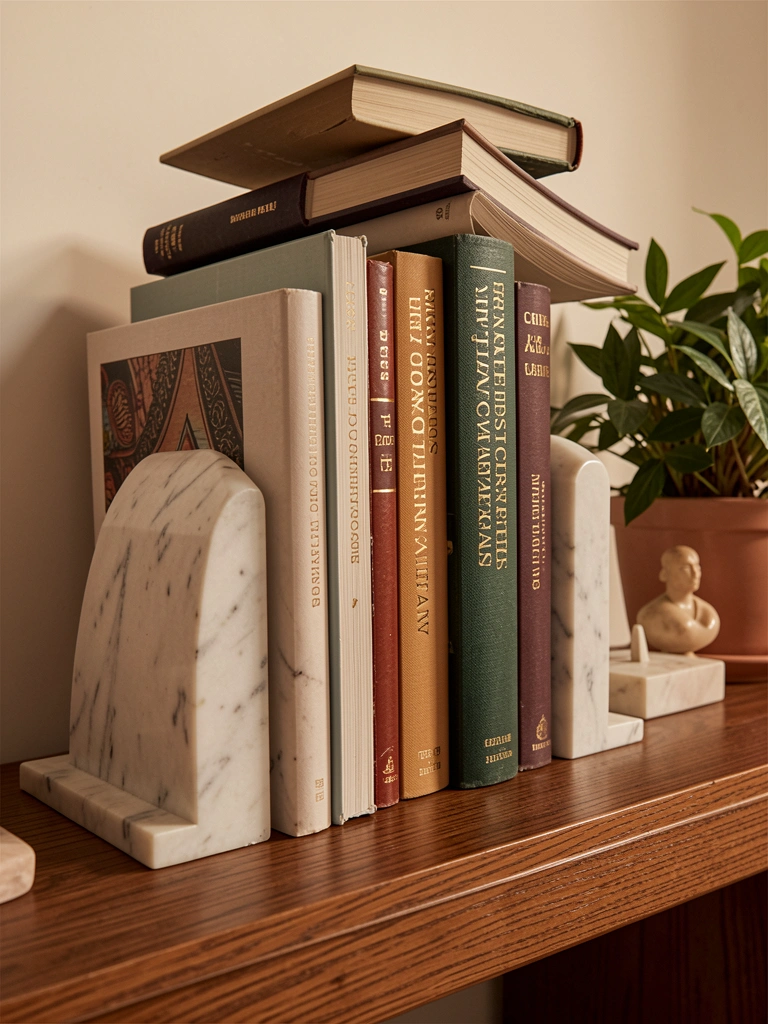
    Stone bookends serve a practical purpose while adding visual weight and sophistication to your shelving. They’re small details that make a big impact on how finished your styling looks.

    Marble, slate, and granite bookends run $15–$50 per pair from Target, Etsy, or HomeGoods. Buy one or two pairs ($30–$100) depending on how many shelves you’re styling. They require zero installation—just place and arrange your books. Styling takes 15 minutes.

    Your books look more curated and intentional rather than haphazardly stacked. The stone bookends add weight and formality that elevates your whole shelving display. This is the kind of detail that makes people think you have a professional designer on speed dial.

    11. Line Your Fireplace Hearth with Textured Stone

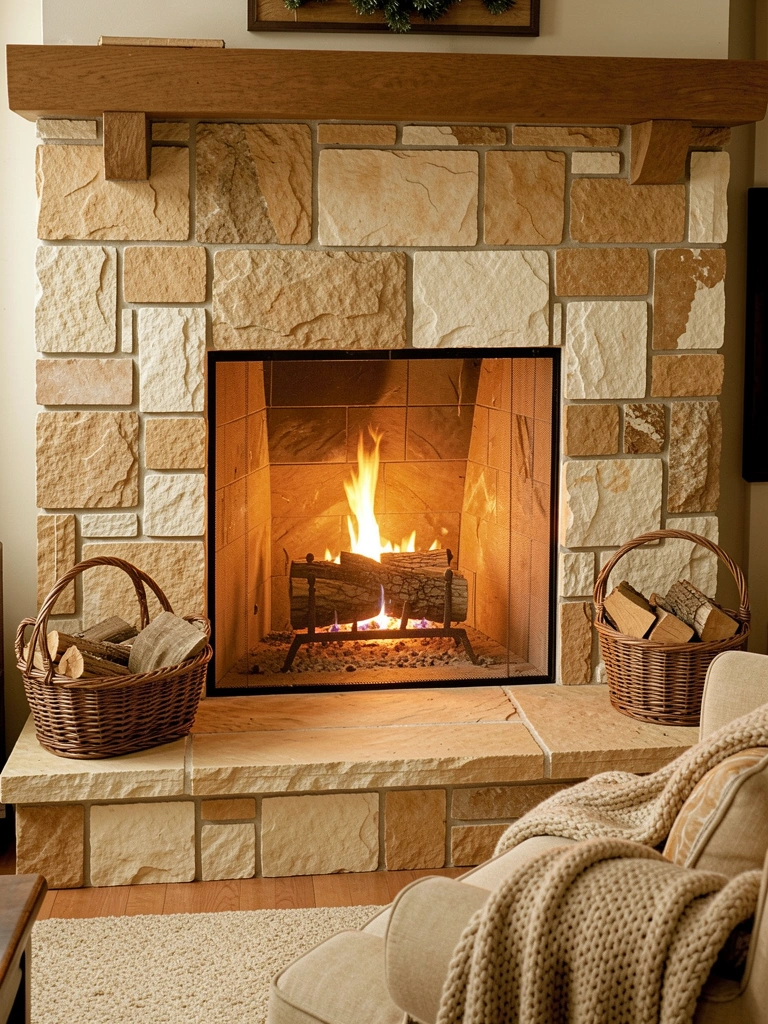
    A stone hearth is both functional and beautiful—it protects your floor while creating a visual anchor for your fireplace area. This is where comfort and design meet perfectly.

    Stone hearth installation costs $500–$2,000 depending on materials and complexity. If you’re renting or want a temporary solution, large stone tiles laid on top work beautifully ($200–$500 DIY). For permanent installation, hire a professional. Plan for 2–3 days of work including curing time.

    Your fireplace area becomes the undisputed focal point of your room. The stone hearth creates a defined gathering space that makes your living room feel more luxurious and intentional. Winter gatherings suddenly feel more special.

    12. Add Stone Texture with Peel-and-Stick Wallpaper

    Peel-and-stick stone wallpaper gives you the look of real stone without the cost or commitment. This is perfect for renters and anyone who wants to test the trend risk-free.

    Peel-and-stick stone wallpaper costs $15–$40 per roll and covers approximately 30 square feet. For a 10×12 wall, you’ll need 4–5 rolls ($60–$200 total). Application takes 2–3 hours and requires just a ruler, utility knife, and your patience. Find options at Amazon, Wayfair, or Etsy. Search “peel-and-stick stone wallpaper” for tons of realistic options.

    Your wall instantly looks textured and dimensional without permanent damage. When you move, it peels off cleanly. This is a game-changer for renters who want to personalize their space without landlord stress.

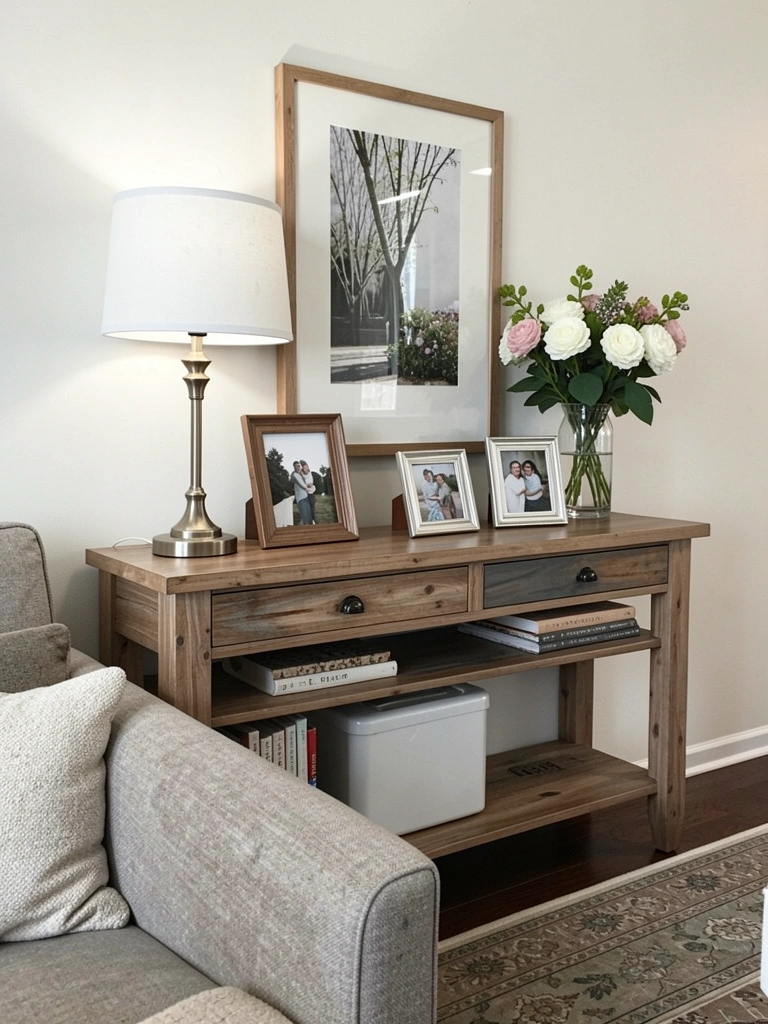
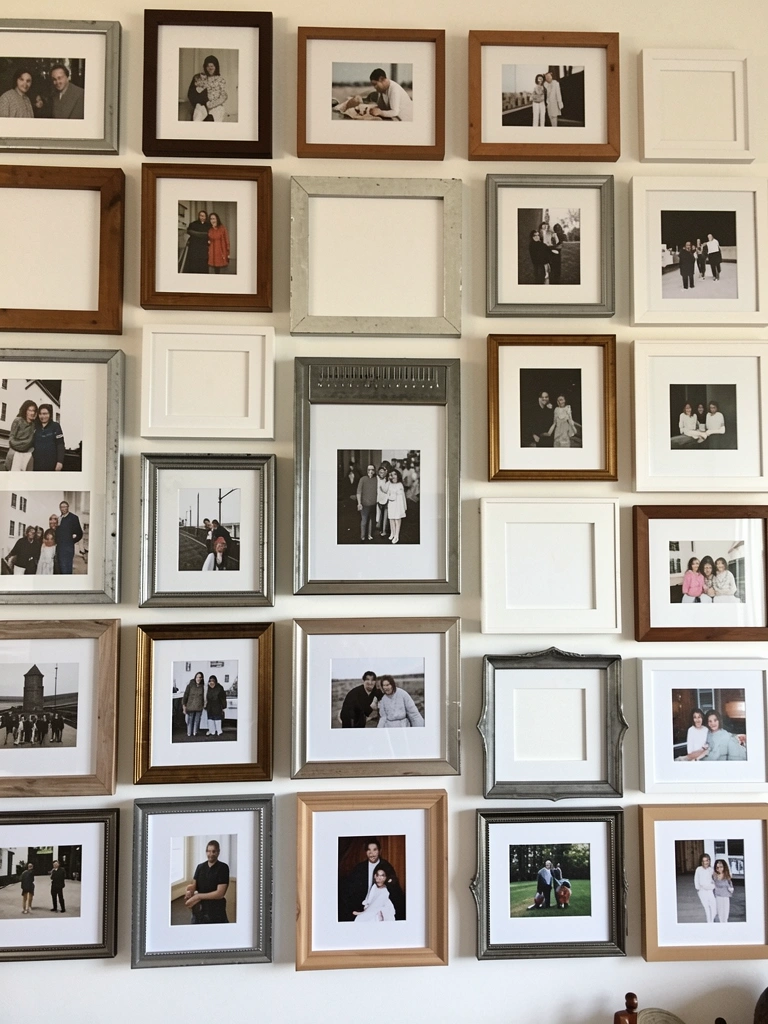
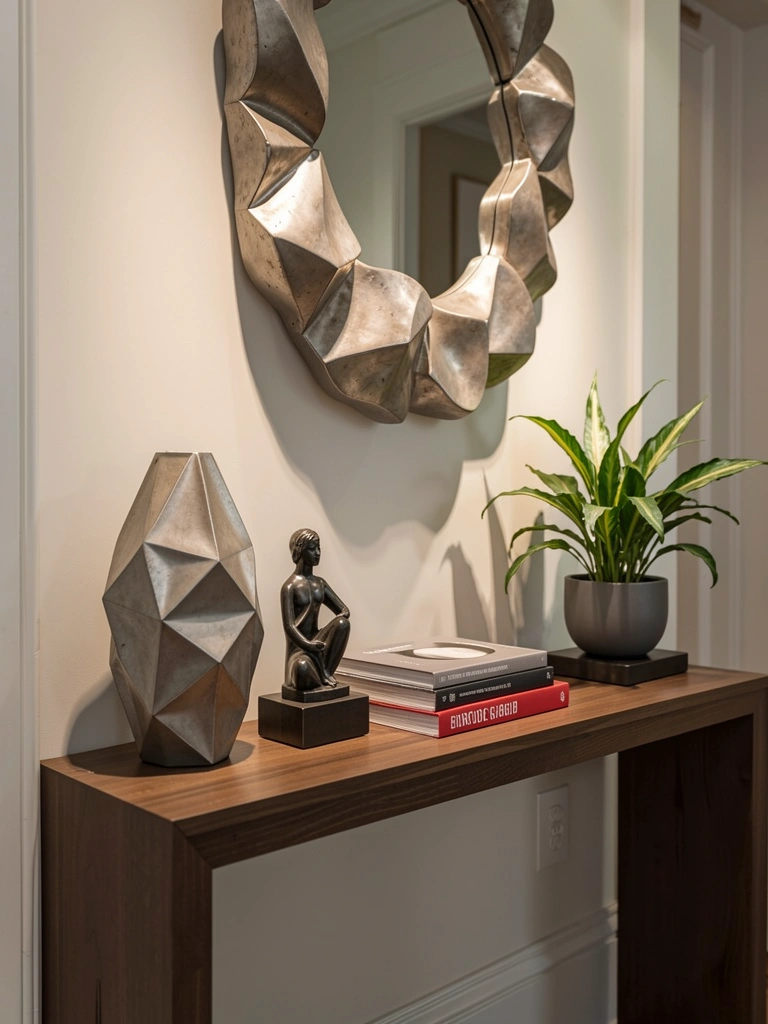
    13. Style Your Console Table with Stone Accessories

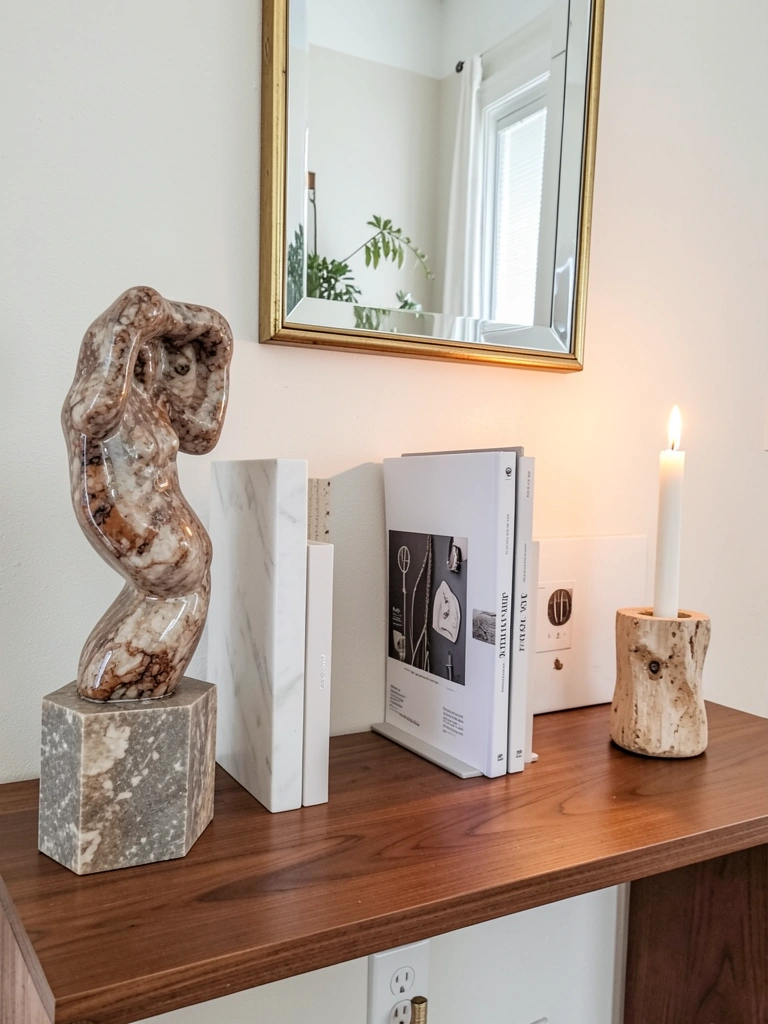
    A styled console table becomes a mini gallery that showcases your taste and love of natural materials. Stone pieces are the perfect foundation for this kind of vignette.

    Stone accessories for console styling run $10–$50 each: bookends ($15–$30), decorative spheres ($10–$25), candle holders ($15–$40), and sculptures ($20–$80). Budget $100–$200 total to create a fully styled console. Styling takes 30 minutes.

    Your entryway or hallway console becomes a destination that sets the tone for your whole home. Visitors see stone textures and natural materials, which signals that your space is thoughtfully designed. It’s the first thing people notice, and it makes a lasting impression.

    14. Install Stone Tile Baseboards for Subtle Texture

    Stone baseboards might seem like an odd choice, but they add an unexpected textural element that makes your room feel more designed. This is a detail-oriented move that design enthusiasts will notice.

    Stone tile baseboards cost $5–$15 per linear foot plus installation ($1,500–$3,000 for a 300-square-foot room if professionally installed). DIY installation is possible but requires precision. For a renter-friendly option, stick with traditional baseboards and add removable stone-look trim tape ($20–$50) for instant impact.

    Your room gains architectural detail that most people overlook but everyone notices subconsciously. The stone baseboards ground the space and create visual continuity. This is the kind of sophisticated touch that elevates a room from nice to wow.

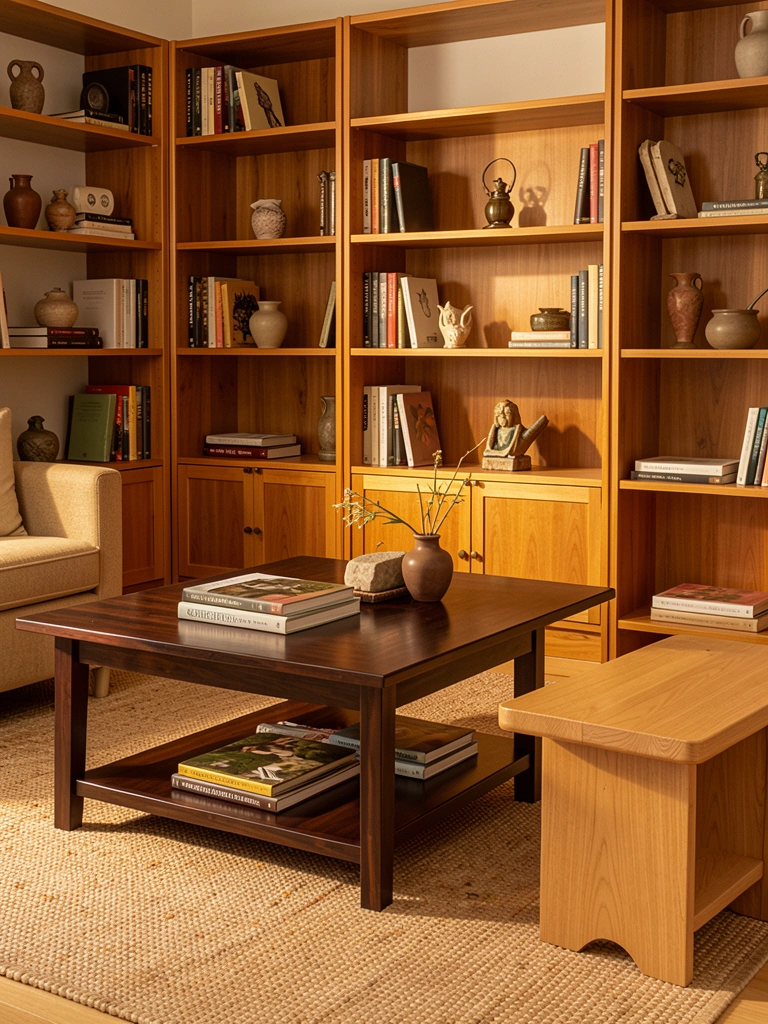
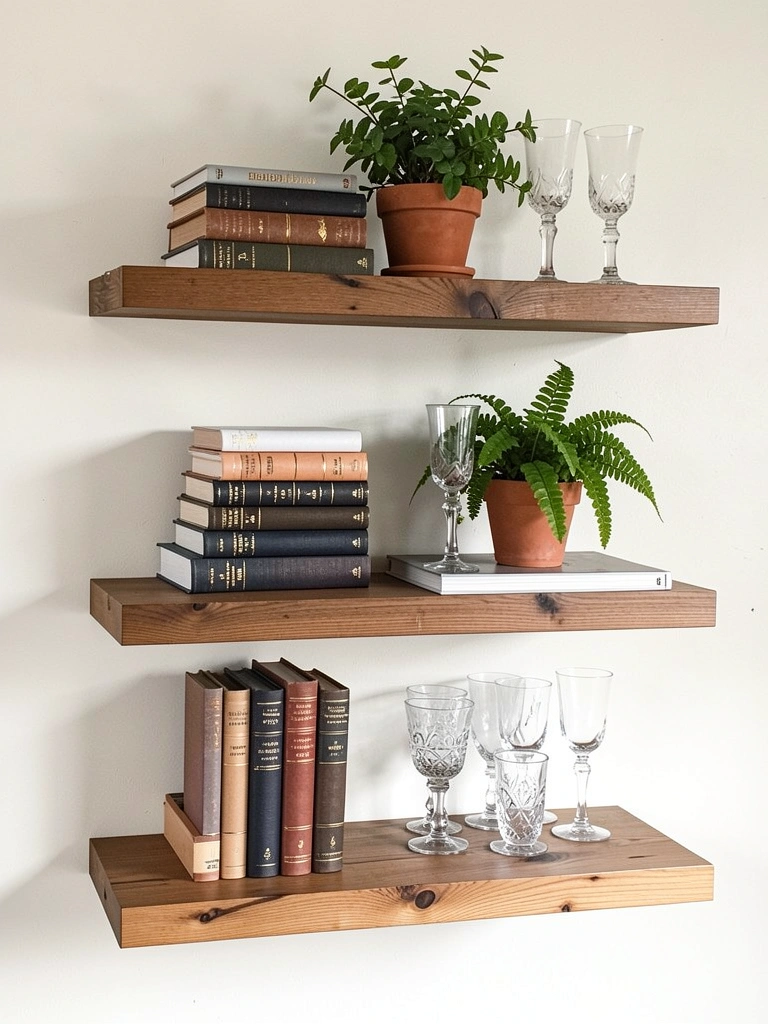
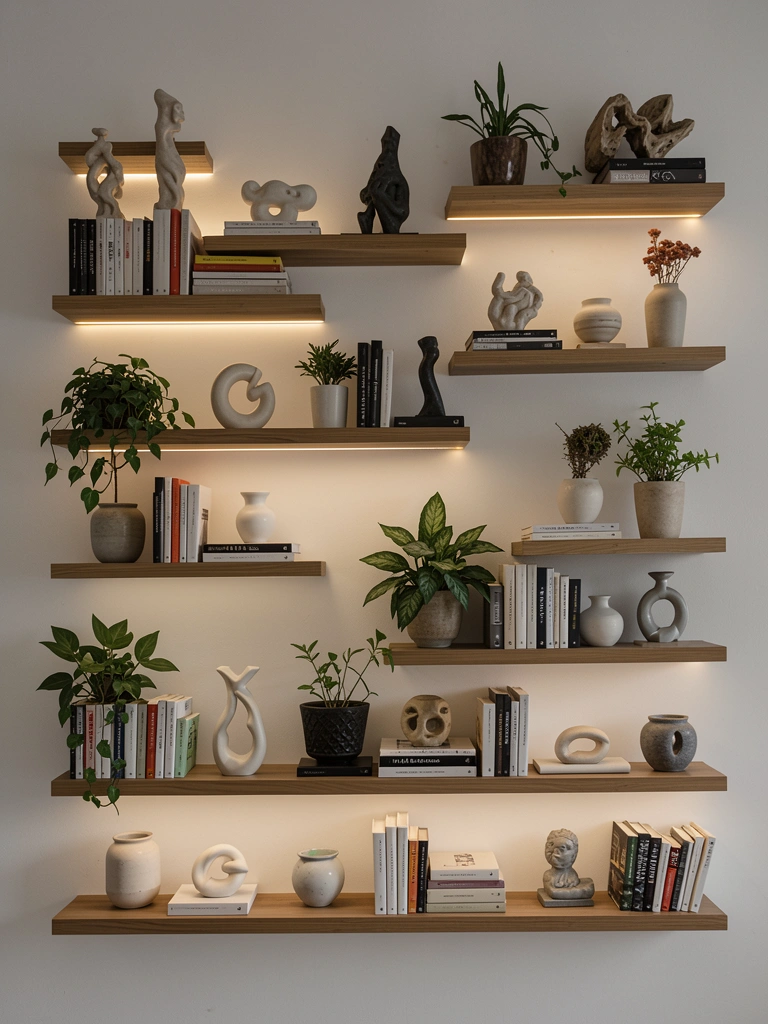
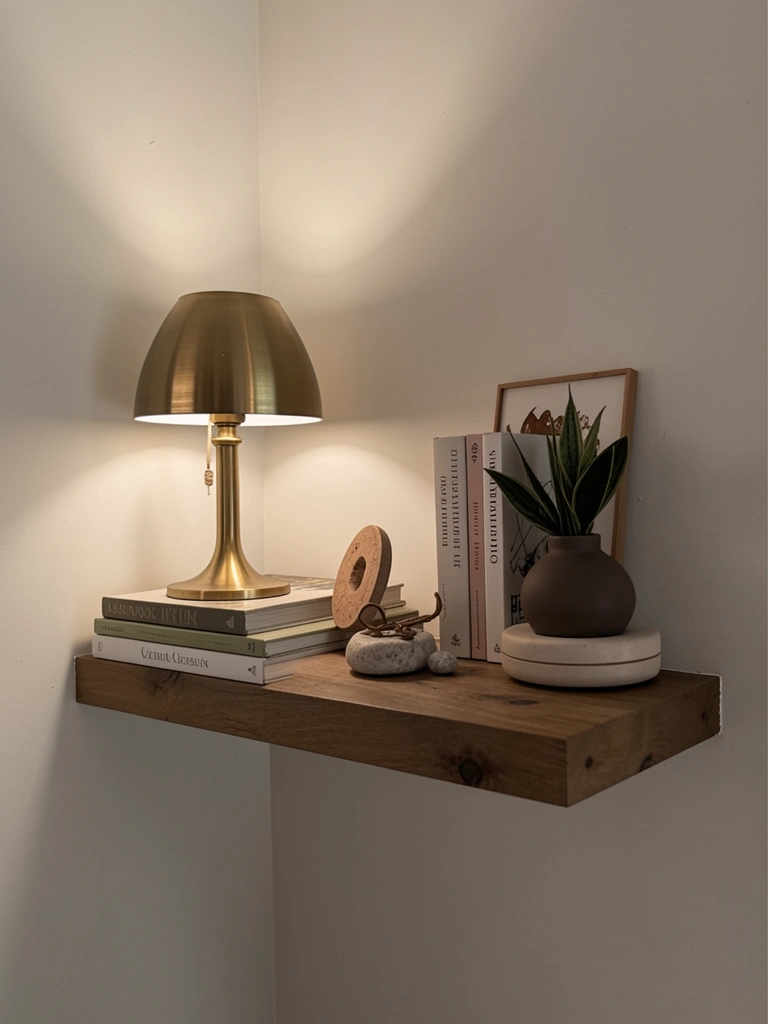
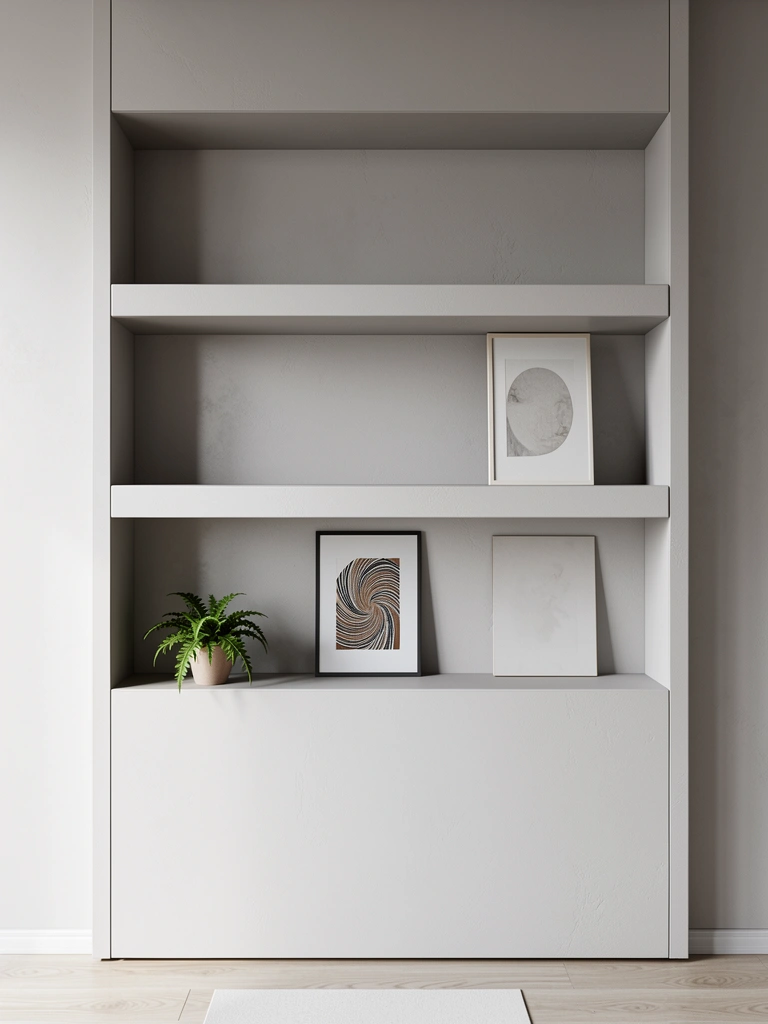
    15. Create a Stone Display Shelf for Art and Objects

    A stone display shelf becomes a mini museum for your favorite pieces and objects. Stone shelves are architectural elements that look expensive and feel intentional.

    Floating stone shelves cost $100–$300 each from Wayfair, Article, or local stone suppliers. Installation runs $200–$500 professionally. For renters, wall-mounted metal shelves topped with a stone tile slab ($50–$150 DIY) work beautifully and are removable. Styling and installation takes a full day.

    Your collected objects and art suddenly feel curated and gallery-worthy. A stone shelf transforms random items into a thoughtful display. This is where you showcase your personality and aesthetic in a way that feels intentional and design-forward.

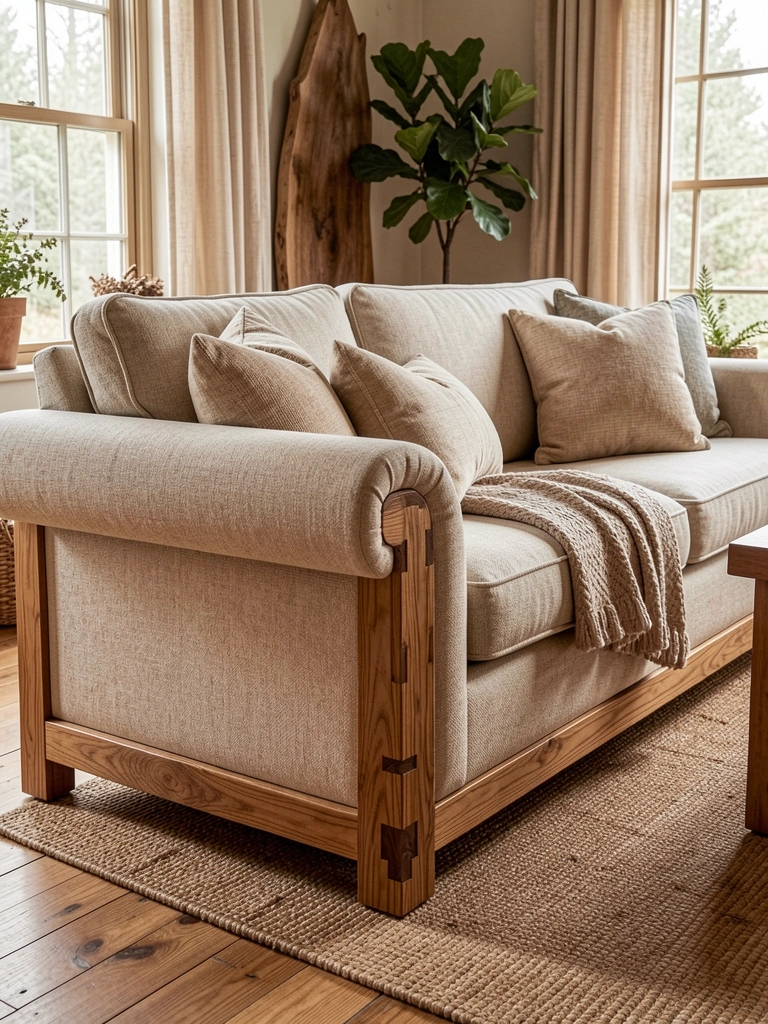
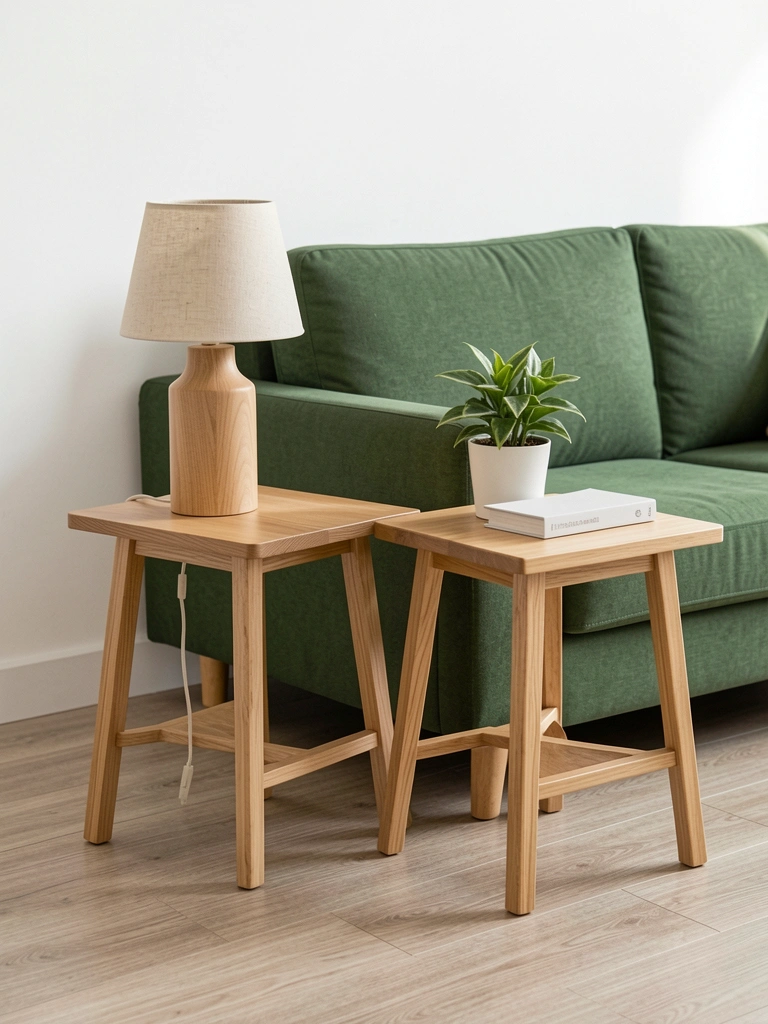
    16. Layer Stone with Wood for Contrast and Warmth

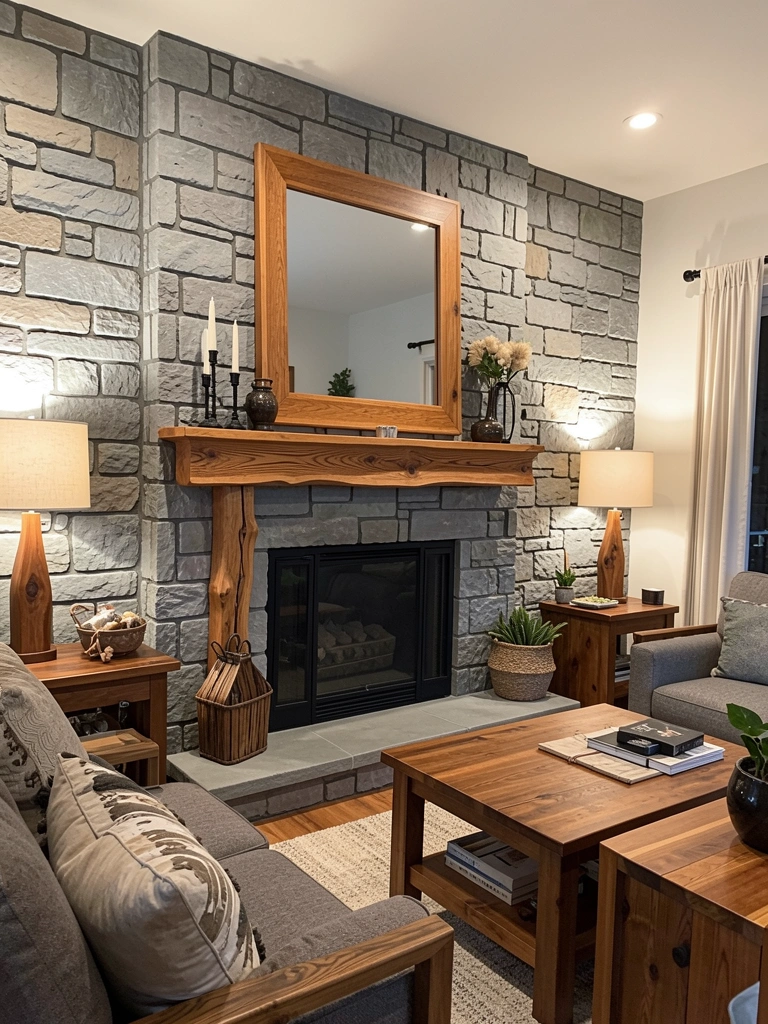
    Pairing cool stone with warm wood creates visual balance and depth. This is the modern-nostalgia trend in action—old materials meeting new design thinking.

    A stone accent wall ($2,000–$5,000 professionally installed) paired with existing wood furniture creates instant contrast. If you don’t have wood furniture, add wooden side tables ($150–$400 each), a wood mantel ($100–$300), or wooden shelving ($50–$200 per shelf). This styling strategy costs $300–$5,000 depending on what you already own.

    The result is a living room that feels balanced and intentional. Stone adds cool sophistication while wood brings warmth and livability. Together, they create a space that feels both luxe and inviting—not cold or sterile.

    17. Use Stone Coasters and Decorative Bowls as Styling Props

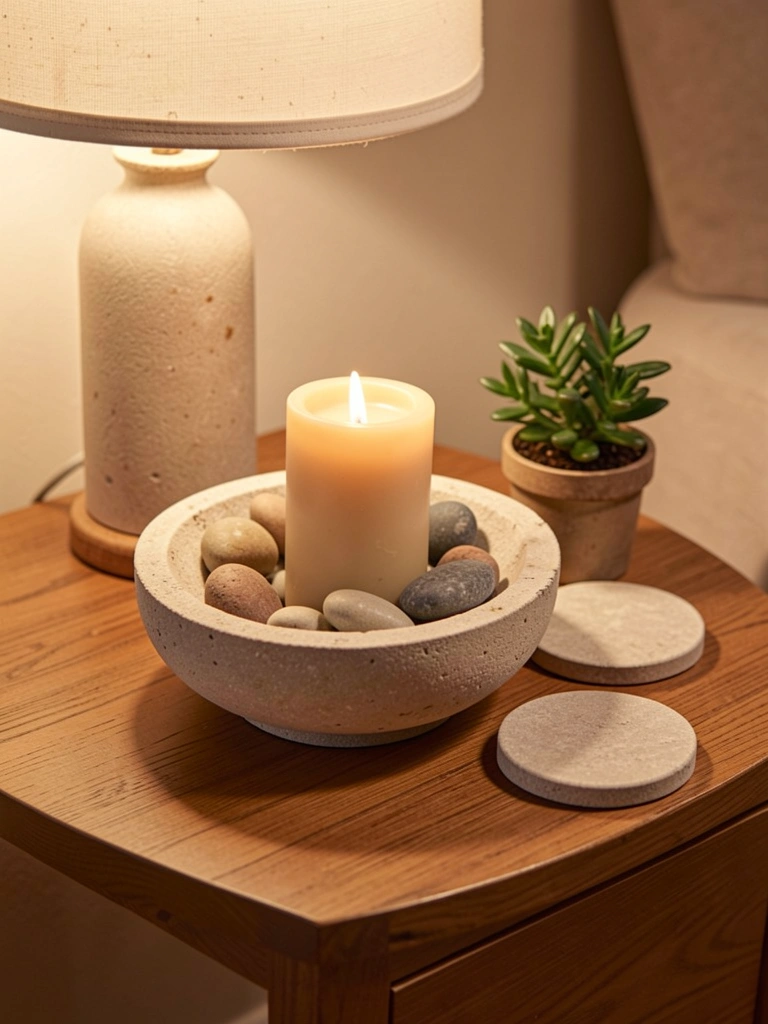
    Stone bowls and coasters become decorative objects that ground your styling with natural texture and visual interest. These functional pieces do double duty as decor.

    Natural stone bowls cost $20–$60 each from West Elm, CB2, or Etsy. Matching coasters run $10–$25 per set. Budget $50–$150 to create multiple vignettes throughout your living room. Styling takes 30 minutes.

    Your side tables and surfaces immediately feel more intentional and curated. Stone bowls add organic texture that makes your space feel grounded and serene. These pieces work year-round and never feel out of style—they’re timeless natural materials.

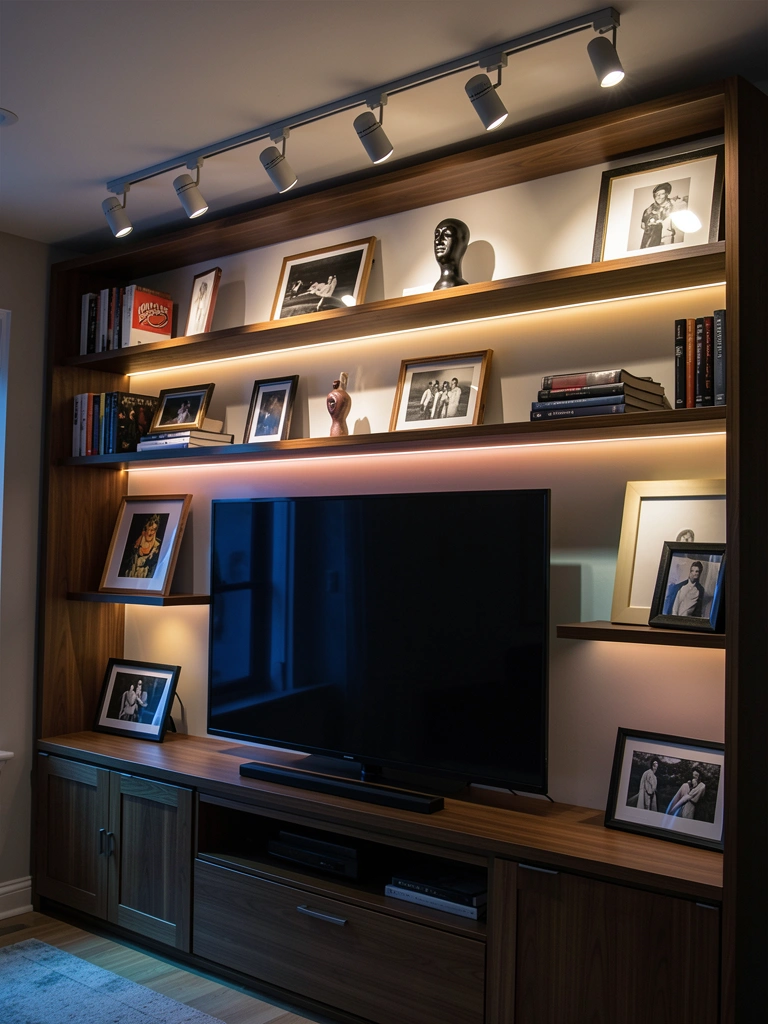
    18. Create Stone-Backed Built-In Shelving

    Built-in shelving with stone backing becomes an architectural focal point that organizes and displays your life beautifully. This is an investment piece that adds permanent value.

    Stone backing for built-ins costs $1,500–$4,000 depending on the wall size and stone type. Installation takes 3–5 days professionally. For renters, removable peel-and-stick stone panels ($300–$800) create a similar look without commitment. Shelves themselves run $50–$200 each.

    Your living room gains architectural interest and storage that actually looks good. Built-in shelving with stone backing becomes the focal point that organizes your space while showcasing your style. This transforms a blank wall into a gallery-like display.

    19. Style with Geometric Stone Sculptures and Objects

    Geometric stone sculptures add artistic interest and textural variety to your shelving and surfaces. These pieces feel gallery-worthy and collected over time.

    Polished stone sculptures and geometric objects run $15–$100 each from Etsy, West Elm, or specialty home stores. Build a small collection of 3–5 pieces ($50–$300) in complementary colors and shapes. Arrange on a shelf or console for maximum impact. Styling takes 20 minutes.

    Your shelves look more artistic and curated instantly. Stone sculptures add sophistication without feeling fussy. These pieces work with any decor style and create conversation-starting vignettes that people genuinely want to look at.

    20. Add Stone Architectural Details to Existing Walls

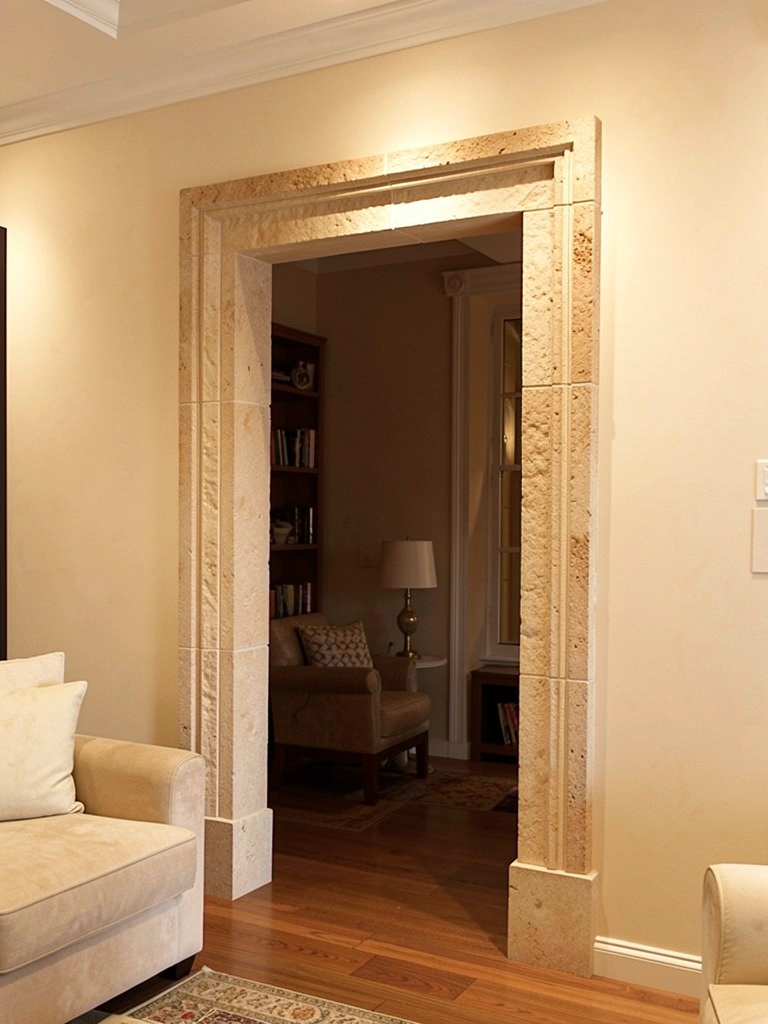
    Stone trim or molding around architectural features like doorways creates instant detail and polish. This is a subtle way to add texture and visual interest to existing structures.

    Stone trim installation costs $300–$1,000 depending on materials and complexity. Peel-and-stick stone trim options ($50–$200) work for renters and temporary solutions. Professional installation takes 1–2 days. DIY installation is possible but requires precision and the right tools.

    Your existing walls gain architectural detail that makes them look more intentionally designed. Stone trim frames doorways and windows in a way that feels expensive and polished. This detail-oriented approach elevates your whole space.

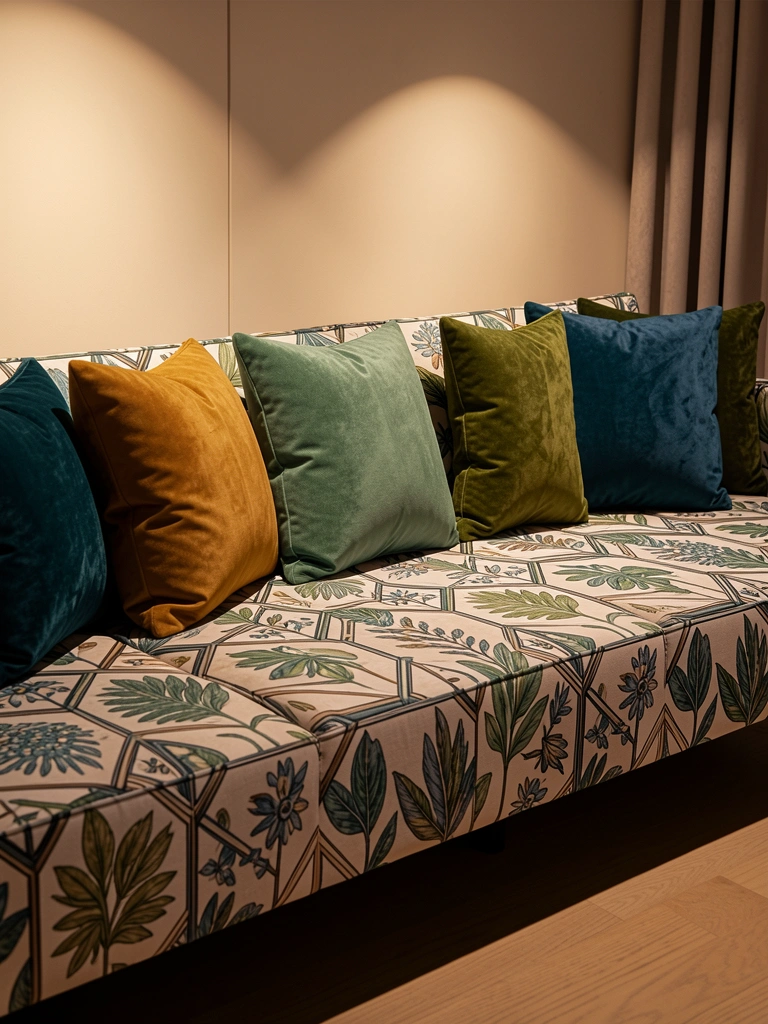
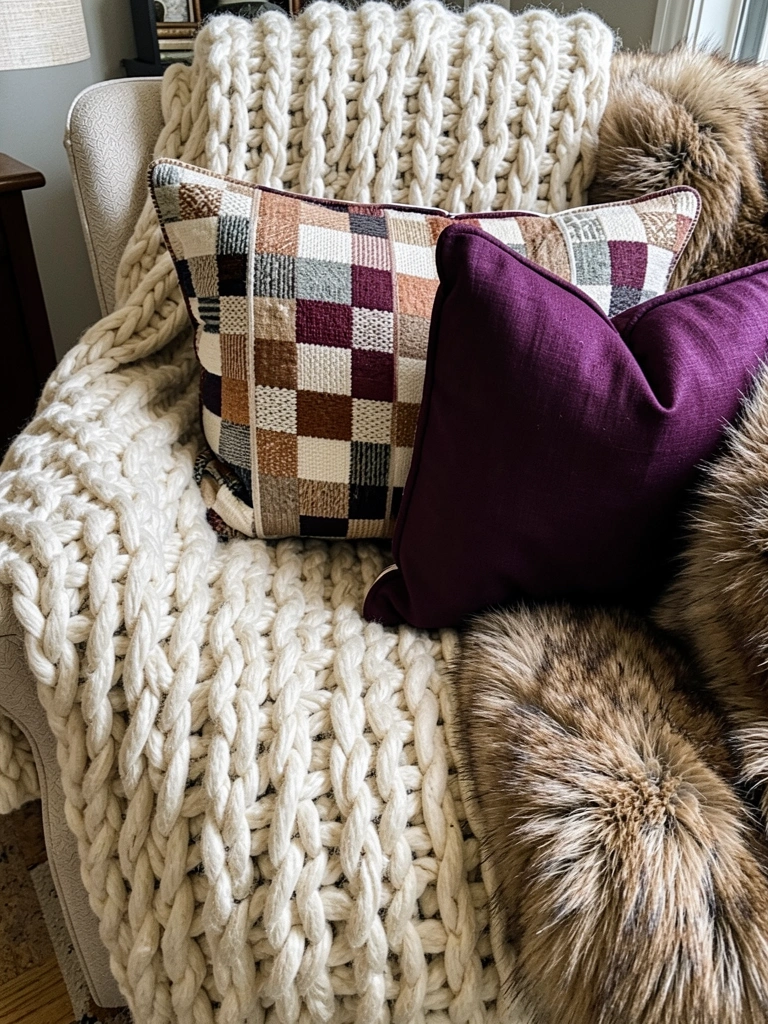
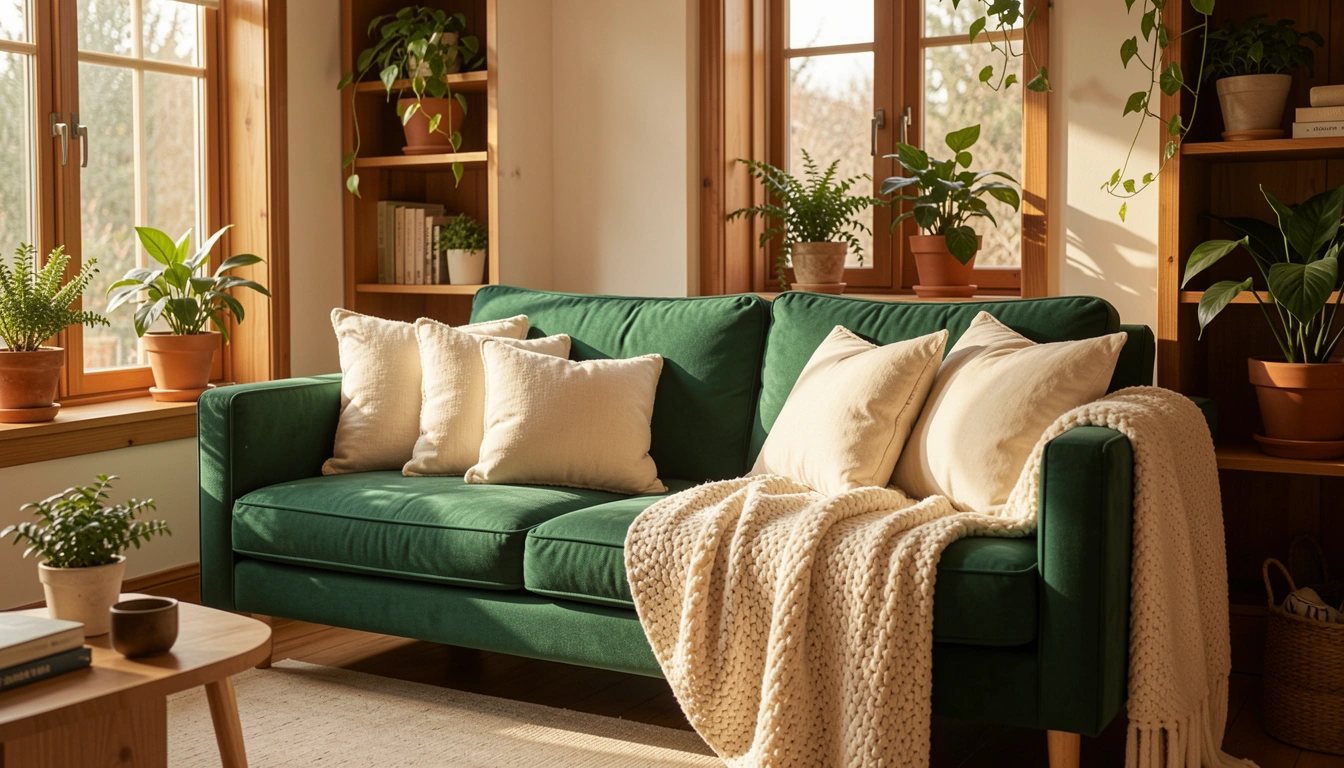
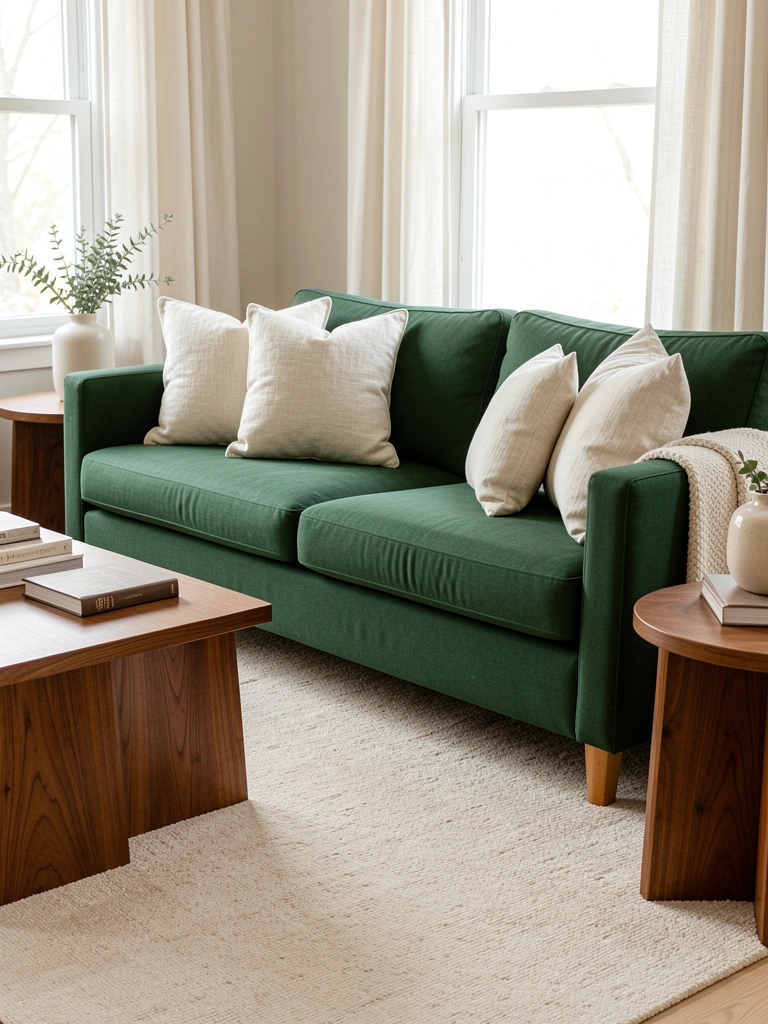
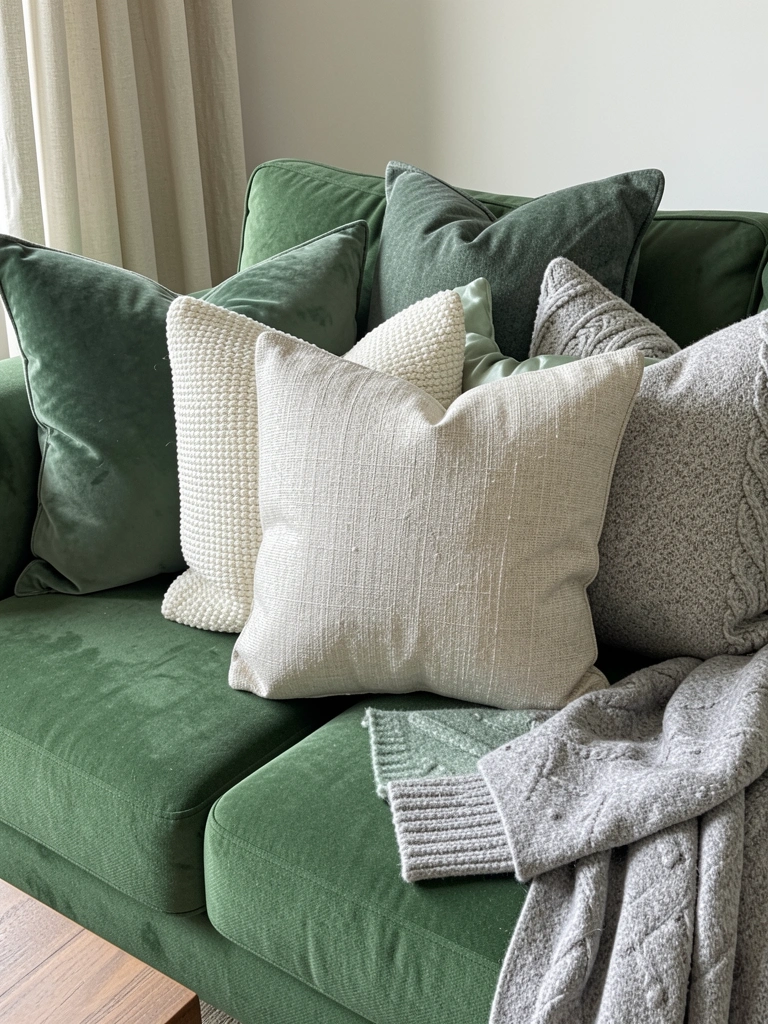
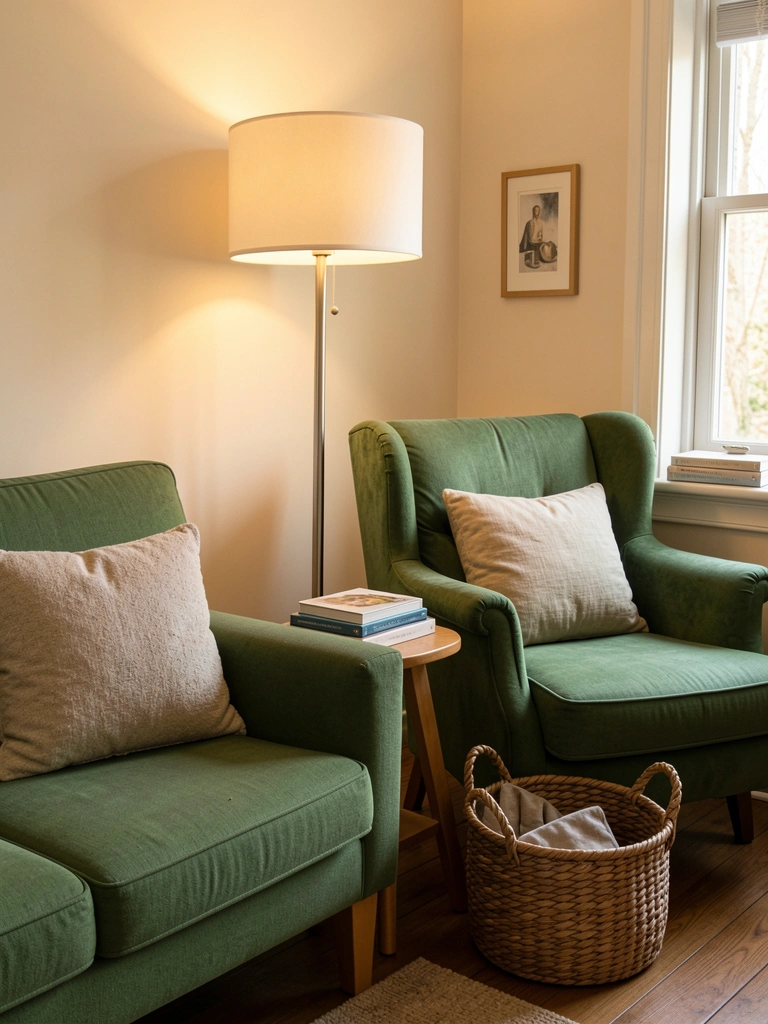
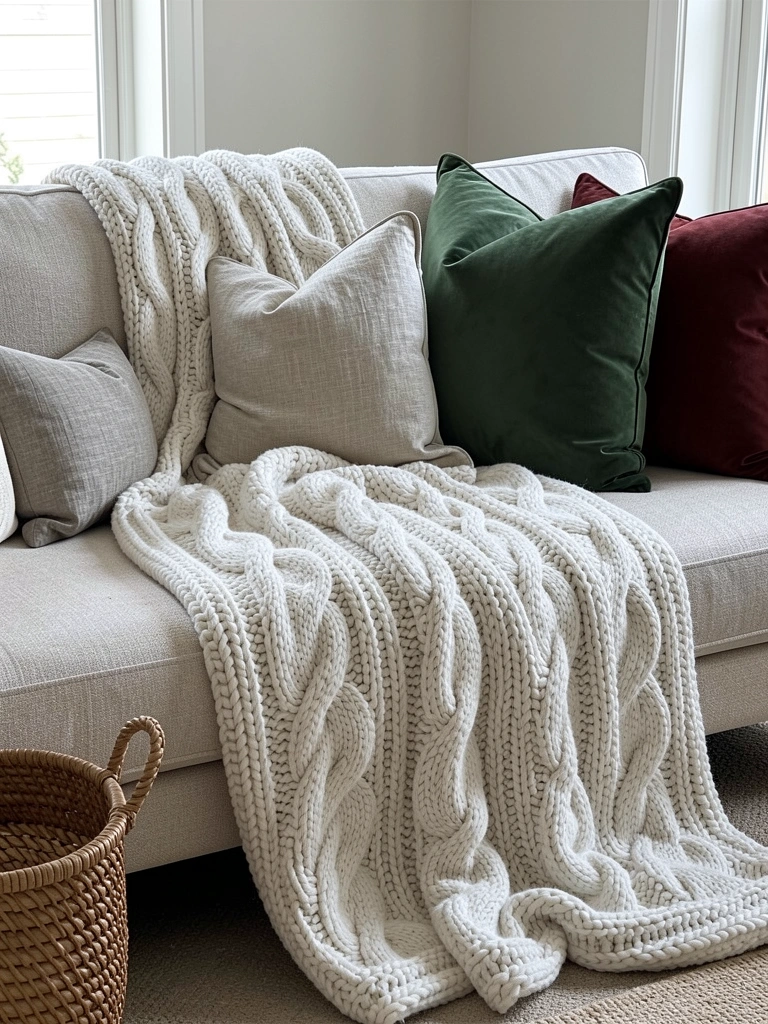
    21. Layer Stone with Textured Fabrics and Plants

    Layering stone with soft textiles and greenery creates a multisensory space that feels both luxe and livable. This approach blends hard and soft materials for visual and tactile interest.

    Stone wall ($2,000–$5,000) + textured sofa ($500–$1,500) + potted plants ($50–$200) + layered pillows ($100–$300) = a complete, cohesive room. Total investment: $2,650–$7,000 depending on choices. This styling approach combines multiple trends into one sophisticated look. Implementation takes 1–2 weeks.

    Your living room becomes a space that looks beautiful but feels livable and comfortable. The stone provides visual drama while soft textures and plants add warmth. This is the balance that makes a room feel both luxe and like home.

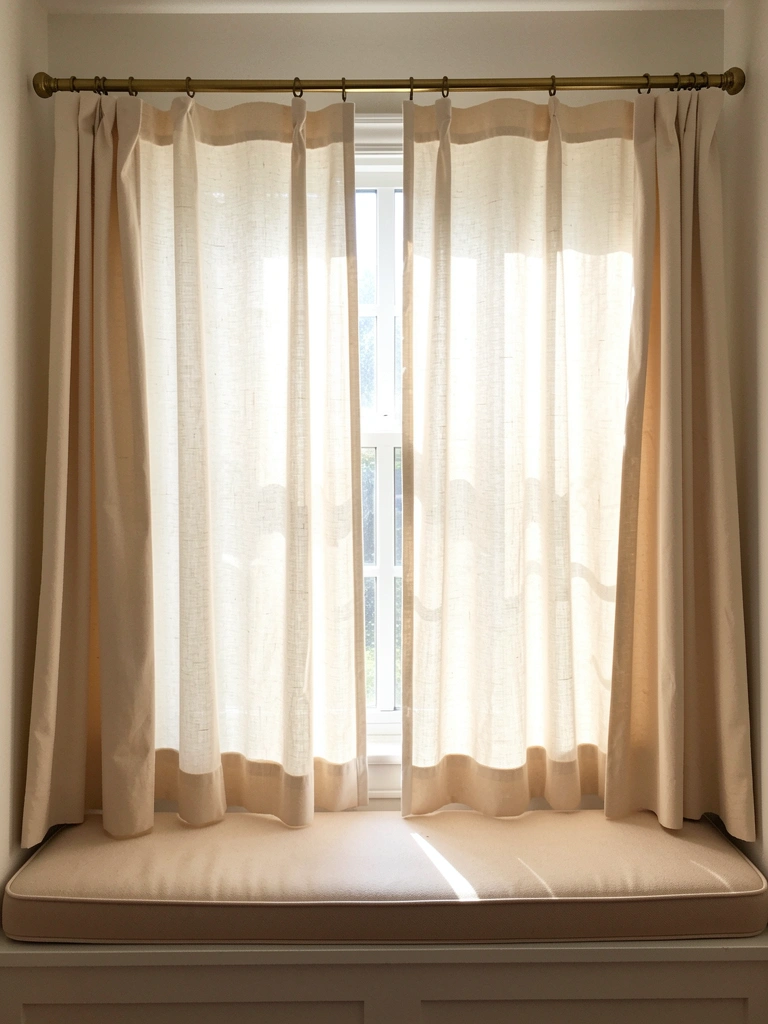
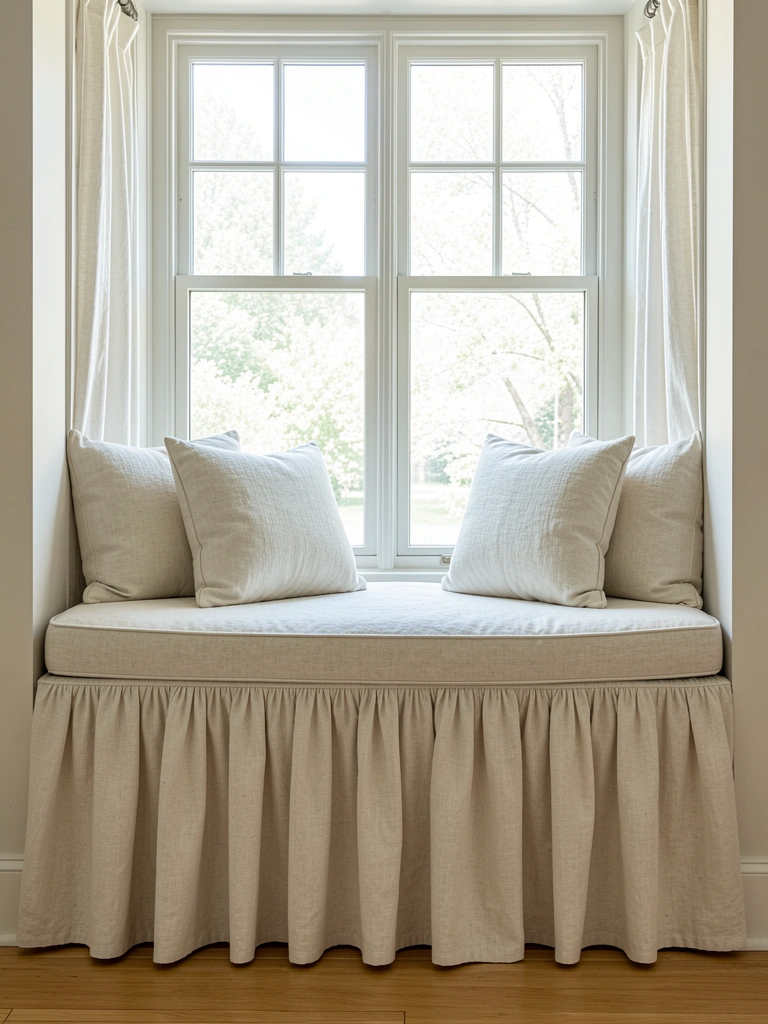
    22. Install Stone Window Sills and Surrounds

    Stone windowsills and surrounds add architectural detail while maximizing natural light opportunities. This is where indoor-outdoor connection meets textural elegance.

    Stone windowsill installation costs $500–$1,500 depending on window size and materials. Peel-and-stick stone options ($50–$200 per window) work for renters. Professional installation takes 1–2 days per window. Styling takes minutes—just add a small plant or candle to the sill.

    Your windows become architectural features rather than afterthoughts. Stone sills draw light and attention to your windows while adding textural interest. This detail becomes a natural place to showcase small plants and seasonal styling.

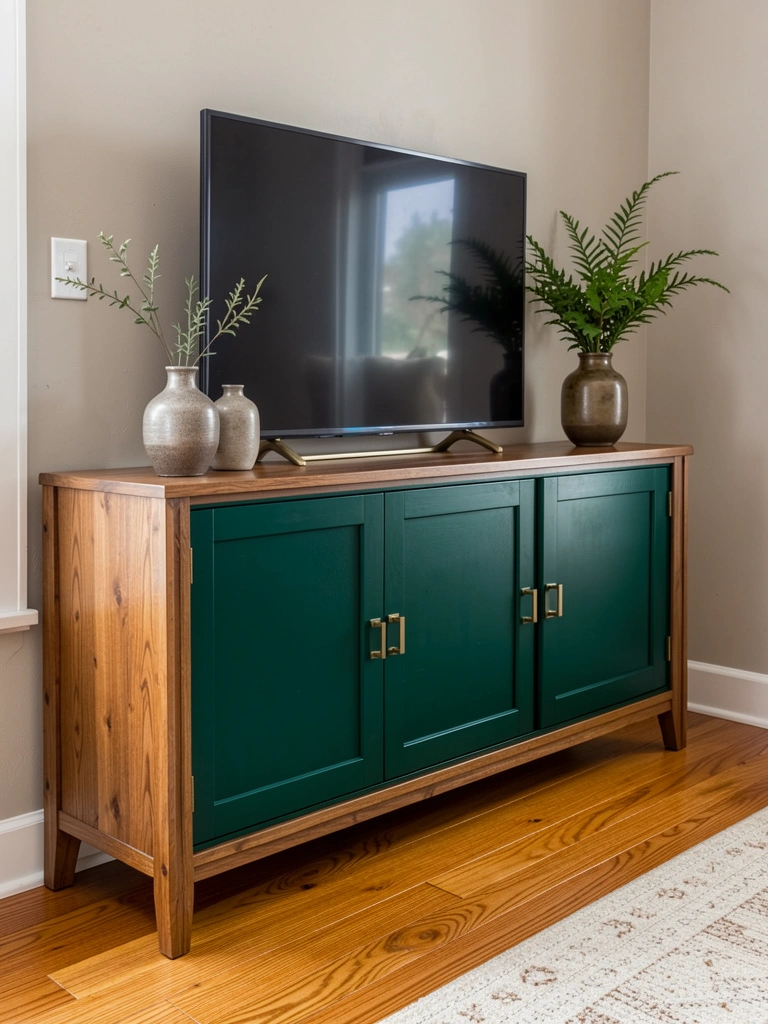
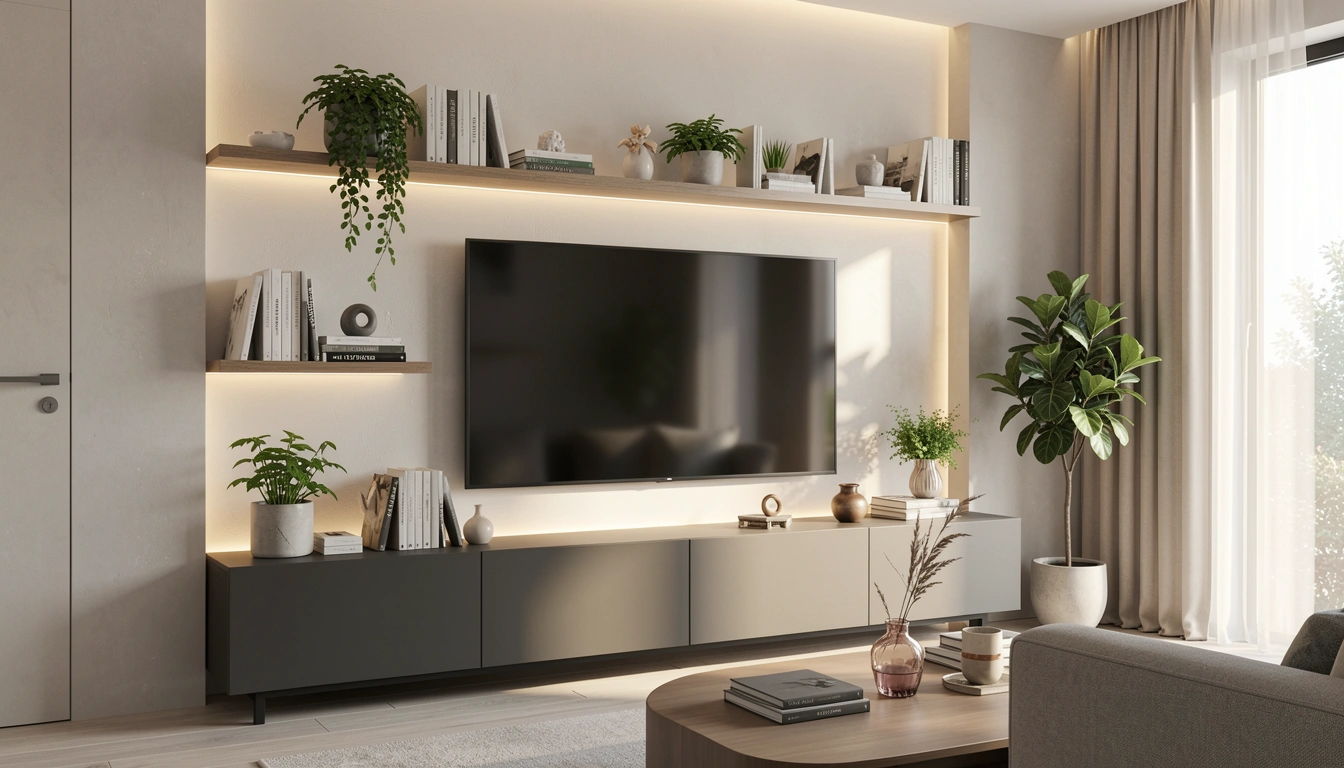
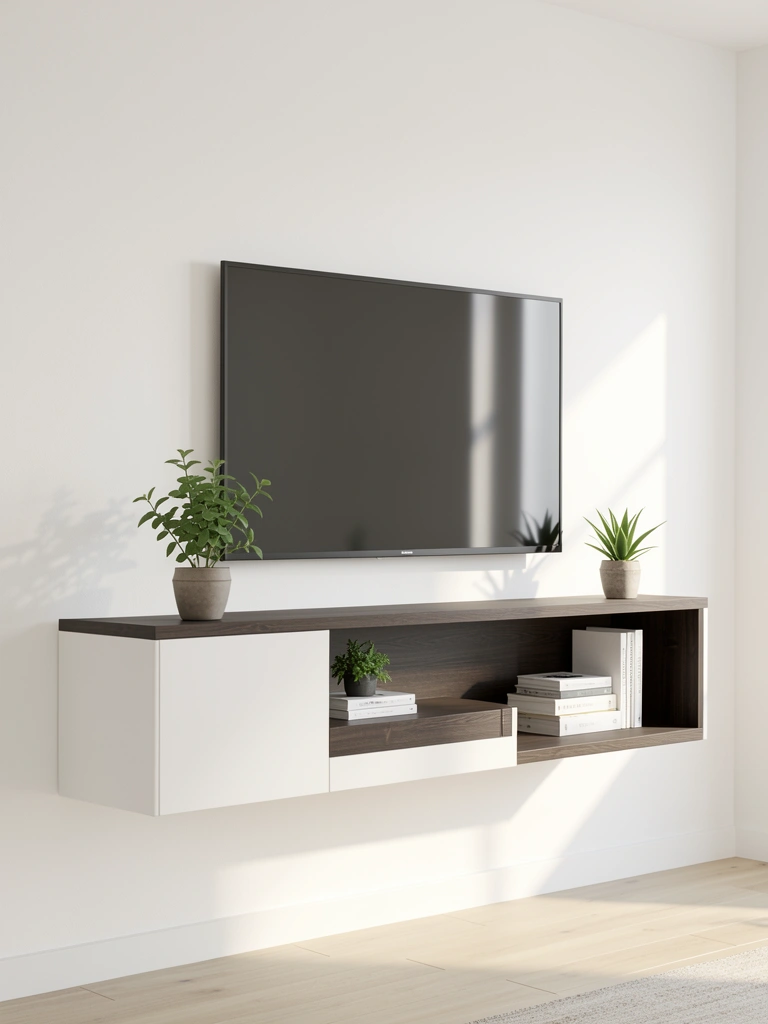
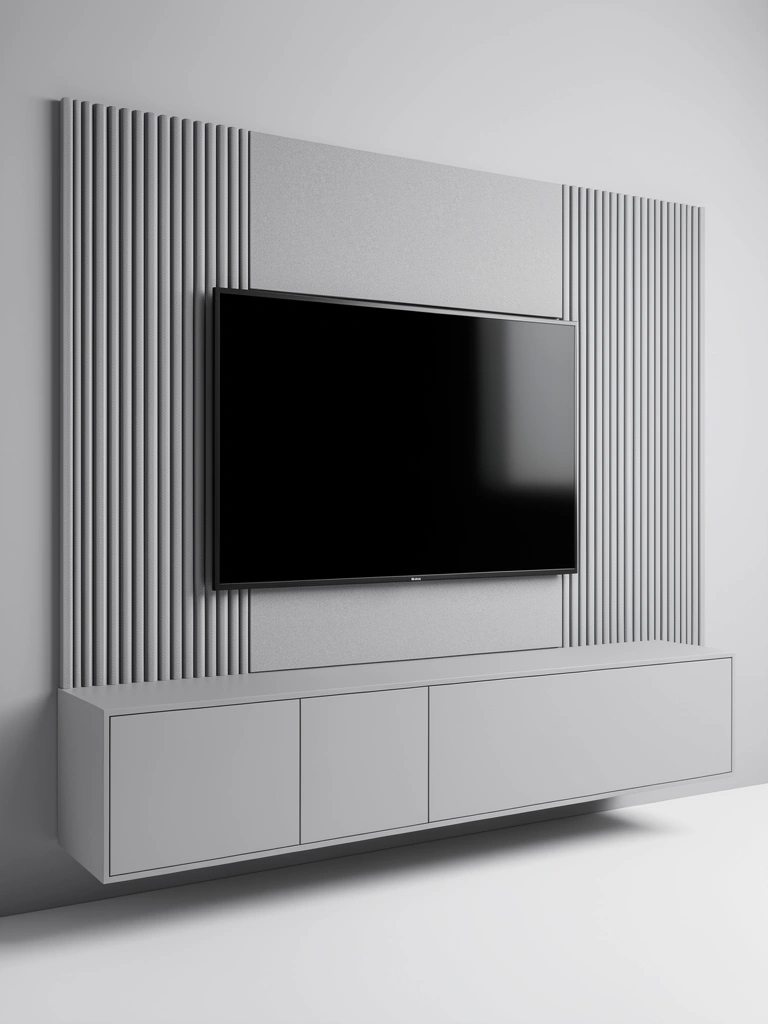
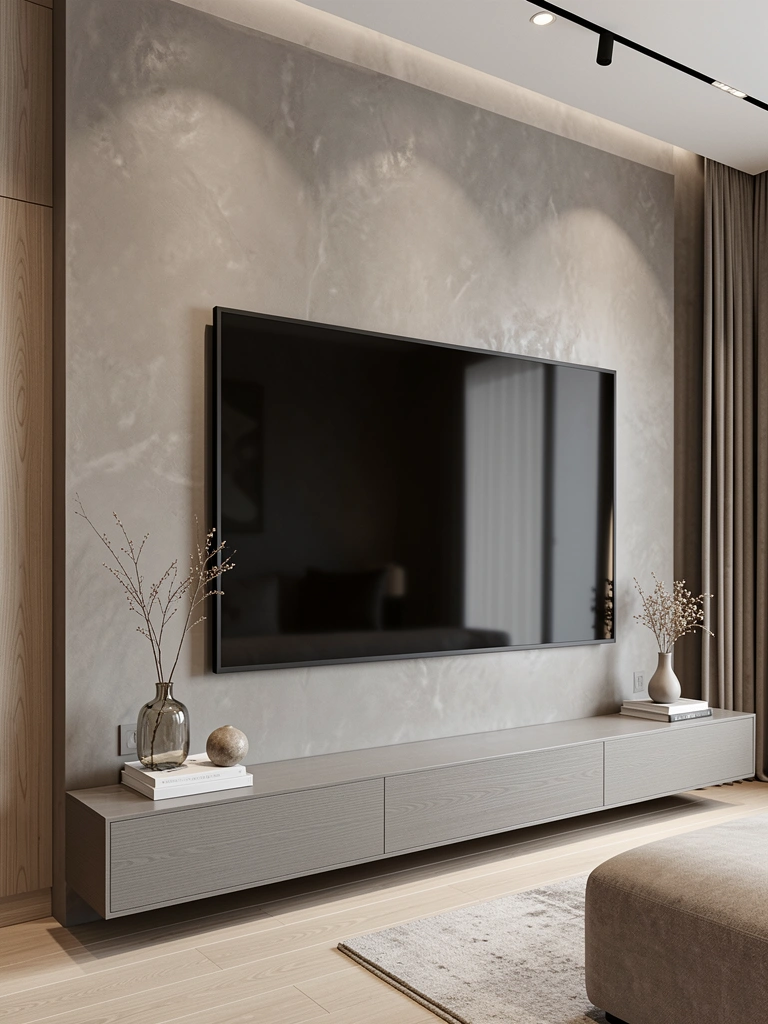
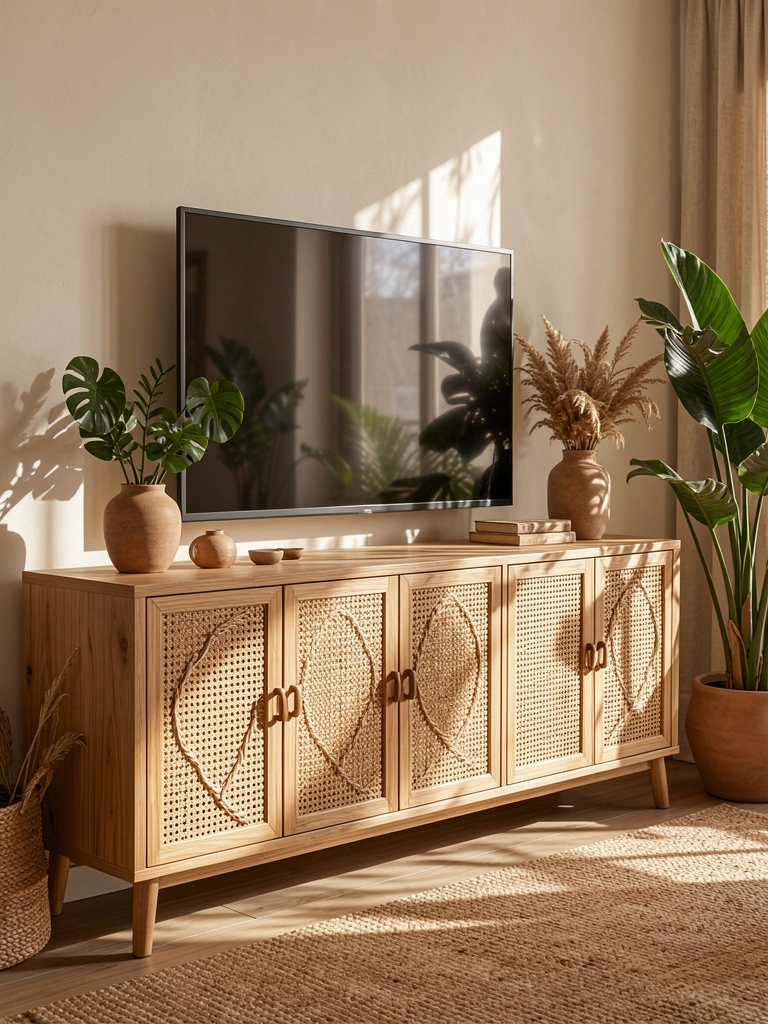
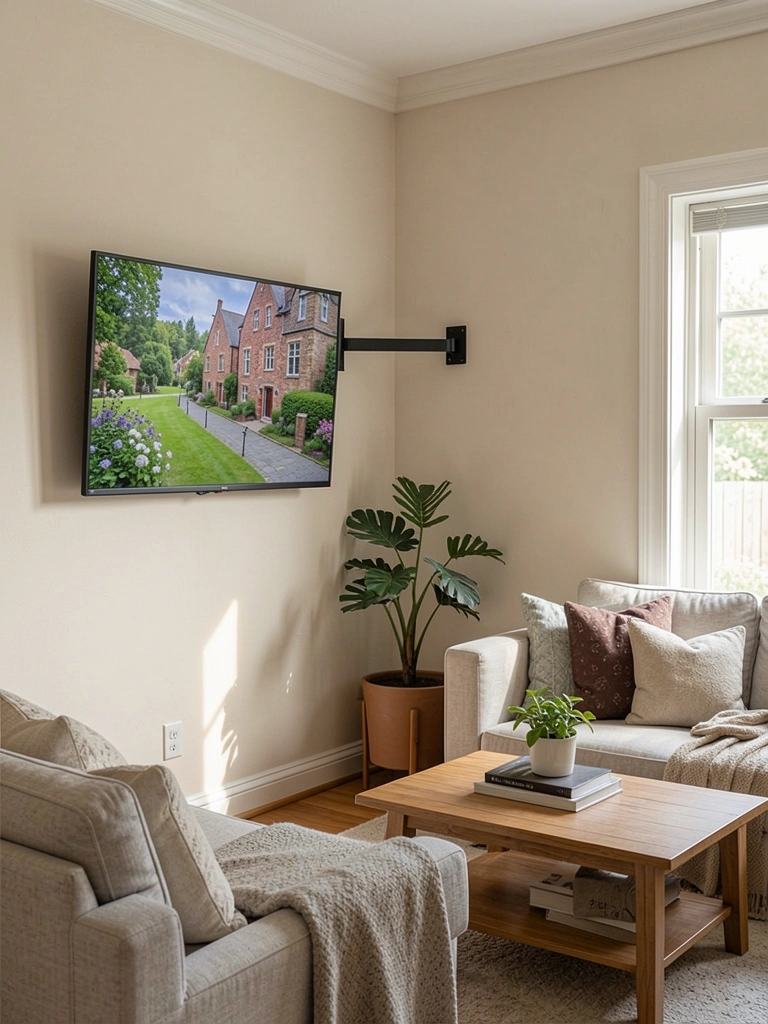
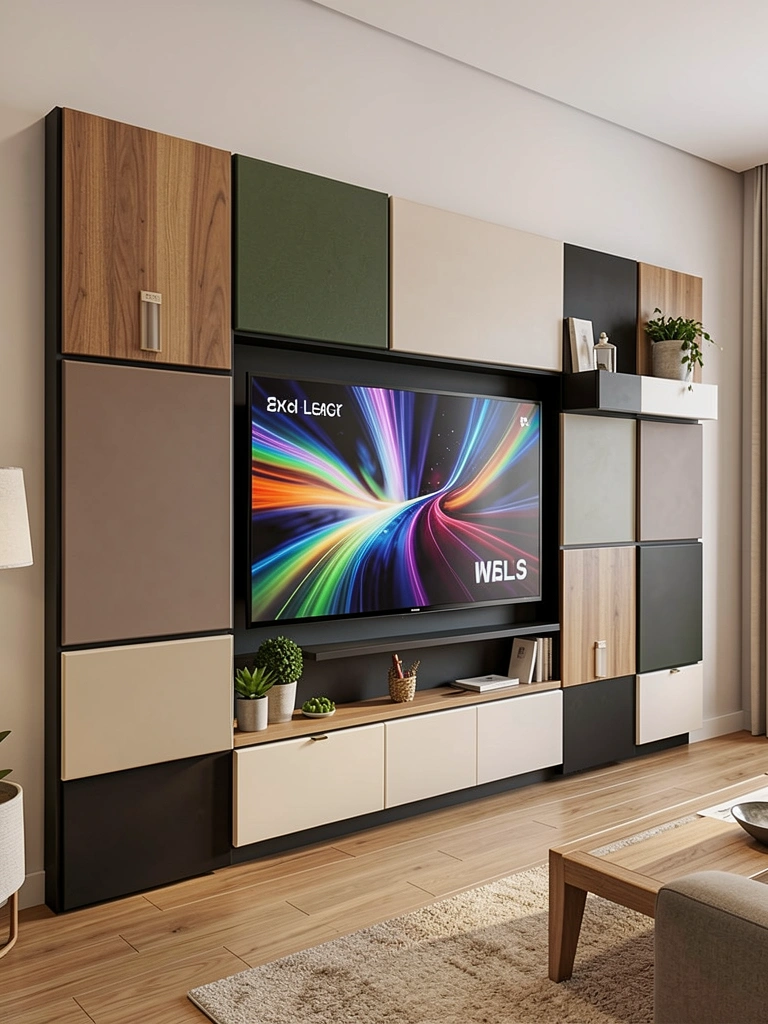
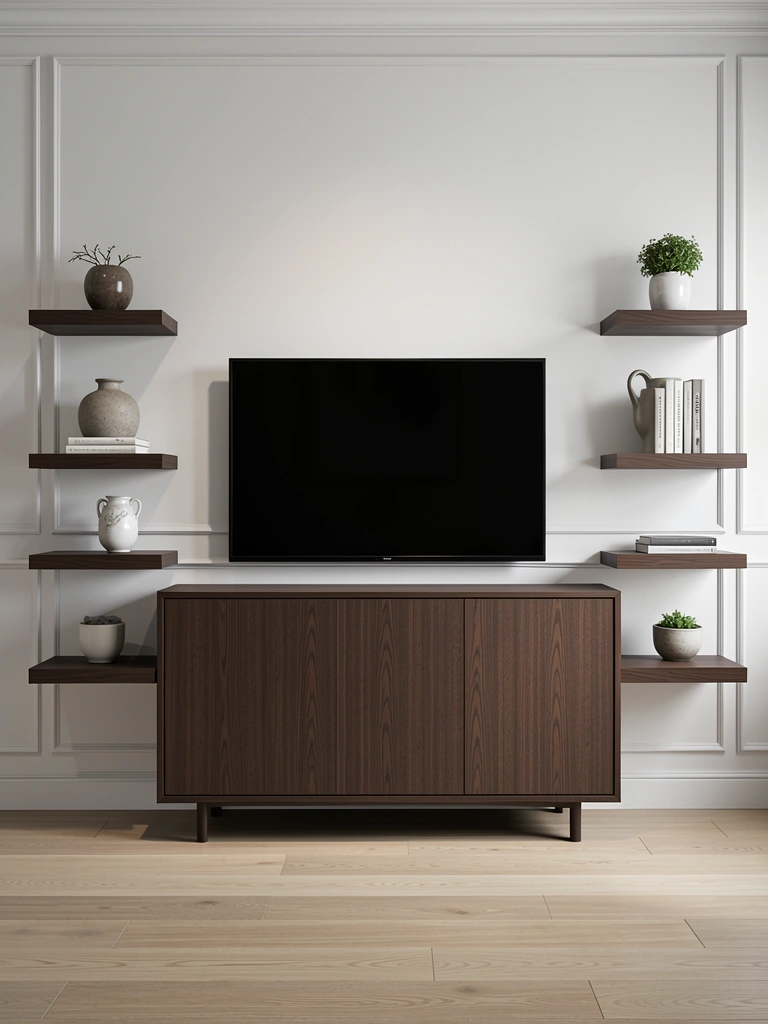
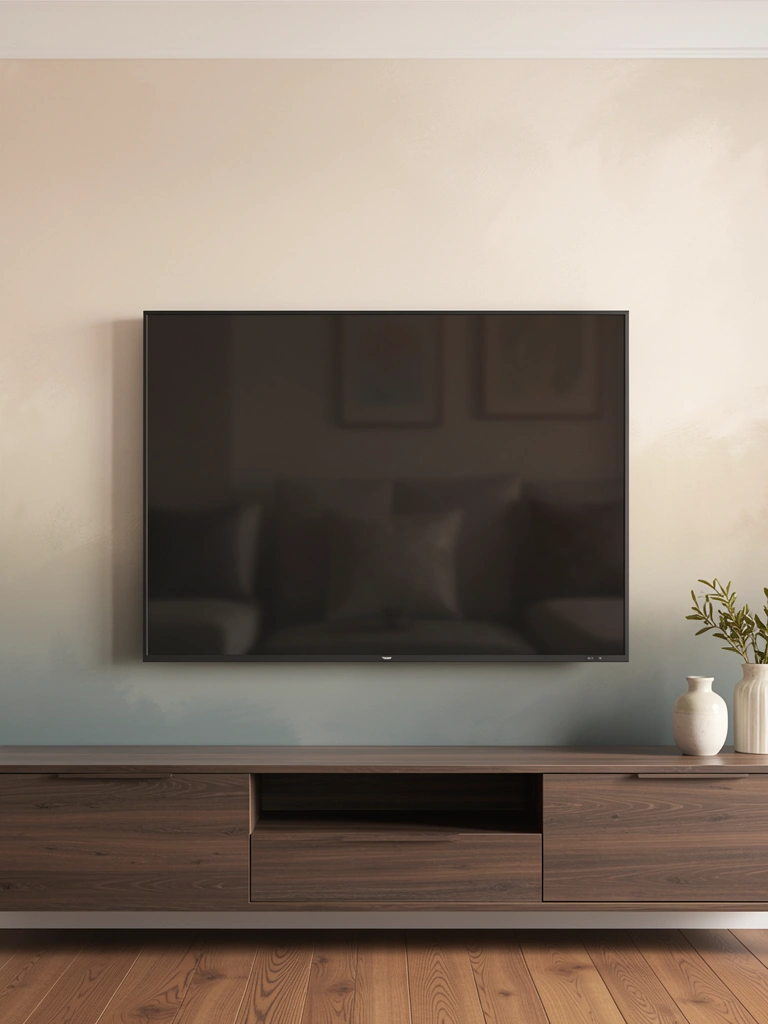
    23. Create a Stone-Based Media Console or TV Stand

    A stone-topped media console grounds your entertainment area while adding luxury-hotel vibes. This is functional decor that looks expensive and intentional.

    Stone-topped TV consoles cost $400–$1,200 from Wayfair, Article, or West Elm. DIY option: wooden base ($100–$300) topped with a large stone tile slab ($50–$150) sealed and adhered ($30 in supplies). Total DIY cost: $180–$450. Installation or assembly takes 2–3 hours.

    Your media area feels more like a designed focal point than just a TV shelf. Stone adds weight and sophistication that balances the visual heaviness of a flat-screen. This piece anchors your living room and deserves styling just like any other display.

    24. Add Stone to Your Bookcase Styling with Layered Objects

    Layering stone objects on bookshelves creates visual depth and textural interest that makes your styling feel sophisticated and collected. This is about strategic placement and contrast.

    Stone styling objects cost $10–$60 each: bookends ($15–$30), spheres ($10–$25), coasters ($8–$20), and small sculptures ($20–$50). Budget $100–$250 to fully style a large bookcase with multiple levels. Styling takes 45 minutes.

    Your bookshelves move from looking like storage to looking like curated display. Stone elements add visual weight and sophistication that transforms basic books into a gallery-like arrangement. This is the detail work that makes people ask, “Did you hire a designer?”

    25. Use Large Stone Tiles as Accent Flooring

    Large-format stone flooring defines spaces and adds permanent architectural interest. This is an investment that transforms your entire living room experience.

    Stone tile flooring costs $8–$25 per square foot installed ($2,400–$7,500 for a 300-square-foot room). DIY installation is possible but challenging. Rental option: large stone tiles arranged without adhesive create visual interest without permanence ($500–$1,500 in materials). Professional installation takes 5–7 days.

    Your living room gains permanence and luxury that’s impossible to fake. Stone flooring grounds the space and creates visual continuity with your accent walls or fireplace. This is a long-term investment that pays off in daily enjoyment and resale value.

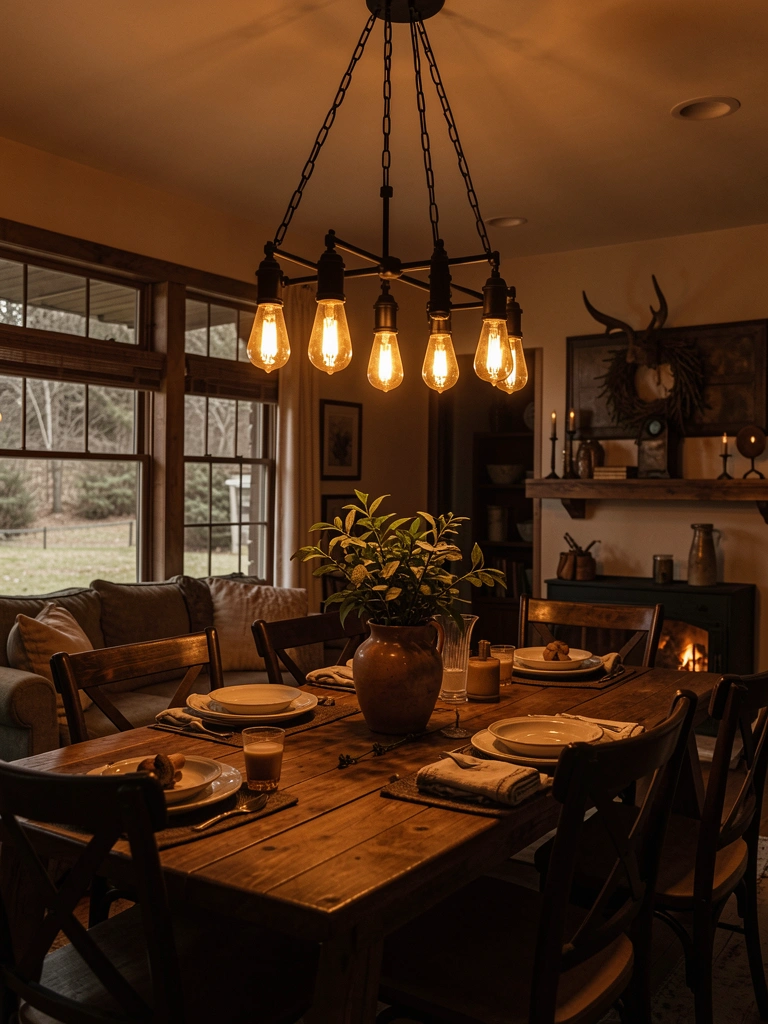
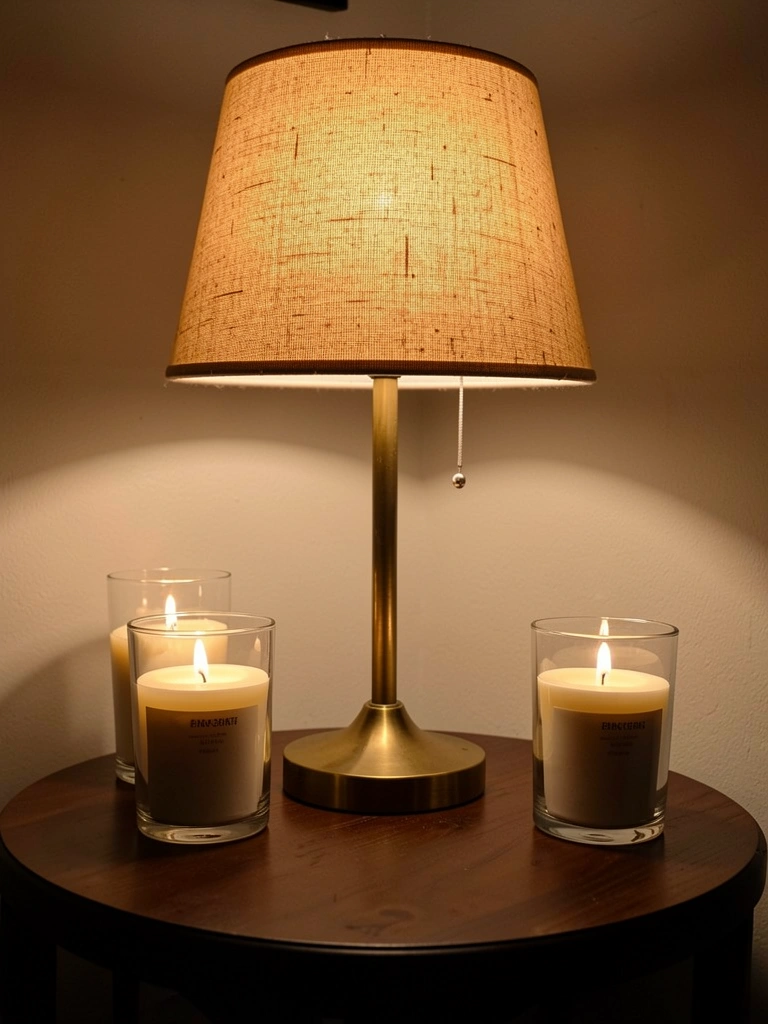
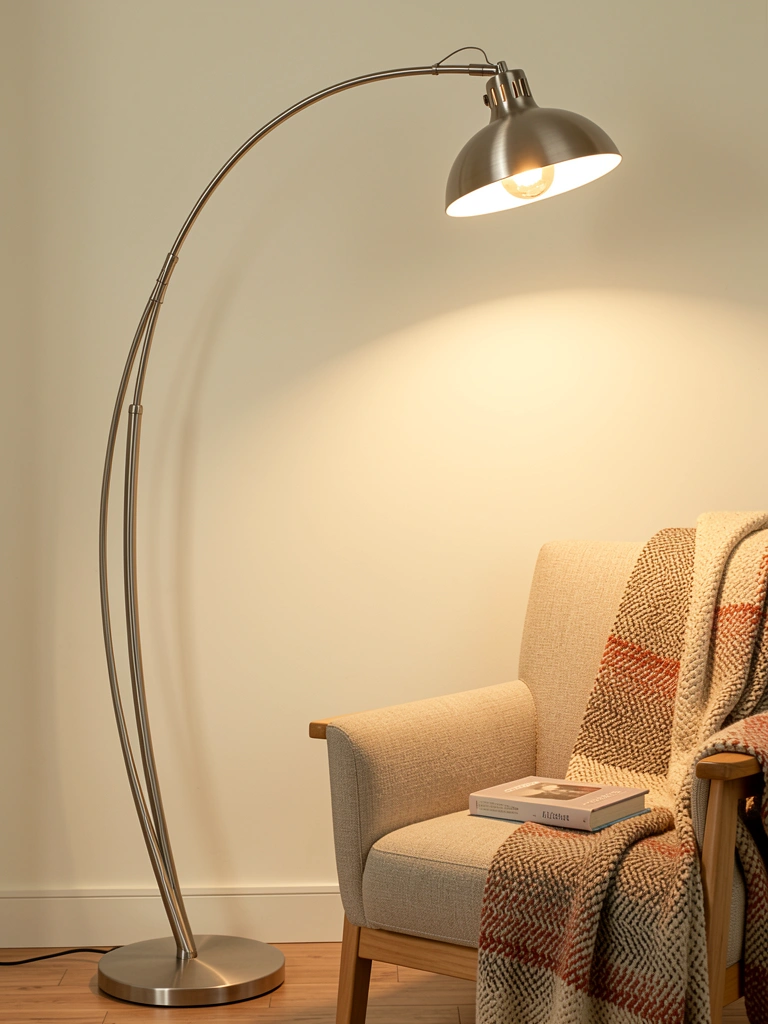
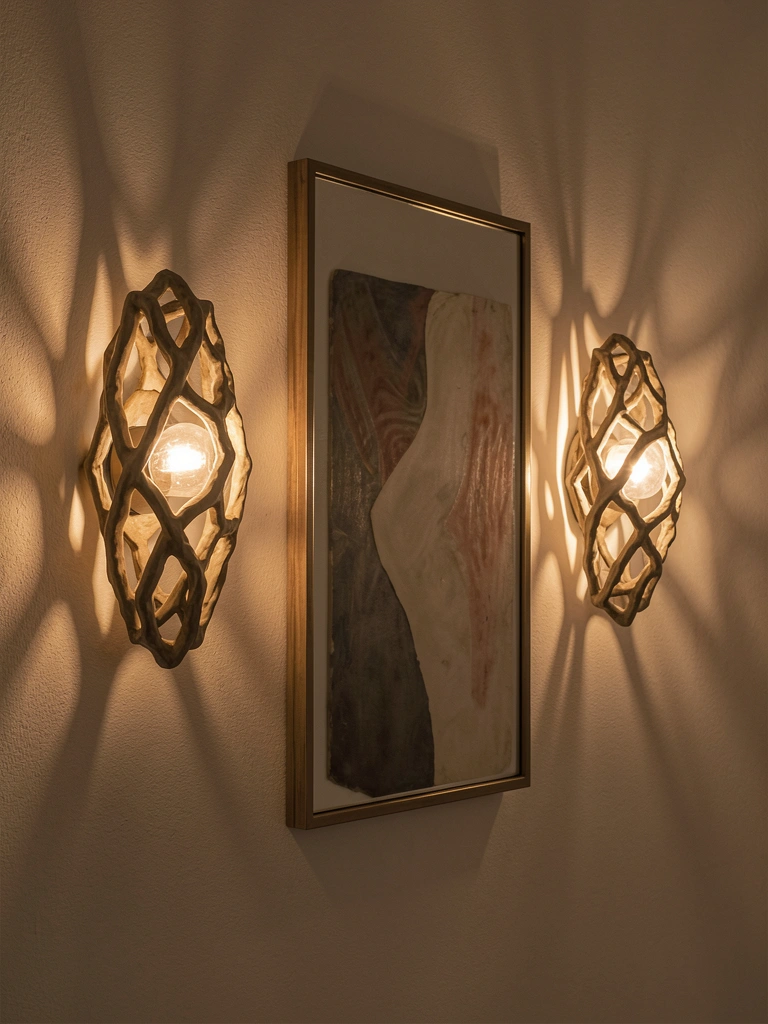
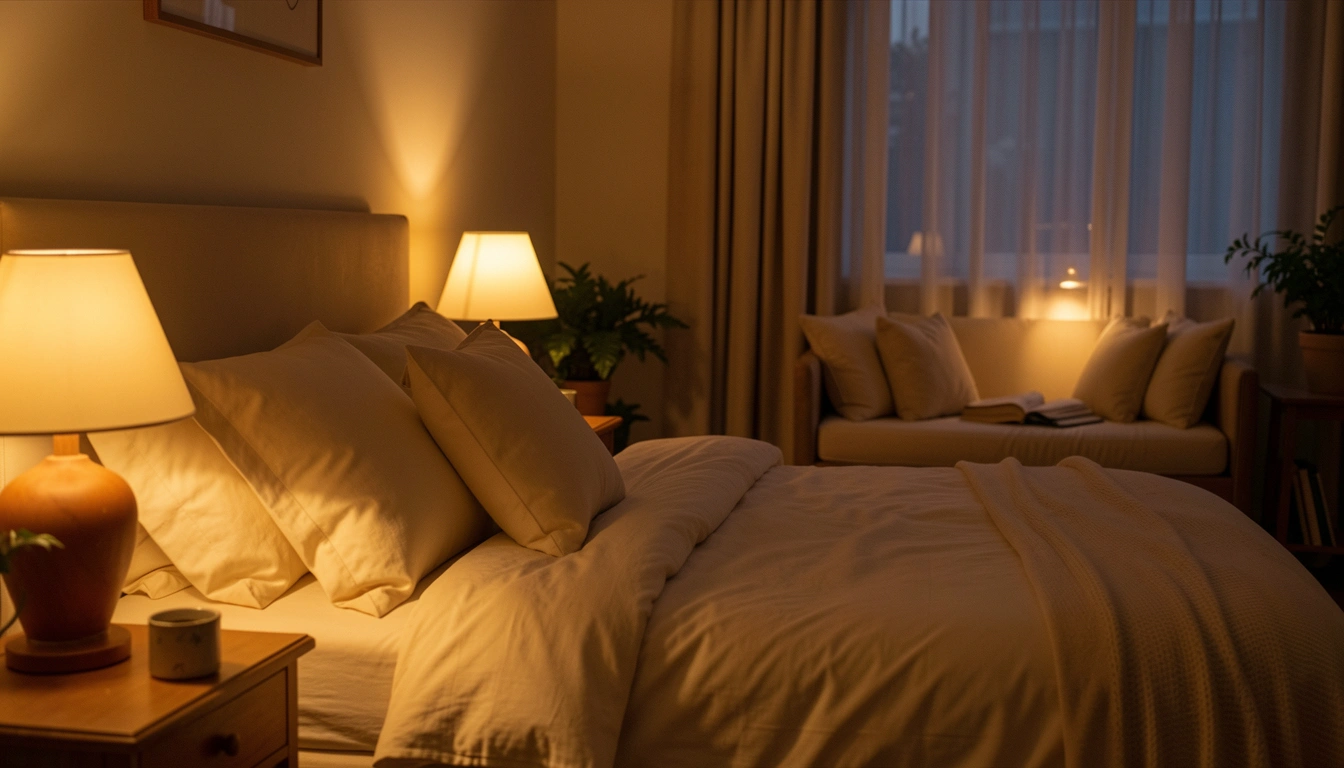
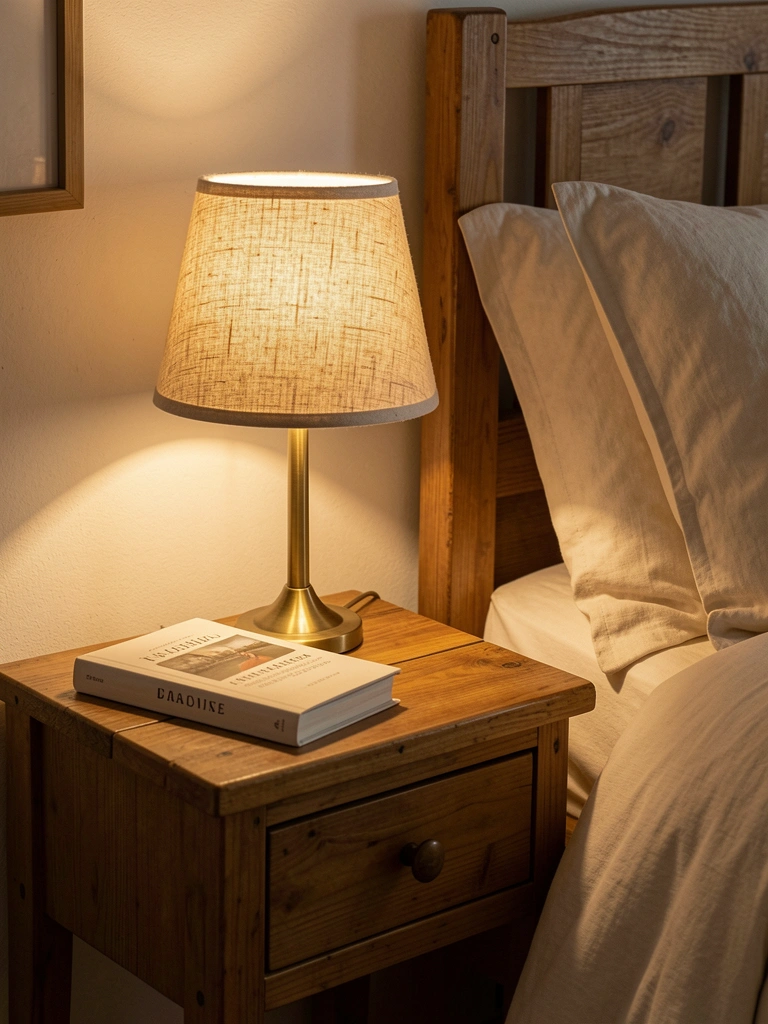
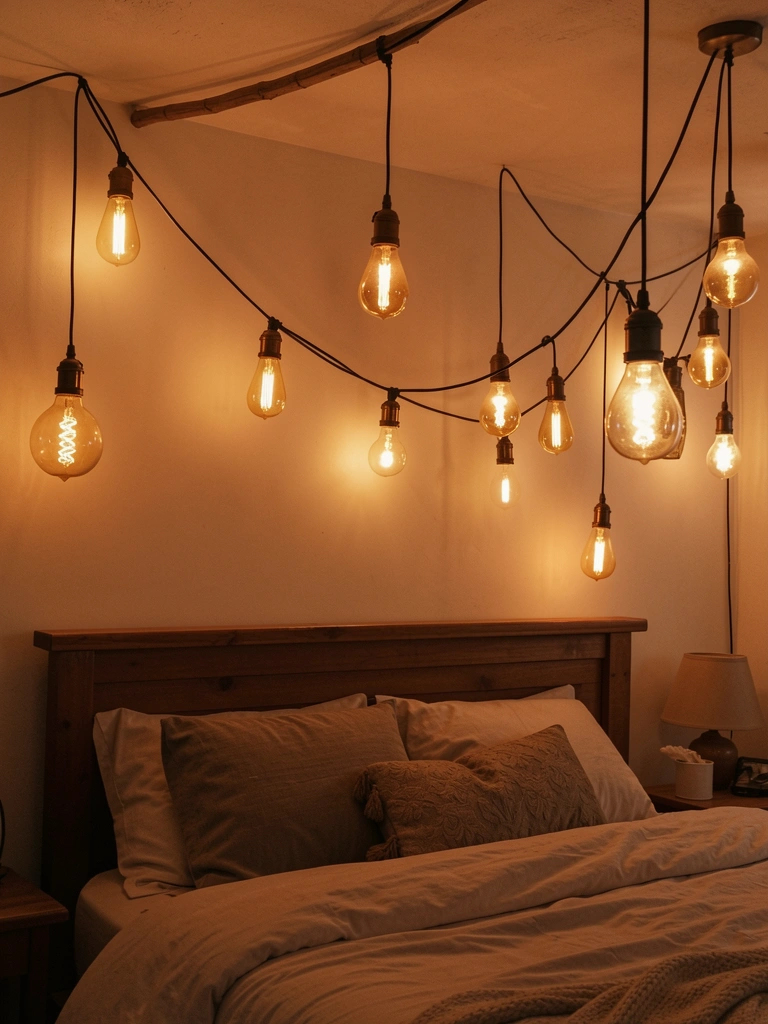
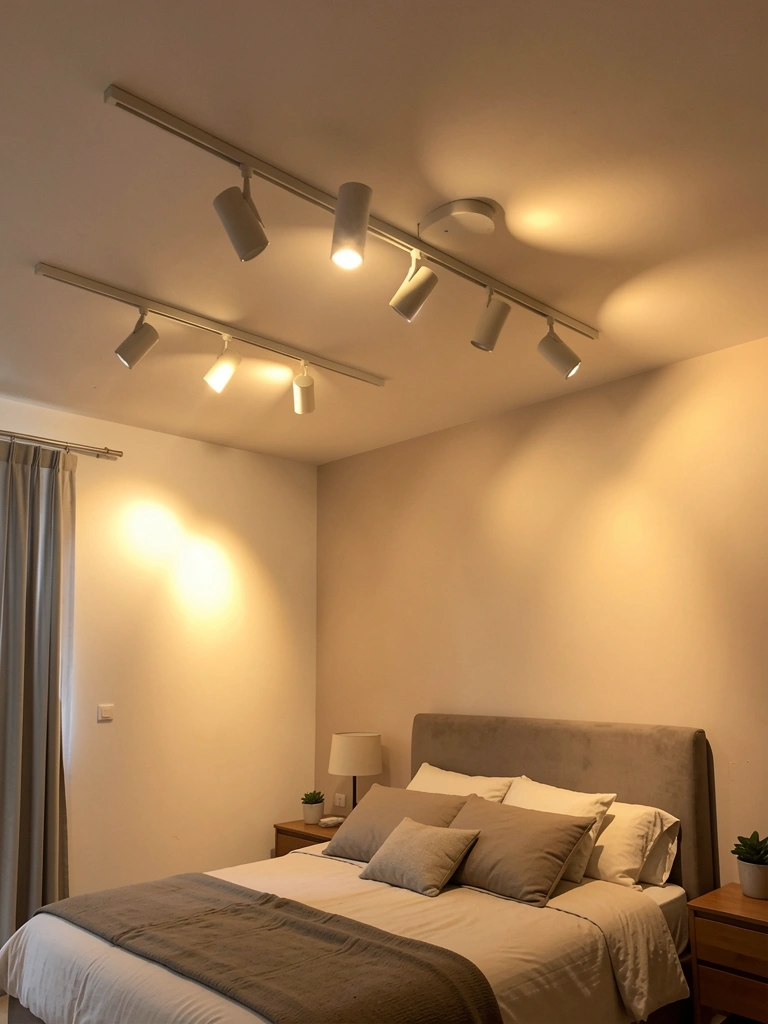
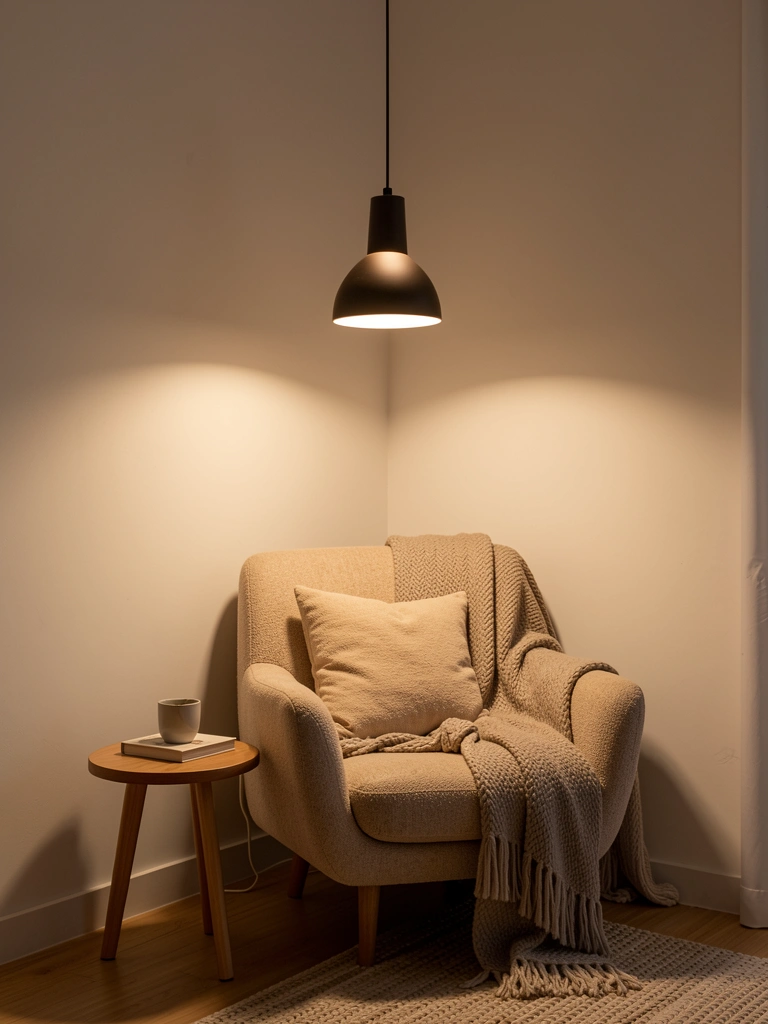
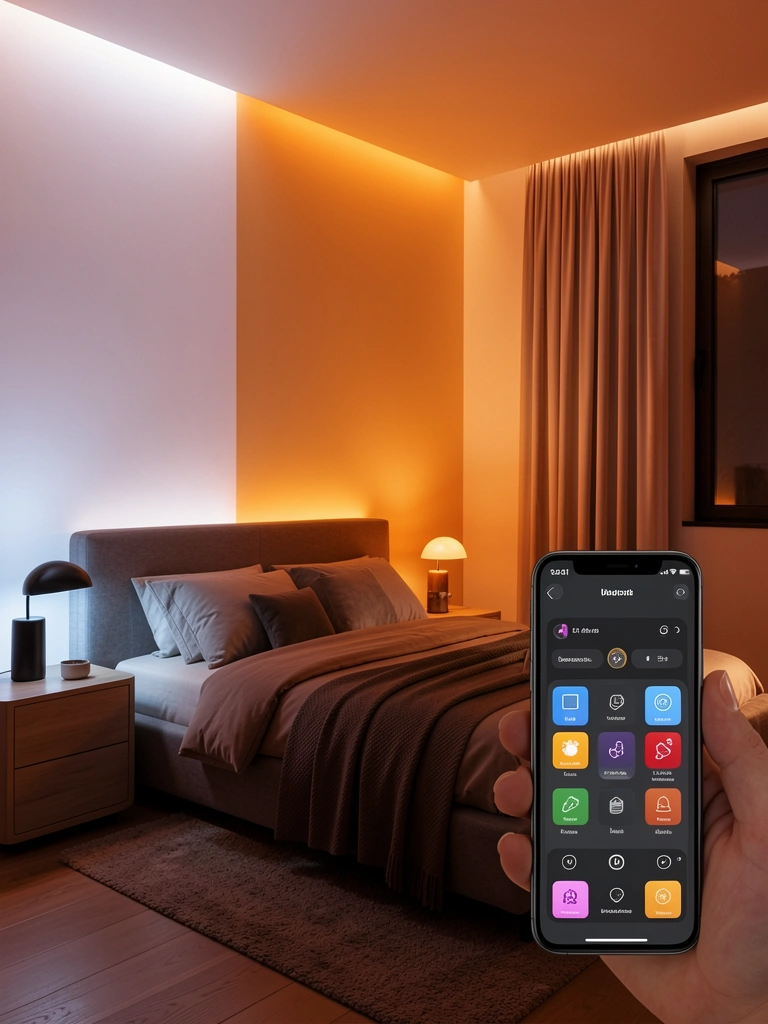
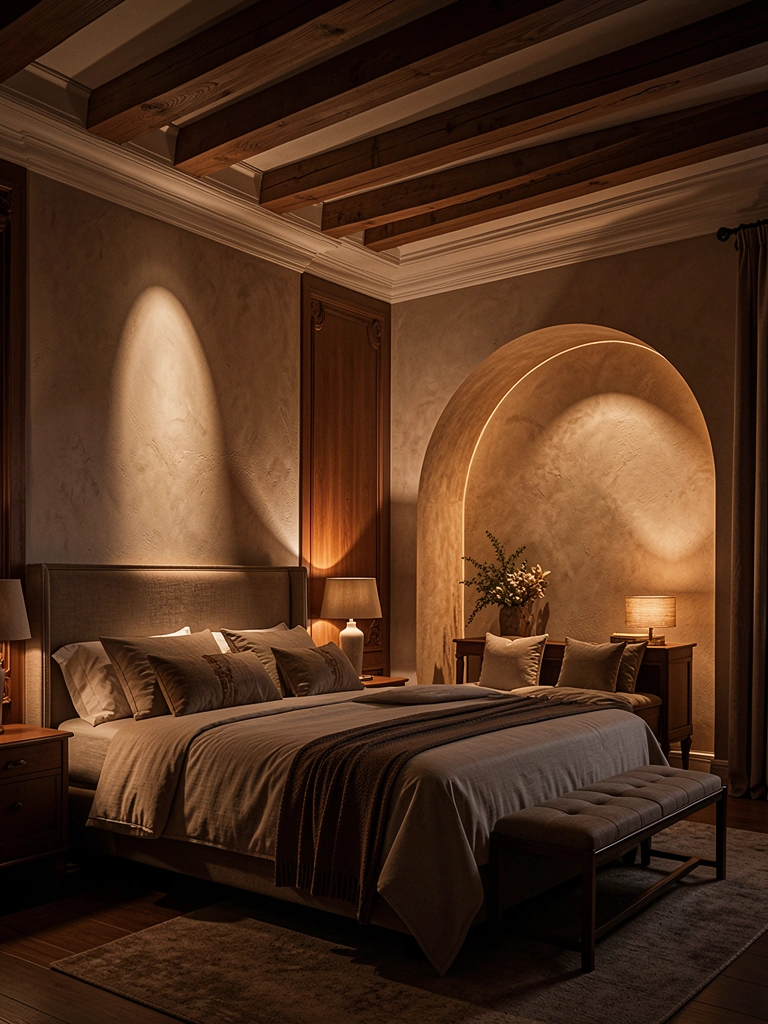
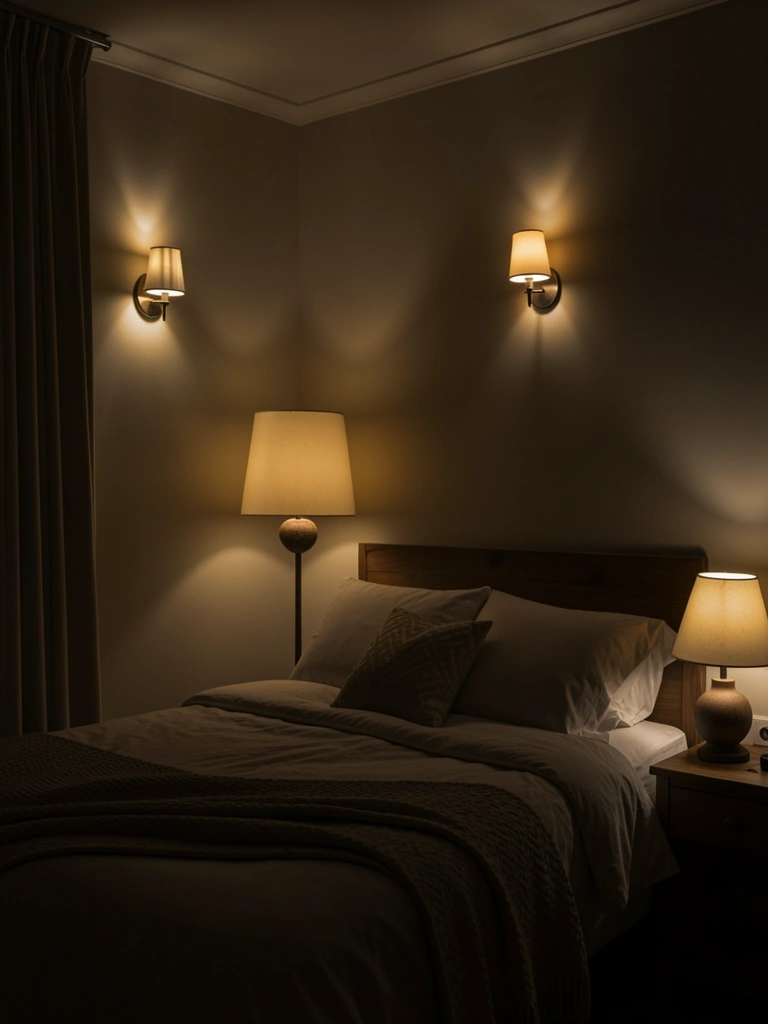
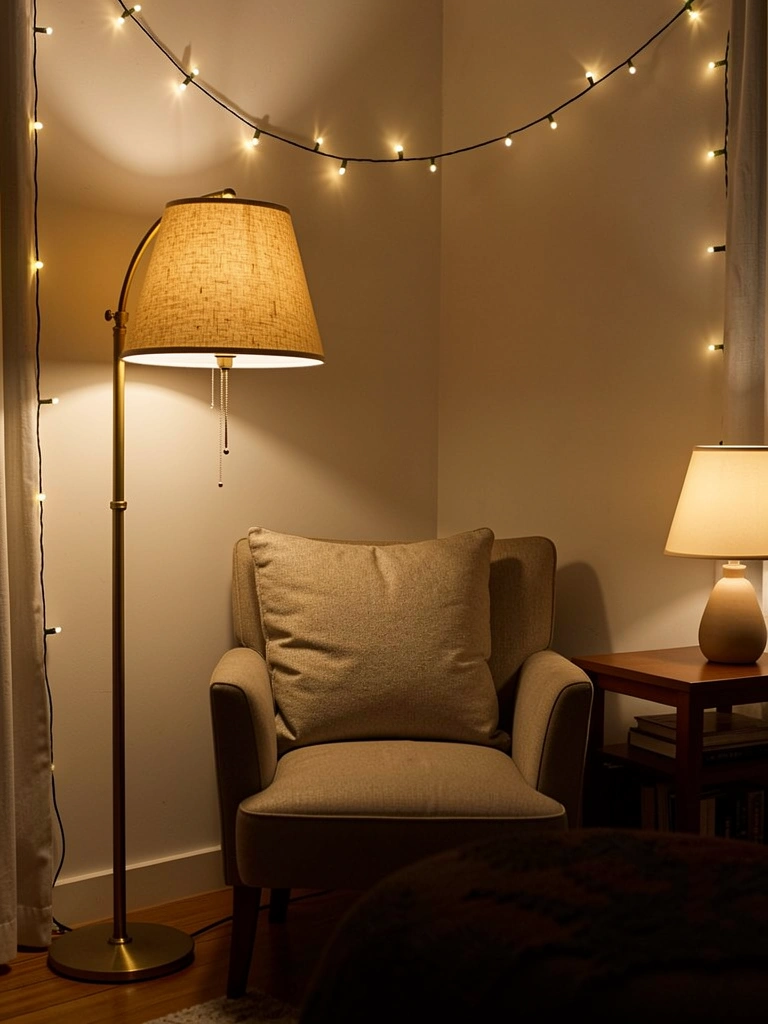
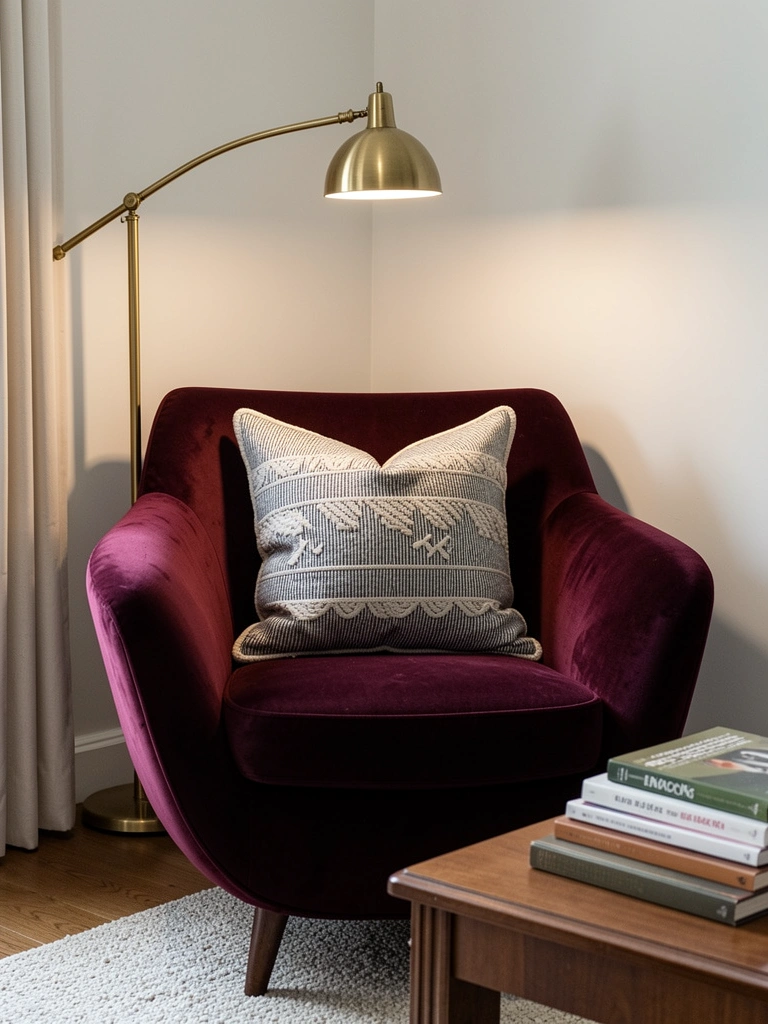
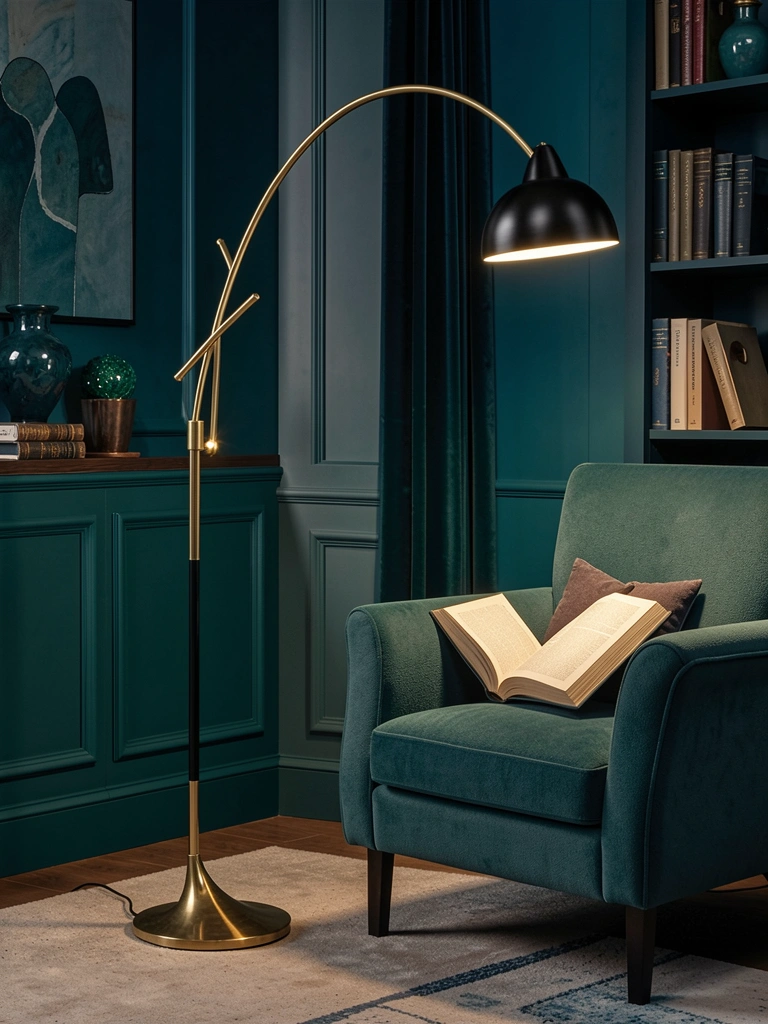
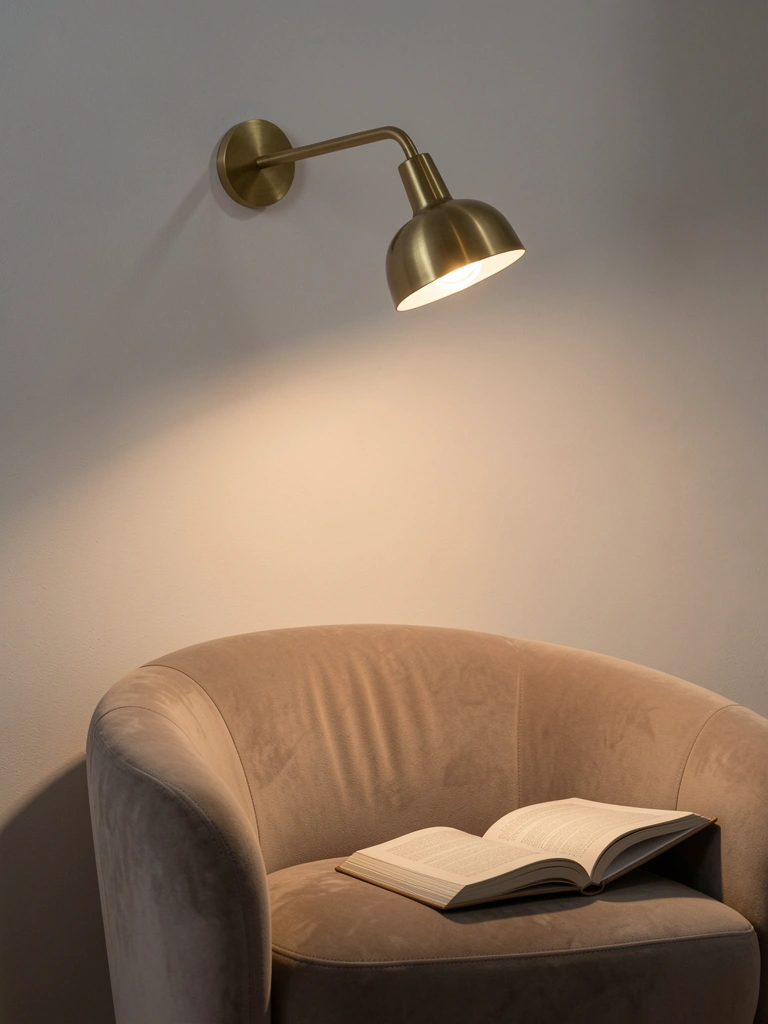
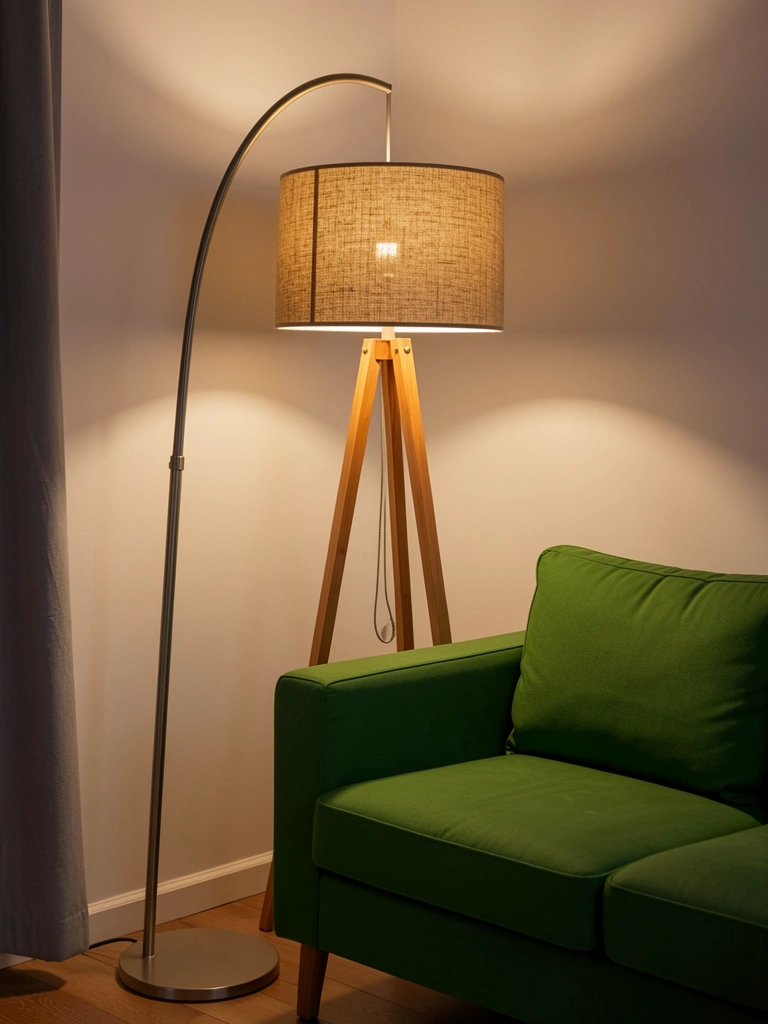
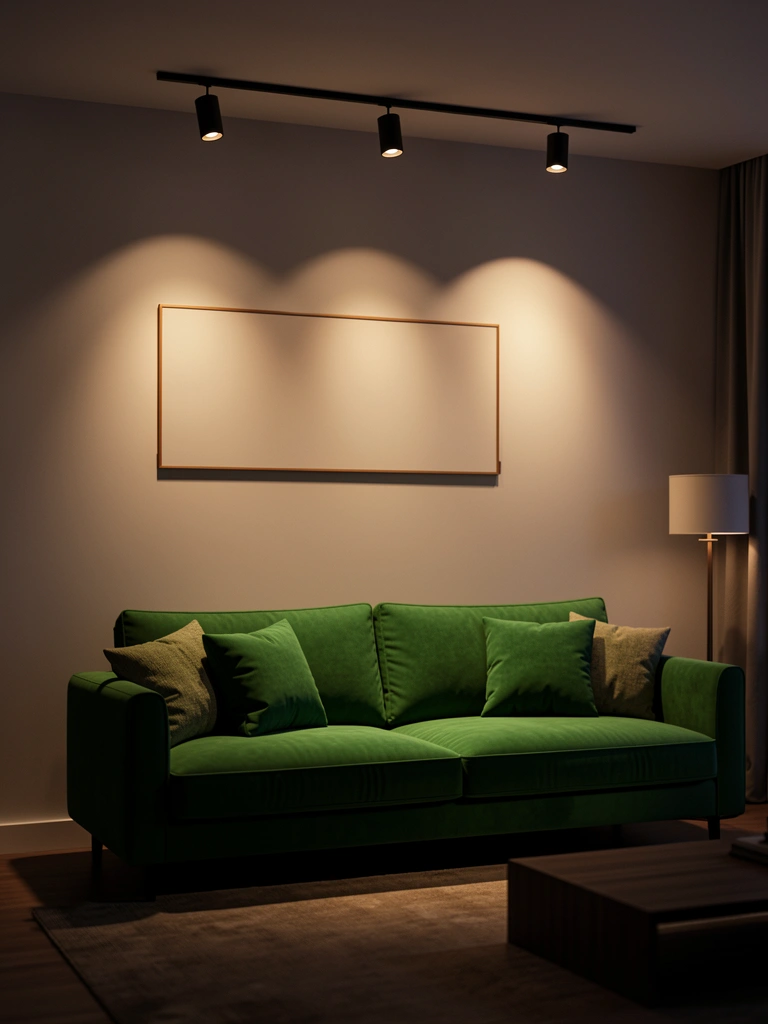
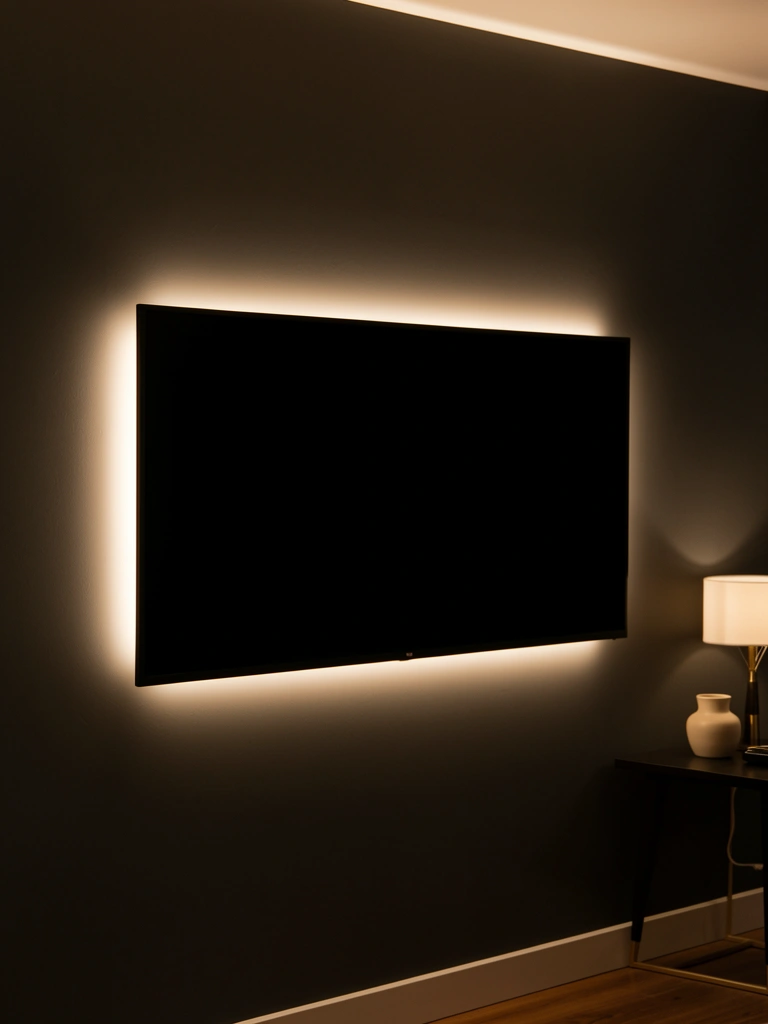
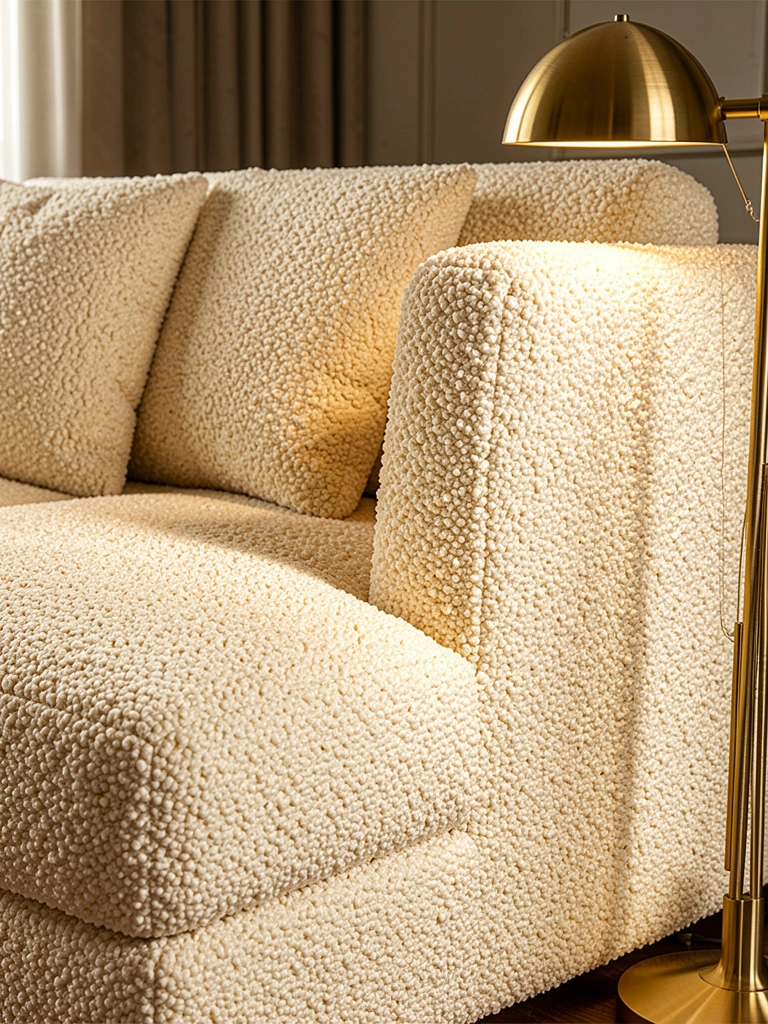
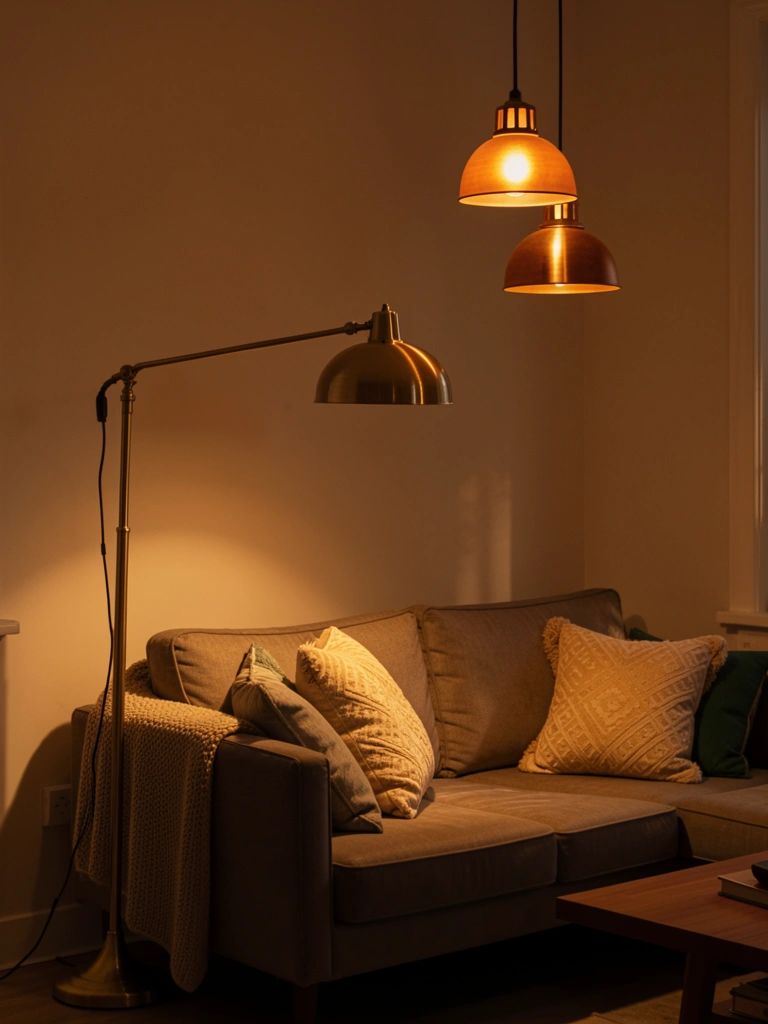
    26. Style Stone Elements with Warm Lighting for Ambiance

    Lighting is the secret ingredient that makes stone look its absolute best. Warm, directional lighting highlights texture and creates mood.

    Accent lighting options: picture lights ($30–$80 each), uplighting strips ($50–$150), or recessed lighting ($200–$500 to install). One to three well-placed lights ($50–$300 total) can transform how your stone looks. Installation takes 1–4 hours depending on complexity.

    Your stone features suddenly look dramatically more luxe and sophisticated. Warm lighting emphasizes texture, creates shadows that add dimension, and transforms your living room into a space that feels intentionally designed. The stone looks richer, deeper, and more dimensional with proper lighting.


    Save this post and start with one idea this weekend—even a small stone element makes a noticeable difference in how your living room feels. Which piece of stone is calling to you first?

  • 26 Farmhouse Living Room Ideas Filled With Rustic Charm

    26 Farmhouse Living Room Ideas Filled With Rustic Charm

    You’re probably scrolling through home decor feeds thinking, “I want that warm, welcoming farmhouse vibe, but I have no idea where to start.” The good news? You don’t need a complete overhaul to get there. Farmhouse style is about mixing vintage finds, natural materials, and cozy textures that make your living room feel like a retreat—not a museum. Whether you’re working with a tight budget or ready to invest in statement pieces, we’ve got 26 practical ideas that’ll bring authentic rustic charm into your space without the Pinterest-perfect pretension. From paint colors and lighting to furniture swaps and styling hacks, each idea is designed to work in real homes, with real families, on real timelines. Let’s create a living room you actually want to spend time in.

    1. Paint Walls in Soft, Warm Whites

    Farmhouse style starts with the right wall color—and it’s not stark white. Soft, warm whites and creams are the foundation of every cozy farmhouse room, creating a backdrop that lets vintage furniture and natural textures shine. These colors reflect light beautifully without feeling cold or clinical like bright white can.

    Paint all four walls in a warm white like Sherwin-Williams Alabaster or Benjamin Moore Swiss Coffee ($30–$40 per gallon). Application takes a weekend with basic supplies you probably have. The key is choosing a warm undertone rather than blue-based whites, which can feel sterile. Primer isn’t always necessary if you’re covering a similar color, but it saves paint. Test swatches on your walls and observe them at different times of day—lighting changes everything.

    Your walls become a calm canvas for everything else. This neutral backdrop makes it easier to bring in textures, patterns, and vintage finds without visual chaos.

    2. Add Exposed Ceiling Beams for Instant Texture

    Exposed beams are the signature farmhouse ceiling element—they add structure, visual interest, and that authentic rustic feel without actually needing to renovate. If your home doesn’t have real beams, faux beams are surprisingly easy to install and look equally stunning.

    You can buy faux beam kits from Home Depot or Lowe’s ($50–$150 per 10-foot beam) made from lightweight polyurethane or wood veneer. Installation takes a weekend with a level, drill, and basic tools. Apply them in parallel lines across the ceiling, spacing them 3–4 feet apart for proportion. Stain or paint them dark brown or weathered gray for that aged appearance. Real wood beams cost more ($200–$500+ per beam) but last forever and develop natural patina.

    Your ceiling suddenly has architectural character. The beams draw the eye upward and make the room feel intentionally designed rather than just default.

    3. Layer a Textured Area Rug Under Furniture

    Rugs anchor a room and add that crucial texture farmhouse style demands. A quality rug in natural fibers creates warmth and softens hard flooring—essential for that cozy, grounded feeling. Layering rugs also adds depth and makes spaces feel intentional.

    Choose a wool or jute blend in cream, gray, or soft taupe ($100–$300 from Wayfair, Ruggable, or Article). Size matters: go at least 8×10 if your living room is medium-sized, so furniture sits partially on the rug. Natural fibers like jute show texture beautifully and wear well over time. If you have pets or kids, washable rugs from Ruggable ($80–$200) are practical without sacrificing style. Layer a smaller vintage runner on top for added visual interest.

    Your living room feels grounded and cozier underfoot. The rug defines your seating area and adds the natural fiber warmth that’s central to farmhouse style.

    4. Swap Sleek Furniture for Chunky Wood Pieces

    Farmhouse furniture is substantial, sturdy, and often has visible wood grain and natural imperfections—the opposite of mass-produced, particle-board modern pieces. Solid wood furniture ages beautifully and becomes more charming over time.

    Scout for chunky wood tables and dressers at Facebook Marketplace, estate sales, or Craigslist ($50–$300 used) rather than buying new particle-board versions. If new pieces fit your budget, Pottery Barn, Arhaus, or Wayfair carry farmhouse-style wood furniture ($300–$800+). Look for visible wood grain, turned legs, and slightly distressed finishes. Mix wood tones—it’s not about matching perfection. If you find a piece you love but it’s the wrong color, refinishing or limewashing takes a weekend and costs under $50 in supplies.

    Your room instantly feels more substantial and collected. Real wood develops character and patina that makes your space look genuinely loved, not staged.

    5. Install Vintage-Style Lighting Fixtures

    Lighting sets the mood and farmhouse style thrives on warm, vintage-inspired fixtures that become focal points rather than hidden utilities. Chandelier and lantern styles feel more authentic than modern minimalist lights.

    Browse Etsy, Wayfair, or Home Depot for vintage-inspired chandeliers or pendant lights ($60–$300). Edison bulb fixtures with amber-tinted glass add instant warmth and that nostalgic glow. If you’re renting, plug-in pendant lights ($50–$150) hang from your existing ceiling fixture with minimal adjustment. Installation typically takes 30 minutes to an hour with basic tools. Choose black metal, bronze, or aged brass finishes over chrome or stainless steel for authentic farmhouse feel.

    Your space glows with character. Warm-toned lighting makes everything feel more inviting and highlights textures like wood and stone beautifully.

    6. Display Vintage Collections on Open Shelving

    Farmhouse style celebrates vintage finds and collections—they tell your story and add personality that new purchases can’t replicate. Open shelving is the perfect stage for this collected aesthetic.

    Install floating shelves ($30–$80 from IKEA or Home Depot) at varying heights on a living room wall or around a fireplace. Arrange collections with intention: group items by color or type, leave breathing room between objects, and layer different heights and depths. Mix old and new—a vintage pitcher next to a modern plant, antique books stacked with a current magazine. Thrift stores, estate sales, and Etsy are goldmines for authentic vintage pieces under $20 each. Dust monthly to keep collections looking intentional rather than cluttered.

    Your shelves become a gallery of memories and personality. Visitors see your taste and story rather than generic home decor.

    7. Bring in Woven Baskets for Hidden Storage

    Baskets solve the storage problem every cozy living room faces—where do blankets, throw pillows, and magazines live? Woven baskets add texture while keeping clutter invisible, staying true to farmhouse’s blend of function and style.

    Hunt for woven baskets at HomeGoods, Target, or TJ Maxx ($20–$80 each) in seagrass, rattan, or woven wood. Size them proportionally to your space: one large basket beside the sofa, smaller ones under a console or coffee table. Label them with hand-painted wood tags ($5–$15) for a rustic touch if you want clear organization. Mix basket styles—woven, wicker, wire—for collected-over-time authenticity. Baskets also dampen sound and soften hard flooring, making rooms feel warmer acoustically.

    Your living room looks magazine-ready even when it’s lived-in. Baskets hide the reality of family life while keeping everything within arm’s reach.

    8. Layer Throw Blankets and Pillows Generously

    The difference between a basic sofa and a farmhouse haven is layers of soft, touchable textiles. Throws and pillows add color, pattern, and that “curl up here” coziness farmhouse demands.

    Combine 5–7 pillows on your sofa in varying textures: chunky knit, linen, wool, cotton, velvet ($15–$40 each from Target, West Elm, or Wayfair). Drape one or two quilted or knit throws ($30–$80 each) casually over sofa arms or the back. Stick to a color palette of creams, grays, taupes, and one accent color like soft green or burgundy to avoid visual chaos. Natural fabrics like linen and cotton feel authentic to farmhouse style; synthetic fabrics can feel cheap. Wash throws monthly and rotate pillows to maintain shape.

    Your sofa becomes a refuge. People want to sit and stay, and your living room feels warm enough to live in, not just look at.

    9. Create a Focal Point with a Fireplace Mantel

    A fireplace mantel is prime real estate for farmhouse styling—it’s naturally a focal point where you can display collections, create seasonal arrangements, and add layers of visual interest. Even if you don’t use the fireplace, the mantel matters.

    Start with a large mirror or piece of artwork as your anchor ($50–$200). Flank it with matching brass or wooden candlesticks ($30–$60 per pair). Add height with stacked books, botanical prints, or vintage signage. Layer in smaller items like enamelware, glass bottles, or collected treasures. Keep one side of the mantel slightly more open to avoid a cluttered look. Change seasonal displays quarterly: fall leaves and pumpkins, winter garland, spring branches, summer botanicals.

    Your mantel becomes a conversation piece. Visitors stop and notice the thoughtful curation rather than just walking past a blank wall.

    10. Paint Cabinet Doors in Soft Jewel Tones

    Farmhouse style is evolving beyond all-white interiors, and cabinet doors are the perfect place to introduce rich, moody colors like emerald or burgundy. This adds depth and personality while keeping the overall aesthetic grounded and warm.

    Choose a color from the jewel tone family: deep emerald, forest green, burgundy, or even dusty navy. Sherwin-Williams Rookwood Dark Green or Benjamin Moore Hunter Green are popular choices ($30–$40 per gallon). Paint existing cabinet doors with furniture paint or chalk paint ($20–$30 per can), which requires minimal prep. Update hardware to brushed brass or vintage bronze ($5–$20 per pull) for a coordinated upgrade. Polyurethane topcoat protects the finish ($15–$25 per quart). Total project time: one weekend with drying time between coats.

    Your living room gains sophistication and visual interest. A statement cabinet becomes the room’s anchor while maintaining farmhouse warmth.

    11. Mix Wood Tones Intentionally, Not Perfectly

    Farmhouse interiors are built over years, not purchased all at once—so mixing wood tones is not just acceptable, it’s essential to the authentic aesthetic. The key is being intentional rather than randomly clashing.

    Choose a mix of at least three wood tones: one dark (walnut or dark oak), one medium (cherry or warm honey), and one light (pale oak or pine). Space them around the room so one tone doesn’t dominate one corner. Balance visual weight by placing heavier, darker pieces low and lighter pieces higher. If existing furniture is mismatched, you can unify with a common finish like limewash or stain ($20–$50 per can). Natural wood variation reads as authentic; too-perfect matching feels mass-produced.

    Your room looks collected and genuine. Guests see a curated space assembled with care rather than an Instagram aesthetic.

    12. Install a Shiplap Accent Wall

    Shiplap is the visual shorthand for farmhouse style—it adds texture, architectural interest, and that “cozy cabin” feeling instantly. You don’t need to shiplap every wall; one accent wall creates maximum impact for minimum effort.

    DIY shiplap costs $100–$300 in materials (Home Depot or Lowe’s carry prefinished shiplap boards) and takes a weekend to install with a nail gun and level. Hire a professional for $400–$800 if you’re not handy. Paint it white, cream, or soft gray for traditional farmhouse or darker colors for modern farmhouse. If you’re renting, removable peel-and-stick shiplap panels ($50–$150) exist but look less authentic—worth skipping unless you’re in a temporary space. Real shiplap holds value and stays with your home.

    Your room gets instant architectural character. Shiplap catches light and shadow beautifully, adding dimension that flat walls can’t provide.

    13. Add Vintage Mirrors for Depth and Light

    Mirrors serve double duty in farmhouse design: they bounce light around making rooms feel bigger and brighter, and vintage frames add instant character and collected authenticity.

    Scout estate sales, antique shops, and Facebook Marketplace for ornate or rustic-framed mirrors ($30–$150 used) rather than new reproductions. Lean larger mirrors casually against walls rather than hanging them—it’s more authentic and renter-friendly. Mix frame styles: wood, metal, painted finishes. Hang smaller mirrors as a gallery wall on one wall ($50–$200 for 3–5 pieces). Position mirrors opposite windows or light sources to amplify natural light. Clean mirrors monthly with vinegar and newspaper for spot-free shine.

    Your room feels brighter and more spacious. Vintage mirrors add genuine patina and character that new purchases can’t match.

    14. Create a Reading Nook with Wingback Chairs

    A dedicated reading corner turns your living room into a retreat within a retreat. Wingback chairs are quintessentially farmhouse—structured but cozy, timeless, and perfect for curling up with a book and coffee.

    Hunt for wingback chairs at estate sales, Facebook Marketplace, or thrift stores ($50–$300 used) and reupholster if needed ($200–$400 professionally, or DIY with fabric and a staple gun for $50). New wingbacks from Wayfair, Article, or Pottery Barn cost $300–$700. Pair with a small side table ($30–$80), a floor lamp ($40–$100), and a throw blanket. Position in a corner or by a window for natural light and quiet atmosphere. Add a small bookshelf nearby for easy reach.

    You create a designated sanctuary within your home. Your living room becomes more than gathering space—it’s a place for solitude and comfort.

    15. Style Floating Shelves with the Rule of Threes

    The “rule of threes” is a design principle that makes styling look intentional and prevents the “too much, too cluttered” problem many farmhouse rooms face. Grouping items in odd numbers creates visual rhythm and balance.

    Install 2–4 floating shelves at staggered heights. On each shelf, arrange 3–5 items grouped by theme or color—don’t spread items evenly. For example: one shelf gets a stack of three books, a small plant, and a single vintage bottle. Next shelf has three glass jars, a framed photo, and a woven box. Leave 30–40% of each shelf empty—negative space is as important as what you display. Vary heights and depths: tall items next to low ones, deep objects beside thin ones.

    Your shelves feel designed and thoughtful rather than randomly populated. Visitors notice intentionality and restraint, which is more sophisticated than maximalism.

    16. Incorporate Live-Edge Wood Shelving

    Live-edge wood brings organic, raw beauty to farmhouse interiors—those natural edges and wood grain variations are impossible to replicate with manufactured shelves, making them feel genuinely gathered rather than store-bought.

    Source live-edge wood slabs from Etsy, local woodworkers, or specialty lumber yards ($100–$300 per slab depending on size and wood type). Pair with industrial metal brackets from Home Depot or Etsy ($20–$50 per pair). Install at eye level where the wood’s natural beauty becomes the focal point. The irregular edges dictate shelf styling—keep items sparse and let the wood itself be the statement. Seal the wood quarterly with natural finish ($15–$25 per can) to prevent cracking.

    Your shelves become sculptural art rather than utilitarian storage. The natural wood variations tell a story that perfectly aligned manufactured shelves can’t.

    17. Hang Vintage Metal Signs or Farmhouse Art

    Vintage signs and farmhouse art anchor walls and add that nostalgic rural character that defines the style. They’re also affordable and easy to swap out seasonally.

    Hunt Etsy, estate sales, or antique shops for authentic vintage metal signs ($20–$80) or vintage agricultural prints. New farmhouse-style art from Wayfair, World Market, or HomeGoods costs $30–$100. Hang one statement piece or create a small gallery of 3–5 pieces. Leave significant white space around pieces rather than filling every inch of wall. Frame vintage posters ($20–$50 for basic frames) to elevate them. Rotate seasonal art quarterly to keep your room feeling fresh.

    Your walls become storytellers. Genuine vintage pieces carry history and character; new pieces styled well feel collected over time rather than purchased all at once.

    18. Layer Lighting with Table Lamps and Candlelight

    Farmhouse style thrives on warm, ambient lighting rather than harsh overhead lights. Layering multiple light sources creates the cozy, gathered atmosphere that makes farmhouse rooms feel like home.

    Add table lamps on side tables and consoles ($40–$80 each) in brass, bronze, or black metal with linen or burlap shades. Distribute at least 3–4 light sources around your living room for even, warm illumination. Scatter pillar candles or candlesticks ($5–$20 each) on tables and shelves—candlelight adds coziness that electric light alone can’t. Use warm-white bulbs (2700K) in all fixtures rather than cool white, which feels institutional. Dimmers on overhead lights ($20–$40) let you adjust ambiance throughout the day.

    Your room glows with natural warmth. Evening becomes your favorite time to spend in the space because it feels genuinely inviting rather than brightly lit.

    19. Add a Console Table Behind Your Sofa

    A console table behind the sofa is a farmhouse staple that serves double duty: it defines seating areas, adds display surface, and creates functional flow in open-concept living spaces.

    Look for wooden console tables with open shelves or drawers at Wayfair, Article, or thrift stores ($60–$300). Narrow depths (10–14 inches) work best for a floating-behind-sofa look. Style the top with a table lamp, framed photos, and a vase or sculptural piece. The shelf below holds baskets or decorative boxes. If you don’t have a sofa back against the wall, use a console to anchor an accent wall and create the illusion of separation in open-concept spaces. Paint or stain it to coordinate with other furniture.

    Your space gains structure and function. The console becomes a natural gathering point and display area without blocking sightlines through the room.

    20. Incorporate Stone or Brick Textures

    Stone and brick add geological weight and authenticity to farmhouse spaces—they reference farmhouse roots in rural, working landscapes where these materials were structural necessities, not design choices.

    If you have existing brick or stone, expose it by removing paint or drywall ($0 if DIY, $200–$500 professionally). Paint exposed brick in white or cream for a softer farmhouse look rather than leaving it raw. Add brick accents with removable peel-and-stick tiles ($50–$150 per section) around a fireplace or accent wall if you’re renting or reluctant to renovate. Real stone veneer costs more ($300–$800 installed) but lasts forever and develops patina. Balance stone with soft textiles and warm wood so the room doesn’t feel cold or industrial.

    Your room gains grounding and permanence. Stone and brick anchor a space and reference the authentic farmhouse structures that inspired this style.

    21. Create a Gallery Wall with Mismatched Frames

    A gallery wall of mismatched frames is quintessentially farmhouse—it celebrates imperfection and creates visual interest that a single piece can’t achieve. It also tells your personal story through collected photographs and art.

    Gather frames from thrift stores, estate sales, and IKEA ($3–$20 each) in wood, metal, white, natural, and mixed finishes. Create an asymmetrical grid rather than perfectly aligned rows. Include a mix of photographs, prints, botanical art, and even empty frames for visual interest. Lay frames on the floor first to plan arrangement, then hang. Mix frame sizes and orientations for authentic collected-over-time feel. Swap out photos seasonally or as your life evolves.

    Your wall becomes a personal timeline and conversation starter. Gallery walls feel lived-in and genuine in a way single pieces never can.

    22. Style Your Coffee Table with Layered Decorating

    Your coffee table is constantly visible, making styling intentional here pays dividends. Farmhouse coffee table styling is about balance—functional objects mixed with decorative elements, nothing too precious.

    Use the “tray trick”: place items on a small wooden or brass tray ($15–$30) to anchor the grouping. Stack 3–4 vintage books ($3–$10 each) as height variation. Add a candle, small plant, or decorative object. Leave one quarter of the table clear for actual use—holding a mug, remote, or open book. Change seasonal styling every 3 months. Don’t overstyle: a farmhouse table serves a family, not just looks pretty.

    Your coffee table becomes functional art. Visitors notice the intentional arrangement while the table remains usable for daily life.

    23. Install a Wooden Beam Mantel Over Your Fireplace

    A wooden mantel beam is the ultimate farmhouse focal point—it’s substantial, visibly aged, and creates architectural gravitas without major renovation. This is a statement piece worth investing in.

    Source reclaimed wood beams from salvage yards or specialty lumber suppliers ($200–$600 depending on length and wood type). Installation requires professional help ($300–$800) to ensure proper support and safety—this is not a DIY project. Paint the wall behind in shiplap or keep it simple. Style the mantel with symmetrical pairs of candlesticks, a centered mirror or artwork, and layered greenery. The beam itself is the statement; don’t over-style.

    Your fireplace becomes unmistakably farmhouse. A wooden beam mantel is an investment that increases perceived home value and becomes the focal point every guest notices.

    24. Add Vintage Enamelware for Color and Nostalgia

    Vintage enamelware is functional farmhouse decor: mixing bowls, colanders, pitchers, and canisters that were everyday necessities now become charming decorative objects. The worn finishes and nostalgic shapes are quintessentially farmhouse.

    Hunt Etsy, estate sales, flea markets, and antique shops for genuine vintage enamelware ($5–$25 per piece depending on age and condition). Look for chipped edges and faded paint—these signs of age add authenticity. Mix colors: white with red trim, blue and white, solid colors. Hang on open shelving, pegboard, or stack on a console. Group by type or color for visual coherence. Don’t refinish vintage pieces; the wear is the charm.

    Your space gains nostalgia and handmade character. Enamelware tells a story of everyday living better than any new purchase can.

    25. Create Contrast with Dark Wood Ceiling Beams

    Dark beams against light walls create visual contrast that makes rooms feel architecturally sophisticated while staying cozy. The contrast draws eyes upward and emphasizes ceiling height.

    If installing new beams, go dark: espresso, dark walnut, or even black for modern farmhouse ($100–$150 per faux beam from Home Depot). Paint existing beams dark if they’re currently light wood. The contrast creates drama and definition—it’s bold but reads as intentional, not accidental. Keep walls light to let beams be the focal point. This technique works especially well in open-concept living rooms where it creates visual separation without walls.

    Your room gains architectural interest and perceived height. Dark beams become a design statement rather than just structural necessity.

    26. Mix Old and New Furniture for Authentic Layering

    Farmhouse style is fundamentally about mixing periods and styles—nothing says “authentic” like a room that’s evolved over years with pieces from different eras. Too much new furniture feels sterile; too much old feels like a museum.

    Aim for a 60/40 or 70/30 mix: more vintage or antique pieces than new, but enough new pieces for comfort and function. Pair a new upholstered sofa with antique side chairs, a modern lamp with a vintage table. Let the room tell a story of different collecting moments. Don’t worry about matching perfectly; varied wood tones, finishes, and styles create authenticity that coordinated suites can’t replicate.

    Your room feels genuinely lived-in and collected rather than purchased from one catalog. Guests see a curated space that reflects real taste and patience rather than a staged advertisement.

    Save this post and try one styling idea this weekend—pick something small that excites you and see how it shifts your whole room. Which idea will you tackle first?

  • 23 Sculptural Decor Ideas That Add Artful Flair to Your Living Room

    23 Sculptural Decor Ideas That Add Artful Flair to Your Living Room

    Your living room has so much potential—but flat, predictable furniture can make it feel forgettable. Sculptural pieces are the secret weapon designers use to add personality, visual interest, and that “wow factor” without a full renovation. Whether you’re drawn to flowing curves, geometric forms, or organic shapes that feel like art, these 23 ideas show you exactly how to bring artful flair into your space. We’ll mix high-impact statement pieces with budget-friendly options, DIY projects, and styling tricks that work for renters and homeowners alike. Ready to make your living room look like a curated gallery? Let’s explore the pieces and placements that create real magic.

    1. Invest in a Curved Statement Sofa

    A curved sofa anchors your entire room while delivering instant style and comfort. Curved silhouettes soften hard architectural lines and make spaces feel more intentional and spa-like.

    Search for curved or rounded sectionals at IKEA ($400-$800), Article ($800-$1,500), or West Elm ($1,200-$2,500). Measure your space first—curved sofas need breathing room. The investment takes one week to deliver, but you’re looking at a 5-10 year piece that defines your aesthetic. If budget is tight, try a curved loveseat instead, or layer a curved reading chair nearby for the same effect.

    The beauty of a curved frame is how it naturally draws people into conversation and makes gatherings feel cozier. You’ll notice how the space flows better once you have that organic anchor in place.

    2. Add a Sculptural Arc Floor Lamp

    Sculptural arc lamps double as functional lighting and modern art—they create visual height and movement without taking up floor space. These pieces feel like gallery installations but work hard for your reading nook.

    Budget options run $80-$150 at Target or Amazon; mid-range ($150-$400) at West Elm or Wayfair include designer finishes; investment pieces from brands like Gubi or Muuto hit $400-$800. Assembly is 10-15 minutes. Position it behind a chair or beside a side table so the curve reads as sculpture, not clutter. Look for arcs in matte black, brass, or sculptural concrete finishes for maximum impact.

    Once installed, that graceful arc becomes a focal point that anchors the corner. Guests always comment on it first—it’s the kind of piece that makes your room feel intentionally designed.

    3. Layer Abstract Sculptural Wall Art

    Three-dimensional wall art catches light and shadow differently than flat prints, adding depth and sophistication to your walls. Sculptural pieces create visual interest and give your living room that curated gallery feel.

    Mix media by pairing a metal wall sculpture ($60-$150 at Urban Outfitters or Etsy), a textured resin piece ($40-$100), and a geometric wood art installation ($50-$200). Total investment: $150-$450 for a high-impact grouping. Hang at eye level (57 inches from floor to center) and use Command strips for renter-friendly mounting. Asymmetrical layouts photograph better and feel more dynamic than symmetrical rows.

    Your eyes now have somewhere interesting to land instead of just blank walls. The play of light across these pieces changes throughout the day, keeping the room feeling fresh and alive.

    4. Style with Curved Side Tables

    Rounded side tables replace sharp corners and soften the rigid feel of modern rooms. They tuck into spaces awkwardly and add artful geometry that complements curved furniture.

    Look for options at Target ($80-$150), Article ($150-$400), or luxury brands like Norm Architects ($400-$800). Marble, wood, and sculpted metal all work beautifully. Installation is instant—just position and style your top with a plant, candle, or book stack. For renters, a $60-$120 option from Wayfair works just as well as a pricier investment.

    The moment you replace a boxy table with a curved one, the whole corner feels more intentional. It’s a small swap that reads as thoughtful design everywhere you sit.

    5. Hang a Sculptural Mirror with Organic Frame

    Sculptural mirrors multiply light, expand the visual space, and add dimensional art to your walls—they’re functional and beautiful. Organic or wavy frames feel contemporary while reflecting natural elements into your room.

    Budget option ($50-$150): IKEA’s curved wood frames or Wayfair finds. Mid-range ($150-$400): West Elm or CB2 sculptural pieces. Investment ($400-$1,000+): Artisan mirrors from independent makers on Etsy or design showrooms. Mounting takes 20 minutes with proper wall anchors. Position above a console or credenza to maximize its reflective and decorative impact.

    A sculptural mirror becomes a room’s second focal point. It bounces natural light deeper into your space and frames the room’s best angles, making everything feel larger and more curated.

    6. Display Ceramic Sculptural Vessels

    Ceramic vessels in sculptural forms bring handmade artistry and organic texture to your shelves and surfaces. They feel like gallery pieces but work as accessible home décor.

    Source from Etsy makers ($30-$150 per piece), local pottery studios ($40-$200), or retailers like Schoolhouse Electric ($60-$300). Group odd numbers (3, 5, 7) at varying heights for visual rhythm. No installation needed—just arrange on shelves, sideboards, or console tables in asymmetrical clusters. Mix textures: smooth curves with dimpled finishes, matte with glazed surfaces.

    These pieces spark conversation and give your room personality you can’t buy off-the-shelf. They age beautifully and become meaningful objects in your space.

    7. Choose a Sculptural Coffee Table Base

    Sculptural table bases draw the eye downward and keep your table from disappearing visually. A striking base adds architectural interest and becomes a design statement, not just furniture.

    Search Article, West Elm, or Wayfair for bases ($200-$600); pair with a stone or glass top. If you have an old table, consider replacing just the base for a $150-$300 refresh (available on Etsy from artisans). Installation is one afternoon. Choose forms in bronze, blackened metal, or natural wood that echo other materials in your room for cohesion.

    Now when people sit around your table, they notice the craftsmanship underneath. It’s functional sculpture that becomes a talking point and grounds your seating arrangement.

    8. Layer Sculptural Throw Pillows

    Pillows with dimensional quilting, pleats, or sculptural textures add depth and visual interest to your seating. They’re easy to swap and swap again, making them a renter-friendly way to experiment with artful layering.

    Mix textures by pairing knit pillows ($30-$80 at Target or H&M Home) with pleated linen ($40-$100 at Schoolhouse Electric) and quilted options ($35-$90 at CB2 or Etsy). Layer 4-6 pillows per sofa in a mix of sizes (24×24, 18×18, 16×16 inches). Swap them seasonally in 5 minutes—no tools needed. Play with warm neutrals, then add one bold jewel tone for personality.

    The moment you layer dimensional pillows, your seating area looks intentionally styled instead of bare. They create visual texture that photographs beautifully and makes sitting there feel more luxurious.

    9. Mount Abstract Wood Wall Panels

    Sculptural wood panels create architectural interest and natural warmth on blank walls. These dimensional pieces feel like custom millwork but cost far less and install in a day.

    Find panels at Etsy ($150-$600 per panel for artisan work), Wayfair ($100-$400), or specialty suppliers like Inhabit. Group 2-4 panels asymmetrically for maximum visual impact. Installation involves wall studs and brackets (one afternoon with a drill). Alternatively, commission a local wood artist for a custom design that reflects your aesthetic ($300-$800 for a feature wall).

    Once installed, this wall becomes the room’s anchor. The play of light across the carved wood changes throughout the day, adding movement and dimension you’ll appreciate every time you walk in.

    10. Style Open Shelves with Sculptural Objects

    Open shelves are opportunity. Curated sculptural objects make shelves feel like gallery installations instead of storage dumps.

    Collect pieces from Etsy ($20-$150 each), local galleries, thrift stores ($5-$50), and retailers like Anthropologie ($30-$200). Style using the rule of three: group objects in odd numbers at varying heights, leaving breathing room between clusters. Layer books horizontally, stack vertically, tuck plants between sculptures. Refresh your arrangement monthly—this is your creative outlet.

    Styled shelves completely change how a room reads. Instead of looking like clutter, they become the visual heart of the room. Guests notice and comment on how thoughtfully you’ve arranged everything.

    11. Hang a Sculptural Pendant Light

    Sculptural pendant lights combine illumination with art. They hang at eye level, so their form becomes a constant visual element that shapes your room’s personality.

    Budget range ($50-$150): IKEA, Target, or Wayfair sculptural shades. Mid-range ($150-$400): CB2 or West Elm designer pendants. Investment ($400-$1,000+): handblown glass or artisan metal fixtures from specialty lighting shops. Installation requires a licensed electrician (budget $200-$400) or DIY hardwiring if you’re experienced. Position over a reading chair, console, or sofa side for maximum visual impact and function.

    That sculptural pendant becomes the room’s jewelry. It catches attention, casts beautiful shadows, and functions as both task lighting and artistic statement.

    12. Display a Sculptural Plant Stand

    A sculptural plant stand elevates greenery from simple decoration to focal point. The stand’s form matters as much as the plant it holds.

    Find stands at Target ($40-$120), West Elm ($100-$300), Etsy artisan makers ($80-$250), or specialty plant retailers ($150-$400). Choose forms with curves, arches, or geometric cutouts that create negative space and visual intrigue. One weekend to assemble; position in a corner where light and form are both visible. Pair with a trailing or architectural plant to echo the stand’s sculptural vibe.

    A sculptural plant stand turns a corner into a living art installation. It’s the kind of detail that makes visitors ask where you found it, and you get to share your good taste.

    13. Arrange Sculptural Bookends

    Sculptural bookends do double duty: they organize books while adding design interest to your shelves. Treated as art, not afterthoughts, they elevate any bookcase.

    Look for sculptural options at Etsy ($30-$80 per pair), Urban Outfitters ($40-$100), CB2 ($50-$120), or Anthropologie ($60-$150). Choose forms in bronze, brass, concrete, or wood that complement your décor. Style books horizontally and vertically, framing them with your sculptural bookends. Swap them out seasonally if you like mixing styles.

    Bookends aren’t background players—they’re design statements. The right pair ties your shelves together and shows intentionality in how you curate your space.

    14. Add a Sculptural Room Divider

    A sculptural room divider creates defined zones in open living rooms while functioning as standalone art. It solves the privacy problem without committing to walls.

    Budget options ($80-$200): foldable wooden or metal dividers from IKEA or Wayfair. Mid-range ($200-$500): sculptural designs from Article or CB2. Investment ($500-$1,200): handcrafted dividers from artisan makers on Etsy or design specialists. Setup is instant—no tools or installation. Move it seasonally or when you want to refresh your layout. Choose forms with curves or cutouts so light flows through and the room doesn’t feel chopped up.

    A sculptural divider transforms your open-concept from “one big space” to “thoughtfully zoned rooms.” It blocks sightlines without blocking light, and it looks like intentional design, not a workaround.

    15. Style a Sculptural Credenza

    A credenza with sculptural proportions becomes the visual foundation of your seating area. Low-profile pieces with interesting leg forms or curved fronts feel modern and collected.

    Hunt for options at Article ($400-$1,000), West Elm ($500-$1,500), Wayfair ($250-$800), or Etsy custom makers ($600-$1,500). Look for curved edges, sculptural leg frames, or geometric front cutouts. Assembly takes one afternoon (hire someone if needed—$100-$200). Style the top minimally: 3-5 curated objects plus breathing room. Use the interior storage to keep visible surfaces clean and intentional.

    A sculptural credenza anchors your room and stores all the stuff you need to hide. It’s the kind of piece that makes people say, “Your living room is so well-designed.”

    16. Hang Sculptural Wall Sconces

    Sculptural sconces add personality to walls while providing ambient lighting. They’re smaller commitments than chandeliers but pack serious visual punch.

    Find sconces at Etsy artisan shops ($60-$200 per pair), West Elm ($150-$300 per pair), or specialty lighting retailers ($200-$500). Look for organic curves, geometric cutouts, or hand-finished brass or concrete. Professional installation ($200-$400) takes one evening; DIY with experience is possible if you’re comfortable with wiring. Position flanking a mirror, artwork, or above a console for balanced impact.

    Wall sconces in sculptural forms cast beautiful shadows and change the room’s mood entirely. They’re the detail that separates “decorated” from “thoughtfully designed.”

    17. Layer Sculptural Throw Blankets

    Textured throw blankets add dimensional warmth and visual interest to your seating. Sculptural knits and dimensional weaves feel handmade and intentional.

    Shop for chunky knit throws ($50-$100 at Target or H&M Home), linen geometric blankets ($60-$150 at Schoolhouse Electric), or designer wool ($150-$300 at Etsy or specialty retailers). Layer one throw across a sofa arm or the back of a chair—never fully cover the sofa, or it reads cluttered. Mix textures by pairing a smooth linen with a nubby knit. Wash quarterly according to fiber type.

    A beautifully draped throw becomes part of your room’s visual story. It says “this space is lived-in and cared for” and adds coziness that photographs gorgeously.

    18. Display Sculptural Vases at Varying Heights

    Empty or filled, sculptural vases function as standalone art. Their forms become visual anchors when grouped with intention.

    Collect from local pottery studios ($30-$150 each), Etsy artisan makers ($40-$200), Anthropologie ($40-$120), or specialty home shops ($50-$250). Group 3-5 vases in odd-numbered clusters at staggered heights. Fill some with dried branches, pampas grass, or fresh flowers; leave others empty to showcase their form. Refresh arrangements seasonally or monthly.

    Sculptural vases work harder than you’d expect. They fill empty corners, add color and texture to shelves, and become the kind of objects people ask about and remember from your home.

    19. Create a Sculptural Bookcase Wall

    A sculptural bookcase wall becomes a living mood board and a design investment that organizes and displays simultaneously. It’s the room’s gallery.

    Install floating shelves ($20-$50 each at IKEA, plus $200-$400 installation) or use an existing bookcase you style intentionally. Budget $300-$800 for curated objects to fill 5-7 shelves (mix thrifted finds with new purchases). Styling takes time but it’s a one-time project that evolves. Group books by color or subject, layer objects in front and back, add plants for life and movement.

    A styled bookcase wall transforms your room into a curated space that reflects who you are. It’s art, organization, and personality all at once—and the best design investment you can make.

    20. Position a Sculptural Accent Chair

    A sculptural accent chair adds seating while making a bold design statement. Curved frames and organic proportions feel like furniture as art.

    Hunt for chairs with curved armrests at Article ($400-$800), West Elm ($600-$1,200), Wayfair ($300-$700), or vintage finds ($100-$400 refurbished). Look for forms that echo other curved pieces in your room. Delivery and assembly takes one week; position in a corner or opposite your sofa for visual balance. Choose upholstery in solid colors or subtle patterns so the form reads clearly.

    A sculptural accent chair transforms an empty corner into an inviting retreat. It becomes the spot where people naturally want to sit, and it signals that your room is thoughtfully designed.

    21. Install a Sculptural Ceiling Detail

    Ceiling details draw the eye upward and add architectural interest that furniture can’t achieve. Sculptural ceilings make rooms feel intentionally designed and spacious.

    DIY options include painted coffered panels (supplies $50-$150, DIY weekend project) or removable ceiling tiles ($100-$300 for a room). Professional installation of wood beams or plaster details runs $500-$2,000 depending on complexity. Start small—a single accent beam or arched soffit creates impact without overwhelming the space. Check rental agreements before committing.

    Once you look up, you see intentional design. A sculptural ceiling transforms the whole room’s energy and makes people comment, “I love how designed this feels.”

    22. Curate a Sculptural Entryway Console

    Your console is the room’s first impression. Curated sculptural styling signals that your space is thoughtfully designed from the moment someone walks in.

    Style an existing console with collected objects ($50-$300 total: thrifted finds, Etsy pieces, plant nursery treasures). Pair with a sculptural mirror above ($60-$200) and a sculptural light fixture ($50-$150). Spend 30 minutes arranging objects at varying heights, leaving negative space. Refresh your arrangement monthly—this is your creative practice space.

    An intentionally styled console sets the tone for your whole home. It shows care and intentionality before anyone even sits down. It’s the detail that transforms an entryway from blah to boutique.

    23. Layer Sculptural Textures Through Rugs

    A sculptural rug grounds your seating area while adding tactile, visual dimension. Textured rugs feel handmade and collected rather than flat and basic.

    Shop for textured wool rugs ($200-$600 at Wayfair), designer pieces with dimensional patterns ($400-$1,200 at Article or CB2), or handwoven artisan rugs ($300-$1,000+ from Etsy). Choose natural fibers (wool, jute, cotton) in neutral tones with dimensional weaves or raised patterns. Layer a smaller sculptural rug (4×6) over a larger neutral base (8×10) for visual interest and texture play. Rotate and refresh yearly to prevent uneven wear.

    A sculptural rug becomes the foundation of your seating arrangement. When people sit, they notice the texture underfoot and comment on how thoughtfully you’ve pulled the room together.


    Ready to add artful flair to your living room? Pick one sculptural piece—whether it’s a mirror, accent chair, or layered throw pillows—and commit to it this weekend. Save this post and return to it as you refresh your space over time. Which sculptural idea speaks to you first?

  • 23 Mixed-Material Sofa Frame Ideas That Look Chic & High-End

    23 Mixed-Material Sofa Frame Ideas That Look Chic & High-End

    When you’re shopping for a sofa, the frame matters just as much as the fabric. Mixed-material frames—combining wood, metal, leather, and upholstery in unexpected ways—instantly elevate any living room while staying practical and affordable. The beauty? You don’t need a designer budget to get that high-end look. Whether you’re working with a small apartment or a sprawling open plan, these 23 mixed-material sofa frame ideas show you how to choose, style, and customize sofas that look like they cost way more than they do. You’ll discover specific products, price ranges, and styling tricks that make your space feel curated and intentional. Let’s explore what makes mixed-material frames the secret to chic, long-lasting sofas.

    1. Warm Wood Legs with Tapered Design

    Tapered wood legs instantly communicate quality and design sophistication. This frame style works because it lifts the sofa visually, making your room feel more open and modern.

    Look for sofas with solid walnut or oak legs from brands like West Elm ($800-$1,800), Article ($600-$1,500), or IKEA’s premium Söderhamn line ($400-$700). The taper—angling inward slightly from top to bottom—is the key detail that reads expensive. If your current sofa has chunky legs, replacing them with tapered wood feet costs $80-$150 per set from hardware stores like Etsy sellers or Wayfair.

    Pro tip: Match your leg wood tone to other furniture in the room (nightstands, shelving) for cohesion.

    The result? Your sofa suddenly looks intentional, like you curated every detail. This one change makes renters and homeowners alike feel like they’ve upgraded their entire space.

    2. Brushed Metal Frame with Exposed Details

    Exposed metal frames—brushed steel or brass—give sofas an architectural edge that photographs beautifully. This works especially well in modern, industrial, or eclectic spaces where you want the structure to be part of the design.

    Search for sofas with visible metal frames on Wayfair ($700-$2,200), Structube ($900-$2,000), or Design Within Reach ($1,200-$3,500). The brushed finish matters; it feels warmer and less clinical than polished steel. If you love a sofa but wish the frame were visible, some custom builders like What A Room can modify standard designs to expose metal legs or arm supports ($1,500-$4,000 depending on customization).

    Alternative: Adhesive metal corner brackets ($15-$30) can accent existing wooden frames if you’re renting.

    You’ll notice how the frame becomes a design statement, drawing the eye and anchoring the room. This approach works especially well in open-plan homes where the sofa is a focal point.

    3. Leather Arm Wraps on Wood Frame

    Leather wrapping on wooden frames combines luxury tactile appeal with durability. The leather protects high-wear areas while the wood underneath stays visible, creating visual contrast.

    High-end brands like Restoration Hardware ($3,000-$6,000+) and Poltrona Frau ($4,000-$8,000) specialize in this detail. More budget-friendly options exist at Article ($1,200-$2,000) and Wayfair’s curated collections ($1,000-$1,800). You can also wrap existing sofas yourself using genuine leather adhesive tape ($20-$50) from craft stores, though hiring an upholsterer ($150-$300) gives professional results.

    Pro tip: Cognac and caramel leather pairs beautifully with warm walnut or oak frames.

    The texture combination feels high-end and lived-in simultaneously. Guests notice the craftsmanship immediately, and the wrapped areas naturally soften with use and develop character.

    4. Metal Corner Brackets on Solid Wood

    Metal corner brackets—brass, copper, or steel—add vintage hardware appeal without looking fussy. This detail reads expensive because it’s structural and decorative simultaneously.

    Look for these on mid-century modern sofas from Mid-Century Modern furniture retailers ($1,200-$2,500), Maiden Home ($1,400-$2,800), or vintage finds on 1stDibs ($800-$2,000). Add brackets yourself to plain sofas using brass hardware from Anthropologie ($8-$15 per bracket) or Etsy artisan makers ($30-$80 for a set). Installation takes 20 minutes with an electric drill.

    Alternative: Leather corner guards ($20-$40) provide similar detail with more vintage charm.

    Your sofa suddenly looks like a curated vintage piece. These brackets catch light beautifully and give any room a collected, thoughtful feeling.

    5. Two-Tone Wood Frame (Light + Dark)

    Mixing light and dark wood tones on a single frame creates visual interest and works with almost any décor style. Light legs with dark arm supports (or vice versa) feel intentional and designer-level.

    Custom options at Maiden Home ($1,600-$3,000), What A Room ($1,400-$2,800), and Restoration Hardware allow full control over wood selections. More affordable options appear at Article ($900-$1,600) and IKEA’s custom services ($600-$1,200). Production typically takes 6-10 weeks.

    Pro tip: Pair light ash with dark walnut, or blonde oak with espresso for maximum contrast.

    This frame style makes your sofa look bespoke and considered. It anchors eclectic rooms and works beautifully in spaces with collected furniture from different eras.

    6. Plywood Base with Upholstered Skirt

    Upholstered skirts hide practical plywood bases while adding softness and formality. This frame style works brilliantly in traditional, transitional, or eclectic spaces where you want the sofa to feel settled and curated.

    Brands like Pottery Barn ($1,200-$2,600), Ethan Allen ($1,400-$2,800), and Room & Board ($1,100-$2,300) offer skirt options. Custom upholsterers can add skirts to existing sofas for $200-$500. Choose performance fabrics for skirts ($15-$25 per yard) so they withstand foot traffic and pet interactions.

    Alternative: Remove skirts seasonally or swap them with different fabric colors ($100-$300 each).

    The skirt grounds your sofa, making it feel intentional and designer-decorated. It also hides dust and makes cleaning underneath easier—a practical luxury.

    7. Chrome or Polished Steel Legs

    Polished chrome or steel legs read ultra-modern and work especially well in minimalist, contemporary, or industrial spaces. They reflect light, making sofas feel lighter and more sculptural.

    Find these at Modern furniture retailers like Article ($1,000-$2,000), CB2 ($800-$1,600), and Design Within Reach ($1,500-$3,000). Metal leg replacements from Etsy metalworkers ($40-$120) fit most standard sofa frames. Installation requires removing old legs and bolting on new ones (15 minutes with basic tools).

    Pro tip: Pair polished metal with neutral upholstery to let the frame shine.

    The reflective quality makes rooms feel brighter and more open. Your sofa becomes a sculptural element rather than just furniture.

    8. Reclaimed Wood Frame with Modern Upholstery

    Reclaimed wood frames combine sustainability with character. The weathered texture reads high-end and eco-conscious while staying practical.

    Custom builders like What A Room, Maiden Home, and independent upholsterers create these for $1,800-$4,000+. Sourced reclaimed wood costs more upfront but tells a story. Ready-made options with faux-reclaimed details appear on Wayfair ($1,200-$2,200) and Article ($1,400-$2,600) at lower price points.

    Sustainability note: Reclaimed frames last decades and feel better knowing they’re repurposed materials.

    Your sofa becomes a conversation starter with built-in backstory. The weathered frame pairs beautifully with modern fabrics, creating intentional contrast.

    9. Brass or Gold Metal Accents on Arms

    Metal capping on armrests—in brass, gold, or copper finishes—adds jewelry-like detail that elevates any sofa. This works because it’s subtle but undeniably luxe.

    High-end brands like Restoration Hardware ($3,500-$7,000+), Rh Modern ($2,500-$5,000), and Design Within Reach ($1,800-$4,000) feature these regularly. Budget-friendly versions appear at Article ($1,200-$2,200) and Wayfair designer collaborations ($900-$1,800). Metal trim tape ($15-$40) can be applied to existing armrests by upholsterers ($100-$250 labor).

    Alternative: Brass nail head trim ($20-$60 for decorative kits) creates similar luxury impact.

    The warm metal catches light beautifully throughout the day. Guests immediately notice these details and feel the quality.

    10. Angled Wood Frame with Splayed Legs

    Splayed legs—widening slightly outward—create a distinctive mid-century modern silhouette that reads expensive and intentional. The angle affects both aesthetics and stability.

    Search for these on vintage platforms like 1stDibs ($800-$2,000), Chairish ($600-$1,800), or specialized mid-century retailers ($1,200-$2,500). New versions with splayed frames appear at Article ($1,100-$2,000), West Elm ($1,200-$2,200), and Maiden Home ($1,400-$2,600).

    Pro tip: Splayed legs show off beautiful hardwood floors or pair gorgeously with woven rugs.

    The angle creates visual movement and makes your sofa look sculpted rather than boxy. This frame style works beautifully in rooms where you want furniture to be a focal point.

    11. Leather and Wood Combination Frame

    Leather and wood together create warmth and depth. The combination feels collected and upscale without reading cold or corporate.

    Luxury brands like Poltrona Frau ($4,000-$8,000+) and Cassina ($3,500-$7,000) excel at this pairing. Accessible mid-range options include Maiden Home ($1,600-$3,000) and What A Room ($1,400-$2,800). Leather wrapping or trim applied to existing sofas costs $150-$400 through local upholsterers.

    Pro tip: Choose leather in warm tones (cognac, caramel, chocolate) rather than cool blacks for approachability.

    The combination feels sophisticated but livable. Leather ages beautifully and darkens over time, adding character.

    12. Solid Wood Platform Base Instead of Legs

    Platform bases—continuous wood underneath instead of individual legs—create a grounded, architectural look. This style reads contemporary and works beautifully in low-profile spaces.

    Scandinavian brands like BoConcept ($1,200-$2,400), Urban Natural ($1,100-$2,200), and IKEA’s Söderhamn collection ($500-$1,000) specialize in platform designs. Custom builders create them for $1,400-$3,000+. This style suits smaller spaces and modern décor perfectly.

    Alternative: Lower platform bases make rooms feel spacious; higher bases ($8-$12 inches) hide storage.

    Your room instantly looks more intentional and design-forward. Platform bases also reduce visual clutter since nothing sits beneath.

    13. Mix Metal Types (Steel Legs + Brass Details)

    Mixing metal finishes—brushed steel with brass or copper—creates visual interest and works in contemporary, eclectic, or transitional spaces. The key is limiting yourself to two complementary metals.

    Custom builders at What A Room ($1,500-$3,500), Maiden Home ($1,400-$2,800), and independent upholsterers create these. Ready-made options with mixed metal details appear on Wayfair ($1,200-$2,200) and Design Within Reach ($1,800-$3,500).

    Pro tip: One metal should be warm (brass, copper) and one cool (steel, chrome) for maximum contrast.

    The mixed metals feel collected and intentional—like you’ve curated each element. This approach works especially well in open-plan homes where sofas are viewed from all angles.

    14. Curved Wood Frame with Organic Silhouette

    Curved wood frames—especially those following organic, serpentine lines—read expensive and feel completely unique. Curved details are harder to manufacture, so they signal quality and investment.

    Browse curved sofas at Restoration Hardware ($3,000-$7,000+), Design Within Reach ($2,000-$5,000), and Article ($1,400-$2,600). These require longer lead times (10-16 weeks typically) but feel worth the wait.

    Pro tip: Curved frames work beautifully in rooms without sharp angles; they soften traditional rectangular spaces.

    A curved sofa becomes an instant focal point. The flowing shape makes rooms feel softer and more inviting.

    15. Nail Head Trim with Contrast Wood Frame

    Nail head trim—rows of decorative metal nails—adds jewelry-like detail and instantly reads luxury. The contrast between shiny nails and wood creates sophisticated visual interest.

    Brands like Pottery Barn ($1,200-$2,600), Ethan Allen ($1,400-$2,800), and Restoration Hardware ($2,500-$6,000) offer nail head options. Add trim yourself using nail head kits ($20-$60) and an upholsterer ($150-$300 labor), or choose online from Wayfair ($900-$1,800) with trim pre-applied.

    Alternative: Faux nail head tape ($15-$30) provides the look without permanent commitment for renters.

    The trim catches light beautifully and makes your sofa look like a designer investment piece. Each detail reads intentional and collected.

    16. Solid Hardwood Construction with Visible Joinery

    Visible joinery—where wood pieces connect in joinery rather than metal brackets—signals superior craftsmanship and durability. This detail reads expensive because it demonstrates woodworking skill.

    Premium brands emphasize this: Room & Board ($1,200-$2,500), Crate and Barrel’s high-end line ($1,400-$2,800), and Ethan Allen ($1,400-$2,800). Custom woodworkers create these for $1,600-$3,500+. Ask about solid hardwood frames and visible joinery specifically.

    Pro tip: This construction lasts 15-20+ years because wood joinery distributes stress better than metal fasteners alone.

    Your sofa becomes an heirloom-quality piece. The visible craftsmanship tells a story about durability and intention.

    17. Mixed Upholstery Frame with Leather Back

    Mixing fabrics on frames—fabric front with leather back—lets you save money while maintaining luxury appearance. This works brilliantly in open-plan homes where both sides of the sofa are visible.

    Custom builders like What A Room ($1,400-$2,800), Maiden Home ($1,500-$3,000), and upholsterers offer this. Ready-made two-fabric options appear on Wayfair ($1,000-$2,200) and Article ($1,200-$2,400). The leather back is more affordable than leather overall and hides wear.

    Pro tip: Use performance fabric in front (higher traffic) and leather in back (less visible).

    You get luxury details where guests see them while staying practical. This approach maximizes visual appeal and durability simultaneously.

    18. Powder-Coated Metal Frame with Modern Lines

    Powder-coated metal frames—available in matte or satin finishes rather than polished—feel ultra-contemporary and extremely durable. This finish resists scratching better than polished metal.

    Find these at Design Within Reach ($1,600-$3,200), Article ($1,000-$2,000), and Structube ($1,200-$2,400). The matte finish is key; it photographs beautifully and reads more expensive than glossy alternatives.

    Pro tip: Pair matte metal with velvet or linen upholstery for maximum contrast.

    The matte finish feels architectural and intentional. This style works especially well in minimalist, industrial, or modern spaces.

    19. Woven Rattan or Cane Frame Details

    Rattan or cane inserts—woven into wooden frames—add texture, warmth, and visual interest. This natural material combination reads expensive and design-forward.

    Search for these on Wayfair ($1,200-$2,000), Article ($1,300-$2,300), and West Elm ($1,400-$2,400). Custom rattan inserts can be added by upholsterers ($200-$400). Rattan is durable and develops beautiful patina over time.

    Alternative: Rattan and wood appear together in sculptural mid-century modern pieces on 1stDibs ($800-$1,800).

    The natural texture makes your sofa feel organic and collected. Rattan pairs beautifully with warm wood tones and neutral upholstery.

    20. Stacked Wood Base with Negative Space

    Stacked or layered wood bases with visible negative space create architectural interest. This design-forward approach reads expensive because it’s structural and sculptural simultaneously.

    These appear primarily in custom or contemporary collections: What A Room ($1,600-$3,200), Maiden Home ($1,500-$3,000), and Design Within Reach ($2,000-$4,000+). Production takes 8-12 weeks typically.

    Pro tip: The gaps under stacked bases make cleaning easier and visually lighten the sofa’s appearance.

    Your sofa becomes a design statement. The negative space reads intentional and contemporary, making rooms feel more open.

    21. Tuxedo Frame with Upholstered Sides

    Tuxedo frames—where wood shows on top edges while sides are upholstered—create a tailored, expensive look. The frame remains visible in the places guests see most.

    This style appears at Restoration Hardware ($3,000-$6,500), Poltrona Frau ($3,500-$7,000+), and Design Within Reach ($1,800-$3,500). Semi-custom versions exist at Wayfair ($1,200-$2,200) and Article ($1,300-$2,400).

    Pro tip: Dark wood frames with light upholstery create maximum contrast and read luxury.

    The tuxedo approach feels intentional and designer-curated. You get frame detail where it matters most visually.

    22. Metal Trim with Decorative Nailing Pattern

    Metal trim arranged in patterns—rather than simple rows—adds artistic detail and craftsmanship. This custom approach reads expensive and unique.

    High-end brands offer this through custom services: Restoration Hardware ($3,000-$7,000+), Poltrona Frau ($4,000-$8,000+). Budget-friendly custom nail trim from Wayfair artisans ($1,200-$2,400) creates similar impact. Upholsterers can arrange nails in patterns for $200-$500 additional labor.

    Alternative: Pre-made patterned nail head trim kits ($30-$80) install in 2-3 hours.

    The patterned detail reads like art. Guests notice the intentionality immediately.

    23. Combination Base: Wood Frame + Metal Feet + Leather Wrapping

    Combining three materials—wood, metal, and leather—on a single frame creates ultimate visual sophistication. The layers tell a story about craftsmanship and intentional design.

    This highest-level combination appears at Restoration Hardware ($4,000-$8,000+), Poltrona Frau ($4,500-$9,000+), and custom builders. More accessible three-material combinations exist at What A Room ($1,800-$3,500), Maiden Home ($1,600-$3,200), and upholsterers offering mix-and-match customization.

    Pro tip: Choose one metal finish (warm or cool) and stick with it for cohesion.

    Your sofa reads like a collected investment piece. Each material serves both aesthetic and functional purposes, creating a heirloom-quality piece.

    Save this post and pick one mixed-material frame style that speaks to your room. These details transform sofas from generic to intentional—and the best part is you don’t need a designer budget to make it happen.

  • 24 Layered Living Room Fabric Ideas for a Cozy, Elevated Look

    24 Layered Living Room Fabric Ideas for a Cozy, Elevated Look

    Introduction

    Your living room should feel like a warm hug, not a showroom. The magic isn’t in picking one perfect fabric—it’s in mixing textures, colors, and patterns that work together to create depth, comfort, and visual interest. Whether you’re renting or own your space, layering fabrics is one of the fastest ways to go from “meh” to “wow” without a major renovation. This guide walks you through 24 specific fabric layering ideas that feel high-end but won’t break your budget. From affordable pillow swaps to investment throws, you’ll discover how to combine materials that catch light differently, invite you to touch them, and make your room feel intentional and lived-in. Ready to start your cozy refresh? Let’s dig in.

    1. Mix Velvet Pillows With Linen for Textural Contrast

    Velvet and linen are opposites in the best way: one catches light, the other diffuses it. This contrast makes your sofa instantly more interesting and dimension-rich.

    Layer a jewel-tone velvet pillow ($25–$60 on Amazon, Wayfair) next to a cream or taupe linen pillow ($20–$40). The matte linen grounds the shine, and together they look curated rather than matchy-matchy. Mix in a third pillow in a woven cotton blend to add another texture layer. This takes 10 minutes to style and costs under $100 for quality options.

    Pro tip: Rotate your pillows seasonally—jewel tones feel richer in fall and winter, while lighter linens breathe better in spring and summer.

    Your sofa goes from flat to tactile in one afternoon, and guests will actually want to sink into it.

    2. Layer a Chunky Knit Throw Over a Lightweight Blanket

    A single throw looks sparse. Two fabrics in different weights create visual volume and real coziness that photographs beautifully.

    Start with a lightweight linen or cotton blanket ($30–$50) as your base layer, then drape a chunky knit throw ($40–$80, try Target, H&M Home, or Amazon) over the arm or back. The knit adds texture and movement, while the lighter layer prevents bulk. This works especially well on smaller sofas where you can’t pile on endless pillows. Takes 5 minutes to style, zero installation required.

    The result: your sofa looks intentionally styled, touchable, and endlessly inviting—like someone actually lives there and loves it.

    3. Use Geometric and Floral Rugs Together for Pattern Depth

    Pattern layering isn’t chaos—it’s curated eclectic. Two complementary patterns create visual richness and draw the eye around the room.

    Start with a neutral geometric rug ($80–$200, 5×7 or 6×9) as your foundation—jute, wool, or a washable synthetic blend all work. Top it with a smaller vintage-style floral or botanical rug ($50–$120, 3×5 or 4×6) that picks up one accent color from your pillows. Shop vintage rugs on Etsy, Facebook Marketplace, or Home Depot’s vintage-inspired lines. Overlap them slightly at a 45-degree angle for modern edge.

    Your room suddenly feels intentional and layered, like you’ve traveled and collected pieces you genuinely love.

    4. Combine Corduroy Upholstery With Silk Accents

    Corduroy is having a moment—it’s warm, durable, and deeply tactile. Pairing it with slick silk creates visual and touchable contrast that feels unexpectedly luxe.

    If you’re shopping for a new sofa, look for corduroy in warm neutrals ($600–$1,500 for quality pieces at Article, Anthropologie, or Facebook Marketplace). Pair it with silk or silk-blend throw pillows ($25–$60) in deep jewel tones—emerald, sapphire, or burnt orange. The matte corduroy grabs light differently than the silk, making both look more expensive. Rent? Layer an inexpensive corduroy throw ($40–$70) over your existing sofa.

    This combination makes your space look design-forward and touchable—people genuinely can’t resist running their hands over it.

    5. Add Woven Jute Textures Under Soft Cotton Layers

    Natural fibers ground a room and create tactile interest without looking staged. Layering jute under cotton softens the rough texture while keeping authenticity.

    Place jute placemats or a small jute runner ($15–$40, from IKEA, Target) on your coffee table or console, then top with a folded or draped organic cotton throw or kitchen towel ($20–$35). This works on shelves too—jute backing with soft linen in front. It takes 5 minutes to arrange and costs under $75 total.

    Your surfaces become intentional vignettes that feel organic, warm, and inviting—like you curate with purpose, not accident.

    6. Layer Patterned Curtains With Sheer Overlays

    Sheers alone feel flimsy; patterns alone can feel heavy. Together, they filter light beautifully and add dimension to a bare wall.

    Hang patterned linen or cotton curtains ($40–$100 per panel, Wayfair, Target, H&M Home) in a geometric or botanical print. Layer white or cream linen sheers ($20–$50 per panel) underneath so light filters through both. The combination softens harsh afternoon sun and creates depth at the window. Affordable and renter-friendly if you use tension rods.

    Your windows become a focal point that plays with light throughout the day, and the room feels more intentional and expensive.

    7. Mix Faux Leather With Soft Suede in Accent Pieces

    Faux leather brings modern edge; suede adds softness. Together they balance industrial chic with cozy comfort.

    Style a faux leather accent chair or ottoman ($150–$400, Article, West Elm, Target) with a suede or microsuede throw ($30–$70). The leather grounds the piece as contemporary, while the suede invites you to curl up. If you already have a leather sofa, add a suede pillow or throw to soften the look. Both materials are durable and low-maintenance—a huge plus for renters and families.

    The result feels balanced and modern—grown-up but not cold or sterile.

    8. Layer Vintage Tapestries Over Modern Textiles

    Modern nostalgia means old meets new. Hanging vintage textiles alongside contemporary art creates curated eclectic energy.

    Find a vintage or vintage-inspired tapestry ($25–$80, Etsy, Urban Outfitters, World Market) in jewel tones or warm earth colors. Hang it on your wall or drape it over a sofa back. Layer a modern abstract print or canvas ($40–$120) slightly overlapping one corner for visual depth. You can use removable adhesive strips, making it completely renter-friendly.

    Your wall becomes a conversation starter that feels collected and intentional rather than decorated.

    9. Combine Macramé Wall Hangings With Woven Baskets

    Macramé and woven pieces feel handcrafted and organic. Layering them creates boho warmth that photographs beautifully.

    Mount a large macramé wall hanging ($30–$70, H&M Home, Urban Outfitters, Etsy) above a console table or shelf. Stack 2–3 woven storage baskets ($20–$50 each, IKEA, Target, Wayfair) below it in natural jute or seagrass. Add a rolled linen throw or folded blanket inside one basket for extra texture and function. Totally renter-friendly with Command hooks.

    Your corner becomes a cozy, intentional vignette that makes the room feel warm and lived-in rather than sterile.

    10. Add Metallic Fabrics to Jewel-Tone Backdrops

    Metallics on deep jewel tones create a high-end, almost Art Deco vibe. The contrast feels luxe without being over-the-top.

    Layer a jewel-tone velvet or brocade pillow ($25–$60) with a metallic throw pillow in gold, copper, or silver ($20–$50). Add a metallic throw blanket ($40–$80, try Anthropologie, H&M Home) draped casually for extra shimmer. The metals catch light and make deep colors pop. Look for gold and copper at Target and Wayfair; silver metallics work well with sapphire or emerald.

    Your space instantly feels curated and elevated—the kind of room you see in design magazines.

    11. Layer Quilted Throws for Organic, Lived-In Texture

    Quilted textures are vintage charm meets modern comfort. Layering quilts creates bohemian depth that feels collected, not cluttered.

    Place a vintage or vintage-inspired quilt ($40–$100, Etsy, Target, West Elm) over your sofa back, then layer a chunky knit throw ($30–$60) partially over it. Add a quilted or patchwork pillow ($20–$45) to complete the mix. If you have family quilts, now’s the time to style them as living décor rather than hiding them. Mix solids with patterns for visual interest.

    Your space feels warm, collected, and full of stories—like you’ve actually lived and loved in it.

    12. Combine Smooth Silk Pillowcases With Textured Knit Covers

    Silk feels luxe but can look cold; knit feels cozy but can read as casual. Together, they’re perfectly balanced.

    Buy silk or silk-blend pillowcases ($15–$40 each, Amazon, Etsy, Mulberry Silk brands) and chunky knit pillow covers ($20–$50, H&M Home, Urban Outfitters). Mix them 50/50 on your sofa or bedroom. Silk doesn’t wrinkle like cotton and adds a subtle shimmer; knit adds warmth and tactile interest. This takes 15 minutes to style and costs $50–$150 for a full pillow setup.

    Your sofa suddenly looks intentional and high-end—like you’ve invested in comfort that actually looks the part.

    13. Use Bold Patterned Fabrics on Accent Walls

    Fabric on walls is a renter-friendly alternative to wallpaper. Pattern drenching one wall creates immersive depth without permanent changes.

    Buy bold patterned fabric ($10–$25 per yard, 3–4 yards for most walls) in geometric, botanical, or Art Deco motifs from Joann, fabric.com, or local quilting shops. Use removable fabric adhesive spray (like Elmer’s Repositionable Spray) to attach it to one accent wall. Pair with neutral furniture ($0–$500 depending on what you own) so the wall stays the star. This takes a weekend and costs $40–$100 in materials.

    You’ve created an immersive, curated room that feels intentionally designed—and it’s totally reversible.

    14. Layer Woven Wall Panels for Dimensional Depth

    Woven panels are architectural without being heavy. Layering them at different heights creates visual movement and organic interest.

    Mount 2–3 woven wall panels ($30–$80 each, World Market, Urban Outfitters, Amazon) in rattan or wicker at staggered heights. Leave 6–12 inches between them so light and shadow play across the wall. They’re lightweight, completely removable, and work brilliantly as a gallery wall alternative. This takes an afternoon and costs $100–$250 total.

    Your wall becomes a textural focal point that adds dimension and warmth without feeling over-decorated.

    15. Combine Corduroy Pillows With Knit and Linen Mixes

    Corduroy is tactile and warm; knit is soft; linen is crisp. Together, they’re a texture trifecta that feels sophisticated and touchable.

    Buy or make three pillow covers: corduroy ($15–$35), chunky knit ($18–$40), and linen ($12–$30) from Etsy, Target, or fabric stores. Fill with standard pillow inserts ($5–$15 each). Layer them on your sofa with slightly different heights so each texture shows. This takes 30 minutes if buying pre-made, costs under $150, and is totally customizable.

    Your sofa becomes a masterclass in intentional styling—expensive-looking but built on a realistic budget.

    16. Add Fringed or Tasseled Throws for Playful Movement

    Fringe and tassels add personality and movement without being fussy. They catch light and create visual flow across a room.

    Layer a fringed or tasseled throw ($30–$70, H&M Home, Anthropologie, Wayfair) over your existing blankets or throws. Moroccan-inspired tassels, bohemian fringe, or minimalist geometric fringe all work. The fringe catches light and creates visual interest every time you move the blanket. Renter-friendly and totally changeable seasonally.

    Your room gets instant personality and movement—it feels curated and playful rather than stiff or overdone.

    17. Layer Lace or Semi-Sheer Curtains Over Solid Drapes

    Lace adds romance and vintage charm; solids provide privacy and weight. Together, they’re both functional and beautiful.

    Hang cream or ivory lace or semi-sheer fabric ($20–$50 per panel, IKEA, Target) as an inner curtain on tension rods or lightweight curtain rails. Layer solid linen or cotton drapes ($40–$100 per panel) on the outside for privacy and warmth. The combination softens harsh light while adding visual depth at the window. This takes an afternoon and costs $100–$300 for a standard window.

    Your windows become a romantic, layered focal point that filters light beautifully and feels intentionally styled.

    18. Mix Leather Accents With Soft Chenille Fabrics

    Leather is structured and modern; chenille is plush and forgiving. This pairing feels balanced between sophisticated and comfortable.

    Style a leather chair or ottoman ($150–$400) with a soft chenille throw ($25–$60, Target, Amazon, West Elm). Chenille is durable, easy to clean, and irresistibly touchable. Add a leather pillow or two ($15–$40) for extra cohesion. Both materials age beautifully and work for families and renters alike. This styling takes 10 minutes and costs $40–$100 in throws and pillows.

    Your seating area feels balanced—modern and invested without being cold or uncomfortable.

    19. Create Textural Contrast With Burlap and Linen Combinations

    Burlap is raw and rustic; linen is refined and neutral. Together, they create organic depth that feels authentic without trying too hard.

    Use burlap fabric ($5–$15 per yard, Joann, fabric stores) as a backing on open shelving or as a wall accent. Layer rolled or folded linen throws ($20–$50) in front of it, with wooden or ceramic accessories ($10–$50) for visual interest. This works beautifully behind bookshelves, floating shelves, or as a focal wall. Total cost: $40–$120, takes an afternoon.

    Your shelves become styled vignettes that feel collected, intentional, and warm—not like you’re trying too hard.

    20. Layer Statement Rugs in Complementary Color Stories

    Large neutral rugs ground a space; smaller patterned rugs create focal points. Layering them defines areas and adds visual intrigue.

    Start with a large neutral rug in cream, gray, or warm tan ($80–$250, 8×10 or 9×12, IKEA, Wayfair, Target). Top it with a smaller patterned rug ($50–$150, 5×7 or 6×8) in jewel tones or bold patterns. Leave 12–18 inches of the base rug visible around the edges for definition. Both natural fibers (jute, wool) or washable synthetics work. This takes 30 minutes to arrange.

    Your space instantly feels zoned, intentional, and layered—like you’ve curated a sophisticated, lived-in room.

    21. Combine Printed Fabrics With Solid Suede or Velvet

    Print demands a solid anchor. Suede or velvet in a complementary solid color keeps the look curated rather than chaotic.

    If your sofa or primary piece has a bold pattern ($400–$1,200 or budget-friendly slip covers $50–$150), balance it with 2–3 solid velvet or suede pillows ($20–$50 each) in a color pulled from the pattern. Add a solid linen throw ($30–$70) to complete the mix. This works beautifully with Anthropologie fabrics, sustainable designers, or affordable options from West Elm and Target.

    Your room feels design-forward and intentional—pattern-forward but not overwhelming.

    22. Add Handwoven Textiles as Wall or Sofa Accents

    Handwoven fabrics bring artisanal warmth and support makers. Layering them elevates a room without feeling overdone.

    Find handwoven textiles from ethical makers ($40–$150, Etsy, fair-trade brands, local artisans)—blankets, wall hangings, or runners. Drape one over your sofa back, hang one above a console, or use as a throw. Layer it with modern pieces ($0–$500 of existing furniture) to create intentional contrast. Supporting makers and creating jobs feels good and looks beautiful.

    Your space gains warmth, authenticity, and a story—it feels like you’ve traveled or know the makers.

    23. Layer Textured Wallpaper With Fabric Accents

    Textured wallpaper adds depth to walls; fabric accents echo and amplify that richness. Together, they create immersive, multisensory interest.

    Install subtle textured wallpaper ($15–$40 per roll, Spoonflower, Wayfair, local paint stores) in warm earth tones—creams, greens, soft blues, or peachy tones. Layer coordinating fabric pillows, throws, and accents ($20–$150 total) in deeper or lighter shades of the same palette. Add a fabric-covered storage basket ($20–$50) that echoes the wall color for cohesion. This takes a weekend and costs $150–$300.

    Your room feels intentionally designed and immersive—like you’ve layered with purpose and personal style.

    24. Mix Lightweight Linens With Structured Canvas Layers

    Linen breathes and drapes beautifully; canvas is structured and durable. Mixing them creates visual and tactile balance—soft but grounded.

    Layer a lightweight linen throw ($25–$50) with a structured canvas throw pillow or canvas storage box ($15–$40). Canvas ages beautifully, showing wear as character. Pair both with solid or patterned linen pillowcases ($15–$35) for cohesion. All these materials are washable and budget-friendly. This takes 15 minutes to style and costs $50–$150.

    Your space feels balanced and intentional—soft but grounded, cozy but not overwhelming.


    Save this guide and pick one layering idea to try this weekend. Start with what you already own—most of these work with existing pieces—and add one or two new fabrics to build your layers. Your living room will feel more expensive, intentional, and infinitely more inviting. Which texture combo calls to you first?

  • 25 Nighttime Lighting Ideas That Build a Peaceful Evening Atmosphere

    25 Nighttime Lighting Ideas That Build a Peaceful Evening Atmosphere

    There’s a reason you wind down differently depending on the light around you. Harsh overhead fixtures drain your energy, while thoughtfully layered lighting creates a sanctuary where your body naturally signals it’s time to rest. The right evening lighting doesn’t just look beautiful—it actually helps you sleep better by supporting your body’s natural rhythms. This guide walks you through 25 lighting ideas, from budget-friendly swaps to investment pieces, that build a genuinely peaceful evening atmosphere. Whether you rent or own, have a tiny bedroom or sprawling master suite, you’ll find approaches that work with your space and budget. Let’s create a bedroom that feels like an actual retreat.

    1. Layer with Warm Dimmers on Existing Fixtures

    Dimmers are the easiest lighting upgrade most people overlook—they cost almost nothing but change everything. Instead of choosing between bright and off, you control exactly how much light you need. Install a dimmer switch ($15–$40 at Home Depot or Lowe’s) on your existing overhead or wall fixture in about 20 minutes with a screwdriver. Pair it with warm-white bulbs (2700K color temperature, $8–$15 for a pack) so even at full brightness, your light feels cozy rather than clinical.

    The magic happens at night: dim to 40–50% while you’re getting ready, then drop to 10–20% once you’re in bed. Your brain gets the signal that evening is here, melatonin kicks in naturally, and you drift off more easily. Renters, check with your landlord first, but most allow dimmer switches since they’re reversible.

    2. Add Bedside Task Lighting for Reading

    Bedside lamps aren’t luxury—they’re essential for protecting your sleep while still having light when you need it. A good task lamp keeps light focused on your book or phone instead of flooding your whole room. Look for swing-arm lamps ($30–$80, IKEA, Wayfair) or small brass table lamps ($40–$120, Target, West Elm) with fabric shades that diffuse light softly.

    Choose warm bulbs (2700K) under 60 watts so light stays intimate. Position your lamp 12–15 inches away from where your head rests—close enough to read, far enough that you’re not strained. The best part? You can turn off overhead lights entirely and rely on this single, gentle source. This also means your partner isn’t blinded if they sleep earlier or later than you.

    3. Install Wall Sconces Instead of Bedside Tables

    Wall sconces save space and create a sophisticated look while cutting down on bedside clutter. Mount a pair flanking your headboard ($60–$200 per pair, Rejuvenation, Schoolhouse Electric, IKEA) so each side of the bed gets its own light. Sconces work especially well in small bedrooms or if you have minimal nightstand space.

    Installation takes 30–45 minutes if you’re comfortable with basic wiring; otherwise, hire an electrician ($100–$150 for the job). Pair them with downward-facing shades that direct light onto the bed rather than up the wall. Look for models with individual switches or dimmer compatibility so you control each side separately. The clean, hotel-like feel makes your room look intentional and calming—no cords, no clutter, just warm light exactly where you want it.

    4. Use Ambient Floor Lamps in Room Corners

    Floor lamps are renter-friendly, flexible, and can dramatically change how a room feels without any installation. Place a tall arc or tripod floor lamp ($40–$150, Target, West Elm, Wayfair) in a corner to cast indirect light across the ceiling and upper walls. This creates ambient “wash” lighting that feels enveloping without being direct or harsh.

    Choose models with 3-way bulbs or dimmer-compatible bases ($50–$200) so you adjust brightness. Warm brass or matte black finishes blend with any style. Position it 2–3 feet from the corner and 4–5 feet from your bed so light wraps around the room rather than shining in your eyes. The bonus? You can unplug it and move it anywhere, making it perfect for renters. One strategically placed corner lamp often replaces the need for your overhead fixture entirely.

    5. Hang Edison Bulbs for Warm Nostalgic Glow

    Edison-style bulbs with visible filaments create that warm, old-fashioned glow that feels instantly cozy. These aren’t just decorative—they’re genuinely softer than typical bulbs because the filament design diffuses light naturally. Purchase individual Edison bulbs ($8–$15 each, Amazon, Etsy, Home Depot) and either hang them in a simple pendant fixture or use a swag hook setup ($20–$40) to suspend them over your bed or reading nook.

    Go for 2700K color temperature for maximum warmth. The wattage should stay under 40–60W to keep them soft and sleep-friendly. If you want multiple bulbs, hang them at slightly different heights and distances for a less rigid, more organic look. The result feels like you’re reading by candlelight but with reliable, controllable light. Renters love this option because it doesn’t require permanent installation.

    6. Install Track Lighting with Warm Spotlights

    Track lighting gives you sculptural control over light placement without needing new ceiling wiring. Mount a small track system ($80–$200, Home Depot, Lowe’s, Rejuvenation) along one wall or ceiling edge, then position spotlights to highlight different zones: bed, reading corner, dresser. Each light pivots independently, letting you adjust angles as needed.

    Install in 1–2 hours if you’re handy; otherwise, hire an electrician ($150–$300). Pair track lights with warm-white spotlights (2700K, 50–75W) and matte black or brass fixtures to keep the look warm and contemporary. Add a dimmer control ($30–$60) so you lower overall brightness at night. The flexibility means you can accent artwork, create mood lighting, or focus light exactly where you need it—all with one fixture system. This approach works beautifully in bedrooms with high ceilings or awkward layouts.

    7. Layer Lampshades with Linen or Frosted Diffusers

    Even if you already have lamps, upgrading the shade changes how light disperses. Swap out thin or shiny shades for linen, cotton, or frosted diffuser shades ($20–$60, Target, West Elm, IKEA). These materials scatter light instead of concentrating it, making the glow feel softer and more enveloping.

    Measure your lamp base (typically 10–14 inches wide for bedside lamps) and choose a shade that matches. Look for warm cream, soft gray, or pale yellow shades—these colors reflect warm light rather than cool it. Frosted plastic options are budget-friendly ($15–$25) if fabric feels out of reach. This 5-minute swap makes a dramatic difference. Your existing lamp now casts that dreamy glow instead of a glaring pool. It’s one of the cheapest ways to upgrade your lighting feel.

    8. Create a Reading Nook with Overhead Task Lighting

    If you have a bedroom corner you’re not using, claim it as a reading sanctuary with targeted lighting. Install a pendant light ($40–$150, IKEA, West Elm, Anthropologie) or adjustable clamp lamp ($25–$60) positioned 18–24 inches above where you’ll sit. This focused light is perfect for evening reading without disturbing a sleeping partner.

    Choose warm-white bulbs (2700K, 40–60W) and a diffused shade so light doesn’t glare. Position your reading chair away from direct bedroom views—in a corner or near a window—to create psychological separation from the sleep zone. Add a small side table ($30–$80) for books and tea. The beauty here is intentionality: your body recognizes this corner as “wind-down space,” not sleep space, so reading happens here while your bed stays pure for rest. This works in both large and small bedrooms.

    9. Use Candles (Real or LED) for Ambient Warmth

    Real candles provide beautiful ambiance, but if you’re worried about safety or have pets or kids, high-quality LED candles ($15–$50 per set, IKEA, Target, Wayfair) offer the same effect with zero risk. Look for candles with realistic flickering and warm-white bulbs (2700K) so they actually mimic candlelight rather than looking plasticky.

    Place clusters of 3–5 candles on your dresser, nightstand, or windowsill—spread them across the room rather than grouping tightly so light distributes evenly. Real candles should burn 2–3 hours before bed; LED versions run 8–20 hours on a charge. Neither should be your primary light source, but layered with dimmed overhead or lamplight, candles create that spa-like quality that signals relaxation. The flickering motion is genuinely calming—your brain responds to it. Use these 30 minutes before bed, then switch to dimmed lamps for sleeping.

    10. Install Indirect Strip Lighting Behind the Headboard

    Hidden strip lighting adds high-end visual drama and actually serves a purpose: it prevents light from hitting your eyes directly while still illuminating the room. Install adhesive LED strips ($30–$80, Amazon, Home Depot) behind your headboard so light bounces off the wall instead of coming straight at you.

    Choose warm-white strips (2700K) and ideally ones with dimmer compatibility ($20–$40 extra). Installation takes 20 minutes: clean the wall, peel and stick the strip, plug it in (or wire it if you want permanent installation). This creates ambient light that feels intentional and design-forward—perfect if you want a contemporary, sophisticated look. You can run the strip low all evening, then turn it off when you sleep. The indirect approach means your eyes adjust gently rather than being shocked by sudden brightness or darkness.

    11. Add Uplighting to Highlight Artwork or Textured Walls

    Uplighting isn’t just for galleries—it brings bedroom walls to life and creates visual interest without direct overhead light. Place a small uplighter or accent lamp ($40–$120, Rejuvenation, Design Within Reach) on the floor pointing upward at a feature wall, textured surface, or artwork. This draws the eye up and makes the room feel taller while adding ambient glow.

    Alternatively, use affordable clamp lights ($25–$50, Home Depot) with a 25–40W warm bulb. Position it 12–18 inches from the wall and angle it up. The light bounces off the wall and ceiling, creating soft ambient fill without any direct source visible. This technique works beautifully with textured wallpaper, exposed wood, or painted accent walls. The result looks intentional and gallery-like—your bedroom suddenly feels curated rather than generic.

    12. Install a Dimmer on Wall Sconces for Dual Control

    Wall sconces are wonderful, but adding individual dimmer switches ($15–$40 each, Home Depot) to each sconce gives you restaurant-level control over your mood lighting. Install dimmer switches so you can lower both sconces together or adjust each side independently—perfect if one person sleeps earlier than the other.

    This upgrade takes 45 minutes to an hour if you’re comfortable with basic electrical work; hire an electrician ($150–$300 total) if not. The advantage is massive: you can dim to 20% for a partner who’s still reading, while you relax in darkness. Or dim both to 40% for a calm evening together. Pair with warm-white bulbs (2700K, 40–60W) so even at full brightness, light feels cozy. This level of control costs $30–$80 in total hardware but changes how you actually use your bedroom each night.

    13. Hang Sheer Curtains to Soften Direct Lamplight

    If you have a bright lamp that’s too harsh even at low settings, hang sheer curtain fabric ($15–$40 per yard, Joann Fabrics, Amazon) between the lamp and your bed to diffuse it further. This creates a romantic, Moroccan-riad quality without any installation—just drape it carefully or use removable adhesive hooks.

    This trick is renter-friendly and costs almost nothing. Use lightweight linen, cotton voile, or traditional sheer curtain fabric in cream, white, or pale yellow. The fabric softens direct glare while still allowing light through, creating a gentle glow that feels like silk-filtered candlelight. Adjust the distance between lamp and fabric to control how much diffusion you want. This is perfect if you love a specific lamp’s design but find its brightness jarring. The fabric fix transforms it instantly.

    14. Add a Light Bar Above the Bedroom Mirror

    If you have a bedroom vanity or mirror for morning routines, a vanity light bar ($50–$150, Amazon, Wayfair, IKEA) ensures you can actually see yourself without shadows. Mount it 24–30 inches above the mirror surface so light falls evenly on your face. Choose warm-white bulbs (2700K) so you see your actual skin tone rather than a washed-out version.

    Look for dimmable models ($80–$150) so you can lower brightness in the evening if you’re getting ready for bed. Installation takes 30 minutes if you’re handy; hire an electrician ($75–$150) if needed. The key is mounting it high enough that you don’t shadow your own face, and warm enough that evening light doesn’t feel clinical. Once installed, this becomes your go-to for any nighttime mirror tasks without needing overhead lights. It’s a small upgrade with huge functional impact.

    15. Use Smart Bulbs for Automated Evening Transitions

    Smart bulbs ($10–$25 each, Philips Hue, LIFX, Wyze) let you automate your lighting to follow your natural rhythm—bright in morning, progressively warmer in evening. Set up a routine that starts dimming at sunset and shifts bulbs from cool white (5000K) to warm amber (2700K) over 2–3 hours.

    Install smart bulbs in your primary overhead fixture and bedside lamps—no wiring needed, just screw them in. Connect via smartphone app and set schedules that fit your routine. If you’re out late, one tap dims everything to 30% automatically. The beauty? Your circadian rhythm gets real support—your body thinks it’s actually getting sunset light, not artificial darkness followed by bed. This costs $50–$100 in bulbs upfront but saves money long-term since you’re using less light overall. Perfect for anyone with irregular sleep schedules.

    16. Install a Motion-Sensor Nightlight for Safe Pathways

    A motion-sensor nightlight ($15–$40, Amazon, Target, Home Depot) provides safe pathways at night without flooding your room with light. Mount one near the bedroom door or beside the bed so it activates when you get up but doesn’t shine when you’re sleeping.

    Choose warm-white models (2700K) with adjustable brightness—ideally 5–20% at full strength so it never jolts you awake. Battery-operated versions avoid any wiring and work in rentals. The sensor typically activates within 6 inches, so set it where you’ll naturally pass. This is a game-changer if you struggle with stubbed toes at night or navigate around a sleeping partner. It provides just enough light to be safe without disrupting sleep quality. Cost is minimal, benefit enormous.

    17. Hang Fabric Panels to Define Lighting Zones

    If you share a bed with someone on a different schedule, hanging sheer fabric panels ($30–$80, Joann Fabrics, Etsy) creates separate lighting zones while keeping the room connected. Hang panels from ceiling tracks ($40–$100, Amazon) or use removable tension rods ($20–$50).

    This isn’t permanent and works in rentals. Panel placement lets one person have reading light while the other sleeps undisturbed. The fabric filters light so it doesn’t fully block a partner’s space, but creates enough separation that brightness doesn’t interfere. This costs $100–$200 total and solves one of the biggest couple-sleep problems: conflicting light needs. It’s also beautiful—looks intentional and design-forward, not like a temporary fix.

    18. Install Recessed Lighting with Warm Bulbs on a Dimmer

    Recessed lighting sounds expensive, but kits exist for renters and smaller spaces. Install a recessed lighting kit ($100–$300, Amazon, Home Depot) with 4–6 lights across your ceiling on a dimmer switch ($30–$60). These lights sit flush with the ceiling, keeping your bedroom looking sleek and uncluttered.

    If you own your home, hire an electrician ($500–$1,200 for installation). If you rent, look for wireless recessed options ($200–$400 total, Sunforce, others) that require no wiring. Choose warm-white bulbs (2700K, 40–50W) so even at full brightness, light feels cozy. Set your dimmer to 30–40% in evening hours. The advantage: clean, professional look with zero visible fixtures marring your design. Recessed lights work beautifully with minimal design schemes or transitional styles.

    19. Place Warm Pendant Lights at Varying Heights

    Multiple pendants at varying heights add visual interest and distribute light evenly without creating one bright focal point. Hang 2–3 pendant fixtures ($60–$150 each, IKEA, West Elm, Wayfair) from a ceiling rail or individual hooks, positioning them 18–36 inches apart vertically and horizontally.

    Space them roughly 24–30 inches above furniture or 60–66 inches above the floor for bedside use. Choose matching or complementary designs in brass, matte black, or woven materials. Install on a single dimmer circuit ($30–$60) so you control all three together. This approach feels intentional and collected—like you’ve curated each piece—while functionally providing layered ambient light. The varying heights make the space look taller and more dynamic than standard flush-mount fixtures.

    20. Use Warm Table Lamps with Fabric Shades on Floating Shelves

    Floating shelves ($30–$80, IKEA, Target, Wayfair) with small brass or ceramic table lamps ($30–$80) create functional nightstands without visual bulk. Mount shelves 24–30 inches above mattress height and position a lamp on each side with enough clearance for books and a water glass.

    Install shelves properly into studs or use heavy-duty anchors ($15–$40). Pair with warm-white bulbs (2700K, 25–40W) so light stays intimate. Choose lamps with proportions that fit the shelf—avoid oversized bases that dominate the space. This approach works beautifully in small bedrooms or minimalist designs where traditional nightstands feel too heavy. The shelf becomes part of your design rather than just functional furniture. You get storage, lighting, and that curated, thoughtful feel all in one.

    21. Install a Dimmable Chandelier for Elevated Coziness

    Chandeliers aren’t just for formal spaces—a smaller, warm-toned chandelier ($80–$300, Wayfair, Rejuvenation, Design Within Reach) adds elegance to a bedroom while providing adjustable ambient light. Choose styles with fabric or frosted shades to diffuse light, not crystal that might create glare.

    Install on a dimmer switch ($30–$60) for evening control. Hire an electrician unless you’re experienced ($150–$300 for installation). Pair with warm-white, lower-wattage bulbs (2700K, 40W each) even if the fixture holds multiple bulbs. A chandelier dimmed to 30–40% creates that spa-hotel quality where light feels luxurious but still sleep-inducing. This is an investment piece ($150–$400 total with installation) but transforms how a room feels. It’s particularly beautiful in bedrooms with higher ceilings or traditional design.

    22. Create Accent Lighting Around Architectural Features

    If your bedroom has architectural interest—exposed beams, crown molding, a coffered ceiling—use small spotlight fixtures ($30–$80 each, Rejuvenation) to accent these features with warm light. This draws the eye to beautiful details while providing ambient illumination.

    Mount spotlights on the ceiling or walls pointing at these features and wire them to a dimmer switch ($30–$60). This costs $150–$400 depending on how many fixtures you use, but the visual payoff is significant. The interplay of light and shadow on architectural elements creates depth and coziness that flat overhead lighting never achieves. Your bedroom suddenly looks designed and intentional rather than generic. This approach works especially well in older homes or bedroom renovations where you want to showcase original details.

    23. Add a Warm Floor Lamp Behind Furniture for Ambient Fill

    One of the easiest tricks: position a floor lamp ($40–$150) behind furniture—a chair, dresser, or the side of your bed—so light fills the room indirectly. You see the glow, not the fixture, creating that magazine-worthy ambient quality.

    Use a tall arc lamp or torchiere ($50–$120) with a warm bulb (2700K, 60–75W). Add a dimmer-compatible base ($20–$40 extra) for evening control. This costs $70–$170 total and requires zero installation. The genius is that light bounces off your wall and ceiling rather than hitting you directly, so it feels softer and more enveloping than a standard lamp. It works beautifully as your only evening light source or layered with bedside lamps. Renters especially love this because it’s plug-and-go.

    24. Use Warm RGB Bulbs for Color-Mood Flexibility

    Smart RGB bulbs ($15–$30 each, Philips Hue, LIFX, Nanoleaf) let you adjust both brightness and color temperature. While you won’t want full-spectrum color at night, setting these to warm amber or soft coral tones ($2,700K equivalent) creates a uniquely calming atmosphere.

    Install in 1–2 key fixtures (overhead, bedside, or corner lamp). Adjust via app or voice control. The advantage: you’re not stuck with whatever “warm white” the manufacturer decided—you fine-tune it to what feels most relaxing to you. Some people prefer 2700K, others love a hint of amber or peach. RGB bulbs let you experiment. Cost is $40–$60 per fixture, but flexibility is worth it if you’re picky about light quality. Set a routine so lights shift to your preferred evening tone automatically at sunset.

    25. Layer Lamplight with Low-Level Background Lighting

    The secret to genuinely cozy lighting is layering: never rely on a single source. Combine a dimmed overhead fixture (30% brightness), wall sconces (40%), a bedside lamp (50%), and a corner floor lamp (20%) so light fills the room from multiple angles without any one source feeling dominant.

    Wire different fixtures to different switches or dimmers so you can activate only what you need. Evening routine might look like: overhead + one sconce while getting ready, then shift to bedside lamp + floor lamp once in bed. This costs $200–$500 depending on what you’re adding, but it’s the most transformative approach because it mimics natural light (which comes from multiple directions). Your brain recognizes layered light as genuinely restful. The room never feels dark or harsh—it feels intentionally curated for calm.


    Save this guide and try one idea this weekend. Even a single layer of new lighting changes how your bedroom feels, and small changes compound fast. Which approach speaks to you most—going minimal with one perfect lamp, or building a fully layered system? Either way, your bedroom deserves lighting that feels like a real retreat.

  • 23 Cozy Reading Nook Styling Ideas for Warm, Quiet Moments

    23 Cozy Reading Nook Styling Ideas for Warm, Quiet Moments

    There’s nothing quite like having a dedicated corner where you can disappear with a book and forget the world exists for a while. But creating that perfect reading sanctuary doesn’t require a complete room overhaul—it’s about layering comfort, lighting, and intentional details into one cozy spot. Whether you’re working with a corner, an alcove, or even a closet nook, these 23 ideas will help you build a reading retreat that feels like an escape without breaking the bank. From rich jewel-tone walls to vintage furniture finds and ambient lighting tricks, you’ll discover both budget-friendly hacks and investment pieces that transform an ordinary space into somewhere you actually want to spend hours. Let’s create your reading haven.

    1. Paint Walls a Deep Jewel Tone

    Dark, moody colors like emerald, burgundy, or deep teal create instant coziness and make a small nook feel like a personal sanctuary. The right wall color signals to your brain that this space is special—different from the rest of your home.

    Paint three walls in your chosen jewel tone (or just the wall behind your chair for a statement backdrop) using quality interior paint. Expect to spend $30–$60 on paint and a few hours on a weekend project. Deep jewel tones hide dust better than pastels and pair beautifully with warm lighting. If you’re renting, use removable peel-and-stick wallpaper in emerald or burgundy instead—brands like Spoonflower and Amazon have hundreds of options for $25–$50 per roll.

    The depth of color wraps around you while you’re reading, making the space feel more enclosed and intimate. You’ll notice how much more relaxing the nook becomes once you’re surrounded by richness instead of stark white.

    2. Layer Multiple Textures with Throws and Pillows

    Reading requires physical comfort, and mixing textures—chunky knits, velvet, linen, faux fur—signals luxury while giving you something to fidget with when you’re lost in thought. Texture makes a space look lived-in and inviting.

    Start with a quality throw ($40–$80 from Schoolhouse Electric or Etsy), then add 2–3 pillows in complementary textures and colors ($15–$30 each from Target, West Elm, or thrifted). Mix a knit throw with a velvet pillow and a linen cushion for contrast. Layer them generously—this isn’t about minimalism.

    Your reading chair transforms into a nest that supports your back, neck, and legs. You’ll want to sink into it every single day, and guests will notice how thoughtfully styled it is.

    3. Install a Swing or Hanging Chair

    A swing or hanging chair adds playfulness and movement to a reading space—plus it’s an instant focal point that photographs beautifully. The gentle motion while reading is surprisingly soothing.

    Hanging chairs range from $100–$400 depending on style (Wayfair, Amazon, West Elm). Installation takes 30 minutes with a stud finder and basic hardware. If your ceiling can’t support hanging hardware, consider a floor-standing reading swing for $200–$600. Add a cushion and throw for comfort.

    The slight sway creates a meditative reading experience that stationary chairs can’t match. Plus, your nook looks Instagram-worthy without feeling overdone.

    4. Create Ambient Lighting with Layered Fixtures

    Reading requires good light, but harsh overhead lighting kills coziness. Layering 2–3 light sources (floor lamp, table lamp, string lights) lets you adjust brightness and create warmth.

    Combine a dimmable floor lamp ($40–$120 from Target or CB2), a small table lamp ($25–$60), and optional string lights ($15–$30 from Amazon). Total investment: $80–$210. Install on a dimmer switch for maximum control. Position the floor lamp behind or beside your chair to avoid glare on your book.

    Soft, warm lighting (2700K color temperature) makes reading easier while creating ambiance that makes you want to linger. You’ll read longer and feel less eye strain.

    5. Add a Small Side Table for Books and Beverages

    A side table keeps your essentials within arm’s reach—tea, water, your current book, glasses—so you don’t have to abandon your cozy position. It also visually anchors the nook and provides a styling surface.

    Look for a small wooden table (18–24 inches wide) at IKEA ($30–$50), thrift stores ($10–$40), or Wayfair ($50–$150). Vintage wooden stools work too. If space is tight, a floating shelf ($20–$40) or a narrow console does the same job.

    Everything you need sits within reach, and your nook looks intentional and styled rather than cluttered. You’ll stop knocking over your mug mid-chapter.

    6. Hang Floating Shelves Above Your Chair

    Vertical storage makes a small nook feel intentional and lets you display books as decor. Floating shelves are renter-friendly and easy to install.

    Install 2–3 shelves using heavy-duty wall anchors if renting, or into studs if you own ($40–$100 for a set of three from IKEA). Takes 45 minutes. Fill with books, a few decorative objects, and candles to create a styled backdrop that feels like a personal library corner.

    Your books become part of the decor, and you always know where to grab your next read. The nook feels curated and special rather than empty or generic.

    7. Use Pattern Drenching for Immersive Coziness

    Pattern drenching—layering matching or complementary prints across walls, textiles, and furniture—creates an immersive, cocoon-like feeling perfect for a reading retreat. It signals this space is different and intentional.

    Start by choosing one dominant pattern (geometric, checks, animal print, or botanical) and incorporate it across 2–3 surfaces: wallpaper, curtains, or upholstery. Mix in one complementary solid. Use peel-and-stick wallpaper ($25–$50 per roll) on just one wall if you’re unsure. Balance busy patterns with calm lighting and one neutral furniture piece.

    Being surrounded by coordinated patterns feels luxurious and magazine-worthy. Your brain registers the space as “specially designed for me,” which triggers relaxation.

    8. Install Wallpaper on the Ceiling for Architectural Drama

    Ceiling wallpaper is an unexpected detail that adds architectural interest without cluttering the space with objects. It draws the eye upward and makes even a small nook feel intentional and designed.

    Apply peel-and-stick or traditional wallpaper to your ceiling using $30–$80 in materials and a few hours of work (or hire help for $150–$300). Geometric, botanical, or subtle check patterns work best. Avoid busy animal prints overhead—they’re visually overwhelming.

    The unexpected detail makes people notice your reading space immediately. You get architectural drama without buying a single piece of furniture.

    9. Add Contrast Trim for Definition Without Clutter

    Painting or adding trim in a contrasting color (white, cream, or a darker shade) defines the space and adds sophistication without adding objects. It creates a “frame” around your reading zone.

    Paint existing trim white or cream ($20–$40 in paint) or add wallpaper trim along baseboards and ceiling edges ($15–$30). If you’re renting, use removable wallpaper borders for $10–$25.

    The visual separation makes your nook feel like a purposefully designed room within a room. It photographs beautifully and costs almost nothing.

    10. Choose a Statement Armchair in Jewel Tones or Patterns

    Your chair is the star of a reading nook. A statement piece in a jewel tone or interesting pattern signals that this corner is special and worth investing in comfort.

    Look for vintage or new armchairs in emerald, burgundy, navy, or mustard ($200–$600) from Wayfair, Article, or local thrift stores. Upholstered chairs ($300–$800) last longer than leather. Check for good back support and deep seat depth—you’re going to spend hours here.

    A beautiful, comfortable chair is non-negotiable for a reading retreat. You’ll use it every day, and the right chair makes reading feel like a luxury rather than an afterthought.

    11. Hang Sheer Curtains with a Patterned Overlay

    Layering sheer and patterned curtains combines the softness of diffused light with visual interest. Sheers filter harsh light while patterned overlays add style without blocking the view.

    Install sheer linen curtains ($40–$80 from Target or IKEA) on a standard rod, then add a roman shade or patterned panel ($60–$150) over top. Total: $100–$230 and 30 minutes to install. This combo works in any size window.

    Soft, filtered light makes reading comfortable while the pattern gives your nook personality. You get privacy and aesthetics at once.

    12. Create a Reading Nook Using a Closet or Alcove

    If you lack floor space, transform a closet or under-stair alcove into a hidden reading cave. Closets are naturally cozy and feel like secret hideaways.

    Remove hanging rods if needed, add a low cushion or yoga mat ($30–$100), install floating shelves ($40–$80), and string lights ($15–$30). Total cost under $250 and a weekend of work. Prop the door open or leave it mostly closed for a mysterious vibe.

    The enclosed, private feeling makes this space feel like your own retreat. Kids and adults alike love the fort-like coziness of a closet nook.

    13. Use Limewashed Walls for Textured Warmth

    Limewashing creates a soft, lived-in texture that’s more interesting than flat paint while still feeling calm and cozy. The uneven finish adds character.

    Apply limewash using a kit ($30–$60 from Sherwin-Williams or Farrow & Ball) following package instructions, or hire a pro ($400–$800). DIY takes a full day and feels meditative. The finish gets more beautiful over time as it ages unevenly.

    Limewashed walls feel handcrafted and intentional—like a European countryside retreat. The texture catches light beautifully and never looks sterile or corporate.

    14. Add a Statement Floor Lamp with Sculptural Base

    A sculptural floor lamp does double duty as both functional lighting and decor. Arc lamps are especially good—they curve over your chair and don’t take up much floor space.

    Look for arc floor lamps in brass, black, or natural wood ($80–$250) from West Elm, Schoolhouse Electric, or Wayfair. Vintage options from thrift stores cost $20–$50. Pick one with a dimmable bulb for maximum coziness.

    The lamp becomes a focal point that looks intentional and designed. Brass or sculptural bases photograph beautifully and upgrade the entire nook’s aesthetic.

    15. Display Books as Decor with Spine-Out Styling

    Books are beautiful objects—show them off. Styling spines spine-out (rather than buried in storage) turns your collection into instant decor and makes choosing your next read fun.

    Arrange books on floating shelves with spines facing out, mixing vertical and horizontal stacks. Tuck in a few small objects (candles, plants, framed photos) for visual breaks. No purchase needed—just reorganize what you own.

    Your reading nook looks like a personal library rather than a blank corner. Seeing your collection makes you want to reread old favorites and curate future purchases.

    16. Invest in a High-Quality Reading Light or Gooseneck Lamp

    A dedicated reading light (not overhead lighting) is essential for comfortable reading. Gooseneck or swing-arm lamps position light exactly where you need it without shadows.

    Install a swing-arm wall lamp ($60–$150 from Rejuvenation, Etsy, or IKEA) if you own your space, or use a clip-on lamp ($30–$60) if you rent. Choose warm white bulbs (2700K) for comfort. Total cost $30–$150 depending on style.

    Proper lighting prevents eye strain and makes reading physically comfortable. You’ll notice the difference immediately—your eyes won’t tire halfway through a chapter.

    17. Layer a Vintage or Persian-Style Rug Underneath

    A rug anchors the nook visually and adds warmth (literally and figuratively). Vintage rugs in geometric or botanical patterns tie together jewel tones and create a “collected over time” aesthetic.

    Hunt for a 3×5 or 4×6 rug at thrift stores ($20–$80), estate sales ($30–$150), or Ruggable ($100–$300 for easy-to-clean modern options). Geometric patterns and deep jewel tones align with current trends and hide dirt.

    The rug defines your nook as a separate zone within a larger room. It also adds comfort underfoot and visual grounding that makes the space feel intentional.

    18. Add Cafe Curtains for Soft Vintage Charm

    Cafe curtains—covering only the lower half of a window—let in light while maintaining privacy and adding charming, vintage-inspired character. They’re perfect for reading nooks.

    Install a brass rod halfway up your window frame ($20–$40) and add cafe curtains in linen, cotton, or lace ($30–$70 from Etsy, Pottery Barn, or IKEA). Takes 20 minutes. Pair with sheers above for a layered look.

    Cafe curtains add instant cottage or European charm without feeling overdone. They’re especially perfect in bedrooms or living room corners where you want a soft, romantic vibe.

    19. Create a Book Wall with Contrasting Paint Behind Open Shelving

    Paint the wall behind open shelves in a contrasting jewel tone to make your book collection pop. The color becomes the backdrop and your books the focal point.

    Paint a feature wall in emerald, burgundy, navy, or deep teal ($30–$60 in paint, a few hours of work). Install open shelves ($40–$100 for a set). Arrange books spine-out with a few decorative objects mixed in.

    Your book collection becomes a design feature rather than clutter. Visitors immediately see that you’re a reader, and the nook feels curated and intentional.

    20. Use a Pleated or Gathered Skirt Around a Cushioned Window Seat

    A skirted window seat looks vintage and adds softness to hard lines. Gathering or pleating fabric creates movement and charm—it’s a detail that photographs beautifully.

    Add a cushion to a window seat ($50–$150 from a seamstress or Etsy) and drape it with a pleated skirt using 3–5 yards of linen ($40–$80 from fabric stores). Alternatively, buy a pre-made bedskirt and adapt it (**$30–$60 from Target). This is a weekend project or have it made for you.

    The soft detail transforms a utilitarian window seat into something that feels designed and special. It adds texture and romantic charm instantly.

    21. Incorporate Brass or Gold Metallic Accents

    Warm metallics like brass and gold tie a room together and add luxury. Repetition of the same metal creates cohesion.

    Choose either brass or gold and repeat it across fixtures: lamp base ($60–$120), side table frame ($50–$150), wall sconce ($40–$100), picture frame ($15–$40). Total coordinated investment: $165–$410. Mix metals intentionally (don’t scatter random silvers and golds).

    Brass threading throughout your nook creates a sophisticated, collected aesthetic. It costs little extra but looks intentional and high-end.

    22. Stock Your Nook with Beloved Books and Meaningful Objects

    The best reading nooks feel personal, not decorated-by-committee. Surround yourself with books you actually want to reread, objects that make you happy, and pieces with memories attached.

    Gather your favorite books (no rules on which ones), add a mug that brings you joy, a candle that smells like comfort, a plant for life, and 1–2 meaningful objects. Cost: $0–$50 depending on what you already own. Arrange on shelves and side table.

    A nook filled with your actual favorites feels like a true retreat. You’ll gravitate there naturally because it’s genuinely yours—not a Pinterest recreation.

    23. Use Tactile, Pattern-Forward Textiles for Layering

    Combining different patterns (checks, geometrics, stripes) and textures (knit, velvet, linen, fur) adds visual interest and makes your nook feel abundant rather than sparse. Tactile layering signals luxury.

    Start with a solid base throw ($40–$80), add a patterned pillow in checks or geometrics ($20–$40), layer a textured cushion ($15–$30), and include a faux fur accent ($20–$50). Mix 2–3 patterns with varying scales; let one color (like burgundy or emerald) tie them together.

    Your nook looks magazine-styled and feels irresistibly cozy. Guests will want to sink into that chair immediately, and you’ll crave reading time more often.


    Save this post and tackle one idea this week. Whether you start with paint, a new throw pillow, or a statement chair, each small addition layers into a space that truly feels like yours. Your reading retreat is just a few inspired changes away.

  • 24 Green Couch Styling Ideas That Transform Your Living Room

    24 Green Couch Styling Ideas That Transform Your Living Room

    A green couch is the perfect statement piece—bold enough to anchor your entire living room, yet surprisingly versatile to style. Whether your green leans into deep forest tones, soft sage, or vibrant emerald, the styling possibilities are endless. The challenge? Making sure it feels cohesive and intentional, not overwhelming or dated. That’s where this guide comes in. We’ve gathered 24 specific styling ideas that work with any shade of green, from renter-friendly swaps to investment-level upgrades. You’ll discover how to pair your couch with complementary colors, textures, and accessories that make it shine. By the end, you’ll have a complete roadmap for creating a living room you actually love sitting in—and one that photographs beautifully too.

    1. Layer Warm Neutrals Around Cool Greens

    Pairing a cool-toned green (like forest or sage) with warm neutrals creates instant balance and prevents the space from feeling cold or clinical. This approach lets your green couch be the star without competing with other bold colors.

    Start with a cream or beige area rug as your foundation ($50–$200 depending on size and material). Layer in throw pillows in ivory, oatmeal, or warm taupe ($20–$60 each). Add a wooden coffee table or side tables in walnut or oak ($100–$400) to warm up the space. The contrast makes the green feel more intentional and luxe.

    Pro tip: Skip pure white—warm whites and creams create a more sophisticated, lived-in look than stark white accents.

    Your green couch becomes the hero piece while the neutrals keep everything feeling calm and grounded, like a designer chose each element deliberately.

    2. Add Patterned Throw Pillows in Complementary Colors

    Throw pillows are your secret weapon for testing pattern combinations without commitment. They’re cheap to swap, renter-friendly, and completely change the vibe of your couch.

    Choose 3–4 pillows with different scales of pattern ($15–$40 each): one botanical print, one geometric, one subtle texture, and one solid-color echo of your couch. Keep all patterns in a similar color family—warm earth tones, jewel tones, or pastels work beautifully. Target, West Elm, and Wayfair have excellent options that won’t break the bank.

    Pro tip: Odd numbers of pillows (3 or 5) look more intentional than even numbers, and mixing textures (linen, velvet, knit) adds depth.

    Your couch instantly feels curated instead of bare, and visitors will think you’re a pattern-mixing expert.

    3. Hang Botanical Wall Art Above the Couch

    Wall art directly behind your couch ties the whole look together and adds a curated, intentional feel that transforms a bare wall into a focal point.

    Create a gallery wall with 3–5 framed botanical or nature prints ($30–$150 total depending on whether you frame DIY or buy pre-framed). Stick with natural wood frames or matte black for a cohesive look. Arrange them in a loose rectangle or salon-style grid centered behind your couch. IKEA frames are budget-friendly ($5–$15 each), and printable options from Etsy let you customize ($5–$20).

    Pro tip: Hang the center of your arrangement at eye level (about 57 inches from the floor) for the most pleasing visual balance.

    Your couch becomes part of a deliberate design composition instead of just floating in the room.

    4. Style a Bookshelf Behind or Beside the Couch

    A styled bookshelf beside or behind your green couch adds personality and breaks up empty wall space while keeping the focus on your sofa.

    Stack books horizontally and vertically, add 3–4 decorative objects (a woven basket, small plant, sculptural book ends, framed photo), and layer in a small accent lamp ($40–$100). Keep the color palette neutral with warm wood so the green couch stays the star. IKEA Kallax, Target, or a thrifted wooden shelf all work ($80–$300).

    Pro tip: Leave some shelves partially empty—a styled shelf crammed full looks cluttered, not curated.

    You’ve created a functional display that looks like it belongs in a magazine without needing a professional designer’s help.

    5. Add a Large-Scale Patterned Area Rug

    A statement rug grounds your furniture arrangement and pulls together multiple colors in a way that feels intentional rather than random.

    Choose a rug that’s 8×10 or larger with a pattern featuring your couch’s green plus 2–3 complementary colors like rust, cream, or gold ($150–$500 depending on material). The pattern should be bold enough to see but not so busy it competes with your couch. Wayfair, Rugs USA, and West Elm have excellent options; thrift stores and Facebook Marketplace offer designer finds at a fraction of the price.

    Pro tip: Layer a smaller solid or subtle rug on top for added texture and to define smaller seating zones if your space allows.

    The rug ties the entire room together visually and makes even a small living room feel intentionally designed.

    6. Drape a Chunky Knit Throw Across the Armrest

    A draped throw adds texture, warmth, and an instant “cozy living” vibe that makes your space feel lived-in rather than showroom-perfect.

    Pick a chunky knit throw in cream, oatmeal, or soft taupe ($40–$120). Drape it loosely over one armrest so it cascades slightly onto the seat or back. The texture contrast against the smooth upholstery creates visual interest. Target’s Threshold collection, Anthropologie, and Etsy vintage sellers all have gorgeous options.

    Pro tip: Rotate your throw seasonally—heavier knits in winter, lighter linen blends in summer keep the look fresh.

    Your couch becomes an irresistible invitation to sit down and relax, not just a piece of furniture.

    7. Style End Tables with Lamps and Accessories

    End tables flank your couch and define the seating area—styling them well anchors the whole arrangement and adds functional beauty.

    On each side table, create a small vignette: a table lamp with a neutral shade ($40–$120), a small potted plant or vase ($15–$50), and a stack of 2–3 design or coffee table books ($10–$40). Keep colors warm and muted so they don’t compete with your green couch. Wood or natural-finish tables work best ($100–$400 per table).

    Pro tip: Vary the heights of objects on each table for visual interest—don’t line everything up at the same level.

    Your seating area feels like a complete, thoughtful composition instead of random furniture pushed against walls.

    8. Paint an Accent Wall in Warm White or Cream

    A fresh coat of paint behind or beside your couch costs almost nothing and completely changes how your green sofa reads in the space.

    Choose a warm white or cream paint ($30–$50 per gallon) and paint just the wall behind your couch for impact without overwhelming the room. Prep work takes 2–3 hours; painting takes 1–2 hours. Benjamin Moore, Sherwin-Williams, or budget options like Rustoleum all have lovely warm neutrals. If you rent, ask your landlord—if they say no, peel-and-stick wallpaper ($30–$80) is an easy alternative.

    Pro tip: Paint the wall a shade lighter or darker than your existing walls for subtle visual interest, or go bold with a complementary shade like soft gold or pale sage.

    Your green couch instantly feels more intentional, and the space looks professionally designed on a tiny budget.

    9. Mix Textured Throw Pillows in Similar Color Families

    Mixing textures creates depth and makes your couch feel high-end and curated, like a designer styled it with intention.

    Layer 5–7 throw pillows in the same color family but different textures: smooth velvet, linen, chunky knit, silk, wool, or faux fur ($20–$60 each). Stick to creams, grays, warm whites, or soft accent colors to let the green couch shine. Etsy sellers, CB2, and Wayfair have excellent texture-mixing options that won’t drain your budget.

    Pro tip: Arrange pillows so smoother textures are on the outside and chunkier textures nest in the center—it photographs beautifully and feels intentional.

    Your couch becomes a tactile, inviting focal point that begs to be sat on and, yes, photographed.

    10. Add Potted Plants on Floating Shelves Nearby

    Plants echo your couch’s color and add life to the space while requiring minimal investment or styling skill.

    Install 2–3 floating shelves ($30–$80 total) and fill them with small to medium potted plants ($15–$50 each depending on variety). Opt for low-maintenance plants like pothos, snake plants, or ZZ plants if you’re new to plant parenting. Group plants in odd numbers and vary heights for visual interest. IKEA, Wayfair, or a local nursery have everything you need.

    Pro tip: Place plants on different shelves at different heights so they feel arranged, not crammed in a line.

    Your living room becomes a calming, oxygen-rich space that feels fresh and alive—literally.

    11. Layer a Vintage Runner Rug in Front of the Couch

    A vintage runner adds character and suggests you’ve collected beautiful things over time rather than buying everything at once.

    Source a vintage or antique runner rug ($60–$300) from Facebook Marketplace, Etsy, local antique shops, or estate sales. Choose one with warm earth tones—rust, gold, cream, or muted jewel tones work beautifully with green couches. Layer it perpendicular to your main area rug or in front of your couch for a collected, eclectic vibe. Condition varies, so inspect photos carefully.

    Pro tip: Vintage runners are often narrower than modern rugs—that’s intentional and adds to the charm.

    You instantly look like someone with excellent taste who knows how to hunt for treasures instead of buying everything new.

    12. Display a Large Mirror with a Wood or Metal Frame

    A leaning mirror beside your couch amplifies natural light and makes the space feel bigger and brighter while adding a design-forward element.

    Choose a large mirror (3 feet or larger) with a wooden, metal, or composite frame ($100–$400) and lean it against the wall beside your couch rather than hanging it. The size and angle create visual impact while keeping it renter-friendly. IKEA, Target, Wayfair, and thrift stores all have gorgeous options at various price points.

    Pro tip: Position the mirror to catch and reflect your window light during the day—this amplifies natural light and makes the room feel more open.

    Your living room instantly feels brighter, larger, and more sophisticated with just one large, strategically placed piece.

    13. Accessorize with Warm Metallics (Gold, Brass, Copper)

    Warm metals (gold, brass, copper) complement green beautifully and add luxury without screaming “I just bought everything yesterday.”

    Incorporate warm metallics through table lamps ($40–$120), picture frames ($15–$40), vases ($20–$80), and decorative objects scattered across your side tables and shelves. Keep metals consistent—mix brass with copper if you like, but stick to warm tones, not silver or chrome. Target, West Elm, and Amazon have affordable options.

    Pro tip: Mix matte and polished metallics for visual depth—one shiny brass lamp and one matte copper vase feel more intentional than all matching finishes.

    Your space takes on an immediate sense of warmth and sophistication without needing expensive furniture pieces.

    14. Create a Cozy Reading Nook in the Corner

    Carving out a small reading nook beside your couch doubles the functionality of your seating area and creates an intimate space within the larger room.

    Position a comfortable chair or oversized cushion ($100–$400) in a corner near your couch, add a small side table ($40–$120), a floor lamp ($40–$100), a woven basket for blankets or books ($30–$60), and a stack of your favorite books. Keep textiles and colors cohesive with your couch’s palette.

    Pro tip: If you don’t have a dedicated corner, create the illusion of one by grouping furniture and draping a throw blanket nearby.

    You’ve transformed a single sofa into a full-fledged reading destination that makes curling up with a book feel like the best way to spend an afternoon.

    15. Style Low-Profile Side Tables in Natural Wood

    Low-profile tables keep the visual weight of your seating area light and modern while maintaining that intentional, designed look.

    Choose natural wood side tables under 24 inches tall ($80–$250 each) with simple, clean lines—mid-century modern styles work beautifully with green couches. Keep styling minimal: just a lamp, small plant, and perhaps a coffee table book or candle on each. IKEA, Article, and Facebook Marketplace vintage finds all work.

    Pro tip: Mismatched tables (different heights or finishes) create a more collected, intentional vibe than matching sets.

    Your seating area feels modern and uncluttered while still having personality and purpose.

    16. Add a Sculptural Ceramic or Wood Accent Piece

    One statement accent piece adds art and sophistication without requiring wall space or additional furniture.

    Choose a large ceramic vase, wooden sculpture, or abstract art piece ($50–$300) in cream, warm tones, natural wood, or contrasting jewel tones. Position it on a side table, shelf, or the floor in a prominent spot near your couch where it can be admired. Local ceramicists, Etsy, Chairish, and galleries are great sources for one-of-a-kind pieces.

    Pro tip: Odd shapes and imperfect finishes feel more collected and interesting than perfectly symmetrical pieces.

    You’ve added museum-quality art to your living room without spending fine-art prices.

    17. Hang Sheer Curtains to Frame Windows Softly

    Soft curtains frame your windows beautifully and allow natural light to filter through while adding vertical lines that make ceilings feel taller.

    Hang floor-to-ceiling sheer curtains in white or cream ($40–$150 per panel depending on length) from a simple rod in black, gold, or natural wood ($30–$80). Install curtain rods near the ceiling, not at the window frame, to maximize height. IKEA, Target, and Amazon have budget-friendly options in various styles.

    Pro tip: Sheer curtains work beautifully with green couches because they diffuse light without competing visually—your couch stays the star.

    Sunlight now filters through your windows in the most flattering way possible, and your entire room feels brighter and more finished.

    18. Create a Gallery Wall with a Mix of Frame Styles

    A mixed-style gallery wall feels more collected and intentional than matching frames, and it’s a perfect canvas for rotating art.

    Curate 6–10 framed pieces in different frame styles and sizes ($40–$200 total for DIY options, more for pre-framed art). Mix botanical prints, abstract pieces, favorite quotes, family photos, or a combination. Arrange in a loose rectangle or salon-style grid. Etsy printables, thrifted frames, IKEA, and indie artists all provide affordable options.

    Pro tip: Use painter’s tape to map out your arrangement on the wall before hanging anything—this prevents mistakes and ensures balanced spacing.

    Your wall becomes a personal gallery that tells your story and adds depth and sophistication to your entire seating area.

    19. Layer Varying Heights of Throw Pillows

    Varied pillow heights create a luxe, layered look that screams “designed on purpose” rather than “just grabbed whatever was on sale.”

    Mix square pillows (24 inches), rectangular pillows (14×24 inches), and small accent pillows (12 inches) in coordinating colors and textures ($20–$60 each). Arrange taller pillows in the back corners, medium heights in the middle, and smaller accents in front. This creates depth and visual movement.

    Pro tip: Odd numbers feel more intentional than even—aim for 5, 7, or 9 pillows rather than 6 or 8.

    Your couch becomes impossibly plush and inviting, and visitors will assume you have a professional interior designer on speed dial.

    20. Position a Floor Lamp in a Corner for Warm Ambiance

    A strategically placed floor lamp adds functional lighting while creating a warm, intimate atmosphere that transforms your living room at night.

    Choose an arc lamp or tripod floor lamp with a linen or burlap shade ($60–$200) and position it in a corner behind or beside your couch to cast light across the seating area. Warm-toned bulbs (2700K) create the coziest effect. IKEA, West Elm, Target, and Wayfair have options for every budget.

    Pro tip: Pair your floor lamp with dimmable smart bulbs ($15–$30) so you can adjust light levels from your phone.

    Your living room now has the moody, intimate lighting that makes every evening feel like a retreat from the outside world.

    21. Add a Woven Basket for Blankets and Books

    A woven basket serves triple duty: storage, textural accent, and styling opportunity that keeps your space functional and beautiful.

    Place a large woven basket ($40–$120) beside or under your couch to store blankets, books, and throw pillows. Choose natural materials like seagrass, rattan, or woven jute in warm tones. Keep blankets and books visible and slightly overflowing for a collected, lived-in feel. IKEA, Target, West Elm, and thrift stores have excellent options.

    Pro tip: Place a decorative basket liner in a complementary color inside to frame items beautifully and prevent items from looking haphazard.

    You’ve solved the problem of where to store couch accessories while adding another layer of intentional styling.

    22. Mix Vintage and Modern Decor Pieces

    Pairing vintage finds with modern pieces creates a sophisticated, eclectic look that suggests you have excellent taste and a story behind each object.

    Combine new items from modern retailers (West Elm, CB2, Article) with vintage pieces from Etsy, thrift stores, and antique shops. Mix old mirrors, vintage rugs, antique side tables, and inherited furniture with contemporary pillows and art. The key is keeping colors cohesive so the mix feels intentional rather than random.

    Pro tip: Anchor the look with one or two high-quality vintage investment pieces—an antique mirror or side table—and fill in with affordable modern accents.

    Your space feels like it’s been curated with intention over time, not assembled in a weekend shopping spree.

    23. Style Shelving Above the Couch with Books and Objects

    Shelving above your couch maximizes vertical space and gives you a canvas for displaying books and objects that reflect your personality.

    Install 2–4 floating shelves ($40–$120 total) above your couch and style them with stacked books, small plants, framed photos, ceramic pieces, and meaningful objects. Mix vertical book stacking with horizontal arrangements for visual variety. Keep one third empty space to prevent cluttered feeling. IKEA, Wayfair, and a local carpenter can install shelves.

    Pro tip: Group objects in odd numbers and vary heights so shelves feel intentional, not haphazard.

    You’ve created a personal gallery above your couch that tells your story and turns wasted wall space into a design feature.

    24. Install Recessed Lighting or Track Lighting Nearby

    Professional lighting is an investment that completely changes how your green couch looks and how the room feels at night.

    Hire an electrician to install recessed lights or track lighting above your seating area ($300–$800 installed depending on complexity). Use warm-toned bulbs (2700K) to complement your green couch. If you rent or can’t do permanent installation, plug-in track lighting systems ($150–$300) offer an easy alternative.

    Pro tip: Position lights to highlight your couch as the focal point, not wash the entire room equally—this creates dramatic, designer-level ambiance.

    Your living room now has professional-grade lighting that makes your green couch look museum-quality and transforms the entire room after dark.

    Save this post and start with just one or two ideas this weekend—maybe add a throw blanket and a couple of new pillows, or hang that gallery wall you’ve been thinking about. Small changes stack up fast, and your green couch deserves to feel completely intentional.

  • 27 TV Cabinet Design Ideas That Add Style & Smart Storage

    27 TV Cabinet Design Ideas That Add Style & Smart Storage

    Your TV cabinet should be more than just a place to stash the remote. It’s the focal point of your living room, and the right design can completely change how your space looks and feels—without requiring a total renovation. Whether you’re working with a tiny apartment, an open floor plan, or you just want to ditch the visible cable chaos, there are smart solutions for every room and budget. We’ve rounded up 27 cabinet ideas that combine style with practical storage, from floating units that save floor space to textured finishes that add visual interest. You’ll find budget-friendly hacks, investment pieces, and everything in between. Ready to stop staring at that awkward blank wall? Let’s dive in.

    1. Go Floating for Maximum Floor Space

    Floating TV cabinets are the ultimate space-saver, especially in smaller rooms where every inch counts. They create the illusion of more floor space by eliminating the visual weight of a bulky stand.

    Mount a floating media unit between $80–$400 depending on size and material. Use a stud finder to locate wall studs, then install heavy-duty brackets rated for at least 50 pounds. IKEA, Wayfair, and Amazon all carry budget options; wood and metal designs are available. Installation takes one afternoon if you’re comfortable with a drill—or hire a handyman for $75–$150.

    The best part? You’ll feel like your room physically expanded, plus you gain floor space for a plant, basket, or extra seating. Renters can ask landlords about wall mounting, or use temporary adhesive strips for lighter cabinets (under 30 pounds).

    2. Hide Cables with Cord Management Behind the Unit

    Visible cables are the enemy of a clean aesthetic, but hiding them doesn’t require expensive custom builds. Strategic planning and affordable cable management tools do the job.

    Buy a cable management box ($15–$40) from Target, Amazon, or Best Buy. Mount it behind your TV or inside a cabinet shelf, then group cables by device using velvet cable ties ($5–$12 per pack)—they’re gentler on wires than plastic ties and look nicer. Label each cable with a small sticker or tag (under $5 for a pack) so you know what’s what when troubleshooting. Spend 30 minutes organizing, and the transformation is instant.

    You won’t waste time tracing mystery cables when something stops working. Your living room looks intentional and sophisticated, not like a tech graveyard. This upgrade works for renters too—no permanent changes needed.

    3. Add LED Backlighting for a Halo Effect

    LED backlighting reduces eye strain during evening viewing and creates a stunning visual frame around your TV—it’s a favorite trick in cinema design.

    Install warm-white LED strip lights ($20–$60) from Amazon, Home Depot, or Best Buy. Measure the back of your TV, then apply self-adhesive strips to the upper corners and sides. Plug into a power outlet or USB port (many strips come with adapters), then control brightness via remote or app. Installation takes 15 minutes—just clean the wall first so strips adhere properly.

    The halo effect makes your TV look like it’s floating and reduces the contrast shock when you glance away from a bright screen. Bonus: it makes your whole setup look high-end, even on a budget. Choose warm tones for cozy vibes or cool tones for a modern feel.

    4. Use Natural Wood Slats for Organic Texture

    Slatted wood finishes have dominated 2025 design for good reason—they add visual interest and make plain cabinets feel intentional and modern.

    Purchase a pre-made slatted cabinet ($200–$800) or buy a basic cabinet and add DIY slatted panels using wooden shiplap or thin slats ($50–$150). Attach with a brad nailer or construction adhesive. If DIY feels intimidating, buy adhesive-back wood panels from Amazon ($30–$100 for a set) and apply them directly. Time needed: 2–4 hours for DIY, or hire a handyperson for $100–$200.

    The texture draws the eye upward and creates sophisticated shadow play throughout the day. Your TV becomes part of a styled feature wall instead of a stark black rectangle. This works beautifully in both modern and rustic spaces.

    5. Mix Open and Closed Storage for Balance

    Open shelves look gorgeous when styled intentionally, but they also expose clutter. Combining them with closed storage gives you the best of both worlds.

    Choose a cabinet with both closed and open sections ($150–$600) from IKEA, Wayfair, or a local furniture store. Use closed cabinets below to hide cables, remotes, DVDs, and gaming consoles. Style open shelves above with 3–5 curated books, small plants, and one statement piece. Apply the “rule of three” in each shelf section—group items in odd numbers for visual balance.

    You get the styled Instagram-worthy look without dedicating your entire cabinet to decoration. Honestly, this is one of the easiest ways to feel organized and design-forward at the same time.

    6. Install Acoustic Slatted Panels for Sound Control

    If your room echoes or sounds hollow during movies, acoustic panels are a game-changer. They improve sound quality while adding texture to your wall.

    Buy acoustic slatted panels ($100–$400 for a wall set) from Amazon, Best Buy, or specialty audio stores. Mount them directly to the wall using adhesive strips or a brad nailer. Gray, white, and natural wood options blend seamlessly with most decor. Installation takes 30 minutes to 1 hour. Pair with your TV cabinet to create a cohesive media zone.

    You’ll notice dialogue becomes clearer, bass sounds richer, and the room feels less echoey. It’s a pro-level upgrade that looks like intentional design, not audio equipment. Renters: confirm with your landlord first, but adhesive-mounted panels usually don’t leave marks.

    7. Choose High-Gloss Lacquer Finishes for Small Spaces

    High-gloss finishes reflect light, making small rooms feel larger and creating a premium, sophisticated look.

    Invest in a high-gloss lacquer cabinet ($300–$1,000) from mid-range brands like Wayfair or West Elm, or upgrade an existing cabinet with high-gloss spray paint ($30–$60 per can). If spray-painting, prep the cabinet with sandpaper, primer, and 3–4 thin coats. DIY time: 4–6 hours plus drying time. Hire a pro for $150–$300 if painting feels overwhelming. Choose deep colors like navy, charcoal, or emerald for maximum impact.

    The reflective surface makes your room feel more open while adding that high-end hotel-lobby vibe. The downside? Fingerprints show easily, so keep fingerprint-resistant spray ($10–$15) on hand. Worth it for the wow factor.

    8. Mount the TV on an Articulating Arm

    Articulating arms free up cabinet space and let you adjust your TV for better viewing angles—a smart choice if you have a small room or open floor plan.

    Buy an articulating TV mount ($40–$150) from Best Buy, Amazon, or Home Depot. Choose between “full motion” (maximum flexibility) or “tilt” (up and down only) based on your needs. Mount directly to wall studs using the included hardware. Installation takes 1–2 hours. Pair with a slim floating cabinet below that’s purely for storage and styling.

    You get flexibility without the bulk of a traditional stand. Rearranging your furniture becomes easier, and your room feels more spacious. Test the range of motion before tightening everything down to make sure your viewing angle is perfect.

    9. Add Floating Shelves Beside the Cabinet for Asymmetry

    Asymmetrical floating shelves beside your TV cabinet create visual interest and display space without feeling heavy or cluttered.

    Install 3–5 floating shelves ($80–$250 total) from IKEA or Wayfair at staggered heights on one side of your cabinet. Use a level to ensure straight mounting. Vary shelf depth (8 to 12 inches) for added visual rhythm. Style with books, small plants, framed photos, and a few decorative objects. Installation takes 1–2 hours.

    The asymmetry makes your wall feel curated and modern, not rigid or corporate. You create a cohesive gallery effect that draws the eye across your entire media wall. This trick works beautifully in apartments since you’re not committing to major changes.

    10. Integrate an Electric Fireplace Below the TV

    An electric fireplace adds warmth and ambiance below your TV, transforming a media wall into a genuine focal point without needing a vented chimney.

    Buy a wall-mounted electric fireplace ($150–$600) from Amazon, Wayfair, or Best Buy. Models like Regal Flame or Real Flame are popular mid-range options. Mount it directly below your TV using the included brackets, then plug into a nearby outlet. Installation takes 30–45 minutes. Use a decorative mantel or ledge ($50–$150) above the fireplace to frame the space.

    The flickering light adds cozy ambiance while the TV stays your daytime focal point. You get double the visual interest and warmth without expensive renovation work. Renters love this option because it’s completely removable.

    11. Paint the Cabinet a Moody Accent Color

    A bold cabinet color anchors your room and makes a statement—especially effective if your walls are neutral.

    Paint your existing cabinet with high-quality furniture paint ($30–$60 per quart) in colors like forest green, navy, terracotta, or charcoal. Prep with sandpaper and primer, then apply 2–3 thin coats. DIY time: 4–6 hours plus drying. Alternatively, buy a pre-finished colored cabinet ($300–$800) from retailers like Article or CB2. Use a finish like matte or satin to hide fingerprints better than gloss.

    The moody backdrop makes your TV, plants, and decorative objects pop visually. It’s a bold move that signals you’ve thought about your space intentionally. Test your color choice by taping samples on the wall and living with them for a few days before committing.

    12. Use Micro Cement for a Luxe Textured Finish

    Micro cement creates a sophisticated, almost velvety surface that feels expensive and architectural—perfect for a statement TV wall.

    Hire a professional to apply micro cement ($800–$2,000 for a wall) or DIY with a micro cement kit ($150–$300). The DIY route requires patience—follow kit instructions carefully, as application is technique-sensitive. Professional installation takes 2–3 days including curing time. Colors range from warm taupes to cool grays to bold blacks.

    The result looks like a high-end hotel and instantly elevates your entire room. The texture catches light beautifully throughout the day, creating subtle shadow play. It’s an investment piece that’ll stay relevant for years.

    13. Create a Gallery Wall Around Your TV

    A gallery wall transforms a TV from an isolated black box into part of a larger, intentional display.

    Collect frames in varying sizes ($5–$30 each from Target, IKEA, or thrift stores) and fill with art, photos, or prints. Plan your layout using kraft paper templates ($2–$5) on the wall first—trace each frame and move pieces around until it feels balanced. Install frames using a stud finder and wall anchors. Time: 2–3 hours. Mix frame finishes (black, gold, wood) for visual interest.

    Your TV becomes part of a styled collection rather than a tech eyesore. It’s incredibly satisfying to step back and see your wall come together as a cohesive whole. This works for renters using removable adhesive strips too.

    14. Install Recessed Shelving Inside the Wall

    Recessed shelving eliminates visual clutter by creating built-in storage that sits flush with the wall.

    Hire a contractor to cut into your wall and install recessed shelves ($500–$2,000 depending on depth and number). This is a renter-unfriendly option, but for homeowners it’s a permanent upgrade worth the investment. Alternatively, use adhesive-back floating shelves ($50–$150) that create a similar appearance without wall cutting.

    Your room feels more intentional and spacious because nothing protrudes into the floor plan. It’s a premium look that works with minimalist or modern aesthetics. Best for spaces where you’re planning to stay long-term.

    15. Add Vertical Lighting with Track Lights Above

    Track lighting lets you highlight specific shelves, artwork, or design details while keeping your space from feeling flat.

    Install track lighting ($100–$400) from Home Depot or Wayfair. Choose between 2–4 adjustable lights depending on wall width. Mount to the wall or ceiling using the included bracket system. Hire an electrician ($100–$200) if wiring feels intimidating, or DIY if you’re comfortable with basic electrical work. Professional install: 2–3 hours.

    Your cabinet instantly looks gallery-quality, with specific pieces glowing rather than everything in uniform light. The adjustable heads let you change emphasis as you update your styling. It’s one of those upgrades that makes a huge difference with minimal visual bulk.

    16. Incorporate Rattan or Woven Textures

    Woven textures bring warmth and organic beauty to cabinets, especially if your style leans bohemian or earthy.

    Buy a rattan or woven panel cabinet ($250–$700) from West Elm, Article, or Amazon. Alternatively, add rattan panels to an existing cabinet ($40–$120) using adhesive or light nailing. Rattan doors hide clutter beautifully while allowing airflow for electronics. Style with plants and natural wood accessories to complete the look.

    The texture is conversation-starting and instantly makes your space feel more layered and thoughtful. Rattan works especially well in rooms with lots of natural light, where shadows play through the weaving. It’s a warm, welcoming choice that feels collected rather than decorated.

    17. Use Fluted Wood Panels for Depth and Luxury

    Fluted panels add sophisticated texture through subtle vertical grooves—a signature luxury furniture detail that’s now more accessible.

    Buy a cabinet with fluted fronts ($400–$1,200) from Wayfair, Article, or CB2, or add fluted panels to an existing unit ($100–$250). Adhesive-back fluted panels are the easiest option for renters. Mix with open shelving to show off the texture. Installation takes 1–2 hours for DIY panel additions.

    The grooves catch light beautifully and create visual depth without feeling busy or patterned. It’s a subtle luxury detail that makes your room feel intentional and expensive. Pair with warm metallics (brass, gold) for maximum impact.

    18. Mount Your TV on a Swivel Base for Corner Placement

    Swivel TV mounts let you place your cabinet in a corner and adjust the viewing angle—perfect for open floor plans.

    Invest in a swivel TV mount ($60–$200) from Best Buy, Amazon, or Home Depot. Mount to the corner wall stud, then place your cabinet directly below. Test the swivel range to ensure it captures all your seating positions. Installation: 1–2 hours.

    This setup lets you claim a corner without sacrificing viewability, and you can adjust for different rooms if you rearrange furniture. It’s especially smart for studios or open-plan apartments where the TV needs to serve multiple zones.

    19. Layer Different Materials (Wood, Metal, Plaster)

    Material layering creates visual richness and makes your space feel curated and expensive.

    Combine elements: a wooden cabinet base ($200–$500), metal shelving accents or frame ($50–$150), and a textured plaster or stucco wall finish ($300–$800 professionally). You don’t need all three—even mixing two creates impact. Style with objects in contrasting materials: ceramic, plants, brass accessories. Time varies based on complexity, but mixing store-bought and DIY pieces saves money.

    The mixed materials tell a story and prevent your wall from feeling one-note or sterile. Each texture adds personality and depth. This approach works beautifully in modern, eclectic, and industrial spaces.

    20. Install Curved or Arched Cabinet Silhouettes

    Curved cabinets soften modern spaces and feel more organic than sharp right angles—a trend that’s gaining momentum.

    Choose a curved media unit ($400–$1,500) from designers like Blu Dot, Article, or Wayfair. Curved options are often pricier than linear cabinets, but they create a statement. Alternatively, add curved shelving accents ($100–$300) to straighten a basic cabinet. Installation is standard for floating units. Allows 1–2 hours.

    The soft lines make your room feel friendlier and less corporate. Curved cabinets pair beautifully with other round elements like plants or circular artwork. It’s a subtle way to add personality without bold colors.

    21. Hide a TV Behind Smoked Glass Doors

    Smoked glass doors let your TV disappear into the wall when it’s off—the ultimate minimalist solution.

    Buy a cabinet with smoked glass fronts ($500–$1,500) from high-end retailers like Article, Design Within Reach, or custom builders, or retrofit existing doors with smoked glass film ($50–$100). When the TV’s off, it’s invisible. When it’s on, the screen shows through clearly. Installation: 30 minutes for film, 1–2 hours for full cabinet swap.

    You reclaim wall space psychologically—your room doesn’t feel dominated by a black rectangle 24/7. It’s a game-changer for people who want tech to blend into their life rather than anchor their room. This strategy works beautifully in minimalist, mid-century modern, and luxury aesthetics.

    22. Add Modular Customizable Panels for Future Changes

    Modular systems let you change your look without replacing the entire cabinet—perfect if you like experimenting.

    Invest in a modular TV wall system ($300–$1,000) from IKEA (their besta system offers tons of customization), Wayfair, or specialty retailers. Mix and match panel colors, textures, and cabinet heights. Reconfigure whenever inspiration strikes. Installation depends on customization level, typically 2–4 hours.

    You’re buying flexibility alongside storage. Test colors and layouts before committing to permanent paint or major remodels. It’s brilliant for renters or anyone who redesigns frequently. Update panels seasonally or annually to keep your space feeling fresh.

    23. Create Symmetrical Flanking Shelves for Architectural Appeal

    Symmetrical flanking shelves around your TV create a formal, architectural look that feels curated and intentional.

    Mount identical floating shelves ($80–$250 for a pair) at the same height on both sides of your TV. Use a level to ensure perfect alignment. Fill both sides with similar items—books on one side, plants on the other—to emphasize balance. Style consistently across both shelves. Installation: 1–2 hours.

    Symmetry feels inherently sophisticated and creates visual calm. Your TV becomes the centerpiece of an organized, balanced composition. This approach works especially well in traditional, mid-century modern, and minimalist spaces.

    24. Use Venetian Plaster for Subtle Drama

    Venetian plaster creates a sophisticated finish with depth and subtle sheen—expensive-looking without being loud.

    Hire a professional to apply Venetian plaster ($600–$1,500 for one wall) or DIY with a kit ($100–$200). The technique involves applying multiple thin coats and buffing to create depth. Color options include warm grays, taupes, and cream. Professional installation takes 2–3 days including curing. This is an investment, but it lasts for years.

    The subtle sheen catches light beautifully, creating a luxe, almost liquid appearance. It’s the design equivalent of whispering instead of shouting—sophisticated and understated. Best for people who want high-end impact without bold colors or busy textures.

    25. Combine Your TV Cabinet with a Mantel-Style Ledge

    A mantel-style ledge on top of your cabinet creates additional display space and anchors your TV within a larger composition.

    Install a wooden ledge ($50–$200) or buy a cabinet with a built-in ledge. Mount securely using brackets rated for the weight of your décor. Style with 5–7 carefully chosen pieces: candles, a mirror, framed photos, and a small plant. Rotate items seasonally to keep it fresh. Installation: 30 minutes.

    You instantly add visual interest above your TV without cluttering the wall. The ledge frames your TV beautifully and creates a focal point that feels intentional. It’s a designer trick that makes a huge difference with minimal effort.

    26. Paint the Wall Behind with an Ombre or Gradient Effect

    An ombre or gradient wall adds dimension and interest while keeping the overall look sophisticated and subtle.

    Paint your wall with a gradient effect using one color family in two shades ($30–$60 for paint). Apply the lighter shade first, then blend downward into the deeper tone using a damp sponge or gradient tool. Watch YouTube tutorials beforehand—the technique takes practice. DIY time: 3–4 hours. Hire a painter for $200–$400 if you want professional results.

    The subtle color shift creates depth and prevents your wall from feeling flat or one-note. It’s an artistic touch that photographs beautifully and feels intentional without being overdone. Test the effect on a large cardboard piece first to see how light plays across the gradient throughout the day.

    27. Combine Your TV Cabinet with Complementary Accent Pieces

    Styling your cabinet alongside complementary accent pieces creates a complete, intentional media zone that feels finished.

    Choose pieces in coordinating finishes: if your cabinet is natural wood, add brass sconces, woven baskets, and a wooden side table. Match metals throughout (all brass, all blackened steel, or mixed metals intentionally). Source from the same retailer or designer collection for visual cohesion ($200–$800 total for accents). Layer heights and textures to create visual rhythm.

    The result looks like a professionally designed vignette instead of random furniture scattered around. Your TV cabinet becomes part of a larger conversation about your style. This approach transforms a basic media wall into the most thoughtfully styled zone in your home.


    SAVE THIS POST for your next living room refresh. Pick one or two ideas and start this weekend—whether you’re painting, adding lighting, or rearranging, small changes add up fast. Which cabinet hack will you try first?

  • 27 Trendy Sofa Ideas That Instantly Modernize Any Home

    27 Trendy Sofa Ideas That Instantly Modernize Any Home

    Your living room deserves to feel like a retreat, not a showroom. Whether you’re working with a small apartment or a sprawling family home, the right sofa sets the tone for everything. These 27 ideas blend 2025’s biggest trends with practical, budget-friendly solutions that actually work in real life. You’ll discover how curved silhouettes, bold colors, modular layouts, and smart styling can completely refresh your space—without requiring a design degree or a massive budget. Ready to make your sofa the hero of your room? Let’s dive in.

    1. Go Curved for Softer, Organic Vibes

    Curved sofas soften rigid rooms and create an approachable focal point that encourages gathering. Unlike traditional straight sectionals, curved pieces feel sculptural and intentionally designed.

    Hunt for curved sofas on Wayfair ($800–$2,500), Article ($1,200–$3,000), or budget-friendly options at IKEA ($400–$800). If you’re renting, companies like Article and Article offer sectionals that curve subtly without screaming “expensive.” Measure your doorway and pathways before ordering—curved sofas can be tricky to maneuver.

    Look for pieces with rounded corners rather than sharp 90-degree angles. A weekend delivery and setup typically runs 1–2 hours. The payoff? A room that feels intentional and way more inviting than boxy furniture.

    2. Layer Deep-Seated Sofas for Maximum Comfort

    Deep-seated sofas let you actually sink in and lounge—no perching on the edge like a formal furniture catalog. This shift toward comfort-first design means you get extra cushion depth (usually 28–32 inches instead of standard 24 inches).

    Brands like Living Spaces ($1,500–$3,000), Article ($1,200–$2,800), and Wayfair ($700–$2,000) offer deep options. For budget shoppers, Article and IKEA’s Sectionals have decent depth starting around $400–$600. Check the measurements carefully; deeper isn’t always better if your legs dangle off the seat. Expect delivery in 2–4 weeks for custom orders.

    The result? A sofa that becomes your favorite napping spot, movie-watching perch, and conversation zone rolled into one.

    3. Choose Earthy Neutrals for Timeless Calm

    Earthy tones—camel, clay, warm beige, and soft taupe—create a soothing backdrop that pairs with almost any decor style. These colors age beautifully and hide wear better than stark whites or blacks.

    Target these hues at West Elm ($800–$2,500), Article ($600–$2,000), Living Spaces ($700–$2,200), and Wayfair ($400–$1,800). If you’re choosing fabric, ask for samples first—lighting in your home affects how colors read. Most retailers ship samples free or for $5. Paint swatches and hold them up against your walls before committing.

    This neutral foundation becomes a canvas for your personal style, making future décor updates feel fresh without replacing the sofa.

    4. Mix Modular Sections for Flexible Layouts

    Modular sofas adapt to your space as life changes. Rearrange sections, add a chaise, or swap an armrest—flexibility is the whole appeal. Perfect for open-plan homes or rooms that serve multiple purposes.

    Brands leading this space: Living Spaces ($1,200–$3,500), Article ($1,000–$3,000), Wayfair ($600–$2,500), and IKEA ($400–$1,500). Buy the base sofa first, then add pieces individually over time if budget is tight. Most modular systems let you mix configurations—no locked-in design.

    You can zone your open floor plan without walls, create cozy reading corners, or adjust for guests in just a few minutes.

    5. Invest in Performance Fabrics for Durability

    Performance fabrics resist stains, pet damage, and spills without sacrificing style or feel. They’re woven differently to repel liquids while maintaining softness.

    Look for brands like Article (performance options $900–$2,000), Wayfair (budget-friendly $500–$1,500), and Living Spaces (premium $1,200–$2,800). Check fabric codes: Crypton, Sunbrella, and Ultrasuede are trusted names. Cost is usually $100–$300 more than standard fabric, but worth it if you have kids, pets, or spill-prone households. Spot-treat stains same day; many come with cleaning kits.

    You get years longer life from your sofa without compromising on the look you actually want.

    6. Add a Rounded Sectional for Social Spaces

    Rounded edges and curved sectionals encourage face-to-face conversation instead of the awkward “staring at the TV” silence of traditional layouts. Sculptural sofas work especially well in smaller rooms where every inch matters.

    Hunt on Article ($1,200–$2,500), What A Room (custom curved options $1,500–$3,500), and Wayfair ($800–$2,000). Measure your room’s flow; curved sofas need at least 3 feet of walking space on each side. Consider semi-circular or serpentine shapes if full curves feel too bold.

    Your gatherings become more intimate and engaging because the furniture itself invites real connection.

    7. Try Low-Profile Silhouettes for Airy Rooms

    Low-profile sofas sit just 8–10 inches off the ground, making rooms feel more spacious and modern. Without visual bulk from legs and storage, your floor breathes.

    Check Decorilla’s guides, Article ($700–$1,800), IKEA’s Scandinavian range ($400–$900), and Wayfair ($500–$1,500). These work best in rooms without young kids or mobility issues (getting up requires flexibility). Dust and pet hair collect underneath more easily, so plan for regular vacuuming. Delivery: 2–3 weeks typically.

    Your space suddenly feels 20% larger, and the minimalist aesthetic creates a calm, intentional vibe.

    8. Select Muted Greens for Wellness Vibes

    Muted greens—sage, olive, and eucalyptus tones—connect your home to nature and promote calm without the harshness of pure neutrals. They’re having a major moment in wellness-focused design.

    Brands carrying green: Bellona USA (color trend authority, $1,000–$2,500), Living Spaces ($800–$2,000), Article ($700–$2,000), and Wayfair ($500–$1,800). Request fabric swatches to see how green reads in your lighting—north-facing rooms may shift the tone toward blue. Pair with warm wood and cream accents to prevent the space from feeling too cool or sterile.

    This palette creates a space that feels like a wellness retreat, boosting mood and focus during those long workdays at home.

    9. Layer Textured Throws and Cushions

    Texture makes sofas feel lived-in and luxe. Boucle, sherpa, velvet, and chunky knits add depth and make you want to sink in immediately.

    Buy throws from Target ($20–$60), IKEA ($15–$50), Wayfair ($25–$80), and Article ($40–$150). Cushions range from IKEA ($10–$40) to Article ($30–$120) depending on material. Start with 3–4 throws and 5–6 pillows; layer asymmetrically for that curated-but-casual look. Wash covers monthly to keep them fresh.

    Your basic sofa becomes a space that looks styled and feels like a cozy hug, perfect for those Netflix nights or lazy Sunday mornings.

    10. Incorporate Sustainable, Custom Designs

    Sustainable sofas use eco-friendly fabrics (organic linen, recycled polyester, FSC-certified wood) and are built to last decades, not seasons. Custom options mean you get exactly what you want without settling.

    Leaders: What A Room (custom $1,500–$4,000), Article (sustainable line $800–$2,500), and Wayfair’s eco-conscious filters ($600–$2,000). Lead times are longer (6–12 weeks), so plan ahead. Yes, upfront cost is higher, but cost-per-year drops significantly when furniture lasts 10+ years instead of 5.

    You invest in a sofa that grows with you, reduces waste, and supports ethical manufacturing—plus it becomes a family heirloom, not landfill-bound.

    11. Add Bold Accent Colors for Personality

    Skip all-neutral if your style leans bold. A rich jewel tone, peachy pink, or deep navy sofa becomes the room’s personality centerpiece and reduces the need for busy accessories.

    Hunt on Wayfair (bold colors $600–$2,000), Living Spaces ($1,000–$2,500), Article ($800–$2,000), and Designer outlets. Pair bold sofas with neutral walls and minimal accessories so they stay the focus, not visual noise. Remember: resale value may be lower, but who cares if you love it for 7 years? Pro tip: test bold colors by renting the fabric first or ordering large samples.

    Your living room becomes a confident reflection of who you are, and guests actually remember it instead of a blur of beige.

    12. Use Modular Pieces to Zone Open Spaces

    In open-plan homes, modular sofas act as architectural dividers without permanent walls. Position the angle to face your TV, then let the other end create a natural buffer between zones.

    Brands excelling here: Living Spaces (zoning layouts $1,200–$3,000) with design advice from Brynna Evans, and Wayfair ($800–$2,500). Measure your space and traffic flow before ordering. Aim for 3–4 feet of walking space between the sofa and the next zone. A designer consultation from Decorilla ($30–$60 per room) can save guesswork.

    The result is a multifunctional space that feels organized and intentional without the cost and permanence of walls.

    13. Try Velvet or Boucle Fabrics for Luxury Feel

    Velvet and boucle elevate any sofa from “fine” to “wow” without five-figure price tags. These fabrics catch light gorgeously and feel premium underhand.

    Expect to pay $100–$400 more for velvet or boucle upgrade (total sofa $900–$2,500 at retailers like Article, Wayfair, and Living Spaces). Downside: velvet shows dust and pet hair more visibly; boucle is slightly more forgiving. Dry-clean occasionally to refresh, or vacuum gently with an upholstery brush weekly. Not ideal for homes with large dogs or young kids (yet).

    This splurge gives you a sofa that looks like a magazine spread for under $2,500—way better ROI than pricier designer brands with less personality.

    14. Embrace Floral and Striped Patterns

    Designer Lucinda Sanford champions bold patterns (botanical prints, stripes, geometrics) as fun focal points. These replace the all-neutral sofa trend and inject personality without looking dated.

    Find patterned options at Wayfair ($500–$1,800), Article ($800–$2,200), Living Spaces ($1,000–$2,500), and specialist stores. Keep walls neutral and accessories minimal so the sofa stays the star. Patterns hide wear slightly better than solids. Order samples first and live with them for a week in your lighting.

    Your sofa becomes a conversation piece and a reflection of your actual style—not the “safe” version everyone else has.

    15. Choose Statement Blues or Charcoal Tones

    Deep blues and charcoals create sophisticated, drama-filled rooms that feel intentional and modern. These darker tones work especially well in minimalist spaces.

    Explore Living Spaces ($900–$2,300), Wayfair ($600–$1,800), and Article ($800–$2,200) for moody options. Pair with warm lighting (soft gold lamps, warm-white bulbs) so the space doesn’t feel dark or sterile. These colors hide stains better than lights, and they feel timeless rather than trendy.

    You get a sophisticated backdrop that makes everything else pop while creating a cocoon-like vibe that’s calming rather than cold.

    16. Invest in Multi-Functional Sleeper Sofas

    Sleeper sofas serve double duty: everyday seating plus guest bed. Modern versions are way more stylish than old pull-outs and actually comfortable enough for real sleep.

    Brands with stylish sleepers: Urban Natural ($1,200–$2,500), IKEA’s Scandinavian range ($400–$900), Article ($1,000–$2,200), and Wayfair ($500–$1,600). Check the mattress thickness—aim for 5+ inches of actual foam, not thin springs. Mechanism should be smooth and not require two people to open. Test one in-store if possible.

    Guest rooms become optional, and your living room serves as an extra bedroom that doesn’t look like a temporary cot.

    17. Pair Sofas with Warm, Layered Lighting

    The right lighting makes even an average sofa feel high-end and welcoming. Warm lighting (2700K bulbs, brass fixtures) pairs beautifully with any sofa color.

    Invest in: 1 floor lamp ($40–$150), 1 table lamp ($30–$120), and 1 pendant or overhead fixture ($50–$300). Retailers: Target, IKEA, West Elm, Wayfair. Layer three light sources to avoid harsh overhead-only situations. Dimmer switches ($15–$30) let you adjust mood throughout the day.

    Suddenly, your sofa glows and becomes the ultimate gathering spot instead of feeling exposed or washed-out.

    18. Customize Your Sofa With Build-Your-Own Options

    Many brands now offer build-your-own tools where you pick the frame, legs, fabric, cushion firmness, and size. You get exactly what you want instead of settling for in-stock limitations.

    Brands with strong customization: Article (30+ fabrics, multiple legs), What A Room ($1,500–$4,000 custom), Wayfair (some options), and Living Spaces. Lead times are 8–12 weeks. Yes, wait time is longer, but you avoid buyer’s remorse. Some brands let you visualize your choices in a 3D room preview.

    Your sofa becomes truly yours—not someone else’s design—and reflects exactly how you want to live.

    19. Go Scandinavian Minimalist for Simplicity

    Scandinavian design emphasizes multi-functional pieces, natural materials, and clean lines. These sofas prioritize comfort and longevity over trends.

    Find Scandi sofas at Urban Natural ($1,000–$2,000), IKEA ($400–$900), Article ($700–$1,800), and Wayfair ($500–$1,500). These sofas typically have: wooden legs, neutral fabrics, simple silhouettes, and hidden storage options. Perfect for renters and minimalists because they stay relevant forever. Pair with one or two quality side tables and minimal accessories.

    You get a living room that feels calm, organized, and genuinely comfortable—not a showroom pretending to be a home.

    20. Layer Organic Shapes to Soften Angular Rooms

    Curved and organic sofas soften boxy rooms. Add rounded side tables, curved mirrors, and organic plants to amplify the effect. This creates visual flow instead of static, rigid geometry.

    Start with the sofa (curved options $800–$2,500 at Article, Wayfair, Living Spaces), then layer: round side table ($100–$300), curved mirror ($80–$250), and potted plants ($20–$100 each). Budget-friendly win: repaint a rectangular table’s edges with rounded trim ($0—DIY project). Arrangement takes one afternoon.

    Your space feels intentional and high-design despite having no actual interior designer in the mix.

    21. Create Visual Warmth With Textured Layers

    Texture creates visual warmth and makes spaces feel expensive without adding clutter. Mix matte, shiny, rough, and soft elements for depth.

    Layer throws ($20–$80 from Target, IKEA, Wayfair), pillows ($15–$100 depending on material), and a woven basket ($40–$150 from West Elm, IKEA). Aim for 5–6 textural pieces total; more looks chaotic, fewer looks bare. Swap seasonal pieces monthly to refresh without spending big money.

    Your sofa becomes an Instagram moment that’s also genuinely comfortable—proof that style and coziness aren’t mutually exclusive.

    22. Position Sofas to Create Conversation Areas

    Furniture arrangement matters as much as the sofa itself. Position pieces to face each other rather than all pointing at the TV to encourage genuine interaction.

    Measure before moving: sofas should be 6–9 feet apart, with a coffee table roughly 18 inches from the sofa edge. Move one piece at a time (recruit help—it’s heavy). Rearranging takes 1–2 hours but costs nothing. Apps like Room Planner or Wayfair’s design tool let you virtually test layouts before moving furniture.

    Suddenly, your living room becomes where people actually want to hang out and talk, not just scroll their phones.

    23. Try Rattan or Cane-Accented Frame Details

    Sofas with rattan or cane accents blend modern comfort with organic, artisanal touches. These details add visual interest and feel fresh.

    Look at Article ($900–$2,200), West Elm ($1,000–$2,500), and Wayfair ($600–$1,800) for frame details. Rattan is durable but requires gentle care; dust weekly and avoid placing in direct sunlight (fades and cracks). These pieces pair beautifully with natural wood and neutral palettes.

    Your sofa becomes a design statement that feels curated and intentional, like you actually know what you’re doing.

    24. Opt for Space-Saving Apartment-Scale Sofas

    Apartment living demands proportionate furniture. A 96-inch sectional in a 200-square-foot room is chaos. Smaller scale sofas (72–84 inches) keep rooms feeling spacious.

    Apartment-friendly options: IKEA (compact $300–$600), Article’s loveseat collection ($500–$1,200), and Wayfair’s filtered “small space” section ($400–$1,500). Measure your actual space plus doorways; I’m serious about this. A sectional that doesn’t fit through your door becomes a $1,200 hallway sculpture.

    You get a sofa that fits your actual space instead of one that dominates it, leaving room for life.

    25. Mix Neutral Sofas With One Bold Accent Wall

    A neutral sofa + one painted accent wall gives you boldness without commitment. If you tire of the wall color, paint over it ($100–$300 in paint and labor). The sofa remains timeless.

    Paint costs: $100–$200 in materials, or hire pros ($300–$800). Sofa options stay accessible ($500–$2,000 across all retailers). Let paint dry completely before moving furniture (48 hours). Choose wall colors that complement your sofa’s undertones.

    This balance means you get design drama without risking thousands on a bold sofa you might regret in two years.

    26. Incorporate Throw Pillows for Easy Seasonal Swaps

    Throw pillows ($10–$50 each) let you refresh your sofa seasonally without replacing anything. Swap them monthly for new moods and trends without commitment.

    Buy from Target ($8–$25), IKEA ($10–$30), Wayfair ($12–$60), and Article ($20–$80). Aim for 3–5 pillows in different sizes (24″, 20″, 16″ squares work well). Mix textures and subtle patterns with one neutral anchor. Wash covers every 2–3 months.

    Your sofa becomes a blank canvas for creativity, and seasonal updates cost next to nothing while keeping the space feeling fresh and intentional.

    27. Select Pet-Proof Upholstery for Family Homes

    If you have pets, performance fabrics or darker microsuede absorb paw prints and hide fur better than light linen or velvet. Washable covers are a lifesaver.

    Performance fabrics add $100–$300 but save thousands in replacement costs. Brands: Article (pet-friendly fabrics), Wayfair (performance filters), Living Spaces (durable options). Microsuede ($400–$1,500 total) wipes clean and resists snags. Throw blankets ($30–$80) protect high-traffic areas. Lint rollers become your best friend.

    You finally stop stressing about every paw print and actually enjoy your sofa with the whole family.


    Save this post for your next living room refresh. Pick one or two ideas this weekend—whether it’s adding layers, rearranging to create conversation zones, or finally investing in that curved sofa you’ve been eyeing. Your living room is too important to leave to chance, and one small change makes way more difference than you’d expect.