Your TV cabinet should be more than just a place to stash the remote. It’s the focal point of your living room, and the right design can completely change how your space looks and feels—without requiring a total renovation. Whether you’re working with a tiny apartment, an open floor plan, or you just want to ditch the visible cable chaos, there are smart solutions for every room and budget. We’ve rounded up 27 cabinet ideas that combine style with practical storage, from floating units that save floor space to textured finishes that add visual interest. You’ll find budget-friendly hacks, investment pieces, and everything in between. Ready to stop staring at that awkward blank wall? Let’s dive in.
1. Go Floating for Maximum Floor Space
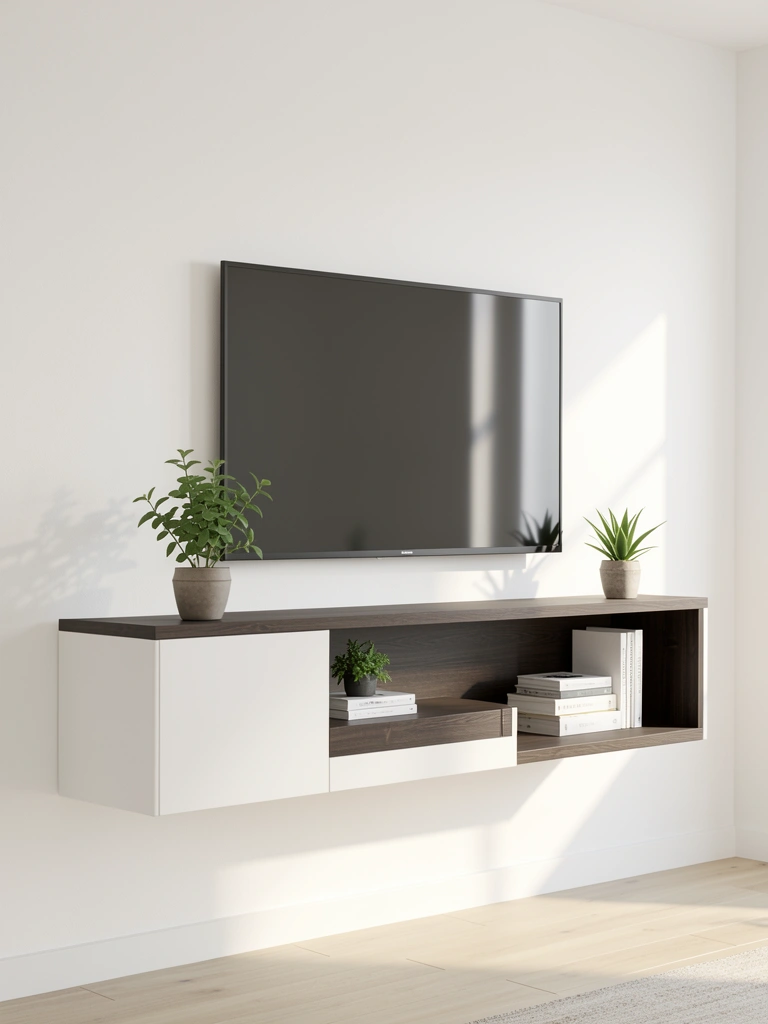
Floating TV cabinets are the ultimate space-saver, especially in smaller rooms where every inch counts. They create the illusion of more floor space by eliminating the visual weight of a bulky stand.
Mount a floating media unit between $80–$400 depending on size and material. Use a stud finder to locate wall studs, then install heavy-duty brackets rated for at least 50 pounds. IKEA, Wayfair, and Amazon all carry budget options; wood and metal designs are available. Installation takes one afternoon if you’re comfortable with a drill—or hire a handyman for $75–$150.
The best part? You’ll feel like your room physically expanded, plus you gain floor space for a plant, basket, or extra seating. Renters can ask landlords about wall mounting, or use temporary adhesive strips for lighter cabinets (under 30 pounds).
2. Hide Cables with Cord Management Behind the Unit
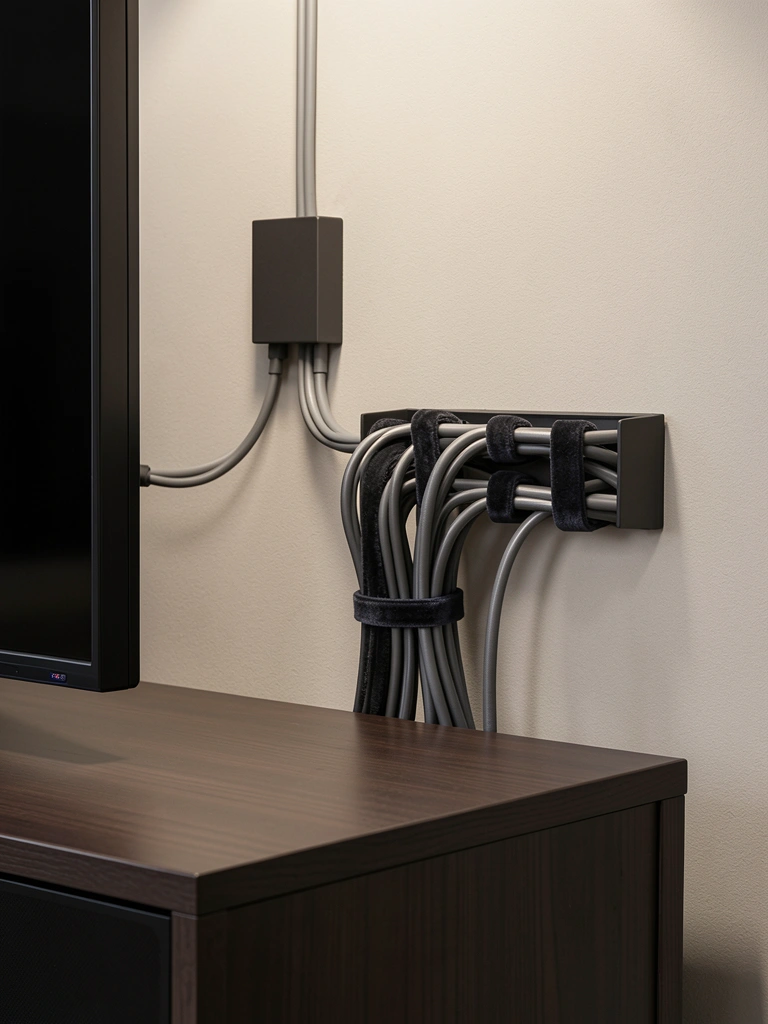
Visible cables are the enemy of a clean aesthetic, but hiding them doesn’t require expensive custom builds. Strategic planning and affordable cable management tools do the job.
Buy a cable management box ($15–$40) from Target, Amazon, or Best Buy. Mount it behind your TV or inside a cabinet shelf, then group cables by device using velvet cable ties ($5–$12 per pack)—they’re gentler on wires than plastic ties and look nicer. Label each cable with a small sticker or tag (under $5 for a pack) so you know what’s what when troubleshooting. Spend 30 minutes organizing, and the transformation is instant.
You won’t waste time tracing mystery cables when something stops working. Your living room looks intentional and sophisticated, not like a tech graveyard. This upgrade works for renters too—no permanent changes needed.
3. Add LED Backlighting for a Halo Effect
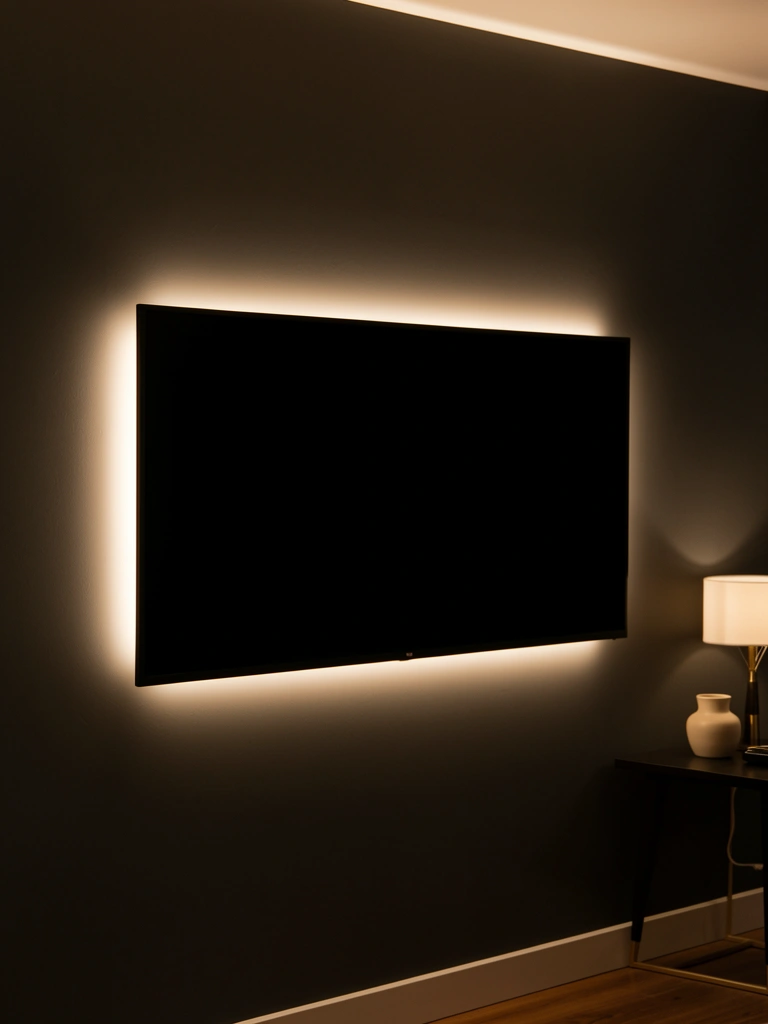
LED backlighting reduces eye strain during evening viewing and creates a stunning visual frame around your TV—it’s a favorite trick in cinema design.
Install warm-white LED strip lights ($20–$60) from Amazon, Home Depot, or Best Buy. Measure the back of your TV, then apply self-adhesive strips to the upper corners and sides. Plug into a power outlet or USB port (many strips come with adapters), then control brightness via remote or app. Installation takes 15 minutes—just clean the wall first so strips adhere properly.
The halo effect makes your TV look like it’s floating and reduces the contrast shock when you glance away from a bright screen. Bonus: it makes your whole setup look high-end, even on a budget. Choose warm tones for cozy vibes or cool tones for a modern feel.
4. Use Natural Wood Slats for Organic Texture
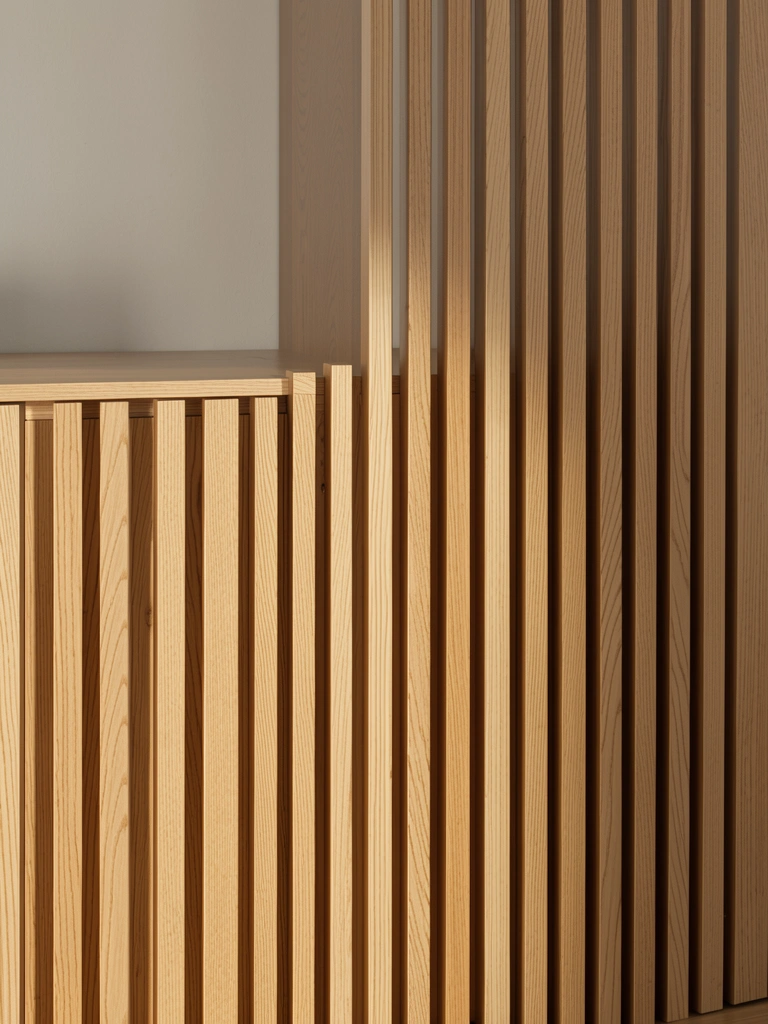
Slatted wood finishes have dominated 2025 design for good reason—they add visual interest and make plain cabinets feel intentional and modern.
Purchase a pre-made slatted cabinet ($200–$800) or buy a basic cabinet and add DIY slatted panels using wooden shiplap or thin slats ($50–$150). Attach with a brad nailer or construction adhesive. If DIY feels intimidating, buy adhesive-back wood panels from Amazon ($30–$100 for a set) and apply them directly. Time needed: 2–4 hours for DIY, or hire a handyperson for $100–$200.
The texture draws the eye upward and creates sophisticated shadow play throughout the day. Your TV becomes part of a styled feature wall instead of a stark black rectangle. This works beautifully in both modern and rustic spaces.
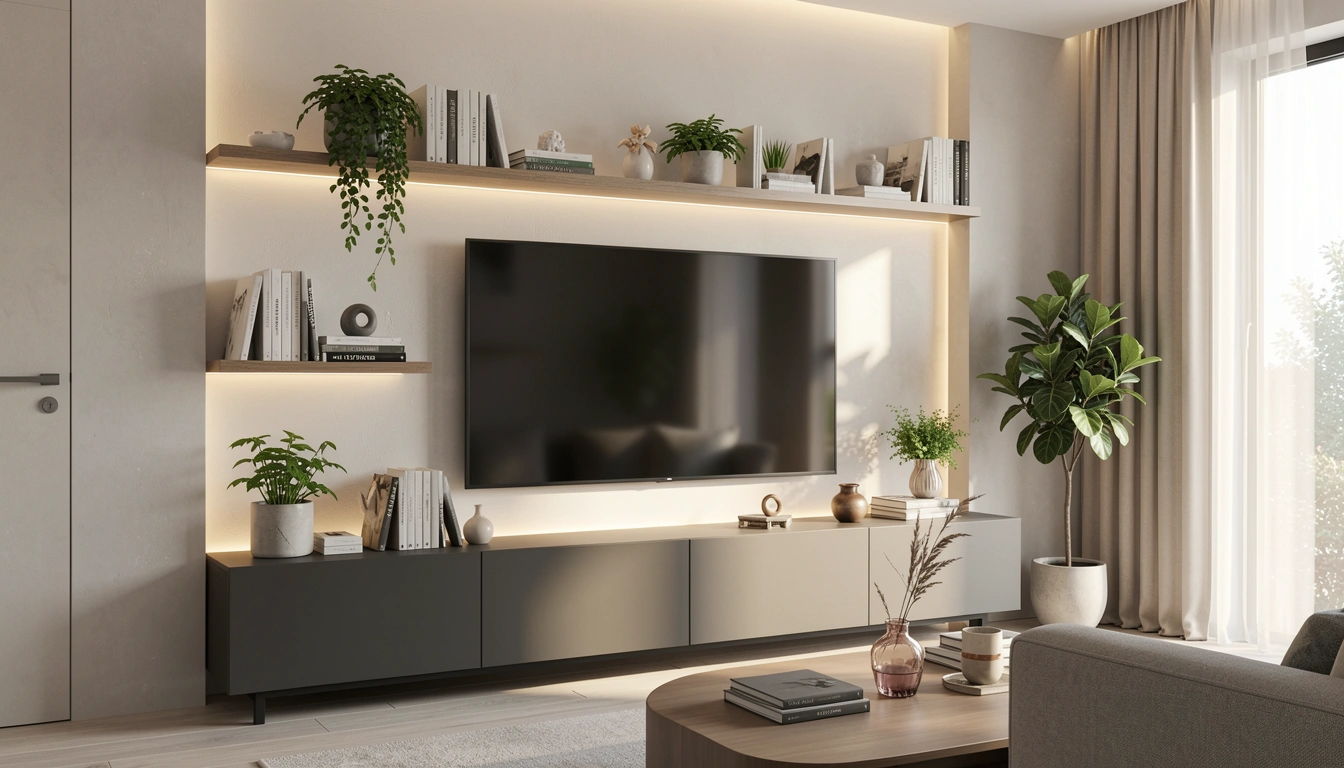
5. Mix Open and Closed Storage for Balance
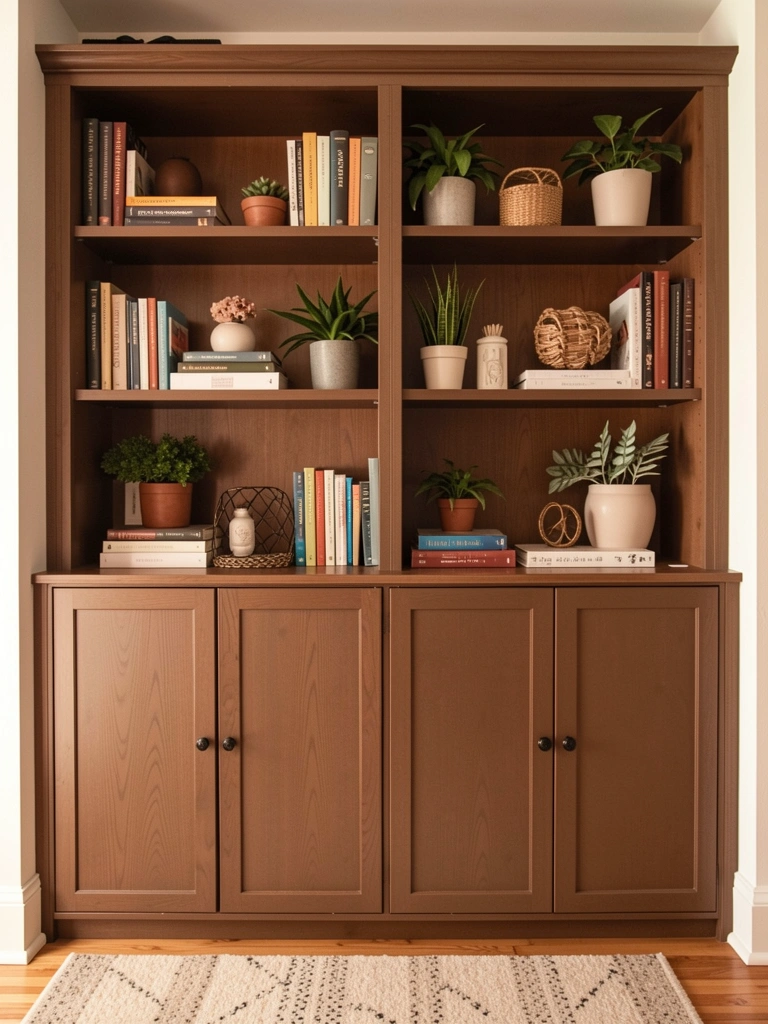
Open shelves look gorgeous when styled intentionally, but they also expose clutter. Combining them with closed storage gives you the best of both worlds.
Choose a cabinet with both closed and open sections ($150–$600) from IKEA, Wayfair, or a local furniture store. Use closed cabinets below to hide cables, remotes, DVDs, and gaming consoles. Style open shelves above with 3–5 curated books, small plants, and one statement piece. Apply the “rule of three” in each shelf section—group items in odd numbers for visual balance.
You get the styled Instagram-worthy look without dedicating your entire cabinet to decoration. Honestly, this is one of the easiest ways to feel organized and design-forward at the same time.
6. Install Acoustic Slatted Panels for Sound Control
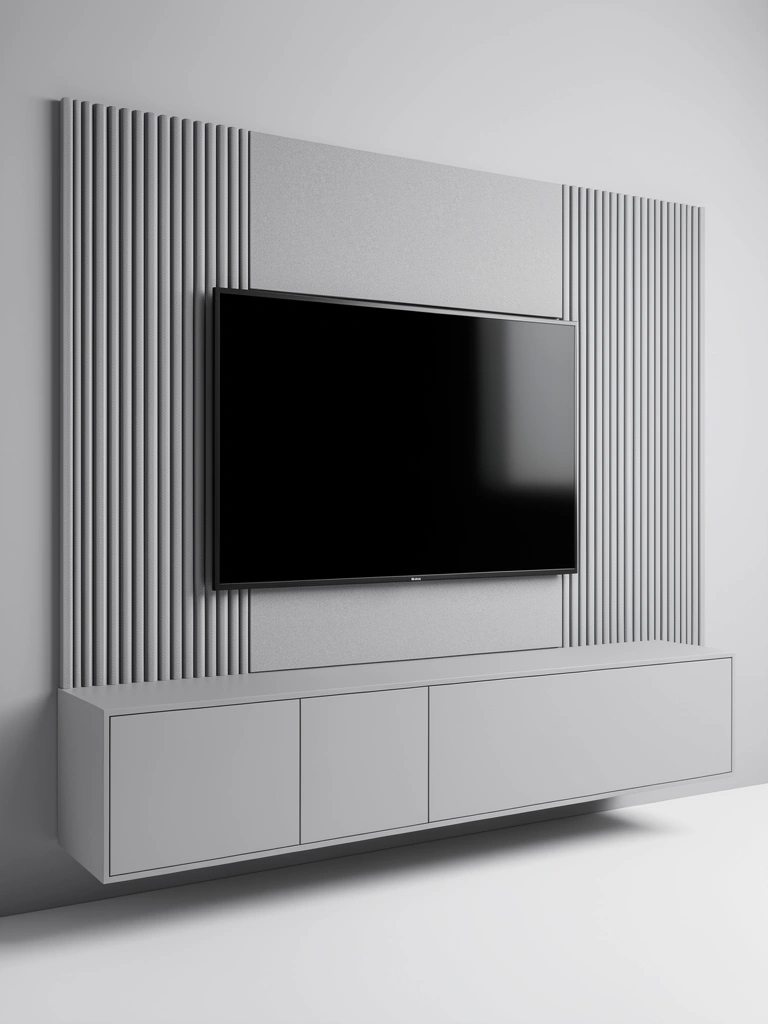
If your room echoes or sounds hollow during movies, acoustic panels are a game-changer. They improve sound quality while adding texture to your wall.
Buy acoustic slatted panels ($100–$400 for a wall set) from Amazon, Best Buy, or specialty audio stores. Mount them directly to the wall using adhesive strips or a brad nailer. Gray, white, and natural wood options blend seamlessly with most decor. Installation takes 30 minutes to 1 hour. Pair with your TV cabinet to create a cohesive media zone.
You’ll notice dialogue becomes clearer, bass sounds richer, and the room feels less echoey. It’s a pro-level upgrade that looks like intentional design, not audio equipment. Renters: confirm with your landlord first, but adhesive-mounted panels usually don’t leave marks.
7. Choose High-Gloss Lacquer Finishes for Small Spaces
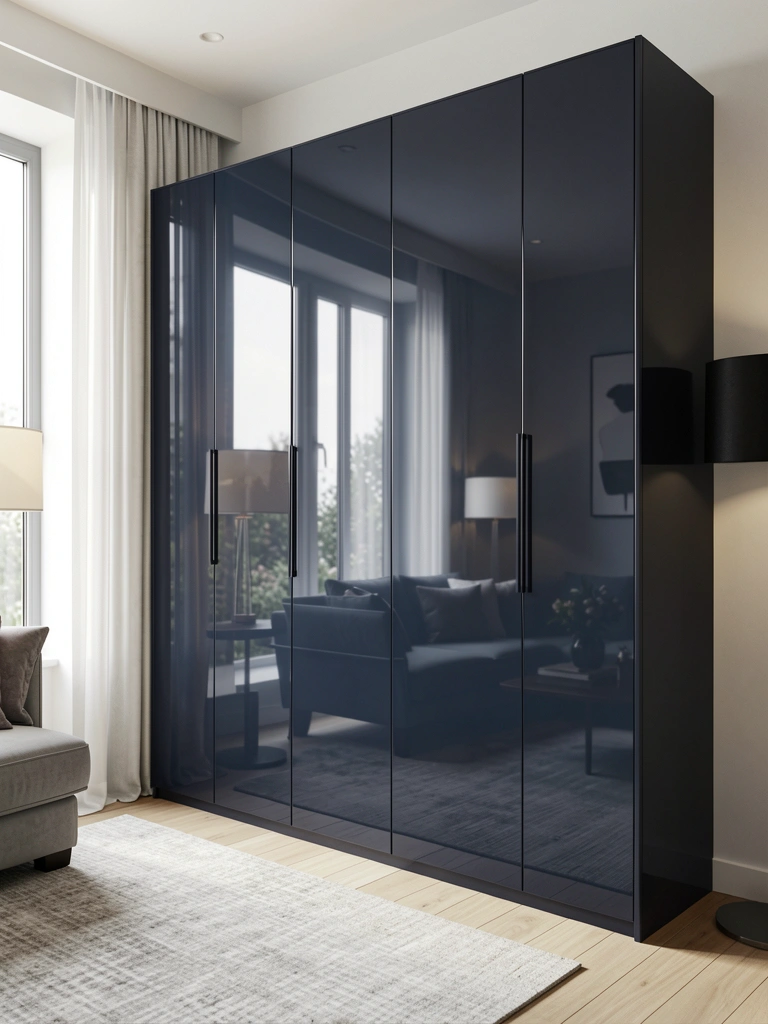
High-gloss finishes reflect light, making small rooms feel larger and creating a premium, sophisticated look.
Invest in a high-gloss lacquer cabinet ($300–$1,000) from mid-range brands like Wayfair or West Elm, or upgrade an existing cabinet with high-gloss spray paint ($30–$60 per can). If spray-painting, prep the cabinet with sandpaper, primer, and 3–4 thin coats. DIY time: 4–6 hours plus drying time. Hire a pro for $150–$300 if painting feels overwhelming. Choose deep colors like navy, charcoal, or emerald for maximum impact.
The reflective surface makes your room feel more open while adding that high-end hotel-lobby vibe. The downside? Fingerprints show easily, so keep fingerprint-resistant spray ($10–$15) on hand. Worth it for the wow factor.
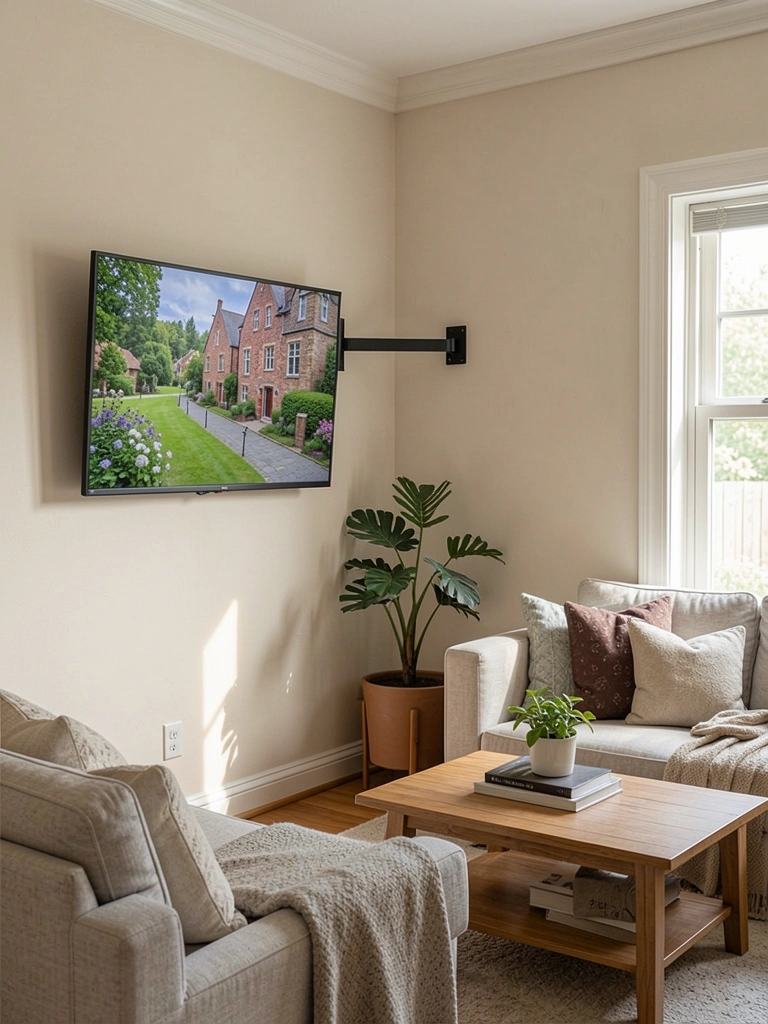
8. Mount the TV on an Articulating Arm
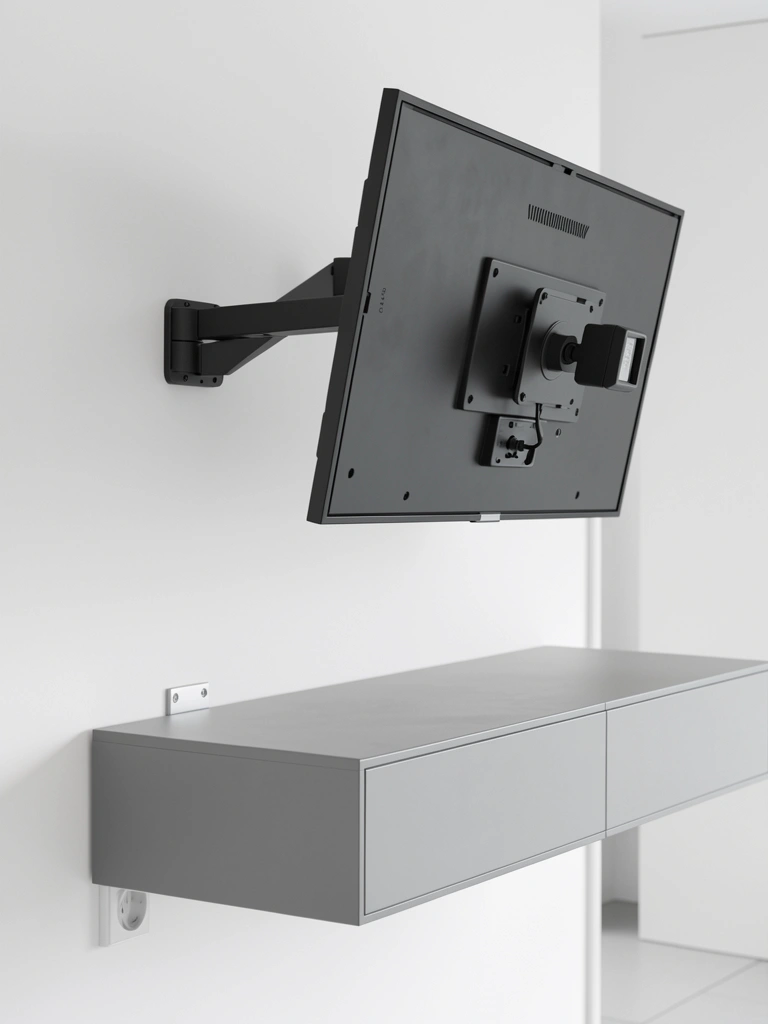
Articulating arms free up cabinet space and let you adjust your TV for better viewing angles—a smart choice if you have a small room or open floor plan.
Buy an articulating TV mount ($40–$150) from Best Buy, Amazon, or Home Depot. Choose between “full motion” (maximum flexibility) or “tilt” (up and down only) based on your needs. Mount directly to wall studs using the included hardware. Installation takes 1–2 hours. Pair with a slim floating cabinet below that’s purely for storage and styling.
You get flexibility without the bulk of a traditional stand. Rearranging your furniture becomes easier, and your room feels more spacious. Test the range of motion before tightening everything down to make sure your viewing angle is perfect.
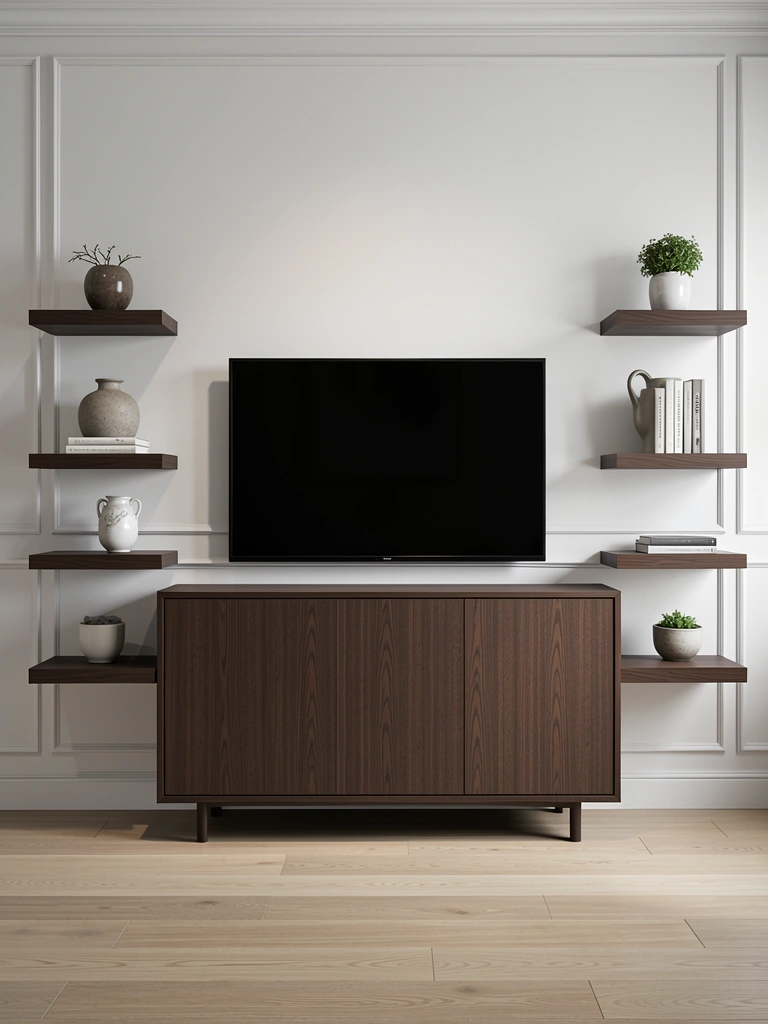
9. Add Floating Shelves Beside the Cabinet for Asymmetry
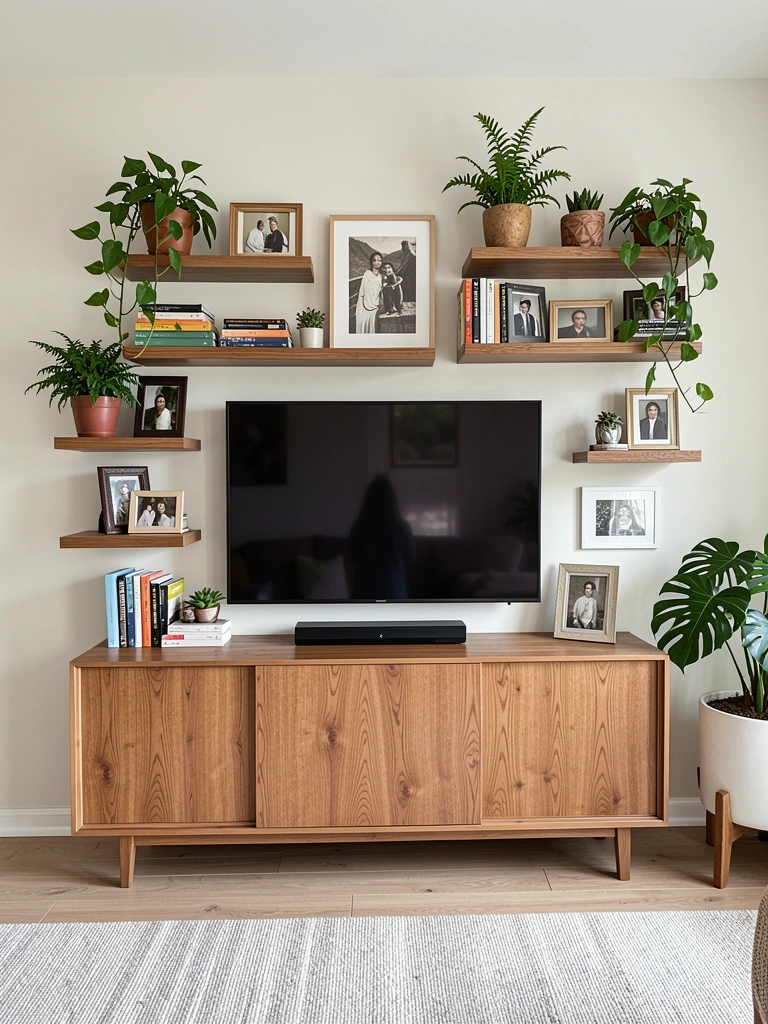
Asymmetrical floating shelves beside your TV cabinet create visual interest and display space without feeling heavy or cluttered.
Install 3–5 floating shelves ($80–$250 total) from IKEA or Wayfair at staggered heights on one side of your cabinet. Use a level to ensure straight mounting. Vary shelf depth (8 to 12 inches) for added visual rhythm. Style with books, small plants, framed photos, and a few decorative objects. Installation takes 1–2 hours.
The asymmetry makes your wall feel curated and modern, not rigid or corporate. You create a cohesive gallery effect that draws the eye across your entire media wall. This trick works beautifully in apartments since you’re not committing to major changes.
10. Integrate an Electric Fireplace Below the TV
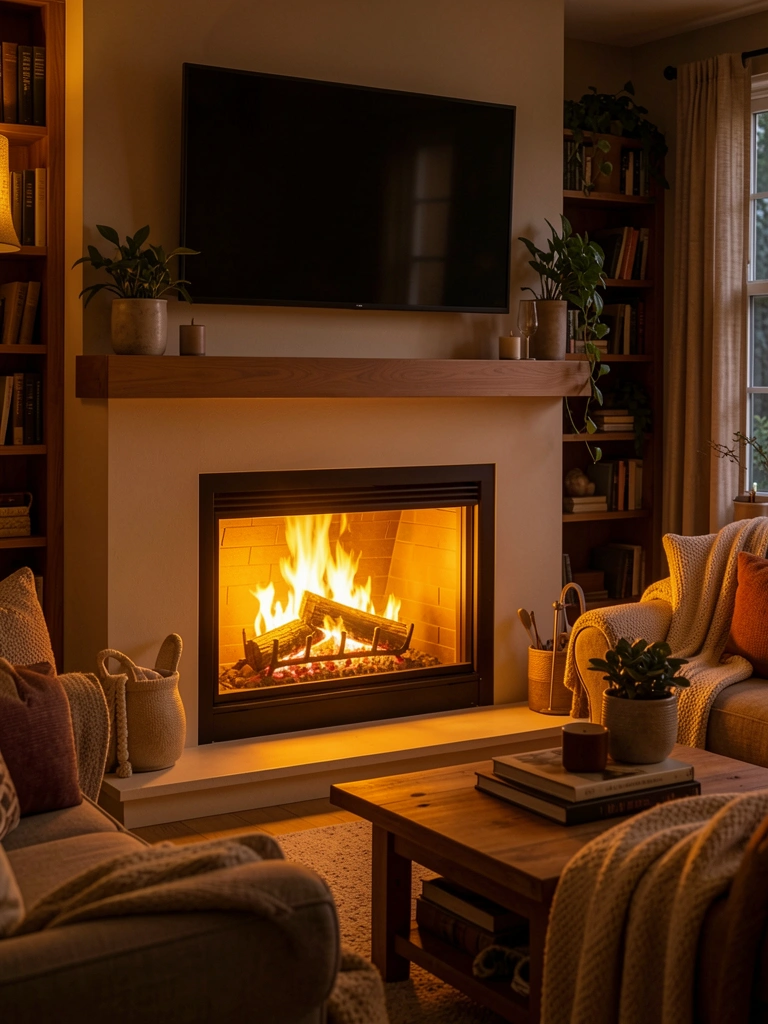
An electric fireplace adds warmth and ambiance below your TV, transforming a media wall into a genuine focal point without needing a vented chimney.
Buy a wall-mounted electric fireplace ($150–$600) from Amazon, Wayfair, or Best Buy. Models like Regal Flame or Real Flame are popular mid-range options. Mount it directly below your TV using the included brackets, then plug into a nearby outlet. Installation takes 30–45 minutes. Use a decorative mantel or ledge ($50–$150) above the fireplace to frame the space.
The flickering light adds cozy ambiance while the TV stays your daytime focal point. You get double the visual interest and warmth without expensive renovation work. Renters love this option because it’s completely removable.
11. Paint the Cabinet a Moody Accent Color
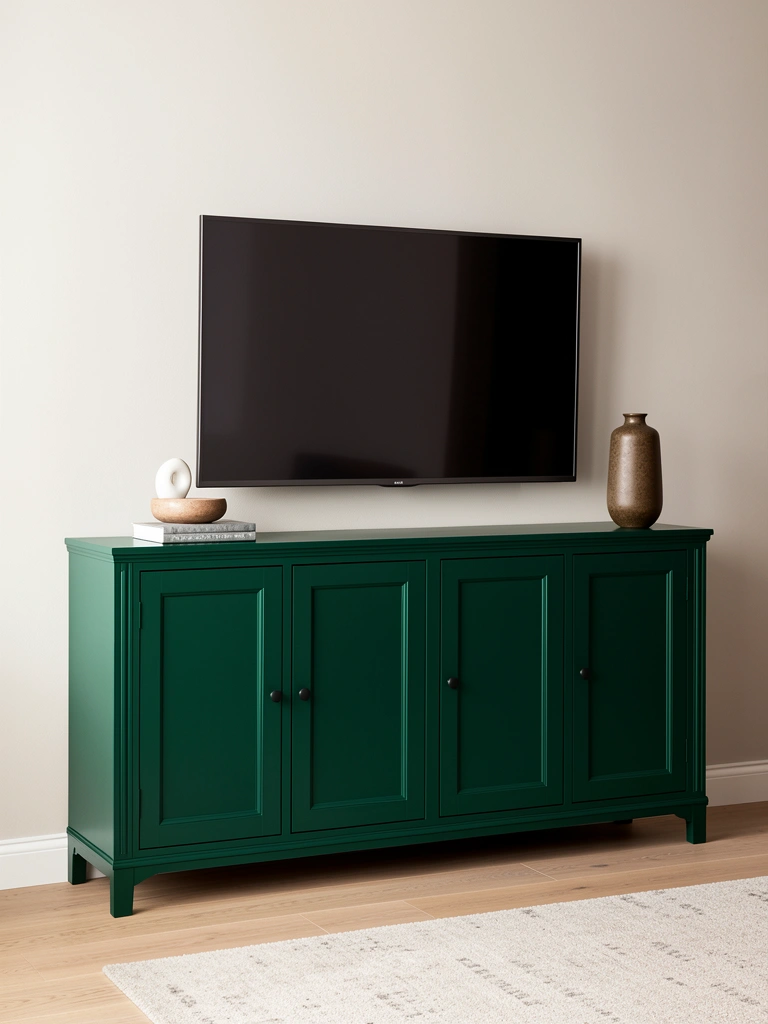
A bold cabinet color anchors your room and makes a statement—especially effective if your walls are neutral.
Paint your existing cabinet with high-quality furniture paint ($30–$60 per quart) in colors like forest green, navy, terracotta, or charcoal. Prep with sandpaper and primer, then apply 2–3 thin coats. DIY time: 4–6 hours plus drying. Alternatively, buy a pre-finished colored cabinet ($300–$800) from retailers like Article or CB2. Use a finish like matte or satin to hide fingerprints better than gloss.
The moody backdrop makes your TV, plants, and decorative objects pop visually. It’s a bold move that signals you’ve thought about your space intentionally. Test your color choice by taping samples on the wall and living with them for a few days before committing.
12. Use Micro Cement for a Luxe Textured Finish
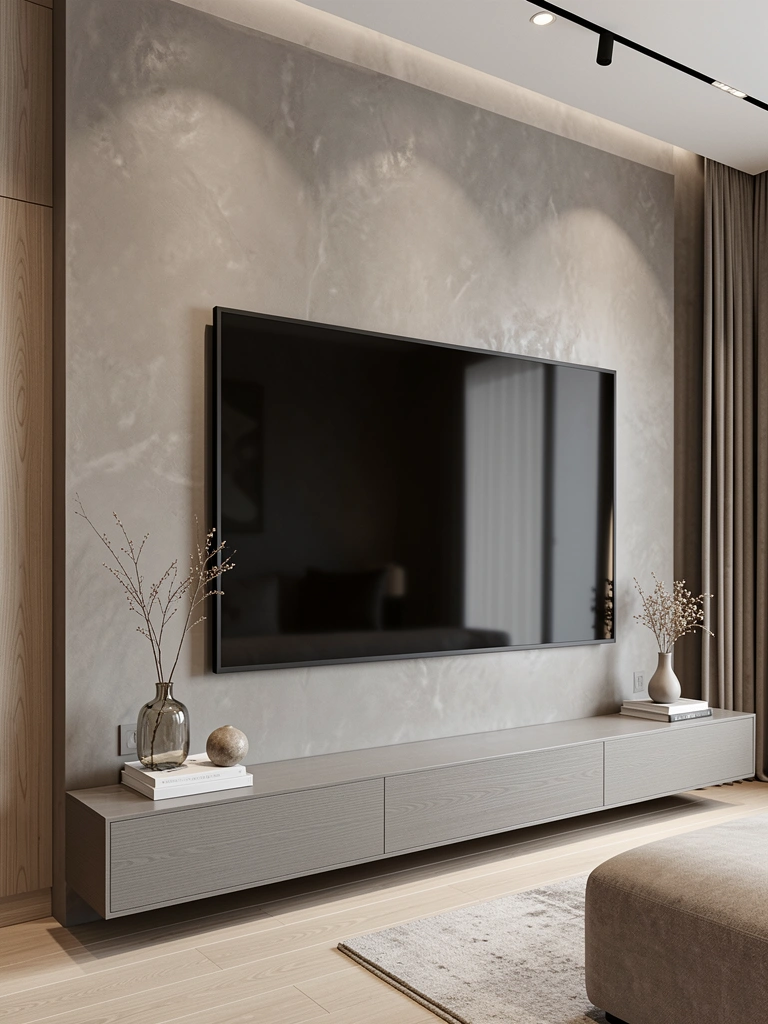
Micro cement creates a sophisticated, almost velvety surface that feels expensive and architectural—perfect for a statement TV wall.
Hire a professional to apply micro cement ($800–$2,000 for a wall) or DIY with a micro cement kit ($150–$300). The DIY route requires patience—follow kit instructions carefully, as application is technique-sensitive. Professional installation takes 2–3 days including curing time. Colors range from warm taupes to cool grays to bold blacks.
The result looks like a high-end hotel and instantly elevates your entire room. The texture catches light beautifully throughout the day, creating subtle shadow play. It’s an investment piece that’ll stay relevant for years.
13. Create a Gallery Wall Around Your TV
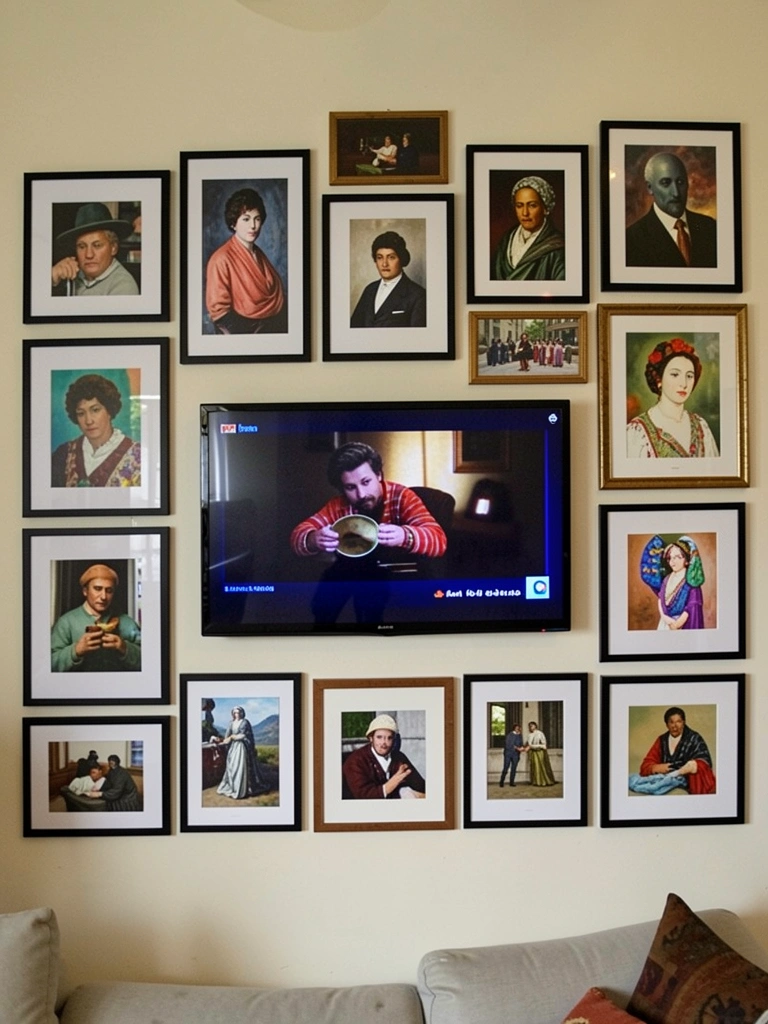
A gallery wall transforms a TV from an isolated black box into part of a larger, intentional display.
Collect frames in varying sizes ($5–$30 each from Target, IKEA, or thrift stores) and fill with art, photos, or prints. Plan your layout using kraft paper templates ($2–$5) on the wall first—trace each frame and move pieces around until it feels balanced. Install frames using a stud finder and wall anchors. Time: 2–3 hours. Mix frame finishes (black, gold, wood) for visual interest.
Your TV becomes part of a styled collection rather than a tech eyesore. It’s incredibly satisfying to step back and see your wall come together as a cohesive whole. This works for renters using removable adhesive strips too.
14. Install Recessed Shelving Inside the Wall
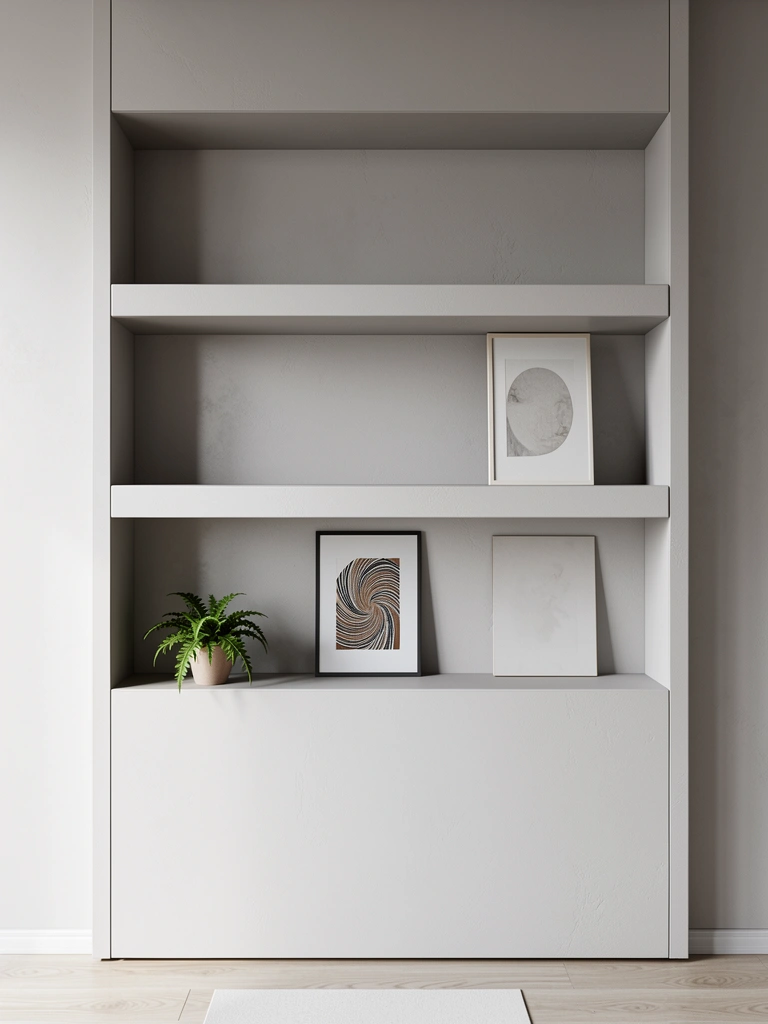
Recessed shelving eliminates visual clutter by creating built-in storage that sits flush with the wall.
Hire a contractor to cut into your wall and install recessed shelves ($500–$2,000 depending on depth and number). This is a renter-unfriendly option, but for homeowners it’s a permanent upgrade worth the investment. Alternatively, use adhesive-back floating shelves ($50–$150) that create a similar appearance without wall cutting.
Your room feels more intentional and spacious because nothing protrudes into the floor plan. It’s a premium look that works with minimalist or modern aesthetics. Best for spaces where you’re planning to stay long-term.
15. Add Vertical Lighting with Track Lights Above
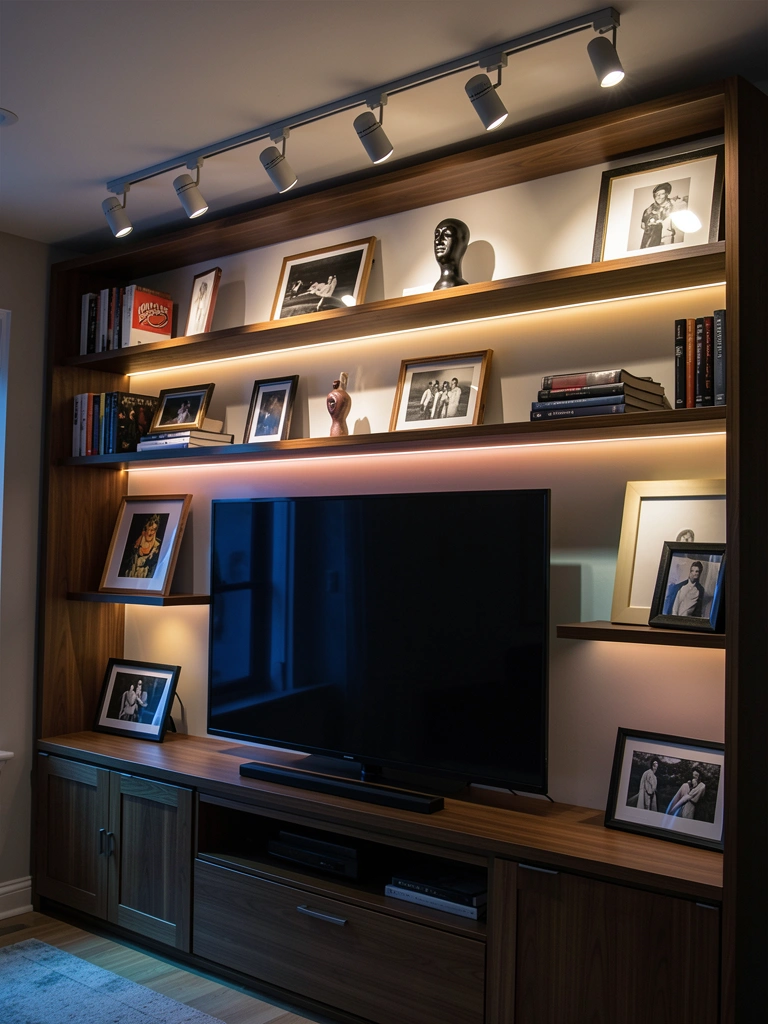
Track lighting lets you highlight specific shelves, artwork, or design details while keeping your space from feeling flat.
Install track lighting ($100–$400) from Home Depot or Wayfair. Choose between 2–4 adjustable lights depending on wall width. Mount to the wall or ceiling using the included bracket system. Hire an electrician ($100–$200) if wiring feels intimidating, or DIY if you’re comfortable with basic electrical work. Professional install: 2–3 hours.
Your cabinet instantly looks gallery-quality, with specific pieces glowing rather than everything in uniform light. The adjustable heads let you change emphasis as you update your styling. It’s one of those upgrades that makes a huge difference with minimal visual bulk.
16. Incorporate Rattan or Woven Textures
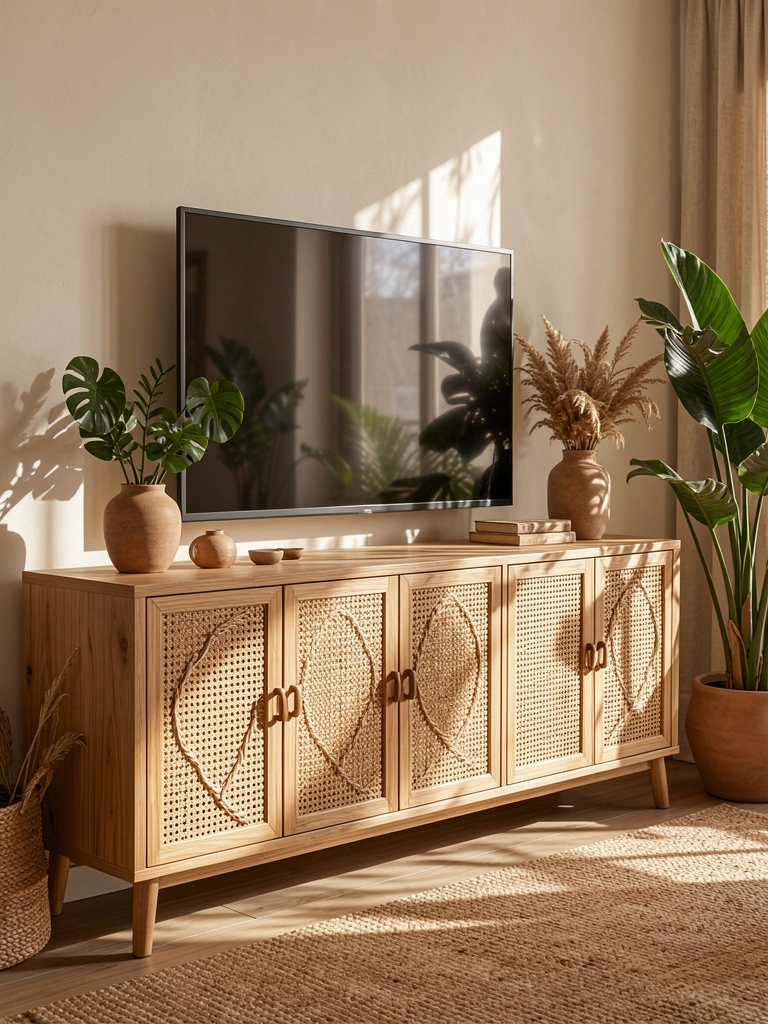
Woven textures bring warmth and organic beauty to cabinets, especially if your style leans bohemian or earthy.
Buy a rattan or woven panel cabinet ($250–$700) from West Elm, Article, or Amazon. Alternatively, add rattan panels to an existing cabinet ($40–$120) using adhesive or light nailing. Rattan doors hide clutter beautifully while allowing airflow for electronics. Style with plants and natural wood accessories to complete the look.
The texture is conversation-starting and instantly makes your space feel more layered and thoughtful. Rattan works especially well in rooms with lots of natural light, where shadows play through the weaving. It’s a warm, welcoming choice that feels collected rather than decorated.
17. Use Fluted Wood Panels for Depth and Luxury
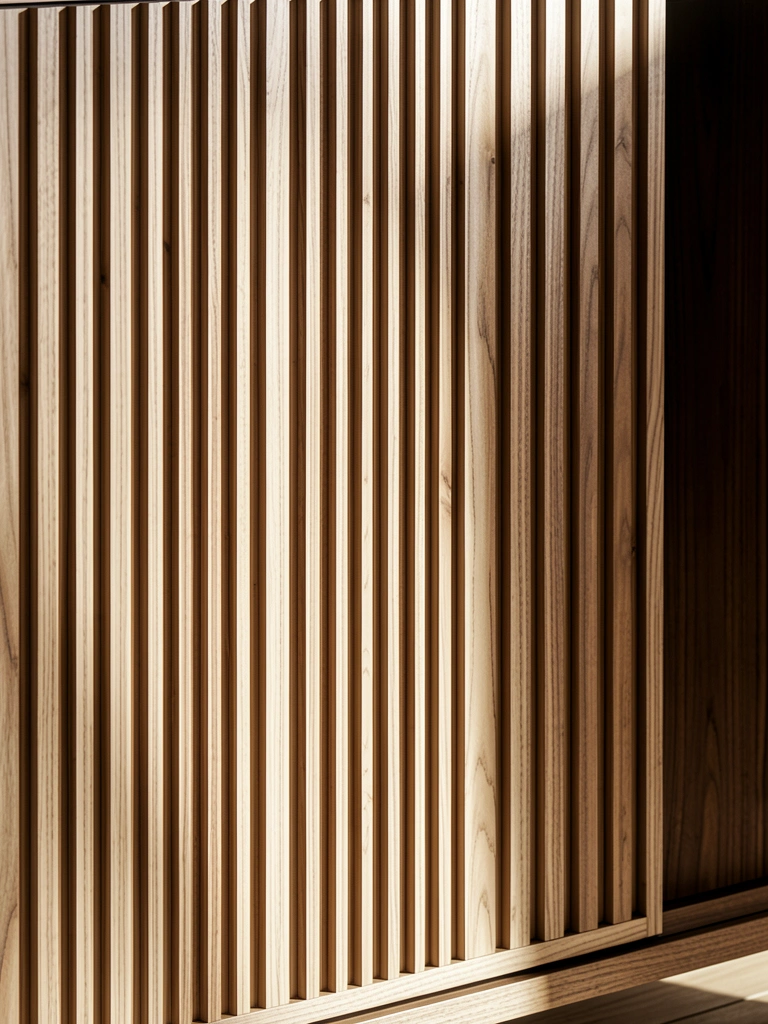
Fluted panels add sophisticated texture through subtle vertical grooves—a signature luxury furniture detail that’s now more accessible.
Buy a cabinet with fluted fronts ($400–$1,200) from Wayfair, Article, or CB2, or add fluted panels to an existing unit ($100–$250). Adhesive-back fluted panels are the easiest option for renters. Mix with open shelving to show off the texture. Installation takes 1–2 hours for DIY panel additions.
The grooves catch light beautifully and create visual depth without feeling busy or patterned. It’s a subtle luxury detail that makes your room feel intentional and expensive. Pair with warm metallics (brass, gold) for maximum impact.
18. Mount Your TV on a Swivel Base for Corner Placement
Swivel TV mounts let you place your cabinet in a corner and adjust the viewing angle—perfect for open floor plans.
Invest in a swivel TV mount ($60–$200) from Best Buy, Amazon, or Home Depot. Mount to the corner wall stud, then place your cabinet directly below. Test the swivel range to ensure it captures all your seating positions. Installation: 1–2 hours.
This setup lets you claim a corner without sacrificing viewability, and you can adjust for different rooms if you rearrange furniture. It’s especially smart for studios or open-plan apartments where the TV needs to serve multiple zones.
19. Layer Different Materials (Wood, Metal, Plaster)

Material layering creates visual richness and makes your space feel curated and expensive.
Combine elements: a wooden cabinet base ($200–$500), metal shelving accents or frame ($50–$150), and a textured plaster or stucco wall finish ($300–$800 professionally). You don’t need all three—even mixing two creates impact. Style with objects in contrasting materials: ceramic, plants, brass accessories. Time varies based on complexity, but mixing store-bought and DIY pieces saves money.
The mixed materials tell a story and prevent your wall from feeling one-note or sterile. Each texture adds personality and depth. This approach works beautifully in modern, eclectic, and industrial spaces.
20. Install Curved or Arched Cabinet Silhouettes

Curved cabinets soften modern spaces and feel more organic than sharp right angles—a trend that’s gaining momentum.
Choose a curved media unit ($400–$1,500) from designers like Blu Dot, Article, or Wayfair. Curved options are often pricier than linear cabinets, but they create a statement. Alternatively, add curved shelving accents ($100–$300) to straighten a basic cabinet. Installation is standard for floating units. Allows 1–2 hours.
The soft lines make your room feel friendlier and less corporate. Curved cabinets pair beautifully with other round elements like plants or circular artwork. It’s a subtle way to add personality without bold colors.
21. Hide a TV Behind Smoked Glass Doors

Smoked glass doors let your TV disappear into the wall when it’s off—the ultimate minimalist solution.
Buy a cabinet with smoked glass fronts ($500–$1,500) from high-end retailers like Article, Design Within Reach, or custom builders, or retrofit existing doors with smoked glass film ($50–$100). When the TV’s off, it’s invisible. When it’s on, the screen shows through clearly. Installation: 30 minutes for film, 1–2 hours for full cabinet swap.
You reclaim wall space psychologically—your room doesn’t feel dominated by a black rectangle 24/7. It’s a game-changer for people who want tech to blend into their life rather than anchor their room. This strategy works beautifully in minimalist, mid-century modern, and luxury aesthetics.
22. Add Modular Customizable Panels for Future Changes
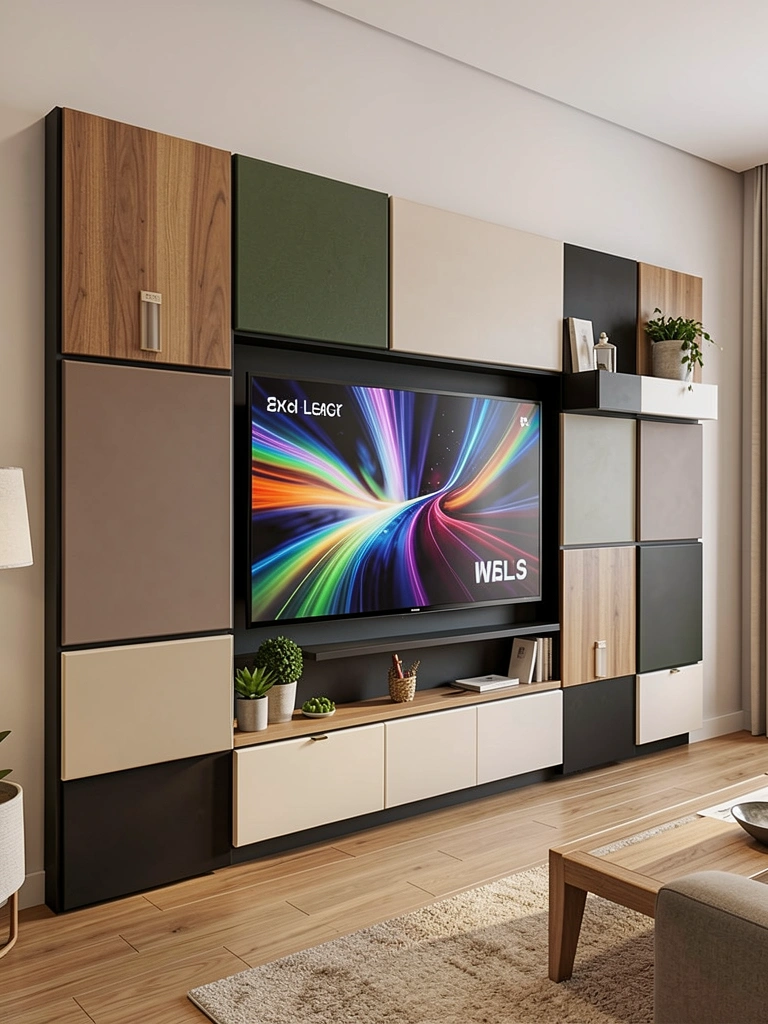
Modular systems let you change your look without replacing the entire cabinet—perfect if you like experimenting.
Invest in a modular TV wall system ($300–$1,000) from IKEA (their besta system offers tons of customization), Wayfair, or specialty retailers. Mix and match panel colors, textures, and cabinet heights. Reconfigure whenever inspiration strikes. Installation depends on customization level, typically 2–4 hours.
You’re buying flexibility alongside storage. Test colors and layouts before committing to permanent paint or major remodels. It’s brilliant for renters or anyone who redesigns frequently. Update panels seasonally or annually to keep your space feeling fresh.
23. Create Symmetrical Flanking Shelves for Architectural Appeal
Symmetrical flanking shelves around your TV create a formal, architectural look that feels curated and intentional.
Mount identical floating shelves ($80–$250 for a pair) at the same height on both sides of your TV. Use a level to ensure perfect alignment. Fill both sides with similar items—books on one side, plants on the other—to emphasize balance. Style consistently across both shelves. Installation: 1–2 hours.
Symmetry feels inherently sophisticated and creates visual calm. Your TV becomes the centerpiece of an organized, balanced composition. This approach works especially well in traditional, mid-century modern, and minimalist spaces.
24. Use Venetian Plaster for Subtle Drama
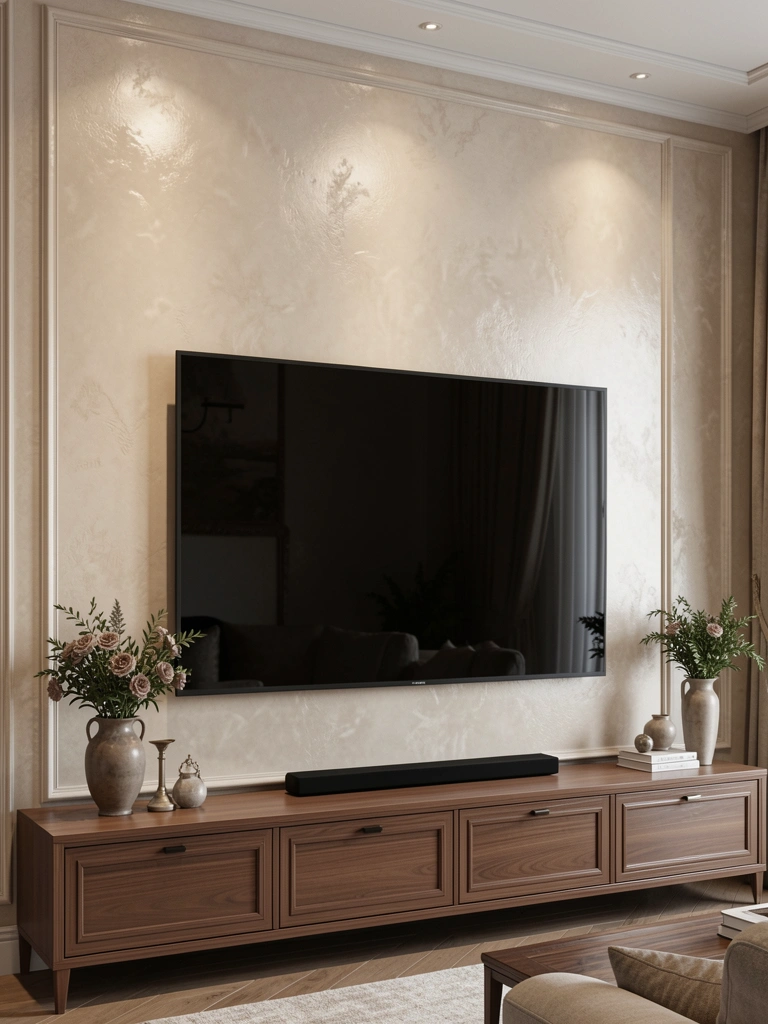
Venetian plaster creates a sophisticated finish with depth and subtle sheen—expensive-looking without being loud.
Hire a professional to apply Venetian plaster ($600–$1,500 for one wall) or DIY with a kit ($100–$200). The technique involves applying multiple thin coats and buffing to create depth. Color options include warm grays, taupes, and cream. Professional installation takes 2–3 days including curing. This is an investment, but it lasts for years.
The subtle sheen catches light beautifully, creating a luxe, almost liquid appearance. It’s the design equivalent of whispering instead of shouting—sophisticated and understated. Best for people who want high-end impact without bold colors or busy textures.
25. Combine Your TV Cabinet with a Mantel-Style Ledge
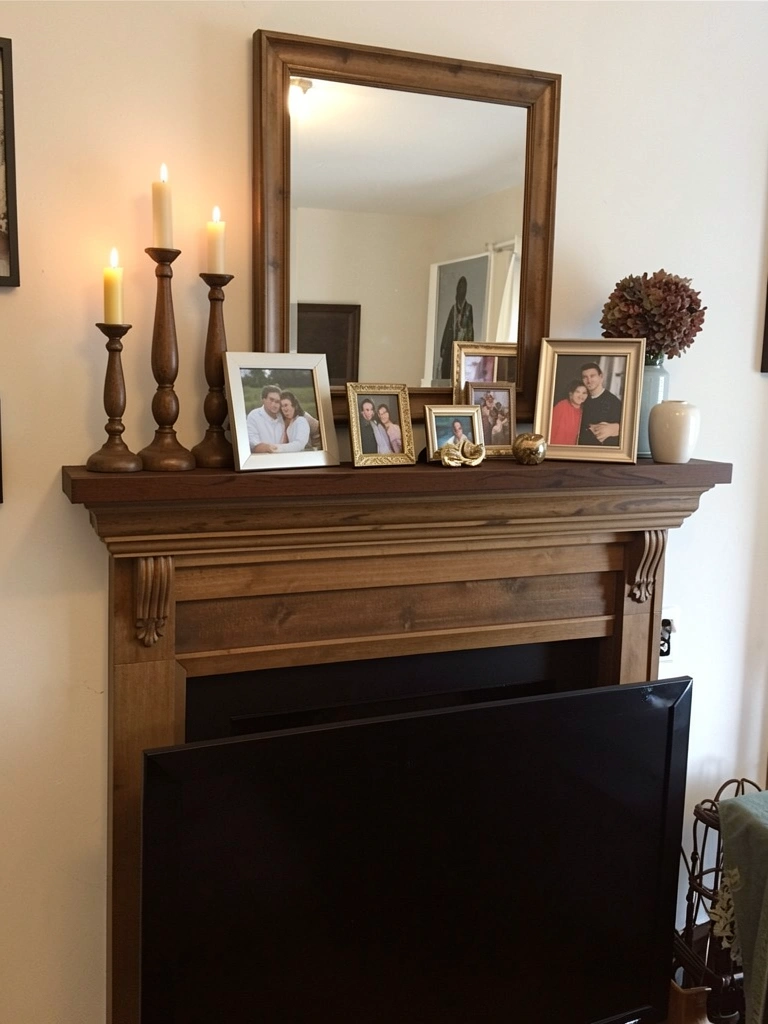
A mantel-style ledge on top of your cabinet creates additional display space and anchors your TV within a larger composition.
Install a wooden ledge ($50–$200) or buy a cabinet with a built-in ledge. Mount securely using brackets rated for the weight of your décor. Style with 5–7 carefully chosen pieces: candles, a mirror, framed photos, and a small plant. Rotate items seasonally to keep it fresh. Installation: 30 minutes.
You instantly add visual interest above your TV without cluttering the wall. The ledge frames your TV beautifully and creates a focal point that feels intentional. It’s a designer trick that makes a huge difference with minimal effort.
26. Paint the Wall Behind with an Ombre or Gradient Effect
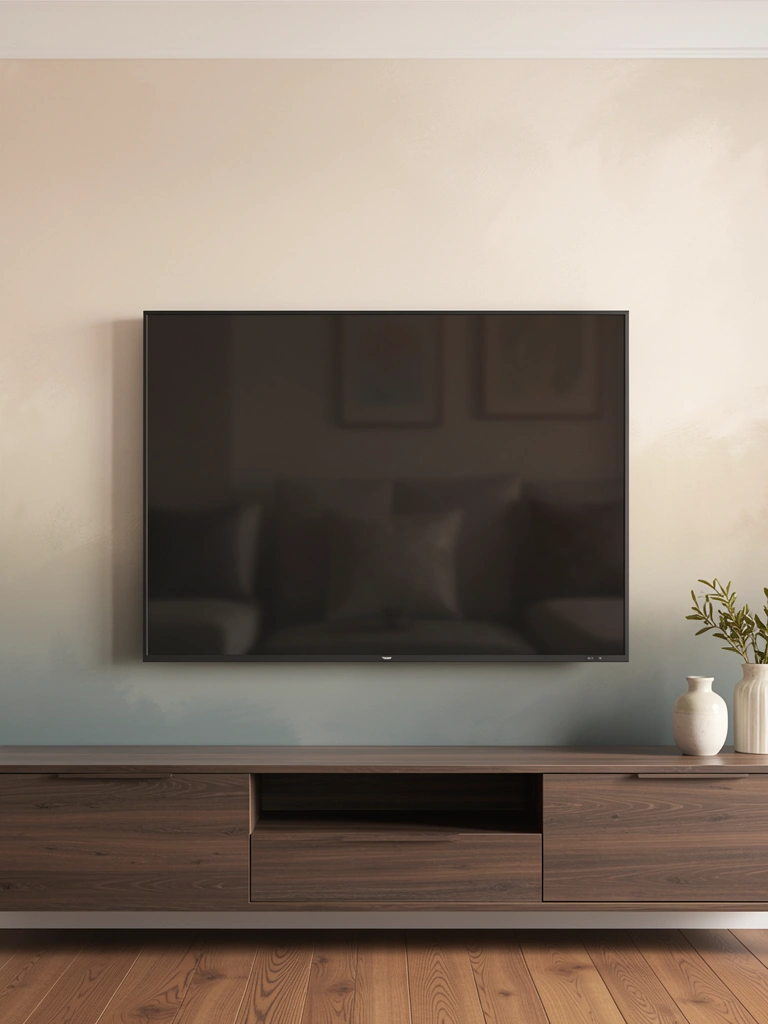
An ombre or gradient wall adds dimension and interest while keeping the overall look sophisticated and subtle.
Paint your wall with a gradient effect using one color family in two shades ($30–$60 for paint). Apply the lighter shade first, then blend downward into the deeper tone using a damp sponge or gradient tool. Watch YouTube tutorials beforehand—the technique takes practice. DIY time: 3–4 hours. Hire a painter for $200–$400 if you want professional results.
The subtle color shift creates depth and prevents your wall from feeling flat or one-note. It’s an artistic touch that photographs beautifully and feels intentional without being overdone. Test the effect on a large cardboard piece first to see how light plays across the gradient throughout the day.
27. Combine Your TV Cabinet with Complementary Accent Pieces
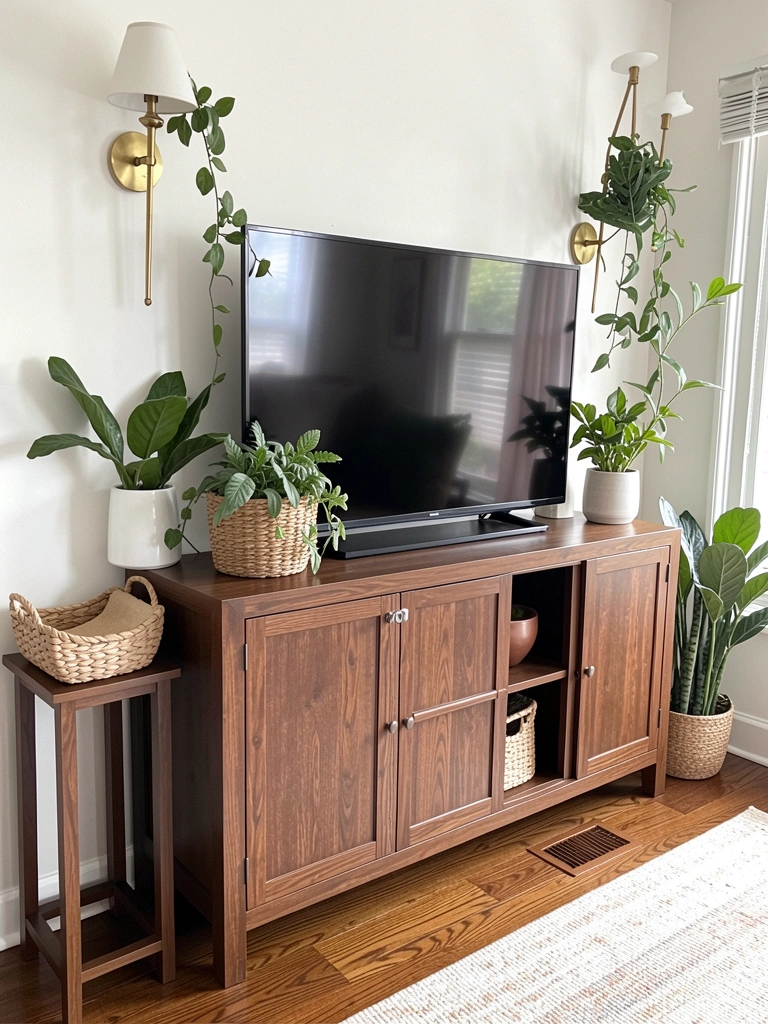
Styling your cabinet alongside complementary accent pieces creates a complete, intentional media zone that feels finished.
Choose pieces in coordinating finishes: if your cabinet is natural wood, add brass sconces, woven baskets, and a wooden side table. Match metals throughout (all brass, all blackened steel, or mixed metals intentionally). Source from the same retailer or designer collection for visual cohesion ($200–$800 total for accents). Layer heights and textures to create visual rhythm.
The result looks like a professionally designed vignette instead of random furniture scattered around. Your TV cabinet becomes part of a larger conversation about your style. This approach transforms a basic media wall into the most thoughtfully styled zone in your home.
SAVE THIS POST for your next living room refresh. Pick one or two ideas and start this weekend—whether you’re painting, adding lighting, or rearranging, small changes add up fast. Which cabinet hack will you try first?
Leave a Reply