Category: Living Room Decor

  • 24 Soft-Edge Sofa Concepts That Add Modern, Sculptural Appeal

    24 Soft-Edge Sofa Concepts That Add Modern, Sculptural Appeal

    Your living room doesn’t need sharp corners and rigid lines to feel modern—in fact, soft-edged sofas are stealing the spotlight in 2025, and for good reason. Curved silhouettes create conversation-friendly layouts, soften the visual weight of large furniture, and add sculptural interest that makes your space feel intentionally designed. Whether you’re drawn to gentle curves, serpentine shapes, or rounded armrests, these 24 concepts show you exactly how to incorporate soft-edge sofas into your home. From budget-friendly styling tricks to investment pieces that anchor your entire room, you’ll find ideas for every lifestyle and budget. Let’s explore how one furniture choice can completely refresh your living space.

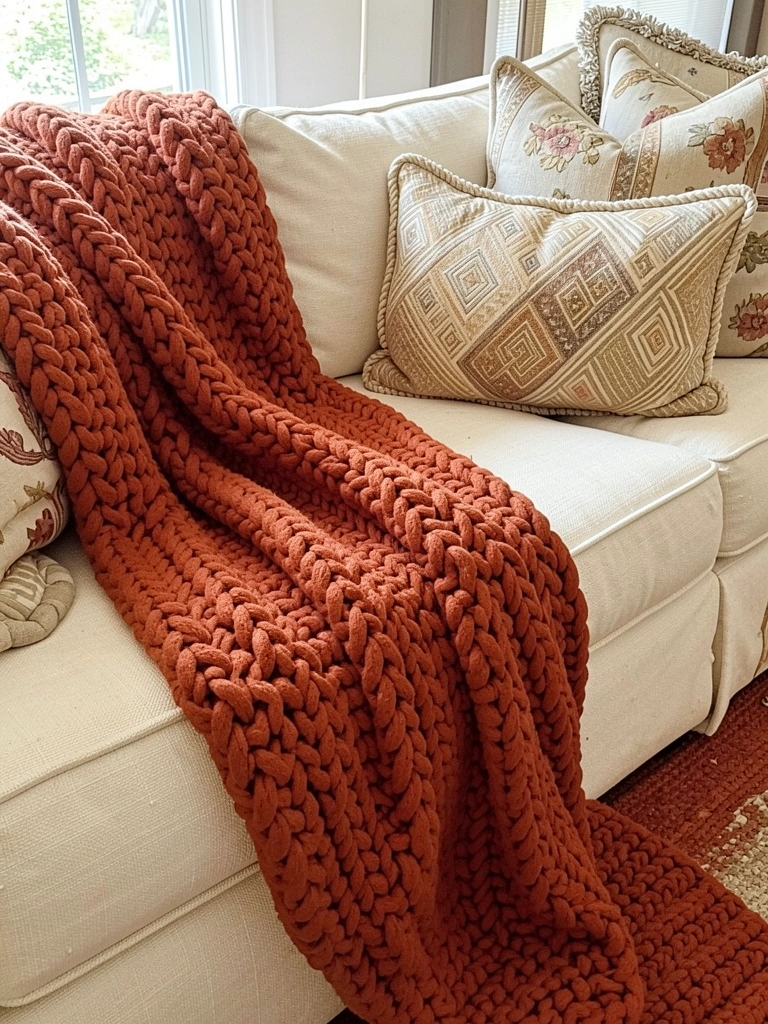
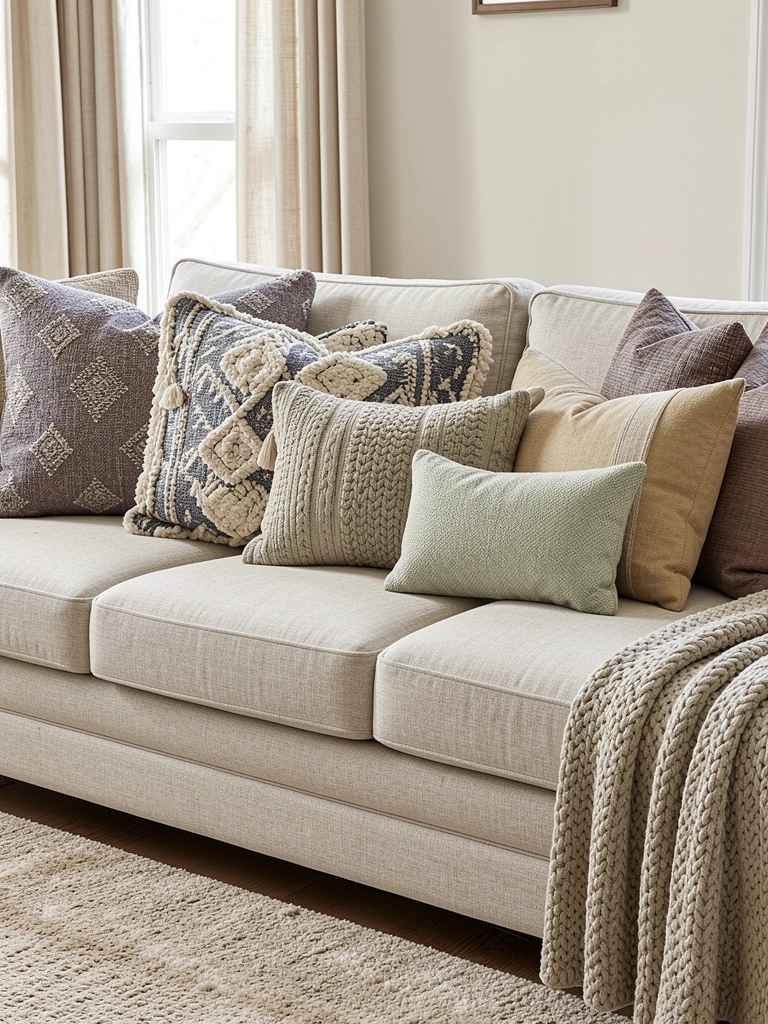
    1. Layer Your Curved Sofa with Contrasting Textures

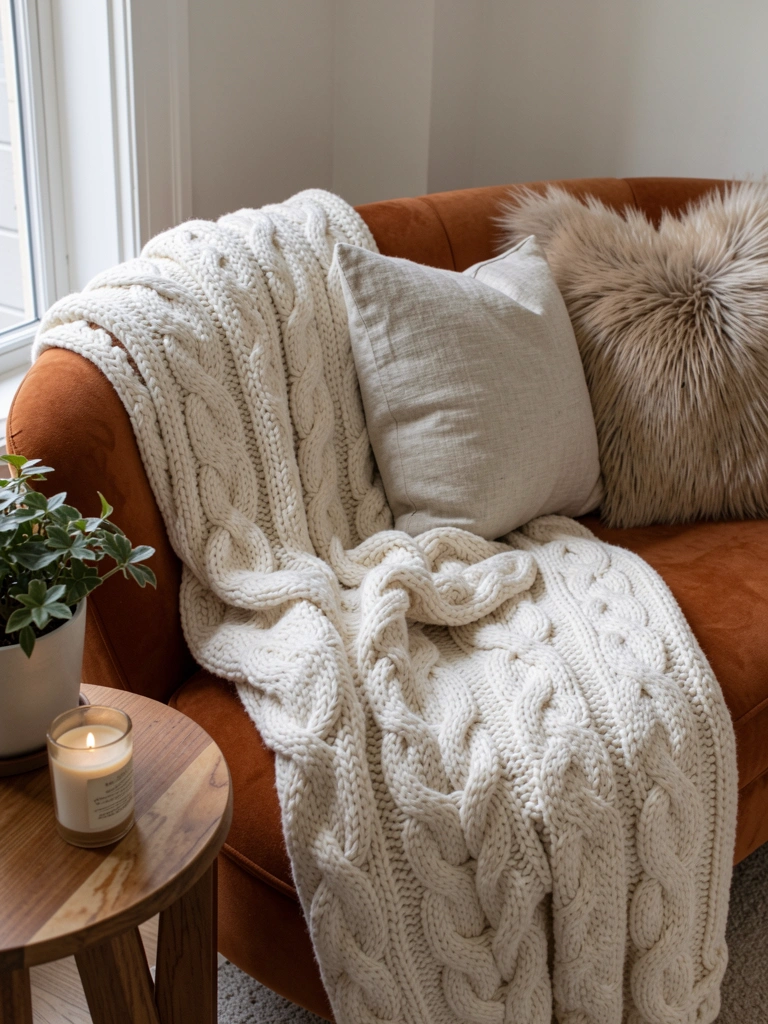
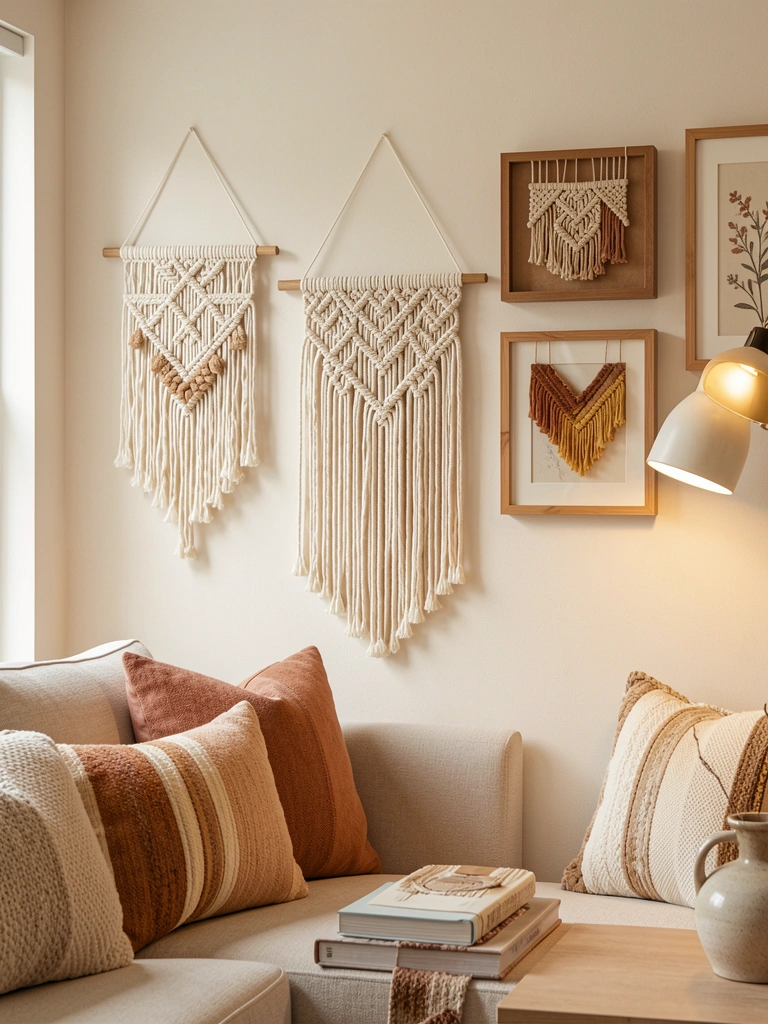
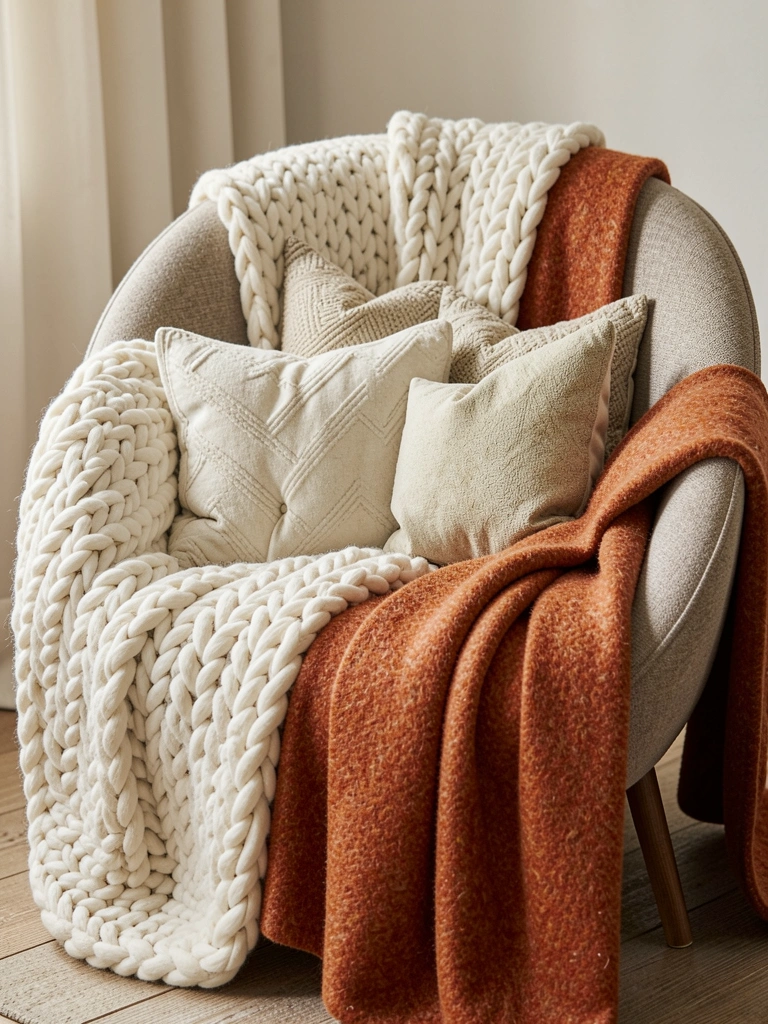
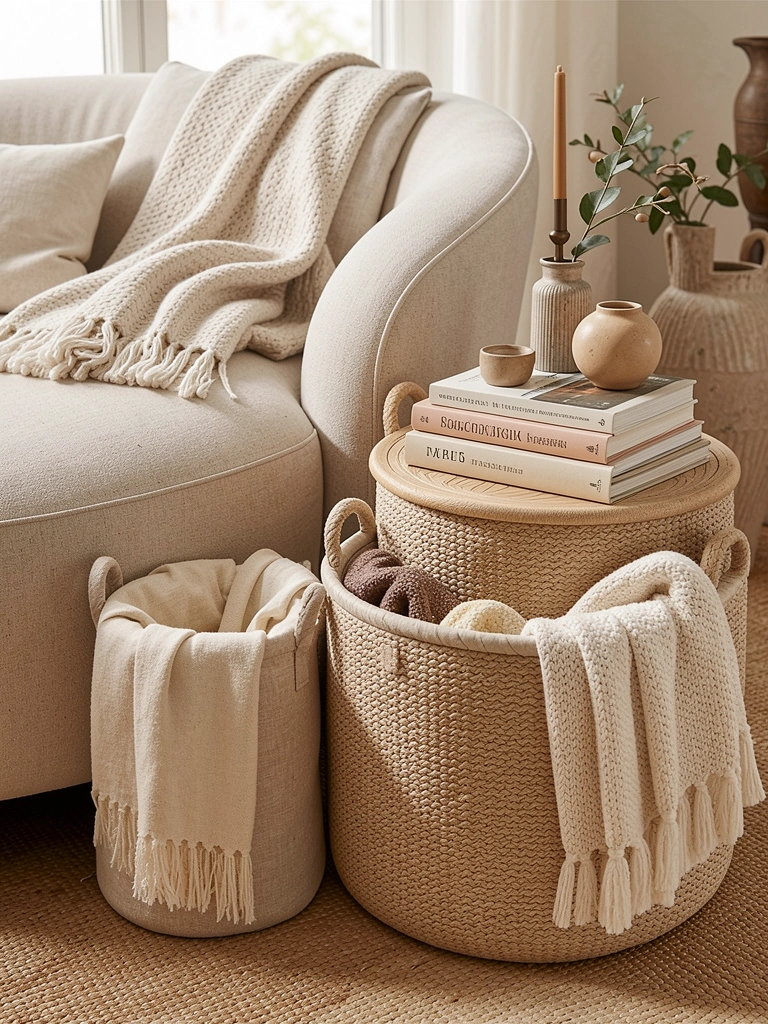
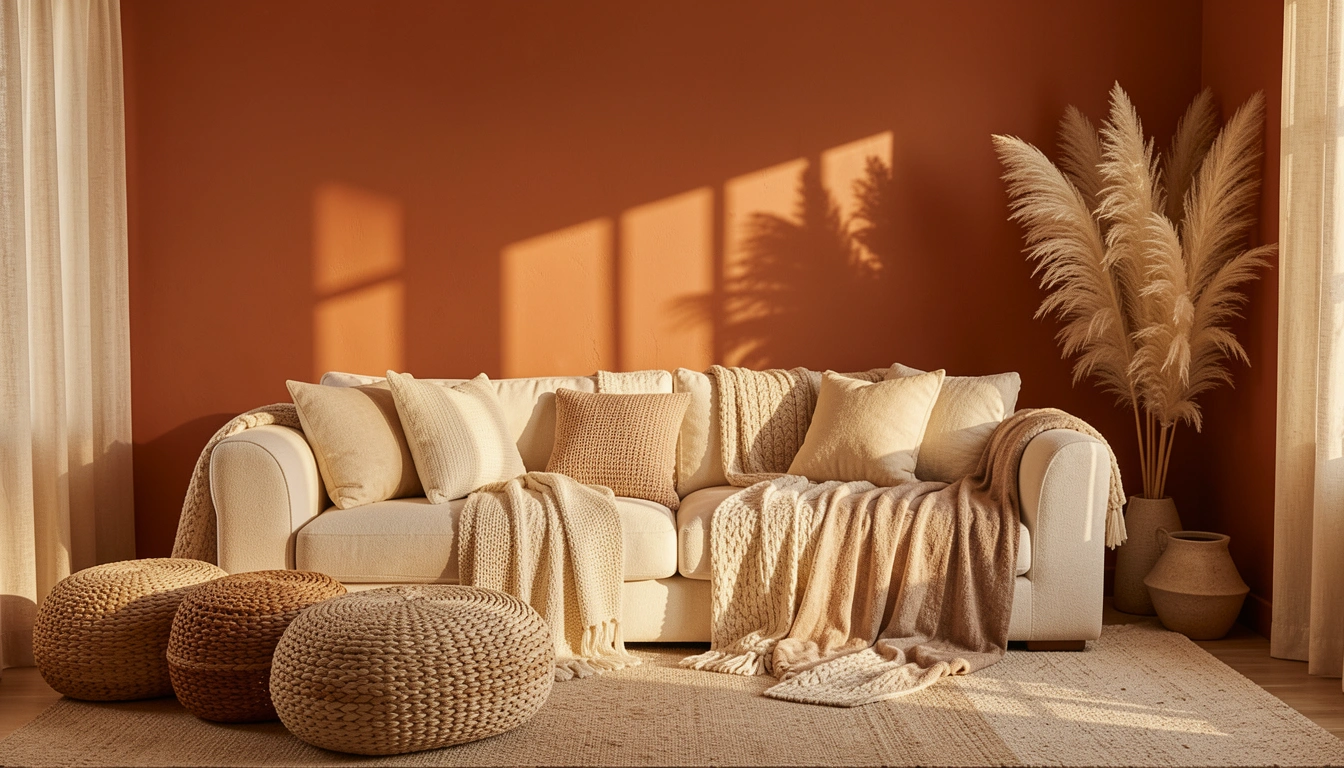
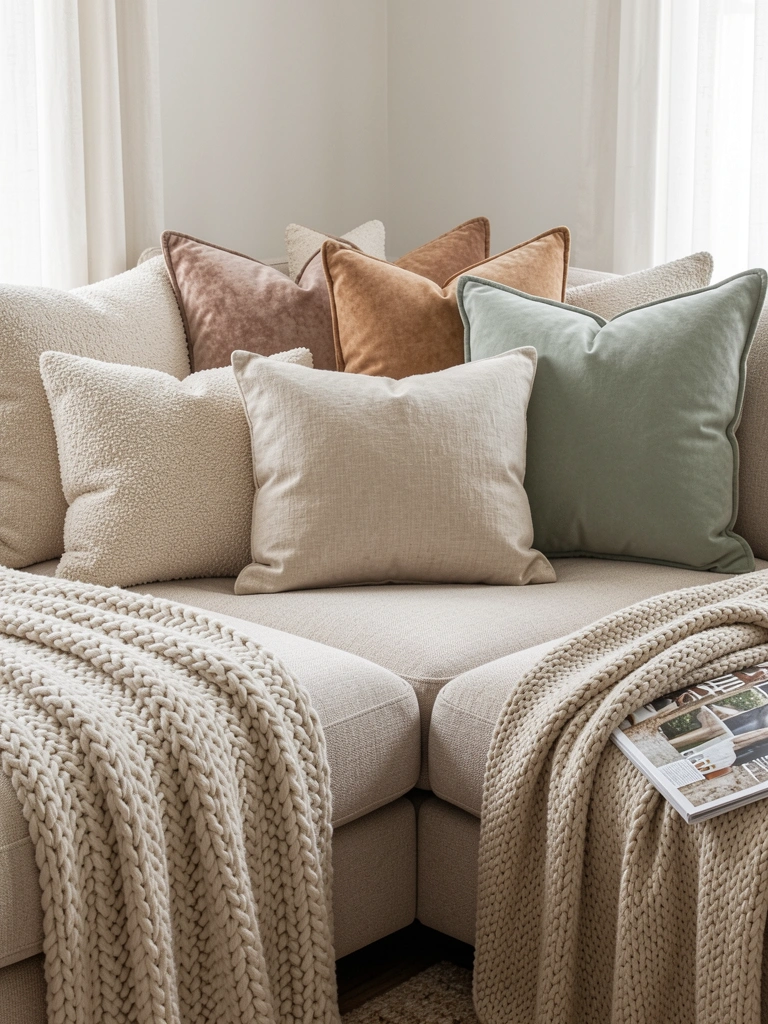
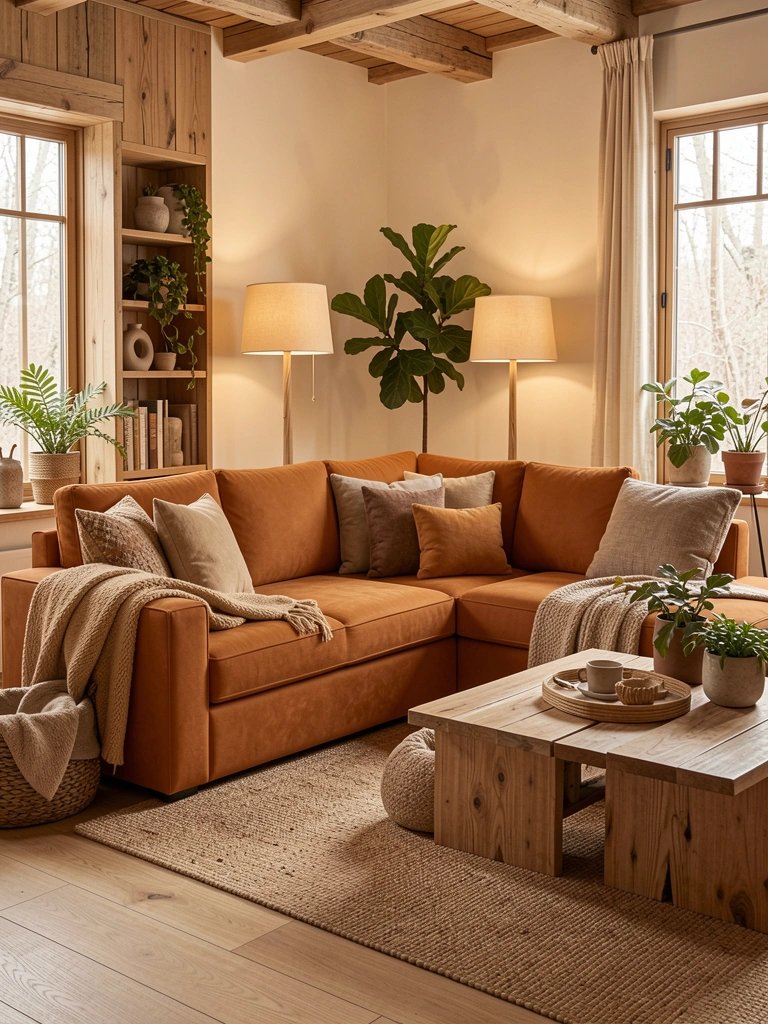
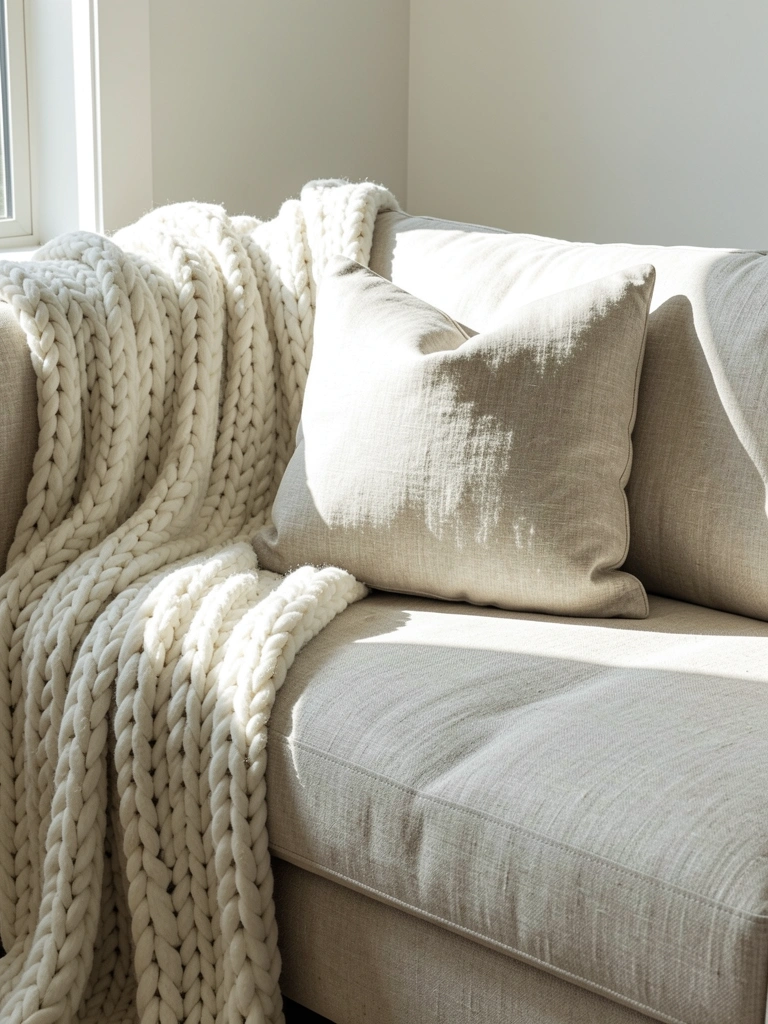
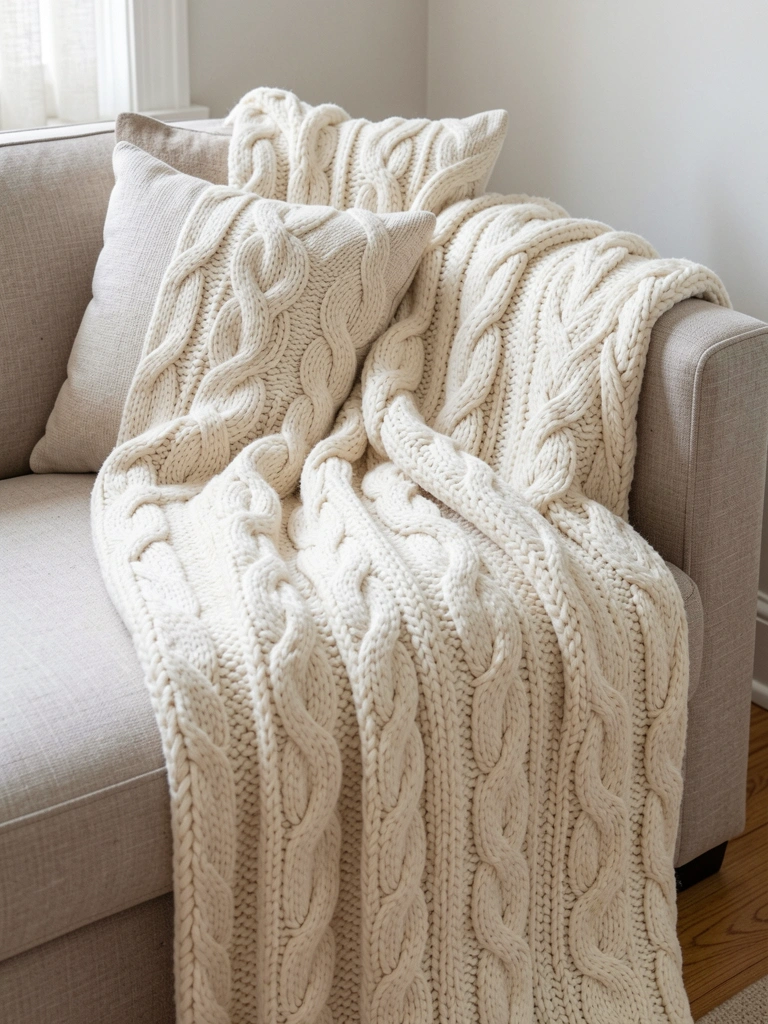
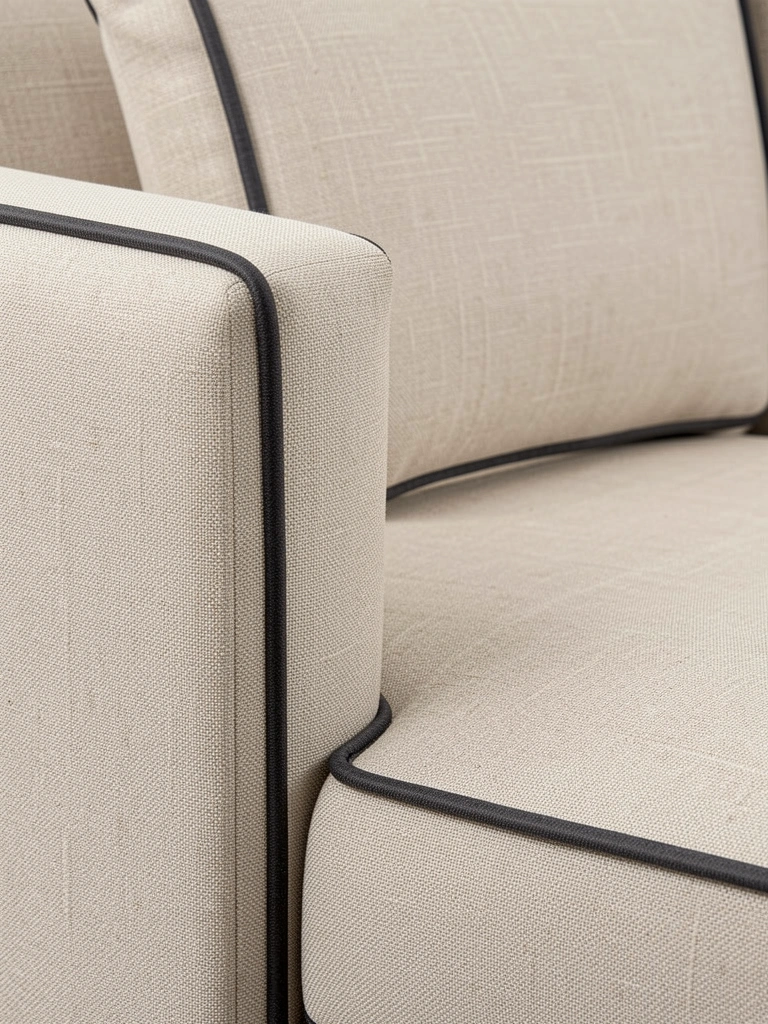
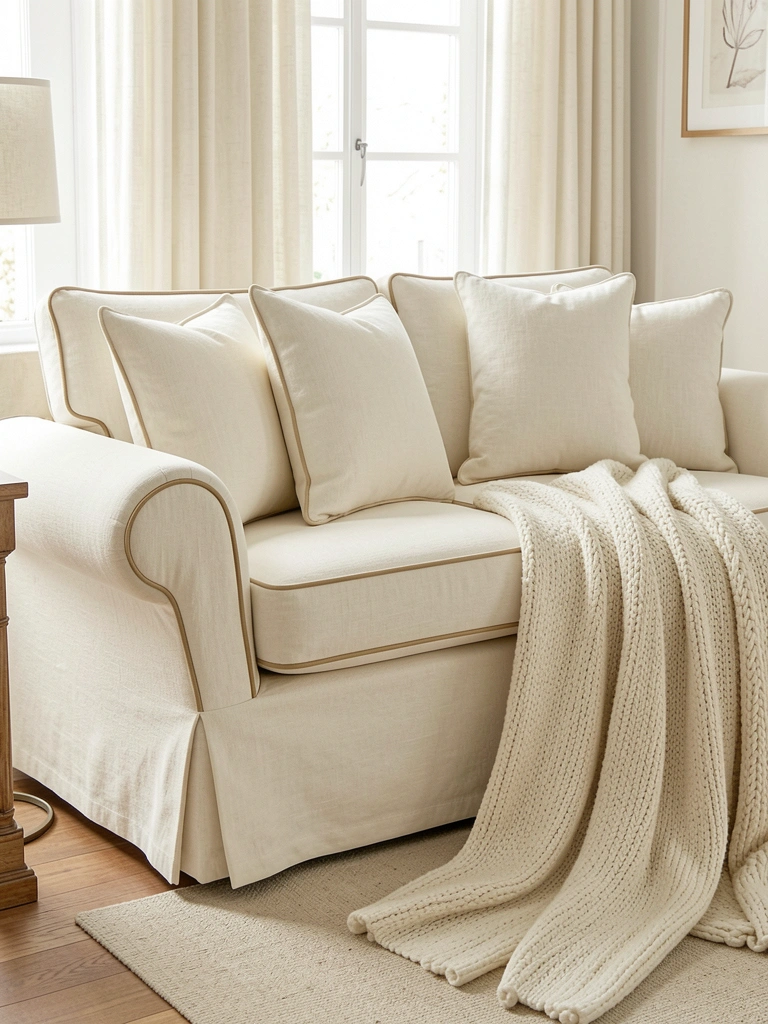
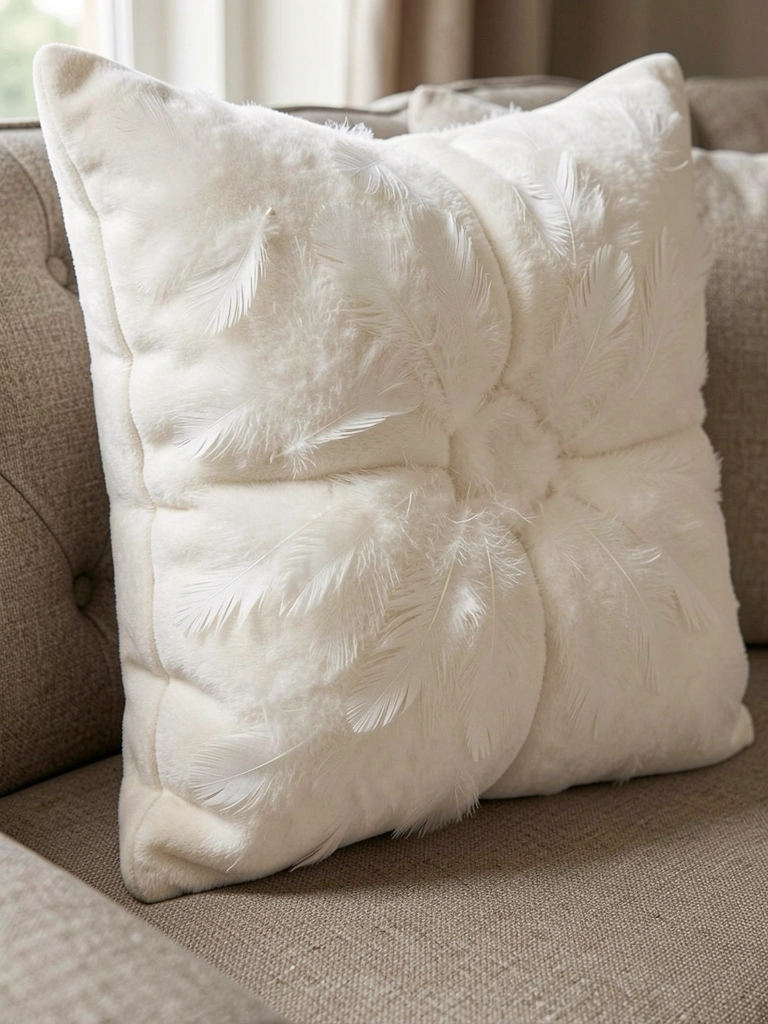
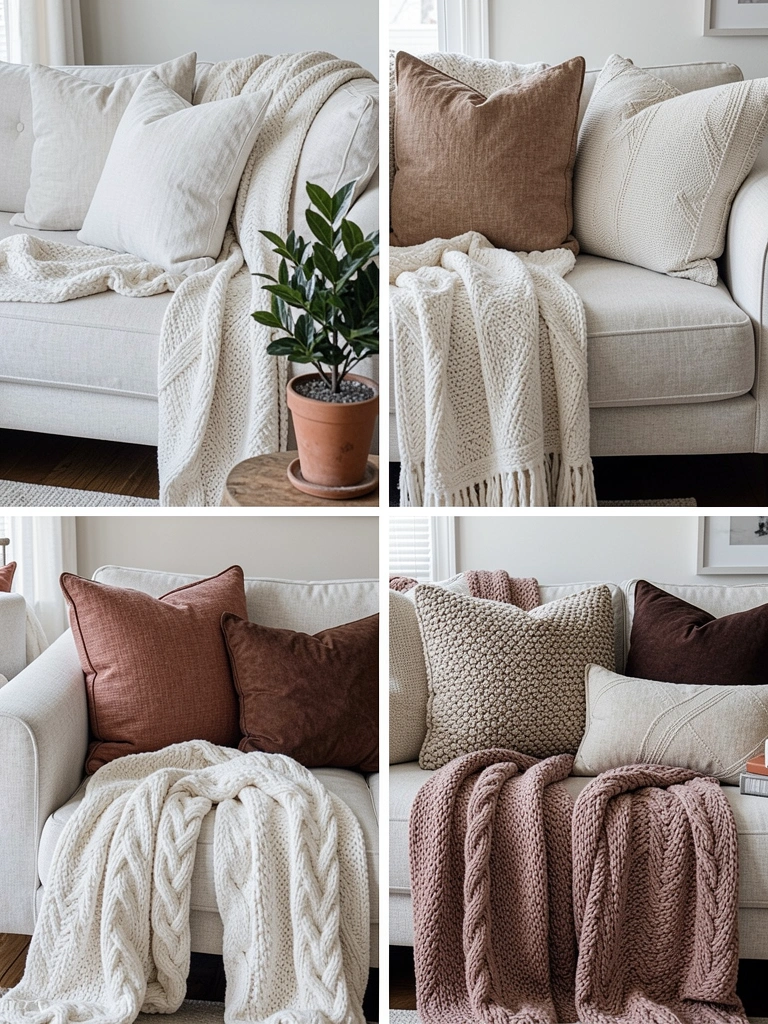
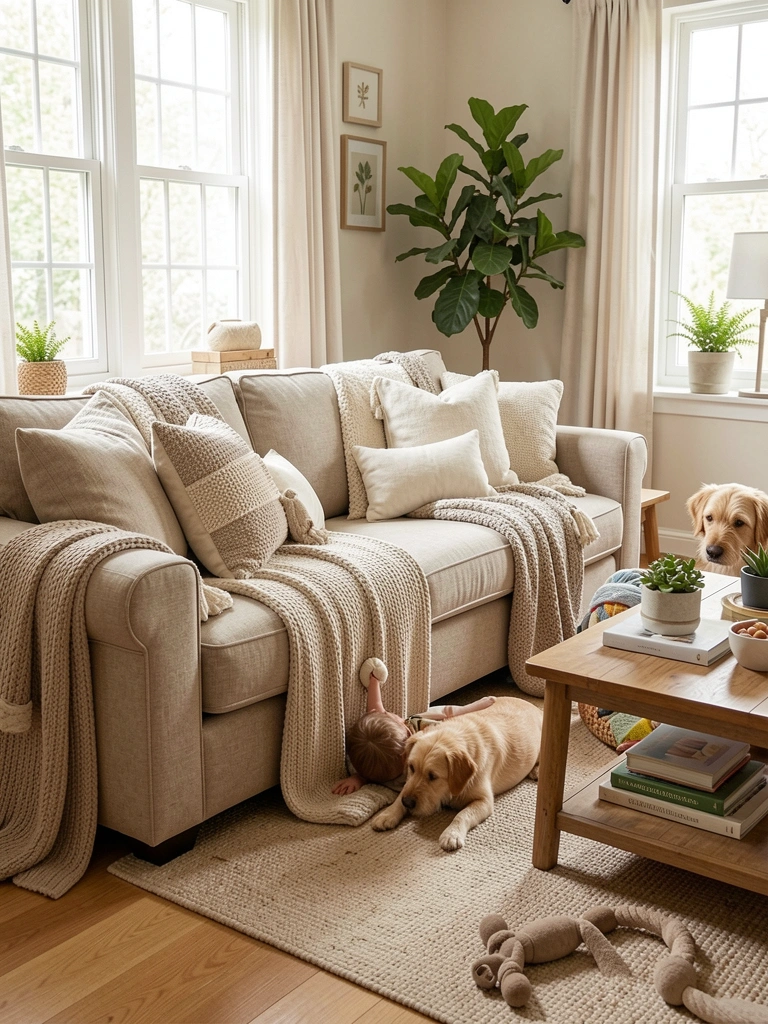
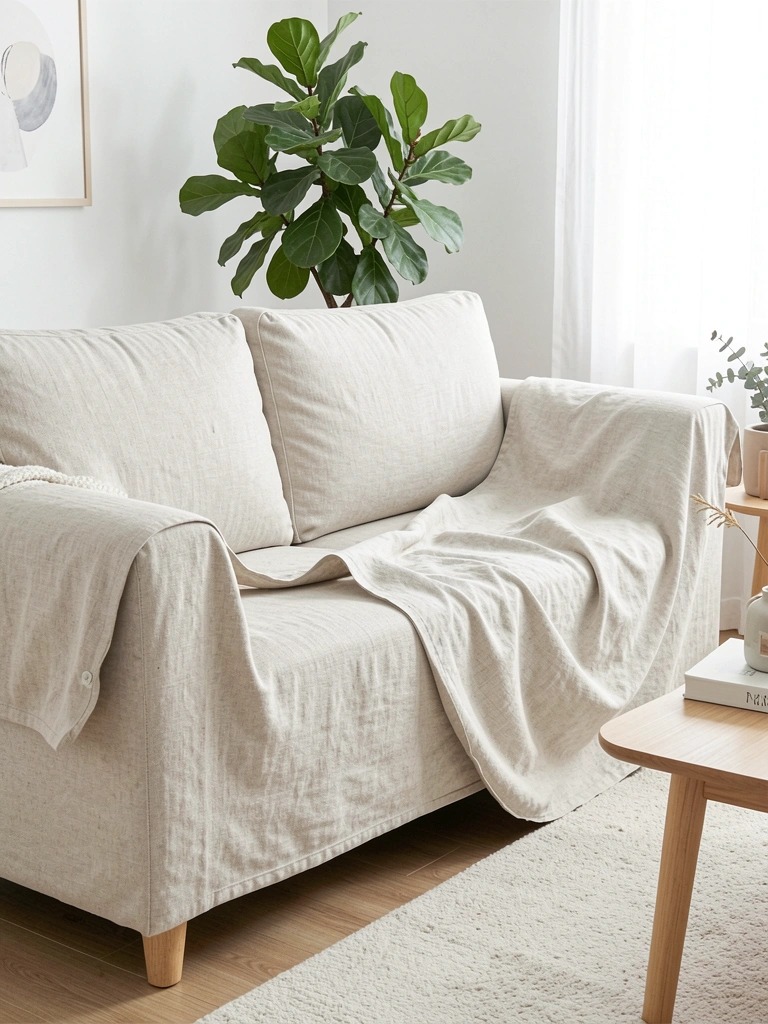
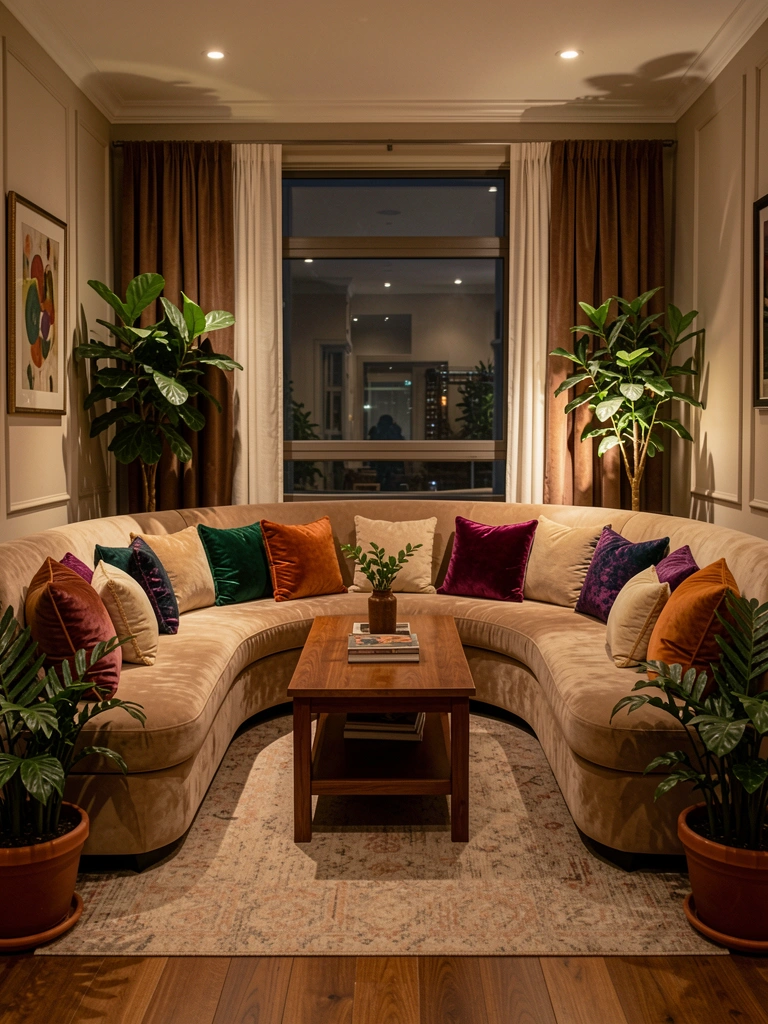
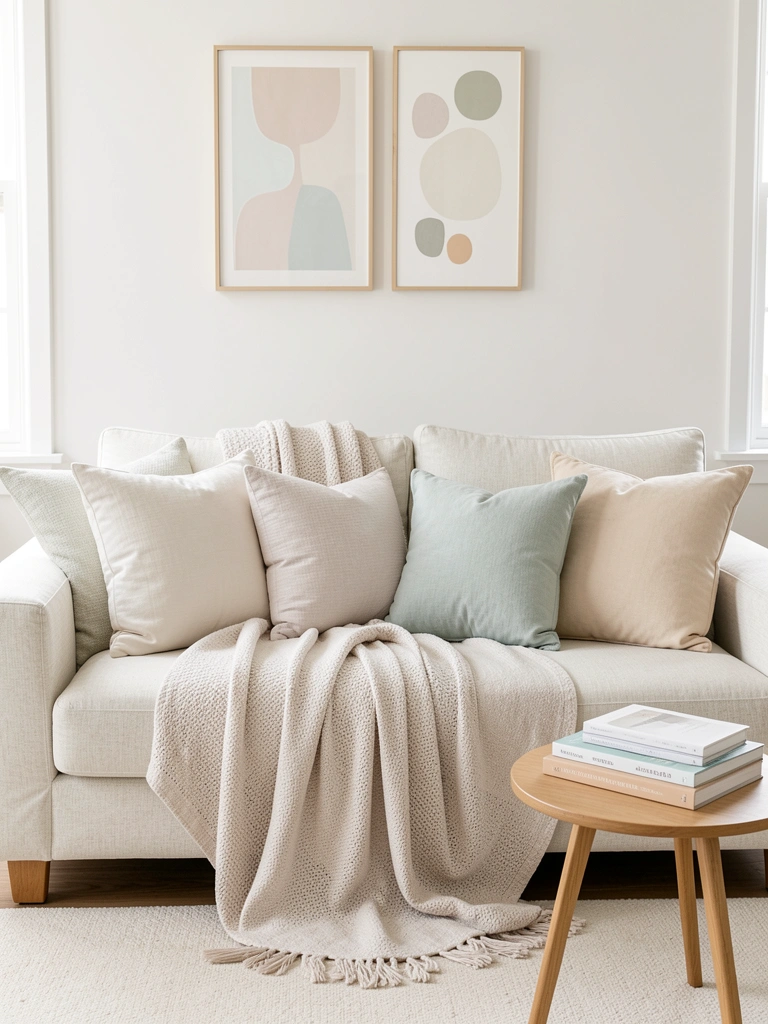
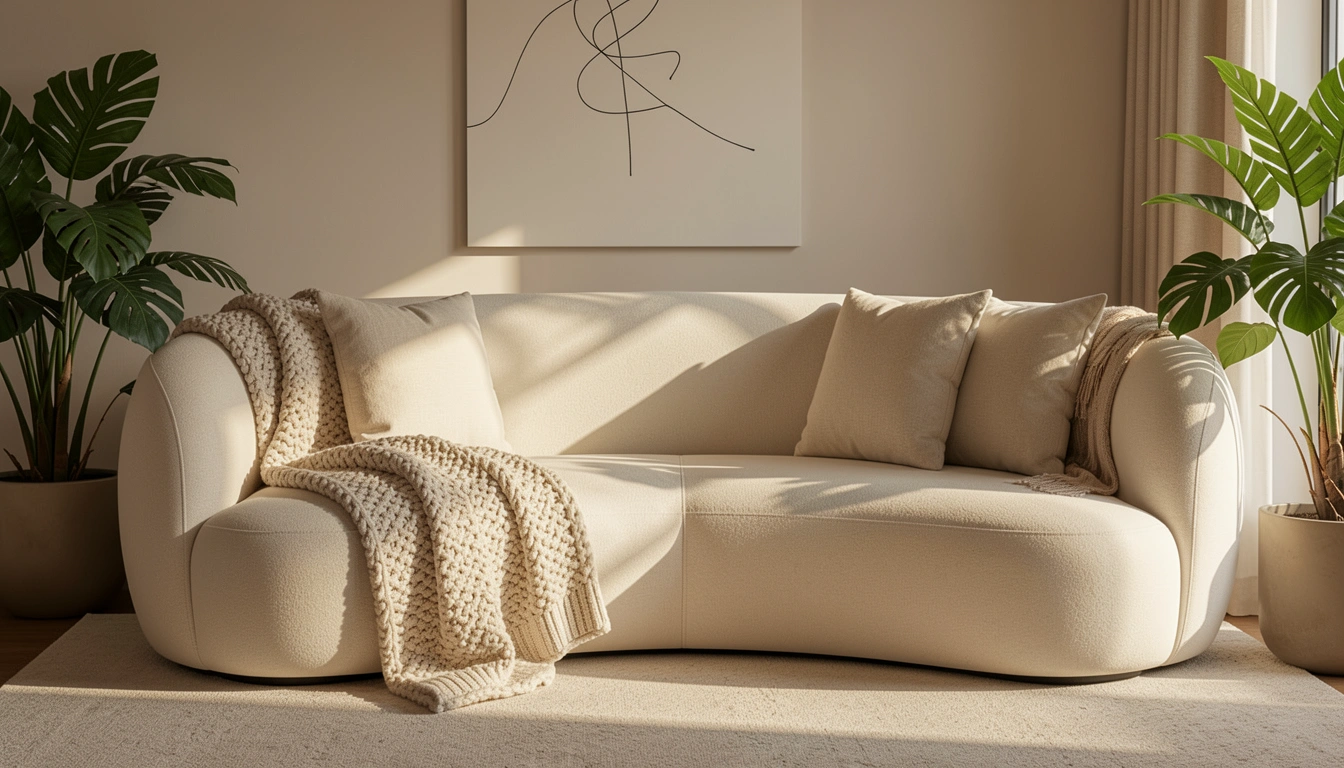
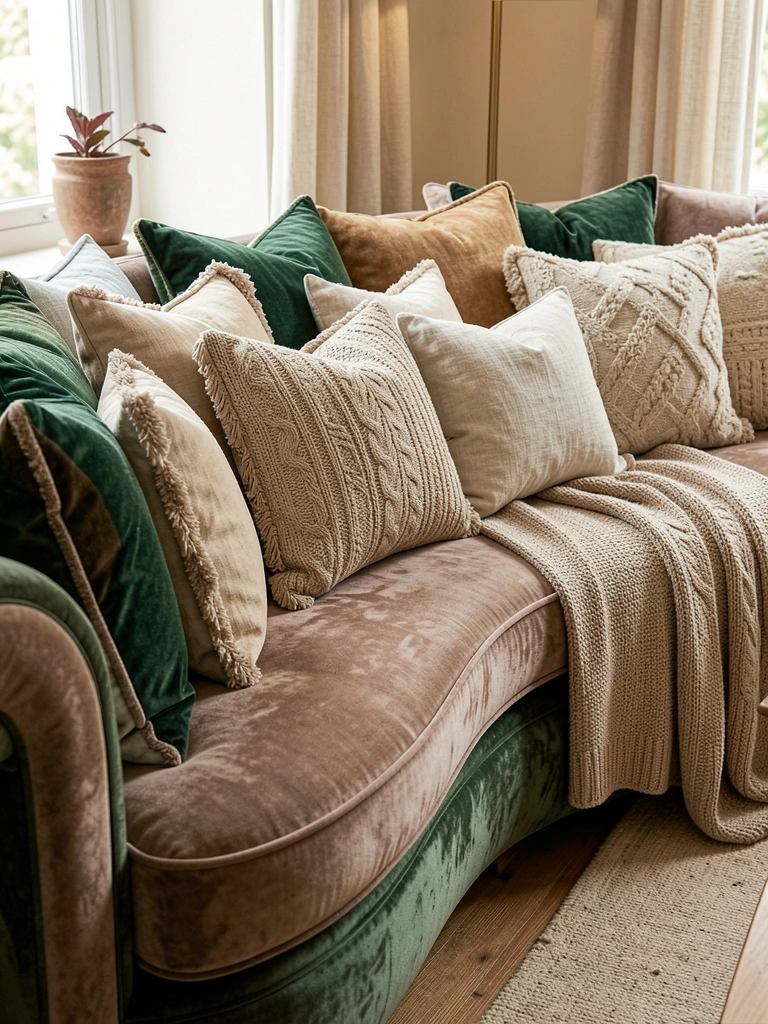
    Textures are your secret weapon for making curved sofas feel even more inviting and lived-in. A curved sofa paired with mixed textiles creates depth that photographs beautifully and feels amazing to sink into.

    Layer a chunky knit throw ($30–$60 from Target or Amazon) over one arm, add a smooth linen pillow ($25–$45 from West Elm), and tuck a faux fur accent pillow ($20–$35 from IKEA) into the corner. Mix matte and shine—linen next to velvet, cotton beside metallic accents. The key is variety without chaos; stick to two or three neutral base colors and let texture do the talking.

    This approach works for renters too—throws and pillows are portable and easy to swap when you move.

    Your sofa becomes a tactile focal point that draws people to sit down and stay awhile.

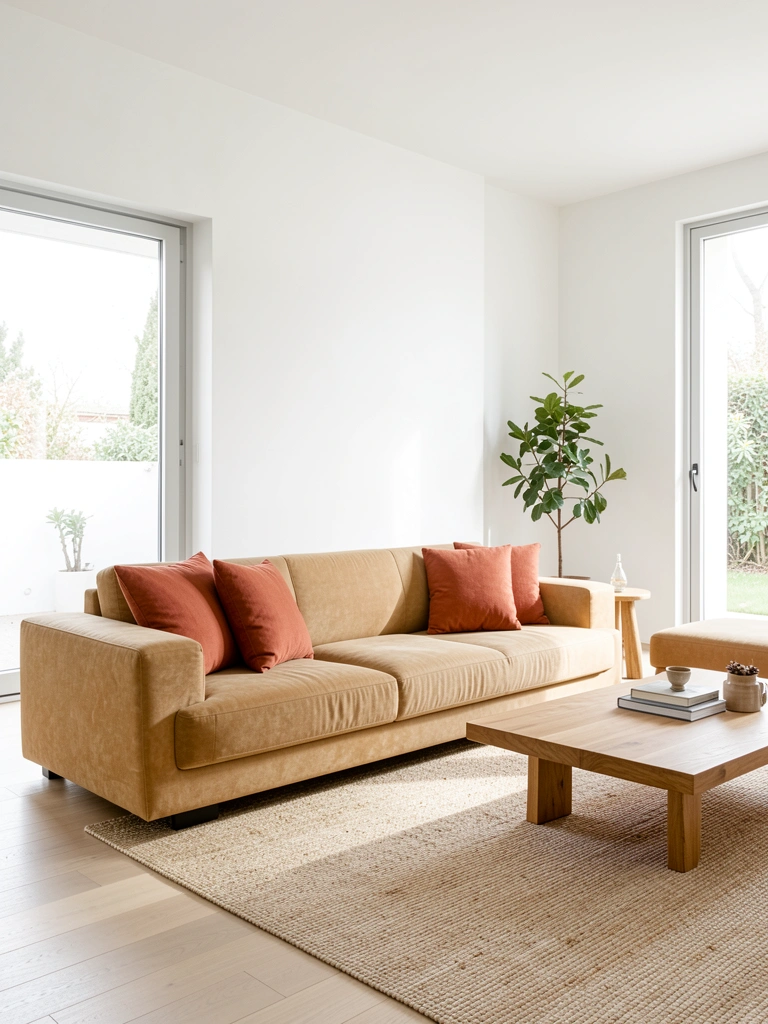
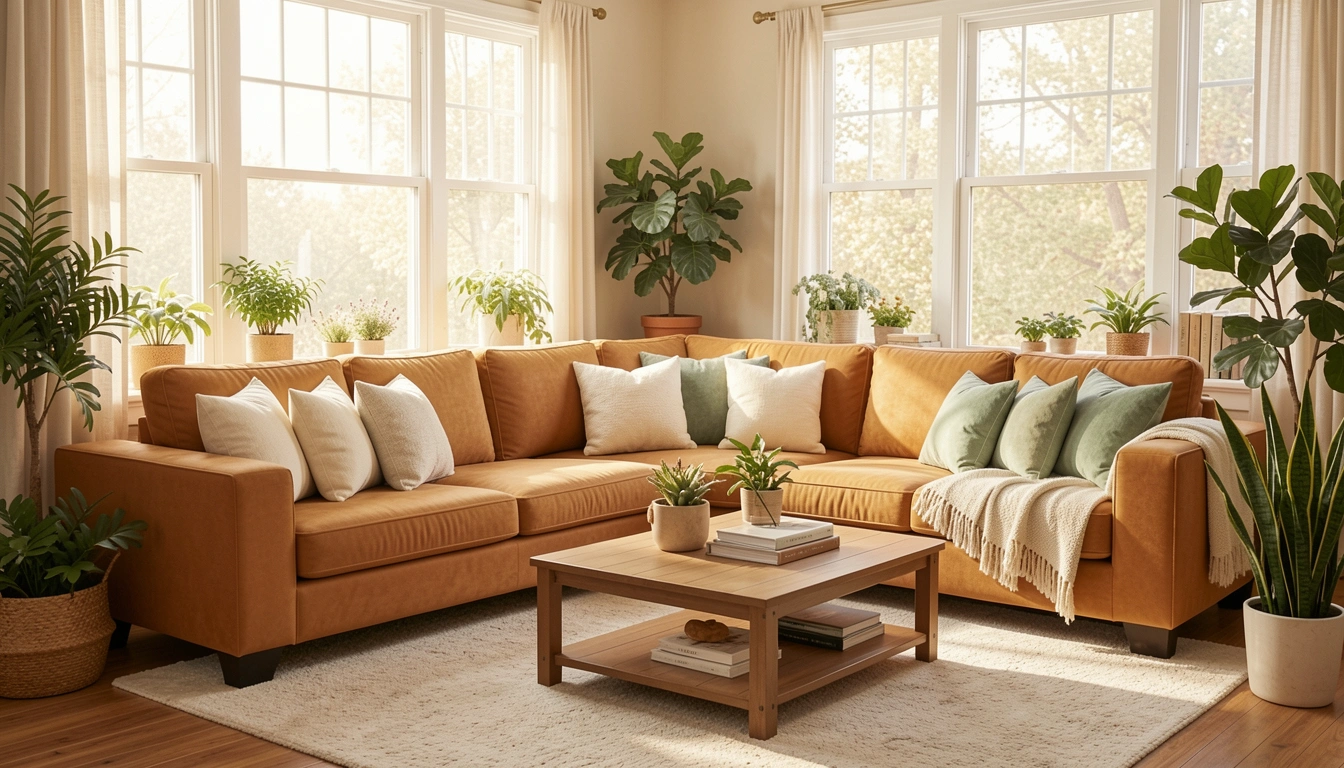
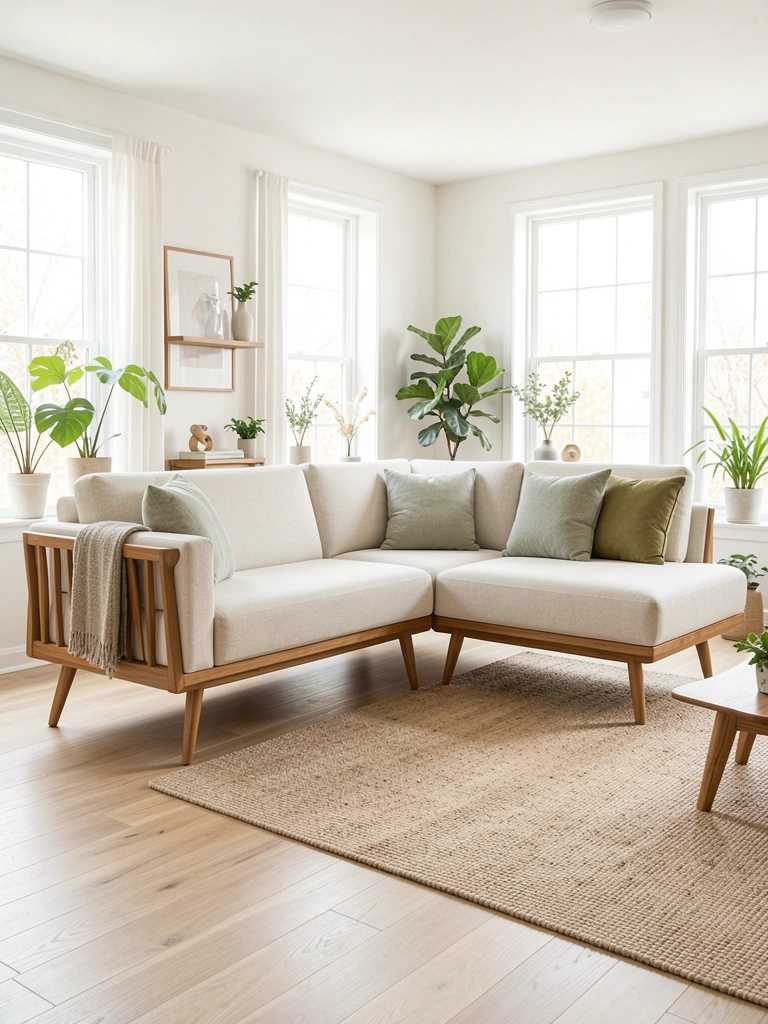
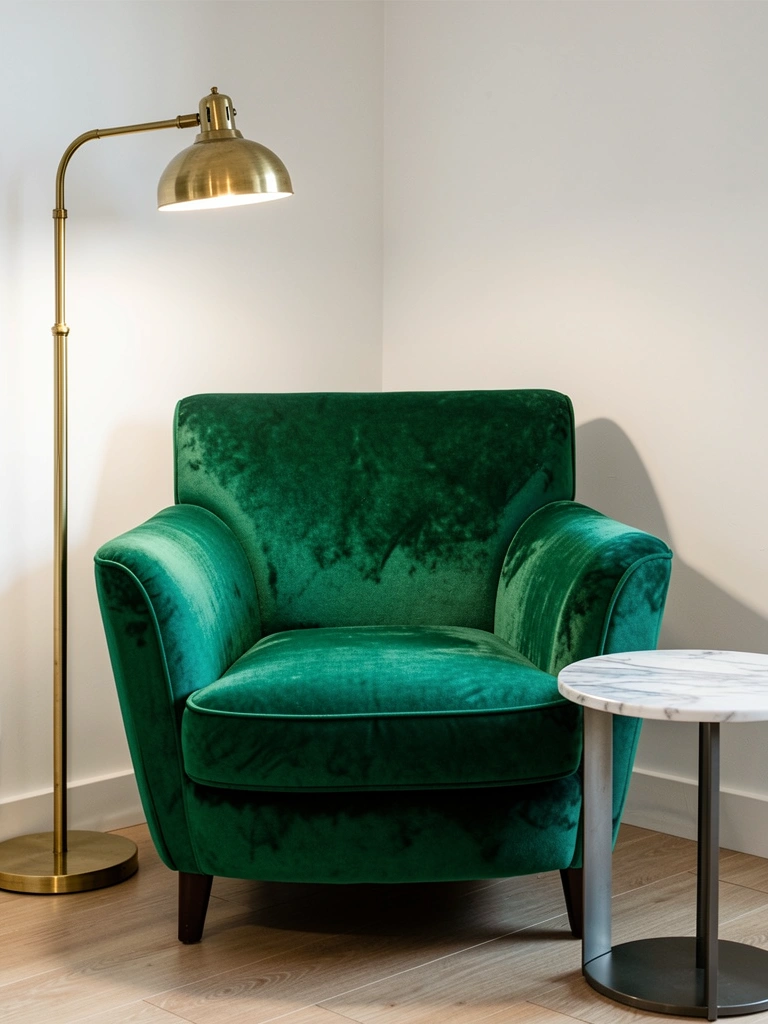
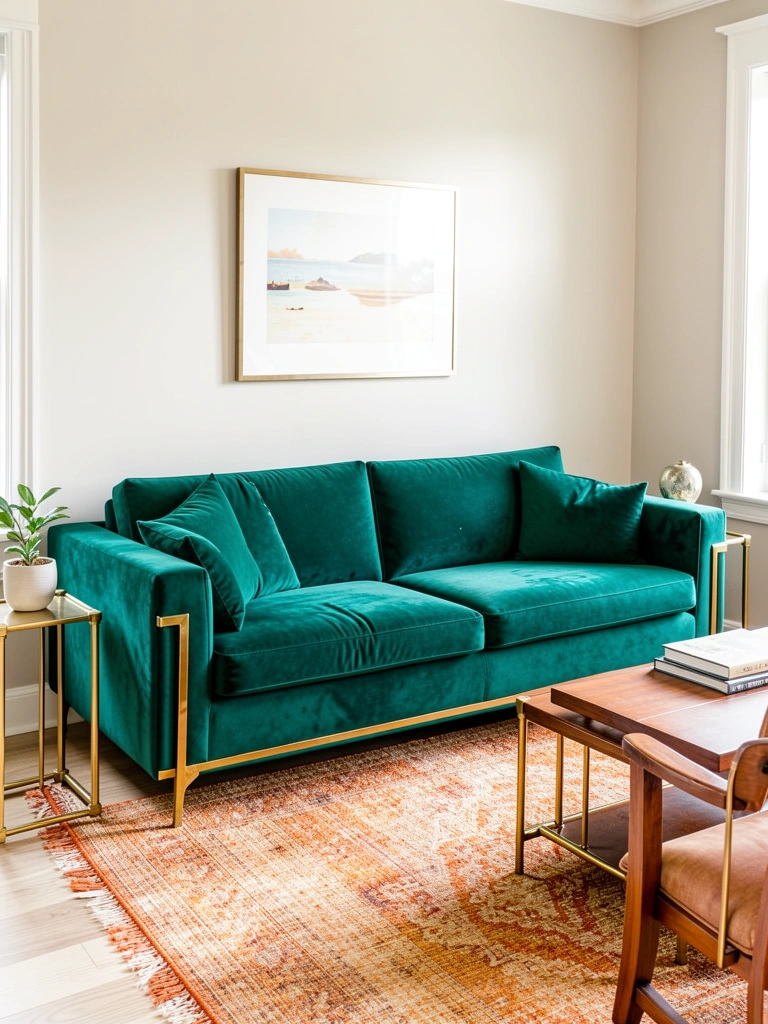
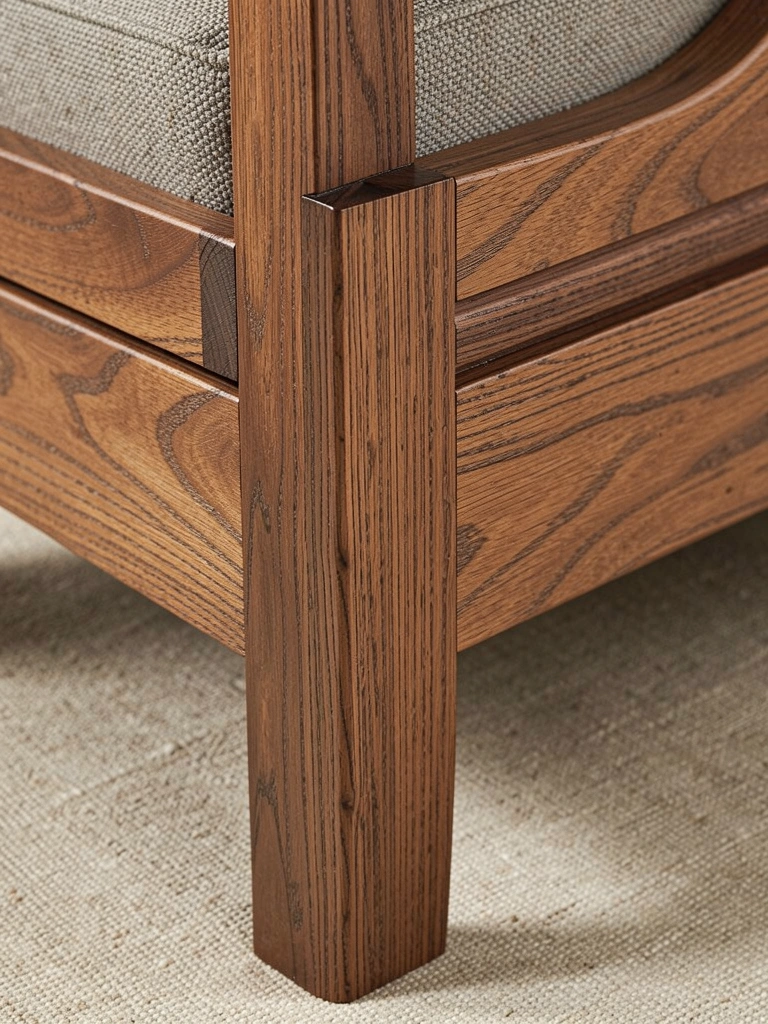
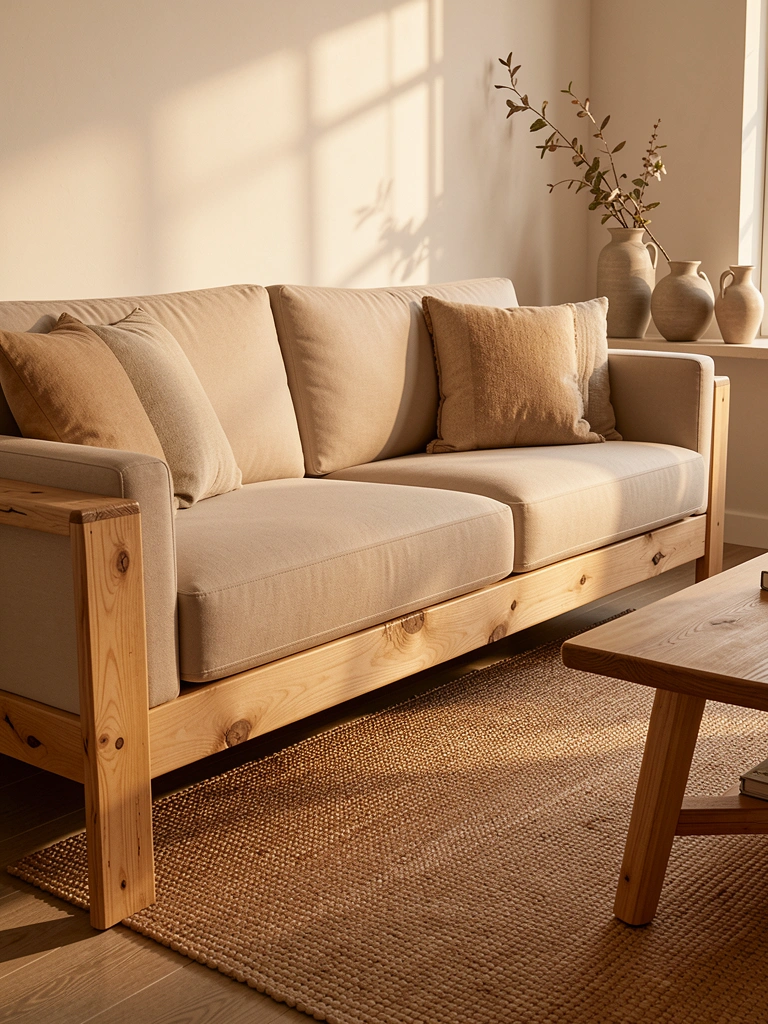
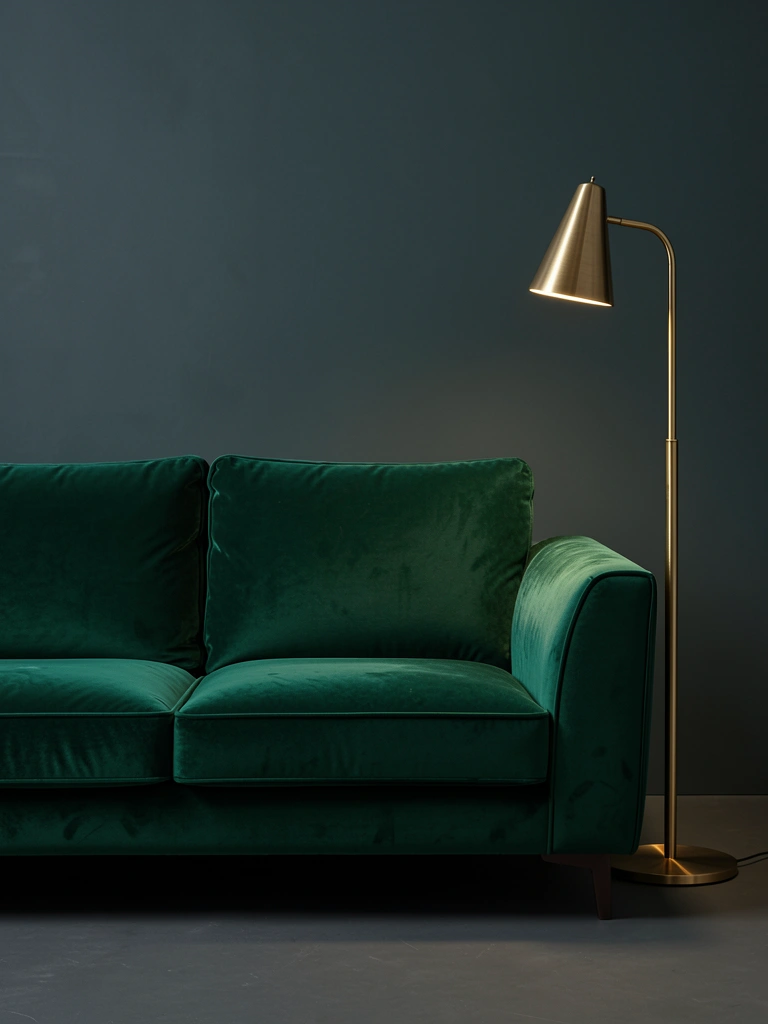
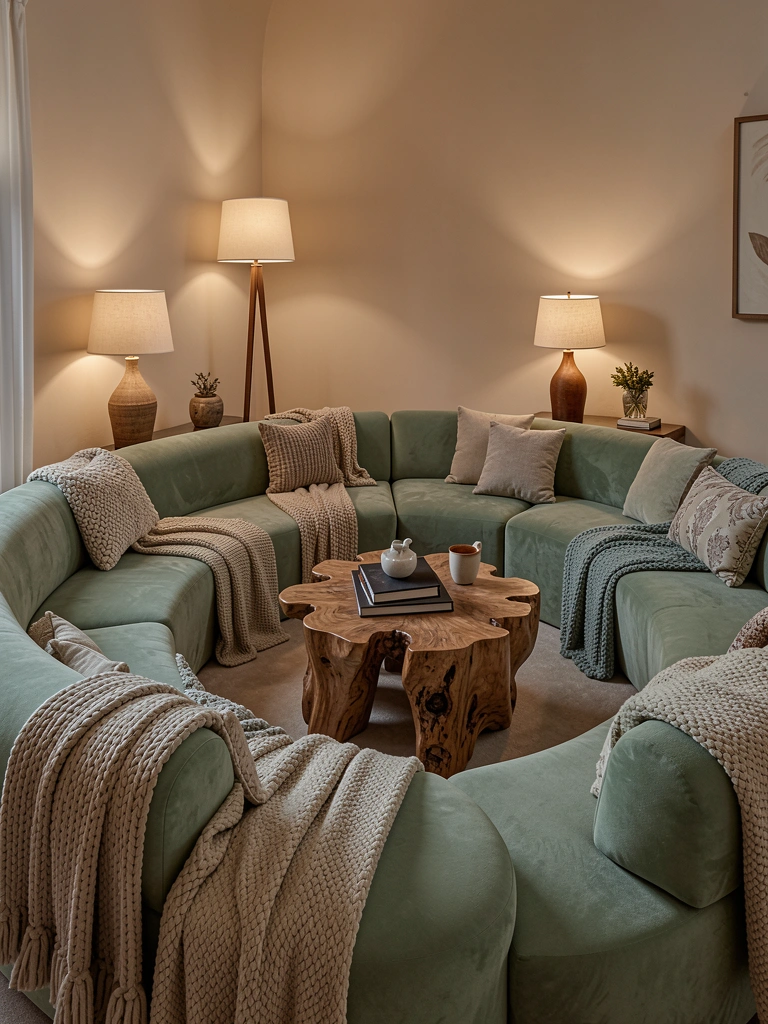
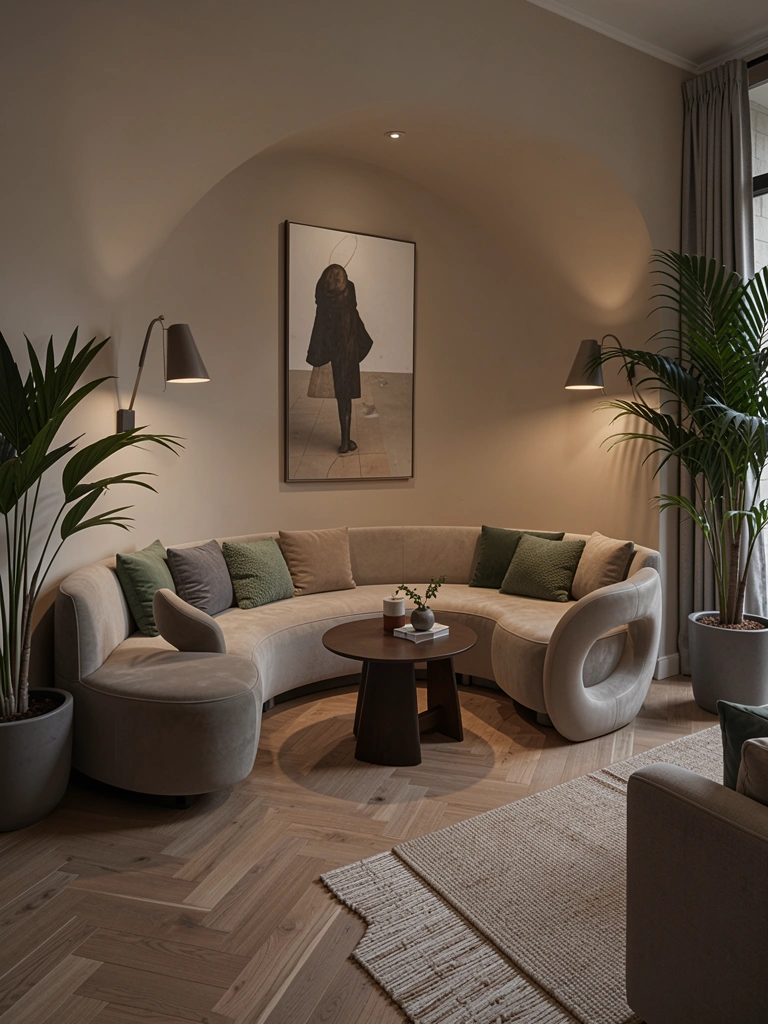
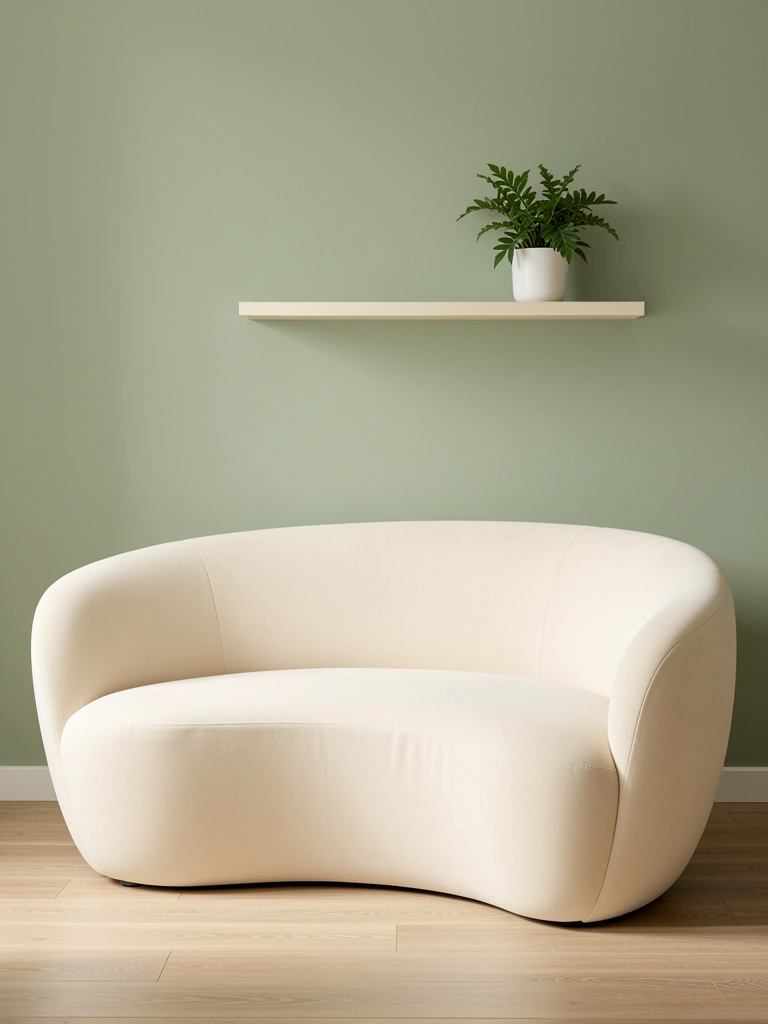
    2. Pair Sage Green Curves with Warm Wood Legs

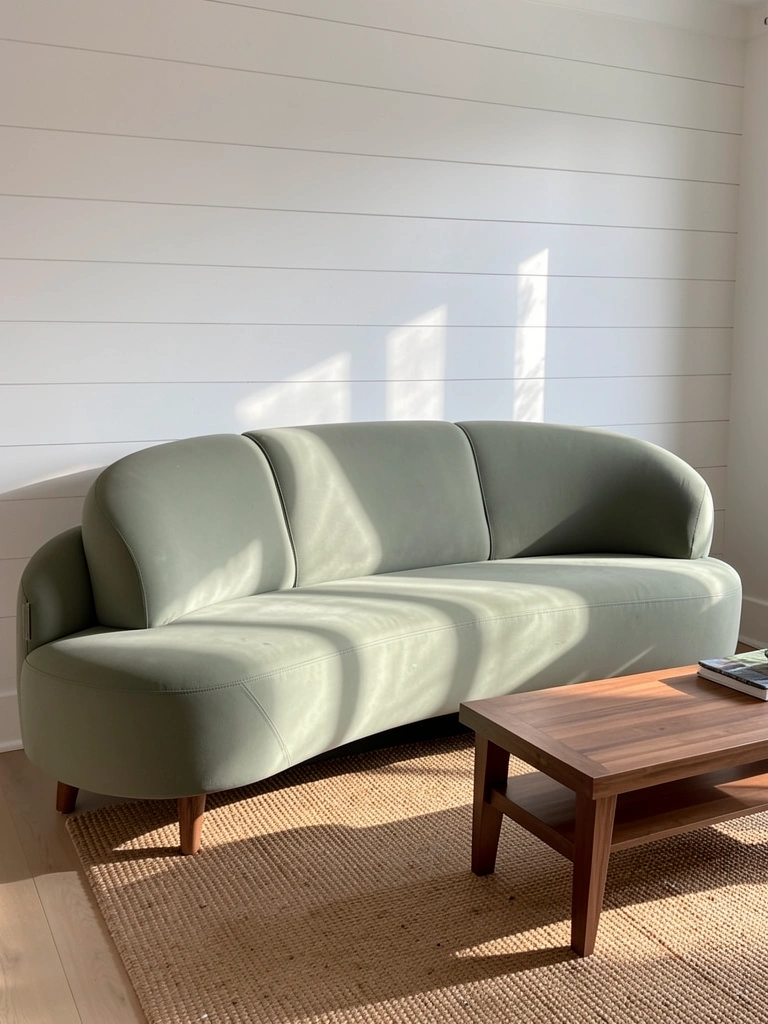
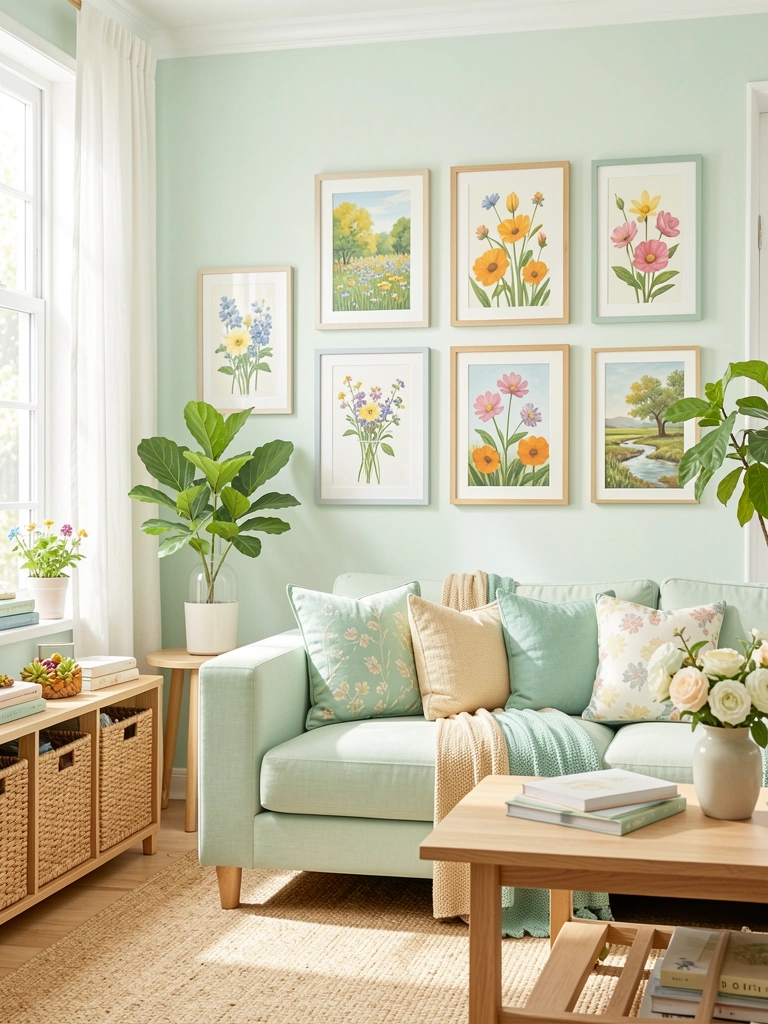
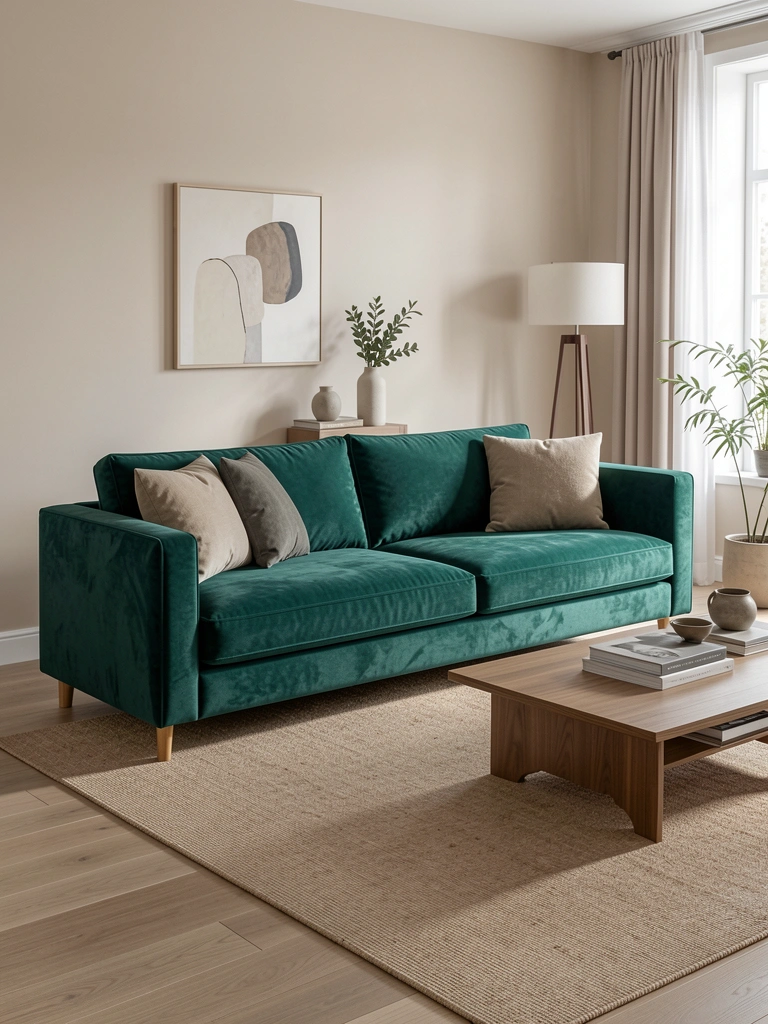
    Muted greens are having a major moment, and curved sofas in sage or olive tones feel organic and calming without reading as trendy. The curved shape softens the depth of color, making a green sofa feel approachable rather than bold.

    Seek out curved sofas with exposed wood legs in walnut or oak (prices range $900–$2,200 from brands like Article, Wayfair, or Living Spaces). The wood adds warmth and grounds the softness of the curves. Pair with a natural jute rug ($80–$150) to reinforce the earthy vibe. If you can’t find a curved frame with wood legs, add adjustable wooden feet ($15–$25 per set) to an upholstered base.

    This combination creates a wellness-focused space that feels connected to nature while staying modern and minimal.

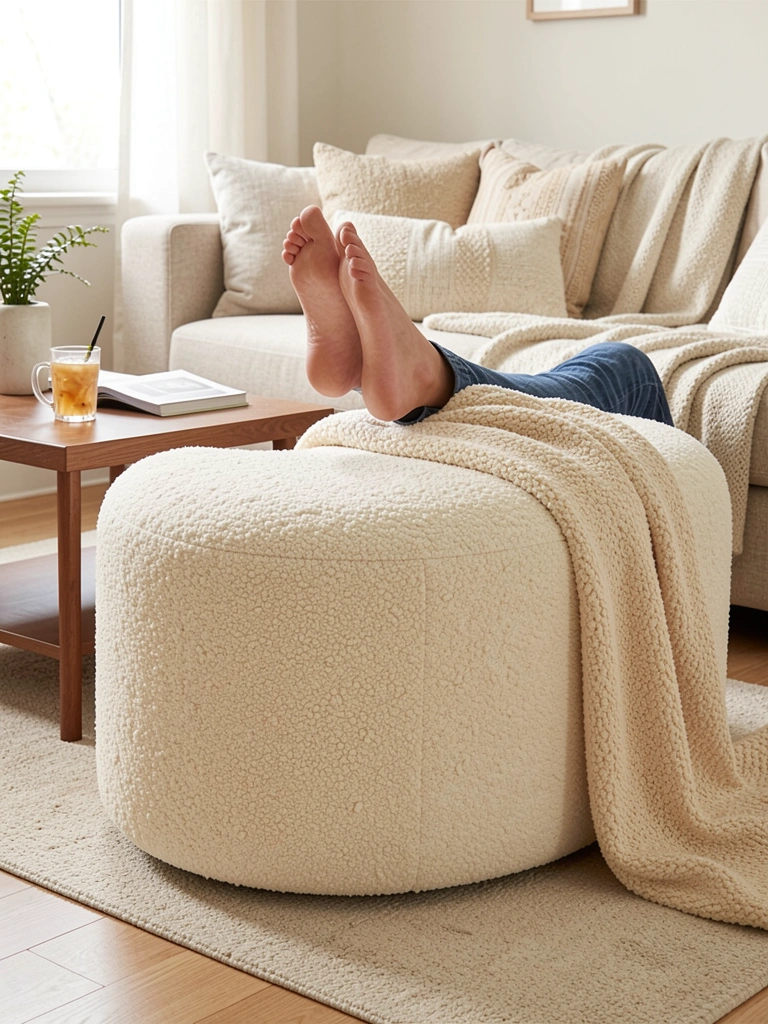
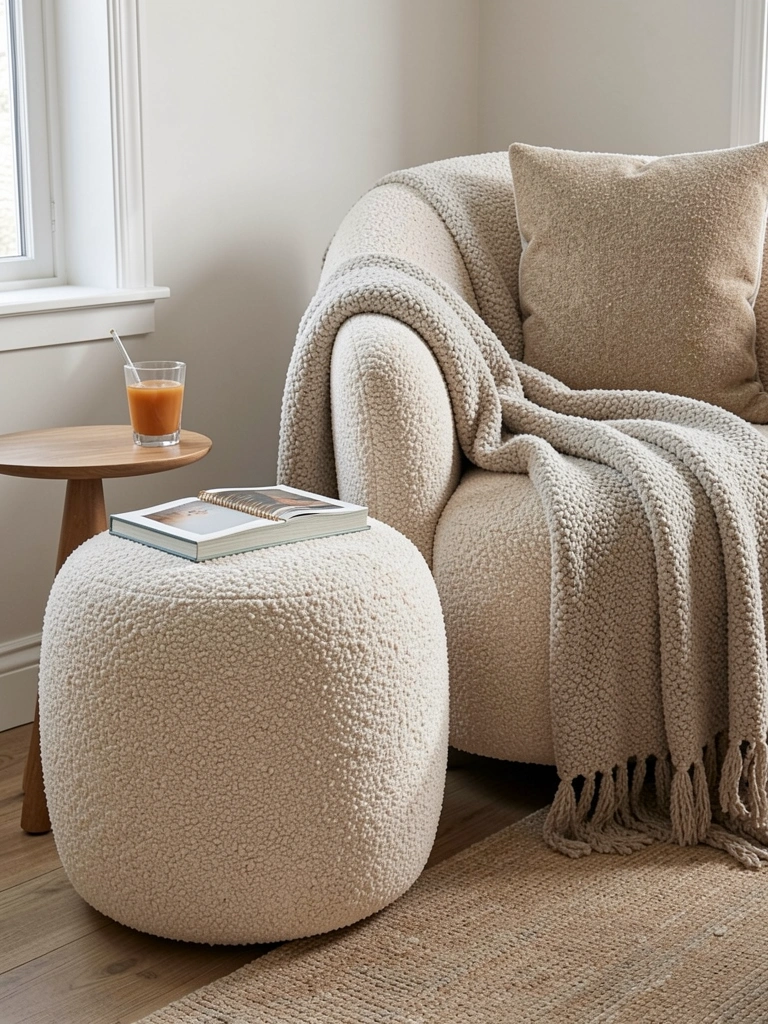
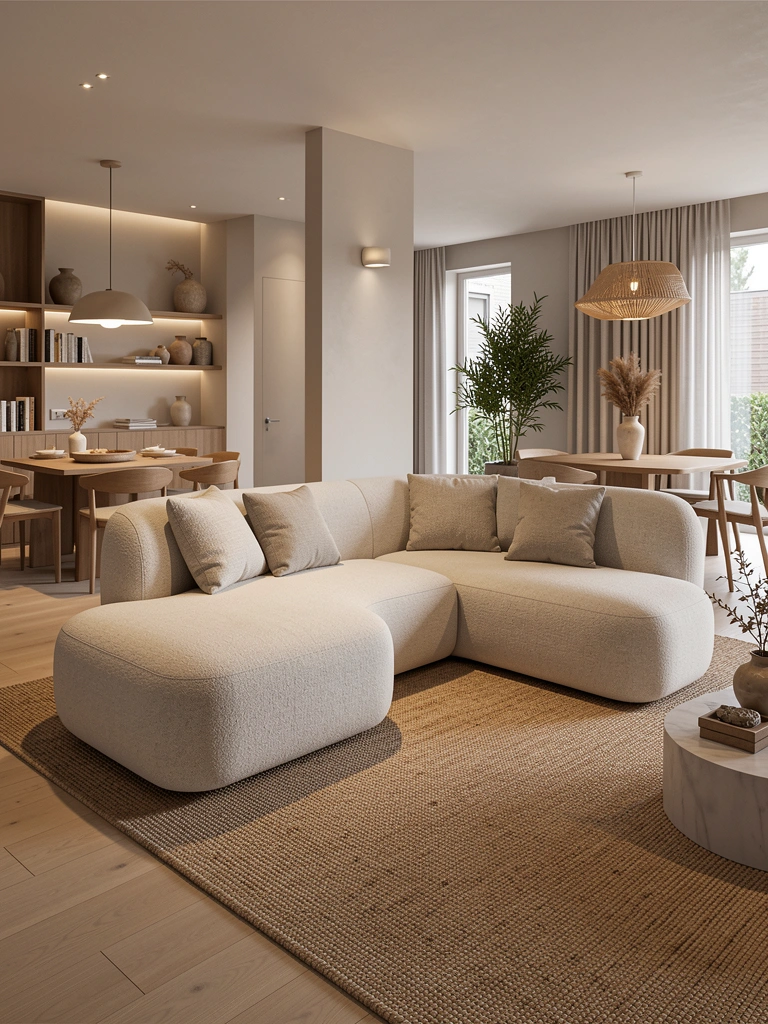
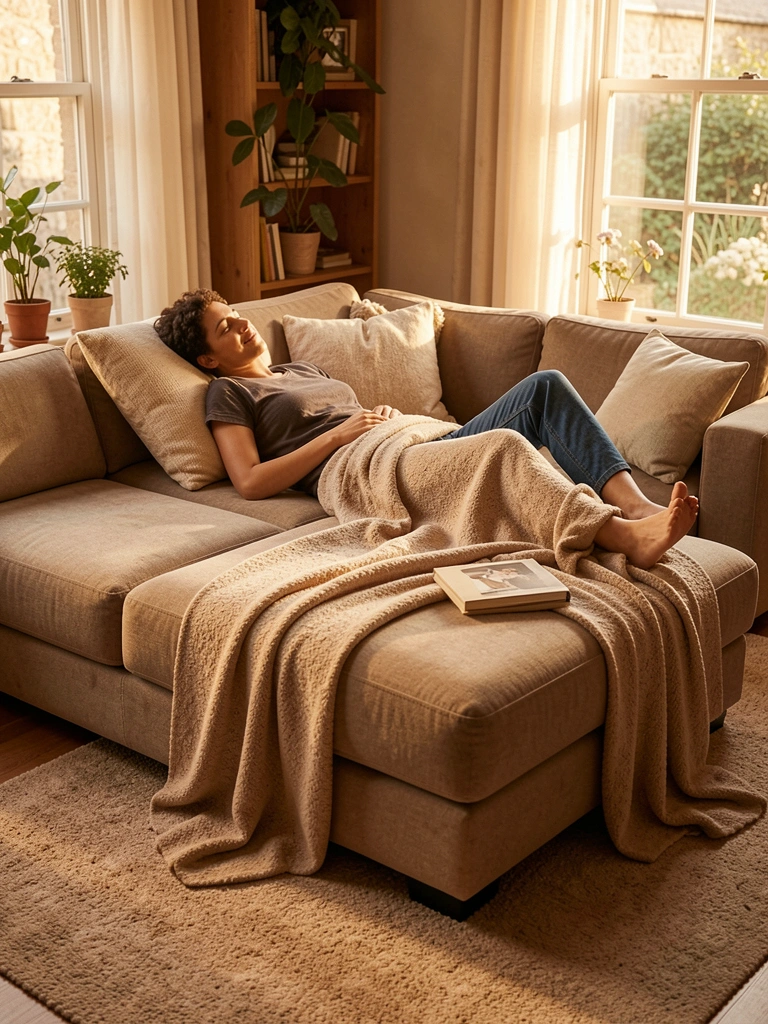
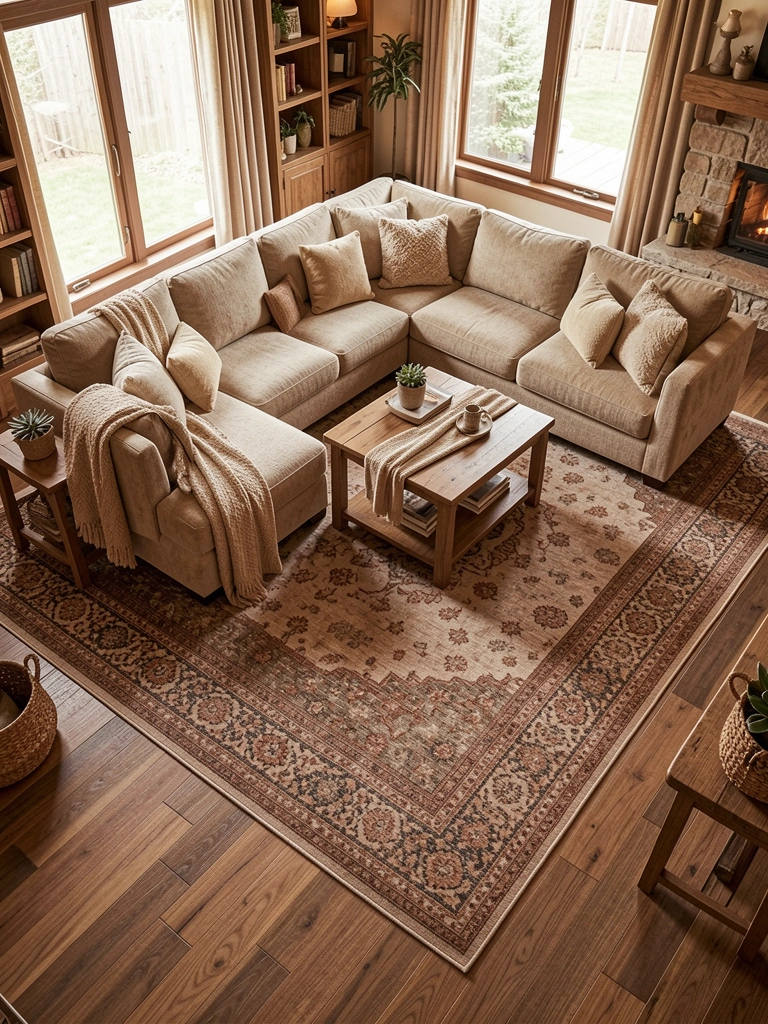
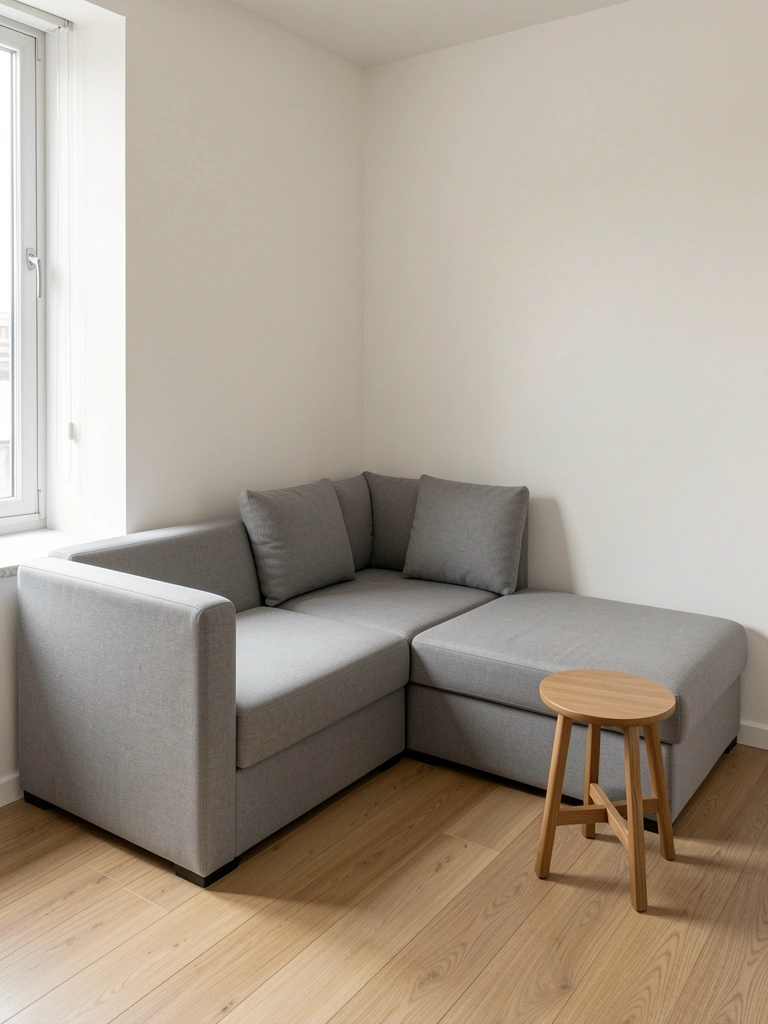
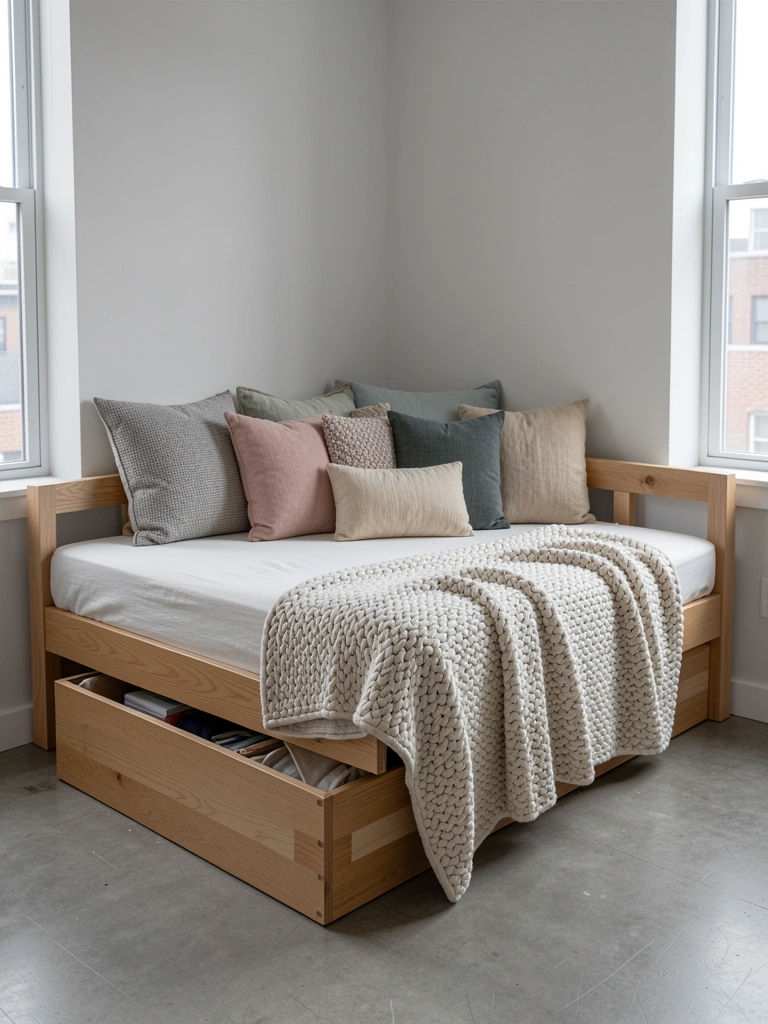
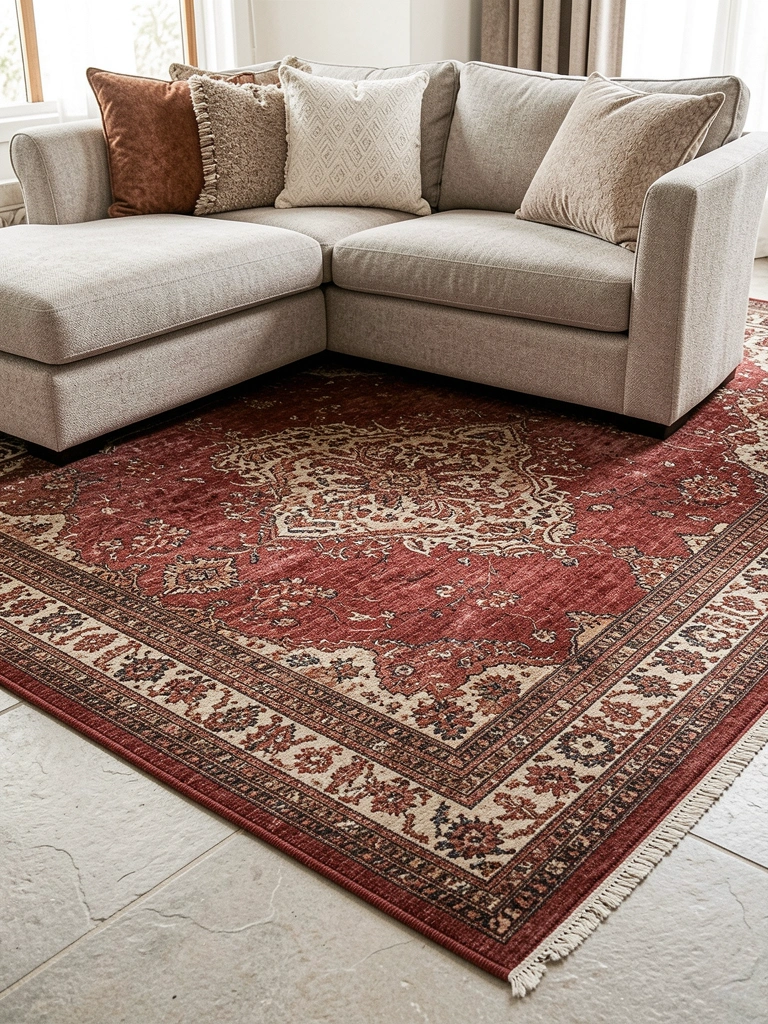
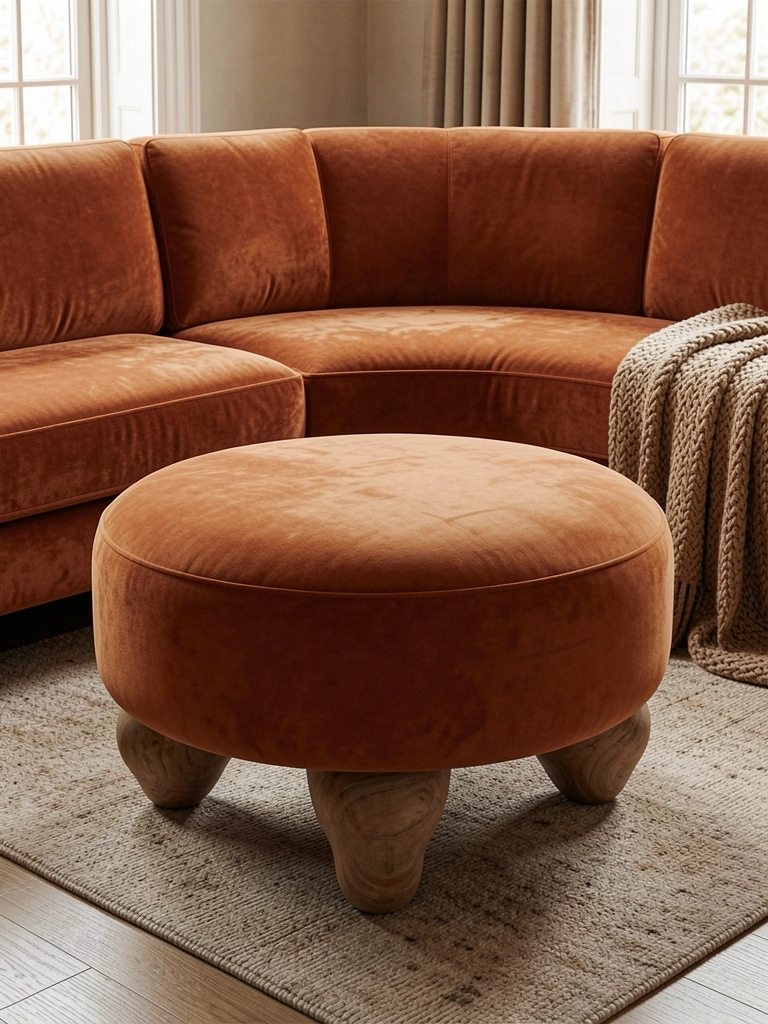
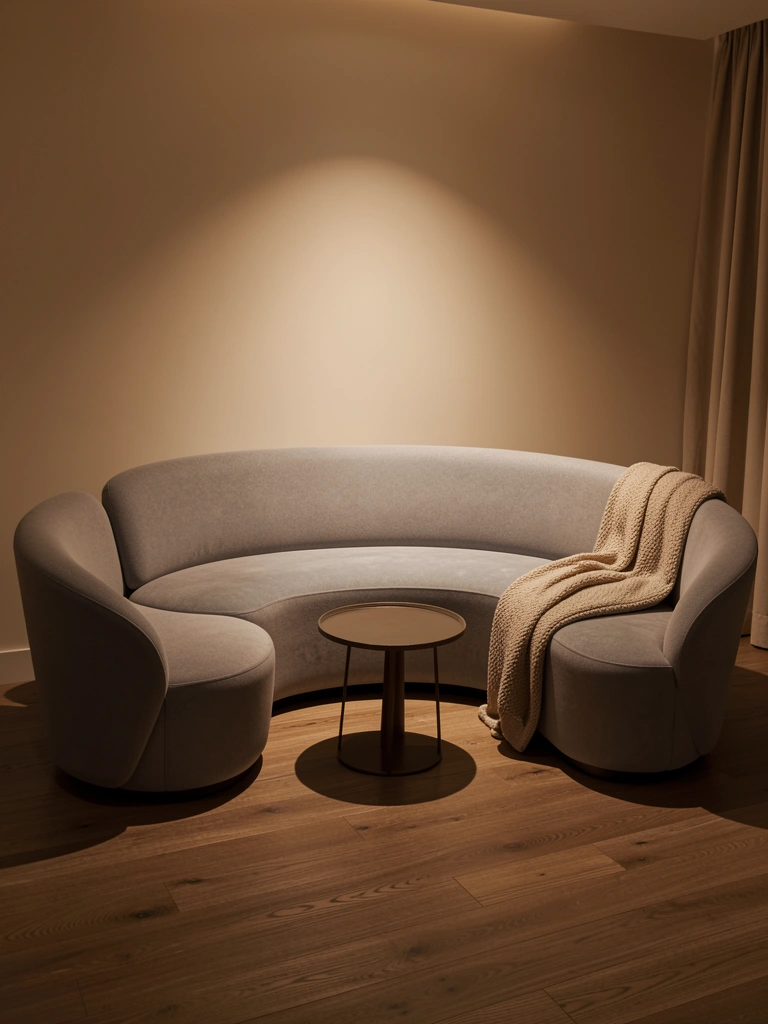
    3. Create a Curved Corner Nook with an Ottoman Extension

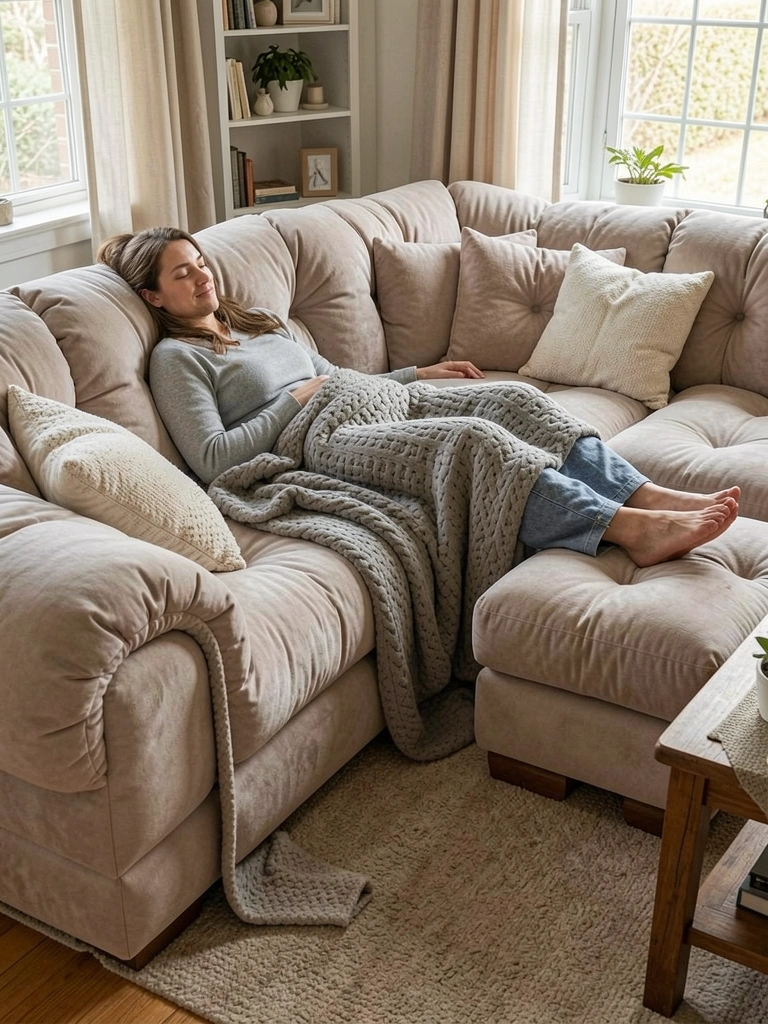
    If you want maximum comfort without committing to a full sectional, add a curved ottoman to extend your sofa into a lounge-worthy nook. This setup mimics a chaise without the commitment of a traditional chaise lounge.

    Purchase a curved or rounded ottoman ($200–$500 from Wayfair, Article, or living room specialty retailers) that coordinates with your sofa’s curves. Position it perpendicular to one end of the sofa to create an L-shape. Add a small side table ($50–$120) between the sofa and ottoman for drinks and books. This works beautifully in bedrooms or small living rooms where a full sectional wouldn’t fit.

    You’ve created a personal retreat that invites you to relax without eating up square footage.

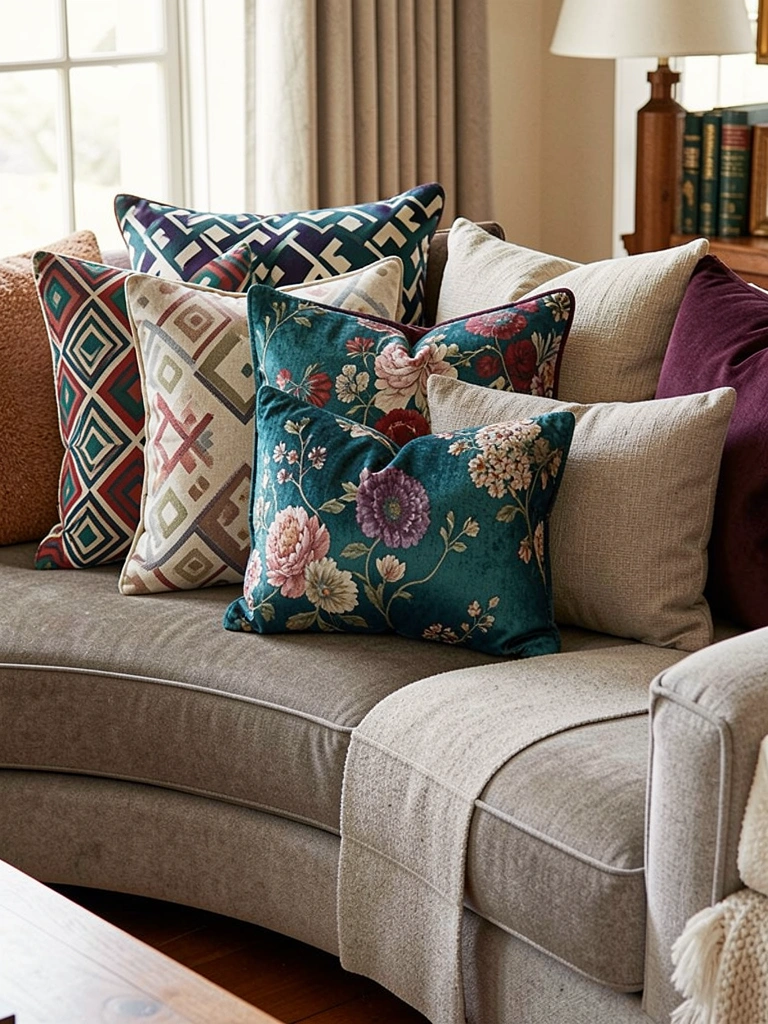
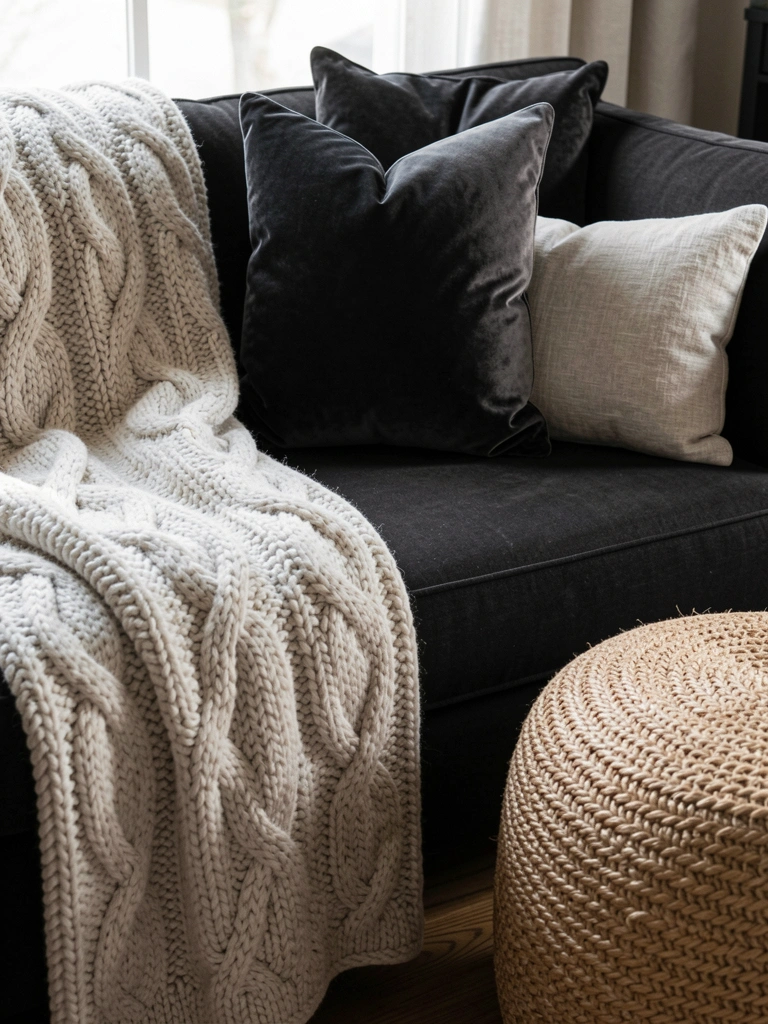
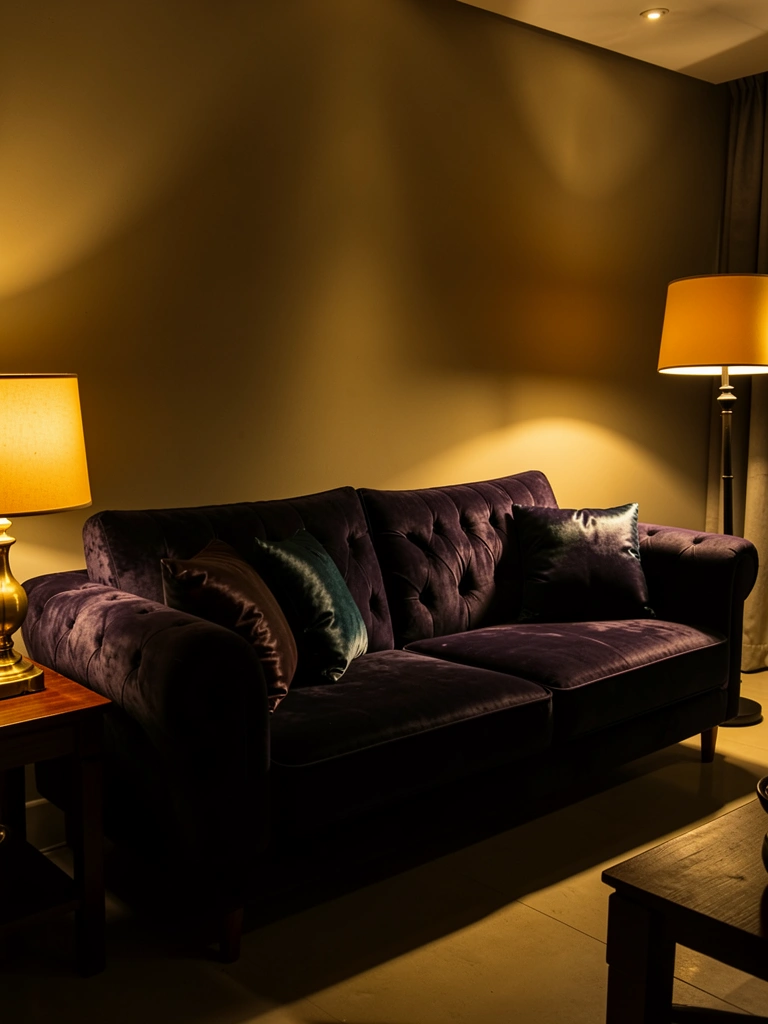
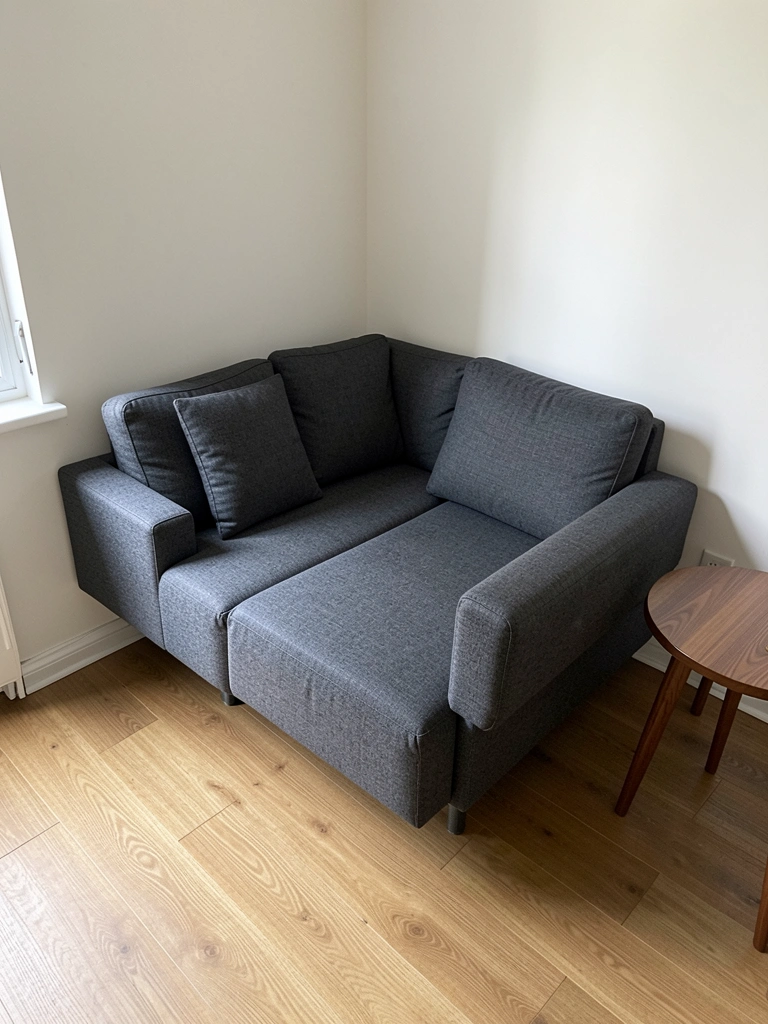
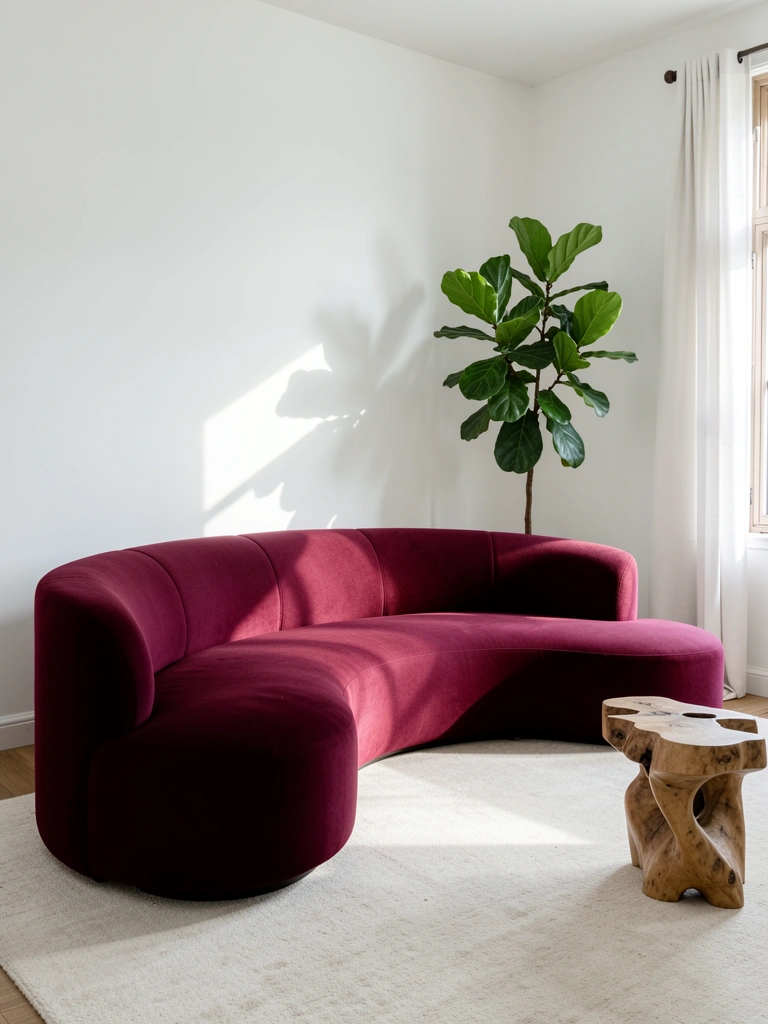
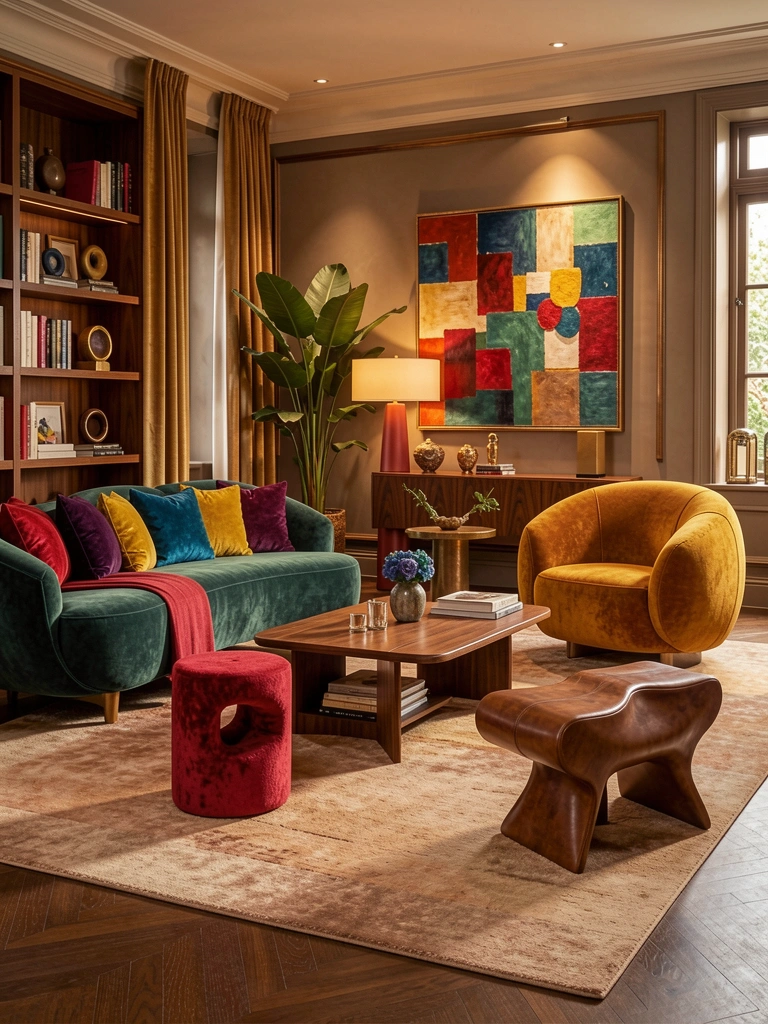
    4. Style a Dark Charcoal Curve with Bright Patterned Pillows

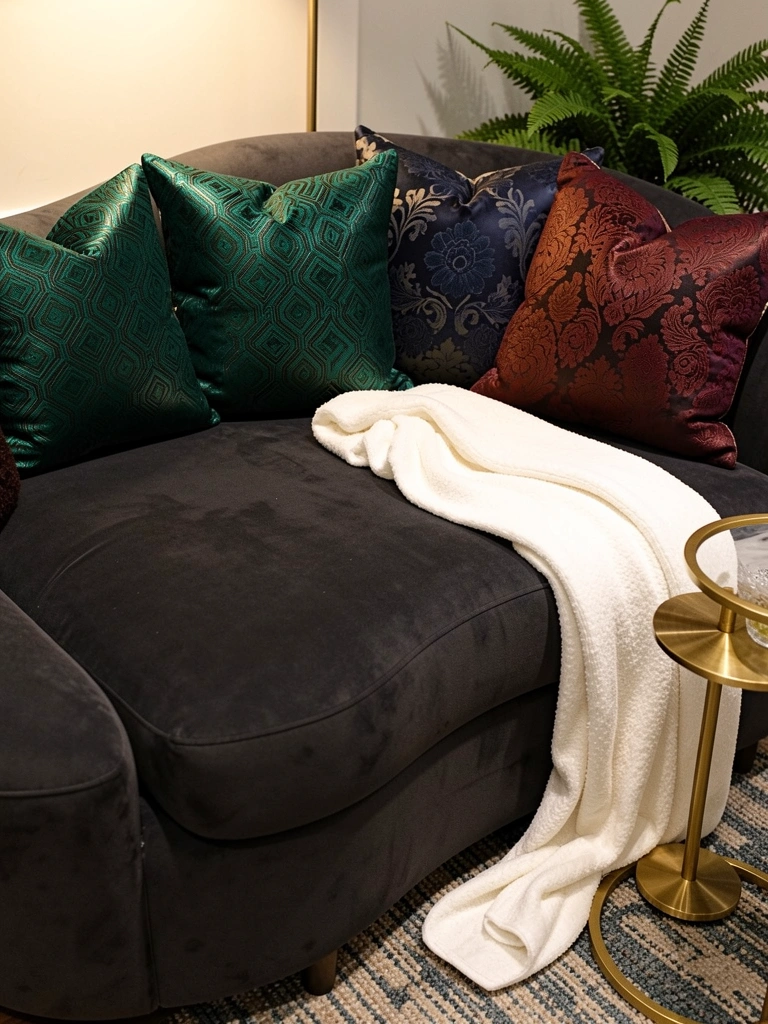
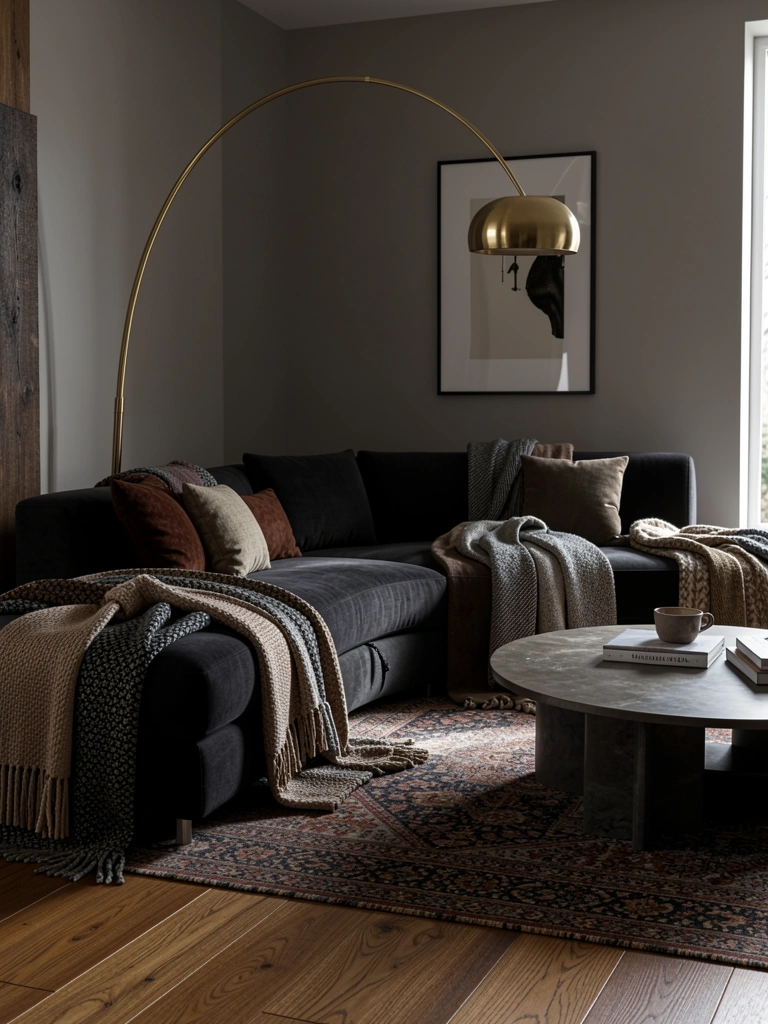
    Dark sofas ground a room beautifully, but curved silhouettes keep them from feeling heavy or formal. Charcoal and navy curved sofas create moody sophistication that pairs perfectly with bold pillow patterns.

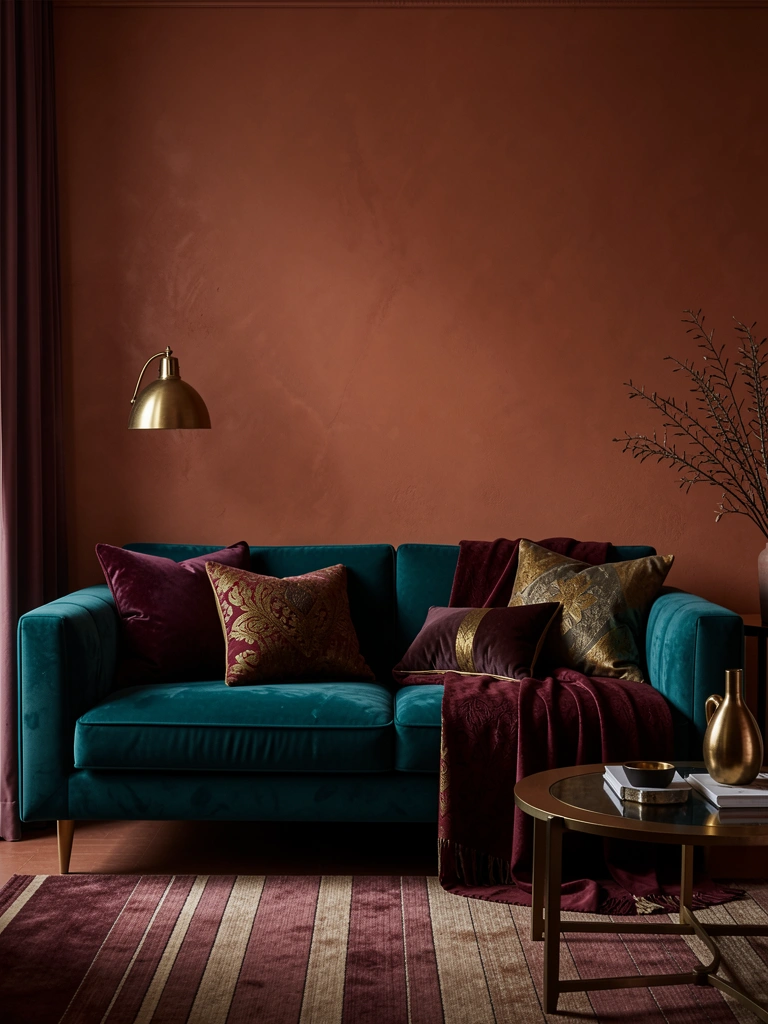
    Layer in patterned pillows ($30–$80 each from Etsy, Target, or HomeGoods) in jewel tones—emerald, sapphire, burgundy—with geometric, floral, or damask prints. Pair two patterned pillows with one solid coordinating pillow to avoid visual chaos. Add a crisp white linen throw ($40–$70) to soften the darkness and break up solid color. The curves prevent the dark base from feeling oppressive; they add movement and approachability.

    The combination reads high-end and intentional without requiring a professional decorator or a massive budget.

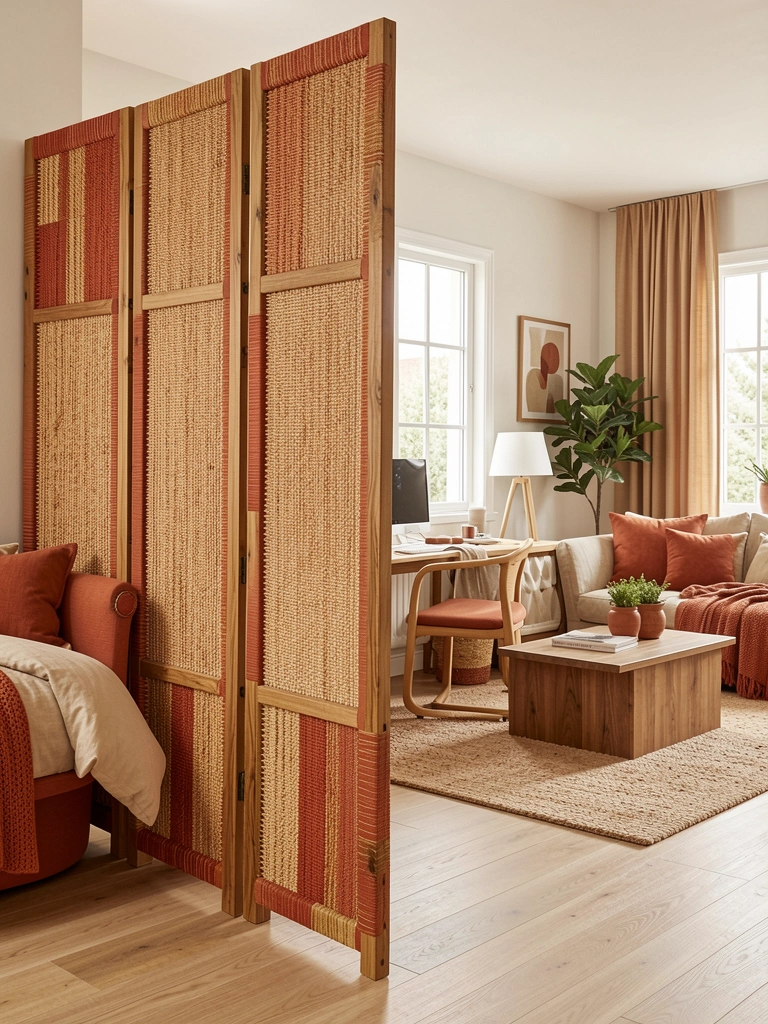
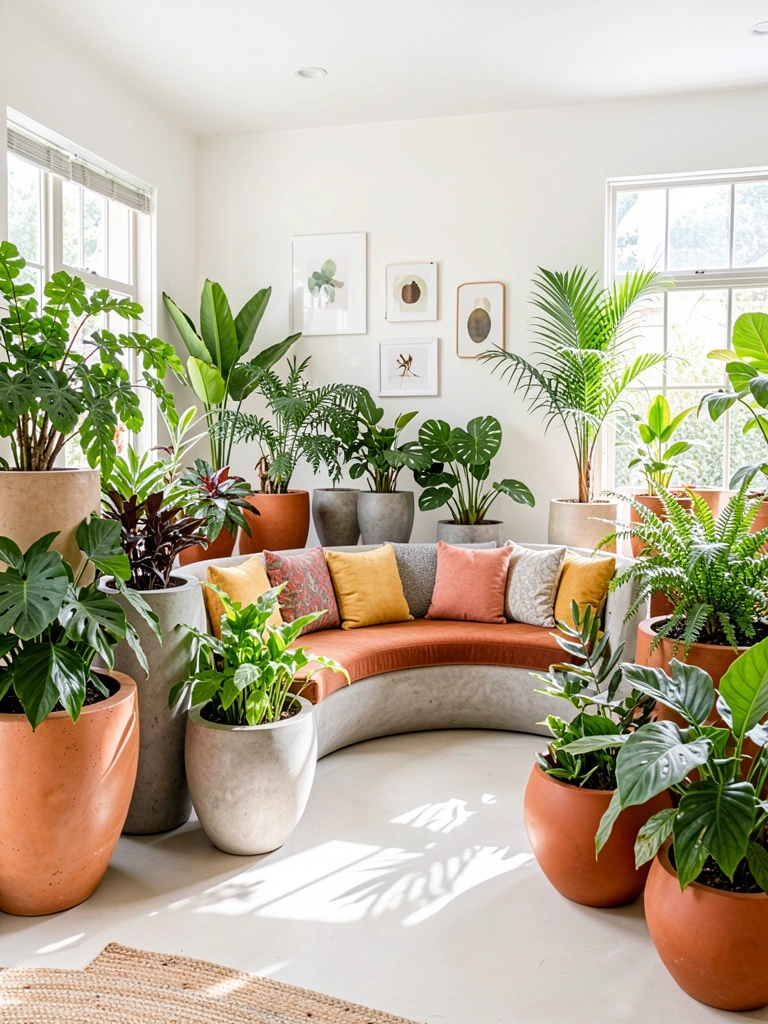
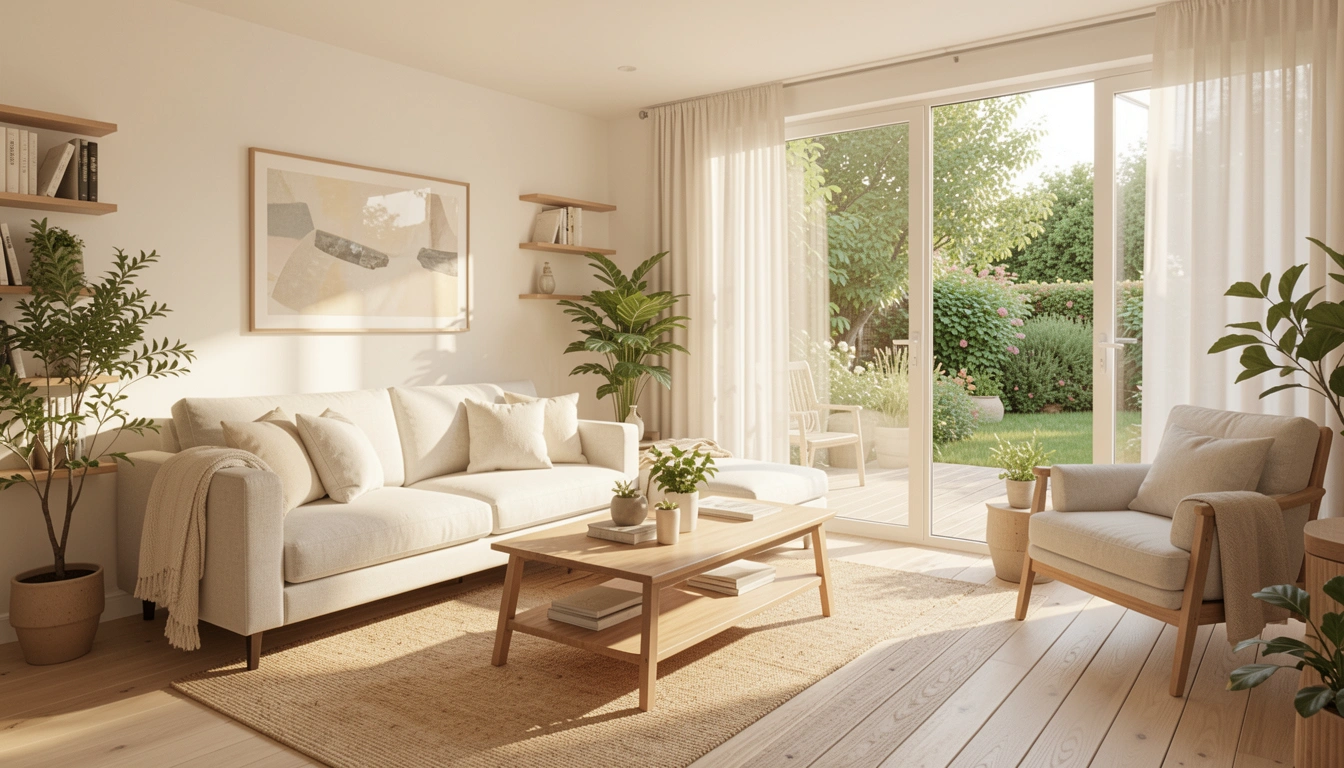
    5. Use a Curved Sofa as Room Divider in Open Plans

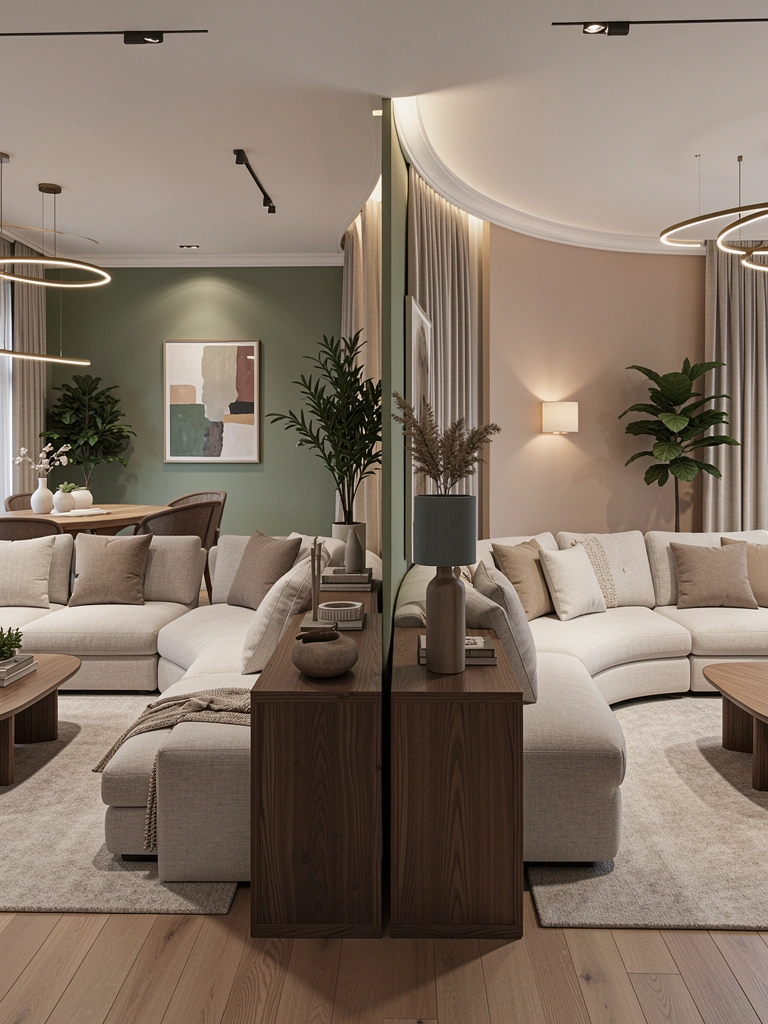
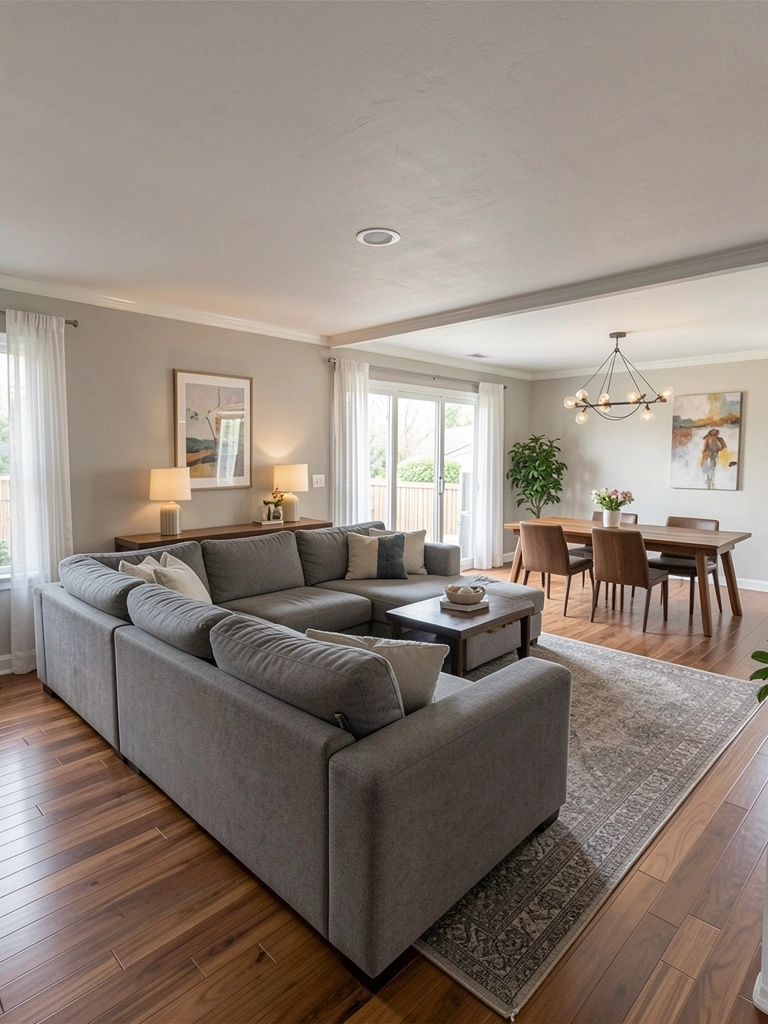
    Open-plan homes benefit enormously from curved sofas because the rounded shape creates visual boundaries without walls. A curved sofa can physically separate zones while keeping sightlines open.

    Position a curved sectional or sofa perpendicular to an open space ($1,000–$2,500 for modular options from Living Spaces, West Elm, or Article) to define the living area while maintaining the openness of the floor plan. Place a low console table ($150–$350) behind the sofa to anchor the dividing line. Add pendant lighting ($80–$200) above the sofa back to further define the zone. The curved back of the sofa becomes an architectural feature, not just furniture.

    This approach gives you defined spaces without the claustrophobia of walls or the cost of renovation.

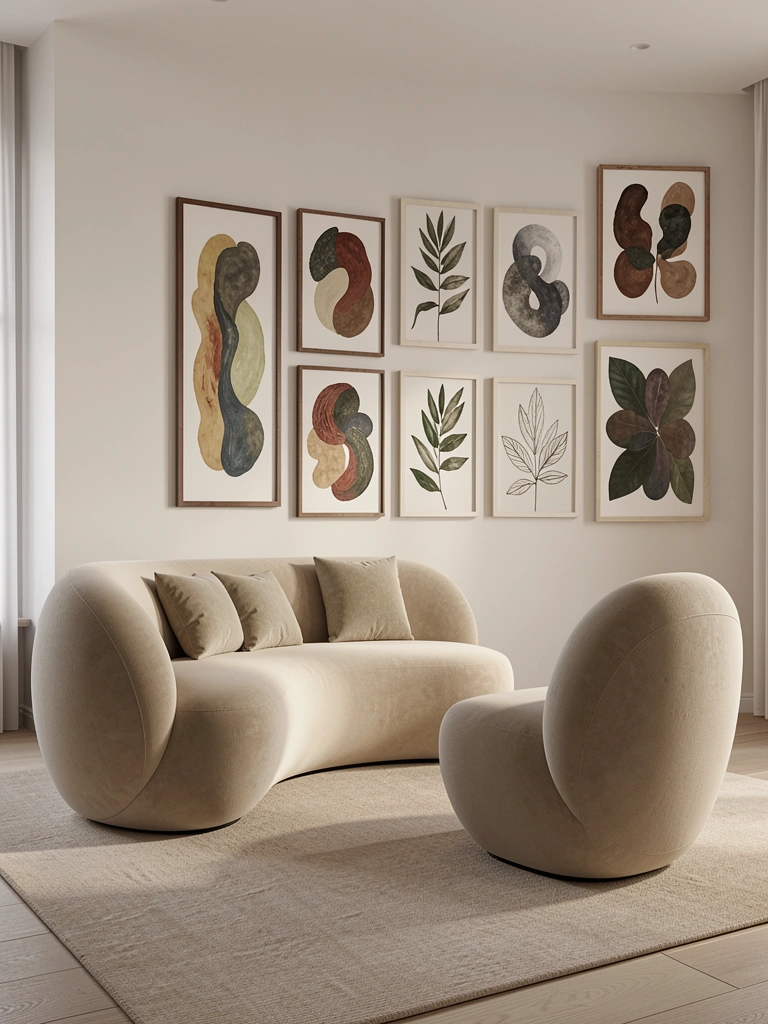
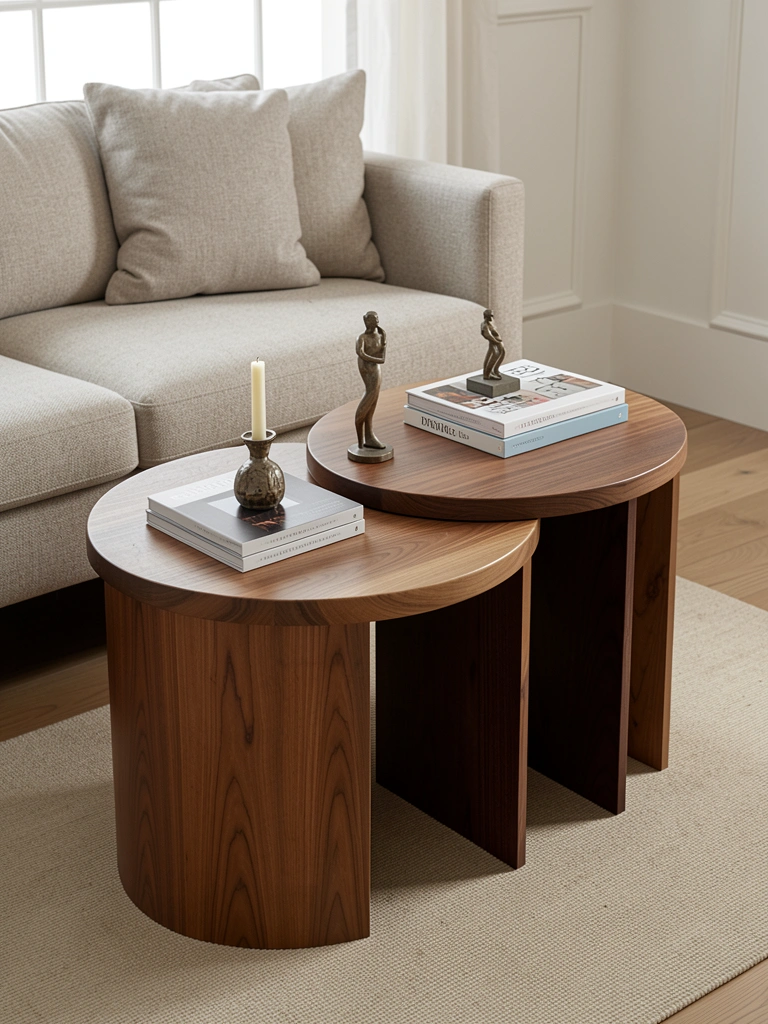
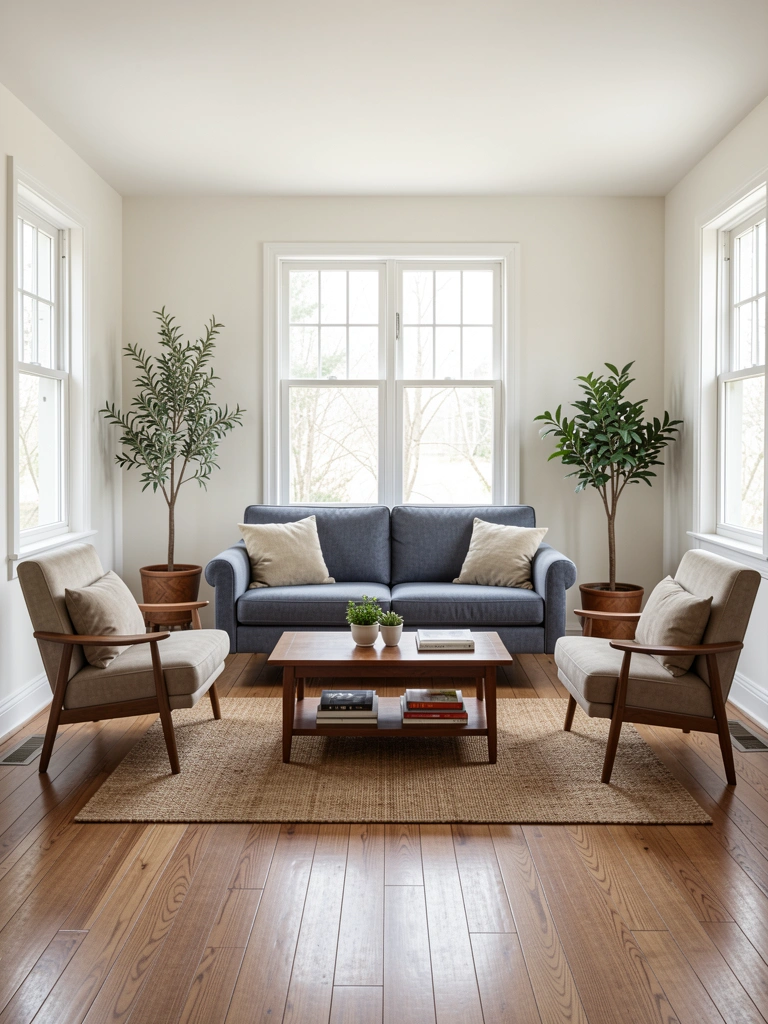
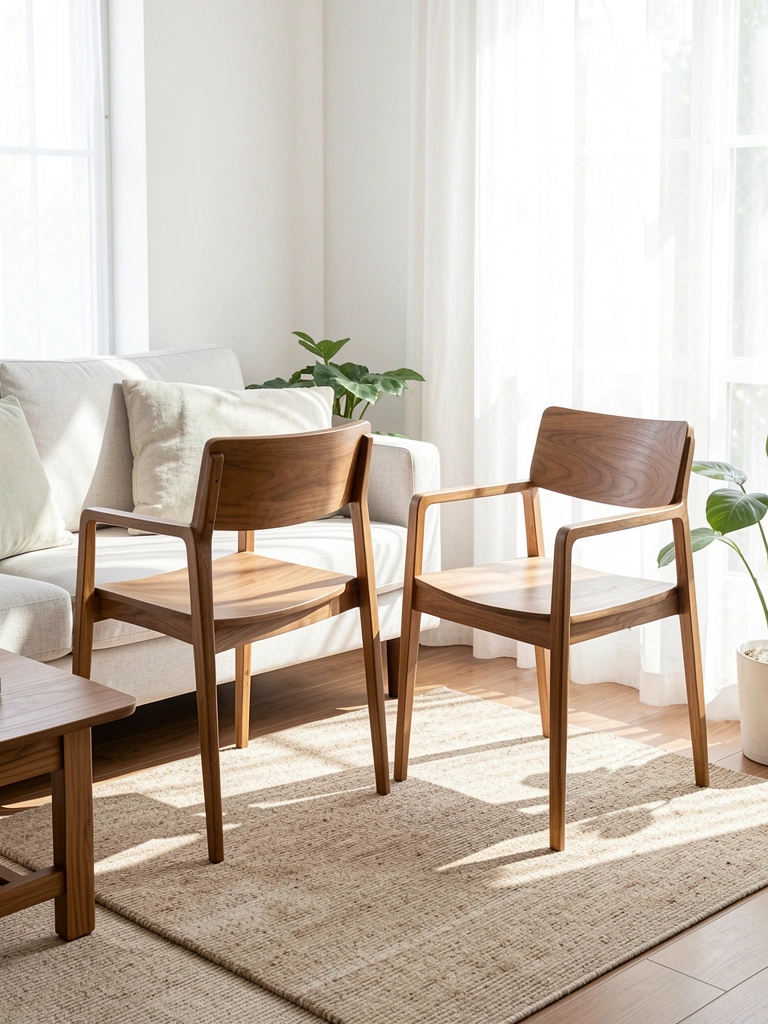
    6. Mix Curved Sofa with Nesting Crescent Armchairs

    Multiply the magic of curves by adding matching or coordinating curved armchairs that nestle alongside your sofa. This creates an intentional, cohesive seating landscape that feels more curated than standard furniture pairings.

    Shop for curved or crescent-shaped armchairs ($250–$600 each from Wayfair, West Elm, or Article) in the same fabric family as your sofa or in a complementary neutral. Position them at slight angles on either side of the sofa to create a conversational grouping. Add a round side table ($100–$250) between seating pieces to reinforce the organic, flowing aesthetic. The circular and curved shapes echo each other, creating visual harmony.

    Your living room becomes a destination for conversation and connection instead of just a place to watch TV.

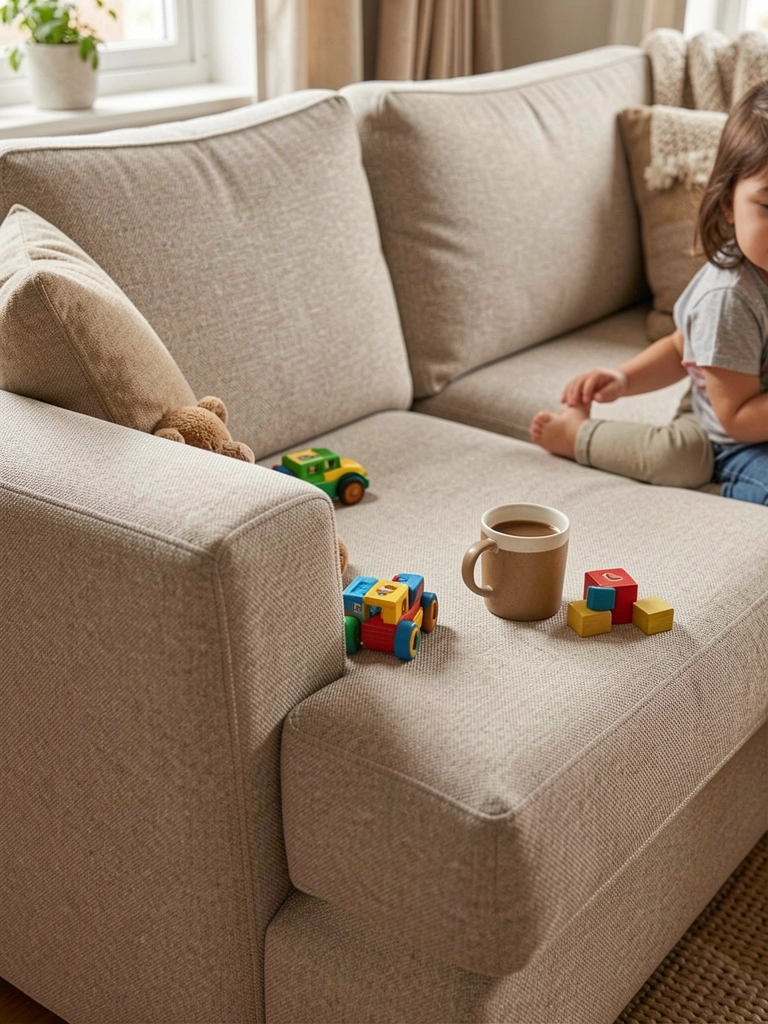
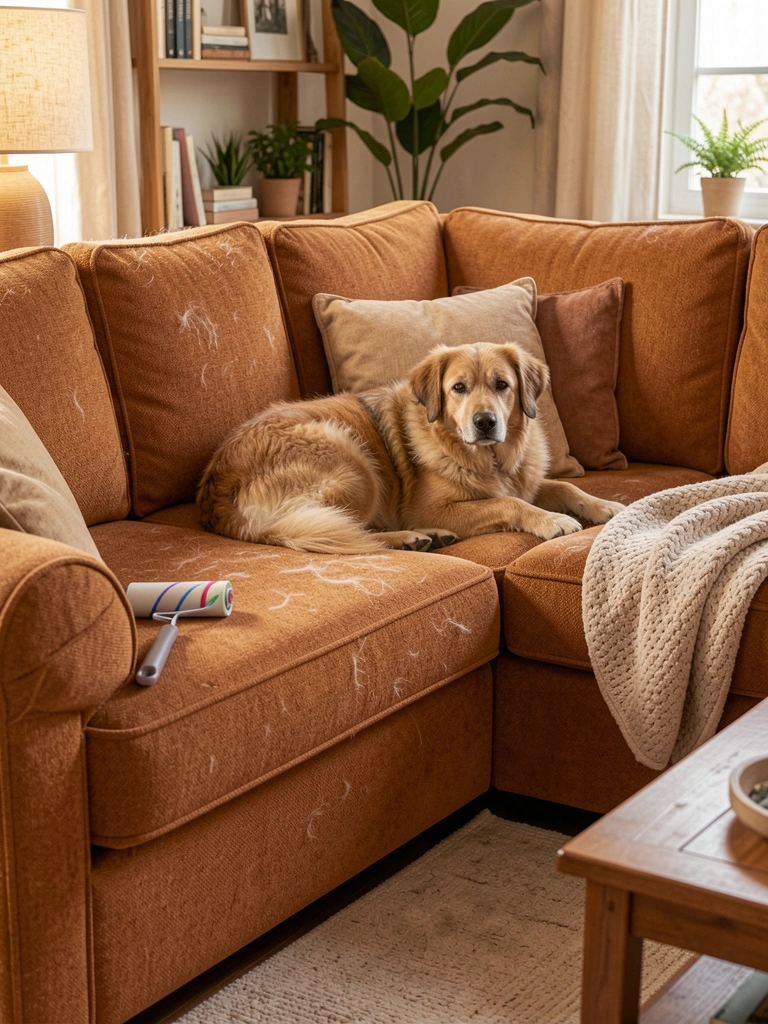
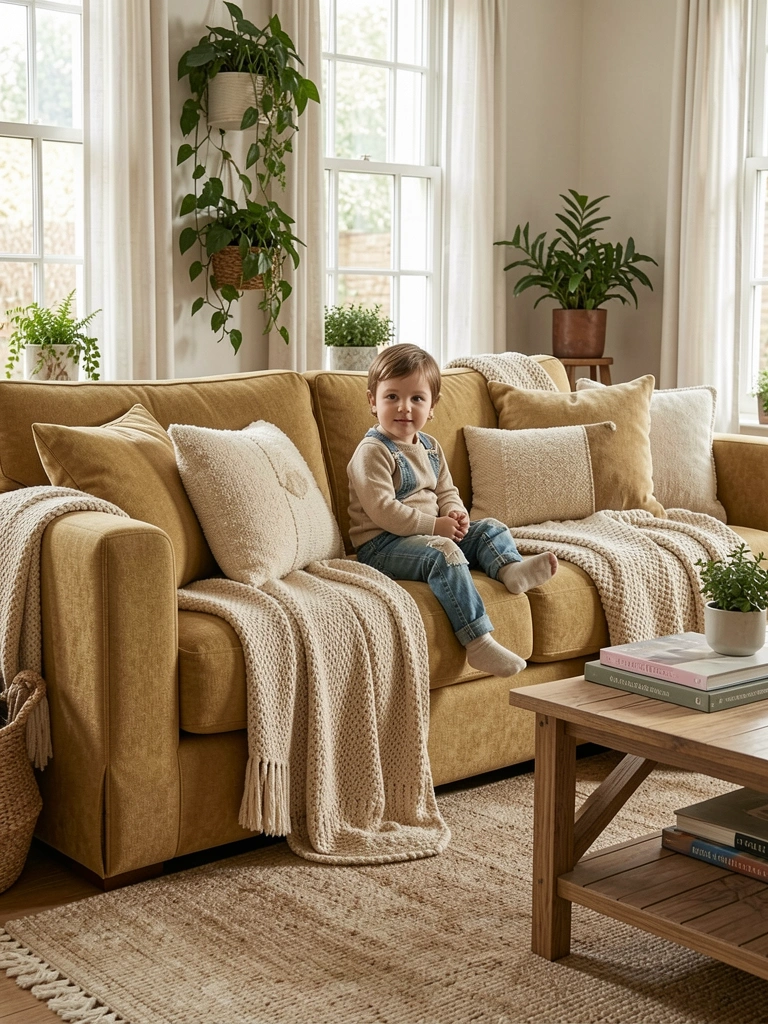
    7. Choose Performance Fabric for Curves with Kids or Pets

    Curved sofas in homes with kids and pets need durable, stain-resistant fabrics that don’t sacrifice style. Performance fabrics have come a long way—many now feel soft and look indistinguishable from traditional upholstery.

    Look for performance fabrics like Crypton, Sunbrella, or Performance by solution-dyed polyester ($1,200–$2,500 for a quality curved piece from Wayfair, Article, or specialty brands like Article). These fabrics resist stains, are easy to clean (often just soap and water), and hold color beautifully. Request fabric swatches ($5–$15) from multiple brands before committing. Performance fabrics add maybe $200–$400 to the sofa cost but save thousands in potential damage over five years.

    The best part? You can relax knowing spills and accidents won’t panic you anymore—your sofa is built to handle real life.

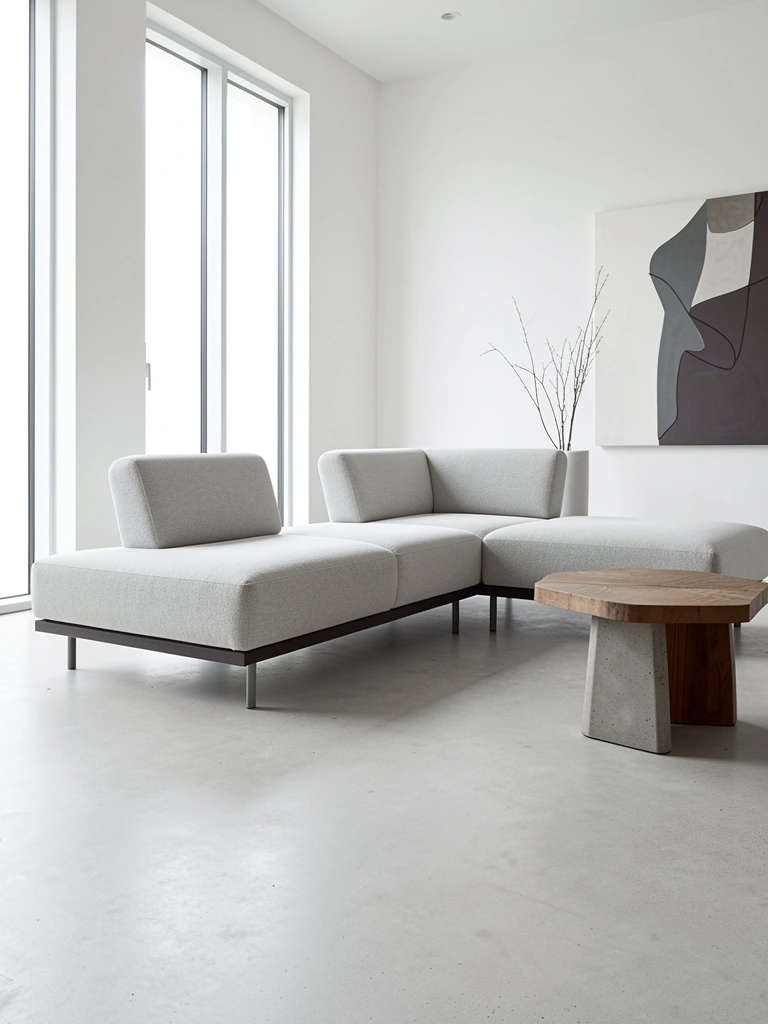
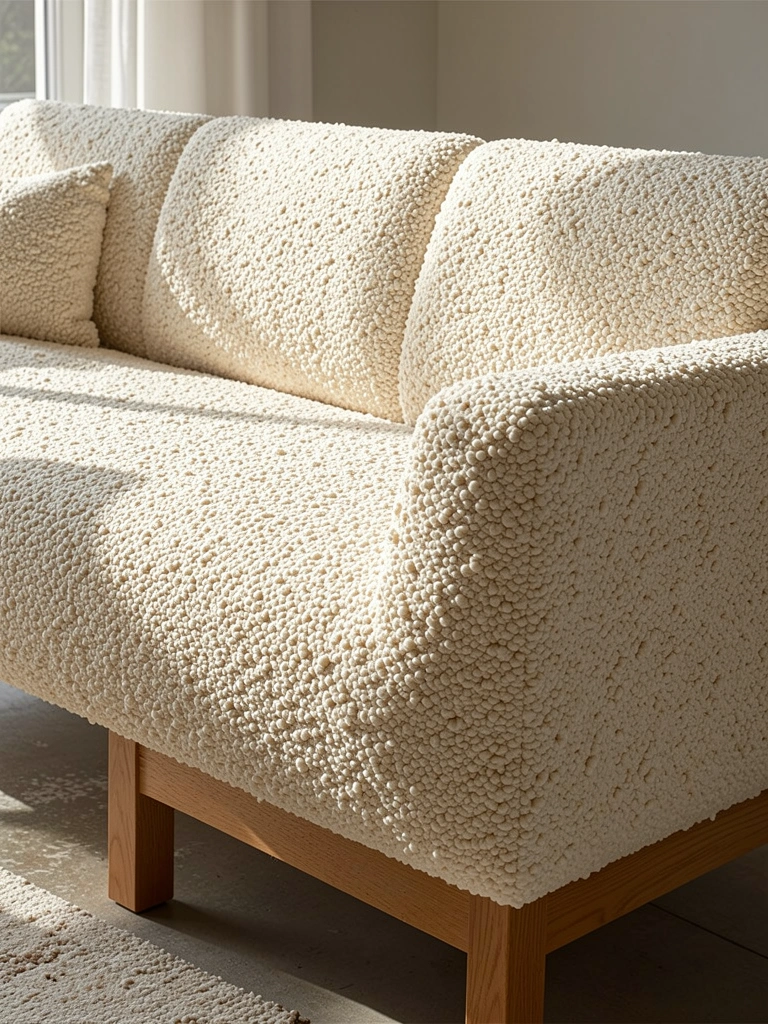
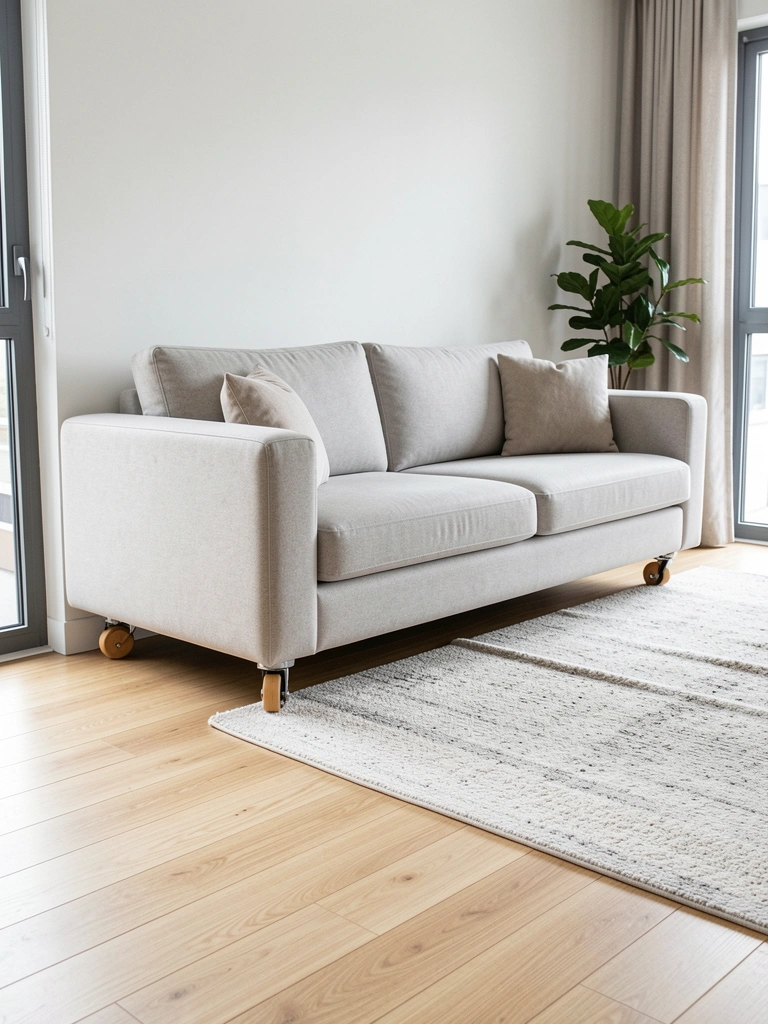
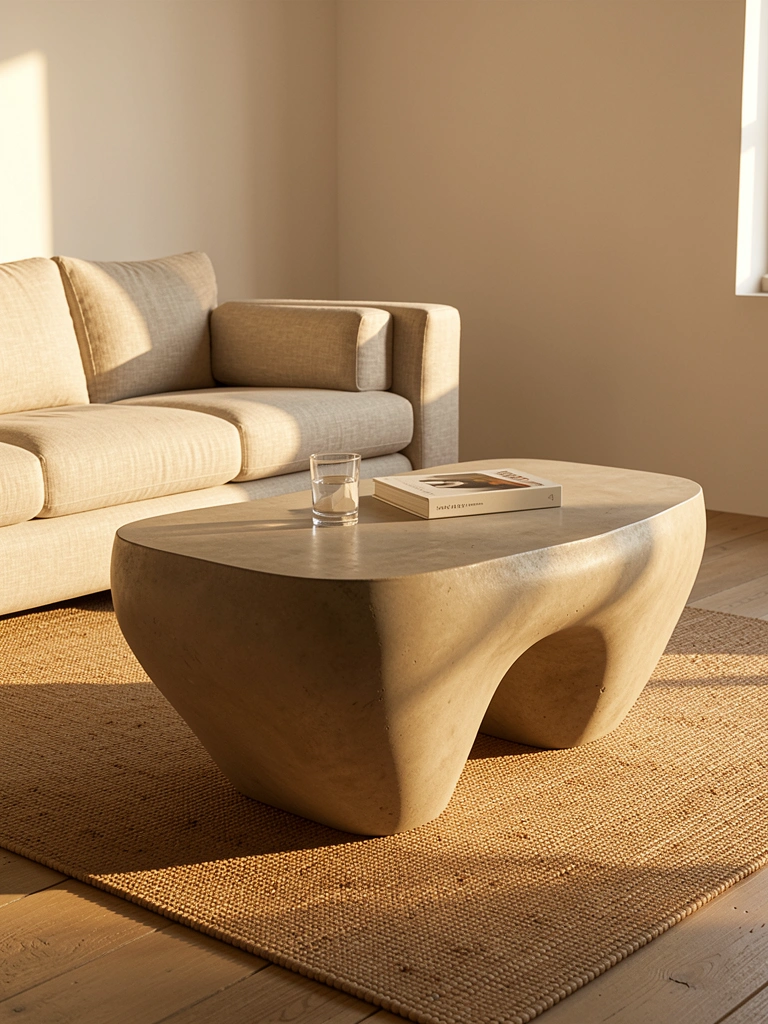
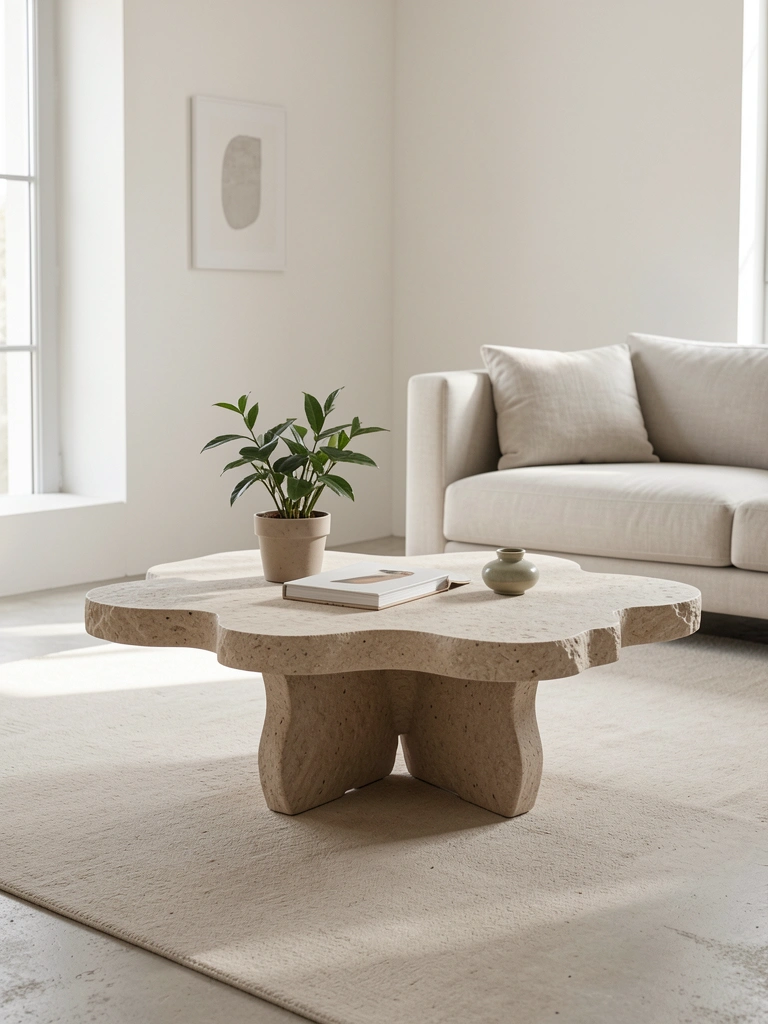
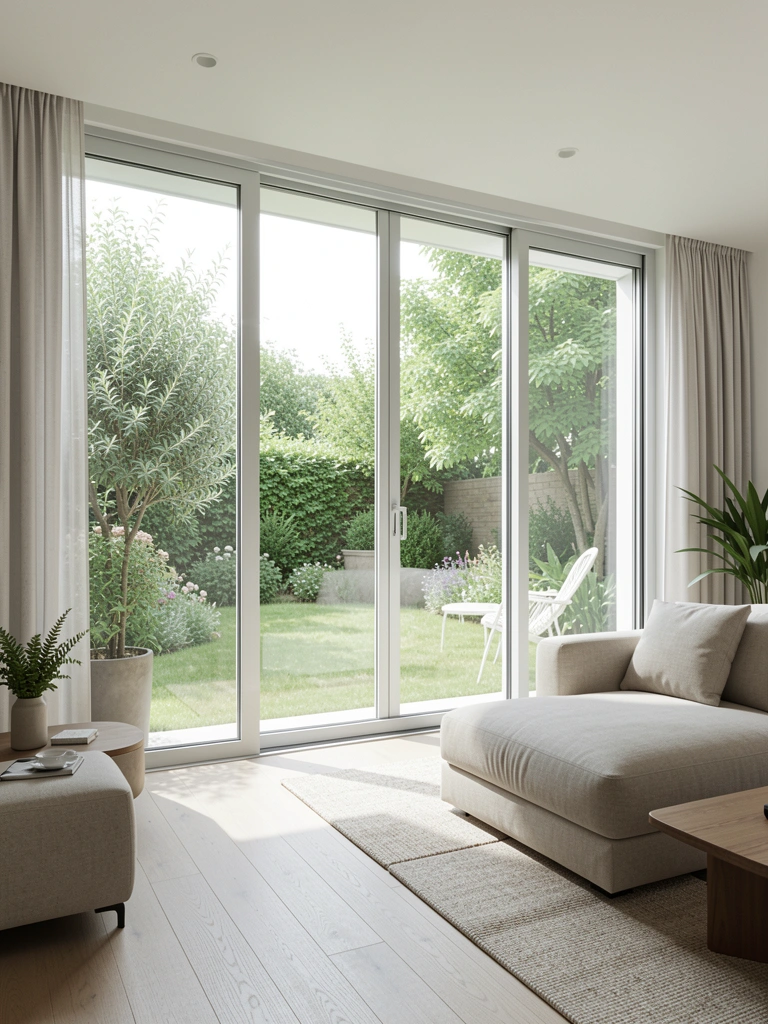
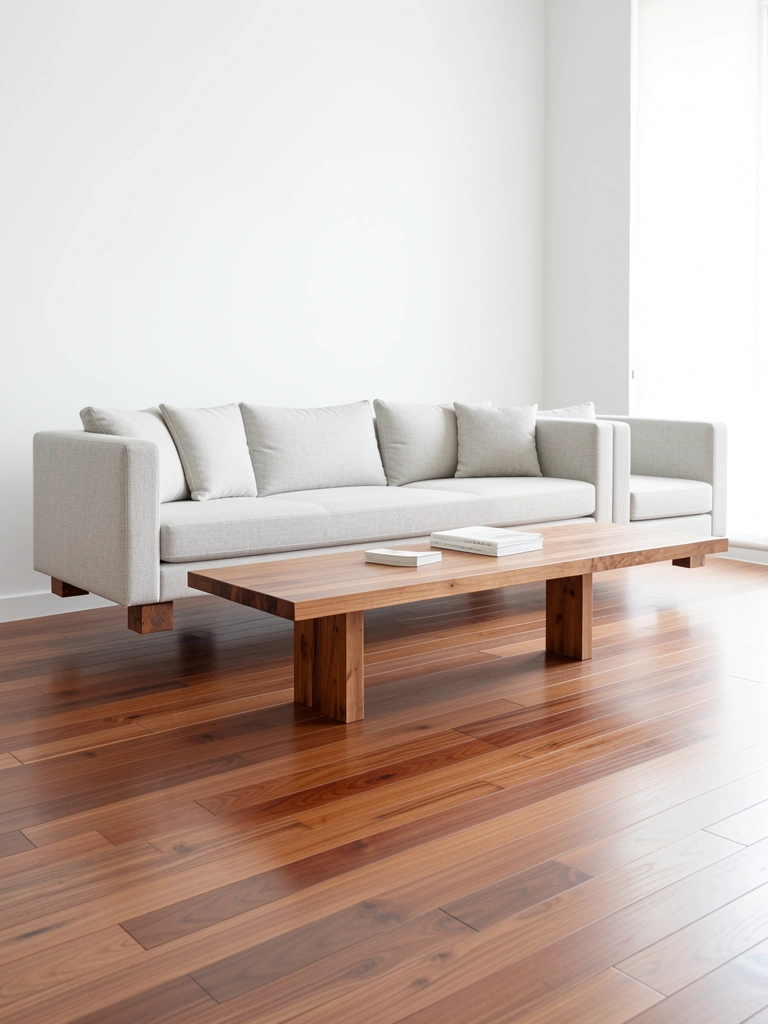
    8. Adopt a Low-Profile Curved Sofa for Modern Minimalism

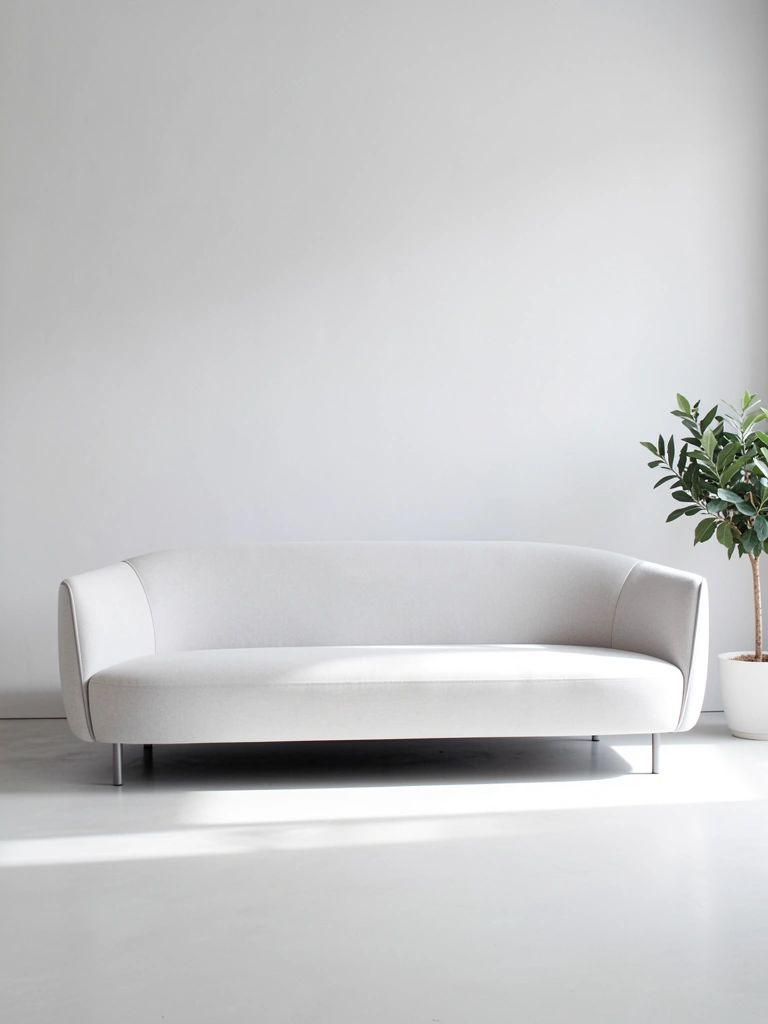
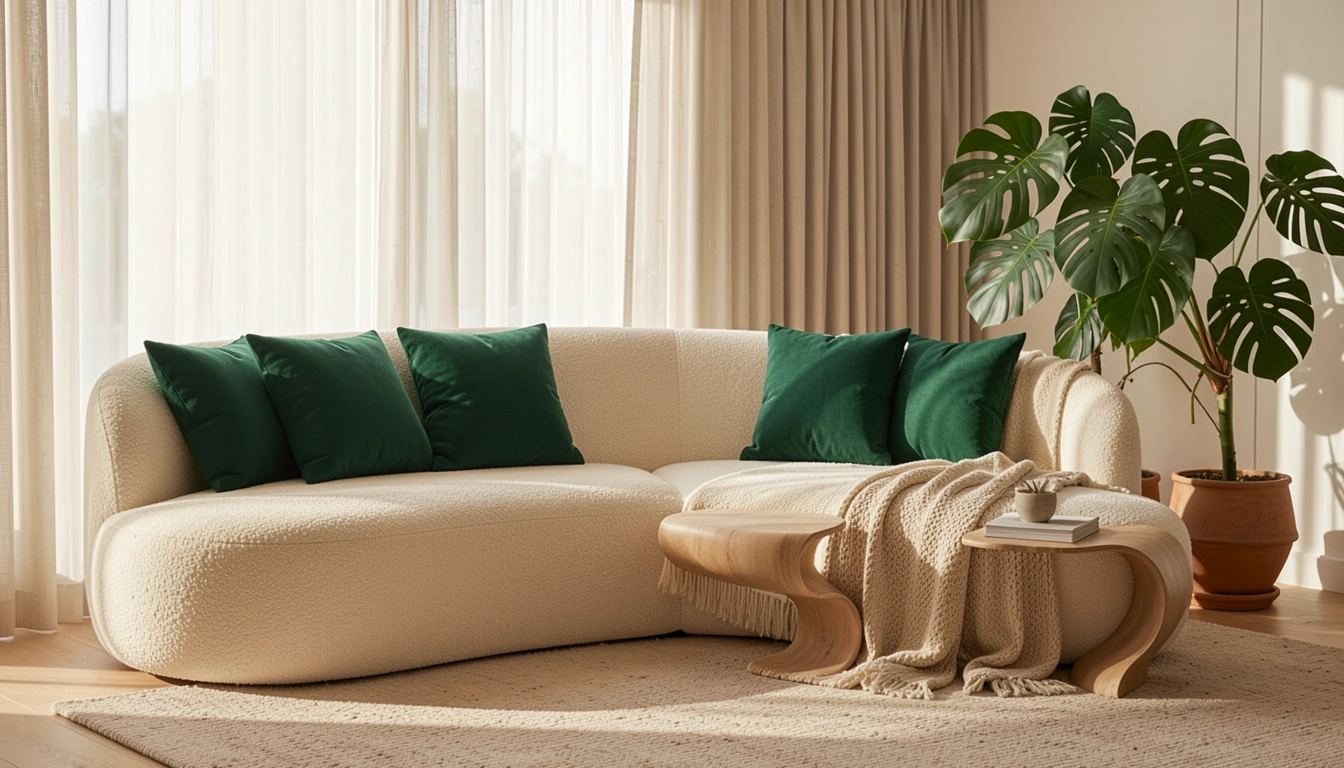
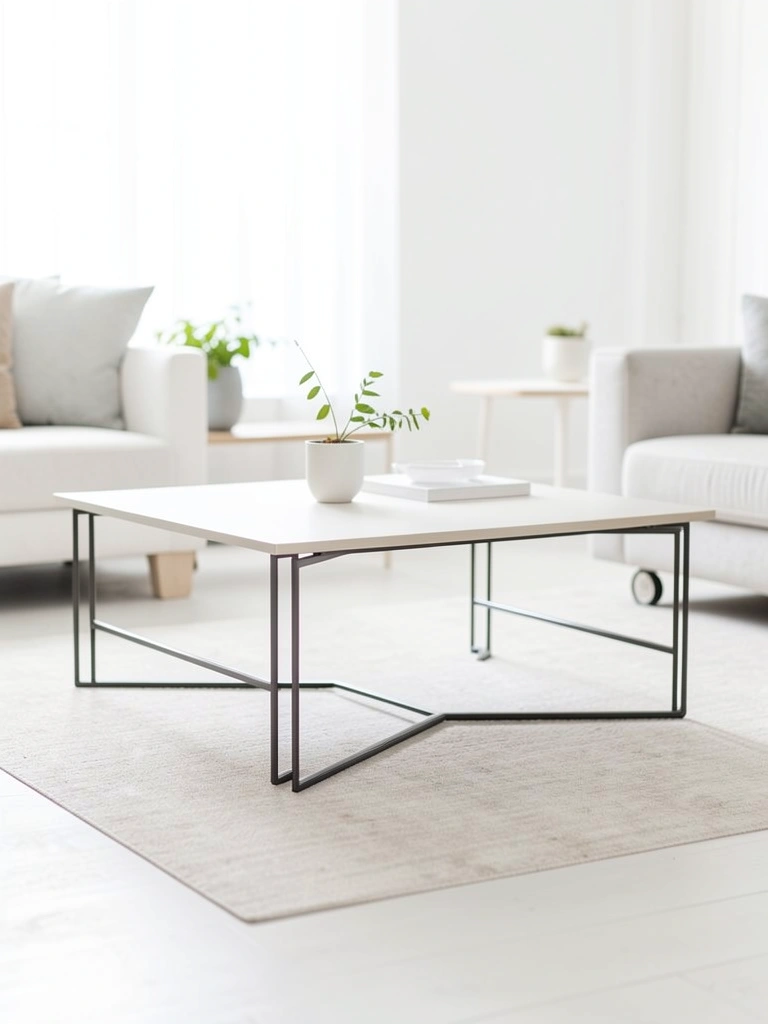
    Low-profile furniture makes rooms feel larger and more open. Curved sofas with lower seat heights and streamlined arms create a modern, grounded aesthetic that floats within the space.

    Search for low-profile curved sofas with seat heights around 16–18 inches and minimal arm width ($900–$2,000 from Article, Wayfair, Design Within Reach, or CB2). Look for sofas with slender metal or wood legs rather than upholstered bases so you can see floor underneath—this visually expands the room. Pair with a low coffee table ($200–$400) to keep proportions consistent. This style works beautifully in smaller spaces or modern homes where visual lightness matters.

    Your room immediately feels airier, more intentional, and somehow more spacious without losing comfort.

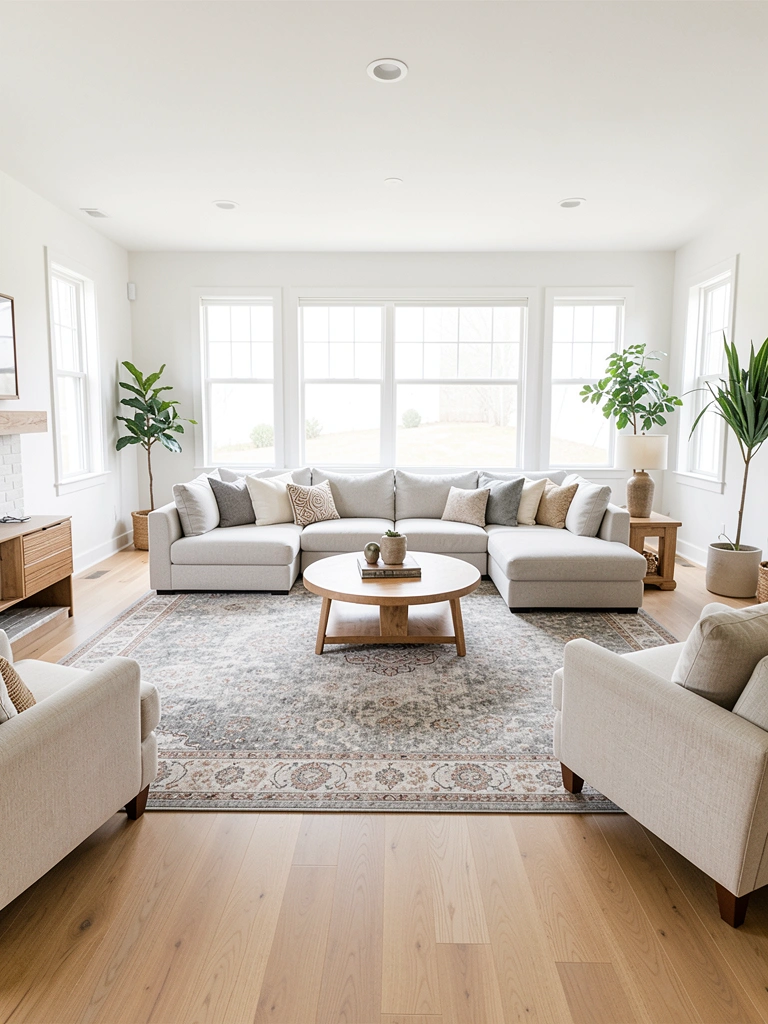
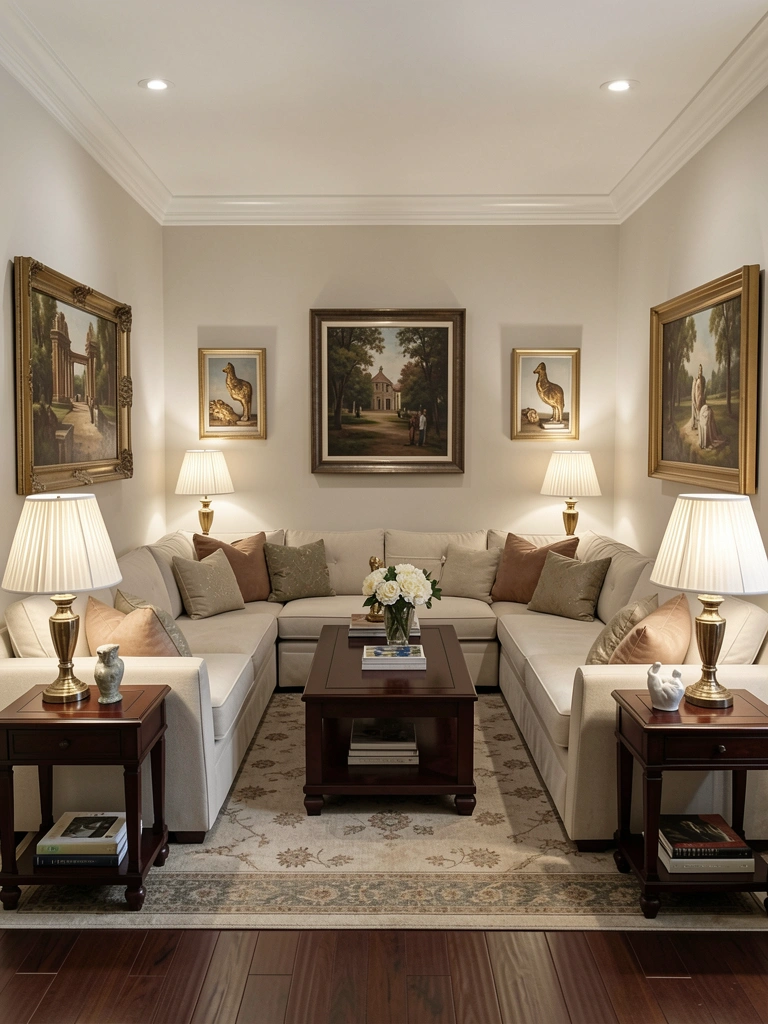
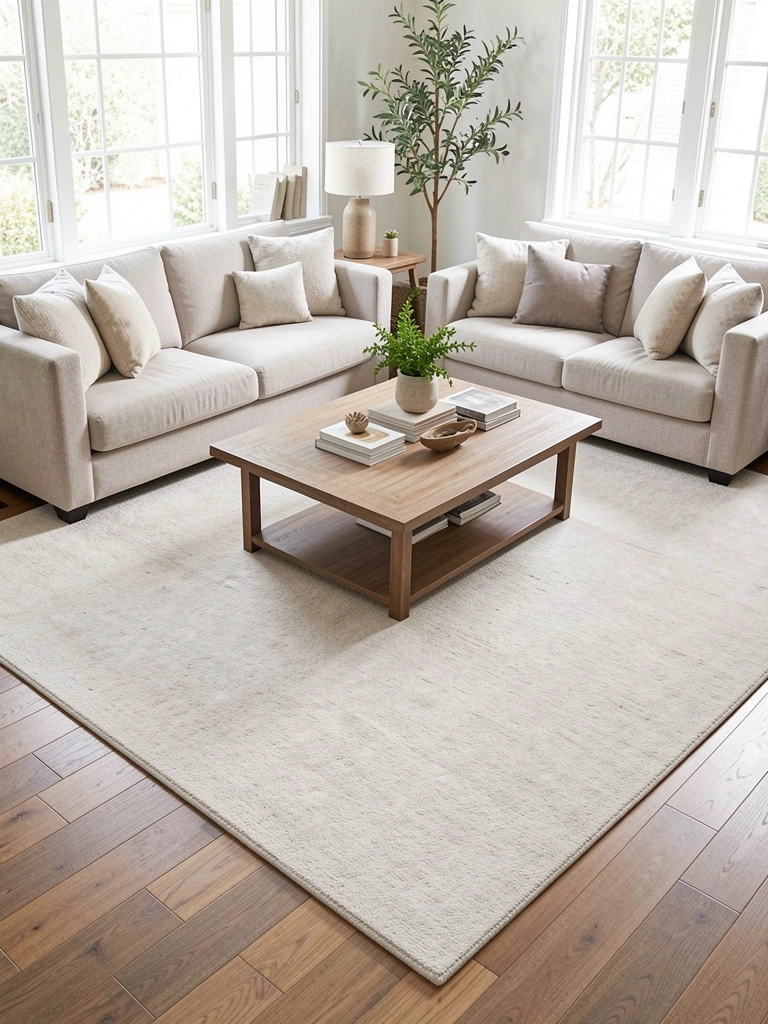
    9. Arrange Two Curved Sofas Face-to-Face for Intimate Layouts

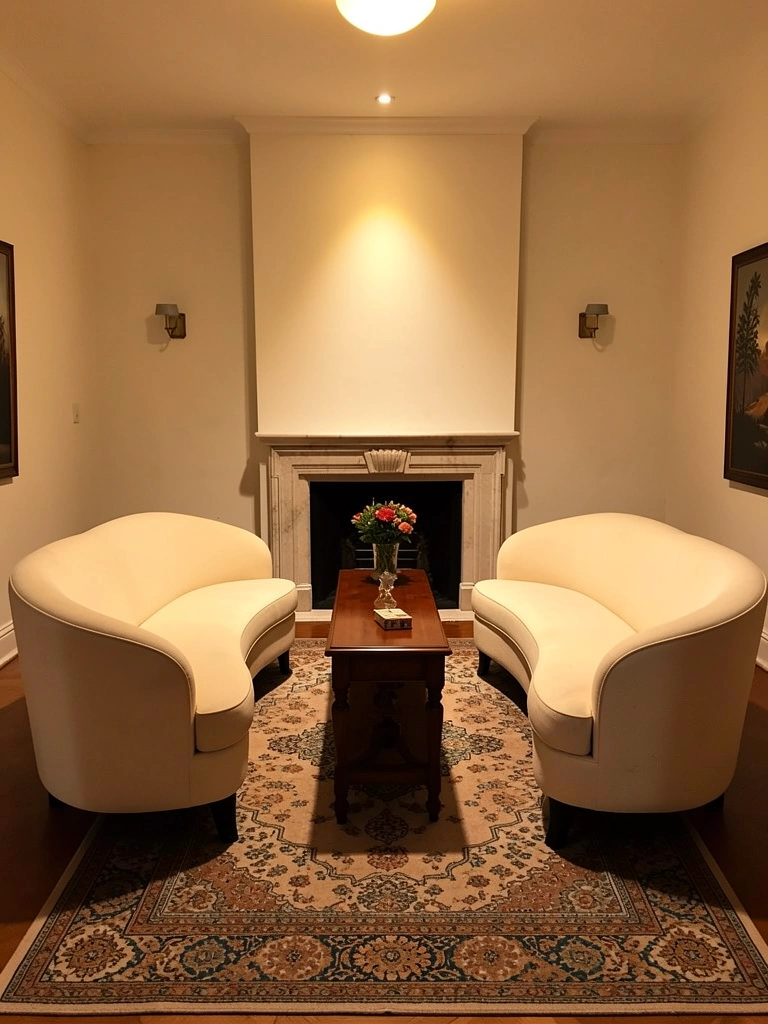
    Two curved sofas facing each other create an unexpectedly intimate and formal seating arrangement that works beautifully in living rooms, dens, or master bedrooms.

    Purchase two matching or complementary curved sofas (budget $1,800–$3,500 for a coordinated pair from Article, West Elm, or high-end retailers). Position them 4–6 feet apart to create a natural conversation zone. Place a narrow console table ($150–$300) or low coffee table ($200–$400) between them. Define the space with a large area rug ($300–$600) that anchors both sofas. This arrangement signals formality without stuffiness—the curves keep the vibe relaxed and organic.

    You’ve created a lounge-like intimate retreat where people naturally want to linger and chat.

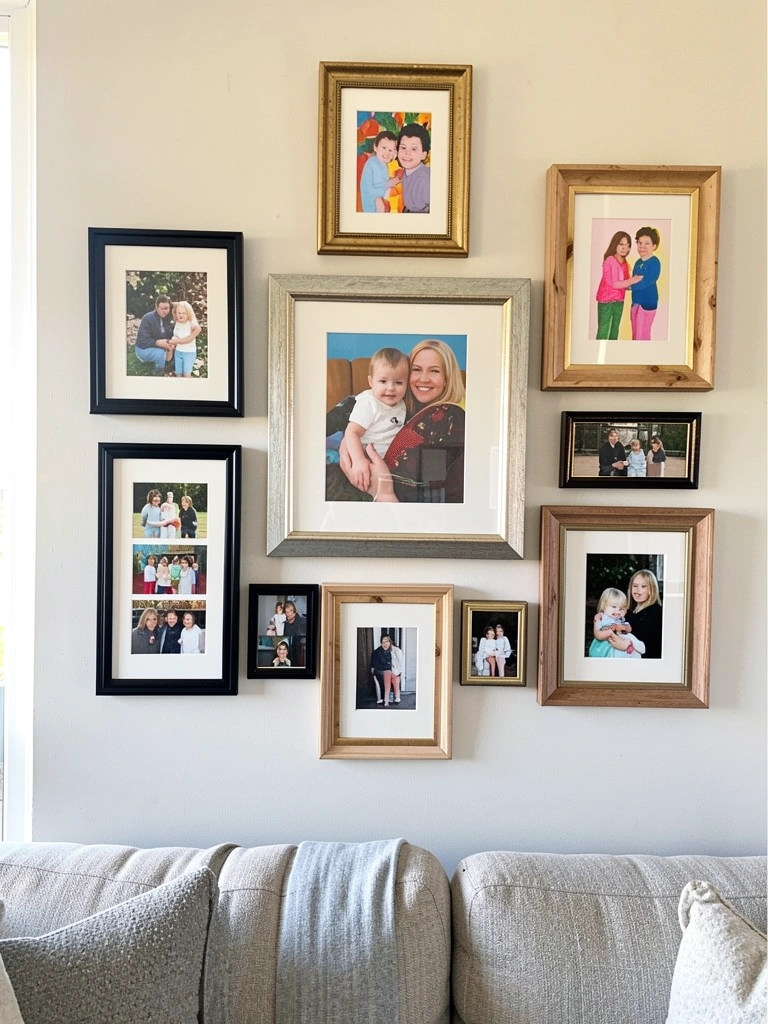
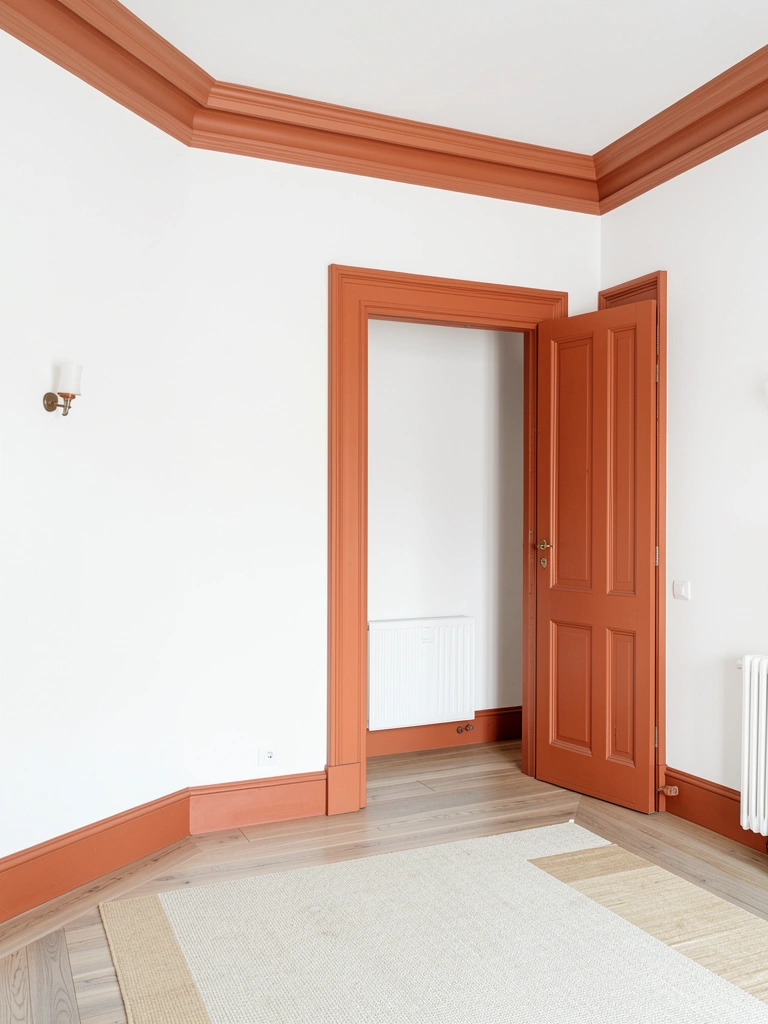
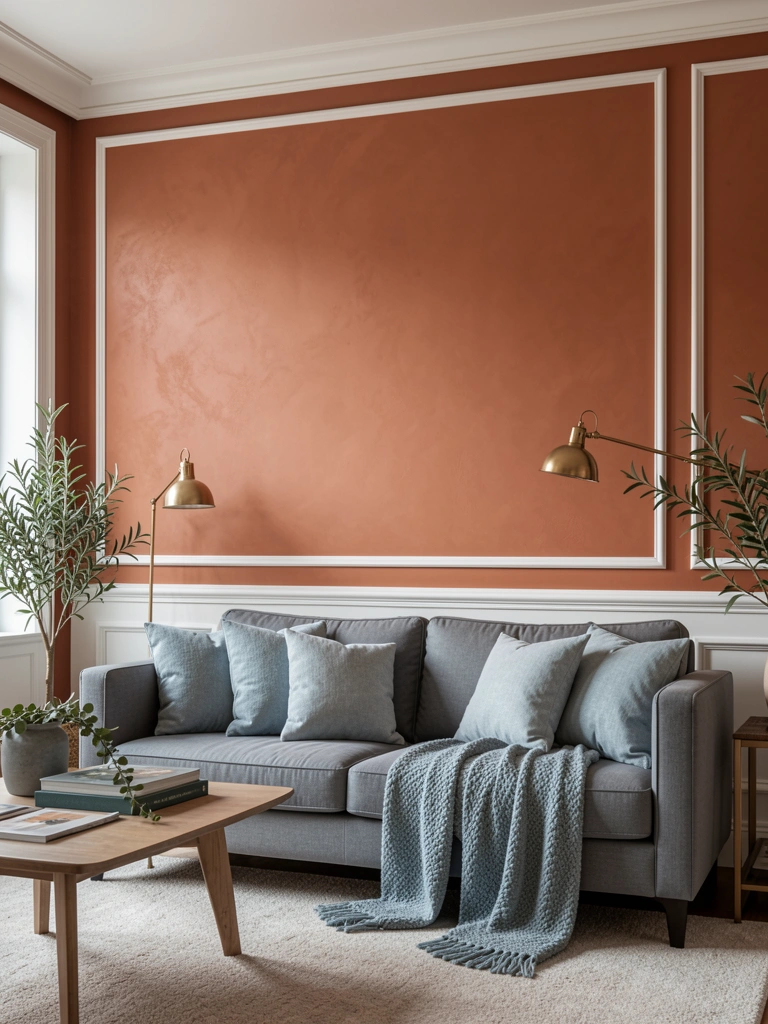
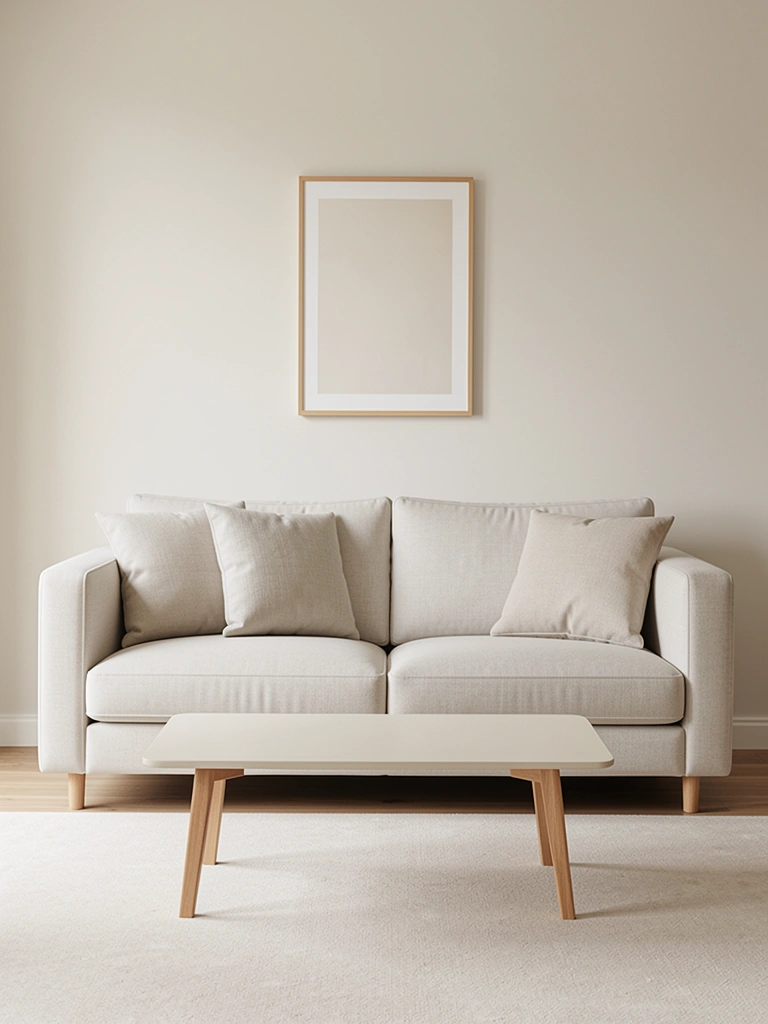
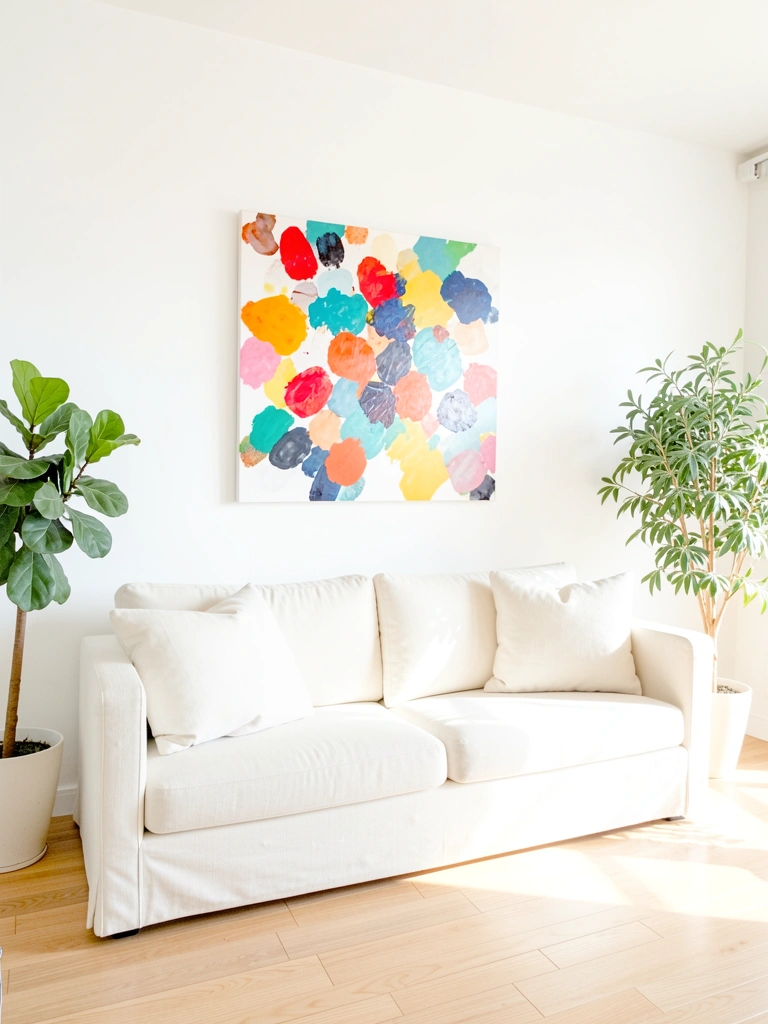
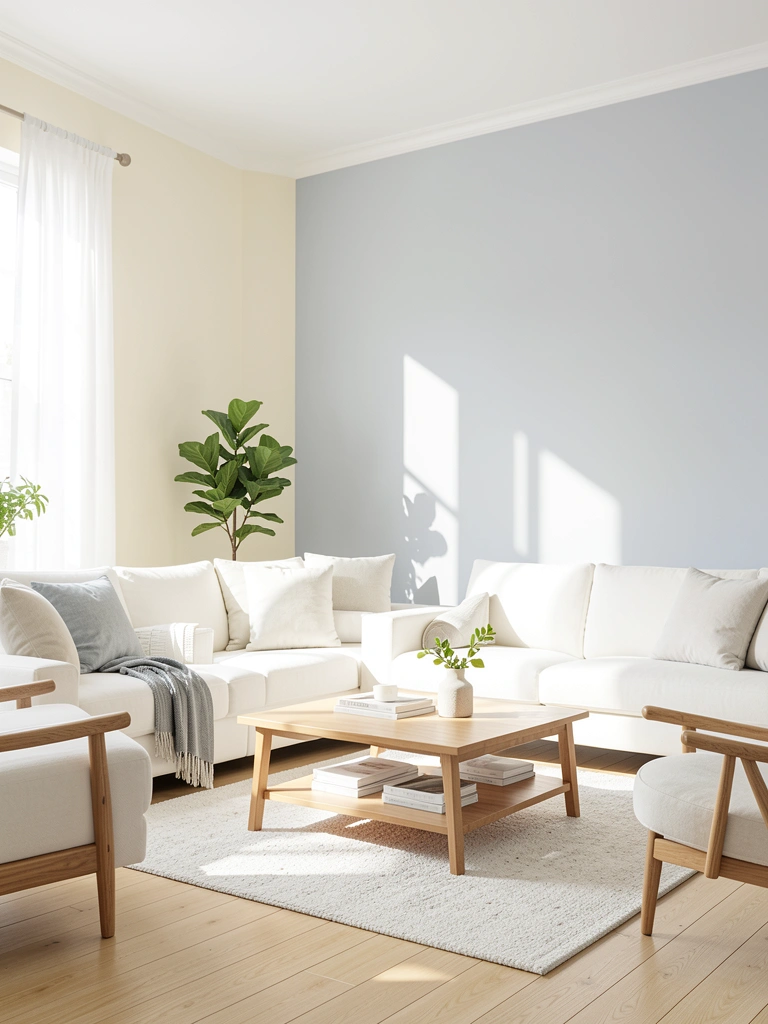
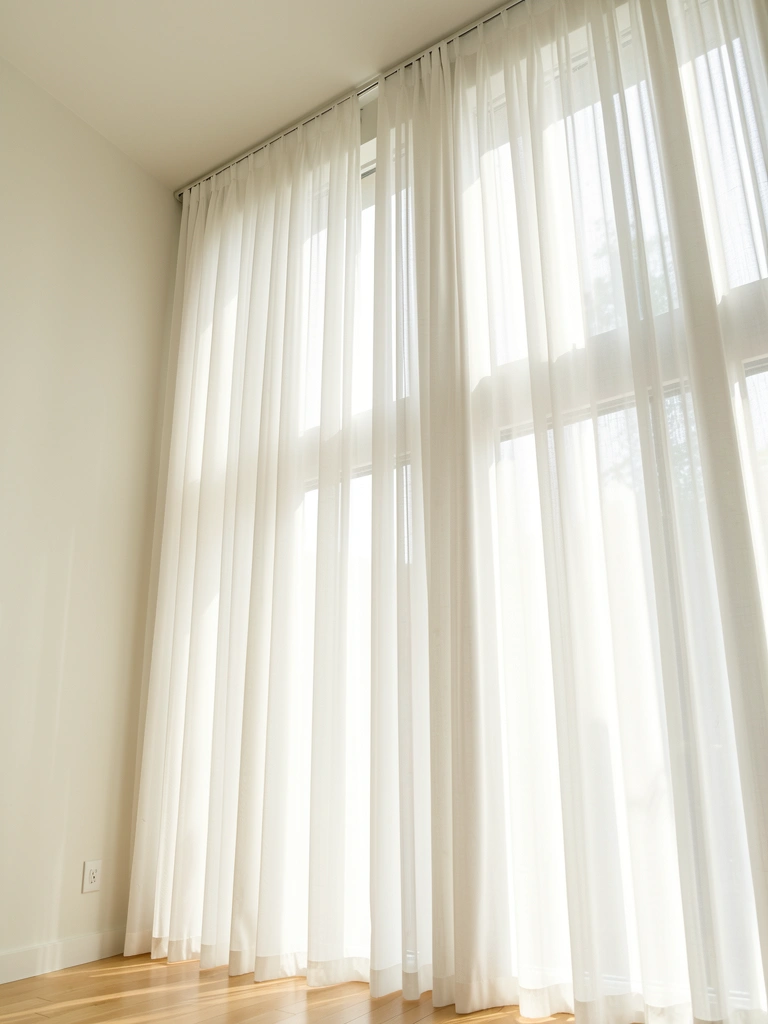
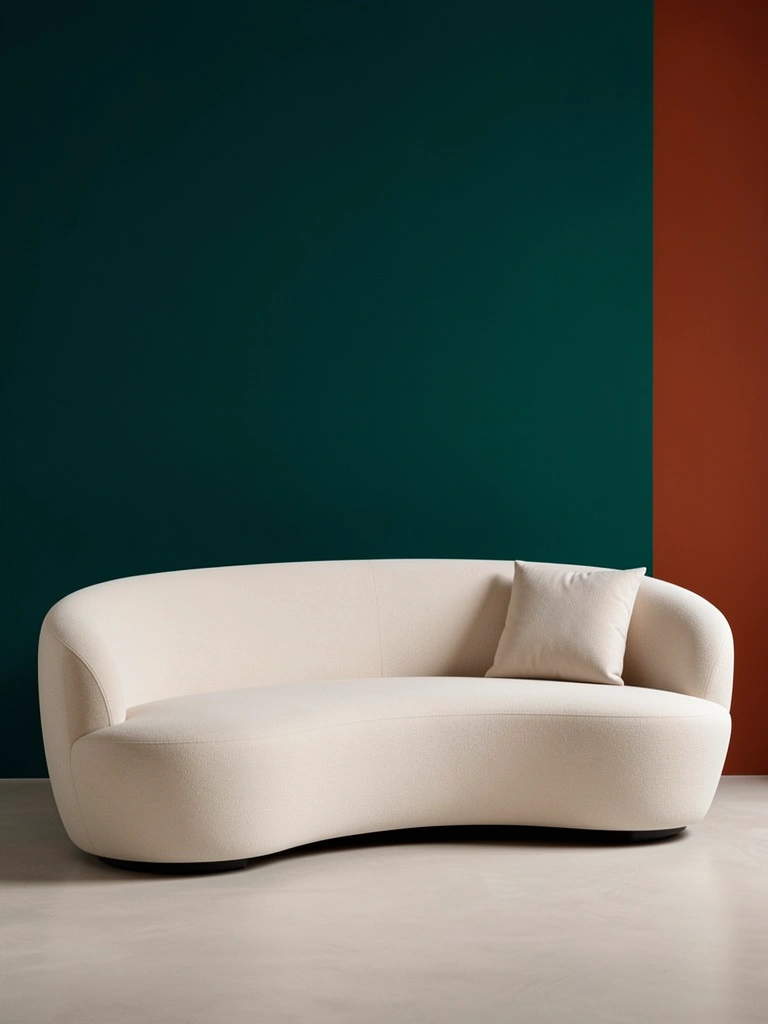
    10. Paint Your Wall to Complement Your Curved Sofa’s Curves

    The wall behind your curved sofa doesn’t have to be boring white. A complementary wall color emphasizes the sofa’s sculptural shape and creates visual depth.

    Choose a wall color ($25–$50 per gallon from Sherwin-Williams, Benjamin Moore, or local hardware stores) that’s one to two shades deeper or warmer than your sofa. If your sofa is cream, try soft sage or warm beige. If it’s charcoal, consider a dusty blue or warm gray. Paint just the wall behind the sofa rather than all four walls to keep the focus tight and the project manageable—this takes one weekend for most people. The contrast makes the sofa’s curves pop without overwhelming the space.

    Your curved sofa becomes an architectural feature instead of just a piece of furniture.

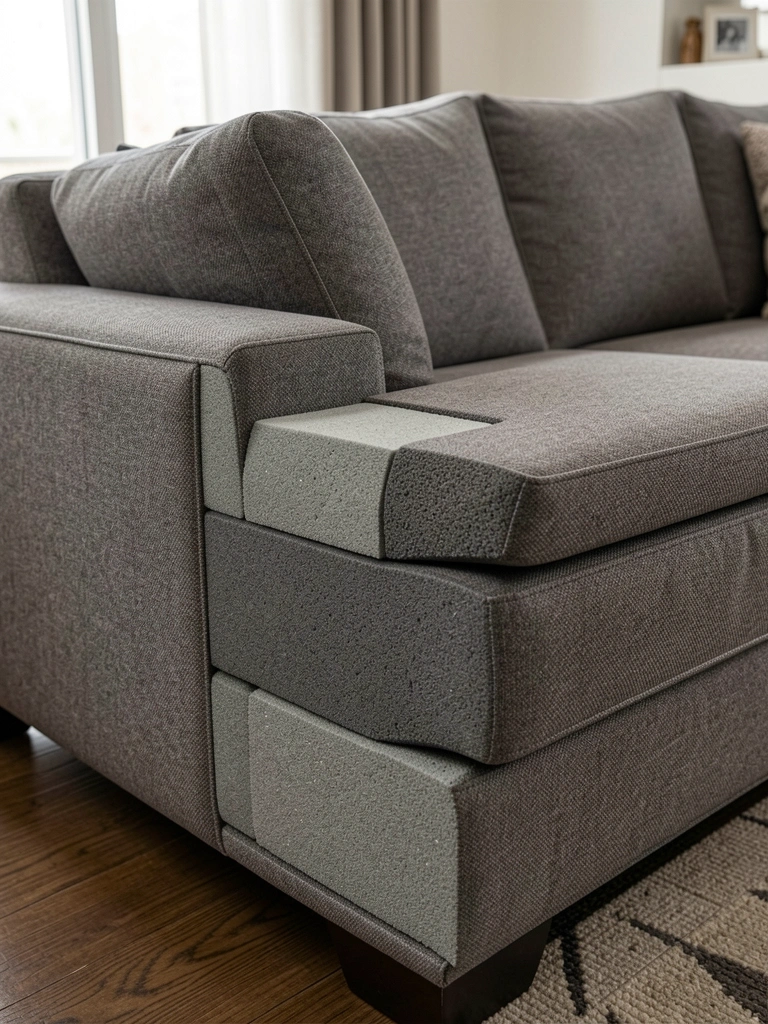
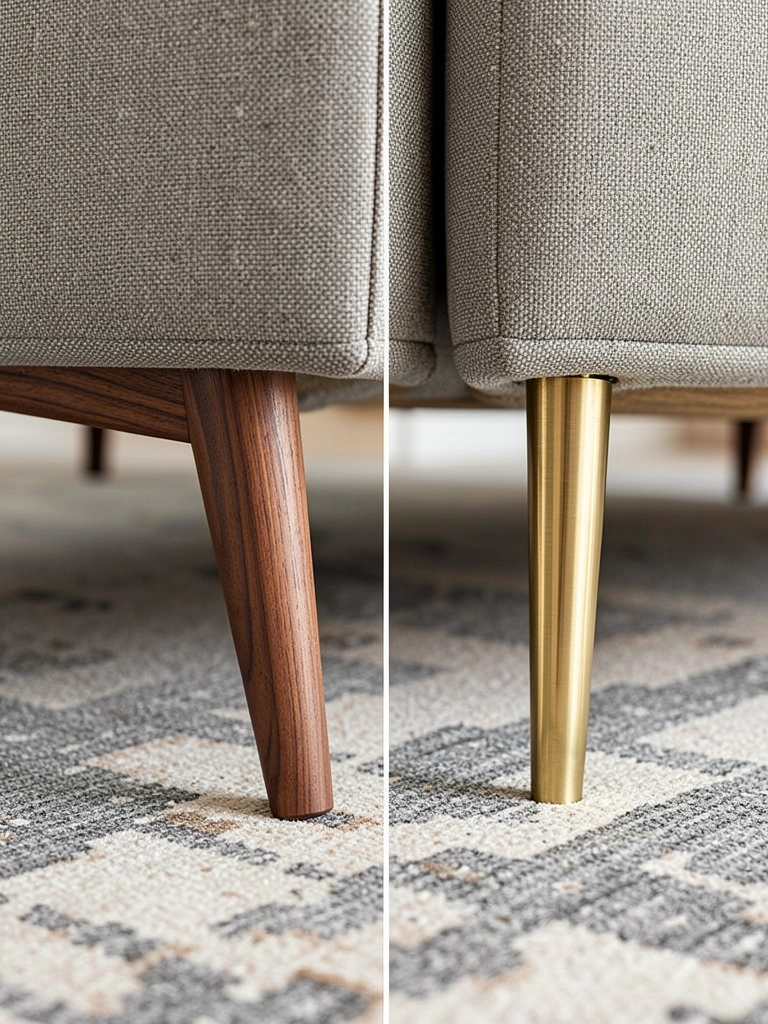
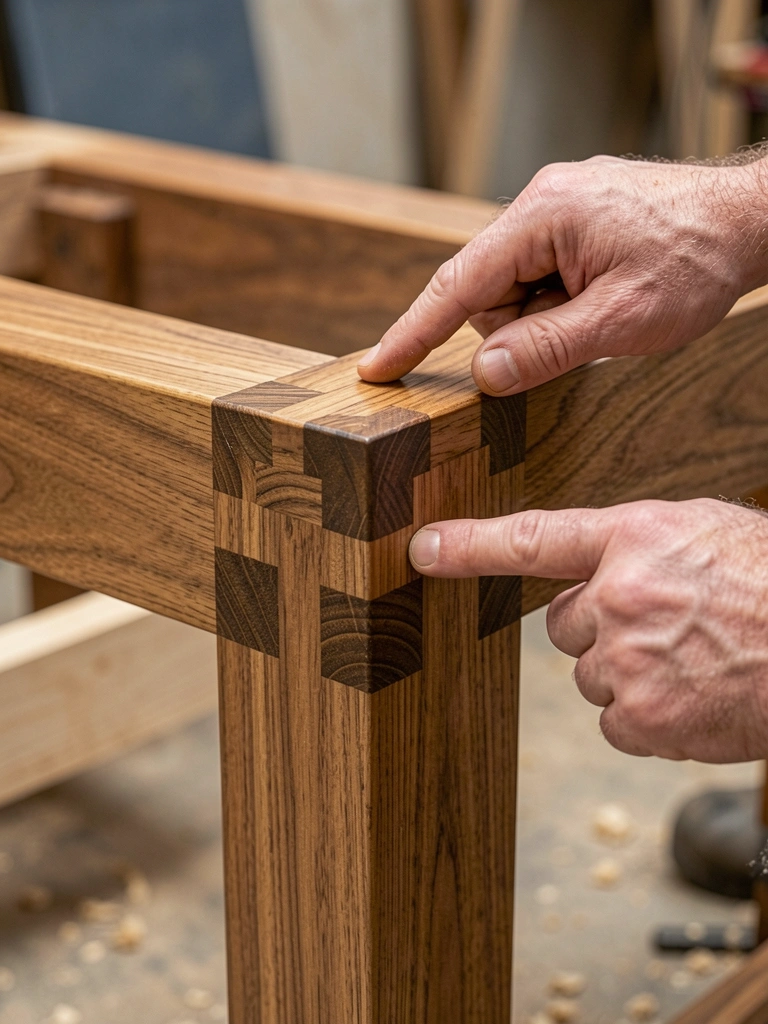
    11. Add Curved Sofa Legs for an Instant Update

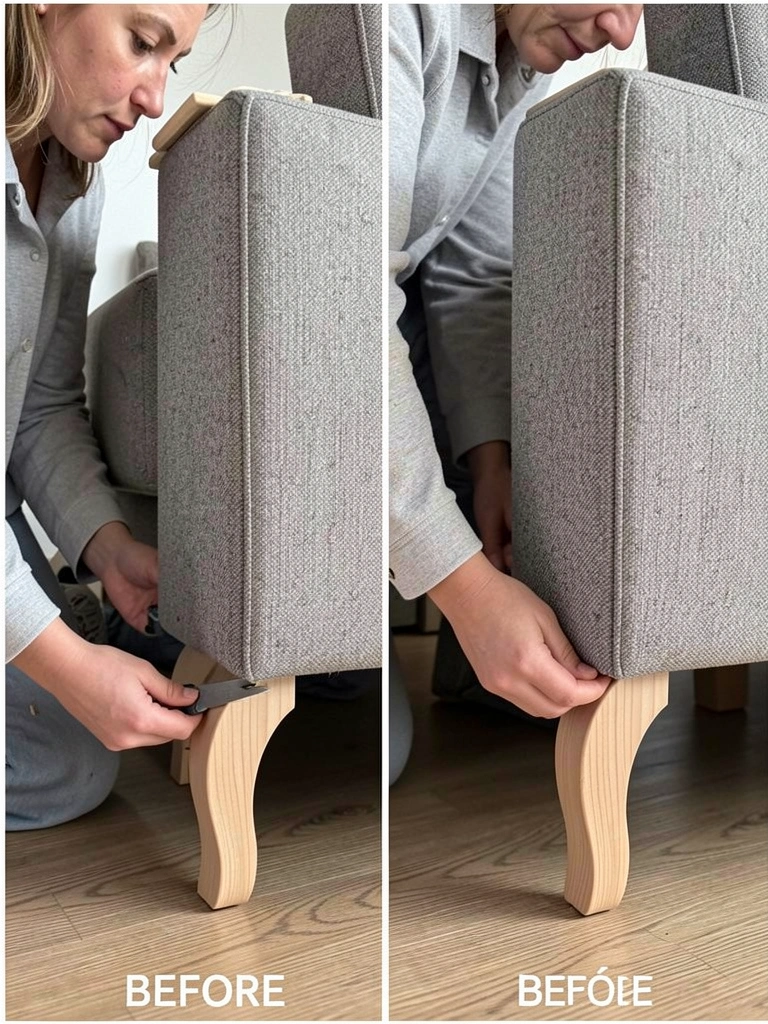
    Already own a boxy sofa? Retrofit curved or angled legs to instantly refresh its proportions and create the illusion of a modern curved base.

    Purchase replacement sofa legs ($40–$120 per set from Amazon, Wayfair, or specialty hardware stores) in wood, metal, or upholstered options. These attach with brackets underneath your existing sofa in minutes—no tools needed for screw-on options, or a simple screwdriver for bracket installation (15 minutes max). Curved or splayed wooden legs in walnut or brass read as much more expensive than your original sofa. This hack works on renters’ sofas too since legs aren’t permanent.

    Suddenly your sofa feels designer-approved and intentionally styled without replacing the entire piece.

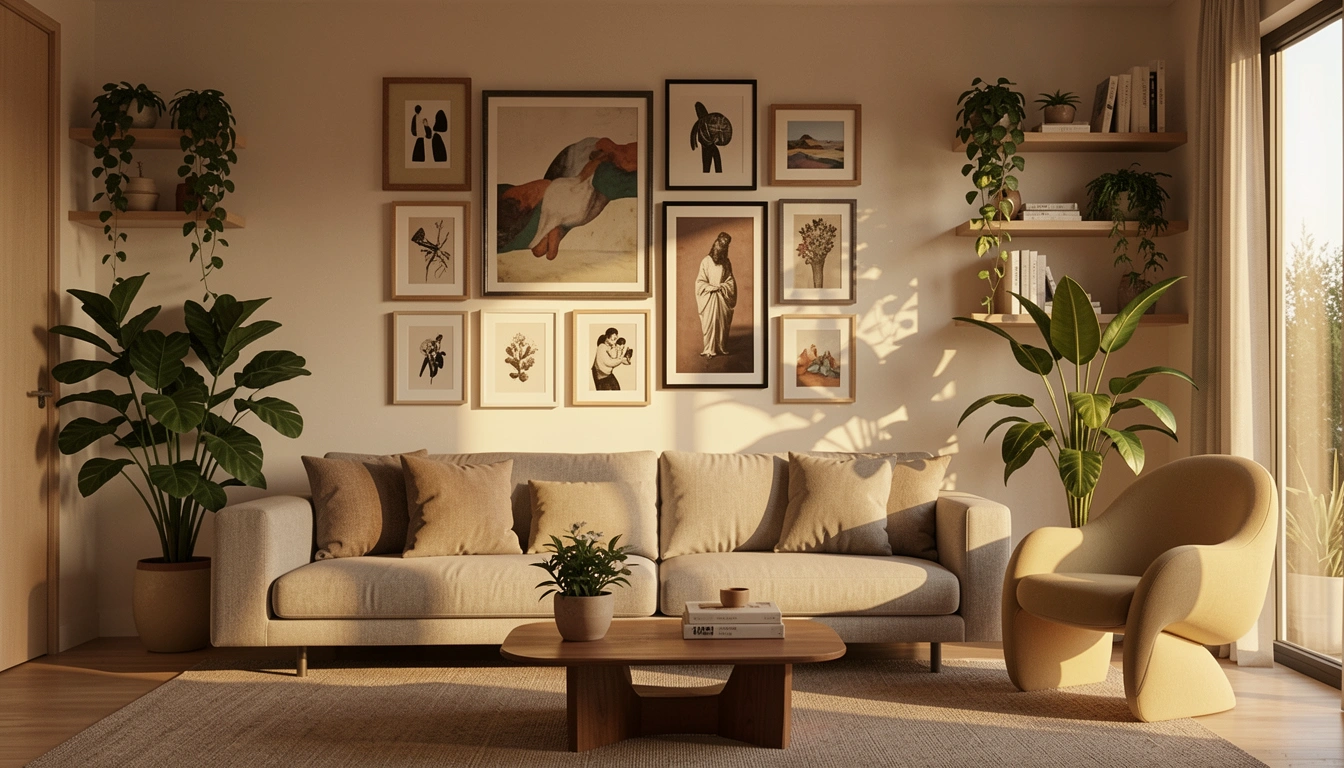
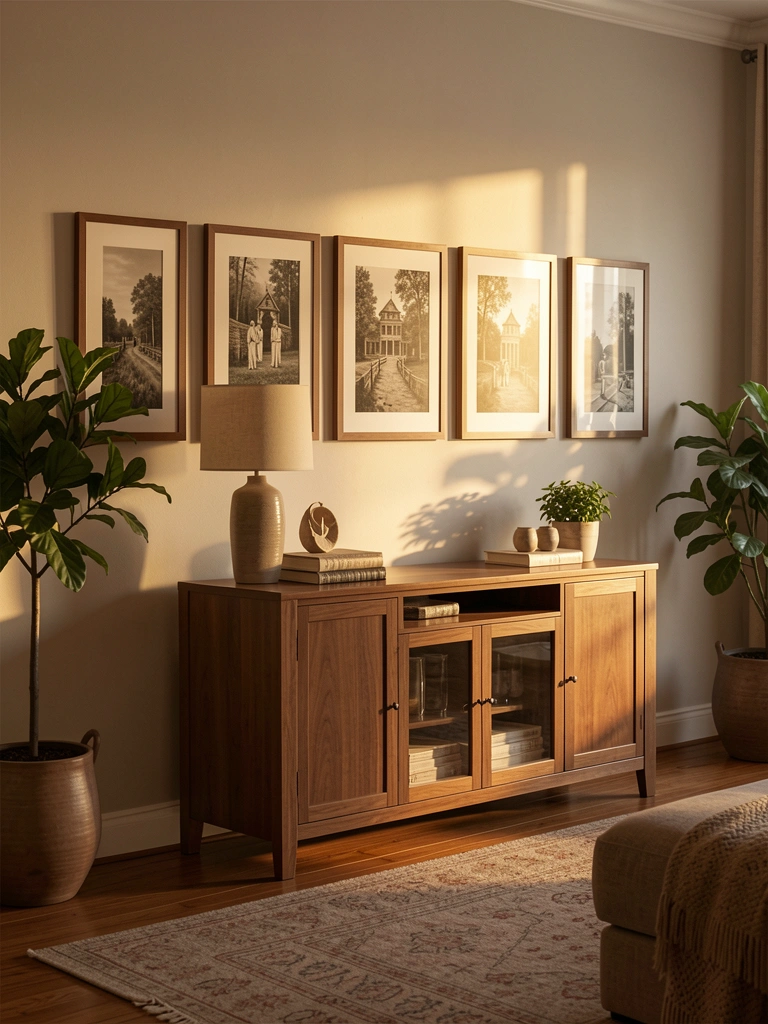
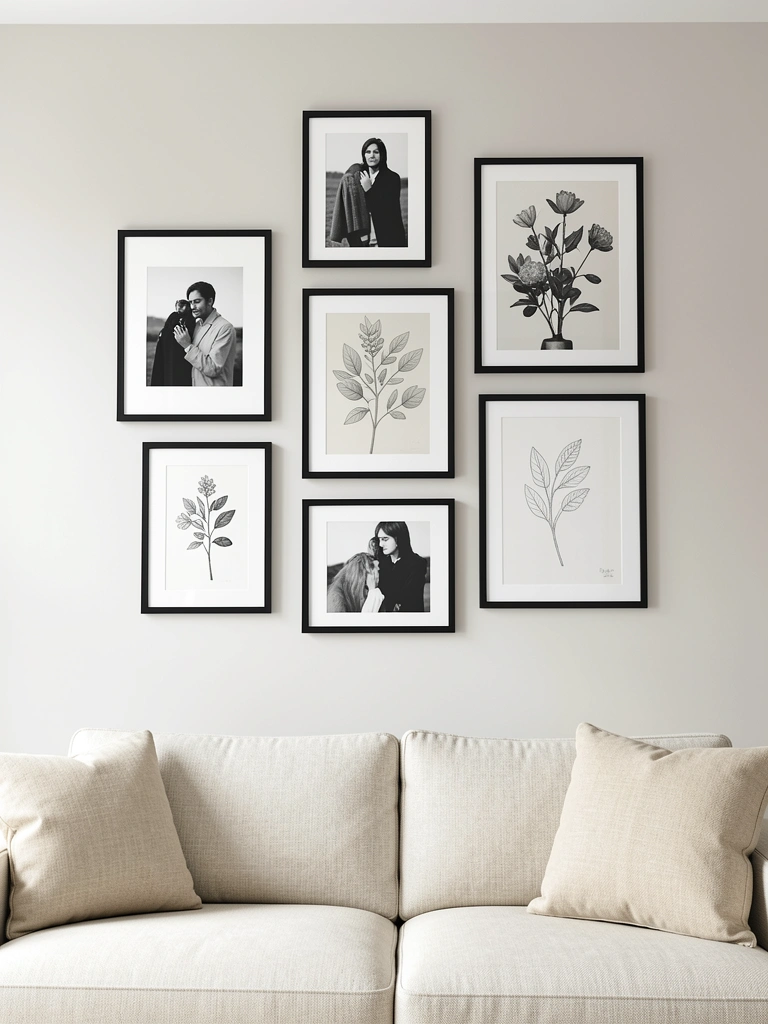
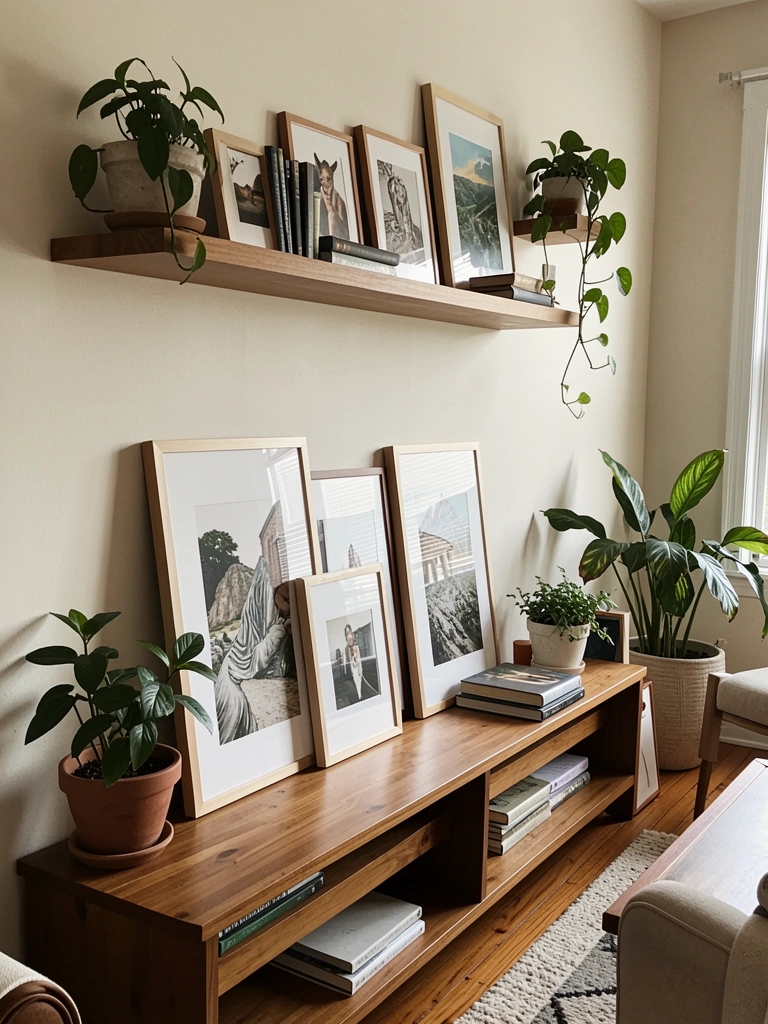
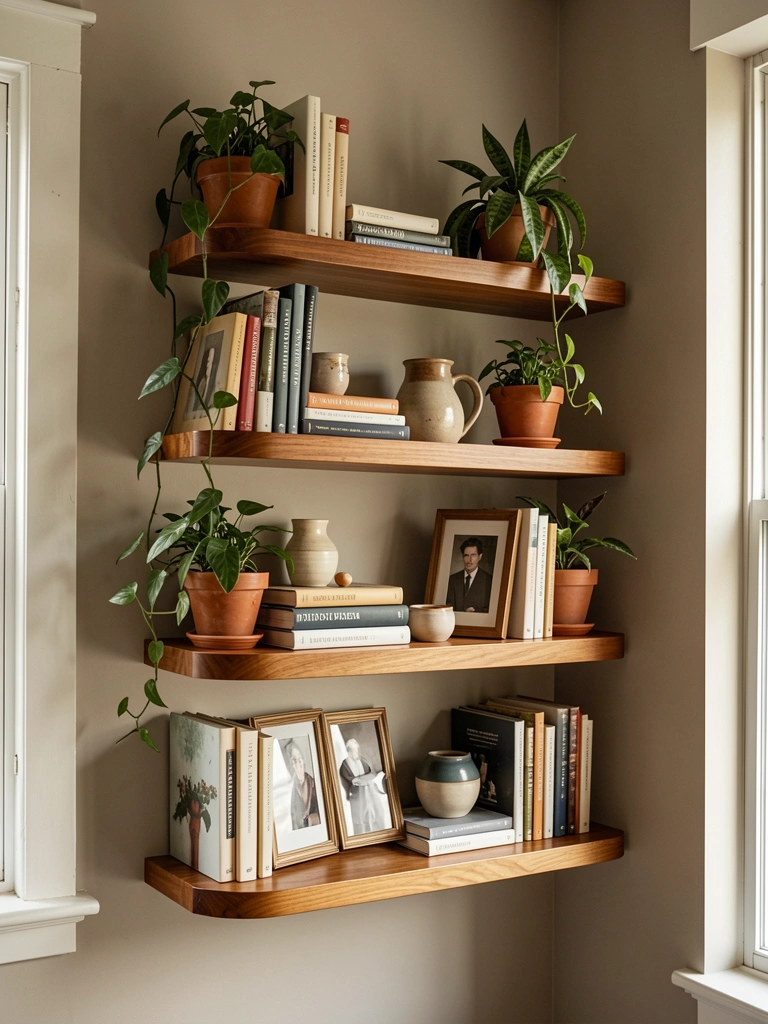
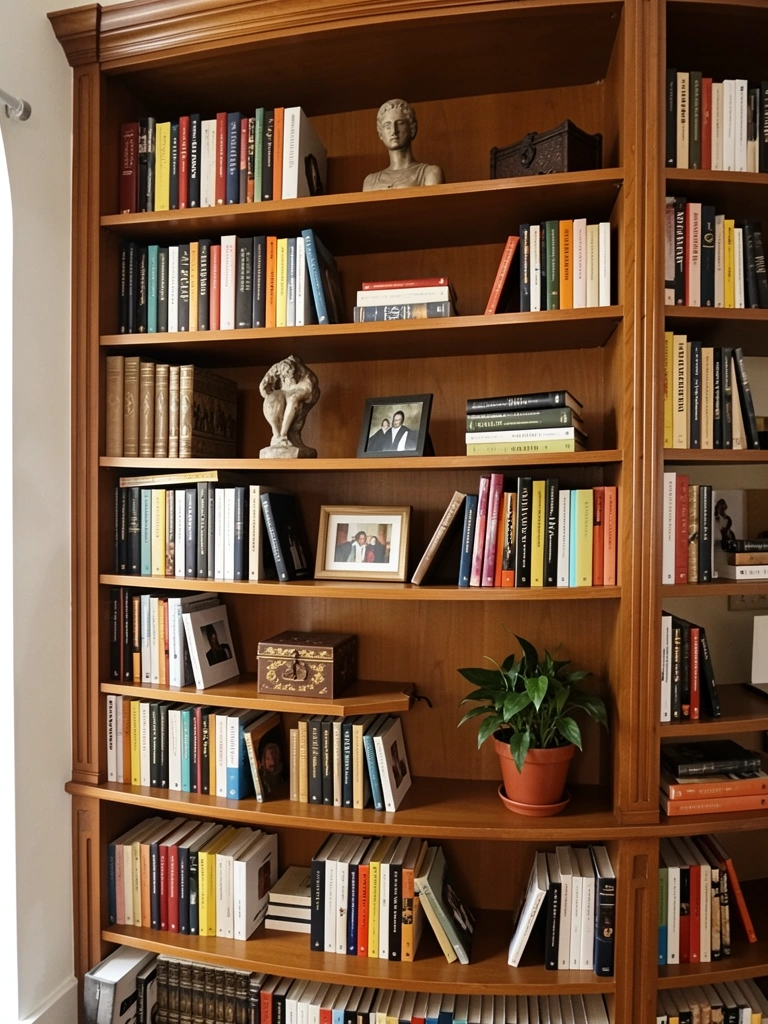
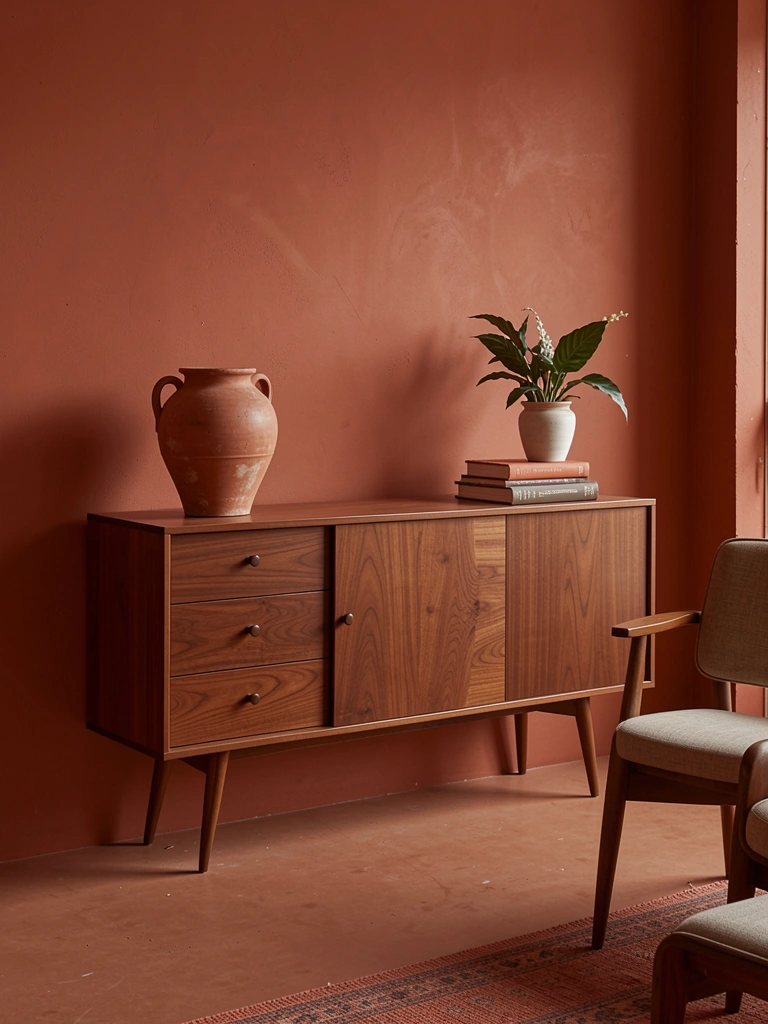
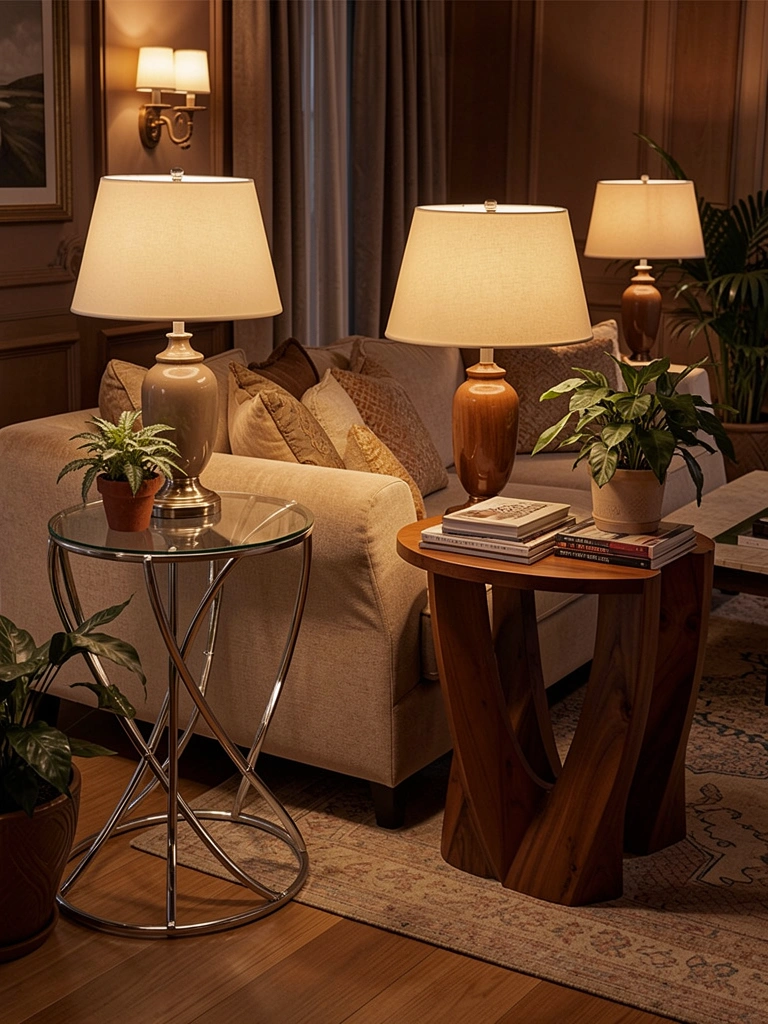
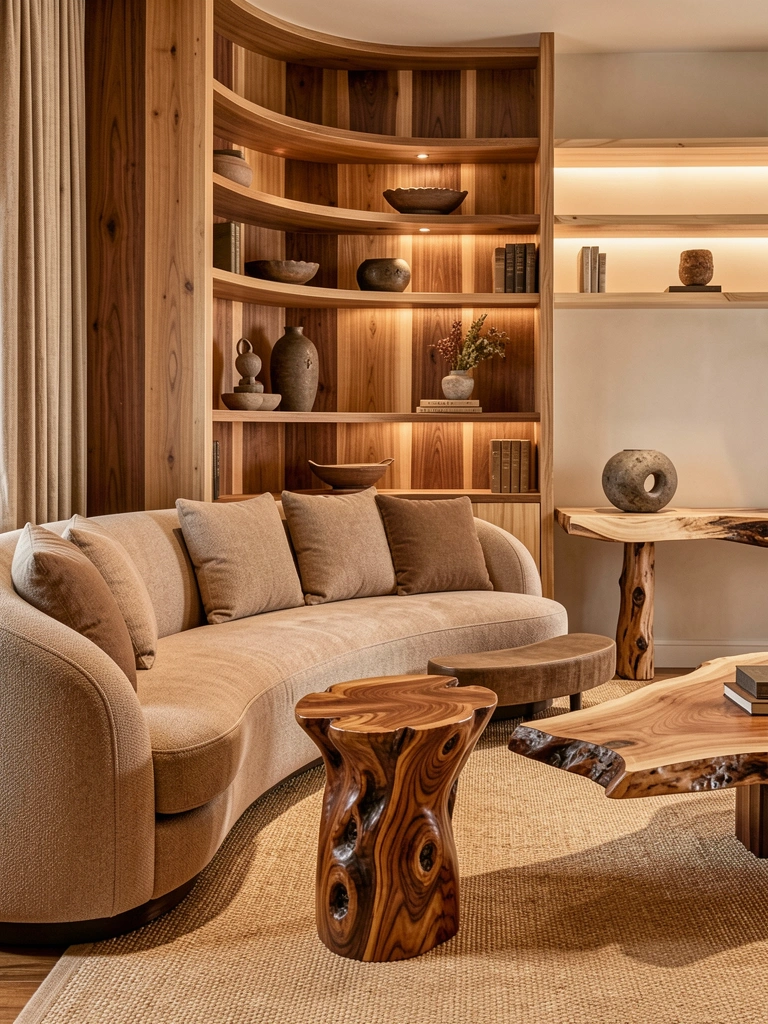
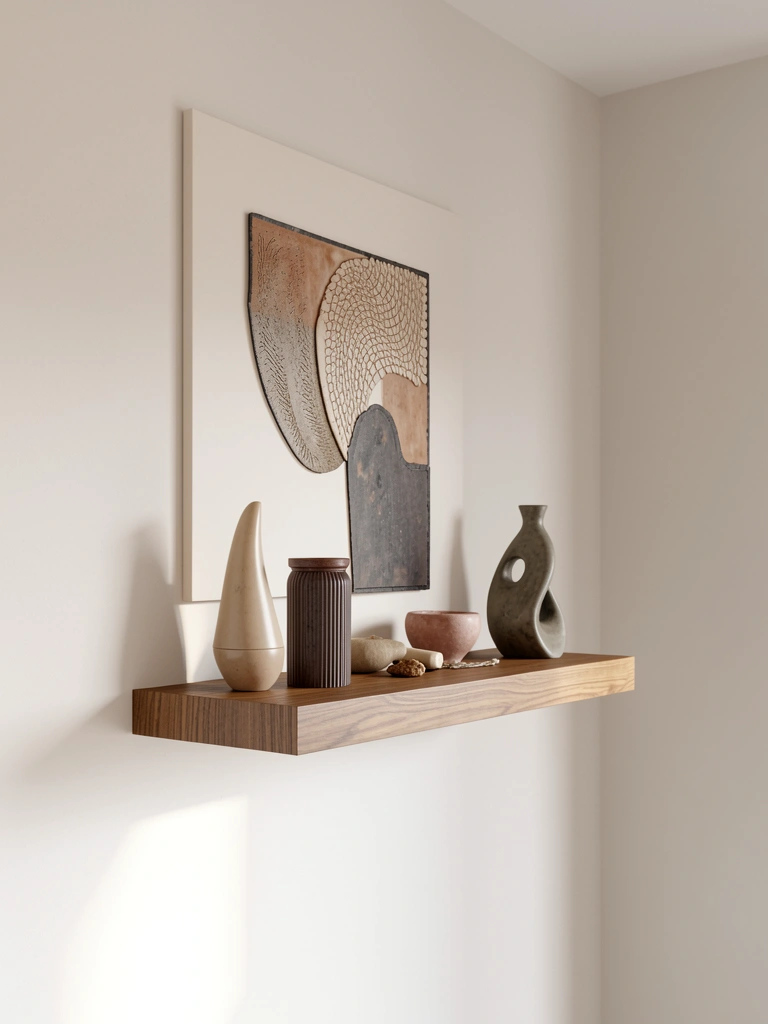
    12. Layer Curves with a Curved Credenza Behind the Sofa

    Echo your sofa’s curves throughout the room by adding a curved credenza or console behind it. Repetition of curves creates visual harmony and makes the space feel thoughtfully designed.

    Find a curved credenza or console ($400–$1,200 from West Elm, Article, CB2, or vintage consignment shops) with similar arc to your sofa. Position it directly behind the sofa, floating on the wall or slightly forward. Style the top with plants, books, and a table lamp ($50–$150). The parallel curves create a flowing visual line that draws the eye and makes the entire vignette feel intentional. Curved wooden pieces read as more expensive than they usually are.

    Your living room now has a curated, gallery-like quality that makes guests notice your thoughtful design choices.

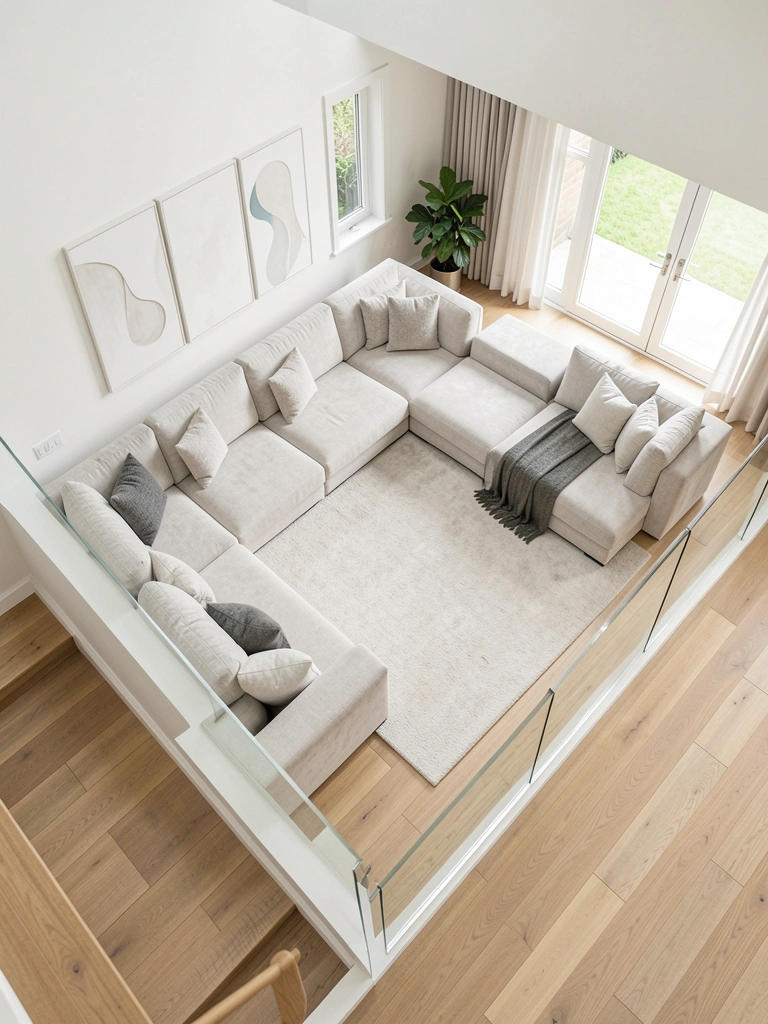
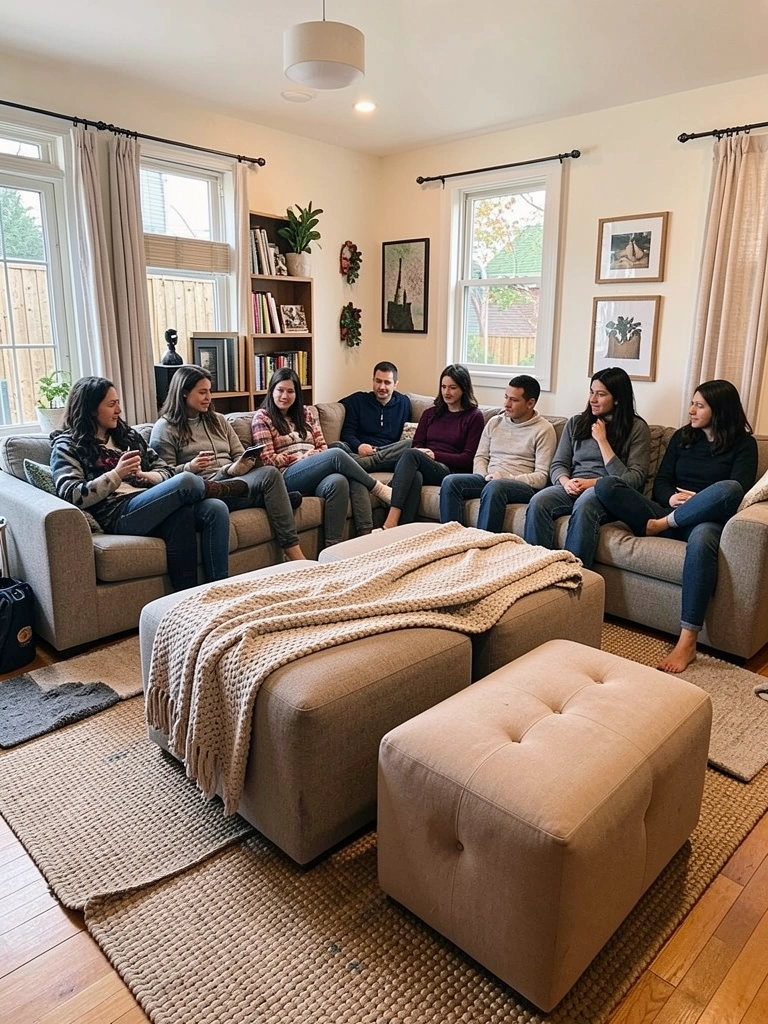
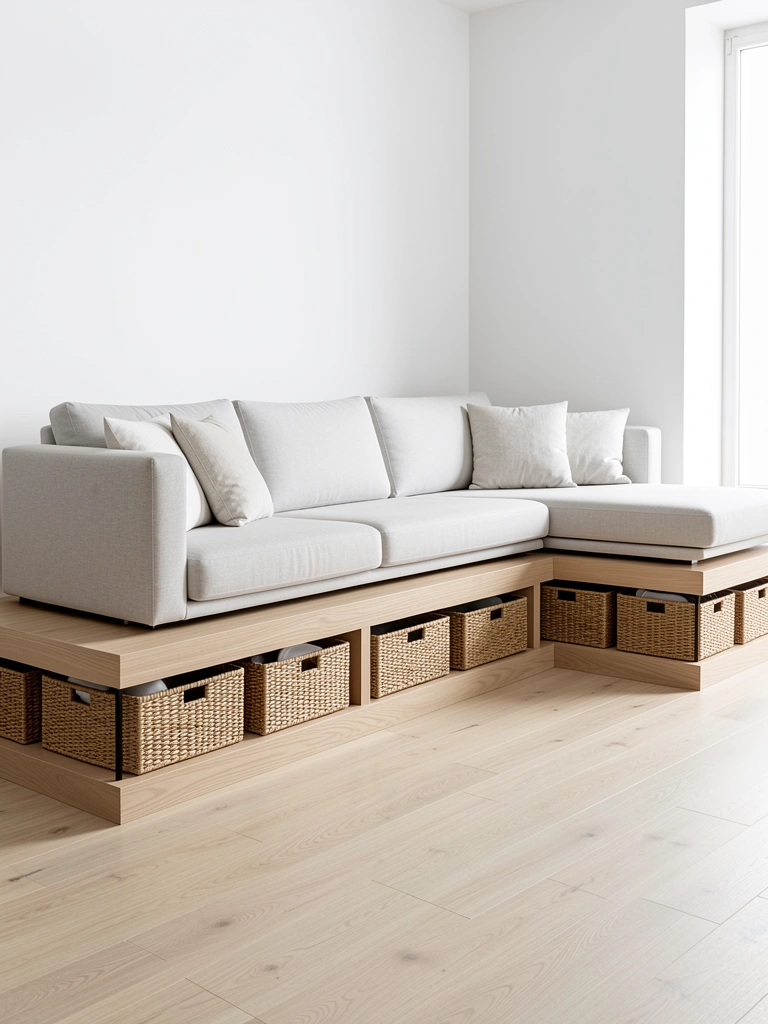
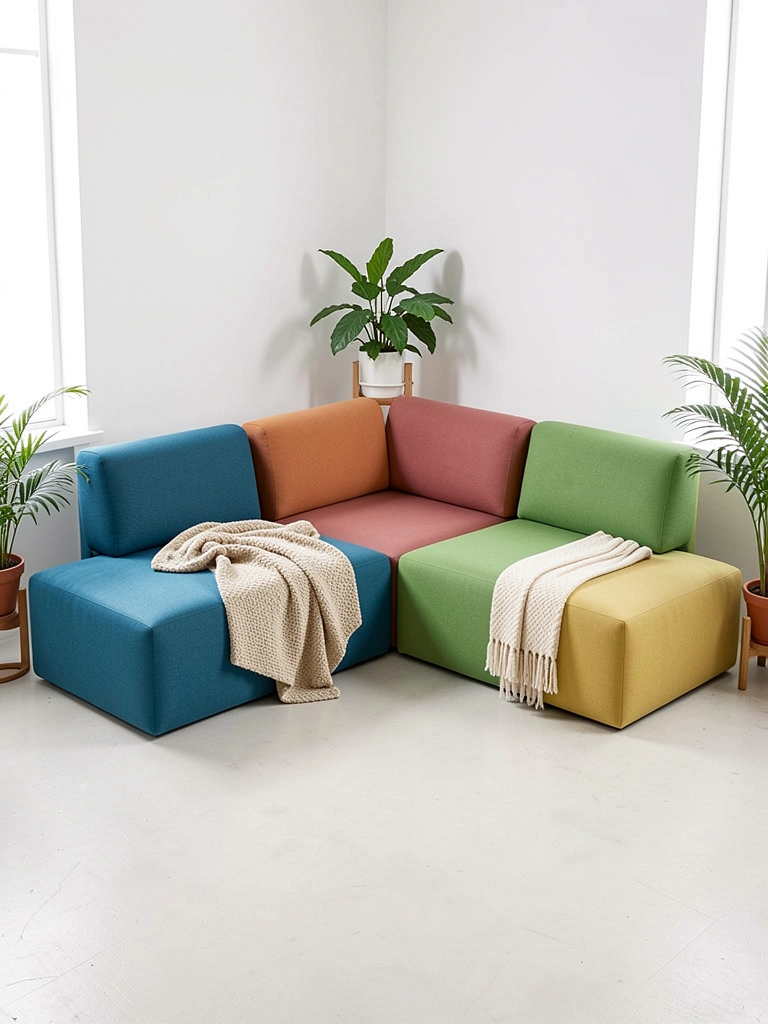
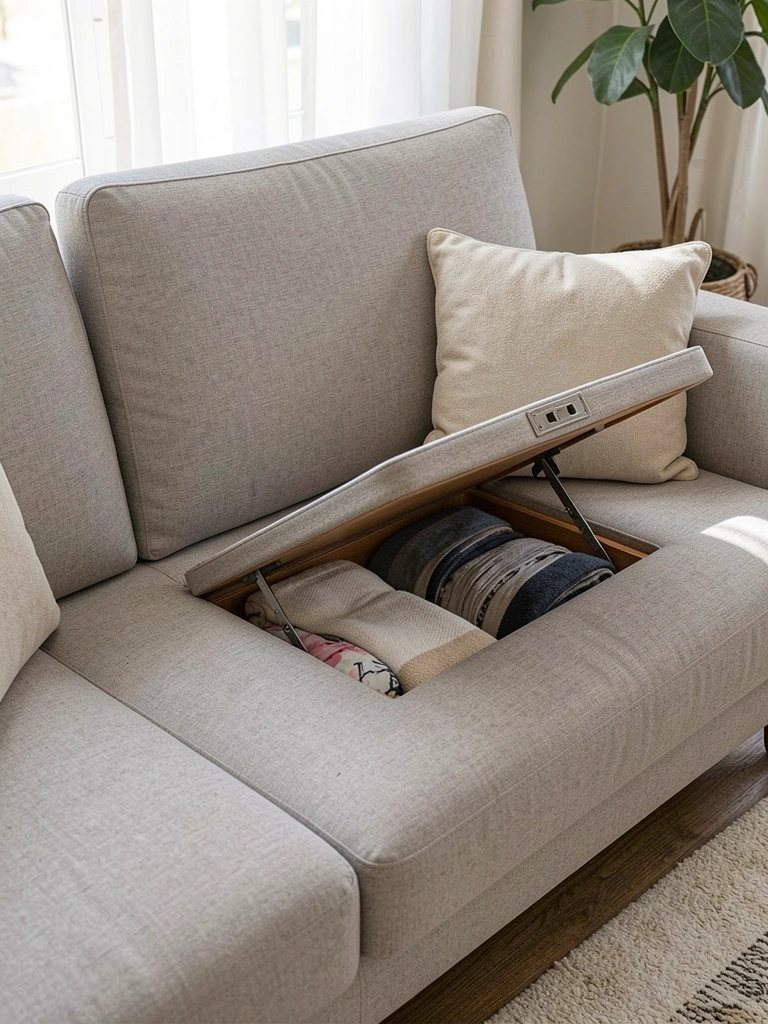
    13. Pair Curved Sectional with Ottomans for Flexibility

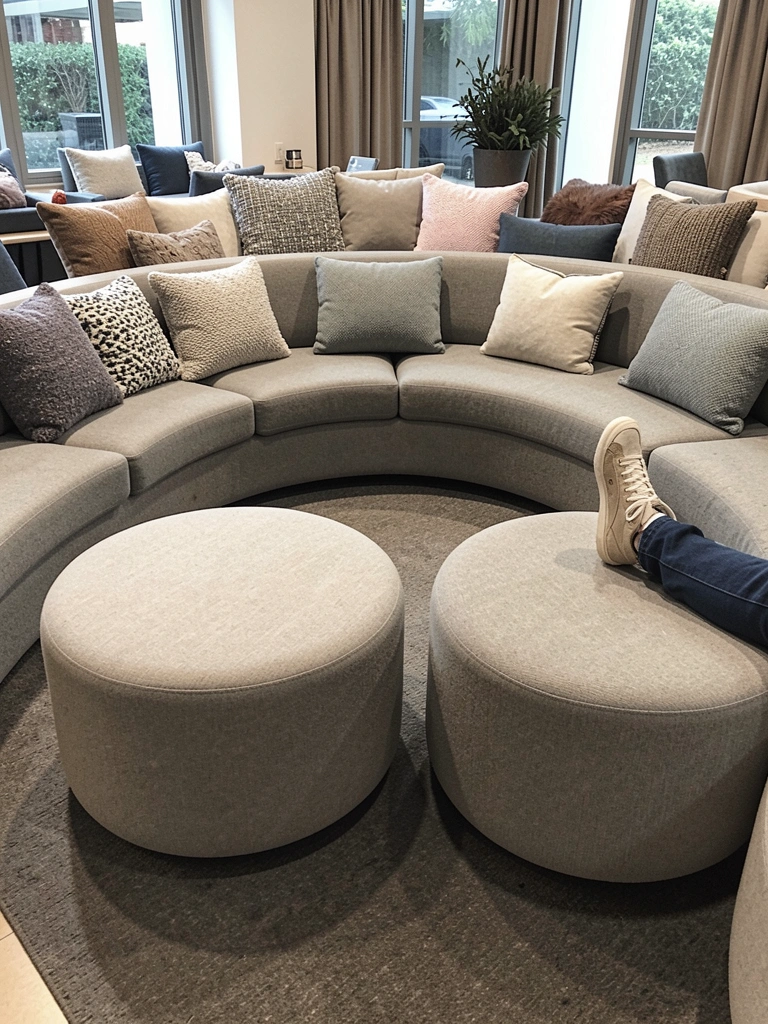
    A curved sectional paired with loose ottomans gives you maximum flexibility—you can move pieces around based on how you want to use the space each day.

    Choose a curved sectional ($1,500–$3,000 from Living Spaces, Wayfair, or Article) and add two to three round or curved ottomans ($200–$400 each). Ottomans can act as footrests, extra seating, or even small tables when topped with a tray. This configuration lets you expand or reconfigure instantly—perfect for households with changing needs or frequent guests. Renter tip: seek modular options where pieces can be swapped or moved independently.

    You’ve created flexible seating that grows and shifts with your lifestyle, not against it.

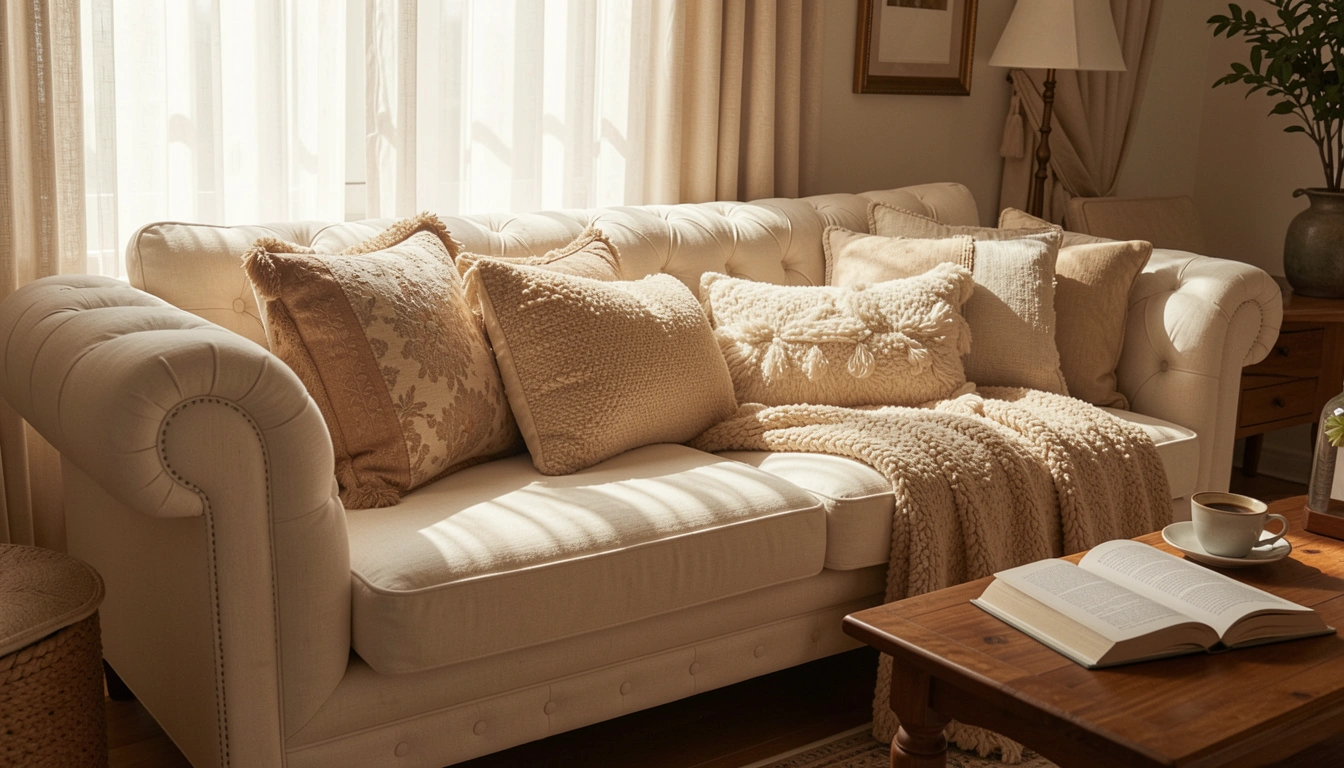
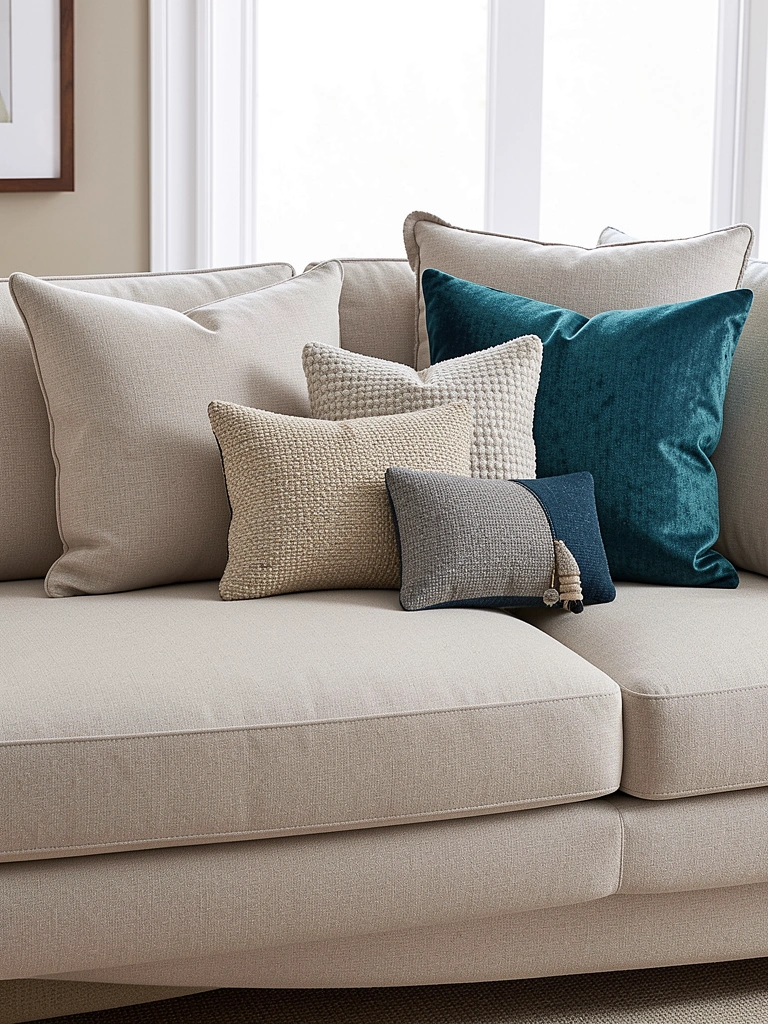
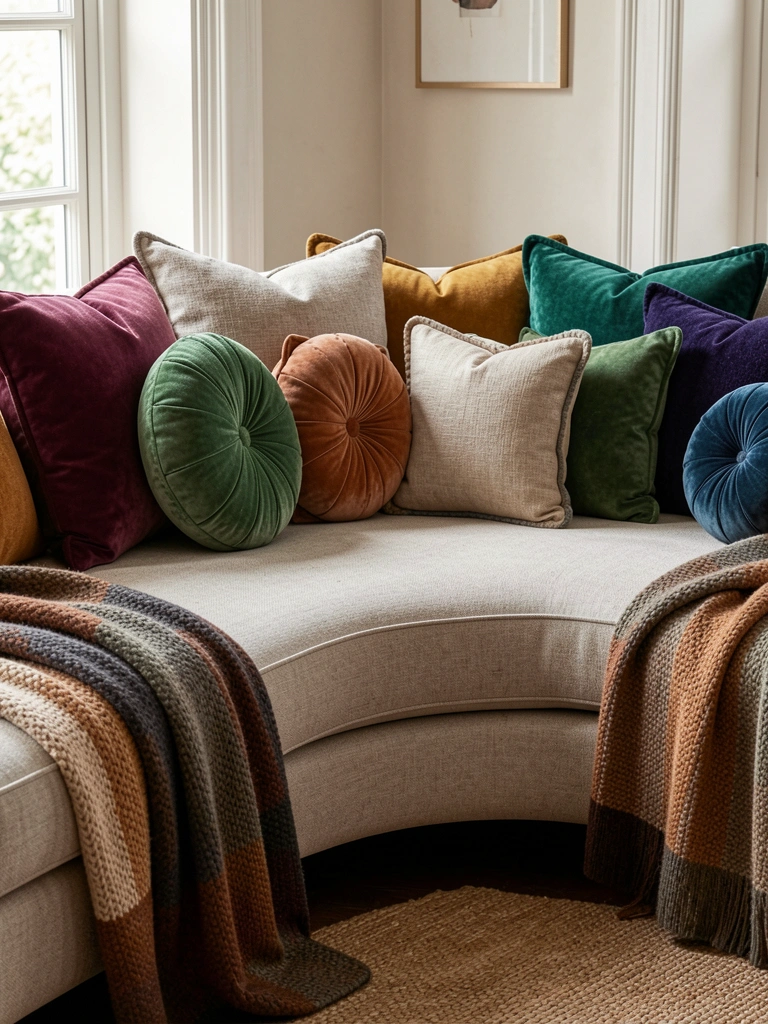
    14. Style a Curved Sofa with Oversized, Layered Pillows

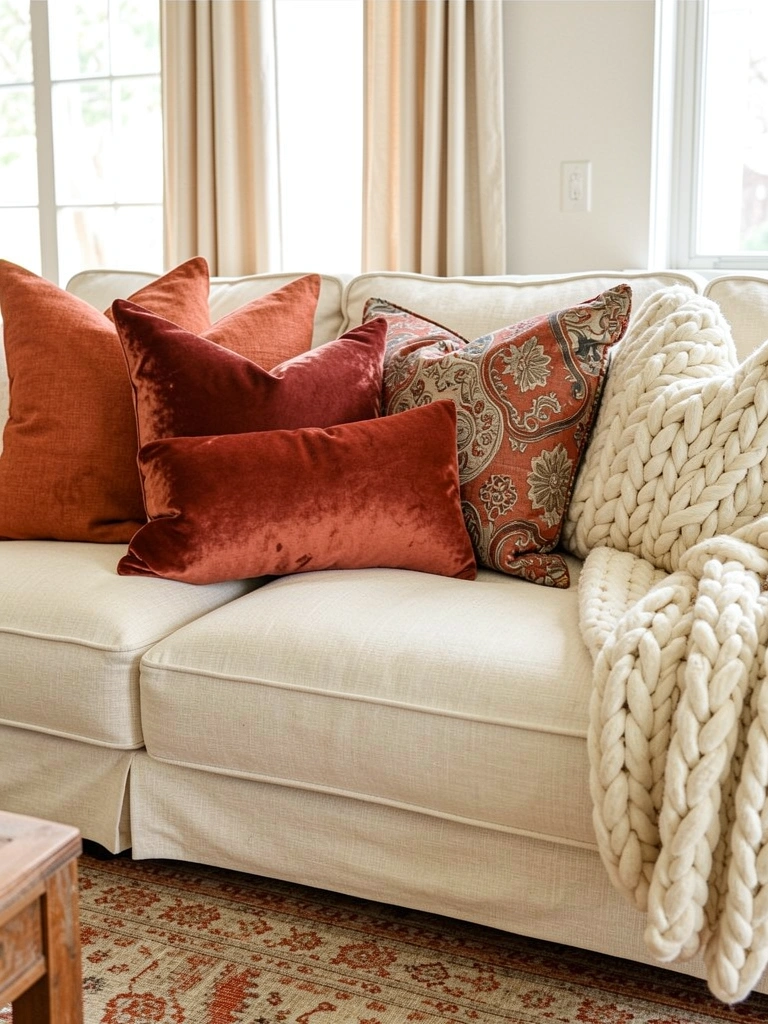
    Deep-seated curved sofas deserve an abundance of pillows to enhance coziness and create that high-end hotel feel. Layer pillows in varying sizes and textures for visual richness.

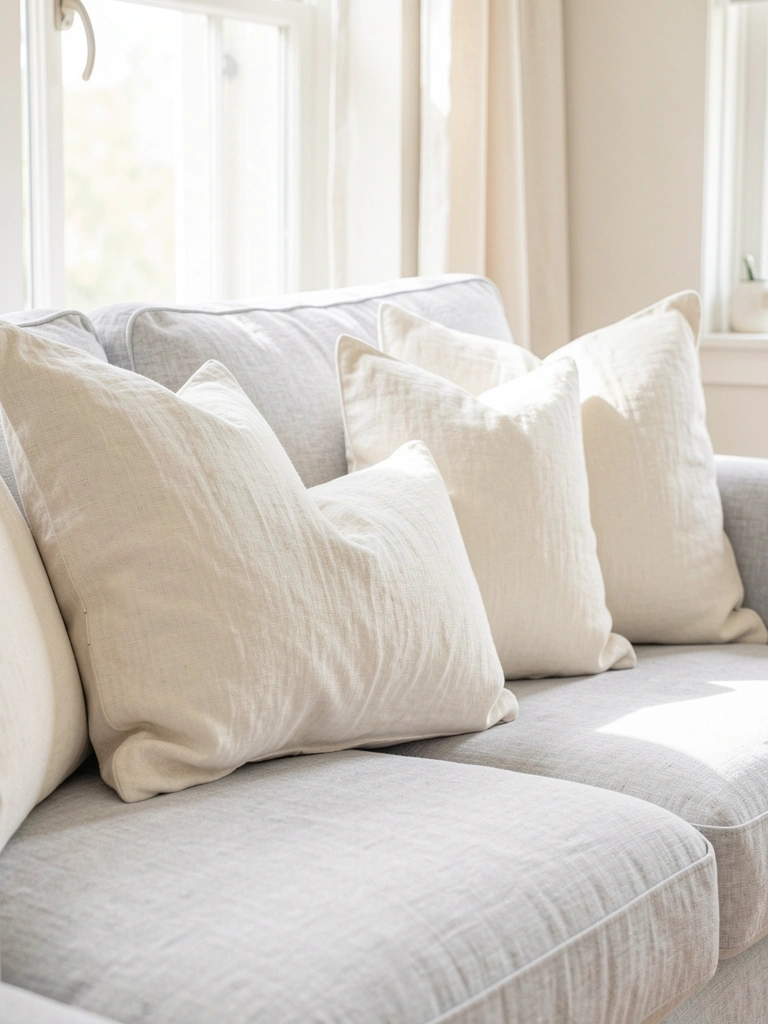
    Style your curved sofa with 8–12 pillows in assorted sizes ($20–$80 each from Target, West Elm, Etsy, or HomeGoods). Mix textures: velvet, linen, knits, faux leather. Vary heights by combining square pillows (18–20 inches), rectangular lumbar pillows, and smaller accent pillows (12–14 inches). Stick to a color palette of two or three tones to prevent clutter. Pillows can be rearranged seasonally or whenever you want a quick refresh without replacing furniture.

    Your sofa becomes a plush haven that looks magazine-worthy and feels like the coziest place in your home.

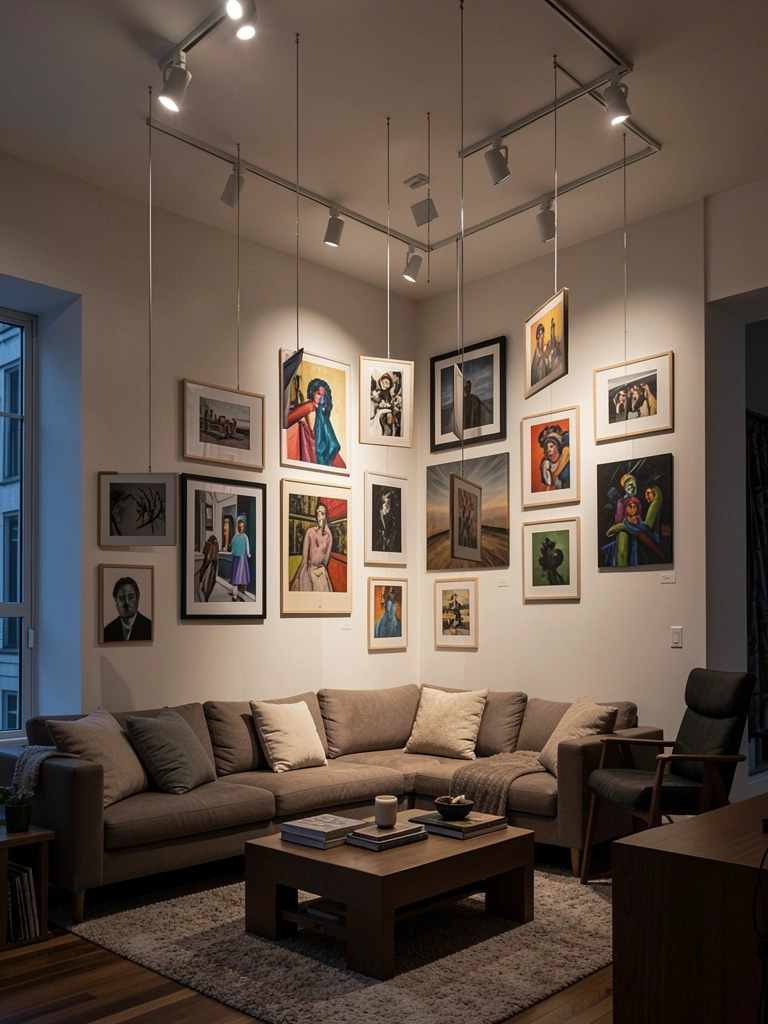
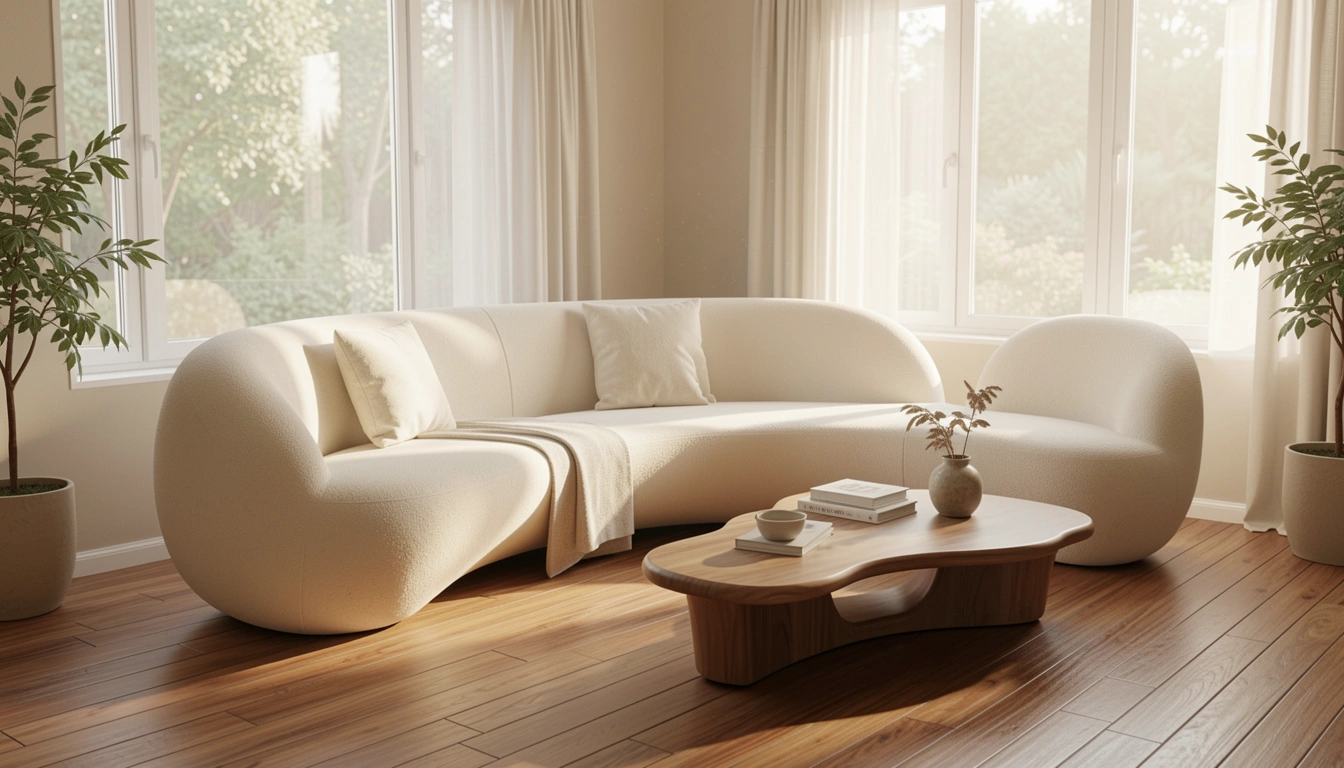
    15. Choose a Serpentine Curved Shape for Architectural Drama

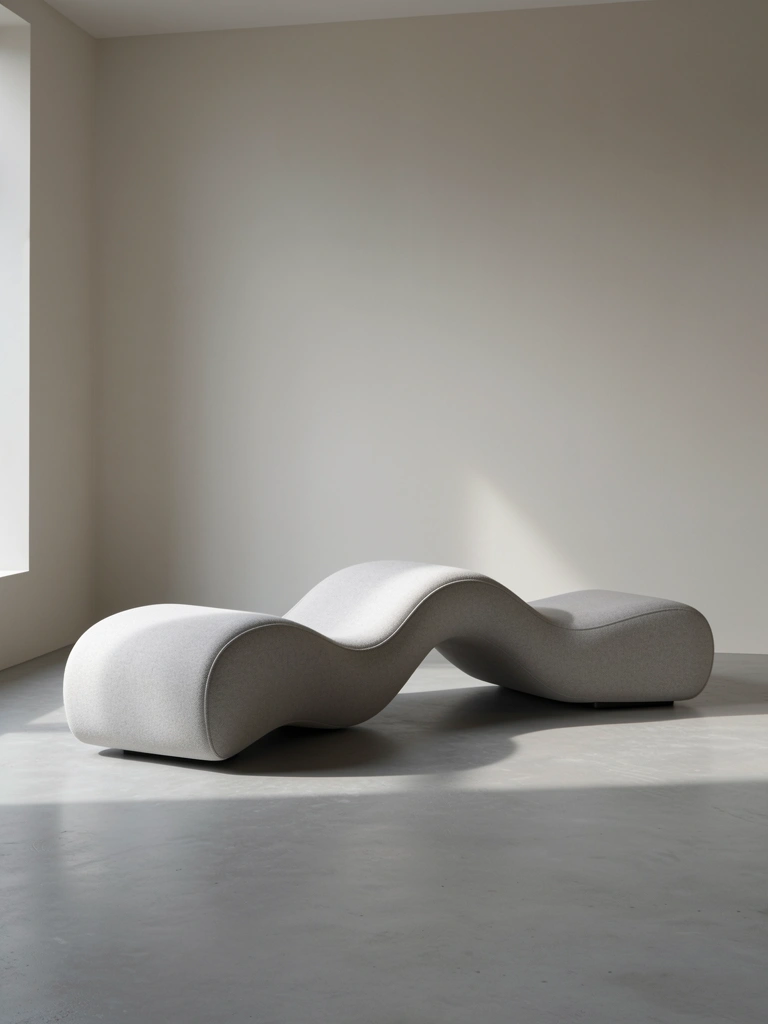
    Beyond traditional curved sofas, serpentine or wave-shaped designs offer sculptural impact that transforms your living room into an art gallery.

    Invest in a serpentine or S-curve sofa ($2,000–$4,500 from high-end retailers like Design Within Reach, Article’s luxury section, or custom makers like What A Room). These statement pieces are architectural in their own right—the undulating shape means the sofa itself becomes the focal point. Position in an open area where the curves can be fully appreciated from multiple angles. These sofas often come in neutral tones (cream, gray, camel) so they anchor without overwhelming. This is a significant investment but creates conversation-starting design.

    You’ve positioned a sculptural piece that makes your living room feel like a curated, intentionally designed space rather than a standard decorated room.

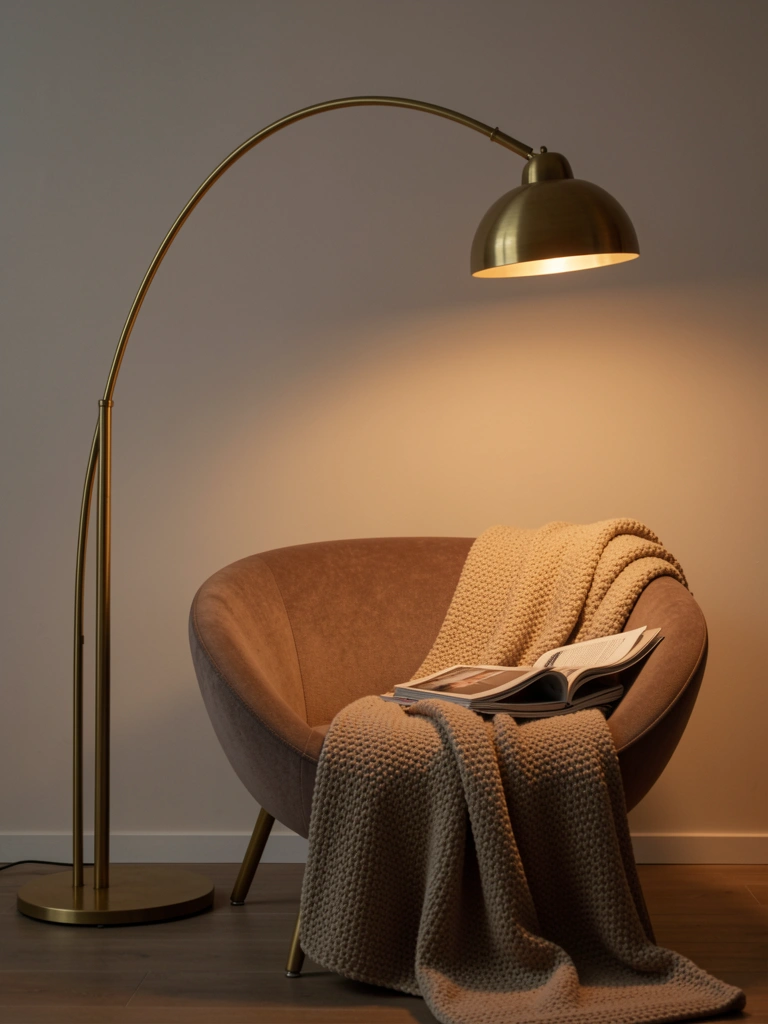
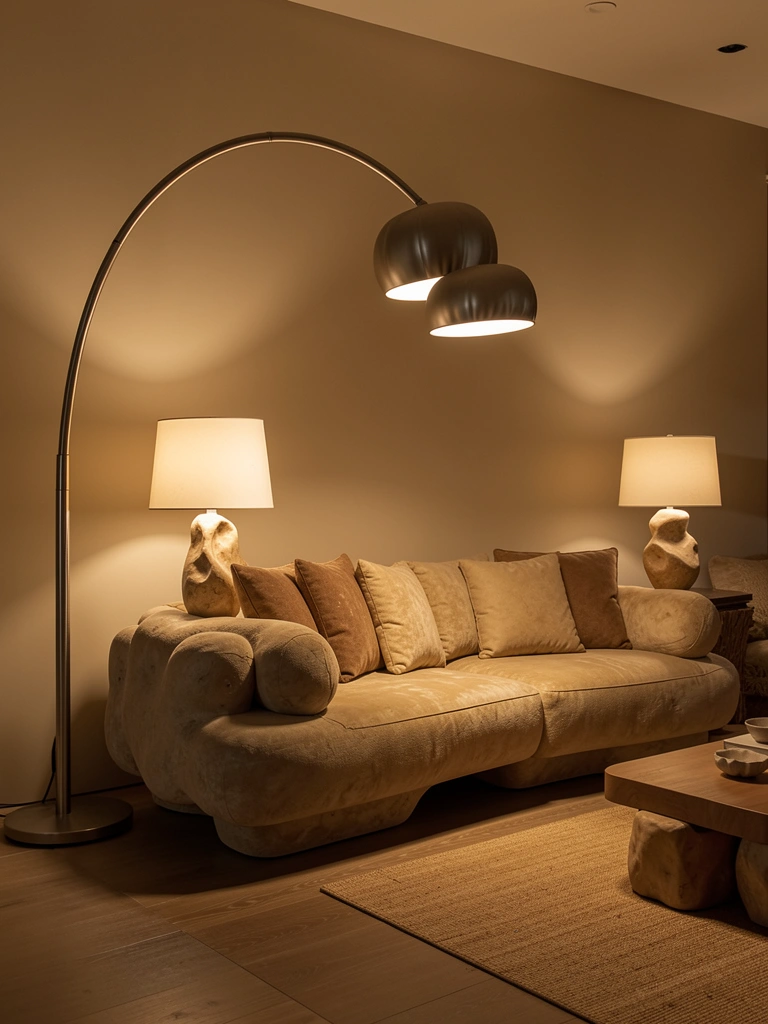
    16. Use a Curved Sofa to Soften Industrial or Masculine Spaces

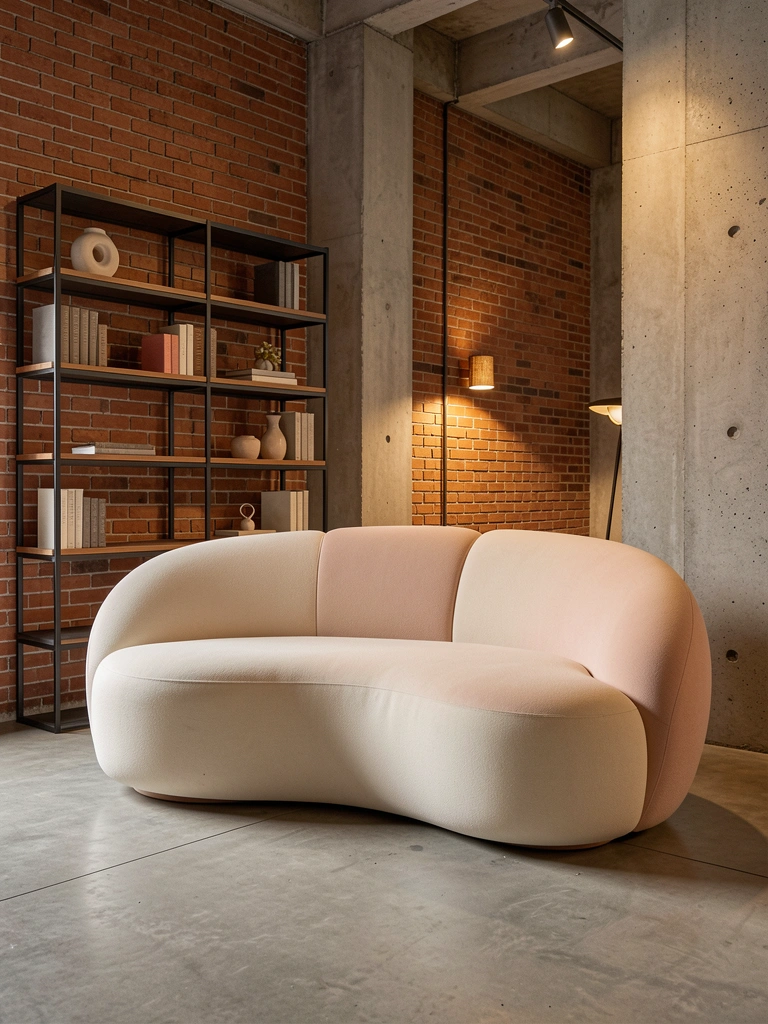
    Industrial spaces with hard angles, exposed brick, and metal details need softness to feel livable. A curved sofa introduces organic, rounded forms that humanize otherwise rigid environments.

    Select a curved sofa in soft neutrals like cream, blush, or warm gray ($1,000–$2,500) to contrast with industrial elements. Pair with soft textures—a chunky throw, plush rug, and layered pillows. The curves literally balance the sharp angles of exposed brick, metal, or concrete. Add warm lighting ($50–$150 for a curved arc floor lamp) to soften shadows. This contrast is what makes industrial spaces feel intentional rather than harsh.

    Your industrial space becomes warm and inviting while still maintaining its cool-factor aesthetic.

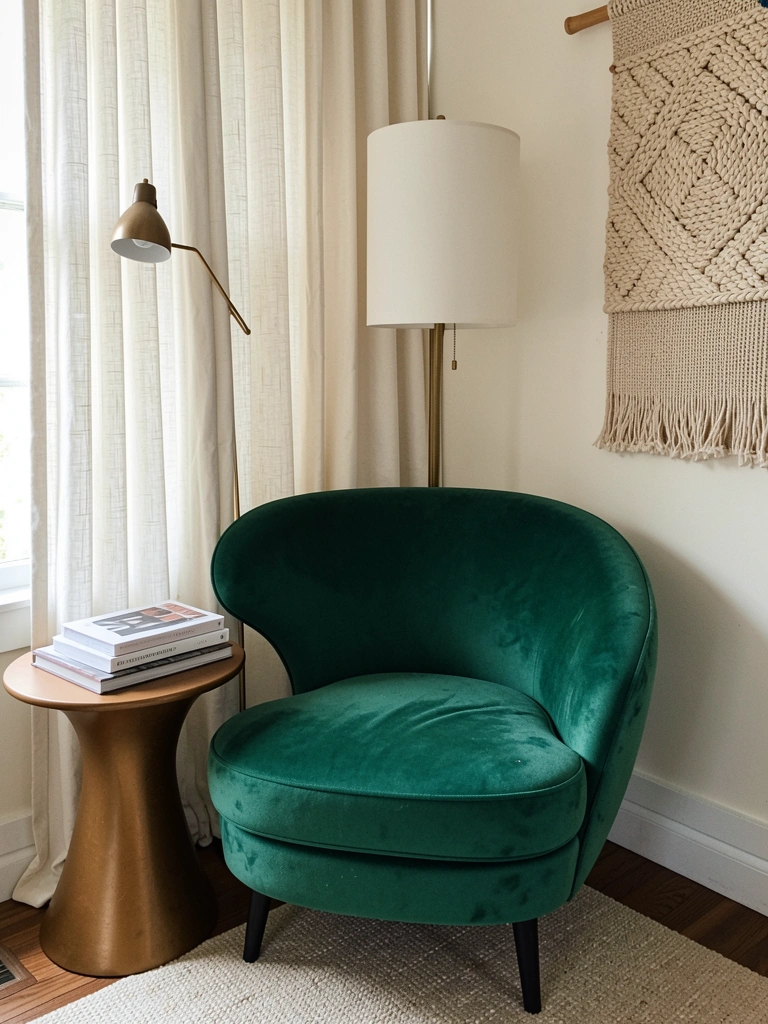
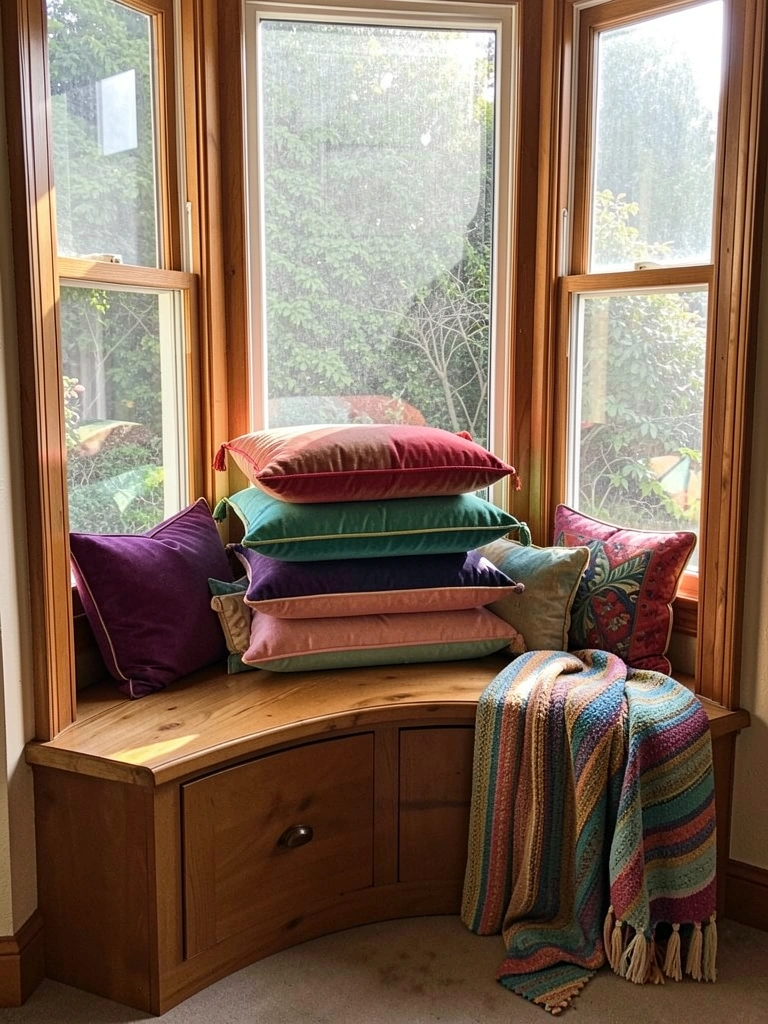
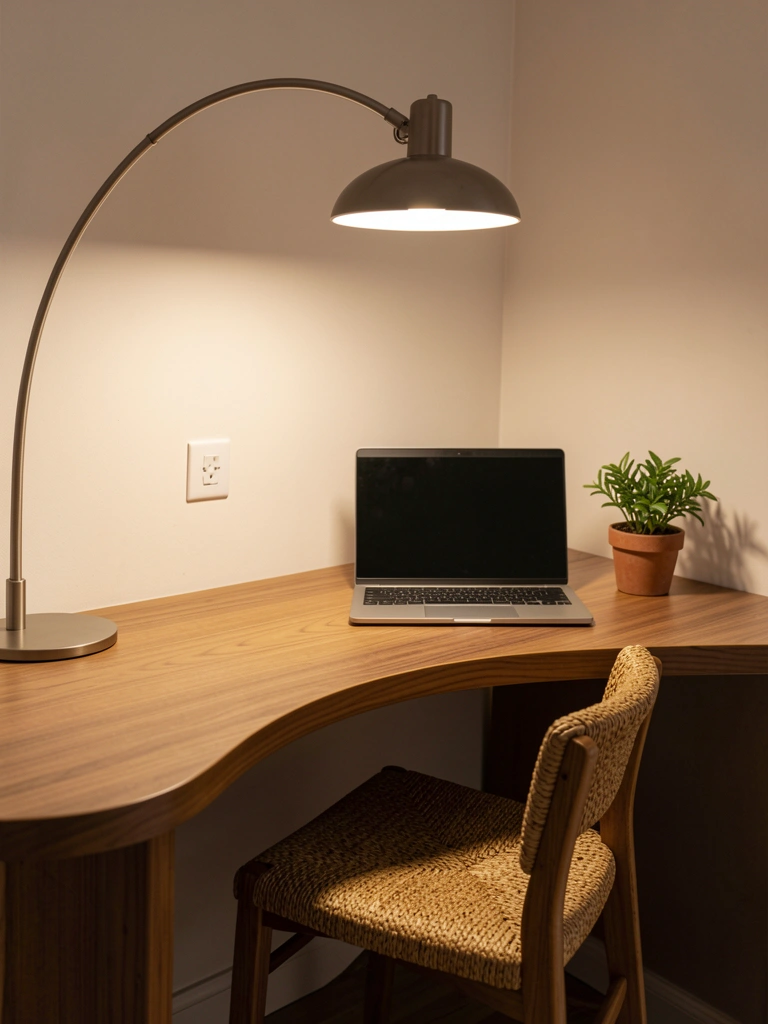
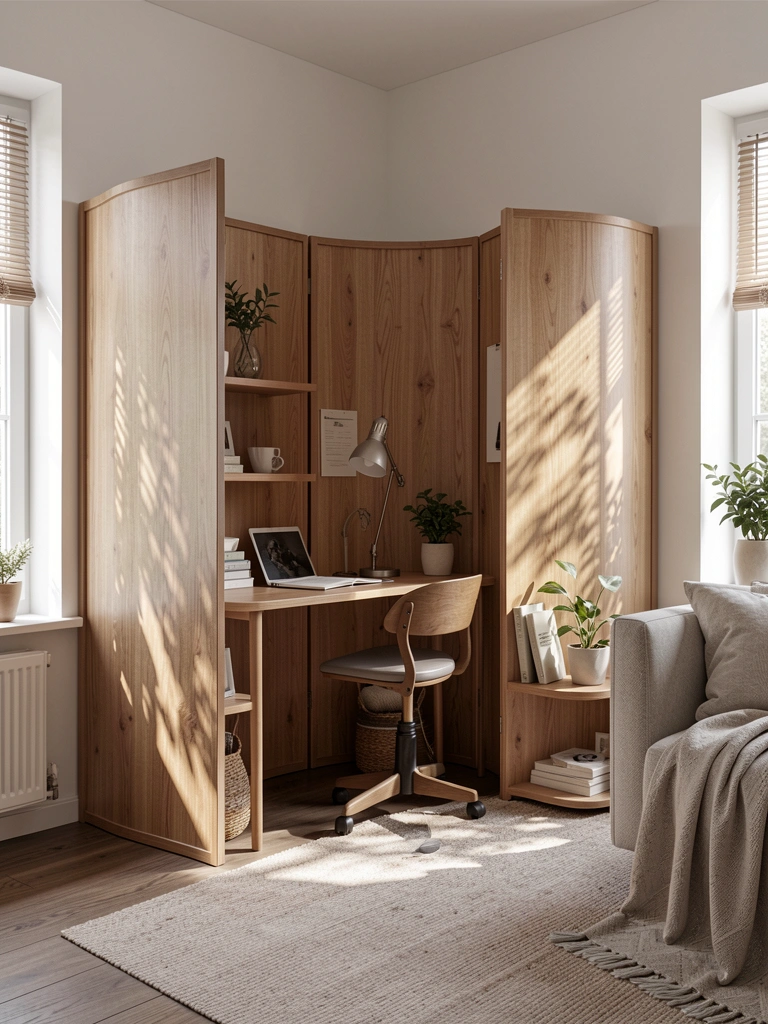
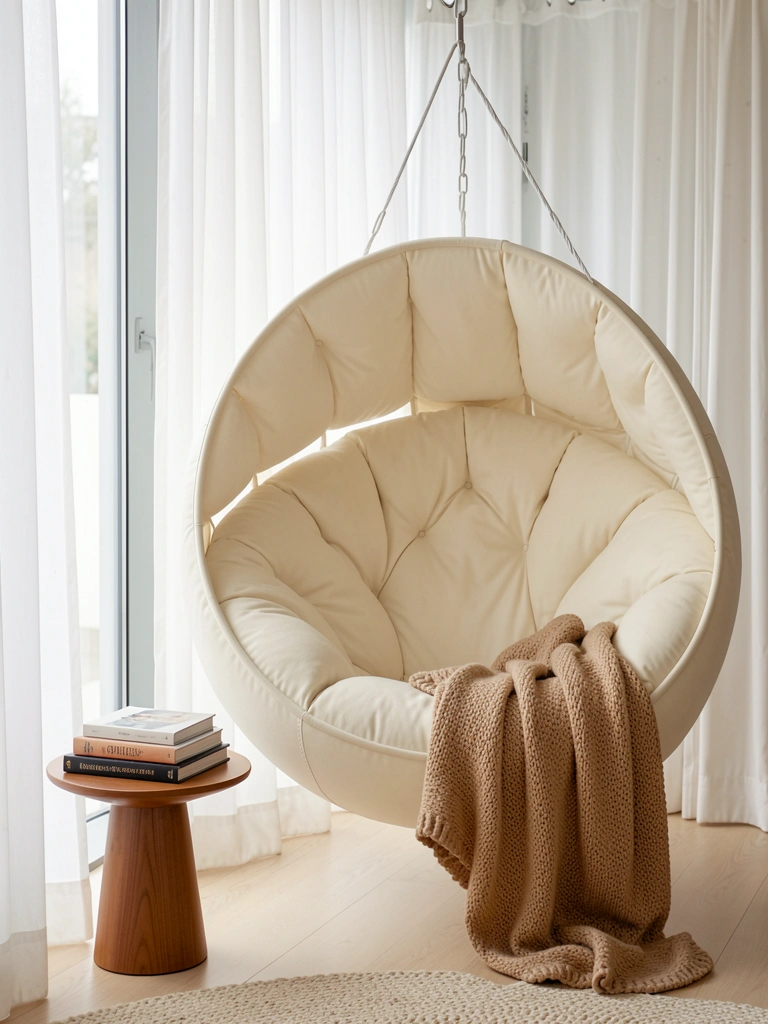
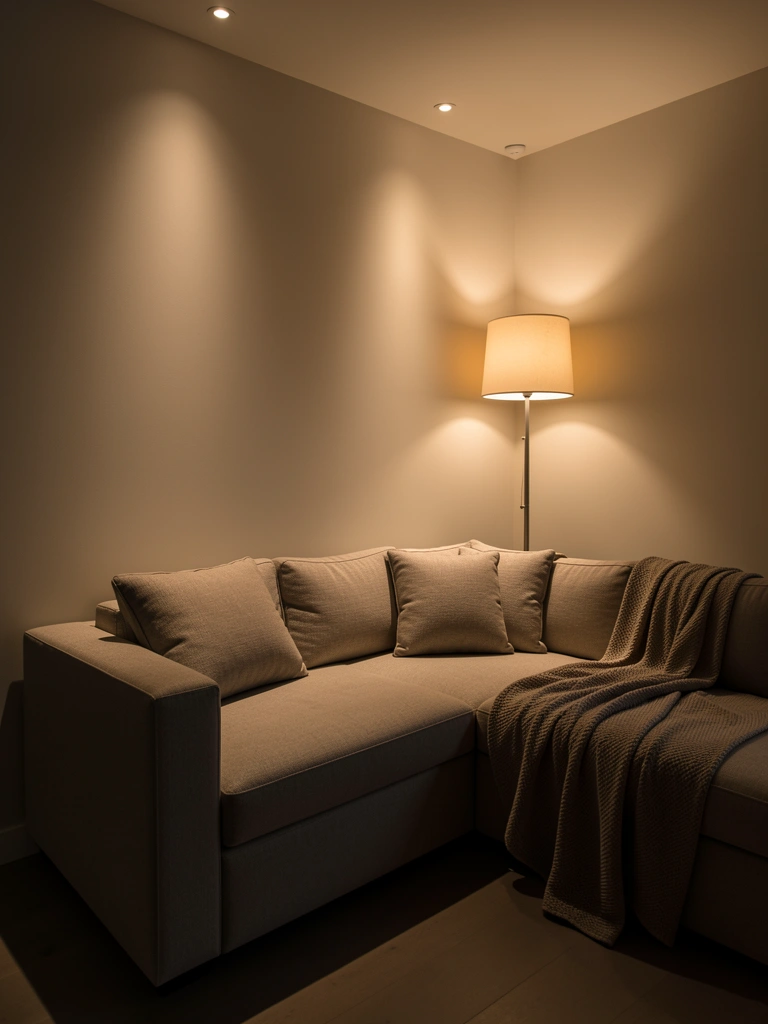
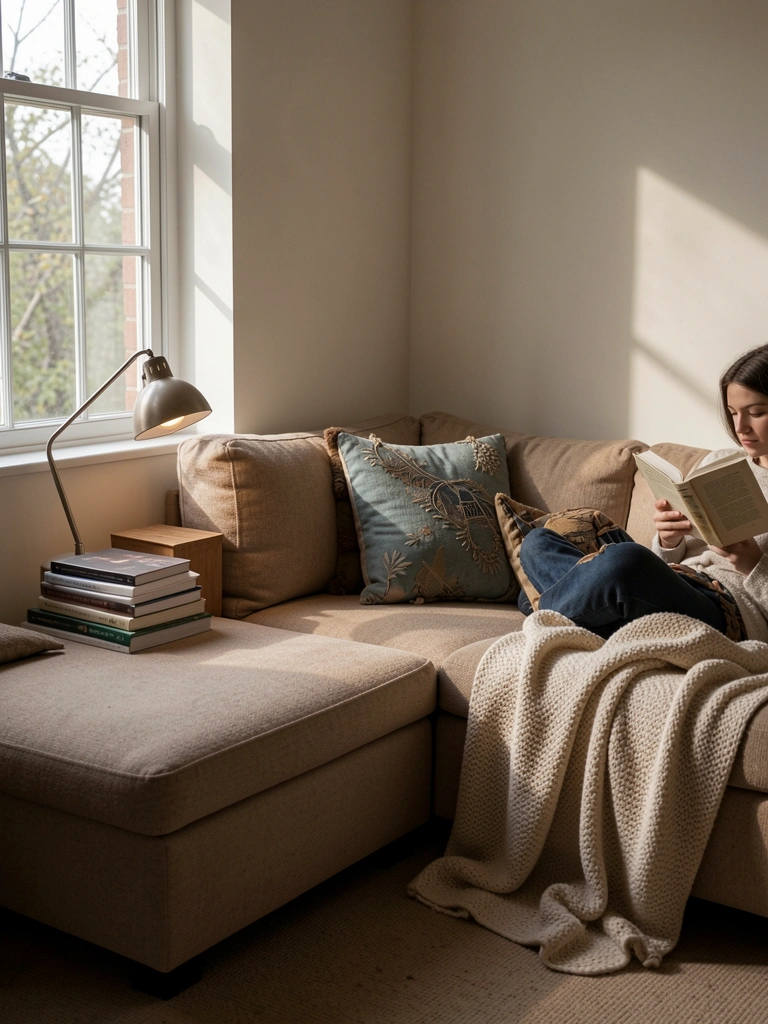
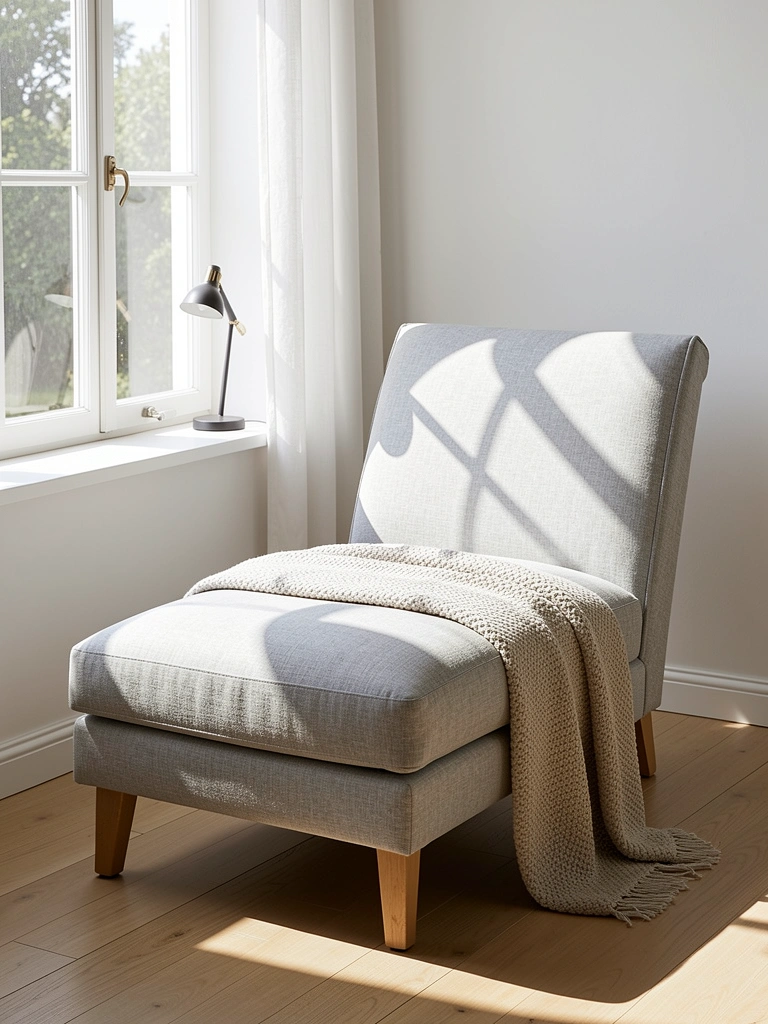
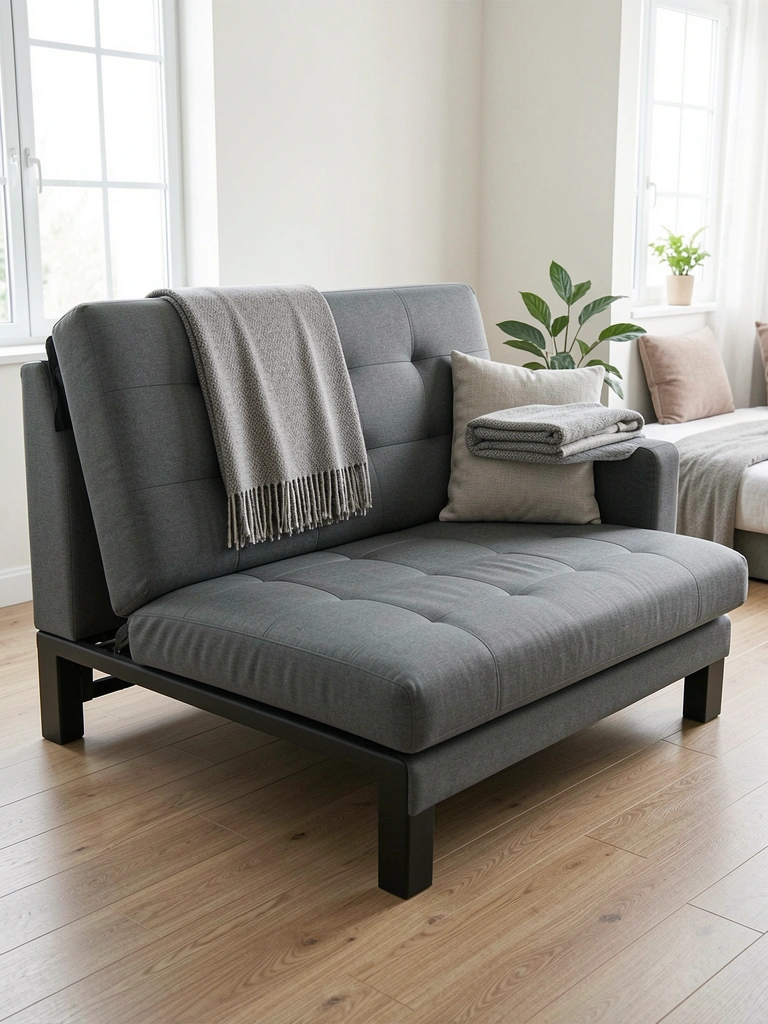
    17. Create a Reading Nook with a Compact Curved Sofa

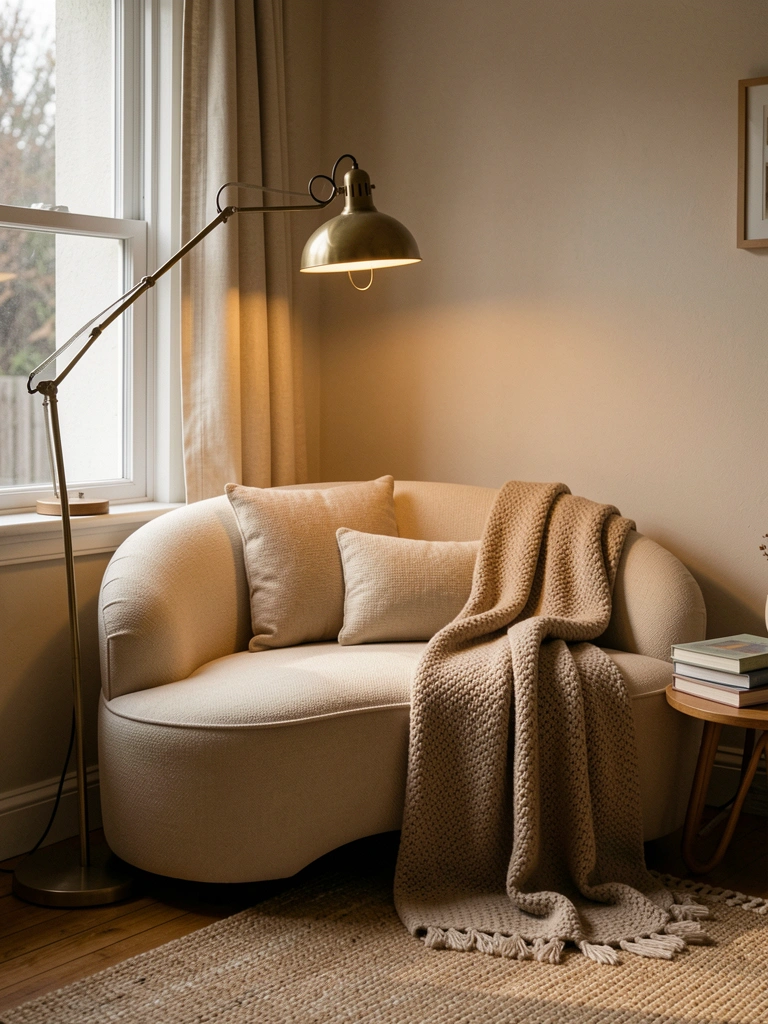
    Smaller spaces need curves too. A compact curved sofa or loveseat creates a reading nook or home office seating area that feels proportionate and intentional.

    Shop for curved loveseats or compact sofas ($600–$1,500 from IKEA, Target, Wayfair, or Article’s smaller collection). Seat widths typically range 60–72 inches, perfect for bedrooms, studies, or small living rooms. Pair with a narrow side table ($80–$200) and a reading lamp ($40–$120) to create a defined nook. Even in tight quarters, the curved silhouette makes the space feel thought-out and designed. Renters will especially appreciate the compact size—easy to move and fits most apartments.

    Your small space now has a dedicated cozy corner that invites you to slow down and relax.

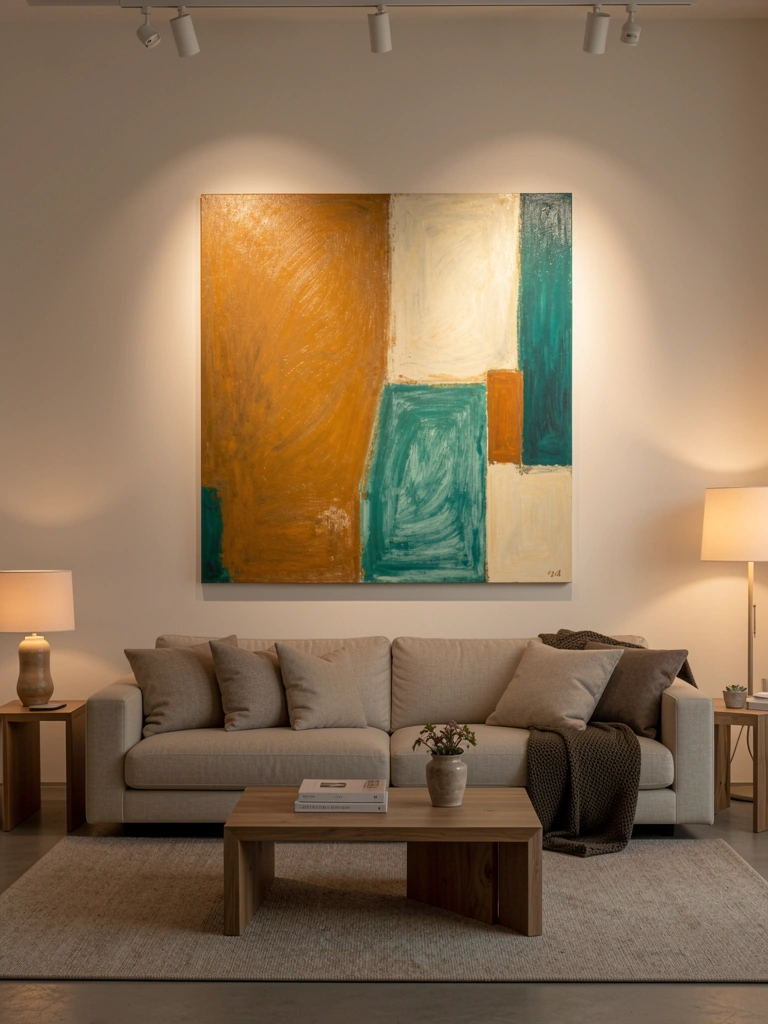
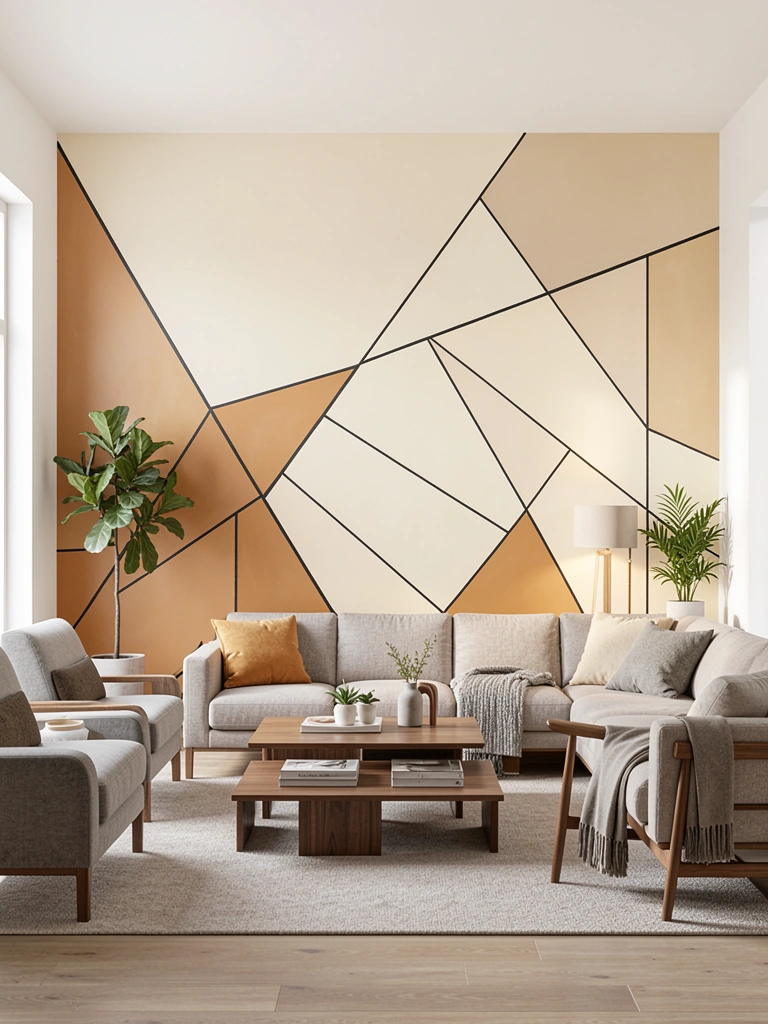
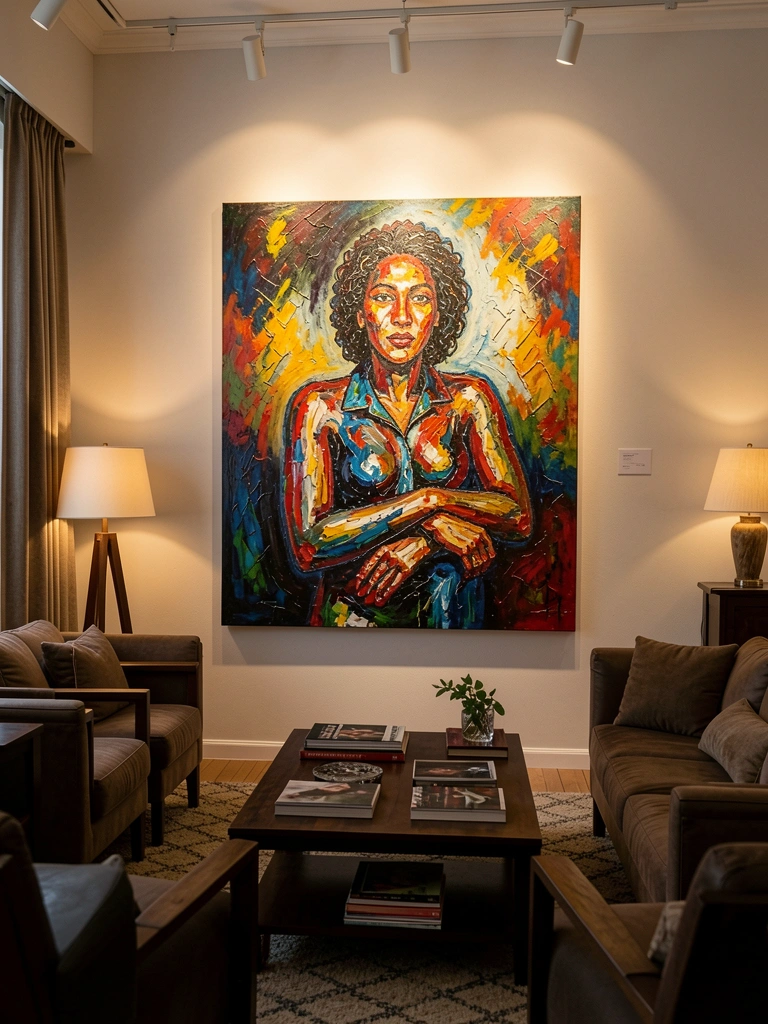
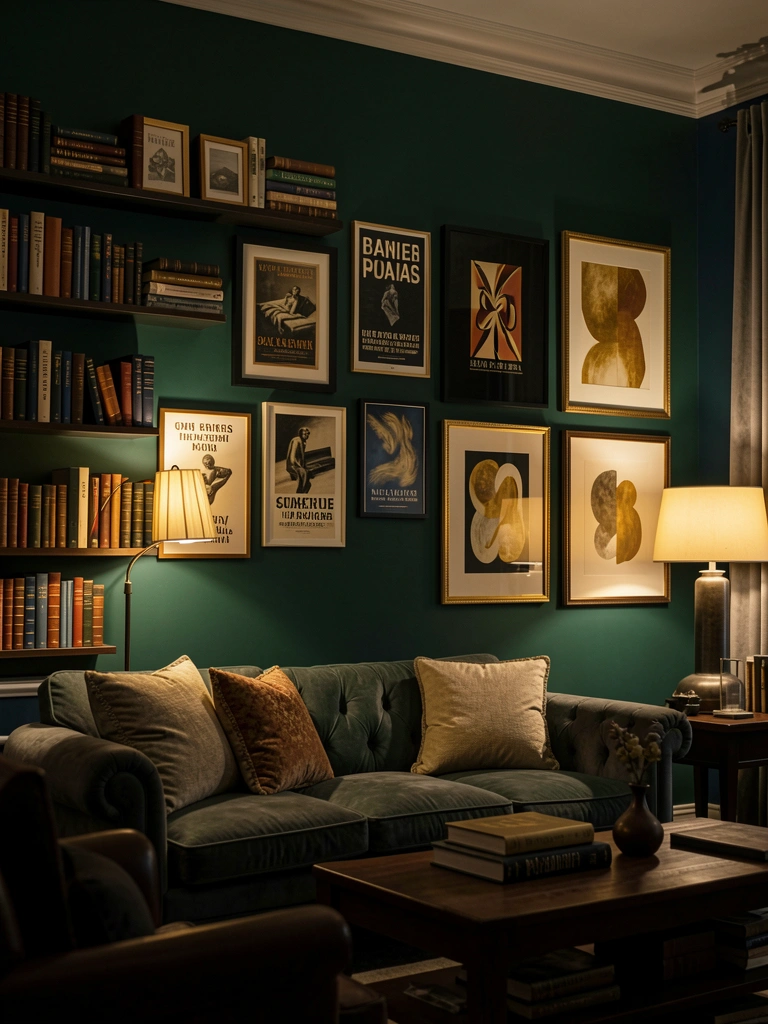
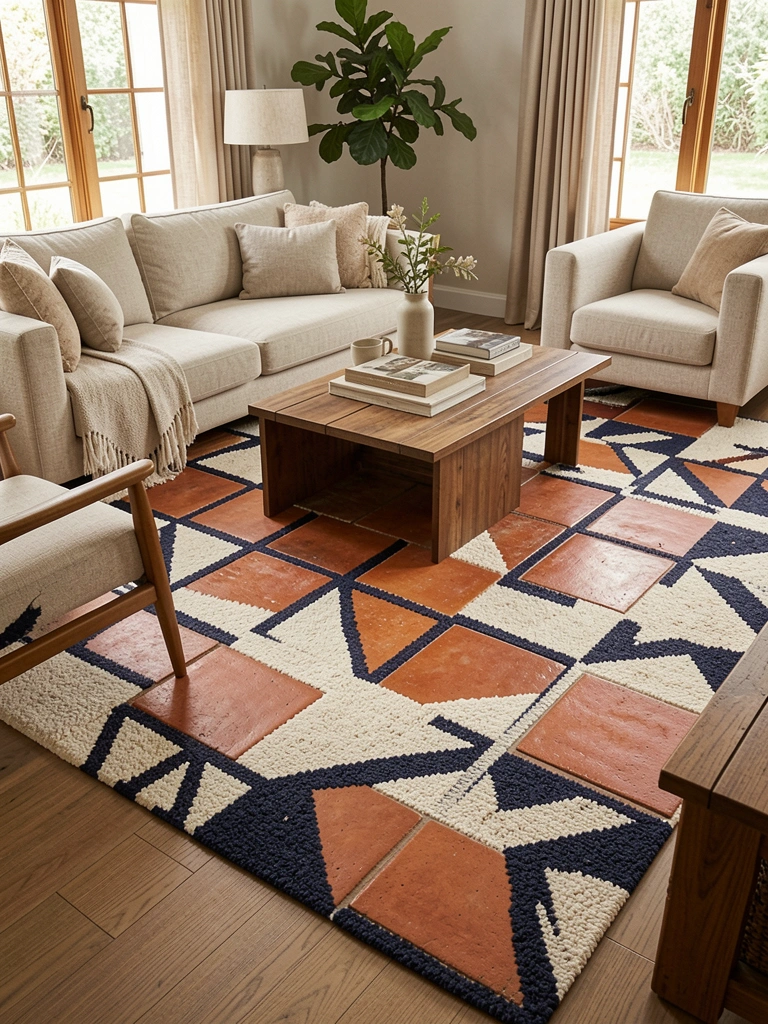
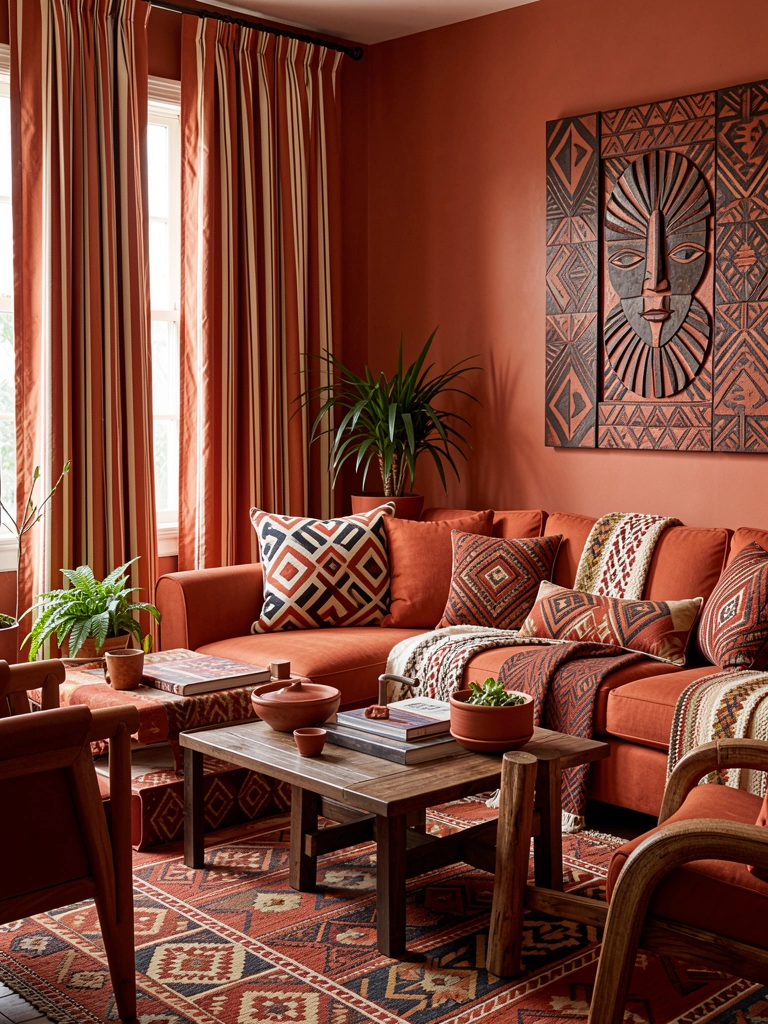
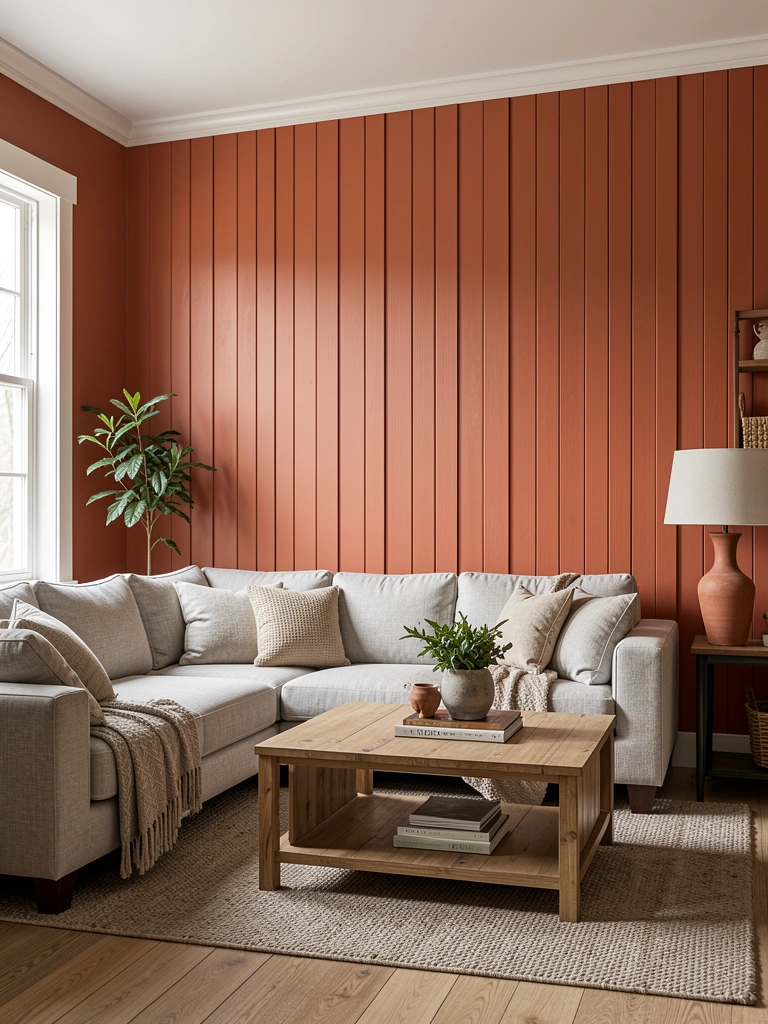
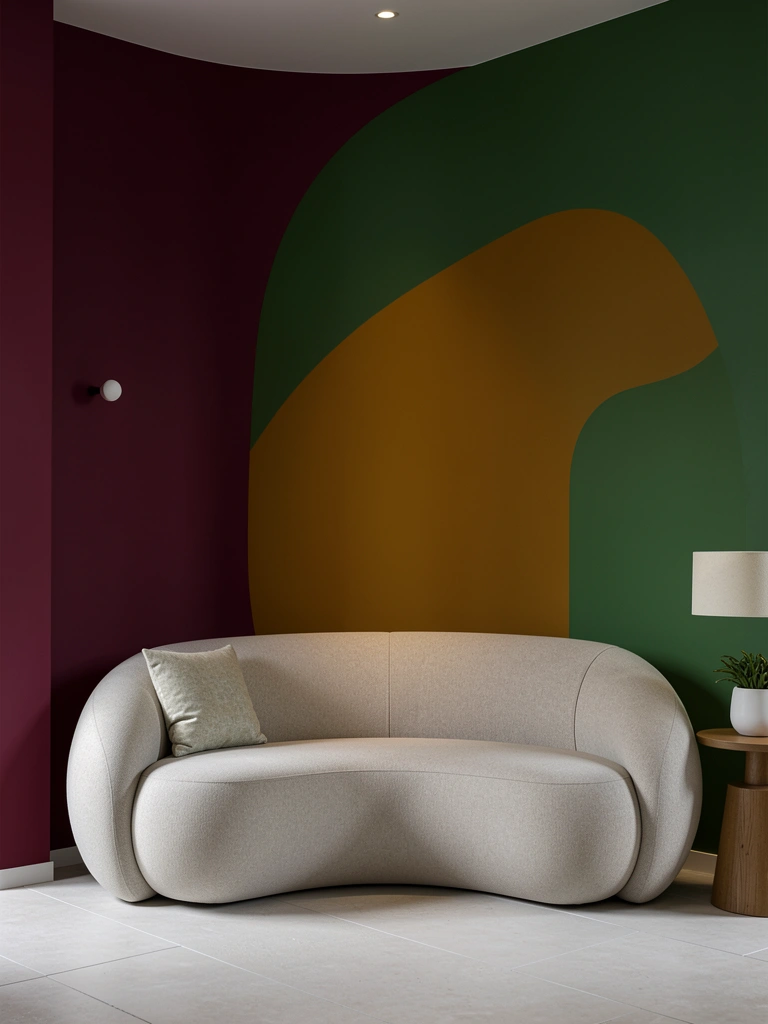
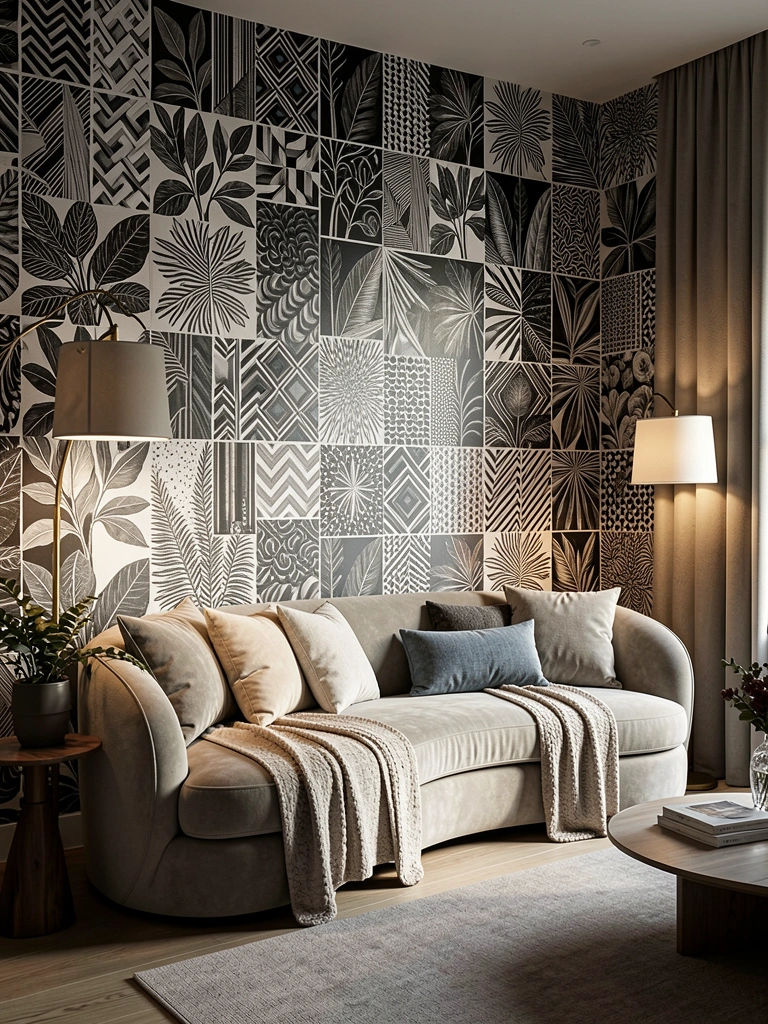
    18. Mix Curved Sofa with Bold Accent Wall for Impact

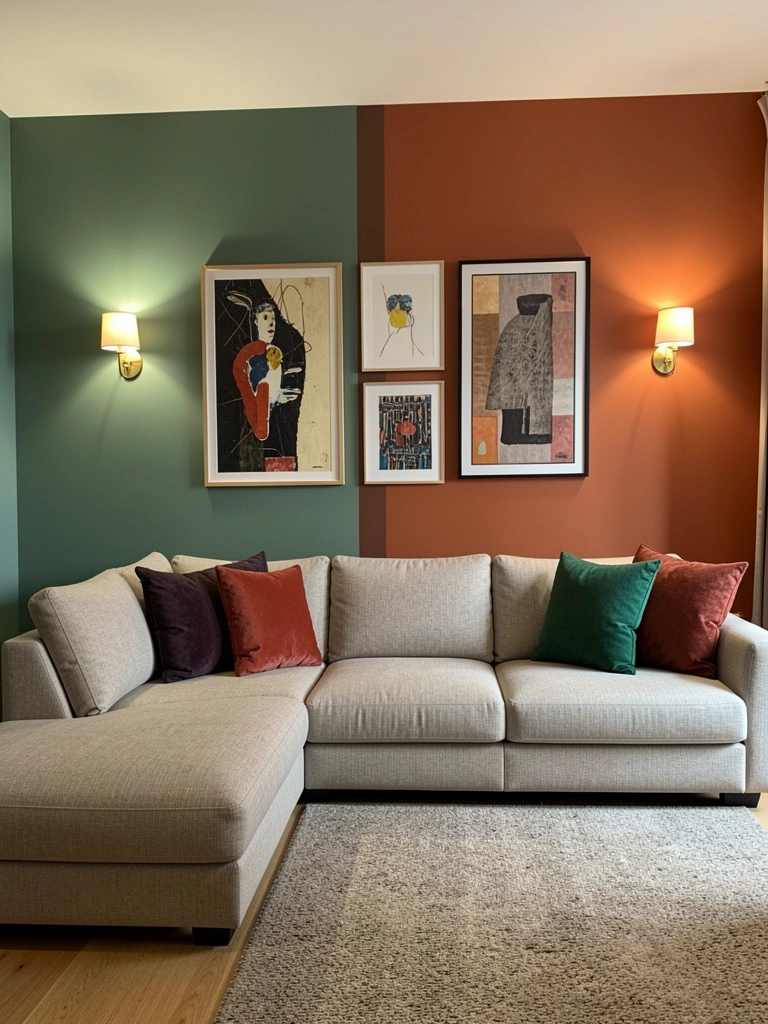
    A bold accent wall needs a soft, rounded counterpoint to feel balanced. A curved sofa in neutral tones provides that organic contrast beautifully.

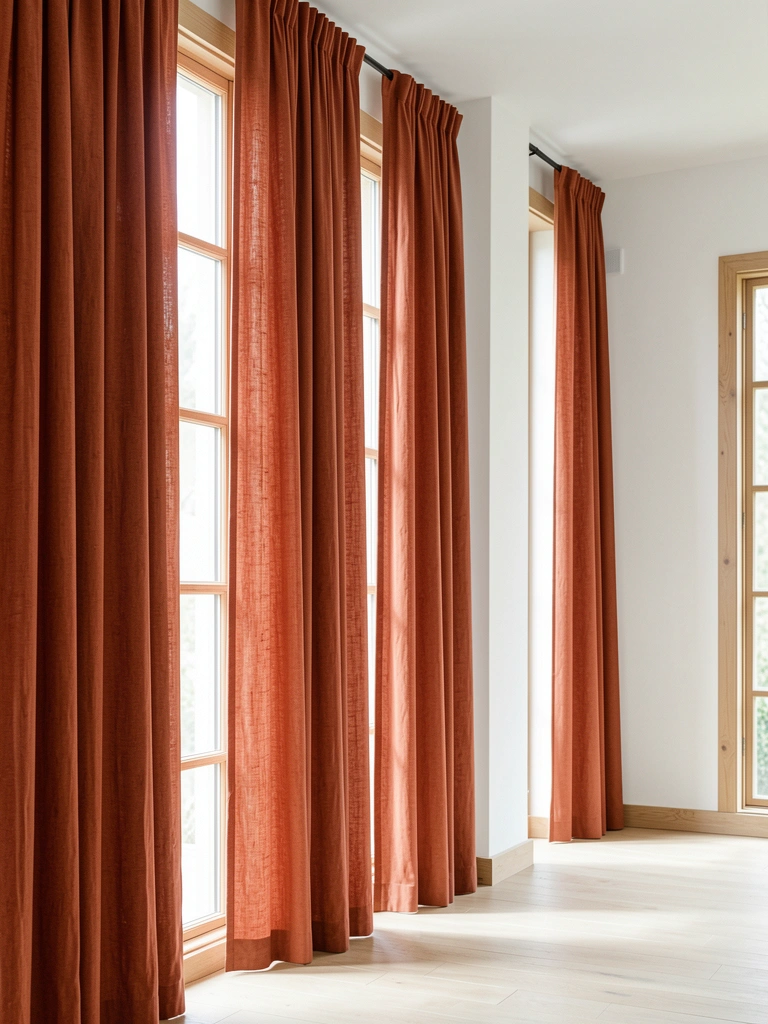
    Paint one wall behind your sofa in a bold, saturated color ($25–$50 per gallon) like emerald green, navy blue, or terracotta—pick a tone that excites you. Style your curved sofa in a complementary neutral ($1,000–$2,500) like cream, gray, or warm beige. The rounded shape of the sofa prevents the bold wall from feeling too aggressive; curves are inherently approachable. Add minimal additional decor to let both the wall and sofa shine. This combination signals confidence and taste.

    Your living room feels curated and modern, not trendy or overdone.

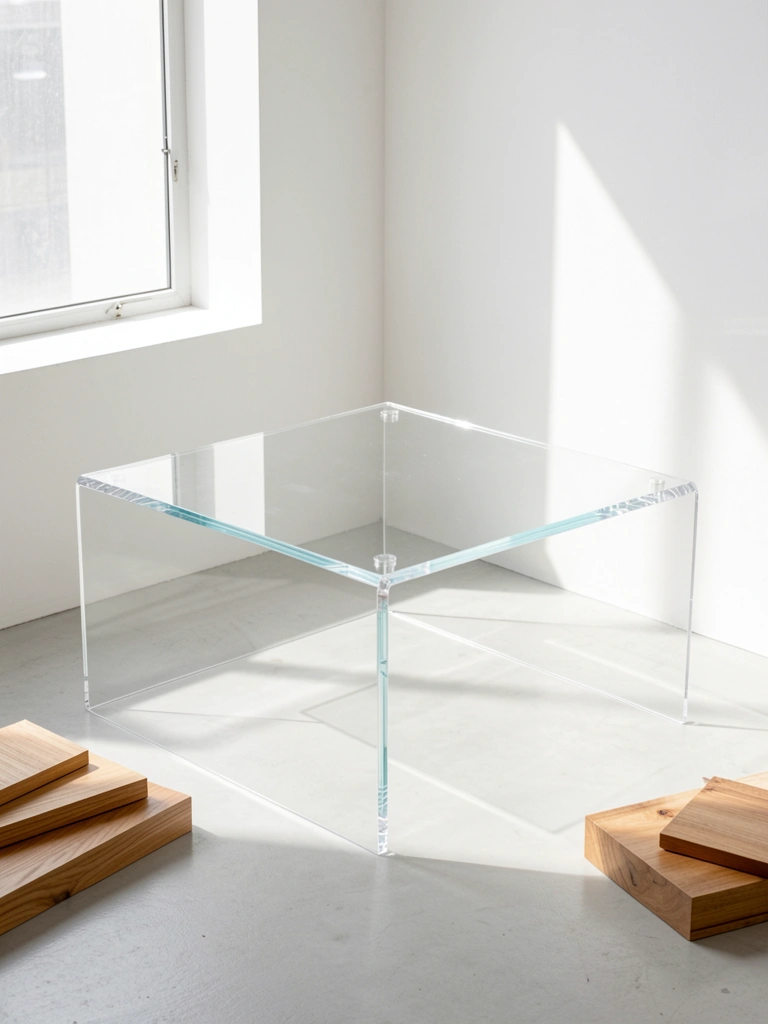
    19. Invest in a Custom Curved Sofa Using 3D Renderings

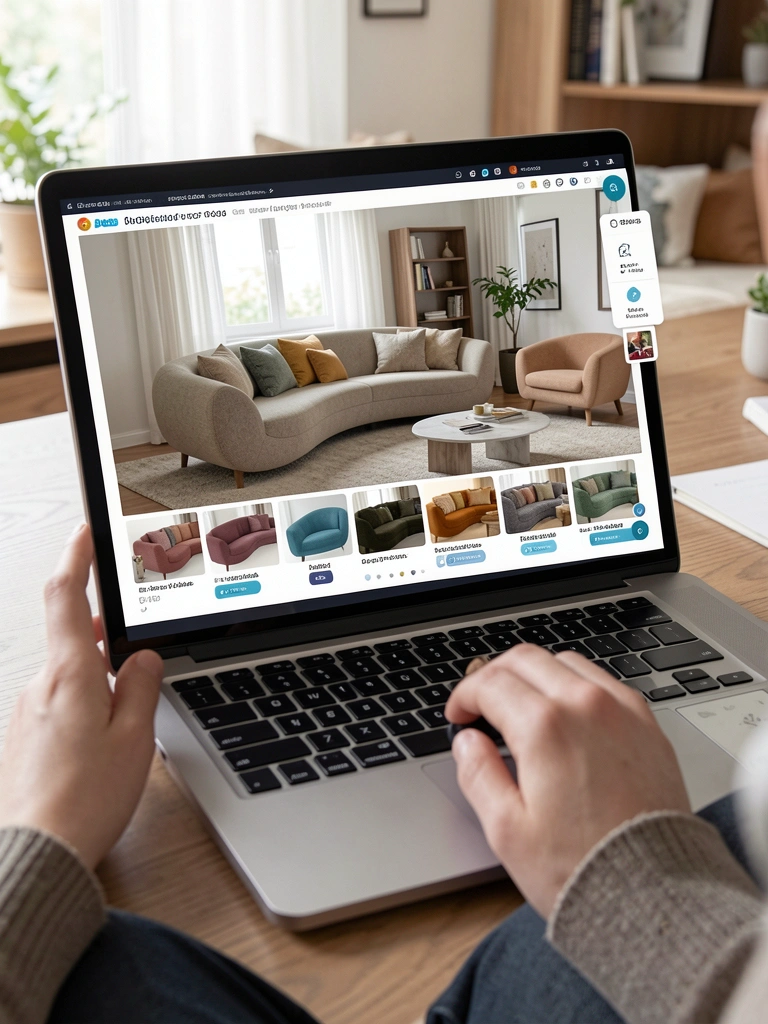
    Custom-made curved sofas with 3D visualization tools eliminate guessing about how a piece will fit and function in your space before you commit.

    Work with custom sofa makers like What A Room or Etsy sellers offering customization ($1,500–$3,500 depending on complexity). Many provide free 3D renderings showing your sofa in your actual room with your chosen fabric and dimensions. Request fabric swatches ($5–$15 per swatch) to confirm colors match your vision before production. Made-to-order pieces typically take 8–12 weeks but arrive exactly as specified. This investment makes sense if you have specific measurements, color needs, or unusual room configurations.

    You get a sofa designed precisely for your space, your aesthetic, and your practical needs—worth the wait.

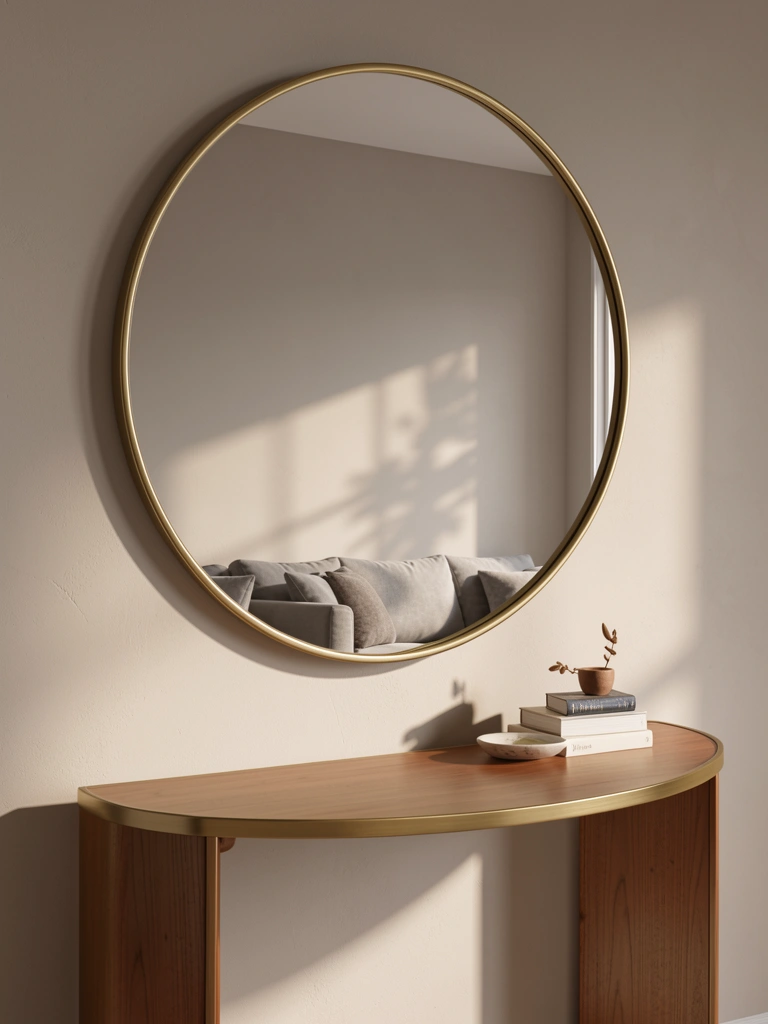
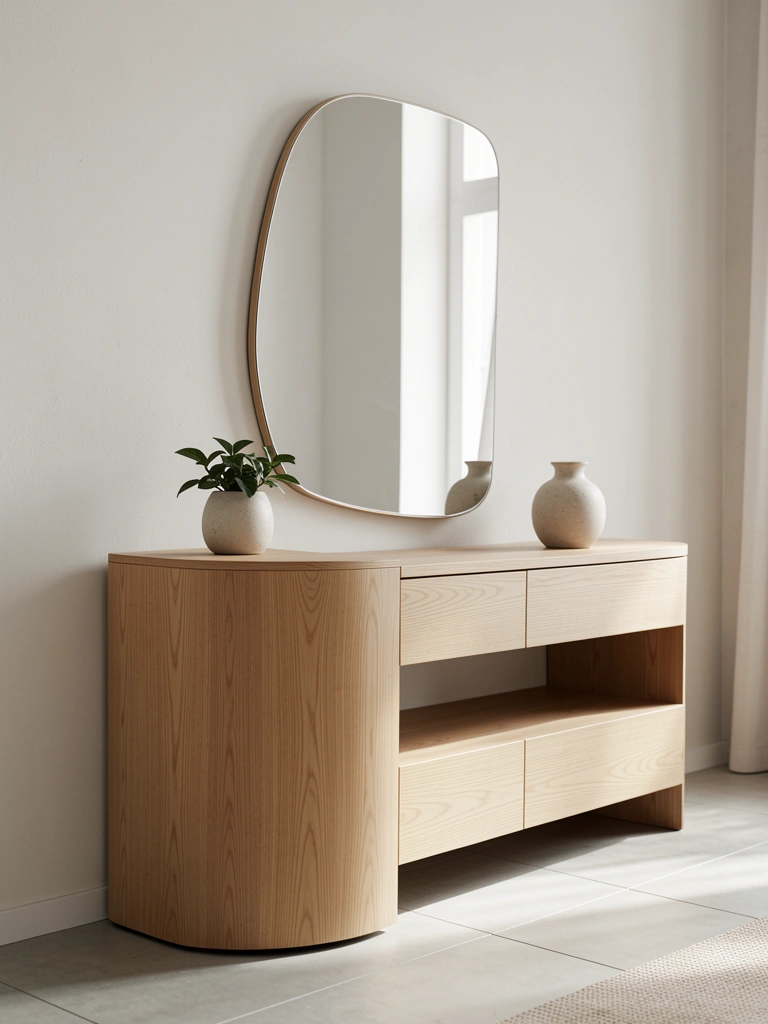
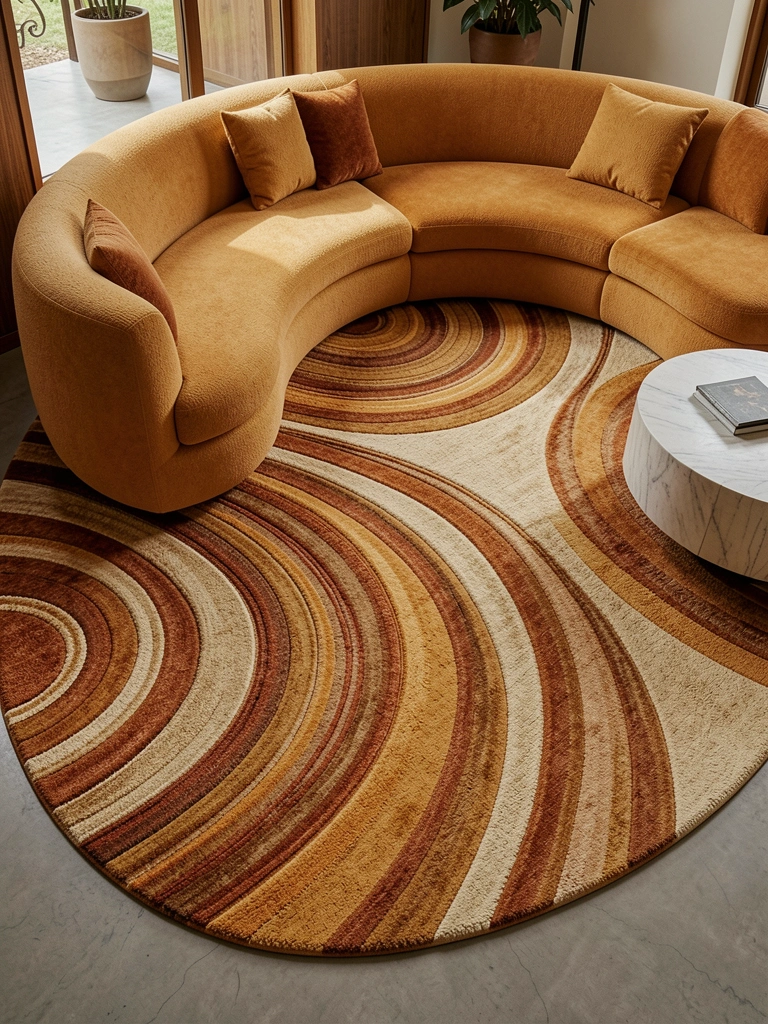
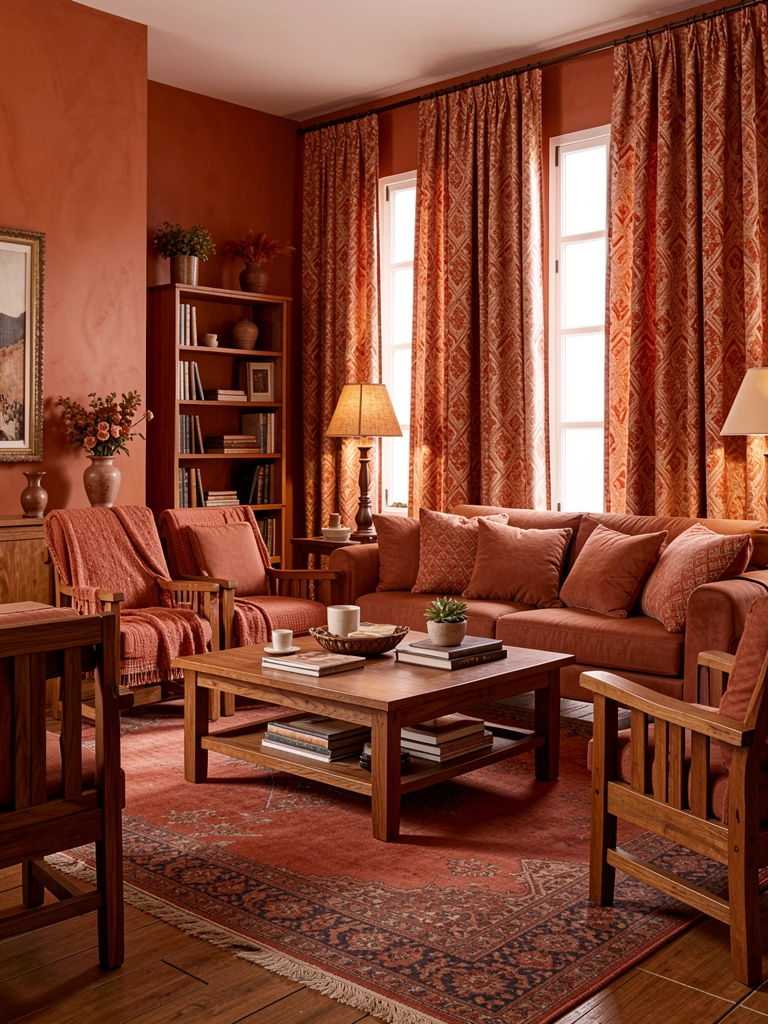
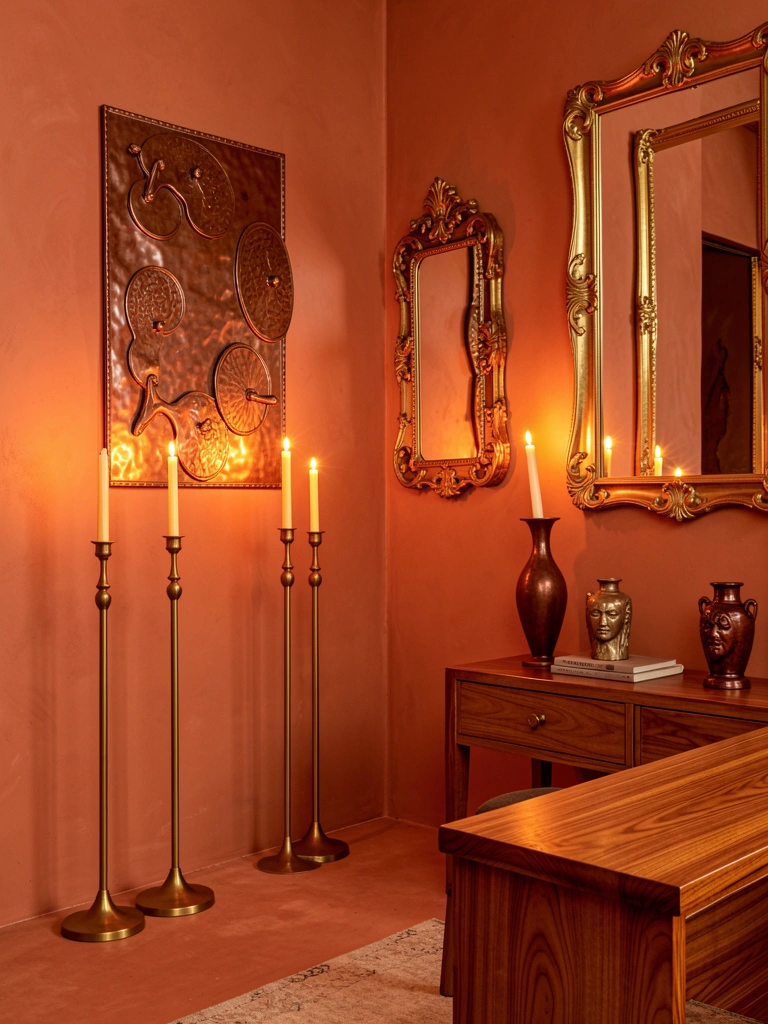
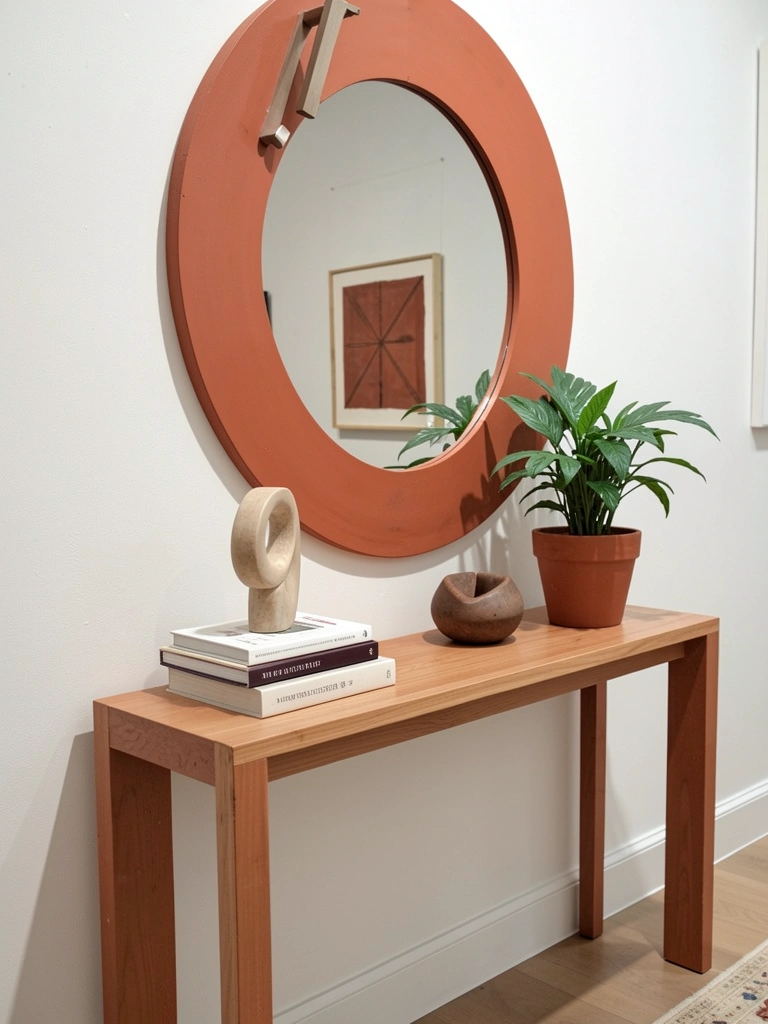
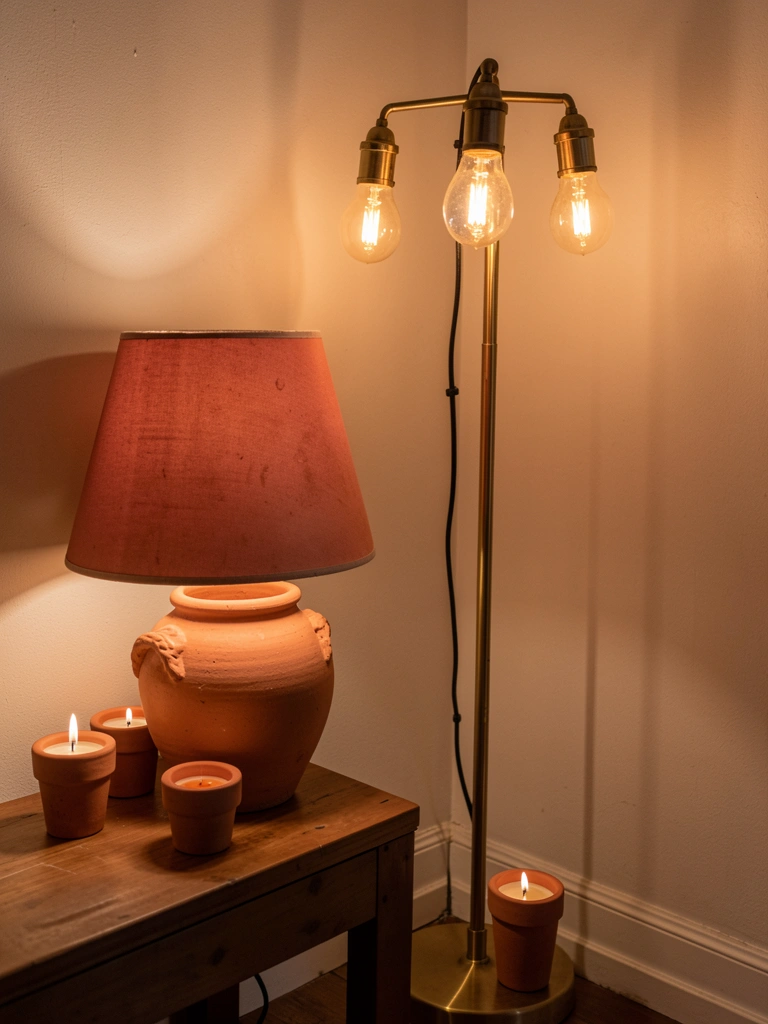
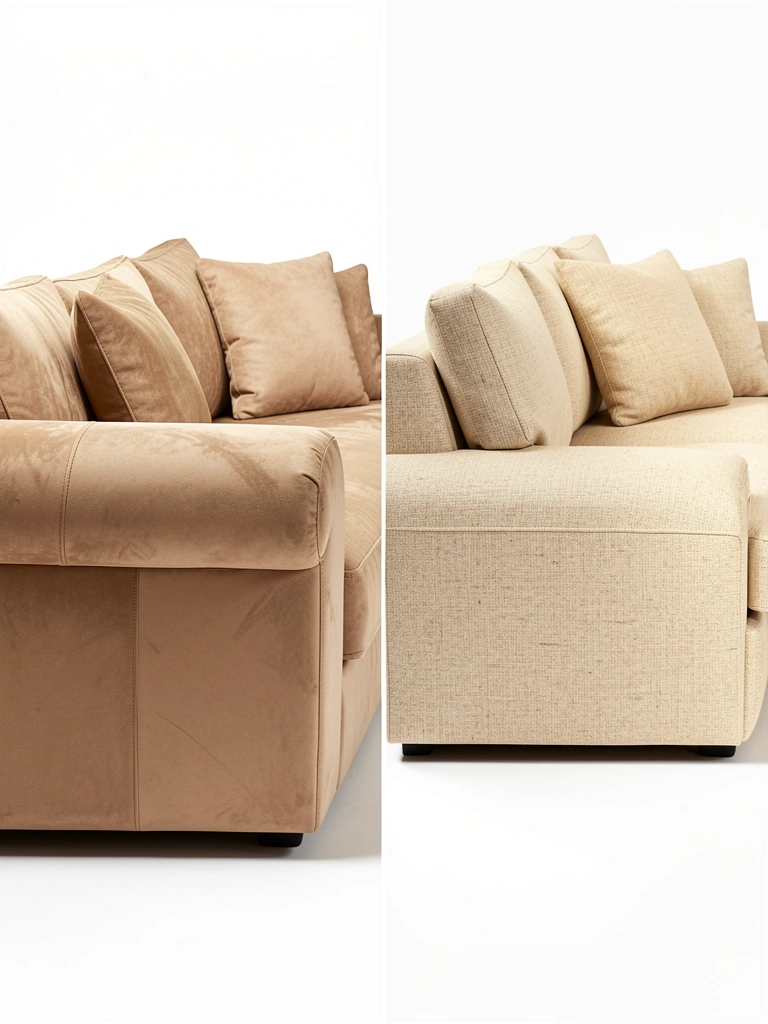
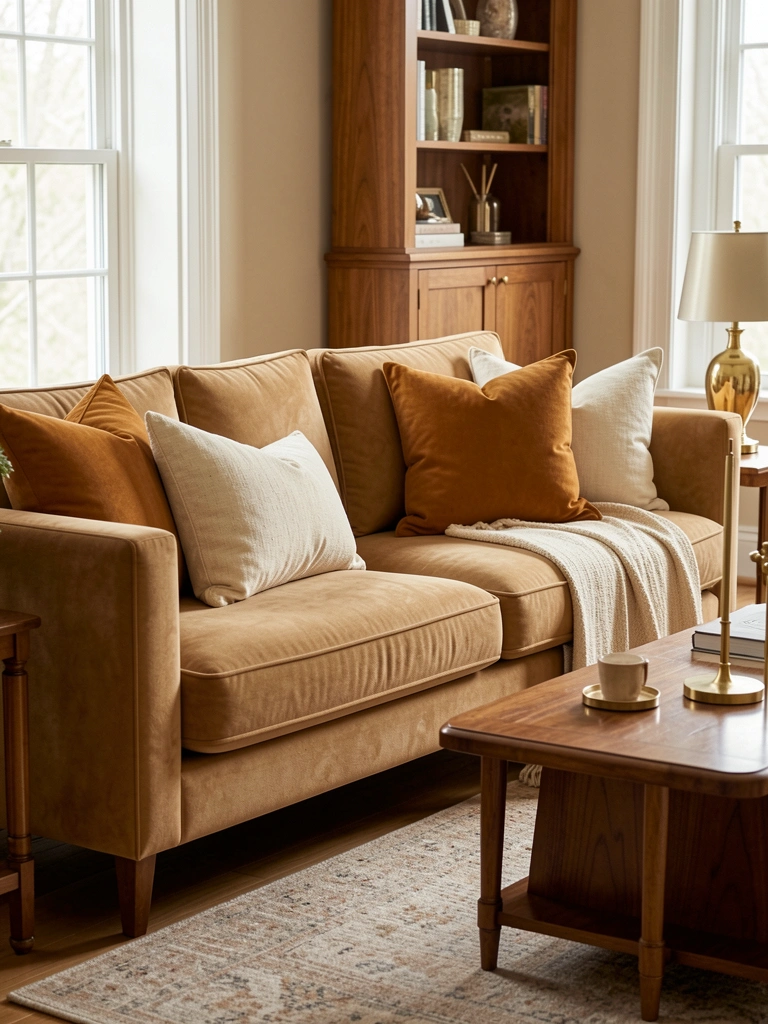
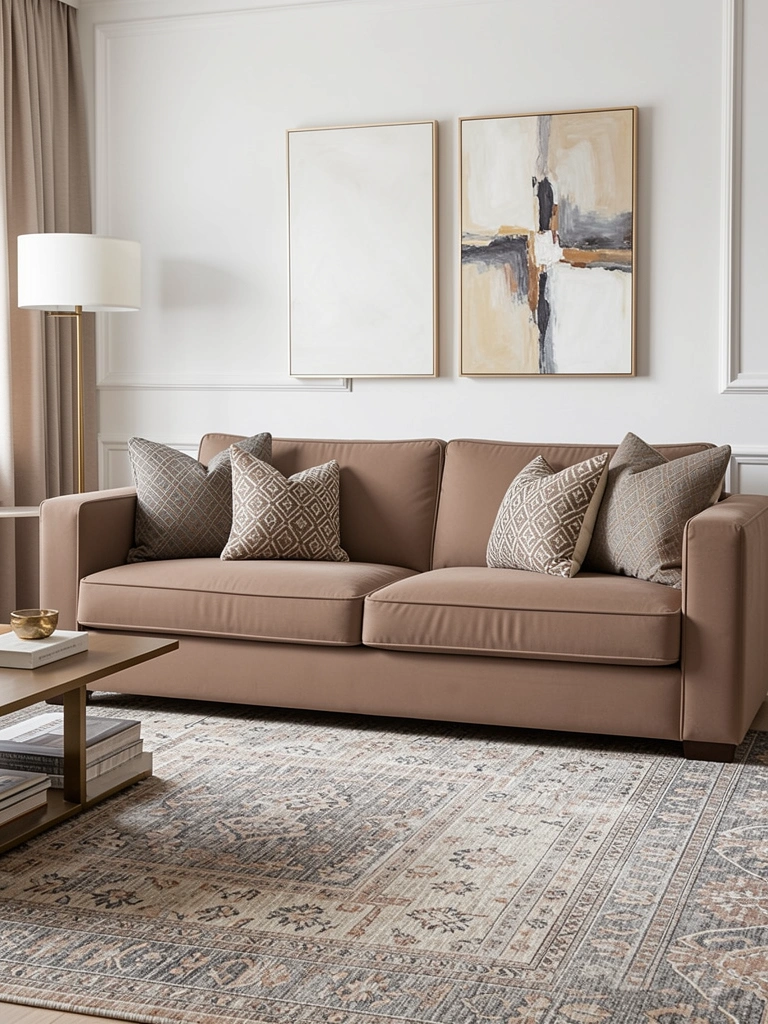
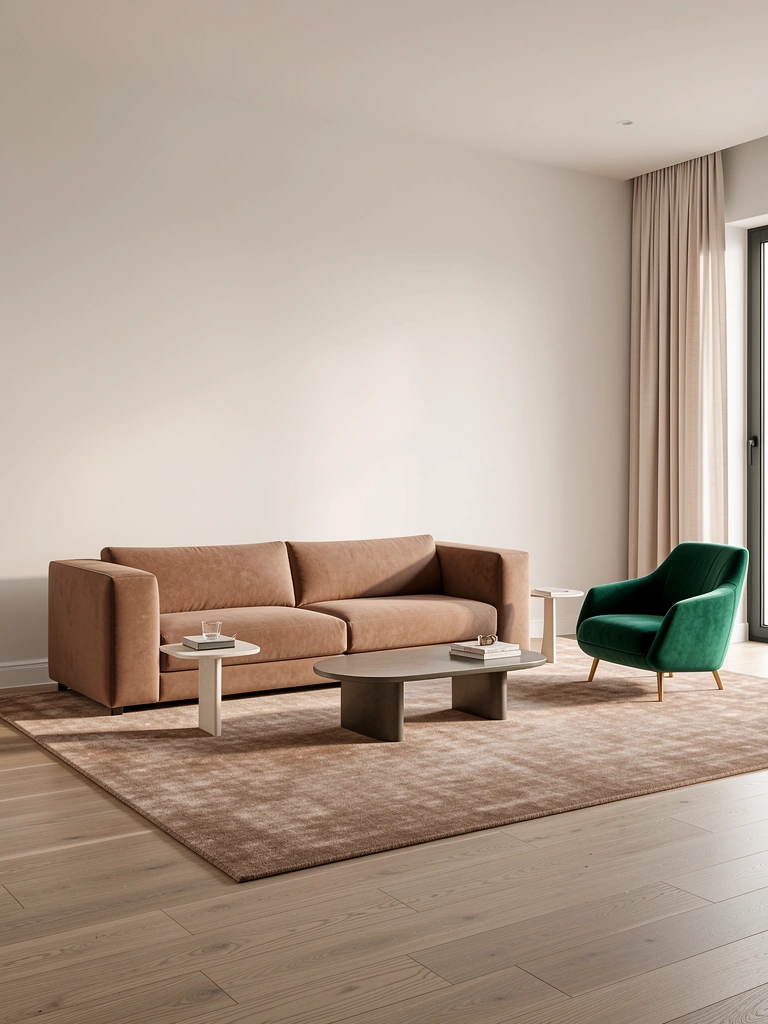
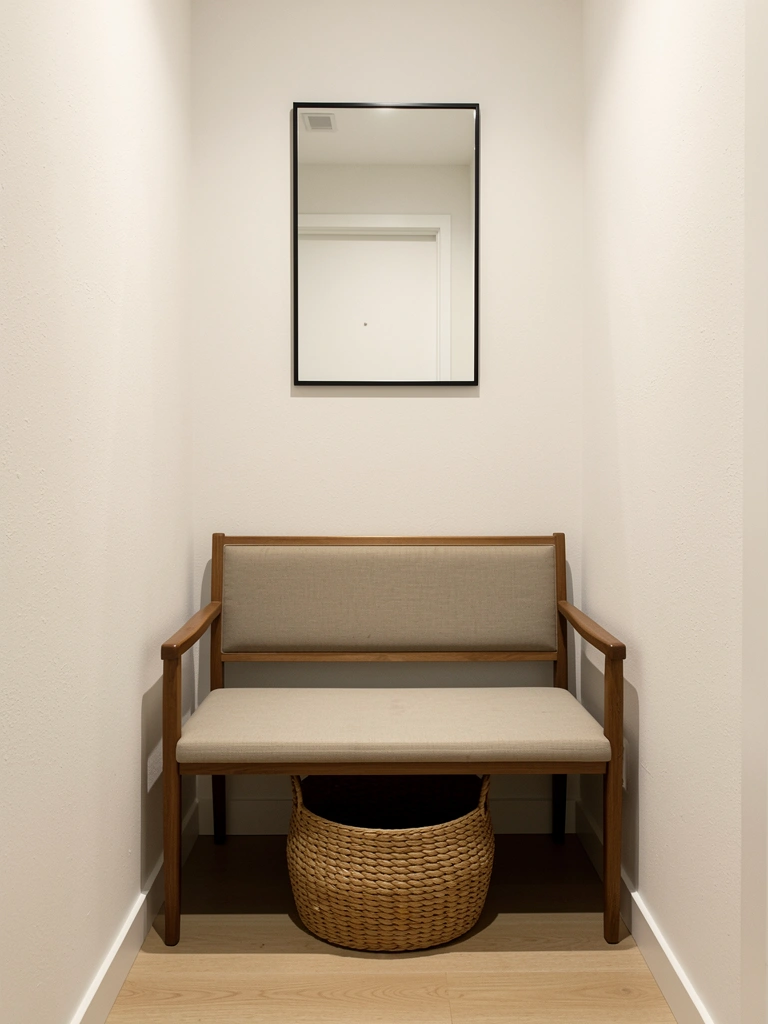
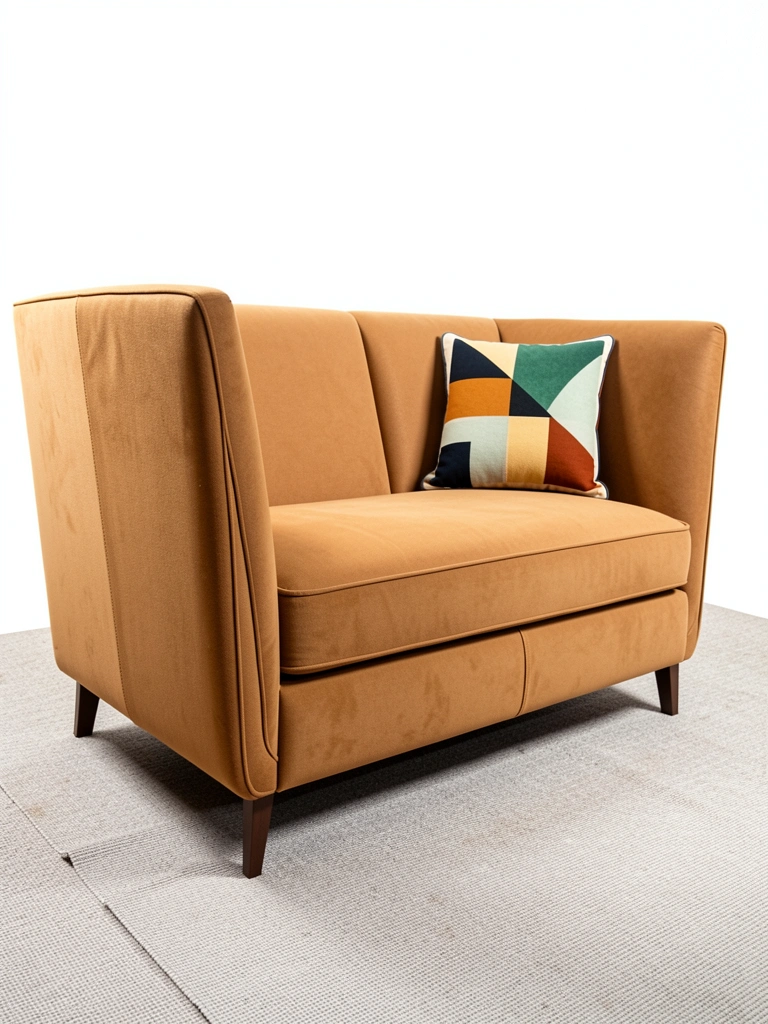
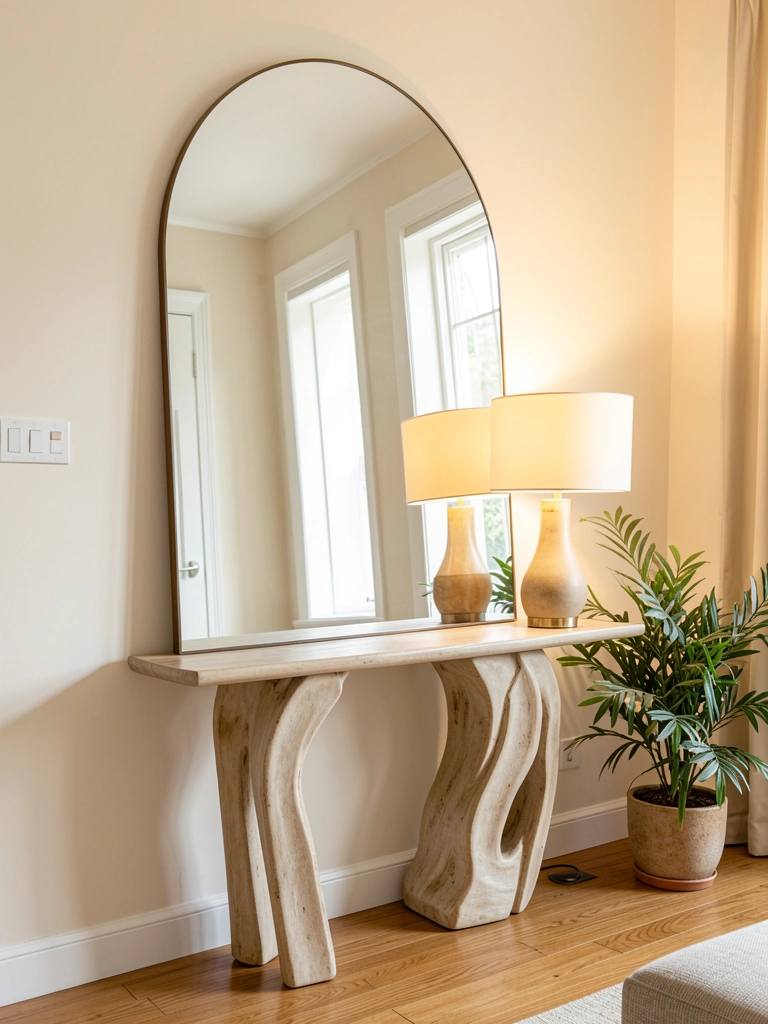
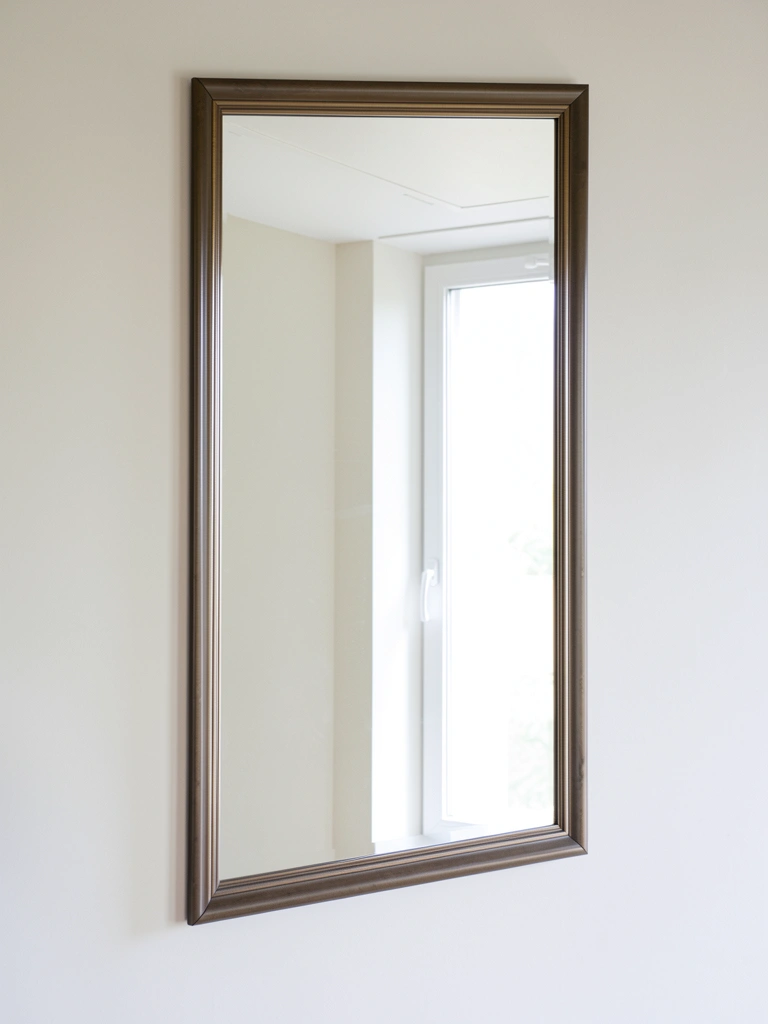
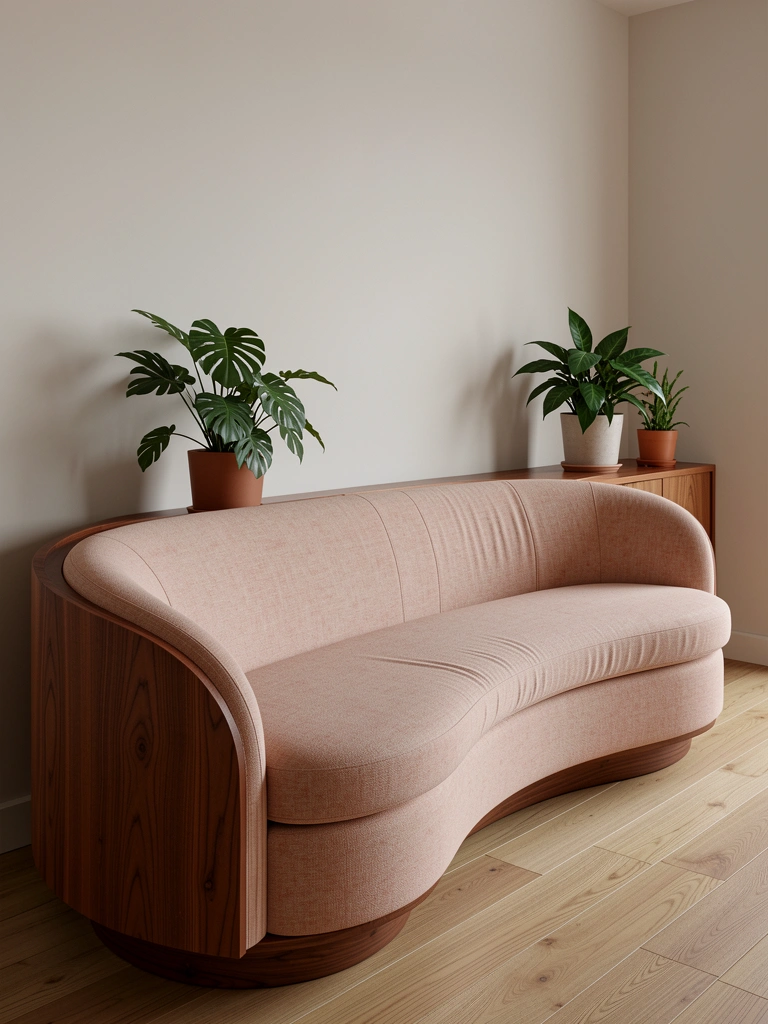
    20. Pair Caramel Curved Sofa with Warm Metallics

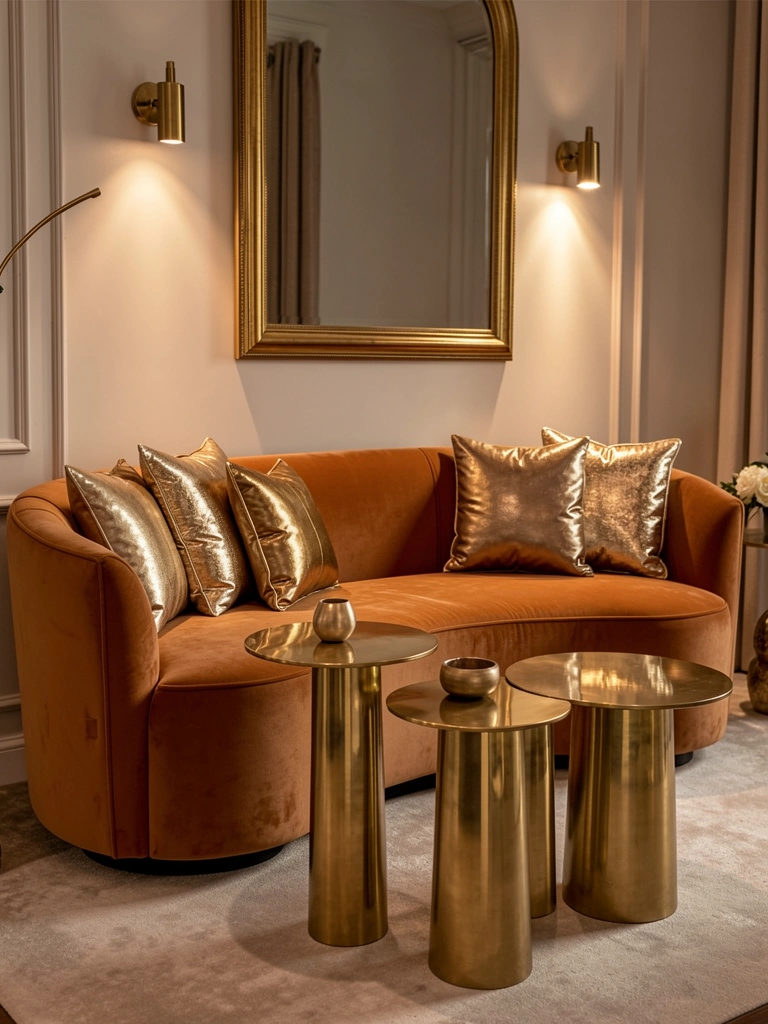
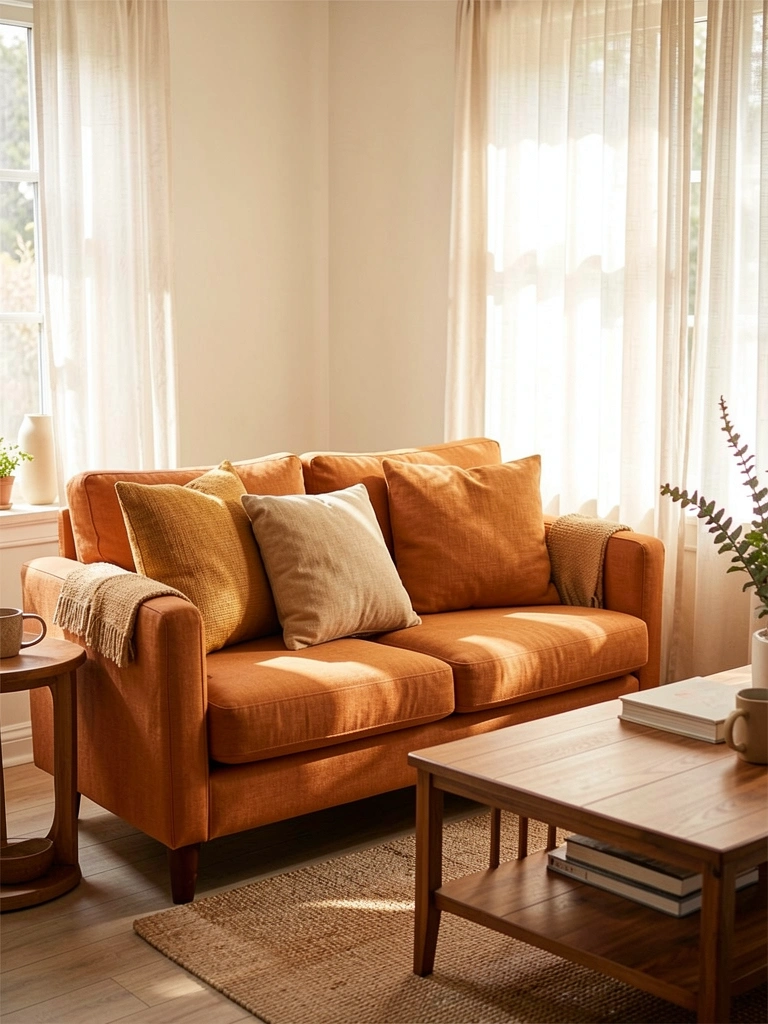
    Warm-toned curved sofas in caramel, tan, and honey pair beautifully with brass, gold, and warm copper metallics. This color story reads expensive and intentional.

    Style your caramel curved sofa ($1,200–$2,200) with brass side tables ($80–$250 each), a gold-framed mirror ($100–$300) on the wall behind it, and metallic throw pillows ($30–$70). Add warm-toned lighting like Edison bulb fixtures ($50–$150) to reinforce the warm palette. Avoid cool silvers and chrome, which clash with warm sofa tones. This cohesive approach feels curated and sophisticated without requiring a designer’s budget.

    Every element works together to create a warm, luxe aesthetic that photographs beautifully and feels inviting.

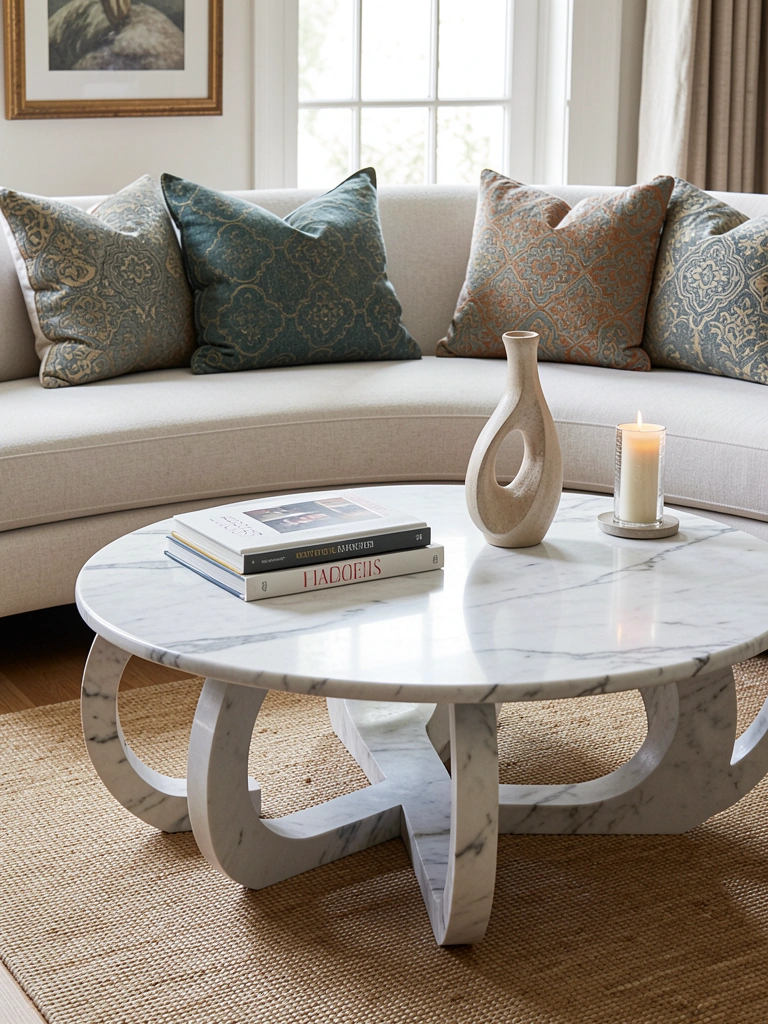
    21. Use Curved Sofa to Frame a Fireplace

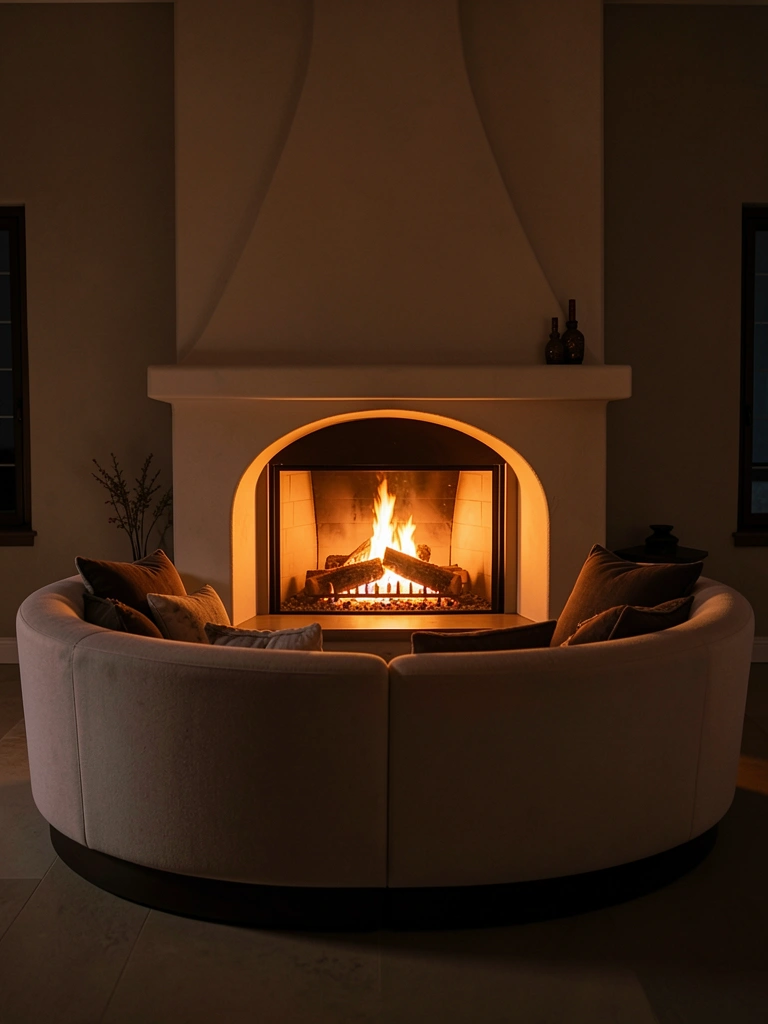
    A curved sofa oriented toward a fireplace naturally echoes the fireplace’s form and creates a visually balanced, intentional focal point arrangement.

    Position your curved sofa facing the fireplace ($1,000–$2,500), leaving 8–12 feet between seating and hearth for safety and sightlines. Add matching curved armchairs ($250–$600 each) on either side to extend the curved motif and reinforce symmetry. Place a simple rectangular or round coffee table ($150–$400) in front of the sofa. The curves of the sofa mirror and complement architectural fireplace elements, creating visual harmony. This arrangement is timeless and feels intentional without being overdone.

    You’ve created a gathering space where people naturally gravitate, anchored by both furniture and architecture.

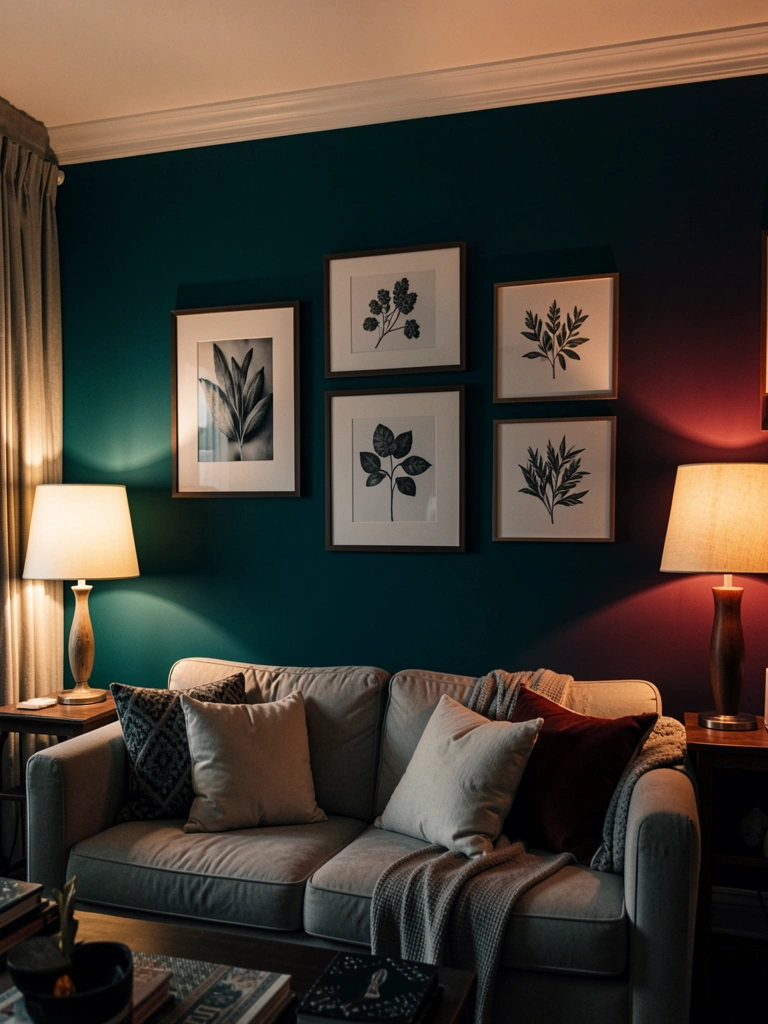
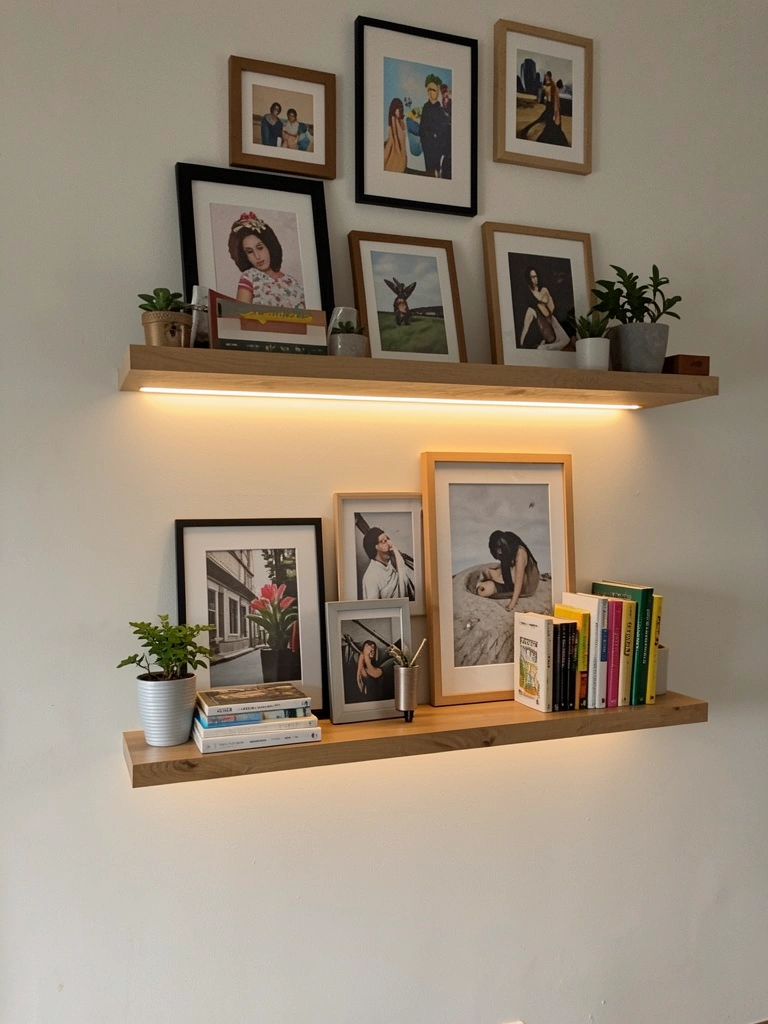
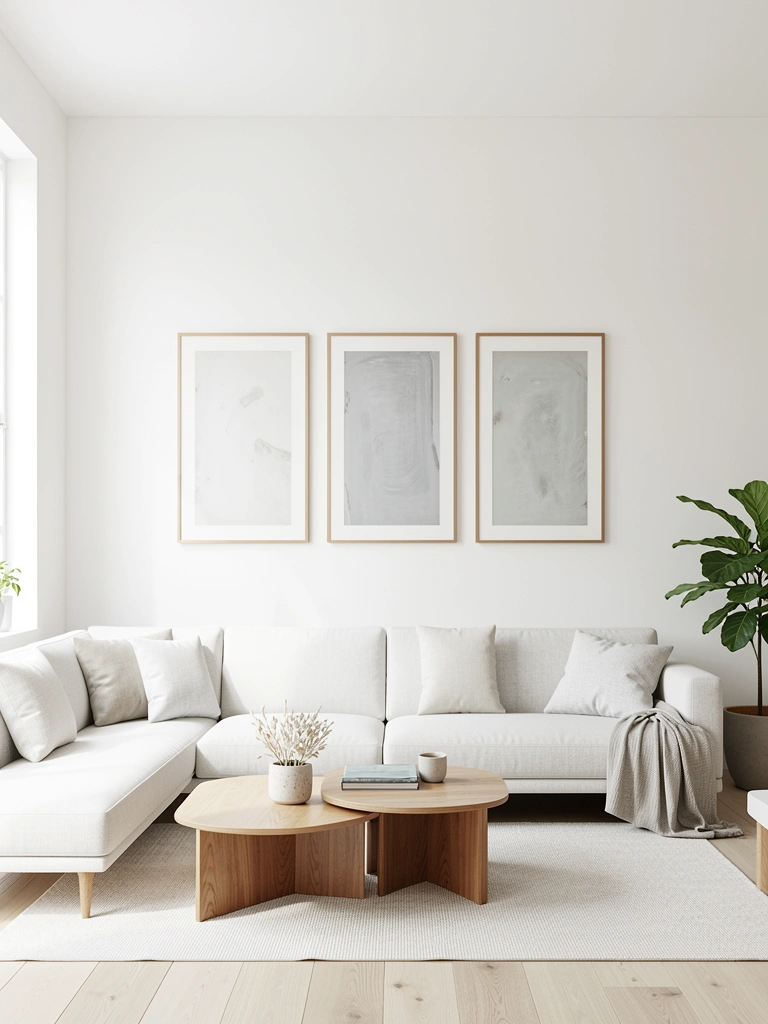
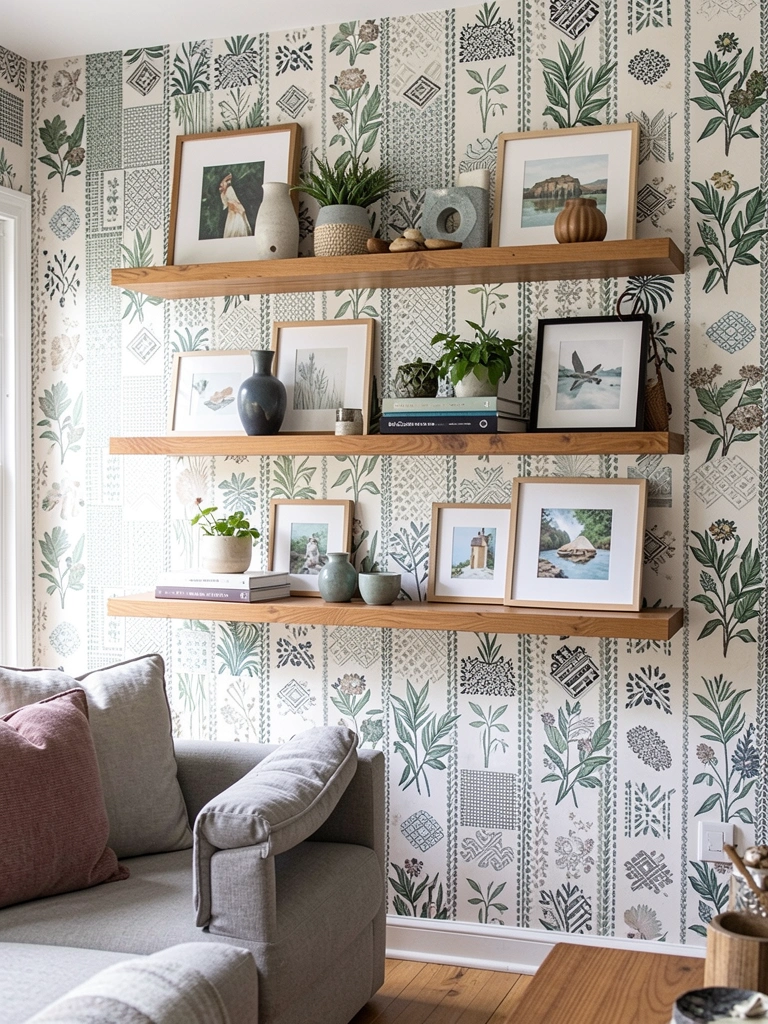
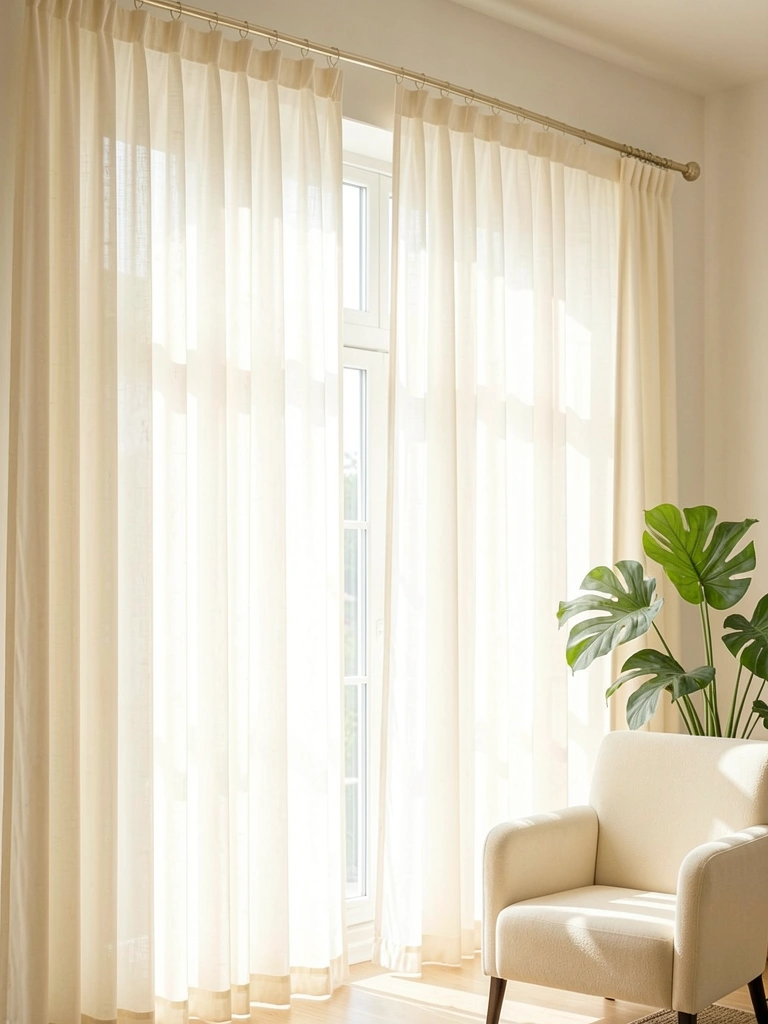
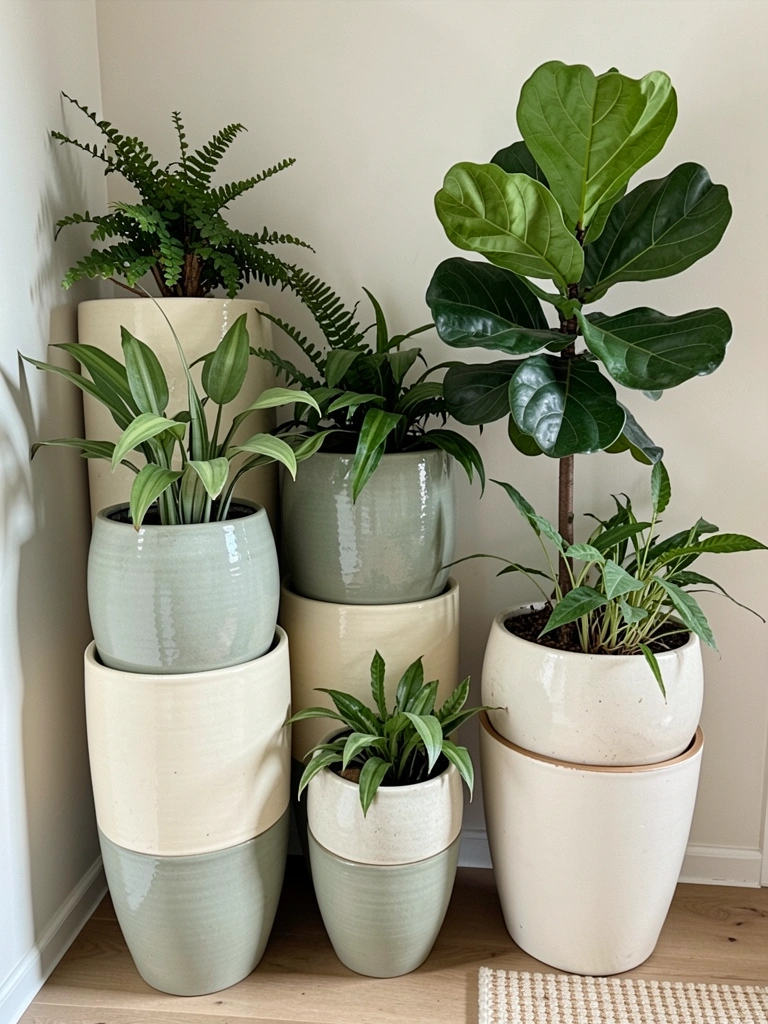
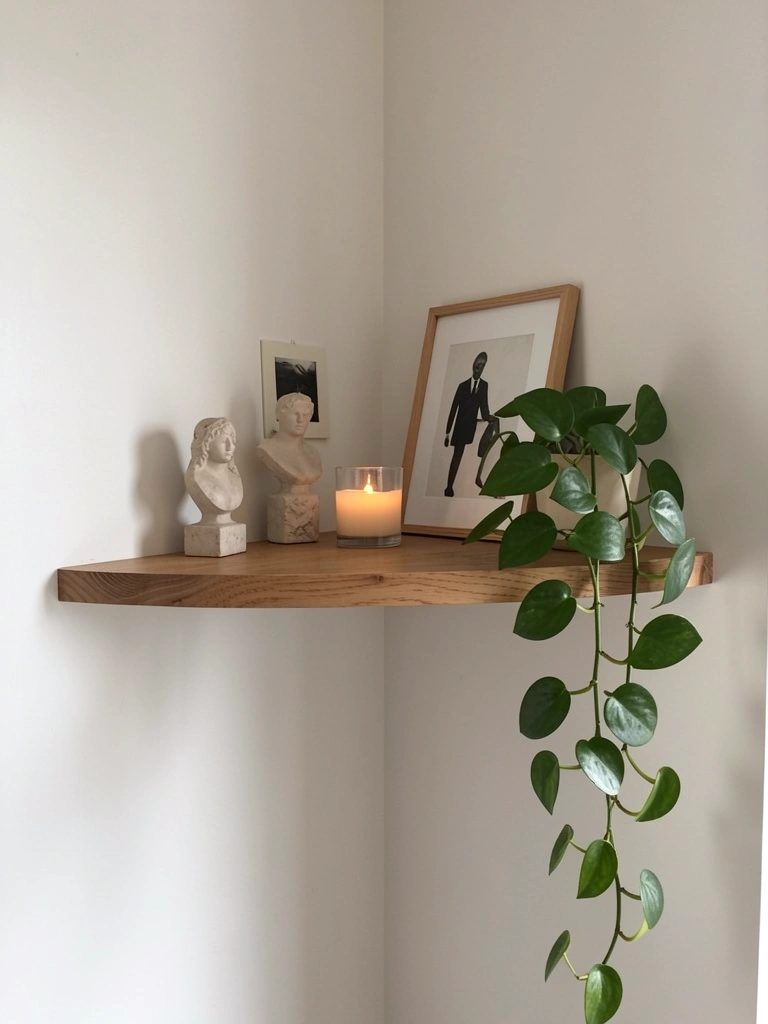
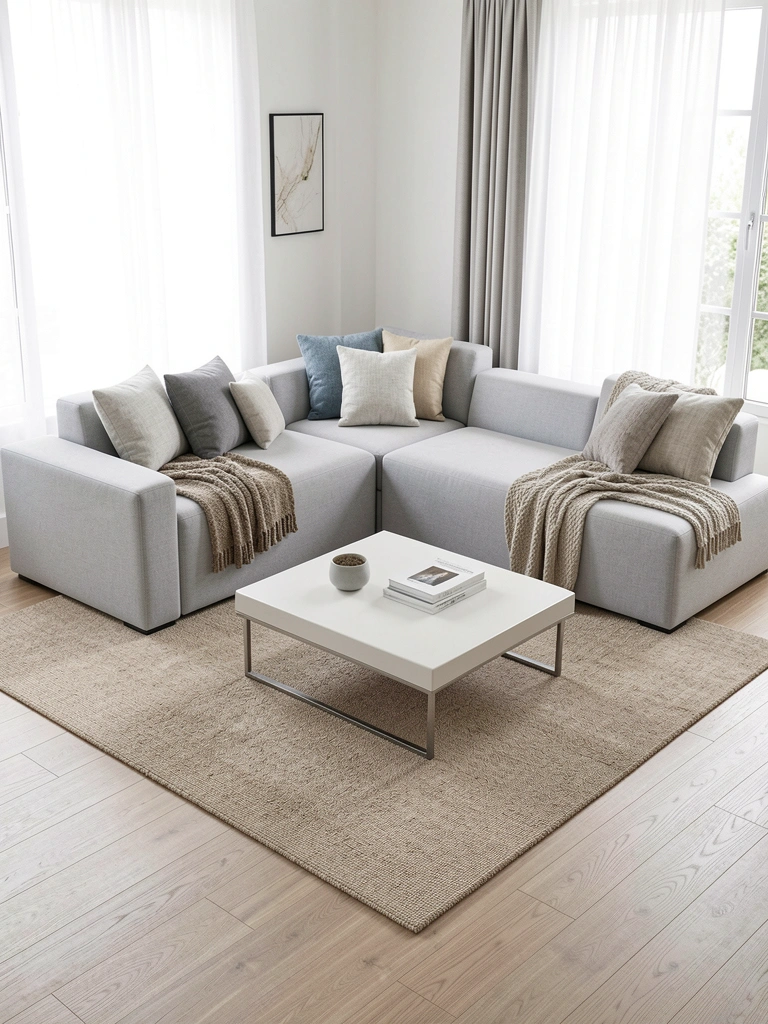
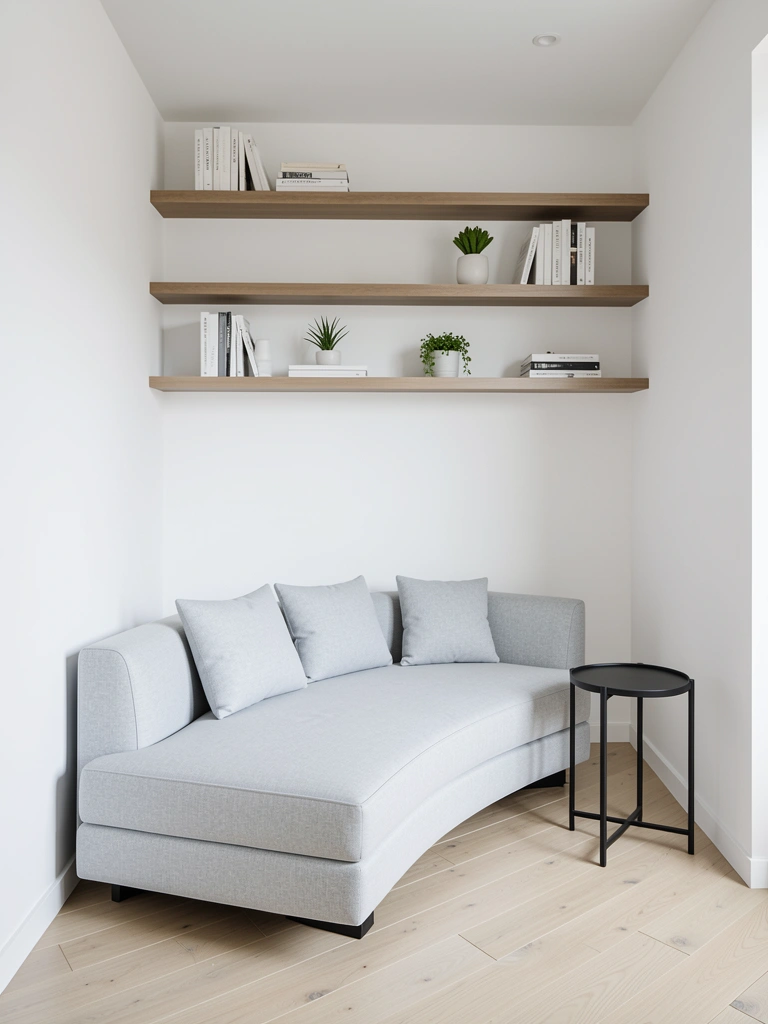
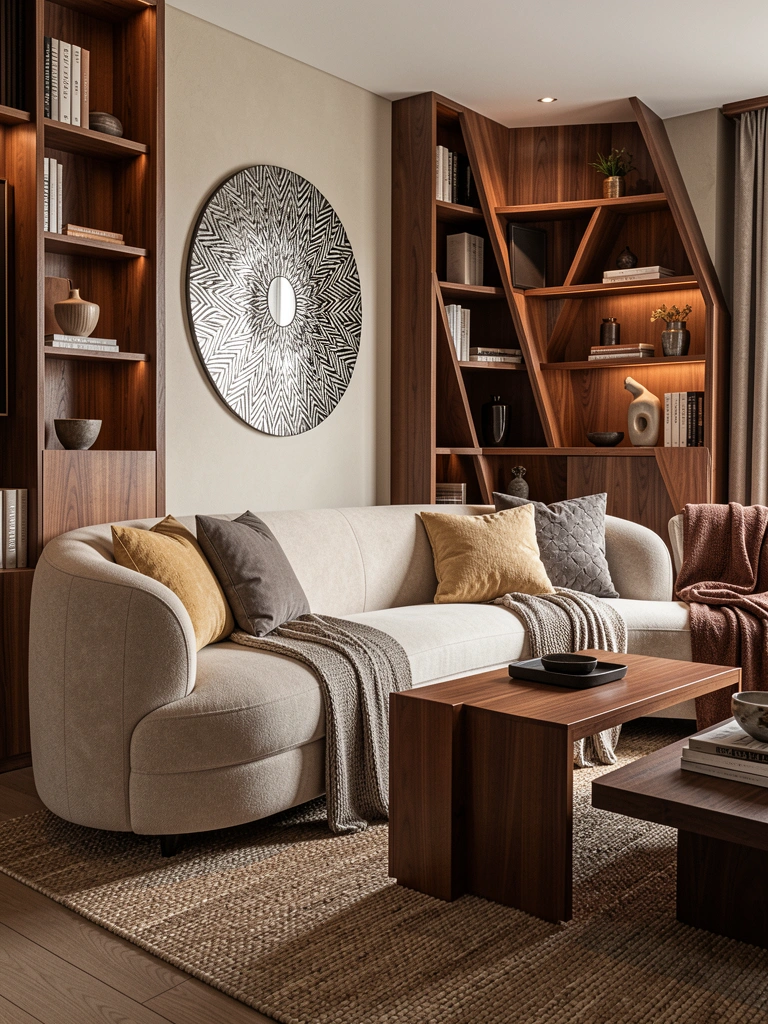
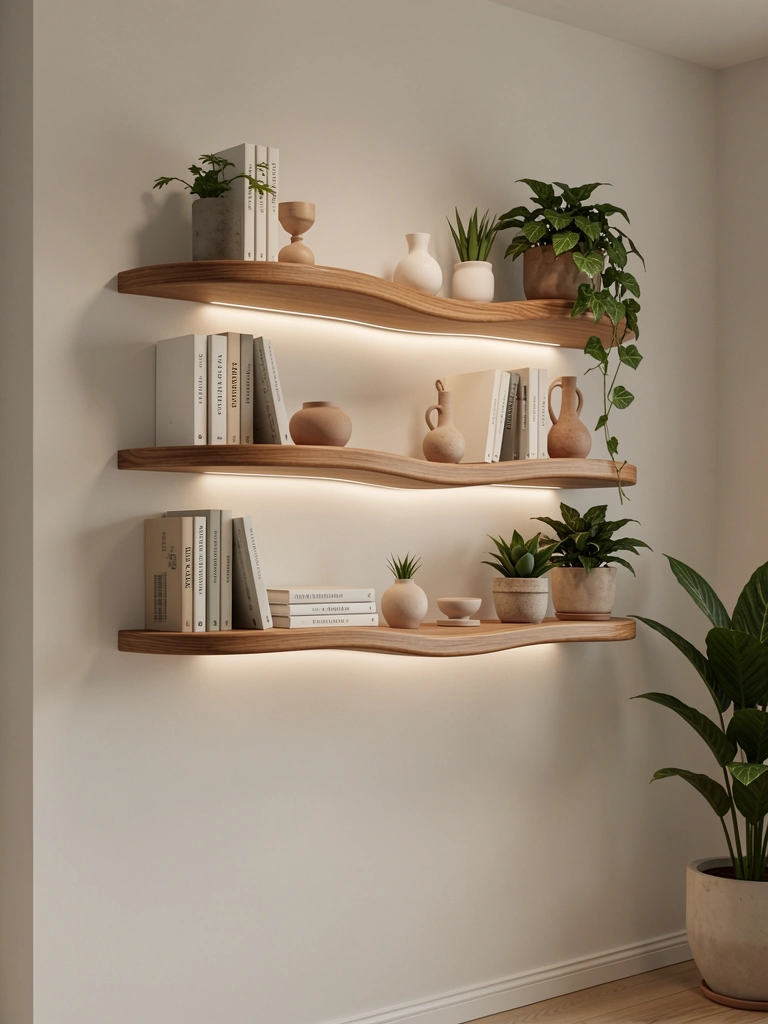
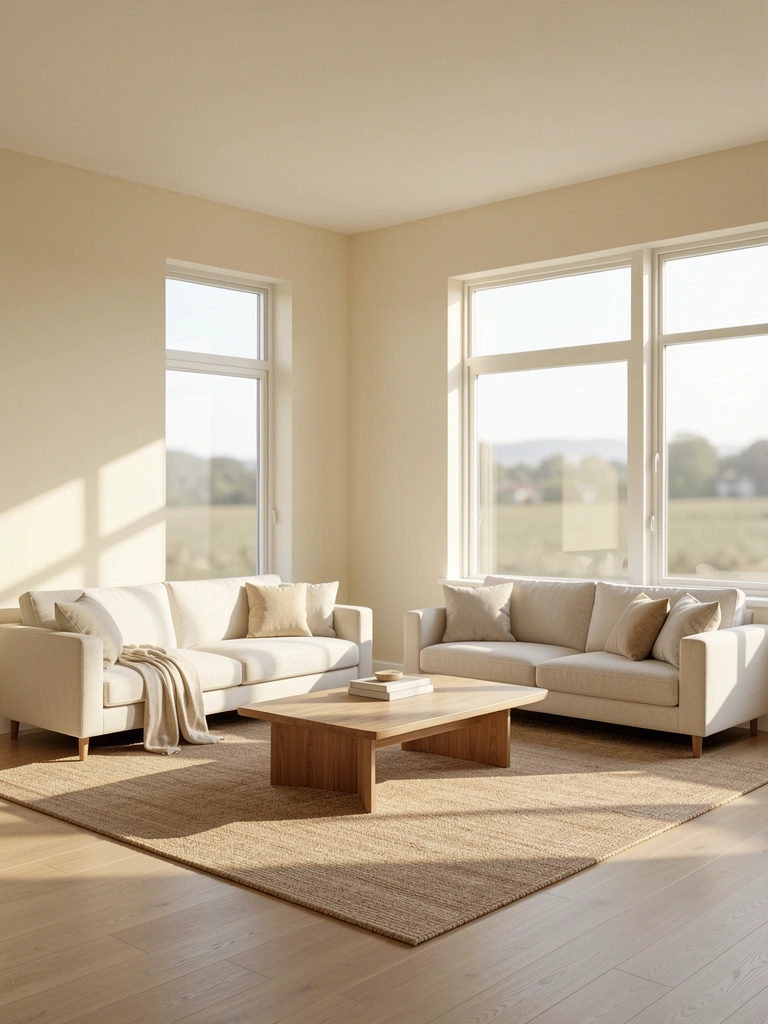
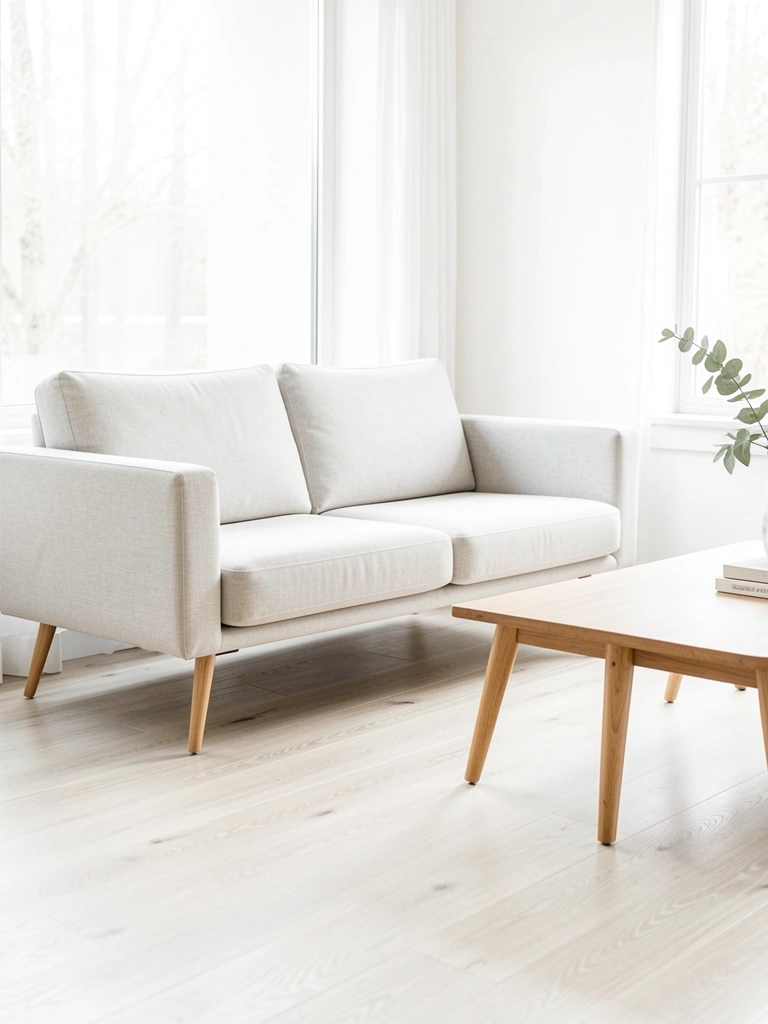
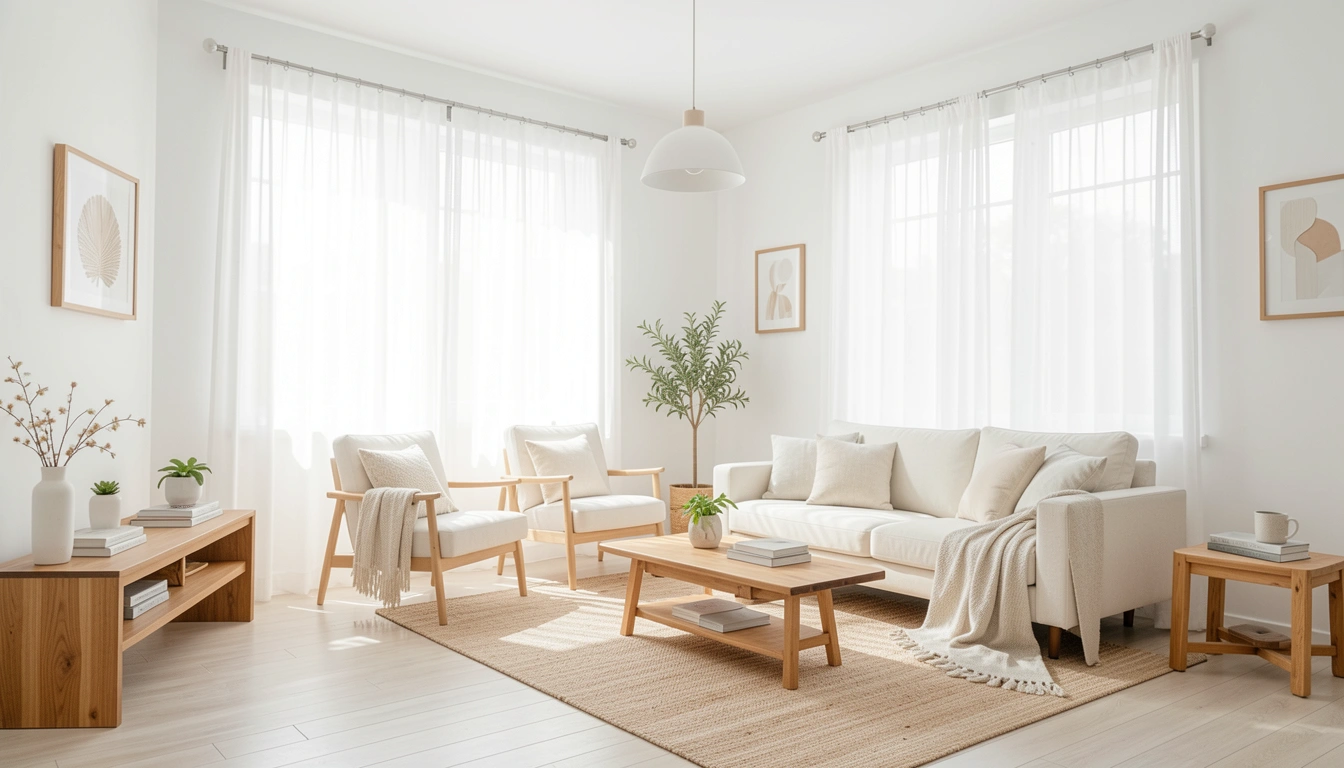
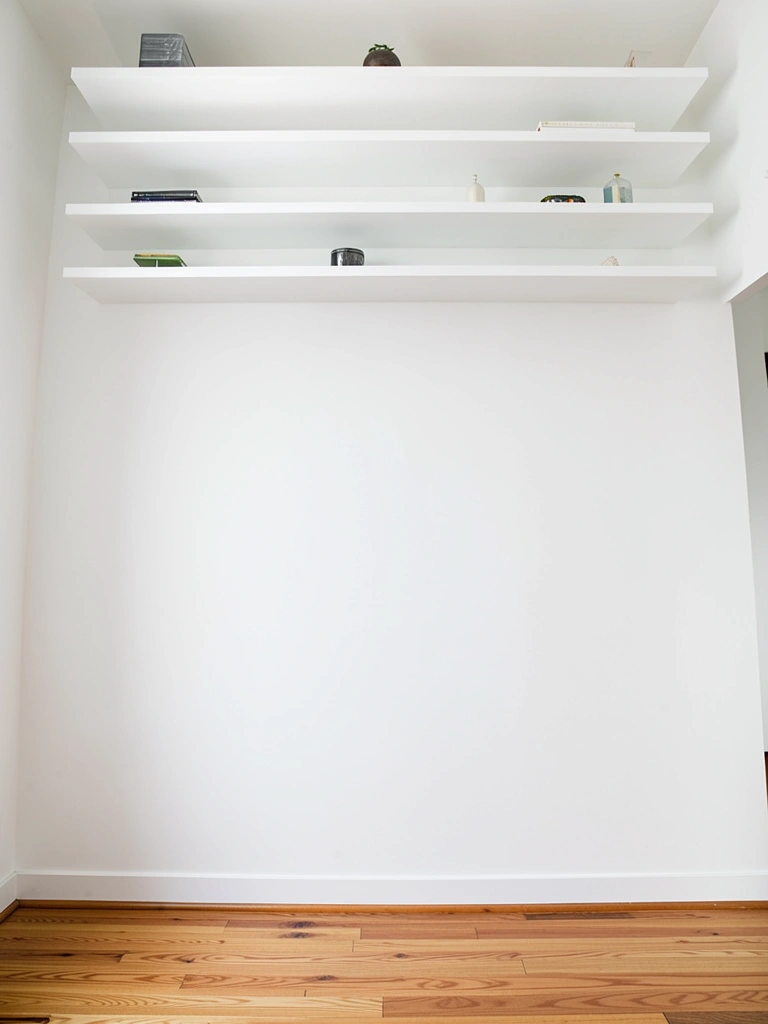
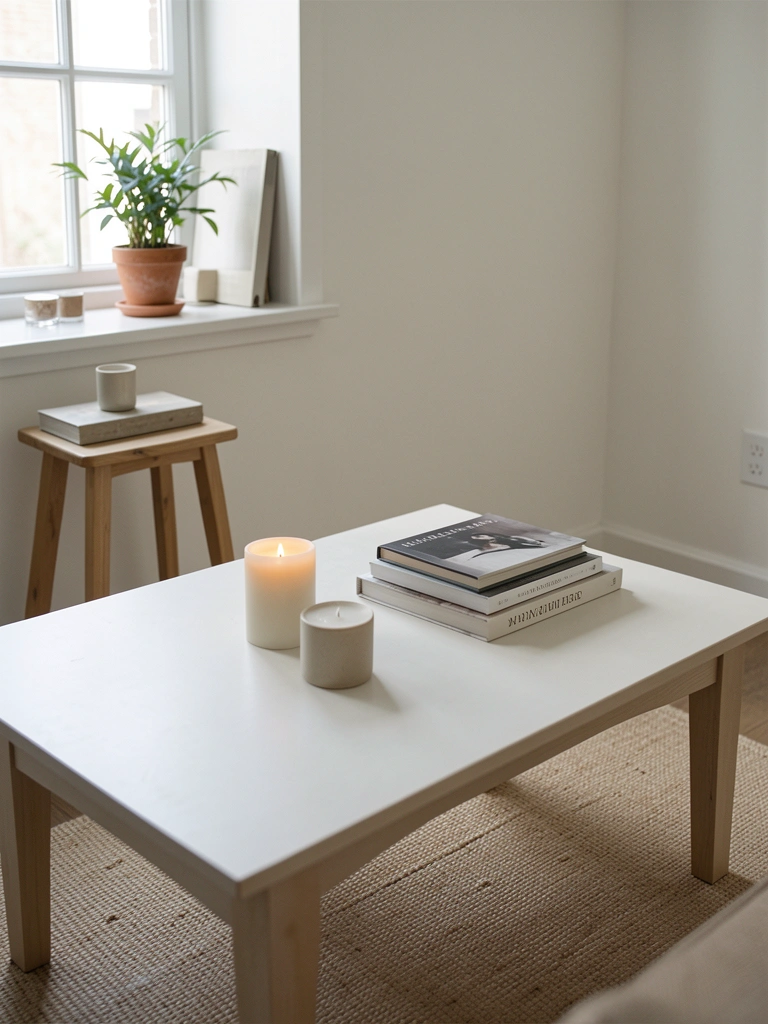
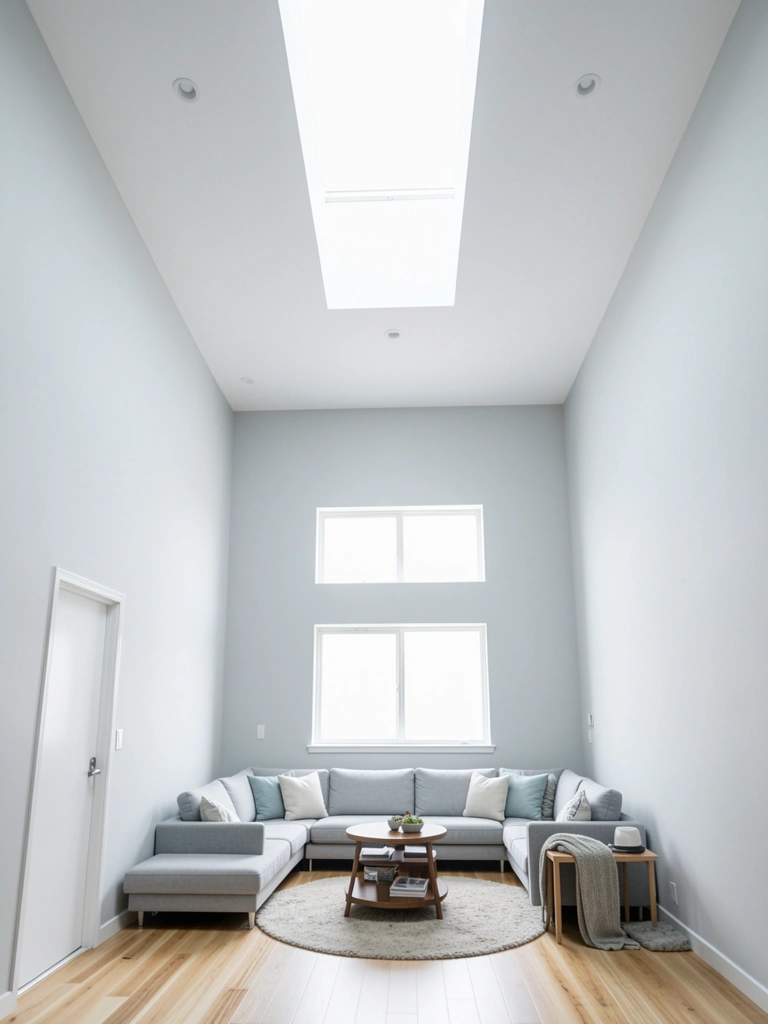
    22. Style a Light Gray Curved Sofa for Scandinavian Calm

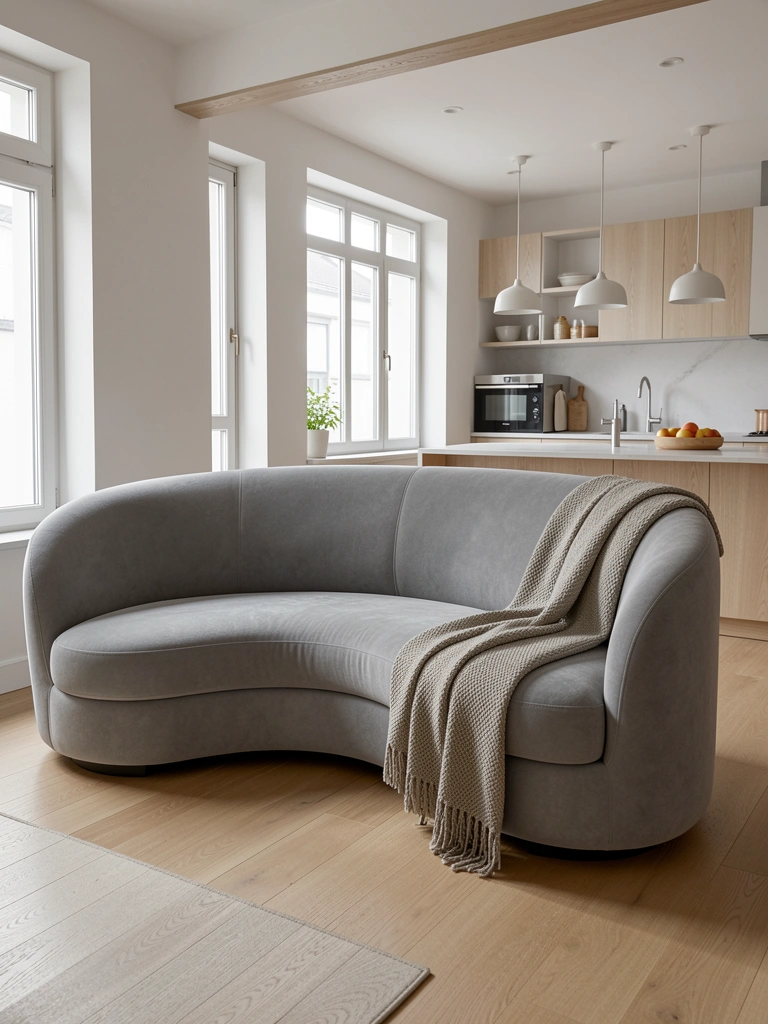
    Scandinavian design embraces curves, and light gray curved sofas with minimal styling embody this philosophy perfectly. Simple, functional, beautiful.

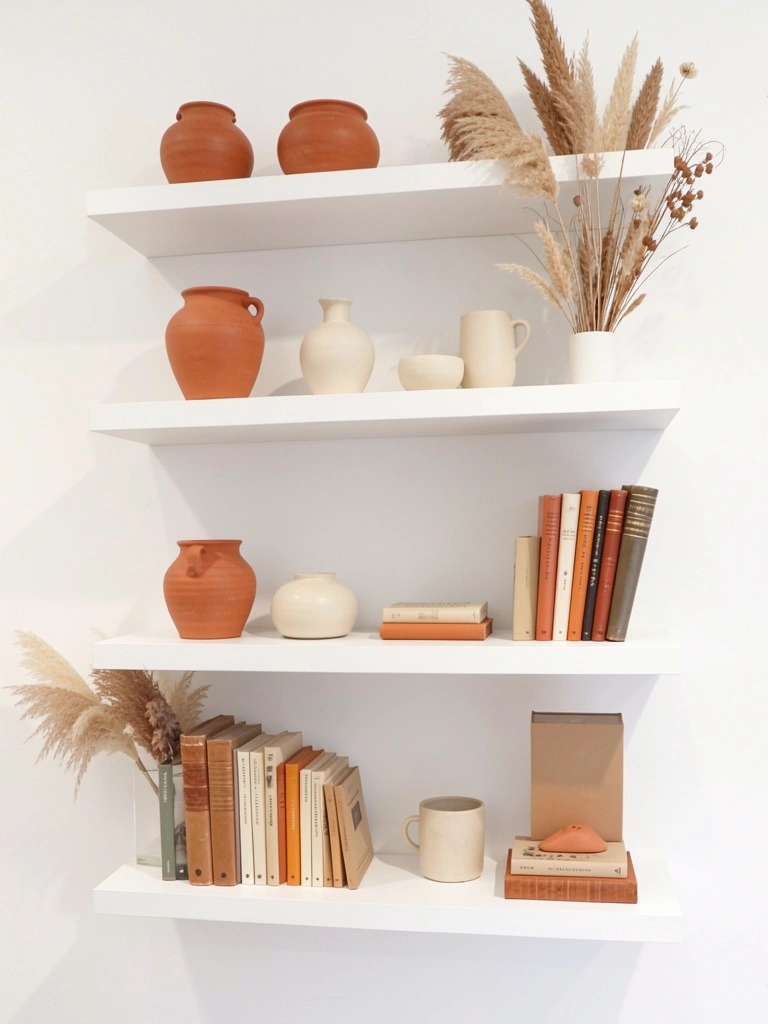
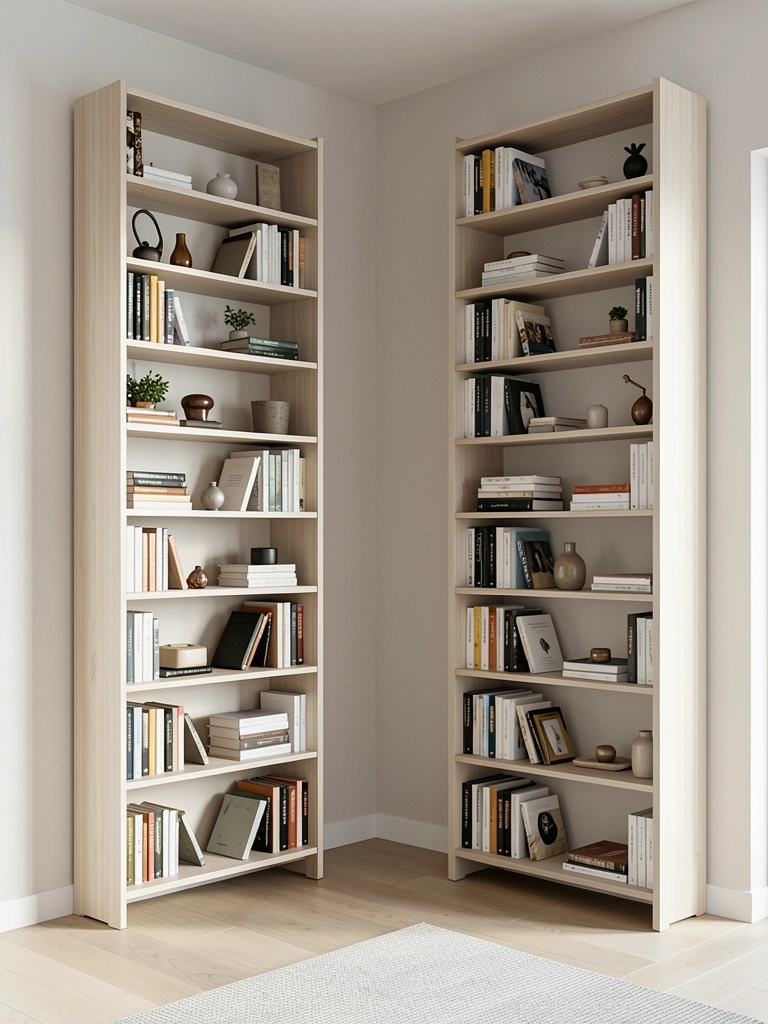
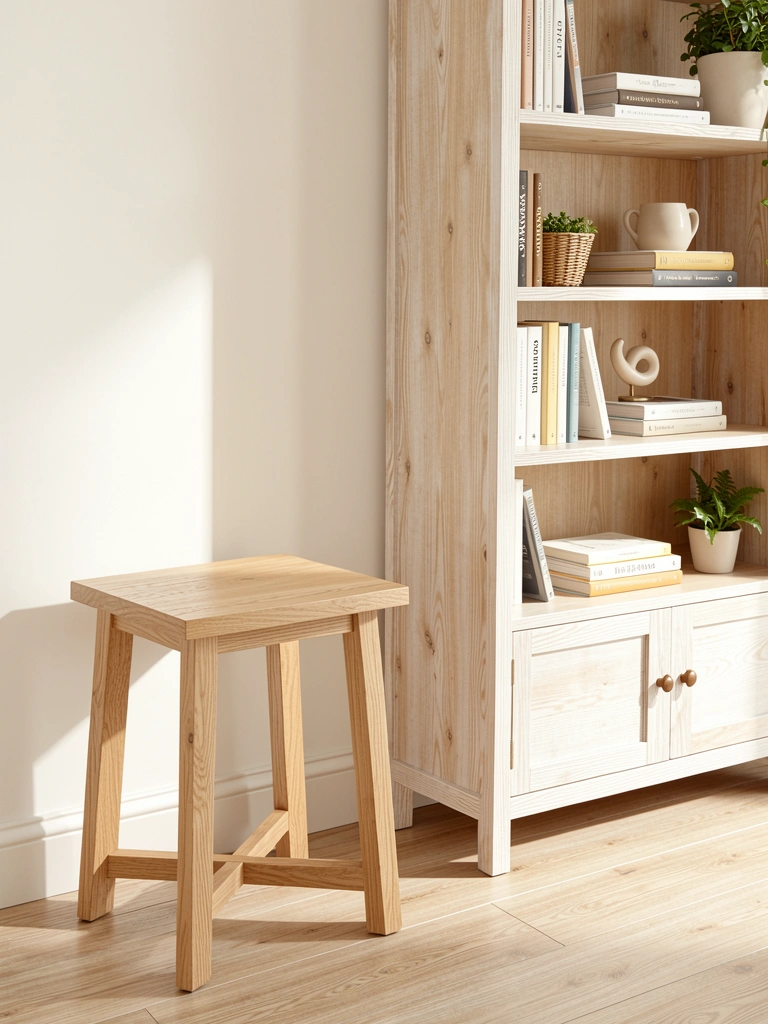
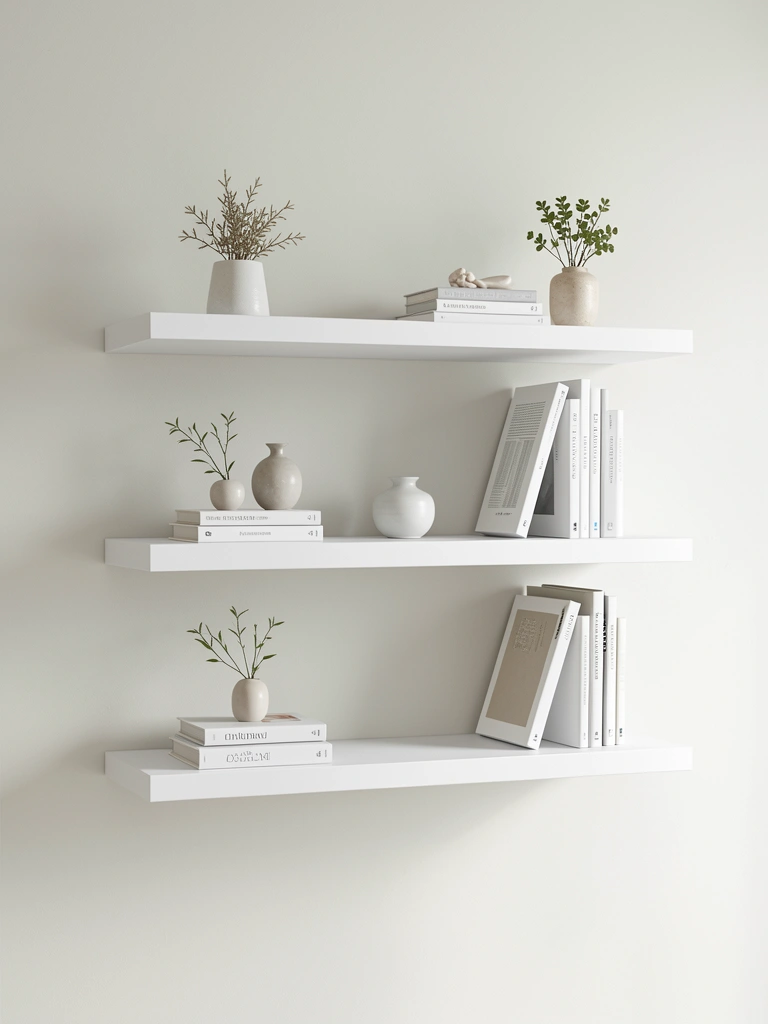
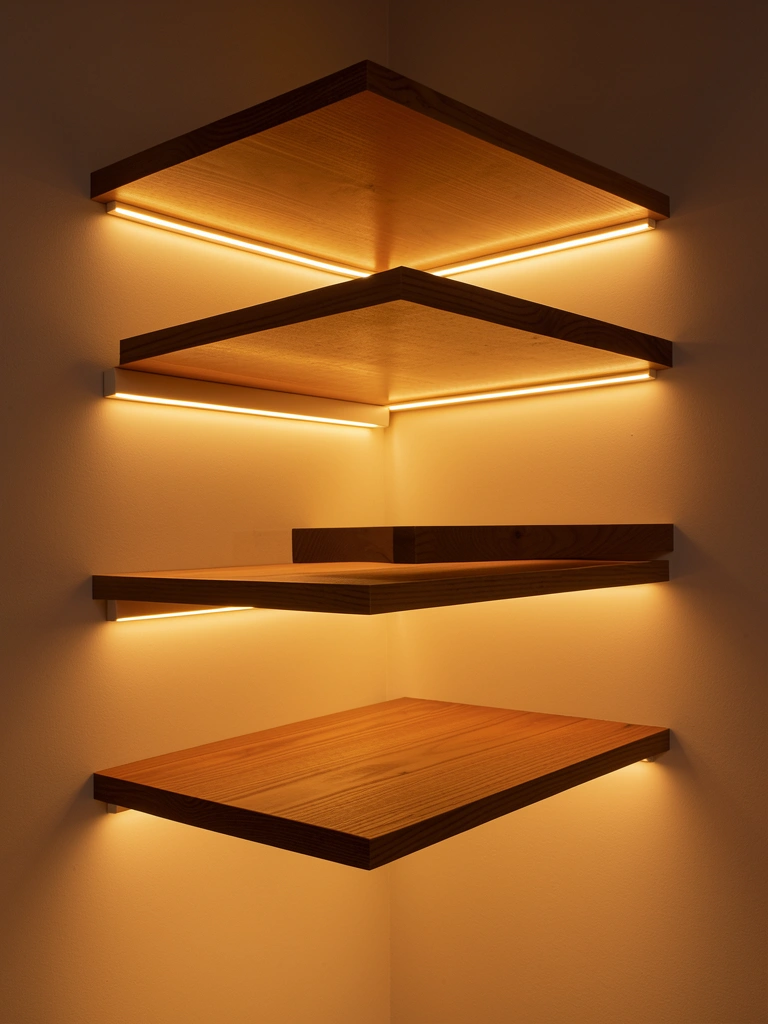
    Choose a light gray curved sofa with clean lines and wooden legs ($1,000–$2,000 from Article, Wayfair, or IKEA’s premium line). Style with a single faux fur throw ($30–$60), one to two simple pillows ($25–$50 each), and nothing else on the sofa itself. Keep walls pale and backgrounds minimal. Add simple floating shelves ($40–$100) with plants above the sofa to introduce life without clutter. Scandinavian style celebrates breathing room and functionality. Every piece earns its place.

    Your space feels calm, intentional, and peaceful—a true refuge from the chaos of daily life.

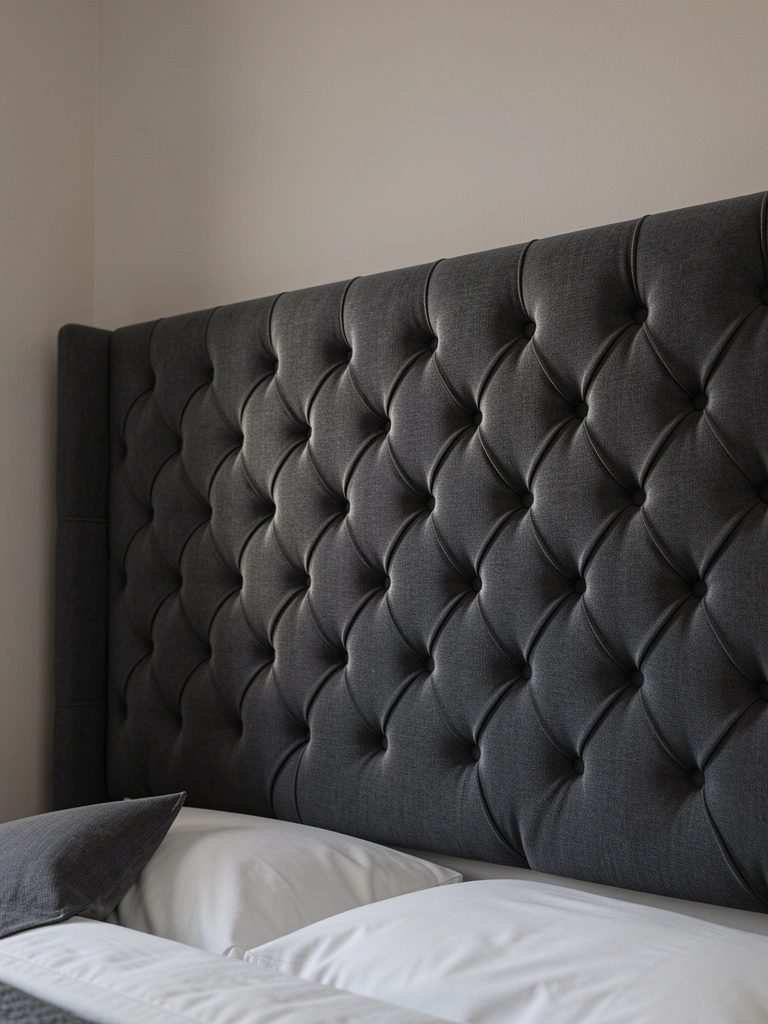
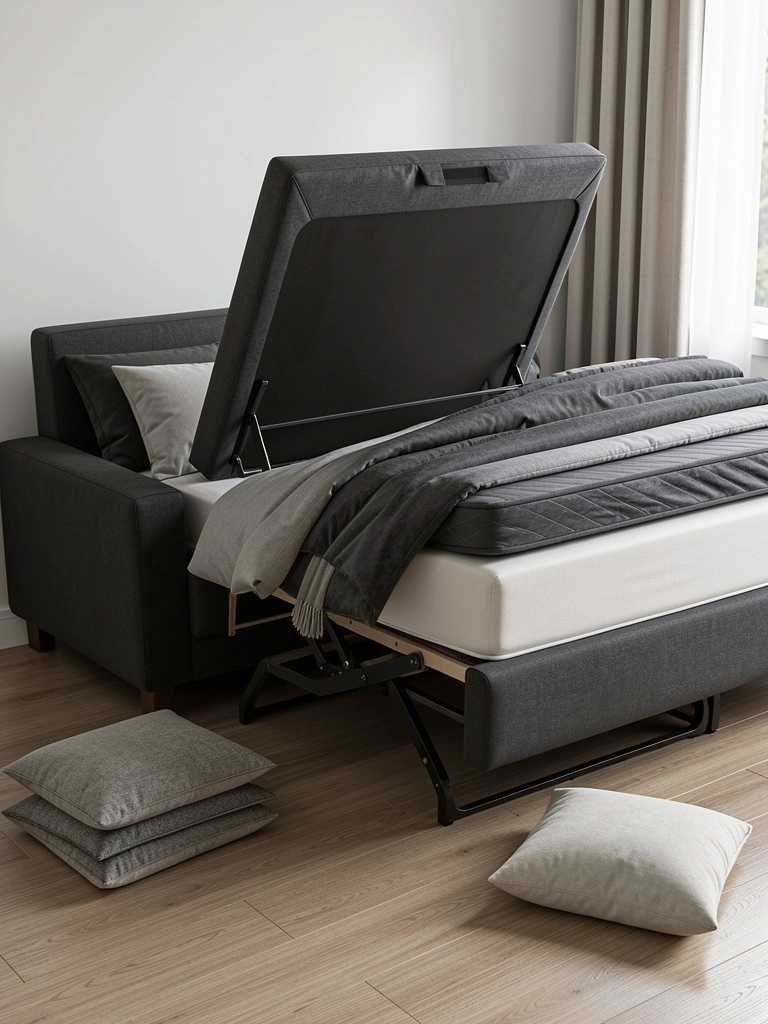
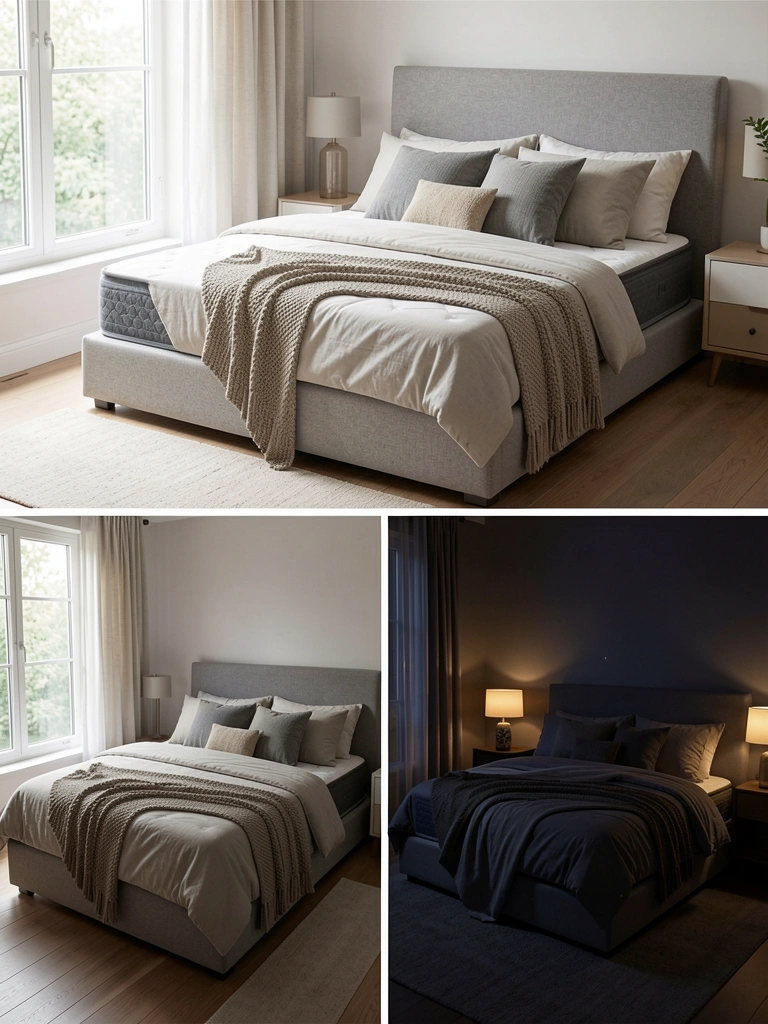
    23. Add a Curved Sofa to a Bedroom for High-End Hotel Feel

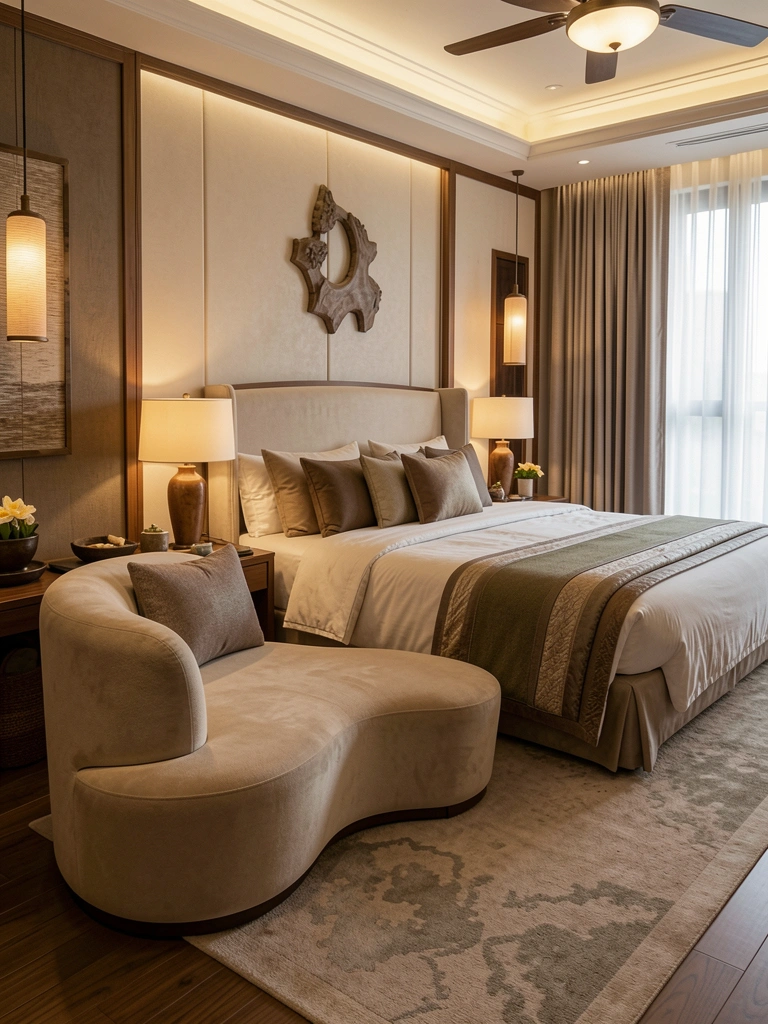
    Curved sofas in bedrooms create secondary seating that feels luxurious and spa-like, elevating the entire room’s vibe without taking up floor space.

    Position a curved sofa or loveseat ($800–$2,000) at the foot of your bed or along one wall. Choose neutral fabrics in cream, soft gray, or camel to complement bedding. Add a chunky throw and pillows to match your bed’s palette. This creates a seating area within the bedroom—perfect for reading, getting dressed, or just lounging. The curves soften what could feel crowded and add a design feature that reads intentional. This works beautifully in master bedrooms or guest rooms.

    Suddenly your bedroom feels like a five-star hotel suite instead of just a place to sleep.

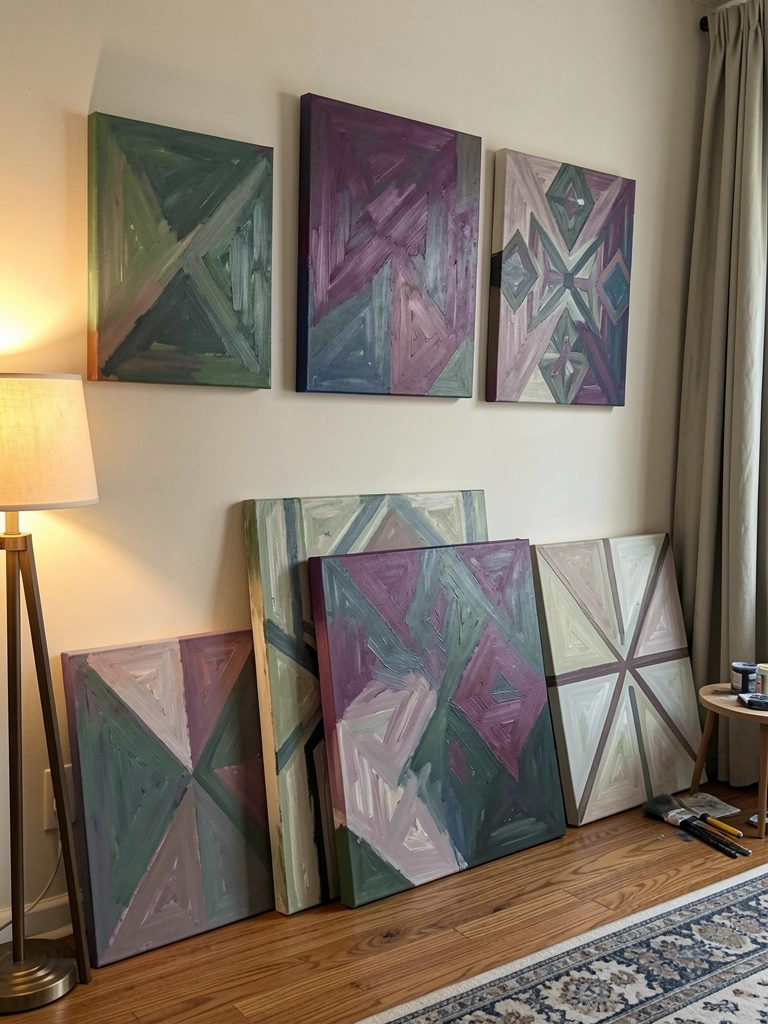
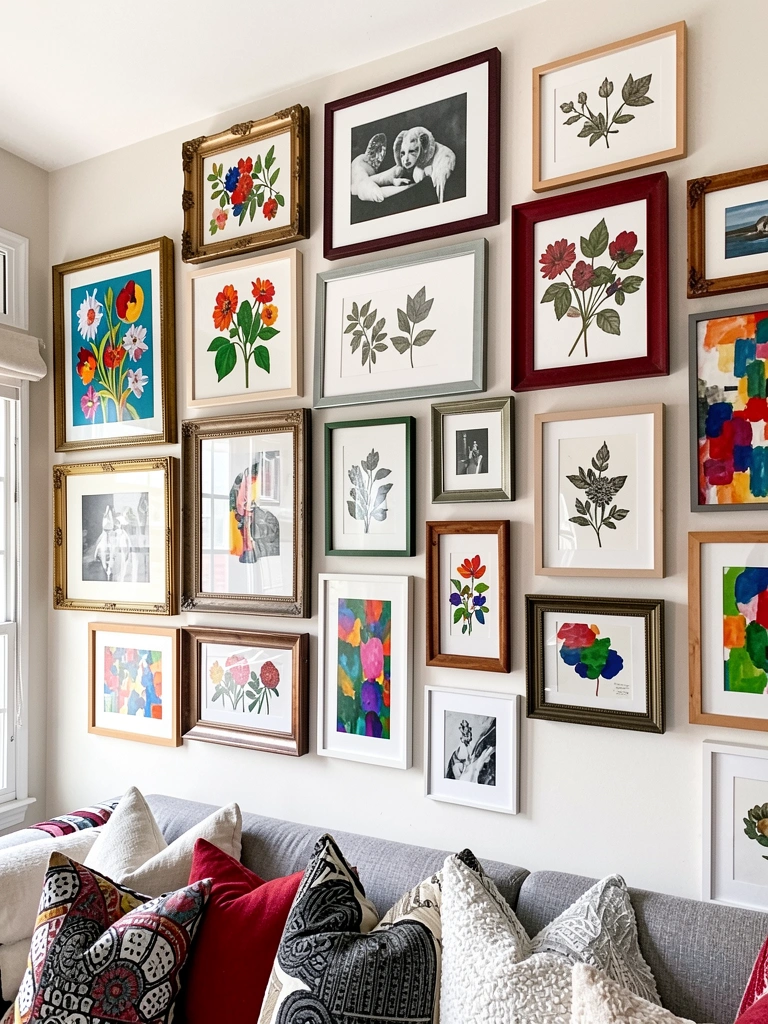
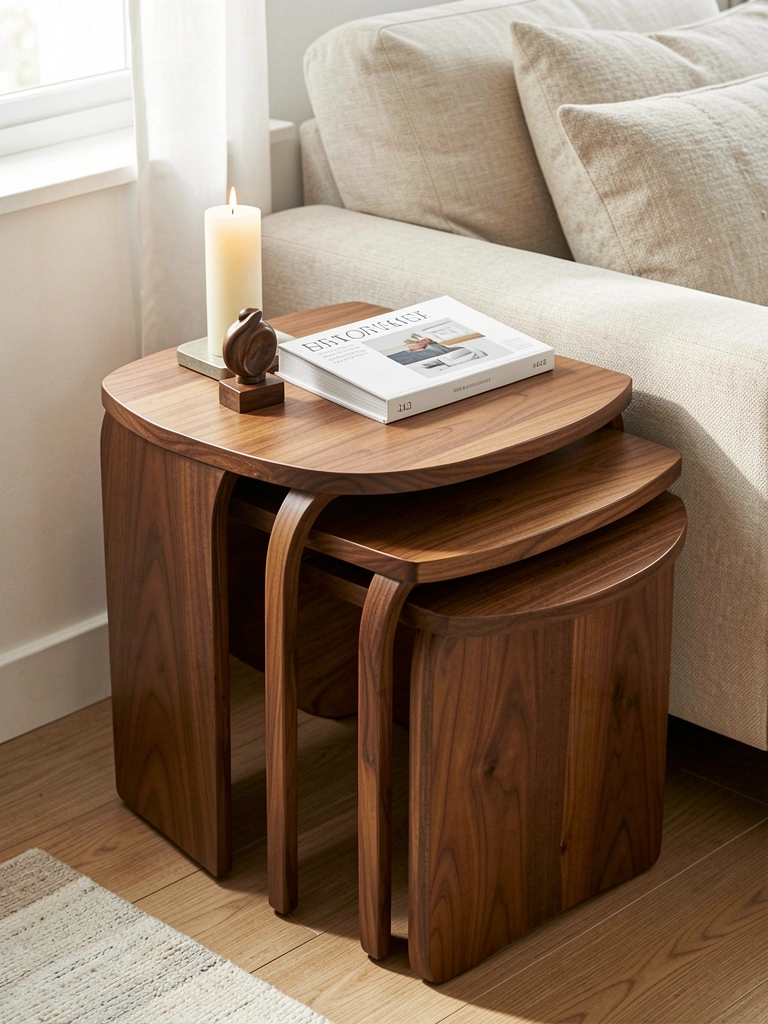
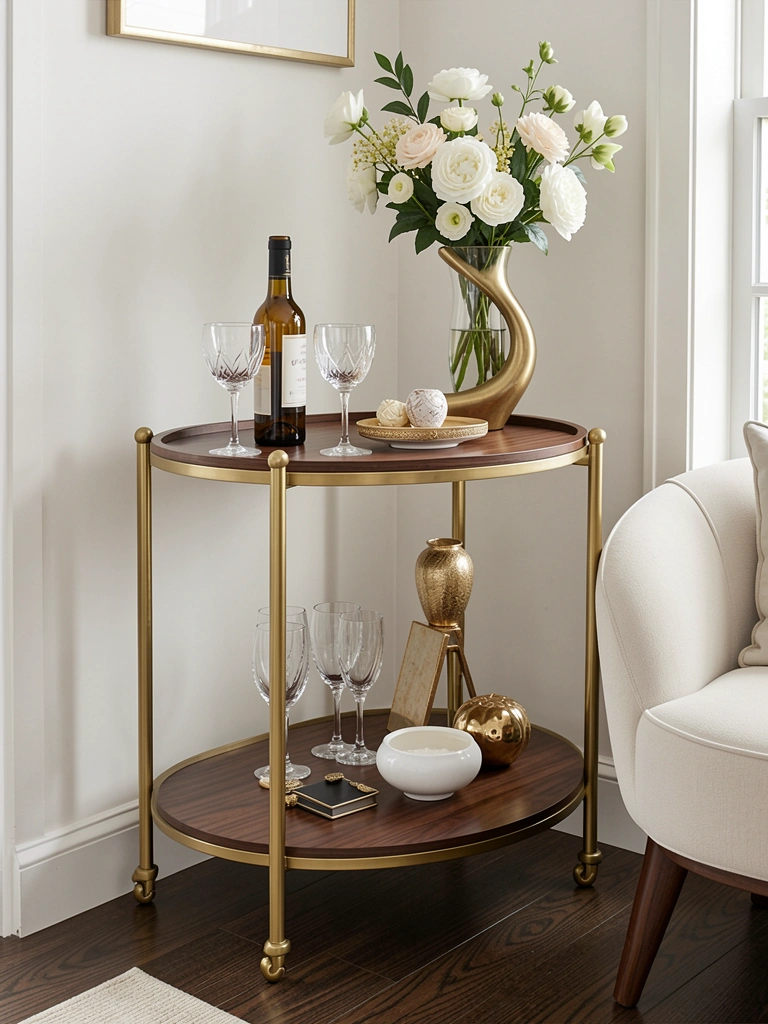
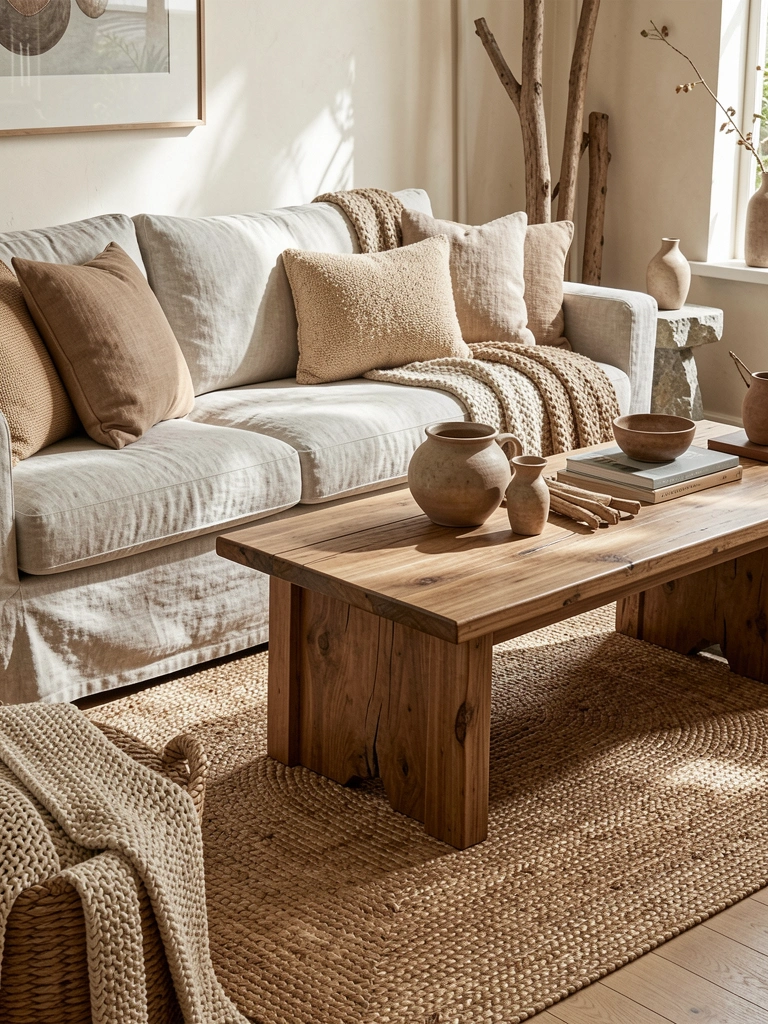
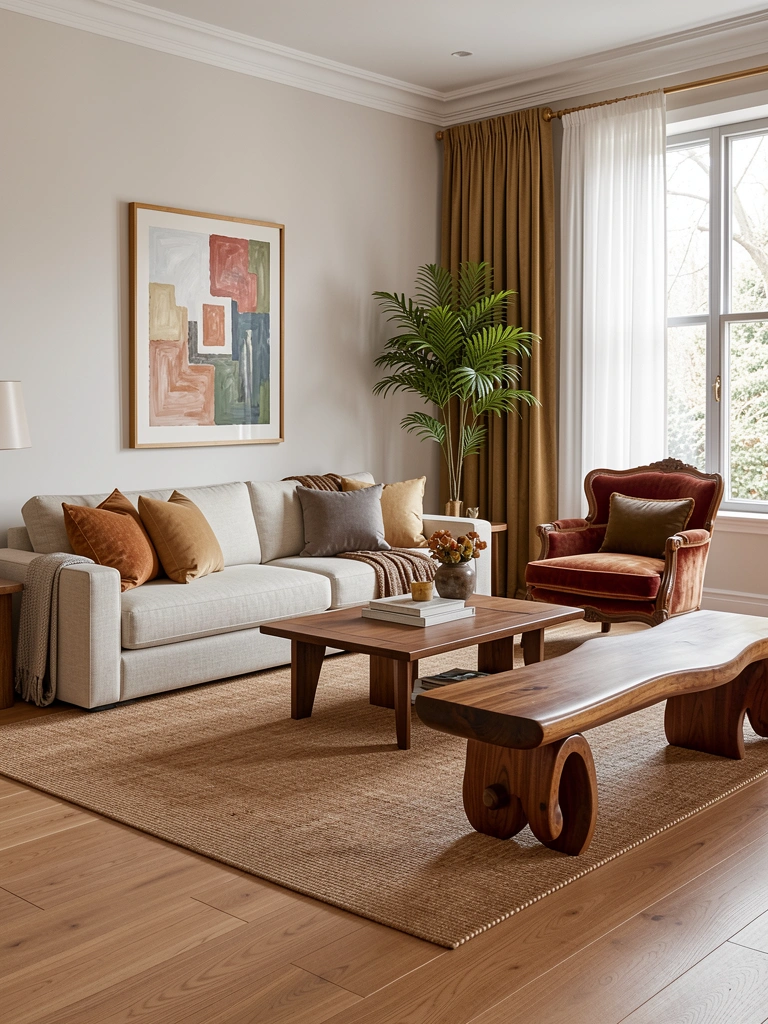
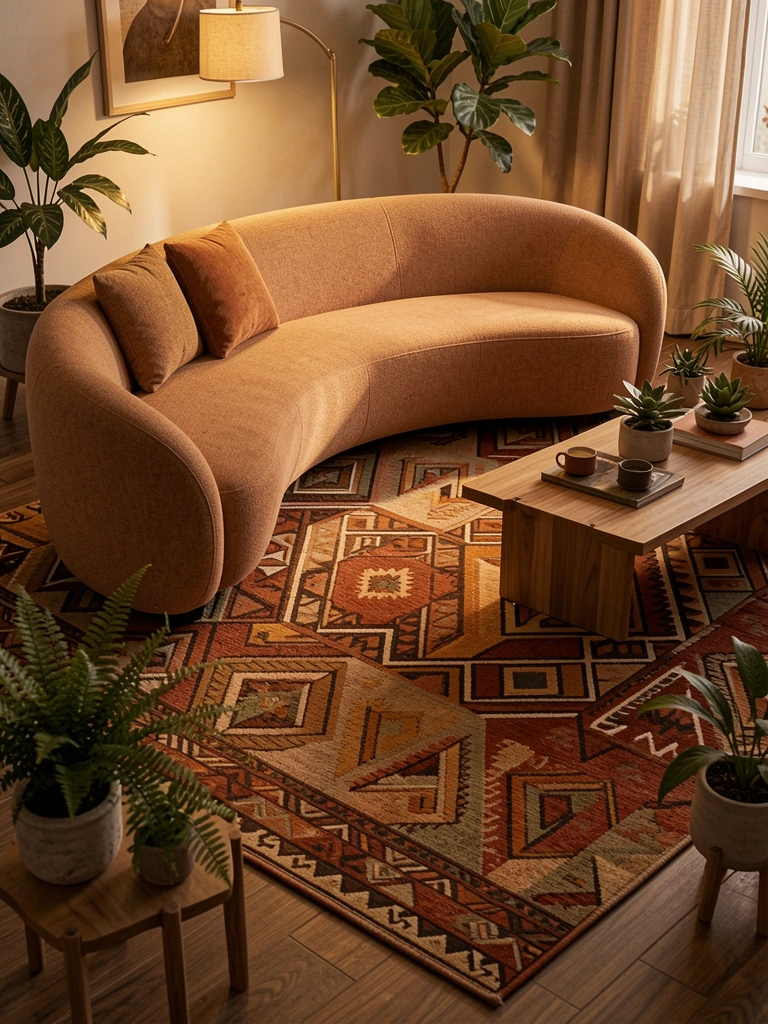
    24. Combine Curved Sofa with Vintage or Thrifted Pieces

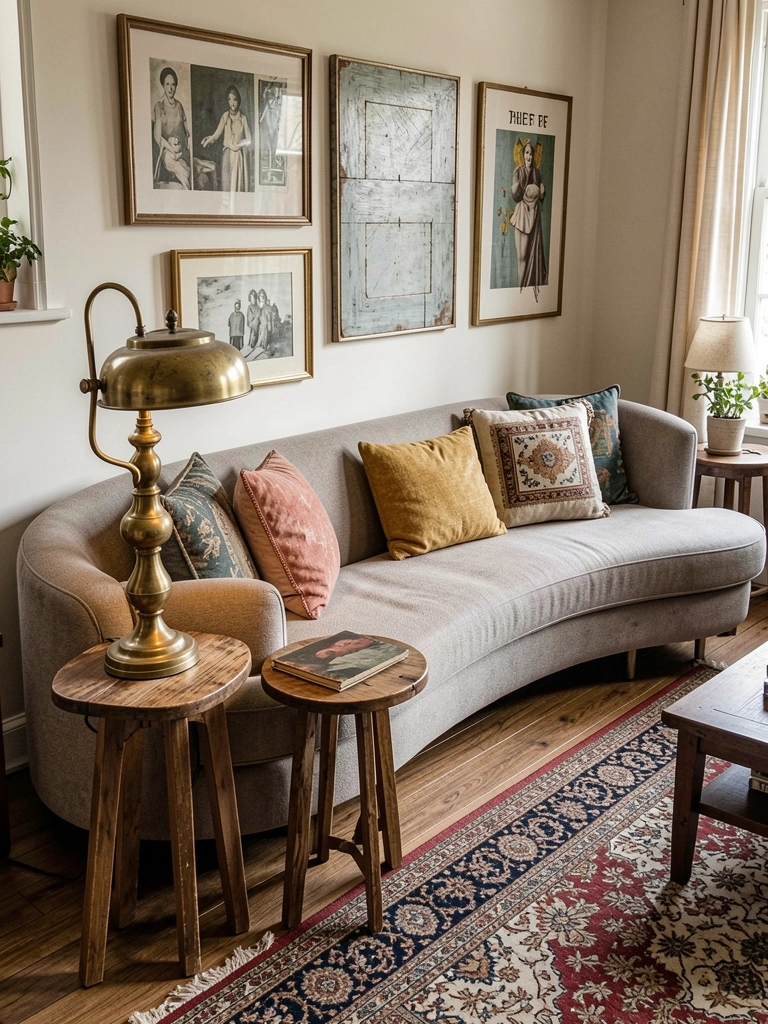
    Modern curved sofas pair beautifully with vintage and thrifted pieces, creating an eclectic, collected aesthetic that feels personal and high-design.

    Start with a modern curved sofa ($1,000–$2,000) in a neutral tone, then layer in vintage or thrifted pieces ($20–$200 each from thrift stores, Facebook Marketplace, or local estate sales). Search for mid-century wooden side tables, brass lamps, or unique frames. The contrast between the modern sofa and vintage accents creates visual interest and tells a story of collected pieces over time. This approach also keeps costs down while building a curated look. Mix eras intentionally rather than accidentally—this is the key to making eclectic feel designed.

    Your space reads as thoughtfully designed and authentically personal instead of decorated from a catalog.


    Save this post and try just one idea this weekend—whether it’s adding curved legs to a sofa you already own or layering textures into your existing piece. The beauty of soft-edge sofas is that they work with so many styles, budgets, and spaces. Your perfect sofa is out there.

  • 25 Art-Led Living Room Styling Ideas That Turn Walls Into Statements

    25 Art-Led Living Room Styling Ideas That Turn Walls Into Statements

    Your living room walls deserve better than blank space or a lonely piece of art collecting dust. Art-led styling transforms your entire room—it sets the mood, anchors your furniture choices, and gives your space personality that feels intentional without feeling overdone. Whether you’re working with bold statement pieces or building a gallery wall from scratch, these 25 ideas show you exactly how to make your walls the hero of your room. We’ll cover gallery walls, color-matched art strategies, budget hacks, and styling tricks that work for renters and homeowners alike. Pick one idea this week, and you’ll see how quickly your living room shifts from “nice” to “people notice.”

    1. Create a Gallery Wall with Mismatched Frames

    A gallery wall is the quickest way to add visual interest and personality to your living room. Instead of matching frames perfectly, mixing frame styles—black metal, natural wood, thin gold—looks collected and intentional. This approach costs between $40-$150 depending on whether you buy frames new or thrift them, and it takes about 2-3 hours to plan and hang. Start by laying out your frames on the floor in your desired arrangement, then photograph it before hanging. Pro tip: Use a level, painter’s tape, and small nail holes to keep things straight. The beauty of a mixed-frame wall is that you can swap out art seasonally or as your taste evolves—your wall grows with you.

    2. Go Bold with a Single Large Statement Painting

    Sometimes less is more. A single large artwork (36 inches or bigger) can anchor an entire room and do the work of ten smaller pieces. Look for abstract paintings, landscapes, or textured pieces that speak to you—this is your chance to be bold. Budget $80-$600 depending on whether you buy original art, high-quality prints, or canvas reproductions from sites like Etsy, Minted, or local artists. One Saturday afternoon is all you need to hang it and rearrange your furniture to face it. The power of this approach is that one stunning piece makes you feel like you’ve hired a designer, even though you’re doing it yourself. Your guests will immediately notice it, and you’ll never tire of looking at something you genuinely love.

    3. Layer Art Over a Bold Wall Color

    Painting one wall a richer tone—think teal, ochre, oxblood, or deep navy—gives your art more visual weight and makes colors pop differently than white drywall. Choose a color that complements your art, then hang framed prints or paintings directly on top. This project costs $30-$80 for premium paint plus $50-$200 for frames and art, and takes one weekend (paint Friday, hang Saturday). Use painter’s tape for crisp edges, and don’t rush the paint drying time. The trick is choosing art that has some contrast to the wall color—white frames on deep walls, darker art on lighter accent walls. This combo makes a small living room feel intentional and design-forward without feeling cramped or dark if you balance it with light furniture and plenty of natural light.

    4. Hang Art at Eye Level—The Right Height Matters

    Most people hang art too high. The rule: hang the center of your art at approximately 57 inches from the floor to the middle of the frame. This simple fix makes your entire room feel more polished and intentional. It costs nothing except 30 minutes of your time with a measuring tape and level. If you’re hanging art above furniture, leave 8-12 inches of space between the top of the piece and the art. This spacing creates a visual anchor that ties your wall and furniture together. Check your work as you hang—step back every few frames to assess the overall balance. Getting the height right is the fastest way to look like you know what you’re doing, even if you’re a total beginner.

    5. Use Floating Shelves to Display Art + Objects

    Floating shelves give you flexibility to display art without committing to permanent nails, and they add another layer of visual interest. Mount two or three shelves at varying heights, then prop framed art against the wall, lean it casually, or hang it from small wire. Budget $60-$150 for shelves and hardware, plus $0 if you already have frames. Installation takes about 1-2 hours with a stud finder and drill. The real advantage here: you can rearrange, swap out art, or add plants without rehanging. Lean your larger pieces and stand smaller ones upright for rhythm. This approach is great for renters too if you use damage-free mounting strips and lean pieces instead of hanging them.

    6. Paint a Mural or Geometric Wall Design

    You don’t need to be an artist to create a painted wall mural—geometric shapes, color blocks, or simple line work read as intentional and modern. Sketch your design lightly in pencil first, then paint with quality acrylic or wall paint. Cost: $20-$50 for paint supplies. Time: 4-8 hours depending on complexity, spread over a weekend. Start with something simple like horizontal color blocks or a diamond grid pattern if you’re nervous. Use painter’s tape for crisp lines and a level to keep angles straight. The payoff is huge—a painted mural becomes a conversation piece and makes your living room feel custom-designed. Plus, you can update it whenever your taste shifts.

    7. Build a Color-Blocked Frame Collection

    Frame a collection by painting wooden frames in complementary colors—ochre, sage, cream, mauve—then hang them in a grid or scattered pattern. This unifies a collection even if the art inside varies widely. Cost: $40-$100 for plain wood frames and paint. Time: 2-3 hours to paint frames, then 1 hour to arrange and hang. Paint frames with acrylic paint or spray paint for a smooth finish, let them dry fully, then add your art. This approach works great if you’re collecting prints gradually—you can add frames over time as your collection grows. The colored frames become part of the design, almost as important as the art itself. It’s a creative way to tie together mismatched pieces into one cohesive look.

    8. Pair Art with Sculptural Furniture for Flow

    Art and furniture work together. If your wall art has flowing curves or organic shapes, choose furniture with soft edges and curved lines to echo that feel. A sculptural sofa or rounded chair paired with abstract or botanical art creates visual rhythm throughout the room. This isn’t about buying matching sets—it’s about intentional pairing. Budget depends on furniture ($300-$2,000+) and art ($50-$400), but you can start by styling with what you have. Arrange your furniture to face your art rather than the TV, and suddenly your art becomes the focal point. The room feels more designed and curated. This is where your living room stops feeling like a collection of separate objects and starts feeling like a cohesive space.

    9. DIY Canvas Art from Thrifted Paintings

    Hit your local thrift store for old paintings you can paint over or modify. Thrifted canvases cost $2-$10 each, and you already have paint at home. Add geometric designs, color washes, or patterns on top—the “imperfect” result looks intentional and artistic. Time: 2-3 hours total for 3-4 pieces. The magic here is that your art becomes 100% unique and costs almost nothing. Hang them salon-style on a feature wall, and people will ask if you commissioned them. This project is also a great weekend activity—put on music, grab your paints, and create without pressure. Your DIY imperfections become part of the charm.

    10. Use Negative Space as Part of Your Design

    You don’t need to fill every inch of wall. Negative space—the empty area around your art—makes your pieces feel more important and prevents the room from feeling crowded. Choose 2-3 meaningful pieces and give them room to breathe. Cost: $0 (just rearranging). The skill here is resisting the urge to fill space. A single large artwork centered on a wall with nothing else around it feels more sophisticated than a cramped wall. This approach works especially well in small living rooms where breathing room makes the space feel bigger. Let your art stand alone. The emptiness around it actually amplifies its impact.

    11. Create a Black-and-White Art Moment

    Black-and-white art feels gallery-like and works with any room color. Mix black-and-white photography, line drawings, botanical prints, and sketches in matching or complementary black frames for a cohesive collection. Budget: $50-$150 for frames and prints from Etsy, Minted, or printable art sites. Time: 2-3 hours to hang. The advantage of this approach is that you can build it gradually—add one or two frames every few months without worrying about color coordination. Black-and-white is timeless, so your wall won’t feel dated in a year. This works beautifully in minimalist or maximalist rooms because it doesn’t compete with other colors.

    12. Lean Art Against the Wall for a Casual Vibe

    Leaning art instead of hanging it feels collected and intentional—plus it’s renter-friendly. Prop framed pieces against your wall on a shelf, console, or directly on the floor in front of furniture. Cost: $0 if you already have frames. Time: 15 minutes. This casual approach works especially well if you rotate your art seasonally or like to change things up. There’s no commitment, no nail holes, and you can rearrange anytime. Pair leaning art with wall-hung pieces for a layered look that feels like you’ve been collecting thoughtfully. This styling trick alone makes a room feel less “decorated” and more “lived in.”

    13. Match Your Art to Your Color Palette Intentionally

    Don’t choose art in isolation—pick pieces that echo colors already in your room. If your sofa is cream and teal, choose art with those tones. If your accent wall is ochre, find art that pulls that color forward. This creates visual flow and makes your room feel designed rather than random. Cost: $50-$300 for art, depending on size and source. Time: 1-2 hours of browsing and choosing. When your art coordinates with your furniture and walls, the room reads as intentional. You get bonus points if your art also echoes your throw pillow colors or rug. This layered approach to color makes small rooms feel bigger because the eye follows a cohesive color story rather than jumping between conflicting hues.

    14. Hang Art from Ceiling to Create Height

    Hanging art from ceiling cables or wire creates drama and draws the eye upward, making ceilings feel higher. Use thin cable, fishing line, or picture-hanging wire attached to ceiling hooks or track lighting. Cost: $30-$80 for hardware and cables. Time: 2-3 hours for installation and adjustment. This approach works especially well in rooms with low or standard ceilings—the upward draw creates perceived height. Change the height, spacing, and rotation of pieces for a living, evolving display. This styling trick feels expensive and design-forward, but it’s actually affordable and attainable. It’s a showstopper move that takes your room from basic to gallery-quality.

    15. Invest in One Really Good Piece of Original Art

    Save up for one piece of original art from a local artist, emerging painter, or art fair. One beautiful, authentic piece tells a story and becomes an investment that appreciates over time. Budget: $200-$1,500 depending on the artist and size. Time: Research and purchasing over a few weeks. The difference between a print and an original is immediate—original art has texture, presence, and provenance that prints can’t match. Even if it’s your only wall art, one stunning original makes your living room feel curated and intentional. You’ll love it more over time because it carries meaning and story. This is where your living room stops feeling temporary and starts feeling like home.

    16. Build a Maximalist Gallery Wall with Pattern Mixing

    Maximalist gallery walls layer patterns, colors, and frame styles boldly for an eclectic, collected feel. Mix botanical prints with abstract art, ornate frames with simple ones, and lean into color without worrying about perfect coordination. Budget: $80-$200 for a collection of frames and prints from thrift stores, Etsy, and art prints sites. Time: 4-6 hours of collecting and hanging over 2-3 weeks. The secret to maximalist walls: arrange on the floor first, snap a photo, then transfer that layout to your wall using painter’s tape as guides. The “more is more” approach works if you commit to it—half-hearted maximalism reads as cluttered, but a fully committed, thoughtfully layered wall reads as bold and artistic. Your room becomes a conversation starter.

    17. Use Removable Wallpaper Behind Floating Shelves

    Removable wallpaper behind floating shelves creates a designed backdrop for your displayed art and objects. Choose a pattern that complements your art—geometric, botanical, or abstract. Cost: $30-$60 for peel-and-stick wallpaper. Time: 2-3 hours to apply, spread over a weekend. The wallpaper becomes part of your art display, framing the shelves and everything on them. This is great for renters because it peels off without damage. When you’re ready to change things up, new wallpaper gives your wall completely new energy. Combine this with framed art and small sculptures on the shelves for a layered, curated look that feels professionally styled.

    18. Create a Vertical Timeline Wall with Personal Art

    Arrange personal art—family photos, framed children’s artwork, your own sketches, meaningful posters from travels—in a vertical timeline from oldest to newest (or vice versa). Mix frame styles to keep it from feeling too formal. Cost: $0 if you use frames you have, or $40-$100 for new frames. Time: 1-2 hours to gather, frame, and arrange. This wall is deeply personal and tells your story in a way that mass-produced art can’t. When guests see it, they immediately understand what matters to you. Your living room stops being about trends and starts being about your life. This approach is especially powerful in family rooms where kids can see their own contributions displayed proudly.

    19. Pair Botanical Art with Real Plants for Biophilic Design

    Layer botanical prints and nature photography with real plants for a cohesive, biophilic feel. Group your framed art with hanging or potted plants to create a nature-inspired feature wall. Cost: $50-$150 for art plus $20-$100 for plants. Time: 2-3 hours to arrange and style. The combination of real plants and botanical art makes your room feel alive and grounded—it’s like bringing nature indoors twice over. This approach works especially well with sculptural plants like fiddle leaf figs, monstera, or snake plants that have interesting shapes. Your living room becomes a peaceful retreat rather than just a space. The visual rhythm of plants plus art keeps the eye moving and makes the room feel curated and intentional.

    20. Combine Moody Colors with Intellectual Art

    Moody academia styling pairs rich wall colors with intellectual or artistic art—vintage book covers, literary posters, abstract prints. Choose deep forest green, charcoal, or navy walls, then hang art in frames with warm finishes (gold, brass, natural wood). Cost: $30-$80 for paint plus $60-$150 for art. Time: One weekend for painting and hanging. This look feels sophisticated and intentional without being pretentious. It works especially well if you’re a reader, artist, or intellectual at heart. The moody color and thoughtful art selection create a room that feels like a retreat—somewhere you actually want to spend time. Pair it with comfortable furniture, good lighting, and books nearby, and you’ve created a living room that’s both beautiful and genuinely lived-in.

    21. Use String Lights or Wire to Display Rotating Art

    String thin wire or cable horizontally across a wall, then use small metal clips to hang framed art that rotates or changes. This system lets you swap art without adding new nail holes. Cost: $20-$40 for wire, hooks, and clips. Time: 1-2 hours to install, then 15 minutes to swap art anytime. This works great if you’re an artist or collector who likes to rotate pieces seasonally or rotate from storage. The wire system itself becomes part of the aesthetic—it looks intentional and design-forward. You get the flexibility to refresh your wall constantly without commitment, which is perfect for people who get bored easily or like to follow trends.

    22. Layer Art Styles Across Different Eras

    Mix art styles from different eras—70s retro, mid-century modern, contemporary abstract—in one arrangement tied together by consistent frame colors or a unified palette. This “nostalgia meets modern” approach feels intentional and collected. Cost: $60-$200 for a mix of art from thrift stores, Etsy, and contemporary artists. Time: 3-4 hours of hunting and arranging. The trick is choosing a frame color (black, natural wood, gold) that links all the pieces together visually. When everything has the same frame color or material, disparate styles read as a curated collection rather than random. This approach lets you lean into your actual taste rather than trying to match some imaginary “perfect” palette.

    23. Create a Statement Wall with Oversized Typography

    Oversized typography with an inspiring word or phrase becomes instant art. Choose a word that resonates with you, print it in a beautiful font, frame it large, and make it your focal point. Cost: $20-$80 to print and frame large-scale typography. Time: 1 hour to source, print, and hang. This approach makes a bold statement without requiring art skills—you’re just curating existing designs. Pair your typography with smaller framed pieces for visual balance. The words you choose reflect your personality and values, making your room feel deeply personal. This styling move is especially effective in rooms where you want to inspire action—a home office, entryway, or creative space where the words actually impact your daily mindset.

    24. Install Picture Rails for Flexible, Damage-Free Hanging

    Picture rails are mounted near the ceiling and let you hang art from adjustable wire or cords—perfect for renters and people who like to change things often. Cost: $50-$150 for rails and hardware, depending on wall length. Time: 2-3 hours for installation (or hire help). Once installed, you can hang, rehang, and rearrange art infinitely without new nail holes. This system is also damage-free if you remove it carefully. It’s a slightly higher upfront investment, but it pays off if you’re someone who refreshes your space frequently. The look is elegant and gallery-quality—picture rails read as intentional and designed. You get flexibility plus sophistication.

    25. DIY Macramé or Fiber Art Pieces

    Create your own macramé or fiber art to pair with framed pieces for a handmade, textural look. Macramé kits cost $15-$40, and tutorials are free online. Time: 4-6 hours per piece spread over a few weekends. Your handmade art carries meaning that store-bought pieces can’t match—your guests will ask about it, and you get to share the story of making it. Even if you’ve never tried macramé, the DIY imperfection is part of the charm. Pair your fiber art with photography, prints, or paintings for a layered, curated gallery wall that feels truly unique. This approach transforms your living room into a space that reflects your hands, time, and intention.

    26. Rotate Your Art Seasonally for Constant Refresh

    Collect art gradually and rotate pieces seasonally—spring pastels, summer brights, fall warm tones, winter moody colors. Store off-season pieces safely and swap them out 4 times a year. Cost: $0 if you already have frames and prints. Time: 30 minutes each season to swap. This constant refresh keeps your room feeling new without actually buying new things. You get to enjoy every piece you own, and your space evolves with the seasons. Your guests notice when you’ve updated, even if they can’t pinpoint what changed. This approach is also budget-smart because you’re building a collection over time rather than buying everything at once. Your living room becomes a living, breathing space that changes with you.


    Ready to make your walls work harder for your room? Pick one idea and start this week—whether it’s rearranging existing art at the right height, hanging one new piece, or sketching out a gallery wall layout. Your living room is waiting to show some personality, and these art ideas are the quickest way to get there. Share this post with anyone who needs a living room refresh, and save it for when you’re ready to tackle your next project.

  • 25 Curved Furniture Trends That Make Living Rooms Look Soft & Modern

    25 Curved Furniture Trends That Make Living Rooms Look Soft & Modern


    Straight lines are out. If your living room still features boxy, angular furniture, it’s time for a refresh—curved pieces instantly soften a space and add that modern-yet-collected vibe that’s everywhere right now. Whether you’re working with a tiny apartment or a sprawling family room, curved furniture makes your space feel more intentional and grown-up without trying too hard.

    The best part? You don’t need to overhaul everything at once. Swapping even one statement piece—a curved sofa, a rounded armchair, or a swooping side table—changes how your entire room feels. This guide walks you through 25 curved furniture ideas that range from budget-friendly finds to investment pieces, plus styling tips to make each one work. Most are renter-friendly, many are under $200, and all of them will make you genuinely excited to spend time in your living room.


    1. Invest in a Curved Sectional as Your Room’s Hero

    A curved sectional is the ultimate statement piece—it anchors your room and immediately signals “this space is designed.” Unlike straight sectionals, curved ones create natural seating zones and soften hard corners.

    Look for options at West Elm ($1,200–$2,500), Article ($800–$1,800), or Wayfair (mid-range $600–$1,500). If you’re renting or testing the trend, IKEA’s Vallentuna modular system ($400–$900) offers curved configurations. Measure your space carefully—these pieces take up real estate—and consider fabric durability (performance fabrics like Crypton resist stains). Installation takes 1–2 hours.

    Your room’s whole energy shifts when a curved sofa becomes the centerpiece. Suddenly, your space looks curated and intentional, even if the rest is still in progress.


    2. Add a Curved Accent Chair for Layered Seating

    A curved accent chair fits into almost any room without the commitment of a full sectional. It’s the perfect piece to introduce curved furniture if you’re hesitant, and it doubles as a reading nook.

    Scout Target for budget-friendly curves ($300–$600), CB2 for mid-century vibes ($400–$800), or Restoration Hardware for splurge-worthy designs ($1,500–$3,000+). Upholstery matters—boucle, velvet, and performance fabrics all photograph beautifully and feel tactile. Place it perpendicular to your sofa or float it in a corner. Setup is usually under 30 minutes.

    One curved chair creates a secondary seating zone and makes guests feel genuinely welcomed. It’s the kind of detail that makes a room feel designed rather than decorated.


    3. Layer with Curved Side Tables and Nesting Options

    Curved side tables take up less visual space than boxy alternatives while adding softness and sophistication. Nesting versions are especially smart—you get flexibility and a sculpted look.

    Hunt for curved tables at IKEA (walnut curves $40–$120), Article ($150–$400), or Etsy for vintage finds ($80–$300). Wood finishes feel warmer than metal, though brass or copper curves add modern nostalgia. These require no assembly and zero maintenance—just move them where you need seating or surface space.

    Curved side tables feel more collected than standard rectangular pieces. They anchor a corner and make your setup look intentionally styled without extra effort.


    4. Swap Straight Lamps for Arc or Curved Floor Lamps

    Statement lighting is already a top trend—combine it with curved forms and you’ve got a room that feels professionally designed. Arc and curved floor lamps instantly elevate your space.

    Target offers curved brass lamps ($80–$150), CB2 has sculptural options ($120–$300), and Article carries mid-century curves ($200–$500). Look for adjustable arms so you can angle light exactly where you need it. Installation is plug-and-play—about 10 minutes if you’re arranging a rug beneath it too.

    A curved lamp softens a corner and creates ambient warmth that straight fixtures can’t match. The arcing form draws the eye upward, making rooms feel taller and more intentional.


    5. Choose a Curved Coffee Table to Soften Your Center

    Coffee tables are one of the first things guests see—a curved one immediately signals that you’ve thought about your space. Curved-leg tables are easier to navigate around than sharp corners, too.

    Find curved coffee tables at West Elm ($200–$600), IKEA ($60–$180), or Wayfair ($100–$400). Marble tops feel luxe, but walnut, oak, or metal work beautifully for modern-nostalgia vibes. Delivery usually takes 1–2 weeks; setup is typically under 15 minutes.

    A curved coffee table creates visual flow around your seating arrangement. It’s the centerpiece that ties your whole arrangement together—practical and gorgeous.


    6. Introduce Curved Wall Shelving for Organic Storage

    Curved shelving breaks the monotony of straight lines and adds organic visual interest while staying functional. They’re perfect for displaying books, plants, and curated objects.

    IKEA sells curved brackets ($15–$40 per pair) that work with most wood boards; Etsy has full curved shelf sets ($80–$250). Article and West Elm offer pre-made versions ($150–$400+). You’ll need basic wall anchors and a drill—installation takes 30–60 minutes, or hire a handyperson ($50–$100).

    Curved shelves make your wall arrangement feel artistic rather than utilitarian. They’re perfect for styling with books, plants, and small sculptures in that “collected” way editors love.


    7. Layer a Curved Ottoman or Pouf for Flexible Seating

    Curved poufs and ottomans are the unsung heroes of flexible living rooms. They work as extra seating, a footrest, or even a side table—plus they’re way less formal than boxy versions.

    Target has budget-friendly curved poufs ($50–$120), CB2 carries sculptural options ($100–$250), and Etsy has handmade versions ($150–$400). Boucle and performance fabrics are durable for daily use. These arrive ready to use—just unbox and fluff.

    A curved ottoman makes your seating arrangement feel casual and livable. You actually want to kick your feet up and relax, which is exactly what living rooms should invite.


    8. Install Curved Curtain Rods for Soft Window Treatments

    Curved curtain rods are a subtle detail that completely changes how a room feels. They soften window lines and make curtains drape more elegantly.

    IKEA offers simple curved rods ($15–$40), while Wayfair and Amazon carry brass and matte black options ($30–$100). Measurements are critical—map your window width and drop height before ordering. Installation takes 20–30 minutes with basic tools; renters can use damage-free adhesive brackets.

    Curved rods create an architectural softness that photographs beautifully. Your windows become a design element rather than just a functional opening.


    9. Float a Curved Bench Under Your Window Seat

    Window seats are already a dreamy living room feature—add a curved bench and you’ve created the perfect reading nook. It’s intimate without feeling cramped.

    Look for curved benches at Article ($400–$800), Etsy for vintage finds ($150–$400), or IKEA for budget options ($100–$250). Pair it with simple cushions (add $50–$150) and you’ve got instant coziness. Placement takes 15 minutes; cushion fluffing is ongoing enjoyment.

    A curved bench transforms an empty window into the room’s most coveted spot. It’s the kind of detail that makes people ask, “Can I sit there?”


    10. Style Curved Wall Mirrors to Expand Your Space Visually

    Curved mirrors do double duty—they bounce light around and make rooms feel bigger, plus they’re inherently softer-looking than rectangular versions. The frame matters as much as the shape.

    Find curved mirrors at Target ($40–$120), West Elm ($150–$400), or Article ($200–$500+). Brass and wood frames feel modern-nostalgic; black metal works for contemporary rooms. Hanging takes 15–20 minutes with proper wall anchors; this is a renter-friendly swap.

    A curved mirror reflects light and makes your room feel airier. It’s one of the fastest ways to upgrade a space without moving heavy furniture.


    11. Bring in Curved Planters and Plant Stands for Greenery

    Curved planters and plant stands are having a major moment—they’re both practical and visually interesting. Layering plants in varied heights creates that curated, lived-in look.

    Target has budget ceramic curves ($15–$50), CB2 carries sculptural planters ($30–$100), and Article offers high-end plant stands ($150–$400+). Mix sizes and materials (ceramic, concrete, brass) for collected vibes. Styling takes as long as you want—the beauty is experimenting.

    Curved planters break up negative wall space and bring organic energy to your room. They’re practical greenery holders that feel like design features.


    12. Layer Curved Throw Blankets Over Seating for Texture

    Curved blankets and throws aren’t a real product category, but layering different textures over curved furniture amplifies the softness. It’s styling that makes you want to curl up and stay.

    Score blankets at Target ($15–$80), Wayfair ($20–$150), or Etsy ($40–$120). Boucle, chunky knits, and performance fabrics all look gorgeous draped over curved pieces. Folding takes literally two minutes per blanket—the payoff is enormous.

    Layered throws make your curved furniture instantly more inviting and touchable. It’s the detail that turns a nice room into one where you actually want to spend time.


    13. Choose Curved Desk or Console Furniture for Workspace Blend

    If your living room pulls double duty as a workspace (hello, 2025), curved desks and consoles keep your setup feeling soft and collected rather than corporate.

    IKEA offers curved desk options ($100–$300), Article has mid-century curves ($400–$800), and West Elm carries premium versions ($600–$1,200+). Wood finishes warm up a space better than stark metal. Clear a wall space, position your chair, and you’re done in 30 minutes.

    A curved desk makes your workspace feel integrated into your living room rather than intrusive. It’s functional design that doesn’t sacrifice aesthetics.


    14. Add Curved Throw Pillow Arrangements for Layered Comfort

    Curved sofas shine when you layer pillows intentionally. Mix patterns, textures, and colors for that curated-collection feel editors always showcase.

    Invest in quality pillows at Target ($15–$40), CB2 ($20–$60), or Etsy ($25–$80). Buy 3–5 pillows in varying sizes, patterns, and textures. Arrange in odd numbers and layer different heights. Styling takes 15 minutes and transforms your seating arrangement entirely.

    Intentional pillow layering makes your curved sofa look professionally styled. It’s the difference between a piece of furniture and a room feature.


    15. Install Curved Floating Shelves for Corner Display

    Corner shelves are awkward spaces—curved versions solve that problem while adding visual interest. They’re perfect for small collected objects without eating up floor space.

    Find curved corner shelves at IKEA ($20–$60), Wayfair ($50–$150), or Etsy ($60–$200). Installation requires basic wall anchors and takes 20–30 minutes. Choose finishes that match your room’s palette—natural wood warms spaces; matte black adds contemporary edge.

    Curved corner shelves make unused corners feel intentional. Suddenly, awkward angles become perfect spots to display your favorite objects.


    16. Select Curved-Arm Dining or Accent Chairs for Softness

    If your living room includes dining space, curved-arm chairs are a genius way to keep the aesthetic soft and modern-nostalgia-forward without compromising comfort.

    Hunt for curved-arm dining chairs at Target ($150–$300), Wayfair ($120–$400), or Article ($300–$700). Upholstery options range from budget-friendly polyester to splurge-worthy leather. Delivery typically takes 1–3 weeks; assembly is usually 30 minutes per chair.

    Curved-arm chairs make dining spaces feel less formal and more livable. They’re the kind of thoughtful detail that guests actually notice and admire.


    17. Layer Curved Bookcase Shelving for Styled Storage

    Curved bookcases are a rarer find but worth hunting for—they add organic interest while storing your collection beautifully. Styling them is half the fun.

    Search Etsy for vintage curved bookcases ($200–$600), or try Article and West Elm for contemporary options ($500–$1,500+). If you find a straight bookcase you love, arrange books and objects on its shelves in a curved, asymmetrical way for the same effect. Styling takes an hour or two and changes every season.

    A styled curved bookcase becomes a room feature rather than just storage. It tells your story and gives guests something genuinely interesting to look at.


    18. Introduce a Curved Credenza for Media and Storage

    Curved credenzas are perfect for living rooms that need media storage without looking entertainment-focused. They’re furniture as sculpture.

    Find vintage curved credenzas on Etsy ($300–$800) or Facebook Marketplace ($100–$400), or commission a custom piece from a local woodworker ($600–$1,500+). New options appear at Article ($500–$1,200) and West Elm ($700–$1,400). Delivery takes 2–4 weeks; placement requires 30–60 minutes.

    A curved credenza is a statement piece that serves real purpose. It’s the kind of furniture people ask about because it looks that intentional.


    19. Position Curved Accent Stools for Extra Seating Flexibility

    Curved stools offer flexible seating without the footprint of a full chair. Move them around as needed for gatherings or tuck them away for open space.

    Look for curved stools at Target ($50–$150), CB2 ($80–$200), or Article ($120–$300). Upholstery options like boucle and velvet are not only gorgeous but also forgiving of use. These arrive ready to place—no assembly required.

    A curved stool adds seating flexibility and visual softness. It’s the perfect accessory for a room that needs to adapt to different needs.


    20. Use Curved Room Dividers or Screens for Zoning

    Curved screens and dividers are trending—they define space without hard walls and look sculptural enough to be a design feature on their own.

    Find curved screens at Article ($300–$600), Wayfair ($80–$300), or Etsy ($150–$500). Wood and woven options feel organic; metal adds edge. Positioning takes minutes; they’re lightweight and easy to move as your room evolves.

    A curved divider softly defines your space and creates visual interest. It’s especially smart for studio or open-plan living rooms that need breathing room.


    21. Select Curved Nesting Coffee Tables for Styling Flexibility

    Nesting curved tables give you all the flexibility of one piece plus the visual interest of three. Style them together or spread them out as needed.

    Scout for curved nesting sets at IKEA ($80–$150), Target ($100–$200), or Article ($200–$500). Mixing wood finishes adds depth. These are ready to use immediately—no assembly, just arrange them how you like.

    Curved nesting tables adapt to your space and styling mood. They’re functional pieces that also look intentionally designed when you arrange them artfully.


    22. Add Curved Reading Nook Elements with Appropriate Seating

    Curved papasan chairs, hanging bubble chairs, and rounded lounge seats create the ultimate reading nook—they’re practically made for curling up with a book.

    Find curved papasan chairs at Target ($150–$350), Wayfair ($100–$400), or Article ($250–$600+). Hanging bubble chairs range from $200–$800 depending on style. These need proper placement and, in some cases, ceiling anchors. Installation varies; follow manufacturer guidelines or hire help ($50–$100).

    A curved reading chair is an instant invitation to slow down. It transforms a corner into your personal retreat without requiring much space.


    23. Layer Curved Rugs as Styling Anchors for Seating

    Curved or organic-shaped rugs echo your furniture and create visual cohesion. They soften rectangular room layouts and add movement.

    Look for curved rugs at Article ($200–$600), Wayfair ($80–$400), or Etsy ($100–$500). Natural fibers like jute and wool feel warm; contemporary options in performance materials are durable. Rug placement takes two minutes; the visual impact is immediate.

    A curved rug softly grounds your seating arrangement. It’s an understated detail that makes your whole layout feel more thoughtful and designed.


    24. Choose Curved Linen Storage Baskets for Organized Beauty

    Curved storage baskets combine function and beauty—they hide clutter while adding soft visual interest. Layer them for a collected look.

    Find curved storage baskets at Target ($15–$60), IKEA ($10–$40), or Etsy ($30–$100). Woven, linen, and rattan options all feel organic and touchable. Styling takes minutes—arrange them beside your sofa or tuck them under a curved console.

    Curved storage baskets keep your space organized without looking utilitarian. They’re the practical details that make a room feel genuinely livable.


    25. Install Curved Bar Cart or Beverage Station for Entertaining

    A curved bar cart is both practical and a design statement—it’s ready for guests while looking stylish even when not in use.

    Hunt for curved bar carts at Target ($80–$180), CB2 ($150–$300), or Wayfair ($100–$400). Brass finishes feel luxe; wood adds warmth. Wheels make these mobile—roll it to your seating area for gatherings or tuck it in a corner between entertaining. Setup takes five minutes.

    A styled curved bar cart makes entertaining feel effortless. It’s both practical and beautiful—the kind of piece that makes your room feel intentionally designed for living well.


    26. Layer Curved Wall Art and Sculptural Pieces for Visual Softness

    You don’t always need curved furniture—curved wall art and sculptural objects create the same softness and visual interest. Gallery walls feel more intentional when shapes are varied and organic.

    Find curved artwork at Etsy ($30–$200), Target ($20–$100), or local galleries and makers ($50–$500+). Mix paintings, prints, woven wall hangings, and sculptural pieces. Hanging takes an hour or so; the payoff is a wall that feels genuinely curated.

    Curved and organic artwork softens your walls and adds personality. It’s the detail that transforms a neutral room into one that tells your story.


    Save this post and try just one curved furniture swap this weekend—even a single curved side table or throw blanket arrangement shifts how your whole room feels. Which piece are you most excited to add?

  • 25 Terracotta Living Room Decor Ideas Full of Warm Earthy Tones

    25 Terracotta Living Room Decor Ideas Full of Warm Earthy Tones

    If you’re craving a space that feels cozy, grounded, and endlessly Instagram-worthy, terracotta is your answer. This warm earthy tone brings instant personality to any living room—whether you’re renting or own your home. Terracotta works beautifully as a wall color, through furniture choices, or woven into accents and textiles. The best part? It pairs seamlessly with almost every decorating style, from boho to mid-century modern to maximalist. In this guide, you’ll discover 25 specific ways to bring terracotta warmth into your living room, from budget-friendly tweaks to investment pieces that’ll make your space feel like a design magazine spread. Get ready to fall in love with this timeless hue.

    1. Paint One Accent Wall in Warm Terracotta

    A single terracotta wall anchors your entire room without overwhelming the space. This is the easiest way to test the color if you’re hesitant about committing fully.

    Choose a quality paint in a warm terracotta shade (try “Burnt Clay” or “Rust” from Benjamin Moore or Sherwin-Williams). Prep your wall with primer, then apply two coats with a roller for smooth coverage. The entire project takes one weekend, costs $30–$60 for paint, and requires zero decorating experience. Renters can use peel-and-stick wallpaper in terracotta instead for a temporary solution.

    Once that wall goes up, your room gains instant depth and warmth. Everything else—your furniture, art, and accessories—suddenly looks more curated and intentional.

    2. Layer Terracotta Throw Pillows in Mixed Textures

    Throw pillows are the fastest way to inject terracotta into your living room without any commitment. Mix textures to create visual interest and depth that prevents the look from feeling flat.

    Grab pillows in different materials: linen, velvet, cotton, and even chunky knit covers. Look for $15–$40 per pillow at IKEA, Target, Wayfair, or local thrift stores. Mix solid terracotta with geometric patterns, stripes, or abstract designs in coordinating colors like cream, olive, and burnt orange. Layer 4–6 pillows on your sofa for that effortless, lived-in maximalist vibe.

    Your sofa becomes a focal point that draws people in. The texture mix makes the space feel collected and sophisticated, not matchy or overdone.

    3. Use Terracotta as Your Color-Drenching Base

    Color drenching—saturating a space in varying shades of one hue—is the 2025 design trend replacing flat accent walls. Terracotta is perfect for this approach because it has so many tonal variations.

    Paint walls in a medium terracotta, layer in a darker rust-tone rug, add curtains in a lighter apricot-terracotta blend, and choose furniture with warm wood finishes. This creates a cohesive envelope that makes your room feel intentionally designed. Budget $200–$500 for paint, rug, and curtain updates. Most of these items are available at Home Depot, Wayfair, and West Elm.

    The result? A room that feels immersive and intentional, like you’ve stepped into a curated experience. Everything works together instead of competing.

    4. Incorporate a Terracotta Patterned Area Rug

    An area rug in terracotta tones grounds your seating arrangement and defines the living room space. Patterned rugs add visual interest without requiring you to commit to solid color walls.

    Search for $80–$250 rugs at Wayfair, Rugs USA, or Target featuring geometric, Moroccan, or tribal patterns in terracotta. Look for natural fibers like jute or wool if possible—they add texture and durability. Lay the rug under your coffee table and sofa so it anchors the whole seating zone.

    Your furniture arrangement suddenly feels intentional and cozy. The rug also softens footsteps and adds warmth underfoot—both practical and beautiful.

    5. Style Open Shelving with Terracotta Ceramics

    Terracotta pottery and ceramics are natural on open shelves—they look collected, artful, and deliberately styled. This works especially well if you have a bookshelf, media console, or floating shelves visible in your living room.

    Hunt for terracotta vessels at thrift stores ($3–$15 each), HomeGoods ($10–$40), or Etsy ($20–$80 for handmade pieces). Mix sizes and shapes: vases, bowls, planters, and decorative vessels. Style them with dried pampas grass, books, and layered textures. Spend $50–$150 total for a beautiful, collected look.

    Your shelves transform from cluttered storage into a design statement. Guests will think you’re a seasoned decorator, even if you threw it together in an afternoon.

    6. Add Terracotta Curtains for Soft Warmth

    Terracotta curtains soften natural light while bringing warmth to your living room. This is one of the most impactful ways to use the color because of how light interacts with fabric.

    Look for linen or linen-blend curtains in terracotta at $60–$150 per panel from West Elm, CB2, or Etsy. Choose lightweight fabrics for that airy feeling, or heavier ones if you want room-darkening capability. Hang them floor-to-ceiling to make your ceilings look higher and create an intentional frame around windows.

    When sunlight filters through terracotta fabric, your whole room glows. It’s like adding a permanent golden-hour filter to your living space.

    7. Create a Cozy Reading Nook with Terracotta Accents

    A reading nook anchored by terracotta pieces becomes an instant retreat within your living room. This is perfect if you want terracotta warmth without committing to wall color.

    Choose a corner near a window, add a comfortable armchair ($200–$600), drape a terracotta linen or wool throw ($40–$80), and style a side table with a small lamp, plant, and terracotta mug. Add a small bookshelf or basket for storage. Total investment: $300–$750 depending on furniture quality.

    You’ll find yourself settling into this corner regularly. It becomes the most-used spot in your living room because it feels special and separated from the rest of the space.

    8. Mix Terracotta with Deep Jewel Tones

    Terracotta pairs beautifully with 2025’s trending bold colors like teal, oxblood, and deep emerald. This creates a moody, maximalist aesthetic that’s anything but boring.

    Combine terracotta walls with a jewel-toned sofa or accent chair ($400–$1,200), layer in jewel-toned pillows and throws, and add brass or gold lighting fixtures. Incorporate artwork featuring both color families. Budget $600–$1,500 total for a fully coordinated look.

    The combination feels sophisticated and intentional. It’s bold without being chaotic, and it proves terracotta is far more versatile than expected.

    9. Use Terracotta Pottery as a Statement Piece

    A single large terracotta pottery piece becomes a focal point that anchors your entire room. This maximalist approach celebrates the beauty of a single statement object.

    Source a large urn, sculptural vessel, or hand-thrown ceramic at a local pottery studio, antique shop, or Etsy ($80–$300). Place it empty in a corner, or fill it with dried pampas grass and branches for added height and texture. Let it be the star—everything else should complement it.

    This one piece tells a story. It looks intentional, cultured, and instantly elevates your living room aesthetic.

    10. Layer Terracotta with Warm Metallics

    Warm metallics—brass, copper, and gold—amplify terracotta’s richness and create a glowing, cohesive effect. This combination feels naturally elevated and collected.

    Add brass or copper lighting fixtures ($40–$200), gold-framed mirrors ($30–$150), and metallic wall art or sculptures ($20–$100). Choose warm-toned wood furniture to complement. Total investment: $100–$500 depending on your starting point.

    Your room takes on a warm glow, especially in evening light. The metallic accents catch and reflect light, making the space feel more luxe and intentionally styled.

    11. Create Pattern Drenching with Terracotta Motifs

    Pattern drenching uses the same color across different patterns and textures for cinematic depth. Terracotta works beautifully for this because it ties everything together visually.

    Layer terracotta stripes, geometric patterns, Moroccan motifs, and abstract designs across pillows, curtains, rugs, and wall art. Mix 3–4 different terracotta patterns in your room. Budget $200–$600 for rug, curtains, pillows, and art combined.

    The effect is immersive and intentional. Your living room feels thoughtfully curated, like each piece was chosen to work with everything else.

    12. Paint Your Trim and Doors Terracotta

    Instead of painting walls, try painting architectural elements like door frames, baseboards, and trim in terracotta. This is a subtle approach that adds character without commitment.

    Paint doors, frames, and trim in warm terracotta using quality trim paint ($25–$40). The paint job takes a weekend and requires basic painting skills. This works beautifully in rooms with high ceilings or lots of architectural detail where you want to highlight those elements.

    The warmth draws your eye upward and around the room. Your space gains personality and polish without feeling bold or overwhelming.

    13. Add a Terracotta Feature Wall Using Shiplap or Textured Wallpaper

    Shiplap or textured wallpaper in terracotta adds depth that flat paint can’t achieve. This is trending and works especially well in modern farmhouse or rustic-inspired spaces.

    Install shiplap and paint it terracotta ($150–$400 in materials and time), or apply textured peel-and-stick wallpaper in terracotta ($40–$80 for a roll). Both create visual interest and are renter-friendly if you choose removable wallpaper. The project takes a weekend.

    Your walls gain architectural interest. Even a simple room feels designed and intentional with textured, colored walls.

    14. Style Your Coffee Table with Terracotta Accessories

    A well-styled coffee table anchors your living room seating area. Terracotta accessories make this styling feel warm and intentional without requiring major changes.

    Layer terracotta candles ($5–$15 each), a small terracotta dish or bowl ($10–$30), stacked books, and a small potted plant. Keep it simple—3–5 objects look more curated than a cluttered table. Budget $30–$80 for styling pieces.

    Your living room gains a focal point that looks magazine-ready. Guests will notice the intentional styling, and you’ll enjoy a thoughtfully arranged space.

    15. Hang Terracotta-Toned Artwork and Photography

    Artwork ties color schemes together and adds personality. A gallery wall of terracotta-toned art makes a statement without requiring wall paint or major furniture changes.

    Frame prints from Etsy ($10–$30 per print), vintage terracotta photography, or your own images. Create a gallery wall using command strips for renters or nail hangers for homeowners. Budget $60–$200 total for 5–8 pieces and frames.

    Your walls become personal and expressive. A gallery wall transforms a blank wall into a curated collection that reflects your style and taste.

    16. Introduce Terracotta Through Window Treatments Beyond Curtains

    Roman shades, roller shades, or woven bamboo blinds in terracotta offer a modern alternative to curtains while maintaining warmth. Layering window treatments adds depth.

    Choose terracotta roman shades ($60–$150) or woven shades ($40–$100) and pair them with lightweight cream curtains ($60–$100). The combination is functional and visually interesting. Both options are easy to install in a couple of hours.

    Your windows become an intentional design element. The layered approach makes your living room look professionally decorated.

    17. Use Terracotta Planters for a Biophilic Boost

    Grouping plants in terracotta planters at different heights creates a living display that connects you to nature. This biophilic approach supports wellness and mood.

    Buy terracotta planters ($5–$20 each) and fill them with low-maintenance plants: pothos, snake plant, philodendron, or spider plant ($8–$15 each). Cluster them on shelves, windowsills, or floor corners. Budget $50–$100 for a substantial plant display.

    Your room becomes fresher and more alive. Studies show plants improve mood and air quality—plus they look beautiful grouped in terracotta.

    18. Create Visual Flow with Low-Profile Furniture in Warm Tones

    Low-profile furniture creates an airy feeling while allowing terracotta accents to shine. This approach maximizes visual flow, especially in smaller living rooms.

    Choose a sofa with slim legs and low arms ($500–$1,200), pair it with a low wooden coffee table ($150–$400), and layer terracotta pillows on top. The furniture doesn’t visually block the room, making the space feel bigger and more open.

    Your living room feels spacious and intentionally designed. The low-profile furniture provides a clean backdrop for terracotta warmth without visual heaviness.

    19. Mix Terracotta with Vintage and Mid-Century Modern Pieces

    Terracotta’s earthy warmth pairs perfectly with mid-century modern and vintage pieces. This creates a collected, nostalgic aesthetic that feels curated over time.

    Layer terracotta walls or accents with a vintage credenza ($200–$600), mid-century chairs ($300–$800), and terracotta ceramics found at antique shops ($10–$100 each). The color brings warmth to cool modern lines while keeping the look sophisticated.

    Your room tells a story of collected pieces and intentional choices. The mix of eras feels personal and lived-in rather than matched or overdone.

    20. Use Terracotta Textiles Beyond Pillows: Blankets and Throws

    Terracotta throws and blankets add texture and warmth to your sofa. Layering different textile weights creates visual depth and encourages cozy lounging.

    Drape a chunky knit terracotta throw ($40–$80) over your sofa, layer with linen or velvet pillows, and add a woven blanket ($30–$60) for extra warmth. Fold them loosely for that effortless, styled look. Total: $100–$200 for multiple textiles.

    Your sofa becomes irresistibly cozy. Guests automatically want to curl up here, and you’ll find yourself using this space more often.

    21. Paint Furniture Pieces in Terracotta

    Paint thrifted or existing wooden furniture terracotta for a DIY update that costs almost nothing. This is perfect for renters who can’t paint walls.

    Find wooden furniture at thrift stores ($10–$50), sand it lightly, prime it, and paint with terracotta paint ($15–$25). The project takes a Saturday afternoon. You can use leftover paint from a wall project to cut costs.

    You’ve created a custom piece that coordinates with your room’s color scheme. Furniture you already own gains new personality and purpose.

    22. Define Zones with a Terracotta-Bordered Room Divider

    In open-concept living rooms, a room divider creates visual separation and privacy while adding design interest. Terracotta-toned dividers maintain warmth while defining space.

    Choose a woven, wooden, or fabric room divider ($80–$250) in warm terracotta or neutral tones with terracotta accents. Place it strategically to divide your seating area from a work or sleeping zone. Most require no installation.

    Your open living room gains structure and privacy. The divider creates multiple functional spaces within one room.

    23. Layer Terracotta with Cool Neutrals for Balance

    Pairing terracotta with cool neutrals like soft grey, white, or cool blue prevents the space from feeling too warm or overwhelming. This balance feels sophisticated and timeless.

    Paint one terracotta wall and keep others white or soft grey ($40–$80 total for paint). Choose a grey sofa ($400–$1,000) and layer with cool-toned pillows. Add a few terracotta accents to tie everything together. Budget $500–$1,200 total.

    Your room feels balanced and intentional. The cool neutrals keep terracotta from feeling heavy, while the terracotta keeps the room from feeling cold.

    24. Create a Terracotta-Focused Styling Vignette on a Console Table

    A small vignette on a console, mantle, or credenza is an easy way to experiment with terracotta styling. This works beautifully as an entry point to your living room.

    Style a terracotta-framed mirror ($30–$80), stack 2–3 books with warm-toned spines, add a small sculptural object or plant ($15–$40), and include a candle ($5–$15). Keep it minimal—4–5 items look more intentional than a crowded table. Budget $60–$150.

    Visitors notice this intentional styling immediately. It sets the tone for your whole living room and makes your space feel designed.

    25. Layer Terracotta Lighting for Ambient Warmth

    Lighting in terracotta tones creates ambient warmth that enhances the color throughout your room. Layered lighting (overhead, task, and ambient) also improves functionality.

    Choose a terracotta ceramic table lamp ($40–$100), add a brass floor lamp with warm bulbs ($60–$150), and display terracotta candle holders ($5–$20 each). Use warm-toned LED bulbs ($5–$15 per bulb) for that golden glow. Total investment: $150–$300.

    When you dim the overhead lights and layer in terracotta-toned lamps and candles, your room glows. This transforms your living room into a warm, welcoming retreat.

    Save this post for your next living room refresh. Start with one or two ideas this weekend—whether it’s new throw pillows or painting that one accent wall. You’ll be amazed at how much warmth and personality terracotta brings to your space.

  • 23 L-Shaped Sofa Design Ideas That Maximize Comfort & Layout

    23 L-Shaped Sofa Design Ideas That Maximize Comfort & Layout

    An L-shaped sofa is one of the smartest furniture investments you can make—it combines seating capacity with smart space planning, giving you room for lounging, entertaining, and actually living. But choosing the right L-shaped sofa goes beyond just finding one that fits; it’s about maximizing comfort, traffic flow, and the entire look of your room. Whether you’re working with a sprawling open-plan living area or a cozier space, there are strategic ways to position, style, and configure your L-shaped sectional to make it work harder for your daily life. We’ve gathered 23 design ideas that show you exactly how to make your L-shaped sofa the anchor of a room that feels both beautiful and functional—no design degree required.

    1. Anchor a Curved L-Shape in an Open-Plan Zone

    Curved L-shaped sofas are having a major moment because they soften room layouts and feel more intimate than sharp right angles. A gently curved sectional positioned away from walls creates an invisible boundary in an open-plan space, naturally zoning the living area without a wall or room divider.

    Start by measuring your floor space and positioning the curve to face the main focal point—typically the TV or a fireplace. Curved sectionals are available from Blu Dot, Article, and Wayfair ($1,200–$3,500 depending on size and fabric). The slight arc takes up roughly the same floor space as a traditional L, but the visual impact is softer and more conversational. It takes about 2–3 hours to assemble (often doable solo with help from a friend).

    Pro tip: A curved sectional works best when you float it rather than tuck it tight into corners—this lets the silhouette shine and improves traffic flow. You’ll immediately notice how much more open and designed your living room feels.

    2. Layer Warm Lighting Behind Your L-Shaped Sofa

    Poor lighting can make even a beautiful sofa feel flat and uninviting. Adding warm light sources behind your L-shaped sectional—whether recessed ceiling lights, wall sconces, or a tall arc floor lamp—completely changes the mood and makes the space feel more intentional and spa-like.

    Install recessed lights ($15–$40 per fixture, plus installation) if you’re open to minor electrical work, or opt for a portable arc floor lamp ($80–$300) that requires zero installation. Position the lamp behind the corner or along the back edge so light spills onto the wall and softly illuminates the sofa from behind. This takes 15 minutes for a lamp or a weekend for electrical work.

    Renter-friendly option: A tripod floor lamp with a dimmer bulb achieves the same cozy effect without any commitment. You’ll notice the entire room suddenly feels warmer, more intimate, and far more magazine-worthy.

    3. Define Traffic Flow with Your L-Shape Placement

    The way you position your L-shaped sofa can either invite movement through your space or create an awkward traffic jam. The best layouts leave at least 18–24 inches of clear walking space on the open sides of your sectional and ensure the “short leg” of the L faces toward main entry points or the kitchen, keeping sightlines open.

    Measure your doorways and natural movement paths before deciding on your L orientation. Sketch a quick floor plan (free with Pinterest’s room planning tools or Canva) to test different angles. Moving furniture typically takes 30 minutes to an hour and requires zero budget.

    Pro tip: The most functional L-shapes have the long run perpendicular to windows or the TV, and the short leg angled slightly inward—this maximizes the view while keeping the room from feeling blocked. Suddenly, navigating your living room feels effortless, and guests naturally flow through your space instead of feeling trapped.

    4. Mix Modular Pieces to Customize Your Configuration

    Modular L-shaped sofas are the ultimate in flexibility—if life changes (you move, your family grows, you want a new layout), you can reconfigure or swap pieces without buying a new sofa. Many brands now offer sectionals that let you move the corner unit, add more seating, or shift the footprint entirely.

    Look for brands like Article, West Elm, Room & Board, or Blu Dot ($1,500–$4,000+ for full modular systems) that clearly sell individual sections separately. A basic modular L with corner unit and 2–3 seating pieces costs roughly the same as a fixed sectional but gives you way more control. Assembly takes 2–4 hours depending on complexity.

    Bonus: Many modular sofas have interchangeable cushion covers, so you can refresh the look (or hide wear) without replacing the whole sofa. Your space adapts to life changes instead of the other way around.

    5. Float Your L-Sofa for a Designed, Open Feel

    Pushing your L-shaped sofa flush against walls is a default move—but floating it (positioning it away from walls, typically over a rug) instantly makes your room feel more high-design and spacious. This layout works especially well in open-plan homes and larger living rooms where anchoring a rug under the sofa creates a natural focal point.

    Start with a large area rug ($100–$400) that extends under the front two-thirds of your sectional. Float the sofa over the rug, leaving 12–18 inches on all visible sides. Add a coffee table or ottoman in front to complete the anchored look. This costs only the price of a rug and takes zero installation time.

    Pro tip: A floating arrangement feels most intentional when you add a console table or side table behind the sofa—it gives the back a finished look and adds styling surface. Your living room immediately reads as thoughtful and spacious, even in smaller areas.

    6. Choose Performance Fabrics for Real-Life Living

    Performance fabrics (microfiber, Crypton, polyester blends) resist stains, pet damage, and wear way better than traditional linen or cotton—and modern performance fabrics feel just as soft and look just as good. If you have pets, kids, or just want a sofa that survives spills, this is non-negotiable.

    Sofas upholstered in performance fabrics run $800–$3,500 depending on size, and they cost roughly the same as traditional fabrics these days. Brands like Room & Board, West Elm, Wayfair, and Article clearly label performance options. Most performance fabrics can be spot-cleaned with mild soap and water—takes 5 minutes per spill.

    Pro tip: Ask about “performance fabric blend”—this gets you 80% of the durability benefit at a slightly lower price point. You’ll feel confident letting people actually sit on your sofa without panic.

    7. Add a Low-Profile Sectional for a Modern, Relaxed Vibe

    Low-profile sectionals (shorter backs, thin arms, elevated on thin or no-show legs) feel more modern and refined than traditional deep-backed sofas, and they optically open up even smaller rooms since you can see more wall and floor space around them. These are ideal if you want a sofa that feels like furniture, not a bulky block.

    Brands like Blu Dot, Hay, and Article specialize in low-profile sections ($1,200–$3,000). The trade-off: slightly less back support, so they’re better for perching and lounging than deep napping. Assembly is similar to standard sofas (2–3 hours).

    Styling bonus: Low-profile sofas photograph beautifully and work with minimalist or modern interiors. Your room instantly feels more intentional and less “furnished,” more “designed.”

    8. Incorporate a Chaise Lounge Leg for Lounging

    An L-shaped sectional with one leg extended into a chaise lounge section gives you a place to stretch out and truly recline—perfect if you like reading, napping, or just collapsing after a long day. The chaise transforms your sectional from “seating for guests” to “actually comfortable for you.”

    Look for “L-shaped sectional with chaise” on Wayfair, Overstock, or Amazon ($900–$2,500 depending on size and material). A chaise adds roughly 2–3 feet to one leg of your L. Installation and setup take 3–4 hours (often easier with help).

    Pro tip: Position the chaise where you most naturally recline—often at the end that faces a window or the TV. This one addition totally changes how you use your sofa daily.

    9. Style Your L-Sofa with Layered Throw Pillows and Textures

    Throw pillows and layered textures are the fastest way to make an L-shaped sofa look curated, expensive, and intentionally styled. A mix of textures (bouclé, velvet, linen) in a cohesive color palette instantly upgrades the visual appeal without any structural changes.

    Buy a mix of throw pillows ($20–$60 each) from Target, West Elm, or Amazon—aim for 5–7 pillows depending on your sofa size. Layer them by height and texture, leaving one corner arm exposed for a relaxed feel. Add a chunky throw blanket ($40–$120) draped casually over the back or armrest. This takes 10 minutes to arrange and costs $100–$400 for a complete styling refresh.

    Pro tip: Stick to a 3-color palette (two neutrals + one accent color) to avoid a chaotic look. Suddenly, your sofa looks magazine-ready and way more expensive than it actually was.

    10. Position Your L-Sofa to Support Conversation Areas

    L-shaped sofas naturally encourage conversation because they create a gathering spot where multiple people can sit facing one another—they’re inherently more social than a standard linear sofa. To maximize this, position your L perpendicular to other seating (armchairs, ottomans) so people can easily make eye contact and chat.

    Position your L approximately 3–4 feet from a coffee table, then angle 1–2 accent chairs across from it at roughly 90 degrees. This takes 15–20 minutes to arrange and costs nothing beyond furniture you might already have.

    Result: Your living room naturally becomes a gathering spot. Guests sit down and conversations flow more naturally—there’s no awkward “staring at a TV” vibe unless you want one.

    11. Choose an Oversized L-Sectional for Cloud-Like Comfort

    Oversized, cloud-like L-shaped sofas (extra-deep seats, plush cushioning, wide armrests) prioritize sink-in comfort over formal elegance—they’re meant for actual lounging, not just looking at. If your living room is your retreat, not your showroom, a plush L-sectional is worth the investment.

    Brands like Pottery Barn, Crate and Barrel, Room & Board, and Wayfair offer oversized options ($1,500–$4,000+). The trade-off: these sofas are deeper (require more floor space) and heavier (trickier to move). Most are firm enough to support proper posture when you do sit upright. Assembly typically takes 3–4 hours.

    Pro tip: Pair an oversized sectional with firm throw pillows for lumbar support, so you’re comfortable whether you’re lounging or working from home. The best part? You’ll actually want to be in your living room instead of retreating to the bedroom.

    12. Use an L-Sectional to Divide Open-Plan Spaces Visually

    In open-plan living, an L-shaped sectional can act as a visual and functional divider between your living room and dining area without needing a wall or room divider. The back of the sofa becomes a subtle boundary, and the seating arrangement naturally defines which zone is for what.

    Position your L with the open side facing the main living area (fireplace, TV, windows) and the back angled slightly toward the dining or kitchen zone. No structural changes needed—it’s just strategic positioning. This costs nothing and takes 30 minutes to arrange.

    Result: Suddenly your open-plan space feels intentional and zoned. People understand that the L-sofa area is for relaxation, and the other side is for dining—without any cramped, closed-off feeling.

    13. Pair Your L-Sofa with a Statement Accent Wall

    A strategically chosen accent wall behind your L-shaped sofa draws the eye, adds depth, and makes the seating area feel like an intentional focal point. Deep, muted colors (sage green, warm terracotta, soft navy) work best because they complement most sofa fabrics without feeling overwhelming.

    Paint your chosen wall with 2–3 cans of quality paint ($15–$35 per can) and a weekend of work (or hire a painter, $300–$800 depending on wall size). Neutral sofas show best against bold walls; patterned sofas need more muted walls.

    Pro tip: Add floating shelves or artwork to the accent wall to layer visual interest. Your living room suddenly feels intentionally designed instead of accidentally arranged.

    14. Select a Warm, Earthy Color for Timeless Appeal

    Warm, earthy colors (camel, clay, sand, warm greige, soft terracotta) are trending because they feel calming, work with almost any decor style, and age beautifully. Unlike trendy jewel tones, earthy L-sofas stay relevant for 7–10 years, making them a smart long-term investment.

    Choose your sofa color before committing—order free fabric swatches from Wayfair, Article, or brand websites and look at them in your space’s actual lighting for 2–3 days. This costs nothing and prevents a major color-regret situation. Most sofas in neutral tones cost the same as other colors.

    Bonus: Neutral-toned L-sofas pair easily with statement pillows, throws, or artwork, so you can refresh your look without replacing the whole sofa. Earthy tones feel sophisticated and intentional instead of “default beige.”

    15. Add an Ottoman or Poufs for Flexible Seating

    An ottoman or poufs add flexibility—they’re extra seating when guests come over, a footrest when you’re relaxing, a side table for drinks or a laptop, or even hidden storage in some designs. They’re the most multifunctional furniture piece you can buy for your L-shaped setup.

    Purchase an ottoman ($200–$600) or two small poufs ($80–$150 each) in a complementary fabric—try Article, West Elm, Wayfair, or Overstock. Position it 12–18 inches in front of your L-sofa as a visual anchor. No assembly needed for most poufs (ottomans take 15 minutes).

    Pro tip: Choose performance fabrics for ottomans too if you have pets or kids—they take a beating. One ottoman instantly adds flexibility and makes your living room feel less “rigid furniture” and more adaptable to real life.

    16. Maximize Space with a Right-Facing L vs. Left-Facing L

    The direction your L-shaped sofa faces (left or right) dramatically affects traffic flow and how your room feels. Before ordering, sketch your room’s layout and test both directions to see which maximizes function and sight lines. Right-facing means the chaise or open leg extends to the right; left-facing means it extends left.

    Measure your room walls, doorways, and windows with a measuring tape (free or under $15), sketch it out on paper or use a free app like Planner 5D, and position your L both ways. This takes 20 minutes and costs nothing. Most retailers offer both options for similar pricing.

    Pro tip: The best direction depends on your room’s fixed elements (fireplace, TV, windows)—position the open leg of your L toward the room’s main focal point. Choosing correctly means better sight lines, easier traffic flow, and a room that just feels right.

    17. Invest in High-Quality Cushion Cores for Longevity

    Not all L-shaped sofas are built the same. High-density foam cushion cores (rated 1.8 density or higher) hold their shape for 7–10 years; cheap foam flattens within 2–3 years. When shopping, ask about cushion construction and insist on high-density foam for longevity.

    When comparing sofas at the same price point, always ask about cushion density, frame material (hardwood is better than plywood), and suspension type (eight-way hand-tied is best). Better construction costs roughly $200–$400 more upfront but extends your sofa’s life by 5+ years. This translates to saving thousands long-term.

    Pro tip: Read reviews specifically mentioning “cushion durability after 2 years” to see real-world longevity feedback. Investing in better cushion quality now means your L-sofa stays comfortable and beautiful instead of sagging after a few years.

    18. Create a Reading Nook in Your L-Sofa Corner

    The corner seat of an L-shaped sofa is prime real estate for creating a cozy reading or lounging nook. Position your L with the corner unit near a window (if possible) and style it with a reading lamp, side table, throw blanket, and pillows. It becomes a designated retreat spot.

    Arrange your L with the corner closest to natural light, add a swing-arm wall lamp ($50–$150) or a small floor lamp ($40–$120), and style with a side table ($80–$200) and a chunky throw blanket ($40–$100). Total setup cost: $170–$570. Takes 1–2 hours to arrange and light.

    Result: You have a defined retreat space that makes you actually want to read instead of scrolling on your phone. The corner nook becomes the most-used spot in your living room.

    19. Select a Pet-Friendly L-Sofa Fabric and Layout

    If you have pets, choose an L-shaped sofa that can withstand fur, claws, and accidents without showing wear. Performance fabrics are pet-proof, but fabric color and weave also matter—darker tones and tighter weaves hide pet hair better than light, fluffy textures.

    Select a performance fabric sectional ($1,000–$3,500) in a darker neutral tone (charcoal, warm gray, chocolate). Brands like Article, Wayfair, and West Elm clearly label pet-friendly options. Pair your sofa with a pet blanket or throw ($30–$80) on the most-used section to protect upholstery and provide a designated pet spot.

    Pro tip: Position your L so the chaise or long side doesn’t block your pet’s access to other rooms—pets like open sightlines and freedom of movement. Your sofa stays fresher and your pet feels included instead of excluded.

    20. Incorporate Wooden Legs for Warmth and Visual Lift

    Sofas on wooden legs (especially tapered or mid-century styles) look lighter, less bulky, and more intentionally designed than low-slung sofas on tracks or skirted bases. The visible floor under the sofa optically opens up your room. Most modern L-sofas come with at least minimal legs, but you can sometimes upgrade to nicer wood for $100–$300.

    When ordering your L-sofa, ask about leg options and costs—some retailers offer free upgrades from plastic to wood. If your existing sofa has low skirting, adding legs ($150–$400 for professional installation) is sometimes possible with a furniture repair specialist.

    Styling advantage: Wooden legs add warmth and make your sectional look more like a designed piece than a generic “couch.” The improved sight lines under the sofa instantly make your room feel more open.

    21. Use an L-Sofa to Create a Symmetrical Living Room Layout

    An L-shaped sofa is perfect for creating symmetrical, formal layouts—position it as one “wall” of a seating group and mirror the arrangement with matching accent chairs, side tables, and lamps on either side. This works beautifully in more traditional or transitional living rooms.

    Position your L with the long side parallel to one wall, then add matching side tables ($150–$300 each) and lamps ($80–$200 each) on either end. Add symmetrical accent chairs ($300–$700 each) if space allows. Arrange artwork and decor in balanced pairs. This takes 1–2 hours and costs $600–$1,500+ depending on pieces chosen.

    Pro tip: Symmetrical layouts feel more intentional and formal—they’re ideal if you love a curated, magazine-ready look. Your living room immediately reads as thoughtfully designed instead of casually thrown together.

    22. Hide Unsightly Storage Underneath with a Raised Platform

    If you need hidden storage and your L-sofa has clearance underneath, a low platform or riser can elevate your sectional while creating space for storage baskets, bins, or even a compact bar cart. This works especially well if your sofa sits on legs rather than a skirt.

    Add a low platform (DIY with pallets and casters, $50–$150, or purchase a ready-made platform, $300–$600) and style underneath with woven baskets ($30–$100 each). This takes 1–2 hours to install and organize.

    Practical bonus: You gain functional storage while the hidden base keeps everything looking clean and curated. Your living room stays organized without appearing cluttered.

    23. Layer an Area Rug to Define Your L-Sofa Seating Zone

    An area rug ties together all your living room elements and visually defines your L-shaped seating zone as one intentional grouping. The rug should extend under at least the front two-thirds of your sectional and ideally under a coffee table in front.

    Purchase a large area rug ($200–$800) in a neutral tone or subtle pattern that complements your sofa color. Lay it down before arranging your L-sofa to ensure proper placement. This takes 15 minutes and costs $200–$800.

    Pro tip: A rug in a slightly warmer tone than your sofa (or a subtle pattern) prevents the space from feeling flat. The rug anchors the seating and instantly makes your room feel more finished and intentional—like the layout was actually planned instead of accidentally arranged.

    Save this post and try at least one idea this weekend—whether it’s repositioning your L-sofa to face a new direction, adding throw pillows and a cozy throw, or investing in better lighting behind your sectional. Small changes compound fast, and your living room deserves to feel like the most comfortable room in your home.

  • 26 Premium Upholstery Ideas That Make Furniture Look Exquisite

    26 Premium Upholstery Ideas That Make Furniture Look Exquisite

    Your furniture doesn’t need to cost a fortune to look high-end—it’s all about choosing the right upholstery and styling it strategically. Whether you’re shopping for a new sofa or refreshing what you already own, upholstery is the single biggest investment in your room’s visual impact. The good news? Small upgrades to fabric choice, texture, and care can make even budget pieces read as premium. We’ve gathered 26 upholstery ideas that range from free styling tricks to investment-worthy fabric selections, so you can pick what works for your space and budget. Let’s dive into the specific techniques designers use to make furniture look exquisite.

    1. Choose Linen for Instant Sophistication

    Linen reads expensive because of its natural texture and subtle sheen, even in budget-friendly price ranges. Unlike polyester blends that look flat and plastic-y, linen has an inherent sophistication that photographs beautifully.

    Look for 100% linen or linen blends (at least 70% linen) from brands like Restoration Hardware, Article, or even IKEA’s higher-end collections ($400–$1,500 for sofas). Linen wrinkles naturally, which actually adds to its high-end appeal—it signals relaxed luxury rather than stiff formality. The fabric softens with time and washing, improving with age like a favorite sweater.

    Pro tip: If you’re renting, linen throw pillows ($30–$80 each) work just as well for testing the look before committing to a full sofa.

    Your room immediately gains that effortless, curated quality that reads expensive and comfortable at the same time.

    2. Layer Textures Instead of Patterns

    Mixing textures—not patterns—is how luxury interiors create visual interest without looking busy. A sofa with three coordinating textures (velvet, linen, chunky knit) feels curated and expensive.

    Start with your sofa color as the base, then add pillows in coordinating shades using different fabrics: a smooth velvet ($25–$60 per pillow), a ribbed boucle ($30–$70), and a natural linen ($20–$50). The key is keeping your color palette tight (monochromatic or analogous) while varying surface finishes. Hit a home goods store like West Elm, Crate and Barrel, or Target to feel textures in person before buying.

    Pro tip: Odd numbers work best—use three or five pillows, never four. It creates a more deliberate, designer-like arrangement.

    The layered effect makes even basic sofas look intentionally styled and high-end.

    3. Invest in Quality Velvet for Statement Pieces

    Velvet is the upholstery equivalent of a power suit—it instantly elevates a room because of its luxurious texture and light-reflective qualities. A velvet accent chair or ottoman becomes a focal point that makes the whole space feel more refined.

    Quality velvet isn’t cheap, but one statement piece goes a long way. Look for viscose or cotton velvet blends (more durable than pure viscose) from brands like Article ($300–$600), Wayfair premium lines ($400–$800), or splurge at CB2 or Design Within Reach ($800–$2,000+). Choose jewel tones (emerald, sapphire, oxblood, or deep plum) rather than neutrals to maximize impact.

    Pro tip: Pair velvet with metal legs (brass, gold, or black steel) for a contemporary edge. Wooden legs read more traditional.

    One velvet piece anchors your room and signals that you’ve invested in quality.

    4. Use Boucle for Texture That Looks Expensive

    Boucle (pronounced “boo-clay”) is having a major moment in high-end interiors because it photographs beautifully and feels soft to the touch despite its textured appearance. It reads as “thoughtfully chosen” rather than “default sofa.”

    Boucle is available at most major retailers now: West Elm ($600–$1,200), Article ($500–$1,400), and even Target’s Threshold line ($400–$700). The nubby texture hides dirt and pet hair better than smooth fabrics, and it develops a subtle patina over time that actually improves its appearance.

    Pro tip: Cream and oatmeal boucle reads most luxurious; avoid bright white as it looks harder to maintain and less sophisticated.

    The textured surface creates visual interest and depth that makes your furniture look intentionally selected.

    5. Avoid Microsuede (It Reads Cheap)

    Microsuede and microfiber sound practical, but they read cheap because they have a flat, plastic-y sheen that screams “budget furniture.” Designer homes rarely feature these fabrics, and there’s a reason why.

    If you need something durable and stain-resistant, choose performance linen blends or high-quality cotton twill instead ($500–$1,200 for sofas). Brands like Article, Crate and Barrel, and even Pottery Barn now offer genuinely nice performance fabrics that don’t feel synthetic.

    Pro tip: Pet owners and parents—upgrade to linen and protect it with a quality slipcover ($150–$300) or scotchgard treatment ($50–$100) rather than accepting cheap microfiber.

    Skipping microsuede immediately elevates your room’s perceived quality level.

    6. Add Button Tufting for Instant Luxury

    Button tufting is a signature luxury upholstery technique that instantly makes furniture look high-end and intentional. Even a basic sofa with tufting reads more expensive than a plain, flat version.

    You have two options: buy a tufted sofa ($600–$2,500 depending on quality), or hire an upholsterer to tuft your existing sofa ($300–$800 in labor). If you’re on a tighter budget, a single tufted accent chair from Article, West Elm, or Wayfair ($400–$900) provides the same visual impact. Dark colors (charcoal, navy, oxblood) show tufting details best.

    Pro tip: Buttons should be subtle and match the fabric—avoid contrasting buttons unless going for a maximalist aesthetic.

    The dimensional detail catches light and creates depth that makes furniture look purposefully designed.

    7. Choose Warm Neutrals Over Cool Grays

    Cool, icy grays dominated the last decade, but luxury interiors now favor warm neutrals (oatmeal, sand, caramel, warm taupe) that feel more sophisticated and less sterile. The shift signals a return to comfort-forward luxury.

    Warm neutrals photograph beautifully and work with both modern and traditional decor. Look for sofas in these tones from Article, Restoration Hardware, Crate and Barrel, or even IKEA’s premium lines ($400–$1,500). Pair your sofa with warm wood tones (walnut, oak, or natural wood frames) and brass accents to enhance the sophisticated vibe.

    Pro tip: Test fabric swatches in your actual space under your real lighting before ordering—what looks great in a showroom might feel different at home.

    Warm neutrals feel intentional and refined, making your whole room look more curated and high-end.

    8. Mix Natural Fibers for Organic Luxury

    Natural fibers—linen, cotton, jute, wool, and sisal—feel luxurious because they’re touchable, sustainable, and have visible texture. Mixing them creates a sophisticated, lived-in aesthetic that reads expensive.

    Build your scheme using natural materials: a linen or cotton sofa ($500–$1,500), paired with a wool or jute rug ($300–$1,200), wooden side tables ($150–$600), and a natural fiber throw ($50–$150). Brands like Article, Restoration Hardware, and Wayfair now specialize in natural-fiber upholstery that’s both beautiful and responsibly sourced.

    Pro tip: Natural fibers do require more maintenance (they attract dust and need regular vacuuming), but this “high-maintenance” quality signals premium materials.

    The organic material palette creates a cohesive, intentional room that feels sophisticated and grounded.

    9. Style with a Chunky Knit Throw

    A quality chunky knit throw ($40–$120) is one of the cheapest ways to make any sofa look more expensive and intentionally styled. It adds texture, warmth, and that “designed” aesthetic.

    Choose throws in cream, oatmeal, or warm gray from Target, West Elm, Amazon, or Etsy ($30–$100). The key is draping it casually (never perfectly folded—that looks staged) over one or two arms of your sofa. This simple styling trick adds dimension and breaks up solid-colored upholstery.

    Pro tip: Layer throws by season—lightweight linen blends in summer, chunky wool in winter. This seasonality looks curated and intentional.

    One casual throw transforms a plain sofa into a styled, inviting focal point.

    10. Use Jewel Tones for Perceived Luxury

    Jewel tones (emerald, sapphire, deep plum, oxblood, rich teal) read as more luxurious than neutrals because they require confidence and intentional design choices. Neutrals are safe; jewel tones signal that someone cared about the aesthetic.

    Look for jewel-toned sofas or accent chairs from Article, Crate and Barrel, or West Elm ($500–$1,500 depending on size and material). If you already own a neutral sofa, a single jewel-toned velvet or boucle chair ($400–$900) anchors the room and elevates the whole palette.

    Pro tip: Pair jewel tones with warm metals (brass, copper, gold) and natural wood to keep the look modern rather than dated.

    A jewel-toned statement piece immediately signals thoughtful design and perceived luxury.

    11. Add Contrast Piping for a Designer Touch

    Contrast piping (colored trim along the edges of upholstered pieces) is a designer detail that signals custom, high-end furniture even on budget pieces. It costs little but reads expensive.

    If you’re buying new, order from makers who offer piping customization: Restoration Hardware, Article, or even custom services at Wayfair. Budget an extra $100–$300 for this detail. For existing sofas, an upholsterer can add piping ($200–$400 in labor) for a dramatic upgrade.

    Pro tip: Black piping on neutral fabric, or cream piping on dark fabric, creates the most sophisticated contrast.

    The crisp trim detail instantly elevates your sofa from “basic” to “custom-designed.”

    12. Invest in Slipcovers for Protective Luxury

    High-quality slipcovers ($150–$400) protect your upholstery while looking intentional and expensive. They read as a design choice rather than damage control, especially if they’re tailored and in a premium fabric.

    Choose slipcovers in linen or linen blends (not thin cotton) from brands like Pottery Barn, Restoration Hardware, or custom makers on Etsy. Make sure they fit tightly and tailored—baggy, loose slipcovers look cheap and temporary. Contrast piping or trim details make them feel like a designer choice.

    Pro tip: Slipcovers also allow you to change your room’s color seasonally—swapping them out feels fresh and intentional.

    A well-fitted slipcover looks premium while protecting your investment.

    13. Skip Patterned Upholstery (Use It in Pillows Instead)

    Patterned sofa upholstery often reads busy and dated, even when the pattern is trendy. Luxury interiors favor solid-colored upholstery with pattern introduced through pillows, rugs, and art.

    Keep your sofa in a solid neutral ($500–$1,500) and express pattern through throw pillows ($25–$80 each), a patterned rug ($300–$1,000), and artwork ($100–$500+). This approach is also more practical—you can change patterns seasonally without replacing furniture.

    Pro tip: If you love pattern, a patterned accent chair ($400–$900) is less risky than a full sectional covered in pattern.

    Solid upholstery with patterned accessories reads more refined and allows your room to feel less trendy.

    14. Layer Lighting to Emphasize Upholstery

    Lighting directly affects how your upholstery reads—the right lighting makes fabrics look richer, textured, and expensive. Poor lighting flattens everything and makes nice upholstery look dull.

    Use a combination of ambient light (overhead), task lighting (table lamps), and accent lighting (floor lamps positioned to catch fabric texture). Warm-toned bulbs (2700K) are essential for luxury interiors. Brass or copper fixtures ($50–$200 per lamp) complement upholstery better than chrome or silver.

    Pro tip: Position a floor lamp or wall sconce at an angle to graze across velvet or boucle upholstery—this highlights texture and makes it glow.

    Thoughtful lighting transforms your upholstery from ordinary to exquisite.

    15. Choose Quality Frame Construction

    You can’t see the frame once the sofa is upholstered, but quality construction is what separates a $400 sofa from a $2,000 one. Eight-way hand-tied springs and hardwood frames last decades; budget construction fails in 3–5 years.

    Check product specs for hardwood (not plywood) frames, eight-way springs or high-resilience foam, and solid joinery. Brands like Article, Restoration Hardware, Crate and Barrel, and even some Wayfair lines ($600–$2,000) prioritize frame quality. Avoid the cheapest big-box options—the frame won’t hold up.

    Pro tip: Read reviews specifically mentioning durability and frame quality before buying. Real users report on longevity better than manufacturers do.

    Solid construction means your investment lasts, creating real luxury (not just the appearance of it).

    16. Use Performance Fabric for Realistic Luxury

    Performance fabrics have evolved dramatically—they’re no longer plastic-feeling microfiber. Modern performance fabrics in cotton, linen blends, and proprietary materials look and feel like luxury while resisting stains and pet damage.

    Shop brands like Restoration Hardware, Article, Pottery Barn, and Wayfair for performance upholstery that actually looks good ($600–$1,500). Look for fabric names like “performance linen,” “cotton twill,” or brand-specific proprietary blends. Read reviews from actual pet and kid households for honest feedback.

    Pro tip: Even performance fabrics benefit from scotchgard treatment ($50–$100 application) for extra protection without the plastic feel.

    Realistic luxury means beautiful furniture that actually works for real life.

    17. Add Decorative Pillows Strategically

    Pillow styling is free when you repurpose what you own, but investing in quality pillows ($25–$100 each) makes a massive visual difference. Pillows introduce color, texture, and personality without commitment.

    Buy odd numbers of pillows (three, five, or seven) in complementary fabrics, all within your color palette. Layer sizes from largest (lumbar at back) to smallest (front accent). Brands like West Elm, Target, Wayfair, and Article offer quality options. Pro tip: One statement pillow in a contrasting color or texture is enough—don’t match everything.

    Pillows should look casually arranged, not perfectly lined up. This “designed but lived-in” aesthetic reads expensive.

    Strategic pillow styling is one of the fastest, cheapest ways to make your sofa look intentional and curated.

    18. Invest in Quality Cushion Fillings

    Pillow fill quality directly affects whether your sofa looks slouchy and cheap or plump and luxurious. Down and feather blends (or high-quality foam) hold their shape and feel premium.

    High-resilience foam or down-blend fills cost more upfront but maintain their shape through years of use. When buying pillows, check that they’re filled with down, down-blend, or high-quality foam—not cheap polyester. Brands like Restoration Hardware, Article, and higher-end Crate and Barrel prioritize fill quality.

    Pro tip: Flat, saggy pillows make even expensive upholstery look worn out. Fluff and replace pillows every 2–3 years for maintained luxury.

    Quality cushion fill keeps your furniture looking plump, fresh, and expensive indefinitely.

    19. Choose Sofa Legs That Match Your Aesthetic

    Sofa legs (often overlooked) signal the overall design era and perceived luxury. Metal legs feel contemporary and sleek; wooden legs feel traditional or mid-century; low platform bases feel modern.

    When shopping, check the leg material and style. Brass or copper metal ($0 additional if spec’d from factory) feels luxe and contemporary. Walnut or oak wooden legs ($50–$150 upcharge) feel timeless. Avoid cheap plastic or black metal unless you’re going industrial-modern.

    Pro tip: If your sofa has basic legs you dislike, an upholsterer can replace them ($100–$300) for a design refresh.

    The right legs reinforce your room’s overall aesthetic and elevate the entire sofa’s perceived value.

    20. Care Properly to Maintain Luxury Appearance

    How you maintain your upholstery determines whether it reads expensive for five years or looks worn within two. Luxury isn’t just about initial purchase—it’s about longevity and care.

    Vacuum lightly weekly to remove surface dirt, flip and rotate cushions monthly to distribute wear evenly, and address spills immediately with manufacturer-recommended cleaning. Invest in a quality fabric protectant ($50–$100) and annual professional cleaning ($150–$300). For delicate fabrics like velvet, use a soft brush rather than vacuuming.

    Pro tip: Keep your sofa manual and any fabric care instructions somewhere accessible—they’re worth referencing before DIY cleaning attempts.

    Properly maintained upholstery looks fresh, intentional, and genuinely luxurious for years.

    21. Embrace Warm Minimalism with One Statement Color

    Warm minimalism combines quality upholstery with restrained styling—a single sofa, limited pillows, and open space rather than layered clutter. This approach reads expensive because it signals confidence and intentionality.

    Choose one sofa in a warm neutral ($600–$1,500) and resist the urge to fill every space. Add one or two accent chairs and one side table for a deliberate, high-end look. Minimalist rooms photograph beautifully and feel calming rather than cold.

    Pro tip: When you have fewer pieces, each one matters more—this is why investing in quality upholstery pays off in minimalist schemes.

    Warm minimalism with quality pieces reads sophisticated, intentional, and genuinely luxurious.

    22. Layer Textiles Seasonally for Intentional Rotation

    Changing your textile layers with seasons signals intentional design and makes your space feel fresh and curated. Summer calls for lightweight linens; winter for chunky knits and velvet.

    Keep a rotation of seasonal pillows and throws: lightweight linen/cotton blends for warm months ($30–$80 per pillow), chunky wool and velvet for cold months ($40–$120 per throw). Store off-season textiles in a clear bin ($15–$30). This investment-light strategy maximizes perceived effort and design sophistication.

    Pro tip: Summer brings pale linens and bright accents; winter brings jewel tones and rich textures. The intentional rotation is part of the luxury aesthetic.

    Seasonal textile rotation keeps your room feeling designed and prevents the stale, “never changed” aesthetic.

    23. Mix Upholstery Styles for Curated Eclectic Look

    Mixing upholstery styles (modern sofa with a vintage chair, minimalist bench with a boucle ottoman) reads as intentionally curated rather than mismatched. Designers call this “collected over time” luxury.

    Pair a modern sofa ($800–$1,500) with a vintage-inspired accent chair ($400–$900) and a sculptural bench or ottoman ($300–$700). Keep colors coordinated (all warm tones, all jewel tones) even if styles differ. This approach reads expensive because it signals personal taste and adventure.

    Pro tip: Mix eras but stay within one color story and keep quality consistent—don’t pair a high-end sofa with a cheap chair.

    Mixing styles intentionally signals confidence and creates a genuinely luxurious, personal space.

    24. Use Fringe or Trim Details Sparingly

    Small trim details—fringe, nail heads, or contrasting trim—can elevate basic upholstery to designer-level when used sparingly. The key word is sparingly; overdone trim reads themed or costume-y.

    Look for sofas with subtle nail-head trim from Restoration Hardware, Article, or Crate and Barrel ($800–$2,000) as a detail that costs only $50–$100 extra but reads expensive. Fringe works on ottomans or chairs but rarely on sofas in modern luxury. A single fringe-trimmed ottoman ($300–$600) adds personality without overwhelm.

    Pro tip: Natural materials (wood fringe, brass nails) read more expensive than plastic or shiny metal.

    Minimal trim details signal designer-level attention without visual clutter.

    25. Match Upholstery Quality to Real-Life Usage

    Luxury isn’t pretentious—it’s functional. Choosing upholstery that matches your actual lifestyle reads more genuine and sophisticated than choosing delicate fabric you’re afraid to use.

    If you have kids, pets, or an active household, choose performance fabric ($600–$1,500), not delicate silk ($1,000–$3,000 that you’ll stress over). If you live alone and entertain formally, delicate velvet or silk works. The “luxury” is choosing what genuinely works for you, not compromising comfort for image.

    Pro tip: High-end designers match fabric to lifestyle first, aesthetics second. That’s why their interiors look both beautiful and lived-in.

    Matching upholstery to your reality creates genuinely luxurious spaces that feel comfortable and intentional.

    26. Invest in One Statement Sofa Over Many Cheap Pieces

    The single best upholstery investment you can make is one high-quality sofa rather than three cheap ones. A $1,500–$2,500 sofa in quality materials outperforms three $500 sofas that fall apart in 5 years.

    Put your budget into a single hero piece: a sofa in linen, velvet, or boucle from a maker you trust (Restoration Hardware, Article, high-end Crate and Barrel, or even custom makers). Style around it minimally. This approach signals confidence, quality, and genuine luxury more powerfully than quantity.

    Pro tip: Quality sofas come with better warranties, better frames, and better support. You’re not just buying fabric—you’re buying longevity.

    One statement piece in quality materials reads more expensive and luxurious than multiple cheaper pieces combined.

    Ready to elevate your space? Save this post and pick one upholstery idea to test this month. Whether it’s swapping pillows, trying a new texture, or investing in a statement sofa, small upholstery changes create big luxury vibes. Share this with anyone ready to make their furniture actually feel as good as it looks.

  • 26 Compact Sofa Styles Perfect for Tight Apartments

    26 Compact Sofa Styles Perfect for Tight Apartments


    Small spaces don’t mean you have to sacrifice style or comfort. Whether you’re in a studio, a one-bedroom, or just dealing with a cramped living room, the right sofa can anchor your entire apartment and make everything feel bigger. We’ve gathered 26 compact sofa styles and smart solutions that maximize comfort without overwhelming your floor plan. From budget-friendly finds to investment pieces that’ll last years, you’ll discover exactly what works for tight quarters—and how to style it so your space feels intentional and cozy, not cluttered.


    1. Choose a Curved Sofa to Define Your Layout

    Curved sofas are perfect for small apartments because they create visual interest without eating up floor space the way boxy sectionals do. A curved silhouette guides the eye around the room and naturally defines your living zone without requiring walls or dividers.

    Look for options at IKEA, Article, or West Elm—expect to pay $600–$1,200 for quality curves. Measure your space carefully; curved sofas typically need 7–8 feet of wall length. Installation takes 30 minutes with help. The trick? Position it perpendicular to your TV or window to maximize sightlines.

    Pro tip: Pair a curved sofa with floating shelves above to keep walls open and airy. You’ll be amazed how much architectural interest one good curve adds to a studio or one-bedroom.


    2. Opt for a Loveseat Instead of a Full Sectional

    A loveseat (roughly 60 inches wide) gives you seating for two without the sprawl of a traditional three-seater or sectional. It’s the Goldilocks furniture piece for apartments where space is premium.

    Budget picks: Target or Wayfair offer basic loveseats for $300–$500. Mid-range options from Article or CB2 run $600–$900. Splurge-worthy picks (Article, West Elm) are $1,000–$1,400. Delivery typically takes 1–3 weeks. Measure your doorway before ordering—some loveseats are trickier to move than others.

    Pro tip: Choose a removable, washable cover if you have pets or rent. The best part? A loveseat leaves room for a poufs, side tables, or plants without making your apartment feel packed.


    3. Pick a Low-Profile Frame for a Grounded Look

    Low-profile sofas (with shorter legs or tight frames) visually expand small rooms by creating uninterrupted sight lines. They also feel more modern and less bulky than traditional high-leg furniture.

    Search “low-profile sofa” on Wayfair, Article, or Room & Board. Budget range: $400–$700; mid-range: $800–$1,200; premium: $1,200+. Pay attention to seat depth—many low-profile styles have deeper seats for comfort. Assembly takes 30–45 minutes depending on leg attachment.

    Alternative: If you love the look but need storage, consider a low platform bed with built-in shelving underneath—you get grounded aesthetics plus function. You’ll notice how much taller your ceilings appear when furniture stays low.


    4. Go Modular for Rearrangement Flexibility

    Modular sofas let you swap, rotate, and reconfigure as your life changes—perfect if you move frequently or think your apartment layout might shift. You buy individual sections and connect them however you want.

    Top picks: Article’s Sven collection, CB2’s modular options, or IKEA’s sectional components. Budget: $500–$1,500 depending on size and quality. Installation takes 45 minutes to an hour. The beauty? If one section wears, you replace just that piece instead of the whole sofa.

    Pro tip: Mix and match fabric colors slightly for visual depth, or keep everything neutral for a seamless blend. This approach makes your apartment feel purposeful and gives you the freedom to refresh without major purchases.


    5. Invest in a Sleeper Sofa for Dual Function

    In a tight apartment, a sleeper sofa does heavy lifting—it’s your couch by day and a guest bed by night. Modern designs have come a long way from the uncomfortable couches of the past.

    Look for memory foam or gel-infused mattress options at Article, West Elm, or Wayfair; expect $800–$1,500. Test the pull mechanism in-store if possible—smooth, quiet mechanisms are worth the extra cost. Some models have storage underneath for bedding or linens.

    Pro tip: Pair with a few throw pillows and a chunky knit throw; nobody will guess it’s a bed. You’ll save hundreds of dollars on a guest room, and your visitors will appreciate the comfortable sleeping surface.


    6. Select a Sofa in Warm Earthy Tones

    Warm, earthy colors like camel, clay, sand, and warm greige work magic in small spaces—they feel bigger and more cohesive than bright or cold tones. These shades also hide wear better than white or pale gray.

    Budget loveseats in earthy tones run $300–$600 (Target, Wayfair); mid-range sofas are $700–$1,000 (Article, CB2); premium pieces cost $1,000+ (Article, Design Within Reach). Fabric samples ship free from most retailers—get them before committing. Warm tones pair beautifully with wood, rattan, and natural textiles, so your whole room comes together instantly.

    Pro tip: Avoid pure white or stark gray if you’re a renter with pets—earthy tones forgive life better. You’ll find that neutral warm tones make even a cramped studio feel like a retreat.


    7. Layer Textures with Boucle or Linen

    A single-color sofa becomes visually interesting when you add textural layers—boucle pillows, linen throws, or knit blankets. This strategy makes compact sofas feel more expensive and considered.

    A neutral linen or cotton sofa costs $500–$1,200, then invest $150–$300 in quality throw pillows and blankets. IKEA, Target, and H&M Home offer budget throws ($30–$80); splurge options (Anthropologie, West Elm) run $100–$250. Mix at least three different textures—smooth linen, chunky knit, soft velvet. The result? Your sofa looks styled and intentional without requiring a color overhaul.

    Pro tip: Rotate throws seasonally to refresh the look for free. Adding texture makes a tight space feel designed, not cramped.


    8. Use an Apartment-Sized Sectional (72 Inches or Less)

    A “apartment sectional” is smaller than standard sectionals—usually 72 inches or less—and fits snugly into corners without overwhelming a small room. It gives you the lounge feel without the footprint of a full L-shaped set.

    Budget options (IKEA, Wayfair): $400–$800; mid-range (Article, CB2): $900–$1,400; investment pieces (West Elm, Design Within Reach): $1,500+. Measure corner clearance carefully—you need space to open the door and move through your apartment. Delivery and setup typically take 1–2 hours.

    Pro tip: Choose a chaise on the shorter end (60 inches instead of 80 inches). You’ll get that luxe recline without eating your living room alive.


    9. Pick Stain-Resistant Fabric for Real Life

    Performance fabrics repel stains, resist pilling, and handle pets or messy roommates without showing wear. They’re not as silky as traditional upholstery, but they’re practical for apartment living.

    Brands like Crypton, solution-dyed polyester, and microfiber are your friends. Expect to pay $700–$1,200 for a quality performance-fabric sofa at Article, Wayfair, or Article. Test swatch first—some feel plasticky, while others are surprisingly soft. Cleaning is easy: most stains wipe off with a damp cloth.

    Pro tip: If you’re renting or have kids, performance fabric is non-negotiable. You get years of durability without the stress of permanent damage. The investment pays for itself in peace of mind.


    10. Try a Settee for Narrow Entryways

    A settee (a smaller bench-style sofa with a back and arms) fits in hallways, nooks, or narrow living areas where a full sofa won’t squeeze. It provides seating and visual interest without bulk.

    Budget settees: Target or Wayfair, $300–$500; mid-range: Article or CB2, $600–$900; splurge options: West Elm or Design Within Reach, $900–$1,400. Measure your space precisely—most settees are 48–60 inches wide. Assembly is minimal, usually 15–20 minutes. Pair with a small side table and a throw pillow for instant hotel-lobby vibes.

    Alternative: Use it as a bench at the foot of your bed if your bedroom is the only spare space. You’ll be surprised how much character one settee adds to a tiny apartment.


    11. Go Velvet in Jewel Tones (Go Bold, Strategically)

    A velvet sofa in a rich jewel tone—emerald, navy, or burgundy—becomes a statement piece that makes a small apartment feel designed and intentional. It’s bold without being chaotic.

    Splurge range: $1,000–$1,800 for quality velvet at Article, West Elm, or Design Within Reach. Velvet shows dust and pet hair more than other fabrics, so factor in vacuuming weekly. Keep it simple around it—let the sofa be the star. Pro tip: Pair with brass or wood accents and neutral walls to ground the boldness.

    The payoff? You’ll own a sofa that photographs beautifully and makes your apartment feel like a curated design magazine spread. Just commit fully—half-measures with bold color read as uncertain.


    12. Consider a Chaise Lounge as Your “Sofa”

    If you live alone or don’t entertain much, a chaise lounge replaces a full sofa and takes up far less space. You get that luxe recline without the commitment or footprint of a traditional couch.

    Budget: $300–$600 (IKEA, Target, Wayfair); mid-range: $700–$1,100 (Article, CB2); premium: $1,200+ (West Elm, Design Within Reach). Most chaise lounges are 60–72 inches long but only 30–36 inches deep. Perfect for a studio or one-bedroom where you want to maximize open floor space.

    Pro tip: Pair with a small ottoman to create a makeshift bed for guests—it’s more space-efficient than a sleeper sofa. You’ll love having a dedicated nap or reading spot that doesn’t eat your entire living room.


    13. Use a Daybed as a Sofa-Bed Hybrid

    A daybed (a bed-style frame with a trundle or pull-out mattress) works as a sofa during the day and a full bed at night. It’s especially smart if you’re sleeping and living in one room.

    Budget daybeds: IKEA or Wayfair, $300–$600; mid-range: Article or Pottery Barn Teen, $700–$1,200; quality pieces: Restoration Hardware or Design Within Reach, $1,200–$2,000. Many include under-bed storage for linens or off-season items. Style it with a bolster pillow and throw to make it feel intentional during daytime hours.

    Pro tip: Pair with a low coffee table in front for a living-room setup that doesn’t scream “I sleep on my sofa.” You’ll get functionality that adapts to real apartment living.


    14. Choose an Armless Design to Save Space

    Armless sofas or ultra-low-arm options save precious inches on each side and make tight rooms feel more open. Without bulky armrests, you get more seating surface in the same footprint.

    Budget options: $350–$650 (Target, IKEA, Wayfair); mid-range: $700–$1,000 (Article, CB2); investment pieces: $1,000–$1,500 (West Elm, Article). Assembly takes 20–30 minutes. Trade-off: You lose the armrest lounging comfort, so pair with a few throw pillows for arm support. The upside? Your apartment feels significantly more spacious and modern.

    Pro tip: Measure corner-to-corner and side-to-side before ordering—armless sofas are easier to move and fit through doors than traditional frames. You’ll gain back at least 12–18 inches of usable floor space.


    15. Try a Tuxedo Sofa for Structured Style

    A tuxedo sofa (with high, squared-off arms) looks compact and tailored, perfect for a small space. The clean lines make apartments feel curated rather than cramped, and there’s built-in visual structure.

    Price range: $700–$1,200 for quality tuxedo styles at Article, West Elm, or CB2. The structured design photographs beautifully, so it’s ideal if you like the space to feel Instagram-worthy. Pair with a geometric rug and minimal wall art to amplify that intentional aesthetic.

    Pro tip: Tuxedo sofas feel heavier visually despite taking up similar floor space, so pair with light-colored walls and floating shelves to keep the room airy. The result? Your apartment looks deliberately designed, not makeshift.


    16. Go for a Sofa with Built-In Storage

    A sofa with built-in storage under the seat is a game-changer for studios and one-bedrooms. Stash off-season clothes, extra blankets, or linens without eating closet space.

    Budget options: $500–$900 (IKEA, Wayfair); mid-range: $1,000–$1,400 (Article, Wayfair); higher-end: $1,400–$1,800 (Article, West Elm). Lift-top designs are easier to access than models where you remove the whole cushion. Test the lid mechanism before buying—it should open smoothly and not pinch fingers.

    Pro tip: Use vacuum storage bags for bulky items like winter coats or spare pillows. This simple feature doubles your storage without visible clutter. You’ll never run out of places to stash things again.


    17. Pick a Sofa on Casters for Easy Rearrangement

    A sofa on casters (rolling wheels) lets you shift furniture around without help—essential if you like to refresh your layout seasonally or whenever you feel like it.

    Look for “sofa on wheels” at Article, Wayfair, or Design Within Reach. Budget range: $600–$1,100. Most quality casters are smooth and quiet. Casters also slightly raise the sofa off the ground, making the space feel more open. Make sure your flooring can handle wheels; hard surfaces work best, though felt pads protect wood.

    Pro tip: Use casters as an excuse to rearrange monthly—it keeps the space feeling fresh without spending money. You’ll love having the flexibility to reconfigure your living area anytime the mood strikes.


    18. Select a Sectional with a Chaise for One-Sided Lounging

    A compact sectional with a chaise (one short end that extends for leg-up lounging) gives you lounge comfort in a smaller footprint than a full sectional. You get seating for two plus a recline space.

    Budget: $600–$1,000 (IKEA, Wayfair); mid-range: $1,100–$1,600 (Article, CB2); investment: $1,700–$2,200 (West Elm, Design Within Reach). Measure your corner space carefully—chaise sectionals need more depth on one side. This option works best if you have a defined corner rather than open wall space.

    Pro tip: Pair with a small side table at the non-chaise end for drinks and remotes. You’ll feel like you have a luxury lounging setup without the bulk of a full sectional.


    19. Go with a Futon-Style Sofa Bed for Flexibility

    Modern futons are nothing like your college-dorm days. Today’s futon sofas fold flat into a comfortable mattress and offer maximum flexibility in a small footprint.

    Budget futons: $350–$600 (IKEA, Target, Wayfair); mid-range: $700–$1,100 (Article, Wayfair); quality pieces: $1,200–$1,600 (DlandHonor, modern brands). The fold mechanism takes 5 seconds, and many come with storage drawers underneath. Test the fold-back angle before committing—some sit too upright to feel like a couch.

    Pro tip: Add a high-quality mattress pad on top (around $80–$150) to make the bed sleeping surface more comfortable. You’ll get a legitimate sofa-bed hybrid that actually feels good for both functions.


    20. Try a Sofa with Removable, Washable Covers

    Removable slipcovers mean you can wash or swap fabric seasonally—perfect if you’re renting, have pets, or like to refresh without buying new furniture. It’s the renter’s secret weapon.

    Budget pieces with covers: $400–$800 (IKEA, Target, Wayfair); mid-range: $900–$1,400 (Article, CB2); premium slipcover sofas: $1,500–$2,000 (Article, West Elm). Check wash instructions before buying—some are hand-wash only, others are machine-washable. Buy an extra cover in a coordinating color for rotation.

    Pro tip: Removable covers mean you’re not locked into one look forever. Refresh the vibe for $100–$300 instead of buying a whole new sofa. You’ll have control over your space’s personality and longevity.


    21. Position Your Sofa at an Angle for Visual Interest

    Instead of pushing your sofa flat against a wall, angle it slightly into the room. This creates visual interest and can make a small space feel more intentional and bigger.

    This costs nothing—just rearrange what you have. The angle creates implied corners and zones without needing walls or dividers. Pair with a coffee table aligned with the angle, and suddenly your cramped apartment feels designed. Make sure you still have walkway space; the goal is visual interest, not tripping hazards.

    Pro tip: Angled furniture works best with floating side tables and a coordinated rug underneath. You’ll notice how much more dynamic your living room feels with just a slight rotation.


    22. Choose a Compact Sofa in a Light Color for Spaciousness

    Light-colored sofas (white, cream, pale gray, pale yellow) visually expand a room by reflecting light and blending with walls. In a small apartment, this makes everything feel bigger.

    Light-colored sofas are widely available: budget ($400–$700), mid-range ($800–$1,200), premium ($1,300+) across IKEA, Target, Article, West Elm, and more. The trade-off is stain visibility—go with a performance fabric if you have pets or kids. Pair with colorful throw pillows and art to add personality without visual weight.

    Pro tip: Add a light rug underneath to anchor the space while maintaining that airy feeling. You’ll find that a light, minimal sofa makes even a 400-square-foot studio feel like a loft.


    23. Invest in a High-Quality Frame Over Everything Else

    If you’re buying one sofa that’ll last 5+ years, invest in the frame quality first. A solid hardwood frame outlasts cheap particle board by decades, even if the fabric needs replacing.

    Brands known for solid frames: Article (Italian frames), Design Within Reach (high-end construction), Room & Board (American-made), and Blu Dot. Expect to pay $1,000–$2,000+ for genuinely quality construction. Ask sellers about frame material—hardwood or kiln-dried hardwood is best. Softwood or plywood won’t hold up to apartment wear and tear.

    Pro tip: A great frame with basic upholstery beats a trendy sofa with a flimsy particle-board base. You can always reupholster good bones. You cannot save a bent particle-board frame. This is the investment that matters most.


    24. Use a Sofa Bed as Your Primary Bed (Studio Sleeper Setup)

    If you’re in a true studio with no separate bedroom, a quality sofa bed becomes your primary bed—not just a guest backup. Choose one designed for comfort over style (or both, if budget allows).

    Comfort-first sleeper sofas: Article, West Elm, and Restoration Hardware offer models with quality mattresses for $1,200–$2,000+. Test the mattress before committing—it should support 200+ pounds without sagging. Some have gel or memory foam toppers for added comfort. Budget 10 minutes each morning to convert it back to a couch.

    Pro tip: Pair with high-quality bedding (good sheets and a mattress pad). You’re sleeping on it 8+ hours nightly, so comfort isn’t negotiable. You’ll spend more upfront but gain years of better sleep in a tiny apartment.


    25. Layer Your Sofa with Strategic Throw Pillows

    Throw pillows instantly update a basic sofa and make it feel intentional. Use a mix of sizes, textures, and one bold pattern to add depth without chaos.

    Budget pillows: Target, IKEA, Wayfair, $20–$50 each; mid-range: Article, CB2, H&M Home, $60–$120 each; premium: Anthropologie, West Elm, $100–$200+ each. Start with three pillows (two neutral, one pattern), then add more as budget allows. Mix square, rectangular, and lumbar shapes for visual interest.

    Pro tip: Vary heights and depths—lean one pillow against the back, lay one flat, stand one upright. This layered approach makes even a budget sofa look styled and magazine-ready. Your apartment will feel 10 times more curated with minimal effort.


    26. Pair Your Sofa with a Coordinating Area Rug

    An area rug underneath and in front of your sofa ties the seating area together and makes a small space feel intentionally designed. It also defines the living zone in open-plan apartments.

    Budget rugs: IKEA, Wayfair, Target, $100–$250; mid-range: Article, Rugs USA, $300–$600; premium: West Elm, Anthropologie, $600–$1,200+. Choose a size that extends 12 inches beyond your sofa on at least three sides. A rug slightly smaller than your sofa-plus-coffee-table footprint works best for compact spaces.

    Pro tip: Layer a small patterned rug on top of a neutral base rug for visual depth without overwhelming the space. This approach grounds your seating and makes your apartment feel intentionally styled rather than randomly furnished. You’ll notice how much more composed the space feels with a rug anchoring everything.


    Save this post for your next apartment refresh and bookmark your favorite style. Try one configuration this weekend—whether it’s moving your sofa to a new angle or adding throw pillows—and see how much impact one small change makes.

  • 23 Sculptural Furniture Ideas That Turn Seating Into Art

    23 Sculptural Furniture Ideas That Turn Seating Into Art


    Introduction

    Your living room seating doesn’t have to be a boring rectangle. Sculptural furniture—pieces with curves, artistic forms, and eye-catching silhouettes—turns functional seating into gallery-worthy art that makes people pause when they walk in. The best part? These aren’t museum-only investments anymore. Whether you’re working with $50 or $500, there’s a way to bring organic, fluid shapes into your space. In this guide, you’ll discover 23 ways to swap rigid furniture for pieces that flow, inspire, and actually feel better to sit in. From bold curved sofas to unexpected seating vignettes, these ideas work in small apartments, sprawling living rooms, and everything in between.


    1. Choose a Curved Sofa as Your Main Anchor

    A curved sofa immediately signals that your space prioritizes comfort and style over convention. Instead of fighting against your furniture, let it work with the natural flow of how people move through your room.

    Look for curved sectionals or serpentine sofas at retailers like West Elm, Article, or CB2 (usually $800–$2,500 for quality pieces). If that’s out of budget, check IKEA’s curved options ($400–$700) or hunt Facebook Marketplace and Craigslist for mid-century finds. Measure your doorways first—curved pieces can be tricky to move. Set aside a weekend for delivery and placement.

    Pro tip: If you rent or want to test the trend, curved accent chairs ($150–$400) deliver the same artistic vibe without the commitment of a full sofa.

    Your room instantly feels more intentional and inviting when seating flows instead of sits in sharp corners.


    2. Add a Sculptural Coffee Table Under $500

    Coffee tables are the unsung heroes of room design. A sculptural one stops people mid-conversation because they’re visually interesting enough to notice, but functional enough to use daily.

    Hunt for curved, organic tables at Target ($150–$300), IKEA ($100–$250), Etsy ($200–$400 for handmade stone or wood), or Article ($300–$500). Materials like curved wood, sculpted concrete, or curved metal frames work best. Wood tables age beautifully and hide scratches; concrete reads more modern. Measure your sofa depth beforehand—ideally 16–18 inches away from seating.

    Alternative: DIY a sculptural look by placing a marble or wood slab on sculptural metal legs ($120–$250 total).

    The conversation starter factor alone makes this worth the upgrade. Plus, a shaped table actually guides eye movement around your room better than rectangular ones do.


    3. Invest in a Curved Accent Chair for Reading Nooks

    One sculptural accent chair in a quiet corner transforms how you use your living room. Suddenly, you have a retreat spot that feels separate from the main seating area.

    Curved barrel chairs or papasan-style seats ($200–$600) work well from Article, West Elm, Wayfair, or IKEA. Look for forms that cradle your body—egg chairs, cocoon shapes, or swooping backs feel more luxe than standard armchairs. Upholstery in jewel tones like emerald, burgundy, or ochre pairs beautifully with sculptural forms. This is a one-weekend placement project.

    Budget option: Vintage curved chairs from estate sales or Facebook Marketplace ($50–$150) often have better bones than new budget pieces.

    You’ll find yourself actually using this corner because the chair itself becomes a reason to sit down, not just functional seating filler.


    4. Layer Banquettes for Intimate Gathering Zones

    Banquettes create conversation islands within larger rooms. They signal “this is a special zone” without needing walls, which designers like Rita Konig have championed for years.

    Custom banquettes ($1,500–$3,500) take 6–8 weeks but feel permanent and luxe. For faster results, buy modular seating or curved bench seats ($400–$1,200 each from West Elm, CB2, or Wayfair) and arrange two facing each other. Add coordinating cushions ($50–$200 per cushion) in complementary colors. Layer in a low coffee table ($150–$400) between them. This weekend project transforms your room’s functionality.

    Renter-friendly: Curved outdoor benches moved indoors ($200–$500) create the same effect without permanent installation.

    Your living room becomes a destination within your home—the place where real conversations happen, not just where people sit to watch TV.


    5. Mix Curved and Linear Forms for Balance

    Too many curves feel chaotic; too many straight lines feel cold. The magic happens when you pair them intentionally.

    Start with your curved seating as the hero, then ground it with linear elements: a straight console table ($150–$400), angular bookshelves ($200–$600), or a rectangular rug ($100–$300). This mix—what designers call “organic modernism”—feels curated and intentional. Use mixed metals and wood tones to tie them together. No special tools needed; this is pure styling over one afternoon.

    Pro tip: A round mirror ($80–$200) echoes your sofa’s curves while adding that linear geometry through its frame.

    The result feels sophisticated and balanced, like you’ve studied design rather than randomly purchasing items.


    6. Float Your Seating Away From Walls

    Floating furniture—especially sculptural pieces—makes rooms feel bigger and allows the piece’s form to shine. It’s a simple shift with massive impact.

    Pull your curved sofa or seating away from walls by at least 12–18 inches. This works best in rooms 14×16 feet or larger; smaller spaces might feel cramped. Anchor the floating area with a large area rug ($150–$400) to define the zone. Add a console table behind the sofa ($150–$300) for visual separation. No renovations needed—just one afternoon rearranging.

    This trick works in open-concept homes where it creates an implied wall without blocking sightlines.

    Suddenly your room feels like a curated display, not just filled with furniture. The sculptural shapes get the attention they deserve.


    7. Choose Low-Profile Seating to Emphasize Height

    Low-profile sculptural seating—pieces with exposed legs and minimal height—makes rooms feel taller and more open. It’s especially powerful in apartments with standard 9-foot ceilings.

    Look for sofas 28–32 inches tall (instead of standard 34–38 inches) from IKEA ($300–$600), Article ($500–$1,200), or Wayfair ($400–$1,000). Exposed wooden or metal legs ($0 extra—just part of the design) let light travel underneath. Pair with tall standing plants ($20–$80 each) and floor lamps ($80–$200) to draw eyes upward. Installation is just unboxing and arranging—one Saturday project.

    Budget hack: DIY legs ($15–$30 per set) onto an existing sectional if you’re handy with a drill.

    Your room breathes easier with low furniture. It’s especially noticeable when guests walk in—they’ll comment on how spacious it feels.


    8. Create a Curved Sectional Dialogue With Your Space

    A substantial curved sectional doesn’t need a lot of additional furniture because the piece itself becomes the room’s conversation. It’s sculptural furniture as architecture.

    Invest in a custom curved sectional ($2,000–$4,500) from Design Within Reach, Restoration Hardware, or Article for statement-making impact. Ready-made curved sectionals are cheaper ($800–$1,800) but less flexible on size. Pair with minimal additional seating—just one sculptural accent chair—to let the sofa shine. Plan 6–8 weeks for custom; ready-made ships in 2–3 weeks. Budget for professional delivery ($200–$400).

    Alternative: Modular curved seating ($1,200–$2,000) you arrange yourself offers flexibility if your space changes.

    This investment transforms your living room into a designed space, not just a furnished room.


    9. Mix Sculptural Forms in Your Seating Lineup

    Matching furniture sets feel corporate. Mixing sculptural forms—different shapes that somehow work together—feels intentional and collected.

    Start with your main curved seating, then add a barrel chair ($300–$700), a papasan ($150–$400), or an asymmetrical ottoman ($200–$600) from different designers. Tie them together with color harmony (choose 2–3 colors and repeat across pieces) rather than matching. Shop Wayfair, Article, West Elm, and local vintage furniture stores for variety. This styling takes one afternoon once pieces arrive.

    Pro tip: Keep upholstery colors cohesive while varying shapes. Your eye reads harmony through color, not form.

    Your room looks like you’ve collected thoughtfully over time, not like you shopped one store in one afternoon.


    10. Use Curved Coffee Tables as Sculptural Anchors

    While you’re thinking about seating, don’t forget the table. A curved coffee table echoes your sofa’s form and becomes artwork when not in use.

    Hunt for curved coffee tables in materials like live-edge wood ($150–$600), cast concrete ($200–$500), or curved metal frames ($100–$300) from Etsy, Article, local wood craftspeople, or CB2. Organic materials ground luxury feels, especially in jewel-tone or moody earth-tone rooms. Measure your space before ordering—oversized tables ($1,000+) work in spacious living rooms; smaller ones ($150–$400) suit apartments. Delivery and placement takes one evening.

    DIY option: Commission a local artisan through Etsy ($300–$800) for a truly one-of-a-kind piece.

    A sculptural table does double duty: functional surface and art installation.


    11. Add Curved Side Tables for Layered Interest

    Side tables are the unsung supporting actors in a sculptural room. Curved ones echo your sofa’s form without adding visual weight.

    Place curved or organic side tables ($100–$400 each from IKEA, Target, Wayfair, or West Elm) beside seating. Mix heights (28–32 inches) and materials—one glass and metal, one wood, for instance—to add texture and interest. Use different tables (rather than matching pairs) for a more collected aesthetic. Styling takes 10 minutes once tables arrive.

    Budget option: Thrifted side tables ($20–$80) spray-painted or refinished ($0–$50 in supplies) save money while adding personality.

    These small details make your room feel professionally designed because you’ve thought about every corner, not just the main seating.


    12. Incorporate Curved Storage for Function and Form

    Storage doesn’t have to be boxy. Curved storage cabinets blend function with the sculptural aesthetic you’re building.

    Choose a curved credenza or sideboard ($400–$1,200 from West Elm, Article, Wayfair, or local furniture makers) in warm woods or soft grays to ground your color palette. Curved edges and tapered legs keep it feeling light despite its size. Use it to store books, media equipment, or tableware. Display decorative objects on top for visual interest. Installation is one weekend—measure doorways first for delivery concerns.

    Budget-friendly: Paint a straight cabinet with curved details ($50–$100 in paint and hardware) or drape a curved frame with fabric ($80–$150) for a softer, sculptural illusion.

    Now your storage becomes part of your room’s visual story, not an afterthought piece shoved in a corner.


    13. Layer Curved Mirrors to Amplify Space and Light

    Curved mirrors multiply light and make rooms feel larger. They’re also sculptural objects themselves.

    Hang or lean a large curved mirror ($80–$300) behind seating to amplify natural light and create depth. Arched mirrors ($100–$400) add art deco flair if you’re leaning into geometric drama. Position to catch windows so reflections bounce around. Installation is a one-hour project with basic wall hardware ($10–$20). Renter option: lean it against the wall for zero installation stress.

    Pro tip: Choose a mirror with a sculptural frame ($150–$500)—carved wood, curved metal, or plaster—so it reads as art even when reflecting nothing special.

    Mirrored walls used to feel 80s, but one strategic curved mirror feels contemporary and luxury.


    14. Pair Curved Seating With Geometric Rugs

    Rugs ground seating and create visual anchors. Geometric rugs (even angular ones) work beautifully with curved furniture if color ties them together.

    Place a large area rug (8×10 feet, $150–$500) from Wayfair, Article, or local rug shops beneath your curved seating. Choose geometric patterns in jewel tones or warm earth tones. The rug doesn’t need to match your sofa’s curves—instead, let color harmony do the work. Ensure at least the front legs of seating sit on the rug for visual grounding. Styling takes 15 minutes.

    Budget option: Layer a smaller patterned rug ($80–$200) over a neutral base rug for texture and interest without the price tag.

    Your room’s visual weight shifts downward, creating a complete, designed look rather than floating furniture on bare floors.


    15. Install Curved Shelving for Sculptural Storage Display

    Curved shelving on walls brings sculptural interest to the upper half of your room and works especially well in small spaces.

    Mount curved shelves ($80–$300 each from Etsy, West Elm, or local makers) on feature walls above seating. Wavy or bowed shelves read as artwork while functioning as storage. Space shelves 10–12 inches apart for books and decor. Installation takes 1–2 hours with a drill and level; hire a handyperson ($75–$150) if you’re not comfortable with wall drilling. Styling happens over an afternoon as you arrange items.

    Renter-friendly: Floating curved shelves with adhesive anchors ($50–$150) avoid permanent wall damage.

    Suddenly your vertical space becomes part of the room’s design, not wasted wall. Books and objects feel like an art installation.


    16. Create Curved Accent Walls for Moody Depth

    Paint creates depth and drama without adding physical furniture. A curved (or simply strategically placed) accent wall in jewel or earth tones works beautifully behind sculptural seating.

    Choose one wall opposite your main seating and paint it in moody colors: deep burgundy ($30–$50 in paint, $100–$200 for professional application), forest green, or warm ochre. Test patches first—colors shift dramatically in different lights. Hire a painter ($200–$400 for one wall) or DIY over a weekend ($0–$50 if you already have supplies). Paint in matte or eggshell finishes for luxe, soft looks.

    Alternative: Peel-and-stick wallpaper ($30–$100) offers color without permanent commitment.

    One moody wall behind your furniture instantly makes everything look more intentional and gallery-like.


    17. Mix Curved Seating With Sculptural Wooden Accents

    Organic modernism blends metals and woods with soft upholstery. Sculptural wooden pieces echo seating curves and ground the space with natural warmth.

    Seek out live-edge wood tables and shelving ($150–$600) from local makers, Etsy, or West Elm. Mix wood tones (one dark, one medium, one light) for visual interest without matching. Pair with brass or brushed gold metal accents ($20–$100 for hardware updates) to add luxury shimmer. Styling happens as pieces arrive—arrange over an evening to see what works. Pro tip: Sand and refinish thrifted wood pieces ($0–$50 in supplies) for budget-friendly sculptural upgrades.

    Your space reads as warm, intentional, and connected to nature—that “quiet luxury” feeling everyone craves.


    18. Layer Curved Lighting for Atmosphere and Function

    Lighting transforms curved furniture from functional to magical. Sculptural light fixtures—arched floor lamps, curved sconces, organic table lamps—amplify your design intentionality.

    Install arched floor lamps ($80–$250 from Target, CB2, or Article) beside seating for ambient glow. Add table lamps with curved or organic bases ($50–$150 each). Layer in wall sconces with curved arms ($60–$200) if you want permanent fixtures. Vary light temperatures: warm white (2700K) for evenings, brighter white (4000K) for daytime. Plan one weekend for installation; hire an electrician ($100–$200) for hardwired sconces. Budget option: battery-operated LED uplights ($20–$50) create atmosphere without installation.

    Lighting is the final touch that makes your room feel finished and intentional.


    19. Add Sculptural Planters and Biophilic Elements

    Plants and sculptural planters create organic movement around your seating area. Biophilic design—bringing nature indoors—pairs beautifully with curved furniture forms.

    Place 3–5 sculptural planters ($30–$150 each from Target, West Elm, CB2, or local ceramicists) around your seating. Choose curved or organic planter shapes in warm earth tones. Fill with low-maintenance plants: fiddle leaf figs, monstera, pothos, snake plants ($15–$40 each). Tall planters (28–36 inches) go in corners; smaller ones flank seating. Watering happens weekly; styling happens in an afternoon. Pro tip: Group planters in odd numbers (3, 5, 7) for visual harmony.

    Budget option: Thrifted planters ($5–$20) refreshed with paint ($10 in supplies) add personality affordably.

    Suddenly your room feels alive and intentional, like someone actually lives here thoughtfully—not just filled a space with furniture.


    20. Combine Curved Seating With Pattern-Drenched Walls

    Pattern drenching—applying one pattern across all walls—creates immersive, gallery-like rooms. It sounds bold but feels intimate when paired with organic seating.

    Choose one pattern you love (botanical, geometric, or abstract) from wallpaper collections ($20–$50 per roll from Wayfair, Spoonflower, or Etsy). Apply to all four walls for impact. Pair with a neutral curved sofa ($600–$1,500) so the sofa recedes and the pattern becomes the star. Hire a wallpaper installer ($300–$600) or DIY over 2–3 weekends ($0 if you’re patient). Peel-and-stick options ($15–$40 per roll) avoid permanent commitment.

    Alternative: Paint one pattern yourself using stencils ($20–$80) for a more budget-friendly approach.

    Your room becomes a complete sensory experience—wrapped in a pattern that feels chosen and intentional.


    21. Use Curved Ottomans as Multipurpose Sculptural Pieces

    Ottomans are the overlooked heroes of sculptural seating. A curved, sculptural ottoman adds seating flexibility, footrest functionality, and visual interest.

    Choose a curved or rounded ottoman ($200–$600 from Article, West Elm, CB2, or local makers) with exposed wooden or metal legs. Look for ones slightly lower than your sofa seat height (12–16 inches) so they serve as proper footrests. Upholster in jewel tones or textured fabrics to ground your palette. One delivery and placement is a one-hour project. Pro tip: Look for ottomans with storage inside ($300–$700) for hidden functionality.

    Budget hack: Curved vintage wooden stools ($50–$150) refinished with new upholstery ($100–$200) cost less than new pieces.

    Now you have seating flexibility—extra surface area for guests, footrest for lounging, or side surface for beverages.


    22. Layer Sculptural Throw Pillows for Texture Without Clutter

    Throw pillows on curved seating showcase texture and personality without overwhelming your design. Sculptural pillow shapes (round, barrel, lumbar) echo seating curves.

    Place 4–6 pillows ($20–$80 each from Target, West Elm, Article, or Etsy) in varying shapes and textures on your curved sofa. Mix velvet, linen, wool, and boucle for tactile interest. Stick to 2–3 colors (choose jewel tones or warm earth tones) repeated across pillows. Layer heights—some upright, some reclined—for dynamic styling. Update one evening; rearrange whenever you want fresh variety. Budget option: DIY pillow covers ($5–$15 per cover in fabric) for trendy patterns at a fraction of retail cost.

    Your sofa becomes an inviting nest, not just a place to sit.


    23. Design a Multi-Use Vignette With Curved Seating

    Your final sculptural idea: create a complete vignette—a mini-room within your room—using curved seating as the centerpiece. This works especially well in open-concept spaces.

    Arrange a curved bench or banquette ($400–$1,200) with 2–3 sculptural accent chairs ($200–$700 each) in a conversational arrangement. Add a round or curved low table ($150–$400) between them. Define the zone with a small area rug ($80–$200) and layered lighting ($100–$300 total). Use plants ($15–$50 each) to create visual boundaries. This multi-hour project transforms a corner into a destination. Pro tip: Position your vignette perpendicular to your main seating for maximum visual interest and defined zones.

    Your living room suddenly has rooms within it—a main gathering space and an intimate retreat area. Guests feel the intentionality the moment they walk in.


    Ready to bring sculptural seating into your home? Pick one idea this weekend and start small—maybe a curved accent chair or sculptural coffee table. These pieces aren’t just furniture; they’re how you show up for yourself in your own space. Save this post and share it with anyone else ready to ditch the boring rectangles.

  • 23 Indoor–Outdoor Flow Design Ideas for Bright, Airy Living

    23 Indoor–Outdoor Flow Design Ideas for Bright, Airy Living


    The gap between your indoor and outdoor spaces is costing you natural light, fresh air, and that coveted open, airy feeling everyone craves. Whether you’re in a small apartment with a balcony or a house with a yard, breaking down those visual and physical barriers makes your home feel bigger, brighter, and more connected to nature. The good news? You don’t need a major renovation to pull it off. These 23 ideas range from free styling tricks to strategic upgrades that blur the line between inside and out—and most work in rentals too. Let’s open things up and bring that outdoor calm directly into your living space.


    1. Install Glass Sliding Doors or French Doors

    Glass doors are the single most effective way to visually connect indoor and outdoor spaces. They flood your interior with natural light while creating a psychological sense of expanded square footage. If you’re renting or can’t replace existing doors, consider removable glass panels or adhesive frosted film on existing frames for a temporary upgrade.

    For homeowners: New sliding glass doors run $800–$3,000 installed, depending on size and quality. French doors are typically $1,000–$2,500. Both pay dividends in resale value and daily livability. For renters: Talk to your landlord about temporary glass panels ($100–$300) or use portable room dividers to frame the window instead. Many landlords appreciate the non-permanent approach. Installation takes a professional 4–8 hours or one weekend for a skilled DIYer.

    The result? Instant visual connection. You’ll notice how much lighter and more spacious your home feels within days.


    2. Paint Your Walls Light, Warm Neutrals

    Wall color is the fastest way to amplify natural light. Warm whites, creams, and taupes bounce light around the room and create visual continuity with outdoor spaces, while also making rooms feel bigger. Skip stark white—it creates harsh contrasts and can feel cold. Instead, go for off-white with warm undertones.

    Paint runs $25–$60 per gallon, and a typical room takes 1–2 gallons. Primer is included in most modern paints. A weekend DIY project for one room, or hire a painter for $300–$800 total. Test samples on your wall first—natural light changes how colors look. Pro tip: Paint your ceiling a very light color too. It opens up vertical space and makes the room feel airier.

    Your space instantly becomes a brighter canvas for natural light to dance through.


    3. Remove or Lighten Heavy Window Treatments

    Thick curtains, dark drapes, and heavy shutters block precious natural light. Swap them for sheer curtains, roll-up blinds, or fabric panels that filter light while maintaining privacy. Sheers are your secret weapon for controlling glare while keeping views open.

    Sheer curtains from IKEA or Target cost $10–$30 per panel. Motorized roller blinds run $50–$150 each and offer precise light control. If you’re renting, adhesive hooks ($5–$10) let you hang lightweight options without damaging walls. Installation is 15 minutes per window. Pro tip: Install curtain rods as high and wide as your wall allows to create the illusion of taller, larger windows.

    Light pours in unobstructed, and your interior connects visually to the outdoors throughout the day.


    4. Add Potted Plants Near Windows and Doors

    Houseplants blur the boundary between indoor and outdoor living while improving air quality and adding visual interest. Place taller plants near glass doors to frame views and shorter ones on sills to catch light. Vary pot sizes and heights for a dynamic, less sterile look.

    Plants range from $5–$50 each depending on size and type. Low-light tolerant options like pothos and snake plants work almost anywhere. A beginner-friendly collection of 5–7 plants costs $30–$150 total. No installation needed—just position and water. Pro tip: Group odd numbers of plants together for better visual impact than pairs or singles.

    Your space becomes a garden retreat. That shift from “interior” to “nature connection” happens psychologically the moment you see greenery.


    5. Extend Flooring Across the Threshold

    A visual and physical break at your door disrupts the flow between spaces. Using the same flooring material (or a closely matched color) inside and outside creates continuity and makes both zones feel like one cohesive area. This doesn’t require replacing floors—it’s about alignment and choice.

    If you’re renovating, extend your interior flooring to the patio ($3–$15 per square foot installed, depending on material). For renters or non-renovators, paint your porch or patio the same neutral tone as your interior ($20–$50 for exterior paint). Alternatively, use outdoor rugs in matching colors to visually tie zones together. Pro tip: A threshold strip in a subtle metal finish ($10–$30) provides a clean transition without visual jarring.

    The boundary dissolves. People instinctively feel like they’re in one unified, open space.


    6. Create a Consistent Color Palette Indoors and Out

    When indoor and outdoor furnishings and colors coordinate, it visually extends your space. Use the same accent colors—warm metallics, terracotta, sage green, or soft blues—in both zones. This creates a psychological sense of flow and intentional design.

    Outdoor furniture ranges from $200–$1,500 depending on quality. Aim to match 2–3 key accent colors with indoor throw pillows, artwork, or decor. You don’t need matching furniture—just coordinating colors and finishes. A few outdoor throw pillows ($30–$80 each) tie rooms together affordably. Pro tip: Use the same plants, planters, or planters in both zones to reinforce the visual connection.

    Your eye travels from inside to outside without jarring color shifts. Everything feels intentionally designed as one ecosystem.


    7. Install Skylights or Solar Tubes for Borrowed Light

    If you have limited windows or a dark interior, skylights channel natural light from your roof. Solar tubes (light pipes) are a cheaper, renter-friendly alternative that captures rooftop light and channels it down interior walls. Both create the sensation of openness even in rooms without direct outdoor views.

    Skylights cost $300–$1,500 installed, with ongoing maintenance needed. Solar tubes run $150–$400 installed and are easier to maintain. For renters, this won’t work—but you can use full-spectrum LED panels ($50–$200) designed to mimic natural light, positioned to create ceiling highlights. Installation: professional job (4–8 hours) or weekend project if you’re handy. Pro tip: Pair with light-colored walls to maximize light distribution throughout the room.

    Suddenly rooms that felt cave-like become bright and airy, even on cloudy days.


    8. Use Mirrors to Reflect Natural Light

    Mirrors are the cheapest way to amplify natural light and create the illusion of more space. Position a large mirror across from or adjacent to your main light source—a window or glass door—to bounce light deep into the room. This works especially well in narrow hallways or rooms without direct sunlight.

    A large mirror runs $30–$150 from IKEA, Target, or Wayfair. Installation takes 10 minutes with picture hangers. For renters, lean an oversized mirror against a wall ($40–$100, no drilling). Placement is everything: opposite a bright window works best, but even beside one helps. Pro tip: Antique or black-framed mirrors add style while reflecting light. Avoid mirrors in direct sun during intense afternoon hours—they can create heat and glare.

    The room feels immediately brighter and more spacious. Light bounces around corners that previously felt dark.


    9. Paint Your Ceiling a Pale, Cool Tone

    A light ceiling makes rooms feel taller and airier—especially when paired with light walls. Pale blue, soft gray, or off-white ceilings create a “sky-like” effect that connects the interior to outdoor atmosphere. Avoid painting ceilings dark; it shrinks the sense of space.

    Ceiling paint is the same price as wall paint: $25–$60 per gallon. A typical room takes 1–2 gallons and a weekend to DIY, or hire a painter ($200–$500). The biggest challenge is physical strain—rent scaffolding or an extension ladder ($20–$50) to stay safe. Pro tip: Pale blue (think cloudy sky) performs better than stark white in rooms that get lots of sun.

    Your eye travels upward instead of stopping at a dark plane. The entire room expands vertically and feels more open.


    10. Install Pocket Doors or Barn Doors Instead of Swinging Doors

    Swinging doors take up visual and physical space, blocking views and breaking up flow. Sliding pocket doors or barn doors slide flush against the wall when open, creating maximum visibility and usable floor space. This is especially valuable in small homes or apartments.

    Pocket door kits run $150–$400, plus installation ($300–$800 professionally). Barn doors are slightly cheaper: $100–$300 for the door, $200–$500 for hardware and install. For renters, sliding barn door kits designed to attach to existing frames exist ($300–$600, no permanent damage). Installation is typically one weekend for a handy person or a few hours for a pro. Pro tip: Bypass doors (two doors sliding past each other) work in very tight spaces.

    When open, the doorway disappears entirely. You get an unobstructed view and seamless flow that swinging doors could never deliver.


    11. Choose Furniture with Legs (Not Skirted Pieces)

    Heavy furniture with skirted bases (couches that touch the floor, solid storage pieces) visually shrinks a room and blocks sightlines. Furniture with exposed legs—even modest ones—keeps visual space open and lets light flow underneath. This is a styling choice that costs nothing if you already own pieces.

    If you’re shopping, prioritize furniture with legs ($200–$1,000+ depending on style). Look for sofas, coffee tables, and entertainment centers marketed as “mid-century modern” or “contemporary”—these almost always have visible legs. For existing furniture you love, swap out panel bases for leg kits ($50–$150) available online for many IKEA pieces. Pro tip: Even 4–6 inches of clearance between furniture and floor makes a psychological difference in how spacious a room feels.

    Your sightlines clear from floor to ceiling. The room immediately feels more open and less weighted down.


    12. Use Glass Coffee Tables and Side Tables

    Solid tables block visual flow and light. Glass or acrylic tables let light pass through and keep sightlines open. They’re also easier to see over when you’re sitting, maintaining views to windows and outdoor spaces.

    Glass tables from IKEA, Wayfair, or Target range from $50–$300. Acrylic versions are cheaper ($30–$150) and lighter to move. A quality glass coffee table lasts years and works in almost any style. Installation is unboxing and placing. Pro tip: Keep glass tables clean for maximum light transmission—a quick wipe with glass cleaner ($3–$5) takes 2 minutes weekly.

    Light travels through instead of stopping. Your eye reaches beyond the table to windows and outdoor views without obstruction.


    13. Paint Doors and Trim in Soft, Light Colors

    Dark wood doors and heavy trim interrupt the visual flow and make rooms feel smaller. Light-painted doors, trim, and baseboards extend the visual lightness of your walls and create continuity. This is especially impactful in open-plan spaces.

    A quart of trim paint costs $8–$15. One door and trim takes $20–$40 in materials and 2–3 hours to paint yourself. Hiring out runs $150–$300 per room. Prep is more important than painting—sand lightly, prime, then paint with quality trim paint. Pro tip: Use the same color as your walls for maximum cohesion, or go one shade lighter for subtle definition.

    Rooms feel seamlessly connected. No visual barriers interrupt the flow from space to space.


    14. Create an Outdoor Kitchen or Bar Extension

    Blurring the kitchen into the outdoor space—with a small bar, grill, or serving counter—extends your living area and encourages flow between zones. Even a simple outdoor cart or shelving unit styled to match interior finishes does this.

    A full outdoor kitchen island runs $1,500–$5,000+, but a basic grill cart or bar setup costs $200–$800. Outdoor cabinetry matching your interior style ranges from $300–$2,000 depending on size and material. For renters, a styled outdoor bar cart ($50–$150) and coordinating outdoor storage ($100–$300) create the same effect without permanence. Installation depends on your setup; a cart takes 10 minutes. Pro tip: Use the same hardware finishes (brass, stainless, black) as your interior kitchen to tie zones together.

    Your entertaining and cooking flow seamlessly between inside and out. The boundary between zones dissolves during gatherings.


    15. Add Sliding Glass Panels or Folding Walls

    Full-height folding glass walls (also called accordion or bifold glass systems) completely open up an interior-exterior connection. They’re more expensive than standard doors but create a truly seamless transition. Available as retrofit kits or new installations.

    Custom folding glass walls cost $2,000–$8,000+ installed, depending on width and customization. Retrofit kits designed for existing door frames run $1,500–$4,000. For renters, this isn’t feasible, but temporary removable glass panels ($200–$600) can approximate the effect. Installation is a professional job (one day). Pro tip: Look into thermal efficiency ratings; high-performance glass minimizes heat gain in summer.

    When open, your interior and patio become one expansive zone. The sense of space doubles instantly.


    16. Install Continuous Shelving from Interior to Exterior

    Shelving that runs continuously from inside to outside (or appears to) visually bridges the two spaces. Even if your shelves don’t literally cross the threshold, styling them with coordinating objects creates visual flow.

    Floating shelves cost $20–$60 per shelf, plus installation brackets and hardware ($30–$80). A set of 5–6 shelves runs $200–$400 total with installation. For outdoor shelves, use weather-resistant materials (powder-coated steel or sealed wood). Mounting takes 1–2 hours for a handy person. Pro tip: Use the same styling objects—potted plants, books, decorative boxes—in both zones to reinforce continuity.

    Your eye travels horizontally from inside through doors and onto outdoor shelving. The zones feel intentionally unified.


    17. Hang Sheer Curtains on a Tension Rod for Flexible Privacy

    Sheer curtains on tension rods (no drilling) give you light control without the commitment or cost of permanent fixtures. Tension rods work in rentals and are adjustable as seasons change.

    Sheer curtain fabric runs $5–$15 per yard, and tension rods cost $5–$20 each. A two-panel setup costs under $50 total. Installation is literally pulling the rod taut between two points—zero tools needed. Hemming panels takes 30 minutes if you sew, or a tailor does it for $15–$25 per panel. Pro tip: Hang rods at the very top of windows (even ceiling height) to create the illusion of taller, larger windows.

    Light diffuses gently throughout the day. You maintain outdoor connection while controlling glare and afternoon heat.


    18. Paint Your Exterior Walls a Complementary Shade

    If your exterior walls are visible through glass doors or windows, paint them in a complementary—or identical—shade to your interior. This extends visual unity and makes your home feel intentionally designed, not like separate indoor and outdoor worlds.

    Exterior paint costs $25–$70 per gallon, and a typical house exterior takes 3–5 gallons. DIY painting is one weekend; hiring painters runs $800–$3,000 depending on size. Test paint samples in both morning and afternoon light—outdoor paint behaves differently than indoor. Pro tip: A warm, light exterior shade (cream, tan, soft gray) photographs better and reflects heat in summer.

    Standing outside looking in, your home appears unified and intentional. Inside looking out, the exterior anchors the color story.


    19. Use Area Rugs to Define Zones Without Visual Barriers

    Rugs define space without blocking light or views—unlike walls or furniture placement. A rug that sits partially inside and partially outside (in a covered patio) creates functional zones while maintaining visual openness.

    Indoor-outdoor rugs designed for durability run $100–$400 for a 5×8 size. Budget-friendly options from IKEA or Home Depot cost $30–$80. Placement matters more than price; a rug under a seating area facing glass doors frames the view naturally. No installation needed. Pro tip: Use light, neutral rugs to maintain that open, airy feeling.

    You instinctively recognize separate zones without any physical barriers. The space feels organized and intentional, not cramped.


    20. Install Smart Lighting That Mimics Natural Light Cycles

    Smart lighting—especially tunable bulbs that shift from cool to warm throughout the day—keeps your indoor lighting consistent with outdoor natural light. This psychological alignment makes the interior feel like a natural extension of the outside.

    Smart bulbs from Philips Hue or LIFX cost $10–$25 each. A set of 4–6 bulbs runs $50–$150 total. Smart fixtures designed to look elegant outdoors run $150–$400 each. Setup is downloading an app and customizing schedules (15 minutes). Pro tip: Warm light (2,700K or lower) feels most natural and connects psychologically to outdoor warmth.

    As daylight fades, your interior transitions gracefully from bright to warm. Inside and outside feel harmonized, not disconnected.


    21. Choose Low-Profile or Hidden Deck Railings

    Solid railings block views and interrupt flow. Frameless glass railings or low-profile options maintain sightlines. If you have railings, keeping them transparent or minimizing their visual weight matters.

    Standard deck railings run $500–$1,500 depending on materials. Glass railings cost more: $800–$2,500, but they preserve views. For renters or existing decks, this isn’t feasible—but keeping existing railings clear of clutter and paint helps. Installation is a professional job (1–2 days). Pro tip: If you can’t replace railings, ensure they’re painted a light color to recede visually.

    Standing in your interior looking out, your eye travels unobstructed to the landscape. The space feels boundless.


    22. Install Bi-Fold or Accordion Curtains for Flexible Coverage

    Accordion or bi-fold curtains give you light control and privacy without the permanent visual weight of hanging drapes. They fold compactly to the side when open and remain unobtrusive.

    Accordion curtain kits run $50–$150 per window, with some motorized options at $200–$400. Installation takes 30–45 minutes for most systems. They’re renter-friendly if using adhesive hooks ($5–$10). Pro tip: Keep them in a color that matches your trim to minimize visual distraction when open.

    You control when views are open or private, without sacrificing the open-space feeling most of the time.


    23. Create a Continuous Outdoor Living Room

    Furnishing your outdoor space with pieces styled and scaled like your interior living room creates a seamless outdoor living extension. Use coordinating fabrics, colors, and arrangements to make the outdoor zone feel like a natural continuation of your interior.

    Quality outdoor furniture ranges from $400–$2,000+ for a seating set. Mid-range options from Wayfair, Target, or Overstock run $300–$1,000. Budget setups from discount retailers cost $150–$400. Arrangement takes 1–2 hours; no installation required. Pro tip: Use indoor-outdoor fabrics (specially treated to resist fading and moisture) in the same colors as interior throw pillows.

    Walking between zones, you feel like you’re moving through one continuously designed space, not jumping from “decorated interior” to “forgotten patio.”


    Save this post and pick one idea to implement this week—even something as simple as rearranging furniture with legs or swapping curtains takes 30 minutes and makes a massive difference. Which idea resonates most for your space?

  • 27 Light & Airy Living Room Concepts That Make Small Spaces Feel Open

    27 Light & Airy Living Room Concepts That Make Small Spaces Feel Open


    Small living rooms don’t need to feel cramped or cluttered. With the right design choices, you can trick the eye into seeing way more space than you actually have. The key? Strategic use of light, color, and smart furniture placement that opens up your room instantly. Whether you’re renting a cozy apartment or working with a compact home, these 27 ideas will show you exactly how to make every square foot count. From paint hacks to furniture arrangements that maximize your layout, you’ll find something you can start this weekend. Let’s get your small space feeling bigger and better than ever.


    1. Paint Walls in Soft, Light Colors to Expand Space Visually

    Light wall colors are the fastest way to make a small room feel bigger. Pale colors reflect light and push walls back visually, creating an illusion of depth that darker shades can’t match. Skip the stark white if it feels cold—soft cream, barely-there gray, or pale eucalyptus create warmth without visual heaviness.

    Pick a paint in the $25-$40 range from Benjamin Moore, Sherwin-Williams, or Behr. Grab a sample pot first and test it in your room at different times of day. Paint one accent wall or all four; one weekend project with a roller takes 4–6 hours. The difference is noticeable the moment you finish—walls seem to recede and your furniture pops forward, making the room feel airier.

    Renter hack: Use removable wallpaper in light shades instead of paint for the same opening effect.


    2. Choose Furniture with Open Legs Instead of Solid Bases

    Furniture that sits on legs rather than skirts creates visual space underneath. You can literally see through to the floor, which your brain reads as “more room.” Sofas, chairs, and tables with open legs break up the visual mass that solid-base furniture creates, making the room feel less crowded even when it’s full.

    Hunt for mid-range pieces ($150–$400) at IKEA, Article, or Wayfair—many modern sofas and tables come standard with legs. If you already own skirted furniture, swap it out gradually or add tall furniture pieces that float above it. This trick takes zero time once you have the right pieces in place. The moment you remove solid furniture, you’ll notice how much lighter the room feels and how much more floor you can see.

    Budget option: Raise existing furniture on furniture risers ($15–$30) for a temporary open-leg effect.


    3. Mount Shelves Higher and Leave Space Below for Storage

    High shelves draw the eye upward, making ceilings feel taller and rooms feel more open. When you position shelves up high and leave the wall below clear, you create visual breathing room that ground-level storage doesn’t provide. This works especially well in small rooms where wall space is precious.

    Mount shelves 12–18 inches from the ceiling using a stud finder and wall anchors ($30–$60 for three shelves plus hardware). Keep them styled with just a few books or plants—overcrowding defeats the purpose. Installation takes 1–2 hours if you’re a DIY beginner. You get extra storage, the room looks taller, and your furniture below seems to float in more open space.

    Renter-friendly: Use command strips with floating shelves rated for your wall type (available at Target for $8–$15 per shelf).


    4. Use Glass or Clear Acrylic Furniture for Visual Lightness

    Glass and clear acrylic pieces occupy physical space but don’t feel heavy visually. You see right through them, so they don’t block sightlines or break up the room the way solid furniture does. A single glass table or acrylic shelf can anchor a small room while keeping it open.

    A clear acrylic coffee table runs $50–$150 at Target, IKEA, or Amazon; glass options start around $100–$300 depending on size. No assembly needed if you buy a finished piece. Once you place it, the room instantly looks less crowded—your eye travels through the furniture rather than stopping at it. Pair glass with one or two solid wood pieces to keep warmth in the design so it doesn’t feel sterile.

    Styling tip: Stack books or magazines on a glass table to add color without feeling heavy.


    5. Arrange Furniture Away from Walls to Float Seating

    Pushing furniture against walls seems logical for small rooms, but it actually makes them feel cramped. When you float seating—especially a sofa—into the room and anchor it with a rug or coffee table, the space feels bigger and more intentional. Your eye travels around the furniture rather than getting stuck on walls.

    This costs nothing and takes 30 minutes. Start by pulling your sofa 12–18 inches away from the back wall. Angle chairs to face each other slightly. Add a rug under the seating arrangement to define the zone. You’ll immediately notice the room feels more open because you’re seeing all four walls and the floor around the furniture. It also creates a cozier conversation area even though the room looks bigger.

    Pro tip: Use a console or slim table behind your floating sofa to add storage without blocking the wall.


    6. Install Mirrors Across from Windows to Bounce Light

    Mirrors reflect light and create the optical illusion of another window, making rooms feel larger and brighter. Position a mirror directly across from your window so it bounces natural light throughout the day. The room feels more open and less shadowy, and your energy lifts with the brightness.

    A statement mirror runs $40–$200 depending on frame style; grab one at Target, Wayfair, or HomeGoods. Lean it against the wall (rental-friendly) or hang it with a bracket ($15 for hardware). Placement takes 15 minutes. The transformation is immediate—suddenly your small room has better lighting and appears to extend backward where the mirror reflects the room back at you. Your space feels 20% bigger without moving a single piece of furniture.

    Design bonus: Choose a mirror with a wooden or metal frame to add visual interest and tie in other accents.


    7. Use Vertical Storage to Keep Floors Clear

    Vertical storage keeps clutter off the floor, which is where your brain reads “space.” By stacking up instead of spreading out, you free up floor area that makes the room feel open and walkable. Even in a tiny room, vertical storage can hold a ton of stuff while keeping the floor pristine.

    Install floor-to-ceiling shelves ($100–$300 for a unit, or build your own with brackets and boards for $50–$100). IKEA and Elfa systems work great in rentals if you use proper wall anchors. Dedicate one weekend to the project. Your floor becomes a visible canvas instead of a storage problem. The room feels less cluttered even if you have the same amount of stuff—it’s just organized up instead of out.

    Renter option: Use a tall, narrow bookcase against one wall instead of wall-mounted shelving.


    8. Choose a Rug that Defines Space Without Dividing It

    A rug anchors furniture and defines a seating area, but the wrong size or color can chop up a small room. Choose a light, neutral rug that extends under at least the front legs of your furniture. This creates visual continuity instead of cutting the room into pieces.

    Look for natural fiber rugs in cream, pale gray, or soft tan at IKEA ($40–$100), Wayfair ($60–$150), or West Elm ($100–$300). A 5×7 works for most small rooms; place it under your sofa and coffee table so seating floats on it. No installation needed—just unroll and style. The room instantly feels more organized and spacious because the rug pulls the seating area together without creating a harsh boundary that makes the room feel smaller.

    Budget hack: Layer a smaller patterned rug on top of a neutral base rug for depth without heaviness.


    9. Pick Multi-Functional Furniture That Hides Storage

    Multi-functional furniture does double duty—it sits and stores, serves as a table and chair, or slides to transform your layout. In a small room, this approach eliminates the need for separate storage pieces that eat up floor space. One piece replaces two or three, opening up your layout instantly.

    Hunt for ottomans with hidden storage ($60–$180 at IKEA, Article, or Target), coffee tables with shelves underneath ($80–$250), or modular sofas with built-in storage ($400–$800). These pieces look like regular furniture but pack serious storage inside. A weekend search online lands you options; delivery takes 1–3 weeks. The payoff is major—you lose zero floor space while gaining storage that keeps blankets, throw pillows, and magazines hidden away. Your room stays visibly open and clutter-free.

    Renter bonus: Look for pieces without assembly required to avoid wall damage during setup.


    10. Declutter Surfaces and Keep Styling Minimal

    Every object on a surface takes up visual space, even if it doesn’t take up physical space. Bare tables and shelves make rooms feel open and organized. The fewer things you display, the more open your small room becomes—it’s that simple.

    Spend a Saturday going through your coffee table, side tables, and shelves. Keep only things you love or actually use. Box up seasonal items and off-season clothes. Donate books you won’t reread. This costs nothing and takes 2–4 hours depending on how cluttered things are. The result is dramatic—your room immediately feels bigger, calmer, and less overwhelming. Visitors notice the difference right away, and you’ll feel more relaxed in a space that isn’t visually competing for your attention.

    Quick win: Use one small basket to corral remote controls, chargers, and small items instead of spreading them across the table.


    11. Hang Curtains from Ceiling to Floor for Height

    Long curtains draw the eye upward and make ceilings appear higher, which makes small rooms feel less boxy. Hanging your rod closer to the ceiling than the window frame also disguises the actual window size. Pair this with light, sheer fabric that lets light through, and your room opens up visually.

    Grab a tension rod and sheer curtain panels ($15–$50 at Target or IKEA); no drilling needed in rentals. Hang the rod 6–12 inches above your window frame. Installation takes 20 minutes. Your eyes travel up instead of being stopped by the window, making the room feel taller and more open. Light pours through, the space stays bright, and your layout gains unexpected height without costing much or requiring permanent changes.

    Bonus: Layer sheer curtains with a lightweight linen panel for light control plus openness.


    12. Create a Focal Point That Draws Eyes Up and Around

    A strong focal point—like a gallery wall, piece of oversized art, or statement shelf—gives your eye somewhere to land and draws attention away from the room’s size. When your brain is focused on something beautiful, it stops noticing that the room is small. This shifts the perception of space entirely.

    Hang a large-scale piece of art ($30–$150 at Etsy, Minted, or Target) or create a small gallery wall with 3–5 pieces ($50–$200 total). Another option: style a floating shelf with a few curated objects ($50–$100 for shelf and objects). A Friday project takes 1–2 hours. Once your focal point is in place, guests look at your wall instead of measuring the room. The space feels intentional and designed, not small and rushed. Your eye stays engaged with the beauty, not the dimensions.

    Pro tip: Place your focal point at eye level off-center for an asymmetrical, modern look.


    13. Use Lightweight Chairs Instead of Bulky Armchairs

    Bulky armchairs with wide arms and overstuffed frames eat up space and make rooms feel cramped. Lightweight chairs with thin frames, open sides, and minimal arms let your eye travel through them and keep the room feeling open. You get seating without the visual weight.

    Shop for accent chairs with exposed wood frames ($100–$300 at IKEA, Wayfair, or Article) or simple metal-frame chairs with fabric seats ($80–$200). These cost about the same as bulky options but feel entirely different in a small space. Delivery takes 1–3 weeks; no assembly needed for many styles. Once they’re in place, you have flexible seating that doesn’t anchor the room or make it feel crowded. The space breathes around them instead of being blocked by them.

    Styling idea: Mix two different chair styles in complementary colors for visual interest without heaviness.


    14. Paint or Lighten Your Ceiling to Feel Higher

    Ceilings that match walls in a light color make rooms feel taller because the eye doesn’t stop at the ceiling edge. If your ceiling is yellowed white or dark, lightening it creates height you didn’t have before. This single change can make a surprisingly big difference in how open your room feels.

    Pick the same light color as your walls or go one shade lighter ($25–$40 for ceiling paint). Grab a paint roller and extension pole ($20–$30). Painting the ceiling is messier than walls but takes 2–3 hours if you move furniture to the center first. Your eye travels up instead of stopping, making the room feel less boxy. Combined with light walls, this creates an airy, open environment that feels much bigger than it actually is.

    Renter hack: If you can’t paint, use a light-colored removable wallpaper or fabric panels on part of the ceiling.


    15. Add Tall, Narrow Bookcases for Vertical Impact

    Tall, skinny bookcases draw the eye upward instead of spreading visual weight across a room. They provide storage without the bulk of wide shelving units. Placed in corners or along walls, they add function and style while keeping the room feeling open and airy.

    Find tall, narrow bookcases at IKEA ($50–$150), Target ($60–$180), or Wayfair ($80–$250). Choose ones with open backs if you can, so you can see the wall behind them. Many arrive flat-packed and assemble in 30–60 minutes. Arrange books loosely with some empty space and small objects to avoid a crowded look. The room gains storage and visual height without feeling cramped. Your eye travels up the bookcases, making the ceiling seem higher and the space more open.

    Styling tip: Leave some shelf space empty so the bookcase reads as airy, not cluttered.


    16. Swap Dark Wood for Light or Natural Finishes

    Dark furniture absorbs light and visual space, making rooms feel smaller and heavier. Light wood or whitewashed finishes reflect light and feel more open. If you have dark pieces, swapping them for light alternatives is one of the fastest ways to open up a small space.

    Sell your dark furniture online and invest in light wood pieces ($100–$300 for a side table or small dresser at IKEA, Article, or Wayfair). Alternatively, paint existing dark wood with whitewash or pale wood stain ($20–$40 for supplies)—a weekend DIY project if you’re up for it. The transformation is immediate once everything is in place. Your room feels 30% brighter and more spacious because light bounces around instead of getting absorbed by dark surfaces. Suddenly your small room feels airy and inviting.

    Budget option: Swap just one or two key pieces first and sell the dark furniture to fund the purchases.


    17. Use Wall-Mounted Shelves for Hidden Vertical Storage

    Wall-mounted shelves don’t take up floor space, so they don’t crowd your layout. Unlike freestanding shelving, they integrate into the wall and feel like part of the architecture rather than separate furniture. This keeps your floor clear and your room open.

    Install floating shelves ($30–$100 each plus hardware) using a stud finder and wall anchors. Most come with instructions; installation takes 30–45 minutes per shelf. You can install 2–3 shelves without major commitment. The beauty is that your floor stays completely open—no bulky furniture eating up square footage. You gain storage that feels integrated and light. Your room looks bigger because nothing sits on the floor competing for visual space.

    Renter option: Use command strip shelves ($15–$25 each) that come off without damage and work on most wall types.


    18. Choose Sheer or Lightweight Fabrics on Upholstery

    Heavy, dark upholstery visually weighs down a room. Light fabrics like linen, cotton, or pale performance fabrics keep a space feeling open and airy. When you can see light and pattern through fabric, it doesn’t feel heavy or dominant the way dark velvet or thick jacquard does.

    Look for light-colored sofas in linen or performance fabric ($300–$600 at IKEA, Article, or Wayfair). Performance fabrics ($400–$800) resist staining better in high-traffic homes or if you have pets. Avoid dark colors and plush velvets. Once your new sofa arrives, the room immediately feels brighter and less dense. The light fabric reflects light instead of absorbing it, making your space feel more open. Pair it with throw pillows in similar pale tones for cohesion without visual heaviness.

    Styling tip: Swap throw pillow covers seasonally in different light textures to keep the sofa feeling fresh.


    19. Remove Doors or Use Sliding Glass Doors for Flow

    Doors that swing open into your room eat up valuable floor space and create visual interruption. Removing doors (if you own the space) or swapping them for sliding or pocket doors opens up your layout and creates flow between rooms. Light and sightlines travel through, making your space feel bigger.

    If you own, hire a handyman to remove a door or install a pocket door ($200–$600 depending on complexity). If you rent, ask your landlord about swapping hinged doors for sliding options ($100–$300 installed). These projects take a pro 2–4 hours. Once complete, you gain the floor space the door used to occupy, and the room feels more connected to adjacent spaces. Light and air flow more freely, and your small room suddenly feels part of a larger whole.

    Renter workaround: Use a tension rod with a lightweight curtain across a doorway for privacy without blocking sightlines.


    20. Style with Lightweight Layers Instead of Heavy Statement Pieces

    Heavy statement pieces—large rugs, bulky artwork, oversized lamps—can overwhelm a small room. Instead, layer lightweight elements like throw pillows, blankets, artwork, and small accessories to build interest without visual weight. Layers in a small space feel curated, not cramped.

    Gather throw pillows ($15–$40 each), lightweight throws ($30–$80), and small artwork pieces ($20–$100)—mix what you already own with a few new finds. Spend an afternoon rearranging pillows and styling surfaces. This costs little to nothing if you’re clever about it. The layered approach makes your room feel intentional and designed rather than stuffed. You get depth and personality without the heaviness of one big statement piece that dominates the space.

    Pro tip: Swap out layers seasonally to refresh the room without buying new furniture.


    21. Install Under-Shelf Lighting to Brighten Dark Corners

    Dark corners make small rooms feel even smaller and more closed-in. Adding LED strip lighting under shelves or along wall edges brightens the space and creates the illusion of more depth. Lighting is the fastest way to make a room feel open when natural light isn’t enough.

    Grab LED strip lights ($15–$40 at Target, Amazon, or Home Depot). Installation takes 30 minutes—they’re sticky-backed and plug into an outlet. Some are dimmable or color-changing for flexibility. Once the lights are on, dark corners brighten up and the room feels more open and inviting. The added light also makes the space feel larger because every area is visible and accessible. This is a renter-friendly upgrade that plugs in—no permanent installation required.

    Lighting hack: Choose warm white LEDs to keep the space cozy, not clinical.


    22. Choose a Low-Profile Coffee Table to Keep Sightlines Open

    A tall, chunky coffee table blocks your sightline across the room and makes the space feel smaller. A low-profile table with thin legs or an open base lets your eye travel over and under it, keeping sightlines clear and the room feeling open. This single swap can open up your layout surprisingly.

    Shop for low coffee tables ($50–$200 at IKEA, Article, Target, or Wayfair)—aim for 14–16 inches high with open legs or a transparent top. Swap out any bulky table you have now. No installation needed; just move it in and arrange your seating around it. The transformation is subtle but powerful—suddenly you can see across your room instead of into a visual wall. The space feels more connected and open because nothing blocks your view.

    Budget option: DIY a simple coffee table from a wooden pallet and hairpin legs ($30–$50) for a custom, low-profile piece.


    23. Add a Statement Light Fixture That Doesn’t Take Floor Space

    Lamps sitting on tables or floors eat up precious real estate in a small room. A statement pendant or flush-mount fixture provides light without furniture footprint. It also becomes a design focal point that draws the eye upward, making the room feel taller and more open.

    Install a stylish pendant light ($40–$150 at IKEA, West Elm, or Wayfair) if you own, or use a plug-in pendant light ($30–$80) if you rent. A handyman can install in 30–60 minutes for $50–$100, or you can DIY if you’re comfortable with basic wiring. Once your light is up, you reclaim the floor space a table lamp used to occupy, and your eyes travel upward toward the fixture. The room feels more open, your ceiling seems higher, and you have ambiance without clutter.

    Renter-friendly: Choose plug-in pendants that hang from ceiling hooks—no wiring required, and they come down easily.


    24. Use Negative Space Strategically on Walls

    Empty wall space is a design tool, not a problem. Leaving walls largely bare makes small rooms feel more open and less chaotic. Strategic negative space lets your eye rest and keeps the room from feeling crowded with visual information.

    Choose one or two focal points per wall (a piece of art, a small shelf, a mirror) and leave the rest bare. This costs nothing and takes an afternoon to edit down. The payoff is huge—your room immediately feels more thoughtfully designed and less cramped. Visitors perceive the space as larger and more intentional because there’s room for your eye to rest. Minimalism works especially well in small rooms because it amplifies the sense of openness.

    Pro tip: Group your art or objects asymmetrically off-center rather than centered, which feels more modern and open.


    25. Incorporate Natural Light with Sheer Window Treatments

    Heavy curtains block light and make rooms feel darker and smaller. Sheer or lightweight linen curtains let maximum light through while still offering privacy. More natural light in your space makes it feel significantly more open and airy, especially in small rooms where every bit of brightness counts.

    Swap heavy curtains for sheer panels ($20–$60 per panel at Target, IKEA, or Amazon) or lightweight linen curtains ($40–$100 at Wayfair or West Elm). Take down your old curtains and hang new ones—a 30-minute project. The result is immediate and dramatic. Your room becomes noticeably brighter, which automatically makes it feel more spacious. Light bounces around instead of getting absorbed, and the whole vibe shifts from dark and small to open and inviting.

    Budget hack: Use white or cream bedsheets as temporary curtains ($15–$25 per set) while you save for proper panels.


    26. Arrange Furniture to Create Subtle Zones Without Walls

    Defining zones with furniture arrangement instead of walls or screens keeps small rooms feeling open while adding functionality. A sofa angled toward the TV, a reading chair near a window, a console behind the sofa—these create distinct areas without breaking up the visual space. The room feels organized and intentional, not chaotic.

    This costs nothing and takes an afternoon. Walk through your space and sketch out different zones—a TV area, a reading nook, a work corner. Arrange furniture to support these zones using rug placement and furniture angles rather than barriers. The room gains function without feeling segmented. Each zone has purpose, and the overall space feels more spacious because nothing physically blocks your view. You get intimacy and organization without sacrificing openness.

    Styling tip: Use a different throw pillow color or rug in each zone to subtly reinforce the area without visual heaviness.


    27. Keep the Space Uncluttered by Adopting a “One In, One Out” Rule

    The final secret to keeping a small room open is preventing it from filling back up with clutter. Adopt a one-in-one-out rule: when something new comes in, something old goes out. This mindset keeps your space intentional and prevents you from sliding back into a cramped, crowded feeling after you’ve opened things up.

    This costs nothing and is a mental shift, not a project. Every time you bring home a new item, sell or donate something you don’t use or love. Check in monthly—is your coffee table still clear? Are your shelves still breathing? Set a phone reminder for one Sunday a month to do a quick edit. The ongoing maintenance takes 20–30 minutes monthly and keeps your space perpetually open. You maintain the work you’ve done to expand your room psychologically and enjoy the lightness and calm that comes with intentional living.

    Accountability hack: Take a photo of your space at its best and compare it monthly to catch clutter creep early.


    Save this post for your next small-space refresh. Pick one idea this weekend—whether it’s swapping furniture, painting, or decluttering—and notice how the shift changes how your room feels. Share this with anyone struggling to make their small space work; they’ll thank you.