Your living room walls have so much potential. Right now, they’re probably just blank backdrops—but they could be a gallery that tells your story, sparks conversation, and makes your space feel intentional and curated. The best part? You don’t need to hire a designer or spend thousands. These 26 ideas range from free solutions using what you already own to affordable prints and DIY installations that take a weekend. Whether you’re renting, own your home, or just want a refresh, you’ll find ideas that match your budget, skill level, and style. Let’s turn those empty walls into something you actually want to look at every day.
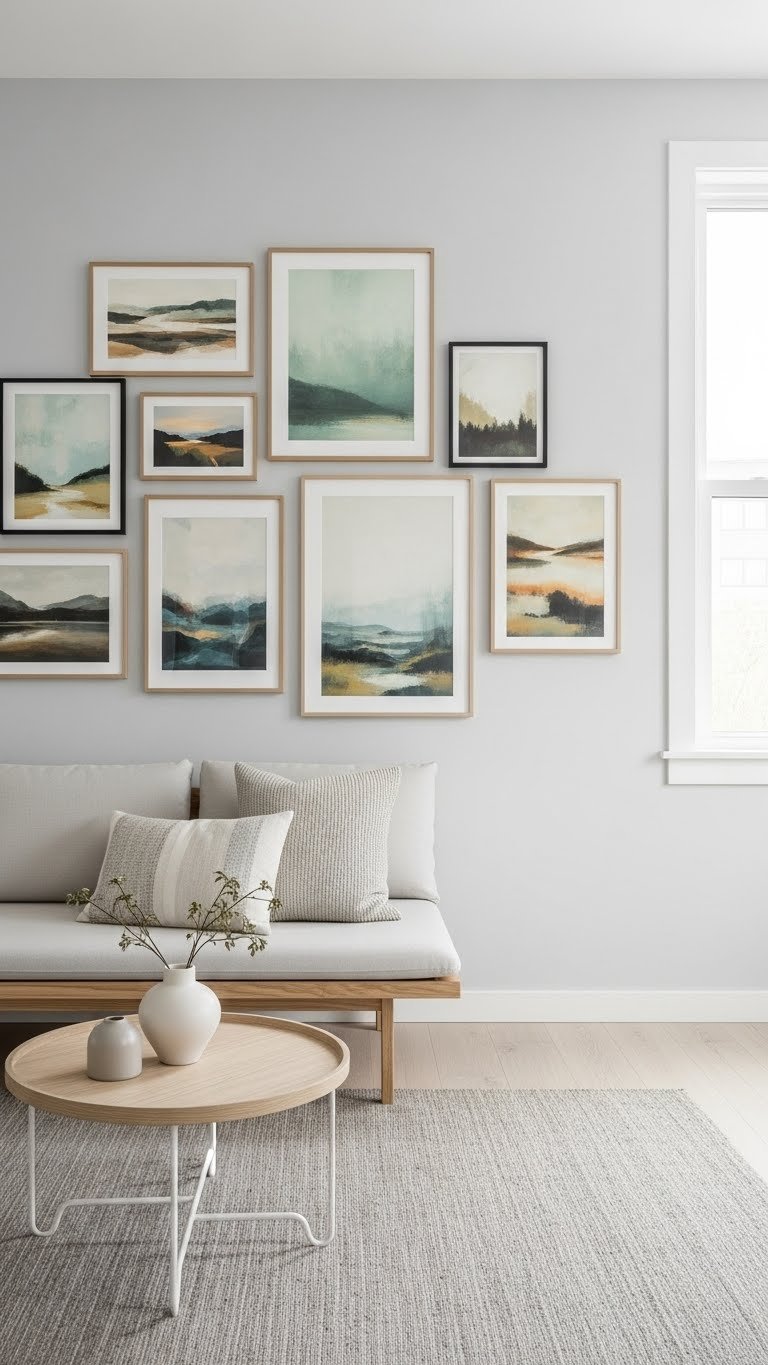
1. Arrange Prints in a Salon-Style Gallery Wall

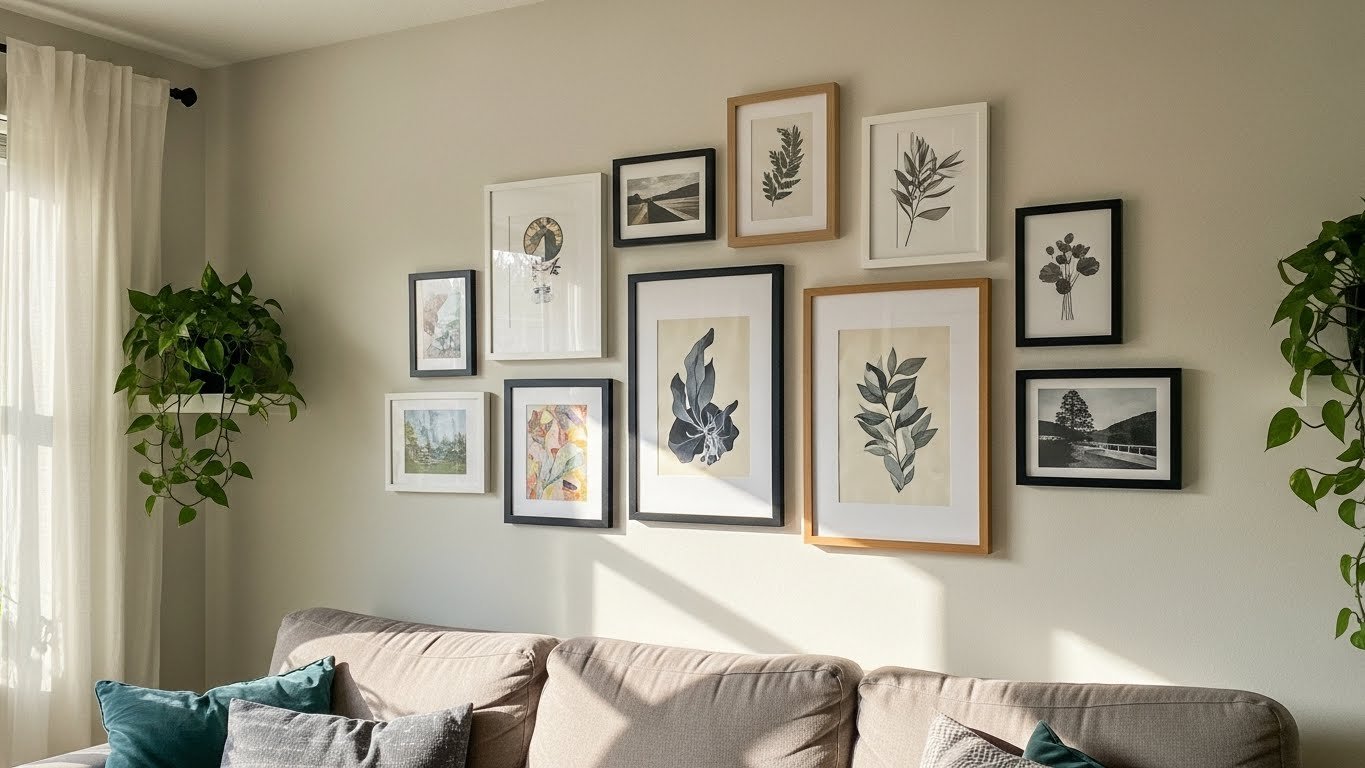
Gallery walls look effortless but feel incredibly curated—and that’s why people save them constantly on Pinterest. The key is mixing frame colors and print styles while keeping some visual logic to the layout.
Start by gathering prints you love (or print images from Etsy, Unsplash, or your own photos). Mix frame finishes: black metal, natural wood, white, and even mismatched thrifted frames work. Lay everything on the floor first to test arrangements. Measure and mark holes with painter’s tape, then hang using a stud finder for heavier pieces. Budget: $30-$150 depending on frame quality (IKEA, Target, or thrift stores). Time: 1-2 hours plus paint drying. Pro tip: Keep spacing consistent (2-3 inches between frames) even if sizes vary—this makes it look intentional rather than random.
Your wall becomes a focal point that guests actually notice, and you get to rotate prints seasonally without committing to anything permanent.
2. Create a Black-and-White Photography Grid
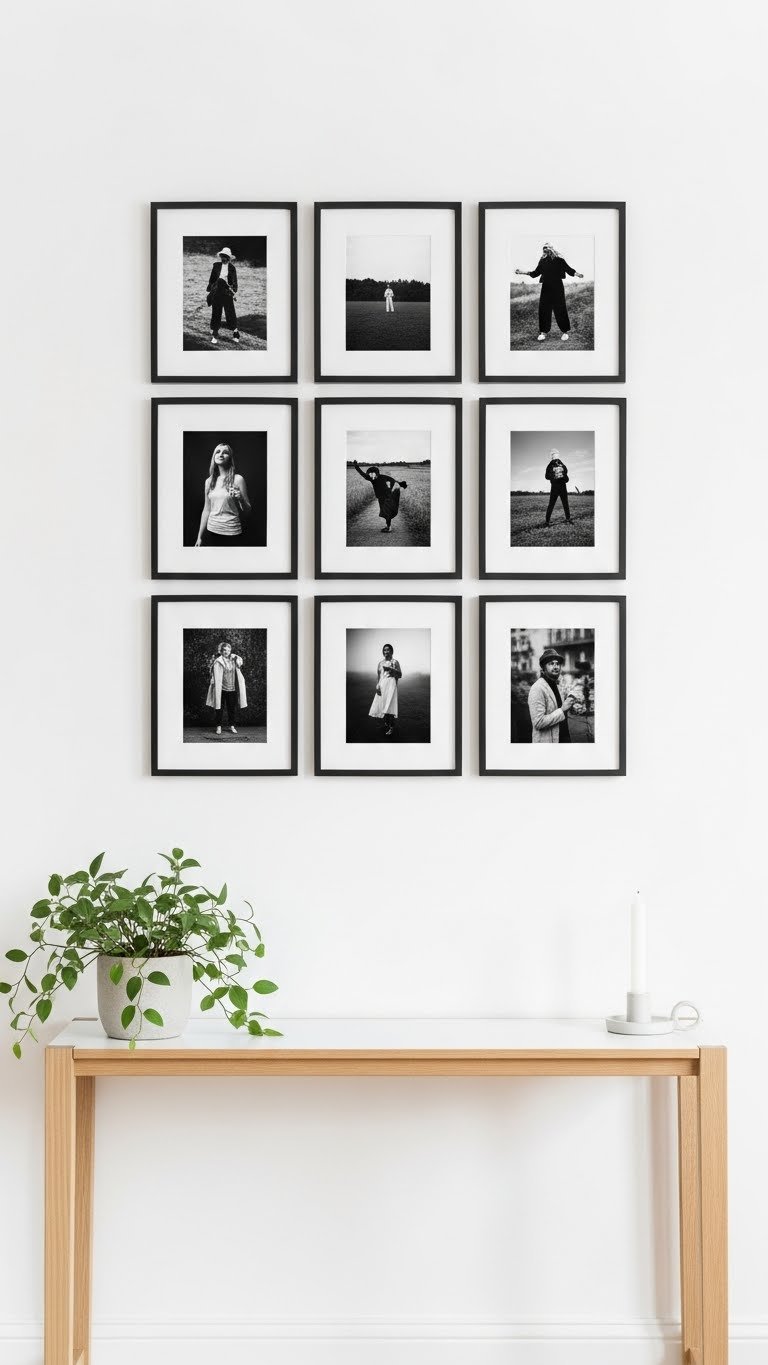
A perfectly spaced grid of black-and-white photos reads as modern and gallery-like—it’s the adult equivalent of a college dorm photo wall. Black-and-white photography works especially well because it doesn’t compete with your décor colors.
Print black-and-white versions of your own photos (family, travel, candid moments) or find affordable prints on Etsy. Use matching frames in black metal or black wood—this uniformity is what makes grids feel sophisticated. Budget: $40-$80 for 9 frames and prints. Measure out a 3×3 or 4×4 grid using painter’s tape first. Hang all at eye level (57 inches center to center is standard). Time: 45 minutes to an hour. Difficulty: Beginner. Renter-friendly: Yes—use removable wall anchors.
The grid creates visual order, and black-and-white photography complements any color scheme in your living room without clashing.
3. Display Woven Wall Hangings and Tapestries
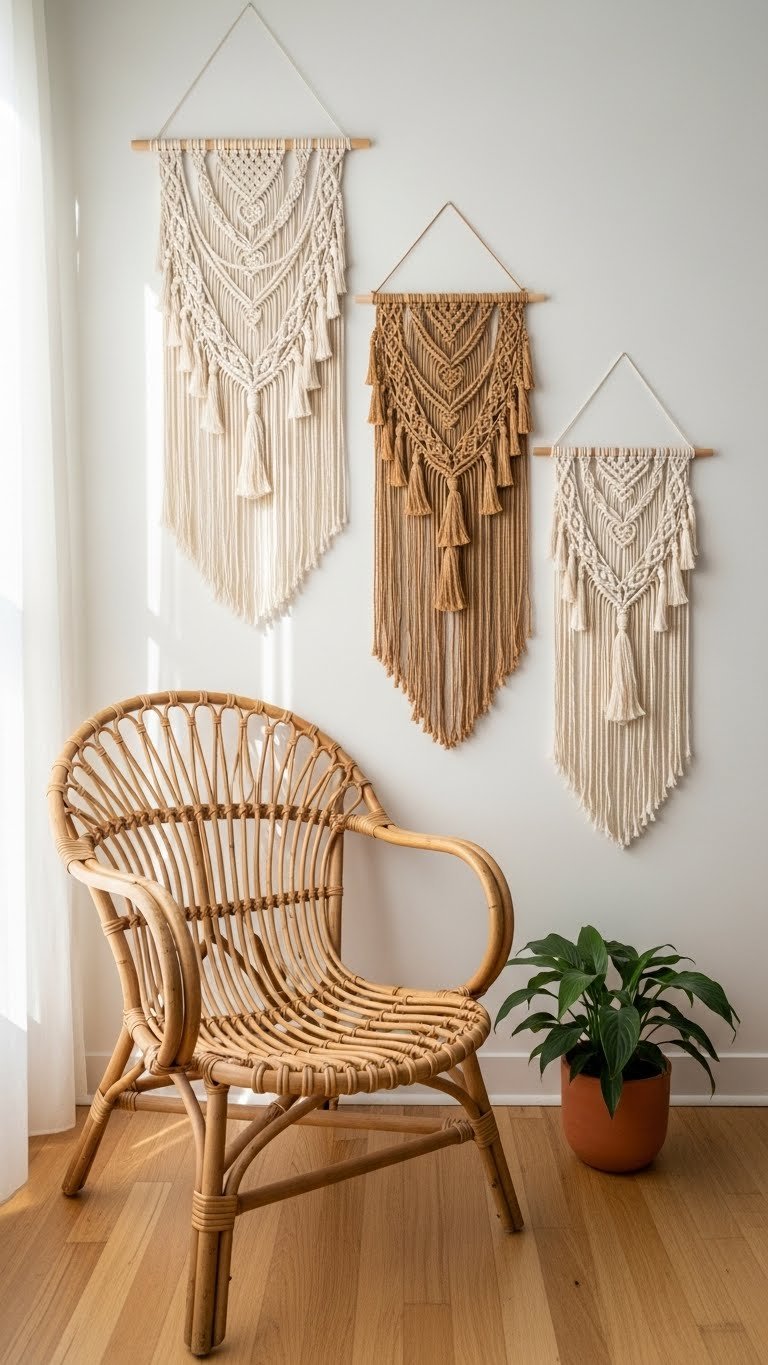
Woven textiles add warmth and dimension without needing frames—they’re also easier to hang than you’d think. Macramé, woven wall hangings, and textile art introduce tactile visual interest and tie into the wellness and natural materials trend.
Source from West Elm, Urban Outfitters, Etsy, or thrift stores. Sizes vary widely (18 inches to 4 feet). Hang at different heights to create flow rather than a rigid line. Use simple hooks or command strips for renters. Budget: $15-$60 per hanging. Time: 15-20 minutes per piece. The layered, organic look gives your room that “collected over time” feeling without trying too hard.
Woven pieces warm up a cool-toned space and add bohemian flair that photographs beautifully for sharing.
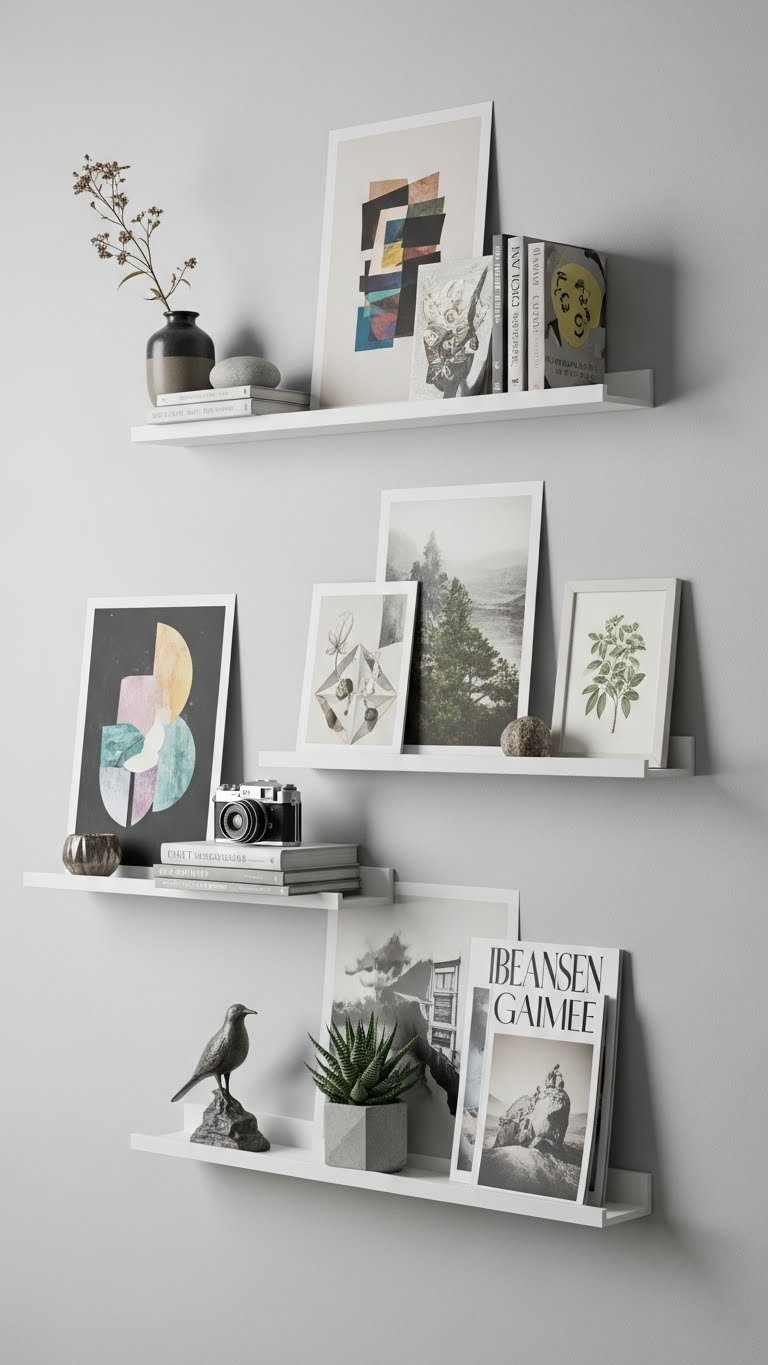
4. Mix Floating Shelves with Small Art and Objects
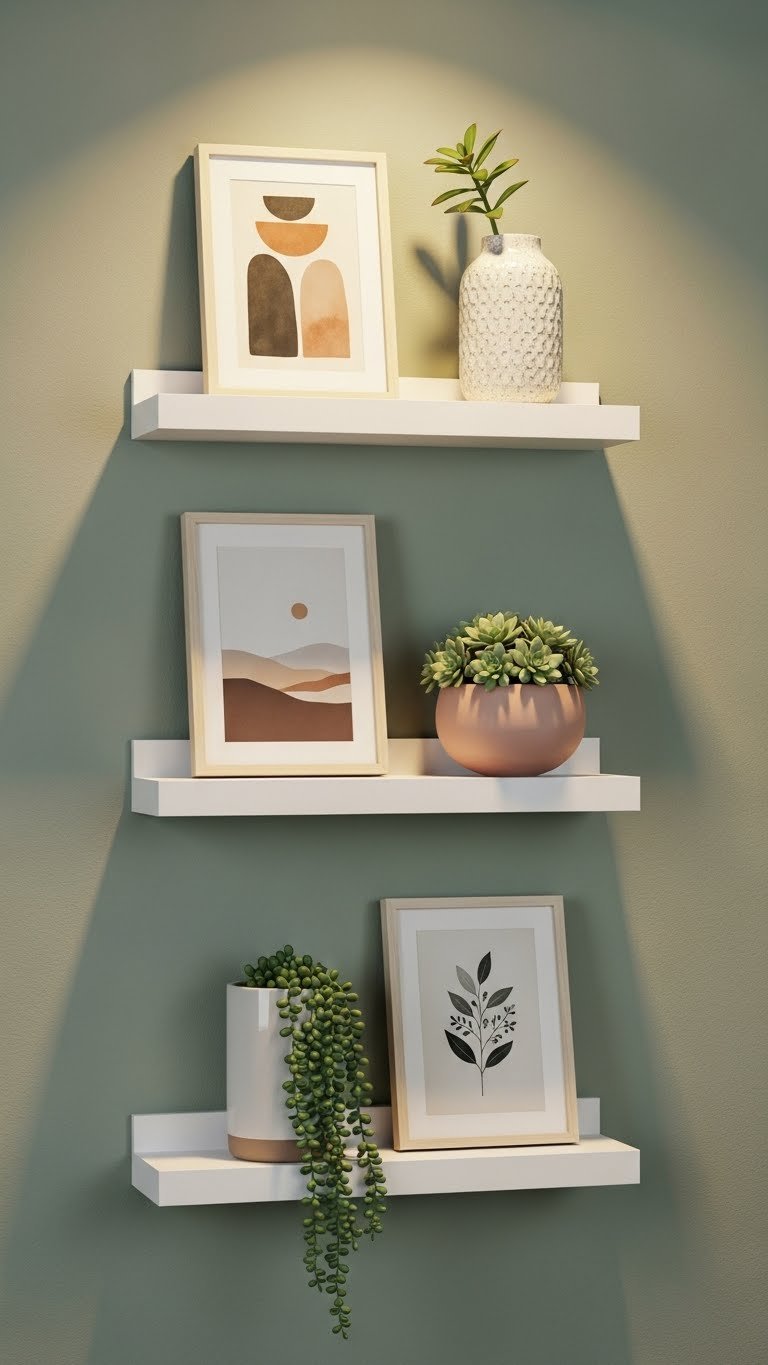
Floating shelves solve two problems at once: you get wall display space without a heavy gallery wall commitment, and you can style them seasonally. Mix framed art with small 3D objects for a curated, magazine-worthy look.
Install 2-3 floating shelves at different heights (use a level and studs or heavy-duty wall anchors). Style each shelf with: one small framed print, one vessel or book, one small plant or object. Keep negative space—don’t overcrowd. Budget: $30-$80 for shelves; styling pieces vary. Time: 1 hour installation. Renter-friendly: Some removable floating shelf options exist, though traditional floating shelves require wall anchors. The key is asymmetry—don’t center everything. Your living room gains depth and you can swap pieces in and out without rehinging.
Floating shelves let you display art alongside objects, creating a dynamic gallery rather than a flat wall of frames.
5. Hang a Large Statement Art Piece as a Focal Point
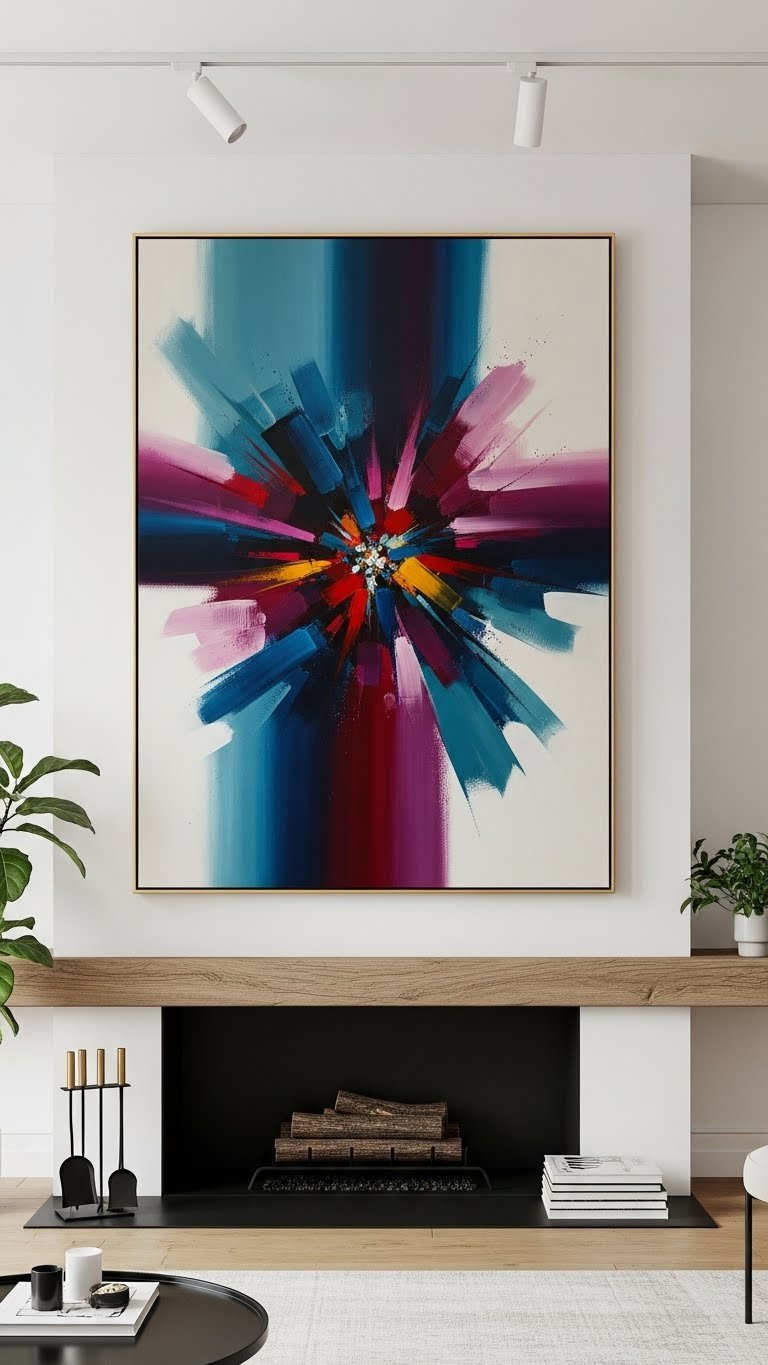
One large, bold artwork can anchor an entire room better than a wall full of small frames. This plays into the trend of statement pieces and makes a confident design choice that feels intentional.
Choose artwork at least 24-36 inches wide for a meaningful impact. Abstract, botanical, or landscape pieces work well depending on your color palette. Source from Minted, Society6, Etsy, or independent artists. For $40-$150, you can get high-quality prints; originals run higher. Time: 20 minutes to hang. Find a stud or use heavy-duty wall anchors. The frame matters—matte black, natural wood, or no frame (canvas wrap) all read as modern. Hang it as the sole focus above furniture, not clustered with other art.
This single focal point makes your living room feel design-forward and gives guests an immediate talking point.
6. Build a Leaning Art Display on a Console or Mantel
Leaning art is a renter’s best friend—zero holes required. This casual approach also reads as gallery-like and gives you flexibility to rotate pieces constantly. It’s also way cheaper than committing to permanent hanging.
Gather 4-6 frames of varying sizes (mix gold, black, and wood finishes). Lean them against the wall on a console, mantel, or shelf at a slight angle. Mix in books, ceramics, or plants for visual interest. Budget: $0 if using frames you own; $20-$50 for new frames. No installation time. The casual, curated feel works in modern, eclectic, and maximalist spaces. Pro tip: Lean art heavier on one side for asymmetrical balance.
This approach lets you swap art weekly if you want—no commitment, just visual inspiration that rotates with your mood.
7. Hang Canvas Prints in a Horizontal Timeline
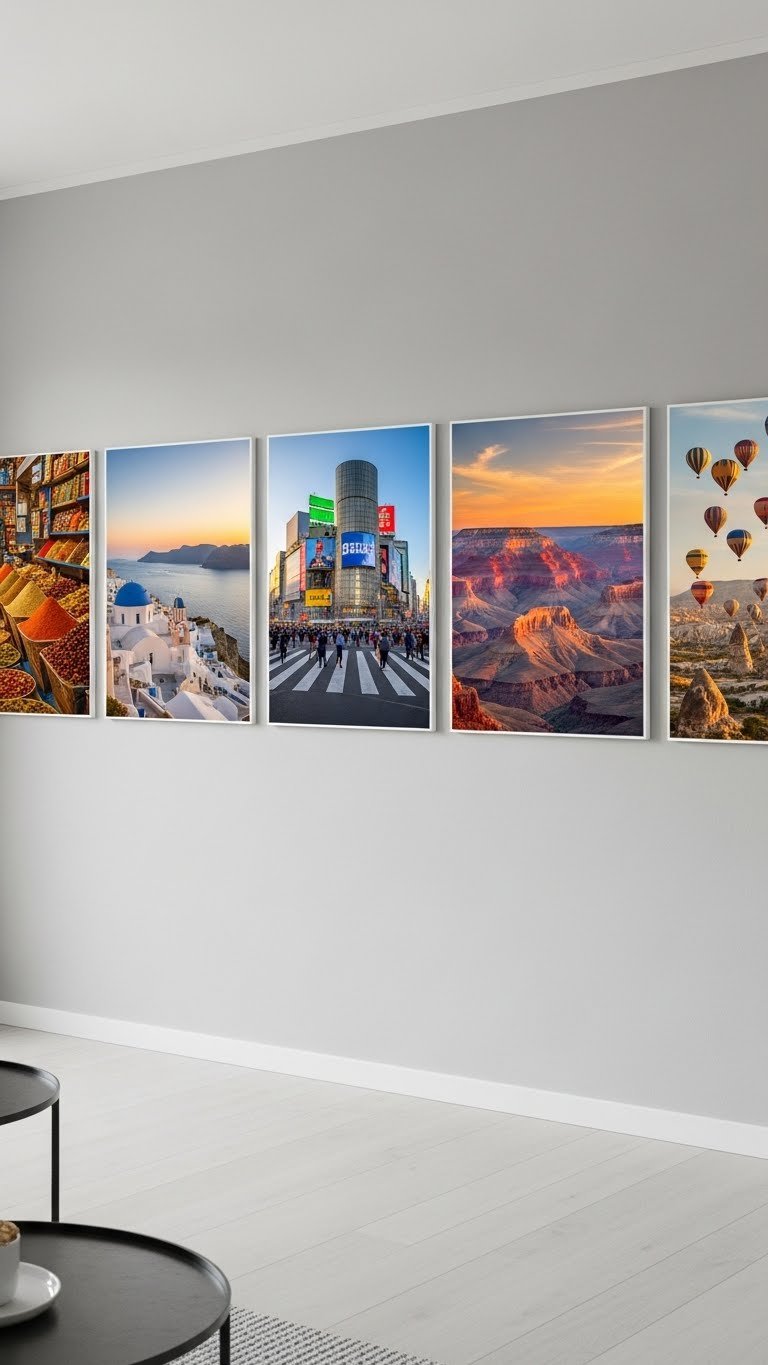
Canvas prints feel more substantial than paper prints and work beautifully for personal photos. Arranging them horizontally creates a narrative or timeline feel—perfect for travel, family moments, or a life journey theme.
Print personal photos or favorite imagery onto canvas (Shutterfly, Artifact Uprising, or local print shops—$15-$40 per print). Mount them flush to the wall using brackets or simply hung with hooks. Keep spacing consistent (4-6 inches between canvases). Budget: $60-$200 for 5 pieces. Time: 45 minutes installation. Renter note: This does require wall anchors, but canvas is lighter than you’d expect. The horizontal line draws the eye across the wall and creates movement in a static room.
Canvas prints add depth and texture compared to flat framed paper, plus they photograph beautifully in natural light.
8. Create a Color-Blocked Wall Section Behind a Sofa
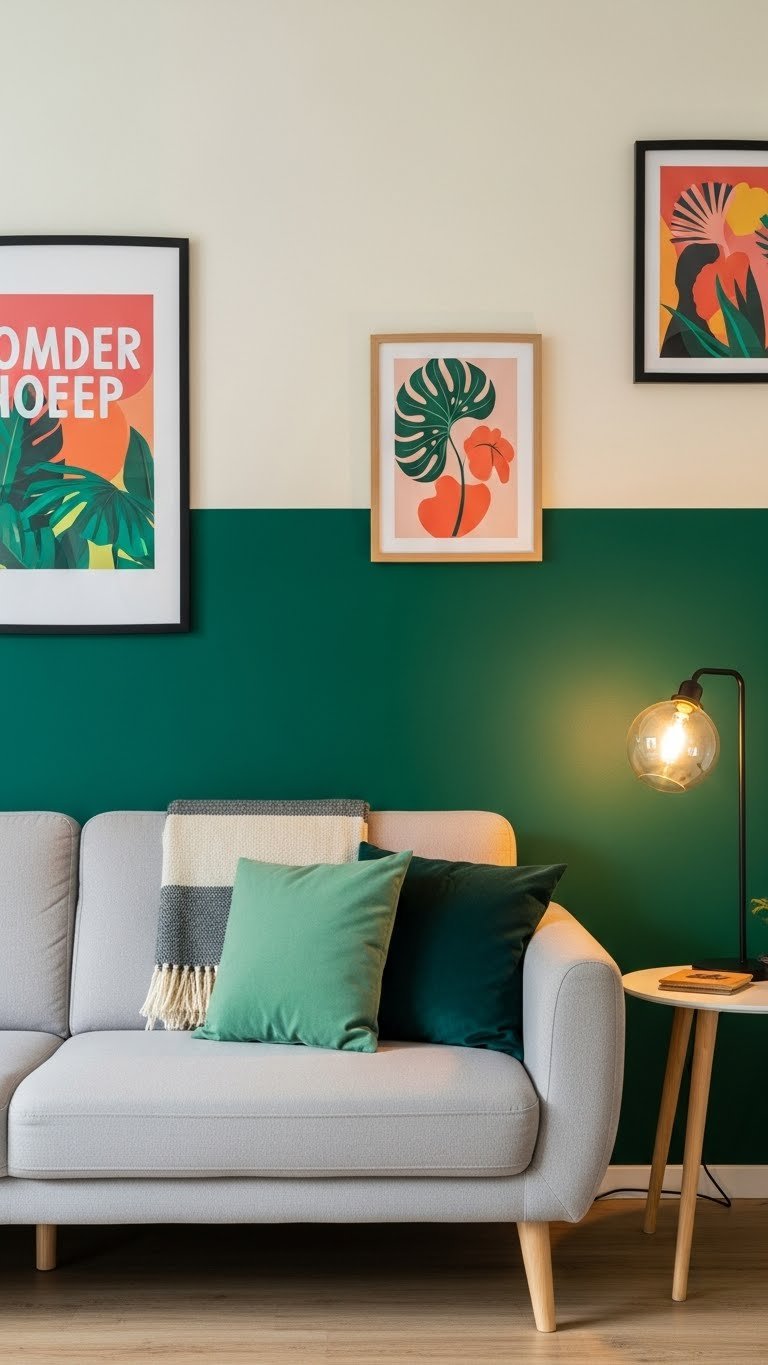
Color blocking amplifies your art display and makes the wall an intentional design feature. This ties directly into the bold color palette and defined spaces trends. A painted accent adds impact without needing more art.
Paint 1/3 to 1/2 of the wall behind your sofa in a bold jewel tone (emerald, sapphire, or burnt orange). Hang art on both the painted and unpainted sections to tie the color into your gallery. Paint budget: $20-$40 per gallon; frames vary. Time: Paint prep and two coats (3-4 hours total). The painted section grounds your art and makes even small prints pop. Pro tip: Use painter’s tape for clean lines; test paint samples first.
A color-blocked wall elevates your entire living room’s design and gives your art display context and cohesion.
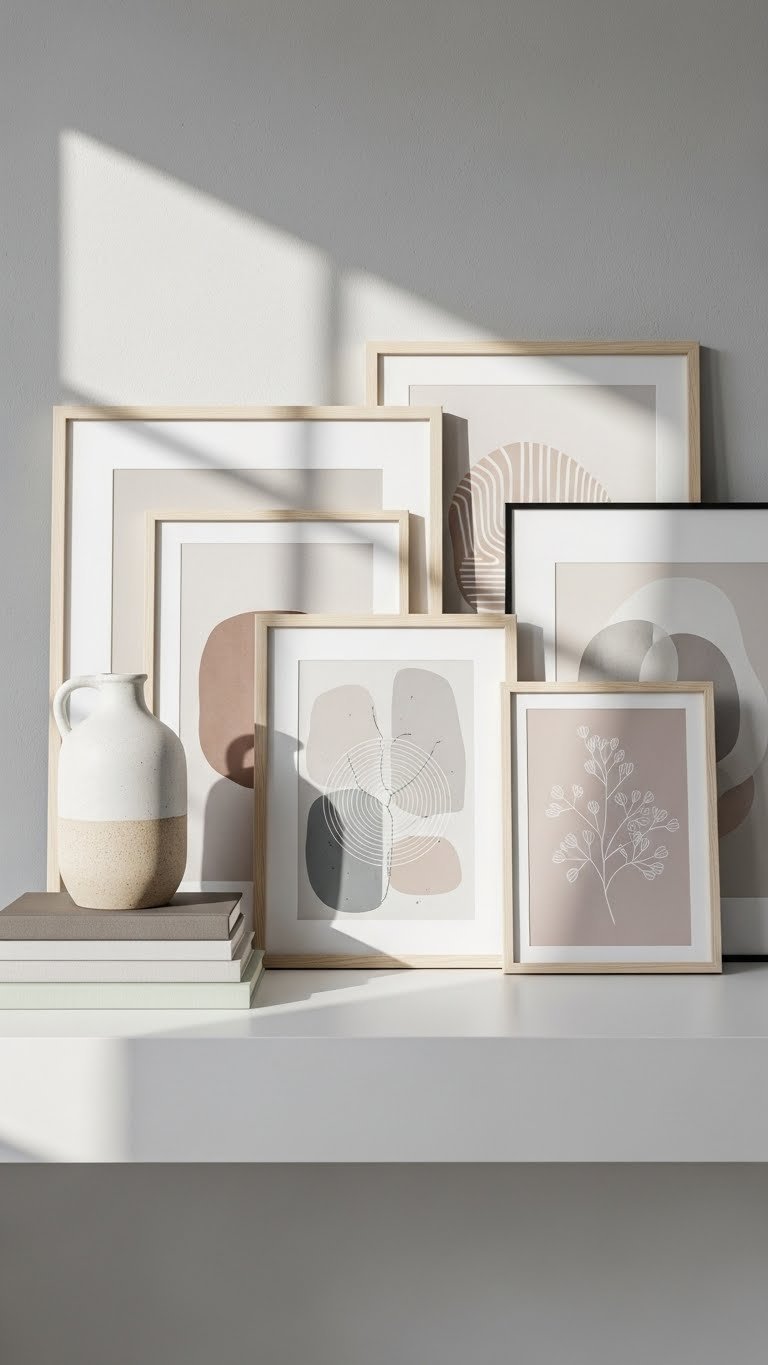
9. Arrange a Minimalist Line-Art Collection

Line art reads as sophisticated and modern—simple enough not to overwhelm a space, bold enough to read from across the room. Pairs beautifully with minimalist or Scandinavian décor.
Search Etsy for “line art print” or “botanical line drawing.” Look for single continuous-line pieces, abstract heads, or simple botanical outlines. Print onto white or cream cardstock, frame in thin black or natural wood frames. Budget: $20-$60 for 4 prints and frames. Time: 30 minutes. Mount vertically (one above the other) or use a vertical trio layout. The simplicity makes the space feel calmer and more intentional—less is genuinely more here.
Line art works in small spaces and complements minimalist furniture without visual noise.
10. Mix Vintage Finds with Modern Prints (Modern Nostalgia)

This plays directly into the “modern nostalgia” trend—combining thrifted vintage pieces with contemporary art creates depth and storytelling. It feels collected over time rather than designed all at once, which is way more interesting.
Hit thrift stores and estate sales for vintage prints, old maps, or framed botanical illustrations. Pair these with 2-3 modern prints from Etsy or independent artists. Mix frame styles intentionally: gold, natural wood, black, and even mismatched vintage frames. Budget: $30-$100 (vintage pieces are cheap; modern prints $15-$40 each). Time: 1-2 hours arranging and hanging. The mix of eras and styles tells a richer visual story. Pro tip: Unify the look by using mats or choosing a consistent color palette across old and new.
This eclectic approach makes your gallery wall feel personal and conversation-starting—people actually engage with art that has varied visual interest.
11. Install Art Ledges for a Rotating Display
Art ledges (shallow shelves designed specifically for displaying art) let you rotate prints without rehanging. Perfect if you like updating your display seasonally or love changing things up frequently.
Install 2-4 art ledges using a stud finder and wall anchors (trust me—don’t skip the stud finder). Lean prints at a slight angle in the ledges; layer them so you can see 2-3 pieces at once for depth. Mix in small objects, plants, or books. Budget: $30-$80 for ledges; art prints vary. Time: 1 hour installation. Renter note: Check with your landlord—permanent installation, but removable if needed. This setup reads as effortlessly curated and gives you flexibility without constant re-hanging.
Art ledges solve the “I want to change my art constantly” problem while maintaining a gallery aesthetic.
12. Frame Fabric Swatches or Textile Pieces
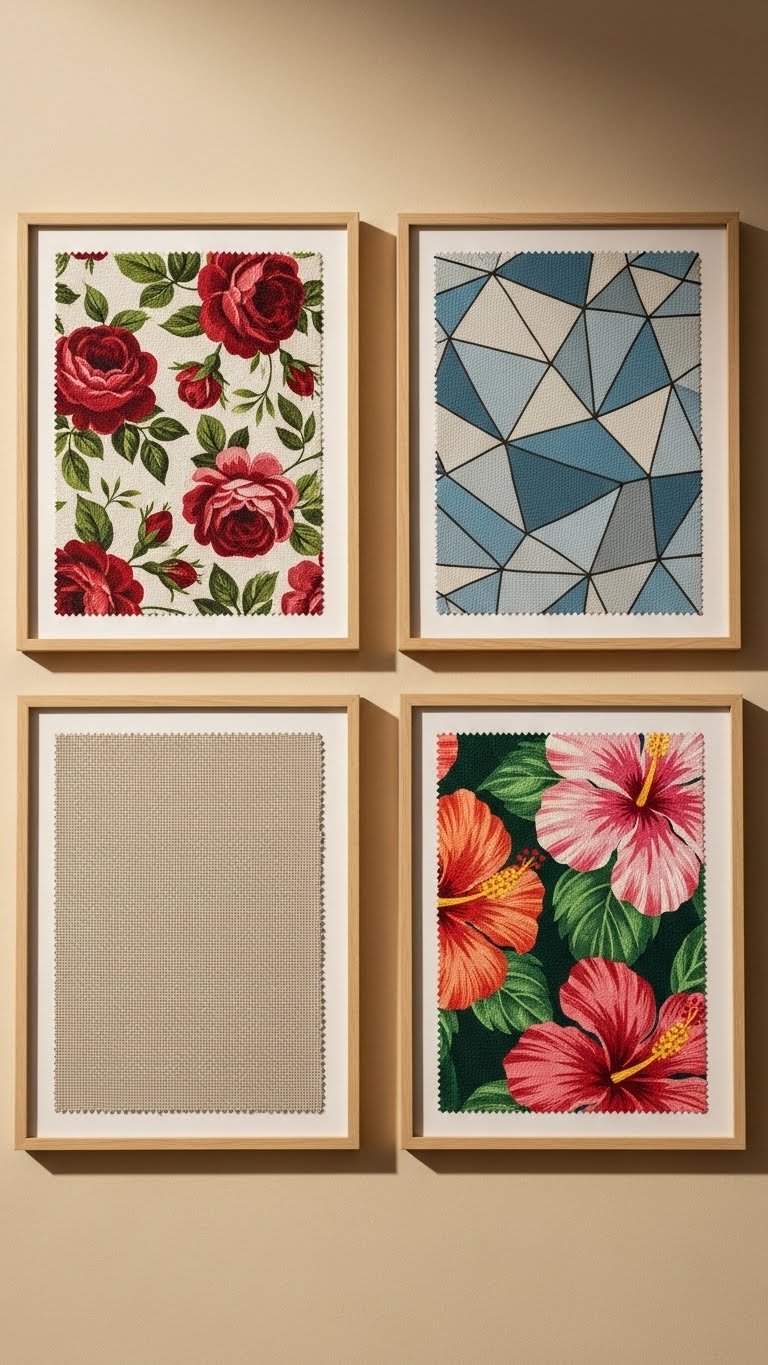
Framing fabric, textile scraps, or even vintage quilts creates unexpected art that ties into the tactile, textured design trend. This is an especially clever hack if you already have interesting fabrics at home.
Choose fabric with visual interest: vintage prints, interesting weaves, bold patterns, or heritage textiles. Cut to uniform sizes, mount on white or cream backing, and frame in simple frames. Budget: $0 if using fabric you own; $20-$60 for frames. Time: 30 minutes if fabric is ready; longer if you’re sourcing. This idea works beautifully in eclectic or maximalist rooms. Pro tip: Use printable fabric or fabric glue to add typography or images to plain fabric before framing.
Framed textiles add depth, texture, and unexpected visual interest to your gallery wall—they’re conversation starters.
13. Hang Large-Scale Geometric Prints

Large-scale geometric prints make a modern, confident statement. They work especially well for bold color palette goals and tie into the trend of pattern drenching and maximalism.
Search for “large geometric art print” on Minted, Society6, or Etsy. Look for pieces at least 24×36 inches with colors that complement your room. Print sizes matter—go big or the impact flops. Budget: $30-$80 per print. Time: 20 minutes to hang (stud-mounted). These work best with minimal competing décor—let the print be the star. Mount them at eye level (57 inches to center). Pro tip: Pair two geometric prints for movement, or use one as an absolute statement.
Geometric prints anchor a modern living room and give you an instant design focal point that photographs beautifully.
14. Create a Personal Photo Wall Timeline
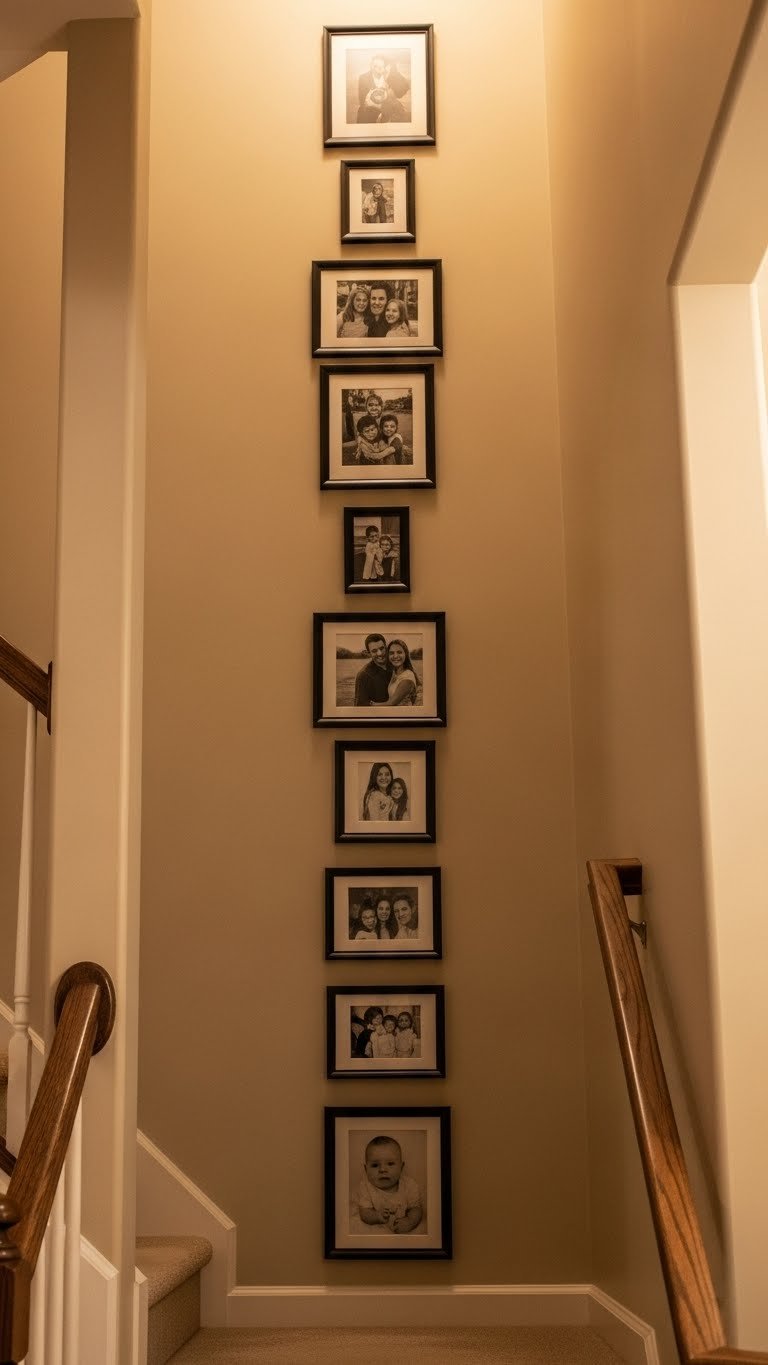
A photo timeline tells your personal story and makes a living room feel like a home rather than a showroom. It’s deeply personal and creates an immediate emotional connection for visitors.
Gather photos spanning years or decades. Convert to black-and-white to unify the look (easier in most photo editing apps). Print at consistent sizes (5×7 or 8×10 inches work well). Frame in matching black or natural wood frames to let the photos speak. Budget: $40-$100 for printing and framing. Time: 1-2 hours arranging and hanging. Mount vertically (up a stairwell is classic) or horizontally across a wall. Space evenly. This becomes a talking point and a grounding element that makes your space unmistakably yours.
A photo timeline adds emotional depth and turns your living room walls into your personal story—guests notice immediately.
15. Use Command Hooks to Hang Oversized Woven Baskets as Art

Woven baskets hung on walls pull double duty—functional storage plus textural art. This plays into the maximalism and tactile layering trends while staying practical.
Find woven baskets in varying sizes and weave patterns (Anthropologie, World Market, HomeGoods, or thrift stores). Hang at different heights using command hooks (renter-friendly!) or wall brackets. Mix tight weaves, loose weaves, and different natural fiber colors. Budget: $15-$50 per basket. Time: 15 minutes. Pro tip: Leave a few empty—you can still use them for storage or styling. No frame needed; the baskets become the art themselves.
Hanging woven baskets adds warmth, texture, and a bohemian edge while staying functional—and they’re totally removable for renters.
16. Frame Pressed Flowers or Dried Botanicals
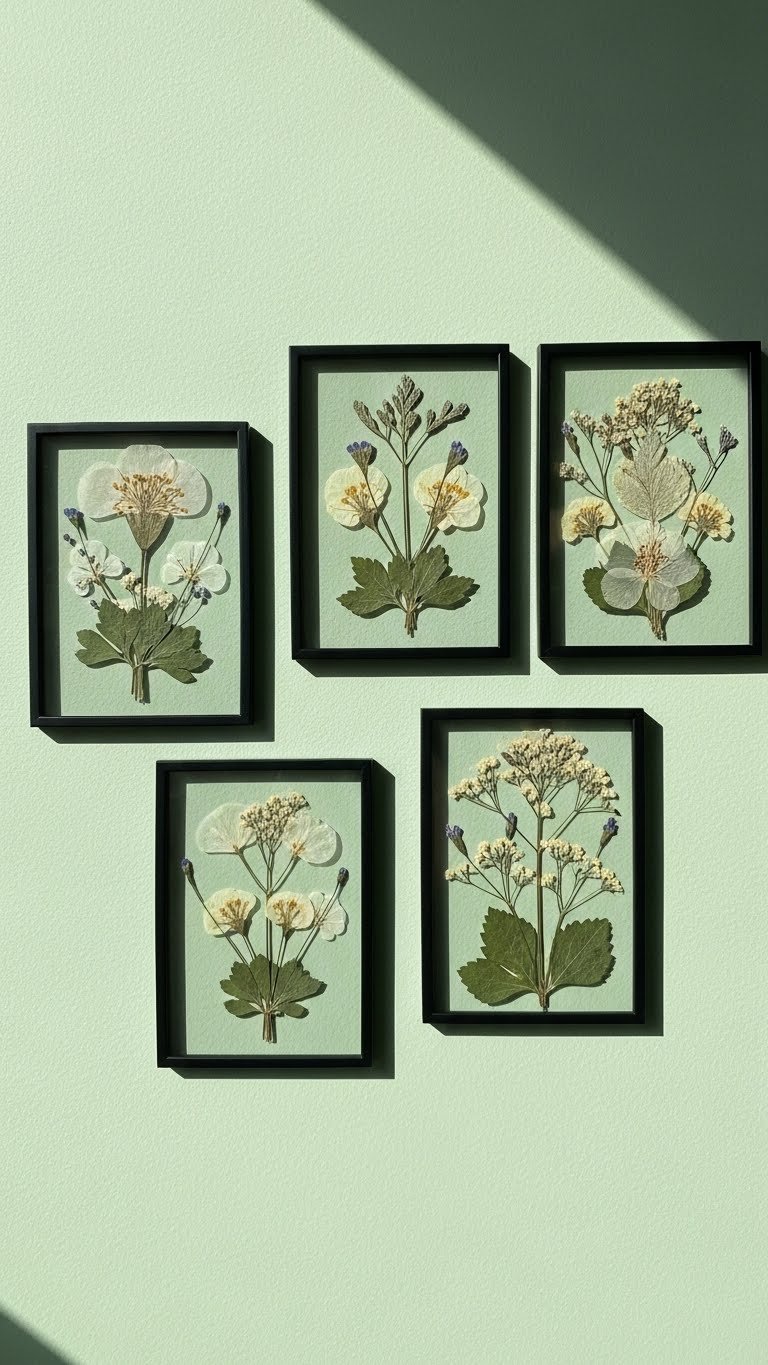
Pressed flowers and dried botanicals are delicate, unexpected art that ties into the wellness and natural materials trend. They’re also surprisingly affordable and you can DIY the pressing.
Press flowers yourself (fast: use a flower press or books for 2 weeks) or buy pre-pressed botanicals from Etsy. Mount on white or cream backing using acid-free glue. Frame in thin frames (wood or black metal). Budget: $0-$10 to press flowers yourself; $20-$60 for ready-made pieces and frames. Time: 20 minutes to frame (or 2 weeks if pressing). Hang in groups of 3-5 for visual interest. They work beautifully in bedrooms or reading nooks too. Pro tip: Botanical prints (not actual pressed flowers) last longer and cost less if longevity matters.
Pressed flowers add a soft, organic touch and make your gallery feel more natural and curated than typical prints.
17. Paint a Mural Accent Behind Framed Art

A painted mural behind your framed art multiplies visual impact and lets you create without being an accomplished painter—soft, abstract styles hide mistakes beautifully.
Paint a soft background using watercolor technique (watered-down acrylic or actual watercolor), geometric shapes, or abstract florals. Keep colors soft and complementary to your frames and room. Budget: $20-$40 for paints. Time: 2-3 hours plus drying. Difficulty: Intermediate (but abstract = forgiving). Hang 3-5 framed pieces over the mural to ground it. Use painter’s tape for clean lines if you want them. The painted mural adds artistry and depth—visitors think you’re far more artistically talented than you actually are.
A painted mural backdrop elevates your gallery and makes your entire living room feel more curated and intentional.
18. Hang a Large Fabric Wall Hanging or Quilt
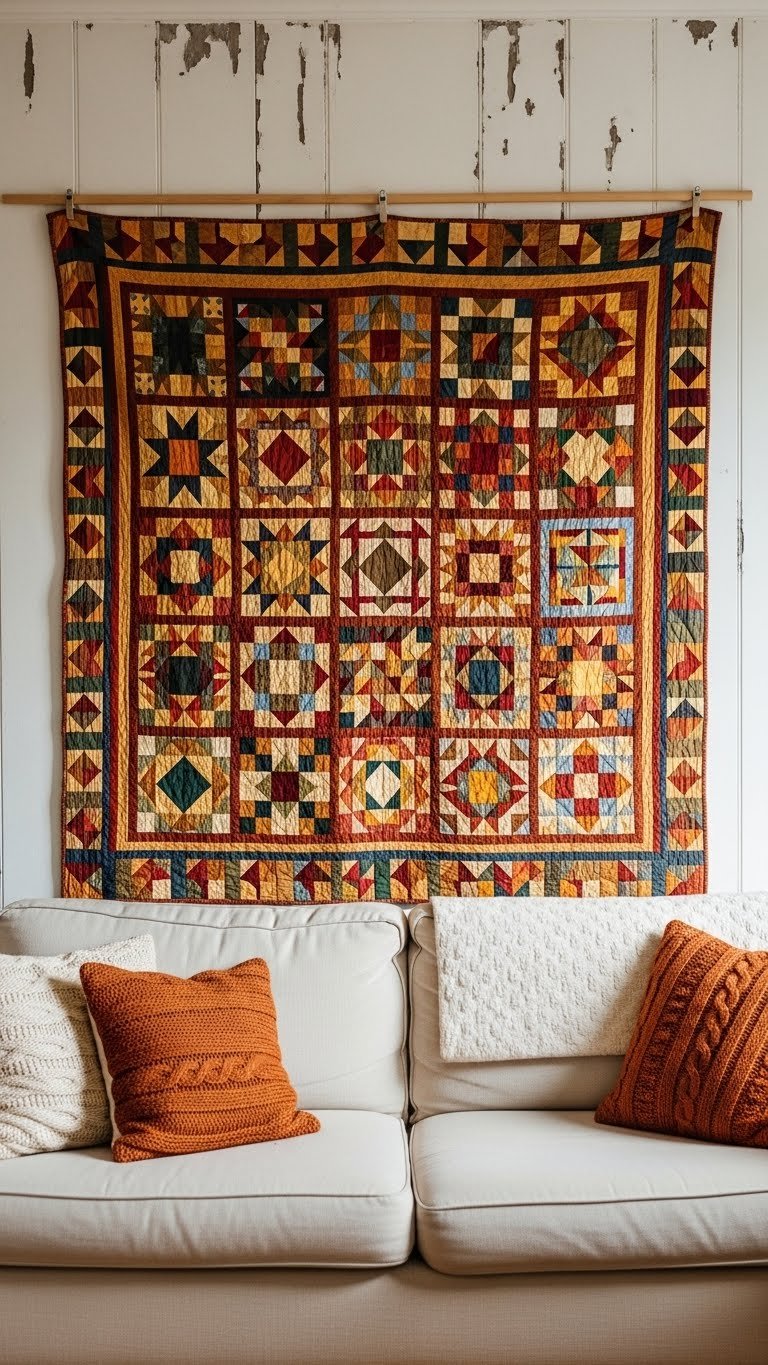
Large fabric hangings or quilts become instant focal points and add warmth. This ties into the texture and organic materials trend while being incredibly renter-friendly.
Find vintage quilts at thrift stores, online vintage shops, or handmade from artists. Mount using a wooden dowel threaded through a pocket sewn to the back (or use clips designed for fabric). Budget: $20-$80 for vintage quilts; handmade $100+. Time: 15 minutes to install. Alternatively, buy modern fabric wall hangings designed for this. The scale matters—go as large as your wall allows. This single piece often gets more compliments than any other wall element.
A large fabric hanging becomes an instant gallery piece and adds warmth that makes your living room feel lived-in and cozy.
19. Create a Typography or Quote Wall

Inspirational quotes or meaningful typography adds personality and becomes part of your décor story. This works especially well in spaces where you want to feel motivated or inspired daily.
Design your own typography prints using Canva (free) or buy from Etsy. Choose quotes that genuinely resonate—not generic motivational platitudes. Mix font styles for visual interest but keep a color palette (usually 2-3 colors max). Budget: $0 (Canva) + printing cost ($10-$20 for 3 prints) or $20-$50 for Etsy prints. Print on high-quality paper or cardstock, frame simply. Time: 30 minutes. Mount at eye level in a grouped arrangement. This works beautifully in home offices, bedrooms, or living room reading nooks. Pro tip: Use typography related to your values—not generic wellness speak unless it’s truly meaningful to you.
Typography art makes your space feel intentional and personal—it’s a subtle way to tell visitors who you are without saying a word.
20. Arrange Plate Wall or Decorative Dish Display

A plate wall feels vintage-inspired and playful—especially if you’re collecting plates from markets, travels, or thrift stores. It’s an unexpected gallery element that works beautifully in maximalist or eclectic rooms.
Collect decorative plates with interesting patterns, colors, or provenance (travel finds, vintage shops, HomeGoods). Mount using plate hangers or adhesive discs (stud-mounted if heirloom pieces). Arrange asymmetrically in a cluster, leaving some negative space. Budget: $2-$8 per plate; hangers $0.50-$2 each. Time: 45 minutes arranging and hanging. Difficulty: Beginner. Mix plate sizes, patterns, and colors for maximum visual interest—unity in variety. This works especially well in dining rooms or kitchen-living room combos.
A plate wall adds personality, color, and an unexpected gallery vibe that photographs wonderfully and sparks conversations.
21. Mount Art on Floating Board for Dimension
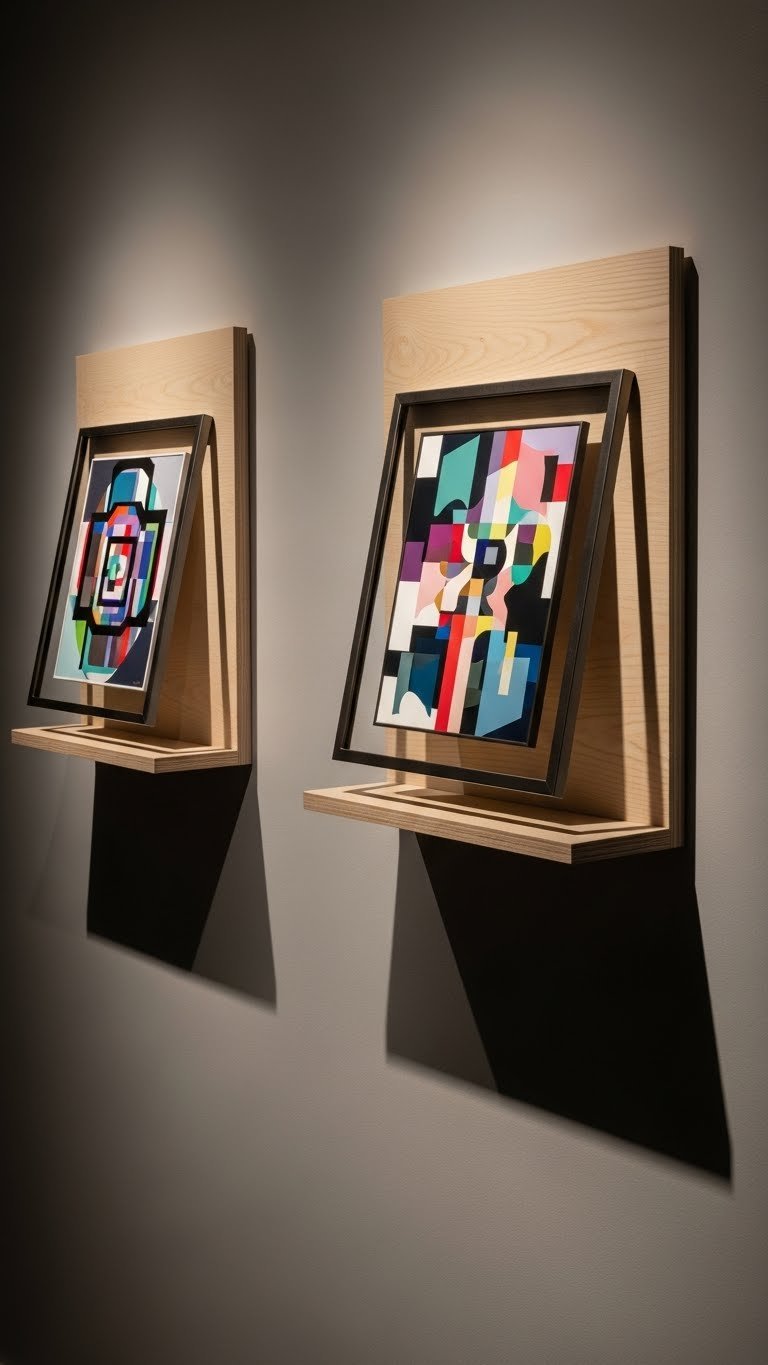
Floating boards create dimension and shadow—the art becomes more sculptural than flat. This simple trick elevates basic prints into something way more interesting.
Mount thin wooden boards (1.5-2 inches deep) using wall anchors or studs. Mount framed art onto the boards rather than directly to the wall. Budget: $15-$30 per board plus frames. Time: 45 minutes for two boards. The shadow cast on the wall behind becomes part of the art itself. Use this for 1-3 statement pieces rather than your entire gallery. Pro tip: This works especially well with large botanical prints or geometric art where shadows add interest.
Floating boards create depth and shadow play that makes ordinary prints feel like installation art—zero additional effort required.
22. Hang a String Light Feature Behind Art
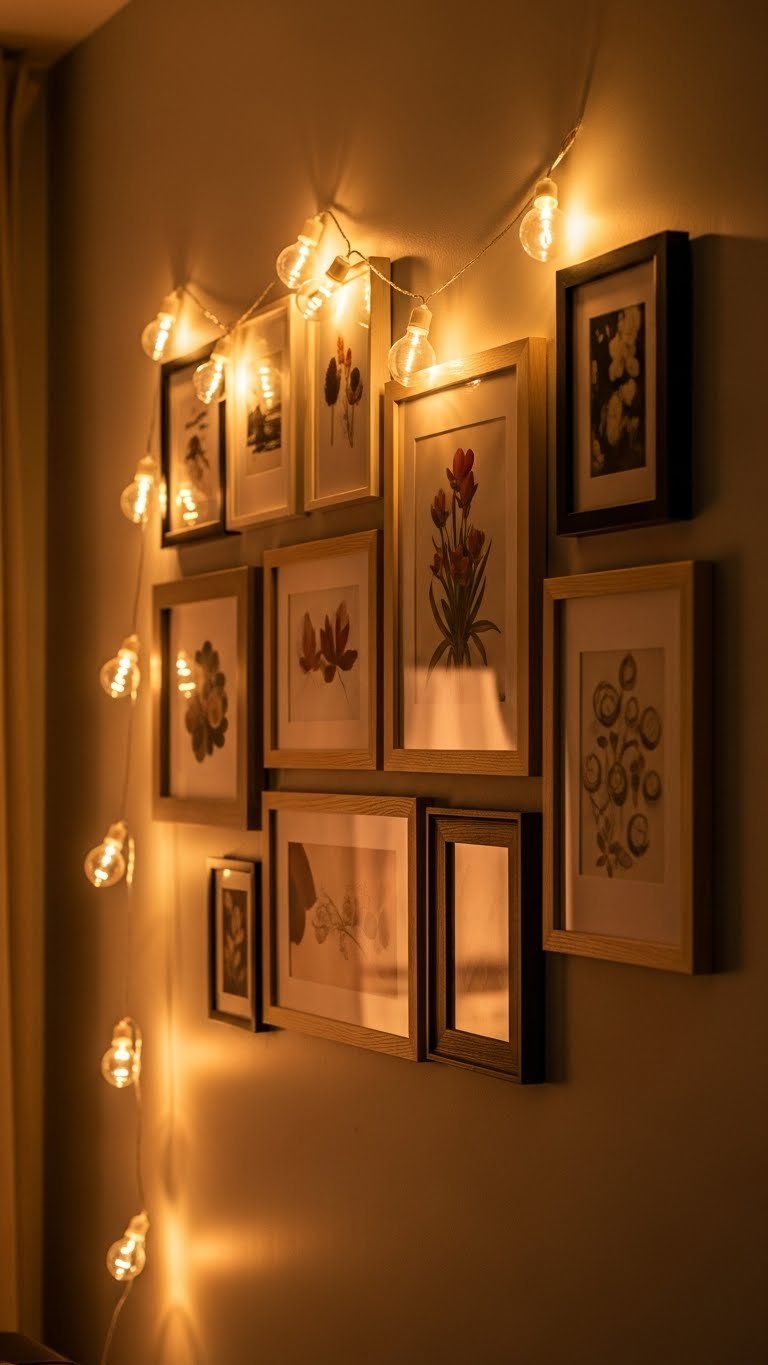
String lights add ambiance and draw attention to your gallery wall. This works especially well in moody living rooms or if you want to highlight art in dim evening light.
Install warm white string lights (Edison bulbs, fairy lights, or cafe lights) above or beside your gallery wall using hooks. Keep the wiring neat by running it along wall edges or the top of the wall. Budget: $15-$30 for quality string lights. Time: 20 minutes installation. This creates a living gallery feel, especially in evenings. Pro tip: Choose dimmable lights so you can adjust ambiance. Use a small power strip hidden behind furniture. The warm glow makes artwork pop and adds unexpected coziness.
String lights transform your gallery wall from daytime display to evening feature—the glow makes your space feel intimate and inviting.
23. Create an Asymmetrical Shelf Display with Objects and Art

Combining framed art with three-dimensional objects on a shelf creates depth and visual interest. This ties into the “curated collected look” trend.
Mount a large floating shelf (36-48 inches wide works well). Layer framed prints (leaning), books (stacked), ceramic pieces, plants, and candles in an asymmetrical arrangement. Vary heights and objects. Budget: $40-$100 for shelf; styling pieces vary. Time: 1 hour styling. Pro tip: Group objects in threes for visual balance—odd numbers feel more intentional than even numbers. Leave some white space. This one shelf often reads as more interesting than a full gallery wall because it has dimensional variety.
Shelf styling with mixed objects and art creates a more interesting display than frames alone—it tells a richer visual story.
24. Frame Your Favorite Fashion or Music Memorabilia
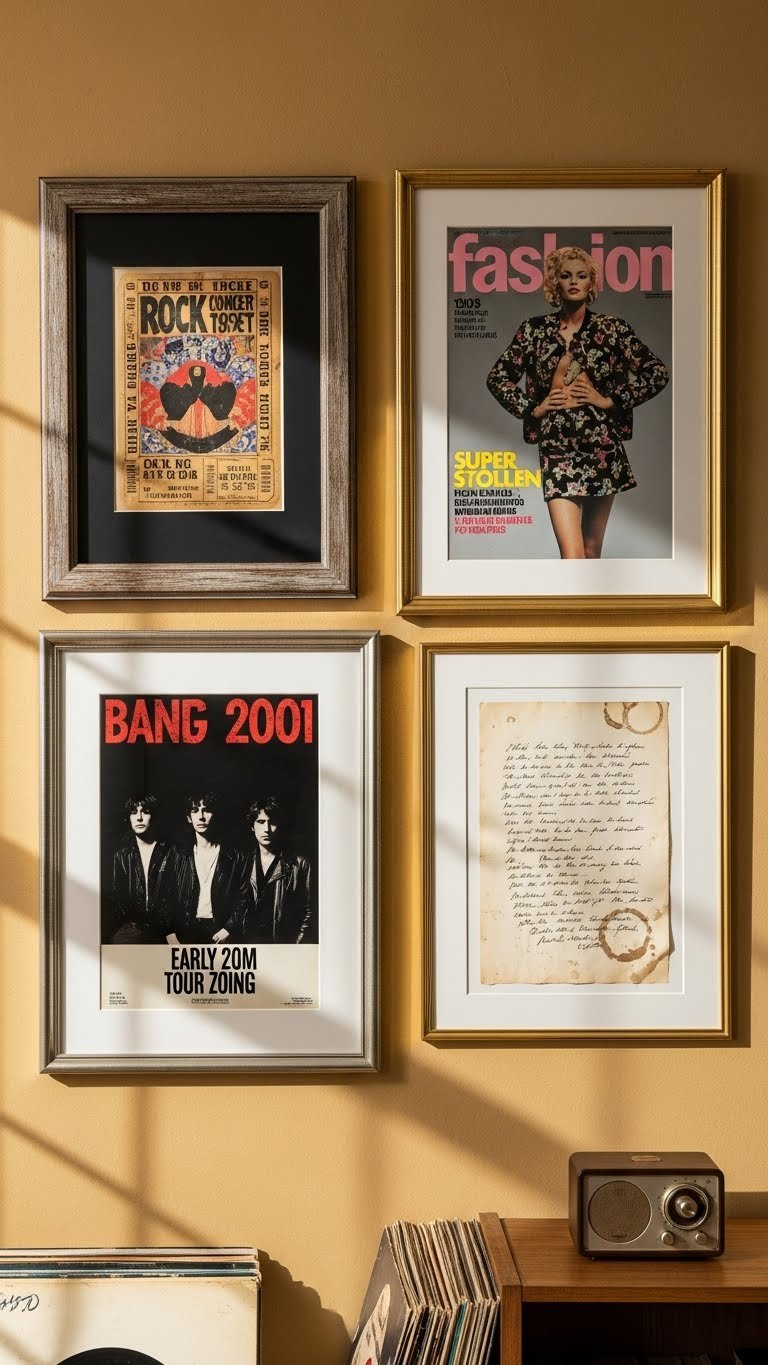
Displaying personal memorabilia—concert tickets, vintage magazine covers, autographed items, or handwritten notes from loved ones—adds genuine personality to your space. This is art that’s meaningful specifically to you.
Gather items that matter: concert tickets, magazine covers, band posters, travel tickets, handwritten lyrics, or pressed concert programs. Preserve using acid-free backing or framing sheets. Frame in simple frames to let the memorabilia shine. Budget: $20-$80 depending on frame quality. Time: 30 minutes. Pro tip: Use UV-protective glass if the items are sentimental or valuable. Hang in a small cluster (3-5 pieces) or one statement piece. This immediately makes your space feel like home—not a showroom.
Framed memorabilia transforms your walls into your personal story and gives visitors genuine insight into who you are.
25. Install a Gallery Wall with Negative Space (White Space Strategy)
Strategic negative space (white wall showing between frames) makes your gallery wall feel sophisticated rather than cluttered. This is harder than it seems, but the payoff is huge.
Choose 6-8 pieces maximum. Space them 6-12 inches apart intentionally—not filling the wall, but rather allowing the wall to breathe. Keep frame colors cohesive (all black, all wood, or monochromatic). Budget: varies by pieces. Time: 1-2 hours planning the layout using painter’s tape first. Map everything before you drill. This is the opposite of the salon wall look—instead of filling every inch, you’re editing ruthlessly. The result feels very intentional and modern.
Strategic white space makes your gallery feel thoughtfully curated rather than random—restraint reads as sophistication.
26. Mix 2D Art with 3D Wall Sculptures or Woven Objects

Adding actual 3D objects and sculptures to your gallery creates dimension and tactile interest. This plays into the texture and maximalism trend beautifully.
Combine framed prints with small sculptures, 3D paper art, wooden wall hangings, ceramic pieces, or woven objects. Mix materials: wood, metal, ceramic, fiber. Mount everything at varying heights and distances from the wall. Budget: $30-$150 depending on pieces. Time: 1-2 hours. Pro tip: Use various mounting systems (hooks, brackets, adhesive dots) to accommodate different weights. Group 3-4 pieces together rather than spacing them evenly. This creates a curated, collected, art-gallery vibe.
Mixed 2D and 3D gallery walls feel way more interesting than flat art alone—the layered dimension creates genuine visual depth.
Pin this post for your next wall refresh—pick just one idea to start. Which style speaks to you: gallery walls, woven textures, or personal memorabilia? Try one this weekend and watch how your space transforms.
Leave a Reply