
Introduction
Lighting does more than illuminate your living room—it sets the entire mood of your space. The right fixtures and layering strategies can make a small room feel expansive, a dated layout feel contemporary, and a boring corner become your favorite gathering spot. Whether you’re working with natural light, struggling with dark corners, or just ready to upgrade basic overhead fixtures, statement lighting is one of the fastest ways to refresh your living room without major renovation.
In this guide, you’ll discover 26 specific lighting ideas that work for renters and homeowners, tight budgets and investment pieces, and every skill level in between. Each idea includes exactly where to shop, how much it costs, and how long it takes to install. By the end, you’ll know exactly which lighting solutions match your space and style.
1. Layer with Warm Pendant Lights Over Seating Areas

Pendant lights create defined zones and add visual interest above seating clusters without needing ceiling work. They’re particularly effective over sofas or accent chairs because they provide task lighting for reading while adding a design statement.
Look for brass, matte black, or frosted glass options at IKEA ($15-$40 per fixture), Wayfair ($30-$150), or West Elm ($80-$200). Installation takes 20-30 minutes with a basic socket adapter if you’re renting—no hardwiring required. Choose bulbs in warm white (2700K color temperature) to keep the mood cozy.
Pro tip: Hang three pendants at staggered heights for visual depth, or use a single oversize pendant for bold simplicity. The key is positioning them low enough to create pools of light but high enough to see around comfortably.
You’ll immediately notice how the room becomes more intentional and functional—plus reading actually becomes pleasant instead of eye-straining.
2. Install Arc Floor Lamps to Reach Dark Corners
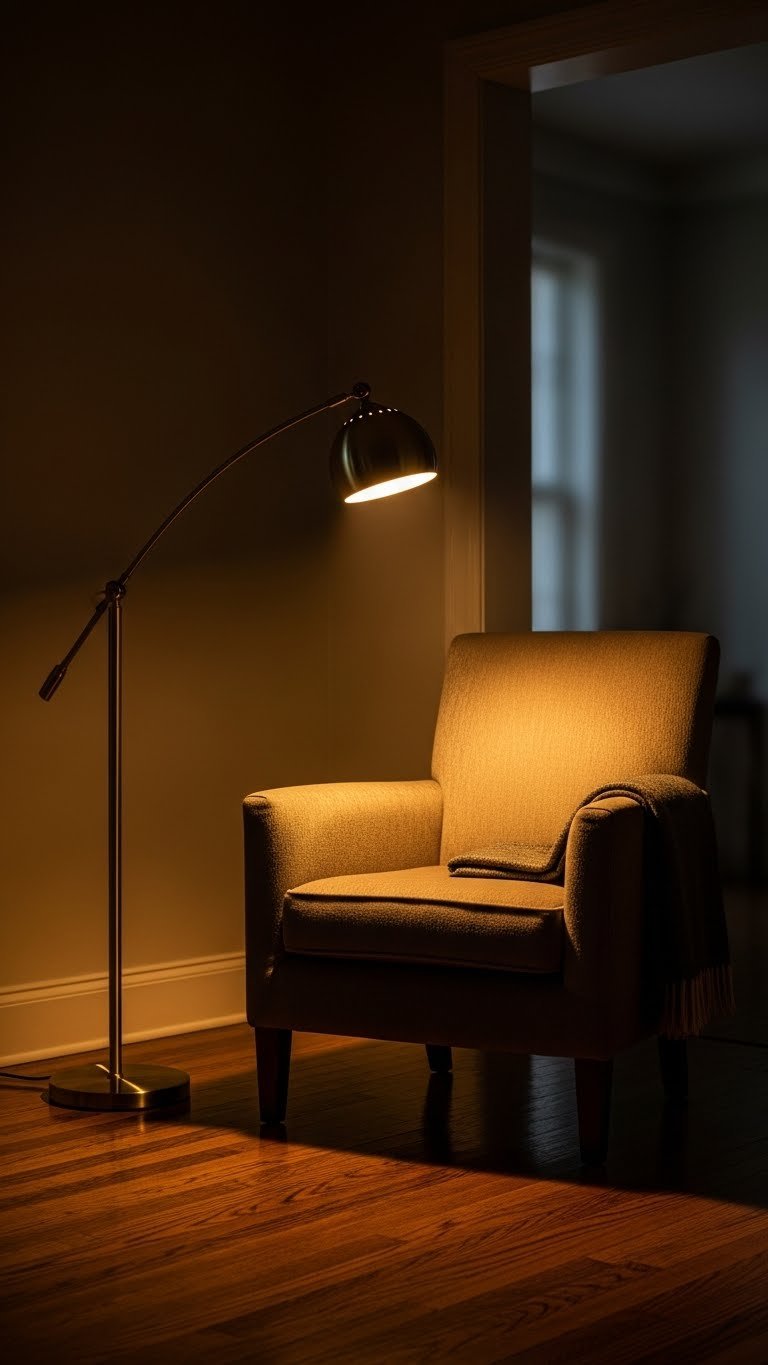
Arc lamps solve the “dead corner” problem by casting light exactly where you need it without taking up wall or table space. They’re especially useful for reading nooks or spaces next to seating where floor lamps would get in the way.
Budget options start at $40-$60 (Amazon, Target); mid-range brass or marble-base arcs run $80-$150 (West Elm, CB2). Investment pieces from Schoolhouse Electric or Apparatus ($200-$400) last decades and become instant focal points. Setup is plug-and-play—10 minutes with no installation needed. Choose a dimmable bulb (60-75W equivalent LED) for flexibility.
The weighted base keeps the lamp stable even in high-traffic areas. If you’re renting, arc lamps are perfect because you just unplug and take them with you.
This simple addition transforms a shadowy corner into an inviting retreat and instantly makes your room feel more designed and layered.
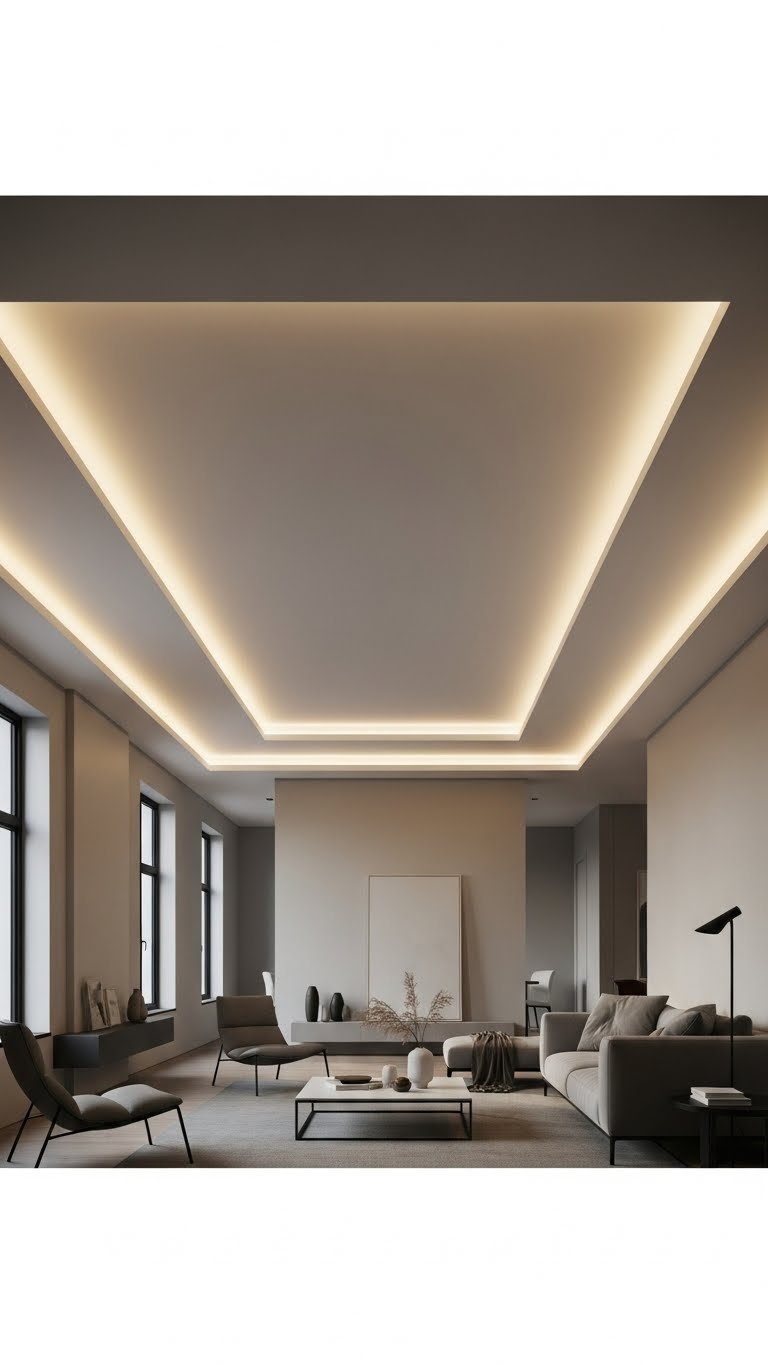
3. Add Recessed Lighting with Peel-and-Stick LED Strips
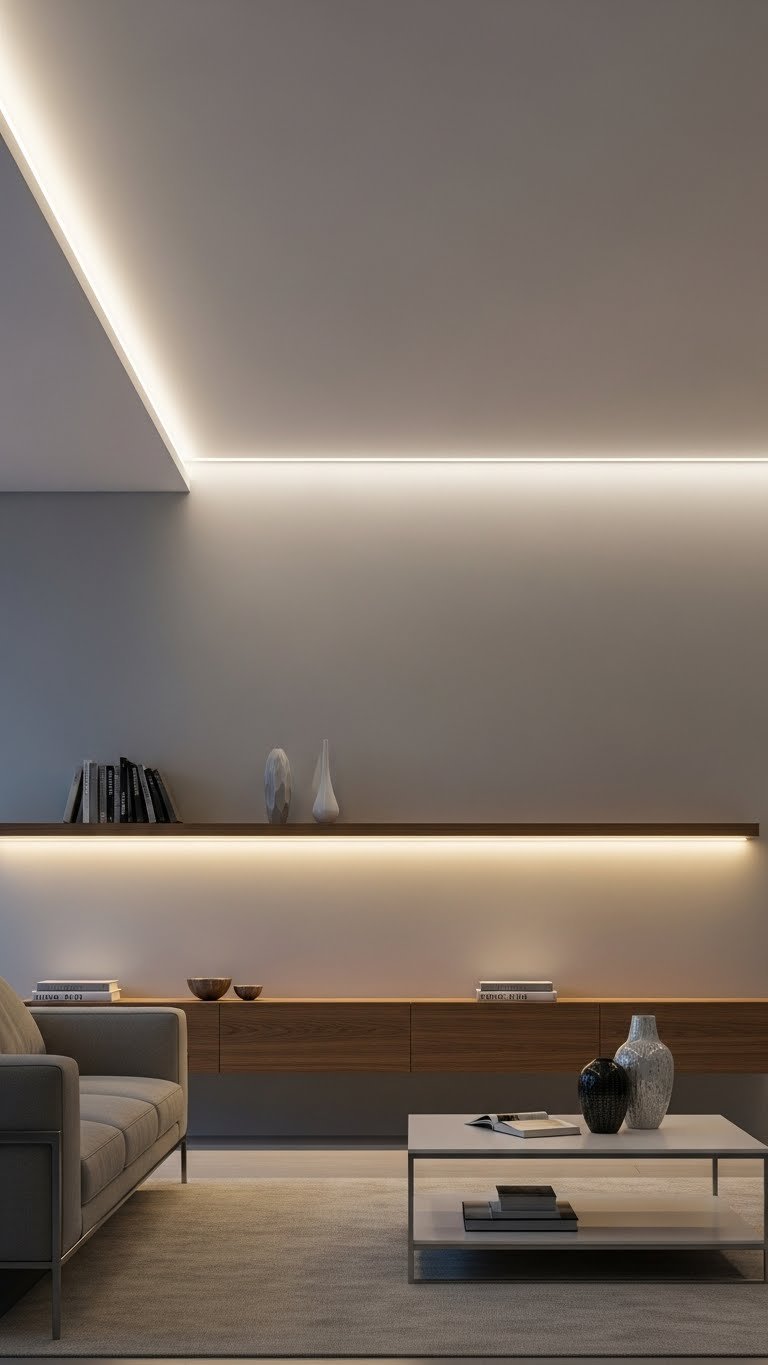
LED strip lights mimic recessed lighting without any permanent installation—perfect for renters and budget-conscious updates. They provide ambient background lighting that makes the whole room feel more intentional.
Adhesive LED strips cost $15-$40 (Amazon, Home Depot). Installation takes 20-30 minutes and requires only a clean ceiling edge and an outlet or power strip nearby. Choose warm white (2700K) or tunable white strips that let you adjust color temperature via remote.
Hide the power cord along your crown molding or behind furniture. Many strips are dimmable and controllable via smartphone app, so you can adjust brightness without getting up.
The effect? Your room instantly gains depth and sophistication. Even a basic space with standard furniture looks more curated when you add this subtle ambient layer.
4. Hang Brass Swing-Arm Wall Sconces for Flexible Task Light
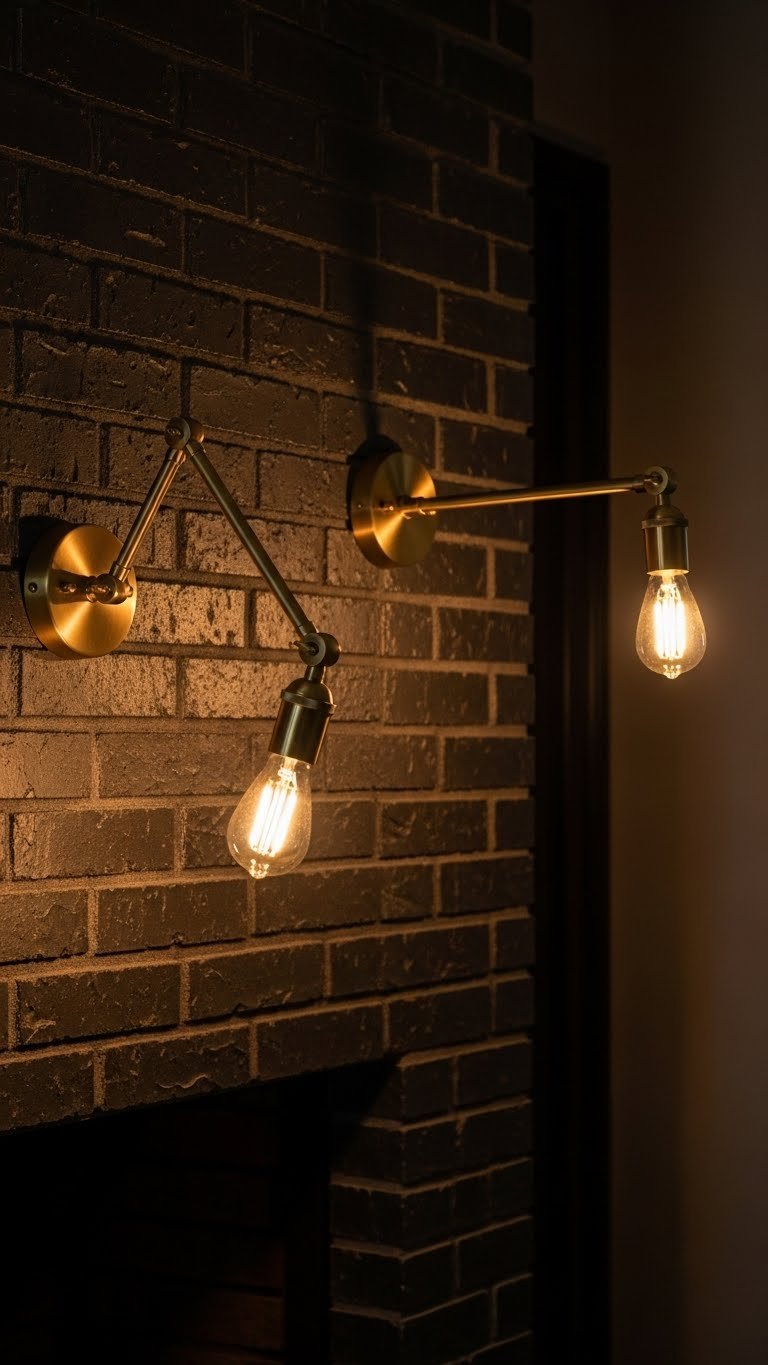
Swing-arm sconces let you direct light exactly where you need it—beside a reading chair, flanking a console table, or highlighting artwork. The adjustable arm means you control the light direction without moving the fixture.
Expect to pay $50-$100 per sconce (IKEA, CB2, West Elm) for quality options, or $150-$300 (Restoration Hardware, Circa Lighting) for designer versions. Installation requires basic wall mounting—45 minutes to 1 hour if you’re comfortable with a drill, or hire an electrician ($100-$150) for hardwiring. Renter-friendly plug-in versions exist ($60-$120) but have visible cords.
Pair matching sconces on either side of a fireplace or sofa for balanced style. The adjustability means they adapt as your room changes.
You’ll notice how much easier reading becomes, and how the directional light creates dimension and drama in ways ceiling fixtures can’t.
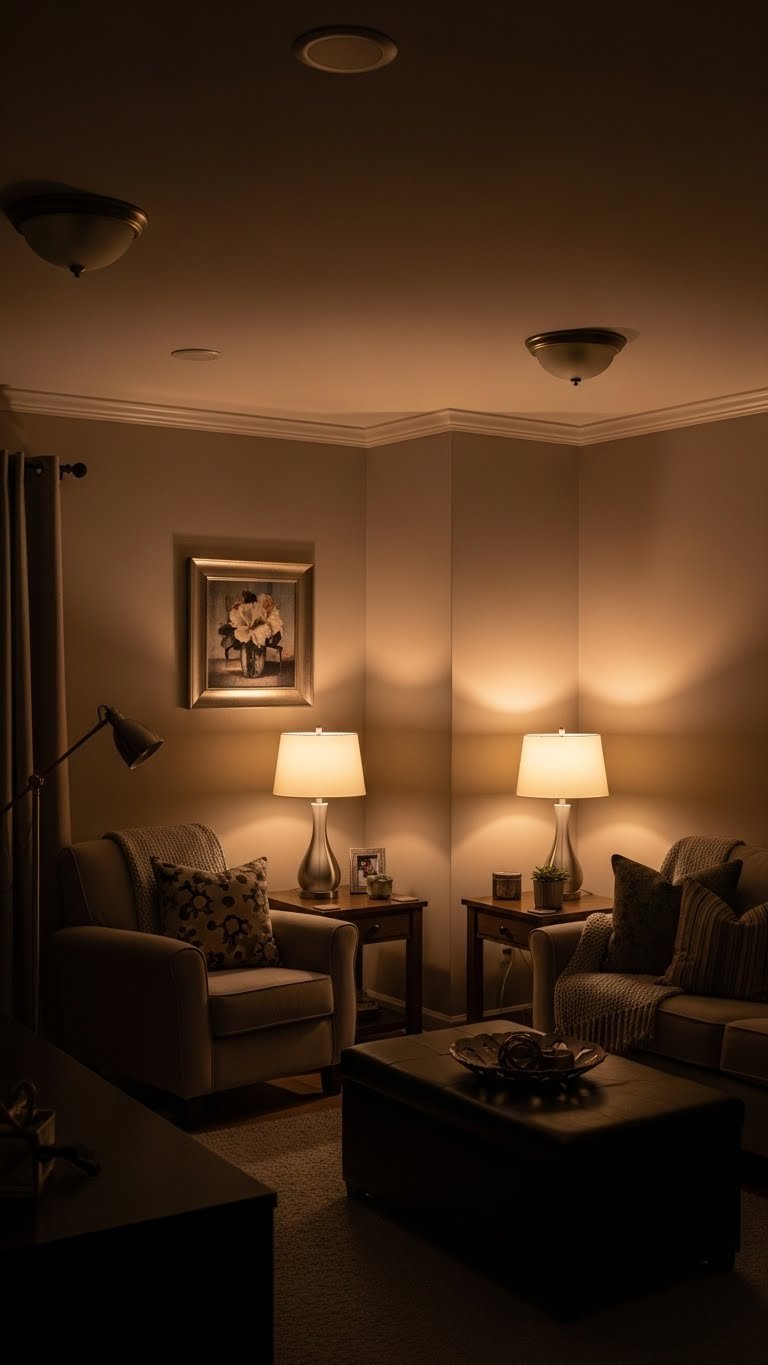
5. Create Warm Ambient Glow with Table Lamps on Dimmers

Dimmers transform basic table lamps into a whole lighting system—you can go bright for cleaning or entertaining, then dial down to 30% for a relaxing evening. Multiple dimmers on different circuits give you complete control over mood.
Budget table lamps with built-in dimmers start at $25-$50 (Target, Wayfair). For $15-$40, install smart bulbs (Philips Hue, LIFX) in any existing lamp—these let you dim via app or voice command. Hardwired dimmer switches cost $20-$50 at hardware stores; installation takes 1-2 hours if you’re comfortable with electrical work, or hire a pro ($200-$400 for multiple rooms).
The simplest approach? Buy dimmable LED bulbs and plug lamps into basic smart plugs ($10-$15 each) that you control from your phone.
This flexibility means your room adapts to every occasion, and you’ll sleep better thanks to the dimmer’s ability to reduce blue light in the evening.
6. Use Uplighting Behind Artwork for Gallery Drama
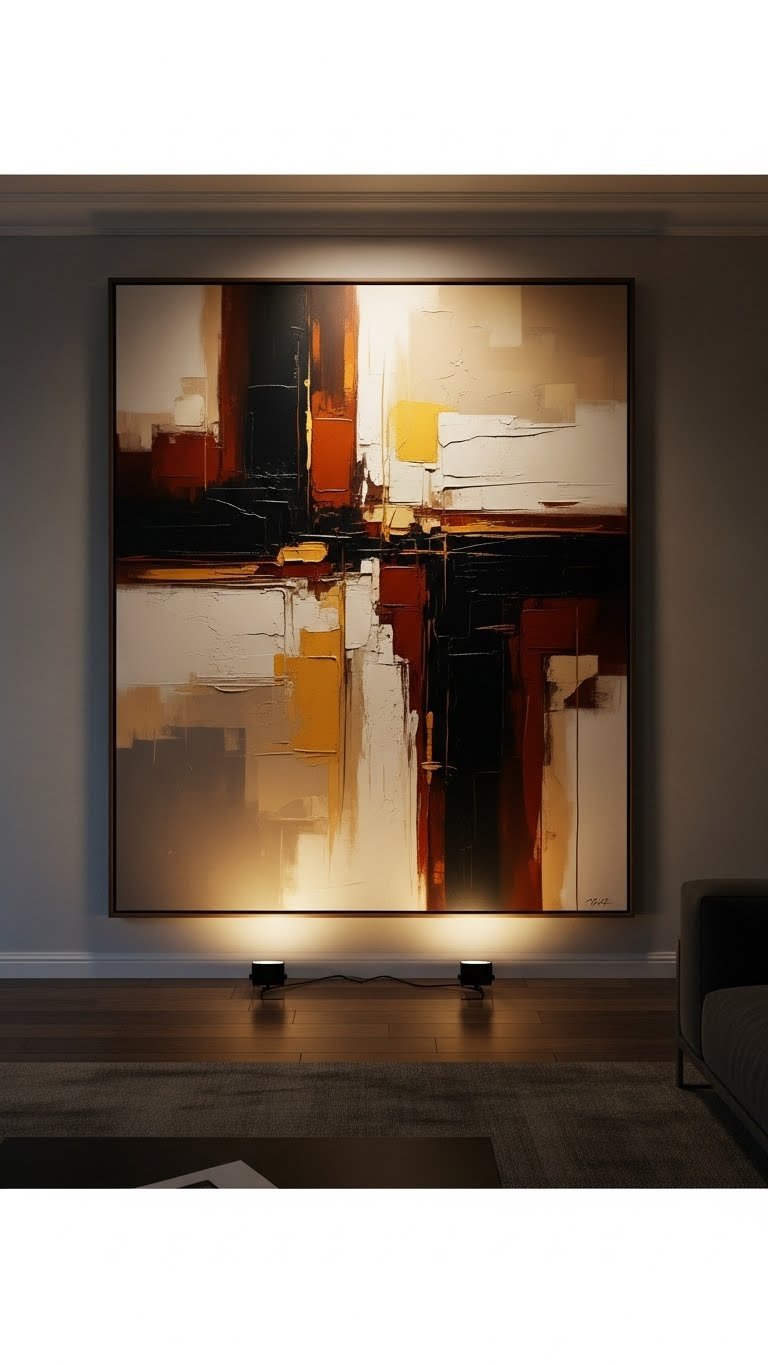
Uplighting behind or below artwork creates gallery-style drama and makes even modest prints feel museum-worthy. This technique also adds layers of visual interest to blank walls.
Small uplighting fixtures run $20-$50 (Amazon, hardware stores) and plug into standard outlets. Position them on the floor or a low shelf, pointing upward. Installation is instant—5 minutes—just unplug and move anytime. Use warm white 2700K bulbs to match your other lights.
This works especially well with textured paintings, black-and-white photography, or bold graphics. Adjust the angle to highlight the piece without creating glare.
Your artwork instantly becomes a focal point, and guests will assume you’ve invested way more in design than you actually have.
7. Install Floating Shelves with Integrated LED Lighting

Lit shelves serve double duty—they organize your space and provide accent lighting that highlights decorative objects. The underlit effect is particularly flattering and creates visual depth.
Floating shelves with built-in LED kits cost $30-$80 per shelf (IKEA, Target, Wayfair). Installation takes 1-2 hours for basic wall mounting with brackets (no electrical work required if you choose battery-powered LED strips). If you want hardwired options, expect 2-3 hours and possibly a pro installer ($150+).
Style your shelves with plants, books, and small objects that photograph well and create interesting silhouettes when backlit.
The result is a space that looks collected and intentional, with lighting that serves both function and aesthetic.
8. Try Adjustable Track Lighting for Flexible Accent Light
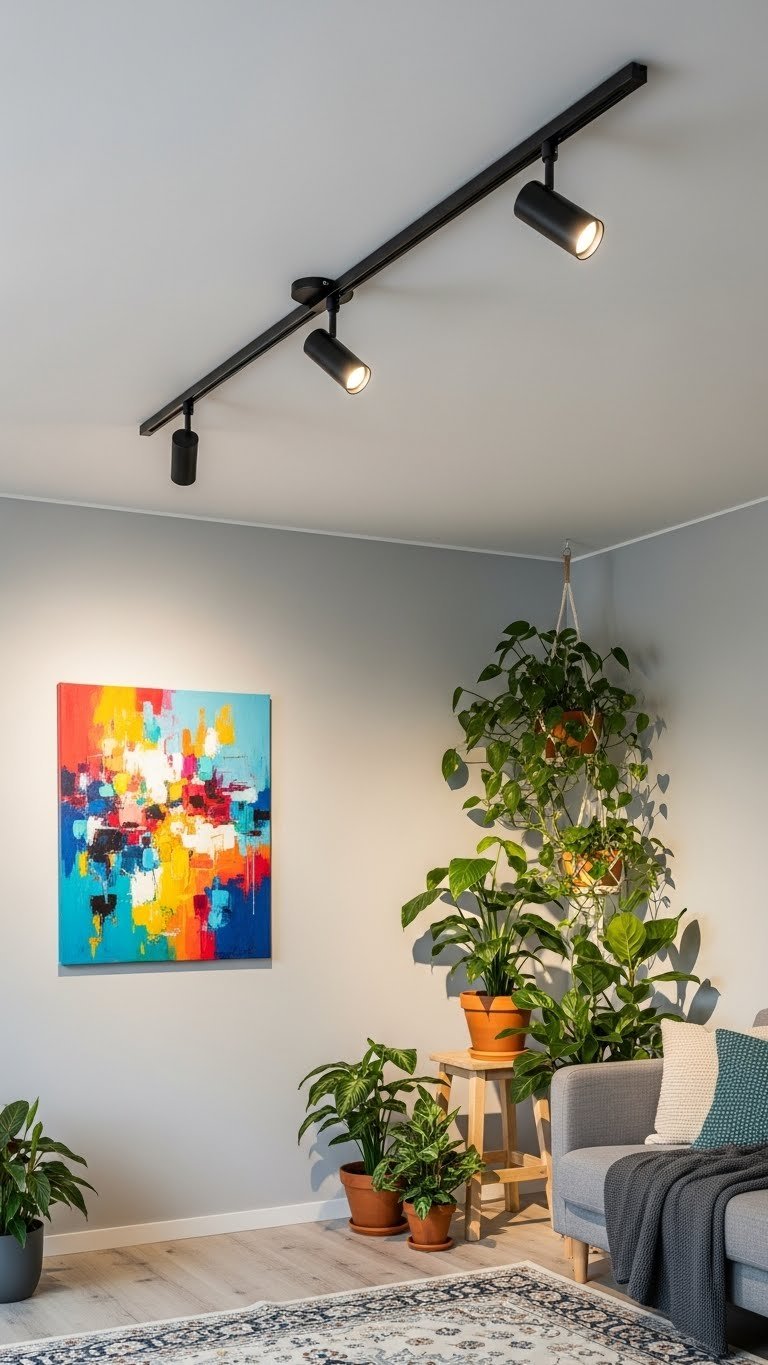
Track lighting gives you flexibility to highlight different zones without multiple permanent fixtures. Each light can rotate and adjust, perfect for emphasizing artwork, plants, or architectural details.
Budget track systems start at $40-$80 (IKEA, Home Depot); mid-range designer options run $150-$300 (CB2, West Elm). Installation takes 2-3 hours with basic tools or about $200-$400 with a professional. The advantage? You can move the lights anytime without patching walls.
Choose warm white LED bulbs (2700K) and dimmable options for maximum flexibility. Renter-friendly stick-on track options exist ($60-$100) but offer fewer adjustment possibilities.
Once installed, you have control over which areas get highlighted, making your space feel intentional and gallery-like.
9. Add Candlelight with Flameless LED Candles
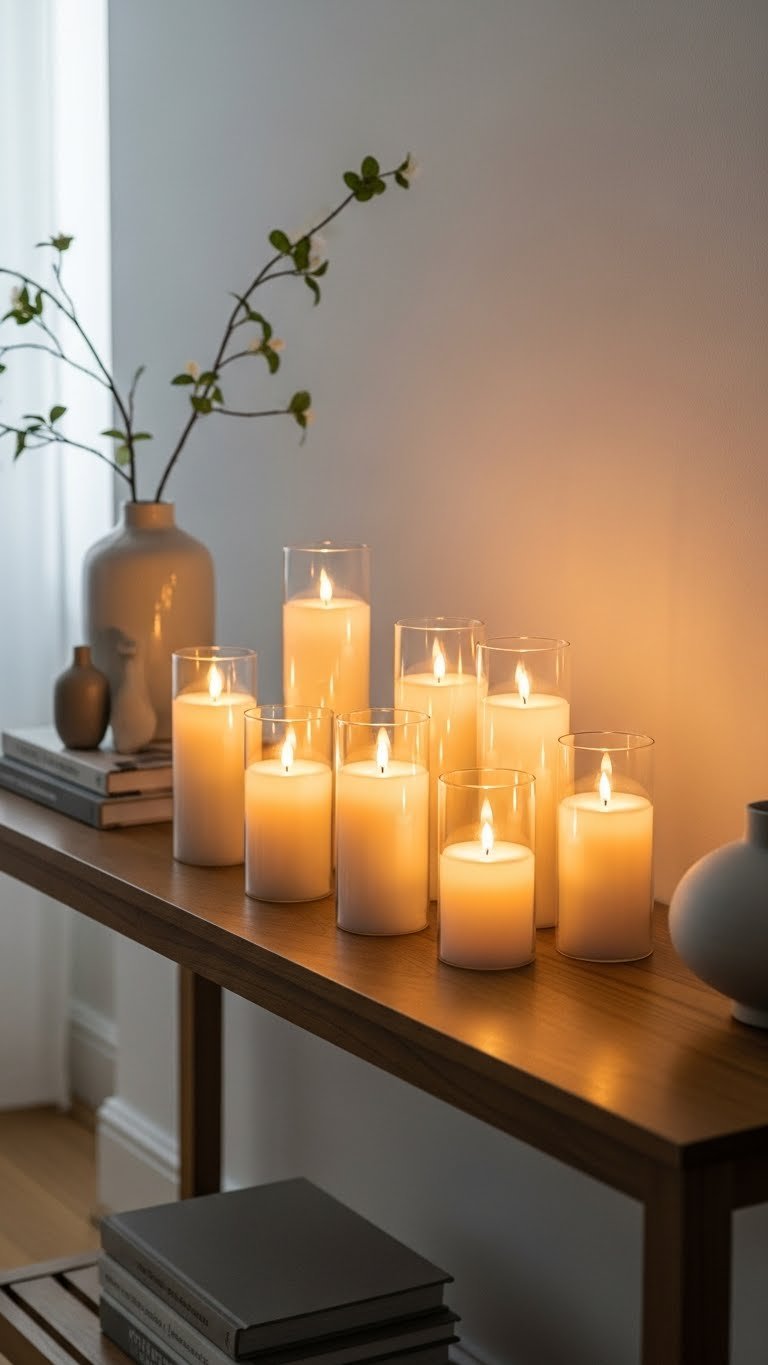
Flameless candles deliver cozy ambiance without fire hazard—perfect for living rooms where real candles feel risky or impractical. They layer beautifully with other lighting for special occasions or everyday coziness.
LED candles cost $1-$5 per candle (Target, Amazon, Dollar stores) or splurge on designer versions with realistic flame effects ($15-$40 from CB2, Wayfair). Battery-powered options last 50-100+ hours per set of batteries. Set them out in minutes—0 setup time.
Place them on console tables, mantels, or shelves. The key is grouping them in odd numbers (3, 5, 7) for visual interest.
Your living room instantly feels more intentional and welcoming, with the warmth of candlelight without any of the worry.
10. Mount Picture Lights Above Artwork for Museum Effect
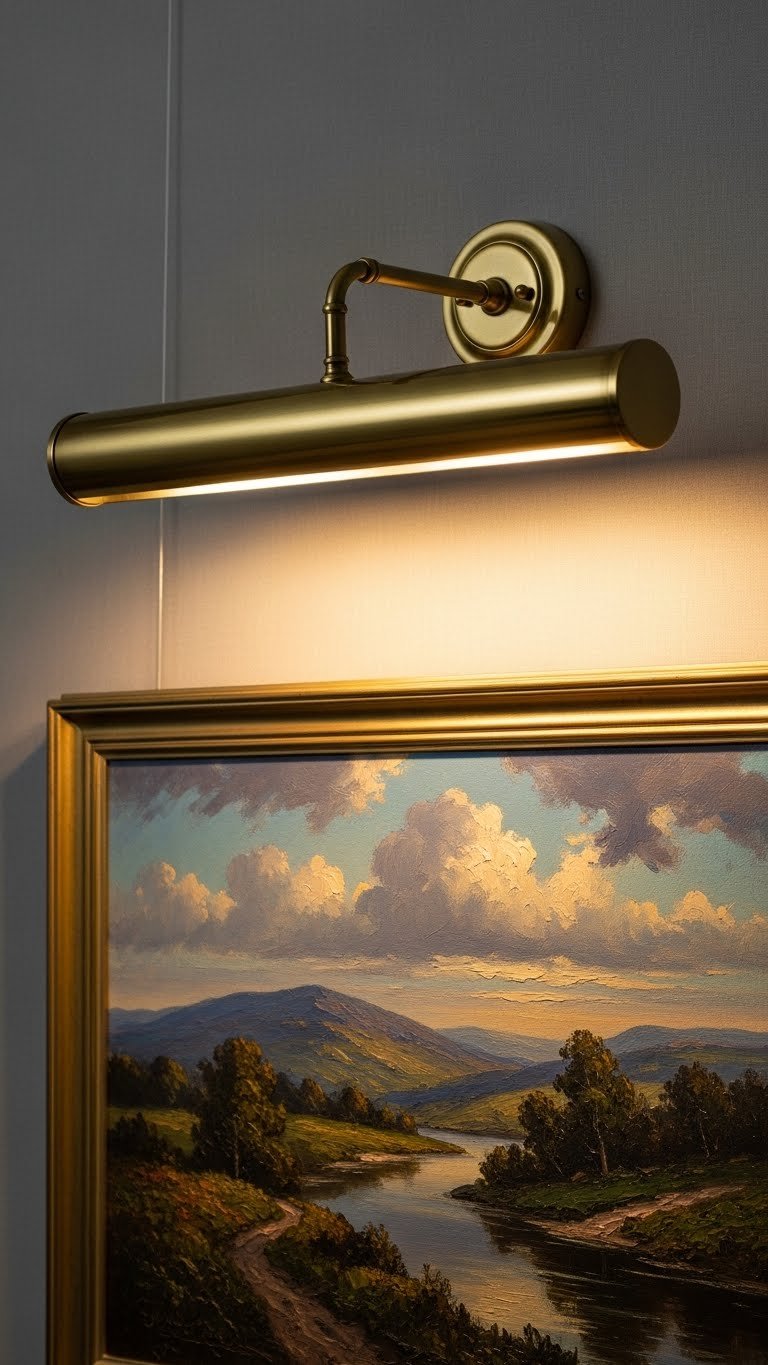
Picture lights are mounted directly above framed art and cast adjustable light down the piece—a timeless solution that makes any artwork feel important. This is especially effective with oil paintings or textured prints.
Picture lights range from $40-$100 (Rejuvenation, Schoolhouse Electric, higher-end options) to budget versions at $20-$40 (Wayfair). Installation takes 30-45 minutes with basic wall mounting and wiring. Most hardwire into your wall power or plug into nearby outlets; professional installation costs $100-$200 if you’re not comfortable.
The light should be positioned about 12-18 inches above the frame, angled slightly downward. Use warm white bulbs (2700K) to keep it gallery-appropriate.
Your artwork becomes a true focal point, and the whole room gains a collected, curated feeling.
11. Use Smart Bulbs for Customizable Color and Brightness
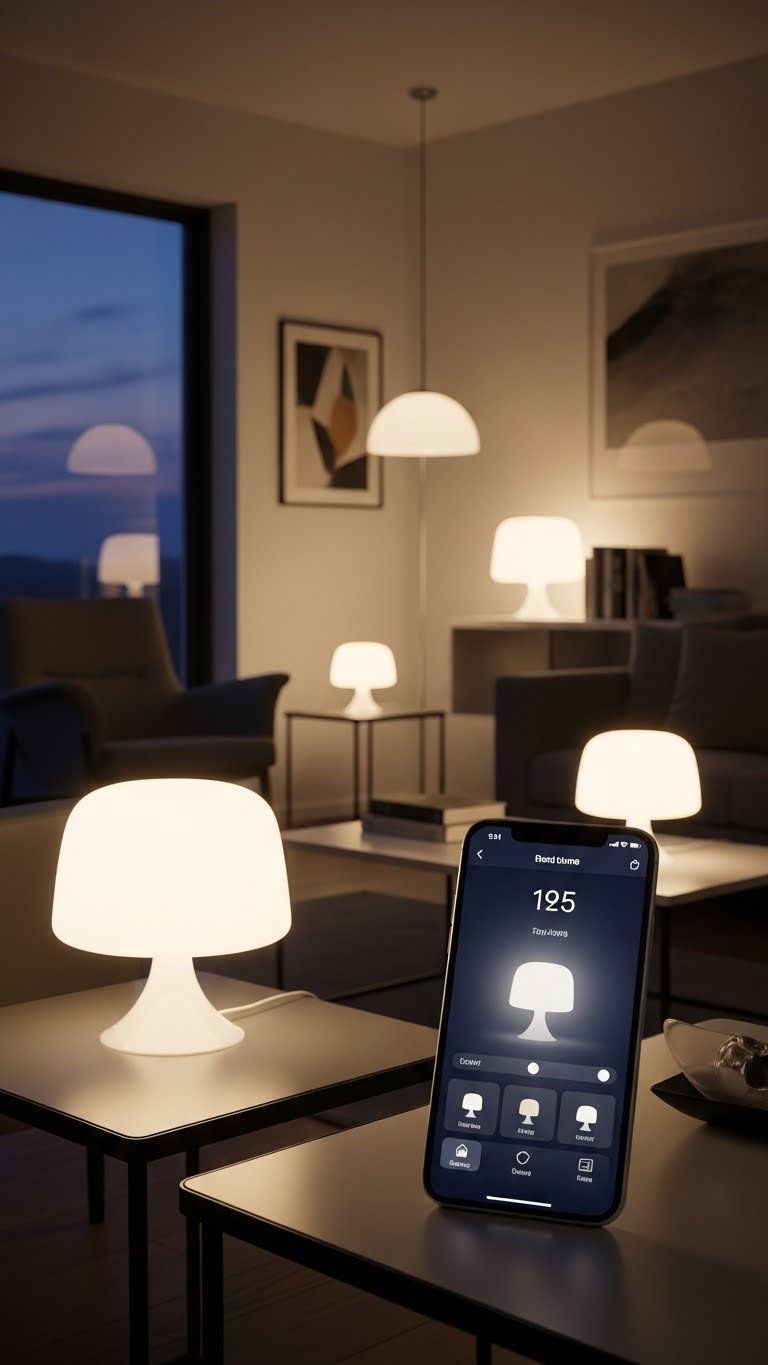
Smart bulbs let you adjust brightness and sometimes color temperature (or even color) from your phone—no rewiring or new fixtures required. This is the easiest way to add lighting flexibility to any existing lamp.
Quality smart bulbs cost $10-$25 per bulb (Philips Hue, LIFX, Wyze) with app control. Basic setup takes 5 minutes per bulb—just screw them in. Budget-friendly options like GE Cync ($8-$15) work similarly. Most connect via Wi-Fi or Bluetooth and let you set schedules, dimmers, and color temperatures via smartphone.
Start with one smart bulb in your main reading lamp to test the system before investing in more.
This flexibility means you can adjust your light for morning alertness, afternoon focus, or evening relaxation—all from your couch.
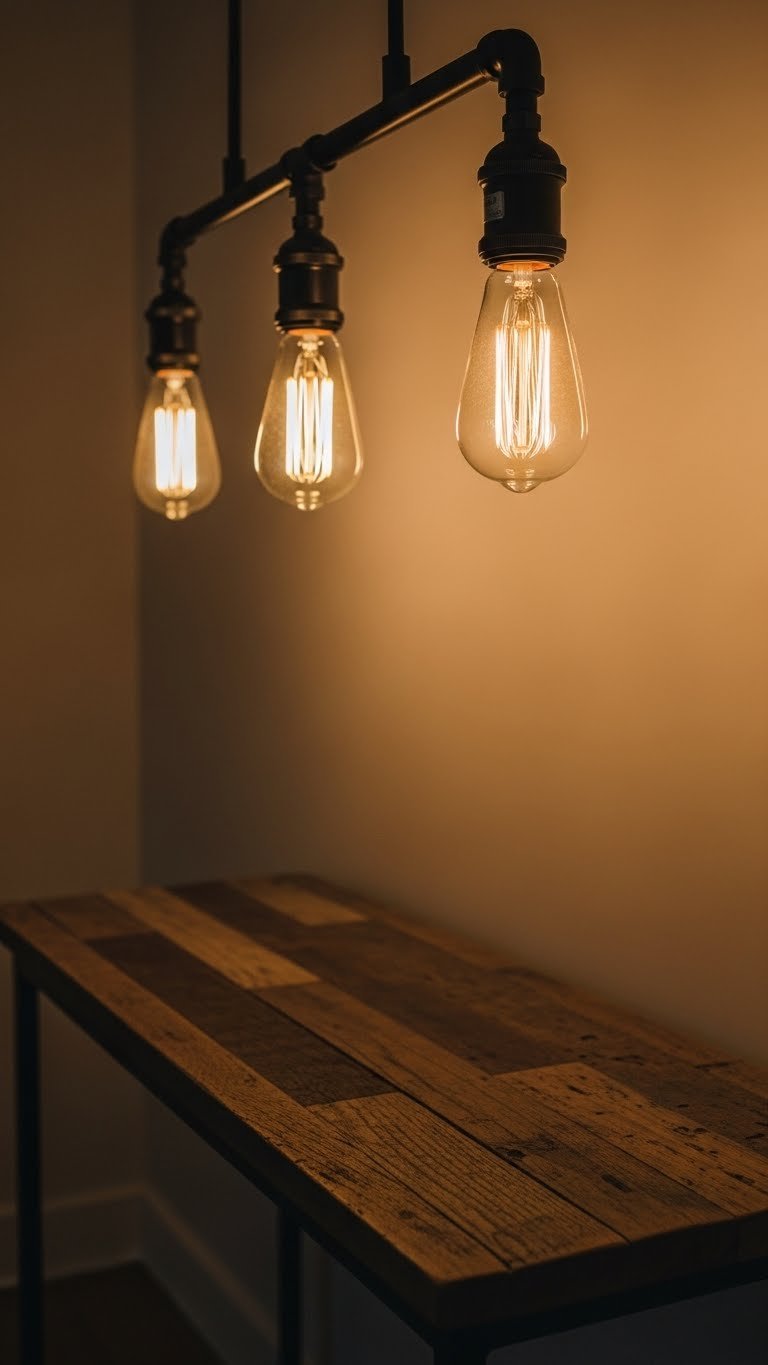
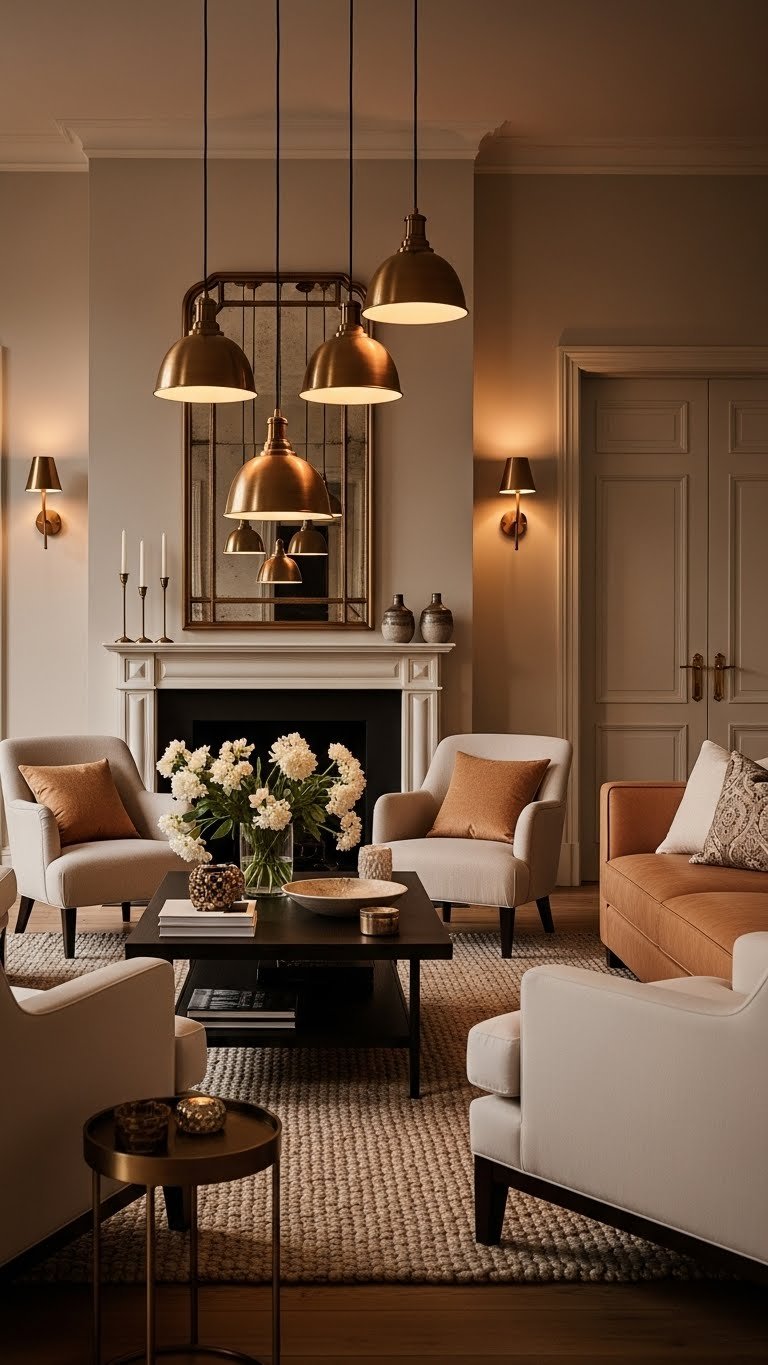
12. Install a Statement Pendant Cluster Above Your Seating

A cluster of varied pendant shapes and sizes creates drama and visual interest while providing functional task lighting over seating. This approach works especially well over large sofas or sectionals.
Individual pendants range from $20-$100 each. A complete cluster of 5 might cost $100-$400 total depending on quality. Installation takes 1-2 hours with a basic plug adapter for renters or 2-3 hours for hardwiring. Choose 2-3 complementary styles rather than matching exactly—mix brass, matte black, and frosted glass for visual richness.
Hang them at staggered heights (roughly 24-36 inches above seating) and use warm white bulbs for cohesion.
The visual impact is striking and makes an otherwise basic living room feel intentional and designed.
13. Create Ambient Light with Bias Lighting Behind Your TV

Bias lighting behind a TV reduces eye strain during viewing, adds ambient light to the room, and creates a modern, sophisticated look. It’s a subtle but noticeable upgrade.
LED bias light kits cost $15-$40 (Amazon, Best Buy, IKEA) and include adhesive strips plus a power adapter. Installation takes 15-20 minutes—just stick the LED strip to the back of your TV stand or directly behind the TV, then plug in. Most kits come with remote dimming.
Choose warm white (2700K) for evening viewing; cooler white (4000K) works for daytime if you prefer brighter light.
The result is a living room that looks more polished, plus your eyes feel less tired after longer TV sessions.
14. Add Vintage Edison Bulbs for Cozy Industrial Aesthetic
Edison bulbs with visible filaments add warmth and vintage character to any fixture. They work beautifully in pendant lights, chandeliers, or exposed-bulb fixtures and make a space feel intentionally curated.
Quality Edison bulbs cost $8-$20 each (filament style) at hardware stores or online. Standard LED Edison bulbs ($5-$10) mimic the look with modern efficiency. Screw them into any existing fixture in 2 minutes. They work in everything from antique brass fixtures to modern minimalist designs.
Choose 2200-2700K color temperature for authentic warm glow. The bulbs themselves become part of the design, so visible fixtures make sense.
Your living room instantly gains character and warmth, with lighting that feels intentional rather than purely functional.
15. Install Wall-Mounted Swing Lights for Reading
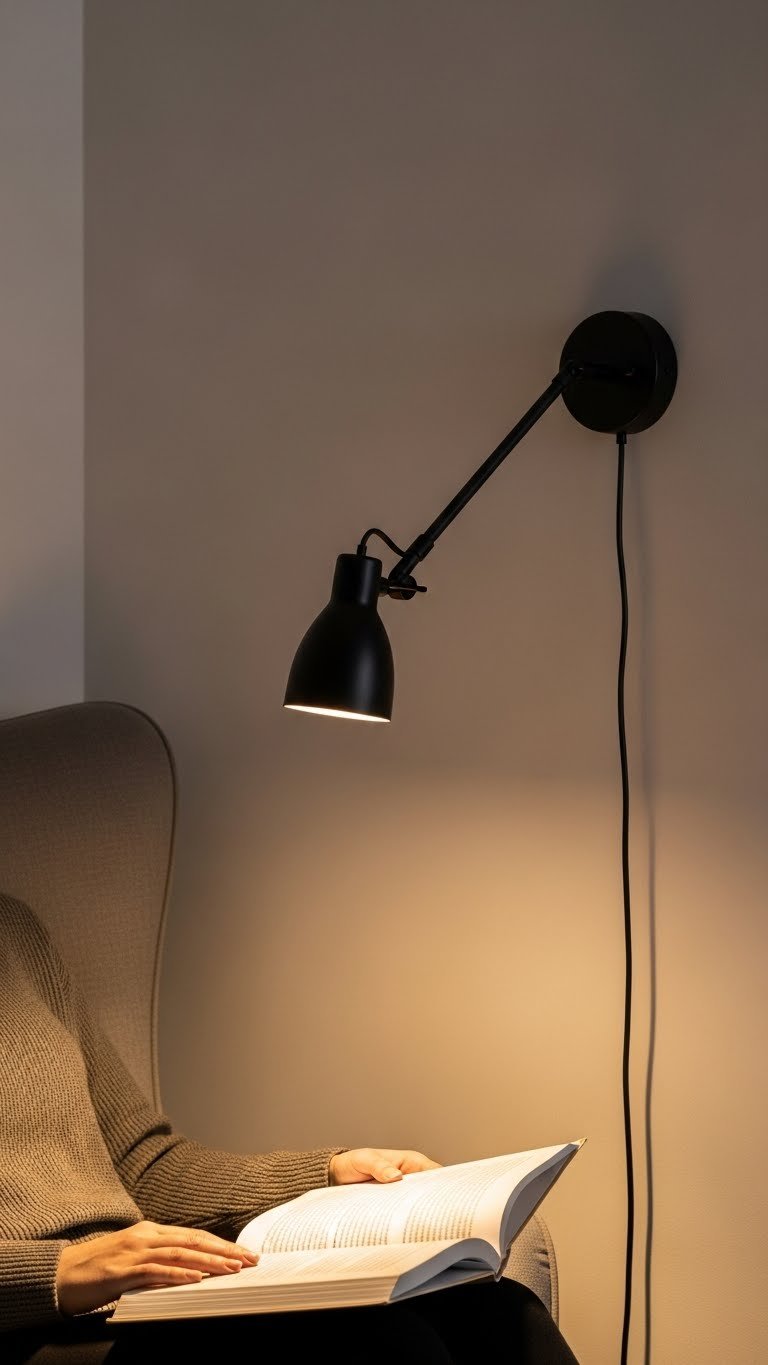
Swing-arm wall lights clip light sources exactly where you need them for reading or detail work without taking up table or floor space. They’re perfect for tight corners and add a design accent simultaneously.
Quality swing arms range from $40-$120 (CB2, West Elm, Rejuvenation) to budget options at $20-$50 (IKEA, Amazon). Installation takes 30-45 minutes with basic wall mounting. Plug-in versions ($50-$80) skip hardwiring but have visible cords.
The adjustable arm swings out of the way when not in use, and the light reaches exactly where a book or project sits. Choose dimmable bulbs for comfort during evening reading.
Reading becomes genuinely enjoyable again, and the fixture adds a subtle design touch beside your chair.
16. Layer Light with Linen Lampshades for Softness

Lampshade material dramatically affects how light spreads—linen and fabric shades diffuse light beautifully, while harder materials create sharper pools. Upgrading shades is one of the cheapest ways to improve your lighting quality.
Replacement shades cost $15-$60 (IKEA, Target, Wayfair, specialty shade shops). Installation takes 5 minutes—just swap the old shade for the new one. Choose cream, white, or natural linen in sizes matching your lamp base. Avoid dark or metallic shades unless you want spotlighting rather than ambient light.
This small change completely transforms how light distributes through your room, making it softer and more welcoming.
The difference is noticeable immediately—your whole space feels warmer and less harsh.
17. Use Dimmer Switches to Control Multiple Fixtures

A single dimmer switch controlling multiple fixtures (ceiling lights, chandeliers, or track lights) gives you one-touch flexibility. This is more sophisticated than having all lights at full brightness.
Dimmer switches cost $15-$40 at hardware stores. Installation takes 30-45 minutes if you’re comfortable with basic electrical work (turn off power, swap the switch), or hire an electrician ($100-$150 per switch). Most standard light fixtures work with dimmers, but check compatibility.
Install in your main living area and any room where you want mood control. Quality dimmers have smooth sliders rather than toggles, for better control.
You’ll immediately notice how much better your room looks at 60-70% brightness compared to blasting lights at full strength.
18. Add Accent Lighting to Highlight Architectural Details
Strategic accent lighting highlights your room’s best features—crown molding, exposed brick, built-in shelving, or interesting wall textures. This creates dimension and makes basic spaces feel more architectural.
Small accent lights or LED strips cost $15-$50 and take 20-30 minutes to position and plug in. Choose warm white for traditional details, cool white for modern elements. Position lights to create shadows and depth rather than uniform brightness.
This technique works especially well in rooms with interesting architecture that usually goes unnoticed.
The result is a space that feels more designed and intentional, with visual interest that makes rooms appear larger and more expensive.
19. Install a Chandelier for Instant Drama and Focal Point
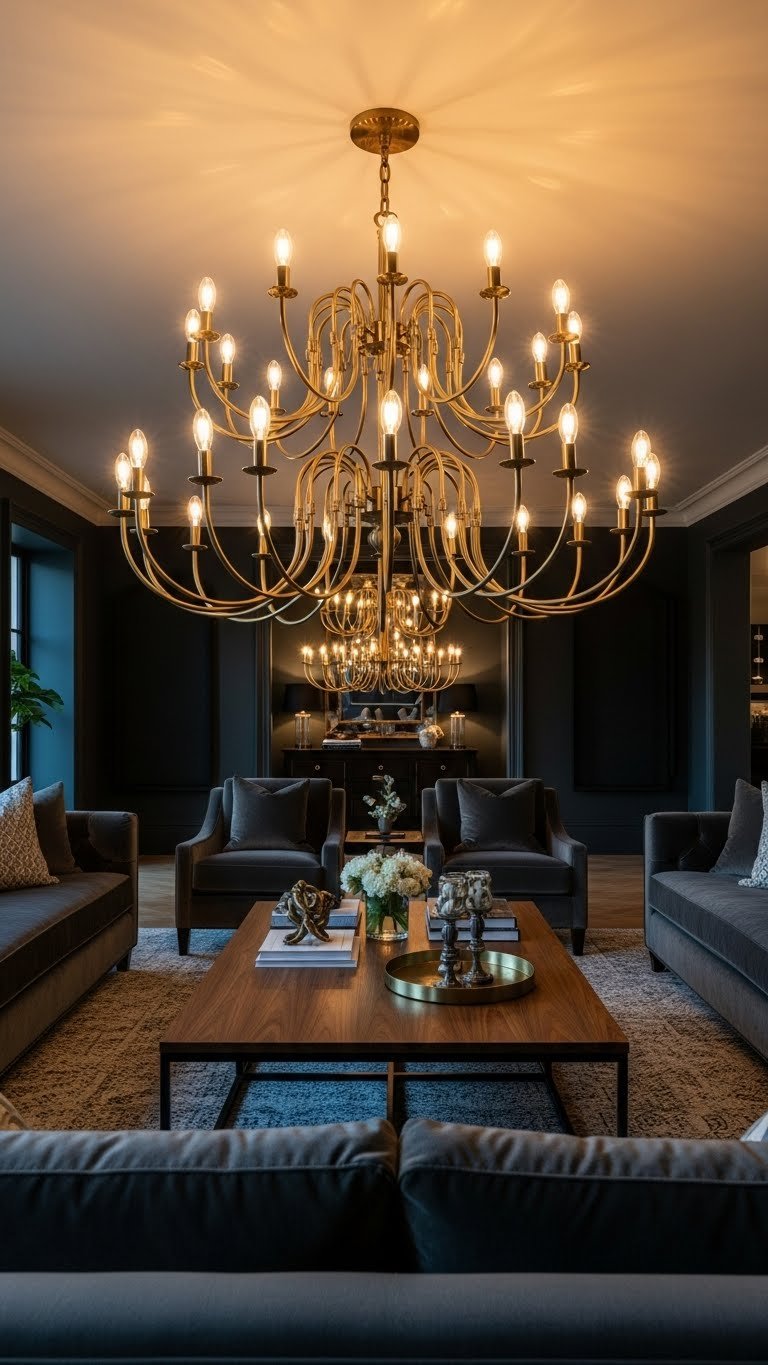
A chandelier transforms a basic room into a designed space instantly. It works in any style—from modern minimalist to maximalist—as long as scale and finish match your aesthetic.
Chandeliers range from $50-$150 (IKEA, Wayfair) for simple styles to $300-$800+ (CB2, West Elm) for designer pieces. Installation takes 2-3 hours for hardwiring (or hire a pro for $150-$300). Plug-in swag chandeliers ($40-$100) work for renters but show a visible cord.
Choose one with dimmable bulbs and ensure it’s proportional to your room size. A room that’s 12’x14′ works best with a chandelier roughly 24-30 inches in diameter.
The dramatic focal point immediately elevates the entire room’s design, making it feel more intentional and sophisticated.
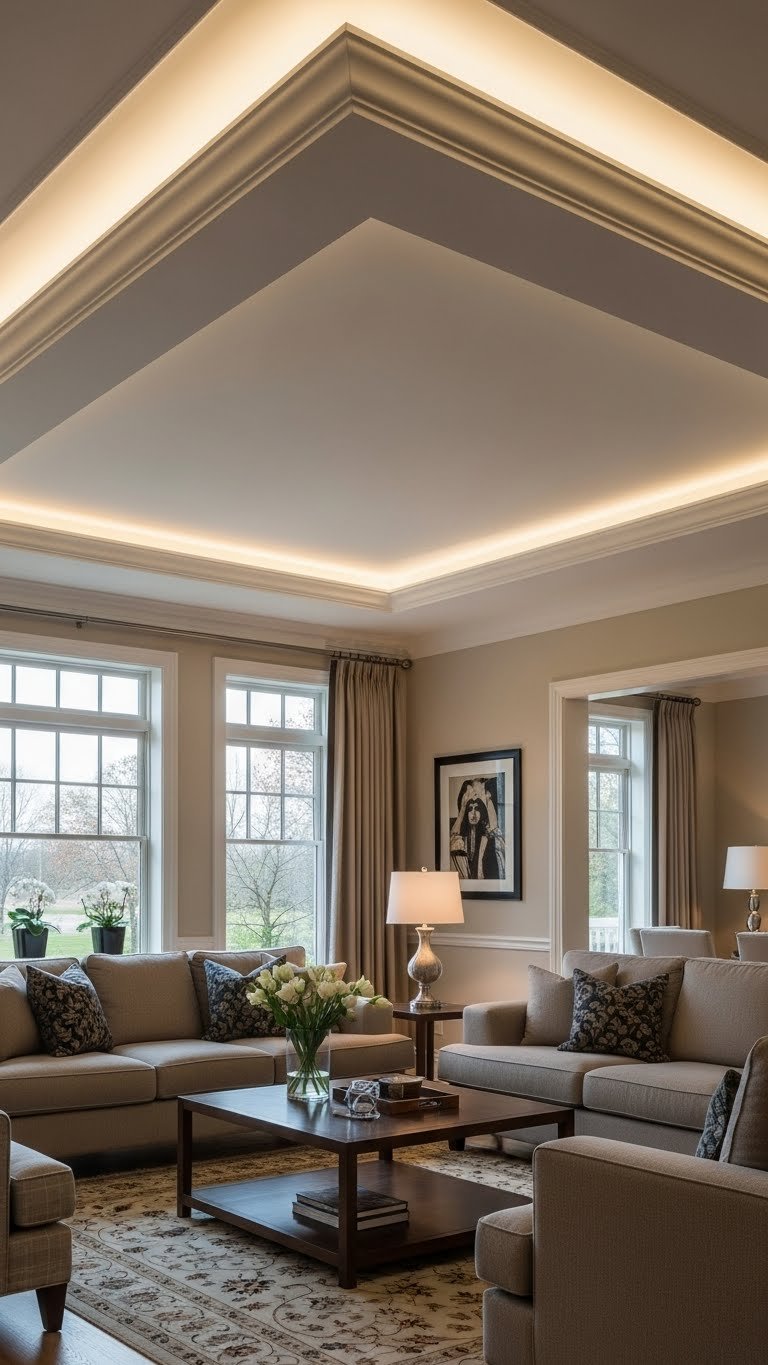
20. Create Floating Light with Recessed Ceiling Fixtures
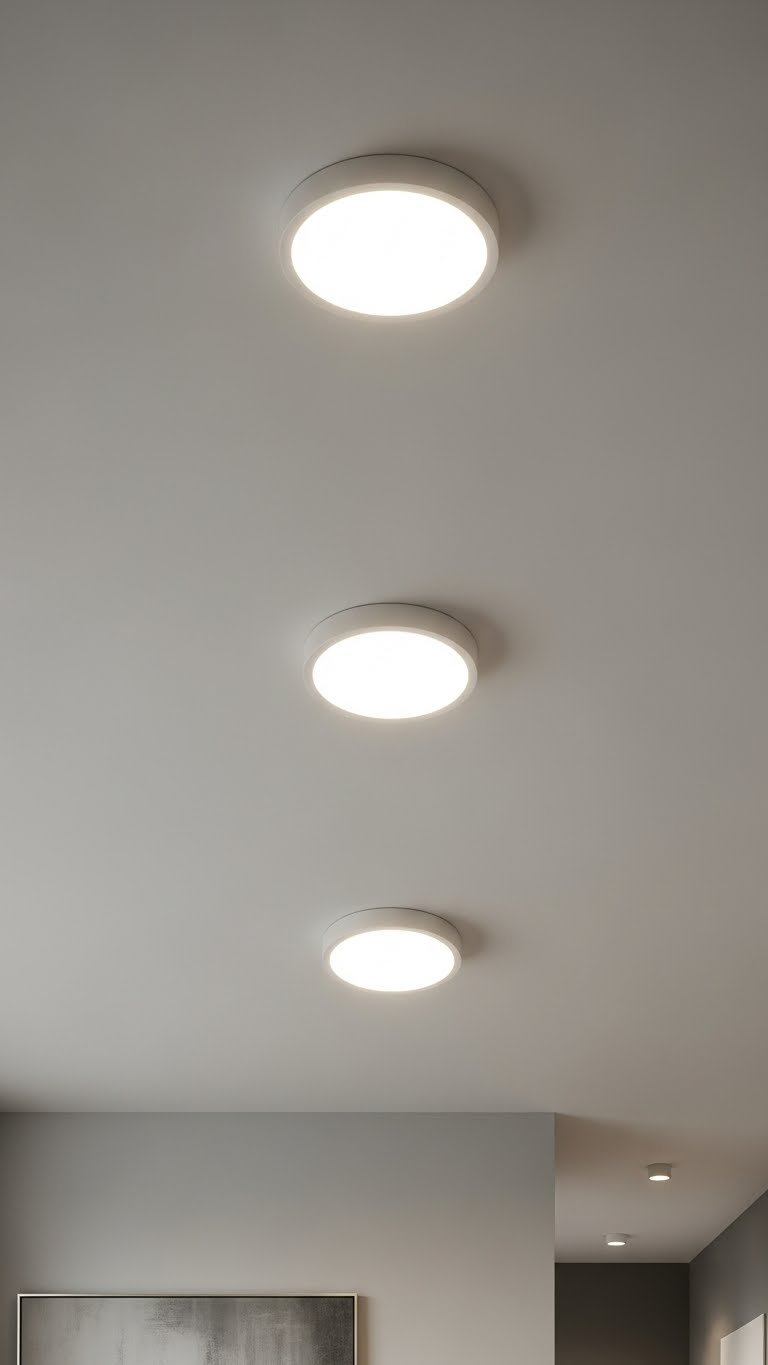
Recessed lighting (downlights) creates the illusion of light floating from nowhere—a contemporary, clean look that works in minimalist and modern spaces. It also opens up visual ceiling space.
Recessed light kits cost $80-$200 for 3-4 fixtures plus installation materials. Installation takes 3-4 hours with basic tools (drywall saw, wiring); hiring an electrician costs $300-$600 total depending on complexity. This requires ceiling access and is permanent, so best for homeowners rather than renters.
Space fixtures 4-6 feet apart for even coverage. Use dimmable LED bulbs (2700K) that last 25,000+ hours.
The result is sophisticated, gallery-like lighting that makes your ceiling feel higher and your room more contemporary.
21. Use Lantern-Style Lights for Transitional Warmth
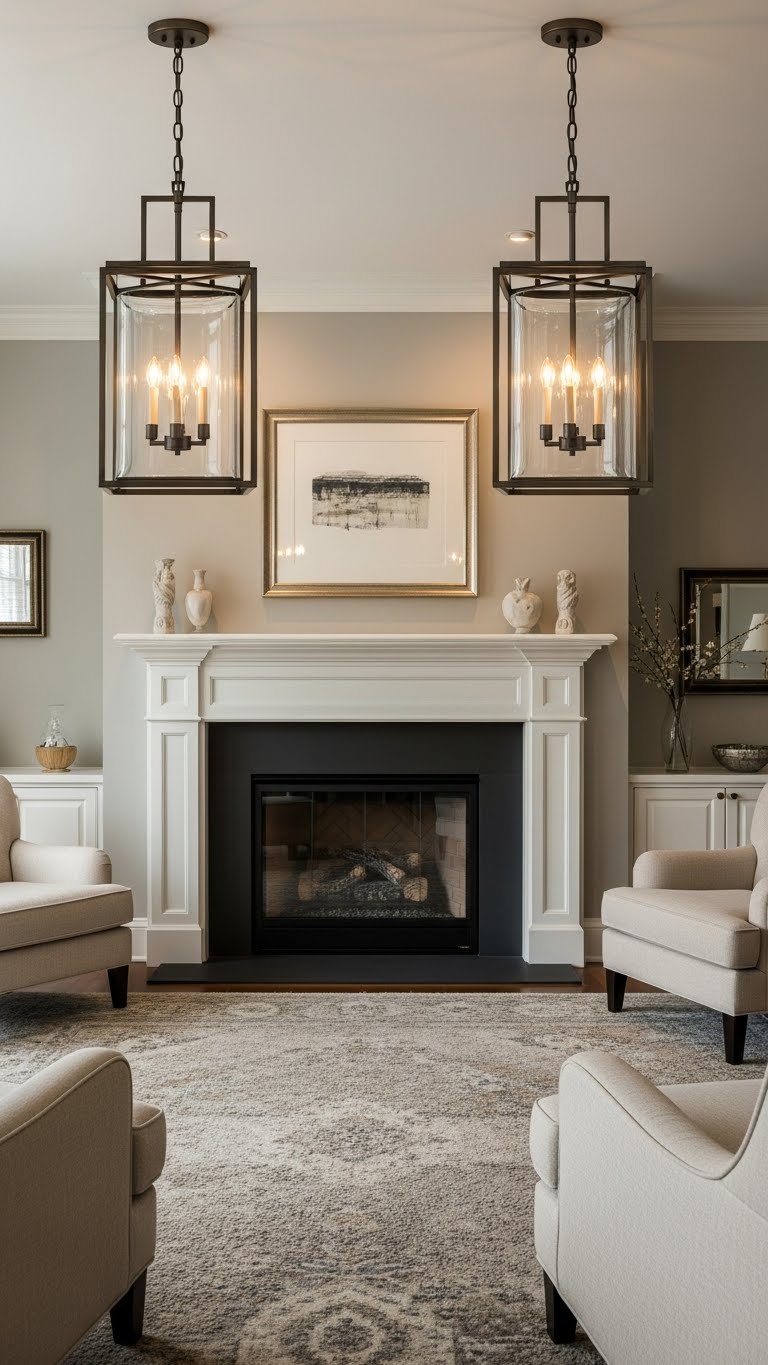
Lantern-style lights blend traditional and contemporary aesthetics, working in transitional rooms where you want timeless appeal. They provide focused light while adding architectural interest.
Lantern pendants cost $30-$80 (IKEA, Target, Wayfair) or $100-$250 (CB2, West Elm) for designer versions. Installation takes 20-30 minutes with a plug adapter (renter-friendly) or 1-2 hours hardwired. Hang them at eye level (about 72 inches from floor) on either side of a fireplace or console table.
Glass panels allow light to spread while creating visual interest. Choose warm white bulbs for authentic charm.
This lighting style adds elegance and works beautifully in rooms that mix old and new elements.
22. Install Ribbon Lights for Subtle Overhead Glow
Ribbon or tape lights create continuous ambient glow without individual fixtures—a contemporary alternative to recessed lighting. They’re renter-friendly and plug directly into outlets.
Ribbon light kits cost $20-$60 and installation takes 30-45 minutes to stick around ceiling edges or behind crown molding. Use warm white (2700K) for living rooms. Most are dimmable via remote control ($5-$15 extra).
This creates a base layer of ambient light that makes your room feel more designed. Pair it with task lighting for a complete system.
Your space immediately feels more contemporary and intentional, with sophisticated lighting that goes beyond basic ceiling fixtures.
23. Add Brass or Gold Fixtures to Warm Up Cool Spaces
Metal finishes dramatically affect room temperature. Brass, gold, and copper add warmth, while chrome and nickel read as cool and contemporary. Warming up your fixtures instantly makes a space feel more inviting.
Brass fixtures cost $20-$150 depending on style and source (IKEA, Target, West Elm, specialty shops). To warm up existing fixtures, you can paint metal with brass metallic spray paint ($8-$15 per can, Home Depot) or simply replace shades with warmer materials.
Coordinate your metal finish across the room—mix brass wall sconces, pendants, and table lamp bases for cohesion. This doesn’t mean everything matches exactly, but the warm tone ties everything together.
The warmth instantly makes your room feel more welcoming and sophisticated.
24. Layer Light with Tiered Brightness Zones
Creating different brightness zones—overhead layer, mid-level task lights, and accent lighting—gives you complete control over ambiance. This professional technique works in any room size.
This requires no additional purchases if you already have fixtures; you just control them separately via different switches or dimmers ($15-$40 per switch). Setup takes 1-2 hours if adding new dimmer switches, or minutes if using smart bulbs ($15-$25 each).
Layer your brightness: dim overhead lights to 50%, keep task lamps at full brightness, and add accent lights at 70-80% for reading areas.
This sophisticated approach means your room looks good in every lighting situation—morning, evening, entertaining, or relaxing.
25. Install Brass Or Matte Black Sconces Flanking a Mirror

Sconces flanking a mirror or artwork create perfect symmetry and provide both functional and accent lighting. This arrangement works especially well in entryway-adjacent living rooms or behind a console table.
Pairs of sconces cost $50-$150 or invest $200-$400 for designer options. Installation takes 1-2 hours with basic wall mounting or hire a pro ($150-$250 for hardwiring). Plug-in versions ($60-$120 per pair) work for renters.
Position sconces roughly 60-72 inches from the floor, roughly 24-36 inches apart on either side of your mirror or focal point. Use matching finishes for intentional balance.
The symmetry creates an instant sense of order and design, making even a basic console look like a styled magazine photograph.
26. Use Color-Changing Smart Bulbs for Seasonal Mood Shifts
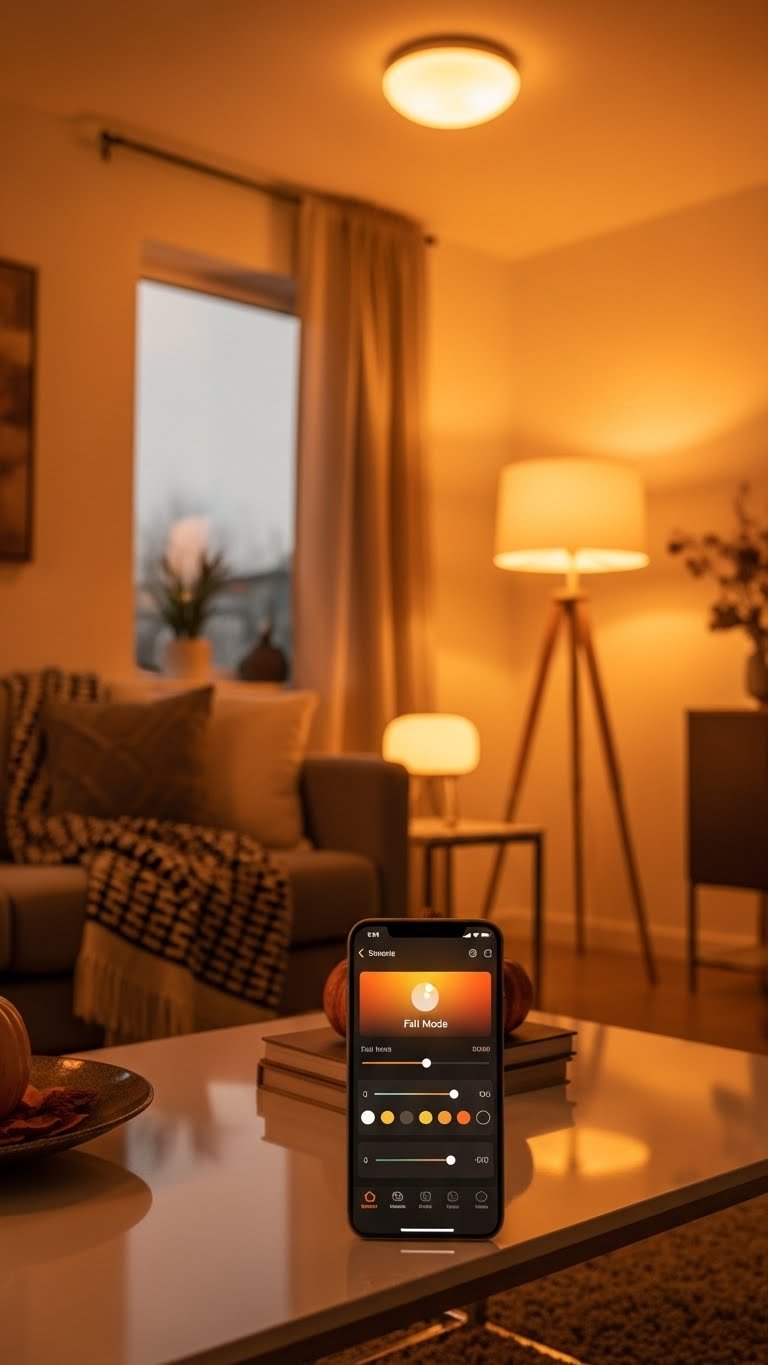
Color-changing smart bulbs let you adjust not just brightness but actual color temperature or even RGB color—perfect for seasonal refreshes without any physical changes. In autumn use warm amber; in summer try crisp white; for cozy evenings dial down to 2200K.
Quality color-changing smart bulbs cost $20-$40 per bulb (Philips Hue Color, LIFX Color). Setup takes 5 minutes per bulb—just screw them in and connect to your app. Basic options start at $15-$20. You control everything from your phone with preset scenes for different moods.
Start with one smart bulb in your most-used lamp to test the system. Many apps let you create custom presets—”Movie Night,” “Reading,” “Party,” etc.
This flexibility means your lighting adapts to your mood and the season without any physical changes to your space.
Ready to brighten your living room? Pick one lighting idea this weekend—even a single new fixture or LED strip makes a noticeable difference. Save this post for whenever you need that next upgrade, and share it with anyone else who’s stuck with basic ceiling lights and flat lighting.
Leave a Reply