Your walls are probably the biggest blank canvas in your home—and they’re also the easiest thing to change. Whether you’re renting, own your place, or just want to refresh without major renovation stress, the right wall treatment can completely shift how a room feels. Gone are the days of basic beige and boring white. Today’s trending wall designs mix color psychology with texture, lighting, and personalization to create spaces that actually feel yours.
The 27 ideas below cover everything from quick paint refreshes to sculptural installations. You’ll find budget-friendly options you can tackle alone, mid-range upgrades that make a real impact, and investment pieces that last. Most importantly, every single one is achievable—even if you’ve never painted before. Let’s turn that blank wall into your new favorite feature.
1. Paint an Accent Wall in Deep Forest Green
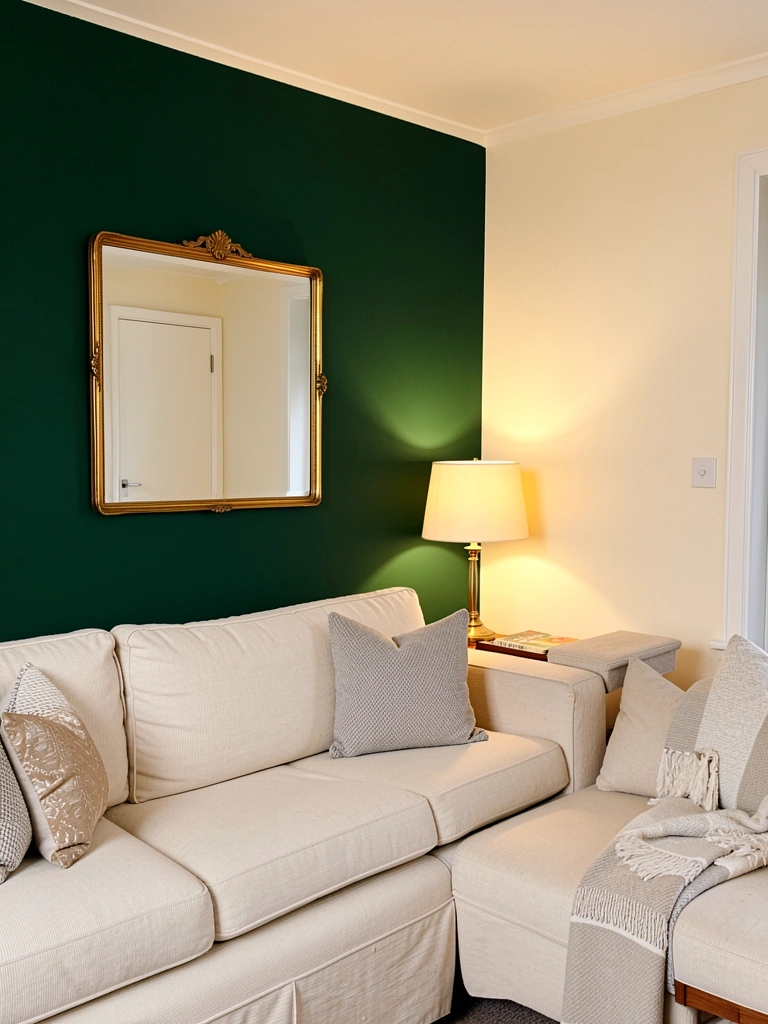
Forest green is having a major moment for good reason—it brings nature inside while feeling sophisticated and calming. An accent wall in this shade creates drama without overwhelming the entire room, and it pairs beautifully with both modern and traditional décor.
Pick one wall (usually the one you see first when entering) and measure it carefully. Purchase high-quality paint in forest green from Benjamin Moore, Sherwin-Williams, or even budget-friendly options at Home Depot ($25–$45 per gallon). You’ll need primer, two paint rollers, and drop cloths. The whole project takes one afternoon (3–4 hours). Apply primer first, then two coats of paint, waiting 2–3 hours between coats.
Pro tip: Pair this wall with warm metallic accents (gold picture frames, brass sconces) to keep it from feeling too heavy.
Your room instantly gains a sophisticated focal point that makes guests stop and ask about your design choices. The color draws the eye and creates visual depth you didn’t have before.
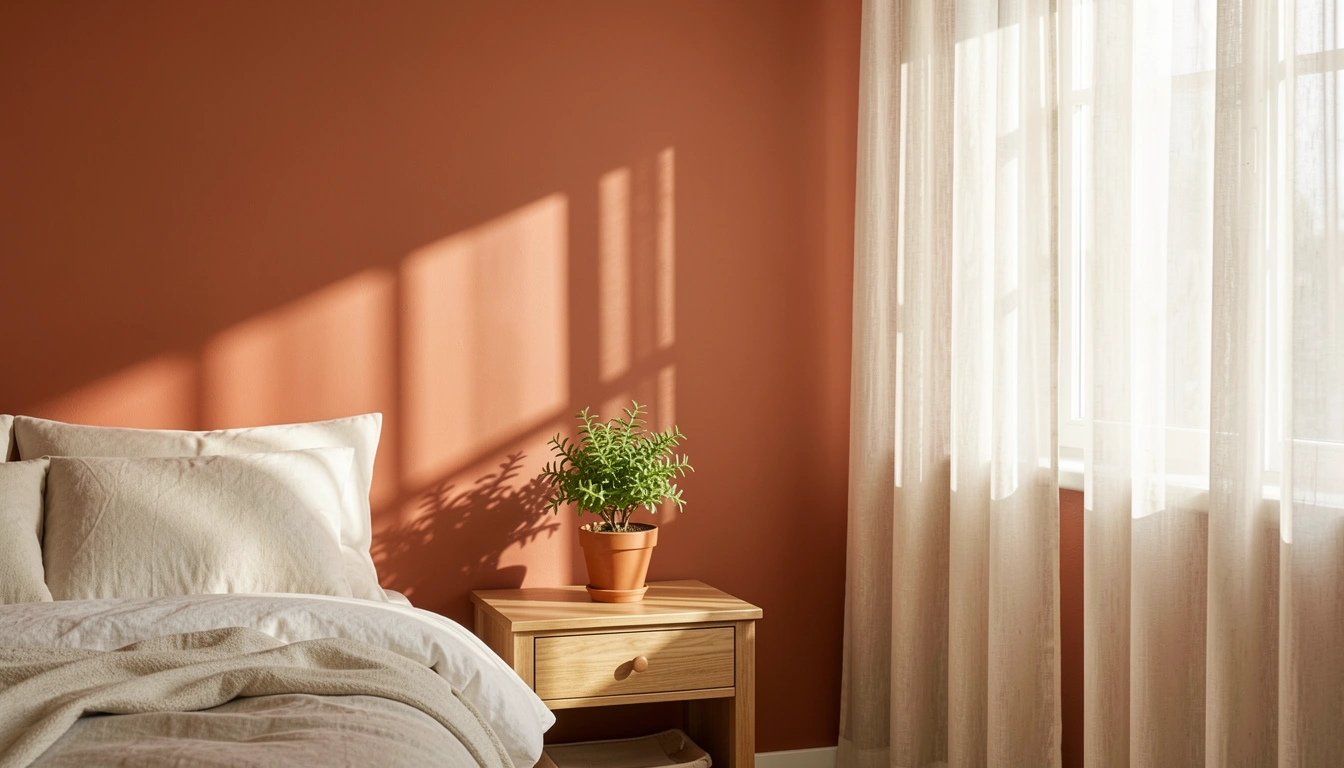
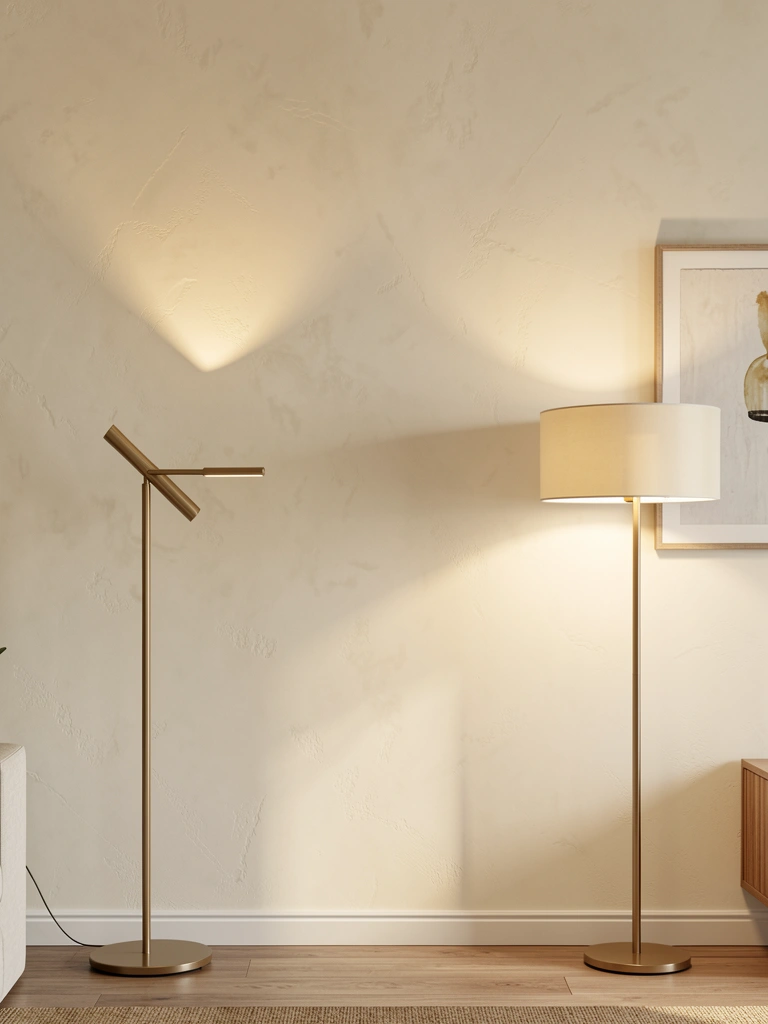
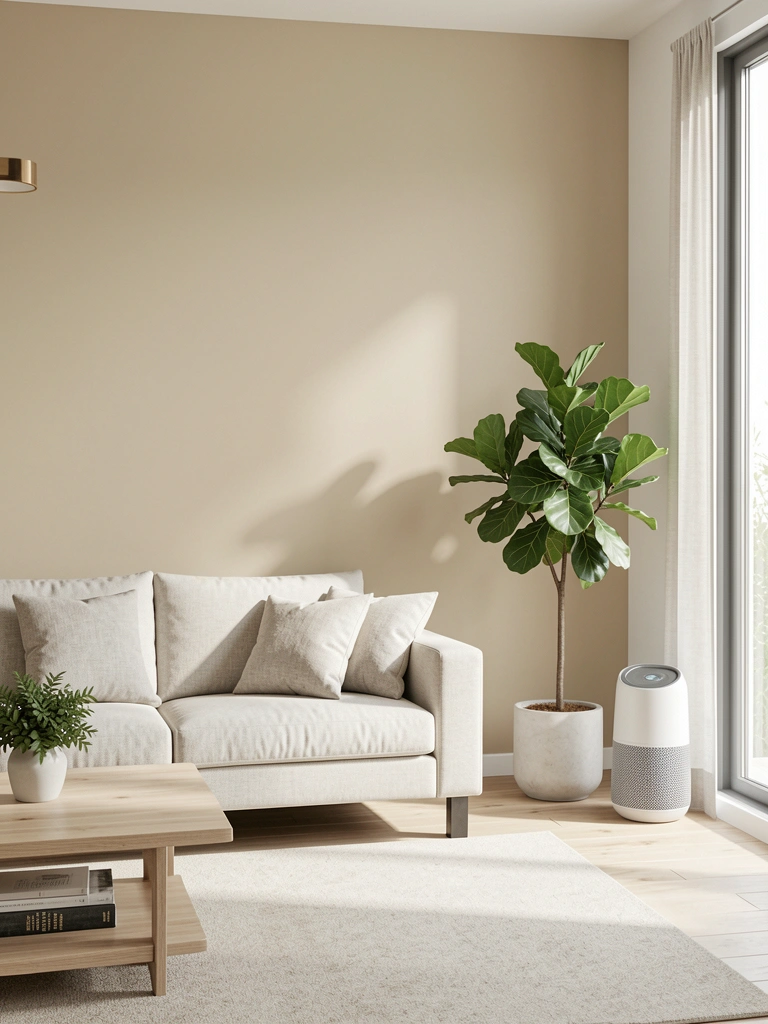
2. Add Warm Earthy Neutrals for Zen Calm
Warm earthy neutrals—think caramel, warm taupe, soft sand—are the antidote to cool grays that dominated the last five years. These shades feel grounding and promote the biophilic design trend that makes spaces feel naturally restorative.
Choose a shade like Benjamin Moore’s Wheat Sheaf or Sherwin-Williams Accessible Beige ($30–$50 per gallon). These warm neutrals work as your main color across all four walls or as a base for other elements. Budget one weekend for two coats on an average bedroom. The key is using a high-quality roller and applying thin, even coats to avoid streaking.
Bonus: These neutrals photograph beautifully in natural light, making your space Instagram-ready without trying.
The difference is subtle but powerful—your room stops feeling sterile and starts feeling like a sanctuary. Natural wood furniture and plants suddenly look intentional rather than random.
3. Create an Ombre Wall Effect for Depth
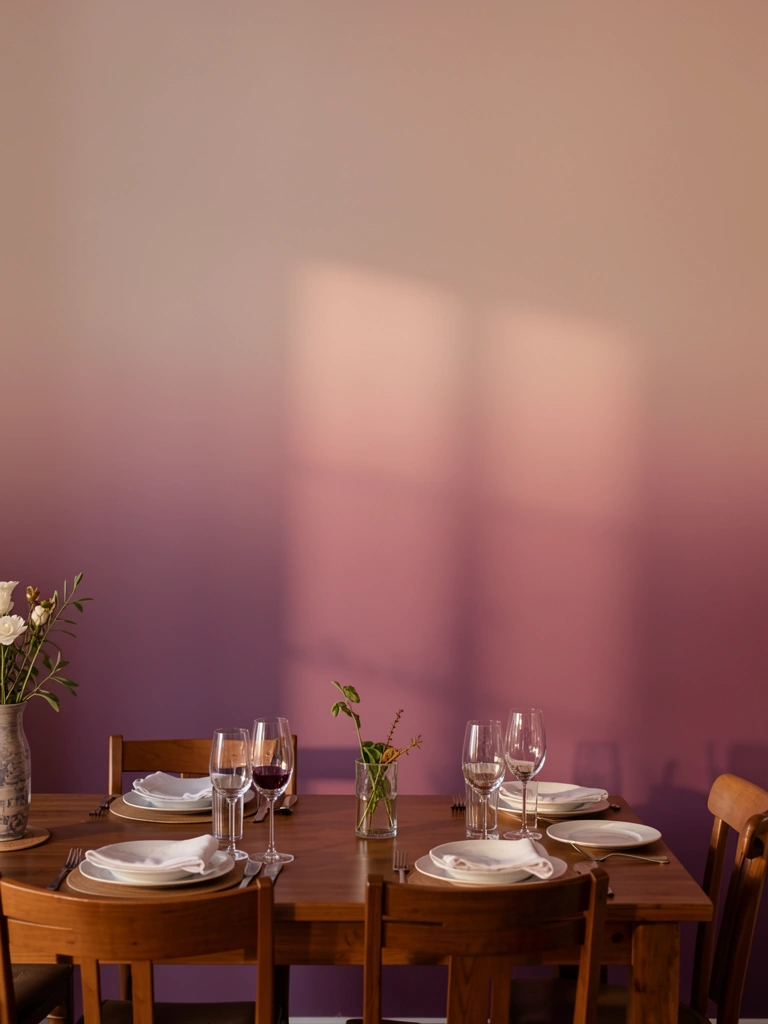
An ombre effect on a single accent wall creates visual interest and dimension without committing to one solid color. It’s easier than you’d think and looks professionally designed.
Get two coordinating paint colors in the same family (light and dark versions—around $30–$50 total). Divide your wall into three or four horizontal sections with light pencil marks. Paint the top section with the lighter shade, the bottom with the darker shade, and blend the middle section by wet-brushing where they meet. This takes 2–3 hours and requires steady hands but no special skills. YouTube has tons of ombre tutorials if you want to watch beforehand.
Pro tip: Use a wide brush (not a roller) for the blending section to create softer transitions.
You’ll get architectural dimension and color gradation that makes walls look taller and spaces feel more curated. It’s especially striking in dining rooms or entryways.
4. Install Metallic Accents for Glam Reflection
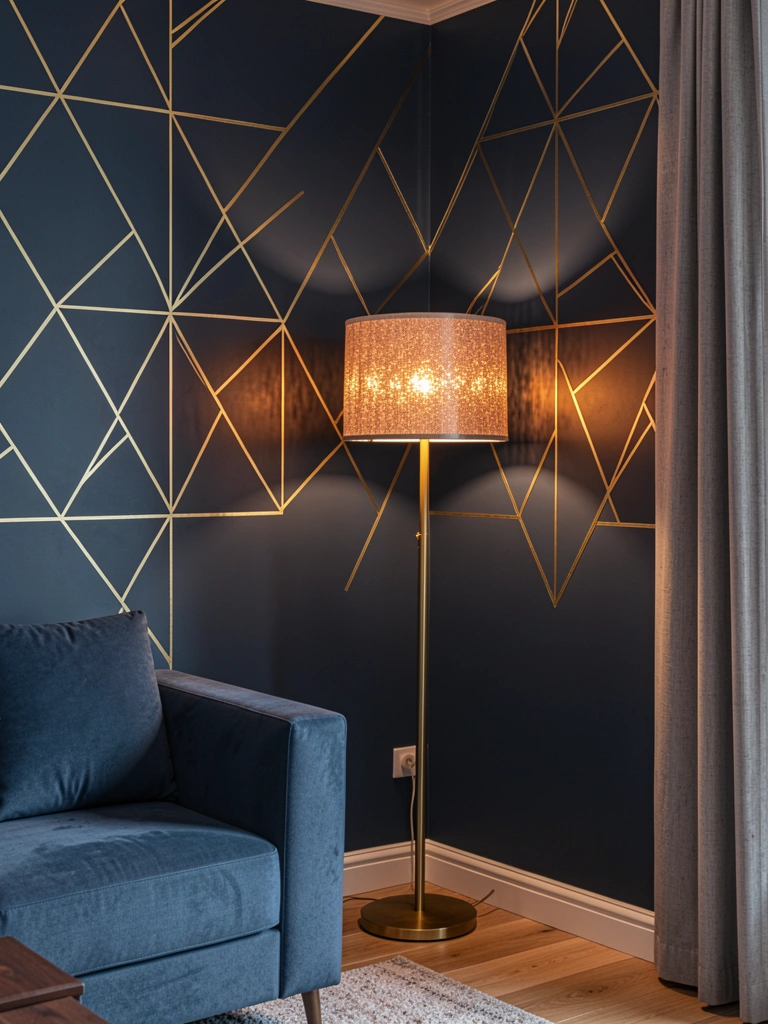
Metallic accents—gold, silver, or rose gold—bounce light around small spaces and add instant glamour without major commitment. They work with nearly every color and style.
Use peel-and-stick metallic wall decals ($15–$40 on Amazon or Wayfair) in geometric patterns, or go minimal with a few gold-painted wooden shelves. Alternatively, stencil metallic paint directly onto your walls using painter’s tape ($20–$60). This takes 1–2 hours and requires zero experience. Apply metallic paint with a foam roller over your base color.
Bonus: Metallics photograph beautifully under any lighting, instantly elevating your space.
The light-reflecting quality makes rooms feel larger and brighter, especially in apartments without tons of windows. Your eyes naturally get drawn to the shimmer, which creates visual interest and makes small spaces feel intentionally designed.
5. Try Stenciled Patterns for Personality

Stenciling adds custom personality without the commitment of wallpaper or the mess of murals. You can create patterns that match your exact aesthetic and color scheme.
Buy a stencil template online ($10–$30 on Etsy or Amazon) in a pattern you love—geometric, botanical, or abstract. Use painter’s tape to secure it, then apply paint with a foam roller or sponge brush in a contrasting color ($20–$40 for paint). One accent wall takes 4–6 hours but is genuinely relaxing. Work in small sections to avoid sliding the stencil.
Pro tip: Test the pattern on poster board first to visualize spacing and color contrast.
The custom pattern becomes a signature feature of your space—it’s what makes your room yours rather than cookie-cutter. Guests always comment on stenciled walls because they look high-effort but are actually very doable.
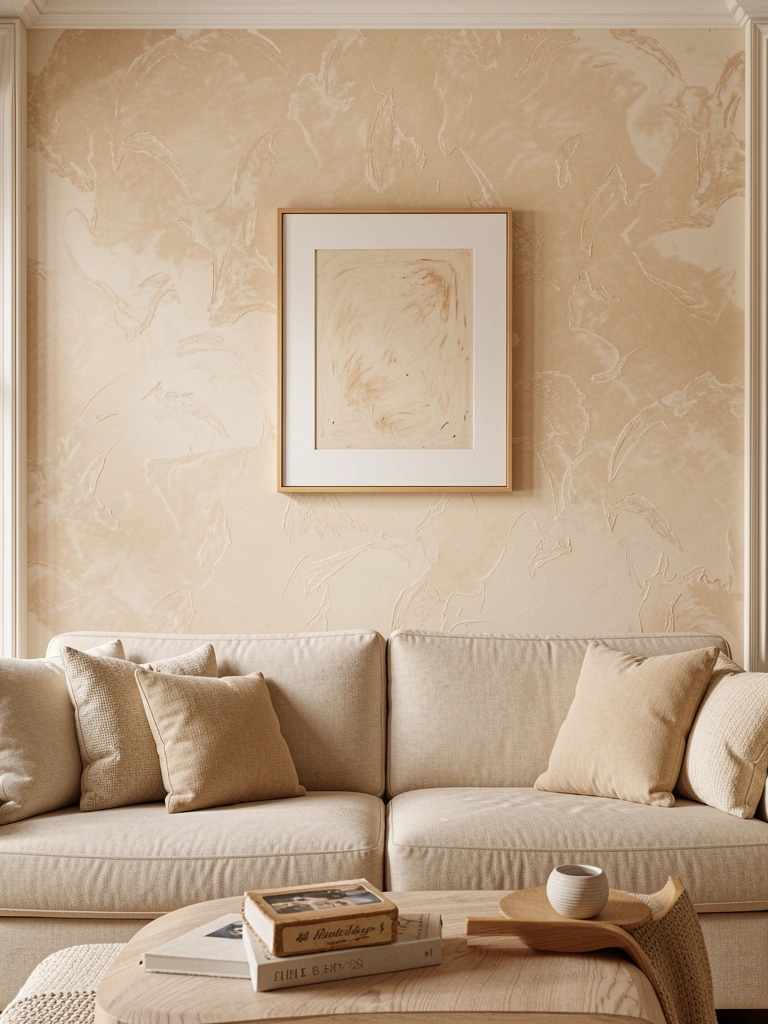
6. Paint Venetian Plaster for Luxe Texture
Venetian plaster creates a high-end, textured finish that reflects light in subtle, sophisticated ways. It’s more durable than regular paint and looks like you hired a professional—even if you DIY’d it.
Purchase a Venetian plaster kit ($40–$80) from Home Depot or online. You’ll apply it with a steel trowel in thin, overlapping layers, allowing each coat to dry. Budget one full day for one accent wall and be prepared for a learning curve on your first attempt (YouTube tutorials are essential). Alternatively, hire a pro ($200–$400 for one wall), which guarantees a flawless finish.
Bonus: This finish is genuinely durable and hides wall imperfections better than regular paint.
Your walls gain depth and light-play that changes throughout the day. The tactile quality makes the room feel curated and special, and it photographs with professional-grade texture.
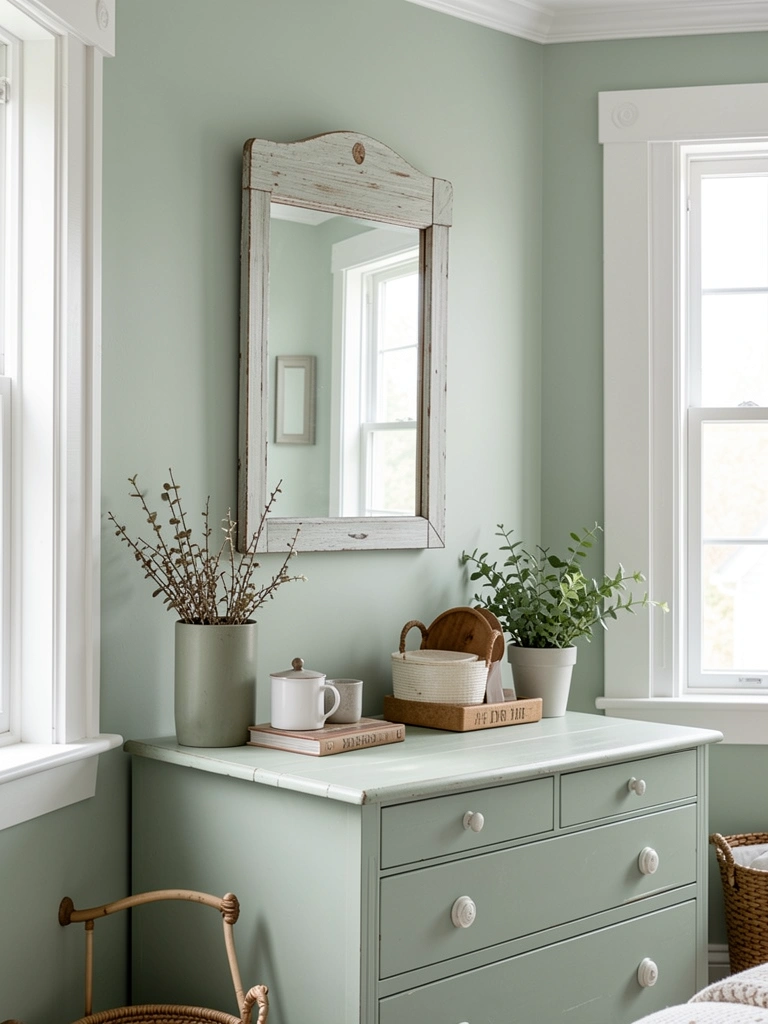
7. Use Soft Pastels to Brighten Small Spaces
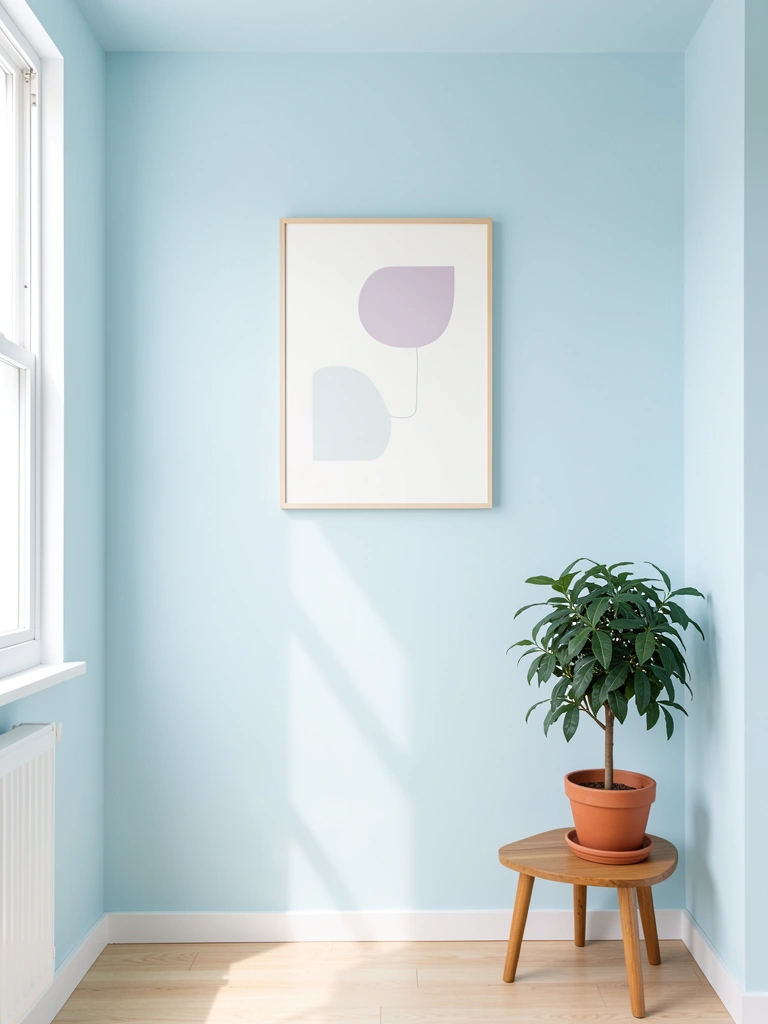
Soft pastels—powder blue, muted blush, sage green, pale lavender—reflect light and make compact rooms feel open and breathable. They’re trendy but timeless and work across all décor styles.
Choose a pastel from Benjamin Moore or Sherwin-Williams ($30–$50) that feels calm to you. Apply two coats with a quality roller. This takes one afternoon and requires zero experience. Pastels work best when paired with white trim and minimal, light-colored furniture to maximize the airy effect.
Pro tip: Pastel walls photograph beautifully in natural light, making even tiny spaces look dreamy.
Your small room suddenly feels intentional rather than cramped. The soft color brings psychology of calm into your daily life, and natural light bounces around differently, making the space feel brighter overall.
8. Paint Moody Walls for Built-In Coziness
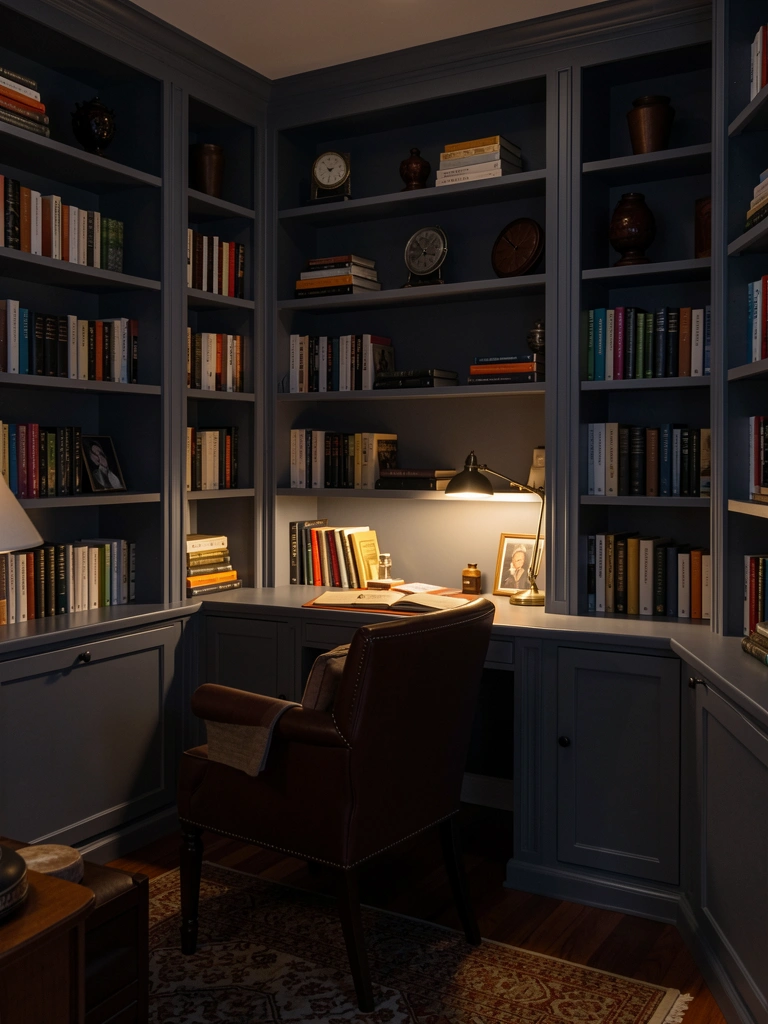
Deep, moody colors like navy, deep plum, or charcoal on built-ins or smaller rooms create dramatic sophistication and surprisingly cozy intimacy. These colors pair beautifully with warm lighting.
Select a shade like Benjamin Moore Silhouette or Sherwin-Williams Naval ($30–$50). Apply two coats to your built-ins or accent wall. Budget 4–5 hours for careful application, as darker colors need good coverage. Pair this wall with warm-toned lighting (soft white bulbs, not cool white) to avoid cave-like vibes.
Pro tip: Test your color in the actual room at different times of day—moody colors look different in morning light versus evening.
The result is a cocoon-like space that feels sophisticated and collected. Moody walls make you want to spend time in the room, and they’re surprisingly excellent for productivity (offices feel serious, bedrooms feel restful).
9. DIY a Nature-Inspired Mural
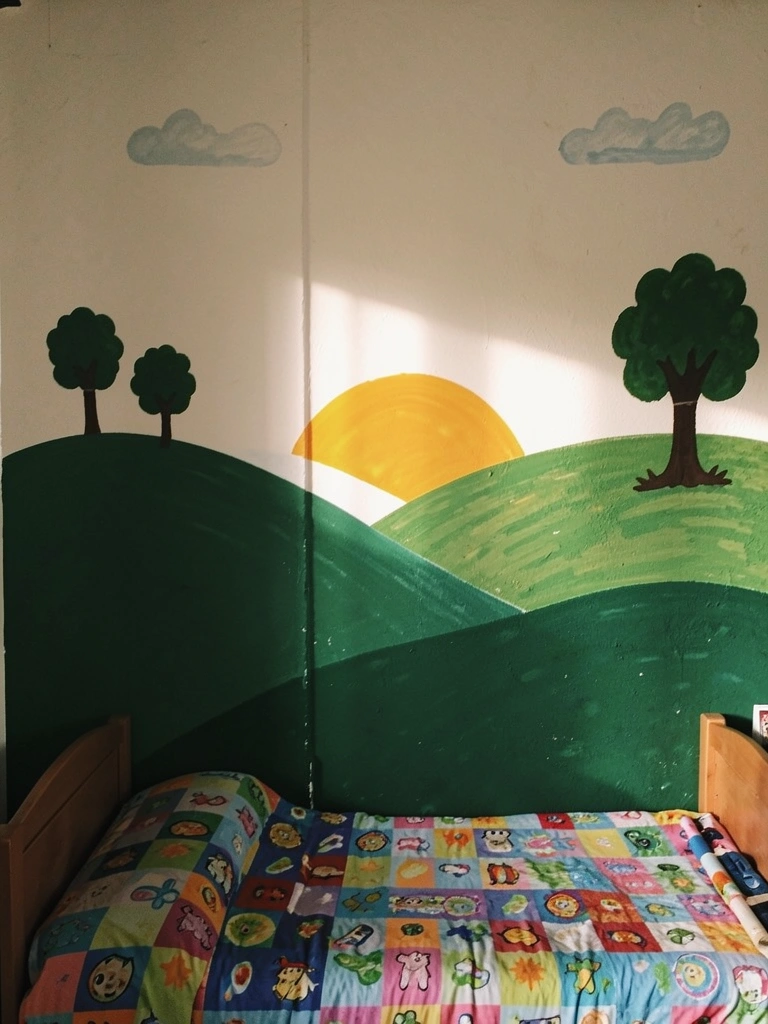
Nature murals bring biophilic design into your space without the cost of custom artists. Simple landscapes, botanical branches, or abstract trees are doable for beginners and create a focal point.
Grab acrylic paint in earth tones ($20–$40), paint brushes, and a design sketch (print from Pinterest or draw freehand). Start simple—mountains, trees, and sky take about 6–8 hours spread over two days. Use light pencil marks to sketch your design first, then paint over them. Seal with matte polyurethane for durability ($15).
Bonus: Murals are renter-friendly if you use removable primer first (talk to your landlord about a security deposit swap).
You get a one-of-a-kind focal point that no store-bought art can replicate. Murals make rooms feel personal and connected to nature, which research shows reduces stress and improves mood.
10. Apply High-Gloss Finishes for Light Reflection
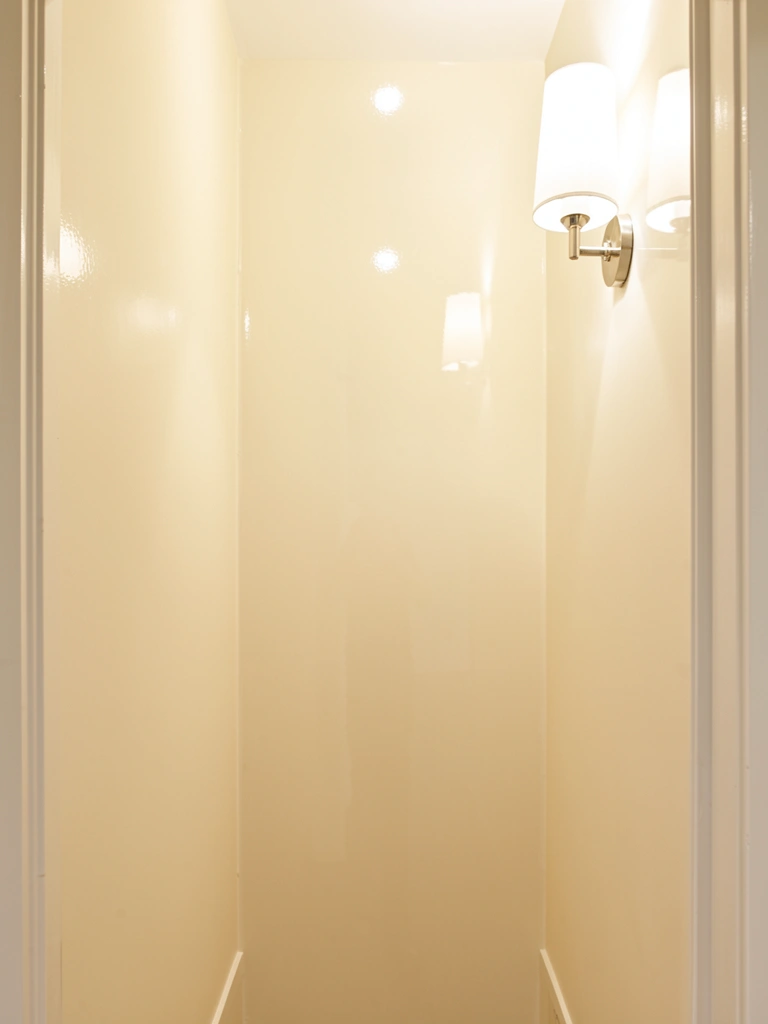
High-gloss and satin finishes reflect light differently than matte paint, making small or dark hallways, bathrooms, and entryways feel brighter and more spacious. This is a subtle upgrade with real impact.
Use high-gloss paint in white or a pale neutral ($30–$50). Apply two coats with a foam roller for even coverage and fewer brush marks. Budget one afternoon. Note: Gloss shows fingerprints, so it’s best for walls you don’t touch frequently. Satin (semi-gloss) offers 70% of the reflection with better durability.
Pro tip: High-gloss works beautifully in bathrooms and mudrooms where humidity and cleaning are regular—it’s genuinely more durable than matte.
Your hallway or bathroom becomes noticeably brighter without adding actual light fixtures. The reflective quality creates visual depth and makes tight spaces feel less cramped.
11. Layer 3D Sculptural Wall Art
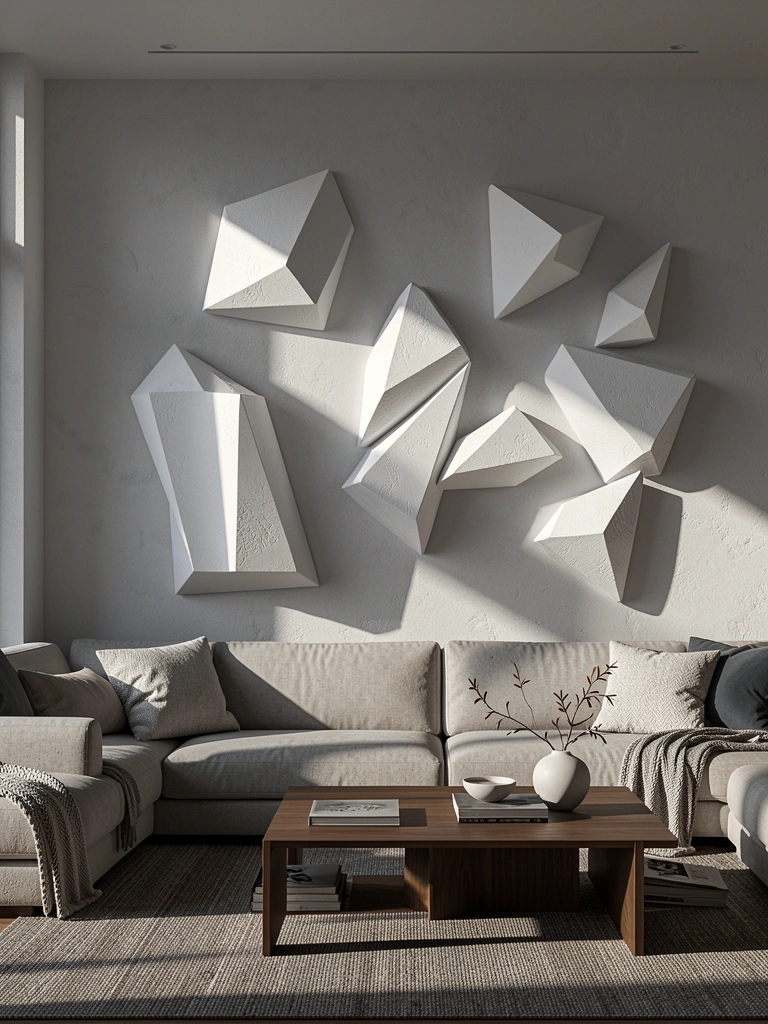
3D sculptural pieces have replaced flat posters as the go-to wall art. They create shadow play, visual interest, and genuine depth that photographs amazingly.
Purchase 3D wall art from Amazon, Wayfair, or Urban Outfitters ($40–$150 per piece) in materials like resin, wood, or metal. Arrange 3–5 pieces on your wall in an asymmetrical grouping using a level and a stud finder. Installation takes 30 minutes per wall. Alternatively, make your own from foam shapes and paint ($20–$40) for a budget version.
Bonus: Lighting matters hugely—position a directional light source to cast shadows and maximize dimension.
Your wall becomes an art installation rather than a decorative afterthought. The textured, three-dimensional quality makes rooms feel curated and collected, and it changes throughout the day as light hits it differently.
12. Paint Full-Spectrum Rainbow Walls for Kids’ Rooms
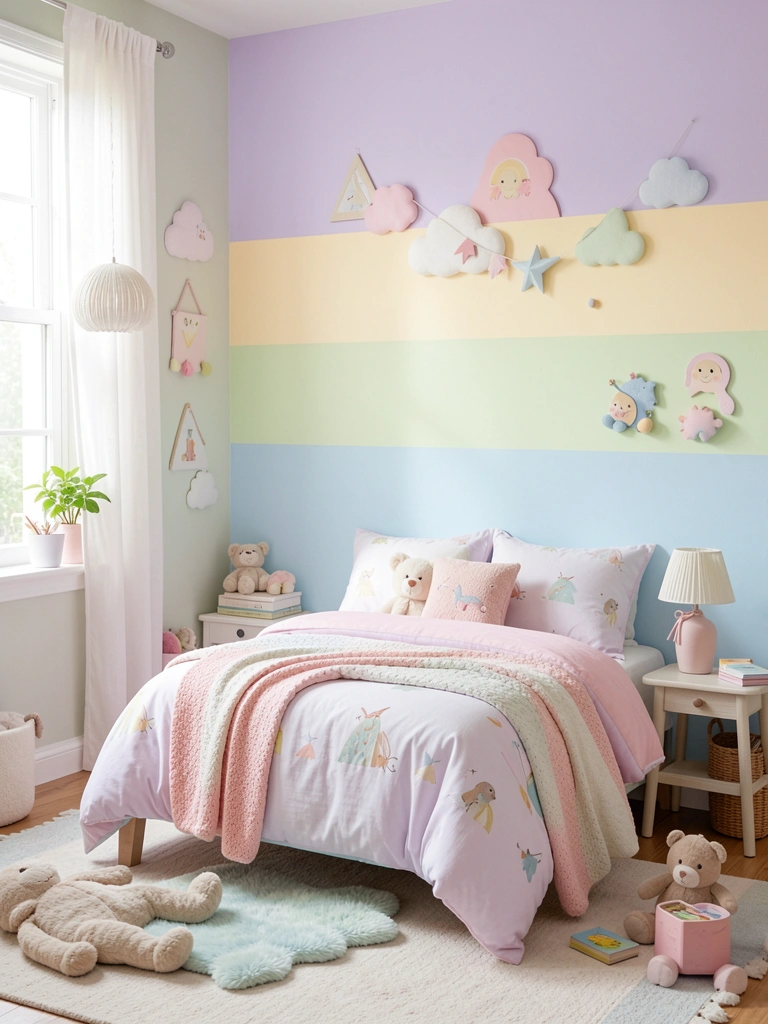
Full-spectrum color blocks (subtle rainbow versions) in pastels bring playfulness without overstimulation. Kids love the visual interest, and soft pastels keep the vibe calm.
Paint horizontal or vertical color blocks using painter’s tape and soft pastel paint ($40–$60 for 4–5 colors). Measure equal sections, tape them off, and paint each section a different pastel shade. Budget one full day. Pro tip: Use painter’s tape and paint slowly for clean edges.
Bonus: Kids can help with painting, making it a fun project they feel ownership over.
The result is a personalized room that sparks creativity and joy. The soft rainbow keeps energy playful rather than chaotic, and it photographs beautifully for memories.
13. Use Removable Wallpaper for Pattern + Flexibility
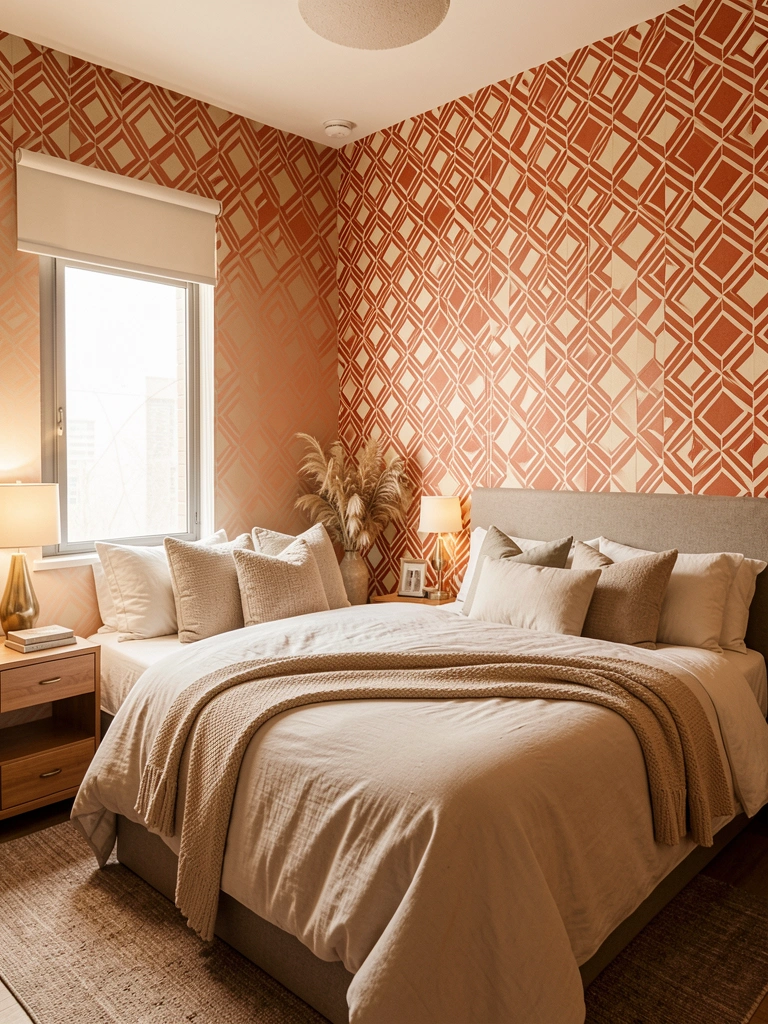
Removable wallpaper gives you bold pattern and texture without paint-and-prime commitment—perfect for renters or commitment-phobes. Modern peel-and-stick options look genuinely beautiful.
Select peel-and-stick wallpaper from Spoonflower, Wayfair, or Amazon ($25–$75 per roll). Measure your wall carefully and order extra to account for pattern matching. Application takes 2–4 hours depending on wall size and pattern complexity. Smooth out bubbles with a squeegee as you go. Removal is gentle and leaves no damage when done correctly.
Pro tip: Prep your wall by cleaning it thoroughly and letting it dry completely—adhesion is everything.
You get the impact of wallpaper (pattern, visual interest, personality) without the permanent commitment. Your space feels designed and intentional, and you can swap it out whenever you want a change.
14. Blend Warm Whites with Wood Tones
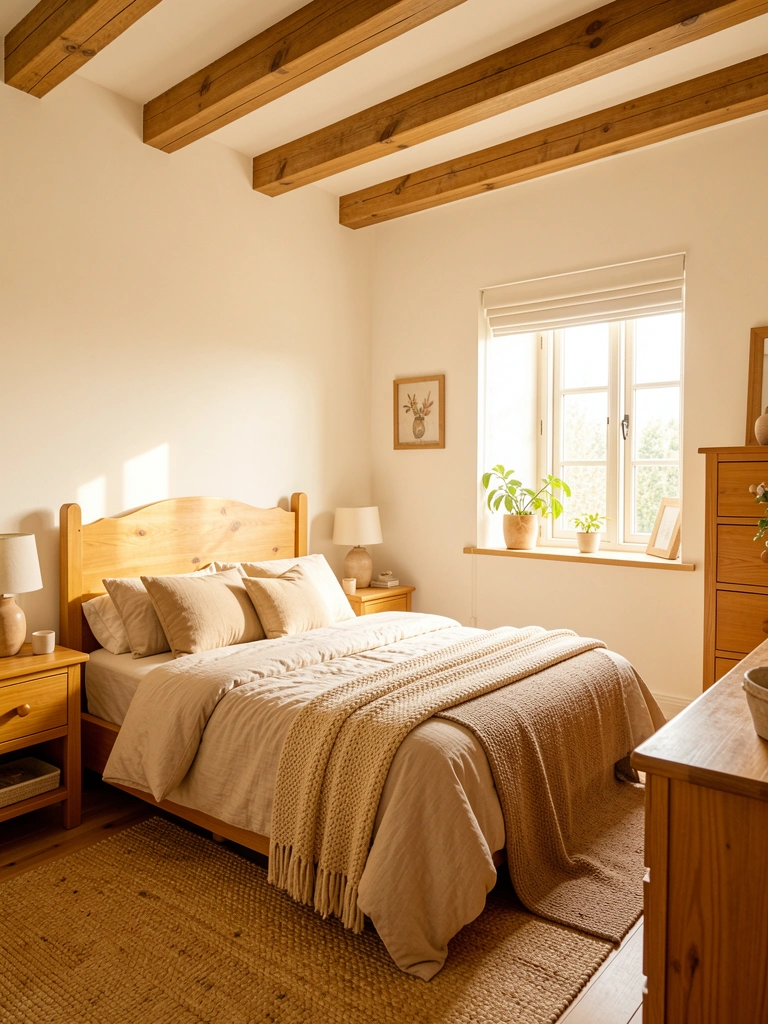
Warm whites with beige undertones have replaced cool whites as the go-to neutral. They pair beautifully with natural wood and create a connected, organic feel.
Choose a warm white like Benjamin Moore Swiss Coffee or Sherwin-Williams Alabaster ($30–$50). Apply two coats across your space. The transformation happens when paired with natural wood furniture, woven textures, and warm lighting. Budget one weekend for an average room.
Bonus: These warm whites actually look clean and intentional—they don’t show dirt like pure whites can.
Your room gains cohesion and warmth that cool whites can’t match. The combination of warm white walls and wood tones creates a naturally sophisticated backdrop for any décor style.
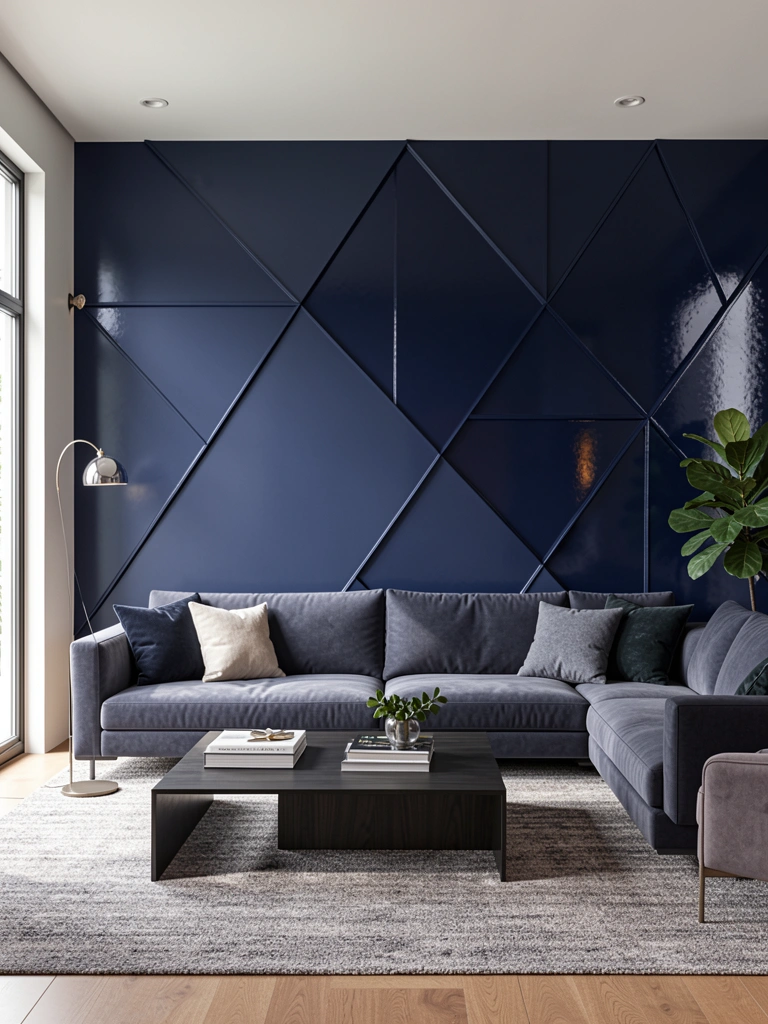
15. Create Bold Sapphire or Emerald Accent Walls
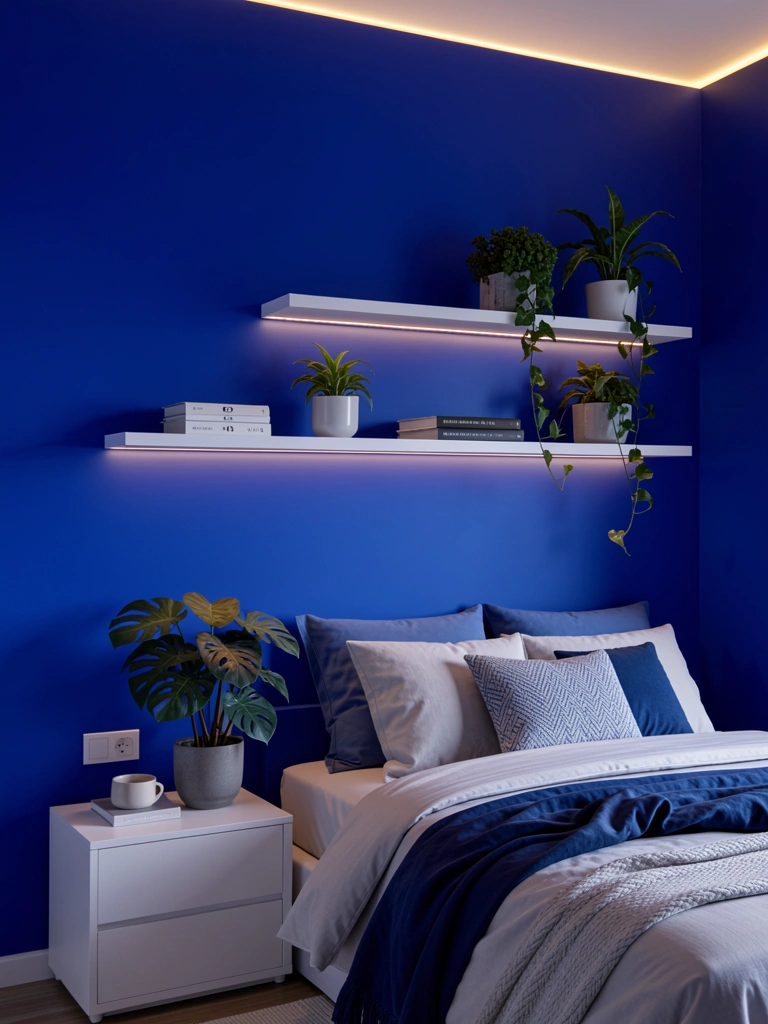
Bold jewel tones like sapphire blue and emerald green are having a moment for creating drama and sophistication. These colors work best as accent walls or in smaller rooms.
Select a high-quality blue or green from Sherwin-Williams or Benjamin Moore ($35–$55). Apply two coats to one or two walls. Use proper primer if you’re covering a light color with dark paint (crucial for even coverage). Budget one full day. Pair bold colors with warm lighting to keep the space from feeling cold or severe.
Pro tip: Paint test patches and observe them at different times of day—bold colors change dramatically with light.
Your room develops serious personality and visual impact. Bold accent walls make a statement about your style and create a curated, intentional aesthetic that feels anything but cookie-cutter.
16. Incorporate Geometric Patterns with Tape
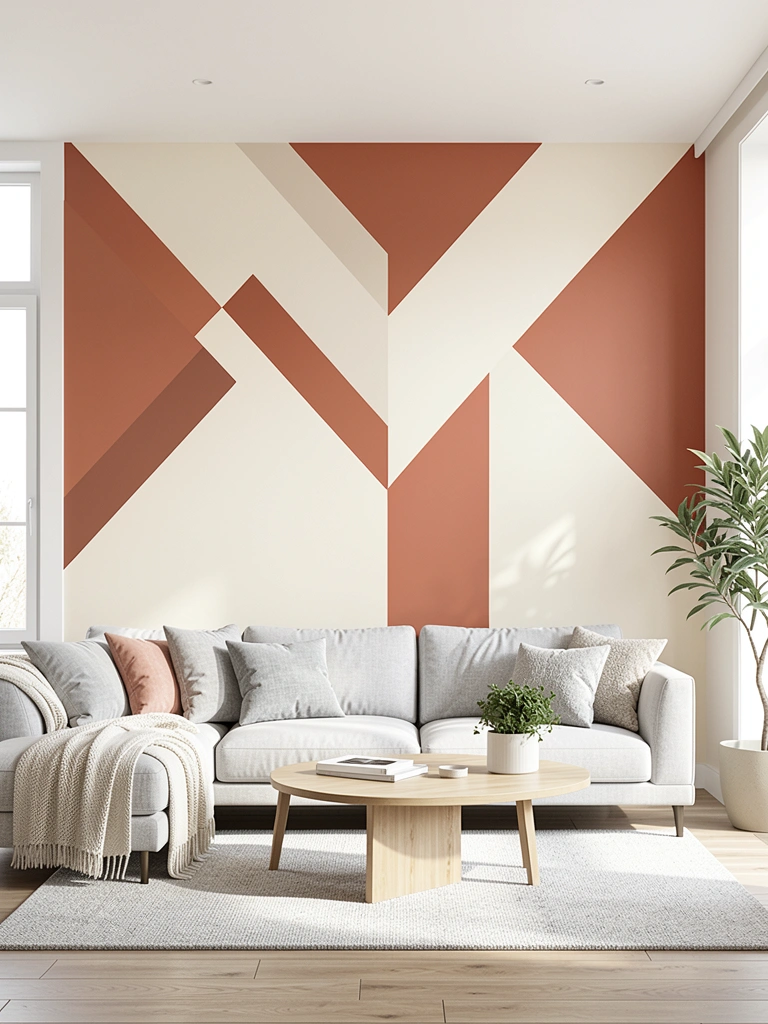
Geometric patterns created with painter’s tape are less commitment than stencils and offer more control. Chevrons, stripes, and color blocks are beginner-friendly and look professionally designed.
Use painter’s tape to create your pattern, then paint between the taped sections in two coordinating colors ($40–$60 total). Budget 4–6 hours, including tape setup. Remove tape while paint is still slightly wet for the cleanest lines. Pro tip: Use high-quality painter’s tape—cheap tape bleeds and ruins lines.
Bonus: Geometric patterns work in any room style and photograph beautifully for sharing.
Your wall becomes a graphic focal point that feels modern and intentional. Geometric patterns add energy and visual interest without the commitment of wallpaper or the complexity of murals.
17. Paint Shelving Backs in Contrasting Colors
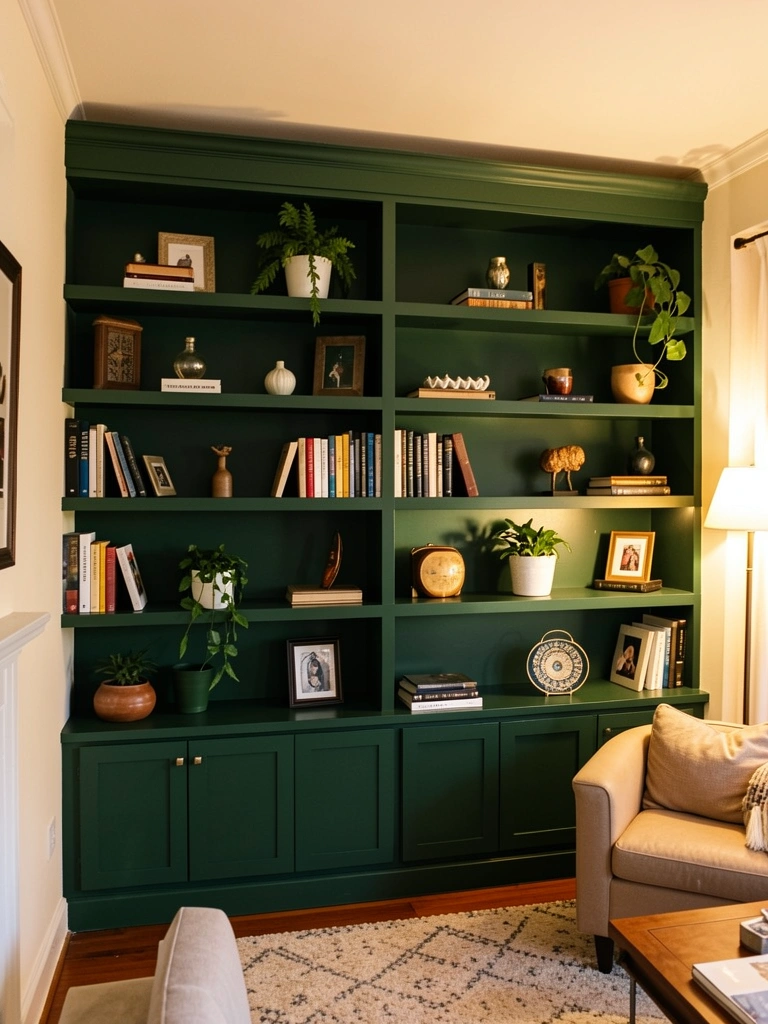
Painting the back walls of open shelving (or built-ins) in a contrasting color makes styled items pop and adds depth to your space. It’s an easy upgrade many people overlook.
Paint the interior back panels of shelves in a bold or complementary color ($20–$40). This takes 1–2 hours and requires no special skills—just painter’s tape, a small brush, and precision. The color should either match your accent wall or complement it dramatically.
Pro tip: This works especially well if you already have built-in shelving you want to refresh without a full room repaint.
Your shelves become a designed element rather than just storage. The contrasting background makes whatever you display look more intentional and curated, and it’s an affordable way to add visual interest and depth.
18. Use Paint + Wallpaper Combo for Custom Interest
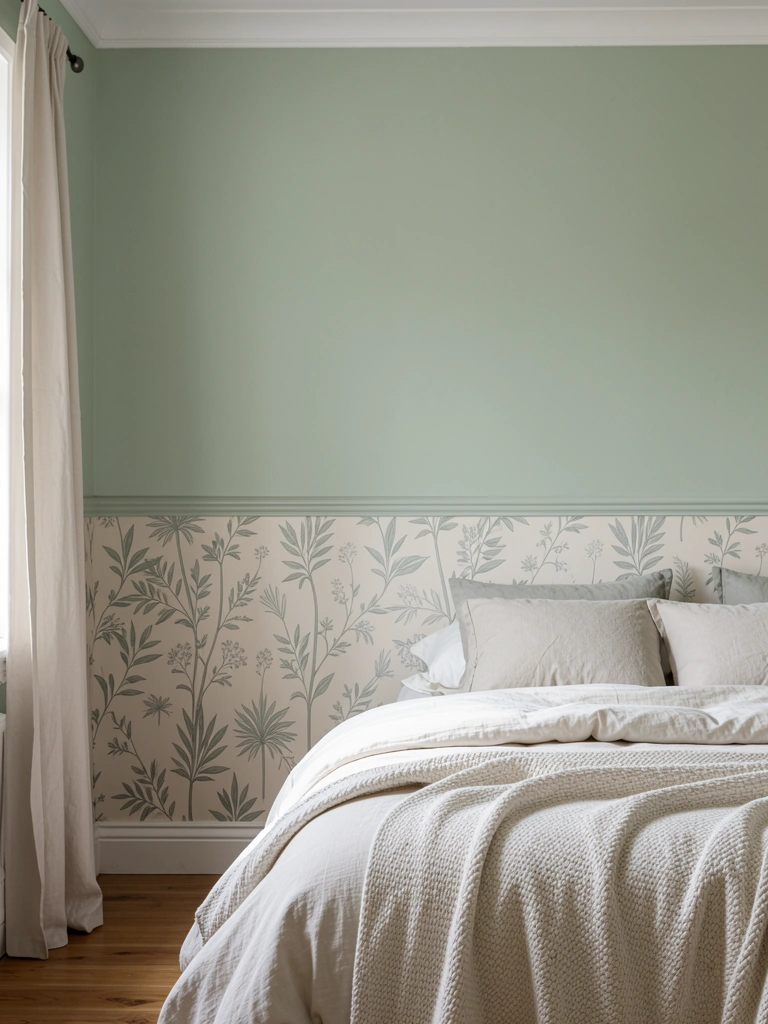
Combining paint and wallpaper (or paint with painted borders) creates custom visual interest without overwhelming the space. This technique works beautifully in bedrooms and dining rooms.
Paint your upper walls one color ($30–$50), then apply peel-and-stick wallpaper to the lower half ($25–$75). Draw a straight line at the midpoint with painter’s tape for clean edges. Budget one full day. Alternatively, paint the entire wall, then add a painted stripe or border using contrasting paint and painter’s tape ($40–$60 total).
Bonus: This technique makes average-height ceilings feel taller.
You get visual layering and custom design that feels collected and intentional. The combination of techniques creates depth and personality that solid color alone can’t achieve.
19. Create Ombre Ceilings for Unexpected Drama
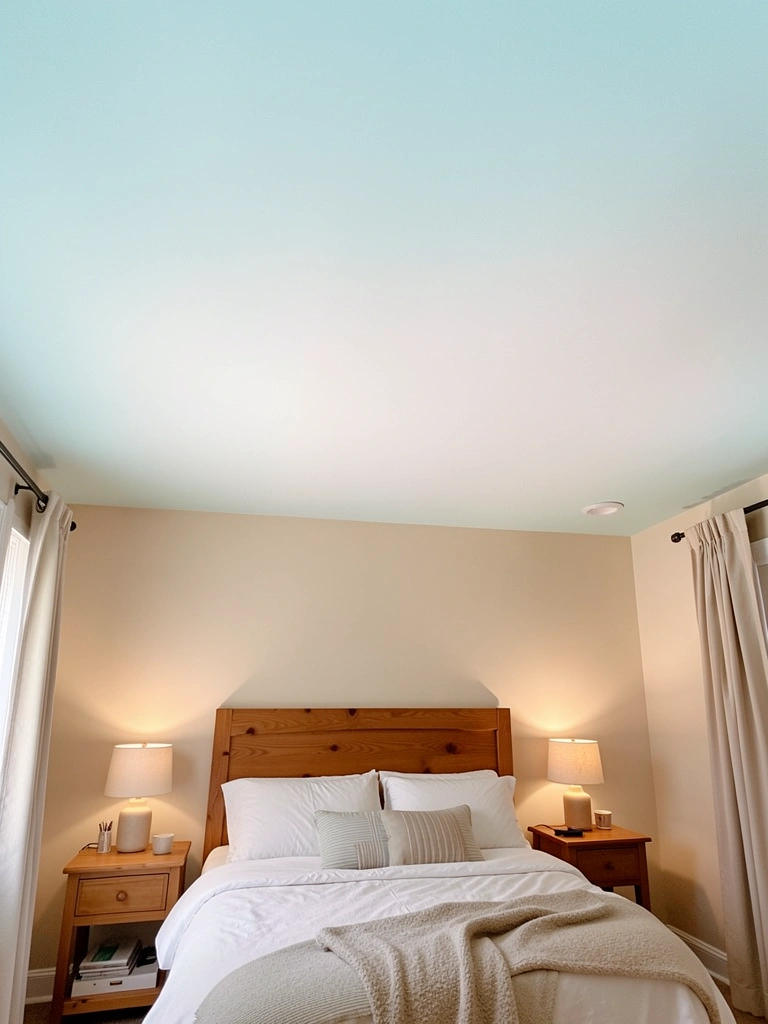
Ombre ceilings are an underrated trick that makes rooms feel taller and adds subtle drama. It’s an unexpected detail that impresses.
Paint your ceiling white in the center, gradually transitioning to a soft color at the edges ($40–$60 for two paint colors). Use painter’s tape to create horizontal bands, starting with light pencil marks for guides. Budget 4–6 hours for an average ceiling and use a quality angled brush for precision. A ladder is essential.
Pro tip: Enlist a friend—ceiling painting is legitimately easier with two people.
Your room gains architectural interest and visual height. Ombre ceilings make spaces feel designed and thoughtful, especially in bedrooms and small bathrooms.
20. Apply Chalk Paint for Textured Matte Finish
Chalk paint creates a velvety, matte finish that feels organic and cottagecore. It adheres well to most surfaces and doesn’t require primer on previously painted walls.
Purchase chalk paint ($20–$50 per quart) from Annie Sloan, Rust-Oleum, or even craft stores. Apply two thin coats with a foam roller, allowing drying time between coats. Budget one afternoon. Chalk paint requires a protective sealant topcoat ($15–$25) to prevent dust transfer, but it’s worth it for the gorgeous matte finish.
Bonus: Chalk paint works on furniture too, so you can create a coordinated look.
Your walls gain a sophisticated, velvety-soft appearance that photographs beautifully. The matte finish feels artistic and intentional, especially in bedrooms and dining rooms with vintage or farmhouse styles.
21. Paint an Accent Wall Behind Your Bed
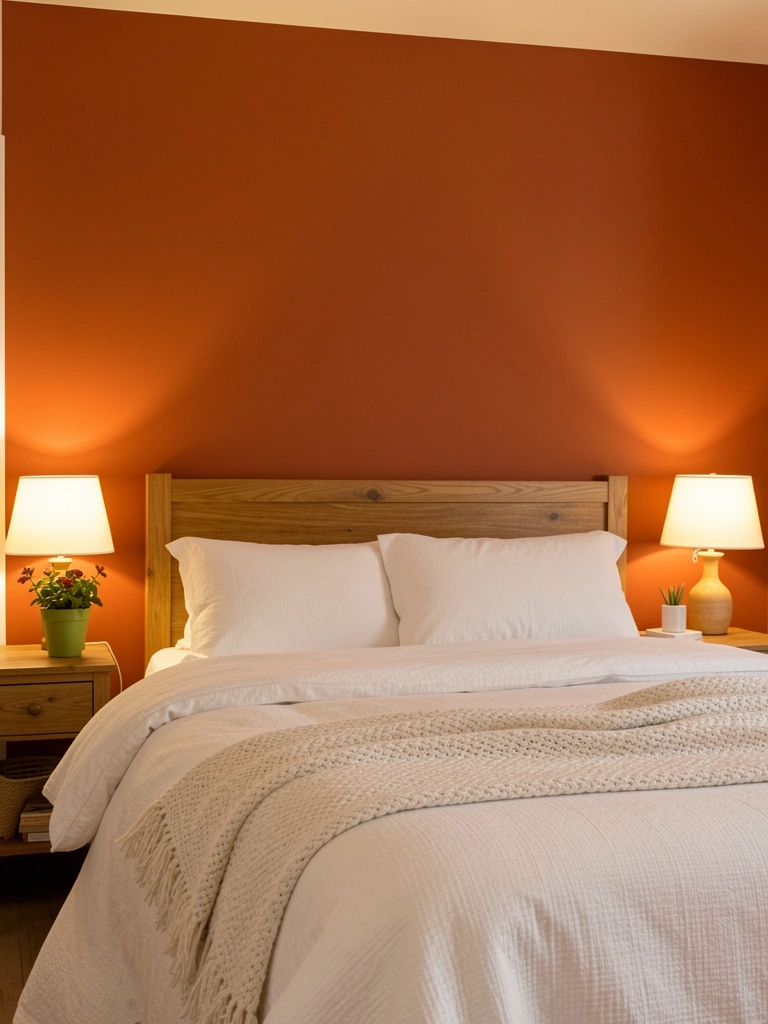
An accent wall directly behind your bed creates a cocoon-like effect and makes the bed feel like the hero of the room. It’s a high-impact, low-commitment upgrade.
Choose your favorite moody or warm color ($30–$50) and paint only the wall behind your bed. Alternatively, extend it slightly wider for more drama. Budget 2–3 hours for just one wall. This strategy works beautifully with darker colors because it’s contained to one small area.
Pro tip: Make sure your bed is positioned in front of this wall—don’t hide it behind nightstands.
Your bedroom instantly becomes more designed and intentional. The focus naturally draws to your bed, making the room feel like a personal retreat rather than an afterthought.
22. Mix Matte and Gloss Paint on Same Wall
Mixing matte and gloss finishes on the same wall creates subtle texture and light-play that looks custom and sophisticated. It’s an advanced trick that feels simple once you try it.
Paint your wall in sections: some areas matte, some areas gloss in the same or coordinating colors ($50–$80 total). Use painter’s tape to define sections clearly. Budget 4–5 hours, allowing drying time between finish changes. This technique works beautifully with geometric shapes or ombre effects.
Pro tip: The gloss sections should have a purpose (around shelving, window frames, or in a geometric pattern)—random gloss looks accidental.
Your wall gains subtle sophistication and texture that catches light throughout the day. The mixed finishes create visual interest that photographs beautifully and feels genuinely high-end.
23. Paint Color Capsules for Curated Cohesion
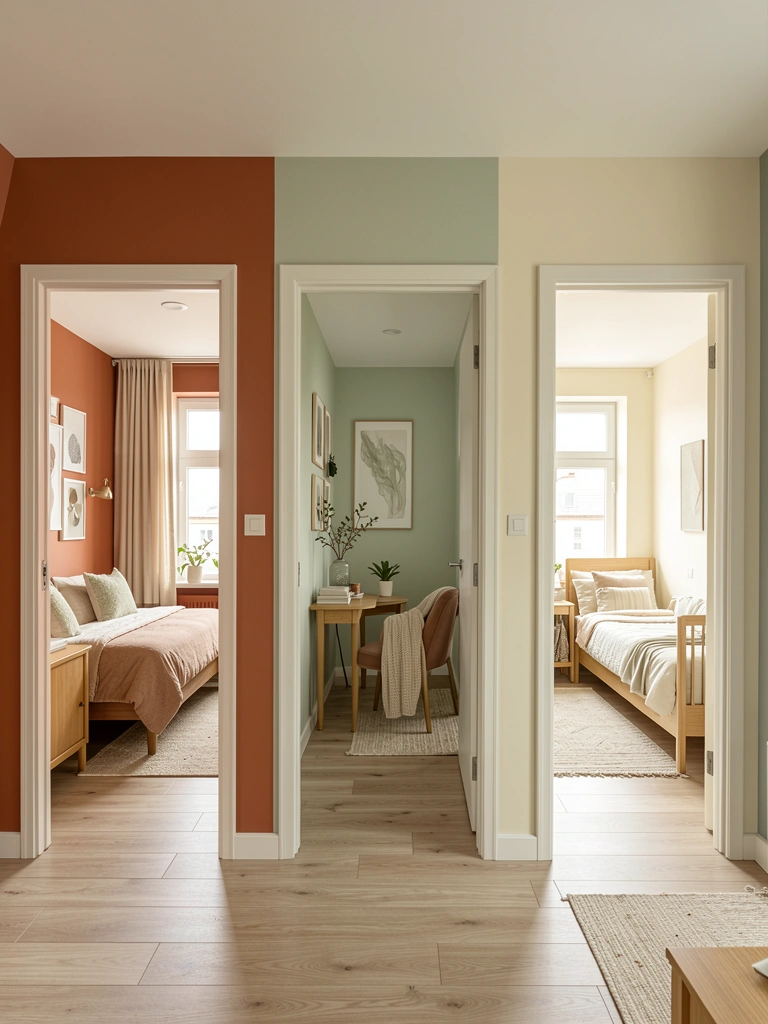
Color capsules (curated palettes of 3–4 coordinating colors used throughout your home) create flow and intention across multiple rooms. It’s how designed homes feel collected rather than random.
Select a primary color, an accent color, and neutrals from Benjamin Moore or Sherwin-Williams that complement each other. Paint different rooms in different colors from your palette ($100–$150 total for multiple rooms). Budget one weekend per room. The key is repeating at least one color across rooms so they feel connected.
Bonus: Color capsules are easier to plan using online color tools from paint brands.
Your entire home gains cohesion and intentional design. Moving through rooms with coordinating colors makes spaces feel like they belong together, and the overall aesthetic feels significantly more curated.
24. Create a Textured Wall Using Sponge Technique
Sponge texturing creates subtle depth and organic interest without the expense of Venetian plaster. It’s accessible, budget-friendly, and genuinely charming.
Purchase a natural sea sponge ($5–$10) and two coordinating paint colors ($40–$60). Apply your base color, let it dry, then dab the second color on using the sponge in a dabbing (not wiping) motion. Budget 3–4 hours for one wall. The key is using a light hand—you want subtle texture, not obvious sponge marks.
Pro tip: Practice your technique on poster board first to get the pressure and spacing right.
Your wall gains organic, handmade character that looks intentional and charming. The texture catches light and creates shadow play, making your space look more carefully designed than flat paint.
25. Paint Doorframes and Trim in Contrasting Colors
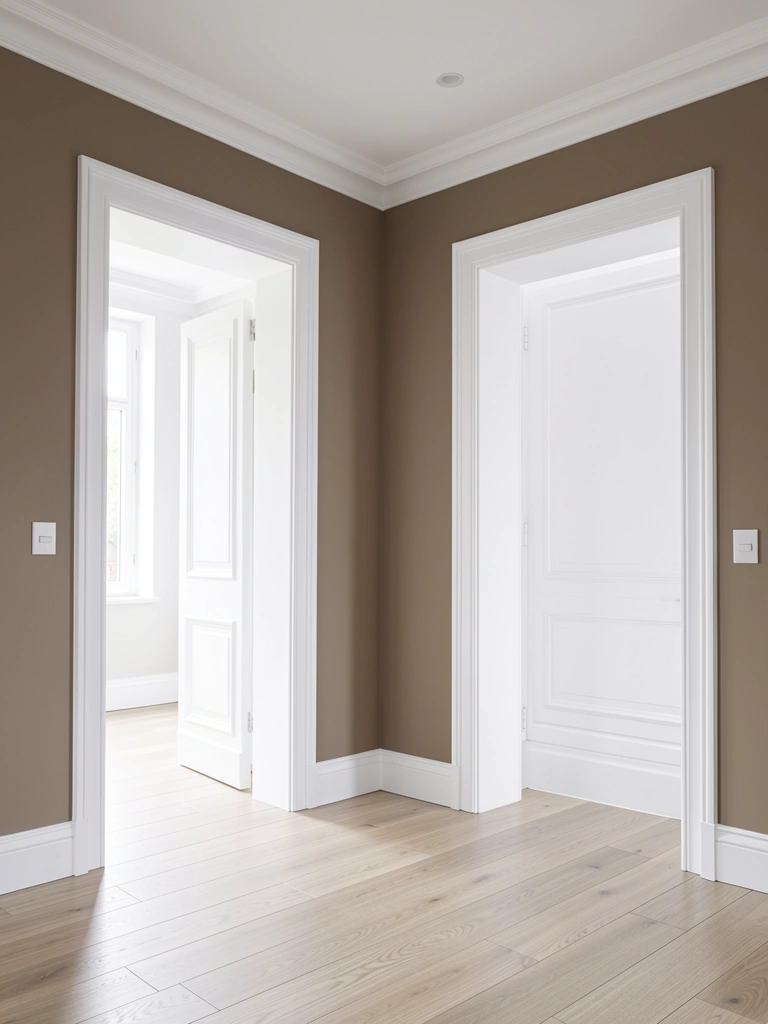
Painting trim and doorframes in a contrasting color (usually white or a bolder shade) instantly adds architectural interest and sophistication. It’s an overlooked detail with major impact.
Use semi-gloss trim paint in white or your chosen color ($30–$50) and apply two coats with a small brush or trim roller. Budget one afternoon for average trim. Tape walls carefully to keep paint off them. Semi-gloss is more durable and easier to clean than matte on trim.
Bonus: Crisp white trim makes walls feel more like art—it frames them beautifully.
Your room gains defined architecture and visual sophistication. The contrast between wall color and trim creates clean lines that make spaces feel more intentionally designed and professionally finished.
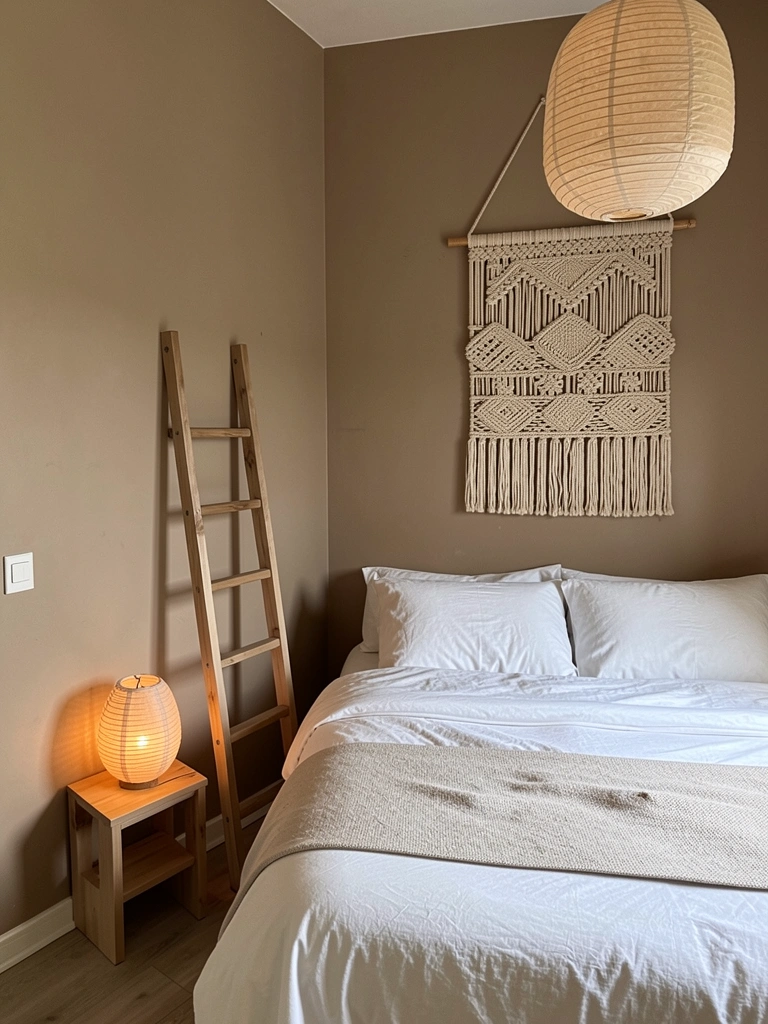
26. Install Woven Tapestry Wall Art Over Paint
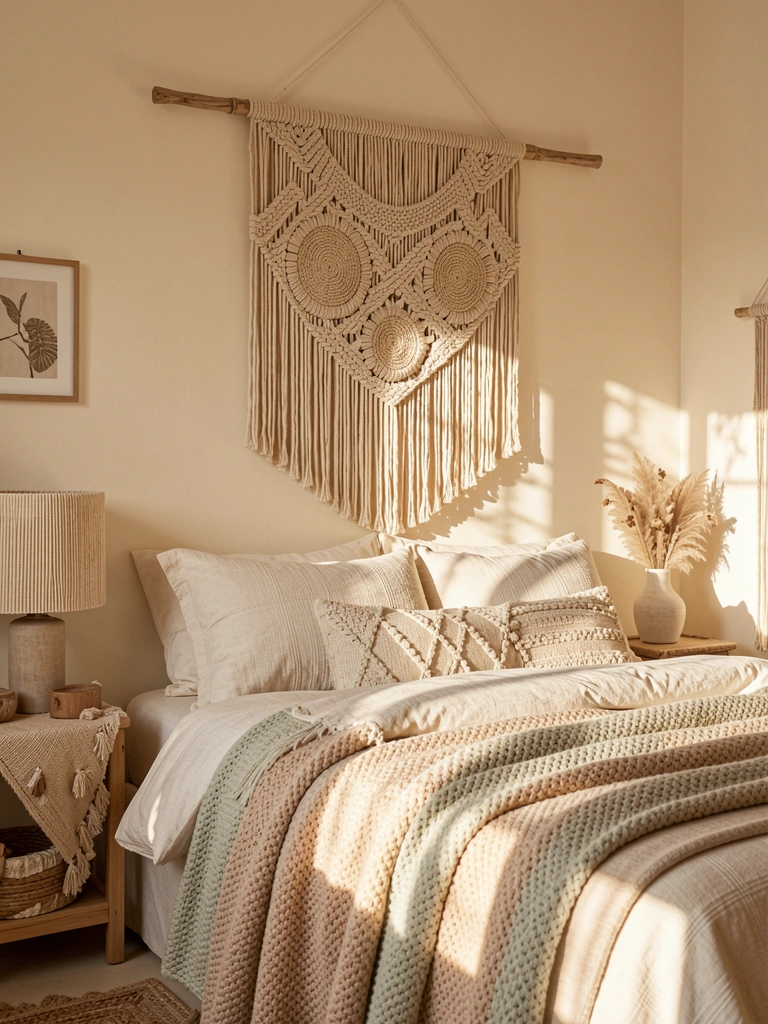
Layering woven textiles (macramé, tapestries, woven wall hangings) over painted walls combines color, texture, and organic interest. It’s an easy way to add personality without changing paint.
Mount a large woven tapestry or macramé ($40–$150 from Etsy, Urban Outfitters, or Amazon) on a painted accent wall using a sturdy hanging rod or hooks. This takes 30 minutes including measuring and hanging. The combination of paint color + texture creates a designed, intentional focal point.
Pro tip: Choose natural fibers and neutral palettes for timeless appeal, or go bold with dyed textiles if your style leans eclectic.
Your wall becomes a multidimensional focal point that combines color, texture, and artisanal craft. Woven pieces add warmth and bohemian sophistication that flat art alone can’t achieve.
27. Paint a Feature Wall in Sustainable, Low-VOC Paint
Choosing low-VOC (volatile organic compound) or eco-friendly paint is a health-conscious upgrade that matters, especially for bedrooms and nurseries. Modern eco-paints perform beautifully without the chemical smell.
Purchase low-VOC paint brands like Benjamin Moore Natura, Sherwin-Williams Harmony, or Seventh Generation ($40–$65 per gallon). Performance is identical to conventional paint—you get the same coverage and durability with fewer chemicals. Budget one weekend for average room painting. Many eco-paints come in gorgeous colors, so you’re not sacrificing aesthetics.
Pro tip: Eco-paints dry slightly faster and have minimal odor, so you can reenter the room sooner.
You create a healthier indoor environment, especially important in bedrooms where you spend hours breathing. The bonus? Eco-paint brands often have beautiful color options, so your health-conscious choice never compromises style.
Save this post for your next wall refresh and pick just one idea to tackle this weekend—even renters can try removable wallpaper or accent wall paint. Share it with anyone redesigning, and let us know which technique you’re most excited about trying.
Leave a Reply