Introduction
Good lighting can feel like magic—it sets your mood, highlights your favorite pieces, and makes your whole living room feel intentional without trying too hard. But here’s the thing: most of us rely on one overhead fixture and wonder why the space feels flat or harsh. The secret that designers use? Layered lighting that combines different sources at different heights, creating depth and warmth that photographs beautifully and feels amazing to live in. Whether you’re working with a small apartment or a sprawling family room, these 27 architectural lighting ideas show you exactly how to build a lighting plan that feels refined, balanced, and unmistakably yours. From budget-friendly DIY hacks to investment pieces that anchor a room, you’ll find solutions for every space, skill level, and budget. Ready to glow up your living room?
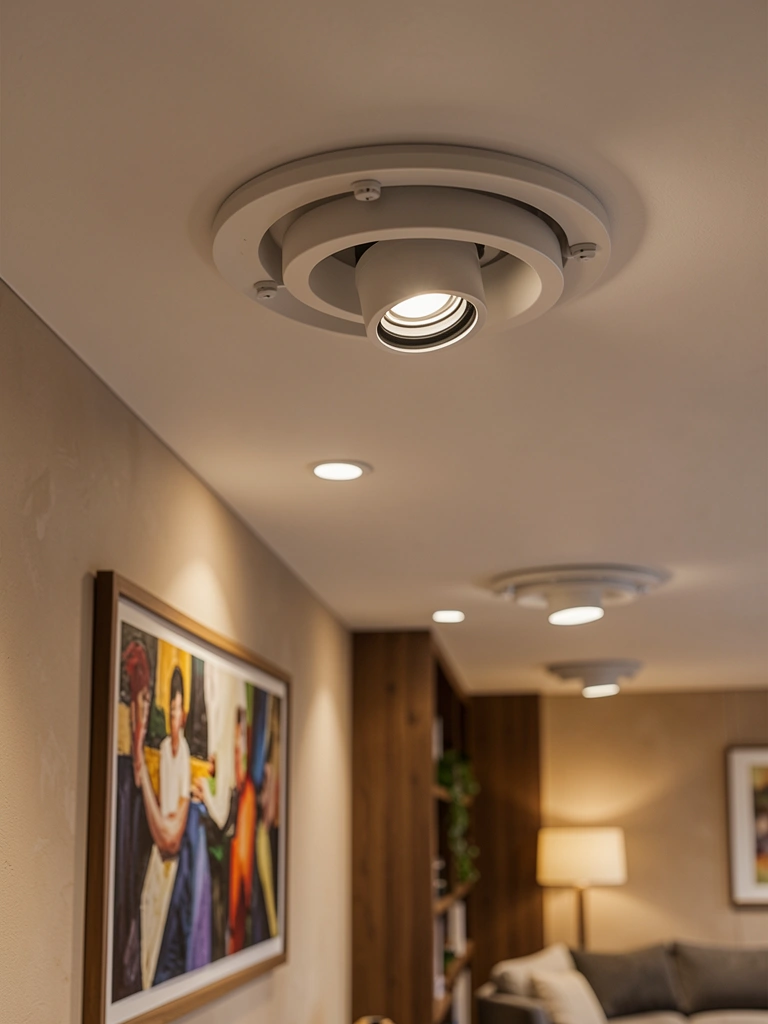
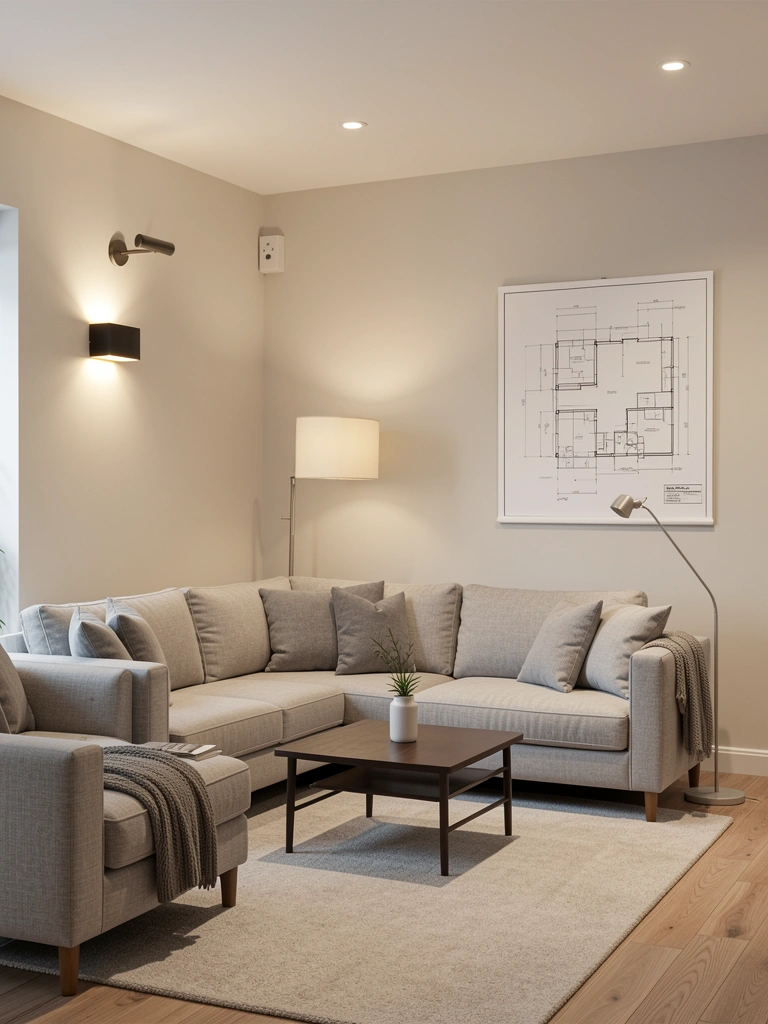
1. Install Recessed Lighting on a Dimmer System
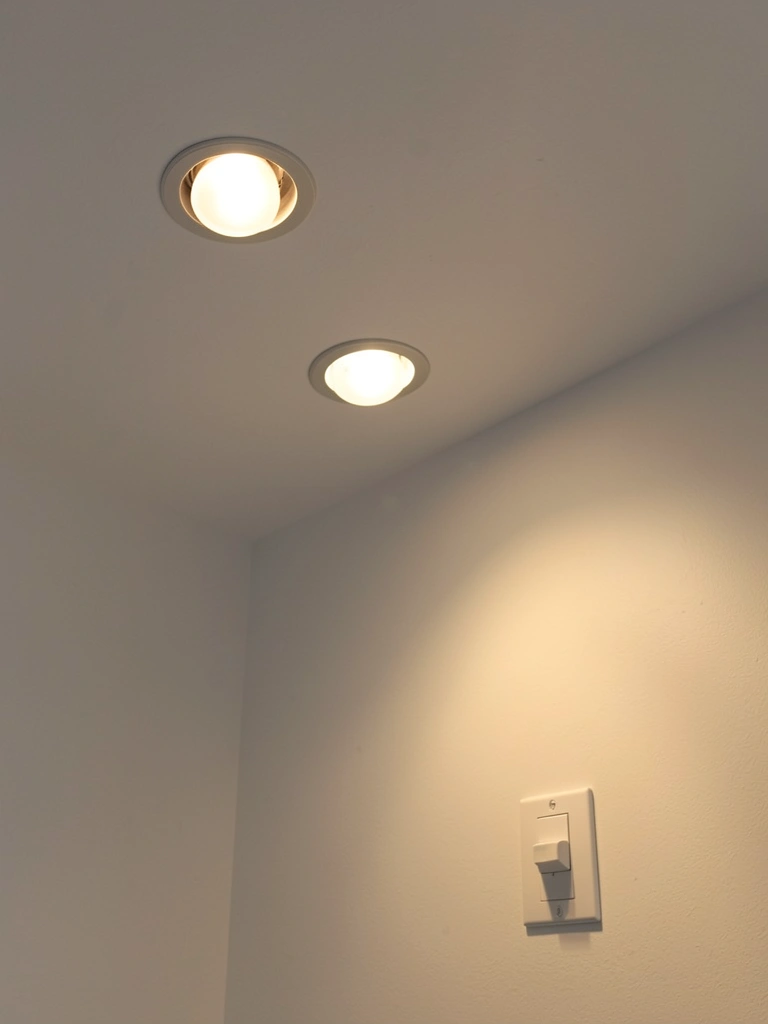
Recessed lights are architectural game-changers because they give you control without visual clutter—no bulky fixtures stealing attention from your furniture or art. The secret is putting them on a dimmer so you can dial the intensity from energizing daytime light to intimate evening glow.
Work with an electrician to install 4-6 recessed cans spaced 4-6 feet apart across your ceiling, depending on room size. Cost runs $300-$800 for professional installation (or $150-$300 if you’re handy and want to DIY in existing ceilings). Pair them with warm white LED bulbs (2700K color temperature) to avoid that clinical hospital vibe. The dimmer switch costs $20-$50 and takes a handyperson about an hour to install.
Pro tip: Angle half your recessed lights toward walls to create ambient wash lighting, and point the others toward seating areas for task light. This setup works for renters too if you go with surface-mounted versions instead.
Your whole room gains flexibility—breakfast brightness or date-night dimness at the flick of a switch.
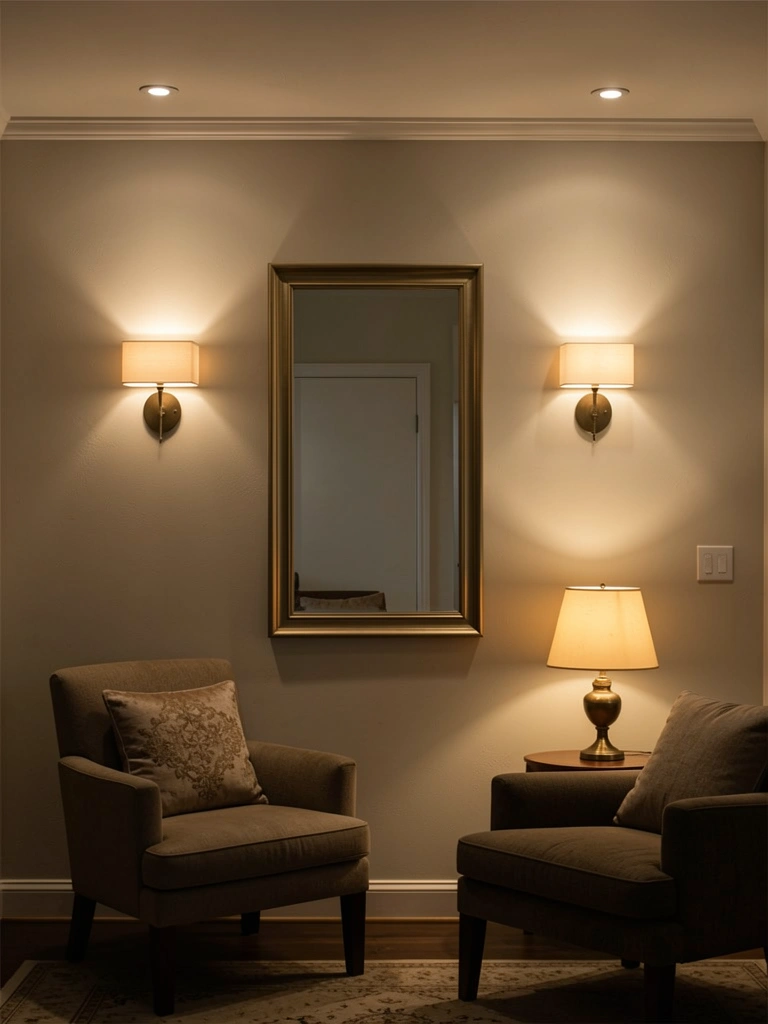
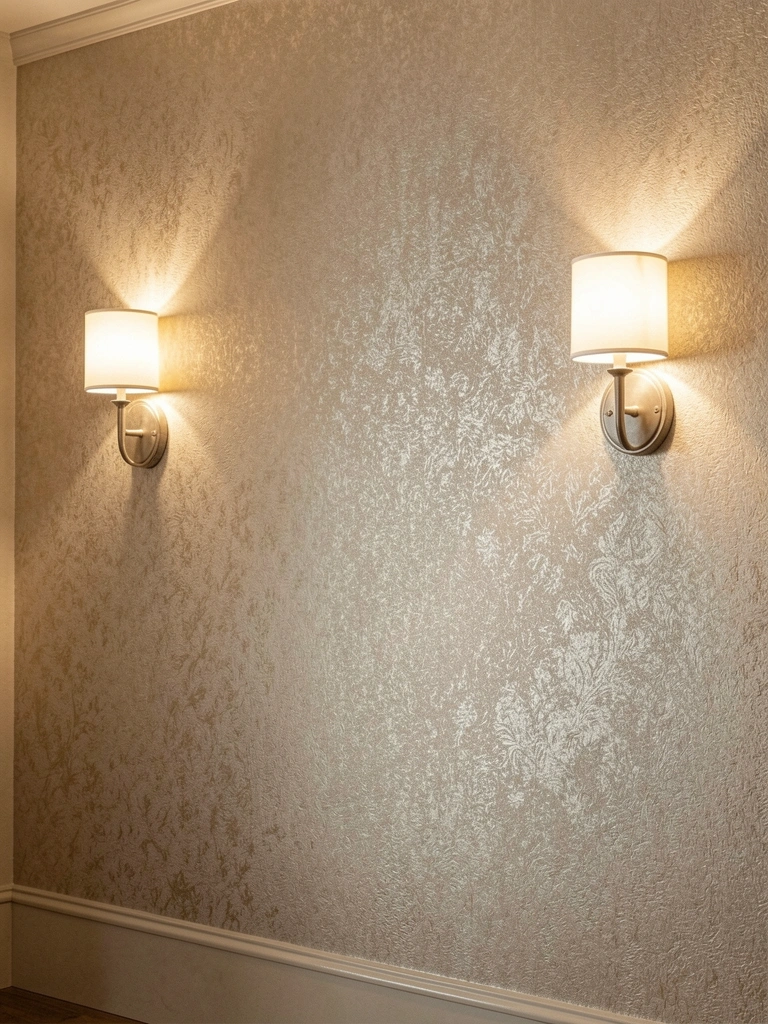
2. Layer Wall Sconces on Both Sides of a Mirror or Sofa
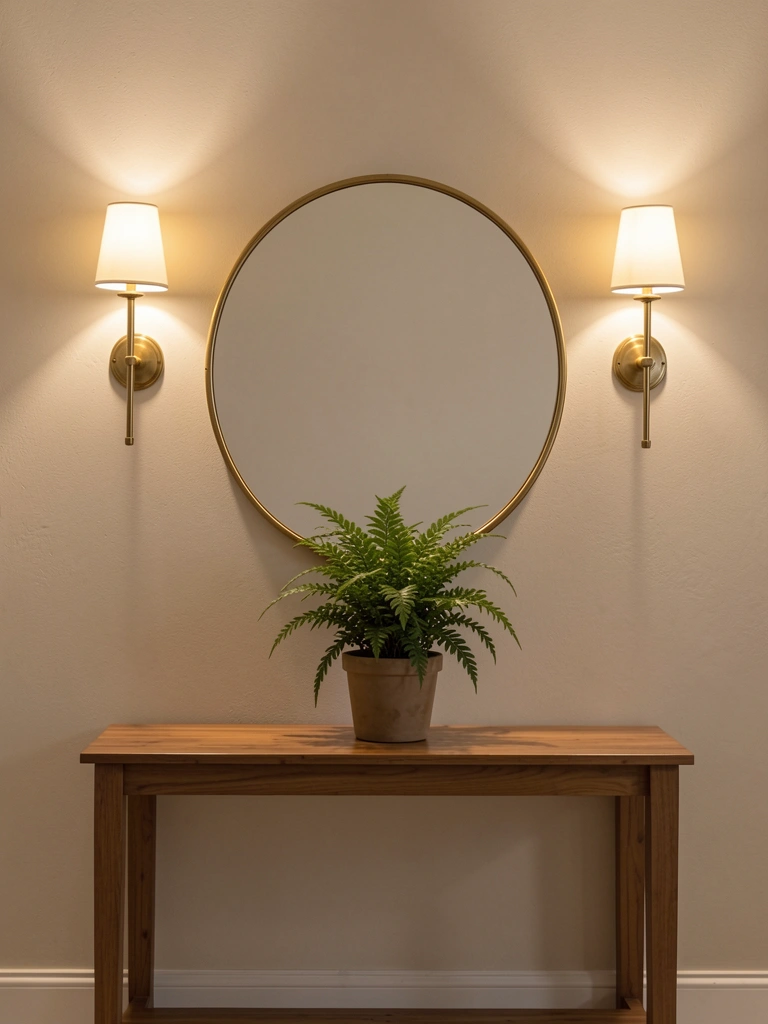
Wall sconces do heavy lifting because they add architectural interest and functional light without taking up floor space. The trick is mounting them on either side of a focal point—a mirror, a sofa, or an entryway—so light spreads evenly and shadows disappear.
Mount sconces 60-66 inches from the floor (about eye level when seated) on either side of your focal point. Expect to spend $80-$400 per sconce depending on material and finish. Brands like West Elm, Rejuvenation, and IKEA offer solid options at every price point. If you’re renting, get adhesive-backed battery-powered sconces ($30-$80) instead of hard-wiring them.
Pro tip: Choose sconces with adjustable arms or directional shades so you can point light where you need it most. Pair warm brass or copper finishes with jewel-tone walls for that 2025 moody-luxe vibe.
The result is a room that looks thoughtfully designed, with light that seems to come from everywhere and nowhere at once.
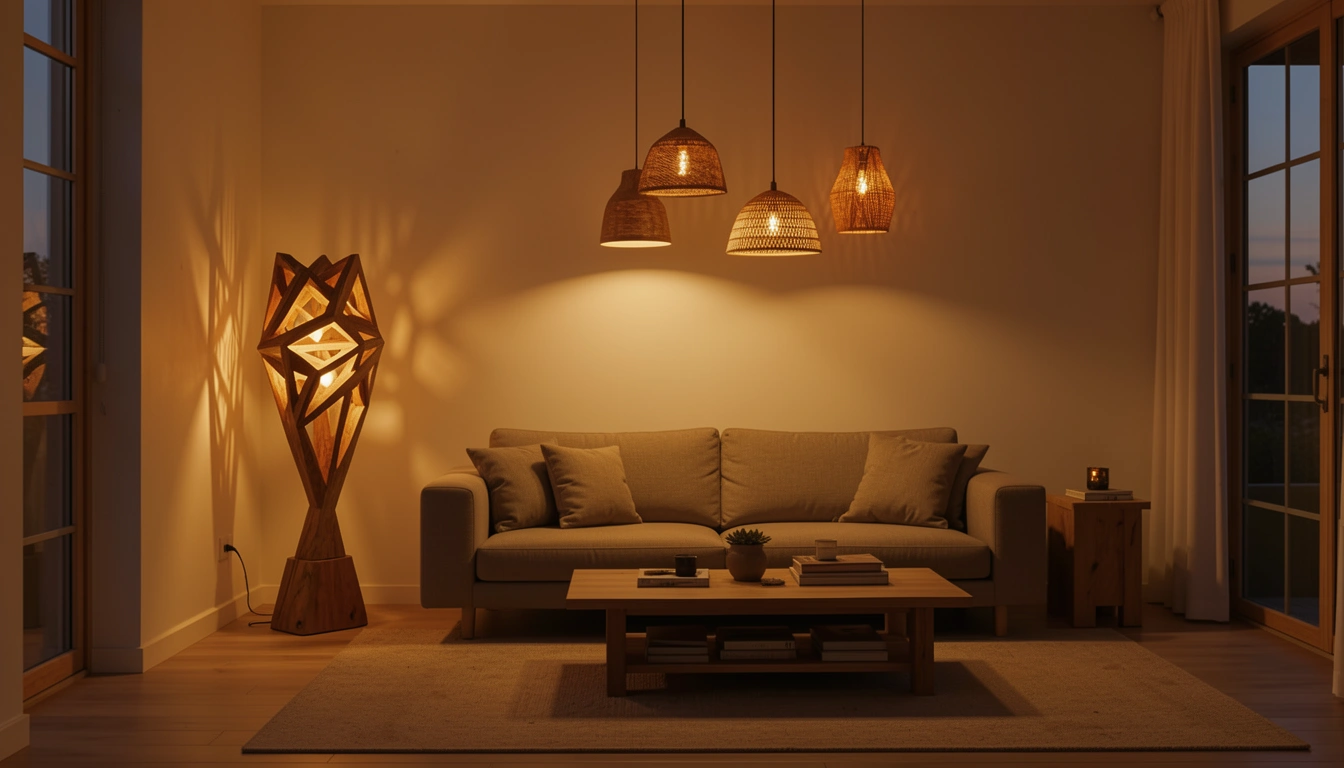
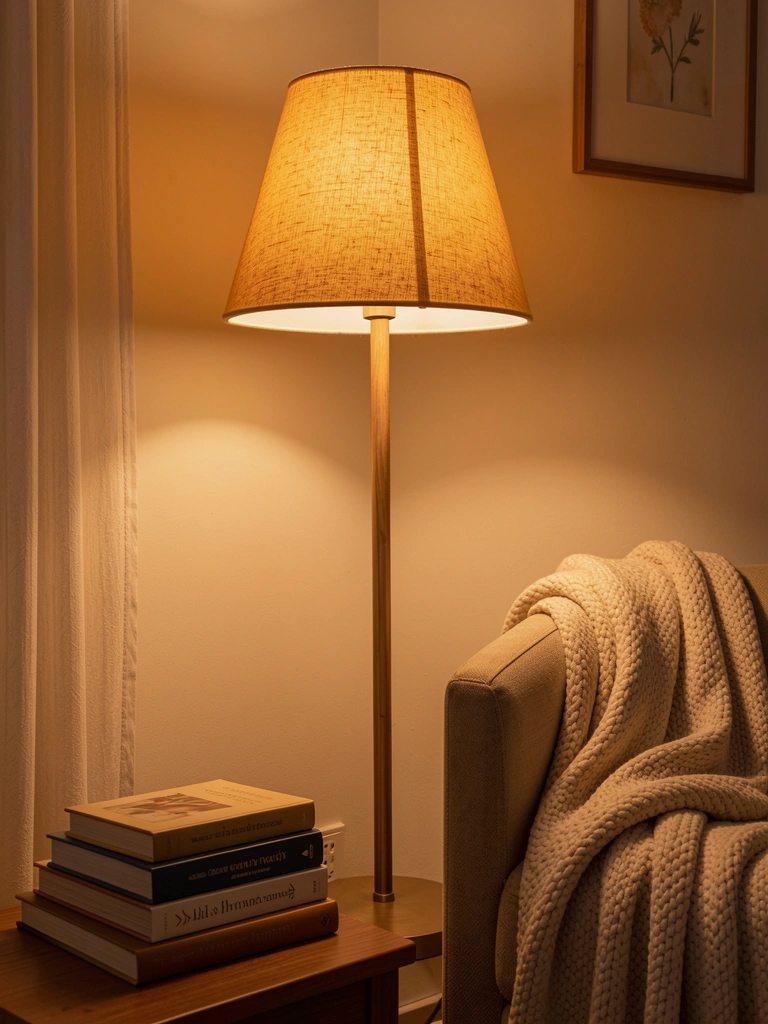
3. Add a Statement Floor Lamp as Sculptural Furniture
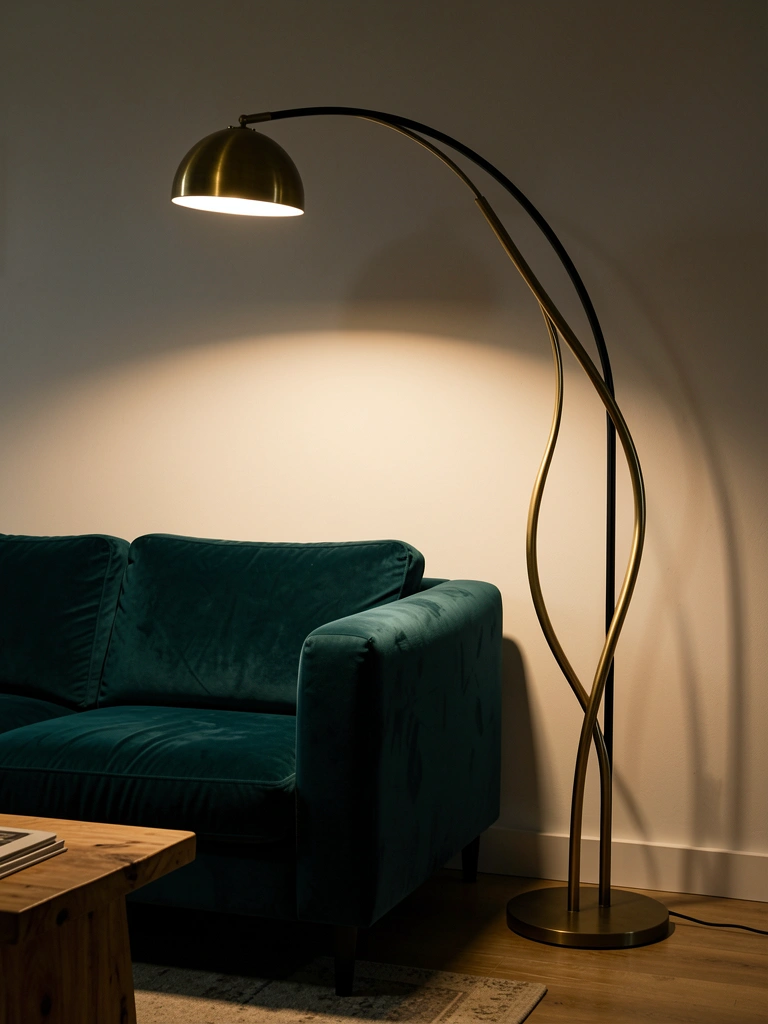
A statement floor lamp isn’t just lighting—it’s art that happens to illuminate. Sculptural lamps with arcs, geometric bases, or interesting finishes add personality while solving the “dark corner” problem without needing an electrician.
Look for lamps with adjustable arms, dimmable bulbs, and neutral or jewel-tone finishes to match your aesthetic. Budget $150-$600 for a quality piece that’ll last years. West Elm, Schoolhouse Electric, and Design Within Reach offer investment-worthy options; IKEA and Target have beautiful budget versions ($80-$150). Position the lamp 12-18 inches from furniture so light doesn’t glare on screens.
Pro tip: Pair it with a warm 40-60 watt equivalent LED bulb and a dimmer-compatible fixture so you control the intensity.
You get both functional light and a room that feels curated—like someone actually thought about how the pieces work together.
4. Use Picture Lights to Highlight Art and Create Ambient Glow
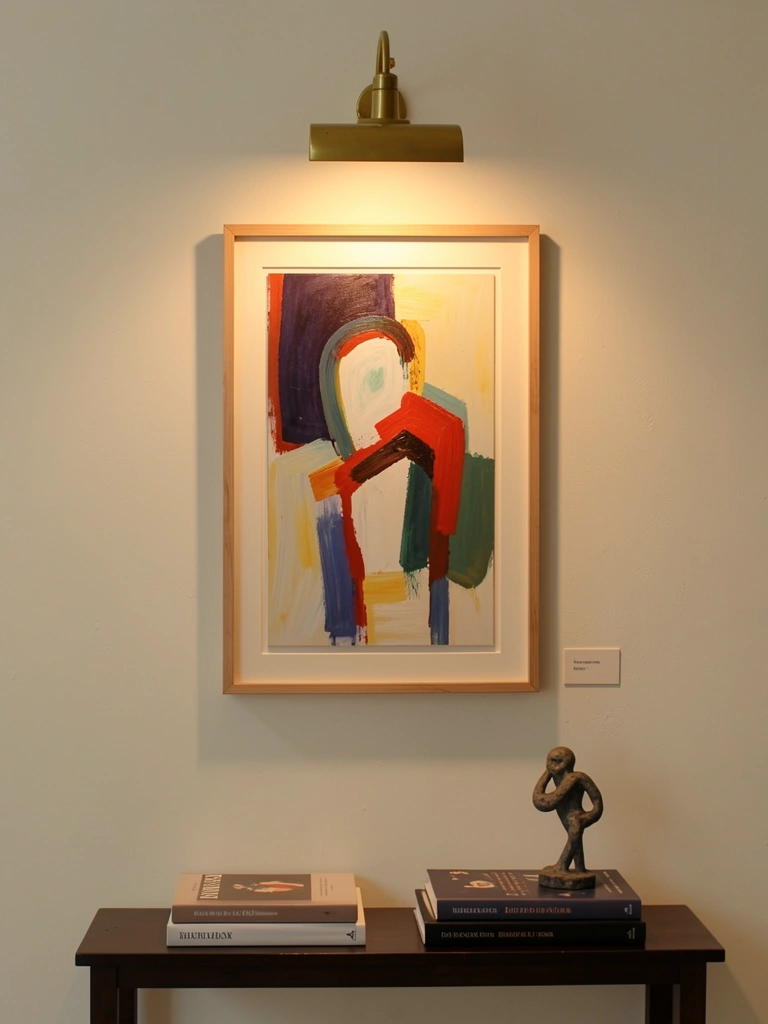
Picture lights are underrated secret weapons. They’re tiny fixtures that sit on top of your frames and create a museum-quality glow that reads as ambient light throughout the room—not just task lighting on one piece.
Mount picture lights 6-12 inches above your frame using included brackets. Cost just $25-$100 per light, making them perfect for a gallery wall or single statement piece. Brass or matte black finishes feel refined. Use warm LED bulbs (2700K) and go for adjustable brightness so the light doesn’t overpower smaller artwork.
Pro tip: Spread picture lights across different walls so light seems to come from multiple sources. Add three to five small lights instead of one big fixture for a layered effect.
Your art becomes part of the lighting scheme itself—guests will notice the thoughtfulness, and you’ll feel the difference in how the space reads after dark.
5. Install Pendant Lights Over a Console, Desk, or Sideboard
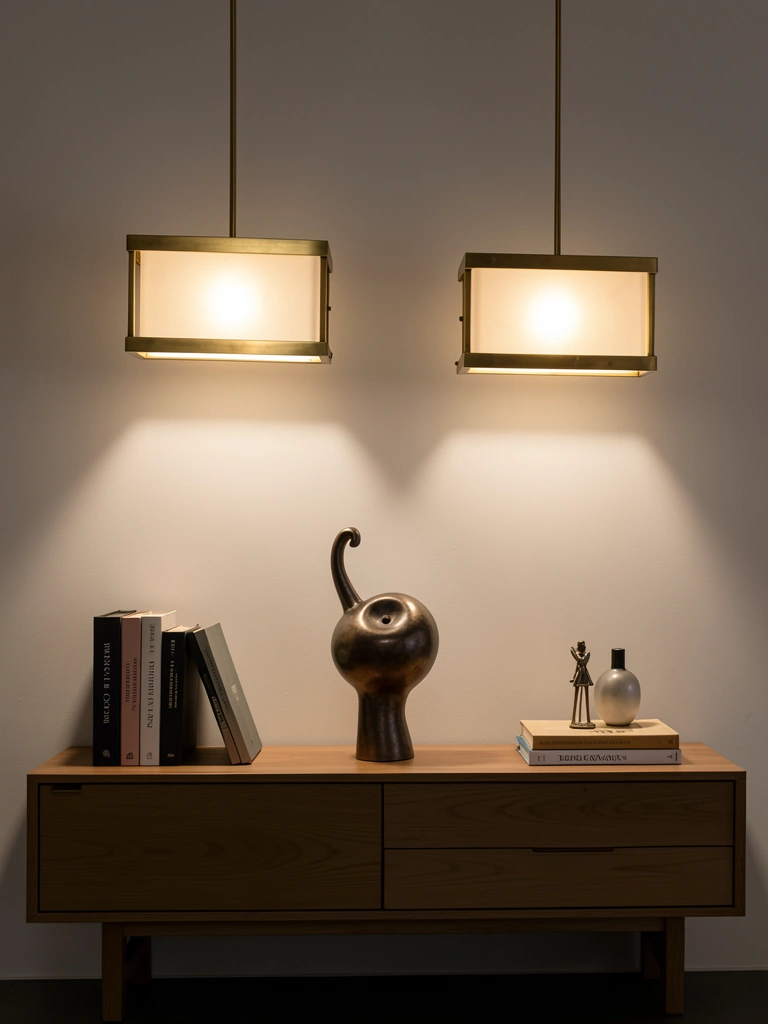
Pendant lights give you task light with visual interest, especially when hung over a console or desk where you actually need illumination. Unlike overhead fixtures, pendants create intimate zones and add architectural definition to a room.
Hang two pendants 24-30 inches apart, 30-36 inches above your surface (adjust based on ceiling height and desired ambiance). Expect $60-$400 per pendant; brands like Cedar & Moss, Apparatus, and Target offer options at every budget. Install on a dimmer circuit so you can adjust from focused work light to gentle ambient glow.
Pro tip: Choose a material that echoes other fixtures in your room—if you have brass sconces, go brass pendants. Consistency creates cohesion.
The space suddenly feels purposeful and organized, with light that supports what you actually do there—work, display, gather.
6. Create Uplighting with Floor Lamps Behind or Beside Furniture

Uplighting—directing light upward to bounce off your ceiling—creates ambient glow that feels sophisticated and intentional. It’s the lighting trick hotels use to make lobbies feel expensive without being bright.
Position a floor lamp with an upward-facing shade or reflector behind or beside seating, about 12-18 inches away from furniture. Invest $100-$400 in a quality uplight, or grab a budget version ($50-$100) from IKEA or Target. Make sure your ceiling is light enough (white, cream, pale gray) to bounce warmth effectively.
Pro tip: Pair uplighting with a dimmer so the glow adjusts with your mood. In small rooms, one well-placed uplight often replaces harsh overhead fixtures entirely.
You’ll notice the space gains depth and sophistication—it’s the lighting trick that makes people ask, “Why does your living room feel so nice?”
7. Install Floating Shelves with LED Tape Lighting Underneath
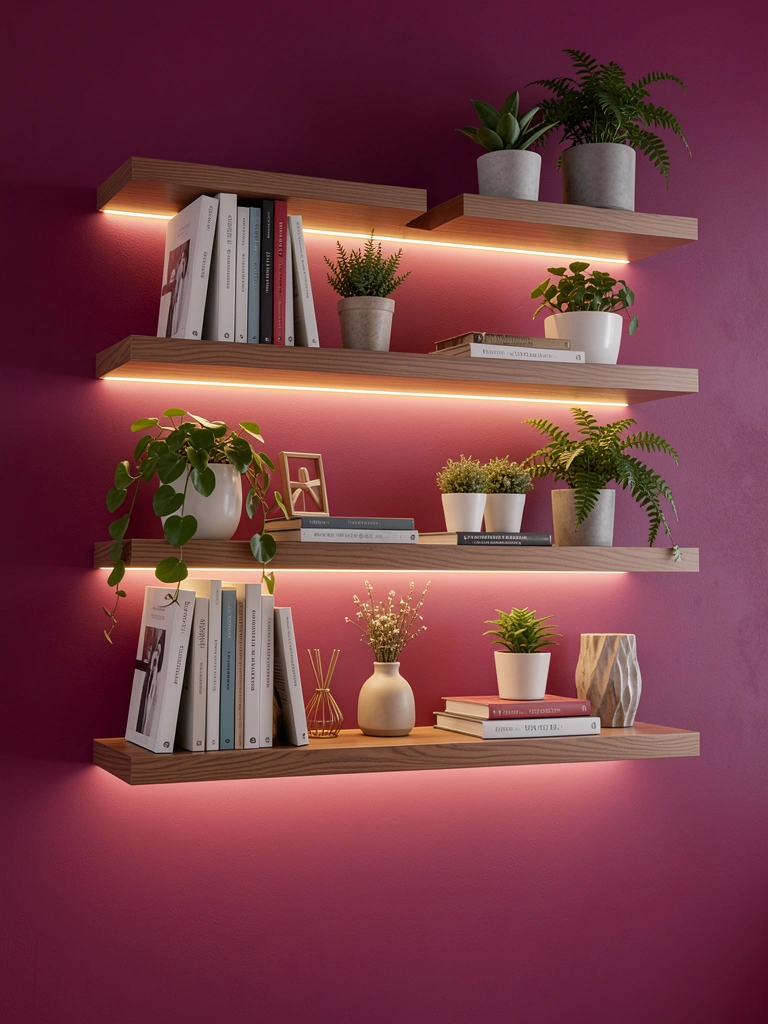
LED tape lighting is affordable, installation-friendly, and creates a modern accent that reads as intentional design. It’s perfect for renters and can highlight collections or create ambient light without taking up space.
Stick adhesive-backed LED tape ($10-$30 per roll) along the bottom edge of floating shelves using the pre-installed backing. Total project cost: $30-$80 depending on how many shelves you light. Wire the tape to a plug-in transformer, then hide the cord behind furniture or along the baseboard. Use warm white tape (2700K) to match your other fixtures.
Pro tip: Layer tape on shelves at different heights—both on the bottom of one shelf and the top of the shelf below—to create more dynamic light distribution.
Your shelves become functional art, and the wall transforms into an illuminated display that looks intentional and collected.
8. Position a Brass or Copper Swing-Arm Wall Lamp for Focused Reading
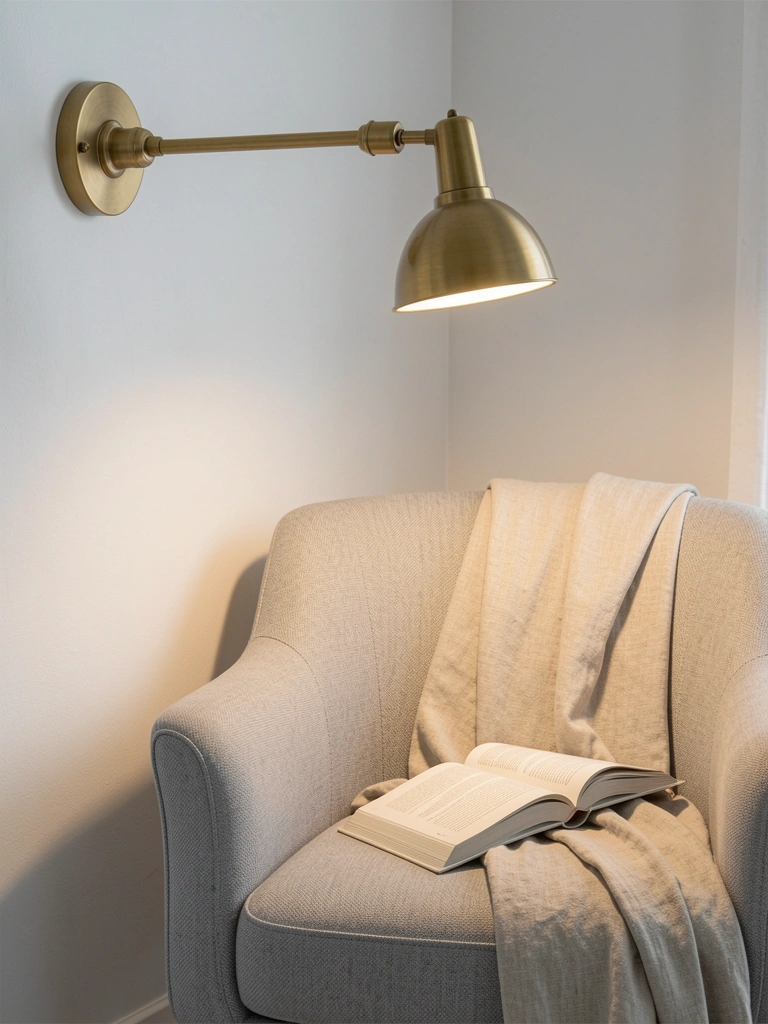
Swing-arm lamps solve the “I want to read but don’t want a floor lamp taking up space” problem while adding sculptural interest to walls. They’re especially useful in small rooms where every square inch counts.
Mount the lamp 12-18 inches above your seated shoulder height using included wall brackets. Cost ranges from $40 to $300 depending on material and brand; Rejuvenation and Apparatus offer investment pieces, while IKEA and Schoolhouse have excellent mid-range options. Use a dimmable bulb so you can adjust for ambiance or focused task light.
Pro tip: Install two swing-arms on either side of a sofa back to create balanced task lighting without needing side tables or floor lamps.
Reading becomes comfortable, and your room gains functional elegance—no clunky lamp base required.
9. Layer Multiple Small Accent Lights Instead of One Big Fixture

This is the 2025 design secret: instead of relying on one dominant fixture, use 4-6 smaller lights at different heights and distances to create depth and visual interest. It takes planning but transforms how a room feels.
Audit your current lighting and identify gaps. Add: one task light (desk or reading lamp), one accent light (picture light or uplighter), one ambient source (recessed or pendant), and one decorative fixture (table lamp or sconce). Budget $200-$600 to build a complete system, or start with one item and add monthly.
Pro tip: Put each light on its own dimmer circuit or use smart bulbs so you can adjust the scene. Warm 2700K bulbs across all fixtures create cohesion.
The room gains sophistication and flexibility—you’ll adjust lighting based on time of day, activity, and mood without feeling like you’re living in a lighting studio.
10. Install a Ceiling-Mounted Flush or Semi-Flush Fixture for Ambient Warmth
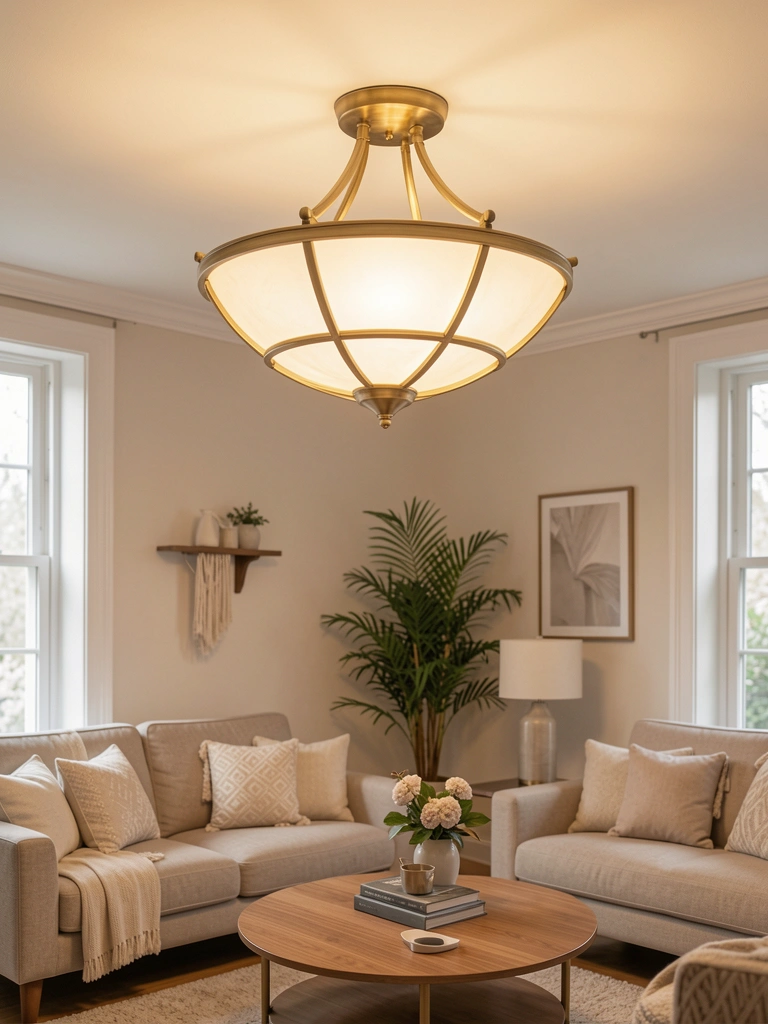
A quality semi-flush fixture does heavy lifting as your room’s primary ambient light—it needs to feel warm and refined, not clinical or dated. It’s your foundation that other lights layer onto.
Mount a semi-flush fixture in the room’s center using an electrician or following included instructions if you’re comfortable with wiring. Budget $150-$500 for a quality piece; brands like Apparatus, Cedar & Moss, and even West Elm offer beautiful options. Choose finishes that echo your overall palette (brass for warm rooms, matte black for moody spaces). Use warm LED bulbs and pair with a dimmer switch.
Pro tip: Size matters—choose a fixture 12-15 inches smaller than your room width (a 24-inch fixture for a 36-foot-wide room).
This becomes the lighting backbone of your space, setting the tone for everything else you layer on top.
11. Add a Tripod Floor Lamp for Adjustable, Sculptural Task Light
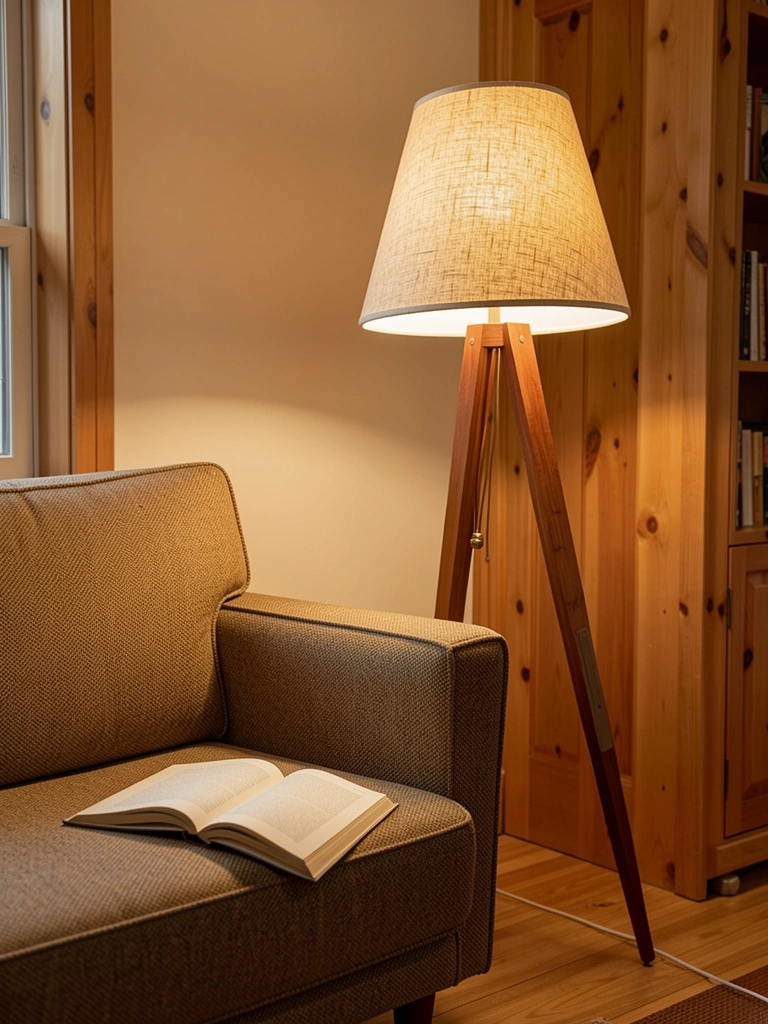
Tripod lamps hit the sweet spot between sculptural furniture and functional lighting—they’re visually interesting and practical. The adjustability means you dial light exactly where you need it.
Look for lamps with wooden or metal legs, adjustable heads, and linen or fabric shades ($80-$300). IKEA has great budget versions, while Rejuvenation and Article offer mid-range designs. Position the tripod 12-18 inches from seating and angle the shade to direct light without glare.
Pro tip: Choose colors that complement your existing palette—natural wood pairs with warm minimalism, while matte black works with jewel tones and moody schemes.
You get functional reading light that doubles as a design statement—no compromise between beautiful and practical.
12. Install Dimmable Smart Bulbs Throughout for Scene Control
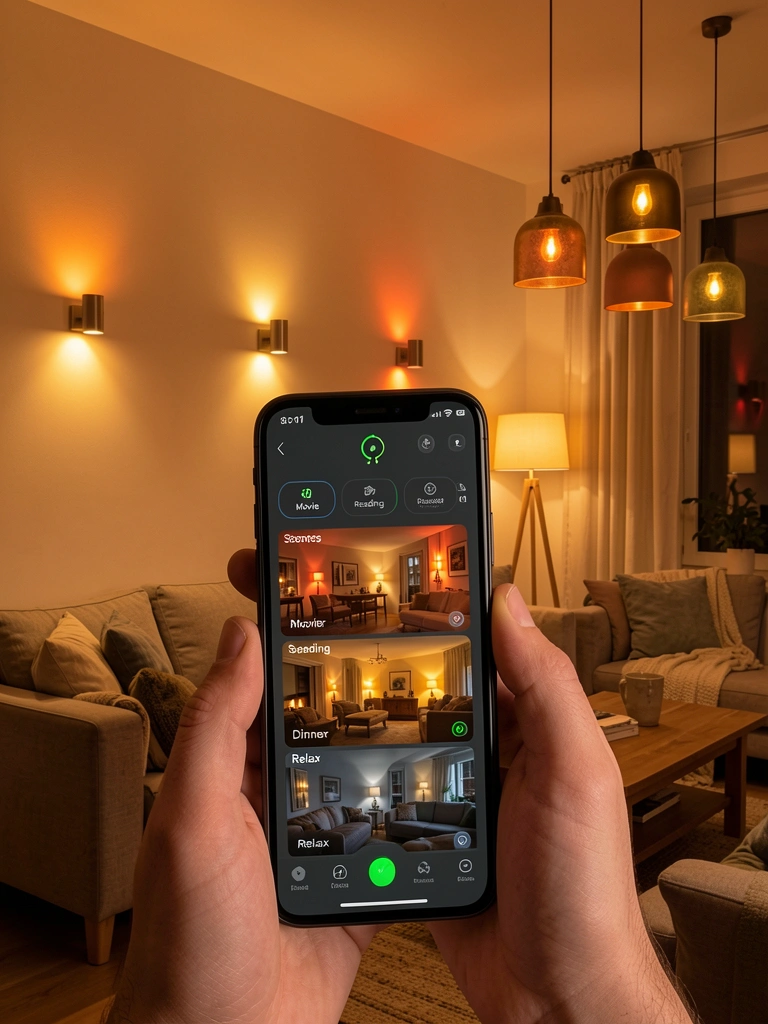
Smart bulbs let you create custom lighting “scenes” that adjust multiple fixtures at once—morning brightness for cleaning, evening warmth for relaxing, centered glow for entertaining. It’s the easiest way to build architectural lighting without rewiring your whole space.
Replace existing bulbs with dimmable smart bulbs like Philips Hue or LIFX ($15-$30 per bulb). Use them in lamps, sconces, and fixtures you already own. Download the app and create scenes: “Movie Night” dims everything to 30% at 2700K, “Dinner Party” boosts pendants while dimming uplights. Most bulbs work with Alexa or Google Home voice control too.
Pro tip: Start with 3-4 bulbs in your most-used fixtures, then add more as budget allows. Warm white (2700K) bulbs create coherence across scenes.
Your lighting becomes responsive to your needs—morning energy shifts to evening calm at the push of a button, and your room adapts to whatever you’re doing.
13. Frame Negative Space with Lighting to Define Room Zones
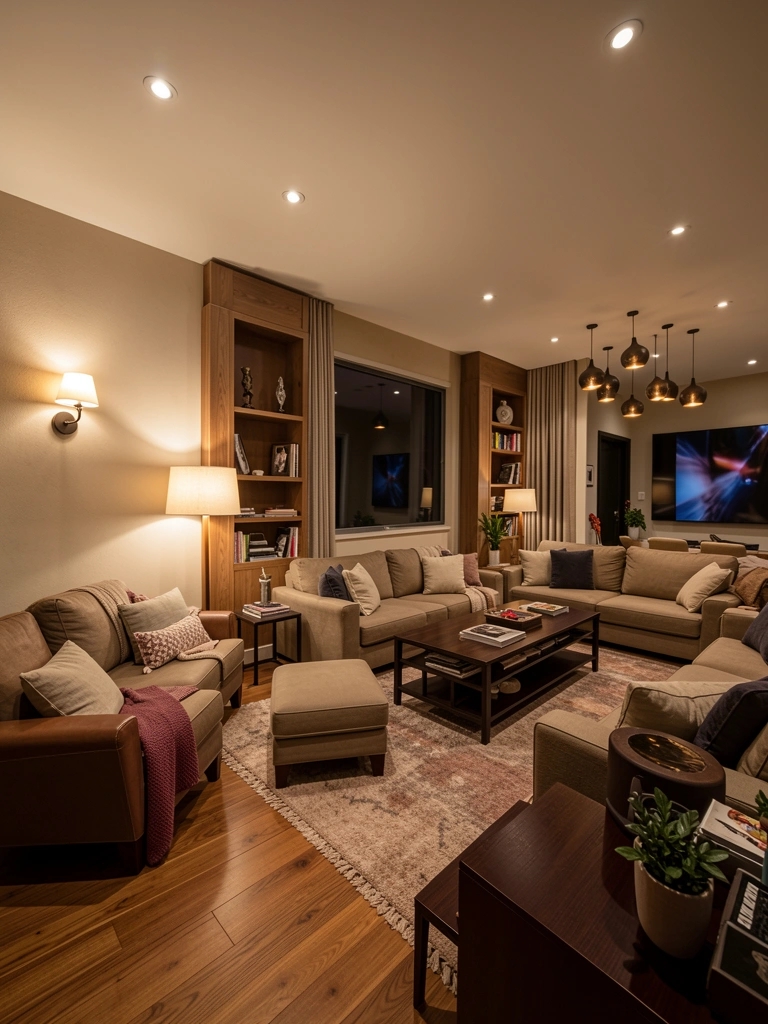
In open-plan living rooms, lighting architecture replaces physical walls—you use light to define zones and create the intimacy that open-concept can lack. It’s psychological genius: light and shadow create “rooms” within rooms.
Map your space into activity zones: reading (task light + uplighter), lounging (ambient + sconce), dining (pendant over table). Assign different fixtures to each zone and put them on separate dimmer switches or smart bulbs. Budget $400-$1,200 for complete zoning depending on room size and existing fixtures.
Pro tip: Use consistent light temperatures (all 2700K) so zones feel connected despite physical separation. Overlap light pools slightly for visual cohesion.
Your open living room suddenly feels intimate and purposeful—you’ve created multiple rooms’ worth of ambiance in one space.
14. Use Brass Pipe Fixtures for Industrial-Warm Aesthetic
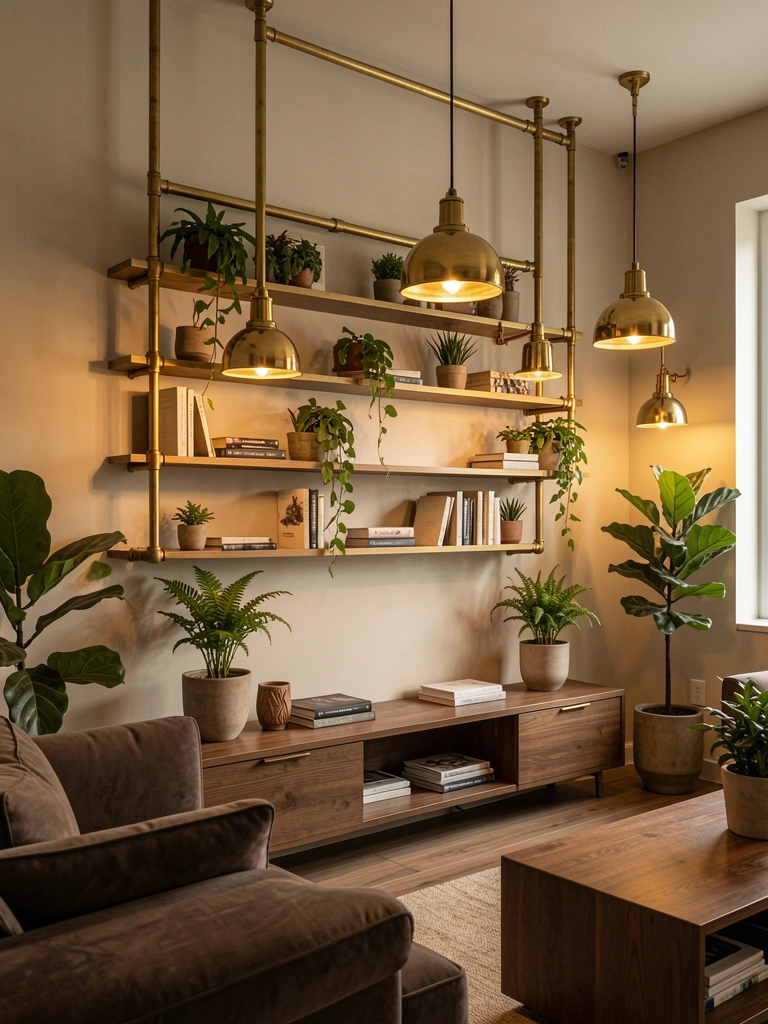
Brass pipe lighting adds warmth and architectural interest—it’s industrial without feeling cold, and it photographs beautifully. The metal catches and reflects light, multiplying your glow.
Source unlacquered brass pipes and fittings from hardware stores ($20-$50 for a DIY fixture kit), or buy premade brass pendant lights ($80-$300). If you DIY, pair pipes with standard light sockets and shades. Install using wall brackets or ceiling mounts. Choose warm white bulbs so the brass glows rather than glints.
Pro tip: Mix brass pipes with wood shelves or fabric shades for warmth. Keep lines simple—over-complicated industrial feels trendy rather than timeless.
The result feels collected and intentional, like you’ve curated lighting that actually matches your aesthetic instead of just lighting up the space.
15. Install Linear Pendant Lights Over a Long Sofa or Dining Area
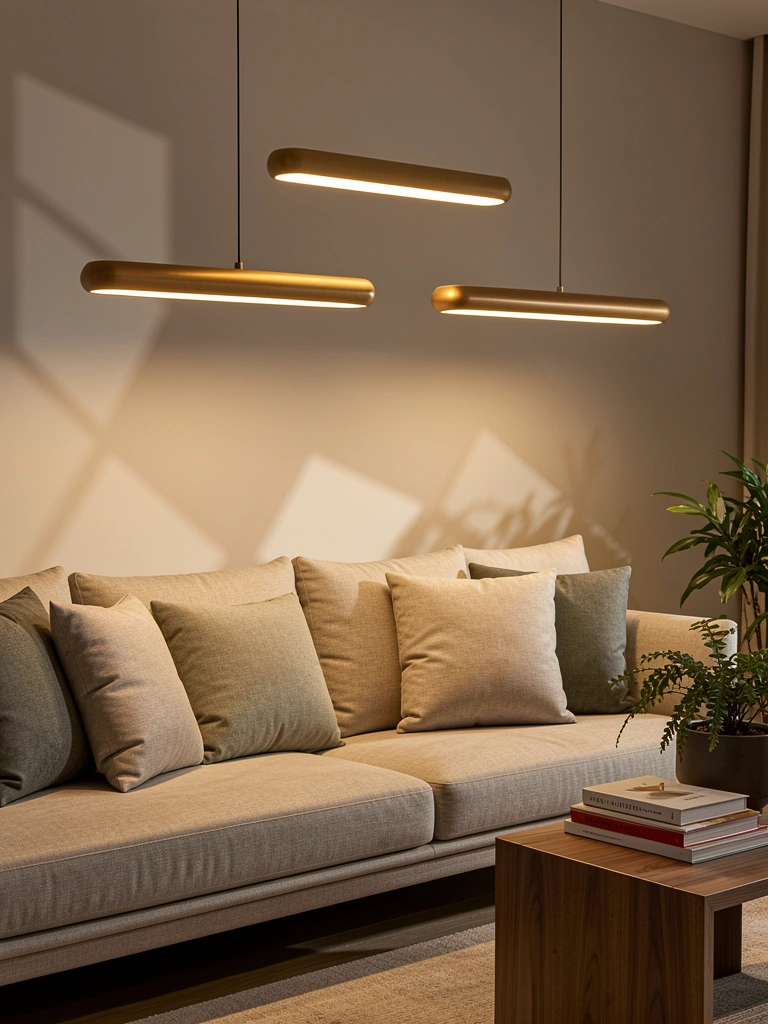
Linear pendant lights solve the challenge of lighting long furniture pieces—they spread light evenly without visual clutter, and they look architectural rather than decorative.
Mount linear pendants 24-36 inches above your seating or table surface, spaced 24-36 inches apart depending on fixture length. Expect $150-$500 per pendant; brands like Tom Dixon, Schoolhouse Electric, and even IKEA offer beautiful options. Use warm white dimmable bulbs and pair with an architectural dimmer for ultimate flexibility.
Pro tip: Choose minimalist designs in finishes that echo your room’s palette—matte black, warm brass, or natural wood.
Long seating areas suddenly feel architecturally designed—lighting follows the furniture’s lines, creating a cohesive, gallery-like effect.
16. Layer Light at Different Heights: Ceiling, Eye Level, and Low
The architectural lighting trick: light at ceiling height (recessed, pendants), eye level (sconces, swing-arms), and low height (table lamps, uplights) creates dimension that single-source lighting can never achieve. It’s what makes hotel lobbies feel expensive.
Audit your room and identify gaps in each height tier. Ceiling: recessed lights or statement fixture. Eye level: sconces, picture lights. Low: table lamps, uplighters, or accent lights. Budget $300-$1,000 to build a complete three-tier system, or start with one fixture per tier and add over time.
Pro tip: Vary brightness at each level—ceiling might be 40%, eye level 60%, low 50%—so light feels dynamic rather than flat.
Your room gains sophisticated depth—light seems to come from everywhere, creating ambiance that feels natural and intentional rather than over-lit or harsh.
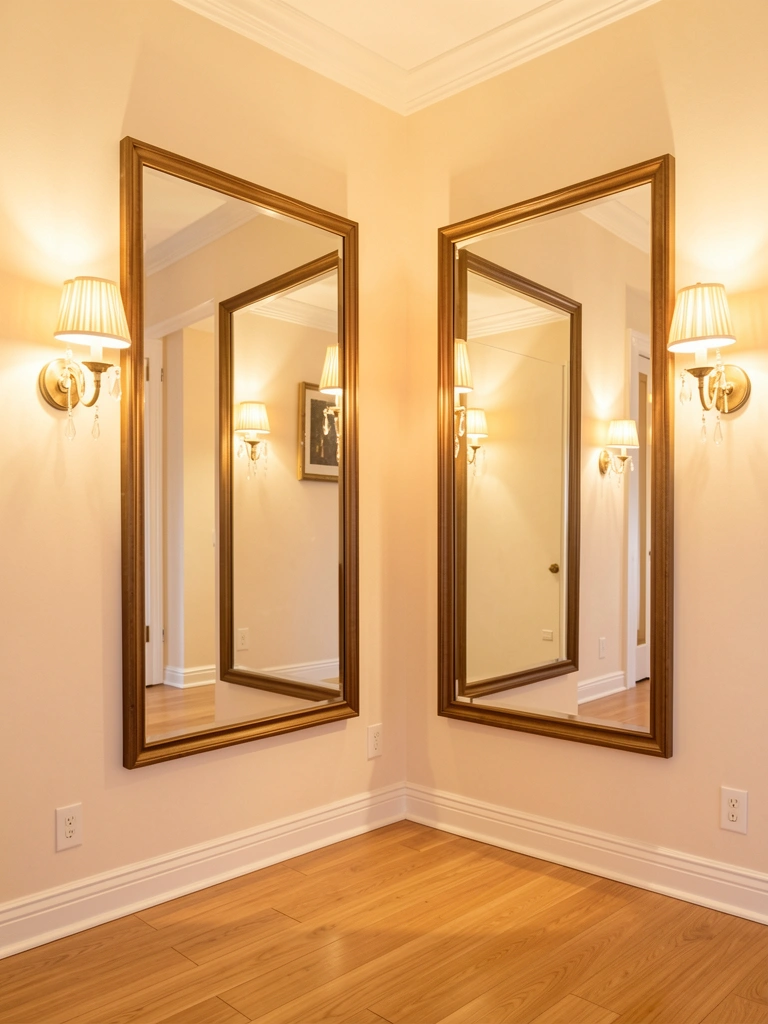
17. Position Lamps to Create Symmetry and Visual Calm
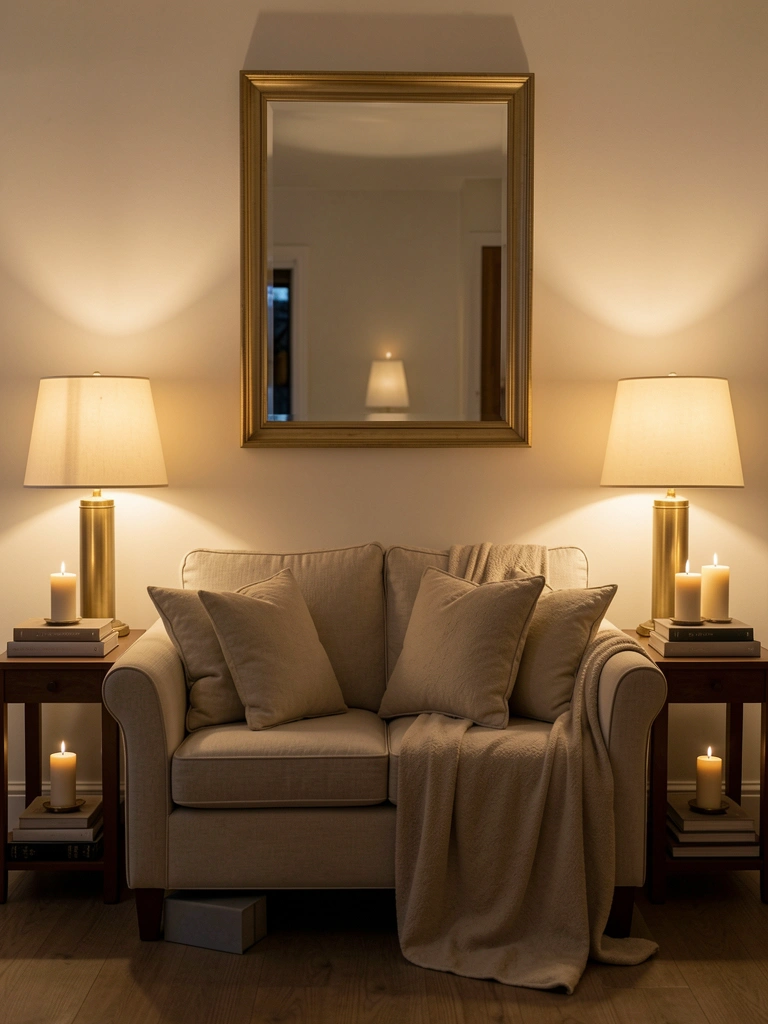
Symmetry in lighting creates psychological calm—two matching sconces, two table lamps, or paired pendants feel ordered and refined. It’s foundational to luxury design and works in small and large spaces.
Place matching lamps or sconces on either side of a focal point: sofa, mirror, bed, or entry. Buy two identical fixtures ($80-$400 depending on quality) and mount or place them 4-6 feet apart. Use the same bulb wattage and color temperature in both so light output feels balanced.
Pro tip: Symmetry works even in small spaces—two tiny battery-powered sconces flanking a bedroom mirror cost $60-$100 total and feel high-end.
The room looks intentional and calm—symmetry is inherently soothing, and your eyes rest on a balanced composition rather than searching for visual logic.
18. Add Candles and Ambient Accents to Soften Architectural Light
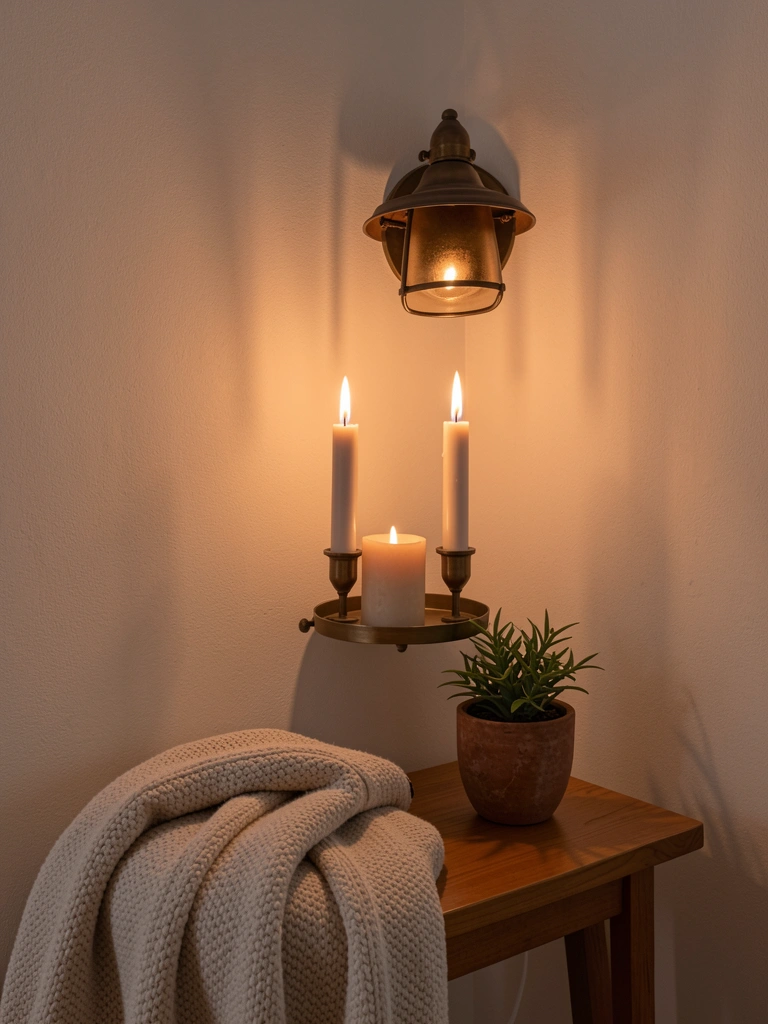
Architectural lighting is the foundation, but soft accents like candles add warmth that pure electric light can’t match. Candlelight creates movement and softness that photographs beautifully and feels luxurious.
Keep unscented pillar or jar candles on side tables, mantels, or consoles. Budget $3-$20 per quality candle (Diptyque for luxury, Target for everyday). Light them during evening hours to layer warmth on top of your designed lighting scheme. Group three candles in varying heights for visual interest.
Pro tip: Use flameless candles with real wax and amber LED for the same ambiance with zero fire risk (especially in rentals with strict policies).
Your space gains a sensory dimension—the flicker and scent of candles combined with architectural light create an experience that feels intentional and refined, not just lit.
19. Install Recessed Lights with Adjustable Trim for Precise Control
Adjustable trim recessed lights let you point light exactly where you need it—toward artwork, away from screens, across seating. It’s architectural precision without complexity.
Work with an electrician to install recessed fixtures with adjustable gimbal trim ($20-$50 per trim) instead of standard fixed trims. This lets you aim each light independently after installation. Use warm white LED bulbs and put the circuit on a dimmer.
Pro tip: Angle half your recessed lights toward walls for ambient wash, and angle others toward seating or art for functional light. Adjust angles as your decor changes.
You get precision lighting that adapts to your space’s actual needs—no more wishing light was angled differently or shining on your TV screen.
20. Create a Feature Wall with Wallpaper That Reflects and Glows
This is a design trick that works especially well with architectural lighting: a textured or subtly reflective feature wall bounces and multiplies light, making your room feel brighter and more dimensional without adding fixtures.
Choose wallpaper with subtle sheen, metallic thread, or texture (grasscloth, linen look, damask) rather than flat finishes. Cost $20-$50 per roll; most rooms need 2-5 rolls depending on wall size. Install on one accent wall and light it with sconces or pendants positioned to graze the surface.
Pro tip: Pair with warm light (2700K) so the texture glows rather than glints. Flat wallpaper won’t have the same reflective effect.
Your feature wall becomes a secondary light source—it glows and shimmers, creating depth and warmth that makes the whole room feel larger and more sophisticated.
21. Use Warm-Toned Linen or Fabric Shades to Diffuse Light Softly
Lamp shades aren’t just decorative—they completely change how light feels. Warm linen or fabric shades diffuse harsh bulbs into soft, flattering glow that feels refined and intentional.
Choose linen, cotton, or linen-blend shades in cream, taupe, or warm white ($20-$100 depending on size and quality). Avoid white plastic or translucent shades, which feel cheap and spread light too harshly. Pair with dimmable bulbs so you control warmth and intensity.
Pro tip: Slightly thicker fabrics diffuse light better than thin ones. Hold the shade up to a light source in the store—you should see the bulb shape softly, not sharply.
Your lighting becomes instantly more refined—harsh bulb light transforms into a warm, flattering glow that makes the whole room (and you) look better.
22. Install Track Lighting with Warm Adjustable Heads for Flexibility
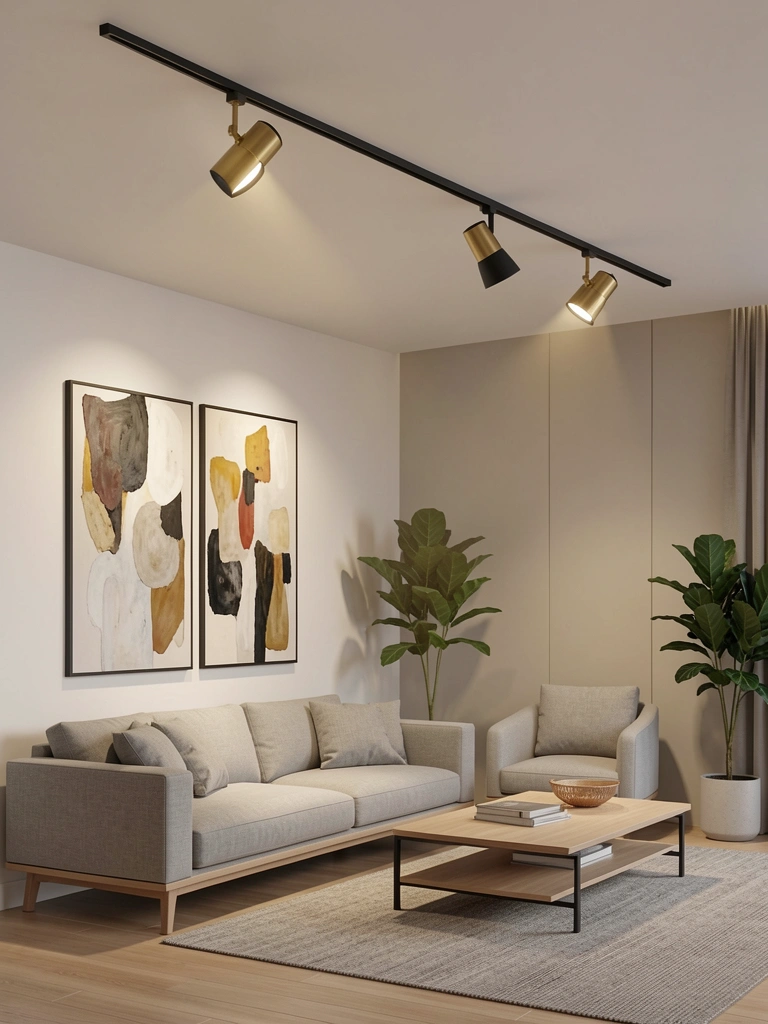
Track lighting gives you flexibility and architectural interest—you can adjust light direction as your room evolves, and it looks intentional rather than temporary.
Install a track system ($100-$400 for materials and labor) with warm-toned adjustable heads. Use warm white dimmable bulbs and angle heads toward art, seating, or walls depending on your needs. Minimalist tracks with 2-3 heads feel more refined than 5-head systems that read as studio lighting.
Pro tip: Choose matte black or brass finishes in tracks and heads so the system feels designed rather than industrial. Position tracks parallel to walls or architectural lines for visual logic.
Your space gains flexibility—you can adjust light as seasons change, decor evolves, or you discover which areas need more illumination.
23. Layer Mirrors to Multiply and Amplify Your Lighting Effects
Mirrors aren’t just decor—they multiply your lighting effectiveness. Positioned strategically across from light sources, mirrors bounce and spread warmth throughout the room.
Hang mirrors across from bright windows during the day to bounce natural light, and across from sconces or lamps at night to amplify electric light. Mirrors cost $30-$300 depending on size and frame material. Position at angles that reflect light into darker corners or across seating areas.
Pro tip: Choose frames that echo your lighting fixtures—brass mirrors with brass sconces, wood-framed mirrors with natural wood lamps. Consistency creates cohesion.
Your room feels brighter and more open—mirrors multiply your lighting’s effectiveness, making the space feel larger and more luxurious without adding fixtures.
24. Create Cove Lighting by Installing LED Strips in Architectural Details

Cove lighting (indirect light along ceiling or architectural details) creates the most sophisticated ambient light—it feels architectural and intentional, not like an afterthought.
Install warm LED strip lighting ($15-$30 per roll) along crown molding, ceiling coves, or wall-to-ceiling details using adhesive backing. Wire to a plug-in transformer hidden behind furniture. Total cost: $40-$100 depending on room perimeter and strips needed. Use 2700K warm white for cohesion.
Pro tip: Cove lighting works best when ceilings are light-colored so light bounces gently rather than getting absorbed. Pair with other fixtures for a complete system.
You achieve hotel-lobby-level sophistication—light seems to emanate from the architecture itself, creating ambiance that feels both intentional and invisible.
25. Mix Metals for Warmth: Brass, Copper, and Gold Tones
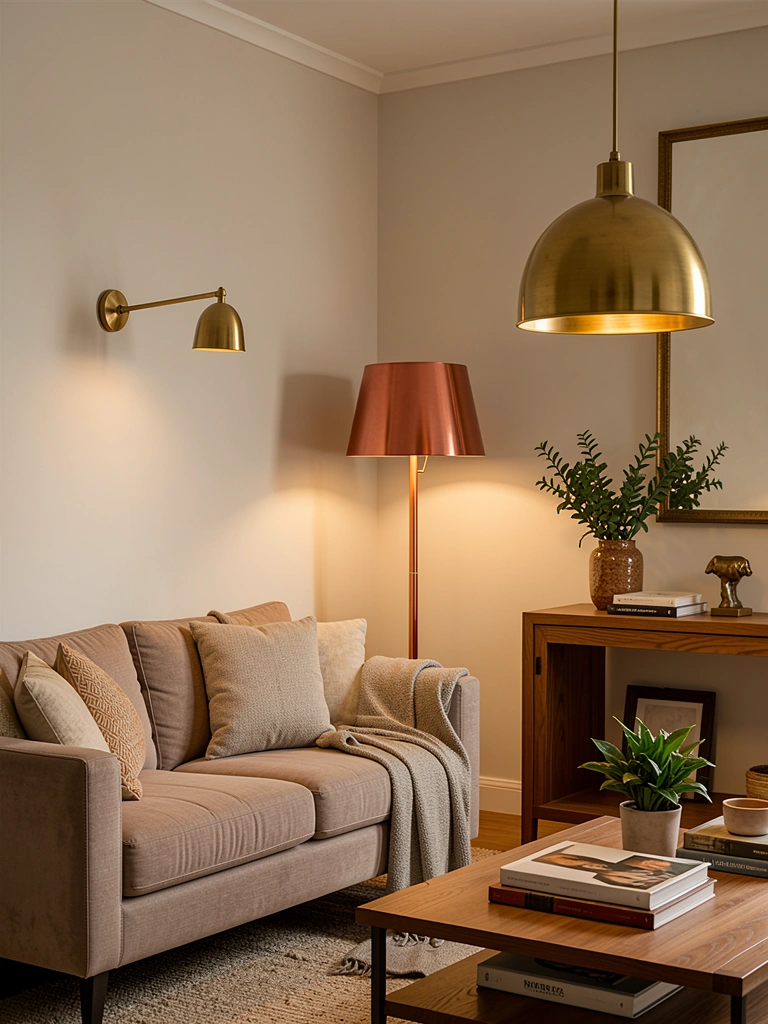
Mixing warm metals (brass, copper, warm gold) creates richness and visual interest—it’s the opposite of cold “everything must match” design. Warm metals catch light differently and multiply your glow.
Combine brass sconces with a copper floor lamp and gold pendant lights across your space. Budget $100-$600 depending on how many fixtures you’re mixing. The key is ensuring all metals have warm undertones (avoid silver or chrome, which read as cold).
Pro tip: Mix metal finishes but keep them in the same warm family. Brushed brass, polished brass, and oil-rubbed brass all work together. Avoid mixing with cool metals like chrome or stainless steel.
Your room feels collected and intentional—like you’ve curated pieces over time rather than buying an entire lighting set that came in matching boxes.
26. Install a Dimmer Switch in Every Room for Total Control
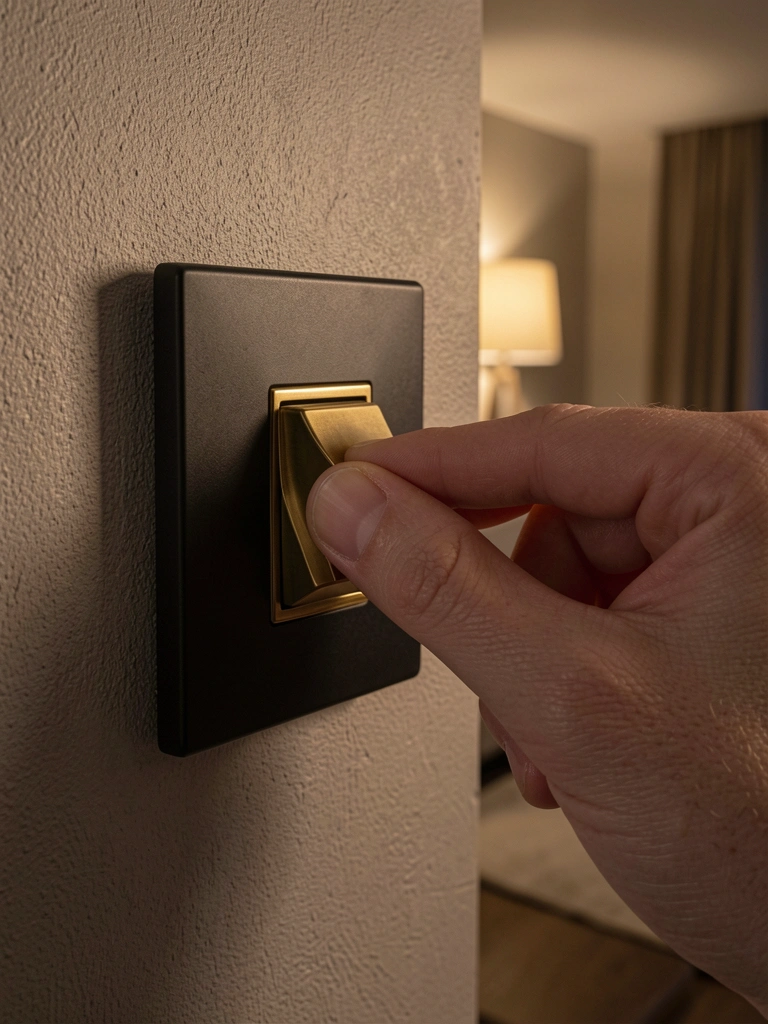
This is the simplest architectural change with the biggest impact: putting every fixture (or at least every major one) on a dimmer switch. It gives you complete control over how your room feels at any time.
Have an electrician install dimmer switches in place of standard switches ($20-$50 per switch plus installation). Make sure your bulbs are dimmer-compatible (most modern LEDs are, but check before buying). Total cost: $80-$200 for 3-4 rooms depending on your electrician’s rates.
Pro tip: Pair dimmers with smart bulbs and an app for scene control (Movie, Reading, Dinner, Relax) that adjusts multiple fixtures at once. You get total flexibility with minimal switching.
Control becomes your superpower—you adjust light moment to moment, and your room transforms from energizing morning space to cozy evening retreat without any structural changes.
27. Build Your System Gradually: Start with One Fixture and Layer Over Time
You don’t need to install everything at once—start with one strategic fixture and build your lighting architecture over months or years. This approach spreads cost and lets you test what actually works before committing.
Month 1: Install one statement floor lamp or wall sconce ($80-$300). Month 2: Add a dimmer switch to existing fixtures ($50 total). Month 3: Install one pendant or recessed fixture ($150-$400). Month 4-6: Add sconces, task lights, or accent lighting as budget allows. Total flexibility: spend $300 year one, $500 year two, or accelerate based on budget.
Pro tip: Start in your most-used room so you experience how light layers change your daily life. That motivation often leads to smarter decisions about what you add next.
Your lighting system evolves with your space and life—you’re never stuck with something that doesn’t work, and you build something genuinely yours rather than imposing someone else’s design.
Save this post for your next living room refresh. Pick one idea that speaks to your space and try it this month—even one layered light source makes a bigger difference than you’d expect.
Leave a Reply