Laundry rooms don’t have to be chaotic catch-alls. Whether you’re drowning in laundry piles, struggling with a tiny space, or just tired of clutter spilling everywhere, the right storage strategy changes everything. You don’t need a complete renovation to feel in control—small, smart tweaks turn a messy room into one that actually works for you. Here, we’ve gathered 27 built-in storage ideas that work for renters, homeowners, and everyone in between. Mix and match these solutions to create a laundry space that makes folding less painful and finding clean clothes way easier.
1. Stack Your Washer and Dryer Vertically
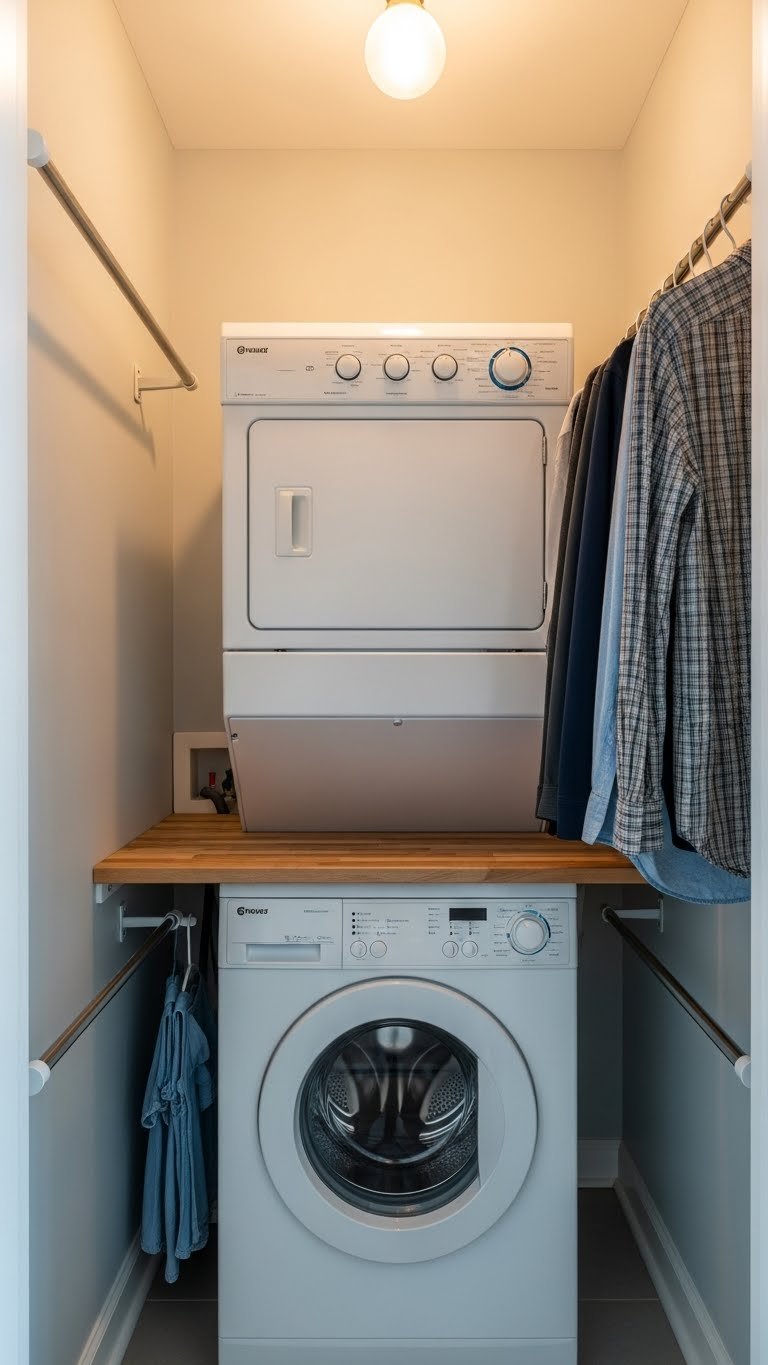
Stacking your machines frees up precious floor space for storage, folding tables, or even a small shelving unit. This move is especially valuable in apartments or small rooms where horizontal space is at a premium.
To stack, you’ll need a stacking kit ($30-$60) from your machine’s manufacturer or a universal adapter from Home Depot or Amazon. Installation takes about 30 minutes if you’re comfortable moving heavy appliances—otherwise, hire a pro for $100-$150. Make sure your ceiling height allows at least 6 inches clearance above the dryer for venting and access.
Pro tip: Position your stacked unit in a corner to leave the rest of the wall open for cabinets, shelves, or a utility sink.
You’ll instantly reclaim 20+ square feet of floor real estate. That space becomes your buffer zone for everything else you need in this hardworking room.
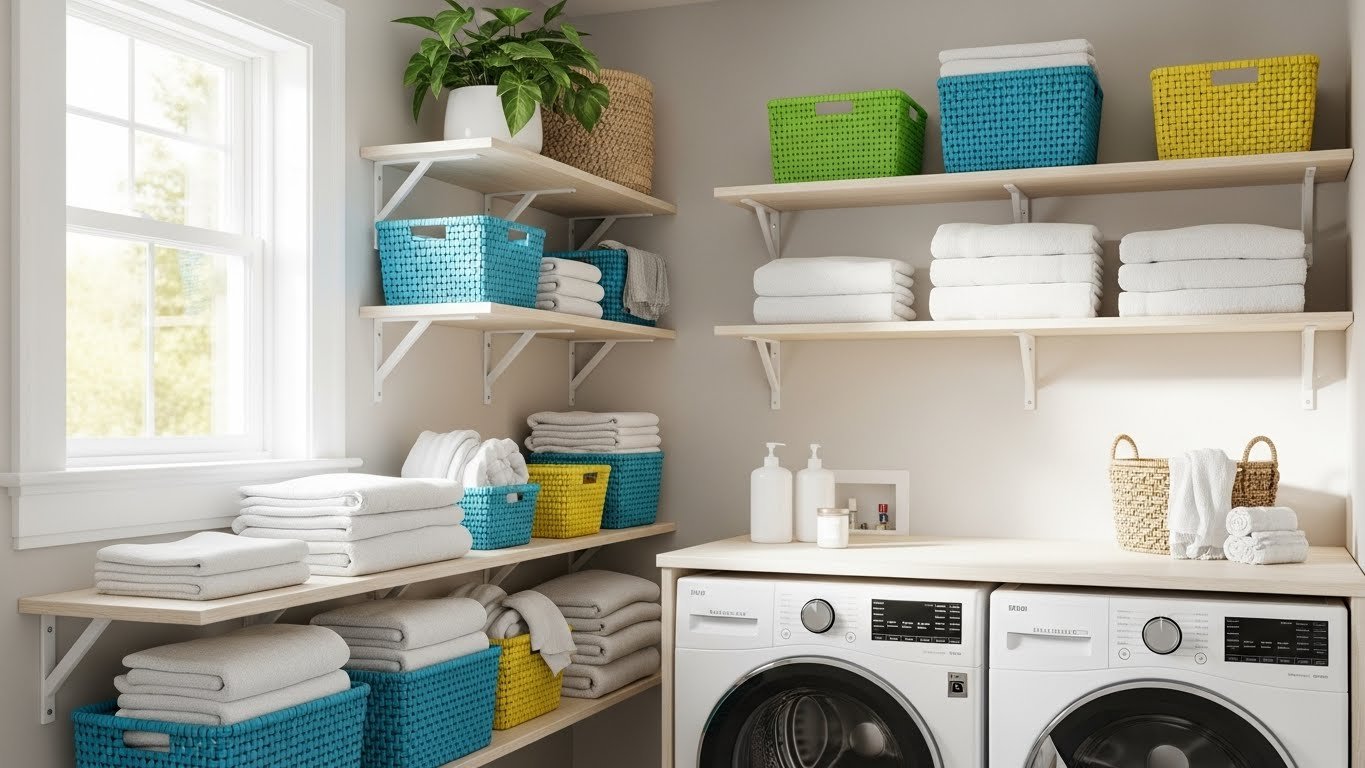
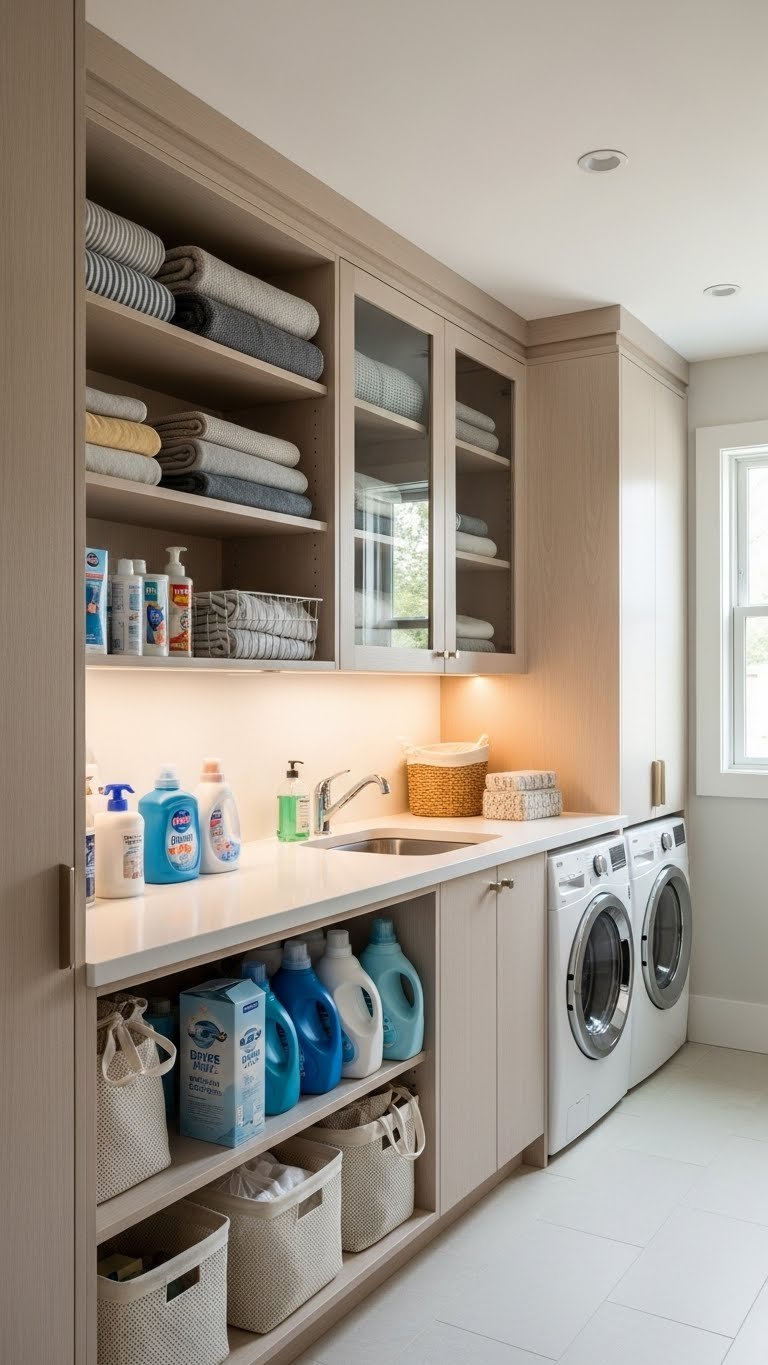
2. Install Floating Shelves Above Your Machines
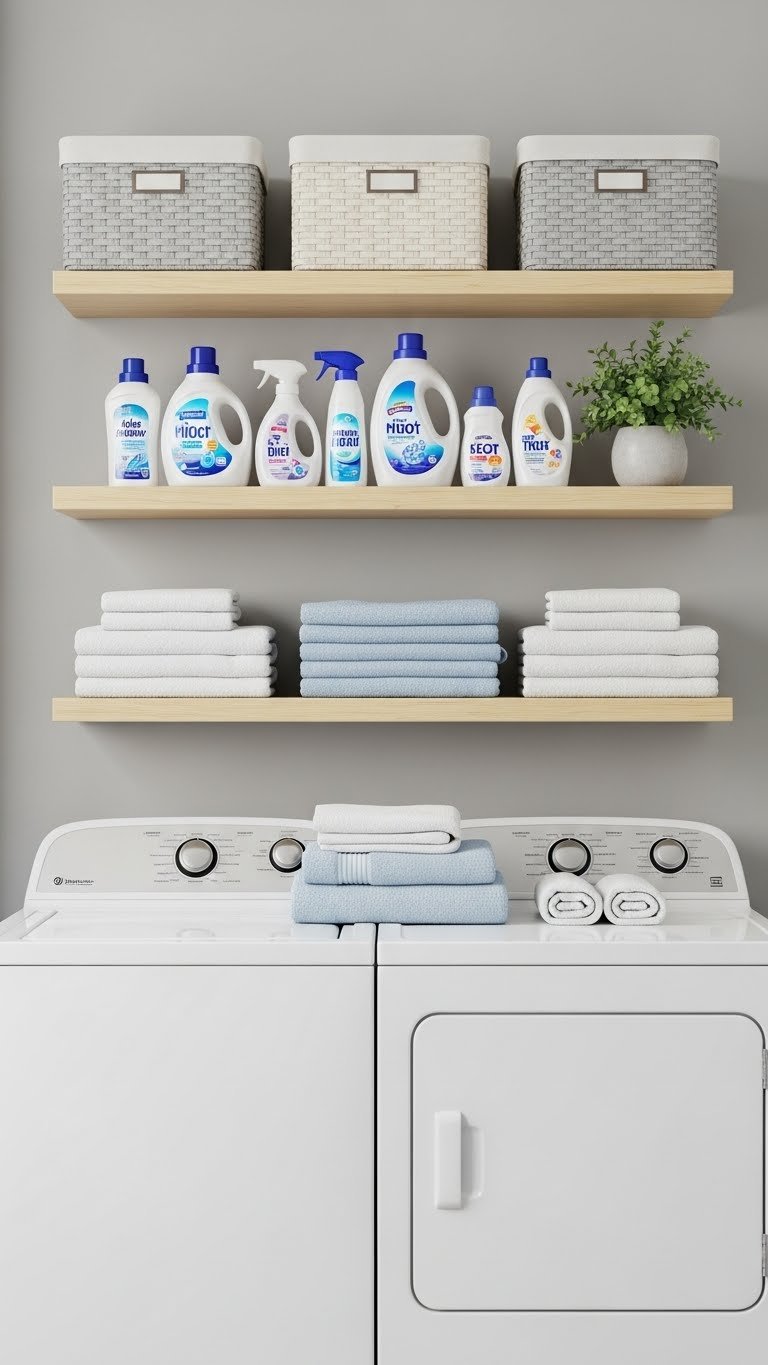
Floating shelves use vertical real estate that usually goes to waste. They’re perfect for storing detergent bottles, fabric softener, bleach, lint rollers, and those odd items that never have a home.
Install shelves 12-18 inches apart using heavy-duty wall anchors (if renting) or studs (if you own). A basic floating shelf kit runs $25-$80 per shelf from IKEA, Target, or Wayfair. Mounting takes 45 minutes to an hour with a drill. Add label makers or washi tape labels to keep everything identifiable and tidy.
Stack like items together—all stain removers on one shelf, all fabric care on another—so you know exactly where to grab what you need.
This turns dead wall space into functional storage without taking up counter room. Your detergent and tools are visible and reachable, which means you’ll actually use them.
3. Add Pull-Out Hamper Drawers Under Counters
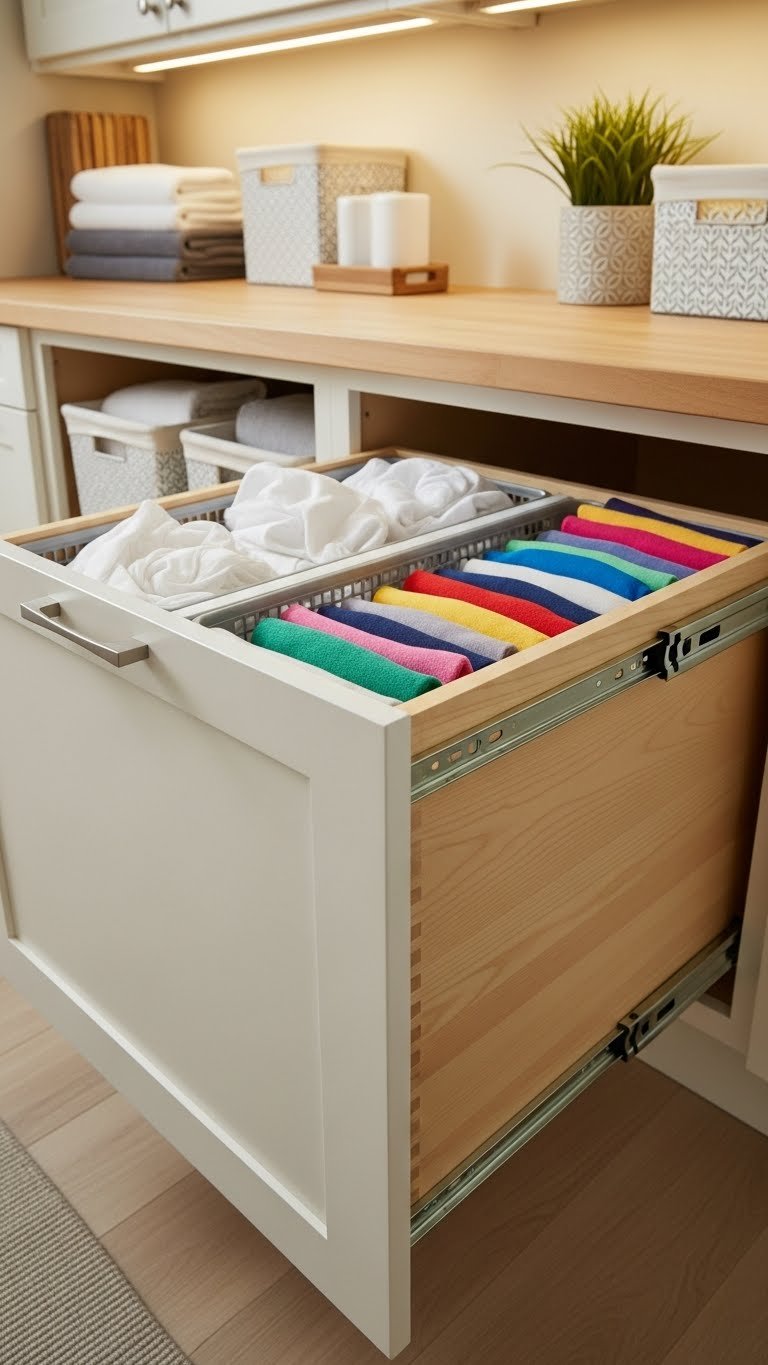
Pull-out hamper drawers hide dirty laundry while keeping it sorted by color or fabric type. They’re one of the most underrated space-savers because they hide chaos completely until laundry day.
Install a pull-out hamper system ($80-$200) under an existing counter or fold-out table. Brands like Rev-A-Shelf or Rubbermaid make quality kits that include mesh or fabric liners. Mounting requires basic tools and takes about 2 hours. For renters, freestanding rolling hamper units ($40-$100) give you the same benefit without installation.
Label each drawer or liner for whites, colors, and delicates so everyone in your household knows where to sort.
Dirty clothes disappear from view, and your laundry room looks put-together instead of like a dumping ground. The sorting bonus means wash day runs smoother too.
4. Use Door-Mounted Organizers for Cleaning Supplies

The back of your laundry room door is free real estate most people ignore. A simple over-the-door organizer transforms it into a dedicated spot for supplies without taking up wall or counter space.
Grab an over-the-door shoe organizer ($15-$35) from Target or Amazon—fabric pockets work great for bottles and smaller items. Hang it with the included hooks in 5 minutes. If you rent or want to avoid holes, use damage-free adhesive strips or hanging hooks instead.
Group similar items: stain removers in one column, detergents in another, lint rollers and dryer sheets in a third.
Everything you need is visible and within arm’s reach. No more digging through cabinets or forgetting you bought that specialty fabric cleaner.
5. Build a Custom Folding Counter With Hidden Storage Below
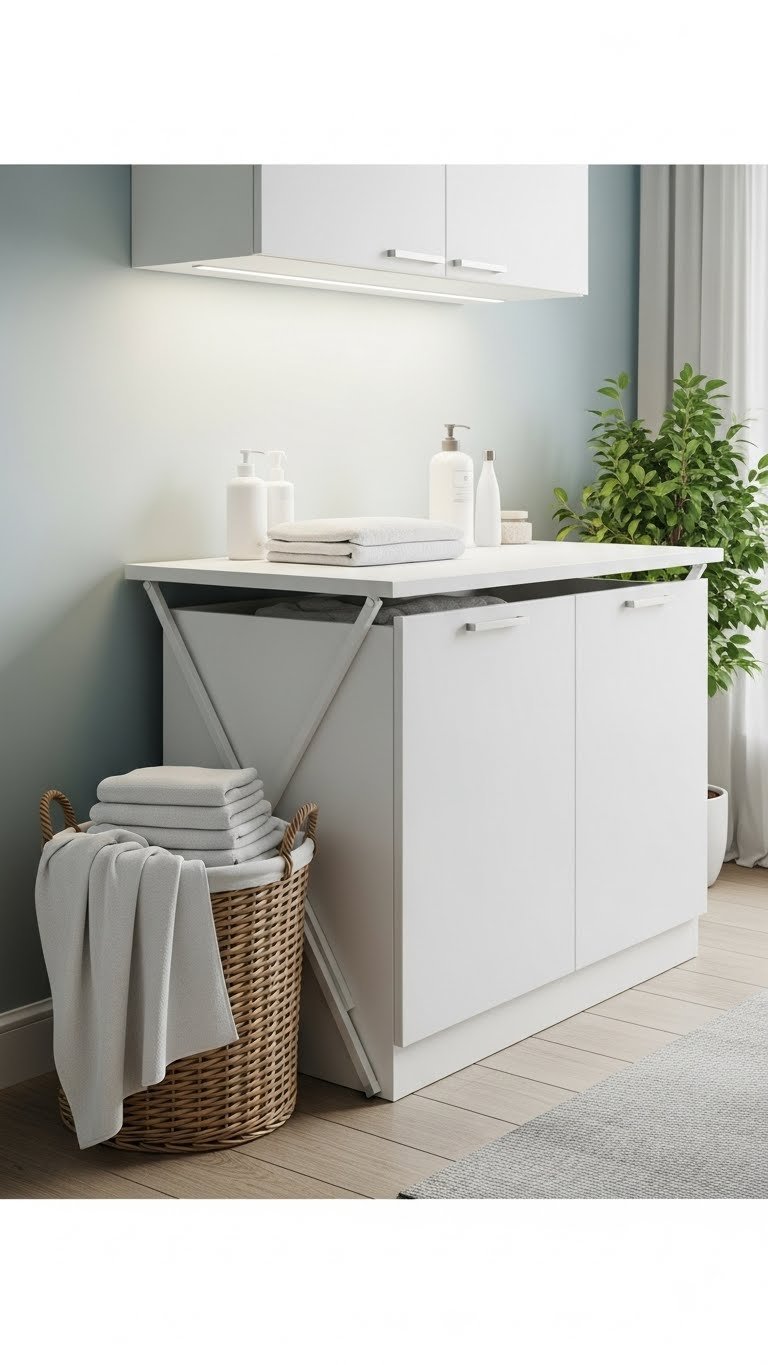
A dedicated folding surface saves your back and creates a command center for laundry management. When you add storage underneath, you hide baskets, sorting bins, and supplies while keeping everything within reach.
Build or buy a folding table ($120-$400) with a cabinet base. IKEA sells sturdy options around $150-$250, or opt for custom carpentry if you own your home ($300-$800). Mount it securely to the wall so it doesn’t wobble under the weight of wet clothes. Make sure the surface is at least 24-36 inches wide and positioned at a comfortable height for folding (usually 36-40 inches from the floor).
Store rolling baskets or pull-out hampers underneath for sorted clean laundry categories.
Folding stops being a painful chore when your setup is ergonomic. Plus, that counter becomes your visual anchor—the organized, functional heart of the room.
6. Mount Drying Rods on Side Walls
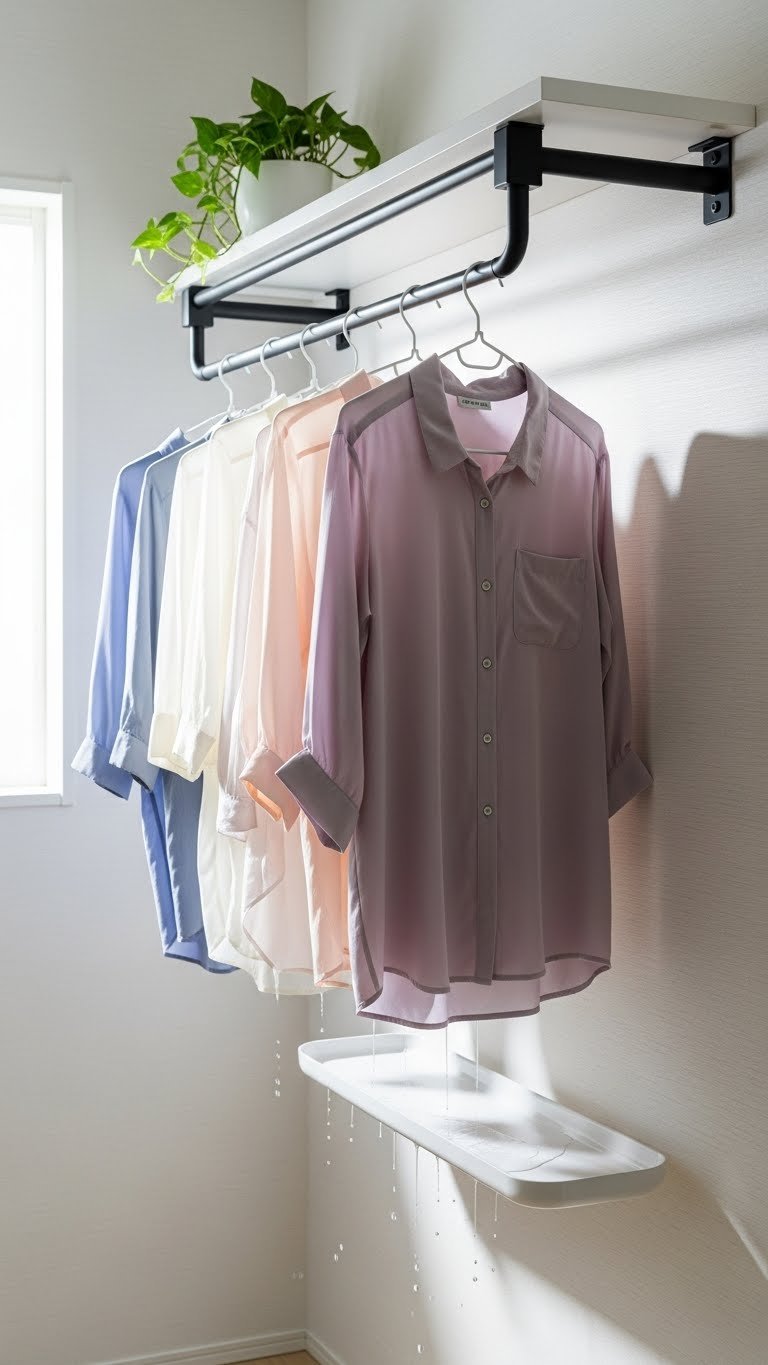
Wall-mounted drying rods save valuable floor and counter space while keeping delicates, dress shirts, and lightweight items off the dryer. They prevent wrinkles and extend the life of clothes that need gentle care.
Install a heavy-duty drying rod ($25-$60) between wall studs using a sturdy mount kit from Home Depot. If walls aren’t an option, use a tension rod inside a corner. This 20-minute job requires a drill and basic hardware. Renter-friendly: some tension rods don’t require drilling and work between any walls.
Hang items immediately after washing to prevent wrinkles and free up your dryer for heavier loads.
You’ll dry more clothes simultaneously, which speeds up laundry day. Plus, your clothes last longer when they’re not tumbled constantly.
7. Install Drawer Dividers for Sorted Socks and Delicates
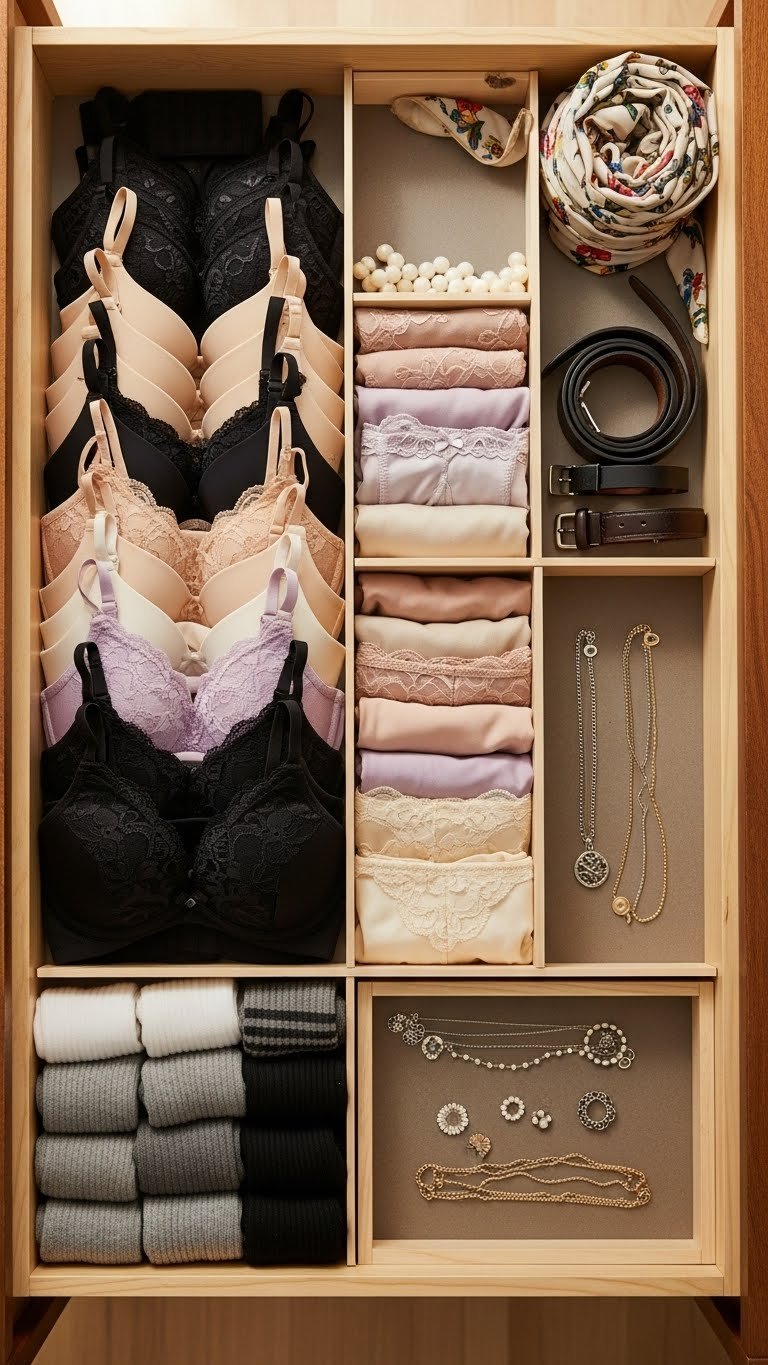
A shallow drawer near your folding station keeps small items sorted and easy to locate. No more hunting for matching socks or wondering where that one bra disappeared to.
Add a drawer divider kit ($15-$40) to an existing cabinet or create one with fabric bins ($20-$50). Adjust dividers to create sections for each item type. Setup takes 15-30 minutes with no tools needed if you use adjustable dividers.
Label each section with a small tag so family members know where to put things back.
Getting dressed is faster when socks and intimates are organized in one place. Your folding station feels less cluttered, and you’re not hunting through piles for basics.
8. Add Pegboard Wall for Hooks and Custom Storage
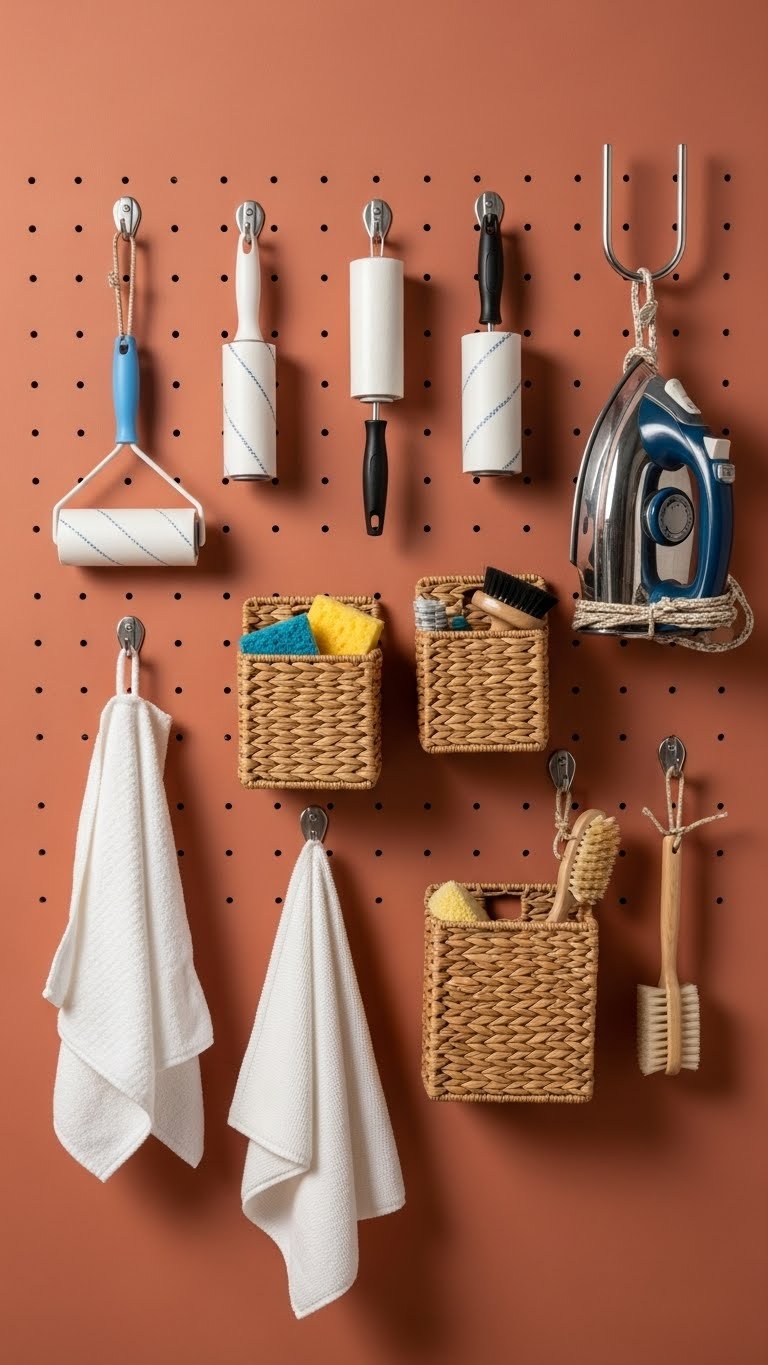
Pegboard is endlessly customizable and works for renters if you use damage-free mounting. You can rearrange hooks anytime your storage needs change, making it perfect for evolving households.
Install pegboard ($20-$40 per sheet) with lightweight hooks ($0.50-$2 each) from Home Depot or Lowe’s. Use adhesive strips if you rent, or screws for permanent mounting. The whole setup takes about 2 hours. Paint the pegboard before installing to match your decor ($15-$30 for paint).
Start with 4-5 essential hooks and add more as you discover what you need to hang: cleaning cloths, lint rollers, ironing board, spray bottles, and baskets.
Your supplies are visible and within reach, and the pegboard becomes a design feature instead of just a storage necessity. You can swap items around whenever you feel like refreshing the look.
9. Use Ceiling-Height Cabinets for Long-Term Storage
Tall cabinets maximize every inch of vertical space, storing off-season quilts, extra linens, and backup supplies without eating into valuable floor or counter area. This is a game-changer for small rooms.
Invest in ready-to-assemble cabinetry ($400-$1,000+) from brands like Closet Factory, Elfa, or IKEA Sektion. Hire a pro installer for $200-$500 if you’re not comfortable DIY-ing. For renters, freestanding tall shelving units ($150-$400) give similar storage without permanent changes.
Use clear bins on upper shelves so you can see contents without opening. Label everything. Rotate seasonal items twice a year.
You’ll be shocked how much stuff fits when you use the ceiling. Your everyday working space stays clear because bulk storage is up and out of the way.
10. Create a Sorting Station With Labeled Bins
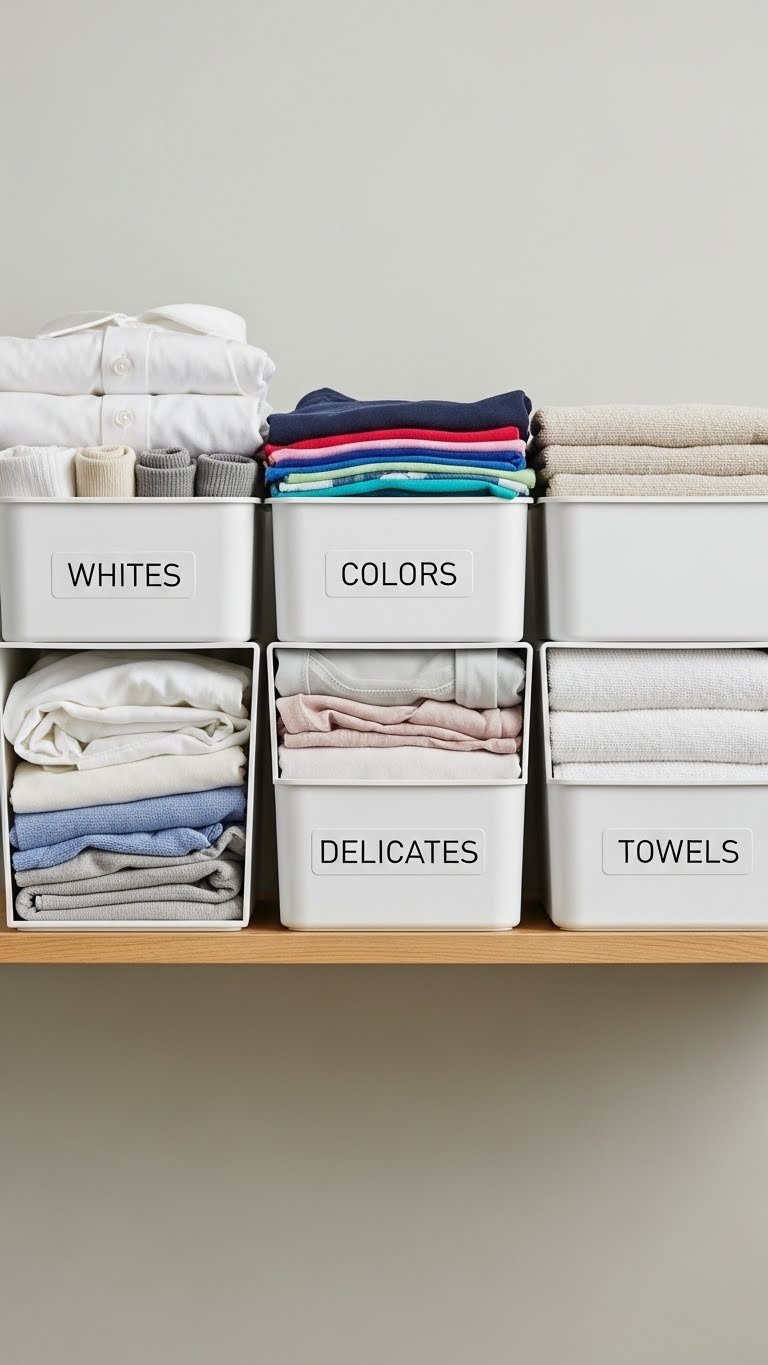
A visible sorting system makes it obvious where clean laundry goes and trains household members to put things away correctly. Everyone benefits when the system is simple and clearly labeled.
Buy stackable storage bins ($10-$25 each) from Target, IKEA, or Container Store. Grab a label maker ($15-$30) to make crisp, readable labels. Total setup: 30 minutes and under $100 for a four-bin system.
Color-code bins by person or by item type—whatever works for your household. Towels, sheets, and clothes get their own sections.
Laundry actually makes it back to closets instead of piling on the dresser or bed. Everyone knows their stuff will be in the right place, sorted and ready to grab.
11. Install a Utility Sink for Pre-Treating Stains
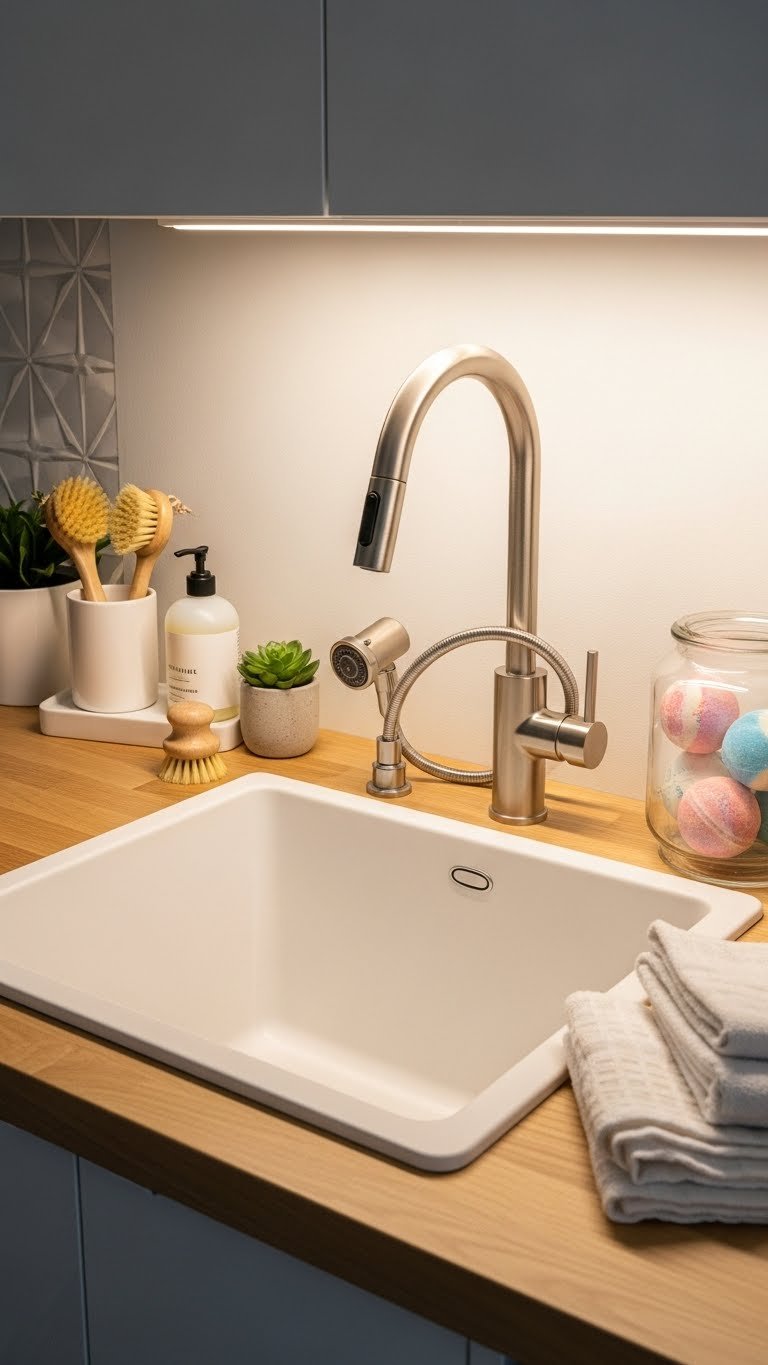
A utility sink lets you pre-treat stains, rinse delicates, and wash dirty pet paws without moving to the kitchen. It’s a game-changing upgrade if you have space.
A basic utility sink with faucet costs $150-$300 installed or $80-$150 for a DIY install if you have basic plumbing access. Home Depot and Wayfair have ready-made units. For renters, a freestanding basin ($40-$80) with a pitcher works for spot-treating without plumbing work.
Keep a small brush, white vinegar, and oxygen bleach nearby for quick stain-fighting sessions before clothes hit the washer.
Stains come out better when treated immediately, and you’ll save money on dry cleaning or replacing ruined clothes. The convenience alone makes this a worthwhile upgrade.
12. Hang Lightweight Shelving on Rental-Friendly Strips

Adhesive mounting strips let you create built-in-style storage without landlord drama. They’re strong enough for lightweight items and leave no holes when removed.
Use heavy-duty adhesive strips ($15-$30 for a pack) with lightweight metal or plastic shelves ($30-$60 each). Surfaces must be clean and dry. Installation takes 20 minutes and no tools. Weight limit is usually 5-10 pounds per shelf, so stick to lighter items.
Use these shelves for rolled towels, baskets with socks, or small bottles of detergent—not heavy books or stacked canned goods.
You get a custom look without risking your security deposit. When you move, the strips peel off cleanly.
13. Build a Rolling Cart for Under-Counter Storage
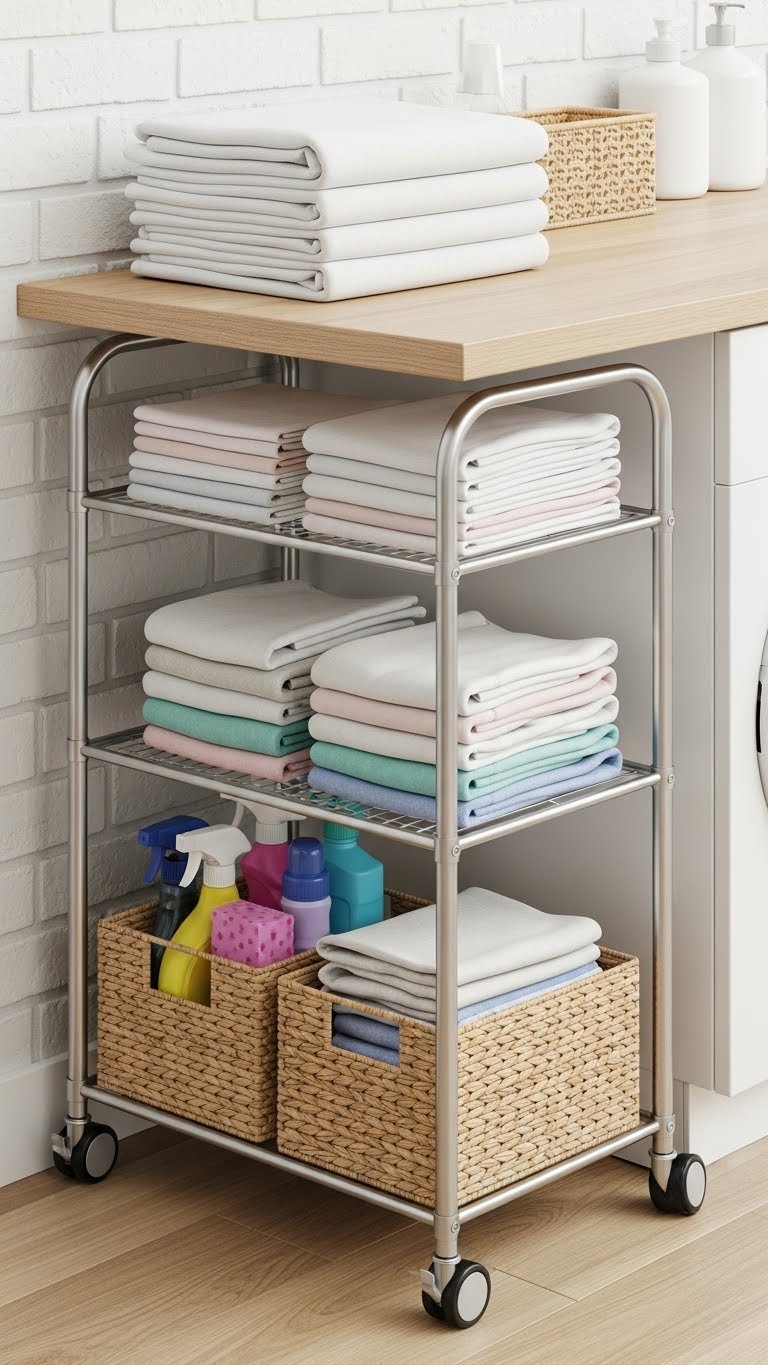
A rolling cart slides into tight spaces and moves whenever you need to clean or rearrange. It’s the perfect flexible storage for renters or anyone who likes the ability to reconfigure their space.
Pick a slim 3-tier rolling cart ($40-$80) from Target, Bed Bath & Beyond, or Amazon. No installation needed—just unbox and fill. Most carts fit in 12-18 inch gaps between appliances or walls.
Stock each tier by category: cleaning supplies on top, folded items in the middle, empty baskets on the bottom for collecting dirty laundry.
You can pull the cart out for easy access or push it fully against the wall when you need floor space. It’s mobility without commitment.
14. Add Hooks to the Sides of Your Washer and Dryer
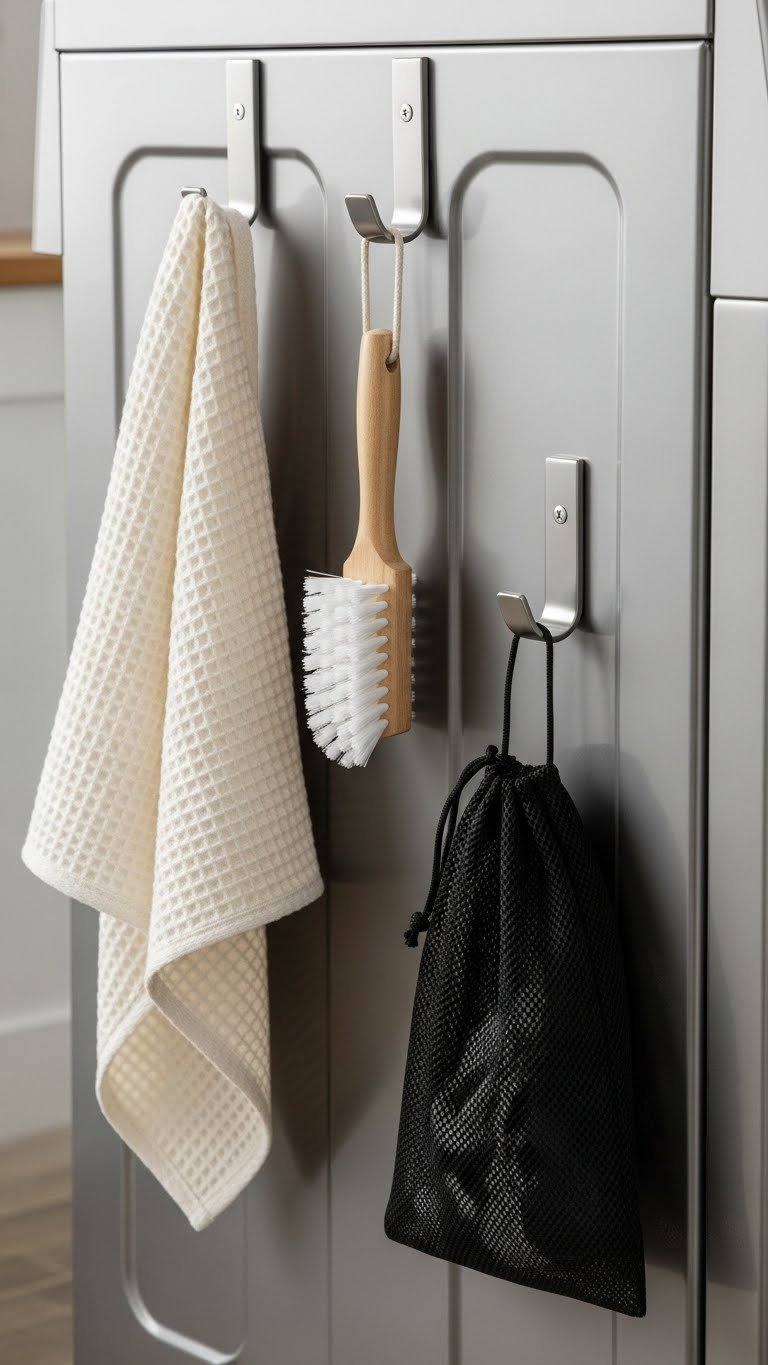
Hooks on the machine frames are prime real estate that usually goes unused. This is one of the easiest, cheapest ways to organize small items.
Install heavy-duty adhesive hooks ($0.50-$2 each) or screw-mounted hooks ($1-$3 each) on the machine sides using mounting hardware from the manufacturer. Takes 15 minutes total. Adhesive works best on smooth stainless steel; drill holes in painted surfaces for permanent hooks.
Hang your lint roller, mesh delicates bag, cleaning cloth, and spray bottle directly on the machines.
These items are right where you need them, and you’re not searching through drawers. It’s a tiny fix that solves a nagging problem.
15. Create Wall-Mounted Charging Station for Devices
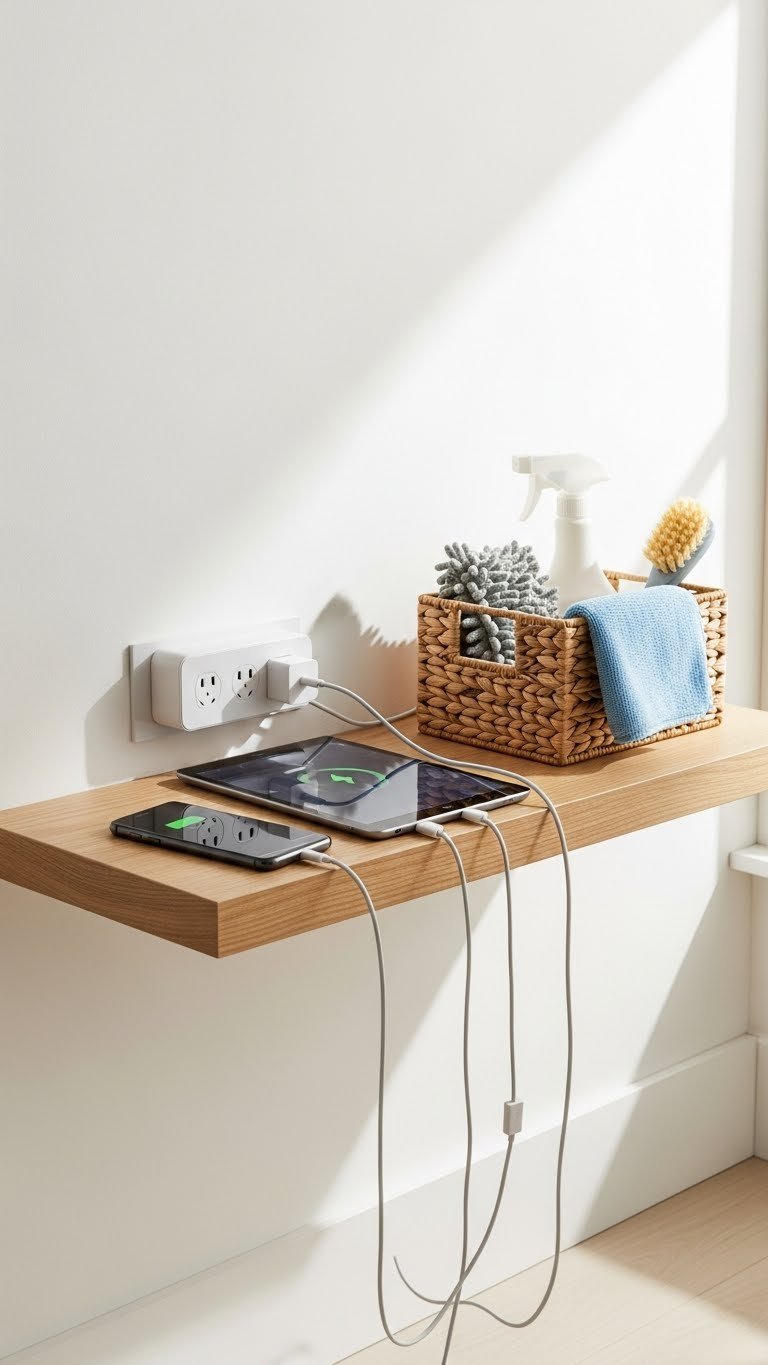
If your laundry room has an outlet, create a simple charging station so you can listen to podcasts, music, or watch videos while folding. It makes the chore way more enjoyable.
Mount a slim shelf ($20-$40) at a comfortable height above a nearby outlet, then add a flat power strip ($15-$25) behind or below it. Cable management sleeves ($10-$15) hide the cord clutter. Total setup: 30 minutes and around $60.
Charge your phone, tablet, or wireless earbuds while you fold. Add a small waterproof speaker ($30-$60) if that motivates you.
Suddenly, laundry time becomes me-time with entertainment. You’ll get through pile-folding faster when you’re not bored.
16. Use Vacuum Storage Bags for Off-Season Linens

Vacuum-sealed bags compress seasonal bedding down to a fraction of its original size, freeing up cabinet space for items you use year-round.
Buy a set of vacuum storage bags ($15-$30 for 5-6 bags) from Target, Walmart, or Amazon. A basic handheld or small pump ($20-$40) makes sealing easier than sucking air out manually. Setup takes about an hour to seal everything, then label bags with a permanent marker.
Stack sealed bags on the highest shelves or in storage closets once sealed. They’re weatherproof and space-efficient.
You’ll get 50-60% more storage capacity from the same cabinet space. Off-season linens stay dust-free and protected until you need them again.
17. Mount a Slim Ironing Board to the Wall

An ironing board that folds flat against the wall keeps this bulky item off the floor but accessible when you need it. This is perfect for small laundry spaces where floor real estate is gold.
Install a wall-mounted ironing board ($40-$80) from Wayfair or Home Depot, mounted to wall studs for maximum stability. Installation takes about 45 minutes with basic tools. For renters, a slim tabletop ironing board ($30-$50) stores vertically in a corner or behind a door.
Keep your iron on a small shelf nearby so it’s ready to use without hunting.
The ironing board stops being an eyesore taking up corner space. You fold it down when needed, flip it up when done.
18. Organize Cleaning Supplies in a Caddy Cart
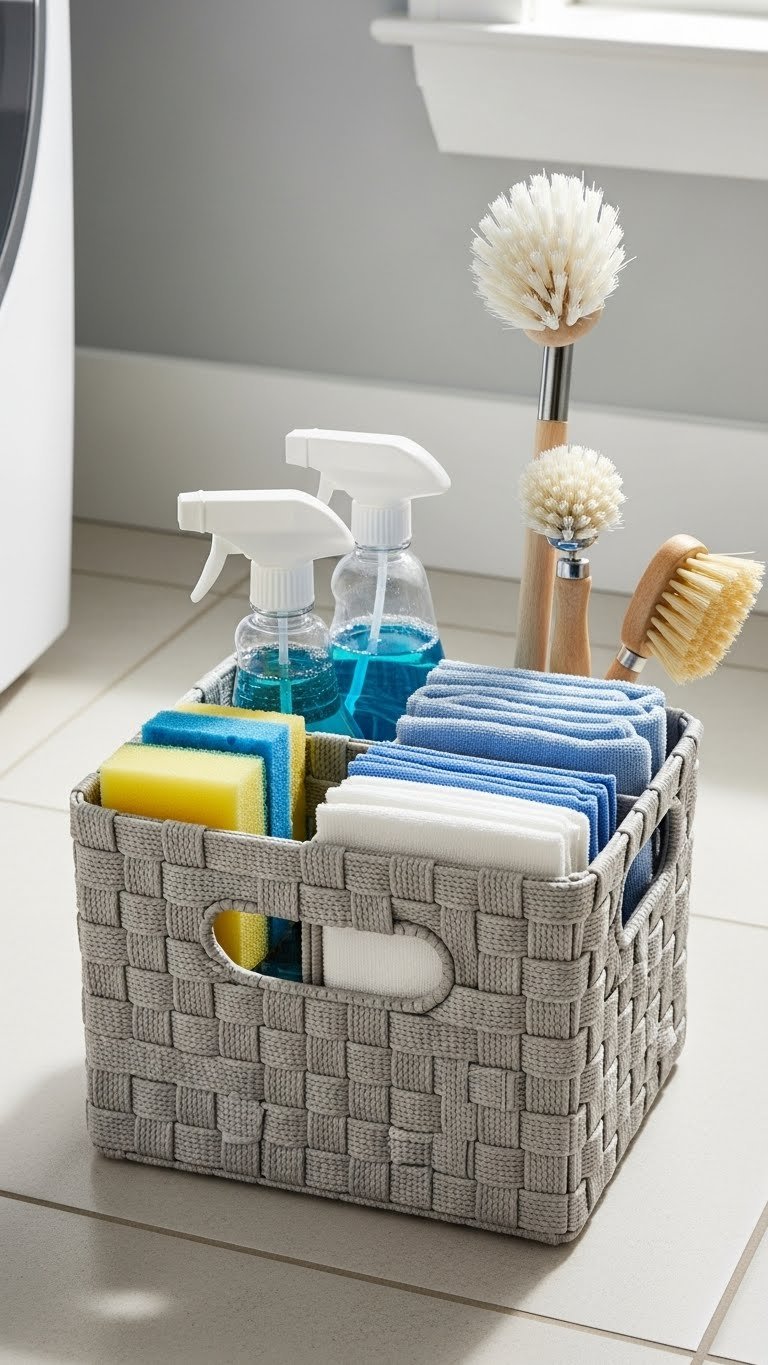
A dedicated caddy keeps all your cleaning supplies together so you can grab everything at once when it’s time to wipe down machines or clean the space itself.
Pick a compact caddy ($15-$30) with handles and divided sections from Target, Dollar Tree, or Amazon. Or DIY with a plastic utility basket and dividers. Just drop supplies in and carry the whole thing. Setup: instant.
Stock it with microfiber cloths, sprays, small brushes, and lint traps so you’re never searching for what you need mid-clean.
Cleaning the laundry room takes 10 minutes instead of 30 because everything’s in one place. You’re more likely to wipe down machines regularly when it’s this easy.
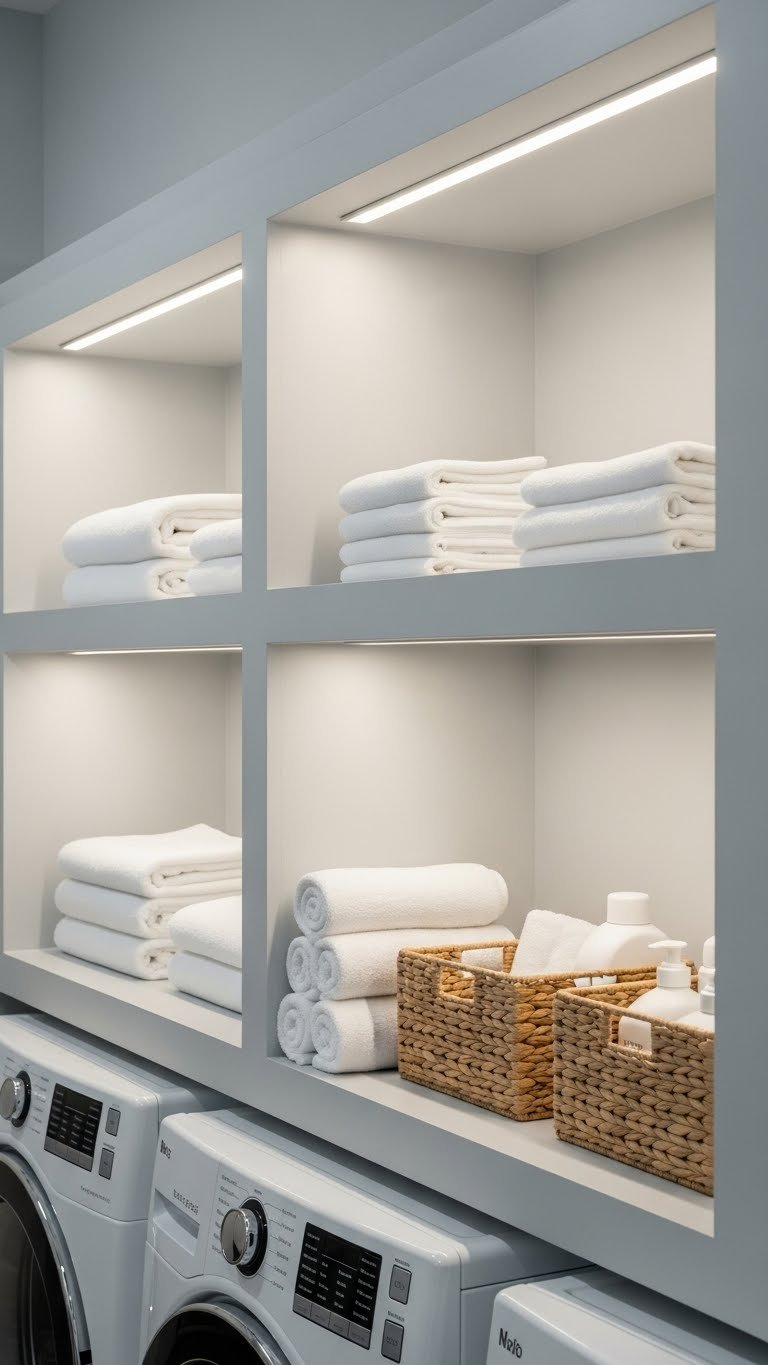
19. Add Interior Lighting Inside Glass Cabinet Doors
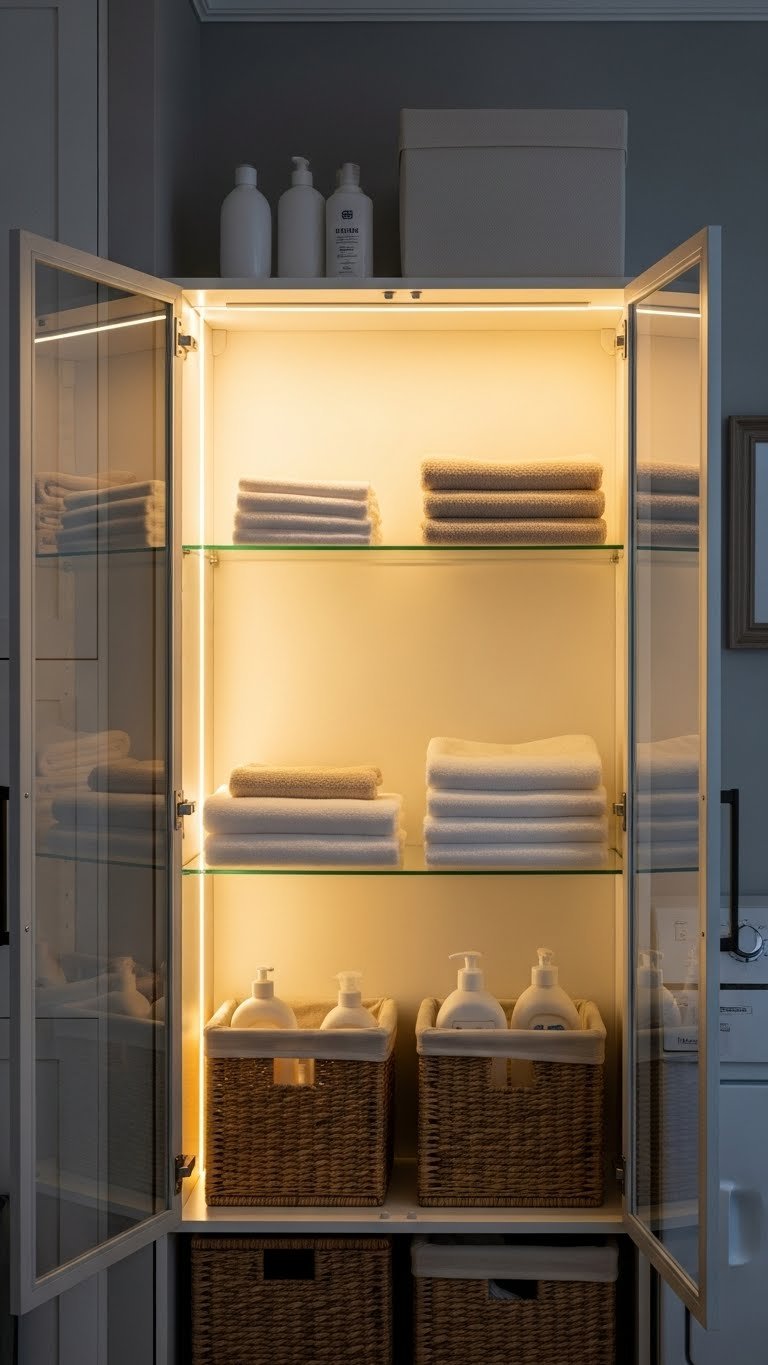
Interior cabinet lighting transforms ordinary storage into a display. It also helps you find what you need without opening doors, saving time.
Install battery-powered LED strip lights ($15-$25) or corded puck lights ($20-$40) inside glass cabinet doors. No wiring needed with battery versions. Adhesive mounting takes 10 minutes total.
Use warm white bulbs (2700K) for a spa-like feel, or bright white (4000K) for task-focused lighting.
Your organized linens become a visual feature instead of hidden clutter. The lighting also improves functionality by reducing shadows inside cabinets.
20. Create Labeled Zones for Each Household Member
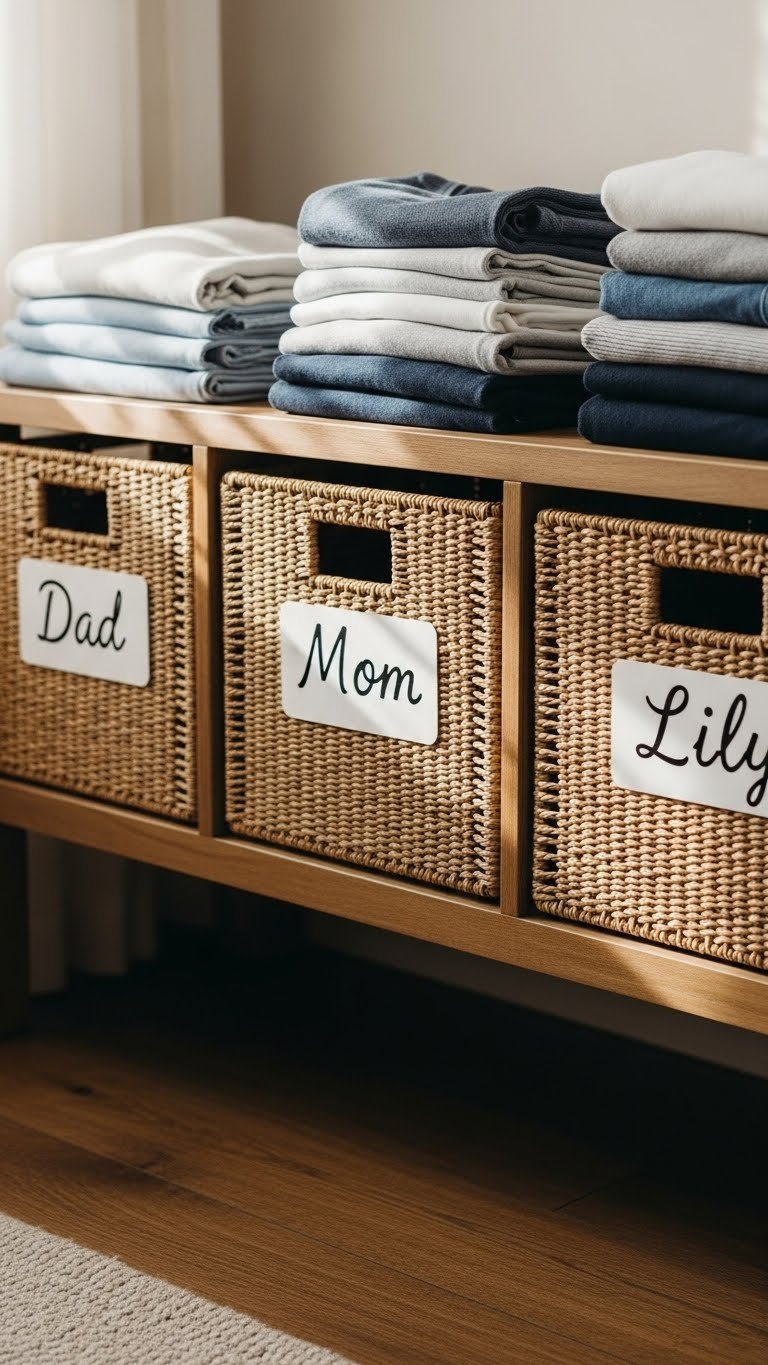
Designated zones for each person remove the “whose is whose” argument and make everyone responsible for putting their own stuff away. It’s a game-changer for families.
Assign each person a labeled basket ($15-$30 per basket) or shelf section. Use a label maker or adhesive labels ($10-$15 total). Setup: 20 minutes to decide zones and create labels.
Each person grabs their own basket and puts clothes away, or they know exactly which section is theirs to collect from.
Laundry drama disappears when ownership is clear. Kids learn responsibility, and everyone knows where their clean clothes are waiting.
21. Install Wooden Pallets as Floating Shelves
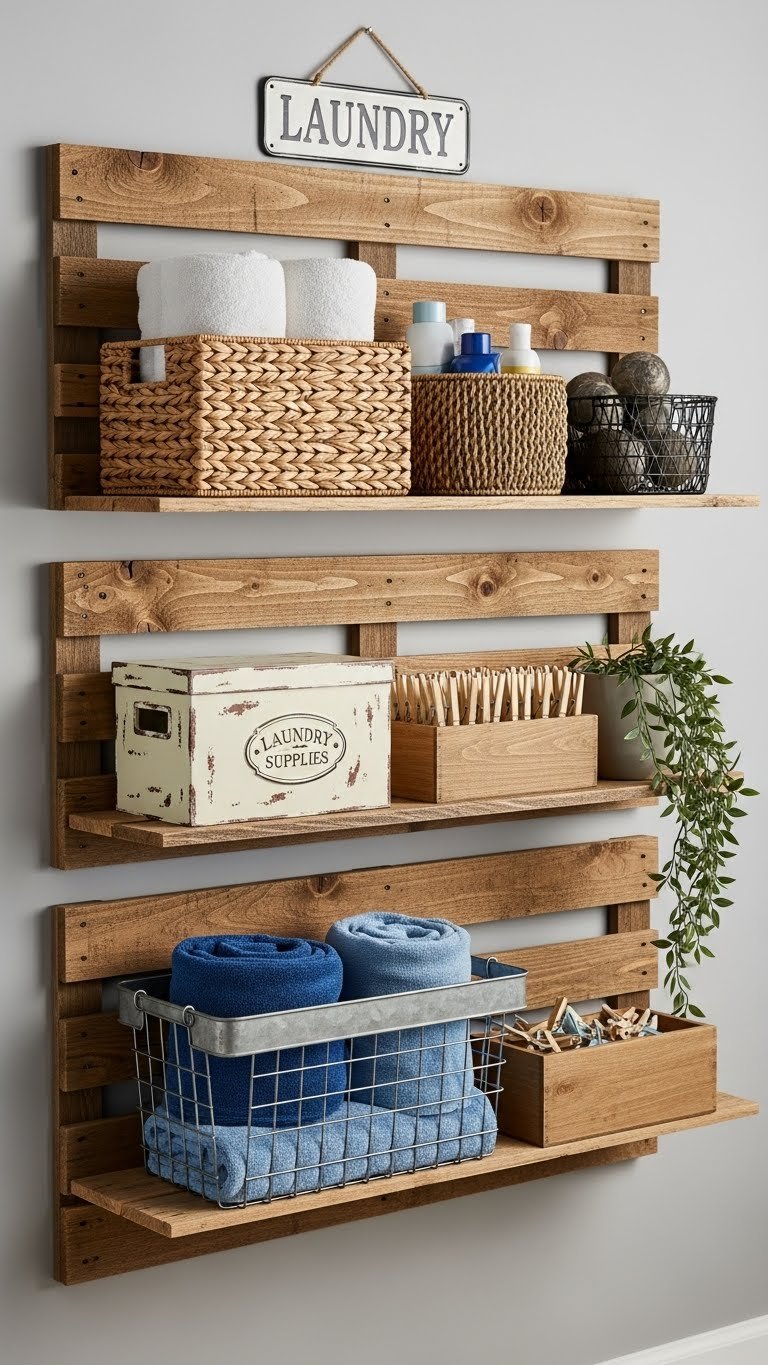
Repurposed pallets create industrial charm while providing affordable, sturdy shelving. They add warmth that typical shelving can’t match, especially in laundry rooms that need personality.
Grab free or cheap wooden pallets ($0-$20 each) from shipping companies, then sand and seal them ($20-$40 in materials). Mount with heavy-duty brackets ($15-$30 per shelf). Total project: 4-6 hours if you sand yourself, or 1 hour if you skip sanding for a rustic look.
Paint or stain pallets to match your decor, or leave natural for farmhouse vibes.
You get rustic character and storage function in one. Pallets are way less expensive than built-in shelving, and they photograph beautifully.
22. Use Stackable Clear Containers for Visibility
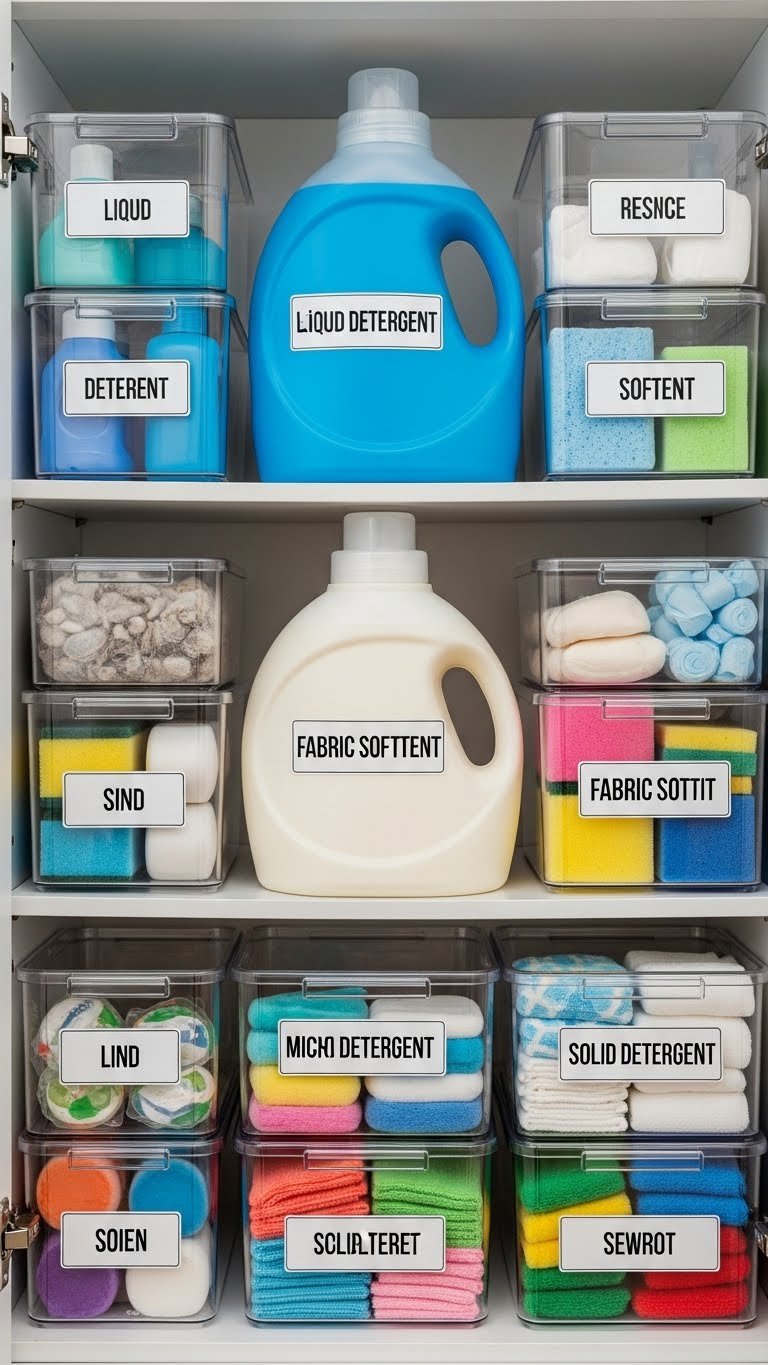
Seeing what you have prevents buying duplicates and helps you reorder before supplies run out. Clear containers also look neater than mismatched bottles.
Buy a set of stackable clear containers ($20-$50 for a variety pack) from Container Store, Target, or Amazon. Label each with a label maker ($15-$30) or vinyl labels ($10-$15). Setup: 30 minutes.
Decant powders, pods, and liquids into containers. Group by type: all stain removers together, all scent boosters together, and so on.
Your cabinet becomes a visual inventory system. You know at a glance when you’re running low, and everything looks intentional and organized.
23. Build Recessed Shelving Into Wall Cavities
Recessed shelving is a permanent upgrade that saves space by using unused wall cavities. It’s a step up from floating shelves and looks truly built-in.
This is a DIY or pro installation project ($200-$600 for 2-3 shelves) depending on how many you add and whether you hire help. Rent a drywall saw ($20-$30), or use an oscillating multi-tool. You’ll need to work between wall studs, so find them first. Plan on 4-6 hours per shelf if DIY, or 1-2 hours per shelf with professional installation.
Measure carefully and mark stud locations before cutting. Frame out the cavity with wood, install backing, then add shelves.
Recessed shelving looks custom and high-end while maximizing space efficiency. It’s the closest thing to a designer installation without the designer price tag (if you DIY).
24. Hang a Pegboard Banner for Accessories
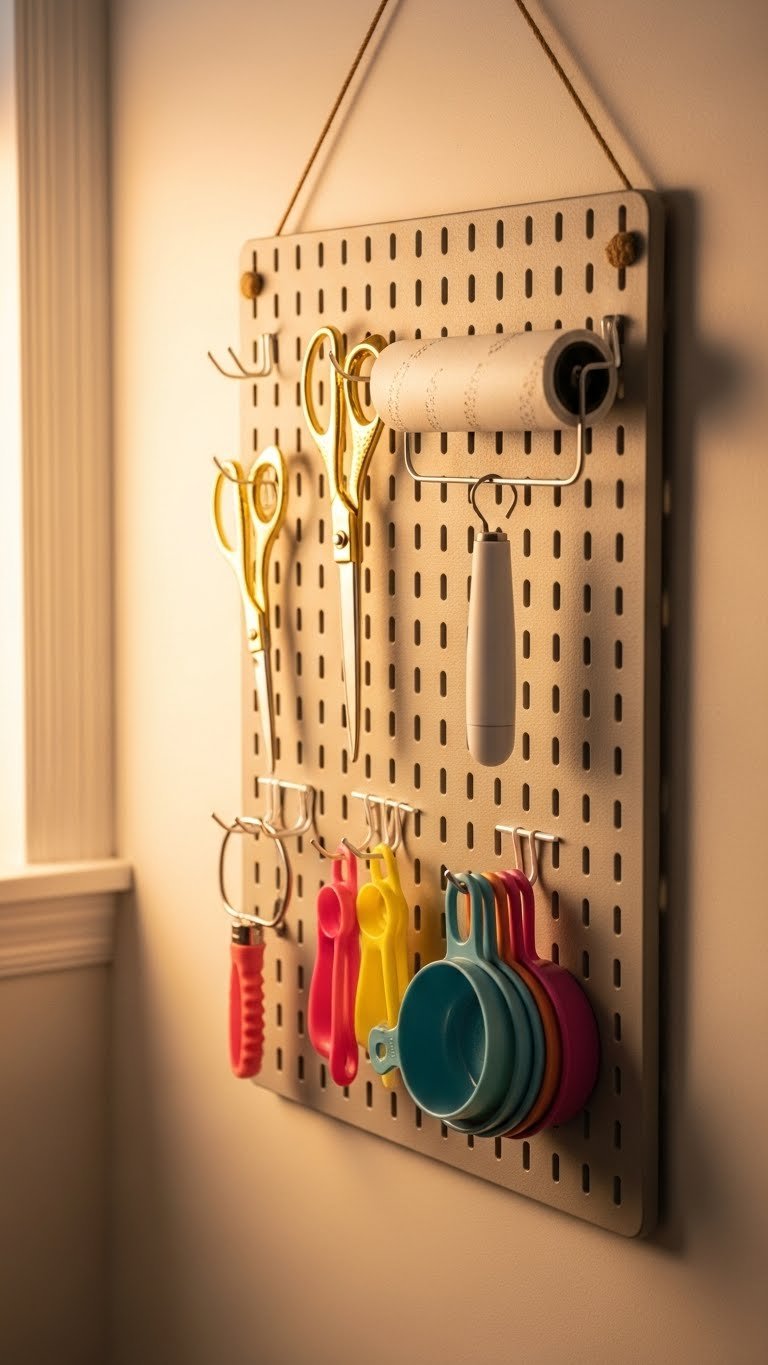
A pegboard treated like wall art adds visual interest while organizing small hand tools and accessories. It’s basically functional decor.
Make or buy a small pegboard piece ($30-$80) from Etsy or make one yourself with a craft pegboard and paint. Add decorative hooks ($1-$3 each) and arrange tools artfully. Mounting takes 30 minutes.
Arrange your collection of lint rollers, stain sticks, small scissors, and delicate hangers on hooks for an organized look that’s actually pretty.
Your laundry room stops feeling purely utilitarian. The pegboard becomes a conversation piece while keeping everything accessible.
25. Create a Linen Folding and Storage Station Combo
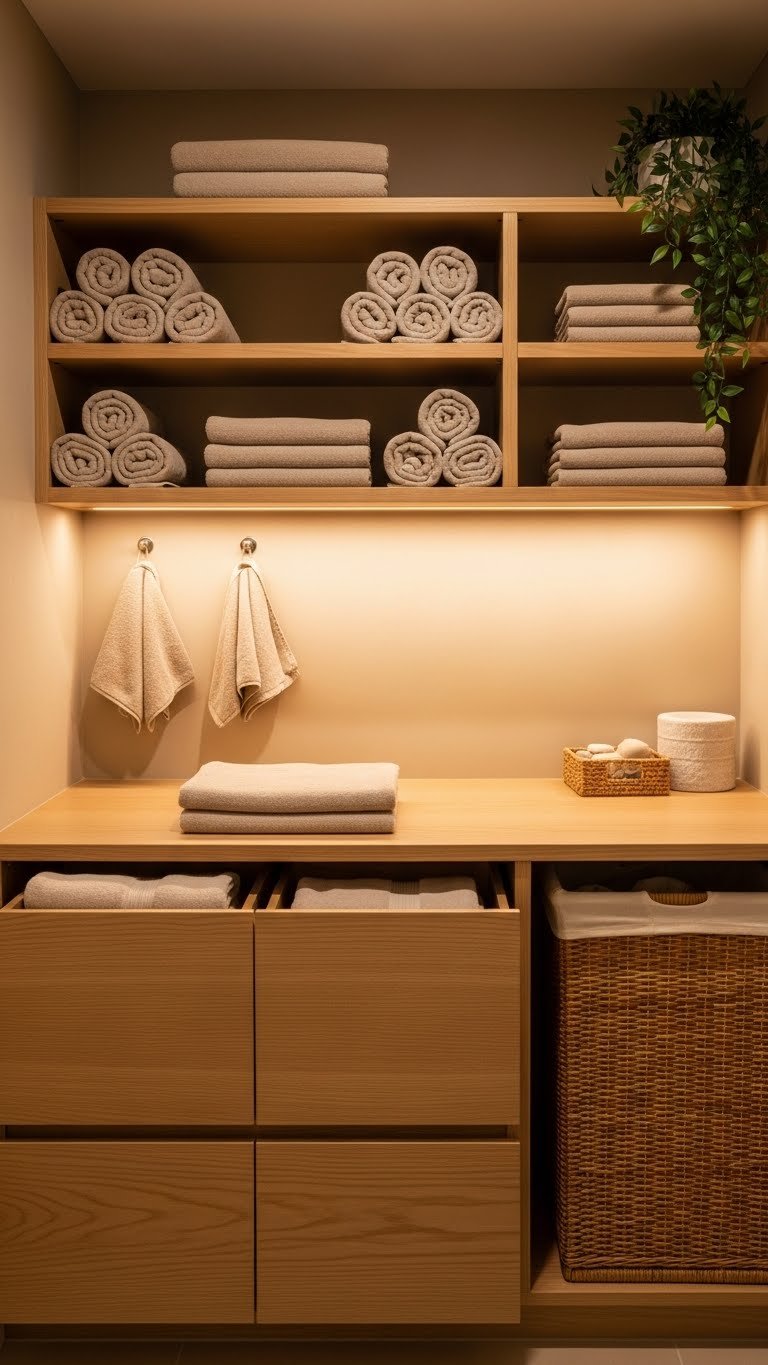
A dedicated linen station keeps towels, sheets, and blankets organized in one spot. You’ll know exactly where clean linens are, and guests will be impressed by your organization.
Invest in a linen-specific cabinet or shelving unit ($200-$500) or build a simple DIY station with shelves and rolling drawers ($150-$300 in materials). Include tiered shelf dividers ($15-$30) to keep stacks from toppling. Setup takes a weekend for DIY or a few hours for installation if professionally done.
Roll towels and flat-fold sheets so they’re easy to grab. Use shelf dividers to keep stacks organized by type and size.
You’ll never frantically hunt for a fitted sheet again. Guests see organization instead of chaos, and your linen closet becomes actually functional.
26. Add Durable Stainless Steel Hardware and Fixtures
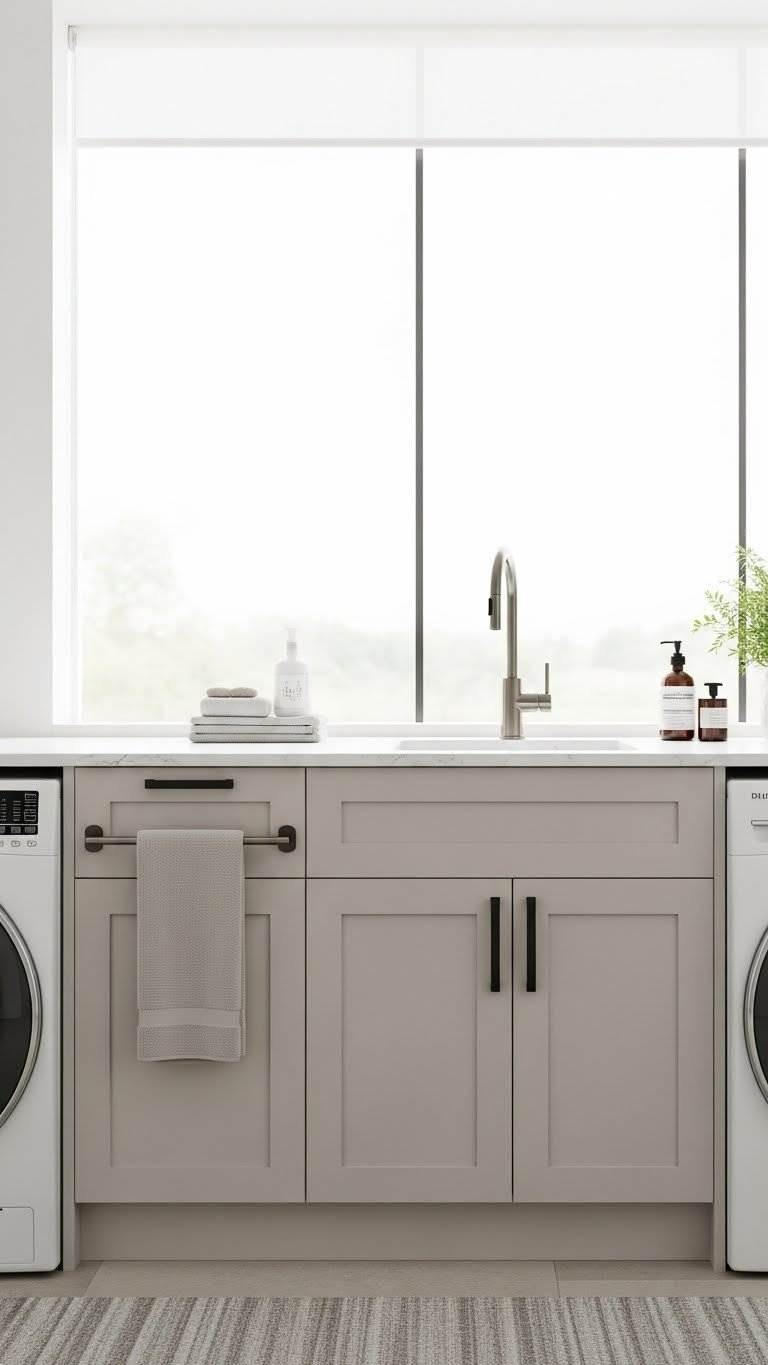
Upgrading hardware from basic to matte black, brushed nickel, or polished stainless instantly modernizes the space. It’s a small detail that reads as high-end.
Swap cabinet handles for quality hardware ($2-$8 per handle) and install a matching faucet ($60-$150) if your utility sink allows. A power drill and screwdriver handle most swaps in 1-2 hours. Match all metals for a cohesive look—don’t mix finishes unless you’re intentionally doing a mixed-metal aesthetic.
Keep finishes consistent across handles, towel bars, and any visible fixtures.
The space immediately looks more curated and designer-adjacent. Quality hardware also tends to last longer than cheap alternatives, so you’re investing in durability too.
27. Install a Moisture-Control System for Humid Basements

If your laundry room is in a damp basement, moisture management protects both your clothes and your storage systems. Damp environments ruin textiles and encourage mold.
Add a small dehumidifier ($80-$200) and use moisture-resistant paint ($30-$50 per gallon) on walls and inside cabinets. Run the dehumidifier during and after laundry days. Also ensure your dryer vent exhausts outside, not into the room. Total setup: $150-$300 and a few hours for painting.
Keep a small hygrometer ($10-$15) to monitor humidity levels—aim for 30-50%.
Your clothes won’t develop that musty smell, and your storage systems (and drywall) won’t suffer water damage over time. Prevention now saves thousands in future repairs.
Save this guide for your next laundry room refresh. Pick one idea this weekend—even a small change makes a real difference in how you feel when you walk into the room. Which idea will you try first?
Leave a Reply