Category: Home Decor

  • 23 Minimal Clutter Home Ideas That Simplify & Beautify Your Space

    23 Minimal Clutter Home Ideas That Simplify & Beautify Your Space


    Clutter doesn’t just take up physical space—it steals your mental peace. Whether you’re juggling a small apartment or just tired of visual chaos, you don’t need a complete home overhaul to feel the difference. These 23 ideas blend practical organizing strategies, smart design choices, and budget-friendly hacks that work for renters and homeowners alike. You’ll discover how to eliminate unnecessary items, create hidden storage, choose furniture that earns its place, and style what remains so your home actually looks more beautiful with less stuff. Let’s get started.


    1. Create a “One In, One Out” Rule for Guilt-Free Editing

    The best way to stop clutter from returning is to prevent it in the first place. Every time you bring something new home, commit to removing something similar—whether it’s clothes, kitchen tools, or décor pieces.

    This practice keeps your spaces proportional and forces intentional purchases instead of impulse buys. Set a calendar reminder once a month to audit one category (closet, kitchen, bedroom). You’re not throwing things away weekly—just being mindful about what enters your home. It takes 20 minutes per session and costs nothing. Many people find this habit naturally leads to fewer, higher-quality purchases over time.

    The beauty? Your home stays edited without ever feeling spartan or cold. You end up surrounded only by things that genuinely serve you or bring joy—and that creates a baseline of calm you didn’t have before.


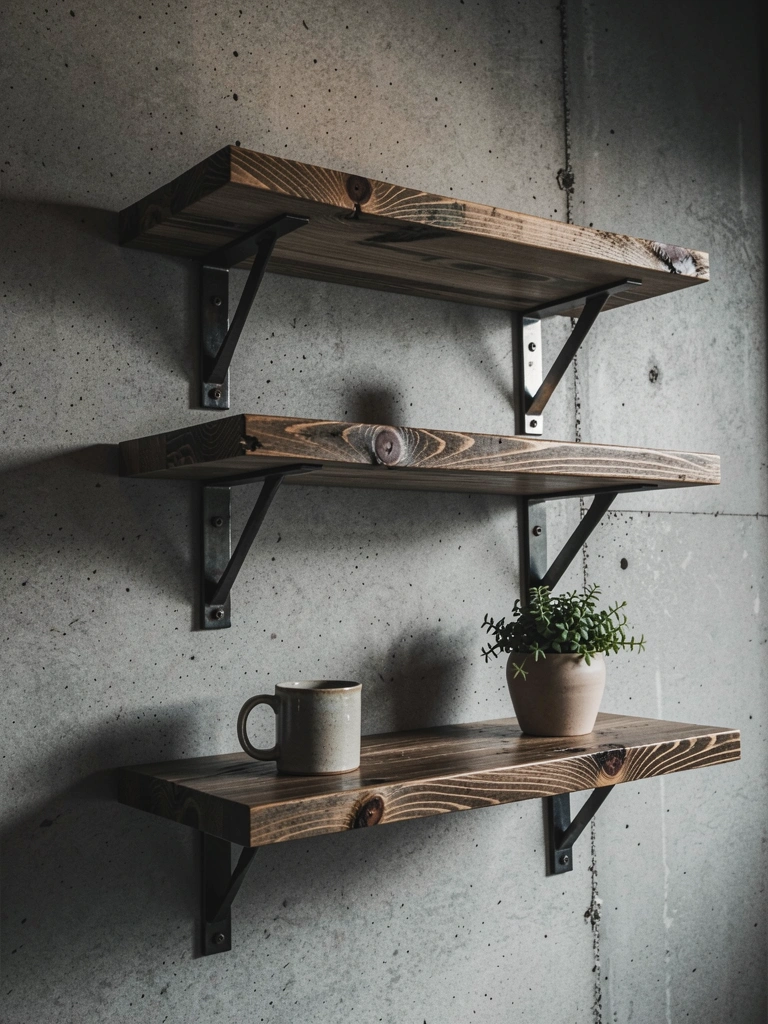
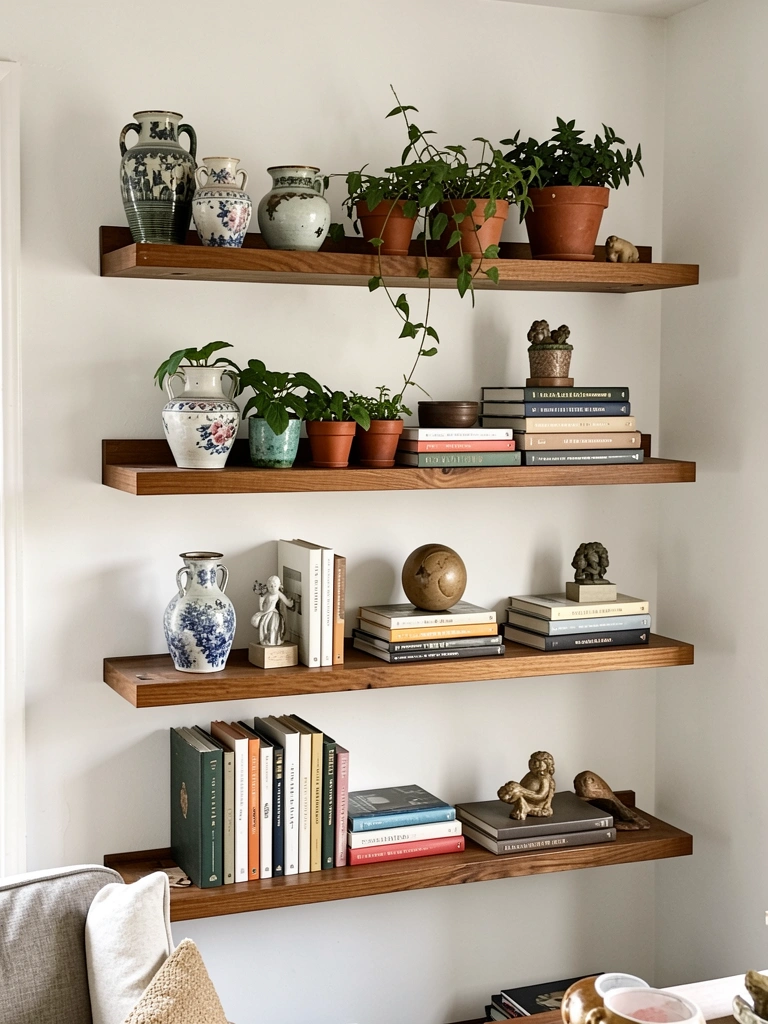
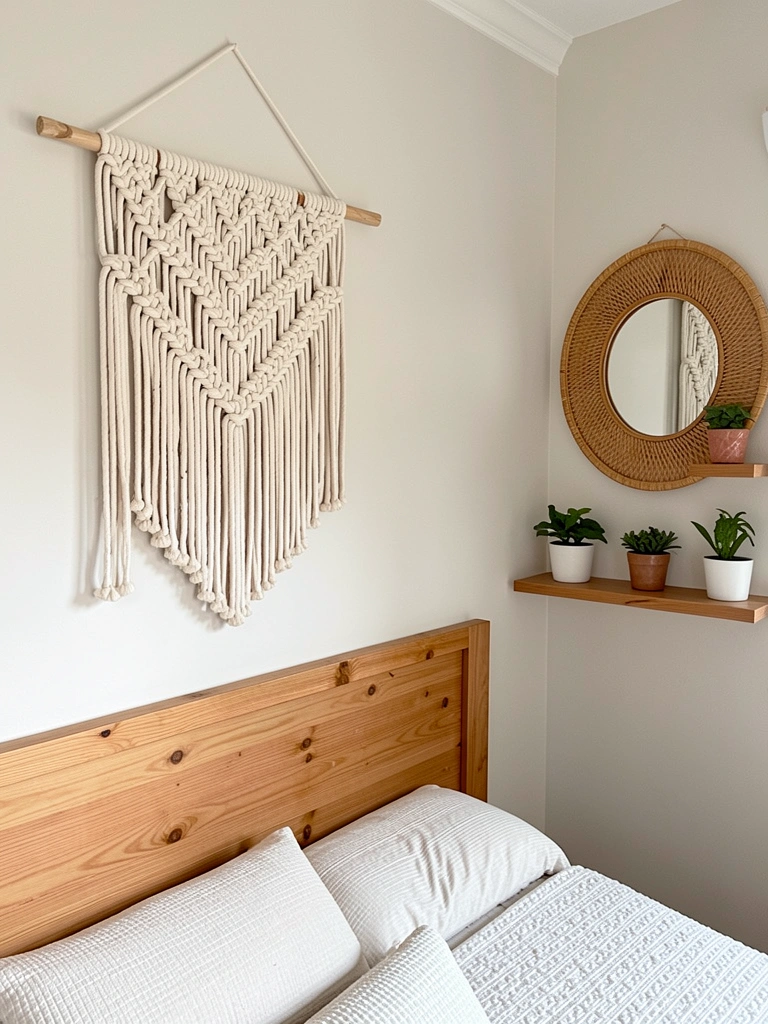
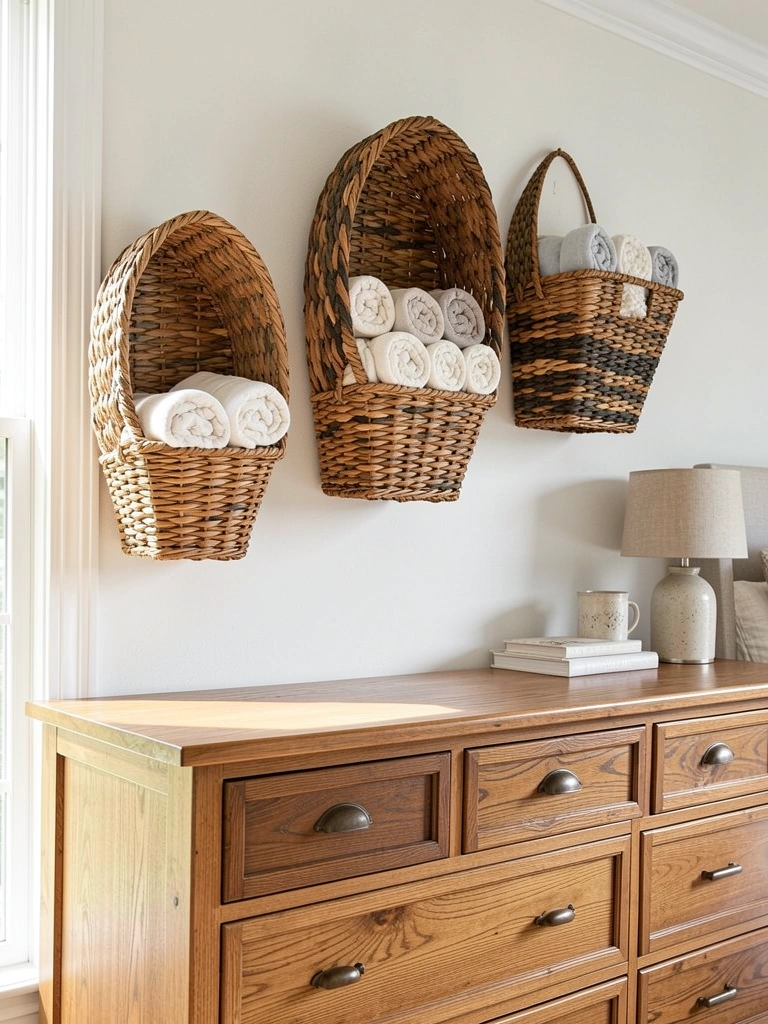
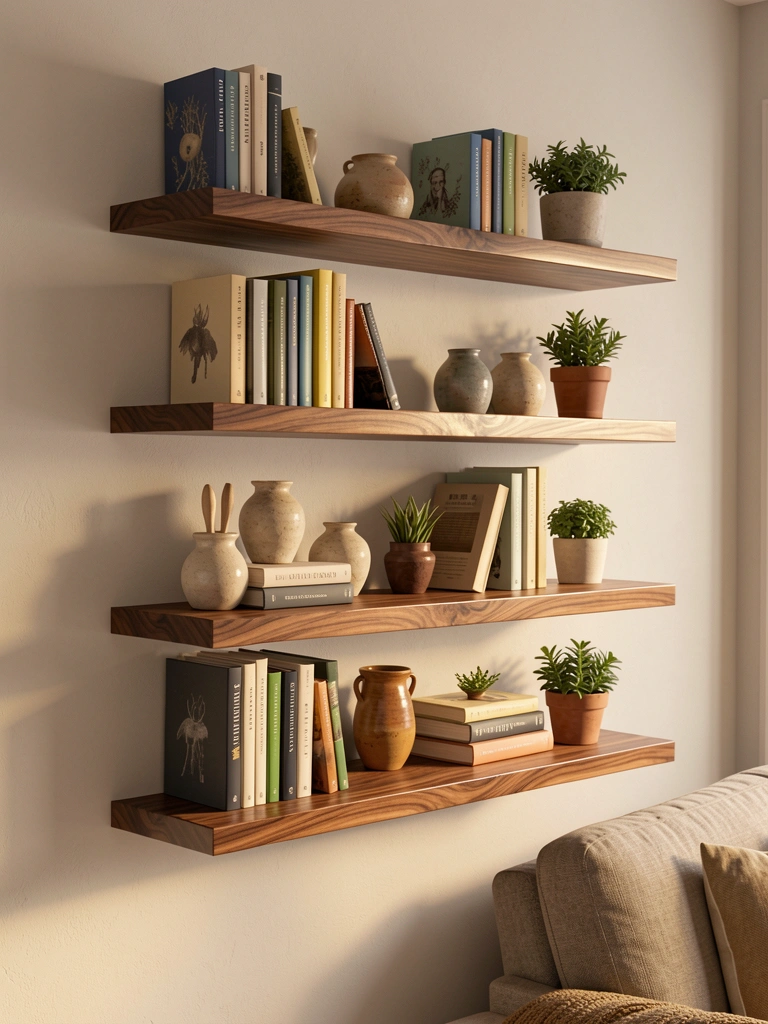
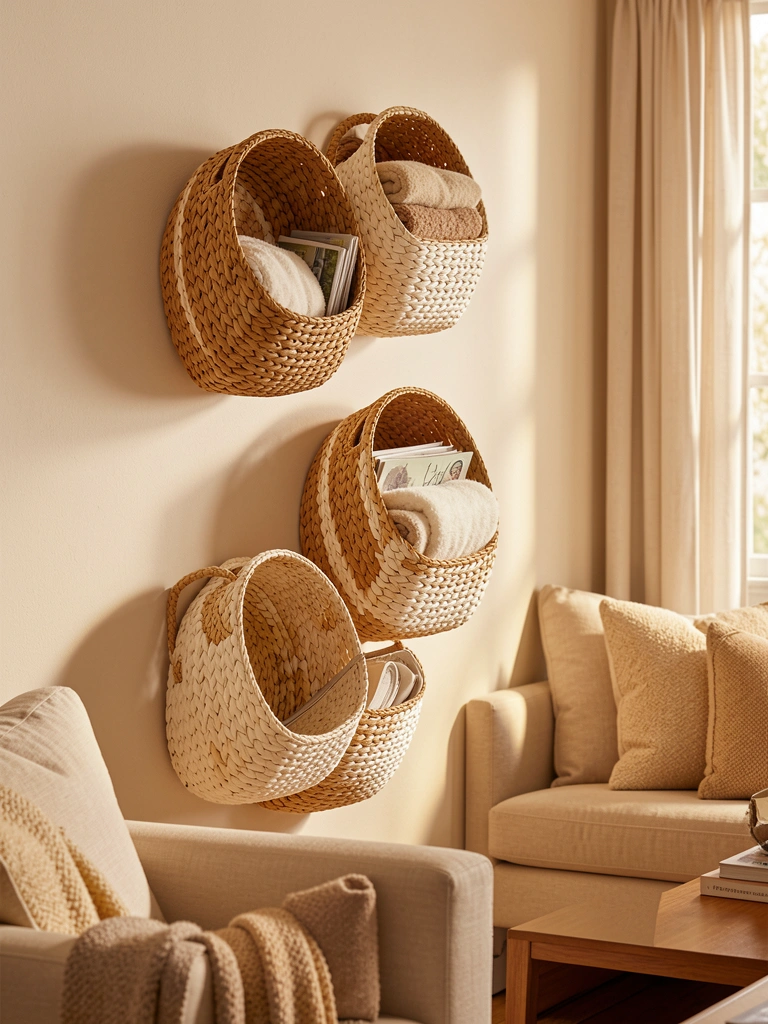
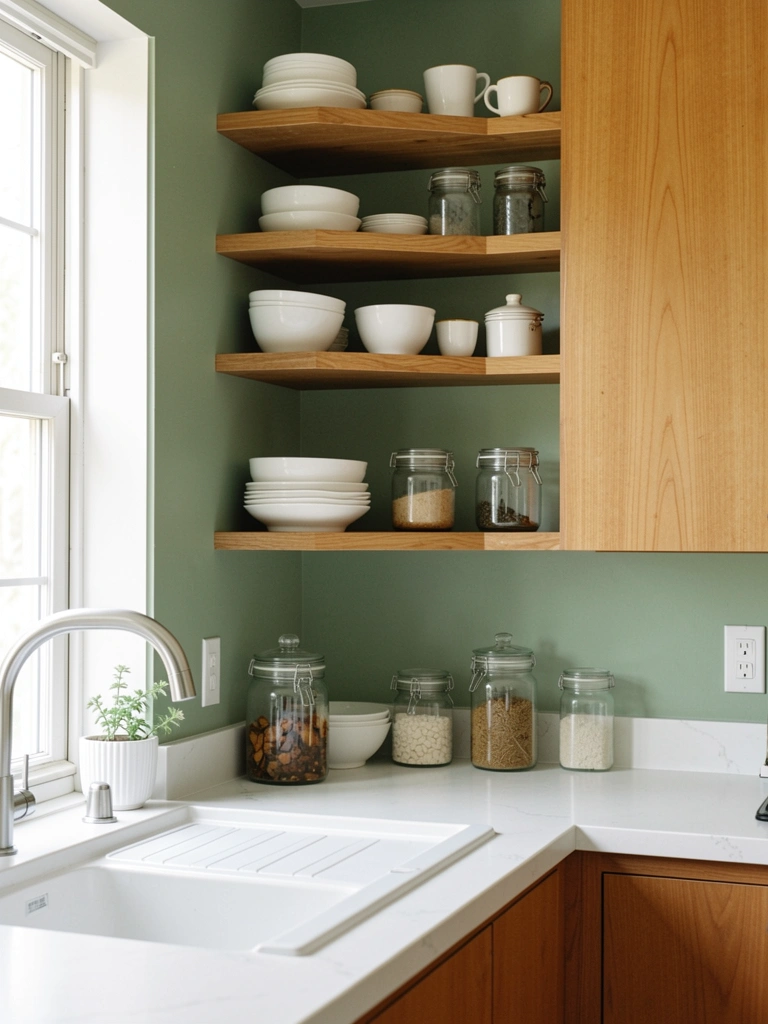
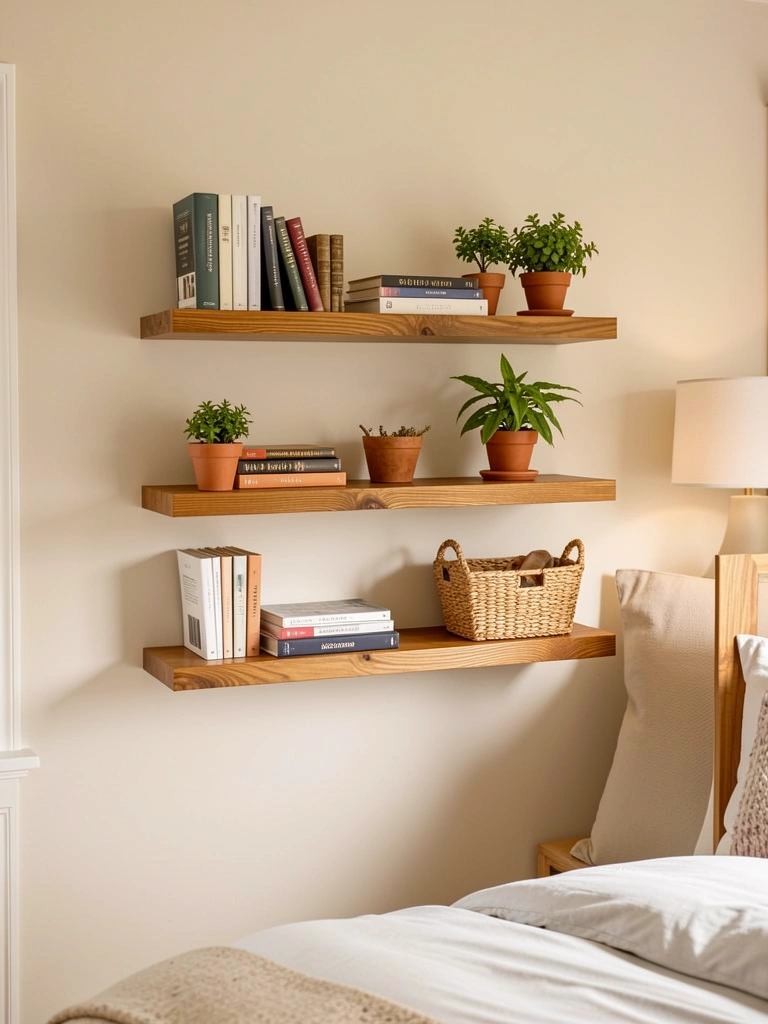
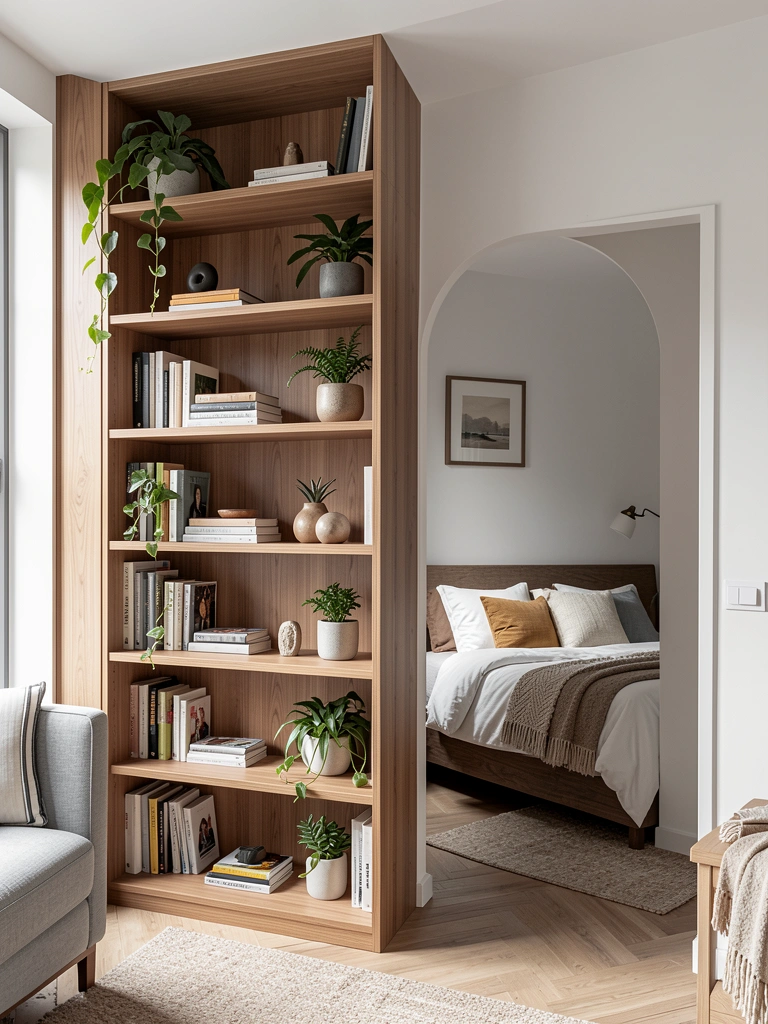
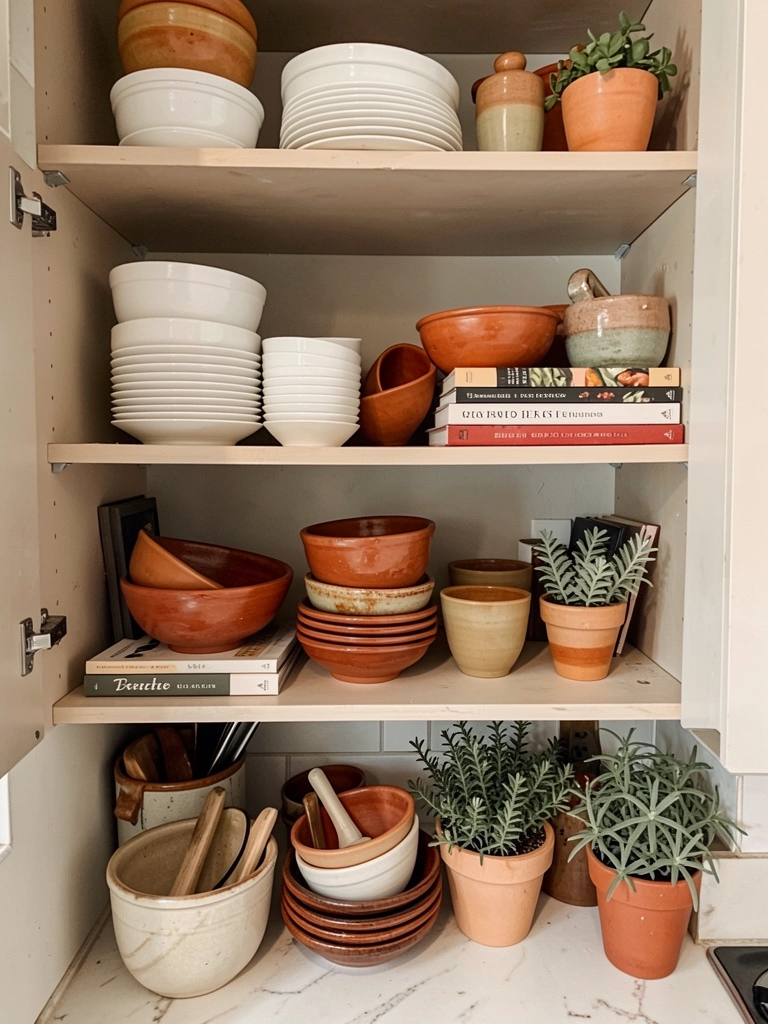
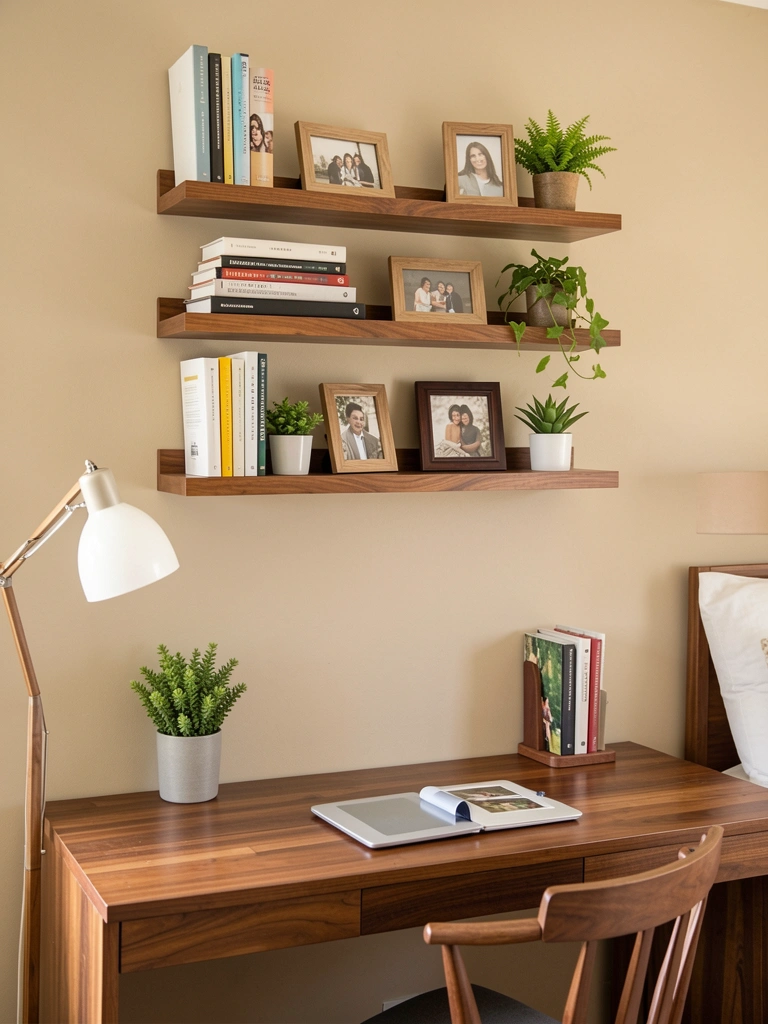
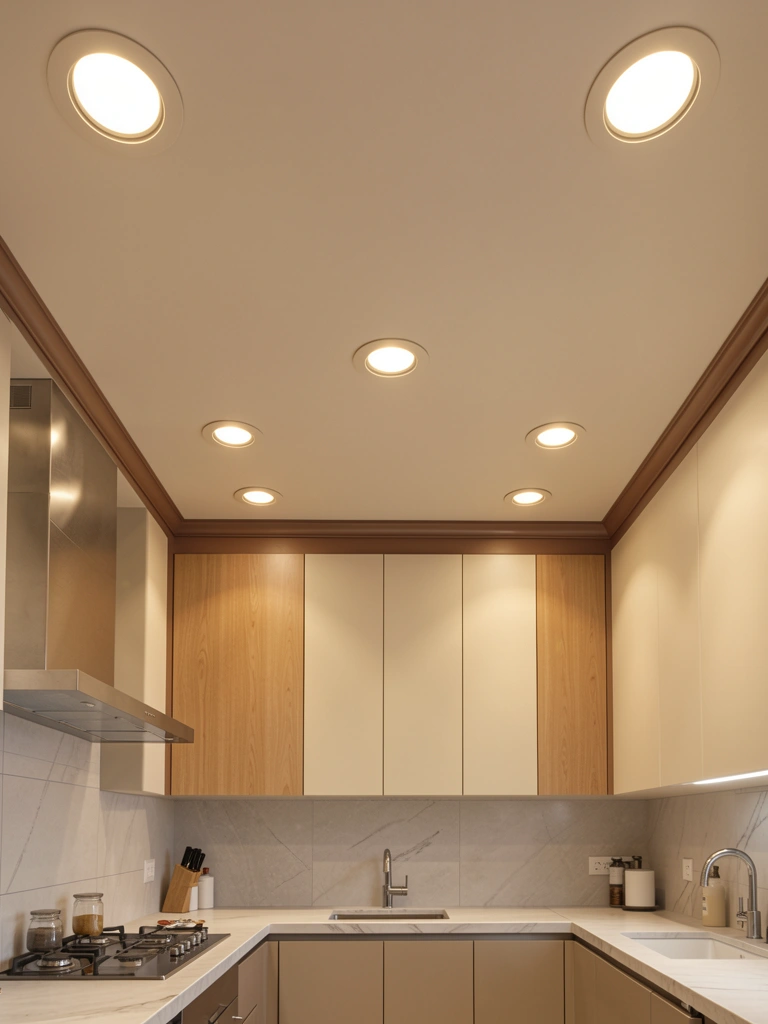
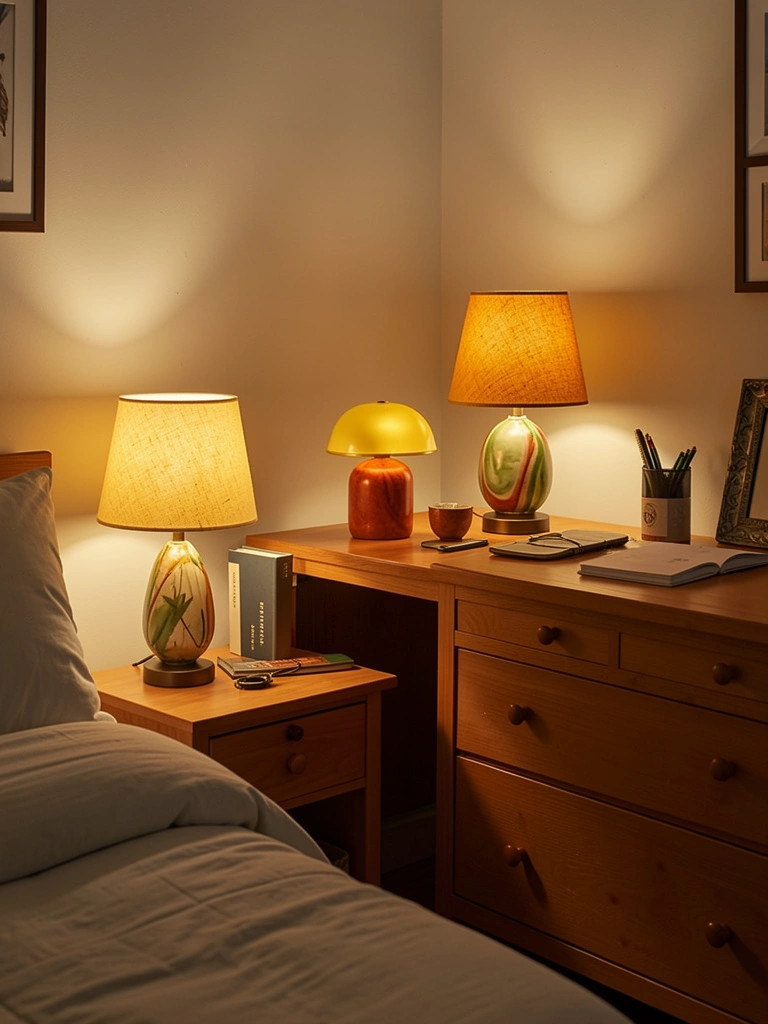
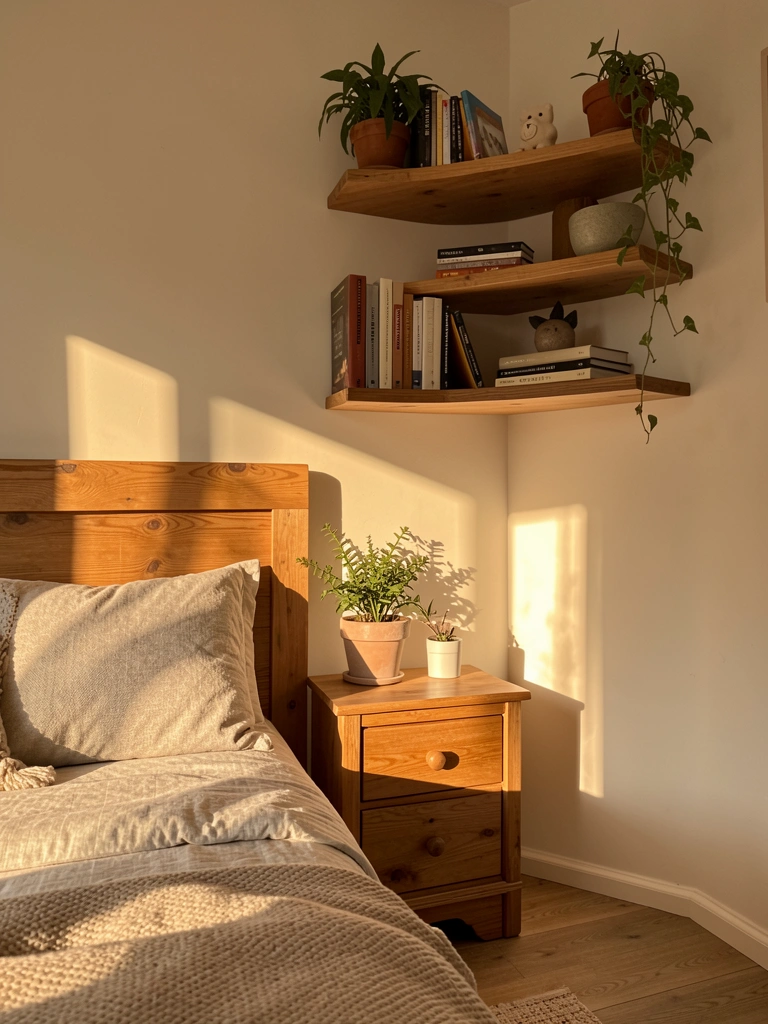
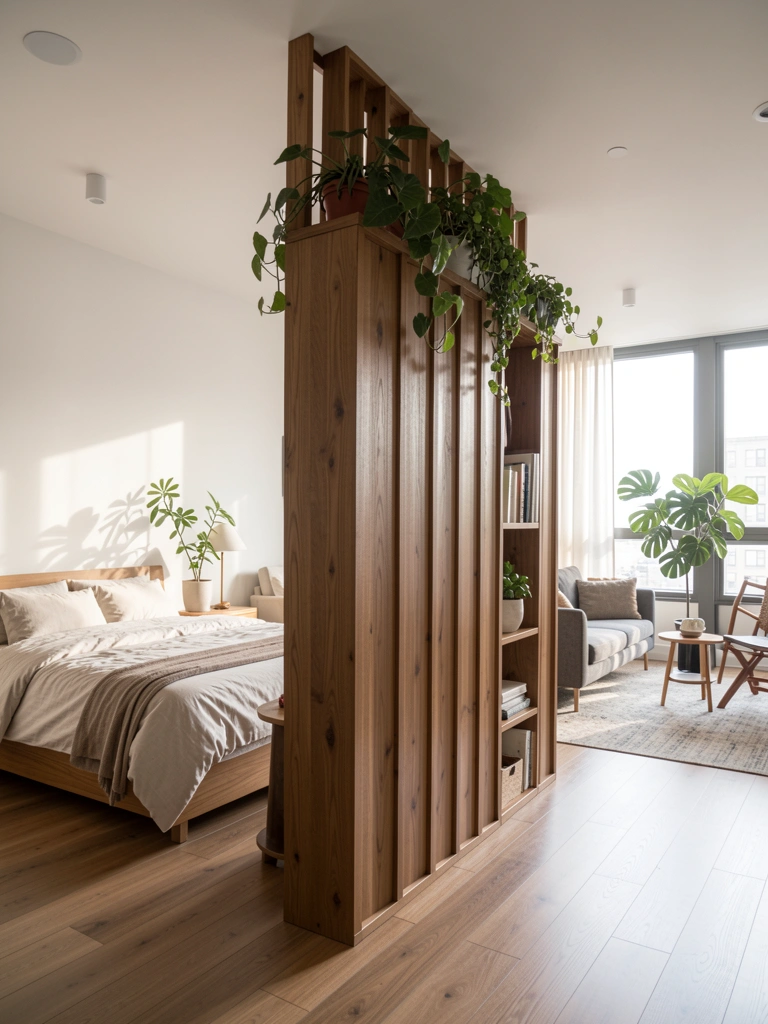
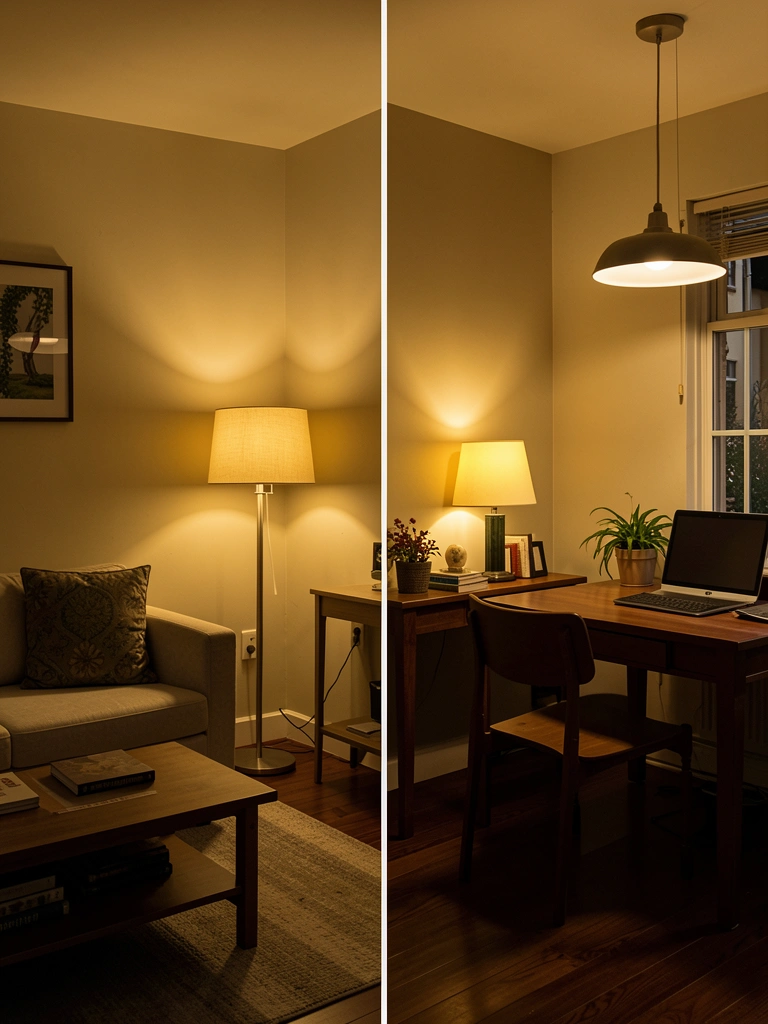
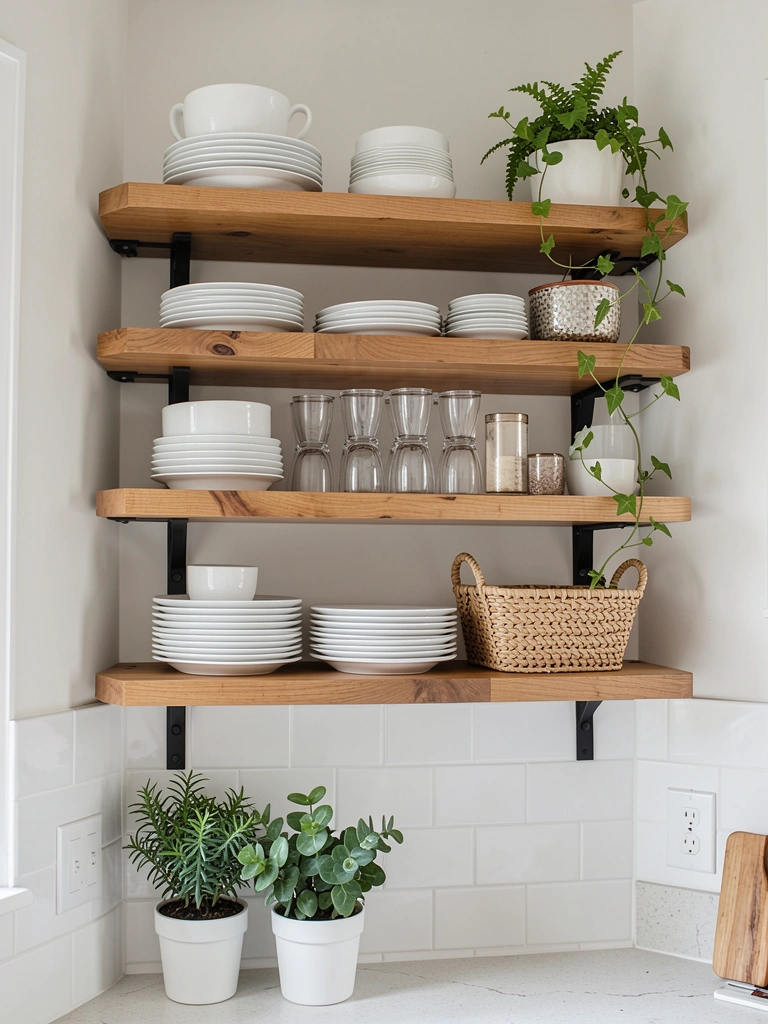
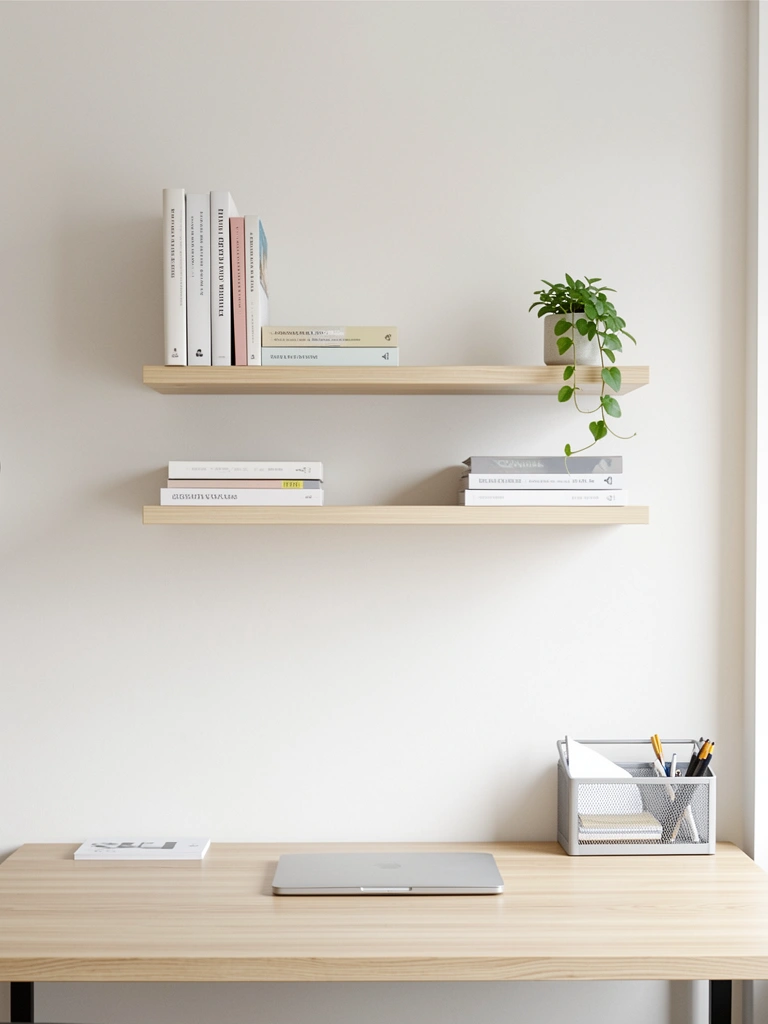
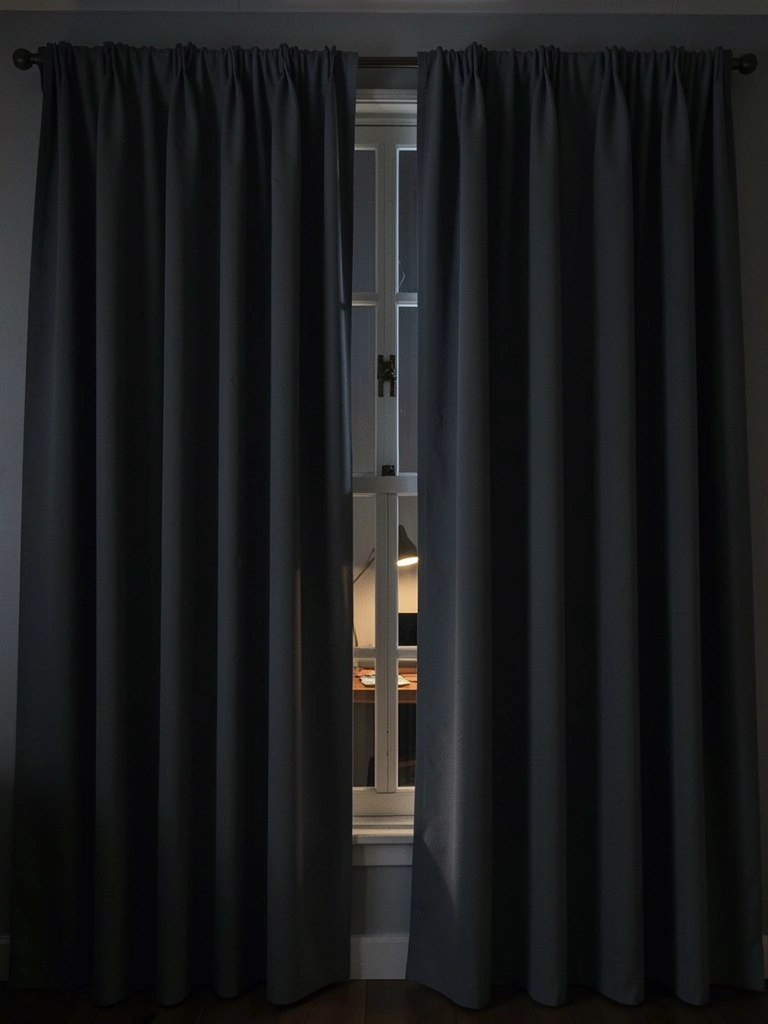
    2. Use Vertical Wall Storage to Free Up Floor Space

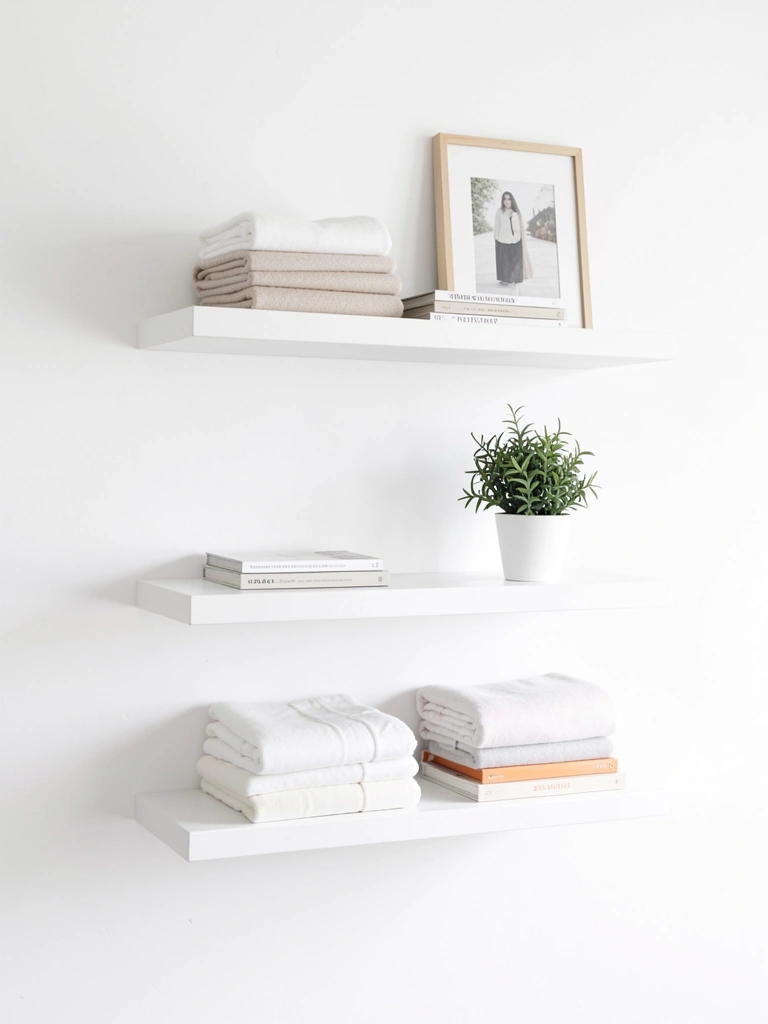
    Walls are real estate you’re not using. Vertical storage instantly makes rooms feel larger because it pulls visual clutter off surfaces and floors.

    Install floating shelves ($20-$60 each at IKEA, Home Depot) to store books, plants, folded linens, or display pieces. Alternatively, use wall-mounted pegboards ($15-$40) for kitchen tools, bathroom supplies, or garage items. Installation takes one to two hours if you’re handy, or hire someone for $50-$100. The key is being selective about what goes up—don’t just transfer clutter to shelves. Choose 5-7 meaningful items per shelf instead of cramming them full.

    Your floor opens up instantly, sightlines clear, and rooms breathe. It’s one of the fastest ways to make a crowded space feel intentional.


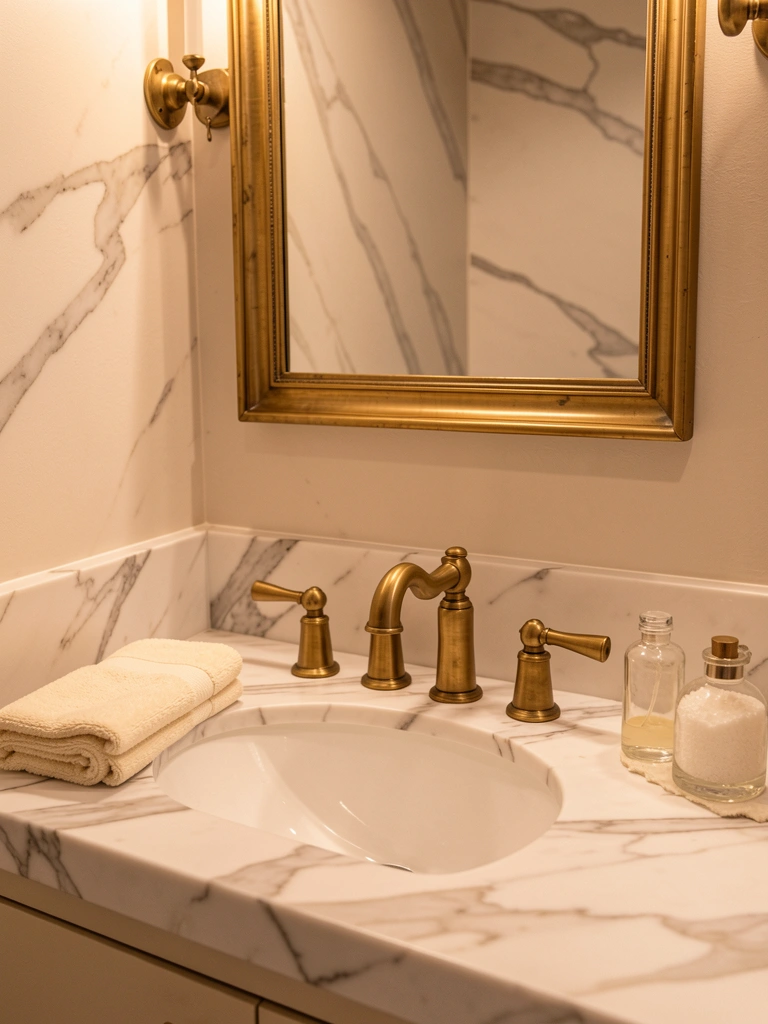
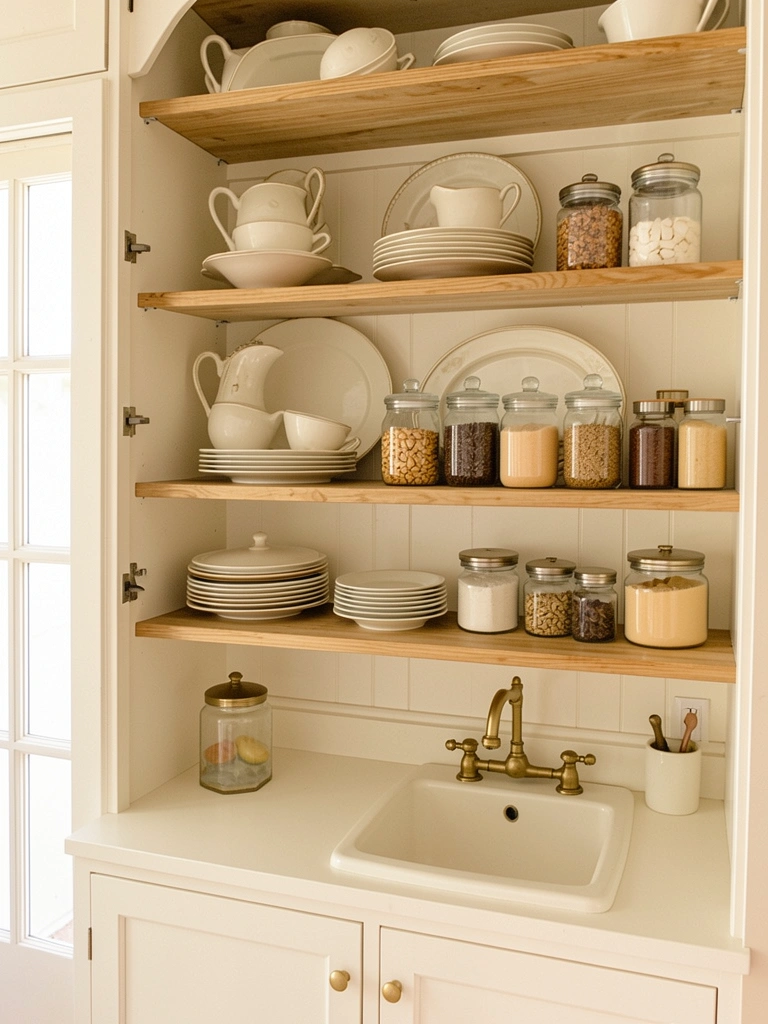
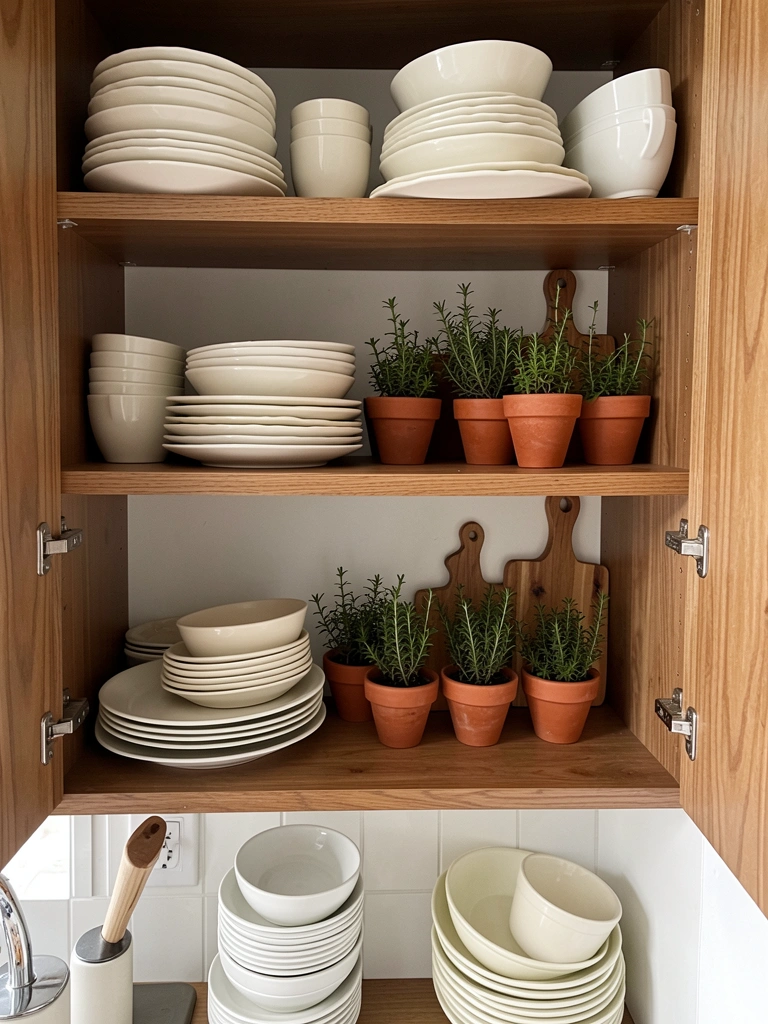
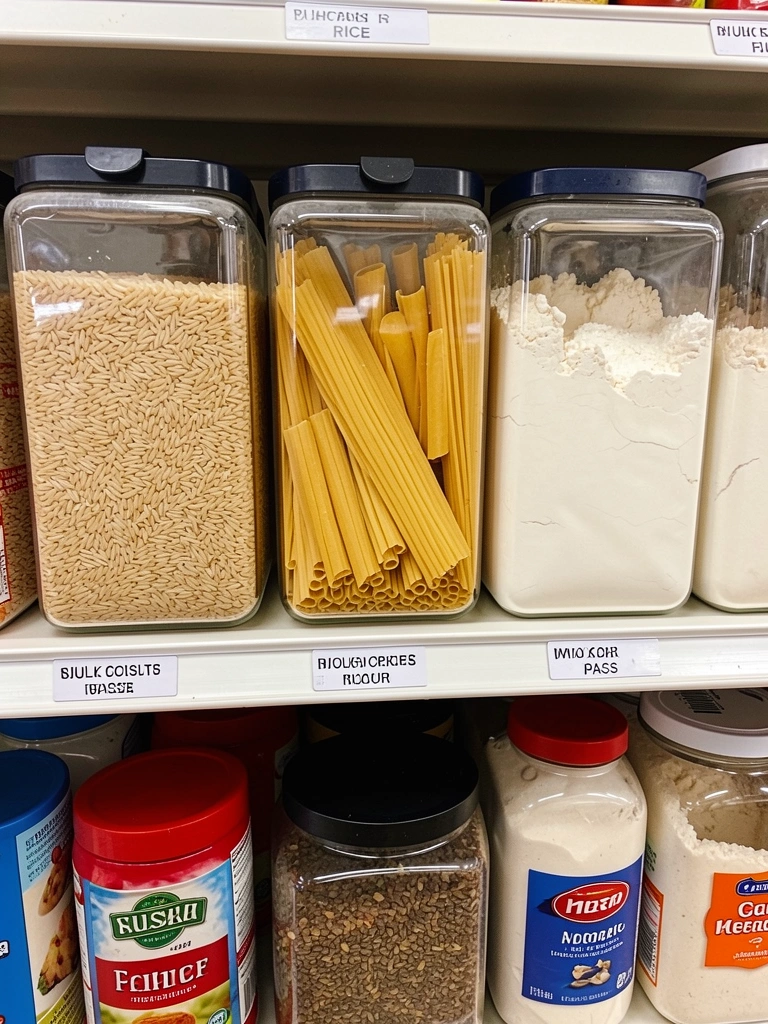
    3. Adopt a Clear Container System in Cabinets and Drawers

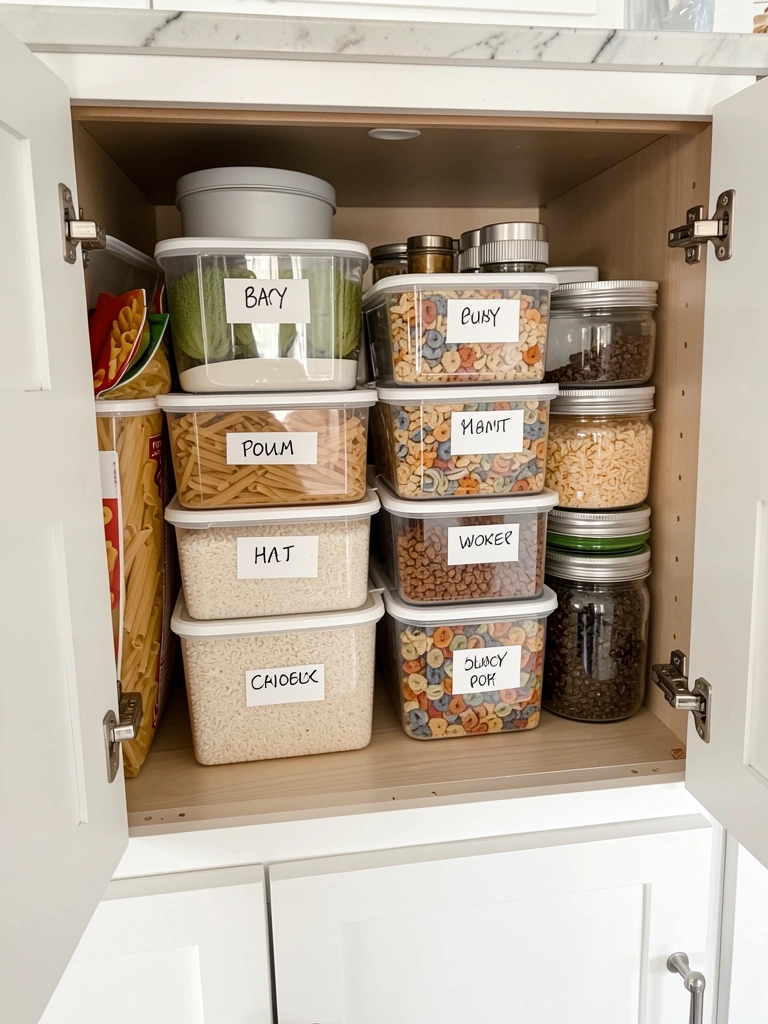
    Clear storage containers might seem simple, but they’re game-changers for hidden clutter. When everything is visible and labeled, you stop buying duplicates and use what you already have.

    Measure your cabinets and drawer space, then invest in matching clear containers ($25-$60 for a set at Target, IKEA, or The Container Store). Transfer dry goods, pantry items, or under-sink supplies into them. Label each container with a label maker ($15-$25) or white tape and marker. This takes one to two hours and immediately prevents forgotten items from piling up. You’ll know exactly what you have, so you shop smarter and waste less.

    The organized look is a bonus—your cabinets become functional décor, and you’ll actually enjoy opening them instead of dreading what might fall out.


    4. Declutter by Room Category, Not by Location

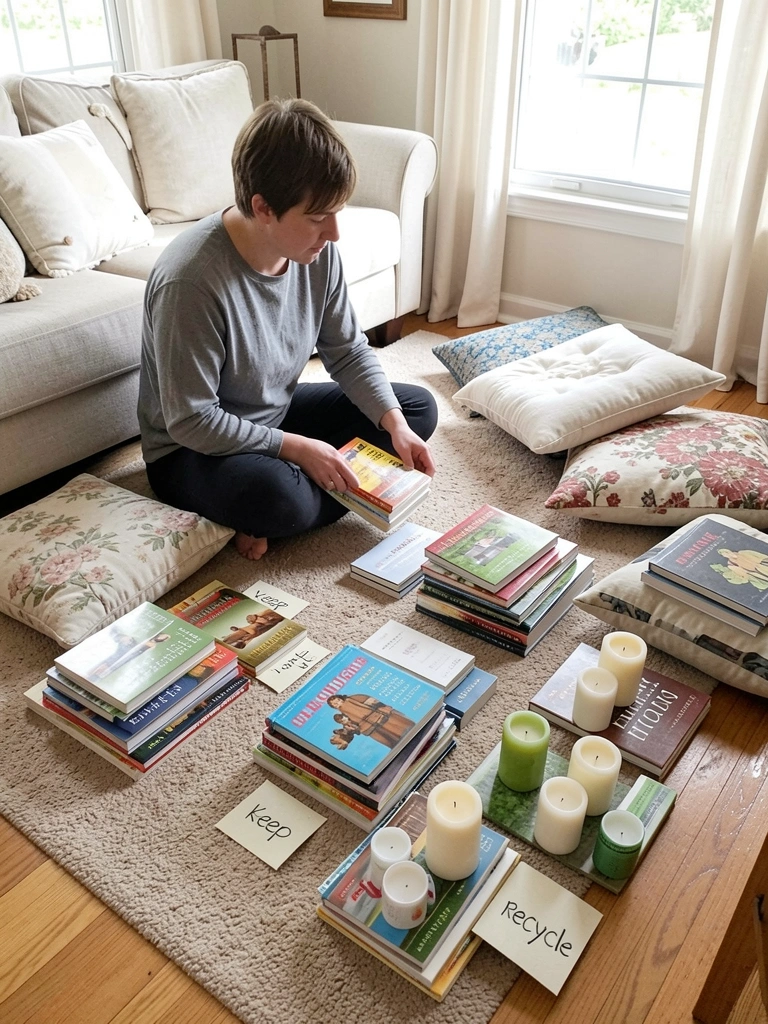
    Marie Kondo’s category method actually works because your brain processes items differently when they’re grouped. Instead of decluttering your bedroom, then your kitchen, gather all your books, all your kitchen utensils, or all your linens in one spot.

    Pick one category and spend one to three hours sorting everything you own into keep, donate, or trash. You’ll notice duplicates you didn’t know existed and realize how many items don’t serve you anymore. This approach prevents the “I might use this” trap because seeing five identical can openers forces a decision. Once you’ve edited, these categories stay smaller because you know what you have.

    You’ll feel lighter and more in control—and your space naturally stays less cluttered because you’ve reset expectations about how much you actually need.


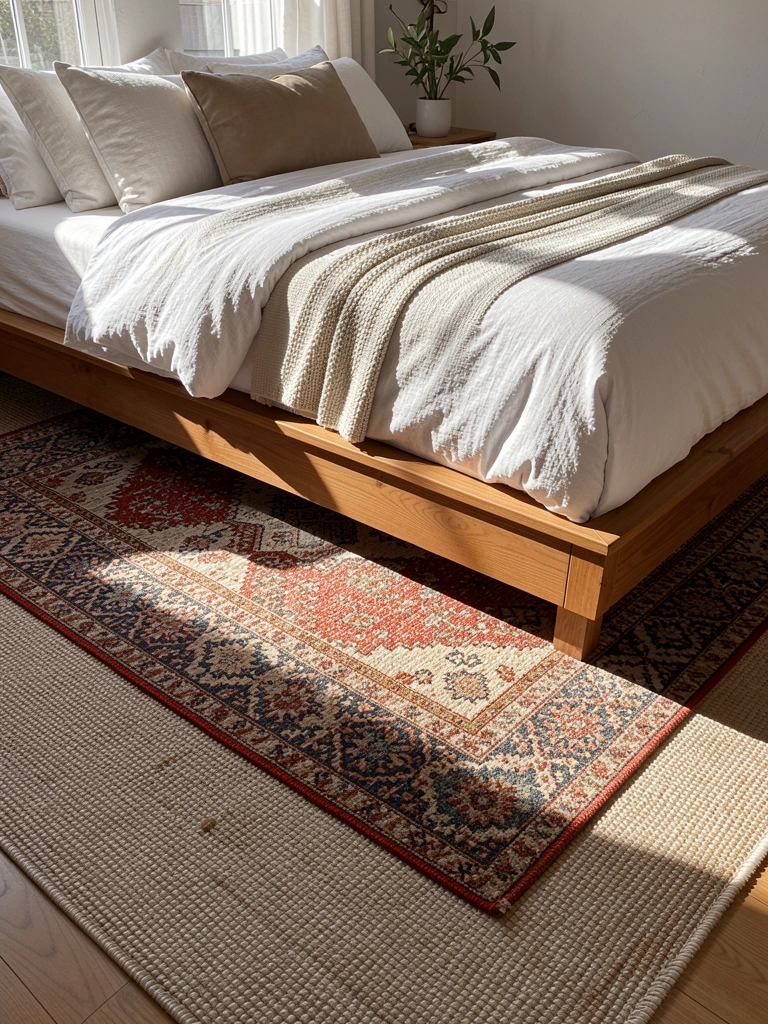
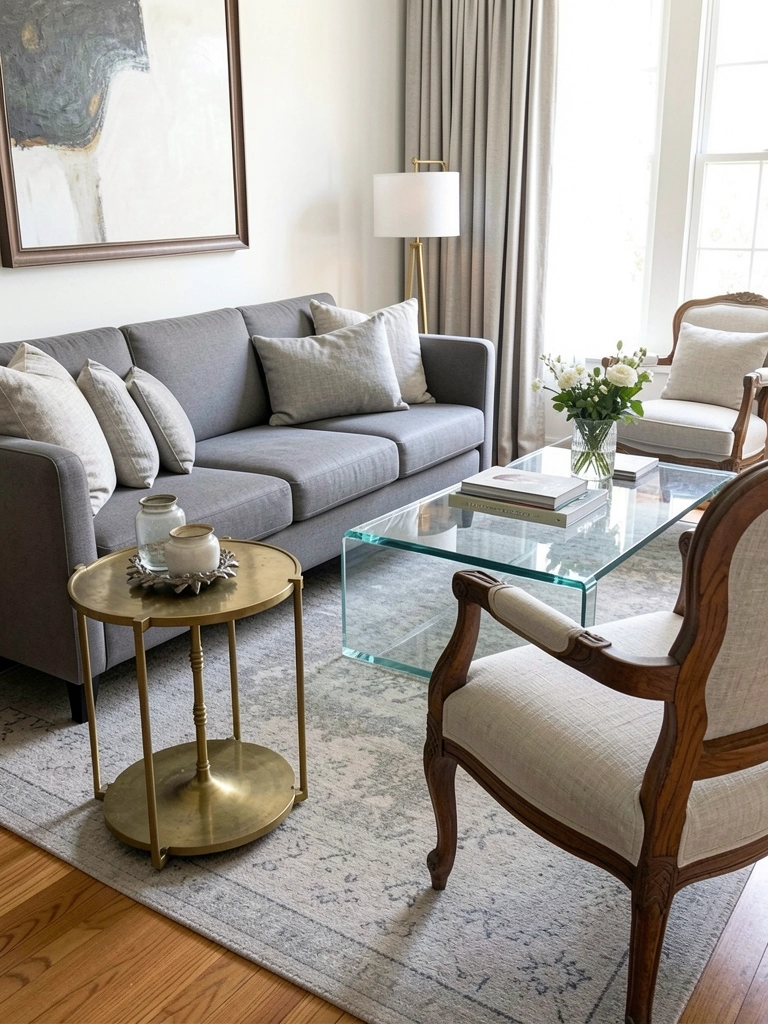
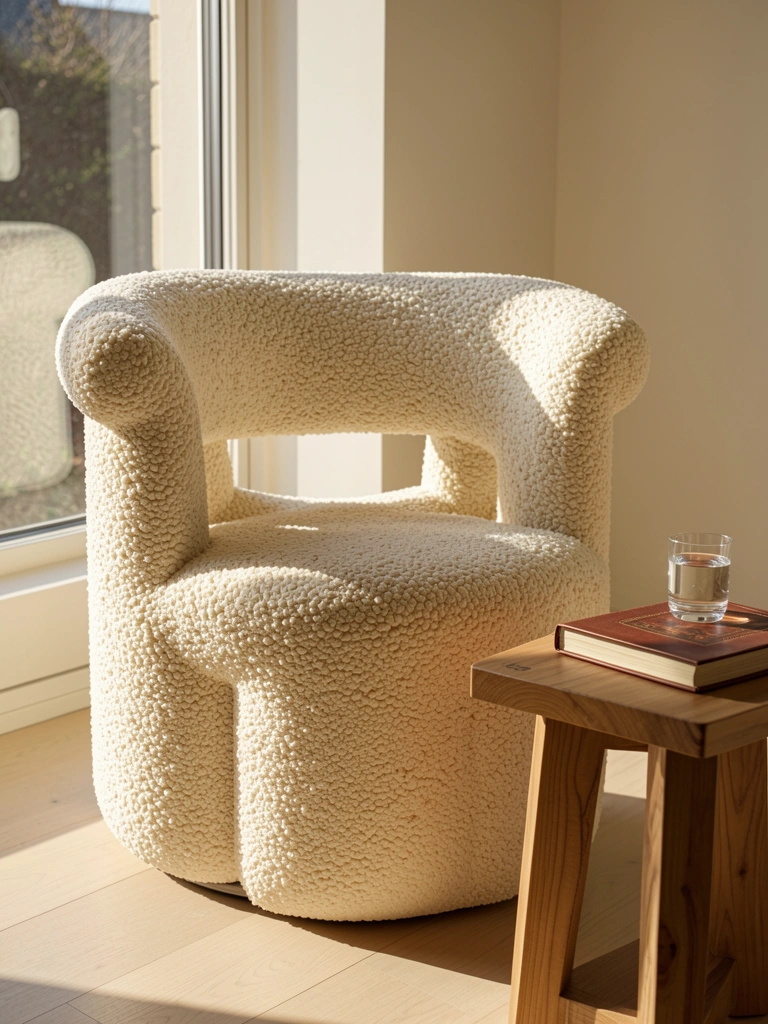
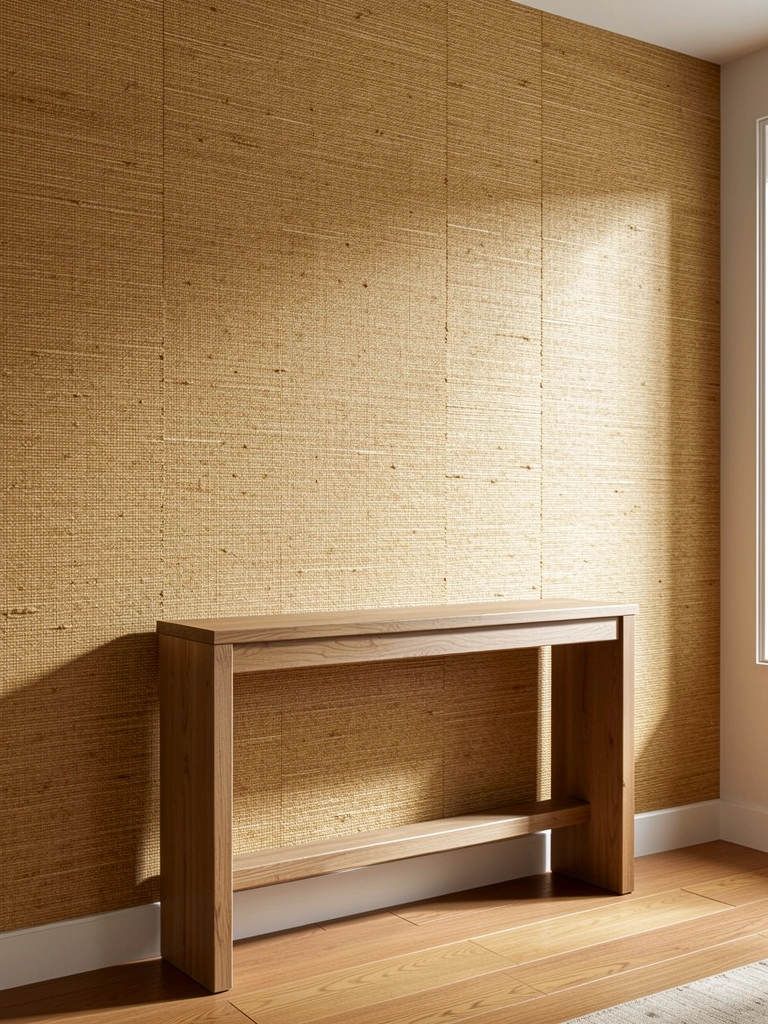
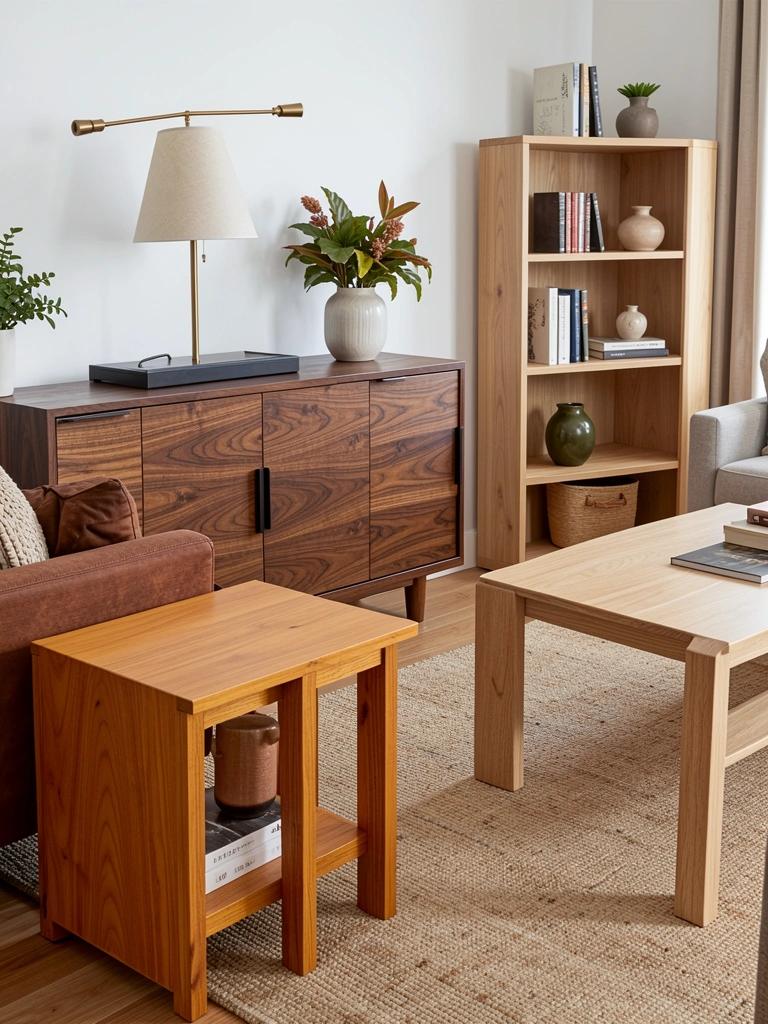
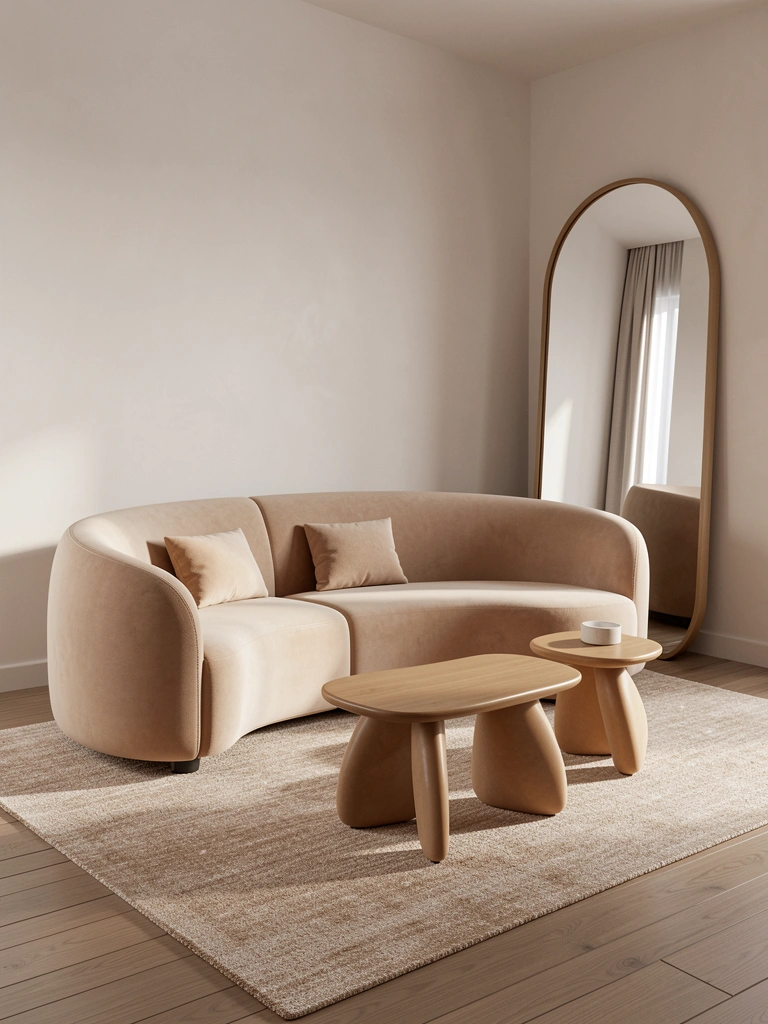
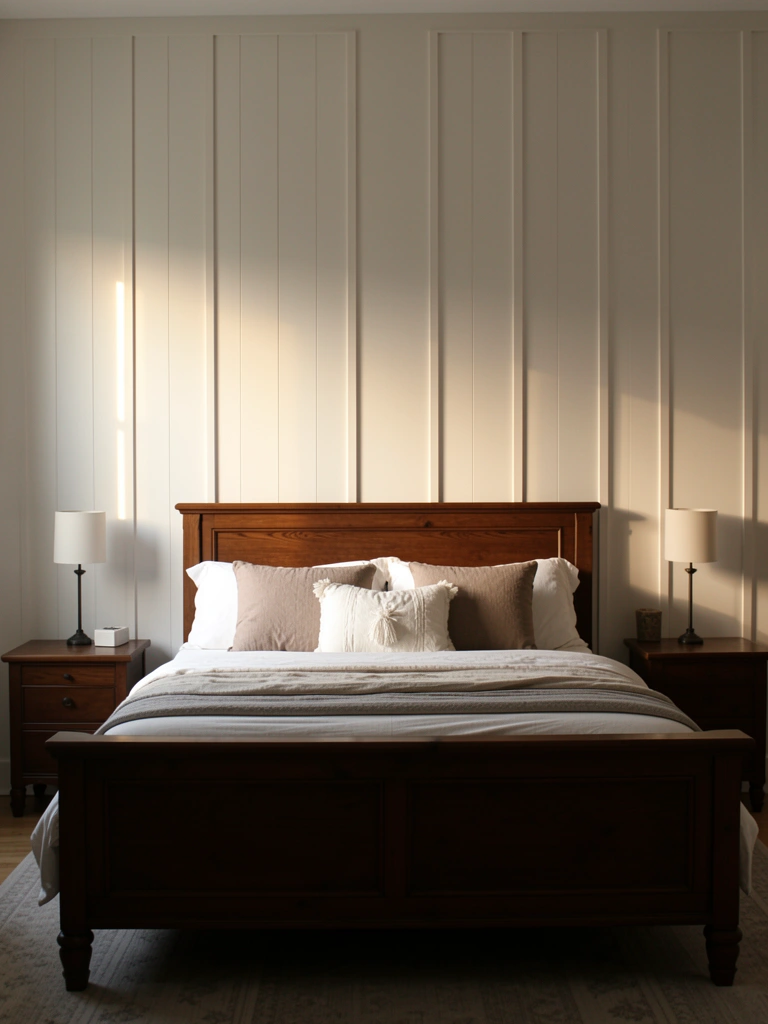
    5. Invest in Furniture With Built-In Storage

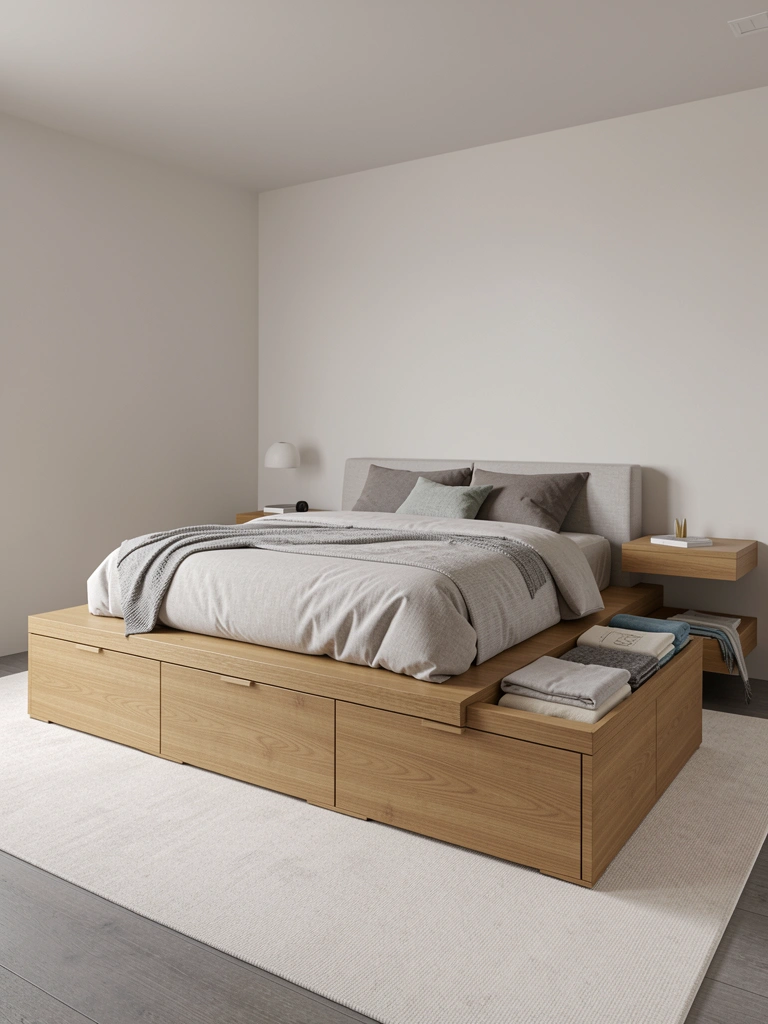
    Multifunctional furniture is the secret weapon for small spaces and clutter prevention. Every piece should work overtime.

    Shop for ottomans with hidden storage ($80-$200 at Wayfair, West Elm, or Article), beds with underbed drawers ($300-$800), or coffee tables with shelves ($150-$400). These pieces cost more upfront but eliminate the need for extra dressers, cabinets, or shelving units. Renter-friendly option: Look for beds with removable storage drawers or ottomans on wheels that slide under existing furniture. The investment pays off because you cut down on the total number of furniture pieces by 30-40%, leaving your floor plan open and room to move.

    Your home looks curated instead of cluttered, and everything has a designated home—no more “stuff storage” taking up valuable real estate.


    6. Use the “Close the Door” Test for Visible Spaces

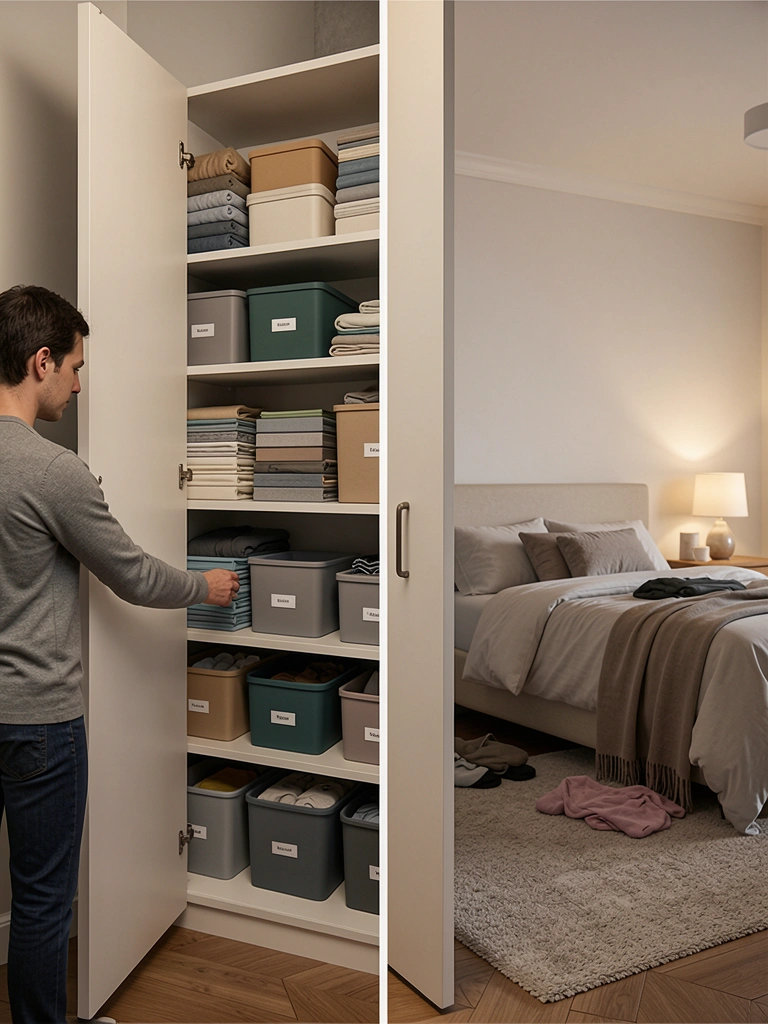
    If you can close a door on it, it’s hidden clutter—which means you have freedom to store more in there than you’d dare leave out on display.

    Deep closets, pantries, under-sink cabinets, and linen closets are for overflow storage. The rule: anything visible in open areas (shelves, counters, furniture surfaces) should follow stricter editing rules. Use closed storage for supplies, backups, seasonal items, and things you use regularly but don’t need to see. Organization systems cost $30-$150 depending on the space size. This mental shift stops you from moving clutter around—it gives you permission to store it properly instead.

    Open areas become calm and curated. Closed spaces become efficient, and you don’t feel guilty about what’s behind the door because everything serves a purpose.


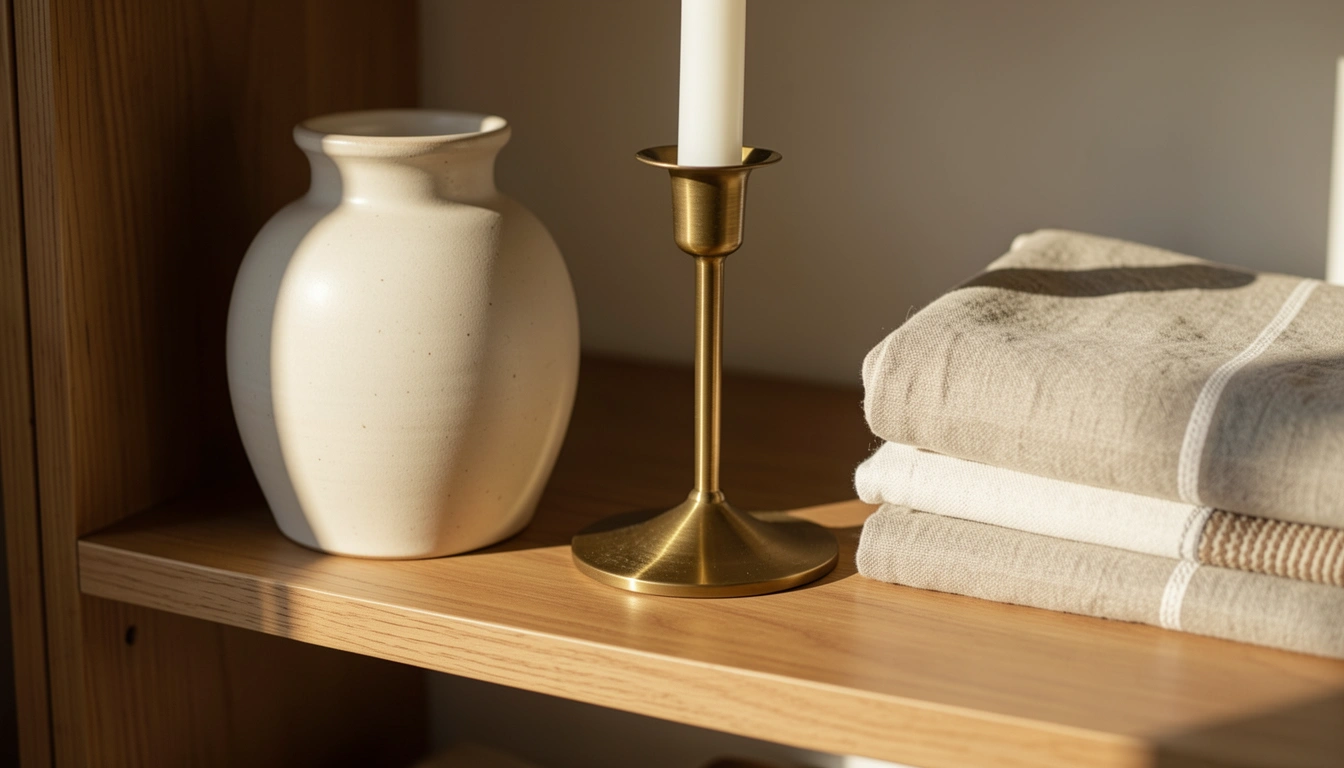
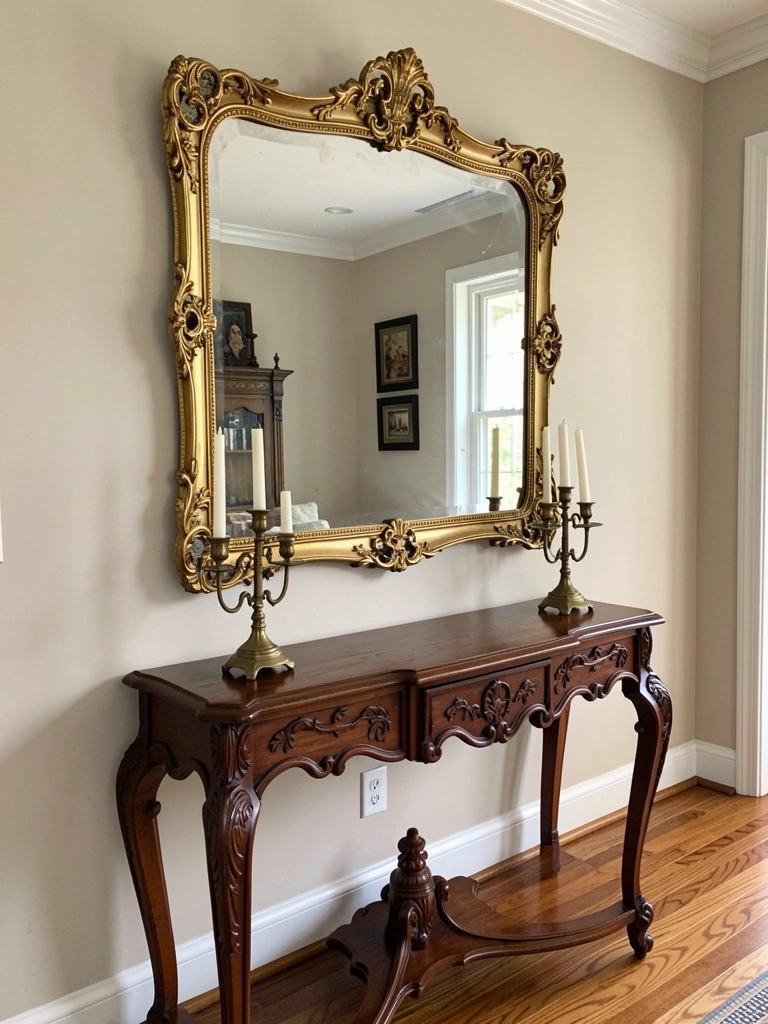
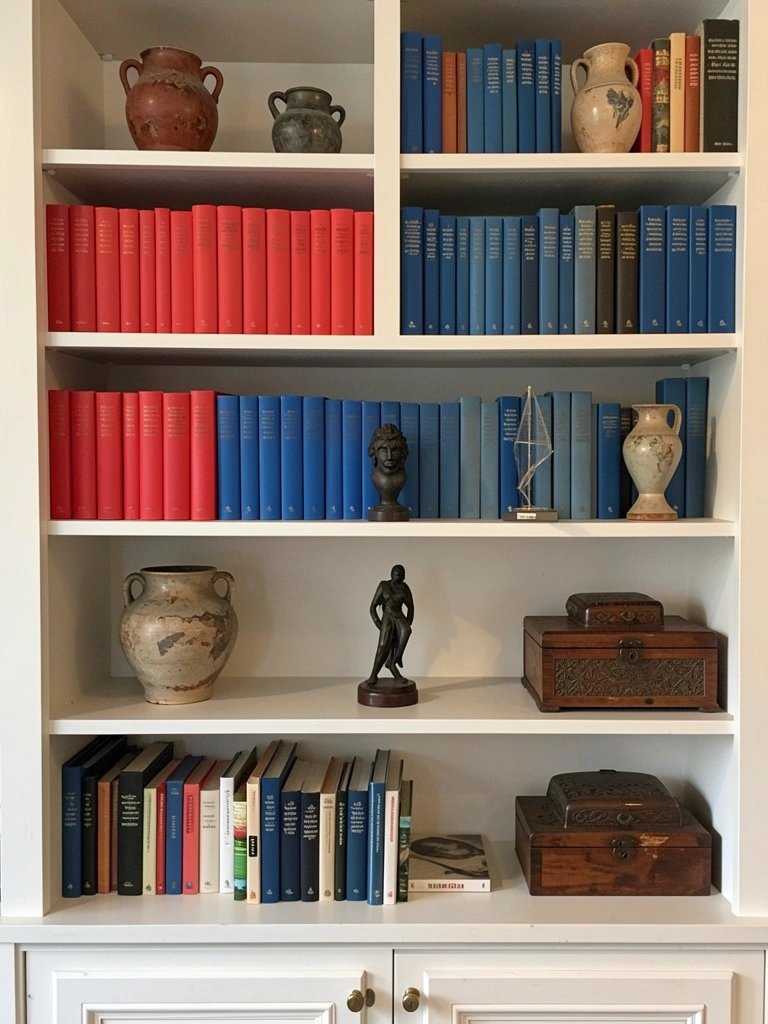
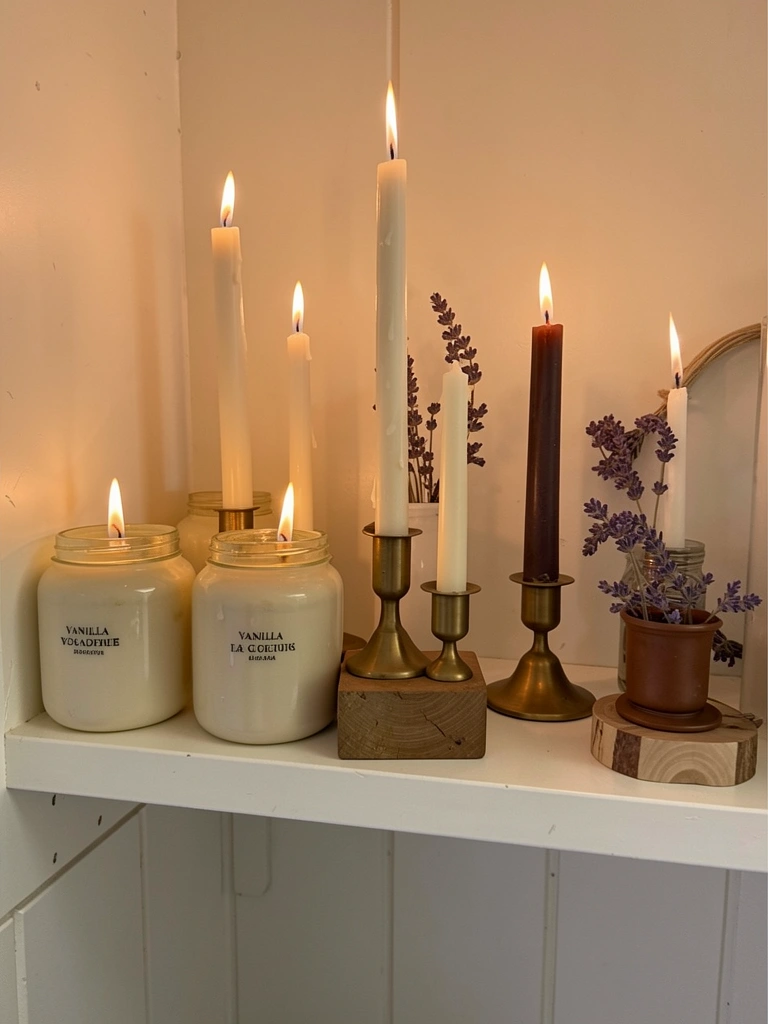
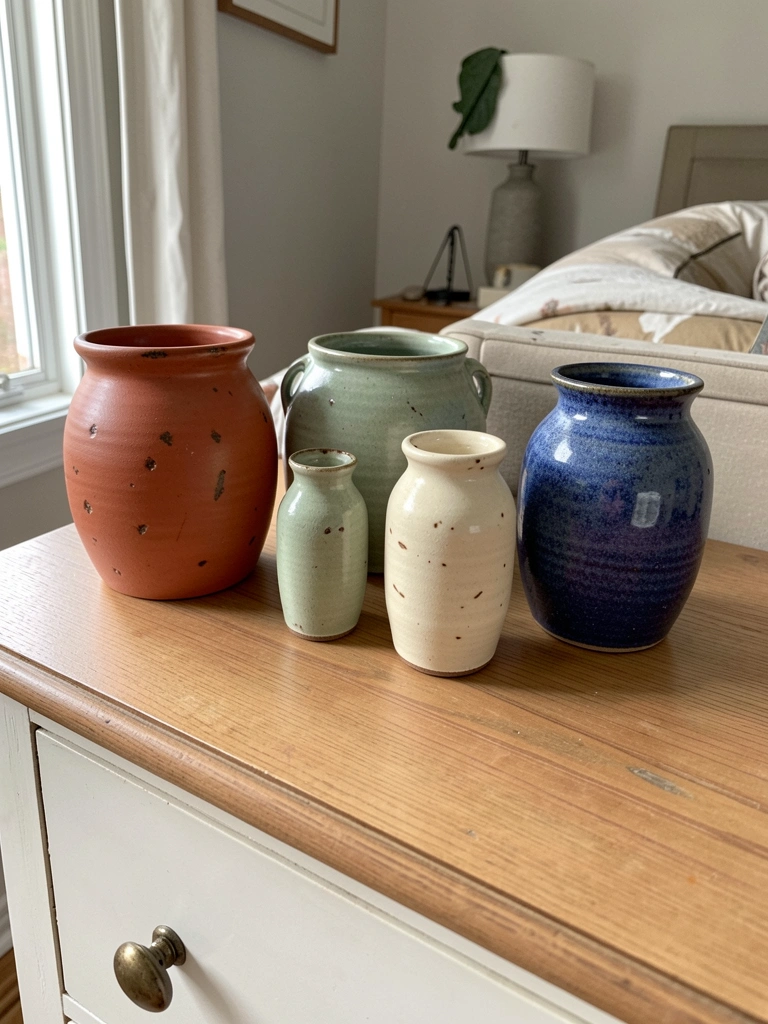
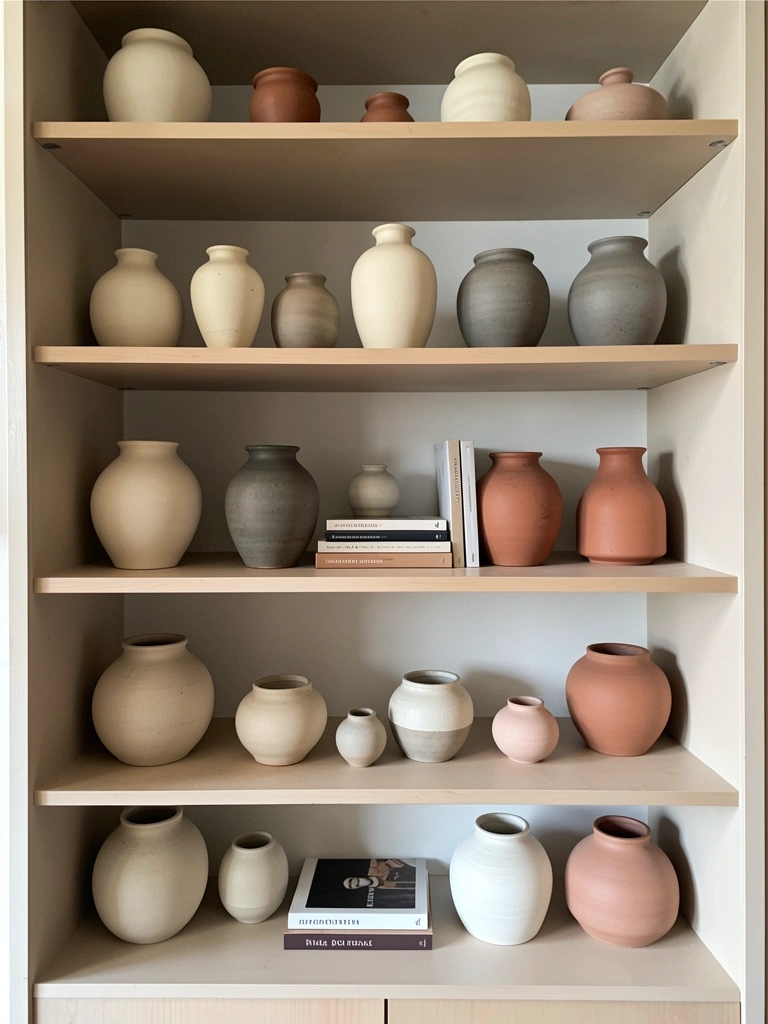
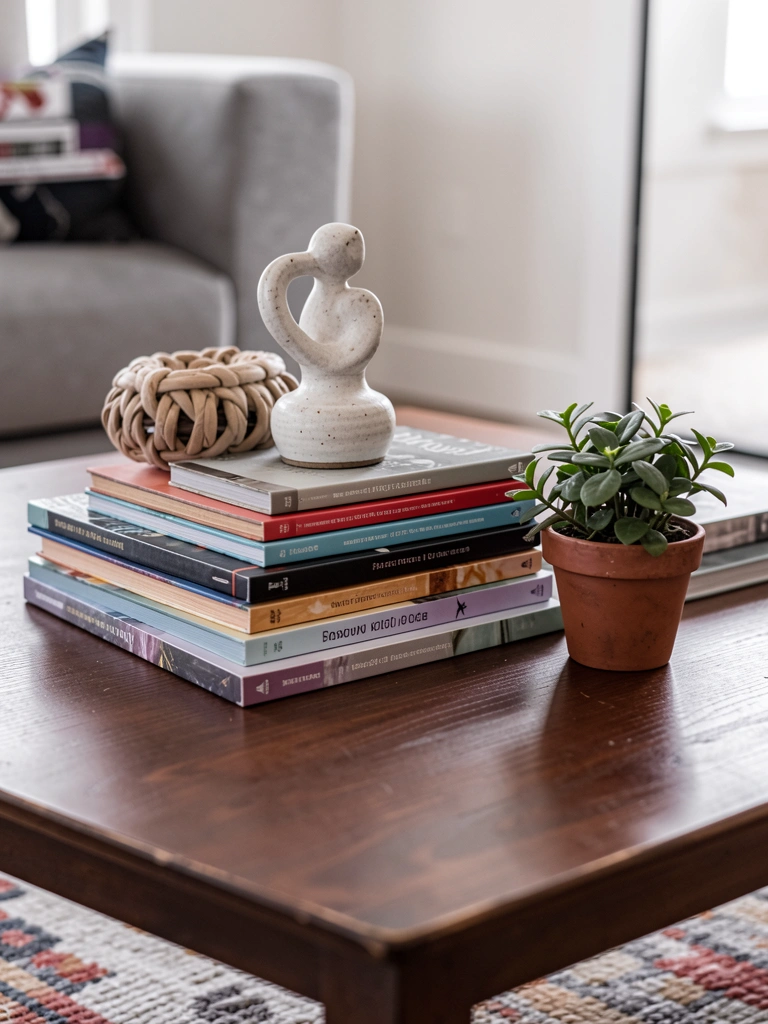
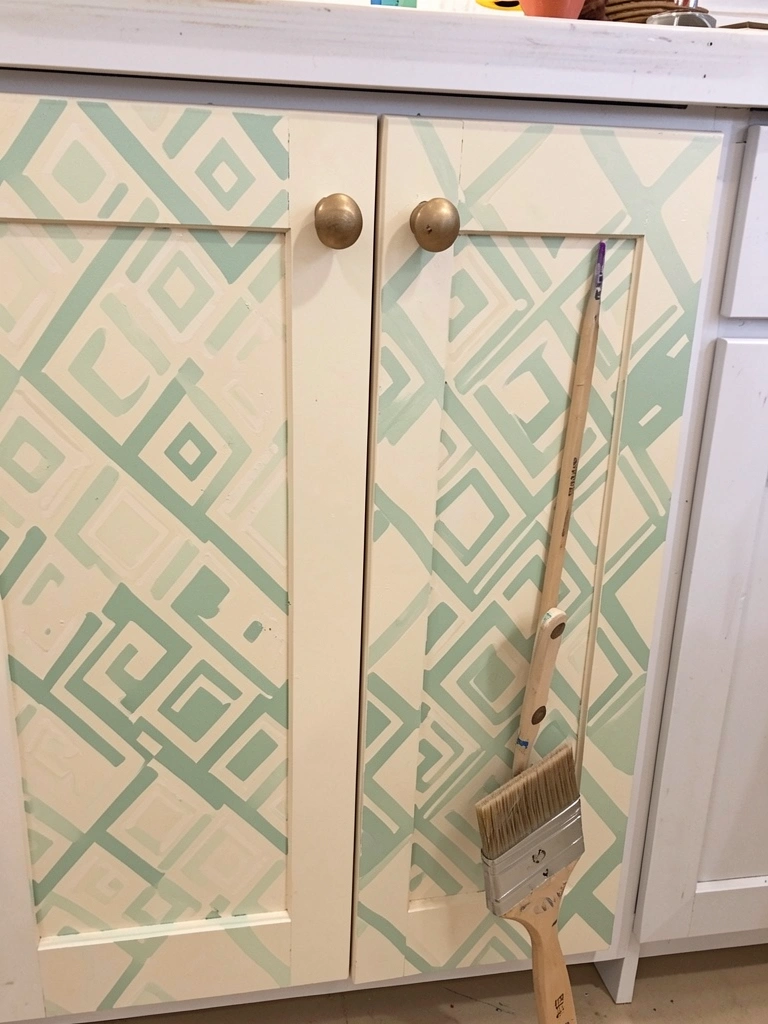
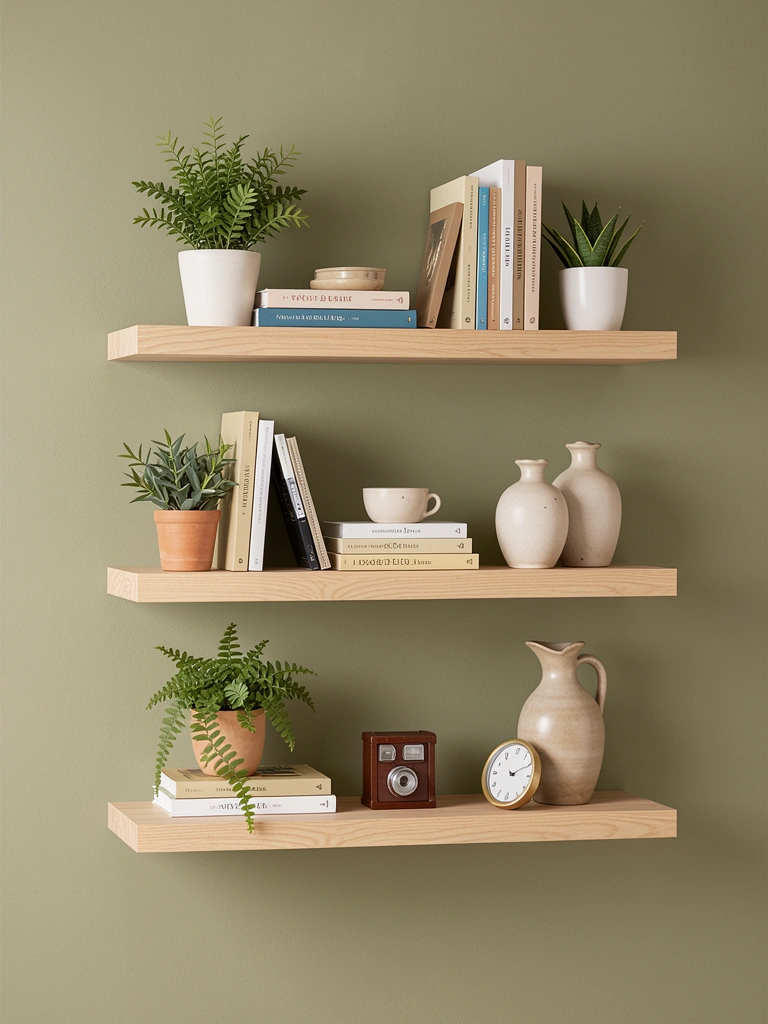
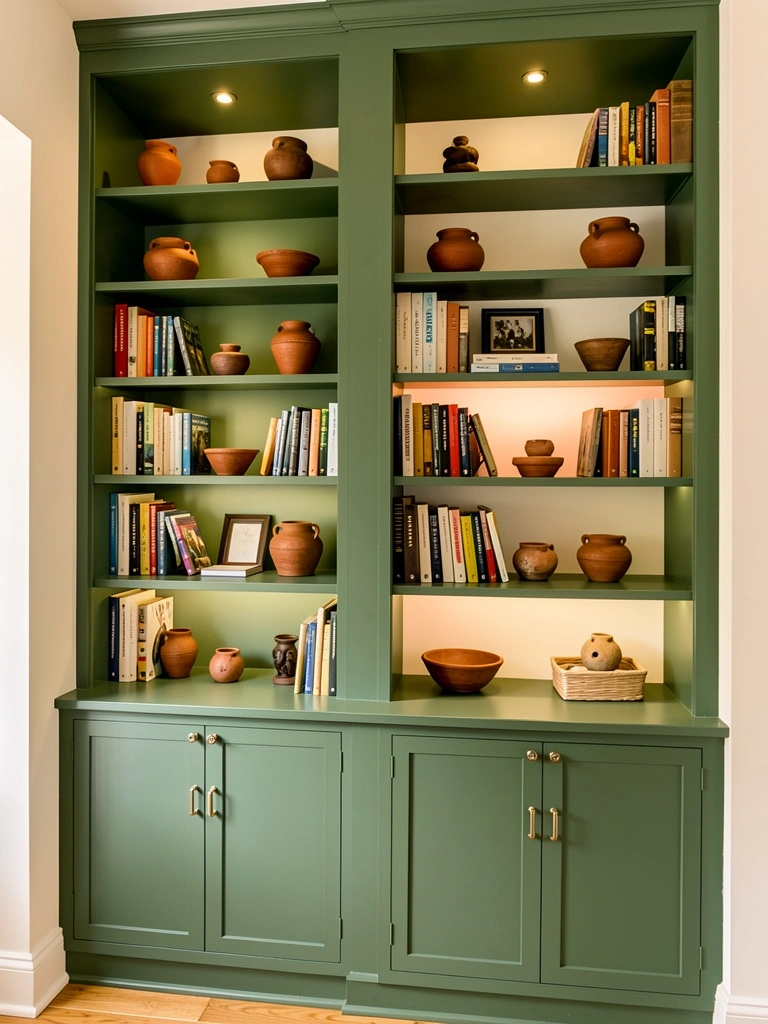
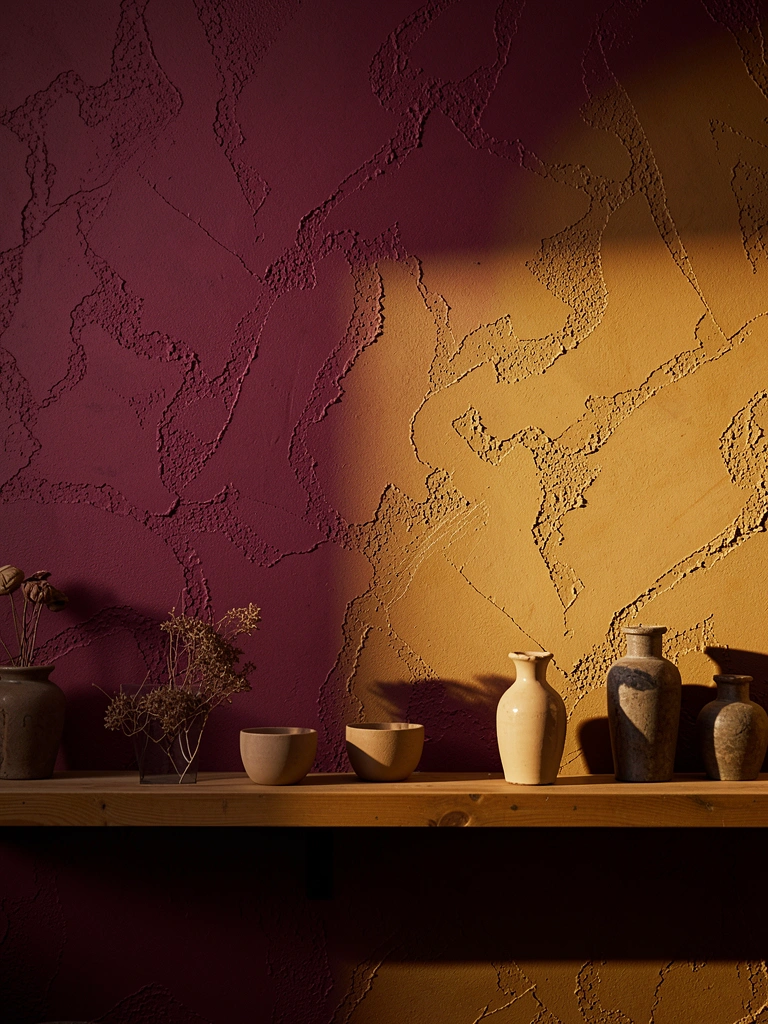
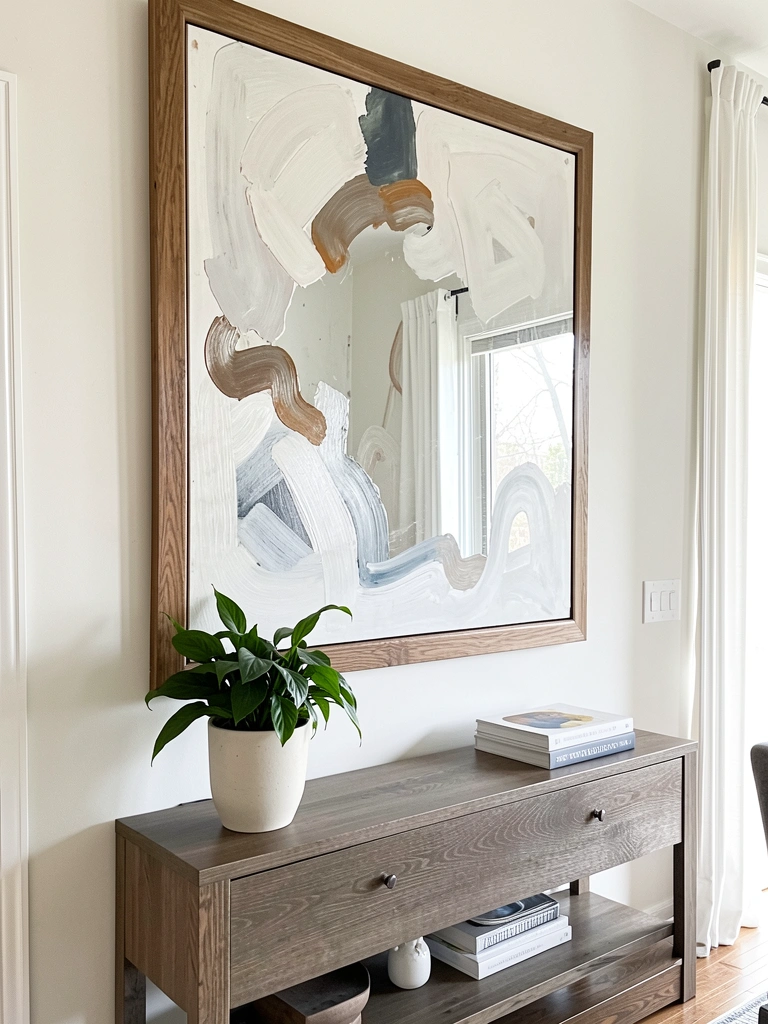
    7. Edit Your Décor Collection to Your Actual Style

    Most people own décor they’ve accumulated over time—gifts, impulse buys, things that matched old décor schemes. It all sits there visually competing for attention.

    Gather every decorative object in your home and place them on your bed. Pick only items that genuinely match your current style and make you happy when you look at them. This takes two to three hours but costs nothing. Be ruthless: that decorative bird you got five years ago? If it doesn’t spark joy or fit your aesthetic now, it goes. Donate or sell extras on Facebook Marketplace or Goodwill. Suddenly your shelves, nightstands, and coffee tables look intentional and gallery-like instead of like a thrift store display.

    With fewer pieces, each one gets visual prominence and your eye can finally rest. Décor becomes meaningful instead of noise.


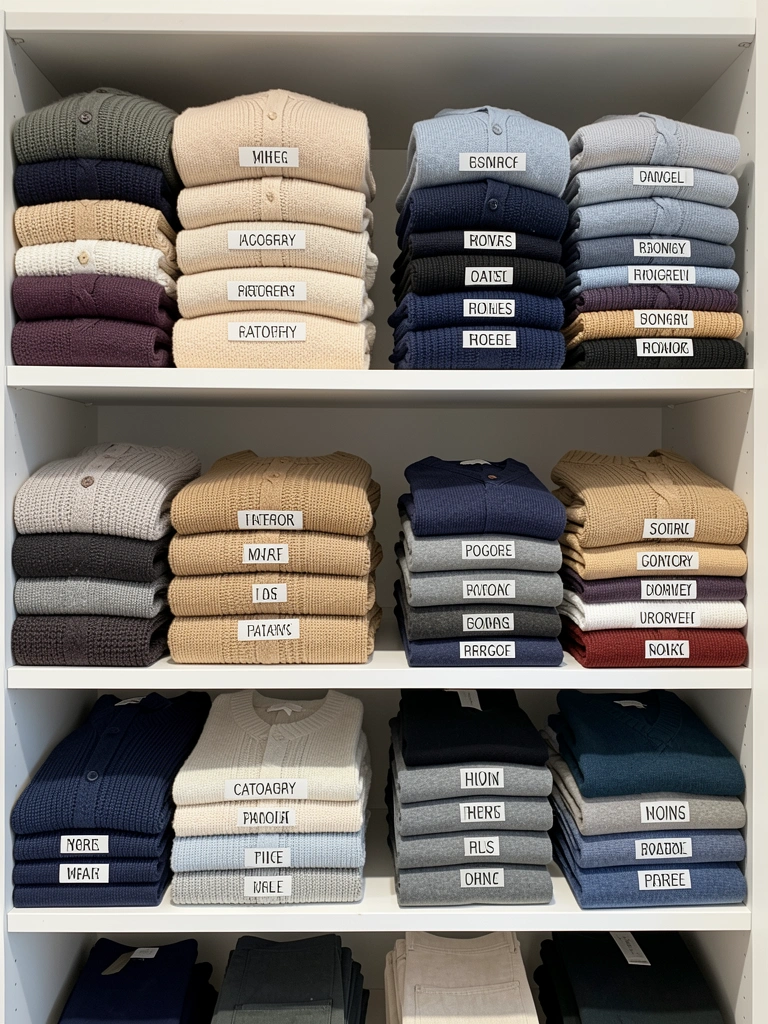
    8. Switch to Vertical Hangers for Double Closet Capacity

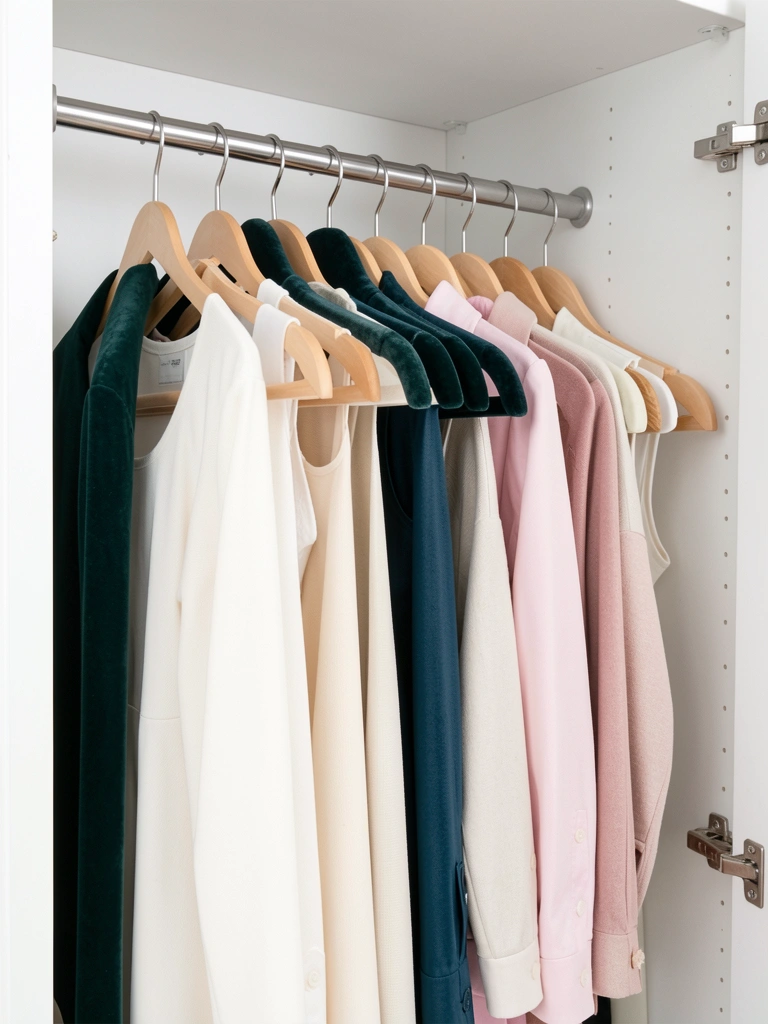
    Traditional hangers waste massive amounts of closet space. Tiered or vertical hangers let you stack multiple items in the footprint of one.

    Replace your current hangers with tiered velvet hangers ($20-$40 for a pack of 6-10 at IKEA, Target, or Amazon) or vertical cascade hangers ($15-$30). You’ll gain 40-50% more hanging space instantly—no closet reorganization needed. It takes 15 minutes to swap them out. Velvet hangers also prevent clothes from slipping, so everything stays organized and visible. Suddenly your closet feels spacious instead of jammed.

    You see all your clothes at once, wear items more often, and stop buying duplicates because you remember what you own. It’s a tiny change that makes a massive difference in how you experience your space daily.


    9. Create a “Donation Station” Box That Lives Year-Round

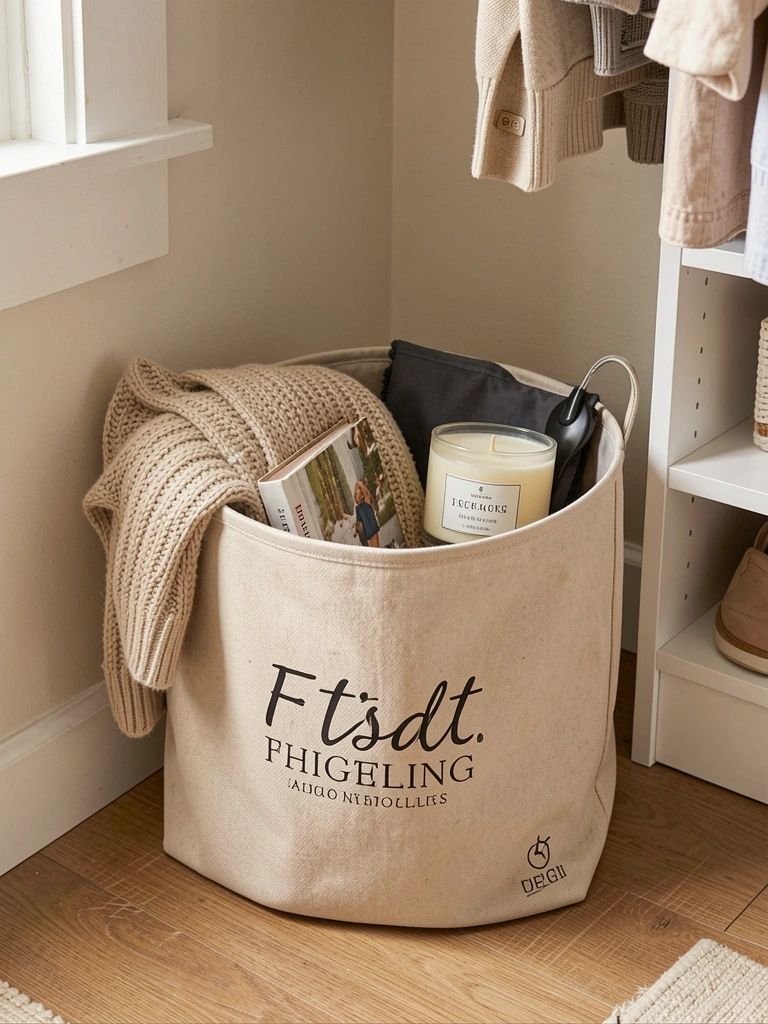
    Instead of holding onto items “just in case” you’ll donate them, make donating friction-free by keeping a permanent donation box visible.

    Place a labeled fabric bin or small shelf ($10-$25 at IKEA or Target) in your closet, bedroom, or mudroom. When something doesn’t fit, breaks, or you simply don’t use it anymore, it goes straight in the box instead of cluttering drawers. Once it’s full, schedule a monthly drop-off at Goodwill, Salvation Army, or a local shelter—takes 15 minutes. Knowing you have an immediate home for unwanted items stops you from justifying keeping them around. You edit more decisively because the guilt disappears.

    Your space stays lighter, editing becomes a habit instead of a guilt-laden annual project, and nothing sits unused for months gathering dust.


    10. Use Drawer Dividers to Prevent Chaos Creep

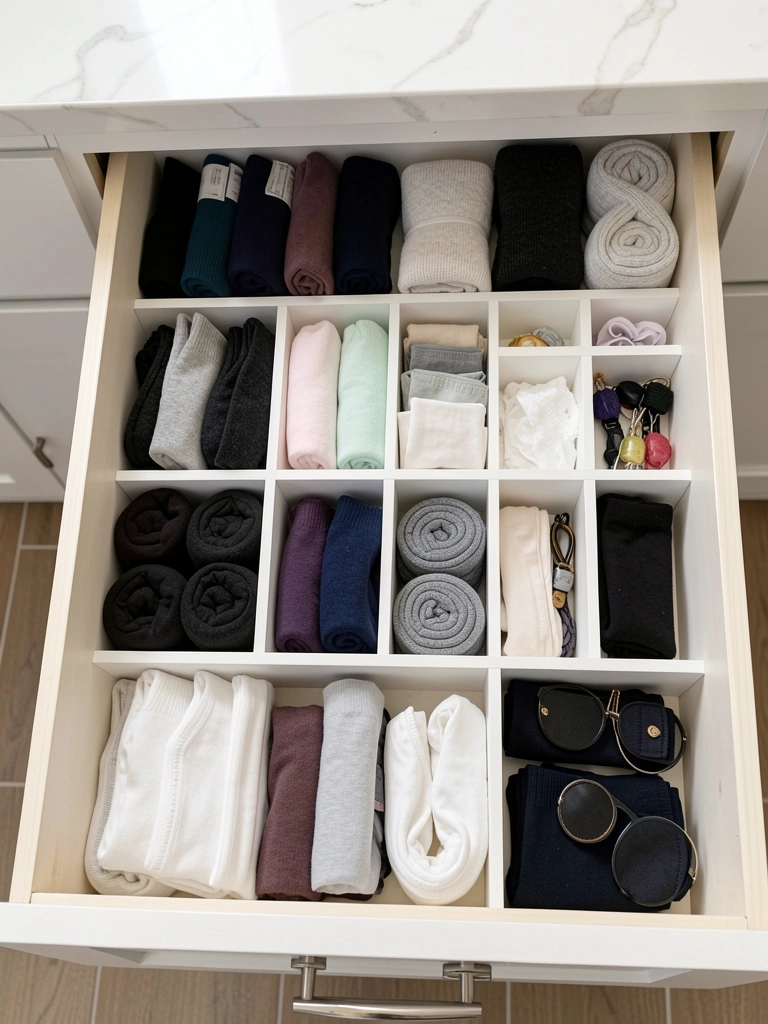
    Drawers are where clutter goes to hide. One divider system prevents the messy pile that happens when everything tumbles together.

    Install adjustable drawer dividers ($15-$40 for a set at IKEA, The Container Store, or Amazon)—they take 10-15 minutes to adjust and fit any drawer. Assign each section a category: socks, undergarments, accessories, tech cables, whatever you’re storing. Roll or fold items vertically so you see everything without digging. When each item has a zone, you use things more, spot duplicates faster, and maintain order without effort. Nothing crumbles into chaos again.

    Your drawers become functional and pleasant to open. You stop rebought items you forgot you had, and mornings run smoother because everything is visible and accessible.


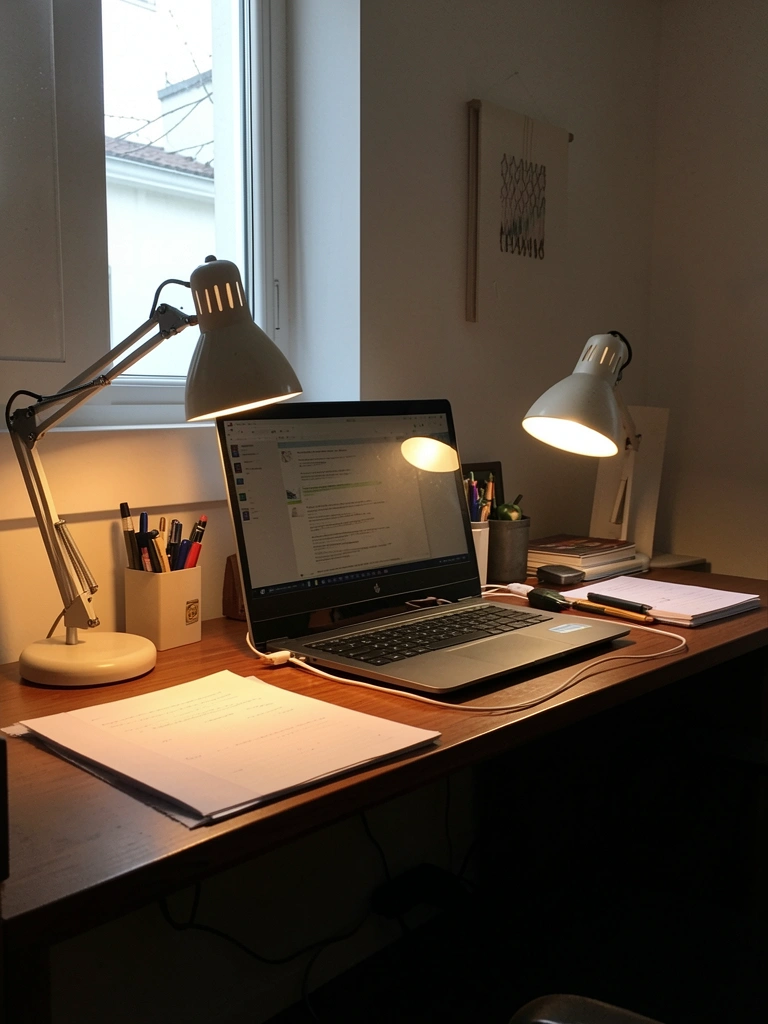
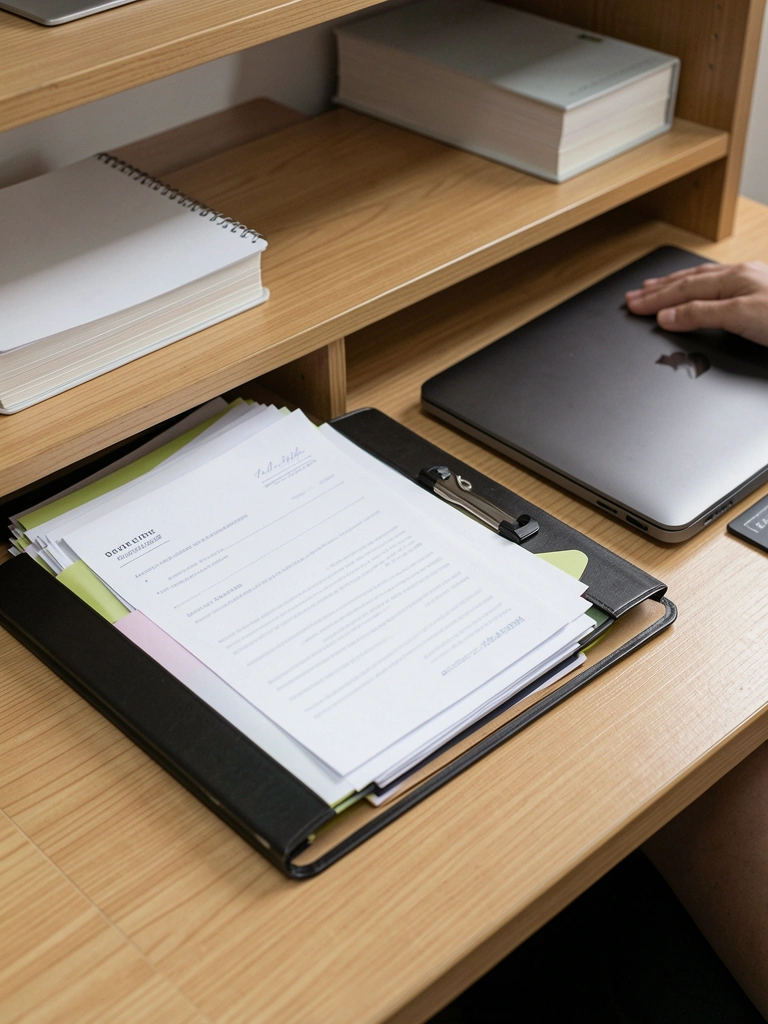
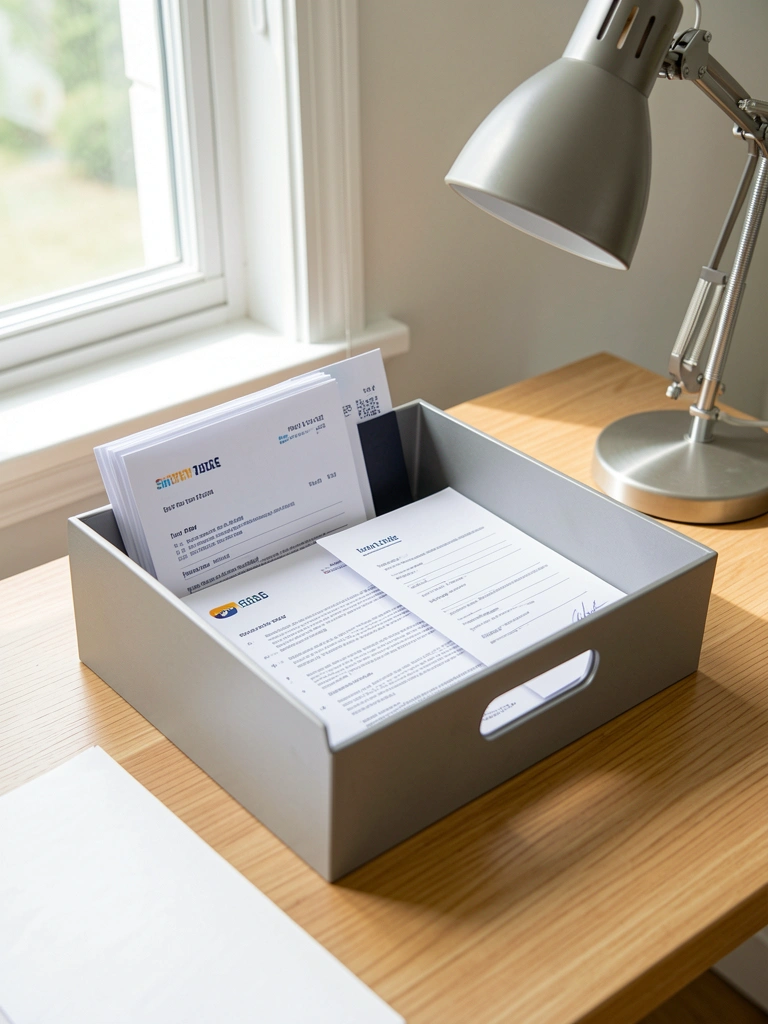
    11. Adopt a “Inbox Zero” System for Mail and Papers

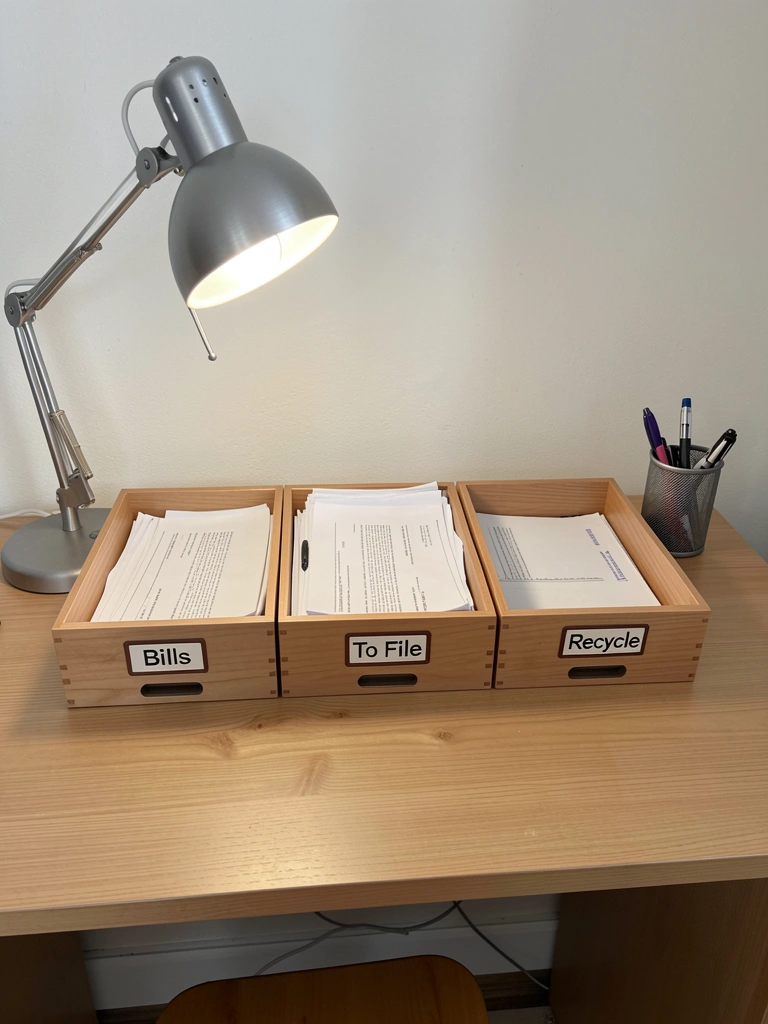
    Paper clutter multiplies faster than anything else. Bills, receipts, letters, and junk mail pile up and make spaces look chaotic.

    Set up a simple paper management system using three labeled file trays ($10-$20 at Target or Office Depot): one for bills to pay, one for items to file, and one for recycling. Check the trays once a week—takes 10 minutes. Pay bills, scan important documents and shred originals, recycle the rest. Go digital where possible: set up paperless billing, unsubscribe from catalogs, and file documents in a cloud system like Google Drive or Dropbox. Suddenly your surfaces are clear and your desk becomes a place to actually work instead of a filing system.

    You’ll never lose an important bill again, mail stops being a source of stress, and your entire home looks more intentional when papers aren’t stacked everywhere.


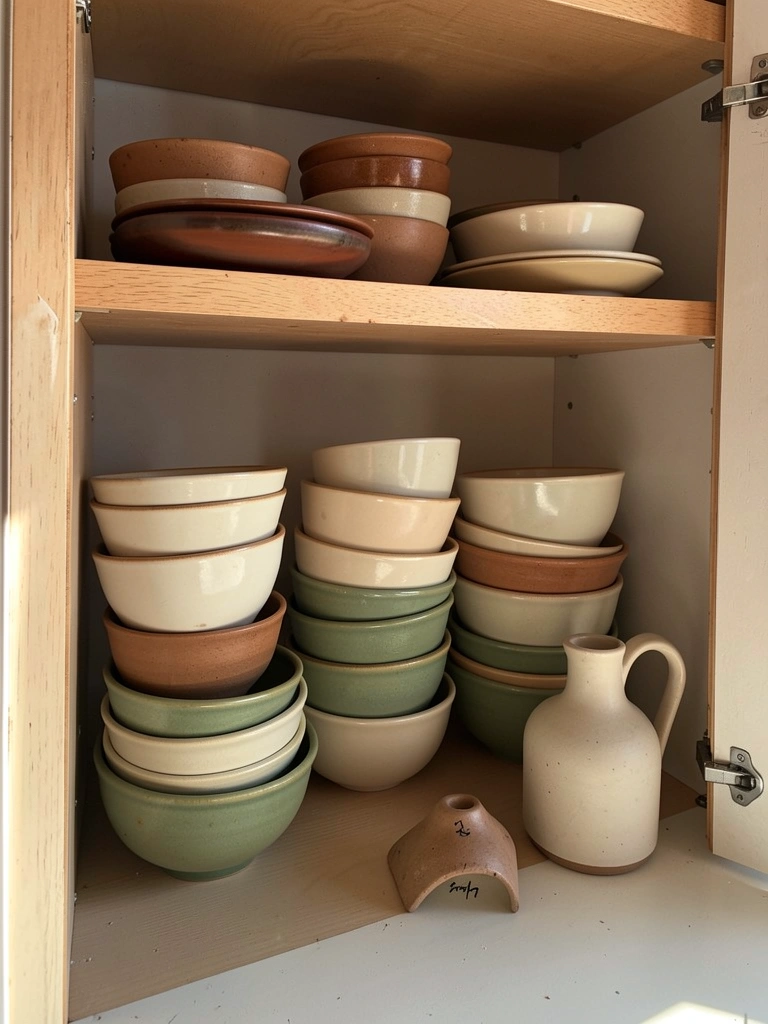
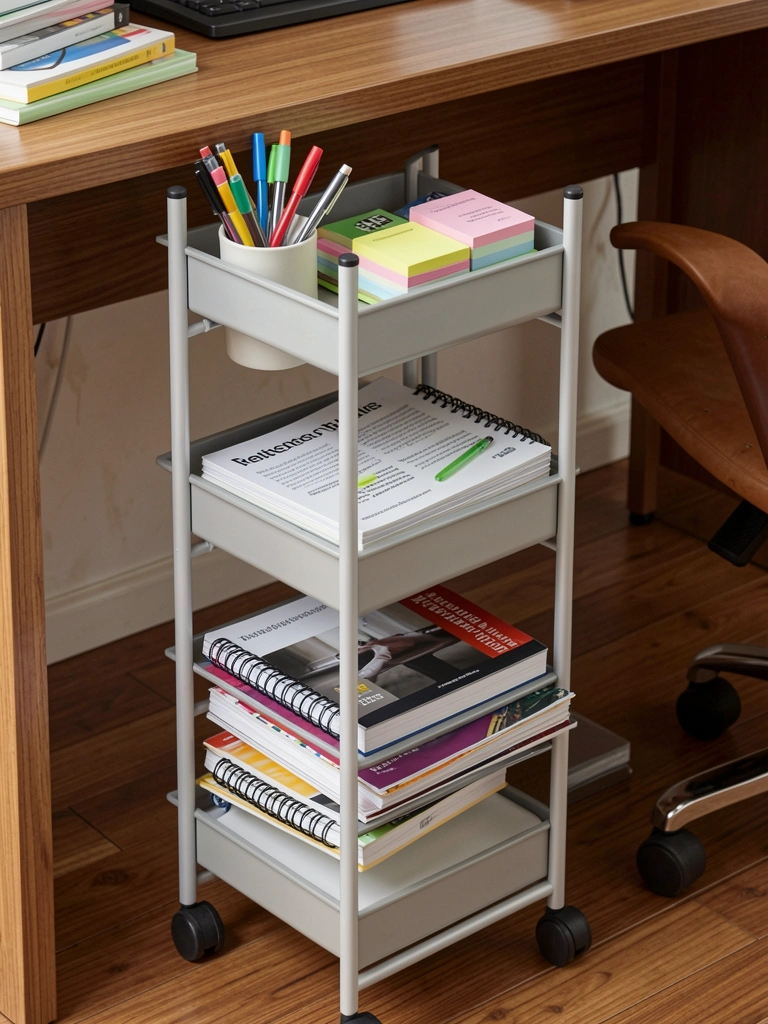
    12. Pare Down Your Kitchen Utensil Collection to Essentials

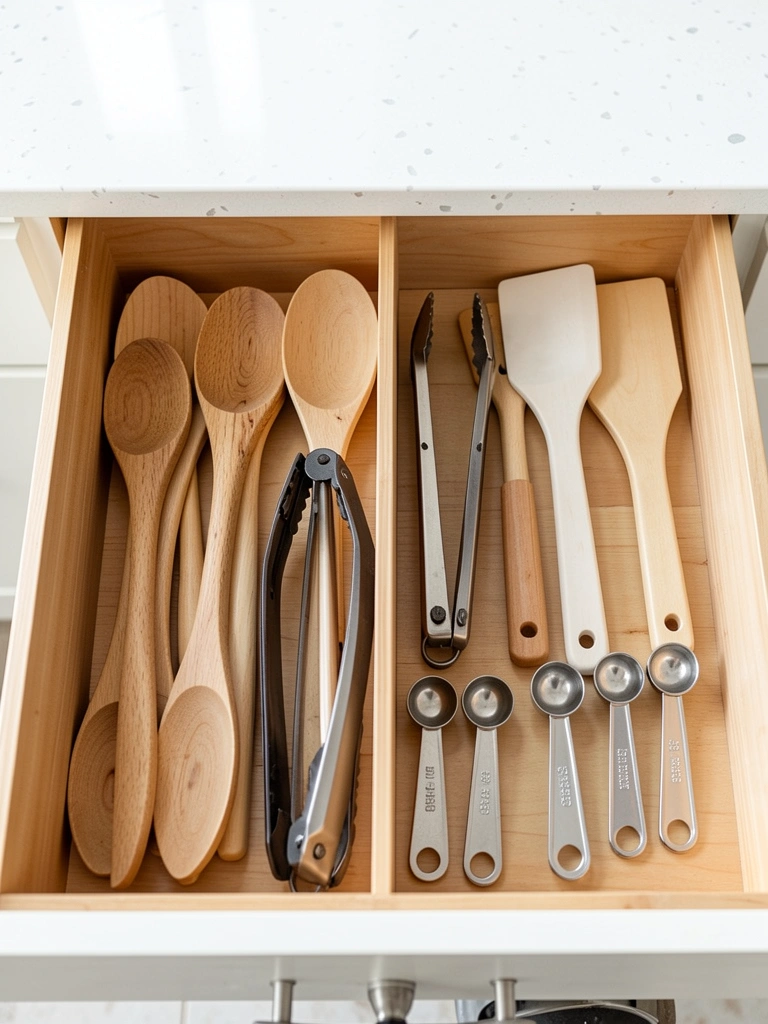
    Most home cooks use about 15 utensils regularly. The other 30 in your drawer just take up space and make cooking annoying.

    Gather every kitchen utensil, spatula, spoon, and gadget. Keep only the ones you’ve actually used in the past six months. Donate or sell the rest—takes one to two hours. Invest in quality multitasking tools ($40-$80 total): a sturdy wooden spoon, silicone spatula, good tongs, measuring spoons, and a couple of specialty pieces you genuinely use. Store them upright in a utensil holder ($15-$30) on your counter or in a divided drawer for easy access. No more digging through a tangled mess of single-use gadgets.

    Cooking becomes more enjoyable because you can find what you need instantly. Your kitchen looks and functions better with 40% fewer items taking up real estate.


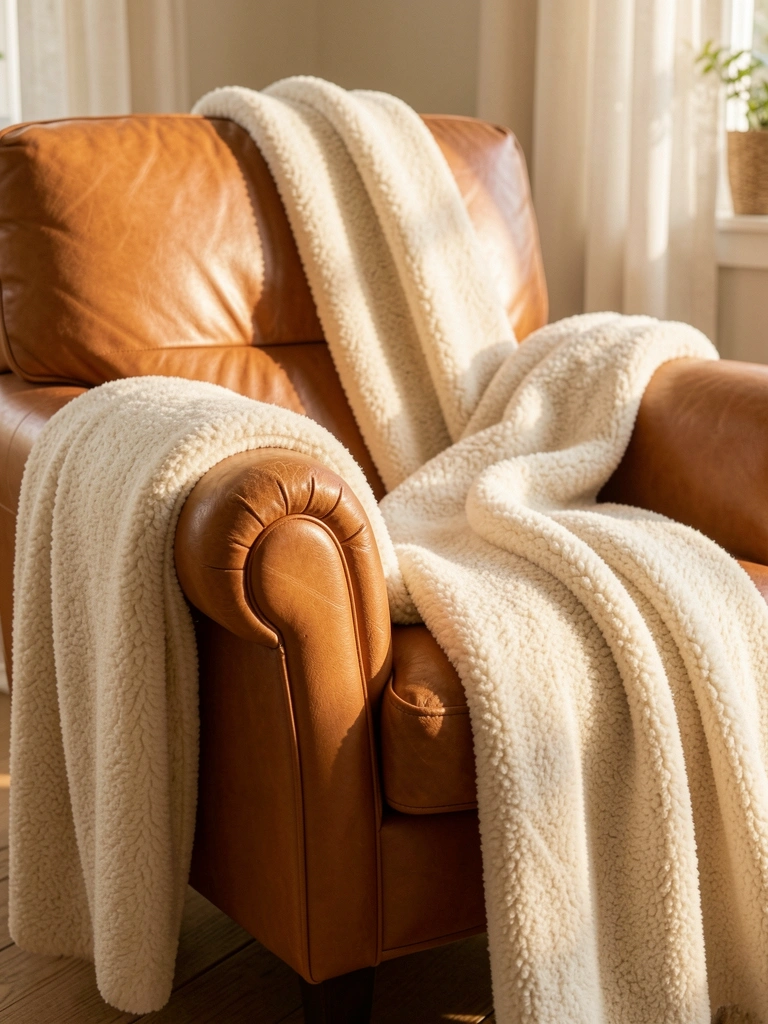
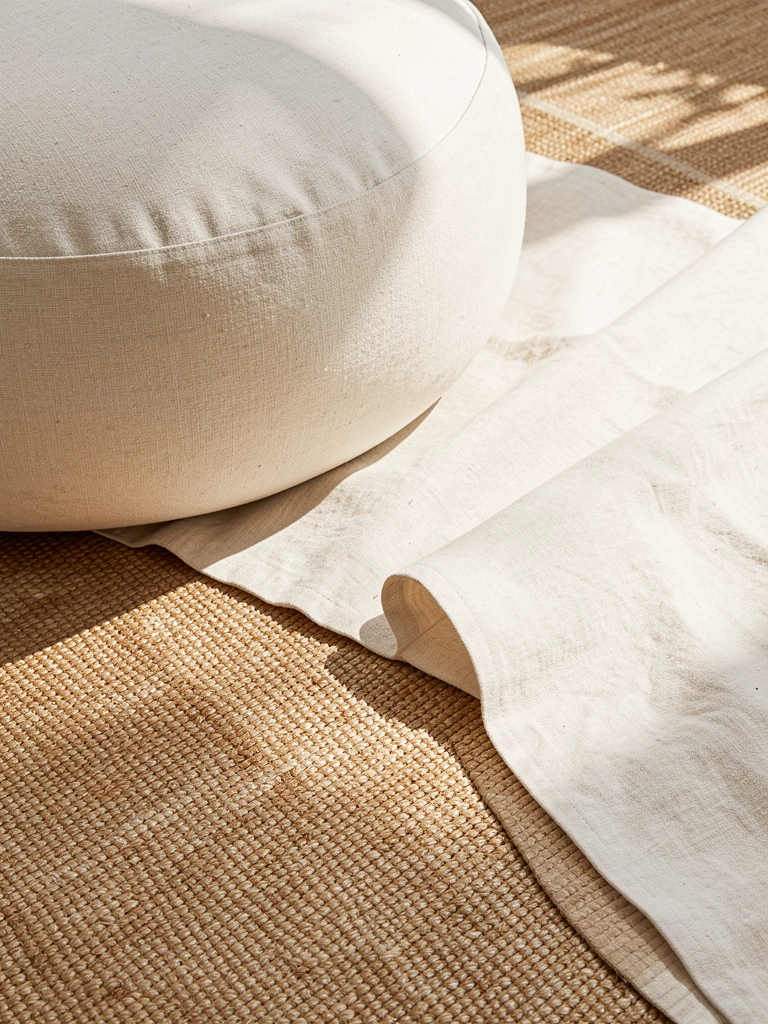
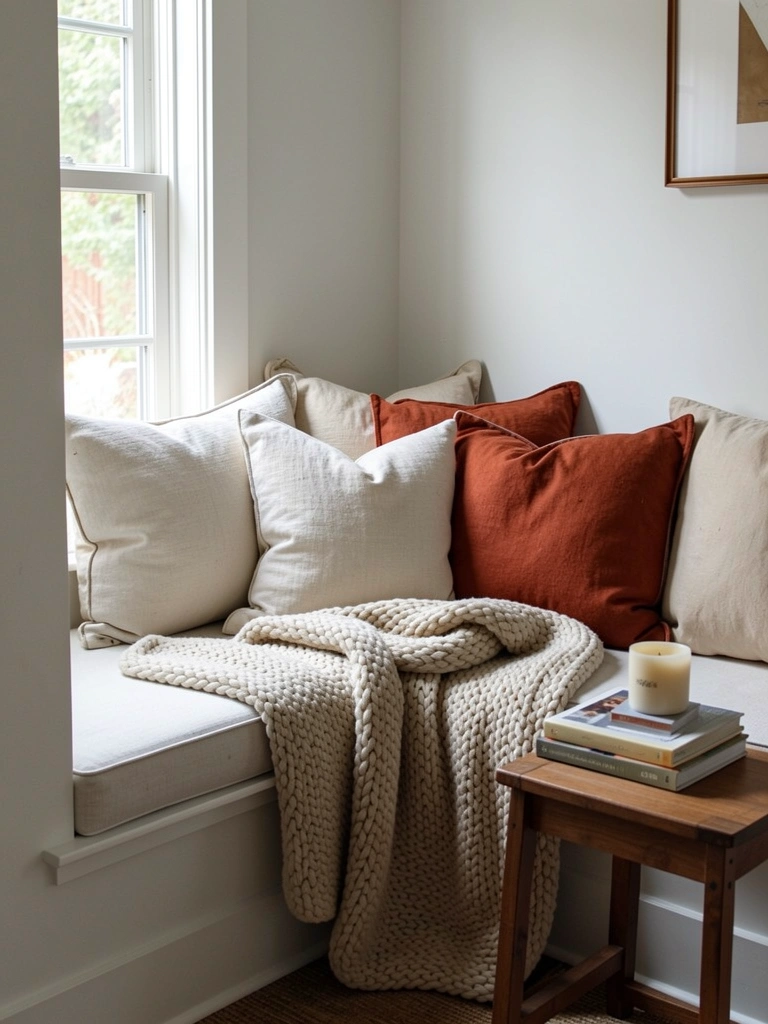
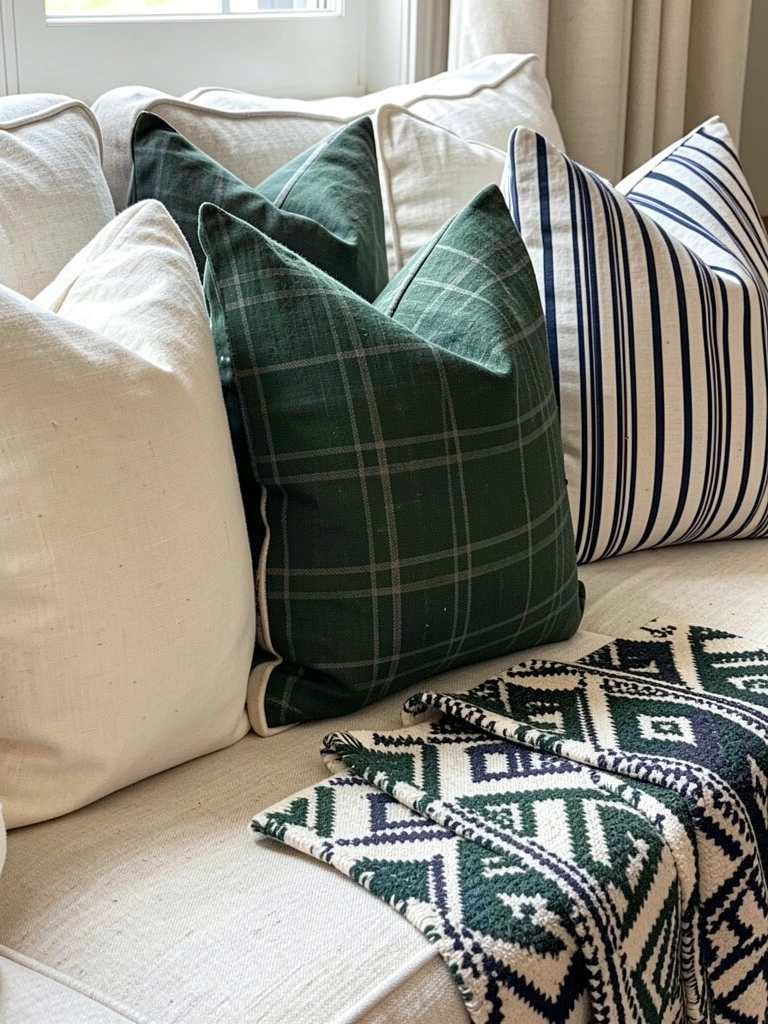
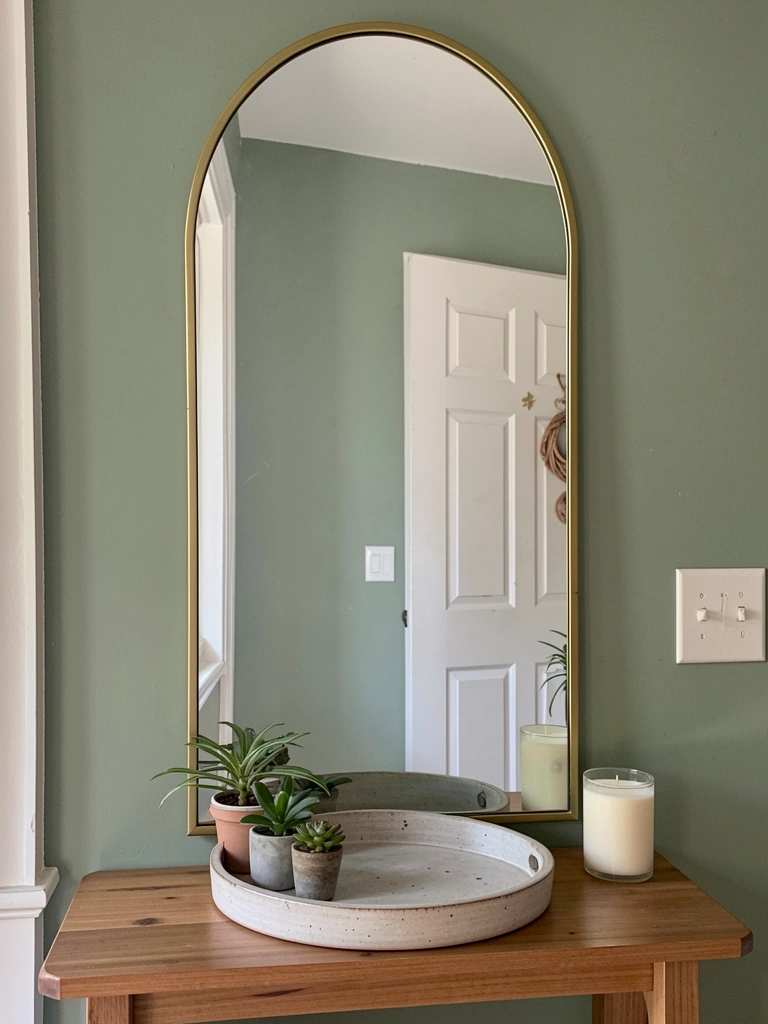
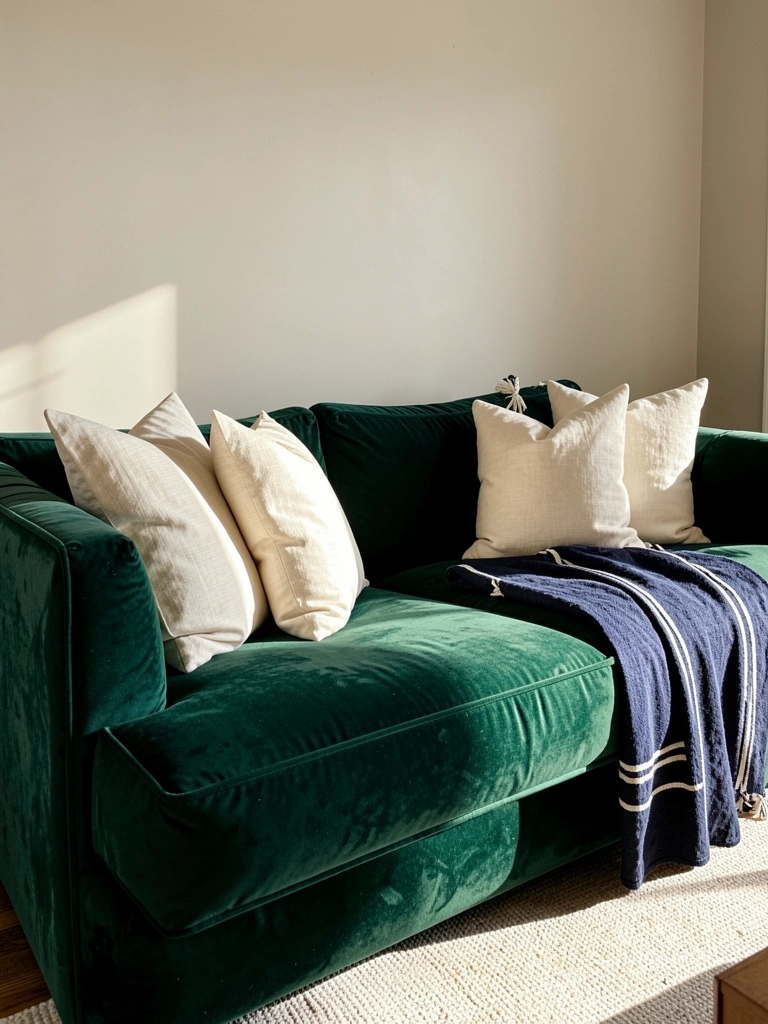
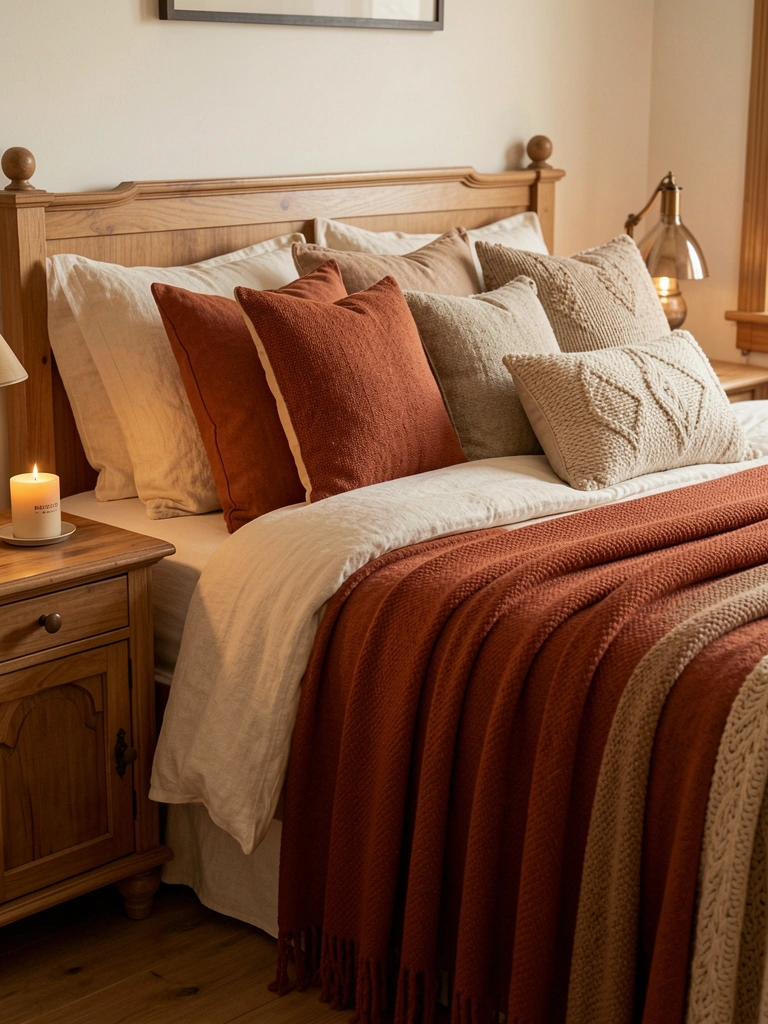
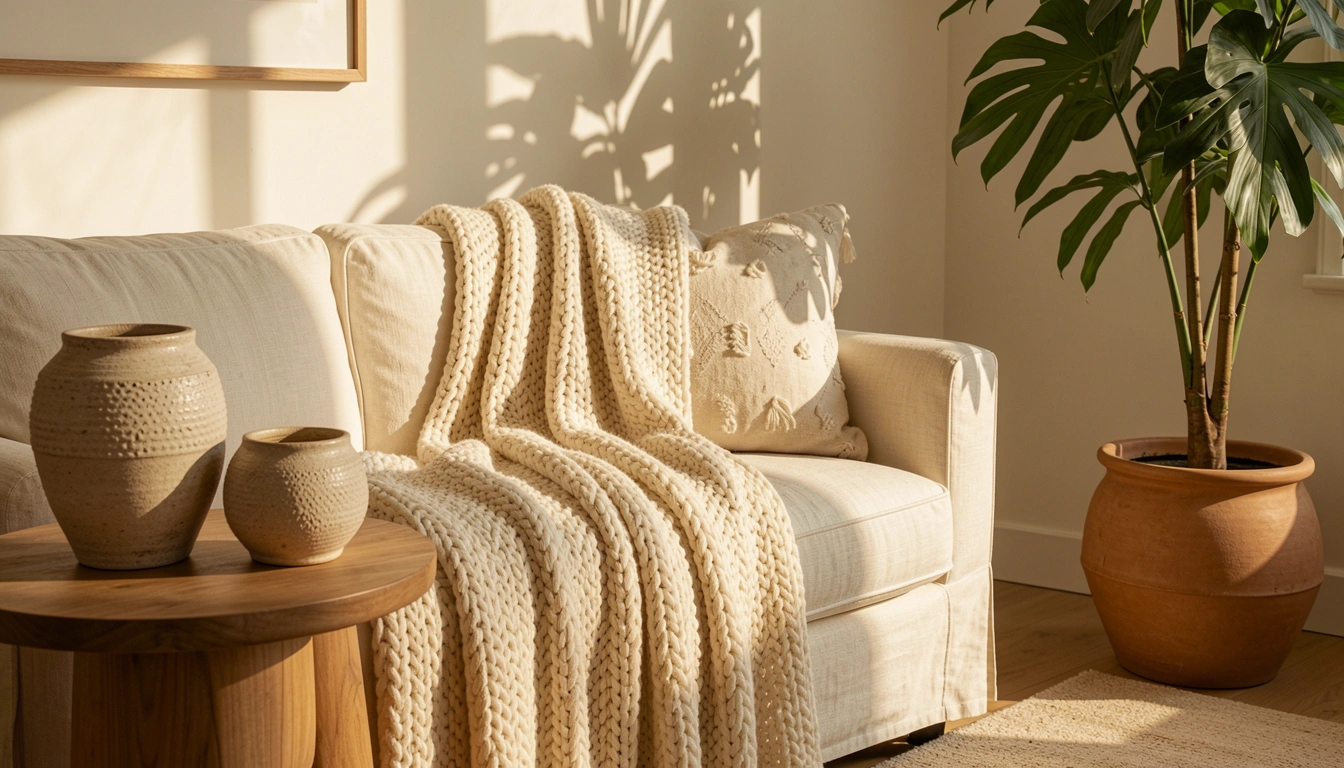
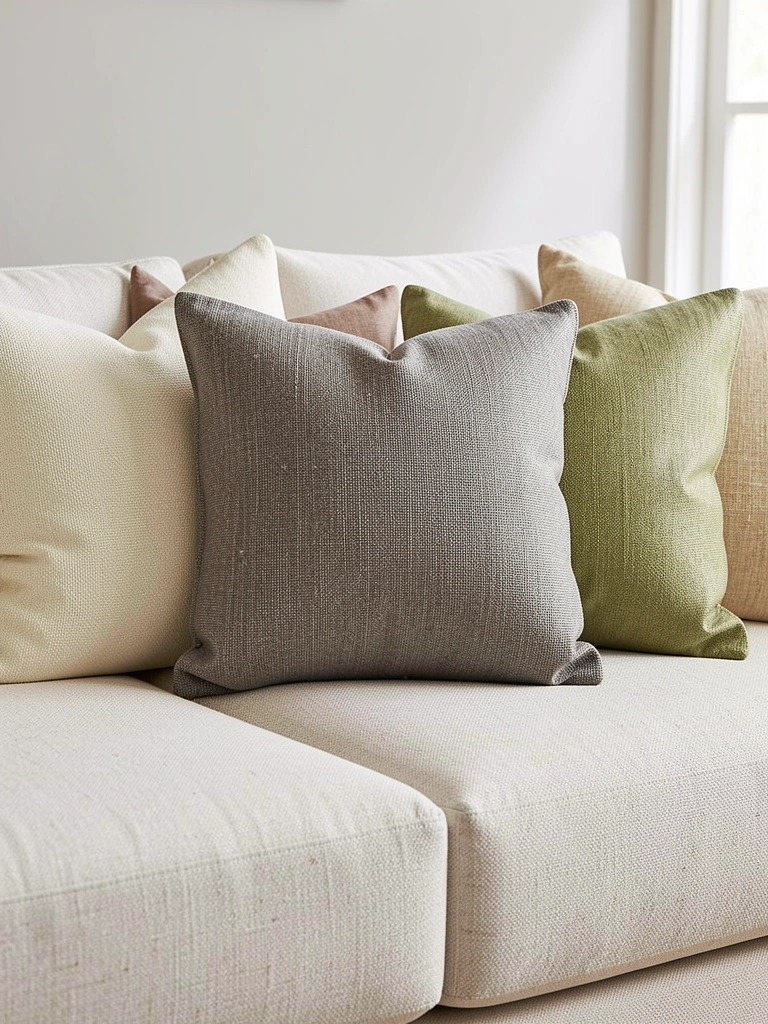
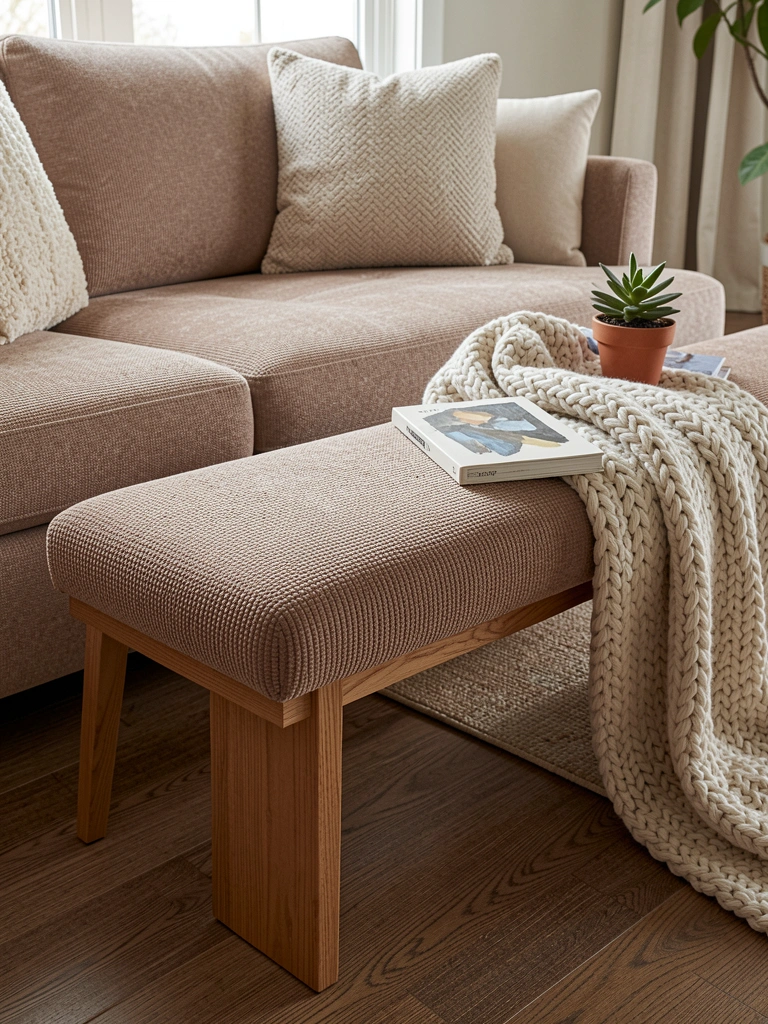
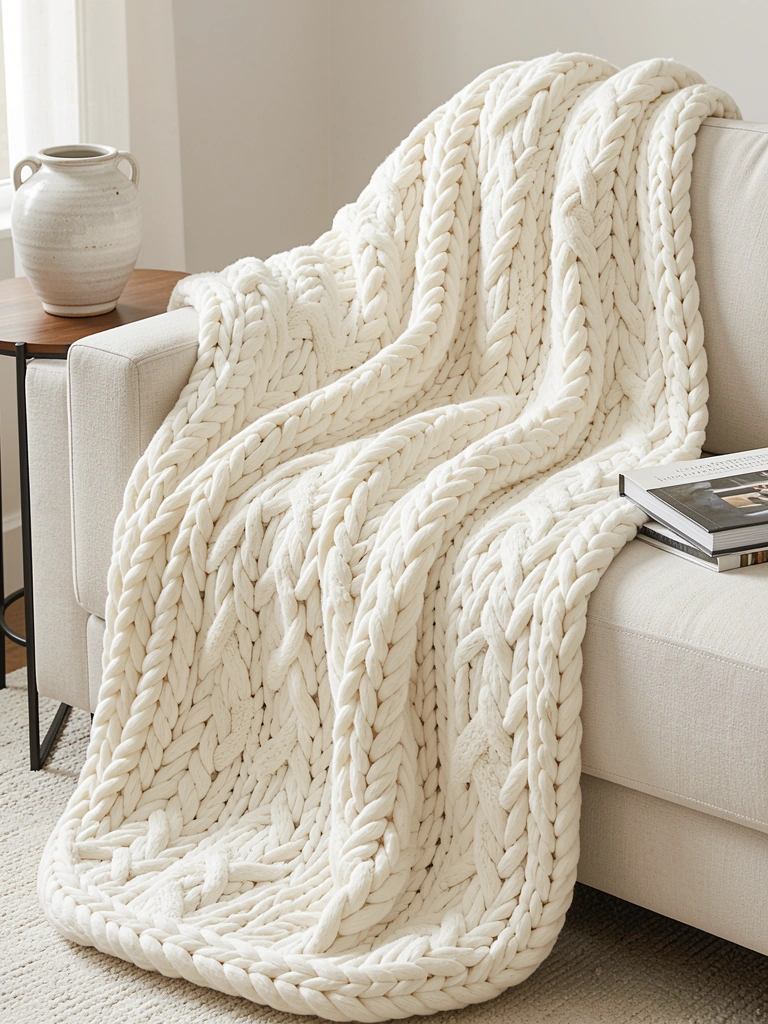
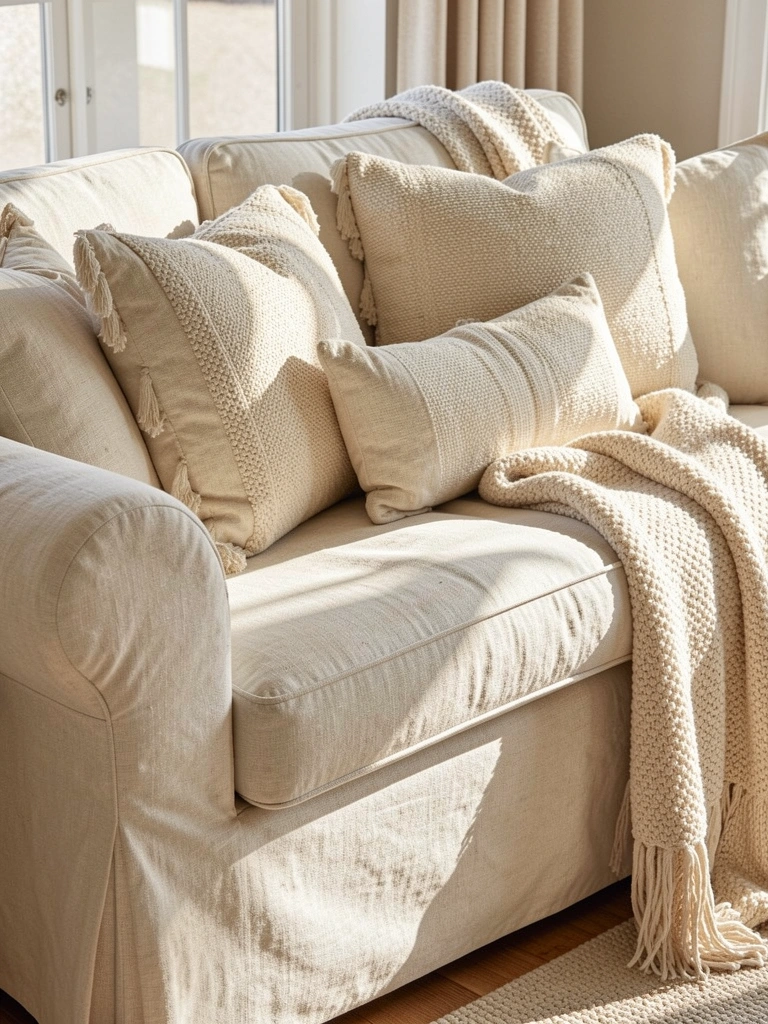
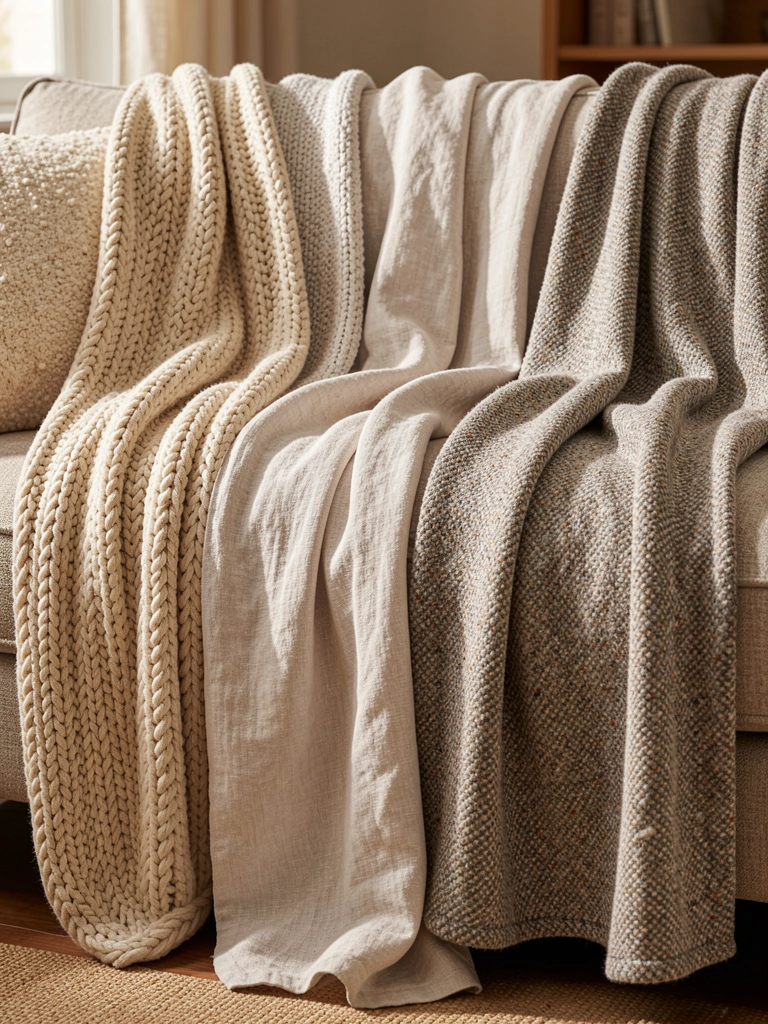
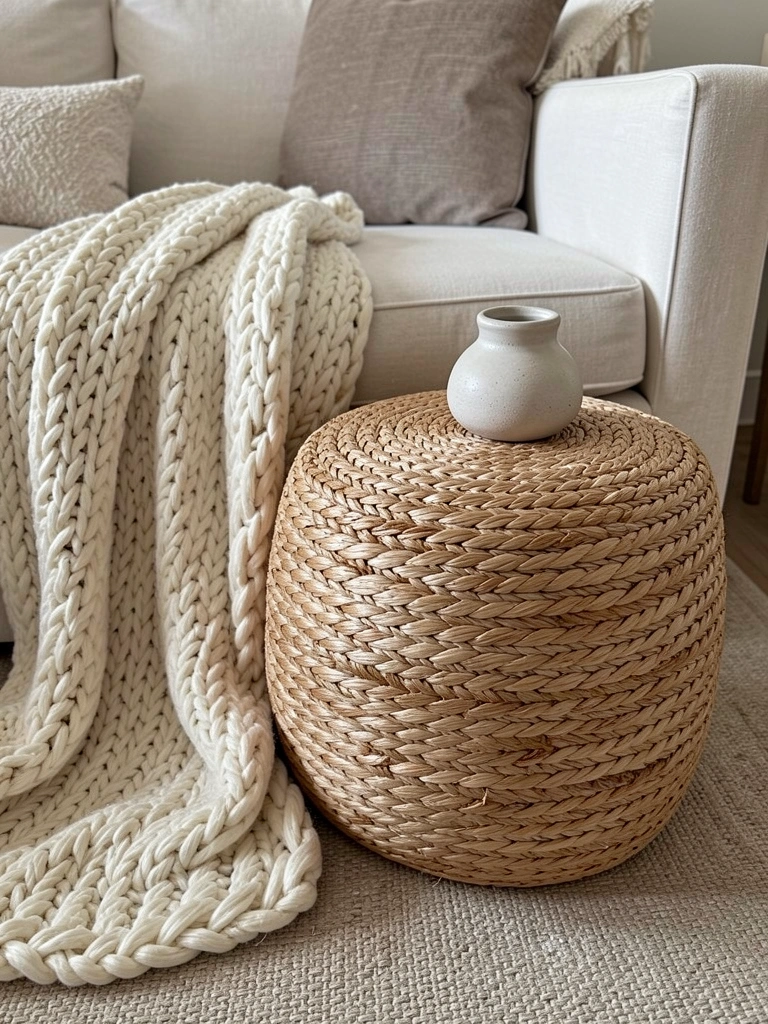
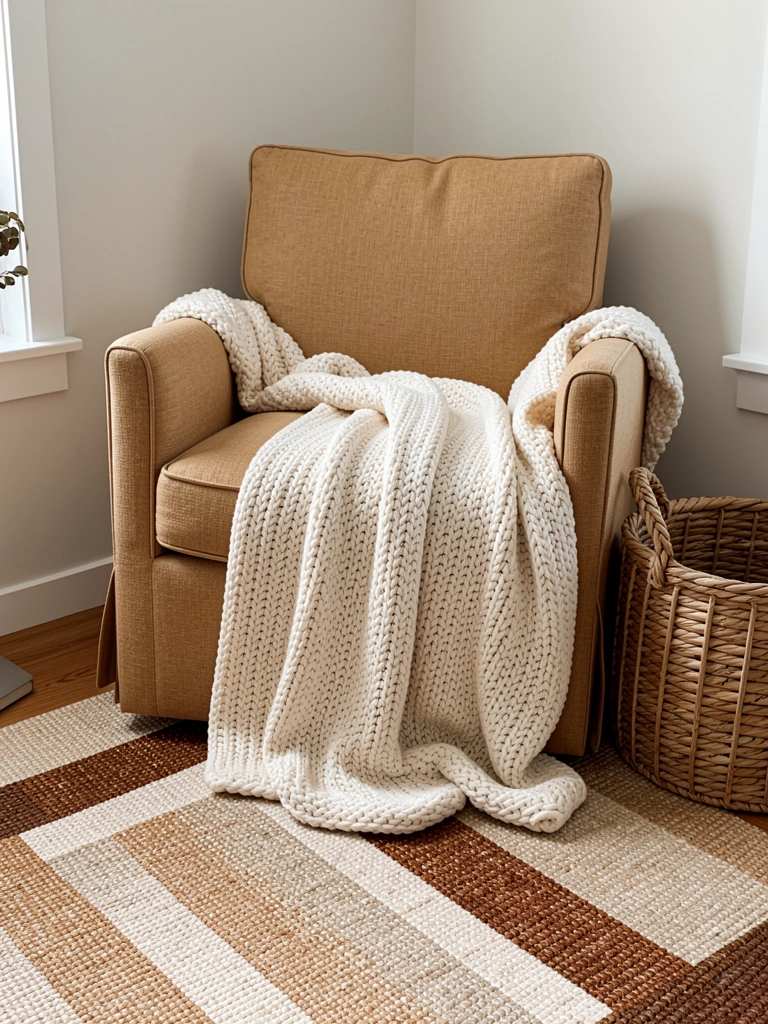
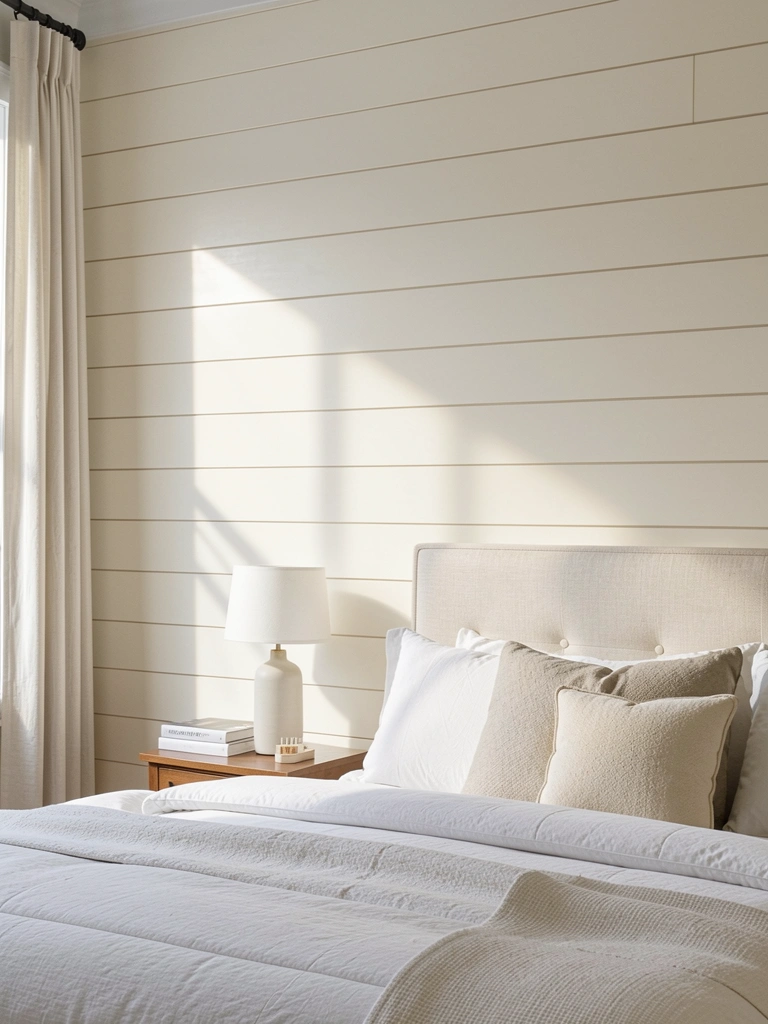
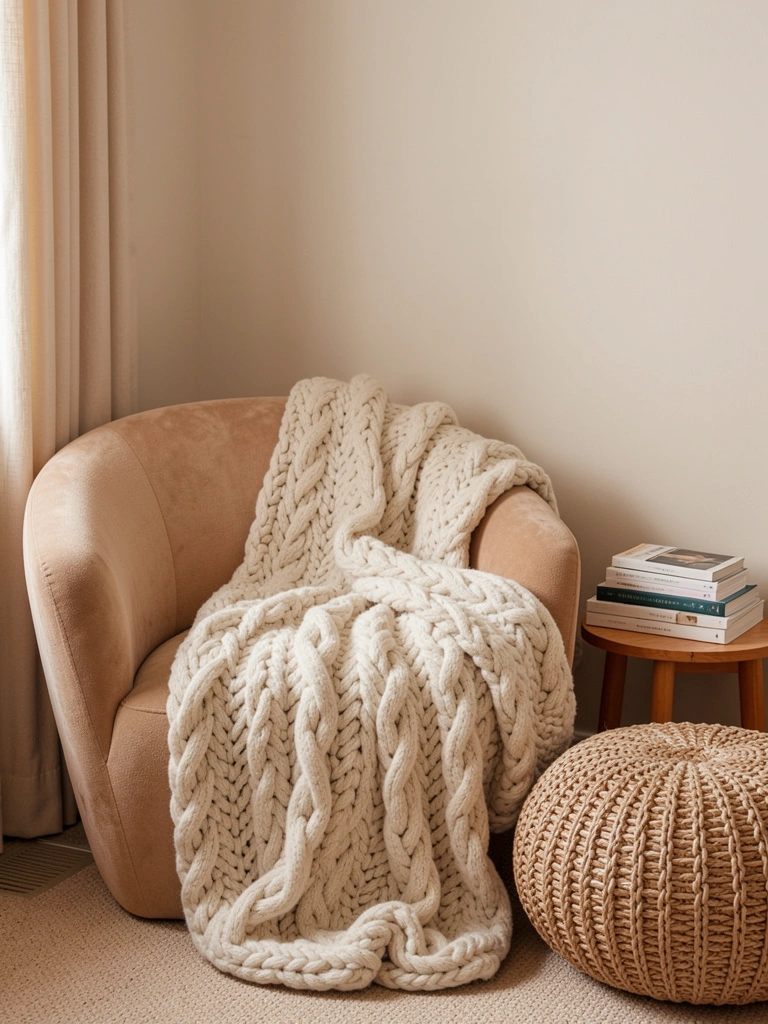
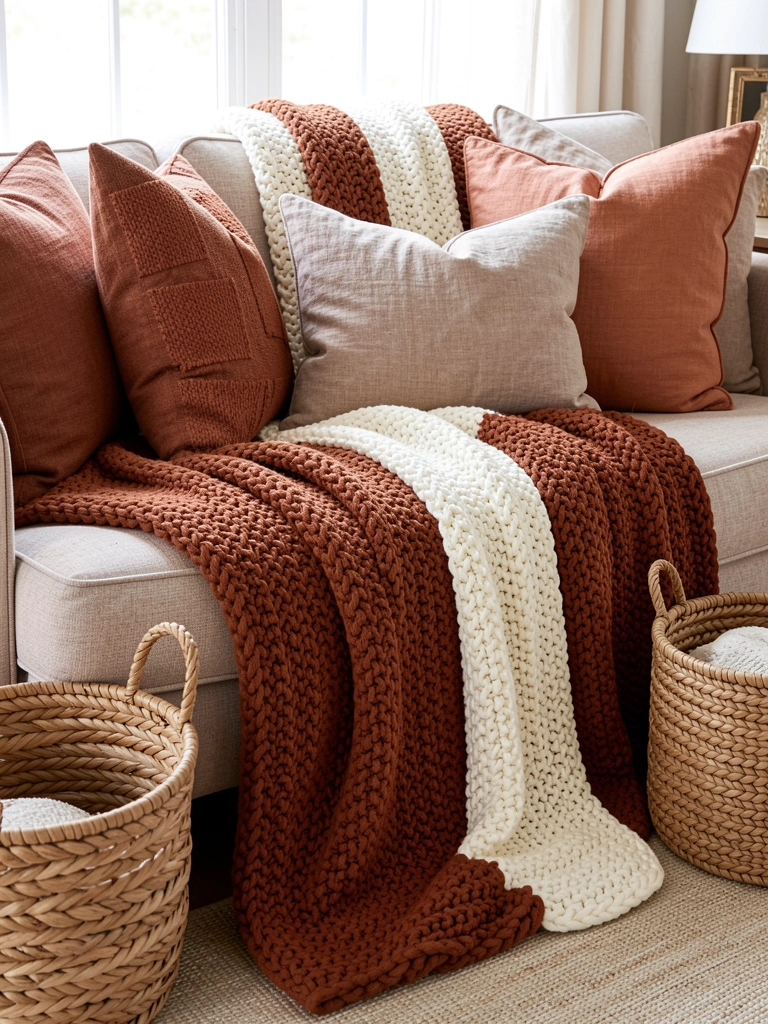
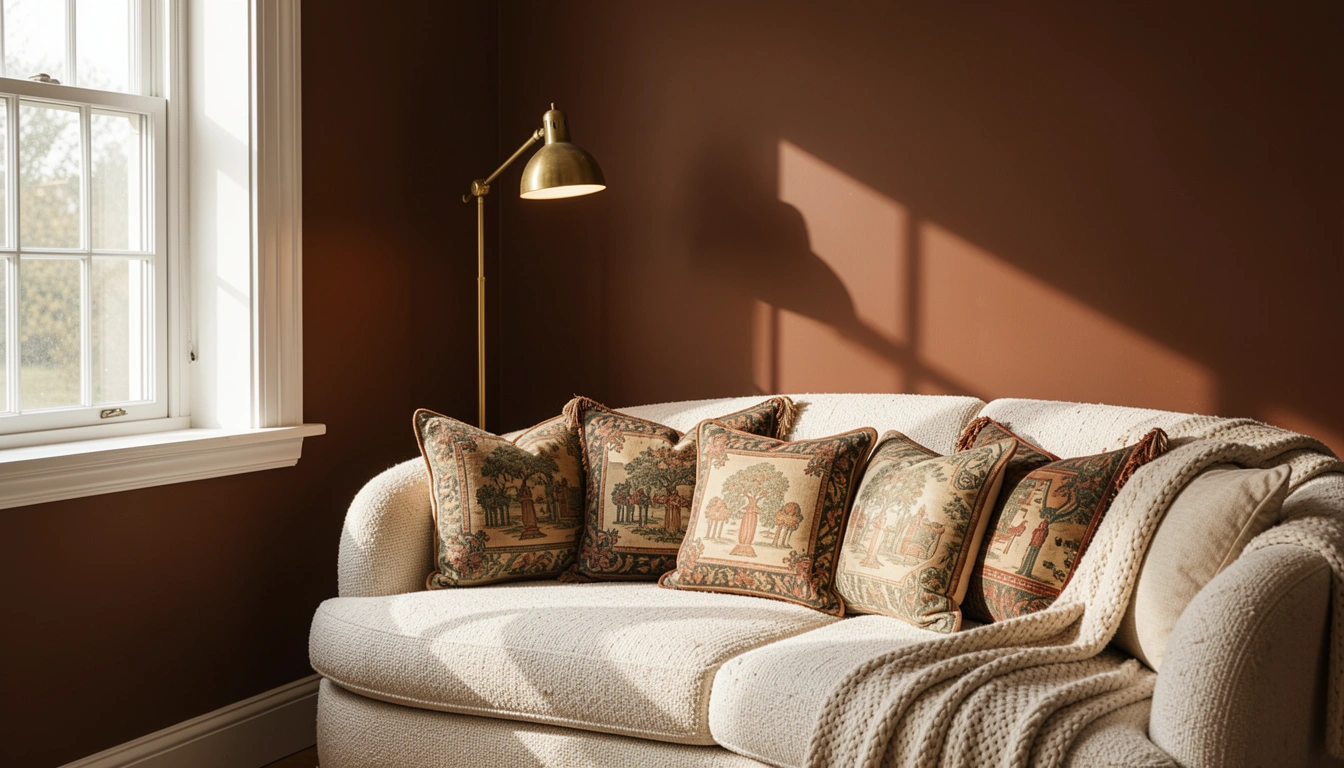
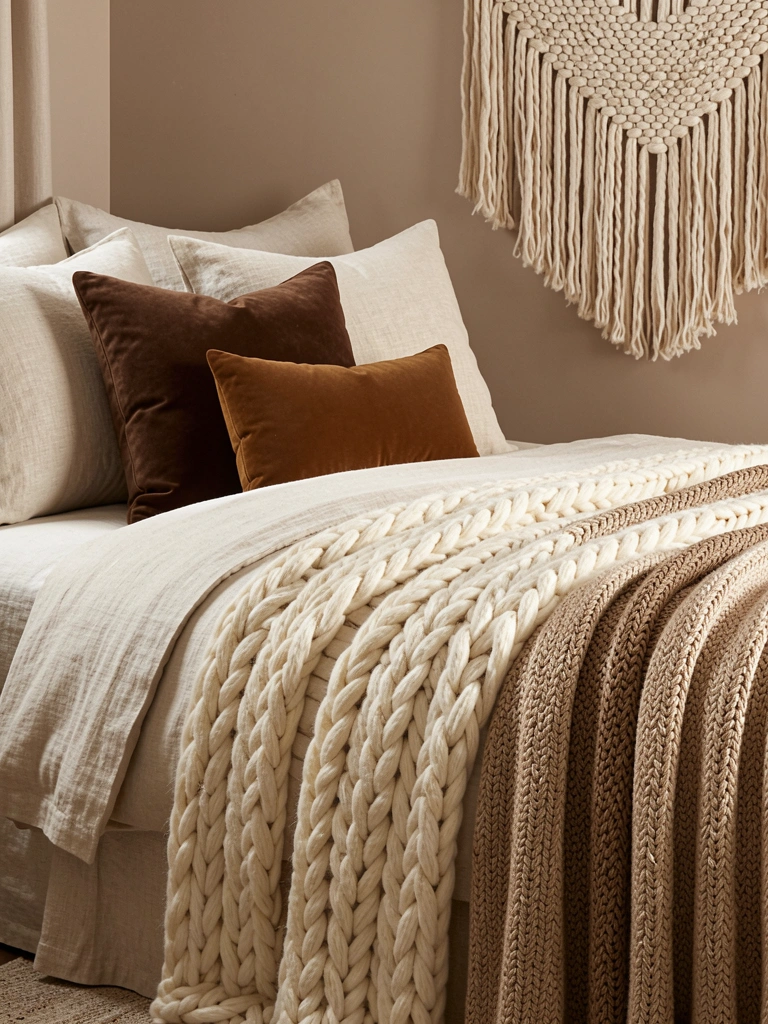
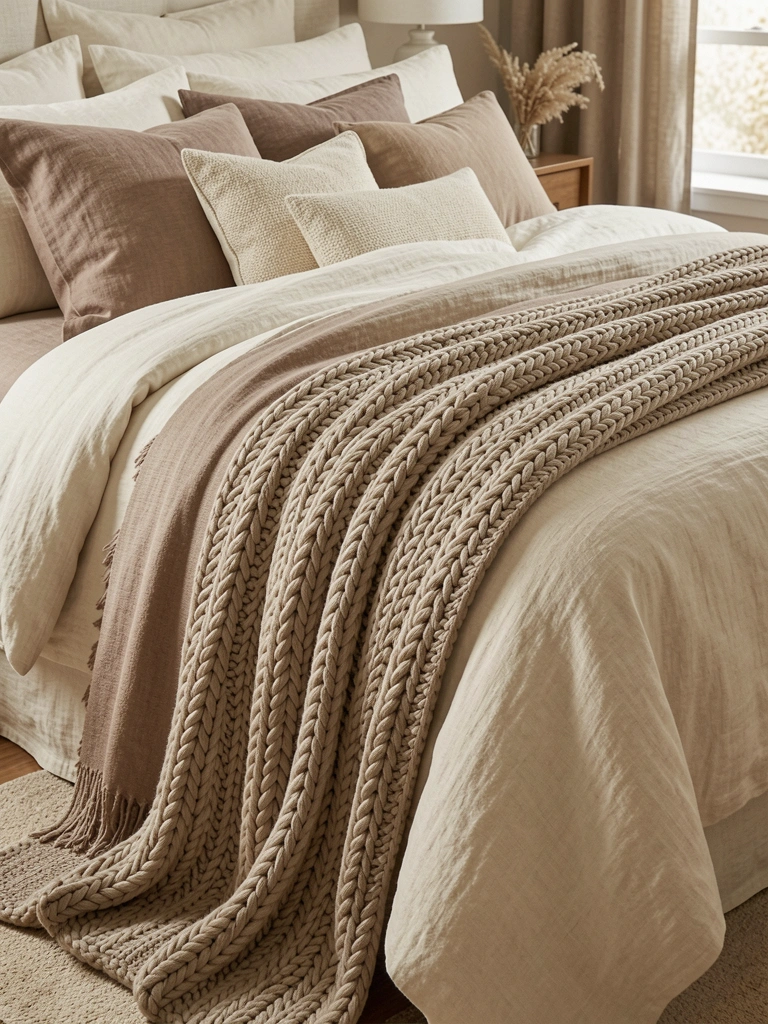
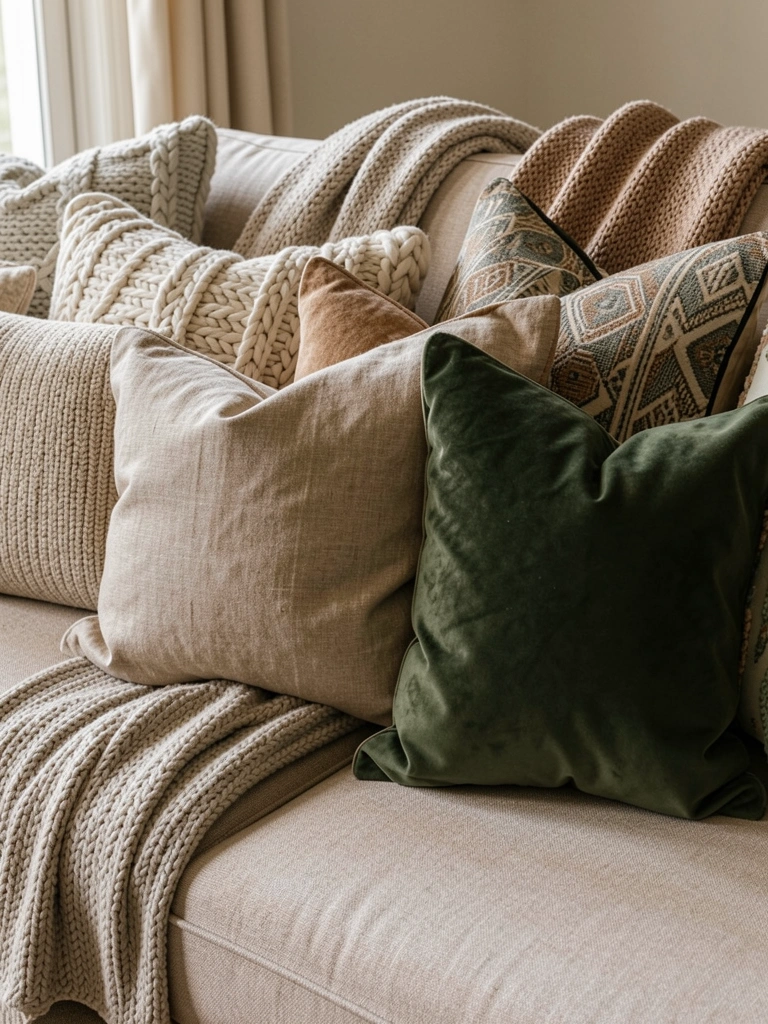
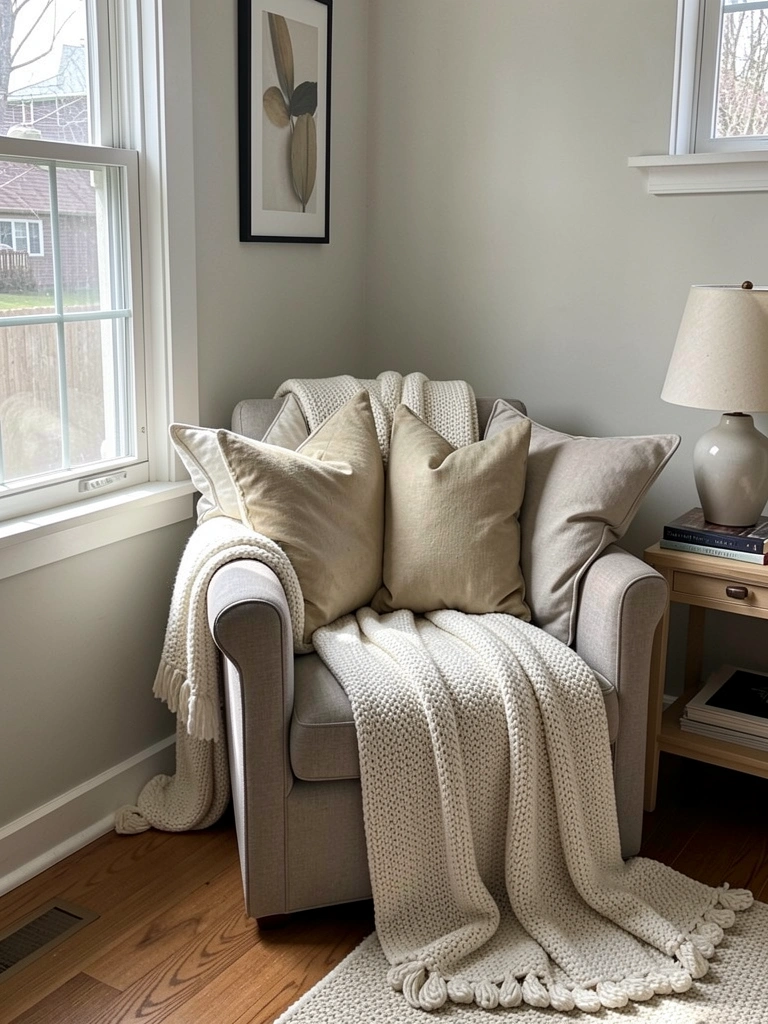
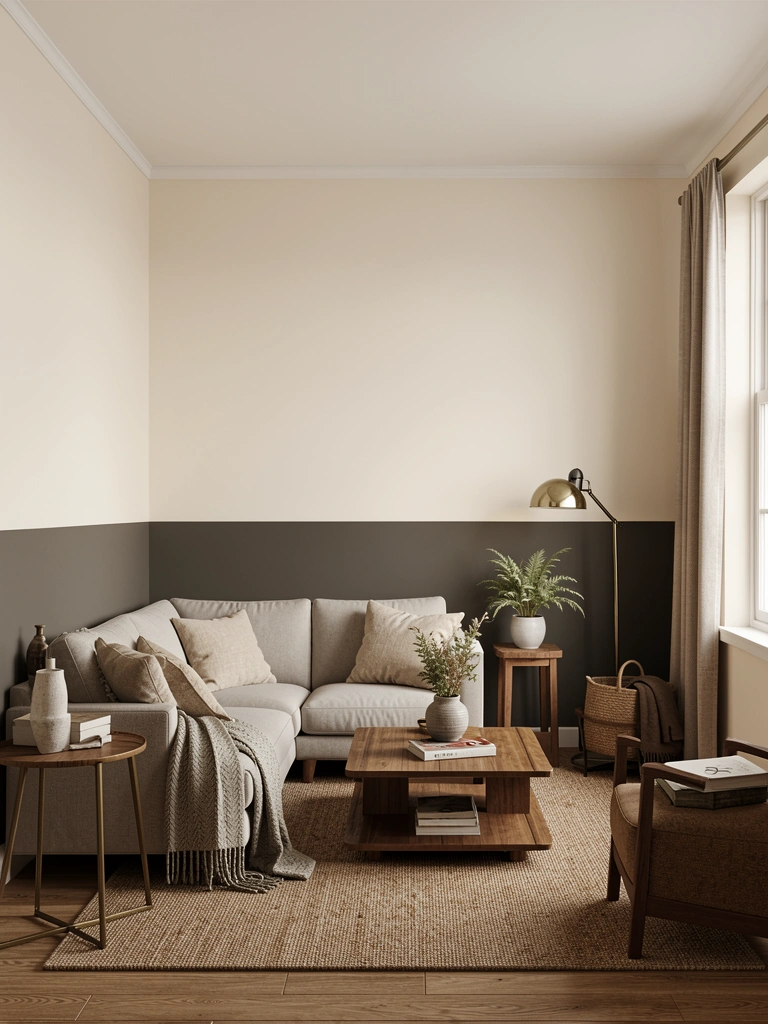
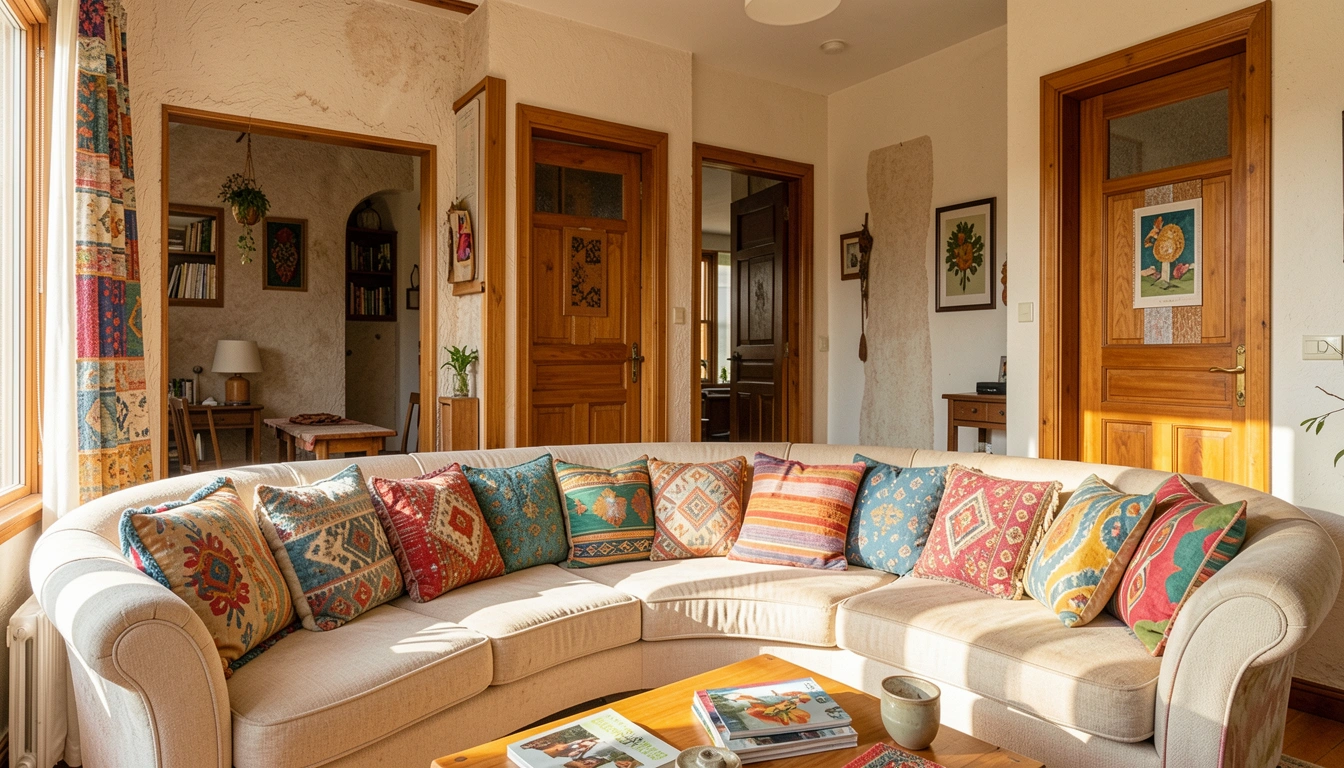
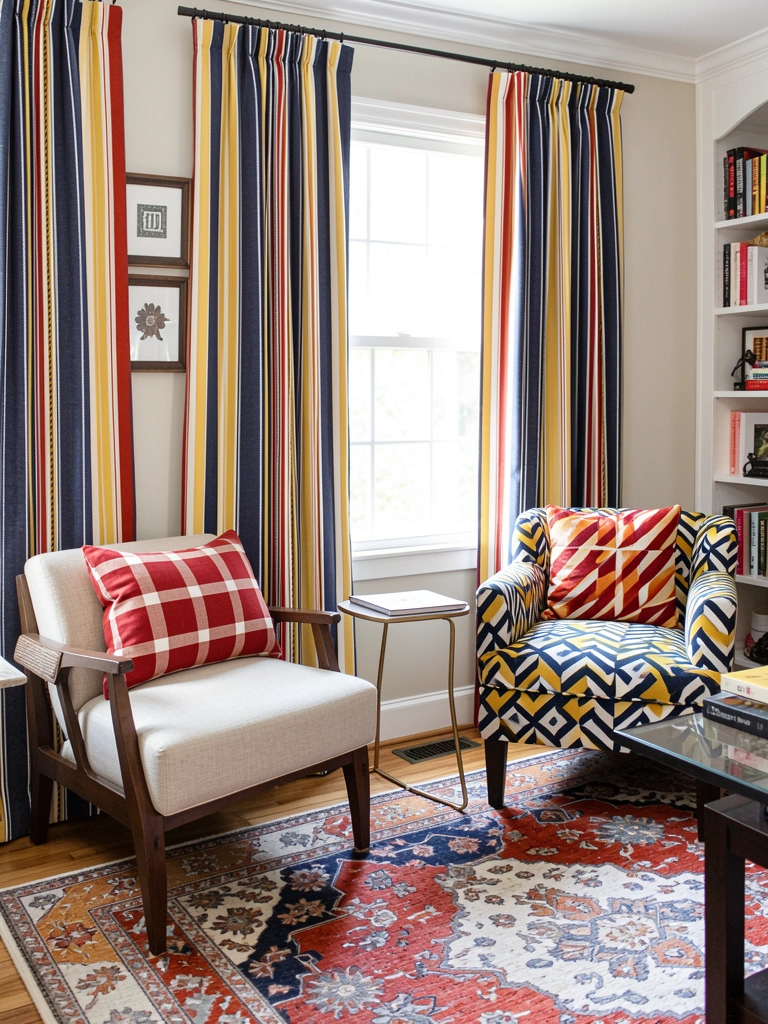
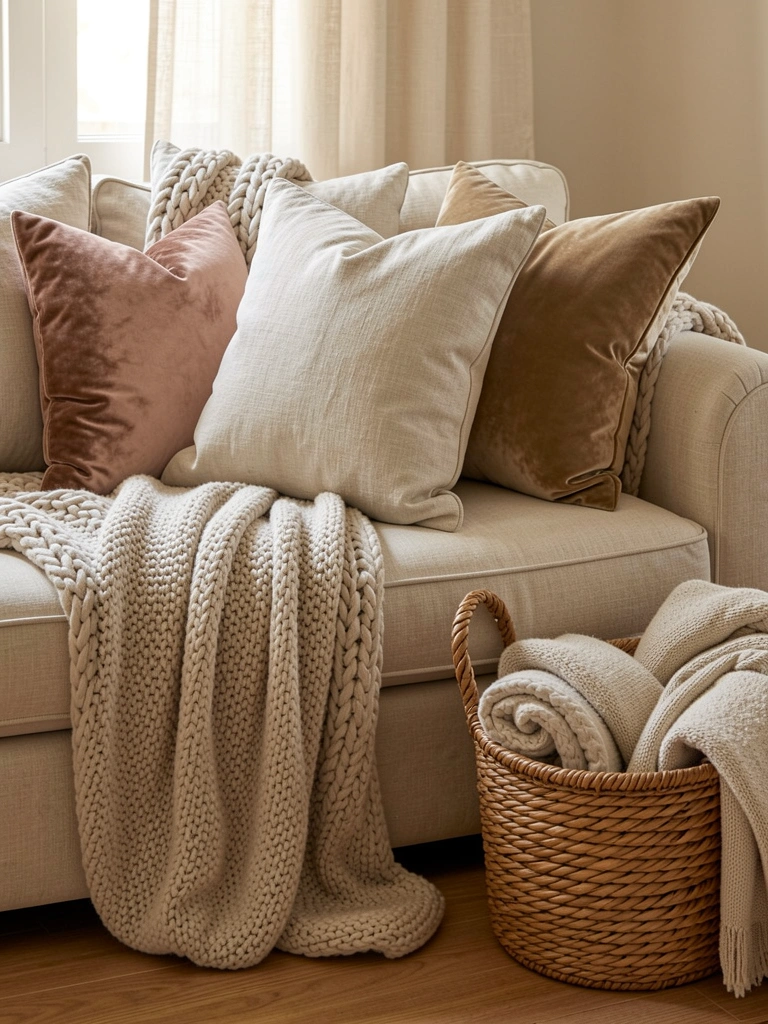
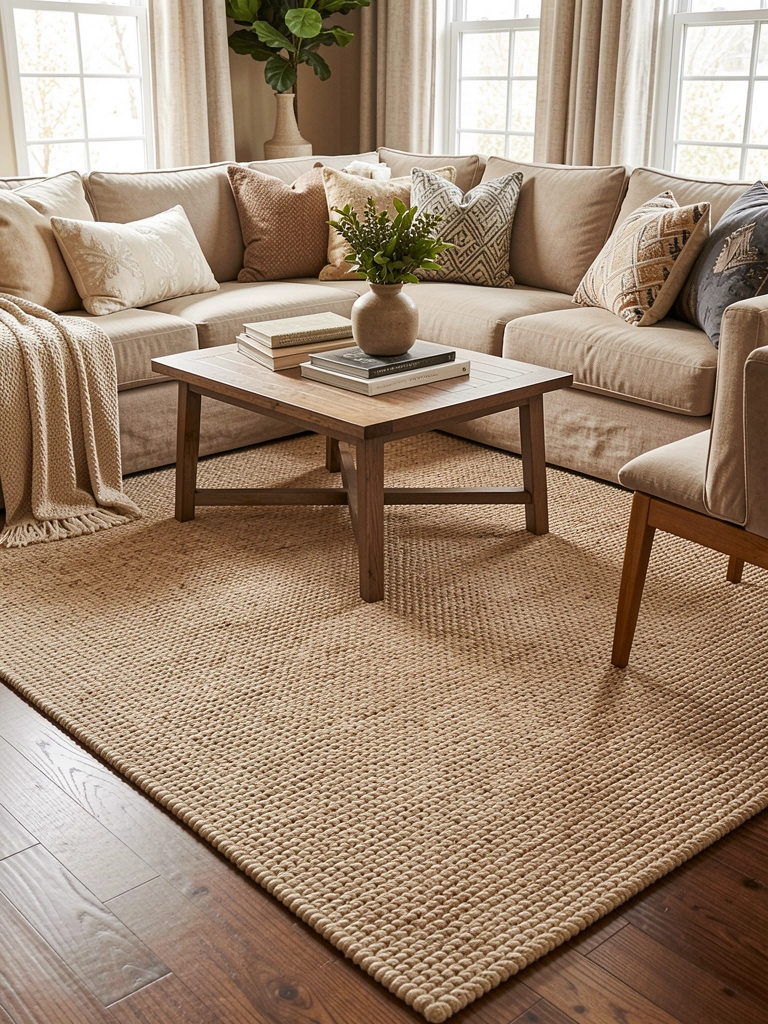
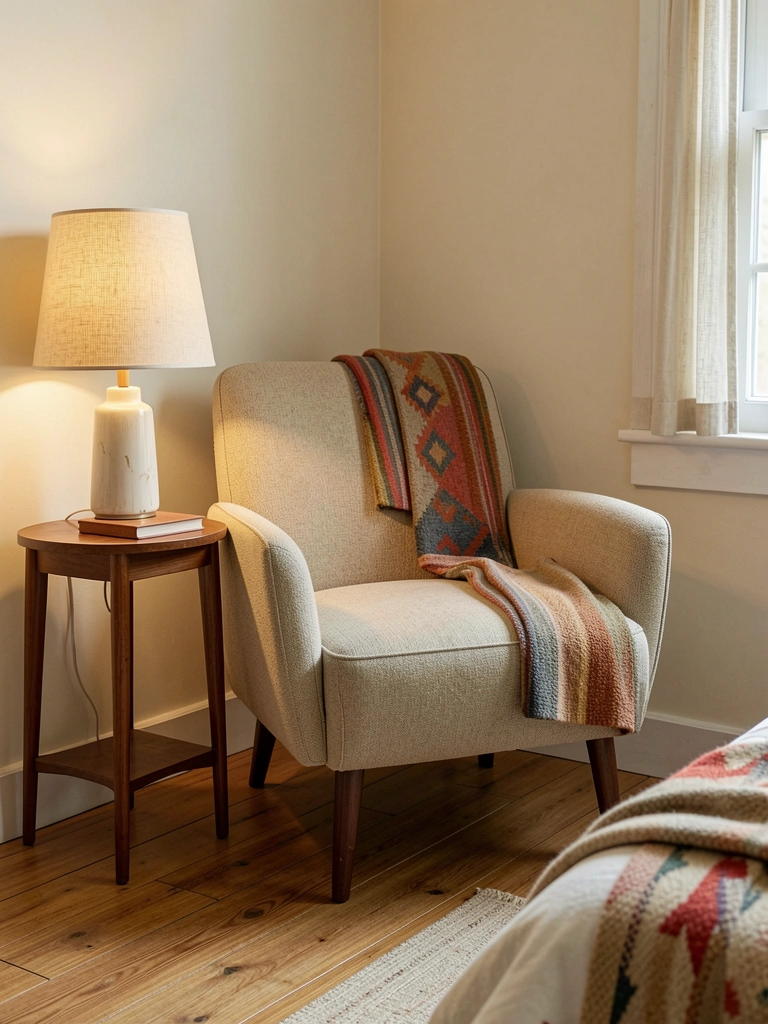
    13. Go Minimal With Throw Pillows and Blankets

    Throw pillows and blankets accumulate fast and make sofas look messy instead of cozy. Most people own 2-3 times more than they actually need.

    Edit your collection to two to four pillows in coordinating colors ($15-$40 each at Target, West Elm, or Article) and one or two throws ($30-$80). Choose neutral or subtle patterns so they work with your décor long-term. Donate or sell extras. Store off-season blankets in a vacuum bag ($10-$15) under the bed or in a closet bin. Suddenly your sofa looks designed instead of cluttered, and the pillows actually enhance the space instead of competing for attention.

    Guests notice the difference immediately—your living room becomes the inviting, calm space you imagined instead of looking like a throw pillow explosion.


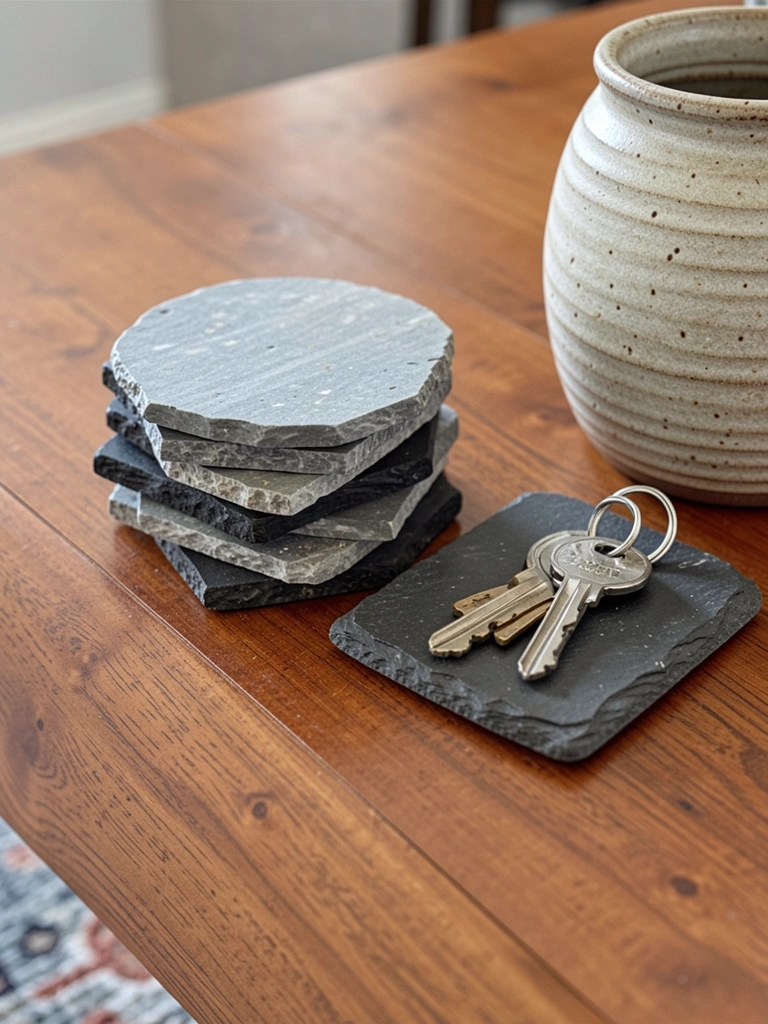
    14. Create a “Utility” Drawer for Miscellaneous Items

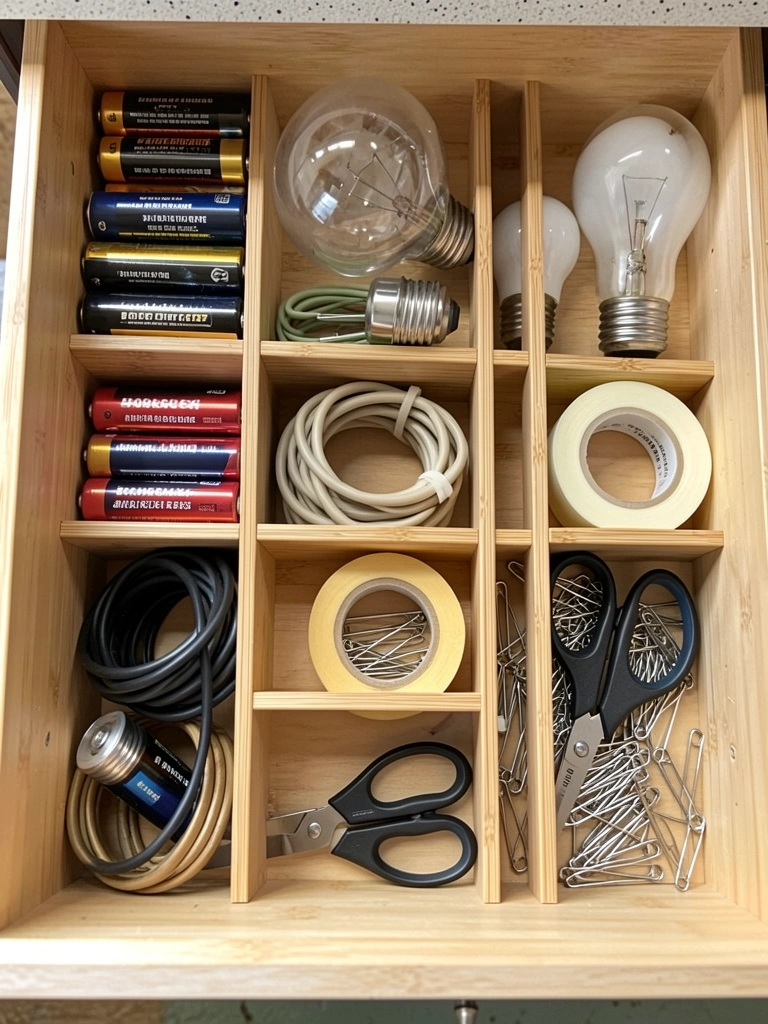
    Every home needs a junk drawer. The trick is organizing it so it stays usable instead of becoming a black hole.

    Use a large drawer organizer with multiple compartments ($20-$40 at IKEA, Target, or The Container Store) to create homes for batteries, lightbulbs, phone chargers, tape, scissors, and other miscellaneous essentials. Toss broken items and expired medications. Label each section so you know where things are and can find them without emptying the entire drawer. Check it quarterly—takes 15 minutes. Everything else cluttering your nightstands, bathroom counters, or kitchen junk spots gets categorized and stored here.

    You’ll actually find what you’re looking for, your visible surfaces become cleaner, and you stop searching the whole house for a pair of scissors or a battery.


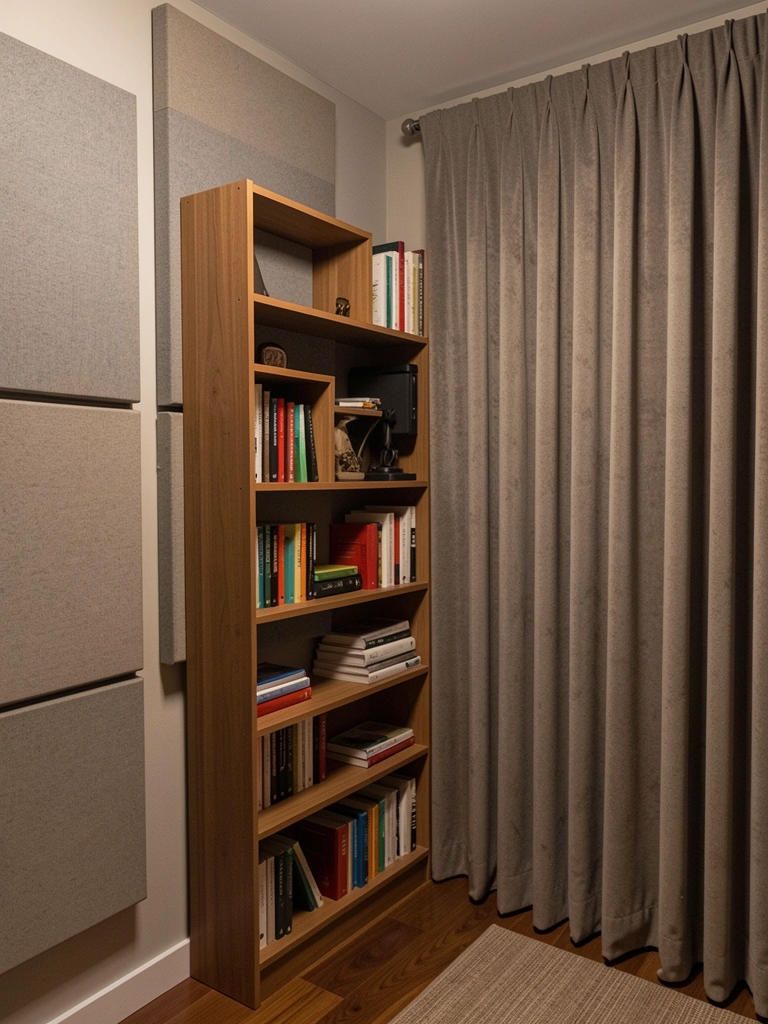
    15. Digitize Photos and Declutter Physical Albums

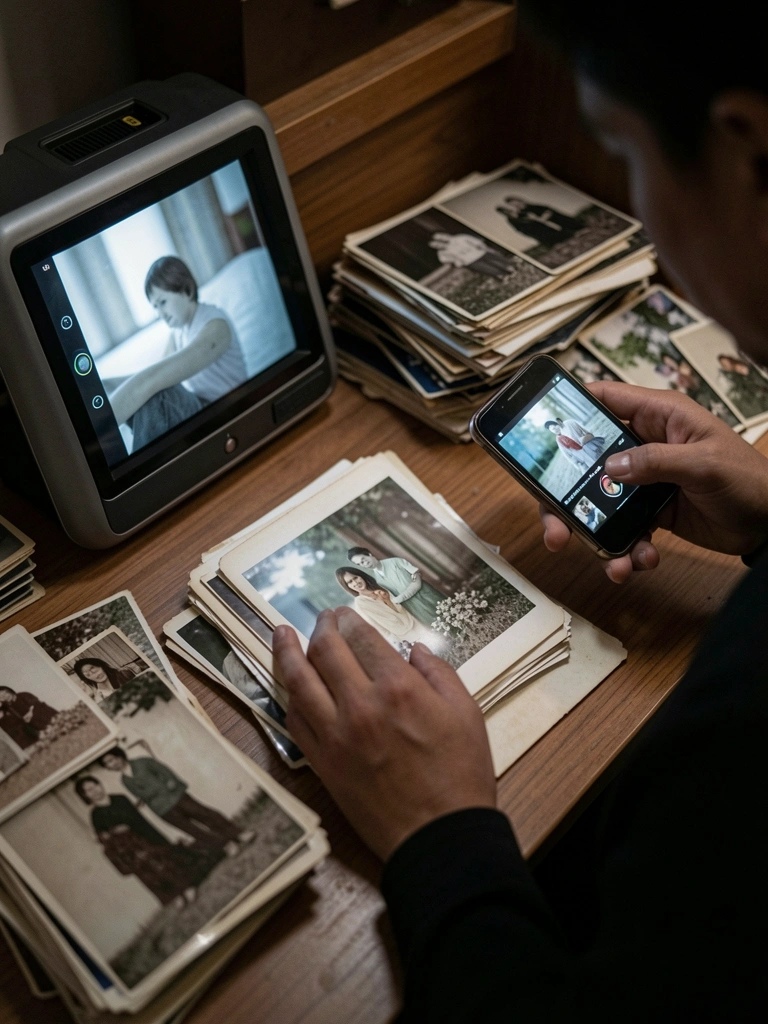
    Physical photo albums, boxes of loose pictures, and old school photos take up surprising amounts of drawer and closet space.

    Scan photos using a portable scanner ($50-$150 at Best Buy or Amazon) or simply photograph them with your phone. Upload them to Google Photos, Amazon Photos, or Shutterfly for free cloud storage and easy access. Scanning takes 2-4 hours depending on volume but you only do it once. Donate or recycle original photos after scanning—keep only a few sentimental physical prints in a single small album ($15-$25). Your drawers open up, and you have digital backup of memories that won’t fade or take up physical space.

    You can access your photos anytime from any device, share them with family easily, and never worry about them getting damaged or lost. Plus, your home gains significant storage space back.


    16. Use Shelf Risers to Double Cabinet Storage

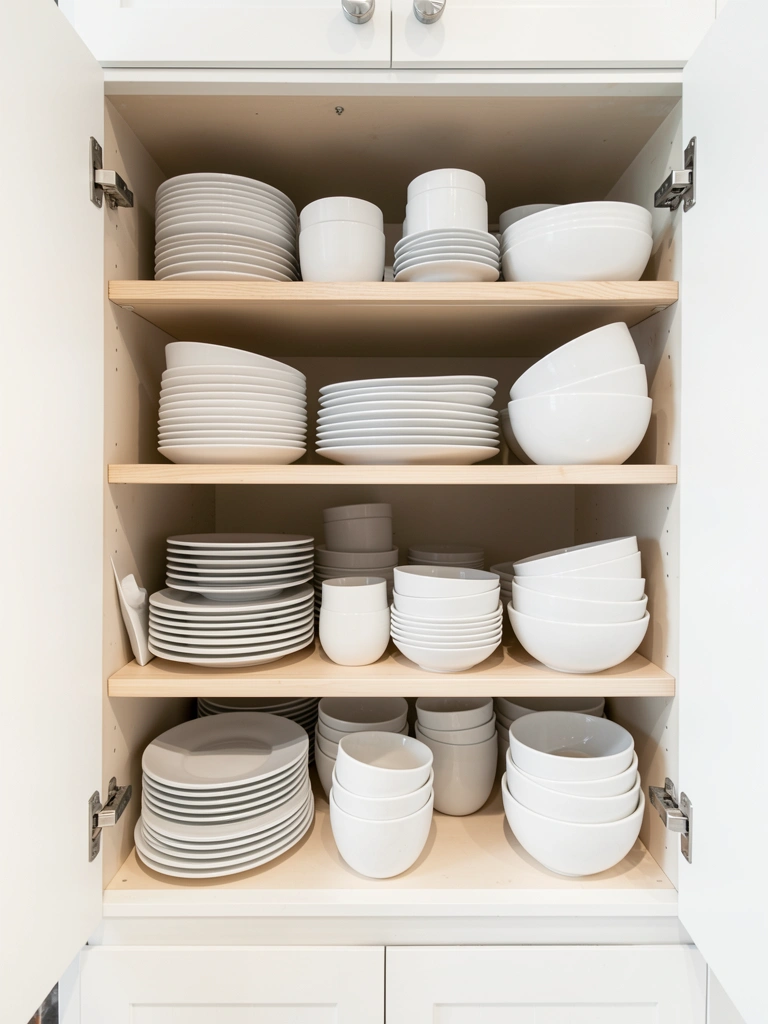
    Under-cabinet and kitchen storage can always do more. Shelf risers create a second tier and double your usable space.

    Install adjustable shelf risers ($15-$40 for a set at Target, IKEA, or Amazon)—takes 10 minutes and requires no tools. Stack plates, bowls, or glasses vertically on the lower shelf, then add another tier above. This trick works in bathrooms too: stack towels and supplies vertically instead of piling them flat. Suddenly you have room for things that were crammed in a nearby drawer or basket. Everything stays visible and accessible, and you stop playing cabinet Tetris every time you unload the dishwasher.

    Your cabinets function beautifully, everything has a clear home, and you quit shuffling items around trying to make them fit.


    17. Limit Pantry Items to What Fits One Shelf Deep

    Double-stacking pantry items means duplicates hide and you buy what you already have. A simple “one shelf deep” rule eliminates waste and mystery inventory.

    When organizing your pantry, arrange all items in a single row so you see everything at a glance. This forces you to use what you buy before replenishing and prevents the $40 mystery pasta stash. Use clear containers, label everything, and toss anything expired. This takes one to two hours the first time, then 15 minutes monthly to maintain. Your food costs drop immediately because you stop throwing away expired items or buying duplicates. Cooking becomes easier when you know exactly what’s available.

    Your pantry becomes functional and you waste less money. The mental clarity of knowing exactly what you have—and not having hidden backup supplies—simplifies meal planning and grocery shopping.


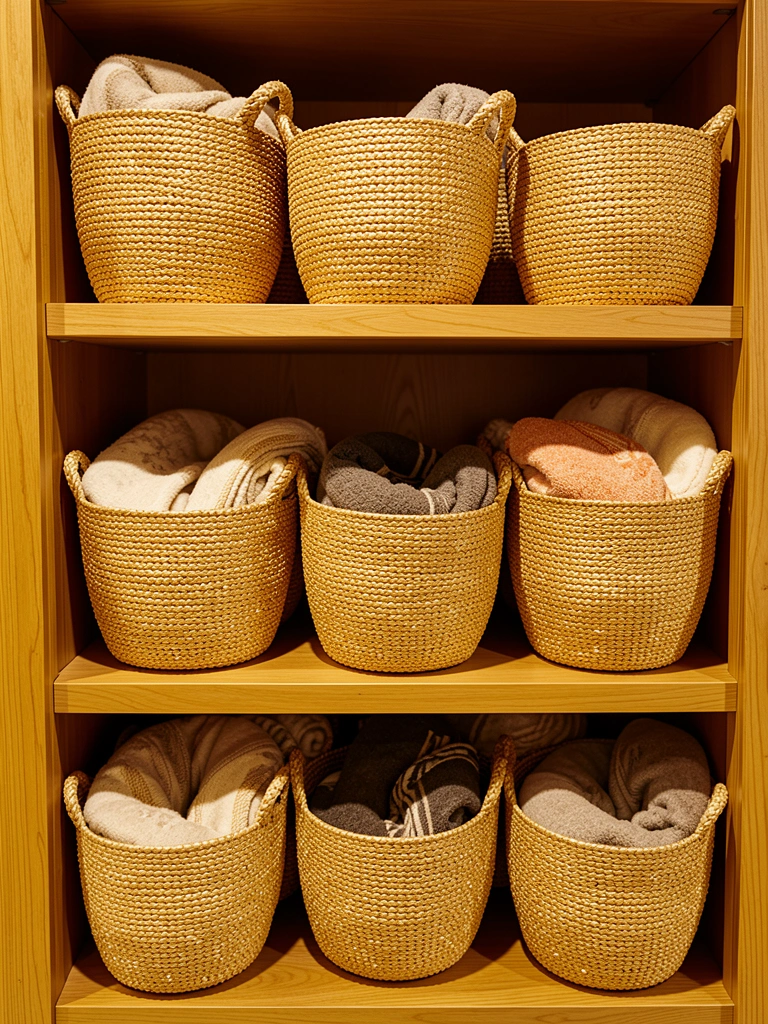
    18. Establish a Seasonal Storage Rotation System

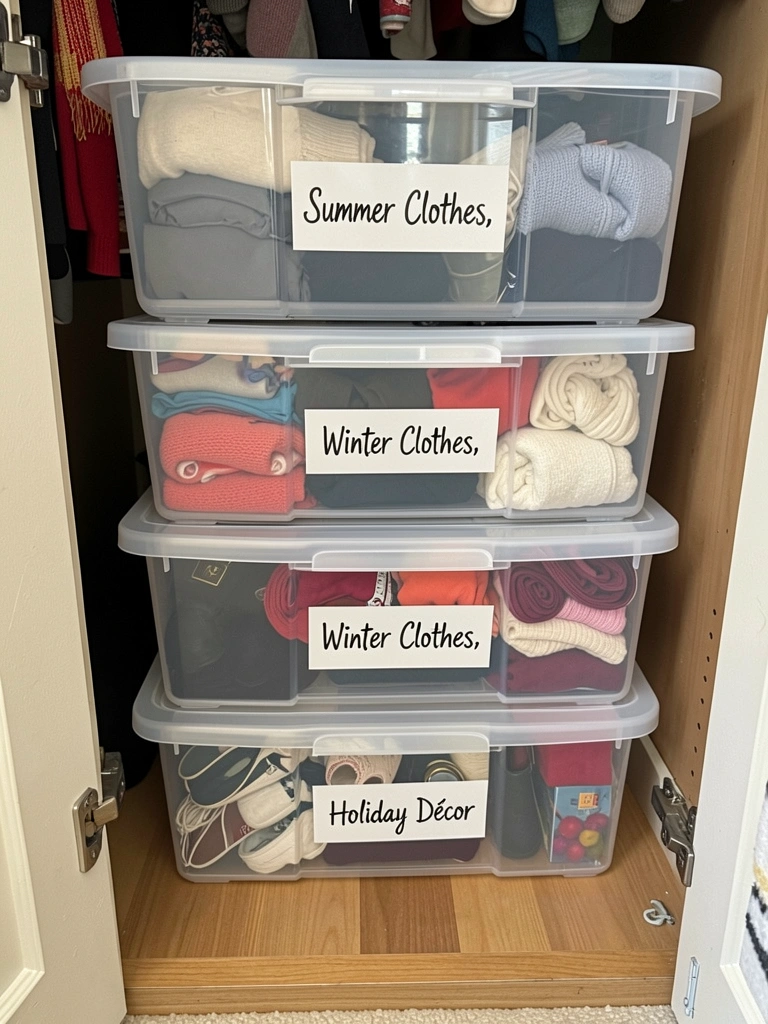
    Seasonal items clogging your active closet and shelves create constant visual noise. Move them out, and your home automatically feels less cluttered.

    Invest in clear storage bins ($10-$20 each) and a label maker ($15-$25). Sort seasonal clothing, holiday décor, and sports equipment into labeled bins. Store them on a high closet shelf, under the bed, or in a basement—somewhere out of daily view. Set phone reminders to rotate bins when seasons change—takes 30 minutes twice a year. Your active closet shrinks by 40%, your shelves open up, and your bedroom feels 10 pounds lighter just from the visual reduction. You enjoy current-season items more because they’re not competing for space with winter coats in July.

    Your home looks intentional year-round, getting dressed becomes easier, and seasonal transitions feel fresh instead of chaotic.


    19. Use “One Year” Rules for Sentimental Items and Clothes

    Sentimental clutter is the hardest to release, but keeping things “just in case” often means they sit unused for years, taking up prime real estate.

    For clothes: if you haven’t worn it in one year, it goes. For gifts or mementos: if you haven’t thought about it or used it in one year, donate it guilt-free. Take a photo of sentimental items before letting them go—you’ll feel less attached knowing you have the memory. This rule takes willpower but prevents your closets from becoming a graveyard of “maybe someday” items. Purge sessions take 1-2 hours quarterly. Suddenly your closet contains only pieces you actually wear, and your shelves hold only items you genuinely use or look at regularly.

    Your space finally reflects your current life, not a version of yourself from five years ago. You move through your home with ease, and decision fatigue drops because clutter isn’t silently judging your choices.


    20. Create a “Before Bringing Home” Purchase Checklist

    Impulse purchases are the number-one reason clutter creeps back in. A simple decision framework stops you from bringing home things that looked good in the moment but don’t fit your actual life.

    Before buying anything new, ask: Do I have space for this? Does it match my current style? Will I use/wear it in the next three months? Where will it live permanently? If you answer “maybe” to any question, don’t buy it. Take a photo and save it to a “Someday” folder—you can revisit it in a month and often won’t care anymore. This five-minute practice saves hundreds in clutter-generating purchases annually. You stop bringing home things that seemed perfect in the store but sit unused on your dresser or in a corner gathering dust.

    Your home stops accumulating random items, and your space stays curated because new things are intentional, not impulse-driven. Decision-making becomes easier when you have a framework.


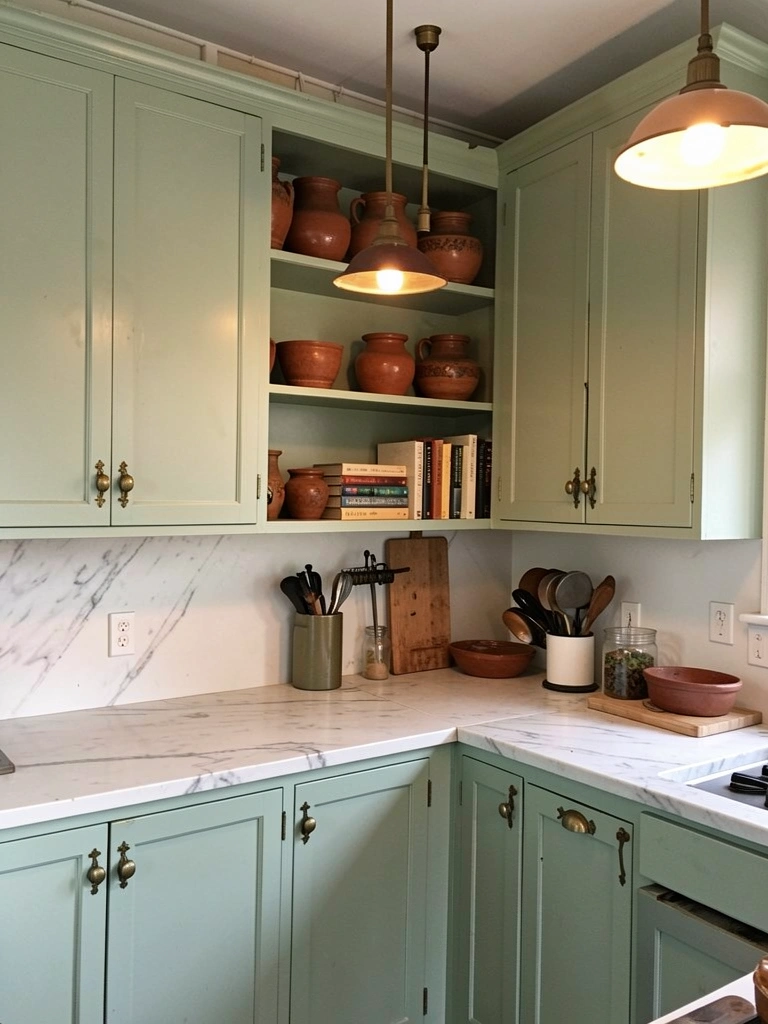
    21. Switch Kitchen Canisters to Matching Sets

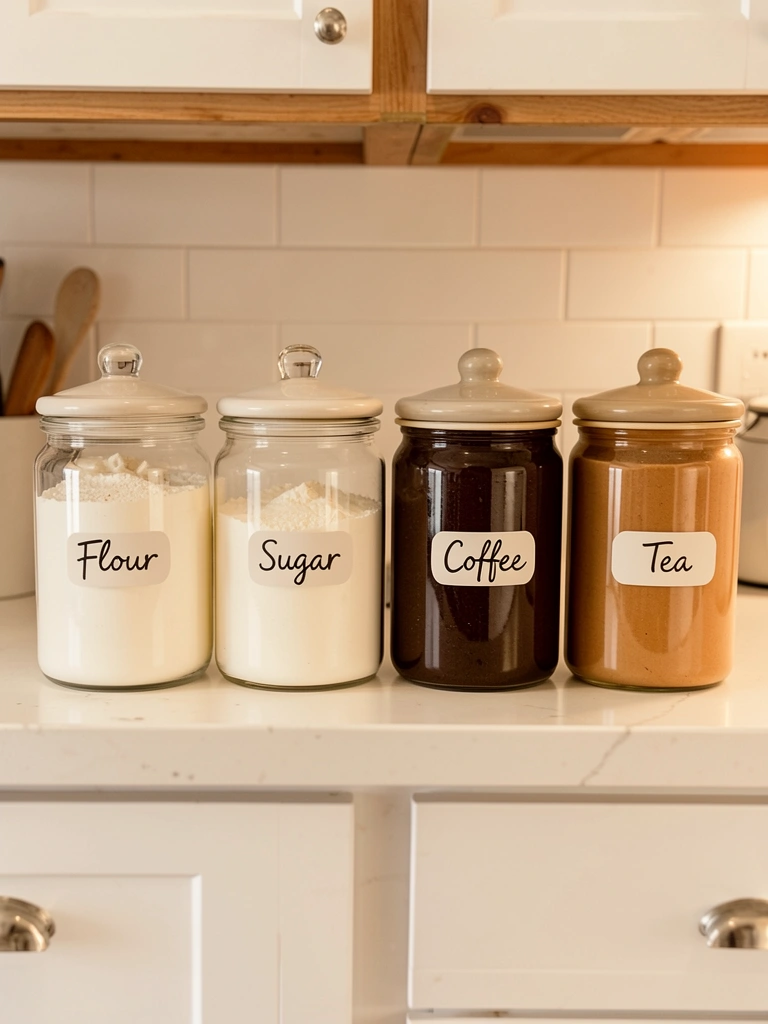
    Mismatched containers and random jars on your counter create visual clutter even when items are organized. Matching canisters look intentional and calm.

    Replace various food storage containers with a coordinated set of three to five glass or ceramic canisters ($30-$70 at Target, Williams Sonoma, or Amazon). Transfer dry goods into them and label each canister. Toss the original boxes and bags they came in. Takes one hour to set up. This visual edit instantly makes your kitchen look more curated and sophisticated—it’s a décor upgrade, not just organization. Your counter becomes more peaceful because the eye doesn’t bounce between five different containers in competing styles.

    Your kitchen feels intentionally designed instead of accidentally organized. Guests notice the difference, and you feel more calm just looking at your counters.


    22. Go Vertical With Closet Shelving for Folded Items

    Stacking folded clothes flat creates towers that topple and hide items underneath. Vertical folding (like the KonMari method) keeps everything visible and accessible.

    Fold each sweater or t-shirt into a small rectangle, then file them vertically in a bin or on a shelf—they stand up like files in a filing cabinet. This takes 30 minutes to learn and apply but changes everything about how you interact with your clothes. You see every item at once, grab what you need without disturbing the stack, and everything stays visible. Combine this with shelf dividers ($10-$15) to keep categories organized. Suddenly your closet feels spacious and your mornings are less stressful because you’re not fishing through piles.

    Getting dressed becomes easier, you wear more variety because you remember what you own, and your closet looks like a boutique instead of a pile of clothes waiting to topple over.


    23. Create an “Active Use” System for Paperwork and Mail

    Instead of mail and papers scattered across your desk and kitchen counters, centralize active items into one clear inbox that you process weekly.

    Use a single mail/inbox tray ($10-$25 at Target or Office Depot)—not multiple piles, just one designated spot for anything requiring action. Once weekly—takes 15 minutes on Sunday night—move bills to your payment system, sign forms, recycle junk mail, and file documents. Nothing sits in limbo longer than seven days. Keep important papers in a single accordion file or small filing cabinet ($20-$60) organized by category. This one-inbox approach works because it’s a bottleneck: if the tray is full, something isn’t being processed, and you immediately take action.

    Your desk stays clear, your counters aren’t buried in paperwork, and you never miss a deadline again. The mental relief of knowing exactly where everything is removes constant background stress.


    Save this post for your next decluttering session. Pick one idea this weekend—even the five-minute drawer divider swap makes a difference. Share this with anyone drowning in clutter and ready to change their space.

  • 26 Material Combination Ideas That Bring Subtle, Refined Elegance

    26 Material Combination Ideas That Bring Subtle, Refined Elegance


    The most elegant rooms aren’t about having more stuff—they’re about pairing the right materials together. When wood, metal, stone, and textiles work in harmony, your space feels curated, calm, and undeniably refined. The trick? Understanding which combinations create visual warmth without looking cluttered. Whether you’re working with a single shelf, an entire room, or just refreshing one corner, these 26 material pairings will show you how to layer depth and sophistication into every inch of your home. You don’t need an interior design degree to pull this off—just intention and a few smart swaps. Let’s explore combinations that feel collected over time, never forced.


    1. Pair Raw Wood With Blackened Metal for Modern Depth

    Raw wood and blackened metal create instant sophistication. The warmth of natural timber softens the industrial edge of matte black hardware, giving you drama without coldness.

    Find a wooden console ($150–$400) at West Elm, Article, or Facebook Marketplace. Pair it with blackened metal legs ($80–$200) from Etsy or hardware stores. If you already own a wooden table, simply swap the legs—a 30-minute job with basic tools. Add a blackened iron lamp ($60–$150) as your focal point.

    The beauty here is balance: the metal grounds the warmth, and the wood prevents the space from feeling too harsh. This combination works especially well in entryways or home offices where you want polish with personality.


    2. Combine Warm Stone With Pale Oak for Earthy Elegance

    Stone and pale oak feel naturally luxurious together. The neutral coolness of limestone or cream marble pairs beautifully with the golden warmth of light oak, creating a balanced, grounded aesthetic.

    DIY option: Buy stone peel-and-stick tiles ($30–$80) from Home Depot or Amazon to freshen a fireplace surround. Pair with wooden floating shelves in oak ($40–$120) from IKEA or local suppliers. Installation takes 2–3 hours and requires no special skills.

    Investment option: Custom stone millwork ($2,000+) designed by local fabricators (like Design Solutions in Miami) creates a statement focal point that lasts decades.

    Your space immediately reads as intentional and curated. This pairing works in living rooms, bedrooms, or bathrooms where you want the room to feel serene rather than trendy.


    3. Layer Brass Hardware With Soft Linen for Gentle Luxury

    Brass brings warmth; linen brings softness. Together they whisper luxury without shouting about it. This pairing works on dressers, cabinets, cushions, and even wall hangings.

    Swap out your existing hardware for brass pulls ($15–$50 per set) from Anthropologie, Schoolhouse Electric, or Etsy. Style with linen throw pillows ($30–$80 each) or a linen duvet ($100–$300). No tools needed beyond a screwdriver—budget 15 minutes per drawer.

    Pro tip: Don’t polish your brass to a shine. Slightly aged, matte brass looks more refined and hides fingerprints better.

    You’ll notice the combination creates a cohesive, high-end aesthetic that feels collected rather than matchy. Perfect for bedrooms, living rooms, or anywhere you want touchable luxury.


    4. Mix Reclaimed Wood With Concrete for Industrial Warmth

    Reclaimed wood softens concrete’s stark industrial feel. Concrete adds gravitas to wood’s warmth. Together they create a balanced, modern-rustic aesthetic that reads as both intentional and approachable.

    Source reclaimed wood from salvage yards ($1–$3 per board-foot) or Etsy, then commission a local carpenter to build shelving ($300–$800). Alternatively, buy pre-made reclaimed wood shelves ($100–$300 each) from Wayfair or specialty woodworkers.

    For renters: Use removable concrete peel-and-stick wallpaper ($30–$60) as your backdrop, then layer reclaimed wood shelves with command hooks.

    This pairing works in home offices, kitchens, and studios. It feels authentic and crafted, never sterile or cold.


    5. Combine Marble With Warm Brass for Timeless Contrast

    Marble feels cool and expensive; brass feels warm and approachable. When paired, they create an elegant, balanced aesthetic that never goes out of style.

    Install a marble sink countertop ($500–$1,500+) from local stone suppliers or upscale home stores. Pair with a brass faucet ($150–$400) from Waterworks, Rejuvenation, or West Elm.

    Budget option: Use marble peel-and-stick wallpaper ($40–$100) with brass-finished shelf brackets ($20–$50) for a 10th of the cost.

    Your bathroom instantly reads like a boutique hotel. This pairing works especially well in powder rooms and master baths where you want a polished, intentional focal point.


    6. Layer Cork With Natural Linen for Organic Softness

    Cork and linen are both natural, breathable, and warm to the touch. This pairing creates a grounded, approachable aesthetic that feels like home.

    Add cork coasters ($15–$30 per set) from Target, Urban Outfitters, or etsy. Layer with linen table runners ($30–$80) from H&M Home, Restoration Hardware, or Etsy. Use a cork bulletin board ($20–$50) with linen trim to create a memo station.

    Pro tip: Cork develops a beautiful patina over time, so it actually improves with age.

    Spaces with cork and linen feel inviting and real—not showroom-perfect. This works beautifully in kitchens, home offices, and casual dining areas where you want warmth over formality.


    7. Pair Textured Plaster Walls With Dark Wood Frames

    Textured plaster gives walls dimension and interest. Dark wood frames anchor that texture without competing with it. This combination feels curated and intentional.

    Apply textured plaster or limewash ($300–$800 for a room) through a local painter or try DIY peel-and-stick textured wallpaper ($40–$80) from Spoonflower or Amazon.

    Hang wood-framed art ($30–$200 per frame) from Framebridge, Artifact Uprising, or local framers. Space frames 8–10 inches apart for a gallery effect that photographs beautifully.

    Your walls become a backdrop rather than just a surface. This pairing works in living rooms, bedrooms, and hallways where you want sophistication without fussiness.


    8. Mix Natural Leather With Soft Cashmere for Tactile Luxury

    Leather is durable and sleek; cashmere is soft and warm. Together they create a space that looks expensive and feels even more so.

    Find a leather chair ($400–$1,200) from Article, West Elm, or thrift stores. Layer with a cashmere throw ($80–$300) from Everlane, Quince, or The Cashmere Shop.

    Budget option: Use a faux leather chair ($150–$400) and a wool-blend throw ($30–$80) for a similar vibe at a fraction of the cost.

    This pairing makes your living room feel like a luxury hotel lounge. It works best in bedrooms and living rooms where comfort and sophistication are equally important.


    9. Combine Raw Jute With Soft White Linen for Relaxed Contrast

    Jute’s rough texture meets linen’s soft drape. The contrast creates visual and tactile interest without feeling discordant.

    Layer a jute rug ($100–$300) from Ruggable, West Elm, or Wayfair with a linen pouf ($50–$150) from CB2 or Article. Add linen curtains ($40–$120 per panel) for cohesion.

    The beauty? Jute is durable and washable, while linen softens the room’s edges. This combination works in living rooms, bedrooms, and home offices—anywhere you want casual elegance.


    10. Pair Warm Terracotta With Natural Concrete for Earthy Grounding

    Terracotta’s earthy warmth looks stunning against cool concrete. This pairing brings outdoor elegance inside—perfect for plant-forward spaces.

    Display terracotta pots ($10–$40 each) from local nurseries or Etsy on a concrete plant stand ($50–$150) from CB2, Article, or specialty retailers. Or create a DIY concrete planter ($5–$15 in materials) using a concrete mold and cement.

    Pro tip: Terracotta improves with age, developing a beautiful weathered patina that concrete complements perfectly.

    Your plant collection becomes a design moment rather than just greenery. This works beautifully in living rooms, bathrooms, and home offices where you want nature and sophistication to coexist.


    11. Layer Aged Brass With Deep Charcoal Stone for Rich Contrast

    Aged brass feels collected and intentional. Deep charcoal stone provides the perfect moody backdrop. This pairing reads as high-end and design-forward.

    Install charcoal stone tiles ($2–$5 per sq. ft.) from tile suppliers, then mount vintage-inspired brass sconces ($80–$250 each) from Rejuvenation, Etsy, or salvage shops.

    Budget option: Use charcoal peel-and-stick tiles ($20–$50) and battery-operated brass picture lights ($30–$60) for impact without installation.

    Your space gains drama and visual depth. This combination works in entryways, powder rooms, and dining rooms where you want to make a statement.


    12. Combine Natural Woven Raffia With Warm Wood for Organic Warmth

    Woven raffia brings textural interest and natural warmth. Light wood echoes that warmth without competing. Together they create spaces that feel approachable and lived-in.

    Add woven raffia baskets ($15–$60 each) from Schoolhouse Electric, Etsy, or home stores, then style on wooden shelves ($40–$120 each) from IKEA, Article, or local woodworkers.

    Pro tip: Fill baskets with rolled blankets or textiles for a styled, magazine-ready look.

    Your shelves become functional art. This pairing works in bedrooms, living rooms, and home offices—anywhere storage needs to look intentional.


    13. Pair Soft Velvet With Polished Brass for Jewel-Tone Drama

    Velvet’s lusciousness pairs perfectly with brass’s shine. This combination screams refined luxury and works especially well with jewel tones.

    Invest in a velvet chair ($400–$1,200) from Article, Wayfair, or local furniture makers. Look for brass nail-head trim ($200–$400) as built-in detailing, or have an upholsterer add it ($150–$300).

    Budget option: Buy a velvet throw pillow ($40–$100) with brass accents instead.

    Your seating becomes a statement piece. This pairing works beautifully in living rooms and bedrooms where you want personality and polish in equal measure.


    14. Layer Cork And Ceramic For Warm, Handmade Appeal

    Cork’s warmth meets ceramic’s handmade charm. This pairing creates spaces that feel authentic and personal.

    Collect cork trivets ($10–$25 each) and handmade ceramic pieces ($20–$80 each) from local artisans, Etsy, or craft fairs. Arrange on wooden serving boards or shelves ($20–$50).

    Pro tip: Hunt for ceramics with imperfections—that’s what makes them feel real and intentional.

    Your kitchen or dining space becomes a gallery of meaningful pieces. This works beautifully where you want to celebrate handmade quality over mass production.


    15. Combine Soft Stone With Light Marble Veining and Brushed Nickel

    Soft stone provides texture; marble adds visual interest; brushed nickel keeps everything balanced and modern. This trio creates spaces that feel curated and calm.

    Use soft stone tiles ($2–$4 per sq. ft.) from tile suppliers for walls. Add a marble vanity top ($300–$800) and brushed nickel fixtures ($80–$200) from PlumbingDepot, Wayfair, or specialty retailers.

    Budget option: Use peel-and-stick stone wallpaper ($40–$80) with similar finishes for a 10th of the cost.

    Your bathroom feels like a personal spa. This pairing works best in powder rooms and master baths where relaxation is the priority.


    16. Pair Natural Hemp Rope With Warm Walnut Wood

    Hemp rope is tactile and organic; walnut wood is rich and grounding. Together they create texture without clutter.

    Create a DIY rope shelf ($30–$60 in materials) by wrapping hemp rope around walnut wood dowels, or buy pre-made hemp wall hangings ($40–$120) from Etsy or West Elm. Style on a walnut floating shelf ($80–$150).

    This takes 30 minutes if DIY, or 5 minutes to hang if you buy finished pieces.

    Your walls gain warmth and texture instantly. This pairing works in bedrooms, living rooms, and nurseries where you want organic softness.


    17. Layer Distressed White Plaster With Aged Iron for Rustic Romance

    Distressed plaster suggests history and age. Aged iron adds character without modernity. This pairing feels collected and romantic.

    Apply DIY distressed plaster ($200–$400 for a room) through a local painter, or use peel-and-stick distressed plaster wallpaper ($50–$100) from Spoonflower. Mount aged iron sconces ($60–$150 each) from Etsy, Rejuvenation, or salvage shops.

    Pro tip: The imperfections in plaster are the point—they make spaces feel authentic and lived-in.

    Your walls tell a story. This combination works beautifully in entryways, bedrooms, and dining rooms where you want romance and sophistication.


    18. Combine Smooth Alabaster With Warm Oak Accents

    Alabaster glows from within; oak provides grounding warmth. This pairing creates spaces that feel elegant and approachable.

    Display an alabaster lamp ($80–$200) on an oak side table ($100–$250) from Article, West Elm, or local furniture makers. Pair with oak wood bowls ($20–$60) or other carved pieces.

    The alabaster becomes a focal point that softens the room’s edges. This works beautifully in bedrooms and living rooms where you want subtle luxury.


    19. Pair Natural Linen With Blackened Steel Frame Details

    Linen’s softness needs grounding; blackened steel provides visual anchor. This pairing feels contemporary and refined.

    Find a linen sofa ($800–$2,000) from Article, Room & Board, or Restoration Hardware, or reupholster an existing piece ($400–$800). Look for blackened steel frame details—they’re increasingly common in modern furniture.

    Budget option: Use a linen slipcover ($200–$400) with visible steel legs.

    Your living room looks designed, not decorated. This combination works beautifully in modern minimalist spaces where every piece earns its place.


    20. Layer Warm Honey Onyx With Brushed Brass Fixtures

    Honey onyx seems to glow from within. Brushed brass warms without harshness. This pairing creates spaces that feel high-end and sensual.

    Install honey onyx accent tiles ($5–$15 per sq. ft.) from specialty tile suppliers or Wayfair. Pair with a brushed brass faucet ($150–$350) from PlumbingDepot, Waterworks, or high-end retailers.

    Budget option: Use peel-and-stick onyx-look wallpaper ($50–$100) with brass-finish fixtures ($80–$150).

    Your bathroom becomes a moment of luxury in your daily routine. This works best in powder rooms or master baths where visual impact matters.


    21. Combine Reclaimed Brick With Modern Stainless Steel Accents

    Reclaimed brick brings history and warmth. Stainless steel provides modern counterbalance. This combination reads as intentional and forward-thinking.

    Source reclaimed brick ($1–$2 per brick) from salvage yards and have walls built by a mason ($1,000–$3,000), or use peel-and-stick reclaimed brick wallpaper ($50–$100). Install stainless steel shelves ($80–$200 each) from Metal Supply or industrial suppliers.

    This pairing works beautifully in kitchens, lofts, and home offices where you want character with contemporary polish.


    22. Pair Soft Taupe Suede With Rose Gold Accents for Feminine Warmth

    Taupe suede is sophisticated and tactile. Rose gold adds warmth without coldness. This pairing feels feminine and refined.

    Layer a taupe suede chair or ottoman ($200–$600) from Article, Wayfair, or secondhand sources. Add rose gold accents ($20–$100 each): bookends, mirrors, picture frames from Urban Outfitters, Target, or specialty retailers.

    Budget option: Use a taupe suede throw pillow ($40–$80) with rose gold throw blanket clips ($15–$30).

    Your space feels curated and intentional. This works beautifully in bedrooms, reading nooks, and home offices where you want warmth with polish.


    23. Layer Weathered Cedar With Antique Copper Fixtures

    Weathered cedar has character and history. Antique copper develops a beautiful patina that complements aged wood perfectly. This pairing feels authentic and collected.

    Install weathered cedar paneling ($3–$8 per sq. ft.) on accent walls or ceilings through a carpenter ($500–$1,500), or use peel-and-stick cedar look ($40–$80) for renters. Add antique copper hardware ($20–$50 per piece) from Etsy, specialty hardware shops, or Rejuvenation.

    Your space feels like it has stories to tell. This works beautifully in cabins, farmhouse-inspired kitchens, and bedrooms where authenticity matters.


    24. Combine Soft Chenille With Antique Brass Details

    Chenille is luxuriously soft; antique brass adds vintage charm. Together they create spaces that feel collected and high-end.

    Find a chenille chair ($400–$1,000) from Article, Room & Board, or vintage furniture stores. Look for antique brass details built in, or have an upholsterer add brass nail-heads ($150–$250).

    Budget option: Buy a chenille throw pillow ($50–$120) with brass accents already included.

    Your living room reads as a curated, timeless retreat. This pairing works beautifully wherever you want comfort wrapped in sophistication.


    25. Pair Natural Slate With Warm Copper Accents for Grounded Drama

    Slate’s cool darkness needs warmth; copper provides it perfectly. This pairing feels grounded and intentional.

    Install slate flooring or tiles ($3–$8 per sq. ft.) from tile suppliers. Mount a copper pendant light ($100–$250) from Etsy, Rejuvenation, or West Elm above a key area like a kitchen island or entryway.

    Budget option: Use slate peel-and-stick tiles ($30–$60) with a copper-finish pendant light ($50–$120).

    Your space gains visual drama and sophistication. This works beautifully in kitchens, entryways, and dining rooms where you want bold, collected style.


    26. Layer Warm Terrazzo With Champagne Gold Fixtures for Modern Luxury

    Terrazzo has playful texture and warmth. Champagne gold adds approachable luxury without coldness. This pairing feels modern and collected.

    Install terrazzo tile ($4–$10 per sq. ft.) from tile suppliers like Floor & Decor, or use peel-and-stick terrazzo ($40–$100) for accent walls or backsplashes. Pair with champagne gold fixtures ($80–$200) from Wayfair, West Elm, or specialty plumbing retailers.

    Budget option: Use a terrazzo backsplash ($200–$500) with champagne gold cabinet hardware ($15–$40 per piece).

    Your kitchen or bathroom becomes a conversation starter. This combination works beautifully in contemporary spaces where personality and polish are equally important.


    Save this post for your next refresh and pick just one pairing to start with. The most refined spaces aren’t built overnight—they’re created through small, intentional choices stacked together. Which material combination speaks to you?

  • 26 Global-Inspired Home Decor Ideas Filled With Culture & Texture

    26 Global-Inspired Home Decor Ideas Filled With Culture & Texture

    Your home doesn’t need to look like a catalog to feel intentional. The beauty of global-inspired decor is that it celebrates imperfection, storytelling, and the pieces that make you smile—whether they’re from a flea market in Morocco or your grandmother’s attic. If you’re tired of cold minimalism and craving spaces that feel lived-in and connected to the world, you’re ready for this approach. These 26 ideas blend cultural elements, natural materials, and vintage finds into rooms that feel both traveled and deeply personal. You’ll discover budget-friendly styling tricks, investment pieces worth saving for, and quick wins that work whether you’re renting or own. Let’s build a home that tells your story.

    1. Layer Vintage Rugs for Depth and Pattern

    Stacking rugs adds visual interest and lets you mix patterns without feeling chaotic. This technique works especially well in bedrooms and living rooms where you want softness underfoot and a curated, collected look.

    Start with a neutral base rug (jute or wool, $80–$200 from IKEA or Ruggable), then layer a smaller patterned rug on top (Moroccan, kilim, or Turkish styles, $50–$300 from 1stDibs, Wayfair, or Etsy). Align them so the base layer peeks out 6–8 inches on all sides. This takes 5 minutes to arrange and costs less than buying one premium rug. If you’re renting, both rugs stay with you when you move.

    The layered approach breaks up large empty floors and makes rooms feel grounded. Your space instantly gains dimension and warmth without needing a full renovation.

    2. Source One Statement Antique Piece Per Room

    One authentic antique anchors a room and gives it soul. Unlike mass-produced furniture, vintage pieces have history and character that new items can’t replicate.

    Browse 1stDibs, Chairish, or local Facebook Marketplace for pieces like carved wooden mirrors, brass side tables, or ornate frames ($80–$500). Spend time scrolling and don’t rush—the right piece will speak to you. When you find it, check condition and ask about return policies. Many sellers offer one-week trials. Position your piece where it catches light or serves as a room’s focal point.

    This single anchor piece ties together all your other decor and makes the whole room feel more intentional. Guests will ask about it, and you’ll have a real story to share instead of “I got it at Target.”

    3. Paint Kitchen Cabinets a Deep, Moody Blue or Green

    The shift from Scandi minimalism to bold cabinet colors is one of 2025’s biggest moves. Deep blues and forest greens create sophisticated, cozy kitchens that feel nothing like the stark white trend.

    Use high-quality cabinet paint (Benjamin Moore or Sherwin-Williams, $40–$80 per quart) and invest in primer. If you have 10–15 cabinet doors, the project takes a full weekend or hire a painter for $800–$2,000. Replace hardware with brass or vintage pulls ($3–$15 per knob from Anthropologie or Etsy). Pair with light countertops and warm wood accents to balance the boldness.

    Your kitchen becomes a room you actually want to spend time in. The color wraps you in warmth while still feeling modern and sophisticated—no more cold, clinical cooking space.

    4. Create a Reading Nook With Layered Textiles

    Libraries are making a comeback, and even small homes can have a cozy reading corner. Layering different textile weights and textures creates an inviting space that whispers “stay awhile.”

    Start with a bench or cushioned window seat ($150–$400 from IKEA, Article, or vintage finds), then add pillows in linen, wool, and velvet ($20–$60 each from H&M Home, Etsy, or thrifted). Drape a chunky knit blanket ($50–$150 from Anthropologie or Amazon) nearby. Add a small side table ($40–$100) and a warm light source—floor lamp or string lights ($25–$80). The whole setup takes 2–3 hours to arrange.

    This becomes your retreat space where you actually want to relax with a book. The textural mix makes it feel like a curated escape rather than just a corner of your room.

    5. Display Collections on Floating Shelves With Breathing Room

    Collections become clutter without intention. Floating shelves let you showcase what you love while leaving enough space so it feels curated, not crowded.

    Install wooden or metal floating shelves ($30–$100 each from IKEA, Home Depot, or Wayfair) at varying heights using a stud finder for security. Styling rule: one-third empty space, one-third vertical (stacked books, tall plants), one-third horizontal (ceramics, small sculptures). This takes one afternoon including installation. Group items by color or height rather than random placement.

    Your treasured pieces become the room’s focal point instead of visual noise. Visitors notice your carefully chosen collections rather than seeing a messy shelf.

    6. Incorporate Woven Wall Hangings and Macramé

    Woven and macramé pieces bring texture without taking up floor space. These global-inspired accents work in any room and feel personal, not generic.

    Browse Etsy, World Market, or local artisan markets for handmade macramé ($30–$150), woven wall tapestries ($40–$200), or rattan mirrors ($50–$180). Mount using picture hooks or adhesive strips (renter-friendly). Layer 2–3 pieces at different heights and scales—one large piece with smaller accents creates balance. Installation takes 30 minutes.

    These pieces soften hard walls and add warmth instantly. They photograph beautifully too, which means your space looks Instagram-ready without feeling staged.

    7. Mix Metals for Visual Interest (Chrome, Brass, Wood)

    Matching all your metals is outdated. Intentionally mixing chrome, brass, and wood creates sophisticated, layered spaces that feel more collected and worldly.

    Choose one metal as your primary (brass works well), then add secondary accents in chrome or copper. Update hardware ($5–$30 per piece from Wayfair or local hardware stores), add brass bathroom fixtures ($40–$150 from Rejuvenation or Amazon), and include wooden frames and shelves. This takes just swapping out a few key pieces over time, so there’s no rush.

    The mixed-metal approach feels intentional and sophisticated rather than matchy or bland. Your space reads as thoughtfully designed instead of following one trend.

    8. Layer Patterned Textiles Using Checks and Stripes

    Google searches for “checks” jumped 5,000% this season. Layering checks with stripes and solid textures creates visual interest while staying cohesive.

    Start with a solid-colored sofa (cream, gray, or neutral), then add pillows in checks ($20–$40 each), stripes ($15–$35 each), and solids ($15–$30 each) in complementary colors like forest green, navy, and cream. Use similar color palettes to tie it together. The trick: vary the scale (small checks, medium stripes, larger geometrics). Takes 30 minutes to style.

    Your seating area becomes a conversation starter instead of a blank backdrop. The pattern mix feels intentional and globally inspired rather than chaotic.

    9. Add Wood Beams or Trim for Architectural Warmth

    Wood accents ground neutral spaces and add the warmth that’s missing from minimalist homes. Even in rental apartments, removable wood solutions work.

    Install faux wood beams ($20–$80 per 10-foot beam, stick-on or adhesive from Amazon or Home Depot) or add wooden trim around doorways and windows ($1–$3 per foot). If you’re renting, use adhesive-backed solutions that peel off. For permanent installations, this takes a weekend with basic tools. Paint beams dark brown or black to contrast against white or cream walls.

    The wood instantly makes spaces feel warmer and more grounded. This single addition can make even rental apartments feel like your own retreat rather than a temporary space.

    10. Curate a Styled Bookshelf by Color and Size

    Styled bookshelves serve as functional art and reflect your interests. Organizing by color plus adding objects creates visual flow and gives the shelf breathing room.

    Group books by spine color, then add non-book objects (ceramics, small sculptures, candles) to break up the rows. Follow the rule of three: alternate between stacked books, vertical books, and objects. Leave one-third of shelf space empty. Takes 2–3 hours depending on shelf size. No special tools needed.

    Your bookshelf becomes a gallery of things you love rather than just storage. People will linger and actually want to look at it instead of overlooking it.

    11. Install Curved Mirrors for Soft Architectural Lines

    Curved and arched mirrors soften hard lines while reflecting light and making spaces feel larger. This trend is everywhere because it actually works.

    Find arched or circular mirrors ($80–$300 from Article, Wayfair, or vintage sources) with brass, wood, or rattan frames. Lean against walls or hang using appropriate wall brackets. Position near entryways or bedrooms to create visual interest. Hang or lean takes 30 minutes. Works beautifully in rentals since leaning requires no installation.

    The curved silhouette instantly makes rooms feel less boxy and more sophisticated. Light bounces off the mirror, making spaces brighter and more open.

    12. Source Locally Made Pottery and Ceramics

    Locally made ceramics support artisans and add one-of-a-kind character that mass production can’t match. Every piece has a story and slight variations that make it special.

    Visit local maker fairs, pottery studios, and craft markets or shop Etsy for regional artisans. Budget $15–$60 per piece depending on size and artist reputation. Buy pieces you’ll actually use—bowls for fruit, mugs for coffee, vases for flowers. One piece takes 30 seconds to place, but the collection grows intentionally over time.

    These handmade pieces become conversation starters. You’ll feel good supporting creators, and your kitchen or shelf reflects your values, not just a catalog aesthetic.

    13. Create Room Dividers Using Curtains or Screens

    Open-concept fatigue is real. Soft dividers like curtains or wooden screens create defined spaces without permanent walls, perfect for renters and small homes.

    Install a tension rod and linen curtain ($40–$80 from IKEA, Target, or Amazon) to create a bedroom nook, or use a wooden folding screen ($50–$150 from Article or Wayfair). Sheer curtains filter light while solid fabrics create privacy. Installation takes 15 minutes. These work in rentals and require no wall damage.

    Your space suddenly feels intentional and organized instead of one big room. You can close off your bedroom or workspace and create distinct zones without knocking down walls.

    14. Layer Candles in Different Heights and Scents

    The candle market hit $11.51B by 2025 because they work. Layering different heights, scents, and holders creates a spa-like atmosphere that’s both functional and decorative.

    Mix large 3-wick candles ($20–$40 from Jo Malone, Diptyque, or Anthropologie) with smaller single-wick candles ($8–$15 from Target or Paddywax) and unscented taper candles ($2–$5) in brass holders. Group by room—lavender and eucalyptus for bedrooms, citrus for kitchens, cedar for living rooms. 5 minutes to arrange. Rotate scents seasonally for freshness.

    Your home smells intentional and welcoming. Visitors notice the scent before they notice the candles, which creates an invisible but powerful sense of home.

    15. Hang Woven Baskets for Storage and Visual Texture

    Woven baskets solve the storage problem while adding global texture and warmth. They work in every room and transition between styles easily.

    Find handwoven baskets ($20–$80 each from World Market, Urban Outfitters, or Etsy) in jute, rattan, or seagrass. Install using wall brackets or adhesive hooks ($5–$15). Hang in clusters of 3–5 at varying heights for visual interest. One afternoon to install and style. Use for blankets, scarves, or everyday items you want hidden but accessible.

    Your walls gain texture and purpose. Baskets break up empty space while keeping clutter contained, making rooms feel both organized and artfully decorated.

    16. Style Open Shelving With Books, Objects, and Plants

    Open shelving is a commitment—everything shows, so styling matters. Mixing books, ceramics, and plants creates visual rhythm that feels organic rather than overstaged.

    Choose a color palette (whites, creams, one accent color) and repeat items (if you have 3 ceramic bowls, group them). Follow this pattern: one-third books, one-third objects, one-third plants. Vary heights by stacking books, standing objects upright, and placing plants at different levels. Takes 2–3 hours to fully style. Rearrange seasonally to keep it fresh.

    Open shelves become a reflection of your taste and lifestyle instead of looking sparse or cluttered. People see your interests displayed beautifully rather than questioning why your kitchen is so bare.

    17. Add Vintage Textiles as Wall Art or Runners

    Vintage textiles do double duty as art and bring color, pattern, and cultural storytelling to walls. They’re often cheaper than traditional art and infinitely more interesting.

    Hunt on 1stDibs, Etsy, or estate sales for vintage rugs, tapestries, or runners ($30–$200). Hang using a tension rod, wooden dowel, or picture rails (installation costs $10–$30). Layer smaller textiles on benches or chairs for added texture. 30 minutes to install, depending on your hanging method.

    Your walls become conversation starters. Visitors ask about the origin of pieces rather than barely noticing standard art. You’re supporting sustainable fashion by giving old textiles new life.

    18. Build a Scullery or Second Kitchen Space

    The guest suite trend extends to second kitchens—sculleries for entertaining or extra prep space. Even small homes can steal closet space or corners for this.

    Designate a small closet, hallway, or corner and add floating shelves ($30–$100), a small sink or beverage station ($200–$600), and storage baskets ($20–$50 each). Stock with entertaining essentials like serving pieces, extra glassware, and dry goods. Budget $400–$1,200 total depending on plumbing needs. Takes one weekend if no plumbing is involved.

    Your entertaining setup becomes seamless. Guests feel welcomed in a thoughtfully designed space, and you’re not running back and forth to your main kitchen during parties.

    19. Incorporate Deep Jewel Tones in Soft Furnishings

    Dopamine decor is here to stay, and jewel tones deliver joyful color without feeling chaotic. They add luxury to neutral spaces inexpensively.

    Swap throw pillows to jewel-tone velvet ($25–$50 each from Article, Etsy, or CB2), add a rich-colored throw ($40–$100 from Anthropologie or Wayfair), or reupholster a chair in deep blue, emerald, or burgundy ($200–$600 if hiring). Mix jewel tones with neutrals in a 2:1 ratio (two neutral pieces, one jewel). These swaps take 30 minutes and require no permanent changes.

    Your space shifts from predictable to personality-filled. Jewel tones make rooms feel sophisticated and warm while still being calming—the best of both worlds.

    20. Display a Curated Collection of World Ceramics

    Collections tell stories about where you’ve traveled or what moves you aesthetically. Displayed thoughtfully, ceramics become personal gallery rather than clutter.

    Start collecting handmade ceramics from local markets, Etsy artisans, or antique shops—budget $15–$100 per piece. Group by color, size, or origin on shelves, dressers, or windowsills. Leave space around each piece so it breathes. You’re not looking for a massive collection—5–10 beautiful pieces are plenty. Rotate seasonally.

    Your home reflects real exploration and intentionality. Guests ask about each piece, turning your collection into stories you genuinely want to share.

    21. Paint an Accent Wall in a Moody, Warm Tone

    One accent wall changes a room’s entire energy without the commitment of full repainting. Warm, moody tones (terracotta, sage, deep gray) create intimate, welcoming spaces.

    Choose a color from brands like Benjamin Moore, Sherwin-Williams, or Farrow & Ball ($30–$50 per gallon) in shades like terracotta, warm gray, or sage. Paint one wall behind your bed or sofa as a focal point. Buy quality primer ($15–$25) for better coverage. DIY takes one full day; hire a painter for $300–$800. Test paint on a large swatch first—colors look different depending on lighting.

    The room instantly feels more intentional and grounded. Your space becomes a retreat instead of a blank box, and the whole room’s aesthetic shifts with just one wall.

    22. Create a Gallery Wall of Mixed Art and Objects

    Gallery walls display personality and curated taste. Mixing frames, objects, and textiles creates visual rhythm that feels collected and intentional rather than random.

    Start with a focal point (larger piece, mirror, or textile), then add complementary items using matching or coordinating frames ($10–$40 each from IKEA, Etsy, or local framers). Vary frame colors (black, wood, metal) and sizes for interest. Lay everything out on the floor first to plan arrangement, then install using a level and nails or picture hooks ($5–$15 total). Takes one full afternoon to plan and install.

    Your wall becomes a mini gallery that reflects your aesthetic and travels. It’s a conversation starter that shows you’re thoughtful about your space rather than just throwing up whatever hangs.

    23. Mix Vintage and New Furniture for Eclectic Balance

    Mixing eras and styles creates rooms that feel personal and lived-in. The key is intentionality—each piece earns its place, not thrown together randomly.

    Balance new basics (neutral sofa, simple bed frame, practical storage) with statement vintage pieces (ornate mirror, wooden dresser, antique chair). Keep 70% neutral/minimal and 30% vintage/statement. Start with one vintage focal point, then add gradually. Budget $200–$500 total for small vintage finds; splurge $500–$2,000 on one special antique.

    Your space tells a story instead of looking like you shopped one store. Guests see a curated home rather than a catalog spread, which feels infinitely more special and real.

    24. Use Natural Light and Sheer Curtains Strategically

    Lighting transforms everything. Strategic use of natural light and sheer fabrics creates spaces that feel warm, welcoming, and naturally beautiful.

    Replace heavy curtains with lightweight linen or cotton ($20–$50 per panel from H&M Home, Anthropologie, or Target). Hang floor-to-ceiling to maximize height and light. Keep windows clear or use sheer only to filter glare. If privacy is needed, layer with roller shades ($30–$60). This change takes 30 minutes and costs under $100.

    Your rooms feel brighter and more open instantly. Light becomes part of your decor strategy, and spaces feel more welcoming without any structural changes.

    25. Accessorize With Hand-Blown Glassware and Vessels

    Hand-blown glass adds subtle color, texture, and craftsmanship without feeling heavy or fussy. These pieces catch light beautifully and feel precious.

    Shop Etsy artisans, local glass studios, or Design Within Reach for hand-blown vessels ($20–$100 each depending on artist). Group 3–5 pieces of varying sizes and colors on a shelf or windowsill where light can shine through. No installation needed—just place and enjoy. Budget $80–$300 for a meaningful collection.

    These pieces add sophistication quietly. Visitors notice the artistry, and you’ll catch yourself admiring how light plays through the glass throughout the day.

    26. Establish a Guest Suite Using Layered Textures and Warmth

    Guest suites are rising in popularity because hosting becomes a pleasure when you have a thoughtfully prepared space. Layering comfort (soft bedding, good lighting, quality pillows) makes guests feel truly welcomed.

    Start with a quality mattress ($400–$1,000), then add 100% cotton or linen sheets ($60–$150 per set), multiple pillows ($30–$80 each), and a weighted throw ($50–$150). Include a side table ($50–$150), good reading light ($40–$100), and fresh candles ($15–$30). Dedicate a drawer or shelf for extra blankets and toiletries. Budget $1,000–$2,500 total for a complete suite. Takes a full weekend to assemble and style.

    Guests feel genuinely cared for in a retreat-like space. This becomes the room people ask to come back to, and hosting becomes easier because your guests are actually comfortable and rested.


    Pin this guide and tackle one idea this weekend. Whether you start with a small ceramic collection or commit to a full accent wall, each change builds a home that feels worldly and authentically yours. Save this post and share it with anyone craving a space filled with culture and intention.

  • 25 High-Texture Material Ideas That Add Depth & Rich Detail

    25 High-Texture Material Ideas That Add Depth & Rich Detail

    When you’re decorating a luxury living room on any budget, texture is your secret weapon. It’s what separates a flat, sterile space from one that feels expensive, inviting, and rich with detail. The good news? You don’t need to overhaul your entire room or spend a fortune. By strategically layering different textures—from soft bouclé and linen to natural wood and stone—you can create a space that feels intentional, layered, and absolutely worth lingering in.

    This guide gives you 25 specific material ideas you can start using this weekend. Some cost nothing (they’re styling hacks), others are small upgrades under $50, and a few are investment pieces that’ll anchor your room for years. Whether you’re renting or own, have pets or are working with minimal space, you’ll find something here to add that high-end, textured depth your living room deserves.


    1. Layer a Bouclé Accent Chair for Instant Soft Drama

    A bouclé chair is the easiest way to add luxury texture without committing to a full sofa replacement. The looped fabric catches light beautifully and reads as high-end, even at mid-range price points. Look for bouclé accent chairs between $400–$800 at Wayfair, Article, or West Elm. If that’s outside your budget, check Facebook Marketplace or local vintage shops for secondhand options—you’ll often find quality pieces for $150–$300.

    Pair your bouclé chair with a simple wooden frame (no heavy upholstery competing for attention). Position it near natural light so the texture shows off. The project takes zero time—just delivery and placement—and the result is immediate.

    Your seating area suddenly has depth and personality, plus you’ve got a comfortable reading nook that actually looks like it belongs in a design magazine.


    2. Swap Standard Throw Pillows for Linen-Look Weave Covers

    Most throw pillow covers feel cheap because they’re too smooth and synthetic-looking. Linen-look weaves—tight, natural-fiber fabrics that mimic linen without the wrinkles—read as expensive and add tactile interest to any sofa.

    Hunt for covers on Amazon ($15–$30 each), Target ($20–$25), or IKEA ($10–$15 per cover). Buy 4–5 in coordinating warm neutrals (cream, warm gray, soft olive, clay). Mix and match textures: throw in one with a subtle ribbed weave, another with a looser linen look, one in solid linen. The variety creates visual depth without clashing.

    This swap takes 10 minutes and costs $40–$75 total if you refresh four pillows. The impact is massive—suddenly your sofa looks curated and intentional instead of generic.


    3. Add Natural Stone or Slate Coasters and Catchalls

    Natural stone isn’t just beautiful—it’s a texture that whispers luxury without shouting. Stone coasters, small catchalls, and serving boards add that high-end tactile element to every surface in your living room.

    Look for natural slate or marble coasters at HomeGoods ($10–$15 for a set), Wayfair ($12–$25), or locally at tile shops (often cheaper for bulk small cuts). A simple slate catchall runs $15–$40. These pieces take up minimal visual space but add serious material richness.

    Arrange coasters in a stack on your coffee table, place the catchall near your sofa (keys, remotes), and use a slate or marble board as a base for styling a side table. Zero installation, instant upgrade.

    Your coffee table becomes a display of natural materials that feels collected and intentional, not like generic décor.


    4. Introduce Tight Chenille Upholstery Through a Bench or Ottoman

    Tight chenille is softer than bouclé but equally textured and sophisticated. It’s also durable enough for households with pets or kids. If you’re not ready to reupholster your sofa, start with a smaller piece: a bench ($300–$600) or ottoman ($200–$400) in chenille.

    Check Article, West Elm, CB2, or Restoration Hardware for options. Look specifically for “tight-weave chenille” to ensure it photographs well and feels durable. Opt for warm neutrals: taupe, warm gray, or soft cream.

    Place the piece at the end of your sofa or as a coffee table alternative. The textural contrast between chenille and your existing pieces adds depth instantly.

    You now have a functional, textured anchor that transforms your living room’s tactile richness and gives you a bonus spot to perch or rest your feet.


    5. Layer Oiled Wood Shelving and Floating Surfaces

    Oiled wood—particularly walnut or oak with a matte oil finish—adds warmth and texture that painted surfaces can’t match. The grain shows, the finish feels tactile, and it reads as intentional. If you don’t have built-in shelving, floating wooden shelves are a weekend DIY project or a one-time pro install.

    Floating shelves cost $40–$150 per shelf depending on material and length (IKEA, Wayfair, local carpentry). Installation is $50–$200 if you hire help. If you’re handy, DIY costs under $100 total with basic supplies and a drill.

    Mount 2–3 shelves at varying heights. Style them with books, plants, and ceramics to create visual interest. The oiled wood becomes a textured backdrop that doesn’t compete with your décor.

    Your wall becomes a functional gallery that feels warm and collected, and oiled wood’s longevity means this upgrade lasts for years with minimal maintenance.


    6. Use Chunky Knit Throws as Both Texture and Color Accent

    A chunky knit throw is one of the cheapest ways to add luxury texture. The looser weave catches light, feels soft, and photographs beautifully. Plus, it’s functional—warmth and comfort combined with style.

    Find chunky knit throws at Target ($30–$50), IKEA ($25–$40), Amazon ($20–$60), or splurge at Restoration Hardware ($150–$300). Look for cables, ribs, or other visible texture patterns in cream, warm gray, or your room’s accent color.

    Drape it loosely over one sofa arm rather than folding it neatly—the casual arrangement looks more expensive and intentional. Takes two seconds to style.

    Your sofa instantly feels cozier and more layered, and you’ve added a textured element that’s both beautiful and livable. This is a renter-friendly upgrade too.


    7. Introduce Natural Rattan or Woven Textures via Wall Art or Panels

    Woven natural-fiber wall art—rattan, jute, or wicker—adds dimension and warmth without requiring wall paint or major changes. These pieces are lightweight, removable, and bring organic texture to any space.

    Rattan wall hangings run $40–$150 at Wayfair, Urban Outfitters, or Etsy. Smaller woven pieces are $20–$50. You can also find great options at HomeGoods or TJ Maxx for under $40.

    Hang one statement piece above a console or sofa, or layer 2–3 smaller pieces at varying heights on an accent wall. Installation takes 10 minutes with a picture hanger.

    The woven texture adds warmth and organic interest, and because rattan is a natural material, it elevates the entire room’s perception of thoughtfulness and quality.


    8. Layer Multiple Area Rugs for Depth and Acoustic Benefit

    Layering rugs—a larger jute or natural fiber base with a smaller patterned or textured rug on top—adds both visual depth and acoustic richness. This trend reads expensive and intentional while also improving sound absorption in your room.

    Start with a large jute or sisal base rug ($100–$300 for 8×10) from IKEA, Rugs USA, or Wayfair. Layer a smaller wool or patterned rug on top ($80–$200) in a complementary tone. Total investment: $180–$500.

    Center the smaller rug on the larger one so the base rug peeks out underneath. This simple layering trick adds texture, warmth, and visual sophistication instantly.

    The result is a room that feels more grounded, acoustic-friendly, and deliberately curated. Bonus: layering rugs makes a space feel more intimate and intentional.


    9. Add Linen Upholstery Through Slipcovers or New Pieces

    Real linen—not linen-look fabric—has a distinctive weave and subtle slub texture that reads as luxury. If you’re not ready to reupholster your sofa, a linen slipcover ($150–$400) is a renter-friendly option. Alternatively, seek out linen-upholstered chairs or small sofas ($500–$1,500).

    Search for slipcovers on Wayfair, Amazon, or specialist sites like Comfort Works. For new pieces, check Article, West Elm, or Restoration Hardware. Choose warm neutrals: cream, warm gray, or soft taupe.

    Install a slipcover in 30 minutes (just tuck it around your existing sofa), or style a new linen piece as a focal point. Both work beautifully.

    Your seating instantly feels more refined and textured, and linen’s natural fiber quality conveys quality and intention without screaming “expensive.”


    10. Style Open Shelving with Mismatched Ceramics and Vessels

    Individual ceramic pieces—bowls, vases, vessels, plates—add texture and visual interest to shelving. The key is curating them thoughtfully, not just filling every inch. Mismatched pieces in coordinating tones read as collected and expensive.

    Hit thrift stores (Goodwill, estate sales) for $2–$8 per piece, HomeGoods for $8–$25 per piece, or invest in artisan ceramics from Etsy for $30–$100+ per piece. Build a collection slowly. You don’t need more than 8–12 pieces to create impact.

    Arrange pieces with breathing room between them. Vary heights and group by tone (warm grays, creams, soft earth tones). Leave at least 30% of shelf space open.

    Your shelving becomes a gallery of textured surfaces and careful curation that makes your entire room feel more intentional and collected.


    11. Incorporate Woven Wall Baskets for Storage and Texture

    Woven baskets—hung on walls—serve dual purpose: storage and visual texture. They add organic warmth and break up blank wall space while staying functional.

    Find woven wall baskets at Target ($15–$30), IKEA ($12–$25), Amazon ($10–$40), or HomeGoods ($8–$20). Choose natural fibers: seagrass, hyacinth, or rattan in cream or tan tones.

    Mount 3–4 baskets at varying heights on an accent wall or beside a sofa. Use them for blankets, magazines, or lightweight storage. Installation takes 30 minutes with basic wall anchors.

    Your wall gains dimension and warmth, plus you’ve created functional storage that actually looks good. The woven texture adds that handmade, curated quality that reads as intentional design.


    12. Layer Vintage or Antique Wood Furniture for Character

    Vintage and antique wooden furniture—side tables, credenzas, coffee tables—brings texture through age, grain, and finish variation. These pieces read as collected and intentional, not mass-produced.

    Hunt estate sales, Facebook Marketplace, and local antique shops for pieces in the $50–$400 range depending on quality. Look for solid wood with visible grain and character marks (not restoration-perfect, just honest aging).

    Mix one or two vintage wood pieces with modern minimal seating. The contrast makes both feel more intentional.

    Your room gains warmth and a sense of story. Vintage wood’s varied patina and grain creates visual richness that new furniture struggles to match, making your space feel both curated and lived-in.


    13. Add Tactile Throw Blankets in Varying Weaves

    Beyond one throw, layering multiple blankets in different weaves and textures adds richness and visual interest. Each different textile catches light differently, creating depth.

    Collect 3–4 throws in varying textures (chunky knit, linen, waffle weave, wool) from Target ($25–$50 each), IKEA ($20–$40), Amazon ($15–$60), or invest at Restoration Hardware ($80–$200). Choose warm neutrals so they coordinate without matching exactly.

    Drape them loosely over sofa arms and the back of your sofa rather than folding them neatly. Let them look casually layered.

    Your seating suddenly feels more luxurious and textured. Guests will notice the subtle variety, and you’ve added visual depth without cluttering the space.


    14. Use Natural Stone or Slate Accents as Side Table Bases

    Stone or slate bases for side tables add unexpected texture and weight without requiring a lot of visual real estate. These pieces feel sculptural and intentional.

    Look for stone-base side tables at Wayfair ($150–$400), Design Within Reach ($300–$600), or Etsy ($100–$400). If you’re handy, buy a slate or stone slab from a local tile shop ($50–$150) and pair it with a simple wooden top (DIY or professionally mounted).

    A stone base immediately reads as high-end and draws the eye downward, making your room feel more grounded and intentional.

    This single piece becomes a focal point that elevates your entire living room aesthetic. The natural material variation in stone ensures it stays visually interesting over time.


    15. Style with Vintage or Contemporary Art in Textured Frames

    Art frames themselves add texture and material interest beyond the art inside. Mix frame finishes and materials to create a curated gallery wall that feels collected.

    Buy individual frames or ready-made pieces at Target ($20–$40), IKEA ($15–$30), Wayfair ($25–$80), or invest in wood/metal frames from local framers ($50–$150 per frame). Mix materials: natural wood, blackened metal, brass accents.

    Arrange 3–5 pieces at varying sizes and heights. Leave breathing room between pieces. This takes an afternoon to hang and style.

    Your wall becomes a textured gallery that feels personally curated. The variety of frame finishes adds visual depth and makes your living room feel more intentional and sophisticated.


    16. Introduce Brass or Aged Metal Accents Throughout

    Aged or weathered metals—brass, bronze, copper—add subtle texture and warmth to a room. These materials catch light and add visual interest without dominating the space.

    Hunt for brass or aged metal pieces at Target ($15–$50), Wayfair ($20–$100), or HomeGoods ($10–$40). Look for: picture frames, lamp bases, candle holders, hardware, or decorative objects. Mix metal finishes (don’t match everything exactly—variety reads more intentional).

    Scatter these pieces throughout your room: a brass frame on a shelf, an aged metal lamp beside your sofa, bronze hardware on a vintage side table. Takes zero time—just swap out or add new pieces.

    Your room gains warmth and sophistication through metal accents. The patina and variation make everything feel more collected and less like a showroom.


    17. Layer Cork or Natural Rubber Under-Rugs for Hidden Texture

    An often-overlooked texture opportunity: the rug underlay. Cork and natural rubber underlays add texture (hidden but felt when you walk on it) while being functional and sustainable.

    Find natural rubber or cork underlays at Wayfair ($40–$100 for 8×10), Amazon ($30–$80), or IKEA ($25–$60). They’re designed to go under rugs to prevent slipping and add cushioning.

    Place the underlay under your area rug before styling on top. The added cushioning and subtle texture make stepping on your rug feel more luxurious and intentional.

    Your footsteps feel softer and your rug stays in place. This hidden detail adds quality and thoughtfulness that guests might not see but will definitely feel.


    18. Add Textured Wallpaper or Grasscloth to One Accent Wall

    Textured wallpaper—particularly grasscloth, linen-look papers, or subtle embossed designs—adds serious material richness without overwhelming your space. Pick one accent wall to avoid visual chaos.

    Look for textured wallpaper at Wayfair ($20–$60 per roll), Spoonflower ($25–$50 per roll), or local wallpaper shops ($15–$80 per roll). Calculate your wall size and buy enough rolls (usually 2–3 per accent wall). Wallpaper removal or application runs $100–$300 if you hire help or costs just time if you DIY.

    Choose one wall—often behind a sofa or console table—for maximum impact. Install or hire out (professional installation takes one day).

    The textured wall becomes an instant focal point that elevates your entire room. Even in warm neutrals, textured wallpaper reads as intentional luxury.


    19. Mix Wood Tones for Warmth and Visual Depth

    Instead of matching all wood furniture to one tone, deliberately mix warm wood finishes for texture and depth. This curated variety reads as more collected and intentional than matching sets.

    Hunt for wooden pieces in varying tones: warm honey, walnut, oak, teak, or cherry. Mix vintage finds (thrift stores, $20–$200) with new pieces (Target, IKEA, West Elm, $50–$400). Look for visible grain and natural finishes rather than highly polished pieces.

    Arrange pieces so warm and dark tones alternate around your room—not clustered together. This creates visual movement and balance.

    Your room gains warmth and dimension through wood-tone variety. The effect is more collected and sophisticated than any single matched set could achieve.


    20. Layer Textured Window Treatments for Depth and Function

    Window treatments often get overlooked for texture, but layering different fabrics creates both visual interest and practical light control. Mix opaque and sheer, smooth and textured for maximum impact.

    Start with sheer lightweight curtains ($20–$50 per panel at IKEA, Target, Amazon), add a textured roman shade or cellular shade ($40–$120 at Wayfair or Target), and finish with a linen or linen-look panel ($30–$80 per panel). Total investment: $90–$250.

    Layer the treatments from window outward: sheer closest to glass, then textured shade, then heavier panels on the outside. Install takes a weekend or $100–$200 if you hire help.

    Your windows become a textured focal point that frames natural light beautifully. The layered approach reads as intentional design while staying functional.


    21. Style Surfaces with Stacked Books and Mixed-Media Objects

    Books aren’t just for reading—stacked horizontally with sculptural objects layered on top, they create visual texture and add personality to any surface. Mixed media styling reads as collected and curated.

    Gather hardcover books from your collection or thrift stores ($1–$5 each). Add ceramic sculptures, small wooden objects, or vintage finds ($5–$40 each). Source plants from a local nursery ($8–$20).

    Arrange books in stacks of 2–3, varying heights. Layer a sculpture or object on top. Add one small plant beside the stack. Leave breathing room—don’t crowd the surface.

    Your coffee table or console becomes a styled vignette that reads more like a design magazine spread than generic home décor. The varied textures and heights keep eyes moving and interested.


    22. Incorporate Natural Fiber Floor Poufs or Ottomans

    Floor poufs in natural fibers (jute, seagrass, rattan) add flexible seating and organic texture without requiring permanent furniture placement. They’re renter-friendly and easy to move.

    Find natural fiber poufs at IKEA ($25–$50), Target ($30–$60), Wayfair ($40–$100), or splurge at Design Within Reach ($150–$300). Choose sizes and colors that coordinate with your space.

    Tuck a pouf beside your sofa, in a corner, or beside an armchair. Drape a throw loosely over one side for extra texture. Takes zero time to style.

    You now have flexible seating that adds organic texture and functions as extra storage or footrest. The natural fiber weave adds warmth and visual interest without clutter.


    23. Add Sculptural Ceramic Vessels as Standalone Art

    Instead of always putting flowers in vases, display empty ceramic vessels as sculptural art. The form, glaze texture, and clay finish become the focal point.

    Find ceramic vessels at local makers markets ($20–$80), Etsy ($15–$150), or HomeGoods ($10–$40). Look for pieces with visible glaze texture, interesting shapes (not just simple cylinders), and warm tones.

    Arrange 3–5 vessels at varying heights on a console, shelf, or side table. Leave space between each one. No flowers needed—the vessels themselves are the art.

    Your room gains a curated, gallery-like quality. The sculptural pieces add visual interest and signal thoughtful curation and intentional design choices.


    24. Layer Vintage or Contemporary Rugs with Patterns Underneath

    If you want pattern texture without overwhelming a room, layer a smaller patterned rug on a larger solid base. The technique adds visual interest while staying grounded and intentional.

    Start with a large solid base rug in jute, sisal, or neutral tone ($100–$300). Layer a smaller patterned wool or textured rug on top ($80–$250). Choose complementary color palettes so patterns feel intentional, not chaotic.

    Center the smaller rug so the base peeks out as a frame. Styling takes zero time once rugs are placed.

    Your seating area gains dimension and pattern interest through layering. The effect feels more collected and sophisticated than a single solid rug could achieve.


    25. Style with Leather Accents for Subtle Luxury Texture

    Real leather—from chairs to side tables to decorative objects—adds a tactile, luxury texture that reads as intentional investment. Leather ages beautifully and improves over time.

    Seek out quality leather accent chairs ($300–$800), leather poufs ($100–$300), or smaller leather pieces like bookends or storage boxes ($20–$100) at Article, West Elm, Restoration Hardware, or secondhand at estate sales.

    Choose warm tones: cognac, chocolate brown, or saddle brown. Pair with warm wood and neutral textiles for maximum cohesion.

    Your room gains depth and sophistication through leather’s natural grain and patina. Leather ages gracefully, so this investment improves with time.


    Save this post and tackle one texture idea this weekend. Small layering changes add up fast, and once you start mixing materials intentionally, you’ll notice how much richer your living room feels. Pick whichever idea calls to you first.

  • 24 Earth-Tone House Interior Ideas for a Warm, Organic Look

    24 Earth-Tone House Interior Ideas for a Warm, Organic Look

    If your home feels cold or sterile, you’re not alone. Stark white walls and cool gray tones have dominated design for years, leaving many spaces feeling impersonal and unwelcoming. The good news? Earth tones—think chocolate brown, sage green, terracotta, and warm taupe—are bringing back the coziness factor without sacrificing style. These 24 ideas show you exactly how to layer earthy colors, textures, and natural materials into every room of your home. Whether you’re renting or own, have a big budget or a small one, you’ll find something here that feels doable. Get ready to create a space that actually wraps around you like a warm sweater.

    1. Paint Your Bedroom Walls in Warm Chocolate Brown

    Chocolate brown walls create an intimate cocoon that cooler colors simply can’t match. This shade feels expensive and grounding without being dark or oppressive—especially when paired with plenty of light-colored bedding and natural light during the day.

    Paint all four walls or just an accent wall behind your bed. Benjamin Moore HC-172 (Borscht) or Sherwin-Williams SW 7598 (Coffee) are reliable warm browns that photograph beautifully. Budget $40–80 for quality paint and supplies. Expect a full day for one bedroom, or hire someone for $300–500. The trick? Use a warm white (like ivory or cream) for trim and ceiling to prevent the space from feeling too dark.

    Pro tip: Test paint chips on your actual walls over several days to watch how the color shifts with morning and evening light.

    You’ll feel more relaxed at bedtime, and your bedroom becomes a true retreat rather than just a place to sleep.

    2. Add Sage Green Accent Wall in the Kitchen

    Sage green is the earthy color that works everywhere—calming but not bland, natural but never boring. In a kitchen, a single sage wall draws the eye without overwhelming the space where you cook and eat.

    Paint behind your open shelving, range hood, or above the backsplash. Sherwin-Williams SW 9205 (Evergreen Fog) or Benjamin Moore HC-126 (Healing Aloe) sit perfectly between gray and green. Budget $40–80 for paint supplies; DIY over a weekend afternoon. If you’re renting, peel-and-stick wallpaper in sage gives you the same effect without commitment—search “removable sage green wallpaper” on Amazon ($20–35 for a roll).

    The best part? This color pairs with stainless steel, brass, and natural wood without clashing.

    3. Layer Warm Neutrals Through Textiles and Rugs

    Warm neutrals—cream, beige, warm gray, and taupe—create depth when you layer them instead of sticking to one shade. This approach adds visual interest while keeping the space cohesive and calming.

    Start with a neutral base paint, then layer in rugs, blankets, and pillows in slightly different warm tones. A jute rug ($50–150 from IKEA or Wayfair) topped with a wool throw ($60–120) and cream linen pillows ($20–40 each) build warmth without matchy-match feeling. The key is varying texture—smooth linen next to chunky knit, sleek wood beside woven jute.

    Swap out one textile monthly during seasons to keep the look fresh without a full redesign.

    4. Install Wood-Plank Ceiling for Architectural Warmth

    A wood-plank ceiling instantly adds character and brings organic warmth to any room. Shiplap or tongue-and-groove wood draws the eye upward and makes spaces feel both cozy and intentional—far more interesting than drywall.

    Real wood runs $200–800 depending on coverage and quality; labor is $800–2000. Peel-and-stick wood veneer ($100–300 for a room) offers a renter-friendly option that looks surprisingly real up close. Installation takes a weekend for DIY or 1–2 days professionally. Pair with soft overhead lighting to avoid harsh shadows.

    Your ceiling becomes a design feature, not forgotten space. Guests notice it immediately.

    5. Create a Feature Wall with Hand-Stenciled Patterns

    Hand stenciling beats wallpaper for customization and cost. You control the pattern, color, and placement—plus you can redo it without residue damage (renter gold).

    Buy a stencil ($10–30 from Etsy or craft stores), acrylic paint in your earth tone ($5–8), and foam rollers ($3–5). Tape off your wall section, apply paint over the stencil, let dry, repeat. Budget 4–6 hours for a 10×12 wall. YouTube has countless tutorials—search “hand stenciling wall patterns” for step-by-step guidance. Start small (above a bed or behind a sofa) before committing to a full wall.

    Your wall becomes one-of-a-kind art that reflects your taste, and you saved hundreds versus wallpaper or a mural artist.

    6. Swap Out Light Fixtures for Brass or Bronze Art Deco Chandeliers

    Lighting is jewelry for your home. Replacing a basic overhead fixture with a statement brass or bronze chandelier grounds a room in warmth and instantly reads as elevated.

    Vintage Art Deco chandeliers run $150–500 on Etsy or Wayfair; modern reproductions are $80–250 on Amazon or West Elm. Swapping fixtures takes 30 minutes if you’re comfortable with basic wiring (watch tutorials first or hire an electrician for $100–200). Install in entryways, dining rooms, or bedrooms where guests see it.

    The warm glow from brass or bronze naturally flatters skin tones and creates intimacy, even in bright daylight.

    7. Add Curved Furniture to Soften Hard Edges

    Straight lines feel modern but cold; curves feel organic and comforting. Swapping angular furniture for rounded pieces—curved sofas, scalloped chairs, circular tables—softens your entire room’s energy.

    Search “curved sofa” or “rounded armchair” on Wayfair, Article, or CB2 ($500–1500 for a sofa; $200–400 for accent chairs). Budget-friendly option: pair an angular existing sofa with one curved accent chair ($200–350). Curved furniture photographs beautifully and feels more luxe than boxy pieces, even when it’s affordable.

    The room feels less corporate and more approachable. Movement feels natural instead of rigid.

    8. Layer Patterned Rugs and Textiles Without Fear

    Maximalism is back, and it means mixing patterns without overthinking. Stripes next to florals, geometric next to abstract—when tied together by an earthy color palette, it’s intentional, not chaotic.

    Pick 3–4 patterns that share one warm tone (chocolate brown, sage, cream, terracotta). Layer a striped rug ($60–200), patterned throw pillows ($15–40 each), and a quilted or patterned blanket ($40–100). Start with items you can easily swap if they don’t work; most online retailers have free returns.

    Your space gains personality and visual depth. It stops looking like a showroom and starts looking like home.

    9. Paint Cabinetry in Earthy Jewel Tones

    Cabinet color is bold but reversible (you can always repaint). A deep sage, terracotta, or warm gray cabinet transforms a kitchen without the investment of new cabinets.

    Use cabinet-specific paint like Benjamin Moore Advance ($40–60 per quart) or hire a pro for spray-painting ($800–1500 for full kitchen). DIY takes a weekend; professional spray finish lasts longer. Replace hardware with warm brass or bronze knobs for $40–100 total. The impact? Massive—guests think you renovated.

    Pro tip: Paint lower cabinets and leave uppers white for balance and light.

    Your kitchen goes from dated to intentional in one weekend with budget flexibility.

    10. Install Arched Doorways or Curved Doorway Trim

    Arches are the softest architectural detail you can add. They break up straight lines, reference Art Deco and vintage design, and feel playful without being over-the-top.

    Real arch installation costs $500–2000 and requires professional framing. For renters or budget-conscious homeowners, curved doorway trim kits ($50–150 from specialty hardware stores) attach to existing rectangular doors and mimic the effect. Installation takes 2–3 hours. Alternatively, use a removable curved architectural frame ($80–200) that sits around existing doorways.

    Arched entries create a sense of threshold—you’re moving from one intentional space to another, which psychologically feels more luxe.

    11. Use Terracotta Pots and Planters Throughout

    Terracotta is the OG earth tone and costs almost nothing. Clustered on shelves, windowsills, or grouped on the floor, terracotta pots add warmth and immediately read as intentional styling.

    Buy pots in bulk from garden centers ($2–10 each depending on size) or HomeGoods ($5–25 for larger decorative pots). Fill with low-maintenance plants like pothos, snake plants, or succulents ($5–20 each). Group in odd numbers (3, 5, 7) at varying heights for visual interest.

    Your home gains life, warmth, and a organic vibe. Plants also improve air quality—bonus.

    12. Add Textured Wall Paneling (Shiplap or Grooved Boards)

    Paneling adds dimension and visual interest—the grooves catch light and create shadow play that flat paint can’t. It reads as high-end even on a budget.

    Real wood shiplap runs $200–600 per wall including installation; peel-and-stick shiplap ($80–200) works for renters. Grooved MDF panels ($100–300) give the look without cost. DIY shiplap takes a full weekend; hire a handyperson for $400–800 labor. Install on one accent wall for impact without overdoing it.

    Textured walls become a backdrop for art, mirrors, and decor—everything looks better against paneling than flat walls.

    13. Layer Warm Wood Tones in Furniture and Flooring

    Mixing warm wood tones (honey, walnut, oak, cherry) in the same space sounds risky but works beautifully when you commit to warm earth tones everywhere else. The variety in wood grain becomes a feature, not a mistake.

    You don’t need to replace everything—layer in one walnut piece ($200–600 for a dresser or desk) with existing honey-toned furniture. Use wood stain ($15–30) to warm up existing pieces, or refinish floors ($800–2000) if you own. Warm wood + warm paint + warm textiles = cohesive warmth.

    Your space gains richness and depth. Multiple wood tones feel collected and intentional, not mismatched.

    14. Hang Oversized Mirrors with Brass or Wood Frames

    Mirrors multiply light and space, especially when framed in warm metals or wood. An oversized brass or wooden-framed mirror becomes a statement piece, not just functional.

    Search “oversized brass mirror” or “round wood frame mirror” on Wayfair or Article ($150–500 for quality). Budget option: thrift a basic mirror frame ($5–30) and wrap it in rope or wood trim ($10–40) for a DIY upgrade. Hang at eye level or lean against a wall for flexibility.

    Pro tip: Position opposite a window to bounce natural light around the room.

    The space feels larger and brighter. Mirrors also catch and reflect the warm tones you’ve added—they become part of your earth-tone design.

    15. Switch to Warm White Paint on All Trim and Ceilings

    If your walls are earthy and rich, your trim and ceiling should be warm white (not stark white or cool gray). This balance prevents rooms from feeling dark or cave-like.

    Warm whites: Benjamin Moore OC-17 (White Dove), Sherwin-Williams SW 7005 (Pure White), or Benjamin Moore HC-172 (Pale Oak). Paint costs $40–80; labor is $300–600 if hiring out. This single change makes earth-toned walls feel intentional and elevated instead of heavy.

    The room breathes. Dark walls + dark trim feel oppressive; dark walls + warm white trim feel designed.

    16. Create a Reading Nook with Layered Textures

    Designated cozy spaces make homes feel intentional and luxe. A reading nook layers texture—soft fabrics, natural materials, warm lighting—into a small, defined zone.

    Pick a corner and add: a comfortable chair ($200–500), side table ($50–150), ottoman or pouf ($40–100), throw blanket ($40–80), and warm lighting like a brass floor lamp ($80–200). Total investment: $400–1000 depending on quality. Renter-friendly: use items you already own and layer in affordable pieces from Target or Article.

    This nook becomes your retreat. You’ll use it daily and guests immediately see your design intention.

    17. Paint Interior Doors in Contrasting Earthy Tones

    Interior doors are overlooked real estate. Painting them in a contrasting earthy tone (different from your walls) adds architectural interest and makes hallways feel intentional.

    Paint doors sage, terracotta, deep gray, or warm charcoal ($40–80 for paint). A single door takes 2–3 hours; full house is a weekend project. This costs almost nothing but creates maximum impact. Pair with warm brass or bronze door hardware ($20–50 per door) for cohesion.

    Your hallway stops being a pass-through and becomes part of your design story.

    18. Install Floating Wood Shelves for Natural Warmth

    Floating shelves combine storage, display, and architectural warmth. Wood shelves anchor a room in natural materials and let you style with plants, books, and woven baskets.

    Floating shelves run $30–80 each (IKEA, Wayfair) plus $50–150 installation if hiring help. DIY installation takes an afternoon with basic tools and a level. Walnut, oak, or honey-toned wood pairs perfectly with earth-tone palettes.

    Style with: terracotta pots, stacked books, woven baskets, and small plants for a collected, curated look.

    Your wall becomes functional decor. Shelves display your taste while adding architectural interest that flat walls can’t achieve.

    19. Layer Brass and Bronze Hardware Throughout

    Metallics matter. Swapping silver or chrome hardware for warm brass or bronze instantly upgrades a space’s vibe and ties into your warm earth-tone palette.

    Replace cabinet knobs ($3–8 each), faucet ($100–400), light switch covers ($2–5 each), and towel racks ($20–60). Budget $50–200 for a full bathroom or kitchen refresh. Most hardware swaps take an afternoon and require no special skills beyond a screwdriver.

    The cohesive warm metallic threading through your space ties everything together. It reads as intentional and expensive.

    20. Paint Your Front Door in a Bold Earthy Shade

    Your front door is your first design statement. A bold earthy shade (sage, terracotta, warm charcoal, or deep brown) signals that you have taste and intention right from the curb.

    Use exterior-grade paint in your chosen earth tone ($50–100 for paint plus primer). One door takes 3–4 hours including prep and dry time. Add brass or bronze house numbers ($30–80) and hardware ($40–100) to complete the look.

    Guests feel welcomed. Your home stands out on the street. You’ve set the tone for the warm, intentional space inside.

    21. Add a Gallery Wall with Wood and Metal Frames

    A gallery wall is art meets organization. Mix frame styles in warm woods and metals, then fill with art, prints, or photos that tie to your earth-tone palette.

    Frames run $10–40 each from IKEA, Target, or Etsy; art prints are $3–20 each from Etsy or Minted. Total budget for 9–12 pieces: $150–400. Spend an hour sketching your layout on paper before hanging, or use painter’s tape directly on the wall to test arrangement.

    Your wall becomes a reflection of your personality and aesthetic. It’s the first thing people see and remember.

    22. Use Woven Baskets for Storage and Texture

    Woven baskets do double duty: they store clutter and add organic texture. Grouped together, they’re sculptural and immediately read as intentional styling.

    Rattan or jute baskets cost $15–60 each from IKEA, HomeGoods, or Target. Buy 2–4 in varying sizes and group on the floor, on shelves, or under tables. They hide mess while adding warmth and movement to your space.

    Pro tip: Fill baskets with extra blankets, books, or off-season items—they become functional decor.

    Your room looks curated and intentional. Clutter disappears but stays accessible.

    23. Paint Your Bedroom Doors and Frames in Coordinating Tones

    Painting doors and frames in coordinating earth tones creates threshold moments—visual punctuation that says “this space is designed.” It defines rooms without walls.

    Choose a door color that echoes or contrasts with your wall color. Paint the frame in warm white or a lighter shade of the same tone. Budget $60–120 for paint; 3–4 hours DIY time. Pair with a matching interior or exterior door hardware color for visual flow.

    You create a sense of arrival and intention. Each room feels like a separate design story.

    24. Add a Decorative Throw Blanket in Earth Tones to Every Seating Area

    A throw blanket is the quickest way to add warmth (literally and visually). Draped over a sofa or chair, it signals coziness and gives you an instant styling layer.

    Quality throw blankets run $40–120 from Parachute, Etsy, or Target. Pick one in chunky knit, linen, or wool in your earth-tone palette. Layer it over a sofa or armchair, drape it asymmetrically, or fold it into a basket for casual access.

    Your seating area feels lived-in and intentional. You’ve added color, texture, and functional coziness in one move.


    Save this post for your next home refresh and try one idea this weekend—even small changes add up to big warmth. Which earth tone will you start with?

  • 24 Room Makeover Ideas That Refresh Your Home on a Budget

    24 Room Makeover Ideas That Refresh Your Home on a Budget

    You don’t need a massive budget or a contractor to make your home feel brand new. Whether you’re renting, own a smaller space, or just want to refresh without the financial commitment, these 24 ideas prove that thoughtful changes—big and small—add up fast. From swapping out hardware to full-room color updates, you’ll find a mix of quick wins you can tackle this weekend and slightly bigger projects that deliver serious impact. Most of these ideas cost under $200, and several are completely free. Ready to fall in love with your space again? Let’s dive in.

    1. Paint Your Cabinets for Instant Personality

    Painted cabinets are one of the fastest ways to completely change a room’s vibe without replacing anything. Whether you’re updating kitchen cabinets, bathroom vanities, or bedroom dressers, a fresh coat of paint in an earthy tone like sage green, chocolate brown, or soft cream makes everything look intentional and curated.

    Use a high-quality cabinet paint (Benjamin Moore or Sherwin-Williams, $35-$60 per quart) or grab a furniture paint kit from Amazon ($20-$40). You’ll need a primer, paint, and brushes or foam rollers. The project takes a weekend or two, depending on size. Remove hardware first, lightly sand the surface, prime, and apply two coats. For renters, removable cabinet wrap ($15-$30) offers a similar effect without commitment.

    The payoff? Your whole kitchen or bathroom suddenly feels curated and high-end. This one change makes every other element in the room stand out.

    2. Create Defined Zones Without Walls

    Open-concept spaces can feel chaotic and lack-luster. Zoning creates privacy and functionality without construction—and it’s often free or nearly free.

    Use a low bookshelf, console table, or even a clothing rack to visually separate areas. Layer in an area rug to anchor each zone and define the space. Paint one wall a different earthy tone to suggest division. Renters can use tall curtains hung from ceiling to floor as a soft divider. These solutions cost $0-$100 depending on what you already own. No time commitment beyond arranging what you have.

    Your space suddenly feels purposeful, like each area has its own role. You get privacy and a more organized-looking home.

    3. Switch to Curved Furniture for Softness

    Straight-lined furniture feels dated and formal. Curved, sculptural pieces create a friendlier, more organic atmosphere that photographs beautifully and feels more comfortable to live with.

    Look for curved sofas, round accent chairs, or wavy console tables at IKEA ($200-$500), Wayfair ($300-$800), or Facebook Marketplace for secondhand finds ($50-$300). Even one curved piece transforms a room—pair it with your existing furniture for an eclectic look. Budget for a replacement over a few months if you need to.

    The space immediately feels more inviting and less “sterile showroom.” You’ll gravitate toward these pieces naturally because they’re genuinely comfortable.

    4. Layer Textures to Create Depth

    Tactile depth makes spaces look designed and feel premium. Flat, single-texture rooms look sparse, but layering different materials—linen, velvet, marble, jute, ceramic—creates visual interest and warmth.

    Start by swapping your bedding: add a textured throw blanket ($20-$60), mix pillow fabrics (linen, velvet, knit from Target or Etsy, $15-$40 each), and add a chunky knit or macramé wall hanging ($30-$80). In bathrooms, swap bath mats and add woven baskets ($15-$50). In living rooms, layer rugs or add a textured accent chair. Most of these pieces cost under $50 each.

    Your room transforms from “catalog flat” to “I actually live here beautifully.” The touchable quality makes people want to stay longer in your space.

    5. Paint Your Walls Earthy Brown or Green

    Color drenching—painting an entire room one immersive color—replaces dated accent walls and creates real mood. Earthy tones like chocolate brown, sage green, and warm taupe feel grounding and sophisticated without being dark or heavy.

    Choose a quality paint in your chosen tone (Sherwin-Williams “Urbane Bronze” or Benjamin Moore “Dried Sage,” $40-$70 per gallon). You’ll likely need one to two gallons depending on room size. Hire someone ($400-$800 for a professional) or DIY with a friend over a day or weekend. Prep is the real work—cover furniture, tape trim, fill holes.

    The entire room feels intentional and calming. This one change anchors all your furniture and styling choices, and suddenly everything looks like it belongs.

    6. Add Skirted Furniture for Drama

    Skirted furniture—ottomans, sofas, or benches with fabric skirts and trim—brings back a playful, nostalgic feel that still feels fresh and modern. The skirt hides less-pretty legs and adds unexpected personality.

    Find skirted ottomans at Wayfair ($150-$400), Article ($200-$500), or thrift a vintage piece and add a custom skirt (Etsy makers, $100-$250). Budget furniture can be dressed up with a DIY slip cover. Fringe details or ribbon trim ($10-$30) make it even more intentional. This is an investment piece that makes a statement.

    One skirted ottoman becomes the conversation starter in your room. It’s practical, pretty, and proves that “imperfect” can be incredibly stylish.

    7. Thrift Vintage Pieces for Authenticity

    Thrifted vintage finds add soul and authenticity that new mass-produced items can’t touch. They’re also wildly more affordable than buying “vintage-style” reproductions new.

    Hit Facebook Marketplace, Craigslist, local thrift stores, and estate sales every weekend. Budget $10-$100 per piece depending on what you find—vintage brass lamps ($5-$25), wooden furniture ($20-$80), mirrors and art ($5-$50). Spend a few hours hunting or check online listings daily. Clean, refinish, or paint pieces to match your home.

    You end up with one-of-a-kind pieces that feel collected and intentional. Your space tells a story instead of looking like you shopped one store.

    8. Hand-Stencil Patterns for Budget Drama

    Hand stenciling transforms flat, boring surfaces into statement pieces—and it’s surprisingly affordable and doable as a beginner. It adds personality and imperfect charm that feels intentional, not matchy-matchy.

    Buy stencil kits from Etsy ($15-$35), Amazon ($10-$25), or hardware stores. Use craft paint ($3-$8 per color) and foam stencil brushes ($5-$10). Work on cabinet doors, walls, or even lampshades. This takes 2-4 hours depending on complexity and surface size. YouTube tutorials make it foolproof—no artistic skill required.

    Your hand-stenciled surface becomes a focal point and conversation starter. It looks expensive and custom without the designer price tag.

    9. Swap Hardware for Instant Upgrade

    Hardware is the jewelry of your home. Swapping old knobs and pulls for new ones—especially in brass, black metal, or ceramic—costs almost nothing but feels like a huge upgrade.

    Buy new hardware at IKEA ($2-$5 per piece), Anthropologie ($5-$15 each), or Amazon ($1-$8 per piece). A typical kitchen might need 20-40 pieces for $40-$150 total. This takes 30 minutes to an hour—just unscrew the old hardware and screw in the new. Keep the old hardware in a box in case you move.

    Every time you open a drawer or cabinet, you notice the upgrade. Small changes add up to make your whole kitchen or bathroom feel more curated.

    10. Create a Gallery Wall with Thrifted Frames

    Gallery walls are still trending, but skip the perfectly matching sets. Mismatched thrifted frames in different metals and wood tones feel collected and intentional, not sterile.

    Find frames at thrift stores ($1-$5 each), Facebook Marketplace, or estate sales. Paint them if needed to match your palette. Print art from Etsy ($5-$15 per print), use personal photos, or find free printables online. Budget $30-$100 total for a good-sized wall. This takes 2-3 hours to arrange and hang. Use a level and painter’s tape to plan your layout first.

    A gallery wall anchors a room and tells your story. It’s personal, affordable, and way more interesting than a single large print.

    11. Add Metallic Finishes for Approachability

    Soft metallics like brass, gold, and copper feel warm and approachable—unlike cold silver or chrome. They pair beautifully with earthy tones and make spaces feel high-end without being pretentious.

    Swap light fixtures to brass ($40-$150 at IKEA or Amazon). Add a brass or gold mirror ($30-$100). Incorporate metallic accents through lamps, frames, or hardware ($10-$80 each). Build this over time as you update pieces. No rush—this is about gradually bringing warmth into your home.

    Your space gains sophistication and warmth. Metallics catch light and make everything feel more intentional and polished.

    12. Divide Rooms with Bookcases

    Tall bookcases work as functional dividers—they provide storage, display space, and privacy without the expense and permanence of walls. They’re renter-friendly and moveable.

    Find tall open shelving at IKEA ($50-$150), Wayfair ($150-$400), or thrift solid wood bookshelves ($20-$80). Position it to visually separate zones. Style one side toward the living space and one toward the bedroom. This costs $50-$200 and takes an hour to set up.

    You get functionality, storage, and room division in one piece. It anchors the space and makes open layouts feel purposeful.

    13. Paint Your Ceiling for Cozy Impact

    Ceilings are often overlooked, but painting them a soft earthy tone creates coziness and visual interest without feeling heavy or dark. It’s surprisingly impactful.

    Use the same paint as your walls or go one shade darker ($40-$70 per gallon). Tape off your walls carefully—this takes 4-6 hours DIY or $300-$600 for professional help. You’ll need a tall ladder and patience. Start small with a bedroom or bathroom if you’re nervous.

    The room instantly feels more intimate and intentional. Painted ceilings create a cocooning effect that makes spaces feel like retreats.

    14. Repurpose Unused Formal Spaces

    Formal dining rooms and unused living rooms don’t match how we actually live. Repurposing them into offices, reading nooks, or workout spaces makes your home functional and cozy.

    Assess your space: Do you need a dining table, or would you prefer a reading corner? Move your best seating there, add a soft rug ($50-$150), layer in a floor lamp ($30-$100), and style with plants and books. This costs $100-$300 and takes a few hours to rearrange. Renters can do this with zero permanent changes.

    Suddenly your whole home feels more useful and intentional. You’ll actually use these spaces instead of walking past them.

    15. Bring in Plants for Life and Color

    Plants breathe life into rooms, add color, and improve air quality. They’re affordable, forgiving, and make any space feel more organic and lived-in.

    Start with easy varieties like pothos, snake plants, or ZZ plants ($5-$20 each). Find cute pots at thrift stores ($2-$10) or Target ($5-$25). Budget $30-$100 for a collection of 5-7 plants. Arrange them at different heights on shelves, windowsills, or plant stands ($20-$60). This takes 30 minutes to arrange.

    Your space immediately feels fresher and more organic. Plants soften hard edges and make rooms feel alive instead of static.

    16. Layer Rugs for Warmth and Definition

    Layered rugs define spaces, add warmth, and create visual interest. Unlike single rugs, layered rugs feel collected and intentional—and they’re easier on your budget.

    Start with a neutral base rug ($50-$150 at IKEA, Target, or Wayfair). Layer a smaller patterned or textured rug on top ($30-$100). Together they cost less than one high-end rug but look more interesting. Let the base rug peek out underneath. This takes 10 minutes to arrange and costs $80-$250 total.

    Your space gains dimension and warmth. Layered rugs make rooms feel more designed and cozier underfoot.

    17. Update Window Treatments with Black Frames

    Modern black window frames and hardware update cozy cottage-core aesthetics and make windows feel intentional and architectural. It’s a small detail with major impact.

    Swap your curtain rod to matte black ($30-$80 at IKEA, Amazon, or Target). Use soft linen or cotton curtains in cream, white, or a warm tone ($20-$60 per panel). Consider black-framed curtain rods even if you don’t replace the curtains. This costs $50-$200 and takes an hour to install.

    Your windows become architectural features instead of afterthoughts. Black frames feel modern and elegant without losing the cozy vibe.

    18. Paint Doors for a Bold Statement

    Painting interior doors (especially closet or bedroom doors) in an earthy, saturated tone creates visual interest without overwhelming the space. It’s bold but doable.

    Choose one or two doors to paint. Use high-quality paint in a warm tone like sage, chocolate brown, or warm charcoal ($40-$70 per quart). Remove the door from hinges for easier painting, or paint it in place. Budget 2-4 hours for prep, painting, and drying. Cost is $50-$100 for paint and supplies.

    Your home gains personality and visual breaks. Painted doors feel intentional and expensive—but they’re one of the cheapest updates you can make.

    19. Style Open Shelving Intentionally

    Open shelving only works if it’s styled thoughtfully. The key is balancing practical items with visual interest—books, plants, ceramics, and personal objects arranged with intention.

    Declutter first and keep only items you actually use or love. Group items by color or category. Alternate horizontal stacks with vertical leaning. Add small plants or art objects between functional items. This is free if you’re rearranging what you have. Add a few new pieces (small plants, books, or ceramics, $20-$60) to fill gaps.

    Open shelves become a display of your personality and taste. They should look styled but livable—not precious or untouchable.

    20. Swap Bedding for Instant Coziness

    Quality bedding transforms sleep and styling. Swapping cheap poly-blend sheets for natural linen or cotton changes how your bed looks and feels.

    Invest in a quality sheet set (Brooklinen, $150-$200, or similar), or find affordable linen at Target ($40-$60) or IKEA ($20-$35). Add a textured throw blanket ($30-$80) and mix pillow covers in different fabrics ($15-$40 each). Budget $100-$250 to upgrade your whole bed. This is one investment that pays off every single day.

    Your bedroom instantly becomes more luxurious and inviting. You’ll actually want to spend time in bed.

    21. Create a Pattern-Drenched Accent Area

    Pattern drenching—covering multiple surfaces in coordinating patterns—creates an immersive, cinematic room that photographs beautifully. It sounds overwhelming but works when you keep a cohesive color story.

    Choose one bold wallpaper ($15-$30 per roll at Spoonflower, Etsy, or hardware stores) and apply it to one wall or small area. For renters, removable peel-and-stick wallpaper ($20-$50) works great. Coordinate with patterned pillows, throws, or curtains in the same color family. Keep other elements simple and neutral. This takes a weekend DIY or $100-$200 professionally.

    One pattern-drenched corner becomes a focal point. Your space feels designed and intentional—not random or chaotic.

    22. Install Floating Shelves for Display

    Floating shelves provide storage and display space without bulk. They’re renter-friendly (if you patch holes when leaving) and work in any room.

    Buy floating shelves at IKEA ($15-$35 each), Home Depot ($20-$50), or Etsy ($30-$80). Install at varying heights for visual interest. Budget $50-$150 for three shelves plus hardware and installation. This takes 2-3 hours with a level and drill. Style with books, plants, and objects you love.

    Your walls gain function and visual interest. Floating shelves make small spaces feel organized without feeling cluttered.

    23. Add Warmth with Task Lighting

    Overhead lights flatten rooms and feel cold. Strategic task lighting (arc lamps, table lamps, wall sconces) creates warmth and intimacy while being more practical than one ceiling fixture.

    Invest in a brass arc floor lamp ($80-$200 at West Elm, Wayfair, or Target) or a sculptural table lamp ($50-$150). Add smaller lamps in other zones ($30-$80 each). Position lights to cast pools of warm illumination rather than flooding the whole room. Budget builds over time as you add pieces.

    Your space gains mood and ambiance. Good lighting instantly makes a room feel more intentional and livable.

    24. Incorporate Burnt Orange or Warm Burgundy Accents

    Warm jewel tones like burgundy, burnt orange, and deep terracotta bring richness and sophistication. They pair beautifully with neutrals and earthy tones for a balanced, intentional look.

    Introduce these tones through an accent chair ($200-$600), throw pillows ($20-$60 each), artwork ($30-$100), or a throw blanket ($40-$100). Start with pillows or textiles if you’re nervous—they’re the cheapest way to test a color. These rich tones make spaces feel more curated and less sterile.

    One warm jewel-toned piece becomes an anchor. Your room gains sophistication and depth without feeling heavy or dated.


    SAVE THIS POST FOR YOUR NEXT REFRESH. Pick one idea and tackle it this weekend—even the smallest change creates momentum. Share this with anyone renting or working with a tight budget; small updates prove that big changes don’t always need a big budget.

  • 27 Interior Ideas That Instantly Refresh Any Home

    27 Interior Ideas That Instantly Refresh Any Home


    Introduction

    Your home doesn’t need a complete overhaul to feel refreshed and welcoming. Sometimes the best changes are the small, intentional moves that shift how a space looks and feels without breaking the budget or requiring a contractor. Whether you’re renting, own your space, or just want to inject some life back into tired rooms, these 27 ideas work with what you’ve got and deliver real results. From quick styling tweaks to weekend projects, you’ll find solutions for every room, every budget, and every skill level. Let’s dive in and discover which ideas will become your favorites.


    1. Layer Earthy Tones on Your Walls

    Paint is the easiest way to anchor a room in warmth, and earthy tones do the heavy lifting instantly. Instead of one neutral, combine terracotta, sage, warm taupe, or chocolate brown across walls and accents to create depth without overwhelming the space.

    Visit a paint store and grab sample quarts of three earthy shades—test them on your wall for a few days to see how light changes them. Paint costs $20–$50 per gallon, and you can knock out most rooms in one weekend with a friend. Apply to one accent wall first if you’re nervous. If you rent, use peel-and-stick wallpaper in earthy tones ($15–$40) for the same effect without commitment.

    The payoff? Your room instantly becomes a sanctuary that feels grounded and intentional, not cold or sterile.


    2. Add Wooden Ceiling Beams or Trim

    Wooden architectural details make rooms feel warmer and more layered without furniture changes. Real beams are pricey, but faux beams or wood trim give the same visual punch at a fraction of the cost.

    Search for faux wood beams at IKEA, Home Depot, or Amazon ($30–$150 per 8-foot section). Most are lightweight polyurethane and install with adhesive or brackets—no structural work needed. Installation takes 4–6 hours for a standard ceiling. If installing feels daunting, hire a handyperson ($200–$400 for labor). Renters can use temporary adhesive or ask landlords about removable options.

    You’ll notice the ceiling draws the eye upward and the whole room gains character and coziness in one afternoon.


    3. Swap Stark White Trim for Warm Neutrals

    Bright white trim against warm walls creates harsh contrast that reads dated. Shifting to warm whites, greige, or soft taupe trim keeps the architectural detail while boosting coziness.

    Paint existing trim with quality interior paint in warm white (Benjamin Moore’s “White Dove” or Sherwin-Williams “Alabaster” are classics; $30–$60 per gallon). One gallon covers 350–400 square feet of trim. Use painter’s tape to protect walls, and expect one weekend for most homes. Professional painters charge $400–$800 for trim work if you’d rather outsource it.

    The shift feels subtle but powerful—your room stops feeling cold and starts looking thoughtfully curated.


    4. Create Zones with Area Rugs and Floating Furniture

    Open-concept homes lack natural boundaries, making them feel chaotic. Rugs and furniture placement create psychological “rooms” without adding walls.

    Choose a rug 3–5 feet larger than your seating area ($100–$300 from Wayfair, Rugs USA, or West Elm). Arrange sofas and chairs on the rug so legs sit on it—this anchors the zone visually. Layer a side table, lamp, and accent chairs in that area to complete the vignette. Renters can use rugs as temporary dividers with zero commitment.

    Your open space now feels organized and intentional, giving each area purpose and making the home easier to navigate.


    5. Install Curved Mirrors to Amplify Light

    Arched and curved mirrors are trending for good reason—they bounce light around, soften sharp corners, and add visual interest. A curved mirror reads as sculptural art plus functional décor.

    Search Amazon, Wayfair, or West Elm for arched mirrors in gold, brass, or black frames ($60–$200). Mount at eye level above a console or dresser. Installation is simple—just find studs or use heavy-duty wall anchors (20 minutes, zero skill required). Renters can lean a large floor mirror against the wall for the same effect.

    The reflected light opens up your room and creates an instant focal point that looks like you hired a designer.


    6. Introduce Pattern Drenching in One Motif

    Pattern drenching—using one pattern across multiple surfaces in a room—creates visual cohesion and personality without chaos. Pick one geometric, floral, or abstract pattern you love and repeat it strategically.

    Choose a removable wallpaper pattern or fabric print ($15–$50), apply it to an accent wall, then repeat on throw pillows ($20–$40 each), curtains ($40–$80), or a desk chair cushion ($30–$60). Mix the pattern with solid neutrals so it doesn’t overwhelm. Complete the look in one afternoon if using removable wallpaper.

    Your room becomes cohesive and intentional—visitors will immediately notice how thoughtful your design choices are.


    7. Use Flexible Curtain Dividers Instead of Walls

    Renters and open-concept lovers: curtains divide space without commitment. They’re budget-friendly, reversible, and rent-friendly.

    Install a ceiling-mounted tension rod ($20–$40) using removable adhesive hooks (renters!) or screws (owners). Hang thermal or sheer curtains ($30–$80) depending on privacy needs. This project takes 30 minutes. For less visual impact, use a sheer fabric that diffuses light instead of blocking it fully.

    You gain privacy and functional zones without losing floor space or natural light.


    8. Paint Ceilings in Deep, Saturated Colors

    Color drenching extends to ceilings—a painted overhead surface makes rooms feel intentional and more intimate. Deep greens, warm grays, or muted blues work best.

    Choose a ceiling-specific paint (it hides imperfections better) in deep sage, charcoal, or warm navy ($25–$40 per gallon). Paint your ceiling before walls to catch drips easily. Most ceilings take 4–6 hours solo or 2–3 hours with help. A paint roller on an extension pole makes this manageable for DIYers. If ladders make you nervous, hire a pro ($300–$600).

    The painted ceiling pulls your eye upward and creates a cozy, designed-on-purpose feeling that standard white ceilings never achieve.


    9. Layer Lighting at Different Heights

    Single overhead lighting makes rooms feel flat and harsh. Layering light sources at different heights creates depth, warmth, and flexibility for different moods.

    Add a floor lamp ($40–$100), table lamps ($30–$80 each), and dimmable smart bulbs ($10–$25) to existing fixtures. Arrange so light pools around seating areas. This takes one afternoon and costs under $200 for most rooms. Install dimmer switches ($15–$30 per switch) to control brightness throughout the day.

    Suddenly your space feels like a sanctuary—warm, layered, and responsive to your mood.


    10. Install Floating Shelves Above Furniture

    Floating shelves add storage, display space, and architectural interest without taking up floor room. They work in any bedroom, living room, or hallway.

    Buy floating shelves in wood or metal ($20–$60 each) from IKEA, Target, or Amazon. Mount at eye level using wall anchors or studs—each shelf takes 15 minutes to install. Style with books, plants, and meaningful objects spaced with breathing room so it looks curated, not cluttered. Renters can use removable wall adhesive shelves ($15–$30) for zero-damage hanging.

    Your walls gain personality and usable storage without consuming valuable floor space or feeling heavy.


    11. Swap Hardware for Brass or Matte Black

    Cabinet and drawer hardware is the jewelry of a room—updating it changes how the entire space appears without major work. Brass, matte black, and warm metals are trending over chrome.

    Purchase replacement hardware from Amazon, Anthropologie, or Rejuvenation ($5–$20 per handle). Unscrew old hardware and screw in new pieces—each drawer or cabinet takes two minutes. Collect old hardware in a bag (you may need it when you move). This project costs $50–$150 for a full kitchen or bedroom and takes one afternoon solo.

    Hardware updates feel disproportionately impactful—suddenly your cabinets look intentional and expensive.


    12. Add Terracotta Pots and Plants Throughout

    Plants in terracotta pots introduce color, texture, and life to any space. Terracotta reads warm and organic—it’s 2025’s texture of choice.

    Start with low-maintenance plants like snake plants, pothos, or ZZ plants ($10–$20 each) paired with terracotta pots ($8–$25 per pot) from a garden center or Amazon. Cluster pots in odd numbers (three or five) at varying heights on a shelf, windowsill, or floor corner. Water weekly and rotate monthly for even growth. Beginners can start with two plants and add more as confidence builds.

    You’ll notice your room becomes livelier, the air feels fresher, and you’ve created a mini biophilic retreat.


    13. Drench Walls in Warm Neutrals for Continuity

    Painting your entire home in the same warm neutral creates flow and makes spaces feel larger. Skip stark white and embrace greige, warm taupe, or soft beige.

    Choose one versatile neutral ($30–$50 per gallon) and paint every room. This creates continuity—your eye flows naturally between spaces instead of stopping at color changes. You’ll need 2–3 gallons for most homes; tackle one room per weekend. Paint costs $60–$150 total, and professional painters charge $1,000–$2,000 for full-home coverage if you prefer to outsource.

    Your home becomes cohesive and serene, making even small spaces feel larger and more connected.


    14. Create Texture with Paneled Accent Walls

    Textured walls (shiplap, tongue-and-groove, or peel-and-stick paneling) add depth and visual interest without color commitment. Texture reads expensive and designer-level.

    Install peel-and-stick paneling ($30–$80 per sheet) for renter-friendly options, or real shiplap ($50–$150 per sheet installed) for permanent updates. One accent wall takes 4–8 hours depending on your method. Paint the paneling in soft white, greige, or a warm neutral to keep the focus on texture. If DIY intimidates you, hire a carpenter ($400–$800 for labor on one wall).

    Your space gains architectural interest and depth that photographs beautifully and costs less than you’d expect.


    15. Mix Mid-Century Furniture with Modern Pieces

    Mid-century modern furniture is trending again for its warmth and sculptural appeal. Mixing it with contemporary pieces keeps the look fresh and avoids being costume-y.

    Hunt for vintage or reproduction mid-century pieces ($100–$400 each) at Etsy, Facebook Marketplace, or thrift stores. Pair with modern lighting, contemporary rugs, and current-year accents. One statement mid-century piece (sofa, credenza, or chair) mixed with modern accessories creates the trend without overdoing it. Budget $200–$600 for one key vintage piece plus modern complements.

    Your space looks collected, thoughtful, and timeless instead of trendy or dated.


    16. Use Glass Bricks as Light-Diffusing Dividers

    Glass bricks are resurging as architectural dividers that diffuse light beautifully. They work in kitchens, bathrooms, and open concepts—anywhere you want subtle separation without solid walls.

    Purchase individual glass bricks ($3–$8 each) and mortar or adhesive from a building supply store. A 4-foot partition might use 30–50 bricks ($150–$400 total). Installation is intermediate-level; hire a mason for $300–$800 in labor if you’re unsure. Alternatively, use glass block panels ($100–$200 each) as temporary room dividers.

    Light passes through while creating subtle privacy—your space gains architectural interest and your lighting becomes sculptural.


    17. Add Arched Doorways or Niches

    Arches soften hard-edged spaces and add sculptural interest. They’re trending in doorways, windows, and architectural niches for a reason—curves make rooms feel warmer.

    For a dramatic update, hire a carpenter to frame an arched opening ($600–$1,500 in labor). For a subtle option, add removable arch trim ($50–$100) above existing doorways using adhesive or temporary fasteners. Paint the arch to match trim or walls. This mid-range project takes one to two days with professional help.

    Suddenly your space feels more sophisticated and intentional—arches draw the eye and add organic warmth.


    18. Style Open Shelving with Intentional Gaps

    Overcrowded shelving reads chaotic. Styling with breathing room between grouped items looks expensive and intentional—the opposite of thrifted clutter.

    Gather your most beautiful dishes, books, and objects, then arrange in groupings of three or five with space between (this is called negative space). Mix heights, textures, and finishes—wood, ceramic, brass, fabric. Step back and remove anything that doesn’t contribute to the overall aesthetic. This costs zero dollars and takes one afternoon to style.

    Suddenly your shelves look like they belong in a design magazine instead of looking like storage overflow.


    19. Install a Shiplap Feature Wall Without Renovation

    Shiplap creates warmth and architectural character, but real installation is expensive. Peel-and-stick options deliver the look for renters and budget-conscious homeowners.

    Buy peel-and-stick shiplap ($30–$80 per sheet, covers 20–30 square feet) from Amazon, Wayfair, or Home Depot. Measure your wall, clean it thoroughly, and apply sheets horizontally starting at the bottom. Most walls take 2–4 hours to cover. Paint the shiplap to match your palette if desired. Remove easily when moving—zero damage to walls.

    Your space gains warmth and architectural interest without contractors or commitment.


    20. Layer Throw Pillows and Blankets for Texture

    Pillows and throws are affordable ways to add texture, color, and coziness. Layering different fabrics (knit, linen, velvet, wool) creates visual depth without major expense.

    Choose a color palette (three to four colors max) and gather throw pillows in different sizes and textures ($15–$40 each) from Target, IKEA, or Wayfair. Add a chunky knit throw ($30–$80). Arrange odd numbers of pillows asymmetrically on sofas for a relaxed feel. Budget $100–$200 for a full sofa refresh. Swap out seasonally to keep things fresh without furniture changes.

    Your sofa becomes an inviting focal point that begs you to settle in with a book or warm drink.


    21. Paint Interior Doors a Bold Color

    Painting interior doors a rich color makes them architectural focal points instead of invisible. Deep greens, blues, and warm grays work beautifully.

    Choose a color that ties into your room’s palette—perhaps matching an accent wall or pulling from your artwork. Use semi-gloss or satin interior paint ($25–$40) for durability and easy cleaning. Paint takes two to three hours per door (including drying between coats). Most homes have five to ten doors, so you could tackle one room per weekend. This costs $25–$120 total for paint and zero labor if DIY.

    Your doorways become design features that tie rooms together and add intentional personality.


    22. Add Warm Metallics Through Lighting and Hardware

    Warm metallics (brass, rose gold, warm copper) make spaces feel cozier than cool chrome or stainless steel. Updating fixtures is an investment with lasting impact.

    Swap out faucets, lighting, and hardware in warm metallics—brass pendant lights ($50–$120 each), brass faucets ($80–$200), and gold drawer pulls ($5–$15 each). These updates cost $200–$500 per room but feel premium and last decades. Hire a plumber for faucet replacement ($100–$200 in labor) if you’re unsure. Light fixture installation is straightforward DIY for most people.

    Your space instantly reads more sophisticated and warm—metallics catch light and make everything feel intentionally curated.


    23. Create a Cozy Nook with Layered Seating

    Dedicated seating nooks invite you to slow down and make rooms feel livelier. A chair, lamp, small table, and textiles create an instant escape without major space requirements.

    Choose a comfortable armchair ($150–$400) from Wayfair, Article, or IKEA and place it near a window if possible. Add a small side table ($40–$100), warm lamp ($30–$80), and layered textiles ($50–$100). The complete nook costs $300–$700 and takes one afternoon to arrange. Smaller spaces can use an oversized poufs or floor cushions ($60–$120) instead of chairs.

    Your room gains livability and purpose—you’ve created an actual destination people want to sit in rather than pass through.


    24. Install Recessed Lighting for Clean Ambiance

    Recessed lighting feels modern and gives rooms a clean, designer-approved look. It’s less dramatic than layered lighting but provides reliable, even illumination.

    Hire an electrician to install recessed lights—costs $100–$300 per light in labor plus $30–$80 per fixture ($200–$500 total for a small room). This project requires cutting drywall and running electrical, so DIY isn’t recommended unless you have experience. Choose warm-toned bulbs (2700K) for coziness. This is an investment (often $1,000+ for full-home installation) but increases home value and provides years of reliable lighting.

    Rooms glow with clean, intentional illumination that photographs beautifully and makes everyday life more pleasant.


    25. Use Color-Blocking to Define Zones

    Horizontal color blocking (two-tone walls) adds architectural interest and visually changes room proportions. Paint the lower half deeper and upper half lighter for sophistication.

    Paint a line at chair-rail height (usually 36–48 inches up) and paint differently above and below. Use two complementary colors ($30–$50 each) and use painter’s tape for clean lines. This takes one to two days for most rooms. Use a level and snap chalk lines to ensure straight edges. For renters, use removable tape and peel-and-stick panels to create the effect without commitment.

    Your walls gain architectural interest and intentional design—the color blocking draws the eye and adds depth.


    26. Layer Rugs for Texture and Definition

    Layering two rugs (a large neutral base with a smaller patterned rug on top) adds texture and visually defines seating zones. It’s a trend that works especially well in open concepts.

    Start with a neutral base rug ($150–$300) in wool or jute and layer a smaller patterned rug ($80–$150) on top at a slight angle. Choose complementary colors so they look intentional rather than accidental. Rugs can be found at Wayfair, Rugs USA, or local shops. Layer while furniture is in place—it takes five minutes and costs $250–$500 total. This idea works for renters and homeowners alike.

    Your floor becomes textured and intentional, adding visual interest that photographs beautifully and makes the space feel more designed.


    27. Paint Built-In Shelving or Cabinetry

    Painting built-in shelves or cabinetry a bold color transforms them from blending in to becoming statement pieces. Deep greens, blues, or warm neutrals work beautifully.

    Choose a color that complements your room and use quality semi-gloss interior paint ($25–$50) for durability and easy cleaning. Remove items from shelves, paint thoroughly (three coats for coverage), and let cure for 48 hours before reloading. This project takes one full weekend for most shelving units. Professional painters charge $300–$600 in labor if you prefer to outsource.

    Suddenly your built-ins become the room’s focal point—painted shelving reads expensive and designer-intentional.


    Ready to refresh your space? Save this post and pick just one idea to tackle this weekend. Small changes create big impact—your home (and your mood) will notice the difference immediately.

  • 24 Soft Lighting Setup Ideas That Create Warm, Relaxing Evenings

    24 Soft Lighting Setup Ideas That Create Warm, Relaxing Evenings


    There’s something magical about the right lighting—it can turn a sterile dorm room into a sanctuary where you actually want to spend time. Whether you’re stressed about midterms, catching up with friends, or just need a quiet moment to yourself, soft lighting sets the mood and makes everything feel more intentional. The problem? Most dorms come with harsh overhead fluorescents that drain your energy and make the space feel cold. The good news? You don’t need a major renovation to fix it. We’ve rounded up 24 lighting setup ideas that work for renters, small budgets, and spaces where you can’t install anything permanent. From affordable LED strips to clever positioning tricks, these ideas will help you create the warm, relaxing atmosphere you’ve been craving—even if your dorm room is the size of a shoebox.


    1. Layer LED String Lights Above Your Bed

    String lights are the fastest way to add warmth and personality to any dorm room. They’re affordable, movable, and instantly photograph well for your social feed. You can drape them in loose waves, create a geometric pattern, or arrange them in a grid—whatever matches your vibe.

    Buy warm white LED string lights (not cool white—they’ll look harsh) from Amazon, Target, or IKEA. Look for 15-30 feet lengths around $8–$20. The key is placement: hang them above your bed headboard using removable adhesive hooks or Command strips so you don’t lose your security deposit. If you’re worried about damage, weave them through the bed frame itself. Takes about 10 minutes to set up, and you can adjust them anytime without tools.

    Pro tip: Combine string lights with sheer fabric or a tapestry behind them for a softer diffusion effect. Your bed becomes the focal point of the room, and the warm glow makes late-night studying feel less grindy.

    2. Install Peel-and-Stick LED Strip Lights Behind Your Desk

    Desk work doesn’t have to happen under harsh lighting. LED strip lights behind your monitor or along the edge of your desk reduce eye strain while creating ambient warmth. This is especially helpful during those late-night study sessions when you’re already tired.

    Grab a peel-and-stick LED strip light (look for warm white 2700K color temperature) from Amazon or Best Buy. Budget-friendly options start at $15–$30, while smarter strips with app control run $40–$80 (like LIFX Lightstrip at $80.09 on sale). The strips stick directly to the wall behind your desk—no tools needed, and they peel off cleanly when you move. Installation takes 5 minutes. Position them horizontally behind your monitor for indirect ambient light, or vertically along the side of your desk for task lighting that still feels soft.

    The result? Your eyes stay comfortable, your space looks polished, and you’ve got lighting that actually supports focus instead of fighting it.

    3. Use Lampshades to Soften Harsh Overhead Lights

    You can’t remove the overhead light your dorm provides, but you can make it way less aggressive. A fabric lampshade designed to clip onto ceiling fixtures diffuses harsh light into something warm and approachable. It’s one of the easiest tricks that actually works.

    Search for clip-on ceiling lampshades on Amazon or at IKEA—they run $10–$25 and take 2 minutes to install. Choose warm white fabric (linen, cotton, or paper) in cream or soft beige. The shade catches the harsh overhead light and spreads it evenly across the room, cutting the “fluorescent office” vibe immediately. No tools, no permanent changes, and you can swap shades if you want to change your room’s aesthetic later.

    Fair warning: This alone won’t create that cozy evening feeling, but paired with string lights or a floor lamp, it completely changes how the room feels during the day.

    4. Create a Reading Nook with Recessed Lighting

    Designate one corner as your escape zone. Pair a comfortable chair with a high-quality reading lamp that has a warm bulb, and suddenly you’ve got a refuge that’s separate from your study area. This psychological separation matters when you’re trying to unwind.

    Grab a warm-bulb reading lamp (try Target, IKEA, or Amazon) for $20–$50. Look for lamps with adjustable brightness so you can dial down the light as the evening goes on—this helps your body naturally wind down before sleep. Place the lamp to the side of your chair, not directly overhead, to avoid harsh shadows. Add a throw blanket and a few pillows, and you’ve created a completely different atmosphere from the rest of your room in just one corner.

    This spot becomes sacred for relaxing, journaling, or decompressing. Your brain learns to associate it with calm, making it easier to actually switch off when you need to.

    5. Hang Fabric Behind Wall Lights for Diffused Glow

    If you can find a renter-friendly way to add a small wall sconce (using adhesive or command strips), draping lightweight fabric behind it transforms the light quality completely. The fabric acts as a filter, turning direct light into ambient warmth.

    Mount a battery-powered or plug-in wall sconce (around $20–$40 from IKEA or Amazon) using removable adhesive. Hang sheer white or cream fabric (lightweight muslin, organza, or even a scarf) behind the light source using more command strips or removable hooks. The light passes through the fabric before hitting the room, diffusing it into something soft and inviting. Setup takes about 15 minutes, and you can adjust or remove the fabric anytime.

    Your walls now glow instead of reflect harsh light, and the whole room feels warmer. It’s a subtle change that makes a surprising difference in how relaxed the space feels.

    6. Position Multiple Small Lamps Around the Room

    One overhead light or even one floor lamp leaves dark corners and creates a flat, one-dimensional atmosphere. Multiple smaller lamps create pockets of warmth and let you control the mood by turning different ones on and off depending on what you’re doing.

    Buy 2–4 small table lamps in warm white tones from Target, IKEA, or thrift stores. New lamps run $15–$30 each, but you can find decent secondhand options for $5–$15. Distribute them across your room: one on your nightstand, one on your desk, one on your dresser or shelf. Each lamp should have a warm-white bulb (2700K color temperature). This takes minutes to set up and costs $30–$80 total for a completely transformed lighting ecosystem.

    Now you’ve got flexibility. Studying? Turn on desk and overhead lights. Winding down? Just the bedside lamp. Having friends over? Multiple warm sources make the room feel gathered and cozy instead of spotlight-lit.

    7. Use Dimmable Smart Bulbs for Mood Flexibility

    If you want next-level control, smart bulbs let you adjust brightness and color temperature from your phone—no switch flipping required. This is especially useful for those moments when you’re already settled in bed and don’t want to get up.

    Pick up dimmable smart bulbs like Philips Hue (around $15–$25 each) or LIFX bulbs (similar pricing) from Amazon or Best Buy. Screw them into any lamp or fixture you already have. Download the app, connect to your Wi-Fi, and you can dim the light or shift the color tone without moving. Some come in warm white only (easier and cheaper), while others offer full color ranges if you want to experiment with mood lighting later.

    The best part? You can create presets: “Study Mode” for brighter focus, “Evening Wind-Down” for dimmer warmth, or “Movie Night” for whatever vibe you’re going for. It’s an investment piece ($60–$100 for a basic setup), but it pays off in flexibility and energy savings.

    8. Drape Tapestries to Soften Light and Add Texture

    Tapestries do double duty: they add personality and color to your walls while also acting as diffusers for harsh light. Heavier fabrics absorb light and create intimacy, while lighter ones let glow pass through softly.

    Find a tapestry or large fabric wall hanging at Urban Outfitters, Target, or thrift stores for $15–$40. Hang it using removable adhesive strips or command hooks in warm tones (terracotta, cream, sage, burgundy) that complement your existing lights. Position it behind a lamp or in a corner where light naturally hits it. The fabric catches and softens light, and shadows create visual depth and interest.

    Your walls now look intentional and styled, not bare and cold. Plus, tapestries are easy to swap out when you want a seasonal refresh or aesthetic change without any damage to your walls.

    9. Create Ambient Light with Candles (LED or Real)

    Candles create the coziest light possible, but real flames aren’t always dorm-friendly (and rightfully so—safety first). LED candles give you that flickering warmth without the fire hazard.

    Grab LED tea lights or pillar candles from Target, IKEA, or Amazon for $2–$8 each. Get 4–6 of them to create noticeable ambient light ($8–$50 total). Battery-operated models last months on a single set of batteries. Group them on your dresser, shelf, or windowsill so they’re visible but not in the way. They cast flickering shadows that feel warm and human-scale—nothing beats that visual effect for relaxation.

    If you want real candles and your dorm allows them, go for soy or beeswax candles (cleaner burn, better scent) and always use a candle holder to catch drips. Either way, you’ve got the coziest lighting option available, without the guilt or danger.

    10. Install Warm White Neon Signs for Personalization

    Neon signs are huge on TikTok right now, and for good reason—they’re fun, customizable, and cast a flattering warm glow. They also work as both lighting and wall decor, killing two birds with one stone. Look for warm white neon signs (not pink or blue) to keep the vibe cozy rather than nightclub-y.

    Order custom warm white neon from Etsy, Amazon, or Neon Monkey for $40–$120 depending on complexity. Simple options like initials, “Good Vibes,” or a shape are cheaper and still impactful. They run on USB power, so plug them into an outlet near where you want to hang them. Mount using removable adhesive strips (the weight is light). Setup takes 10 minutes.

    Your friends will immediately ask about it, it photographs beautifully in natural light, and it adds personality that nothing else can. The warm glow makes your room feel like a curated space, not a generic dorm.

    11. Use Fairy Lights in Glass Jars for Subtle Ambiance

    This is a budget-friendly way to create distributed ambient light without much visual clutter. Fairy lights stuffed into clear jars glow from within, creating soft pools of warmth.

    Grab warm white fairy lights (also called starry lights or micro LED strings) from Amazon or Target for $5–$12 per strand. Buy 2–4 strands. Place mason jars, clear drinking glasses, or small vases around your room (nightstand, shelf, windowsill). Coil the fairy lights inside each jar and plug in (or use battery-operated versions for cord-free placement).

    The jars scatter light softly throughout your space, and you can move them around anytime. They’re cheap enough to buy several, flexible enough to rearrange, and gentle enough to create real relaxation without feeling overdone. Bonus: They look especially good in photos.

    12. Mount a Wall-Mounted Reading Light Above Your Bed

    If you share a room or want to read in bed without turning on the overhead light, a wall-mounted reading lamp is a game-changer. It’s focused light exactly where you need it.

    Find a swing-arm wall lamp or articulating reading light at IKEA, Home Depot, or Amazon for $20–$50. Install using removable adhesive strips or command hooks (check weight limits and follow instructions carefully). Position it above and to the side of your bed so light falls on your book or phone without blinding you or your roommate. The bulb should be warm white and dimmable if possible ($3–$8 extra for the bulb).

    Now you can read comfortably at night without the harsh overhead light or straining to see. It’s also perfect for late-night phone scrolling without that blue-light exhaustion feeling.

    13. Create Mood Lighting with Edison Bulbs

    Edison bulbs have a built-in vintage charm and cast light that feels inherently warmer than standard bulbs. They’re not just aesthetic—they actually deliver better ambient light quality.

    Swap out any regular bulbs in your existing lamps for warm white Edison bulbs from Home Depot, Target, or Amazon for $8–$15 each. They fit standard fixtures and come in multiple wattages depending on how bright you need. The visible filament inside creates a nostalgic, intentional look even when the light is on, and the warm color temperature (usually 2200K–2700K) is naturally relaxing.

    Bonus: Edison bulbs are durable and last longer than regular incandescent bulbs, so you’re not replacing them constantly. They photograph beautifully too, which matters if you’re into room-styling content.

    14. Use Colored Light Filters Over Existing Lamps

    This is an ultra-cheap way to shift your room’s lighting temperature without buying new fixtures. Fabric scraps or lightweight colored tissue can filter light in seconds.

    Grab lightweight fabric in warm tones (amber, rose gold, cream) from a fabric store, thrift shop, or even use a lightweight scarf. Drape it loosely over a lamp shade or fixture opening—don’t touch hot bulbs. The fabric filters the light into warmer tones instantly. Cost: basically free if you use stuff you already have, or $2–$5 for fabric scraps. Installation: literally 30 seconds, and you can adjust or remove it anytime.

    This is perfect for renters who can’t modify fixtures and want to test out different lighting moods before investing in new bulbs or lamps. Try it once and you’ll be amazed at how much a simple colored filter changes the atmosphere.

    15. Install a Corner Floor Lamp with a Fabric Shade

    Floor lamps take up zero wall or surface space, can be positioned anywhere, and make a huge visual impact. A corner lamp with the right shade becomes an instant focal point that actually improves the room’s vibe.

    Find a tall floor lamp with a fabric shade at IKEA, Target, or thrift stores for $25–$80. Pick one with a warm linen or cotton shade in cream, beige, or soft gray. Place it in a corner or next to your reading chair so it casts warm light without being in your way. The lamp should have a warm-white bulb and ideally a dimmer switch for flexibility.

    Unlike overhead lights, floor lamps are naturally forgiving and create pockets of warmth rather than flooding your entire space. Your room instantly looks more grown-up and intentional. Plus, if you move, you just unplug and take it with you—zero installation hassle.

    16. Hang Lights Under Lofted Beds for a Private Glow

    If you’ve got a lofted bed, the space underneath is prime real estate for creating a private, womb-like retreat. Lights under the bed make that space feel separate and intentional.

    String warm white LED lights along the underside of your bed frame using removable adhesive hooks or by weaving them through the structure. Look for 15–30 feet of lights for $10–$20. The lights glow downward, illuminating your under-bed zone without lighting the whole room. Setup takes about 15 minutes, and you can adjust brightness and placement easily.

    Now you’ve got a secret glow-up zone—perfect for studying, relaxing, or just having a quiet moment. The enclosed space with soft lighting feels like your own sanctuary, which is especially valuable in a shared dorm where privacy is limited.

    17. Layer Warm Lighting with Sheer Curtains

    Sheer curtains diffuse both natural and artificial light beautifully, creating a softer overall atmosphere. When combined with warm indoor lights, you get this magical layered glow.

    Hang white or cream sheer curtains in your window using removable curtain rods or adhesive strips for $15–$40. Make sure they’re lightweight so light passes through easily. Position your warm lamps (floor lamp, desk lamp, string lights) near but not directly behind the curtains. Light bounces through the sheer fabric and reflects back into your room, creating this dimensional, glowing effect that’s impossible to achieve with hard light alone.

    During the day, sheer curtains diffuse harsh sunlight and keep your room feeling calm. At night, they layer your artificial light into something warmer and more complex. It’s the difference between a lit room and a room that glows.

    18. Use Uplighting to Create Depth and Drama

    Uplighting is an underrated technique that makes small rooms feel bigger and more sophisticated. By bouncing light off ceilings and walls instead of pointing it straight ahead, you create visual depth.

    Position a floor lamp or table lamp to face upward rather than downward—angle it toward a corner or blank wall. This bounces light off the ceiling and creates softer, more diffused overall illumination. If you’re using a lamp without a shade, aim it at a light-colored wall or ceiling to maximize reflection. No extra purchases needed if you’re repositioning existing lamps; otherwise, grab a versatile floor lamp for $25–$50.

    The room suddenly feels more spacious and atmospheric. Your brain perceives uplighting as more luxe and intentional than straight-on light, which is why high-end hotels use this technique constantly.

    19. Create a Warm Light Sequence for Evening Wind-Down

    Your body responds to gradual light changes. By dimming lights as evening progresses, you signal to your brain that it’s time to wind down, which actually improves sleep quality.

    Set up dimmable warm lights in key spots: overhead (dimmed), desk (off or dimmed), floor lamp (full), string lights (full), bedside lamp (full). Around 7–8 PM, start dimming the brighter lights and relying more on the warmer, softer ones. By 9–10 PM, just your bedside lamp stays on. This gradual transition mimics natural sunset and trains your body’s circadian rhythm.

    If you’ve got smart bulbs (from Tip #7), program this sequence as a preset so it happens automatically or with one button tap. If not, just manually dim fixtures as evening progresses—takes 10 seconds and makes a real difference in how easily you fall asleep. You’ll notice better sleep quality within a few days.

    20. Combine Warm Lights with Cool Accent Lighting for Balance

    All warm light can feel monotonous or even sleepy. A tiny bit of cooler accent light adds visual interest without ruining the cozy vibe.

    Keep your primary lighting warm (2700K) but add one small cool-toned light (like a white LED strip on your desk at 4000K) for visual contrast and function. The cool light helps with focus during study, while the warm lights provide the cozy foundation. The two tones together create complexity that feels more sophisticated than one temperature alone.

    This is especially useful if you’re balancing relaxation with productivity in the same space. The warm lights make the room feel like yours, while the cool accent keeps your brain engaged when you need it to be.

    21. Use Rope Lights for Flexible, Low-Profile Illumination

    Rope lights (also called LED strip lights in flexible tubing) are way more forgiving than bulky fixtures and can bend around corners, shelves, and architectural features.

    Grab warm white rope lights from Amazon or Home Depot (usually $10–$30 for 15–30 feet). They’re self-adhesive on one side, so just peel and stick around your shelf edges, along your desk, or outlining your window frame. They bend smoothly around corners and curve along furniture. Plug into an outlet nearby or use battery-operated versions for wireless placement.

    The result looks more built-in and intentional than string lights, with less visual clutter. Rope lights are also great for creating definition in a small space—they subtly outline your zones without making the space feel crowded or over-decorated.

    22. Combine Different Light Heights for Visual Interest

    This is lighting design 101: varying heights keeps your eye moving and makes rooms feel larger and more intentional.

    Audit your current lights and ensure you have at least 3 different height zones: overhead (ceiling), mid-level (wall sconce or table lamp at eye level), and low (floor lamp or bedside lamp). All should be warm white. This takes zero budget if you’re repositioning existing lamps; adding new fixtures might run $50–$150 depending on what you’re missing.

    When light comes from multiple heights, your brain perceives more depth and sophistication. The space stops feeling flat and one-dimensional. This is why professional interior design always includes layered lighting.

    23. Use Warm Light Timers to Automate Your Evening Routine

    If you struggle with consistency in your wind-down routine (or you’re just forgetful), automate it. Plug your warm lights into smart timers or smart plugs so they turn on or dim at specific times.

    Grab a smart plug (around $15–$25 from Amazon) or a smart power strip ($30–$50). Plug your dimmable lamp or string lights into it, then set the schedule in the app: lights on at 6 PM at full brightness, dimmed at 8 PM, turned off at 10:30 PM (or whatever your schedule is). You can override manually anytime, but the automated routine takes the thinking out of it.

    This small automation makes a big difference in consistency, which is what actually trains your body to wind down. You’re removing friction from the process, which means you’re more likely to actually follow through.

    24. Create a Soft Light Backdrop for Video Calls and Content

    If you’re doing Zoom calls, TikToks, or just want to look good on camera, soft warm lighting is your secret weapon. It’s flattering to skin tone, makes spaces look bigger, and photographs beautifully.

    Position 2–3 warm white lamps around your camera’s sight line so light hits you and your background evenly—avoid one bright light directly overhead. If you’re serious about this, grab a ring light with warm white setting ($20–$40 from Amazon) and position it slightly above and to the side of your camera. Keep the background simple and uncluttered so the warm glow is the star.

    Now every video call you take looks professionally lit instead of harsh and unflattering. Your friends will ask if you got new lighting (you did, kind of). Plus, if you’re ever streaming or making content, this setup handles it beautifully.


    Save this post and try layering just one or two of these ideas this week—you’ll be shocked at how much a single warm light changes the entire vibe of your space. Which lighting setup speaks to you first?

  • 26 Home Interior Design Ideas That Transform the Entire House

    26 Home Interior Design Ideas That Transform the Entire House

    Your home doesn’t need a complete overhaul to feel brand new. Sometimes the biggest impact comes from small, strategic changes that tie your whole space together—from how light hits your walls to how you arrange your furniture. Whether you’re renting, homeowning, or working with what you’ve got, these 26 ideas work in any budget and timeline. You’ll discover quick wins you can do this weekend, affordable swaps that rival expensive renovations, and investment pieces worth saving for. Each one solves a real design problem while bringing warmth, personality, and function back into your rooms. Ready to finally love every corner of your home?

    1. Layer Warm Wood Tones Throughout

    Wood isn’t just for furniture anymore—it’s the foundation of modern comfort. Swap cool grays and stainless steel for warm wood tones (think honey oak, walnut, or natural pine) to shift your entire home away from cold minimalism.

    Start with one statement piece like a wooden headboard or dining table, then layer in smaller items: wooden shelves, a wooden ladder for blankets, wooden picture frames. IKEA and Wayfair have affordable options ($40–$300+), while thrift stores often have real wood gems at half the price. It takes 0 time to swap—just rearrange what you have.

    The payoff? Your space immediately feels warmer and more grounded, even if everything else stays the same.

    2. Add Curved Furniture for Organic Modern Vibes

    Sharp corners are out; curves are where comfort meets style. A curved sofa or rounded accent chair signals “relax here” in a way straight edges never will.

    You don’t need to replace everything—one curved piece changes the whole room’s energy. Look for curved sofas at Article ($800–$2,500), West Elm ($1,200–$3,500), or Facebook Marketplace for secondhand finds ($300–$800). Curved coffee tables and side tables run $150–$400 at Wayfair and Target. If budget’s tight, a single curved accent chair ($300–$600) makes the same point. Installation takes minutes; choosing the right color takes the real time.

    Suddenly your room feels less rigid and more inviting—like a space designed for actual living instead of just looking good.

    3. Embrace Bold Cabinet Colors in the Kitchen

    Minimalism’s neutral everything is officially boring. Deep blues, forest greens, and even moody aubergine are replacing white as the “new neutral”—especially in kitchens where they make the biggest statement.

    Paint existing cabinets yourself with quality cabinet paint ($40–$80 per gallon from Sherwin-Williams or Benjamin Moore) and new hardware ($50–$150 for a full set), or hire a pro for $1,500–$3,000. This is a weekend DIY if you’re confident, or a 1-2 day job for professionals. Renter-friendly alternative: stick-on cabinet film ($30–$60 per roll) gives the same effect without commitment.

    Your kitchen shifts from forgettable to show-stopping, and you’ll actually enjoy cooking in a space that feels intentional.

    4. Create a Reading Nook in Dead Space

    That awkward corner by the kitchen or bedroom window? It’s now your personal retreat. Multifunctional nooks combine work, reading, and relaxation in one small space that actually serves you.

    Grab a simple bench ($100–$300 at IKEA, Wayfair, or Target), add a cushion ($30–$100), throw in a small table ($40–$150), and stack some books or a basket for throws. Total time: 30 minutes to arrange. Cost: $200–$500 for everything. Renters love this because nothing’s permanent—just move pieces around as needed.

    Now you have a dedicated spot that makes you actually want to sit down, read, or journal instead of scrolling on the couch.

    5. Swap Cool Grays for Warm Neutrals

    Cool grays made sense five years ago. Now warm beiges, soft terracottas, and creamy taupes are where it’s at—they make spaces feel enveloping rather than sterile.

    Pick one accent wall or go full-room; either works. Quality paint runs $35–$60 per gallon (Sherwin-Williams, Benjamin Moore, or Behr). Budget 4–8 hours for a bedroom, or hire a painter for $300–$800. If you’re renting, peel-and-stick wallpaper in warm tones ($20–$50 per roll) gives the same cozy effect without the landlord drama.

    Your whole room immediately feels more lived-in and soothing—like somewhere you actually want to spend time.

    6. Mix Bold Patterns Without Fear

    Pattern phobia is real, but limiting yourself to solids means missing out on personality. Stripes, checks, and geometrics are surging (+5,000% searches for checks alone), and mixing them looks intentional when you follow one rule: keep colors consistent.

    Start with one bold patterned statement piece (a rug for $50–$300 at Ruggable or Wayfair), then layer in complementary patterns in similar tones—a striped pillow here, a checked throw there. Buy individually so you can test combos before committing; most stores accept returns. This costs $150–$400 total and takes 0 installation time.

    Your space goes from “safe and boring” to “I clearly have good taste and vision.”

    7. Install Textured Limewash Walls

    Flat paint is fine, but textured limewash feels like art. It’s DIY-able, forgiving, and transforms walls into something people actually comment on.

    Limewash kits run $25–$60 at Home Depot or online. Watch a YouTube tutorial (20 minutes), then apply with a brush or sponge—takes 2–3 hours for one room and requires zero special skills. Mistakes look intentional with textured finishes. Bold colors like deep aubergine or mustard work best and hide imperfections while adding drama.

    Your walls stop being a background and become a feature that anchors the entire room’s vibe.

    8. Use Hand Stenciling for Custom Wall Art

    TikTok has made DIY wall art accessible to everyone, and hand stenciling is the easiest entry point. No painting skills required—just a stencil, a sponge, and confidence.

    Grab stencil templates ($10–$30 from Amazon or Etsy), pick two coordinating paint colors, and go to town on an accent wall. Takes 3–4 hours for a full wall and costs around $40 total. If it looks wonky, that’s the charm—hand-done always beats perfect. Renters, don’t worry: test on a poster board first, then add it to your wall.

    Suddenly your bedroom or entryway feels personalized and gallery-worthy, not like a rental or placeholder space.

    9. Layer Textured Throws and Pillows

    One throw pillow looks lonely. Eight throws in varying textures (linen, wool, faux fur, velvet) looks intentional and cozy. This is the easiest way to fight the “cold minimalist” problem without spending big.

    Mix textures across $15–$50 pillows from Target, IKEA, or West Elm. Add a chunky knit throw ($30–$100) and a woven basket ($25–$80) to store extras. Total investment: $200–$400 for a whole sofa’s worth, and it takes 10 minutes to arrange. This works in rentals since nothing’s permanent.

    Your seating area becomes the place everyone wants to sink into, and it looks like a magazine shoot without trying.

    10. Paint Ceiling Beams for Architectural Warmth

    Visible ceiling beams are trending, but not everyone has them built in. Paint faux beams ($40–$80 in paint cost) or highlight real ones with a contrasting color to add instant architectural interest and warmth.

    If you have real beams, a darker wood stain or paint ($30–$100 depending on size) takes a weekend and looks professional. No beams? Faux beam kits from Home Depot or Wayfair ($100–$300) stick up in hours and look surprisingly real from below. Hire help if heights scare you ($500–$1,500 for installation).

    Your ceilings stop being invisible and become part of your design story—suddenly everything feels more substantial.

    11. Define Spaces with Room Dividers (No Walls)

    Open concepts are great until you need privacy or visual separation. Room dividers give you zones without the landlord saying no.

    Folding screens ($40–$200 at Target, IKEA, Wayfair) are quick and renter-friendly. For something more permanent, tall open shelving ($150–$400) or curtain rods with fabric ($30–$100) create soft boundaries. Bookcases back-to-back ($100–$300 each) work too. Most installs take under an hour and involve no drilling.

    Now your open space reads as intentional zones instead of one big, undefined room—you actually feel like you have separate living and sleeping areas.

    12. Invest in Quality Rugs to Ground Spaces

    Rugs are the single most underrated design investment (the category’s worth $51.87B for a reason). A good rug makes everything feel more pulled together, defines spaces, and adds texture instantly.

    Buy rugs that photograph well—natural fibers (jute, wool) or patterned designs ($200–$800 from Ruggable, Wayfair, West Elm, or CB2). Size matters: area rugs should anchor furniture, not float in the middle of the room. Washable rugs ($150–$400) are renter and pet-owner gold. This is a one-time purchase that lasts years.

    Suddenly your room feels grounded, intentional, and significantly more expensive-looking than it actually is.

    13. Add Candles for Scent and Ambiance

    Scent is the forgotten design layer. The candle market’s at $11.51B for 2025—people know this works. A few quality candles don’t just smell good; they shift your whole room’s atmosphere.

    Grab 2–3 candles ($15–$40 each from Diptyque, Jo Malone, or budget-friendly brands like Threshold from Target) and place them on shelves, coffee tables, or bathrooms. Unscented candles ($5–$15 each) add ambiance without smell if you’re sensitive. Group them in odd numbers for visual interest. Costs $30–$100 total; display takes 5 minutes.

    Your home stops smelling like “nothing” and starts smelling intentional—visitors notice immediately, even if they can’t put their finger on why.

    14. Paint an Accent Wall in Deep Color

    One accent wall breaks up the “all one color” trap and costs way less than full-room painting. Go bold—deep greens, navy, or even charcoal—and let it anchor the whole room.

    Quality paint ($35–$60 per gallon) covers one wall in 2–3 hours if you DIY ($0–$20 in supplies), or hire a painter for $200–$500. Light colors bounce light; dark colors add drama—choose based on your room’s natural light. Renters, use removable wallpaper ($20–$50 per roll) instead.

    Your room instantly feels more designed and intentional—like you actually made a plan instead of going with whatever was cheapest.

    15. Create Defined Zones with Strategic Lighting

    Open-concept spaces feel chaotic without visual or light-based boundaries. Strategic lighting creates zones without building walls and costs less than you’d think.

    Add a floor lamp ($40–$150) to a reading corner, a table lamp ($30–$100) to a console, or pendant lights ($50–$250 each) over a desk area. Layer these with overhead lights for full flexibility. Costs $200–$500 total depending on style and where you shop (IKEA, West Elm, Article). Installation takes 30 minutes if there are outlets nearby; electricians can add outlets for $100–$300 per zone.

    Now your open space reads as intentional living zones, and you can control the vibe independently—bright for work, dim for relaxing.

    16. Swap Hardware for an Instant Refresh

    Hardware sounds small until you realize it’s the jewelry of furniture. Swapping out old knobs and pulls for brass, gold, or modern black hardware shifts your whole aesthetic in minutes.

    Gather measurements of your current hardware, then order replacements ($1–$5 per piece) from hardware stores, Wayfair, or Amazon—even 10 pieces runs $30–$80 total. Swap them out with a screwdriver in 20 minutes. This works on kitchen cabinets, dressers, nightstands, or bathroom vanities. Renters, check with your landlord first or keep old hardware to reinstall later.

    Suddenly your furniture looks intentional and updated, like you actually invested thought into every detail.

    17. Layer Throw Blankets for Texture and Function

    Throw blankets serve double duty: they’re functional comfort items that also happen to be the easiest way to add texture without commitment. Styling with throws makes any seating feel cozier and more personal.

    Mix textures and tones—chunky knit ($30–$100), cable knit ($20–$80), faux fur ($25–$75)—and drape them over sofas, chairs, and beds. Buy from Target, IKEA, West Elm ($20–$120 each), or thrift stores ($5–$15). Layer 2–3 throws per seating area. Total cost: $60–$300; styling time: 10 minutes.

    Your space immediately feels more lived-in and cozy, and you’ll actually use these for comfort instead of just decoration.

    18. Hang Large-Scale Art or Mirrors

    One big piece beats twenty small ones every time. Large-scale art or mirrors anchor walls, make rooms feel intentional, and often cost less than you’d expect—especially if you’re strategic about sourcing.

    Buy from local artists ($100–$500), Wayfair ($50–$400), Etsy ($30–$300), or thrift stores ($20–$100 for real finds). Oversized mirrors ($100–$300) bounce light and make small spaces feel bigger. Installation: one nail if it’s lightweight, or hire someone for $50–$150. Takes 30 minutes DIY.

    Suddenly that blank wall has a purpose, and the room feels complete instead of empty.

    19. Create Contrast with Dark Walls and Light Trim

    Contrast is high-impact design. Dark walls with light trim and ceiling create drama and make rooms feel curated instead of coincidental.

    Paint walls a deep tone ($35–$60 per gallon) and keep trim/ceiling white or cream ($25–$50 per gallon). This costs $100–$150 in supplies for one room if you DIY, or $400–$800 if you hire a painter. Takes a weekend DIY or 1–2 days professionally. The contrast makes architectural details pop and adds sophistication without being trendy.

    Your room feels more expensive and design-forward, even if the furniture stayed exactly the same.

    20. Add Open Shelving to Kitchen or Bathroom

    Open shelving makes rooms feel bigger, more functional, and more personal than closed cabinets. It forces you to keep things styled, but the payoff is a space that feels intentional instead of hidden.

    Install shelves yourself with a level and stud finder ($50–$100 in tools one time) or hire a handyperson ($150–$300 per shelf installation). Wood shelves cost $30–$100 each depending on size; industrial brackets add $20–$50 per shelf. Styling takes time but costs nothing—arrange dishes, plants, and a few pretty objects for visual interest. Takes 2–3 hours to install and style.

    Now your daily items become part of your décor, and you love reaching for things because everything’s beautiful.

    21. Upgrade to Quality Bedding and Pillows

    You spend a third of your life in bed. Quality bedding isn’t a luxury—it’s the foundation of a bedroom that feels like a retreat. High-thread-count sheets and quality pillows transform how your room looks and feels.

    Invest in a good sheet set ($80–$200 from Brooklinen, Parachute, or even Target’s Threshold line) and pillows ($40–$100 each from Casper, Purple, or traditional options). A quality duvet ($150–$300) ties everything together. This is a one-time purchase that lasts years; styling takes 10 minutes and costs nothing.

    Your bedroom stops being a place you sleep and becomes a space you actually want to retreat to—suddenly early nights sound great.

    22. Create a Gallery Wall of Mixed Frames

    Gallery walls used to look Pinterest-perfect and unrealistic. Now the trend is “messy gallery walls”—mixed frames, different sizes, personal photos mixed with art. This is how real people style their homes.

    Collect frames from thrift stores ($2–$8 each), IKEA ($3–$20), or Target ($5–$30). Print photos and art from Etsy or your own collection. Arrange on the floor first, then hang in a loose grid formation (takes 2–3 hours including hanging). Total cost: $40–$150 depending on how many frames you need.

    Suddenly your wall tells your personal story instead of looking like a showroom—visitors actually stop to look at it.

    23. Paint Kitchen Cabinets a Fresh Color

    If bold cabinet colors feel risky, go soft: pale sage, cream, dusty blue, or warm gray. These colors feel fresh and current without the commitment of deep tones.

    Cabinet paint costs $40–$80 per gallon; new hardware runs $50–$150 for a full set. DIY takes a weekend ($0 labor), or hire professionals for $1,500–$3,000. This is one of the highest-ROI updates you can make—your kitchen looks completely refreshed without replacing anything.

    Your kitchen goes from outdated to magazine-ready in one weekend, and you’ll enjoy cooking in a space that feels intentional and updated.

    24. Use Wallpaper to Add Pattern and Texture

    Wallpaper’s back, and it’s not your grandmother’s floral anymore. Modern patterns (geometrics, botanicals, stripes) add depth and personality in a way paint never could.

    Peel-and-stick wallpaper costs $20–$80 per roll (Spoonflower, Etsy, Amazon); traditional wallpaper runs similar prices with professional installation at $300–$800. One accent wall needs 2–3 rolls depending on size; takes 2–3 hours DIY or one day professionally. Renters, stick with removable options. Installation is forgiving—mistakes smooth out.

    Your wall becomes a statement and conversation starter instead of boring background—suddenly people notice your space.

    25. Create Seating with a Vintage or Thrifted Find

    Vintage and secondhand furniture has that “I found this and made it work” vibe that new furniture can’t replicate. One thrifted statement chair or bench adds personality and saves money compared to retail.

    Hunt thrift stores, Facebook Marketplace, or estate sales ($50–$300 for good bones). Factor in reupholstering costs ($200–$600 depending on size) if needed, or just add a throw if it’s comfortable as-is. Total investment: $50–$600 depending on what you find. This is a weekend treasure hunt.

    Your room feels curated and personal instead of like you shopped one store—plus you’re actually supporting sustainability.

    26. Layer Lighting with Dimmer Switches

    Single overhead lighting is the enemy of ambiance. Dimmer switches let you control the vibe—bright for function, soft for relaxing—without adding any new fixtures.

    Install dimmer switches ($15–$30 each) in place of regular switches; hire an electrician for $100–$200 per switch if you’re not confident, or DIY if you’re handy (flip the breaker first). Pair with dimmable bulbs ($5–$15 each from any hardware store). Total investment: $50–$300 depending on how many switches you upgrade.

    Now you can adjust your lighting to match your mood instead of living in one harsh brightness level all day.


    Save this post and pick one idea to start this weekend. Even if you just swap out hardware or add a throw blanket, you’ll notice the difference immediately. Which idea speaks to you most—are you going bold with color, or starting with texture?

  • 24 Calm Study Room Ideas That Boost Focus Instantly

    24 Calm Study Room Ideas That Boost Focus Instantly


    Introduction

    A noisy head makes focused work feel impossible. Whether you’re studying for exams, working from home, or tackling creative projects, your environment directly affects your ability to concentrate. The good news? You don’t need a major renovation to build a study room that supports deep focus. Small changes to lighting, sound, color, and organization can transform any spare room, corner, or even a closet into a space where distractions fade and productivity flows. We’ve gathered 24 proven ideas—from free rearrangements to affordable upgrades—that calm your mind and boost your ability to concentrate. Let’s create a study space where you actually want to spend time.


    1. Add Soft, Warm Lighting to Reduce Eye Strain

    Poor lighting tanks your focus faster than anything else. Harsh overhead lights cause eye fatigue, headaches, and that foggy-brain feeling by mid-afternoon. The fix is simple: layer your light sources.

    Swap overhead fluorescent bulbs for warm white (2700K) LED bulbs or add a desk lamp beside your workspace. Warm light tells your brain it’s safe to relax and concentrate, not react. A $15–$30 desk lamp from IKEA or Amazon with adjustable brightness works beautifully. Position it to the side of your desk so light doesn’t reflect off your screen. Bonus: pair it with a dimmer switch ($10–$20) for flexibility across different times of day.

    The result? No more squinting, fewer headaches, and your eyes stay fresh for hours of work.


    2. Choose Calming Wall Colors That Support Concentration

    Walls that energize you into overstimulation are your enemy. Bright reds, busy patterns, or even stark white can keep your nervous system activated when you need it calm. Research on color psychology shows that soft, muted tones—especially blues, greens, and warm grays—lower cortisol and improve focus.

    Consider painting walls in soft sage, pale blue, warm gray, or muted taupe. These shades cost the same as any paint: $15–$25 per quart at Home Depot or Lowes. You’ll need roughly 1–2 quarts for a small room. If you rent, removable wallpaper in these tones ($20–$50 for a roll) works just as well. A single afternoon of painting or pasting gives you an entirely different working atmosphere.

    Pale, cool-toned walls become your invisible focus tool, quietly supporting your mind all day long.


    3. Eliminate Digital Distractions with a “Phone Parking Spot”

    Your phone is your brain’s biggest enemy when studying. Even face-down, knowing it’s nearby creates phantom vibrations and cognitive load. The psychological trick: physically remove it from your desk zone.

    Create a dedicated “phone parking spot”—a drawer, box, or shelf at least 6 feet away from your desk. Use a cute container ($5–$15 at Target or HomeGoods) to make it feel intentional, not punitive. Some people charge their phone there too, creating a natural boundary. If you need it for emergencies, set specific check-in times (every 30 or 60 minutes) rather than having it present.

    This one change alone eliminates the mental friction of resisting your phone every 90 seconds.


    4. Use a White Noise Machine or Ambient Sound to Block External Noise

    Outside noise destroys focus. Roommates, traffic, pets, and neighbors create constant mental interruptions. White noise doesn’t add sound—it masks disruptive noises by filling the acoustic space.

    A dedicated white noise machine runs $20–$50 (Marpac, LectroFan brands at Amazon) or use a free app on a tablet or old phone. Alternatively, play ambient soundscapes free on YouTube or Spotify—rain, forest ambience, coffee shop sounds, or brown noise all work. Plug your speaker into a power strip near your desk and use a timer so sound stops after your study session. Many people find brown noise or rain sounds most effective for sustained concentration.

    You’ll notice distractions fade within minutes, and your mind settles into work mode much faster.


    5. Install Adjustable Shelving to Reduce Visual Clutter

    A cluttered visual field is a cluttered mind. Piles of papers, books stacked haphazardly, and random desk items all pull your attention. Adjustable shelving gives you control over vertical space without floor footprint.

    Floating shelves cost $30–$80 for a set at IKEA, Home Depot, or Wayfair. Mount them at eye level above or beside your desk, then store only active-use items: current textbooks, pens, a desk organizer, maybe one plant. Everything else goes in a closed storage unit below. This takes 2–3 hours and a basic drill. Renters can use tension rods or command strips to hang shelves without holes.

    With just the essentials visible, your eyes have nowhere to wander—and neither does your mind.


    6. Add a Desk Pad or Under-Desk Mat for Comfort and Defined Space

    Your body’s comfort directly affects how long you can focus. A hard desk surface and cold legs under a chair create physical tension that pulls focus away from work. A desk pad and under-desk mat anchor your workspace and improve comfort.

    A quality desk pad runs $20–$50 (Amazon, Wayfair brands) and defines your work zone psychologically. Pair it with an under-desk mat or footrest ($30–$60) to support your feet and reduce leg pressure. These materials also quiet keyboard and mouse noise. Together, they create a cocoon-like workspace that feels separate from the rest of your room. Install takes 30 seconds—just lay them down.

    You’ll stay comfortable and focused longer because your body isn’t fighting against your environment.


    7. Use Closed Storage to Hide Work-in-Progress Items

    Open shelves are confession booths for your anxieties. Unfinished projects, loose papers, and half-done tasks create invisible mental load. Closed storage—cabinets, drawers, bins with lids—keeps work-in-progress items out of sight so your mind can rest.

    Invest in one or two closed storage pieces like a filing cabinet ($40–$120), a storage bench with a lid ($60–$150), or a shelving unit with cabinet doors ($80–$200 at IKEA or Wayfair). Use labeled plastic bins ($10–$25 per set) inside to organize by project. Everything active stays accessible but hidden. Your eyes only see a clean exterior, which tells your brain there’s nothing unfinished demanding attention.

    This psychological trick alone makes your study space feel 10x calmer.


    8. Create Zones for Different Types of Work

    Your brain works differently depending on the task. Deep focus writing needs one setup; reviewing notes needs another. If you’re cramped into one corner, you lose this flexibility. Creating zones tells your brain what type of work happens where.

    Divide your study room into at least two zones: a desk area for computer work and a comfortable chair zone for reading or note review. Use positioning, area rugs ($30–$80), or even a low bookshelf as a gentle divider. You don’t need walls—just visual separation. This costs $0–$100 depending on what you already have. Mentally, switching zones refreshes your mind and prevents the burnout that comes from staring at the same spot all day.

    You’ll notice your energy and focus reset when you physically move between task types.


    9. Install Blackout Curtains to Control Light and Reduce Visual Stimulus

    Too much natural light, especially afternoon sun, can feel chaotic and overstimulating. Blackout curtains give you control—you decide when your space feels energizing or calming.

    Blackout curtains cost $25–$80 per panel at Target, Amazon, or Wayfair. They block 99% of outside light and also add sound insulation. Mount them inside or outside your window frame (takes 20 minutes with a basic rod and brackets). Pair them with sheer curtains so you can filter morning light softly when you want it. In afternoon or late-night study sessions, close them completely to eliminate glare and visual chaos.

    You control the sensory environment instead of being controlled by it.


    10. Use Task-Specific Lighting for Different Work Periods

    One light source isn’t enough for optimal focus across a full study day. Morning work, afternoon reviewing, and evening sessions all benefit from different lighting approaches. Layering lights costs almost nothing but changes everything.

    Add a second lamp ($15–$35) to your desk setup—perhaps a reading light for note review or reference material. Use blue-tinted task lighting ($20–$40) for morning computer work (blue light boosts alertness early in the day) and switch to warm light after 2 p.m. to avoid sleep disruption. Many affordable lamps now have color-temperature switches built in ($30–$50 at Amazon). This takes 10 minutes to set up.

    Your energy naturally aligns with your lighting, so you work smarter throughout the day instead of fighting fatigue.


    11. Organize Supplies in a Rolling Cart for Easy Access Without Desk Clutter

    Desktop clutter kills focus, but you need quick access to supplies. A rolling cart solves both problems—everything you need is within arm’s reach but off your actual work surface.

    A basic 3-tiered rolling cart costs $25–$50 at IKEA, Target, or Amazon. Stock it with pens, notebooks, notecards, highlighters, reference books, and anything else you use daily. Position it within 2–3 feet of your desk so you can swivel and grab what you need in seconds. When you’re done studying, you can roll it into a closet or corner, clearing your mental space completely.

    Your desk stays clear, your supplies are instantly accessible, and your brain stays focused on the work, not hunting for a pen.


    12. Apply Acoustic Panels or Soft Furnishings to Reduce Echo and Sound Reflection

    Hard surfaces like walls, wooden desks, and bare floors bounce sound around, making a room feel chaotic and echo-y. Soft materials absorb sound and create an acoustically calm space.

    Install acoustic panels ($20–$60 per panel at Amazon or acoustic brands) on walls where you hear the most echo or noise. Alternatively, use budget-friendly solutions: bookcases filled with books ($0 if you have them), heavy curtains ($40–$80), or thick area rugs ($30–$100). Even a tapestry or fabric wall hanging ($15–$40) helps. These absorb sound instead of bouncing it back, making the room feel quieter and more contained. Installation takes 30 minutes.

    The result is an acoustically dampened space where you hear yourself think instead of hearing every footstep outside.


    13. Position Your Desk to Face a Window or Blank Wall, Not Distractions

    Where you face while working shapes what your brain pays attention to. A desk facing a hallway, doorway, or screen means constant micro-distractions. A desk facing a wall or window supports focus.

    Rearrange your desk to face either a window (nature views are calming) or a blank wall. Position your chair so your back is to the door—this gives you a psychological sense of security and reduces startle responses when people pass. If your room layout won’t allow this, use a privacy screen or tall plant ($20–$60) to block your peripheral vision. This takes 30 minutes of furniture moving and costs nothing.

    Your brain relaxes when your visual field is calm and expected, not full of movement and interruption.


    14. Install a Dimmer Switch for Flexible Lighting Control

    Fixed lighting levels don’t match your energy or task needs throughout the day. A dimmer switch lets you adjust brightness to match your focus level and circadian rhythm—no replacement needed.

    A basic dimmer switch costs $10–$25 at Home Depot or Lowes and takes 20 minutes to install (or hire an electrician for $50–$100 if you’re unsure). Once installed, you can turn overhead lights bright for morning alertness, medium for afternoon work, and dim for evening study. Pair it with warm-bulb overhead lights for best results. This single upgrade gives you more environmental control than buying five new lamps.

    You adapt your lighting to your body’s needs instead of forcing your body to adapt to fixed lighting.


    15. Use a Comfortable, Supportive Chair (Budget or Investment)

    Your chair determines whether you can focus for 30 minutes or 4 hours without pain. Back pain, neck tension, and poor posture all pull focus away from work and onto your discomfort.

    Budget option: a basic ergonomic office chair ($50–$100 at Wayfair or Amazon) with adjustable height and lumbar support. Mid-range: $150–$300 for a higher-quality office chair with more adjustments. Investment: $300–$600+ for a premium ergonomic chair. Whichever you choose, prioritize adjustable height, lumbar support, and armrests. Spend 15 minutes adjusting it so your feet flat on the floor, knees at 90 degrees, and monitor at eye level.

    Comfort creates the foundation for concentration—you can’t focus if your body’s screaming for relief.


    16. Add a Plant or Two for Air Quality and Calm

    Plants improve air quality, lower cortisol, and add visual softness—all while being nearly zero-maintenance. They’re like having a living reminder that work isn’t everything.

    Choose low-maintenance plants like pothos, snake plant, or spider plant—$5–$15 each from a garden center, nursery, or even grocery stores. Place one on your desk corner and another on a shelf nearby. Water once a week, ignore otherwise. Studies show that even looking at plants for 10 seconds lowers stress and improves focus. If you forget to water, artificial plants ($8–$25) look surprisingly real now.

    Having living things in your space creates an unconscious sense of calm and reminds you that growth happens at its own pace.


    17. Use a Standing Desk Converter or Adjustable Desk to Change Position

    Sitting all day kills focus, circulation, and energy. Alternating between sitting and standing refreshes your mind and prevents the afternoon slump that makes work feel impossible.

    A standing desk converter ($30–$80 at IKEA or Amazon) sits on top of your existing desk and adjusts up and down. A full adjustable desk costs $200–$600. Set a timer to stand for 20–30 minutes every 60–90 minutes of sitting. This takes 10 seconds to adjust and dramatically improves blood flow. Even 5 minutes of standing resets your focus and energy.

    Your body and mind stay engaged because you’re physically changing position, not locked in one posture all day.


    18. Create a “Do Not Disturb” Visual Signal for Others

    Even if you live alone, others (roommates, family, partners) need to know when you’re in deep focus mode. A clear visual signal prevents interruptions that derail your concentration for 15+ minutes.

    Create or buy a “Studying—Do Not Disturb” sign ($5–$15) to hang on your door or near your desk. Alternatively, close your door (if you have one) as a universal signal. Wear visible headphones (even if not playing audio) as a social cue that you’re unavailable. The key: make it a household rule that your signal means “I’m unavailable for 90 minutes” or whatever your study block is.

    Others respect your boundaries when they’re clear and consistent, which means fewer interruptions and way more deep work.


    19. Use a Visual Timer to Build Focus Blocks and Reduce Clock-Watching

    Watching the clock while studying creates low-grade anxiety and pulls focus. A visual timer lets your brain relax and trust that time is being tracked.

    Use a Time Timer ($15–$25 at Amazon) or similar visual timer that shows time passing as a shrinking pie chart. This is different from a regular countdown timer because your brain can sense time without looking directly. Set it for 25–50 minutes (Pomodoro technique recommends 25), then work without checking the clock. When the timer rings, take a 5–10 minute break. This structure creates focus “containers” and prevents the mental exhaustion of self-monitoring.

    You work harder during study blocks because your brain trusts the timer to protect your break time.


    20. Declutter Before Every Study Session (5-Minute Rule)

    Clutter is ambient stress. Even if it’s not consciously distracting you, your brain is processing it as “unfinished business.” Clearing your desk before you start work signals to your brain that it’s safe to focus.

    Spend 5 minutes before each study session putting away anything that’s not essential for that session. File papers, close extra browser tabs, stack books on your rolling cart, put your phone in another room. This tiny ritual costs nothing and takes less time than you think, but it’s psychologically powerful—you’re literally removing friction so your brain can settle.

    A clear desk before you start means your mind is already halfway to focus mode when you sit down.


    21. Choose a Consistent Study Time to Build Routine and Focus

    Your brain works best when you study at the same time each day. Consistency builds neurological pathways that make focus easier and faster over time.

    Pick a specific time window (e.g., 7–9 a.m. or 2–4 p.m.) and study then 5–6 days a week. Your brain learns to enter focus mode automatically at that time. The first week feels effortful, but by week 3, you’ll notice it becomes easier to settle in. This costs zero dollars but pays massive dividends in focus speed.

    Your brain will start preparing for focus 10 minutes before your study time arrives—that’s how powerful routine becomes.


    22. Use a Focus Playlist or Ambient Music to Anchor Attention

    Background music creates an acoustic anchor for your attention while blocking chaotic external noise. Unlike silence, which can feel lonely or anxiety-inducing, the right music tells your brain “we’re working now.”

    Create a study playlist on Spotify or YouTube with instrumental, lo-fi, or ambient music (search “focus music,” “study beats,” or “lofi hip-hop”). Alternatively, use a free service like Brain.fm or Noisli ($free–$50/year for premium). Avoid lyrics (they distract your language processing) or save lyrics for light review work. Play music at low volume, not filling the room. Many people find 60–70 BPM music most effective for deep work.

    The right soundtrack makes studying feel less isolating and creates a mental anchor that trains your brain to focus when that music plays.


    23. Position a Water Bottle and Snacks Within Arm’s Reach

    Dehydration and low blood sugar both massacre focus. Getting up constantly to find water and food breaks your flow. Keeping both within reach removes friction.

    Fill a reusable water bottle ($10–$30) and position it on your desk or side table. Keep easy, brain-boosting snacks nearby: nuts, dark chocolate, fruit, granola bars, or cheese. These take 10 seconds to grab between focus blocks. You’ll notice you can concentrate 30–50% longer when your body’s basic needs are already met.

    You stay in the zone longer because your body isn’t sending distress signals about being hungry or thirsty.


    24. Create an “Exit Ritual” to End Study Sessions Clearly

    Stopping work without closure leaves your brain in “active” mode. You can’t relax because mentally you’re still studying. An exit ritual tells your brain “this session is complete; now you can rest.”

    Spend the last 2–3 minutes of each study session closing out: file papers into tomorrow’s folder, write down one thing you accomplished, close your laptop, straighten your desk, put your chair back. Say something like “study session complete” or do a small physical gesture (stretching, standing, shaking your hands). This takes 3 minutes but allows your brain to release work-mode and actually recover.

    You’ll sleep better, relax faster after studying, and approach tomorrow’s session with fresh energy instead of lingering mental fatigue.


    SAVE THIS POST FOR YOUR NEXT STUDY SPACE REFRESH. Pick one or two ideas to try this week—maybe better lighting and a phone parking spot—and notice how much easier focus becomes. Small changes add up fast, and your brain deserves a space that supports deep, calm work.