Category: Home Decor

  • 27 Vintage Library-Inspired Bookshelf Ideas for Old-World Charm

    27 Vintage Library-Inspired Bookshelf Ideas for Old-World Charm


    There’s something undeniably appealing about stepping into a library that feels like it’s been collecting stories for centuries. If you love the idea of a bookshelf that whispers of antique bookstores, Victorian parlors, and well-traveled collectors, you’re not alone. The “bookshelf wealth” trend has sparked a deeper desire: not just curated shelves, but shelves with character—ones that look like they’ve been loved for generations.

    The good news? You don’t need an actual 200-year-old mansion to create this vibe. Whether you’re working with a small apartment or a dedicated library room, these 27 ideas will help you build that old-world charm on any budget. We’re mixing styling tricks, affordable finds, and a few splurge-worthy pieces that genuinely pay off. You’ll discover how to mix vintage with new, hunt down the right props, and arrange your books so they look like a collector’s dream—not a cluttered mess.

    Ready to create your own vintage literary sanctuary? Let’s dive in.


    1. Mix Leather-Bound Books with Modern Spines

    Leather-bound books are the foundation of old-world charm, but an all-leather shelf can look museum-like and untouchable. The secret is mixing them with modern, softer-spined books for visual interest and authenticity.

    Start by collecting affordable leather-bound editions from thrift stores, estate sales, or online marketplaces like Etsy or AbeBooks ($5–$30 per book). Intersperse them with 2–3 contemporary novels in neutral colors. The leather catches light differently than matte paper, creating natural dimension. Arrange books both spine-out and stacked flat so the leather details show. This takes about an hour to arrange properly and costs $0–$150 depending on how many vintage editions you source.

    Pro tip: Check your local library’s used book sales first—you’ll often find leather-bound classics for under $2 each. Goodwill and estate sales are goldmines too.

    The result is a shelf that looks collected over time, not purchased all at once. It reads as “I’ve been reading since childhood,” which is exactly the vibe old-world charm requires.

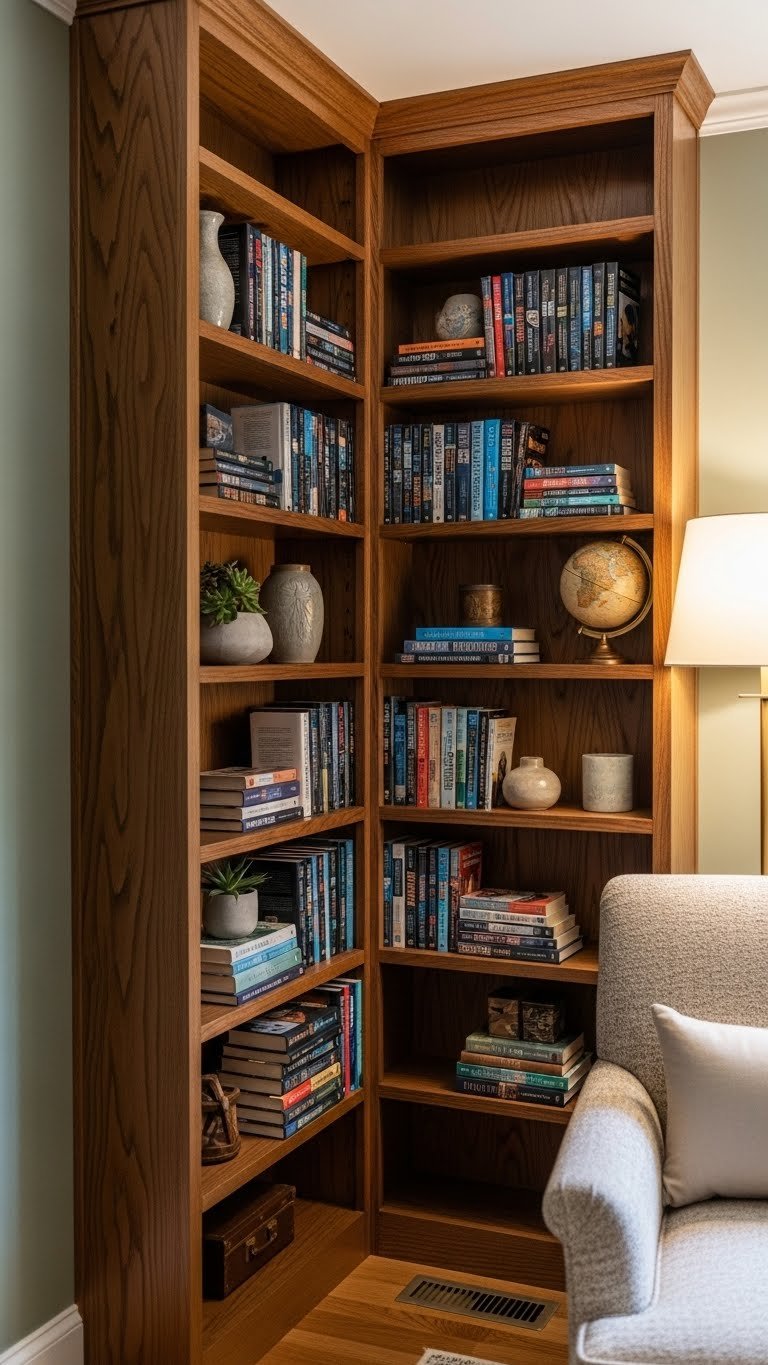
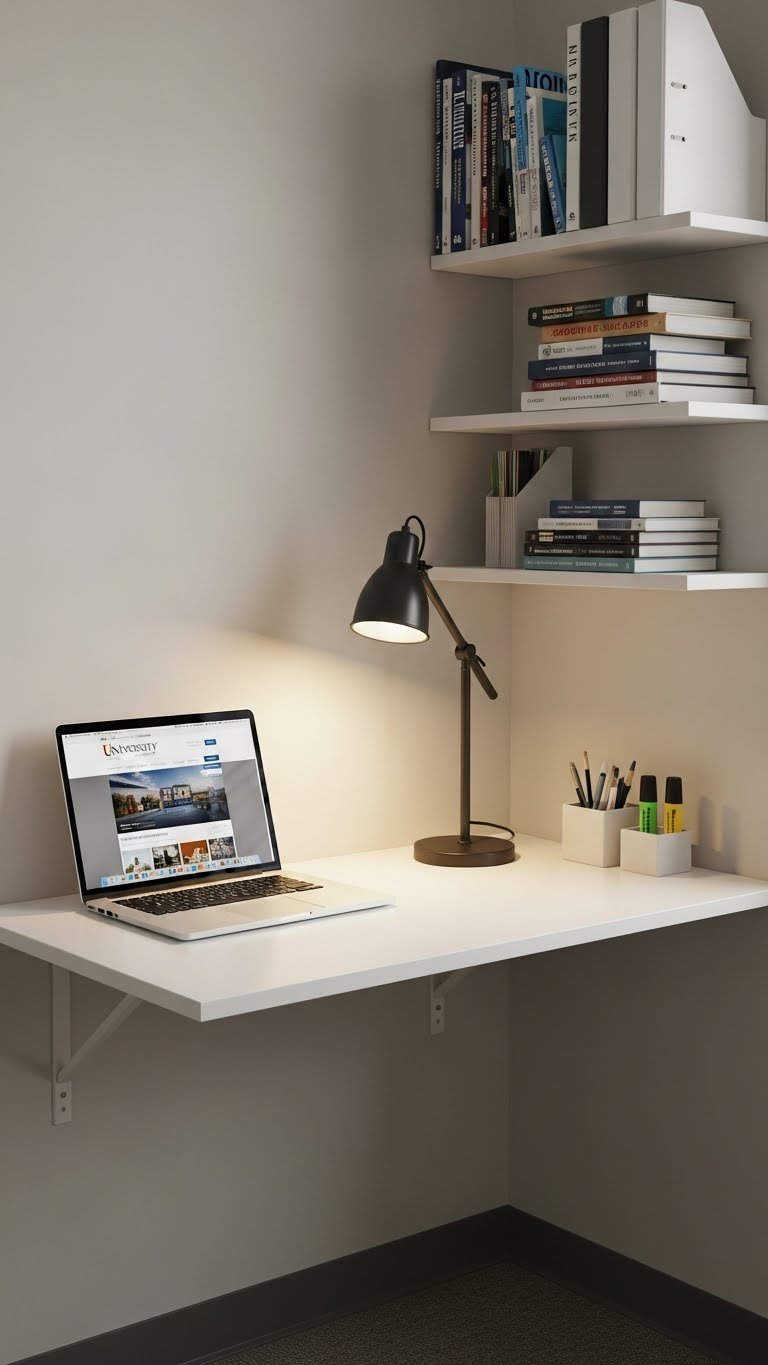
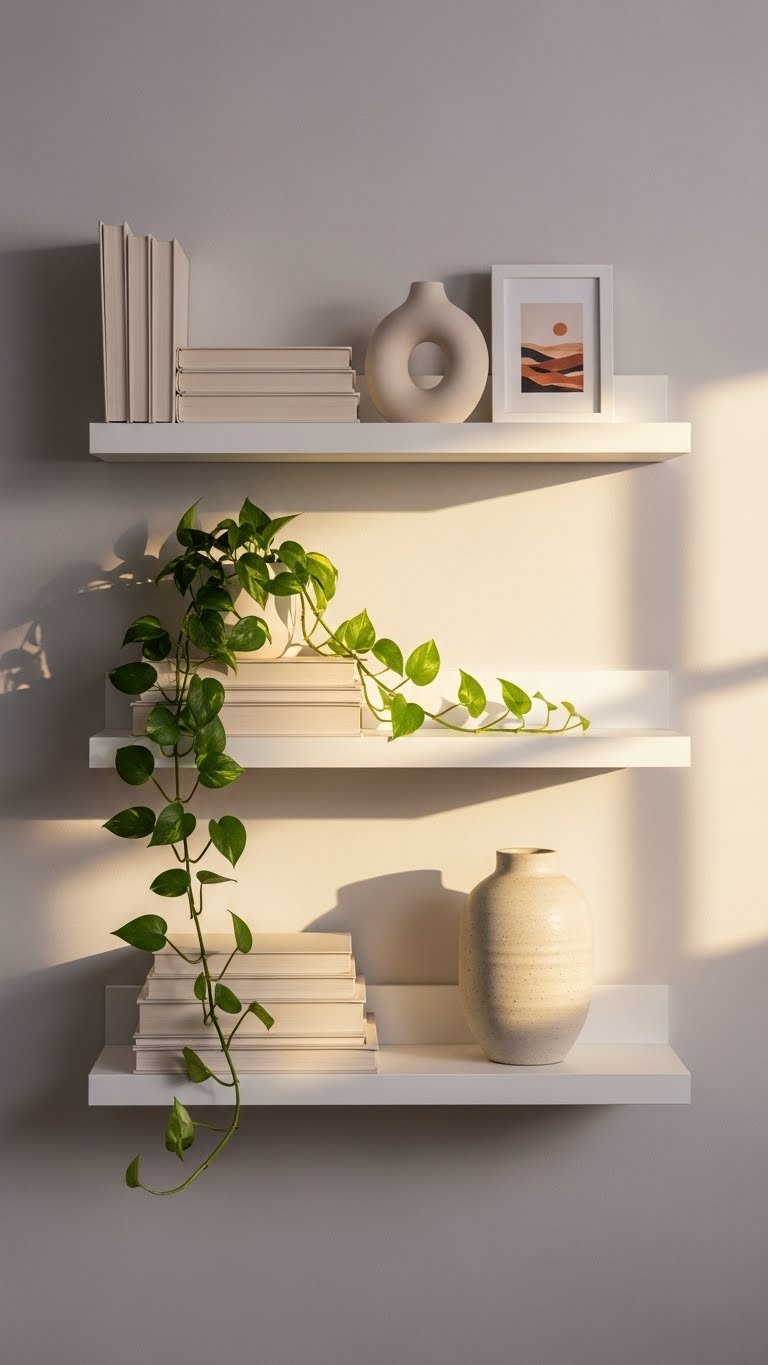
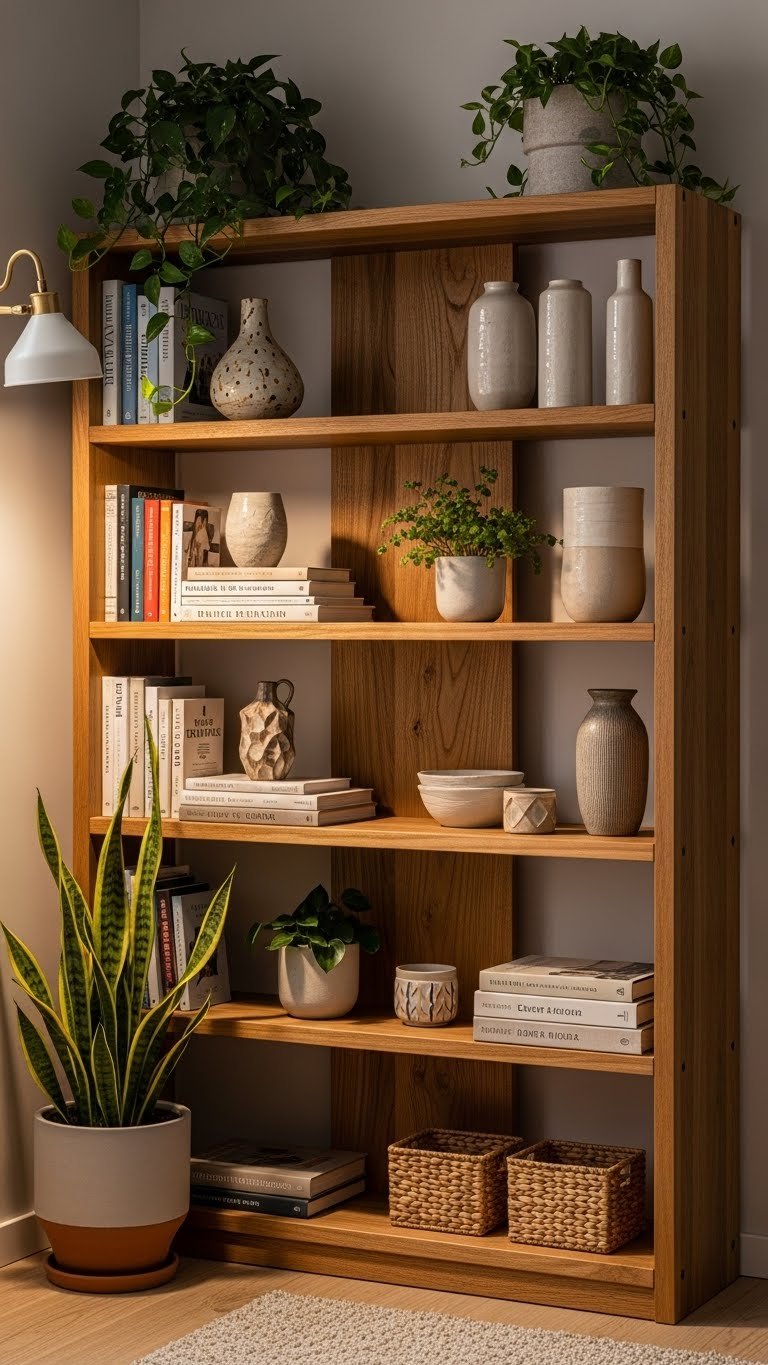
    2. Install Dark Wood Floating Shelves

    Dark wood shelving is the backbone of vintage library aesthetics. Unlike modern light oak or white shelves, deep walnut or mahogany-stained wood reads as established and timeless.

    If you’re renting or want a quick upgrade, floating shelves in dark walnut from IKEA ($35–$60 each) or Wayfair ($50–$150) install in under an hour with a stud finder and basic tools. Own your space? Invest in reclaimed dark wood shelves from local craftspeople or Etsy ($200–$600 per shelf) for authentic aged character—the imperfections and natural patina are the whole point.

    Install at varying heights (not perfectly aligned) to mimic how libraries evolved over time. This slight irregularity feels purposeful, not sloppy.

    The weight and color immediately ground your collection. Books pop against dark wood, and the shelves themselves become part of the design rather than disappearing into the background.

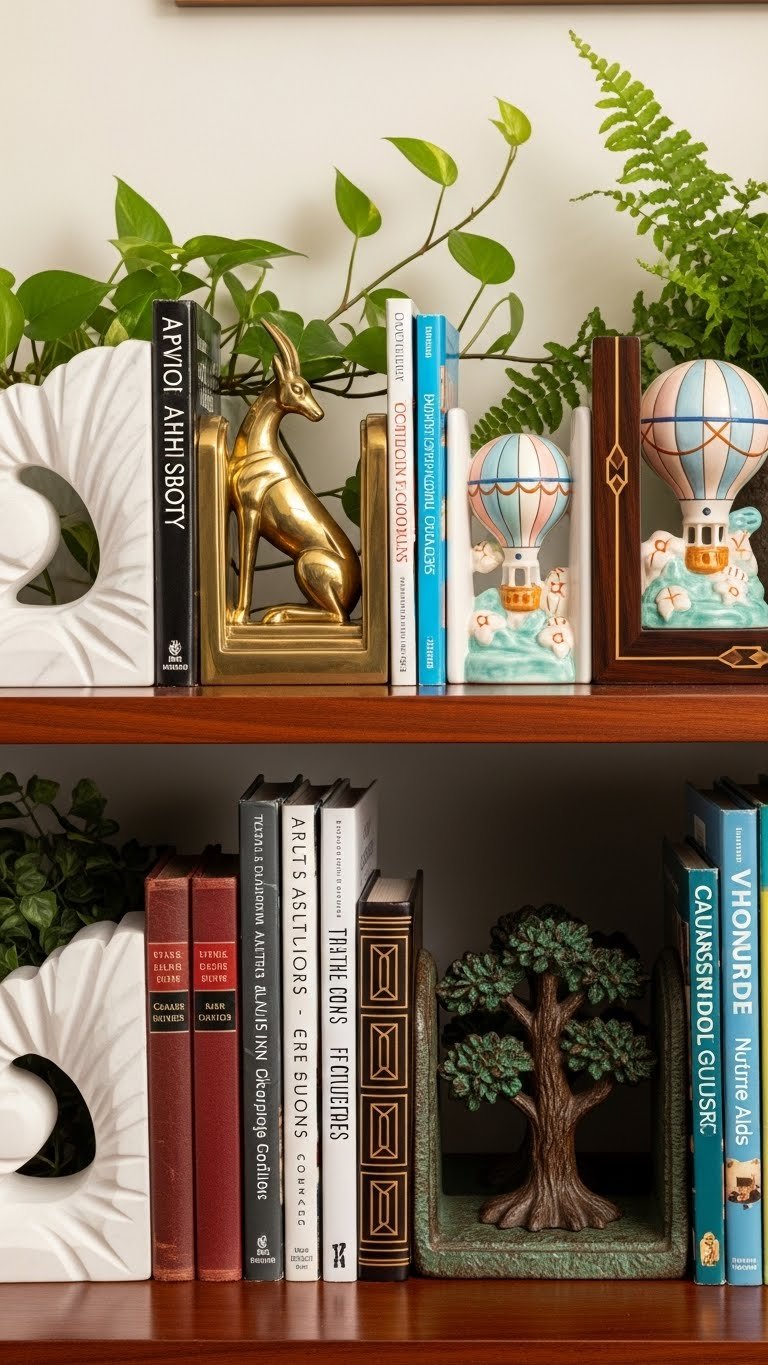
    3. Add Brass or Bronze Library Bookends

    Bookends do more than hold books upright—they’re the jewelry of your shelf. Vintage brass or bronze pieces signal “this collection matters.”

    Hunt for antique or vintage-style bookends on Etsy ($15–$50), AbeBooks, or local antique shops. Look for shapes like classical urns, lion heads, or art deco designs. Mix metals if you want—a brass bookend next to bronze adds richness. Even affordable brass bookends from Target or HomeGoods ($12–$30) read as intentional when styled correctly. You can also hunt thrift stores for solid brass pieces you can polish.

    Pair each bookend with a small stack of your most visually interesting books (leather-bound classics work beautifully). The metal catches light and draws the eye, immediately elevating the entire shelf. Budget 30 minutes to polish and position.

    This small detail makes the difference between “books on a shelf” and “a curated collection.” Guests will notice.

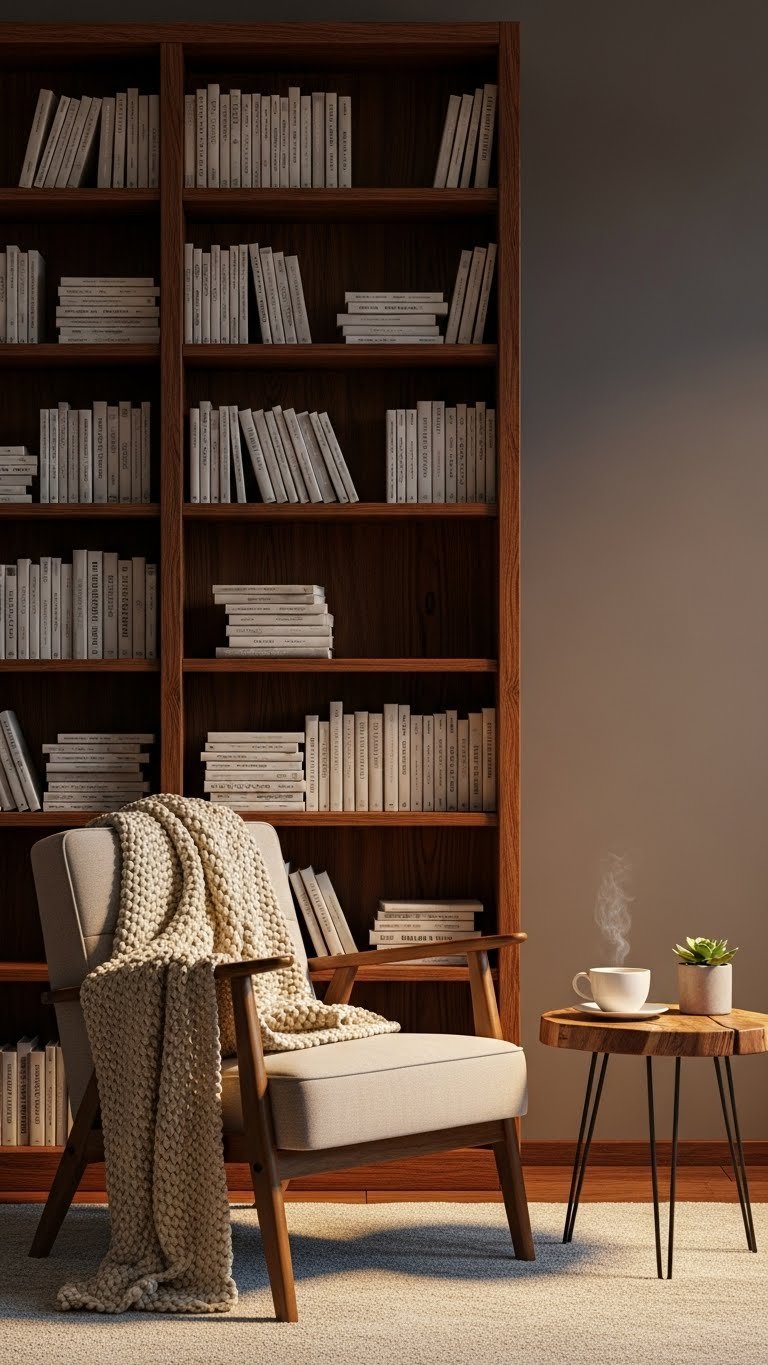
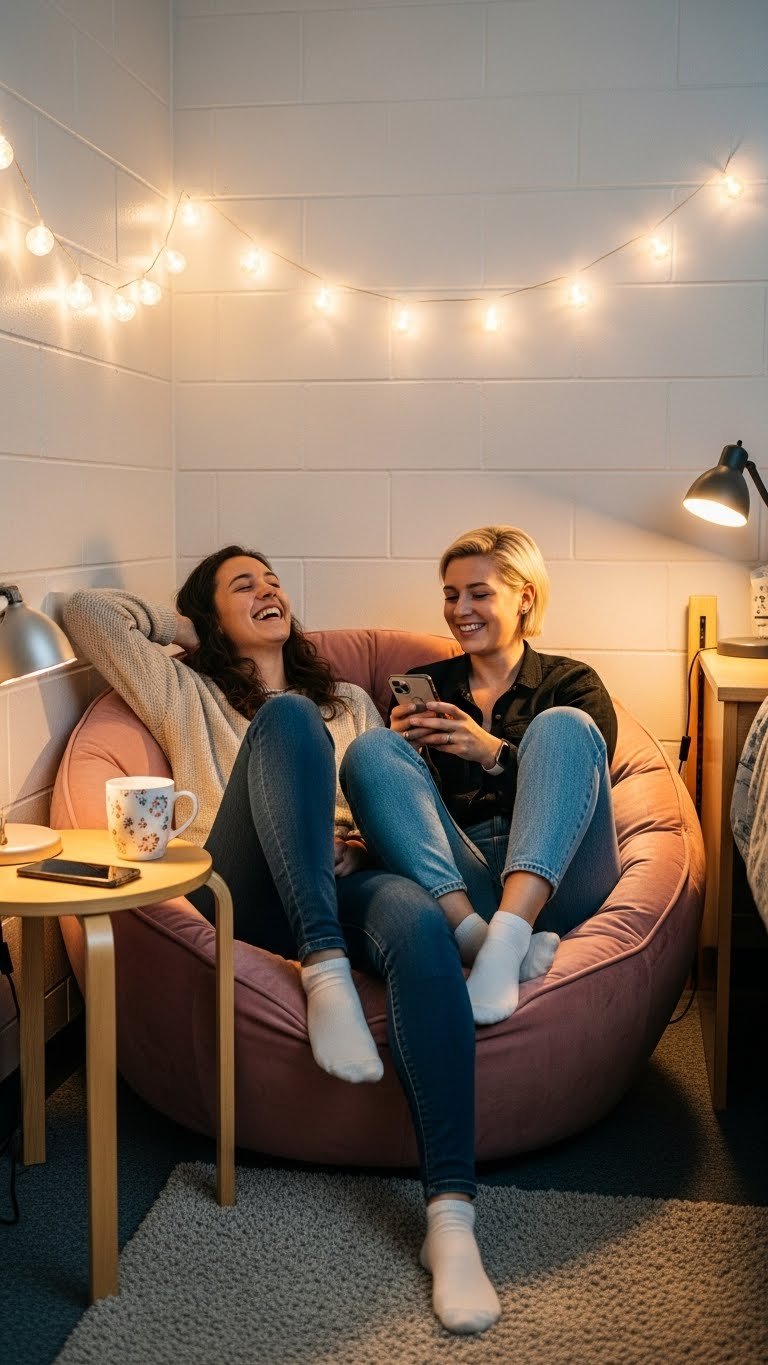
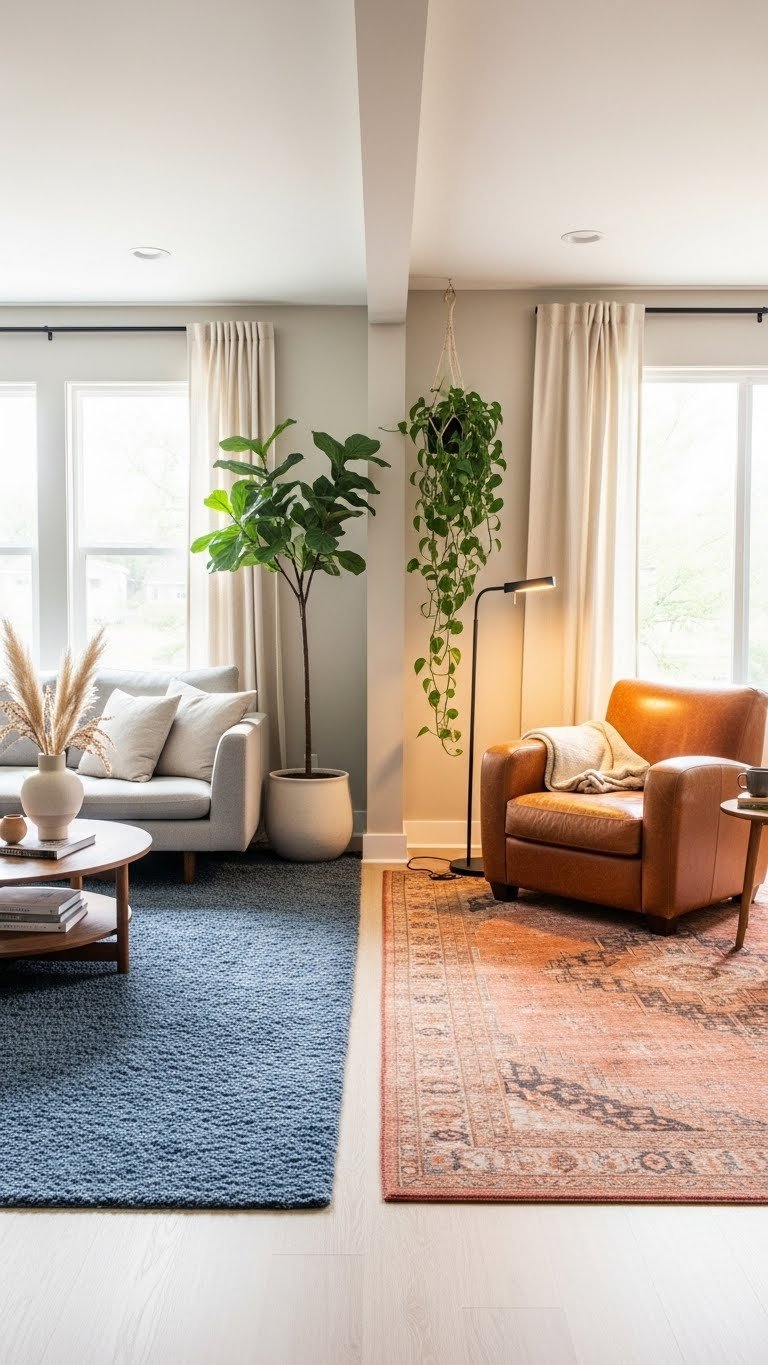
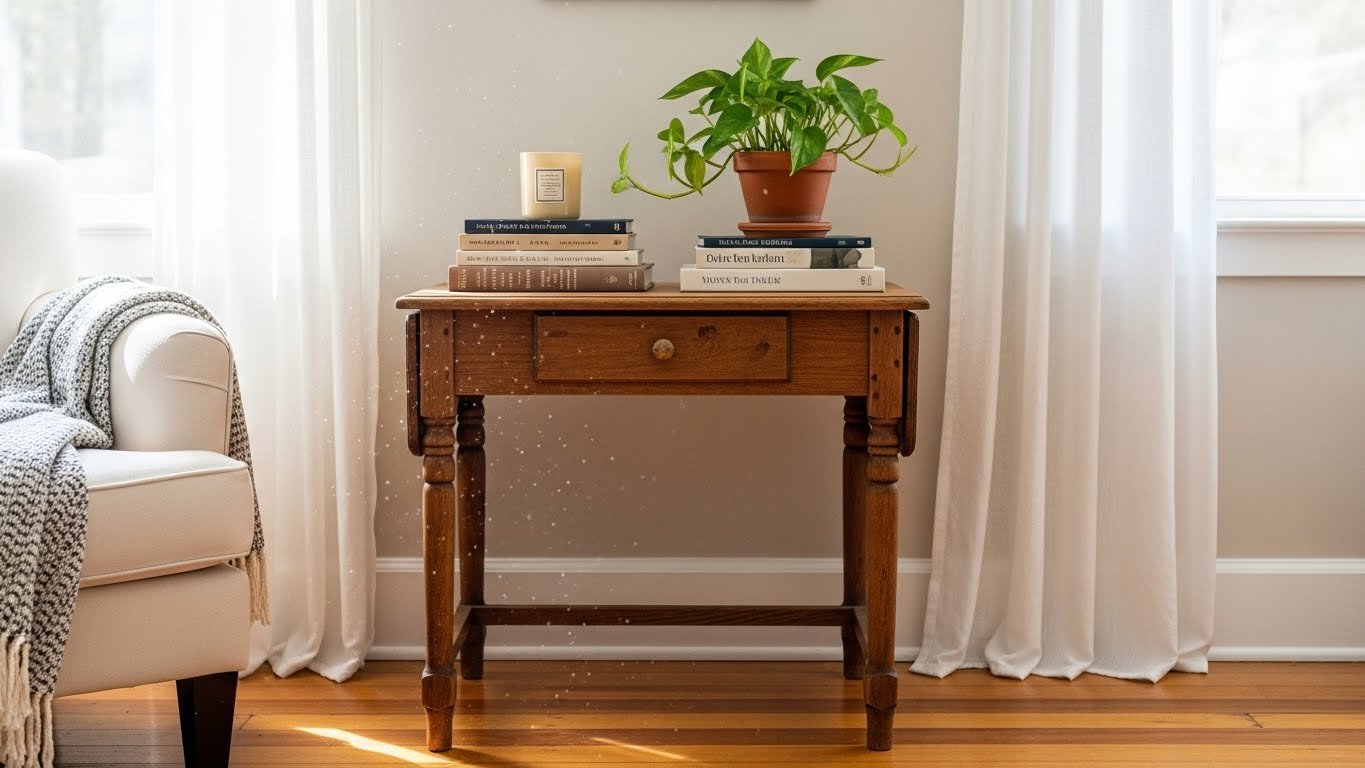
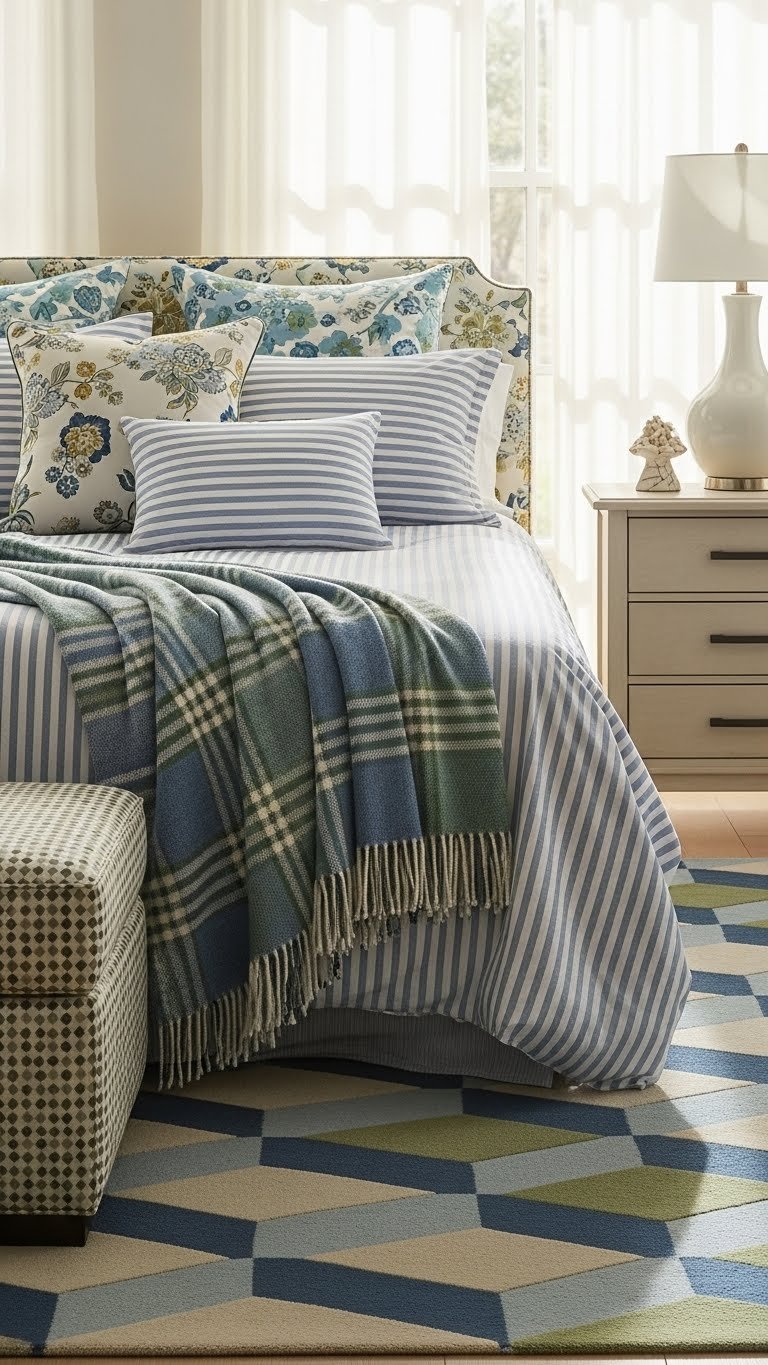
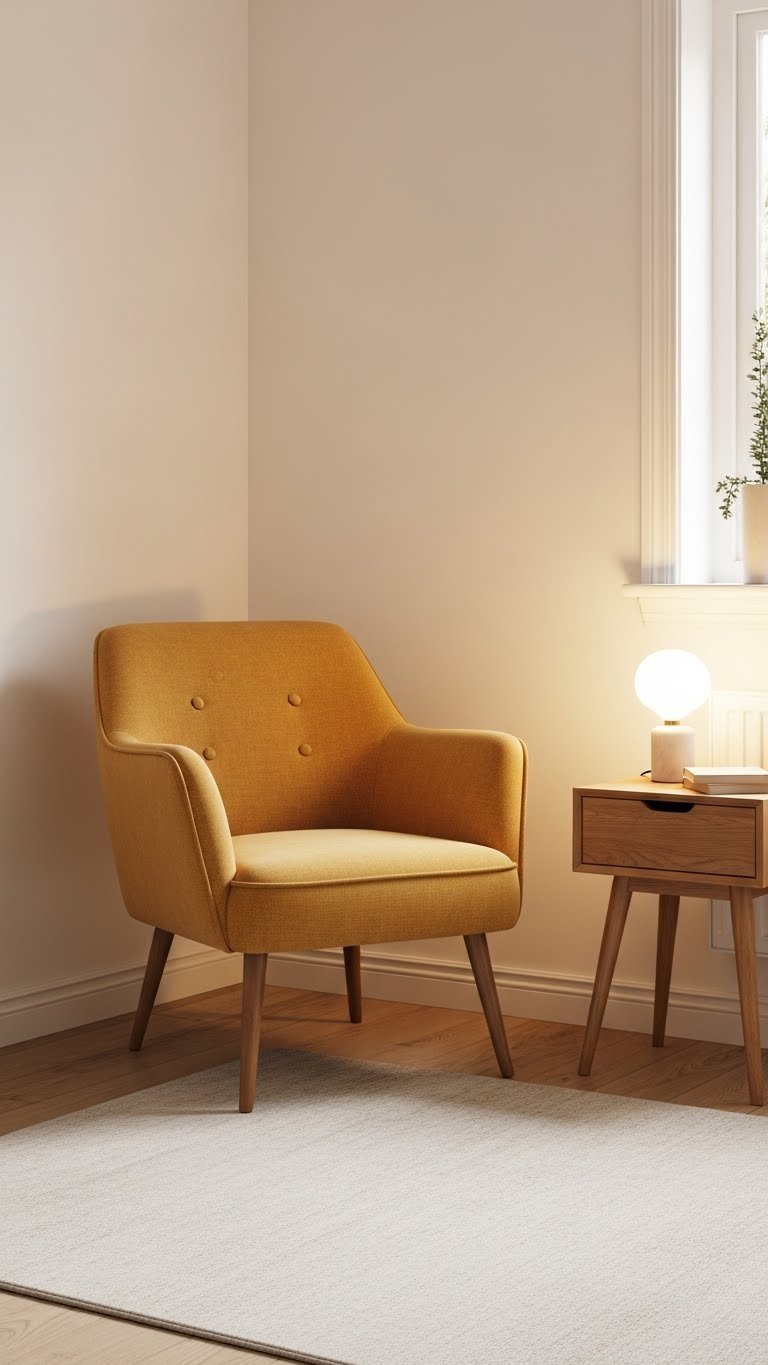
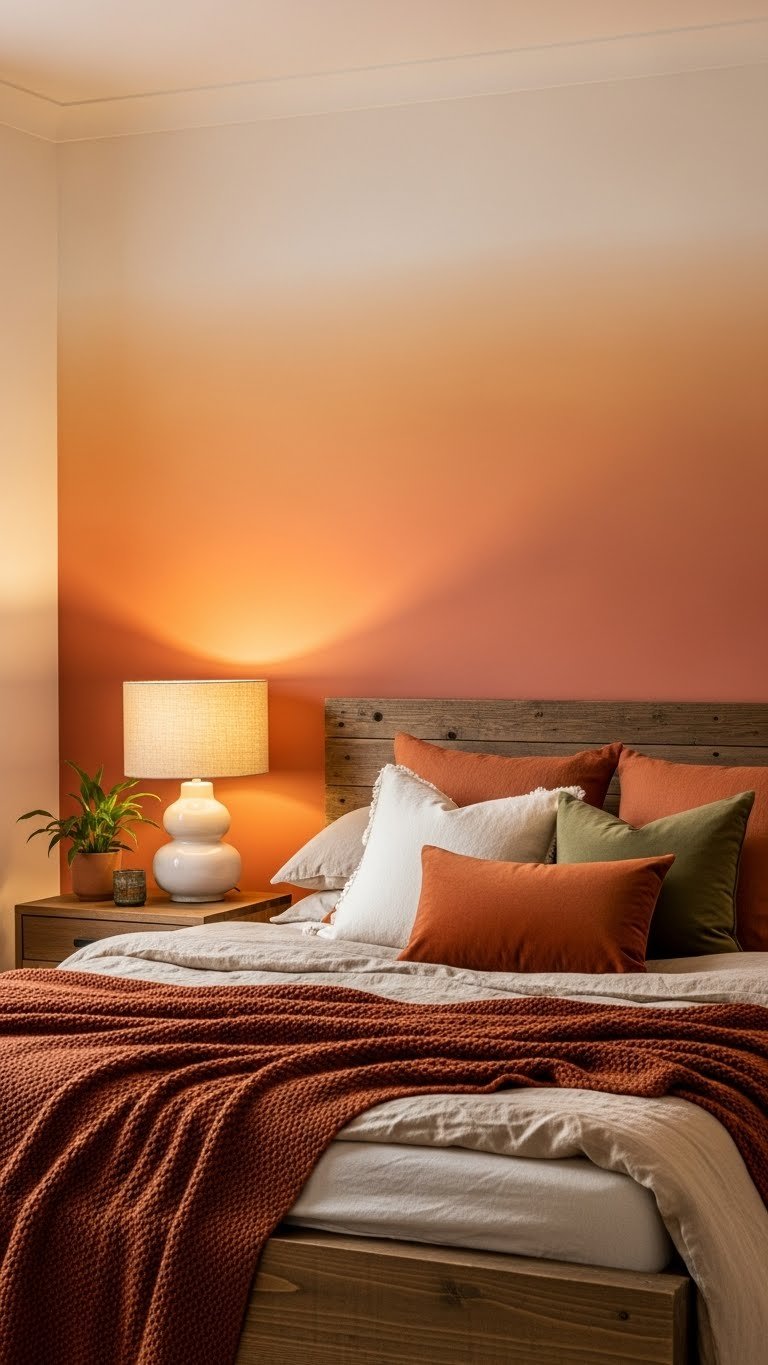
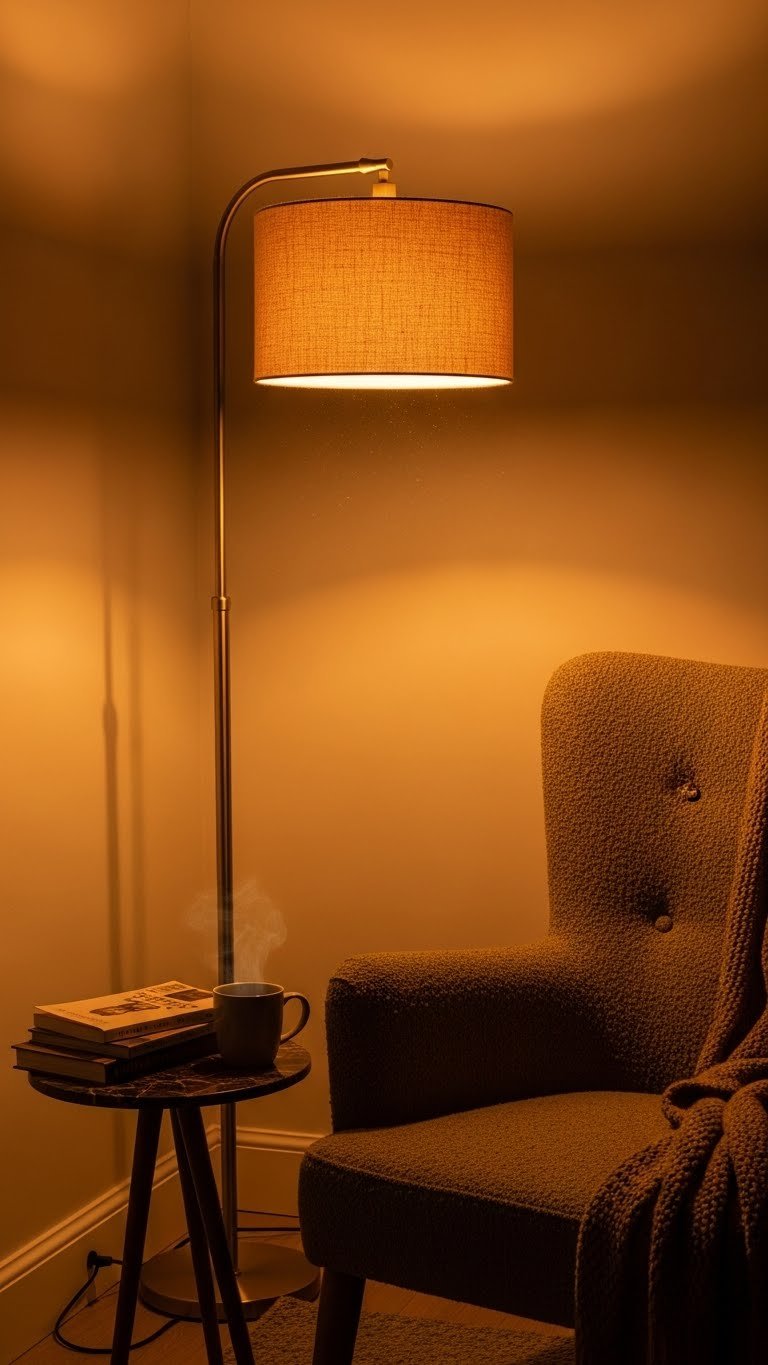
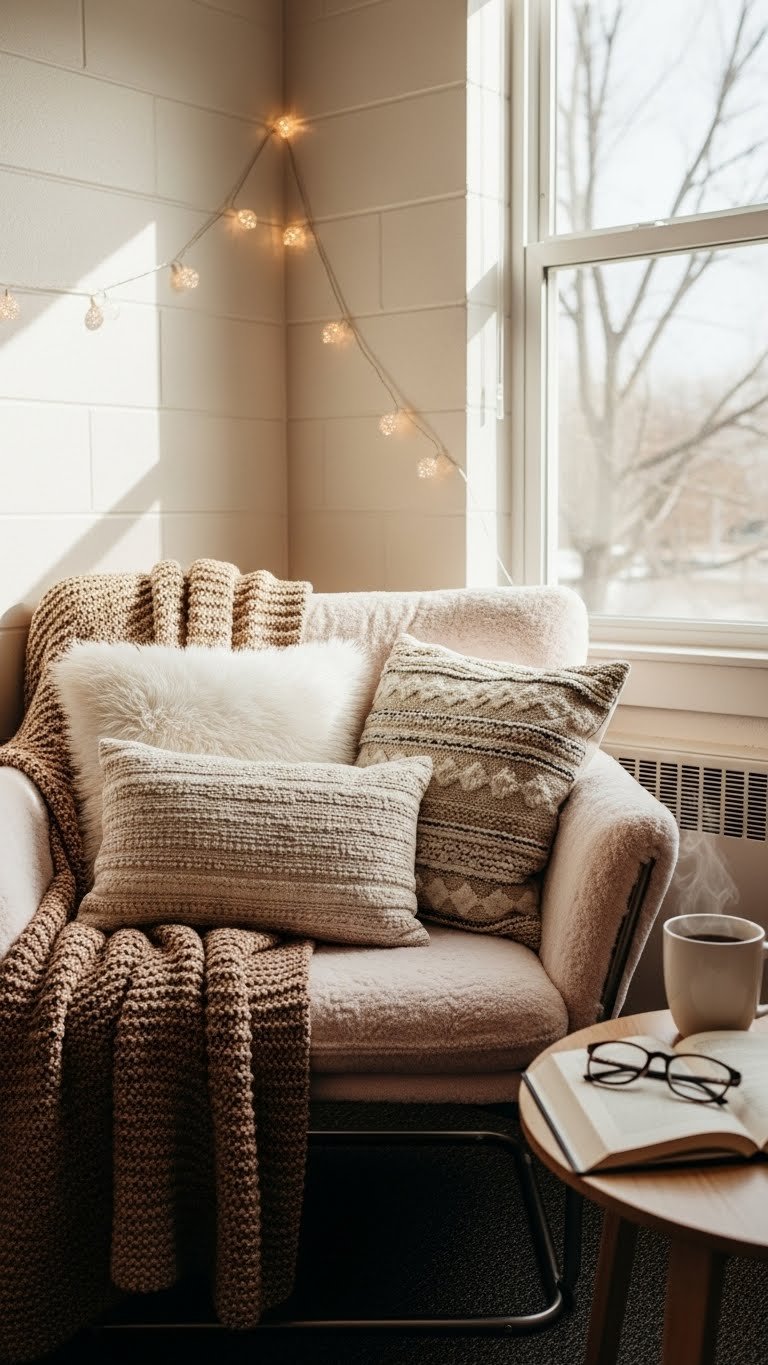
    4. Create a Dedicated Reading Nook Below Shelves

    The most charming libraries have a place to actually read your books. A reading nook below your shelves transforms your space from display-only to lived-in.

    If you have floor space, add a comfortable chair—a vintage wingback in velvet ($200–$600 from estate sales or Wayfair), a modern lounge chair ($150–$400 from IKEA or Article), or even an affordable upholstered armchair from Article or Wayfair ($200–$350). Pair it with a side table for your tea or reading glasses, and a floor lamp with a warm bulb ($30–$100). A throw blanket draped over the arm completes the scene.

    Even a small corner works. Budget two weekends to source pieces and arrange the space comfortably.

    You’ll actually use your library now instead of just looking at it. This is where old-world charm becomes functional luxury—the books are meant to be read, lived with, and enjoyed.

    5. Hunt for Vintage Book Collections at Estate Sales

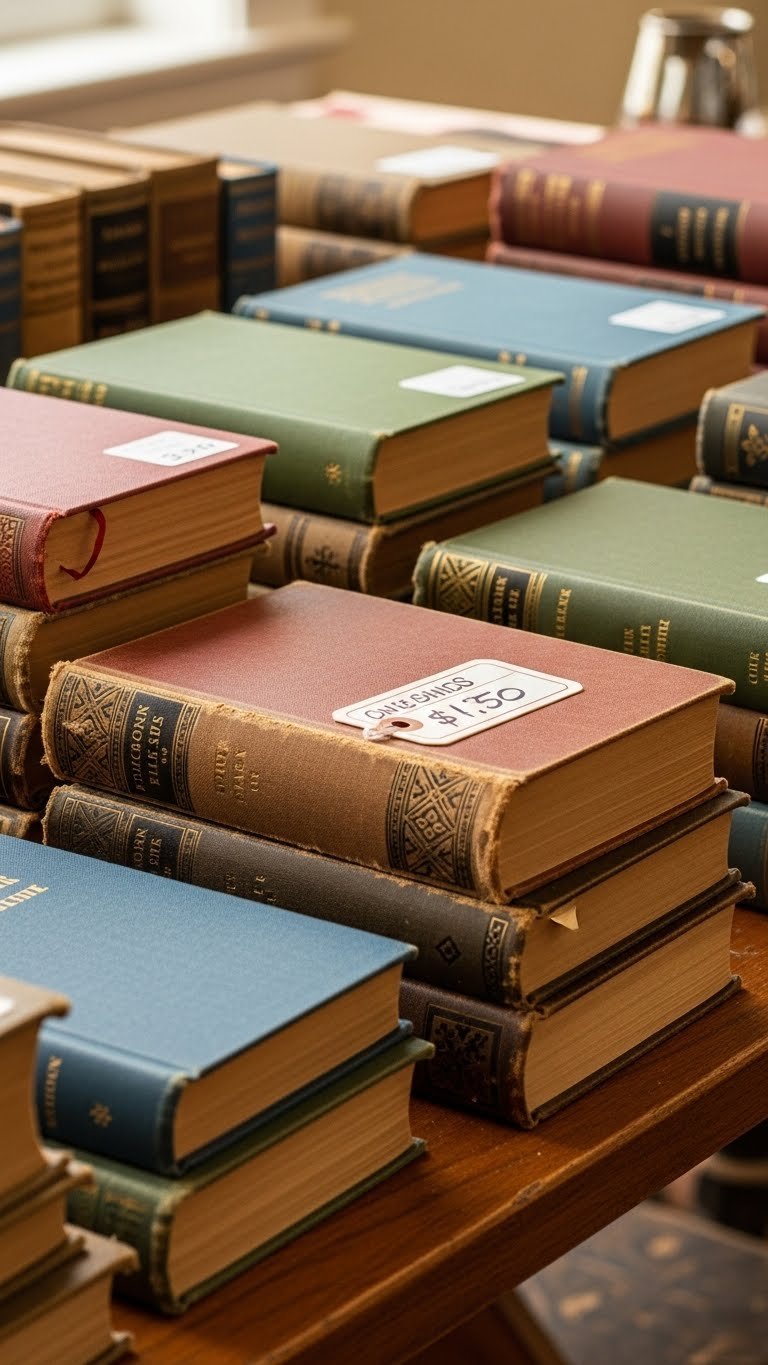
    The most authentic vintage library shelves are built from real collections found over time. Estate sales and auctions are treasure troves of genuine old books.

    Sign up for alerts on EstateSales.net, Craigslist, or Facebook Marketplace in your area. Arrive early and look for boxes of books priced by the lot ($5–$50). Check the spines for interesting typography, faded gold lettering, and cloth bindings—these signal real age and character. Don’t worry if you haven’t read them; the visual authenticity matters more for a vintage aesthetic.

    Spend one Saturday morning hitting 2–3 sales. You’ll spend $20–$100 but walk away with 30–50 genuinely aged books that would cost 3–4x as much buying individually.

    Books sourced this way look earned, not curated by an algorithm. Your shelves will have the patina of a real collector’s library, not a staged Instagram set.

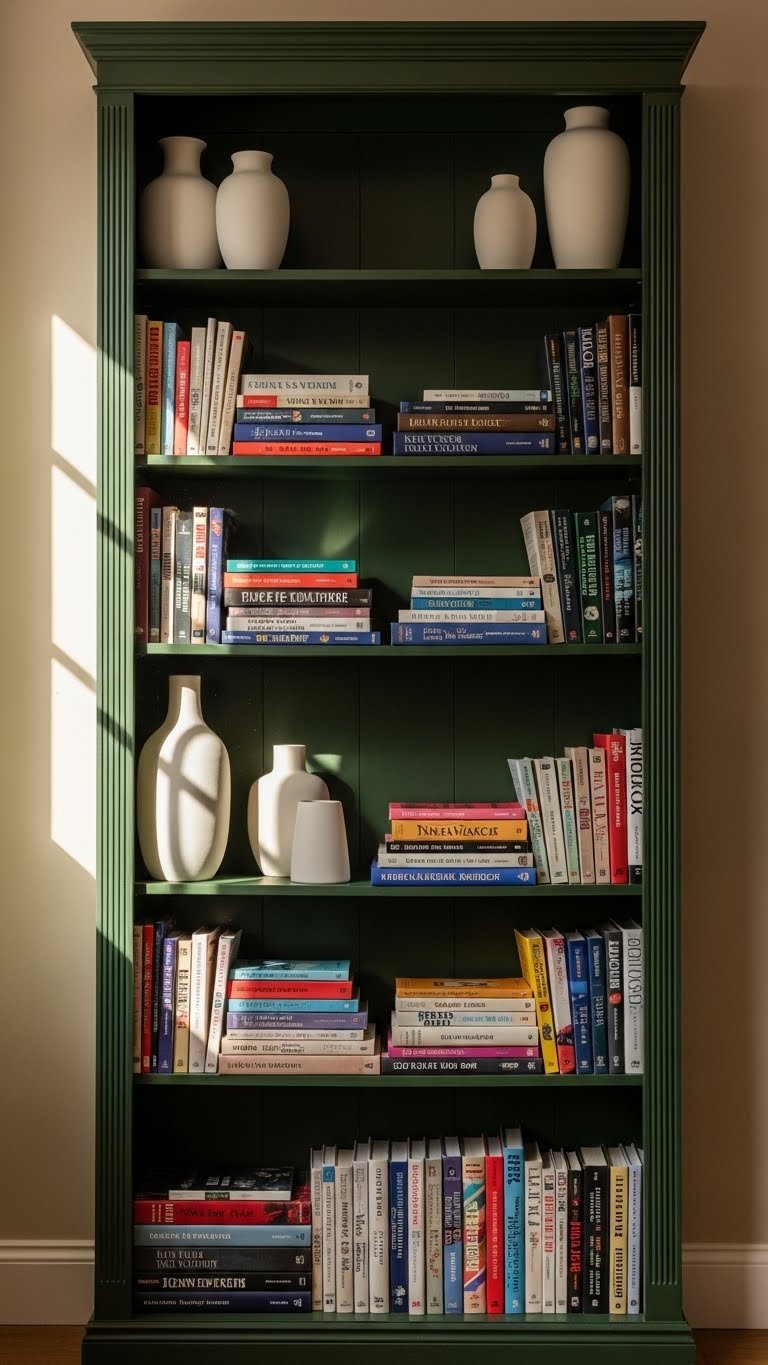
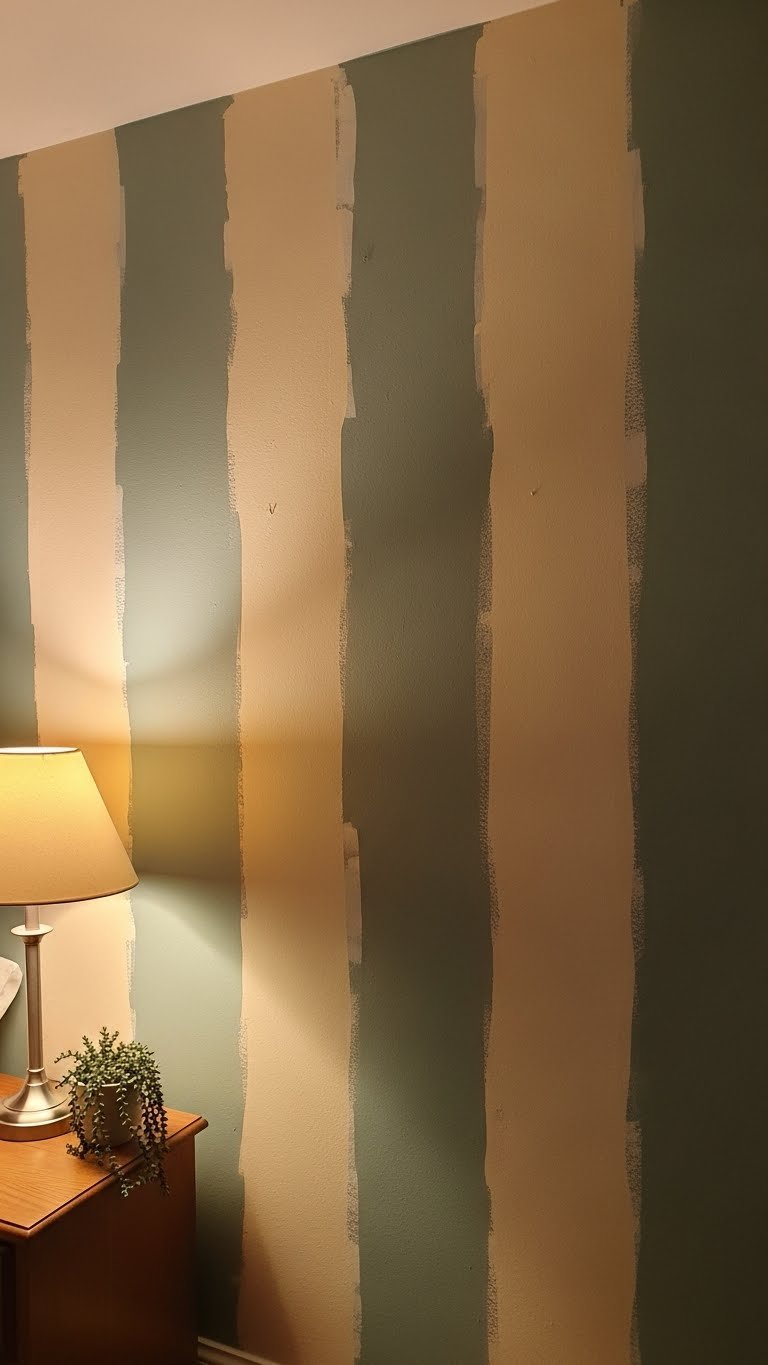
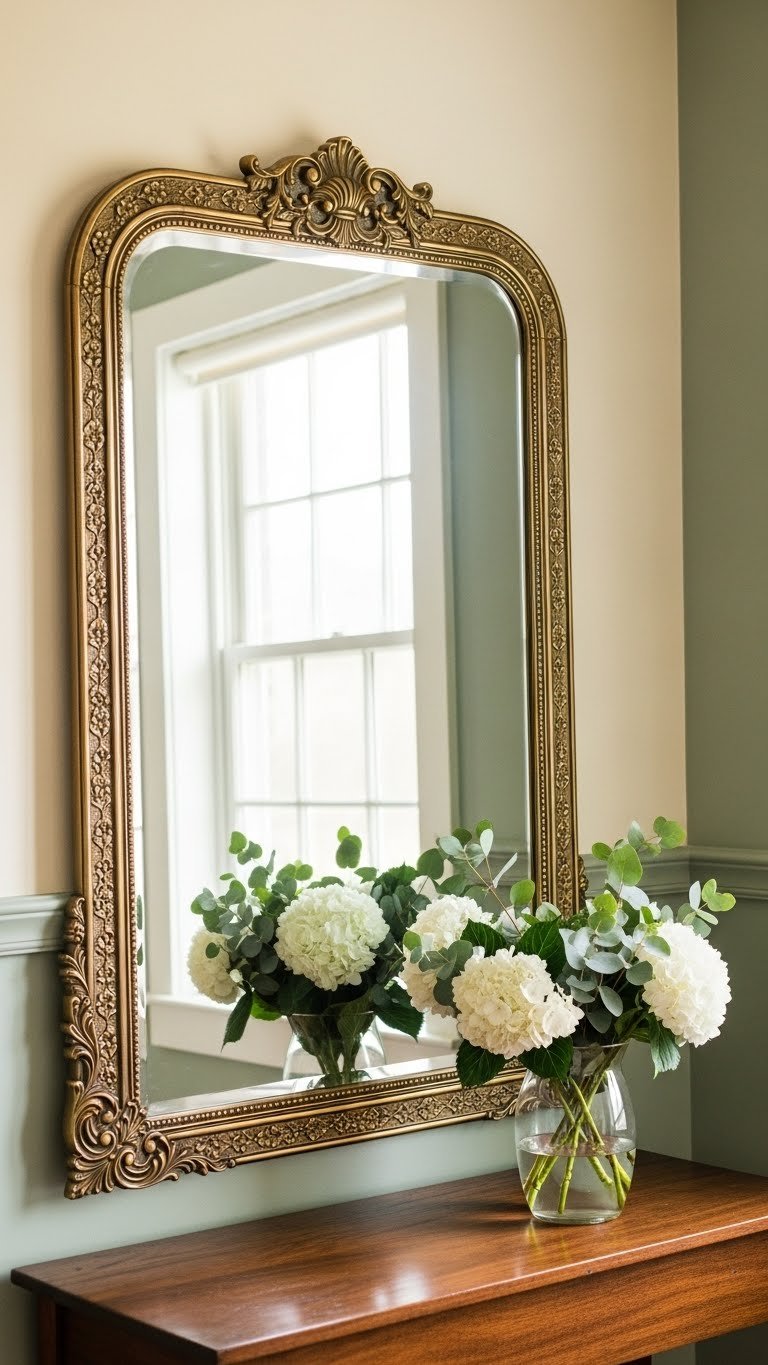
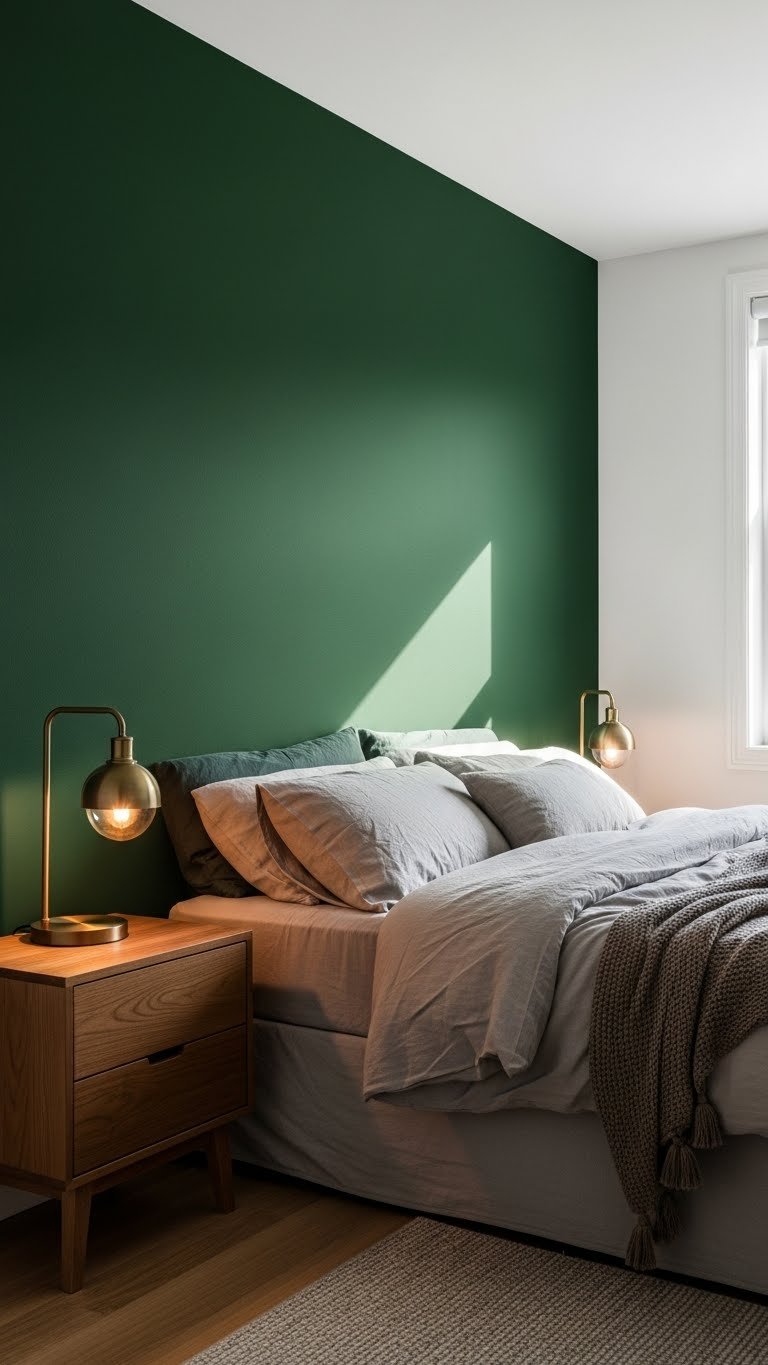
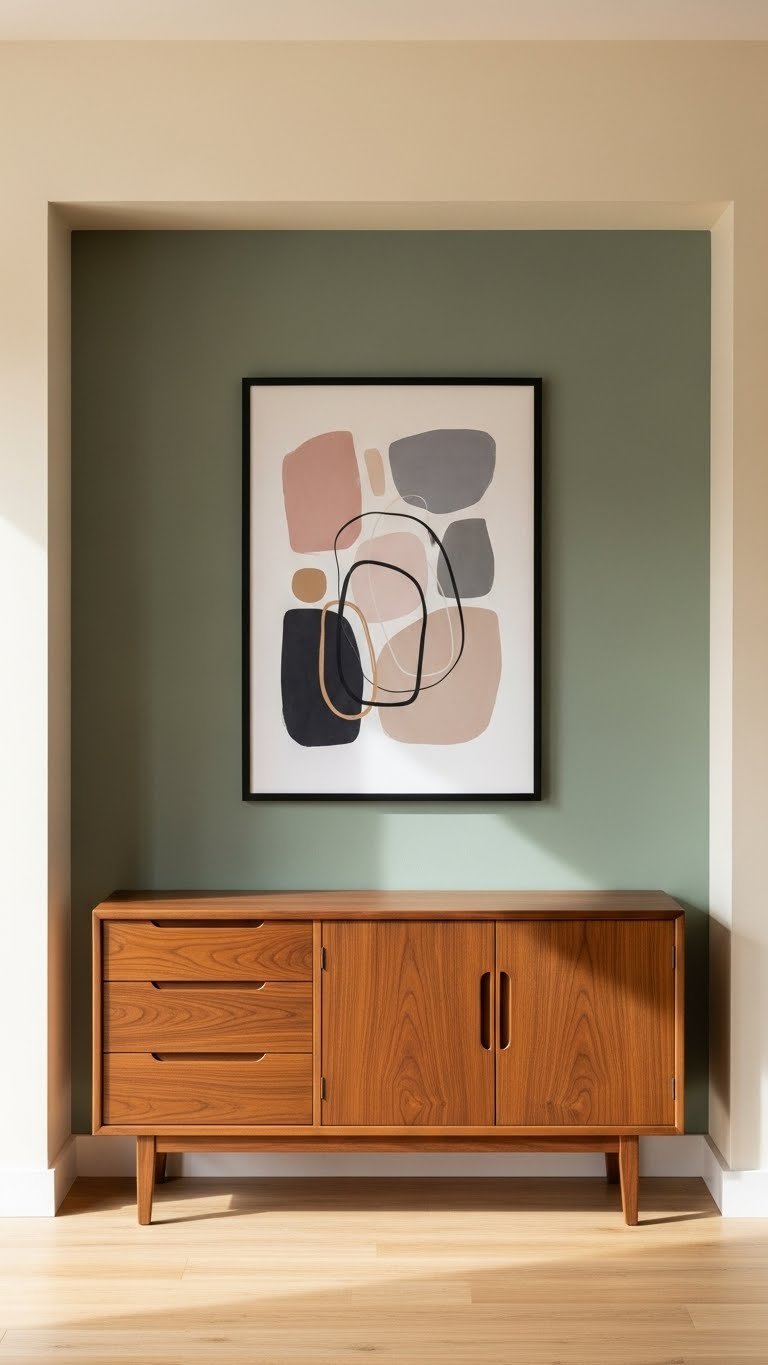
    6. Paint Shelves Cream or Deep Jewel Tones

    The wall color behind your books matters as much as the books themselves. Deep jewel-tone painted shelves feel like old library interiors.

    If you have built-in shelves, a coat of deep emerald, navy, or forest green paint instantly ages them (Benjamin Moore, Sherwin-Williams, or budget-friendly Rustoleum, $25–$50 per can). For maximum vintage impact, paint just the back wall of built-ins cream or soft white while the sides stay the jewel tone. This creates sophisticated depth.

    Rental? Paint the wall behind your shelves instead ($40–$80 for primer and paint). This creates the same visual effect without touching the shelves themselves.

    Allow 3–4 hours for painting plus drying time. The payoff is immense—suddenly your books have a gallery-like backdrop that makes them the stars.

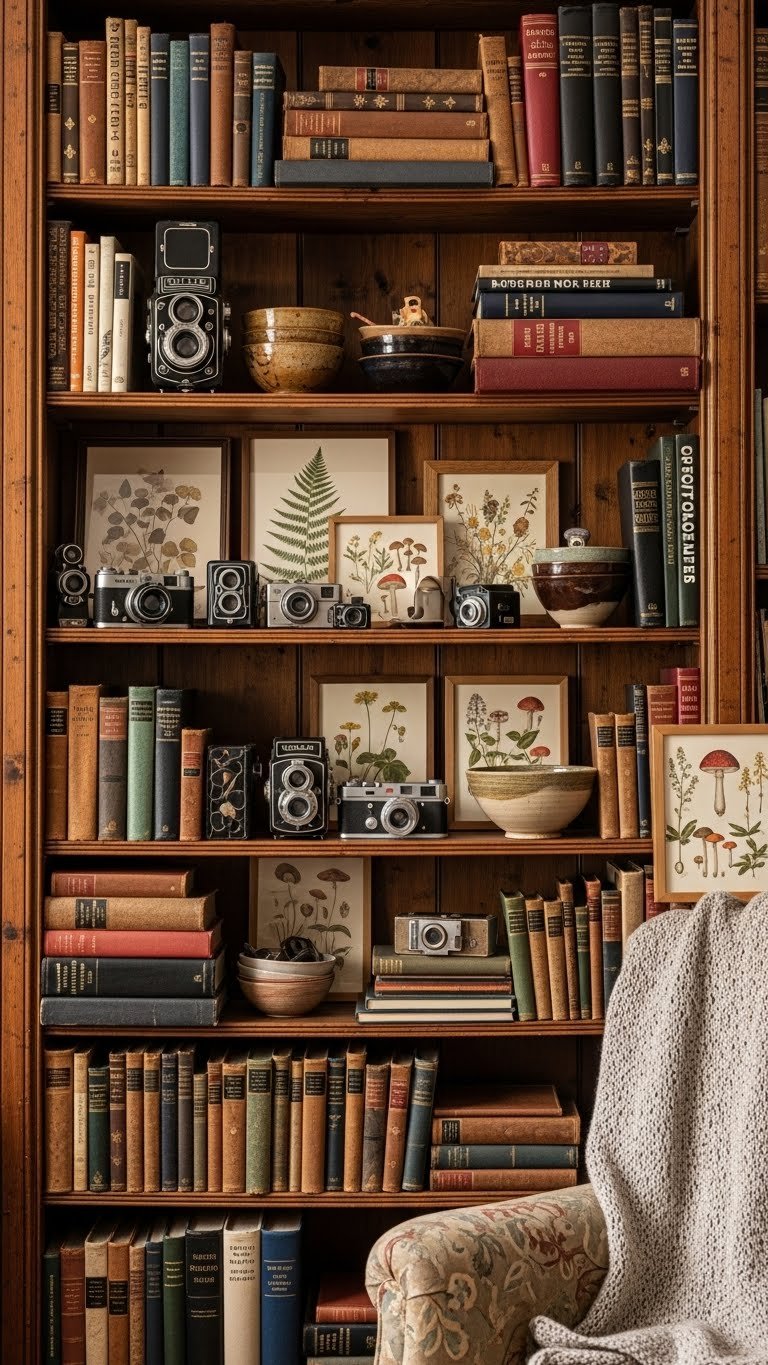
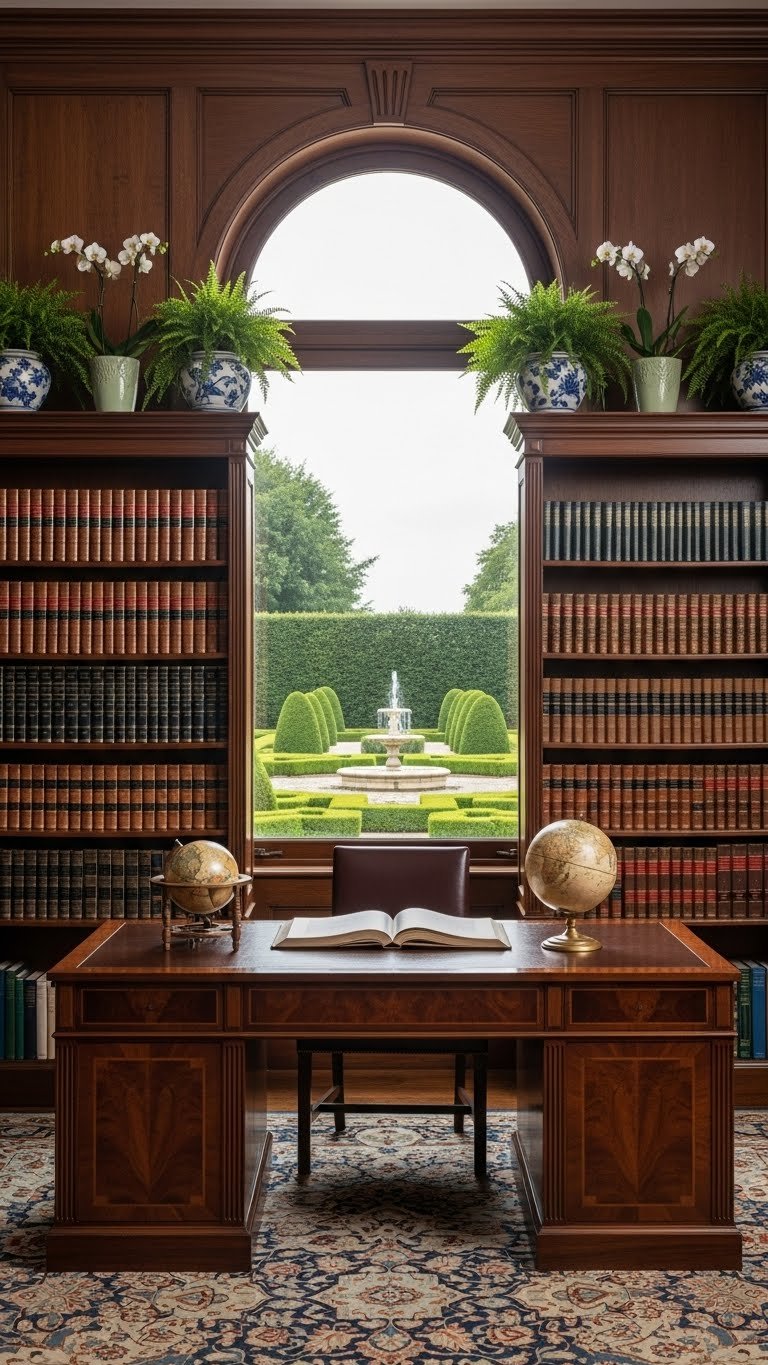
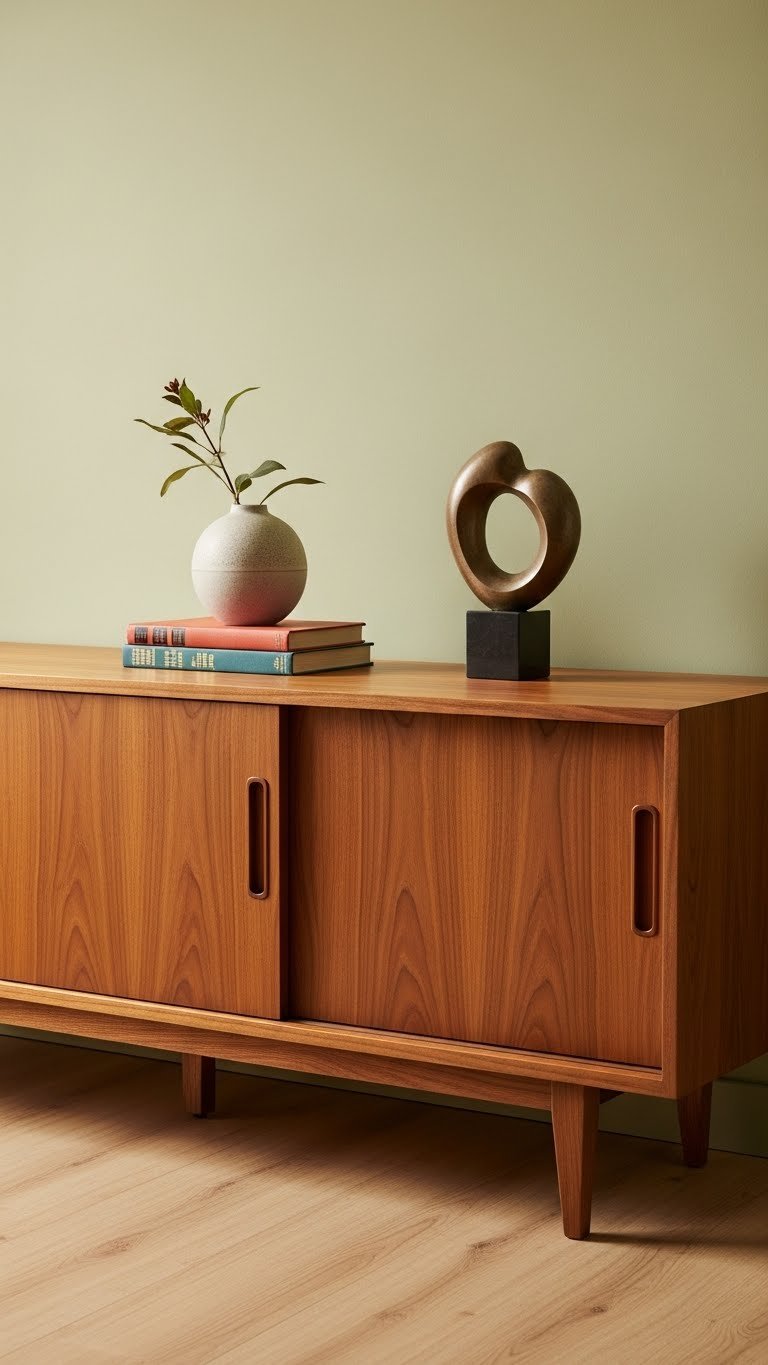
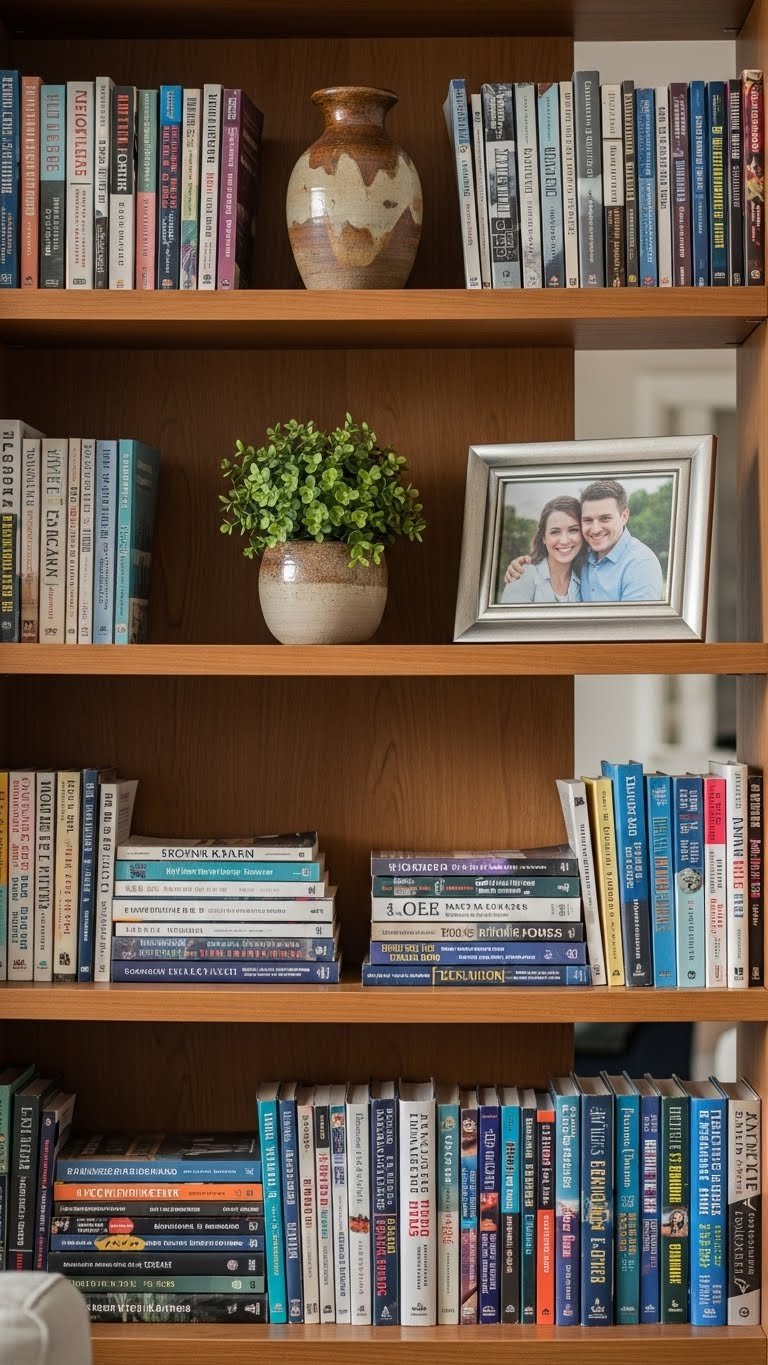
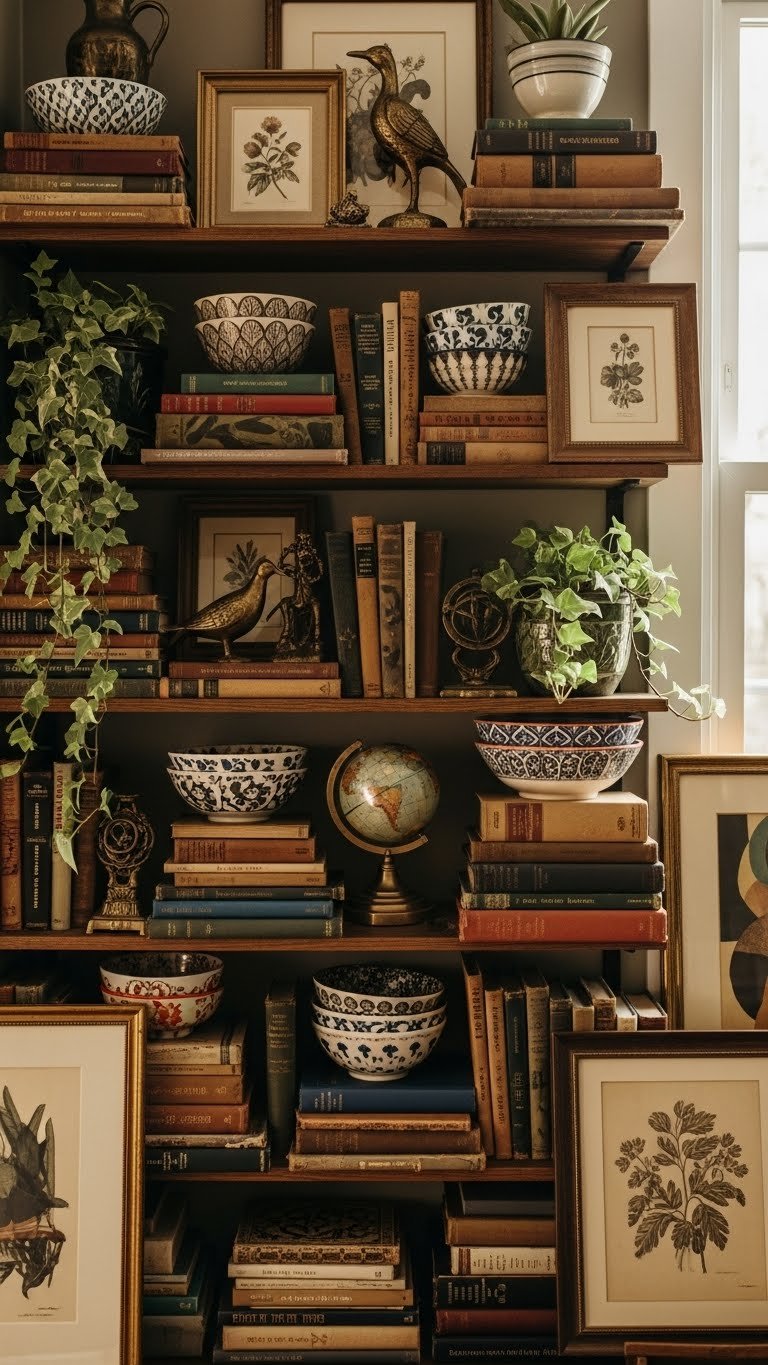
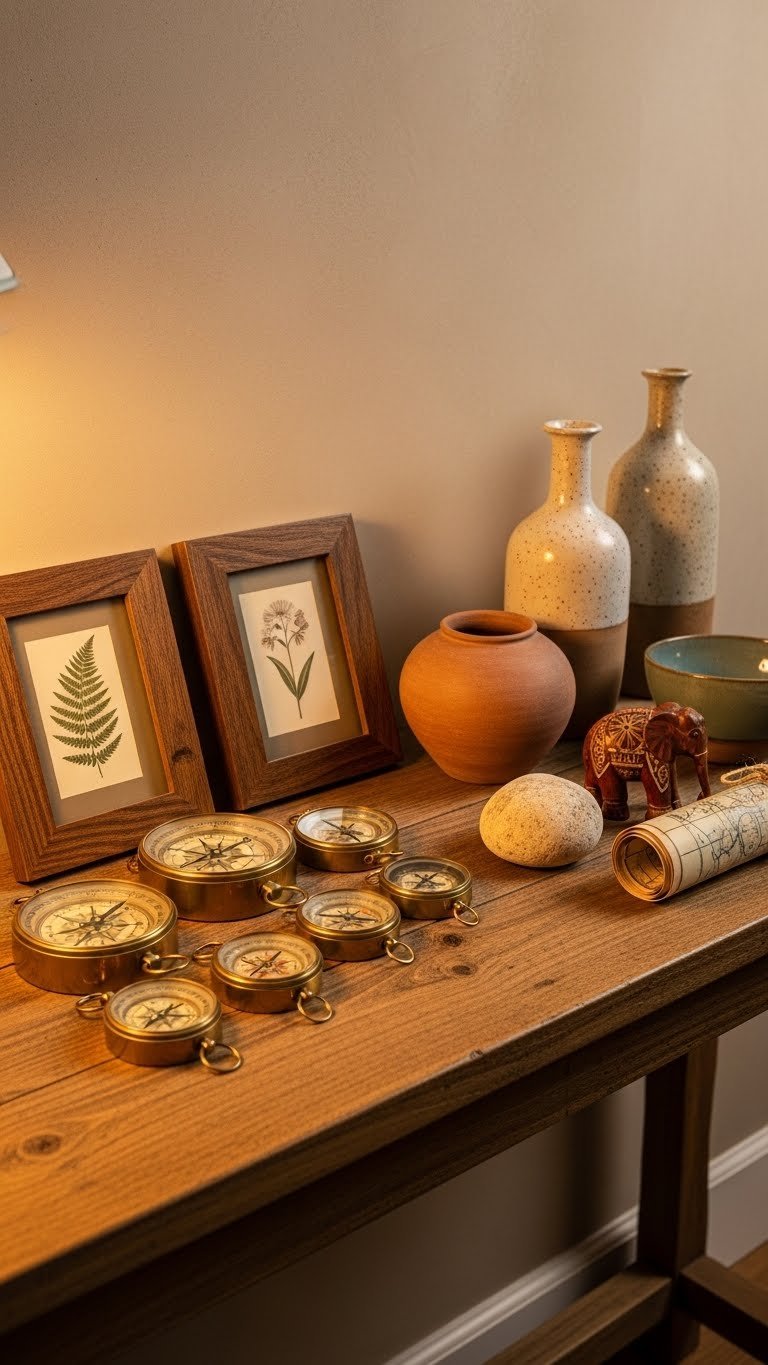
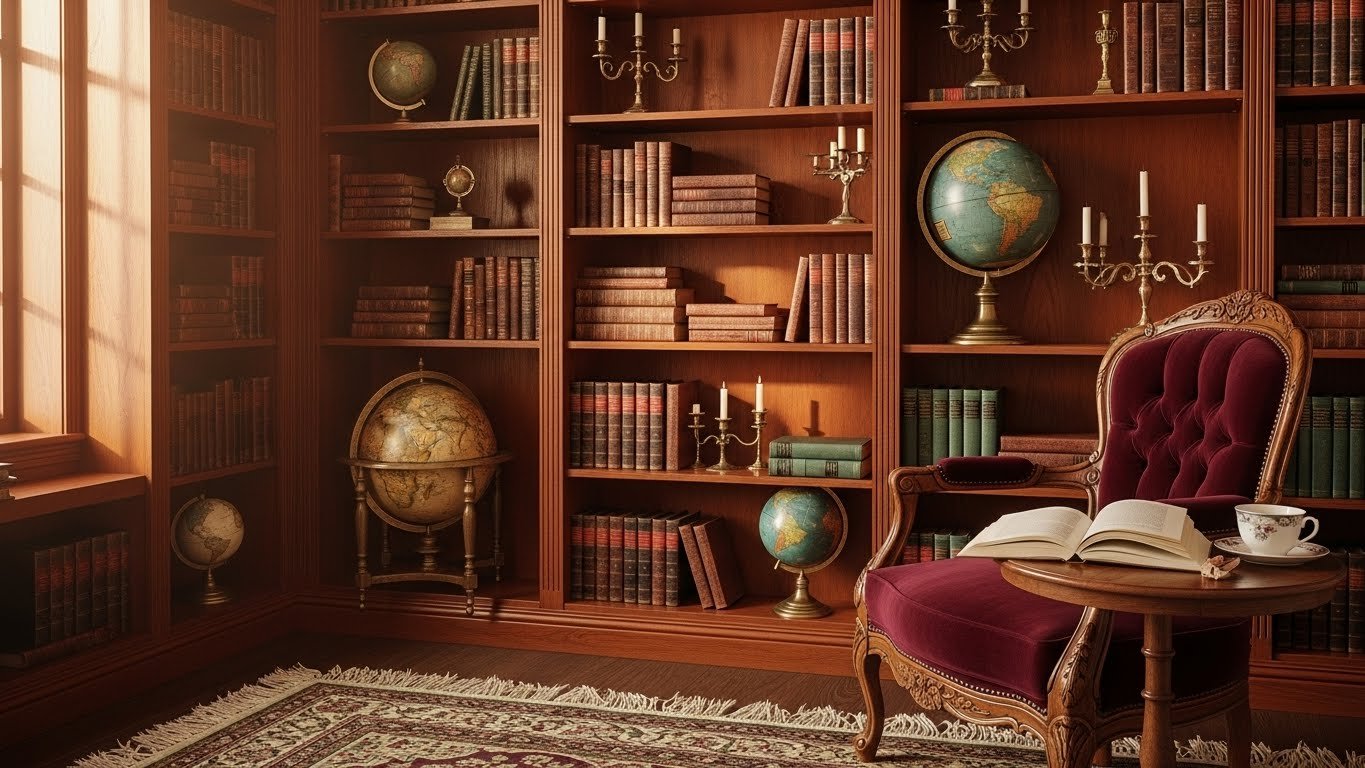
    7. Display Vintage Globes and Maps Between Books

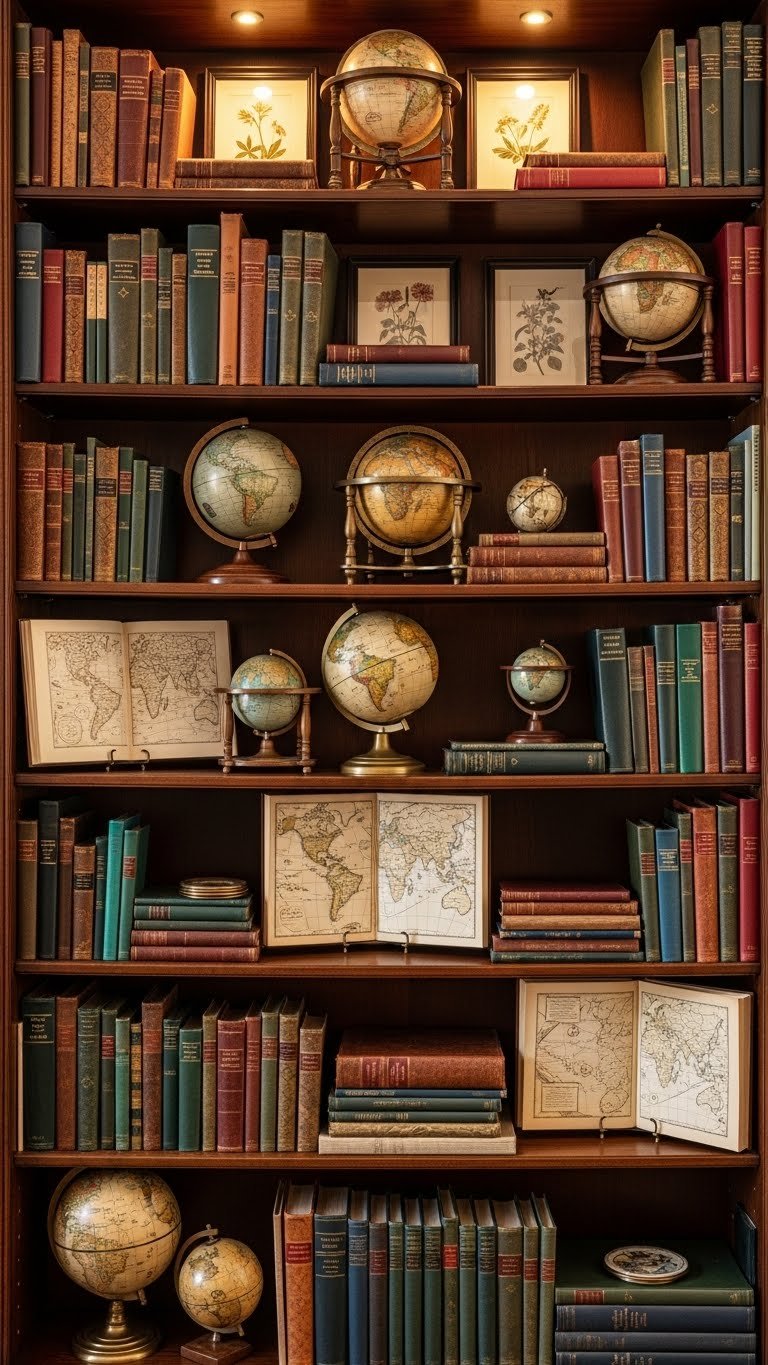
    Books alone, even beautiful ones, can feel flat. Vintage globes, maps, and natural objects break up the monotony and deepen that “well-traveled scholar” vibe.

    Scout Etsy, AbeBooks, antique shops, and thrift stores for small brass globes ($10–$40), vintage fold-out maps ($5–$25), or old botanical prints ($15–$60). You don’t need many—just 4–6 pieces strategically placed. Tuck a globe between stacks, lean a map against the back wall, rest a small framed print on top of a book stack.

    Budget an hour to style and $40–$150 for pieces. This creates visual interest without clutter.

    The effect is immediate: your shelf now tells a story of curiosity and exploration. It reads as a collector’s space, not just a repository for books.

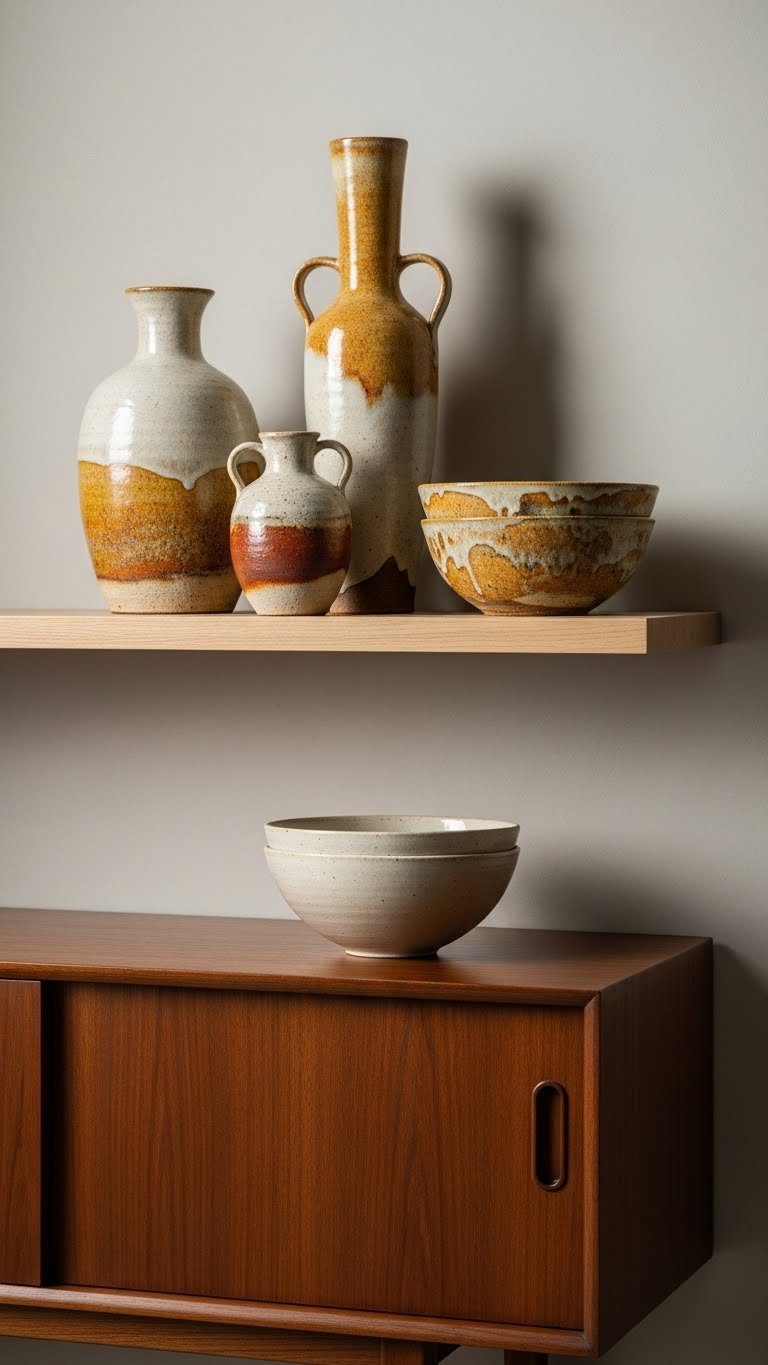
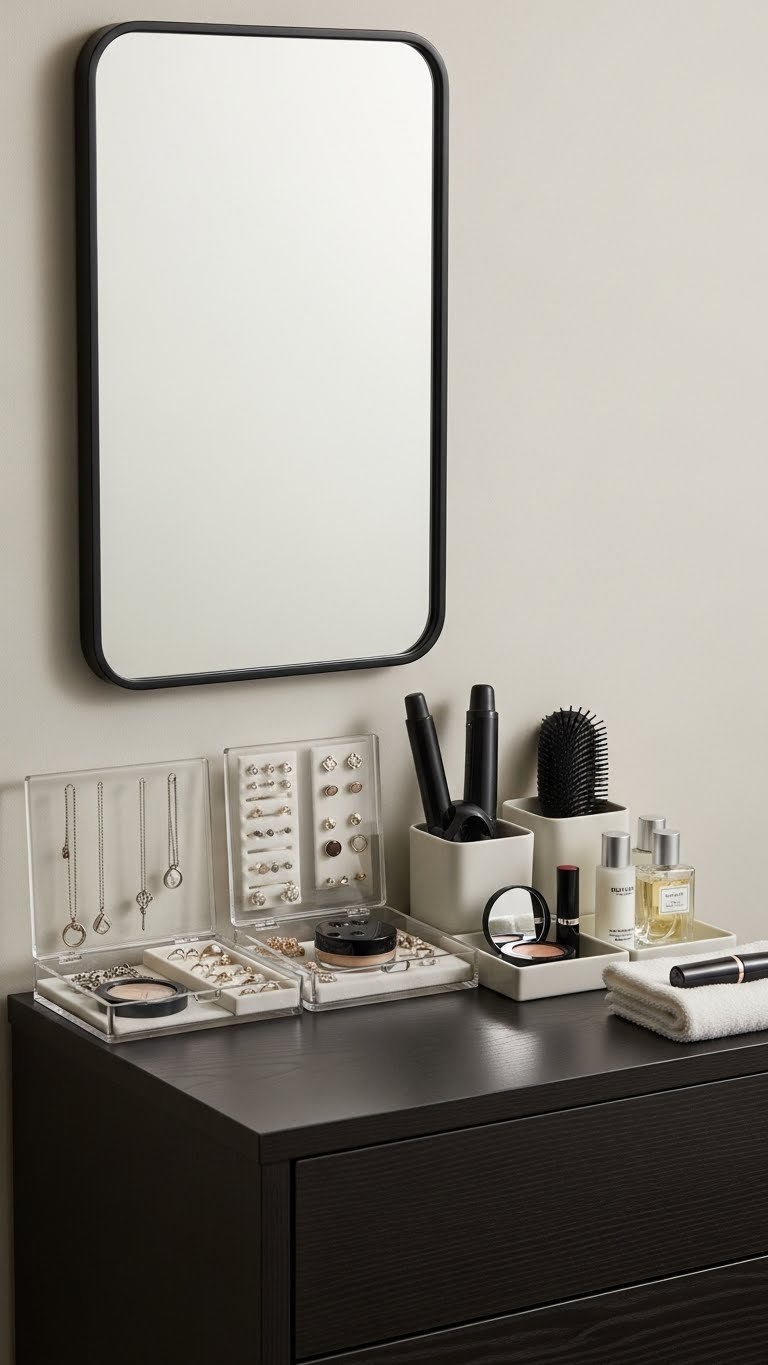
    8. Mix in Decorative Boxes and Vintage Tins

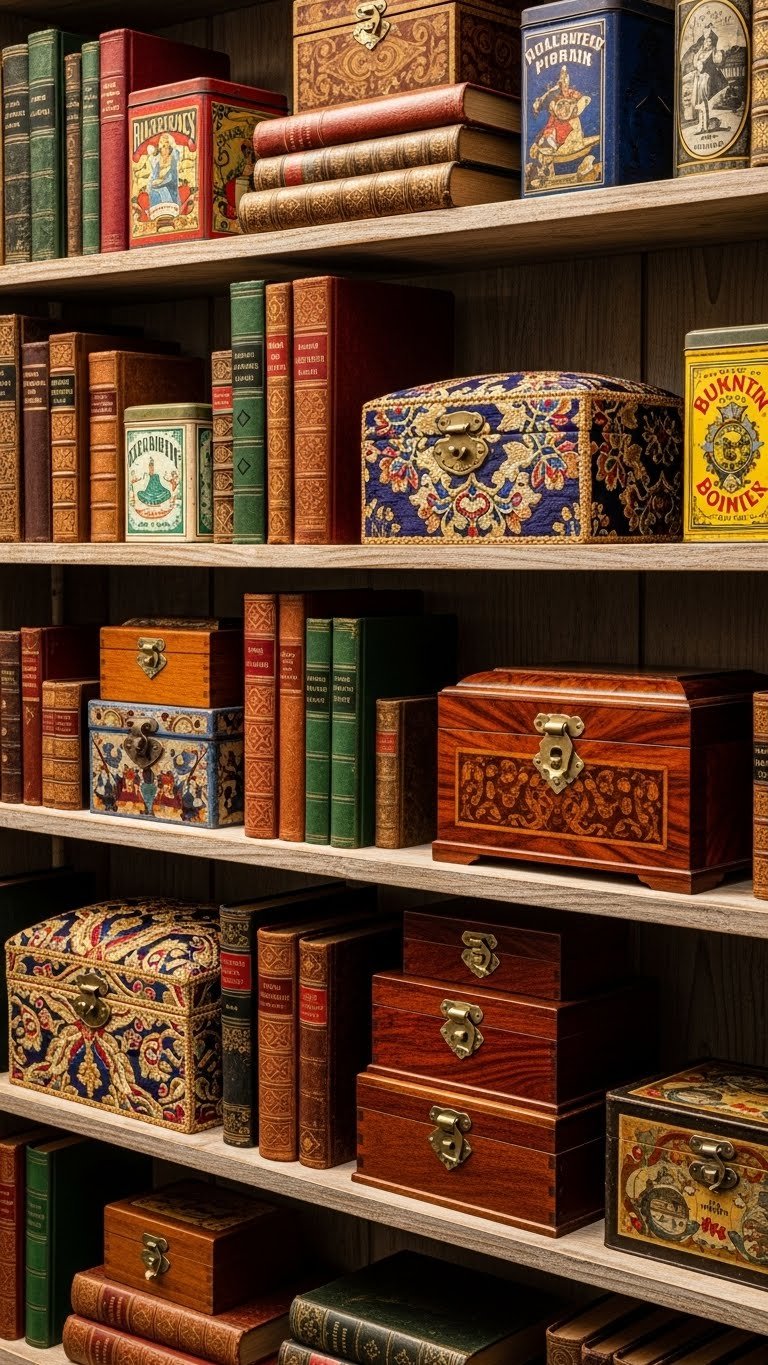
    Decorative storage breaks up book spines and adds dimensional texture to your shelves. Vintage boxes and tins look expensive but cost almost nothing at thrift stores.

    Hunt Goodwill, Salvation Army, or local antique shops for small decorative boxes, leather boxes with brass corners, or vintage tins ($2–$8 each). Look for items with patina, worn leather, or interesting hardware. You can also find affordable options on Amazon ($10–$25) or Wayfair if hunting local feels like too much.

    Mix them into your shelves horizontally—place a box between stacks of books, or lean a small tin against the shelf backing. Budget an hour to integrate 4–6 pieces.

    This adds visual richness and practical storage for reading glasses, small journals, or bookmarks. Your shelf suddenly looks like it contains treasures, not just books.

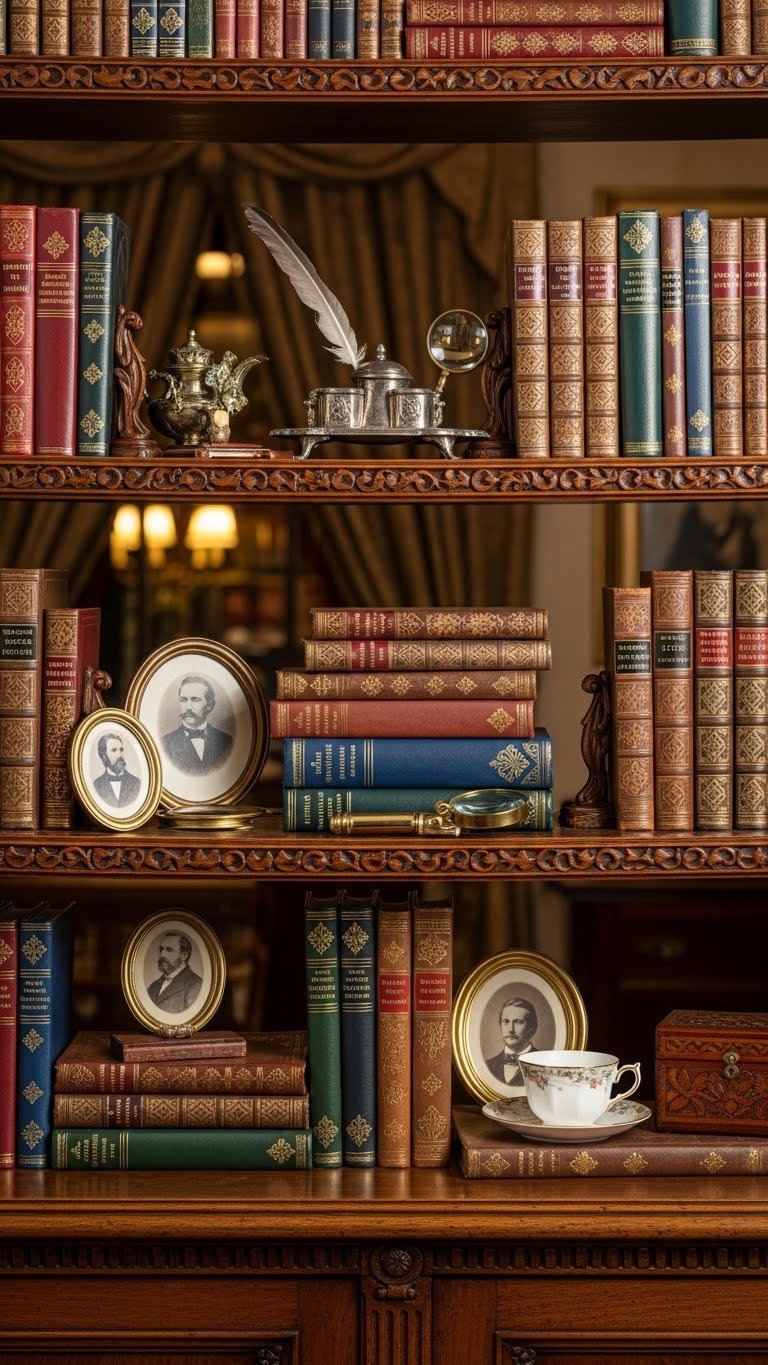
    9. Incorporate Vintage Inkwells and Writing Tools

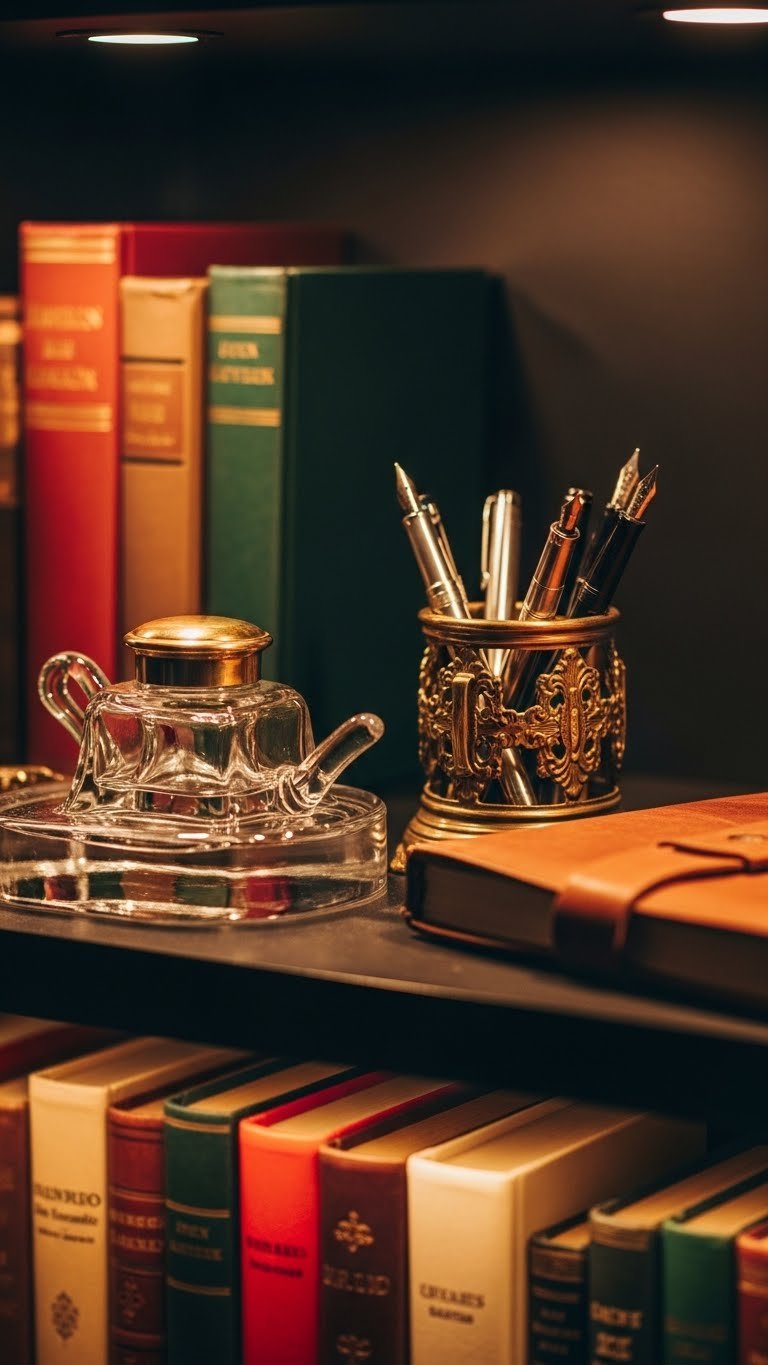
    Old-world library vibes are enhanced by touches of the writing life—inkwells, vintage pens, and journals scattered among reading material.

    Find antique or reproduction inkwells on Etsy ($15–$50), vintage fountain pens at pen shops or antique stores ($10–$100), and leather journals on Amazon or Barnes & Noble ($20–$60). You don’t need working inkwells—the visual authenticity is what matters.

    Arrange a small cluster: inkwell in the center, 2–3 pens nearby, journal leaning against a book stack. This takes 15 minutes to style and costs $40–$150 depending on what you source.

    Suddenly your shelf looks like the desk of a 19th-century novelist. It’s theatrical in the best way—it creates atmosphere and invites people to imagine the stories behind your collection.

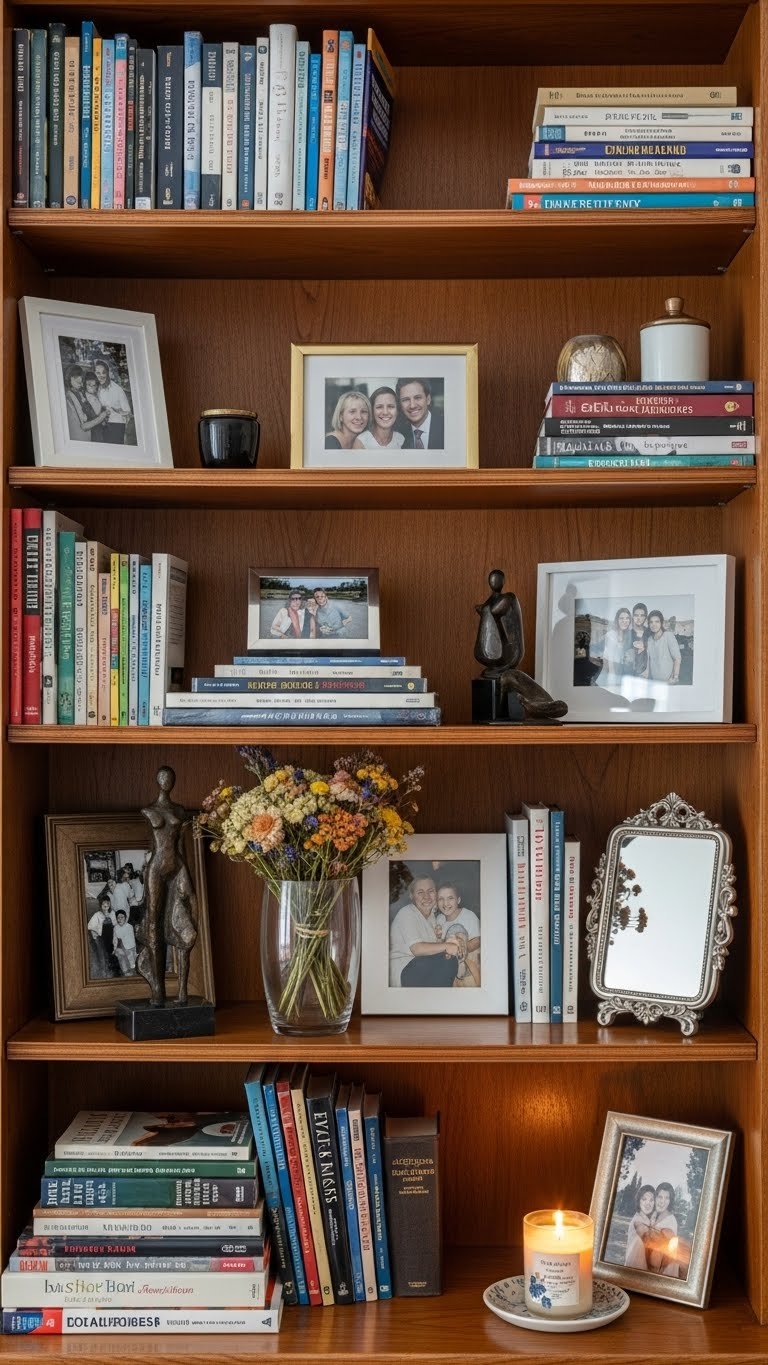
    10. Stack Books Horizontally on Upper Shelves

    How you arrange books matters. The most sophisticated vintage libraries mix vertical and horizontal stacking to create rhythm and show off beautiful spines.

    Group 4–5 books of similar height and stack them flat on upper shelves. This displays the spine artistically and breaks up the visual line created by all-vertical arrangement. Place a small object on top—a globe, a small framed print, or a decorative object. Lower shelves stay spine-out for easy browsing.

    This rearrangement is free and takes 30 minutes.

    The visual effect is collected and intentional, like someone who knows good design lives here. It also feels less rigid than perfect rows—more human and real.

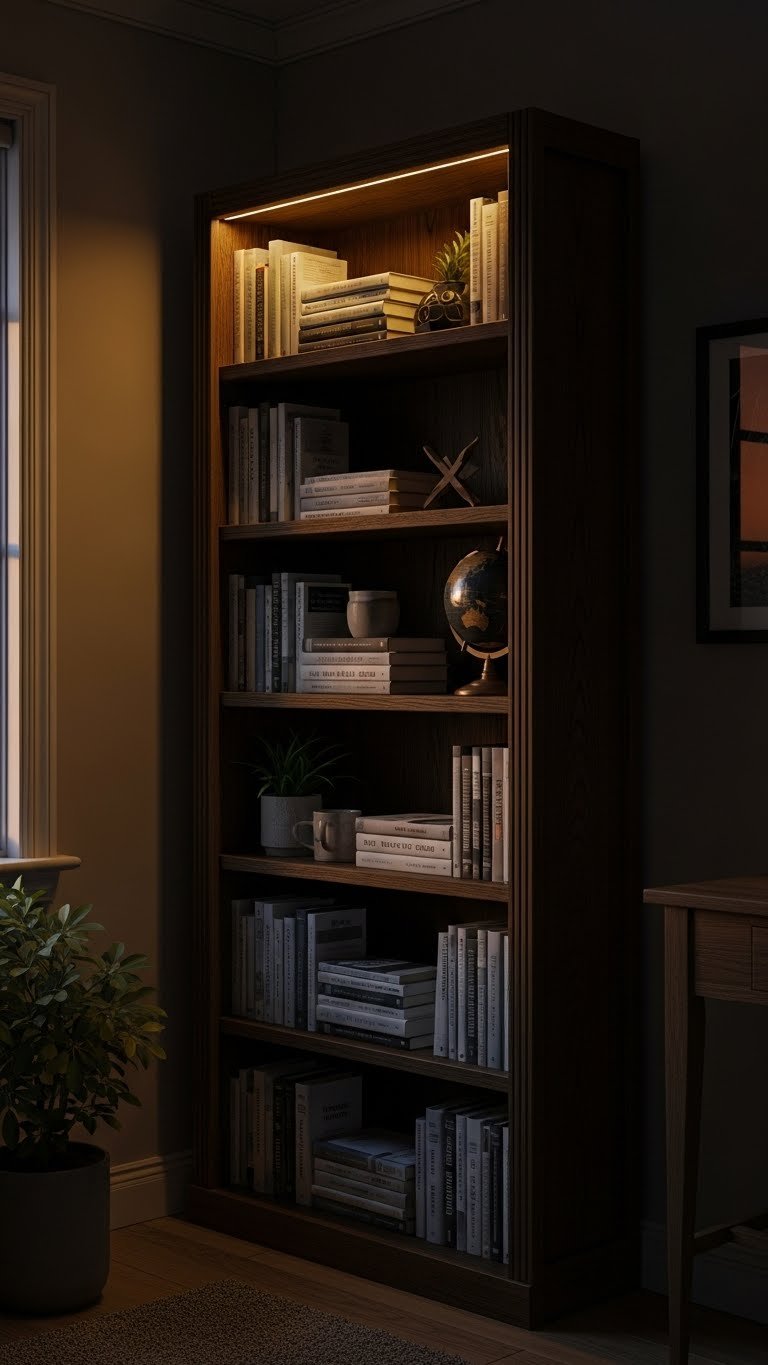
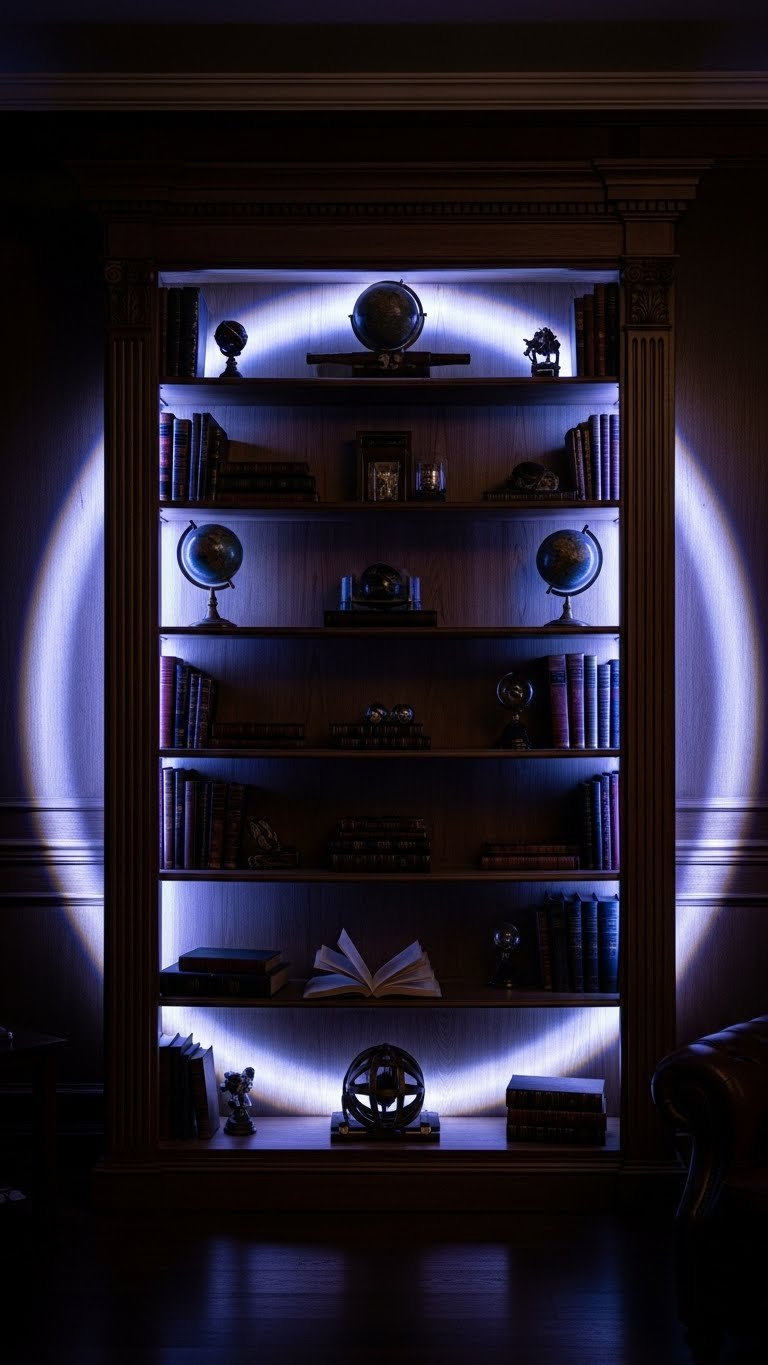
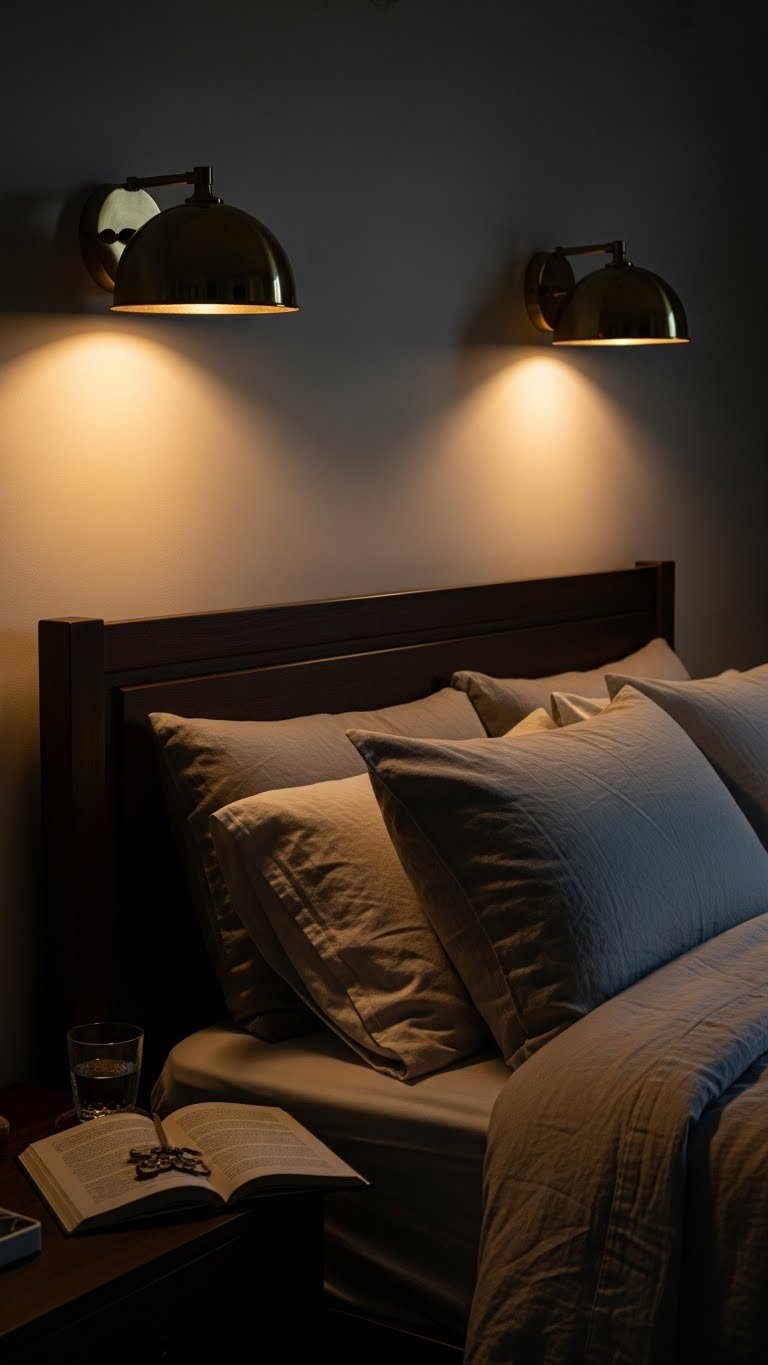
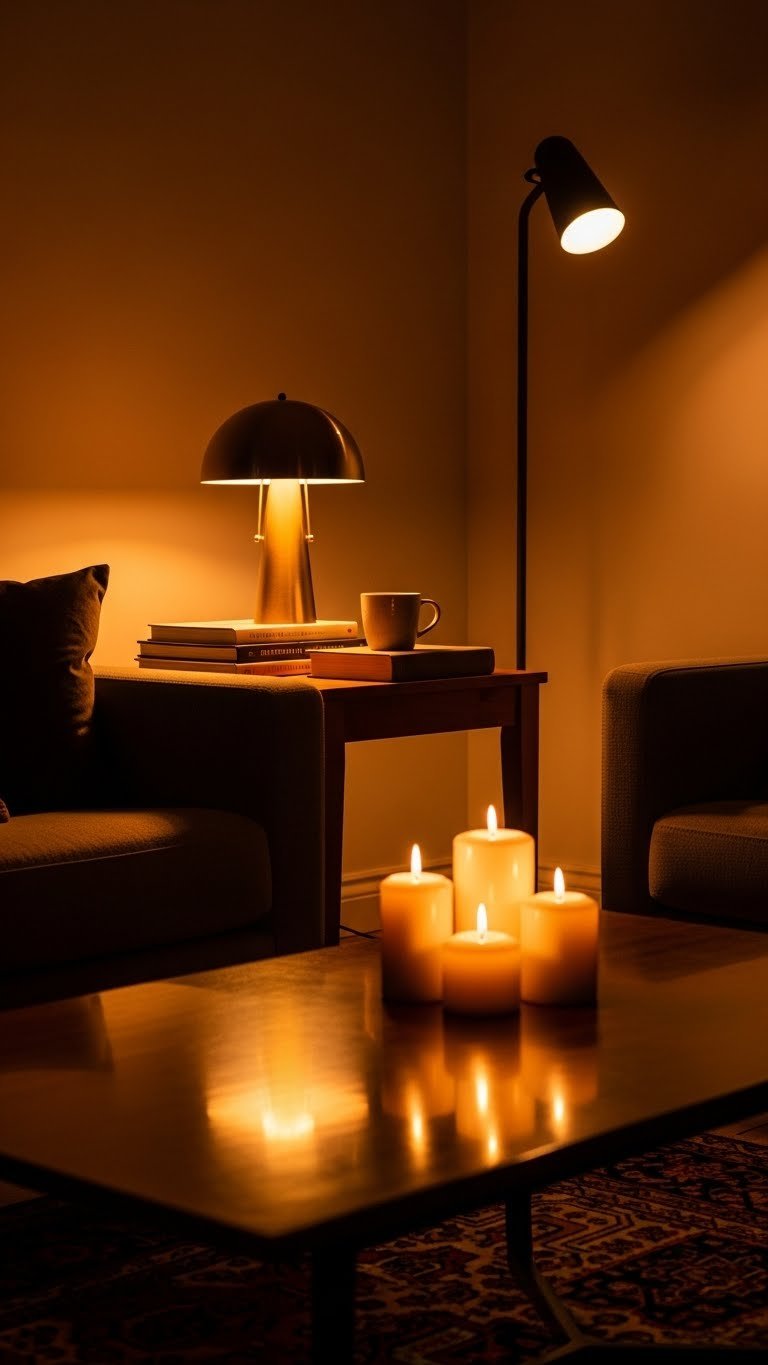
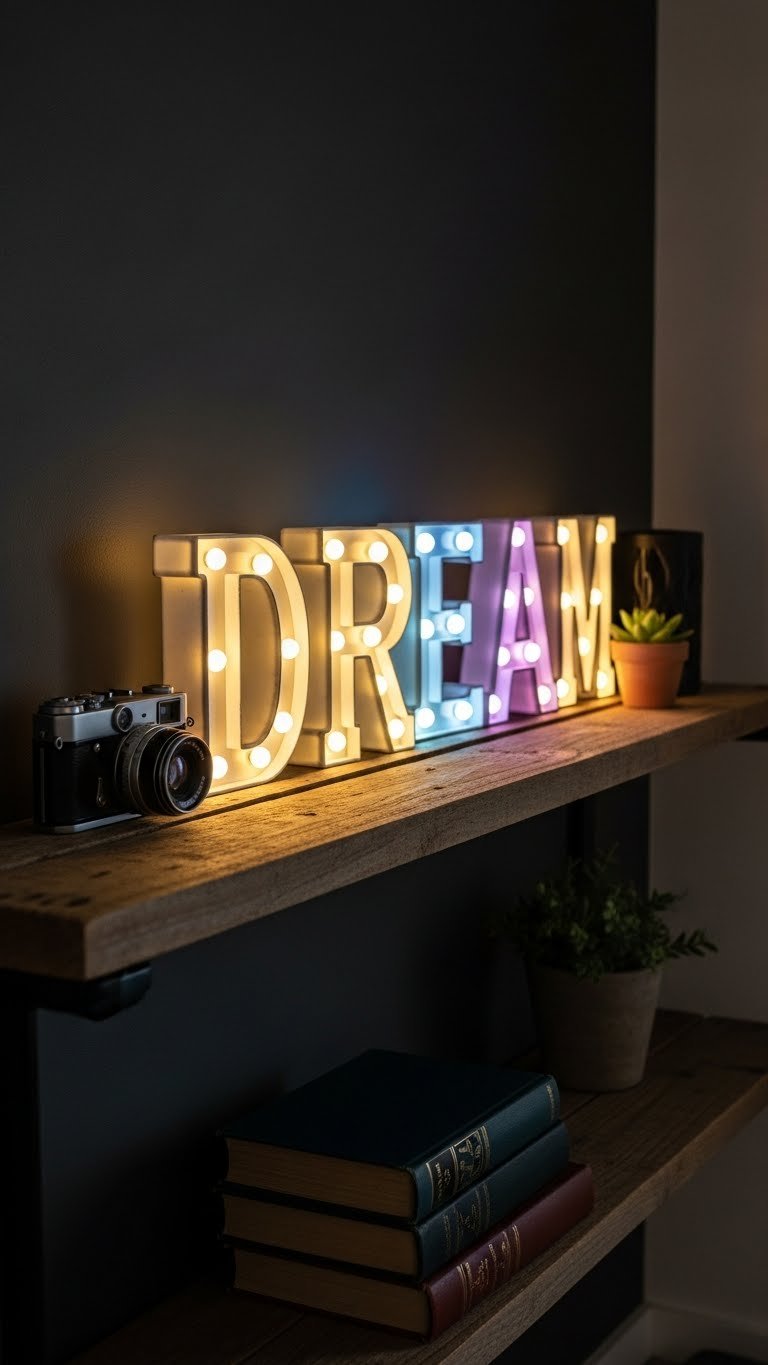
    11. Use Soft String Lights Behind Shelves

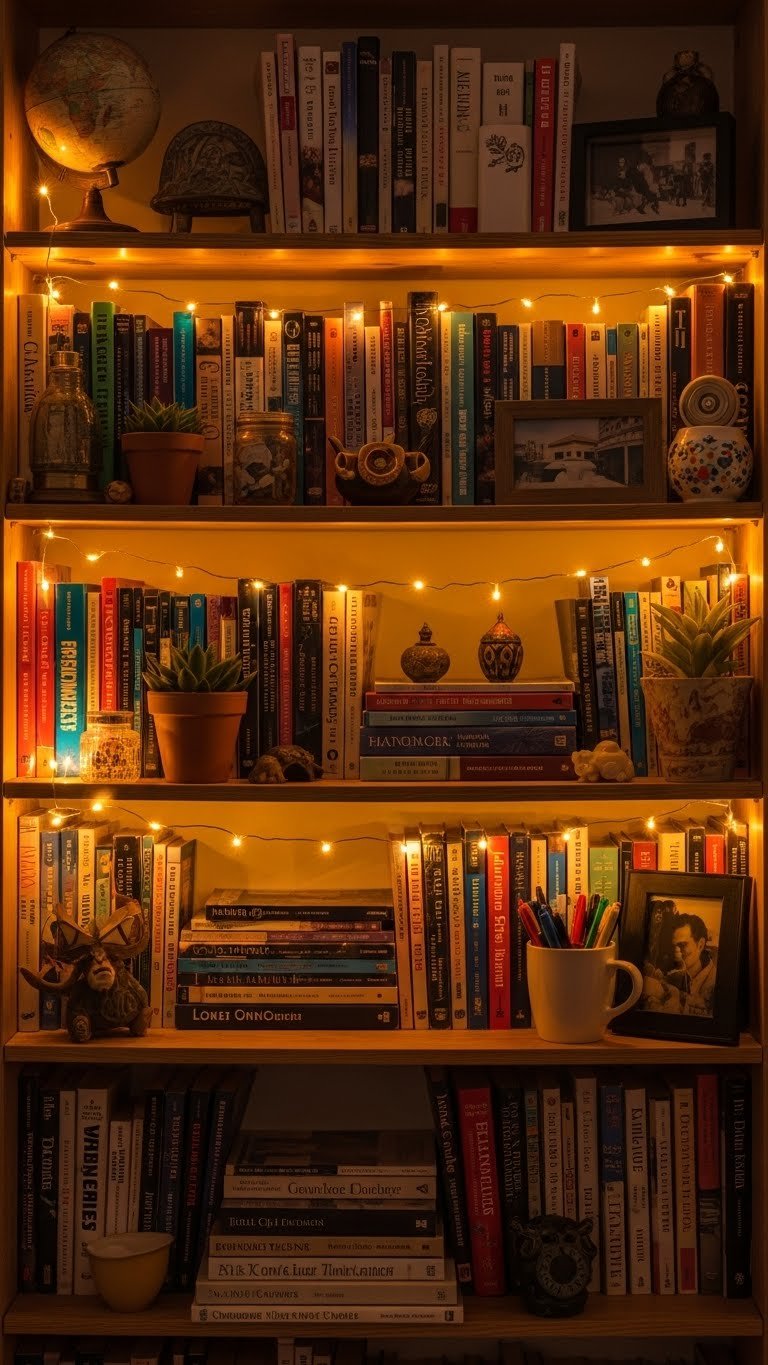
    Lighting transforms how vintage shelves look, especially in the evening. Warm string lights create that library ambiance without being dramatic or installation-heavy.

    String fairy lights or Edison bulb strands ($15–$40 from Amazon or Target) can be taped or clipped behind shelves if you’re renting. For permanent installations, have an electrician run low-voltage lighting ($150–$400) if you want built-in sophistication. Battery-operated options ($20–$30) work great as rentable alternatives.

    Budget 30 minutes to install and $15–$40 for a rental-friendly solution.

    Evening light transforms your shelf from daytime reading space into an atmospheric retreat. Books glow, metals catch the light, and the whole corner becomes inviting. This is when your vintage library truly shines.

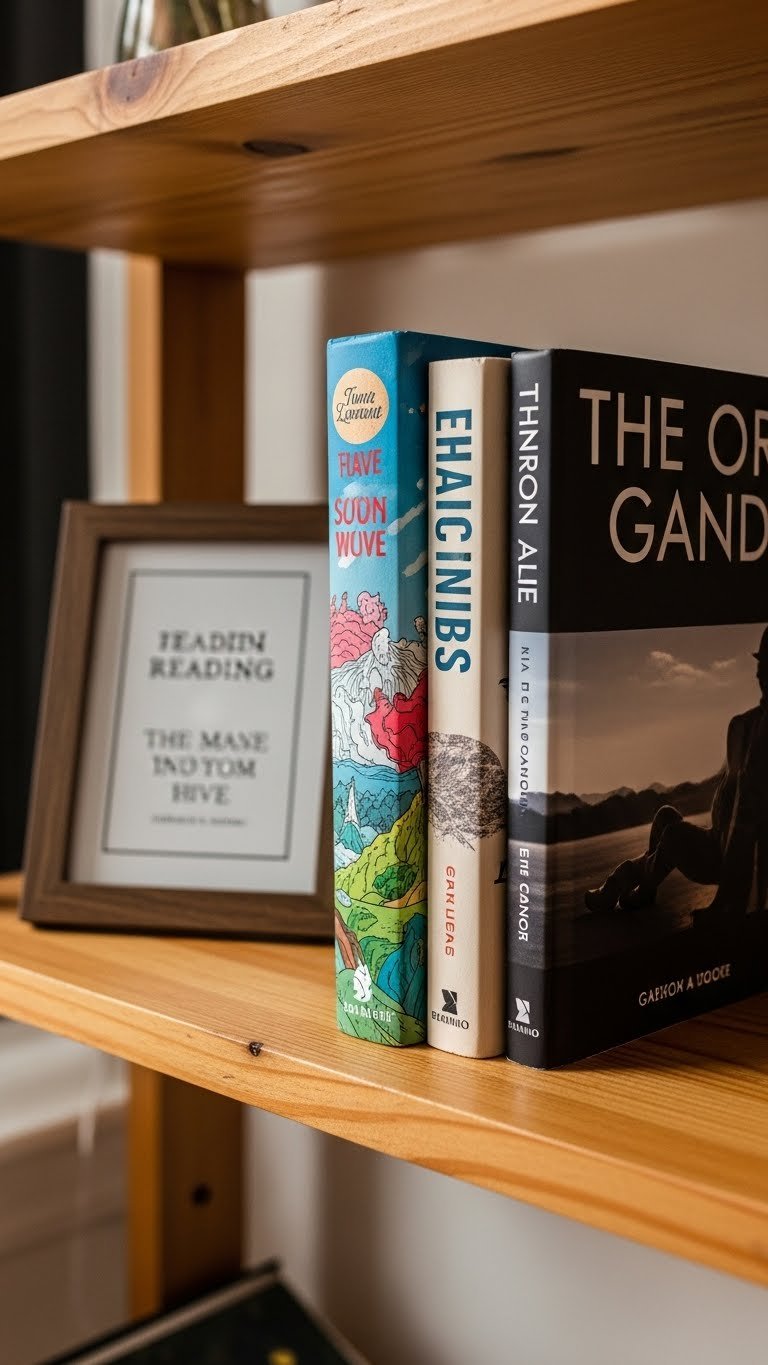
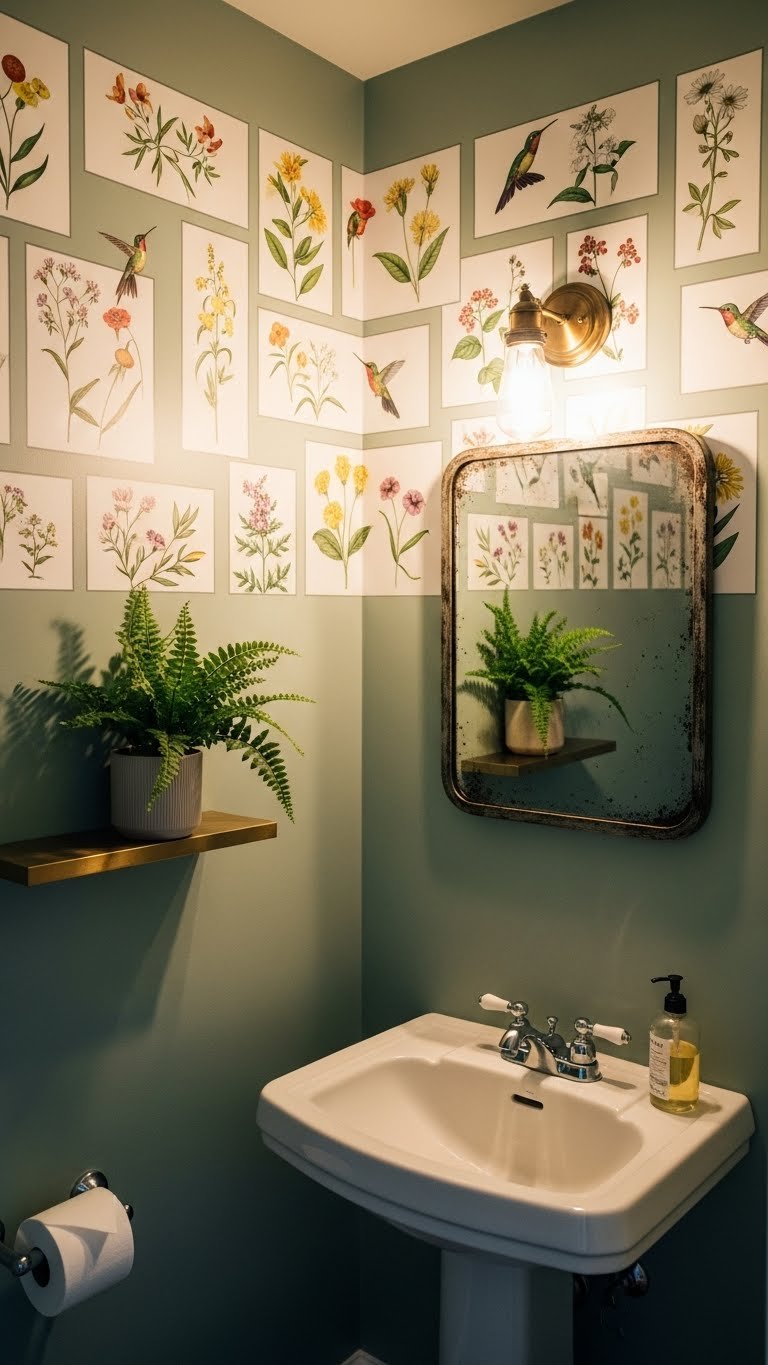
    12. Frame Vintage Book Pages or Literary Quotes

    Literary quotes and aged book pages add intellectual depth to your shelves. They’re inexpensive to frame but read as curated and sophisticated.

    Find vintage book pages on Etsy ($5–$15), purchase plain wood or metal frames from IKEA or Michael’s ($5–$15 each after sales), or print literary quotes you love on aged paper ($2–$5 worth of specialty paper). Frame 2–4 pieces and hang above or within your shelves.

    Budget one afternoon and $25–$80 total.

    This transforms your shelf from book storage into a statement about what you value intellectually. Visitors immediately understand that this is a thoughtful, curated space.

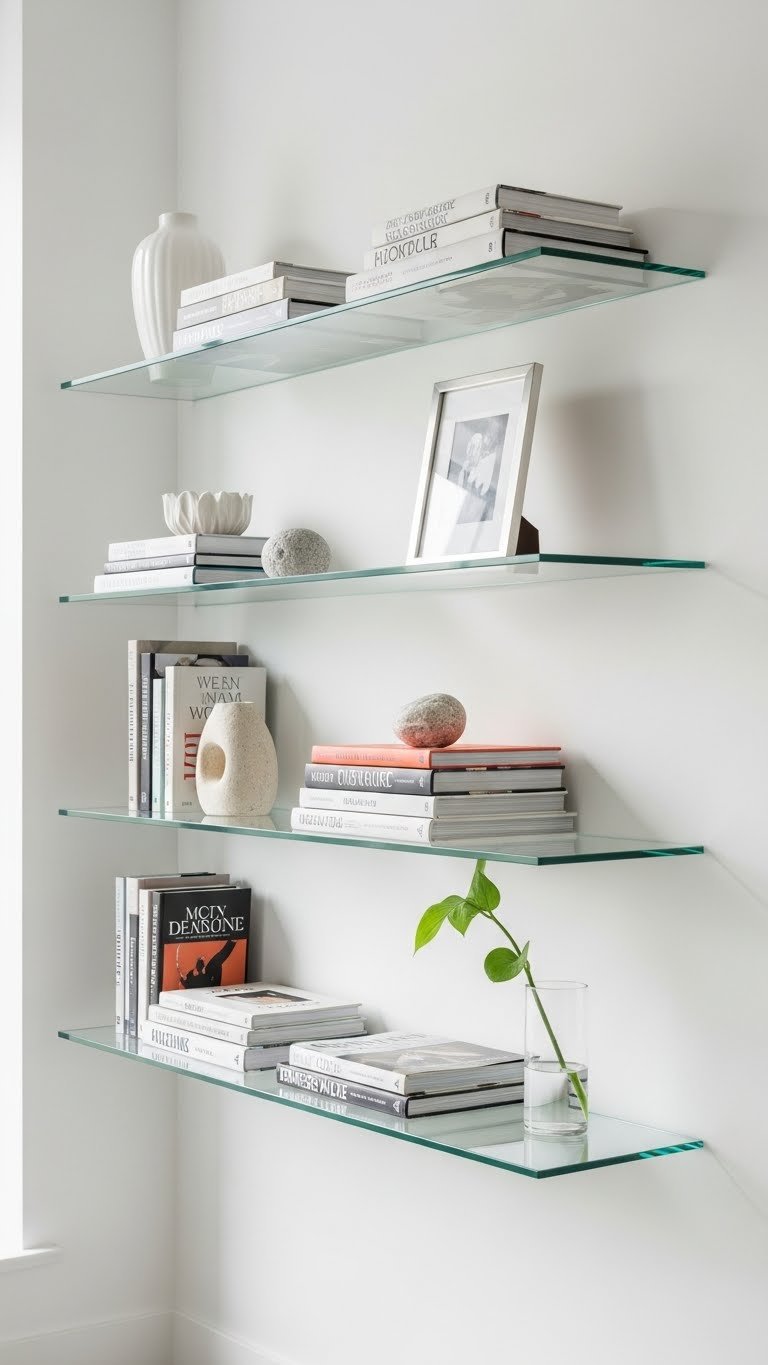
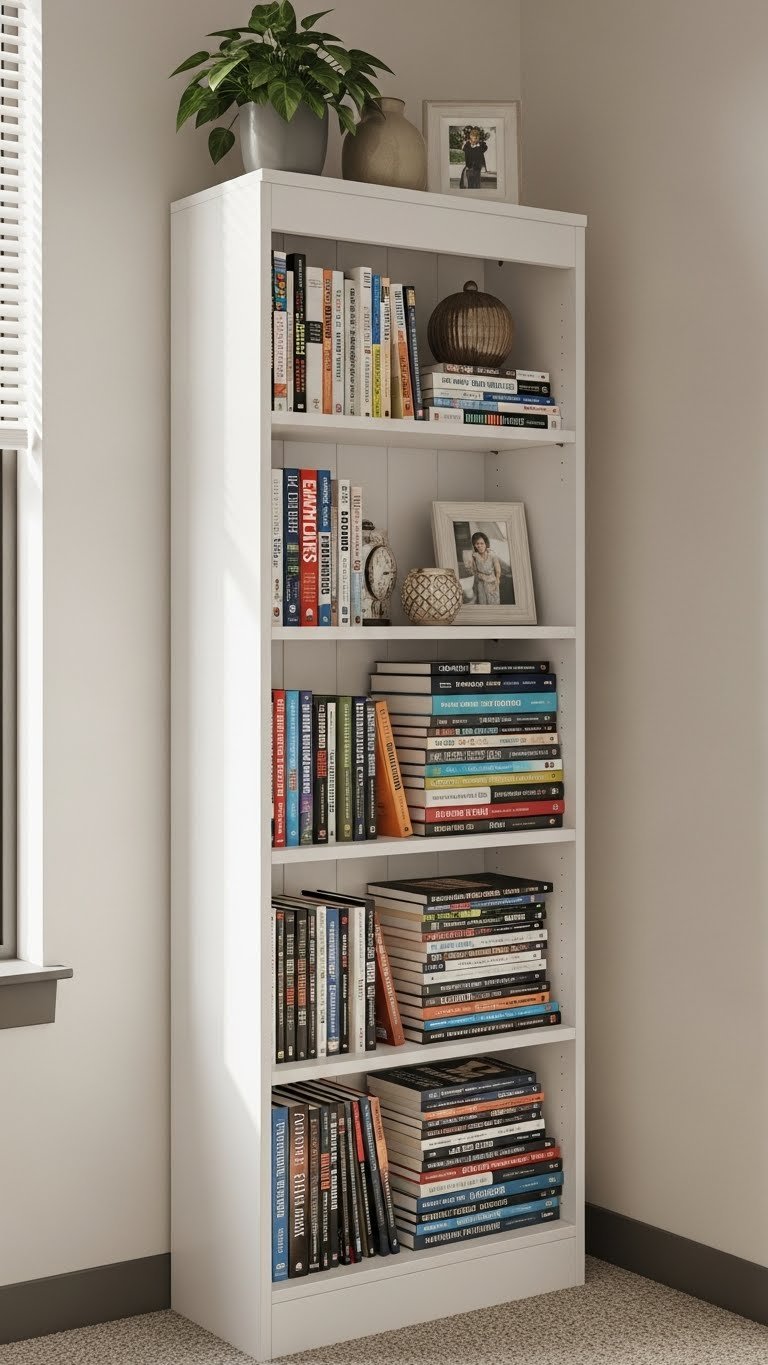
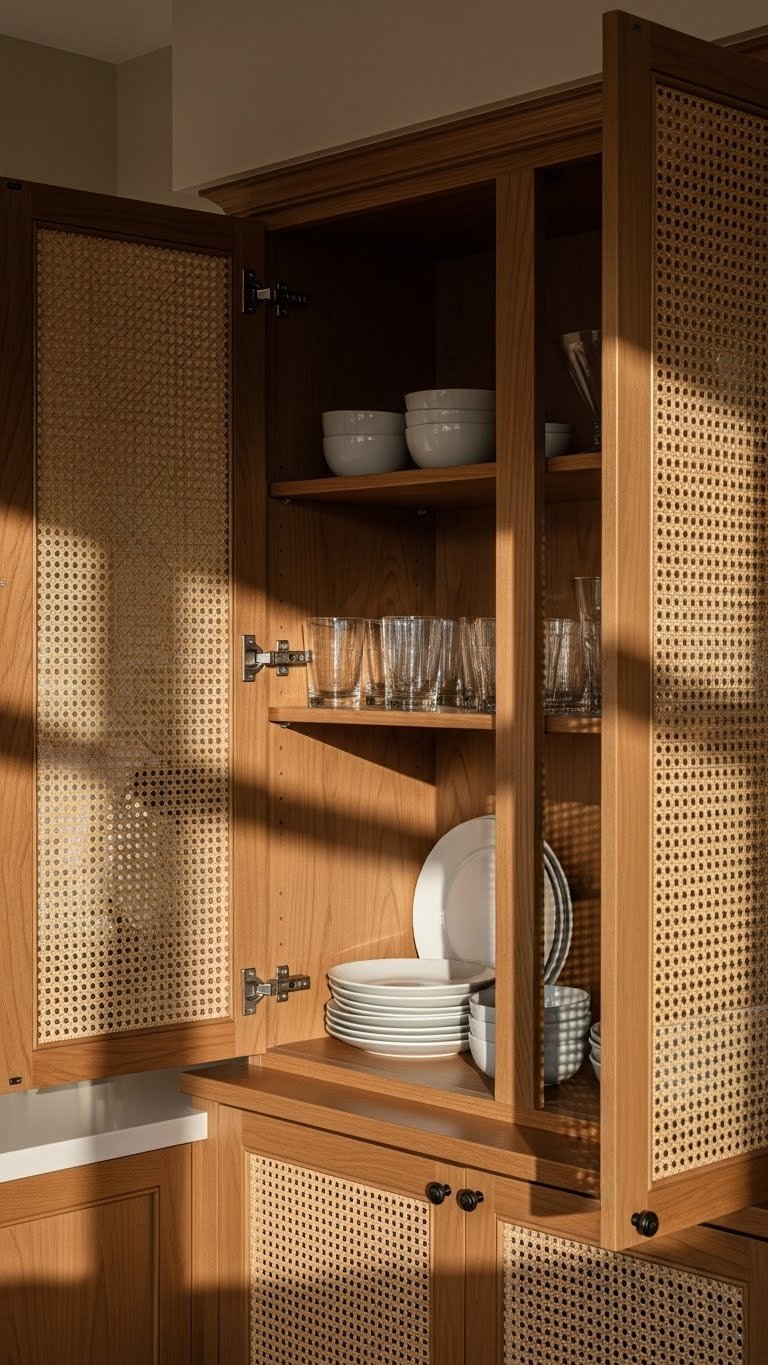
    13. Invest in a Tall Bookcase with Glass Doors

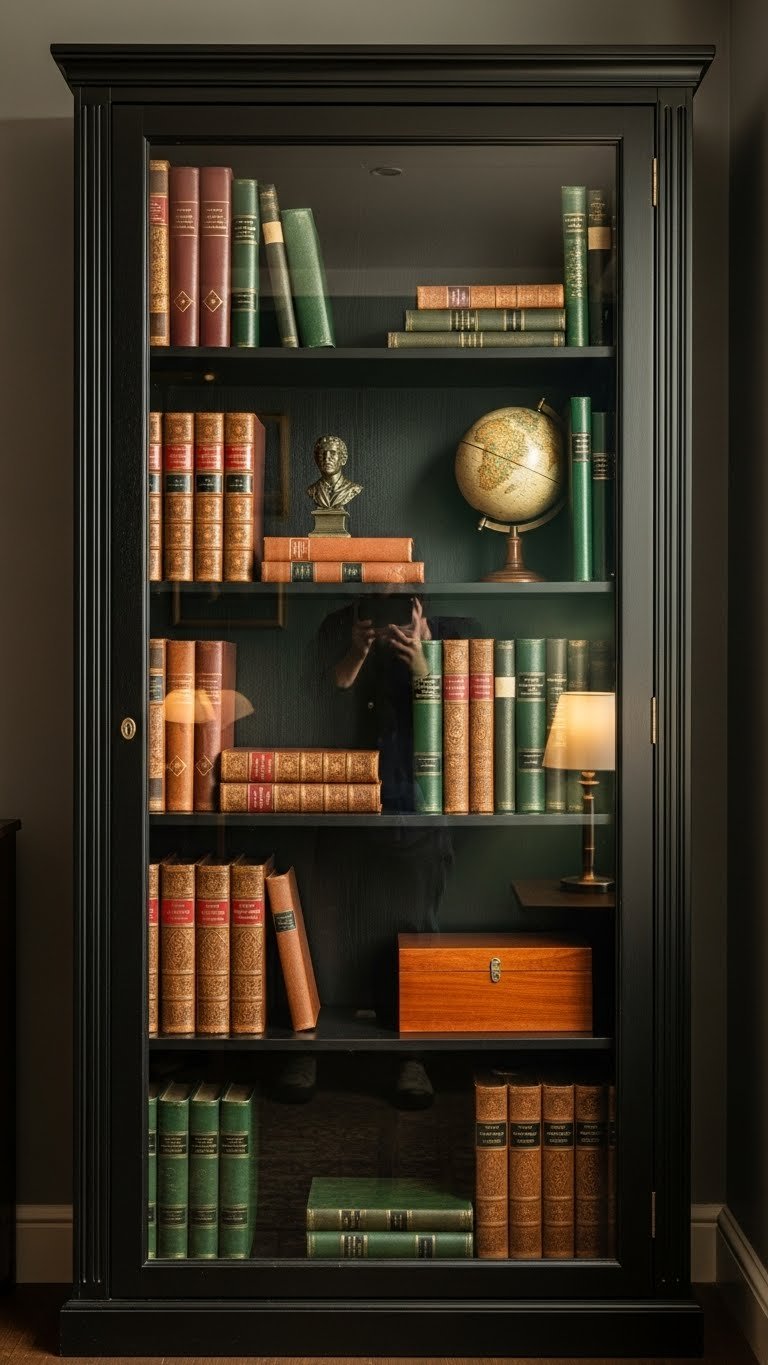
    If you’re building a serious vintage library, an enclosed bookcase protects books from dust while displaying them beautifully. It reads as collector-grade immediately.

    Look for vintage glass-door bookcases at estate sales ($200–$800) or reproduction versions from Wayfair ($300–$800), West Elm ($400–$1,200), or Roche Bobois for investment pieces ($1,000+). IKEA has affordable glass-door units ($150–$300) that work in smaller spaces.

    This is a bigger investment ($150–$1,200+), but it’s a long-term piece. Install over a weekend and spend time styling the interior.

    Glass doors instantly elevate your collection and protect valuable or sentimental books. It says you’re serious about preservation, which is very old-world library.

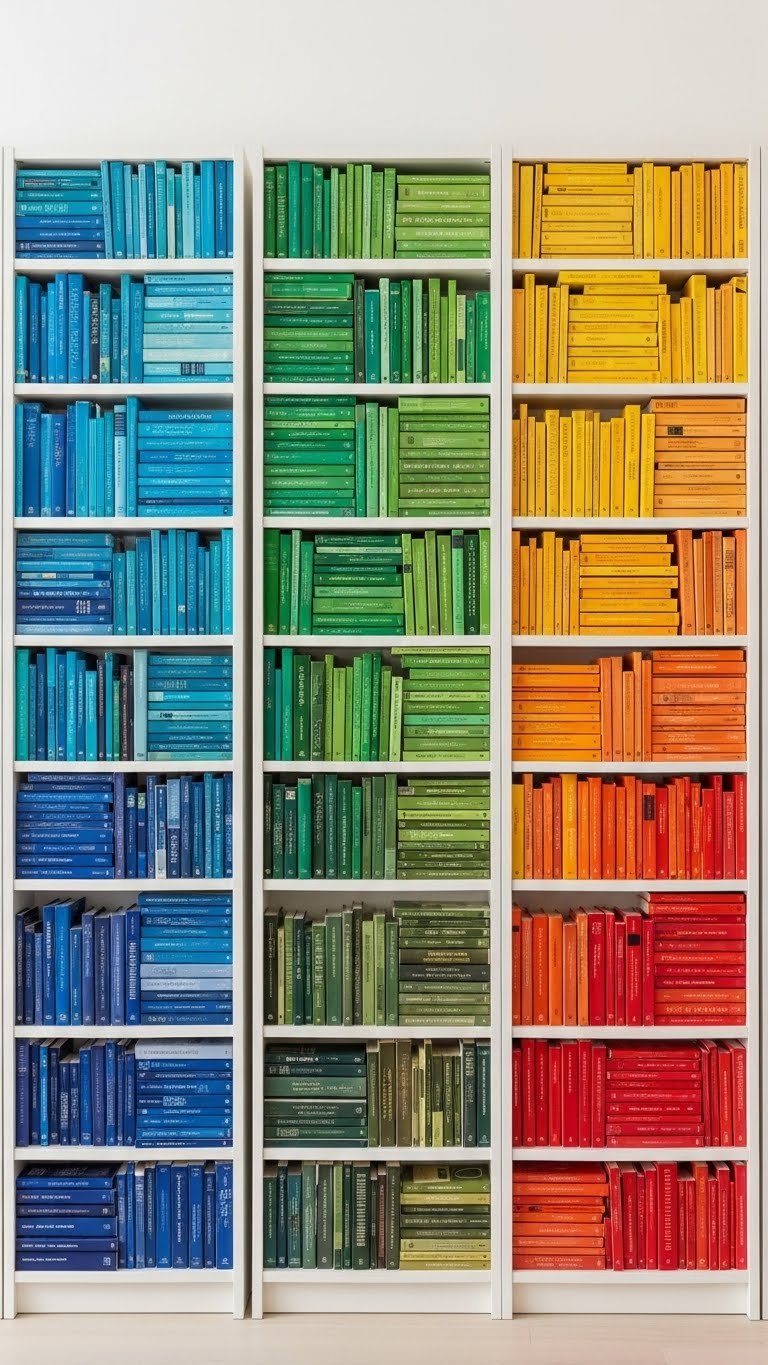
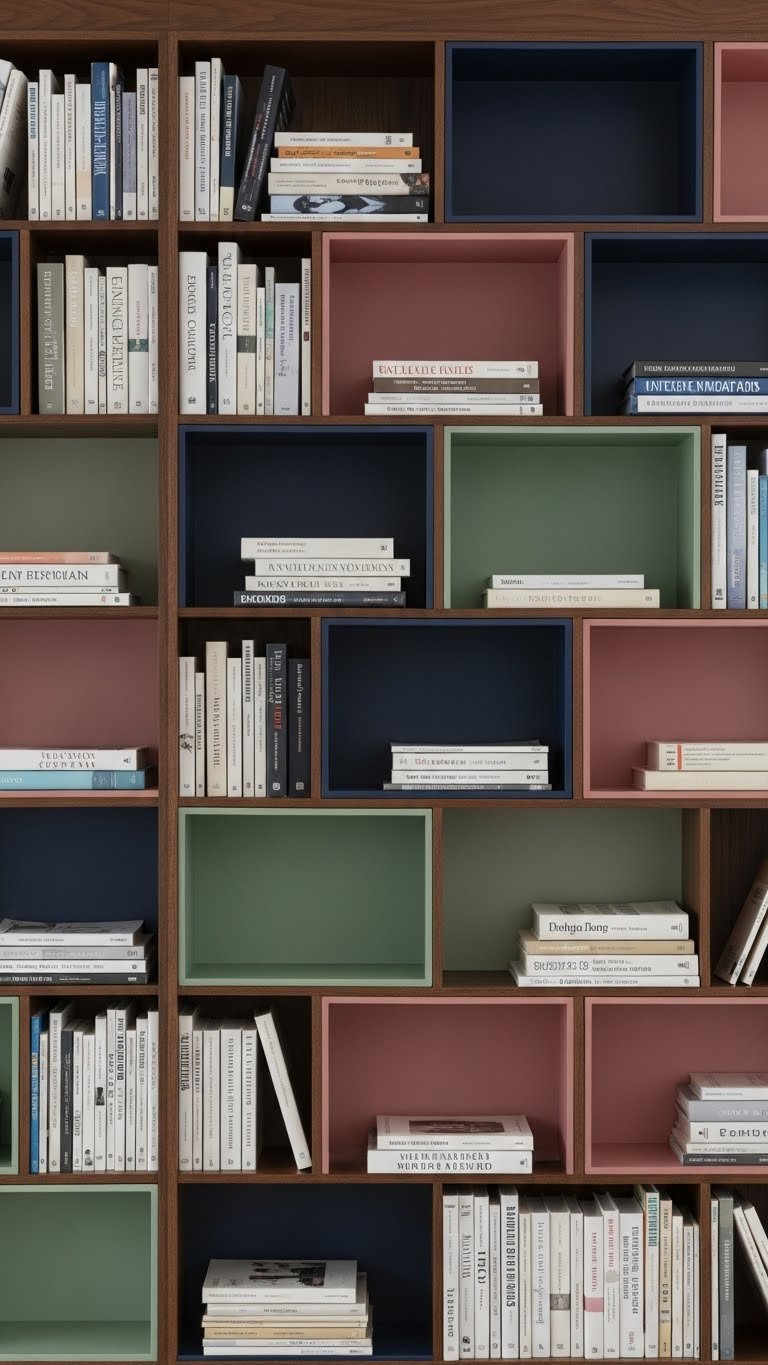
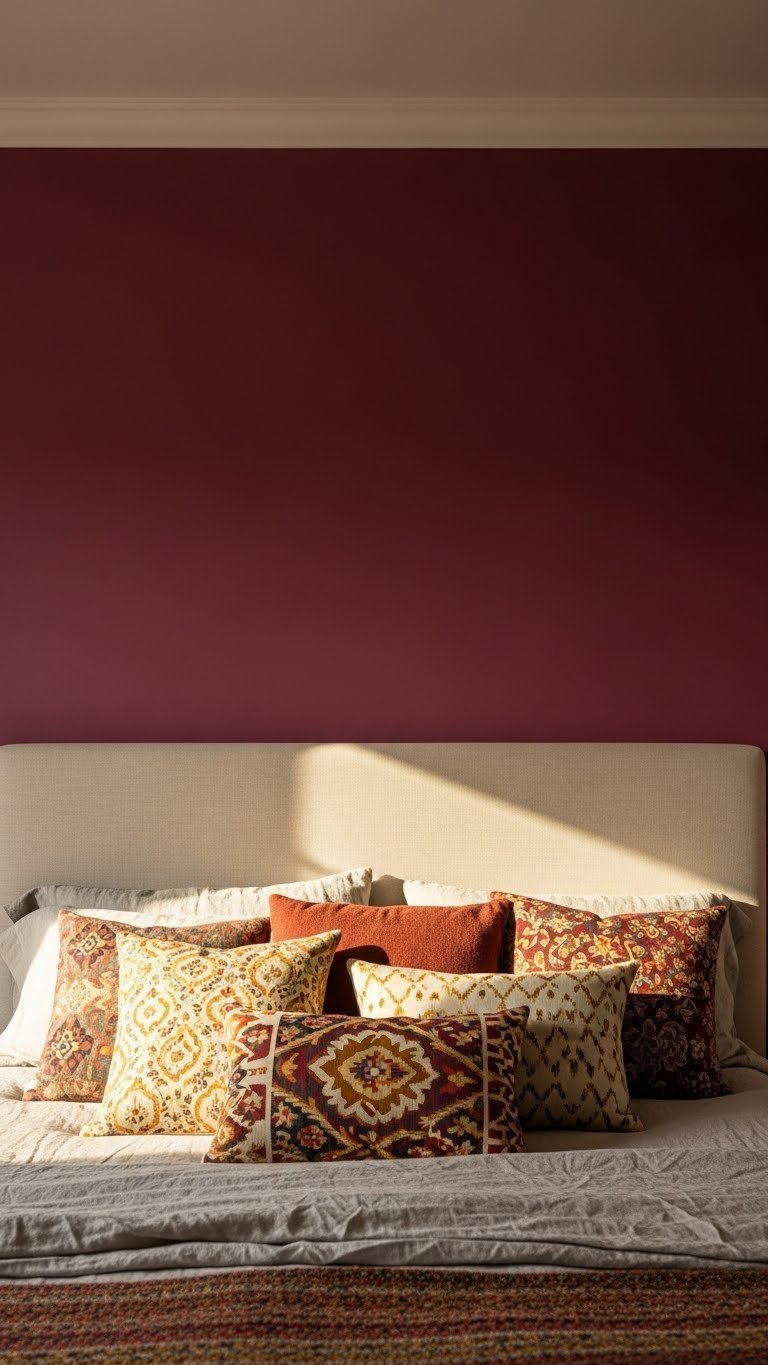
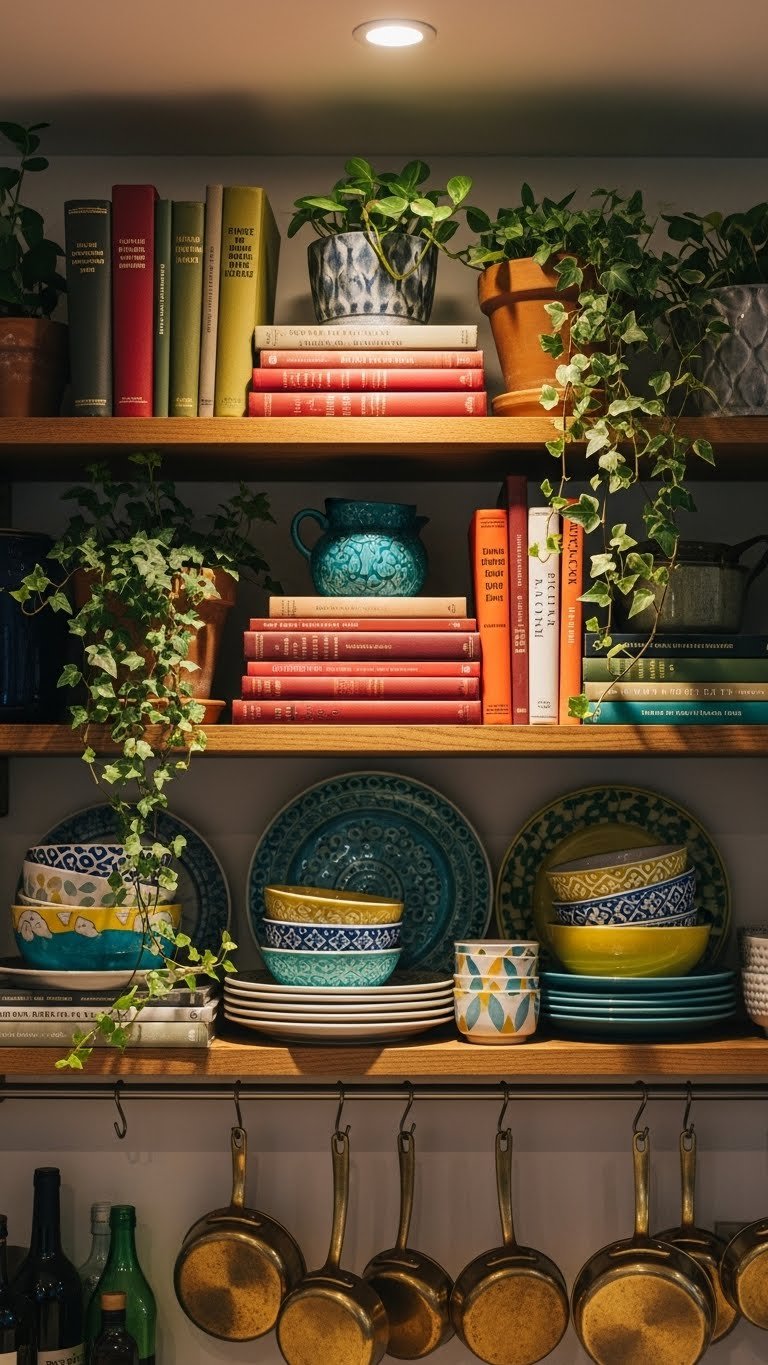
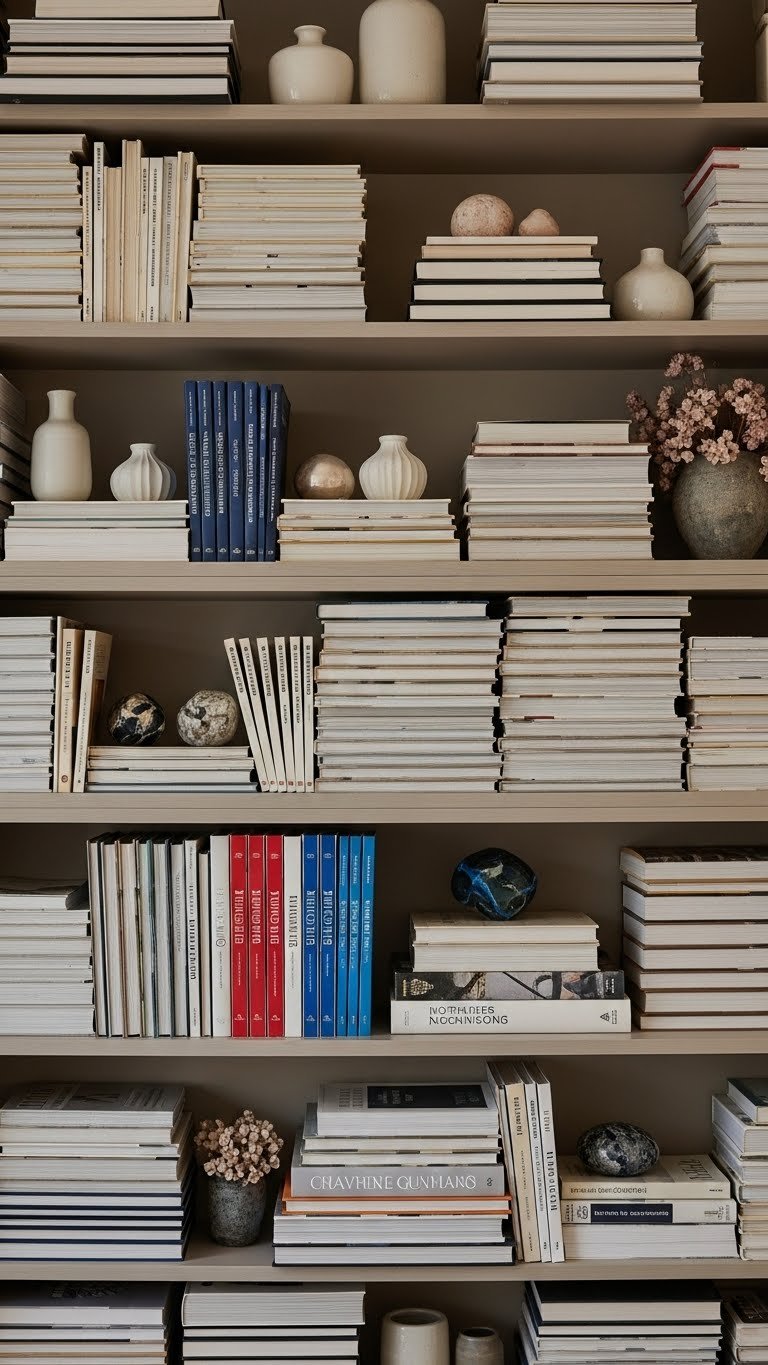
    14. Arrange Books by Color in Sections

    While traditional libraries organize by subject, a vintage aesthetic often organizes by tone and color. This creates visual harmony and a gallery-like quality.

    Group books by color family: burgundy and brown on one shelf, greens and blues on another, creams and whites on a third. Use objects (brass bookends, boxes, globes) to transition between color sections. This takes 1–2 hours to arrange and costs nothing beyond what you already own.

    The result feels intentional and sophisticated. Color-coordinated shelves photograph beautifully and look more curated than mixed spines.

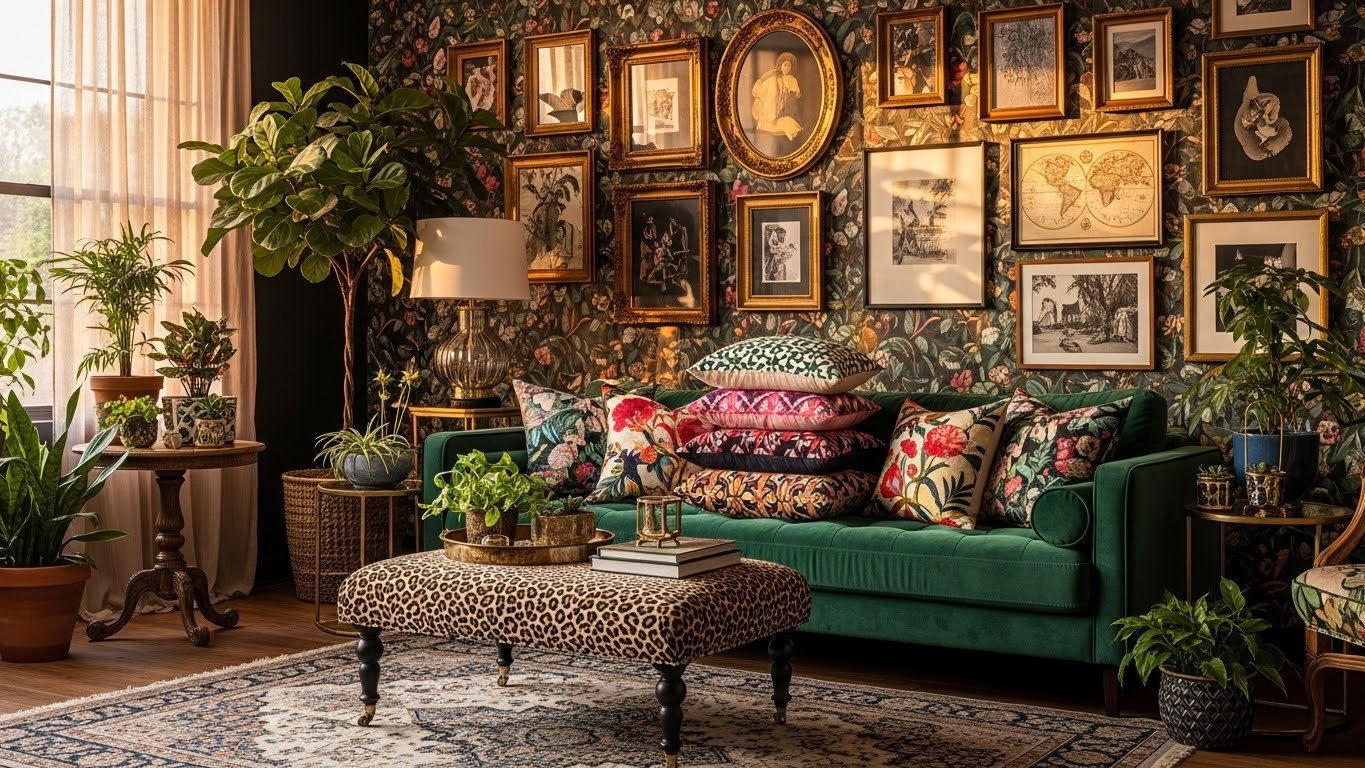
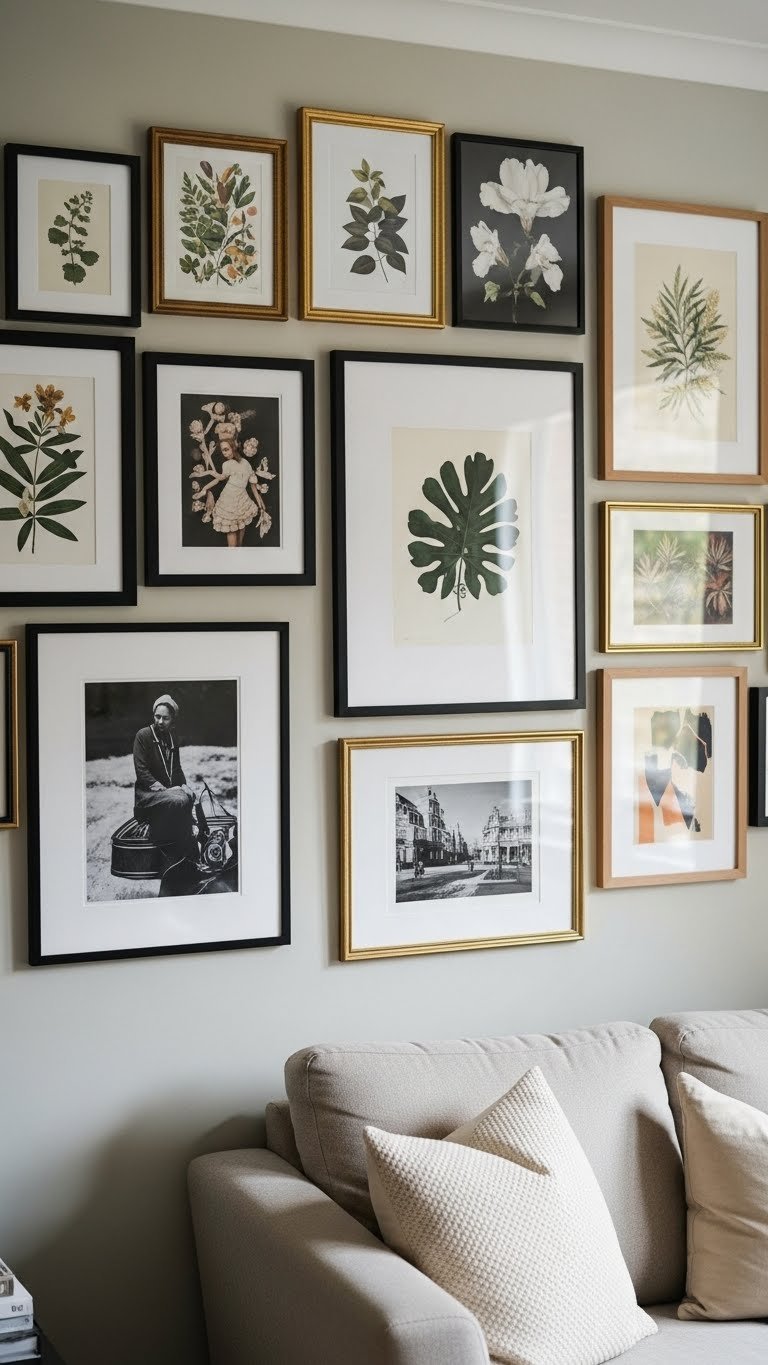
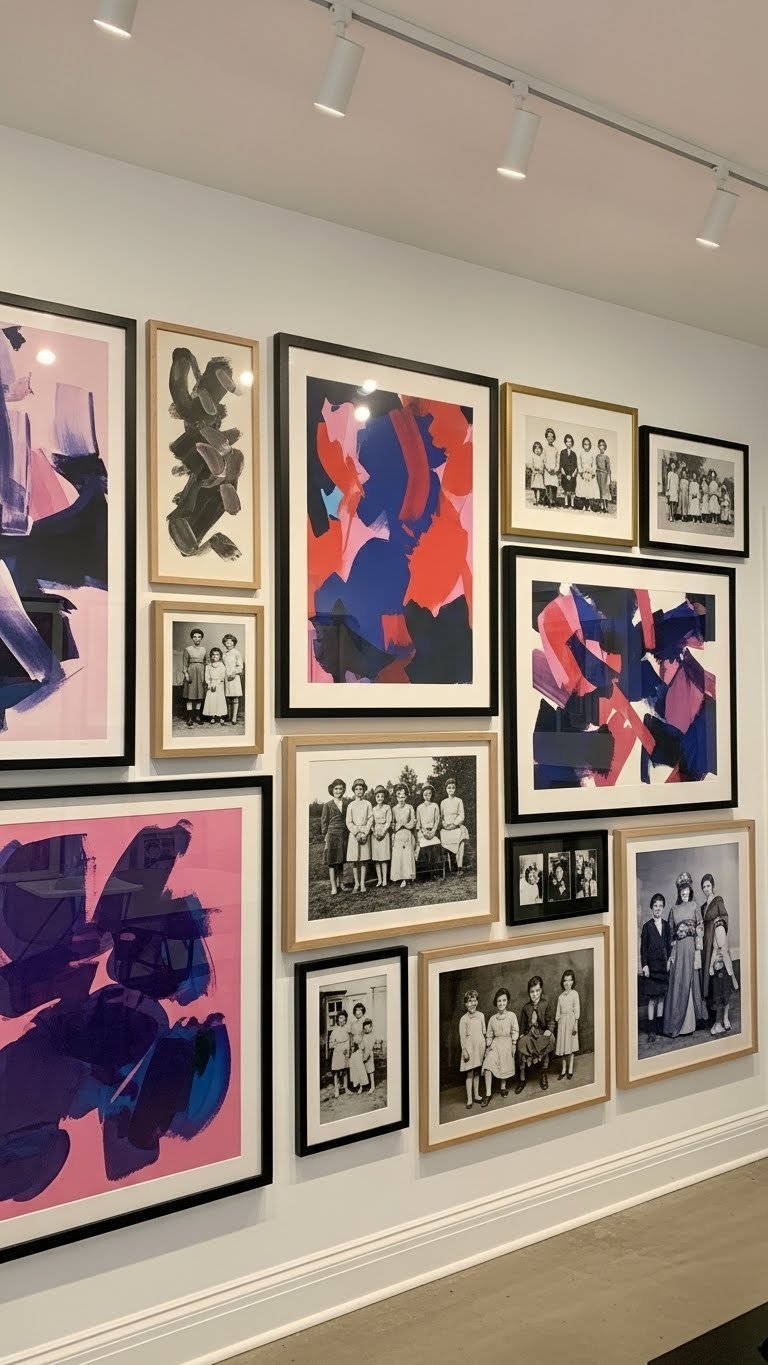
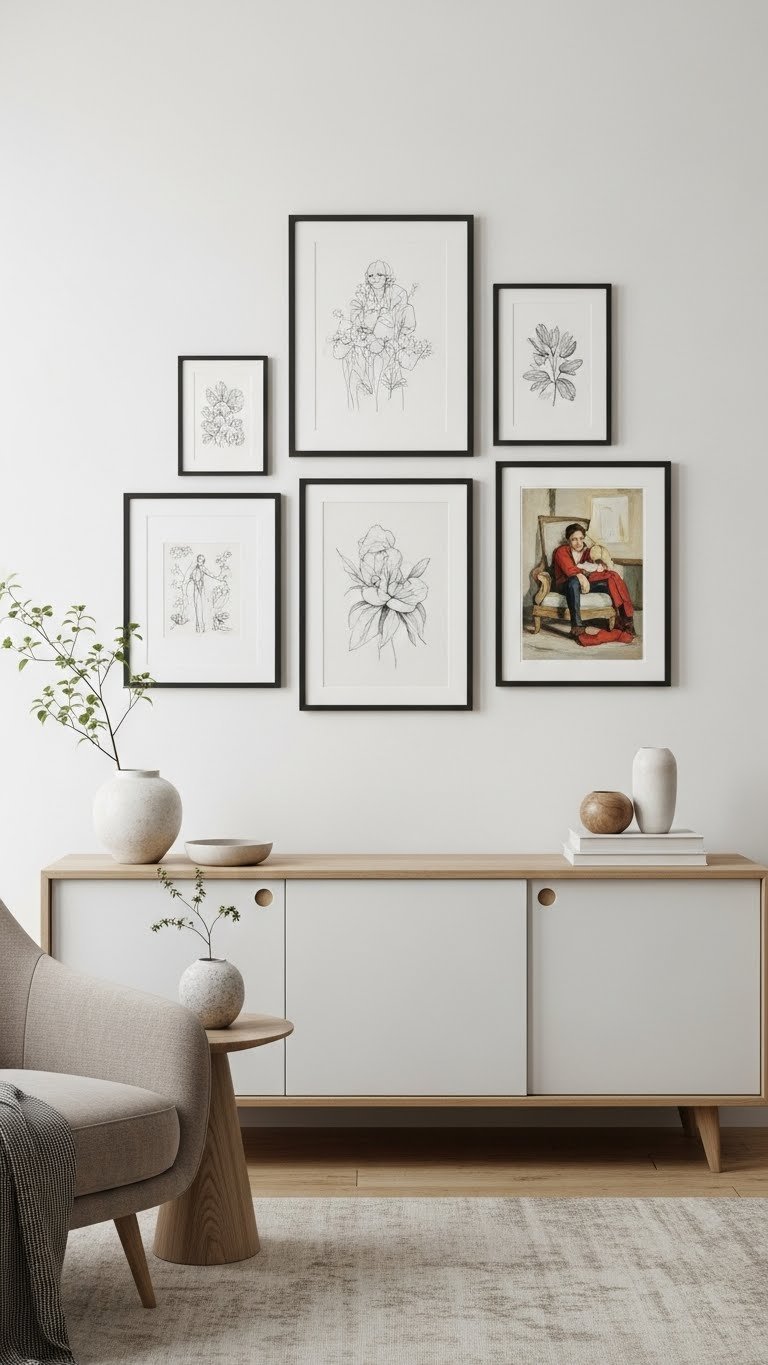
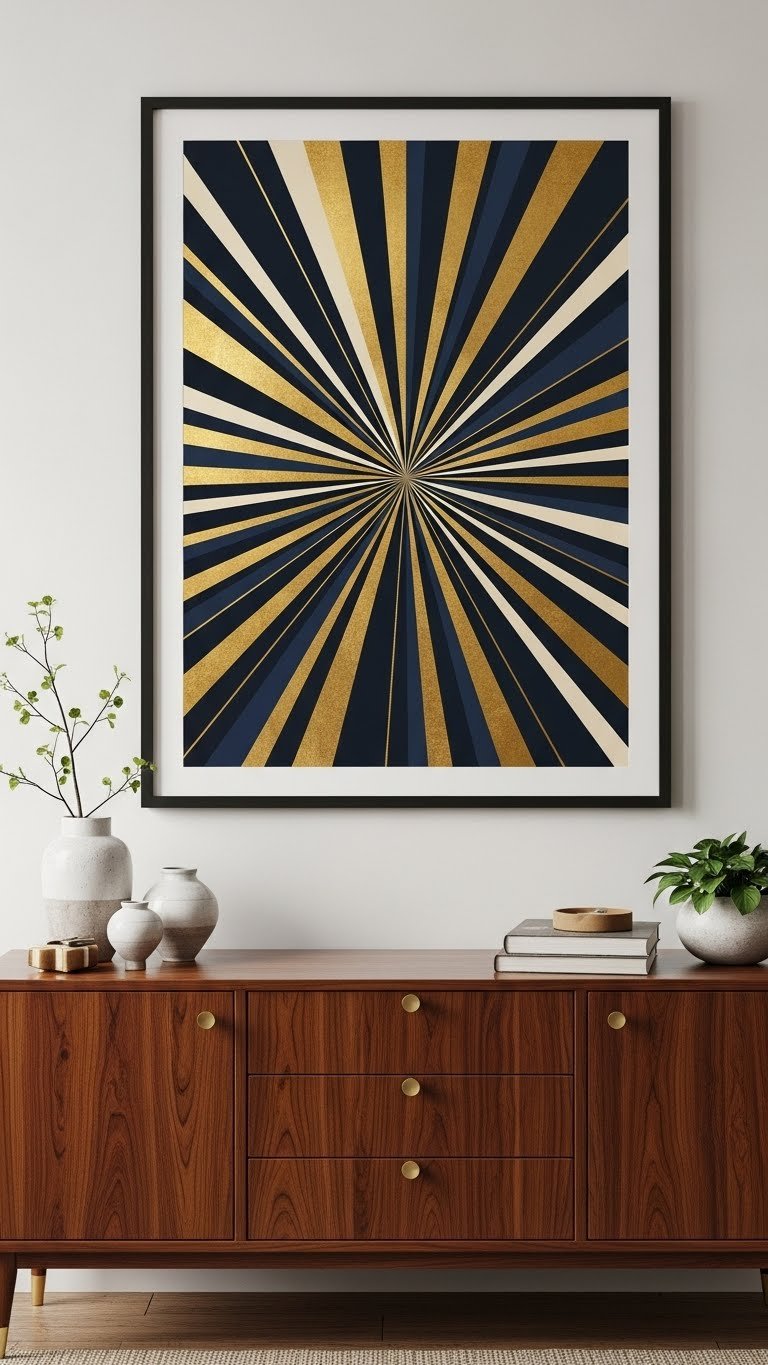
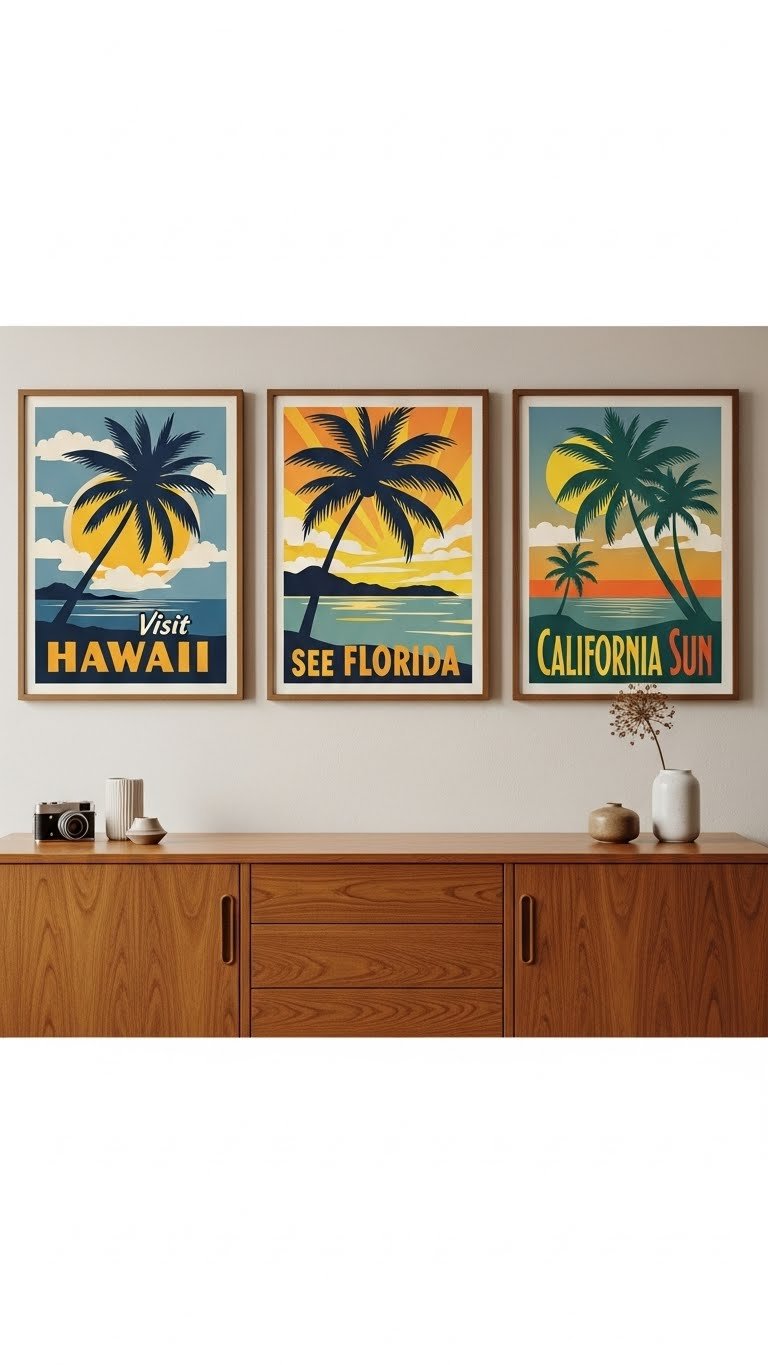
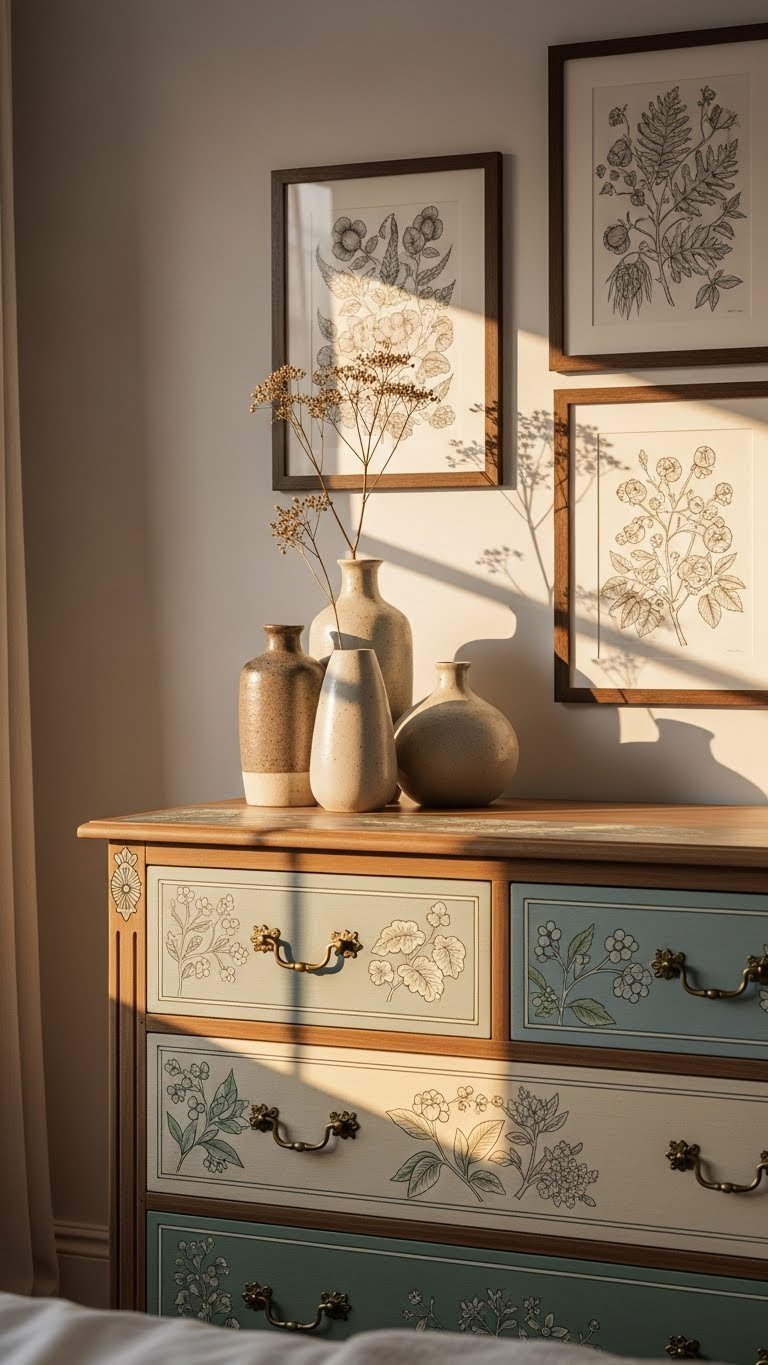
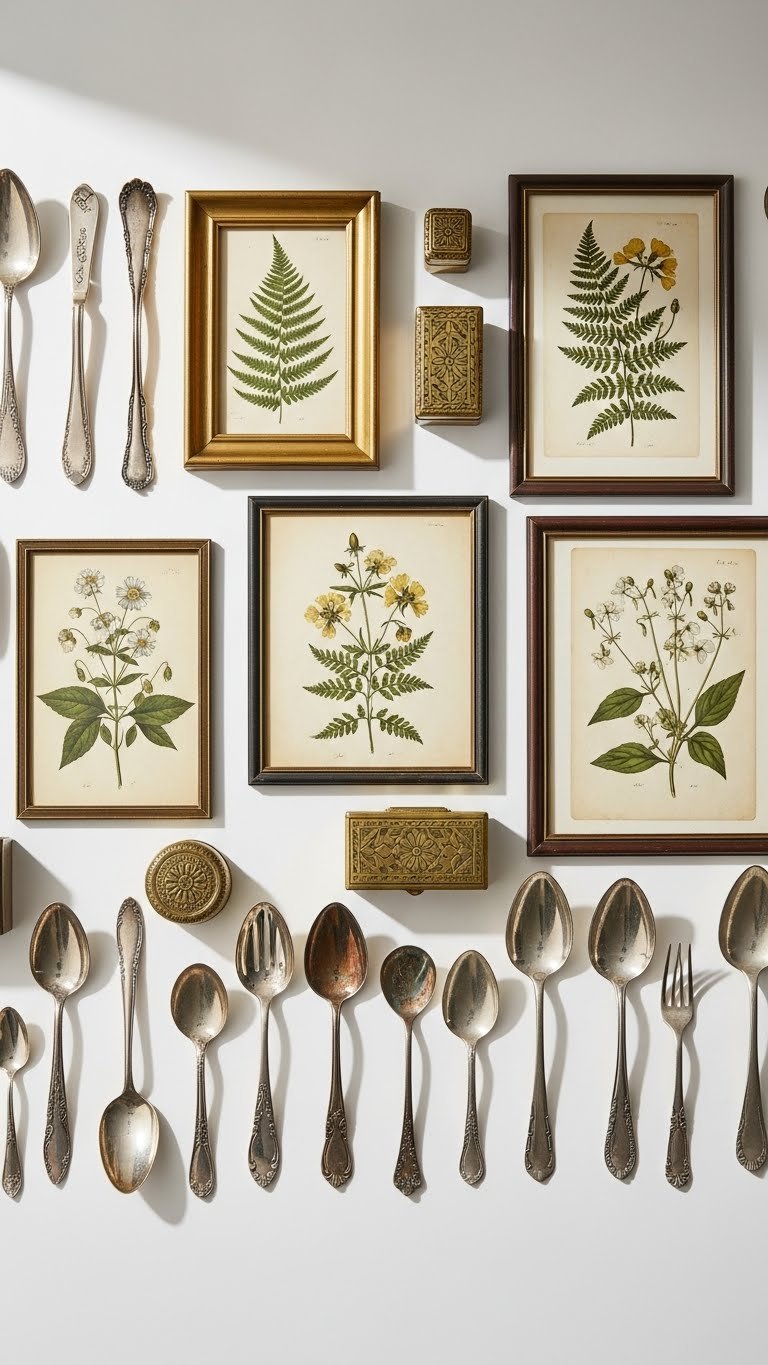
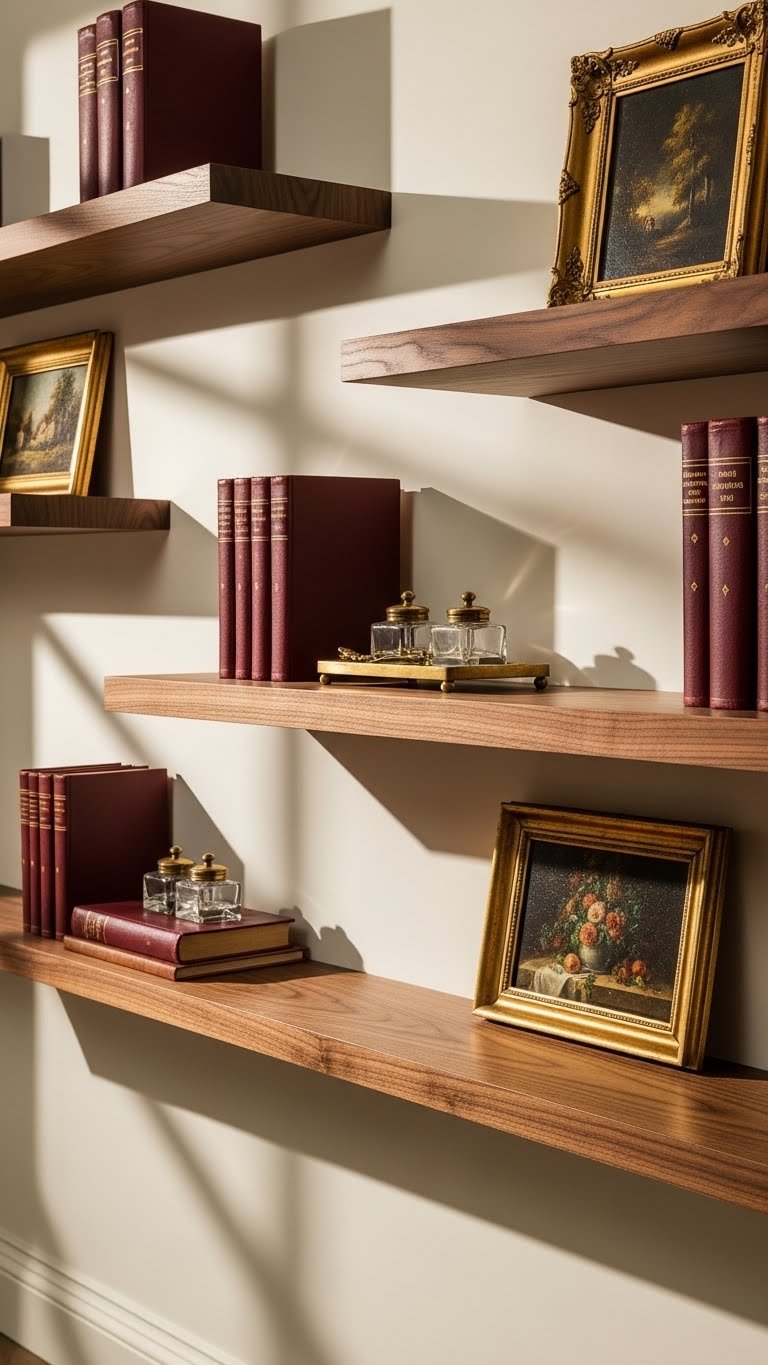
    15. Add Vintage Oil Paintings or Botanical Prints

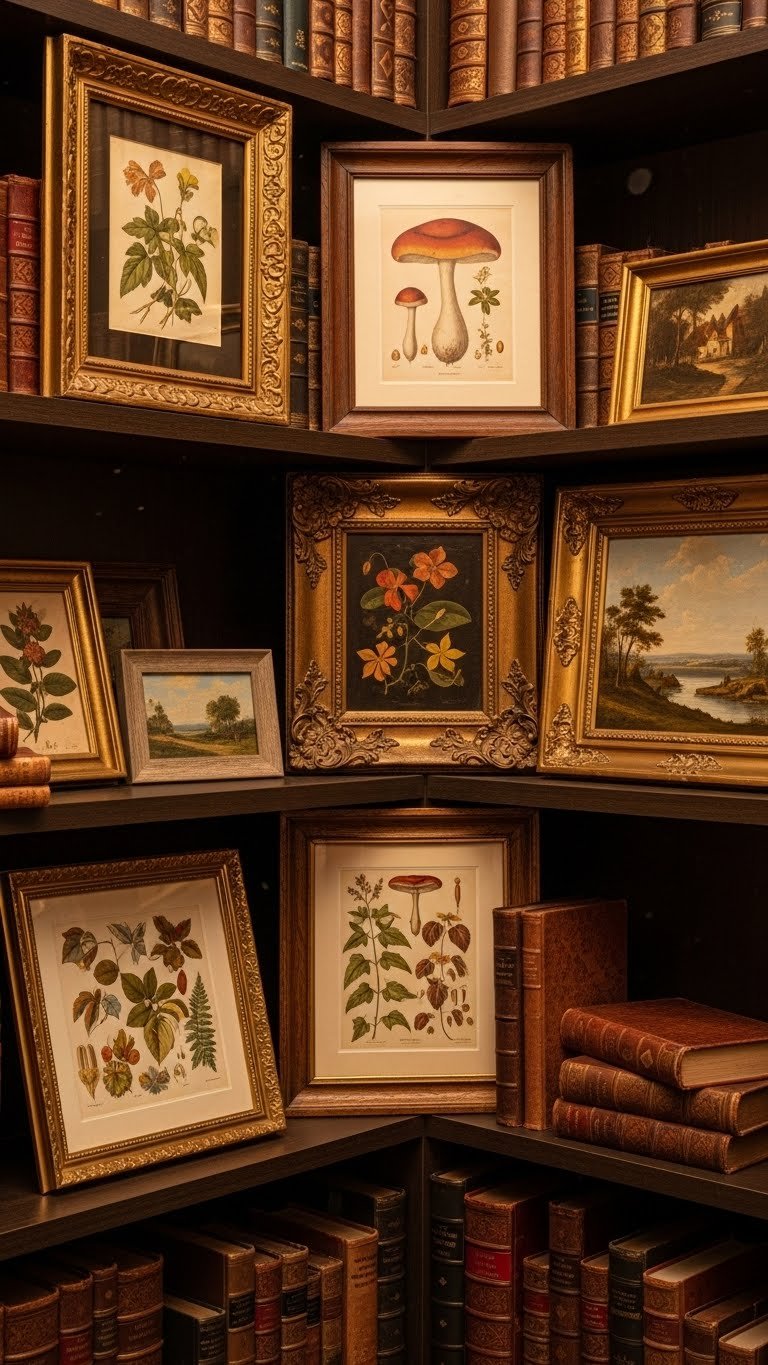
    Framed artwork breaks up long rows of books and adds gallery-like sophistication to your vintage library aesthetic.

    Scout Etsy, estate sales, or antique shops for small vintage frames ($20–$80 each) and prints ($10–$40). You can also find affordable options at HomeGoods or Marshalls ($15–$40). Look for botanical drawings, landscape paintings, or portraits—anything that fits your aesthetic.

    Lean 2–3 frames against the back wall of your shelves or hang them slightly overlapping your book rows. Budget an hour and $50–$200 for 3–4 pieces.

    Suddenly your shelf reads as an art collection with books, not just a bookshelf. It becomes more room design, less storage solution.

    16. Create a Vintage Card Catalog Display

    A vintage library card catalog is pure nostalgic charm. Even a reproduction adds authentic old-world character to your book collection space.

    Hunt Etsy, eBay, or antique shops for actual card catalogs ($150–$600) or find reproduction versions online ($100–$300). Smaller drawers cost less ($50–$150) than full catalogs. Position on the floor beside your shelves or on a lower shelf as a functional piece.

    You can fill drawers with: hand-written book lists, literary notes, vintage postcards, or just leave them decoratively empty. Budget $100–$400 depending on what you find, plus a few hours arranging.

    This piece is a conversation starter and transforms your space into something truly special. It whispers “serious collector” immediately.

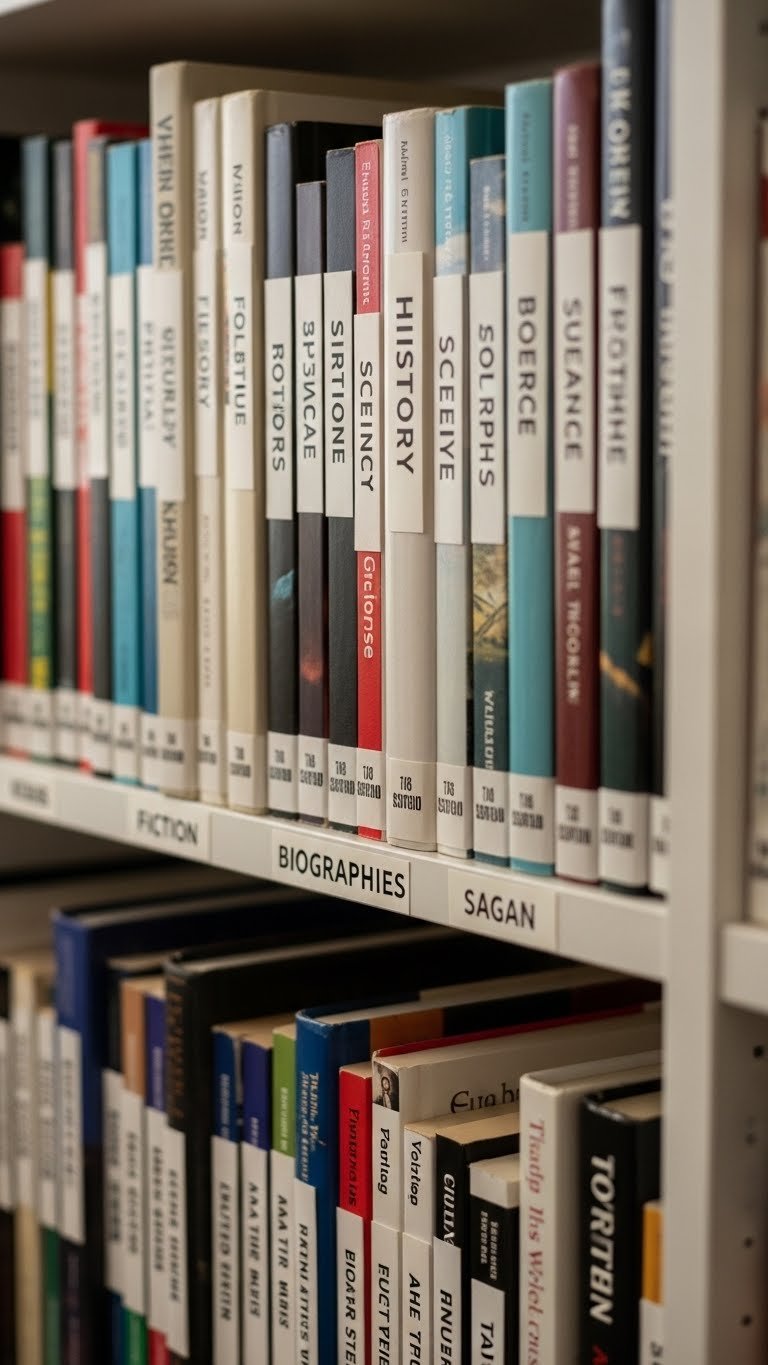
    17. Group Books by Genre with Small Brass Plaques

    Organizing by genre feels scholarly and old-library authentic. Small brass plaques mark each section beautifully.

    Order custom brass plaques from Etsy ($15–$40 each) with labels like “Classics,” “Poetry,” “Travel,” or “Mysteries.” Stick them to the front of your shelves with museum putty (renter-friendly) or mount with small nails. Organize your books accordingly below each label.

    Budget $30–$150 for plaques and one afternoon for organizing. This costs nothing if you skip the plaques and use handwritten kraft paper labels ($0–$5).

    Your shelves now read as intentionally curated and knowledgeable. It’s organized enough to feel scholarly, but stylish enough to look like design.

    18. Display Vintage Writing Boxes or Lap Desks

    Vintage writing boxes and lap desks add texture and evoke the life of literary pursuits. They’re both decorative and functional.

    Search Etsy ($30–$120), antique shops, or estate sales for wooden writing boxes with brass hardware or small lap desks. These pieces often have beautiful wood grain and real age. Even affordable versions from Amazon ($20–$50) work if you’re testing the concept.

    Position one on a middle shelf with books stacked around it. Budget $30–$100 and 15 minutes to integrate.

    This object immediately signals “this is a space for creativity and writing,” not just consumption. It deepens the narrative of your library.

    19. Hang a Vintage Library Ladder or Shelf Ladder

    A classic library ladder is pure old-world romance. Even if you don’t use it to reach top shelves, it’s a design statement.

    Find vintage wooden library ladders at estate sales or antique shops ($150–$500) or reproduction versions on Wayfair, Etsy, or Article ($200–$600). Smaller, budget-friendly versions exist ($80–$150) if you want to test the look first.

    Position against your tallest shelves. A weekend installation if mounting permanently, or it can simply lean for renters. Budget $150–$400.

    This single piece transforms your space into something aspirational. It says “this is a real library,” not just a shelf with books.

    20. Style Upper Shelves with Decorative Spines Out

    Upper shelves deserve careful styling. Showing beautiful spines prominently creates a gallery effect and draws the eye upward.

    Choose your most visually striking books—beautiful leather spines, interesting typography, or unique colors—and arrange spine-out on upper shelves, organized either by color gradient or size. Resist adding objects here; let the spines be the star. Lower shelves can have more mixed styling.

    This arrangement takes 30 minutes and costs nothing.

    The effect is sophisticated and intentional. Your eye travels upward, and the upper shelves feel like a curated collection, not overflow storage.

    21. Incorporate Vintage Bookplates and Labels

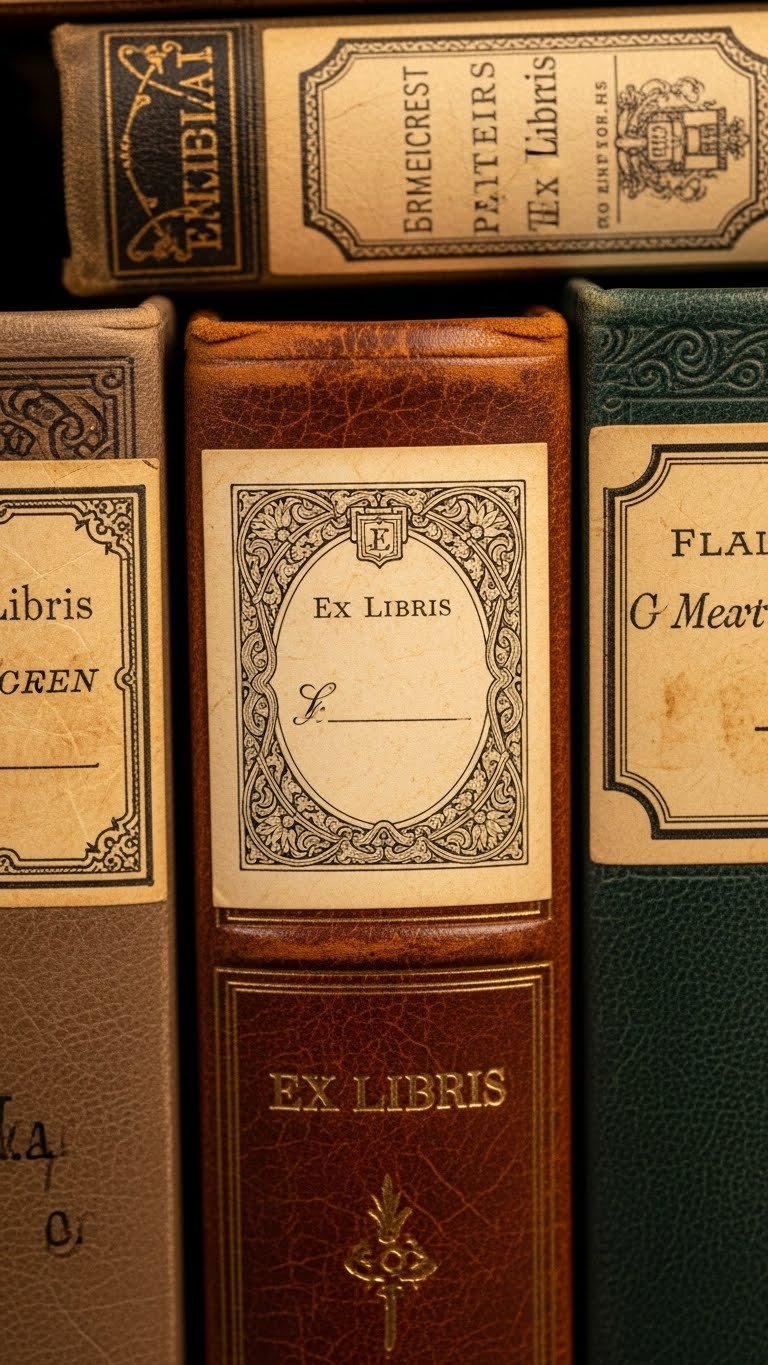
    Vintage bookplates and library labels add authentic detail and tell a story of previous ownership—very old-world charm.

    Find vintage bookplates on Etsy ($0.50–$3 each), or print reproduction bookplates for your own use ($10–$20 for a pack). Subtly display them by leaving a few books slightly open to show the bookplate, or stack books with visible labels.

    Budget $10–$30 and 15 minutes to incorporate naturally.

    These small details reward close inspection. They make viewers feel like they’re discovering secrets in your collection, which deepens the sense of authenticity.

    22. Create a Tiered Height Arrangement

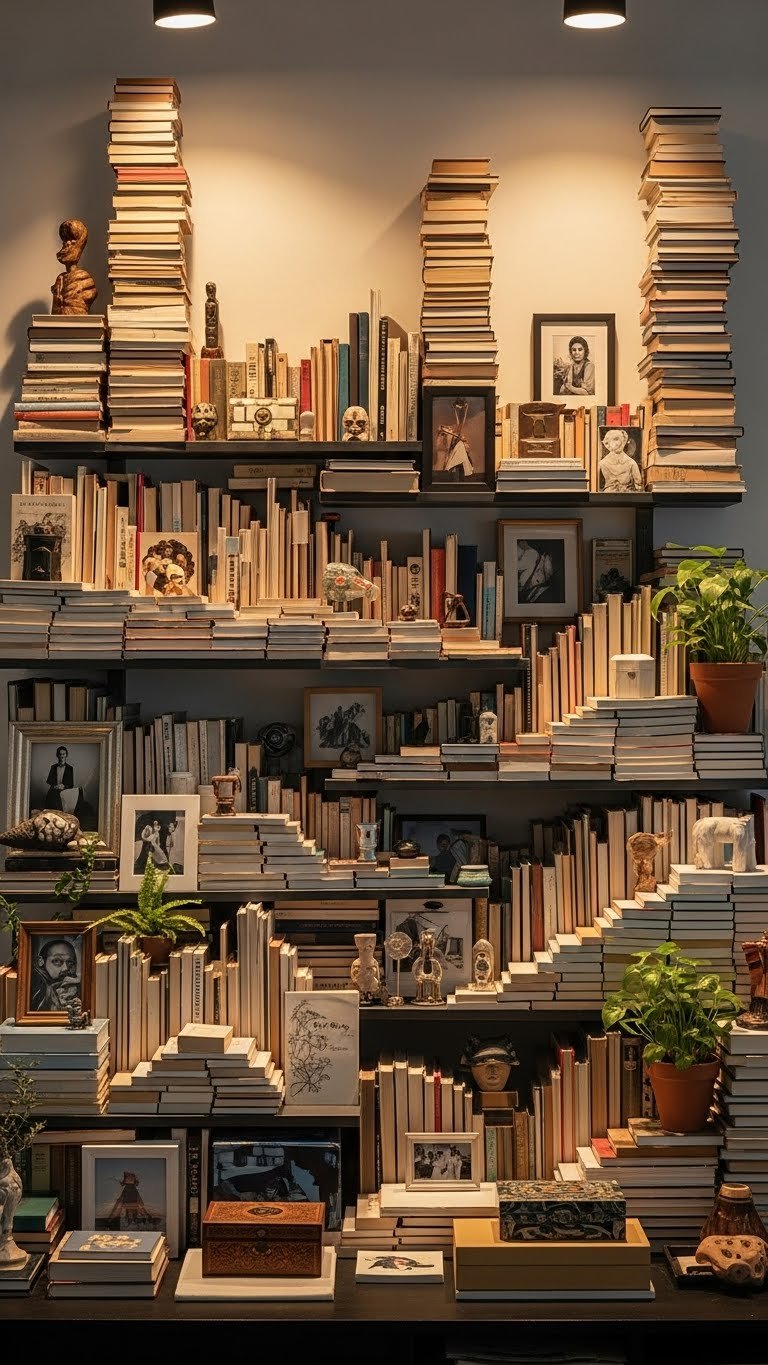
    Vintage libraries evolved naturally over time with irregular heights and depths. Mimicking this randomness looks more authentic than perfect alignment.

    Vary your book stacks: place some flat, some vertically, some leaning. Position objects at different depths—some flush against the back, some pulled forward. This creates visual movement and texture. Takes 45 minutes to arrange and costs nothing.

    The result looks lived-in and collected, not designed. It reads as real, which is ultimately what old-world charm means.

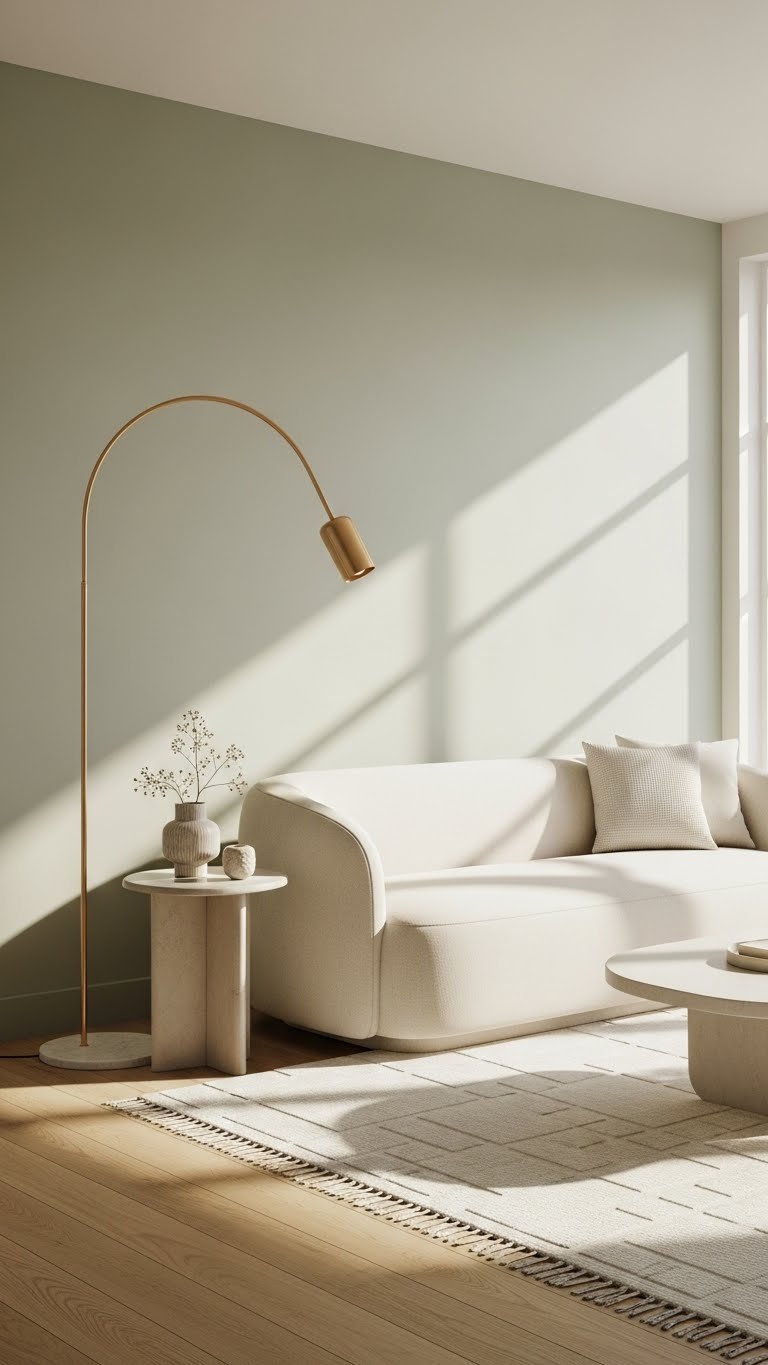
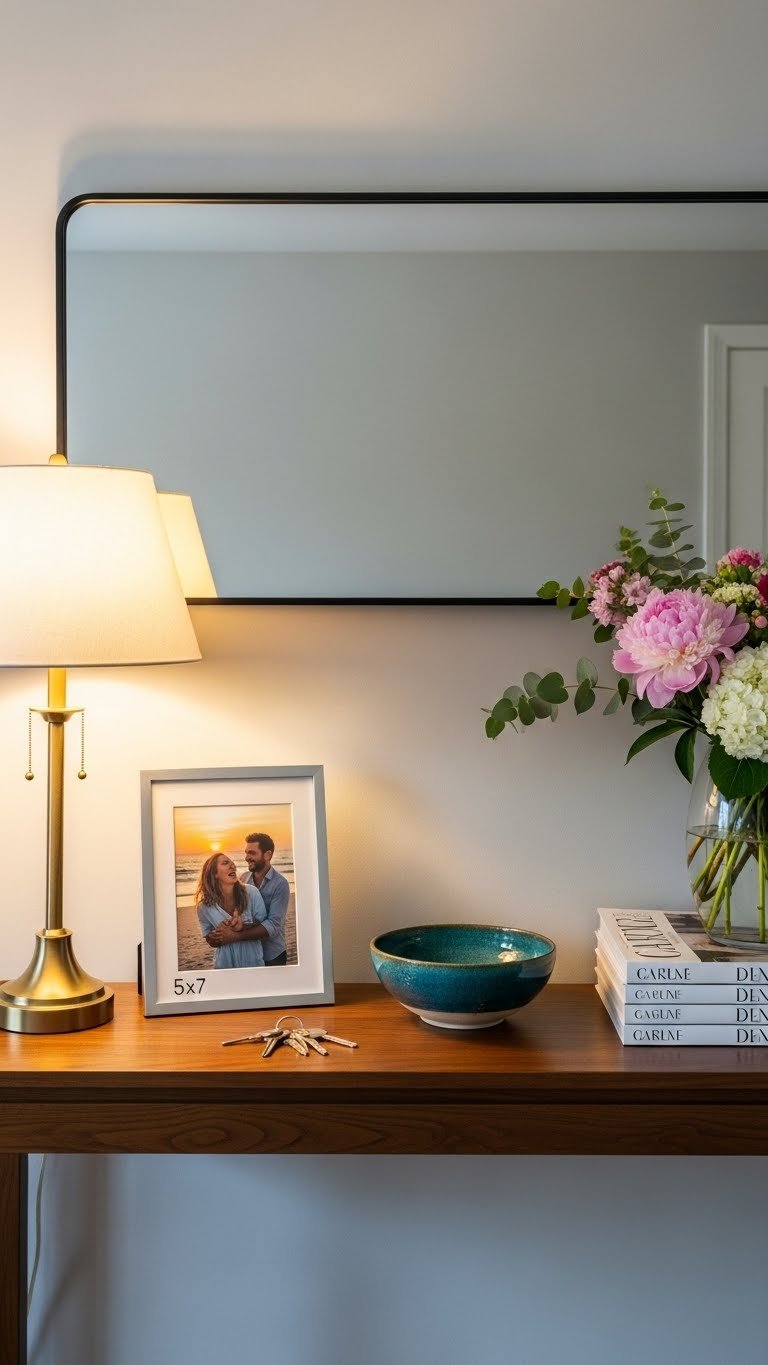
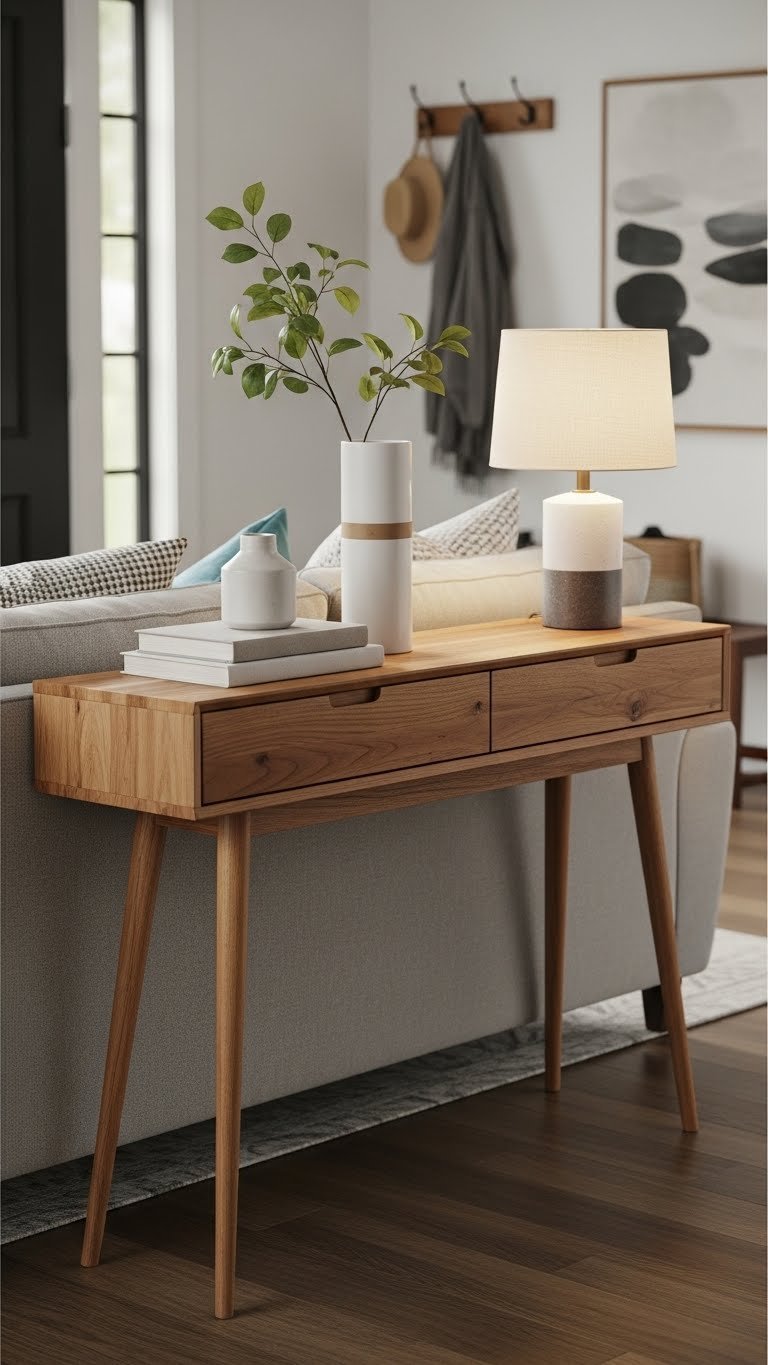
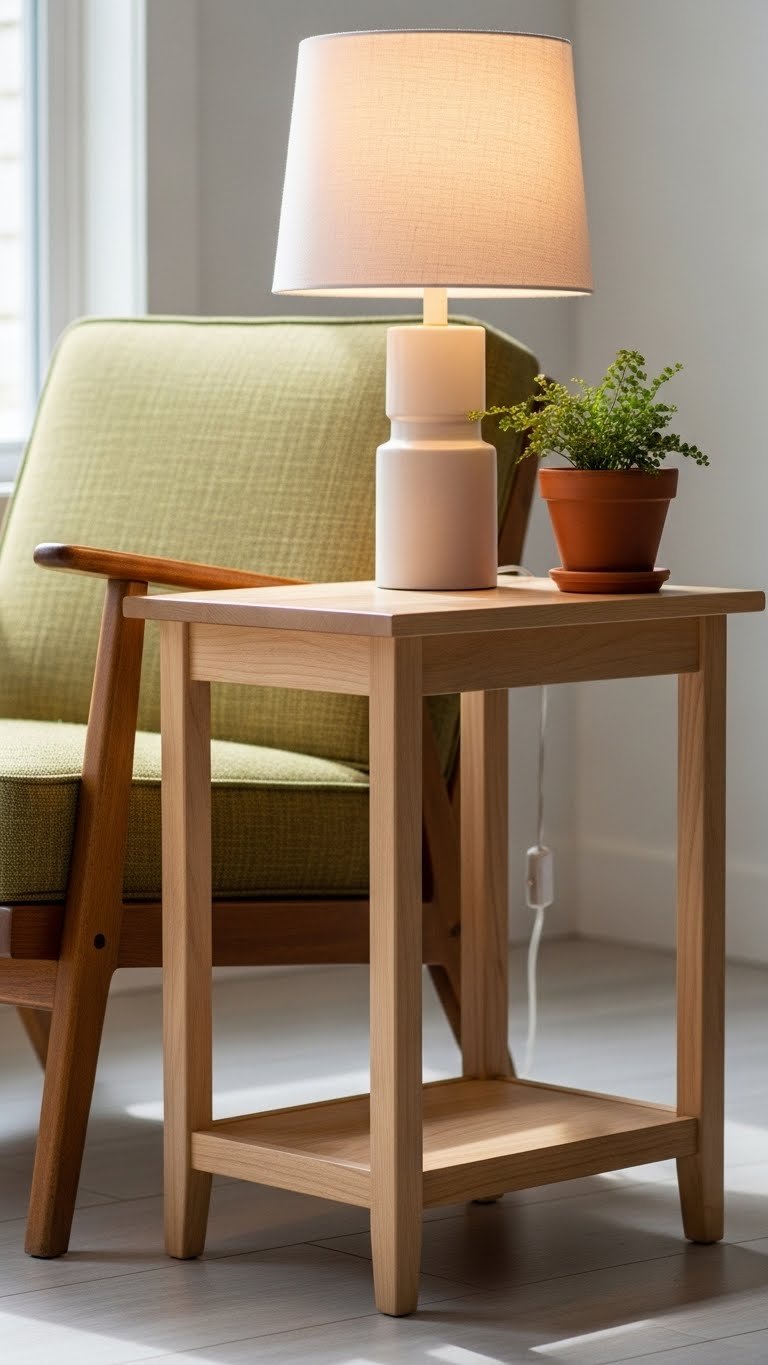
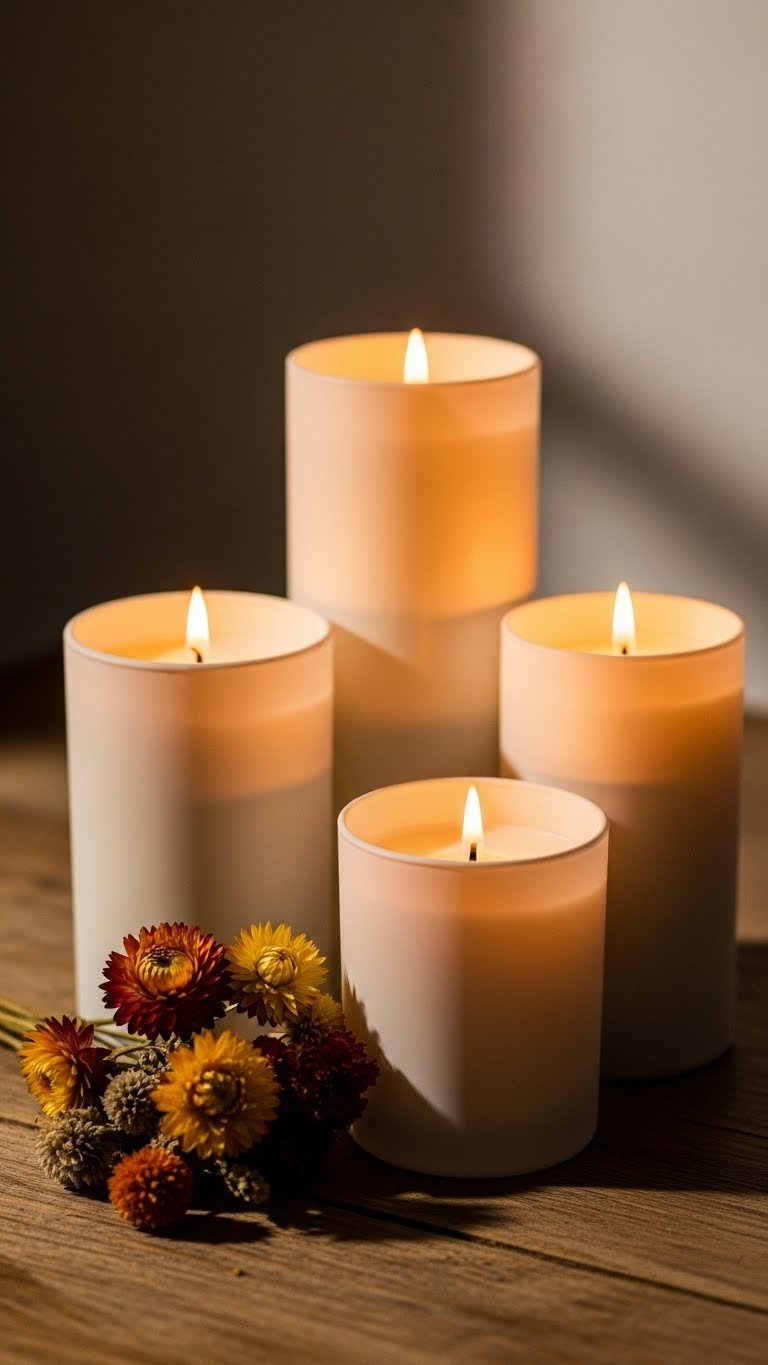
    23. Add Candlesticks or Vintage Lamps to Shelves

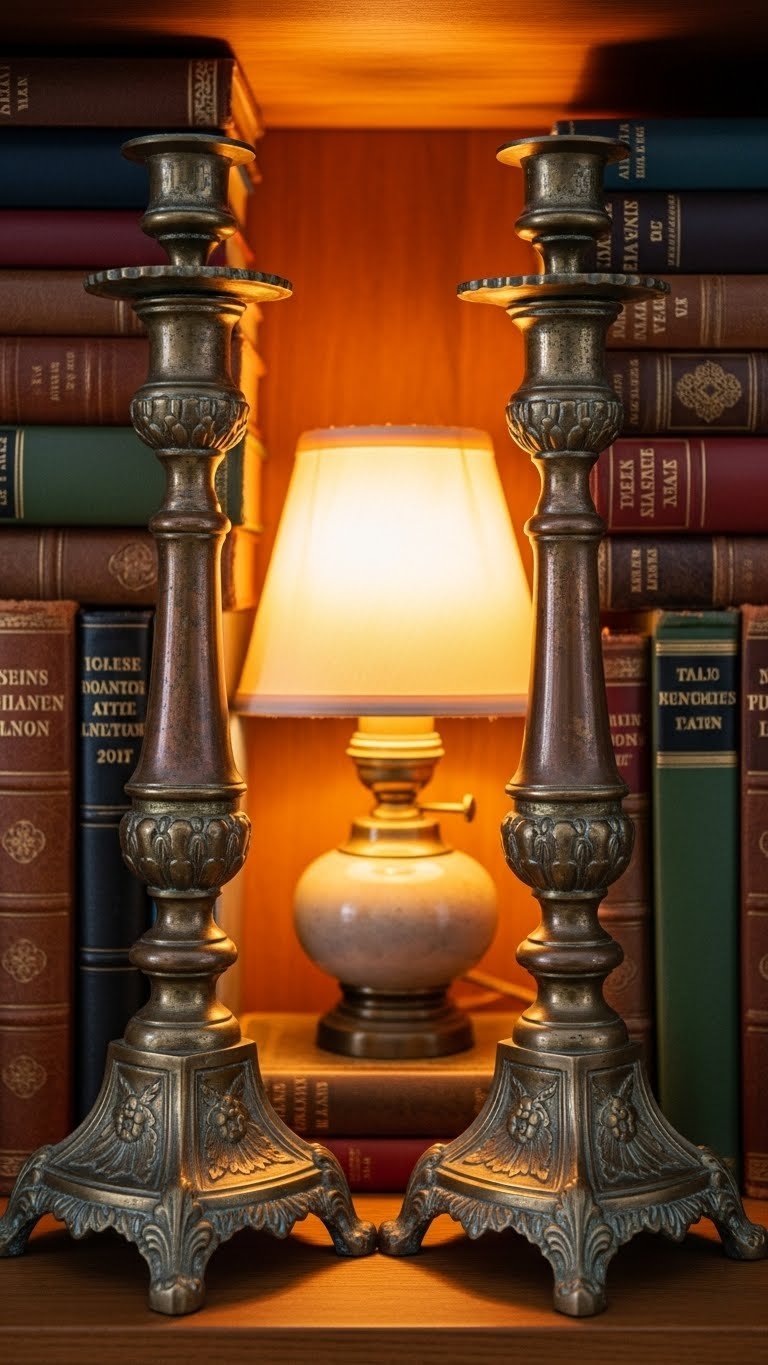
    Candlesticks and small vintage lamps add warmth and functionality to styled shelves. They’re deeply old-world without being over-the-top.

    Hunt Etsy or antique shops for brass or bronze candlesticks ($15–$50), vintage brass lamps ($30–$80), or even newer brass pieces from HomeGoods ($20–$40) that read as vintage. Group a pair of candlesticks together with books stacked around them, or position a small lamp where it can cast light over a reading chair.

    Budget $30–$100 and 15 minutes to arrange. Battery-operated candles ($5–$10) add safety if you go the candlestick route.

    These objects make your shelf feel like a room rather than storage. They invite touch and use—whether lighting candles while reading or using a small lamp for task lighting.

    24. Display Vintage Bookmarks and Leather Journals

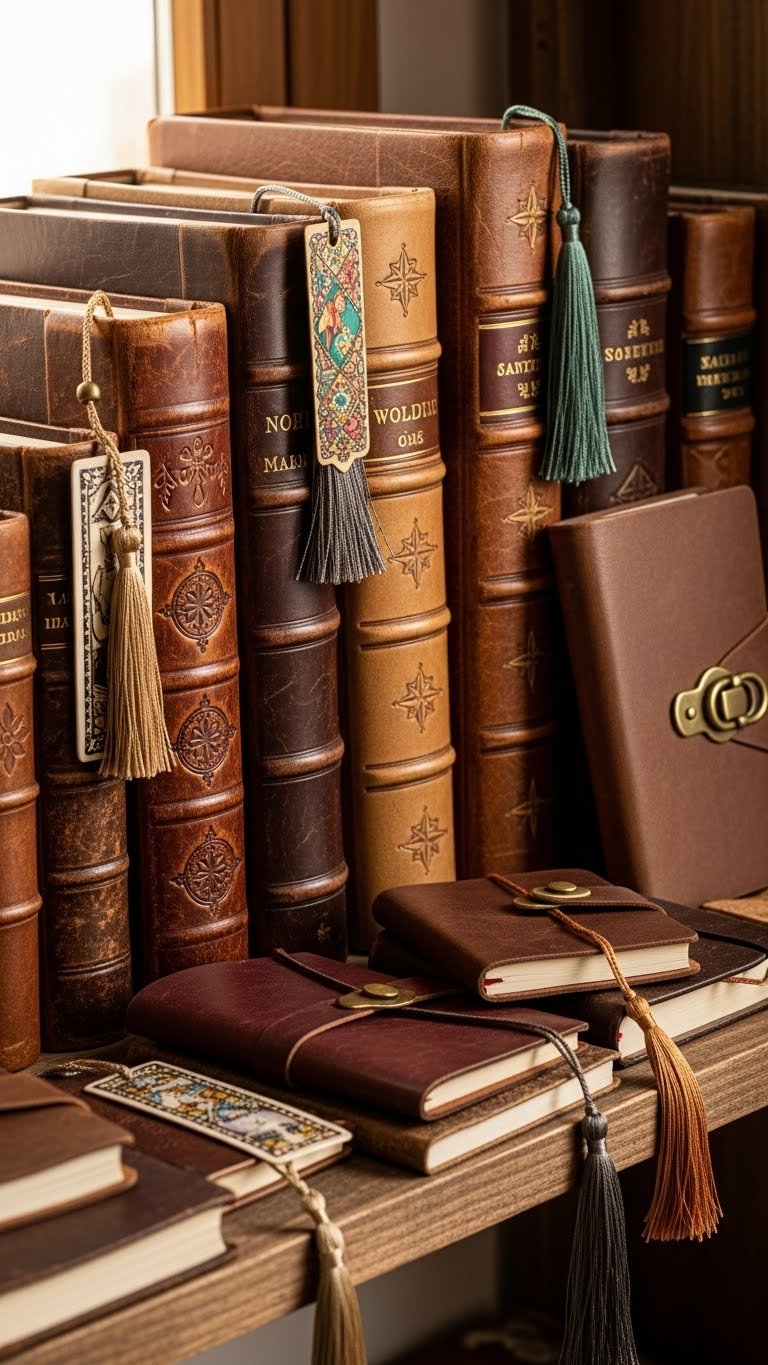
    Books about books deepen the literary narrative. Vintage journals, notebooks, and bookmarks add tactile, layered authenticity.

    Find vintage leather journals on Etsy ($20–$50), bookmarks at estate sales or antique shops ($2–$10), or modern reproduction journals from Leather Factory or Barnes & Noble ($15–$40). Position journals like actual books, let bookmarks peek from pages, and arrange naturally among your collection.

    Budget $30–$100 and 15 minutes to integrate.

    These objects create a sense that this is an active, lived-in collection—not a static display. They suggest reading, note-taking, and intellectual engagement.

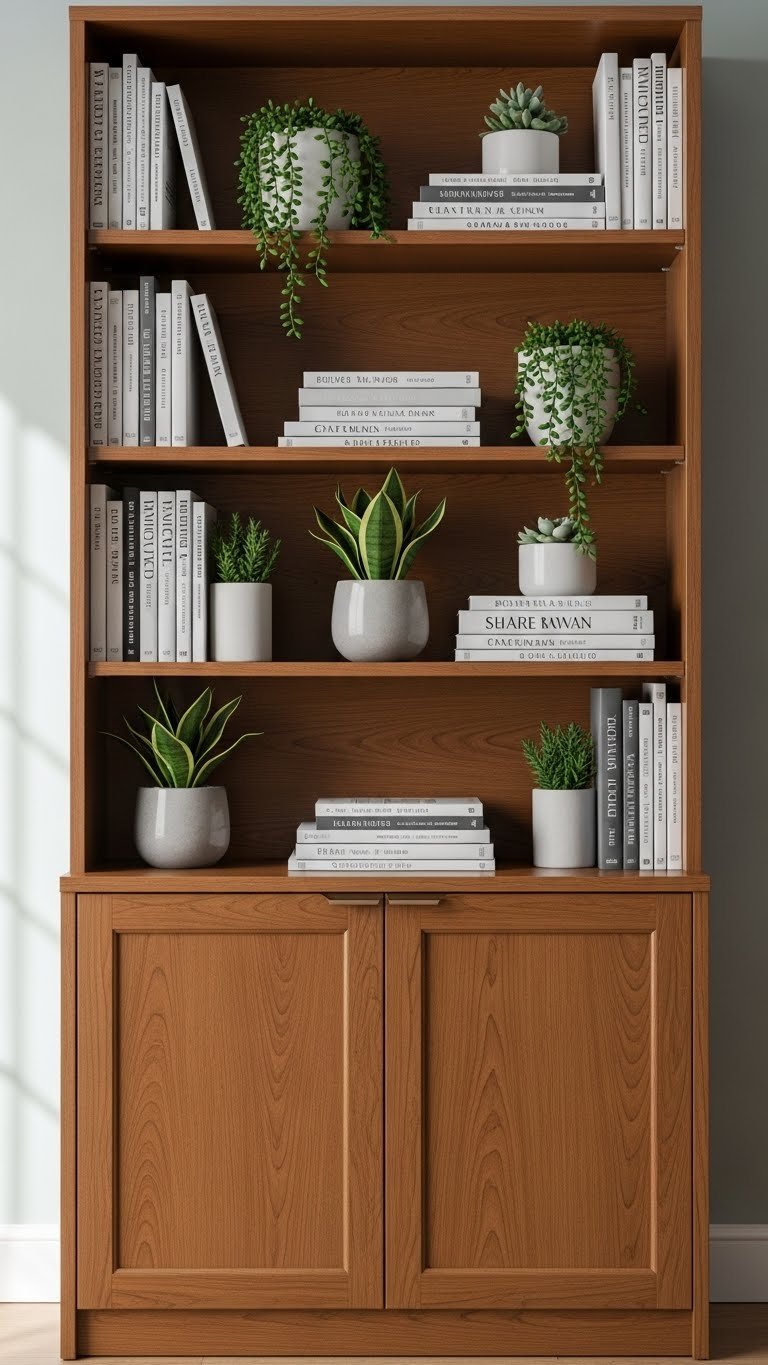
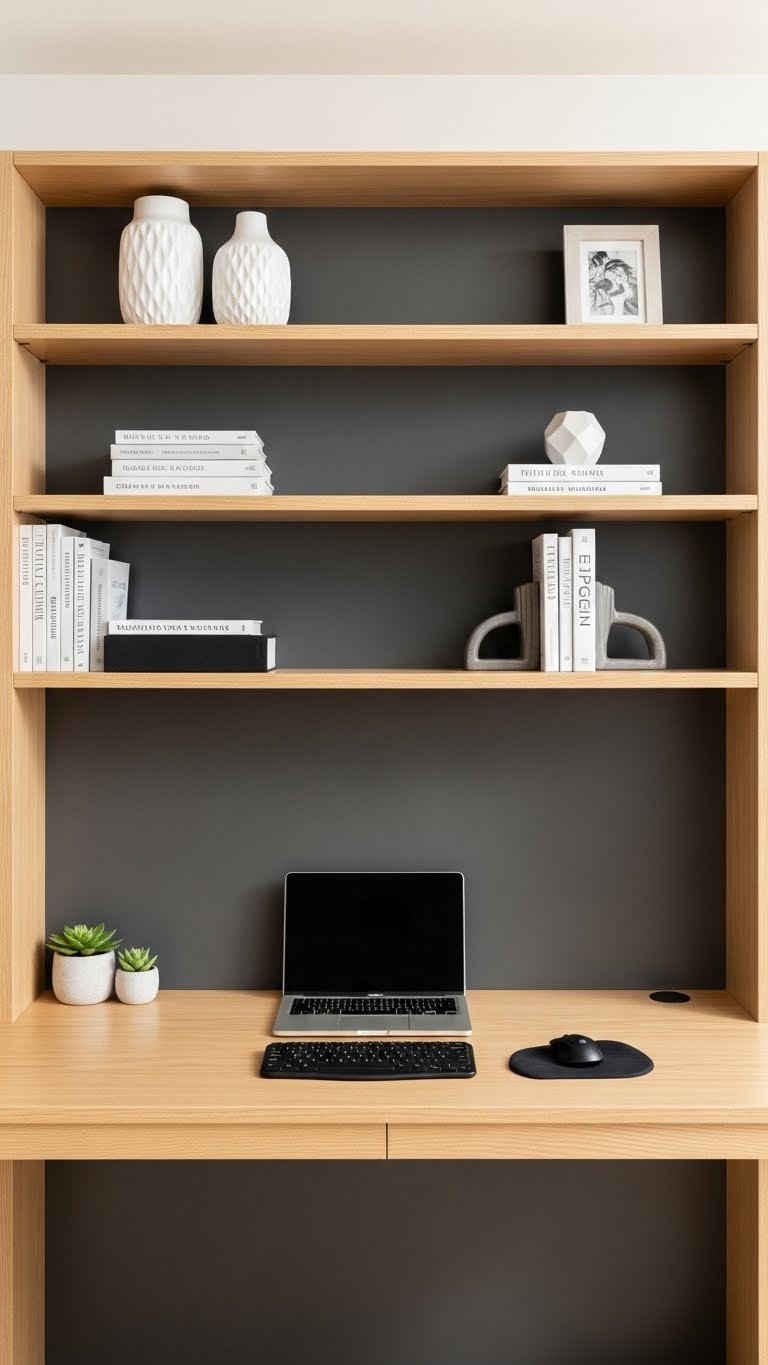
    25. Mix Dark Wood Shelves with Light Backing

    Contrast between shelf color and wall color dramatically impacts vintage aesthetic. Dark shelves against light walls look gallery-like and intentional.

    Paint or wallpaper your wall in cream, soft white, pale sage, or dusty blue ($30–$80 for paint, $50–$150 for wallpaper). Install or keep your dark wood shelves. The contrast immediately becomes sophisticated.

    Budget $50–$200 for wall treatment and a few hours for painting or wallpapering.

    This simple decision elevates your entire collection. Books gain presence, metals catch light more effectively, and the whole shelf reads as more intentional than if everything blended together.

    26. Curate a Specific Literary Theme or Era

    The most compelling vintage libraries feel like they tell a specific story. Curating by theme—Victorian literature, 1920s first editions, nature writing—creates narrative depth.

    Start collecting intentionally around your chosen theme. Hunt estate sales, Etsy, and AbeBooks for books fitting your focus ($5–$50 each depending on rarity and condition). Build slowly; this might take several months or longer. Style supporting objects to echo your theme—period artwork, era-appropriate writing tools, or relevant decorative pieces.

    Budget $100–$500+ depending on your theme’s depth. This is a longer-term project, not a quick refresh.

    The result is a collection that feels serious and personally meaningful. Visitors immediately understand your passion, which is the deepest form of old-world charm.

    27. Frame and Display a Vintage Library Receipt or Card

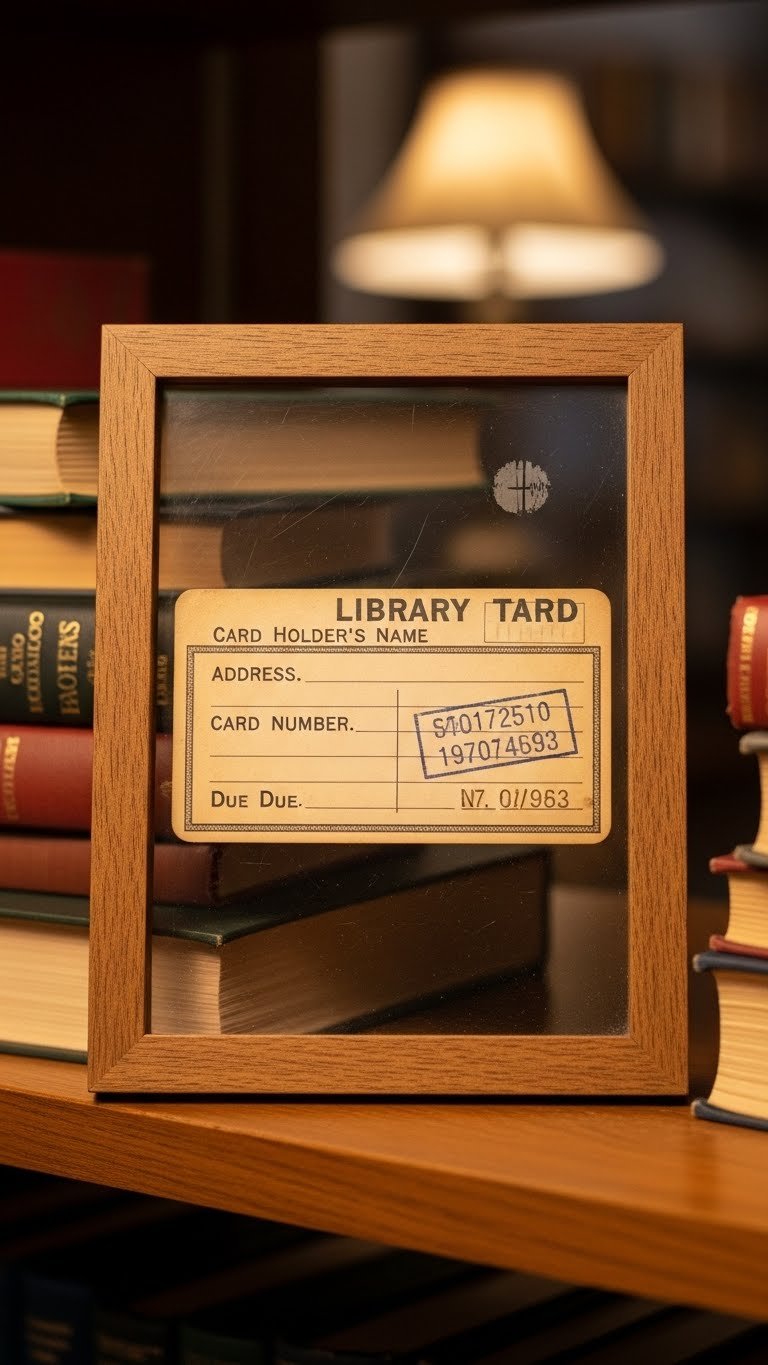
    A framed vintage library card or receipt is nostalgia personified. It’s a small detail with enormous charm.

    Search eBay, Etsy, or ask at local antique shops for vintage library cards or library receipts ($5–$25). Frame in a simple wood or metal frame ($5–$15) and hang above your shelves or position on a shelf. Alternatively, frame a vintage library checkout card you create yourself ($0–$20).

    Budget $15–$40 total.

    This single piece ties your entire collection’s narrative together. It says “I love libraries, I love books, and I celebrate this love.” It’s deeply personal and deeply charming.


    Ready to build your vintage library? Start with one idea this weekend—maybe source a few leather-bound classics from an estate sale or paint that one shelf a deep jewel tone. Your space will surprise you with how quickly it transforms. Save this post and come back to it as you layer in more touches. Which vintage library element speaks to you most?

  • 27 Bookcase Design Ideas That Elevate Any Home Office

    27 Bookcase Design Ideas That Elevate Any Home Office

    Your home office should make you want to sit down and get work done. Yet so many of us end up with cramped, cluttered spaces that feel chaotic instead of creative. The good news? Your bookcase is the secret weapon. A well-designed bookcase doesn’t just store books—it anchors your whole room, reflects your personality, and actually boosts your productivity. Whether you’re working with a tiny corner or an entire wall, we’ve gathered 27 practical bookcase design ideas that work for any budget, any space, and any style. From DIY hacks to statement pieces, you’ll find something that makes your office feel like a place you actually want to spend eight hours a day.

    1. Float Shelves for a Modern, Minimalist Look

    Floating shelves give you that high-end designer vibe without eating up precious floor space. They work in tight corners or along dead wall space that traditional bookcases can’t reach.

    Install floating shelves using heavy-duty wall brackets and a stud finder (about $30–$100 per shelf including hardware). IKEA, Home Depot, and Amazon all carry affordable options. The install takes about 30 minutes per shelf if you’re comfortable with basic drilling. No drilling skills? Many hardware stores offer installation services for a small fee. Pro tip: Stagger them at different heights to create visual interest and maximize storage without looking rigid.

    Your office instantly gains sophistication. The open design keeps the room feeling airy even when packed with books, and you can access everything at eye level without bending or reaching.

    2. Paint Your Bookcase a Bold Accent Color

    A painted bookcase becomes a focal point that anchors your entire office aesthetic. Instead of a boring wood tone, bold color creates instant personality.

    Choose a semi-gloss or satin finish paint in jewel tones (emerald, navy, terracotta) or soft pastels (sage, cream). Budget $15–$40 for paint and supplies. Use painter’s tape, primer, and two coats for a professional finish. The whole project takes a weekend and requires zero woodworking skills. Renting? Use a removable peel-and-stick paint alternative (about $25–$60) that protects your deposit.

    This single change makes your office feel intentional and curated. A bold bookcase backdrop photographs beautifully for video calls, too.

    3. Mix Open Shelving with Closed Cabinet Storage

    Open shelves look beautiful but require constant styling. Closed storage keeps the chaos hidden. Combining both gives you the best of everything.

    Look for open-and-closed bookcase hybrids (IKEA’s Billy with doors, $80–$200, or Wayfair’s designer options). The open top lets you display your best books and decor, while lower cabinets hide supplies, cords, and things you don’t want guests to see. Install in about 1–2 hours with basic tools. No assembly skills? Hire a handyman for $50–$100.

    You get a styled, editorial look on top with practical storage below. Your office looks polished, and you have a place for everything.

    4. Create a Two-Tone Bookcase with Paint and Stain

    Two-tone bookcases add sophistication without requiring major investment or construction skills. The contrast makes your space feel designed, not default.

    Paint the back panel of your existing bookcase while leaving the frame stained wood (budget $10–$30 for paint). Use painter’s tape for clean edges. The project takes 3–4 hours including drying time. Alternatively, buy a two-tone bookcase from West Elm ($400–$800) or IKEA ($150–$300) if you prefer new.

    This layered approach creates visual depth. Your bookcase becomes a piece of furniture rather than just storage, elevating your whole workspace.

    5. Organize Books by Color for a Magazine-Worthy Display

    Rainbow-organized books look stunning and actually make it easier to find titles visually. It’s the “bookshelf wealth” aesthetic that’s taking over social media for good reason.

    Sort your existing books by color (free) or buy a few coordinating titles from thrift stores or used sections ($10–$30 total). Arrange them spine-out for visual impact. Add 1–2 small decor pieces per shelf (plant, framed photo, small sculpture) to break up the color blocks. This takes about 1–2 hours to arrange and photograph well.

    Your bookcase becomes a visual asset that makes your home office feel curated and intentional. Video call backgrounds suddenly look professional and personal.

    6. Install Adjustable Shelving for Flexible Storage

    Standard bookcases force you into fixed shelf heights that waste space. Adjustable shelving lets you customize spacing for your actual stuff.

    Buy adjustable wall-mounted shelving systems like Elfa (Container Store, $100–$300 per unit) or Slingsby modular systems ($80–$250). Installation takes 1–2 hours with basic tools. These systems let you add, remove, or raise shelves anytime without tools. Budget-friendly alternative: Buy a traditional bookcase with adjustable pegs ($60–$150 from IKEA or Wayfair).

    You’ll stop wasting vertical space and actually use every inch. When your needs change, just adjust—no furniture replacement needed.

    7. Add LED Strip Lighting Behind Shelves

    Shelf lighting serves double duty: it makes your bookcase look like a high-end display and provides practical task lighting for your desk below.

    Install adhesive LED strip lights ($15–$40 on Amazon) along the top edge or behind shelves. Warm white (2700K) feels professional; cool white (5000K) energizes. Takes 10 minutes to install and plug in. Plug into a smart outlet ($15–$25) to control brightness via your phone.

    Your office gains upscale ambiance instantly. The warm glow makes late afternoon work sessions feel less draining, and your bookcase becomes a beautiful focal point, especially on video calls.

    8. Use Bookends as Decorative Styling Tools

    Bookends aren’t just functional—they’re miniature sculptures that break up visual monotony and add personality to your shelves.

    Collect mixed bookends in marble, brass, ceramic, or wood ($8–$20 per pair from Target, World Market, or West Elm). Buy 3–5 pairs in complementary finishes for $30–$100 total. Mix metals (no matching sets) for a curated gallery vibe. Arrange books in staggered heights using bookends to create rhythm.

    Your shelves instantly look styled and intentional. Bookends become conversation pieces that reflect your taste without taking up much space.

    9. Style Shelves in Threes for Visual Balance

    The “rule of three” is a design principle that makes any shelf arrangement look polished and intentional, not random or chaotic.

    For each shelf, create three distinct groupings: a stack of 3–5 books, one taller object (plant, vase, frame), and one smaller decorative piece. Use this pattern across multiple shelves. Source items from what you already own (free) or add 1–2 pieces per shelf from thrift stores or Target ($10–$30 per shelf). Arranging takes 30 minutes per bookcase.

    Suddenly your shelves look like they belong in a design magazine. This simple principle works whether you’re decorating a $50 budget bookcase or a $500 designer piece.

    10. Create a Reading Nook Around Your Bookcase

    Your bookcase can anchor a mini retreat space within your office. Add a chair, and your bookcase becomes the backdrop to actual relaxation.

    Place a small armchair ($150–$400 from Article, West Elm, or IKEA) or reading chair directly in front of your bookcase. Add a throw blanket ($20–$60) and side table ($40–$100) for your coffee or tea. This setup requires about 4 square feet of space but gives you a mental break zone without leaving your office.

    You create a psychological separation between work and rest even in a small space. A quick 10-minute reading break actually improves focus for the next work block.

    11. Display Collections Alongside Books

    Books aren’t your only option for shelf styling. Collections (vintage cameras, pottery, figurines) add personality and tell your story.

    Mix books with collected items from your interests or travels (free—use what you already own). Dedicate one shelf to a cohesive collection or scatter pieces throughout. Thrift stores are goldmines for affordable collectibles ($2–$10 per item). Arrange at varying heights for visual interest. This takes 30–60 minutes to arrange thoughtfully.

    Your bookcase becomes a gallery of your life, not just storage. Clients and colleagues see personality, making your office feel human and approachable.

    12. Install a Bookcase Ladder for Style and Function

    A library ladder isn’t just for show—it makes tall bookcases actually functional while adding undeniable style and character.

    Buy a decorative library ladder (brass, wood, or metal) from Wayfair ($150–$400), Etsy ($200–$600), or Target ($80–$150). Install takes 15–20 minutes (most come with hardware). Choose one that complements your bookcase material—brass for modern, wood for traditional. Budget this as a long-term investment but totally doable for maximizing a floor-to-ceiling bookcase.

    You gain actual access to upper shelves without a step stool. More importantly, the ladder becomes a design feature people notice—it makes your office feel intentional and literary.

    13. Incorporate Woven Baskets for Hidden Storage

    Baskets hide paperwork, cables, and office supplies while adding warmth and texture that pure books can’t provide alone.

    Buy 2–4 decorative woven baskets in various sizes ($15–$40 each from IKEA, Target, or Wayfair). Nestle them into shelf spaces where they fit snugly. Use them to corral pens, files, charging cables, and overflow supplies. No assembly needed—just place and fill. Budget $50–$150 total depending on how many you buy.

    Your bookcase gains visual warmth and texture. Everything stays organized and accessible without cluttering your desk surface.

    14. Use the Back Wall as a Backdrop for Styling

    If your bookcase sits away from the wall, the back becomes a hidden design opportunity. Paint or wallpaper it for surprising visual impact.

    Paint the area directly behind your bookcase in a complementary color ($10–$25 for paint) or apply removable peel-and-stick wallpaper ($20–$50, renter-friendly). Choose a soft shade that pops slightly—dusty pink, sage, or warm gray work beautifully. Paint or apply in 1–2 hours.

    When colleagues see your bookcase from the side, they notice the surprising color backdrop. It signals that you’ve thought about your space, elevating the whole aesthetic.

    15. Create Symmetry with Matching Bookcase Pairs

    Two matching bookcases create a statement-making, intentional look that feels designed rather than assembled.

    Buy two identical bookcases ($100–$300 each depending on size) and position them on either side of your desk, window, or door. Fill them with similar book layouts and matching decor (two matching planters, two identical frames) for visual balance. This works beautifully even in small spaces—two slim bookcases side-by-side create a focal wall. Assembly and styling takes 2–3 hours total.

    Your office instantly feels more put-together and professional. The symmetry creates calm and order, which actually boosts focus.

    16. Go Minimalist with a Single-Shelf Floating Display

    Not every office needs a massive bookcase. Sometimes a single floating shelf creates more impact than overwhelming storage.

    Install one long floating shelf ($30–$80 including hardware) and display only your favorite 5–10 books plus one meaningful decor item. This works especially well in small offices or studio apartments where a full bookcase would overwhelm the space. Installation takes 30 minutes.

    You get the psychological benefit of organized, curated storage without cramming. Your office feels intentional and calm rather than cluttered.

    17. Use Corner Bookcases to Maximize Tight Spaces

    Corners are dead space in most offices. A corner bookcase transforms wasted real estate into functional storage.

    Buy a corner-specific bookcase ($80–$250 from IKEA, Wayfair, or specialty retailers) or use corner floating shelves ($40–$100 total for a set of three). These maximize vertical space without claiming precious floor area. Install takes 1–2 hours depending on configuration. Renter-friendly tip: Some corner bookcases stand freely without wall installation ($100–$200).

    You’ve created usable storage from nothing. Small offices suddenly feel better organized without furniture taking up extra space.

    18. Mix Books Horizontally and Vertically for Visual Texture

    Stacking some books horizontally breaks up the monotony of all vertical spines and creates natural visual interest without extra styling effort.

    Stack 3–5 books horizontally on one shelf, stand others vertically. Place a decorative object on top of horizontal stacks (small plant, frame, sculpture). This costs nothing if you use existing books and requires just 15 minutes of rearranging. The “rule” is roughly 70% vertical, 30% horizontal for balance.

    Your shelves look styled and intentional, like you’ve thought about every placement. This simple technique works with any color scheme or bookcase style.

    19. Install Bias Lighting Behind Your Bookcase

    Bias lighting goes beyond function—it creates ambiance that transforms your office into a space you actually want to spend time in, especially for evening work sessions.

    Install RGB LED strip lights ($20–$50 on Amazon) along the top back edge of your bookcase, or run them down the sides. Choose warm white for professionalism or play with soft colors (blue, amber) for mood. Plug into a smart controller ($10–$20) to adjust brightness and color. Installation takes 15 minutes.

    Your office transforms into a high-end hotel workspace aesthetic. The ambient light makes late-night work sessions feel intentional rather than draining, and your bookcase becomes a beautiful focal point.

    20. Create a “Current Reads” Display Shelf

    Most books hide their covers on spines. Dedicating one shelf to face-out displays celebrates the actual design while creating a mini bookstore vibe.

    Pick one shelf (preferably at eye level) to display 3–5 books face-out. Rotate them monthly or weekly. This works especially well for books you’re currently reading or your absolute favorites. Costs nothing—you’re just rearranging. Takes 10 minutes to set up and maintain.

    This simple change makes your bookcase feel alive and curated. It signals that you actually read and have interests, not just decoration.

    21. Add Glass Shelving for a Light, Modern Feel

    Glass shelves create an illusion of floating storage without visual weight. They work beautifully in small offices or modern aesthetics.

    Install glass floating shelves ($40–$100 each from IKEA, CB2, or Wayfair). These require secure wall anchoring, so hire a handyman if uncertain ($50–$100). They’re maintenance-intensive (dust and fingerprints show), so they work best in offices where you don’t share space. Install takes 1–2 hours.

    Your office gains a sophisticated, gallery-like quality. Glass creates openness even when shelves are full, making small spaces feel larger.

    22. Use Pegboard Backing for Flexible, Modular Display

    Pegboard backing lets you change your bookcase configuration anytime without tools. It’s also a major current design trend that photographs beautifully.

    Install pegboard ($15–$30 per sheet) on the back wall behind your bookcase or inside the bookcase if it’s open-backed. Add pegboard shelves, hooks, and accessories ($20–$50 total). Rearrange anytime depending on your storage needs. Installation takes 2–3 hours but offers endless flexibility afterward.

    You get a designer-approved look that’s totally customizable. Your bookcase setup evolves with your needs instead of staying static.

    23. Style with Meaningful Decor, Not Just Books

    Bookcases that display only books feel sterile. Adding personal items tells your story and makes your office feel human.

    Intersperse books with meaningful items: framed photos ($5–$20 each), plants ($5–$30), art prints ($10–$40), candles ($8–$20), or travel souvenirs (free if you already have them). Spend 1–2 hours arranging until it feels balanced. Aim for roughly 60% books, 40% decor.

    Your bookcase becomes a conversation starter. When clients or colleagues see photos, plants, and personal touches, they see a human, not just a professional—and that builds connection.

    24. Create a Digital Archive Tag System for Organization

    If you actually use your books (not just display them), a subtle tagging or color-coding system keeps everything findable without looking chaotic.

    Use small colored stickers ($5–$10) to tag books by category (work, fiction, design, etc.) or white labels ($8–$15) to mark by author’s last name. Keep tags small and subtle so they don’t ruin the aesthetic. Takes about 30 minutes to tag an average bookcase. This works best if you have 100+ books.

    You actually use your bookcase instead of just staring at it. Finding that one book you need becomes instant, and your office functions better.

    25. Combine Bookcase with Desk Space for an All-in-One Workstation

    Instead of separate furniture, buy a bookcase with integrated desk space (often called a “bookcase desk” or “shelving unit desk”). These maximize every square inch, especially for small offices.

    Look for combination bookcase-desk units ($200–$600 from IKEA, Wayfair, or Amazon) that attach a desk surface to a bookcase base. These work beautifully in studio apartments or small home offices. Assembly takes 2–3 hours or hire help ($75–$150). You’ll also need a task chair ($100–$300).

    Your whole workspace becomes one cohesive, intentional unit. You save floor space, create visual continuity, and everything you need sits right in front of you.

    26. Paint the Interior of an Open Bookcase Back Panel

    Even if you can’t paint the wall behind your bookcase, painting the bookcase’s interior back panel creates the same premium effect.

    If your bookcase has a removable back panel, paint it with semi-gloss paint in a contrasting shade ($8–$20 for paint). If it’s built-in, paint directly on it. Choose colors that make your book covers pop—deeper tones (navy, forest green, charcoal) work beautifully with colorful books. Takes about 2–3 hours including dry time.

    The painted interior frames your collection beautifully. Even with the same books, the background color completely changes the shelf’s visual impact, making it look professionally designed.

    27. Rotate Seasonal Decor on Your Shelves

    Your bookcase doesn’t have to stay static all year. Seasonal rotation keeps your office feeling fresh and intentional as seasons change.

    Every 6–8 weeks, swap out 2–3 decor items (seasonal plants, themed items, color-coordinated books) without moving everything. Spring: pastels and fresh plants. Fall: warm tones and dried botanicals. Winter: deep jewel tones and cozy textures. Summer: bright, light combinations. Costs nothing if you use existing items; refresh takes 30 minutes.

    Your office evolves subtly throughout the year. You stay engaged with your space, and it never feels stale or ignored.


    Save this post and pick one idea to try this weekend—whether it’s painting a back panel, adding lights, or just rearranging your books by color. Small changes add up fast, and your home office deserves to feel like a place you’re excited to work in.

  • 27 Multi-Use Furniture Ideas Every Student Should Try

    27 Multi-Use Furniture Ideas Every Student Should Try

    Your dorm room is about 200 square feet of real estate—and you need it to be a bedroom, study zone, lounge, and storage unit all at once. Multi-use furniture isn’t just a nice-to-have; it’s your secret weapon for fitting everything you actually need without feeling cramped. We’ve rounded up 27 furniture ideas that pull double (or triple) duty, designed specifically for renters and budget-conscious students who refuse to sacrifice style for function. From ottomans that hide storage to beds that create extra seating, these pieces solve the space puzzle while looking intentional. Ready to make every inch count? Let’s dive in.

    1. Invest in a Storage Ottoman That Works as Seating

    An ottoman is your MVP piece—it’s seating, a footrest, a coffee table, and hidden storage in one compact item. When you open the lid, you get instant access to extra bedding, seasonal clothes, or supplies you don’t need daily. Look for ottomans with soft-close lids (so they don’t slam your fingers) and sturdy construction that can handle regular weight.

    Brands like IKEA’s EKTORP ($80–$120), Amazon’s Ornavo Home Ottoman ($60–$90), and Wayfair’s West Elm collection ($150–$250) offer renter-friendly options that don’t require assembly skills. Measure your doorway before ordering—larger ottomans won’t fit through narrow dorm entrances. Installation is literally just unboxing; softer upholstery hides stains better than leather finishes.

    You get a seat for friends, a soft landing spot for your feet after class, and hidden storage for everything else.

    2. Choose a Lofted Bed Frame to Unlock Floor Space

    A lofted bed lifts your mattress 4–5 feet high and opens up an entire room-sized area underneath for a desk, seating nook, or storage unit. This is the single biggest space-multiplier for tiny dorms. You essentially gain a second room on your floor without adding square footage.

    Metal lofted frames run $150–$400 depending on weight capacity and adjustability. IKEA’s TUFFING frame ($180–$220) is student-approved and assembly-takes-two-people-and-two-hours. Amazon carries dozens of options with safety railings and built-in shelves. Check your dorm’s weight limits and clearance from the ceiling before purchasing. Some dorms restrict lofting entirely, so verify with your housing office first.

    Once installed, you’ve doubled your usable room layout and eliminated the cramped feeling completely.

    3. Add Rolling Storage Bins Under the Bed

    You already have square footage under your bed—you just haven’t claimed it yet. Flat rolling bins slide in and out smoothly, store more than you’d think, and cost almost nothing. Unlike boxes that get stuck, wheels mean you can actually access what’s inside.

    Grab IRIS weathertight bins ($25–$40 per bin) or Target’s Room Essentials collection ($15–$30) in whatever size fits under your bed frame. Buy two for full coverage. Label each bin’s contents on a small tag so you’re not hunting around blind. The investment is under $50–$80 total, and you’ve created storage for an entire season’s worth of clothes without buying furniture.

    Your off-season wardrobe and extra bedding finally have a home, and your floor stays clutter-free.

    4. Use a Hanging Organizer for Wall Space Storage

    Over-the-door organizers give you 10–15 pockets of storage without drilling, nailing, or taking up floor space. Use them for charging cables, snacks, stationery, hair products, or anything small that usually ends up in a pile. They’re renter-gold because they hang on any door and remove cleanly.

    Target’s SturdyMax collection ($12–$18), Amazon’s Homz over-the-door organizer ($10–$20), and IKEA’s fabric pockets ($8–$15) are all solid options. Installation takes two minutes: hang the hooks and slide the organizer on. The key is not overstuffing—heavier items should go in lower pockets to prevent tipping.

    Your essentials are visible, accessible, and organized. No more digging through drawers or losing chargers under the bed.

    5. Swap Your Dresser for a Tall Wardrobe Cabinet

    Traditional dressers take up tons of floor space and require a ton of drawer management. A wardrobe cabinet with hanging rods combines closet functionality with furniture storage—and takes up roughly the same footprint as a dresser.

    IKEA’s DOMBAS wardrobe ($120–$180), Wayfair’s simple cabinets ($150–$250), and Amazon’s portable closet solutions ($80–$140) all work. Look for styles with both a hanging rod and shelves so you can store pants, jackets, and folded items in one piece. Assembly usually takes 45 minutes with the instructions clearly laid out. Measure your ceiling height first—tall cabinets won’t fit in rooms with low ceilings.

    You’ve replaced two pieces of furniture with one, gained hanging space for proper garment storage, and made your dorm feel less cluttered instantly.

    6. Get a Bed Frame with Built-In Drawers

    Instead of treating the space under your bed as wasted real estate, choose a frame with built-in drawers from day one. These frames combine bedding, storage, and support in one thoughtful design. You don’t need a separate storage solution—it’s already there.

    IKEA’s MALM frame with drawers ($180–$280), Wayfair’s solid wood platforms ($200–$350), and Amazon’s upholstered frames ($150–$280) all include drawer systems. They cost more upfront than basic frames, but you’re avoiding the purchase of separate storage bins. Assembly ranges from 30–90 minutes depending on complexity. Make sure to measure your doorway before ordering.

    Built-in storage means everything has a designated spot, and your under-bed space is actually usable.

    7. Layer a Desk-Shelf Combo Unit for Study + Display

    A desk with shelves above it combines your work surface and display space without sprawling across your room. It’s perfect for small dorms where a traditional desk takes up half the floorplan.

    IKEA’s LISABO desk with shelves ($200–$300), Wayfair’s ladder-style combinations ($150–$250), and Amazon’s wall-mounted options ($100–$200) let you work while keeping books, plants, and inspiration visible. Some styles are floating (no visible legs), which makes the room feel more open. Installation takes 1–2 hours if you’re comfortable with basic tools. Use a stud finder to locate wall support before mounting anything permanent—or ask your dorm’s maintenance team for help.

    Your study area looks intentional, organized, and functional. No more papers scattered around because you had nowhere to put them.

    8. Choose a Chair That Doubles as Guest Seating and Storage

    A saucer chair or papasan seat isn’t just comfy—it’s the perfect guest furniture that also works as a bedroom anchor. Some styles have hidden storage underneath. It gives you casual seating that’s way more stylish than a generic folding chair.

    Urban Lifestyles Faux Fur Saucer Chair ($60–$100), Target’s comfy chair collection ($80–$150), and Amazon’s papasan options ($50–$120) come in fabric options that hide dirt and match most dorm aesthetics. If you want the storage bonus, look for models with ottomans that have zippered bases. Most assemble in 10–15 minutes.

    Your room now has multiple seating options, making it feel more like a hangout spot than a solo sleeping quarters.

    9. Add a Compact Bookcase for Vertical Storage

    Bookcases force you to use vertical space instead of spreading stuff across your floor. A tall, narrow style takes up minimal footprint but stores a shocking amount. Style it with textbooks, decor, and personal items for a curated look.

    IKEA’s BILLY bookcase ($30–$80), Target’s tall narrow options ($50–$120), and Wayfair’s industrial styles ($100–$200) all work in small rooms. Choose a design no wider than 24 inches to avoid overcrowding your space. Assembly is usually 15–30 minutes. Anchor it to the wall if you’re putting heavy textbooks on multiple shelves—unanchored tall furniture can tip over.

    Your books and keepsakes have a proper home instead of stacking on your nightstand and desk.

    10. Use a Folding Room Divider to Create Zones

    A folding divider creates psychological separation between your sleep and work zones without taking up permanent space like a wall would. It’s renter-safe, movable, and instantly makes your room feel more organized. Bonus: it can hide a messy corner during video calls.

    Target’s room dividers ($40–$80), IKEA’s folding screens ($30–$60), and Amazon’s fabric panels ($35–$100) come in styles from minimalist to patterned. Most weigh under 10 pounds and assemble in seconds. Choose a height that matches your bed (usually 5–6 feet) so it actually creates a visual break.

    Your dorm feels less like one box and more like distinct areas for different activities.

    11. Opt for a Floating Desk to Save Floor Real Estate

    Floating desks are wall-mounted surfaces that leave your floor completely open underneath. They create a dedicated work zone without eating into your already-limited square footage. They look minimal and modern while being super functional.

    IKEA’s NORBERG floating desk ($60–$100), Wayfair’s wall-mounted options ($80–$150), and Amazon’s simple shelves ($40–$90) are solid budget choices. Installation requires finding wall studs and using proper anchors—this is one situation where asking maintenance for help is completely reasonable. Floating desks support 25–50 pounds depending on the model, so check weight capacity before loading it with a monitor and supplies.

    You’ve claimed a work zone without giving up any floor space, and your room instantly looks less cramped.

    12. Pick an Expandable Closet Rod to Maximize Hanging Space

    Your dorm’s standard closet rod probably maxes out around 12 hanging items before it’s slammed. An expandable second rod doubles your hanging capacity in seconds and costs almost nothing. It’s one of the easiest upgrades you can make.

    Simple expandable rods cost $8–$20 at Target, IKEA, and Amazon. Installation takes two seconds: expand it to fit your closet width and slide it onto the existing rod, creating two tiers. It holds about 20–25 pounds per rod, which is enough for everyday clothes. The lower rod will hang about 3 feet down, so make sure that height works for your closet layout.

    Your hanging closet suddenly fits twice as many clothes without buying a single new piece of furniture.

    13. Invest in a Desk Hutch for Overhead Storage and Organization

    A desk hutch sits on top of your desk or is wall-mounted above it, creating overhead storage that keeps your work surface clear. It’s perfect for organizing supplies, books, and decor without sprawling sideways across your desk.

    IKEA’s MÖRBYLÅNGA hutch ($150–$250), Wayfair’s floating options ($120–$220), and Amazon’s compact hutches ($80–$150) range in size and style. Some mount to the wall; others sit on top of an existing desk. Assembly usually takes 45–60 minutes. Make sure your desk surface can support the hutch weight before installing—many are designed to sit directly on wood without additional fastening.

    Your desk becomes an actual work zone instead of a catch-all surface, and you’ve added storage without buying a second piece of furniture.

    14. Use a Nightstand with Built-In Shelves or Drawers

    A nightstand should earn its real estate by doing more than holding your lamp. Look for models with shelves, drawers, or both so it becomes a catch-all for books, phone chargers, skincare, and other bedside essentials.

    IKEA’s RAST nightstand ($30–$50), Target’s multi-shelf options ($40–$80), and Wayfair’s drawered styles ($60–$120) all combine style with functionality. Choose an open-shelf version if you want your items visible and accessible, or go with drawers if you prefer a cleaner aesthetic. Assembly is usually under 20 minutes. Measure the space between your bed and wall first—some nightstands are deeper than you’d expect.

    You’ve consolidated your bedside clutter into one organized spot, and your room doesn’t feel like stuff exploded everywhere.

    15. Try a Bed Skirt to Hide Under-Bed Chaos

    A bed skirt isn’t just decor—it’s the disguise that hides all your storage containers and under-bed mess while making your bed look intentional and styled. It’s one of the easiest visual upgrades in your room.

    Basic bed skirts run $15–$40 from Target, IKEA, and Amazon. Choose a length that drapes to the floor (usually called “drop” or “fall”) to fully hide whatever’s underneath. Most are just elastic and fabric, so installation is literally sliding it under your mattress. Pick a color that matches your bedding or complements your aesthetic. Natural linen or cotton hides dust better than synthetics.

    Your messy under-bed storage becomes invisible, and your room looks significantly more organized from the ground up.

    16. Add a Rolling Cart for Mobile Storage and Display

    A rolling cart is storage that moves with you. Use it as a nightstand, mini kitchen for snacks, textbook holder, or style display. When you need the space, just roll it to the side or closet. It’s perfect for renters who can’t commit to permanent furniture placement.

    IKEA’s RÅSKOG cart ($30–$50), Target’s options ($25–$45), and Amazon’s multicolor selections ($20–$40) are all under $60 and worth every penny. Most are lightweight and roll smoothly, even on thick carpet. You can access items from three sides, so nothing is hidden in the back. Some come with brakes so it won’t accidentally roll during video calls.

    Your storage becomes mobile, flexible, and instantly more stylish than a pile of bins in the corner.

    17. Use Wall-Mounted Shelves to Create Open Display Storage

    Wall-mounted shelves create storage and display space without using your floor. They’re perfect for showing off books, plants, photos, and decor while keeping items accessible and visible.

    IKEA’s LACK shelves ($8–$15 per shelf), Wayfair’s floating styles ($20–$60 per shelf), and Amazon’s brackets and boards ($30–$80 for a set) are all installation-friendly. Floating shelves look seamless but require finding wall studs for proper support—don’t skip this step or they’ll sag. Shelf brackets are usually included. Mix different shelf depths to create visual interest. Stagger heights so it doesn’t look institutional.

    Your vertical wall space becomes functional and beautiful at the same time, multiplying your storage capacity without eating floor space.

    18. Choose a Compact Coffee Table for Your Lounge Area

    If your dorm allows it, a small coffee table or side table creates a lounge focal point in your room. Choose compact styles that don’t dominate the space but add functionality and style to your seating area.

    IKEA’s GLADOM table ($30–$50), Target’s marble options ($40–$80), and Wayfair’s compact designs ($50–$120) work for tight spaces. Look for tables with shelves underneath for hidden storage, or choose simple tops if you prefer minimal visual weight. Most are under 24 inches square, so they don’t overwhelm a dorm. Check your lease to make sure furniture isn’t restricted before bringing one in.

    Your room now has a casual gathering spot, and that small table becomes the heart of your hangout area.

    19. Install a Tension Rod Curtain Divider for Privacy Without Commitment

    A tension rod and lightweight curtain create temporary partitions for changing, storage, or privacy without damaging walls. It’s renter-safe and adjustable if your room layout changes.

    Basic tension rods cost $8–$20, and a lightweight curtain panel runs $10–$30. Installation takes two minutes: extend the rod to fit your doorway or corner width and hang it. Choose a tension rod with a diameter that fits your window width or wall width exactly—measure twice. Pair it with a semi-sheer or solid fabric that complements your aesthetic. The rod stays up with tension alone, no nails required.

    You’ve created a private zone without permanent damage and can remove it instantly when you move out.

    20. Get a Ladder Shelf Unit for Angled Storage and Style

    Ladder shelves are narrow, angled, and incredibly space-efficient. They work well in corners or along walls and hold a surprising amount of stuff while looking intentional and styled rather than cluttered.

    IKEA’s PINNIG ladder shelf ($20–$40), Target’s leaning designs ($50–$100), and Wayfair’s tiered options ($40–$90) are all compact. The angled design means items won’t slide off as easily as straight shelves, and they photograph well for social media. Assembly usually takes 15 minutes. Since they lean rather than mount to the wall, they’re renter-safe and can be repositioned whenever you want.

    You get substantial storage in a small footprint, plus a decor element that looks way more intentional than random shelving.

    21. Add a Hanging Closet Rod for Extra Garment Storage

    If your dorm’s closet is tiny, a hanging rod clipped to existing furniture or suspended from the ceiling adds immediate garment storage. It works great for seasonal items, jackets, or everyday clothes you want accessible but not taking up closet space.

    Hanging rods with clips cost $15–$35 and are available at Target, Amazon, and IKEA. Some clamp to bunk beds or shelves; others mount to the ceiling with hooks. Installation is super quick—usually just tightening a clamp or hanging hooks. Make sure whatever you’re suspending it from can handle the weight (usually 20–40 pounds depending on the rod). Check your dorm rules before ceiling mounting anything.

    You’ve doubled your accessible clothing storage without sacrificing closet space or taking up floor real estate.

    22. Use an Underbed Drawer System on Wheels for Seasonal Swaps

    Unlike static bins under your bed, rolling drawer systems slide out smoothly and give you easy access to seasonal clothes without moving your entire bed or digging around blind.

    Flat rolling drawers cost $30–$60 each and are sold at IKEA, Target, and Amazon. Buy two to use the full space under your bed. Look for models with smooth-rolling casters and reinforced bottoms that can handle heavy textbooks or winter coats. Label each drawer clearly so you know what’s inside without opening it. The investment is under $100 for a pair, and they’ll outlast your college years.

    Your off-season wardrobe stays organized and accessible, and you don’t have to disturb anything to get to items you need.

    23. Invest in a Desk Organizer System with Multiple Compartments

    A desktop organizer keeps your desk functional by giving every small supply a specific spot. It prevents the desk-as-junk-drawer situation and keeps you from losing pens and chargers.

    IKEA’s desk organizers run $10–$25, and Target’s compartment systems cost $15–$35. Choose something with 5–8 compartments for pens, pencils, chargers, sticky notes, and miscellaneous small items. Some are stackable so you can add a second tier if needed. Look for materials that match your desk aesthetic—natural wood blends better than plastic if you care about cohesion.

    Your desk becomes a functional work space instead of a catch-all, and you can actually find what you need instantly.

    24. Add a Pegboard Wall for Customizable Storage and Display

    A pegboard lets you arrange and rearrange storage and display to match your changing needs. It’s visual, functional, and super customizable—plus it’s renter-safe if you use damage-free wall strips.

    Pegboards themselves cost $15–$40 depending on size, and hooks and baskets run $2–$8 each. IKEA, Target, and Amazon all carry them in various colors and sizes. Mount it using damage-free strips if you’re renting, or small nails if you own your space. Start with a basic set of hooks and add specialty pieces (shelves, baskets) as you figure out what you actually need.

    You have customizable storage that adapts as your needs change throughout the semester and across years.

    25. Try a Bed Canopy or Curtain Rod for Cozy Separation

    A bed canopy or curtain rod frame creates a cozy cocoon above your bed and can hold lightweight storage or decor. It’s purely optional but adds major style points and makes your sleep space feel distinct from the rest of your room.

    Simple curtain rods cost $20–$40, and fabric draping materials run $15–$35. Some styles are adjustable tension rods that don’t require any mounting. Pair with lightweight gauze, cotton, or tulle fabric. You can clip string lights to the rod for ambient lighting that’s cheaper than replacing your ceiling fixture. Installation takes 10 minutes for tension rods, longer if you’re mounting to walls.

    Your bed becomes a retreat within your room, and the visual separation makes your sleep space feel special and intentional.

    26. Add a Compact Shoe Rack or Organizer Behind the Door

    Shoes take up a ton of floor space, but an over-the-door or behind-the-door rack keeps them organized, visible, and off your carpet. It’s one of the best space-saving hacks for footwear storage.

    Over-the-door shoe racks cost $12–$25 and are widely available at Target, IKEA, and Amazon. Choose a style with clear pockets so you can see all your options at a glance. Most hold 8–12 pairs depending on shoe size. Installation takes two minutes: hang it on your door and slide shoes into pockets. Check the weight capacity before loading it—some maxes out around 10 pounds.

    Your shoes are organized, visible, and using space that would otherwise be wasted behind your door.

    27. Use a Tension Rod Under Your Bed for Hanging Storage

    If your bed is raised high enough (lofted or platform style), a tension rod under the frame creates hanging storage for lightweight bags or garments. It’s genius for storing things you need to keep but don’t access constantly.

    Basic tension rods cost $8–$15, and lightweight hanging storage bags run $15–$30 each. Measure the width and height under your bed frame first to ensure the rod fits and leaves enough clearance. Install the rod by extending it to fit snugly between two support beams. Load it with seasonal clothes, gym gear, or lightweight items only—heavy bags will sag and make sleep uncomfortable.

    You’ve utilized dead space that usually just collects dust, adding substantial storage without buying furniture.

    Ready to maximize your space? Pick one or two ideas that match your current setup and budget, then start this weekend. Even small changes add up fast when every piece pulls double duty. Which idea are you trying first?

  • 25 Maximalist Room Styling Ideas Filled With Color & Energy

    25 Maximalist Room Styling Ideas Filled With Color & Energy

    Forget playing it safe with neutral walls and minimalist furniture. Maximalism is your permission slip to fill your rooms with color, personality, and joy—and honestly, it’s way more fun than a blank slate. If you’re tired of boring spaces that lack character, these 25 ideas will show you exactly how to layer patterns, textures, and bold hues into rooms that actually feel like home. You don’t need a designer budget or a huge overhaul; most of these ideas work in small doses or can be tackled one weekend at a time. From color-drenched accent walls to thrifted vintage finds, you’ll discover how to build a maximalist space that feels intentional, not chaotic. Let’s dive into the specific ways to make your rooms sing.

    1. Color-Drench One Wall for Full Impact

    Painting a single wall in a bold, saturated color creates drama without overwhelming the whole room. Unlike trendy accent walls that often feel dated, color drenching that one surface makes it feel intentional and moody rather than like an afterthought.

    Pick a wall that gets natural light—it’ll show off the color’s depth. Deep jewel tones like burgundy, forest green, or navy work best. Grab a couple of sample pots from Home Depot or Lowe’s ($5 each) and test them for a few days before committing. This takes a weekend with a paint roller and costs $30–$60 for quality paint. The trick? Use a primer first so the color looks rich and covers evenly.

    Consider the room’s function: bedrooms look dreamy in darker shades, while living rooms might handle a slightly brighter version of that same hue.

    Once dry, your room gains instant personality and becomes a backdrop that makes everything else—furniture, art, plants—look curated rather than random.

    2. Layer Patterned Wallpaper Over Paint

    Removable wallpaper lets you test-drive pattern maximalism without a permanent commitment—perfect if you’re renting or indecisive. Layering it over a painted base color creates richness and prevents the pattern from feeling flat or busy.

    Paint the lower half of your wall a solid earthy color (sage, warm taupe, chocolate brown), then apply patterned removable wallpaper to the upper section. Brands like Spoonflower and Peel & Stick wallpaper from Target cost $30–$80 per roll and cover roughly 28 square feet. You can install it in an hour with a squeegee and a steady hand. If you mess up, peel it off and reposition—no damage deposit risk for renters.

    The best part: you can change it seasonally or whenever you’re ready for a refresh without guilt.

    Your bathroom instantly gains a gallery-like quality that feels way more sophisticated than a single solid color.

    3. Mix Vintage Furniture With Modern Pieces

    Pairing sleek contemporary furniture with thrifted vintage finds creates a curated, collected-over-time aesthetic rather than a showroom look. The contrast keeps maximalism from feeling cluttered.

    Scout Facebook Marketplace, Craigslist, or local thrift stores for solid mid-century or Art Deco pieces—look for good bones and structure, even if the upholstery needs work. A vintage wingback chair runs $50–$200 used; reupholstering costs $300–$600 if needed. Mix these with modern pieces from IKEA, Article, or Wayfair to balance vintage’s sometimes heavy vibe. Spend a weekend styling; arrange pieces at angles rather than against walls for a less formal layout.

    Pro tip: Vintage leather or wood pieces age beautifully and develop a lived-in patina that new furniture can’t replicate.

    This blend makes your space look intentional and editorial—like you’ve been hunting for the perfect pieces, not just filling a space with whatever matched.

    4. Stencil Patterns Directly Onto Cabinets

    Hand stenciling cabinet doors adds personality and artisanal charm without the cost or commitment of replacing them entirely. It’s a surprisingly achievable DIY project that screams “I have great taste.”

    Grab cabinet-grade stencils from Michaels or Etsy ($15–$30), high-quality acrylic paint in your chosen color ($8–$15), and a dense stencil brush. Tape the stencil securely to clean, lightly sanded cabinet doors and dab paint using an up-and-down motion rather than brushing (prevents seeping). You can stencil 4–6 cabinet faces in an afternoon. Seal with polyurethane after drying for durability.

    The lived-in charm comes from slight imperfections—they make it feel handmade, not manufactured.

    Your kitchen instantly becomes a reflection of your style rather than a generic builder-grade space.

    5. Create Zones With Rugs Instead of Walls

    Open-concept layouts lack privacy and definition, but you can psychologically “zone” spaces using rugs, furniture arrangement, and lighting without structural changes. This creates multiple cozy areas within one large room.

    Layer two rugs of different colors or patterns to visually separate seating zones. Anchor each area with a rug (or two overlapped), then arrange furniture on top facing inward. A quality wool or jute rug runs $150–$400 for a 5×8, but budget options from IKEA or Wayfair cost $50–$150. Pair with a floor lamp or pendant light hanging slightly to one side to further define the zone.

    This trick works for renters since you’re not installing anything permanent.

    Suddenly, one large room reads as multiple distinct spaces, each with its own purpose and atmosphere.

    6. Go Bold With Leopard Print Upholstery

    Leopard print reads as sophisticated maximalism when applied to statement furniture rather than scattered across many small pieces. A leopard-print sofa becomes the room’s focal point and grounds everything else.

    Hunt for a vintage sofa or chair with good bones ($100–$300 used), then have it reupholstered in leopard print fabric from Spoonflower or Etsy ($20–$40 per yard; your upholsterer will calculate yardage needed). Reupholstering typically costs $400–$800 labor depending on complexity. Alternatively, buy a pre-upholstered piece from Wayfair or Article ($600–$1,500). Pair it with solid-colored accents in warm neutrals to let the print shine.

    The trick: keep leopard print to one major piece so it anchors the room rather than competes for attention.

    This bold choice immediately signals that you’re confident in your style and won’t bore easily.

    7. Layer Textures With Throws and Pillows

    Texture creates tactile richness and visual interest without adding clutter—it’s the secret weapon of maximalism done right. Layering different materials makes a room feel collected and inviting rather than flat.

    Combine at least three contrasting textures on your bed or sofa: linen, velvet, chunky knit, faux fur, or even a quilted fabric. Start with a base layer (duvet or throw), then add 2–3 pillows in different textures and one accent throw. Source pieces from Target ($20–$60 per item), IKEA ($15–$40), or splurge on quality linen from Etsy ($40–$100). Spend 10 minutes arranging them for maximum visual impact—lean some back, angle others, let some drape naturally.

    Pro tip: Stick to a consistent color palette (all warm earth tones or cool jewel tones) so textural mixing feels intentional rather than chaotic.

    Your sofa becomes a space you actually want to sink into, combining comfort and style in a way that photographs beautifully.

    8. Paint Kitchen Cabinets a Jewel Tone

    Cabinet color is hugely impactful and budget-friendly compared to replacement. Deep jewel tones—emerald, navy, rich teal—make kitchens feel high-end and intentional, especially when paired with warm metallic hardware.

    Clean and lightly sand cabinets, apply primer, then use cabinet-grade paint in your chosen color (Benjamin Moore, Sherwin-Williams, or Rustoleum Cabinet Transformations, $30–$80). This takes a full weekend with multiple coats and drying time. New hardware from Amazon or Home Depot ($3–$8 per pull) costs $40–$100 for a full kitchen. Skip the professional refinisher ($1,000+) if you’re handy—DIY gives you the same result at a fraction of the cost.

    The trick: use painter’s tape meticulously around hinges and edges for crisp, clean lines.

    Your kitchen goes from builder-grade to “did they hire a designer?” in one weekend project.

    9. Hang Gallery Wall With Mixed Frames

    Gallery walls are the ultimate maximalist statement and a renter-friendly way to add instant personality. Mixing frame styles and artwork types creates visual richness and tells a story about your taste.

    Collect frames from IKEA, Target, thrift stores, and Etsy—aim for 8–15 frames in varying sizes. Mix finishes: black, brass, natural wood, and even colored frames work together if your artwork ties them visually. Print artwork from Etsy ($2–$10 digitally downloadable), use family photos, or buy inexpensive prints from Minted or Society6. Lay everything on the floor first to plan your arrangement, then hang with painter’s tape templates ($20 total setup cost). The whole project takes 2–3 hours once you’ve gathered pieces.

    Pro tip: Odd numbers and slightly irregular spacing feel more curated than perfectly symmetrical layouts.

    Your gallery wall becomes a conversation starter and a visual representation of what you love.

    10. Use Fabric to Create a Feature Wall

    Instead of painting, hanging fabric or a tapestry creates texture and is completely removable. This works for renters and feels more bohemian than traditional paint.

    Find a large tapestry or fabric from Urban Outfitters ($30–$80), Etsy ($20–$100), or even a vintage kimono from thrift stores ($10–$30). Install a simple curtain rod or wooden dowel at the top of your wall using command strips or adhesive hooks (renter-friendly) or light-duty wall anchors. Fabric-drape it and secure the bottom with removable hooks or even tacks if you’re okay with tiny holes. The entire project takes 30 minutes to an hour.

    Layering patterned fabric with textured furniture and artwork prevents the space from feeling one-dimensional.

    Your wall becomes a textile art installation that adds warmth and visual interest instantly.

    11. Build a Patterned Throw Blanket Collection

    Collecting throw blankets serves both function and style—they’re practical, affordable, and let you switch up your room’s vibe seasonally without commitment.

    Buy 3–5 throw blankets in different patterns and colors from Target ($20–$40 each), H&M Home ($15–$35), or Etsy ($30–$60 for quality pieces). Choose a unifying color (all include rust, all include cream, etc.) so they read as intentional rather than random. Drape one over your sofa arm, fold and stack another on a chair, and hang one over a clothing rack if you have space. Swap them out seasonally or just rearrange for visual refresh. Total investment: $100–$250 for a rotating collection.

    The trick: blankets feel even better when they’re high-quality and actually comfortable to use, not just decorative.

    Your living room becomes more inviting and instantly gains a collected, lived-in quality.

    12. Apply Marble or Patterned Wallpaper to Powder Room

    Powder rooms are the perfect testing ground for bold pattern drenching since they’re small and low-stakes. All-over patterned wallpaper makes a huge impact in a tiny space without overwhelming your home.

    Choose removable patterned wallpaper in marble, geometric, or botanical prints from Spoonflower, Chasing Paper, or Etsy ($40–$100 per room depending on size). Apply it to all four walls for maximum immersion—this reads as intentional rather than hesitant. Installation takes 1–2 hours for a powder room. If you mess up with removable wallpaper, peel and reposition with no stress.

    Pro tip: Start with a clean, smooth wall surface for the best adhesion and finished look.

    Guests will genuinely comment on how thoughtful and designed your powder room feels.

    13. Style Open Shelves With Books, Plants, and Ceramics

    Open shelving requires thoughtful styling to look curated rather than cluttered. Mixing books, plants, and dishware in a color-coordinated way creates visual interest and functionality.

    Arrange items in odd groupings of three: stack books horizontally, lean a few vertically, place a small plant on top. Vary heights using small stands or risers ($10–$20 from IKEA). Introduce warm metals—brass or copper—through utensil holders, plant stands, or serving pieces ($15–$40 each). Choose a loose color scheme (warm metallics + green plants + cream dishware, for example) and stick to it. Rearrange every few months to keep styling fresh without buying new items.

    The key: negative space matters just as much as objects—don’t fill every inch.

    Your open shelves read as intentional and editorial, and you’ll actually enjoy looking at your kitchen.

    14. Mix Geometric and Floral Patterns in One Space

    Mixing two contrasting pattern types—say, geometric and floral—feels bold and curated when they share a unifying color. This prevents pattern mixing from feeling chaotic.

    Choose your unifying color first (rust, navy, cream, etc.), then find one geometric pattern and one floral pattern that both incorporate it. Apply one pattern to larger surfaces (sofa upholstery, a rug, or wallpaper) and use the contrasting pattern in smaller doses (pillows, artwork, a throw blanket). Keep wall paint neutral or in your unifying color to avoid competing for attention. Source pieces from wayfair, Article, Etsy, or thrift stores.

    Pro tip: Print mood boards on Pinterest to see how your chosen patterns actually look side-by-side before committing to purchases.

    Your room becomes a sophisticated pattern story rather than a random collection of pretty things.

    15. Create a Vintage Bar Cart or Styling Station

    A styled cart serves as functional décor and becomes a focal point wherever you place it. Vintage finds make this affordable and more interesting than buying a pre-styled option.

    Hunt for a brass or wood bar cart at thrift stores ($20–$60), then style it with found glassware, vintage bottles, potted succulents, and decorative objects in your color palette. Source items from thrift stores ($1–$10 each), IKEA ($5–$20), or Etsy ($10–$40). Arrange items in odd-numbered groupings, use risers or small stands to create height variation. The styling takes 30 minutes; the gathering takes longer but becomes a fun treasure hunt.

    Bonus: this works for styling smaller spaces like bathrooms or bedrooms when placed on a table instead.

    Your cart becomes both functional and visually striking—a conversation starter that doesn’t require wall space or permanent installation.

    16. Drench Your Bedroom in Warm Burgundy or Deep Green

    Full-room color drenching in a warm, saturated tone creates immersion and coziness that accent walls can’t achieve. This works especially well in bedrooms where the moody atmosphere feels intentional rather than dark.

    Commit to painting all four walls and the ceiling the same deep color—forest green, burgundy, or navy all work beautifully. Use quality paint with good coverage (Benjamin Moore, Sherwin-Williams, $40–$70 per gallon). Two coats plus primer typically requires 2–3 weekends. Keep ceilings white if full-ceiling color feels too daring as a first step. Pair the walls with bright white or cream bedding and adequate lighting (layers of brass sconces, table lamps, and pendant lights) so the room feels cozy, not cave-like.

    Embrace the moodiness—this color choice signals confidence and intentionality.

    Your bedroom becomes a retreat rather than just a place to sleep—a cocoon that feels luxe without requiring renovation.

    17. Source Vintage Brass and Copper Lighting

    Soft metallic finishes in brass and copper add warmth and luxury without the cold edge of chrome or stainless steel. Vintage pieces cost less than new designer fixtures and carry more character.

    Scout vintage brass or copper pendant lights, floor lamps, and table lamps from Etsy ($30–$150 each), thrift stores ($10–$40), or Facebook Marketplace ($15–$100). These are often original and haven’t been replaced with modern versions. If the cord or bulb socket feels sketchy, a handyman can refresh it ($50–$100) or replace the socket yourself ($10–$20 in hardware plus 15 minutes). Hang pendants at varying heights for visual interest and better task lighting.

    Pro tip: Warm brass creates instant coziness, especially when paired with warm-toned bulbs (2700K color temperature).

    Your lighting becomes both functional and beautiful—soft metallic glows that make every room feel intentionally designed.

    18. Layer Patterned Rugs for Texture and Depth

    Rug layering creates dimension and signals collected-over-time styling. This technique works in any room and instantly elevates the look beyond a single rug.

    Start with a large neutral or solid-colored jute or wool rug as your base ($100–$300 for 8×10), then layer a smaller patterned rug on top ($50–$200 for 5×8). Choose patterns with a unifying color so they read as cohesive rather than clashing. This works in living rooms, bedrooms, and even dining areas. The layering takes 10 minutes to arrange; the entire investment can be under $300 if you source one vintage piece. Rugs from IKEA, Wayfair, or Etsy give you endless options.

    The trick: layer an odd number of rugs (one, three) rather than two for a more intentional look.

    Your floors become a designed element rather than an afterthought—layered textures that visually anchor the entire room.

    19. Paint Doors and Trim a Contrasting Bold Color

    Painting trim and doors in a bold, contrasting color adds drama and architectural interest without committing to full-room repaints. This is high-impact and totally manageable as a DIY project.

    Choose a color that contrasts with your walls: if walls are cream, try deep teal or forest green on doors and trim. If walls are already bold, a crisp black or deep charcoal trim can look stunning. Grab cabinet-grade paint from Sherwin-Williams or Benjamin Moore ($30–$60), painter’s tape, and a high-quality brush. Tape meticulously where trim meets walls for crisp lines. This takes a weekend for an average home’s doors and trim. New hardware in brass or chrome ($3–$8 per knob, $40–$100 total) finishes the look.

    Pro tip: Glossy or semi-gloss paint shows off color depth better than flat finishes on doors and trim.

    Your entryway or hallway becomes visually striking—bold enough to feel intentional, contained enough to feel sophisticated rather than overwhelming.

    20. Collect and Display Colorful Ceramics and Glassware

    Displaying a curated collection of ceramics and glassware becomes a form of art and maximalist expression. Collections tell stories and make spaces feel lived-in and thoughtful.

    Hunt for pieces at thrift stores ($1–$10 each), estate sales ($5–$50), and Etsy ($15–$60 for handmade pieces). Focus on a loose color palette (all warm earth tones, or all jewel-tone glassware, or mixed pastels) so the collection reads intentionally rather than randomly gathered. Display on open shelving, in a cabinet, or on a dedicated surface where pieces catch light. Rotate seasonal pieces or rearrange every few months to keep the display feeling fresh.

    The key: quality over quantity—five beautiful handmade bowls feel more curated than twenty mismatched plastic cups.

    Your collection becomes a visual representation of your taste and a conversation starter.

    21. Use Scalloped or Curved Furniture Silhouettes

    Curved and sculptural furniture adds softness and fluidity to a room, balancing bold patterns and colors. The organic shapes feel modern yet warm and approachable.

    Invest in or source a curved sofa, scalloped credenza, or rounded armchair. Vintage pieces from thrift stores and Facebook Marketplace cost $100–$400; new options from Article or West Elm run $600–$2,000. Pair curves with angular pieces (a square-backed chair, a rectangular coffee table) to prevent the space from feeling too soft or undifferentiated. Even one curved furniture piece shifts the room’s entire energy.

    Pro tip: Curved furniture photographs beautifully and makes spaces feel intentionally designed rather than functional.

    The soft lines create visual interest and make your room feel more inviting and less corporate-looking.

    22. Stencil or Hand-Paint Patterns on Accent Walls

    Hand-painted patterns add artisanal charm and can be way more affordable than wallpaper, especially if you DIY. The slight imperfections make spaces feel personal and authentic.

    Sketch your pattern lightly in pencil first (stripes, geometric shapes, or abstract designs all work), then paint using a high-quality brush and acrylic or latex paint in your chosen colors. Tape off areas if you want crisp edges; leave some loose and imperfect for character. This takes 1–3 days depending on complexity and drying time. Paint costs $20–$40; supplies are $10–$20. Embrace the handmade look—slight unevenness is the point.

    Renter-friendly alternative: Use removable stencils and acrylic paint, which you can carefully remove later without wall damage.

    Your wall becomes a one-of-a-kind artwork that adds personality no store-bought piece can match.

    23. Create a Plant Wall or Living Green Statement

    Plant walls create living, breathing maximalism that’s both beautiful and air-purifying. Layering different plant types and planters adds texture and dimension.

    Hang 8–15 plants of varying sizes using wall-mounted planters ($5–$30 each), macramé hangers ($8–$20), and shelves ($20–$60 per shelf). Choose plants that tolerate your light conditions and require similar watering (easier maintenance). Source plants from local nurseries ($3–$20 each) and affordable planters from IKEA, Target ($5–$25), or Etsy ($10–$40). Installation and arrangement takes a weekend; ongoing care is just regular watering.

    Pro tip: Mix trailing plants (pothos, string of pearls) with upright plants (snake plant, calathea) for visual variety.

    Your plant wall becomes a focal point that brings life and energy to the room while improving air quality.

    24. Layer Bold Abstract Art With Vintage Photographs

    Mixing contemporary abstract art with vintage personal photographs creates emotional depth and prevents maximalism from feeling impersonal or over-designed. The contrast makes each piece feel more meaningful.

    Source abstract prints from Minted ($40–$100), Society6 ($15–$60), or Etsy ($10–$50 for digital downloads). Mix with personal photographs either printed large ($10–$30 at local print shops or through Artifact Uprising) or smaller vintage photographs from thrift stores. Display in frames of varying finishes and sizes for visual richness. Hang in a salon-style gallery wall or scattered asymmetrically across one wall. Total project cost: $150–$400 depending on print size and frame investment.

    The key: let the abstract pieces pull from colors in your room (walls, furniture, accents) so everything ties together visually.

    Your art wall tells your story while looking intentionally curated and editorial.

    25. Mix Vintage and New Bedding With Layered Textures

    Bedding is the largest surface in a bedroom, making it the perfect place to showcase maximalist layering. Mixing vintage and new pieces creates character while ensuring comfort and functionality.

    Start with a quality base (neutral linen duvet from Etsy, Parachute, or thrift stores, $100–$250). Layer with a vintage quilt or throw ($20–$80 from thrift stores or estate sales), then add 4–6 pillows in varying textures: linen, velvet, quilted, chunky knit. Stick to a unifying color palette so the mix feels intentional. Spend an hour arranging to find your ideal layered look. Source new pieces from Target ($20–$60 per item) or vintage pieces ($10–$40 each).

    Pro tip: Odd numbers of pillows (5 rather than 4) feel more collected and less staged.

    Your bed becomes a textural masterpiece that’s as beautiful to look at as it is comfortable to sleep in.

    26. Paint Your Bathroom Vanity a Jewel Tone

    Your vanity is the focal point of any bathroom, and painting it a saturated color creates dramatic impact with minimal effort. This draws the eye and makes even small bathrooms feel designed.

    Clean and lightly sand your existing vanity, apply primer, then paint with cabinet-grade paint in your chosen jewel tone ($30–$60 for paint). Two coats take a full weekend including drying time. Upgrade hardware to brass or brushed gold knobs and pulls ($30–$80 for the whole vanity, installed in 30 minutes with a drill). Consider the countertop color: white marble or light wood complements jewel-toned vanities beautifully. This DIY project costs $75–$150 total and transforms the entire bathroom’s feel.

    The trick: warm metallic hardware makes the bold color feel luxe rather than trendy.

    Your bathroom becomes a spa-like retreat that feels far more expensive than the cost or effort required to achieve it.


    Save this post and pick one idea to try this weekend. Start small—a single stenciled cabinet door or a patterned throw pillow—and see how good it feels to add personality to your space. Maximalism isn’t about chaos; it’s about surrounding yourself with things you genuinely love. Which idea are you trying first?

  • 27 Home Design Decor Ideas That Make Every Room Look Professionally Styled

    27 Home Design Decor Ideas That Make Every Room Look Professionally Styled

    You know that feeling when you walk into someone’s home and instantly think, “How did they make this look so polished?” It’s not about having the biggest budget or the fanciest furniture—it’s about knowing how to style spaces so they feel intentional and put-together. Whether you’re working with a tiny apartment, a rental with strict rules, or just want to elevate what you already have, these 26 ideas will show you exactly how to make every room look professionally designed. We’re talking real strategies used by interior stylists, budget-friendly hacks that don’t look cheap, and small changes that deliver major impact. Let’s dive into the ideas that actually work.

    1. Layer Your Walls With Textured Plaster in Deep Colors

    Bold, textured walls are having a major moment, and limewash plaster in deep jewel tones like aubergine, forest green, or navy is the move that designers are using. This technique adds depth and character that flat paint simply cannot match—it photographs beautifully and makes rooms feel curated, not sterile.

    You can hire a professional to limewash walls ($200–$600 for a bedroom accent wall), or DIY with a limewash kit from Home Depot ($30–$50 per gallon). Application takes about 2–3 hours per wall. The beauty of limewash is its organic, slightly imperfect finish—flaws actually add to the charm. Brands like Portola Paints make quality limewash that’s easier to apply than traditional plaster.

    The result? Your space immediately gains sophistication and texture. Visitors will ask where you got the idea, and you’ll have a wall that becomes a conversation starter.

    2. Invest in One Statement Curved Sofa or Armchair

    Curved furniture is replacing boxy pieces everywhere, and investing in one curved sofa, armchair, or chaise makes your entire room feel more intentional and modern. Those soft, rounded edges create visual flow and make spaces feel less angular and more inviting.

    Look for curved pieces at Article, West Elm, or IKEA’s newer collections ($300–$1,200 for a quality armchair, $800–$2,500 for sofas). Wayfair and Facebook Marketplace also have solid curved options at mid-range prices. Wait for seasonal sales (January and Labor Day are best) to snag quality pieces at 20–30% off. If you rent, a curved accent chair under $500 from Target or Wayfair is a game-changer.

    This one piece ties a room together and instantly elevates your style without needing to overhaul everything else.

    3. Mix Checks and Stripes Without Looking Chaotic

    Checks are up +5,000% in Google searches, and pairing them with stripes and other geometric patterns is how stylists create rooms that feel fashion-forward, not cluttered. The key is keeping your color palette tight—typically 2–3 colors maximum.

    Choose one base color (like cream or soft gray), then layer in checks and stripes using that color family. Mix a blue-check pillow with a blue-striped throw, then add a geometric rug that echoes both patterns. Start with affordable pieces from Target, IKEA, or Ruggable ($20–$80 for pillows, $40–$150 for throws). The beauty of pattern-mixing is it looks intentional and editorial, not accidental.

    You’ll have a bedroom or living room that feels styled by a designer, and you did it in one afternoon shopping.

    4. Paint Kitchen Cabinets a Bold, Saturated Color

    Minimalist beige kitchens are officially over—bold cabinet colors like deep navy, forest green, or even terracotta are what’s trending. This is the easiest way to completely refresh your kitchen without gutting it.

    If you own your home, hire a pro painter for a full kitchen ($1,500–$3,000) or DIY with cabinet paint from Sherwin-Williams or Benjamin Moore ($100–$300 in supplies). The process takes 3–4 days with prep and drying time. For renters, removable cabinet film from Spoonflower ($50–$150) achieves a similar look without commitment. Benjamin Moore’s “Hale Navy” and “Chelsea Green” are go-to colors that feel both bold and timeless.

    Your kitchen becomes the star of your home, and you’ve just increased the perceived value of your space significantly.

    5. Style Floating Shelves With the Rule of Three

    Floating shelves look professional when styled, not just when you cram stuff on them. The “rule of three” means grouping items in odd numbers and leaving negative space—this creates visual interest without looking cluttered.

    Install floating shelves (IKEA, $15–$30 per shelf; hardware included) or splurge on solid wood shelves from Etsy makers ($50–$150 per shelf). Arrange items in groupings of 3: a stack of books, a single plant, and a decorative object. Vary heights and sizes so your eye moves around. This styling takes 20 minutes, and you can change it whenever you want.

    Now your shelves look intentional and gallery-like, not like storage overflow.

    6. Add Sconce Lighting for Instant Sophistication

    Overhead lighting is harsh and unflattering, but sconces flanking your bed or bathroom mirror instantly make a space feel high-end and intimate. Lighting is one of the most underrated styling tools, and this single change elevates everything.

    Choose sconces from IKEA ($30–$60 each), Target ($25–$70), or Wayfair ($40–$150+). Installation requires basic wall mounting (or hire an electrician for $150–$300 if you’re unsure). Pair them with warm bulbs (2,700K color temperature) for a cozy glow. Brass or matte black finishes feel most current.

    Your room now has sophisticated layered lighting that works for both practical use and mood-setting.

    7. Create a Kitchen Nook With Built-In Bench Seating

    Kitchen nooks are making a comeback because they’re functional and they create defined, cozy spaces in open-concept homes. Even if you don’t have an existing nook, you can DIY one.

    Option 1: Repurpose a corner with a storage bench ($150–$400 from IKEA or Wayfair), add a small bistro table ($80–$250), and two matching chairs ($100–$200 each). Total investment: around $500–$900 for a complete nook. Option 2: Hire a carpenter to build custom seating ($1,500–$3,000) if you want something that feels built-in. This project takes one weekend for the DIY route or 2–3 weeks for custom builds.

    You’ve just created a dedicated dining space that makes your kitchen feel intentional and adds seating for guests.

    8. Hang Artwork at Eye Level in Clusters

    Artwork hung too high is a dead giveaway that a space isn’t professionally styled. When you hang pieces at eye level (57–60 inches from the floor to the center of the artwork) and cluster them together, suddenly your room feels curated and intentional.

    Gather frames and prints from IKEA ($5–$25 per frame), Minted ($30–$80 per print), or Etsy ($20–$60 per print). Mix frame styles but keep finishes consistent (all matte black or all natural wood). Arrange on the floor first to determine spacing, then mark and hang. This takes about 1–2 hours, and it’s one of the biggest visual impact upgrades you can make.

    Your wall becomes a focal point that guests will actually notice and compliment.

    9. Layer a Jute Rug Under a Colorful Runner

    Layering rugs is how designers add depth and visual interest while keeping costs lower than buying one expensive rug. A jute rug ($50–$200) anchors the space, and a patterned runner or smaller rug ($40–$150) on top adds color without overwhelming.

    Start with a jute 8×10 base from IKEA, Ruggable, or Wayfair. Then layer a 5×8 patterned runner on top. The combination costs $100–$350 and creates a look you’d find in a design magazine. Jute is also a sustainability-focused choice, which resonates with conscious buyers.

    Your floor becomes a design statement that ties the entire room together and adds warmth.

    10. Style Open Shelving With a Mix of Functional and Decorative Items

    Open shelving can look either chaotic or magazine-worthy—the difference is intentional styling. Mix functional items (plates, glasses) with decorative pieces (plants, books, a small vase) in a 70/30 ratio.

    On each shelf, create “zones”: one section for stacked plates, one for glasses, one for a single plant or book. Leave breathing room between items. If you’re renting or want to test this first, use removable shelving from IKEA ($20–$50 per shelf) before committing to wall-mounted shelves.

    Your kitchen now looks both functional and stylish—like someone actually lives there but also like they have it all together.

    11. Swap Out Hardware With Brass or Matte Black Handles

    Hardware is a small detail that makes a massive difference. Replacing cabinet handles and drawer pulls with brass, matte black, or stainless steel instantly modernizes any piece of furniture without refinishing it.

    Buy hardware in bulk from Etsy ($2–$8 per handle), Amazon ($3–$10 per handle), or specialty hardware stores ($5–$15 per handle). Changing handles on a dresser or kitchen cabinets takes 30–45 minutes. A full kitchen cabinet hardware swap (20–30 handles) costs $50–$150 in materials and looks like you spent thousands updating your cabinets.

    Suddenly, your old furniture or cabinets look current and intentional, not dated.

    12. Create Defined Zones in Open-Concept Spaces

    Open-concept homes feel directionless and impersonal. Creating visual boundaries with furniture, rugs, and mirrors makes spaces feel intentional and gives each area its own identity.

    Use a console table ($150–$400) to divide spaces, a rug ($100–$300) to define seating zones, and a room divider ($80–$250) or tall bookcase ($200–$500) as a visual boundary. These elements cost far less than building walls and create the feeling of separate rooms. Arrange furniture to create natural flow between zones.

    Now your open space feels organized and sophisticated, not like one big room where everything blends together.

    13. Display Books With Spines Facing Inward on Some Shelves

    You don’t have to hide books on open shelves—style them intentionally by mixing forward-facing spines with stacked books and turning some spines inward to create a cohesive look. This creates visual calm and makes shelving feel more sophisticated.

    Place books spine-inward in groupings, stack others horizontally, and add one decorative item (a small plant or object) on top to break it up. This takes 15–20 minutes on existing shelves. No cost, just styling.

    Your shelves feel curated and calm, not cluttered with colorful chaos.

    14. Incorporate One Large Statement Mirror

    A large mirror (36 inches or bigger) bounces light around the room, makes spaces feel bigger, and immediately feels like a design investment. It’s one of the easiest ways to add impact without much effort.

    Find statement mirrors at Wayfair ($100–$400), West Elm ($150–$500), or Etsy ($80–$300). Hang it or lean it against a wall above a console table. Even a 48-inch mirror under $200 can feel luxe and designer-approved. Brass, gold, and natural wood frames feel current and sophisticated.

    Your room feels brighter, bigger, and immediately more professionally styled.

    15. Add Throw Pillows in Varying Sizes and Textures

    Throw pillows are the quickest way to layer color and texture, and varying sizes (16×16 inches, 20×20 inches, 12×20 inches lumbar) creates visual interest that uniform pillows can’t achieve. Mix materials—linen with velvet, wool with cotton—for depth.

    Buy pillow covers from Target ($8–$25 each), West Elm ($30–$80 each), or Etsy ($15–$50 each). Purchase three to five pillows for a sofa, mixing solids and patterns in your color palette. Total investment: $50–$250 for a complete pillow styling refresh that takes 10 minutes to arrange.

    Your seating area now looks styled and intentional, not like you just threw whatever was around onto the couch.

    16. Paint an Accent Wall in a Saturated Color

    One accent wall in a rich color (deep green, navy, terracotta, or charcoal) instantly makes a room feel more sophisticated and design-forward than an all-neutral space. This is less commitment than painting the whole room but still makes major impact.

    Use Benjamin Moore, Sherwin-Williams, or Behr paint ($30–$60 per gallon). Plan for 2–3 hours if you’re DIYing or $300–$500 if hiring a pro for one wall. Pair it with neutral furniture so the wall stays the hero. Test the color on your wall first—it looks different in various lighting.

    Your bedroom or living room instantly feels intentional and curated, not generic.

    17. Incorporate Plants of Varying Heights

    Plants add life and visual interest, and grouping them in varying heights creates a professional, curated look. Tall plants draw the eye up, small plants fill gaps, and trailing plants add movement.

    Choose easy-care plants like snake plants, pothos, and fiddle leaf figs ($15–$50 each from local nurseries or Etsy). Invest in three to five plants for $50–$150 total. Repot them into matching or complementary planters ($10–$40 each) for a cohesive look. Arrange at different heights using plant stands or shelving.

    Your space now feels alive, fresh, and thoughtfully decorated—not sterile or corporate.

    18. Layer Lighting With Table Lamps, Floor Lamps, and Candles

    Professional spaces use layered lighting (ambient, task, accent) rather than a single overhead light. Combining table lamps, floor lamps, and candlelight creates a sophisticated atmosphere that feels intentional and cozy.

    Invest in a quality floor lamp ($60–$200) and one or two table lamps ($40–$100 each). Add candles ($10–$40 for quality scented candles from Diptyque, Jo Malone, or Target’s Good & Gather line). Use warm-toned bulbs (2,700K). Total investment: $150–$350 for dramatic impact.

    Your room transforms from harsh and uninviting to sophisticated and welcoming, perfect for both daily living and entertaining.

    19. Curate a Styled Entryway Console

    An entryway sets the tone for your entire home, and a styled console table is the fastest way to create that impression. Even a small 36-inch table becomes a focal point when intentionally styled.

    Find a console from IKEA ($60–$150), Target ($80–$250), or Wayfair ($100–$400). Style it with: a table lamp, a mirror above it, a small tray for keys, fresh flowers, and one or two decorative objects. Takes 30 minutes to style and costs $200–$500 total.

    Guests are immediately impressed by your entryway, and you have a dedicated space to corral everyday items.

    20. Invest in Quality Bedding That Lasts

    Quality bedding is worth the investment because you spend eight hours a night in it, and it’s one of the first things people notice about your bedroom. High-thread-count linen or cotton feels luxe and lasts years.

    Splurge on sheets from Parachute ($100–$175 per set), Brooklinen ($85–$150 per set), or Target’s Threshold line ($40–$60 per set). A quality comforter or duvet runs $150–$400. Yes, this is an investment, but quality bedding doesn’t pill, fades beautifully, and feels incredible—it’s worth every penny for daily comfort.

    Your bed becomes a sanctuary, and your bedroom immediately feels more sophisticated and comfortable.

    21. Use Textiles to Add Warmth and Layering

    Textiles like throws, blankets, and runners add texture, color, and warmth that hard surfaces can’t provide. Layering different textile patterns and weights creates depth and visual interest that feels intentional.

    Mix a chunky knit throw ($30–$80) with a linen blanket ($40–$100) and patterned pillows ($15–$50 each). Drape throws over chair arms or the end of your bed—this looks both styled and functional. Total textile refresh: $100–$250 for major visual impact.

    Your space feels warm, inviting, and intentionally designed—not cold or corporate.

    22. Paint Ceiling or Door Frames a Contrasting Color

    Painting ceilings or door frames in a color that contrasts with your walls is a sophisticated design move that most people never think of. It draws the eye up and creates visual interest that feels designer-level.

    Use leftover paint from your accent wall or buy a gallon for $30–$50. Painting a ceiling or trim takes 3–4 hours DIY or $200–$400 with a pro. Deep green, navy, or charcoal ceilings look sophisticated; white trim on colored walls keeps spaces feeling fresh.

    Your space immediately feels more thoughtfully designed and less basic.

    23. Hand-Paint or Decoupage Existing Furniture Pieces

    You don’t need new furniture—hand-painting old pieces with premium furniture paint creates that vintage maximalism vibe that’s trending and gives thrifted finds new life. Imperfect brushwork adds character, not mistakes.

    Find a secondhand dresser or table from Facebook Marketplace, Goodwill, or a thrift store ($20–$80). Paint it with Chalk Paint, Annie Sloan paint, or Benjamin Moore Advance paint ($40–$70 per quart). A small piece takes 4–6 hours including drying, and you’ve created a one-of-a-kind statement piece that cost under $150 total.

    Your room feels curated and personalized, not like everything came from one store.

    24. Install Open Shelving in the Bathroom

    Bathroom open shelving is both practical and beautiful when styled correctly. It keeps essentials accessible and makes your bathroom feel spa-like and intentional rather than cluttered.

    Install floating shelves from IKEA ($15–$30 each) or a specialty hardware store ($50–$150 each). Add storage solutions: glass jars ($5–$15 each), woven baskets ($15–$40 each), and matching towels ($8–$25 each). Style takes 1 hour and costs $100–$250 total.

    Your bathroom transforms from a utilitarian space into a curated, spa-like retreat where you actually want to spend time.

    25. Add Scented Candles to Every Room

    Scented candles aren’t just decorative—they create atmosphere and make a space feel complete and intentional. Quality candles are a hallmark of styled, high-end spaces. The candle market is at $11.51B because people recognize this.

    Invest in quality candles from Jo Malone ($45–$65), Diptyque ($60–$85), or Target’s Good & Gather line ($10–$20). Place one in each main living area—bedroom, bathroom, living room. A three-candle rotation costs $30–$60 at budget-friendly retailers. Light them during evening hours or when guests arrive for instant ambiance.

    Your home smells incredible and feels welcoming, turning ordinary moments into cozy, intentional experiences.

    26. Create a Gallery Wall Above a Bed or Console

    A gallery wall anchors a space and becomes the focal point that ties a room together. Above a bed or console table, it creates visual interest and makes a room feel curated and intentional.

    Mix frames in wood, black metal, and brass ($5–$25 per frame from IKEA, Target, or Etsy). Include a mix of prints ($15–$60 each), a small mirror, and even a textured textile or woven piece. Arrange 6–12 pieces in a grid or organic cluster. Takes 2–3 hours including layout and hanging. Total investment: $100–$300 for a statement that looks like professional design.

    Your bedroom or living area becomes a visual masterpiece that guests will admire and you’ll love waking up to.


    Save this for your next refresh and try just one idea this weekend—you’ll be amazed how a single styling shift changes the way your whole room feels.

  • 24 Vertical Cabinet Extension Ideas for High-Impact Storage

    24 Vertical Cabinet Extension Ideas for High-Impact Storage

    Introduction

    You’re staring at your kitchen cabinets and thinking, “I need more storage, but I don’t have more floor space.” Sound familiar? Vertical storage is the secret weapon that changes everything—it’s about going UP, not OUT. Whether you’re in a tiny apartment, a sprawling suburban home, or renting a place you can’t permanently alter, vertical cabinet extensions transform dead space into functional storage that actually looks intentional. The 24 ideas ahead mix budget-friendly hacks, renter-approved solutions, and investment pieces that’ll make you wonder why you didn’t maximize your walls sooner. From floating shelves that feel designer-level to stackable organizers and DIY overhead solutions, you’ll find options that fit your lifestyle, your budget, and your exact aesthetic. Ready to reclaim your space? Let’s go vertical.


    1. Float Extra Shelving Above Cabinet Tops

    Wall space above your existing cabinets is prime real estate that most people ignore. Floating shelves here give you instant extra storage without taking up counter or floor room.

    Install floating shelves 8–12 inches above cabinet tops using heavy-duty brackets rated for at least 25 pounds each (they’re hidden behind the shelves). Amazon, Home Depot, and Wayfair carry options in wood, metal, or mixed materials ranging from $30–$120 per shelf depending on depth and style. Most are renter-friendly if you use heavy-duty anchors instead of studs. Measure twice, mark your bracket holes, and use a level to ensure they’re straight—installation takes about 30 minutes per shelf.

    Style with cookbooks, serving pieces you don’t use daily, or decorative containers that match your kitchen’s vibe. The best part? You’ve just added a whole new display layer that makes your kitchen feel more curated and spacious at once.


    2. Install Tall Pantry Cabinets to the Ceiling

    Going full height with your pantry cabinet is a game-changer if you have the vertical clearance (typically 9–10 feet in most homes). You’re essentially doubling your storage capacity by not stopping at standard 84–inch cabinet height.

    Custom floor-to-ceiling pantry cabinets run $800–$2,500 depending on materials and finish, while semi-custom options from brands like kraftmaid or IKEA’s PAX system run $400–$1,200. This is a project to hire a professional for (expect $500–$1,000 in installation), or you can stack standard IKEA cabinets and trim the top unit to fit—a DIY option that saves money but takes a full weekend. Add pull-out organizers inside ($100–$300) to access items at the top without a step stool.

    You’ll have space for 40+ percent more inventory, and everything stays hidden behind closed doors. It’s the ultimate “stuff it and shut it” solution that keeps your kitchen looking polished.


    3. Add Pegboard Organizer Above Counter Workspace

    Pegboard isn’t just for garages anymore—it’s the renter’s best friend for adding vertical storage without permanent installation. You get customizable, adjustable storage that photographs beautifully.

    Grab a sheet of pegboard ($15–$40 for 2’x4′), paint it to match your kitchen (free if you have paint, or $10–$25 for a pint of quality paint), and mount it to studs with heavy-duty anchors if you can’t use nails. Add hooks, shelves, and baskets ($20–$60 for a starter set) to hang frequently used tools, measuring cups, or cutting boards. Total investment: $50–$120 and a Saturday afternoon of work. For renters: use removable adhesive strips and damage-free anchors.

    Now your most-used kitchen items are visible, accessible, and styled like a purposeful display. You’ve turned what was probably just blank wall into functional art that actually makes cooking easier.


    4. Use Corner Carousel Inserts in Base Cabinets

    Corner cabinets are notorious dead zones—stuff goes in and disappears forever. A corner carousel (also called a Lazy Susan turntable for cabinets) solves this with rotating access to items you’d otherwise reach blindly.

    Install a pull-out corner carousel ($80–$250 depending on quality and size) in existing base cabinets. If your cabinet doesn’t have one built-in, brands like Knape & Vogt and Hardware Resources sell aftermarket units that slide into standard 36–42 inch corner cabinets. Professional installation is recommended ($150–$300), though handy DIYers can do it in 1–2 hours. No drilling required if you use the gliding system.

    Everything in that corner is now rotating-accessible—no more lost storage. You’ll use that corner space intentionally instead of as a black hole for forgotten containers.


    5. Mount Magnetic Spice Rack on Cabinet Side

    If your spices live in a cabinet, they’re hard to see and easy to duplicate-buy. Moving them to a vertical magnetic rack on a cabinet’s side puts them at eye level and saves precious shelf space.

    Choose a magnetic spice container set ($25–$60 for 12–20 containers with labels) designed to stick to metal surfaces or use magnetic strips mounted to cabinet sides. If your cabinet is wood, mount a thin metal sheet first ($15–$30) and then add the magnetic containers on top. Installation takes 20 minutes and requires just a level and painter’s tape. Renters: use damage-free adhesive strips underneath the metal sheet.

    Your spices are now instantly visible, organized alphabetically if you want, and taking up zero cabinet real estate. Cooking becomes faster because you’re not hunting through a cabinet pile for cumin.


    6. Install Open Shelving in Upper Cabinet Frames

    Converting solid upper cabinets to open shelving (or removing doors entirely) maximizes storage visibility and makes your kitchen feel taller and more open. This works especially well for frequently used items or things beautiful enough to display.

    Remove cabinet doors (takes 15–30 minutes with just a screwdriver), or replace them with glass doors ($40–$120 each from IKEA, Home Depot, or Amazon). If you want shelves inside without doors, add adjustable shelf supports ($15–$40 per set) to customize spacing. Total cost: $0–$300 depending on your approach. Renters should stick with glass door replacements rather than permanent modifications.

    Now you can grab everyday dishes or glasses in seconds instead of reaching and searching. Plus, the visual openness makes your kitchen feel 20 percent larger.


    7. Add Overhead Pot Racks with Hanging Storage

    Hanging pots from a ceiling rack isn’t just decorative—it’s smart vertical storage that frees up cabinet space for things that need to stay hidden. You’re using the fifth wall (your ceiling) as storage.

    Install a ceiling-mounted pot rack ($60–$300 depending on style and material—stainless steel or wrought iron options from Williams Sonoma, Wayfair, or Amazon). This requires finding ceiling joists and using appropriately rated hardware, so hire a pro if you’re unsure ($100–$250 installation). DIYers with stud finders can do it in 1–2 hours. Add S-hooks ($10–$20 for a set) to hang pots, pans, and cooking utensils.

    Your cabinet shelves are now free for storing bowls, containers, or appliances. Plus, your most-used cookware is visible, accessible, and adds visual interest to your kitchen design.


    8. Stack and Secure Small Appliances Vertically

    Small appliances multiply faster than you expect, and they chew up counter space. Stacking them vertically on a tiered shelf or stackable organizer keeps them accessible without the clutter.

    Use an adjustable kitchen shelf unit ($40–$100 from IKEA, Target, or Amazon) or a stackable appliance riser ($20–$60) that fits on your counter. Arrange appliances by frequency of use—daily coffee maker on the middle shelf, air fryer one level up, toaster oven on top. Secure power cords with cable clips ($5–$15) to keep everything tidy and safe. Total setup time: 20 minutes.

    You reclaim half your counter space while keeping appliances in arm’s reach. Everything looks intentional instead of haphazard, and your kitchen immediately feels bigger.


    9. Install Dish Drying Rack Shelving Above Sink

    That wall space above your sink is perfect for a narrow shelving unit that holds your dish rack AND storage in one vertical footprint. You’re consolidating what used to need counter space.

    Mount a wall-mounted dish rack shelf ($50–$120 from Wayfair, Amazon, or Etsy—look for bamboo or stainless steel styles) directly above the sink using studs or heavy-duty anchors. The top typically holds a dish drying rack, and lower shelves store canisters, soap, or cleaning supplies. Installation takes 30–45 minutes and requires a level, drill, and appropriate fasteners. Renters should use removable adhesive strips if available, though drilling is usually okay for this weight.

    Dishes drip directly into the sink below, and you’ve eliminated the need for a bulky counter-top drying rack. Everything you need near the sink is now within arm’s reach in a compact vertical zone.


    10. Use Tension Rods to Create Vertical Dividers in Cabinets

    Baking sheets, cutting boards, and serving platters take up huge cabinet real estate when laid flat. Tension rods create vertical dividers so they stand upright and take up a fraction of the space.

    Install tension rods ($8–$20 per pair from Target, IKEA, or Amazon) horizontally in a cabinet and slide flat items between them vertically. You can stack 5–7 baking sheets or cutting boards in the space one flat stack would have taken. Installation: 5 minutes—just twist the tension rods to fit the cabinet width. Costs: under $30 for a full cabinet setup.

    Now you can grab the exact baking sheet or board you need without pulling out a whole stack. Your cabinet interior stays organized, and you’ve doubled the usable space for these items.


    11. Add Wall-Mounted Spice Drawers

    Spice drawer units are a step up from carousels—they give you dedicated, labeled, vertical storage specifically designed for dried herbs and spices. They’re kitchen organization that actually looks like a design choice.

    Install a wall-mounted spice drawer cabinet ($80–$200 depending on wood quality and number of drawers—brands like The Container Store, Etsy, and Amazon have options). Most are 12–18 inches tall and only 4–6 inches deep, making them perfect for tight spaces. Mounting requires studs or heavy-duty anchors; professional installation runs $100–$150, or DIYers can handle it in 1–2 hours. Add label makers ($10–$30) to keep things organized long-term.

    Your spices are now vertical, labeled, and accessible without opening a cabinet. You’ve turned functional storage into a design feature that pulls your kitchen’s organization style together.


    12. Install Pegboard Inside Cabinet Doors

    The inside of cabinet doors is unused real estate. Add pegboard there and you’ve created hidden vertical storage that stays out of sight until you open the door.

    Cut pegboard sheets to fit inside your cabinet door ($1–$3 per square foot at hardware stores), paint if desired (free to $10), and secure with liquid nails or small brackets ($5–$15 total). Add hooks and small baskets ($10–$30) to hold cleaning supplies, extra shopping bags, or small tools. Total cost: $20–$60 and 30 minutes of work per door.

    When the cabinet closes, this storage vanishes from view. It’s perfect for things you use frequently but don’t want cluttering your visible kitchen—like extra foil, plastic wrap, or cleaning rags.


    13. Mount Magnetic Strips for Knives and Metal Tools

    Knife blocks take up counter space, and drawer storage hides your best knives. A magnetic strip mounted vertically gives you visible, accessible knife storage that takes up almost no space.

    Install a wall-mounted magnetic knife strip ($20–$60 from IKEA, Target, Amazon, or Williams Sonoma). Mount it at waist height for safety using studs or heavy-duty anchors; takes 15 minutes. This also works for metal utensils, scissors, and small tools—anything magnetic. Renters can use removable adhesive strips if the manufacturer offers them, though wall-mounting is typically okay.

    Your best knives are now on display, within instant reach, and taking up zero drawer space. Plus, they’re safer because kids can’t accidentally reach into drawers, and you’ll actually use your quality knives because they’re visible.


    14. Use Over-Cabinet Door Organizers for Thin Spaces

    If you have a narrow cabinet that doesn’t need interior shelves, an over-door organizer lets you use that edge for vertical storage. It’s perfect for foil, plastic wrap, bags, or other thin items.

    Install an over-cabinet-door organizer ($15–$40 from Target, IKEA, or Wayfair—look for models with slots or pockets). These hang on top of an existing cabinet door and provide instant slots for storing flat items without any drilling. Setup: 5 minutes, just hang and fill.

    You’ve claimed an entire vertical zone that had zero function before. Your cabinets now work harder without taking up more floor or counter space.


    15. Create a Wall-Mounted Beverage Station

    If you drink coffee, tea, or keep water bottles handy, a dedicated vertical beverage station consolidates these items into one styled zone. It’s functional storage that doubles as décor.

    Mount 3–4 floating shelves ($60–$150 total for brackets and shelves from IKEA, Home Depot, or Wayfair) 12 inches apart vertically. Top shelf holds coffee mugs, second holds tea or coffee supplies, third holds water bottles or cups, bottom holds small appliances like a milk frother or electric kettle. Installation: 1–2 hours if using studs; DIY-friendly with level and drill. Add a small hooks below ($5–$10) for hanging towels or promotional bags.

    Every morning you walk to one organized zone instead of hunting through cabinets. Guests immediately see you’ve thought about your kitchen’s function, and everything stays at arm’s reach.


    16. Stack Glass Storage Containers on Pull-Out Shelves

    Deep cabinets are tough to access—things get buried in the back. Adding a pull-out shelf inside lets you see everything vertically and grab what you need without reaching into darkness.

    Install a pull-out sliding shelf ($50–$120 from Knape & Vogt, Hardware Resources, or Amazon) inside an existing cabinet. These glide smoothly and support 50+ pounds. Pair them with stackable glass storage containers ($30–$80 for a set of 8–12 from Pyrex, Rubbermaid, or Amazon). Professional installation: $100–$200; DIYers can do it in 1–2 hours with a level and drill.

    Now when you open the cabinet, everything slides toward you and stays visible. No more forgotten containers in the back. You’re using vertical space within cabinets more efficiently.


    17. Add Open Shelving Between Wall Studs

    If you have wall studs close together (typically 16 inches apart), you can build or install shelving directly between them. It looks built-in, doesn’t protrude into the room, and feels custom.

    Hire a carpenter to install between-stud shelves ($400–$800 depending on number of shelves and finish) or buy a pre-made between-stud shelving unit ($100–$300 from Wayfair or Etsy). If you’re handy, you can build it yourself with 1×12 boards, brackets, and paint—materials run $50–$150. This is permanent, so it’s for homeowners, not renters.

    You’ve gained beautiful, integrated storage that looks like it was designed into your kitchen from day one. The shelves appear to float out of the wall, and you’ve used dead space that did nothing before.


    18. Use Stackable Wire Shelving on Top of Cabinets

    The space above your cabinets doesn’t need to be just a dust collector. A compact stackable metal shelf gives you organized vertical storage for items you don’t use daily.

    Place a stackable wire shelf unit ($30–$80 from The Container Store, Target, or Amazon) on top of your existing cabinets. These are lightweight, modular (you can add more shelves later), and create a second storage layer. Add woven baskets ($15–$40 each) to keep items organized and looking styled. Setup: 10 minutes, no installation needed.

    You’ve created a display zone for seasonal items, serving pieces, or decorative baskets without any construction. Everything stays accessible but out of everyday sight.


    19. Install a Corner Cabinet Lazy Susan with Multiple Shelves

    Standard single-shelf corner carousels are okay, but multi-shelf versions give you 3–4 storage levels in that awkward corner. You’re maximizing a typically wasted space with rotating access.

    Install a multi-tier corner carousel system ($120–$300 depending on shelves and quality—brands like Hardware Resources and Knape & Vogt offer excellent options). Professional installation: $200–$350; DIY-capable in 2–3 hours with basic tools. This requires some modification to cabinet interior, so it’s better for homeowners than renters.

    That problematic corner now holds 2–3 times more usable storage, all rotating within reach. You’ll actually use the corner intentionally instead of it being a “lose it there and forget it” zone.


    20. Mount Utensil Rails with Hooks Above Counter

    Utensil containers on your counter take up valuable real estate. A simple mounted rail with hanging hooks moves these items to the wall above your prep space, keeping them visible and accessible.

    Install a wall-mounted utensil rail ($25–$60 from Williams Sonoma, Target, or Amazon) at 36–42 inches height above your counter. Use S-hooks or magnetic hooks ($10–$20 for a set) to hang wooden spoons, spatulas, tongs, and other frequently used tools. Mounting takes 30 minutes and requires finding studs or using heavy-duty anchors. Renters: use removable adhesive options if available.

    Your counter loses clutter, and your tools are organized exactly where you need them. Cooking becomes faster because you’re not rooting through a drawer for the right utensil.


    21. Add a Narrow Vertical Pantry Tower in Corners

    Awkward kitchen corners cry out for vertical storage. A slim pantry tower fits perfectly in that dead corner space and holds 3–4 times more than a standard cabinet would in that footprint.

    Place or build a narrow vertical pantry unit ($200–$500 for semi-custom; $600–$1,500 for custom) in an unused corner. These are typically 12–18 inches deep and 24–30 inches wide—perfect for corners. IKEA’s PAX system or custom builders from local carpentry shops can create this. Hiring installation: $300–$500. This is excellent for renters if it’s a standalone piece you can take with you.

    You’ve reclaimed an entire corner while maximizing vertical storage capacity. The pantry tower holds significantly more than a standard base cabinet would in that same footprint.


    22. Use Magnetic Spice Containers on Cabinet Exterior

    If your cabinet side or refrigerator is metal, magnetic spice containers on the exterior give you visible, accessible spice storage without taking up any interior cabinet space. It’s storage that doubles as design.

    Apply adhesive-backed metal sheets ($15–$30 if your surface isn’t naturally magnetic) and add magnetic spice containers ($25–$60 for 12–20 containers with labels from Etsy, Amazon, or specialty kitchen stores). No drilling needed if you use adhesive-backed metal. Setup: 20 minutes.

    Your spices are now at eye level, labeled, and styled like a purposeful kitchen feature. Interior cabinet space opens up, and you’ve created a functional design element.


    23. Install Adjustable Shelf Supports in Upper Cabinets

    Standard cabinet shelving is fixed—you can’t adjust spacing to fit taller items. Adding adjustable shelf supports lets you customize vertical spacing and use cabinet height more efficiently.

    Replace fixed shelves with adjustable shelf supports and shelving ($40–$100 per cabinet from hardware stores or online). These use pegs or clips that slide into holes, letting you move shelves up or down by an inch or two. You can accommodate everything from cereal boxes to wine glasses to serving platters by adjusting each shelf height to fit what you’re storing. Installation: 30–45 minutes per cabinet with a hand saw (if custom-cutting shelves) or drill (if pre-cut).

    You’re now using every inch of your cabinet height intentionally. Taller items fit where they couldn’t before, and you can rearrange shelves when your storage needs change.


    24. Create a Vertical Coffee and Tea Nook

    Coffee lovers need a compact coffee station. A vertical nook with tiered shelves consolidates mugs, beans, tea, and equipment in one organized, beautiful zone. It’s like a mini café in your kitchen.

    Mount 2–3 floating shelves ($40–$80 for brackets and shelves) 12 inches apart, then style them: top shelf for mugs (group by color), middle shelf for coffee beans/grinder and tea selection, bottom shelf for French press or electric kettle. Add a small shelf for sugar/creamer if space allows. Mounting: 45 minutes to 1 hour with studs or heavy-duty anchors. Total cost: $50–$150 including styling.

    Every morning you walk to one organized zone instead of opening multiple cabinets. Guests see your coffee preferences on display, and everything you need for your caffeine ritual is within arm’s reach.


    25. Use Tension Rods and Baskets for Pull-Out Pantry Organization

    Pull-out pantry shelves are game-changers, but they need internal organization. Adding tension rods and small baskets to pull-outs creates vertical dividers within that already-smart storage.

    Install a pull-out pantry shelf ($60–$150 from hardware suppliers) in a deep cabinet, then add tension rods ($8–$15 per pair) vertically to divide sections. Underneath, stack small storage baskets ($10–$30 each) for snacks, grains, or baking supplies. Label everything ($5–$10 for a label maker tape if you don’t have one). Total cost: $90–$200 and 1–2 hours setup.

    When you pull out the shelf, everything is visible, organized by category, and easy to grab. You’ve created a mini pantry that slides out to you instead of making you reach or crouch.


    26. Mount Open Shelving in Kitchen Alcoves

    Awkward alcoves in kitchen walls feel like wasted space until you build shelving into them. Open shelves in an alcove look like they were built into your kitchen’s original design and use space that otherwise does nothing.

    Build or install shelving directly into the alcove ($200–$600 for a professional carpenter; $100–$250 in materials for DIY approach). Depth is typically 12–16 inches, and shelves can be wood, metal, or glass. Paint shelves to match kitchen walls or choose a contrasting accent color. Installation: 4–6 hours for a handy DIYer or 1–2 days for a pro. Permanent, so homeowner-focused.

    You’ve created custom-looking storage that appears intentional and designed. The alcove now pulls its weight instead of being a blank, empty-looking space.


    Save this post and try one or two ideas this weekend—start with the budget-friendly hacks like tension rods or floating shelves, and you’ll be shocked how much vertical storage transforms your space. Your kitchen will suddenly feel bigger, more organized, and way more functional.

  • 27 Mid-Century Home Decor Ideas That Bring Retro Elegance Home

    27 Mid-Century Home Decor Ideas That Bring Retro Elegance Home

    Remember when mid-century modern felt like the only style that mattered? If you’re ready to revisit that era’s best elements without feeling stuck in a design rut, you’re in the right place. Mid-century homes have a timeless appeal—clean lines, functional beauty, and warmth that photographs beautifully—but the key is mixing in modern sensibilities so your space feels fresh, not like a museum exhibit. These 27 ideas pull the most lovable parts of retro design and show you how to make them work for how you actually live today. Whether you’re starting from scratch or refreshing a single room, you’ll find budget-friendly hacks, weekend projects, and investment pieces that genuinely make a difference.

    1. Choose a Sofa with Tapered Wooden Legs

    A sofa with tapered wooden legs is the anchor piece that defines mid-century style. These legs—usually angled outward slightly and crafted from walnut or teak—instantly elevate any living room and create visual lightness by showing floor space underneath.

    Look for sofas at West Elm, Article, or Wayfair ($400–$1,200 range for quality reproduction pieces). If you’re on a tighter budget, IKEA’s Strandmon ($350–$500) offers clean lines and decent wood details. Vintage options at 1stDibs or local Facebook Marketplace often cost less but require more hunting and checking structural integrity.

    Measure your doorway and hallways before purchasing—these statements sofas are tricky to maneuver. Installation takes 20 minutes if you’re assembling legs yourself.

    The beauty of this investment? You’re not just buying a sofa; you’re creating the foundation for your entire room’s vibe. Everything else will arrange around those iconic legs, and suddenly your space looks intentionally designed rather than randomly furnished.

    2. Add Brass or Copper Accent Lighting

    Mid-century design loved metals—especially brass and copper—because they warm up a room while adding a touch of sophistication. Pendant lights, arc lamps, and table lamps in these metals became design icons for a reason.

    Hunt for fixtures at Target ($40–$150), Amazon ($30–$200), or splurge at West Elm ($150–$400). A brass arc lamp works especially well in small spaces because it reaches over seating without eating up floor room. IKEA’s Ranarp ($50) delivers that vintage brass vibe at a fraction of the price.

    Swapping out bulbs to warm white (2700K) takes two minutes and makes the biggest difference in how cozy the light feels. If you’re renting, plug-in arc lamps skip the hardwiring drama.

    Suddenly your room glows instead of glares. That warm metallic shimmer against your walls creates depth and makes evenings feel restaurant-level inviting rather than fluorescent-office harsh.

    3. Layer Geometric Throw Pillows in Jewel Tones

    Geometric patterns were the thing in the ’50s and ’60s, and they’re back without apology. Throw pillows give you permission to experiment with bold colors and abstract shapes without committing to wallpaper or paint.

    Start with one jewel-tone pillow ($15–$50 depending on quality) and add others over time. Etsy sellers, Target, and West Elm carry mid-century reproduction prints. Mix scales—one large geometric, one small-scale pattern, one solid accent color. Aim for odd numbers (3, 5, or 7) on a sofa; it’s more visually interesting than even pairs.

    This costs nothing to rearrange, so experiment for 10 minutes until the mix feels right. Renter? Perfect—pillows are the easiest design change you can make.

    You’ve just introduced color and personality without overwhelming the space. Mid-century maximalism thrives on mixing patterns, so lean into it.

    4. Install Floating Shelves Above Your Sofa

    Floating shelves above the sofa create a gallery-like backdrop and display space for the objects you actually love. Mid-century design celebrates honest materials and functional beauty, so this is your chance to show both.

    IKEA shelves run $10–$30 each plus mounting hardware; Amazon has options from $25–$75; premium versions at CB2 or West Elm hit $80–$150. You’ll need a stud finder, level, and drill (or call a handyperson for $50–$100 installation). Time investment: one hour for three shelves if you DIY.

    Decorate with a mix: books (spines facing out), small plants, vintage pottery, or a single large ceramic piece. Leave breathing room—empty space is part of the design.

    Your wall transforms from blank backdrop to curated display. Guests notice immediately, and you finally have a home for those special objects that deserve visibility.

    5. Paint an Accent Wall in Muted Sage or Charcoal

    Instead of screaming bold, mid-century color runs understated. Muted sage, soft charcoal, dusty teal, or warm gray accent walls ground a room while keeping the focus on your furniture’s lines and materials.

    Benjamin Moore, Sherwin-Williams, or Behr sell mid-century–inspired colors; grab a few sample pints first ($5–$8 each) to test on your wall in natural light. Plan to spend $30–$60 on paint plus brushes. One accent wall takes one afternoon (two hours active time, plus drying).

    Pick the wall behind your sofa or the one you see when entering the room. Primer speeds up coverage, especially over existing color.

    Suddenly the room has dimension. That single accent wall anchors your furniture, makes artwork pop, and makes the whole space feel intentionally designed rather than default white.

    6. Swap Out Hardware on Kitchen Cabinets

    The cheapest style upgrade? Cabinet hardware. Brass, copper, or wood-and-brass pulls instantly age-shift your kitchen from 2010s-generic to mid-century timeless.

    Amazon, Wayfair, and Etsy sell reproduction mid-century hardware for $3–$15 per pull. A typical kitchen needs 12–20 pulls, so budget $40–$300 depending on quality. You need only a screwdriver and 15 minutes. No skill required—just remove old hardware, fill old holes if they don’t match, and install new pulls.

    This works for dressers, nightstands, and bathroom vanities too. Maximum impact, zero commitment.

    Your kitchen suddenly feels cohesive and intentional. That small detail catches every eye, and for under $100, you’ve just refreshed an entire room’s vibe.

    7. Display Vintage Pottery and Ceramics

    Mid-century designers celebrated handmade objects—especially pottery with visible glaze variations and imperfect surfaces. These pieces looked expensive, felt warm, and told a story.

    Etsy, 1stDibs, and local antique shops sell authentic mid-century pottery ($20–$200 per piece depending on rarity). If budget’s tight, Target and West Elm offer modern reproductions that capture the vibe for $15–$80. Spend a weekend hunting at estate sales or thrift stores—you’ll find gems for $5–$20.

    Display three to five pieces together in odd numbers for visual interest. Group by color or size for cohesion.

    Suddenly your space tells a story beyond “stuff I bought new.” That handmade quality adds soul, and visitors ask where you found each piece—which means your design is working.

    8. Bring in a Credenza for Storage and Style

    A credenza screams mid-century more than almost anything else—it’s functional, beautiful, and shows off those beloved tapered legs. Perfect for living rooms, bedrooms, or entryways to hide clutter while looking intentional.

    New credenzas run $400–$1,200 at West Elm, Article, and Design Within Reach. Vintage finds at 1stDibs, Craigslist, and Facebook Marketplace often cost less ($200–$600) but require inspection for water damage and structural issues. IKEA’s Ivar system ($200–$400) offers a budget DIY route.

    These are heavy—measure doorways and plan delivery or pick-up logistics. Assembly takes one to two hours.

    Now you have stylish storage and a major design anchor. Your room instantly feels more curated, and suddenly all your stuff has a home that looks intentional.

    9. Mix Metals in Your Decor (Don’t Match Everything)

    Matching all your metals used to be a decorating rule. Mid-century design flipped that—mixing brass, copper, walnut, and even silver created visual interest and felt more collected over time.

    You don’t need to buy anything new for this. Audit what you already own: lamps, picture frames, plant stands, hardware. Deliberately choose pieces with different metal finishes. As you shop, pick a primary metal (brass or copper) but let secondary pieces vary naturally.

    This takes zero time—just intentional styling as you add pieces over the next few months.

    Your room looks more sophisticated, collected, and personal. That mix of metals makes your space feel like it evolved naturally rather than ordered all at once from one catalog.

    10. Hang a Large Abstract Art Print

    Mid-century abstract art—especially sunbursts, geometric shapes, and retro color blocks—became iconic for a reason. One large print anchors a wall and sets your room’s entire color palette.

    Etsy, Amazon, and Society6 sell reproductions for $20–$80 unframed or $60–$200 framed. Authentic vintage pieces at 1stDibs run $100–$500+. IKEA’s framing service keeps costs down ($15–$40 for framing). Pick a print that matches your existing color scheme or use it to introduce your accent color.

    Hanging takes 15 minutes with the right hardware. A stud finder prevents wall damage.

    Suddenly you have a focal point. That single art piece elevates the entire room, justifies your color choices, and gives visitors a clear sense of your style.

    11. Choose Furniture with Clean Lines and No Ornamentation

    Mid-century design rejected ornate carved details—furniture spoke through proportion and material, not decoration. Clean lines make a room feel bigger, less cluttered, and more serene.

    When shopping, look for zero carved details, tapered or angled legs, and simple joinery. Avoid rounded edges, curved legs, or decorative trims (that’s Victorian or Chippendale). IKEA, Article, Wayfair, and Target all carry modern pieces with mid-century bones at every price point.

    This guideline applies to everything: dressers, nightstands, desks, dining tables. Consistency makes the room feel intentional.

    Your space breathes. Without visual noise from ornamentation, your eye rests, and you focus on color, material, and the room’s overall proportion. It’s surprising how much calm comes from stripped-down furniture.

    12. Add a Round Coffee Table

    Round coffee tables became popular in mid-century design because they’re friendlier for conversation (no sharp corners) and feel less formal than rectangles. The circular shape also breaks up rooms dominated by straight lines.

    Article, West Elm, and IKEA offer round tables from $150–$500 new. Thrift stores and Facebook Marketplace often have vintage options for $50–$200. Diameter matters—aim for 36–42 inches for living rooms so it’s proportional to your sofa.

    This is a one-person delivery typically. Legs attach in 20 minutes.

    A round table makes your seating area feel more intimate and less formal. Guests naturally gather closer, and the space suddenly feels warmer and more inviting.

    13. Style a Bookshelf with the “Bookshelf Spine-Out” Method

    Instead of jamming books upright cover-to-cover, mid-century styling mixed spine-out books with horizontal stacks, objects, and negative space. This creates visual rhythm and makes your bookshelf look curated rather than library-ish.

    You already own the books—this costs nothing. Spend 30 minutes experimenting with arrangement: place one shelf mostly spine-out, another with stacked horizontal books, and break the pattern with decorative objects (pottery, plants, photos).

    Follow the “rule of thirds”—divide each shelf into thirds and vary what each section displays.

    Suddenly your bookshelf becomes a design feature. That intentional arrangement makes the entire room look more sophisticated, and your collection looks valuable rather than random.

    14. Invest in Quality Mid-Century Lighting

    Mid-century lighting transcends function—iconic designs like the Saarinen tulip base, Nelson bubble lamps, and simple paper shades became art. Good lighting completely changes how a room feels.

    Replica pendant lights run $50–$150 on Amazon or Wayfair. Authentic vintage pieces start at $200–$500 at 1stDibs or local antique dealers. For maximum impact, invest in one statement pendant ($150–$300) over the dining table or entryway rather than multiple cheap fixtures.

    Professional installation costs $50–$150 if you need hardwiring (renting? ask your landlord first).

    That single sculptural light becomes a conversation piece. Evenings suddenly feel intentional and beautiful rather than utilitarian.

    15. Use Natural Wood Tones for Warmth

    Mid-century design celebrated wood—walnut, teak, oak, and rosewood each had distinct characters. Mixing two or three wood tones (never matching everything) adds warmth and prevents the cold, sterile feel of all-white rooms.

    Audit your existing furniture for wood tones. When adding new pieces, intentionally choose different woods rather than matching. Walnut + oak + teak create visual interest; all-matching wood feels stiff and thematic rather than designed.

    Paint or stain existing furniture to match your palette if needed ($30–$100 for supplies, one weekend).

    Your room stops feeling flat. That mix of warm wood tones creates depth, richness, and a sense of having collected beautiful things over time—which is exactly the mid-century vibe.

    16. Place a Woven Wall Hanging or Macramé

    Woven textiles and macramé became popular in mid-century design, especially the ’60s and ’70s. They add texture, warmth, and that handmade quality that screams personality over mass production.

    Etsy and Wayfair sell woven hangings from $30–$150. Vintage macramé at thrift stores costs $5–$30. You don’t need an expensive piece—even a simple woven hanging completely shifts a blank wall’s energy.

    Mounting hardware takes five minutes; most hangings come with D-rings ready to hang.

    Suddenly your wall has dimension and texture. That single woven piece makes the space feel more collected, personal, and intentionally designed—not sterile.

    17. Swap Carpet for Hardwood or Refinish Existing Floors

    Mid-century design showcased flooring rather than hiding it. Hardwood was the standard, and area rugs defined spaces without covering everything.

    If you’re renting, this isn’t an option. Homeowners: hardwood installation runs $5–$12 per square foot, so budget $2,000–$5,000 for a typical room. Refinishing existing floors costs $3–$8 per square foot ($1,500–$3,500). Laminate alternatives ($2–$5 per sq ft) capture the look affordably.

    Projects take days professionally; plan accordingly.

    Clean floors make rooms feel bigger and lighter. That wood grain becomes a design element, and suddenly your entire room has warmth and visual interest at ground level.

    18. Create a Vignette on Your Nightstand

    Mid-century stylists didn’t scatter items randomly—they grouped objects intentionally to create small scenes. Your nightstand is prime real estate for a tiny vignette.

    Pull together three to five objects: a lamp, a small plant, a favorite book, a candle, a small bowl. Arrange them leaving space between items so each object breathes. This costs nothing if you’re using objects you own.

    Spend 10 minutes styling. Rearrange seasonally to keep it fresh.

    Suddenly your nightstand is a mini gallery rather than a junk drawer. That small intentional styling makes your bedroom feel more restful and sophisticated.

    19. Hang Pendant Lights at Varying Heights

    Instead of a single fixture or matching pairs, hanging pendants at staggered heights (24–36 inches apart vertically) creates visual interest and catches light differently from each angle.

    IKEA and Amazon pendants ($25–$80 each) work great for this look. You’ll need an electrician for hardwiring ($100–$200) unless you’re using plug-in options for temporary rentals.

    The key: stagger heights so no two pendants align horizontally. It looks intentional and modern instead of matchy.

    Your kitchen counter transforms into a designed space. That subtle height variation makes a huge difference in how sophisticated the zone feels.

    20. Introduce Pops of Color Through Accent Chairs

    A single accent chair in jewel tone or warm accent color (mustard, teal, burnt orange, sage) becomes an instant focal point. Mid-century design loved color—just used it strategically in one or two pieces rather than everywhere.

    Article, West Elm, and Wayfair have mid-century accent chairs at $300–$800. IKEA’s Strandmon ($250–$350) offers clean lines at budget prices. Thrift stores sometimes yield treasures for $50–$150.

    An accent chair needs floor space—even small rooms can fit a 28–32-inch-wide chair in a corner. Assembly takes 30 minutes.

    That single pop of color anchors your room’s palette and gives visitors a clear sense of your style. It’s surprising how one accent piece makes the entire space feel more intentional and designed.

    21. Pair Your Sofa with a Simple Wooden Console

    A console table behind your sofa serves dual purposes: it visually defines the seating zone and creates display space for styling objects. Mid-century design valued functional furniture that solved problems beautifully.

    IKEA, Wayfair, and Article offer console tables from $100–$400. Thrift stores often have vintage options for $50–$150. Look for pieces 12–16 inches deep and 48–60 inches wide so they fit proportionally behind a sofa.

    No installation needed—just position and decorate. Style with 3–5 objects: a lamp, small plant, framed photo, or vase.

    Now your room feels intentional and zoned. That console creates visual separation, adds functional surface area, and makes your sofa arrangement look designed rather than randomly placed.

    22. Select Window Treatments with Clean Geometry

    Mid-century window treatments favored simplicity: floor-to-ceiling curtains in solid colors or simple geometric patterns, mounted on slender metal rods. Heavy velvet and florals? Absolutely not.

    Curtain rod cost: $20–$80; fabric: $30–$150 per window depending on size. IKEA’s Räcka rod ($15–$30) nails the minimal look. Simple linen or cotton in cream, gray, or soft color works best.

    Mounting takes 20 minutes. If you’re renting, use tension rods ($10–$30) for damage-free installation.

    Suddenly natural light isn’t fighting heavy curtains. That clean geometry frames your windows beautifully and makes the entire room feel more spacious and intentional.

    23. Add a Small Side Table for Function and Style

    The best mid-century design moves—it has purpose. A side table beside your favorite chair isn’t decoration; it’s functional and becomes a design anchor for that corner.

    IKEA, Article, and Target offer side tables from $80–$250. Thrift finds run $20–$80. Look for pieces 16–20 inches wide and 22–24 inches tall so they align with armrest height.

    Assembly typically takes 15 minutes. Renter-friendly—just position and style.

    Suddenly that corner feels purposeful. You have a place for your lamp, book, and morning coffee, making the space more livable and intentional.

    24. Use Geometric Area Rugs to Define Zones

    Area rugs serve mid-century design brilliantly—they define spaces (especially in open-plan homes), add color and pattern, and anchor your furniture arrangement. Geometric patterns feel authentically retro.

    IKEA’s rugs ($50–$200), West Elm ($200–$500), and Etsy sellers ($80–$400) all carry mid-century patterns. Size matters: an 8×10 rug anchors a living room; 5×8 works for bedrooms or smaller spaces.

    This costs nothing to rearrange. Test placement before fully committing.

    Suddenly your room has visual structure. That rug defines your seating area, introduces pattern without overwhelming, and makes furniture arrangement feel intentional rather than random.

    25. Frame Vintage Magazine Covers or Retro Travel Posters

    Vintage magazine covers and travel posters look like mid-century style because they’re literally from that era. Framing affordable reproductions creates impact without the restoration costs of authentic prints.

    Etsy, Minted, and Society6 sell reproductions ($10–$30 unframed). IKEA frames ($3–$15 each) keep total cost low. Authentic vintage posters at 1stDibs start at $50–$200+.

    Arrange three to five pieces in a gallery wall for maximum impact. Spacing should be even (2–3 inches between frames). Hanging takes 45 minutes with a level and stud finder.

    Gallery walls become instant focal points. Those retro images anchor your room’s aesthetic and tell visitors exactly what era inspires you.

    26. Incorporate Handpainted or Glazed Tiles

    Handpainted tiles—especially with visible glaze variation and geometric patterns—scream mid-century craftsmanship. They add warmth and personality that mass-produced tiles can’t match.

    Etsy sellers and specialty tile shops carry handpainted options ($5–$20 per tile). Installation runs $10–$20 per square foot labor. A small backsplash (30–50 tiles) costs $300–$500 installed; DIY saves labor costs if you’re handy.

    This is a weekend project if you DIY or one-day install if professional. Prepare surface and use epoxy grout ($20–$40).

    Suddenly your kitchen or bathroom feels artisanal and collected. Those imperfect tiles add character and warmth that make the space feel lived-in and intentional.

    27. Curate a Mid-Century Vignette on Your Entryway Table

    Your entryway is the first impression visitors get of your style—make it count. A curated vignette (4–6 objects arranged intentionally) creates instant personality and sets the mid-century tone for your entire home.

    Gather objects you already own: a favorite vase, stacked books, a small plant, a decorative bowl. Spend 15 minutes arranging them with breathing room between items. This costs nothing.

    Rearrange seasonally or whenever inspiration strikes to keep it fresh.

    Visitors immediately sense that you’ve designed your home intentionally rather than furnished it randomly. That small entryway vignette communicates taste and thoughtfulness—setting expectations for the style they’re about to experience inside.


    Save this post for your next refresh. Pick one or two ideas from this list and start this weekend—you’ll be shocked how quickly your space shifts from generic to intentionally retro-inspired. Share this with any friends obsessed with mid-century design; they’ll appreciate the actionable tips.

  • 25 House Interior Decor Ideas That Add Warmth & Character

    25 House Interior Decor Ideas That Add Warmth & Character


    If your home feels cold, sterile, or like something’s missing, you’re not alone. That bland, mass-produced feeling is exactly what’s pushing designers toward warmth and personality in 2025. The good news? You don’t need a huge budget or a designer’s eye to create a space that feels authentically yours. These 25 ideas blend trending styles—Art Deco revivals, organic modernism, and vintage maximalism—with practical, renter-friendly solutions. Whether you’re refreshing one room or reimagining your entire home, you’ll find quick wins, weekend projects, and investment pieces that actually make a difference. Ready to trade generic for genuine? Let’s go.


    1. Layer Handpainted Furniture for Instant Personality

    Handpainted furniture has jumped 135% in search popularity because it screams personality in a way IKEA flatpacks never will. This doesn’t mean you need to hire an artist—simple, imperfect brushstrokes actually look more authentic and charming.

    Start with a thrifted piece: a nightstand, dresser, or side table from Facebook Marketplace or 1stDibs ($30–$150). Grab acrylic paint in soft, trendy colors—sage green, dusty blue, or terracotta—from any craft store. Sketch a simple design (geometric shapes, florals, or abstract strokes work best) with pencil first, then paint over it. Use a matte topcoat to protect your work. Total time: 2–4 hours spread over a weekend. Cost: paint and supplies under $25.

    The beauty? Imperfect brushwork looks intentional and artisanal, not amateur. Your bedroom or living room suddenly has a focal point that cost less than a store-bought accent piece.

    2. Swap Cool Grays for Warm Wood Tones Everywhere

    Cool gray has dominated interiors for five years straight—and people are officially tired of it. Warm woods (oak, walnut, pine) create what designers call “architectural warmth,” making spaces feel instantly more inviting and less corporate.

    If you’re renting or can’t replace cabinets, start small: swap out hardware for brass or wood knobs ($2–$8 per knob), add open shelving with natural wood boards above your kitchen counter, or introduce a wood-topped console table ($100–$400). If you own your space, consider cabinet refinishing or staining—yes, it’s an investment ($1,500–$4,000 for a kitchen), but it outlasts trends. Paint walls in warm neutrals: warm white, cream, or soft taupe instead of greige.

    Pro tip: Layer warm wood with brass accents and cream textiles to avoid a heavy, dark feeling. The shift happens fast—your space goes from sterile to serene in weeks.

    3. Add Blue Ceramic Tiles for Modern Edge

    Blue ceramic tiles surged 470% in search traffic, and for good reason. They’re bold without being trendy-risky, photograph beautifully, and work in kitchens, bathrooms, and even accent walls.

    Go full statement: replace a bathroom backsplash or kitchen splashback with blue tiles ($3–$12 per tile; installation $200–$800 professionally, or DIY for $50 in materials plus effort). Go subtle: use them as a single accent row or corner detail. Pair them with brass or warm gold fixtures (not chrome) to ground the look. Home Depot, Wayfair, and specialty tile shops like Bedrosians have deep collections. Mixed with white grouting or intentionally “imperfect” joints (now trendy!), they look European and collected.

    You’ll notice it the moment you walk in—suddenly your bathroom or kitchen feels curated, not cookie-cutter.

    4. Introduce Rounded Furnishings for Organic Flow

    Hard, boxy furniture is giving way to curves and rounded edges—think rounded sofas, curved coffee tables, and arched shelving. This shift toward “organic modernism” makes spaces feel less rigid and more inviting.

    Hunt for curved pieces at Wayfair ($400–$1,200 for a rounded sofa), Article, or secondhand via Craigslist and 1stDibs ($200–$600 for vintage finds). A simple curved side table ($80–$250) pairs beautifully with angular art or plants. Even rounded bookshelf ends ($150–$400) soften a room’s energy. If you’re renting, add a curved floor mirror ($100–$300) or round poufs ($40–$120) to signal the shift.

    The result? Your eye moves more smoothly through the room, and sharp corners no longer break up the visual flow. Space instantly feels calmer and more contemporary.

    5. DIY Woven Cabinet Fronts for Textural Depth

    Woven or mesh cabinet fronts are having a moment—they add texture, let you display pretty dishware or kitchen items, and feel handcrafted without requiring actual skill.

    Measure your cabinet doors and order pre-made mesh or woven panels from Etsy ($20–$60 per panel) or DIY with rattan webbing from craft stores ($15–$40). Pop out the cabinet door insert if your cabinets have removable panels, swap in the weave, and secure with small nails or adhesive. Takes 30 minutes per cabinet. No tools? Order ready-made woven cabinet fronts online ($150–$400 per cabinet) and have them installed by a handyperson ($50–$100/hour).

    This small change makes your kitchen instantly feel more artisanal and less sterile—like you actually curated your space.

    6. Hang Architectural Arches for Budget-Friendly Curves

    Arches are trending everywhere, and the smart part? You can add them for under $100. They soften hard corners, add architectural interest, and make rented spaces feel intentional.

    Mark out an arch shape above a doorway or on a feature wall using a curved template or flexible curve tool. Paint along the line with a contrasting color (white arch on warm walls, dark arch on light walls). No painting skills? Use removable wallpaper or peel-and-stick arch decals ($20–$50 from Amazon or Etsy). DIY time: 1–2 hours. For a permanent option, hire a handyperson to add a plaster or drywall arch ($300–$800), which elevates your home’s architectural character forever.

    Your hallway or entryway transforms from plain to gallery-worthy with a single curved line.

    7. Layer Vintage Maximalism with Intentional Repetition

    Vintage maximalism isn’t chaos—it’s thoughtful layering. Searches are up 260% because people crave personality over sterile minimalism. The trick is repetition and a cohesive color palette.

    Choose 3–4 colors (dusty blue, cream, gold, green) and layer pieces within that palette. Mix vintage finds ($5–$50 each from thrift stores, 1stDibs, or Facebook Marketplace) with 2–3 modern anchor pieces. Layer books horizontally and vertically, add small plants, brass candleholders, and patterned ceramics. Spend a weekend sourcing; styling takes 2–3 hours. Total investment: $100–$400 for a well-styled bookshelf or console table.

    The best part? It looks collected and intentional, not accidental or hoardy. People will ask where you found everything.

    8. Paint a Feature Wall in Warm, Earthy Tones

    One painted feature wall changes a room’s entire energy without a major commitment. Warm, earthy tones (terracotta, ochre, warm taupe, sage) ground a space and feel so much more current than cool grays.

    Pick one wall—usually the wall behind your bed or above your sofa. Choose a warm paint from Benjamin Moore, Sherwin-Williams, or Farrow & Ball ($40–$60 per gallon). Paint yourself on a weekend ($0 labor, just supplies and time) or hire a painter ($200–$500). Pair the warm wall with light, neutral furniture and plenty of natural wood or brass accents.

    Your room goes from anonymous to intentional instantly, and the psychological warmth is real—visitors comment on how “cozy” the space feels.

    9. Source Statement Lighting for Ambient Warmth

    Lighting isn’t decor—it’s the foundation of warmth. Swap out clinical overhead lights and add layered, warm-toned ambient lighting with vintage-inspired pieces that actually look good.

    Hunt 1stDibs, Etsy, or Facebook Marketplace for brass or sculptural vintage lamps ($40–$200). Add warm-white LED bulbs (2700K color temperature) instead of cool whites ($5–$15 each). Layer: a floor lamp in the corner, table lamps on side tables, and wall sconces ($50–$300 per sconce). Budget option: add cordless LED candles ($10–$30) and a simple brass swing-arm lamp ($80–$150). Install time: 30 minutes to 2 hours depending on complexity.

    Warm light literally makes everything feel better—your skin looks better, your space feels more luxurious, and the whole room changes vibe.

    10. Curate an Antique-Hunting Strategy for Authentic Pieces

    62% of designers will shop for antiques in 2025 because secondhand pieces beat mass-produced junk every time. But hunting can feel chaotic without a strategy.

    Start with a specific hunt: “I need a brass three-tier plant stand” or “warm wood side table under $150.” Then hit 1stDibs, Etsy, Chairish, Ruby Lane, or Facebook Marketplace with those exact terms. Set alerts. Check Facebook Marketplace and Craigslist daily—the best finds sell fast. Join local Buy Nothing groups for free treasures. Visit actual antique malls ($0 cost, 2–3 hours of browsing) and thrift stores weekly. Spend $10–$50 per hunt; one great piece per month builds a curated home.

    Your home stops looking like a catalog and starts looking like your life—because it literally is filled with pieces you intentionally chose.

    11. Invest in Quality Rugs and Layering Textiles

    The rug market hit $51.87B in 2025 because textiles are the fastest way to add warmth and personality. Rugs aren’t just functional—they’re statement pieces.

    Invest in one large, quality rug ($300–$1,000) in a warm-toned pattern or natural fiber (jute, wool, sisal). Layer a smaller rug on top if you’re feeling bold. Add throw pillows ($30–$100 each) in complementary colors, and drape a chunky knit throw ($50–$200) over your sofa or chair. Mix textures: linen, wool, cotton, and hand-woven materials. Shop Ruggable for washable options, Anthropologie for pattern, or Etsy for vintage finds.

    This layering creates visual depth and actual coziness—you’ll notice how much softer and more inviting your space feels underfoot and to the eye.

    12. Style Open Shelving with Personality, Not Perfection

    Open shelving is only as good as what you display. The shift toward “imperfect” styling means showing actual items you use and love, not showroom-perfect rows.

    Choose 3–4 neutral staples (white plates, natural wood bowls, clear glassware) and mix with colorful or patterned pieces. Add small plants, cookbooks, and a few decorative objects. Vary heights and cluster items in odd numbers (3 or 5, not 4). Style takes 1–2 hours; cost depends on what you already own. If starting fresh: $150–$400 for quality basics.

    Pro tip: Leave breathing room. Overstuffed shelves look cluttered, not curated. When people see your shelves, they think “that person has good taste,” not “that person is obsessive.”

    13. Create a Luxe Home Office with Ergonomic Beauty

    “Luxe office” searches jumped 2,766%—because working from home deserves a space that feels intentional and inspiring, not like a cramped corner.

    Start with a solid wood or marble desk ($200–$800). Add an ergonomic chair upholstered in warm fabric ($300–$1,000; IKEA has budget options under $200). Layer: warm desk lighting ($80–$300), a small plant ($15–$40), and natural wood organizers ($20–$80). If you’re renting or budget-constrained, a simple desk ($100–$300) plus a good chair ($150–$400) and plants ($30–$60) totally shifts the energy. Spend a weekend organizing cables and styling—time: 3–4 hours.

    You’ll actually want to spend time in your office instead of avoiding it. Work feels like a choice, not a chore, when your environment supports you.

    14. Add Artisanal Candles for Scented Styling

    Candles hit $11.51B in 2025 because they’re simultaneously decor, scent, and ambiance. Artisanal candles double as styling objects that actually make your space smell good.

    Invest in 2–3 quality candles ($15–$40 each) from makers like P.F. Candle Co., Diptyque, or Etsy small businesses. Display them grouped (odd numbers!) on a tray or console with dried flowers, books, or small ceramics. Soy or beeswax candles burn cleaner and last longer than paraffin. Light them during work calls or evenings to shift your space’s sensory impact. Budget: $50–$120 for a well-curated candle collection.

    The combination of warm light, subtle scent, and beautiful vessels makes your home feel cared-for without trying. People notice immediately.

    15. Mix Metals for Visual Interest Without Clashing

    Matching all your metals to one finish is actually boring now. Intentional mixing—brass with matte black, rose gold with warm copper—feels curated and modern.

    Start by auditing existing fixtures: hardware on cabinets, faucets, light fixtures, and handles. Replace mismatched pieces gradually. Swap cabinet hardware from chrome to brass ($2–$8 per knob; DIY install, 30 minutes for a full kitchen). Mix finishes: brass handles, matte black hinges, copper fixtures. The key is intentionality—don’t randomly mix. Stick to warm metals (brass, copper, rose gold) or cool metals (chrome, brushed nickel, matte black), not both. Budget: $50–$300 depending on how many pieces you swap.

    Your kitchen or bathroom feels more sophisticated instantly. Mixing metals signals you know what you’re doing, even if you got there by accident.

    16. Display Art and Frames for Affordable Personality

    Art doesn’t have to be expensive or come from a gallery. Mixing affordable prints, personal photos, and thrifted frames creates a gallery wall that feels deeply personal.

    Search Etsy or Minted for prints ($10–$50 each). Mix in personal photos ($0). Hunt thrift stores or Facebook Marketplace for frames ($2–$15 each) in coordinating finishes. Arrange on your wall first using painter’s tape to finalize layout. Hang at eye level, mixing frame sizes and orientations. Total time: 2–3 hours. Budget: $100–$300 for a full wall.

    Pro tip: Use frames in 2–3 finishes (natural wood, brass, black) to avoid monotony. Your wall tells your story in a way mass-produced art never will.

    17. Invest in Natural Wood Shelving Units

    Wooden shelving—especially open shelving—is one of the best ROI investments for warmth and function. Unlike furniture, they change the architecture of your space.

    Shop Article, Wayfair, or West Elm for mid-range options ($200–$600). For investment pieces, check Etsy for handmade or vintage ($300–$1,200). DIY option: buy shelving boards from a hardware store ($30–$60 each) and floating shelf brackets ($20–$40), install yourself in one afternoon. The magic happens when you fill them thoughtfully—don’t overstuff. Wood’s grain, color variation, and warmth become part of your decor. Cost: $100–$1,000 depending on size and quality.

    Wooden shelving stops feeling temporary and becomes part of your home’s permanent bones—literally.

    18. Layer Textures with Woven and Macramé Accents

    Texture is the secret ingredient designers use to make spaces feel expensive and lived-in. Layering woven, macramé, and natural fiber pieces adds dimension without clashing.

    Add a macramé wall hanging ($20–$80 from Etsy or Urban Outfitters), woven wall baskets ($15–$60 each), or a jute rug ($50–$200). Layer a textured throw ($40–$150) over seating. Mix smooth ceramics with rough woven pieces. All these materials should feel natural and touchable. Spend one weekend styling; total investment: $150–$400.

    When people enter your space, they might not know why it feels special—but they’ll feel the texture subconsciously. Your brain registers “thoughtful” and “cozy.”

    19. Create a Personalized Gallery Moment with Thrifted Finds

    The shift away from mass-produced decor means showing your actual interests and travels. A personalized collection beats ten identical store-bought objects.

    Dedicate a console table, shelf, or wall to items you genuinely love: thrifted brass objects ($5–$20 each), small framed prints ($10–$30), ceramics from local makers ($20–$80), or travel souvenirs. Arrange in clusters of 3–5. Vary heights and create visual rhythm. Time: 2–3 hours. Budget: $100–$300 for a well-curated collection (or $0 if using items you own).

    Your shelf becomes a conversation starter because it’s actually about you, not about trends.

    20. Introduce Handmade Ceramics for Artisanal Warmth

    Handmade ceramics are having a moment because the slight imperfections and color variations feel authentic. Unlike factory ceramics, each piece tells a story.

    Support small makers on Etsy, local pottery studios, or ceramicists at farmers markets. Expect to spend $20–$80 per piece for quality handmade ceramics. Start with functional items: a serving bowl ($30–$60), mugs ($15–$30), or a vase ($25–$70). Display them openly so the glaze and handmade details show. Incorporate 3–5 pieces into your kitchen or dining area styling.

    Using handmade pieces—even just a few—signals that you value craftsmanship over convenience. People will ask where you got them.

    21. Design a Cozy Reading Nook with Layered Comfort

    Every home needs at least one intentional cozy spot—not just sitting space, but an actual retreat that says “pause here.”

    Find a corner, window seat, or section of your sofa. Add a high-quality cushion ($50–$200), layer 3–4 pillows in coordinating textures ($30–$80 each), and drape a chunky knit throw ($60–$150). Add a small side table ($40–$150) for tea or books. One warm lamp ($60–$200). Spend an afternoon styling; investment: $300–$800. Renter hack: use a floor cushion ($40–$100) instead of a permanent cushion.

    This space becomes your favorite room instantly because it was designed for actual comfort, not just looks.

    22. Swap Out Hardware for Instant Cabinet Refresh

    Changing cabinet hardware is the easiest, cheapest way to update a kitchen or bathroom without renovation. You can literally swap 30 handles in one afternoon.

    Unscrew old hardware (usually 2 screws per handle), measure the hole distance, and order new hardware in brass, wood, or matte black ($2–$10 per knob). Screw in new handles. Time: 15–30 minutes for a full cabinet run. Cost: $50–$300 depending on quantity. Shop Hardware Hut, Anthropologie, or Etsy.

    Your kitchen or bathroom suddenly looks intentional and updated, and it cost less than takeout for two people.

    23. Bring in Trailing Plants for Living, Breathing Warmth

    Living plants instantly warm up a space and improve air quality. Trailing plants especially add organic flow without taking up floor space.

    Choose easy, low-maintenance plants: pothos ($10–$20), string of pearls ($15–$30), or trailing philodendron ($15–$25). Place pots in warm ceramic or terracotta vessels ($10–$40 each). Let vines trail from shelves or hang macramé plant hangers ($15–$40 per hanger). Water weekly; spend 5 minutes per week on care. Budget: $100–$300 for a well-planted collection.

    Plants literally breathe life into your space—and the act of caring for them adds a ritual that grounds your day.

    24. Create Intentional Vignettes on Every Surface

    Instead of random objects, design small “vignettes”—intentional groupings of 3–5 items on nightstands, dressers, or console tables. This is how magazines style homes, and you can do it too.

    Choose a color palette (warm metals, warm woods, cream ceramics). Gather 5–7 objects: a candle, a small plant, a book, a frame, a decorative object. Arrange in a triangle or line, varying heights and textures. Leave breathing room. Rearrange monthly as items or interests shift. Time: 30 minutes per vignette. Cost: $50–$150 per vignette depending on what you already own.

    Your home suddenly feels intentional everywhere—not just one showcase room. It’s the difference between “nice home” and “wow, their taste is impeccable.”

    25. Commit to Warm Lighting Temperature Everywhere

    The single most impactful change: swap out all overhead lights and cool-white bulbs for warm-toned ambient lighting. It changes everything.

    Replace every bulb in your home with 2700K warm-white LEDs ($5–$15 per bulb). Remove or rarely use overhead ceiling lights. Layer lamps throughout rooms instead: floor lamps ($60–$250), table lamps ($40–$200), wall sconces ($80–$300), and string lights for bedrooms ($20–$50). Install dimmers on existing lights ($15–$40 per switch). Time: an afternoon. Cost: $200–$800 depending on how many lamps and switches you add.

    The psychological effect is immediate—your space feels more luxurious, more intimate, and warmer. Everything looks better under warm light, including you.


    Save this post and try just one idea this weekend—you’ll be shocked how much warmth and personality one small change brings to your space. Which tip are you tackling first?

  • 27 Small Utility Room Ideas That Boost Function in Tight Spaces

    27 Small Utility Room Ideas That Boost Function in Tight Spaces


    Stuck with a cramped utility room that feels more chaotic than functional? You’re not alone. Small laundry spaces often become dumping grounds for supplies, cleaning tools, and whatever doesn’t fit elsewhere. But here’s the good news: your tight utility room has serious potential. The right mix of smart storage, layout tweaks, and design choices can transform even the tiniest room into a space that actually works for you—not against you.

    We’ve gathered 27 practical ideas that work for renters and homeowners alike, whether you’re working with a closet-sized room or a slightly bigger squeeze. From budget-friendly hacks to investment pieces that last, you’ll find solutions for every budget level. Some ideas take 15 minutes, others are weekend projects. All of them make a real difference in how you move through your space.

    Ready to reclaim your utility room? Let’s dive in.


    1. Stack Your Washer and Dryer for Maximum Floor Space

    Stacking saves you nearly half the floor space of traditional side-by-side units. This is a game-changer if your room is narrow or you need space for other functions like a folding station or storage.

    Most stacked units cost $700–$1,500 depending on the brand and features. Look at compact models from brands like LG, Samsung, or GE—many retailers like Best Buy, Home Depot, and Amazon offer installation services (usually $100–$300). Installation takes one afternoon if you’re replacing existing units. Pro tip: measure your doorway and hallways before buying; getting a stacked unit into a tight space sometimes requires professional movers.

    You’ll free up floor space for a small table, shelving, or even a pet washing station. Your utility room suddenly feels less cramped and more purposeful.


    2. Install Floating Shelves Up to the Ceiling

    Floating shelves pull your storage upward instead of outward, making tiny rooms feel bigger. You’ll use every inch of vertical space without the bulk of traditional cabinets.

    Install shelves $8–$25 each from IKEA, Target, or Wayfair. A basic wall kit with brackets costs $50–$120 for three shelves. If you’re renting, use command strips or magnetic shelves that don’t require drilling. For renters or beginners, expect 2–3 hours of work; if you’re comfortable with a drill, it’s faster. Anchor shelves securely into wall studs for maximum weight capacity.

    Your room looks taller and more intentional. Plus, that blank wall space you’ve been ignoring becomes functional storage you can actually see and reach.


    3. Add a Utility Sink for Pre-Treating Stains

    A utility sink is one of the best upgrades for serious laundry care. You can pre-soak delicates, treat stubborn stains, and hand-wash items right where you need them.

    Budget options start at $150–$300 for a basic sink unit; higher-end models run $400–$600. Installation costs vary—DIY is possible if you’re comfortable with plumbing, but hiring a pro costs $150–$400. Alternatively, get a portable wash station for $80–$150 that doesn’t require permanent installation. If you rent, check your lease; some landlords allow temporary sink additions.

    You’ll treat stains immediately instead of letting them set. Delicate items get the attention they deserve. Your laundry routine becomes more efficient and less stressful.


    4. Use Vertical Pull-Out Hampers for Hidden Organization

    Pull-out hampers hide dirty laundry behind closed doors while keeping items sorted by color or fabric type. They’re perfect for small spaces because they don’t take up floor room.

    Pull-out hamper kits cost $60–$180 from Wayfair, Amazon, or The Container Store. Installation is usually a DIY project that takes 30 minutes to an hour. No special tools needed if you’re mounting to existing cabinetry. Renters can use freestanding versions with collapsible frames ($40–$90) that tuck into corners.

    Your floor stays clearer. Laundry stays sorted and contained. You’re not hunting for clean baskets when you need them.


    5. Paint Walls in Soft, Energizing Colors

    Ditching stark white for earthy tones instantly changes the room’s energy. Soft greens, warm grays, and muted blues make chores feel less tedious.

    Quality paint costs $30–$50 per gallon; you’ll need 1–2 gallons for a small room. Total project cost: $50–$100. Painters charge $400–$800 if you hire out; DIY takes a weekend. Renter-friendly option: use removable wallpaper ($25–$60) that peels off without damage.

    Your space stops feeling utilitarian and starts feeling intentional. You actually want to spend time there. A small color shift impacts your mood every time you do laundry.


    6. Install Ceiling-Height Cabinetry for Total Storage Capacity

    Ceiling-height cabinets capture wasted space above eye level while providing deep storage for seasonal items, bulk supplies, and rarely-used equipment.

    Semi-custom cabinetry runs $800–$2,000 depending on size and finish; custom options cost $2,500–$5,000+. Budget-friendly alternative: mix ready-made units (IKEA, Home Depot) to reach ceiling height ($300–$800 total). Installation takes 1–2 days for DIY; professionals charge $400–$1,000. Renters can use tall shelving units instead.

    You reclaim dead space. Your room feels cohesive and purpose-built. Everything has a dedicated spot.


    7. Add a Fold-Down Counter for Minimal Footprint

    A fold-down counter gives you a folding surface that disappears when not in use. Perfect for rooms where floor space is at a premium.

    Wall-mounted fold-down counters cost $40–$150 from Amazon, IKEA, or Wayfair. Installation is simple—about 30 minutes with basic tools. Most renters can install these without landlord permission since they’re easily removable. Standard dimensions are 24–30 inches wide.

    When you’re folding, you have the counter space you need. When you’re done, it tucks away. Your room stays spacious and uncluttered.


    8. Install Drying Rods and Wall-Mounted Racks

    Wall-mounted drying solutions save energy and protect delicates. You can air-dry everything from sweaters to lingerie without a separate drying rack taking up floor space.

    Rods and racks range from $15–$80 depending on style and load capacity. A basic wooden rod system from IKEA or Target runs $20–$40. Installation takes 20–30 minutes with wall anchors. Renters can use tension rods ($10–$20) that require no installation.

    Your clothes dry gently without heat damage. You save on electricity. Your utility room becomes a quiet, functional drying zone.


    9. Organize with Coordinated Storage Baskets and Labels

    Matching baskets create visual calm while keeping categories separate. Labels ensure everyone finds what they need without creating chaos.

    Coordinated basket sets cost $40–$120 for a collection of 3–5 from Target, Container Store, or Wayfair. Label makers are $15–$30. Total investment: $60–$150. This is a quick weekend project—about 1 hour to fill and label everything.

    Your space looks intentional instead of cluttered. Family members know where supplies belong. Everything stays tidy longer.


    10. Create an Open-Closed Storage Combo

    Mixing open and closed storage lets you display pretty items while hiding the clutter. It’s the sweet spot between function and aesthetics.

    This approach uses existing cabinets plus floating shelves (total: $200–$500). Rearranging existing pieces costs nothing. If you’re building from scratch, budget $600–$1,200 for a combination setup. No additional time beyond installation.

    Your room looks curated, not chaotic. Pretty items catch the eye. Ugly supplies stay hidden. Guests won’t judge your cleaning stockpile.


    11. Switch to Smart, App-Controlled Appliances

    Smart washers and dryers let you start, stop, and monitor loads from your phone. No more guessing if you left the washer running.

    Smart appliances cost $900–$1,800 per unit depending on capacity and features. Brands like LG, Samsung, and GE all offer app-connected options. The app is usually free; sometimes there’s a subscription for advanced features ($3–$8/month). These machines last 10–15 years, so the per-year cost is reasonable.

    You get alerts when loads are done. You control everything remotely. Laundry day becomes way less manual and stressful.


    12. Install Efficient Task Lighting and LED Strips

    Good lighting makes you want to work in the space and helps you spot stains and dirt. LED strips and overhead fixtures eliminate dark corners.

    Basic LED strips cost $15–$50; pendant fixtures run $30–$150 depending on style. Total lighting upgrade: $80–$250. Installation is usually 1–2 hours if you’re comfortable with basic wiring. Electricians charge $200–$400. Renters can use battery-operated LED strips ($20–$40) and clip-on lights.

    Your space feels brighter and more inviting. You actually see what you’re doing. Task lighting makes folding and stain-treating easier.


    13. Add Matte Black or Brushed Nickel Fixtures for Modern Appeal

    Updating hardware is a quick way to refresh your space. Modern finishes feel more high-end than basic chrome.

    Faucets and fixtures range from $40–$150 depending on quality. A hardware refresh project (replacing knobs and pulls) costs $30–$80. Installation is a DIY weekend project—about 2–3 hours. Renters should check their lease before making permanent changes.

    Your space instantly looks more put-together. Those small metal details add polish without a full renovation. The room feels newer and more intentional.


    14. Use Compact Appliances for Tight Spaces

    Compact and slimline appliances fit in hallways, closets, and corners. If you live in a city or have a tiny utility room, these are your answer.

    Slimline washers cost $500–$900; compact dryers run $400–$700. These are often more energy-efficient, saving you money over time. Installation is the same as standard units. Many apartment dwellers rely on compact models because they fit where nothing else does.

    You get a complete laundry setup in half the footprint. No sacrificing function for space. Your tiny room becomes fully functional.


    15. Create an Ergonomic Folding Counter and Height-Appropriate Storage

    Folding at counter height instead of on a bed or table saves your back. Storing supplies at arm’s reach means less reaching and bending.

    An ergonomic counter setup costs $100–$300 depending on whether you DIY or buy prefab. Positioning supplies is free. This reorganization takes about 2–3 hours. The payoff is long-term comfort—your back will thank you during laundry day.

    You finish laundry without neck and back pain. Reaching supplies doesn’t feel like a stretch. Your body stays comfortable while working.


    16. Install Touchless Faucets for Hygiene and Convenience

    Touchless faucets reduce bacteria transfer and work great for rinsing delicates or cleaning supplies without touching handles.

    Touchless faucets cost $80–$200 depending on quality and installation. They run on batteries or plug into outlets (battery options are renter-friendly). Installation is typically DIY or requires a plumber ($150–$300 if you hire out). Battery-operated models last 1–2 years per set.

    You wash your hands without touching anything. Rinsing delicates is cleaner and easier. The space feels more hygienic and modern.


    17. Mix Metal Finishes for Modern, Curated Style

    Mixing metals is a modern design trend that works in small spaces. It adds visual interest without being matchy-matchy.

    Updating hardware to mix finishes costs $50–$150 total. You’re simply swapping out existing pieces with new ones in different finishes. This is a 2–3 hour weekend project. The metals to combine: brushed gold, brushed nickel, matte black, and stainless steel all work together.

    Your space feels intentionally designed, not randomly assembled. The mixed metals add sophistication. Your utility room looks curated.


    18. Add Moisture-Resistant Materials if Your Room Is in a Basement

    Basements have moisture issues. Using resistant materials prevents mold, mildew, and material breakdown.

    Vinyl flooring costs $100–$300 for a small room; moisture-resistant paint is $40–$60 per gallon. Total investment: $200–$400. Installation takes 1–2 days for DIY or a weekend for professionals ($400–$800). This is important if you live in a humid climate or below ground.

    Your space stays dry and fresh. Mold and mildew don’t get a foothold. Materials last longer because they’re protected from moisture damage.


    19. Set Up a Pet Washing Station for Fur Parents

    If you have dogs or cats, a dedicated pet wash station keeps your bathroom clean and makes grooming easier.

    A basic pet wash basin costs $60–$150; elevating it on a platform adds $30–$80. A handheld sprayer attachment runs $25–$50. Total setup: $120–$280. Installation takes 1–2 hours if you’re adding it to existing plumbing. Some people use a large utility sink or even a kiddie pool on a platform.

    Bath day becomes way less messy. Your pets get a dedicated grooming space. Your bathroom stays clean.


    20. Use Clear or Labeled Containers for Visibility

    Clear containers let you see what you need at a glance without hunting. Labels prevent confusion and waste.

    Clear containers range from $20–$60 for a set depending on size and material. Chalkboard or label maker labels cost $10–$30. Total investment: $40–$90. Organization takes 1–2 hours depending on how much you’re storing.

    You know exactly what you have. You reorder supplies before running out. Your space looks neat and intentional.


    21. Install a Small WiFi-Enabled Lounge Corner (for Shared Spaces)

    If you live in an apartment with shared laundry, a small seating area makes wait time tolerable instead of annoying.

    A cushioned bench costs $80–$180; a side table is $30–$80; WiFi extender is $40–$80. Total: $150–$340. Check with management before installing anything permanent. This project takes an afternoon if you’re adding seating.

    You’re not stuck standing in a utility room waiting for loads. You have a real place to sit and relax. Your laundry day becomes less tedious.


    22. Create Hidden Appliances Behind Cabinetry

    In small spaces, hiding appliances behind matching cabinetry makes the room feel larger and less appliance-heavy.

    Custom cabinetry fronts run $800–$1,500. Prefab options cost $300–$600. Installation is 1–2 days. This is an investment piece, but it completely changes how the room feels. Not recommended for renters.

    Your space looks more like a finished room than a utility closet. Appliances disappear visually. Your room feels bigger and more intentional.


    23. Add Reclaimed Wood or Natural Stone Counters

    Natural materials add character and warmth. Reclaimed wood or stone counters are conversation starters that make the space feel less utilitarian.

    Reclaimed wood countertops cost $300–$600 installed. Stone-look counters run $200–$500. Laminate alternatives (still attractive) cost $100–$250. Installation takes 1–2 days. This is an upgrade that lasts for years.

    Your workspace feels crafted and intentional. The natural materials add warmth. Your utility room becomes a space you actually enjoy being in.


    24. Maximize Vertical Door Space with Over-Door Organizers

    Your door is wasted space. Over-door organizers hold supplies you access frequently without taking up shelf or counter room.

    Over-door organizers cost $15–$50 depending on size and material. They’re super easy to install—just hang on the door without tools. This is a free or cheap fix if you already have the organizer. Takes 10 minutes to install and fill.

    Frequently used supplies are right at hand when you need them. Your shelves and cabinets stay less packed. Your door becomes functional storage.


    25. Switch to Energy-Efficient Appliances and Save Long-Term

    Energy-efficient appliances cost more upfront but pay for themselves through lower utility bills over their 10–15 year lifespan.

    Energy Star washers cost $700–$1,200; dryers run $600–$1,000. They use 25–40% less energy than standard models, saving $50–$100+ annually on utilities. The payback period is typically 5–8 years. Many utility companies offer rebates ($100–$300) for upgrading to efficient models.

    Your monthly utility bills drop noticeably. You’re supporting the environment. Over time, you’re saving real money while reducing your carbon footprint.


    26. Use Wall-Mounted Ironing Boards and Rod Systems

    A wall-mounted ironing board folds down when needed and disappears when done. Pair it with a rod for organized storage of pressed items.

    Wall-mounted ironing boards cost $40–$100; wall rods are $15–$40. Total: $60–$140. Installation takes 30 minutes and doesn’t require special skills. Renters can use tension rods for hanging and portable ironing boards.

    Ironing becomes more convenient because everything’s in one spot. Pressed items stay wrinkle-free on the rod. Your workflow feels purposeful and efficient.


    27. Install Integrated Appliance and Cabinet Systems for Seamless Style

    Fully integrated systems (appliances + cabinetry designed together) create a built-in, finished look instead of a collection of separate pieces.

    Integrated systems cost $2,500–$6,000+ depending on size and customization. This is an investment, but it’s the most polished approach to a utility room. Installation takes 2–3 days with professionals. Not ideal for renters due to permanent nature.

    Your room looks like a designed space, not a laundry closet. Everything matches and works together seamlessly. The overall effect is high-end and intentional.


    Save this post for your next utility room refresh. Pick one or two ideas that address your biggest pain point—whether it’s clutter, tiny space, or an outdated feel—and start there. Small upgrades add up fast, and your utility room deserves to work as hard as you do.

  • 25 Budget-Friendly Upgrade Ideas That Make Any Small Space Pop

    25 Budget-Friendly Upgrade Ideas That Make Any Small Space Pop


    Your dorm room doesn’t need to feel like a temporary afterthought. Whether you’re working with a shoebox-sized space or awkward furniture placement, small rooms have huge potential when you know where to focus your energy and budget. The right upgrades can make your space feel intentional, comfortable, and genuinely yours—without requiring landlord permission or breaking the bank. We’ve gathered 25 realistic ideas that deliver major impact for minimal investment. From renter-friendly wall tricks to smart storage that actually holds your stuff, these tips work for every style and budget level. Ready to make your room feel way bigger and way better? Let’s dive in.


    1. Layer Peel-and-Stick Wallpaper on One Accent Wall

    Peel-and-stick wallpaper gives you a total accent wall without the commitment or damage deposits. One patterned wall completely changes how the whole room feels, and you’re not drilling holes or touching actual drywall. Most designs stick cleanly to flat surfaces and peel off without residue—game-changing for renters.

    Measure your wall carefully and order from Wayfair, Amazon, or Spoonflower. Geometric patterns, botanical prints, or subtle texture work well in small rooms without overwhelming the space. Installation takes about 30-45 minutes and costs $25-$60 depending on coverage. Smooth the air bubbles as you go, and take your time along the edges—rushing here shows. You can even layer a second, complementary wallpaper pattern on a smaller section for more visual interest.

    The result? Your room instantly looks designed instead of default. Plus, when you move out, removal takes under 10 minutes and leaves no marks behind.

    2. Install Floating Shelves Above Your Desk or Bed

    Floating shelves solve the “I have nowhere to put my stuff” problem while keeping floor space clear. They’re especially valuable in tiny rooms where every inch counts, and they work on any wall type. You can mount them above your bed for nighttime storage or behind your desk to keep supplies visible and accessible.

    Pick shelves 12-24 inches long from IKEA, Target, or Home Depot—costs run $15-$40 per shelf plus bracket hardware. Installation requires a level and stud finder (or toggle bolts for drywall), taking about 20-30 minutes per shelf. Load them with books, plants, photos, and small baskets to add personality while staying organized. Layer items at different heights so they don’t look flat or cluttered.

    You’ll reclaim cubic feet of storage without eating into floor space. This change makes your room feel intentional, and visitors notice the storage innovation immediately.

    3. Use Under-Bed Storage Bins to Maximize Hidden Space

    Under-bed storage is the oldest trick in the tiny-space playbook, but it works because it actually works. Clear plastic bins let you see what’s inside without pulling everything out, and they slide easily in and out as needed. This is where seasonal clothes, extra bedding, and off-season décor go to live.

    Buy clear stackable storage containers from Container Store, Target, or Amazon for $10-$25 per bin. Standard twin-bed clearance works with low-profile bins up to about 6 inches tall. Label each bin on the front so you don’t forget what’s stored inside. Use a wheeled cart underneath if you want something extra moveable, especially when it’s time to deep-clean or switch out seasons.

    The payoff? Your floor looks cleaner, your closet isn’t bursting, and you actually know where your things are. Plus, pulling out a bin takes literally two seconds—no digging through a mountain of stuff.

    4. Hang a Large Statement Mirror to Reflect Light and Space

    A strategically placed mirror bounces light around and makes cramped rooms feel exponentially larger. It’s pure optics, but it works every single time. Position your mirror across from a window or light source to maximize its reflective power, and suddenly your 100-square-foot room reads as roomy.

    Pick a mirror with an interesting frame from Wayfair, Urban Outfitters, or IKEA—prices range $30-$150 depending on size and material. A 24-30-inch mirror works best for most dorm rooms. Mount it securely with appropriate hardware (not just adhesive), taking about 15 minutes. Avoid placing it directly behind your bed, as that can feel odd spatially. Instead, mount it on a wall perpendicular to your bed or opposite your main seating area.

    The result is immediate: your room looks brighter, bigger, and more polished. Plus, you get practical value from it daily—your actual mirror for getting ready.

    5. Swap Your Overhead Light for a Soft, Dimmable LED Option

    Overhead dorms lights are institutional and harsh—they drain your energy and make your room feel temporary. A single upgrade to a dimmable LED fixture or smart bulb changes your entire vibe and gives you control over your environment. You can work during the day with bright light, then dim everything down for relaxation or sleep.

    Install a dimmable ceiling fixture ($20-$40) or swap in a smart LED bulb like LIFX ($15-$25) that works with most standard sockets. If you can’t modify the fixture (strict housing rules), plug-in pendant lights or a track light are alternatives. No installation needed for smart bulbs—just screw and go. The whole setup takes 5-10 minutes and requires zero contractor skills.

    You’ll sleep better with dimmer evening light, focus better during study sessions with brightness, and your room suddenly feels like a place you actually want to be. Color temperature matters more than people realize.

    6. Create a Cozy Reading Nook with a Small Chair and Throw Blanket

    A dedicated relaxation corner makes your room do double duty—study zone and sanctuary. Even a 2-foot-by-3-foot corner works when you use vertical space and layered textures. This becomes your mental reset button when studying gets intense or you need five minutes to decompress.

    Pick a compact chair like a faux fur saucer chair ($40-$80 on Amazon or Urban Outfitters) or a simple pouf ($25-$50). Add a throw blanket ($15-$30) and a tiny side table ($20-$40). String lights or a clip-on reading lamp overhead complete the mood. Total setup costs $100-$200 and takes about 30 minutes to arrange.

    Layer in pillows, keep a book or journal there, and suddenly you have a retreat within your room. You’ll actually use it—this isn’t decorative. It becomes the place you go to recharge between classes and social commitments.

    7. Add Velvet or Textured Throw Pillows to Your Bed

    Throw pillows are the easiest way to add luxury, depth, and personality to your bed setup. Mix textures—velvet, faux fur, soft cotton—to create visual interest that elevates an otherwise plain bed. They’re also incredibly Instagrammable, which matters if your dorm room shows up in your content.

    Buy 2-4 throw pillows from Target, Amazon, or West Elm (prices: $15-$50 each depending on quality). Mix sizes, shapes, and textures to avoid a matchy-matchy look. Stick with a color palette (2-3 main colors plus neutrals) so it feels cohesive instead of chaotic. Arrange them on your bed during the day, pile them on a shelf at night if space is tight.

    Your bed transforms into a focal point that looks intentional and curated. Guests notice immediately, and you feel like you’re sleeping in a real room, not a college dorm. This one change makes the biggest visual difference for the lowest investment.

    8. Use Removable Command Hooks for Hanging Without Holes

    Command hooks are your renter’s best friend because they actually come off clean. Unlike cheap adhesive hooks that strip paint, these are designed for damage-free removal. Use them to hang bags, belts, headphones, hats, and lightweight decor—instantly clearing floor clutter and adding functional organization.

    Buy a multi-pack of Command hooks ($10-$15 per pack) from Amazon, Target, or Home Depot—you’ll get assorted sizes. Installation takes literally one minute per hook: clean the wall, peel, and press. They hold surprisingly well (up to 7.5 lbs per hook depending on the style), and removal leaves zero residue. Place them at different heights to create visual interest and maximize coverage.

    Your floor stays cleaner, your bags have homes, and your walls stay intact. This is one of those “why didn’t I do this sooner?” upgrades that costs almost nothing.

    9. Organize with Labeled Storage Boxes and Clear Containers

    Organization looks good and makes your life easier—when you can find things, you waste way less time searching. Clear containers let you see what’s inside without opening everything, while labels prevent the “I know this is in here somewhere” panic. This system compounds in value as the semester goes on.

    Invest in a set of clear storage boxes ($20-$40 for a multi-pack) and a label maker ($15-$25) from Container Store, Target, or Amazon. Alternatively, handwrite labels on white sticker tape for a personal touch. Sort by category: school supplies, tech, seasonal, gifts, hobby items. Take 30-45 minutes to set up the system the first time, then it maintains itself. Color-code bins if you want extra visual organization (blue for tech, white for documents, etc.).

    Everything you own has a designated spot, so your room stays tidy even when you’re busy. Plus, you’ll stop buying duplicates of things you already own because you can actually see your inventory.

    10. Paint Your Door or Wall With Removable Wallpaper Patterns

    Your door is a huge, easy-to-modify surface that most people ignore. Painting it or covering it with peel-and-stick wallpaper creates an instant focal point and signals that your room is intentional, not default. It’s especially effective in otherwise neutral spaces.

    If painting: use removable wall paint (like Tempaper or Clare Paint, $50-$80 per gallon) that peels off cleanly, or ask your RA about temporary paint options. If wallpaper: apply peel-and-stick patterns ($15-$40 per roll) over existing door. Painting takes 1-2 hours (including drying time), while wallpaper takes 20-30 minutes. Both give you a bold statement without permanent damage.

    Your room instantly reads as “someone who has taste lives here.” The door becomes a conversation piece, and the whole space feels more curated because of one strategic choice.

    11. Maximize Closet Space With Slim Hangers and Shelf Dividers

    Closet space in dorms is criminally small, so every inch needs to work hard. Slim hangers free up horizontal space, shelf dividers prevent the “pile avalanche” when you pull one thing out, and smart folding maximizes vertical storage. This system actually lets you find and wear more of your clothes.

    Buy velvet slim hangers ($10-$20 per pack of 10) from Target or Amazon—they prevent clothes from sliding off and take up half the space of chunky plastic hangers. Add shelf dividers ($8-$15 per pair) to keep stacks from toppling. Use vacuum storage bags ($10-$15 for a set) for off-season items on your top shelf. Total investment: $40-$60, setup time: 45-60 minutes.

    You’ll suddenly discover clothes you forgot you owned. Getting ready becomes faster because you can see your actual options, and your closet doesn’t turn into chaos when you’re in a rush.

    12. Layer Your Bedding for Maximum Texture and Impact

    Layering bedding adds visual depth, practicality, and a sense of luxury that transforms how your bed reads. Instead of a flat comforter, you build a story with textures—crisp sheets, a warm blanket, a soft throw draped across the foot. It’s the easiest upgrade for the biggest visual payoff.

    Start with quality sheets ($25-$50 per set) in a neutral color—Egyptian cotton or a microfiber blend that feels good. Add a lightweight quilt or comforter ($40-$80). Layer on a textured throw blanket ($20-$40) draped over the foot or end. Mix finishes: matte, velvet, linen, cotton. Total spend: $85-$170, but you’re upgrading comfort too, not just looks.

    Your bed becomes the focal point of your room instead of just a place to sleep. This layering trick photographs beautifully and makes your space feel intentional and curated. You’ll also sleep better with the layering options for different seasons.

    13. Install a Tall Tension Rod Curtain Divider for Extra Privacy

    If you’re sharing a tiny room or want visual separation between zones, a tension rod curtain divider is genius. It costs almost nothing, takes five minutes to install, and instantly makes your room feel bigger psychologically. Use it as a backdrop behind your bed or to create a separate study zone.

    Pick a tension rod ($15-$25) from Target or Amazon that fits your space. Choose curtain fabric ($20-$40 for enough to divide your room) in a color or pattern that complements your room. Installation takes literally 5 minutes—no tools required. Use sheer fabric to filter light without fully blocking it, or heavier linen for more privacy and drama.

    Your room functionally becomes two spaces, which is huge when space is limited. You can study without your sleep area being visible, and you can relax without visual clutter from your workspace. It’s a psychological game-changer.

    14. Create a Photo Wall or Collage Display With Peel-and-Stick Frames

    A photo wall makes your room feel personal and lived-in—it’s an instant mood boost and conversation starter. Peel-and-stick frames mean zero wall damage, and mixing frame sizes and styles creates visual interest. This is one of the easiest ways to “own” your temporary space.

    Buy assorted peel-and-stick frames ($15-$30 for a pack of 8-12) from Amazon, Urban Outfitters, or IKEA. Print photos from your phone ($0.15-$0.50 each at Walgreens or CVS, or print at home). Arrange frames on your wall in a loose grid or organic cluster, then swap photos seasonally. Takes 30-45 minutes to install and arrange. This costs $30-$50 total and requires zero drilling.

    Your room instantly feels like yours instead of generic dorm space. Plus, you have a visual reminder of people and places you love, which matters during stressful times.

    15. Use Adhesive Caulk to Hang Lightweight Décor on Any Surface

    If peel-and-stick doesn’t work for your specific items, adhesive caulk (like Poster Putty or removable caulk) holds posters and lightweight decor safely without holes. It’s stronger than typical putty and releases cleanly when you leave. This opens up decorating options beyond peel-and-stick products.

    Buy a pack of removable caulk ($5-$10) from Amazon or Target. Apply small dots to the back of posters, prints, or lightweight shelving. Press firmly and let cure for 24 hours. It holds surprisingly well—up to 8 lbs in some cases. Removal is clean: just peel off slowly and any residue wipes away.

    You now have endless décor flexibility without any permanent commitment. Posters, prints, lightweight tapestries, and small shelves all stay secure. It’s the renter’s secret weapon for personalizing walls.

    16. Hang Sheer Fabric From the Ceiling to Create a Canopy Effect

    A fabric canopy creates a cozy nest and transforms your bed into a focal point. Unlike a permanent canopy, you’re just hanging lightweight fabric from the ceiling, which creates visual magic without structural changes. It instantly makes your room feel more designed and intimate.

    Get sheer fabric ($10-$20 per yard) from a craft store or use lightweight curtain material. Buy adhesive hooks ($5-$10 per pack) to hang from ceiling corners. Drape and arrange fabric loosely, letting it flow naturally rather than looking stiff. Add string lights or fairy lights ($15-$25) strung through for extra ambiance. Total investment: $40-$80, installation time: 20-30 minutes.

    Your bed becomes a sanctuary and the most inviting spot in your room. This tiny change has an outsized impact on how comfortable and personal your space feels. Plus it photographs beautifully for social media.

    17. Set Up a Desk Lamp and Task Lighting to Improve Focus and Mood

    Desk lamps are practical and emotional—they make focusing easier and create ambiance that overhead lights can’t match. A good desk lamp transforms your study space from institutional to intentional. Plus, proper task lighting actually reduces eye strain and helps you work longer without fatigue.

    Pick a modern desk lamp ($25-$60) from Target, IKEA, or Amazon. Look for warmish tones (2700K color temperature) to avoid that harsh fluorescent feeling. LED bulbs are cheaper to run and last longer. Mount it to the side of your desk (not directly behind your monitor), taking about 5 minutes to set up and adjust the angle.

    Your study sessions become more productive, your eyes feel less strained, and your desk area looks way more intentional. This one tool alone makes a noticeable difference in how long you can comfortably work.

    18. Use Washi Tape to Create Geometric Patterns on Plain Furniture

    Washi tape is the perfect no-commitment decoration hack for dorm furniture. It costs almost nothing, looks intentional when applied thoughtfully, and peels off cleanly if you want to change it. Use it to hide dings in furniture or create geometric patterns that look custom-designed.

    Buy assorted washi tape ($10-$15 for a multi-pack) from Target, Michaels, or Amazon. Plan your pattern (stripes, geometric shapes, or borders work best), then apply tape carefully along edges or across surfaces. Takes 15-30 minutes depending on complexity. This costs practically nothing and looks like you spent way more effort than you did.

    Your basic dorm furniture suddenly looks intentional and stylish. It’s especially effective on plain desks, dressers, and shelving to hide institutional vibes. Plus, if you hate it, you peel it off with zero consequences.

    19. Create a Small Plant Corner for Freshness and Visual Interest

    Plants do triple duty: they look beautiful, purify air, and give you something to nurture. Even small dorm rooms have room for 2-3 small plants. Low-maintenance varieties like pothos, snake plants, and ZZ plants thrive in dorm conditions and don’t require green thumbs.

    Buy small plants ($5-$15 each) from a local nursery, Trader Joe’s, or Target. Pick small pots ($5-$10 each) that match your aesthetic. Find a spot with natural light (south or west-facing windows are ideal, or use a grow light for $20-$40). Water when soil is dry to the touch—most dorm-friendly plants are forgiving.

    Your room instantly feels fresher and more mature. Plus, caring for plants is weirdly grounding during stressful semesters. This is self-care disguised as decoration.

    20. Swap Plain Curtains for Textured or Patterned Panels

    Curtains frame your window and set the tone for your entire room. Upgrading from basic dorm-issue to textured or patterned panels is an easy swap that completely changes your vibe. They also help with light control and provide insulation (extra cozy in winter).

    Measure your window and find curtain panels ($20-$50 per panel) from Target, Urban Outfitters, or Wayfair in a pattern or texture you love. Installation takes 15-20 minutes—just hang the rod and insert panels. You don’t need permanent fixtures; tension rods work in rental situations.

    Your window becomes a design feature instead of an afterthought. The right curtains anchor your whole room’s aesthetic and make the space feel polished and intentional. Bonus: they help regulate temperature and light for better sleep and focus.

    21. Combine Your Desk and Nightstand Into One Multi-Functional Surface

    In tiny rooms, furniture that does double duty is non-negotiable. A desk-nightstand combo or a floating shelf that works for both functions saves crucial floor space. This trick makes rooms feel bigger because you’re using fewer pieces to accomplish more.

    Pick a compact desk ($80-$150) from IKEA or a floating shelf system ($40-$80) that can stretch the width of your bed or beside it. This becomes your study surface by day and your bedside hub by night. Takes about 30-45 minutes to set up and mount. Organize it so school supplies are on one end and personal items on the other.

    You cut down on furniture clutter while keeping everything accessible. Your room feels less crowded, and you’re using your limited square footage smarter. It’s a practical upgrade that also looks intentional.

    22. Use Gradient or Ombré Lighting to Create Depth and Mood

    Layered lighting with different colors and brightness levels makes rooms feel more spacious and allows you to adjust the vibe for different activities. This is the “grown-up dorm room” secret that nobody talks about. Smart bulbs or LED strips let you shift from study mode to chill mode instantly.

    Invest in smart LED bulbs ($20-$40 each) or LED light strips ($15-$30) from Amazon or Best Buy. Set up at least three light sources: overhead ambient light, warm desk lamp, and optional accent lighting. Costs run $50-$100 total for a comprehensive system. Installation takes 30-40 minutes depending on complexity.

    Your room becomes infinitely more functional—bright for studying, warm for relaxing, colorful for socializing. You feel like you actually control your environment instead of being stuck with institutional lighting.

    23. Arrange Your Furniture in a Corner Layout to Create Zones

    How you arrange furniture impacts how big your room feels. Pushing pieces into corners and creating clear zones (sleep area, work area, chill area) makes the space feel intentional and bigger. It also improves traffic flow when friends visit.

    Sketch a layout before moving heavy items (takes 5-10 minutes to plan). Push your bed, desk, and dresser into corners or against walls, leaving the center of the room more open. Try an L-shaped setup with your bed along one wall and desk along another. Rearrange takes 30-60 minutes depending on what you’re moving.

    The psychological impact is huge—your room feels airier and more intentional immediately. Plus, you have a visual hierarchy that guides guests and creates a natural flow when multiple people are in the space.

    24. Add a Rug to Define Space and Add Texture Underfoot

    A rug instantly adds warmth and defines space. Even a small 5-by-7-foot rug makes your room feel more intentional and homey. It also dampens noise, adds texture underfoot, and anchors your furniture arrangement. This is one of those upgrades that affects how the room feels, not just how it looks.

    Pick a durable rug ($30-$80) from Target, IKEA, or Wayfair in a color that complements your palette. Size matters: go for 5×7 or 6×8 for small dorm rooms so it doesn’t overwhelm the space. Place it where you want to define a zone—under your bed, in front of your desk, or in a sitting area. No installation needed; just lay it down.

    Your floor instantly feels warmer and more intentional. The rug grounds your furniture arrangement and makes the space feel complete. Plus, hardwood dorms are loud, so this is a practical upgrade disguised as decoration.

    25. Create a “Getting Ready Station” With Mirror and Organized Drawers

    A dedicated getting-ready station keeps all your personal items in one accessible spot, making mornings faster and your room less cluttered. This is especially valuable when you’re sharing a tight space and need everything within arm’s reach of your mirror.

    Designate a small dresser or floating shelf ($40-$100) as your station. Add a desk mirror ($20-$40) or use an existing wall mirror. Organize items in small open containers or drawer organizers ($10-$20 total). Arrange items by category: jewelry, hair stuff, skincare, daily accessories. Setup takes about 30 minutes the first time.

    Getting ready becomes faster and easier because everything is exactly where you need it. Your room feels more organized, and you’re not scrambling for things on rough mornings. This station becomes your favorite corner of the room.

    26. Use LED Marquee Letters or Signs for Personalized Ambiance

    LED marquee letters add personality, ambiance, and a touch of whimsy that photographs beautifully. They’re the TikTok darling of dorm décor for a reason—they’re customizable, relatively affordable, and they create instant mood. Use them to spell your name, an initial, or a favorite word.

    Buy LED marquee letters or signs ($20-$50 per letter) from Amazon, Urban Outfitters, or West Elm. Plug them in and arrange on a shelf, desk, or wall. Some come with color-changing options; stick with warm white for a cozy vibe. Takes about 5 minutes to unbox and plug in. You can rearrange them or swap letters if you want to change it up seasonally.

    Your room gets an instant personality boost and a piece that genuinely works as both décor and lighting. Visitors comment on these immediately, and they photograph so well that your room becomes the backdrop for better social media posts.


    Save this for your next room refresh and try just one idea this weekend. Pick whichever speaks to you first—whether that’s the practical storage hack or the cozy lighting vibe—and watch how one small change shifts everything about how your space feels.