Category: Kitchen Decor

  • 26 Modern Kitchen Ideas That Feel Elegant & Minimal

    26 Modern Kitchen Ideas That Feel Elegant & Minimal


    If your kitchen feels stuck between sterile and cluttered, you’re not alone. The all-white, perfectly uniform kitchens we see everywhere? They’re out. What’s in is something smarter: spaces that layer textures, play with soft color, and actually work for how you live. This isn’t about overhauling everything—these 26 ideas mix small styling tweaks, budget-friendly swaps, and strategic upgrades that add personality without chaos. Whether you’re renting or planning a full renovation, you’ll find ideas that fit your timeline and budget. Let’s build a kitchen that feels like both a retreat and a real, lived-in home.


    1. Paint Lower Cabinets Sage Green

    Sage green is the color taking over kitchens right now—it’s the perfect balance between bold and calming. Rather than committing to all-green, paint just your lower cabinets and keep uppers white or natural wood for a fresh, layered look that doesn’t feel overwhelming.

    Use high-quality cabinet paint (Benjamin Moore, Farrow & Ball, or Sherwin-Williams) in a soft sage like “HC-137 Healing Aloe” or similar. Plan for $150–$300 in paint and primer, plus 2–3 hours of prep work if you’re DIY-ing (remove hardware, sand lightly, prime, paint two coats). If hiring a pro, expect $800–$1,500 total. For renters, peel-and-stick cabinet film in sage ($40–$100) gives nearly the same impact without commitment.

    The result? Your kitchen instantly gains sophistication without feeling cold. This one change makes the whole room feel intentional and modern.


    2. Mix Metal Finishes on Hardware

    Matching all your hardware is so 2010. The new approach is intentional mixing—brushed gold with black matte, brass with gunmetal—to add dimension and personality.

    Choose hardware from brands like Anthropologie, Rejuvenation, or even IKEA ($5–$20 per piece). Mix two to three finishes across your drawers and cabinets in no particular pattern—asymmetry is the point. Takes 30 minutes to swap them out yourself with just a drill. The beauty? You can change this anytime and it costs under $100 to completely refresh.

    You’ll notice how the different metals catch light throughout the day, making your cabinetry feel expensive and collected rather than matchy-matchy.


    3. Install Open Shelving Above the Sink

    Open shelving brings air and light to a kitchen while giving you a spot to style and display. Above your sink is perfect because you see it constantly and the window light makes it a natural focal point.

    Floating shelves in solid wood or metal-reinforced run $80–$300 per shelf depending on material and length. Install with heavy-duty brackets (most need wall studs or toggle bolts for safety). 2–3 hours for installation if DIY, or hire a handyperson for $150–$300 labor. Keep styling minimal and functional: white dishes, glass jars, one small plant. The key is restraint—too much “stuff” defeats the purpose.

    This small zone becomes a quiet visual break in your kitchen, making the whole space feel more intentional and less cramped.


    4. Add Textured Backsplash with Mixed Patterns

    One flat backsplash is predictable. Mixing tile textures and patterns—matte with gloss, large format with tiny hex, smooth with fluted—creates visual richness that photographs beautifully.

    Choose complementary tiles from suppliers like Wayfair, Floor & Decor, or local tile shops. A mixed backsplash typically runs $300–$1,200 depending on size and tile cost. DIY backsplash takes 8–12 hours; hire a pro for $800–$2,000 labor for a standard 3-foot-by-4-foot area. Keep your color palette tight (whites, grays, one accent tone) so the texture does the talking, not the color.

    The result is a backsplash that draws the eye and makes your kitchen feel curated and modern rather than basic.


    5. Swap Knobs for Push-to-Open Drawers

    Handle-free cabinets are the ultimate minimalist move—they clean up your sight lines and create an almost invisible, seamless look that feels expensive and uncluttered.

    Budget option: Peel-and-stick finger pulls ($20–$40, no tools needed). Mid-range: Retrofit your existing cabinets with soft-close push latches ($15–$40 per drawer, $100–$200 total install). Investment: Custom cabinet doors with push-to-open built in ($2,000–$5,000+ for full kitchen). DIY latch installation takes 30 minutes to 1 hour per drawer.

    Your kitchen immediately feels more sophisticated and contemporary. Plus, no more fingerprints on hardware.


    6. Layer Warm Lighting with Mixed Fixtures

    One overhead light is boring. Layer pendant lights, sconces, and under-cabinet lights in mixed metals (brass, blackened brass, brushed copper) to create depth, warmth, and visual interest.

    Pendant lights: $60–$400 each (West Elm, Rejuvenation, IKEA). Sconces: $40–$300 per pair. Under-cabinet LED strips: $30–$100 (Philips Hue, basic options from IKEA). 4–6 hours DIY with proper wiring, or hire an electrician for $500–$1,200. Mix warm white (2700K) bulbs for that golden glow that photographs like a dream.

    This layered approach makes your kitchen feel more like a designed space than a kitchen, with different moods available depending on what you light.


    7. Create a Minimalist Dining Nook

    A dining nook tucked into a corner of your kitchen turns unused space into a cozy, functional gathering spot that feels intentional and luxury without taking up much room.

    Use a simple wood table ($200–$600), a custom or stock bench ($300–$800), and mismatched vintage or new chairs ($100–$300 each). Total DIY install with basic tools: 2–3 hours. Alternatively, buy a banquette-style dining set from IKEA or Wayfair ($400–$1,000 all-in). For renters, a standalone table and bench work just as well.

    You’ve added seating, style, and a reason to gather—and your kitchen now has a secondary function that makes it feel more like home.


    8. Install Plaster Range Hood

    Plaster hoods are having a moment—they soften the kitchen and add organic texture that’s unexpected and deeply calming. This is a design move that feels collected rather than cookie-cutter.

    Budget option: Stainless steel hood with a DIY plaster-effect finish ($200–$400 + supplies). Investment: Custom plaster hood from a specialist ($2,000–$5,000+). If DIY-ing, use plaster-effect paint or venetian plaster on an existing hood ($50–$100 in supplies, 4–6 hours). Standard hood installation (if new): $300–$800 labor.

    A plaster hood becomes a focal point that makes your kitchen feel like a thoughtfully designed space rather than standard builder-grade.


    9. Paint Kitchen Island a Contrasting Color

    Your island is prime real estate for personality. A contrasting color—deep navy, forest green, warm charcoal—makes it a design statement while keeping walls neutral and calm.

    Use cabinet-grade paint in Benjamin Moore, Sherwin-Williams, or Farrow & Ball ($40–$80 per quart). Prep and paint your island: $0 DIY (4–6 hours) or $300–$600 with a pro. Consider the undertones of your flooring and countertops to choose a color that complements rather than clashes. Navy + white is foolproof; sage green + natural wood is sophisticated; charcoal + brass is moody.

    Your kitchen instantly has a focal point that draws the eye and anchors the whole space with confidence.


    10. Mix Wood Types and Finishes

    Uniform wood finishes feel flat. Mixing light and dark woods—a natural oak shelf next to walnut cabinetry, a light birch island base with darker wood flooring—creates richness and visual complexity.

    You can mix existing pieces or update new ones with stain ($20–$50 per project + time) or paint. Shelving in one tone, cabinets in another, island in a third creates intentional layering without feeling chaotic. Key: keep the metal hardware consistent (brass or blackened brass throughout) to tie it all together.

    This approach makes your kitchen feel collected and thoughtfully designed, like pieces came together over time rather than all at once from one showroom.


    11. Add Fluted or Textured Cabinet Doors

    Flat cabinet doors are basic. Fluted or ribbed doors add texture and catch light beautifully, giving your kitchen depth and visual interest without bold colors or patterns.

    Budget: Peel-and-stick textured film ($30–$60 per door, renter-friendly). Mid-range: Order new fluted doors from IKEA, Wayfair, or custom cabinet makers ($150–$400 per door). Full kitchen: $2,000–$6,000+ depending on number of doors. Install new doors yourself in 1–2 hours per door with a drill, or hire help for $300–$800 labor.

    Textured doors catch morning and afternoon light differently, creating a dynamic, expensive-looking kitchen that’s calm rather than clinical.


    12. Create Hidden Scullery or Pantry

    Keeping mess hidden is the secret to a minimalist kitchen that actually functions. A scullery (small prep kitchen) or hidden pantry keeps appliances, supplies, and clutter out of sight while keeping them accessible.

    Use a shallow closet, alcove, or dead space and add wire shelving or custom shelves ($100–$400). Add a simple barn door or pocket door ($200–$600) for concealment. Organize with matching bins and labels ($50–$150). Total DIY: 4–8 hours depending on complexity. Renters can use a clothing rack with a tension rod curtain ($40–$80) for a temporary solution.

    Now your open kitchen feels serene because the real work happens behind closed doors—and you have room for appliances, bulk items, and supplies without them cluttering your visual space.


    13. Install Under-Cabinet Lighting

    Under-cabinet lighting is functional and beautiful—it illuminates your workspace while adding a warm glow that makes your kitchen feel like a restaurant-quality space.

    LED strip lights from IKEA, Home Depot, or Amazon: $30–$100 total. Hardwired under-cabinet lights: $100–$300 + $200–$500 installation by electrician. DIY peel-and-stick LED strips take 15 minutes. Choose warm white (2700K) for that golden, flattering light. Many systems are dimmable, so you can adjust mood and intensity.

    Your kitchen suddenly has depth and ambiance, and prepping food becomes easier and more enjoyable with proper task lighting.


    14. Mix Countertop Materials

    One continuous countertop is predictable. Mixing marble, butcher block, concrete, or stainless steel—different materials on island versus perimeter, or sections within the same counter—creates visual interest and functionality (wood for prep, stone for durability).

    Marble or quartz: $40–$100+ per square foot installed. Butcher block: $30–$80 per square foot. Concrete: $50–$150 per square foot. A mixed approach for a 15-linear-foot kitchen runs $2,000–$5,000. Hire a fabricator to handle transitions and sealing ($500–$1,500 labor). For renters, removable countertop covers or butcher block sheets ($100–$300) can create zones without permanent changes.

    Your kitchen looks thoughtfully designed and high-end, with materials chosen for both beauty and function rather than uniformity.


    15. Swap Cabinet Hardware for Brass or Blackened Brass

    Hardware is jewelry for your kitchen. Upgrading from basic silver to brushed brass, blackened brass, or matte gold instantly makes your cabinets look premium without a full renovation.

    Pulls and knobs from Anthropologie, Rejuvenation, or hardware-focused shops: $8–$25 per piece. A kitchen with 20–30 drawers and cabinets runs $200–$700 total. DIY swap takes 30–45 minutes with just a drill. The change is immediate and completely reversible.

    Your cabinets instantly feel intentional and collected, like they were chosen for their beauty, not just function.


    16. Create Open Shelving Display Zone

    Instead of cramming shelves everywhere, create one focused display zone—above a peninsula, along one wall, beside a window—where you intentionally style a small collection of beautiful items you actually use.

    Floating shelves: $80–$300 each. 2–3 shelves create visual impact without overwhelming. Keep styling to 8–12 items maximum (white dishware, glass jars, one small plant, books). Installation: 2–3 hours DIY or $150–$300 with a pro. Budget for styling: you likely already own most items.

    This approach gives you open shelving aesthetics without the chaos—you get that airy, designed feeling while keeping most storage closed.


    17. Paint Interior Cabinet Walls Contrasting Color

    Paint the interior walls of open shelves or glass-front cabinets in a contrasting color—a soft sage, warm taupe, or dusty blue—to add depth and make displayed items pop.

    Cabinet-grade paint: $20–$40 per pint. Prep and paint interior walls: $0 DIY (2–3 hours) or $150–$300 with help. Choose colors that complement your main palette but feel slightly different—not a shocking contrast, just enough to add dimension. This works beautifully in glass-front uppers or open shelves.

    You’ve added visual interest and made your displayed items look more curated and intentional, like they’re in a designed showroom rather than just sitting on shelves.


    18. Introduce Stone or Concrete Range Wall

    A textured stone or concrete wall behind your range becomes a dramatic, grounding focal point that feels organic and high-end without being trendy.

    Concrete peel-and-stick panels: $100–$200 (easy, renter-friendly). Real concrete finish: $300–$800. Stone veneer: $400–$1,200. Installation: DIY 2–4 hours for panels, or hire professional for $300–$1,000 labor. Pair with minimal styling (no upper cabinets, just range and stone) for maximum impact.

    Your kitchen gains an anchor point that feels intentional and luxe, drawing focus to the most-used zone in your space.


    19. Style Island with Open Shelving and Closed Storage Hybrid

    An island with both open and closed storage lets you display beautiful items while hiding everyday clutter—the best of both worlds for a polished, functional kitchen.

    Use a stock or semi-custom island base ($500–$2,000) with mixed door and shelf configurations, or DIY with shelving units and furniture-style pieces ($300–$800). Add open shelving on one side and drawer cabinets on the other. Total install: DIY 4–6 hours or hire $300–$800.

    This approach gives you the visual benefit of open shelving with the practical storage of closed cabinets, so your kitchen stays calm and functional.


    20. Add Greenery and Natural Elements

    Plants and natural materials soften a kitchen and connect it to nature, making the space feel alive and warm rather than sterile or cold.

    Small potted plants: $15–$50 each (low-light tolerant options: pothos, snake plant, ZZ plant). Wooden serving boards, bowls, utensils: $20–$80 each. Woven baskets for storage: $25–$100 each. No install time—just styling. Group plants near windows or use grow lights ($20–$60). Choose items with natural, warm tones (wood, ceramic, woven fibers) to tie them together.

    Your kitchen feels like a sanctuary rather than just a functional space—a room where you want to linger, not just grab coffee and go.


    21. Install Brass or Gold-Toned Faucet

    A brass or gold faucet is an instant luxury upgrade that transforms how your sink area looks and feels, catching light and adding warmth.

    Brushed brass or champagne gold faucets: $150–$600 from brands like Wayfair, Rejuvenation, or hardware stores. Installation: DIY 30 minutes (if replacing existing) or $100–$300 with a plumber. Pair with minimal styling—keep the sink area clear—so the faucet becomes the focal point.

    This single swap makes your entire kitchen feel intentional and high-end, and you interact with your faucet multiple times daily, so the investment pays back in joy.


    22. Create Prep Zone with Specialized Surfaces

    Designating a specific prep zone with the right surfaces and storage—a butcher block section, a knife block, a small shelf for frequently used ingredients—makes cooking easier and more enjoyable.

    Use butcher block or wood for the prep area ($30–$80 per square foot), add a knife block ($30–$100), and one small open shelf ($60–$200). Total cost: $200–$500. Install yourself in 2–4 hours or hire help for $300–$500. Stock it with items you use daily so the zone stays functional and doesn’t become a styling prop.

    Your kitchen becomes more efficient and enjoyable to cook in, plus this organized zone signals intentionality to anyone who sees it.


    23. Mix Metallic Accents Across Finishes

    Gone are the days of matching all your metals. Layer brass, bronze, copper, and blackened finishes across hardware, faucet, lighting, and accents for a collected, high-end look.

    Budget per piece: $40–$300 depending on item type. Keep metals in the same undertone family (warm metals together: brass, bronze, rose gold; cool metals together: chrome, stainless, gunmetal). Total cost for full kitchen: $500–$2,000 depending on scale. The beauty is you can add metals gradually as you upgrade pieces.

    Your kitchen feels designed and intentional, like you’ve curated pieces over time rather than buying everything at once from one source.


    24. Add Woven or Textured Wall Baskets for Storage

    Wall-mounted woven baskets add texture, storage, and organic warmth without taking up counter space—perfect for a small kitchen or renter who needs hidden storage with style.

    Wall baskets: $20–$80 each (Wayfair, Target, IKEA, Etsy). Mounting hardware: $10–$30 total. Install: 30 minutes DIY with just a drill and level. Fill with kitchen linens, small supplies, or nothing—just let them add visual interest. Choose baskets in similar weaves or colors for cohesion.

    You’ve gained functional storage that looks beautiful and feels organic, turning a blank wall into a designed, intentional zone.


    25. Install Soft-Close Drawers and Doors

    Soft-close drawers and doors are a small upgrade with big impact on daily experience—no more slamming, no more pinched fingers, and your kitchen feels more refined and considered.

    Soft-close hinges and slides: $15–$40 per drawer or door. Full kitchen retrofit: $200–$600 total. Installation: DIY 30 minutes to 1 hour per door/drawer with a drill, or hire a handyperson for $300–$800. If you’re building new, most stock cabinets offer soft-close as an upgrade ($50–$200 more).

    Your kitchen suddenly feels like a luxury space—the smooth, quiet operation makes every interaction feel intentional and peaceful.


    26. Curate Open Shelves with Negative Space

    The secret to open shelving that looks designed (not cluttered) is negative space—leaving room between items so your eyes can rest and each piece feels important.

    This is free to implement—just edit your existing items down. Keep only 8–12 items per shelf spread across the entire surface with gaps. Style with items you actually use: white dishware, cookbooks, one plant. If shelves feel empty, that’s the point. The goal is calm, not maximum coverage. Rearrange seasonally to keep it fresh without adding more stuff.

    Your open shelves become a restful visual break in your kitchen, making the whole space feel intentional and high-end—like a designed showroom, not a storage unit.


    Closing

    Save this post for your next kitchen refresh and try one idea this weekend. Whether you start with paint, hardware, or just rearranging your open shelves, small changes add up fast—and your kitchen deserves to feel both functional and beautiful.

  • 26 Small Kitchen Design Ideas That Boost Function & Style

    26 Small Kitchen Design Ideas That Boost Function & Style

    Small kitchens don’t have to feel cramped or outdated. Whether you’re working with a galley layout, an apartment galley, or a cozy cottage kitchen, smart design choices can make your space feel larger, more functional, and genuinely beautiful. The 2025 kitchen trends show us that small spaces are perfect for bold moves—mixing materials, adding color, maximizing storage, and layering textures create personality without clutter. In this guide, you’ll find 26 actionable ideas that work with your existing layout, fit most budgets, and deliver real-world results. Let’s start making your small kitchen work as hard as you do.

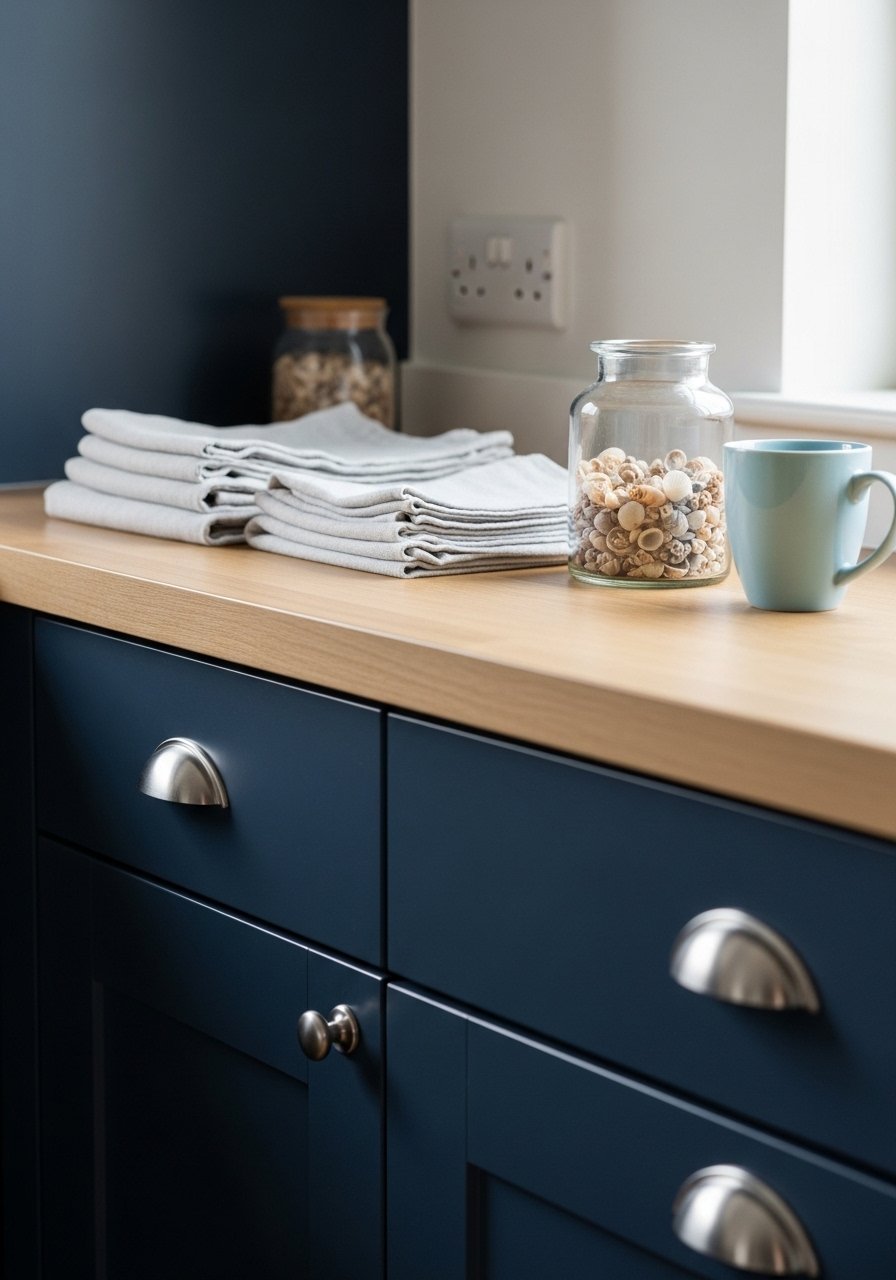
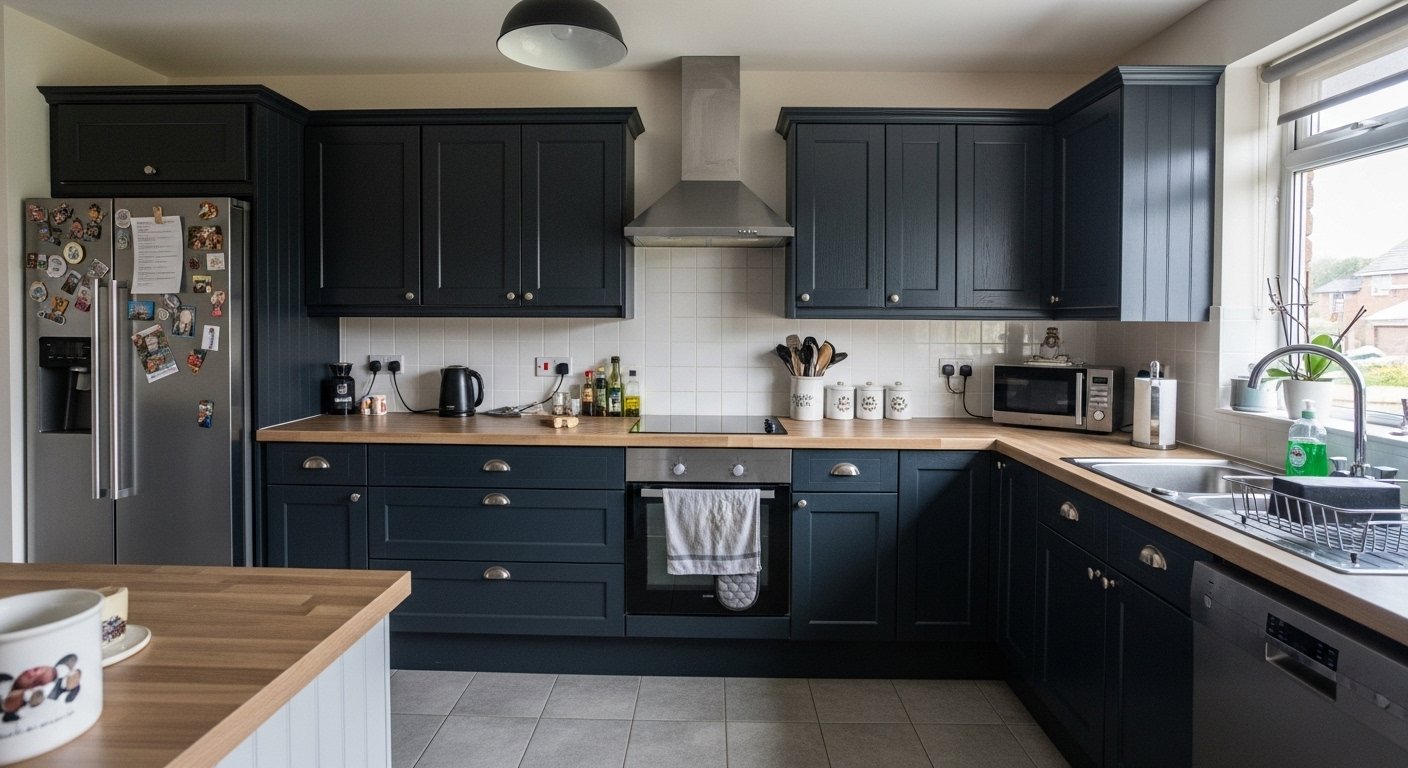
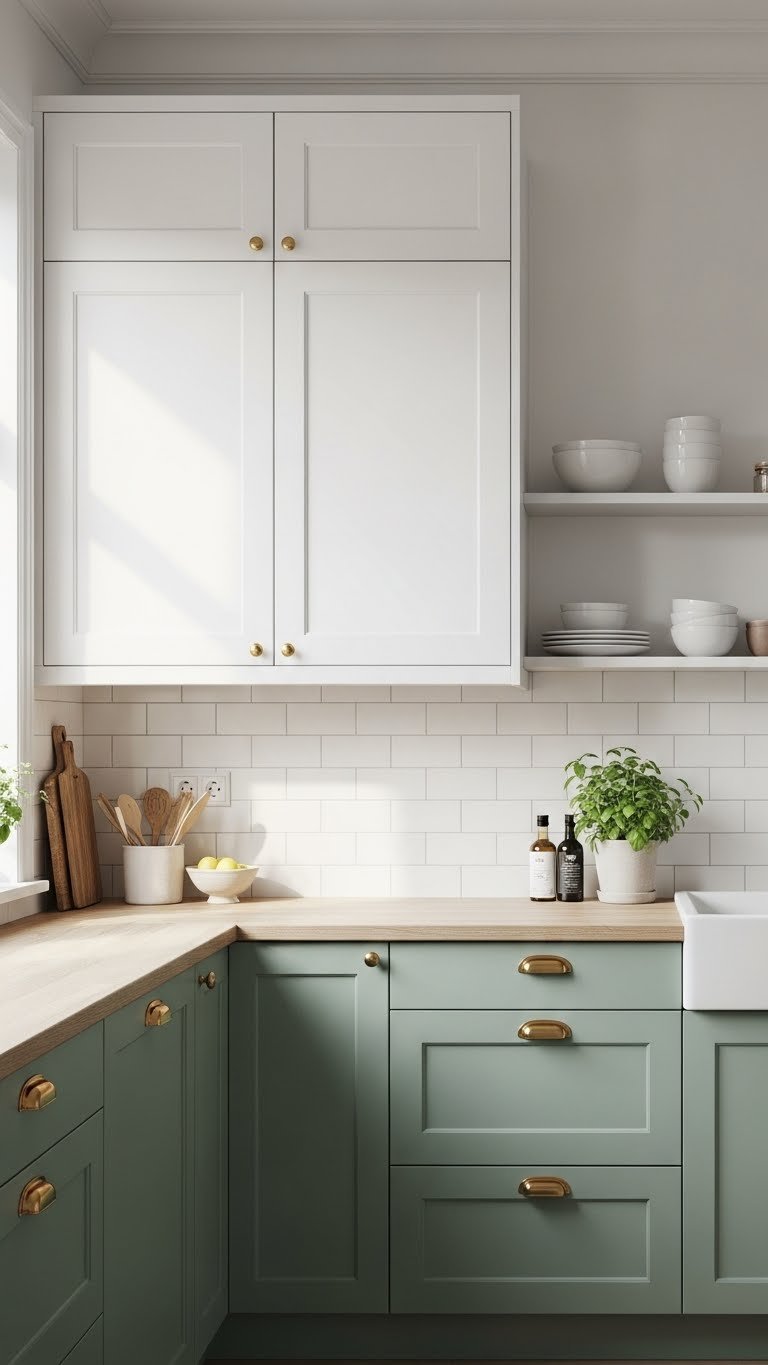
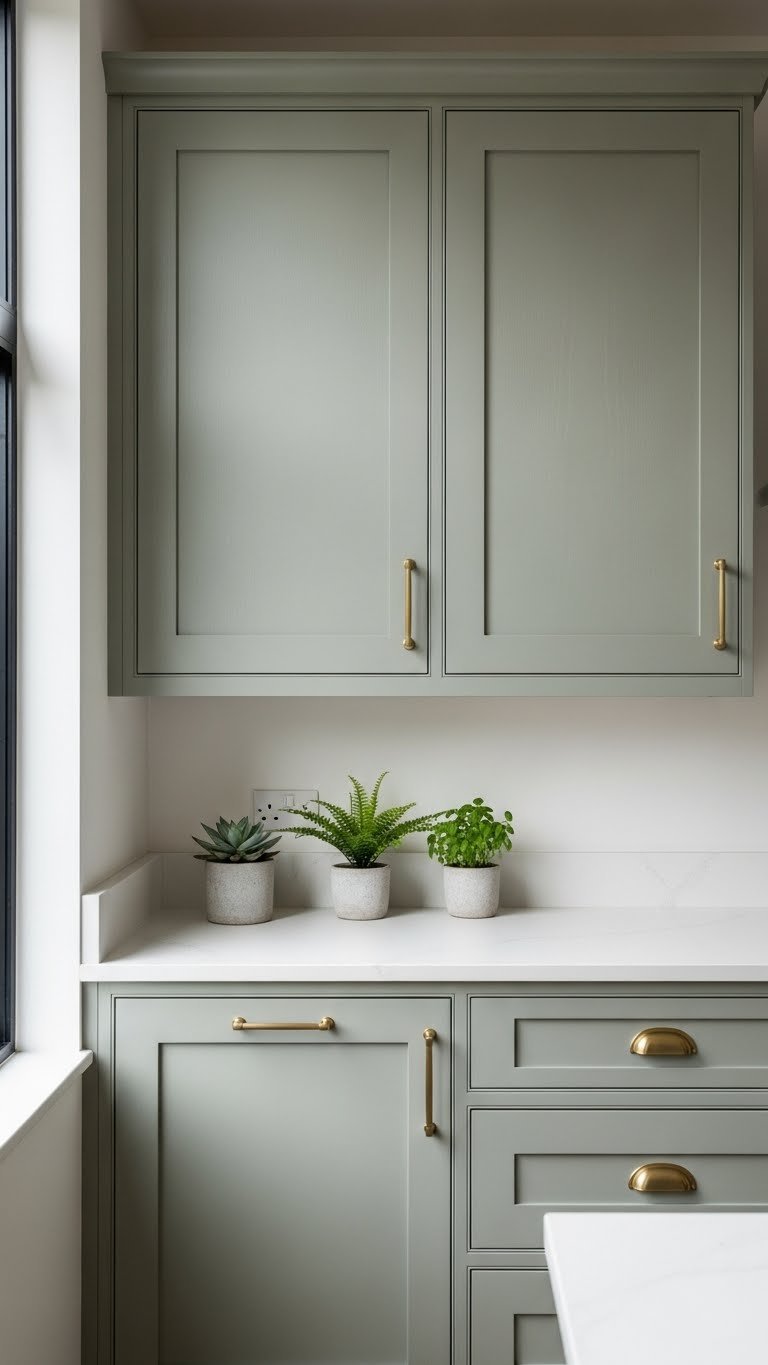
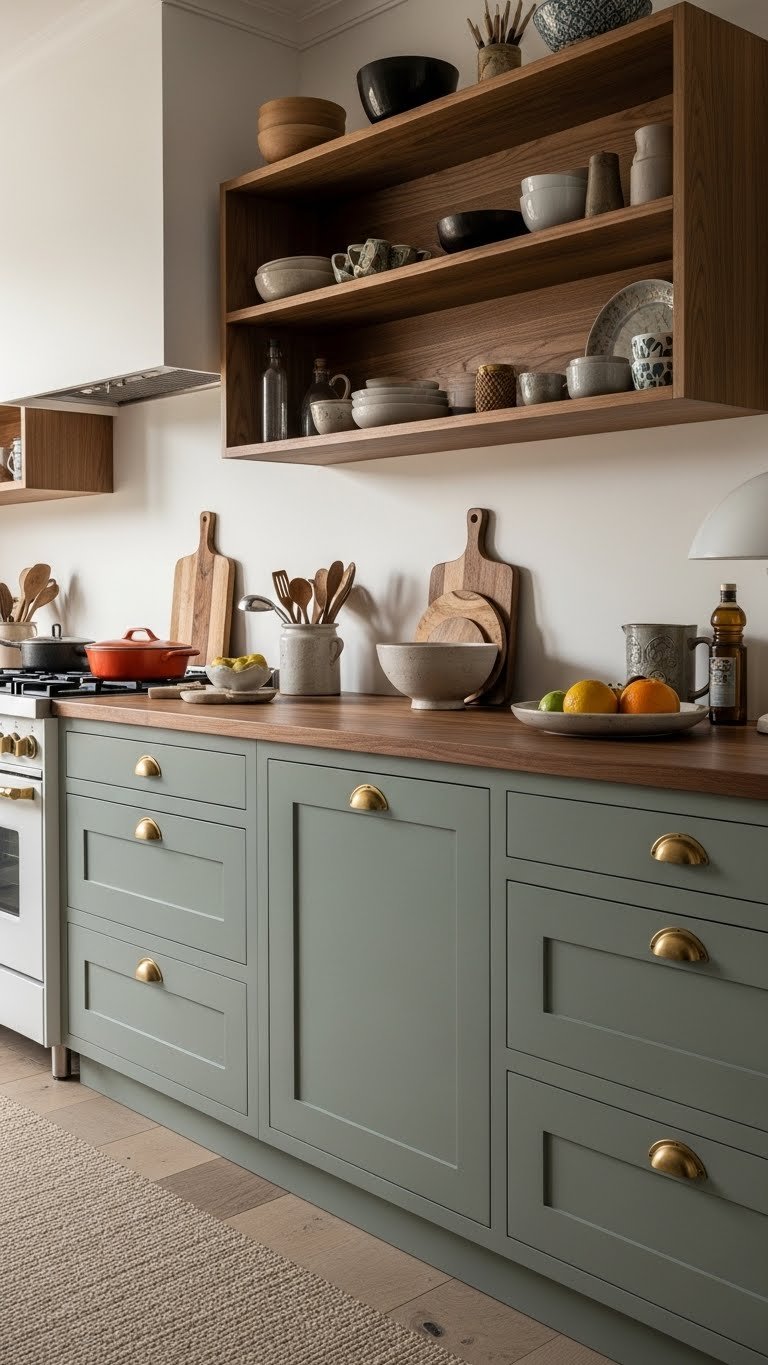
    1. Paint Cabinets a Bold Sage Green

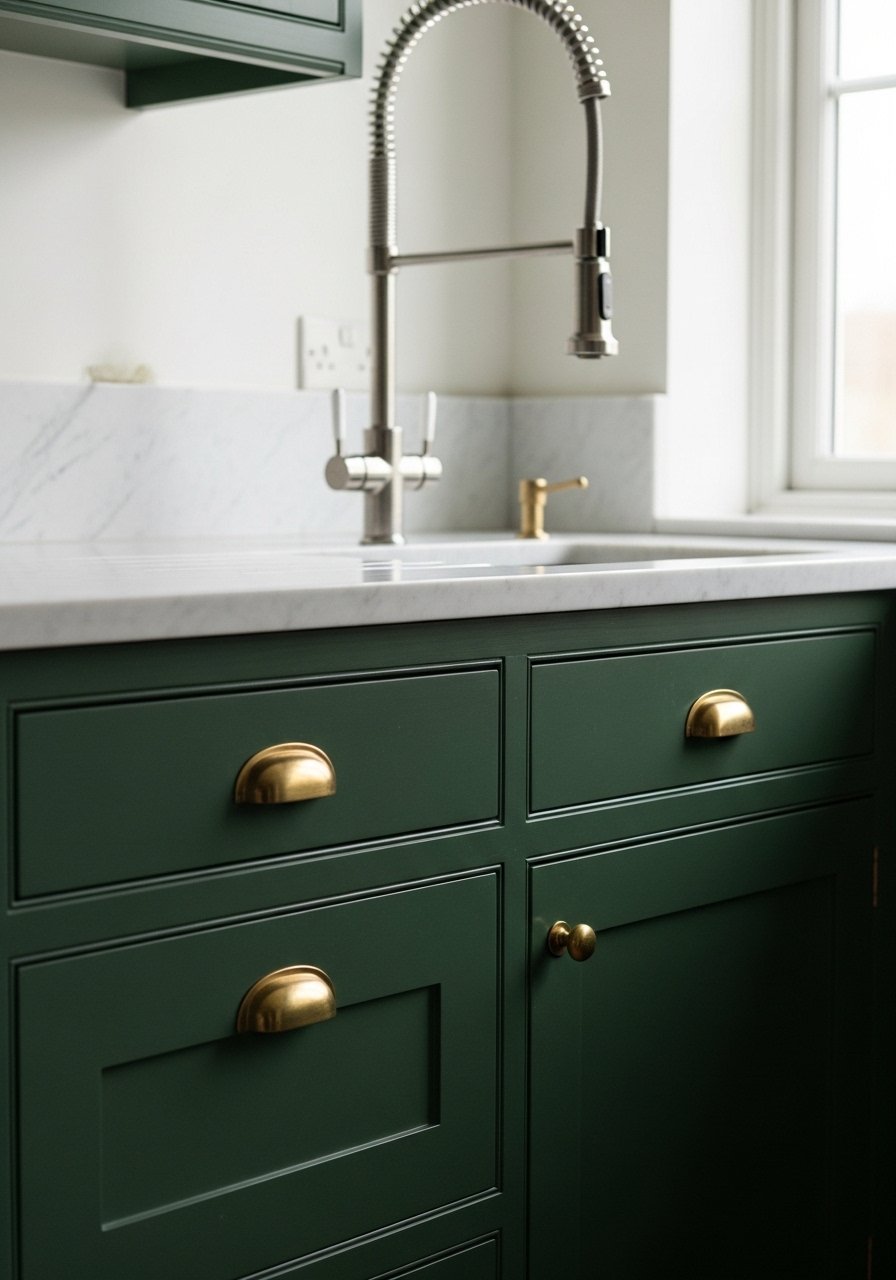
    Cabinet color is your biggest visual game-changer in a small space. Sage green has topped 2025 trend lists with 76% of designers choosing it over traditional white, and for good reason—it creates warmth and sophistication without feeling dark or cramped.

    If you own your home, a cabinet paint job costs $100–$400 in supplies (primer, quality paint, hardware) and takes a weekend. Use semi-gloss or satin finish paint (easier to wipe down), prime first, and apply two coats. For renters, peel-and-stick cabinet film offers the same impact without commitment. Pair with warm brass or matte black hardware for an instant refresh.

    Pro tip: Test a small cabinet door first—sage green reads differently depending on your kitchen’s natural light.

    You’ll be amazed how a single color choice anchors the entire room and makes even a tiny galley feel intentional and curated.

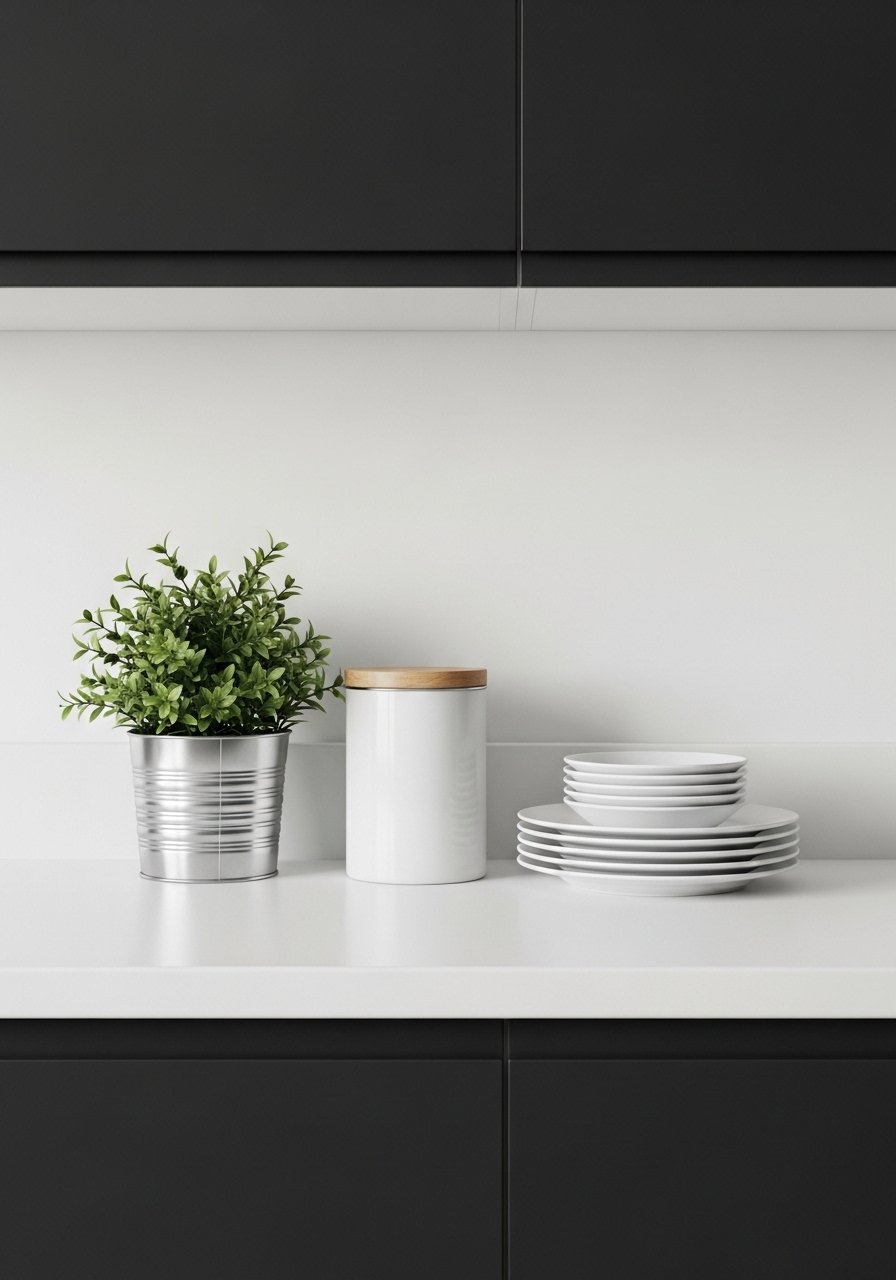
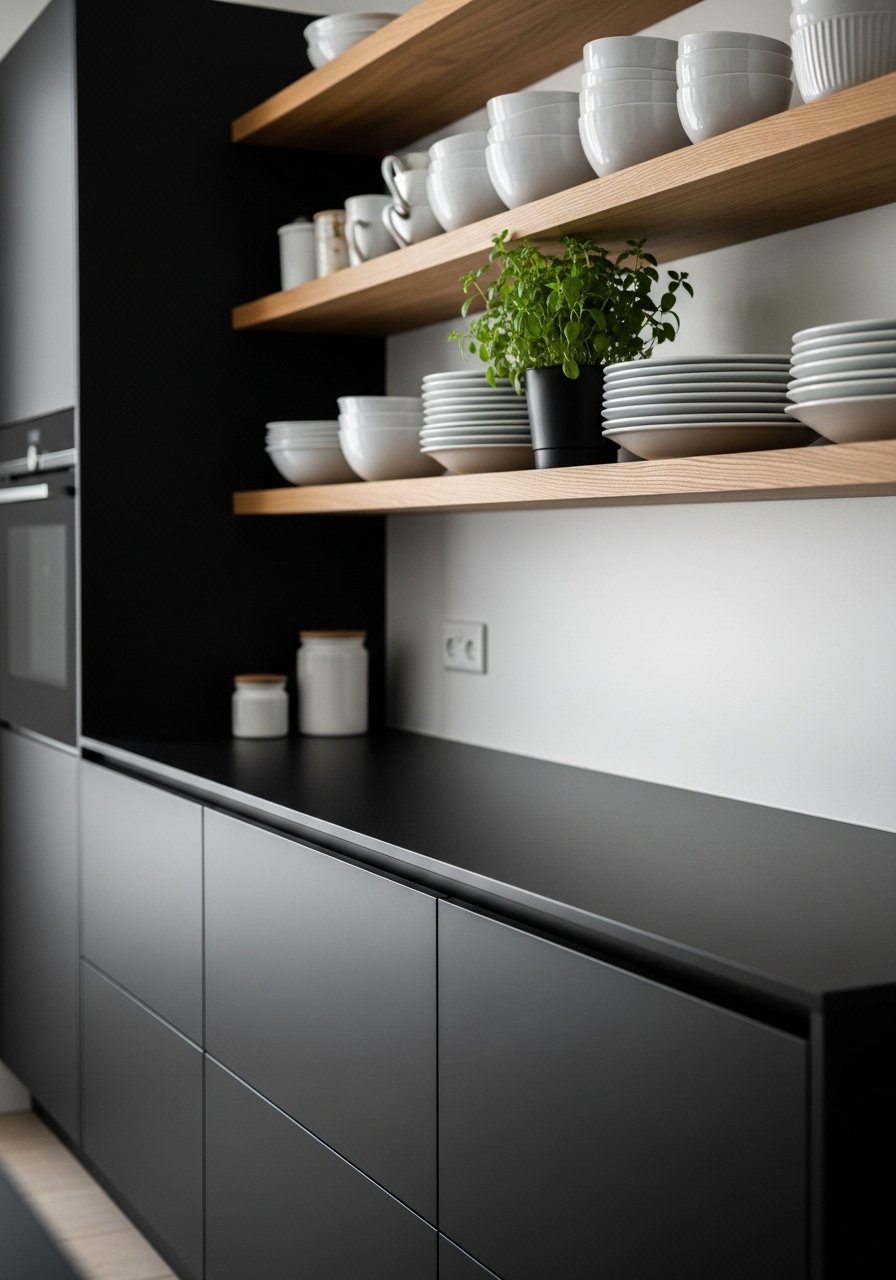
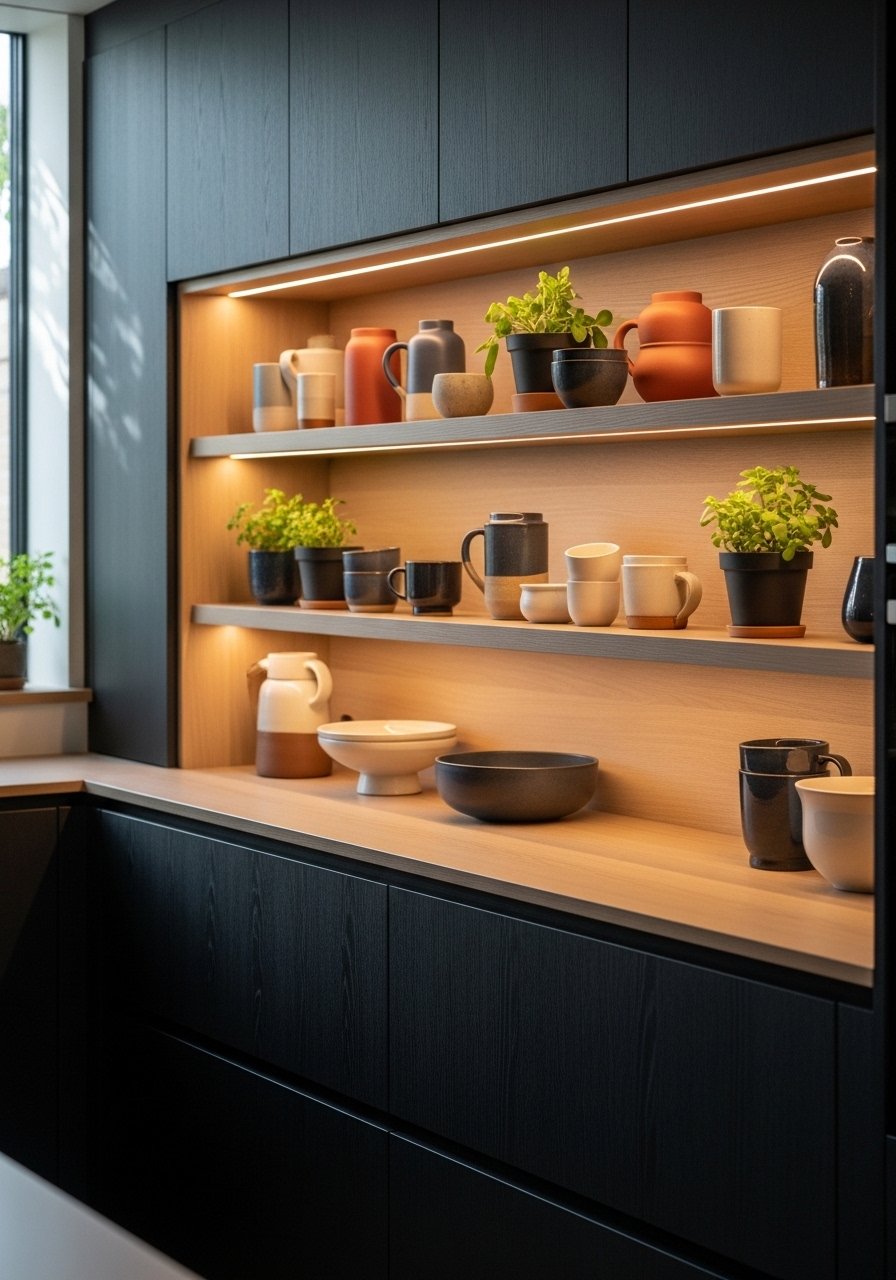
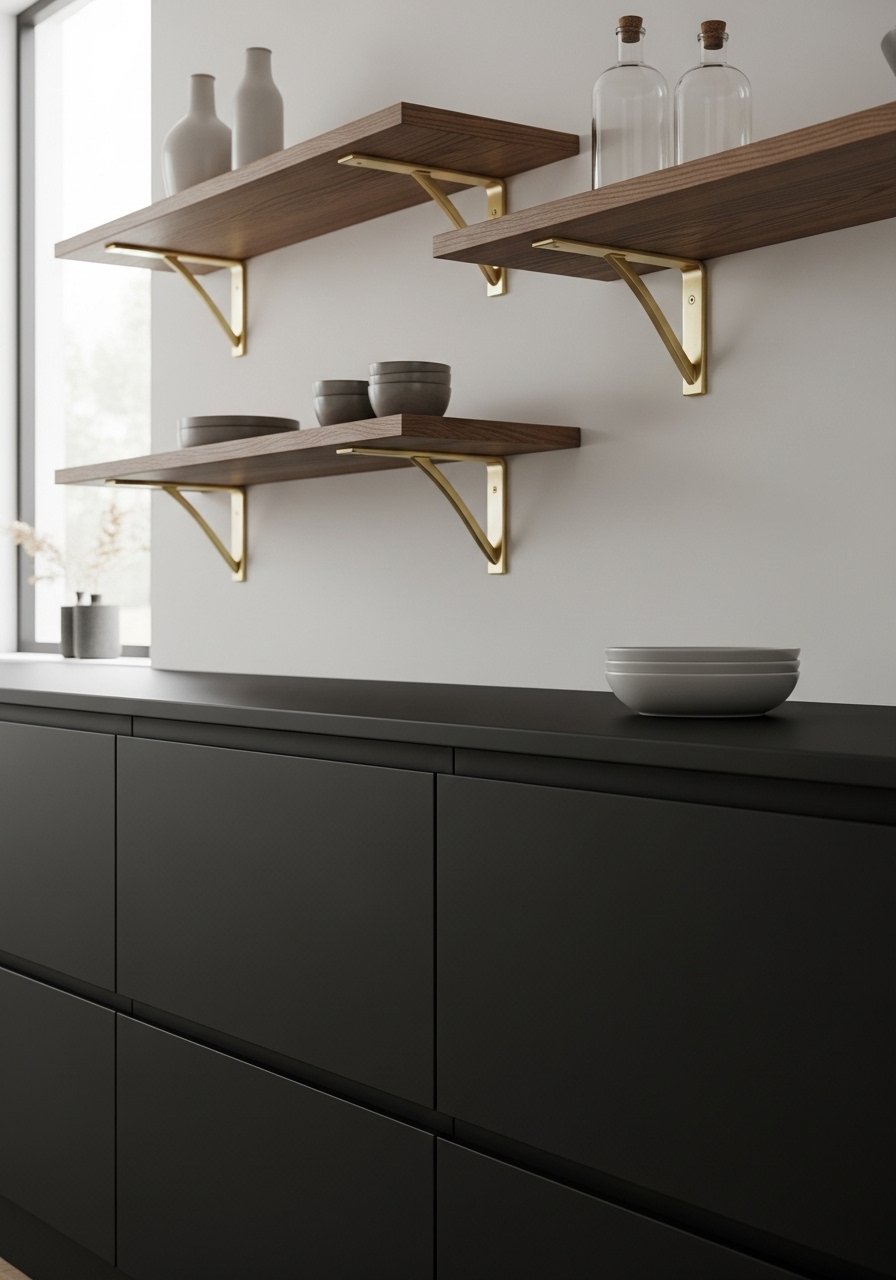
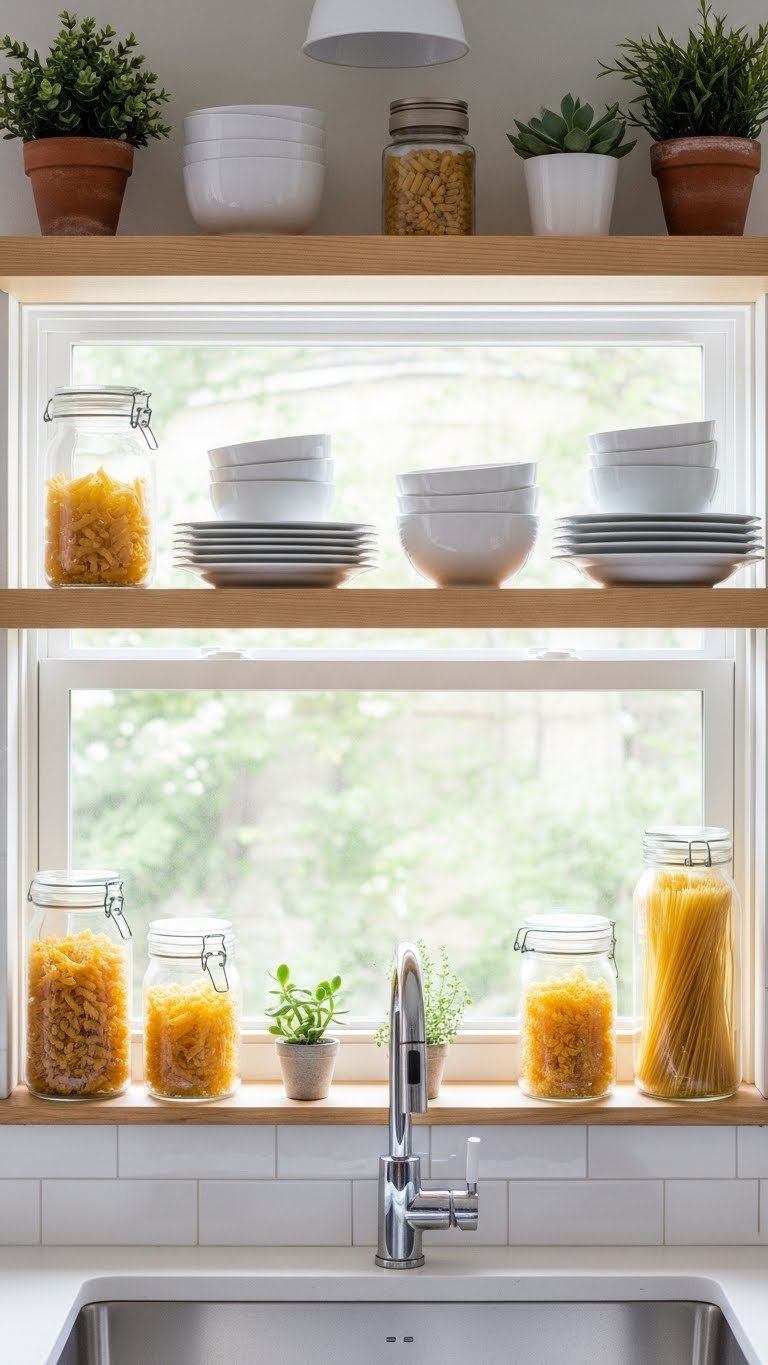
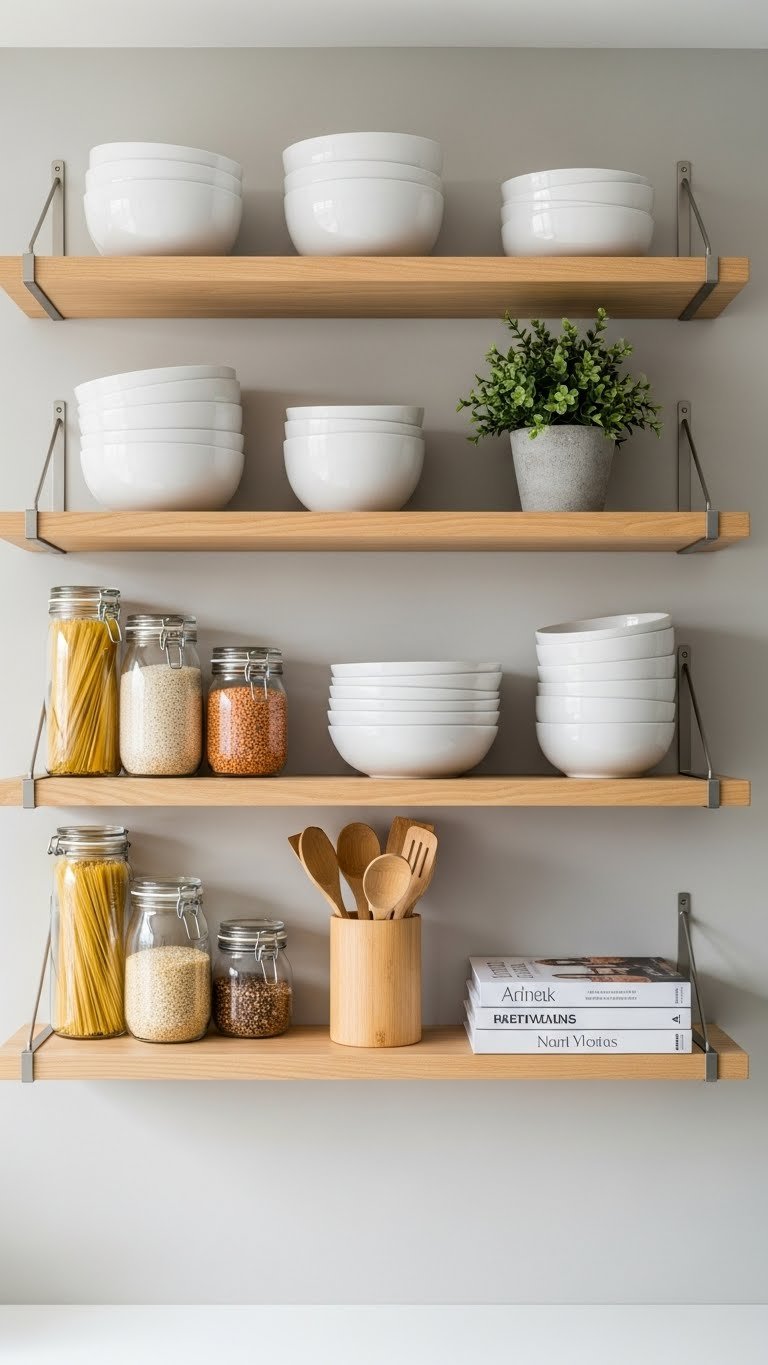
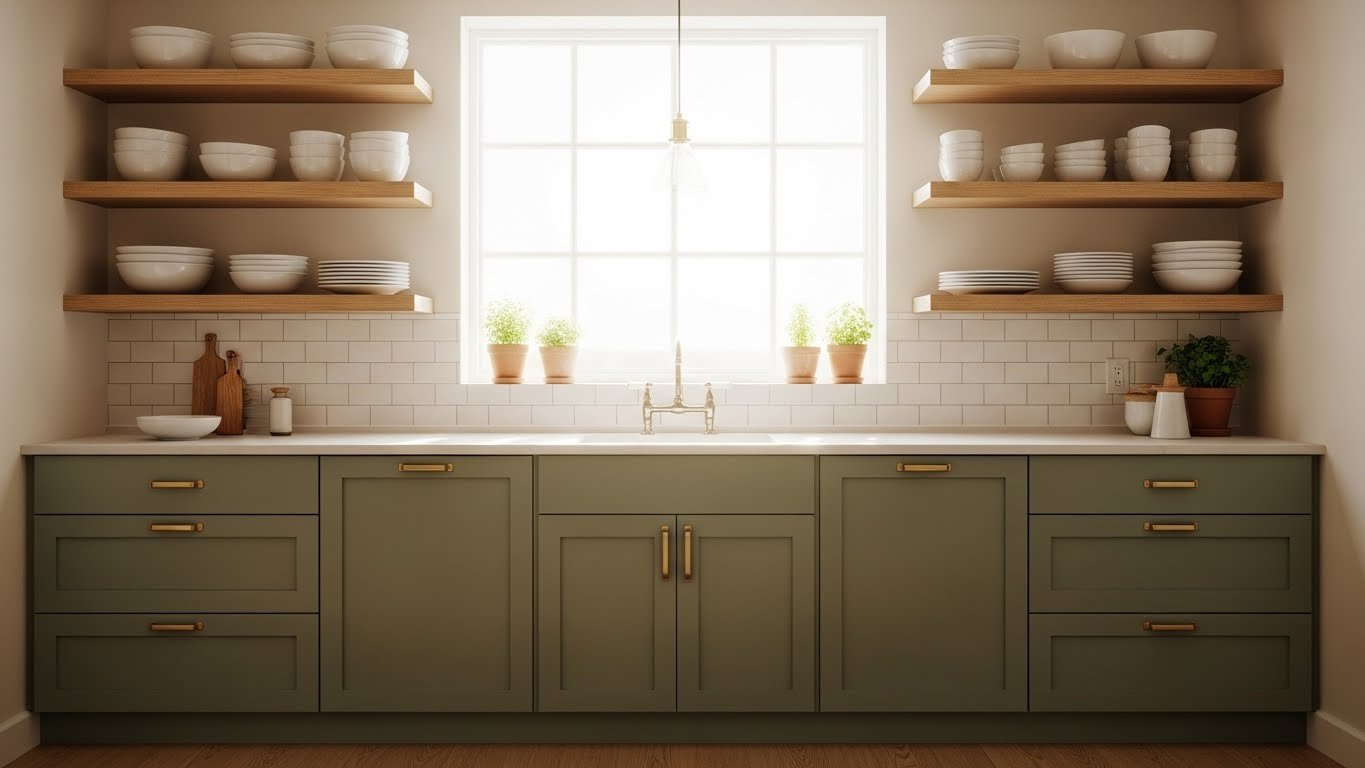
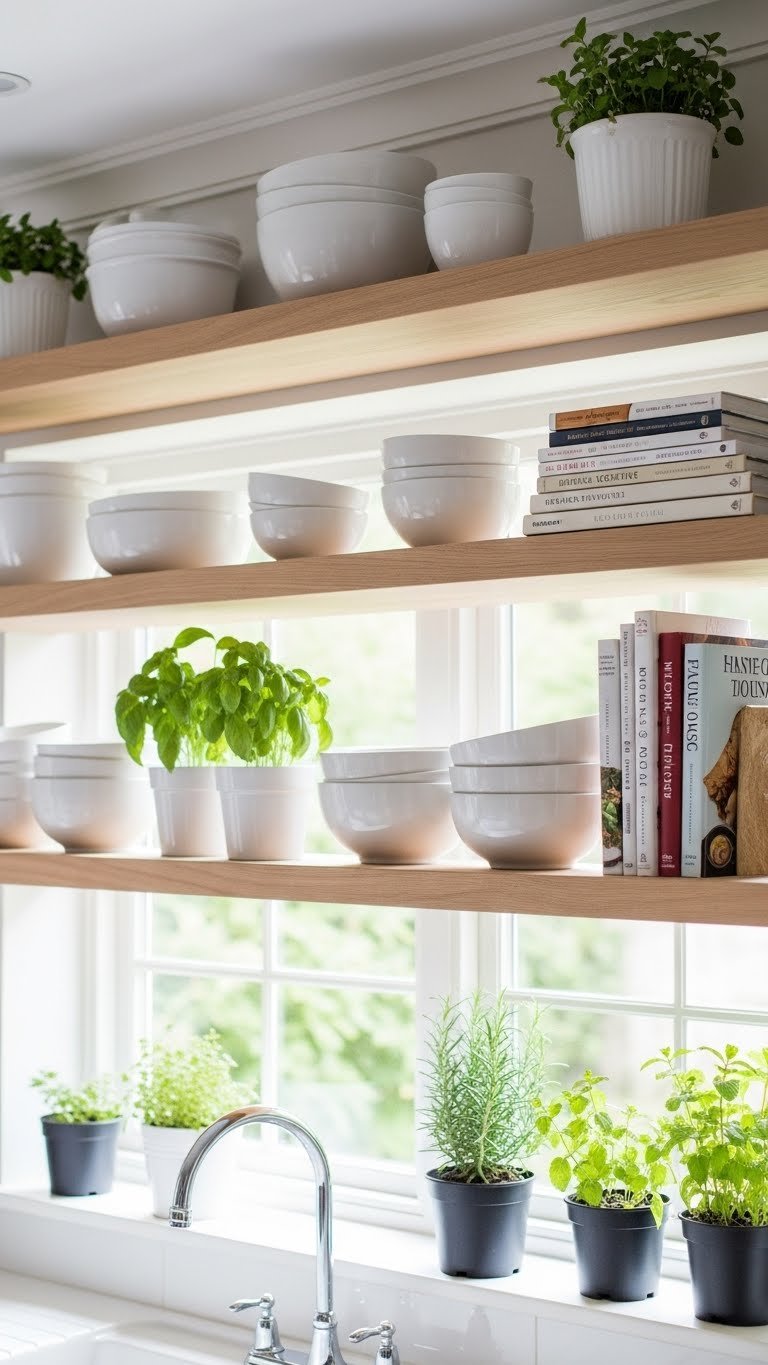
    2. Install Open Shelving Above the Sink

    Open shelving reduces visual clutter in small kitchens while displaying items you actually use and love. This is one of the smartest small-space moves because it eliminates the heaviness of upper cabinets and makes the room feel taller.

    Install two or three floating shelves (around $50–$150 for brackets and shelves) using wall studs for stability. Limit your display to 5–7 items per shelf: a stack of plates, a small plant, a few cookbooks. The key is restraint—open shelving only works when you edit ruthlessly. Renter alternative: use adhesive shelf brackets (about $30) that come off cleanly.

    Add subtle LED strip lighting under shelves ($20–$40) to highlight what you display and make the space feel bigger at night.

    Your kitchen instantly gains vertical interest and breathing room that makes even a compact layout feel airy and intentional.

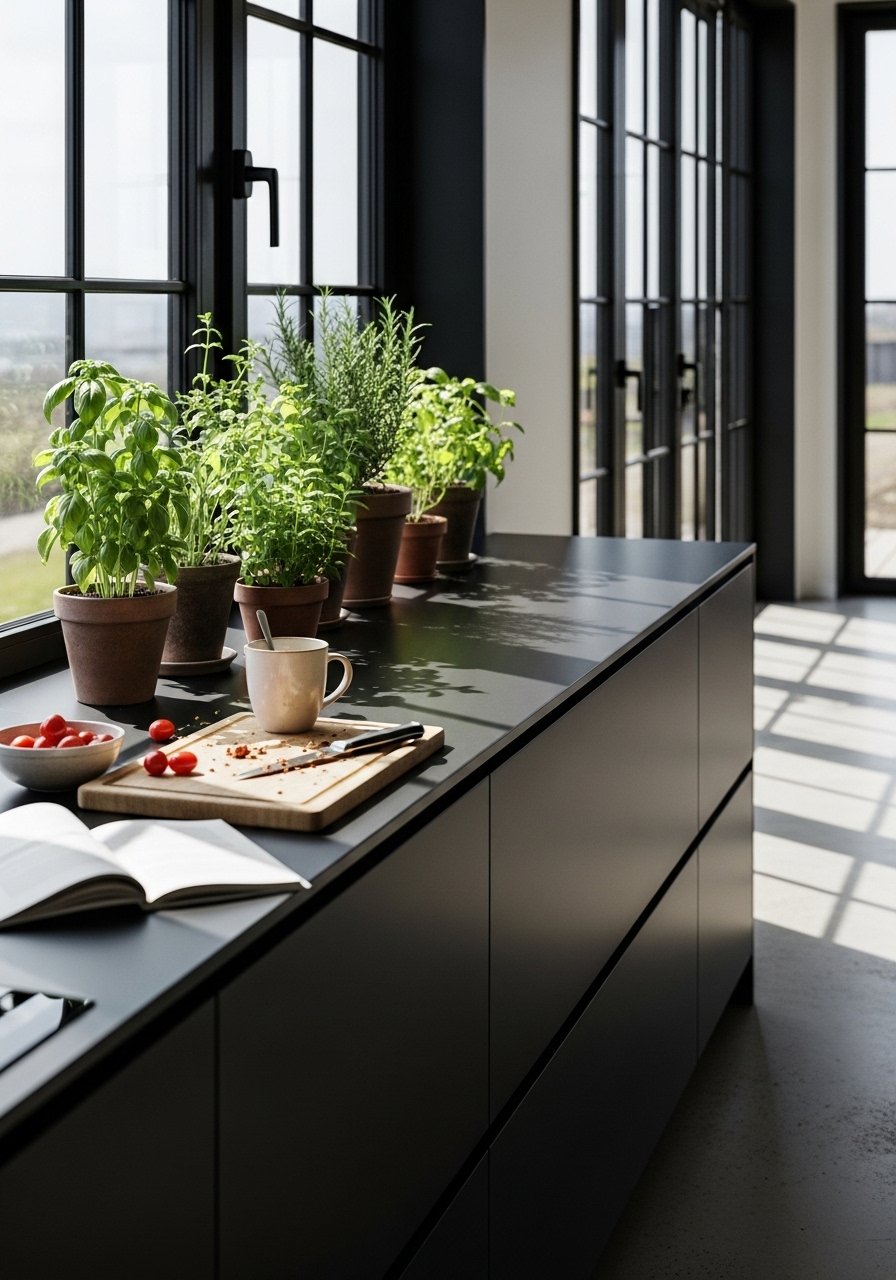
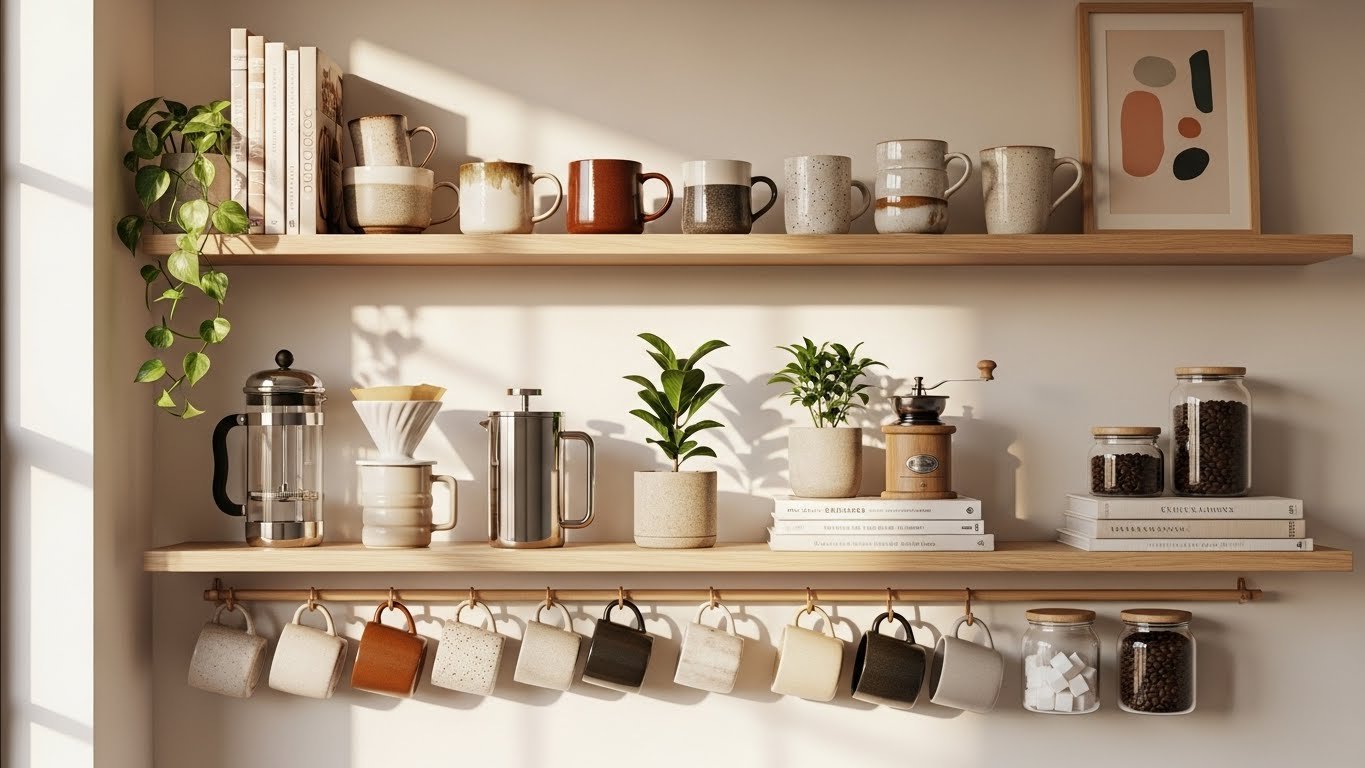
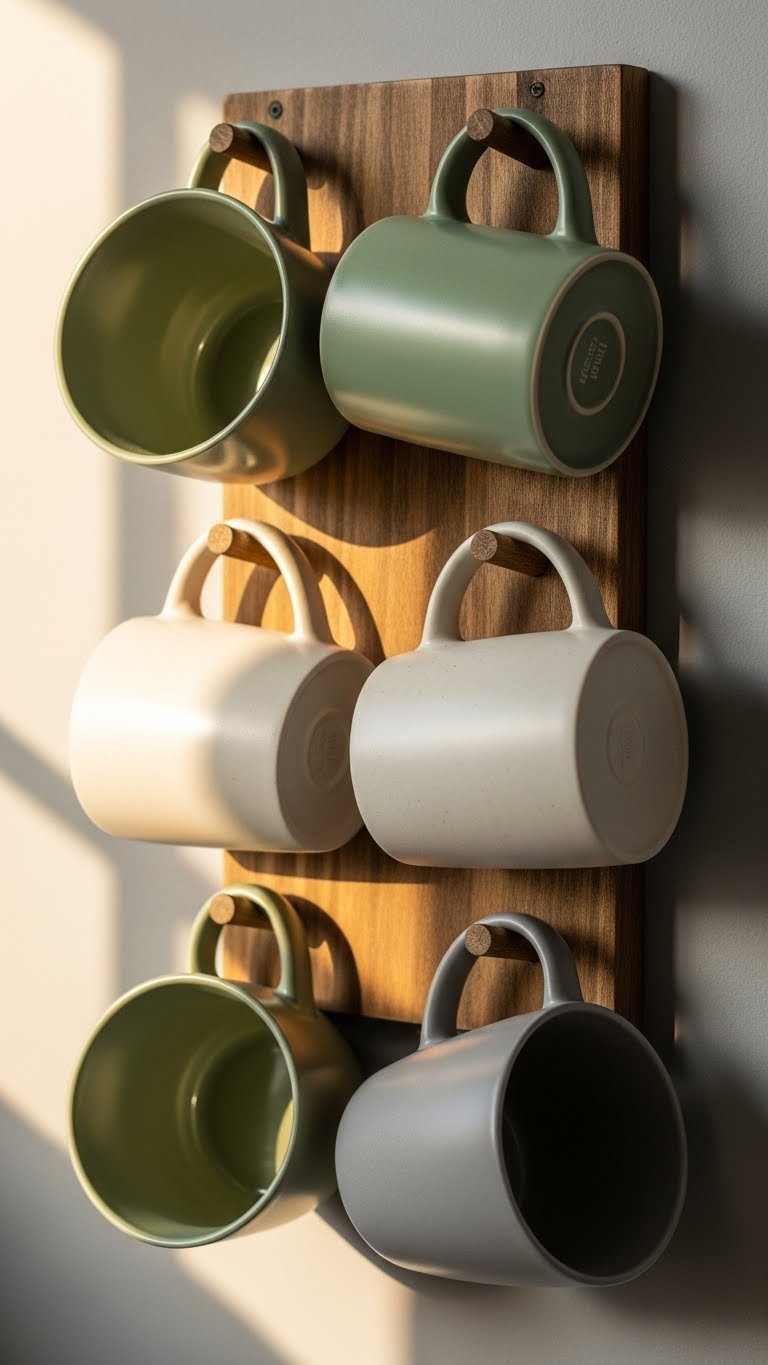
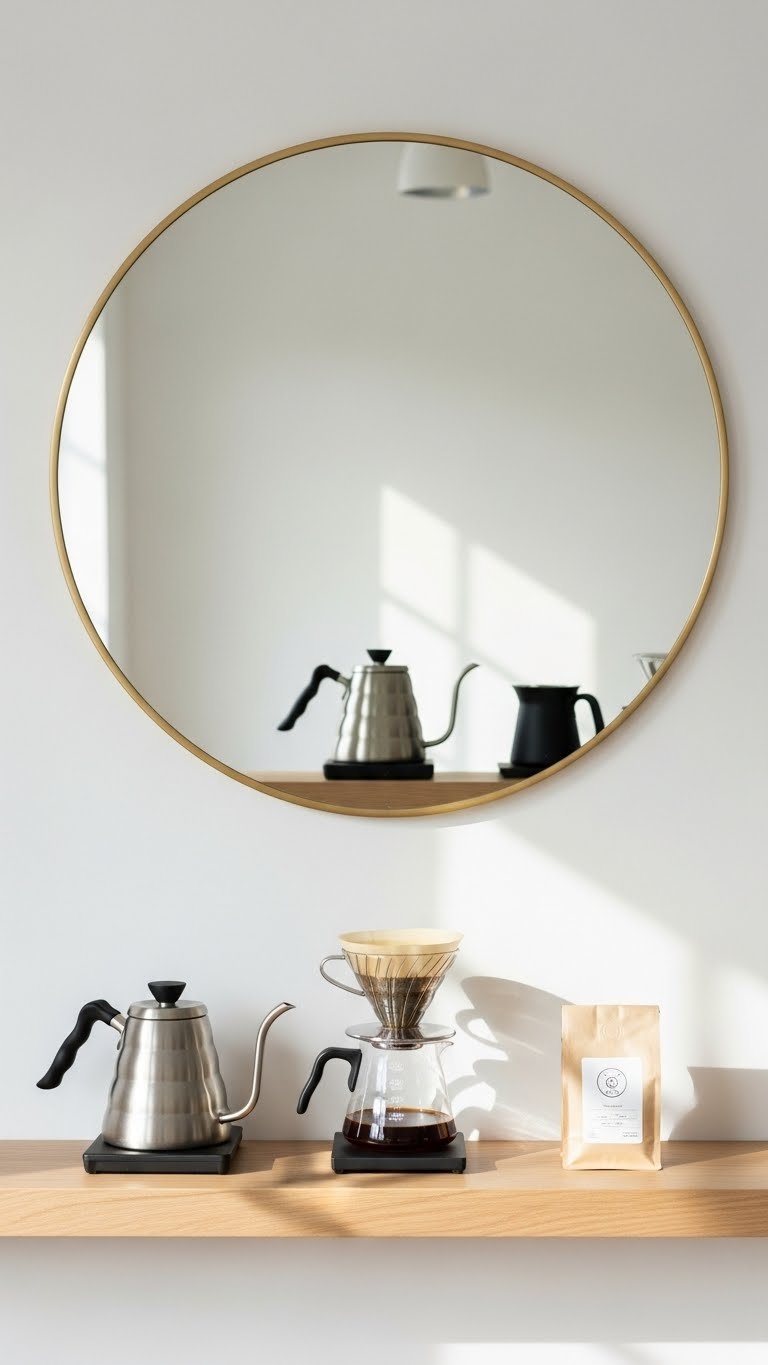
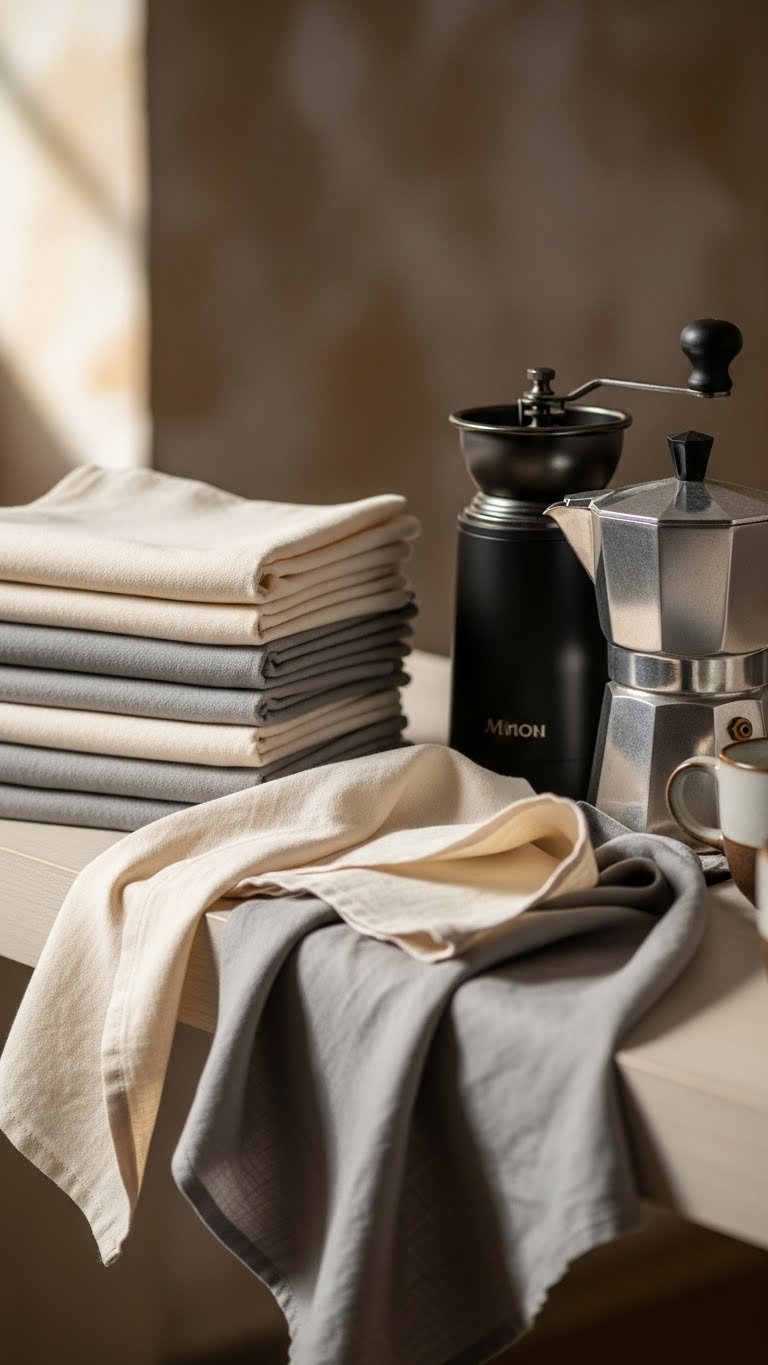
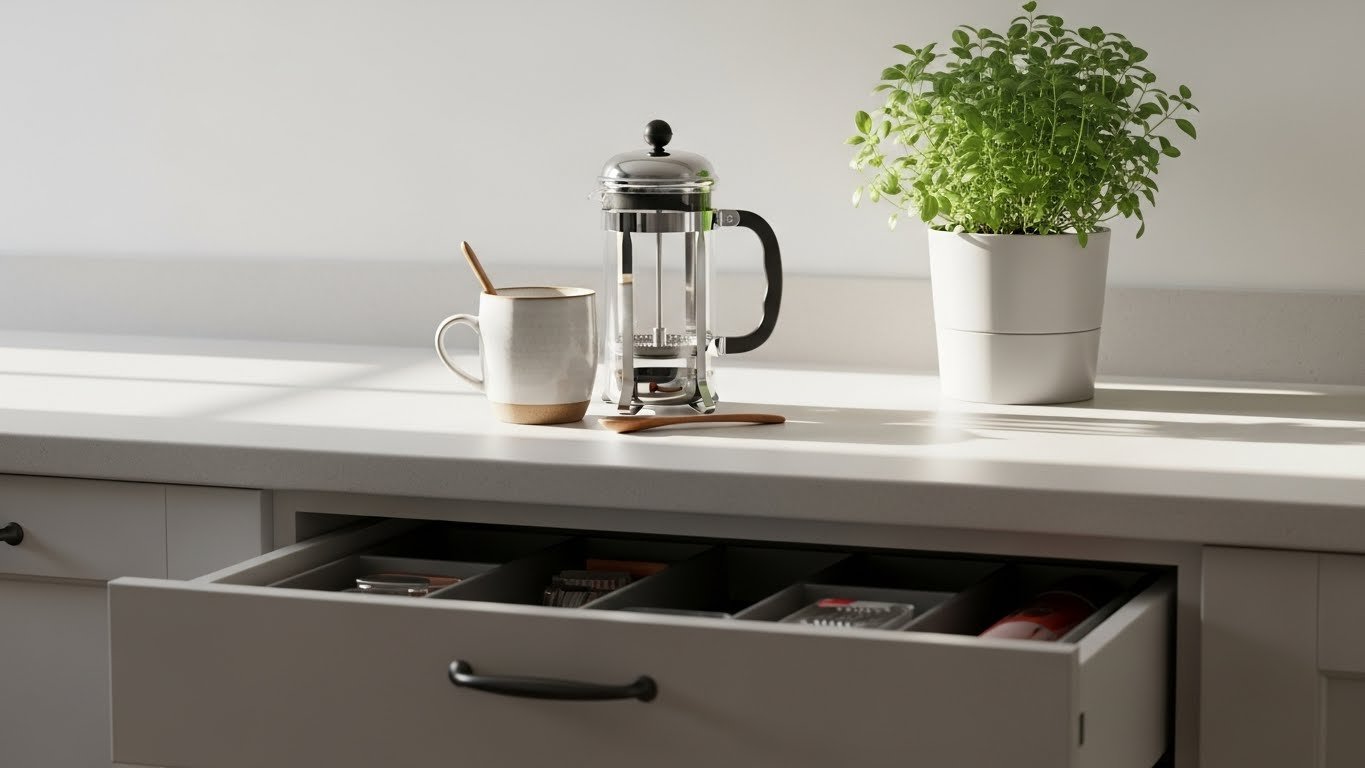
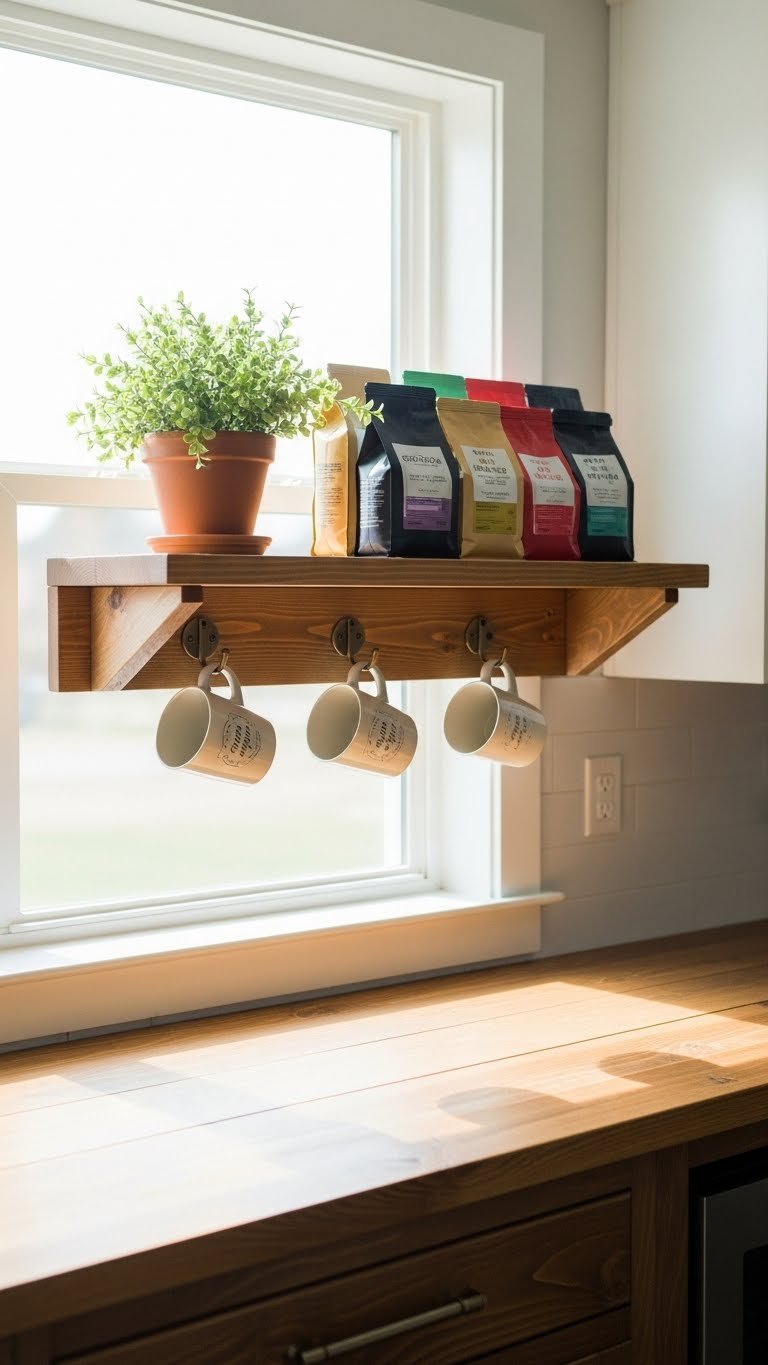
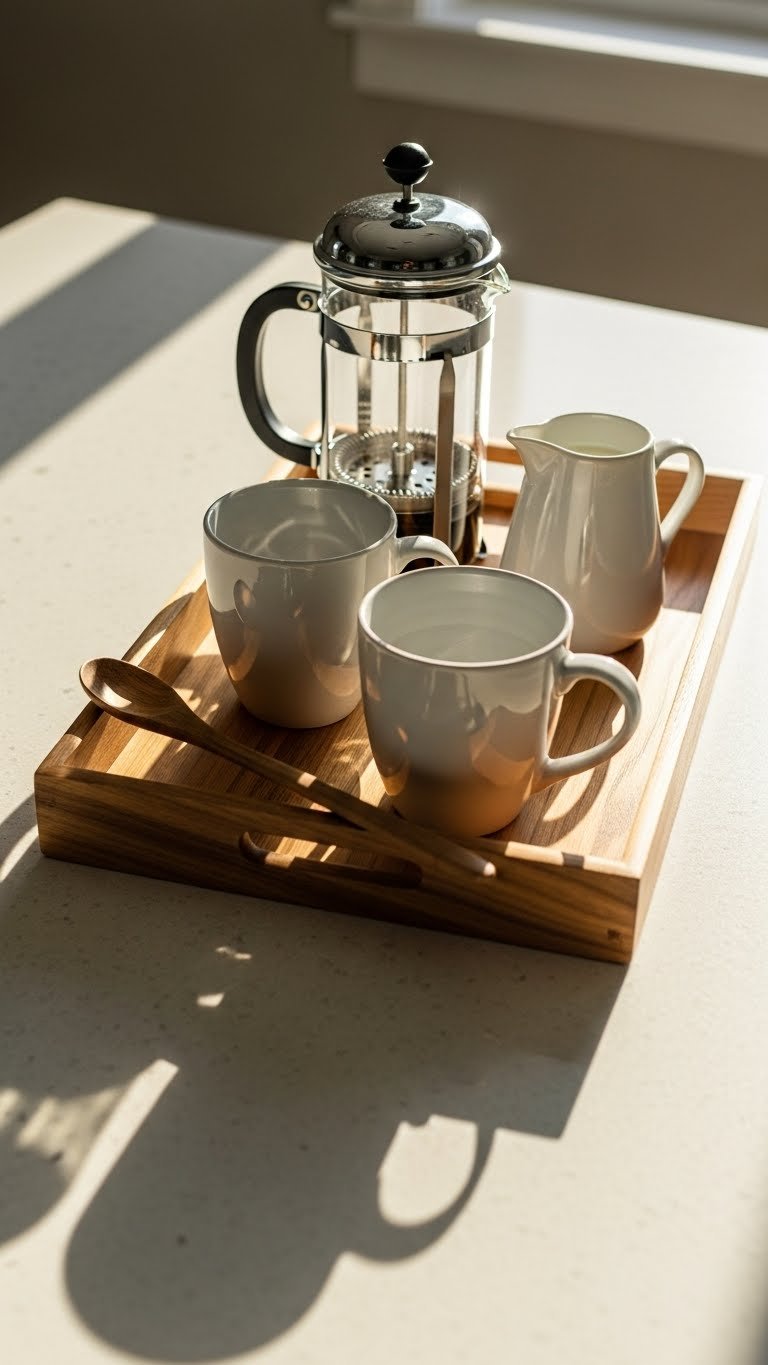
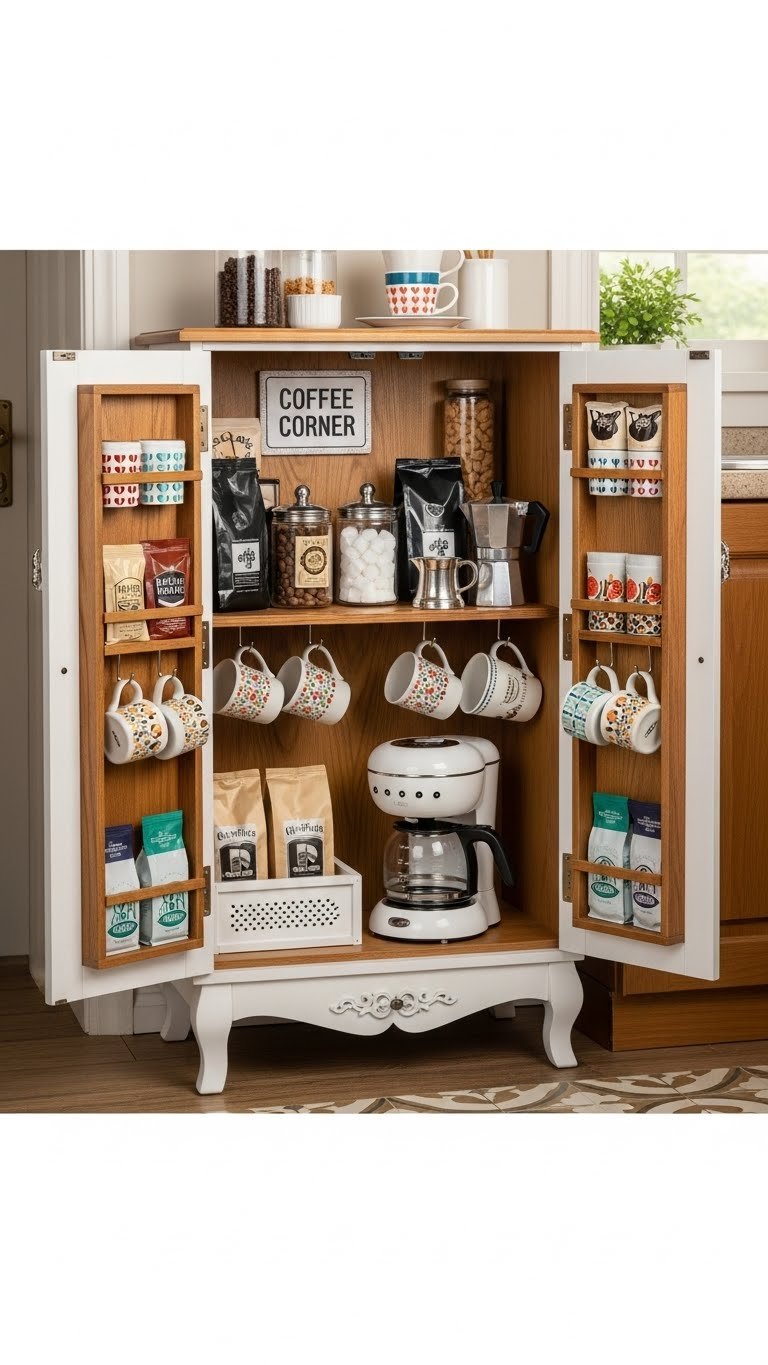
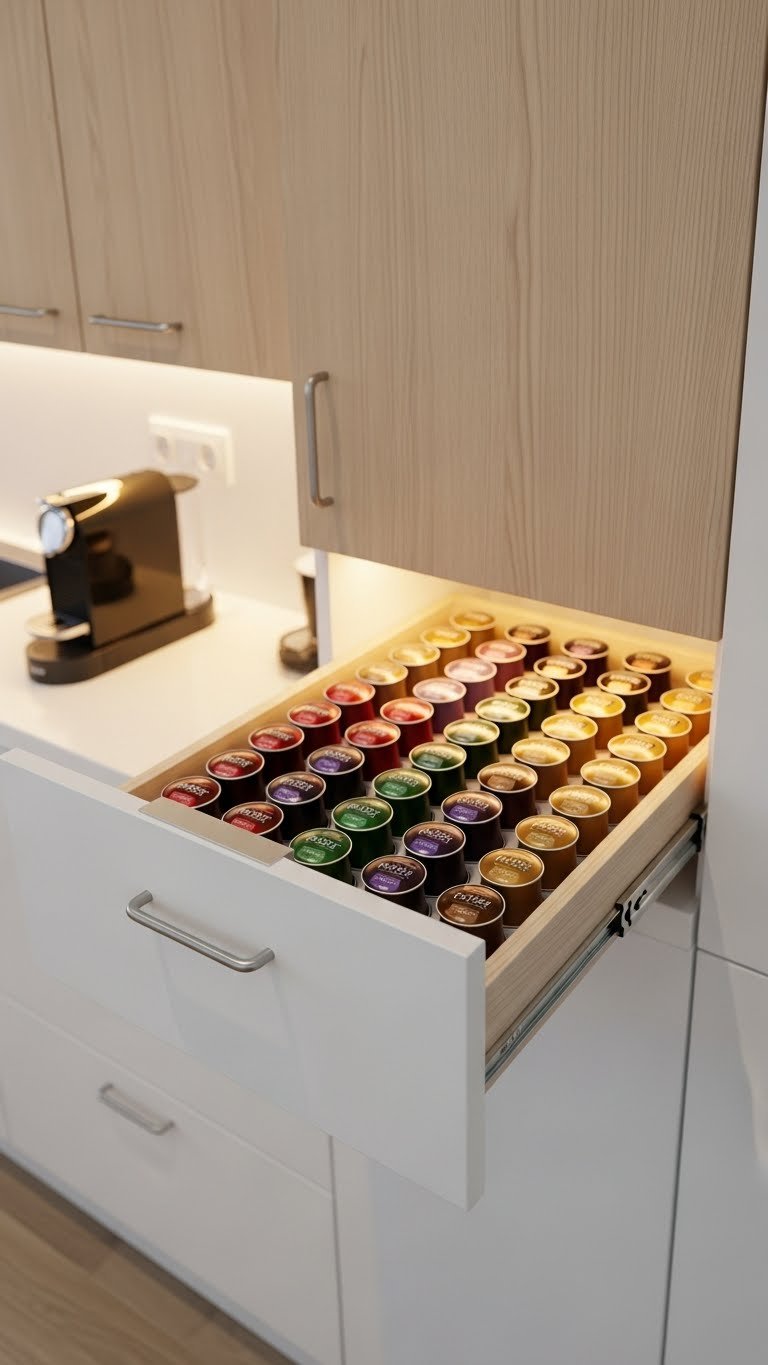
    3. Create a Compact Beverage Station

    A dedicated beverage station frees up counter and cabinet space while creating a morning ritual zone. Small kitchens benefit massively from zones—it’s like creating invisible organization.

    Mount a narrow open shelf (12–18 inches wide, $30–$60) about 18 inches above your counter. Add 3–4 hooks underneath ($15 total) for mugs. Store coffee, tea, and sweeteners in clear containers ($20 for a set). Your coffee maker stays plugged in but tucked into one corner of this station. This setup works especially well above a narrow counter strip or in a corner that’s currently wasted space.

    Real space-saver: group everything you use daily in this one zone so you’re not hunting through multiple cabinets before 9 a.m.

    Now your counter space opens up and your morning runs smoother—plus guests see a stylish, organized detail instead of appliance clutter.

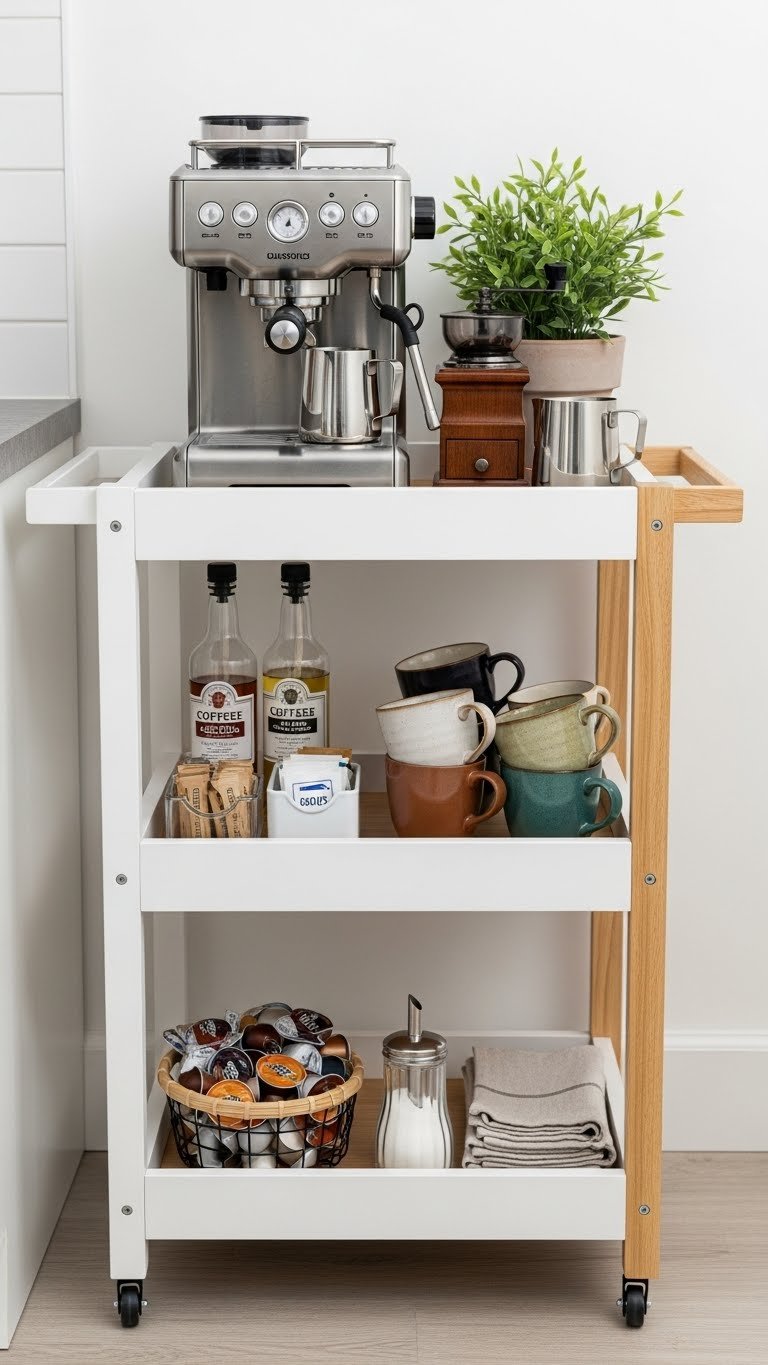
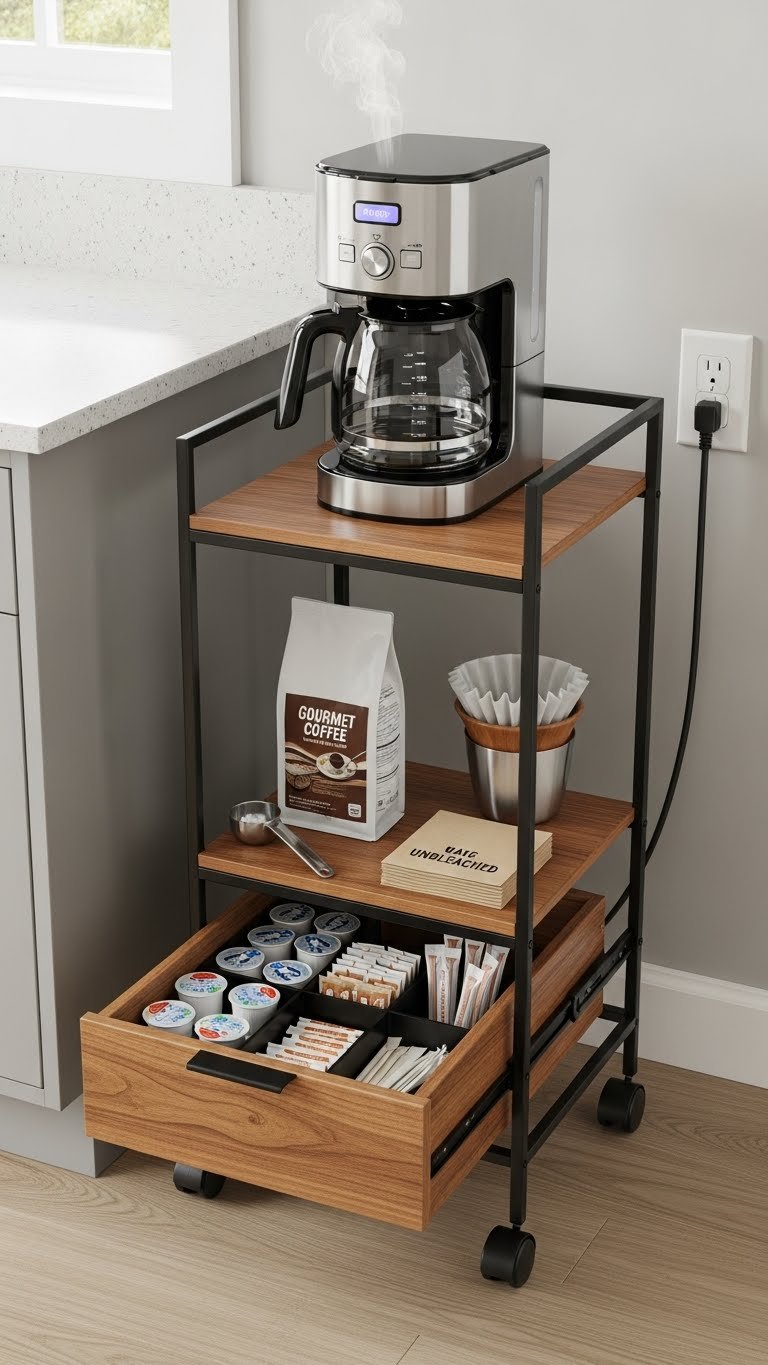
    4. Add a Narrow Rolling Cart for Hidden Storage

    A slim rolling cart slides into tight spaces and stores what doesn’t fit in cabinets. They’re affordable, mobile, and don’t require installation—perfect for renters and small kitchens with odd gaps.

    Look for narrow carts at IKEA, Target, or Amazon ($40–$100) that fit beside the fridge, in a corner, or under a window. Use the top shelf for your blender or air fryer, middle for linens and grocery bags, bottom for pantry overflow or cookbooks. Choose stainless steel, wood, or painted finishes depending on your style. Bonus: you can roll it out when you need counter prep space.

    Pro tip: If your cart has open sides, use fabric bins ($2–$5 each) to hide what’s inside and maintain a clean look.

    You gain functional storage without a permanent footprint, and you can move it whenever you need the space.

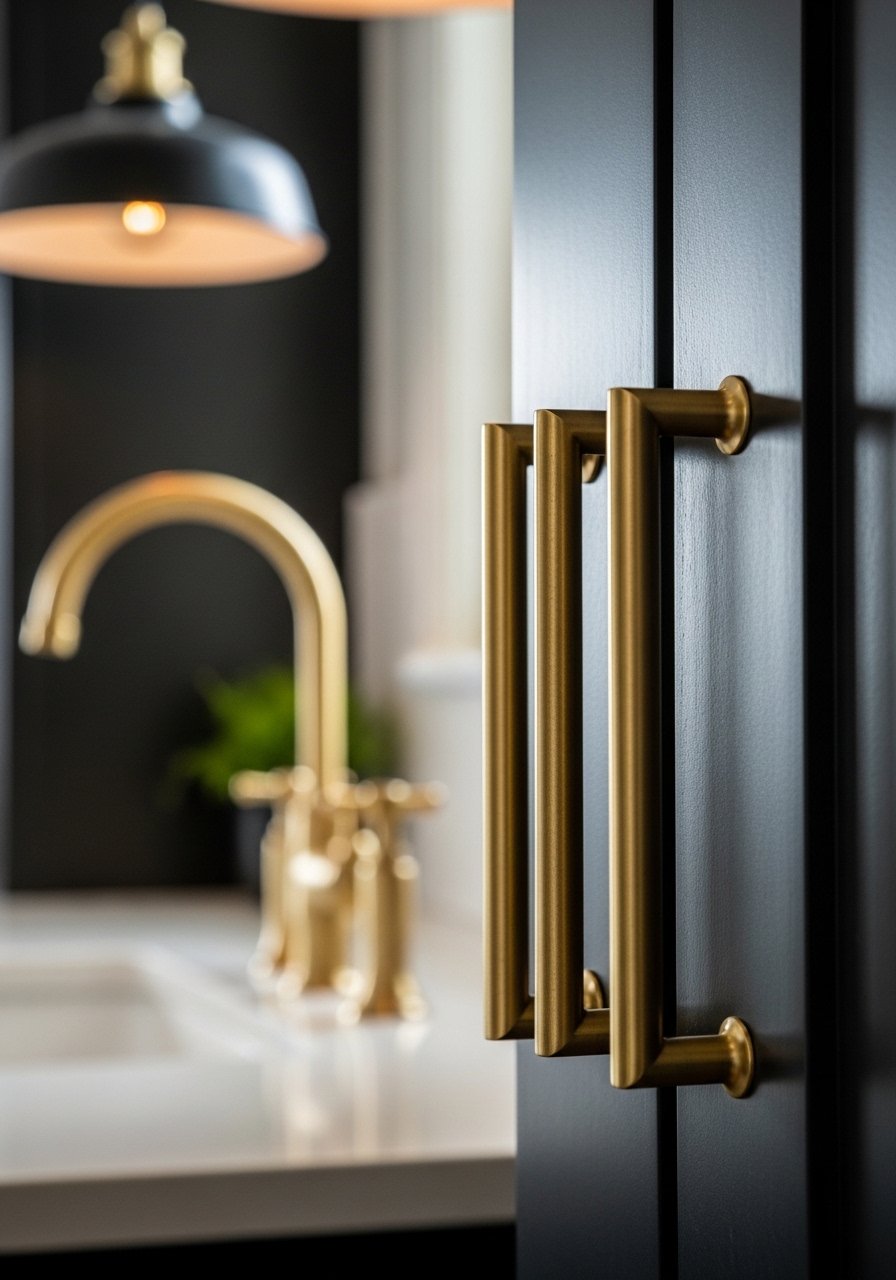
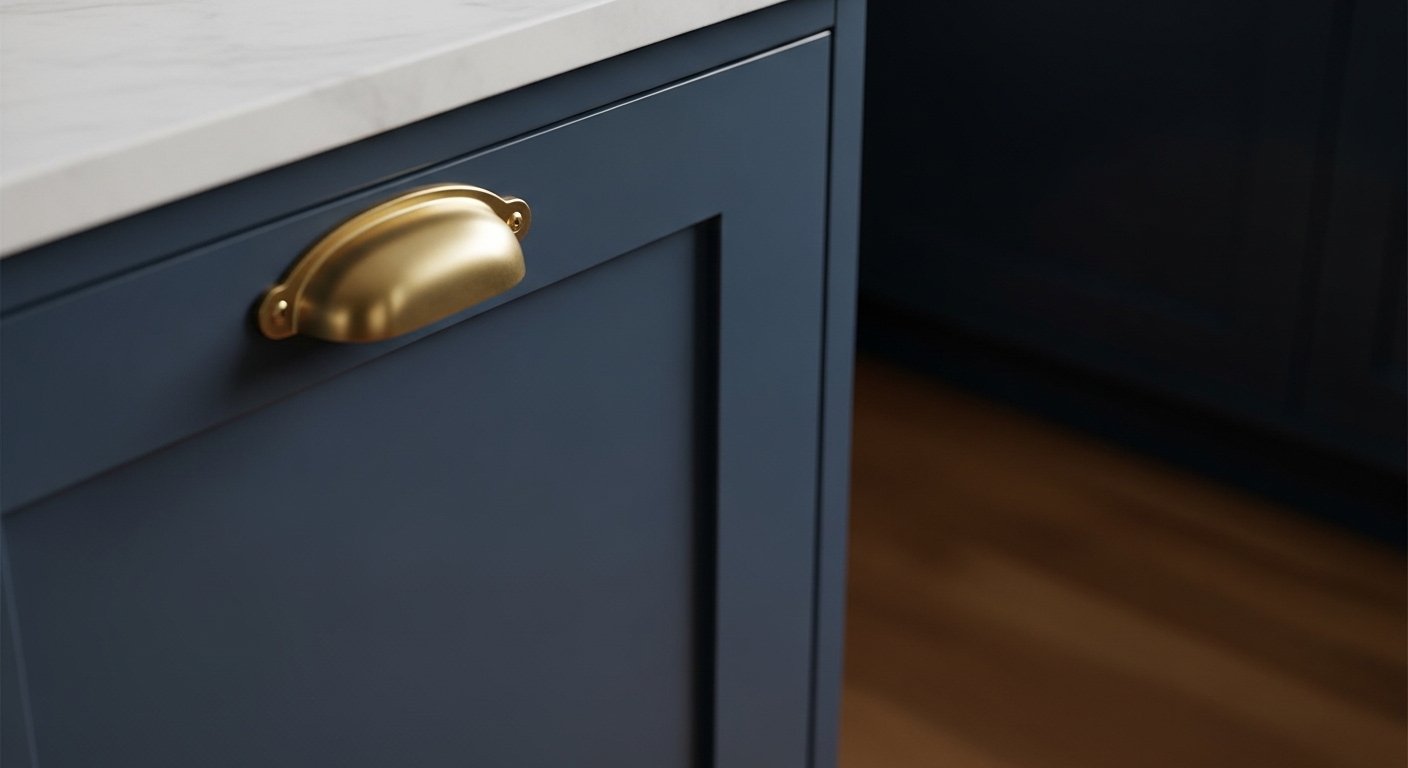
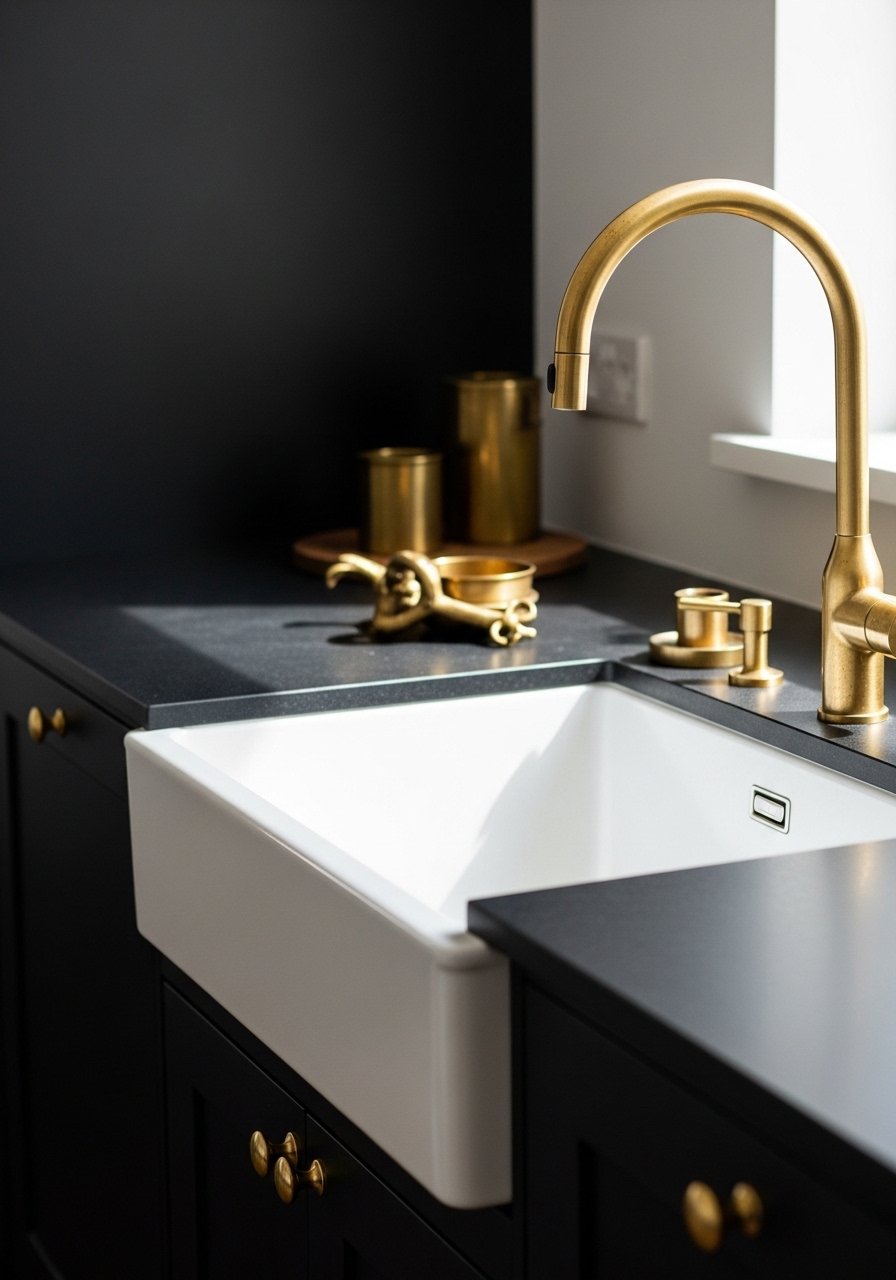
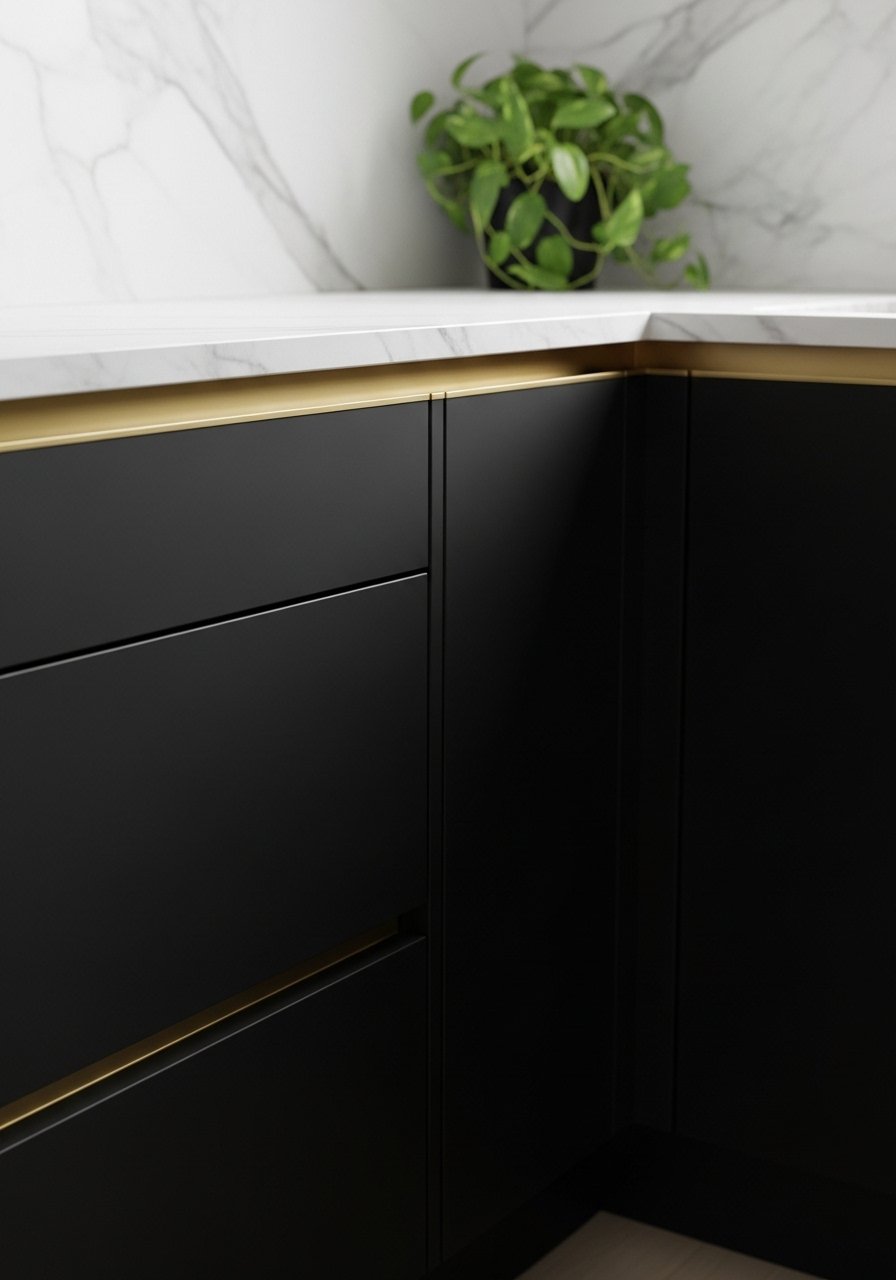
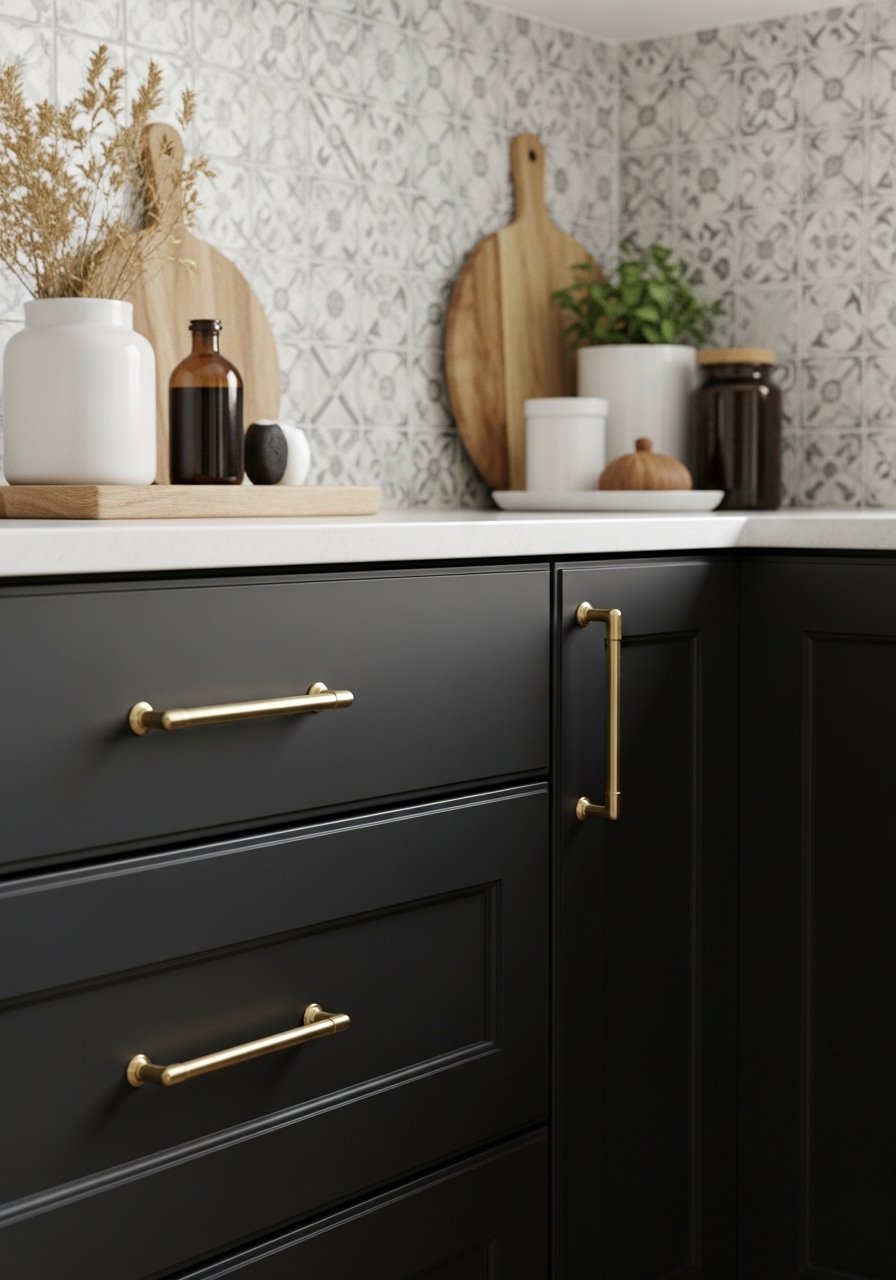
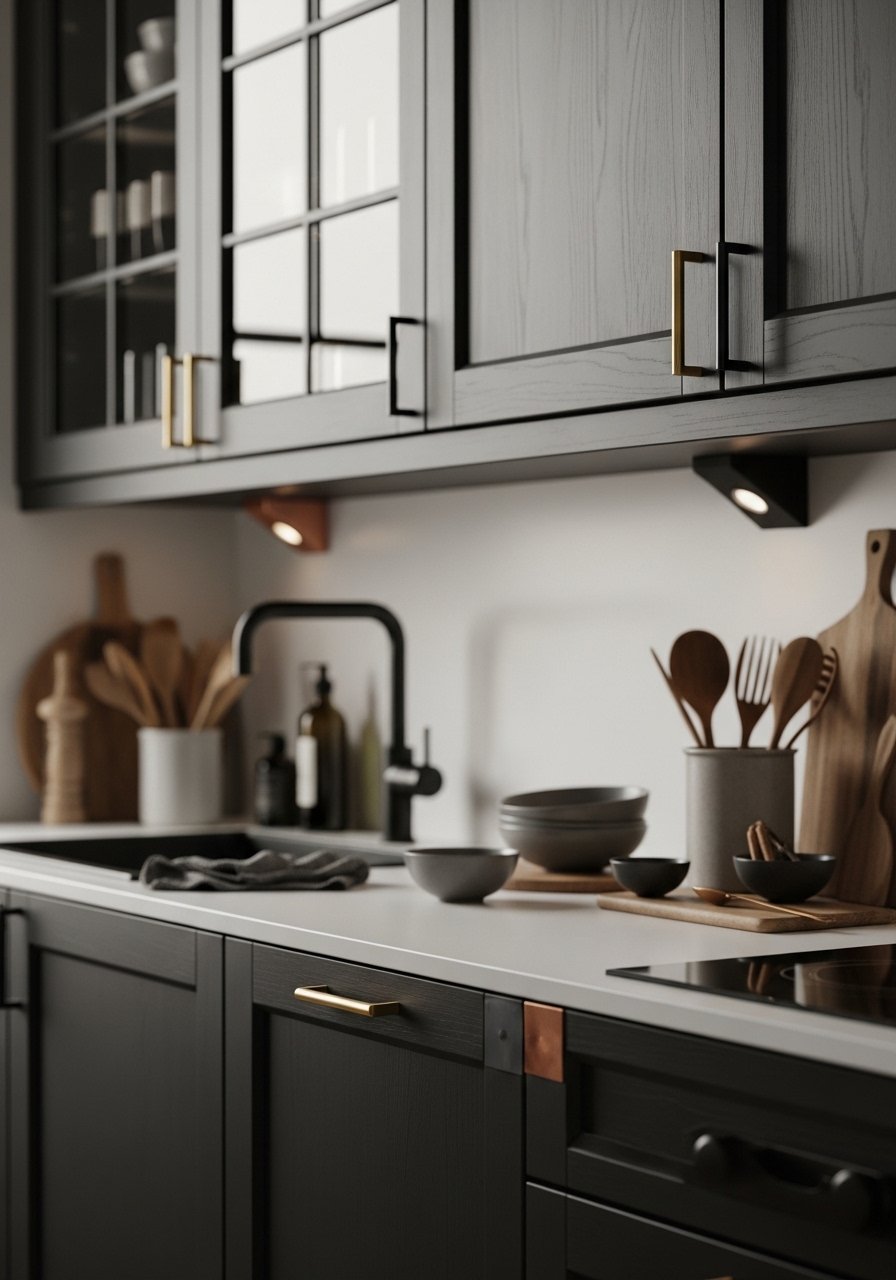
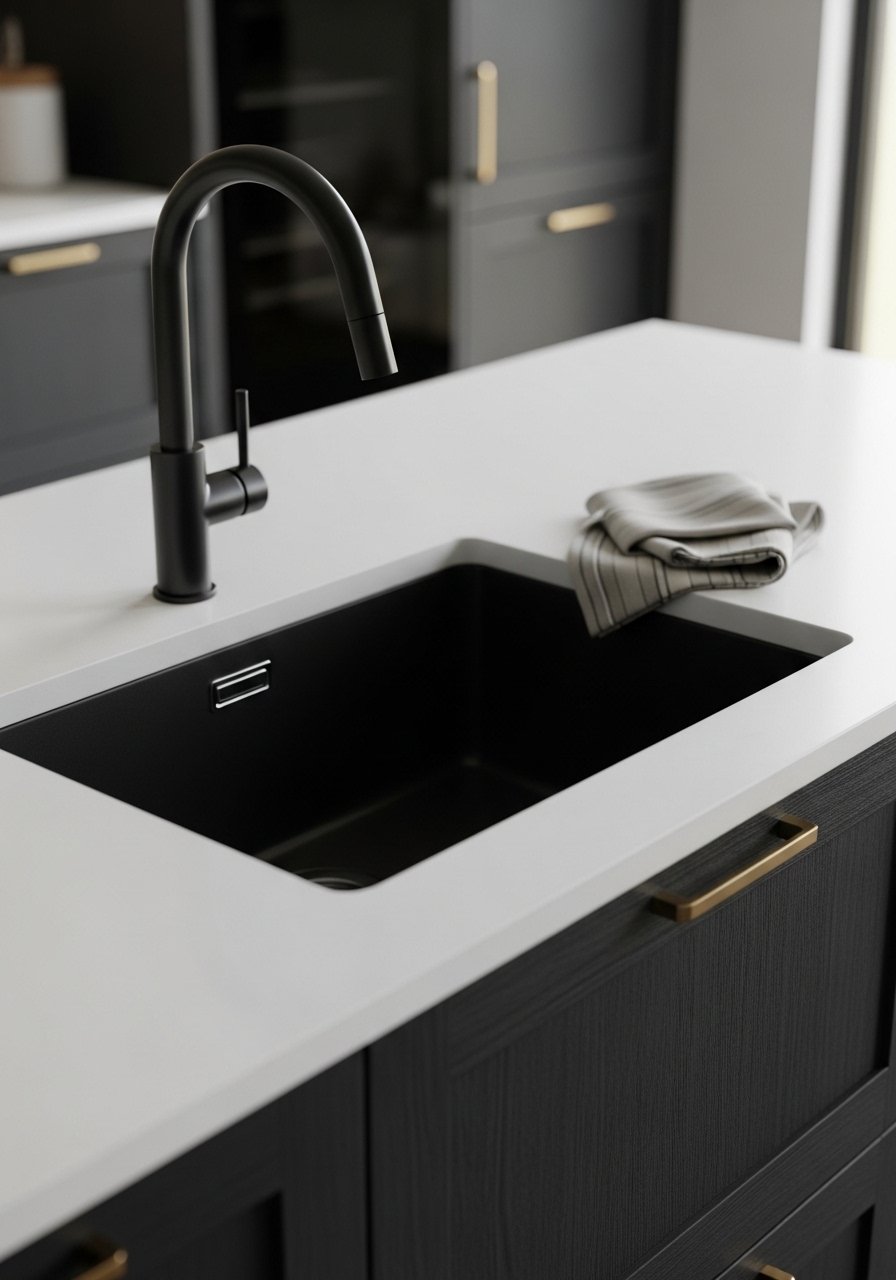
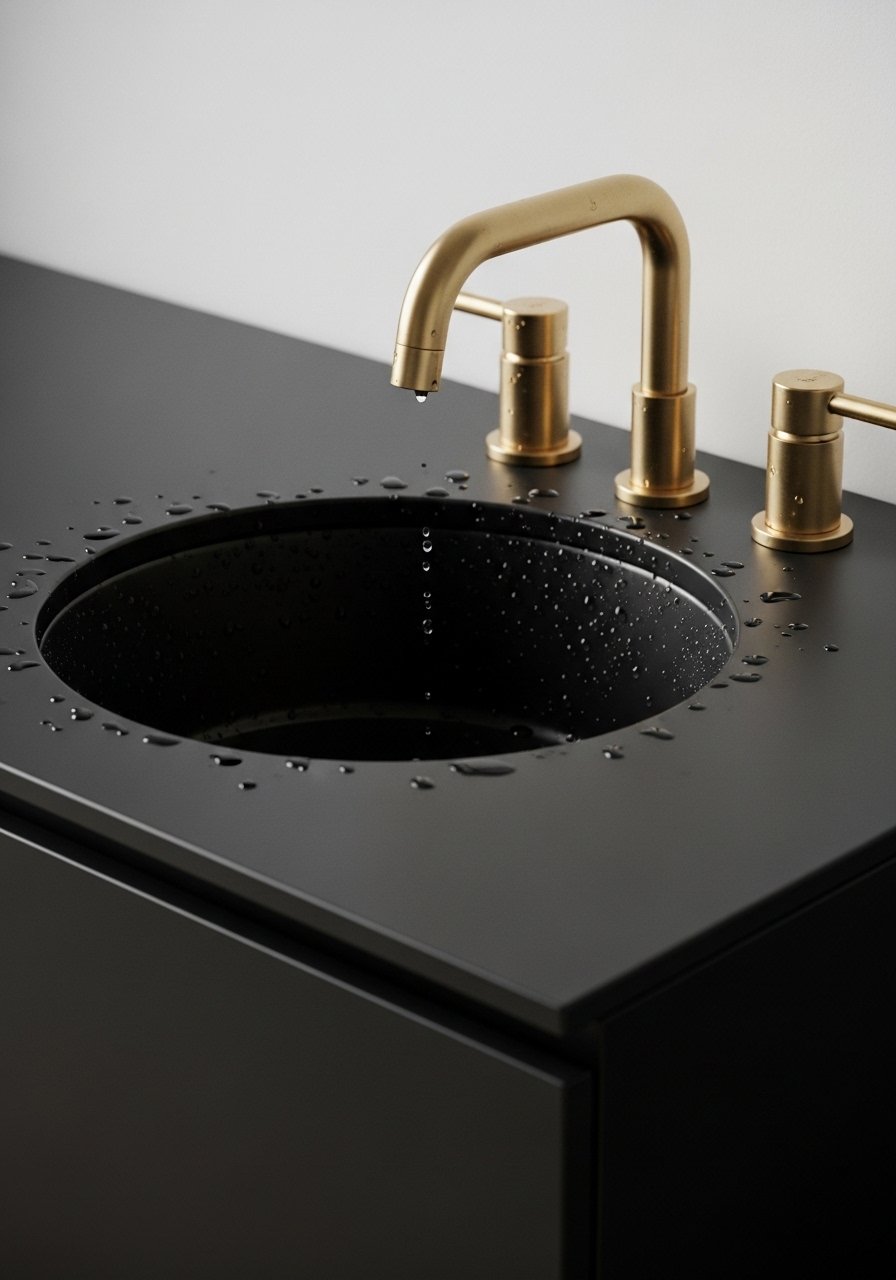
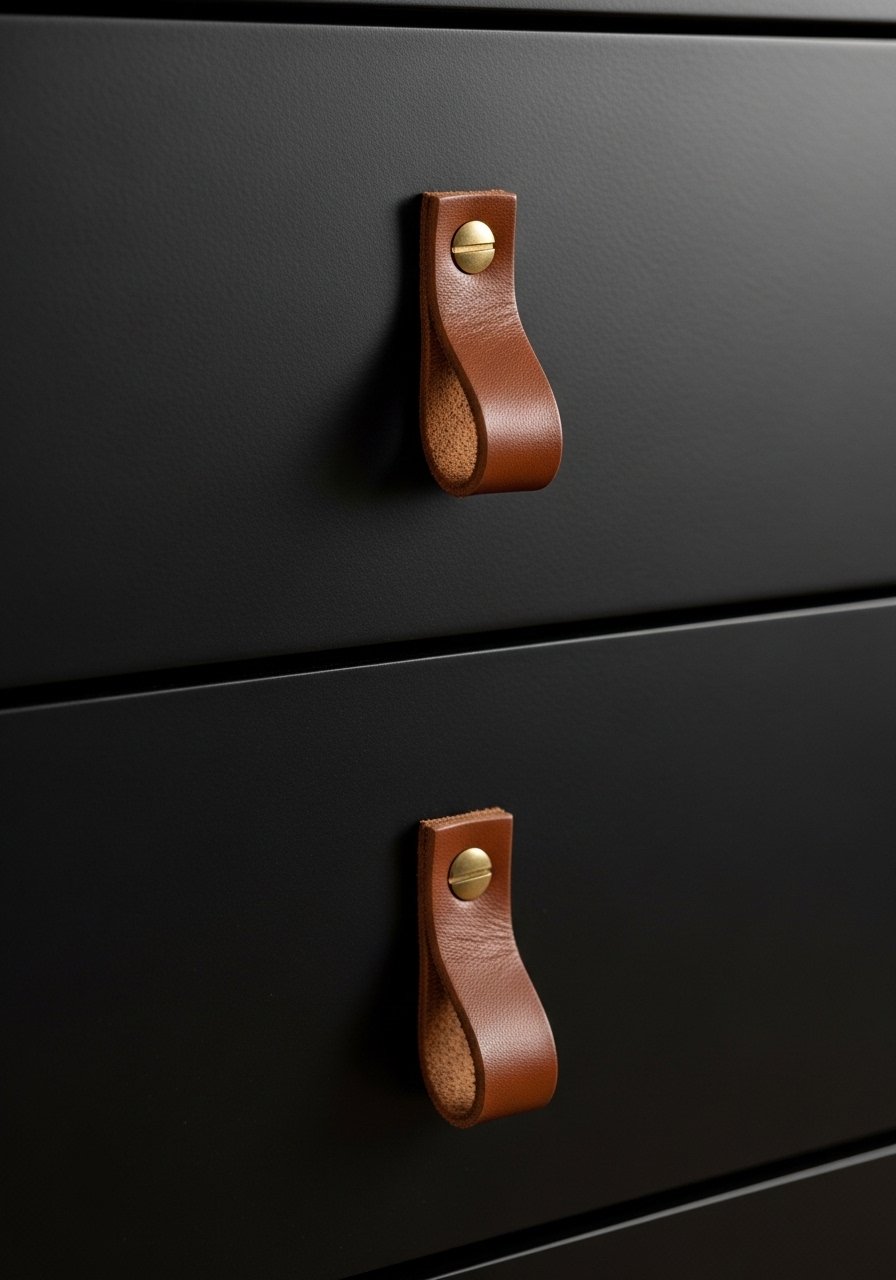
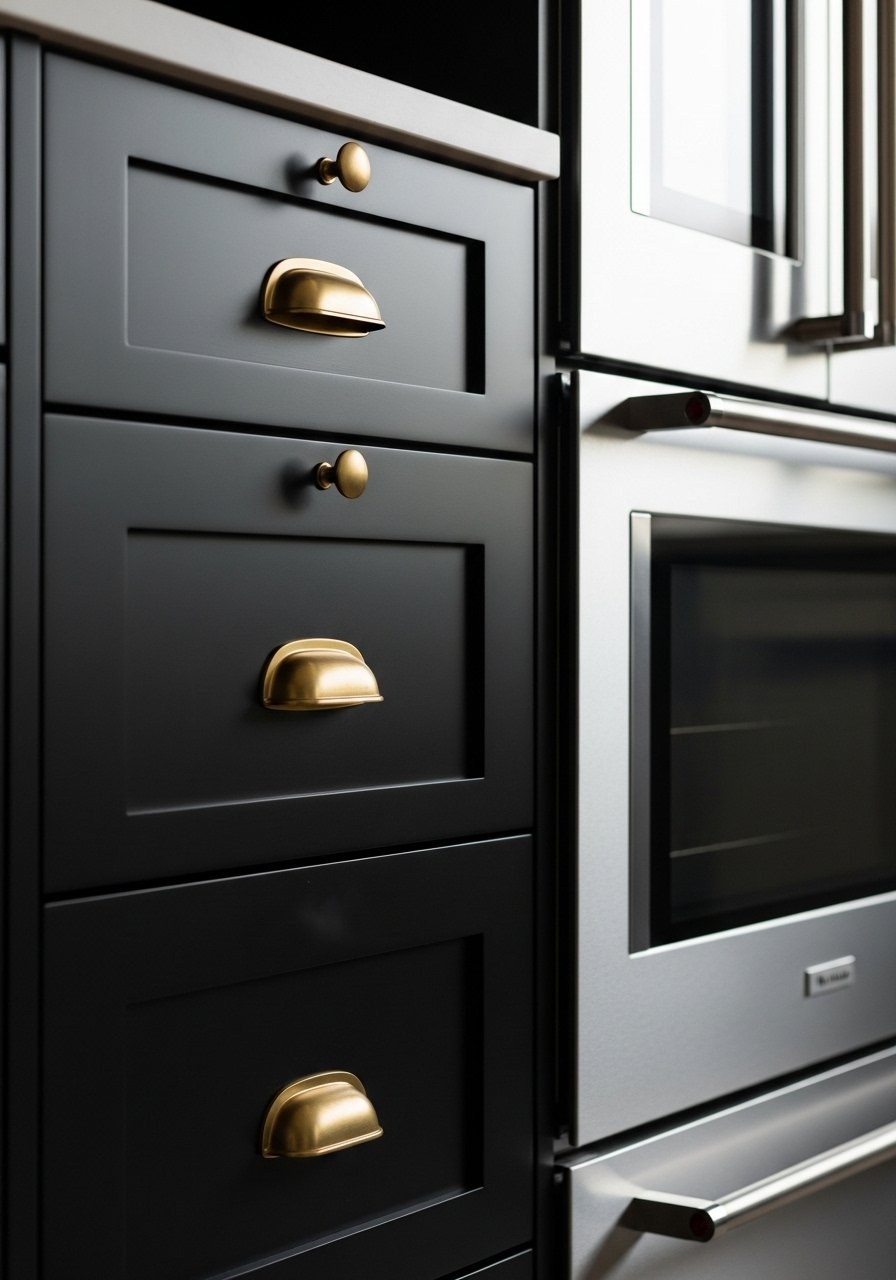
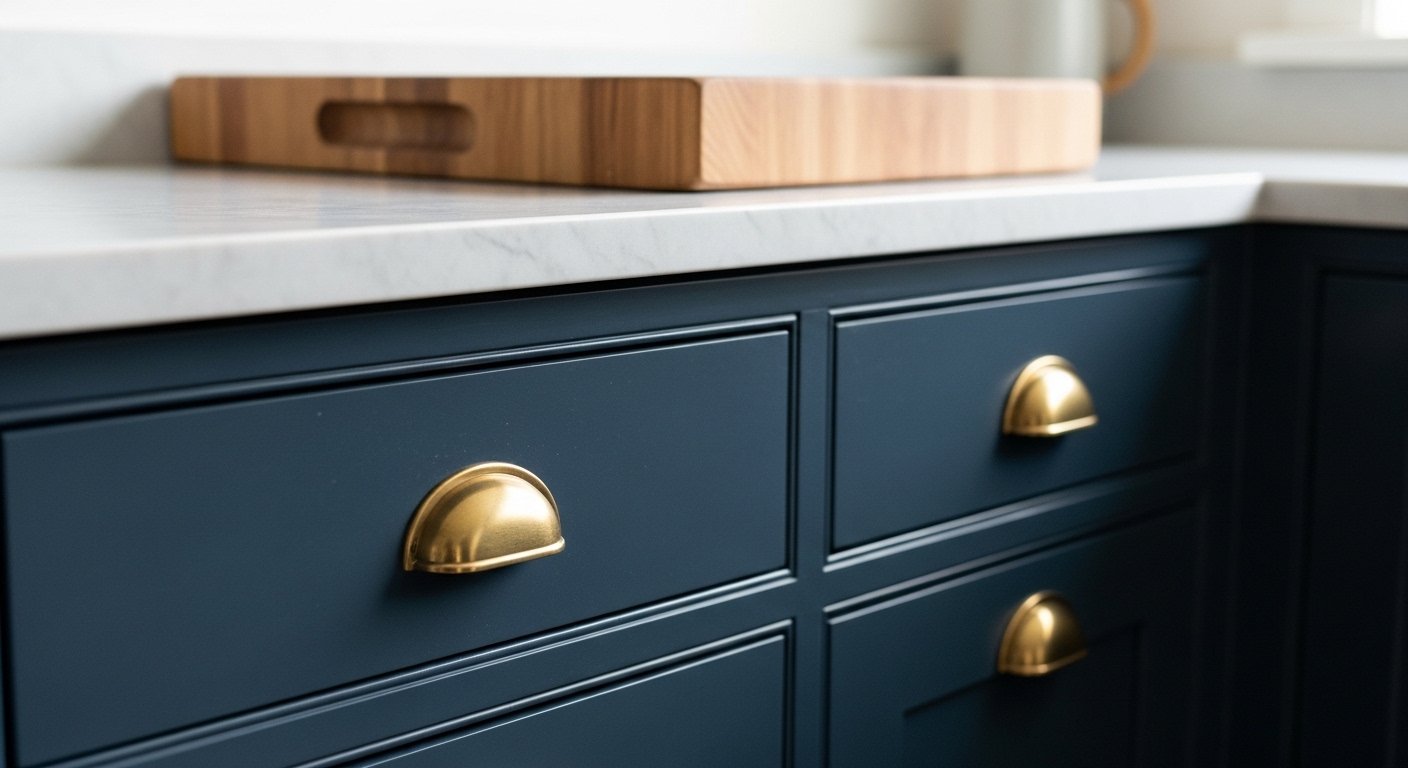
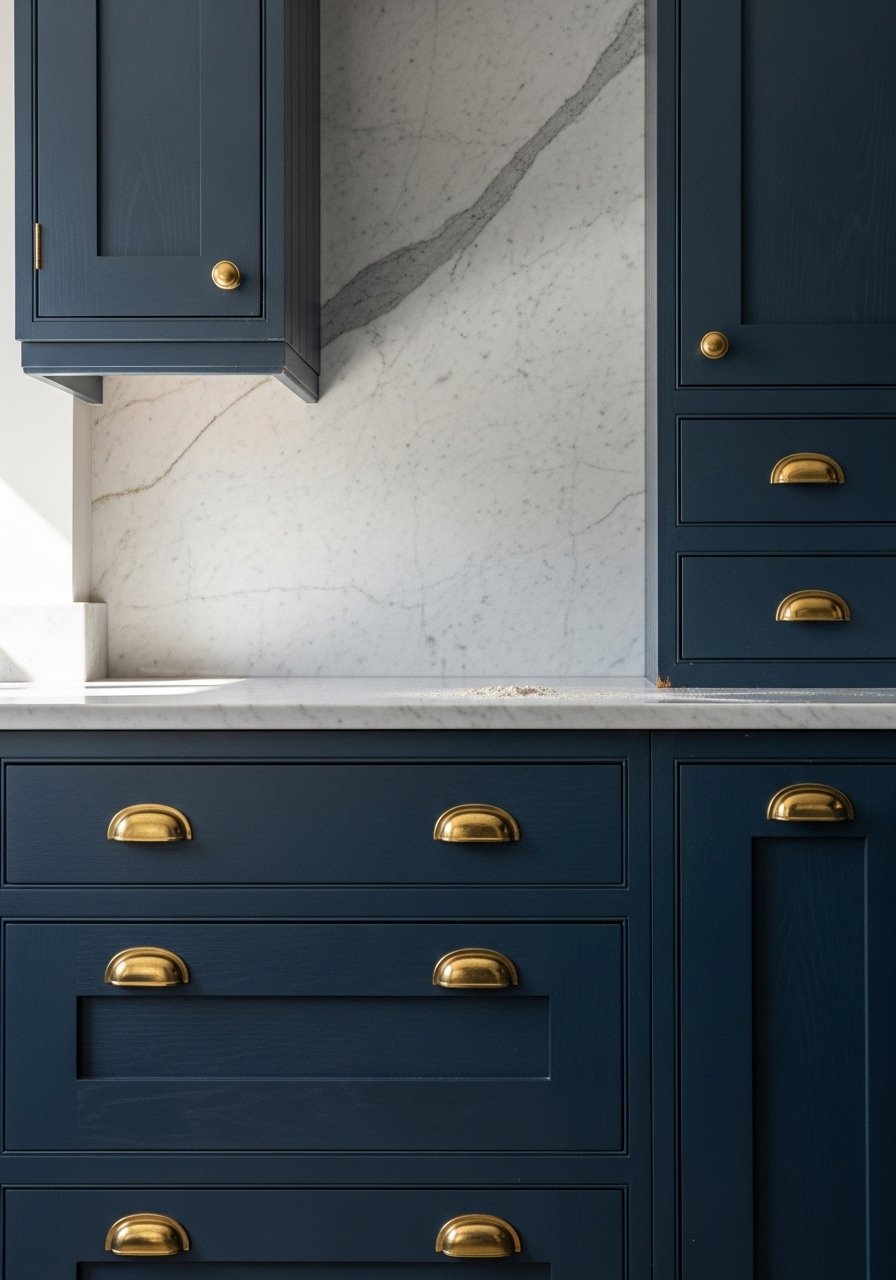
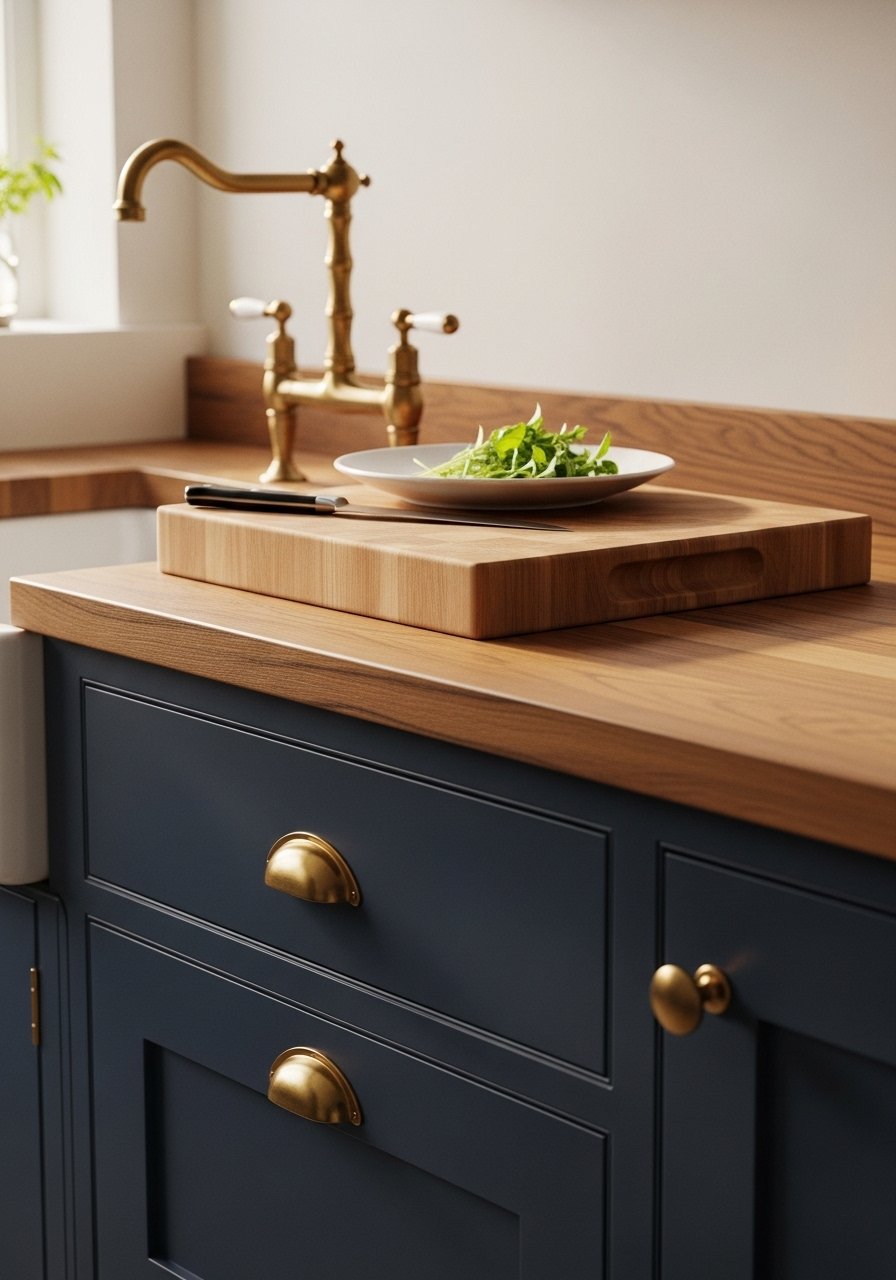
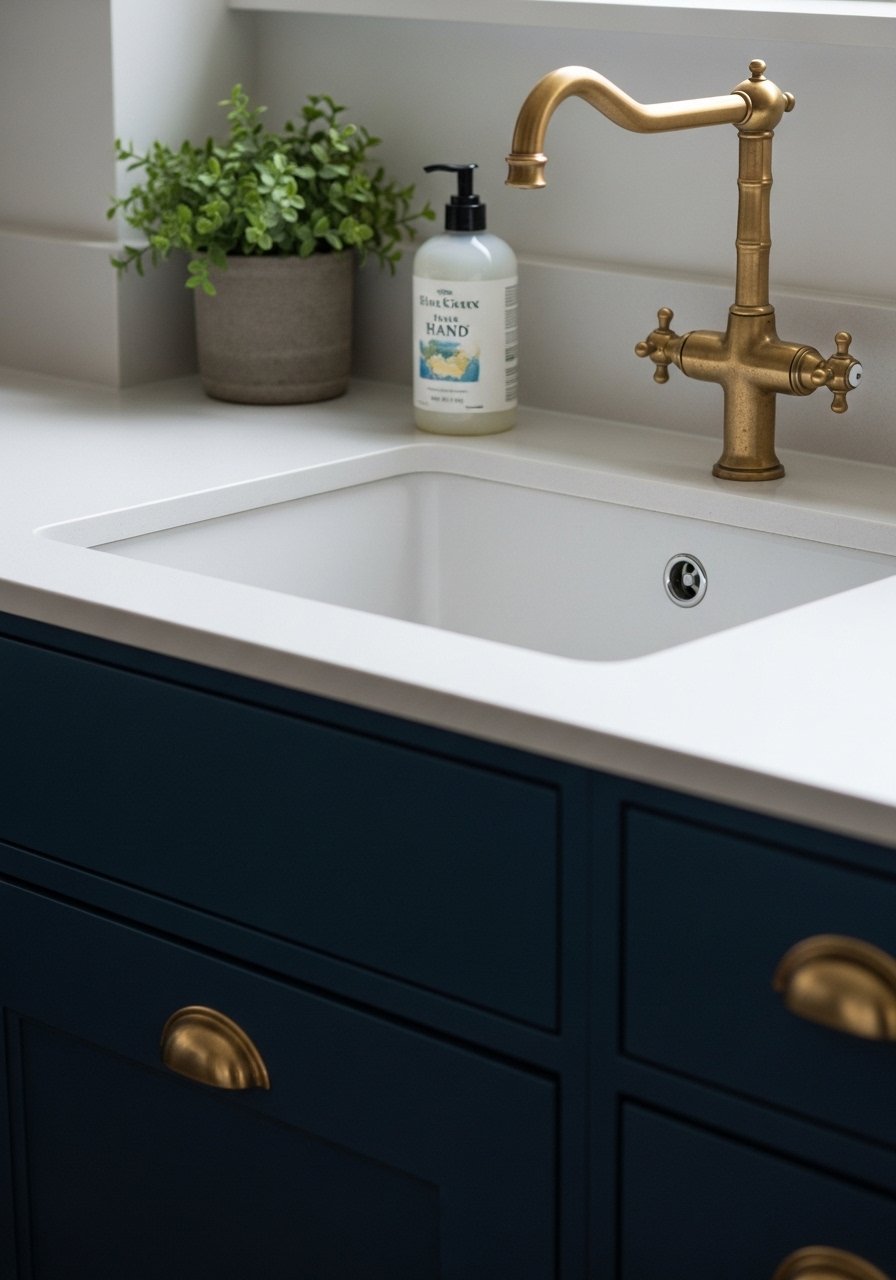
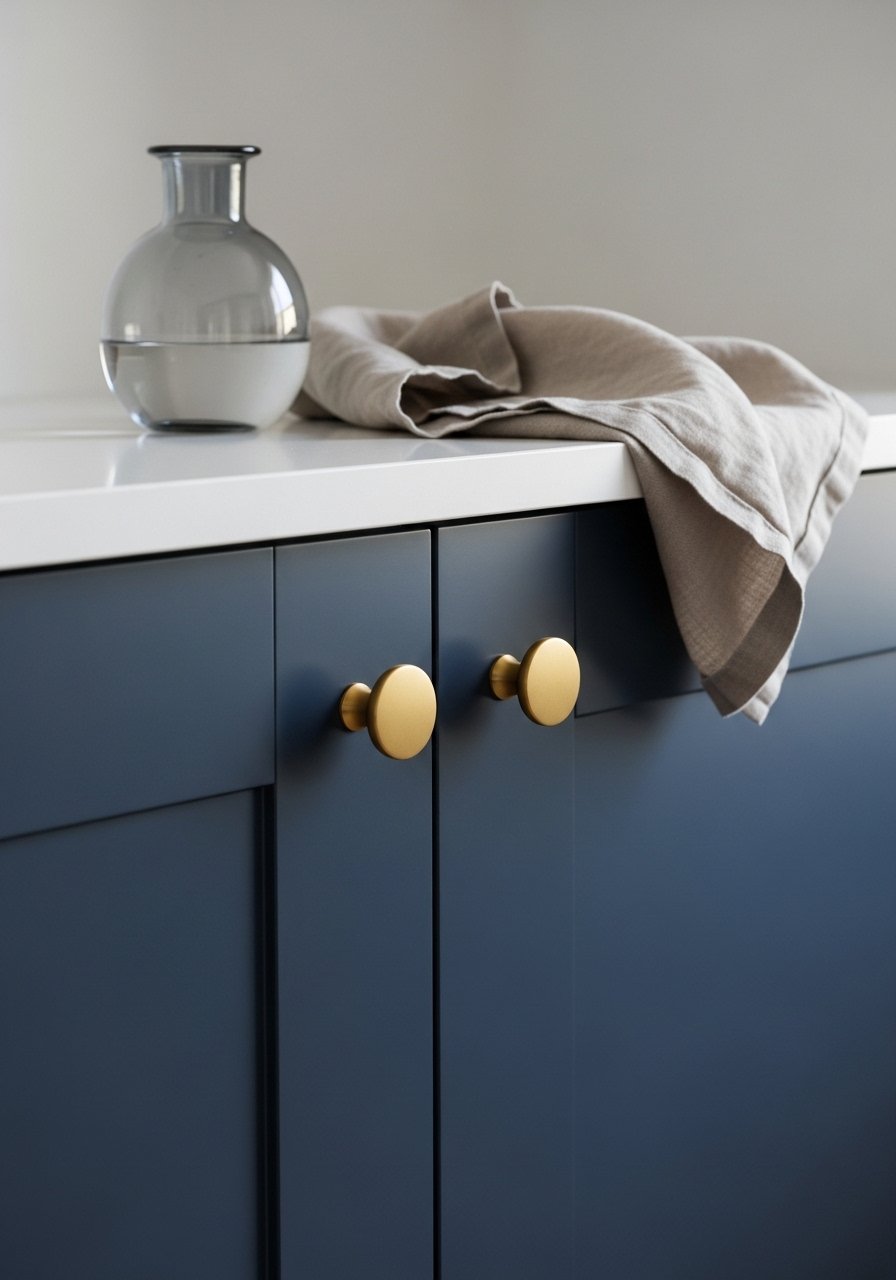
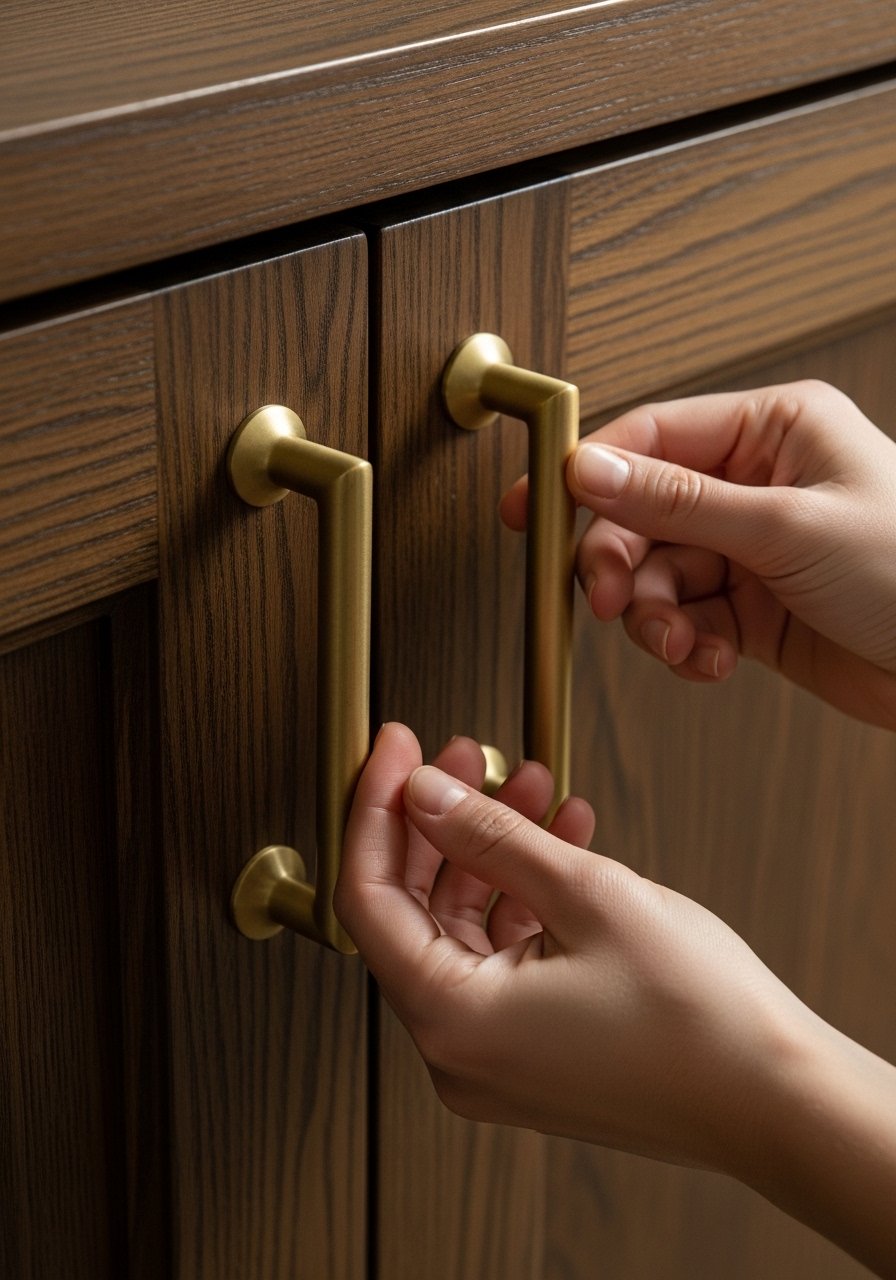
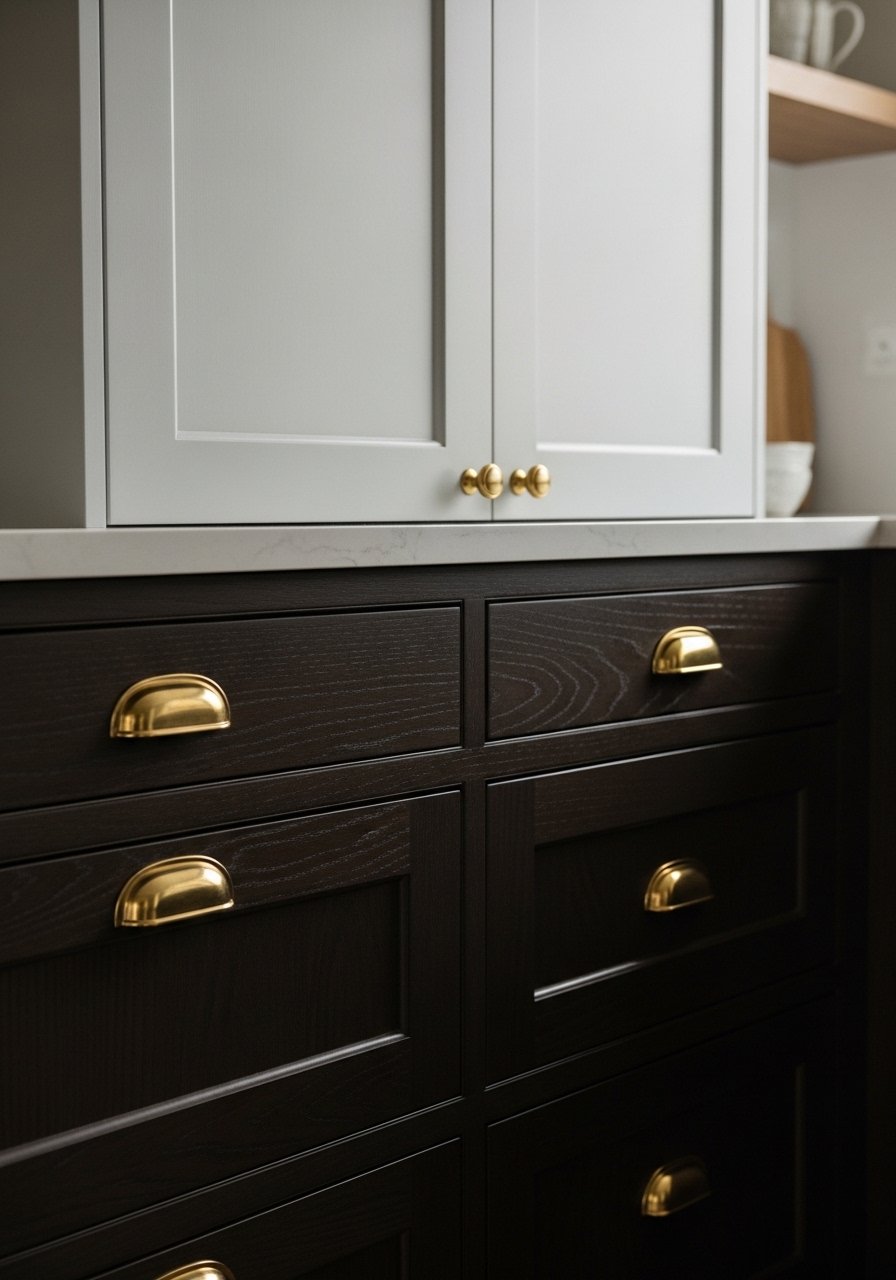
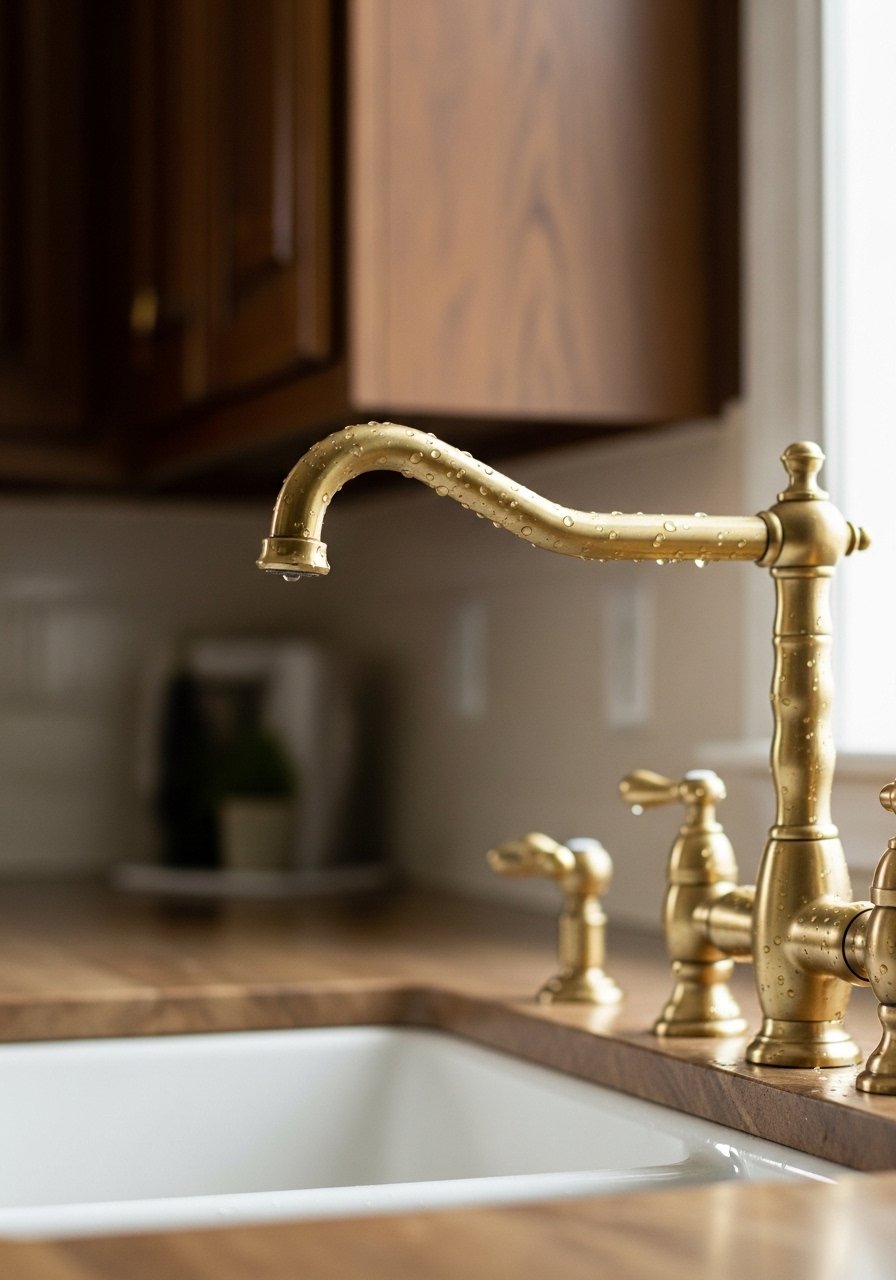
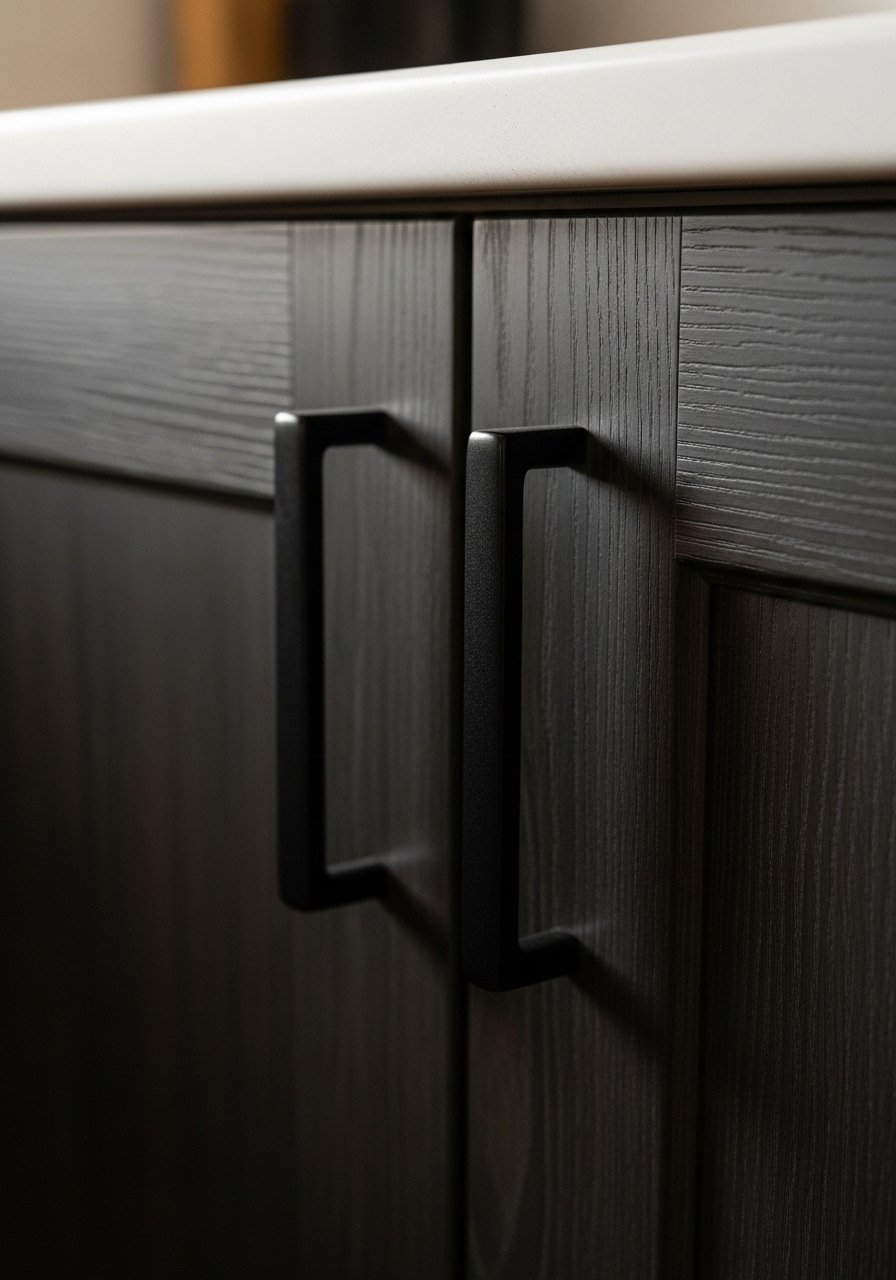
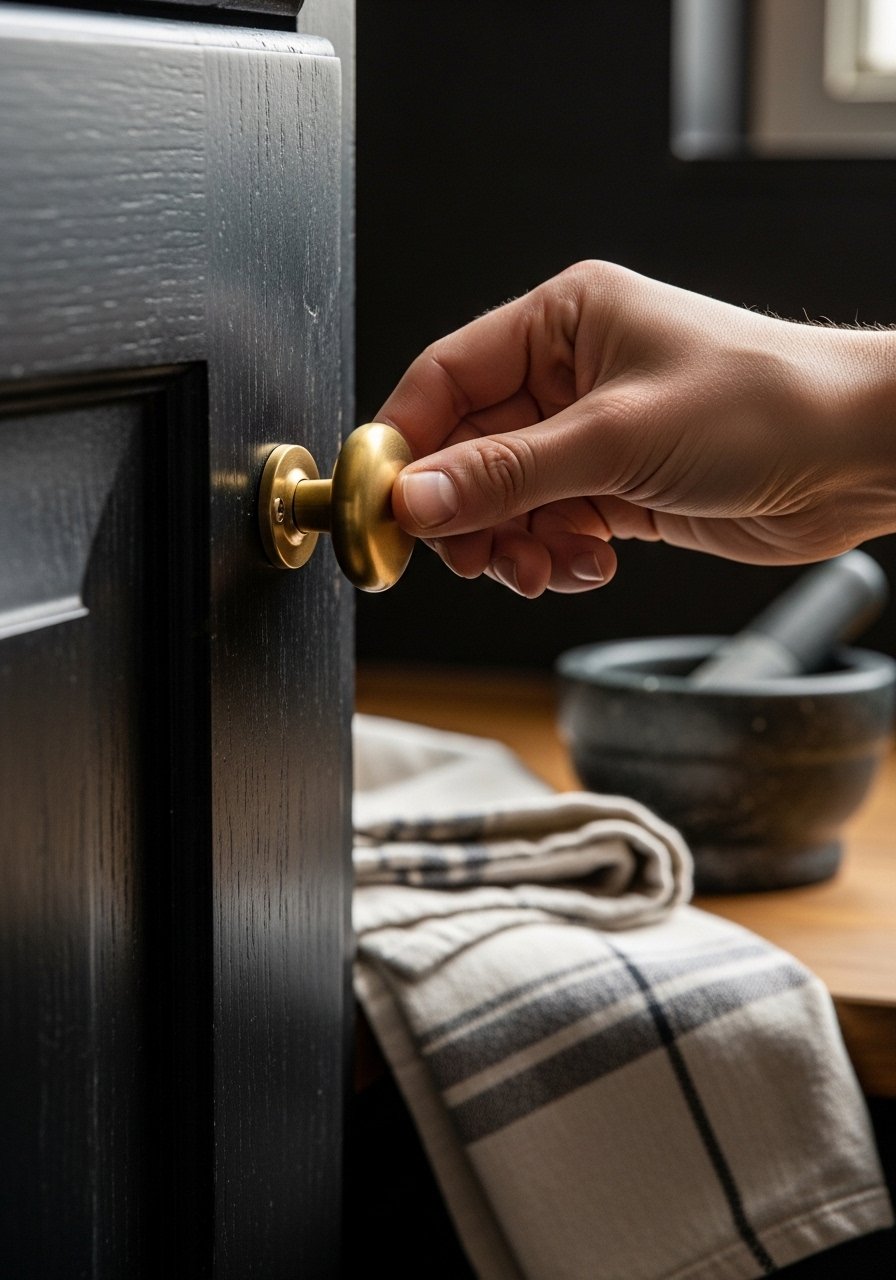
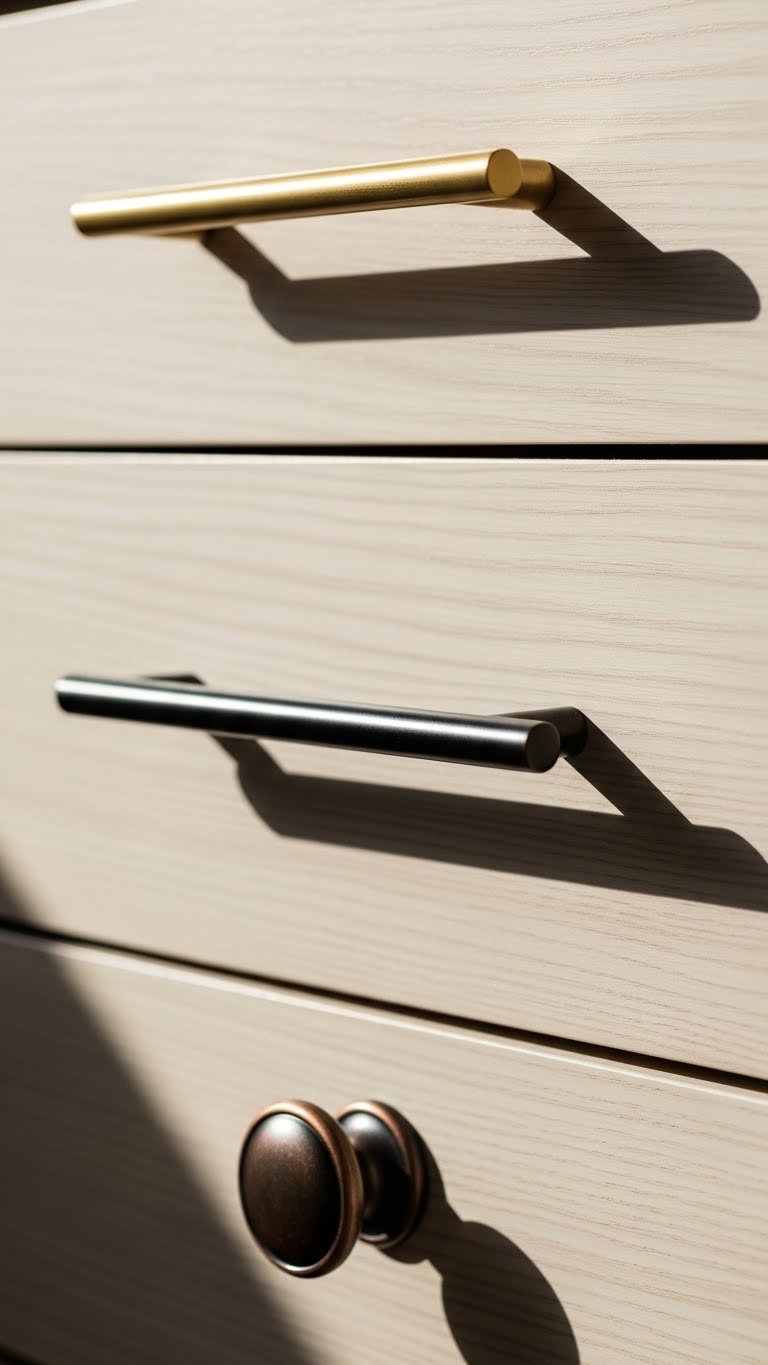
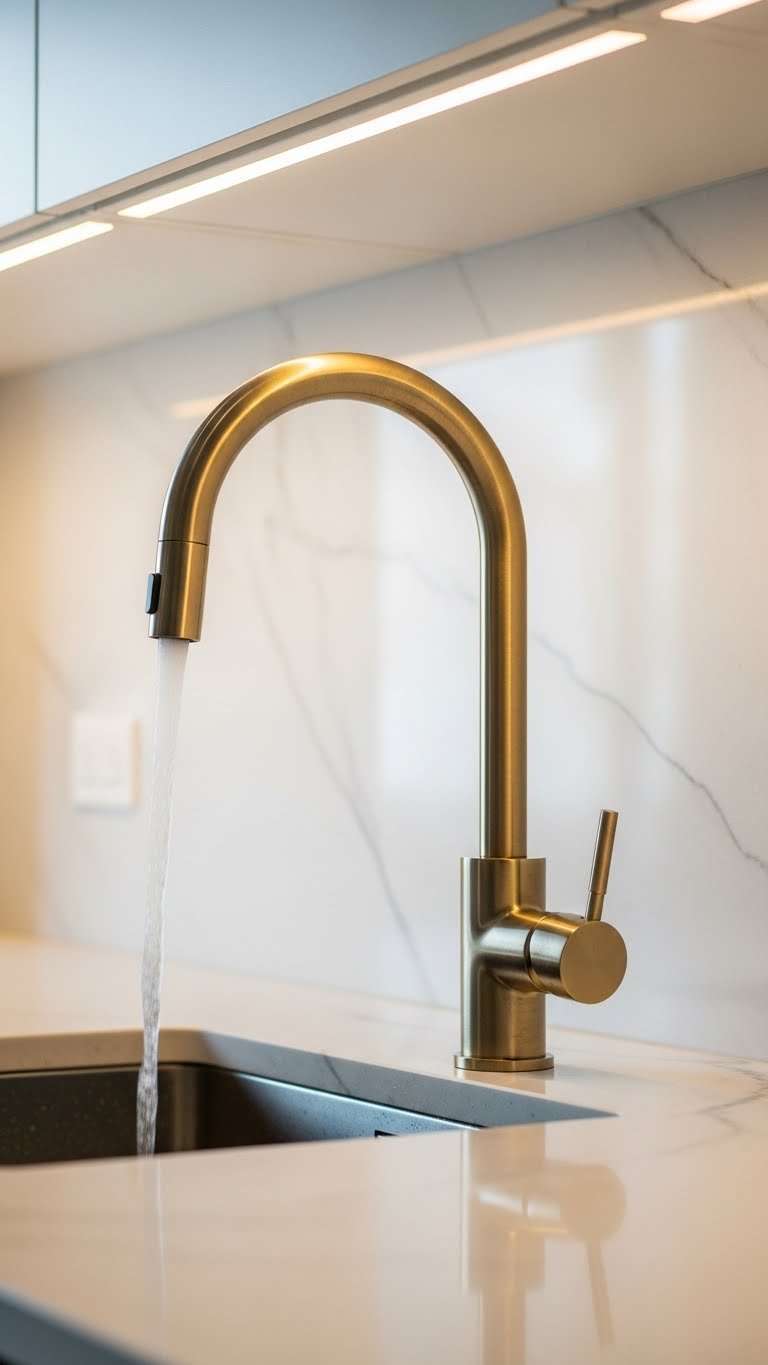
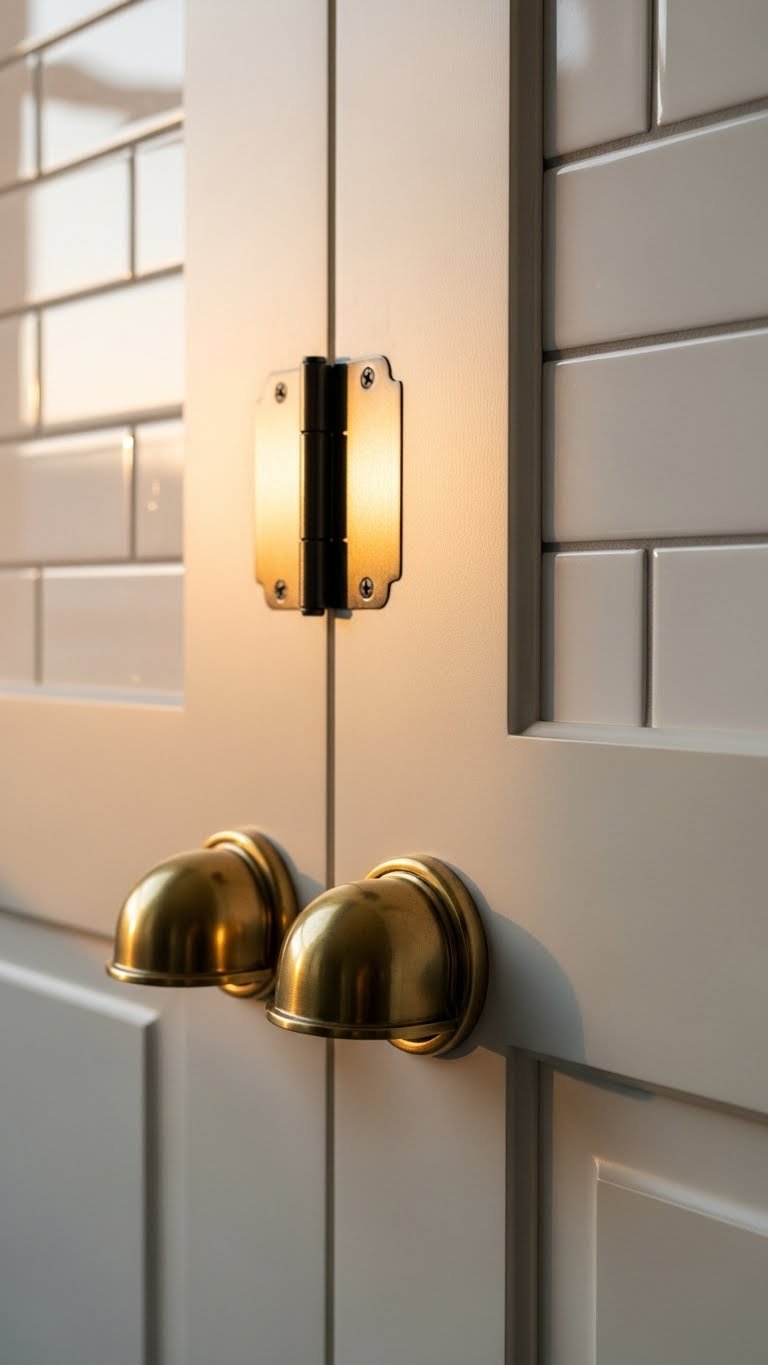
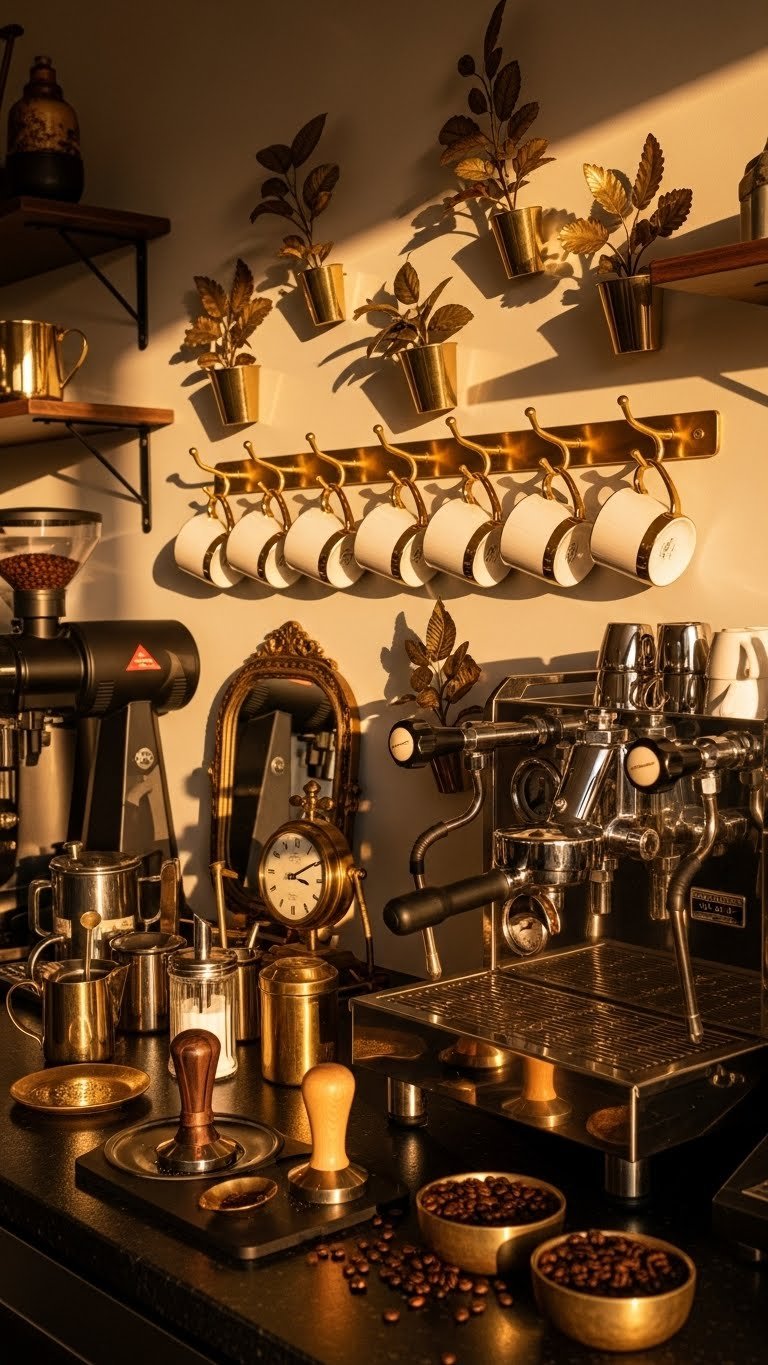
    5. Swap Out Hardware for Brass or Gold Accents

    Hardware is like jewelry for your kitchen—it costs almost nothing but completely changes the vibe. Swapping from builder-grade silver to warm brass or gold is one of 2025’s defining moves and works beautifully in small spaces where every detail shows.

    Replace cabinet handles and knobs with brass or gold options ($50–$150 for a full kitchen) from Amazon, Wayfair, or local hardware stores. It takes 30 minutes to an hour with a screwdriver. Mix metals if you’re feeling it—brass on lower cabinets and matte black on uppers creates visual interest without chaos. Renter option: magnetic covers hide existing hardware without damage.

    Before investing, test one handle on your most visible cabinet to make sure the finish works with your light.

    This small detail immediately elevates your kitchen from cookie-cutter to considered, and it costs way less than new cabinets.

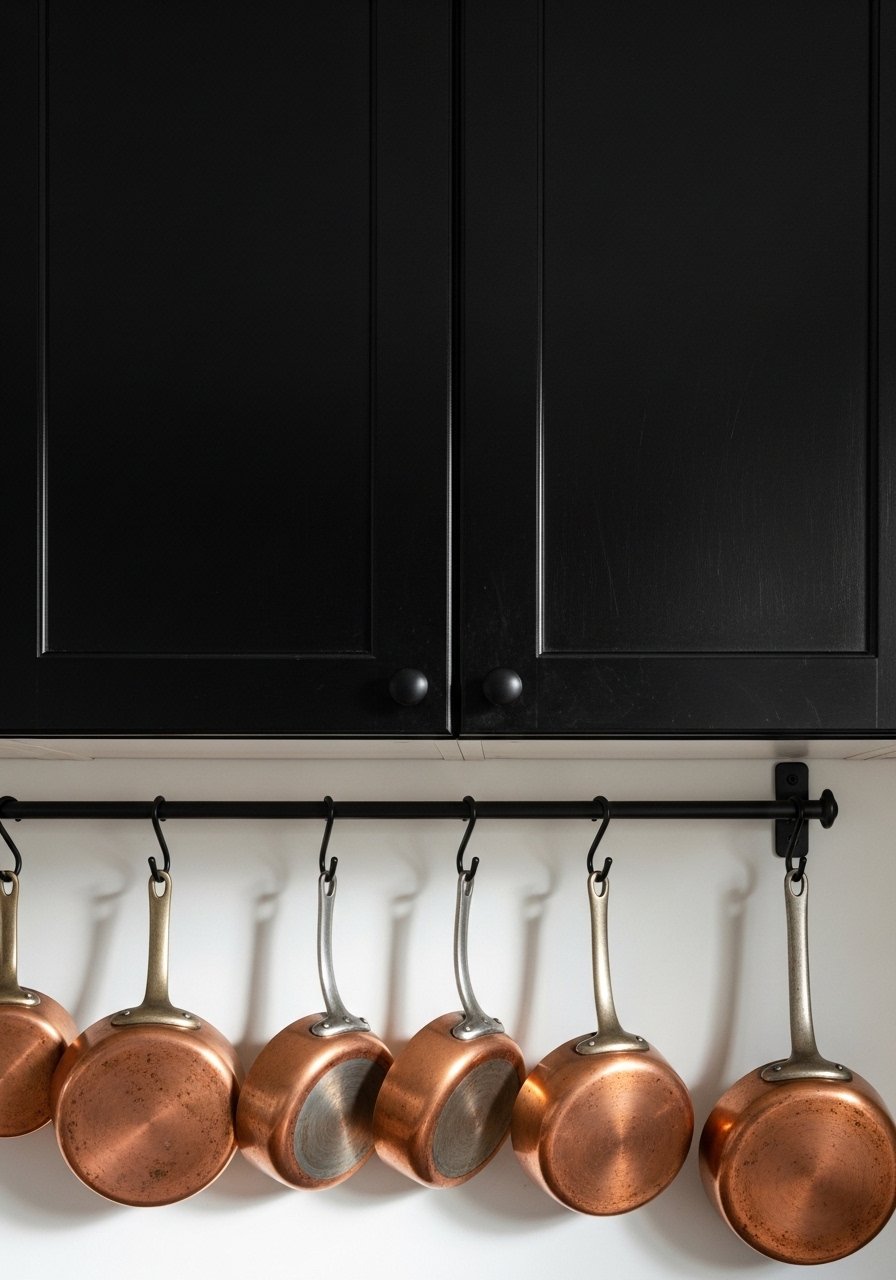
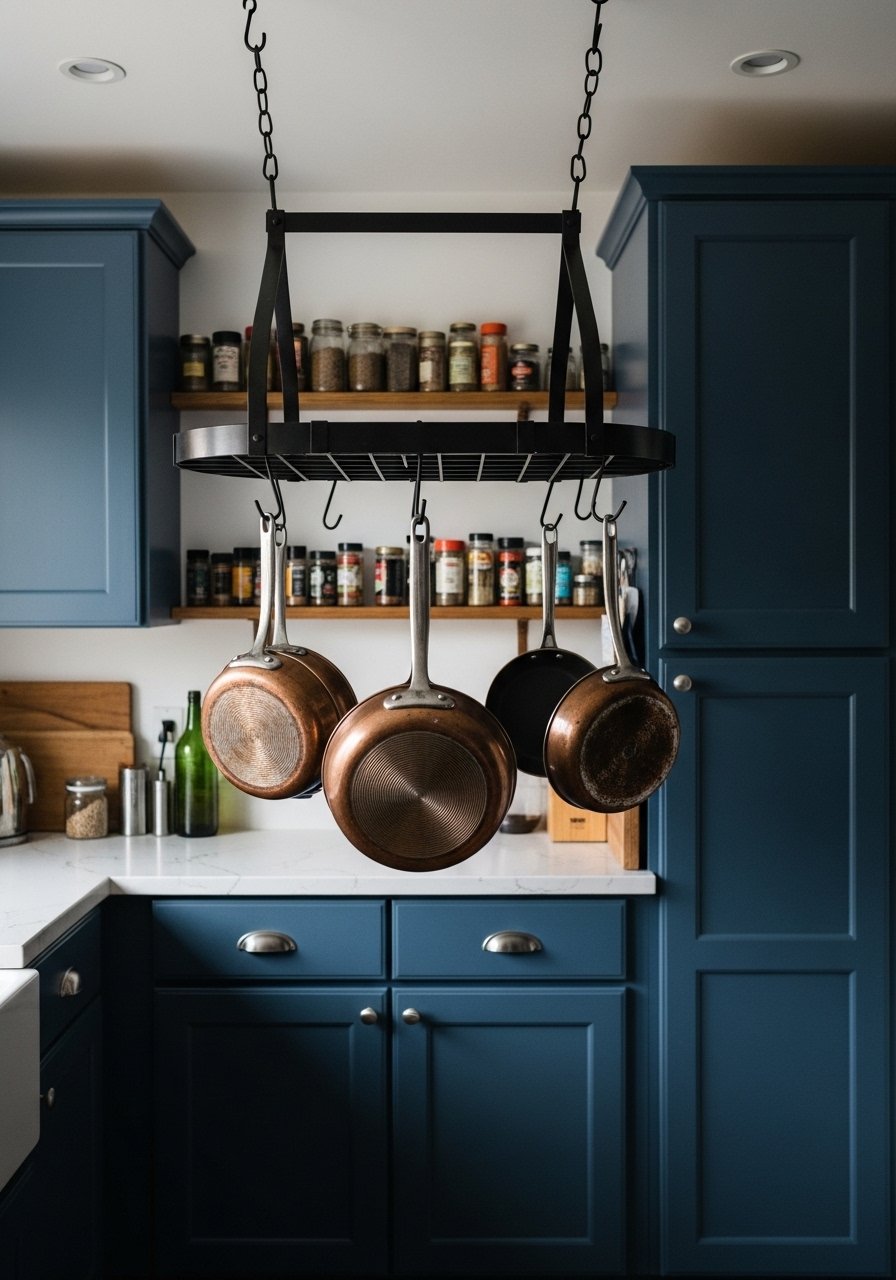
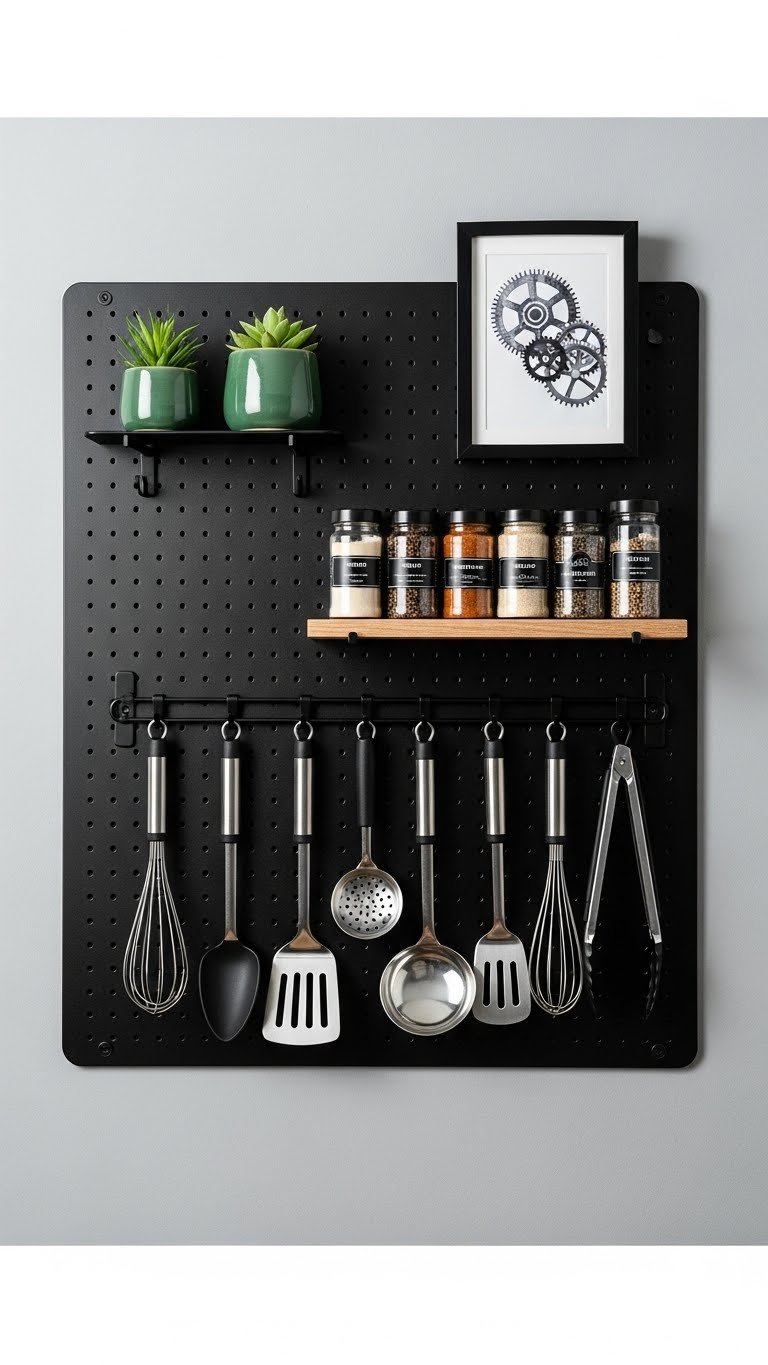
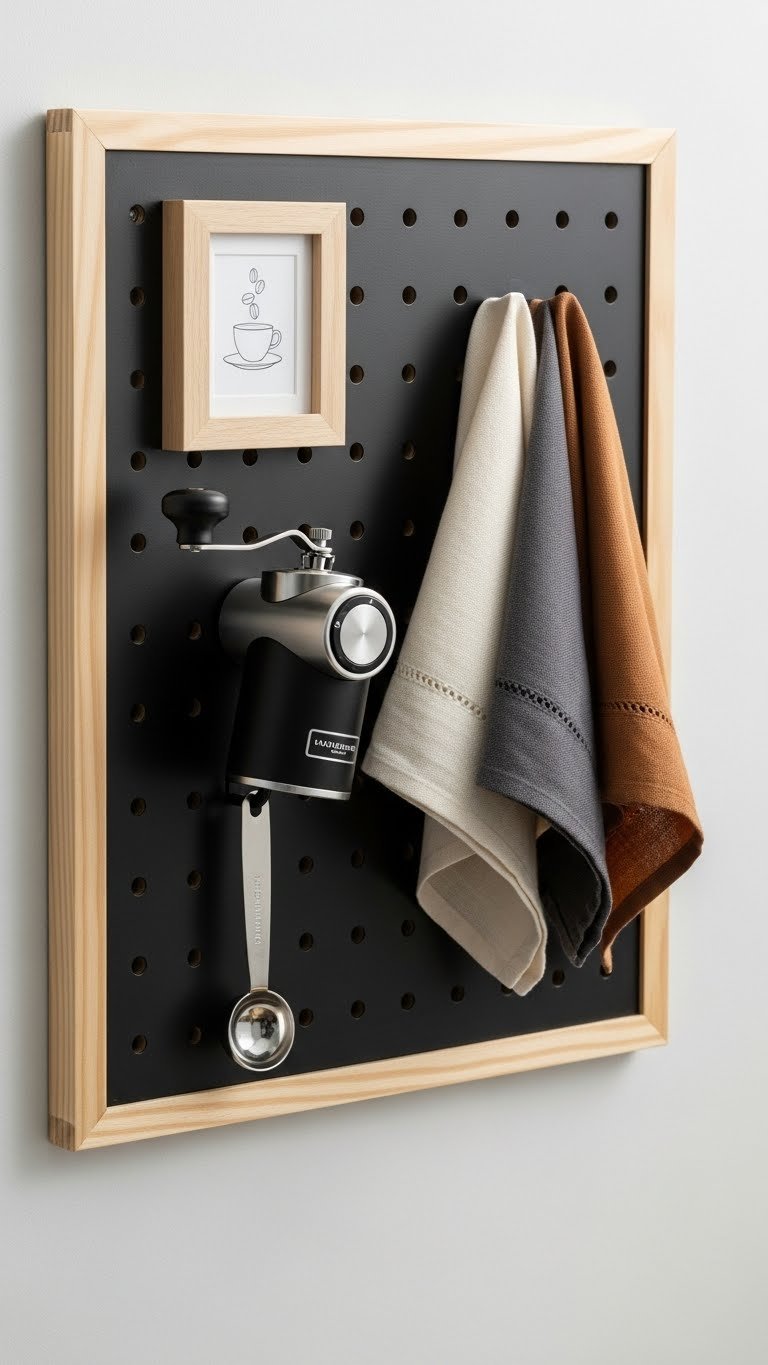
    6. Use Vertical Space with Pegboard

    Pegboard transforms blank wall space into functional storage that’s genuinely practical and looks intentional. In small kitchens, walls are real estate—you need to use them.

    Install a 3-foot pegboard section ($30–$60 at hardware stores) on an empty wall with hooks, small shelves, and clips ($20–$40 for accessories). Hang your most-used utensils, cooking tools, even small containers. Paint the pegboard to match your kitchen style—black, white, or sage to echo your cabinets. Takes about an hour to install if you’re confident with a drill; call a handyperson for $50–$100 if not.

    The beauty: you see every tool at a glance, and you’re using otherwise wasted wall space.

    Your kitchen becomes more functional while developing a collected, design-forward look that feels bigger than it is.

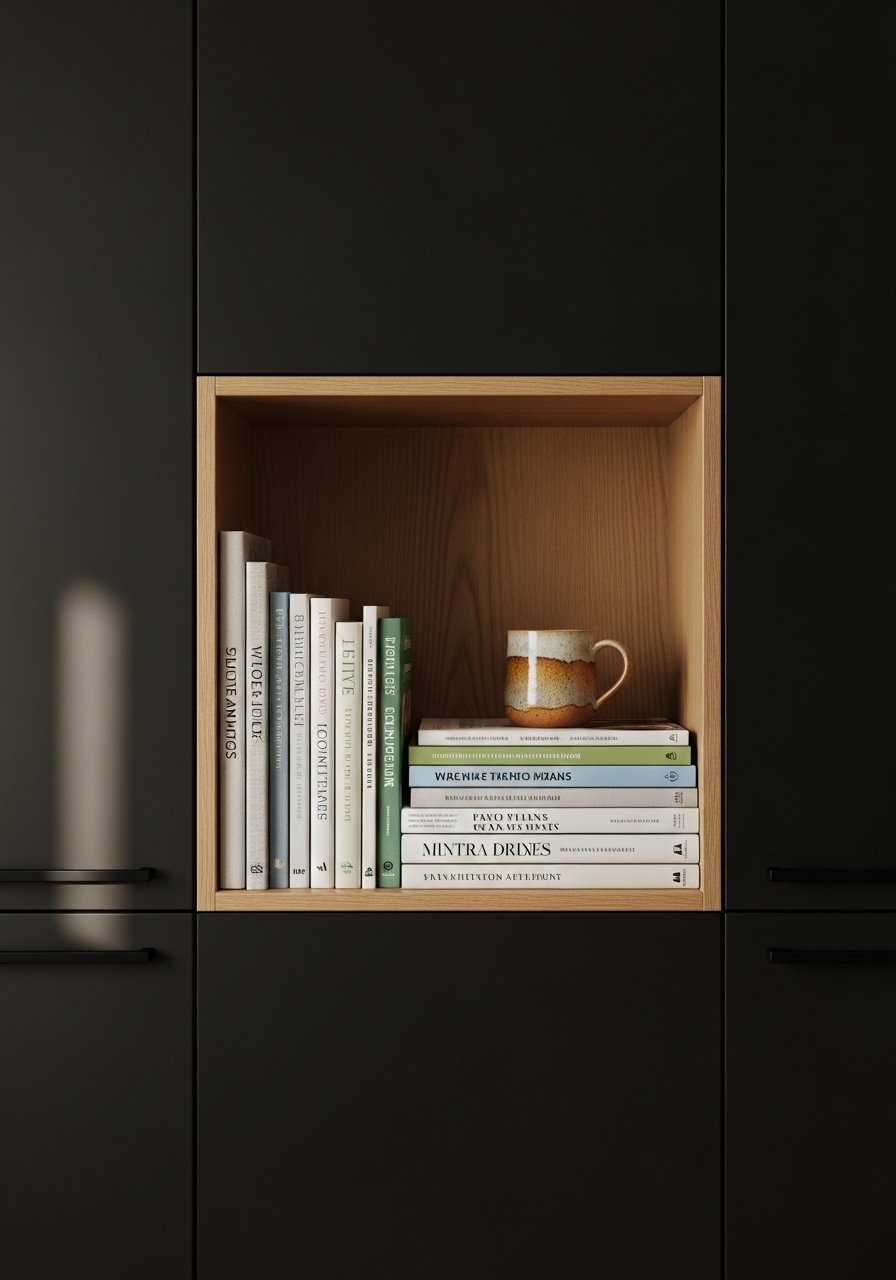
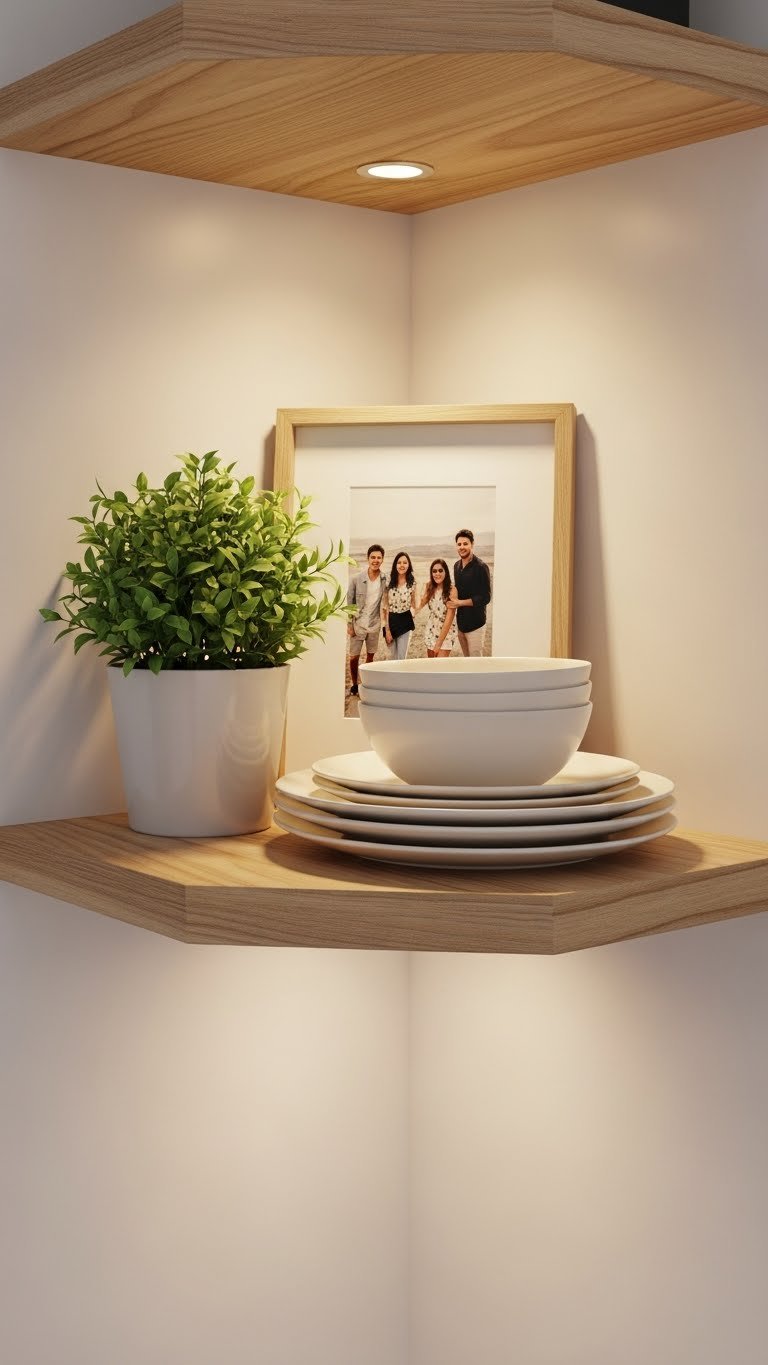
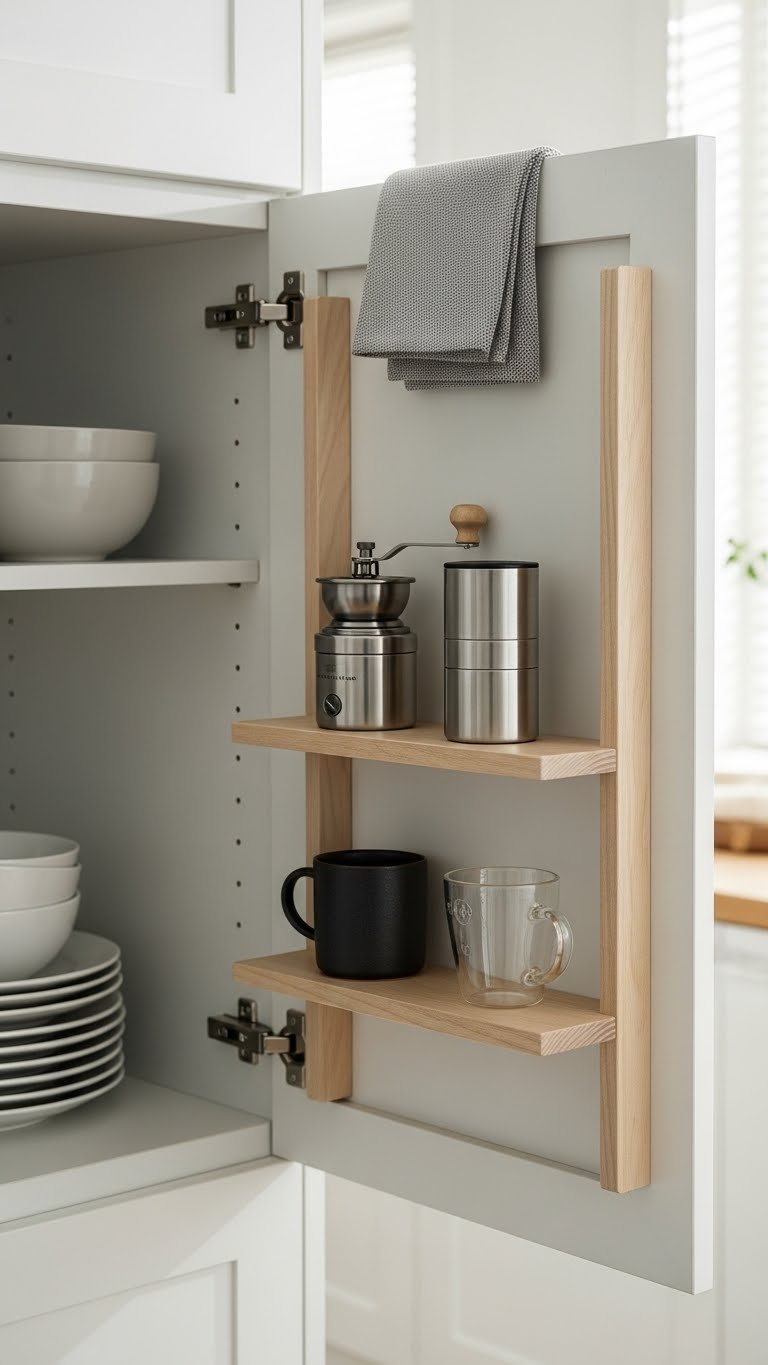
    7. Install Floating Corner Shelves

    Dead corner space in small kitchens is a crime. Floating corner shelves maximize unused real estate without taking up floor or counter space, making your layout feel strategically designed.

    Add a corner shelf or two ($30–$80 each) using wall studs for mounting. These work beautifully above a corner counter or sink, or tucked high for visual interest. Load them with cookbooks standing upright, a small plant, or your favorite dishes for daily use. Wood shelves feel warmer; white or black creates a modern edge depending on your vibe.

    Pro tip: Mount shelves at different heights for a more collected, less “matchy” look.

    You’ve just reclaimed real estate and created a focal point that makes the whole kitchen feel bigger and more intentional.

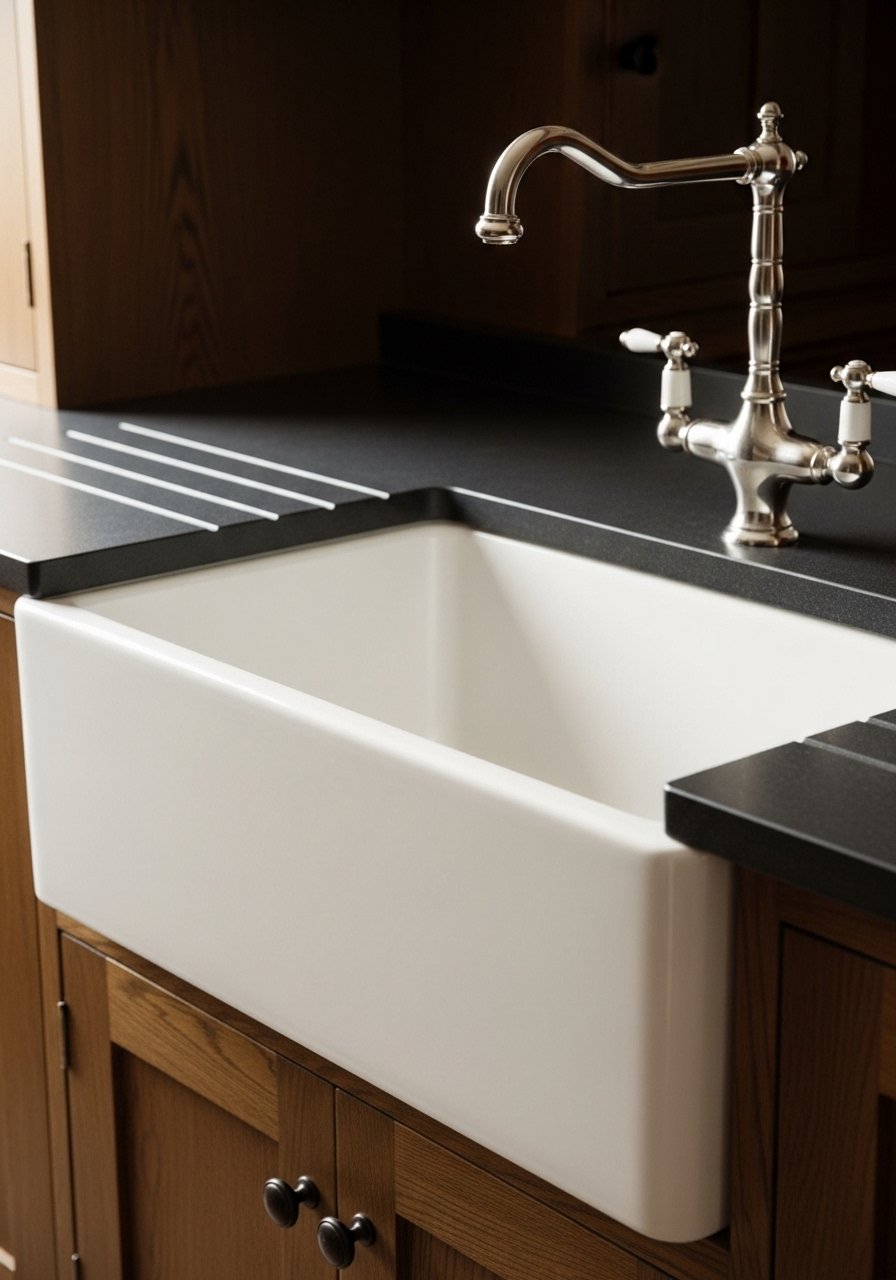
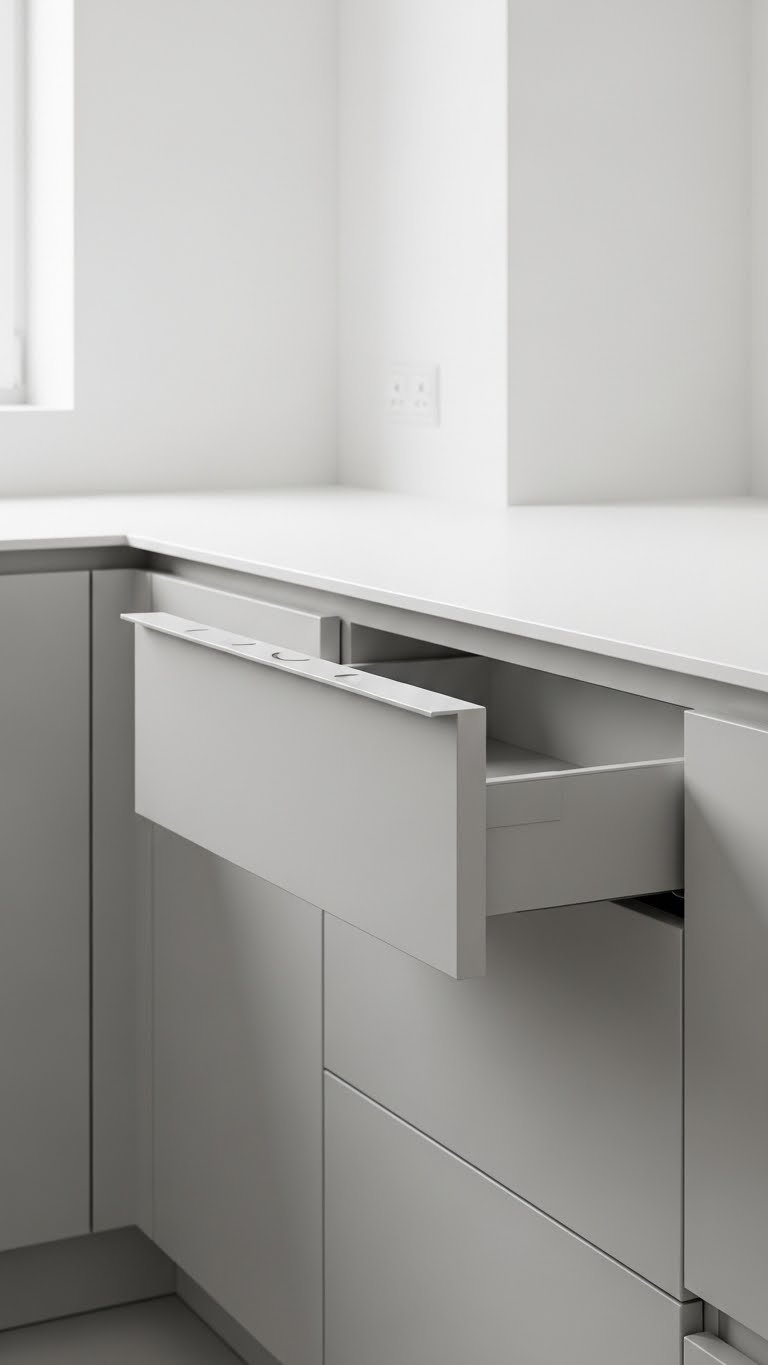
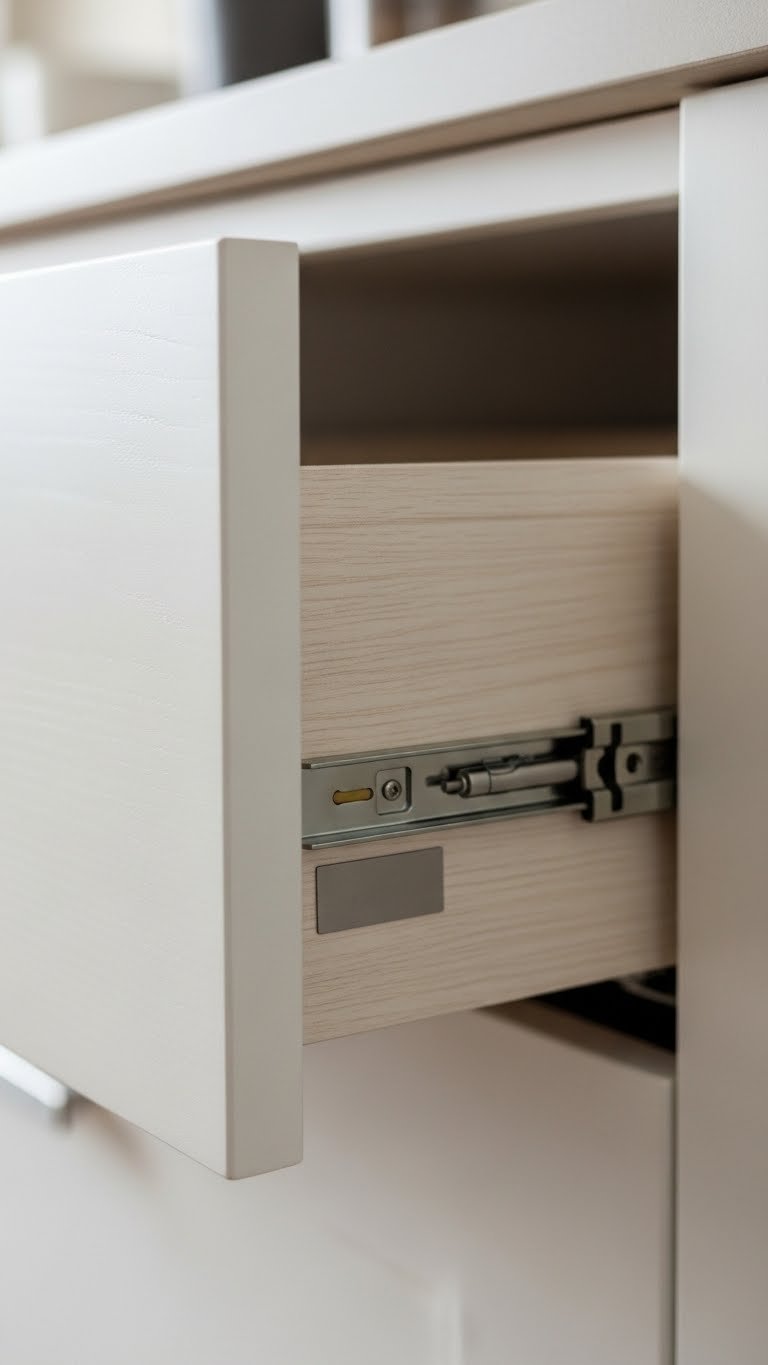
    8. Maximize Under-Sink Storage with Sliding Organizers

    The space under your sink is chaos waiting to happen—pipes, cleaning supplies, and forgotten items pile up fast. Sliding organizers make everything accessible and visible, and they work even in the most awkward cabinets.

    Install sliding drawers or tiered organizers ($30–$80) that pull out like your cabinet is a filing cabinet. Use them for cleaning supplies, compost, bulk items, and trash bags. Everything has a spot, nothing gets buried. You’ll actually know what you have, and you’ll use your space three times more efficiently. Renter-friendly option: tiered shelf risers ($15–$30) work without installation.

    Measure your cabinet first—odd shapes are fine; there’s an organizer for everything.

    When your under-sink area is organized, the whole kitchen feels more controlled and functional—plus you’ll stop buying duplicate supplies.

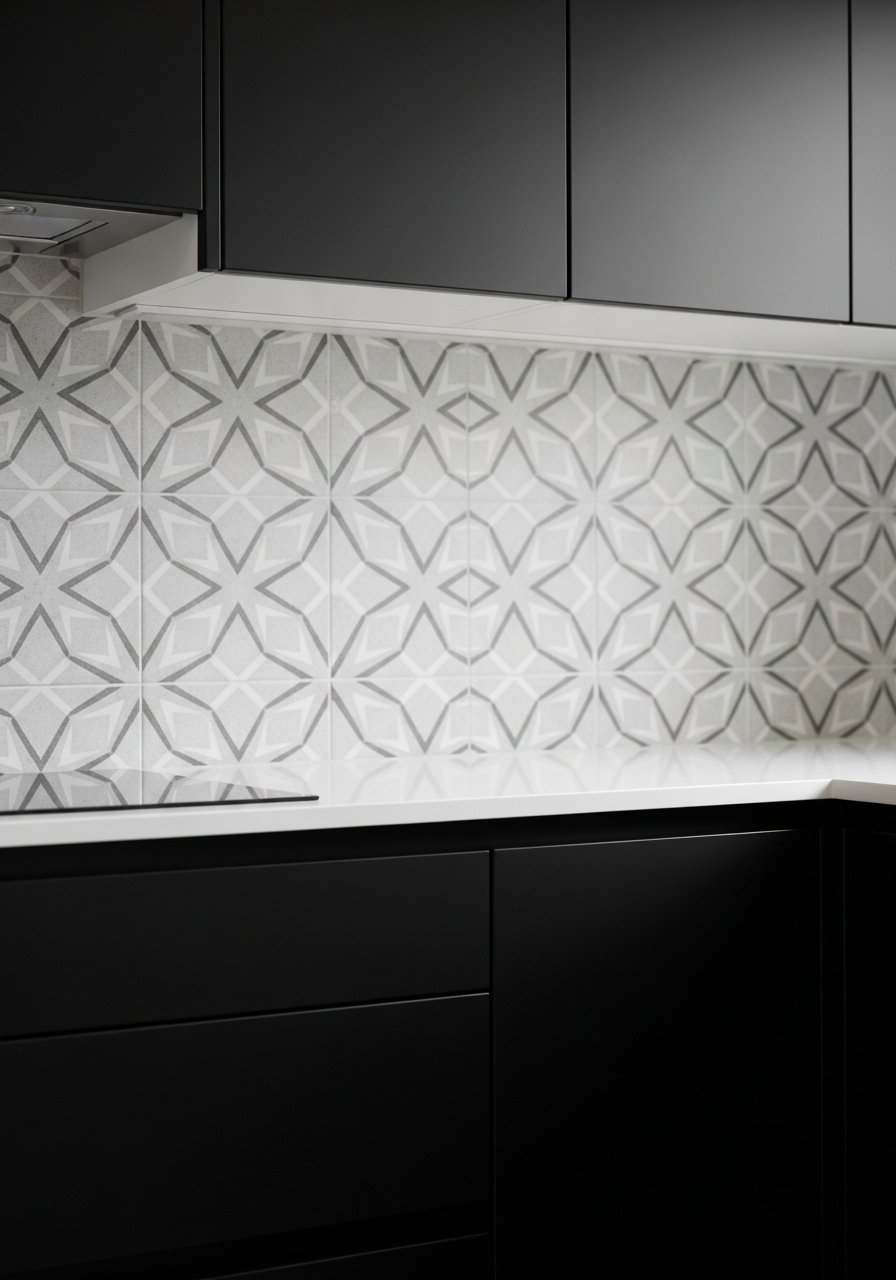
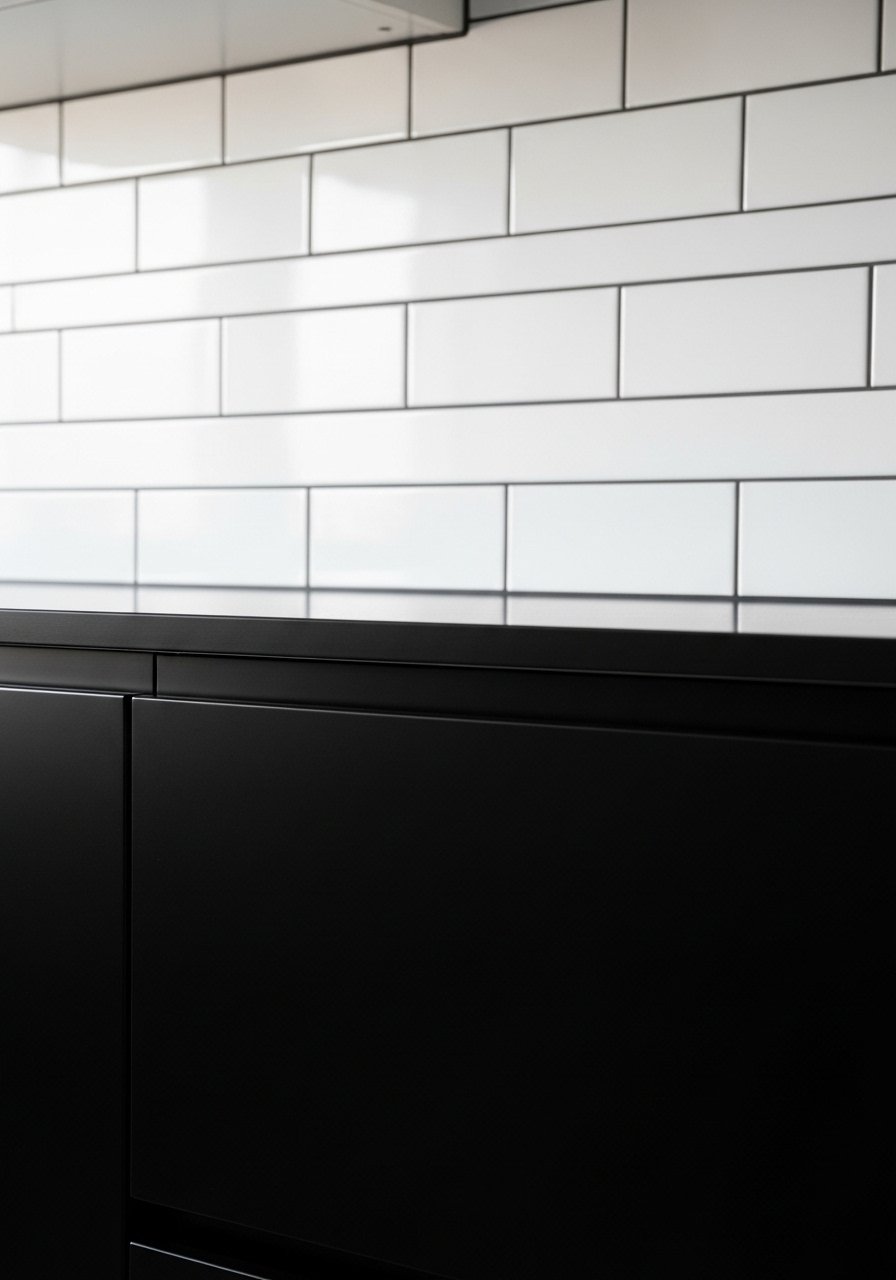
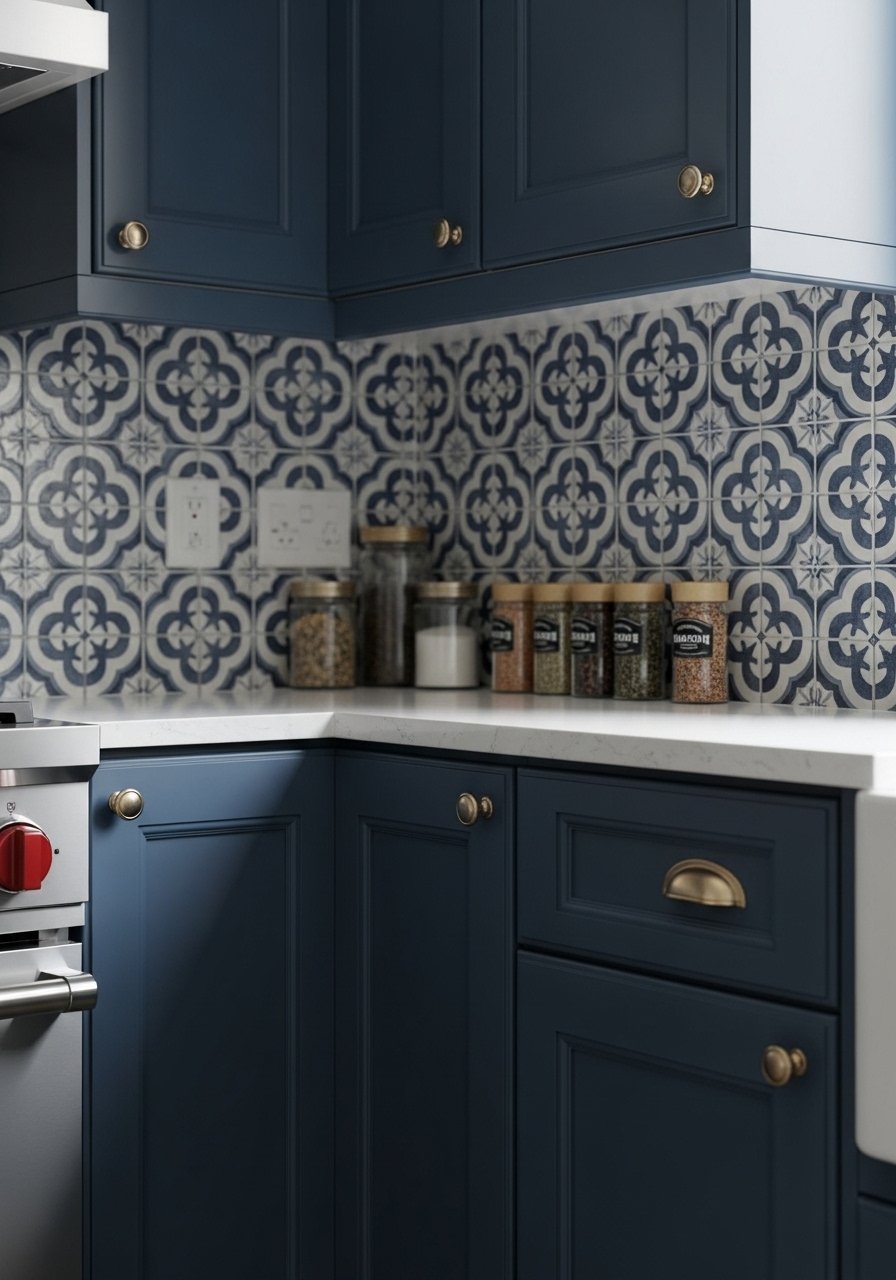
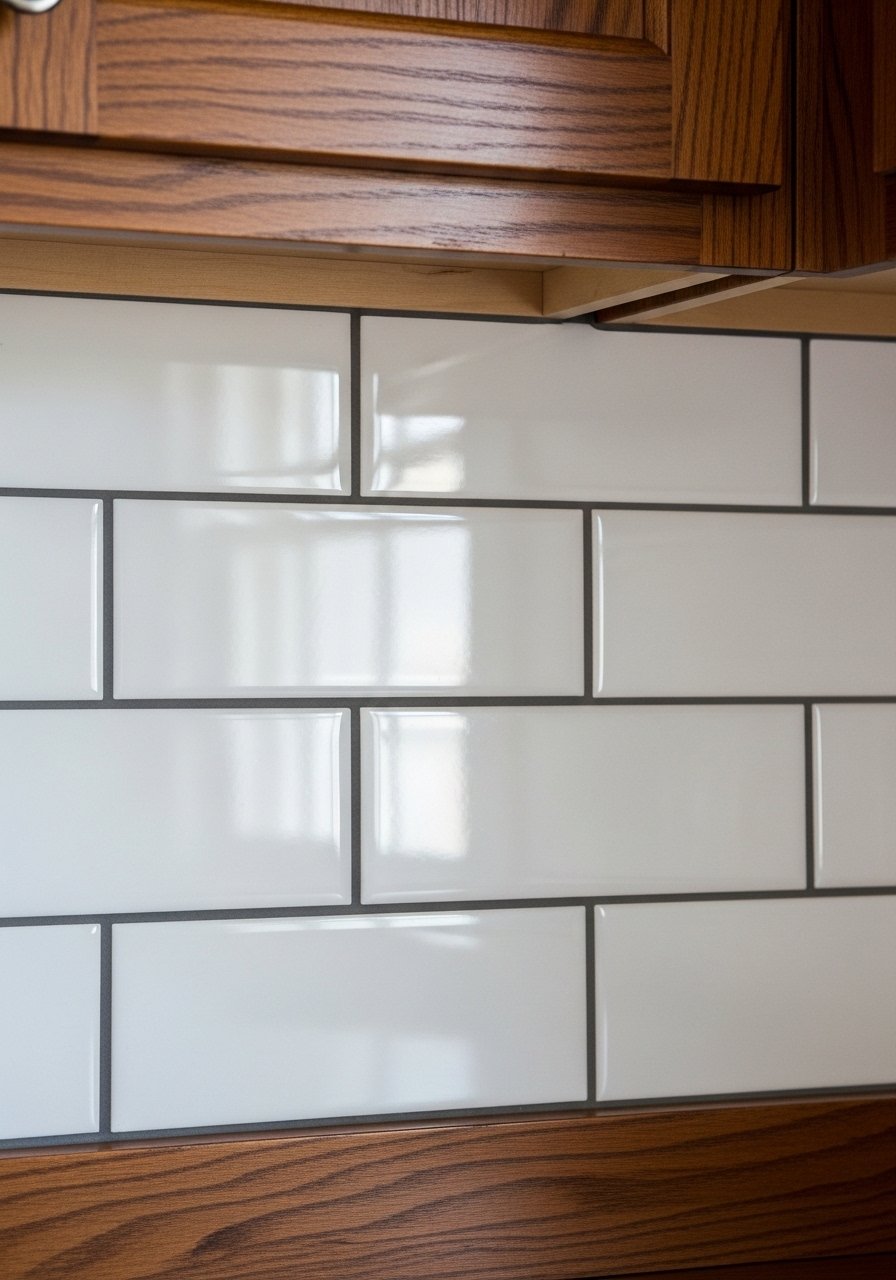
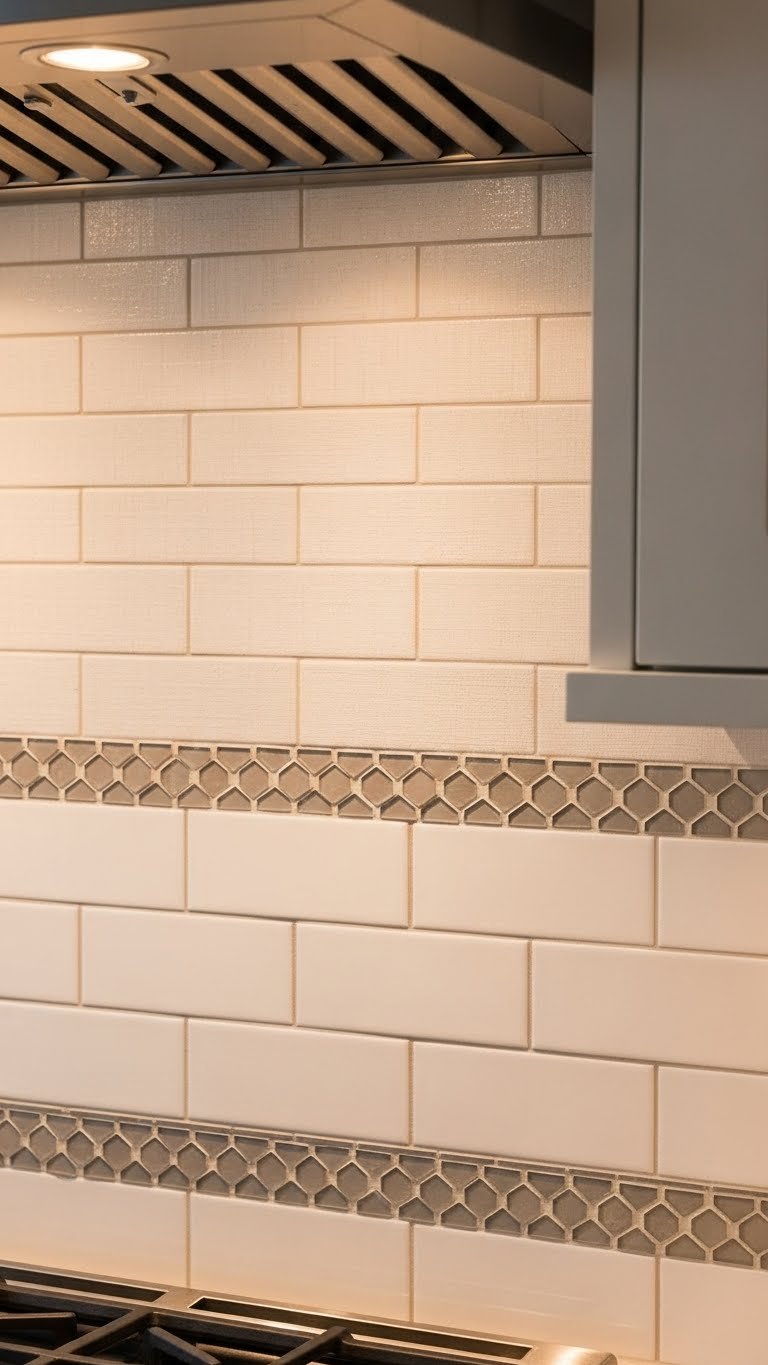
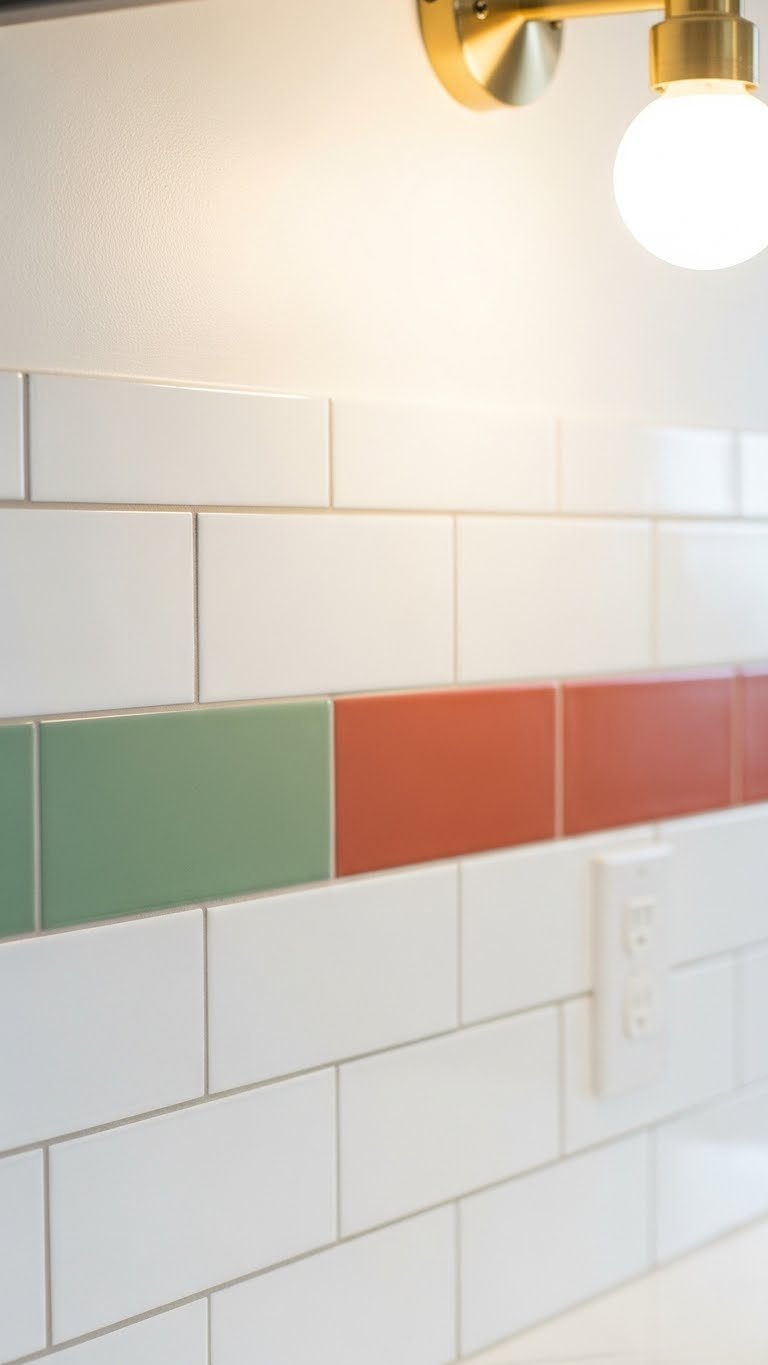
    9. Paint Your Backsplash Bold (or Keep It Minimal)

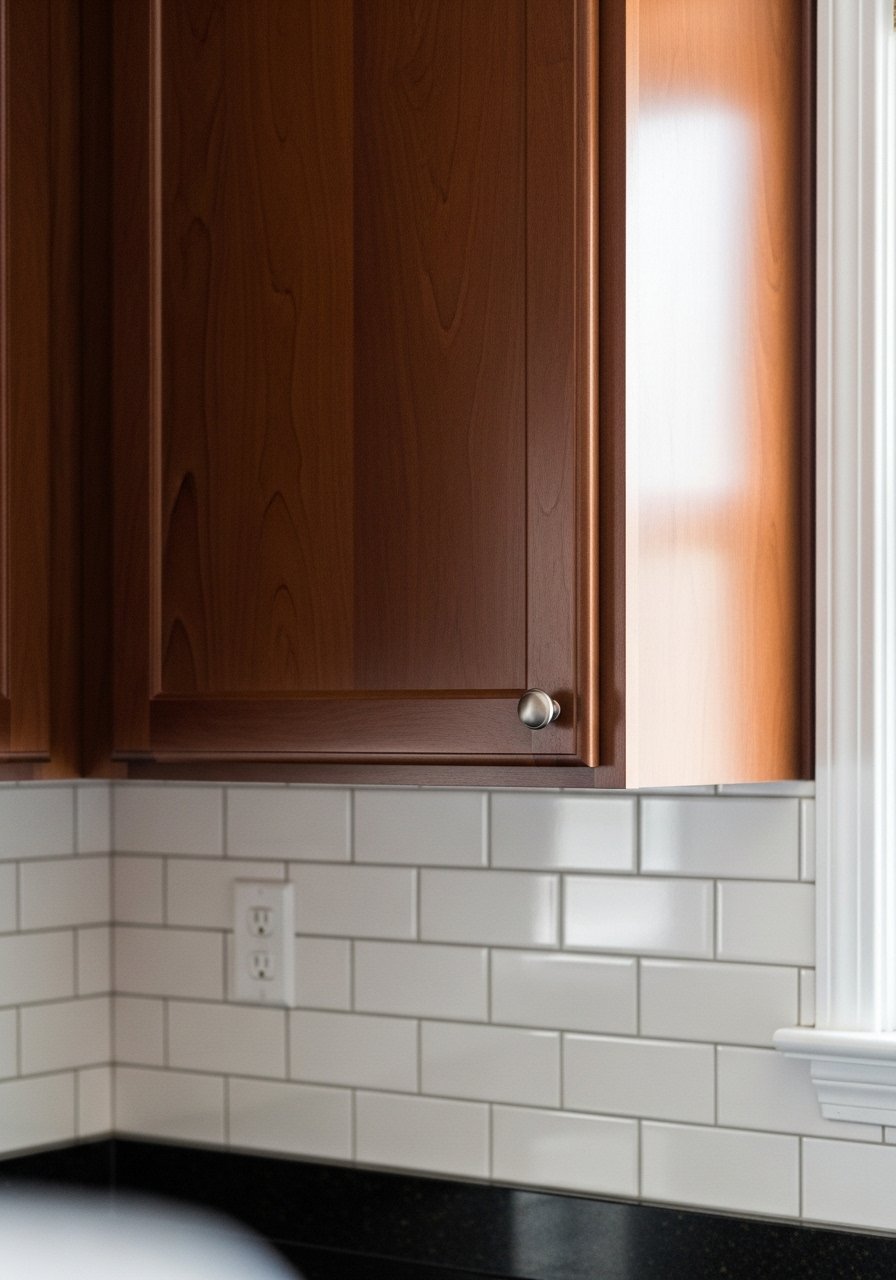
    A painted backsplash costs nothing but makes a huge statement. This is renter-friendly, temporary, and gives you the high-impact trend of mixed materials without ripping out tile.

    Use high-quality tile paint ($20–$40 per can) or peel-and-stick tile alternatives ($50–$150). Either way, it takes an afternoon. Paint an accent row in sage green, soft blue, or warm terracotta while keeping the rest white or neutral. This honors the 2025 trend of bold, mixed backsplashes without overwhelming a small space. Alternative: swap tile with peel-and-stick geometric or marble patterns for zero commitment.

    Prep is everything—clean thoroughly, prime, then paint with a semi-gloss finish for durability.

    Your backsplash shifts from invisible to intentional, and suddenly your whole kitchen has personality and design vision.

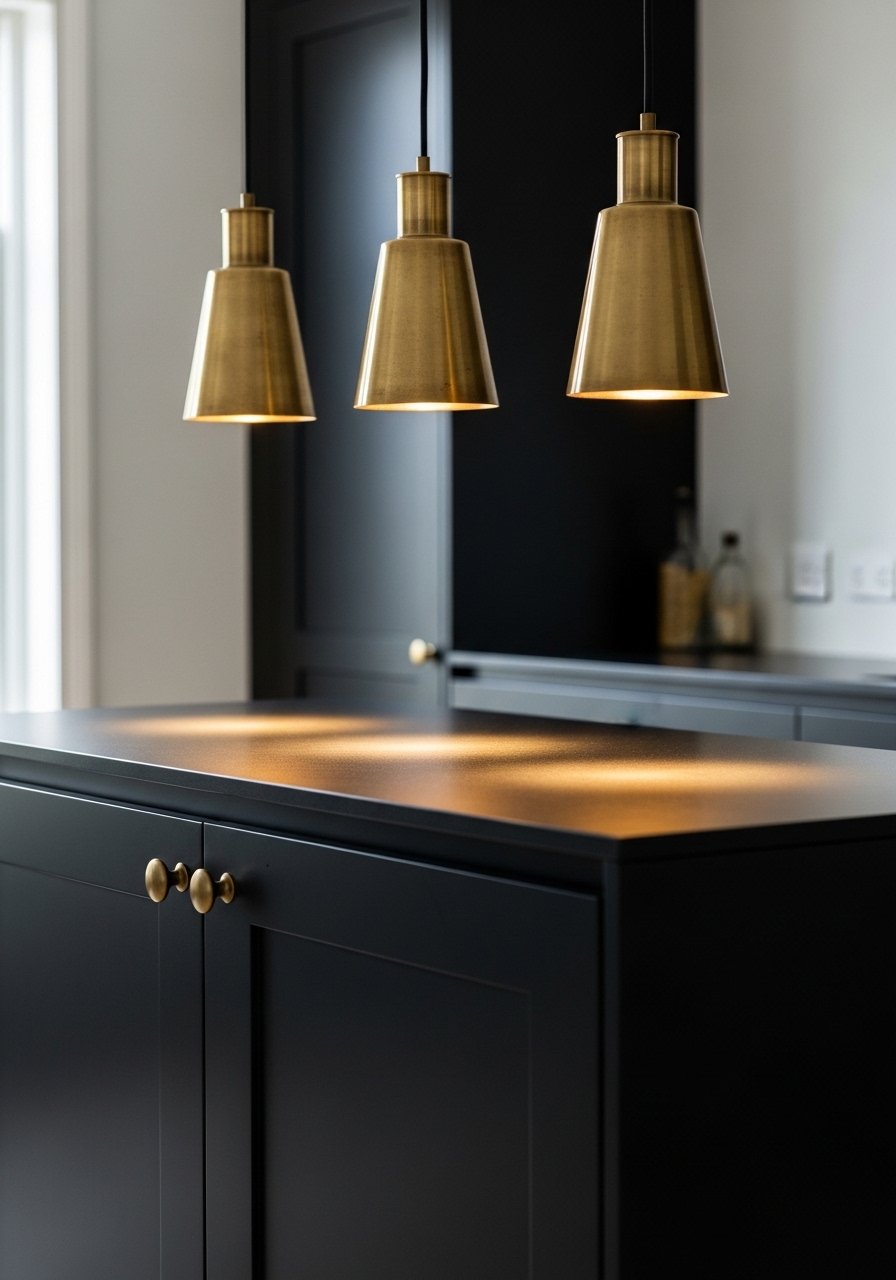
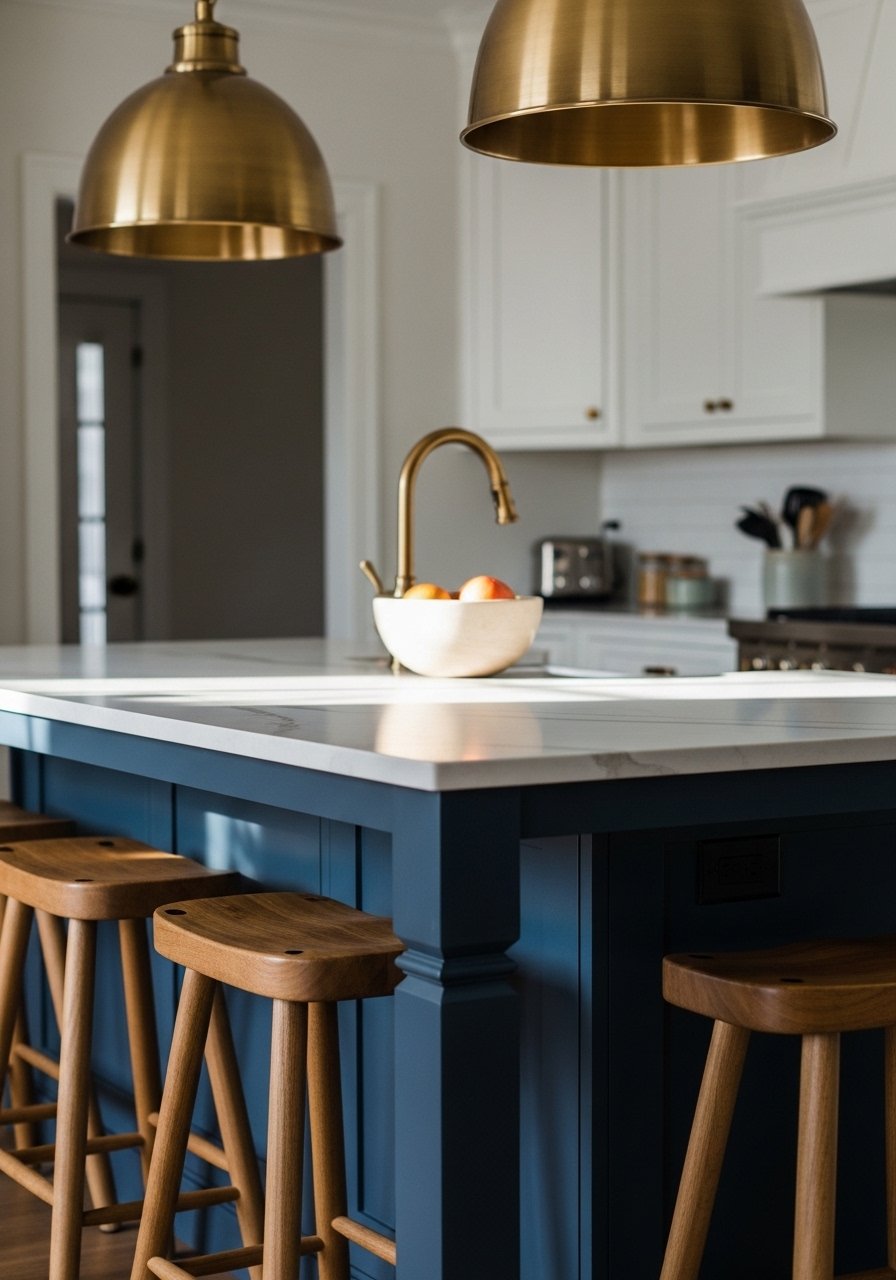
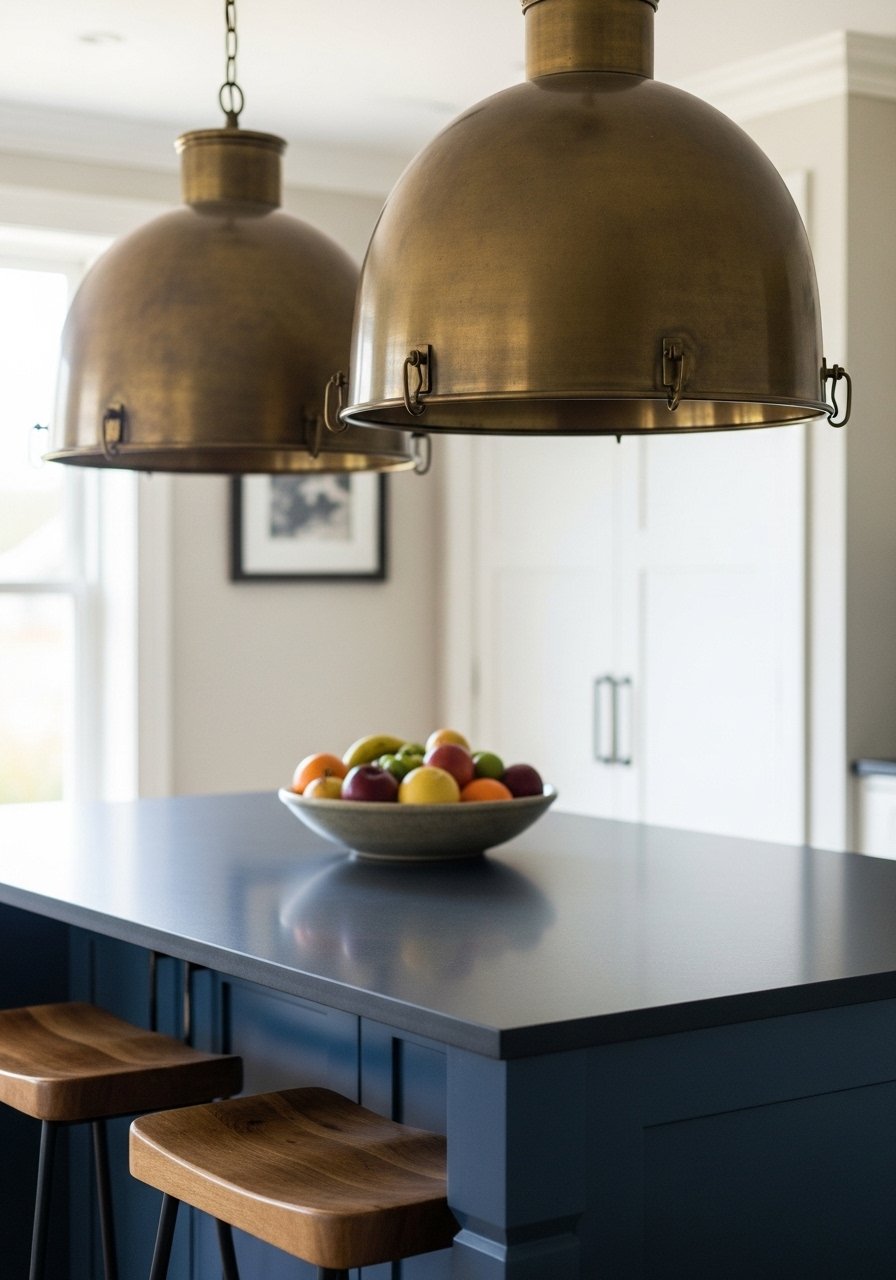
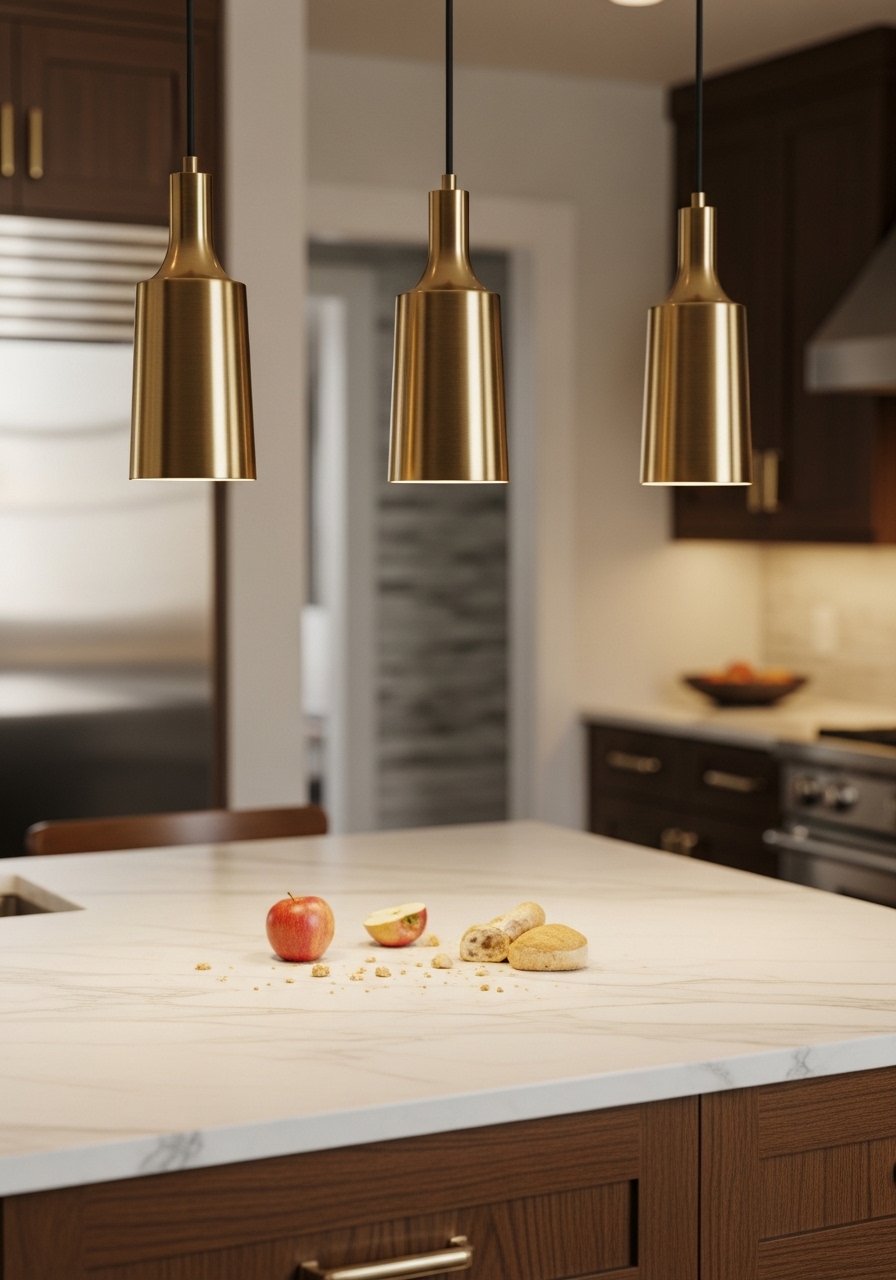
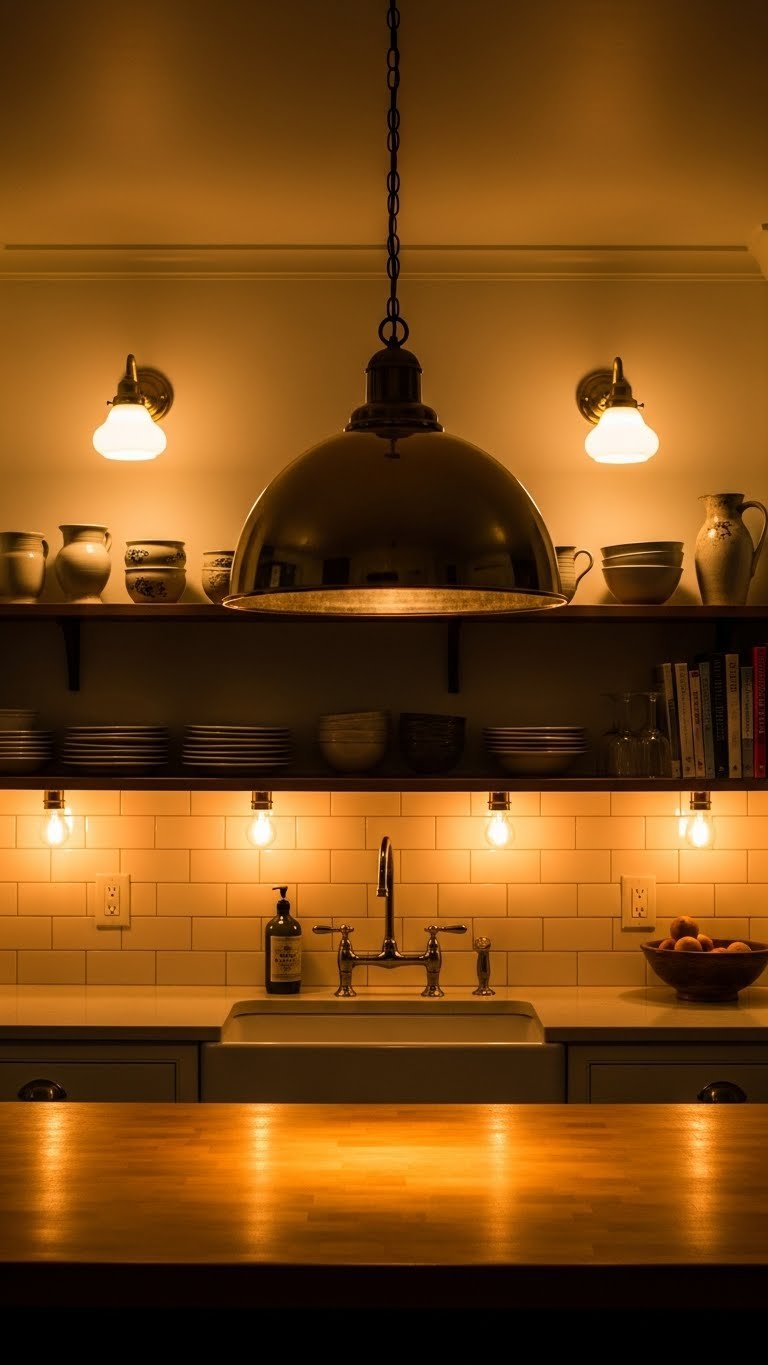
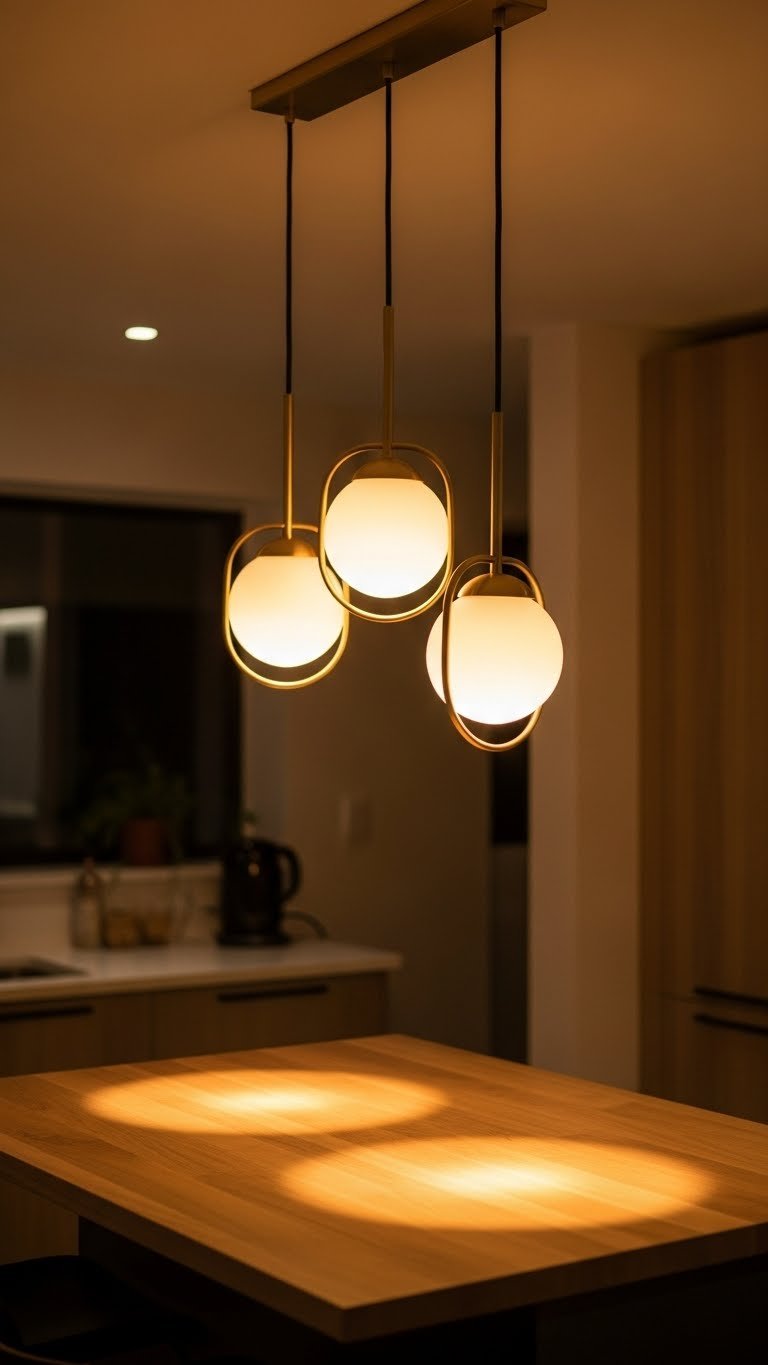
    10. Add Pendant Lights Above Counter or Island

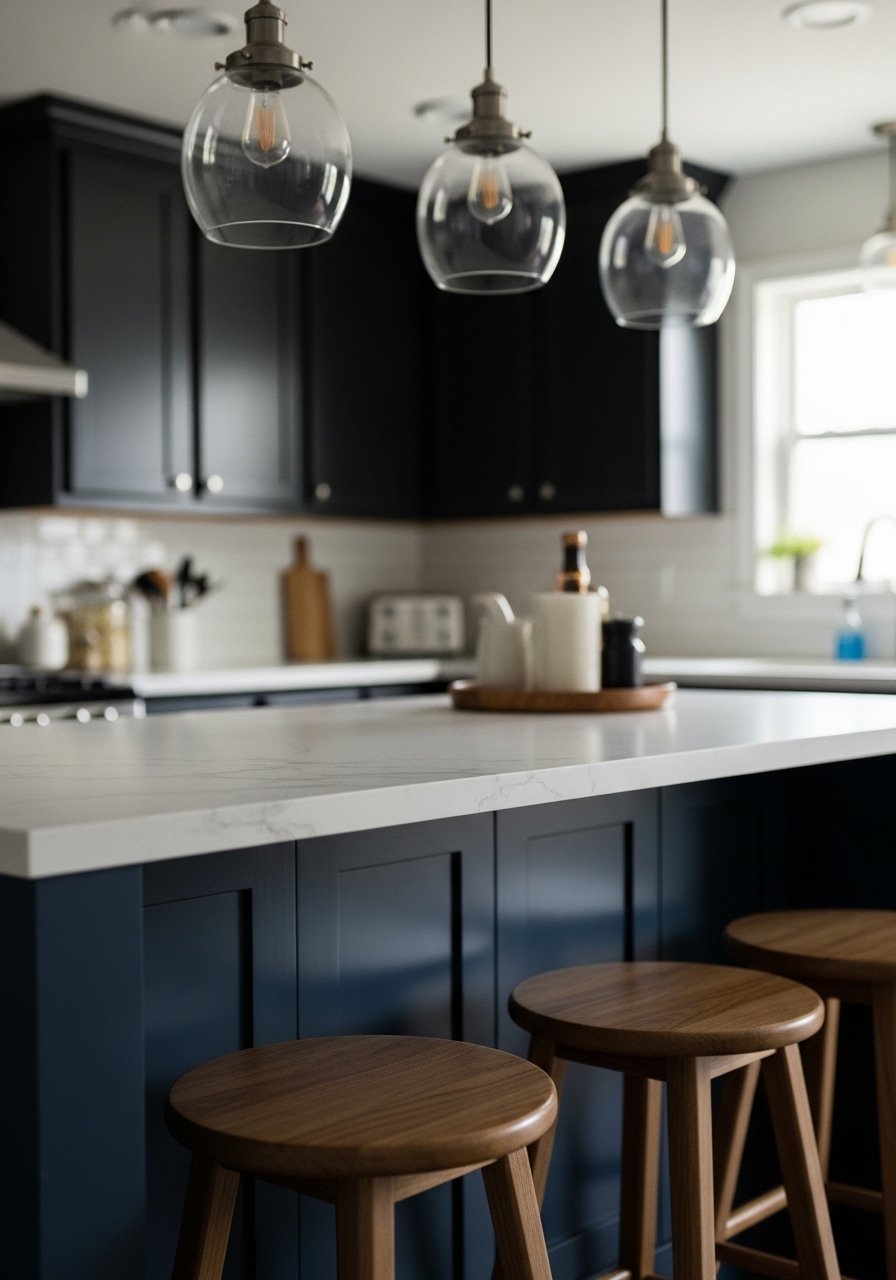
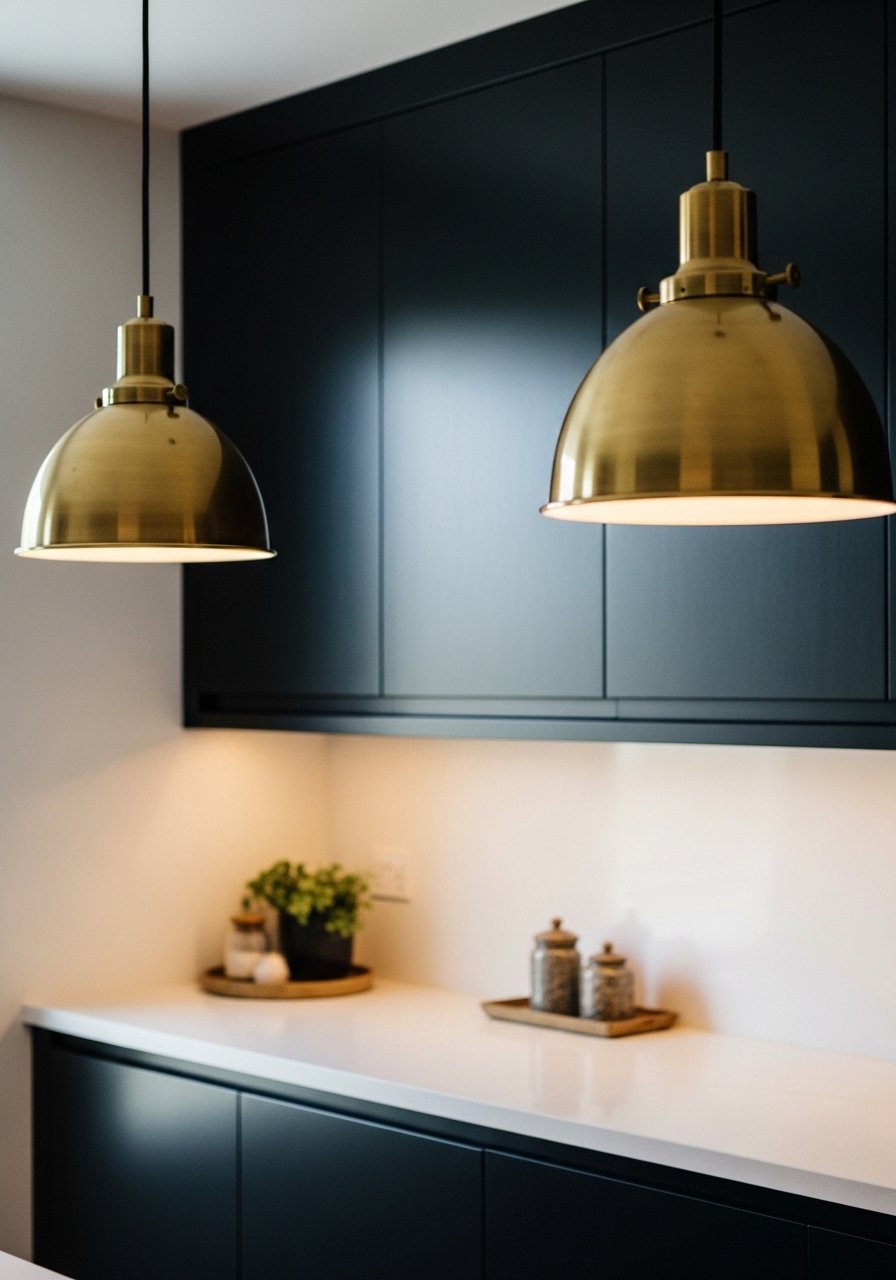
    Lighting is how small kitchens feel big—84% of designers cite fixtures as key to modern style. Pendant lights over a counter or even above a small island create focal points and functional task lighting while looking effortlessly design-forward.

    Install one to three pendants ($80–$300 total) depending on your counter width. Look for globe or geometric shapes in brass, matte black, or sculptural ceramic. They work at IKEA ($25–$60 each), Schoolhouse Electric, or Wayfair. Pair with a dimmer switch ($15–$30) so you control mood and function. Hire an electrician ($100–$150) if you’re not comfortable with wiring, or use plug-in hanging lights ($50–$100) if you rent.

    Pro tip: Group three small pendants rather than one large one—it feels more collected and modern.

    These lights become jewelry for your kitchen while solving the lighting problem that makes small spaces feel cave-like.

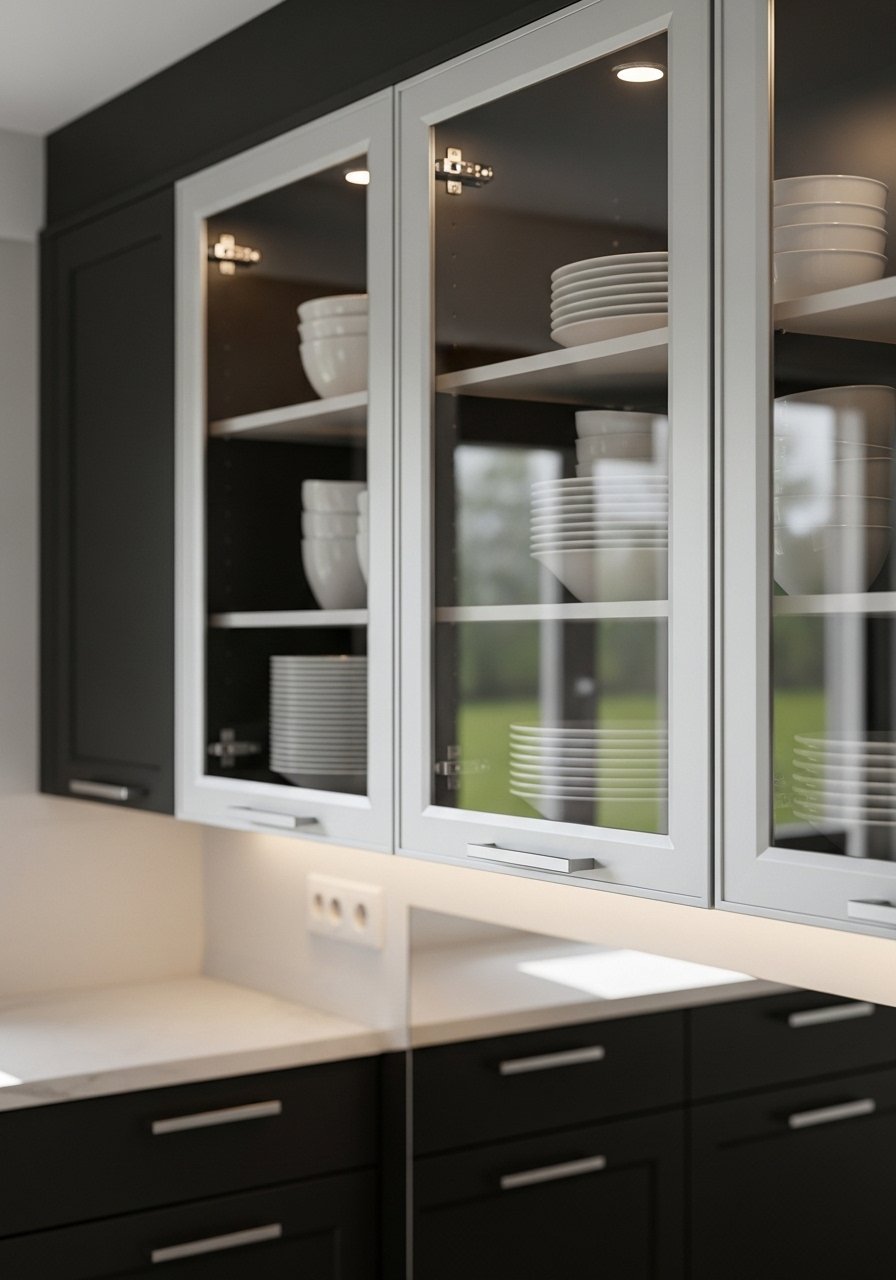
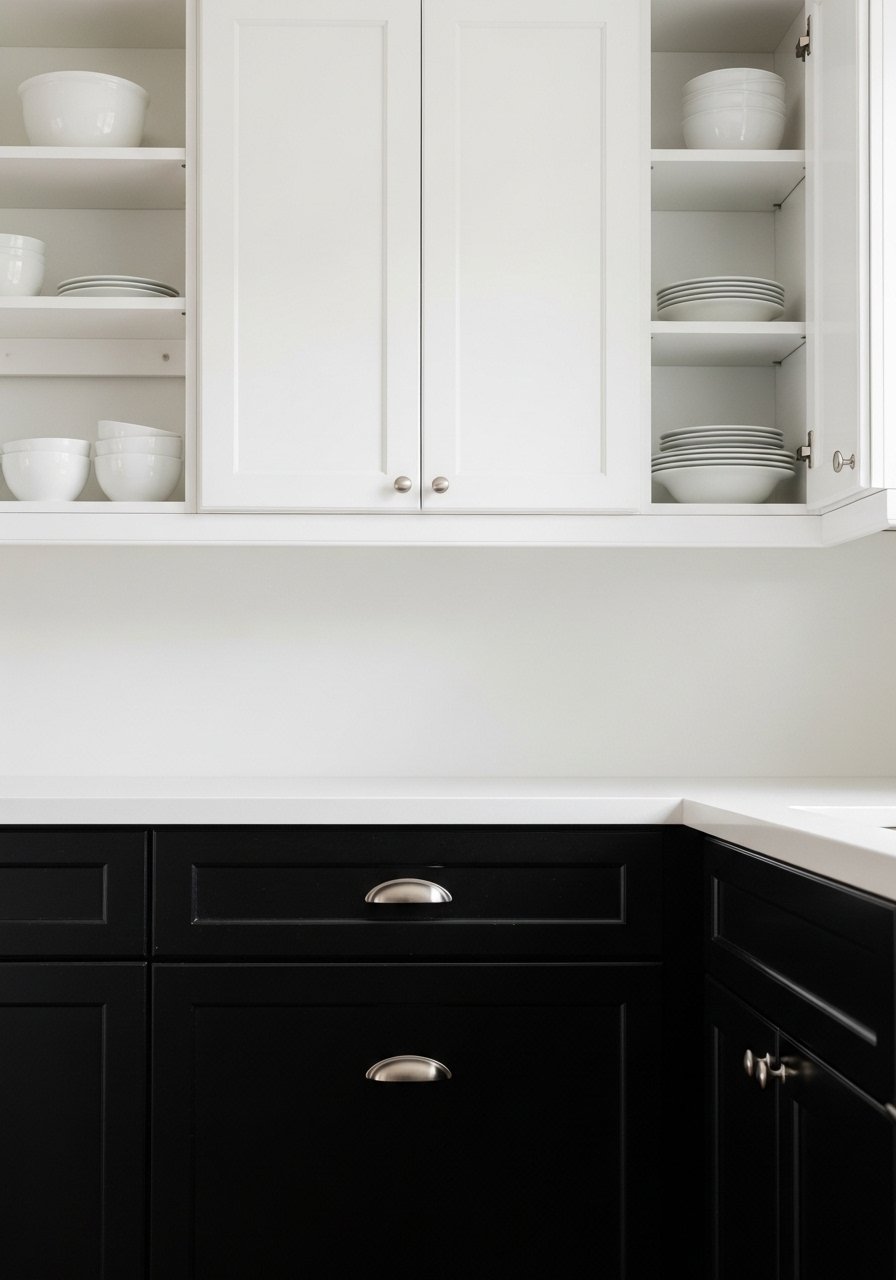
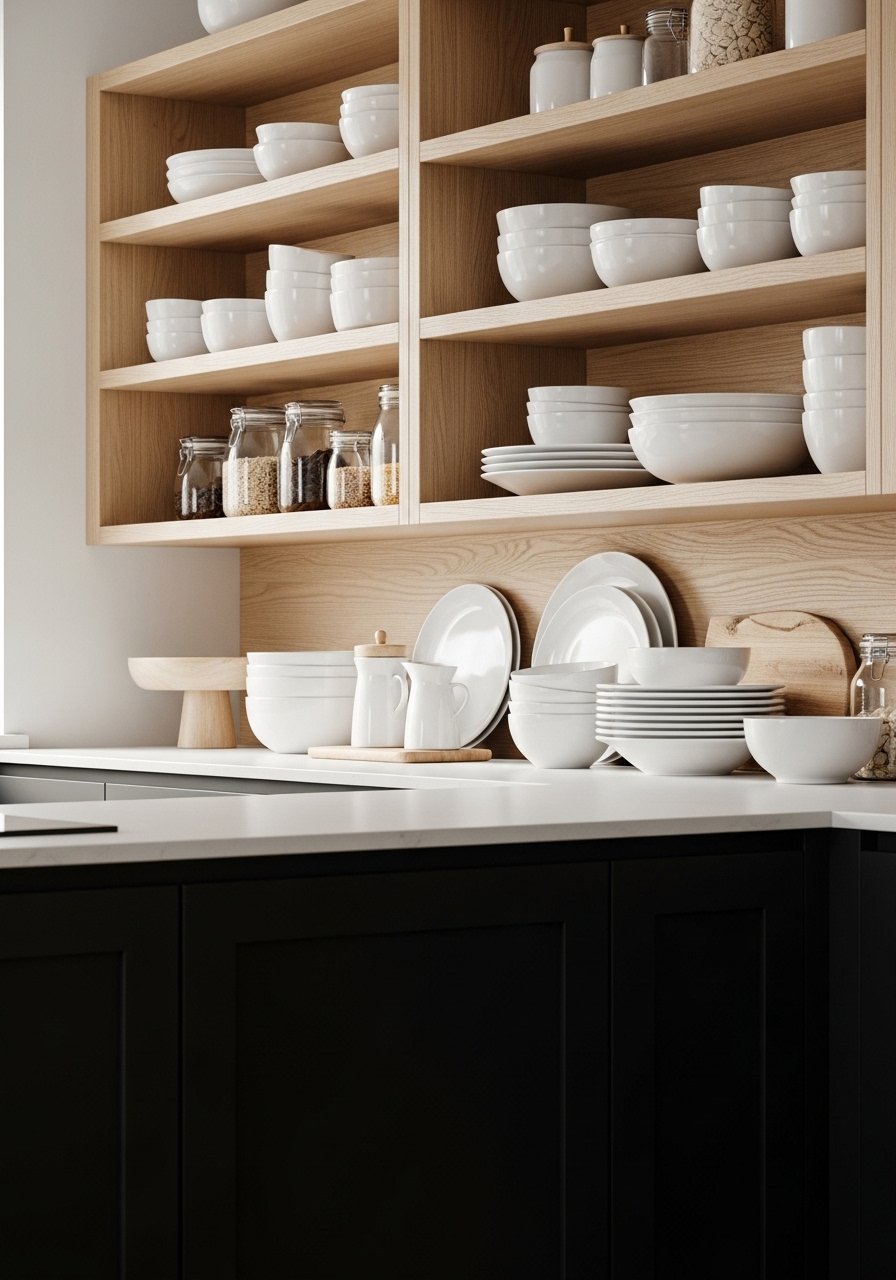
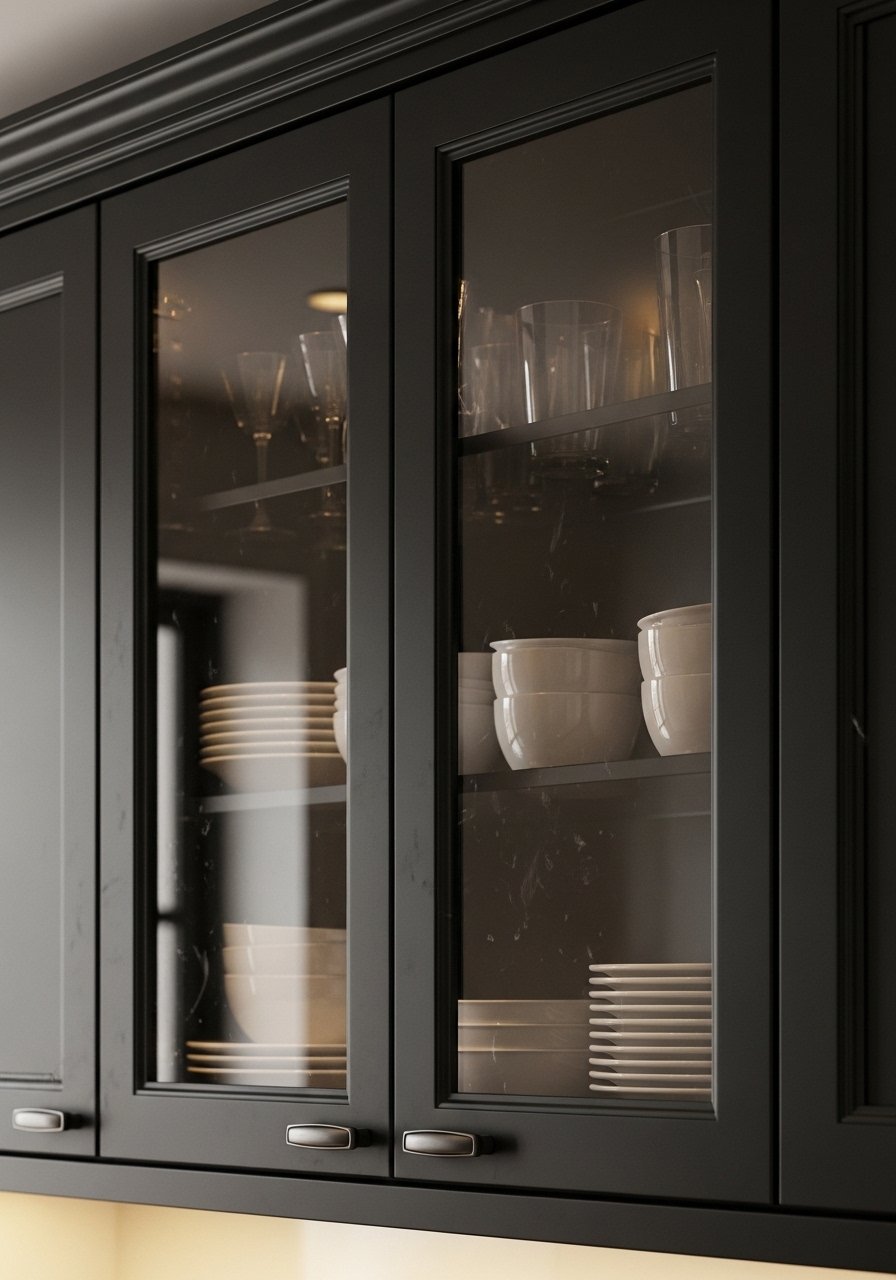
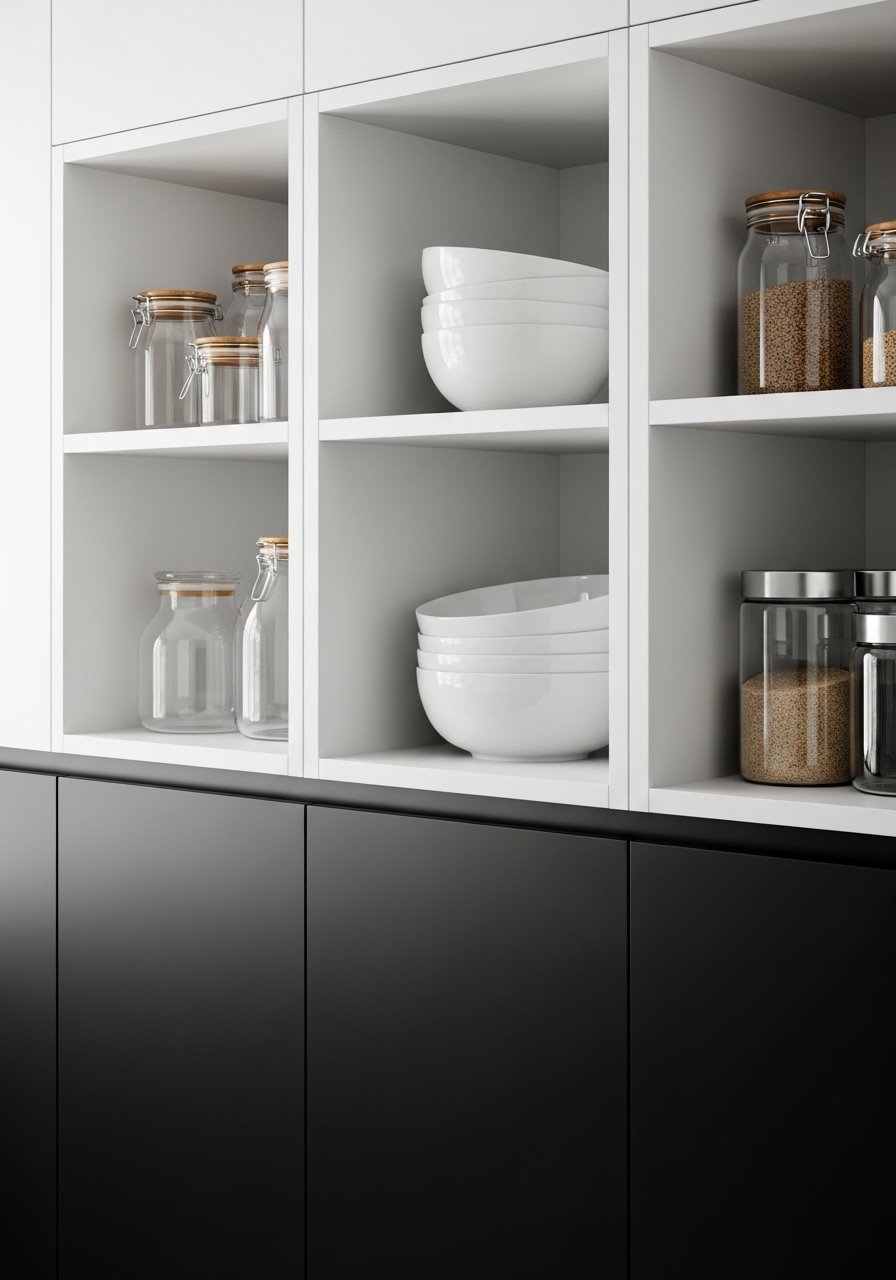
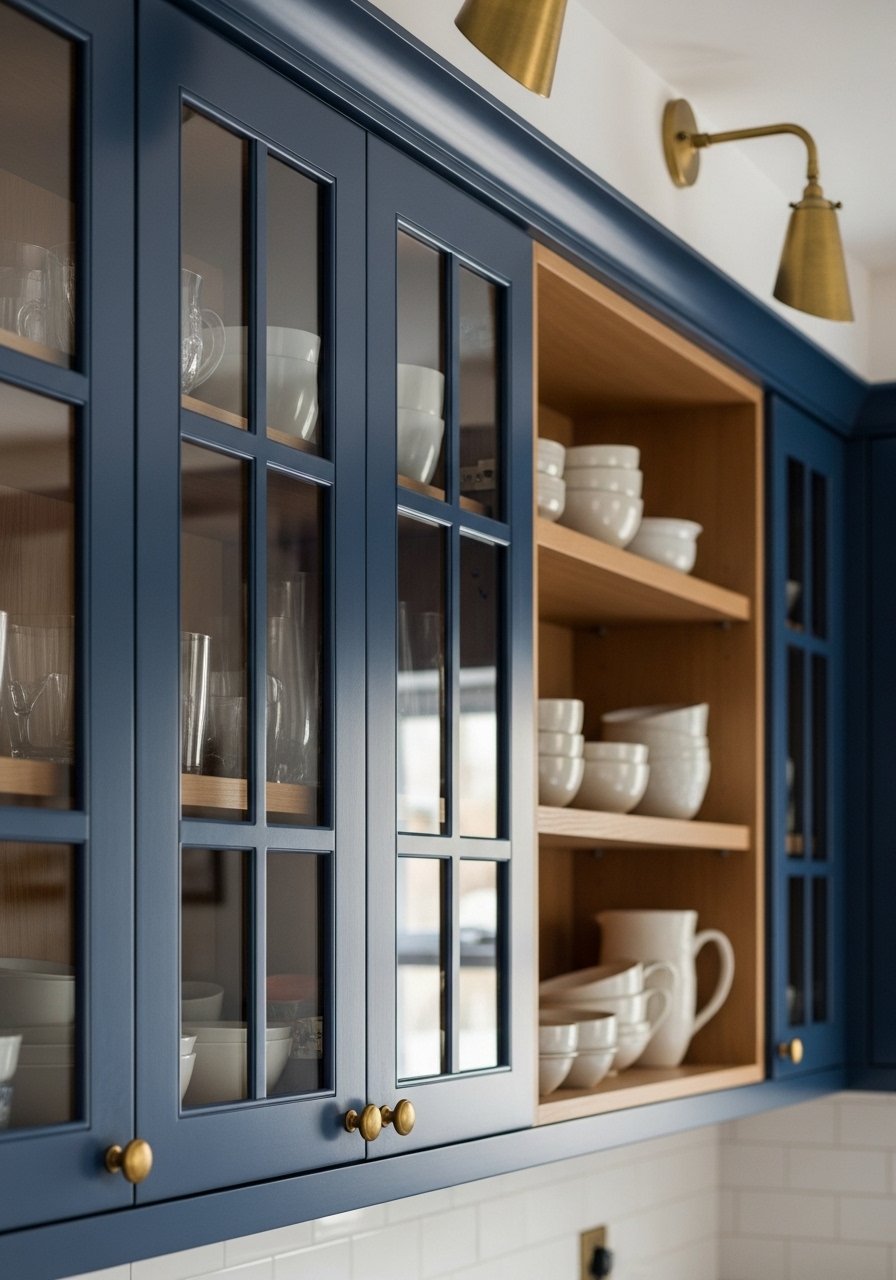
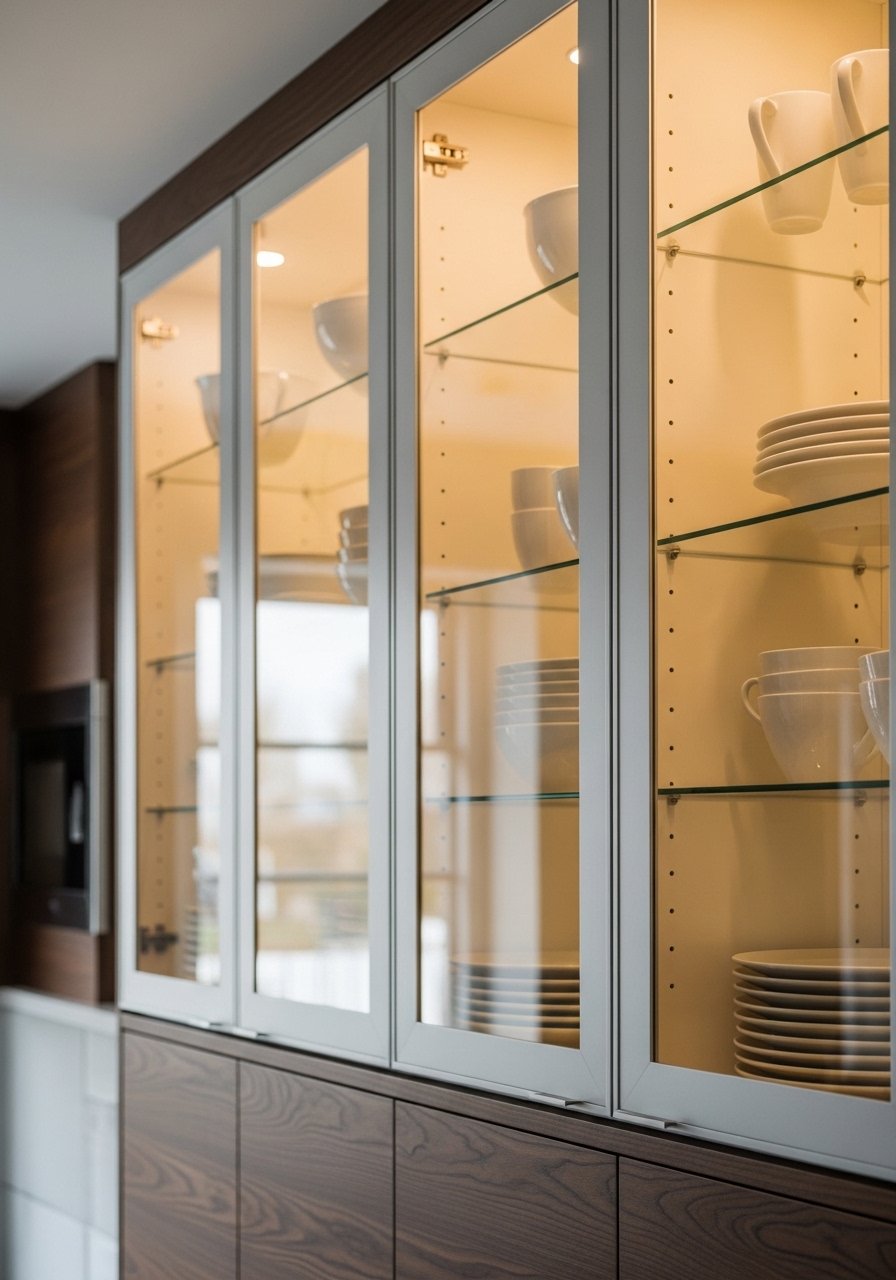
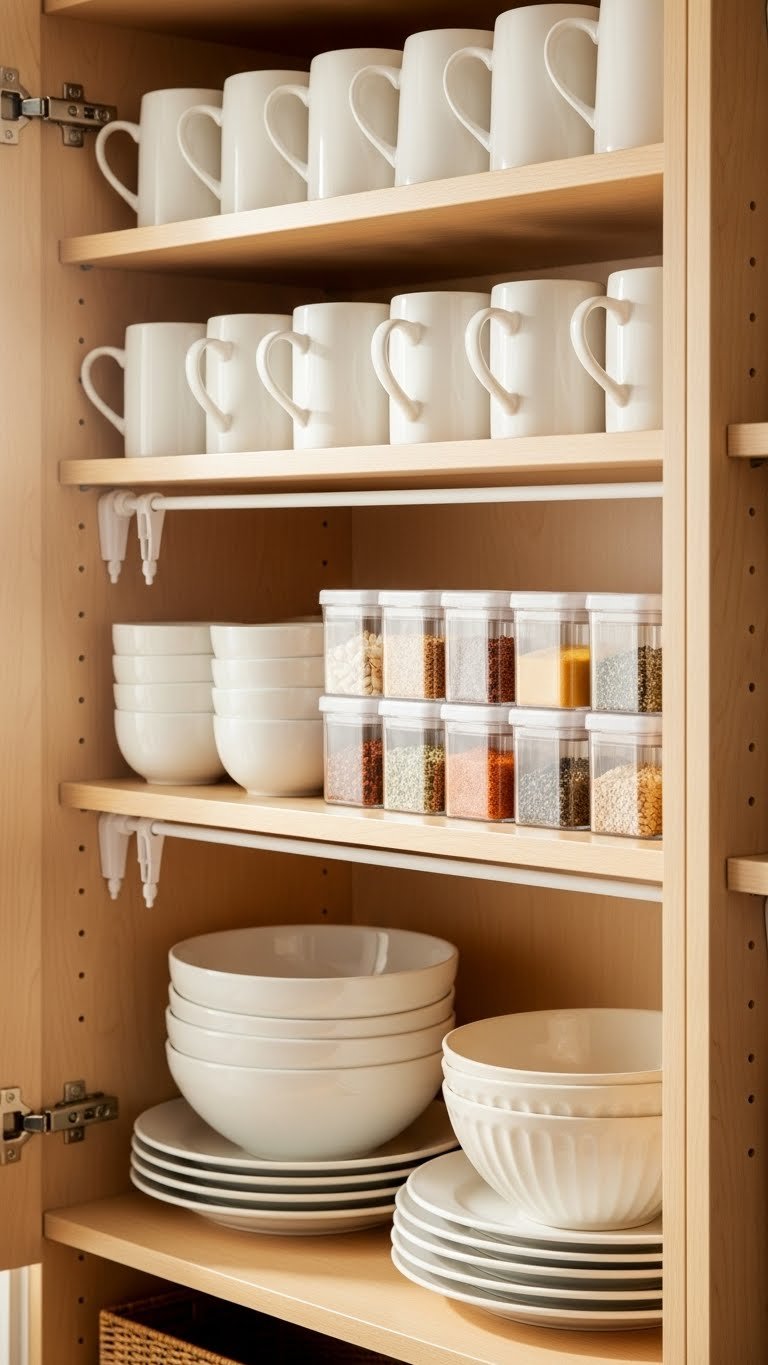
    11. Use Glass Cabinet Doors to Open Up Visual Space

    Replacing solid cabinet doors with glass front ones (or just uppers) opens up your sight line and makes the kitchen feel bigger and brighter. It’s especially effective in small kitchens where every visual trick matters.

    Replace just your upper cabinet doors with glass alternatives ($150–$300 total). Keep uppers glass and lowers solid for a balanced, uncluttered look. Style the visible dishes intentionally—use matching plates, bowls, and glasses. Look for options at IKEA, Wayfair, or Etsy with frosted, textured, or clear glass depending on whether you want a little visual privacy. For renters: peel-and-stick frosted film ($20–$40) creates the same effect temporarily.

    Rearrange your dishes monthly so they feel fresh and intentional, not like you’re keeping house for Instagram.

    You lose nothing functionally but gain the feeling of space and openness—it’s an optical illusion that genuinely works.

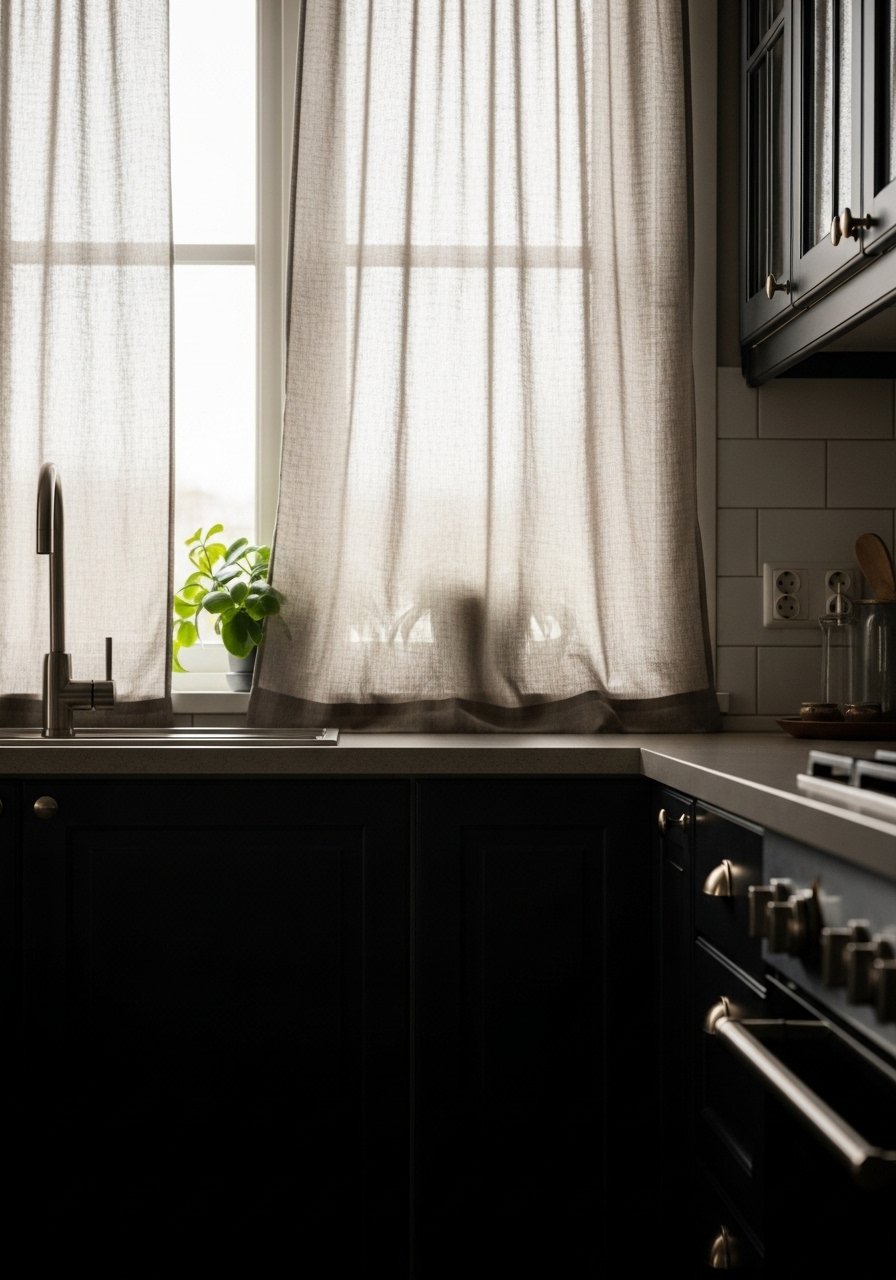
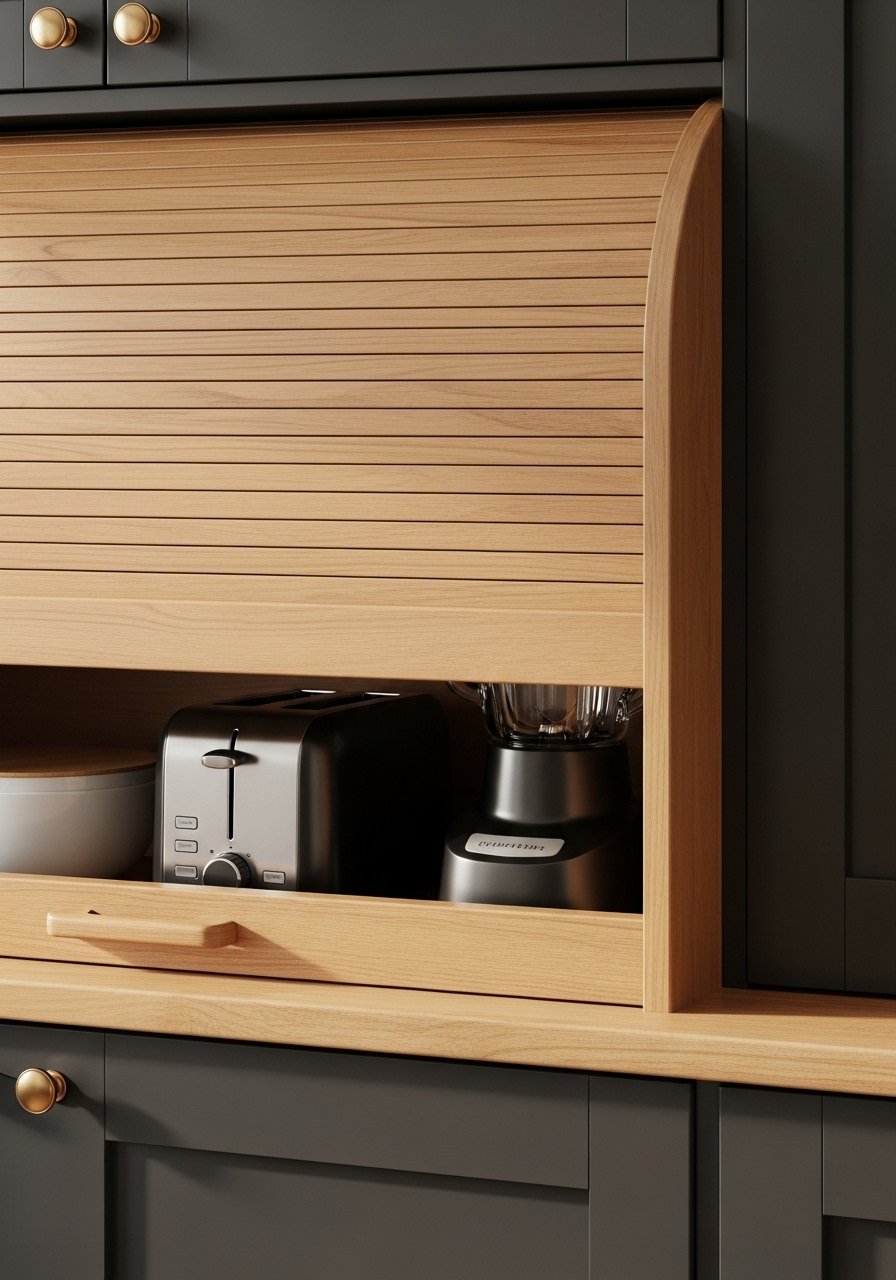
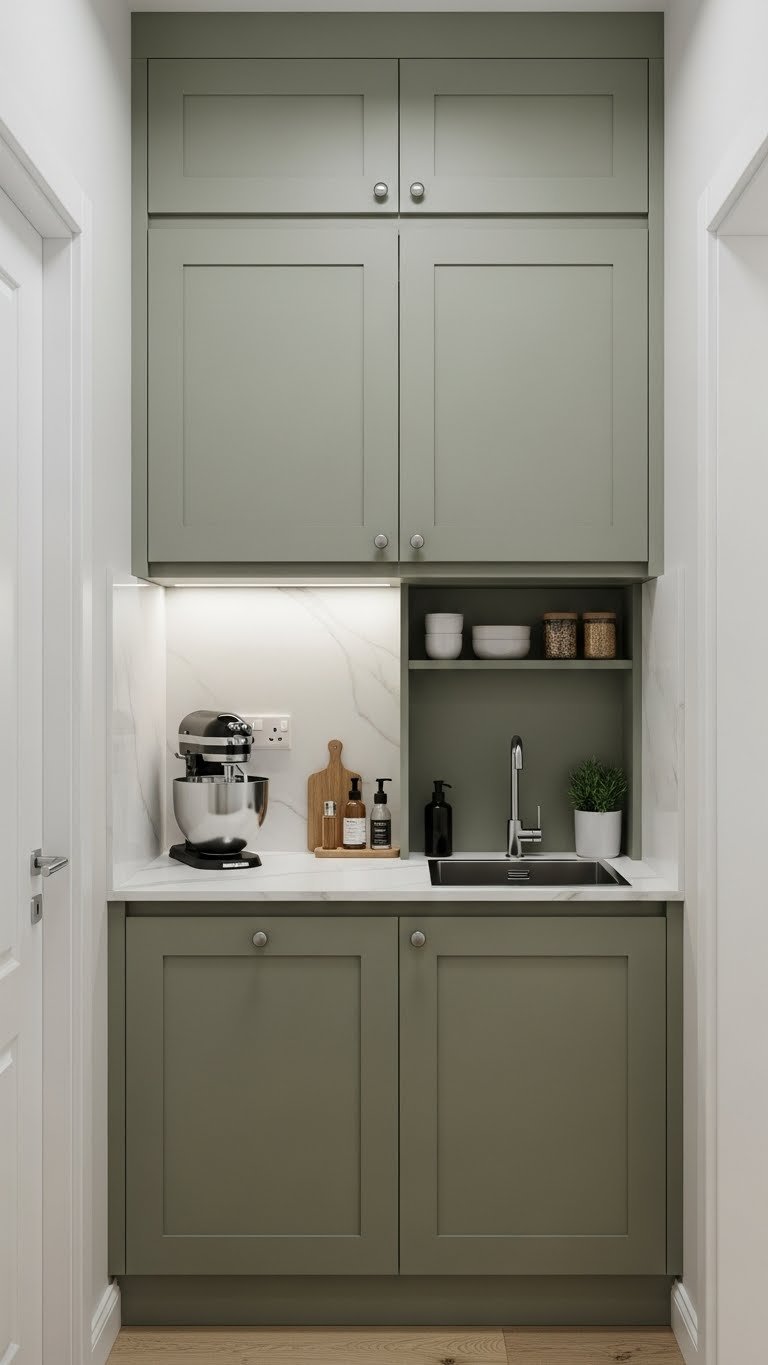
    12. Create a Scullery or Hidden Prep Zone

    A scullery or hidden prep zone keeps cooking mess out of sight while doubling your functional space. This 2025 trend works beautifully for small kitchens because it separates display from work.

    If you have a closet, hallway corner, or galley alcove, convert it into a prep zone with closed shelving or cabinets ($200–$500). Add a small sink if possible ($100–$300 install) or just counter space for prepping, storing bulk items, and hiding kitchen chaos. Use closed doors or a curtain rod with linen curtain ($30–$80) to hide the work-in-progress from your main living space. This creates the feeling of a bigger, cleaner kitchen instantly.

    For renters: a tall rolling cart with a linen curtain in front creates the same hidden-prep effect.

    Now your main kitchen stays beautiful and minimal while you have a functional chaos zone hidden away—the best of both worlds.

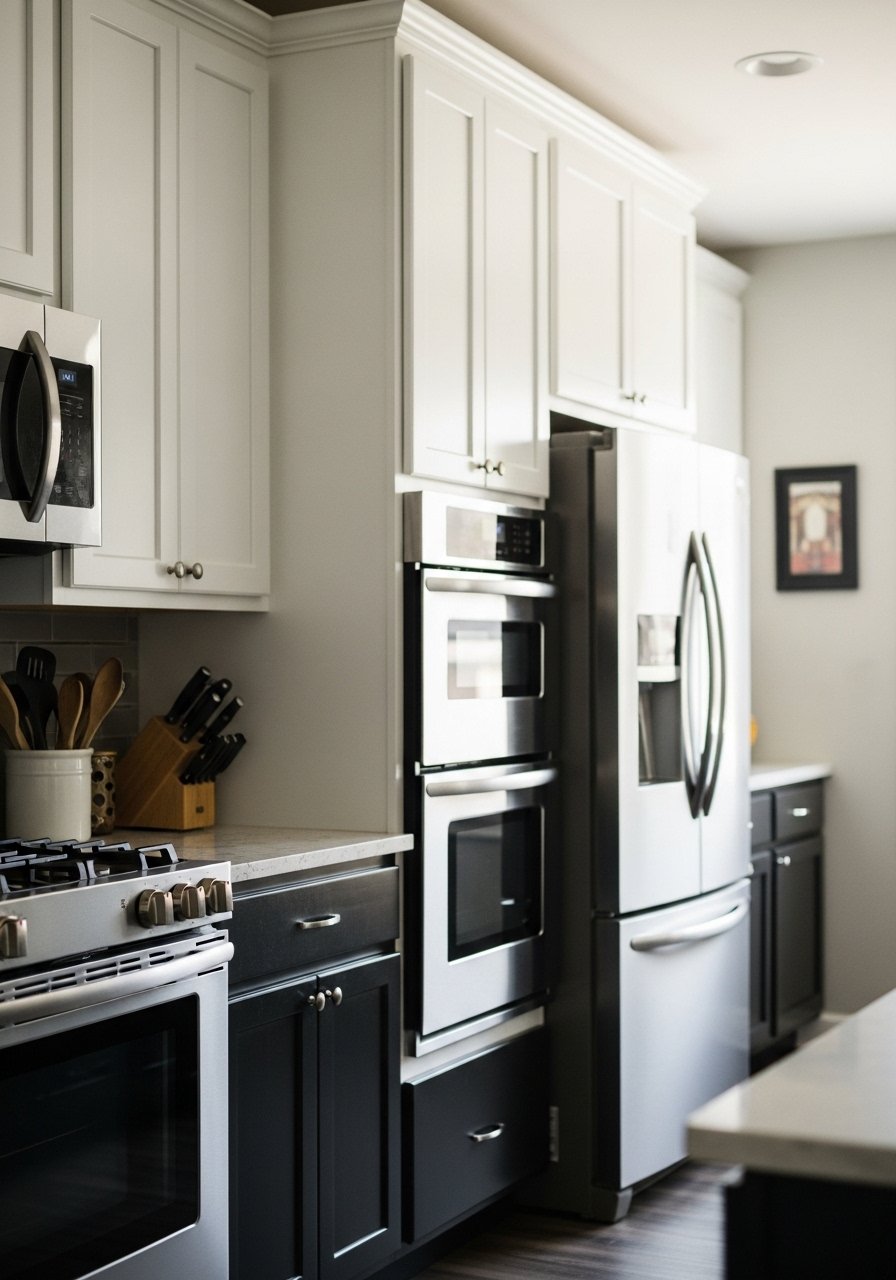
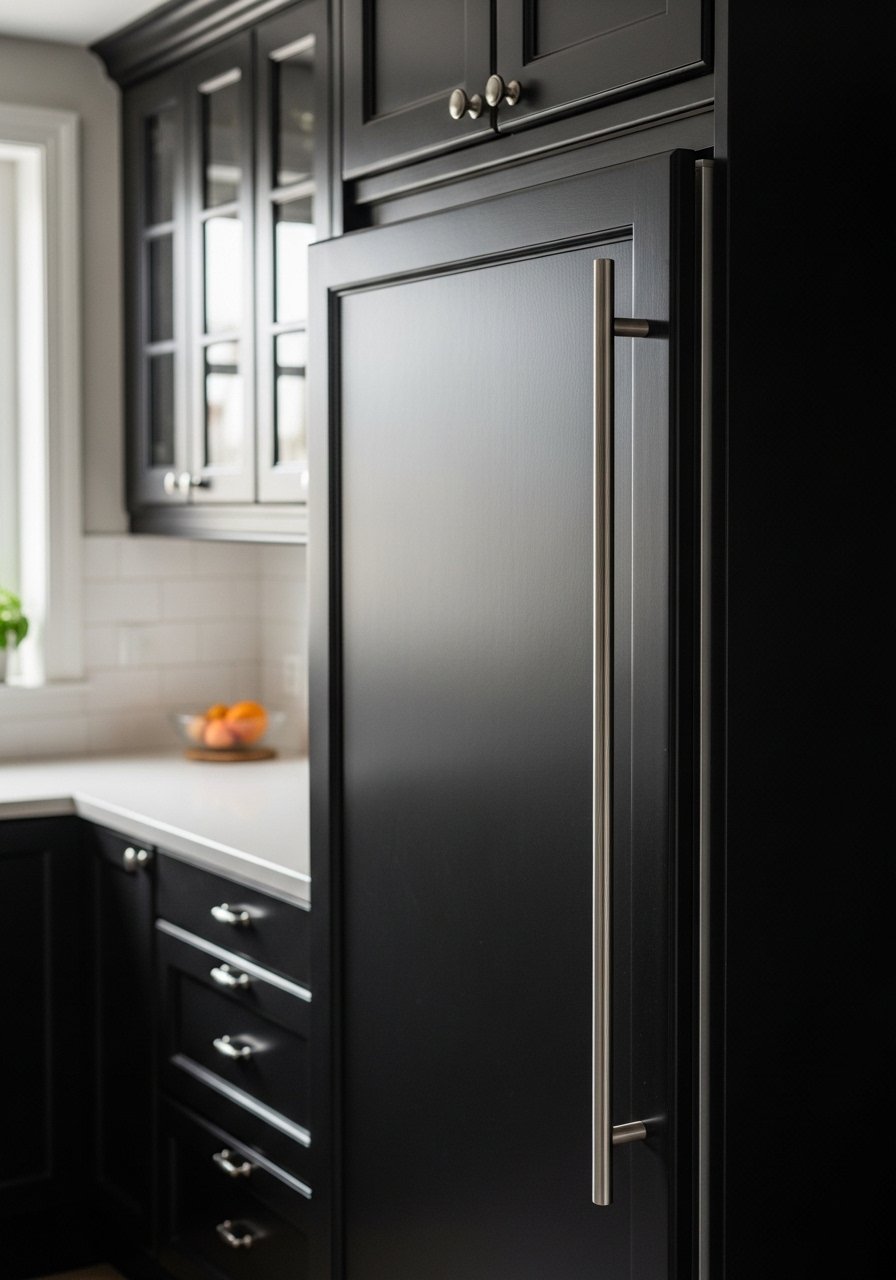
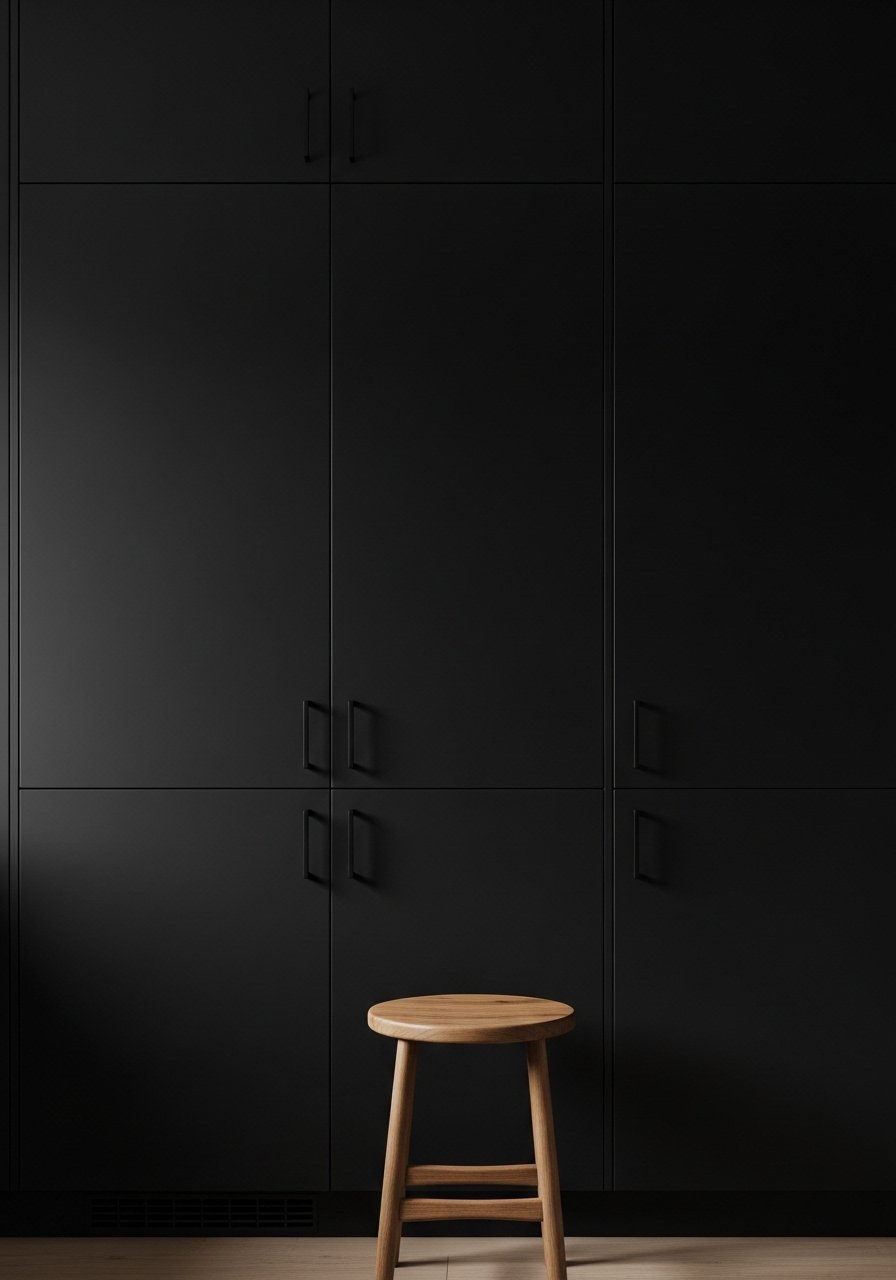
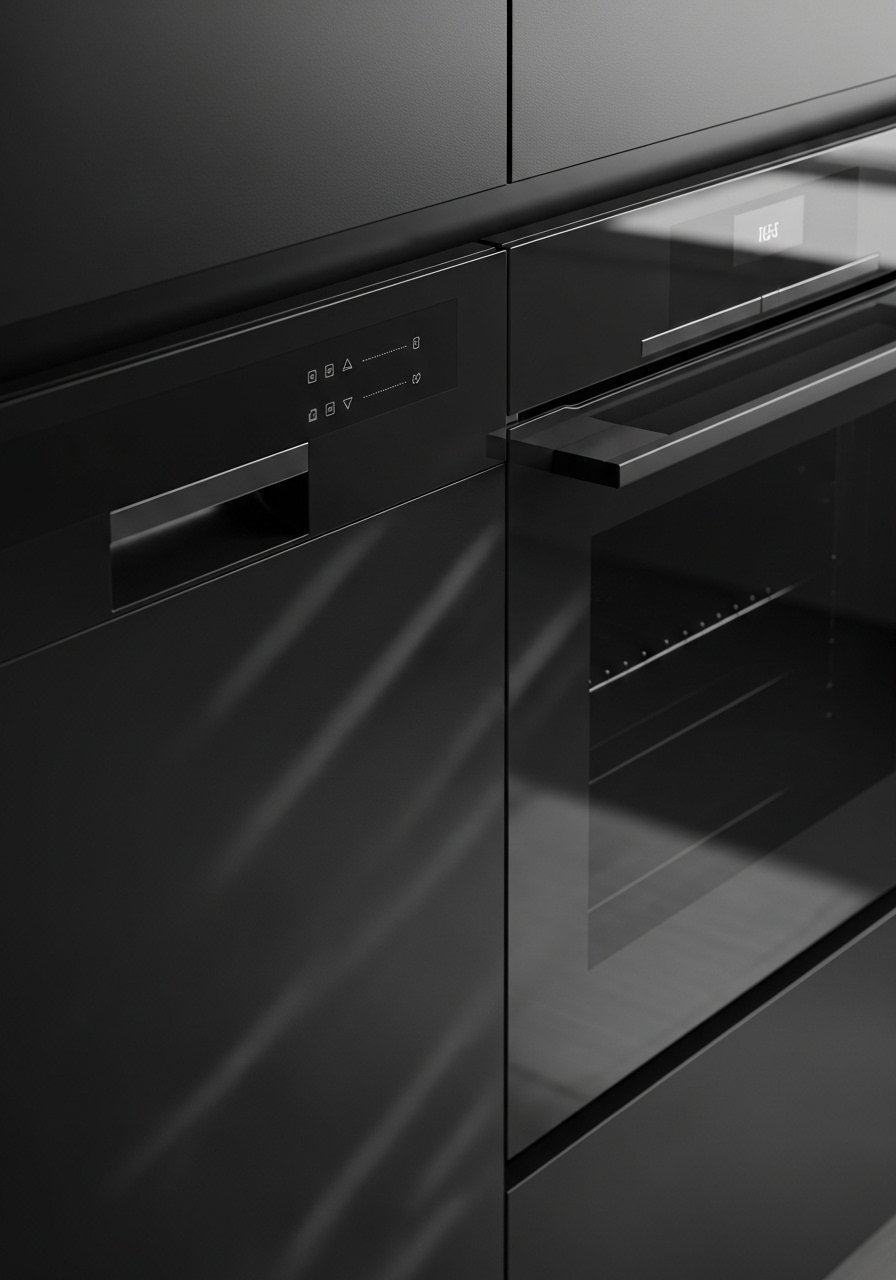
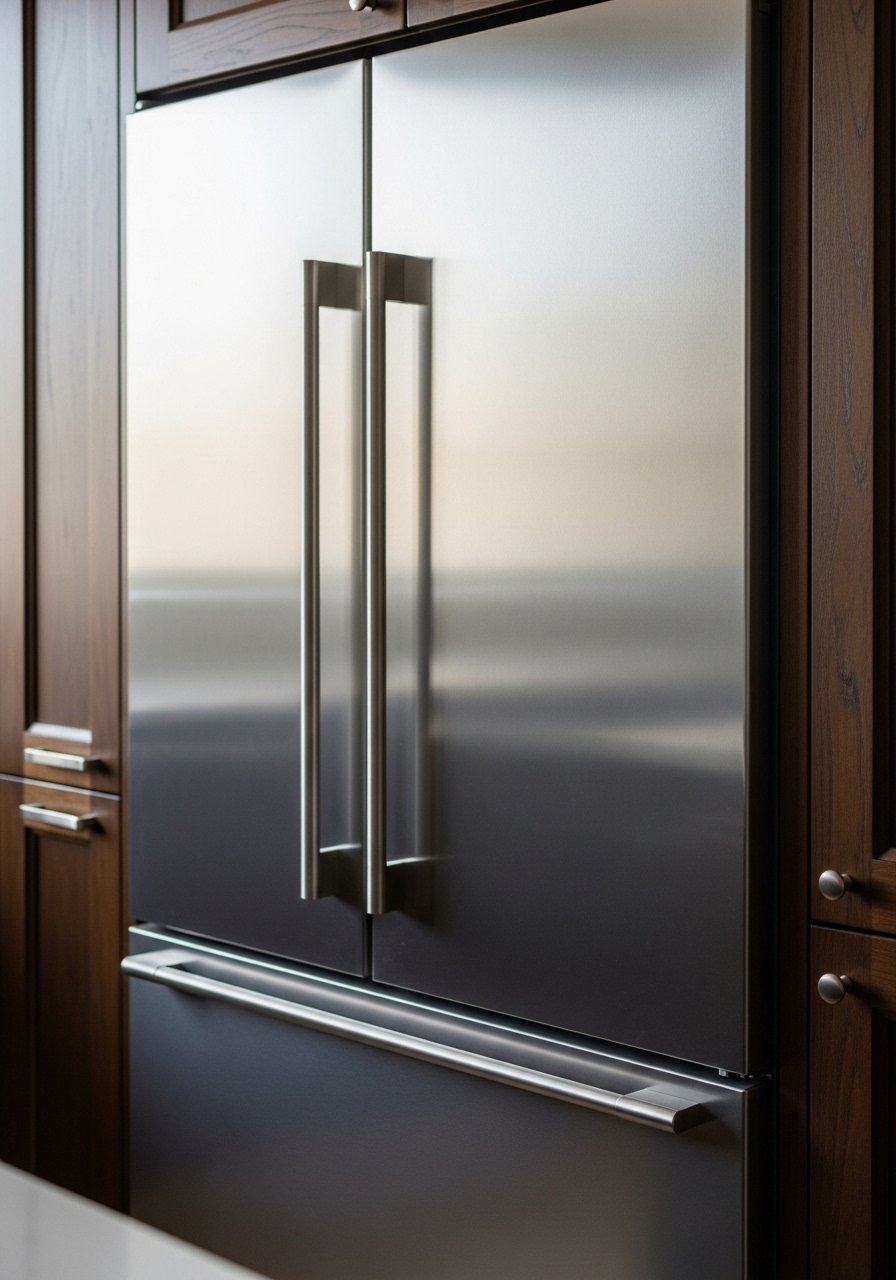
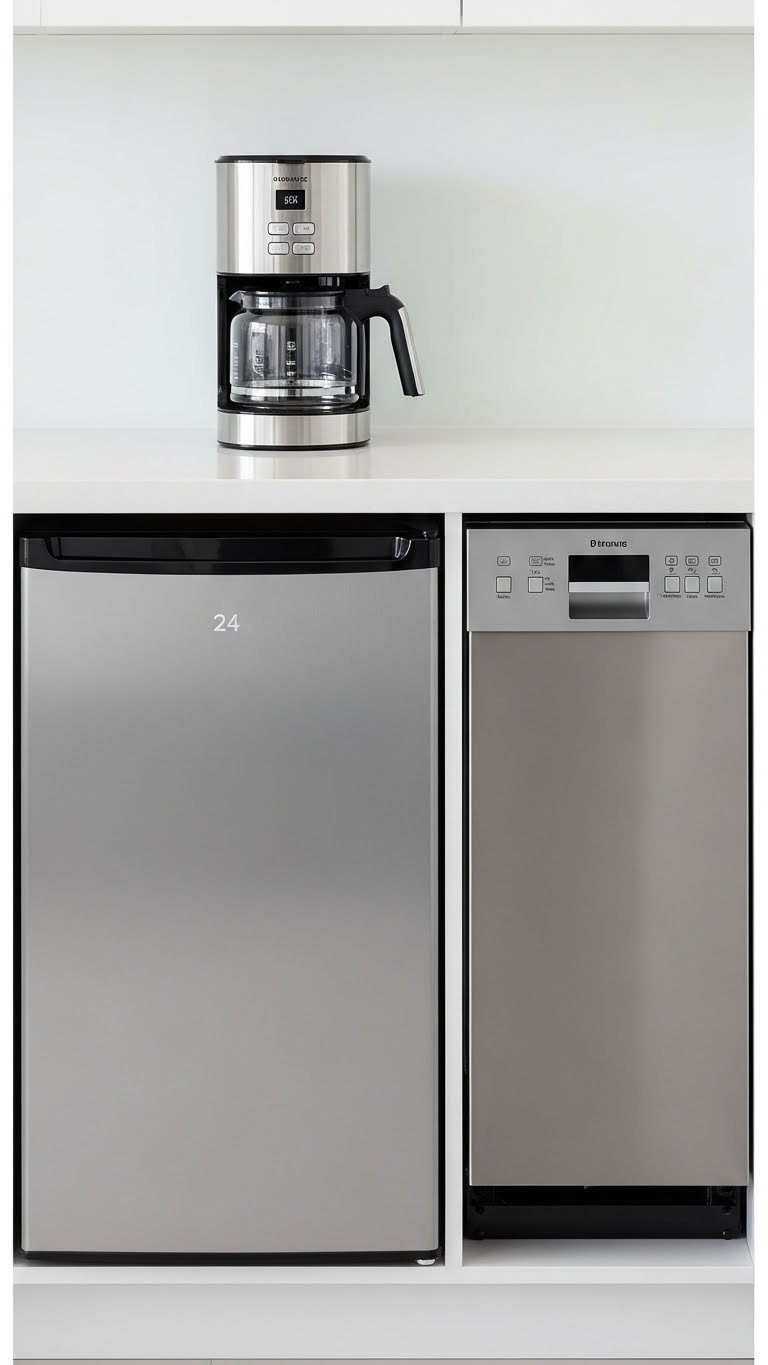
    13. Go Low-Profile with Streamlined Appliances

    Oversized appliances are the enemy of small kitchens. Downsizing to compact, counter-depth, or 24-inch appliances creates the illusion of space while actually adding function.

    Look for 24-inch refrigerators ($800–$1,500), compact dishwashers ($500–$800), or slimline ovens ($1,200–$2,000). They cost more per cubic foot than standard sizes but save visual weight massively. If you can’t replace everything, start with your fridge—it’s the largest visual anchor. Stainless steel tends to recede; black or wood paneling blends with cabinets for a built-in look. Home Depot, Lowe’s, and specialty appliance retailers carry compact options.

    Pro tip: Choose white or black over stainless in small kitchens—it feels less heavy.

    This single choice makes your kitchen breathe and look intentionally designed rather than squeezed into a tiny space.

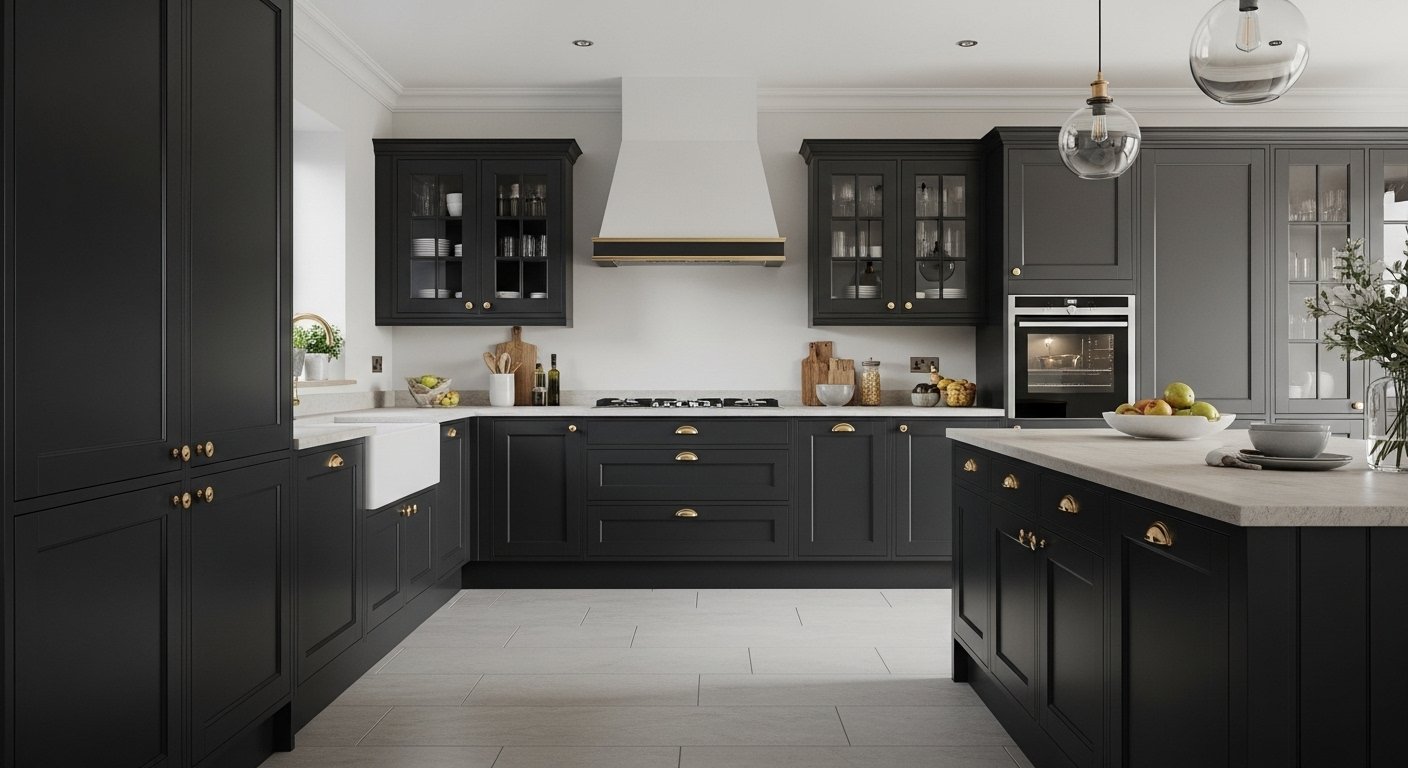
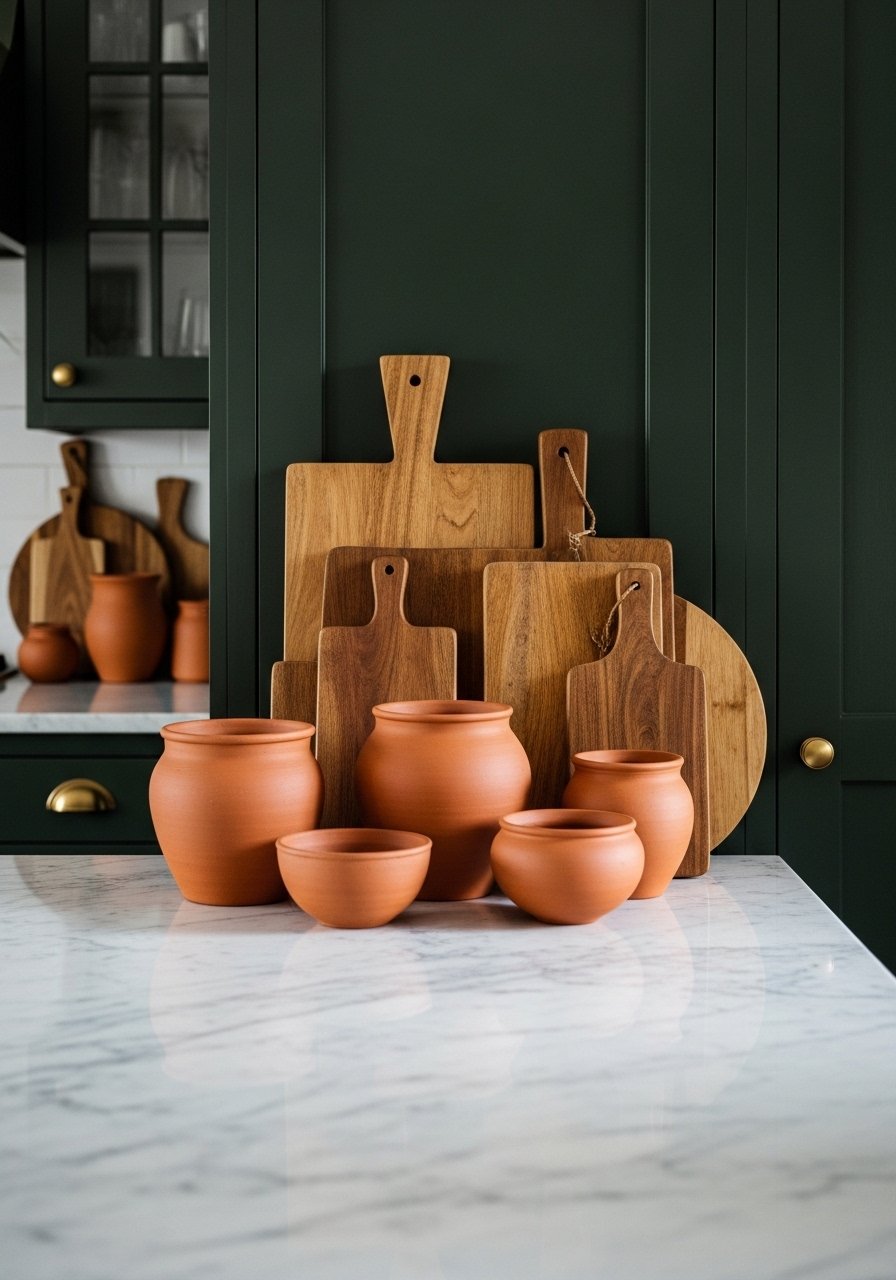
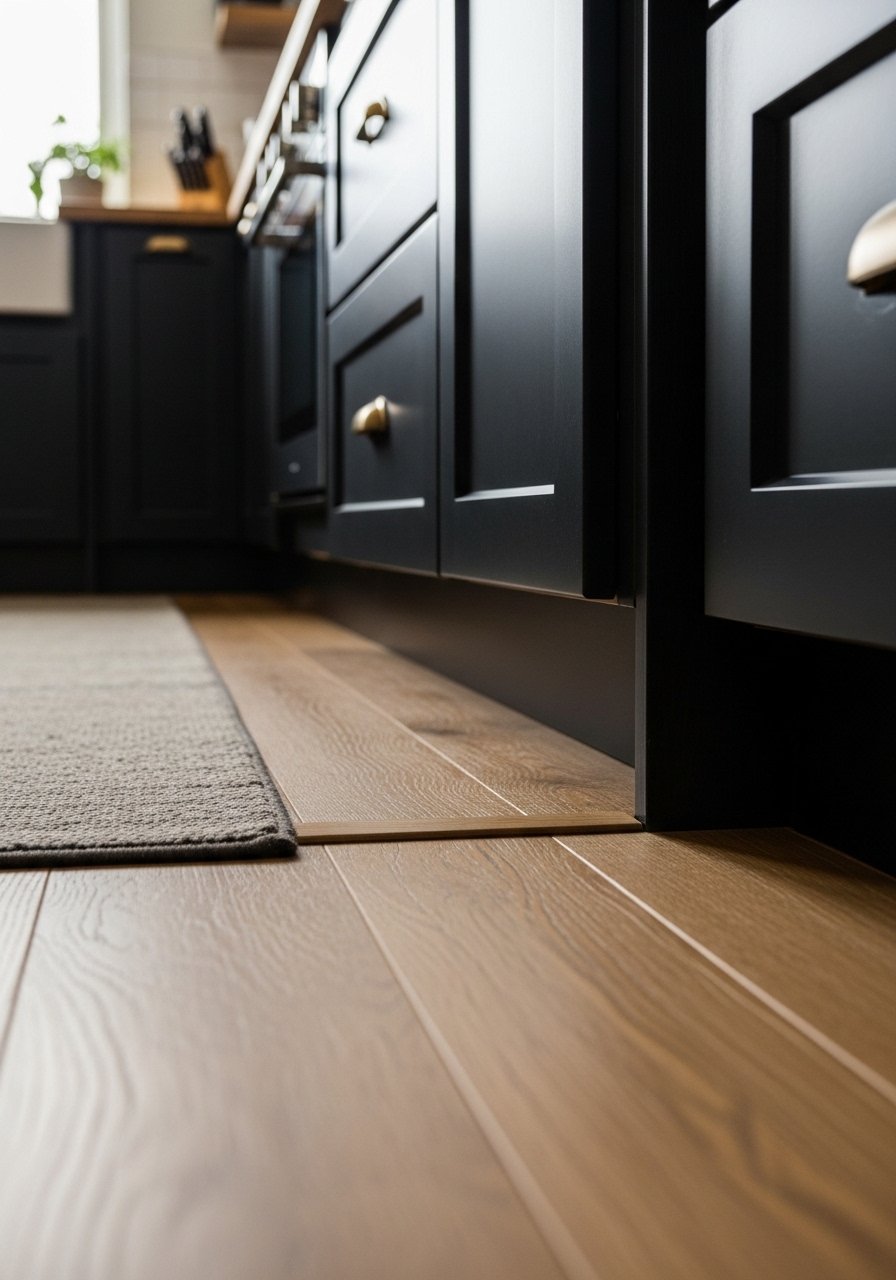
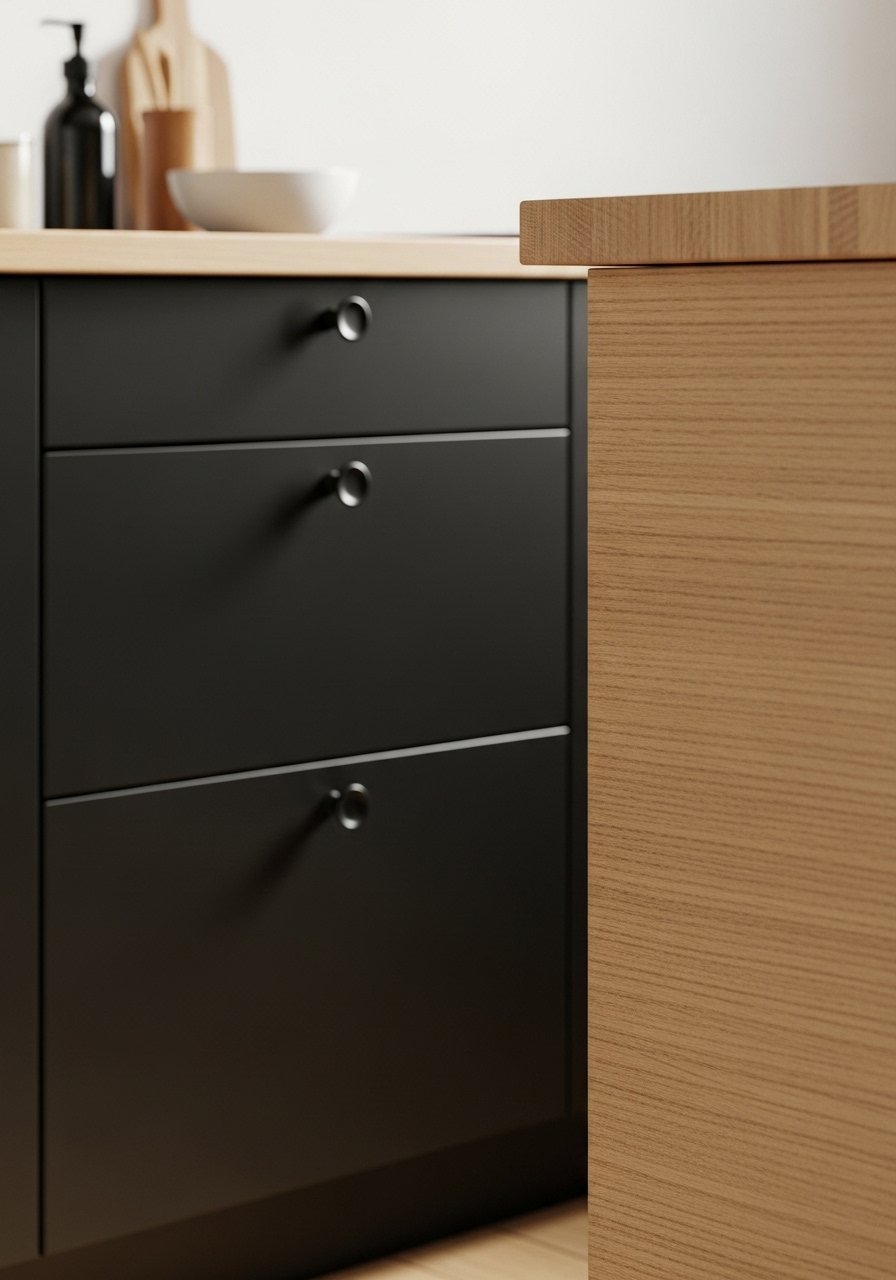
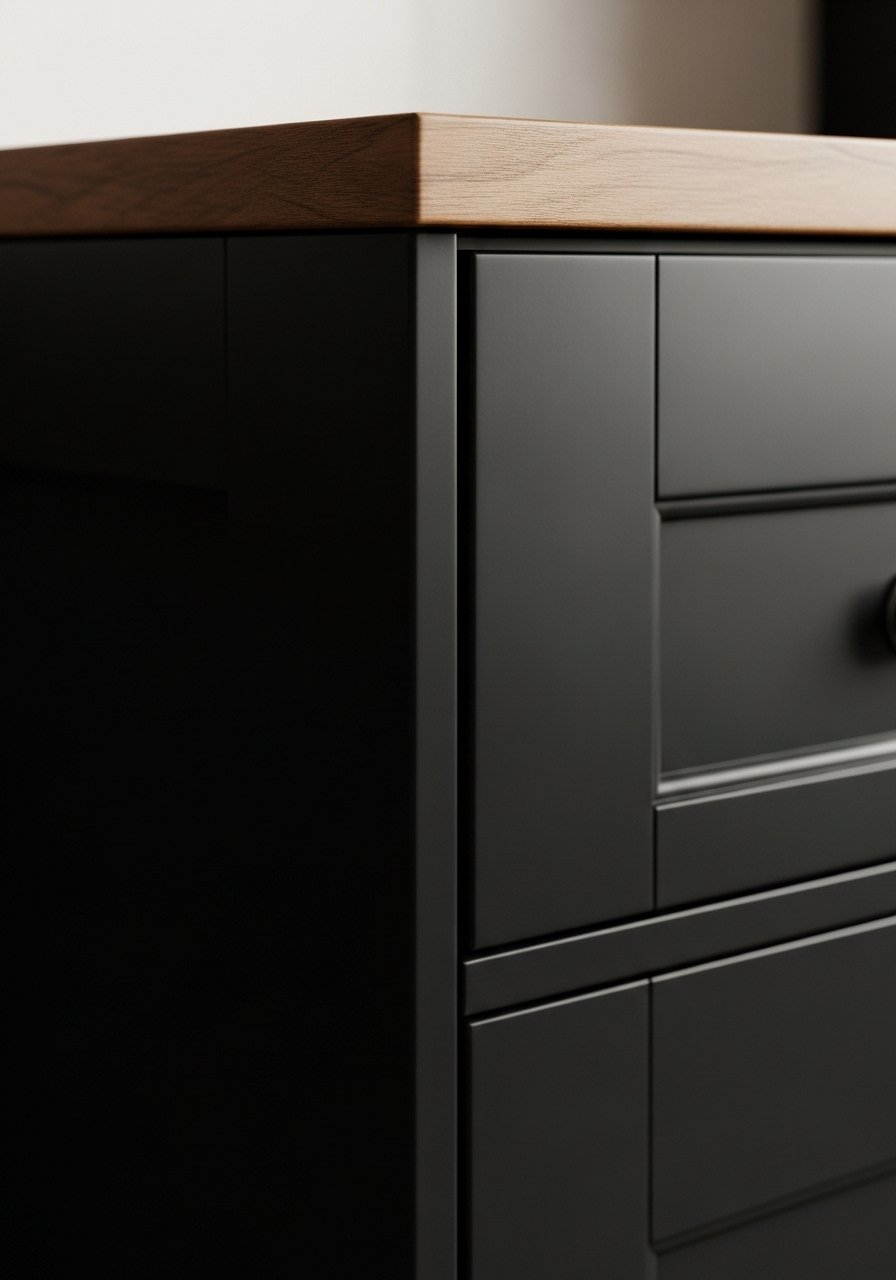
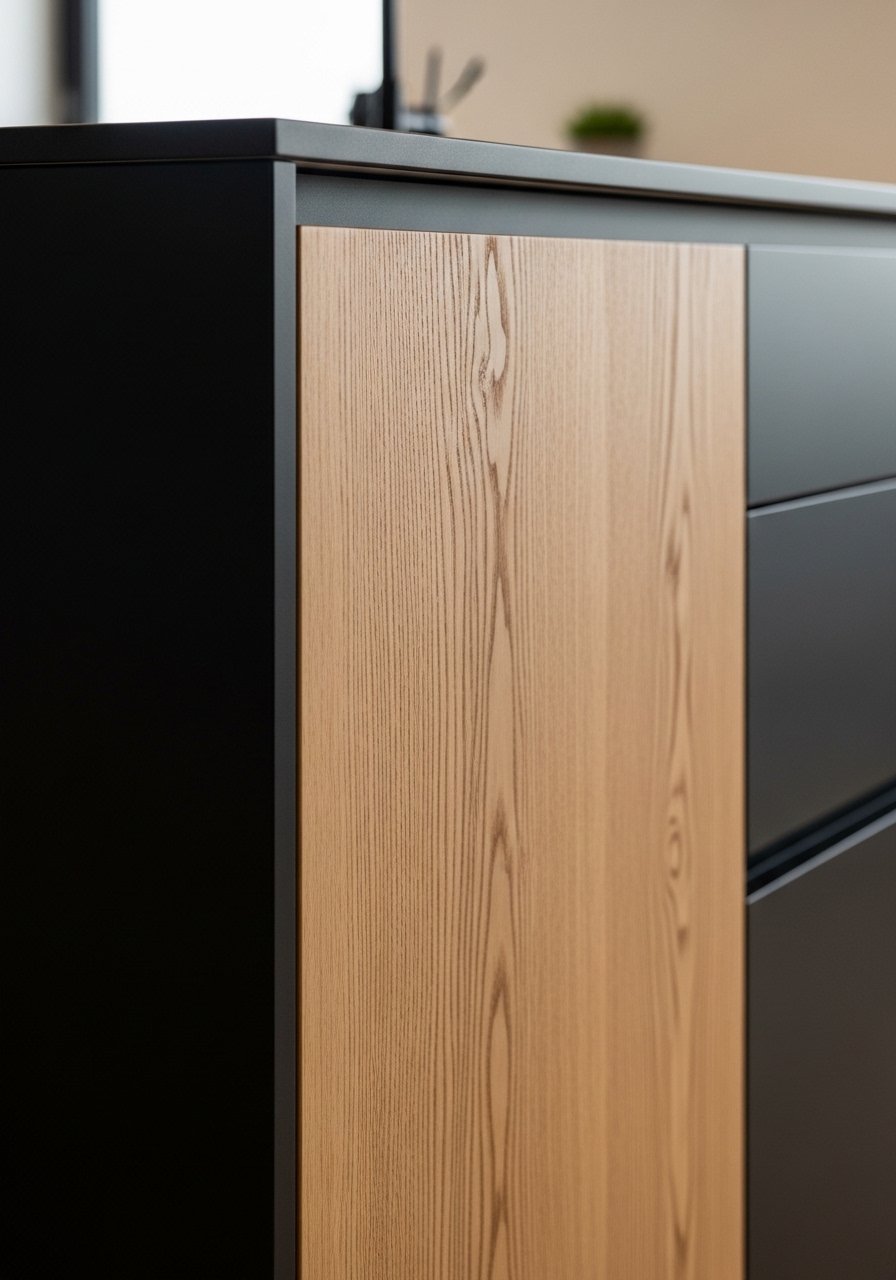
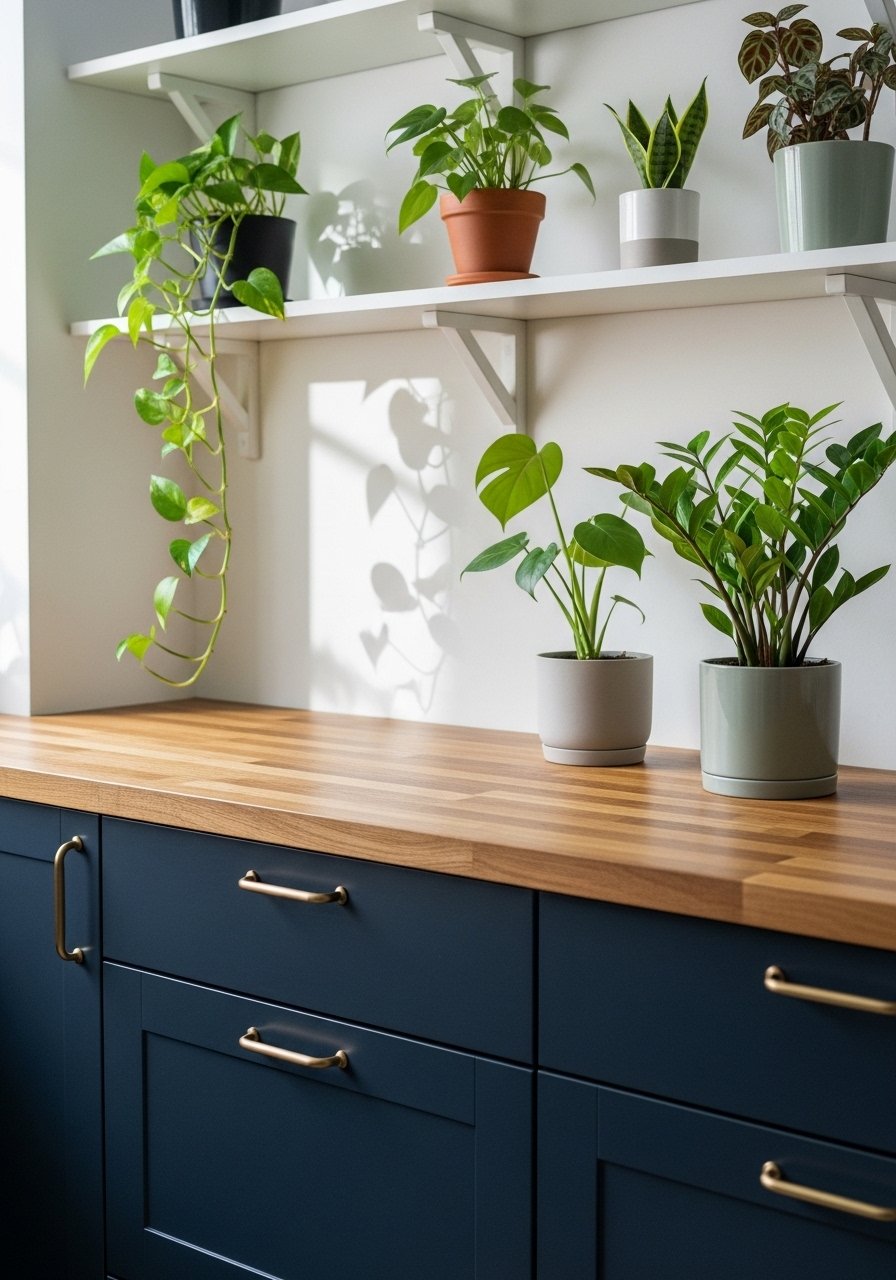
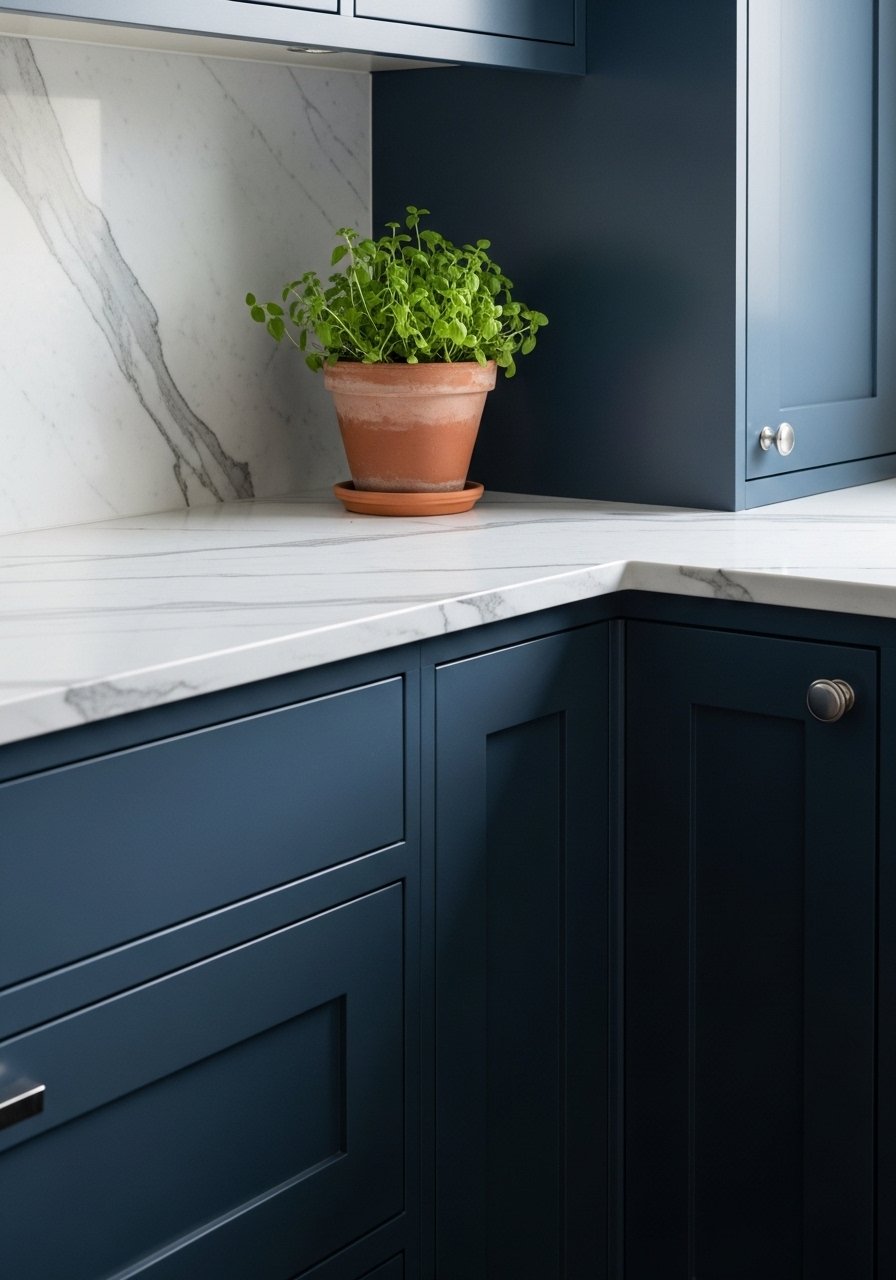
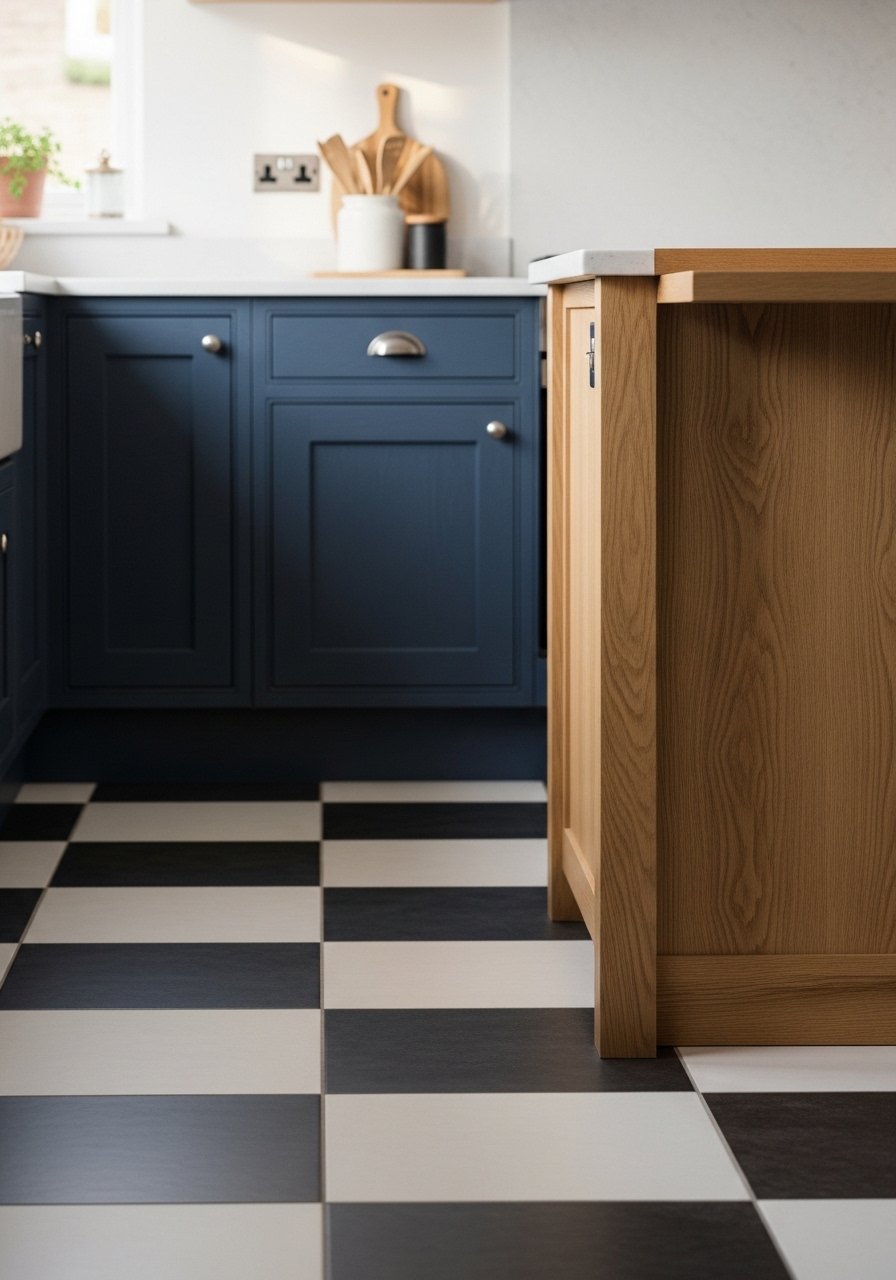
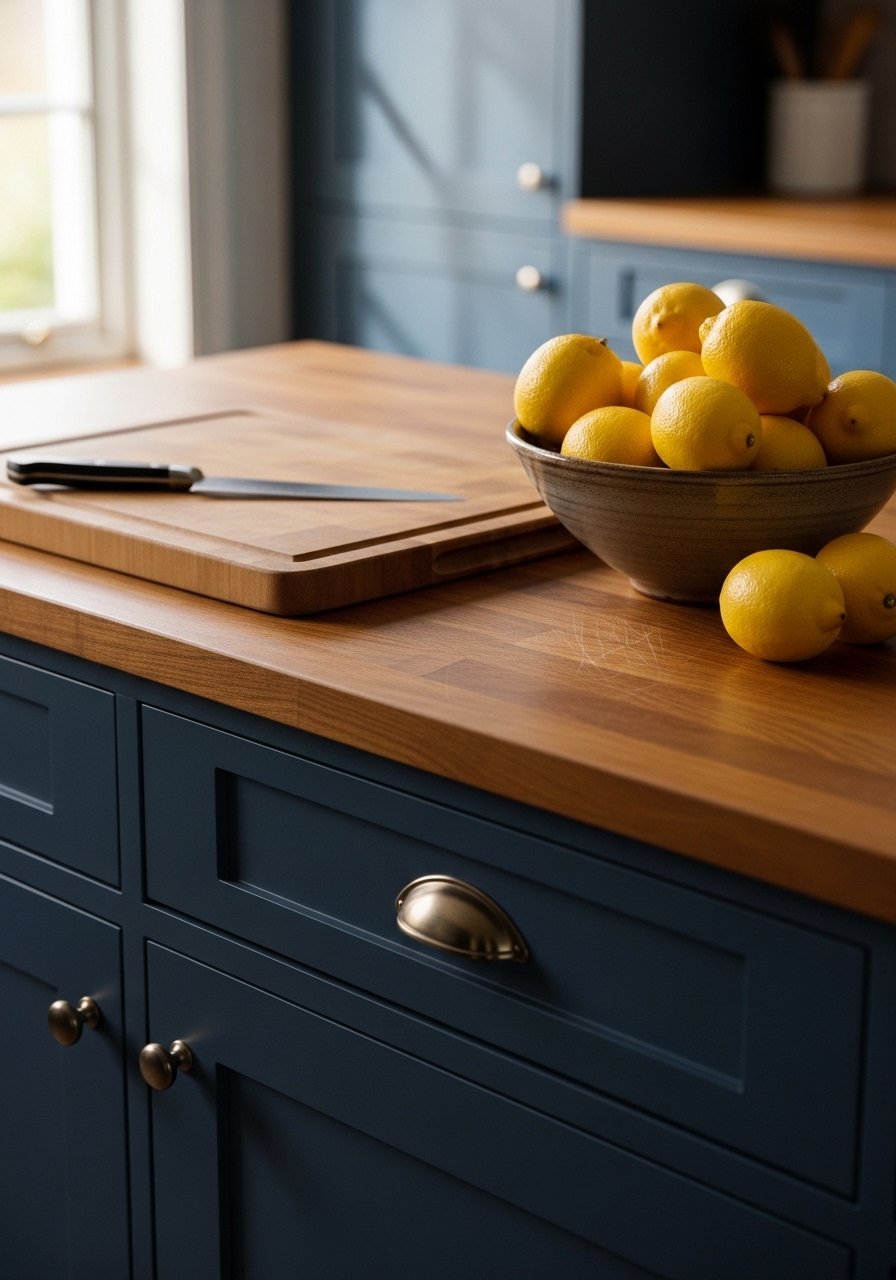
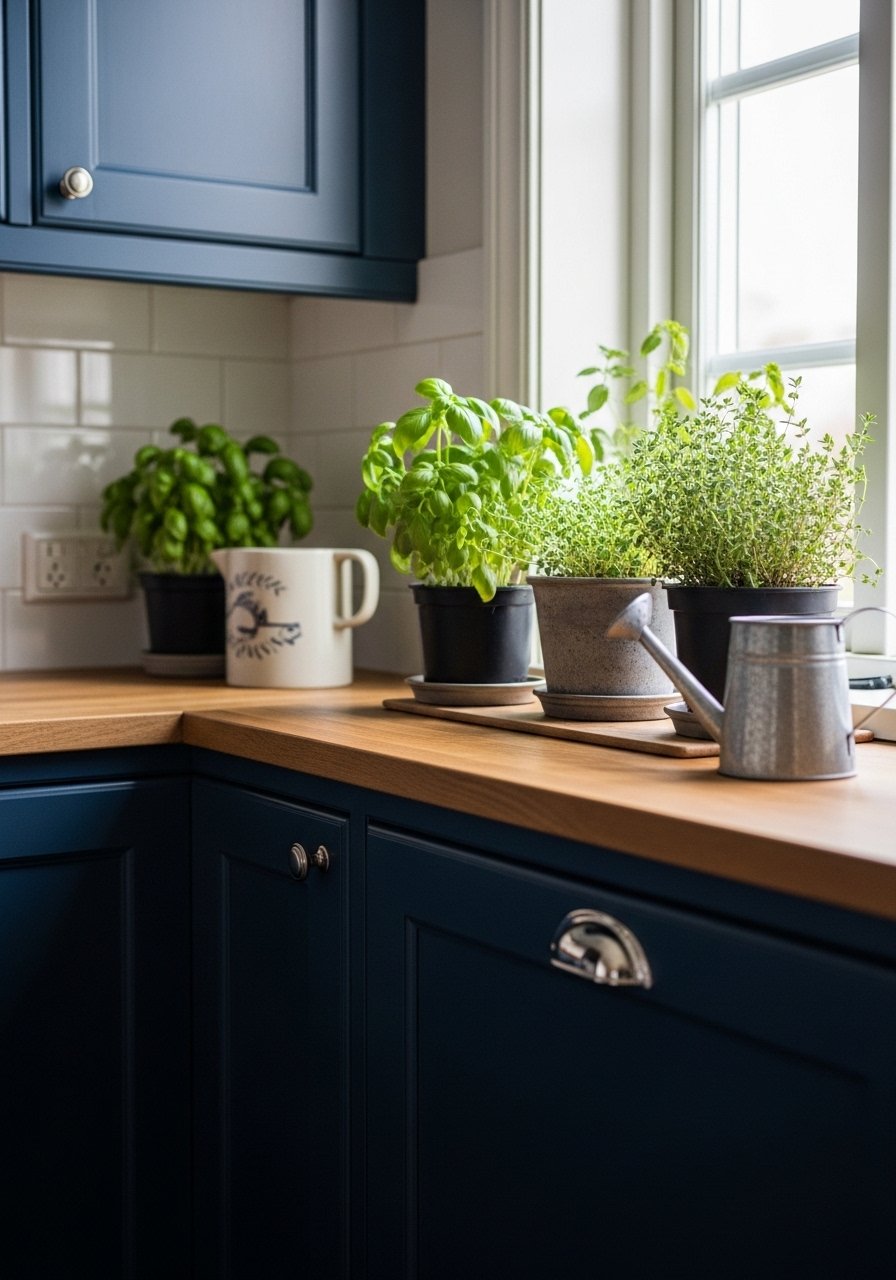
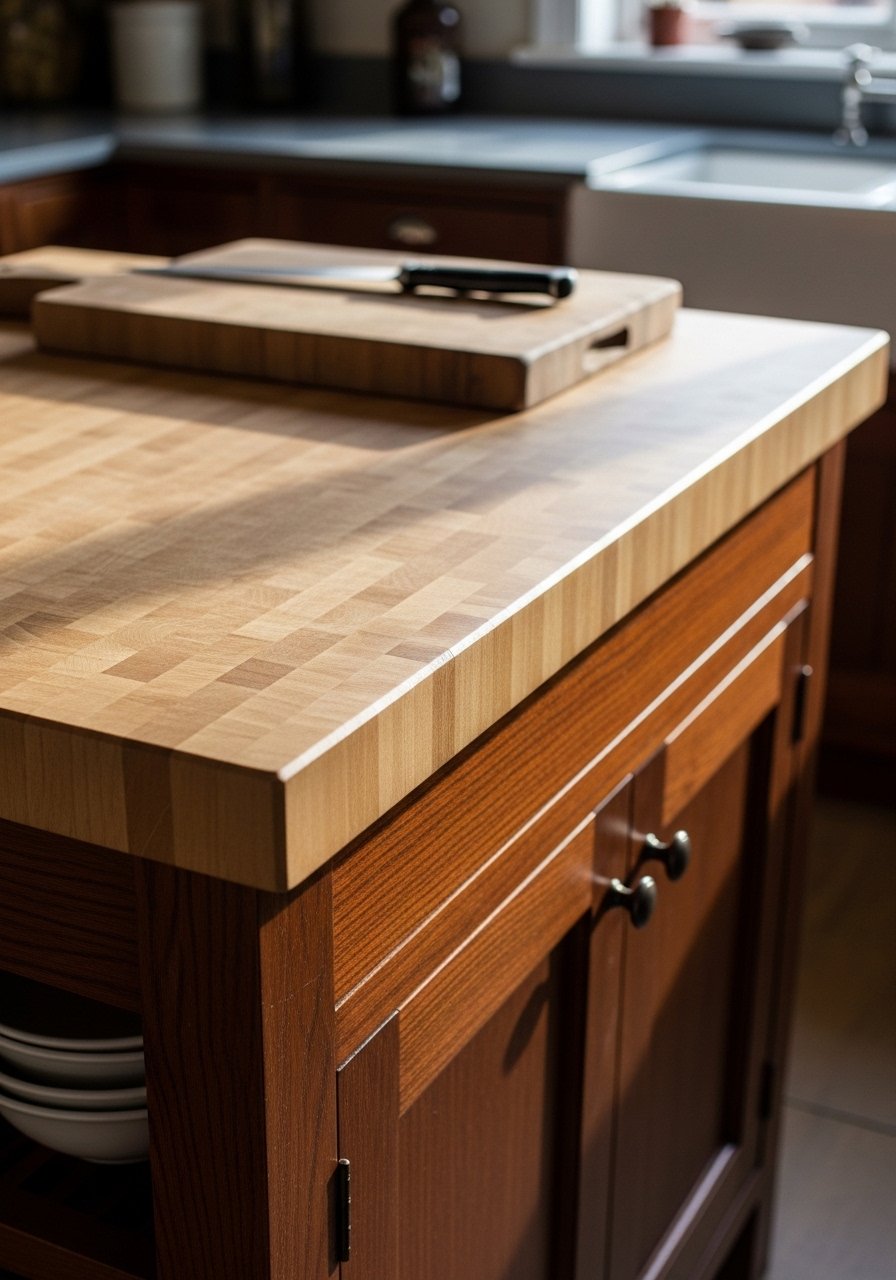
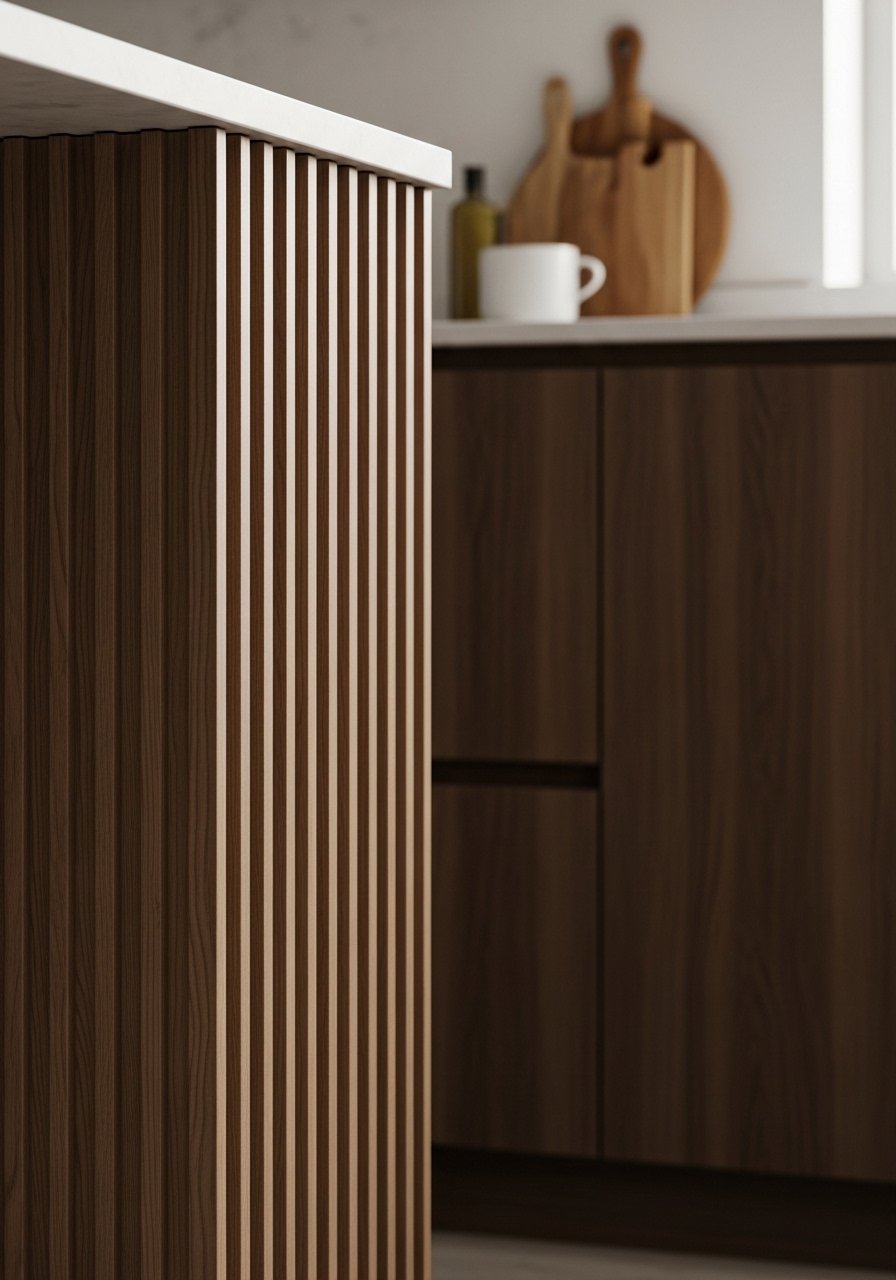
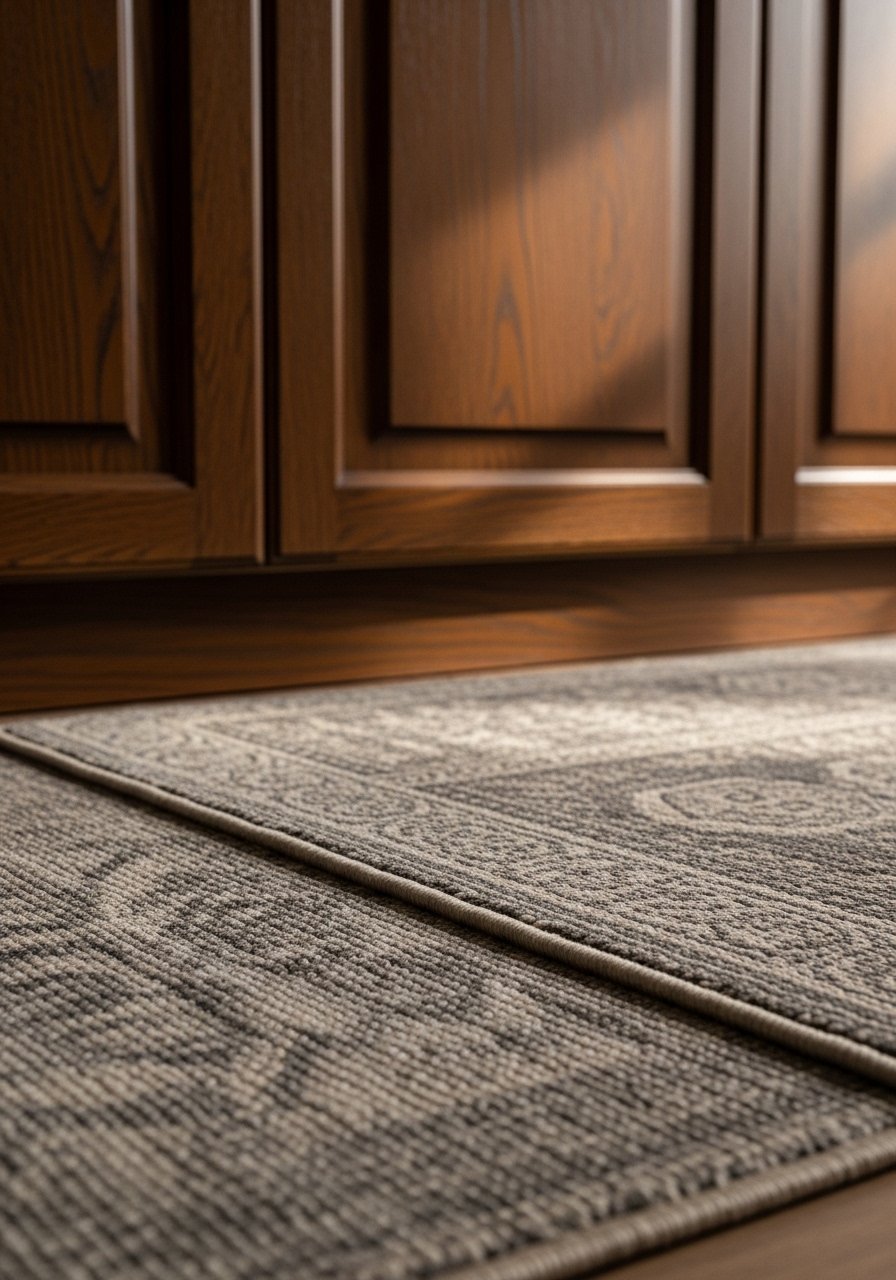
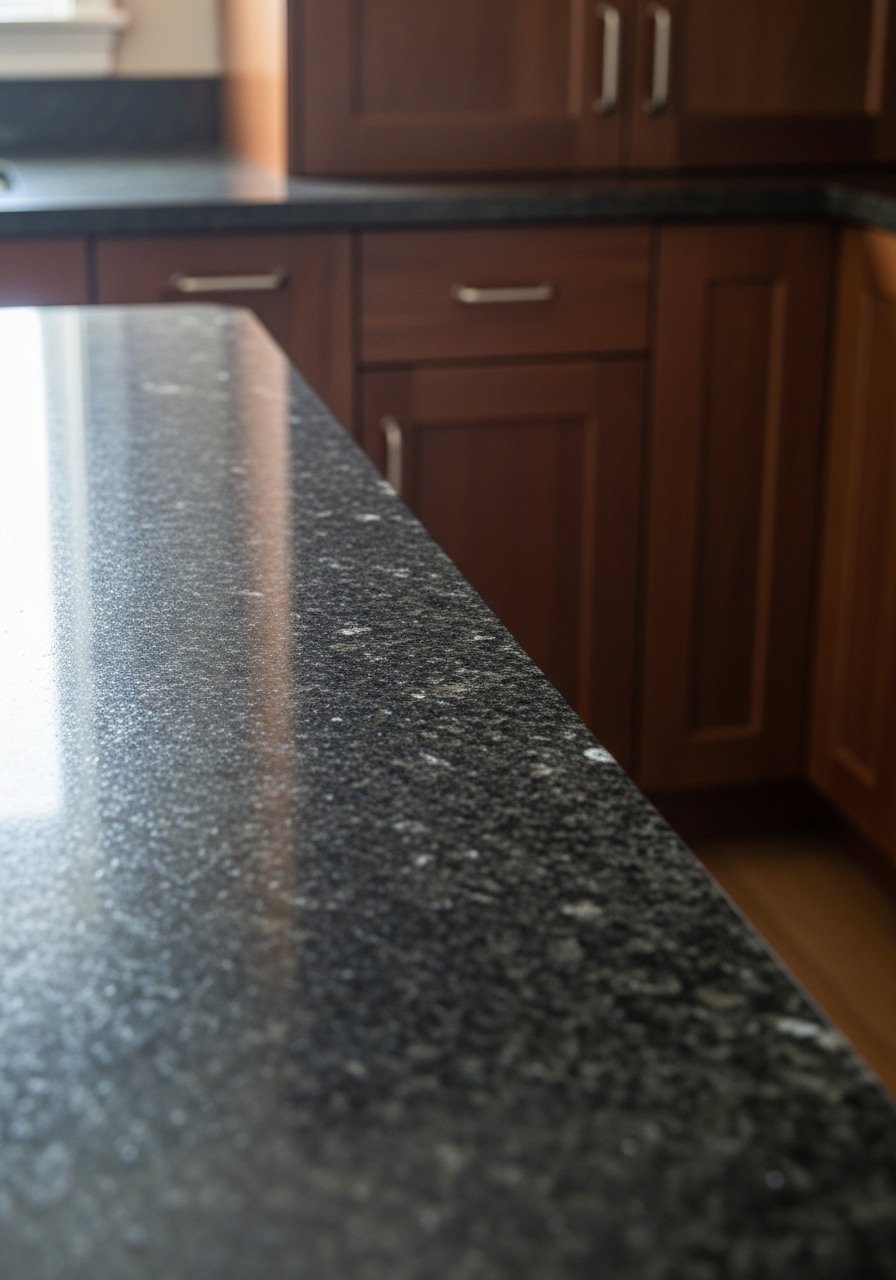
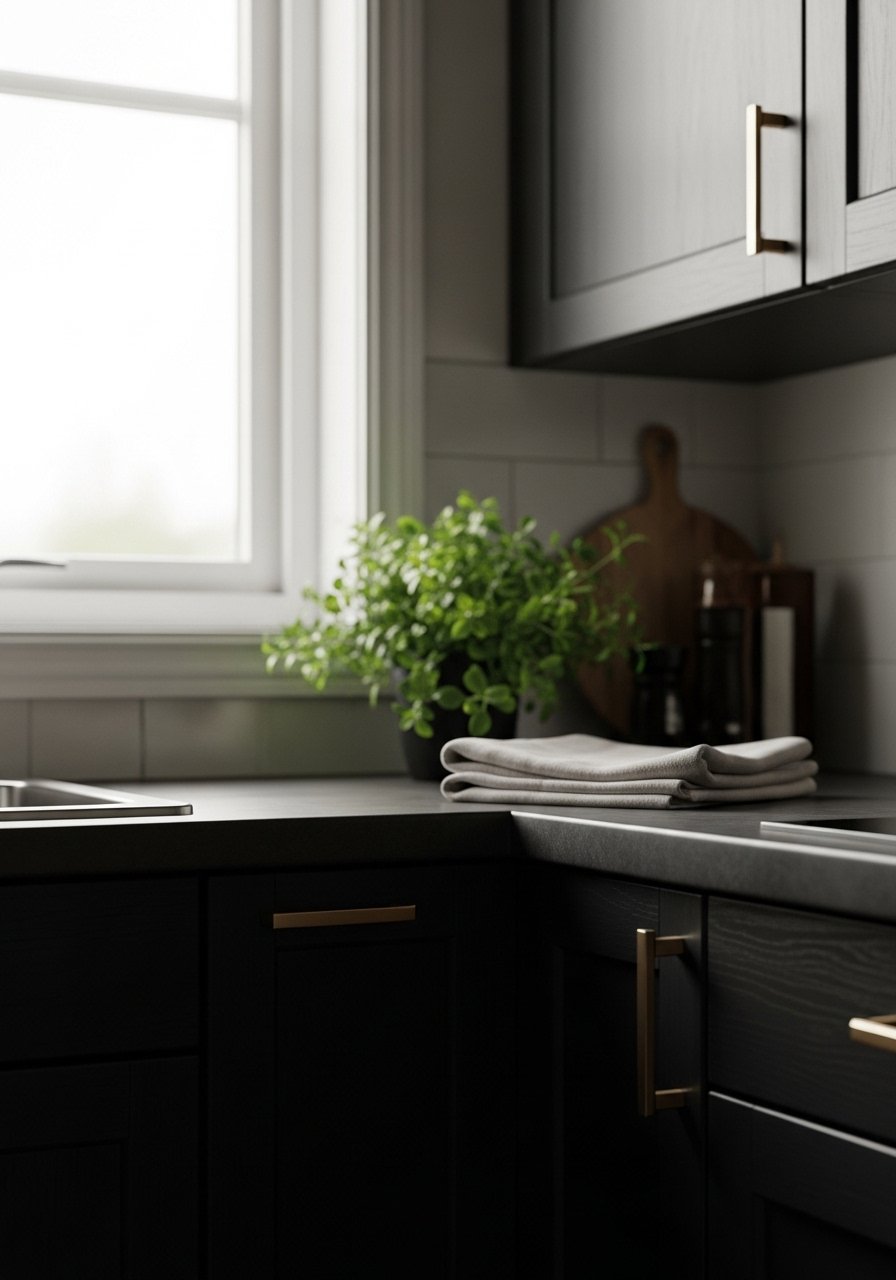
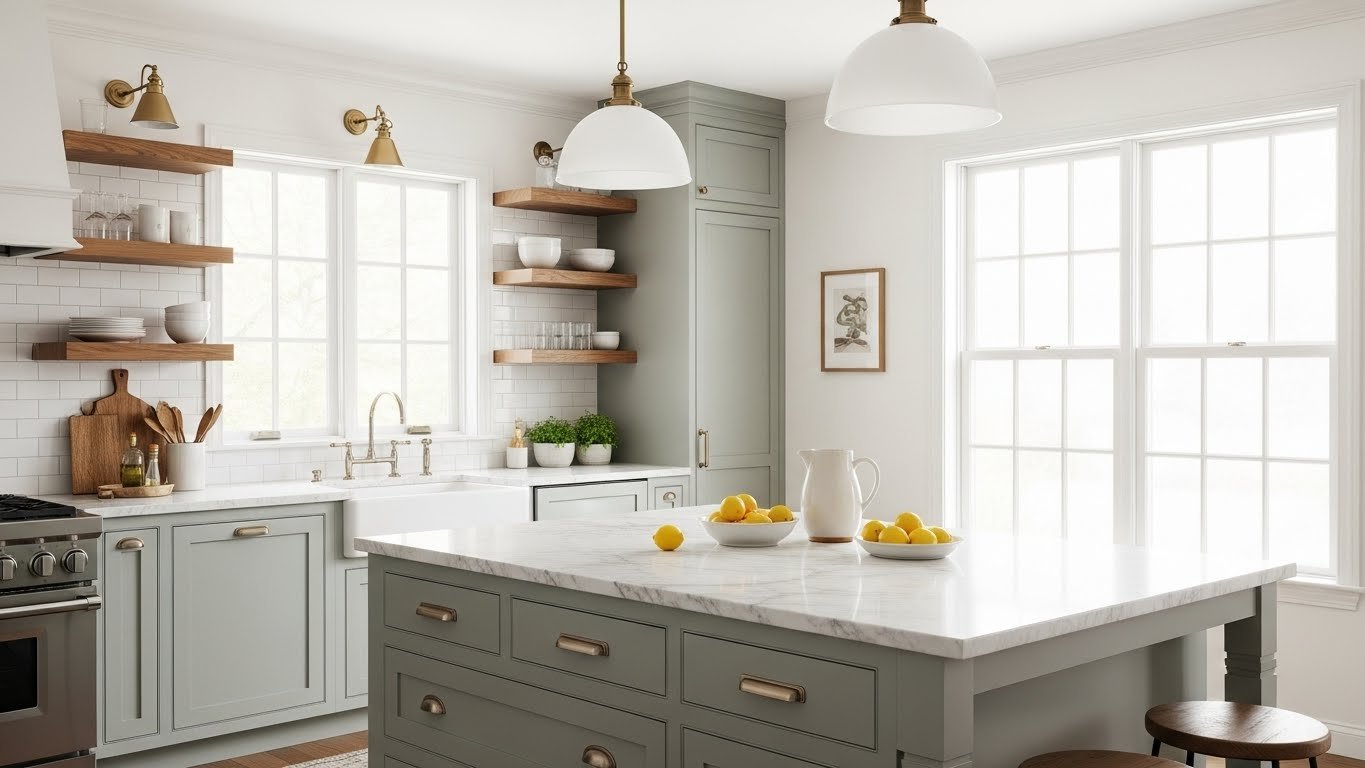
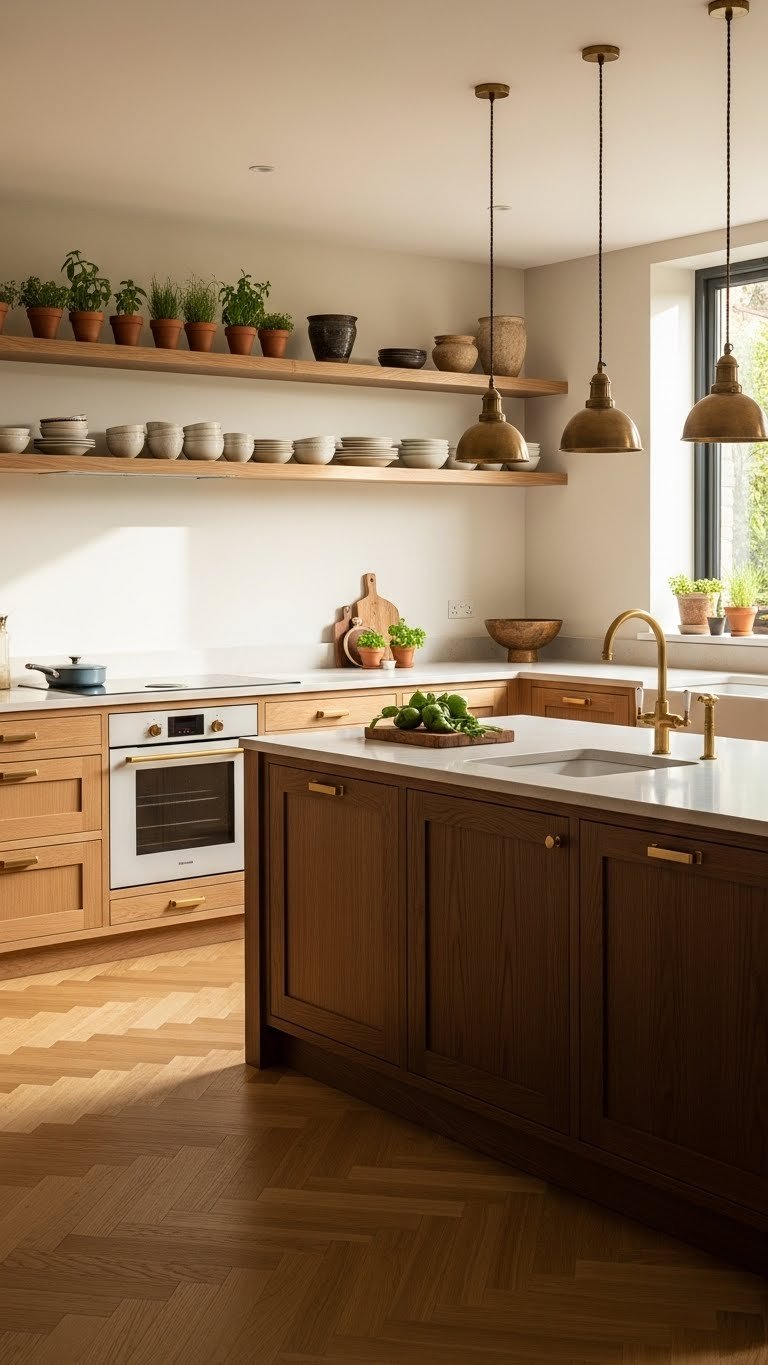
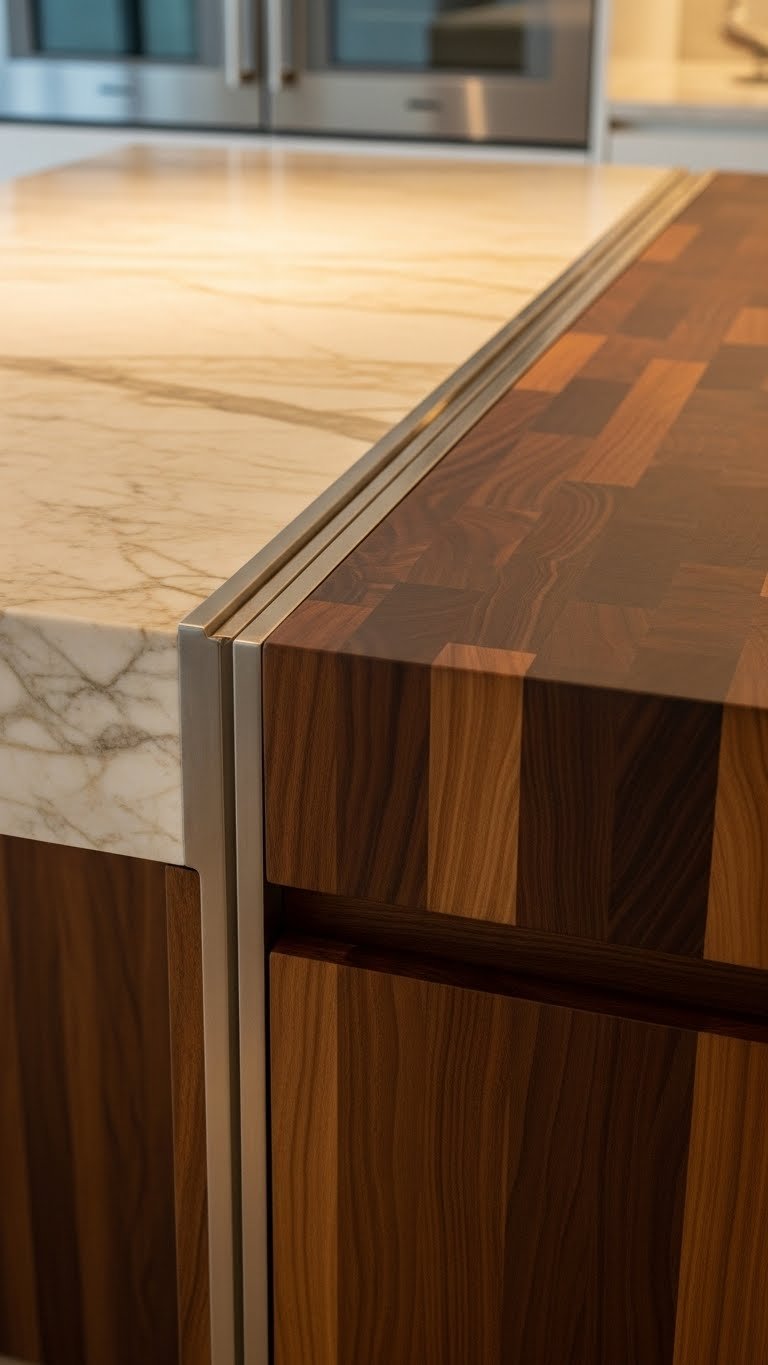
    14. Layer Warm Wood Tones with Painted Cabinets

    Mixing painted cabinets with warm wood creates depth and personality without overwhelming a small space. The 2025 comeback of walnut and oak pairs perfectly with soft greens and blues.

    Paint your lower cabinets ($100–$400 in paint and labor) in sage green or soft blue, then pair with a warm wood countertop in walnut, oak, or butcher block ($800–$2,500 installed). Keep open shelves in natural wood or light cream. Add brass hardware to tie it together. This layering feels curated and warm rather than matchy-matchy or sterile.

    Renter hack: use a wood-look contact paper on counters ($20–$40) to test the combo before committing.

    You create a space that feels both modern and grounded—sophisticated without being cold.

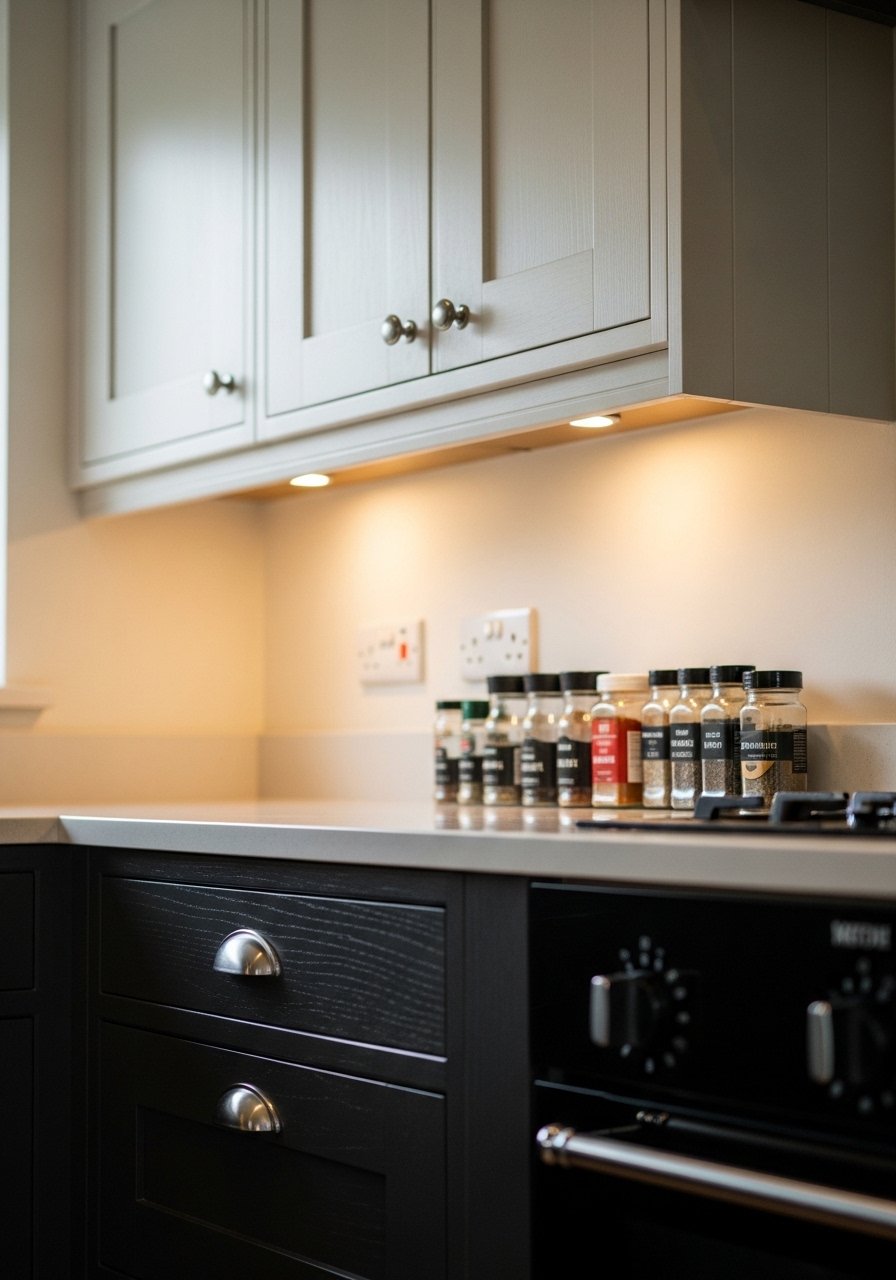
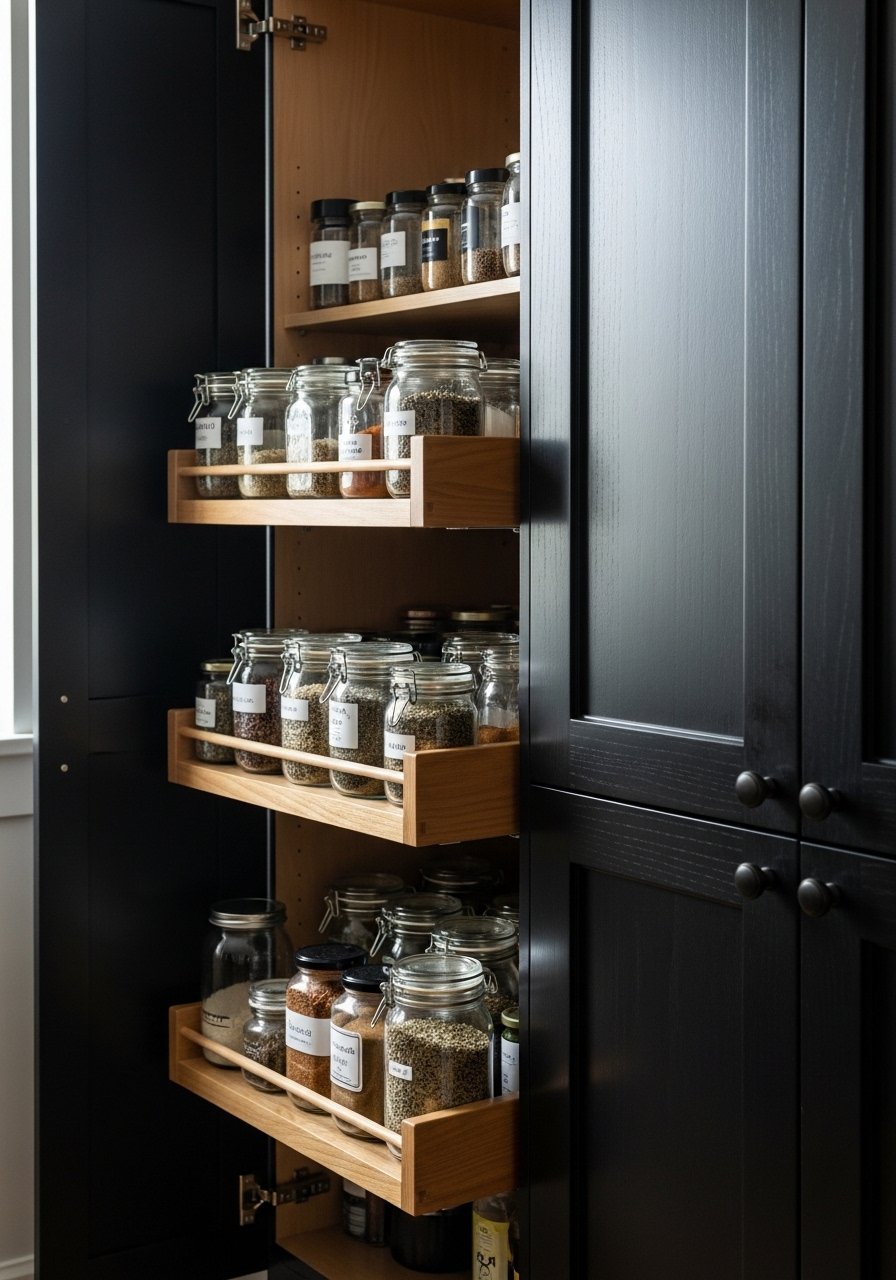
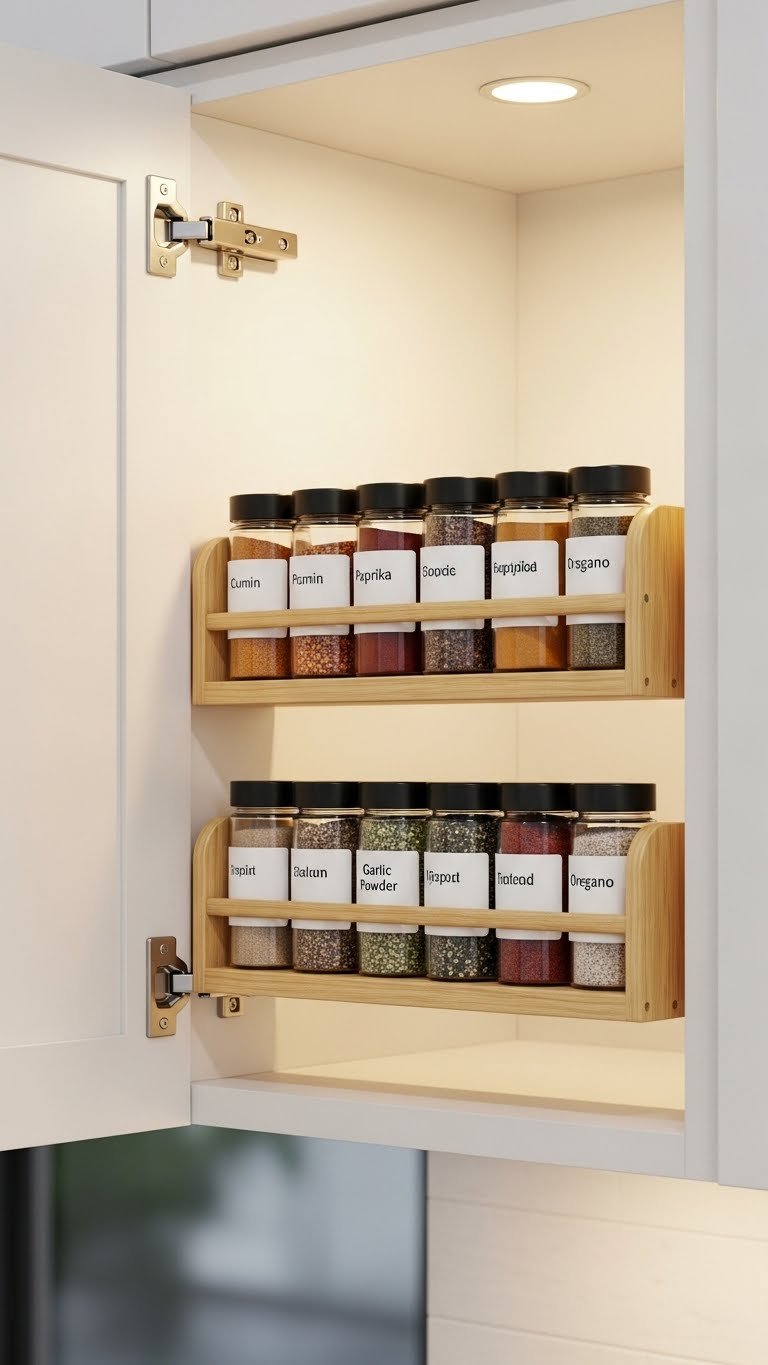
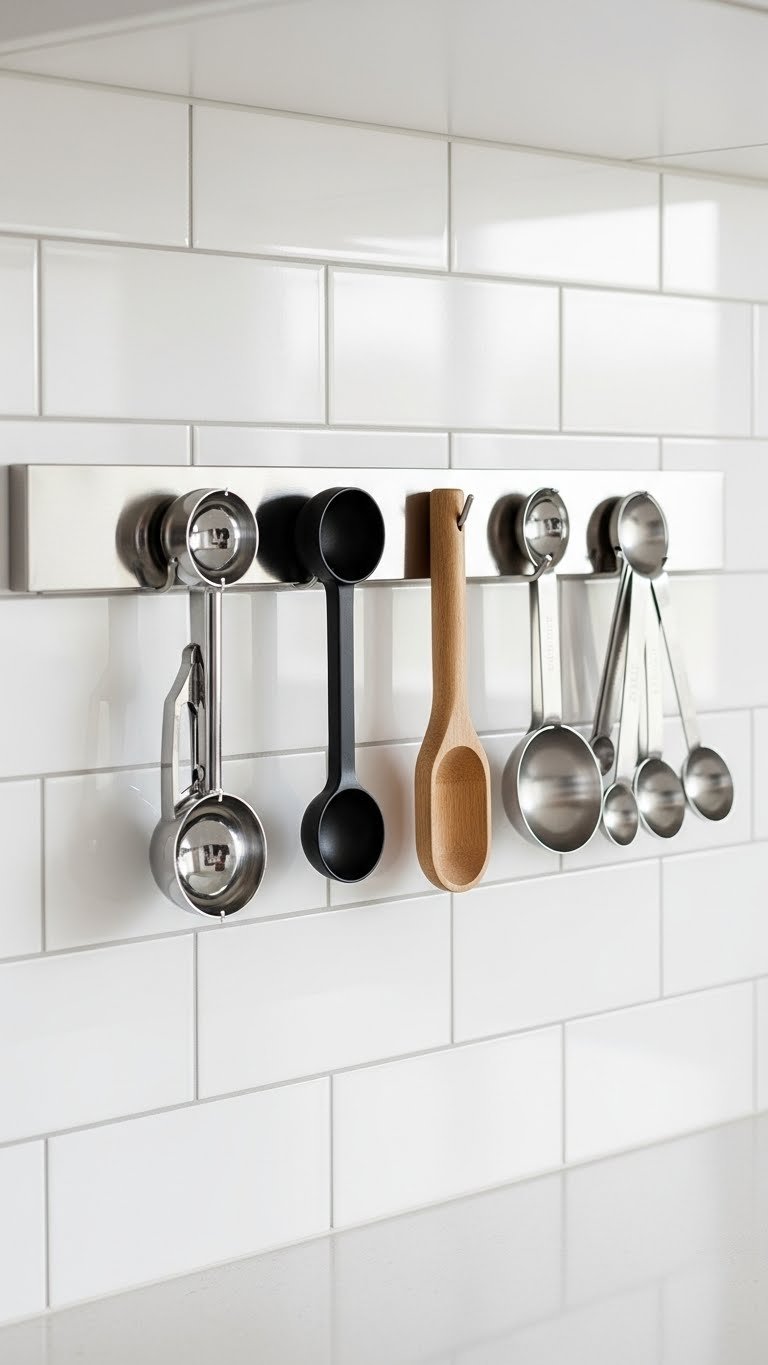
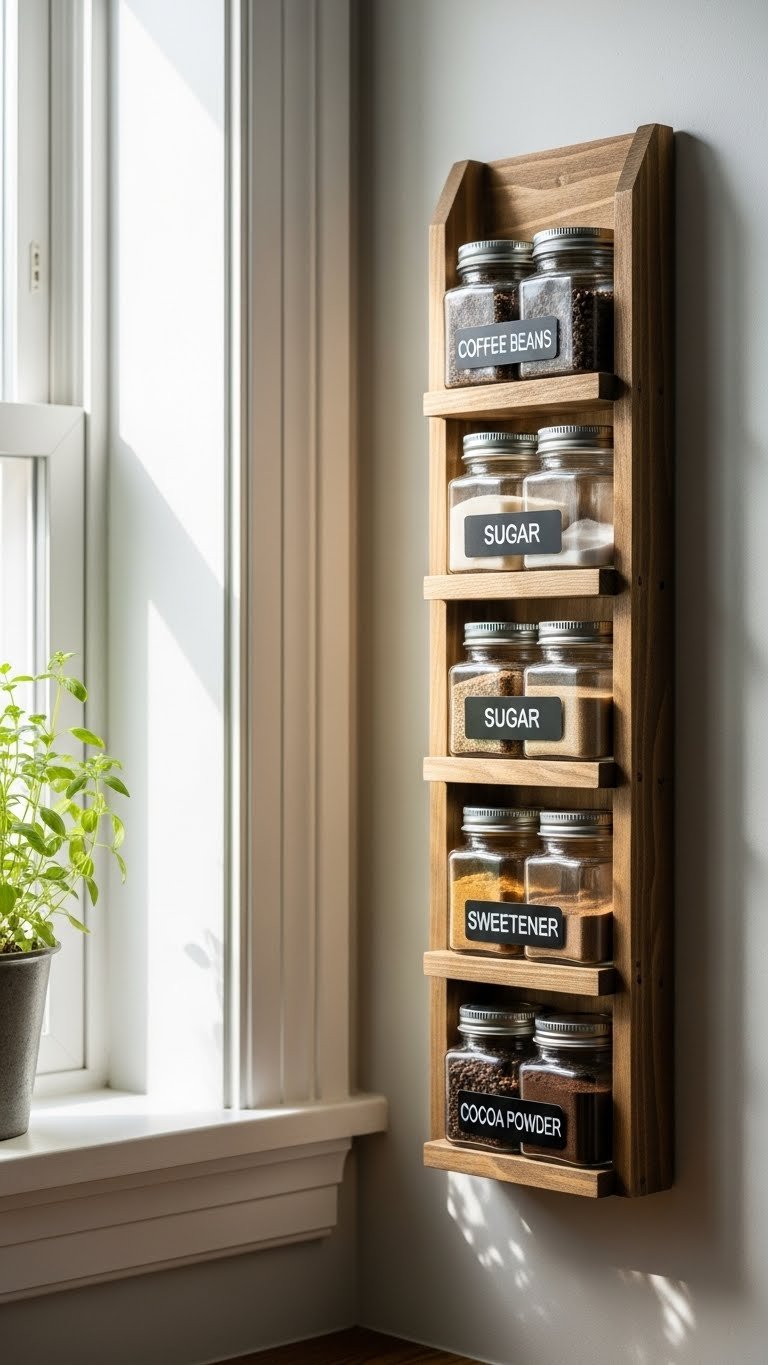
    15. Install Slim Spice Racks on Cabinet Sides

    Spices hide in cabinets and get forgotten; wall-mounted spice racks keep them visible and free up precious cabinet real estate. This is especially smart in small kitchens where every inch matters.

    Mount a slim spice rack ($30–$80) on a cabinet side or thin wall section to hold 10–15 spice jars. Use matching clear containers with printed labels ($15 for a set) so everything looks intentional. Some racks come with hooks for hanging measuring spoons too. Takes 20 minutes to install. If you rent, use adhesive-backed racks ($15–$30) that come off cleanly.

    Pro tip: Alphabetize or group by category—it’s weirdly satisfying and functional.

    Now you see what you have, you use seasonings before they expire, and your cabinets open up for things that actually need hiding.

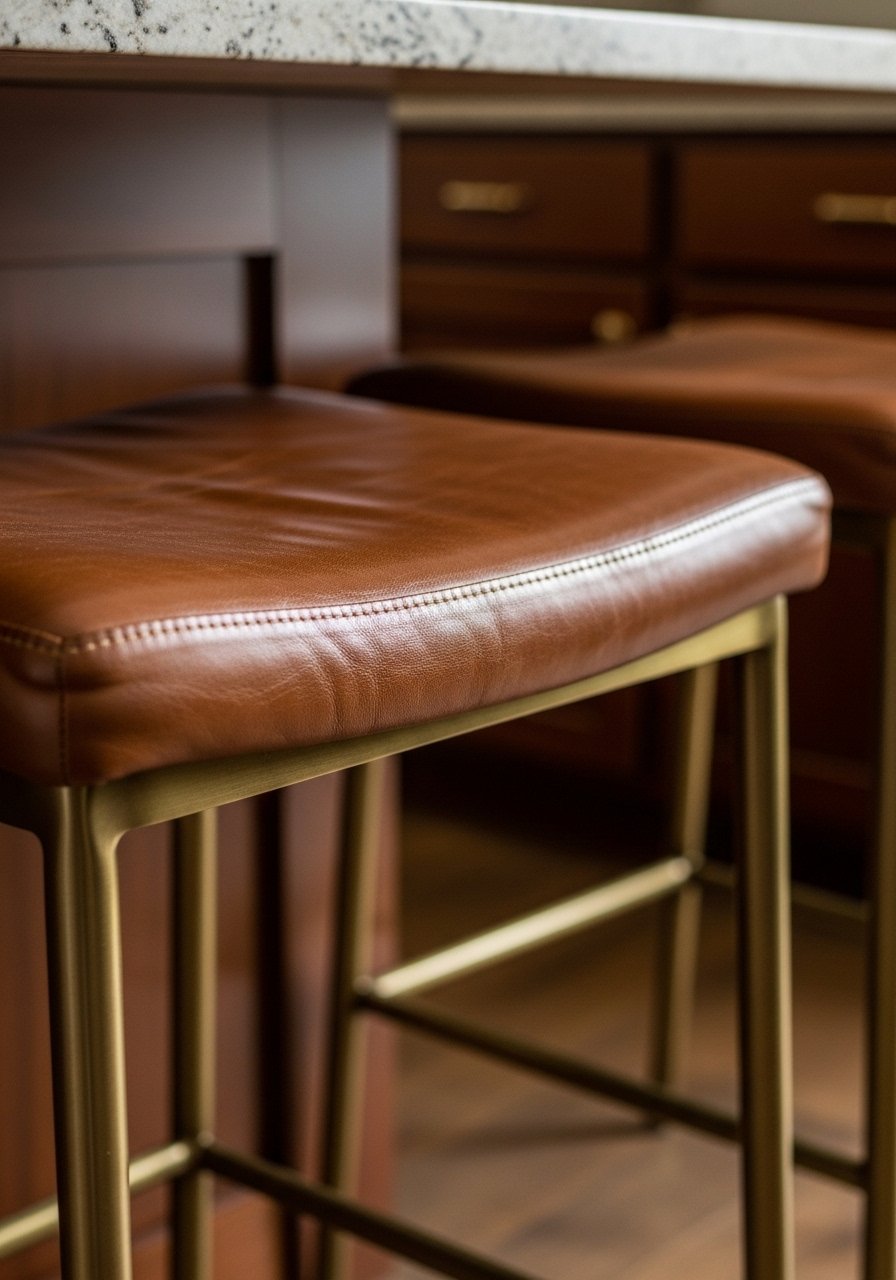
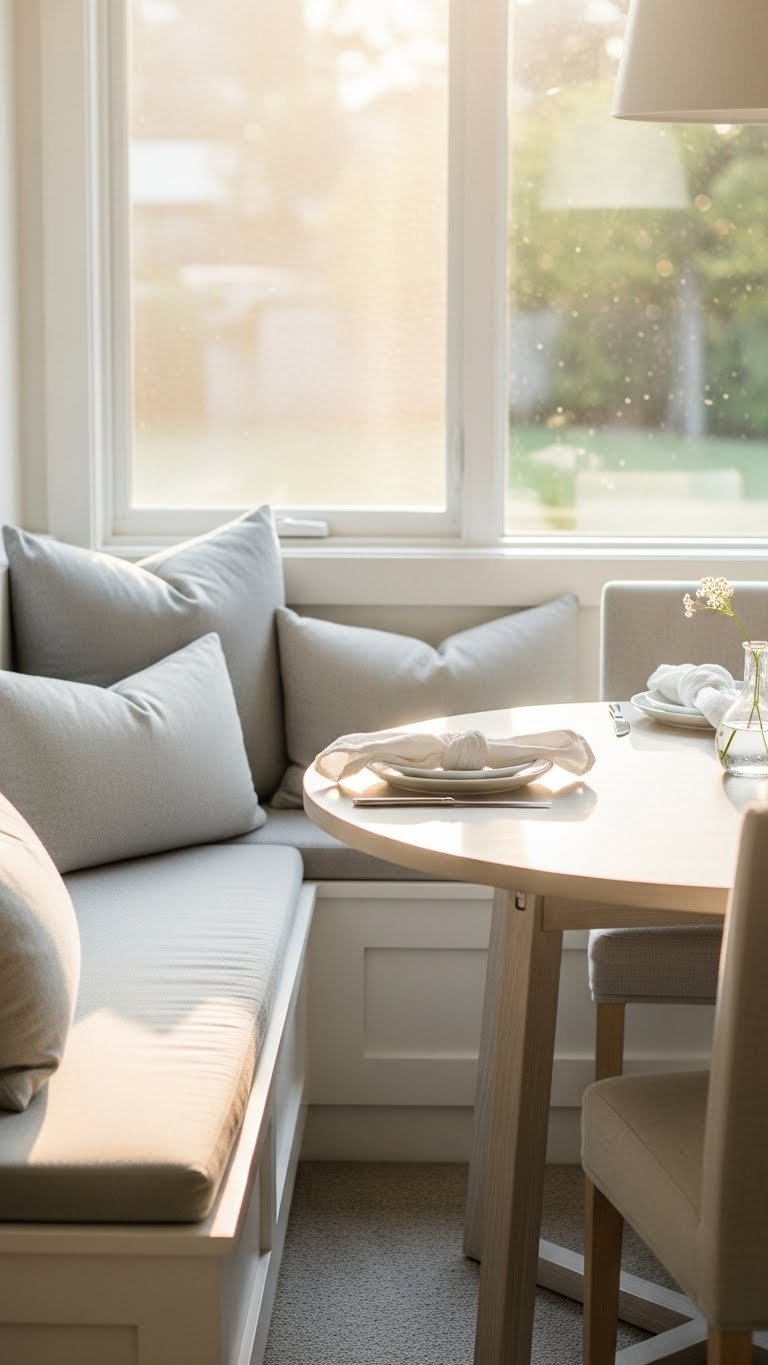
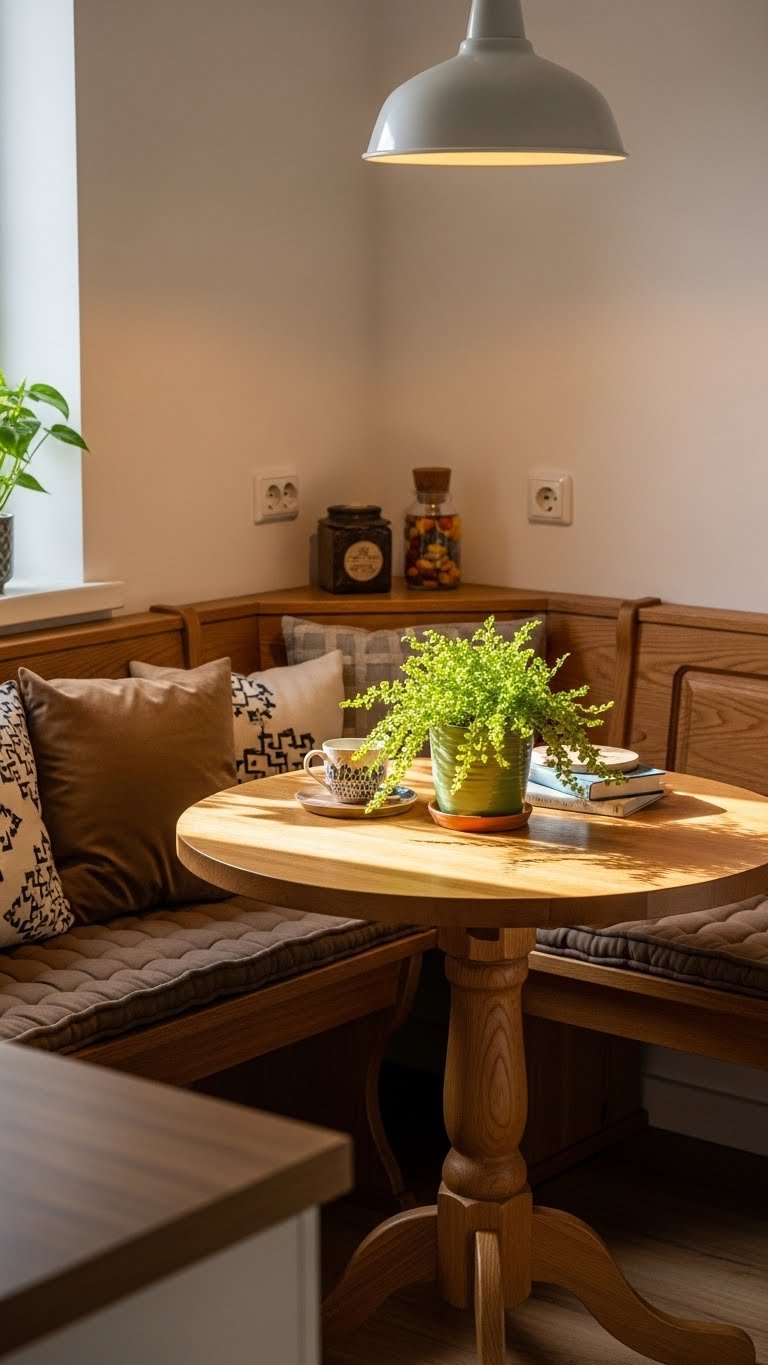
    16. Create a Dining Nook with a Corner Bench

    A corner dining nook reclaims awkward space and creates the feeling of a separate dining room without taking up floor space. Small kitchens feel bigger when they have zones.

    A freestanding corner bench with table ($300–$800) works for renters and doesn’t require installation. Or go built-in with a carpenter ($1,000–$2,500) for a custom, high-end look. Add cushions and throw pillows ($50–$150) in colors that echo your kitchen palette. This becomes a gathering spot, a workspace for kids, or a peaceful breakfast spot—it’s not just eating, it’s a vibe.

    Budget option: use an old wooden pallet or thrift a bench, add cushions, and position it in a corner.

    You’ve stolen square footage from nowhere and created a cozy, functional, Instagrammable detail that makes guests think your kitchen is bigger than it is.

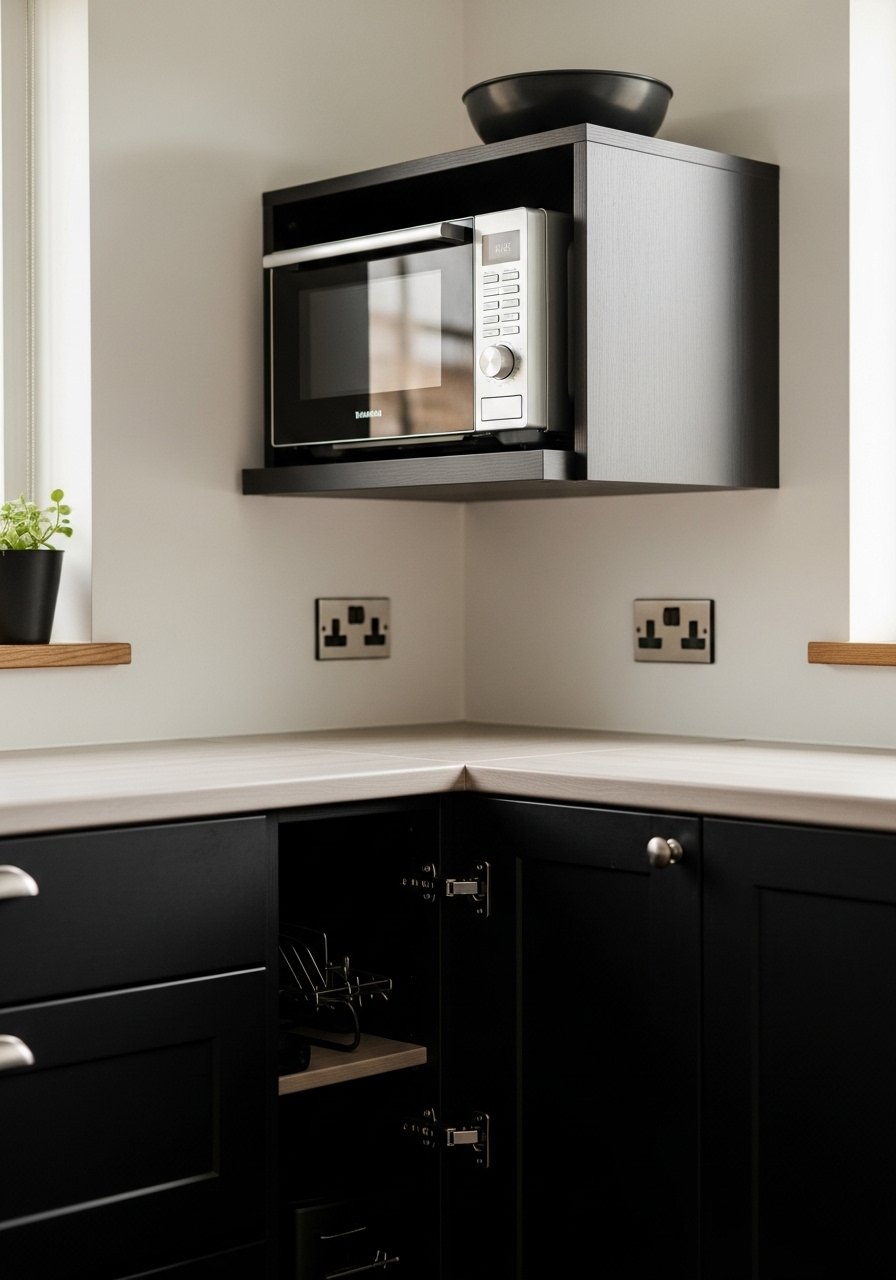
    17. Install Compact Combo Appliances (Microwave-Oven)

    Combo appliances save serious counter real estate. A microwave-convection combo ($200–$400) does the work of two machines while taking up a fraction of the space.

    Mount it under upper cabinets using a bracket ($15–$30) or on a small rolling stand ($50–$100). It microwaves, toasts, and convection-cooks—perfect for small kitchens where you can’t afford dead space. Look at Breville, Cuisinart, or Panasonic models. Installation takes 30 minutes if you’re hanging it; hire help for $50–$100 if you’re unsure.

    Real talk: it’s not a substitute for a full oven, but it handles 80% of small-kitchen cooking needs.

    You open up counter space and still have a fully functional cooking setup—it’s the small-kitchen equivalent of a studio apartment with a murphy bed.

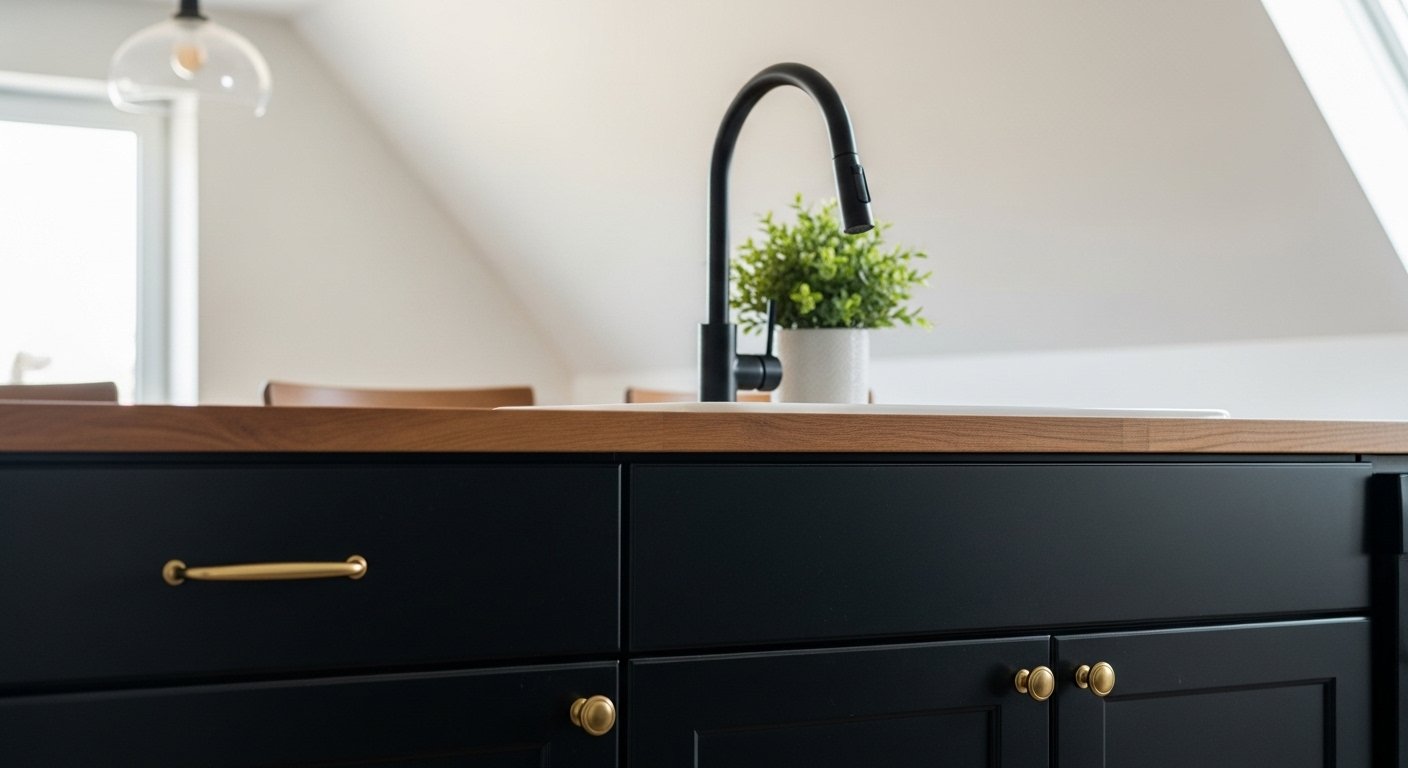
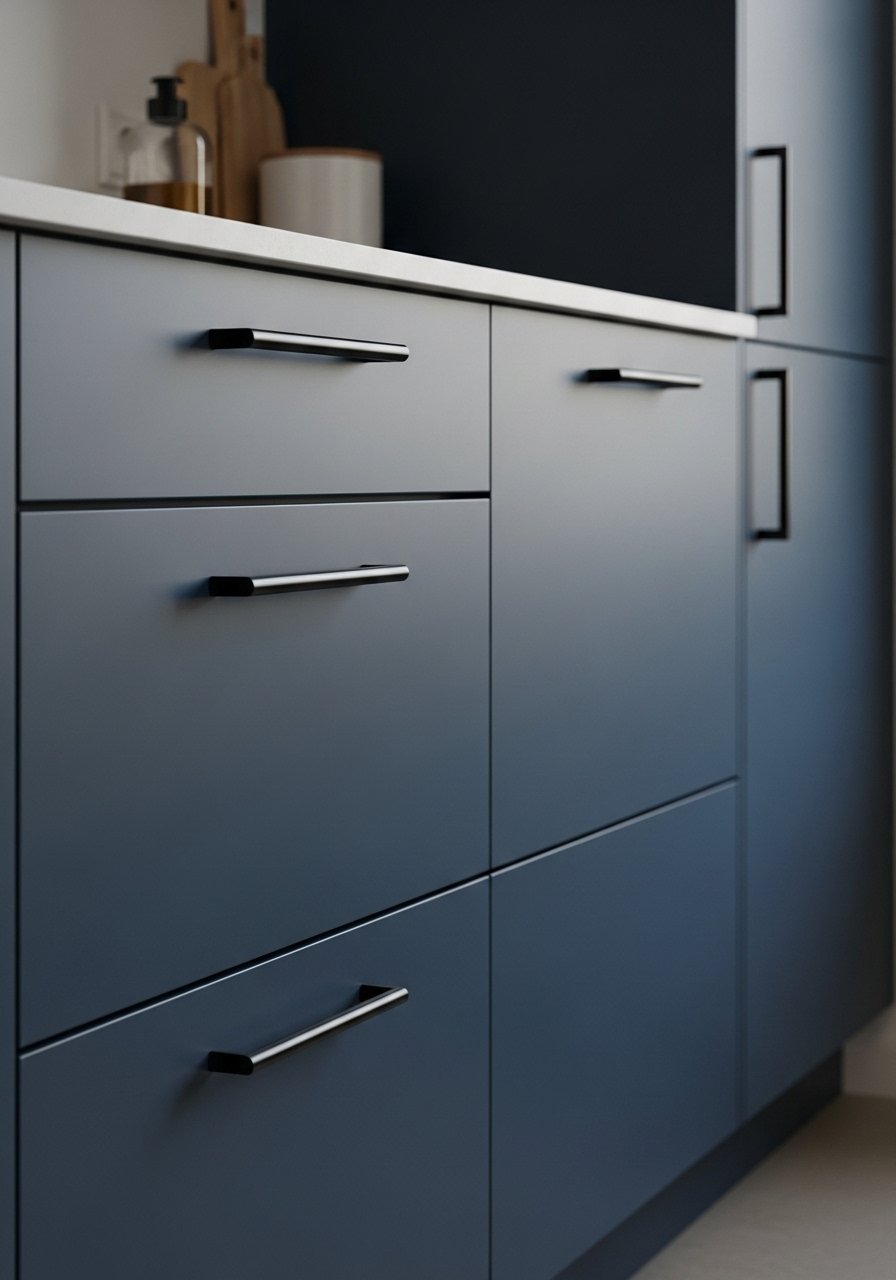
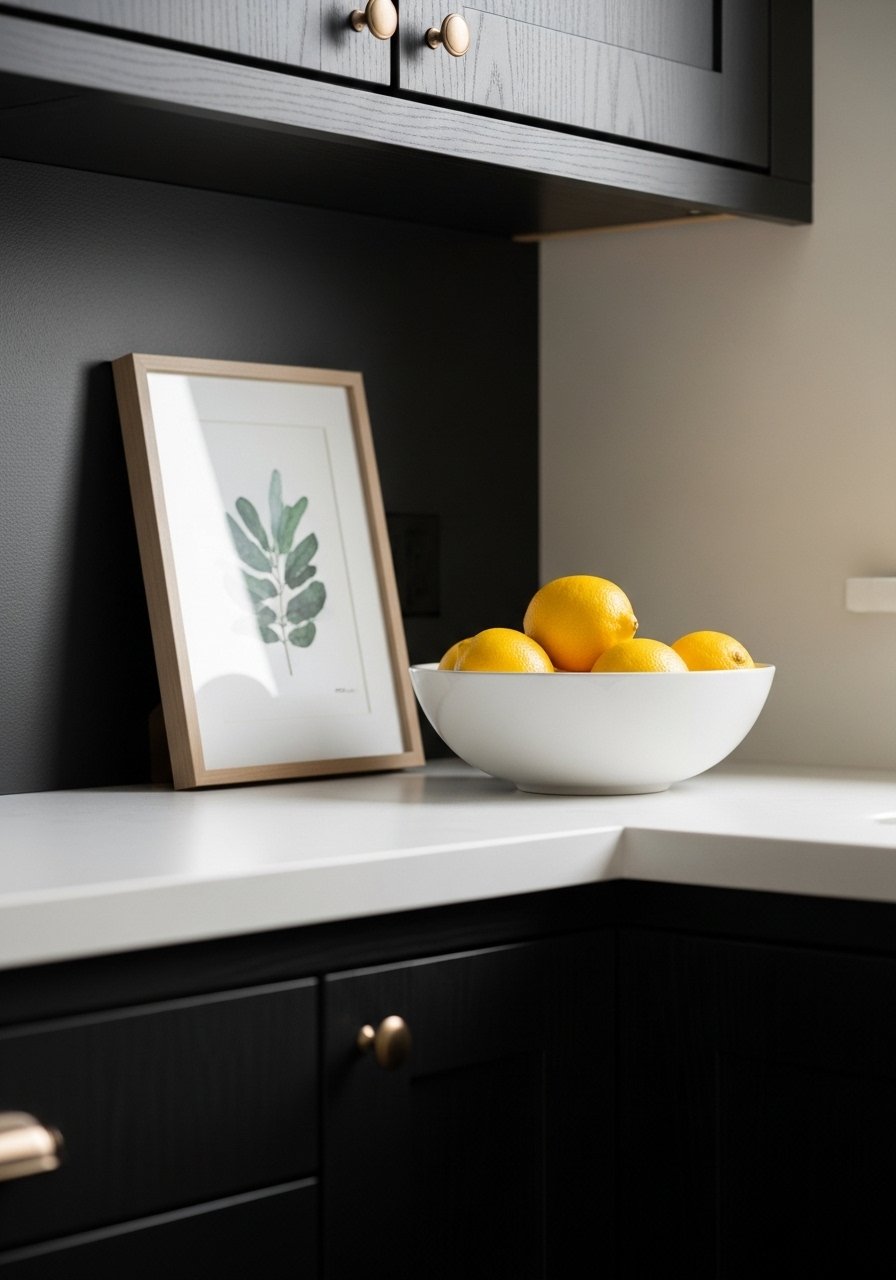
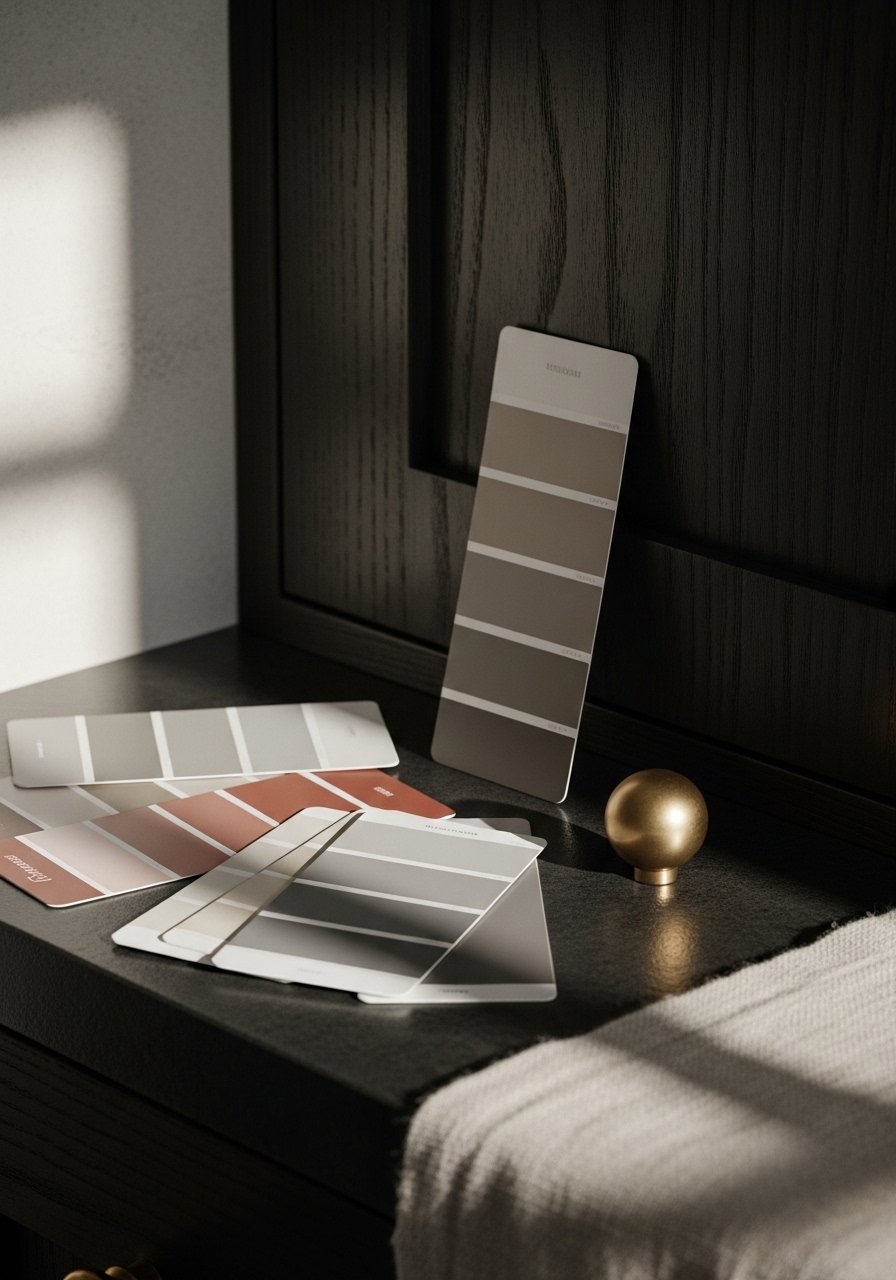
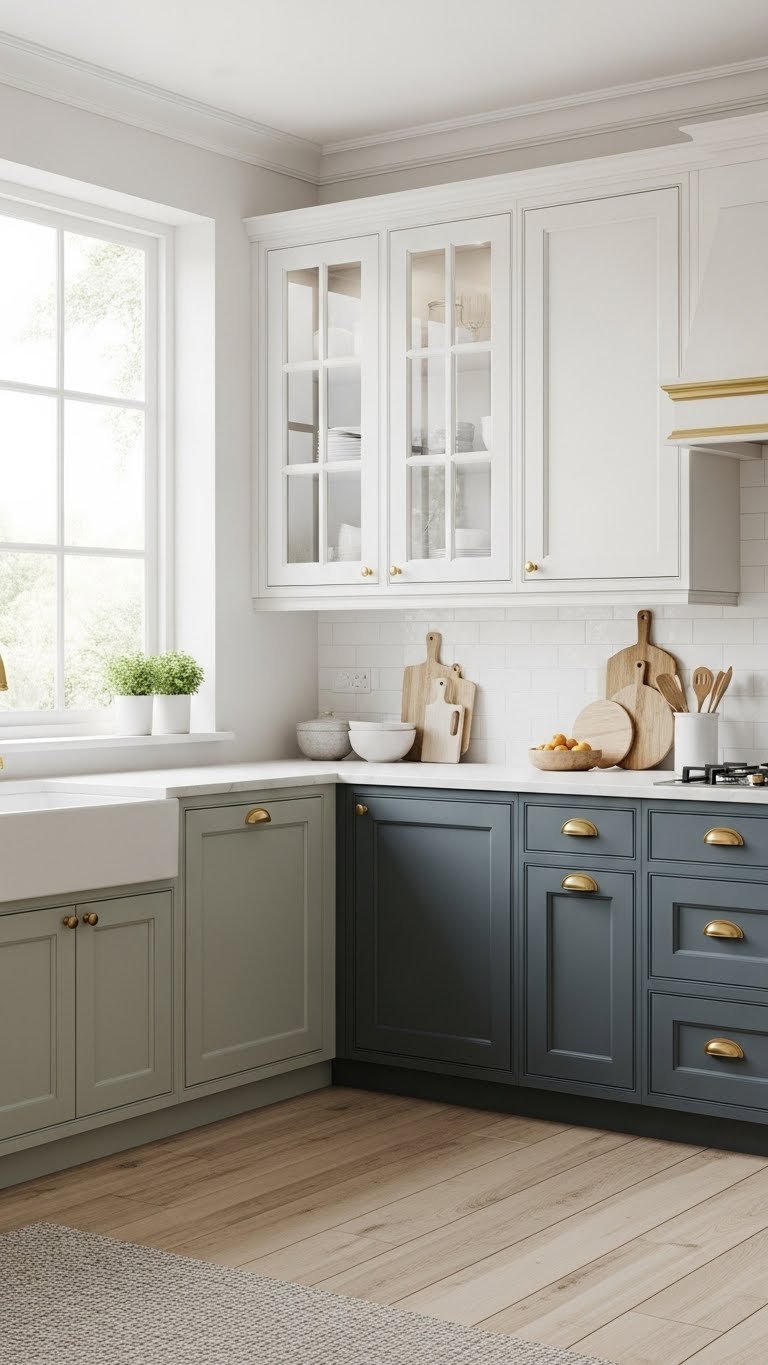
    18. Use Contrasting Cabinet Colors for Visual Interest

    Two-tone cabinets create visual interest and make small kitchens feel more designed and bigger than monotone color. This is the 2025 move that replaces “all-white kitchens.”

    Paint uppers one color (white, cream, or soft gray, $50–$150) and lowers a bold accent (sage green, blue, terracotta, $50–$150). Use matching hardware to tie them together. This breaks up visual weight and creates the feeling of height and intentionality. Test colors on poster board under your kitchen’s actual lighting before committing—colors read completely different by natural versus artificial light.

    Pro tip: pair warm uppers with cool lowers (cream + sage green) or cool uppers with warm lowers (white + terracotta) for a sophisticated feel.

    Suddenly your kitchen has architecture and personality instead of feeling like a blank box.

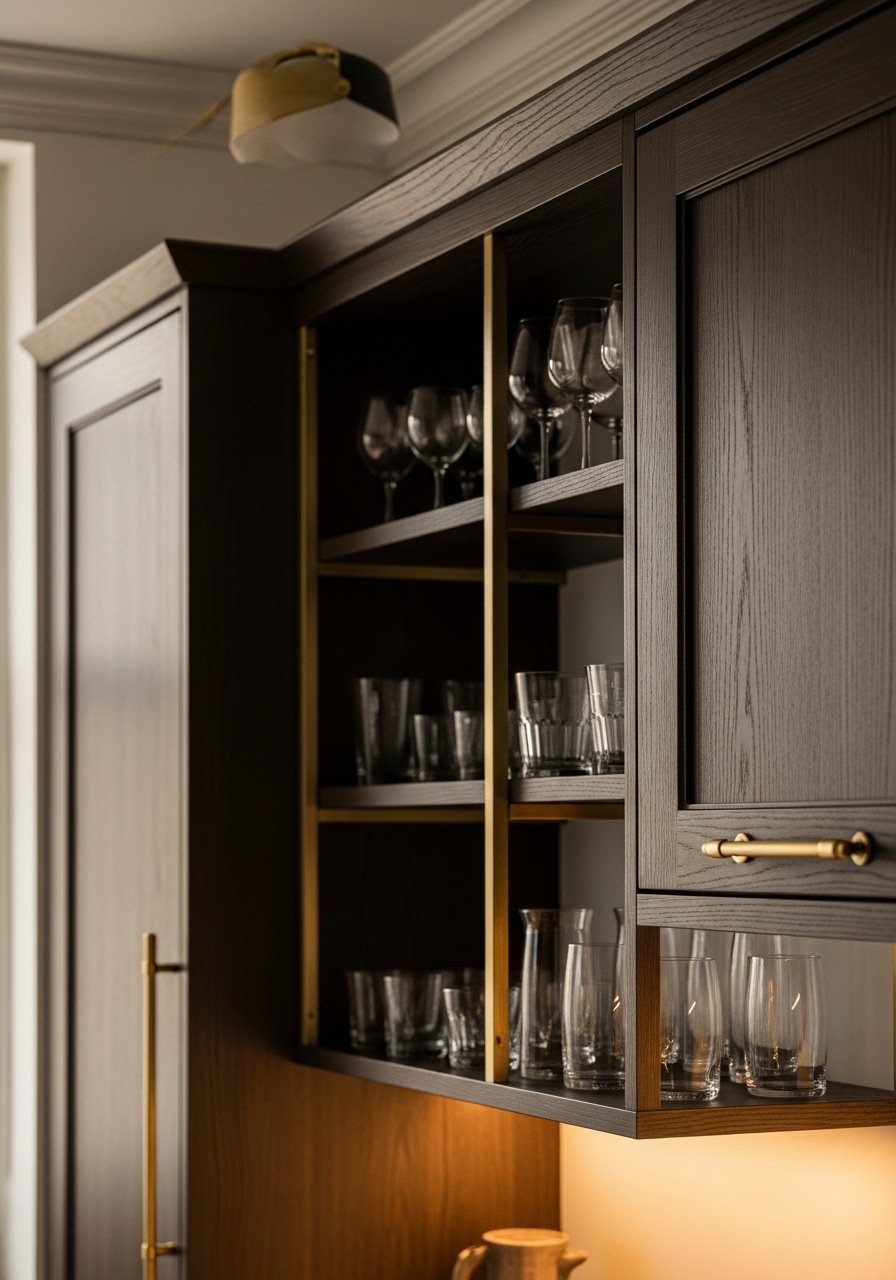
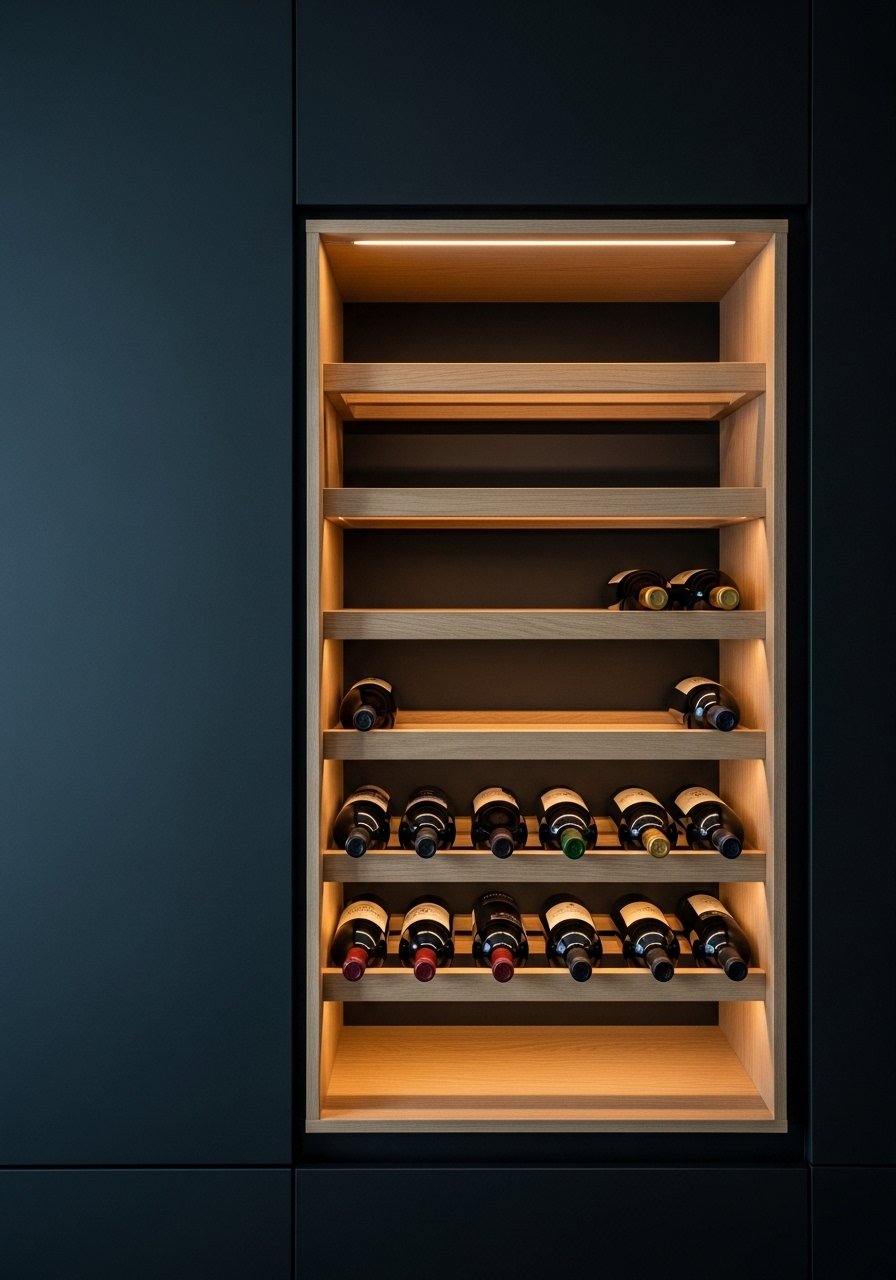
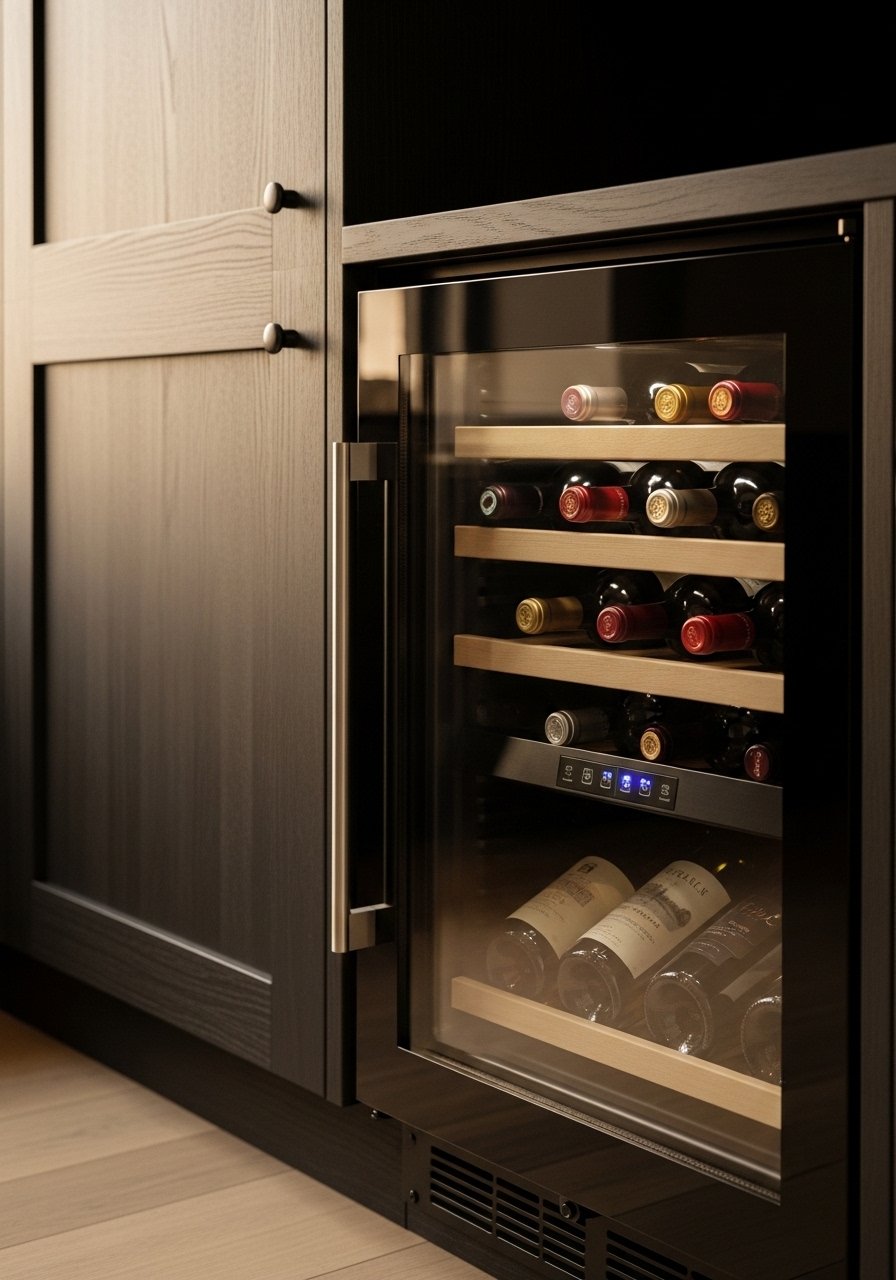
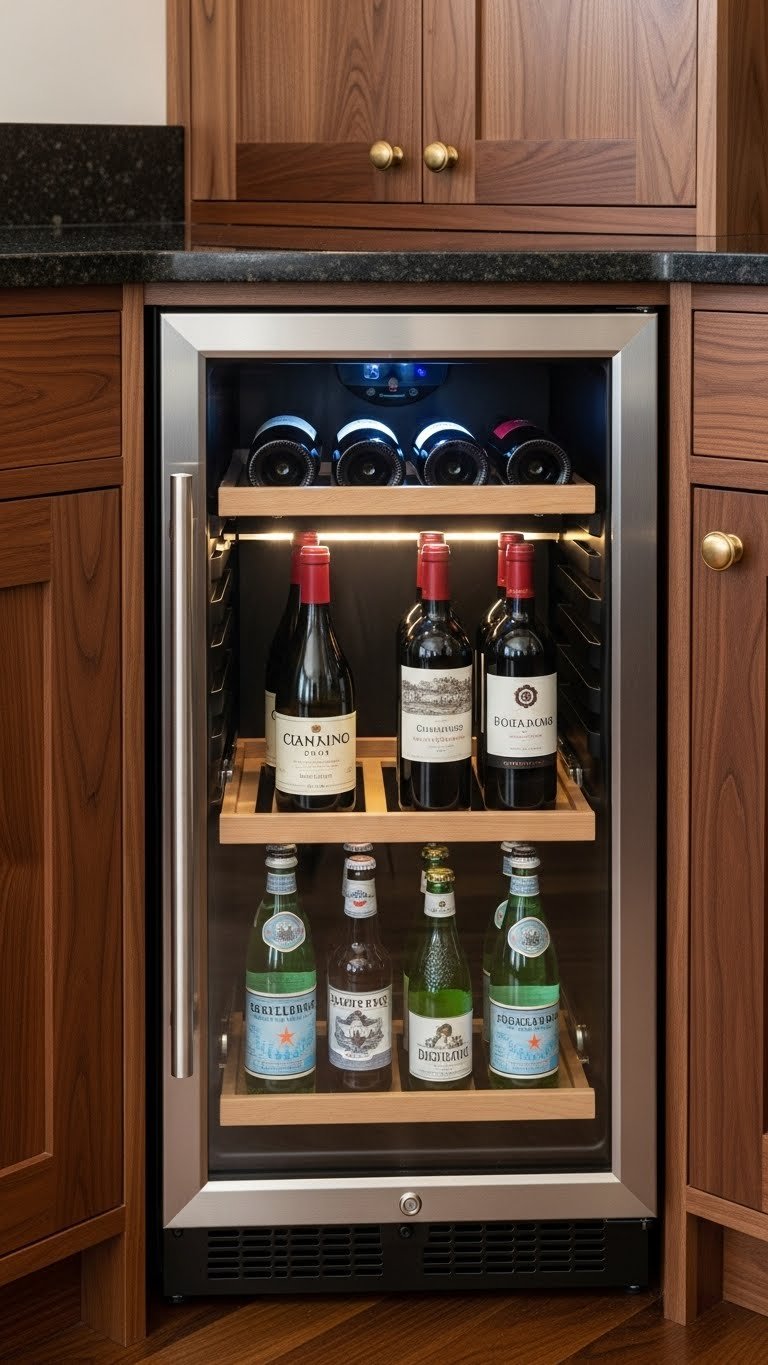
    19. Add a Small Wine Fridge or Beverage Cooler

    A compact wine fridge or beverage cooler ($200–$500) adds luxury and functionality to small kitchens without bulk. It works under bar seating, in a corner, or tucked beside your main fridge.

    Look for 15–20 inch models at appliance stores or Amazon that fit wine bottles or cans depending on your vibe. Some have glass doors so they become a design feature; others are stainless steel for a built-in feel. Plug it in, let it stabilize for a few hours, and you’re done—no installation needed. Perfect for entertaining or creating a beverage station.

    Budget alternative: a small ice bucket ($20–$50) with wine or drinks staged in a corner creates a similar effect visually.

    This detail immediately makes your kitchen feel more intentional, hospitable, and elevated—and honestly, a cold drink on hand changes the vibe.

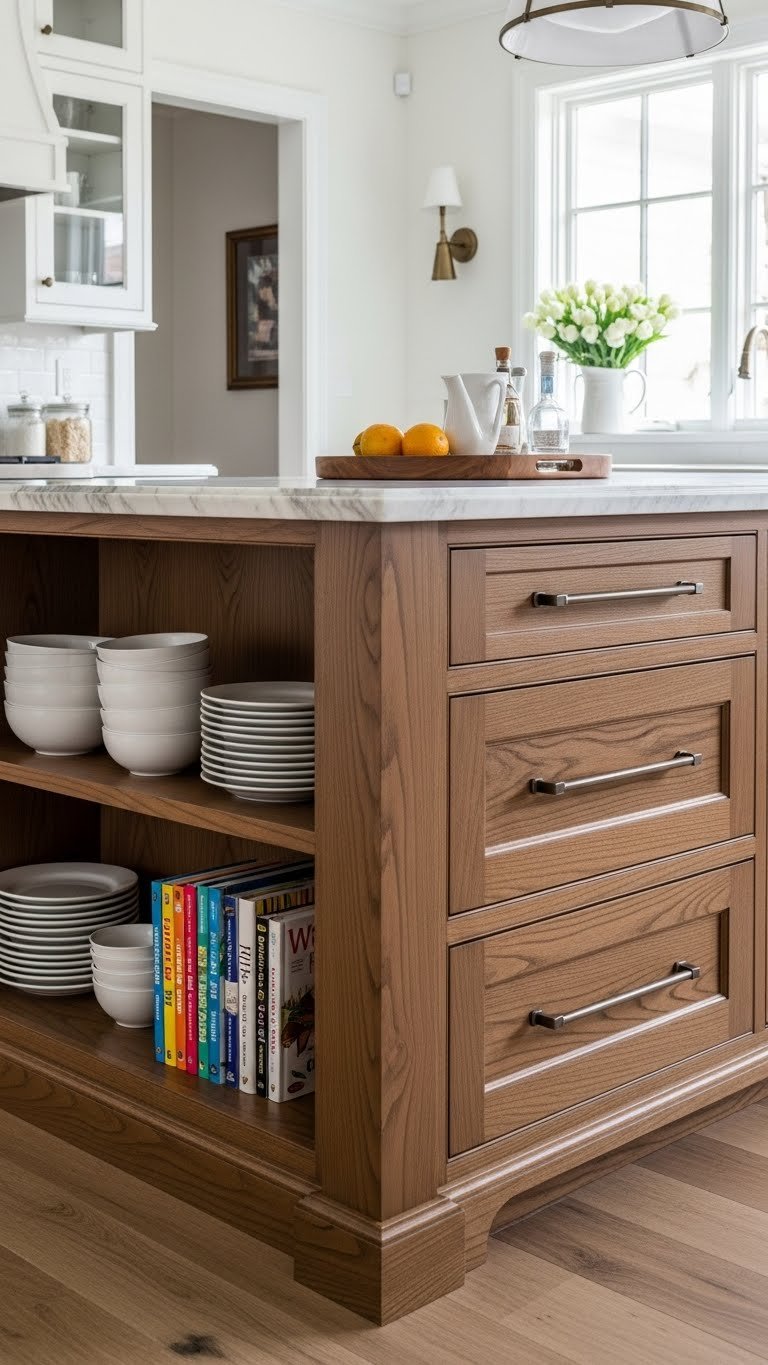
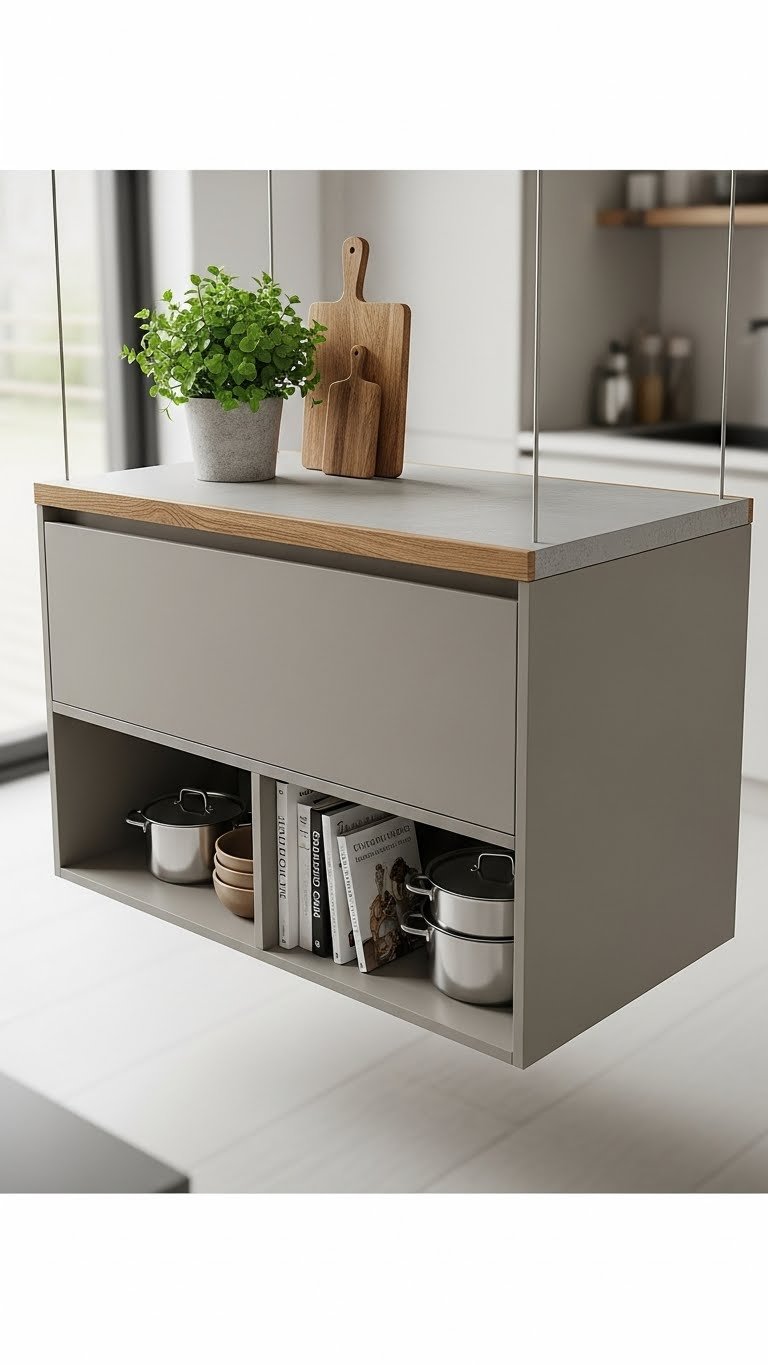
    20. Hide Clutter with Floating Kitchen Island with Enclosed Storage

    A compact floating island creates counter space and storage without feeling like an obstacle. The key is mixing open and enclosed storage—50% hidden, 50% open.

    Build or buy a small floating island ($300–$800 ready-made, $500–$1,500 custom built) that’s 24–30 inches wide and 18–24 inches deep. Add enclosed cabinets on sides and open shelving below to keep the look light. Top it with butcher block or engineered quartz. Anchor it to the floor for safety and stability. For renters: a slim mobile cart with baskets underneath ($100–$200) works as a temporary island.

    Pro tip: keep the top surface minimal—one plant, a cutting board, maybe a soap dispenser—so it feels like active counter space, not storage.

    You gain prep space, hide kitchen chaos, create a gathering point, and make the kitchen feel both bigger and more functional.

    21. Mix Metals for a Collected, Intentional Look

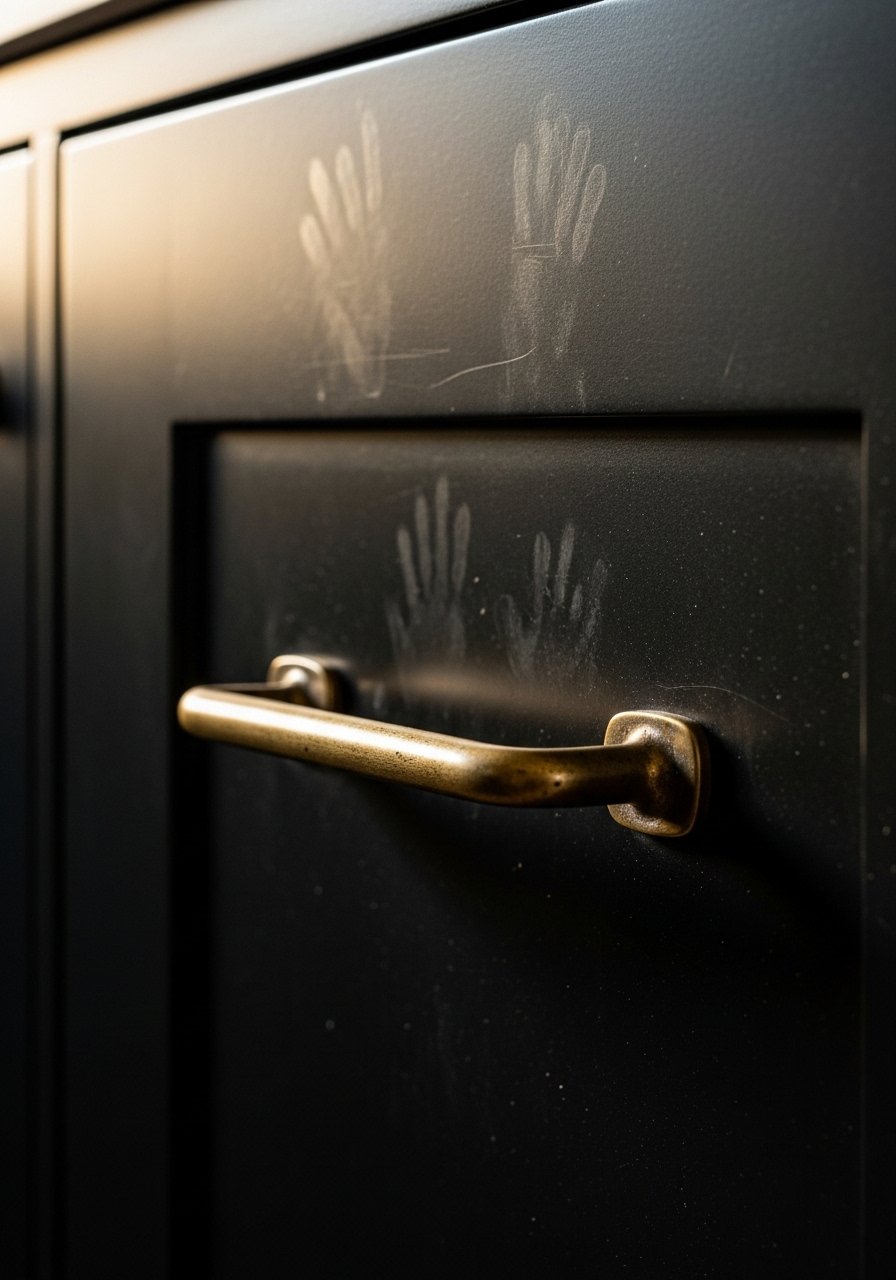
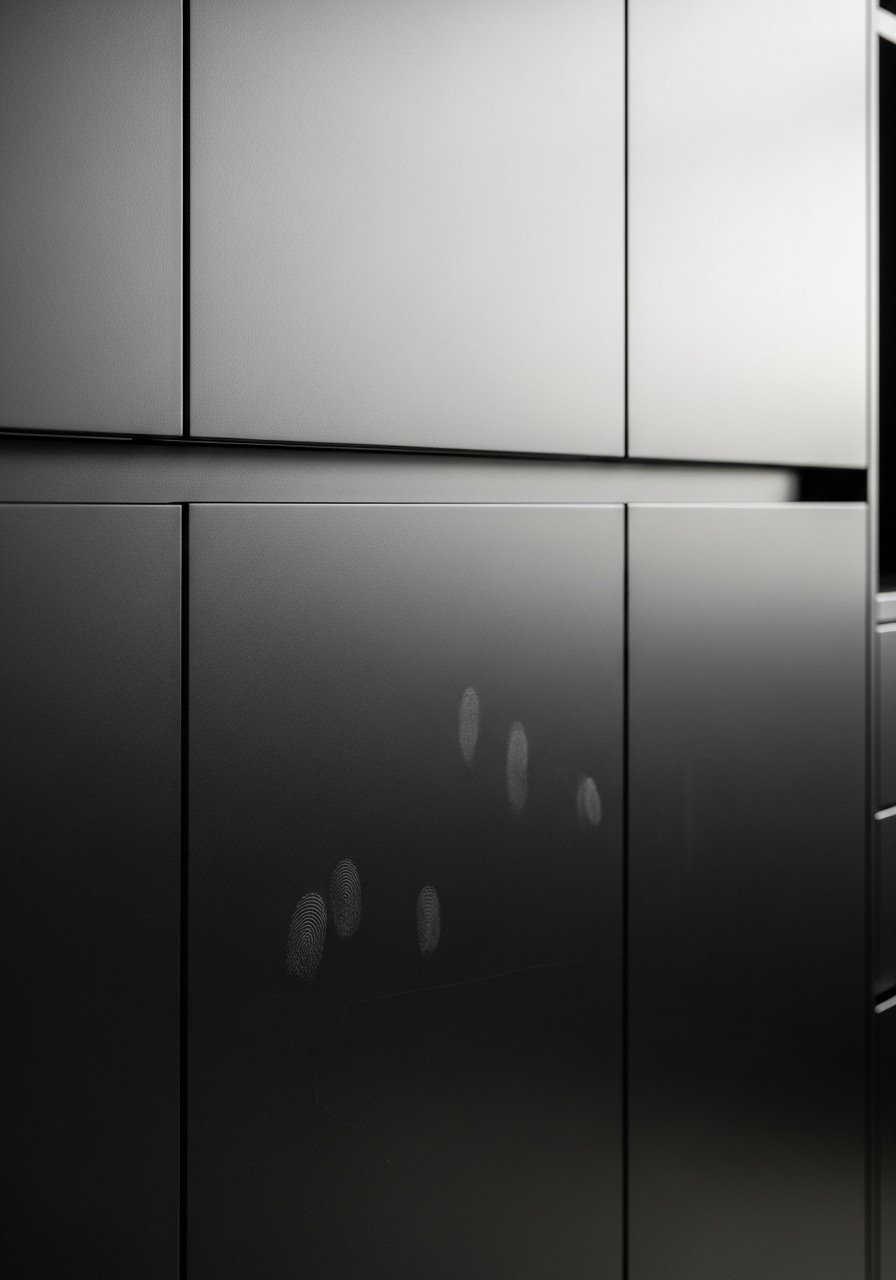
    Mixing metals went from a design taboo to a 2025 signature move. It feels intentional, collected, and way more interesting than monotone hardware.

    Combine warm brass, matte black, and stainless steel across your kitchen—brass on lower cabinets, black on uppers, steel on the island. Or mix them shelf by shelf. The trick: limit yourself to three metals max and let one dominate (usually 50%, then 30% and 20%). Shop Amazon, Wayfair, or local hardware stores ($50–$200 total for a full kitchen). Swap your existing hardware in 30 minutes with a drill.

    Real-world bonus: when you notice a fingerprint on brass, it feels vintage and collected; on stainless, it feels messy.

    This intentional mix signals that your kitchen is designed with thought, not by accident—and it feels so much more modern than any monotone option.

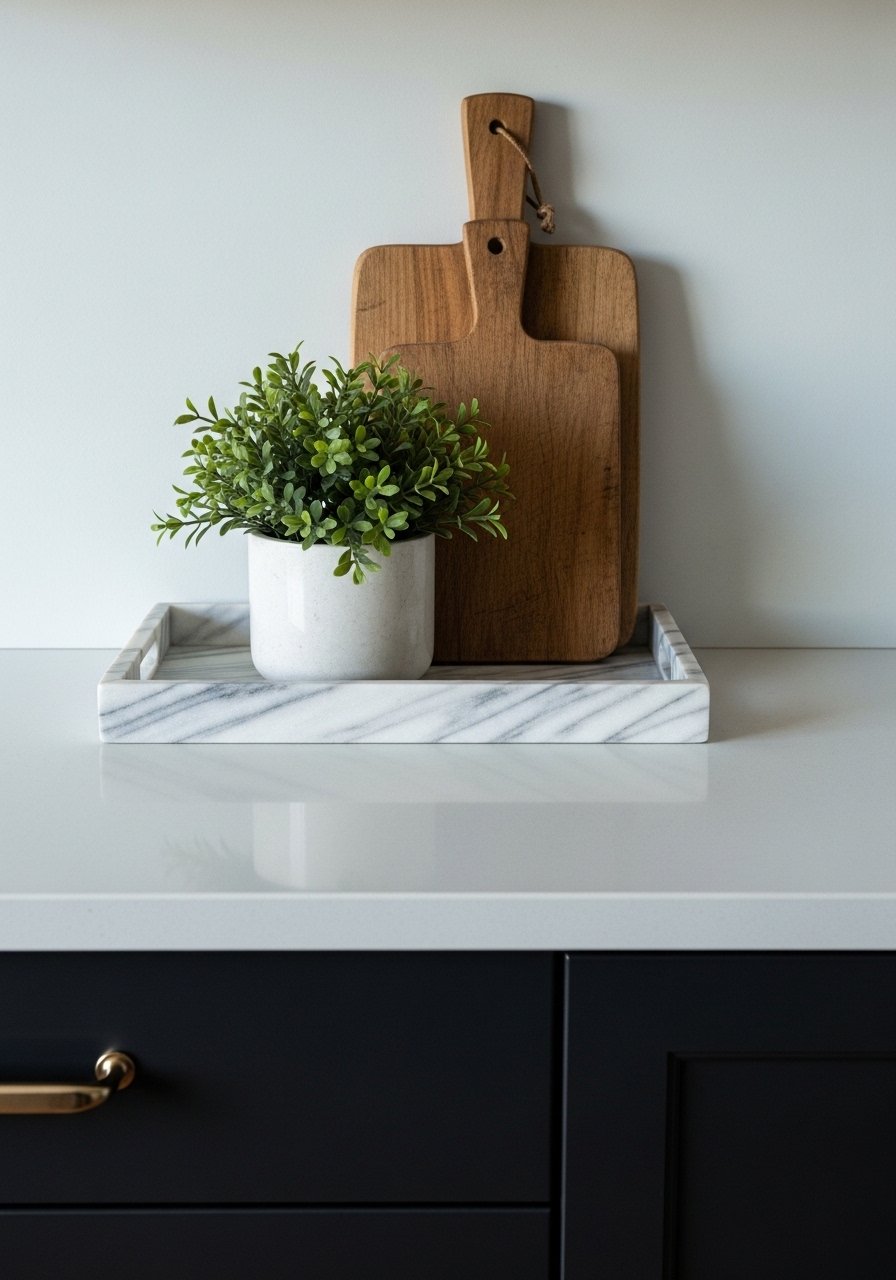
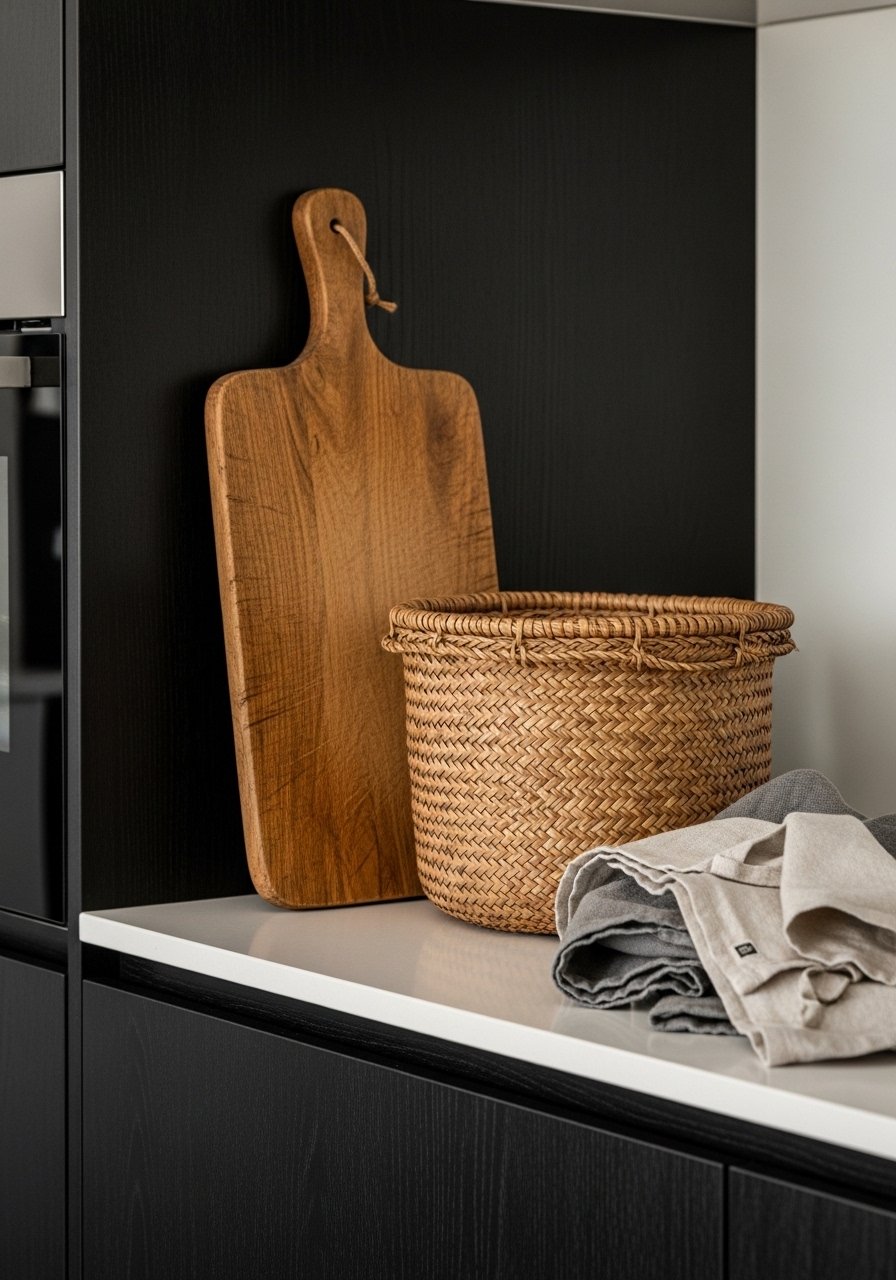
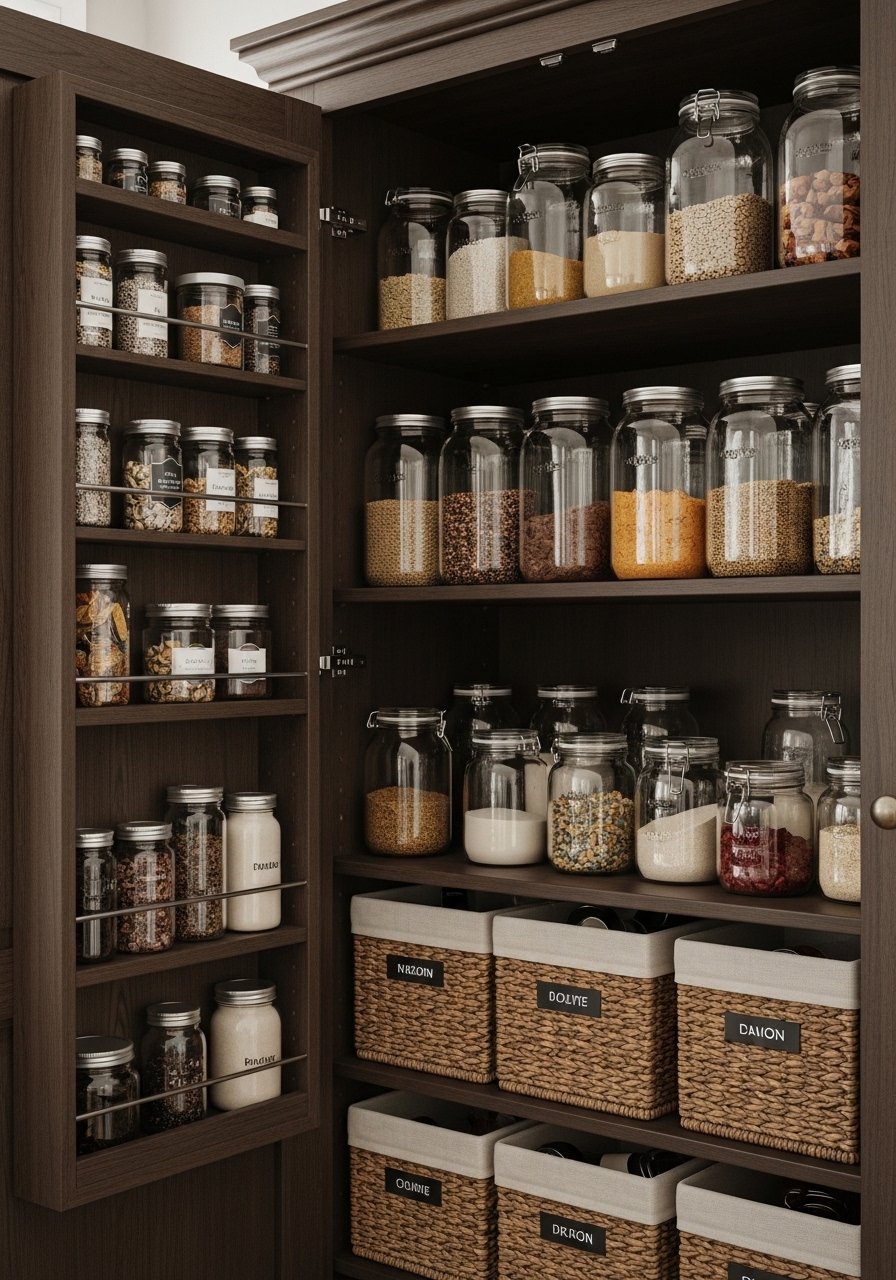
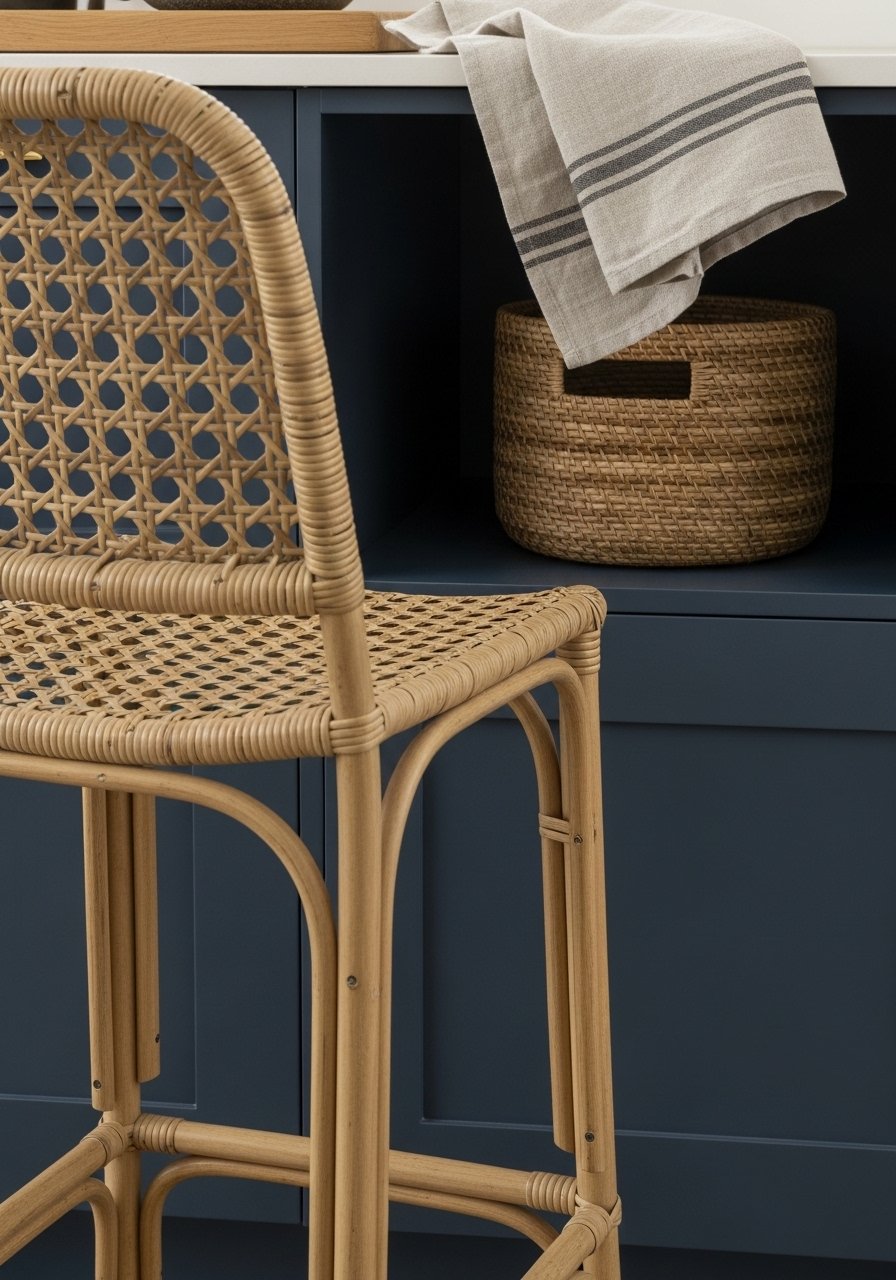
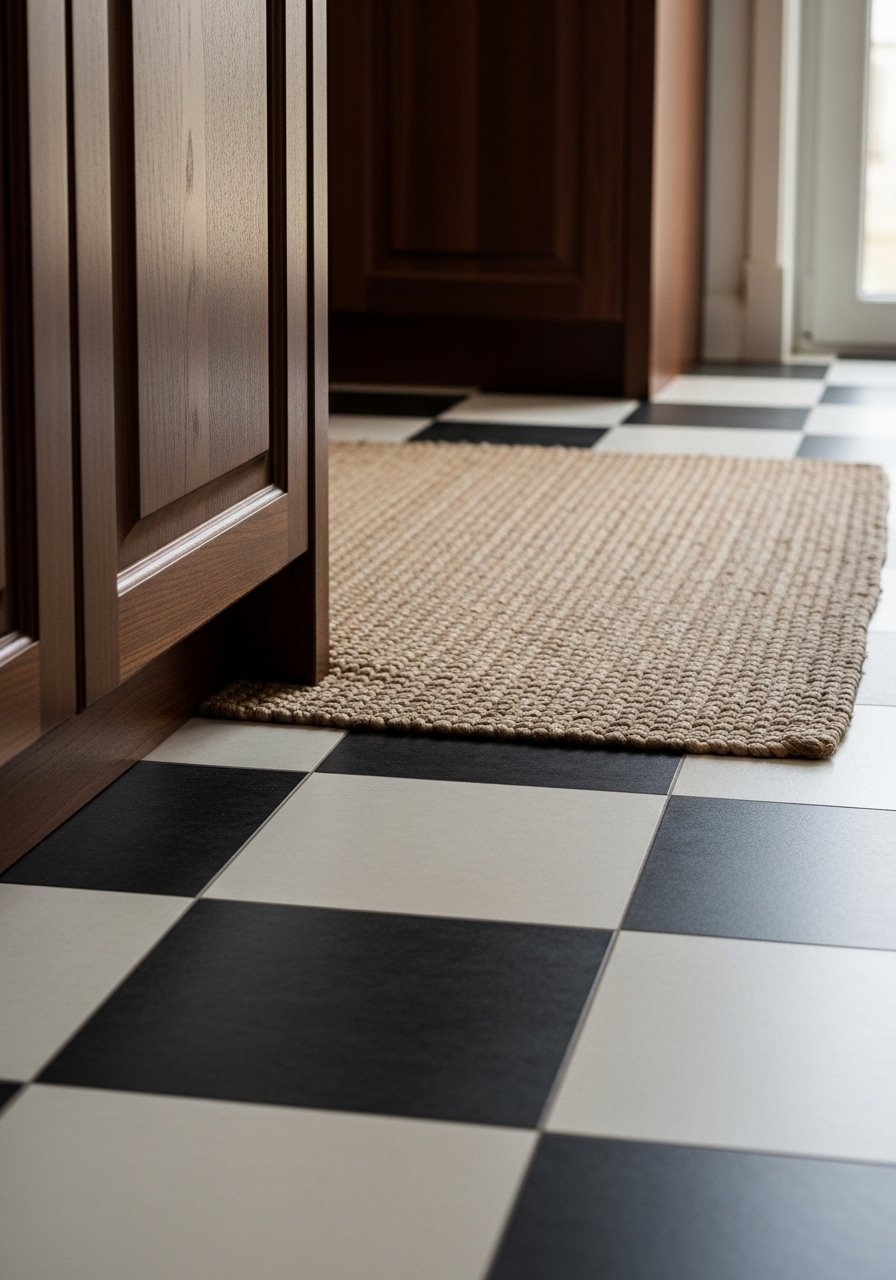
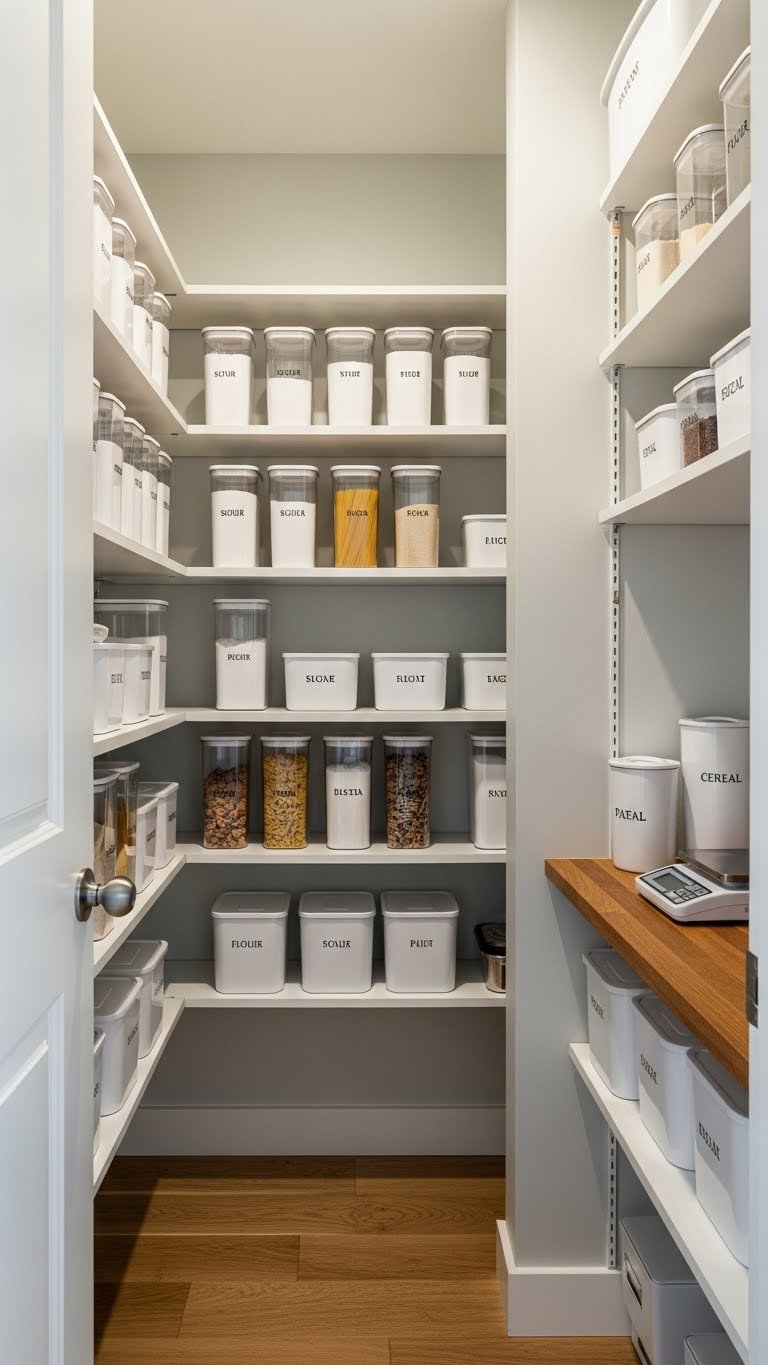
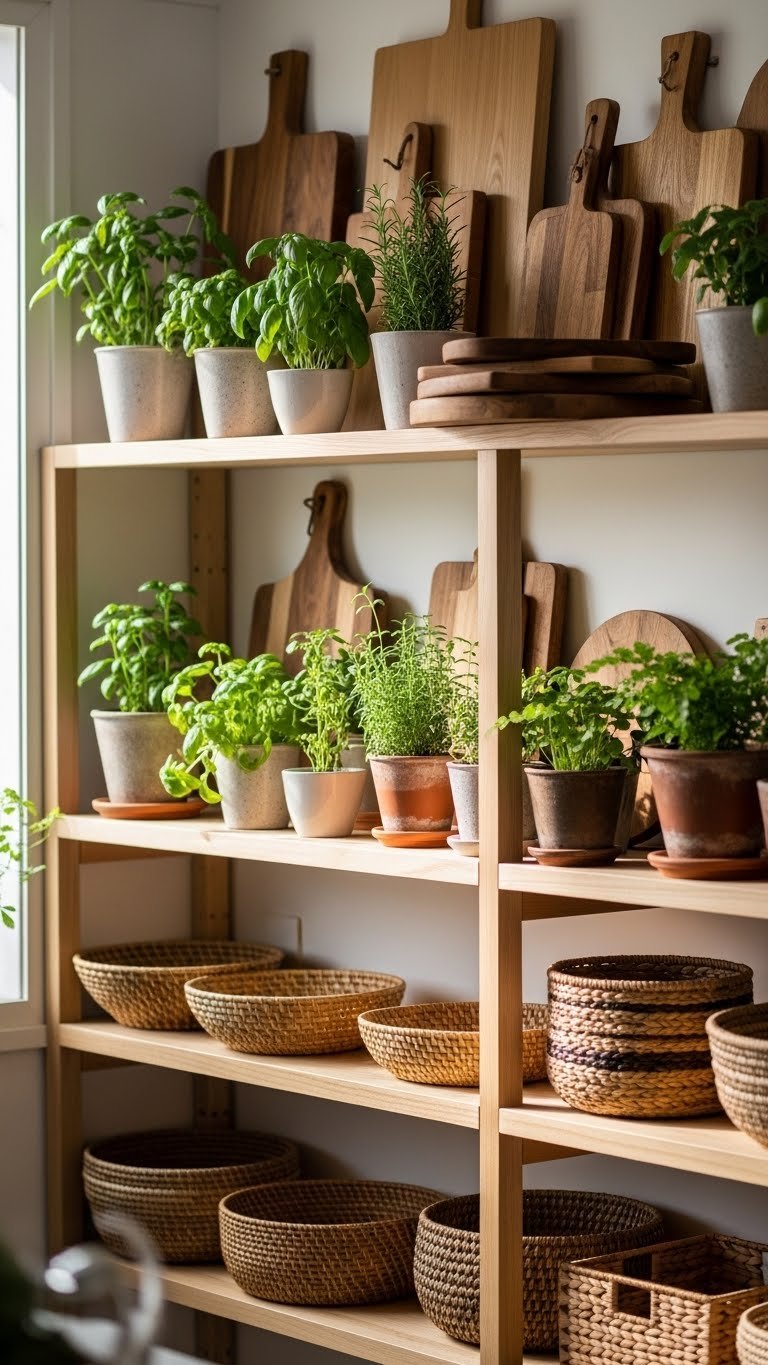
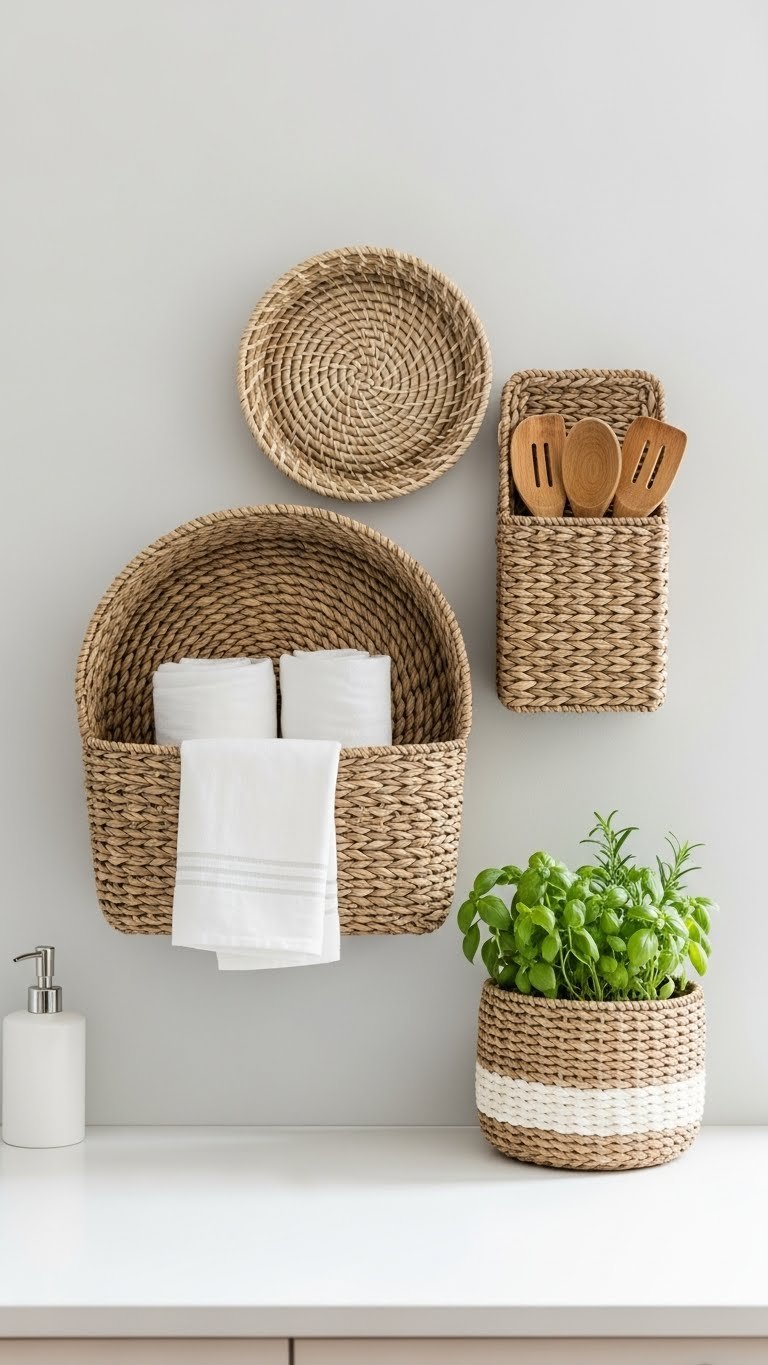
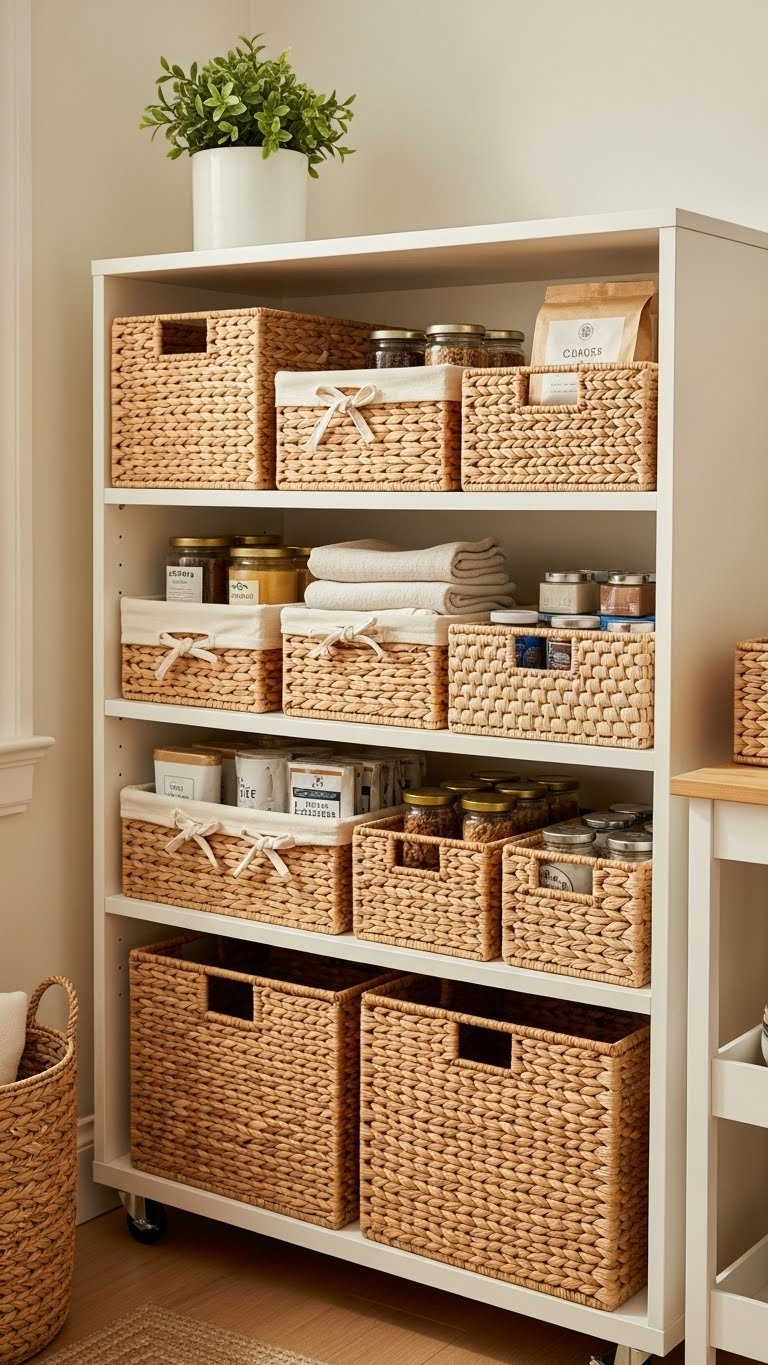
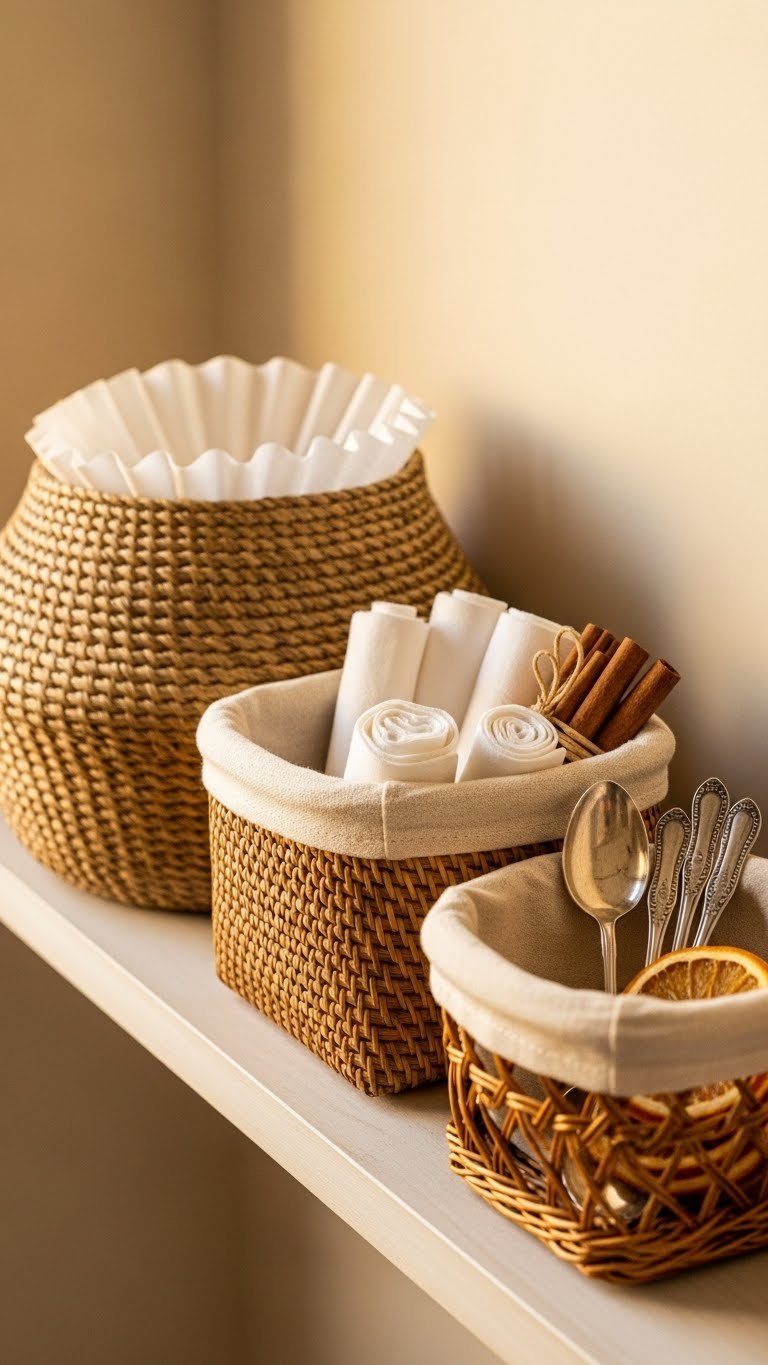
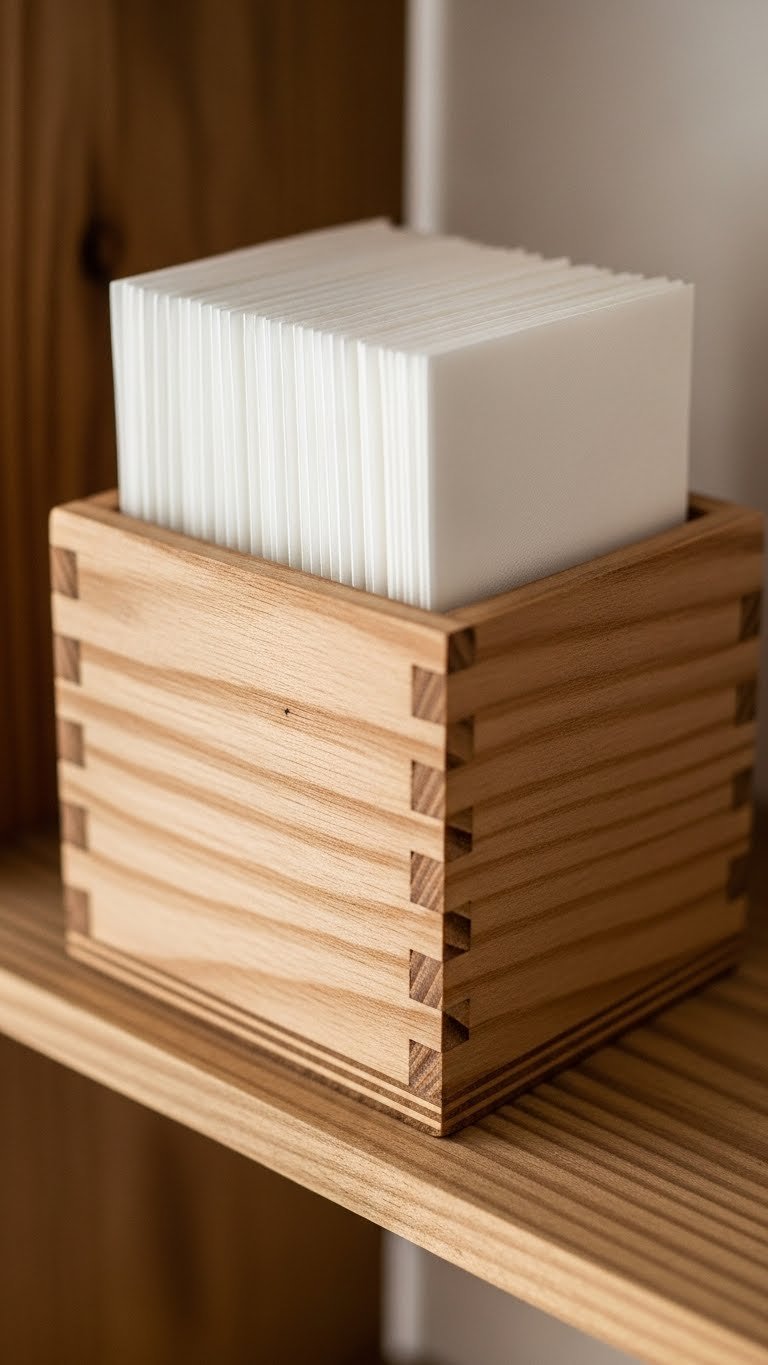
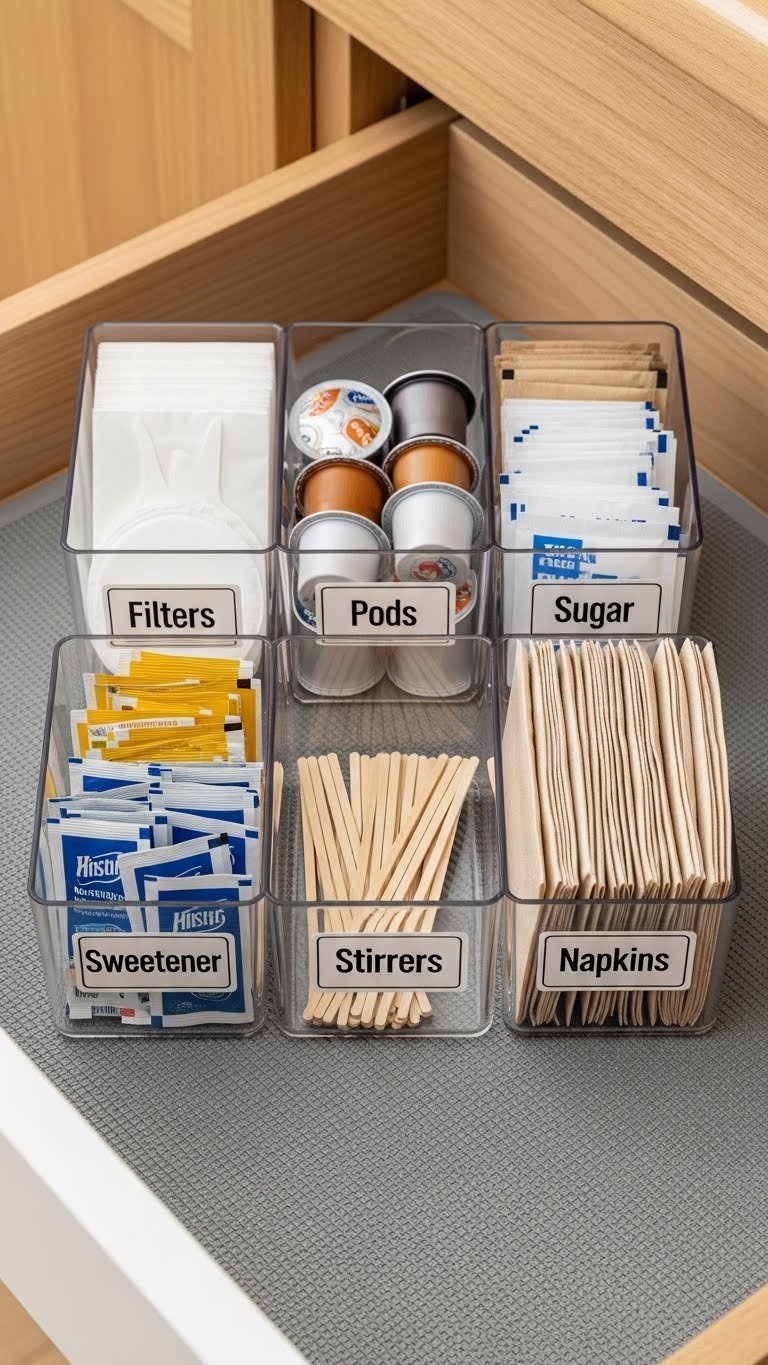
    22. Use Decorative Baskets to Corral Pantry Overflow

    Baskets visually contain clutter while adding warmth and texture. They’re renter-friendly, mobile, and create the feeling of organization even when you’re stuffing them full.

    Buy 3–5 matching woven baskets ($20–$80 total) in natural fibers or painted finishes from IKEA, Target, or Wayfair. Label them with tags or paint ($5) so everyone knows what’s inside. Stack on open shelves, a cart, or under a console table. Use them for dry goods, snacks, linens, or kitchen gadgets. The beauty is nothing is actually more organized—it’s just hidden, and hidden = feels clean.

    Pro tip: line baskets with kraft paper for a finished look and to keep small items from falling through.

    Your kitchen looks intentionally styled instead of like you’re perpetually prepping to move.

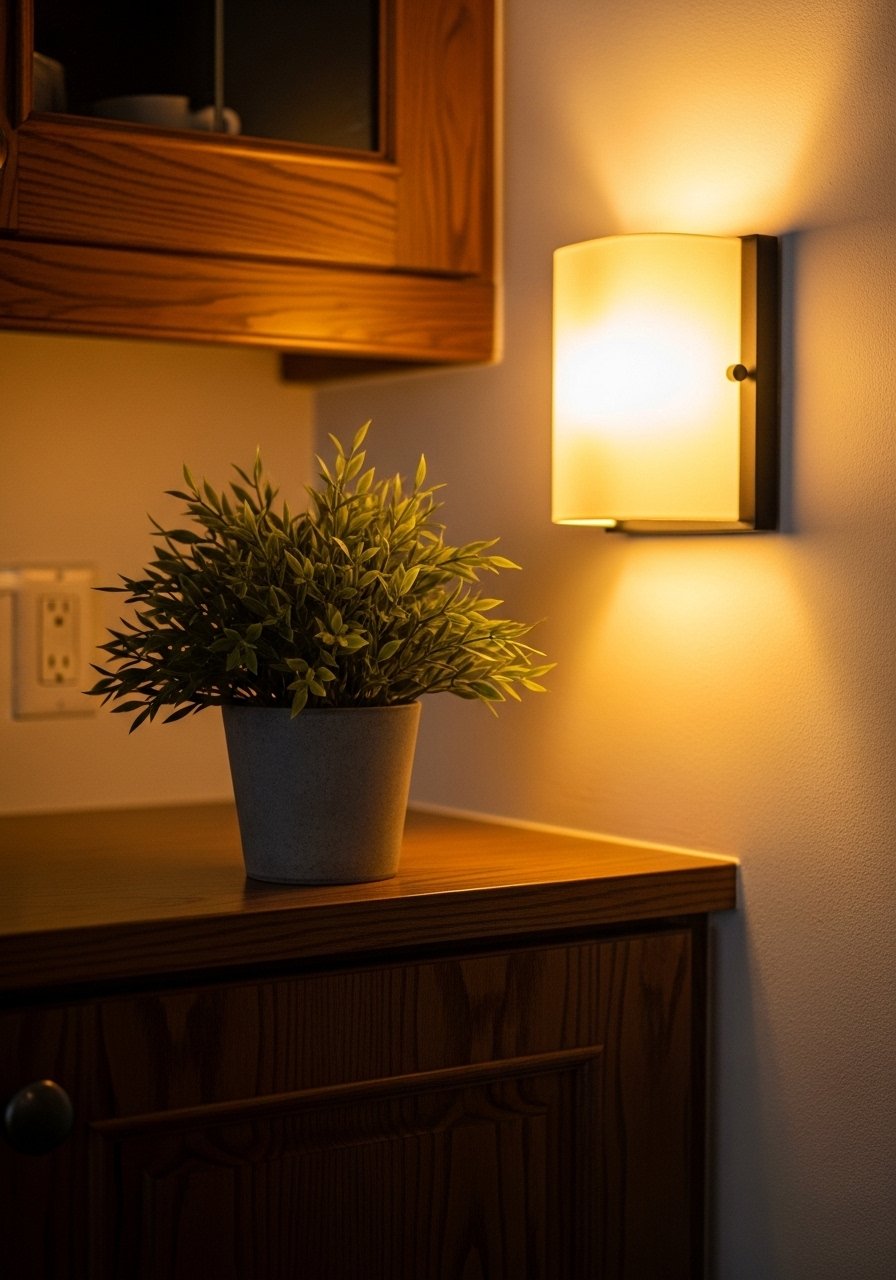
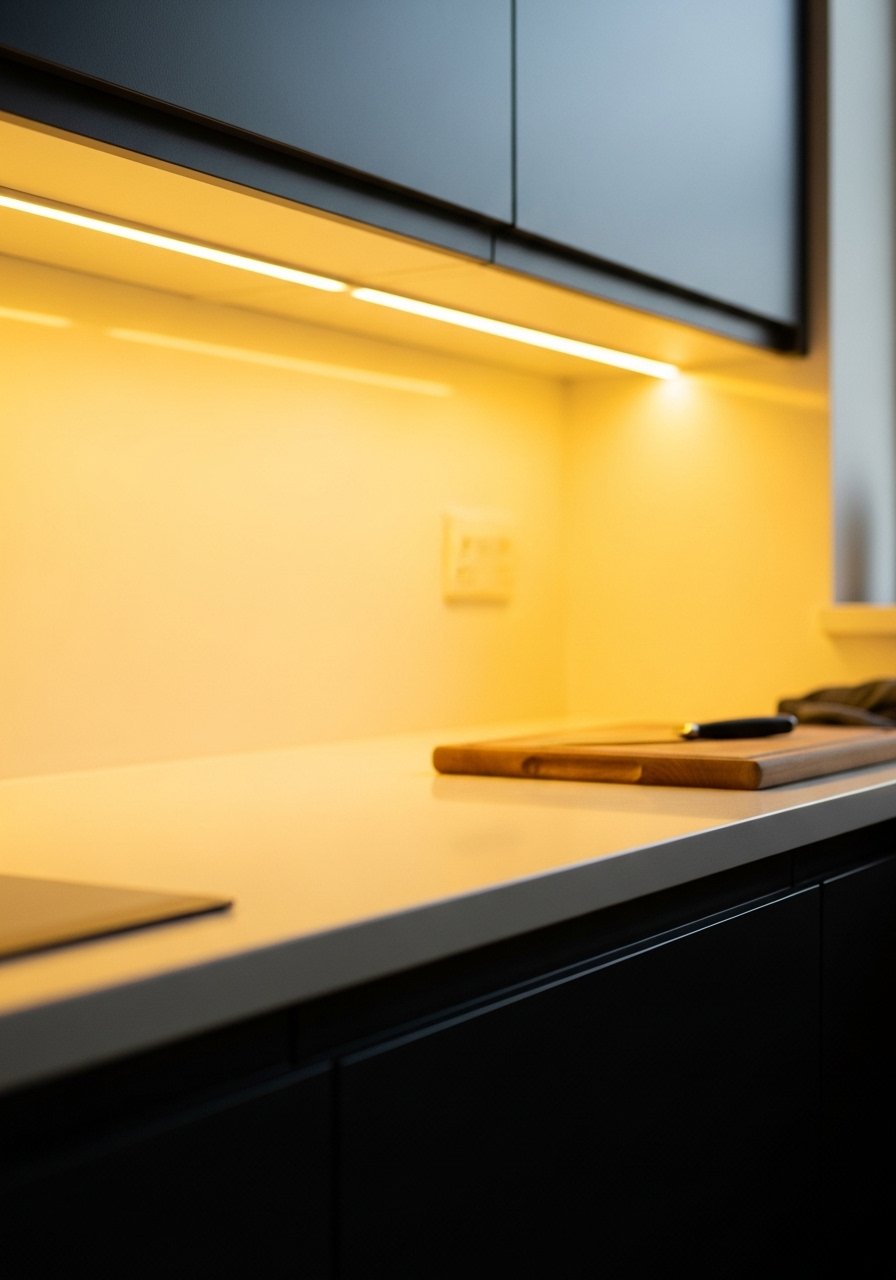
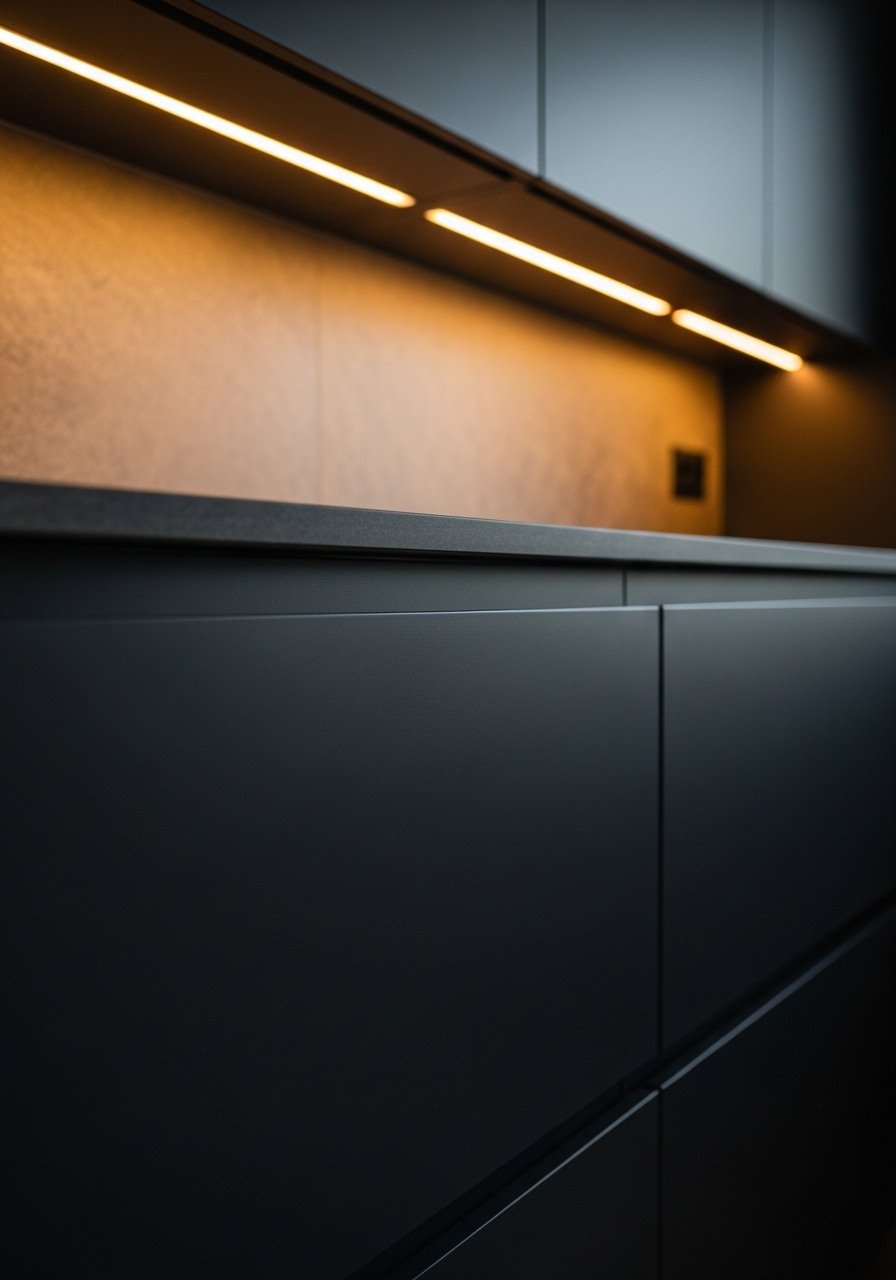
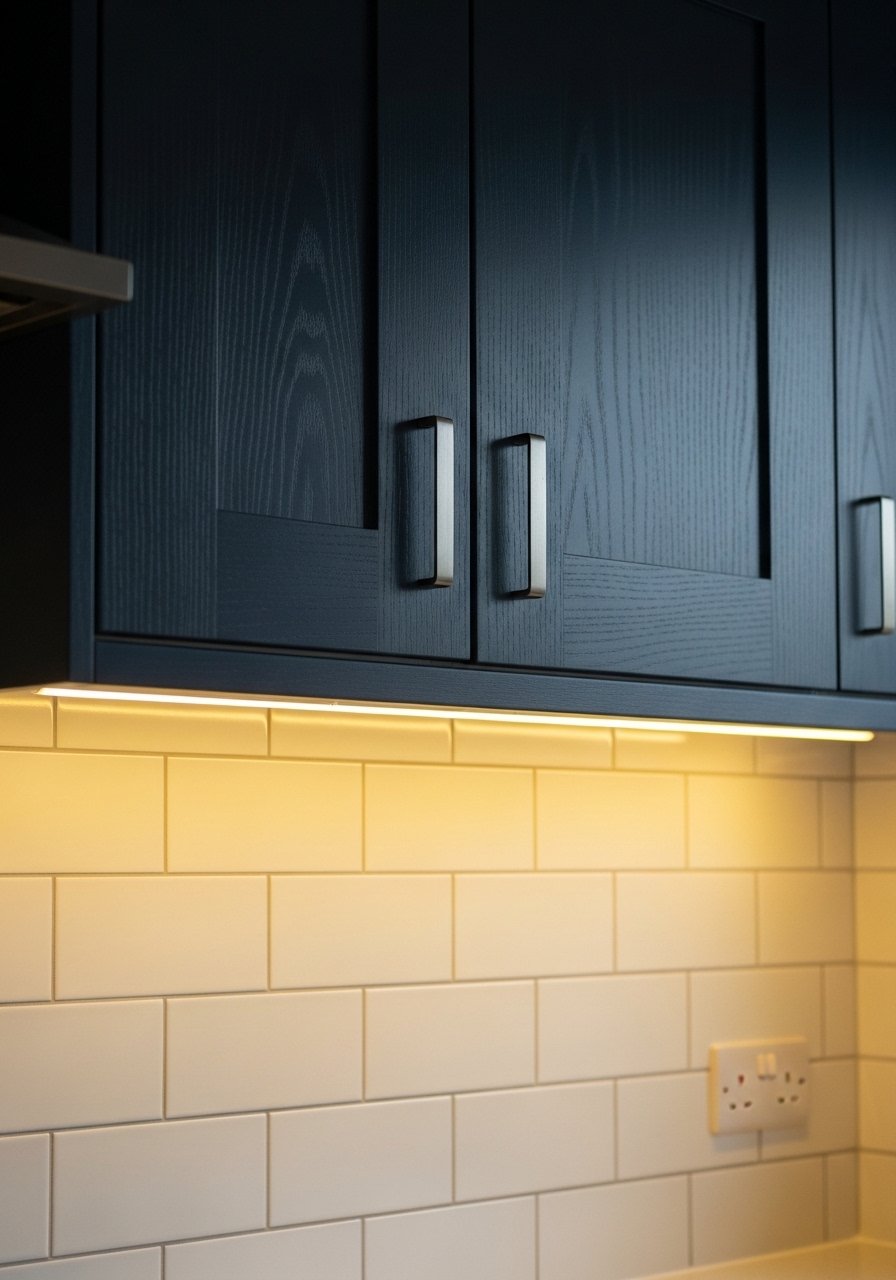
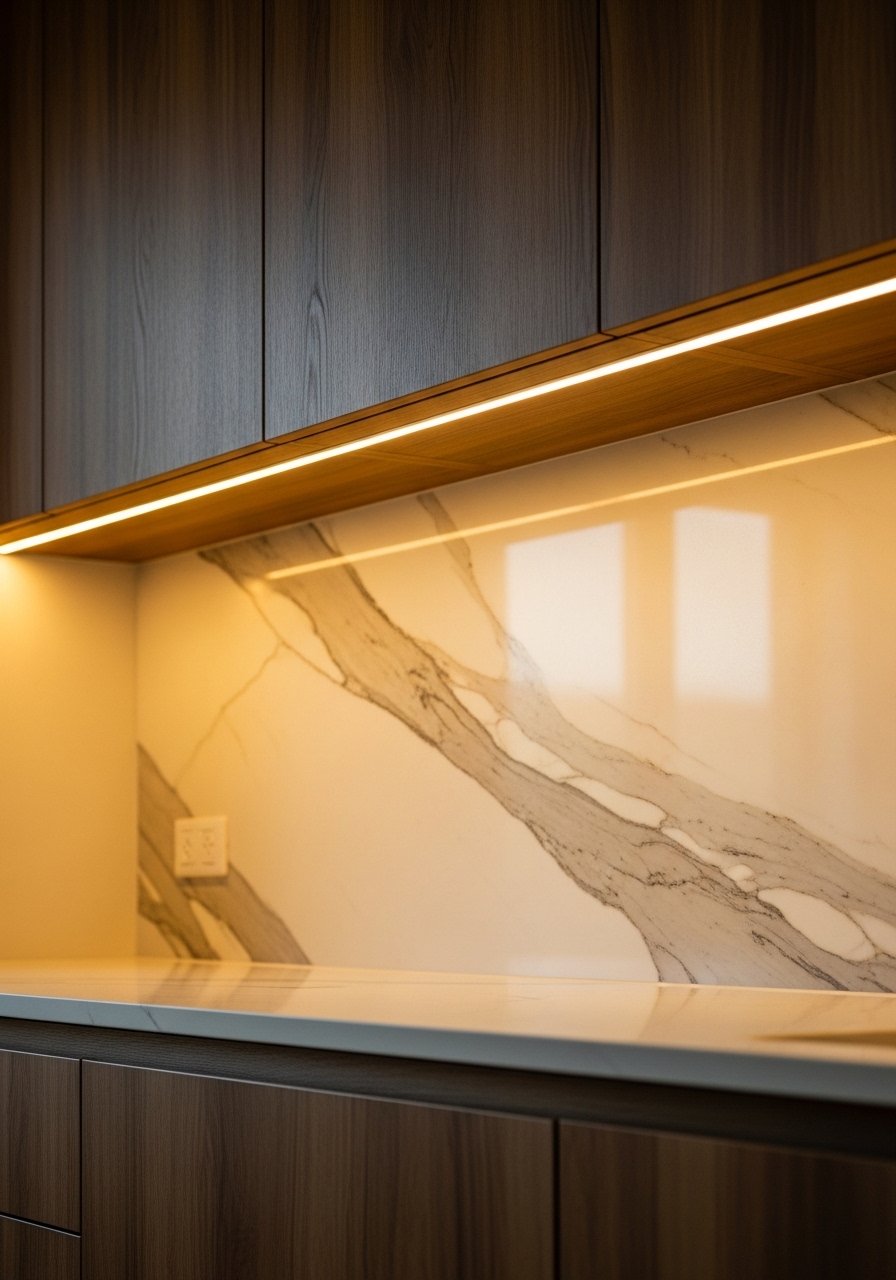
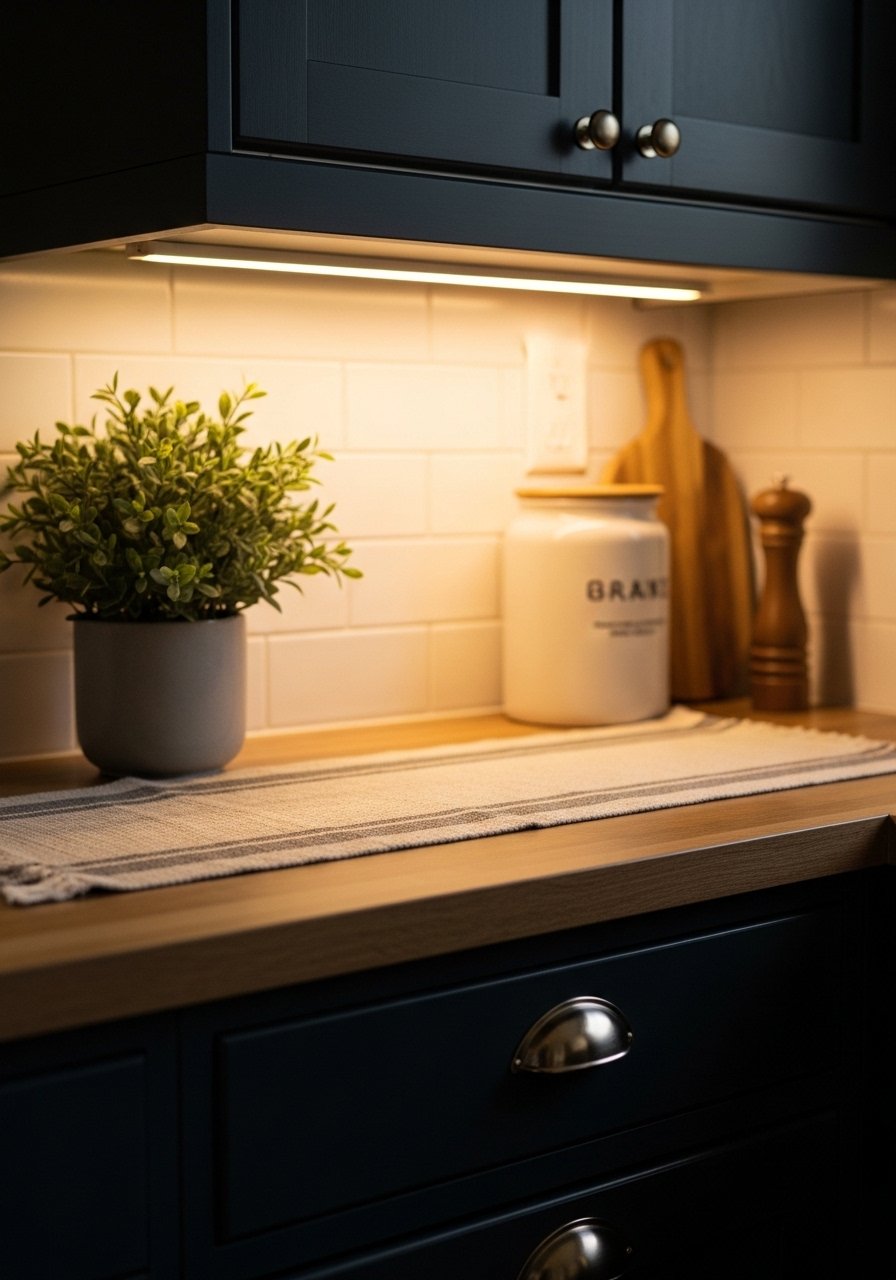
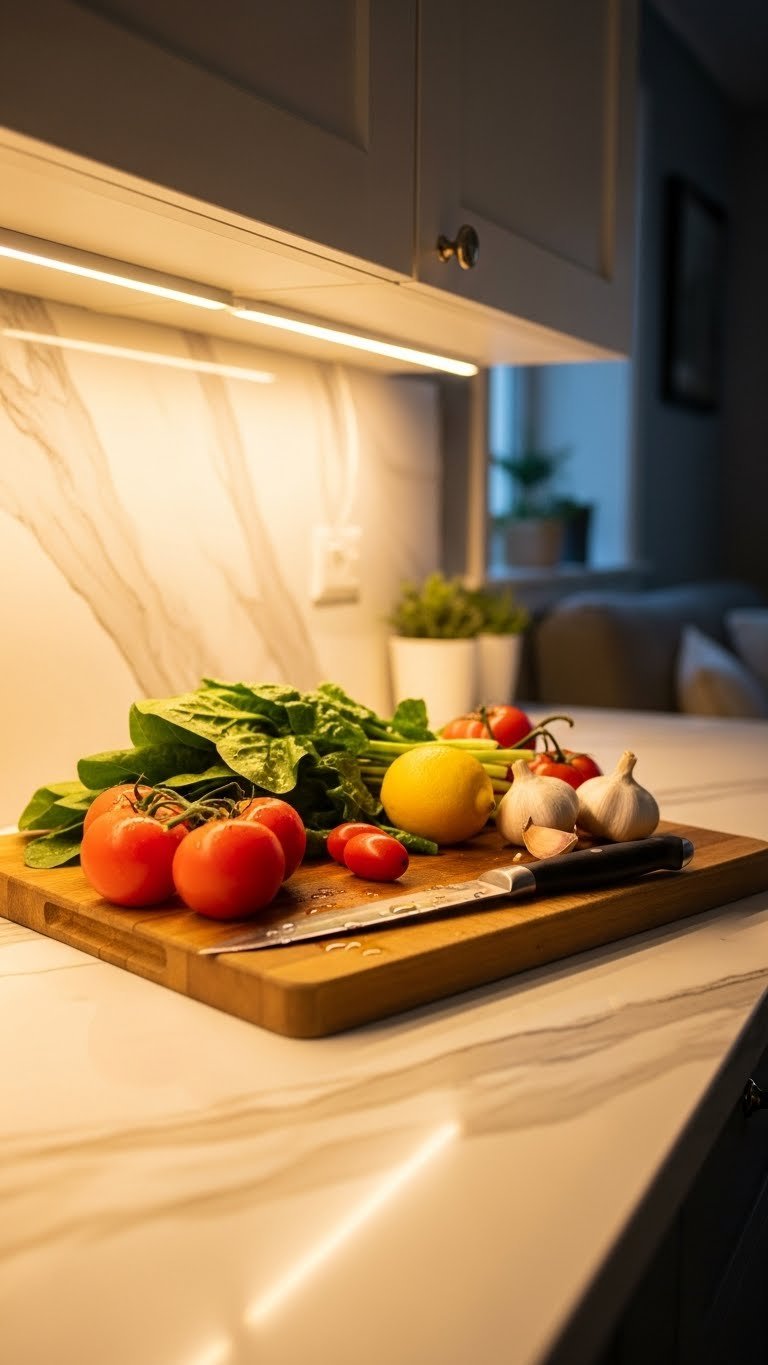
    23. Install Task Lighting Under Cabinets

    Under-cabinet lighting solves a huge problem in small kitchens—dim counters make you feel like you’re working in a cave. LED strips are affordable, easy, and totally transformative.

    Add adhesive LED strip lights ($20–$60) under upper cabinets to illuminate your counter. Look for warm white (3000K) or cool white (4000K) depending on your style. Takes 15 minutes, no wiring required if you use battery-operated or plug-in versions. For a more permanent solution, hire an electrician ($150–$300) to hardwire strips that connect to a dimmer switch.

    Real benefit: you can see what you’re actually cutting and cooking instead of working in shadow.

    Now your counter becomes functional AND the lighting creates ambiance when guests are over—it’s a practical detail that feels effortlessly designed.

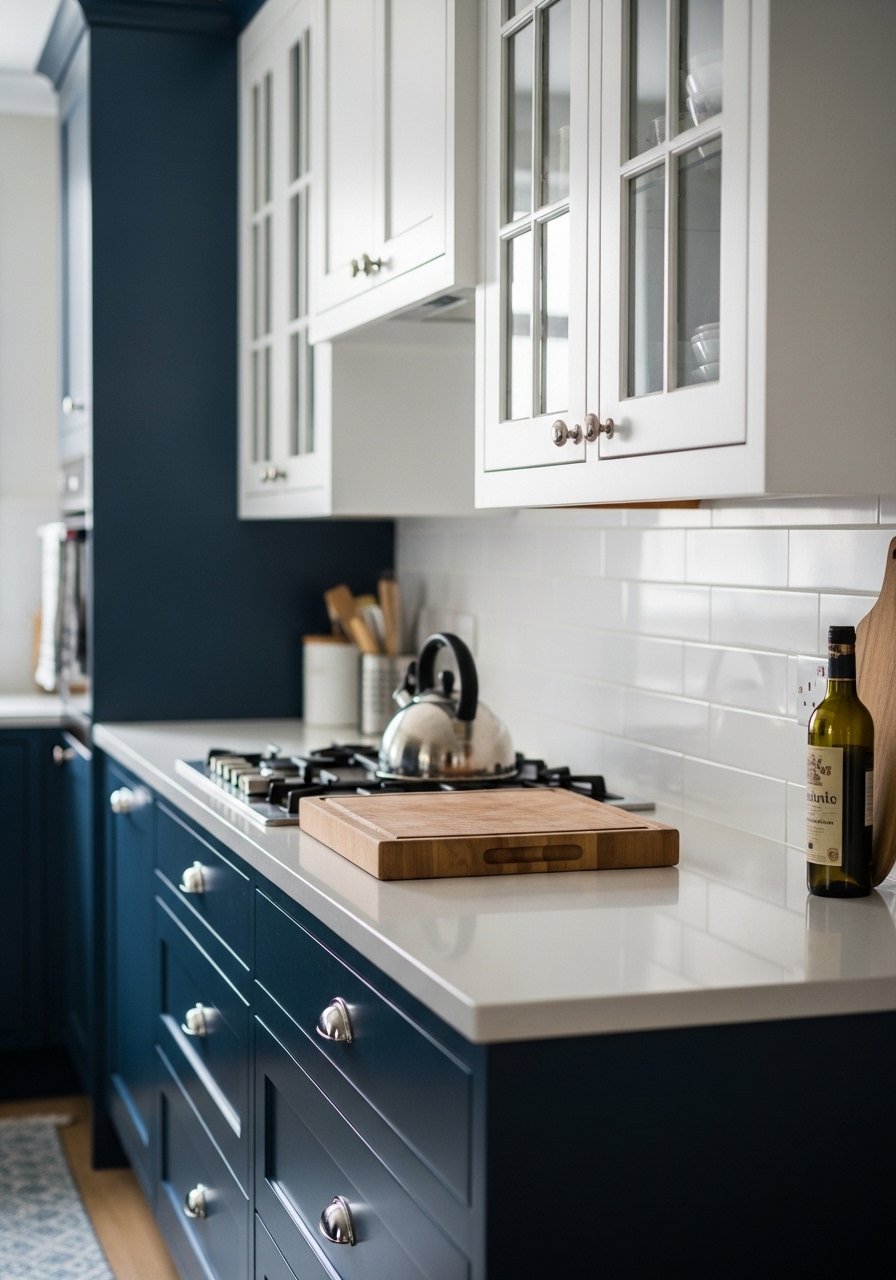
    24. Paint Upper Cabinets a Soft Neutral, Keep Lowers Bold

    This twist on two-tone cabinets uses the psychology that light colors rise and dark colors ground, making small kitchens feel taller.

    Paint uppers in soft cream, white, or pale gray ($50–$150) to lift the eye upward, and lowers in your bold color—sage green, terracotta, or navy ($50–$150). Use the same hardware finish to unify. This creates the feeling of higher ceilings and makes even a galley kitchen feel less boxed-in. Test samples first; colors change drastically throughout the day.

    Pro tip: matte or eggshell finishes feel more sophisticated than gloss, and they hide fingerprints better.

    The spatial illusion is real—your kitchen suddenly feels airier and more intentionally designed.

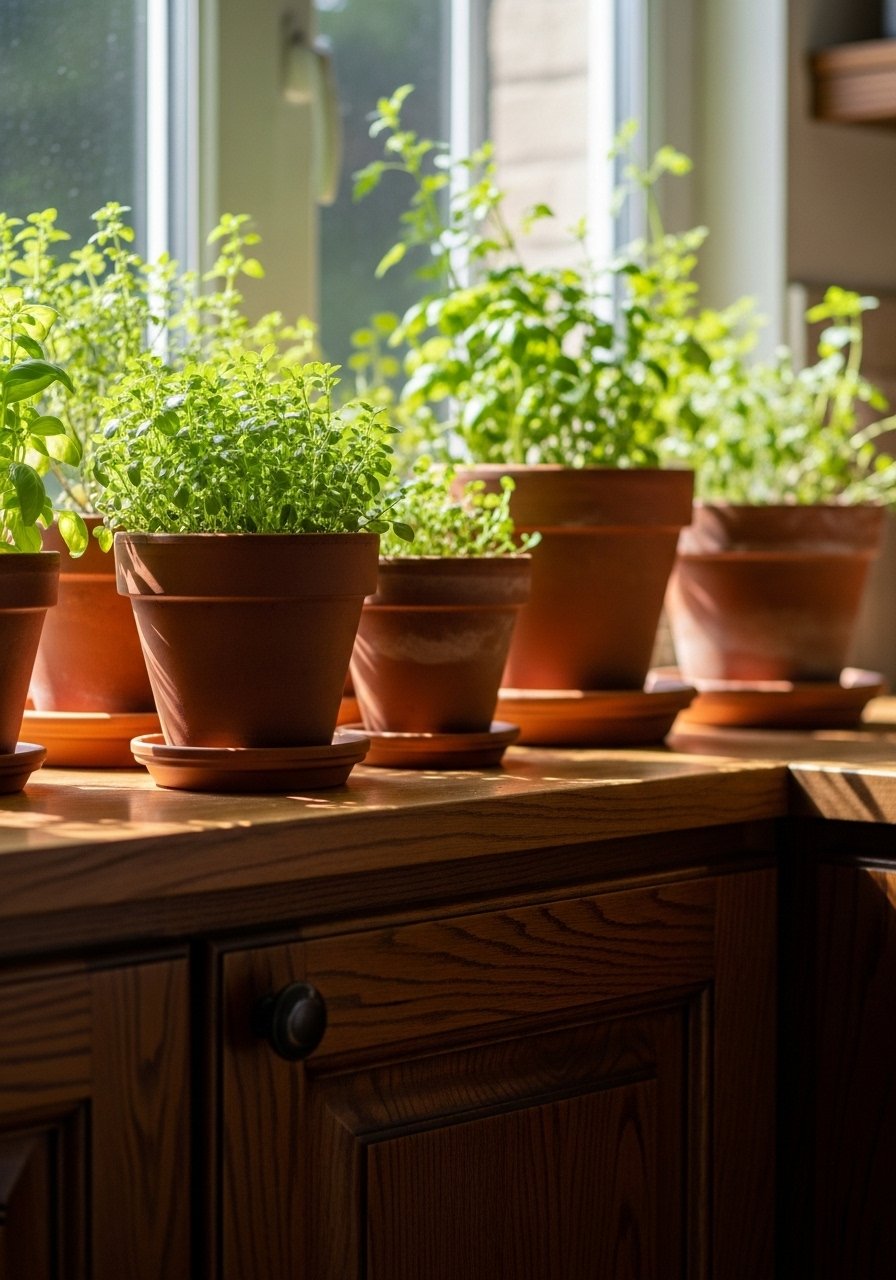
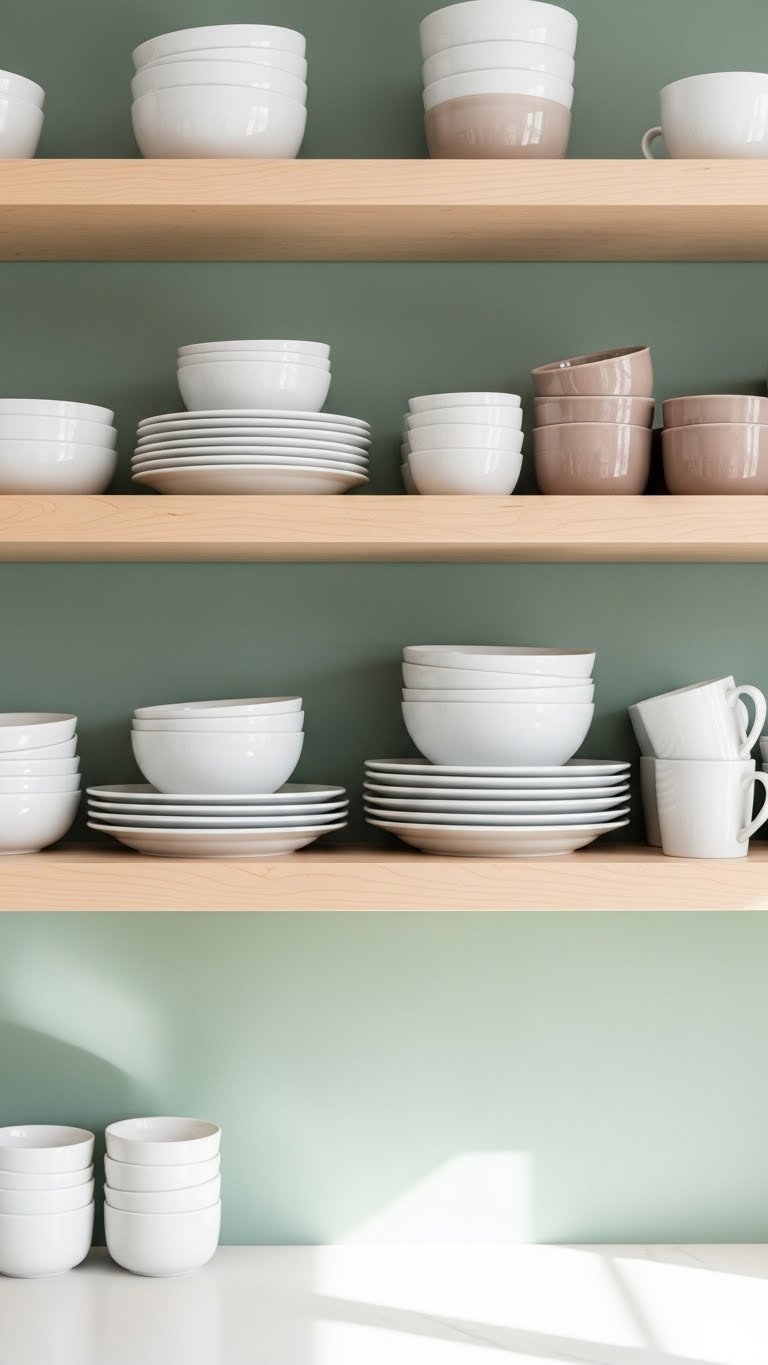
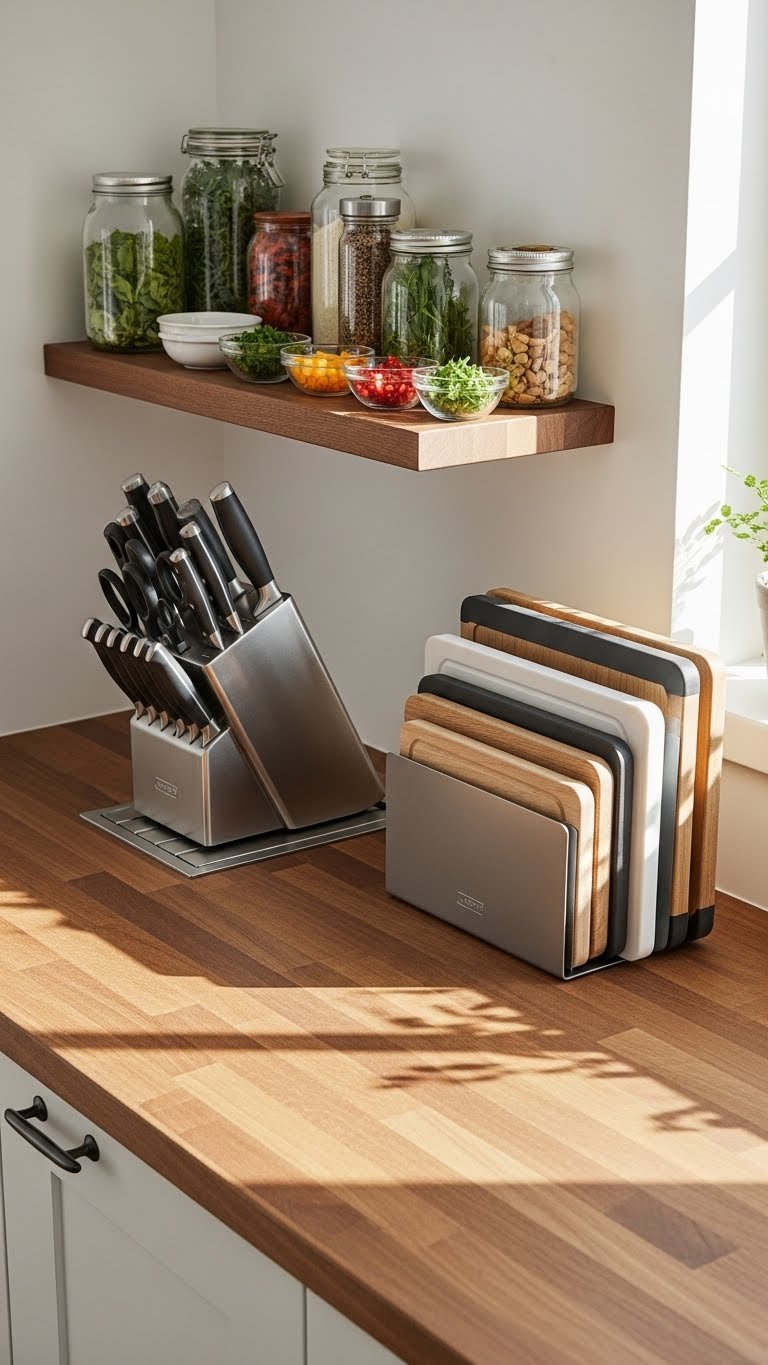
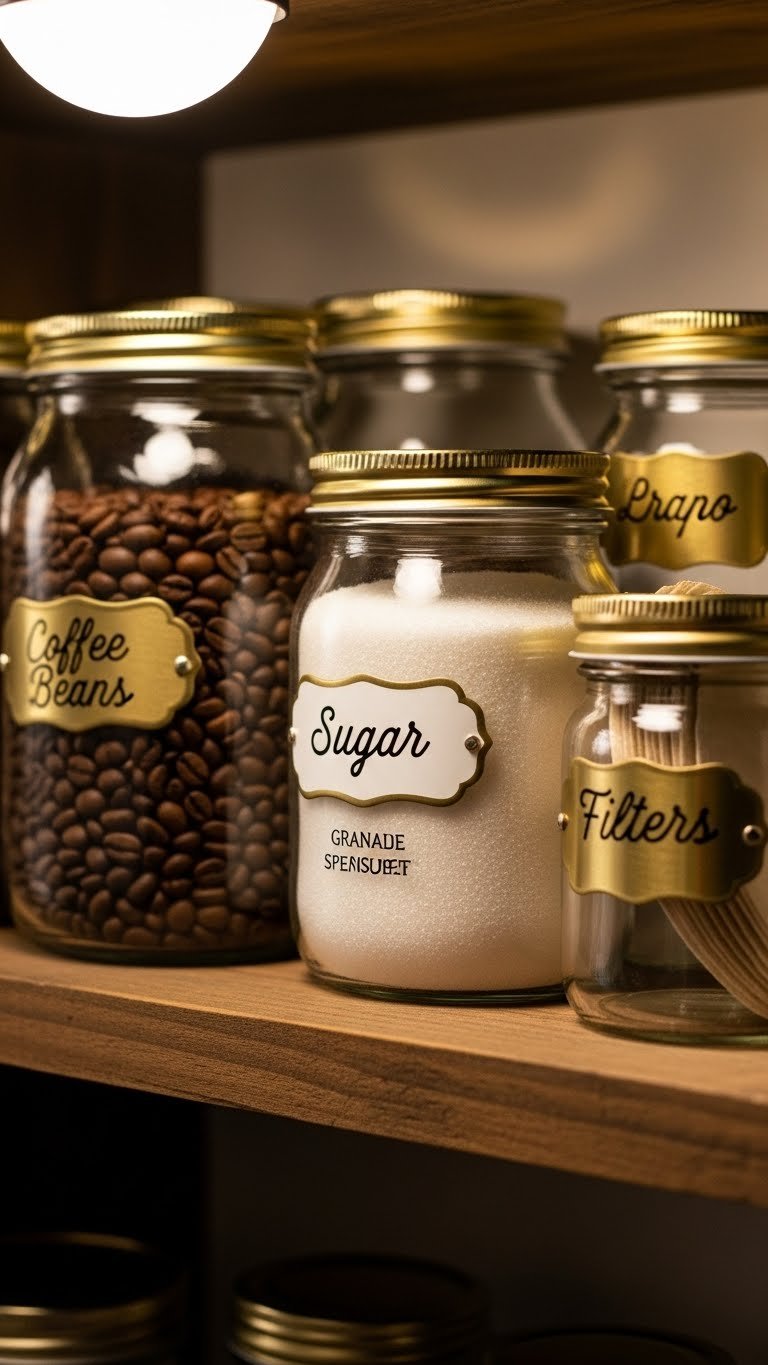
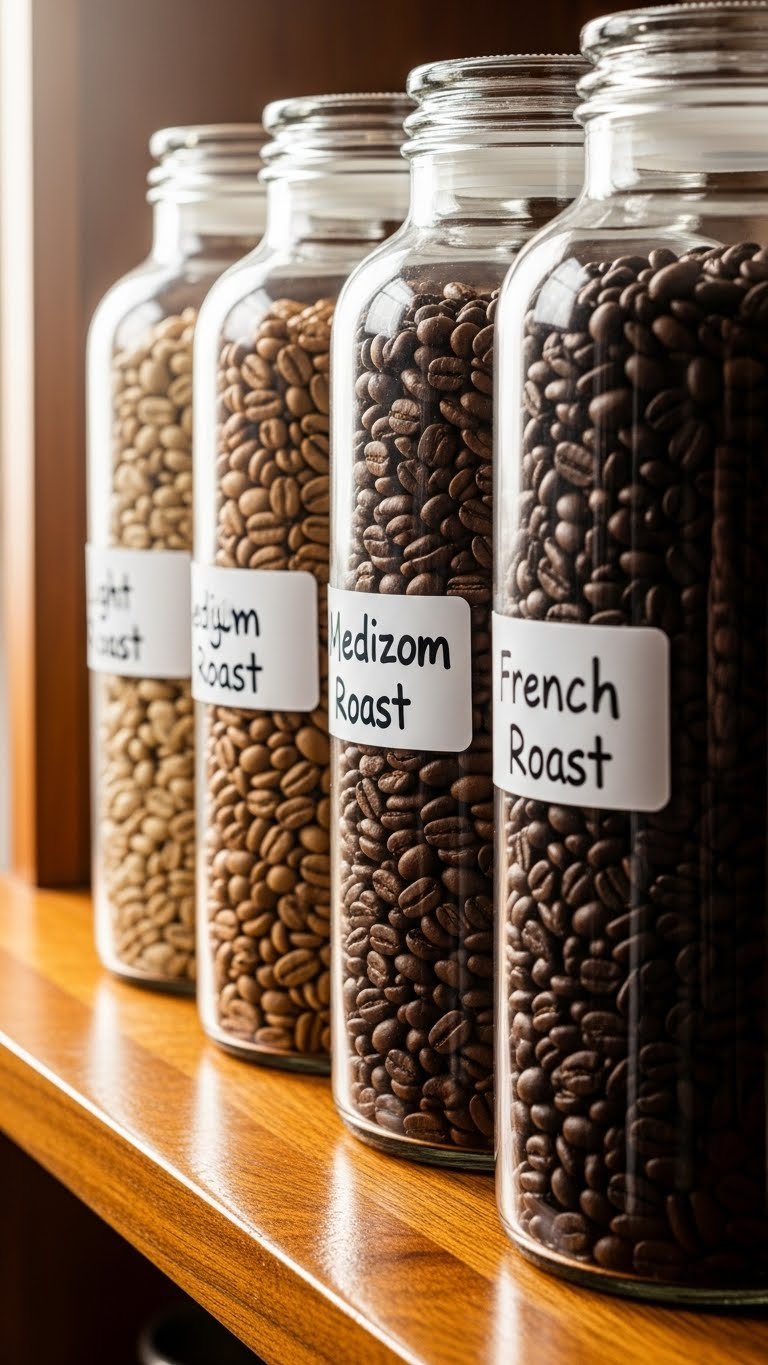
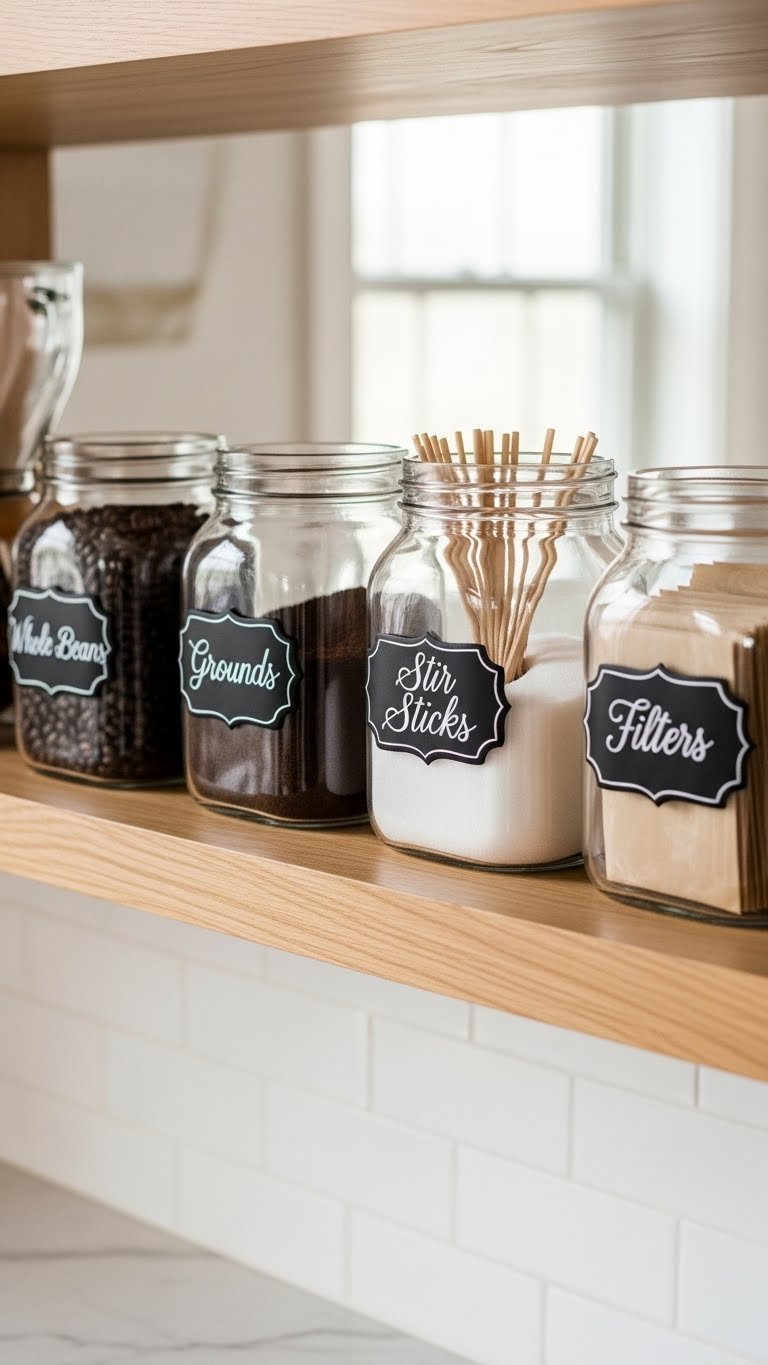
    25. Create a Minimalist Spice Display on Open Shelves

    Organized spice displays become part of your decor in small kitchens. When visible, they need to look intentional, not like storage overflow.

    Invest in matching clear glass spice jars with cork lids ($30–$60 for 12) and printed labels ($10). Arrange them by color or alphabetically on open shelves, mixing in a small plant or ceramic bowl. This is the opposite of hiding spices—you’re celebrating them as part of your design. Update labels with a label maker ($25–$50 as a one-time investment) whenever you refill. This works on floating shelves, pegboard, or a dedicated wall-mounted spice rack.

    Time investment: 30 minutes to set up, then 2 minutes to refill as needed.

    You’ve turned a functional necessity into a stylish focal point that signals your kitchen is designed with intention and personality.

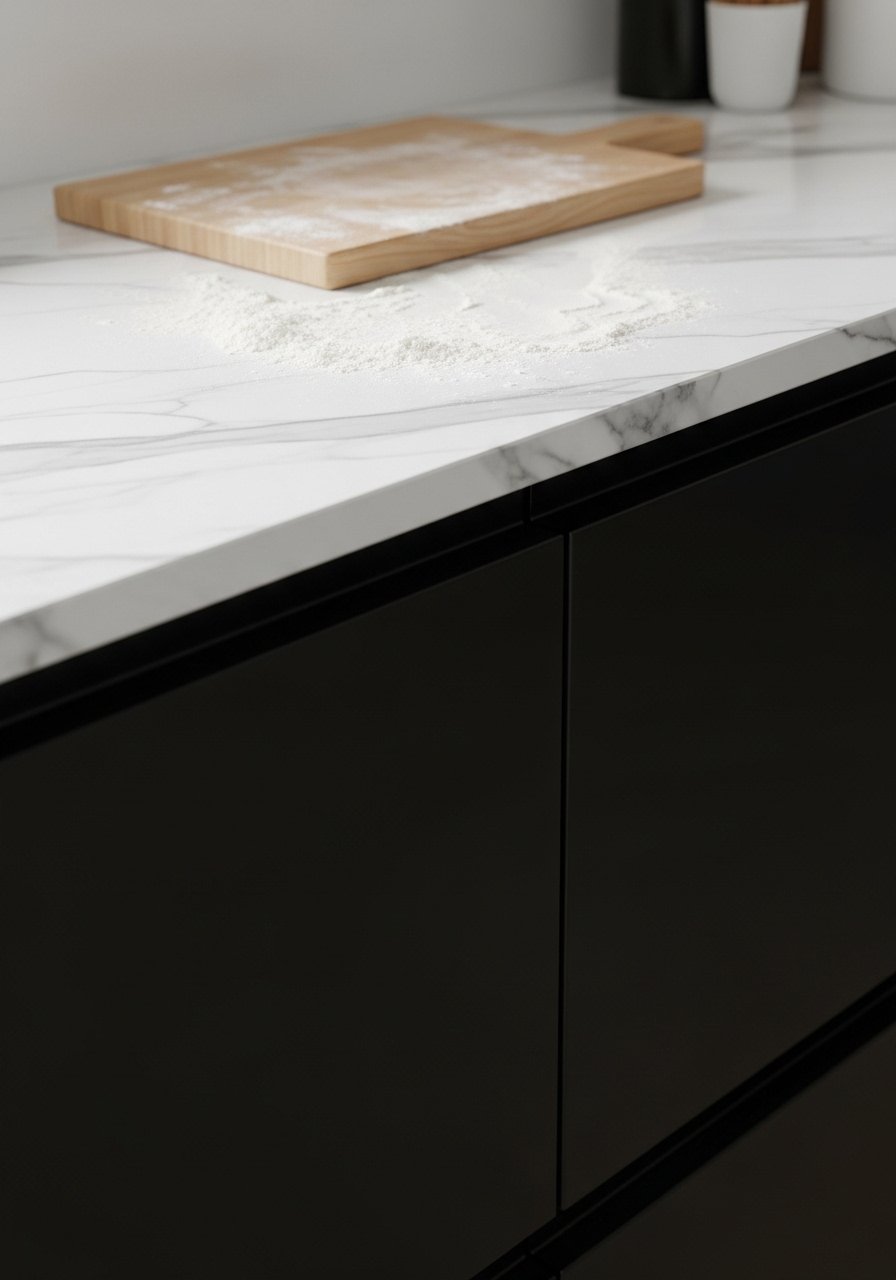
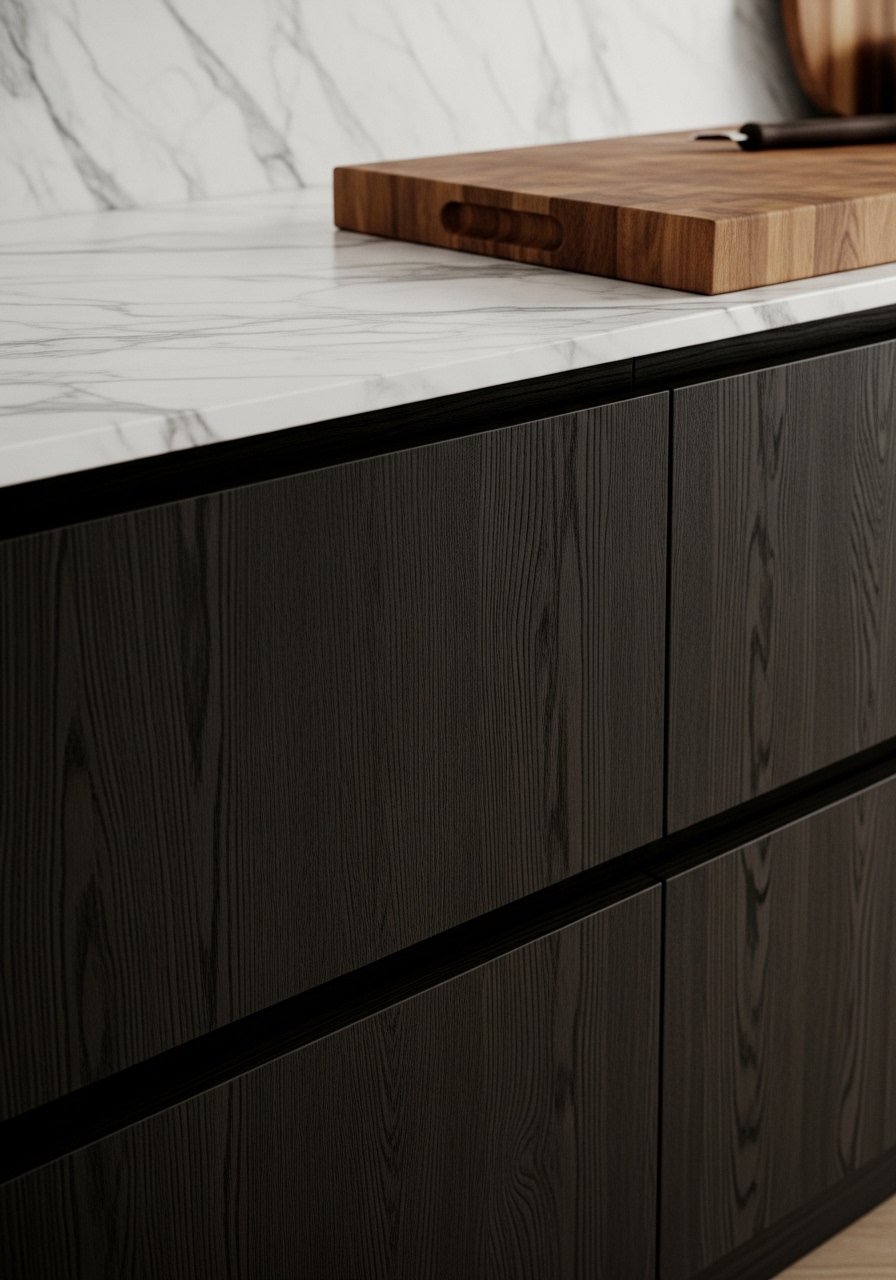
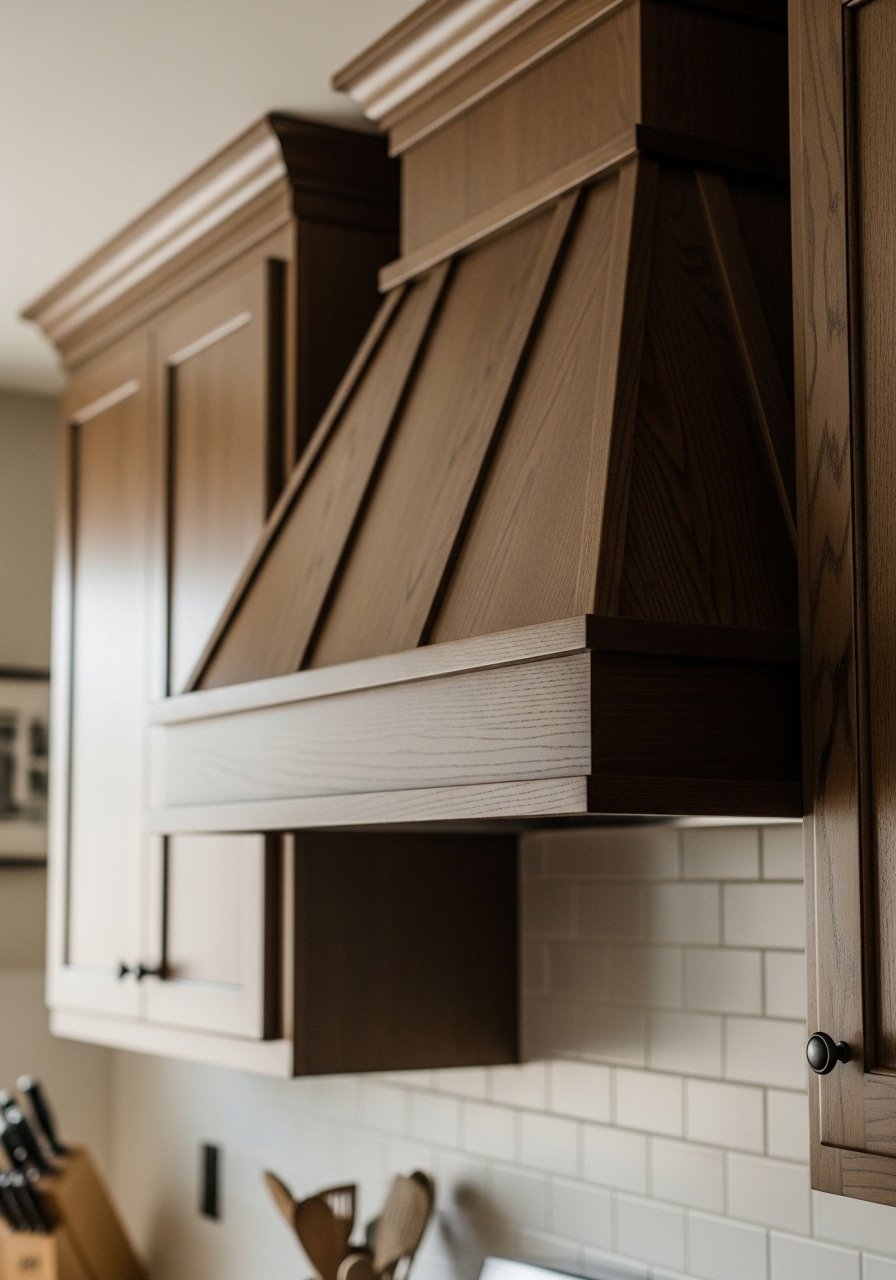
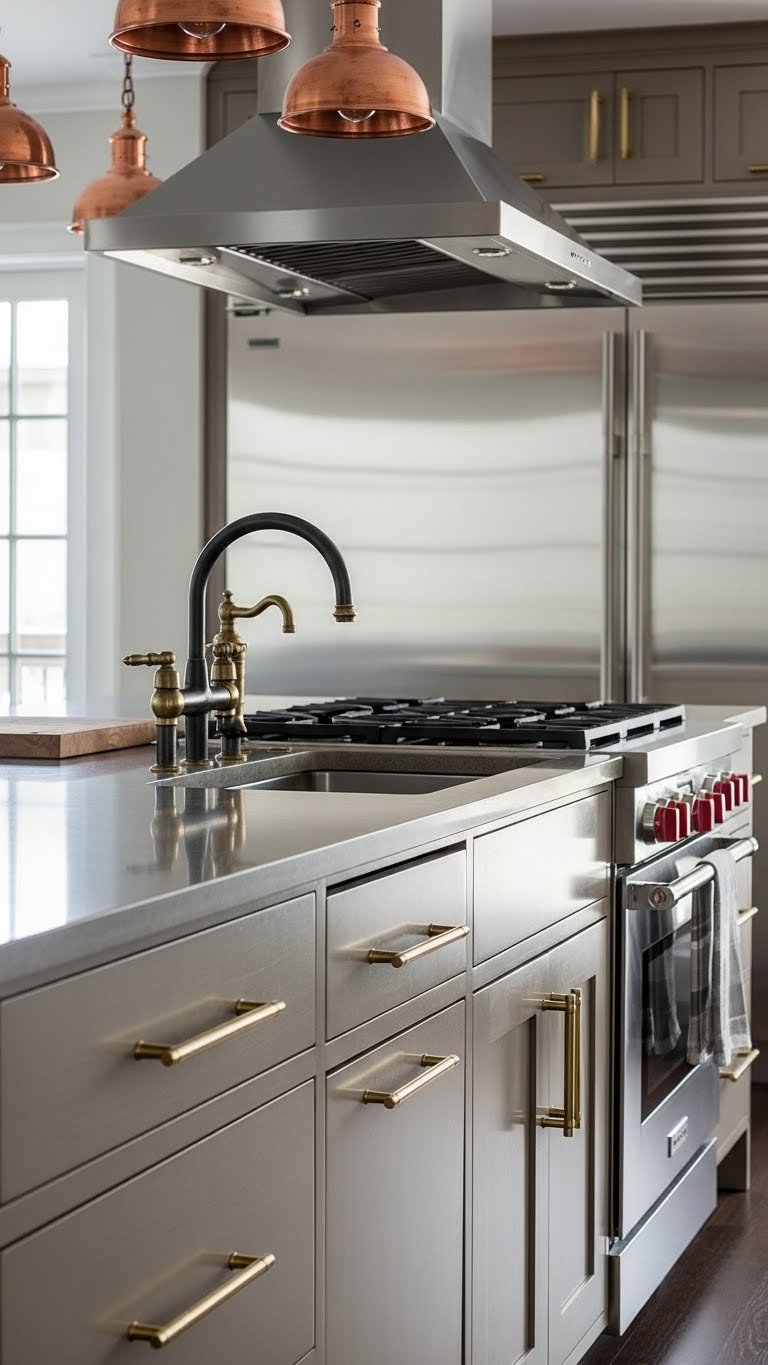
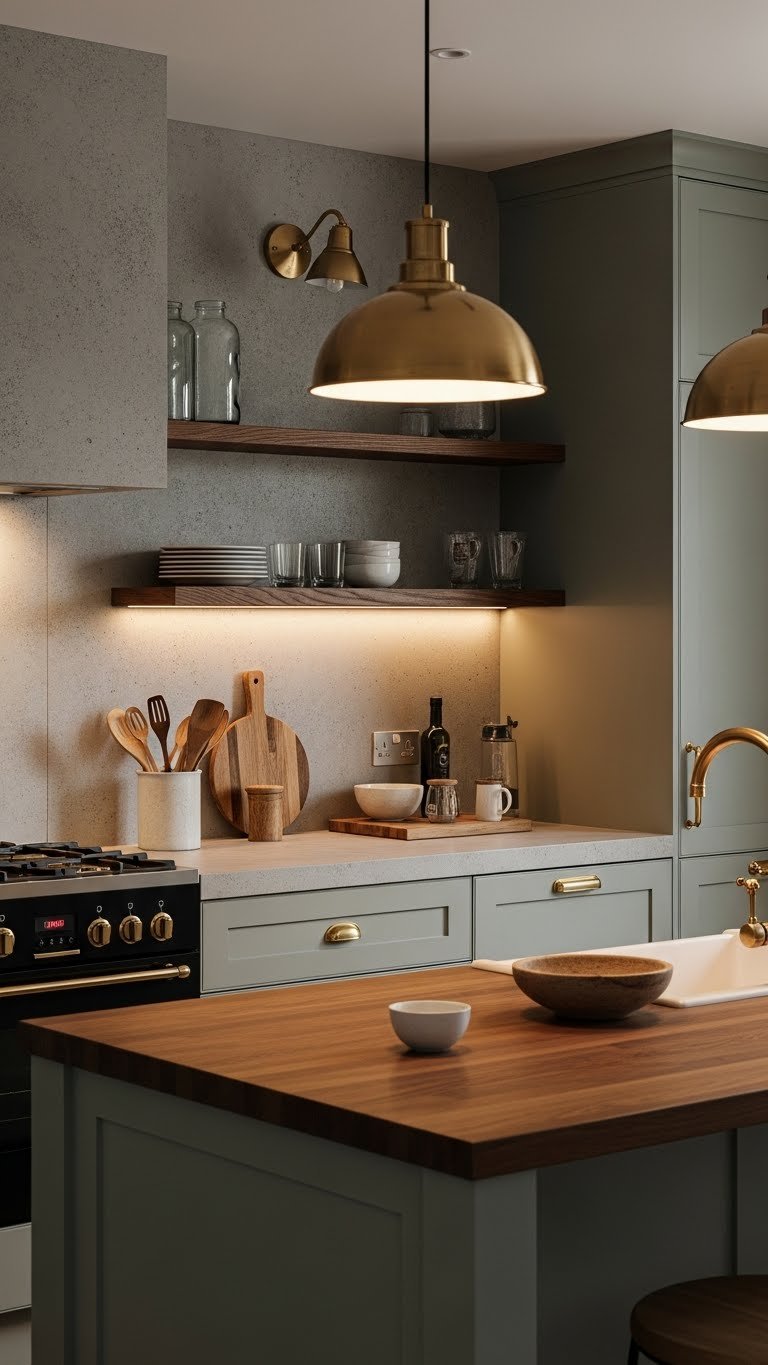
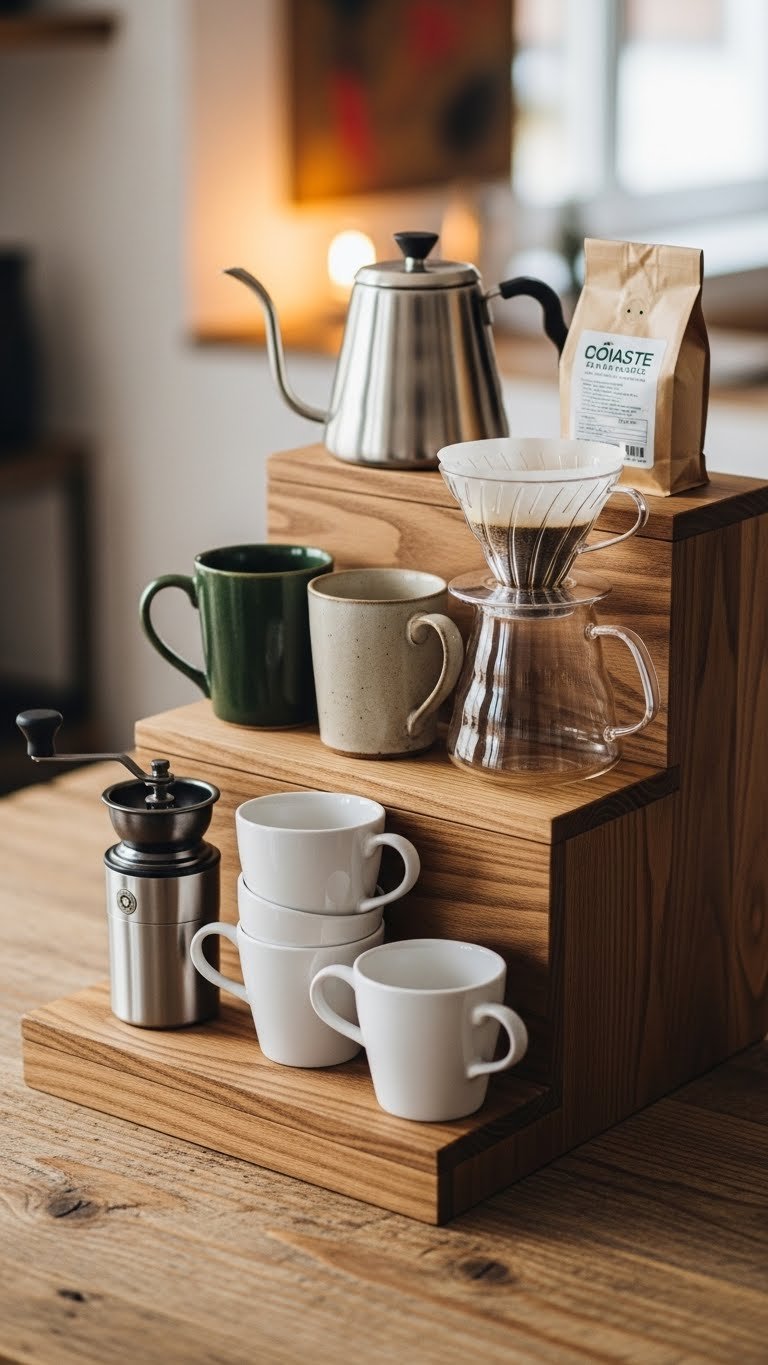
    26. Layer Textures with Concrete, Wood, and Brass

    The #1 2025 kitchen trend is mixing materials and finishes—it’s the antidote to sterile, all-matching kitchens. Small spaces benefit because layering creates depth and personality in tight square footage.

    Combine at least three different finishes: painted cabinets (matte), wood countertop (warm tone), brass or gold hardware (metallic), and a textured backsplash (concrete, fluted, or patterned tile). Add stainless steel or matte black appliances to break up warmth. Mix matte and glossy finishes on cabinets—lower gloss, upper matte, for example. The key is intentionality: pick a palette (warm woods + sage + brass, for example) and stick to it rather than random mixing.

    Pro tip: use two neutrals as your anchor (wood and white) and let one bold color and one metal shine.

    This approach transforms a small kitchen from “cramped and basic” into “carefully curated and sophisticated”—and it costs the same as sticking with boring, matchy finishes.


    Save this post for your kitchen planning—pick one or two ideas and start this weekend. You’d be surprised how even small updates shift your whole kitchen vibe and make cooking feel like less of a chore.

  • 24 Coffee Shelf Decor Ideas That Add Style & Convenience

    24 Coffee Shelf Decor Ideas That Add Style & Convenience

    Your coffee shelf deserves to be both beautiful and functional. Whether you’re working with a tiny corner of a kitchen shelf or a dedicated coffee bar cart, these 24 ideas blend style with everyday convenience. You’ll discover budget-friendly styling tricks, smart organizational hacks, and investment pieces that make your morning routine feel intentional—without requiring a major renovation. From renter-friendly decor swaps to DIY storage solutions, these ideas work whether you’re a casual coffee drinker or a pour-over enthusiast. Let’s turn that shelf into a space you actually want to spend time at.

    1. Stack Vintage Coffee Cans for Instant Charm

    Vintage coffee cans add character and actually store your beans or grounds in style. Hunt for them at thrift stores, estate sales, or online—most cost $3–$8 each. You can stack them, arrange them by size, or mix heights for visual interest.

    Fill them with whole beans or grounds, or leave them empty as pure decor. The vintage aesthetic photographs beautifully and signals that coffee matters here. If you can’t find real vintage cans, stainless steel or ceramic reproductions from Amazon ($15–$25 for a set of 3) work just as well and are dishwasher-safe.

    This simple swap takes 10 minutes and gives your shelf instant personality without any commitment—renters love this approach.

    2. Create a Mini Plant Wall Above Your Shelf

    Living plants make any coffee corner feel intentional and add natural air-purifying benefits. Stick with low-maintenance varieties: pothos, snake plants, or small succulents ($5–$15 each from garden centers or big-box stores).

    Use small ceramic pots or hanging planters and space them so they don’t crowd your coffee equipment. Water on a simple schedule—most of these need water only every 7–10 days. Rotate them occasionally so they grow evenly. The green backdrop makes your shelf a focal point and gives you something living to care for.

    Your morning coffee ritual gains a fresh, calming element that actually improves your space’s air quality. This takes one afternoon to set up and minimal ongoing effort.

    3. Use Floating Shelves to Double Your Display Space

    Floating shelves let you build upward without floor clutter—game-changing for small kitchens or apartments. IKEA’s LACK shelves ($15–$30 each) or Wayfair’s wood options ($40–$100) are solid choices that won’t break the budget.

    Install 2–3 shelves at varying heights above an existing counter or between wall studs. You’ll need a stud finder ($15) and basic hardware. If renting, adhesive-backed shelves (Command Heavy Duty from Target, $12–$18) work without wall damage. Space items so there’s breathing room—not everything needs to be visible at once.

    You’ve created a custom coffee display that looks built-in but actually adds up to 3–5 square feet of usable storage.

    4. Swap Mismatched Mugs for a Curated Collection

    A consistent mug collection looks more intentional than random matching sets. Choose 6–8 mugs in a color palette you love: cream and neutrals, jewel tones, or pastels. Hunt thrift stores for budget-friendly finds ($1–$3 each) or invest in a few quality ceramic mugs ($8–$15 from boutique coffee shops).

    Hang them from a wooden peg rack ($20–$40) or simple hooks ($5–$10). Arrange them by color or size for maximum visual appeal. You’ll actually reach for the mug you want instead of digging through a cabinet. This changes how your shelf photographs and makes your morning routine feel more curated.

    5. Build a Budget Bar Cart for Mobile Coffee Setup

    A coffee bar cart gives you flexibility—roll it to the kitchen counter, dining table, or balcony. IKEA’s SUNNERSTA ($40) or Target’s basic carts ($50–$80) work perfectly for renters.

    Stock the top tier with your coffee maker and grounds, the middle with mugs and accessories, and the bottom with napkins and extras. The key is leaving space so items are accessible without unstacking. This setup takes 20 minutes to assemble and zero wall installation.

    You get a complete coffee station that moves with you and looks polished parked in a corner.

    6. Add Open Shelving Labels for a Curated Look

    Labels transform random jars into a styled display. Use adhesive labels ($5–$10 per set), engraved brass tags ($15–$25), or handwritten kraft labels ($2–$5) from craft stores.

    Label everything: “Espresso Beans,” “Cold Brew,” “Sugar,” “Filters.” Spend 30 minutes organizing matching glass jars (thrift them for $0.50–$2 each) or use ones you already own. This visual clarity makes your shelf look intentional and makes finding what you need faster.

    The finished look photographs beautifully and gives your coffee station a boutique-store vibe that costs almost nothing.

    7. Install a Small Wooden Shelf Riser for Height Variation

    A shelf riser creates layers without adding more shelves—perfect for small spaces. Use a wooden step stool ($15–$35 from IKEA or Target), a stack of books, or DIY one from scrap wood ($0–$20).

    Arrange tall items (coffee maker) in back and shorter items (sugar jar, small plant) in front so everything’s visible. This trick makes your shelf feel more dynamic and magazine-worthy without needing additional wall space.

    Your coffee setup looks professionally styled with depth and dimension in just the footprint you already have.

    8. Hang a Small Pegboard for Equipment Storage

    A small pegboard organizes your tools while keeping them visible and accessible. IKEA’s pegboards ($15–$25) or wooden options from craft stores ($10–$30) keep costs down. Paint it to match your kitchen or leave it natural.

    Use small hooks ($2–$5) to hang your grinder, cloth napkins, measuring spoons, and scales. Arrange with breathing room so it’s not cluttered. Takes about 30 minutes to install and arrange. This saves cabinet space and makes your morning routine faster since you can grab what you need without digging.

    Your coffee tools become part of the display instead of hidden away.

    9. Display Coffee Bags as Wall Art

    Coffee bags from local roasters are beautiful and tell a story. Prop them on your shelf or stick them to a small cork board ($10–$15) with washi tape.

    Feature different roasts as seasons change or as you try new local roasters. It’s a conversation starter and free rotating art. Arrange by color or roaster name for a cohesive look. This takes five minutes to refresh and costs nothing if you’re already buying coffee.

    Your shelf celebrates local makers while staying organized and photograph-ready.

    10. Group Small Baskets for Hidden Storage

    Baskets hide the less-photogenic stuff while adding texture and warmth. Thrift woven baskets for $2–$5 each or buy new from IKEA ($8–$15) or Target ($12–$25).

    Use them to store coffee filters, sweeteners, extra napkins, or your grinder attachment. Label them with small tags if you like, or leave them mystery boxes. This works great if your shelf is open and you need to corral clutter without cabinet doors. Takes 20 minutes to set up.

    Everything’s accessible but not visually loud—your shelf looks intentional even if it’s holding plenty.

    11. Add a Small Mirror to Reflect Light and Space

    A small mirror brightens a dark corner and makes the space feel bigger. Round mirrors from IKEA ($10–$20), Target ($15–$30), or thrift stores ($2–$5) work perfectly.

    Lean it against the wall or hang it above your coffee shelf. Position it to catch light from a window. This simple addition makes a cramped coffee nook feel open and airy. Install time is five minutes if hanging, zero if just leaning it.

    Your shelf gets instant brightness and perceived spaciousness without rearranging anything.

    12. Use Clear Glass Jars to Show Off Coffee Beans

    Displaying beans in clear jars is both practical and beautiful—you see exactly what you have. Glass jars from thrift stores ($0.50–$1.50) or batch-buy clear ones from container stores ($2–$4 each).

    Fill them with different roasts, origins, or blend types. Label the front so you know what’s what. Arrange them in size order or by roast color. The beans create a warm, inviting color palette that photographs gorgeously. Takes 15 minutes to organize and labels are optional.

    Your morning coffee choice becomes a visual decision, and your shelf looks like a specialty coffee shop.

    13. Install a Narrow Shelf Inside a Cabinet Door

    This trick maximizes unused space if you have cabinet doors near your main coffee shelf. Mount a narrow floating shelf ($15–$25) or adhesive shelf ($10–$20) inside the door.

    Use it for your grinder, espresso machine, or overflow mugs. Everything stays close by and hidden when you close the door but instantly accessible when you open it. Installation takes 30 minutes and no wall damage if you use adhesive. This is perfect for renters or anyone with limited counter space.

    You’ve created a second storage zone without sacrificing any floor or counter real estate.

    14. Style a Coffee Corner with Matching Linens

    Cloth napkins or small linens add softness and signal hospitality. Use linen napkins from Target ($12–$20 for a set) or thrifted ones ($1–$2 each).

    Fold them simply or roll them and tie with twine. Place them near your mugs or on a small shelf. They’re practical for spills and beautiful as decor. Choose neutral colors that complement your mug palette. Takes 10 minutes to fold and style.

    Your coffee setup suddenly feels more thoughtfully put together, like you’re ready to share coffee with a guest.

    15. Create a Tiered Mug Rack Using Cookbooks

    Cookbooks do double duty as risers and decor. Prop them at angles to create height variation for mugs. Thrift vintage cookbooks for $1–$3 each or use ones gathering dust on your shelf.

    Arrange tall mugs in back and smaller ones on the stepped risers. This visual trick makes a single shelf feel complex and curated without needing more space. Takes 10 minutes to arrange and rearrange as needed. Photograph it well and feels very Pinterest-ready.

    Your setup looks designed by someone with excellent taste, not slapped together.

    16. Add Adjustable Shelf Dividers for Organization

    Shelf dividers create zones on one shelf so items don’t tip over and everything has a home. Metal dividers from IKEA ($8–$15) or adhesive-backed organizers ($5–$10).

    Divide your shelf into sections: mugs here, beans there, equipment in the third zone. Everything stays put and photographs cleaner. Takes 15 minutes to install and arrange. This works great if you have limited shelf space and need maximum functionality.

    Your coffee shelf now operates like a curated store display instead of a catch-all.

    17. Incorporate a Small Chalkboard for Daily Specials

    A tiny chalkboard adds personality and functionality—perfect for rotating your daily coffee selection. Small chalkboards from craft stores ($5–$12) or Dollar Tree ($1.25).

    Update it daily with your featured blend, a coffee quote, or a fun note. Lean it on your shelf or hang it above. This detail makes your setup feel like an actual cafe and is a perfect photo prop. Takes two minutes to write and erase. Change it whenever you like for instant freshness.

    Your coffee shelf becomes interactive and tells a story beyond just holding coffee.

    18. Use Brass or Gold Accents for Warmth

    Brass and gold hardware elevate a coffee shelf instantly. Swap out any existing silver hooks or hardware for brass versions ($2–$10 each) from hardware stores or online.

    Add a brass plant stand, a gold-rimmed mug, or brass shelf brackets. These warm metals catch light beautifully and photograph well. You don’t need much—just a few touches create cohesion. Takes 20 minutes to make swaps. This works especially well if your kitchen has other brass or gold elements.

    Your coffee corner feels thoughtfully coordinated and higher-end than it actually is.

    19. Build a Coffee Filter Storage Box from Scrap Wood

    A wooden filter holder keeps filters organized and doubles as decor. DIY one from scrap wood ($0–$15) or buy a ready-made holder ($15–$30) from home stores.

    Cut or purchase a small box, sand it smooth, and stain or paint if desired. Store filters standing upright so you grab them easily. Position it on your shelf where you prep coffee. Total cost under $15 if DIY, takes one afternoon if you enjoy woodworking or one minute if you buy pre-made.

    Your filters go from messy bag to intentional storage, and your shelf looks more boutique coffee shop than random kitchen.

    20. Layer Your Shelf with Varying Container Heights

    Visual interest comes from height variation—don’t line everything up in a row. Mix tall glass jars ($2–$5), short ceramic canisters ($5–$10), and medium bottles ($3–$8).

    Arrange them so the eye moves across different heights—short, tall, medium, short creates a pleasing pattern. Leave some shelf space bare so it doesn’t feel packed. This takes 10 minutes to arrange and makes your shelf feel intentional and styled. Rearrange seasonally to keep it fresh.

    Your coffee shelf becomes something you pause to look at instead of just functional storage.

    21. Hang Tiny Floating Shelves for Vertical Storage

    Micro shelves add storage without visual weight—perfect for tiny apartments. Wall-mounted shelves from IKEA ($8–$15) or thin adhesive shelves ($5–$10) work beautifully.

    Mount 2–3 in a vertical line above your main coffee station. Use each one for a single item: one mug, one plant, one coffee scoop. This creates a sculptural display that photographs like gallery-style art. Takes 30 minutes to install with a level and drill. Zero visual clutter despite adding storage.

    Your vertical space becomes functional art and you’ve tripled your display area without a bigger footprint.

    22. Add a Cork or Felt Backing Board Behind Your Shelf

    A backing board frames your display and adds dimension. Mount cork board ($15–$25) or self-adhesive felt ($10–$15) behind a floating shelf or on the wall directly.

    Use it as a subtle backdrop for your coffee equipment or add small hooks to hang items. This simple addition transforms a regular shelf into an intentional display that looks more curated. Takes 20 minutes to measure and install. It’s especially effective if your shelf floats away from the wall.

    Your coffee station suddenly looks professionally designed instead of randomly assembled.

    23. Organize Supplies in a Rolling Utility Cart Underneath

    A rolling cart beneath your main shelf creates tiered storage for bulk items and backups. IKEA’s cart ($30–$50) or basic metal utility carts ($25–$40) hide less-gorgeous supplies while keeping them accessible.

    Stock it with backup coffee bags, extra filters, cleaning supplies, and equipment you don’t display. Roll it into a pantry or corner when it’s not in use. This gives you plenty of space without cluttering your main shelf display. Takes 30 minutes to set up and organize.

    You get function without sacrificing style—the pretty stuff displays, and the practical overflow stores neatly below.

    24. Frame a Simple Coffee Artwork or Quote

    A small framed print adds personality without fuss. Buy pre-made coffee prints ($15–$30) online or frame a quote yourself using printables ($2–$5 and your home printer).

    Use a simple frame in white, black, or brass to match your shelf aesthetic. Prop it between two tall jars or hang it above your shelf. This adds a finishing touch that shows your coffee passion. Costs under $10 if you DIY, takes five minutes to arrange.

    Your coffee shelf now has a focal point that ties everything together and speaks to your style.

    Save this post for your next shelf refresh and try just one idea this weekend—start with whichever speaks to you most, whether that’s the plants, the organizing system, or the styling touches. You’ll be amazed at how quickly your coffee corner becomes a space you actually enjoy lingering in.

  • 24 Countertop Coffee Area Ideas That Keep Everything Organized

    24 Countertop Coffee Area Ideas That Keep Everything Organized


    Introduction

    Your countertop coffee area probably feels chaotic—coffee grounds scattered, mugs piled up, supplies shoved in random corners. The good news? You don’t need a massive overhaul to create a functional, beautiful coffee station that actually stays organized. Over the next 24 ideas, you’ll discover smart storage solutions, styling tricks, and budget-friendly hacks that transform even the tiniest counter space into a place where everything has its spot. Whether you’re working with 2 feet or 20, renting or owning, these ideas work together or standalone to make your morning ritual smoother and your kitchen prettier in the process.


    1. Use a Slim Rolling Cart for Movable Storage

    A rolling cart gives you dedicated coffee real estate without stealing permanent counter space. You can pull it out when you need it and tuck it into a corner or beside the fridge when guests arrive—perfect for renters who can’t commit to fixed storage.

    Choose a slim cart 15–18 inches wide from IKEA (Raskog, $30–$50) or Target. Arrange your coffee maker on the top shelf for easy access, filters and beans on the middle tier, and mugs or supplies below. Add casters with locks so it won’t slide when you’re reaching for things. The whole setup takes under 10 minutes to assemble.

    The best part? You can redecorate or relocate your entire station in seconds. If you move, it goes with you.


    2. Install a Magnetic Knife Strip for Coffee Scoops and Spoons

    Magnetic strips aren’t just for knives—coffee scoops, spoons, and measuring clips stick right to them, freeing up drawer space. Mount one 12–18 inches above your counter with included screws ($8–$15 from Amazon or Home Depot).

    Installation takes 15 minutes. Use a level to ensure it’s straight, drill pilot holes first if your walls are plaster, and secure with wall anchors if you hit studs. Make sure your scoops and spoons are stainless steel or have metal components—test them with a magnet before buying.

    Now every tool you reach for is visible and within arm’s reach. Your drawers finally have breathing room.


    3. Organize Beans in Airtight Glass Containers with Labels

    Clear containers let you see when you’re running low on beans, and airtight seals keep them fresh. Three matching containers cost $20–$40 at Container Store, Bed Bath & Beyond, or Amazon. Grab a label maker ($15–$30) or use white adhesive labels and a pen.

    Transfer whole beans or grounds into containers, seal them tight, and label with the roast name and purchase date. Arrange them on a shelf or cart in order by roast level or purchase date. This setup takes 20 minutes and works for ground coffee too.

    Your counter looks curated, and you’ll know exactly what you have without opening five bags.


    4. Mount a Wall-Mounted Shelf Above the Station

    Wall space is prime real estate—use it to keep your counter clear. Install a 24–36 inch floating shelf ($30–$80 from IKEA, Home Depot, or Wayfair) about 18 inches above your countertop station.

    Use a stud finder to locate wall studs, mark holes, and secure shelf brackets with heavy-duty screws. Most shelves arrive with installation hardware. The whole job takes under 30 minutes (or hire a handyperson for $50–$100 if you’re not comfortable drilling).

    Hang mugs from hooks, stack coffee bags, or display a small plant. Your counter stays clear, and you’ve created a focal point.


    5. Use Drawer Dividers to Organize Coffee Pods or Filters

    Filters, pods, and paper sleeves multiply fast in drawers. Bamboo dividers ($12–$20 on Amazon) create instant organization without removing anything from your counter.

    Measure your drawer depth and width, choose dividers that fit snugly, and assign one section to each supply: filters in one, pods in another, sweeteners or cream packets in another. No sliding around, and you’ll grab what you need in seconds.

    This $15-minute project eliminates “where are the filters?” moments forever.


    6. Create a Coffee Prep Station with a Small Tray

    A tray contains everything in one visual space and moves easily if you need to reset your counter. Grab a wooden or metal tray ($15–$40 from Target, West Elm, or HomeGoods) that’s at least 18 by 12 inches.

    Group your daily-use items on it: French press, one to two mugs, a small spoon, sugar bowl. Leave other supplies in drawers or on shelves. The tray becomes your “coffee zone”—organized, portable, and beautiful. If you spill something, you’re containing the mess.

    Everything your morning needs sits in one spot, and your kitchen looks intentional.


    7. Install a Pegboard for Customizable Storage

    Pegboards let you arrange storage however you want and adjust it as your needs change. Grab a 24 by 24 inch pegboard ($15–$30 from Home Depot or Lowe’s), paint it to match your kitchen ($5–$10 for primer and paint), and install it with wall anchors.

    Add wooden pegs ($10–$15 for a set) and hang small baskets, hooks, or cups. Hang your coffee scoop, a cloth, measuring cups, or small supply containers. Arrange them at eye level above your counter station. Installation takes under an hour, and rearranging takes minutes.

    Your coffee tools are visible, accessible, and you’ve created a gallery-worthy wall.


    8. Use Tension Rods Under Shelves to Add a Second Tier

    Tension rods fit inside existing shelves or cabinets, giving you an instant second tier for mugs or supplies. Grab two to four rods ($8–$15 each from Amazon, Target, or Home Depot) and adjust them to fit your shelf width.

    Pop them in place, and you’ve instantly doubled shelf capacity. Slide stacked mugs or small containers underneath. No tools required—it’s renter-friendly and reversible. This 5-minute setup costs under $30.

    You’ve squeezed more storage out of existing space and didn’t drill a single hole.


    9. Label Everything with a Label Maker for Instant Organization

    Labels prevent the “I know we had these” scramble and make it easy for family or guests to find what they need. A label maker ($15–$30 from Amazon or Target, or free if you use a pen and adhesive labels) is the fastest way to create uniform, professional-looking organization.

    Print labels for all your containers, drawers, and shelves. Use consistent fonts and sizing. It takes 20 minutes and transforms a chaotic setup into something that looks curated. Even renting spaces benefit from removable labels.

    Now you have a system anyone can follow, and your counter looks magazine-ready.


    10. Store Mugs Vertically with a Mug Rack or Shelf

    Vertical mug storage frees counter space and turns your collection into decor. Install a mug rack or shelf ($20–$50 from IKEA, West Elm, or HomeGoods) at eye level near your coffee station.

    Mount it with wall anchors (no stud needed for lightweight racks), arrange mugs by color for a cohesive look, and leave two to three empty spots for rotation or guests. The installation takes 20 minutes, and you’ve reclaimed 2–3 square feet of counter.

    Your favorite mugs are always visible and ready to grab, and you’ve created a focused coffee corner.


    11. Use a Bamboo Utensil Holder for Spoons and Scoops

    A bamboo utensil holder corrals small tools in one spot and costs just $8–$15 from Target, IKEA, or Amazon. Grab one that’s at least 4 inches tall and 3 inches in diameter.

    Fill it with your coffee scoop, measuring spoons, small stirring spoons, and measuring clips. Place it right beside your coffee maker or on your prep tray. It takes 2 minutes to set up and immediately declutters your counter.

    Everything you need is within arm’s reach, standing upright and easy to spot.


    12. Mount a Small Shelf for Cream and Sweetener Bottles

    A slim shelf or ledge ($15–$40) mounted right at counter height keeps bottles off the surface and visible. Install it 12–18 inches above your main coffee prep area using wall anchors or studs.

    Arrange cream, sweetener, and syrup bottles on it in order of how often you use them. This works especially well for small kitchens where counter space is precious. Installation takes 15 minutes.

    Your bottles are visible, accessible, and your counter suddenly feels twice as big.


    13. Repurpose a Small Vintage Cabinet as a Coffee Bar

    A small vintage or thrifted cabinet ($30–$100 from Facebook Marketplace, thrift stores, or Craigslist) creates an entire self-contained coffee station. Look for cabinets with a flat top and shelves inside.

    Place your coffee maker, beans, mugs, and supplies inside, and close the doors when you’re done. This café core approach works beautifully in small kitchens or studio apartments. You’ve essentially created a coffee nook that takes up no visual counter space when closed.

    Your kitchen looks curated, and you’ve given your morning ritual its own dedicated “room.”


    14. Use Clear Acrylic Containers to Stack and Display Supplies

    Stackable acrylic containers ($20–$35 for a set of three from Container Store, Target, or Amazon) let you stack supplies vertically while keeping everything visible. Choose containers with snap lids to protect contents from moisture.

    Fill each tier with different supplies: pods or beans on top, filters in the middle, napkins or sweeteners below. Stack them neatly on a shelf or corner of your counter. This arrangement takes 10 minutes and saves significant counter real estate.

    Your supplies are stacked efficiently, nothing gets lost, and the clear containers look intentional and clean.


    15. Install a Over-the-Door Shoe Organizer for Coffee Pods

    An over-the-door organizer ($10–$20 from Amazon, Target, or Dollar Tree) transforms cabinet doors into storage real estate. Choose one with 12–16 pockets.

    Hang it on the inside of a cabinet door or a wall-mounted frame, and fill each pocket with a different pod variety, filters, or supplies. You’ve created vertical storage that’s completely hidden when the door closes. Installation takes 5 minutes—just adhesive strips or a few small nails.

    This renter-friendly hack holds a huge volume of supplies in a space that was previously wasted.


    16. Create a Coffee Station in a Small Corner with a Corner Shelf

    Corner shelves ($30–$60 from IKEA, Wayfair, or Home Depot) make use of dead space most kitchens ignore. Install a corner shelf unit with two to three tiers.

    Mount it 18–24 inches above your counter using wall anchors in both walls. Arrange your coffee maker on the top shelf, mugs on the middle tier, and supplies or decor below. This approach works in kitchens where counter space is extremely limited. Installation takes 30 minutes if you’re comfortable with a level and drill; otherwise, hire help for $50–$75.

    You’ve claimed an overlooked corner and created a focused coffee zone that feels special.


    17. Use a Tiered Shelf Riser to Add Vertical Display Space

    A tiered shelf riser ($20–$40 from Container Store, Target, or Amazon) adds visual depth and storage to a countertop without eating into counter real estate. Look for risers that are 12–15 inches tall.

    Place your daily-use mugs in front, supplies or decor in back. The riser creates visual interest, makes your station look intentional, and lets you fit more in the same footprint. No installation needed—just place and arrange. Setup takes 10 minutes.

    Your coffee area now has dimension and style, and nothing’s actually taking up more space.


    18. Mount a Slim Spice Rack for Coffee and Extras

    A thin wall-mounted spice rack ($15–$30 from IKEA, Target, or Amazon) holds small jars of beans, sugar, and sweetener in a footprint that’s only 4–6 inches wide. Look for racks with three to five shelves.

    Install it above your counter or beside your main station using wall anchors. Fill small glass jars with supplies and label them. This approach works beautifully in tiny kitchens. Installation takes 15 minutes.

    You’ve created an organized, vertical coffee supply zone that looks like part of your kitchen design, not a haphazard collection.


    19. Use Lazy Susan Turntables for Easy Access to Supplies

    Lazy susans ($15–$30 for a set from Target, Amazon, or HomeGoods) let you rotate supplies to the front without digging. Choose ones that are 10–12 inches in diameter.

    Place one at your prep station holding cream, sweetener, and syrups. Place another beside it for mugs or filters. Spin them to reach what you need—no more stretching or fishing. They work beautifully on small counters or carts. Setup takes 3 minutes.

    Now every supply rotates into reach, and your station feels more functional and easier to navigate.


    20. Install Adhesive Under-Cabinet Lighting for Visibility

    Under-cabinet LED strips ($25–$50 from Amazon, Home Depot, or IKEA, often wireless and rechargeable) brighten your prep area and make it feel like a dedicated café corner. Choose warm white bulbs for a cozy vibe.

    Apply adhesive strips under your cabinet and turn them on during morning prep. Many versions are rechargeable and don’t require electrical work—perfect for renters. Installation takes 10 minutes, and you’ve created ambiance and functionality at once.

    Your coffee station now has its own lighting, feels intentional, and looks Instagram-ready even at 6 a.m.


    21. Use Clear Magazine Holders to Corral Coffee Bags

    Clear magazine holders ($10–$20 for a set of three from Container Store, Target, or Amazon) keep coffee bags upright, visible, and protected. The vertical filing system works like a mini filing cabinet for beans.

    Stand bags vertically so you see the label immediately and can grab one without toppling others. Place holders on a shelf or high counter spot. This method takes 5 minutes to set up and prevents bags from crumpling or getting lost in the back of a cabinet.

    Your coffee bean rotation becomes clear, and you’ll use beans before they go stale.


    22. Add Hooks Under Shelves or Cabinets for Tea Towels

    Adhesive or screw-mounted hooks ($8–$15 for a set from Amazon or Home Depot) hang cloths and aprons right at your station. Choose hooks that complement your kitchen style.

    Mount three to four hooks under your cabinet or shelf, and hang tea towels, cloths, or aprons for quick cleanup. Screw-mounted hooks are sturdier; adhesive hooks work on most surfaces and require no drilling. Installation takes 10 minutes.

    You’ve created a cleanup station within your coffee zone, and cloths are always within reach instead of buried in a drawer.


    23. Create a Coffee Caddy with a Divided Wooden Box

    A wooden caddy or divided box ($15–$35 from IKEA, HomeGoods, or Etsy) combines storage and portability. Look for caddies with four to six compartments.

    Fill each section with a different supply or tool: beans in one, filters in another, sweetener and spoon in others. The entire station becomes portable—you can move it to a different counter or table if needed. It takes 5 minutes to fill, and you’ve created a self-contained coffee bar.

    Your supplies are organized by category, the setup looks curated, and you can move your whole station if you need more counter space for cooking.


    24. Use Jar Labels and Matching Containers for a Cohesive Look

    Matching jars and coordinated labels ($25–$50 for a starter set from Container Store, Target, or Amazon) create a cohesive, intentional look. Choose a style that matches your kitchen: glass and wood, clear with concrete lids, ceramic, whatever resonates.

    Fill jars with beans, grounds, sugar, sweetener, and extras. Use chalkboard labels, printable tags, or hand-lettered stickers. Arrange them in size or color order. This entire project takes 30 minutes and transforms a functional setup into décor.

    Your countertop looks curated and intentional, like you’ve actually designed a coffee zone—because you have.


    25. Install a Small Under-Cabinet Drawer for Pod Storage

    An under-cabinet pull-out drawer ($40–$80 from Amazon, Home Depot, or Wayfair) adds storage without eating counter space. Choose one that’s shallow (3–4 inches deep) to fit under most cabinets.

    Mount it with the hardware provided (usually 15–20 minutes), and fill it with pods, filters, or supplies. Pull it open when you need something, and close it away. It’s a renter-friendly option if you use removable adhesive strips.

    You’ve added storage capacity without changing your counter footprint.


    26. Layer Your Station with a Wooden Serving Board as a Visual Base

    A wooden serving board ($20–$40 from Target, West Elm, or IKEA) creates a visual anchor for your station and defines the space. Choose one that’s at least 18 by 24 inches.

    Arrange your coffee maker, one to two mugs, a small spoon, and supplies on top of it as if you’re styling a table. The board visually contains your setup, makes it feel intentional, and looks beautiful even when things are slightly messy. It takes 3 minutes to style.

    Your coffee corner now looks gathered, curated, and purposeful—like you planned it, not just threw things on the counter.


    Save this post and tackle one idea this weekend. Pick something small if you’re starting out—mounting labels or grabbing a utensil holder takes 10 minutes and makes a noticeable difference. Your morning ritual deserves a corner that’s as organized as it is beautiful.

  • 24 Glass-Front Cabinet Concepts That Elevate Any Kitchen

    24 Glass-Front Cabinet Concepts That Elevate Any Kitchen

    Glass-front cabinets are having a major moment—and for good reason. They instantly showcase your favorite dishes, add visual interest to your kitchen, and make spaces feel bigger and airier. But here’s the thing: glass-front cabinets only work when you’re intentional about what goes inside. That means styling them thoughtfully, knowing which items photograph well together, and understanding how to keep everything looking intentional rather than cluttered.

    If you’ve been thinking about adding glass-front cabinets or refreshing the ones you already have, this guide walks you through 24 distinct concepts—from styling strategies to installation hacks to creative display ideas. Whether you’re a renter looking for temporary solutions or a homeowner ready to commit to new cabinetry, you’ll find something here. Let’s explore how to make glass-front cabinets work beautifully in your space.

    1. Display White Dishware Against Earthy Backgrounds

    White dishes against a colored or natural wood backdrop create visual contrast that photographs beautifully. This works because the white stands out while the background prevents the cabinet from looking sterile or boring.

    Remove the original backing or add a removable adhesive wallpaper in sage green, soft blue, or leave natural wood exposed. Stack plates vertically or horizontally in odd numbers, then tuck mugs and bowls into the arrangement. This takes about 30 minutes to style and costs $0–$30 if you’re using wallpaper (try Spoonflower or Peel & Stick options from Target). If you’re renting, skip the wallpaper and simply arrange items on the existing backing.

    The contrast makes each piece feel intentional, and your everyday dishes become décor. Plus, you know exactly where everything is when you need it.

    2. Mix Open Shelving With Glass Doors for Balance

    Alternating glass-front cabinets with open shelving (no doors at all) prevents the space from feeling too enclosed or display-heavy. Open shelves give your eye a break while glass doors protect and showcase what matters most.

    If you’re replacing existing cabinets, discuss this mix with your contractor—many modern kitchens pair one or two glass-front sections with open shelving elsewhere. Cost varies based on your cabinet choice: IKEA’s glass-front units run $50–$150 per unit, while custom options start at $300+. For renters, floating shelves work great alongside a glass-front cabinet unit.

    This balance makes your kitchen feel curated without overwhelming the senses. You get the display factor without the “all eyes on me” pressure.

    3. Arrange Cookbooks Spine-Out for Color and Personality

    Cookbooks are perfect for glass-front cabinets because they add color, texture, and personality instantly. Spine-out displays make book titles visible and create a gallery effect.

    Arrange cookbooks by color family or group by cuisine type for visual rhythm. Mix in small potted herbs, a vintage scale, or a pretty serving spoon between books to break up the lines. This costs $0 (you already own the books) and takes 20 minutes to arrange. If you want new cookbooks, thrift stores and library sales offer them for $1–$3 each.

    Your cabinet becomes a conversation starter instead of just storage. It signals that you cook, you’re curious, and your kitchen is a lived-in space.

    4. Create Height Variation With Risers and Pedestals

    Flat, single-level shelves look boring in glass cabinets. Adding height variation with risers and small pedestals creates dimension and makes the display more interesting to look at.

    Pick up wooden risers or ceramic pedestals from HomeGoods, Target, or IKEA ($5–$20 each). Place a large bowl or platter on a riser, nest smaller items around and behind it, and adjust heights so each piece is visible. This takes 15 minutes and costs $10–$40 total. Renters can use stacked books as risers—just cover them with a neutral cloth first.

    The eye travels through the cabinet naturally instead of resting on one flat plane. Suddenly your everyday items look like an intentional collection.

    5. Go Minimal With One Item Per Shelf

    Sometimes less is more. One stunning piece per shelf—or one carefully edited group—feels high-design and expensive, even if the items cost next to nothing.

    Choose items with interesting shapes or colors: a ceramic vase you love, a set of matching bowls, a collection of vintage glassware. Leave at least two-thirds of each shelf empty. This costs $0 (style with what you own) and takes 10 minutes. The key is editing ruthlessly—if an item doesn’t spark joy or visual interest, it doesn’t go in the cabinet.

    This approach makes your space feel calm and curated. Visitors see intentionality, not clutter. Plus, cleaning is a breeze.

    6. Incorporate Textured or Patterned Dishware for Visual Interest

    Flat, solid-colored items can feel boring together. Adding pieces with patterns, ridges, or unique textures gives your cabinet visual richness and depth.

    Look for dishware with interesting details: fluted or ribbed glassware, patterned plates, textured ceramics with raised designs. Brands like Heath Ceramics, Schoolhouse Electric, and even Target’s Project 62 line offer textured options ($15–$60 per piece). Thrift stores often have vintage textured glassware for $1–$5 per piece. Mix these with solid items to let the textures shine.

    The interplay of smooth and textured surfaces makes your display more engaging. It looks collected and thoughtful, not cookie-cutter.

    7. Use Floating Shelves With Integrated Glass for Renter-Friendly Display

    If you rent and can’t install permanent glass-front cabinets, floating shelves with integrated glass panels mimic the effect without landlord drama. These mount to studs and look built-in.

    Search “floating shelf with glass” on Amazon or Wayfair—options range from $40–$150 per shelf. Installation takes 1–2 hours with a drill and level (or hire a handyperson for $50–$100). Choose shelves that match your kitchen’s style: industrial metal frames, warm wood, or minimalist white. You can fit 4–6 favorite items comfortably on a 24-inch shelf.

    You get a custom-looking display without any permanent damage. When you move, the shelf comes with you.

    8. Back Your Cabinet With Removable Wallpaper for Color Pop

    The interior background of your glass cabinet has huge design impact. Removable wallpaper instantly changes the vibe without damage or commitment.

    Measure the interior back wall of your cabinet and order removable peel-and-stick wallpaper from Spoonflower, Chasing Paper, or Target ($25–$50 per roll). Options include geometric prints, subtle patterns, or bold colors. Installation takes 20–30 minutes—smooth application is important so it adheres properly and looks crisp. Renters love this trick because it peels off cleanly.

    The background frames your dishes like art. What looked basic suddenly feels designed and intentional.

    9. Style With Varying Glass and Ceramic Heights

    Playing with height differences isn’t just about risers—it’s about choosing items that naturally vary in size and allowing the silhouettes to tell a story.

    Select drinkware in graduated heights: tall water glasses, shorter tumblers, wine glasses, and small juice cups. Arrange them in descending height order or cluster by type. Add ceramic bowls or a pitcher nearby for contrast. This costs $0–$30 if you thrift pieces ($1–$3 each at Goodwill) and takes 15 minutes to arrange.

    The varied silhouettes create visual movement. Your cabinet looks collected and intentional without trying too hard.

    10. Feature Vintage or Heirloom Pieces as Focal Points

    Glass-front cabinets are perfect for showing off pieces that tell a story: your grandmother’s china, a vintage find from a flea market, or something handmade by someone you love.

    Choose one or two hero pieces and place them where light hits them best—usually eye level and slightly off-center. Arrange supporting items (smaller bowls, neutral glassware) around them to create context without competing for attention. This costs $0 (use what you own) or $10–$50 if you’re hunting for a meaningful vintage piece. Styling takes 20 minutes.

    Every time you look at your cabinet, you see memories and meaning. That’s the point of display—it’s not just storage, it’s celebration.

    11. Create a Coffee Bar Display Within Your Cabinet

    If you’re a coffee person, dedicate one or two shelves of your glass cabinet to a styled coffee display. It’s functional and beautiful at the same time.

    Arrange espresso cups, a small pour-over dripper, a coffee bean container, and maybe a vintage coffee tin or grinder. Choose items in a cohesive color palette—matte black, cream, and wood tones work well. Cost depends on what you own: $0 if styling with what’s already there, or $20–$60 for a few special pieces (a pretty jar, a vintage tin). Takes 15 minutes to arrange.

    Every morning, you’re greeted by a mini café right in your kitchen. That’s the kind of detail that makes a space feel special.

    12. Pair Glass Cabinets With Open Shelves and LED Strip Lighting

    LED strip lighting inside glass cabinets adds ambiance and makes your display visible even in low light. It’s a small investment that feels high-end.

    Measure the interior width of your cabinet and purchase warm white LED strip lights from Amazon or Home Depot ($15–$40). Stick them to the top interior edge and plug into the outlet inside (or run them along the side). Installation takes 15 minutes—no tools needed if you go the adhesive route. Renters: check if your cabinet has internal power; some do, some don’t.

    At night, the soft glow highlights your dishes and creates restaurant-quality ambiance. During the day, natural light is enough.

    13. Display Vintage Glassware Collections by Era or Style

    If you love vintage glassware, a glass-front cabinet is your moment. Collections look stunning when organized by visual theme rather than chronologically.

    Group similar silhouettes together or organize by color progression. Mix eras—a 1970s juice glass next to a modern minimalist tumbler creates visual interest. Hunt at thrift stores, estate sales, and online (Etsy, eBay) for $1–$5 per piece. A full 24-piece display costs $20–$60 if thrifting. Arranging takes 30 minutes to get the groupings right.

    Your cabinet becomes a conversation piece about taste and hunt skills. Plus, vintage glassware is durable and adds character that new items can’t match.

    14. Use Floating Glass Shelves Without Visible Brackets for Seamless Look

    Floating glass shelves with hidden or minimal brackets create an almost magical “items in air” effect. It’s the minimalist’s dream.

    Choose shelves with internal support (hidden mounting into studs) rather than external brackets. Options include minimalist metal studs (nearly invisible) or fully hidden wall-mounted systems. Brands like Floating Shelf Company and custom glass shops offer these ($80–$200 per shelf depending on width). Installation requires studs and often a professional ($100–$200 labor)—or DIY if you’re confident with a stud finder and drill.

    The seamless look makes your kitchen feel more spacious and modern. Items appear to float, supported by nothing but air—or careful engineering.

    15. Mix Functional and Decorative: Everyday Dishes Plus Pretty Things

    The best glass cabinets feel lived-in, not like a museum. Mixing everyday items with decorative pieces creates this balance.

    Put some of your actual dishes in the cabinet rather than pretending it’s only for fancy things. This could be your everyday coffee mugs, the bowls you use regularly, the glasses you reach for. Tuck one or two special pieces around them—a small plant, a pretty bowl you don’t use, a framed photo. Everything should make you happy to see. Costs $0 and takes 20 minutes to style thoughtfully.

    Your cabinet becomes functional and beautiful. You’re not afraid to actually use these things—because you do.

    16. Go Monochrome: Display All White or All Neutral Dishware

    An all-white or all-neutral cabinet has a sophisticated, spa-like quality. The restraint is actually the statement.

    Collect white dishware gradually: plain white dishes from Target or IKEA ($10–$20 per set), vintage white ceramics from thrift stores ($1–$5 per piece), and white glassware. Include texture variety—some smooth, some ribbed, some with subtle patterns. The monochrome makes these texture differences pop. Costs $30–$80 for a full display if mostly thrifted. Takes 30 minutes to arrange by size and shape.

    The simplicity feels intentional and expensive. Your kitchen looks calm, organized, and thoughtfully designed.

    17. Install Glass Cabinets With Adjustable Shelving for Flexibility

    Adjustable shelves inside glass cabinets let you optimize spacing for whatever you’re displaying. They’re more flexible than fixed shelves.

    When selecting glass cabinets, choose models with adjustable shelf pegs or rails (most modern options have this). This lets you raise or lower each shelf to fit your items perfectly—no wasted space above a short stack of bowls. Installation varies by cabinet type: $0 if your cabinets come with adjustable shelves, or $50–$100 if retrofitting existing cabinets with new shelving hardware. This takes 1–2 hours per cabinet.

    You can rearrange whenever you want without waste. If you change your collection or style, the cabinet adapts with you.

    18. Add Ambient Lighting Inside for Nighttime Visual Appeal

    Interior lighting transforms your cabinet into a design feature that works around the clock. Warm white light is best for kitchen vibes.

    Install warm white LED strip lights (2700–3000K color temperature) along the interior top or sides ($20–$50). Battery-operated options exist if you can’t access an outlet ($15–$35). Use dimmable lights if you want the option to adjust brightness. Installation takes 15–20 minutes and requires no wiring for battery options.

    Your cabinet becomes a glowing focal point at night. It adds ambiance and makes your kitchen feel like a high-end space—even at 11 PM on a Tuesday.

    19. Style Seasonal Displays for Fresh Rotation Every Few Months

    Switch up your cabinet display with the seasons. It keeps things fresh and gives you a reason to rearrange—which honestly, feels good.

    Spring: pastels, fresh flowers, light glassware. Summer: bright colors, outdoor entertaining pieces, colorful linens tucked in. Fall: warm tones, harvest-themed items, cozy textures. Winter: cool neutrals, metallic accents, minimalist spacing. Costs $0 (rotate what you already own) or $10–$30 if you pick up seasonal pieces from HomeGoods or TJ Maxx. Rearranging takes 20–30 minutes.

    Your kitchen stays visually interesting year-round. It’s a reason to pause and refresh—and that’s basically home décor therapy.

    20. Feature a Collection You’ve Been Building (Vintage Tins, Ceramic Animals, Etc.)

    If you collect anything—vintage kitchen tins, small ceramics, old measuring cups, retro salt-and-pepper shakers—a glass cabinet is the perfect home. Your collection deserves to be seen.

    Group similar items together or organize by color, era, or size depending on what makes sense for your collection. Leave some breathing room so each piece is visible. This costs $0 (use your collection) and takes 30 minutes to style thoughtfully. If you’re building a collection, thrift stores and online shops offer pieces for $1–$10 each.

    Suddenly your cabinet tells the story of what you love to hunt for and collect. It’s a reflection of your taste and your time—way more interesting than a cookie-cutter display.

    21. Combine Glass Cabinets With a Matching Open Shelf for Unified Design

    Pairing a glass-front cabinet directly beside an identical open shelf creates visual balance and flexibility. You get the display benefit of glass plus the openness of open shelving.

    Choose cabinets and shelves from the same line or brand (IKEA, Wayfair, custom builders all offer matching sets). Install them side by side and style them as one cohesive display. Costs depend on cabinet choice: $100–$400 per unit for mid-range options, more for custom. Installation usually runs 2–4 hours or $200–$400 if hiring help.

    The unified look makes your kitchen feel intentionally designed rather than accidentally assembled. The combination of glass and open gives you both visual interest and breathing room.

    22. Use Slim Cabinet Doors to Maximize Views of Your Display

    Some glass cabinet doors have thick frames; others are almost all glass with minimal framing. Minimal-frame designs let more light through and give a better view of what’s inside.

    When shopping for glass cabinets, ask about door frame thickness. Frames should be 1–2 inches wide maximum to keep focus on the display, not the hardware. Brands like IKEA Sektion, Wayfair, and custom glass shops offer slim-frame options. Costs vary: $80–$250 per door depending on size and customization. Installation is the same as any cabinet door.

    You see more, the light travels better, and the focus stays on your beautiful display. The minimalist framing feels modern and intentional.

    23. Display Cookbooks and Dishware Together for Functional Beauty

    Mixing cookbooks with the dishes they celebrate creates a functional, beautiful narrative. It’s practical display that also looks intentional.

    Arrange cookbooks vertically, then tuck related dishes around them: a soup cookbook near bowls, a baking book near your pretty ceramic vessels, a cocktail guide near your special glassware. Group by color or theme for cohesion. Costs $0 (you own these) or $20–$50 if you’re adding a few thrifted pieces. Takes 30–40 minutes to style thoughtfully.

    Your cabinet stops being decoration and becomes a functional guide to how you actually cook and entertain. It’s useful and beautiful—the best of both worlds.

    24. Opt for Corner Glass Cabinets to Utilize Often-Wasted Space

    Corner cabinets are often neglected, but they’re prime real estate for glass-front display if you install one purposefully.

    Measure your corner space and choose a corner glass cabinet designed for that layout (many brands offer these). They open from the front with shelves angled or straight inside. Costs $150–$400 depending on size and quality. Installation requires careful measurement but usually takes 2–3 hours or $150–$250 with professional help. These work great in kitchens where wall space is limited.

    You suddenly have display space you thought was wasted. Corner cabinets add character to awkward architectural features—and make the most of every square inch.

    Save this post for your next kitchen refresh. Pick one or two styling ideas and try them this weekend—chances are you already own most of what you need. Which concept speaks to your space?

  • 23 Earthy Kitchen Ideas That Bring Nature Into Your Home

    23 Earthy Kitchen Ideas That Bring Nature Into Your Home

    If your kitchen feels sterile and disconnected from nature, you’re not alone. After years of all-white minimalism, homeowners are craving spaces that feel alive, warm, and grounded. The good news? Bringing earthy, natural elements into your kitchen doesn’t require a full renovation or a designer budget. From introducing soft greens and warm wood tones to adding living plants and natural textures, these 23 ideas will help you create a kitchen that feels like a retreat—not just a functional space. Whether you’re renting or own your home, you’ll find simple swaps and budget-friendly projects that bring the calm of nature indoors. Let’s explore how to make your kitchen feel like the peaceful, connected space you’ve been wanting.

    1. Paint Walls in Soft Sage Green

    Soft sage green creates an instant calming effect without feeling bold or trendy. This muted tone pairs beautifully with warm metals and natural wood, making your kitchen feel both serene and intentional.

    Pick a mid-to-pale sage (not forest green for smaller spaces). Benjamin Moore’s “Healing Aloe” or Sherwin-Williams’ “Sea Salt” are popular choices. Cost: $30–$100 for paint. Spend a weekend painting—it’s a straightforward DIY project if you prep walls properly. If walls feel too permanent, removable peel-and-stick wallpaper offers the same effect for renters. Apply painter’s tape carefully and use two coats for best coverage.

    You’ll notice the room feels more spacious and peaceful immediately. The soft backdrop makes everything else—your counters, appliances, and decor—feel more curated and thoughtful.

    2. Swap Out Hardware for Warm Brass

    Warm brass instantly elevates cabinetry and bridges the gap between modern and natural materials. It catches light beautifully and feels less sterile than chrome or stainless steel.

    Measure your cabinet door spacing and order brushed brass knobs or pulls (not shiny) from Anthropologie, West Elm, or Amazon. Cost: $30–$150 depending on quantity. Installation takes 2–3 hours with just a screwdriver. If your cabinets aren’t sturdy enough for holes, adhesive metal accents work on drawers. Collect hardware from existing pieces before replacing—you might discover a hidden treasure underneath.

    Cabinet fronts look immediately warmer and more cohesive. This small change has outsized impact on how sophisticated your kitchen feels without needing expensive renovations.

    3. Add Open Wood Shelving for Display

    Open wood shelving brings visual warmth and connects your kitchen to nature through raw material. It also gives you flexibility to rearrange and personalize your display without committing to cabinetry.

    Install solid wood shelves or reclaimed wood planks from Home Depot, IKEA, or Wayfair. Cost: $50–$300 depending on size and material. One weekend installation with basic tools (level, drill, brackets). Style with white ceramics, glass jars, and small potted plants—keep it simple so shelves don’t feel cluttered. Renters can use floating command strips designed for heavier loads as a temporary solution.

    Your kitchen gains a designer-curated look. Display becomes functional art, and you see your favorite pieces every day instead of hiding them behind cabinet doors.

    4. Introduce a Green Island with Natural Wood Legs

    A green island serves as a bold focal point while maintaining that connection to nature through color and material blending. This breaks up monotone cabinetry and creates visual interest instantly.

    Paint existing island cabinetry or order a pre-made green island from Wayfair or custom builders. Add turned wood legs (farmhouse-style) if replacing an older island. Cost: $200–$800 depending on size and whether you’re painting existing or buying new. DIY painting takes one weekend; professional installation varies. Pair with stools in natural wood or woven materials to enhance the biophilic feel. Ensure there’s open legroom so the island doesn’t feel heavy.

    Your kitchen gains a statement piece that encourages gathering. The green feels intentional rather than all-over, and natural wood grounds the whole space.

    5. Layer Different Wood Tones Instead of Matching

    Matching wood tones feels dated and safe. Intentionally mixing light, medium, and dark woods creates depth, visual interest, and a collected, curated aesthetic.

    Combine three wood tones: light cabinetry (white oak), darker shelving (walnut), and a mid-tone island (cherry or maple). If you have existing cabinets, add shelving or an island in a contrasting wood. Cost: $200–$2,000 depending on whether you’re DIY adding pieces or replacing cabinetry. This works over time as you gradually add pieces. The key is keeping grout, paint, or metal consistent so varied woods feel intentional, not mismatched. Warm lighting ties everything together visually.

    The result feels like an evolved, personal kitchen rather than a showroom. You see how design elements relate without being identical, which reads as more sophisticated and human-scaled.

    6. Install a Full-Wall Slab Backsplash in Light Marble

    A marble slab backsplash feels seamless and sculptural—it’s a far cry from tiny subway tiles. The natural movement in stone brings organic beauty and becomes a quiet focal point.

    Order honed (matte) light marble slabs like Calacatta or Statuary from tile suppliers or Wayfair. Cost: $800–$2,500 including installation. Installation requires professional help (2–3 days of work). Honed finishes hide water spots better than polished for daily practicality. Alternatively, large-format quartz slabs mimic marble at half the cost ($400–$1,200) and are more stain-resistant if you cook frequently. Seal marble annually if you choose it.

    Your kitchen gains a gallery-like quality. Behind-stove views feel refined and intentional rather than an afterthought. This investment creates visual calm and backdrop beauty.

    7. Bring in Live Plants and Herb Gardens

    Living plants connect you to nature daily and literally purify the air in your kitchen. Fresh herbs at arm’s reach make cooking feel more intentional and grounded.

    Start with low-maintenance herbs: basil, rosemary, mint, and oregano in 4-inch terra-cotta pots from a nursery or Home Depot. Cost: $5–$15 per plant. Place on sunny windowsills or shelves. Water 2–3 times weekly depending on sunlight. Add larger fiddle leaf figs or pothos in corners ($15–$40 each) for height and air quality. If your kitchen lacks natural light, use grow lights ($20–$50) on shelves or under cabinets. Renters can display pots without any permanent changes.

    Your kitchen smells fresher and feels alive. You’ll notice the difference in daily mood—subtle but real—plus herbs at hand make cooking more accessible and fun.

    8. Switch to Warm Edison Bulbs or Globe Pendants

    Lighting sets the entire mood of a space. Warm Edison bulbs create that golden, cozy glow that makes even functional areas feel intentional and welcoming.

    Replace overhead recessed lights or pendant fixtures with warm Edison bulbs (2700K color temperature). Cost: $10–$40 per bulb. If you want new fixtures, globe pendants or farmhouse-style lights run $50–$300 per fixture from IKEA, West Elm, or Wayfair. Installation is straightforward if replacing existing fixtures; hardwiring new ones may need an electrician ($100–$300). Layer lighting with under-cabinet LED strips ($30–$80) for functional task lighting plus ambiance.

    The kitchen becomes a place you want to linger. Warm light makes food look delicious, skin looks better, and the overall atmosphere shifts from clinical to cozy.

    9. Create a Compost or Waste Sorting Station

    A dedicated waste station aligns your kitchen with sustainable living and reduces guilt about disposal. It’s practical, visible, and reinforces values you likely already hold.

    Install a three-bin system (trash, recycling, compost) under the sink or in a corner with a rolling cart. Options from IKEA ($30–$50), Wayfair ($40–$100), or custom-built under-counter units ($200–$500). Compost bins from companies like Lomi or Vitamix ($150–$400) break down scraps faster for small spaces. Label everything clearly so family members use it correctly. Place near prep areas so composting feels natural, not hidden.

    You’ll feel more aligned with your values daily. Composting reduces waste guilt and creates a visible reminder of intentional living—something you literally see every time you cook.

    10. Add Texture with a Fluted or Plaster Range Hood

    Textured range hoods move beyond stainless steel and add an architectural element that feels like functional art. Fluting or plaster creates movement and catches light beautifully.

    Custom plaster hoods from artisans or specialist contractors range from $800–$3,000+. Pre-made fluted or textured hoods from premium brands like Lacanche run $1,500–$4,000. For budget-friendly texture, apply peel-and-stick plaster-effect wallpaper to an existing hood ($20–$50). Installation requires a contractor unless you’re skilled with finish work. The texture photographs beautifully and becomes an Instagram-worthy focal point without being trendy.

    Your kitchen gains a sophisticated, intentional edge. The hood becomes a design statement rather than just mechanical equipment—guests notice it, and you feel the craftsmanship daily.

    11. Layer Warm and Cool Metals (Brass + Black + Wood)

    Mixing metals feels more evolved and collected than sticking to one finish. Brass, black, and warm wood create a sophisticated, intentional palette.

    Start with one warm metal (brass) and one cool metal (matte black). Add hardware, faucet, or light fixtures in these finishes intentionally. Brass costs $20–$150, matte black $15–$100 depending on item. The key is proportion—if 60% of your metals are brass, 30% black, and 10% copper, it feels intentional. Mix on cabinet hardware, faucet, hood, and lighting to tie the palette together. Avoid equal percentages of each metal, which reads as indecisive.

    Your kitchen feels designed by someone with taste rather than assembled from a catalog. The mixed metals create visual richness and sophistication that’s hard to achieve with matchy finishes.

    12. Incorporate Stone or Quartz Countertops with Warm Undertones

    Countertops cover significant visual real estate. Warm-toned stone connects to natural materials while remaining practical for daily kitchen use.

    Quartz with warm undertones (buttery beige, soft taupe, warm gray) costs $60–$120 per square foot installed. Natural stone like honed limestone or travertine runs $50–$100 per square foot. Avoid cold gray quartz; instead choose colors with names like “Sparkling White,” “Cambrian Black,” or “Stellar White” that lean warm. Installation typically takes 1–2 weeks. Quartz requires no sealing; natural stone needs annual sealing ($100–$200). The warm tone paired with brass and wood creates a cohesive, grounded palette.

    Your countertops stop feeling utilitarian and start feeling like a design anchor. The warm undertones tie everything together and make your kitchen feel intentional rather than generic.

    13. Use Warm Linen or Canvas for Cabinet Hardware Wraps

    Wrapping hardware with natural textiles adds an unexpected layer of warmth and breaks up hard metal finishes. It’s unconventional and signals thoughtful design.

    Wrap brass or metal hardware with natural linen, canvas, or leather cord. Use twine, strips of fabric, or simple leather wraps available on Etsy or Amazon for $5–$20 per wrap. This works beautifully on open shelving, bar stools, or pot handles. Change wraps seasonally or let them age naturally for a vintage feel. It’s completely reversible if you change your mind. This trick works in rental kitchens with zero permanent changes.

    Your kitchen gains texture and a handmade, intentional quality. The fabric softens hard materials and shows personality in an unexpected, sophisticated way.

    14. Paint Lower Cabinets a Deep Green or Blue

    Two-tone cabinetry with a deeper color below creates visual weight and sophistication. Dark green or blue grounds the space while keeping uppers light and airy.

    Paint lower cabinets in deep green (forest or hunter) or deep blue (navy or midnight). Upper cabinets stay white, cream, or light wood. Paint costs $40–$100; professional painting $300–$800 depending on cabinet quantity. DIY takes one long weekend with proper surface prep and primer. Use quality paint formulated for cabinets (Benjamin Moore Advance or Sherwin-Williams ProClassic). The depth of color below creates visual balance—lighter uppers prevent the kitchen from feeling heavy.

    You get high-impact, designer-level impact without replacing everything. The two-tone approach feels current and sophisticated, and it’s less overwhelming than fully dark cabinetry.

    15. Add Open Shelving with Brass or Wood Brackets

    Visible brackets aren’t hidden—they’re design elements. Brass or wood brackets add character while displaying shelves as intentional, beautiful storage.

    Install floating wood shelves with exposed brass L-brackets (not hidden). Brackets from Wayfair or hardware stores cost $15–$40 per pair. Wood shelves run $30–$100 depending on length. Installation takes 2–3 hours with a level and drill. Make sure shelves display items thoughtfully—white ceramics, glass, small plants, and cookbooks. Brass brackets catch light and create visual interest that hidden hardware doesn’t. This approach works in rentals if you use command strips rated for heavier loads instead of drilling.

    Your shelves look intentional and curated rather than makeshift. Visible brackets become part of the design story, showing you’ve thought through every detail.

    16. Introduce a Butler Pantry or Hidden Scullery

    A butler pantry (or scullery) hides cooking mess and clutter while keeping your main kitchen looking serene. It’s a game-changer for people who cook frequently or host.

    If you have a spare closet or hall space, install shallow cabinets, open shelving, and a small sink ($1,000–$3,000 for basic install). Alternatively, use a standalone pantry cabinet or rolling cart ($200–$800) tucked into a corner or closet to create hidden storage. Paint it in a complementary color or leave it natural wood. Stock with dishes, pantry items, and prep supplies so the main kitchen stays clutter-free. This works best in homes with extra space, but even a deep closet converted becomes functional.

    Your main kitchen stays visibly calm and intentional. Mess and preparation happen behind closed doors, so guests see only the serene, designed space you want them to see.

    17. Switch Faucets to Brushed Brass or Matte Black

    Faucets are tiny but visible constantly. Warm brass or matte black reads as intentional and ties into your metal palette while being highly functional.

    Replace your faucet with brushed brass or matte black versions from Wayfair, Home Depot, or Kohler. Cost: $150–$400 depending on style and features. Installation by a plumber takes 1–2 hours ($100–$200 labor). DIY is possible if you’re comfortable with plumbing, but hiring someone prevents leaks. Choose motion-sensor faucets ($200–$500) for a smart tech upgrade—hands-free operation feels luxe and sanitary. Go for a curved or gooseneck style in brass rather than a straight modern shape for warmth.

    Your faucet becomes a design detail rather than an afterthought. Warm brass catches light and elevates the entire sink area from purely functional to intentional and beautiful.

    18. Add Wooden Cutting Boards and Serving Boards on Open Display

    Wooden boards are beautiful, functional, and connect to natural materials. Displaying them makes them decor rather than hidden in a drawer.

    Collect wooden cutting and serving boards from thrift stores ($5–$15 each), IKEA ($15–$30), or artisan makers on Etsy ($30–$100). Prop them against shelving, stack them in a corner, or use a wooden board stand ($20–$50). Choose boards in various wood tones and sizes for visual interest. This styling costs almost nothing if you use boards you already own. It’s completely renter-friendly and takes minutes to arrange.

    Your kitchen gains warm, natural texture. Boards become part of your decor while staying functional—you see them daily and feel connected to the materials you cook with.

    19. Install Under-Cabinet Lighting with Warm Tones

    Under-cabinet lighting is practical and instantly transforms ambiance. Warm-toned LEDs create a spa-like quality while providing task lighting for food prep.

    Install LED strip lights rated 2700K (warm white) from Amazon or Home Depot. Cost: $30–$80 depending on length and brightness. Installation takes 1–2 hours—clean the underside of cabinets, remove backing, and stick strips in place. Plug into an outlet or hire an electrician to hardwire ($100–$300). Dimmer switches ($20–$50) let you adjust ambiance. Warm LEDs feel intentional; cool white LEDs feel clinical by comparison.

    Your kitchen gains functional beauty. You’ll notice the difference during evening cooking—the warm glow makes the space feel intentional and sophisticated while making it easier to see what you’re doing.

    20. Layer Terra-Cotta and Ceramic Vessels for Textural Interest

    Textural variety in displayed items creates visual richness. Terra-cotta, ceramic, and glass together feel artisanal and collected.

    Gather terra-cotta pots, ceramic bowls, and glass jars from thrift stores ($3–$10 each), HomeGoods ($5–$20), or Wayfair ($10–$40). Display on open shelving or counters in loose arrangements. Don’t worry about matching—varied tones and finishes read as intentional. Mix high and low: pair thrifted terra-cotta with one or two nicer ceramic pieces. This costs almost nothing if you’re thrifting and is completely renter-friendly.

    Your shelves feel curated and alive. The mix of textures creates visual interest without feeling cluttered, and each piece tells a story. It’s a design move that signals personality and thoughtfulness.

    21. Use Warm Wood Paneling or Shiplap on a Single Accent Wall

    Accent walls in warm wood add architectural interest without overwhelming the space. Shiplap or paneling feels farmhouse-inspired yet timeless.

    Install warm wood shiplap or paneling (pine, oak, or reclaimed) on one wall using 1×6 or 1×8 boards from Home Depot. Cost: $100–$300 for materials; DIY takes one weekend or hire help for $200–$500. Alternatively, use peel-and-stick wood paneling ($40–$100) for a temporary, renter-friendly solution. Paint paneling in a warm white or leave natural. Horizontal installation feels modern; vertical is more traditional.

    Your kitchen gains warmth and architectural detail. The wood paneling creates a focal point and cottage-like coziness without needing wallpaper or paint.

    22. Create a Beverage or Coffee Station with Warm Metals

    A dedicated beverage station creates a specific, intentional moment in your kitchen. It’s both functional and communicates that you value rituals.

    Set up a small table, cart, or corner shelf with coffee or tea equipment. Use brass kettles and accessories ($20–$100), ceramic mugs from HomeGoods or thrift stores ($3–$15 each), and a small wooden tray ($15–$50). Add a warm brass or pendant light above ($40–$150) to create ambiance. Stock with your favorite coffees, teas, and sweeteners. This takes one afternoon to style and costs as little as $50 if thrifting.

    Your kitchen gains a designed, intentional feel. A dedicated station signals that you value morning rituals, and it becomes a cozy gathering point rather than a scattered counter mess.

    23. Layer Natural Fibers in Textiles and Rugs

    Natural fiber textiles ground your kitchen and connect to biophilic design. Rugs, towels, and placemats in jute, sisal, and linen add texture and warmth.

    Add a jute or sisal runner rug in front of the stove or sink ($30–$150 depending on size) from IKEA, Wayfair, or HomeGoods. Swap cotton kitchen towels for linen versions ($5–$15 each) in cream, natural, or soft green. Use woven placemats and table runners ($10–$30 each) in natural fibers. All are easy to clean (shake out or wash) and completely changeable for renters. Layer these intentionally rather than going all-natural—too much texture feels chaotic.

    Your kitchen feels warmer underfoot and in hand. Natural fibers create sensory coziness—you notice the difference when washing dishes or standing at the stove. Everything works together to create that grounded, nature-connected feeling.


    Save this post and try one idea this weekend. Start with something small—a plant, new cabinet hardware, or warm lighting—and you’ll feel the difference immediately. Which change will you tackle first?

  • 28 Modern Kitchen Design Ideas That Look Sleek & Fresh

    28 Modern Kitchen Design Ideas That Look Sleek & Fresh

    Your kitchen doesn’t need a complete gut renovation to feel fresh and modern. Whether you’re renting, own your home, or have a tight budget, these 28 ideas blend trending 2025 styles with real-world practicality. You’ll discover affordable hacks alongside investment pieces, DIY projects you can tackle this weekend, and shopping recommendations that won’t break the bank. From mixing textures to choosing the right color palette, we’re walking you through every decision that makes a kitchen feel sleek, intentional, and absolutely yours. Ready to refresh your space? Let’s go.

    1. Paint Walls a Soft Sage Green

    Sage green is the 2025 color everyone’s choosing—76% of design pros voted it as the top kitchen color. Unlike trendy pastels that feel temporary, sage works as a sophisticated backdrop that makes wood tones and metallics pop.

    Pick a mid-tone sage (not too light, not too dark) like Sherwin-Williams Accessible Beige or Benjamin Moore’s 2050-50. One gallon covers about 400 square feet, so budget $30-$50 for paint and supplies. Grab painter’s tape, a roller, and primer from Home Depot or Lowe’s. Expect 4-6 hours for one room if you prep properly. Roll in thin, even coats and let dry completely between coats.

    Pro tip: Test your color on a large patch of wall first—sage looks different depending on your lighting. If green feels too bold, soft blue or warm taupe offer similar modern vibes with less commitment.

    This single change makes your kitchen feel curated and calm while keeping the space feeling open and airy.

    2. Mix Metallic Finishes for Visual Depth

    Matching all your metal finishes went out years ago. Mixing brass, bronze, stainless steel, and matte black creates depth and keeps the space from feeling one-note or sterile.

    Start by choosing one “anchor” finish—brass is trending for warmth, or stainless steel if you want contemporary cool. Add 1-2 complementary finishes through hardware, fixtures, and appliances. Swap out cabinet knobs for mixed-metal options ($2-$8 per knob from Target, IKEA, or Wayfair)—total project costs $30-$100 depending on how many cabinets you have. Pendant lights are another easy mix point; grab one brass + one matte black for $40-$150 each. Takes 30 minutes if you’re just swapping hardware.

    The trick? Make sure finishes have slightly different undertones—warm brass pairs beautifully with cool stainless steel or matte bronze.

    Your kitchen instantly gains sophistication and personality without major renovation, and the mixed metals photograph beautifully for sharing.

    3. Add Open Shelving Above the Sink

    Open shelving makes kitchens feel larger, more accessible, and modern. Floating shelves above the sink create storage that’s both functional and beautifully styled.

    Install 2-3 floating shelves in stainless steel or wood-look brackets. Floating shelf kits from IKEA run $25-$40 each, or go higher-end with Anthropologie for $80-$150 per shelf. You’ll need a stud finder, level, and drill—budget 1-2 hours total. If drilling into tile feels risky, adhesive shelves like Command offer a renter-friendly $15-$25 alternative (though weight capacity is lower). Style with everyday dishes you actually use plus a few decorative pieces—the key is keeping it uncluttered so it reads as intentional, not chaotic.

    Pro tip: Use clear glass or mismatched vintage mugs to add visual interest without heaviness.

    Now you’ve created a focal point that serves double duty as storage and decor, plus everything you reach for constantly is at eye level.

    4. Swap Cabinet Hardware for a Statement Look

    Hardware is the jewelry of your kitchen, and upgrading it takes literally 15 minutes but changes everything. This is one of the highest-impact, lowest-effort updates you can make.

    Choose between bold geometric shapes, vintage-inspired cup pulls, or minimalist bar handles—whatever speaks to your style. Mix metals here: try brass + matte black or bronze + brushed nickel. Packages of 5-10 knobs run $25-$60 from IKEA, Target, or Wayfair; higher-end hardware from Anthropologie or CB2 is $8-$15 per piece. Grab a drill with a small bit, remove old hardware (usually two screws), and swap in new pieces. Takes 15-30 minutes even if you’re going slow.

    Order extra in case you mess up installation—returns are easy, and you want matching hardware across drawers.

    Your cabinets go from builder-grade to designed overnight, and it costs less than dinner out.

    5. Install a Textured Backsplash for Visual Interest

    67% of designers favor mixed backsplashes because they add personality without going overboard. A textured backsplash pulls your whole look together and becomes a focal point.

    Combine subway tiles with 2-3 other tile shapes—try mixing 3×6 subway with 1-inch hexagon or small square tiles in complementary colors or finishes. Peel-and-stick tiles from brands like Aspect or Smart Tiles are $20-$30 per sheet and renter-approved; traditional tile from Home Depot runs $1-$5 per square foot. DIY installation takes a weekend for most kitchens; hire a pro for $500-$1,500 labor if you want perfection. Pre-plan your layout on graph paper, measure twice, and take your time with spacing.

    Pro tip: Use light grout on light tile to minimize lines, or go dark grout on light tile for dramatic contrast.

    The textured, layered backsplash becomes something people notice and compliment—it’s the detail that makes your kitchen feel thoughtfully designed.

    6. Choose Warm Wood Tones Over Gray Cabinetry

    Gray cabinetry dominated 2020-2023, but it’s fading fast. Warm wood tones—walnut, oak, cherry—are back and feel infinitely warmer and more livable than cool grays.

    If you’re replacing cabinets, walnut or honey oak run $3,000-$8,000 for a full kitchen depending on size; consider brands like IKEA, Lowe’s, or local cabinetmakers. Alternatively, stain or paint existing cabinets: pick a warm-toned stain like Minwax Dark Walnut ($8-$12 per can) or go with a warm wood-look paint. Budget 2-3 days for stripping, sanding, staining, and drying if DIYing; hire a pro for $1,500-$3,000. Pair with brass hardware and warm lighting to maximize the cozy factor.

    If you’re renting, warm wood-look peel-and-stick contact paper ($15-$30 per roll) temporarily upgrades cabinet look for zero commitment.

    Suddenly your kitchen feels warm, inviting, and less sterile—like a space people actually want to spend time in.

    7. Upgrade to Motion-Sensor Faucets for Smart Living

    Smart kitchen tech isn’t just futuristic—it’s practical. Motion-sensor faucets let you turn water on and off with a wave, keeping your hands clean while prepping food and making cleanup easier.

    Motion-sensor faucets from brands like Moen, Delta, or Kohler run $150-$400; look for models with adjustable sensitivity to avoid false triggers. DIY installation takes 30-45 minutes if you’re mechanically inclined; plumbers typically charge $100-$150 for labor. Some models come with batteries; others need electrical connection. Alternative: touchless faucets ($100-$250) require a single touch anywhere on the spout, which feels almost as futuristic but costs slightly less.

    Pro tip: Skip the cheapest models (under $80)—they have higher failure rates.

    You’ll notice how much easier cooking and cleaning become when you’re not juggling a faucet handle covered in raw chicken or dough.

    8. Create a Multi-Functional Island with Hidden Storage

    50% of kitchen designers are building combination islands with both storage and open seating. This hybrid approach maximizes tiny spaces while keeping everything accessible.

    Look for islands with built-in shelving, deep drawers for pots/pans, and enough overhang (at least 12-15 inches) for comfortable seating. IKEA’s STENSTORP island ($150-$200) is a renter-friendly standalone option. Custom islands run $1,000-$5,000 depending on size and materials. Open shelves hold pretty baskets for produce or cookbooks; closed drawers hide the mess. Pair with 2-3 simple stools ($40-$120 each from Target or IKEA). If building custom, allow 2-4 weeks for construction.

    Pro tip: Size your island to leave at least 36 inches of walkway on all sides—too small and it blocks flow.

    Now you have a real gathering spot that’s also hiding all your kitchen chaos, and you’ve reclaimed countertop space for actual food prep.

    9. Paint Kitchen Cabinets a Bold, Moody Color

    If full sage green walls feel too subtle, go bold on your cabinets instead. Deep forest green, navy blue, or even warm charcoal create personality while hiding stains better than white.

    Painting cabinets yourself costs $100-$300 in supplies (primer, paint, brushes, sandpaper); hiring a pro runs $1,500-$3,500. DIY takes 3-5 days total (prep, prime, paint, cure time); professionals finish in 1-2 days. Start by removing cabinet doors and hardware, sand lightly for paint adhesion, apply primer, then 2-3 coats of quality cabinet paint (not regular wall paint). Top with polycrylic for durability.

    Popular colors: Sherwin-Williams Naval (dark navy), Benjamin Moore Woodland Green (deep forest), or Farrow & Ball Hague Blue.

    Pro tip: Don’t skimp on primer—it prevents stains from bleeding through and ensures your color actually looks like the sample.

    Your entire kitchen suddenly feels designed and intentional, and you’ve done a massive refresh for a fraction of remodel cost.

    10. Layer Lighting for Ambiance and Function

    84% of design pros name lighting as a standout feature. Layered lighting—task, ambient, and accent—makes your kitchen feel intentional and photograph beautifully.

    Install under-cabinet LED strips ($20-$50 per kit from Amazon or Home Depot) for task lighting and ambiance. Add 2-3 pendant lights over the island ($40-$150 each) for focal-point style. Keep overhead recessed lights on a dimmer ($15-$30 per dimmer switch) so you can adjust mood. Total investment: $150-$400 if DIYing; electricians charge $200-$400 labor. LEDs cost less to run than incandescent and last years longer.

    Pro tip: Choose warm-toned bulbs (2700K) for coziness; avoid harsh white (5000K) unless you want a clinical feel.

    When dinner guests arrive, you can dim overhead lights and highlight the island—suddenly your kitchen feels like a restaurant-quality space.

    11. Install Floating Shelves with Decorative Styling

    Floating shelves add modern storage while keeping spaces feeling open. They’re perfect for renters and work in any kitchen style.

    Brackets from IKEA, Wayfair, or Target run $20-$50 per shelf; premium options from Rejuvenation are $80-$150. Floating shelf kits include hardware and clear instructions—installation takes 1-2 hours per shelf if you locate studs. Display items that serve a purpose: everyday bowls, cookbooks, or plants. Keep styling asymmetrical and uncluttered; too many items looks chaotic, not chic.

    Alternative: Self-adhesive shelves ($15-$30) work for lighter items and require zero drilling—perfect for renters who can’t make holes.

    Pro tip: Mix closed and open storage on one wall for balance and function.

    Your kitchen gains visual interest and personality while staying organized and Instagram-worthy.

    12. Upgrade to Stainless Steel or Integrated Appliances

    Built-in or “hidden” appliances are trending because they make kitchens feel more intentional and less cluttered. Panel-ready appliances blend seamlessly with cabinetry.

    Panel-ready refrigerators from brands like Miele, Sub-Zero, or Liebherr run $3,000-$8,000 (pricey but seamless). Standard stainless steel upgrades from Lowe’s or Home Depot are $600-$1,500 per appliance and feel premium without the extreme cost. If replacing large appliances, budget $2,000-$5,000 total for fridge, oven, and dishwasher as a package. Installation typically runs $200-$500 depending on your current setup.

    Budget hack: Keep existing appliances but paint the fridge with stainless steel contact paper ($25-$40) for a quick visual upgrade.

    Pro tip: Measure twice—appliance sizes vary and fit matters.

    Your kitchen instantly looks more cohesive, expensive, and designed rather than thrown together.

    13. Add Warm Brass Fixtures for Modern Warmth

    Brass is the unexpected hero of 2025 kitchen design. Unlike cold stainless steel, warm brass brings richness and feels both modern and timeless.

    Swap out cold silver fixtures for warm brass throughout: pendant lights ($40-$120 each), cabinet hardware ($3-$8 per piece), faucet ($150-$400), and even a decorative towel bar ($20-$50). Total investment: $300-$800 for a few key pieces. Start with lighting since it’s most visible, then add hardware and faucet over time if budget is tight. Brass develops a natural patina over years, which adds character (or clean with lemon juice to keep it shiny).

    Pro tip: Mix warm brass with cool matte black or brushed nickel for balance—all brass can feel heavy.

    The warm glow of brass fixtures makes your entire kitchen feel more intentional, expensive, and photogenic.

    14. Incorporate a Butcher Block Island or Countertop

    Butcher block counters bring warmth and texture while staying practical for everyday cooking. They feel artisanal without sacrificing function.

    Butcher block countertop material runs $30-$60 per square foot from Home Depot or local mills; installation and finishing adds $500-$1,500 labor. Smaller butcher block islands are $300-$800 and work as instant styling. The wood requires occasional sealing (annually or every 2 years) with food-safe mineral oil ($10-$15). Treat stains immediately with lemon juice and salt. If you’re concerned about durability, modern sealed butcher block is harder than you’d expect.

    Budget hack: Reclaimed wood counters from salvage yards run $20-$40 per square foot and feel unique while being eco-conscious.

    Pro tip: Butcher block pairs beautifully with sage green walls and warm brass—it’s the wood-and-warmth trend everyone’s embracing.

    Your kitchen gains organic warmth and becomes a place where you actually want to cook instead of rushing through meals.

    15. Install a Range Hood with Texture or Plaster Finish

    Plaster or textured range hoods are an emerging trend that breaks from standard stainless steel. They add organic softness while staying deeply functional.

    Custom plaster hoods from specialized makers run $2,000-$5,000; more affordable textured alternatives from mainstream brands are $800-$1,500. Standard stainless hoods remain $400-$1,000 if budget is tight. Installation usually requires professional venting work ($300-$600 labor). The textured finish catches light beautifully and feels intentional in photos without looking trendy or temporary.

    Pro tip: Pair a plaster hood with warm wood cabinetry and brass accents for full organic-modern vibes.

    This architectural element becomes a focal point that makes your kitchen feel designed by someone with actual taste.

    16. Create a Scullery or Hidden Butler’s Pantry

    Sculleries (hidden prep zones) keep messy cooking out of sight while maintaining elegant main kitchen aesthetics. It’s a luxury touch that actually solves a real problem.

    Repurpose a hallway closet, spare corner, or galley space into a mini prep kitchen with a sink ($300-$800), open or closed storage ($200-$1,000), and counter space ($400-$1,500). Total project runs $1,500-$4,000 depending on complexity. Install a door or pocket door to hide the chaos when entertaining. This works beautifully in open-concept homes where you want the main kitchen polished for guests but need realistic storage elsewhere.

    Pro tip: Add a small dishwasher drawer ($700-$1,200) if space allows.

    Now you have a chic kitchen for entertaining and a private zone where cooking actually happens—best of both worlds.

    17. Mix Patterned and Textured Tile on Backsplash

    Mixing tile patterns and textures prevents backsplashes from feeling boring or dated. This approach feels curated rather than generic.

    Combine 2-4 tile types in a planned pattern: subway base with geometric or patterned accents, or mix matte and glossy finishes for depth. Peel-and-stick mixed tile sheets from Aspect or Smart Tiles are $20-$40 per sheet; traditional mixed tile installation from Home Depot costs $2-$8 per square foot plus labor. Plan your layout first on graph paper to avoid awkward cuts. DIY takes 2-3 days; professionals finish in 1 day for smaller kitchens.

    Pro tip: Use a light grout to unify different tiles, or go dark grout for dramatic separation between patterns.

    Your backsplash becomes a textural focal point that photographs beautifully and makes your kitchen feel intentionally designed.

    18. Add an Open Shelving Pantry for Easy Access

    Open pantry shelving replaces closed cabinets with accessible, beautiful storage that keeps everyday items within reach. It’s practical and Instagram-worthy.

    Install 4-6 floating shelves in a corner or one wall using brackets from IKEA ($20-$50 each). Stock with matching jars ($2-$5 each from Target, IKEA, or HomeGoods), woven baskets ($10-$30 each), and cookbooks. Total investment: $300-$600 for shelves and styling supplies. Take time organizing before installing—label jars with a label maker ($15-$25) and group items by category. The key is keeping it genuinely organized; chaos on open shelves looks sloppy, not chic.

    Pro tip: Style 70% function, 30% decor—keep it real and usable, not overly curated.

    You’ll reach for items more often because they’re visible and accessible, and your pantry becomes a design feature instead of hidden chaos.

    19. Upgrade Cabinet Interiors with Drawer Dividers and Organization

    Organized interiors matter even if guests never see them—you’ll feel the difference every single day. Drawer dividers and cabinet organizers transform functionality and reduce daily frustration.

    Bamboo or plastic drawer dividers cost $15-$40 per set from Target, IKEA, or Amazon. Pull-out shelf inserts ($25-$80) maximize deep cabinet space. Lazy Susans ($10-$30) let you reach back corners easily. Corner shelf risers ($20-$50) add vertical storage. Total organization overhaul: $200-$400 for a full kitchen. Takes a weekend to install and reorganize. Focus on frequently-used items first; less-used stuff can stay in harder-to-reach spots.

    Pro tip: Use clear containers so you can see what’s inside without opening everything.

    Every time you open a drawer or cabinet, you’ll appreciate the calm organization—it makes cooking faster and reduces stress.

    20. Choose Earth-Tone Colors Beyond Sage Green

    Sage green is trending, but earth tones in general—warm terracotta, soft tan, muted blue, warm brown—are replacing cool grays everywhere. You have options beyond the standard sage.

    Paint walls in warm terracotta ($30-$50), soft clay taupe ($35-$55), or muted dusty blue ($30-$50). These colors feel warmer and more livable than cool grays while staying sophisticated. Benjamin Moore’s HC-172 Borscht, Farrow & Ball’s Tunsgate Blue, or Sherwin-Williams’ Urbane Bronze all work beautifully in kitchens. Expect 4-6 hours for one room with primer and two paint coats.

    Pro tip: Get paint samples and test on your walls at different times of day—lighting changes how colors read dramatically.

    Warm earth tones make your space feel grounded, intentional, and more inviting than cool grays that dominated the last few years.

    21. Add Fluted or Ridged Texture to Cabinet Doors

    Fluted cabinet textures add sophistication without going overboard. Subtle ridges catch light and create dimension that flat doors can’t match.

    Factory-made fluted cabinet doors from premium brands are $150-$300+ per door; budget-friendly textured cabinet kits from Wayfair run $100-$200 per door. Alternatively, add texture with peel-and-stick adhesive film ($25-$50 per door) for renters. Installation requires removing doors and swapping hardware—allows 2-3 hours if you’re hands-on. Hire a pro if replacing full cabinet doors; expect $2,000-$4,000 labor.

    Pro tip: Fluted doors pair beautifully with smooth counters and simple hardware—let the texture be the star.

    Your cabinets shift from basic builder-grade to thoughtfully designed with one architectural upgrade.

    22. Blend Indoor and Outdoor Kitchen Spaces

    Outdoor kitchen integration creates flow and makes small spaces feel larger. Matching materials inside and out blur boundaries beautifully.

    Install matching countertops (concrete, stone, or composite) both inside and outside ($5,000-$15,000+ depending on size). Use similar cabinetry or finishes to create visual continuity. Outdoor appliances like grills or pizza ovens ($2,000-$10,000) pair with indoor options. This project typically requires contractors and builders—budget 4-8 weeks for planning and installation.

    Budget hack: Paint an outdoor wall to match interior colors and add matching outdoor rugs and furniture ($200-$500 total) for less expensive visual connection.

    Pro tip: Weatherproof all materials; concrete and wood outdoor surfaces need sealing annually.

    Your kitchen suddenly feels expanded, and entertaining becomes seamless—guests flow naturally from cooking indoors to lounging outside.

    23. Install Smart Appliances with WiFi and Automation

    WiFi-enabled appliances let you preheat ovens from your phone, monitor fridge temperatures, and get alerts if doors are left open. It’s practical tech that actually improves daily life.

    Smart refrigerators from LG or Samsung run $2,500-$4,500; WiFi ovens are $1,200-$2,500; smart dishwashers are $800-$1,500. Mid-range smart appliances from mainstream brands cost $500-$1,200 per item. These typically cost $300-$600 more than non-smart versions. Installation and WiFi setup take 30 minutes to 2 hours. Start with one smart appliance (a WiFi fridge or oven) rather than replacing everything at once.

    Pro tip: Check WiFi compatibility before buying—you need 2.4GHz networks for most appliances.

    The convenience feels subtle until you realize how much easier cooking and maintenance become with real-time alerts and remote control.

    24. Create a Dining Nook Within the Kitchen

    Breakfast nooks and dining corners maximize small kitchens while creating intimate gathering spaces. They transform kitchens from purely functional to truly livable.

    Install a built-in bench with storage ($800-$2,000) paired with a small table ($200-$800) and 2-3 chairs ($100-$300 each). Total investment: $1,500-$3,500 for a quality setup. Alternatively, a simple round table ($200-$500) and vintage chairs ($50-$150 each) create the same vibe for less. Lighting is key—add a small pendant or wall sconce ($40-$120) to define the zone. Space needs at least 6×6 feet to feel comfortable.

    Budget hack: Use a narrow console table ($150-$300) against a wall plus 2 stools for tight spaces.

    Now your kitchen isn’t just where you cook—it’s where your family eats breakfast and lingers over coffee.

    25. Incorporate Sustainable Materials and Eco-Appliances

    Sustainable kitchen choices reduce environmental impact while creating spaces that feel authentic and grounded. Eco-conscious materials are increasingly affordable and beautiful.

    Recycled wood cabinets from sustainable brands run $2,000-$6,000; bamboo countertops are $40-$60 per square foot. Energy Star appliances cost $200-$500 more than standard but save $100-$200 yearly in utilities. Built-in compost bins ($50-$200) and water-filtering faucets ($100-$300) complete the eco-kitchen. These upgrades cost more upfront but pay dividends in reduced utility bills and fewer trash trips over years.

    Pro tip: Start with one sustainable swap (like recycled glass backsplash) rather than overhauling everything at once.

    Your kitchen aligns with your values, costs less to operate long-term, and feels genuinely thoughtful rather than performative.

    26. Install Warm Under-Cabinet Lighting

    Under-cabinet LED strips solve the practical problem of dark countertops while adding ambiance and visual interest. They’re affordable and impactful.

    Peel-and-stick LED strip lights from Amazon or Home Depot cost $20-$50 per kit and install in minutes—no electrician needed. Hardwired options from Lowe’s are $100-$200 per kit but feel more permanent. Choose warm-toned bulbs (2700K) for coziness and focus; cool white (5000K) feels clinical and harsh. Install strips underneath cabinets so light hits counters directly, not your face. Total project: 30 minutes DIY.

    Pro tip: Dimmer switches ($15-$30) let you adjust brightness for cooking versus entertaining.

    When dusk falls, your kitchen glows beautifully without overhead lights—suddenly it feels like a restaurant you’d actually want to spend time in.

    SAVE THIS POST FOR YOUR NEXT KITCHEN REFRESH. Pick one idea that excites you—whether it’s a color change, hardware swap, or lighting upgrade—and tackle it this weekend. Small changes add up fast, and you’ll be amazed at how intentional your space feels with just one thoughtful update.

  • 27 Coffee Bar Area Ideas That Turn Any Corner Into a Cozy Café

    27 Coffee Bar Area Ideas That Turn Any Corner Into a Cozy Café

    Imagine walking past a corner of your home and feeling like you’ve stepped into your favorite local café. That’s the power of a well-designed coffee bar—it doesn’t need to be big, expensive, or complicated. Whether you’re working from home, hosting friends, or just want a dedicated space to enjoy your morning ritual, a coffee bar transforms any area into a cozy retreat that makes daily life feel a little more intentional.

    The best part? You don’t need a full kitchen overhaul. These 27 ideas mix budget-friendly hacks, renter-approved solutions, and simple styling tricks that work in apartments, small homes, and even tiny corners. From DIY projects under $30 to thoughtful design moves that cost nothing at all, you’ll find something that fits your space and your style. Let’s turn that forgotten corner into the café experience you’ve been craving.

    1. Start With a Rolling Bar Cart

    A rolling cart is the easiest way to create a mobile coffee bar that fits anywhere. This works perfectly if you don’t have a dedicated counter space or if you like flexibility to move things around.

    Choose a cart with at least two to three tiers—$40-$100 for a quality wooden or metal option from IKEA, Target, or Amazon. The top tier holds your coffee maker, the middle stores mugs and saucers, and the bottom keeps supplies like coffee beans, filters, and sugar. You can wheel it from the kitchen to your desk, bedroom, or living room depending on the time of day.

    Pro tip: Look for carts with a handle on the back so you can grip it while rolling. Renter-friendly bonus: it requires zero installation and you can take it with you if you move.

    A rolling cart gives you the café experience without committing to a permanent setup, and it’s mobile enough to tuck away when guests arrive.

    2. Paint an Accent Wall in Warm Neutrals

    An accent wall instantly elevates your coffee bar from functional to intentional-looking. A warm neutral like soft taupe, warm grey, or creamy beige creates that café-core vibe without overwhelming the space.

    Paint is one of the cheapest upgrades—$15-$40 for quality paint, plus supplies if you don’t have them. One accent wall behind your coffee area takes a weekend afternoon to paint and completely changes how the space feels. Stick to warm undertones (avoid stark whites or cool greys—they feel clinical). If you rent, ask your landlord about removable paint or use peel-and-stick wallpaper in warm neutrals instead ($20-$60).

    Pair the accent wall with simple white or natural wood shelving to keep the look balanced.

    The warm backdrop makes your coffee setup feel intentional and polished, while keeping the focus on your equipment and styling rather than competing colors.

    3. Install Open Shelving Above the Counter

    Open shelving makes your coffee bar visible and accessible, plus it looks way more café-like than closed cabinets. You see your favorite mugs, your coffee selection, and everything you need at a glance.

    Budget option ($0): Use existing shelves or shelving you already own. Mid-range ($50-$150): Install simple floating wooden shelves from IKEA or Home Depot—they mount easily to drywall with brackets and take about 30 minutes. Investment ($150-$300): Have a carpenter install custom shelves tailored to your space.

    Display your prettiest mugs, stack coffee bags facing forward, and add small plants or candles for visual interest. Keep the arrangement clean and organized—too much clutter defeats the purpose.

    Open shelving transforms your coffee bar into a styled focal point that you’ll want to show off to friends.

    4. Add Statement Lighting Overhead

    Lighting is the secret weapon of café-core design. The right fixture changes the entire mood and makes your coffee bar feel like a destination worth visiting.

    A pendant light ($30-$150) in brass, matte black, or natural wood instantly feels more intentional than overhead lights. Hang it 24-30 inches above your counter for the best effect. Options from IKEA, Wayfair, and Amazon give you lots of affordable choices. If you rent and can’t install permanently, use a plug-in swag lamp ($20-$60) that hangs from a hook.

    Look for warm-toned bulbs (2700K color temperature) to match the cozy vibe you’re creating.

    The right light makes morning coffee feel like a ritual rather than a routine task, and it photographs beautifully too.

    5. Bring in Biophilic Elements With Plants

    Plants make spaces feel alive and connected to nature—plus they look stunning in photos. A plant-forward coffee bar feels wellness-focused and naturally photogenic.

    Add 3-5 low-maintenance plants ($5-$30 each): snake plants, pothos, or ZZ plants thrive in most light conditions and need minimal care. Arrange them at different heights using small stands or shelves. Water once every two weeks and you’re done. If you don’t trust yourself with plants, faux plants ($10-$40 each) look remarkably realistic now and require zero maintenance.

    Group plants in odd numbers for visual balance, and choose pots in neutral colors (white, terracotta, or matte black) so they don’t compete with your coffee equipment.

    Adding greenery makes your coffee bar feel like a peaceful retreat and increases the sensory experience beyond just caffeine.

    6. Create an Instagrammable Nook With Textured Wallpaper

    An Instagrammable nook doesn’t require professional styling—just an interesting texture or pattern behind your coffee bar that gives photos depth and character.

    Use peel-and-stick wallpaper ($20-$50 for a small section) in a subtle geometric, floral, or textured design. Apply it to just the wall behind your coffee area for maximum impact without overwhelming the space. Brands like Spoonflower, Amazon, and Wayfair have thousands of café-inspired patterns. Installation takes 30-45 minutes and removes cleanly when you leave.

    Keep the pattern subtle so it complements your equipment rather than stealing attention.

    A textured backdrop makes every photo of your morning coffee look magazine-worthy, which might inspire you to use the space even more.

    7. Organize Supplies in Matching Glass Jars

    Clear containers are a game-changer for organization that looks intentional. Matching jars make everything visible and accessible while keeping the aesthetic cohesive.

    Buy a set of matching glass jars ($25-$50 for a set of 4-6) from Target, IKEA, or Amazon. Fill them with coffee beans, ground coffee, sugar, coffee filters, and any other supplies. Add simple labels using chalkboard stickers or printed tags ($5-$10). This takes 15 minutes to set up but saves you from digging through bags and boxes every morning.

    Use jars with cork or metal lids for an elevated look that beats plastic containers every time.

    Organized supplies mean you actually know what you have, you’re not buying duplicates, and your coffee bar looks like a curated storefront rather than cluttered.

    8. Mix Wood and Metal for Tactile Texture

    Materials matter. Mixing textures—wood, metal, concrete, brass—creates depth and makes your coffee bar feel more sophisticated and intentional than a single material throughout.

    Don’t overthink this: choose one or two base materials for your surface (wood counter or shelf, concrete, or white marble-look laminate $50-$150 to add or upgrade). Then introduce accent metals through equipment and accessories (a brass pour-over stand $30-$60, matte black coffee maker $80-$200, or copper canister $15-$40). Pair with natural wood open shelving or a small wooden bar cart.

    The key is balance—don’t try to include every material. Stick with 3-4 complementary finishes.

    Mixed materials create a sophisticated, layered look that feels more intentional than flat surfaces, and it’s more interesting to touch and interact with.

    9. Add a Small Bar Stool for Seating

    Even a small coffee bar benefits from a place to sit and linger. A single bar stool transforms the space from utility to experience.

    Choose a compact stool ($50-$150) that fits your space—look for wooden frames with natural or rattan seats from IKEA, Wayfair, or Target. Adjust the height based on your counter (typically 24-26 inches for standard counters, 30-32 inches for bar height). If space is tight, find a stool that tucks completely under the counter when not in use.

    A stool with natural materials (wood, rattan, linen) keeps the café vibe consistent.

    Having a dedicated seat invites you to slow down and enjoy your coffee rather than just grabbing and going, which is the whole point of a cozy coffee bar.

    10. Use Warm Dimmable Lighting Bulbs

    Lighting color temperature matters more than people realize. Warm light (2700K) feels cozy and welcoming, while cool light (5000K+) feels harsh and institutional.

    Switch to warm dimmable bulbs ($8-$20 for quality LED bulbs) in all fixtures around your coffee bar. Pair with a dimmer switch ($15-$30) if possible so you can adjust brightness depending on time of day. Warm, dimmable lights make morning feel ritual-like and evening feel relaxing.

    Check your existing fixtures to confirm they’re dimmable before buying dimmable bulbs—not all are compatible.

    The right lighting color transforms how you feel in the space, turning a functional corner into somewhere you actually want to spend time.

    11. Create a Coffee Bean Display Wall

    Coffee bean art and educational prints add personality and reinforce the café aesthetic without requiring functional storage.

    Print coffee-themed artwork ($0 if DIY, $10-$30 if from Etsy or Print shops) and frame in affordable frames ($5-$15 each from Target, IKEA, or dollar stores). Create a gallery wall above your coffee bar or on an adjacent wall. Mix in roasting guides, coffee plant illustrations, or quotes about coffee culture. Arrange in a grid or salon-style layout.

    Alternatively, buy ready-made coffee wall art sets ($20-$50) that come pre-coordinated for easy hanging.

    A gallery wall communicates that your coffee bar is a space you’ve thought about and invested in, and it sparks conversation with guests.

    12. Set Up a Filter Coffee Station

    If you prefer lighter coffee or want a backup brewing method, a pour-over or filter coffee station offers variety and a slower, more mindful brewing ritual.

    Pour-over equipment costs $20-$80 total: a ceramic or glass dripper ($10-$25), filters in matching jars ($5-$10), and a gooseneck kettle ($20-$40). Arrange on an open shelf so the ritual is visible and accessible. This takes less space than an espresso machine and is quieter.

    Pour-over enthusiasts love the control and ceremony of the process, and watching it steep is oddly meditative.

    A secondary brewing method gives your coffee bar more personality and invites slower mornings or afternoon tea ceremonies with friends.

    13. Hang a Small Wall-Mounted Shelf for Height Variation

    Height variation makes displays more interesting and prevents everything from looking flat. A single floating shelf solves this instantly.

    Install a small 24-36 inch floating shelf ($20-$60) at about eye level above your main counter or bar surface. Mount it with simple brackets and hardware. Display your favorite mug collection, a plant, or a decorative object. This adds dimension without requiring lots of space.

    Renter option: Use removable adhesive shelves ($10-$20) that require no drilling.

    Even one elevated shelf completely changes how a coffee bar looks—it creates visual interest and makes the space feel more curated.

    14. Add a Small Rug to Define the Space

    A rug is an underrated way to define a dedicated coffee bar zone and add warmth underfoot. It signals “this is a special corner” even if the coffee bar is in your kitchen.

    Choose a small rug ($30-$100) in neutral natural fibers like jute, wool, or sisal. Keep it 2×3 feet or smaller so it fits in your corner without dominating. Natural textures pair beautifully with café-core design and hide stains from spills better than light colors.

    Place it under your cart, under your stool, or directly in front of your counter to anchor the space.

    A rug instantly makes your coffee bar feel intentional and separate from the rest of the room, which encourages you to treat it as a ritual space rather than just a functional corner.

    15. Mount a Small Mirror to Amplify Light

    Mirrors amplify natural light and make small spaces feel bigger—two huge wins for a coffee bar in a compact area.

    Hang a small mirror ($25-$80) on the wall above or beside your coffee bar in a simple frame that matches your aesthetic (brass, natural wood, or matte black). Position it to reflect light from nearby windows or from your pendant light. Installation takes 10 minutes with a stud finder and small nails.

    The right placement of a mirror makes a dark corner feel brighter and more spacious without adding any functional items.

    Amplifying light makes your morning coffee experience more uplifting and your coffee bar more inviting to sit in for longer stretches.

    16. Stock Your Favorite Mugs and Drinkware

    Your mug collection is part of your coffee bar’s aesthetic. Intentional drinkware choice makes each cup feel special.

    Invest in 4-8 quality mugs that you actually love ($8-$20 each). Mix sizes (latte cups, espresso cups, regular coffee mugs) and styles so you have options depending on your mood. Look for natural glazes, subtle patterns, or interesting shapes. Keep only your favorites displayed on open shelves so you’re reminded to use them daily.

    Don’t clutter with mugs you don’t love—every piece should feel intentional.

    Using a beautiful mug elevates the entire ritual and makes you look forward to morning coffee. Plus, guests notice when you’re serving them drinks in vessels you clearly care about.

    17. Create a Coffee Subscription Display

    Rotating specialty coffee selections turns your bar into a micro-café experience where you’re constantly discovering something new.

    Subscribe to a coffee service ($15-$40 per bag, delivered monthly) from local roasters like Blue Bottle, Intelligentsia, or regional favorites. Display new bags on a small shelf or card stand with a handwritten note about the origin and tasting notes. Switch out the selection monthly so your bar feels fresh and you have something to look forward to.

    This requires zero installation and adds novelty while supporting small businesses.

    A rotating selection keeps your coffee bar interesting and gives you permission to try new things, which prevents the space from feeling static or boring.

    18. Add Acoustic Panels for Comfort and Noise

    Sound matters for that café feeling. Acoustic panels soften noise and make the space feel more luxurious without requiring expensive renovation.

    Install decorative acoustic panels ($40-$100 each) on the wall behind your coffee bar. Choose neutral colors in natural linen, cork, or fabric that complements your design. Mount with simple hardware—no special installation needed. One or two panels absorb sound enough to make a difference in a small space.

    Look for aesthetic designs that double as décor so they’re intentional, not industrial-looking.

    Reduced noise makes your coffee bar feel calmer and more peaceful, encouraging you to linger longer instead of rushing through your coffee.

    19. Style With Coffee Table Books and Reading Material

    A coffee bar naturally pairs with reading material. Books add visual interest and signal that this is a place to slow down and think.

    Choose 2-4 coffee table books ($15-$35 each) about coffee culture, travel, or design that genuinely interest you. Stack them or display standing up on a shelf near your coffee bar. Add a small woven basket ($10-$30) to hold magazines or newspapers so they’re accessible but not cluttered.

    Only keep books you actually love—they’re décor, but they should feel authentic to your interests.

    Books reinforce the intention of your coffee bar as a place for rituals, quiet, and thought rather than just caffeine consumption.

    20. Install Under-Shelf Lighting for Drama

    Under-shelf lighting is an easy, inexpensive upgrade that completely changes the vibe and highlights your setup.

    Install adhesive LED strip lights ($15-$40) underneath open shelves. Choose warm white (2700K) for that café feel. Simply peel and stick the strips, plug into a nearby outlet, and adjust brightness. Installation takes 10 minutes. This works even if you rent since no drilling is needed.

    Look for strips with a dimmer feature so you can adjust the intensity depending on the time of day or mood.

    Under-shelf lighting adds drama and sophistication to your coffee bar while highlighting your displayed items, making the space feel more intentional and expensive-looking than it is.

    21. Create a Baking Corner Attachment

    A café isn’t complete without pastries or baked goods. A dedicated baking corner attachment makes the experience feel more whole.

    Set aside a small shelf or counter space ($0 if using existing space) for pastries, cookies, or baked goods. Display in simple ceramic dishes ($10-$25), wooden boards, or a small tiered stand ($20-$50). Stock with homemade bakes, local bakery finds, or quality store-bought options. Rotate seasonally for visual interest.

    This doesn’t require cooking—buying pastries from a good local bakery and displaying them nicely elevates the experience.

    A food component transforms your coffee bar from a beverage station into a complete café experience, making it feel like a destination worth visiting multiple times a day.

    22. Use Floating Countertop to Save Floor Space

    If floor space is tight, a floating countertop gives you a full coffee bar footprint without taking up precious square footage.

    Install a floating countertop ($50-$200) at standard counter height (36 inches). Use simple brackets and mount directly to wall studs. Top with your coffee maker, grinder, and accessories. This works in apartments, small kitchens, or corner spaces where a rolling cart or freestanding counter won’t fit.

    A professional carpenter can install this, or handy DIYers can handle it with basic tools. Renter-friendly option: use a tall console table ($50-$150) that mimics the floating effect without permanent installation.

    A floating setup saves precious floor space while making your coffee bar look built-in and intentional.

    23. Add a Coffee Bean Roasting Chart Print

    A roasting chart or brewing guide adds educational charm and signals that your coffee bar is about quality, not just convenience.

    Print a coffee roasting chart or brewing guide ($0 DIY, or $10-$25 from Etsy) and frame in a simple 8×10 frame ($5-$15). Hang at eye level so it’s readable and serves as both décor and reference. Options include roasting level guides, pour-over instructions, or coffee origin maps.

    This is a subtle way to celebrate coffee culture and gives guests something interesting to look at while they wait.

    An educational print reinforces that your coffee bar is a considered space and gives you conversation starters with anyone who visits.

    24. Set Up a Small Beverage Cart for Variety

    Your bar doesn’t have to be coffee-only. A small beverage station with tea, milk options, and syrups lets guests customize their drinks and makes your setup feel like a real café.

    Dedicate a small shelf or cart section ($0 if existing) to tea options, alternative milks (oat, almond, coconut), and syrups. Store in matching bottles and jars ($20-$50 for a full set) with simple labels. Include honey, agave, or other sweeteners. This takes 30 minutes to organize but makes your coffee bar feel complete.

    Keep everything visible and easy to access so guests (and you) can customize without hunting.

    Offering variety signals that your coffee bar welcomes different preferences and invites people to linger and experiment with flavors.

    25. Use Natural Wood Open Shelving for Warmth

    Wood is the foundation of café-core design. Open wooden shelving instantly adds warmth and a natural feel that no other material matches.

    Install wooden floating shelves ($30-$100 per shelf) in natural wood finishes (oak, walnut, or pine). Mount 12 inches apart at varying heights for visual interest. Fill with intentionally displayed items—not everything you own, just the pieces you love and use regularly.

    DIY option: Use reclaimed wood planks ($20-$50) with simple brackets for a more rustic, authentic look.

    Natural wood feels organic and welcoming, which is exactly the vibe that makes you want to spend time at your coffee bar instead of just rushing through your morning.

    26. Create a Cozy Reading Nook Nearby

    The ultimate coffee bar experience includes a place to sit and linger with a good book. A small reading nook transforms your coffee bar from utility to lifestyle.

    Add a comfortable chair or bench ($100-$300) positioned near your coffee bar with a small side table ($30-$80) within arm’s reach. Layer with a soft throw ($20-$50) and a reading lamp ($30-$80). This creates an inviting spot that makes you (and guests) want to stay longer.

    Renter-friendly option: Use a quality cushion on a bench or already-owned chair instead of investing in new furniture.

    A cozy reading nook transforms your coffee bar from a grab-and-go station into a destination where you actually sit down, breathe, and enjoy quiet moments.

    27. Rotate Seasonal Styling and Decor

    Keeping your coffee bar fresh throughout the year doesn’t require major changes—just seasonal rotation of small décor elements keeps the space feeling new and relevant.

    Every 6-8 weeks, swap out small items ($0-$30 depending on what you buy): seasonal flowers, different throw blanket colors, holiday decorations, or thematic artwork. Keep the core setup constant (your shelves, equipment, lighting) but refresh accessories. This costs almost nothing but keeps the space from feeling static.

    Shop seasonal sections at Target, IKEA, or dollar stores for inexpensive seasonal pieces that look intentional without breaking the bank.

    Seasonal refresh keeps your coffee bar feeling alive and gives you a reason to visit it with renewed interest, which means you actually use the space you’ve created instead of it becoming scenery.


    Save this post for when you’re ready to start your coffee bar refresh. Pick just one or two ideas to tackle this weekend—you’ll be surprised how quickly even small changes make the space feel completely different. Which idea will you try first?

  • 25 Kitchen Cabinet Design Ideas That Transform Your Entire Space

    25 Kitchen Cabinet Design Ideas That Transform Your Entire Space

    Your kitchen cabinets set the tone for your entire home—but updating them doesn’t have to mean a full renovation or breaking the bank. Whether you’re renting, working with a small space, or ready to invest in custom pieces, these 25 ideas range from free styling tricks to smart upgrades that’ll make your kitchen feel brand new. You’ll discover budget hacks that take an afternoon, trending color combos that actually work, and storage solutions that’ll change how you use your space. The best part? Most of these ideas work whether you own or rent, and you can start with just one. Let’s dig in.

    1. Pair Two-Tone Cabinets for Visual Impact

    Two-tone cabinets instantly add personality and depth without a complete overhaul. Pairing a light shade on top with a darker base (or vice versa) creates visual interest and makes your kitchen feel intentional and curated.

    You can achieve this look in several ways: paint existing cabinets if you own, use peel-and-stick contact paper for a renter-friendly option ($20–$40 per roll from Target or Amazon), or swap out cabinet doors if you’re ready to invest ($200–$500 total). The contrast draws the eye upward, making ceilings seem higher in small spaces. Choose complementary colors like white + sage, cream + charcoal, or even pale yellow + deep green.

    Pro tip: Start with lower cabinets in bold color—they hide spills better and feel less committal than painting everything.

    This combo makes your kitchen feel designed and polished. You’ll notice how much more personality your space gains from this one change alone.

    2. Install Handleless Push-to-Open Cabinets

    Handleless cabinets create that seamless, spa-like look trending everywhere—and they actually reduce visual clutter. By removing hardware, you get clean lines and a more spacious feel, even in tiny kitchens.

    If you own, replacing cabinet doors with handleless options costs $300–$800 depending on your cabinet count. For renters, this isn’t viable, but you can remove existing hardware and fill holes with wood filler and paint for a smoother appearance. Handleless cabinets use a soft-close push mechanism or finger indent design, so they’re surprisingly practical—no more handles to grab with wet hands or bump into.

    Look for these at IKEA (budget-friendly), Wayfair, or Home Depot for mid-range options.

    Pro tip: Pair handleless cabinets with motion-sensor LED lighting inside to make them feel high-tech and functional.

    Your kitchen instantly looks more modern and intentional. Daily use becomes easier, and you’ll love how uncluttered the visual feel becomes.

    3. Add Open Shelving in One Accent Spot

    Open shelving makes kitchens feel airier and gives you a chance to display items you actually love. Instead of replacing all cabinets, try adding open shelves to just one wall—it’s a designer trick that costs way less.

    Floating shelves run $40–$150 per shelf depending on materials and length. Installation is DIY-friendly if you have a stud finder and drill ($30–$50 total for tools you’ll use forever), or hire a handyperson for $100–$200. The key: style intentionally with cookbooks, plants, and dishware you’d want photographed. Keep clutter-prone items behind closed doors.

    Measure your wall space and choose shelves that match your cabinet finish (walnut, white, natural oak) for cohesion.

    Pro tip: This works beautifully as a renter if you use removable adhesive shelf brackets—no wall damage.

    Your kitchen instantly feels more luxe and personal. You’ve created an Instagram-worthy focal point without the cost of a full cabinet refresh.

    4. Choose Warm Wood Tones Over Cool Whites

    The shift from stark white to warm woods (oak, walnut, cherry) is one of 2025’s biggest trends—and for good reason. These tones feel cozier, more connected to nature, and hide wear better than white over time.

    If you’re ordering new cabinets, specify warm wood finishes; custom options run $3,000–$8,000+. Already have cabinets? Staining or refinishing costs $400–$1,200 and can be DIY if you’re patient. MINWAX or Varathane stains ($15–$25 per can) work well on existing wood—test on a hidden area first. This change pairs beautifully with gold or brushed brass hardware for an elevated look.

    Warm woods work in modern, farmhouse, transitional, and traditional styles, making them incredibly versatile.

    Pro tip: Pair warm cabinets with light countertops to keep the space feeling open and balanced.

    Your kitchen gains warmth and character instantly. The space feels more inviting, and you’ve tapped into biophilic design principles that make kitchens feel like retreats.

    5. Use Budget-Friendly RTA (Ready-to-Assemble) Cabinets

    Ready-to-assemble cabinets have become seriously good—and they’re often 40–50% cheaper than semi-custom or custom options. RTA cabinets arrive flat-packed and ready for you to assemble, making them perfect for renters, budget-conscious homeowners, and quick updates.

    Quality RTA brands like IKEA, Wayfair, and Amazon Basics run $50–$200 per cabinet box depending on size and finish. Assembly takes 30–90 minutes per cabinet with basic tools (a drill is helpful but not required). You can DIY completely or hire a handyperson for $50–$100 per cabinet to handle assembly. The styles have evolved dramatically—you’ll find handleless, two-tone, and even textured options.

    Pro tip: Measure twice before ordering. RTA cabinets typically can’t be returned after assembly.

    You get a fresh kitchen look without the years-long wait or five-figure price tag. This option makes cabinet updates accessible for anyone, which is why it’s surging in popularity.

    6. Install LED Under-Cabinet Lighting for Function & Ambiance

    Under-cabinet lighting does double duty: it makes cooking easier and completely changes your kitchen’s mood at night. This is one of the highest-ROI upgrades you can make, and it’s surprisingly affordable.

    LED strip lights cost $15–$60 per kit and install in minutes with adhesive backing (no wiring needed for plug-in versions). Hardwired options ($100–$300 professionally installed) look cleaner and work with smart dimming. Warm white (2700K) creates ambiance while bright white (4000K) is better for prep work. Many versions are now motion-activated, turning on when you approach the counter.

    Check Amazon, Home Depot, or IKEA for popular brands like Philips Hue or basic stick-on options.

    Pro tip: Pair motion-sensor lighting with handleless cabinets for a kitchen that feels genuinely high-tech.

    Your counter becomes properly lit for cooking, and you’ve created restaurant-quality ambiance for evening entertaining. You’ll wonder how you ever cooked without this.

    7. Paint Cabinet Doors a Bold Moody Color

    Matte and moody finishes (deep greens, charcoals, navy, eggplant) are everywhere—and they photograph beautifully. A bold paint color transforms your kitchen’s personality without structural changes.

    Cabinet-grade paint costs $20–$50 per quart; you’ll typically need 1–2 quarts depending on cabinet size. Remove doors (takes 30 minutes), prime with bonding primer, then apply two coats of paint designed for cabinets (Benjamin Moore, Sherwin-Williams, or BEHR Cabinet & Trim Paint). Plan for 3–5 days total with drying time. This is totally doable as a weekend DIY project or hire a painter ($400–$800 for full kitchen).

    Pro tip: Stick with matte or satin finishes for cabinets—they’re more forgiving than gloss finishes for hiding imperfections.

    Your kitchen becomes a statement-maker. Friends and family will immediately notice how intentional and designed your space feels.

    8. Swap Handles & Hardware for an Instant Refresh

    Sometimes the cheapest update that creates the biggest change is swapping out hardware. New handles and knobs shift your kitchen’s entire vibe in minutes.

    Cabinet hardware costs $3–$15 per piece; a full kitchen refresh (20–40 pieces) runs $100–$400. It’s a 15-minute DIY project with just a screwdriver—no special skills needed. Brass and gold tones feel warm and elevated, while matte black hardware adds modern edge. Mix and match metals (brass on upper cabinets, matte black on lower) for contemporary style.

    Shop Wayfair, Amazon, Rejuvenation, or even Target for budget-friendly options.

    Pro tip: Keep old hardware in a labeled bag—you might need it if you move or want to restore original cabinets later.

    Your cabinets look refreshed without any real effort. This small change proves that sometimes the biggest design impact comes from thoughtful details.

    9. Incorporate Eco-Friendly Bamboo Cabinets

    Bamboo cabinets have surged 34% in preference as homeowners seek sustainable options—and bamboo is genuinely better for the planet (it regrows in 3–5 years versus 25+ years for hardwood trees). It’s also naturally antimicrobial, making it hygiene-friendly for kitchens.

    Bamboo cabinets cost slightly more than standard wood—expect $2,500–$6,000 for semi-custom or $4,000–$10,000+ for custom options. Full kitchen cabinet projects typically require contractor installation ($1,500–$3,000). If you’re updating existing cabinets, bamboo veneer sheets ($30–$50 per sheet) can cover cabinet boxes as a renter-friendly option (though results vary).

    Look for FSC-certified bamboo—it guarantees sustainable harvesting practices.

    Pro tip: Bamboo works especially well with modern or minimalist kitchen designs due to its clean grain lines.

    You’re making an eco-conscious choice without sacrificing style or durability. Your kitchen becomes part of a larger commitment to sustainable living.

    10. Create a Hidden Pantry Behind Cabinet Doors

    Hidden pantries keep clutter completely out of sight while maximizing storage—perfect for small spaces or open-concept kitchens where you want everything looking clean. This is a game-changer for maintaining visual serenity while storing way more than you’d think.

    A single tall cabinet with pull-out shelves costs $300–$600 installed, or DIY pull-out organizers ($30–$80 from IKEA or Amazon) work in existing cabinets. Add interior LED lighting ($20–$50) so you can actually see everything inside. Use clear labeled containers to maximize visibility and prevent forgotten items.

    This works brilliantly as a renter if you use removable adhesive-backed shelving organizers.

    Pro tip: Measure your cabinet depth precisely—pull-out shelves need at least 16–18 inches of space to function smoothly.

    Your kitchen looks perpetually clean and organized. You’ll love opening a cabinet to find everything you need without visual chaos.

    11. Mix Cabinet Styles (Shaker + Frameless Fusion)

    Blending classic Shaker style (inset doors, raised panel detail) with modern frameless elements creates a hybrid look that feels both timeless and contemporary. This trend appeals to homeowners who want personality without commitment to one era.

    Custom cabinets combining styles run $4,000–$10,000+. Semi-custom options through Wayfair or Home Depot let you mix-and-match styles for $2,000–$5,000. If you’re DIY-inclined, you can paint existing Shaker cabinets in two tones and add frameless open shelving in one spot ($100–$400 total for materials).

    Pro tip: Keep the color palette cohesive when mixing styles—it prevents the look from feeling chaotic.

    You get a personalized kitchen that reflects your design taste. The combination feels intentional and creates visual rhythm throughout your space.

    12. Add Glass Front Cabinet Doors for Display

    Glass-front cabinets transform your kitchen into a gallery—they work especially well for displaying dishware you love or creating visual interest in minimalist kitchens. The openness feels airy while still keeping dust off your items.

    Replacing standard doors with glass-front options costs $100–$300 per door depending on material (basic glass versus beveled or frosted). Full kitchen might run $1,500–$4,000. DIY-friendly alternative: stick adhesive frosted film ($10–$20 per roll from Amazon) on lower cabinet sections for privacy while maintaining the glass-door aesthetic.

    Choose interior LED lighting to make displays glow softly at night.

    Pro tip: Style displays intentionally with matching dishware, cookbooks turned spine-out, and a few decorative items—not everything you own.

    Your kitchen becomes a mini gallery that celebrates your style. Guests notice the design intention immediately.

    13. Refinish Cabinets With Cabinet Paint Systems

    Cabinet refinishing (not replacing doors, actually repainting existing cabinets) has become wildly popular because it costs a fraction of full replacement. Modern cabinet paint systems create durable, professional-looking finishes in any color you want.

    DIY refinishing costs $200–$500 in materials and takes a weekend (or two). Professional cabinet painters charge $800–$2,500 for a full kitchen. SHERWIN-WILLIAMS Cabinet & Trim Paint or BENJAMIN MOORE Advance are industry standards. The process: light sanding, primer, two paint coats, then hardware installation. Results last 7–10+ years with proper care.

    Pro tip: Hire professionals if you don’t have good ventilation or steady painting technique—results matter here.

    Your cabinets look freshly renovated for a fraction of replacement cost. You can’t tell these aren’t new cabinets unless you look closely.

    14. Go Frameless for Seamless Modern Minimalism

    Frameless cabinets (also called European-style) eliminate the face frame that sits between cabinet boxes and doors, creating that seamless, ultra-modern look. They maximize interior storage space by about 10% and feel incredibly clean.

    Frameless cabinets are typically higher-quality options: expect $3,000–$8,000 for semi-custom or $5,000–$15,000+ for fully custom kitchens. IKEA’s SEKTION line offers budget frameless options around $1,500–$3,000 for smaller kitchens. Quality matters here—frameless cabinets need excellent construction to hang properly and align perfectly.

    Look for soft-close hinges and quality hardware when shopping.

    Pro tip: Pair frameless cabinets with handleless design for the ultimate minimalist kitchen.

    Your space looks sleekly designed and intentional. The seamless cabinet lines create visual calm in your kitchen.

    15. Use Fluted & Textured Finishes for Tactile Appeal

    Fluted and textured cabinet finishes add sophistication and dimension without clashing with minimalist design. These details make cabinets feel more expensive and interesting while staying visually clean.

    Fluted cabinet doors typically cost $150–$300 per door depending on material and depth of texture. You can also add fluting with adhesive-backed panels ($20–$50 per sheet from specialty suppliers) on existing cabinets. Textured finishes include everything from subtle grain patterns to hand-carved details—each adds tactile interest that photographs beautifully.

    Popular textures: vertical fluting, subtle waves, or linear patterns that complement modern interiors.

    Pro tip: Texture works best on large cabinet faces—don’t over-texture smaller cabinet sections or it feels busy.

    Your cabinets gain visual interest and high-end appeal. The tactile quality makes people want to touch and explore your kitchen design.

    16. Invest in Smart Storage Solutions & Dividers

    Smart storage isn’t just about looking neat—it’s about actually using your cabinet space efficiently. Dividers, pull-out shelves, and tiered organizers make your daily life easier while maximizing every inch.

    Quality pull-out organizers ($40–$120 per unit) and cabinet dividers ($15–$50 each) transform chaos into function. Popular solutions: pull-out spice racks, tiered shelf raisers, utensil dividers, and deep drawer organizers. These work in existing cabinets—no installation required for many options. Brands like Rev-A-Shelf, Hafele, and even IKEA’s VARIERA series offer excellent solutions under $30–$60 per item.

    Pro tip: Measure your cabinet interior precisely before ordering organizers—sizing is everything.

    You’ll actually know what you have and where to find it. Cooking becomes faster because ingredients and tools are organized logically.

    17. Create Indoor-Outdoor Cabinet Continuity

    Extending your cabinet style outdoors creates a sophisticated flow between spaces. Matching or complementary outdoor kitchen cabinetry makes your home feel designed as a complete environment.

    Outdoor kitchen cabinets cost more ($150–$400+ per cabinet) because they require weather-resistant finishes and materials. TEAK, marine-grade plywood, and specially treated woods resist moisture and UV damage. You can start small: add a single outdoor cabinet or bar unit ($500–$1,500) that echoes your kitchen’s style. Paint, hardware, and color should coordinate even if materials differ slightly due to weather requirements.

    Pro tip: Work with an outdoor kitchen specialist if building from scratch—weatherproofing is crucial.

    Your home gains a resort-like feel. You’ve created an intentional design through both spaces that makes entertaining seamless and stylish.

    18. Experiment With Horizontal Grain & Soft Minimalism

    Horizontal grain patterns and linear details create calm, grounded energy—perfect for contemporary kitchens seeking sophistication over fussiness. This subtle detail shifts a kitchen from plain to purposeful.

    Custom cabinets with horizontal grain details run $3,500–$9,000+ for full kitchens. Budget option: use peel-and-stick wood veneer sheets ($15–$30 per sheet) featuring horizontal patterns on cabinet fronts. Paint cabinets in soft, muted colors (greige, pale blue, warm gray) and add thin linear hardware for that seamless horizontal effect.

    This works beautifully with minimalist or Scandinavian design aesthetics.

    Pro tip: Balance horizontal elements with vertical open shelving or tall glass cabinets for visual variety.

    Your kitchen gains zen-like calm and modern sophistication. The subtle linear details make your space feel consciously designed.

    19. Customize With AI-Designed & CNC-Cut Cabinetry

    Cutting-edge technology like AI design tools and CNC (computer numerical control) machining create hyper-customized cabinets with precision you can’t achieve by hand. This is the future of personalized kitchen design—and it’s becoming more accessible.

    AI design platforms (like those offered by some custom cabinet makers) typically cost $200–$500 for design consultation, then cabinet pricing depends on complexity ($4,000–$12,000+). CNC-cut details add $300–$1,000+ depending on intricacy. The advantage: you get exactly what you envision, with zero guesswork or expensive mistakes.

    Brands like Blum and Hafele integrate smart technology into hardware, while designers use AI visualization for perfect layouts before production.

    Pro tip: Use digital design tools to preview your exact cabinet layout before ordering—it prevents expensive errors.

    You’re getting genuinely custom cabinetry tailored to your exact specifications. This technology makes high-end customization more efficient and more affordable than ever.

    20. Apply Low-VOC & Non-Toxic Cabinet Finishes

    Low-VOC (volatile organic compound) and non-toxic finishes protect your family’s health while respecting the environment. These finishes have improved dramatically—they now perform as well as traditional finishes without off-gassing.

    Low-VOC paints cost $30–$60 per gallon (similar to standard paint) and work in all cabinet applications. Brands like AFM, Ecos, and even BENJAMIN MOORE’s eco-friendly line offer excellent durability. Finish your existing cabinets with these paints for zero additional cost beyond the paint itself. Finishes cure faster now (3–7 days instead of weeks), so your kitchen is back in action quickly.

    Look for Green Guard Gold or similar certifications when shopping.

    Pro tip: Proper ventilation during application is crucial—crack windows and use fans even with low-VOC products.

    You’ve made a health-conscious choice for your family. Your kitchen smells fresh, not chemically sharp, and you’re reducing indoor air pollution.

    21. Design a Shaker Variation With Modern Twists

    Shaker cabinets are timeless for a reason—their clean lines and inset panels work with virtually any design style. Modern interpretations add two-tone color, minimalist hardware, or textured panels for contemporary appeal.

    Custom Shaker cabinets run $3,000–$8,000 for full kitchens; semi-custom options through Wayfair or Home Depot start around $1,500–$4,000. You can update existing Shaker cabinets by painting doors ($50–$200 in materials), swapping hardware ($100–$300), and adding interior lighting ($50–$150). This blend of classic form and modern updates feels instantly elevated.

    Pro tip: Pair traditional Shaker style with contemporary hardware (brass knobs or long pulls) for a hybrid aesthetic.

    Your cabinets feel timeless yet current. You’ve chosen a style that will remain appealing for years, not just this season.

    22. Use Negative Space & Open Floor Plans Intentionally

    Embracing negative space—leaving parts of your kitchen intentionally open—creates visual calm and makes small spaces feel larger. This contrasts beautifully with traditional full-cabinet kitchens.

    You don’t need to buy anything for this approach—it’s about rethinking what stays versus what goes. If you’re ordering new cabinets, choose fewer base cabinets and more open shelving or counter space. This saves money ($500–$2,000 compared to full cabinetry) while creating a gallery-like aesthetic. Open counters also make kitchens easier to clean and less cluttered-feeling.

    Pro tip: When using negative space, ensure remaining countertops are organized and visually clean.

    Your kitchen becomes a calm, intentional space rather than a cluttered workspace. The openness makes your kitchen feel twice its actual size.

    23. Incorporate Motion-Sensor Lighting & Gadget Upgrades

    Motion-activated lighting transforms your kitchen into a genuinely smart space—lights turn on as you approach and turn off automatically, saving energy while creating hands-free convenience.

    Motion-sensor LED systems run $100–$300 depending on how many cabinets you’re outfitting. Installation takes 1–2 hours if you’re handy, or pay $150–$300 for professional setup. Pair this with other smart upgrades: voice-activated spice racks ($60–$120), soft-close hinges with built-in dampers ($40–$80 per hinge), or smart fridge-integrated cabinet systems ($500–$1,500 high-end options).

    These gadgets make your kitchen feel futuristic without being complicated.

    Pro tip: Start with motion lighting in one cabinet to test before committing to your entire kitchen.

    Your kitchen feels genuinely high-tech and responsive. You’ll appreciate the convenience every time you cook.

    24. Blend Materials (Wood + Concrete + Metal) for Texture

    Mixing materials (wood, concrete, metal, matte finishes) adds sophistication and depth—it’s the secret to kitchens that feel designed by professionals. This approach prevents your space from feeling one-note.

    Material blending happens naturally through cabinet colors, countertops, hardware, and open shelving. A natural wood cabinet with matte black hardware, concrete countertops, and metal shelving creates instant visual interest. You don’t need to spend extra for this—it’s about intentional choices. Mix warm and cool tones, glossy and matte finishes, and natural and industrial materials.

    Pro tip: Choose three primary materials and stick to them—more becomes chaotic instead of curated.

    Your kitchen gains sophisticated depth and personality. Visitors notice the thoughtful design immediately.

    25. Maximize Vertical Storage With Floor-to-Ceiling Cabinetry

    Floor-to-ceiling cabinets eliminate wasted space above standard cabinets while making kitchens feel intentional and complete. This maximizes storage without expanding square footage—perfect for small spaces.

    Full-height cabinet systems run $2,000–$6,000+ depending on your kitchen size and materials. The investment pays off immediately through added storage—you can store everything from everyday dishes to seasonal items. Measure ceiling height precisely; some kitchens need custom tops to fit correctly. Add a decorative ladder or pull-down shelves to access high areas safely and stylishly.

    Pro tip: Reduce visual heaviness by using glass doors or open shelving in upper cabinets—it keeps the look light.

    You’ve reclaimed wasted vertical space and created a complete, polished kitchen design. Storage becomes abundant without sprawling cabinets throughout your home.

    26. Start Small With a Single Cabinet Accent Piece

    Sometimes the best approach is starting small: update just one cabinet or section to test colors, styles, or trends before committing to a full refresh. This reduces financial risk while letting you explore new directions.

    A single statement cabinet costs $100–$500 depending on whether you’re painting existing cabinetry or swapping one door. Test bold colors, textures, or finishes on a smaller scale before full commitment. Use this piece as a creative outlet—it’s where you can take design risks. A painted pantry cabinet, textured island base, or two-tone section works as an accent that makes your entire kitchen feel updated.

    Pro tip: This is the perfect strategy for renters testing colors before investing in permanent changes.

    You’ve made a bold design move at minimal cost. If you love it, you know exactly how to move forward. If not, you’ve learned something valuable.

    Ready to transform your kitchen? Save this post and pick just one idea to tackle this weekend—start small or go big, whatever fits your space and budget. Share this with anyone planning a kitchen refresh; I’d love to know which idea inspires you most.

  • 27 Timeless Kitchen Cabinet Ideas That Never Go Out of Style

    27 Timeless Kitchen Cabinet Ideas That Never Go Out of Style

    Your kitchen cabinets are one of the biggest investments in your home—so it makes sense that you’d want them to look good for years to come. The good news? Timeless cabinet styles never go out of style, which means you won’t feel that regret creeping in three years later when trends shift. In this guide, we’re breaking down 27 cabinet ideas that blend classic appeal with modern practicality. Whether you’re planning a full remodel, refreshing your current setup, or just looking for inspiration, you’ll find budget-friendly tweaks, DIY hacks, and investment-worthy upgrades that will genuinely last. Let’s dig in.

    1. Go Classic with Shaker Cabinet Doors

    Shaker cabinets are the vanilla ice cream of kitchen design—and that’s a compliment. These five-panel doors with their simple, geometric frames work in farmhouse, modern, transitional, and traditional kitchens alike.

    The reason Shaker cabinets endure? They’re straightforward and honest. No busy details or ornamental trim to collect dust or feel dated. You can find them pre-made at home improvement stores like Home Depot or Lowe’s for $40–$100 per cabinet, or invest in custom builds from brands like iCabinetry Direct ($150–$400 per cabinet). Installation takes a weekend if you’re replacing existing cabinets. Paint them white for farmhouse charm, stain them walnut for warmth, or go bold with navy or charcoal for modern edge.

    The best part? Shaker doors pair beautifully with nearly any countertop, backsplash, or hardware style you choose later. Your kitchen stays relevant through multiple design cycles.

    2. Embrace White Cabinetry for Brightness

    White cabinets make kitchens feel larger, brighter, and more open—a benefit that doesn’t fade with trends. This is especially smart if you’re in a smaller space or a home with limited natural light.

    White cabinets are available everywhere and in every price tier. Home Depot and Wayfair carry stock options starting at $30–$50 per cabinet, while custom makers run $150–$350. Choose semi-gloss or satin finishes over high-gloss to hide fingerprints and reduce that slick, dated look. Pair white cabinets with warm wood countertops, open shelving, or mixed hardware materials to avoid an overly sterile feel. Pro tip: If you already have white cabinets, consider painting just the island a contrasting color instead of replacing everything.

    You’ll notice how white cabinets absorb less visual clutter, making your kitchen feel calmer and more intentional. They’re a safe bet that works across decades.

    3. Invest in Inset Shaker Doors for Warmth

    Inset Shaker doors are the cousin of standard Shaker cabinets—the doors sit inside the frame rather than flush against it, creating subtle shadow lines and dimension. This style bridges farmhouse and transitional design beautifully.

    Inset cabinetry is more time-intensive to build, so expect to invest $200–$500+ per cabinet from custom makers like RTG Cabinets or local woodworkers. Stock options with inset styling are rare but available through specialty retailers ($100–$150 per cabinet). A full kitchen typically costs $8,000–$20,000+ depending on size and finish. The craftsmanship is visible in the detail, and that extra investment translates to durability and a more premium feel.

    The result? Your kitchen feels intentional and high-quality without screaming trendy. These cabinets work in homes that are decades old and homes built today.

    4. Mix Wood Stain and Paint for Two-Tone Drama

    Two-tone cabinets represent 40% of new kitchen installations, according to industry data—and for good reason. Pairing a painted color with natural wood (or two contrasting paint colors) adds personality without overwhelming the space.

    The classic combo: white or cream uppers with dark walnut or charcoal lowers. Start with your existing cabinets if you have them—painting is $30–$100 per cabinet depending on prep and can be a DIY project over two to three weekends. Pre-made two-tone cabinet sets from Wayfair, IKEA, or iCabinetry run $3,000–$12,000 for a full kitchen. Custom two-tone builds cost $8,000–$25,000+. Hire a pro painter if you want a polished finish (adds $500–$2,000 in labor).

    You’ll immediately feel how two-tone cabinets add sophistication and visual interest. They draw the eye and make your kitchen feel more intentional than a single color ever could.

    5. Choose Matte or Satin Finishes Over Gloss

    High-gloss cabinet finishes look slick and dated by now. Matte and satin finishes feel modern, hide fingerprints better, and work with nearly every style from minimal to traditional.

    If you’re painting existing cabinets, choose Benjamin Moore, Sherwin-Williams, or Behr cabinet paint in matte or satin ($35–$60 per quart). For a full kitchen of cabinets, plan on 3–4 quarts and $200–$400 in paint alone. Professional refinishing runs $2,000–$5,000. Pro tip: Satin finishes are more durable than matte for high-traffic areas like lower cabinets and around the stove.

    The finish you choose affects how light reflects in your kitchen. Matte and satin finishes feel calmer and more sophisticated than the glossy look from the early 2000s.

    6. Add Open Shelving Alongside Closed Cabinets

    Open shelving looks too trendy when it’s all you have, but mixing open shelves with closed cabinets gives you the best of both worlds: display space for beautiful items and hidden storage for clutter.

    Install floating shelves from Amazon, Home Depot, or IKEA ($20–$80 per shelf), or have custom shelves built by a carpenter ($150–$400 per shelf installed). A typical kitchen might add 2–4 shelves for $100–$400 DIY or $800–$2,000 installed. Pro tip: Keep open shelves styled with white dishes, cookbooks, and plants—save bulky small appliances for closed storage below. This takes about a day to install if you’re comfortable with a drill.

    Your kitchen immediately feels more open and personalized when open shelving breaks up solid cabinetry. Guests see beautiful items you’re proud of instead of closed boxes everywhere.

    7. Go Frameless (Euro-Style) for Clean Minimalism

    Frameless cabinets (also called “European-style”) eliminate the frame around each door, creating a seamless look. This style is perfect if you love minimalist design and clean lines.

    Frameless cabinets require more precise installation but offer a contemporary look that feels current. iCabinetry Direct, Ultracraft, and local custom makers build frameless cabinetry starting at $150–$400 per cabinet. Stock options from IKEA and Wayfair run $50–$150 per cabinet. A full kitchen averages $6,000–$20,000+. Pair with handle-free push-to-open doors for maximum sleekness. Installation takes 2–3 days for a full remodel.

    You’ll notice how frameless cabinets make your kitchen feel larger and more contemporary. There’s no visual clutter from frames and trim lines.

    8. Paint Cabinets in Warm Earthy Tones

    Earthy tones like sage green, warm gray, soft taupe, and buttery cream are trending right now because they feel grounded and cozy without being dark or moody. These colors work in homes ranging from farmhouse to modern.

    Paint existing cabinets yourself with cabinet-specific paint in your chosen color ($40–$80 per quart). A full cabinet set takes 3–4 quarts and costs $150–$300 in paint alone plus your weekend. Hire a professional for $2,000–$4,500. Pro tip: Test samples on cardboard first—paint color looks different depending on your kitchen’s lighting. Soft greens are especially forgiving and timeless.

    Your kitchen becomes a retreat rather than just a functional room. Warm earthy tones create an atmosphere that feels intentional without trying too hard.

    9. Incorporate Hidden Pantry Cabinets

    Hidden pantry cabinets solve the storage problem that 78% of homeowners prioritize during remodels. Instead of exposed open shelving, a closed pantry hides mess and maximizes vertical space.

    Install a full-height cabinet (typically $200–$500 pre-made or $400–$1,000 custom) against one wall or in an awkward corner. Add adjustable shelving inside ($30–$100) to customize storage. This is a DIY-friendly project if you have basic carpentry skills—plan for a long weekend. Pro tip: Add a door-mounted spice rack or small baskets inside for extra organization.

    The transformation is immediate: your kitchen looks less cluttered while you gain serious storage capacity. You’ll notice you actually know what groceries you have because they’re organized in one place.

    10. Install Handle-Free Push-to-Open Doors

    Handle-free cabinets are growing in popularity with minimalist design lovers because they eliminate visual clutter and create a truly seamless look. The door opens with a gentle push and closes with a soft click.

    Retrofit existing cabinets with push-to-open hardware ($15–$40 per door from Amazon or specialty hardware sites). This is a DIY-friendly upgrade taking about 30 minutes per cabinet. Alternatively, order new frameless cabinets with push-to-open already installed (add $20–$60 per door). A full kitchen retrofit costs $300–$600 in hardware alone, or build new with the feature included for $150–$400 per cabinet.

    You’ll love how your kitchen feels less cluttered visually. Without handles, the eye moves to the cabinets’ color and finish instead of interrupting hardware lines.

    11. Use Natural Bamboo for Eco-Friendly Durability

    Bamboo cabinets are having a moment because bamboo grows rapidly (harvestable in 3–5 years versus 10–20 years for traditional hardwoods) and offers natural antimicrobial properties. Plus, it’s incredibly strong and beautiful.

    Custom bamboo cabinets start at $200–$500 per cabinet from makers like GoldenHome Global or local craftspeople. Stock bamboo options from Wayfair or iCabinetry Direct run $80–$200 per cabinet. A full kitchen averages $8,000–$20,000+. Bamboo has a warm, honey tone that works in modern, transitional, and Asian-inspired kitchens. Seal it properly to prevent water damage in humid climates.

    Choosing bamboo means your cabinets have a story—they’re sustainable, durable, and genuinely beautiful. You feel good about the environmental impact while enjoying a kitchen that looks premium.

    12. Create Visual Interest with Fluted or Textured Doors

    Fluted texture and mixed materials (like wood veneer mixed with painted panels) add sophisticated dimension without changing your cabinet layout. This works beautifully in modern and transitional kitchens.

    Pre-made fluted cabinet doors are harder to find but available through specialty retailers ($100–$250 per door). Custom fluted cabinets cost $250–$500 per cabinet. DIY texture can be added with paint techniques or specialty finishes ($50–$100 per cabinet in materials). This typically requires professional application for a polished look (add $500–$1,500 in labor). Pro tip: Fluting catches dust, so plan for slightly more frequent cleaning.

    Your kitchen immediately feels more high-end and thoughtfully designed. Textured surfaces add depth that solid flat panels can’t replicate.

    13. Mix Glass Fronts with Solid Cabinet Doors

    Glass-front cabinets are tempting but can look cluttered if overused. The solution: mix them strategically with solid doors to create visual rhythm and keep the space organized.

    Pre-made cabinets with glass fronts cost $60–$150 each from IKEA, Home Depot, or Wayfair. Retrofit existing cabinet doors with glass inserts ($30–$80 per door) through specialty hardware sites. A balanced mix might be 30–40% glass and 60–70% solid in your kitchen. Pro tip: Reserve glass fronts for beautiful dishware or cookbooks; hide food storage and bulky appliances behind solid doors. DIY glass inserts take about 20 minutes per door.

    You achieve the best of both worlds: display space for items you love and hidden storage for everyday clutter. Your kitchen looks curated, not chaotic.

    14. Paint an Island a Contrasting Color

    If replacing all your cabinets feels too big, paint just your island a contrasting color. This adds personality and visual interest without a full overhaul—and it’s completely reversible if you change your mind.

    Cabinet paint in a bold color costs $30–$60 per quart, and you’ll need 1–2 quarts for an island ($40–$120 total). This is a perfect DIY weekend project: prep with sanding and primer, then paint two coats. A professional painter charges $500–$1,500 for island painting. Go bold with charcoal, navy, forest green, or aubergine—these colors feel timeless rather than fleeting.

    Your kitchen instantly gains a focal point that feels intentional. Guests notice the thoughtful design detail, and you get a personalized touch without major expense.

    15. Install Adjustable Shelving Inside Cabinets

    Standard cabinet shelving is often fixed, which means wasted space if you need different heights for various items. Adjustable shelving lets you customize interior space to match what you actually store.

    Install adjustable shelf clips and rods ($20–$50 per cabinet from hardware stores) as a DIY project in about 30 minutes per cabinet. Alternatively, order new cabinets with adjustable shelving pre-installed (included in most modern cabinet builds). Pro tip: Use the shelves strategically—taller gaps for small appliances, smaller gaps for dishes and glasses. This maximizes usable storage and keeps everything accessible.

    You’ll immediately notice how much easier it is to store items efficiently. Adjustable shelves adapt to your actual kitchen needs instead of forcing you into fixed layouts.

    16. Add Soft-Close Hinges for Quiet, Smooth Closing

    Soft-close hinges eliminate the loud bang and last longer than standard hinges because they use hydraulics instead of a slam-and-stop mechanism. They feel luxurious and are surprisingly practical.

    Retrofit existing cabinets with soft-close hinges ($15–$40 per hinge). A kitchen with 20–30 cabinet doors needs 20–30 hinges ($300–$1,200 total). Installation takes about 10 minutes per door if you’re comfortable with a screwdriver. New cabinet builds typically include soft-close hinges at no extra cost or a $20–$50 upgrade per cabinet. Pro tip: Soft-close hinges extend cabinet lifespan by reducing wear on standard hinges.

    The difference is noticeable every single day. No more slamming cabinet doors, which is especially nice in the morning or when kids are cooking. Your kitchen feels quieter and more refined.

    17. Create a Warm Natural Wood Finish

    Natural wood cabinets never go out of style because they’re warm, organic, and improve with age. A walnut, oak, or cherry stain creates timelessness that paint colors can’t match.

    Pre-made wood cabinets start at $60–$150 per cabinet from Home Depot, Lowe’s, or IKEA. Custom wood cabinetry costs $200–$500 per cabinet from local makers or specialty retailers like RTG Cabinets. A full kitchen averages $6,000–$25,000+ depending on wood type and customization. Seal and protect with matte or satin polyurethane ($30–$60 per can). Maintenance includes occasional oiling or refinishing every 5–10 years.

    Your kitchen feels warm and grounded rather than cold or clinical. Wood cabinets age beautifully, developing character rather than looking dated.

    18. Combine Natural Wood with Painted Panels

    Mixing natural wood with painted cabinet doors combines the warmth of wood with the brightness of paint. This hybrid approach feels contemporary and balanced, not trendy.

    Natural wood lower cabinets with painted uppers is the classic combo. Paint existing wood cabinets with cabinet-specific paint ($40–$80 per quart) as a DIY project, or hire a pro ($1,500–$3,000). Alternatively, buy pre-made cabinet sets that already mix wood and paint ($150–$400 per cabinet). A full kitchen might run $8,000–$18,000+. Pro tip: Keep paint color neutral (white, cream, soft gray) so natural wood is the star.

    You get the best of both worlds: wood’s warmth and paint’s brightness. This combination feels sophisticated without being overly designed.

    19. Install Maximized Corner Storage Solutions

    Corner cabinets are notoriously hard to access and often waste space. Solutions like pull-out shelves, lazy Susans, or corner carousels make these tricky spots functional.

    Retrofit existing corner cabinets with pull-out shelf kits ($100–$300 per cabinet from Wayfair or Home Depot) or install a lazy Susan ($30–$80). Both are DIY-friendly and take about 1–2 hours per cabinet. Pre-made corner cabinets with built-in solutions cost $150–$400. This upgrade transforms wasted corner space into prime real estate for storing pots, pans, or small appliances.

    You’ll actually use your corner cabinets now instead of shoving items in there and forgetting them. Corner storage becomes the most organized part of your kitchen.

    20. Choose Warm Hardware That Complements Your Style

    Hardware is jewelry for cabinets—it’s one of the easiest ways to add personality and tie your kitchen’s style together. Warm metals like brass, gold, and copper feel timeless.

    Swap out existing hardware yourself in about 30 minutes with a screwdriver. New hardware costs $3–$15 per handle from Amazon, Wayfair, or specialty hardware stores. A kitchen with 25–40 cabinet doors needs 25–40 pieces ($75–$600 total). Pro tip: Mix metals intentionally (brass with matte black, or two-tone combinations) for a curated look rather than random mixing. Warm metals automatically feel more sophisticated than shiny silver.

    The right hardware transforms how your cabinets look and feel. You don’t need new cabinets—just the right finishing touches.

    21. Add Toe-Kick Lighting for Ambiance

    Under-cabinet lighting (also called toe-kick lighting) adds warmth and functionality. Warm LED strips create ambiance while making it easier to navigate your kitchen at night or early morning.

    Install LED strip lighting kits ($30–$100 from Amazon or hardware stores) as a DIY project in about 2–3 hours. Pre-made cabinet builds can include this wiring at the factory ($200–$500 add-on). Pro tip: Choose warm white (2700K) over cool white for coziness. Battery-operated LED options avoid electrical work if you’re renting ($20–$50).

    Your kitchen transforms at night with ambient lighting that feels upscale. This small addition creates atmosphere without major renovation costs.

    22. Use Tall Cabinets to Maximize Vertical Space

    Floor-to-ceiling cabinets maximize storage in ways standard cabinet heights can’t. This is especially smart in smaller kitchens or homes where storage is premium real estate.

    Full-height cabinet towers cost $200–$600 per unit pre-made or $400–$1,200 custom. A typical kitchen might use 2–4 tall cabinet towers ($1,600–$4,800 total). Installation is straightforward if you have existing wall space—add it to your next remodel or as a standalone upgrade. Pro tip: Use tall cabinets for items you don’t access daily (seasonal cookware, bulk pantry items) and lower cabinets for frequent-use items.

    You gain valuable storage without expanding your kitchen’s footprint. Tall cabinetry makes kitchens feel organized and intentional rather than cramped or cluttered.

    23. Install a Butcher Block or Wood Countertop

    A wood or butcher block countertop pairs beautifully with both painted and natural wood cabinets, adding warmth and grounding the space. Wood counters age beautifully when maintained properly.

    Butcher block countertops cost $30–$60 per linear foot pre-made ($800–$2,000 for a typical kitchen) or $50–$150 per linear foot custom. Installation adds $500–$1,500. Plan to reseal or refinish every 1–2 years with food-grade oil. Pro tip: Wood looks best paired with warm cabinet finishes (natural wood or warm paint colors like cream or green).

    Your cabinets and counters create a cohesive, warm aesthetic together. Wood surfaces make kitchens feel less clinical and more like gathering spaces.

    24. Paint or Wallpaper the Interior Walls Behind Open Shelving

    If you have open shelving, the wall behind it becomes decor. Painting or wallpapering that surface adds personality and makes displayed items look more intentional.

    Paint costs $30–$60 per quart, and you’ll need 1 quart ($30–$60 total) for a small wall section. Wallpaper runs $20–$50 per roll ($80–$200 for a typical shelf wall). This is a weekend DIY project: prep the wall, paint or wallpaper, and style. Pro tip: Choose colors that complement your cabinet color—soft sage with white cabinets, pale blue with wood tones, or classic white-on-white.

    Your open shelving immediately becomes a styled display rather than just storage. The background color makes everything you display look more curated and intentional.

    25. Mix Cabinet Heights and Door Configurations

    Instead of uniform cabinet doors across your kitchen, mixing heights and door configurations creates visual interest and works better for actual storage needs. A custom layout looks thoughtfully designed rather than cookie-cutter.

    This requires custom cabinet design or strategic shopping for mixed pre-made options. Work with a designer ($500–$2,000 design consultation) or use IKEA’s planning tool (free online). Custom cabinetry naturally includes varied heights and configurations ($200–$500 per cabinet). A custom kitchen with mixed elements runs $10,000–$30,000+.

    Your kitchen looks more interesting and personalized. Varied heights and door styles feel intentional rather than one-size-fits-all.

    26. Add Decorative Molding or Crown Trim

    Crown molding on top of cabinets adds architectural detail and finishes the look. It’s especially impactful in traditional or transitional kitchens but works in modern spaces too when kept minimal.

    Pre-made crown molding costs $2–$5 per linear foot ($50–$150 for a typical kitchen) from hardware stores. Custom millwork runs $10–$30 per linear foot. Installation takes a weekend and is DIY-friendly if you have basic carpentry skills, or hire a pro ($500–$1,500 labor). Pro tip: Paint molding to match cabinets for seamless integration or contrast it for architectural emphasis.

    Crown molding instantly adds polish and sophistication. Your kitchen feels finished and architectural rather than basic or incomplete.

    27. Maintain and Refresh Your Existing Cabinets

    Sometimes the most timeless choice is maintaining what you have. Cleaning, hardware swaps, and small refinishes extend cabinet life and save thousands compared to replacement.

    Clean cabinets monthly with wood cleaner or white vinegar solution ($5–$15). Annual maintenance includes checking hinges, tightening hardware, and addressing any water damage (DIY or $200–$500 pro tune-up). Small repairs like re-staining worn edges or touching up paint cost $30–$200 and extend cabinet life by years. Pro tip: Prevent damage with coasters, trivets, and proper ventilation around the stove.

    Well-maintained cabinets age gracefully. You’ll be surprised how much longer your cabinets can serve you with basic care instead of immediate replacement.


    Pin this for your next kitchen project. Whether you’re planning a full remodel or just refreshing what you have, pick one idea and try it this weekend. Small changes add up fast—save this post and come back to it as your kitchen evolves.