Category: Living Room Decor

  • 27 Modular Sofa Layout Ideas That Adapt to Any Room Shape

    27 Modular Sofa Layout Ideas That Adapt to Any Room Shape


    Introduction

    Open-plan living sounds amazing until you realize your sofa doesn’t fit. Or it does, but it leaves your room feeling disconnected and awkwardly arranged. Modular sofas solve this problem—they’re like furniture LEGOs for your space. Whether you’re working with an L-shaped room, an awkward corner, or a sprawling open concept, these 27 layout ideas show you exactly how to configure sectionals, chaises, and ottomans to match your actual room shape, not some designer’s idealized Pinterest board. You’ll discover free rearrangement hacks, budget-friendly sectional buys, and professional layout strategies that instantly adapt as your life changes. Let’s find your sofa’s perfect arrangement.


    1. Create an L-Shape for Corner Maximization

    An L-shaped sectional turns awkward corners into your room’s focal point instead of dead space. This classic layout works in nearly every floor plan and gives you maximum seating without consuming the entire room.

    Measure your corner walls first—you need at least 8 feet on each side for a comfortable L. An IKEA Kivik or Wayfair’s Article sectional runs $400–$900 depending on fabric. Position the longer piece along your longest wall, the shorter section against the perpendicular wall. This takes 30 minutes to arrange and zero assembly if you buy pre-made pieces.

    Pro tip: Leave a 2-foot gap from the corner itself so the inner angle isn’t too tight—you want to actually sit there comfortably.

    The beauty of an L is that it naturally defines your seating zone while keeping the rest of your room open and walkable.


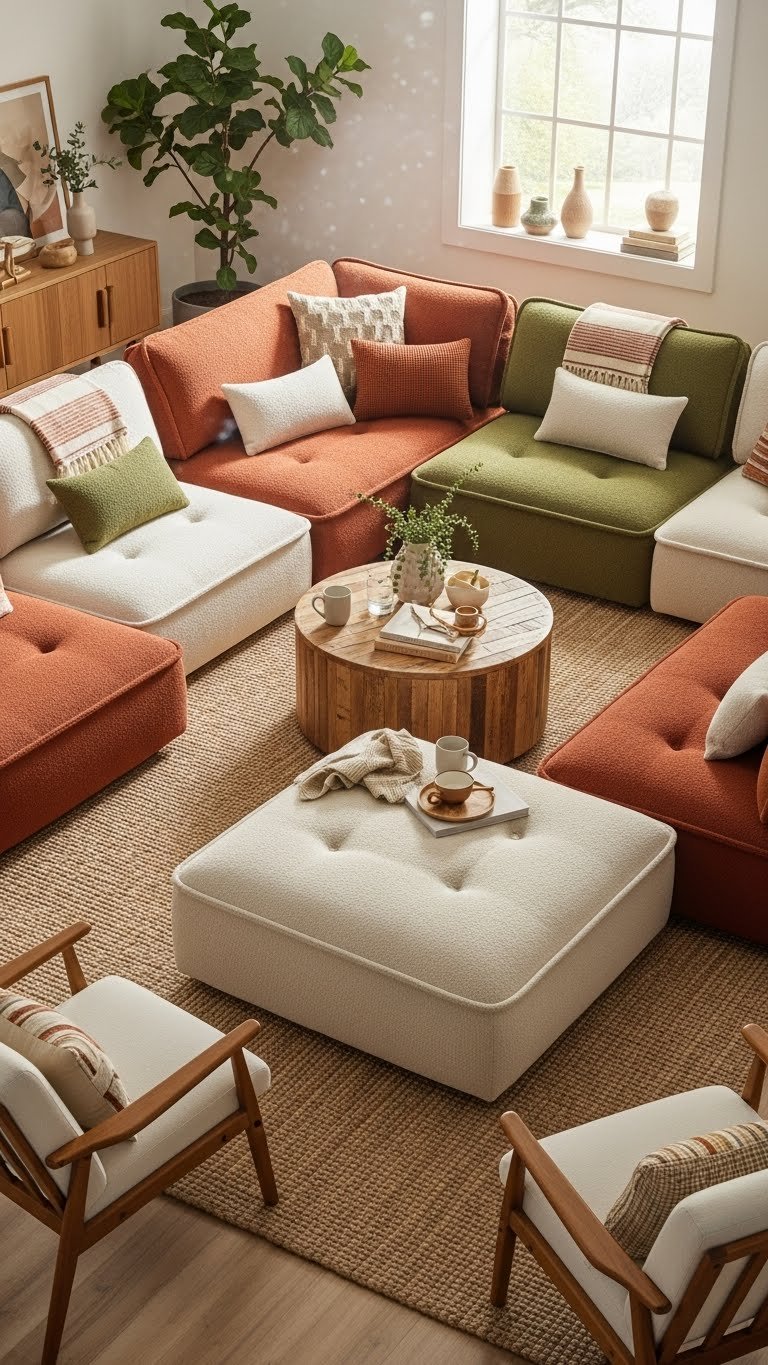
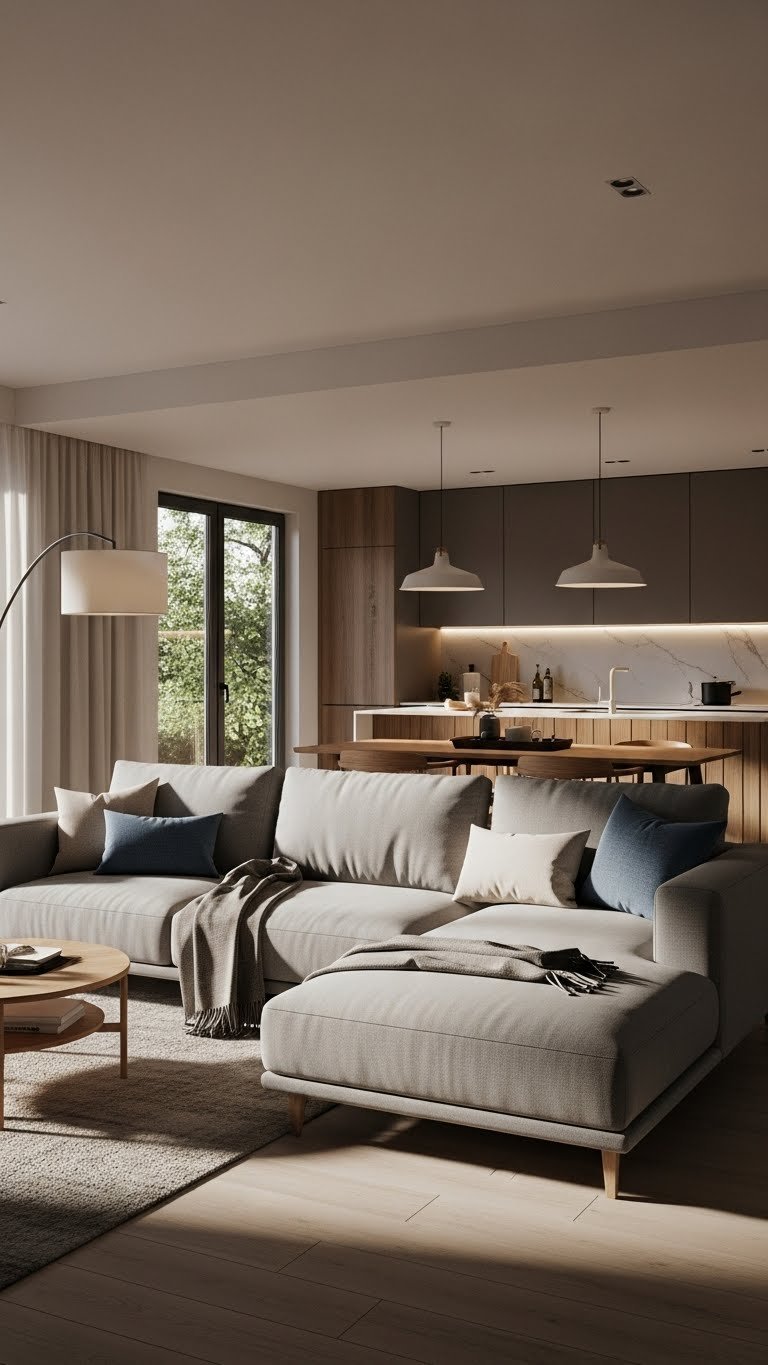
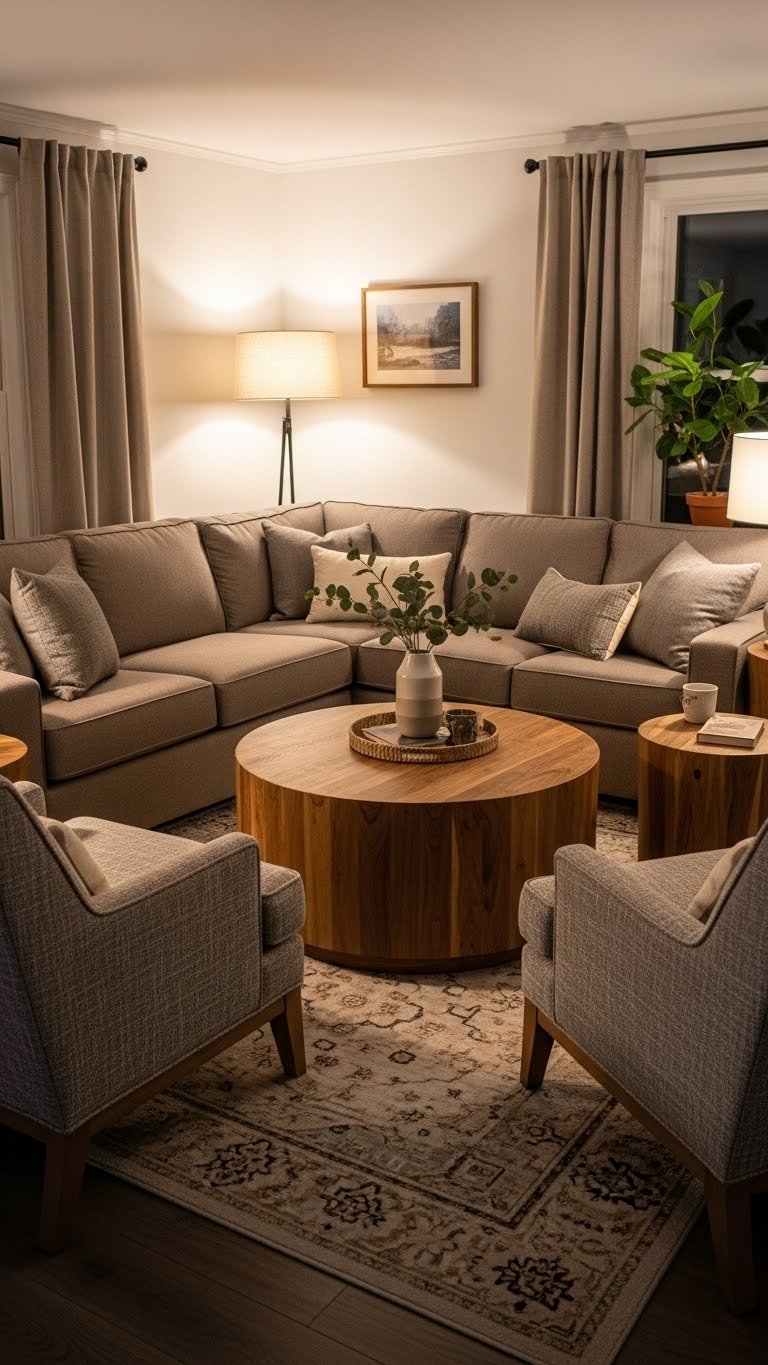
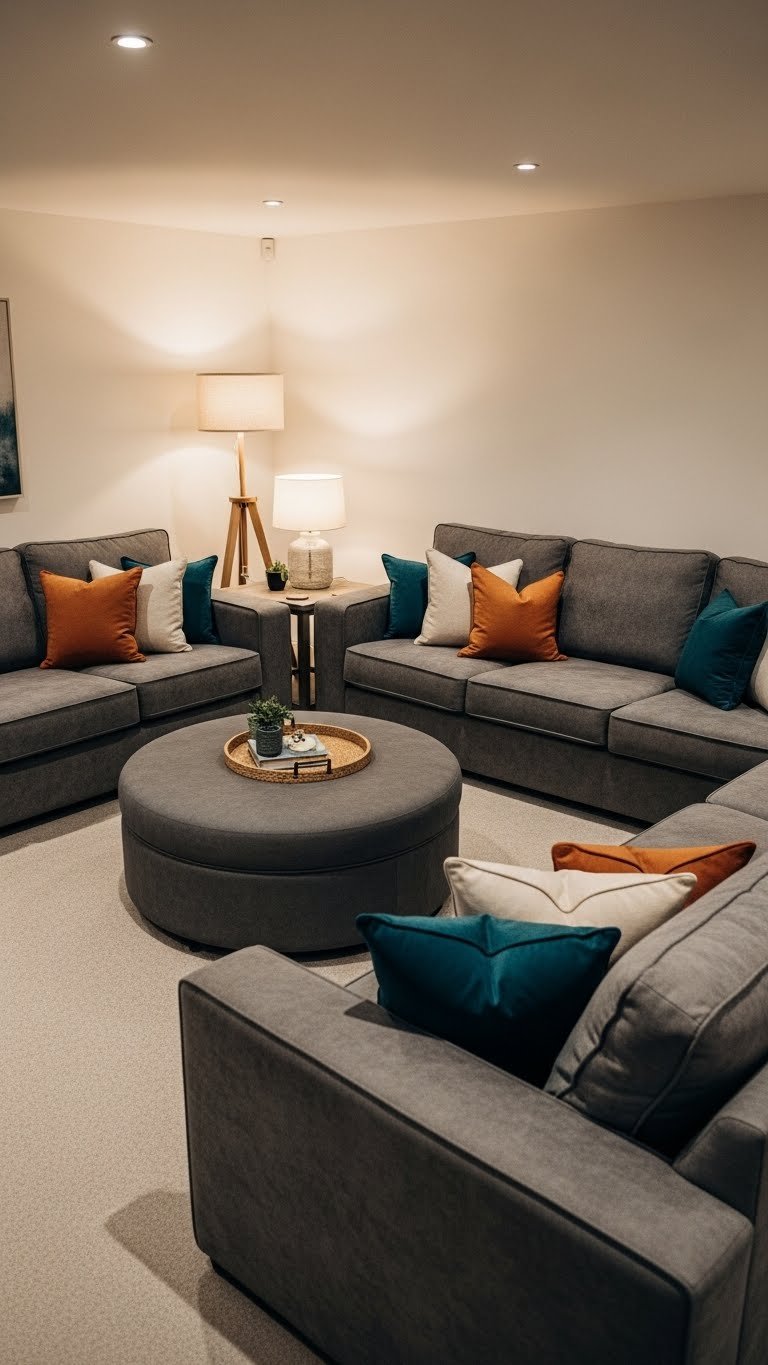
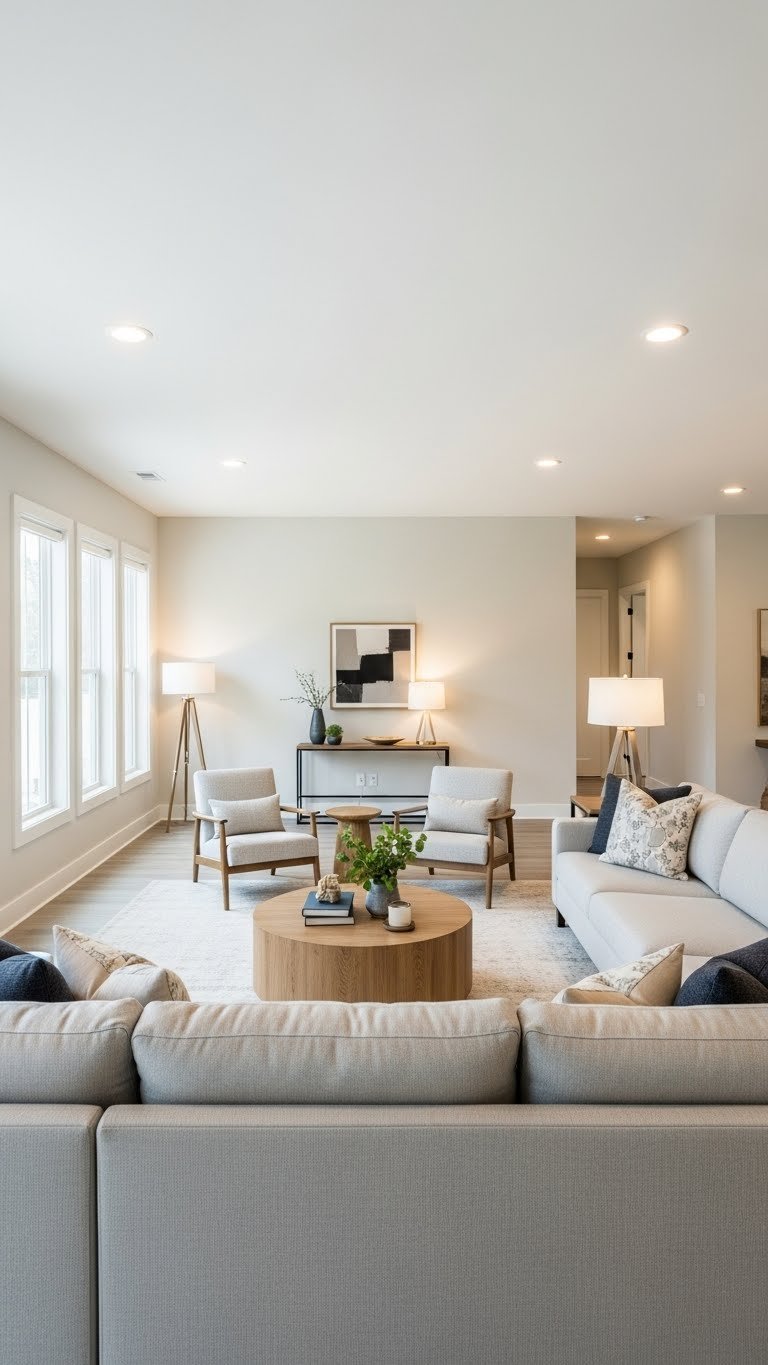
    2. Float a U-Shaped Setup in Open Concepts

    A floating U-shape in an open-plan home creates a conversation pit without walls, perfect for families who want defined zones but need visual flow. You’re essentially building a room within a room.

    You’ll need at least a 15-by-18-foot space to do this justice. Three modular pieces (two corner sections plus one straight component) or a combination sectional with chaise works beautifully here. Budget $1,200–$2,500 for quality pieces from Living Spaces or a made-to-order option like What A Room. Pull everything away from walls, arrange in a U, and add an area rug underneath to anchor the space. Takes about 45 minutes to position pieces and step back to assess.

    Pro tip: Keep the gap between the two sides narrow enough for easy conversation but wide enough for a coffee table.

    This setup makes an open floor plan feel purposeful instead of cavernous, while guests can still see into your kitchen and entryway.


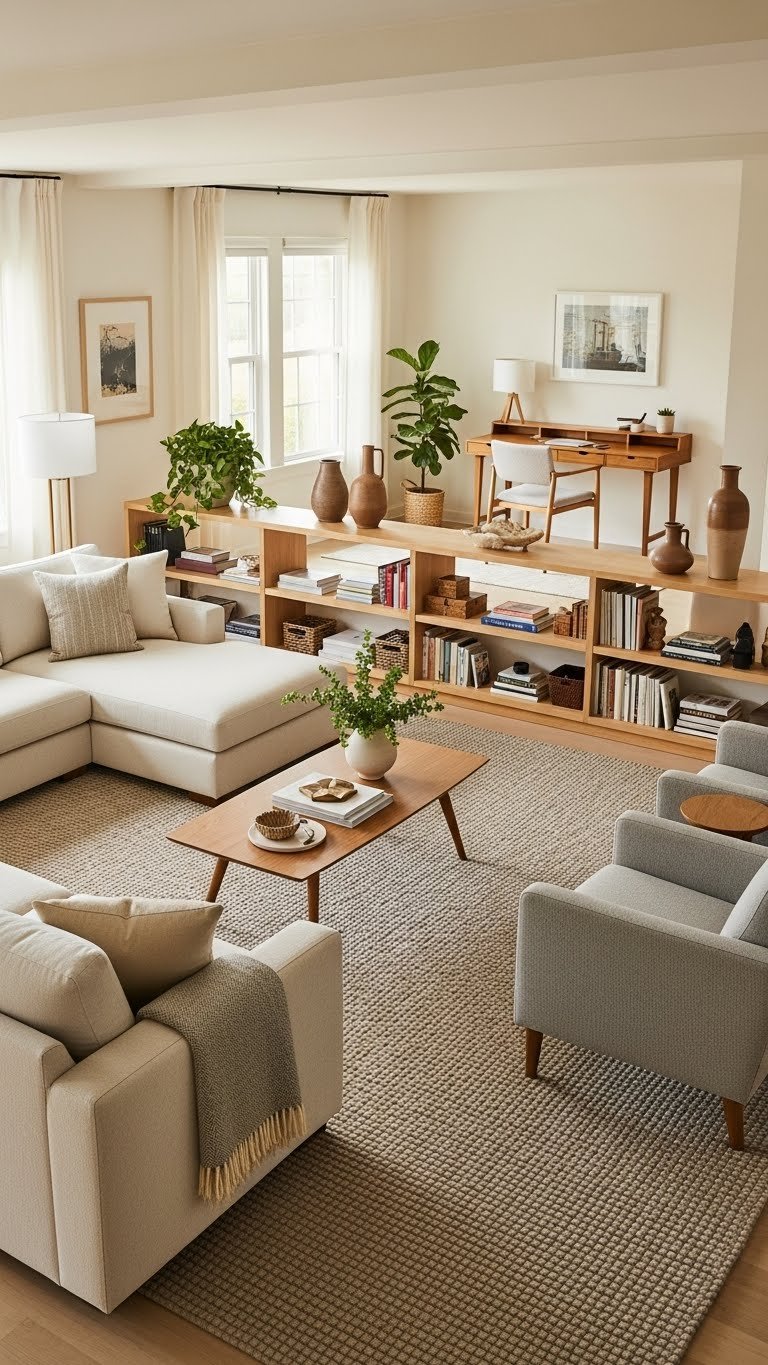
    3. Use Modular Pieces to Divide an Open Floor Plan

    A strategically placed modular sofa becomes architecture without walls, separating your living area from the kitchen or dining zone while keeping sightlines open.

    Choose a sectional with a lower back (under 30 inches) so people in adjacent areas don’t feel blocked. Brynna Evans at Living Spaces recommends this for open homes that need subtle boundaries. Position your sectional perpendicular to your main wall, essentially creating a peninsula of seating. Look for $800–$1,800 pieces on Wayfair or Article that have a clean profile. No tools needed—just placement strategy, about 20 minutes of rearranging.

    Pro tip: Add a console table or credenza behind the sofa’s back to amplify the room-divider effect.

    You’ll get a defined living room that doesn’t sacrifice the openness you paid for in your open-concept home.


    4. Try an Angled Sectional for Awkward Rooms

    Rooms that are too long, too narrow, or just oddly proportioned resist traditional furniture placement—until you angle the sectional. This design hack instantly makes proportions feel more balanced.

    Measure your room diagonals and mark where a 45-degree angle would sit using painter’s tape first (free!). Then position your modular pieces along that line. This works especially well for modern L-shaped or one-wall sectionals from IKEA ($300–$700) or custom pieces from What A Room ($1,500–$3,000 for exact specs). Arranging takes 30–45 minutes including the tape-marking strategy phase.

    Pro tip: Use an angled area rug to echo the sofa’s angle and tie the look together.

    Suddenly your awkward rectangle becomes a room with architectural interest and intentional design flow.


    5. Build a Sectional + Chairs Configuration

    Sometimes more seating pieces create better flexibility than one giant sectional. A modular sofa plus two chairs lets you adapt the layout as needs change—someone wants to read, kids need homework space, or guests arrive unexpectedly.

    Start with a smaller L-sectional ($600–$1,200 from Wayfair or Article) and add two accent chairs ($300–$600 each). Position the sectional as your anchor, then angle the chairs to create a conversation triangle. This takes one hour to arrange thoughtfully, but you get way more layout options. Look for modular pieces designed to work together—brands like Living Spaces make collections that coordinate.

    Pro tip: Choose chairs in a complementary color or fabric to the sofa—this reads as intentional, not accidental.

    You get comfortable seating for six-plus people plus the flexibility to pull chairs out for events or rearrange when the mood strikes.


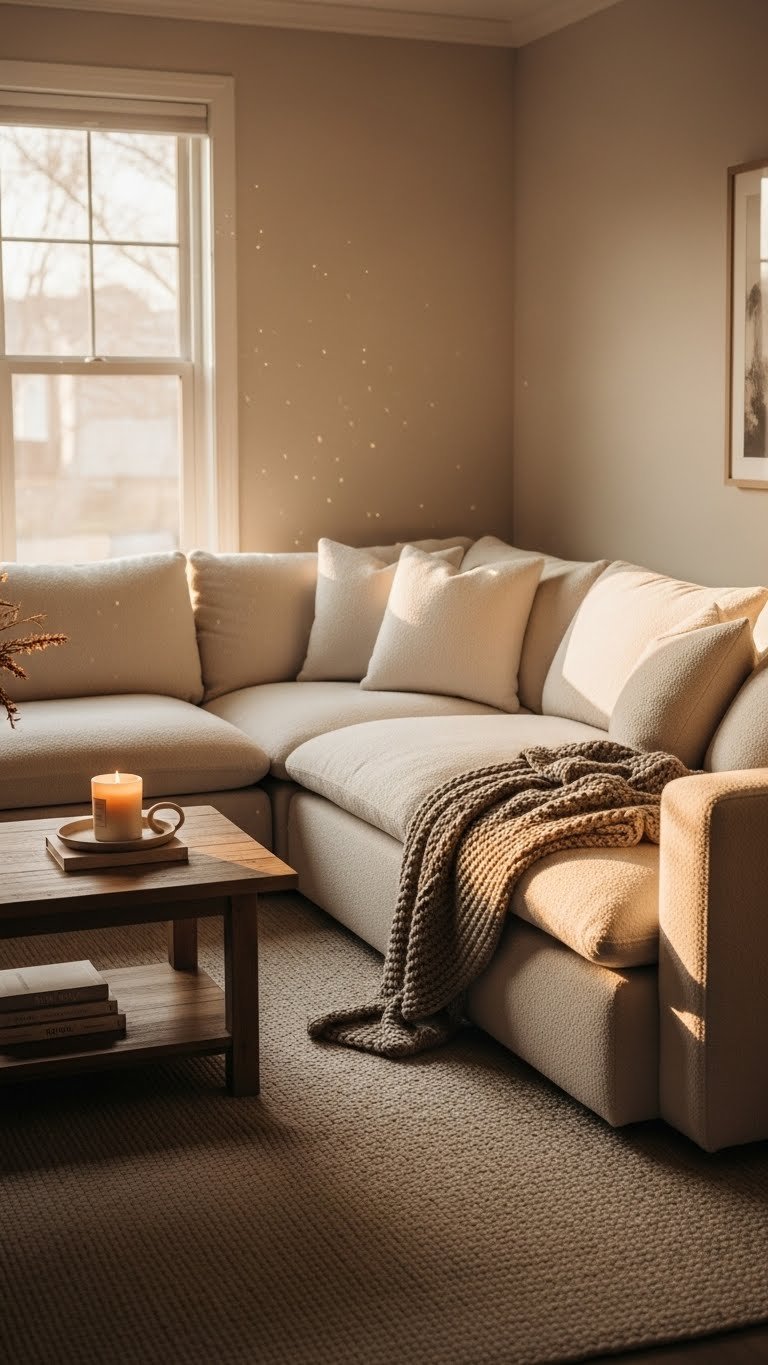
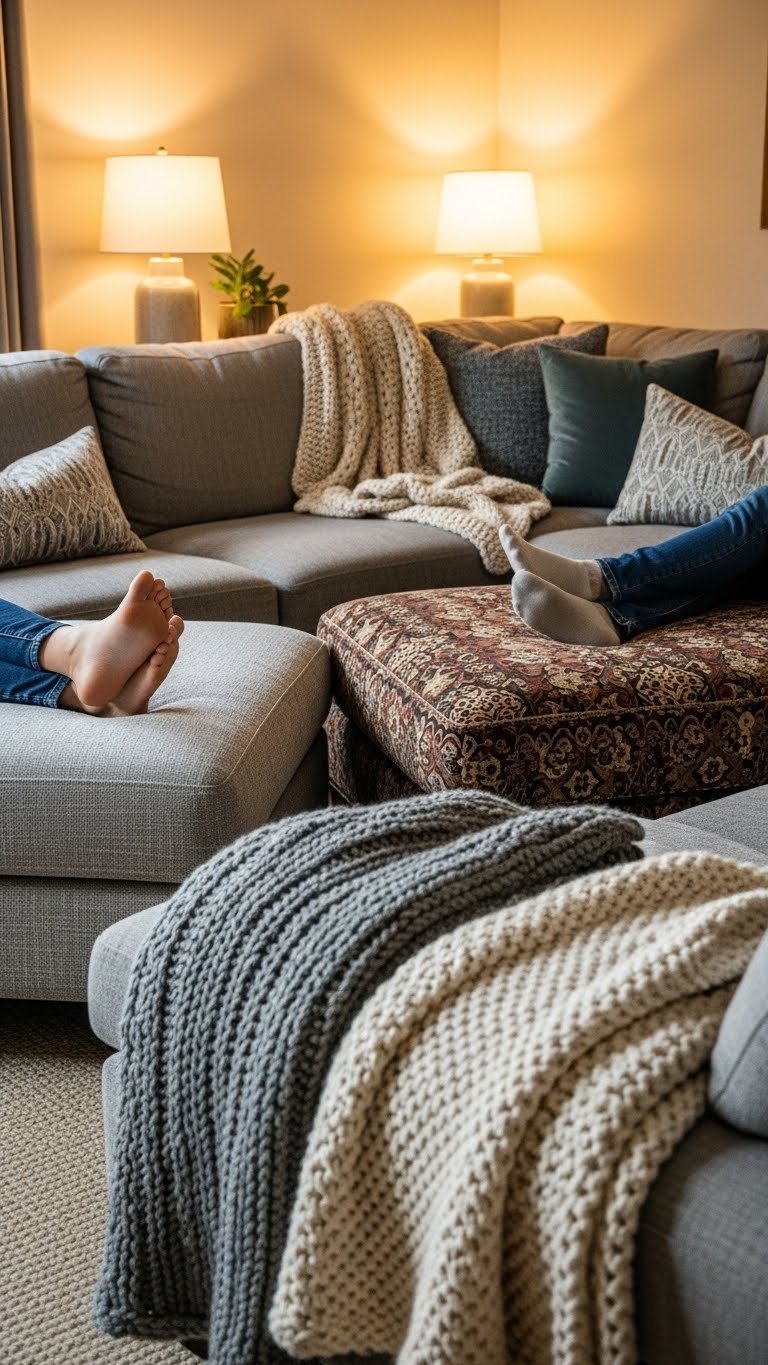
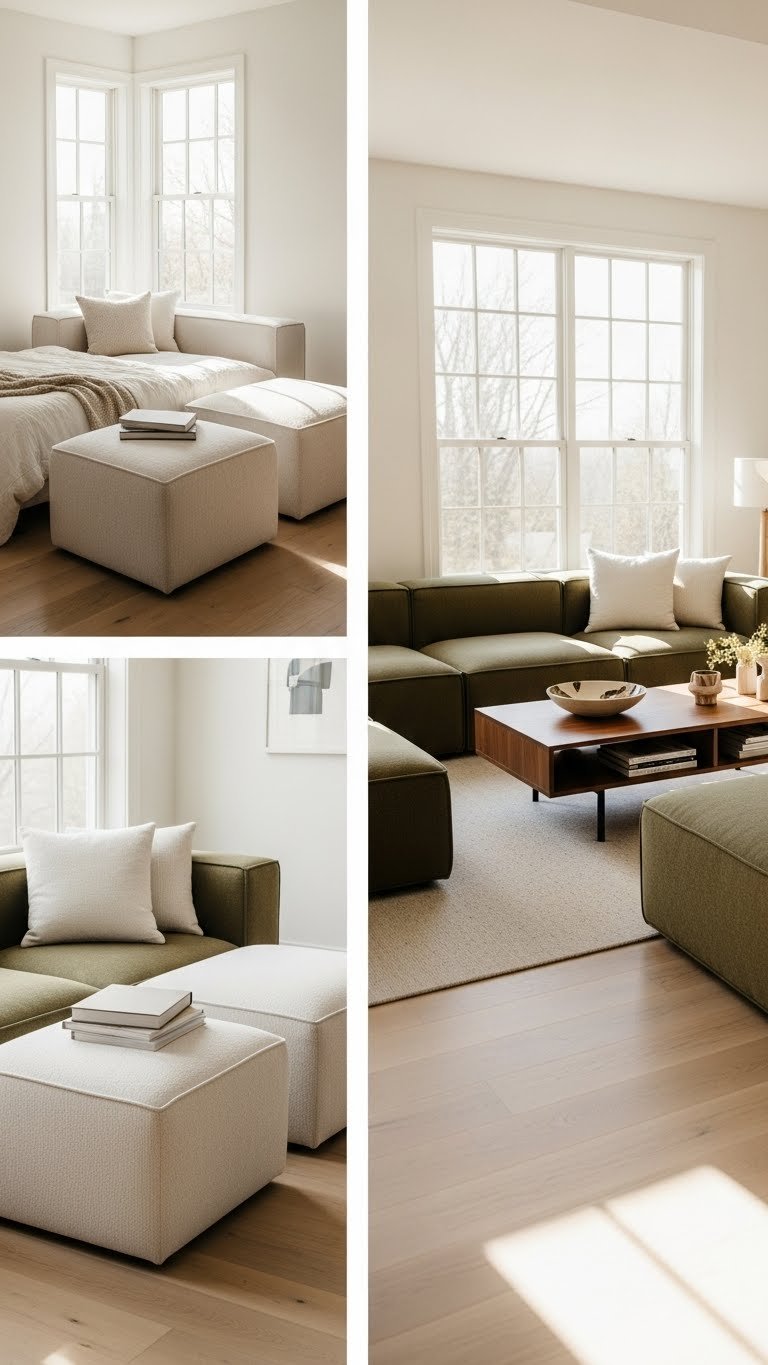
    6. Position a Chaise Extension for Lounging

    Adding a chaise to your sectional transforms it from seating furniture into a lounge space where people actually relax instead of perching on the edge.

    Most modular sectional systems offer chaise add-ons—check if your existing pieces are compatible or budget $400–$800 for a standalone piece. Position the chaise perpendicular to your main seating or as an extension of your L-shape, depending on your room. This is a $0 rearrangement if you own modular pieces already, or a one-weekend addition if buying new. Try it out with a ottoman first (borrow or rent from a furniture store to test before committing).

    Pro tip: Layer the chaise with oversized cushions and throws to make it extra inviting.

    Suddenly your living room becomes a genuine relaxation zone where you’ll actually want to spend your entire evening.


    7. Create Symmetry with Mirrored Sectional Ends

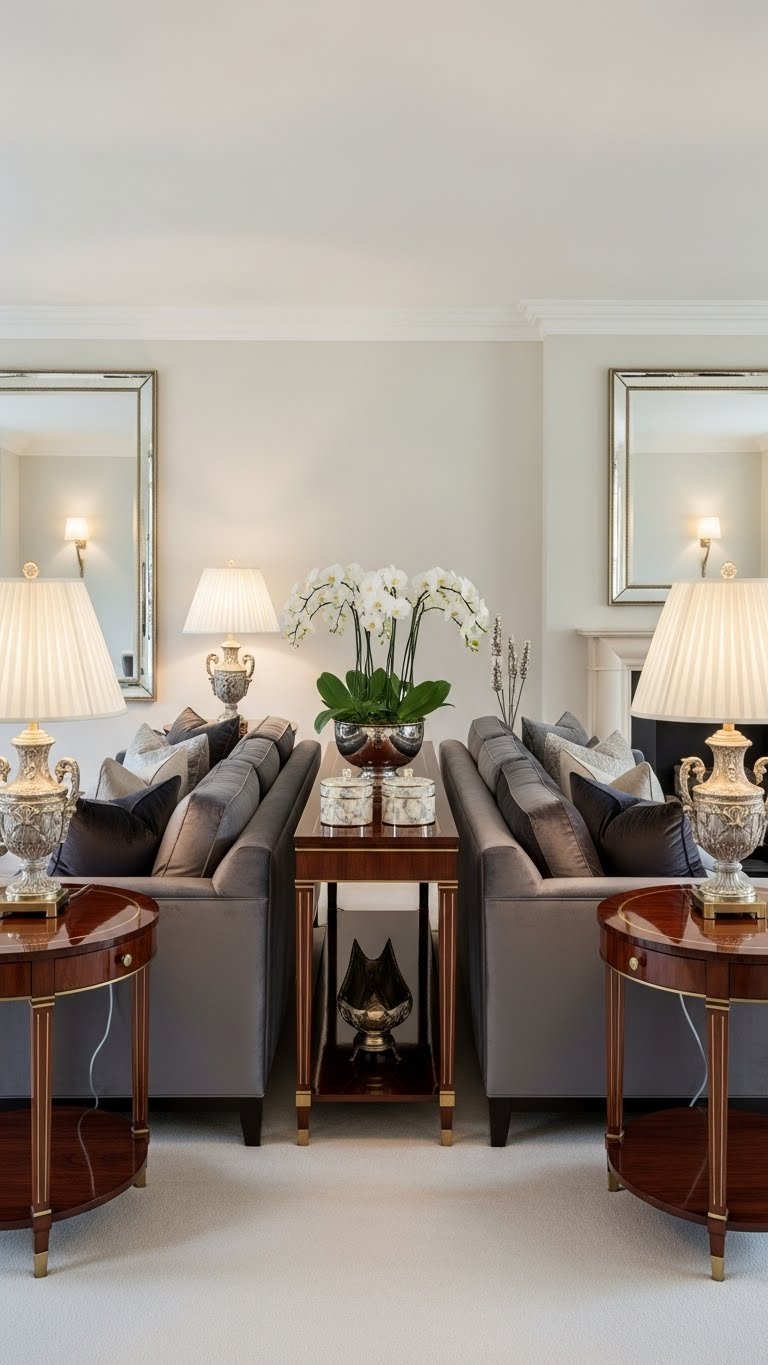
    A formally balanced room with two identical sectional pieces on opposite walls creates a gallery-like calm that works especially well in formal living rooms or master suites.

    This requires either two matching sectionals ($1,500–$2,500 each) or identical modular configurations. Position them facing each other with a console table or low credenza down the middle. Arrange in one afternoon—it’s straightforward symmetry. Brands like Article and Living Spaces make matching sectionals in multiple colors, so you’re not hunting two different pieces.

    Pro tip: This layout is renter-friendly because moving day is simple—pick each sofa up and go. Plus, you could resell them as a matching pair.

    This arrangement gives formal spaces an intentional, curated feeling while keeping traffic flow easy down the center.


    8. Maximize a Studio or One-Bedroom with a Sleeper Sectional

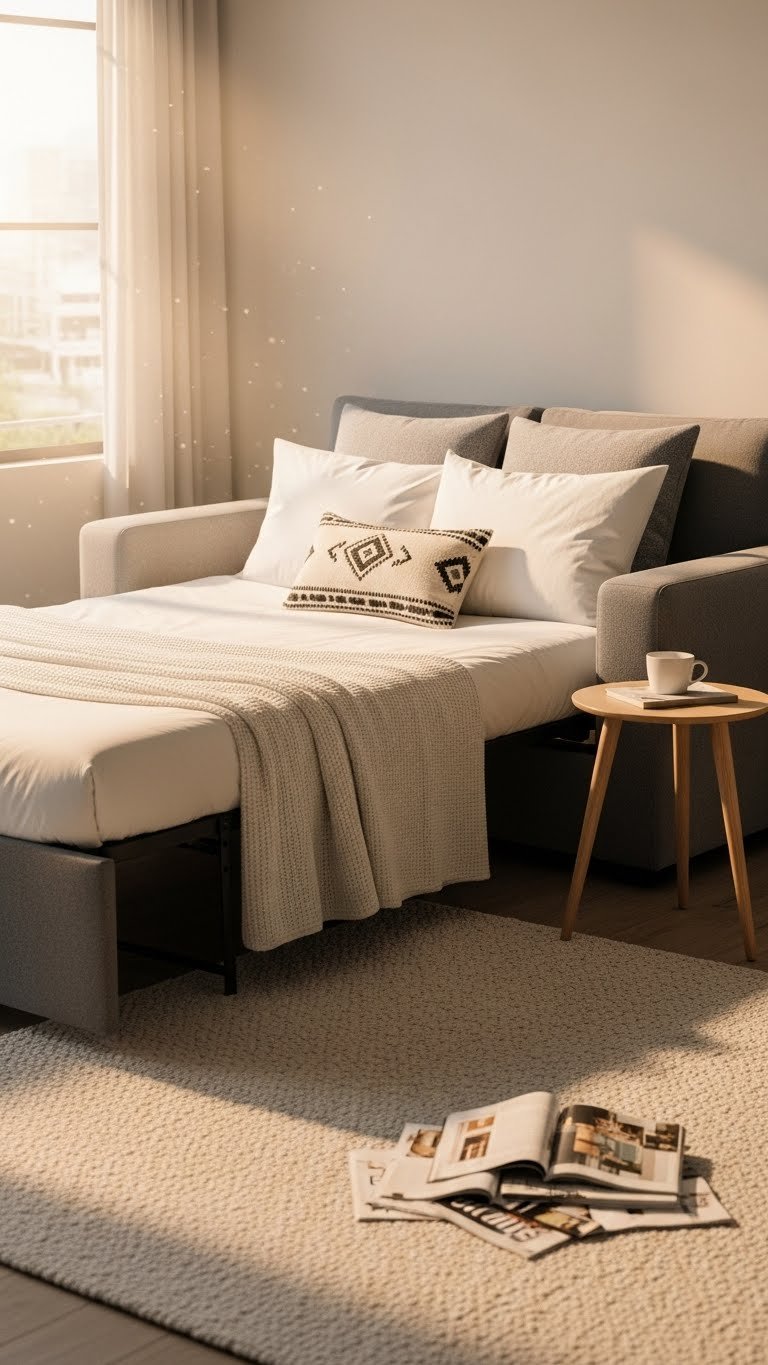
    In a studio or one-bedroom, a modular sleeper sectional does double duty—it’s your sofa by day and guest bed by night, saving you square footage and money.

    Hunt for sleeper sectionals from Article ($900–$1,500), IKEA Friheten ($600–$900), or a custom design from What A Room ($1,800–$3,000 for premium mattresses and configurations). Position it along your longest wall, leaving the rest of your room open for living space. Assembly takes 45 minutes to two hours, plus testing the mechanism to ensure it’s smooth. This is a one-time weekend project.

    Pro tip: Choose a quality mattress insert—cheap ones squeak and feel awful. Spend the extra $200 if you can.

    You’ll gain an extra bedroom’s worth of functionality without needing an extra bedroom, perfect for renters or anyone in a compact home.


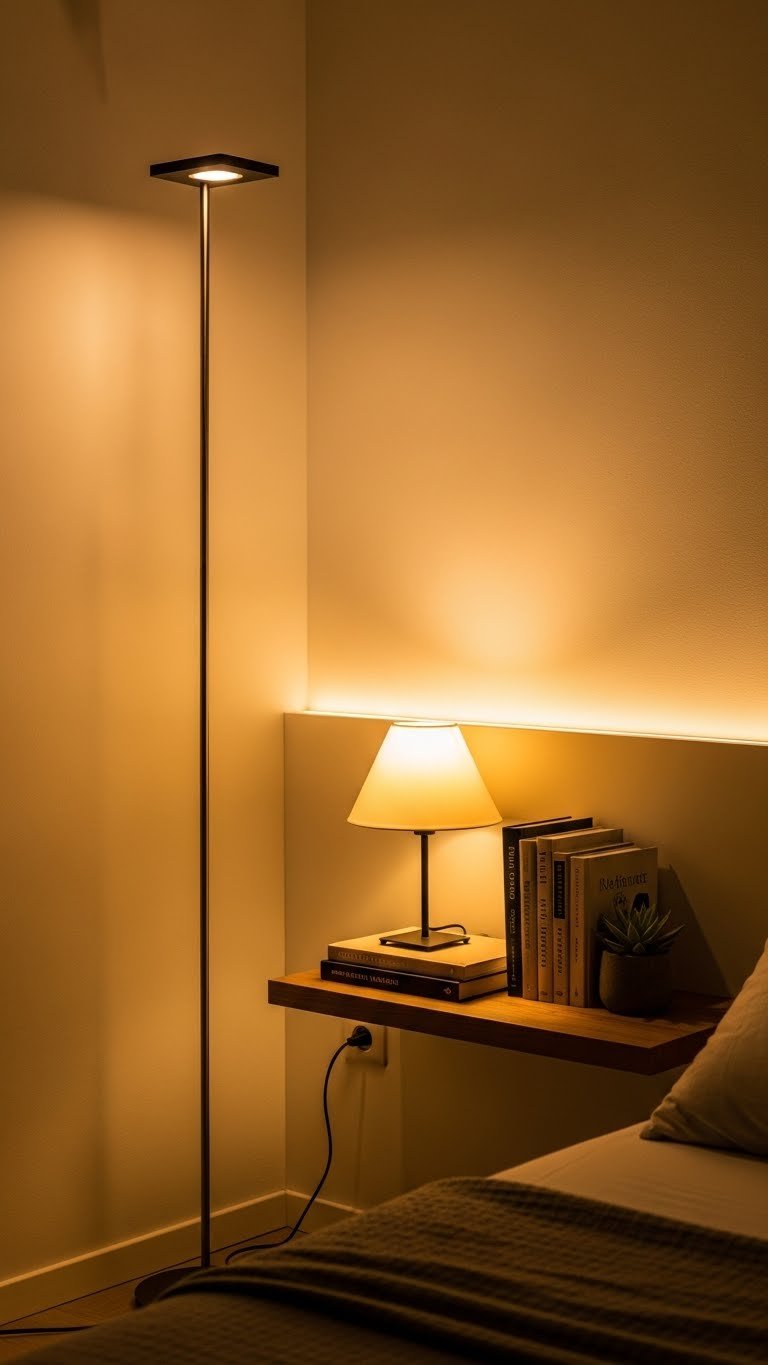
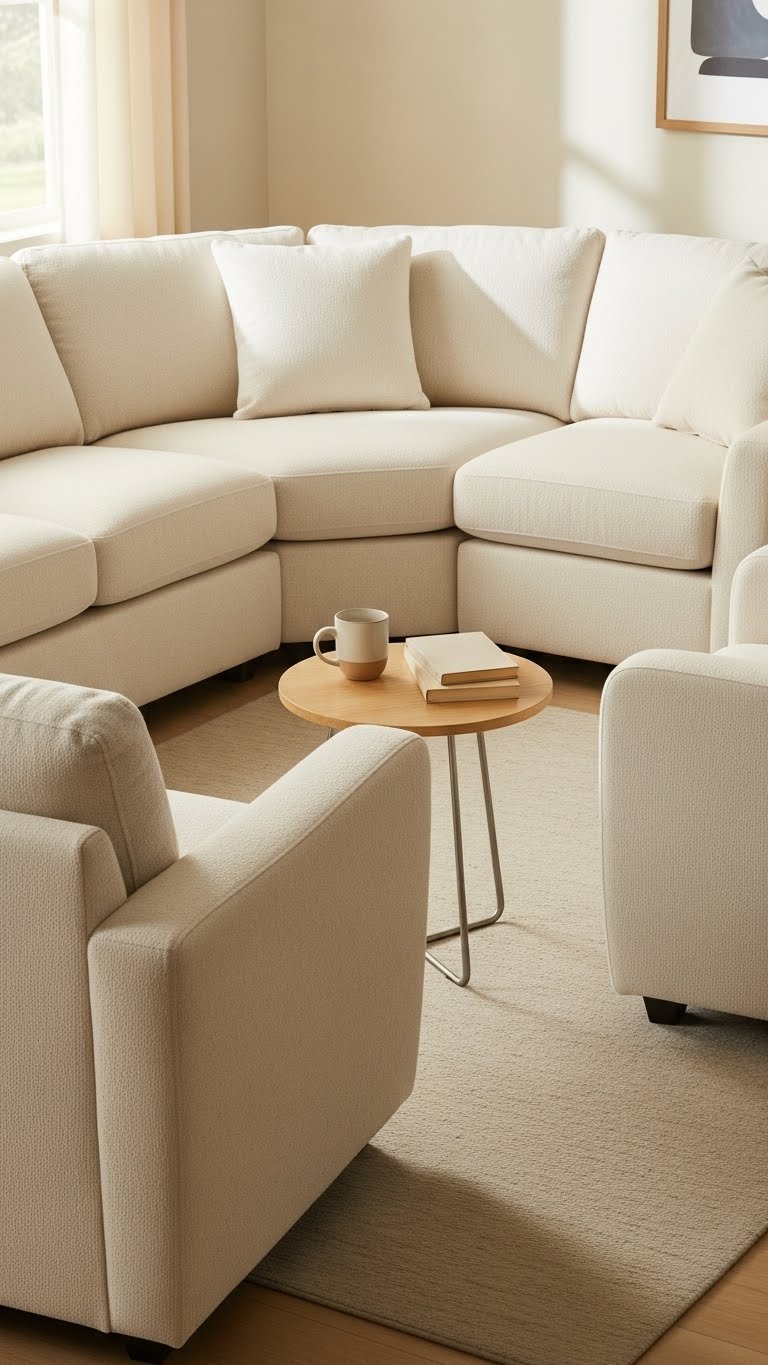
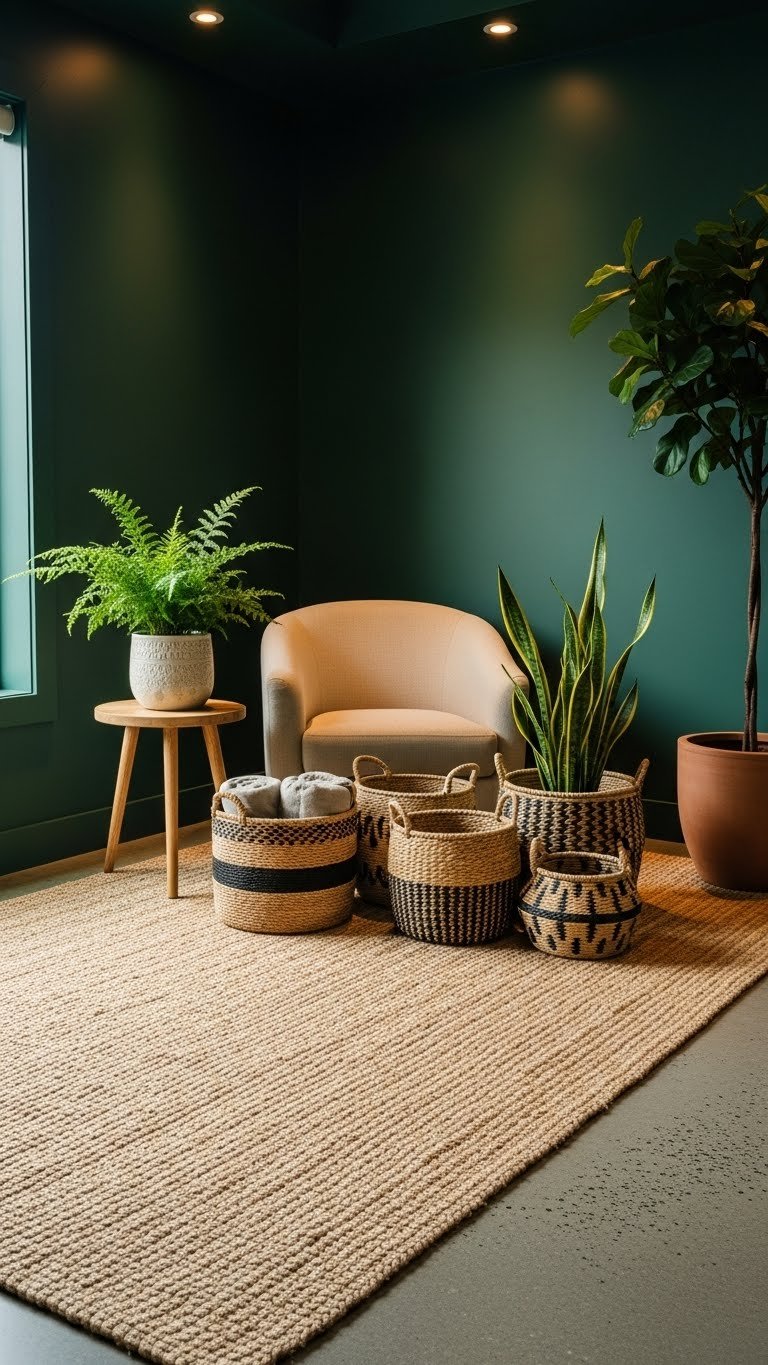
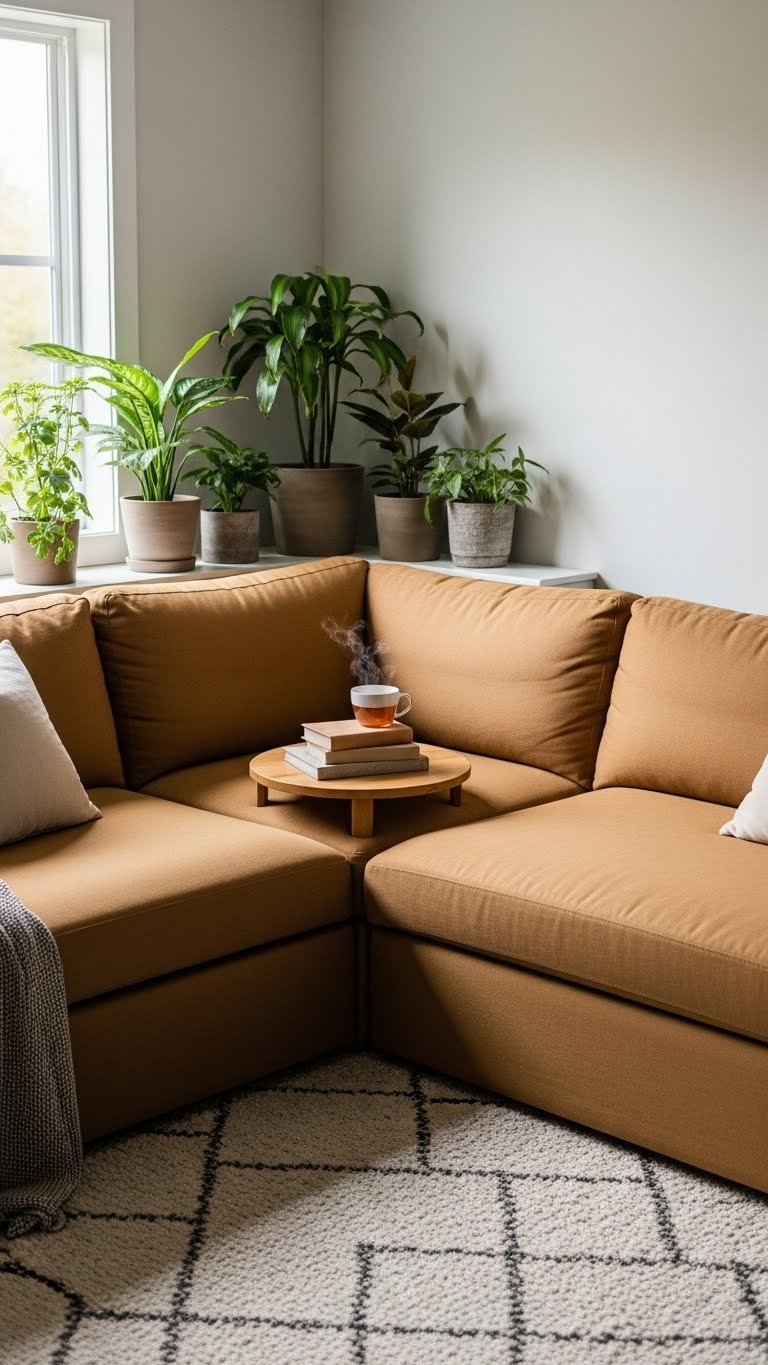
    9. Use Corner Chaises to Maximize Unused Angles

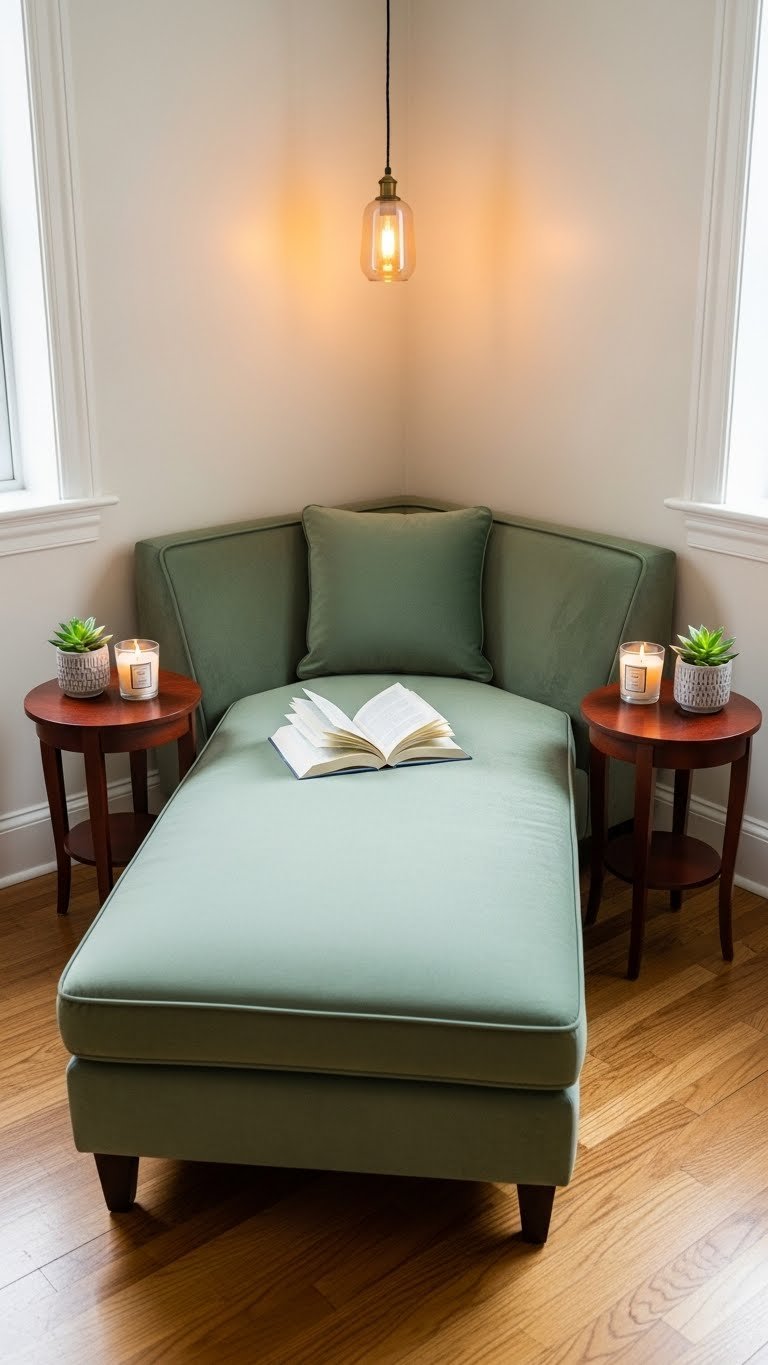
    Corner chaises are modular seating designed to fit snugly into awkward angles—they’re like the sectional’s sophisticated cousin that solves the “what do we do with this corner?” problem.

    A standalone corner chaise runs $400–$900 from Wayfair, Article, or West Elm. No assembly needed; just slide it into place. This takes 10 minutes. Pair it with a small side table for coffee or books, add a throw blanket, and suddenly your dead corner becomes a sanctuary. Perfect for renters since it’s portable and doesn’t require wall mounting.

    Pro tip: Add a tall plant in the corner behind the chaise to soften the edges and create visual interest.

    You’ve created a legitimate reading nook that makes your room feel larger (not cramped) by purposefully using empty space.


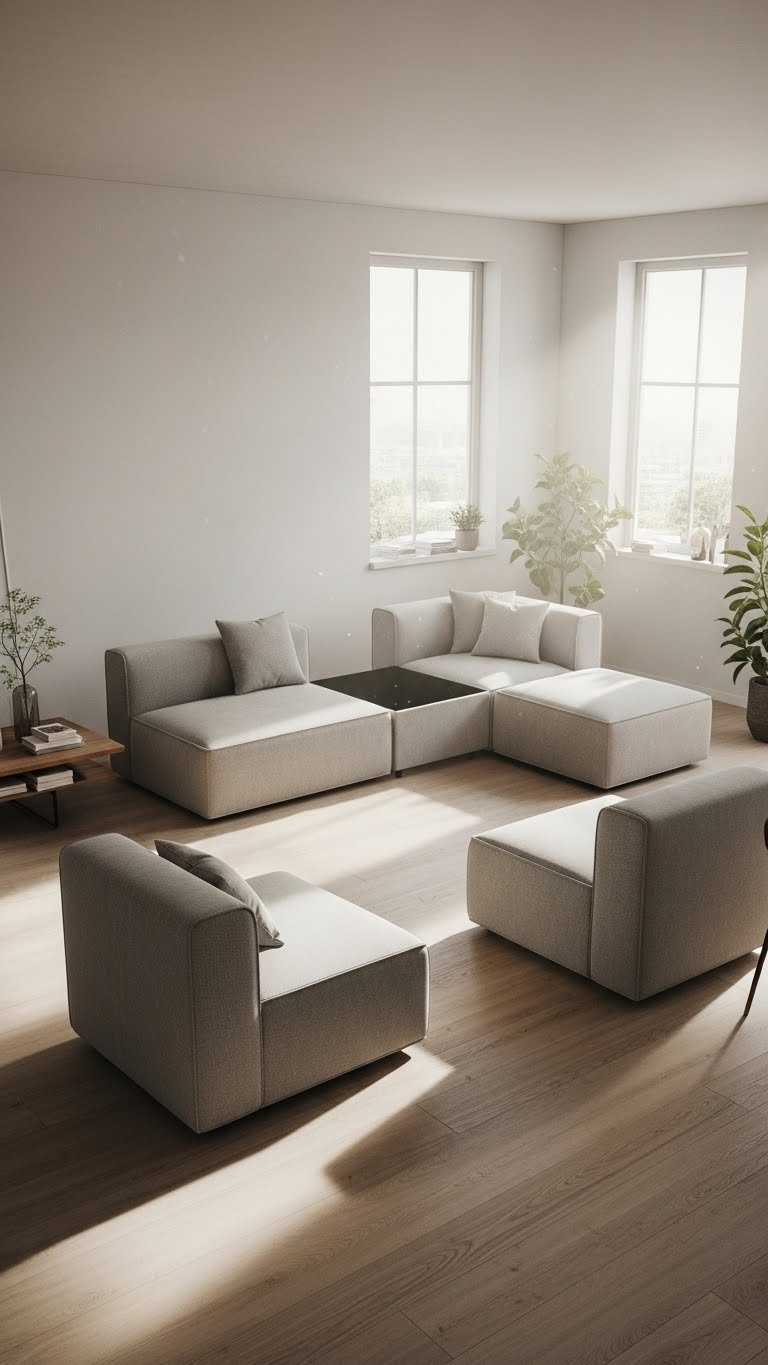
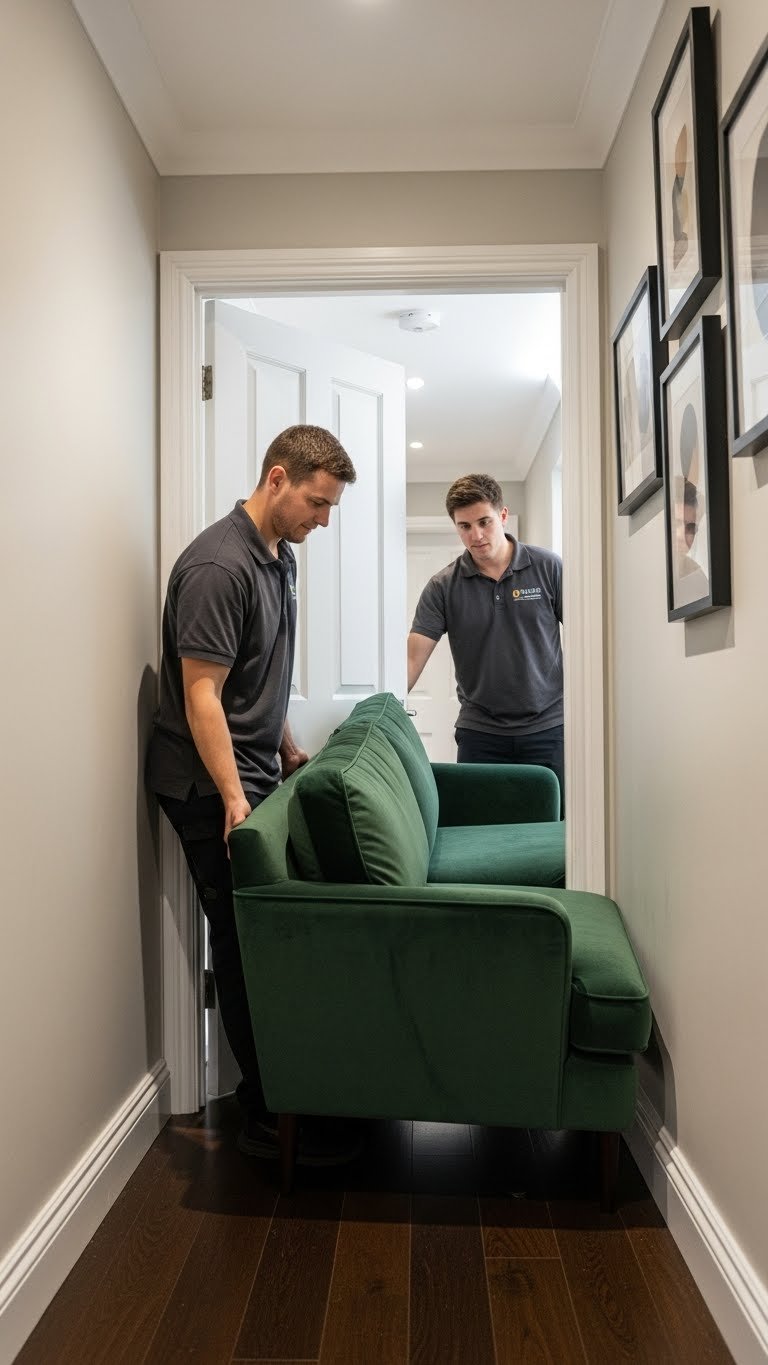
    10. Arrange Modular Pieces as Individual Chairs in Small Spaces

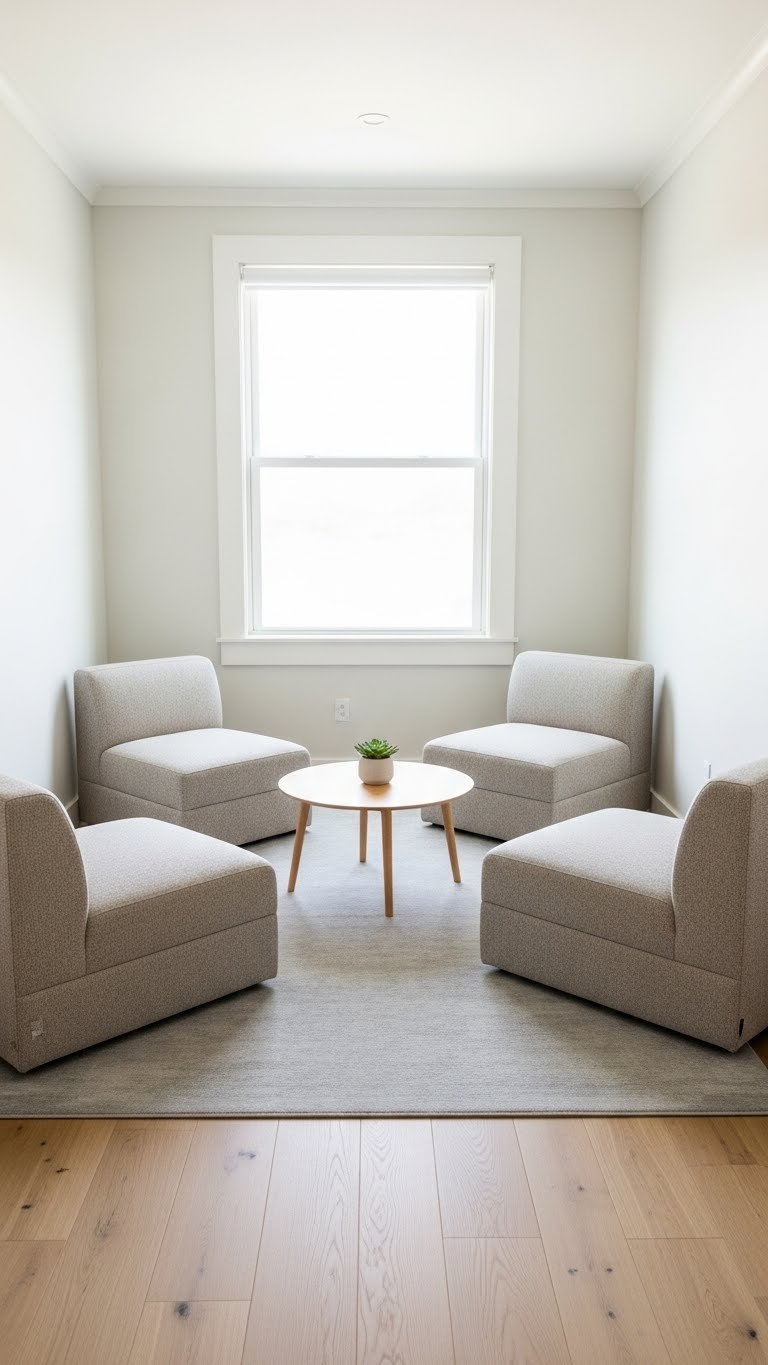
    What if you didn’t push your modular pieces together? Arrange them separately as individual chairs around a coffee table to maximize flexibility in a small footprint.

    Modular pieces like IKEA’s modular line ($200–$400 per component) are designed to snap together, but they also work independently. Buy three or four coordinating pieces and scatter them around your room in a conversation circle. You can reconfigure in minutes any time you want. Perfect for renters and anyone who moves frequently—each piece weighs less than a traditional sofa and fits through doorways easily.

    Pro tip: Choose pieces on casters (wheels) so your kids can slide them around for fort-building or game nights.

    Your space stays functional yet flexible, and you’ll use more of your room instead of anchoring one giant sofa against a wall.


    11. Float a Sectional Away from Walls for Flow

    Pulling your sectional even two feet away from the wall opens up sightlines and makes your room feel larger and more intentional—it’s a simple trick with big impact.

    No budget required if you already own a sofa; this is pure rearrangement strategy. Measure to ensure you leave at least 18 inches between the sofa back and the wall so it doesn’t feel cramped. Add a console table behind the sofa for styling or a rug underneath to anchor the floating arrangement. This takes one hour including fine-tuning. Best for open homes or rooms larger than 200 square feet.

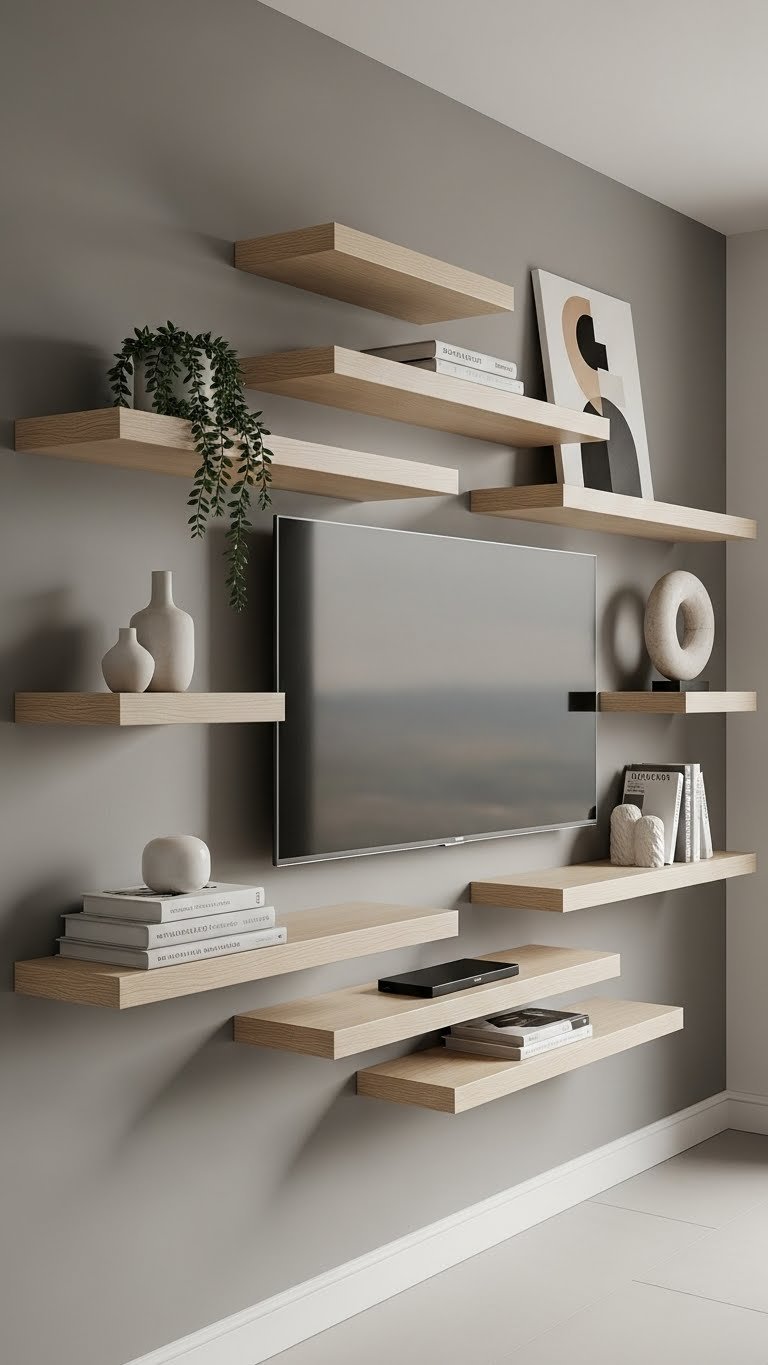
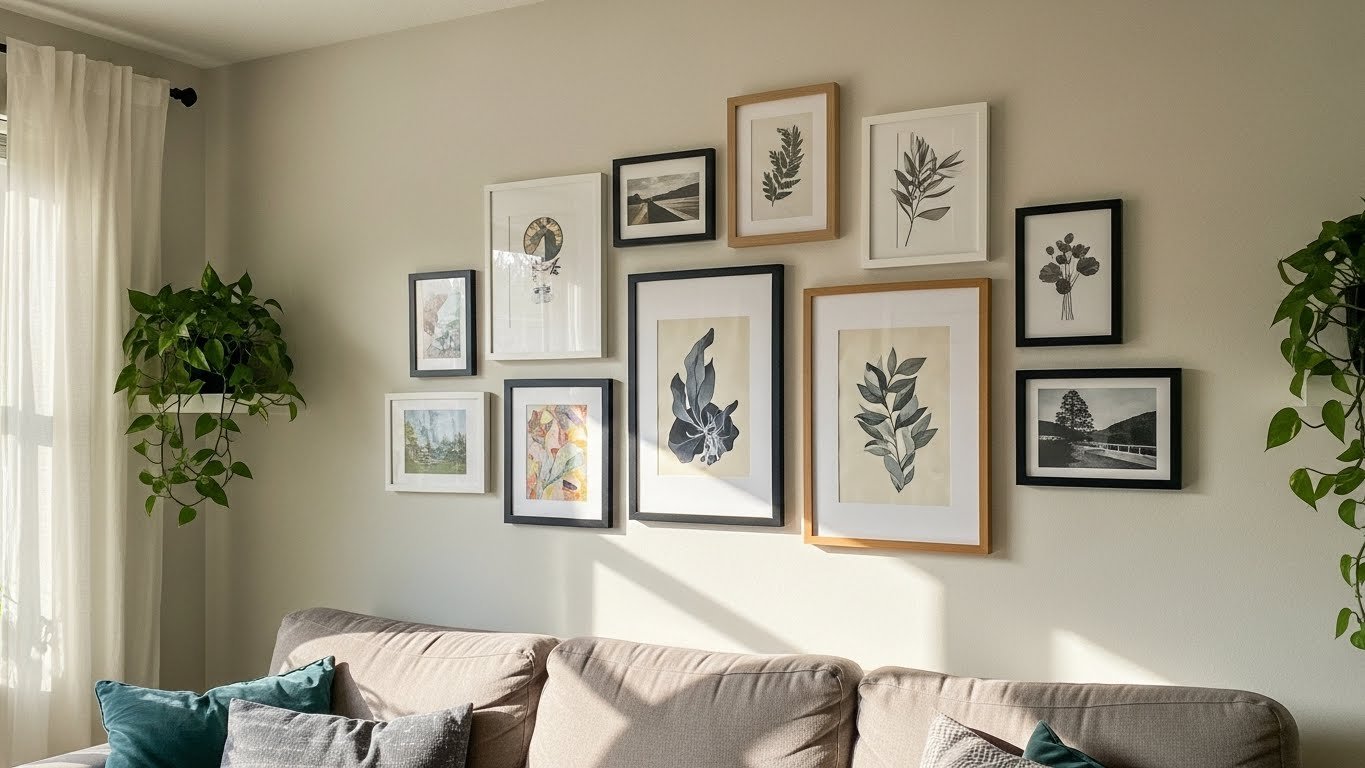
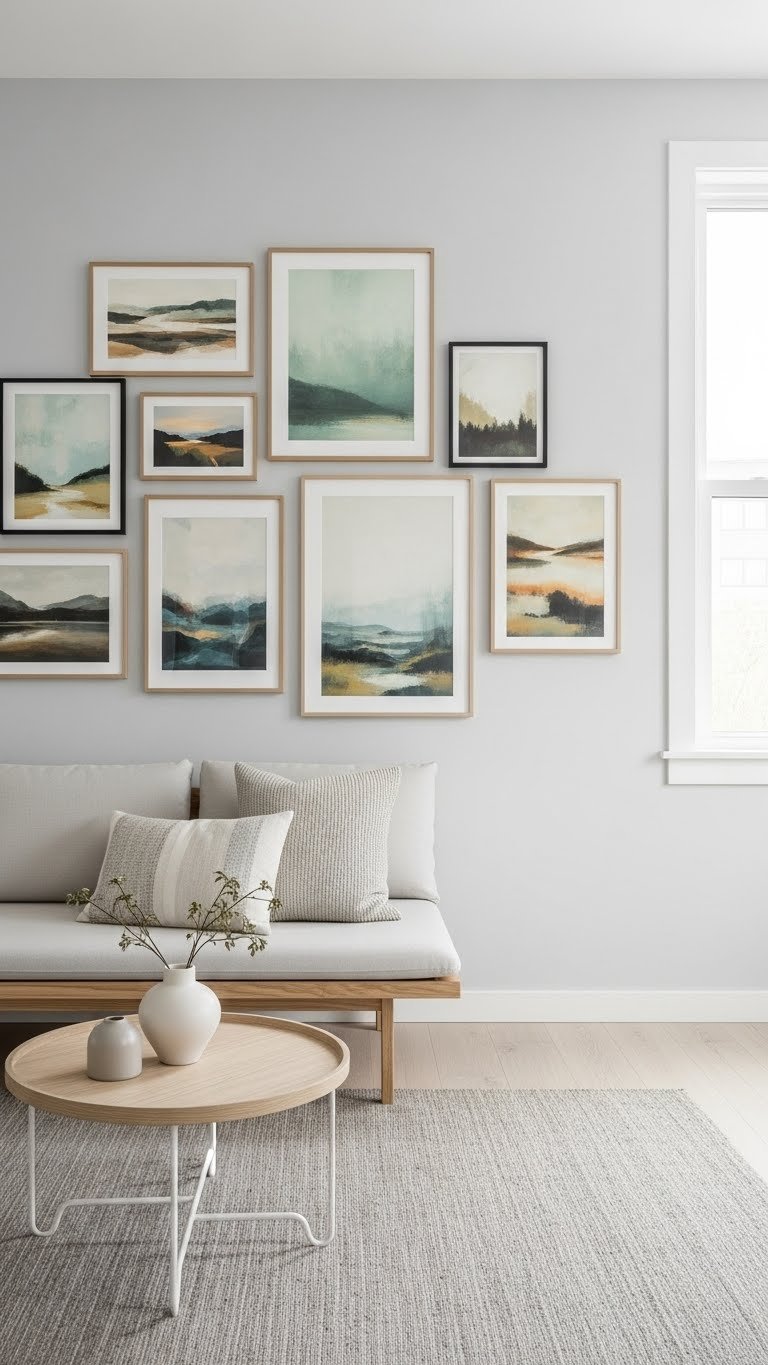
    Pro tip: Use the wall space behind the sofa for gallery art, floating shelves, or a console that adds function to that zone.

    A floating sectional instantly looks more designed and creates better traffic flow through your living area.


    12. Layer Two Smaller Sectionals for Extra Seating

    Instead of buying one massive sectional, buy two smaller L-shapes and arrange them to cover more ground while maintaining flexibility—you can rearrange them individually when needed.

    Two $600–$800 sectionals from Article or Wayfair gives you more layout options than one $1,500 piece. Position them perpendicular to each other or stagger them around your room. Budget $1,200–$1,600 total plus one afternoon for arrangement. This strategy is ideal for larger rooms where one sectional looks lonely but a massive sectional dominates.

    Pro tip: Choose the same fabric but different configurations (one U-shape, one L-shape) to keep options open.

    You get more seating, more flexibility, and honestly, better conversation flow than one giant corner piece monopolizing the room.


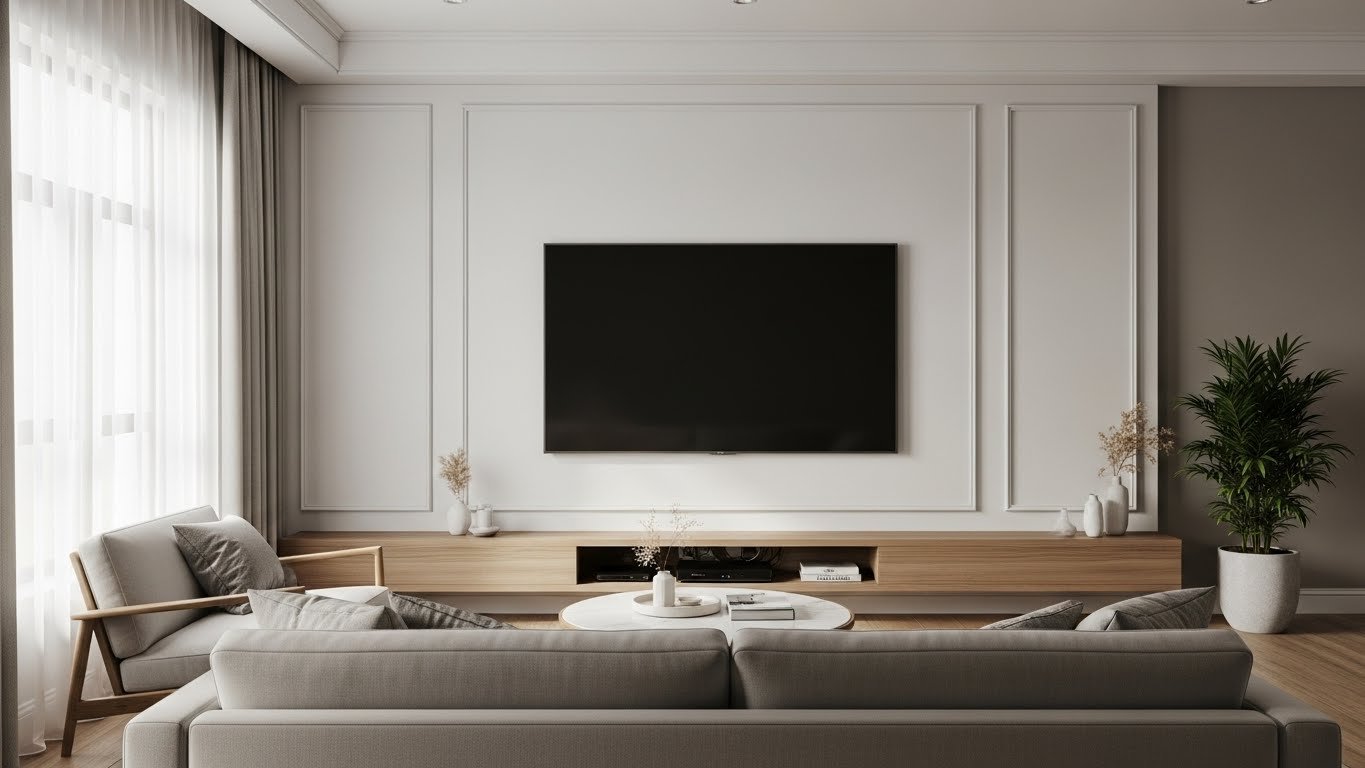
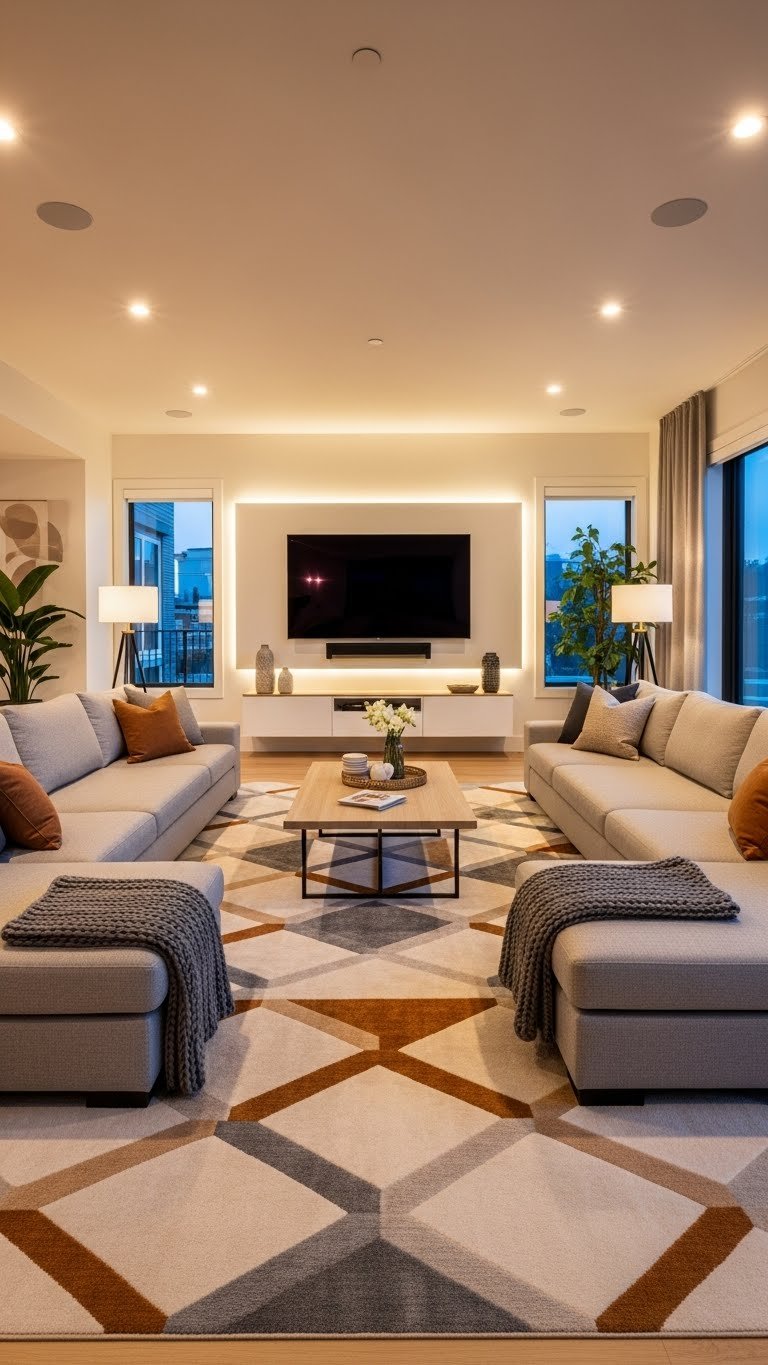
    13. Create a Media-Viewing Wall with Sectional Placement

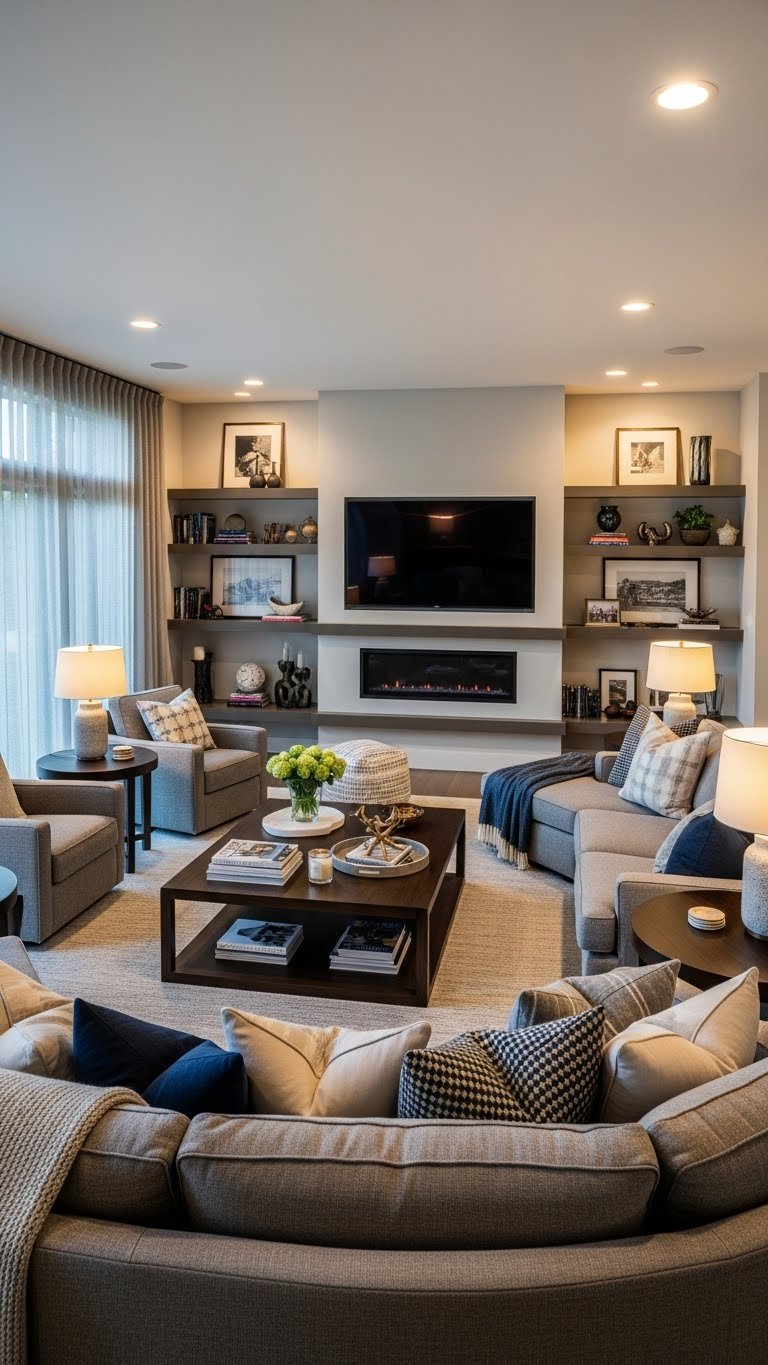
    For movie nights and TV watching, arrange your modular pieces in a gentle arc facing your media wall—everyone gets a good view without anyone craning their neck.

    Position your sectional roughly eight to ten feet from your TV, angled slightly inward if it’s an L-shape. This takes 30 minutes to plan and arrange. Most sectional styles work for this—you’re just being intentional about the angle. No additional budget if rearranging existing pieces.

    Pro tip: If your sectional is tight against the wall, add a low sofa table behind it for plants, lamps, or decor that fills the gap.

    Every seat becomes a good seat, and your living room finally feels optimized for how you actually use it.


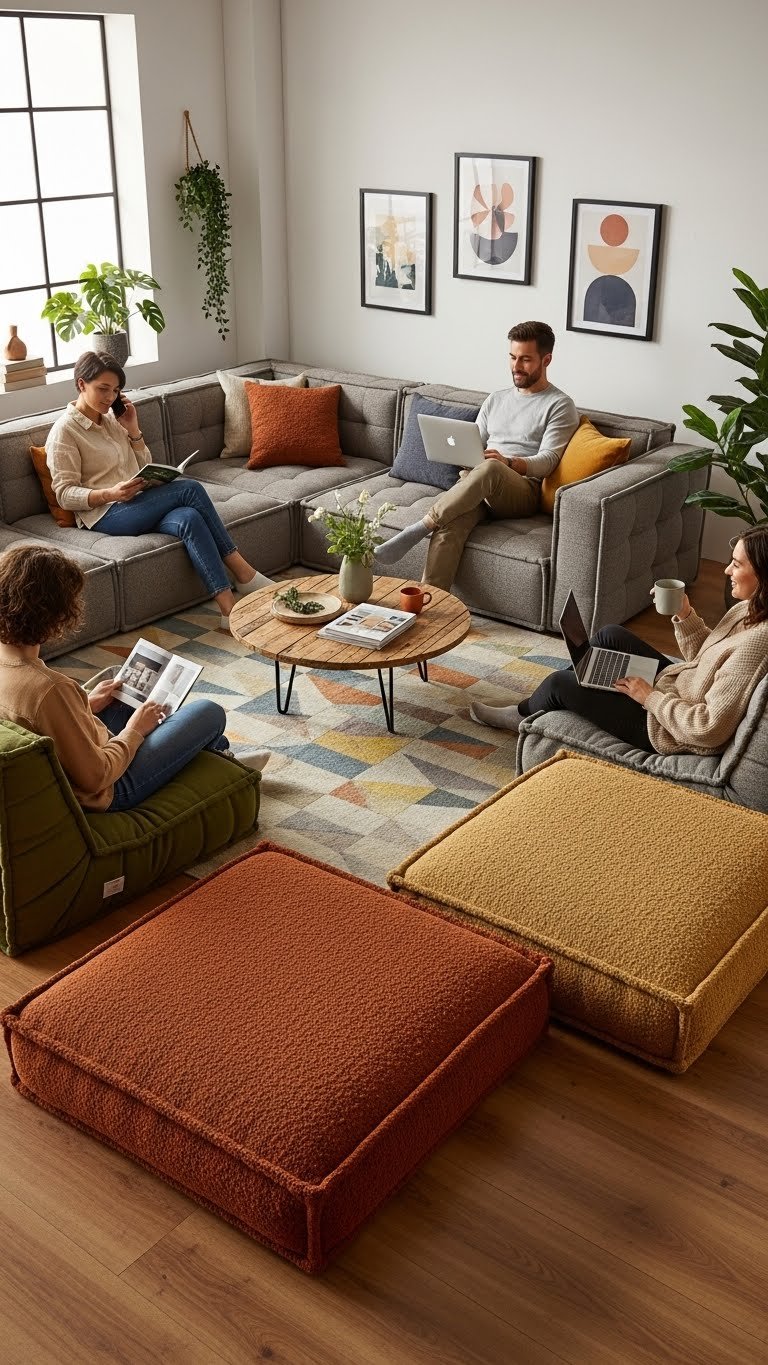
    14. Use Ottomans as Flexible Extra Seating

    Modular ottomans are the secret flexibility weapon—they’re seats, footrests, coffee tables, or extra sleeping surfaces depending on what your day requires.

    Buy one to three ottomans ($200–$400 each from Article, Wayfair, or IKEA) that coordinate with your sectional. Arrange them in front of your sofa as footrests or pull them out when guests arrive. Look for ottomans with hidden storage ($300–$500) to maximize small-space function. Zero assembly time; just position them where you need them. Move them around in seconds when your needs change.

    Pro tip: Mix and match ottoman heights and fabrics for visual interest—this looks intentional, not accidental.

    You’ve added seating capacity and comfort without claiming permanent square footage.


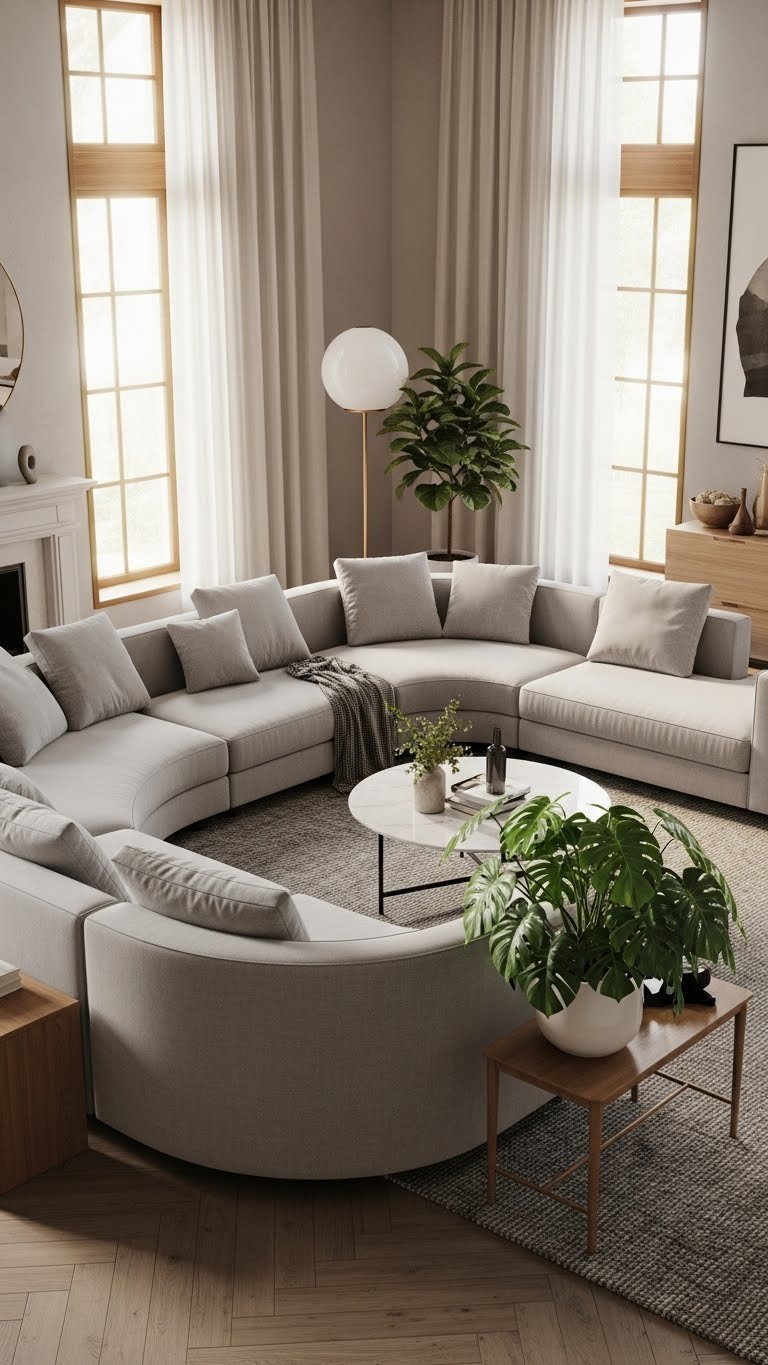
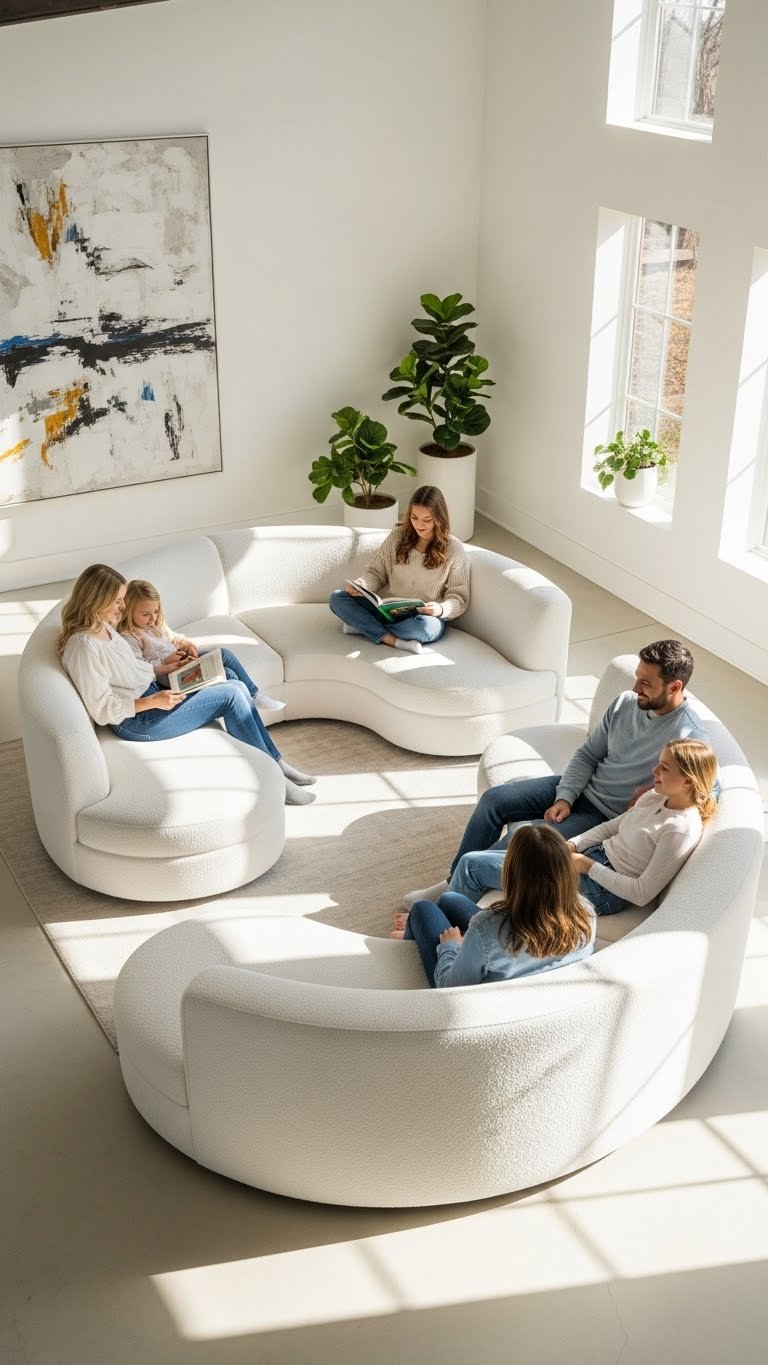
    15. Arrange a Curved Sectional for Conversation Flow

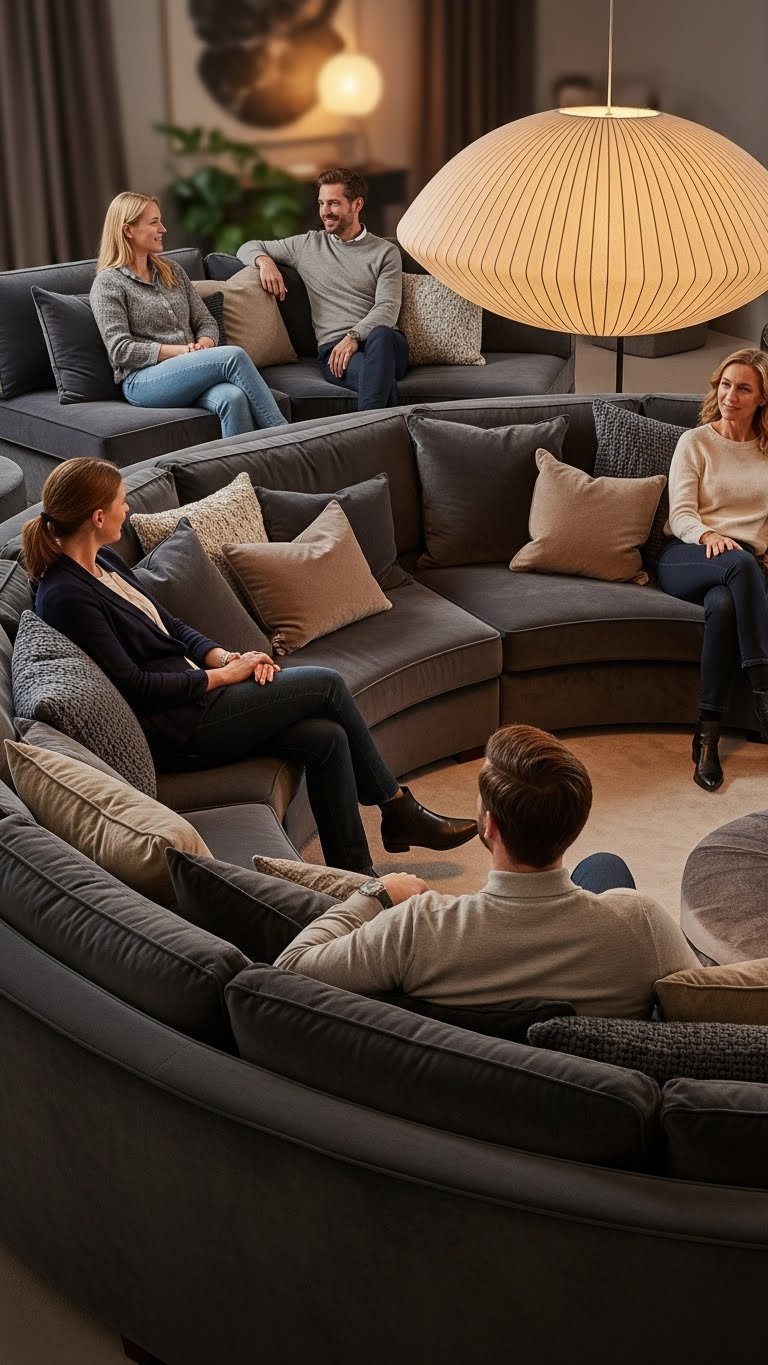
    Curved and serpentine sectionals are 2025’s big trend—they create an organic, conversation-friendly arrangement where everyone naturally faces each other instead of staring straight ahead.

    These pieces cost more—budget $2,000–$4,000 for quality curved sectionals from Article, Living Spaces, or a designer brand. Position the curve roughly in the center of your room with furniture arranged to face inward. No wall placement needed; float it freely. This takes one hour to arrange thoughtfully.

    Pro tip: A curved sectional in a smaller room (under 200 square feet) might overwhelm the space—test the dimensions carefully before buying.

    Conversations flow more naturally, and your room instantly reads as more designed and intentional than a standard L-shape.


    16. Divide Your Sectional for Two Separate Zones

    If your sectional components are truly modular, separate them into two different rooms or zones—a small piece in the bedroom, another in the office or guest room.

    Check whether your sectional is actually modular by reviewing the product specs; some pieces only look like they separate. Truly modular pieces from IKEA ($300–$600 per component) or custom options from What A Room ($1,500–$2,500 per zone) work here. You can rearrange this in 30 minutes any time. Perfect for open-plan homes where you need subtle seating in multiple areas without a massive sectional monopolizing one room.

    Pro tip: Cushions from one zone can migrate to the other for styling flexibility.

    Your furniture works harder for you—why confine it to one room when components could solve problems in multiple spaces?


    17. Position an L-Sectional in a Living Room-Dining Combo

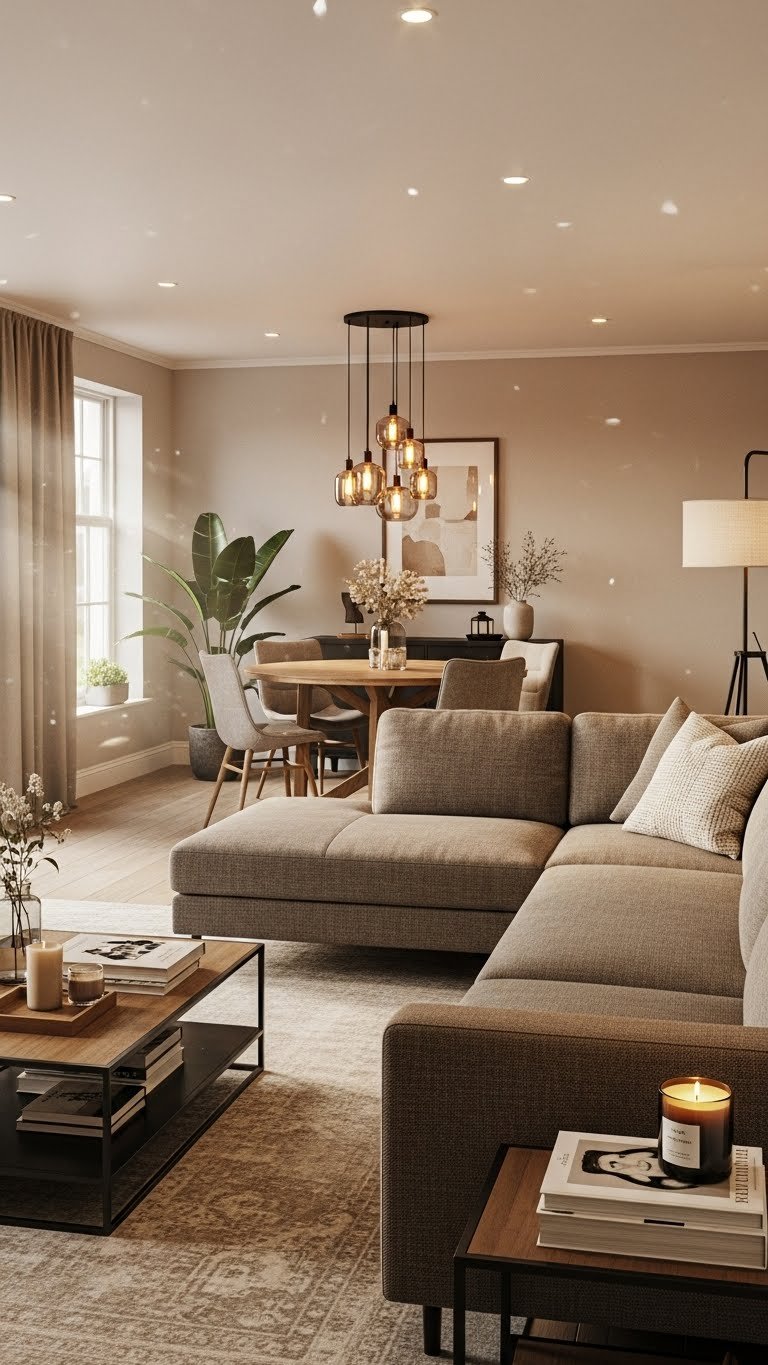
    In homes where living and dining merge, tuck your L-shaped sectional into one corner with one arm gently pointing toward the dining zone—you create separation without walls.

    Position the sectional’s corner roughly six to eight feet from your dining table, angled to create a psychological divide. Brynna Evans at Living Spaces calls this “subtle zoning”—you’re not blocking sight lines, just creating spatial intention. One afternoon of rearrangement, no additional cost if you own pieces already. Works with any L-sectional from $600–$1,200.

    Pro tip: Add an area rug under the sectional and extend it partially under the dining table to tie both zones together visually.

    Your dining guests don’t feel like they’re sitting in your living room, and your seating zone doesn’t feel cramped or overshadowed by the dining setup.


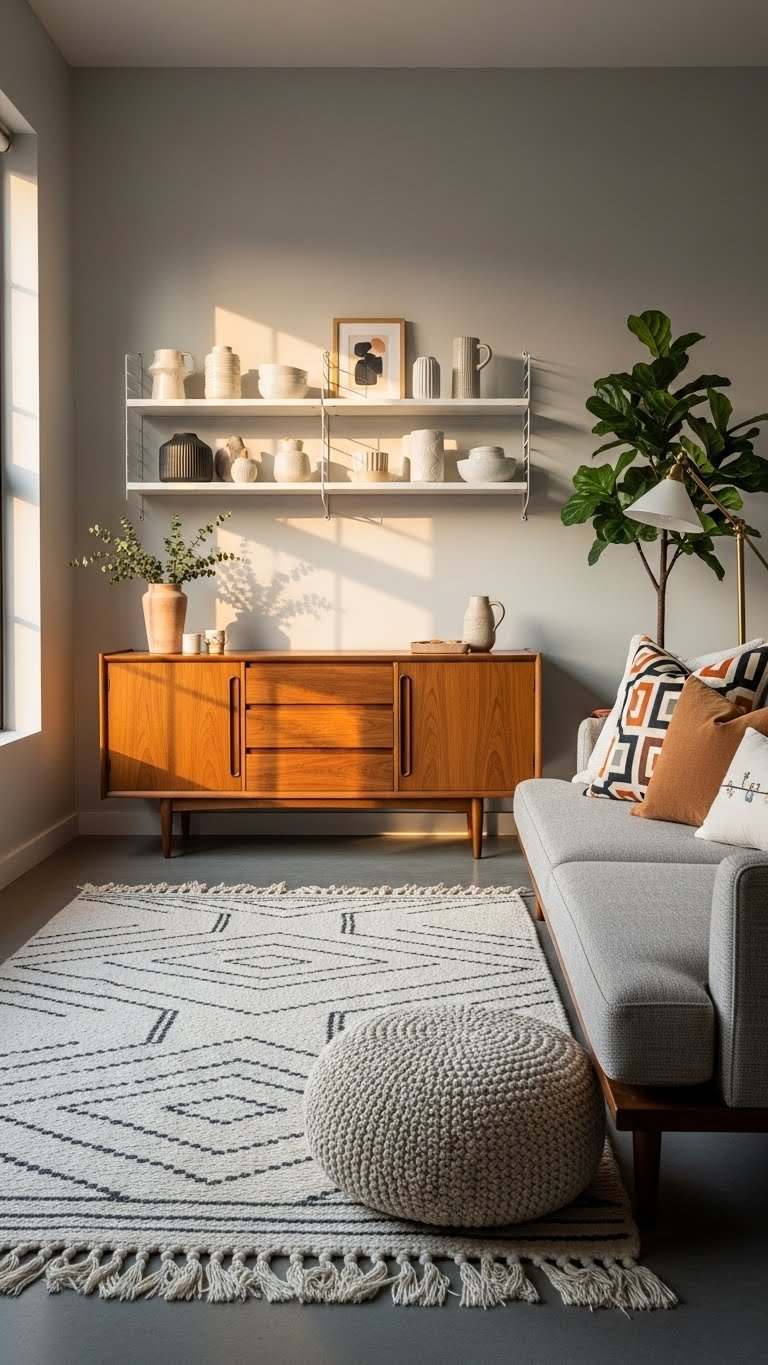
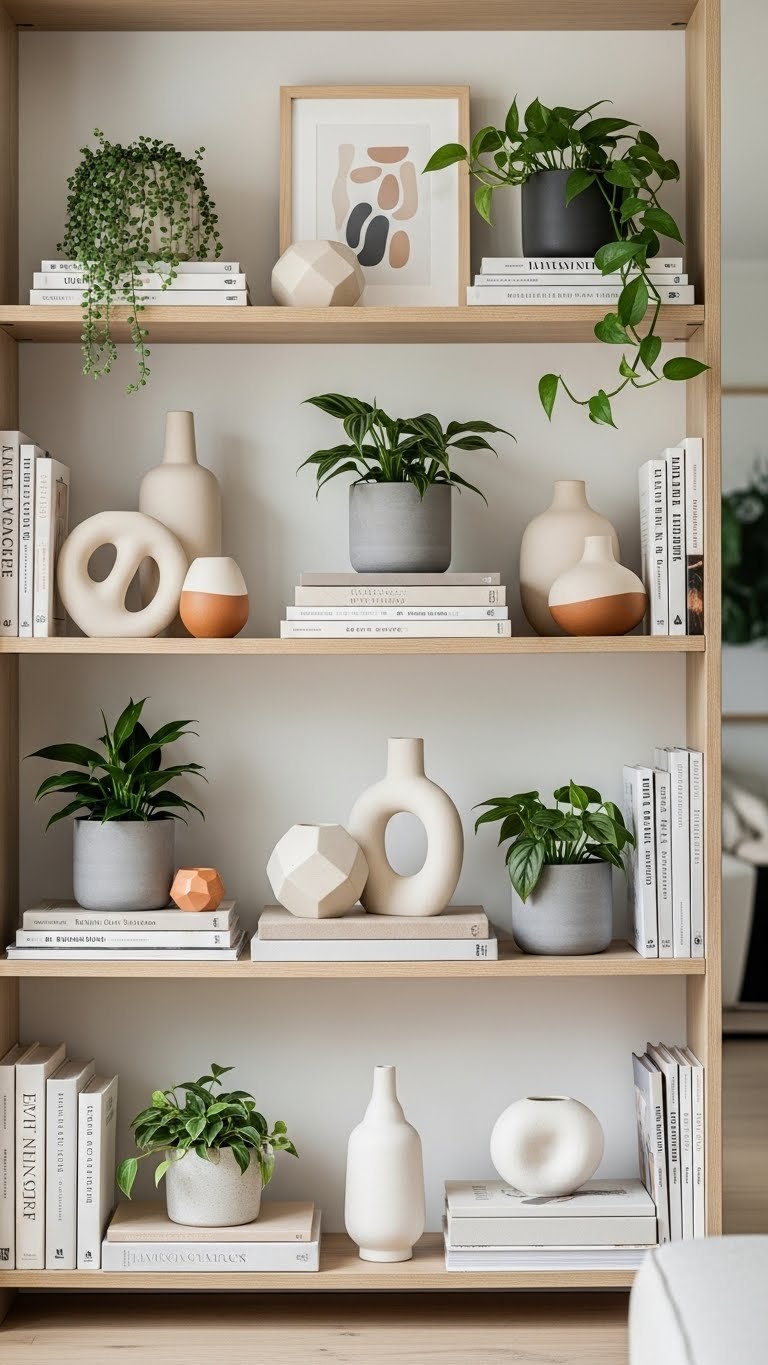
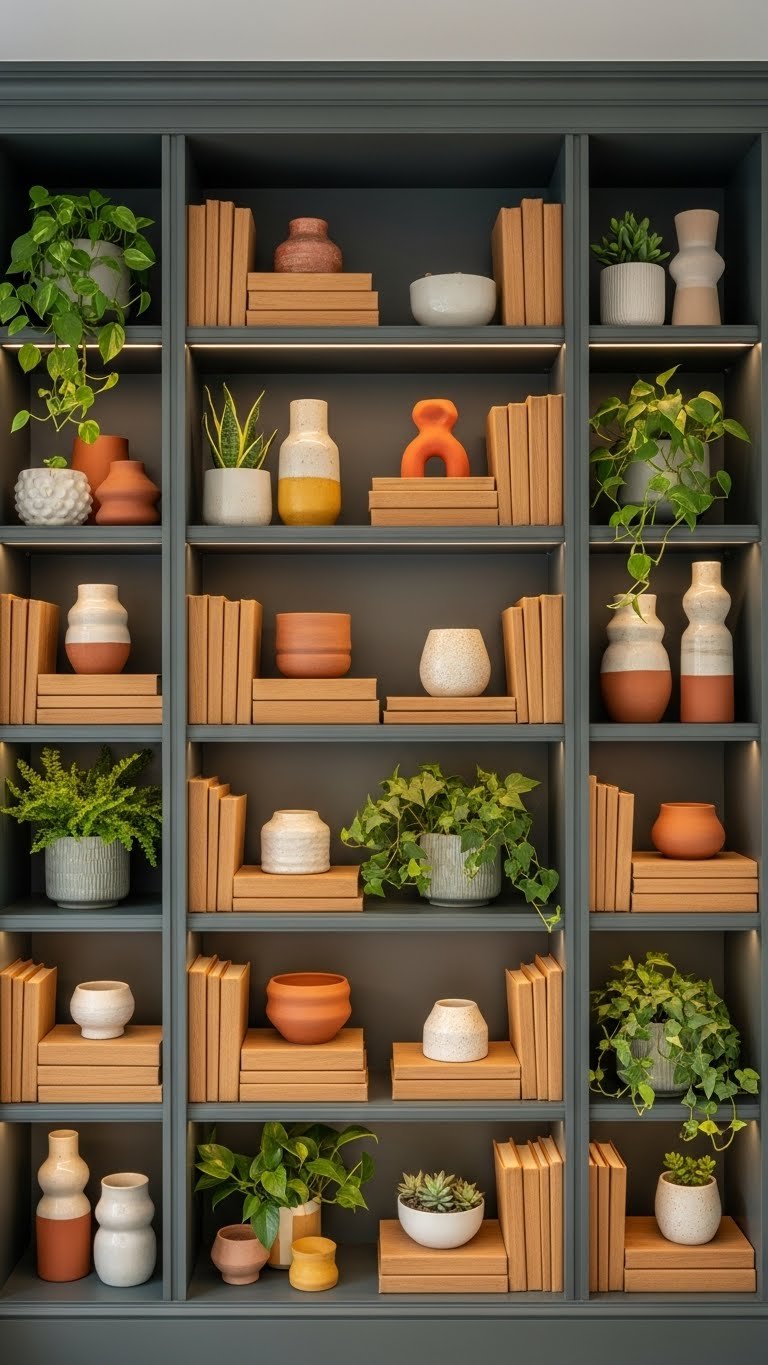
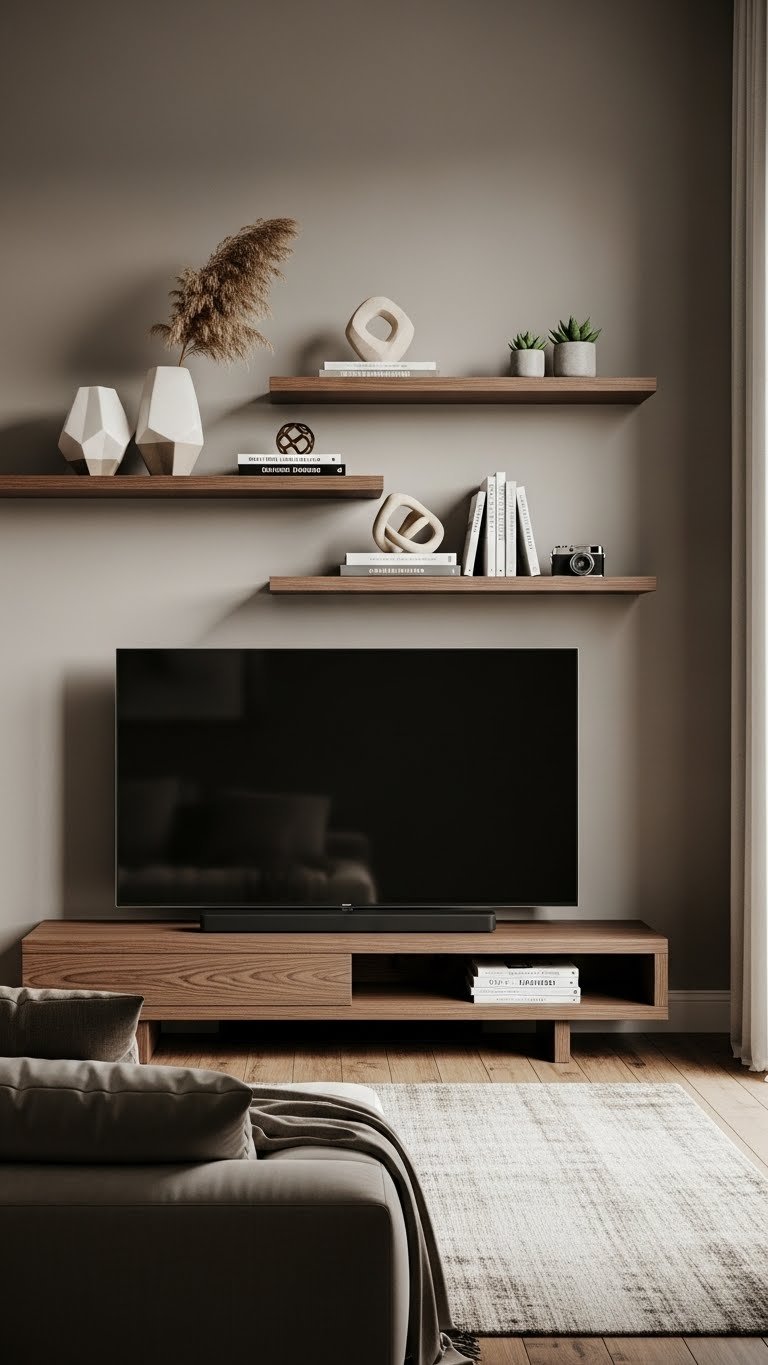
    18. Stack Modular Pieces for Vertical Storage Appeal

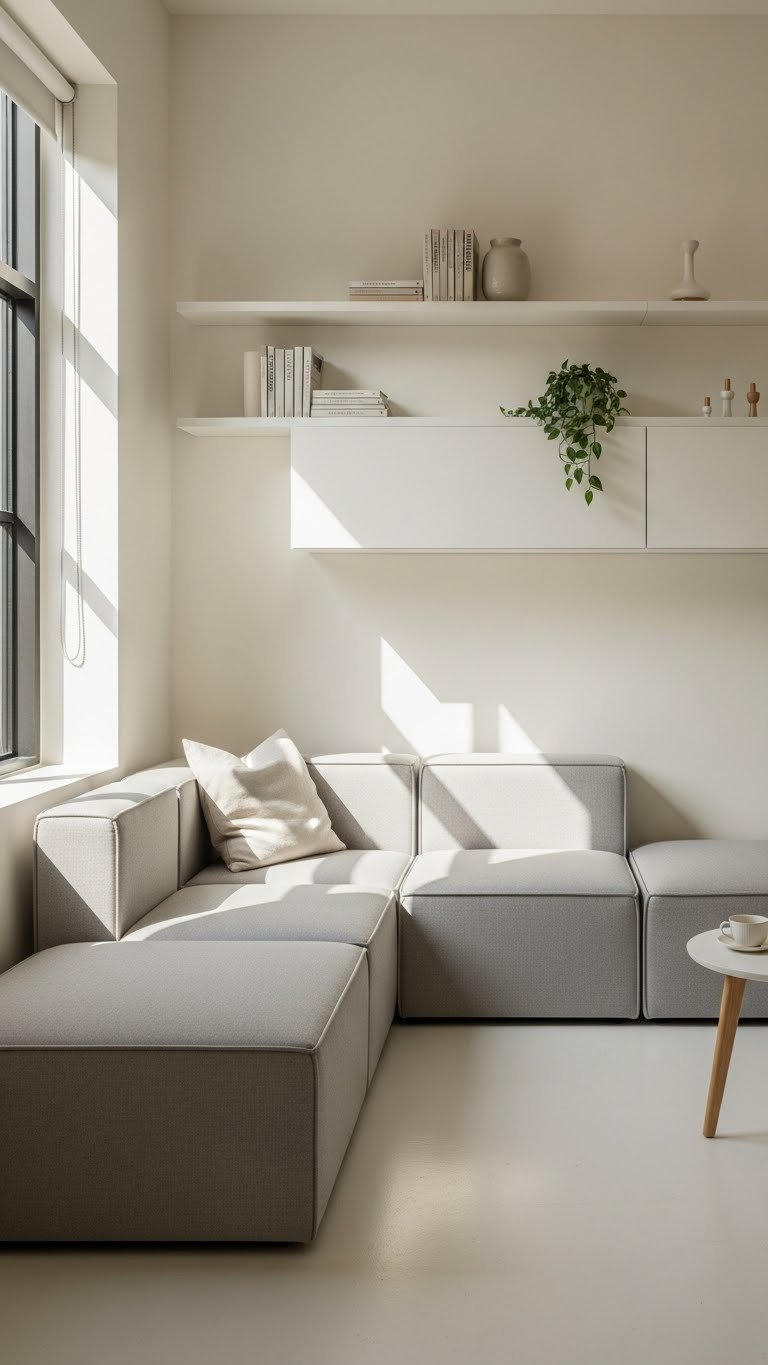
    In ultra-compact homes, position your modular sectional along one wall and install floating shelves or tall bookcases above—you’re stacking storage and seating into one efficient zone.

    A corner sectional ($800–$1,200) tucked against a wall plus floating shelves ($150–$400 from IKEA, Target, or Wayfair) creates a cozy nook that maximizes every inch. This is a half-day weekend project if mounting shelves—or keep it renter-friendly with no wall damage if you don’t add storage. The spatial strategy takes 30 minutes to plan.

    Pro tip: Add baskets on the shelves above for hidden storage that keeps visual clutter contained.

    Your small space becomes a design powerhouse—seating, storage, and style all in one efficient corner.


    19. Create an Asymmetrical Layout for Modern Flair

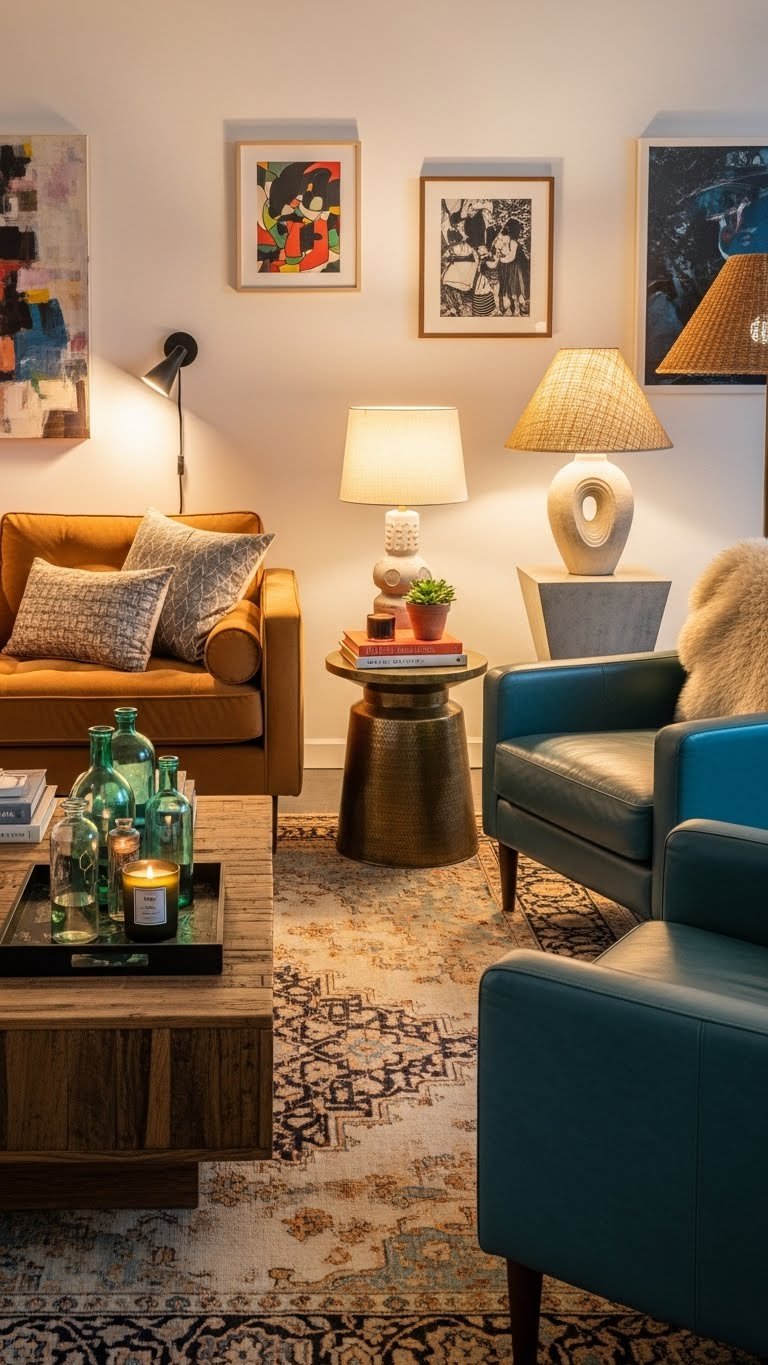
    Symmetry is safe, but asymmetry is interesting—mix sectional configurations, chair styles, and table heights to create a modern, collected look instead of a matchy-matchy showroom aesthetic.

    Combine pieces from different eras or brands ($600–$1,500 total for coordinated-but-different components). Position the larger sectional on one wall, offset a chair or smaller sectional on the adjacent wall at different heights or angles. This is a creative afternoon project as you play with arrangement. Best for renters and anyone who loves eclectic design.

    Pro tip: Tie the asymmetrical layout together with a cohesive color story (all earth tones, all jewel tones) so it looks intentional.

    Your room reads as thoughtfully designed rather than thrown together—and you have total freedom to evolve it as your taste changes.


    20. Use Sectional Orientation to Direct Traffic Flow

    How you orient your sectional either speeds up or slows down foot traffic through your room—position the open side toward your main entry or walkway to create natural flow.

    Position the opening of your L-sectional or U-shape toward the room’s main entry and away from walls you need to access (kitchen, bathroom, bedroom doors). This is pure strategy—zero cost, just thoughtful arrangement. Takes 30 minutes to reassess and adjust.

    Pro tip: If your sectional blocks a natural walkway, pull one end away from the wall slightly to create a passage.

    People move through your space more naturally, furniture shuffles happen less often, and your room feels more spacious.


    21. Arrange a Sectional + Sleeper Chair Combo for Guest Flexibility

    Pair your modular sectional with a sleeper chair to maximize guest accommodation without dedicating an entire guest bedroom or looking like you’re running an Airbnb.

    A quality sleeper chair runs $400–$800 from Article, West Elm, or Wayfair—choose one in a matching color family to your sectional. Position it perpendicular to the sofa or in a corner nearby. This takes 30 minutes to arrange plus testing the mechanism (one-time). Budget-friendly for small-home entertaining—you can accommodate guests comfortably.

    Pro tip: Pair it with a ottoman that has hidden storage to keep guest bedding or blankets contained nearby.

    You’ve got legitimate sleeping accommodations that still look like intentional living room design, not a pull-out bed that screams “sorry, we’re out of rooms.”


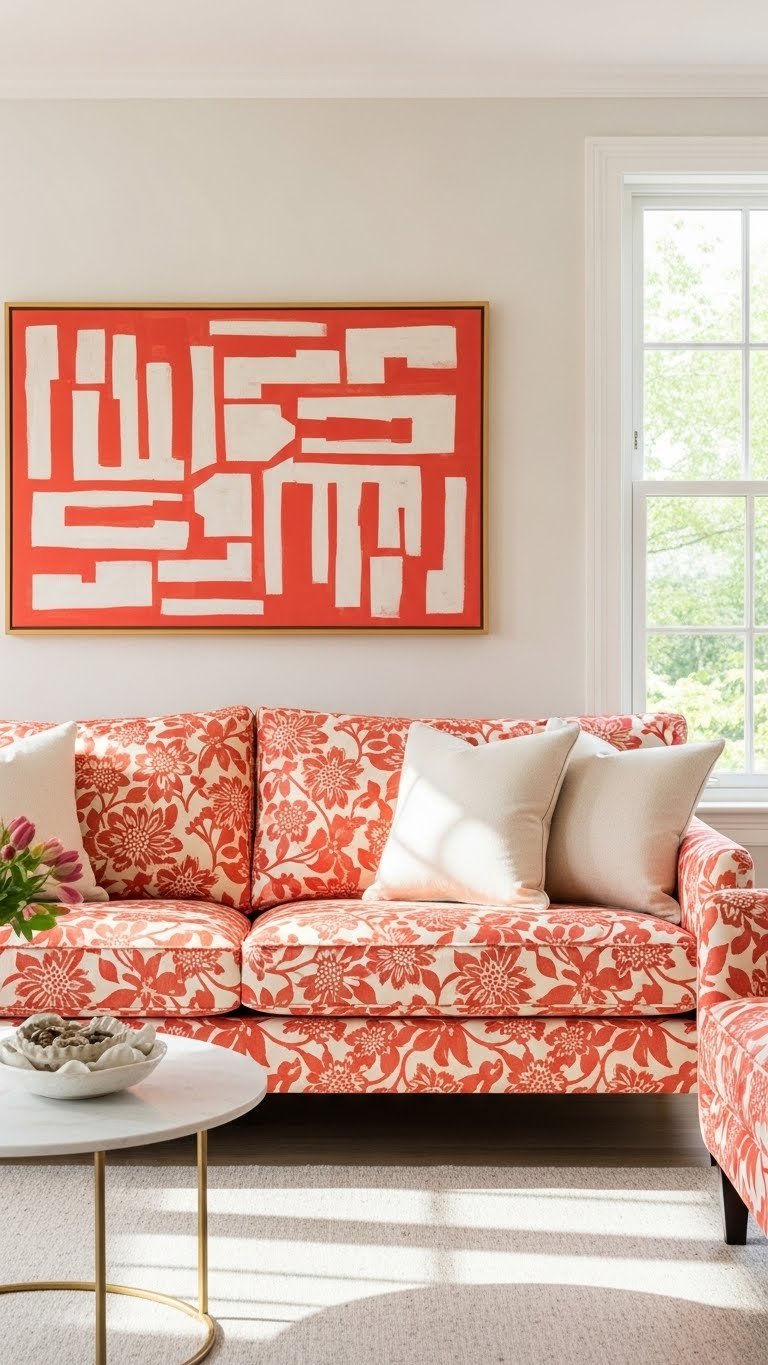
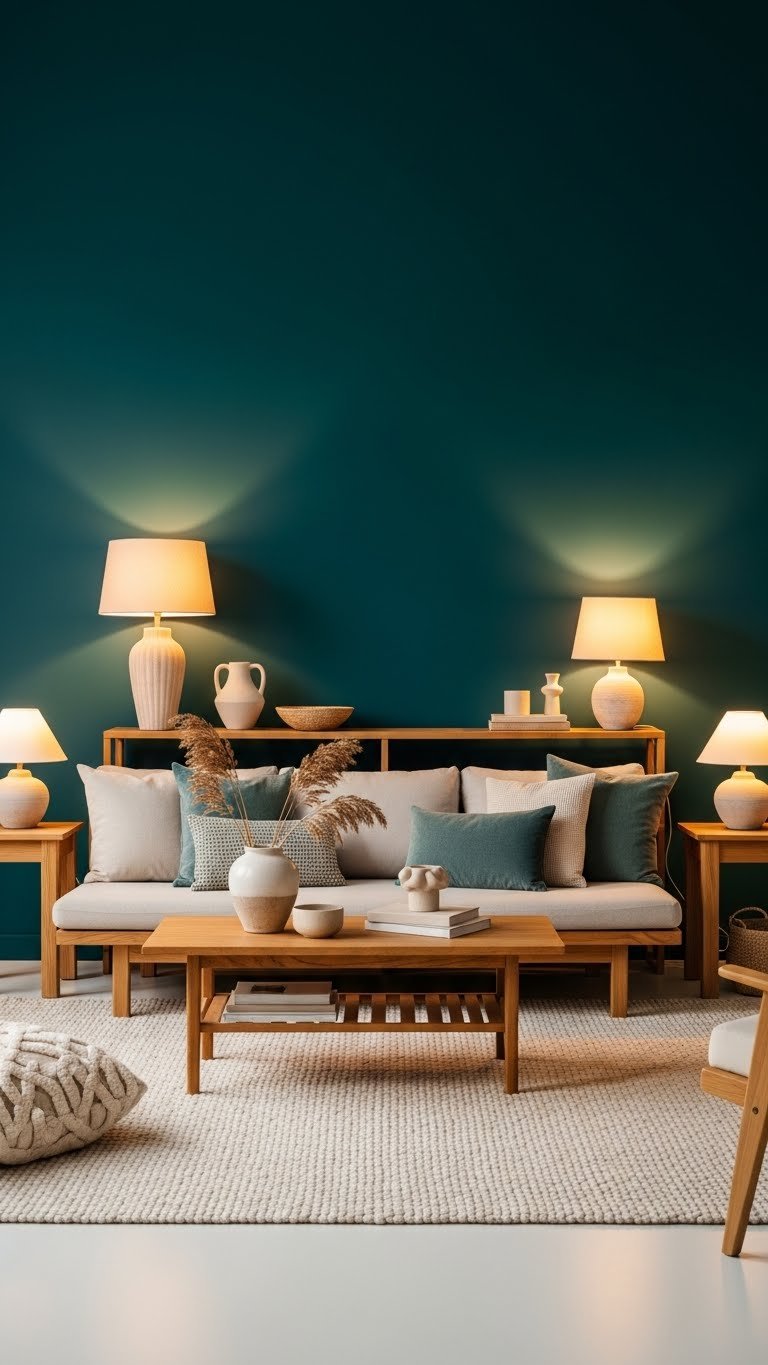
    22. Position a Sectional as a Room’s Architectural Feature

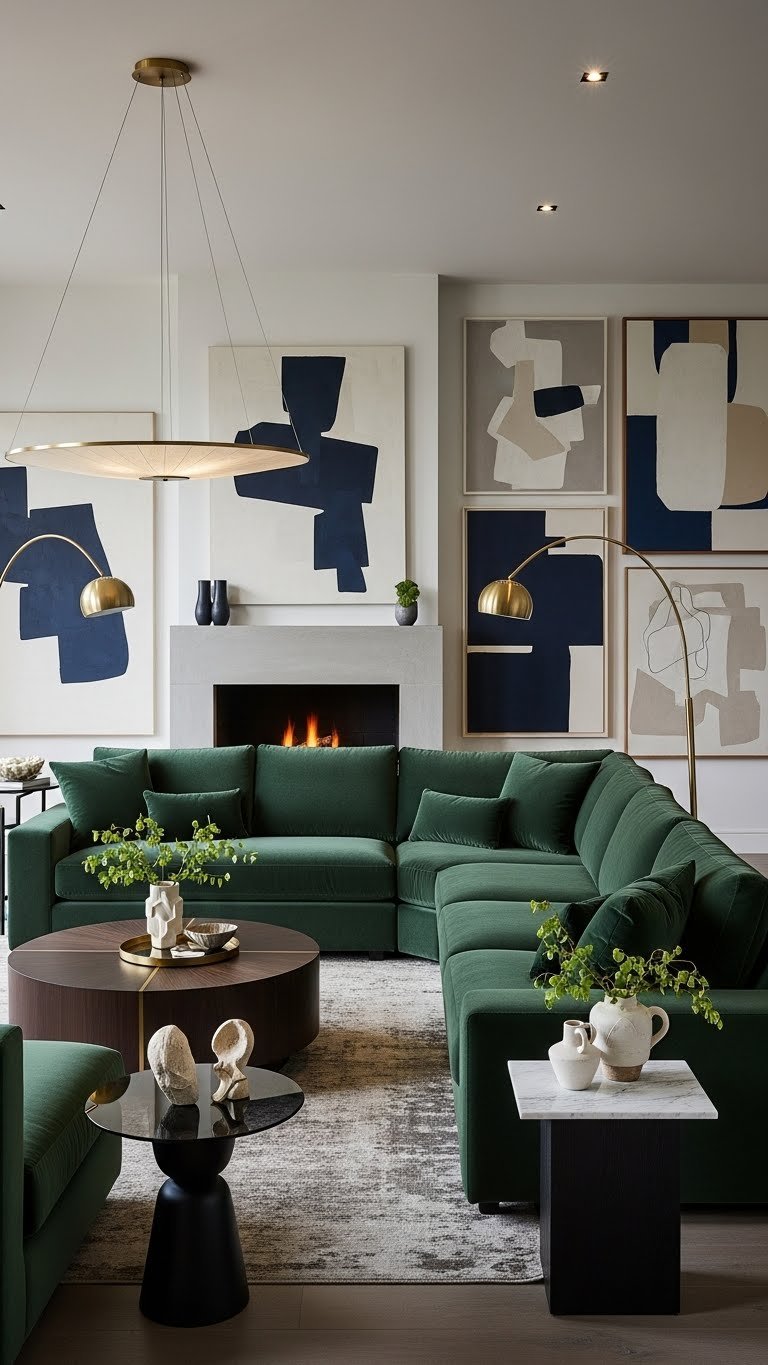
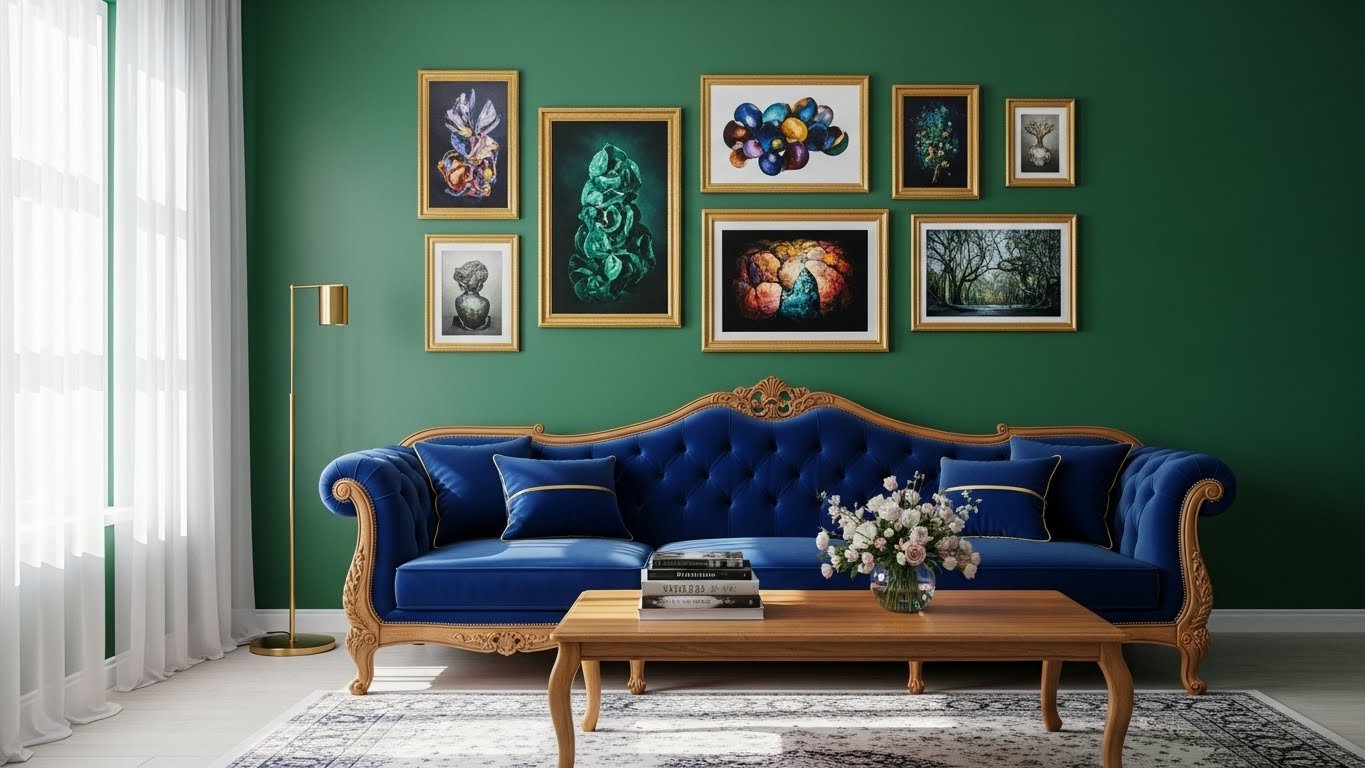
    Instead of tucking your sectional against a wall, make it the room’s statement piece—position it as the primary focal point and build the rest of your design around it.

    A bold-colored or textured sectional becomes the room’s anchor—think deep jewel-toned Article sectionals ($1,200–$2,000) or a made-to-order design from What A Room ($2,000–$3,500). Float it in the room’s center or position it floating perpendicular to the TV wall. This takes one thoughtful afternoon to design and arrange. Best for rooms where the sofa is your biggest furniture piece and deserves to be the visual hero.

    Pro tip: Paint walls a complementary shade to make the sectional pop even more—neutral walls let a bold sofa absolutely shine.

    Your room becomes design-forward and intentional rather than defaulting to safe, expected furniture placement.


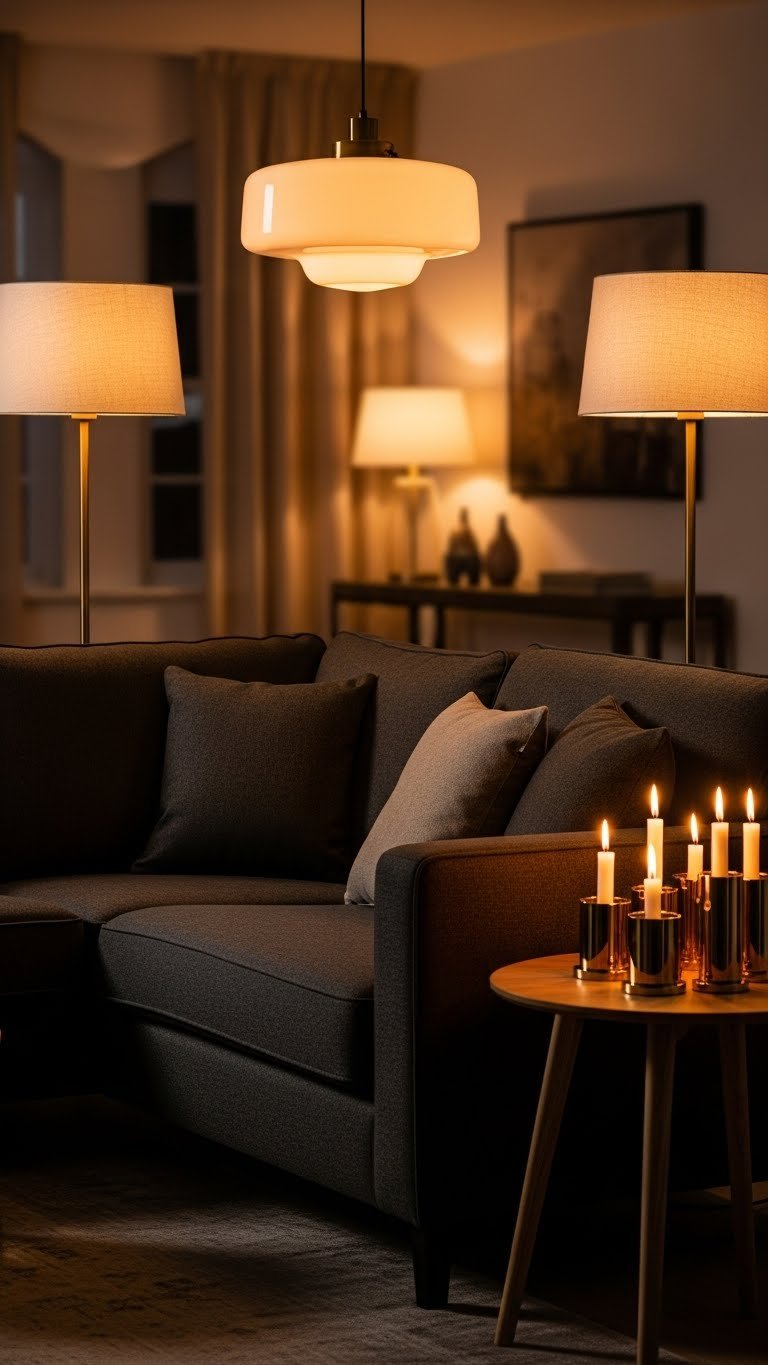
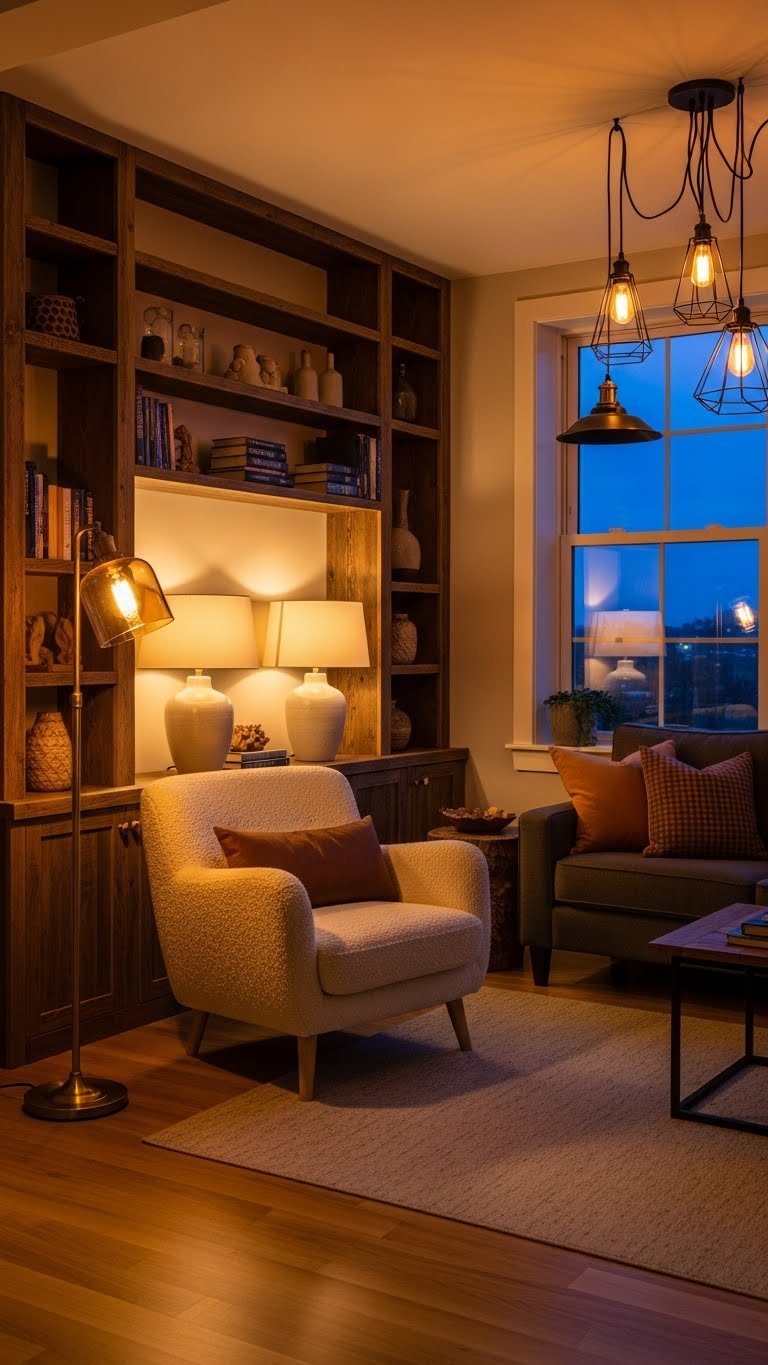
    23. Create a Reading Nook with Sectional + Chaise

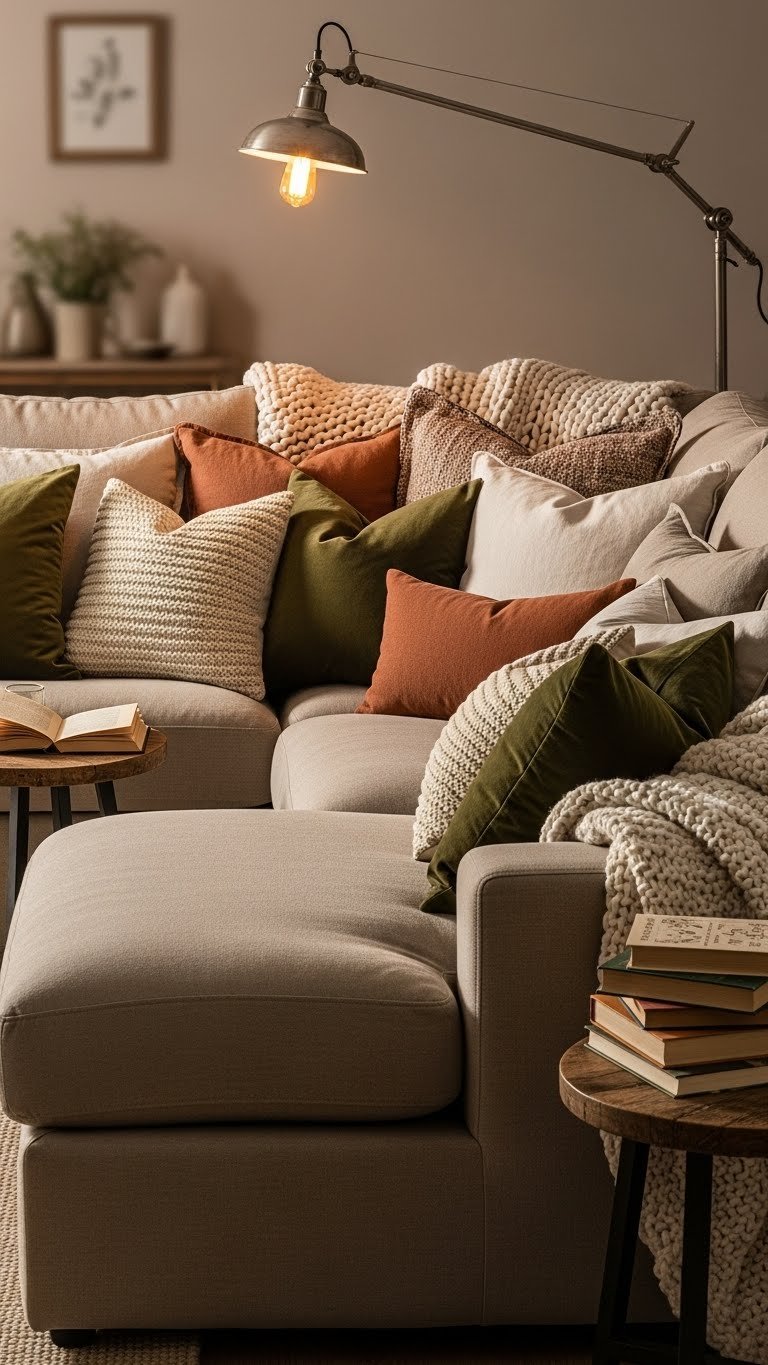
    A sectional with chaise extension becomes your home’s unofficial library—arrange it in a corner with proper lighting, side tables, and cushions for a genuinely cozy reading retreat.

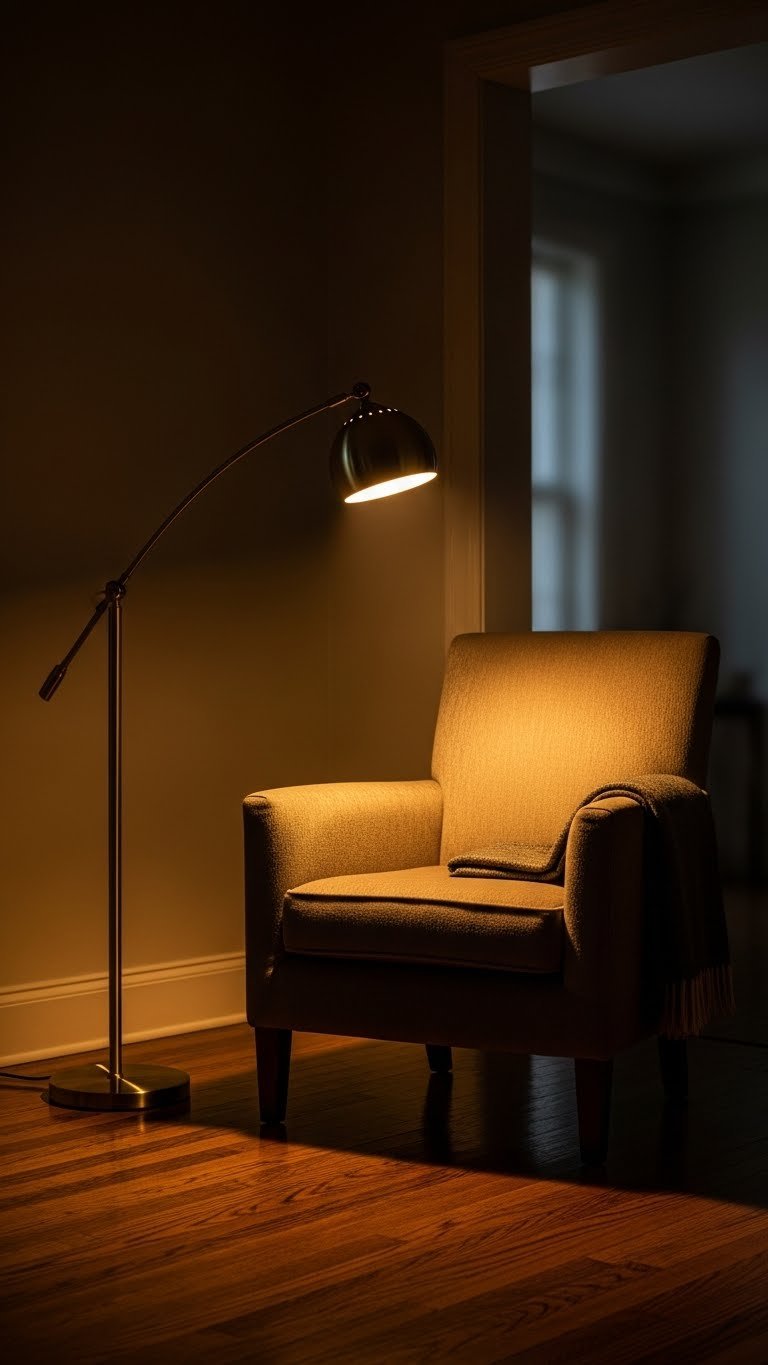
    Position the sectional’s corner where natural light is best, position the chaise perpendicular to catch light from a nearby window or where you’ll place a floor lamp. A quality sectional with chaise runs $1,000–$1,800 from Wayfair or Article. Add a swing-arm floor lamp ($100–$200) and side table ($150–$300) for function. One afternoon to arrange, but the result is a room within a room.

    Pro tip: Mount floating shelves above the chaise for books, creating a built-in library aesthetic without actual shelving installation.

    Suddenly you have a legitimate reading sanctuary that rivals a library chair—and it’s in your living room.


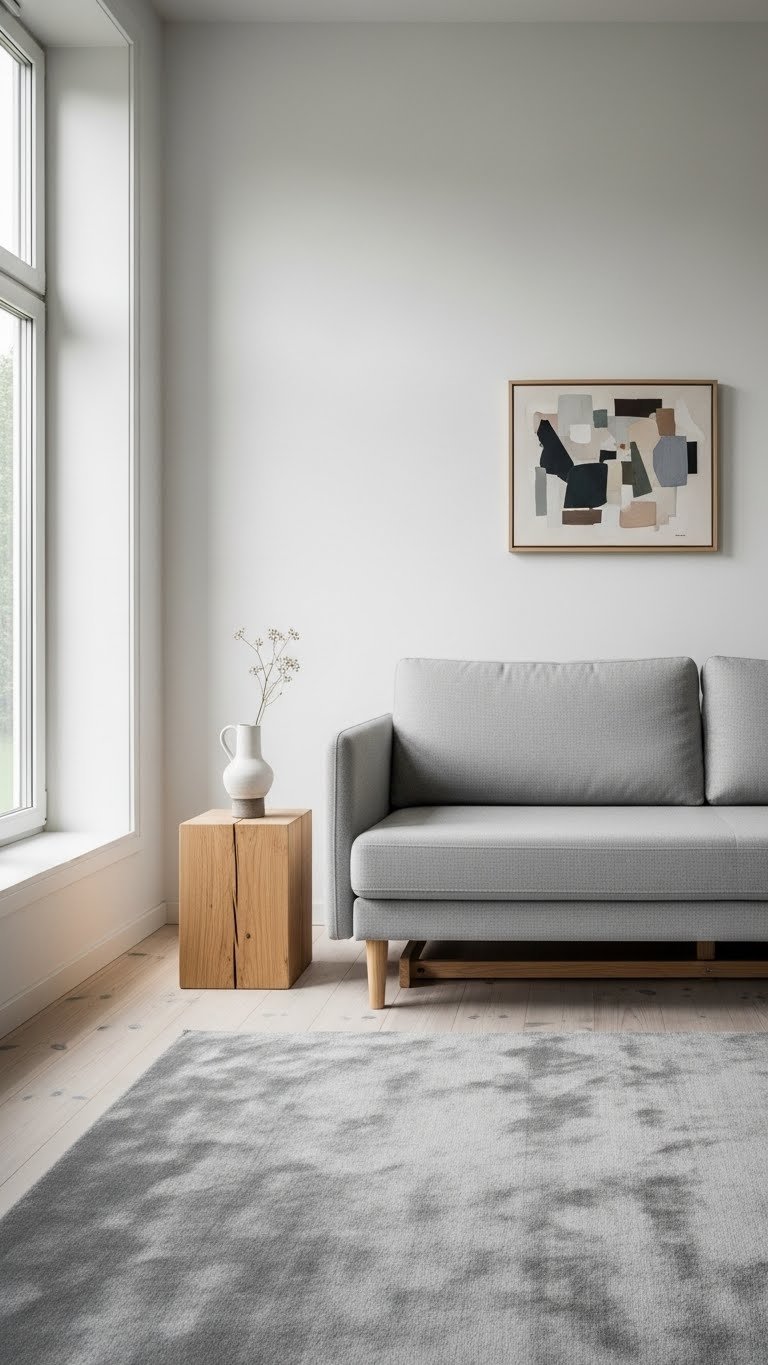
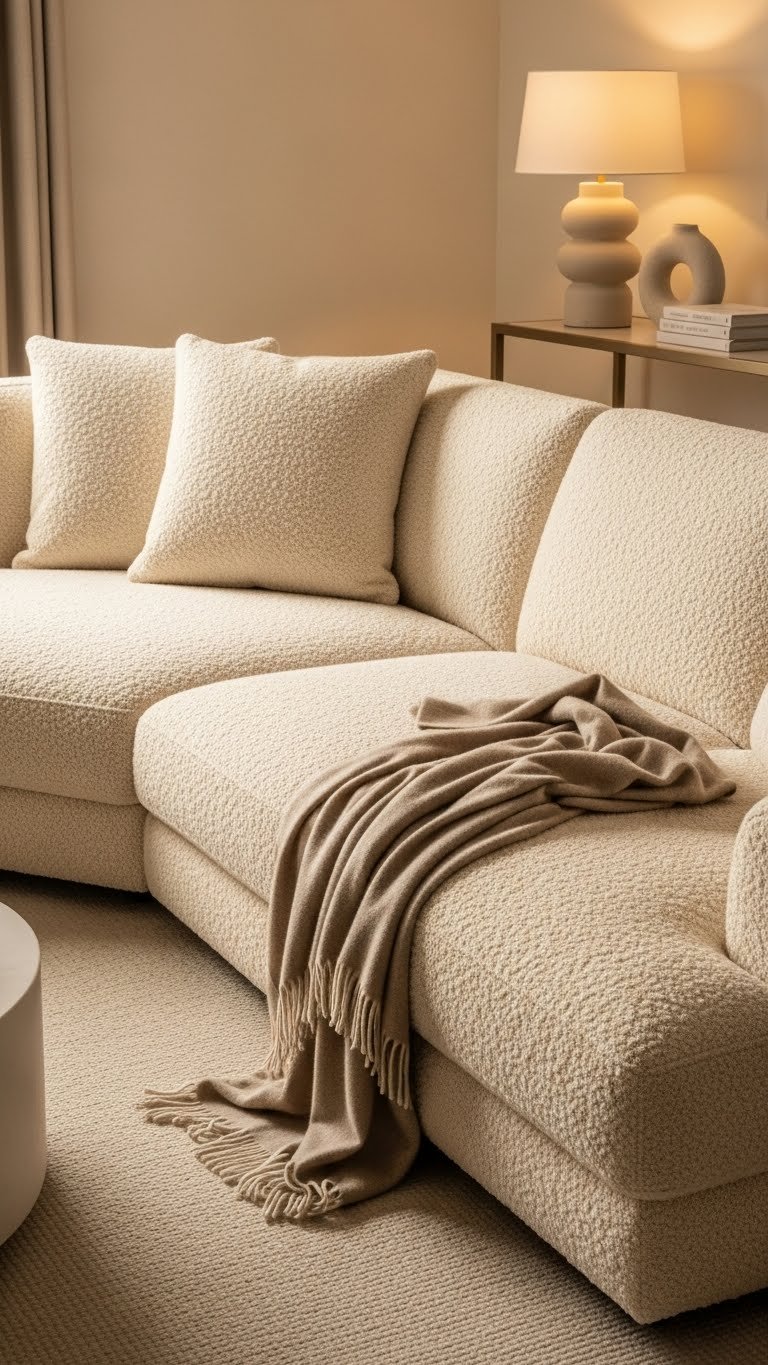
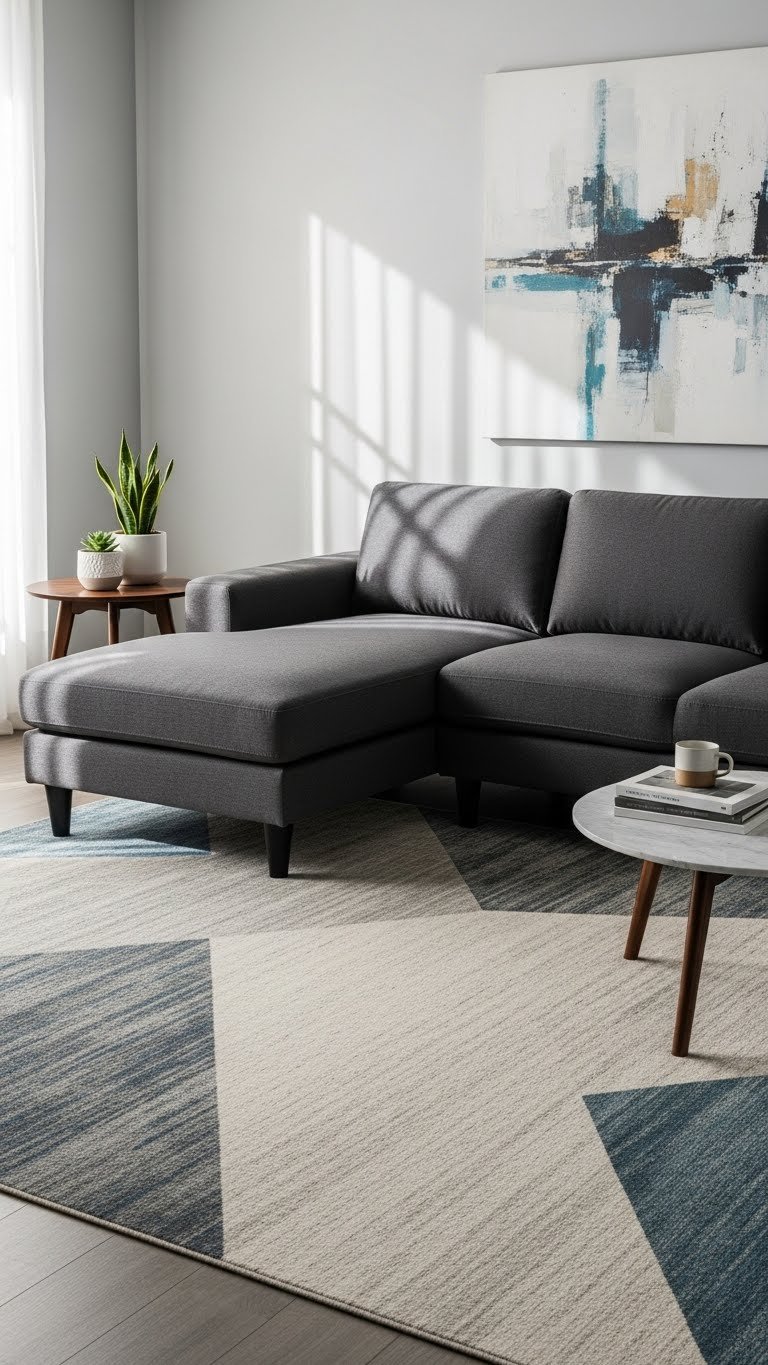
    24. Use Low-Profile Modular Pieces for Airy, Modern Rooms

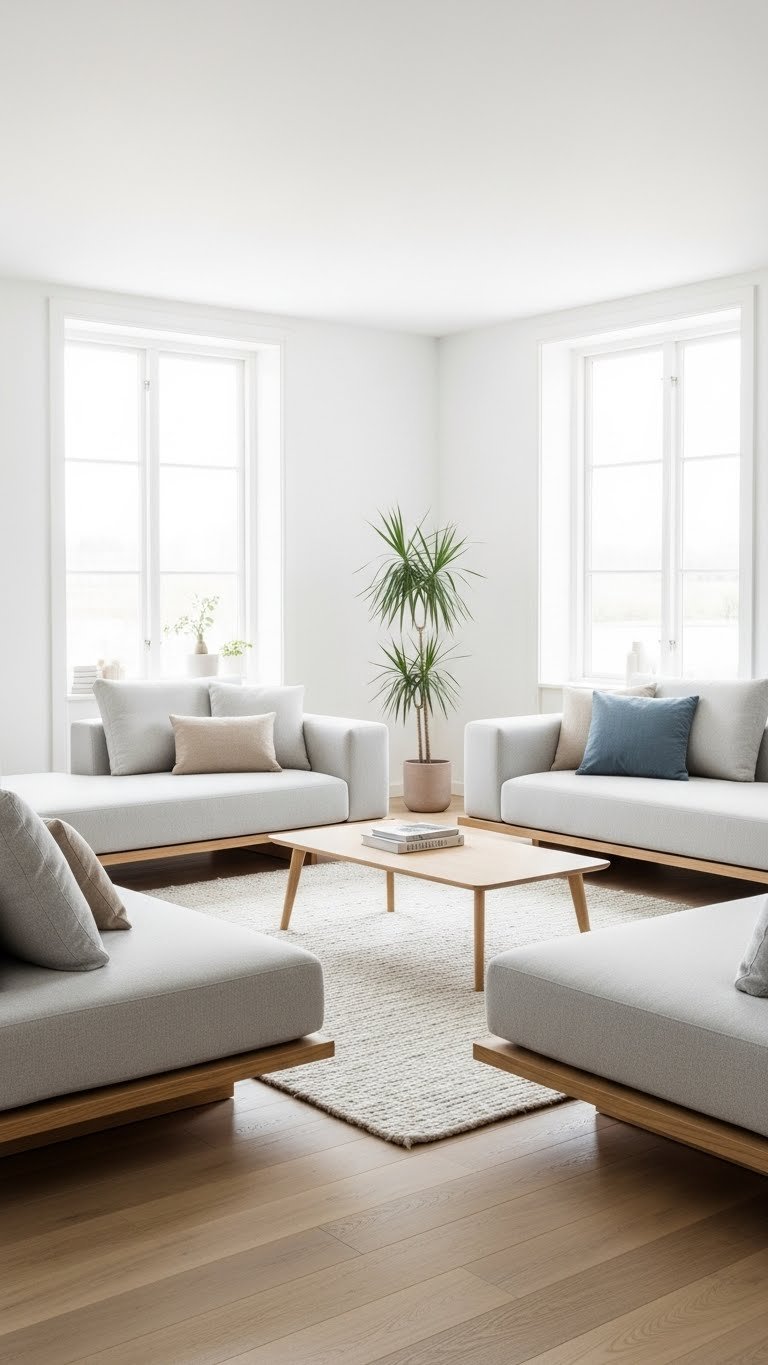
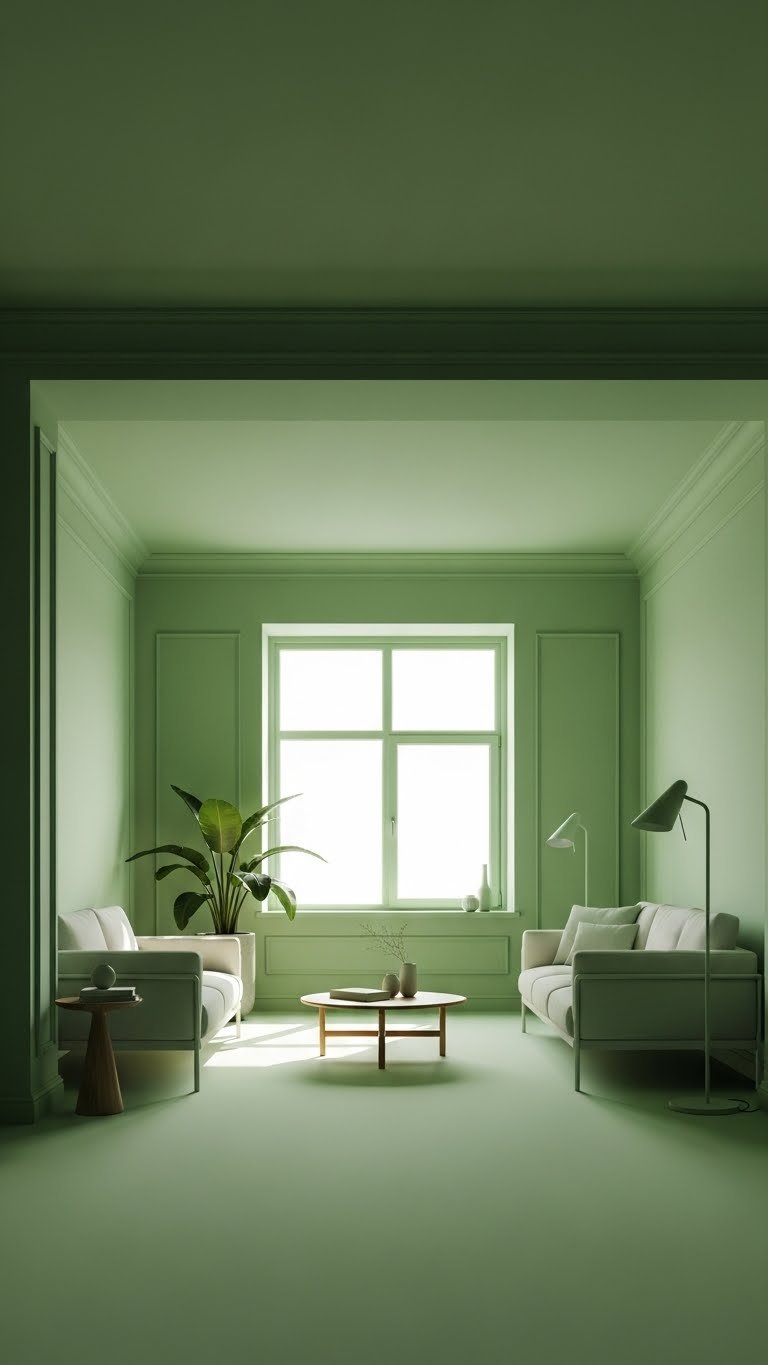
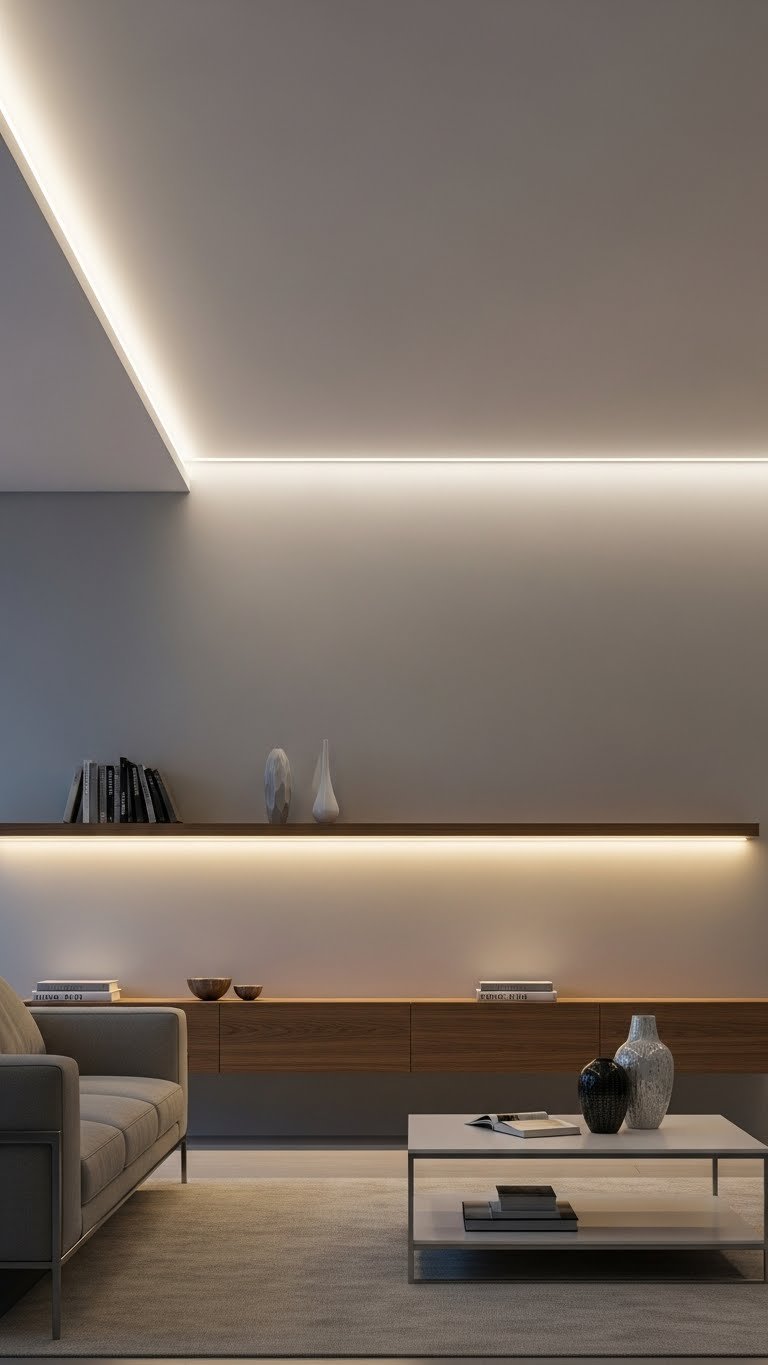
    Low-profile sectional silhouettes make rooms feel larger and more open—the Scandinavian minimalist trend continues into 2025 for good reason.

    Look for modular pieces under 28 inches tall from IKEA ($400–$700), Article ($800–$1,200), or minimalist-focused brands. Position them to maintain sight lines across your room—no bulky backs that block windows or views. This is as important for what you don’t see as what you do. Takes 30 minutes to arrange, and suddenly your space breathes more.

    Pro tip: Pair low-profile seating with tall thin-profile side tables to keep the airy aesthetic intact.

    Your room feels more spacious, modern, and intentionally designed—perfect for small-to-medium spaces that need to feel open.


    25. Arrange a Sectional with Two Entry Points for Accessibility

    Design your sectional layout with two access points—gaps or breaks in the arrangement—so older relatives, kids, or anyone with mobility considerations can enter and exit easily.

    Position modular pieces with deliberate gaps rather than one continuous wall of seating. Two small sectionals arranged facing each other with clear passages between them (or an L-shape with open ends) takes one thoughtful hour to plan. No additional cost, just strategic arrangement.

    Pro tip: Make sure gaps are at least 24 inches wide—narrow passages feel awkward to navigate.

    Your space becomes genuinely welcoming for all guests and ages, not just nimble 25-year-olds who can squeeze past tight furniture arrangements.


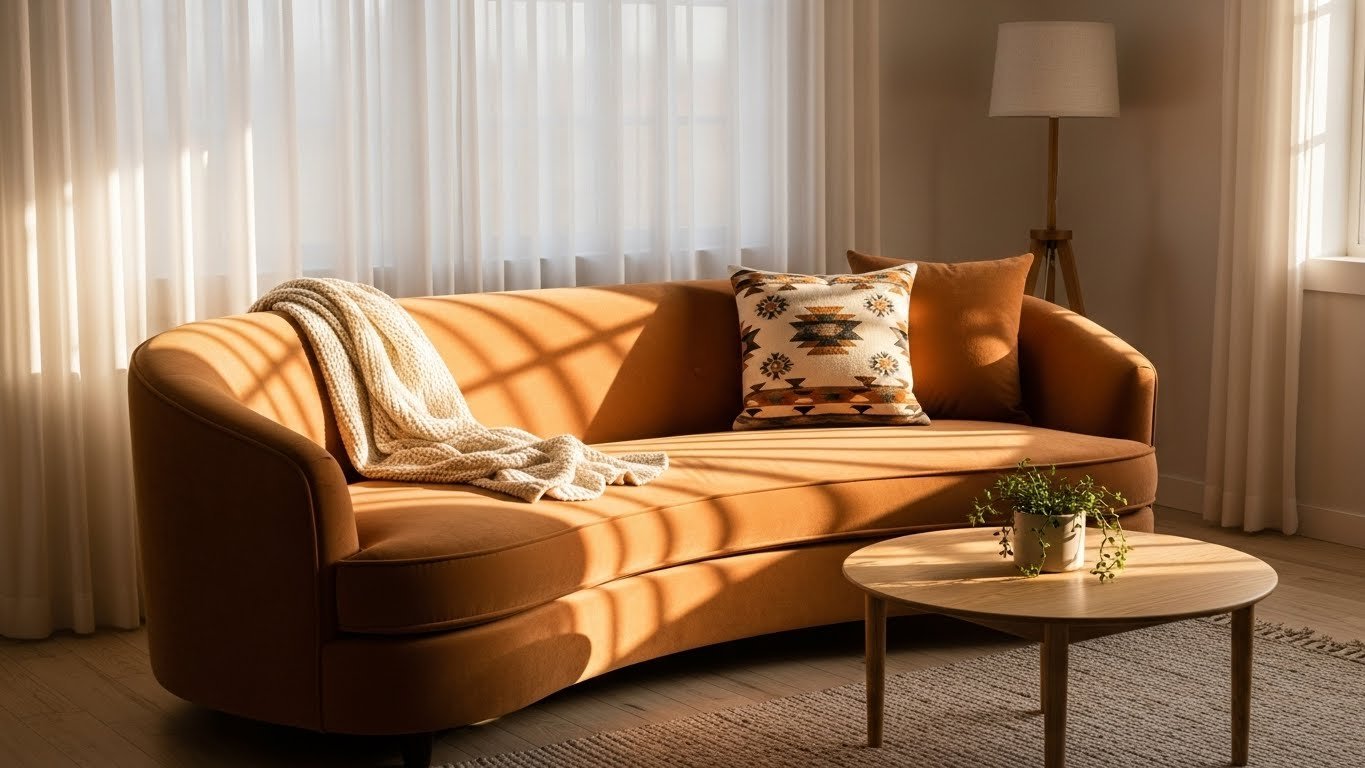
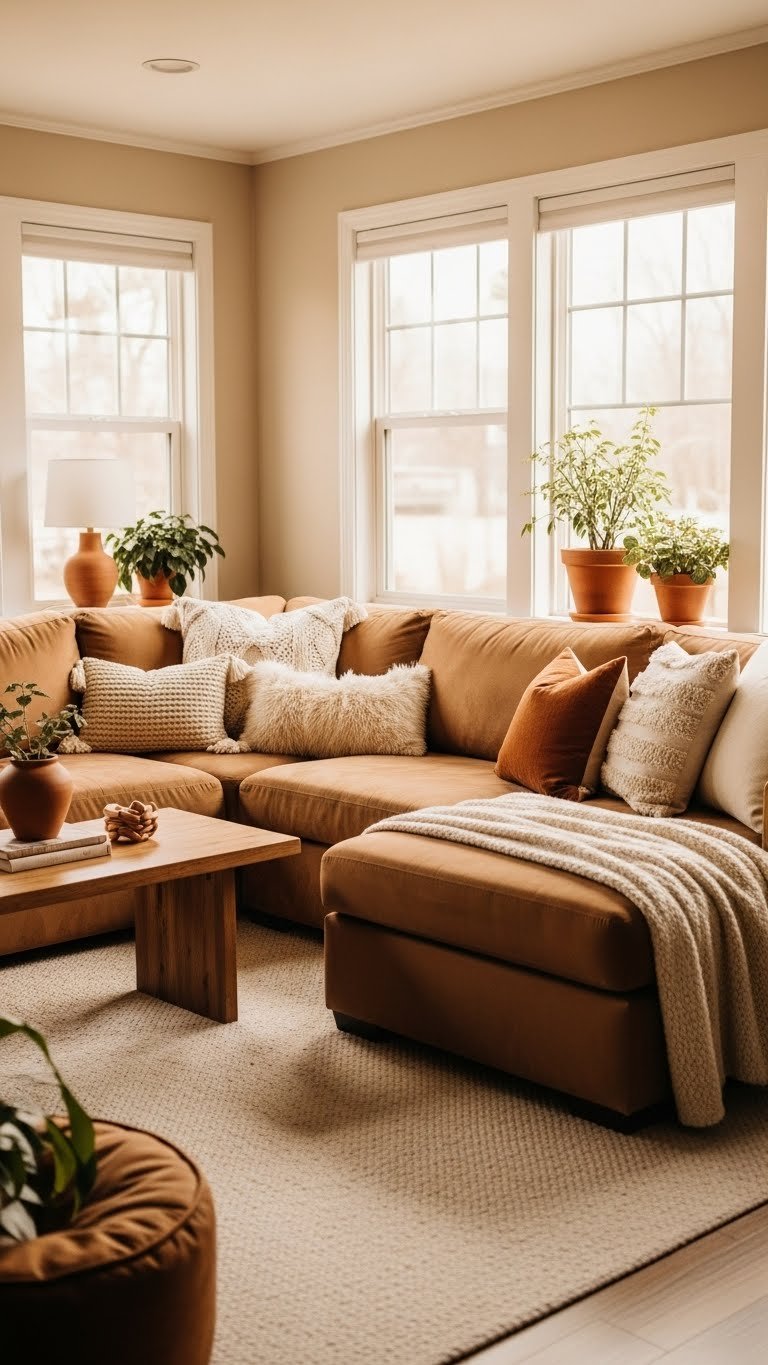
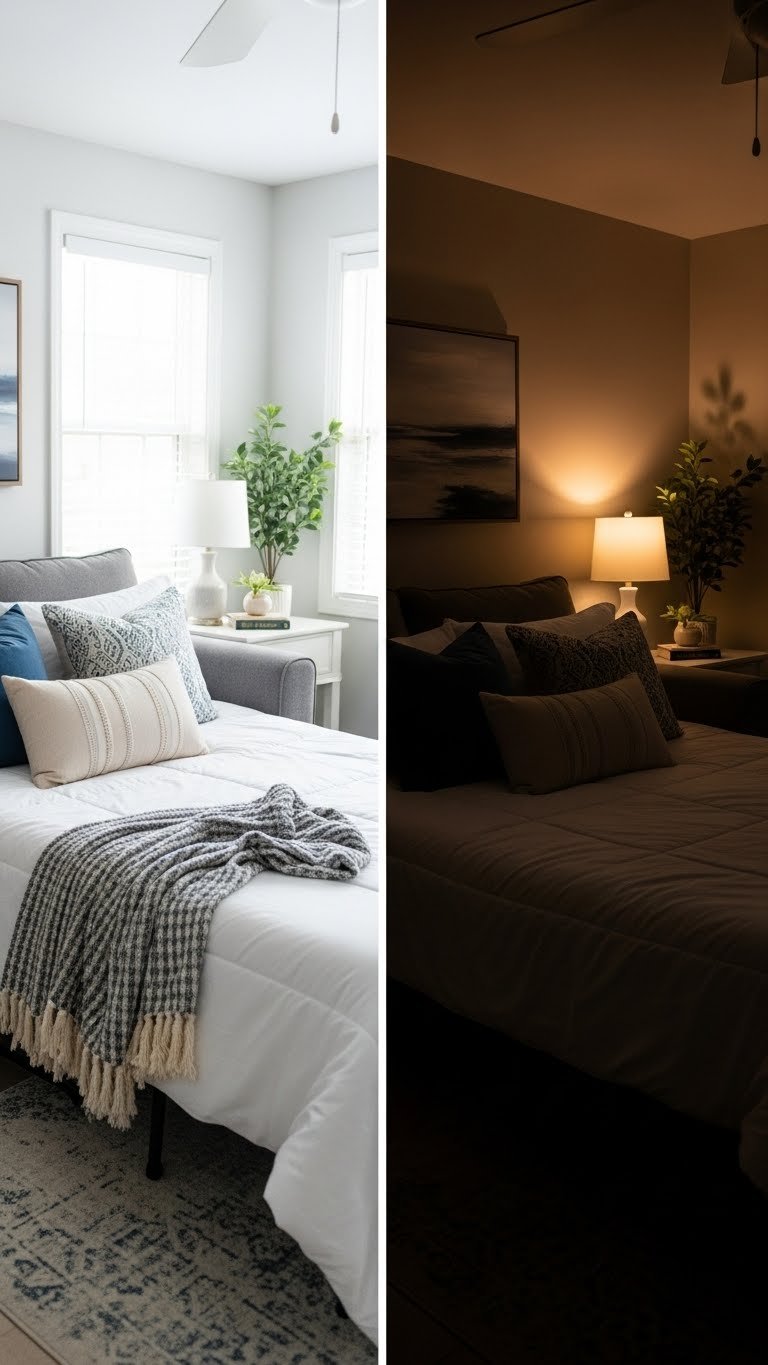
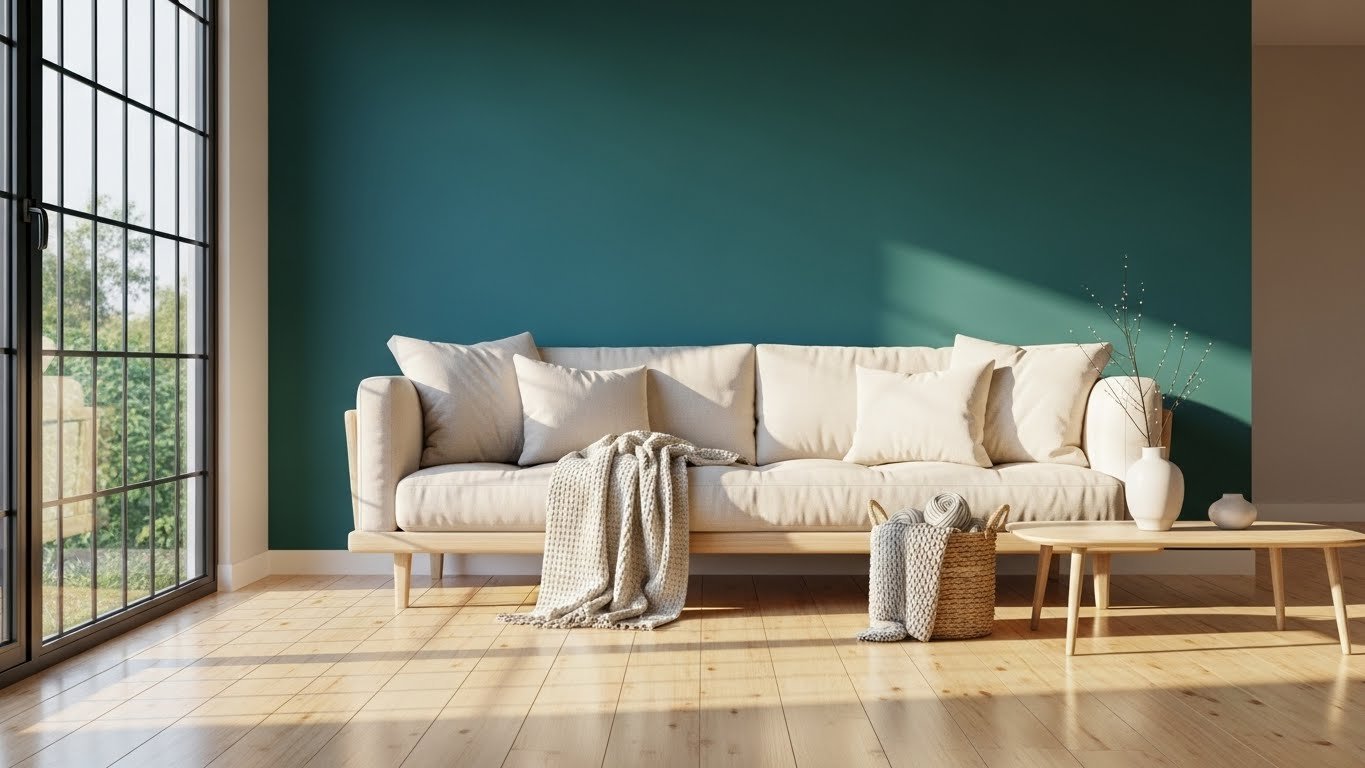
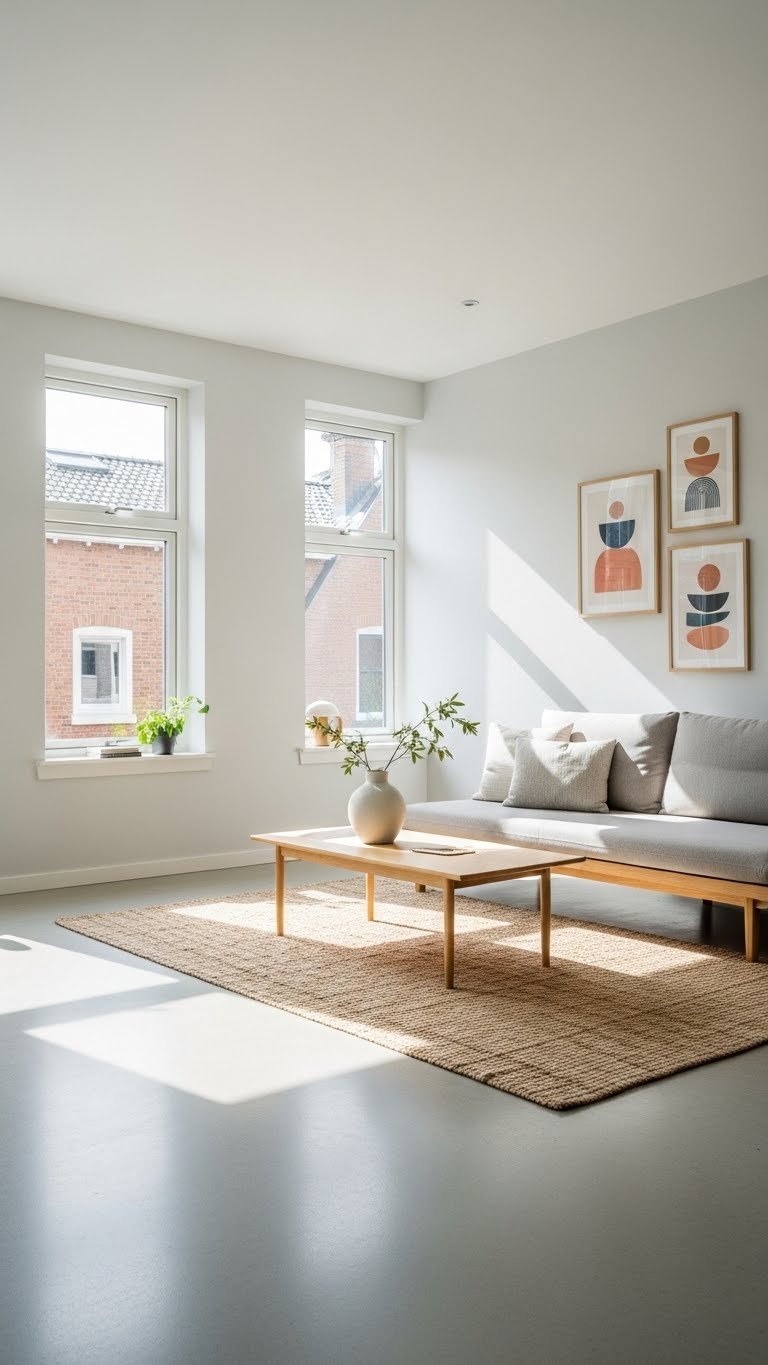
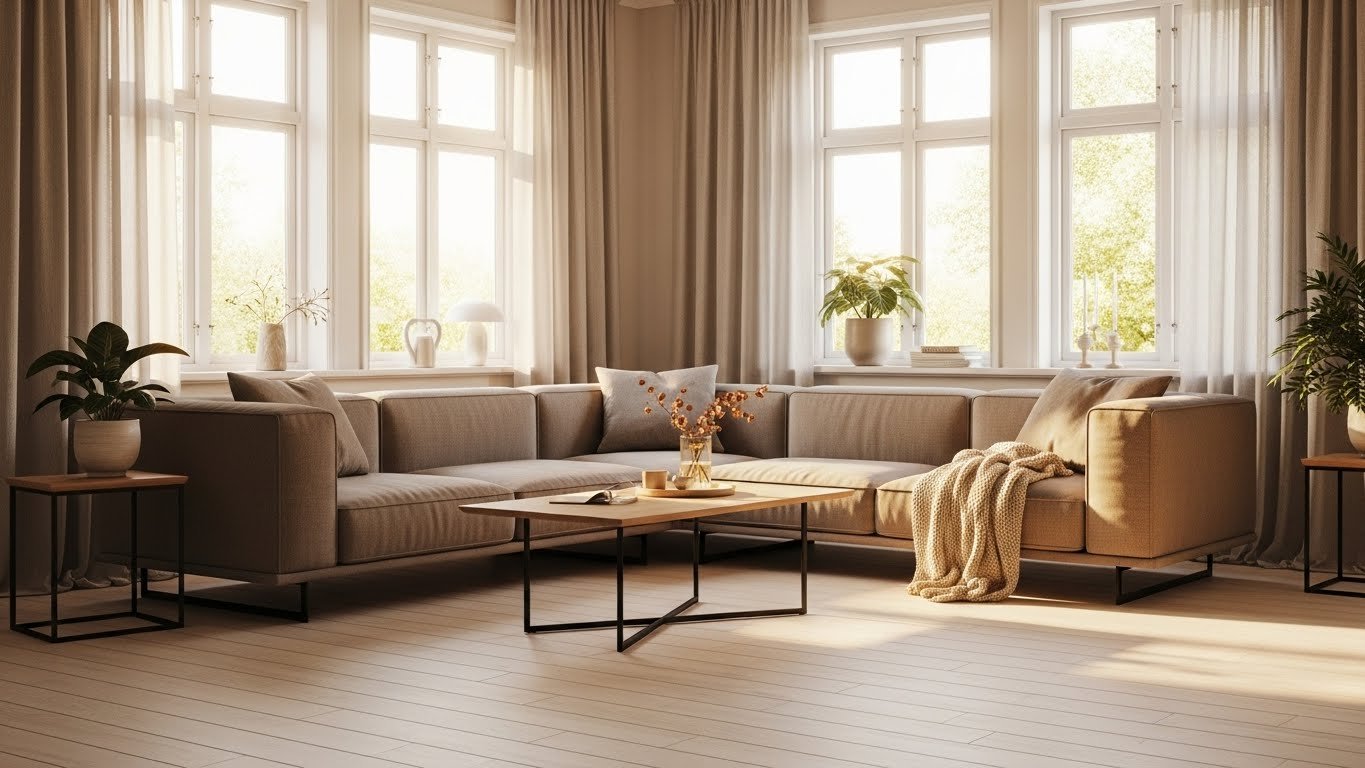
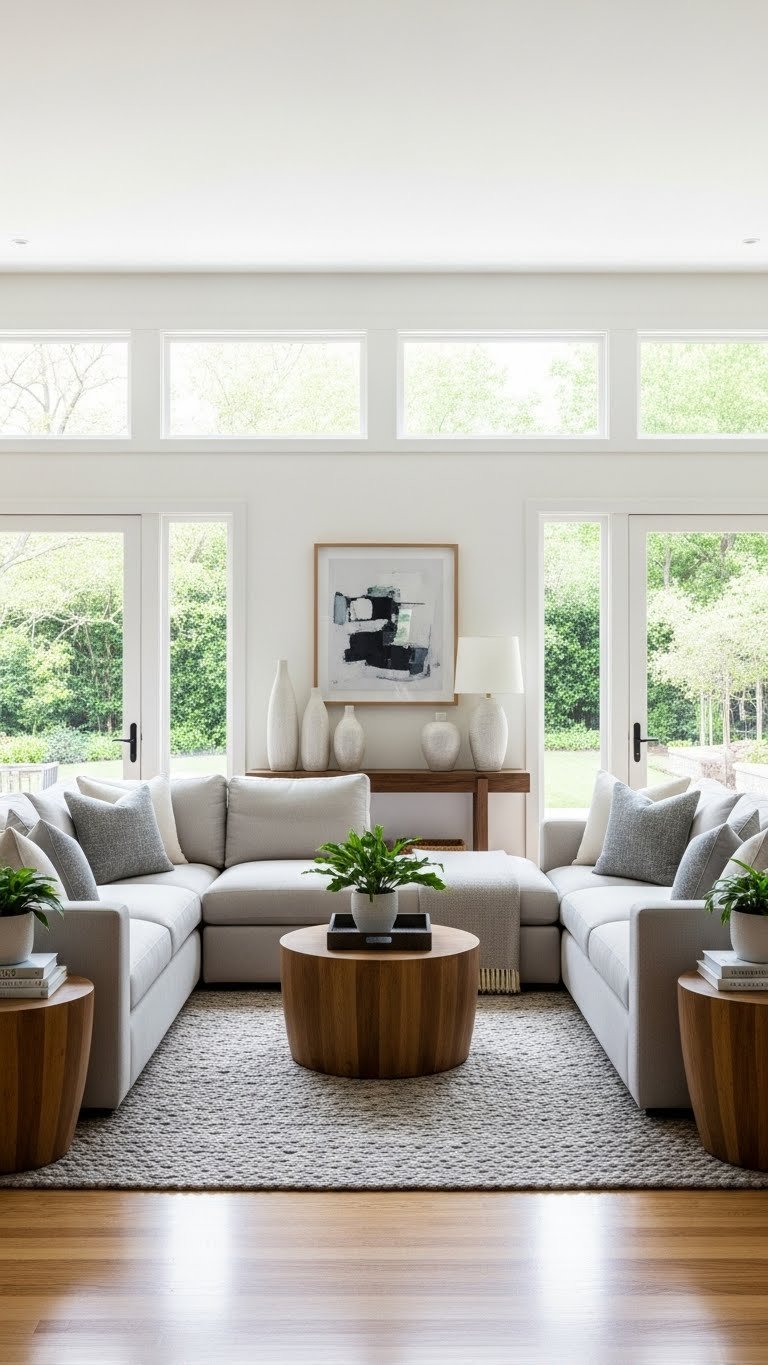
    26. Position a Sectional to Maximize Natural Light Interaction

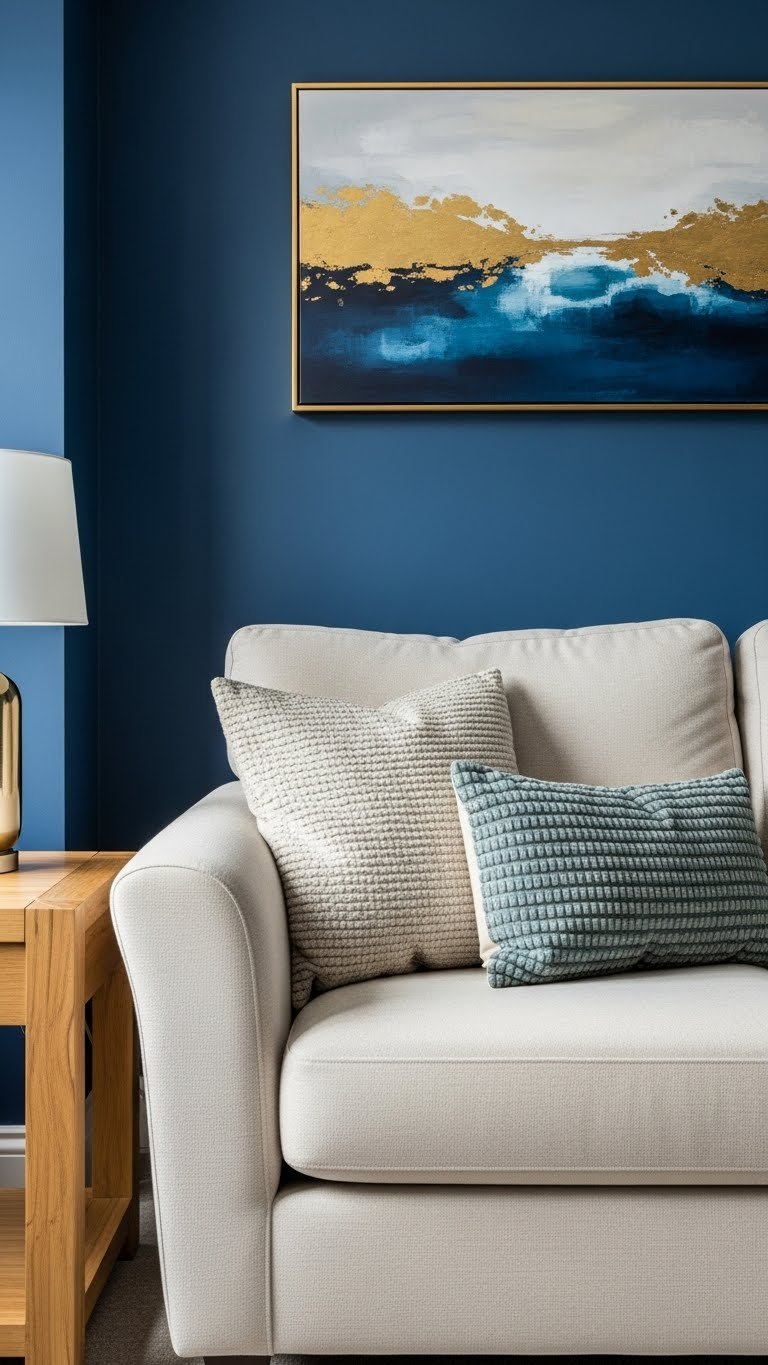
    Arrange your sectional so natural light can showcase its color and texture—position it perpendicular to (not opposite) windows so light hits the upholstery rather than washing it out.

    Measure where your best natural light enters the room, then position the sectional to interact with that light rather than fight it. This takes 30 minutes of observation and rearrangement; no budget required. Most powerful in the mornings or during golden hour. Works especially well with lighter fabrics (creams, beiges, soft grays) or statement colors that benefit from light highlight.

    Pro tip: Avoid positioning upholstery directly opposite a window where glare will wash out the color and create harsh shadows.

    Your sectional becomes more beautiful throughout the day as light shifts, and you’re working with your home’s natural features instead of against them.


    27. Mix Modular Sectionals with Built-In Seating for Hybrid Spaces

    Combine moveable modular pieces with permanent built-in seating—the built-in anchors your design while the modular pieces adapt as needed.

    This strategy works if you own your home or can convince your landlord. A corner sectional ($1,000–$1,500) plus a simple built-in bench or window seat (DIY from basic framing, $300–$800 in materials) creates a hybrid that’s both flexible and rooted. Arrangement takes a full weekend if building a simple bench, but just 30 minutes if the built-in already exists.

    Pro tip: Use the same fabric on both the built-in cushion and sectional to tie them together visually.

    You get permanent design appeal with the flexibility to evolve your layout as your life changes—best of both worlds.


    Save this post and try just one layout this weekend. Whether you’re rearranging what you own or shopping for your first sectional, one of these configurations will fit your room. Snap a before-and-after photo—you might be surprised how much a simple repositioning changes how your space feels.

  • 25 Textured Living Room Accent Ideas That Add Depth & Warmth

    25 Textured Living Room Accent Ideas That Add Depth & Warmth


    Stark, flat living rooms lack personality—and they’re exhausting to look at. But you don’t need a full renovation to add depth and visual interest. The secret? Layering textures that engage your senses and make your space feel intentional and warm.

    From wallpaper tricks to fabric mixing to DIY wall treatments, these 25 ideas show you exactly how to build dimension without overwhelming your space. Whether you’re renting, working with a tight budget, or ready to invest in statement pieces, you’ll find actionable solutions that work for your situation. Let’s add some real texture to your living room—starting today.


    1. Layer Wood Tones in Unexpected Places

    Wood isn’t just for furniture. Mixing different wood finishes on shelving, accent tables, and wall-mounted storage creates visual rhythm without cluttering your space. The key is varying the tones rather than matching them perfectly.

    Hunt for wood pieces at thrift stores (IKEA and Facebook Marketplace are goldmines). A light oak shelf, walnut side table, and honey-toned coffee table work beautifully together when the rest of your palette stays neutral. This takes about 30 minutes to style once pieces are in place. The layers catch light differently throughout the day, creating movement.

    Your room suddenly looks collected and curated rather than randomly decorated. Wood grain becomes a visual texture your eye naturally follows.


    2. Add a Woven Wall Hanging for Instant Dimension

    A statement woven hanging does heavy lifting—it’s art, texture, and focal point all in one. Macramé, rattan wall panels, or woven tapestries add organic, tactile interest without needing nails or installation.

    Look for $30–$80 options on Etsy, West Elm, or Target. If you DIY, rope and a wooden dowel cost under $15 and take 1–2 hours to weave a simple pattern. Hang it slightly off-center for a modern, less-formal look. Pair with greenery on either side to amplify the natural texture story.

    This single piece anchors your space and gives your eye somewhere meaningful to land. Guests notice the craftsmanship immediately.


    3. Create Depth with Stacked Stone or Textured Fireplace Surrounds

    If you own and have a fireplace (or are planning renovations), stacked stone or shiplap creates a focal point that’s all texture. Ribbon stone, stacked slate, or even faux stone options add legitimate depth and character.

    Real stone installation runs $1,500–$4,000 with a pro, but peel-and-stick stone veneers cost $150–$400 and are renter-friendly. Stick them yourself in a weekend afternoon. The shadow lines between stacked pieces create visual drama that flat paint simply can’t match.

    Your fireplace becomes the room’s anchor. Everything else supports it visually and texturally.


    4. Mix Velvet and Linen in Pillow Combinations

    Pillow mixing is an easy, affordable way to layer texture without commitment. Velvet catches light differently than linen, linen feels different than knit, and mixing all three creates a sensory experience.

    Grab $15–$40 pillows from IKEA, Target, or Wayfair in coordinating colors but contrasting fabrics. Aim for one satin or velvet, one textured weave (linen, burlap, canvas), and one chunky knit. Toss them casually—symmetry feels stiff. This takes 15 minutes to style and costs under $150 for a full sofa set.

    Your seating instantly looks more luxe and feels more inviting to actually relax in. The tactile variety makes people want to touch and settle in.


    5. Apply Textured Wallpaper to One Accent Wall

    Textured wallpaper (not smooth, patterned paper) adds dimension that paint can’t deliver. Grasscloth, cork, embossed geometric, or subtle 3D patterns work especially well in living rooms where you’ll see them daily.

    Budget $50–$150 per roll; most accent walls need 3–5 rolls. Professional installation is $200–$400, but renters and confident DIYers can apply it in 6–8 hours with a partner. Prep the wall properly (sanding, primer) for best results. Removable peel-and-stick textured wallpaper ($40–$80 per roll) is perfect if you’re unsure.

    The wall becomes a tactile backdrop rather than a flat surface. Even plain furniture in front of it looks more designed.


    6. Layer Area Rugs for Depth and Softness

    Rug layering is trend-forward and surprisingly functional. A large neutral base (jute, wool, cotton) with a smaller patterned rug layered on top creates visual interest and defines your seating zone.

    Buy a $100–$200 base rug from IKEA or Wayfair, then layer a $80–$250 patterned rug on top. The pattern should complement but not match your wall or furniture color. This takes 5 minutes to arrange and completely changes how a room feels. Opt for natural fiber bases (jute, sisal) for organic texture.

    Layering rugs creates a collected, intentional look. It also gives you flexibility—swap the top rug seasonally for a budget refresh.


    7. Install Shiplap or Paneling on Lower Walls

    Shiplap adds architectural texture and visual interest—especially when done as wainscoting (lower half paneled, upper half painted). It’s not just farmhouse anymore; modern shiplap in white, gray, or even dark tones feels contemporary.

    DIY shiplap costs $200–$600 for a room; pro installation runs $800–$1,500. Expect a weekend project for DIYers. For renters, peel-and-stick shiplap panels ($100–$300) apply in a day without damage. Paint the upper half a complementary color to make the texture pop visually.

    The dimensional play between horizontal lines and paint creates depth without adding objects to your space. It also hides marks and scuffs on lower walls.


    8. Hang Floating Shelves with Varied Depths

    Floating shelves at different depths create visual rhythm and texture through dimensional layering. Mix material finishes: reclaimed wood, live-edge, painted wood, or even concrete.

    Install shelves yourself for $50–$150 per shelf (hardware and materials); pro installation adds $50–$100 per shelf. A DIY installation takes 30 minutes per shelf with basic tools. Arrange items asymmetrically (odd numbers, varying heights) to maximize the depth effect.

    Shelves become sculptural elements that showcase your style while adding legitimate texture through their varied surfaces and shadows.


    9. Layer Textured Throw Blankets on Seating

    Throw blankets are functional art. Layering three different textures (chunky knit, linen, faux fur, or cable knit) on your sofa creates visual interest and tactile appeal.

    Grab $25–$60 throws from Target, IKEA, or Wayfair. Mix a chunky knit, a lightweight cotton or linen, and one luxe option (cashmere-blend, velvet, or faux fur). Drape them casually (not perfectly folded) over your sofa arms and back. This costs $75–$180 total and takes 5 minutes to style.

    Your seating looks inviting and lived-in rather than showroom-perfect. Guests see texture and comfort immediately.


    10. Use Cork or Cane Wall Panels as Modular Accents

    Modular wall panels in cork, cane, or woven rattan are sculptural texture. They’re lighter and more flexible than full shiplap but deliver serious visual interest.

    Peel-and-stick cane or cork panels cost $30–$80 each; most accents use 6–12 panels. Arrange them in a grid, staggered, or asymmetrical pattern for $200–$600 total. Installation takes 2–3 hours DIY with no damage if you use peel-and-stick. Mix panel heights and orientations for maximum dimension.

    The wall becomes a gallery of texture and natural material. It’s modern, sustainable, and works with almost any color palette.


    11. Paint Walls in Textured Finishes (Venetian Plaster or Matte)

    Paint finish matters more than most people realize. Matte finishes, Venetian plaster, or suede-textured paints create depth that glossy paint can’t match. Light plays across textured finishes, creating shadow and movement.

    Textured paint runs $30–$50 per gallon (vs. $20–$30 for standard). A pro painter costs $500–$1,200 per room; DIY takes a weekend with practice. Apply in thin layers with a specialty roller for best results. Venetian plaster is pricier but stunningly dimensional.

    Your walls stop being flat and start being architectural. The texture feels intentional and adds sophistication without pattern.


    12. Add a Jute or Sisal Rug Base Layer

    Natural fiber rugs (jute, sisal, seagrass) are texture workhorses. A large base rug anchors your space and adds organic warmth that synthetic materials struggle to deliver.

    Jute or sisal rugs cost $200–$600 for a large size from IKEA, Wayfair, or Home Depot. They’re durable and renter-friendly. Layer a smaller patterned rug on top ($80–$200) for visual interest without overwhelming the space. Delivery and placement takes one day.

    The natural fiber catches light and creates texture through its weave. Your space immediately feels warmer and more grounded.


    13. Arrange Books Horizontally and Vertically on Shelves

    Book arrangement sounds simple, but it’s a powerful texture tool. Mixing horizontal stacks, vertical arrangements, and horizontal + object combos creates visual movement and layers.

    This costs nothing if you already own books. Hit thrift stores for cheap volumes to fill gaps ($1–$3 each). Arrange so spines face forward and backward (not all matching), and tuck small objects between stacks for dimension. Rearranging takes 30–45 minutes.

    Your shelves become curated gallery spaces rather than mere storage. The varied heights and directions create rhythm your eye enjoys following.


    14. Install Decorative Wall Molding or Trim

    Architectural molding adds dimension and formality. Modern geometric patterns, simple trim frames, or traditional crown molding work depending on your style.

    DIY trim installation costs $200–$500 for a room (materials); pro installation runs $800–$2,000. A weekend DIY project if you have basic carpentry skills. Paint it to match walls for subtle dimension or in contrast for dramatic effect. Peel-and-stick molding ($50–$200) is renter-friendly.

    The molding creates visual frames and breaks up flat walls. Your space suddenly looks more architecturally considered.


    15. Layer Patterned Fabric Wall Tapestry Over a Solid Base

    Combining a solid-painted wall with a layered tapestry is texture through contrast. The flat background makes the textile’s texture and pattern stand out.

    Paint your wall a neutral ($50–$150 per room DIY). Layer a $40–$150 patterned tapestry (Etsy, Urban Outfitters, West Elm) on top. Hang slightly off-center or asymmetrically for modern appeal. This takes one weekend to complete and costs under $200.

    The layering effect is more sophisticated than either element alone. Your eye moves between the solid base and textile detail.


    16. Use Exposed Beams or Faux Beam Installation

    Beams add serious architectural texture, especially if stained or painted a deep tone. Real beams are pricey; faux beams ($200–$800) deliver 80% of the visual impact at a fraction of the cost.

    Real beam installation costs $2,000–$6,000+ and requires professional help. Faux beams (foam or lightweight wood) cost $200–$800 and take a weekend to install DIY. Stain or paint them to match your décor. The shadows they cast are the real magic.

    Beams draw your eye upward and add instant character. They make generic spaces feel purposeful and designed.


    17. Create a Textured Accent Wall with Wallpaper Patterns

    Pattern wallpaper paired with texture creates depth on overdrive. Geometric, abstract, or botanical patterns in rich colors anchor a room while adding visual and textural interest.

    Patterned wallpaper costs $25–$75 per roll; expect 3–5 rolls for one wall. Professional installation is $200–$400; DIY takes 6–8 hours with patience. Removable options ($40–$100 per roll) are renter-friendly. Pair with solid furniture to let the wall shine.

    One textured, patterned wall transforms your entire space. It becomes a focal point you’ll love looking at daily.


    18. Add Concrete or Stone Side Tables

    Concrete and stone tables add industrial texture and unexpected tactile interest. Lightweight concrete is affordable; real stone is pricier but stunning.

    Concrete side tables run $100–$300 (Target, CB2, Wayfair); reclaimed stone or slate tables cost $300–$800. Both materials develop character over time. A concrete DIY project takes a full day if you want to make your own ($50–$100 in materials). Position beside your sofa or chair for visual impact.

    These tables feel heavy and grounded compared to typical wood or glass options. They anchor your space while adding textural interest.


    19. Layer Ceramic, Glass, and Metal Objects on Display Shelves

    Object mixing is texture through material variety. Ceramics, glass, metals, wood, and plants together create visual richness without clutter.

    Thrift stores, HomeGoods, and Amazon offer affordable options ($5–$30 per object). Collect 8–12 pieces in varying heights and materials. Arrange with negative space (don’t crowd items). This costs $40–$150 total and takes 30 minutes to style.

    Your shelves become mini galleries. The variety of materials and textures makes even simple objects look intentional and collected.


    20. Install Acoustic or Textured Ceiling Panels

    Ceilings are often forgotten texture opportunities. Acoustic panels, wooden slats, or textured finishes add dimension and improve acoustics while looking intentional.

    Acoustic panels cost $30–$80 each (budget 8–15 for a room = $250–$1,200). Wooden slat ceiling panels run $50–$150 each. Professional installation is $800–$2,000; ambitious DIYers can tackle this in a weekend or two. Partial coverage (not full ceiling) feels modern and less overwhelming.

    Your eye moves upward, making rooms feel taller. Texture on the ceiling is unexpected and sophisticated.


    21. Mix Velvet and Leather Seating for Tactile Contrast

    Pairing velvet (soft, reflective) with leather (sleek, durable) creates visual and tactile contrast. Both materials add luxury and texture in different ways.

    A quality velvet sofa costs $800–$2,000; leather chairs run $400–$1,500. Look for sales at Article, West Elm, or Wayfair. Thrift stores sometimes have leather pieces for $100–$300. Mix jewel-tone velvet with natural leather for maximum contrast. Budget-conscious option: velvet and faux-leather pieces.

    The interplay between soft and sleek textures makes your seating area feel thoughtfully composed. It’s comfortable and looks intentional.


    22. Use Textured Wall Sconces and Statement Lighting

    Lighting is texture often overlooked. Sculptural sconces, textured lampshades (macramé, woven, pleated), or statement fixtures add dimension and drama through shape and shadow.

    Wall sconces cost $50–$300 each; textured pendant lights run $80–$400. Professional electrical installation is $100–$200 per fixture; renters can use plug-in sconces. Choose brass, wood, ceramic, or natural materials for maximum texture. One or two statement pieces (not matching pairs) feel modern.

    Lighting becomes decorative, not just functional. Shadows cast by textured fixtures add movement to your walls throughout the day.


    23. Apply Textured Paint Technique: Sponging or Ragging

    Textured paint techniques (sponging, ragging, stippling) create organic depth with just paint and tools. It’s budget-friendly and surprisingly easy to DIY.

    Buy two complementary paint colors ($20–$30 each). Grab a natural sponge or lint-free cloth ($5–$10). Follow YouTube tutorials (30 minutes prep, 2–4 hours application). Practice on cardboard first. The result is unique and handmade-looking.

    Your walls gain personality and movement. The layered color effect is far more interesting than flat paint.


    24. Arrange Mixed-Height Planters with Varied Textures

    Plant styling is texture through both pot material and foliage variety. Mixing ceramic, woven, concrete, and terracotta pots with different leaf shapes and sizes creates visual and tactile richness.

    Planters cost $10–$60 each; plants run $5–$40 depending on size. Budget $100–$250 for a small plant corner. Thrift stores have affordable pots. Arrange at different heights using small stands or shelves. This takes one afternoon to style.

    A plant-filled corner feels alive and sophisticated. The varied textures and materials make even a small collection look intentionally curated.


    25. Install Jute Rope or Macramé Wall Details

    Jute rope and macramé add organic, bohemian texture without committing to wallpaper or paint. Frame a mirror, create geometric wall art, or outline shelving.

    Jute rope costs $10–$25 per bundle (Amazon, craft stores). Macramé kits or pre-made pieces run $20–$80. DIY rope projects take 1–2 hours. Use strong adhesive or small nails for permanent placement; removable hooks work for renters. The result feels crafted and intentional.

    These details add soul to your space. Guests immediately sense the care and creativity in your décor.


    26. Layer Textured Wallpaper Under Framed Artwork

    Pairing textured wallpaper with layered artwork creates sophisticated depth. The wallpaper becomes a textured backdrop for your art rather than competing for attention.

    Textured wallpaper costs $50–$150 per roll (3–4 rolls = $150–$600). Frames and artwork run $20–$100 each; budget $200–$500 for 4–6 pieces. Arrange artwork asymmetrically for modern appeal. DIY installation takes one weekend.

    The layered approach feels curated and gallery-like. Texture supports your art rather than overwhelming it.


    Save this post and pick just one idea to start with this weekend. Texture builds gradually—add one element, see how it feels, then build from there. Your living room deserves to feel as good as it looks.

  • 24 Colorful Bookshelf Ideas That Brighten Any Room

    24 Colorful Bookshelf Ideas That Brighten Any Room

    Your bookshelf doesn’t have to be boring storage—it can be a colorful focal point that energizes your entire room. Whether you’re working with a small corner shelf or an entire wall, adding color transforms your space from blah to beautiful. In this guide, you’ll discover 24 creative ways to bring vibrancy to your books and shelves through paint, styling, and smart arrangements. From budget-friendly paint hacks to investment-worthy designer pieces, these ideas work for renters, homeowners, and anyone ready to make their shelves pop. Let’s turn that basic bookshelf into a room-brightening statement piece.

    1. Paint Your Shelf Backs in Bold Colors

    A painted backdrop instantly makes books and decorative items stand out while adding depth to your shelf. Choose a bold jewel tone like emerald, sapphire, or burgundy to create drama, or go soft with sage, blush, or dusty blue for a calming vibe.

    Paint the back panel of your bookshelf with quality acrylic or semi-gloss paint—it takes about 15 minutes and requires minimal skill. You’ll need $15-$30 for paint and a small brush from Home Depot or Lowe’s. If you’re renting, use removable wallpaper or peel-and-stick panels instead (search “self-adhesive bookshelf backing” on Amazon for $20-$50). Test your color choice with paint samples first; the lighting in your room affects how the color looks throughout the day.

    Your books suddenly look like gallery pieces against a rich backdrop, and the color sets the mood for your entire room.

    2. Arrange Books by Rainbow Order

    Rainbow organization is visually stunning and surprisingly satisfying to maintain. Unlike traditional shelving, color-sorted books create a gradient effect that draws the eye and makes your collection feel intentional and curated.

    Sort your books by spine color and arrange them left to right from warm to cool tones. This works best on shelves with 20+ books to create the full effect. You won’t need to buy anything—just reorganize what you own. The process takes 1-2 hours depending on your collection size. Pro tip: keep a few neutral decorative objects (white boxes, natural wood frames) to break up the color blocks and prevent visual overload.

    Guests immediately notice and comment on this colorful arrangement, and it makes finding books easier because you remember colors faster than titles.

    3. Mix Book Stacks with Potted Plants

    Adding living plants to your bookshelf brings organic color and texture that books alone can’t achieve. Green foliage softens hard lines and makes your shelf feel more dynamic and alive.

    Place 2-4 small potted plants (pothos, philodendron, or peperomia work great) among your book stacks. Low-light varieties survive in indoor shelf environments without constant attention. Costs range from $10-$40 depending on plant size (check Trader Joe’s, local nurseries, or Etsy). Water sparingly—about once every 2-3 weeks. Pair plants with brass plant stands or ceramic pots that complement your book colors for added visual interest.

    The combination of paper, plants, and ceramics creates a layered, sophisticated look that makes your shelf feel like an extension of your personality.

    4. Display Vintage Book Covers Horizontally

    Horizontal book stacking creates visual variety while showcasing gorgeous vintage covers you might otherwise hide on a spine. It’s the perfect solution if you’ve inherited beautiful old books or collected special editions.

    Stack 3-5 colorful vintage or collectible books horizontally on select shelves to create visual interest. Thrift stores, estate sales, and Better World Books offer affordable vintage editions for $3-$15 each. Lay heavier books on bottom shelves and alternate between horizontal stacks and upright books to maintain balance. Use a small brass bookend or decorative object to anchor the stack.

    This styling trick makes your bookshelf look curated and intentional, plus it gives new life to beautiful old books that deserve to be seen.

    5. Add Colorful Bookends as Decorative Stops

    Bookends serve function and style—they organize while adding coordinating color that ties your shelves together. Colorful bookends become micro art pieces that frame your collections.

    Choose bookends in colors that complement your books: coral, teal, mustard, or blush. Prices range from $15-$50 per pair depending on material (ceramic, wood, or metal). Wayfair, Target, and West Elm have great options. Position them to divide shelf sections and create visual rhythm. Pair mismatched bookends for an eclectic look—one geometric, one organic shape.

    The best part is bookends anchor your stacks while adding personality; your shelf looks polished and intentionally styled rather than randomly arranged.

    6. Create a Colorful Styling System with Decorative Boxes

    Decorative storage boxes hide clutter while adding color blocks that organize your visual space. This system works especially well in small spaces where you need stylish organization.

    Purchase 3-5 matching decorative boxes in colors that coordinate with your book palette: try gold, navy, emerald, or blush. Expect to spend $30-$80 at IKEA, Container Store, or Target. Fill boxes with bookends, extra books, or random items you want hidden. Arrange boxes on alternating shelves to create visual balance. Label the front with small brass label holders for extra organization.

    Suddenly your bookshelf looks intentional and organized, with defined color zones that make the space feel curated rather than cluttered.

    7. Paint Individual Shelf Edges Bright Colors

    Painting just the visible shelf edges gives you bold color impact without overwhelming the space. This trick works beautifully on white or light wood shelves and is perfect for renters since the color hides when shelves are full.

    Use acrylic paint in pastel or neon shades to paint the front 2-3 inches of each shelf edge. Paint costs $15-$25 total for multiple colors. Take about 30 minutes (including drying time). For renters: use painter’s tape and removable paint, or skip this step entirely and just arrange colorful books to create stripe effects naturally. Match colors to your room’s accent palette—pastels feel soft and modern, jewel tones feel elegant.

    The colored edges peek through when books are stacked, creating unexpected pops of color that make people do a double-take.

    8. Style with Colorful Art Prints and Small Frames

    Art prints break up solid book color while adding personality and visual complexity to your shelves. Small frames create a gallery feel without requiring wall space.

    Lean 2-4 framed prints among your books at varying heights. Mix sizes and styles—watercolors, abstract, botanicals, or vintage posters. Budget $20-$60 for frames from Etsy, minted.com, or print your own designs (Canva templates cost $5-$15). Dollar stores and Target offer affordable frame options. Lean prints at slight angles for a casual, curated gallery aesthetic. Choose print colors that either match or complement your book spines.

    Your shelf transforms into a personal art gallery that reflects your taste and makes browsing more visually interesting than just seeing book spines.

    9. Use Colorful Woven Baskets for Storage & Texture

    Woven baskets add natural texture and warm color while providing hidden storage for items you don’t want displayed. They soften the rigidity of rectangular books and add movement to your shelf.

    Place 2-3 woven baskets (seagrass, rattan, or jute) on lower or middle shelves. Costs range from $15-$50 per basket at IKEA, Target, or HomeGoods. Fill with extra blankets, cables, or anything you want organized but out of sight. Choose basket colors in warm neutrals (tan, cream, cognac) or go bold with colored wicker. Mix basket sizes for visual interest—one large, two small creates better balance than three identical baskets.

    The baskets add warmth and visual relief while keeping your shelf organized; it’s the perfect blend of pretty and practical.

    10. Layer Colorful Books Spine-Out and Stacked

    Layering spines vertically and horizontally creates visual rhythm and showcases more book color than traditional all-upright arrangement. It’s a professional styling technique that looks collected rather than random.

    Alternate between spine-out stacks and 2-3 horizontal book stacks per shelf. This naturally happens as you arrange, and it requires no extra spending. Take time arranging and rearranging until the color distribution feels balanced. Stand back and check from across the room—you want colors distributed evenly rather than all warm tones on one shelf. Pro tip: place heavier books on bottom shelves and use decorative objects to anchor stacks.

    The varied arrangement creates a dynamic, magazine-worthy display that looks intentionally styled and invites people to look closer.

    11. Add Colorful Ceramic Vessels and Vases

    Ceramic vessels add color, height variation, and sculptural interest that flat books can’t provide. They create vertical focal points and introduce colors beyond your book palette.

    Collect 2-4 colorful ceramic vessels in coordinating colors. Thrift stores offer affordable options for $3-$10 each; higher-end pieces from West Elm or Etsy run $25-$80. Fill some with dried flowers, pampas grass, or branches for extra color and texture. Place vessels at varying heights and cluster them in one section or distribute throughout. Choose shapes that complement your decor—modern geometric, rustic organic, or sleek minimalist.

    These pieces become focal points that draw attention and add dimension, making your shelf feel like a carefully curated collection rather than just books.

    12. Paint the Entire Bookshelf in Gradient Color

    A gradient paint treatment adds artistic sophistication while creating a subtle color story that enhances your books without competing. It’s more complex than single-color painting but creates a truly unique look.

    Paint your entire bookshelf in a gradient (light to dark, or warm to cool tones). This takes 4-6 hours over a weekend, plus drying time. You’ll need $30-$50 in paint, primer, and brushes. Use painter’s tape to create clean gradient zones, blending colors where they meet. Alternatively, hire a painter ($200-$400) if DIY painting intimidates you. Choose gradients that complement your room’s color scheme—pastels for calm spaces, jewel tones for drama.

    The gradient effect is unexpected and artistic, making your bookshelf a true statement piece that becomes the room’s visual anchor.

    13. Mix Colorful Spines with Neutral Wrapping

    Wrapping books in neutral paper or fabric creates visual breathing room and prevents color overload while maintaining a curated aesthetic. It’s perfect for ugly book covers or older editions you want to display but hide.

    Wrap 5-10 books in kraft paper, linen, or fabric tape. Costs are minimal—$10-$20 for supplies (craft paper from any office supply store). Use a ruler, pencil, and tape to create neat wraps that look intentional. Label spines with a metallic pen if desired. This technique works especially well for oversized books or odd-sized volumes that disrupt color flow. Pro tip: wrap books in your shelf’s accent color (like blush, sage, or navy) for a cohesive look.

    The neutral zones create visual calm and make your colorful books pop more dramatically; it’s minimalism meeting maximalism.

    14. Install LED Strip Lighting Behind Books

    Lighting dramatically changes how colors appear and creates ambiance while making your bookshelf a functional light source. LED strips are renter-friendly and inexpensive compared to rewiring.

    Install warm white LED strip lights along shelf edges (back or bottom). Costs range from $20-$50 for color-changing options or $10-$25 for simple warm white (Amazon, Home Depot). Installation takes 20 minutes with adhesive backing—no tools needed. Choose warm white (2700K) for cozy vibes or cool white (5000K) for modern feel. Plug into a nearby outlet or use battery-powered options if that’s easier. Pair lighting with your book colors for maximum effect—blues and purples glow beautifully under cool white light.

    The lighting adds atmosphere and highlights your colorful books while creating a functional reading light; your shelf becomes practical and gorgeous.

    15. Create Colorful Shelf Styling with Brass Accents

    Brass and gold metallics add warmth and sophistication while tying together multiple book colors. Metal accents create focal points and catch light beautifully against colorful spines.

    Scatter 3-5 brass or gold pieces among your books: bookends, small sculptures, decorative boxes, or picture frames. Budget $30-$80 depending on pieces (check HomeGoods, Target, or Etsy). Position metallics to break up color blocks and create visual rhythm. Mix different brass finishes (brushed, shiny, rose gold) for texture. Pro tip: cluster metallics in one section for impact, or distribute throughout for subtle elegance.

    The metallic accents feel premium and intentional, making your colorful shelf look like a designer styled it.

    16. Use Colorful Bookplates and Labels for Organization

    Decorative bookplates add personality while creating functional color coding for genre or category organization. They’re perfect for book lovers and cost almost nothing.

    Purchase colorful bookplates from Etsy ($5-$15 for 50-100 pieces) or make your own with label makers and colored tape. Create categories by color: fiction in red labels, non-fiction in blue, poetry in green, etc. Apply bookplates to spine corners where visible but not overwhelming. Use coordinating colors that complement your overall shelf palette. This works beautifully with rainbow-organized shelves, adding another layer of intentional styling.

    Your shelf becomes uniquely yours with custom labeling, plus you’ll spend less time hunting for specific books when colors and categories are clear.

    17. Display Colorful Book Series as Collections

    Grouping matching book series creates visual impact and shows you’re a serious collector. Coordinated spines create natural color blocks that look intentionally arranged.

    Identify your most colorful or impressive book series (Harry Potter special editions, fantasy series with matching spines, etc.) and dedicate one shelf section to displaying them. Most series cost $50-$200 depending on edition and condition. Arrange them chronologically or by color within the series. Anchor the collection with a decorative object at the end (bookend, small plant, or framed photo). This technique works beautifully for special editions with matching, colorful spines.

    Displaying collections makes your bookshelf feel like a gallery and shows off the beauty of carefully chosen editions.

    18. Mix Colorful Books with Colorful Décor Objects

    Blending books with carefully chosen décor objects creates a collected, gallery-like aesthetic rather than a utilitarian book storage system. Small objects add variety and personal storytelling to shelves.

    Integrate 3-5 small decorative objects (ceramic pieces, small sculptures, decorative plates, collectibles) among your books in coordinating colors. Budget $20-$100 depending on pieces (HomeGoods, local boutiques, or vintage shops have great options). Choose objects that tie to your interests—travel souvenirs, artistic pieces, cultural artifacts. Position objects at varying heights to create visual movement. Pro tip: cluster objects in groups of odd numbers (three shells, five small frames) rather than scattering them randomly.

    This approach transforms your bookshelf from storage into a personal museum that tells the story of your life and interests.

    19. Try Colorful Removable Wallpaper on Shelf Backs

    Patterned removable wallpaper adds color and design without permanent commitment—perfect for renters and those who like changing their space seasonally. Patterns add visual interest beyond solid color.

    Apply peel-and-stick wallpaper to your shelf back panel in patterns that complement your books. Costs range from $20-$50 for standard shelf sizes (Amazon, Etsy, Spoonflower). Installation takes 30-45 minutes with just a squeegee and patience. Choose patterns that won’t compete with your books—geometric designs, small florals, or subtle textures work better than busy oversized patterns. Remove and replace wallpaper seasonally if desired; the adhesive leaves no damage on painted surfaces.

    Patterned backdrops create instant drama while keeping your rental agreement intact.

    20. Create Color-Blocked Shelf Sections

    Color blocking (grouping colors into designated zones) creates visual organization and makes your shelf feel thoughtfully designed rather than randomly arranged. It’s gallery-style curation that’s easier to maintain than perfect rainbow arrangement.

    Identify 3-4 color families and dedicate shelf sections to each. Group reds, oranges, and pinks together; then move to purples and blues, etc. This takes 1-2 hours of rearrangement with zero extra spending. Place decorative objects or baskets between color sections to mark transitions and create visual breaks. Keep the arrangement flexible—books won’t perfectly match colors, and that’s fine. Pro tip: stand back regularly and adjust until color distribution feels balanced.

    The result feels intentionally styled and makes browsing feel organized; your brain processes visual information better when colors are grouped logically.

    21. Incorporate Colorful Bookmarks as Shelf Décor

    Colorful bookmarks add personality and small color pops without requiring major rearrangement. They’re especially charming if you collect bookmarks or enjoy handmade accessories.

    Display 5-8 favorite bookmarks either hanging from book tops (use small hooks or let them drape naturally) or standing upright in small vases. Bookmarks cost $2-$8 each from Etsy makers or boutique shops. Mix styles and colors—fabric, leather, beaded, or hand-painted. Cluster bookmarks in one area or distribute throughout. Pro tip: swap bookmarks seasonally to keep your shelf feeling fresh. This works beautifully as a low-commitment styling element.

    The bookmarks add handmade charm and personal touches that make your shelf feel lived-in and warm.

    22. Style Shelves with Colorful Magazine Stacks

    Magazine stacks add visual variety through their glossy covers and large format, plus they’re easier to refresh seasonally than books. Colorful magazine covers create instant eye appeal.

    Stack 3-5 colorful magazines horizontally on one or two shelves, mixing with upright books for variety. Magazines cost $5-$12 each new or $0.50-$2 from library sales and thrift stores. Choose magazines with covers that complement your color scheme. Stack them with heavier magazines on bottom and balance with decorative objects on top. Refresh your magazine stack seasonally as new issues arrive or swap for different titles.

    Magazine covers add a published, sophisticated feel while introducing new colors and visual interest without commitment to adding more books.

    23. Paint Books Themselves with Colorful Covers

    Painting book spines is a creative DIY project that allows you to transform boring covers into colorful statement pieces. It’s perfect for books you love but whose covers don’t match your aesthetic.

    Use acrylic paint and a fine brush to paint book spines in solid colors or custom designs. Supplies cost $10-$20 total (craft paint from any art store). Choose books with spines large enough to paint clearly. Test paint on one book first; it dries quickly and adheres well to paper. Paint solid colors for clean modern look, or add patterns, titles, or designs for artistic flair. This takes 15-30 minutes per book and is perfect for older editions or library rejects you want to display.

    Painted books become functional art while letting you customize your shelf palette exactly as desired.

    24. Mix Colorful Books with Clear or Frosted Display Boxes

    Display boxes create visual structure while allowing you to showcase specific collections or rotate items seasonally. They elevate your shelf styling and add architectural interest.

    Purchase 2-3 clear acrylic or frosted display boxes to place on shelves. Costs range from $25-$60 per box depending on size (Container Store, Etsy, or specialty retailers). Fill boxes with your favorite colorful books standing upright, small collectibles, art prints, or rotating seasonal items. Use boxes to create visual bookends for larger shelf sections or feature collections. Clear boxes maintain visual flow while frosted versions add mystery and separation.

    Display boxes create defined focal points and let you curate mini-exhibitions that feel thoughtfully planned; your bookshelf becomes a series of intentional vignettes.


    Save this post for your next shelf refresh. Try picking just one idea this weekend—whether it’s painting a shelf back, swapping your book arrangement to rainbow order, or adding one plant among your books. You’ll be amazed at how one colorful change brightens your entire room.

  • 23 Relaxation Corner Setups That Turn Any Space Into a Retreat

    23 Relaxation Corner Setups That Turn Any Space Into a Retreat

    Introduction

    Your bedroom should be a place where stress melts away the moment you step inside—but most bedrooms feel more like storage units than retreats. Between clutter, harsh lighting, and uninspiring décor, it’s hard to feel truly relaxed in your own space. The good news? You don’t need a major renovation or a huge budget to create a corner that actually soothes you. These 23 ideas range from free styling tweaks to strategic purchases that work whether you rent or own, and most take just a weekend to pull together. By the end, you’ll have multiple ways to carve out your own slice of calm, no matter how small your room or tight your timeline.


    1. Layer Window Treatments for Soft, Diffused Light

    Harsh, unfiltered daylight kills relaxation instantly. Layering a sheer curtain under solid panels gives you control—filter bright sun when you need rest, or pull them fully open for fresh air and natural warmth.

    Start with a sheer linen or cotton curtain from IKEA ($20–40) or Target ($30–50), hung on a simple rod at the window frame. Layer a heavier linen or linen-blend curtain on an outer rod. This setup takes about 30 minutes to install if you have basic hardware already. The result is adjustable lighting that feels intentional and spa-like, not like you’re hiding from the world.

    Pro tip: If you rent, use tension rods to avoid drilling holes. Most landlords won’t object, and you can take them with you.

    Your room now filters light exactly how you want it, turning midday into a calm afternoon any time.


    2. Invest in Quality Bedding That Actually Feels Good

    You spend a third of your life in bed, so mediocre sheets are a false economy. Good bedding—crisp cotton, breathable linen—signals your brain that this space is worth caring about and makes you want to get into bed.

    Look for 100% cotton sheets (at least 300 thread count) or linen blends from brands like Parachute ($100–150 per set), Target ($40–80), or Amazon Basics ($30–50). A quality duvet cover in neutral tones lets you swap looks seasonally. Budget about one weekend to find your preferences (ordering online, testing in-store if possible). The payoff is immediate: crawling into genuinely soft sheets feels like a small luxury every single night.

    Splurge on the sheets, save on pillowcases initially—you can upgrade those later.

    This one change makes your bed feel like a hotel upgrade, not just a place to sleep.


    3. Create a Reading Nook With Layered Textiles

    A dedicated spot for reading or quiet reflection doesn’t need much space—just a chair, good light, and textures that make you want to stay there. This becomes your mental escape hatch.

    Find an affordable chair (IKEA Strandmon, $120–150; Target accent chairs, $150–250; thrift stores, $20–80) and layer it with throws and pillows. Add a small side table ($30–80 from IKEA or Target) and a floor lamp with a warm bulb ($40–100). Total time: a Saturday afternoon to source and arrange. The key is layering—one pillow looks bare, but three in different textures (velvet, linen, knit) makes it feel intentional and inviting.

    Shop estate sales or Facebook Marketplace for vintage chairs—you’ll find unique pieces at half retail price.

    You’ve now built a corner that genuinely pulls you away from your phone and into calm, focused time.


    4. Hang Tapestries or Textured Wall Art for Depth

    Bare walls feel sterile and cold. A large tapestry or woven wall hanging adds visual interest, warmth, and a sense of enveloping comfort without requiring permanent changes—perfect for renters.

    Look for vintage tapestries on Etsy ($30–80), Urban Outfitters ($40–70), or thrift stores ($5–20). Hang it behind your bed, or drape it asymmetrically for a modern twist. A tension rod or removable hanging system takes 10 minutes. For a renter-friendly option, use 3M damage-free strips rated for the weight. The trick: let it slightly disappear behind your headboard for an old-world, layered aesthetic rather than obvious wall art.

    Mix botanical, geometric, or solid patterns based on your existing palette.

    This addition instantly adds personality and makes your bedroom feel collected, not catalog-like.


    5. Use a Dimmer Switch for Mood Lighting Control

    Overhead lights set to full brightness feel utilitarian and tense. A dimmer gives you control over mood—bright for cleaning or getting dressed, soft for winding down and relaxing.

    If you’re handy or own your home, install a dimmer switch in place of your standard switch (hardware store, $15–30; takes 20 minutes with basic tools). If you rent, use smart bulbs ($15–30 each from LIFX or Philips Hue) that dim via app or voice command—no wiring needed. Add warm-toned bulbs (2700K color temperature) for a cozy feel. The investment is small but the impact on your nightly routine is substantial.

    Pair dimmers with a bedside lamp and you’ll never want harsh ceiling light again.

    Now your lighting matches your mood instead of forcing you into alertness when you want to decompress.


    6. Add Indoor Plants for Living, Breathing Calm

    Plants improve air quality, add visual softness, and create a biophilic sense that nature is nearby. They’re especially powerful in bedrooms where calm is the goal.

    Start with low-maintenance varieties: pothos, snake plant, or monstera. Buy from Target, Home Depot, or a local nursery ($10–40 per plant). Cluster them at different heights on shelves or floor for visual interest. Water once a week (or less for snake plants), and you’re done. Even if you kill one occasionally, the act of tending plants signals self-care. Total setup: 30 minutes to arrange and water.

    If you have limited light, try pothos or snake plants—they thrive in indirect, even low light.

    Your room now feels alive and breathing, not static—a subtle shift that deeply affects how rested you feel.


    7. Swap Pillowcases for Seasonal Pattern Rotation

    Pillows are an easy, affordable way to refresh your bedroom without replacing anything. Rotating seasonal pillowcases keeps the space feeling intentional and prevents monotony.

    Buy sets of pillowcases ($12–25 per pair from Target, West Elm, IKEA) in 2–3 neutral tones and textures (linen, cotton, linen-blend). Mix and match as seasons change: warm terracottas and rust tones in fall, cool creams and sage in spring. Swap them in 5 minutes whenever you want a refresh. Over a year, you’ll have invested $50–100 for an ever-changing look that keeps your space from feeling stale.

    Thrift or buy sample pillowcases from HomeGoods or TJ Maxx ($5–15) for affordable variety.

    This simple trick makes your bedroom feel curated and fresh without requiring you to buy a new bed or furniture.


    8. Install Floating Shelves for Display and Storage

    Floating shelves add storage without visual heaviness and give you space to style small objects that bring you joy. They’re the midpoint between bare walls and cluttered surfaces.

    Install shelves using a stud finder and bracket kit ($30–80 from Home Depot or IKEA). If you rent, removable adhesive shelves ($20–50) work for lightweight items. Style them with books, plants, a small lamp, or candles—aim for 40% empty space so it doesn’t feel cluttered. Installation takes 1–2 hours for a beginner. The payoff is a personalized display that gives your room character.

    Start with one shelf if you’re unsure; you can always add more.

    These shelves turn blank wall space into a curated corner that reflects your taste and keeps nightstands clear.


    9. Use Blackout Curtains for Restorative Sleep

    Even small amounts of light—streetlamps, early sunrise—interrupt deep sleep. Blackout curtains block 99% of light and offer a psychological shift toward serious rest, not just napping.

    Look for room-darkening or blackout curtains ($40–100 per panel from Target, IKEA, Amazon). Thermal-lined versions also insulate and reduce noise. Hang them on a simple rod, or layer them under sheer curtains for daytime style. Installation takes 30 minutes. If you rent, check with your landlord about the rod—most allow non-permanent window hardware.

    Blackout curtains also create the illusion of a smaller, cozier nest.

    You’ll sleep deeper and wake less frequently, noticing the difference within the first week.


    10. Arrange a Low-Profile Console or Writing Desk

    A desk or console gives you a productive corner without taking over the room. Even renters can use slim, freestanding options that move easily between homes.

    Find a narrow desk or console table ($50–150 from IKEA, Target, or thrift stores). Position it under a window or along a wall where you can see the room, not into a corner. Add a chair, a small warm lamp, and a plant. This becomes your spot for journaling, paying bills, or creative work—separate from your bed, which stays sacred for sleep and relaxation. Setup takes an afternoon.

    A simple folding desk ($30–60) works if space is extremely tight.

    Now you have a distinct zone for productivity, keeping your bed and relaxation corner feeling purely restful.


    11. Layer a Large Area Rug for Warmth and Texture

    A bare floor feels cold and disconnected. A large rug grounds the room, adds texture underfoot, and defines your sleep space as separate and special.

    Invest in a 8×10 or 9×12 rug in natural fibers (jute, wool, or jute-blend) from Wayfair, IKEA, or Ruggable ($100–300). Layer a smaller throw rug on top for extra texture and contrast ($50–150). Jute has an earthy feel; wool adds softness. Position the bed so it sits partially or fully on the rug for a cohesive, grounded look. Budget a weekend to shop and arrange. Rugs anchor a room psychologically—they say “this space is intentional.”

    Budget option: Use a smaller rug ($50–100) if full-size is out of reach; layering still works.

    Your feet now sink into softness instead of cold floor, signaling relaxation the moment you step into your room.


    12. Install a Swing Arm Sconce for Flexible Bedside Light

    Overhead lights and bright lamps create glare on your pillow. A swing arm sconce pivots to direct light exactly where you need it—perfect for reading, journaling, or winding down without waking a partner.

    Install a swing arm sconce ($40–100 from Schoolhouse Electric, Rejuvenation, or Amazon) at the bedside using a standard wall bracket. If you rent, use a plug-in swing arm ($50–80) that requires no wiring. Pair it with a warm-toned bulb (2700K). Installation takes 30 minutes for a permanent mount. The benefit: targeted light that won’t shine in your face or across the room, making bedtime routines feel more spa-like than utilitarian.

    A swing arm sconce replaces multiple bedside lamps, actually saving space.

    You’ll read or journal comfortably without harsh light, and the ability to angle the light makes it feel personalized to your needs.


    13. Create a Scent Ritual With Candles or Diffusers

    Scent is powerfully connected to relaxation and memory. A consistent bedtime scent ritual tells your brain it’s time to unwind, even on stressful days.

    Choose a signature scent: candles ($10–30 from P.F. Candle Co., Jo Malone, or Target), an essential oil diffuser ($20–50 from Vitruvi or Amazon), or a room spray ($10–20). Light or diffuse it the same time each evening. After two weeks, your brain will anticipate calm when you catch that scent. The investment is minimal but the psychological payoff is real. Scents like lavender, cedarwood, or chamomile are especially soothing.

    For renters: candles or diffusers require zero installation and move with you.

    Your bedroom now has a sensory anchor that signals rest—even on chaotic days.


    14. Hang String Lights or Fairy Lights for Soft Ambiance

    String lights feel whimsical but also deeply calming. They provide functional light without the harshness of ceiling fixtures, and they’re renter-friendly and removable.

    Buy warm LED string lights ($15–40 from Target, Amazon, or Urban Outfitters). Drape them around your headboard, along a shelf, or across a corner using removable clips or hooks. Plug into an outlet or use battery-operated versions ($20–35) for absolute flexibility. Setup takes 15 minutes. The warm glow creates an intimate, almost campfire-like feeling—psychologically very different from overhead light, which keeps your mind alert.

    Avoid bright white lights; choose 2700K warm white or amber for best results.

    Your room now has a soft, dreamlike quality that makes you want to stay in it longer.


    15. Layer Window Seat Cushions for Luxury Perching

    If you have a windowsill or bench, turning it into a cushioned retreat spot requires minimal investment and creates major coziness. This becomes your daytime reading or meditation corner.

    Get a custom cushion cut at a fabric store ($40–80) or buy a pre-made one ($30–60 from Target or IKEA). Layer it with 2–3 throw pillows ($15–40 each) and a lightweight throw ($25–50). Arrange it so you can curl up and gaze out the window without being visible from the street. Install takes 20 minutes. This corner becomes intensely personal—a spot you retreat to without leaving your room.

    DIY option: Use a yoga mat or pool float covered with a pretty sheet for a zero-cost cushion.

    You’ve created an intimate viewing platform that makes even quiet moments feel like a mini-vacation.


    16. Paint Walls in Warm Neutrals for a Calming Backdrop

    Wall color sets the emotional tone for your entire room. Cool whites feel clinical; warm neutrals feel safe and enveloping. A fresh coat of paint is one of the highest-impact changes you can make.

    Choose warm neutrals like cream, warm greige, soft terracotta, or pale sage (brands like Benjamin Moore, Sherwin-Williams, Behr). A quart of high-quality paint runs $15–25; a gallon $30–50. Primer is included in premium paints. One coat typically covers well; two coats ensure depth. Painting takes a weekend—one evening to prep, one evening to paint. If you rent, check your lease; most landlords allow neutral wall colors. Renting? Use peel-and-stick wallpaper ($30–60 per roll) for a similar effect without paint.

    Test samples on your wall and observe in morning, afternoon, and evening light before committing.

    Your room now has a sophisticated, soothing foundation that makes everything else—furniture, textiles, accessories—look intentional.


    17. Arrange Books by Color for Visual Calm and Display

    Books are natural décor, but chaotic stacks feel stressful. Arranging by color (a trend called “rainbow shelving”) creates visual order that calms the eye and makes your room feel designed, not haphazard.

    Pull your books and sort by color: warm neutrals, blues, greens, jewel tones. Stand them vertically or lay stacks horizontally. Add small objects (candles, plants, framed photos) to break up visual heaviness. This takes an hour or two but the payoff is a shelf that looks like intentional design. You’ll also discover books you forgot you had, which feels like free novelty in your space.

    No books? Use decorative boxes ($10–30 each) stacked by color for the same effect.

    Your shelves now feel curated and restful instead of chaotic, making your whole room appear more organized.


    18. Use Vintage or Thrifted Furniture for Unique Character

    Mass-produced furniture feels soulless. Vintage and thrifted pieces add character, story, and uniqueness that no new piece can replicate—plus they’re usually cheaper and more sustainable.

    Shop Facebook Marketplace, local thrift stores, estate sales, and Craigslist for furniture with bones—don’t worry about upholstery or finish. A mid-century dresser ($50–200) or vintage chair ($30–100) can be refreshed with paint, new fabric, or simply by pairing with fresh accessories. Hunting takes time but is genuinely fun, and you’ll end up with one-of-a-kind pieces. Budget a few weekends to source strategically.

    One statement vintage piece instantly makes a room feel like someone thoughtful lives there.

    Your bedroom now tells a story—not just visually, but emotionally. It feels collected and lived-in, not decorated.


    19. Install a Headboard or Fabric Wall Hanging for Focal Point

    A headboard anchors your bed as the room’s focal point and creates an enveloping sense of rest. It doesn’t need to be expensive or permanent.

    Buy a fabric headboard panel ($100–300 from West Elm, Wayfair) or DIY one using reclaimed wood ($50–150) and basic tools. For renters, use peel-and-stick wallpaper ($40–80) or a fabric hanging ($50–100) behind the bed—removable and zero commitment. This setup takes an afternoon to install and instantly elevates the room’s entire aesthetic. The bed becomes a sanctuary, not just furniture.

    Alternatively: Hang a large tapestry or old quilt behind the bed for instant headboard effect.

    Your bedroom focal point now communicates comfort and intention, making the space feel designed rather than default.


    20. Create Layered Nightstands With Small Plants and Lighting

    Nightstands set the tone for sleep and morning routine. Styling them thoughtfully signals that this bedroom is a priority space, not an afterthought.

    Place a small table ($30–80 from IKEA, Target, thrift stores) on each side of your bed. Layer each with: a warm lamp ($25–60), a small plant ($10–20), a candle ($10–20), and your current book or journal. Keep drawers clear of clutter (use drawer organizers, $5–15). This takes 30 minutes to set up and instantly makes your bedroom feel like a hotel suite. The repetition on both sides creates visual balance and calm.

    Use matching or complementary lamps for a cohesive look; plants can differ slightly for personality.

    Your nightstands now function as both practical and beautiful, supporting your nightly wind-down ritual.


    21. Add a Full-Length Mirror for Space and Light Reflection

    Mirrors expand space and bounce light around, making even small bedrooms feel larger and brighter. They’re practical for getting ready and psychologically calming in how they open up a room.

    Install a full-length mirror ($40–120 from IKEA, Target, West Elm) leaning against a wall or hung beside your bed. Position it to reflect a window or light source for maximum brightening. Mounting takes 15 minutes if wall-hung; leaning takes zero setup. The trick is angle—tilt it slightly so light bounces across the room rather than straight back at you. Even a $40 IKEA mirror creates a surprising shift.

    Hang a frame around a simple mirror ($30 DIY frame kit) for a finished look.

    Your room now feels airier and brighter, with doubled natural light making it appear larger and more open.


    22. Use Soft Area Lighting to Eliminate Dark Corners

    Dark corners feel claustrophobic and uninviting. Strategic lighting eliminates shadows and creates cozy, safe-feeling zones throughout your room.

    Add floor lamps ($40–100 from Target, IKEA, West Elm), table lamps ($25–80), and string lights ($15–40) in corners that feel dark or empty. Aim for warm-toned bulbs (2700K). Arrange so light pools rather than glares—indirect lighting feels calmer than direct. This setup takes an evening to arrange and costs $50–200 total, but transforms the entire room’s atmosphere. You’ve essentially added multiple “rest zones” rather than one harsh center light.

    Use LED bulbs (last longer, run cooler, save money) across all new lighting.

    Every corner of your room now feels safe and intentional, with no harsh shadows to create psychological unease.


    23. Style Your Bed With Layered Textiles and Mixed Textures

    Your bed is the focal point, so styling it with intention makes your room feel magazine-worthy and deeply inviting. Layering textures creates visual and tactile richness that reads as luxury.

    Start with quality sheets ($40–80 per set), add a duvet or comforter ($80–200), layer a throw blanket ($30–100), and finish with 4–5 pillows in different sizes and textures ($15–40 each). Mix velvet, linen, knit, and cotton for tactile variety. Vary pillow sizes (euro, standard, lumbar) and styles (patterned, solid, textured). The bed should look plush and inviting, not sparse. Styling takes an afternoon and costs $200–400 total, but your bed becomes a genuine sanctuary you’ll want to climb into every night.

    Start small: one good pillow per style category, then add over time.

    Your bed now looks hotel-level inviting and genuinely feels as good as it appears—a place you can’t wait to crawl into.


    Save this post and pick one idea to tackle this weekend. Whether it’s new lighting, a single shelf, or fresh pillowcases, small changes compound fast—and your bedroom deserves to feel like the retreat you actually want to be in.

  • 25 Latest Sofa Set Designs That Refresh Your Space in Style

    25 Latest Sofa Set Designs That Refresh Your Space in Style

    Your living room might feel stuck in yesterday’s design trends. Sofas have evolved far beyond generic rectangles, and the right one can completely reshape how your space looks and feels. Whether you’re working with a small apartment, a sprawling open floor plan, or somewhere in between, there’s a sofa style that matches both your lifestyle and your vision. This guide walks you through 25 of the latest sofa designs that are actually doable—from budget-friendly finds to splurge-worthy investment pieces. You’ll discover curves, colors, configurations, and styling tricks that designers are using right now to create living rooms people actually want to hang out in.

    1. Go Curved for a Softer, Modern Aesthetic

    Curved sofas are having a major moment because they soften up any room instantly. Instead of sharp corners that make spaces feel rigid, curves create flow and invite people to actually sit close together.

    You can find curved sofas at Living Spaces (starting around $1,200–$3,000), Wayfair ($800–$2,500), and custom options through What A Room (typically $1,500–$4,000+). Look for curved sectionals in L-shaped or U-shaped configurations if you want maximum seating impact. The styling bonus: curved sofas work as a natural focal point, so you don’t need a ton of extra furniture competing for attention.

    Pro tip: If you’re renting or unsure about commitment, check out curved loveseats or smaller sectionals first to test the layout before going full-size.

    The curved silhouette creates natural conversation zones that make your living room feel more social and intentional. You’ll notice guests naturally gravitate closer together—it changes the whole vibe.

    2. Choose Modular Sectionals for Ultimate Flexibility

    Modular sofas are the smart choice if you move frequently, have pets, or just like rearranging your space. Each piece works independently, so you can add, remove, or reconfigure without replacing the entire sofa.

    Brands leading the modular trend: Article ($600–$1,500 per module), Hem ($900–$2,000), and IKEA’s Kivik series ($400–$1,000 per section). Most modular pieces come with connector plates, so reassembly takes about 30 minutes. Pricing is usually per section, so budget accordingly—a three-piece configuration typically costs $1,200–$2,500 total.

    Pro tip: Choose a neutral base color (camel, gray, charcoal) and add personality with modular ottomans or accent pieces you can swap out seasonally.

    This setup means you’re not locked into one layout—rearrange based on your mood, season, or whenever guests need extra seating. The flexibility alone is worth it for anyone who gets bored easily.

    3. Invest in Oversized Deep-Seated Comfort

    If comfort is non-negotiable, oversized deep-seated sofas are where it’s at. These aren’t your grandmother’s formal couches—they’re basically furniture you can get lost in.

    Look for sofas with seat depths of 30–36 inches (standard is 24–26). Brands like Restoration Hardware ($3,000–$8,000), Article ($1,200–$2,800), and budget-friendly Wayfair and Target ($1,000–$2,000) all offer deep-seated options. You’ll pay more for extra depth, but the trade-off is that you’ll actually use your sofa instead of wishing you were in bed.

    Pro tip: Test the depth in person if you can—what feels deep to one person might not feel right for another. Video calls with store associates are surprisingly helpful here.

    A genuinely comfortable sofa changes your whole relationship with your living room. You’ll find yourself relaxing there instead of retreating to the bedroom, which is the real win.

    4. Try Low-Profile Silhouettes for Airy Modern Spaces

    Low-profile sofas create the illusion of more floor space because you can see underneath them. They’re perfect for smaller rooms or anyone who wants that sleek, Scandinavian-design vibe.

    These work best when paired with modern décor. Try IKEA’s Kivik ($500–$900), Article’s Ceni or Sven lines ($900–$1,600), or splurge on Design Within Reach ($2,000–$5,000). Installation is quick—most arrive flat-pack or assembly-ready within 1–2 hours. The lower profile does mean less under-sofa storage for things like throw blankets, so plan your organization around that.

    Pro tip: Renter-friendly tip: low-profile sofas are easier to move through doorways than chunky traditional styles.

    Your room looks noticeably larger and more open once you swap out a bulky couch for something lean and grounded. The visual breathing room makes the whole space feel less cramped.

    5. Embrace Earthy Neutrals as Your Canvas

    Earthy neutrals—camel, clay, warm beige, oatmeal—are trending because they photograph beautifully and pair with everything. They’re the opposite of boring; they’re actually the most flexible foundation for personal style.

    Where to find them: Virtually every major furniture retailer now offers earthy tones. West Elm ($1,200–$3,000), Restoration Hardware ($2,500–$6,000), and budget options like Wayfair ($600–$1,500) have extensive neutral selections. The price point depends way more on fabric quality than color.

    Pro tip: Neutral sofas are your investment piece—you can change accent décor without re-buying furniture.

    Once you go neutral, you realize how much creative freedom it gives you. Your sofa stops fighting for attention and becomes the perfect backdrop for whatever style direction you want to go next.

    6. Select Performance Fabrics for Real-Life Living

    Performance fabrics are woven with synthetic fibers that resist stains, fading, and wear—basically, they’re designed for chaos. If you have kids, pets, or just eat on the couch, these are game-changers.

    Top picks: Crypton, Sunbrella, and Revolution fabrics from brands like Restoration Hardware ($2,000–$5,000), Article ($1,200–$2,500), or Wayfair’s performance-fabric options ($800–$1,800). Performance fabrics usually cost 15–25% more than standard upholstery, but they’ll last 2–3 times longer. Most are water and stain-resistant and cleanable with just a damp cloth or mild soap.

    Pro tip: Ask specifically for performance fabric options when shopping—not all retailers highlight them.

    You’ll actually feel relaxed on a performance-fabric sofa instead of anxious about spills. That peace of mind alone is worth the small upcharge.

    7. Add a Statement Blue or Green for Wellness Vibes

    Moody blues and muted greens are trending hard because they’re calming without being cold. Sage, olive, and soft teal connect us to nature and create spaces that genuinely feel restorative.

    Where to find them: Living Spaces has extensive color options ($1,200–$3,500), as does West Elm ($1,200–$3,000), Article ($900–$2,000), and Bellona USA color guides suggest pairing with warm wood tones and soft textures. These colors work best with warm lighting (avoid overly bright white bulbs). Budget for a dimmer switch or warm LED bulbs if your lighting feels harsh.

    Pro tip: Look at color samples in your actual space during different times of day before committing.

    This color choice makes your living room feel like a personal retreat instead of just a furniture arrangement. You’ll notice the difference the moment you sit down—it’s more restorative than you’d expect.

    8. Go Bold with Pattern and Color (Skip Safe Neutrals)

    Statement sofas with patterns or bold colors are for people who are done blending in. Florals, stripes, geometric prints, and jewel tones make your sofa the hero instead of background furniture.

    Designer picks: What A Room specializes in custom patterned options ($2,000–$5,000), while Wayfair and West Elm carry patterned collections ($1,200–$3,000). Bold choices photograph incredibly well (hello, Pinterest-worthy living rooms) and make small spaces feel intentional rather than cramped. The trade-off: patterns are trickier to style around, so plan your accent colors carefully.

    Pro tip: If you’re nervous about commitment, try a bold patterned loveseat or sectional corner piece first to test your comfort level.

    A patterned or boldly colored sofa stops being furniture and becomes a conversation starter. Your living room immediately feels like it reflects who you actually are.

    9. Layer Textures for Depth and Coziness

    Mixing textures—velvet, boucle, linen, leather—makes a living room feel way more curated and inviting. Flat, single-texture sofas can feel one-note, but layering different materials creates visual and tactile interest.

    Start with your sofa as the base and add: a linen throw, a velvet pillow, a boucle accent piece, and maybe a leather ottoman. Budget $50–$200 for quality throw blankets and $30–$100 per pillow from places like Target ($20–$80), West Elm ($40–$150), or Wayfair ($25–$120). The texture combinations are endless, and you can swap them seasonally.

    Pro tip: Stick to a cohesive color palette when mixing textures—three colors maximum prevents it from looking cluttered.

    Layered textures make your sofa look expensive and intentional, even if the base piece is budget-friendly. Your space automatically feels more sophisticated.

    10. Use L-Shaped Modularity to Zone Open Homes

    In open-plan homes, an L-shaped sectional acts as a built-in room divider without closing off the space. It creates natural zones that define the living area and make the layout feel intentional.

    Designer Brynna Evans from Living Spaces recommends positioning the longer side parallel to the wall and the corner piece angling into the room. This strategy works with modular pieces ($1,500–$3,500) or built L-shapes ($1,200–$4,000). The setup usually takes an afternoon to arrange and typically takes up 8–12 linear feet of wall space.

    Pro tip: Measure your space first—account for traffic flow so the layout doesn’t feel cramped or awkward.

    Once you zone your open plan with the right sofa, both spaces feel more purposeful. Your living area looks designed instead of just filled with furniture.

    11. Choose Charcoal or Gray for Modern, Moody Interiors

    Dark sofas are having a comeback because they feel modern and create sophisticated, moody spaces. Charcoal and deep gray work especially well in homes with concrete, metal, or industrial-inspired elements.

    Options: West Elm ($1,200–$3,000), Article ($900–$2,500), Wayfair ($700–$2,000). Dark colors hide wear better than light neutrals, which is a practical bonus. The main challenge: dark sofas can make small rooms feel smaller, so pair them with light walls and good lighting to balance the space.

    Pro tip: Use a combination of table lamps, floor lamps, and warm accent lighting to prevent the room from feeling cave-like.

    A well-styled dark sofa creates a sophisticated, retreat-like atmosphere. It’s the opposite of living-room-as-showroom feeling—it’s curated and intentional.

    12. Explore Scandinavian-Inspired Low-Maintenance Pieces

    Scandinavian design prioritizes function and simplicity—no unnecessary details, just solid construction and thoughtful details. These sofas often double as sleepers or have hidden storage, making them perfect for small homes.

    Brands: IKEA leads here ($400–$1,200), but Article’s Scandinavian collection ($800–$2,000) and Urban Natural ($1,000–$2,500) offer higher-end options. Scandinavian sofas are usually upholstered in durable linen or performance fabric and come with minimal assembly. The wood frames are typically birch or oak, designed to last decades.

    Pro tip: These pieces age beautifully—they often look better after a few years of use than brand new.

    Scandinavian sofas feel timeless instead of trendy. You’re not constantly wondering if the style is “still in”—good design just works forever.

    13. Incorporate Sleeper Sofas for Multipurpose Rooms

    Sleeper sofas have evolved beyond rickety metal frames and uncomfortable plastic mattresses. Modern sleeper mechanisms are actually comfortable and hide completely when the sofa is in seating mode.

    Look for sofas with pull-out queen mattresses (easiest to sleep on) from Wayfair ($900–$2,000), Article ($1,200–$2,500), or splurge on Restoration Hardware’s sleeper options ($2,500–$5,000). Quality matters here—test the mattress comfort in person if possible. Check for easy-pull mechanics and memory foam mattresses (way better than basic innerspring). Budget an extra 15 minutes to pull out and put away.

    Pro tip: Pair with quality bedding designed for sleeper sofas—it stores neatly in a basket beside the sofa.

    You get a full living room sofa plus an actual guest bed when you need it. That dual-purpose flexibility saves space and money compared to buying separate furniture.

    14. Select Plush Boucle or Velvet for Textured Luxury

    Boucle and velvet fabrics create an immediate sense of richness and comfort—they feel expensive and photograph beautifully. These materials are trending hard because they satisfy both the comfort and style quotas.

    Where to find them: West Elm ($1,500–$3,500), Restoration Hardware ($2,500–$6,000), Article ($1,200–$2,800), or Wayfair’s higher-end options ($1,200–$2,500). Boucle is more durable than velvet for high-traffic households, but velvet creates a more luxurious aesthetic. Both require occasional brushing to maintain, and neither is ideal for homes with shedding pets. Budget $200–$400 for professional cleaning if something spills.

    Pro tip: Boucle in cream or camel is more forgiving than darker velvet if you’re worried about showing dust.

    These textures make your living room look magazine-worthy without trying too hard. Guests notice immediately—it’s the first thing people comment on.

    15. Add Custom Sizing for Perfect Fit

    Custom sofas are the solution when standard sizes don’t fit your space. Whether your room has awkward angles, weird doorways, or you need exact dimensions, custom is worth the investment.

    Custom specialists: What A Room offers 3D renderings and swatch samples ($2,000–$5,000+), while Design Within Reach ($3,000–$8,000) and select West Elm locations offer limited customization. The process usually takes 12–16 weeks, so plan ahead. You’ll typically pay 20–40% more for custom than off-the-shelf, but you get exactly what you need.

    Pro tip: Order samples before committing—see the fabric and color in your actual lighting before finalizing.

    A sofa built for your exact space feels like it was always meant to be there. No more compromising with “close enough” sizes that never quite work.

    16. Create Conversation with Serpentine Curved Designs

    Serpentine sofas take curves further—they flow and wind, creating multiple seating zones in one sculptural piece. They’re less common than standard curves, which means your living room genuinely stands out.

    Where to find them: These are specialty pieces through What A Room ($3,000–$6,000), Design Within Reach ($4,000–$8,000), or high-end retailers. They’re more installation-intensive (consider professional delivery), and they require more floor space. But the architectural impact is unmatched—these pieces become the room’s focal point immediately.

    Pro tip: Serpentine designs work best in spaces at least 14 feet long with open floor plans.

    A serpentine sofa stops being furniture and becomes a design statement. It changes how people move through and interact with your space.

    17. Mix Neutral Bases with Bold Accent Pops

    The safest way to try bold color without full commitment: neutral sofa base with rotating bold accent pieces. This strategy lets you update your look seasonally without replacing furniture.

    Start with a neutral sofa ($800–$2,500), then budget $15–$50 per pillow for accent colors. Target ($20–$60 per piece), Wayfair ($25–$80), and West Elm ($40–$120) cycle through seasonal colors constantly. You can completely change your room’s vibe by swapping four pillows—takes 10 minutes and costs under $100.

    Pro tip: Stick to a color story (jewel tones, pastels, warm spices) so accent pieces feel coordinated instead of random.

    This approach gives you creative freedom while keeping your biggest furniture investment neutral and timeless. You get variety without the risk.

    18. Opt for Nesting Armchairs with Curved Sofas

    Curved sofas pair beautifully with nesting armchairs that echo the silhouette. This creates intentional seating groups and makes your living room feel deliberately curated.

    Set options: Article’s curved sectional + matching chairs ($2,000–$4,000 total), West Elm’s curved bundles ($2,500–$5,000), or mix brands if you find pieces that complement each other. The nesting strategy works especially well in open-plan spaces where you want to define a sitting area. Budget about two weeks for delivery if ordering coordinating pieces.

    Pro tip: Armchairs don’t have to match exactly—same color and shape matter more than identical upholstery.

    Intentional seating groupings make your living room feel like an actual designed space. It’s instantly more inviting and conversational.

    19. Use Oversized Floor Cushions as Flexible Seating

    Floor cushions are the flexible seating hack that works with any sofa setup. They add extra seating for gatherings, can be stored easily, and cost way less than adding another piece of furniture.

    Options: Target ($30–$80 each), Wayfair ($40–$100), West Elm ($60–$150), or high-end Article ($80–$200). Look for cushions with removable covers so you can wash them. Quality outer covers in performance fabric make them durable enough for regular use. Budget $100–$300 for a set of three cushions that coordinates with your sofa.

    Pro tip: Store cushions in a woven basket next to the sofa for instant rustic charm and accessibility.

    You get flexible seating that actually stores away, plus your living room feels casual and welcoming. Guests appreciate the relaxed vibe.

    20. Try Removable, Washable Slipcovers for Easy Updates

    Slipcovers let you change your sofa’s look seasonally and protect the upholstery underneath. They’re renter-friendly, budget-conscious, and surprisingly effective.

    Where to find them: Target has basic options ($80–$150), Wayfair ($100–$300), or custom slipcover services like Etsy creators ($200–$600). Most are machine-washable and take 20 minutes to apply. The trade-off: slipcovers wrinkle and shift slightly over time, so they look best on sofas that stay relatively stationary.

    Pro tip: Order two sets—one in use while the other is being washed keeps your sofa always looking fresh.

    Slipcovers give you the flexibility of a new sofa without the cost or commitment. You can literally change your room’s color scheme on laundry day.

    21. Prioritize Wide, Deep Cushions for Ultimate Comfort

    The difference between an okay sofa and a genuinely comfortable one comes down to cushion depth and density. Aim for cushions at least 5 inches thick with high-density foam that doesn’t compress flat after a year.

    Check before buying: Press on cushions in stores—good quality bounces back immediately. Budget $1,500+ for thick, durable cushioning. Brands known for this: Restoration Hardware ($2,500–$6,000), Article ($1,200–$2,800), West Elm ($1,500–$3,500). Cheaper options ($600–$1,000) often have lower-density foam that feels great for three months, then flattens.

    Pro tip: Ask specifically about foam density ratings (35+ pounds per cubic foot is ideal for longevity).

    A genuinely comfortable sofa with quality cushioning becomes your favorite place in the house. You’ll use it constantly instead of wishing you were elsewhere.

    22. Select Sustainable, Made-to-Order Options

    Sustainable, made-to-order sofas support slow manufacturing and reduce waste. You’re getting a piece built specifically for you instead of mass production, plus supporting better labor practices.

    Sustainable brands: Article’s sustainably sourced options ($1,000–$2,500), What A Room ($2,000–$5,000), Seven Seating ($2,500–$4,500), or Etsy’s artisan makers ($1,500–$4,000). Production takes longer (12–20 weeks), so plan ahead. These pieces are designed to last 10+ years with minimal replacement needs.

    Pro tip: Look for certifications like FSC (Forest Stewardship Council) for wood frames and eco-fabrics like linen or organic cotton.

    You get a unique piece that supports responsible manufacturing. That matters more to many people than having the trendy option immediately.

    23. Layer Warm Lighting Around Dark Sofas

    Dark sofas need smart lighting strategy—otherwise, they can make rooms feel gloomy. Layer warm-toned lights (2700K color temperature) around the sofa to keep it feeling open and inviting.

    Lighting setup: Add floor lamps flanking the sofa ($60–$200 each from Target, West Elm, IKEA), install a dimmer switch ($30–$100 including installation), and add warm overhead lighting. Total budget typically $200–$500. The warm color temperature prevents that clinical, overly bright feel that makes dark sofas look cave-like.

    Pro tip: Brass or gold-toned fixtures warm up the space better than chrome or steel finishes.

    Good lighting makes your dark sofa feel cozy and sophisticated instead of heavy. The difference is immediate—people comment on how welcoming the space feels.

    24. Mix High and Low Furniture Around Your Sofa

    Varying furniture heights around your sofa creates visual interest and prevents the space from feeling flat. Pair a high sectional with a low table, or a low-profile sofa with taller accessories.

    Strategy: If you have an oversized deep sofa, use a lower coffee table (12–16 inches high) so sightlines aren’t blocked. With a low-profile sofa, go higher with side tables (20–24 inches). Mix vintage finds (Facebook Marketplace, thrift stores, $50–$200) with new pieces for collected, curated energy. The mixing actually makes everything look more intentional.

    Pro tip: Stand back and look at the silhouettes—vary high, medium, and low throughout the arrangement.

    Mixed heights create architectural interest that makes your living room feel thoughtfully designed. It’s the difference between “furniture in a room” and “a curated space.”

    25. Create a Sofa-Centric Room Layout

    Instead of treating your sofa as one piece among many, design your whole room around it. This strategy makes everything feel cohesive and intentional.

    Process: Choose your sofa first (not last), then build everything else around its style, color, and scale. If it’s a statement piece, keep other furniture simple. If it’s neutral, bring in bold accessories. This approach works whether you’re building a room from scratch ($3,000–$8,000) or refreshing an existing space ($500–$2,000 for updates). The effort required is mainly just intentionality—actual costs depend on what else you’re buying.

    Pro tip: Pinterest boards help visualize how your chosen sofa works with different room styles before buying other pieces.

    When your sofa is the intentional centerpiece, the whole room comes together more naturally. Everything has purpose instead of feeling random.

    26. Explore Dual-Tone or Color-Block Upholstery

    Dual-tone or color-blocked sofas create sophisticated visual interest without being loud. Think cream paired with taupe, or soft gray with charcoal—subtle contrast that reads as intentional.

    Finding them: Custom options through What A Room ($2,500–$5,500), Design Within Reach ($3,000–$6,000), or select West Elm pieces ($1,800–$3,500). Some ready-made options exist, but custom usually gives you more color combinations. The construction takes longer (14–18 weeks) since it requires different fabric cuts, but the result is genuinely unique.

    Pro tip: Choose colors that are only one or two shades apart so the blocking looks intentional rather than mismatched.

    A color-blocked sofa signals that you have a distinct design perspective. It’s subtle sophistication that people notice but can’t quite name.


    Save this post for your next sofa shopping mission—whether you’re replacing your old one or refreshing what you’ve got. Even if you try just one idea (like adding a slipcover or rearranging with a modular piece), you’ll see how much a thoughtful sofa choice changes your whole living room.

  • 26 Minimal Maximal Living Room Ideas That Balance Calm & Character

    26 Minimal Maximal Living Room Ideas That Balance Calm & Character


    INTRODUCTION

    You want a living room that feels both peaceful and full of personality—but most advice pushes you toward either stark minimalism or chaotic maximalism. The truth? You don’t have to choose. The best living rooms in 2025 blend restraint with character, using bold color accents, curved furniture, smart zoning, and thoughtful layering to create spaces that feel calm but never boring. Whether you’re working with 200 square feet or 2,000, these 26 ideas show you how to balance serenity with soul using real-world solutions, budget-friendly hacks, and styling tricks that actually work. Let’s build a room you love living in.


    1. Choose Low-Profile Furniture to Anchor Openness

    Low furniture pieces visually expand any room by keeping sightlines clear and floor space visible. This simple shift transforms even cramped layouts into airy-feeling sanctuaries without major renovation.

    Start by swapping heavy, high-backed sofas for pieces under 32 inches tall. Look at IKEA’s Kivik collection ($300–$500), Article’s low-profile options ($400–$800), or thrifted mid-century pieces. Pair with slim tables and floating shelves rather than chunky cabinets. The investment pays off: your room feels 20% larger instantly, and natural light bounces lower across surfaces.

    Pro tip: If you love a statement sofa, go low but textured—skirted hems or curved arms add personality without height.

    This change makes your space breathe. You’ll notice ceiling heights seem taller and movement flows naturally throughout the room.


    2. Paint One Accent Wall in a Moody Jewel Tone

    A single bold wall adds drama and focus without overwhelming small spaces. Ochre, oxblood, teal, and deep sage are 2025’s most-loved moody shades, and they anchor a room beautifully.

    Choose the wall behind your main seating area or opposite windows (bold colors look rich when backlit). Sherwin-Williams Naval (deep navy), Urbane Bronze, or Tricorn Black are favorites; Benjamin Moore’s Caliente and Newburyport Blue also work. Budget $30–$60 for paint and supplies. DIY application takes one weekend; hire a painter for $200–$400. The impact? Your room gains instant sophistication and depth.

    Renter-friendly option: Peel-and-stick wallpaper from Spoonflower ($100–$150) mimics paint drama without commitment.

    Your space stops feeling generic the moment that color goes up. Suddenly, every piece of furniture has somewhere to “land” visually and your room feels designed, not decorated.


    3. Layer Curved Furniture to Soften Hard Angles

    Curved forms break up boxy spaces and add sculptural interest while maintaining calm, approachable aesthetics. Rounded edges feel friendlier than sharp corners.

    Hunt for curved sofas, side tables, and ottomans—brands like Article, West Elm, and Wayfair now offer affordable curved pieces ($300–$1,200 for sofas). Even budget retailers like Target carry curved coffee tables and accent chairs. Mix curves across scales: a round mirror, curved console, and C-shaped side table create harmony without looking matchy.

    Budget hack: Thrifted round tables ($20–$80) and curved seating ($50–$300) at estate sales offer savings.

    These softer shapes make your room feel welcoming and effortless. Movement through the space becomes intuitive, and the overall vibe shifts from rigid to relaxed.


    4. Create Defined Zones With Rugs and Low Shelving

    Open-concept spaces need invisible boundaries—rugs and low barriers organize without walls, keeping sightlines open while creating functional zones.

    Layer a large area rug (8×10 or bigger) under seating to anchor that zone. Add a low console table or 36-inch-tall bookshelf behind the sofa as a subtle divider. Budget $100–$500 for a quality rug, $150–$400 for shelving. Home Depot, IKEA, and Article stock affordable options. Time estimate: two hours to arrange and style. The magic happens when you can see all zones but they feel distinct—your brain reads it as organized.

    Pro tip: Use complementary colors in adjacent zones so flow feels intentional, not accidental.

    Each area now has purpose and personality. You and guests immediately understand the room’s flow, making everything feel more purposeful and peaceful.


    5. Mix Vintage Finds With Modern Minimalist Pieces

    Pairing vintage items with clean, modern pieces creates depth and character while keeping spaces from feeling cluttered or dated.

    Hit thrift stores, Facebook Marketplace, and estate sales for one or two statement vintage pieces (credenzas, side tables, lamps) at $30–$300 each. Pair with neutral modern basics from IKEA, Target, or Wayfair. The contrast tells a story: mid-century lines next to contemporary simplicity feel curated, not random. Spend concentrated time on two or three pieces rather than filling every corner.

    Time estimate: A weekend of thrift hunting yields better pieces than rushed online shopping.

    Your room gains narrative and intrigue. Guests notice the thoughtful mix, and you feel like your space reflects actual taste, not catalog staging.


    6. Use Natural Materials to Ground Bold Color

    When you go bold on color, anchor it with organic materials—wood, jute, linen, wool—to avoid feeling sterile or artificial.

    Choose one natural material as your “anchor”: jute rugs, wood side tables, or linen sofas work beautifully. Add woven baskets, leather accents, or stone surfaces. Budget $150–$400 for quality natural-fiber pieces; thrifted wood furniture runs $20–$150. Natural textures temper bold hues and create visual relief, especially in small spaces.

    Pro tip: Mix wood tones (light oak with dark walnut) rather than matching—it feels more authentic and design-forward.

    The room stops feeling like a paint chip sample and becomes a real, livable space. That textural variety keeps your eye moving and prevents color fatigue.


    7. Add Skirted Furniture for Cozy, Collected Appeal

    Skirted furniture is having a major comeback—skirted sofas, ottomans, and chairs add collected elegance and hide awkward legs while increasing comfort appeal.

    Look for skirted pieces at Article ($600–$1,200 for sofas), Wayfair ($300–$900), or vintage stores. Bonus: skirted bases hide storage, pet toys, or unmatched feet beautifully. Mix skirting styles—pleated, gathered, fringed—for visual interest. Budget $200–$500 for a quality skirted ottoman alone; DIY skirting kits cost $30–$100.

    Time estimate: Installing a DIY skirt takes about 45 minutes once pieces arrive.

    Your space gains instant sophistication and lived-in charm. Skirted pieces photograph beautifully and feel more “designer” than standard furniture, even at mid-range price points.


    8. Layer Lighting With Task, Ambient, and Accent Lights

    Three-layer lighting (task, ambient, accent) is the secret to rooms that feel calm during day and cozier at night—and it improves mood and functionality dramatically.

    Install overhead ambient lighting (dimmer switches if possible), task lighting by seating (floor lamps, $40–$200), and accent lighting on shelves or walls (string lights, $15–$60). Choose warm bulbs (2700K color temperature) to boost serotonin and feel relaxing. Start with one quality floor lamp ($80–$150) and layer upward. Home Depot, West Elm, and Article stock excellent options.

    Renter hack: Plug-in floor lamps and peel-and-stick shelf lights require zero installation.

    Suddenly your room adapts to your mood: bright for tasks, warm for relaxation, dramatic for entertaining. You control the entire atmosphere with a few switches.


    9. Style Shelves With Negative Space and Intentional Gaps

    Overstuffed shelves create visual chaos; strategic negative space calms the eye and makes rooms feel intentional and edited.

    Group items in odd numbers (three books, two plants, one art piece) and leave gaps between clusters. Use the “rule of thirds”: fill one-third of shelf space, leave two-thirds breathing room. Alternate vertical and horizontal stacking, and vary heights with books, boxes, and stands. Budget depends on what you already own—rearrange free items first, then add $30–$100 for gaps-filling pieces if needed.

    Pro tip: Hide cords and clutter behind woven baskets (search “decorative basket shelf” for $20–$60 options).

    Your shelves stop looking like storage and start looking like design. The calm arrangement makes your entire room feel more thoughtful and less overwhelming.


    10. Paint Cabinets or Built-Ins a Contrasting Hue

    Painting existing cabinetry or built-ins transforms them from invisible to architectural features, adding depth for under $200.

    Choose a color that contrasts with your wall color: if walls are warm, try cool sage or charcoal; if walls are neutral, try warm taupe or ochre. Budget: $30–$80 for paint and supplies. Prep (sanding, cleaning) takes two hours; painting takes one weekend. Use quality paint (Benjamin Moore Advance or Sherwin-Williams ProClassic) for durability. No built-ins? Paint a standard bookcase ($40–$150 from IKEA or thrift stores) the same way.

    Renter option: Removable peel-and-stick cabinet paint ($40–$80) mimics the effect without permanent damage.

    That painted backdrop instantly becomes a focal point and frames your curated items beautifully. The contrast draws attention upward and makes small rooms feel intentionally designed.


    11. Introduce Biophilic Elements With Layered Planters

    Living plants reduce stress, boost serotonin, and add organic texture—layering them in varying sizes and vessels creates a living backdrop without feeling like a jungle.

    Start with three easy plants: pothos, snake plants, or ZZ plants ($5–$20 each). Add pots in complementary colors or textures ($10–$50 each). Cluster on shelves, tables, or create a corner “plant moment” with varying heights using plant stands ($20–$60). Budget $50–$150 to start; expand over time. Low-light options exist for any room.

    Time estimate: Styling a plant cluster takes 30 minutes; maintenance is minimal for hardy varieties.

    Your room gains instant freshness and life. The green tones balance bold accent walls, and you’ll feel the psychological shift toward calm every time you see growing plants.


    12. Choose Pattern Drenching Over Scattered Prints

    Using one bold pattern repeatedly (walls, sofa, pillows, art) creates intentional impact rather than chaotic visual noise.

    Pick a pattern you love—florals, geometric, abstract—and repeat it across multiple elements at varying scales. Example: botanical wallpaper on one accent wall, botanical pillow covers ($30–$80), botanical art print ($20–$60), botanical throw ($40–$100). Tie it together with a solid neutral sofa and opposite wall. This costs $150–$300 but feels curated and magazine-worthy.

    Pro tip: Match pattern saturation levels across pieces—keep all prints similarly bold or similarly subtle.

    Instead of feeling random, your room gains a clear personality and narrative. Pattern repetition creates calm cohesion, oddly—your brain reads it as intentional design rather than decorating chaos.


    13. Swap Out Standard Wall Art for a Salon Wall

    A salon-style gallery wall lets you layer personality without feeling overwrought—mixing frame styles, artwork types, and sizes creates visual intrigue and feels authentically collected.

    Gather 8–12 pieces: buy prints from Etsy ($10–$30 each), use family photos, add affordable framed art from Target or IKEA ($5–$40 per frame). Mix frame colors (gold, black, natural wood) and layouts. Budget $80–$250 total. Arrange on the floor first, then hang. Template stickers ($15–$25) guide placement.

    Time estimate: Arranging and hanging takes two hours; rearranging is free and encouraged.

    Your wall becomes a conversation starter and a true reflection of your taste. The collected-over-time feeling makes your space feel more personal and lived-in than any single statement piece.


    14. Create an Entertainment Zone With Floating Shelves

    Floating shelves around your TV create organized functionality without heavy media consoles, keeping sight lines open while hiding clutter.

    Install 3–5 floating shelves ($50–$200 for the set) around your TV using a stud finder ($15). Style with media boxes ($20–$60 each for cable/device storage), plants, and decorative objects. Cable management boxes ($10–$30) hide wires. Total cost: $150–$400 installed. Time: one weekend for prep and installation.

    Renter option: Furniture-grade media stands ($150–$400) mimic shelving without drilling holes.

    Your entertainment area stops looking like clutter and starts looking intentional. Cable management and organized shelving make the whole room feel more curated and expensive than it is.


    15. Layer Textiles in Complementary Textures and Tones

    Mixing textile textures—linen, velvet, wool, knit, leather—creates visual depth and tactile richness while keeping a cohesive color story.

    Start with a base color (cream, taupe, navy), then add 3–4 coordinating shades in varied textures. Example: cream linen pillow, taupe velvet pillow, cream-and-taupe striped knit pillow, leather accent ($30–$100 per pillow). Add layered throws in complementary fibers ($40–$120 each). Budget $200–$400 for a fully styled sofa. Mix high and low prices—thrifted vintage textiles ($5–$30) pair beautifully with new pieces.

    Pro tip: Odd numbers (3, 5, 7 pillows) read as more intentional than even numbers.

    Your sofa stops looking basic and becomes a textural experience. That layered depth makes your whole room feel designer-curated and inviting.


    16. Install a Linear Fireplace or Fireplace Accent

    Linear or recessed fireplaces add focal-point drama, ambient warmth, and wellness benefits—and they work in apartments and homes without traditional chimneys.

    Electric linear fireplaces (most renter-friendly) run $200–$1,500 and require only outlet access. Recessed wall-mounted models need installation ($500–$3,000 professional). Minimal styling on the surround—skip heavy mantels—keeps it modern. Place artwork above or beside to anchor the wall.

    Renter option: Tabletop fireplace inserts ($50–$200) mimic ambiance without installation; ethanol models create real flames.

    The warmth and glow change your room’s entire mood. Evening time becomes automatically cozier, and you’ve created a natural gathering point without major renovation.


    17. Use Negative Wall Space to Anchor Quiet Corners

    Perfectly styled corners don’t need to be crowded; often the best seating nooks feature only one chair, a small table, and significant empty wall space for visual calm.

    Choose a corner near natural light. Add a comfortable low chair ($150–$500), a small side table ($40–$150), and one soft throw. Leave walls mostly bare—one small artwork or mirror is enough. Budget for the chair primarily; the magic is in restraint, not spending. This cost-effective approach teaches the power of negative space.

    Pro tip: Pair minimal styling with quality natural light to create a meditative reading nook without fussiness.

    You’ve created a visual escape within your room—a space that signals calm just by looking at it. That peaceful corner becomes your sanity anchor.


    18. Style Your Coffee Table With Layered Styling and Negative Space

    Coffee tables often become junk drawers, but strategic styling with negative space makes them feel intentional while keeping functionality.

    Choose 2–4 items: a coffee table book or two ($15–$40), a plant ($10–$30), a decorative box or tray ($20–$60). Arrange with gaps between clusters. Rotate seasonal books or objects quarterly. Keep surfaces 60% clear. Budget $50–$150 depending on what you already own. Most styling requires zero spending—just editing.

    Time estimate: Restyling takes 10 minutes and requires zero skills.

    Your table stops looking like a landing pad for chaos and becomes part of your design story. That curated arrangement signals that your entire room is thoughtfully put together.


    19. Add a Statement Mirror to Amplify Light and Space

    A large decorative mirror reflects light, expands perceived space, and adds architectural interest—essential for small rooms or dim spaces.

    Choose a 36–48-inch mirror with a statement frame: brass ($100–$400), black metal ($80–$300), ornate wood ($100–$500), or modern sculptural ($150–$600). Lean against a wall or hang opposite windows to bounce natural light. Budget $80–$600 depending on statement level. This single piece costs less than furniture but impacts the room enormously.

    Renter option: Leaning mirrors require zero installation; peel-and-stick mirror tiles ($30–$80) work too.

    The room suddenly feels brighter and larger. That mirror becomes an unexpected focal point while solving real problems—dim corners brighten, tight spaces expand.


    20. Create Modular Seating for Flexibility and Conversation

    Modular or mix-and-match seating adapts to your lifestyle—dinner parties, movie nights, rearranging when you’re bored—while maintaining calm aesthetics.

    Look for modular sofas from IKEA, Article, or West Elm ($600–$2,000 for multi-piece sets) that click together and reconfigure. Alternatively, buy two accent chairs and one ottoman instead of a traditional sofa ($300–$1,200 combined) for more flexibility. Budget varies widely, but modular pieces provide investment value through adaptability.

    Renter option: Using three standalone chairs instead of a sectional offers infinite rearrangement options.

    Your room becomes infinitely adjustable to your actual needs—game nights, reading marathons, hosting friends. That flexibility makes the space feel more useful and less rigid than traditional furniture arrangements.


    21. Paint Your Ceiling a Soft Contrasting Tone

    A subtly tinted ceiling (not stark white) adds dimensionality without claustrophobia—pale gray, soft sage, or warm white feel intimate and intentional.

    Choose a color one shade lighter or slightly different in tone from your walls. Sherwin-Williams Accessible Beige (ceiling version), Benjamin Moore Chantilly Lace with a hint of their wall color, or soft Swiss Coffee all work beautifully. Budget $30–$60 for paint; DIY takes one weekend or hire help for $200–$400. This subtle move makes ceilings feel lower (cozier in tall spaces) or intentional (interesting in standard-height rooms).

    Pro tip: Ceiling paint is optional during a refresh, but it completes intentional design better than white.

    Your room gains architectural interest you didn’t know it needed. That overhead color draws the eye upward and makes spaces feel more finished and designed.


    22. Define Comfort Zones With Throw Blankets and Layered Seating

    Layered throws and pillows create visual texture and signal “sink in here”—they’re inexpensive comfort boosters that also look designer-curated.

    Drape 2–3 throws ($30–$100 each) over your sofa or chair in complementary colors and textures. Stack 4–6 pillows in varying patterns and sizes ($20–$80 each). Mix thrifted and new pieces. Total styling cost: $150–$400. Budget hack: thrifted vintage textiles from estate sales ($5–$20) pair beautifully with new pieces.

    Time estimate: Styling takes 30 minutes and feels instantly gratifying.

    Your seating area becomes a tactile invitation. People naturally gravitate toward that layered corner, and the room feels instantly warmer and more welcoming.


    23. Use Vertical Wall Storage to Free Up Floor Space

    Vertical storage keeps your floor feeling open and spacious while organizing belongings beautifully—essential for small living rooms.

    Install floating shelves ($50–$200 per set), wall-mounted cabinets ($100–$400), or tall narrow bookcases ($80–$300). Cluster on one wall rather than spreading thin. Style with books, boxes, and objects using the “rule of thirds” for negative space. Budget $150–$500 to start. Time: one weekend for installation.

    Renter option: Tall freestanding bookcases ($100–$400) anchor a wall without drilling.

    Your floor space opens up dramatically. That clear floor makes the room feel larger, more organized, and less cluttered—even though you’ve actually added storage.


    24. Mix Warm and Cool Tones for Visual Interest

    Blending warm and cool tones prevents rooms from feeling one-dimensional or flat—think warm wood against cool paint, or cool upholstery with warm accessories.

    Start with a cool wall color (pale gray, soft blue, sage) and balance with warm wood furniture, brass accents ($50–$200 for decor), and warm-toned textiles. Or reverse: warm walls with cool-toned metals and upholstery. The mix feels more sophisticated than all-warm or all-cool schemes. Budget: apply to decisions you’re already making (paint, furniture purchases) rather than an additional expense.

    Pro tip: Use your lighting as temperature control—warm bulbs (2700K) enhance warm tones; cool bulbs feel modern but can feel cold.

    Your room gains visual sophistication and depth. The balanced temperature keeps the eye moving and prevents the space from feeling flat or boring.


    25. Create a Media-Friendly Wall Without Center-Mounted TV

    Moving TV off the wall and onto a low console makes it part of your design rather than the dominant focal point—your room becomes less “media room” and more “room that happens to have a TV.”

    Choose a low media console ($200–$800) or DIY shelving setup. Style around it with plants, baskets, and objects. Hide cables in management boxes ($10–$30). The TV becomes one element among many rather than the room’s command center. Budget $300–$1,000 total for console and styling pieces.

    Renter option: Leaning a TV on a console (with proper safety bracing) avoids wall damage.

    Your living room feels like an actual living room instead of a media theater. That subtle shift means guests sit and talk instead of default-staring at the screen.


    26. Layer Seasonal Styling for Year-Round Freshness

    Seasonal styling (swapping pillows, throws, and accessories quarterly) keeps your room fresh and lets you use budget-friendly pieces creatively across the year.

    Pick 2–3 accessories to swap: throw pillows ($30–$80 each), throws ($40–$120 each), and wall art ($20–$80). Buy spring/summer versions in light colors and fabrics; fall/winter in warm tones and textures. Budget $150–$300 per season if buying intentionally. Rotate every three months. This strategy extends the visual life of your furniture and your excitement about your room.

    Time estimate: Seasonal swaps take 30 minutes and cost nothing if you’re rotating existing pieces.

    Your room stays interesting and season-appropriate throughout the year. That regular refresh keeps you engaged with your space instead of getting bored, and guests notice the updated feel.


    Save this post for your next living room refresh. Pick one or two ideas and tackle them this weekend—mixing calm with character doesn’t require a total overhaul, just strategic choices that work together.

  • 23 Bold Color Pop Living Room Ideas That Instantly Refresh Your Space

    23 Bold Color Pop Living Room Ideas That Instantly Refresh Your Space

    Introduction

    Tired of looking at the same bland walls day after day? Your living room doesn’t have to be boring—and you don’t need to gut the room to change it. The best part? Color is one of the fastest, most affordable ways to refresh any space. Whether you’re renting or own your home, you can experiment with bold hues that instantly energize the room while still keeping things cozy. We’re talking jewel tones that make your sofa look like it belongs in a magazine, unexpected color combos that work brilliantly together, and clever layering techniques that make small rooms feel bigger. Ready to ditch the beige? Let’s explore 23 bold color ideas that’ll make you fall in love with your living room all over again.

    1. Paint an Accent Wall in Deep Emerald Green

    An emerald accent wall instantly adds sophistication and pairs beautifully with almost any furniture style. This jewel tone works whether your décor is modern, vintage, or somewhere in between.

    Choose a quality paint like Benjamin Moore’s “Calypso Green” or Sherwin-Williams “Greener Pastures” ($30-50 per gallon). One gallon covers most accent walls, so this is genuinely affordable. Grab painter’s tape, prime the wall first, and roll on two coats over a weekend. The key? Use a matte or eggshell finish—it hides imperfections better than glossy paint.

    Pair it with white trim, natural wood furniture, and brass accents for maximum impact. Renters, try peel-and-stick wallpaper in emerald instead.

    Your living room suddenly feels like a designer retreat without breaking the bank.

    2. Mix Jewel Tones With Warm Neutrals

    Pairing bold jewel tones with warm neutrals prevents the room from feeling cold or overwhelming. This combo creates visual balance while keeping the drama.

    Start with one jewel tone as your wall color (emerald, sapphire, or oxblood red). Then layer in cream, beige, or warm gray through furniture and textiles. Add metallic accents in gold or copper—brass lamps run $40-100, and gold-framed mirrors cost $50-150 at Target or IKEA. A few plants and natural wood pieces ground the boldness and keep things feeling livable.

    This approach works in apartments and houses alike because you’re anchoring color with neutrality.

    The result? A room that looks intentional and curated, not chaotic.

    3. Create a Color-Drenched Statement Wall With Oxblood Red

    Oxblood red is the moody, sophisticated cousin of bright red—it adds richness without screaming. Pair it with Art Deco accents and modern furniture for a look that feels both timeless and current.

    Use removable peel-and-stick wallpaper in oxblood red ($40-80 for a standard wall) to keep things renter-friendly. Brands like Spoonflower or Etsy sellers offer geometric patterns perfect for this vibe. If you own your home, Benjamin Moore’s “Caliente” is a stunning paint option. Either way, pair the color with charcoal gray furniture, brass fixtures, and black-and-white geometric accessories for maximum impact.

    Pro tip: Use this color on a shorter wall (like behind a sofa) rather than a large open wall if you’re worried about commitment.

    This bold choice makes your living room feel like a curated, sophisticated space.

    4. Layer Sapphire Blue With Warm Wood Tones

    Sapphire blue sounds fancy, but it’s incredibly welcoming when you pair it with warm wood. The combination feels both energizing and grounded at the same time.

    Paint your walls Sherwin-Williams “Sapphire” or “Naval” ($30-50 per gallon). Add wood elements through furniture, floating shelves, or even a wood ceiling accent—reclaimed wood shelving runs $80-200 from Home Depot or Etsy. Layer in warm-toned textiles: linen sofas, cream throw blankets, and rust-colored pillows balance the cool blue beautifully. Add a few brass fixtures and you’re done.

    This works great in rental apartments because you can use the paint for just one wall.

    Your space suddenly feels like a cabin retreat meets modern apartment.

    5. Go Bold With Full-Room Color Drenching

    Color drenching means painting every surface (walls, ceiling, trim) the same bold hue. It sounds extreme but creates an immersive, enveloping feeling that photographs beautifully.

    Start with a softer jewel tone or jewel-adjacent color—sage green, muted teal, or dusty plum work best for full-room drenching. Buy 4-5 gallons of paint ($120-200 total) and commit to a weekend project. Paint walls first, then ceiling, then trim. Use the same paint throughout—no contrast trim needed. Bring in warm lighting (warm-white LED bulbs, around $5-15 each) and light-colored furniture to prevent the room from feeling like a cave.

    Pro tip: Test the color in your actual room under different light conditions first.

    The payoff? A dramatically cohesive, Instagram-worthy room that feels like a sanctuary.

    6. Add a Jewel-Tone Velvet Sofa as Your Statement Piece

    A jewel-tone velvet sofa is an investment, but it’s the easiest way to anchor color in a room without committing to paint. One bold piece does the heavy lifting.

    Look for quality options at Article ($600-1200), West Elm ($800-1500), or Wayfair ($400-900) in emerald, sapphire, or deep plum. Check the fabric durability rating (aim for 100,000+ double rubs) if you have kids or pets. Pair it with neutral walls, natural wood tables, and layered textiles in cream and gold. This approach gives you flexibility—swap walls later without losing your statement piece.

    Renters: Check if your landlord allows paint; if not, this sofa does all the color work.

    Your living room instantly becomes the most inviting spot in your home.

    7. Use Peel-and-Stick Wallpaper in Bold Geometric Prints

    Peel-and-stick wallpaper lets you experiment with bold color and pattern without permanent commitment. Perfect for renters and indecisive decorators alike.

    Pick a pattern from Spoonflower ($25-50), Etsy ($30-60), or Peel & Stick Wallpaper Co. ($35-70) that combines jewel tones with geometric designs. Measure your wall carefully, prep the surface with a clean, dry cloth, and apply slowly, smoothing out air bubbles as you go. The whole project takes 2-3 hours for a standard wall. Layer with solid-colored furniture so the pattern stays the star.

    Pro tip: Apply the wallpaper to just one wall or use it inside a bookshelf for a softer commitment.

    Your living room suddenly has personality and visual interest that makes guests stop and stare.

    8. Paint Trim and Built-Ins in Contrasting Bold Colors

    Instead of painting large walls, use bold color on trim, baseboards, or built-in shelving. This gives you drama without overwhelming the entire room.

    Choose a jewel tone and paint just your trim, baseboards, or bookcase using semi-gloss or satin finish paint ($25-45 per gallon)—the sheen makes it look more polished. Use painter’s tape for clean edges and apply two coats over 4-6 hours. This works especially well if you have architectural features like built-ins, crown molding, or arched doorways. Pair colored trim with neutral walls for maximum contrast.

    Homeowners especially love this because it adds character; renters should check with landlords first.

    Suddenly your room has depth and sophistication from one well-placed color choice.

    9. Combine Three Complementary Jewel Tones in One Room

    Mixing multiple jewel tones sounds risky, but when you choose complementary shades and balance them with neutrals, the effect is stunning. The key is proportion—one dominant color, one secondary, one accent.

    Pick your three jewel tones first (emerald + sapphire + plum, or emerald + teal + gold-adjacent). Assign each a role: paint walls in your lightest tone ($30-50), choose furniture in your mid-tone ($300-1200 for a sofa), and use accessories in your deepest tone (pillows $20-50, art $30-100). Bring in 60% neutral tones (cream, gray, natural wood) to prevent chaos. Use a color wheel online if you’re worried about clashing—complementary colors sit opposite each other.

    This takes planning but pays off beautifully when executed.

    You’ll have a living room that feels gallery-curated and entirely unique.

    10. Add Jewel Tones Through Layered Throw Pillows

    If painting feels too committed, build color through textiles. Throw pillows are affordable, swappable, and create massive visual impact when layered.

    Buy 4-6 pillow covers in coordinating jewel tones ($15-30 each on Amazon, Target, or West Elm). Mix textures: velvet, linen, wool, even a metallic or patterned option. Vary sizes (18″, 20″, 24″) and arrange them at different angles on your sofa for a curated, not-too-perfect look. Change them seasonally or whenever you want a refresh. Covers are washable, so this is practical and playful.

    Pro tip: Stick to a max of 4 dominant colors to keep it cohesive rather than chaotic.

    Your sofa becomes an ever-changing canvas for color experimentation.

    11. Create a Gallery Wall With Colorful Framed Art

    A gallery wall packed with colorful art lets you layer jewel tones without paint or furniture commitment. Mix abstract prints, photography, and vintage finds for texture.

    Hunt for art on Etsy ($20-80 per print), Minted ($30-100), Uncommon Goods ($40-150), or thrift stores (often $2-15). Mix frames in gold, brass, black, and natural wood ($10-40 each from IKEA, Target, Wayfair). Arrange pieces on the floor first before hanging. Lean into jewel-tone art—emerald botanical prints, sapphire abstract designs, burgundy landscapes. The diversity of frames and styles means no two walls look the same.

    This approach costs time more than money and works in rentals with adhesive strips.

    Suddenly your blank wall tells a story and showcases your taste.

    12. Paint Your Ceiling in a Jewel Tone

    Painting your ceiling a bold jewel tone is an underrated way to add drama. It draws the eye upward, making rooms feel larger and more finished.

    Choose a jewel tone one shade darker than you’d use on walls—deep teal, sapphire, or plum work best. Buy 2-3 gallons of quality paint ($60-100 total) and rent scaffolding or use a sturdy ladder. This is a DIY project if you’re comfortable working overhead, or hire a painter ($300-600 for a standard room). The project takes 4-6 hours. Keep walls neutral (white, cream, or soft gray) to let the ceiling be the star. Pair with brass fixtures and natural wood for warmth.

    Pro tip: Paint the ceiling before walls if doing both, so drips don’t ruin your wall color.

    Your living room now has unexpected architectural interest that makes the space feel curated.

    13. Layer Warm and Cool Jewel Tones for Balance

    Mixing warm jewel tones (oxblood red, burgundy) with cool ones (emerald, sapphire, teal) creates visual tension that feels intentional, not accidental.

    Paint walls in a warm jewel tone like Benjamin Moore’s “Caliente” or Sherwin-Williams “Red Bay” ($30-50). Bring in cool-toned furniture—a sapphire sofa or emerald accent chair ($400-1200). Layer accessories that bridge both temps: brass (warm) mixed with silver (cool) fixtures, cream textiles, and natural wood. The contrast keeps the eye moving and prevents the room from feeling one-dimensional.

    Balance matters here—aim for 60% warm, 40% cool (or vice versa) depending on your preference.

    The result is a living room that feels alive and expertly balanced.

    14. Use Jewel-Tone Wallpaper on a Single Feature Wall

    Wallpaper in a jewel-tone print adds drama faster than paint. Choose a pattern—damask, florals, geometric—that speaks to your style.

    Browse Wayfair ($25-60 per roll), Spoonflower ($40-80), or Traditional Home ($30-50 per roll) for jewel-toned wallpapers. Measure your wall carefully and order enough rolls (ask the retailer how many you need). Either hire a wallpaper installer ($200-400) or tackle it yourself using a smoothing tool and adhesive. The installation takes 3-6 hours DIY. Pair wallpaper with solid-colored furniture and minimal accessories so the pattern shines.

    Renters: Peel-and-stick wallpaper versions exist and work beautifully.

    Your living room transforms into a sophisticated, pattern-forward space.

    15. Paint an Ombré or Colorwash Wall Effect

    An ombré or colorwash creates a gradient effect—light at the bottom, darker jewel tone at the top. It’s easier than it sounds and adds artistic flair.

    Buy two paint colors: a light cream or white base and your chosen jewel tone ($30-50 per gallon each). Use a large soft brush or sponge to blend the colors where they meet. Work in small sections, blending as you go. The beauty of this technique is imperfection looks intentional. Takes 2-3 hours per wall. Watch YouTube tutorials for your specific style—ombré, colorwash, and sponge-painting are all variations.

    This DIY project costs under $100 and requires no special skills.

    Your walls look gallery-crafted and add visual height to the room.

    16. Mix Bold Color With Vintage-Modern Furniture

    Pairing bold jewel-tone walls with a mix of vintage and modern furniture creates a curated, collected-over-time feel. Avoid matching sets; embrace eclectic styling.

    Paint your walls a rich jewel tone, then hunt for furniture that spans eras. Find a vintage dresser or credenza on Craigslist ($100-400), add a modern sofa from Article or IKEA ($500-1200), layer in brass or wood vintage lamps ($20-80 each), and mix contemporary art with vintage frames. The contrast between old and new keeps the bold color from feeling heavy. This approach is budget-friendly because vintage pieces cost less than new furniture.

    Your living room tells a story of your taste and personality.

    17. Use Jewel-Tone Throw Blankets and Textiles

    If you can’t commit to wall color, build jewel tones entirely through soft textiles. Throws, blankets, and rugs are easily swappable and affordable.

    Layer a jewel-tone throw blanket ($25-60 from Target, IKEA, or Wayfair) over a neutral sofa. Add coordinating throw pillows ($15-35 each), then an area rug in cream or soft gray with a subtle jewel-tone pattern ($100-300 from Wayfair or Amazon). Switch seasonally or whenever you crave change. This approach costs $200-400 total and takes zero installation time. Textiles are washable and renter-proof.

    Pro tip: Fold the throw attractively over the sofa arm—it looks intentional and Instagram-ready.

    Your living room transforms instantly without any permanent changes.

    18. Add Jewel-Tone Curtains or Drapes

    Floor-to-ceiling curtains in a jewel tone instantly add luxury and color to a room. They frame windows beautifully and can make ceilings appear higher.

    Choose velvet or linen curtains in emerald, sapphire, or plum from IKEA ($20-40 per panel), Target ($35-80), or Wayfair ($50-150). Invest in a good rod and finials ($30-80 from hardware stores or online). Hang curtains as high as possible, ideally to the ceiling, for maximum impact. Pair with a neutral sofa and natural wood furniture. The curtains become a statement piece all on their own.

    Renters can use tension rods inside the window frame if wall mounting isn’t allowed.

    Your windows become a design feature, not just functional.

    19. Layer Jewel Tones With Metallics

    Metallic accents—gold, brass, copper, silver—elevate jewel-tone walls from bold to sophisticated. The sheen catches light and adds luxury.

    Start with jewel-tone walls, then layer in metallics through fixtures, frames, and accessories. Gold accents ($10-50 for mirrors, $30-100 for lamps) work warmly with emerald and sapphire. Brass and copper ($20-80 for hardware or fixtures) feel similar. Silver ($15-60 for frames or accessories) brings coolness and modernity. Mix metallics rather than sticking to one—it looks more curated. Many pieces are affordable at IKEA, Target, Wayfair, and Etsy.

    Balance metallics with neutrals so the room doesn’t feel overdone.

    The combination feels upscale without requiring an upscale budget.

    20. Paint a Geometric Pattern Directly on Walls

    Hand-painted geometric patterns add artistry and personality without needing wallpaper. Hire an artist or test your own skills with painter’s tape and masking.

    Choose your jewel tones and design a geometric pattern on paper first. Use painter’s tape ($5-15 per roll) to map out shapes on your wall, then fill with paint ($30-50 per gallon). This takes 6-10 hours depending on complexity. If DIY feels risky, hire a local muralist ($300-800) through Instagram or Nextdoor—many offer geometric designs. The result is completely unique and becomes an instant conversation piece.

    This is a homeowner move, but renter-friendly artists sometimes work with removable paint alternatives.

    Your living room wall becomes functional art.

    21. Layer Textural Elements With Your Jewel-Tone Palette

    Texture prevents jewel-tone rooms from feeling flat or cold. Layer different materials—velvet, linen, wood, rattan, wool—for multisensory appeal.

    Pair your jewel-tone walls with varied textures: a velvet sofa ($500-1200), chunky knit throws ($30-80), linen pillows ($20-50), a jute or sisal rug ($100-300), and natural wood or rattan furniture ($100-500). Mix matte and shiny finishes—matte textiles with glossy accents. This layering makes the space feel intentional and lived-in rather than decorator-sterile. Each texture adds depth that reads beautifully in photos and feels great in person.

    Pro tip: Touch everything before buying—comfort matters as much as color.

    Your living room becomes a space you want to sink into.

    22. Use Jewel Tones in Unexpected Furniture Pieces

    Instead of painting or using textiles, apply jewel tones to furniture pieces. An emerald bookcase or sapphire desk adds color without permanent wall commitment.

    Hunt vintage furniture on Craigslist, Facebook Marketplace, or Etsy ($50-300 for a piece worth refinishing). Paint wooden pieces with chalk paint or furniture paint ($20-40 per can) in your chosen jewel tone. Takes 1-2 days with drying time. Alternatively, buy pre-painted jewel-tone furniture from Article, West Elm, or Wayfair ($300-800). Mix one or two statement pieces with neutral walls and furniture. Each bold piece stands out without overwhelming the room.

    Renters love this approach because it’s moveable with you.

    Your living room gains personality through unexpected color placement.

    23. Create a Feature Wall Using Stacked Wood in Jewel Tones

    Shiplap or stacked wood painted a jewel tone combines texture and color for visual depth. It’s a bolder statement than just paint alone.

    Buy tongue-and-groove wood boards or pre-made shiplap kits ($100-300 for a standard wall). Paint them your chosen jewel tone ($30-50 per gallon). Install horizontally or vertically using a stud finder and nails (this is a DIY project or hire someone for $200-400). The wood adds architectural interest while the jewel tone adds boldness. Pair with minimal furniture so the wall shines.

    This is a homeowner project; renters should skip it unless they have landlord approval.

    Your living room gains architectural depth and sophisticated color all at once.


    Save this post and try one idea this weekend. Whether you go bold with paint, test colors through textiles first, or mix and match these approaches, your living room deserves to feel like your favorite space. Which jewel tone is calling to you?

  • 24 Minimal Frame TV Styling Ideas for a Seamless Living Space

    24 Minimal Frame TV Styling Ideas for a Seamless Living Space

    Minimalist TV styling doesn’t mean boring—it means intentional. Your living room is probably the heart of your home, yet visible cables, clunky stands, and mismatched tech can make the space feel chaotic instead of calm. You want your TV setup to disappear into the background while still looking thoughtfully designed.

    Whether you’re renting, decorating on a budget, or ready to invest in a permanent refresh, these 24 ideas show you how to create a seamless media wall that actually enhances your space instead of dominating it. From hidden storage solutions and floating designs to smart frame styling and cable management hacks, you’ll find options for every skill level and budget. By the end, you’ll have a TV area that looks clean, feels intentional, and photographs beautifully—all without the chaos.


    1. Mount Your TV in a Thin Frame Box

    A frame box creates the illusion that your TV is part of the wall itself rather than a protruding object. This approach works especially well with neutral wall colors and keeps the focus on your content, not the hardware.

    Build or buy a shallow wooden box frame (4-6 inches deep) that matches your wall color. Mount your TV inside so only the screen edge shows the frame. This costs $80-$200 for a custom frame or $40-$100 for a pre-made option from IKEA or Amazon. Takes about 2 hours to install if you’re mounting it yourself. The frame disappears visually, making your TV feel like it’s floating within the wall rather than sitting on top of it.

    This approach looks gallery-like and high-end without the luxury price tag. Your guests will notice the thoughtful design before they even realize there’s a TV in the room.


    2. Hide Cables Behind a Cord Management Box

    Visible cables are the enemy of minimalist styling, and one box solves the entire problem. A cord management box catches all your messy cables and hides them completely behind a finished cover.

    Mount a $15-$40 cable management box (available at Target, Best Buy, or Amazon) directly under your TV. Feed all cables through the top, and they’ll exit at the back to your devices. Paint the box to match your wall or leave it black if your wall is dark. Installation takes 15 minutes and requires only a drill and wall anchors.

    You’ll immediately see the difference—your TV wall goes from looking tangled to completely intentional. Rearranging cables later becomes easy since they’re all contained in one accessible spot.


    3. Use Slatted Wood Paneling for Acoustic Texture

    Slatted wood does double duty: it looks elegant while actually improving your room’s acoustics. The gaps between slats absorb sound, making your TV experience feel less echoey and more refined.

    Install vertical wooden slats (oak, walnut, or pine) with 2-3 inch gaps between each board. Budget $150-$400 for materials and tools, or hire help for $300-$600 in labor. This is a solid weekend project for DIYers, or a half-day job for a professional. The slats hide cables routed behind them and create a warm focal point that feels architectural.

    Your room suddenly feels more intentional and gallery-like. The acoustic benefit means your TV doesn’t feel as loud or jarring, and the wood brings natural warmth that neutral walls alone can’t achieve.


    4. Install a Floating Media Console for Zero Visual Weight

    Floating consoles free up floor space and make rooms feel bigger while keeping everything organized and hidden. No bulky TV stand means no visual clutter at eye level.

    Mount a $60-$150 floating shelf from IKEA, Wayfair, or a local carpenter directly below your TV. Choose one that’s 36-48 inches wide to align with your TV. Hide a cable management box behind it or route cables through drilled holes in the back. Install takes 1-2 hours with a drill, level, and wall anchors.

    Your floor suddenly opens up, making the room feel more spacious. Electronics stay hidden in drawers below, and the shelf surface stays clear except for one or two intentional objects. Small spaces benefit most from this approach.


    5. Paint the TV Wall a Soft Neutral Tone

    Color makes a huge difference in how “designed” your TV wall feels. A soft, cohesive paint color makes the wall recede rather than demand attention.

    Choose greige, warm white, or soft taupe and paint just the TV wall (or the whole room for $0 if you’re doing it yourself with paint you already have, or $150-$300 if hiring a painter). One coat with a primer-paint combo takes 2-3 hours DIY. This is the cheapest way to make the biggest impact.

    The unified color makes your TV disappear into a calm backdrop instead of sitting against a stark white that makes it pop out. Your entire room feels more cohesive and thoughtfully planned.


    6. Add Thin Stacked Stone for Modern Texture

    Stone brings organic texture and visual interest without heaviness. Thin stacked stone veneer is lightweight, rental-friendly (with landlord permission), and surprisingly affordable.

    Install thin stacked stone veneer ($80-$200 for materials to cover a wall) using stone adhesive and grout. This weekend project takes 4-6 hours and requires no special tools. You can also rent this job out to a mason for $300-$600 total. Stone hides cables easily and creates natural shadows that add depth.

    Your TV wall becomes an architectural feature that elevates the entire room. The texture catches light in a way that makes your space feel designed, not just “decorated.”


    7. Create a Gallery Wall Above or Beside the TV

    Framed art around your TV transforms it from an electronic into part of your décor story. This approach acknowledges the TV as a functional element while styling around it.

    Select 4-6 matching or complementary frames ($15-$40 each at Target, IKEA, or thrift stores) and arrange them above your TV in a grid or salon-style layout. Add simple artwork or black-and-white prints ($10-$30 each). Arrange and hang takes 1-2 hours. The frames and art become as much a focal point as the TV itself.

    Suddenly your TV isn’t the only thing pulling your eye. The curated art display makes the space feel intentional and gallery-like, and guests see thoughtful design before they register that there’s a TV.


    8. Install Recessed Shelving Behind Your TV

    Built-in shelving makes a TV wall feel custom and high-end while providing functional storage. Recessing the TV means it doesn’t protrude into your room.

    Cut a recessed opening in your drywall, add a backing board, and install $50-$150 worth of simple shelving materials (wood, brackets, paint). This requires carpentry skills or hiring a pro ($400-$800 in labor). Takes a full weekend DIY or one day with a professional. The shelves hide cables and create a curated display area.

    Your TV becomes part of an intentional design moment rather than a standalone object. The recessed effect makes your room feel more spacious, and the surrounding shelves give you flexible styling options.


    9. Use Micro Cement for a Seamless Luxury Finish

    Micro cement creates a seamless, high-end look similar to polished concrete but way more approachable. It’s an emerging luxury finish that feels intentional.

    Apply micro cement ($200-$500 in materials or $400-$800 with professional installation) following product instructions or hiring a pro. The finish cures for 48 hours before your TV can go back up. This is a one-time investment that lasts forever. Micro cement hides imperfections and creates zero visual breaks—your wall is completely seamless.

    The result feels modern and gallery-like, like you’ve designed a professional art installation. This finish works especially well with minimalist frames and makes any TV look elevated.


    10. Mount Your TV on a Motorized Swing Arm

    A motorized arm lets you hide your TV completely when you’re not using it. This is the ultimate minimalist move for anyone who doesn’t want their TV to be the room’s focal point.

    Install a $150-$400 motorized swing arm (available at Best Buy, Amazon, or Wayfair) and run power and cables through the wall behind it. Installation takes 2-3 hours and may require an electrician ($200-$300). When you’re done watching, press a button and your TV slides flush against the wall, completely disappearing from view.

    Your room transforms depending on how you’re using it. During the day, your wall is a clean, uninterrupted surface. At night, your TV emerges for entertainment. This speaks to the most intentional version of minimalist living.


    11. Paint a Bold Feature Wall Behind Floating Furniture

    A bold, solid color behind your TV doesn’t clutter—it defines. Used strategically with minimal accessories, it feels intentional rather than busy.

    Choose one bold but sophisticated color (charcoal, deep navy, warm black, or rich green) and paint the TV wall. Buy premium paint ($25-$40 per quart) for durability and color depth. Two coats takes 3-4 hours DIY or costs $200-$300 with a pro. Keep everything else on that wall minimal—just the TV and console.

    The bold backdrop makes your TV area feel like a distinct room “zone” without crowding the space. Dark colors recede, so the wall feels like a frame rather than a wall pushing in on you.


    12. Arrange Floating Shelves in a Custom Grid

    Floating shelves in a grid layout create visual structure without solid wall coverage. You get open storage and style flexibility simultaneously.

    Install 6-8 floating shelves ($30-$60 each from IKEA, Wayfair, or Amazon) in a balanced grid. Use a level and stud finder (basic $20-$40 if you don’t have them) to ensure accuracy. Layout takes 2-3 hours, installation takes another 2-3 hours. Leave 60% of each shelf empty and style the rest with books, plants, and a few meaningful objects.

    Your wall feels organized and intentional rather than scattered. The negative space is just as important as what’s displayed, giving the wall breathing room while keeping you organized.


    13. Hide Your Cable Box in a Wooden Console Drawer

    Cable boxes are visual clutter that serve zero aesthetic purpose. A simple drawer hides everything while keeping it accessible.

    Mount a low console with at least one deep drawer ($80-$200 from IKEA, Wayfair, or Target) directly below your TV. Place your cable box, power strips, and surge protectors inside the drawer. Drill small holes in the back of the drawer or console to route cables through. Setup takes 30 minutes once the console is installed.

    Your TV setup suddenly looks clean and professional. The drawer keeps tech hidden but within reach, so you’re not hunting for remotes or fumbling with cables.


    14. Use Fluted Wall Panels for Textured Luxury

    Fluted panels are having a major moment and for good reason—they add luxury texture that feels high-end without being visually busy. The vertical lines are subtle but impactful.

    Install pre-made fluted wall panels ($200-$500 for a TV wall, or hire installation for $300-$600). Options include MDF panels, 3D wall tiles, or custom wood fluting. DIY installation takes 4-6 hours; professional takes 4-8 hours. Fluted panels hide cables routed behind them and create visual depth through light and shadow play.

    Your TV wall transforms into a textured architectural feature that photographs beautifully and feels intentionally designed. The subtle ridges catch light in a way that makes the space feel premium.


    15. Create a Japandi TV Wall with Natural Materials

    Japandi blends Japanese minimalism with Scandinavian warmth—the perfect framework for a serene TV area. It’s about intentional simplicity with natural materials.

    Mix light wood slats or paneling ($150-$300) with a warm neutral paint ($50 in paint or $150-$250 with a pro painter). Add one or two large potted plants ($30-$80 each) nearby. No decorative clutter—just clean lines and natural textures. Setup takes one weekend for the walls, then ongoing styling as you add plants.

    Your TV becomes part of a cohesive, calming environment rather than the focal point. The combination of natural materials and negative space makes the room feel peaceful and intentional.


    16. Install an Electric Fireplace Below Your TV

    An electric fireplace under your TV adds warmth and a second focal point without the mess of a real fireplace. It’s functional heating and aesthetic ambiance combined.

    Install a wall-mounted electric fireplace ($150-$400) directly below your TV using the manufacturer’s mounting hardware. These plug into standard outlets, so no venting required. Installation takes 30 minutes to 1 hour and just needs a drill and level. The fireplace creates ambient warmth and adds visual interest below the TV.

    You’ve created two focal points instead of just one, and the room feels cozier during cooler months. Evening gatherings feel warmer and more inviting with the glow of flames below your TV.


    17. Mount LED Strips Behind Floating Shelves

    LED strips add indirect lighting that creates ambiance while highlighting your styling. They’re affordable, easy to install, and completely transformative.

    Purchase adhesive LED strips ($20-$50 at Home Depot, Amazon, or Target) and attach them to the underside of each floating shelf surrounding your TV. Run the power cord behind shelves and plug into a nearby outlet or use a wireless remote-controlled option ($40-$80). Installation takes 20 minutes. Choose warm white light for a cozy feel or adjustable color if you like flexibility.

    Your TV wall becomes a design feature even when you’re not watching. The soft lighting adds depth and makes the entire wall feel curated and intentional. It’s the difference between a TV wall and a designed media installation.


    18. Use a Decorative Room Divider to Frame Your TV

    A room divider frames your TV and defines the media area as its own zone. This works especially well in open-concept spaces where you want to visually separate the TV area.

    Position a $80-$250 room divider (wood, rattan, or metal options at IKEA, Wayfair, or Amazon) to one side of your TV. Choose one that coordinates with your wall color and style. No installation needed—just position it. This instantly signals “this is the TV zone” without building a wall.

    Your open-concept space suddenly feels more intentional and organized. The TV doesn’t dominate the entire room; instead, it’s a defined area within your larger space. Guests immediately understand the room’s layout.


    19. Style Your Console with Intentional Negative Space

    The styling around your TV matters as much as the wall itself. Intentional negative space makes everything you do display feel purposeful.

    Choose only 3-5 objects maximum for your console: a small plant ($15-$30), stacked books you actually read ($0 if you use ones you own), one meaningful decorative piece ($20-$60). Arrange them on one side or in a small cluster. Dust and refresh monthly as needed.

    Your console becomes a curated moment rather than a catch-all shelf. Guests notice the intentional styling and assume you’re more organized everywhere (which makes you want to be). Negative space is just as powerful as what you display.


    20. Paint Cables to Match Your Wall

    If you can’t hide cables completely, camouflage them. This budget hack makes visible cords disappear visually.

    Use spray paint designed for plastic ($8-$15 per can at Home Depot or Amazon) to paint cables the exact color of your wall. Tape off connectors with painter’s tape, then spray in light coats. This takes 15 minutes plus dry time (check paint instructions). The cables remain visible but become invisible to the eye because they match the wall.

    This approach works when cable routing isn’t possible (renters, specific room layouts). From across the room, your wall looks clean. It’s the most affordable cable management solution available.


    21. Install Modular Floating Shelves You Can Rearrange

    Modular shelf systems let you customize your layout and change it later. They’re perfect if you like flexibility or frequently rearrange.

    Purchase modular floating shelf systems ($150-$400 total from IKEA, Wayfair, or Amazon) with adjustable brackets. You can move shelves up, down, or remove them entirely. Install takes 3-4 hours; reconfiguring later takes 30 minutes. Mix shelf sizes for visual interest—different widths feel more intentional than uniform rows.

    You’re not locked into one design forever. As your styling evolves, your shelves can evolve too. This flexibility is perfect for renters or anyone who likes to refresh their space regularly.


    22. Use Venetian Plaster for Sophisticated Texture

    Venetian plaster creates a luxury finish with subtle shimmer and depth. It’s more sophisticated than flat paint and more affordable than many texture options.

    Apply Venetian plaster finish ($300-$600 in materials or $400-$900 with professional application) following product instructions or hiring a specialist. This multi-step process takes several hours per coat and requires drying time. The result is a seamless, sophisticated surface with subtle movement and light-catching properties.

    Your TV wall becomes an art piece itself. The subtle shimmer and depth make the space feel premium and intentionally designed. This finish works beautifully under accent lighting.


    23. Create a Two-Tone Wall with a Horizontal Dividing Line

    A horizontal color block creates visual interest and breaks up wall space without clutter. It’s a surprisingly elegant design move.

    Paint your TV wall in two complementary colors, divided by a horizontal line at roughly 60% up the wall. Use painter’s tape to mark the line perfectly. Paint takes 3-4 hours DIY or $200-$300 with a pro. Mount your TV at the color dividing line for maximum impact. The proportions feel balanced and intentional.

    The two-tone approach creates visual structure and makes your wall feel designed rather than blank. It works especially well in taller spaces where a single color might feel overwhelming.


    24. Mount Your TV on a Minimalist White or Black Frame

    A slim frame gives your TV a finished, gallery-like appearance. It looks intentionally designed rather than just mounted.

    Order a custom-cut frame ($60-$150 from local framers or online services) in your preferred finish (matte white, black, natural wood, or metallic). Mount your TV so the frame sits just outside the TV bezels. Installation takes 1-2 hours once the frame arrives. The frame transforms your TV from an electronic into a designed element.

    Your TV suddenly looks like intentional décor rather than a functional necessity. Guests notice the thoughtful framing before they even realize it’s a TV. The frame signals that your space is designed, not just furnished.


    Pin this post and try one idea this weekend. Whether you go minimal or textured, hidden cables or gallery-styled, your TV wall can become a designed feature that elevates your entire room. Start with what feels most doable—even one small change makes a surprising difference.

  • 26 Artistic Living Room Display Ideas That Turn Walls Into Galleries

    26 Artistic Living Room Display Ideas That Turn Walls Into Galleries

    Your living room walls have so much potential. Right now, they’re probably just blank backdrops—but they could be a gallery that tells your story, sparks conversation, and makes your space feel intentional and curated. The best part? You don’t need to hire a designer or spend thousands. These 26 ideas range from free solutions using what you already own to affordable prints and DIY installations that take a weekend. Whether you’re renting, own your home, or just want a refresh, you’ll find ideas that match your budget, skill level, and style. Let’s turn those empty walls into something you actually want to look at every day.

    1. Arrange Prints in a Salon-Style Gallery Wall

    Gallery walls look effortless but feel incredibly curated—and that’s why people save them constantly on Pinterest. The key is mixing frame colors and print styles while keeping some visual logic to the layout.

    Start by gathering prints you love (or print images from Etsy, Unsplash, or your own photos). Mix frame finishes: black metal, natural wood, white, and even mismatched thrifted frames work. Lay everything on the floor first to test arrangements. Measure and mark holes with painter’s tape, then hang using a stud finder for heavier pieces. Budget: $30-$150 depending on frame quality (IKEA, Target, or thrift stores). Time: 1-2 hours plus paint drying. Pro tip: Keep spacing consistent (2-3 inches between frames) even if sizes vary—this makes it look intentional rather than random.

    Your wall becomes a focal point that guests actually notice, and you get to rotate prints seasonally without committing to anything permanent.

    2. Create a Black-and-White Photography Grid

    A perfectly spaced grid of black-and-white photos reads as modern and gallery-like—it’s the adult equivalent of a college dorm photo wall. Black-and-white photography works especially well because it doesn’t compete with your décor colors.

    Print black-and-white versions of your own photos (family, travel, candid moments) or find affordable prints on Etsy. Use matching frames in black metal or black wood—this uniformity is what makes grids feel sophisticated. Budget: $40-$80 for 9 frames and prints. Measure out a 3×3 or 4×4 grid using painter’s tape first. Hang all at eye level (57 inches center to center is standard). Time: 45 minutes to an hour. Difficulty: Beginner. Renter-friendly: Yes—use removable wall anchors.

    The grid creates visual order, and black-and-white photography complements any color scheme in your living room without clashing.

    3. Display Woven Wall Hangings and Tapestries

    Woven textiles add warmth and dimension without needing frames—they’re also easier to hang than you’d think. Macramé, woven wall hangings, and textile art introduce tactile visual interest and tie into the wellness and natural materials trend.

    Source from West Elm, Urban Outfitters, Etsy, or thrift stores. Sizes vary widely (18 inches to 4 feet). Hang at different heights to create flow rather than a rigid line. Use simple hooks or command strips for renters. Budget: $15-$60 per hanging. Time: 15-20 minutes per piece. The layered, organic look gives your room that “collected over time” feeling without trying too hard.

    Woven pieces warm up a cool-toned space and add bohemian flair that photographs beautifully for sharing.

    4. Mix Floating Shelves with Small Art and Objects

    Floating shelves solve two problems at once: you get wall display space without a heavy gallery wall commitment, and you can style them seasonally. Mix framed art with small 3D objects for a curated, magazine-worthy look.

    Install 2-3 floating shelves at different heights (use a level and studs or heavy-duty wall anchors). Style each shelf with: one small framed print, one vessel or book, one small plant or object. Keep negative space—don’t overcrowd. Budget: $30-$80 for shelves; styling pieces vary. Time: 1 hour installation. Renter-friendly: Some removable floating shelf options exist, though traditional floating shelves require wall anchors. The key is asymmetry—don’t center everything. Your living room gains depth and you can swap pieces in and out without rehinging.

    Floating shelves let you display art alongside objects, creating a dynamic gallery rather than a flat wall of frames.

    5. Hang a Large Statement Art Piece as a Focal Point

    One large, bold artwork can anchor an entire room better than a wall full of small frames. This plays into the trend of statement pieces and makes a confident design choice that feels intentional.

    Choose artwork at least 24-36 inches wide for a meaningful impact. Abstract, botanical, or landscape pieces work well depending on your color palette. Source from Minted, Society6, Etsy, or independent artists. For $40-$150, you can get high-quality prints; originals run higher. Time: 20 minutes to hang. Find a stud or use heavy-duty wall anchors. The frame matters—matte black, natural wood, or no frame (canvas wrap) all read as modern. Hang it as the sole focus above furniture, not clustered with other art.

    This single focal point makes your living room feel design-forward and gives guests an immediate talking point.

    6. Build a Leaning Art Display on a Console or Mantel

    Leaning art is a renter’s best friend—zero holes required. This casual approach also reads as gallery-like and gives you flexibility to rotate pieces constantly. It’s also way cheaper than committing to permanent hanging.

    Gather 4-6 frames of varying sizes (mix gold, black, and wood finishes). Lean them against the wall on a console, mantel, or shelf at a slight angle. Mix in books, ceramics, or plants for visual interest. Budget: $0 if using frames you own; $20-$50 for new frames. No installation time. The casual, curated feel works in modern, eclectic, and maximalist spaces. Pro tip: Lean art heavier on one side for asymmetrical balance.

    This approach lets you swap art weekly if you want—no commitment, just visual inspiration that rotates with your mood.

    7. Hang Canvas Prints in a Horizontal Timeline

    Canvas prints feel more substantial than paper prints and work beautifully for personal photos. Arranging them horizontally creates a narrative or timeline feel—perfect for travel, family moments, or a life journey theme.

    Print personal photos or favorite imagery onto canvas (Shutterfly, Artifact Uprising, or local print shops—$15-$40 per print). Mount them flush to the wall using brackets or simply hung with hooks. Keep spacing consistent (4-6 inches between canvases). Budget: $60-$200 for 5 pieces. Time: 45 minutes installation. Renter note: This does require wall anchors, but canvas is lighter than you’d expect. The horizontal line draws the eye across the wall and creates movement in a static room.

    Canvas prints add depth and texture compared to flat framed paper, plus they photograph beautifully in natural light.

    8. Create a Color-Blocked Wall Section Behind a Sofa

    Color blocking amplifies your art display and makes the wall an intentional design feature. This ties directly into the bold color palette and defined spaces trends. A painted accent adds impact without needing more art.

    Paint 1/3 to 1/2 of the wall behind your sofa in a bold jewel tone (emerald, sapphire, or burnt orange). Hang art on both the painted and unpainted sections to tie the color into your gallery. Paint budget: $20-$40 per gallon; frames vary. Time: Paint prep and two coats (3-4 hours total). The painted section grounds your art and makes even small prints pop. Pro tip: Use painter’s tape for clean lines; test paint samples first.

    A color-blocked wall elevates your entire living room’s design and gives your art display context and cohesion.

    9. Arrange a Minimalist Line-Art Collection

    Line art reads as sophisticated and modern—simple enough not to overwhelm a space, bold enough to read from across the room. Pairs beautifully with minimalist or Scandinavian décor.

    Search Etsy for “line art print” or “botanical line drawing.” Look for single continuous-line pieces, abstract heads, or simple botanical outlines. Print onto white or cream cardstock, frame in thin black or natural wood frames. Budget: $20-$60 for 4 prints and frames. Time: 30 minutes. Mount vertically (one above the other) or use a vertical trio layout. The simplicity makes the space feel calmer and more intentional—less is genuinely more here.

    Line art works in small spaces and complements minimalist furniture without visual noise.

    10. Mix Vintage Finds with Modern Prints (Modern Nostalgia)

    This plays directly into the “modern nostalgia” trend—combining thrifted vintage pieces with contemporary art creates depth and storytelling. It feels collected over time rather than designed all at once, which is way more interesting.

    Hit thrift stores and estate sales for vintage prints, old maps, or framed botanical illustrations. Pair these with 2-3 modern prints from Etsy or independent artists. Mix frame styles intentionally: gold, natural wood, black, and even mismatched vintage frames. Budget: $30-$100 (vintage pieces are cheap; modern prints $15-$40 each). Time: 1-2 hours arranging and hanging. The mix of eras and styles tells a richer visual story. Pro tip: Unify the look by using mats or choosing a consistent color palette across old and new.

    This eclectic approach makes your gallery wall feel personal and conversation-starting—people actually engage with art that has varied visual interest.

    11. Install Art Ledges for a Rotating Display

    Art ledges (shallow shelves designed specifically for displaying art) let you rotate prints without rehanging. Perfect if you like updating your display seasonally or love changing things up frequently.

    Install 2-4 art ledges using a stud finder and wall anchors (trust me—don’t skip the stud finder). Lean prints at a slight angle in the ledges; layer them so you can see 2-3 pieces at once for depth. Mix in small objects, plants, or books. Budget: $30-$80 for ledges; art prints vary. Time: 1 hour installation. Renter note: Check with your landlord—permanent installation, but removable if needed. This setup reads as effortlessly curated and gives you flexibility without constant re-hanging.

    Art ledges solve the “I want to change my art constantly” problem while maintaining a gallery aesthetic.

    12. Frame Fabric Swatches or Textile Pieces

    Framing fabric, textile scraps, or even vintage quilts creates unexpected art that ties into the tactile, textured design trend. This is an especially clever hack if you already have interesting fabrics at home.

    Choose fabric with visual interest: vintage prints, interesting weaves, bold patterns, or heritage textiles. Cut to uniform sizes, mount on white or cream backing, and frame in simple frames. Budget: $0 if using fabric you own; $20-$60 for frames. Time: 30 minutes if fabric is ready; longer if you’re sourcing. This idea works beautifully in eclectic or maximalist rooms. Pro tip: Use printable fabric or fabric glue to add typography or images to plain fabric before framing.

    Framed textiles add depth, texture, and unexpected visual interest to your gallery wall—they’re conversation starters.

    13. Hang Large-Scale Geometric Prints

    Large-scale geometric prints make a modern, confident statement. They work especially well for bold color palette goals and tie into the trend of pattern drenching and maximalism.

    Search for “large geometric art print” on Minted, Society6, or Etsy. Look for pieces at least 24×36 inches with colors that complement your room. Print sizes matter—go big or the impact flops. Budget: $30-$80 per print. Time: 20 minutes to hang (stud-mounted). These work best with minimal competing décor—let the print be the star. Mount them at eye level (57 inches to center). Pro tip: Pair two geometric prints for movement, or use one as an absolute statement.

    Geometric prints anchor a modern living room and give you an instant design focal point that photographs beautifully.

    14. Create a Personal Photo Wall Timeline

    A photo timeline tells your personal story and makes a living room feel like a home rather than a showroom. It’s deeply personal and creates an immediate emotional connection for visitors.

    Gather photos spanning years or decades. Convert to black-and-white to unify the look (easier in most photo editing apps). Print at consistent sizes (5×7 or 8×10 inches work well). Frame in matching black or natural wood frames to let the photos speak. Budget: $40-$100 for printing and framing. Time: 1-2 hours arranging and hanging. Mount vertically (up a stairwell is classic) or horizontally across a wall. Space evenly. This becomes a talking point and a grounding element that makes your space unmistakably yours.

    A photo timeline adds emotional depth and turns your living room walls into your personal story—guests notice immediately.

    15. Use Command Hooks to Hang Oversized Woven Baskets as Art

    Woven baskets hung on walls pull double duty—functional storage plus textural art. This plays into the maximalism and tactile layering trends while staying practical.

    Find woven baskets in varying sizes and weave patterns (Anthropologie, World Market, HomeGoods, or thrift stores). Hang at different heights using command hooks (renter-friendly!) or wall brackets. Mix tight weaves, loose weaves, and different natural fiber colors. Budget: $15-$50 per basket. Time: 15 minutes. Pro tip: Leave a few empty—you can still use them for storage or styling. No frame needed; the baskets become the art themselves.

    Hanging woven baskets adds warmth, texture, and a bohemian edge while staying functional—and they’re totally removable for renters.

    16. Frame Pressed Flowers or Dried Botanicals

    Pressed flowers and dried botanicals are delicate, unexpected art that ties into the wellness and natural materials trend. They’re also surprisingly affordable and you can DIY the pressing.

    Press flowers yourself (fast: use a flower press or books for 2 weeks) or buy pre-pressed botanicals from Etsy. Mount on white or cream backing using acid-free glue. Frame in thin frames (wood or black metal). Budget: $0-$10 to press flowers yourself; $20-$60 for ready-made pieces and frames. Time: 20 minutes to frame (or 2 weeks if pressing). Hang in groups of 3-5 for visual interest. They work beautifully in bedrooms or reading nooks too. Pro tip: Botanical prints (not actual pressed flowers) last longer and cost less if longevity matters.

    Pressed flowers add a soft, organic touch and make your gallery feel more natural and curated than typical prints.

    17. Paint a Mural Accent Behind Framed Art

    A painted mural behind your framed art multiplies visual impact and lets you create without being an accomplished painter—soft, abstract styles hide mistakes beautifully.

    Paint a soft background using watercolor technique (watered-down acrylic or actual watercolor), geometric shapes, or abstract florals. Keep colors soft and complementary to your frames and room. Budget: $20-$40 for paints. Time: 2-3 hours plus drying. Difficulty: Intermediate (but abstract = forgiving). Hang 3-5 framed pieces over the mural to ground it. Use painter’s tape for clean lines if you want them. The painted mural adds artistry and depth—visitors think you’re far more artistically talented than you actually are.

    A painted mural backdrop elevates your gallery and makes your entire living room feel more curated and intentional.

    18. Hang a Large Fabric Wall Hanging or Quilt

    Large fabric hangings or quilts become instant focal points and add warmth. This ties into the texture and organic materials trend while being incredibly renter-friendly.

    Find vintage quilts at thrift stores, online vintage shops, or handmade from artists. Mount using a wooden dowel threaded through a pocket sewn to the back (or use clips designed for fabric). Budget: $20-$80 for vintage quilts; handmade $100+. Time: 15 minutes to install. Alternatively, buy modern fabric wall hangings designed for this. The scale matters—go as large as your wall allows. This single piece often gets more compliments than any other wall element.

    A large fabric hanging becomes an instant gallery piece and adds warmth that makes your living room feel lived-in and cozy.

    19. Create a Typography or Quote Wall

    Inspirational quotes or meaningful typography adds personality and becomes part of your décor story. This works especially well in spaces where you want to feel motivated or inspired daily.

    Design your own typography prints using Canva (free) or buy from Etsy. Choose quotes that genuinely resonate—not generic motivational platitudes. Mix font styles for visual interest but keep a color palette (usually 2-3 colors max). Budget: $0 (Canva) + printing cost ($10-$20 for 3 prints) or $20-$50 for Etsy prints. Print on high-quality paper or cardstock, frame simply. Time: 30 minutes. Mount at eye level in a grouped arrangement. This works beautifully in home offices, bedrooms, or living room reading nooks. Pro tip: Use typography related to your values—not generic wellness speak unless it’s truly meaningful to you.

    Typography art makes your space feel intentional and personal—it’s a subtle way to tell visitors who you are without saying a word.

    20. Arrange Plate Wall or Decorative Dish Display

    A plate wall feels vintage-inspired and playful—especially if you’re collecting plates from markets, travels, or thrift stores. It’s an unexpected gallery element that works beautifully in maximalist or eclectic rooms.

    Collect decorative plates with interesting patterns, colors, or provenance (travel finds, vintage shops, HomeGoods). Mount using plate hangers or adhesive discs (stud-mounted if heirloom pieces). Arrange asymmetrically in a cluster, leaving some negative space. Budget: $2-$8 per plate; hangers $0.50-$2 each. Time: 45 minutes arranging and hanging. Difficulty: Beginner. Mix plate sizes, patterns, and colors for maximum visual interest—unity in variety. This works especially well in dining rooms or kitchen-living room combos.

    A plate wall adds personality, color, and an unexpected gallery vibe that photographs wonderfully and sparks conversations.

    21. Mount Art on Floating Board for Dimension

    Floating boards create dimension and shadow—the art becomes more sculptural than flat. This simple trick elevates basic prints into something way more interesting.

    Mount thin wooden boards (1.5-2 inches deep) using wall anchors or studs. Mount framed art onto the boards rather than directly to the wall. Budget: $15-$30 per board plus frames. Time: 45 minutes for two boards. The shadow cast on the wall behind becomes part of the art itself. Use this for 1-3 statement pieces rather than your entire gallery. Pro tip: This works especially well with large botanical prints or geometric art where shadows add interest.

    Floating boards create depth and shadow play that makes ordinary prints feel like installation art—zero additional effort required.

    22. Hang a String Light Feature Behind Art

    String lights add ambiance and draw attention to your gallery wall. This works especially well in moody living rooms or if you want to highlight art in dim evening light.

    Install warm white string lights (Edison bulbs, fairy lights, or cafe lights) above or beside your gallery wall using hooks. Keep the wiring neat by running it along wall edges or the top of the wall. Budget: $15-$30 for quality string lights. Time: 20 minutes installation. This creates a living gallery feel, especially in evenings. Pro tip: Choose dimmable lights so you can adjust ambiance. Use a small power strip hidden behind furniture. The warm glow makes artwork pop and adds unexpected coziness.

    String lights transform your gallery wall from daytime display to evening feature—the glow makes your space feel intimate and inviting.

    23. Create an Asymmetrical Shelf Display with Objects and Art

    Combining framed art with three-dimensional objects on a shelf creates depth and visual interest. This ties into the “curated collected look” trend.

    Mount a large floating shelf (36-48 inches wide works well). Layer framed prints (leaning), books (stacked), ceramic pieces, plants, and candles in an asymmetrical arrangement. Vary heights and objects. Budget: $40-$100 for shelf; styling pieces vary. Time: 1 hour styling. Pro tip: Group objects in threes for visual balance—odd numbers feel more intentional than even numbers. Leave some white space. This one shelf often reads as more interesting than a full gallery wall because it has dimensional variety.

    Shelf styling with mixed objects and art creates a more interesting display than frames alone—it tells a richer visual story.

    24. Frame Your Favorite Fashion or Music Memorabilia

    Displaying personal memorabilia—concert tickets, vintage magazine covers, autographed items, or handwritten notes from loved ones—adds genuine personality to your space. This is art that’s meaningful specifically to you.

    Gather items that matter: concert tickets, magazine covers, band posters, travel tickets, handwritten lyrics, or pressed concert programs. Preserve using acid-free backing or framing sheets. Frame in simple frames to let the memorabilia shine. Budget: $20-$80 depending on frame quality. Time: 30 minutes. Pro tip: Use UV-protective glass if the items are sentimental or valuable. Hang in a small cluster (3-5 pieces) or one statement piece. This immediately makes your space feel like home—not a showroom.

    Framed memorabilia transforms your walls into your personal story and gives visitors genuine insight into who you are.

    25. Install a Gallery Wall with Negative Space (White Space Strategy)

    Strategic negative space (white wall showing between frames) makes your gallery wall feel sophisticated rather than cluttered. This is harder than it seems, but the payoff is huge.

    Choose 6-8 pieces maximum. Space them 6-12 inches apart intentionally—not filling the wall, but rather allowing the wall to breathe. Keep frame colors cohesive (all black, all wood, or monochromatic). Budget: varies by pieces. Time: 1-2 hours planning the layout using painter’s tape first. Map everything before you drill. This is the opposite of the salon wall look—instead of filling every inch, you’re editing ruthlessly. The result feels very intentional and modern.

    Strategic white space makes your gallery feel thoughtfully curated rather than random—restraint reads as sophistication.

    26. Mix 2D Art with 3D Wall Sculptures or Woven Objects

    Adding actual 3D objects and sculptures to your gallery creates dimension and tactile interest. This plays into the texture and maximalism trend beautifully.

    Combine framed prints with small sculptures, 3D paper art, wooden wall hangings, ceramic pieces, or woven objects. Mix materials: wood, metal, ceramic, fiber. Mount everything at varying heights and distances from the wall. Budget: $30-$150 depending on pieces. Time: 1-2 hours. Pro tip: Use various mounting systems (hooks, brackets, adhesive dots) to accommodate different weights. Group 3-4 pieces together rather than spacing them evenly. This creates a curated, collected, art-gallery vibe.

    Mixed 2D and 3D gallery walls feel way more interesting than flat art alone—the layered dimension creates genuine visual depth.


    Pin this post for your next wall refresh—pick just one idea to start. Which style speaks to you: gallery walls, woven textures, or personal memorabilia? Try one this weekend and watch how your space transforms.

  • 26 Statement Lighting Living Room Ideas That Transform the Entire Room

    26 Statement Lighting Living Room Ideas That Transform the Entire Room

    Introduction

    Lighting does more than illuminate your living room—it sets the entire mood of your space. The right fixtures and layering strategies can make a small room feel expansive, a dated layout feel contemporary, and a boring corner become your favorite gathering spot. Whether you’re working with natural light, struggling with dark corners, or just ready to upgrade basic overhead fixtures, statement lighting is one of the fastest ways to refresh your living room without major renovation.

    In this guide, you’ll discover 26 specific lighting ideas that work for renters and homeowners, tight budgets and investment pieces, and every skill level in between. Each idea includes exactly where to shop, how much it costs, and how long it takes to install. By the end, you’ll know exactly which lighting solutions match your space and style.


    1. Layer with Warm Pendant Lights Over Seating Areas

    Pendant lights create defined zones and add visual interest above seating clusters without needing ceiling work. They’re particularly effective over sofas or accent chairs because they provide task lighting for reading while adding a design statement.

    Look for brass, matte black, or frosted glass options at IKEA ($15-$40 per fixture), Wayfair ($30-$150), or West Elm ($80-$200). Installation takes 20-30 minutes with a basic socket adapter if you’re renting—no hardwiring required. Choose bulbs in warm white (2700K color temperature) to keep the mood cozy.

    Pro tip: Hang three pendants at staggered heights for visual depth, or use a single oversize pendant for bold simplicity. The key is positioning them low enough to create pools of light but high enough to see around comfortably.

    You’ll immediately notice how the room becomes more intentional and functional—plus reading actually becomes pleasant instead of eye-straining.


    2. Install Arc Floor Lamps to Reach Dark Corners

    Arc lamps solve the “dead corner” problem by casting light exactly where you need it without taking up wall or table space. They’re especially useful for reading nooks or spaces next to seating where floor lamps would get in the way.

    Budget options start at $40-$60 (Amazon, Target); mid-range brass or marble-base arcs run $80-$150 (West Elm, CB2). Investment pieces from Schoolhouse Electric or Apparatus ($200-$400) last decades and become instant focal points. Setup is plug-and-play—10 minutes with no installation needed. Choose a dimmable bulb (60-75W equivalent LED) for flexibility.

    The weighted base keeps the lamp stable even in high-traffic areas. If you’re renting, arc lamps are perfect because you just unplug and take them with you.

    This simple addition transforms a shadowy corner into an inviting retreat and instantly makes your room feel more designed and layered.


    3. Add Recessed Lighting with Peel-and-Stick LED Strips

    LED strip lights mimic recessed lighting without any permanent installation—perfect for renters and budget-conscious updates. They provide ambient background lighting that makes the whole room feel more intentional.

    Adhesive LED strips cost $15-$40 (Amazon, Home Depot). Installation takes 20-30 minutes and requires only a clean ceiling edge and an outlet or power strip nearby. Choose warm white (2700K) or tunable white strips that let you adjust color temperature via remote.

    Hide the power cord along your crown molding or behind furniture. Many strips are dimmable and controllable via smartphone app, so you can adjust brightness without getting up.

    The effect? Your room instantly gains depth and sophistication. Even a basic space with standard furniture looks more curated when you add this subtle ambient layer.


    4. Hang Brass Swing-Arm Wall Sconces for Flexible Task Light

    Swing-arm sconces let you direct light exactly where you need it—beside a reading chair, flanking a console table, or highlighting artwork. The adjustable arm means you control the light direction without moving the fixture.

    Expect to pay $50-$100 per sconce (IKEA, CB2, West Elm) for quality options, or $150-$300 (Restoration Hardware, Circa Lighting) for designer versions. Installation requires basic wall mounting—45 minutes to 1 hour if you’re comfortable with a drill, or hire an electrician ($100-$150) for hardwiring. Renter-friendly plug-in versions exist ($60-$120) but have visible cords.

    Pair matching sconces on either side of a fireplace or sofa for balanced style. The adjustability means they adapt as your room changes.

    You’ll notice how much easier reading becomes, and how the directional light creates dimension and drama in ways ceiling fixtures can’t.


    5. Create Warm Ambient Glow with Table Lamps on Dimmers

    Dimmers transform basic table lamps into a whole lighting system—you can go bright for cleaning or entertaining, then dial down to 30% for a relaxing evening. Multiple dimmers on different circuits give you complete control over mood.

    Budget table lamps with built-in dimmers start at $25-$50 (Target, Wayfair). For $15-$40, install smart bulbs (Philips Hue, LIFX) in any existing lamp—these let you dim via app or voice command. Hardwired dimmer switches cost $20-$50 at hardware stores; installation takes 1-2 hours if you’re comfortable with electrical work, or hire a pro ($200-$400 for multiple rooms).

    The simplest approach? Buy dimmable LED bulbs and plug lamps into basic smart plugs ($10-$15 each) that you control from your phone.

    This flexibility means your room adapts to every occasion, and you’ll sleep better thanks to the dimmer’s ability to reduce blue light in the evening.


    6. Use Uplighting Behind Artwork for Gallery Drama

    Uplighting behind or below artwork creates gallery-style drama and makes even modest prints feel museum-worthy. This technique also adds layers of visual interest to blank walls.

    Small uplighting fixtures run $20-$50 (Amazon, hardware stores) and plug into standard outlets. Position them on the floor or a low shelf, pointing upward. Installation is instant—5 minutes—just unplug and move anytime. Use warm white 2700K bulbs to match your other lights.

    This works especially well with textured paintings, black-and-white photography, or bold graphics. Adjust the angle to highlight the piece without creating glare.

    Your artwork instantly becomes a focal point, and guests will assume you’ve invested way more in design than you actually have.


    7. Install Floating Shelves with Integrated LED Lighting

    Lit shelves serve double duty—they organize your space and provide accent lighting that highlights decorative objects. The underlit effect is particularly flattering and creates visual depth.

    Floating shelves with built-in LED kits cost $30-$80 per shelf (IKEA, Target, Wayfair). Installation takes 1-2 hours for basic wall mounting with brackets (no electrical work required if you choose battery-powered LED strips). If you want hardwired options, expect 2-3 hours and possibly a pro installer ($150+).

    Style your shelves with plants, books, and small objects that photograph well and create interesting silhouettes when backlit.

    The result is a space that looks collected and intentional, with lighting that serves both function and aesthetic.


    8. Try Adjustable Track Lighting for Flexible Accent Light

    Track lighting gives you flexibility to highlight different zones without multiple permanent fixtures. Each light can rotate and adjust, perfect for emphasizing artwork, plants, or architectural details.

    Budget track systems start at $40-$80 (IKEA, Home Depot); mid-range designer options run $150-$300 (CB2, West Elm). Installation takes 2-3 hours with basic tools or about $200-$400 with a professional. The advantage? You can move the lights anytime without patching walls.

    Choose warm white LED bulbs (2700K) and dimmable options for maximum flexibility. Renter-friendly stick-on track options exist ($60-$100) but offer fewer adjustment possibilities.

    Once installed, you have control over which areas get highlighted, making your space feel intentional and gallery-like.


    9. Add Candlelight with Flameless LED Candles

    Flameless candles deliver cozy ambiance without fire hazard—perfect for living rooms where real candles feel risky or impractical. They layer beautifully with other lighting for special occasions or everyday coziness.

    LED candles cost $1-$5 per candle (Target, Amazon, Dollar stores) or splurge on designer versions with realistic flame effects ($15-$40 from CB2, Wayfair). Battery-powered options last 50-100+ hours per set of batteries. Set them out in minutes—0 setup time.

    Place them on console tables, mantels, or shelves. The key is grouping them in odd numbers (3, 5, 7) for visual interest.

    Your living room instantly feels more intentional and welcoming, with the warmth of candlelight without any of the worry.


    10. Mount Picture Lights Above Artwork for Museum Effect

    Picture lights are mounted directly above framed art and cast adjustable light down the piece—a timeless solution that makes any artwork feel important. This is especially effective with oil paintings or textured prints.

    Picture lights range from $40-$100 (Rejuvenation, Schoolhouse Electric, higher-end options) to budget versions at $20-$40 (Wayfair). Installation takes 30-45 minutes with basic wall mounting and wiring. Most hardwire into your wall power or plug into nearby outlets; professional installation costs $100-$200 if you’re not comfortable.

    The light should be positioned about 12-18 inches above the frame, angled slightly downward. Use warm white bulbs (2700K) to keep it gallery-appropriate.

    Your artwork becomes a true focal point, and the whole room gains a collected, curated feeling.


    11. Use Smart Bulbs for Customizable Color and Brightness

    Smart bulbs let you adjust brightness and sometimes color temperature (or even color) from your phone—no rewiring or new fixtures required. This is the easiest way to add lighting flexibility to any existing lamp.

    Quality smart bulbs cost $10-$25 per bulb (Philips Hue, LIFX, Wyze) with app control. Basic setup takes 5 minutes per bulb—just screw them in. Budget-friendly options like GE Cync ($8-$15) work similarly. Most connect via Wi-Fi or Bluetooth and let you set schedules, dimmers, and color temperatures via smartphone.

    Start with one smart bulb in your main reading lamp to test the system before investing in more.

    This flexibility means you can adjust your light for morning alertness, afternoon focus, or evening relaxation—all from your couch.


    12. Install a Statement Pendant Cluster Above Your Seating

    A cluster of varied pendant shapes and sizes creates drama and visual interest while providing functional task lighting over seating. This approach works especially well over large sofas or sectionals.

    Individual pendants range from $20-$100 each. A complete cluster of 5 might cost $100-$400 total depending on quality. Installation takes 1-2 hours with a basic plug adapter for renters or 2-3 hours for hardwiring. Choose 2-3 complementary styles rather than matching exactly—mix brass, matte black, and frosted glass for visual richness.

    Hang them at staggered heights (roughly 24-36 inches above seating) and use warm white bulbs for cohesion.

    The visual impact is striking and makes an otherwise basic living room feel intentional and designed.


    13. Create Ambient Light with Bias Lighting Behind Your TV

    Bias lighting behind a TV reduces eye strain during viewing, adds ambient light to the room, and creates a modern, sophisticated look. It’s a subtle but noticeable upgrade.

    LED bias light kits cost $15-$40 (Amazon, Best Buy, IKEA) and include adhesive strips plus a power adapter. Installation takes 15-20 minutes—just stick the LED strip to the back of your TV stand or directly behind the TV, then plug in. Most kits come with remote dimming.

    Choose warm white (2700K) for evening viewing; cooler white (4000K) works for daytime if you prefer brighter light.

    The result is a living room that looks more polished, plus your eyes feel less tired after longer TV sessions.


    14. Add Vintage Edison Bulbs for Cozy Industrial Aesthetic

    Edison bulbs with visible filaments add warmth and vintage character to any fixture. They work beautifully in pendant lights, chandeliers, or exposed-bulb fixtures and make a space feel intentionally curated.

    Quality Edison bulbs cost $8-$20 each (filament style) at hardware stores or online. Standard LED Edison bulbs ($5-$10) mimic the look with modern efficiency. Screw them into any existing fixture in 2 minutes. They work in everything from antique brass fixtures to modern minimalist designs.

    Choose 2200-2700K color temperature for authentic warm glow. The bulbs themselves become part of the design, so visible fixtures make sense.

    Your living room instantly gains character and warmth, with lighting that feels intentional rather than purely functional.


    15. Install Wall-Mounted Swing Lights for Reading

    Swing-arm wall lights clip light sources exactly where you need them for reading or detail work without taking up table or floor space. They’re perfect for tight corners and add a design accent simultaneously.

    Quality swing arms range from $40-$120 (CB2, West Elm, Rejuvenation) to budget options at $20-$50 (IKEA, Amazon). Installation takes 30-45 minutes with basic wall mounting. Plug-in versions ($50-$80) skip hardwiring but have visible cords.

    The adjustable arm swings out of the way when not in use, and the light reaches exactly where a book or project sits. Choose dimmable bulbs for comfort during evening reading.

    Reading becomes genuinely enjoyable again, and the fixture adds a subtle design touch beside your chair.


    16. Layer Light with Linen Lampshades for Softness

    Lampshade material dramatically affects how light spreads—linen and fabric shades diffuse light beautifully, while harder materials create sharper pools. Upgrading shades is one of the cheapest ways to improve your lighting quality.

    Replacement shades cost $15-$60 (IKEA, Target, Wayfair, specialty shade shops). Installation takes 5 minutes—just swap the old shade for the new one. Choose cream, white, or natural linen in sizes matching your lamp base. Avoid dark or metallic shades unless you want spotlighting rather than ambient light.

    This small change completely transforms how light distributes through your room, making it softer and more welcoming.

    The difference is noticeable immediately—your whole space feels warmer and less harsh.


    17. Use Dimmer Switches to Control Multiple Fixtures

    A single dimmer switch controlling multiple fixtures (ceiling lights, chandeliers, or track lights) gives you one-touch flexibility. This is more sophisticated than having all lights at full brightness.

    Dimmer switches cost $15-$40 at hardware stores. Installation takes 30-45 minutes if you’re comfortable with basic electrical work (turn off power, swap the switch), or hire an electrician ($100-$150 per switch). Most standard light fixtures work with dimmers, but check compatibility.

    Install in your main living area and any room where you want mood control. Quality dimmers have smooth sliders rather than toggles, for better control.

    You’ll immediately notice how much better your room looks at 60-70% brightness compared to blasting lights at full strength.


    18. Add Accent Lighting to Highlight Architectural Details

    Strategic accent lighting highlights your room’s best features—crown molding, exposed brick, built-in shelving, or interesting wall textures. This creates dimension and makes basic spaces feel more architectural.

    Small accent lights or LED strips cost $15-$50 and take 20-30 minutes to position and plug in. Choose warm white for traditional details, cool white for modern elements. Position lights to create shadows and depth rather than uniform brightness.

    This technique works especially well in rooms with interesting architecture that usually goes unnoticed.

    The result is a space that feels more designed and intentional, with visual interest that makes rooms appear larger and more expensive.


    19. Install a Chandelier for Instant Drama and Focal Point

    A chandelier transforms a basic room into a designed space instantly. It works in any style—from modern minimalist to maximalist—as long as scale and finish match your aesthetic.

    Chandeliers range from $50-$150 (IKEA, Wayfair) for simple styles to $300-$800+ (CB2, West Elm) for designer pieces. Installation takes 2-3 hours for hardwiring (or hire a pro for $150-$300). Plug-in swag chandeliers ($40-$100) work for renters but show a visible cord.

    Choose one with dimmable bulbs and ensure it’s proportional to your room size. A room that’s 12’x14′ works best with a chandelier roughly 24-30 inches in diameter.

    The dramatic focal point immediately elevates the entire room’s design, making it feel more intentional and sophisticated.


    20. Create Floating Light with Recessed Ceiling Fixtures

    Recessed lighting (downlights) creates the illusion of light floating from nowhere—a contemporary, clean look that works in minimalist and modern spaces. It also opens up visual ceiling space.

    Recessed light kits cost $80-$200 for 3-4 fixtures plus installation materials. Installation takes 3-4 hours with basic tools (drywall saw, wiring); hiring an electrician costs $300-$600 total depending on complexity. This requires ceiling access and is permanent, so best for homeowners rather than renters.

    Space fixtures 4-6 feet apart for even coverage. Use dimmable LED bulbs (2700K) that last 25,000+ hours.

    The result is sophisticated, gallery-like lighting that makes your ceiling feel higher and your room more contemporary.


    21. Use Lantern-Style Lights for Transitional Warmth

    Lantern-style lights blend traditional and contemporary aesthetics, working in transitional rooms where you want timeless appeal. They provide focused light while adding architectural interest.

    Lantern pendants cost $30-$80 (IKEA, Target, Wayfair) or $100-$250 (CB2, West Elm) for designer versions. Installation takes 20-30 minutes with a plug adapter (renter-friendly) or 1-2 hours hardwired. Hang them at eye level (about 72 inches from floor) on either side of a fireplace or console table.

    Glass panels allow light to spread while creating visual interest. Choose warm white bulbs for authentic charm.

    This lighting style adds elegance and works beautifully in rooms that mix old and new elements.


    22. Install Ribbon Lights for Subtle Overhead Glow

    Ribbon or tape lights create continuous ambient glow without individual fixtures—a contemporary alternative to recessed lighting. They’re renter-friendly and plug directly into outlets.

    Ribbon light kits cost $20-$60 and installation takes 30-45 minutes to stick around ceiling edges or behind crown molding. Use warm white (2700K) for living rooms. Most are dimmable via remote control ($5-$15 extra).

    This creates a base layer of ambient light that makes your room feel more designed. Pair it with task lighting for a complete system.

    Your space immediately feels more contemporary and intentional, with sophisticated lighting that goes beyond basic ceiling fixtures.


    23. Add Brass or Gold Fixtures to Warm Up Cool Spaces

    Metal finishes dramatically affect room temperature. Brass, gold, and copper add warmth, while chrome and nickel read as cool and contemporary. Warming up your fixtures instantly makes a space feel more inviting.

    Brass fixtures cost $20-$150 depending on style and source (IKEA, Target, West Elm, specialty shops). To warm up existing fixtures, you can paint metal with brass metallic spray paint ($8-$15 per can, Home Depot) or simply replace shades with warmer materials.

    Coordinate your metal finish across the room—mix brass wall sconces, pendants, and table lamp bases for cohesion. This doesn’t mean everything matches exactly, but the warm tone ties everything together.

    The warmth instantly makes your room feel more welcoming and sophisticated.


    24. Layer Light with Tiered Brightness Zones

    Creating different brightness zones—overhead layer, mid-level task lights, and accent lighting—gives you complete control over ambiance. This professional technique works in any room size.

    This requires no additional purchases if you already have fixtures; you just control them separately via different switches or dimmers ($15-$40 per switch). Setup takes 1-2 hours if adding new dimmer switches, or minutes if using smart bulbs ($15-$25 each).

    Layer your brightness: dim overhead lights to 50%, keep task lamps at full brightness, and add accent lights at 70-80% for reading areas.

    This sophisticated approach means your room looks good in every lighting situation—morning, evening, entertaining, or relaxing.


    25. Install Brass Or Matte Black Sconces Flanking a Mirror

    Sconces flanking a mirror or artwork create perfect symmetry and provide both functional and accent lighting. This arrangement works especially well in entryway-adjacent living rooms or behind a console table.

    Pairs of sconces cost $50-$150 or invest $200-$400 for designer options. Installation takes 1-2 hours with basic wall mounting or hire a pro ($150-$250 for hardwiring). Plug-in versions ($60-$120 per pair) work for renters.

    Position sconces roughly 60-72 inches from the floor, roughly 24-36 inches apart on either side of your mirror or focal point. Use matching finishes for intentional balance.

    The symmetry creates an instant sense of order and design, making even a basic console look like a styled magazine photograph.


    26. Use Color-Changing Smart Bulbs for Seasonal Mood Shifts

    Color-changing smart bulbs let you adjust not just brightness but actual color temperature or even RGB color—perfect for seasonal refreshes without any physical changes. In autumn use warm amber; in summer try crisp white; for cozy evenings dial down to 2200K.

    Quality color-changing smart bulbs cost $20-$40 per bulb (Philips Hue Color, LIFX Color). Setup takes 5 minutes per bulb—just screw them in and connect to your app. Basic options start at $15-$20. You control everything from your phone with preset scenes for different moods.

    Start with one smart bulb in your most-used lamp to test the system. Many apps let you create custom presets—”Movie Night,” “Reading,” “Party,” etc.

    This flexibility means your lighting adapts to your mood and the season without any physical changes to your space.


    Ready to brighten your living room? Pick one lighting idea this weekend—even a single new fixture or LED strip makes a noticeable difference. Save this post for whenever you need that next upgrade, and share it with anyone else who’s stuck with basic ceiling lights and flat lighting.