Category: Wall Decor

  • 23 Sheer Curtain Layering Ideas for Elegant Light Flow

    23 Sheer Curtain Layering Ideas for Elegant Light Flow

    Introduction

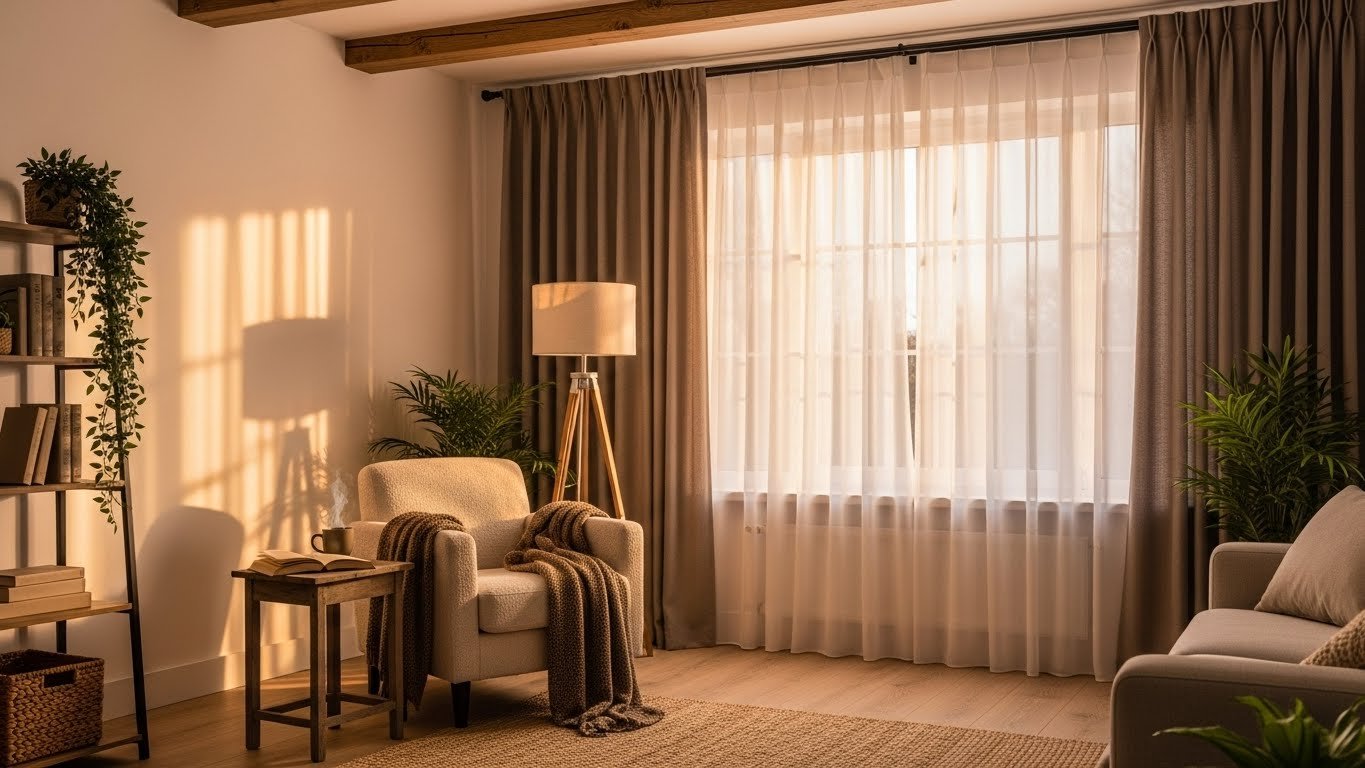
    Layered curtains are the secret weapon of every interior designer—and honestly, they’re way easier to pull off than you think. If you’ve ever felt stuck between wanting natural light and needing privacy, or you’re tired of your living room looking flat and one-dimensional, this guide is for you. We’re breaking down 23 specific layering combinations, styling tricks, and budget-friendly ways to create that elegant, high-end look without the designer price tag. Whether you’re renting or own your home, work with tiny windows or soaring walls, you’ll find ideas that fit your space and your style. Let’s get started.

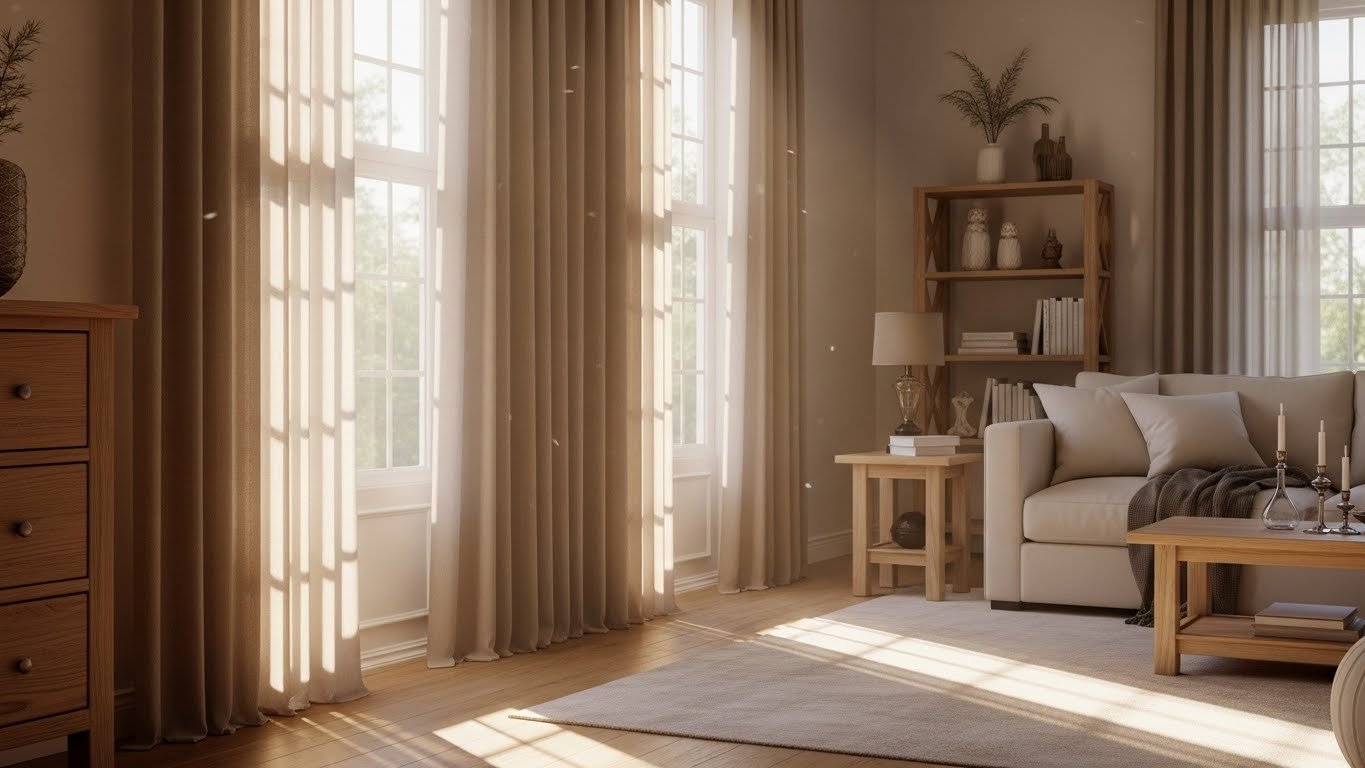
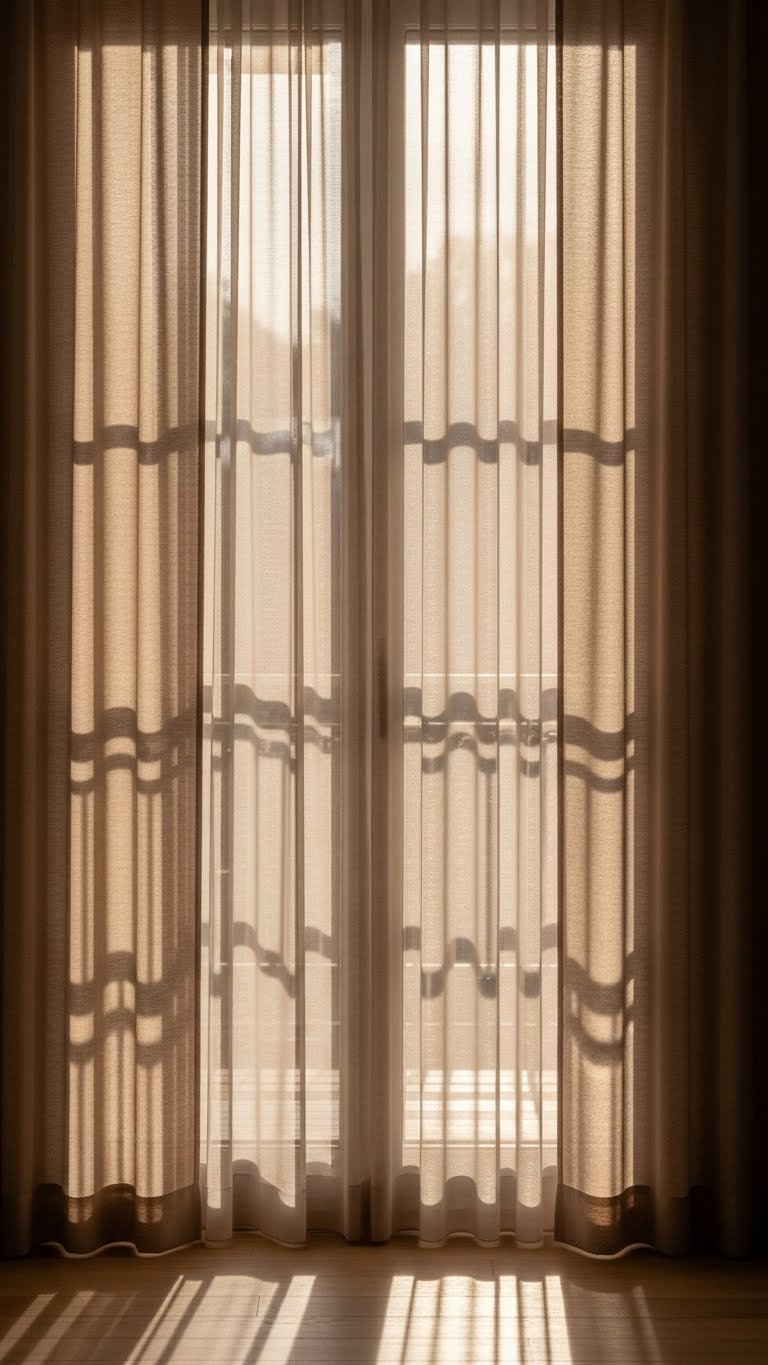
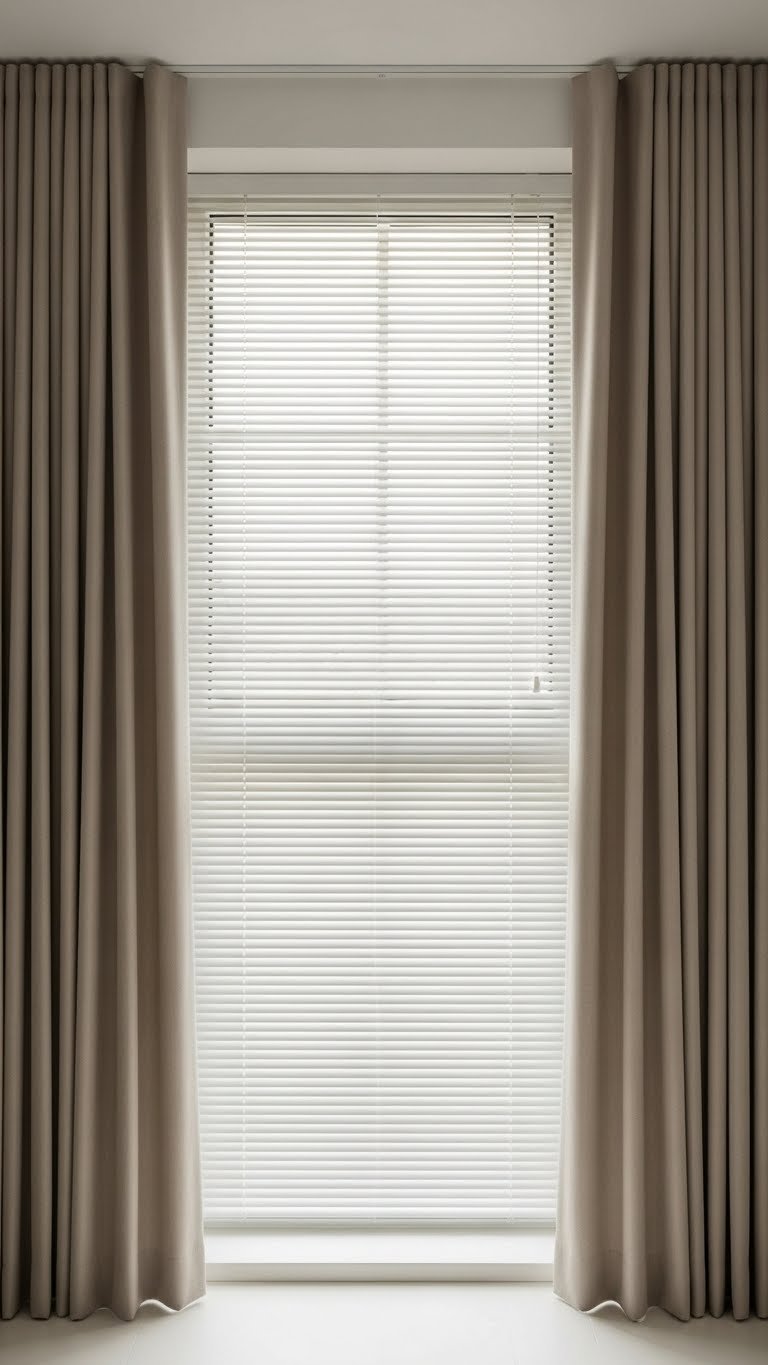
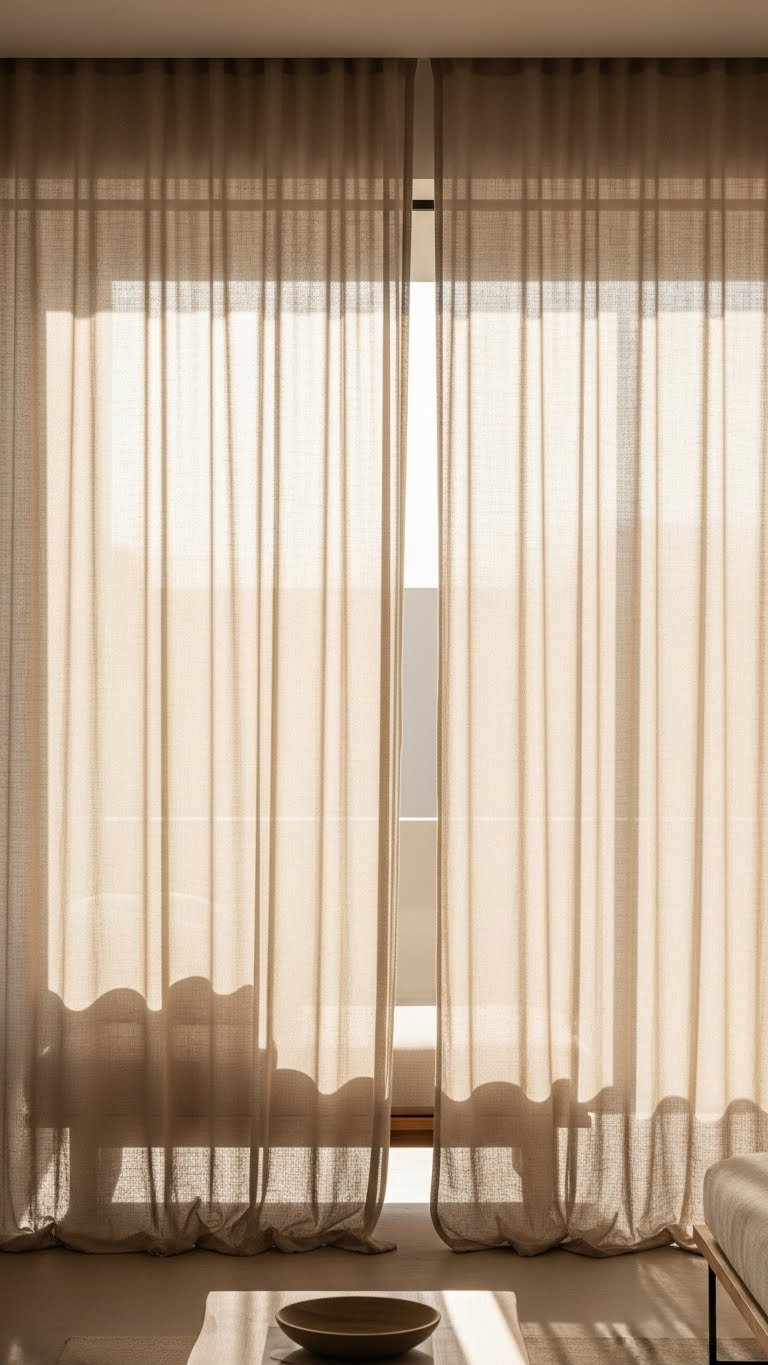
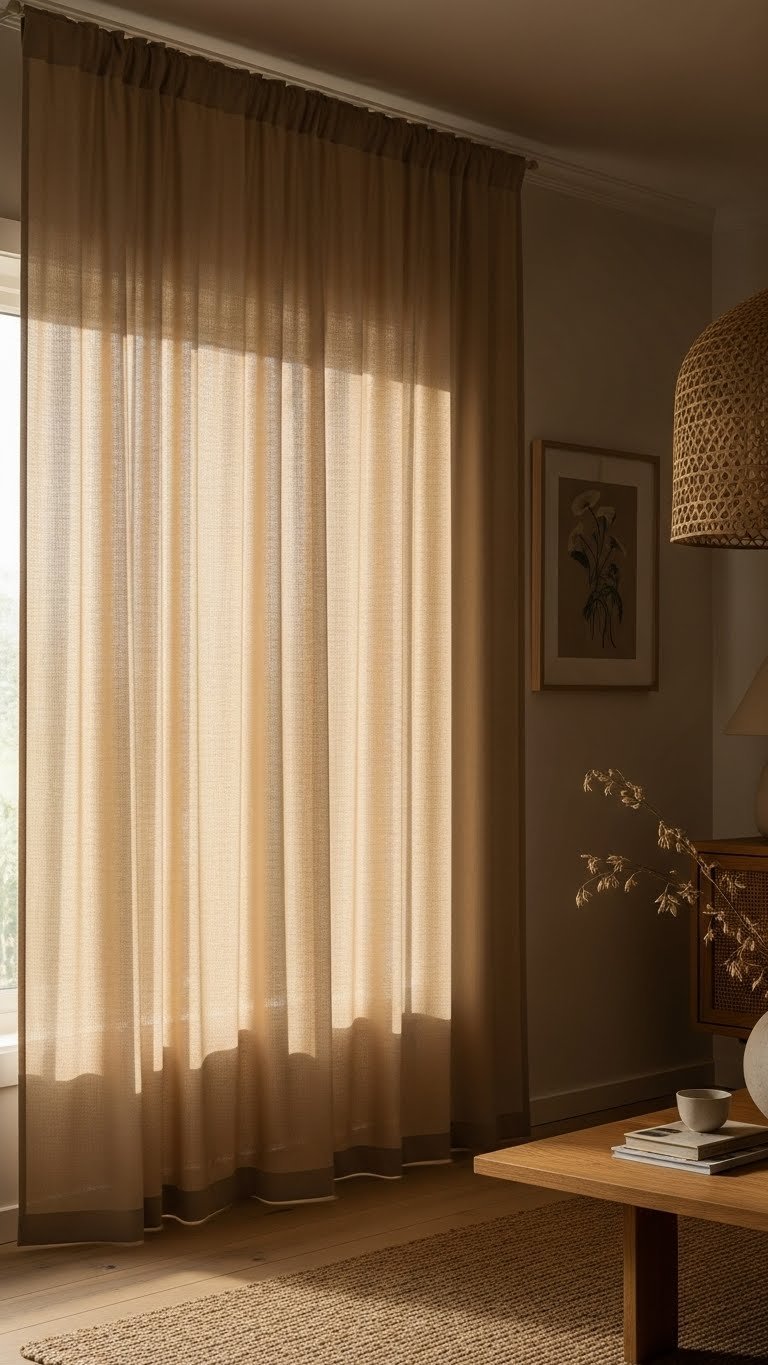
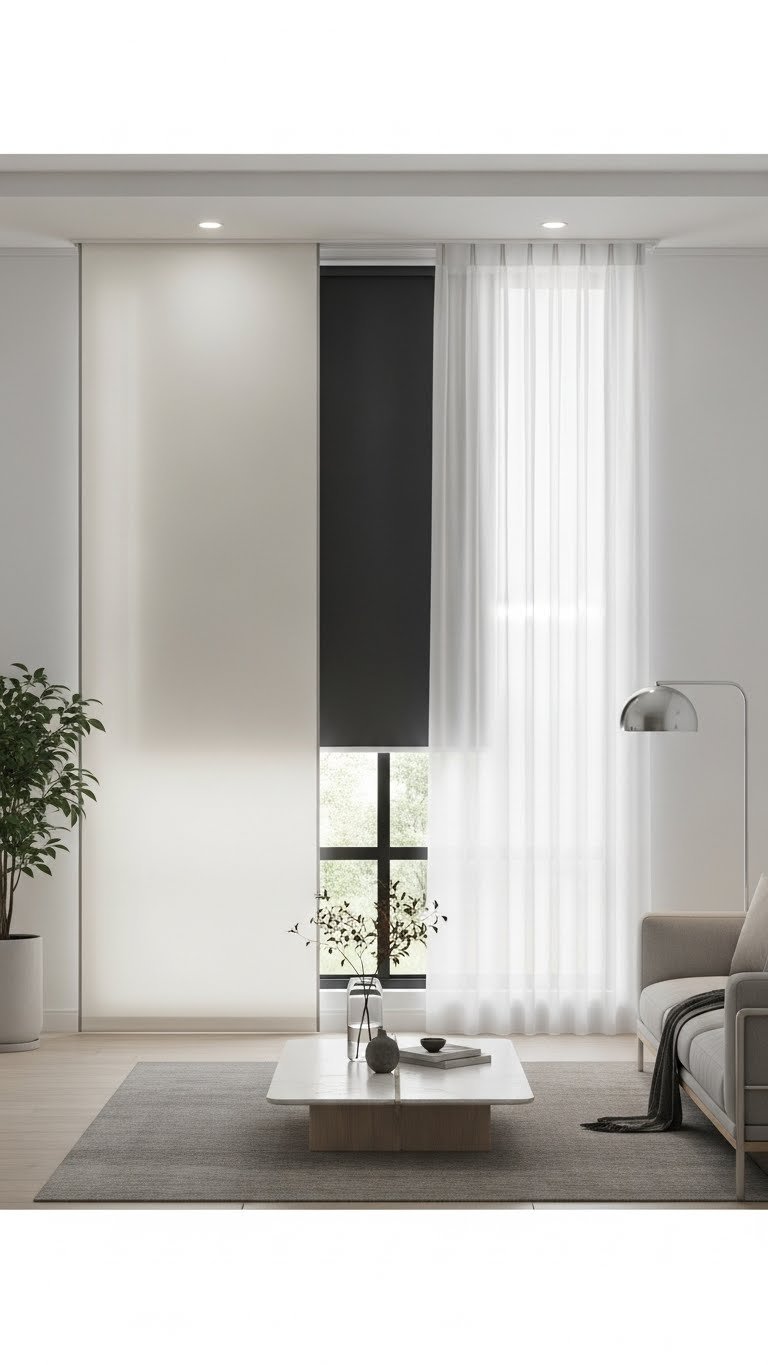
    1. Layer Sheer + Blackout for Light Control

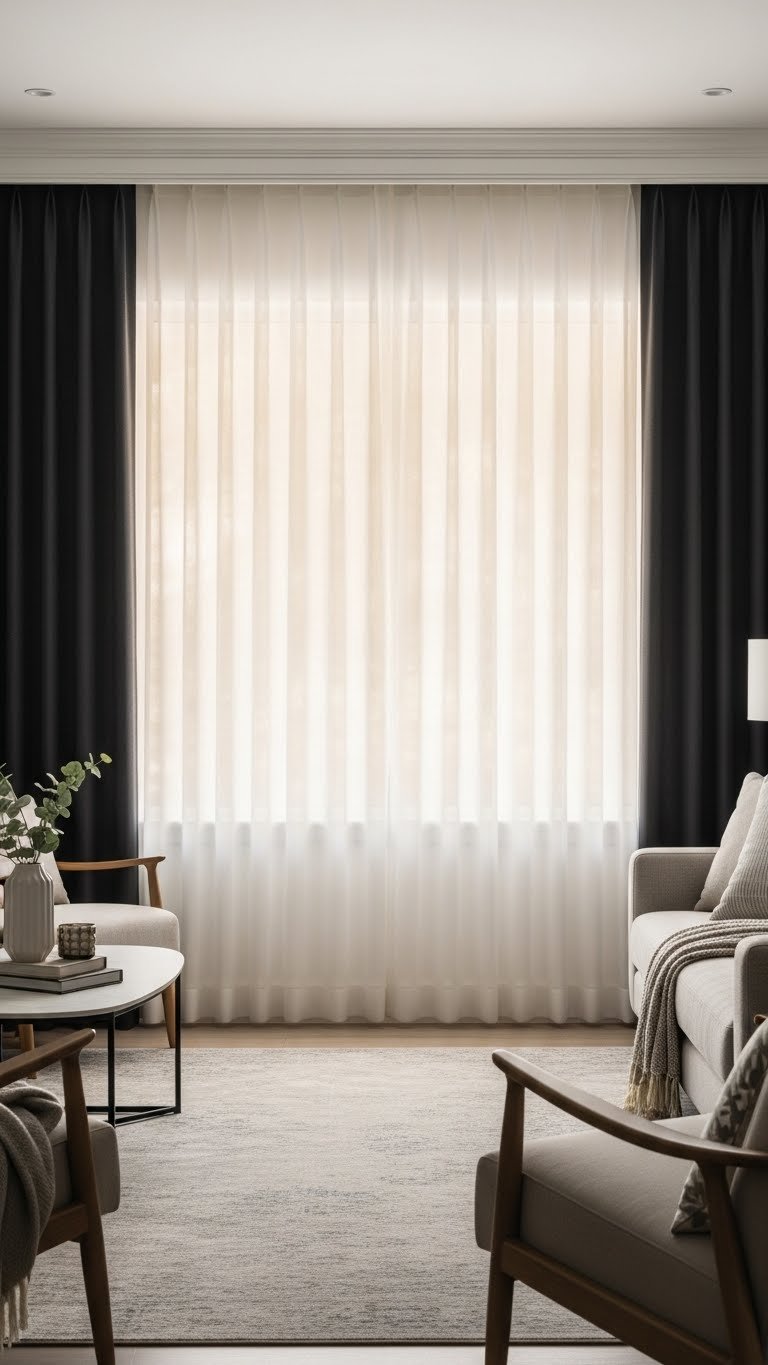
    Sheer curtains filter harsh sunlight while blackout panels give you total privacy and darkness when you need it. This combination solves the biggest living room dilemma: you want natural light by day and complete blackout by night, without buying two separate rod systems.

    Hang lightweight sheers on a tension rod close to the window glass using clip rings ($8–15 from IKEA or Amazon). Mount your blackout curtains on a standard rod 6 inches above the window frame. The sheers stay open during the day to diffuse light and reduce glare, while blackouts sit behind them ready to close at night. This setup takes about 30 minutes to install and works in rentals if you use adhesive hooks instead of drilling. The result? Blackout curtains reduce energy costs by 10–25%, and you get that curated, layered look that reads expensive.

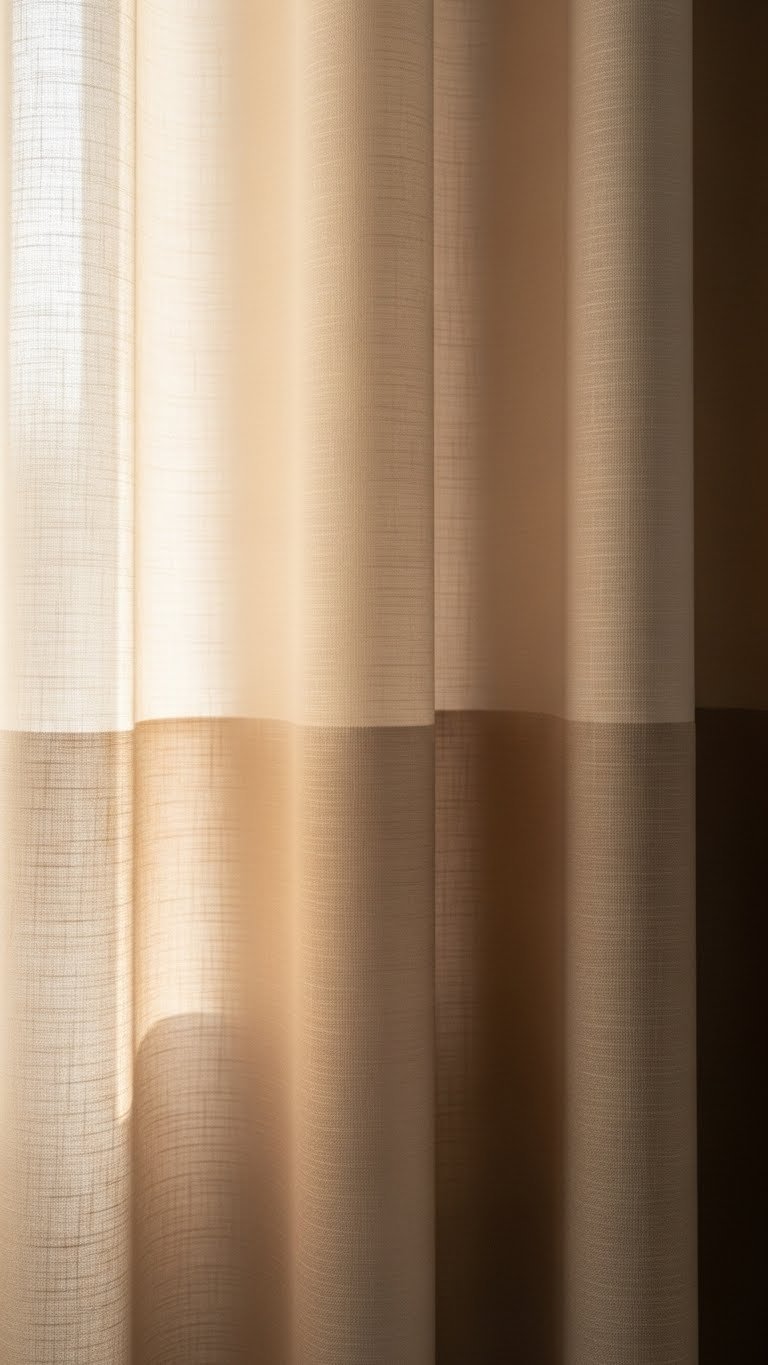
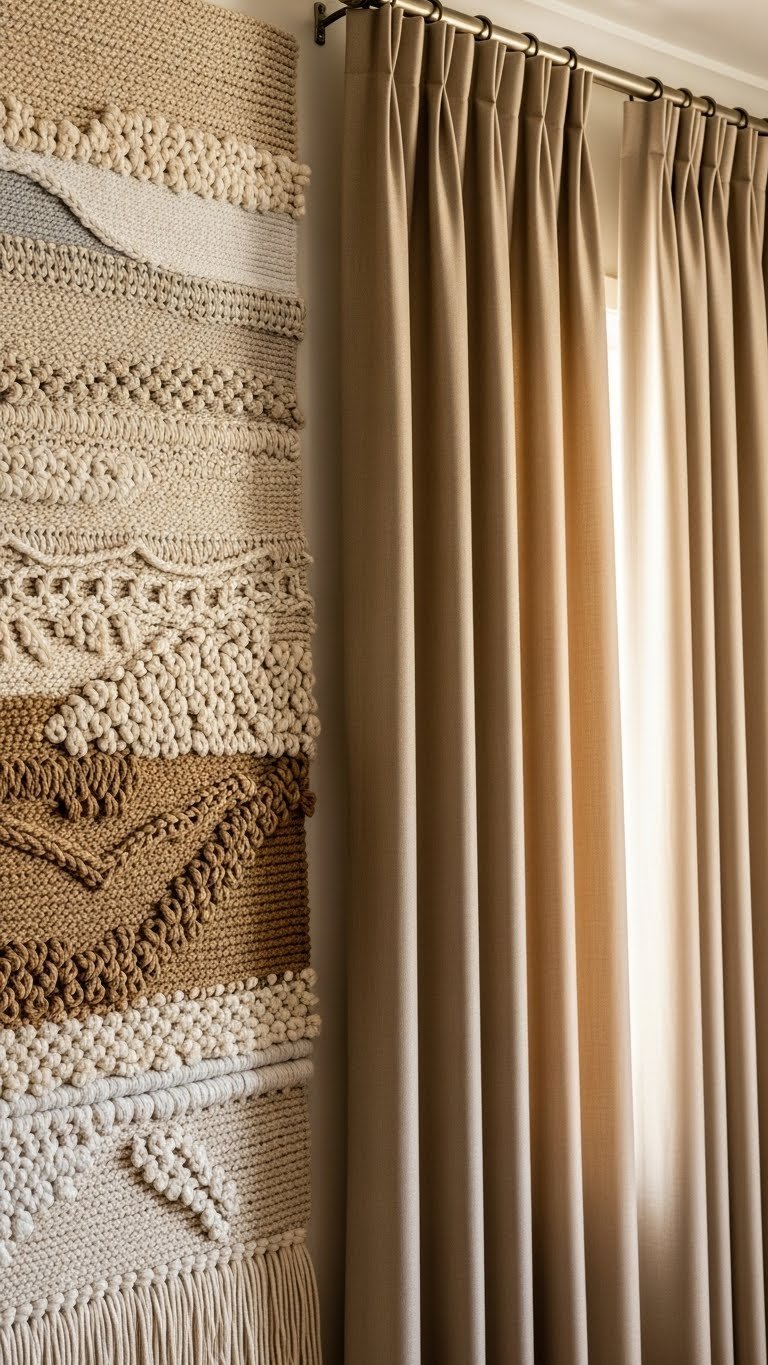
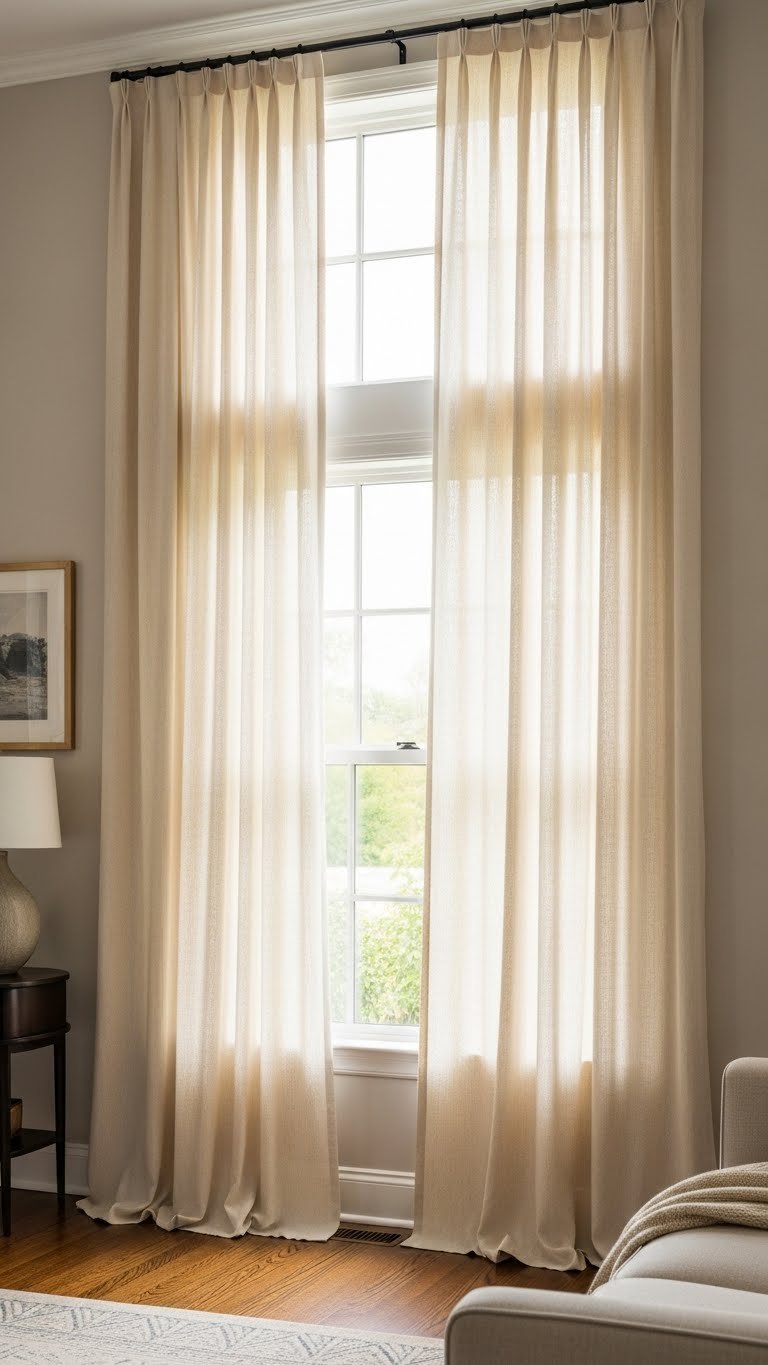
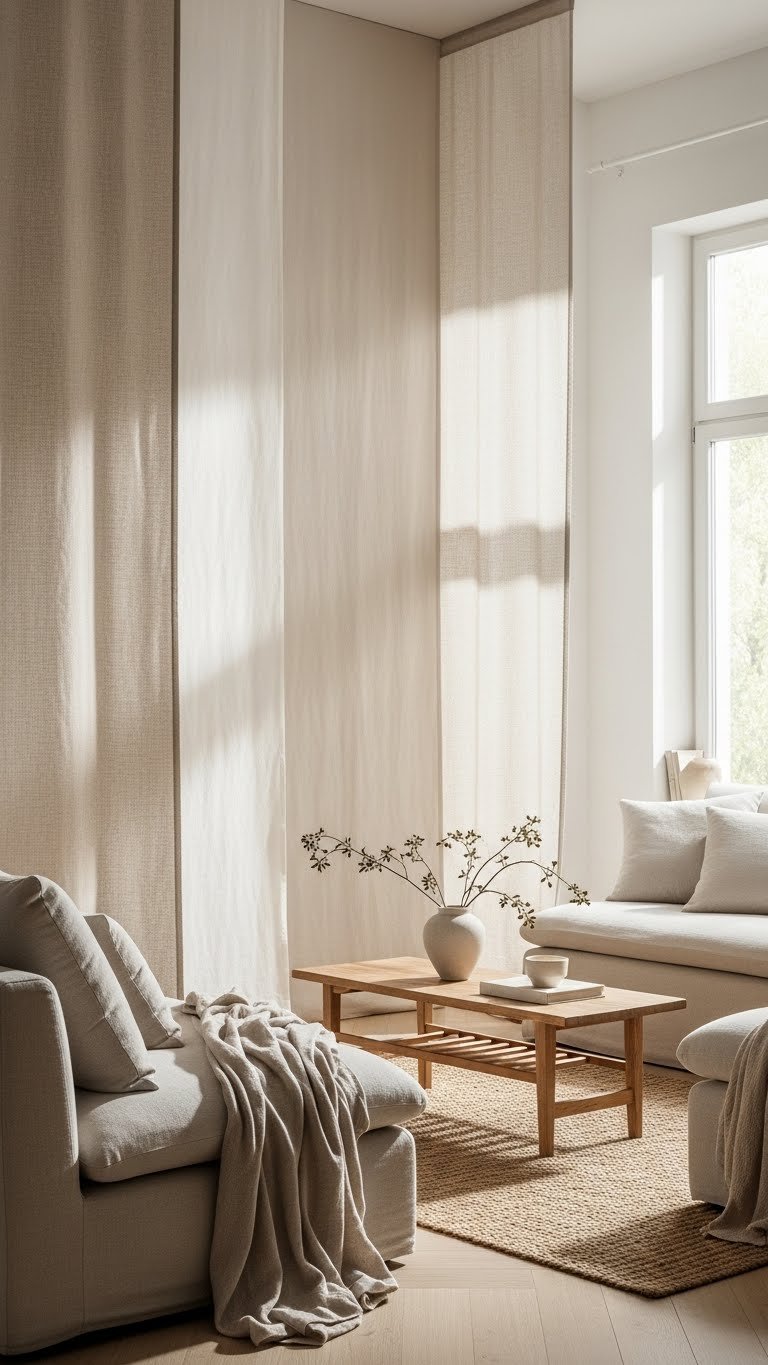
    2. Mix Linen + Velvet for Texture Contrast

    Pairing lightweight linen with luxurious velvet creates visual and tactile depth that makes your space feel intentionally designed. Linen is breathable and photographs beautifully; velvet adds that high-end feel without requiring a huge budget.

    Layer natural linen panels (starting at $35–60 per panel from Target, West Elm, or Wayfair) on your main rod, then add velvet-look drapes behind them ($50–150 from IKEA, Amazon, or Overstock). Real velvet can feel delicate, so velvet-look synthetics are renter-friendly and machine-washable. Mount both on the same rod using rings or a double-curtain rod system. Install time: 20–30 minutes. The linen softens light while velvet provides structure and anchors the look. You get texture that catches light differently depending on the time of day, making your room look dimensional and carefully styled.

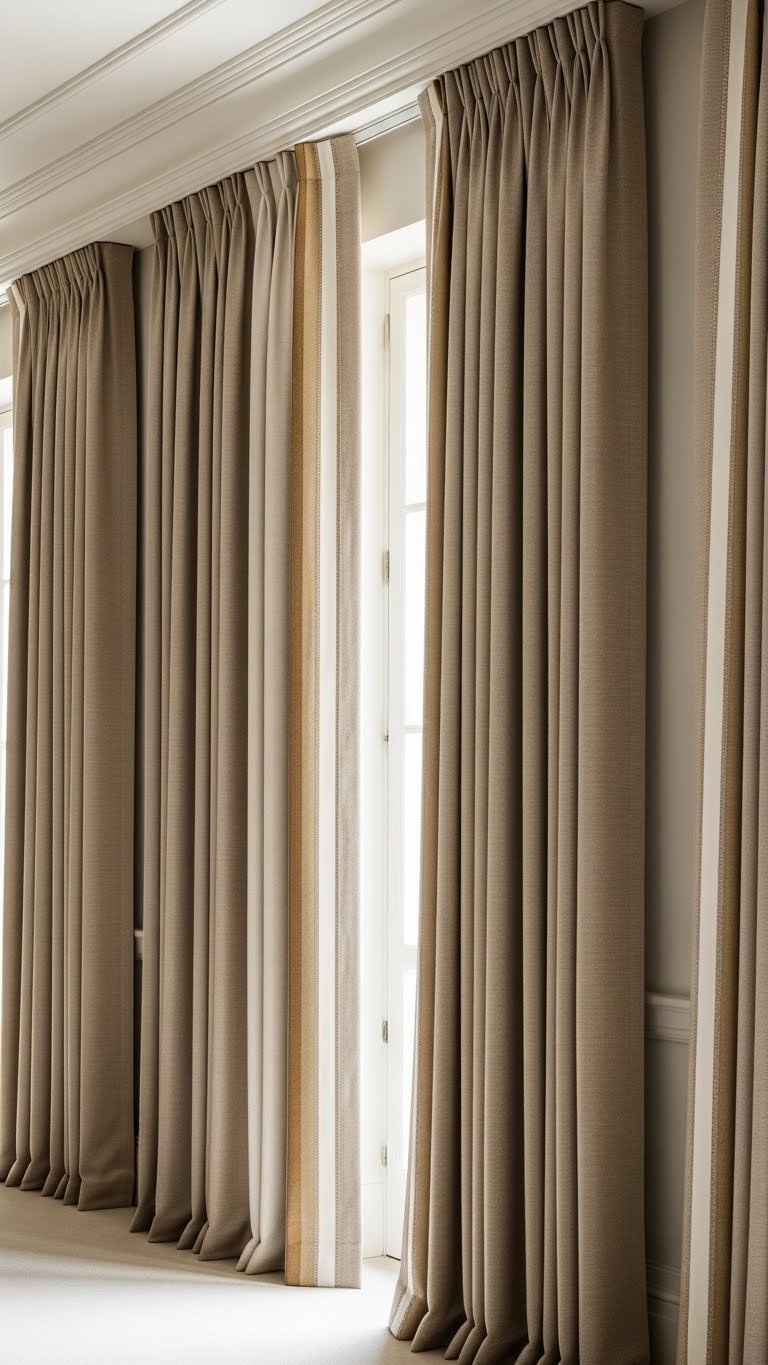
    3. Go Sheer + Patterned for Visual Interest

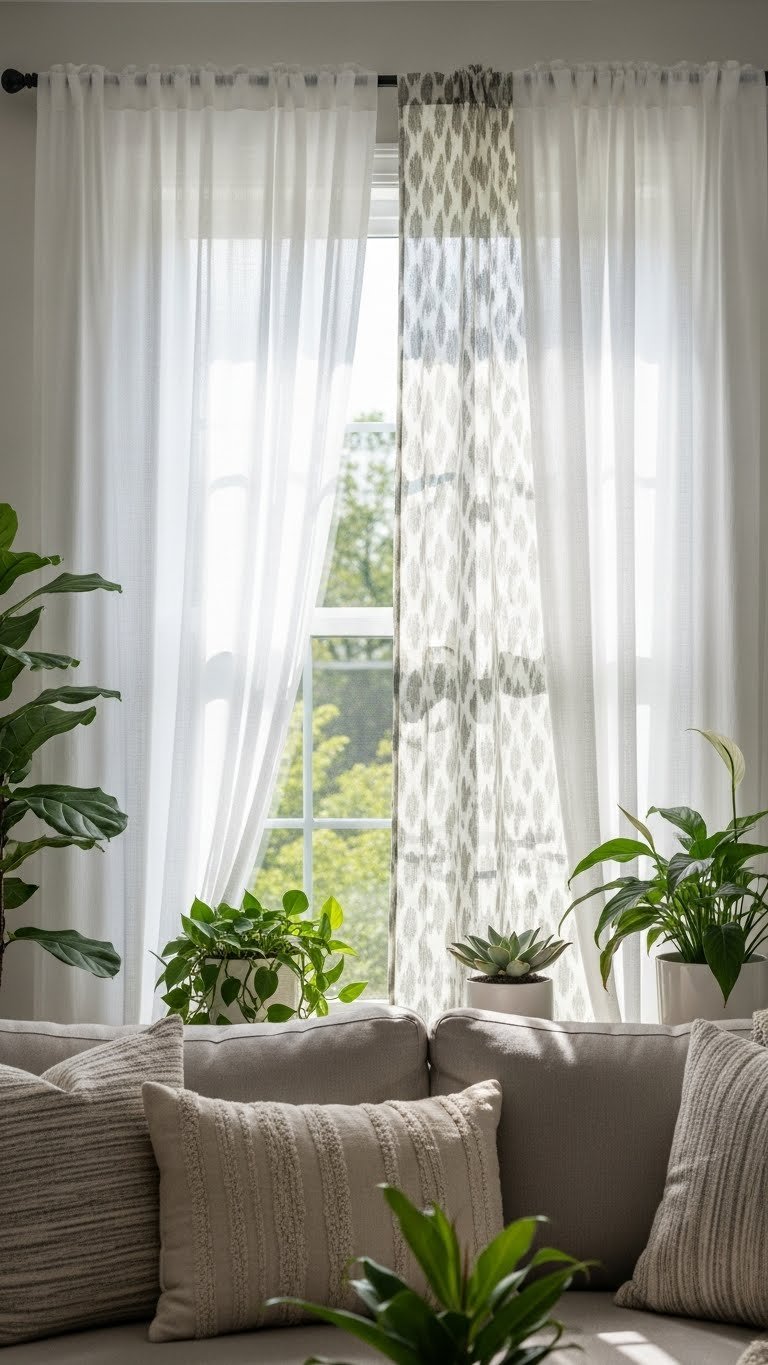
    Solid sheers alone can feel one-note, but adding a patterned layer behind them gives you intrigue without overwhelming the space. This approach lets the pattern peek through the sheer, creating a sophisticated mixed-print effect.

    Install white or cream sheers ($20–40 per panel) on your front rod using a tension rod or standard system. Behind them, hang a printed linen or cotton-blend panel ($40–80 per panel). Choose patterns that complement each other—think solid + ikat, or sheer + subtle geometric print from Wayfair, West Elm, or Anthropologie. The sheers diffuse the pattern, so it reads as subtle rather than busy. Assembly takes about 25 minutes. This layering trick makes your windows look professionally styled and gives you the flexibility to adjust both panels independently throughout the day.

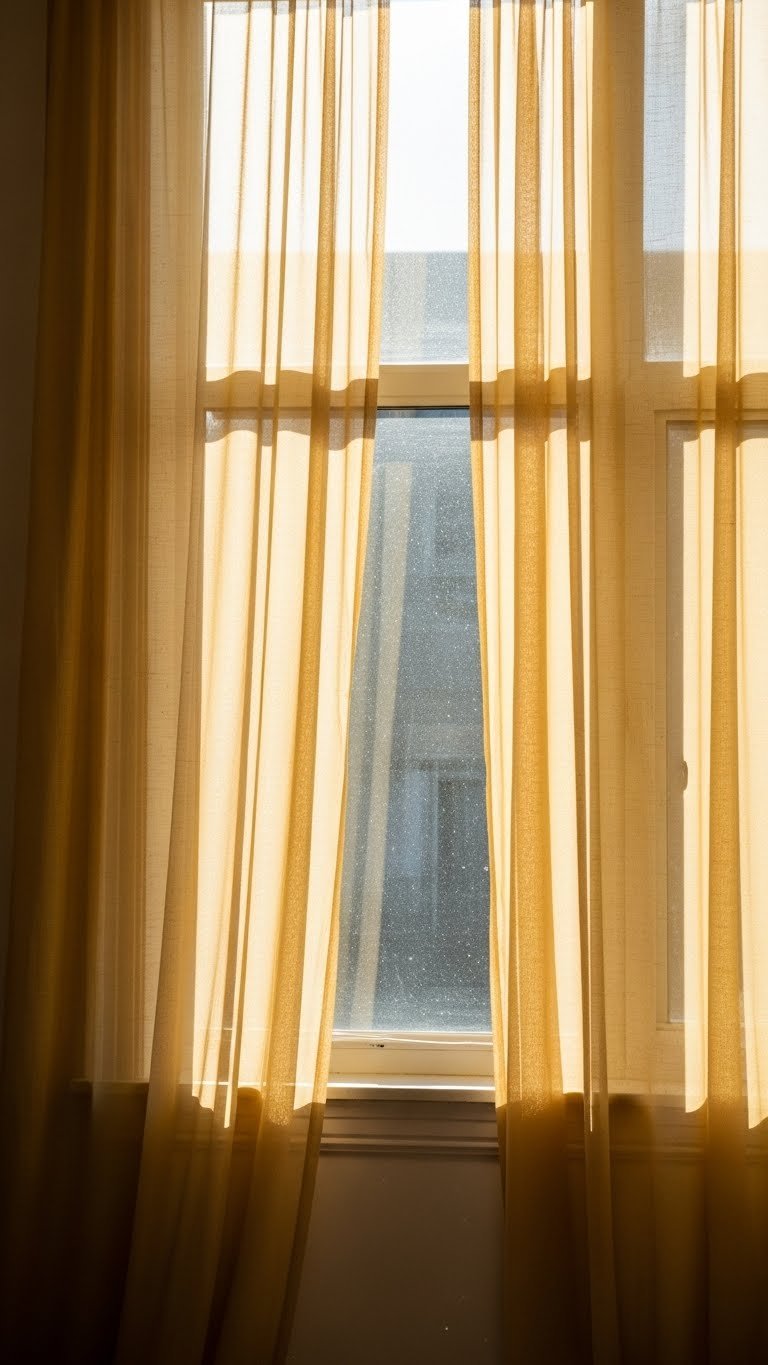
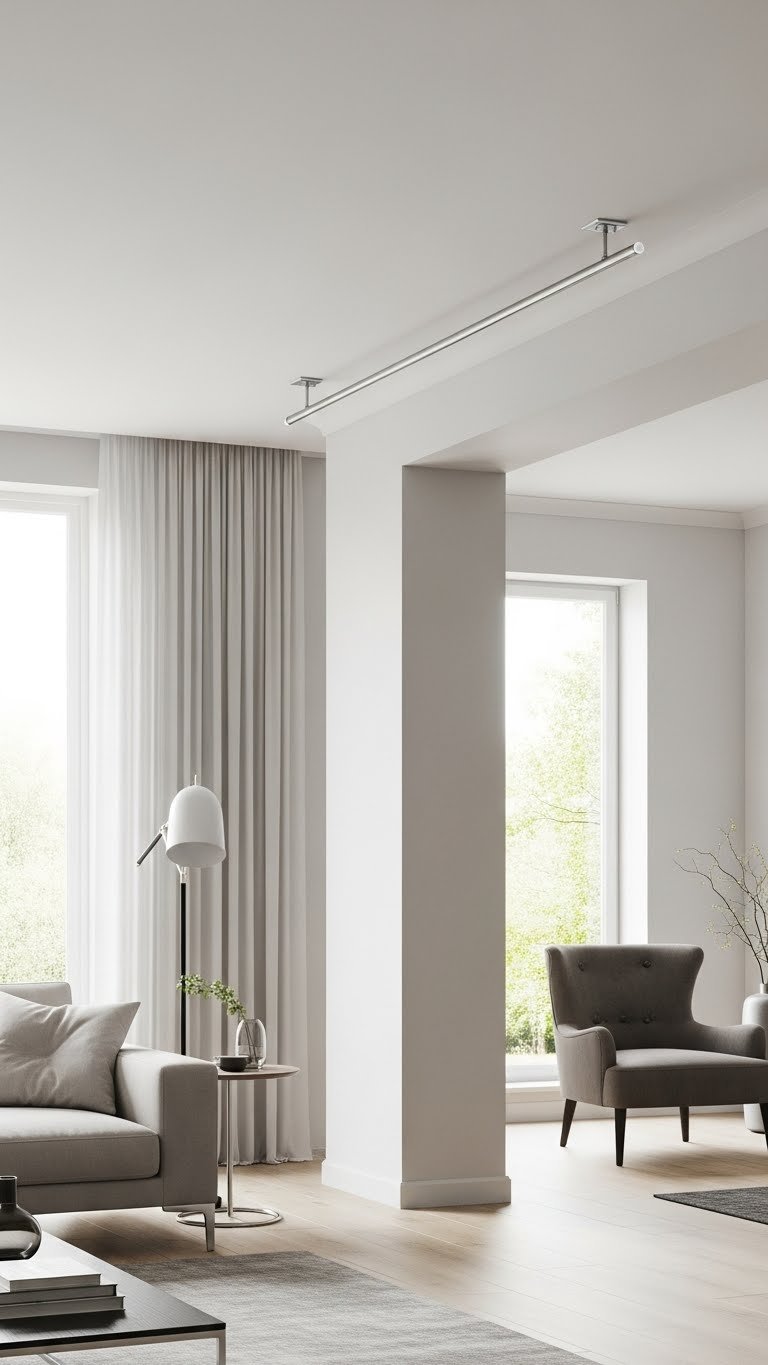
    4. Frame Small Windows with Short Curtains + Height Illusion

    Small windows don’t need floor-length curtains—in fact, keeping them short actually makes rooms feel bigger. Mounting rods high above the window creates the illusion of taller ceilings and draws the eye upward.

    Hang your curtain rod 4–6 inches above the window frame (or higher if your wall allows), and choose panels that end at the sill or just below. Use lightweight synthetics or cotton ($15–35 per panel from IKEA or Target) to keep visual weight minimal. Layer a sheer in front and a linen or cotton blend behind to add depth without clutter. Installation: 20 minutes. This approach is perfect for apartments, rooms with low ceilings, or spaces where floor-length drapes would overwhelm the window. Your living room gains height and airiness just from the rod placement and curtain length.

    5. Create Asymmetrical Panels for Modern Edge

    Asymmetrical curtains break the “match and mirror” rule, giving your space an intentional, designer-forward look. This trend works especially well in modern and minimalist living rooms.

    Hang one full-length sheer panel ($25–50) on one side of the window, then layer a solid or slightly darker panel ($40–80) partially covering the other side. You can use adhesive hooks or standard rods (from IKEA, Amazon, or Home Depot). The beauty of this look is it’s not about perfection—it’s about controlled asymmetry. Installation time: 15 minutes. The result feels editorial and modern, and honestly, it gives you flexibility: close one panel for privacy while keeping the other open for light, or adjust the drape throughout the day based on your mood. It’s a high-impact styling choice that costs very little.

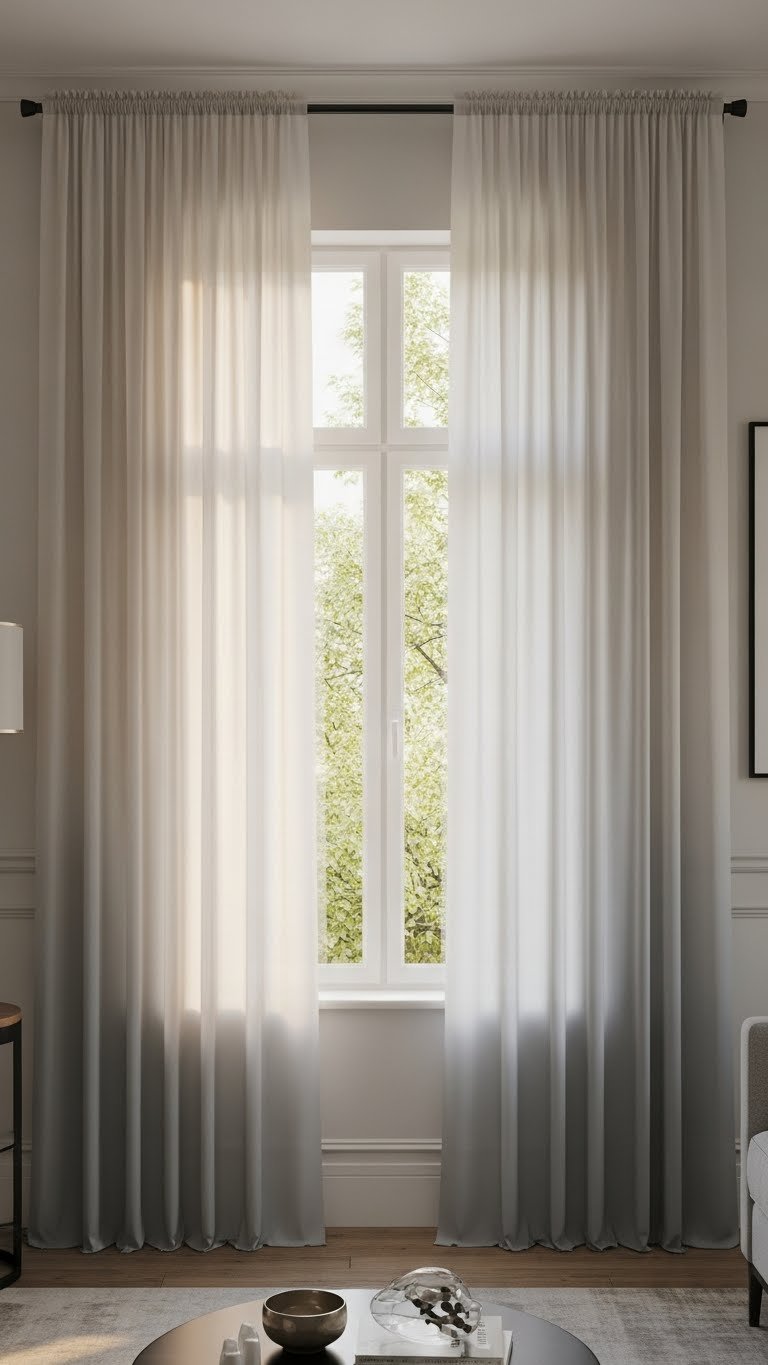
    6. Layer Earth Tones for Cohesive Warmth

    Earth tones are dominating 2025 interiors, and layering them creates a sense of harmony and calm. This palette makes any living room feel intentional and restful.

    Choose a sheer in soft sage, cream, or warm sand ($30–60 per panel) from Target, Wayfair, or West Elm, then back it with a deeper earth tone like terracotta, clay, or warm taupe ($50–100 per panel). Both fabrics should have some natural texture—linen, linen-blend, or cotton work best. Mount on a standard rod or tension rod system ($15–40). Setup takes about 25 minutes. The layered earth tones make your living room feel grounded and gallery-like, while still maintaining openness. Light passes through the warm layers, creating a soft, glowing effect that changes throughout the day.

    7. Introduce Muted Pastels for Soft Elegance

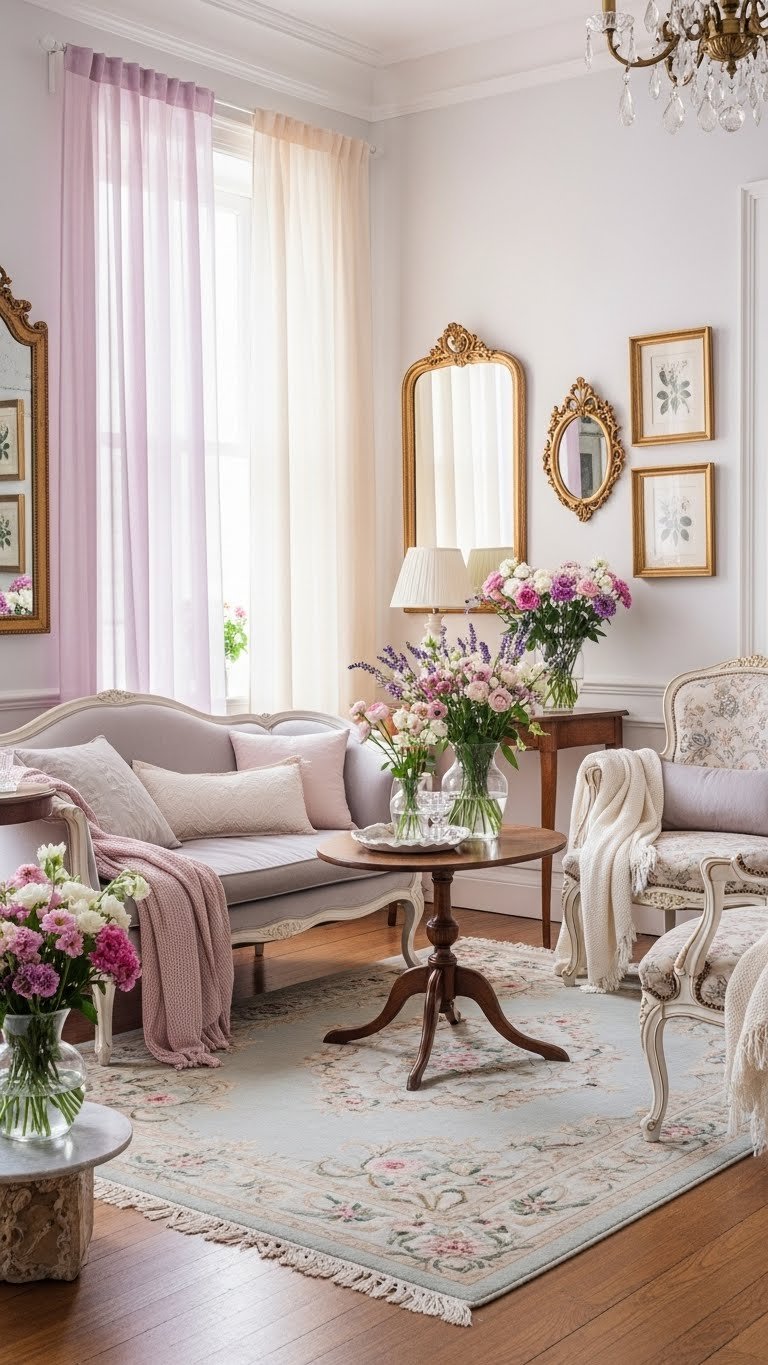
    Muted pastels are having a major moment in 2025—think dusty rose, mauve, soft periwinkle, and pale sage. Layering them creates an effortlessly elegant, almost romantic vibe.

    Layer a pale pastel sheer ($25–50 per panel) in blush, lavender, or soft sage from Target, IKEA, or Wayfair over a cream or off-white base panel ($30–70). Both should be lightweight fabrics like cotton or cotton-linen blends. Use standard rings or a tension rod system ($15–35). This setup works beautifully in vintage-inspired or cottagecore spaces, and it’s particularly effective if your room gets afternoon light—the pastel filters the warmth into something almost ethereal. Installation: 20 minutes. The result feels intentional and designed, without being matchy-matchy or overdone.

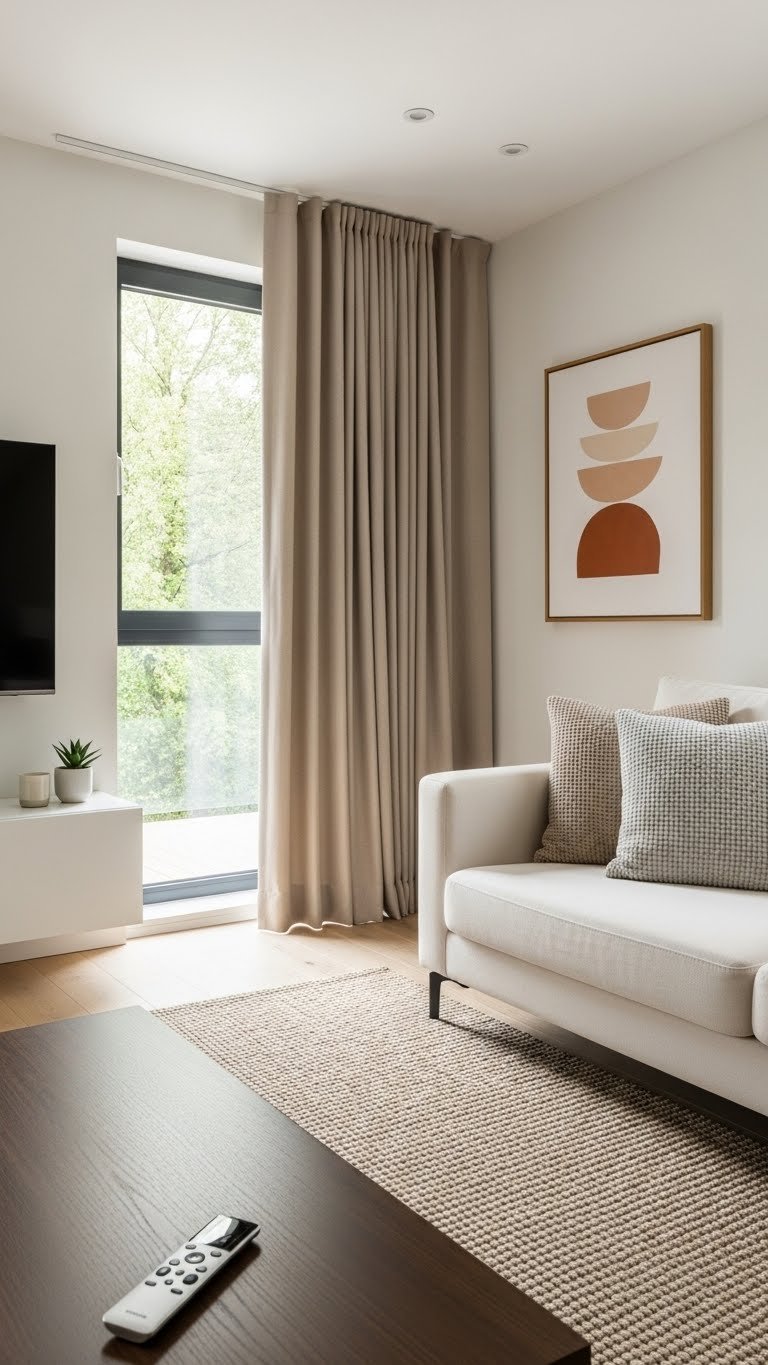
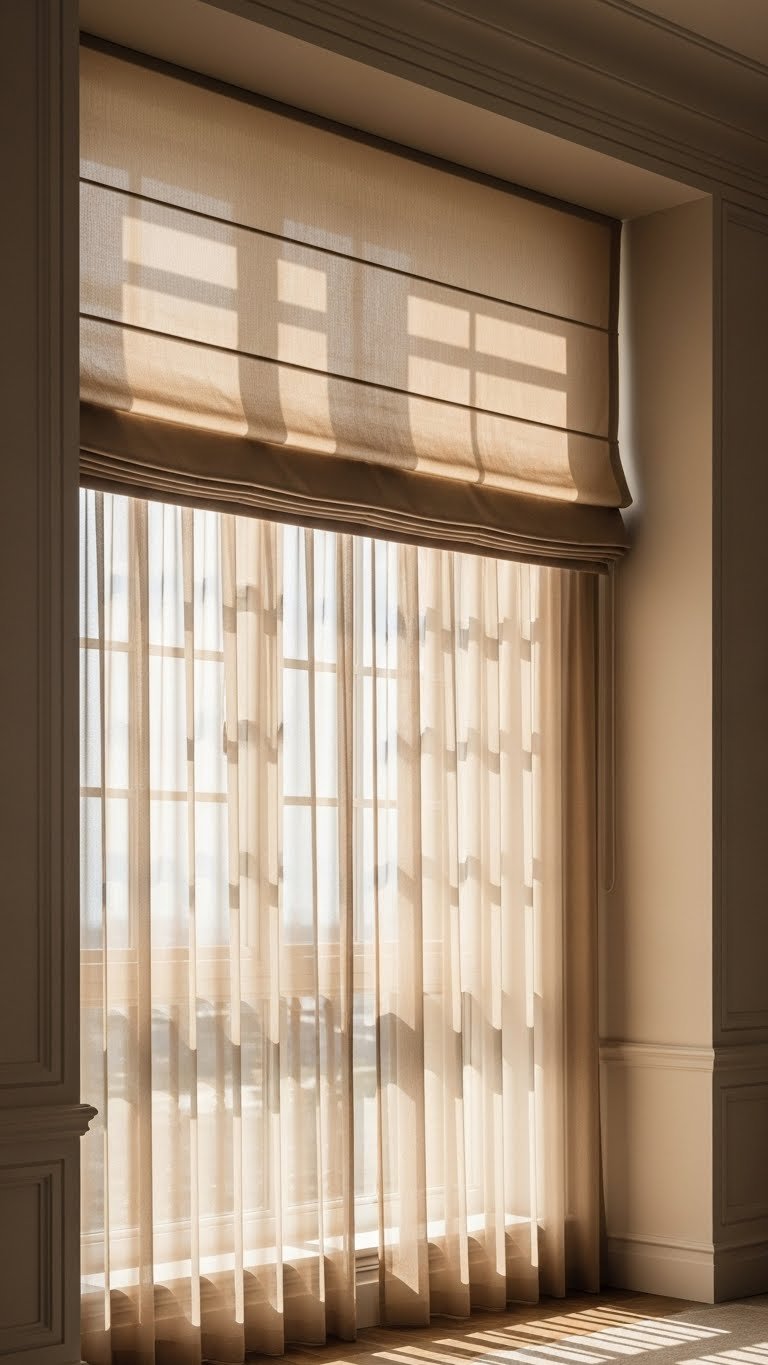
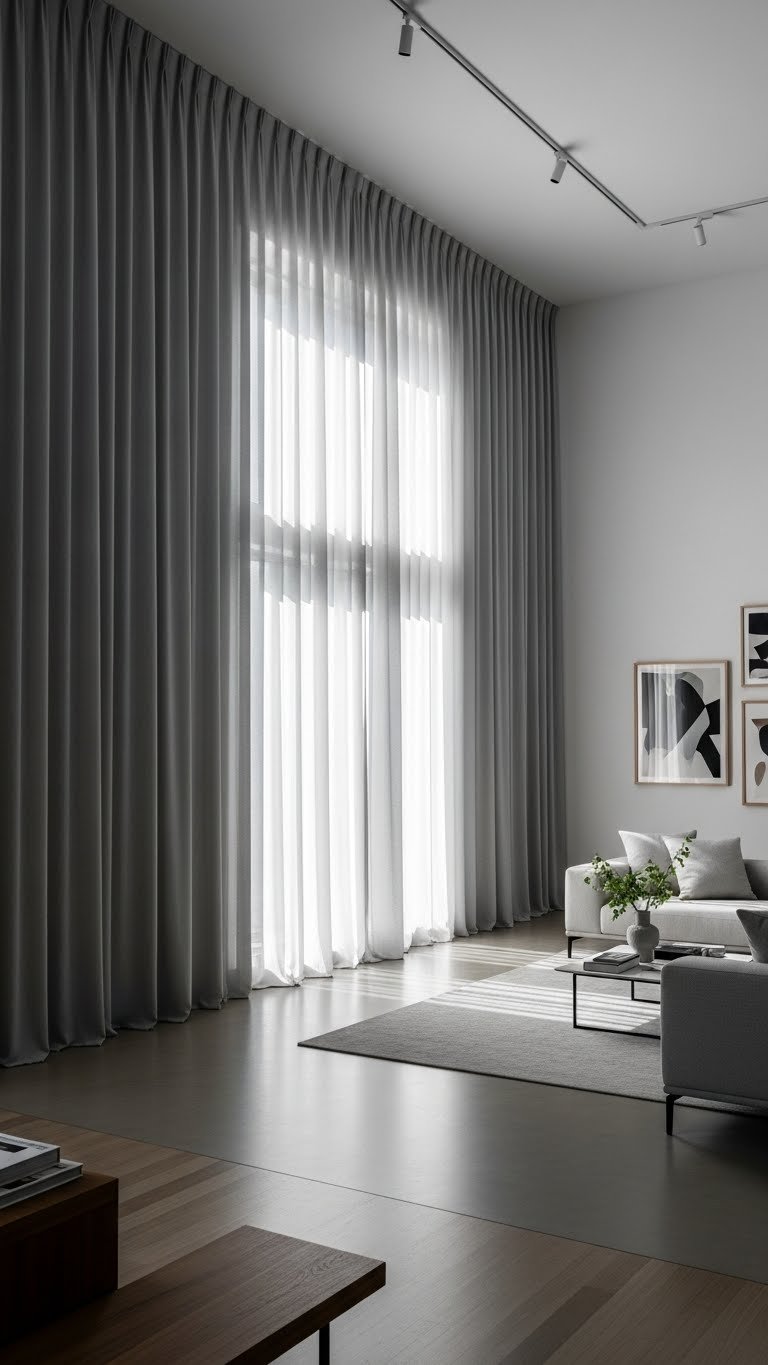
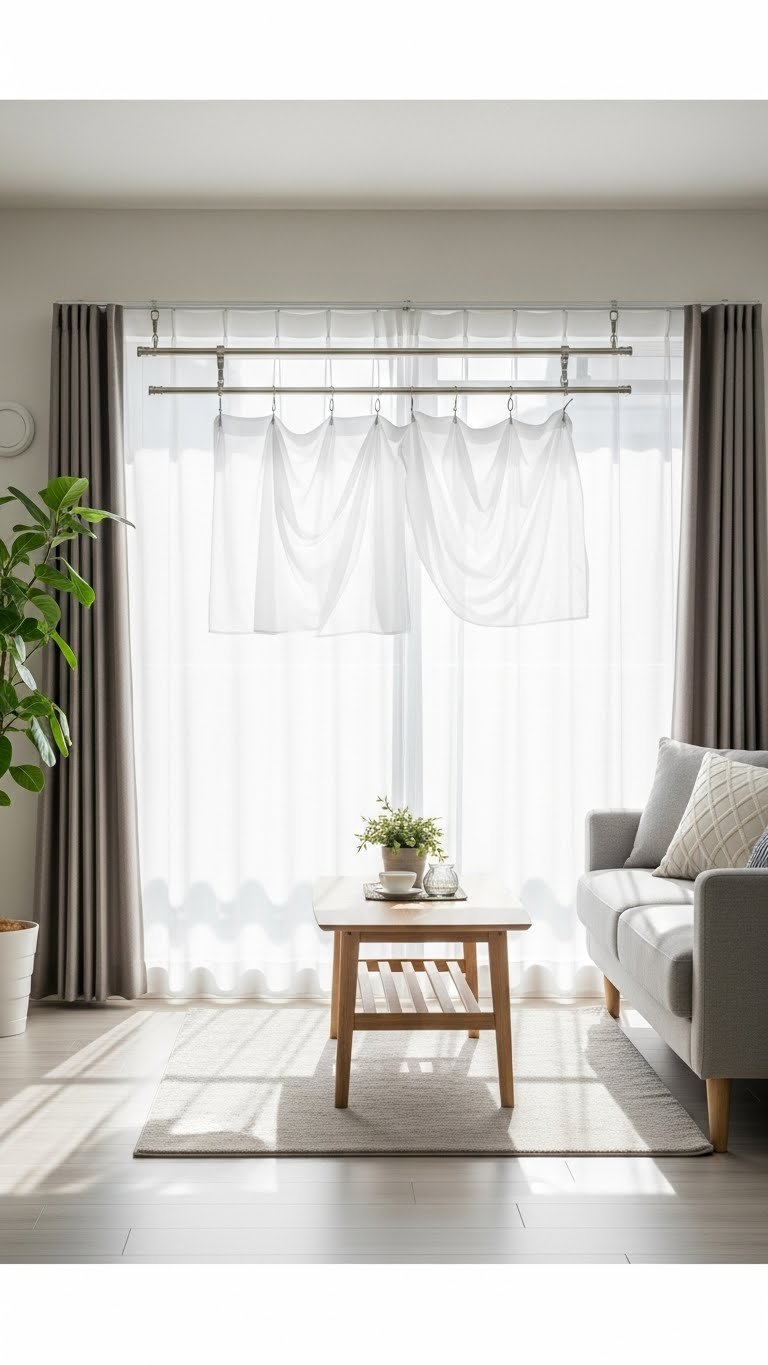
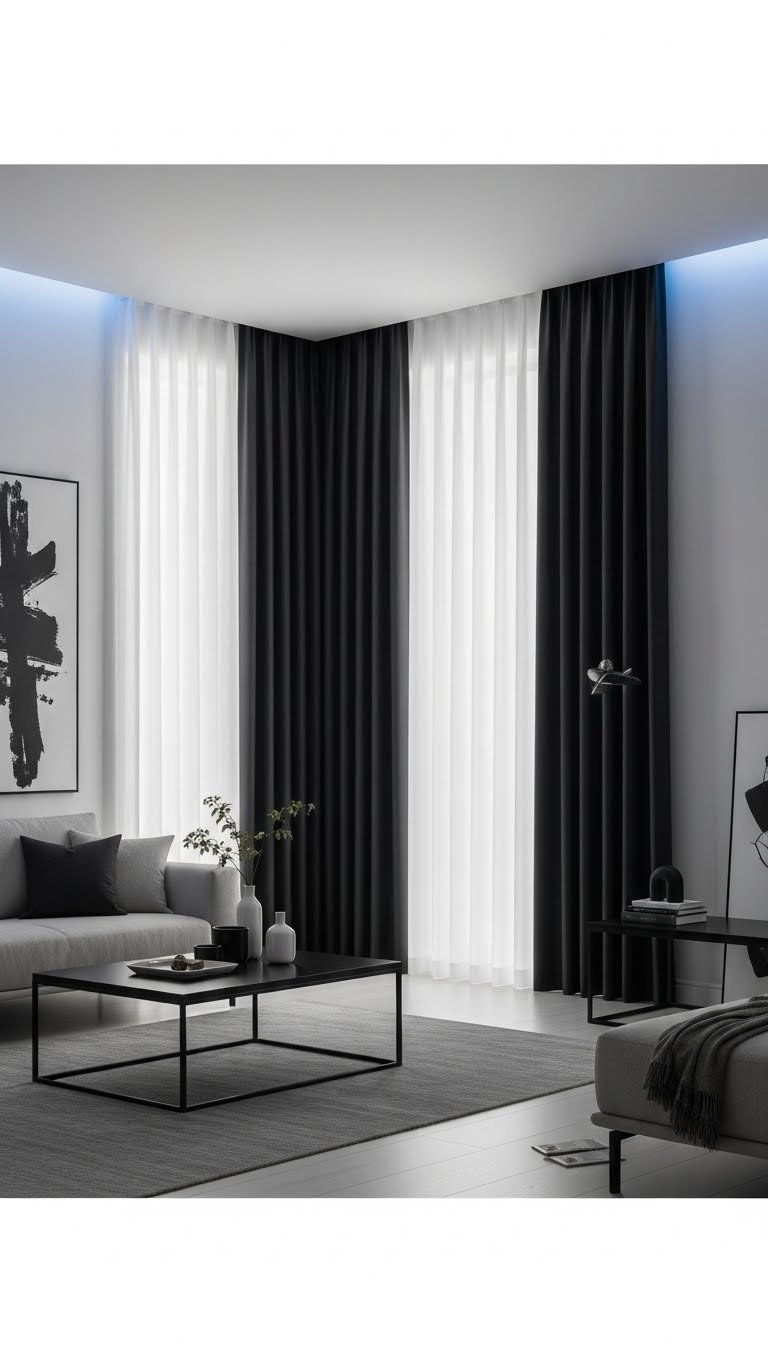
    8. Double Rod System for Maximum Layering

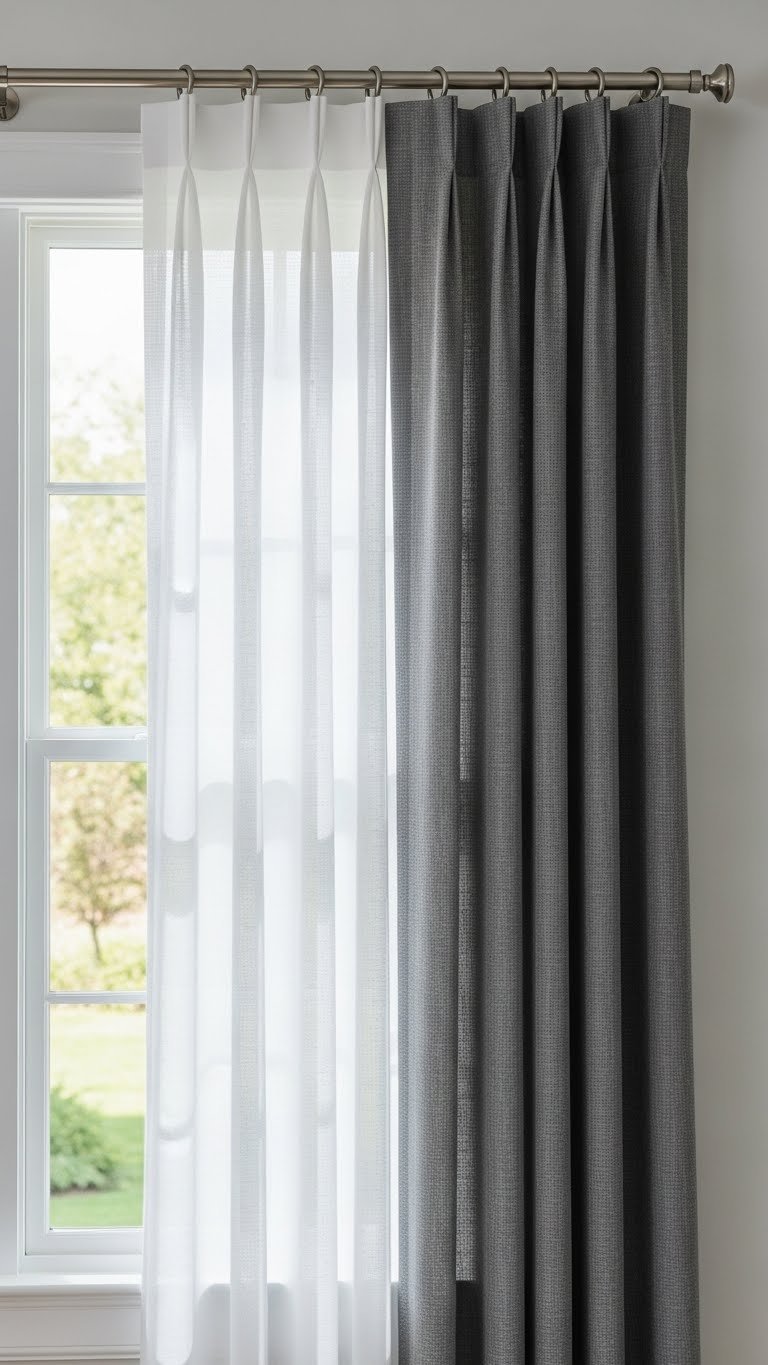
    A double-curtain rod system ($40–80 from IKEA, Home Depot, or Amazon) takes layering to the next level by letting you hang two sets of curtains simultaneously without stacking them. This is the professional designer move.

    Install the double rod 6 inches above your window frame. Hang your sheers on the front rod and your blackout or textured panels on the back rod. Everything hangs independently, so you can adjust both throughout the day or style them differently. The setup takes about 30–40 minutes but pays off immediately—you get professional-looking dimension that a single rod can’t achieve. Popular systems from IKEA’s RÄCKA or Wayfair’s designer collections are budget-friendly and sturdy. This method works especially well if you have large windows or want maximum light control without sacrificing style.

    9. Mix Prints Strategically for Pattern Layering

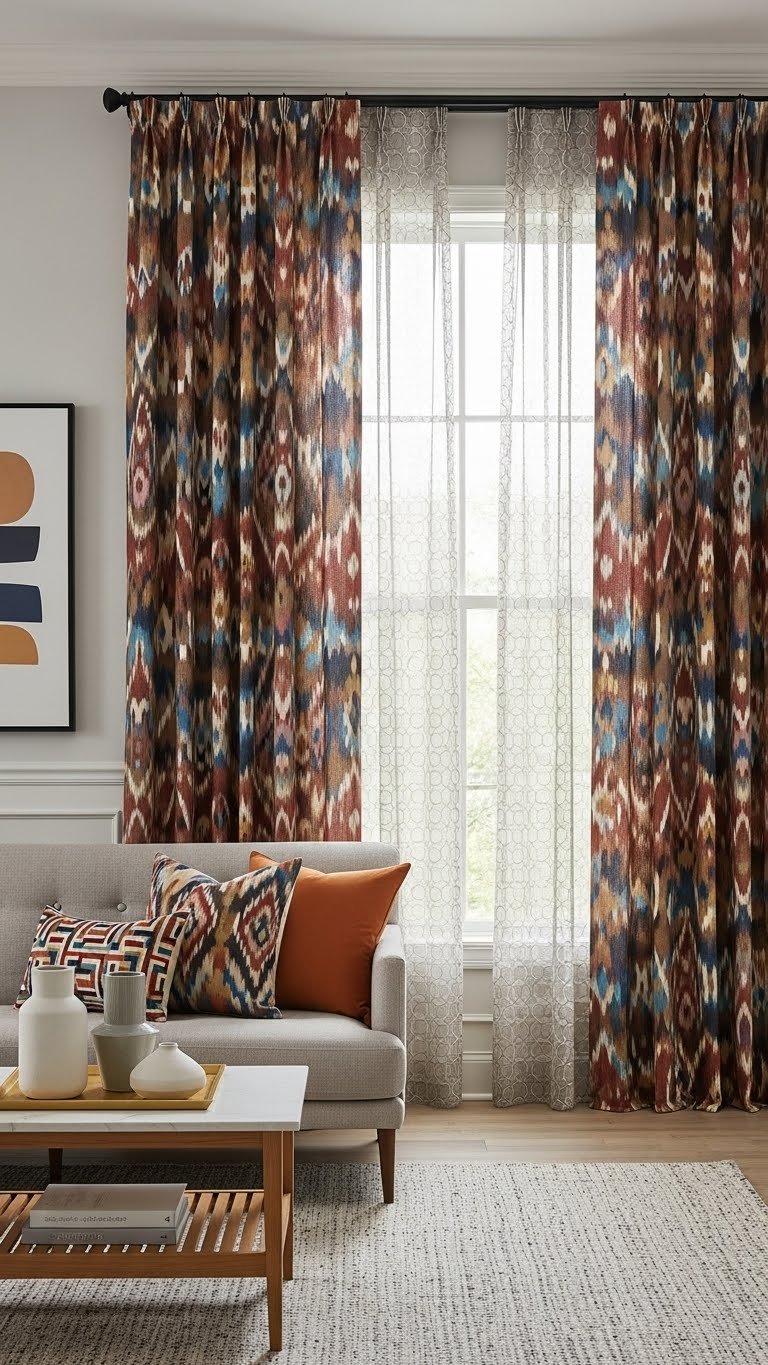
    Pattern mixing is trending in 70% of design guides—the key is balancing scale and color. Sheer patterns read softer, so they pair beautifully with bolder prints behind them.

    Hang a sheer with a subtle print like stripes or small geometric shapes ($30–60 per panel) on your front rod. Behind it, add a bolder pattern like ikat, suzani, or Moroccan tile ($50–100 per panel) in a coordinating color palette from Wayfair, West Elm, or Anthropologie. The front sheer diffuses the back pattern, preventing visual chaos. Installation: 25 minutes. The styling trick is to keep your furniture and walls neutral so the curtains become the star. This approach feels curated and globally inspired without reading as chaotic.

    10. Use Tension Rods for Renter-Friendly Layering

    Tension rods are the renter’s secret weapon—no drilling, no damage, and you can layer multiple panels without any permanent installation. This is the most flexible approach.

    Buy two tension rods ($12–25 each from IKEA, Target, or Amazon) and layer sheer and solid panels independently. Mount them at the same height for a stacked look, or stagger them for visual interest. Use lightweight fabrics ($20–60 per panel) so the rods can support the weight easily. Installation: 10 minutes with no tools required. You can adjust, remove, or change the curtains anytime without penalty—perfect for apartments or temporary spaces. The downside is tension rods don’t hang quite as cleanly as permanent rods, but the convenience trade-off is worth it for most renters.

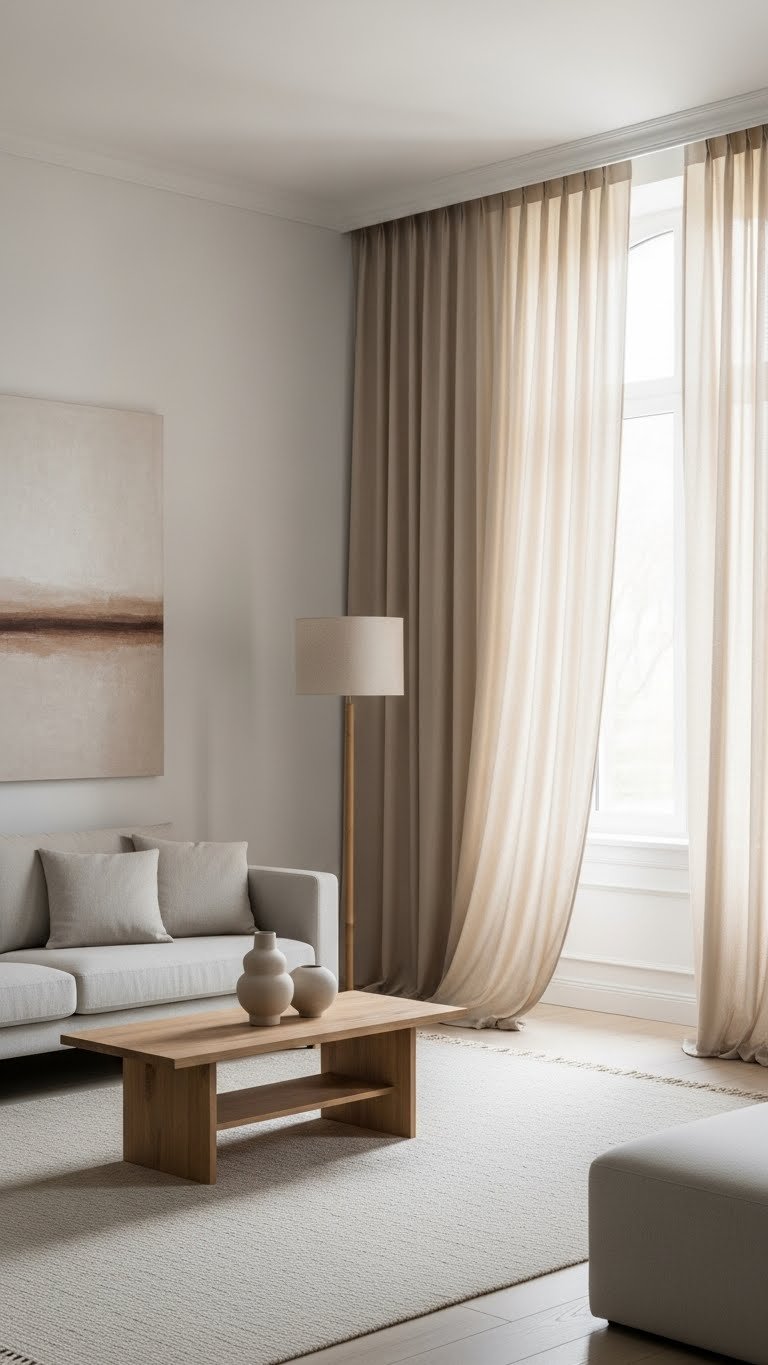
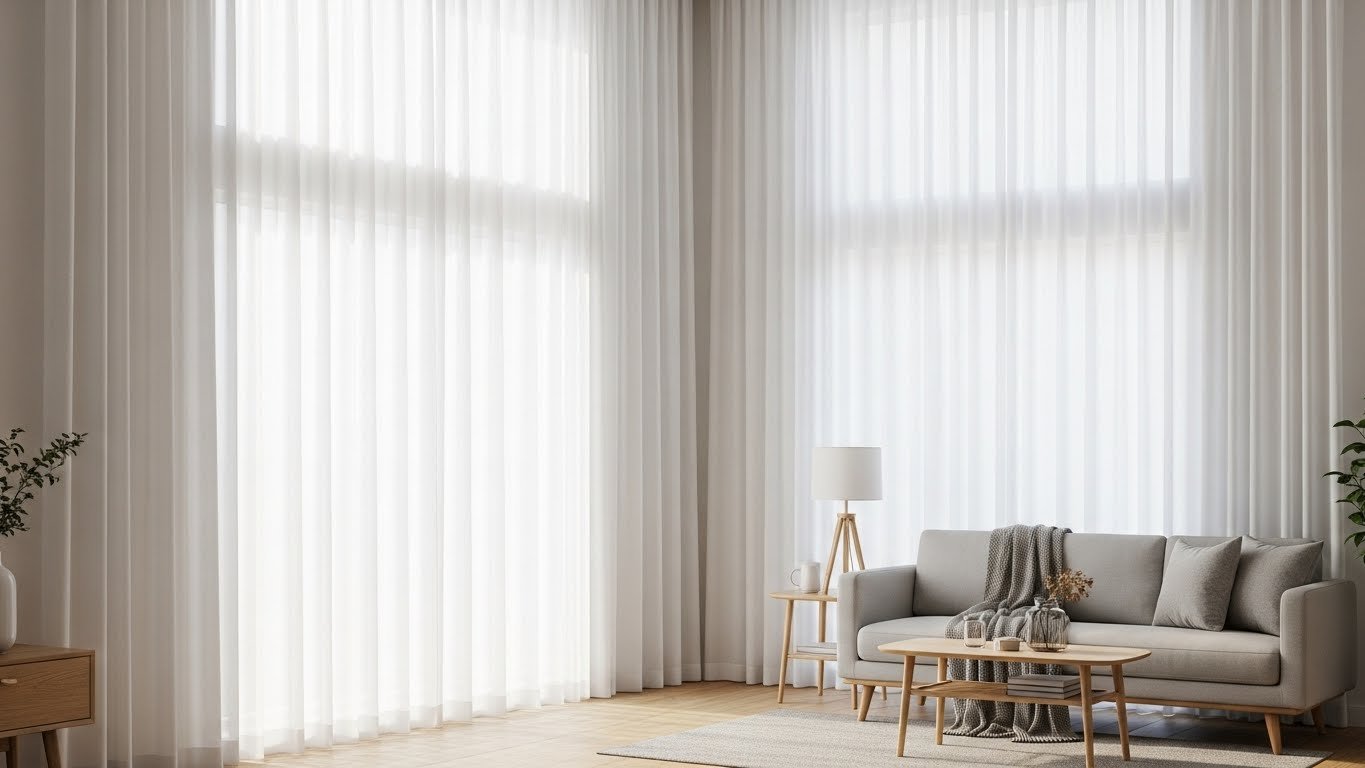
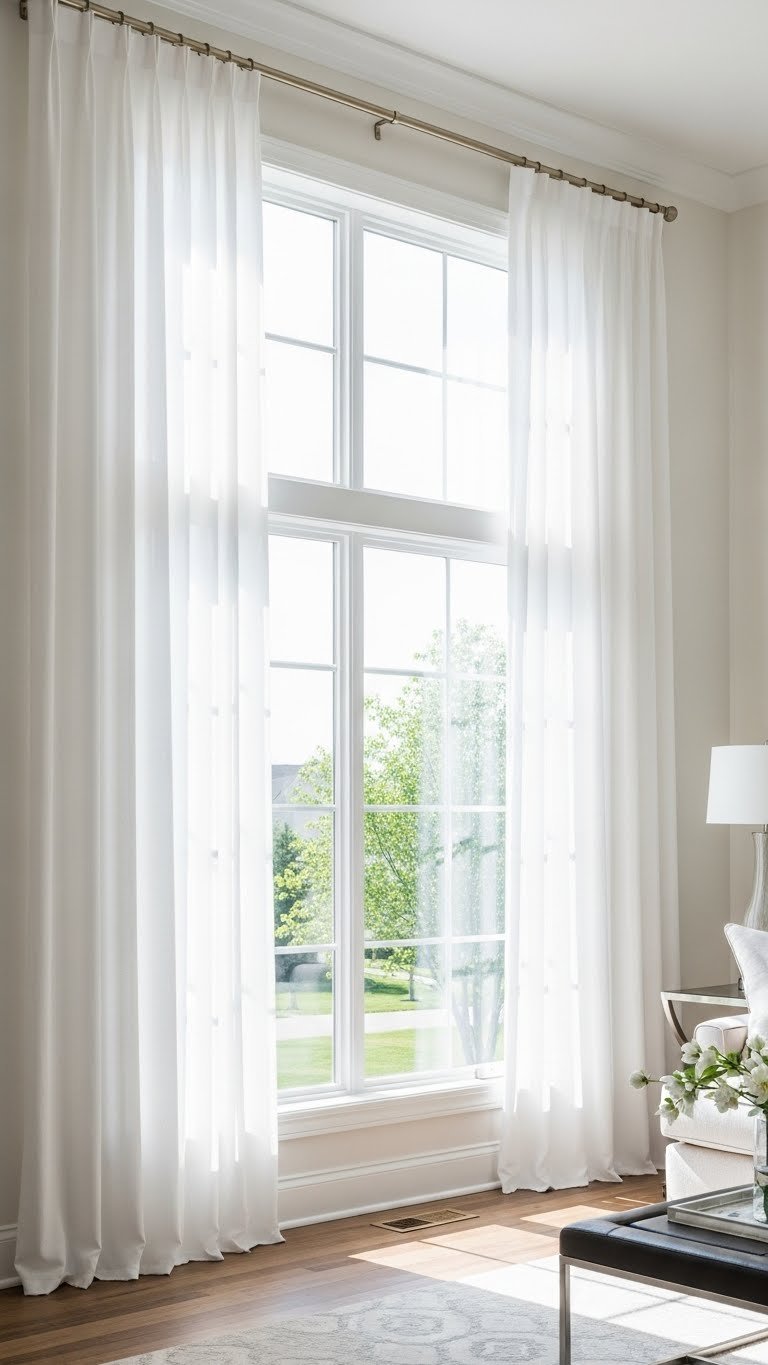
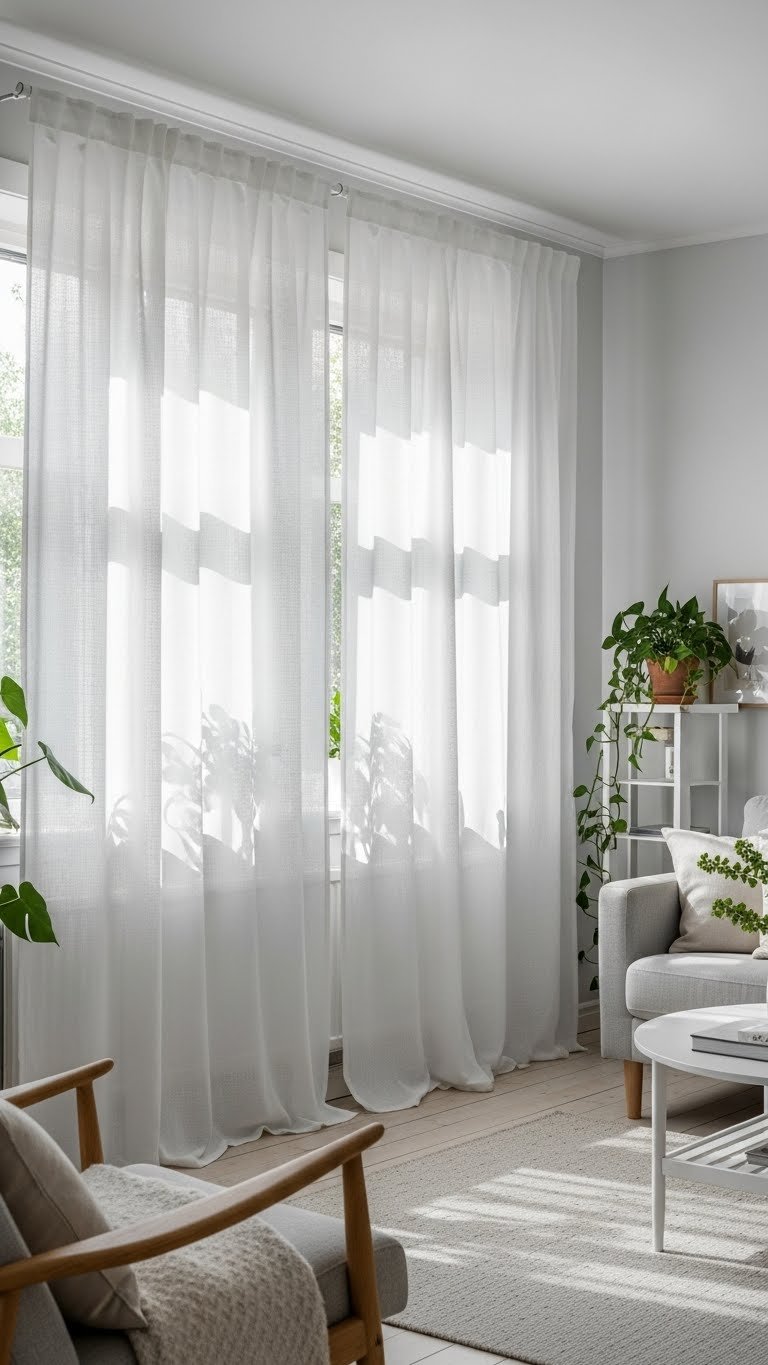
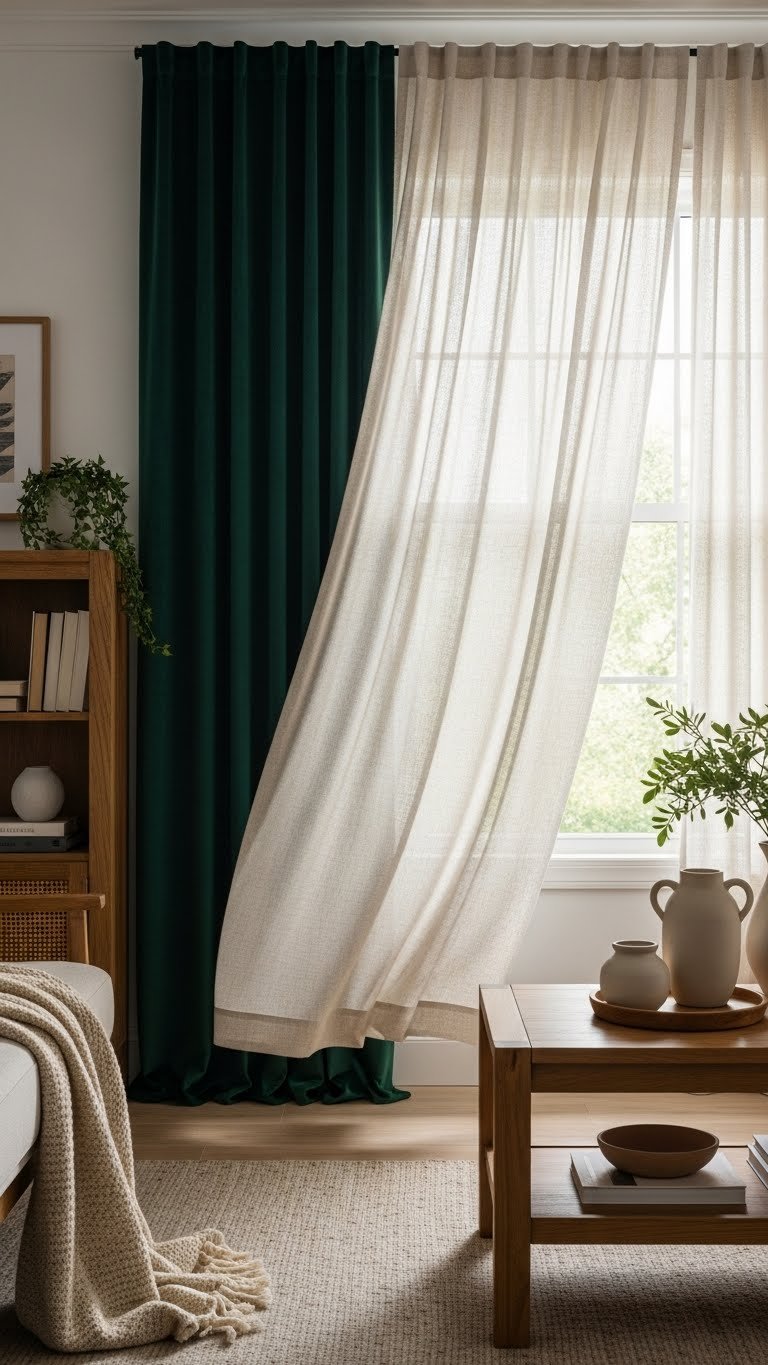
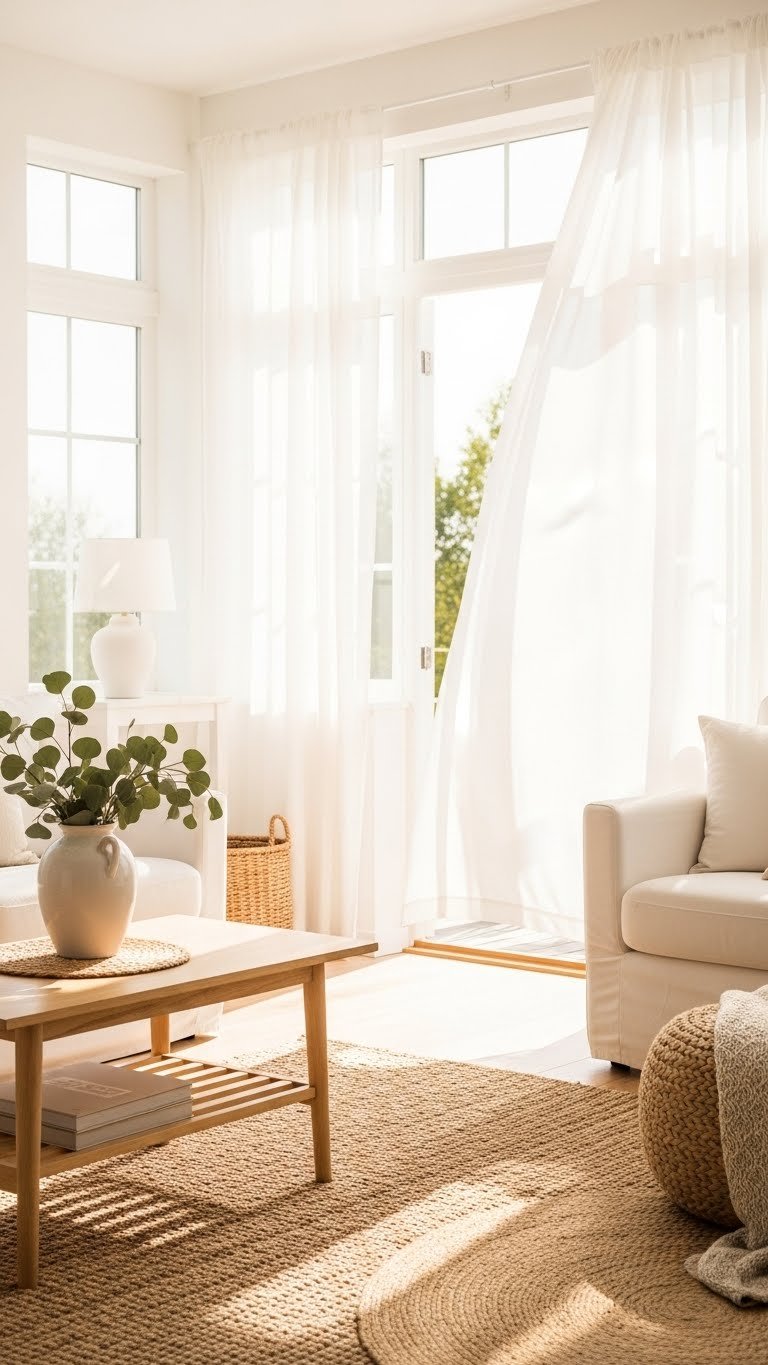
    11. Combine Sheer + Linen for Breathable Layers

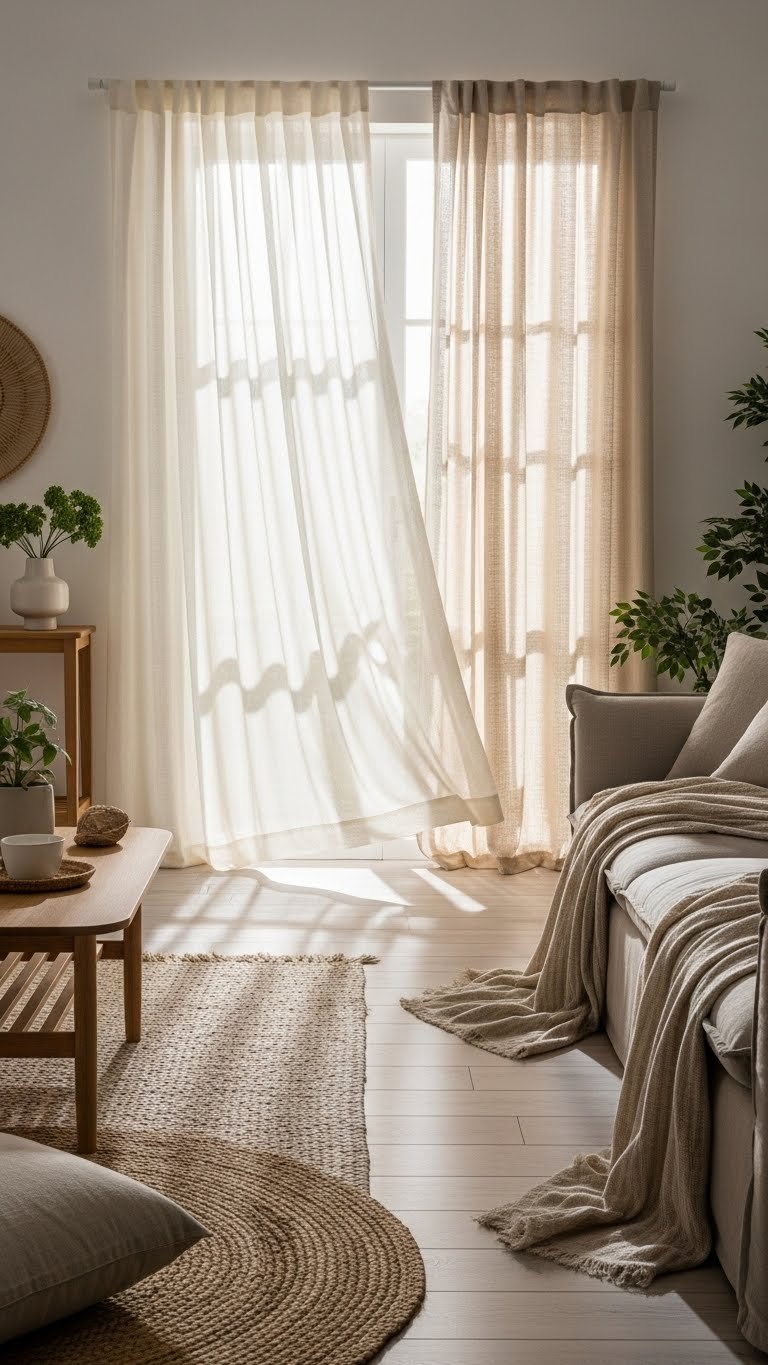
    Sheer + linen is the ultimate combo for spaces where you want light, air, and texture without weight. Both fabrics breathe beautifully and age well.

    Layer a crisp white or cream sheer ($20–50 per panel from Target or IKEA) over a natural linen panel in ecru or sand ($40–80 per panel from Wayfair or CB2). Both fabrics are machine-washable and get softer with every wash. Mount on a standard or tension rod ($15–30). Setup takes 20 minutes. The beauty here is that both fabrics feel organic and move naturally, creating gentle shadows that shift throughout the day. This approach works beautifully in coastal, Scandinavian, or minimalist interiors. You get the spa-like calm of natural materials without sacrificing function.

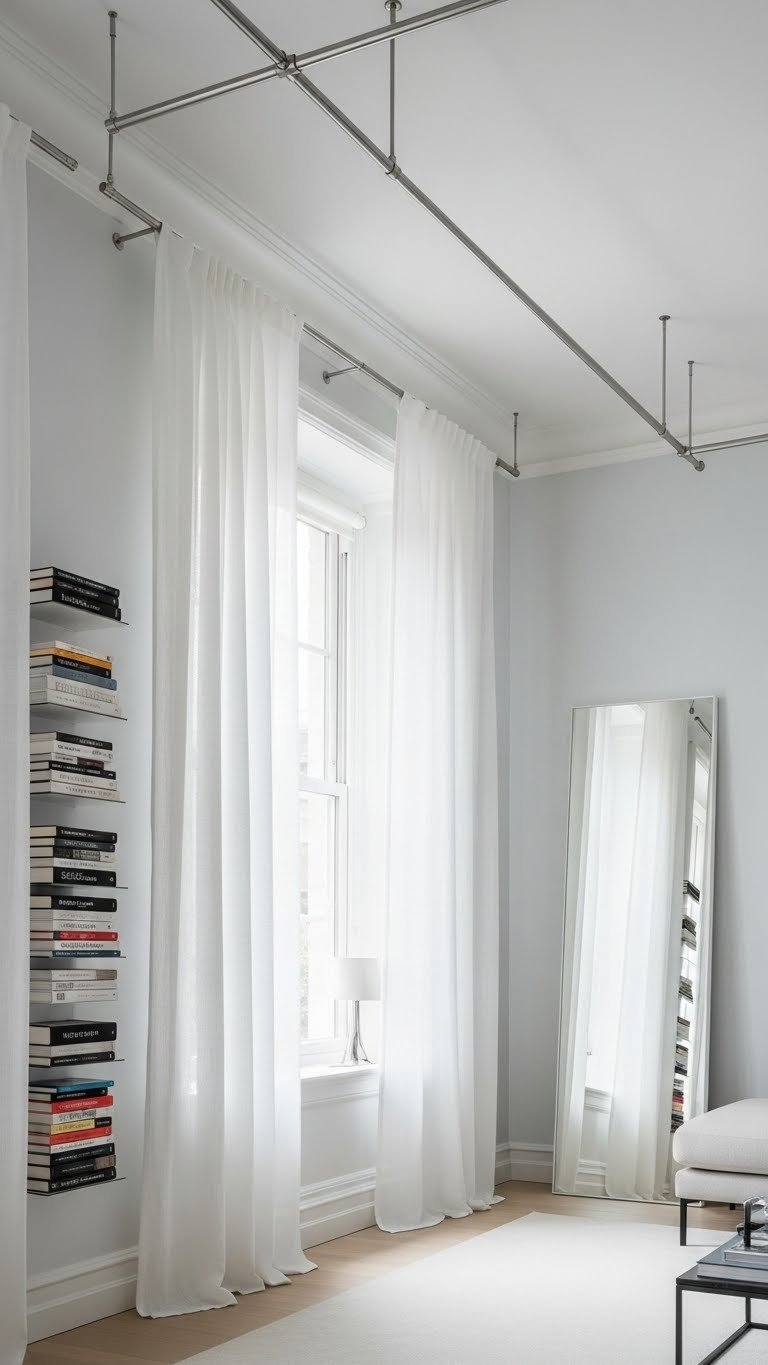
    12. Add Motorized Tracks for Accessible Adjustments

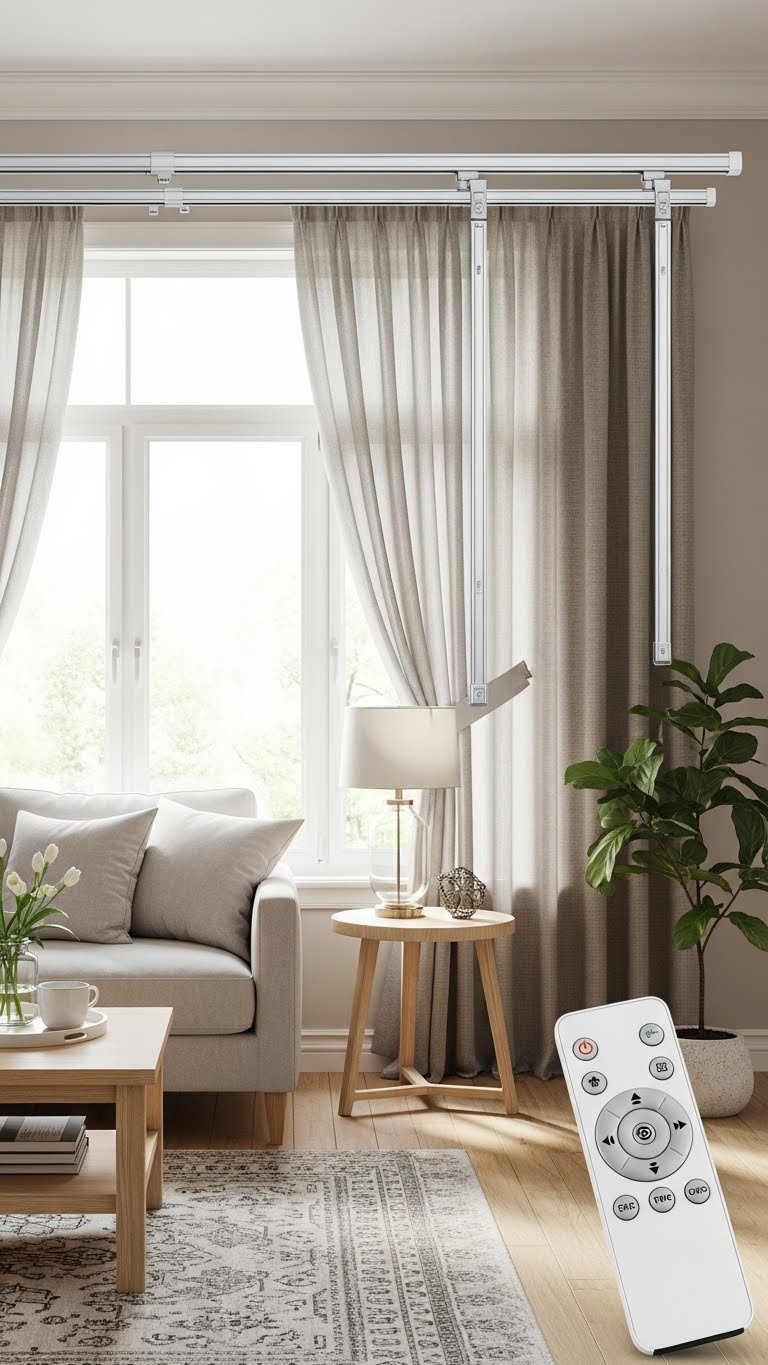
    Motorized curtain systems are emerging as a major accessibility upgrade—especially helpful if your windows are high, large, or hard to reach. Modern systems are more affordable than ever.

    Install a motorized track system ($150–400 from Amazon, Wayfair, or smart home retailers like Best Buy) and pair it with lightweight sheer and blackout panels ($40–100 per set). Most systems work with a remote or app control, so you adjust curtains from the couch. Installation requires drilling but isn’t complex—or hire a handyman for $100–150. The benefit? Accessibility for anyone with mobility challenges, plus it just feels luxe and modern. If motorized feels too steep, start with a manual pulley system ($50–100) that lets you draw heavy curtains effortlessly.

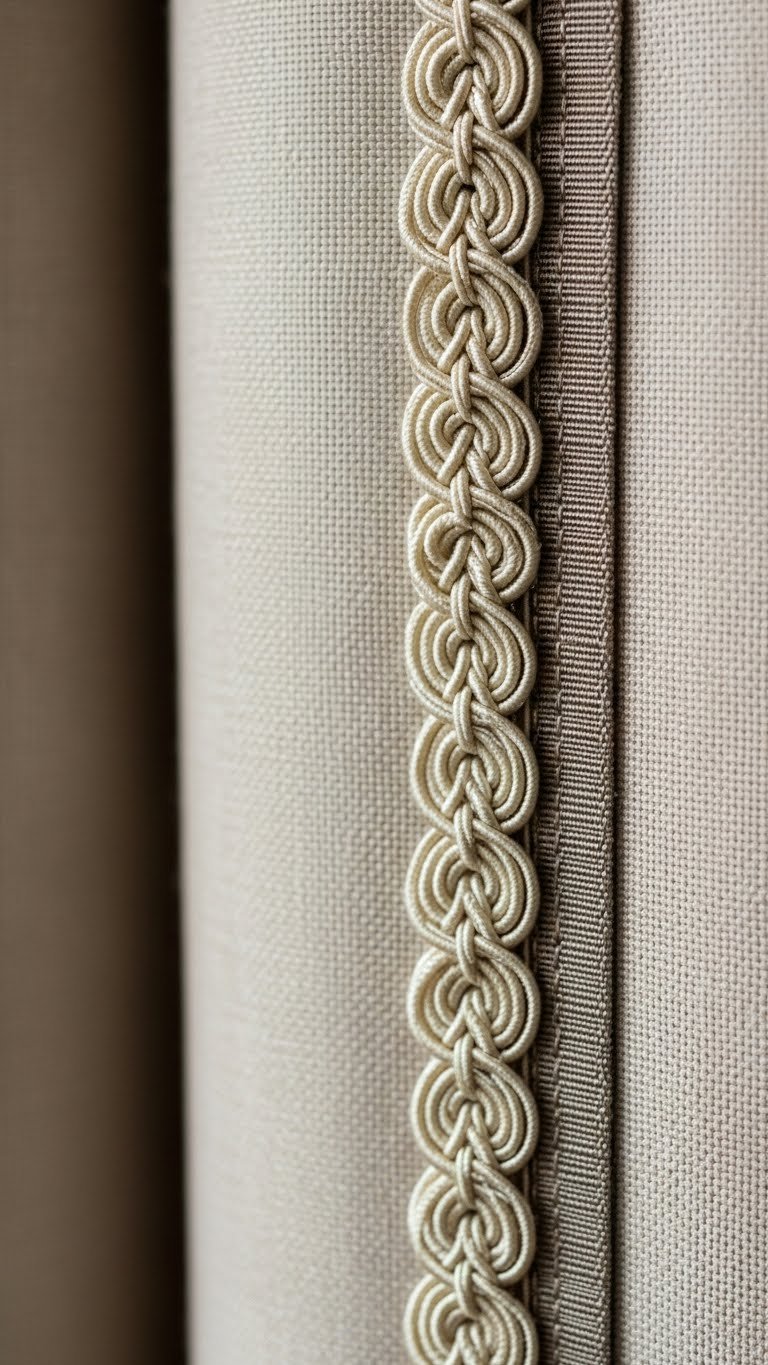
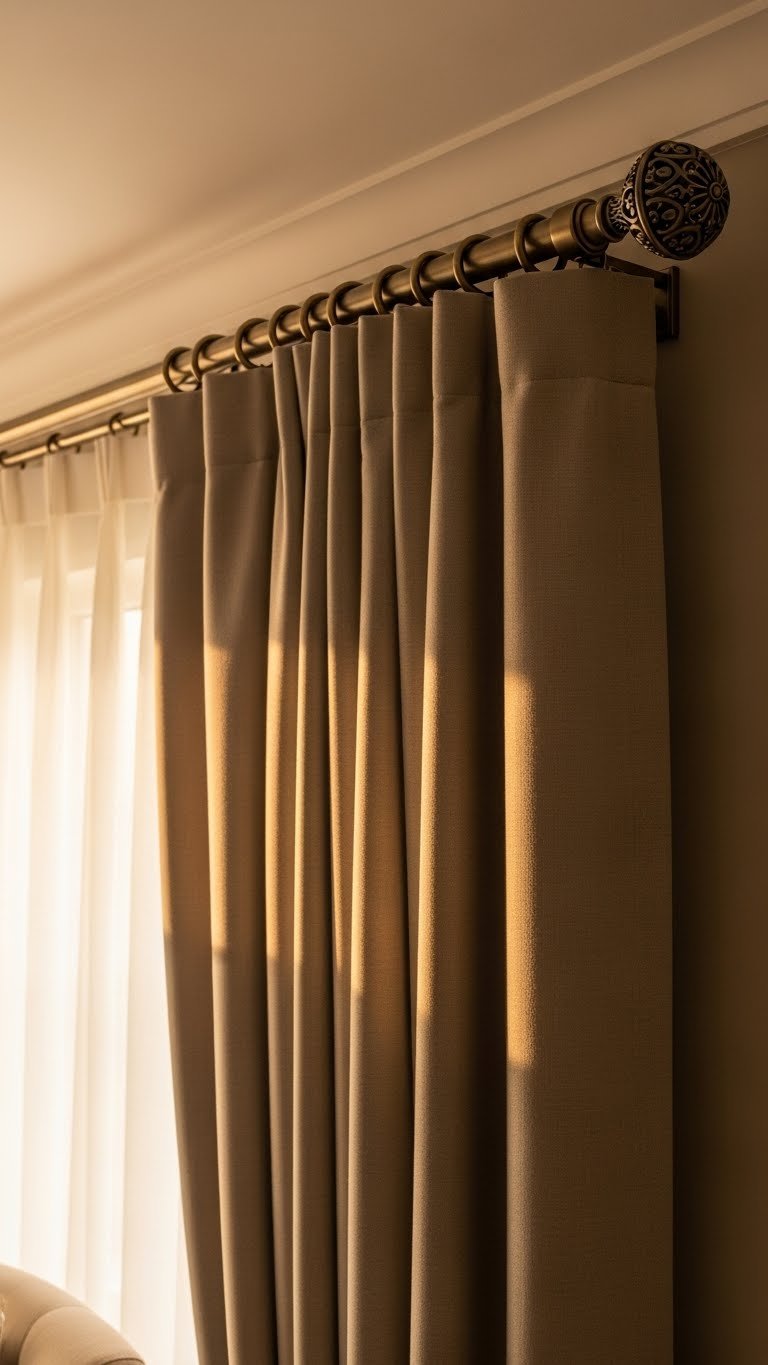
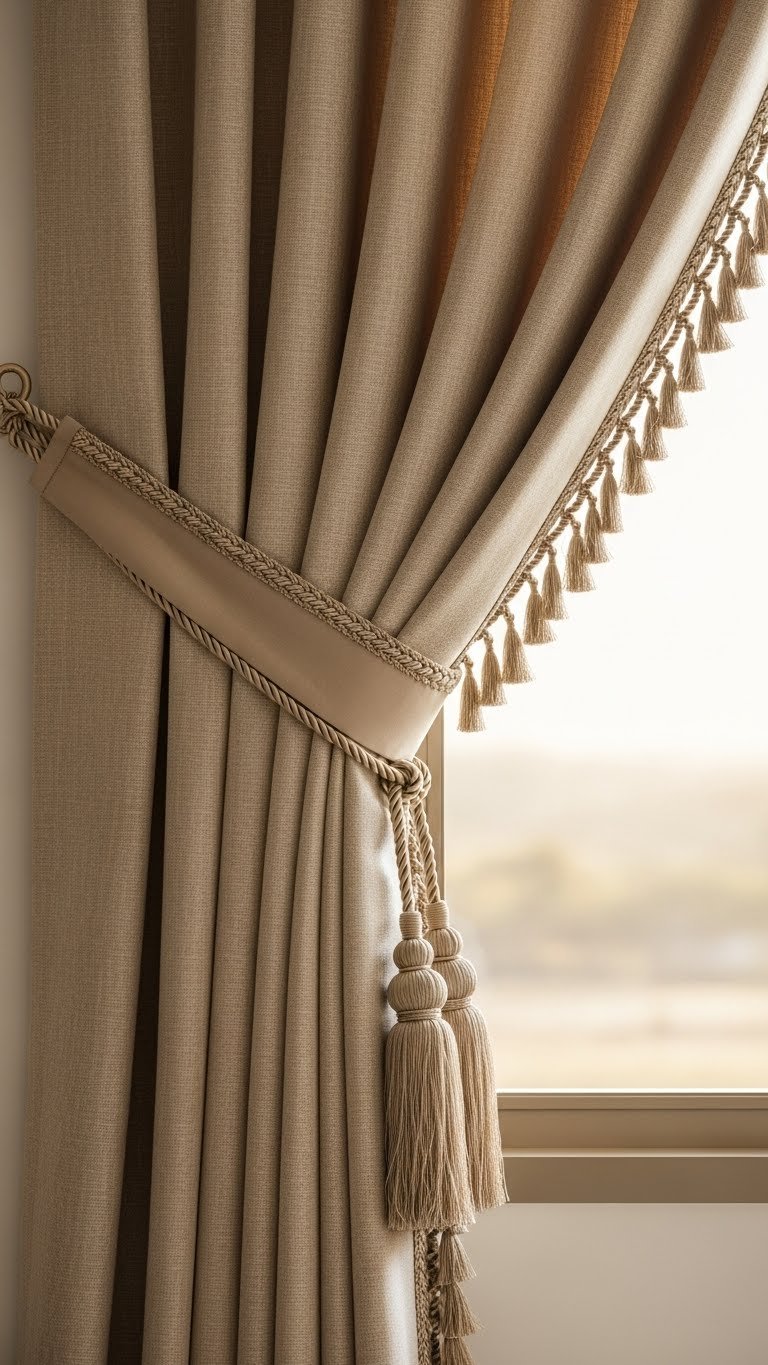
    13. Style with Coordinating Hardware for Cohesion

    Hardware matters more than people realize—it’s the jewelry of your curtains. Coordinating your rod, rings, and brackets instantly elevates the whole look.

    Choose a metal finish (brushed brass, matte black, or brushed nickel) and stick with it across all layers. Pair your main rod ($25–60) with matching rings or clips ($15–30 per set) and finials ($10–20). Sources: IKEA, Target, Home Depot, or Wayfair. All these pieces should come from the same line for visual cohesion. Installation: 30 minutes. The coordinated hardware ties everything together and makes the setup look intentional rather than random. This small detail shifts the whole aesthetic from “just curtains” to “designed space.”

    14. Layer Neutral Linens for Minimalist Calm

    Minimalist doesn’t mean boring—layering neutrals in different textures and weights creates sophisticated depth that reads calm and intentional. This approach is huge in Scandinavian design.

    Choose three coordinating neutral linens in varying weights: start with a crisp sheer ($25–45), add a medium-weight linen ($50–90), and back it with a heavier linen blend ($60–100) from Crate & Barrel, Muuto, or Nordic Nest. Mount on a double rod system ($50–80) using simple metal rings ($20–30). Installation: 40 minutes. The result is layered, textural depth that shifts throughout the day as light moves through each fabric. This approach works beautifully in open-plan spaces where you want definition without visual noise.

    15. Incorporate Global Prints for Boho Layering

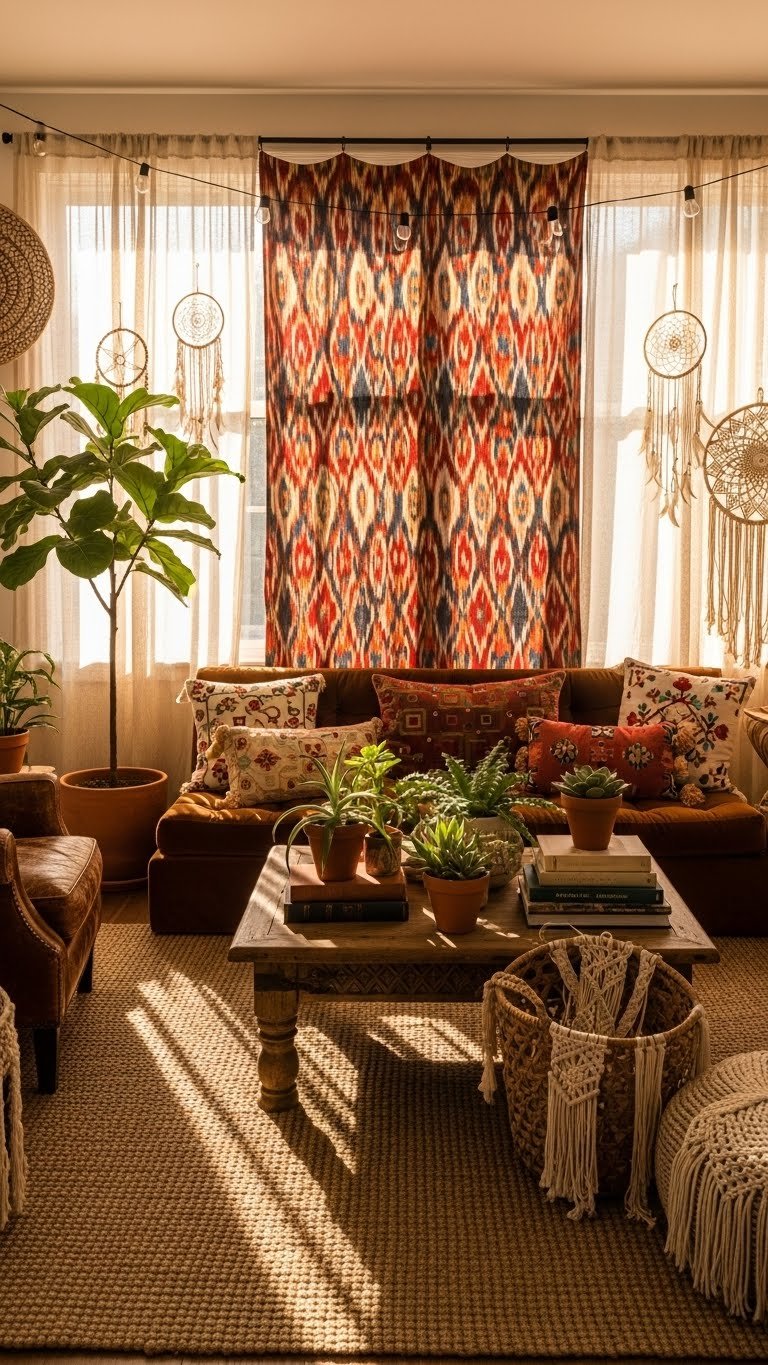
    Global patterns like ikat, suzani, and Moroccan prints are trending up 40% according to design reports. Layering them with sheers keeps the look sophisticated rather than overwhelming.

    Start with a neutral or cream sheer ($25–50 per panel), then layer a global print panel in warm tones ($50–100 per panel from West Elm, Anthropologie, or Etsy) behind it. The sheer diffuses the pattern so it reads as intentional rather than chaotic. Use a standard rod with macramé or wooden rings ($20–40) for extra boho vibes. Installation: 25 minutes. The result feels well-traveled and collected, which is the heart of boho style. Light plays beautifully through both layers, casting patterned shadows that shift throughout the day.

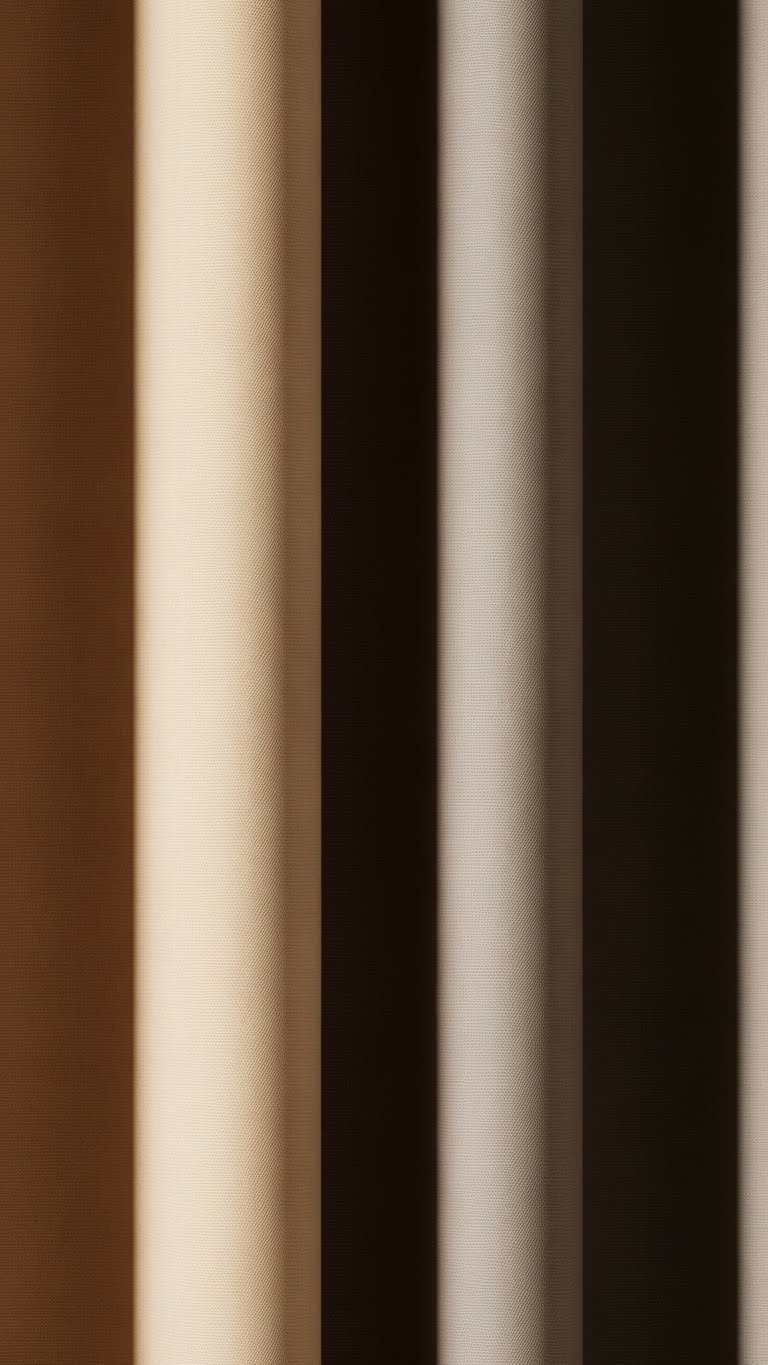
    16. Go Monochromatic for Unified Impact

    Monochromatic layering creates visual interest through texture and weight rather than color, resulting in a refined, curated look. This works beautifully in any color family.

    Select your primary color (blue, green, warm gray, etc.), then buy sheers, linens, and blackout panels in progressively deeper shades of that color ($25–100 per layer from Target, Wayfair, or IKEA). Layer from lightest to darkest. Use coordinating hardware in a complementary finish ($40–80 total). Installation: 30 minutes. The monochromatic approach feels expensive and intentional because the eye reads it as a thoughtful color study. Light moving through tonal layers creates subtle, sophisticated depth that photographs beautifully for Pinterest or Instagram.

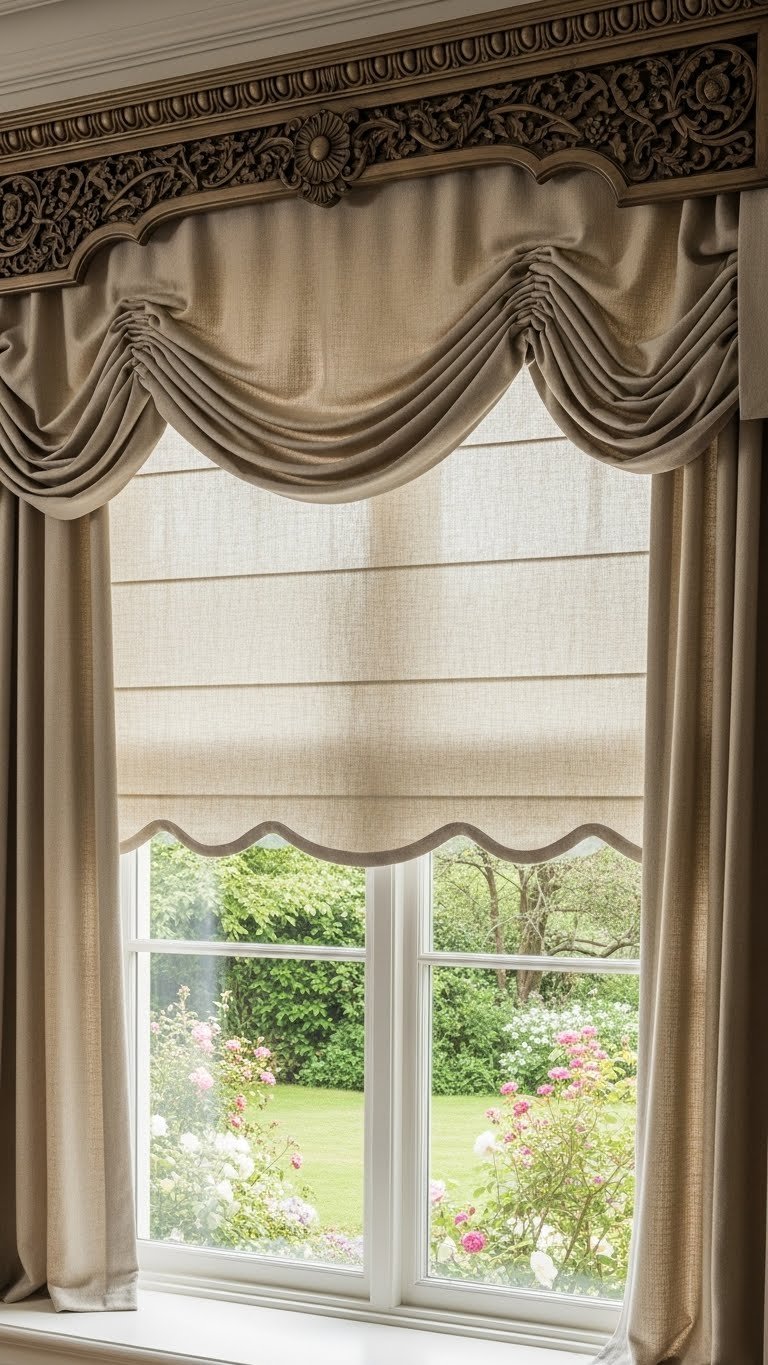
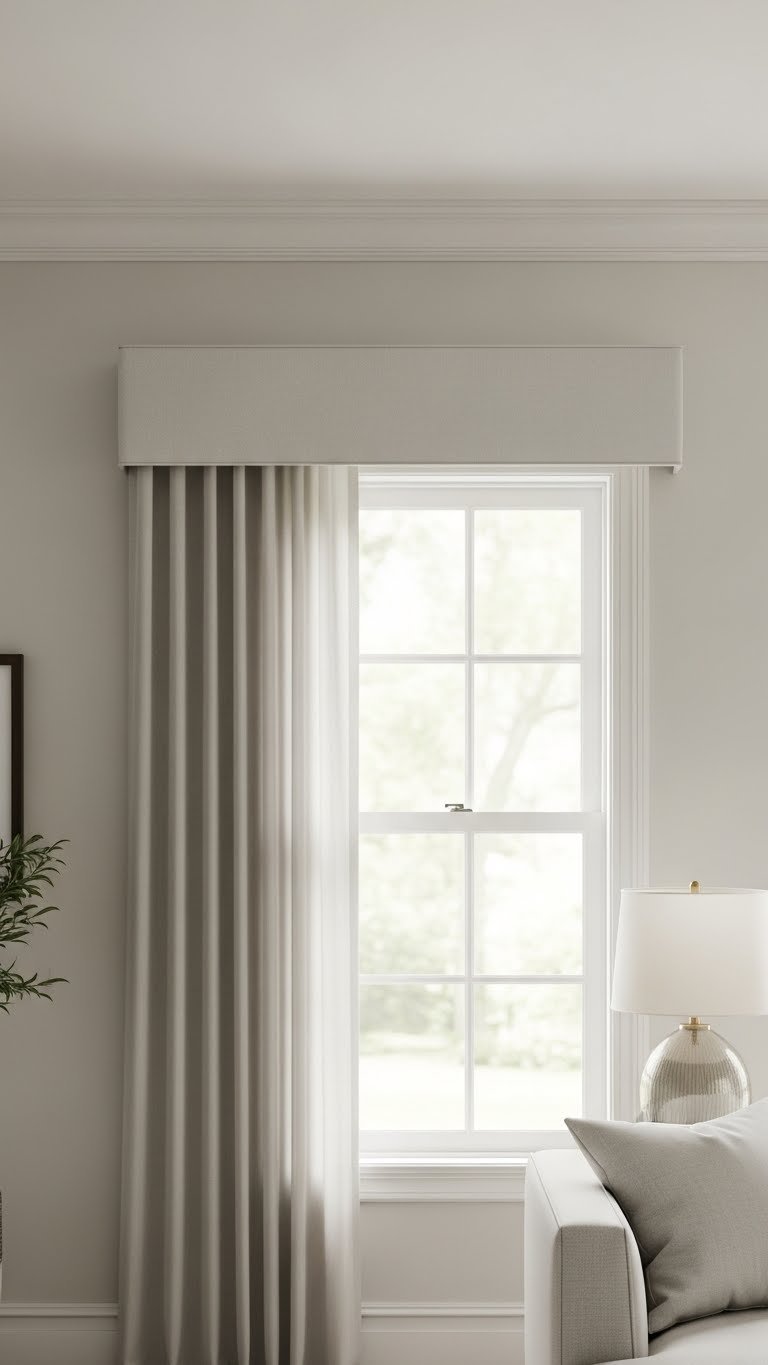
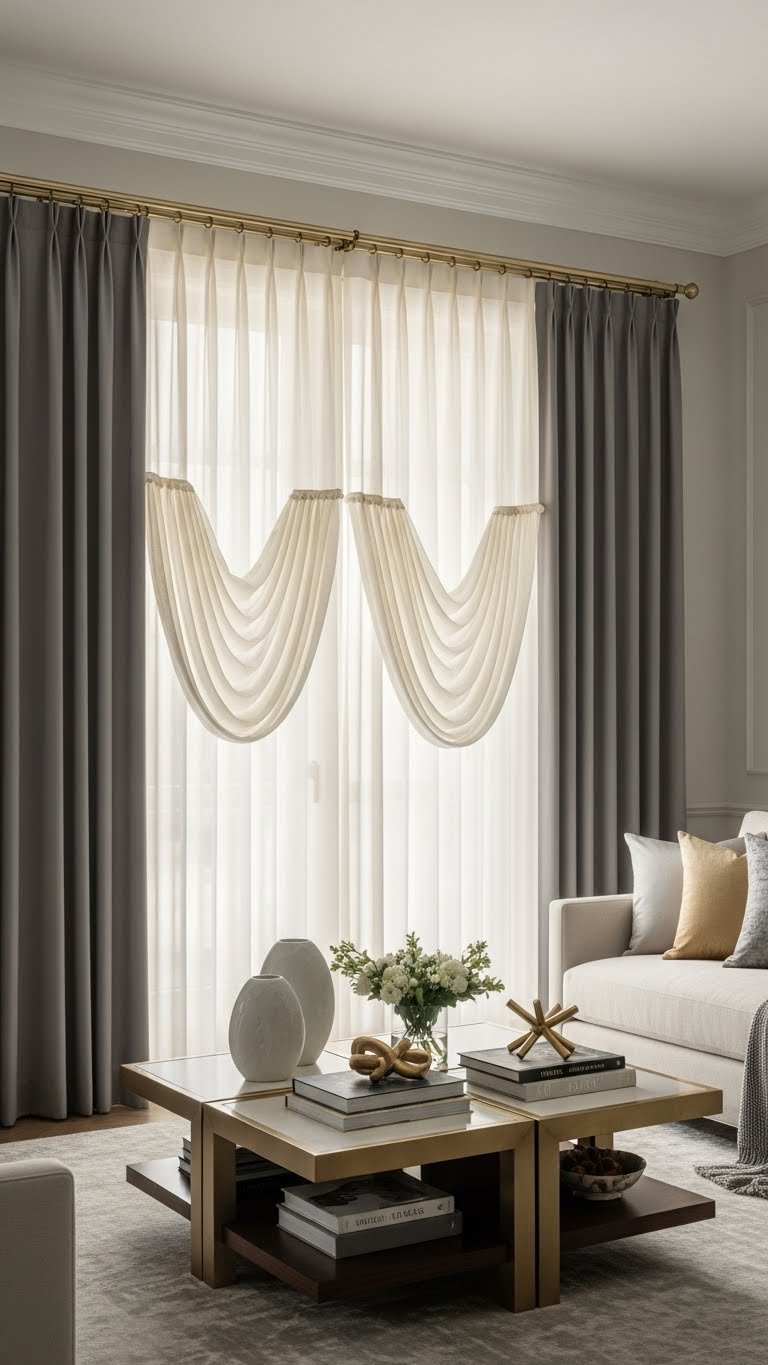
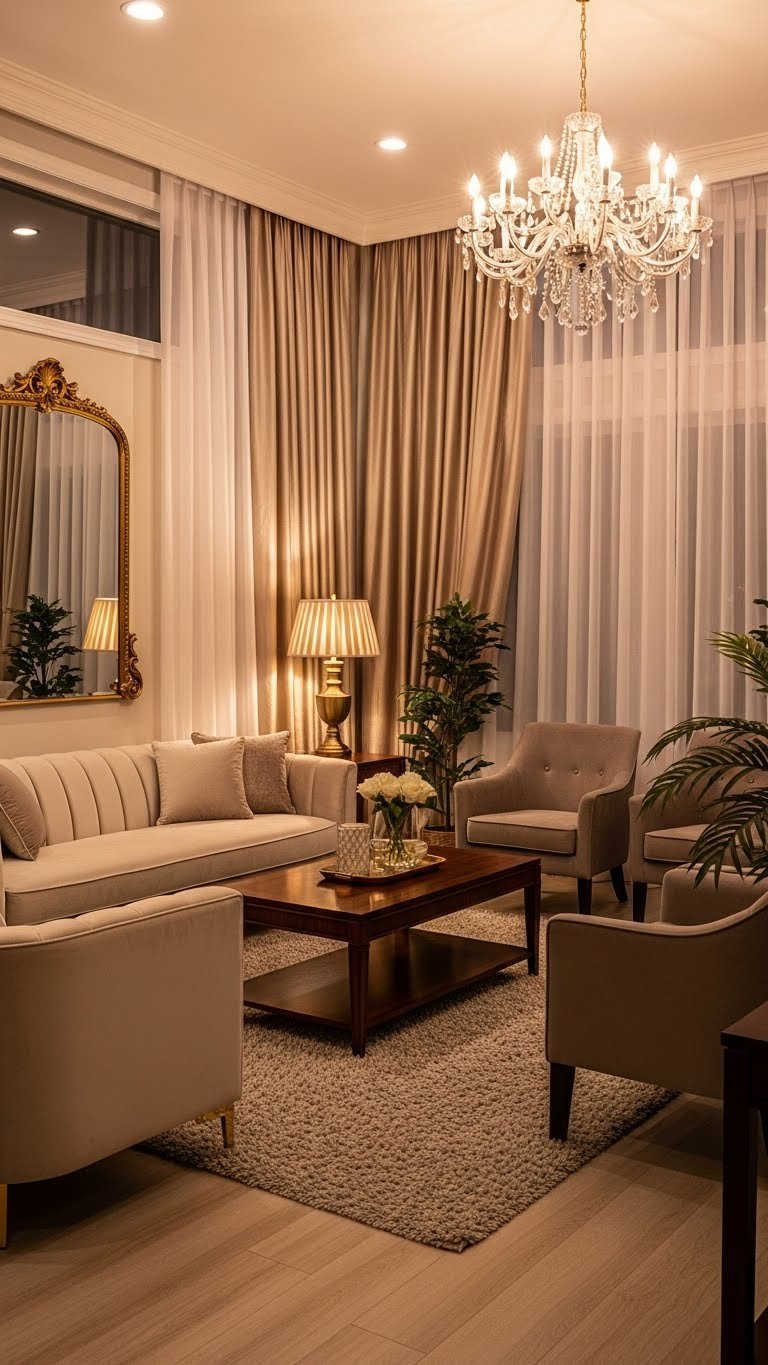
    17. Add a Valance or Cornice for Architectural Detail

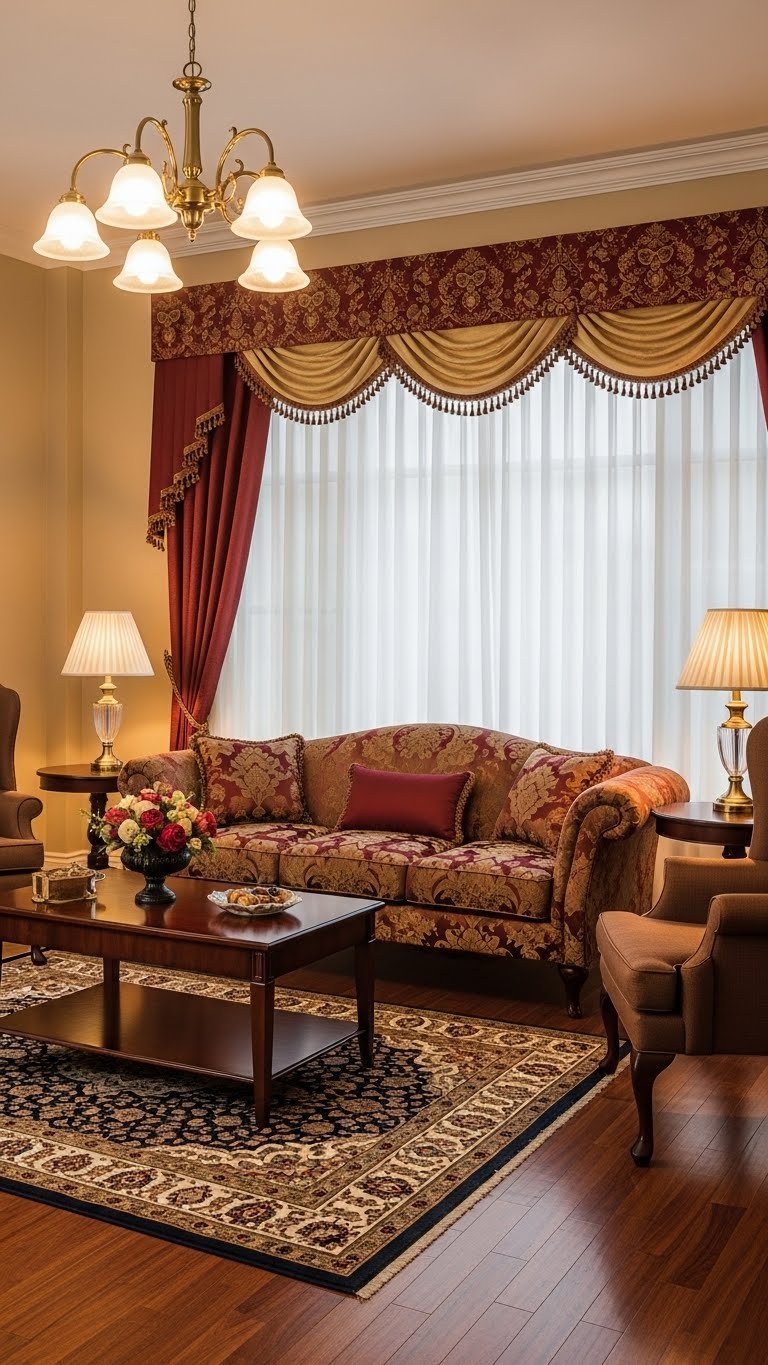
    A valance or cornice adds architectural polish to your layered curtains, especially in traditional or transitional spaces. It also hides rods and hardware for a cleaner look.

    Install a simple cornice board ($30–80 from IKEA or Home Depot) above your existing layers, then drape it with a complementary fabric ($15–30 in scraps) or wrap it with trim ($10–20). Alternatively, buy a pre-made fabric valance ($25–60 from Wayfair or Target) and mount it above your layers. Installation takes 45 minutes to an hour. The valance instantly elevates the look, adding formality and intentionality. This approach works beautifully if you’re layering patterns or bold colors and want a finished, cohesive frame.

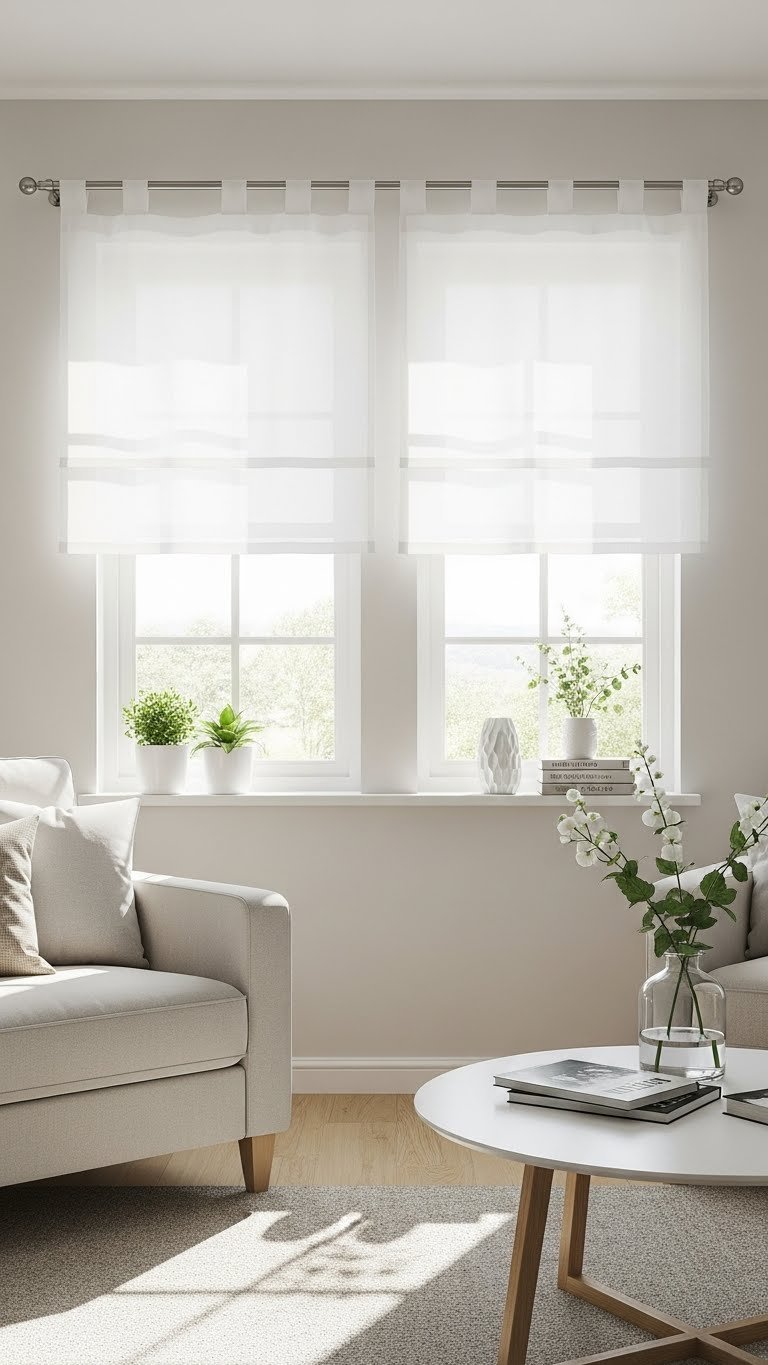
    18. Layer Machine-Washable Synthetics for Low Maintenance

    Not everyone wants high-maintenance fabrics. Machine-washable synthetics solve the cleaning dilemma and cost significantly less than natural fibers—65% of homeowners prioritize this feature.

    Choose polyester or polyester-blend sheers and panels ($20–60 per panel from Walmart, Target, Amazon, or IKEA) that clearly state “machine washable” on the label. Layer them just like natural fabrics. Most can handle a gentle cycle in cold water. Installation: 20 minutes. The beauty? You can actually wash them without worry or dry-cleaning costs. They resist wrinkles better than linen, and many synthetics now look and feel remarkably close to natural fabrics. This is especially practical if you have pets, kids, or live in a dusty climate.

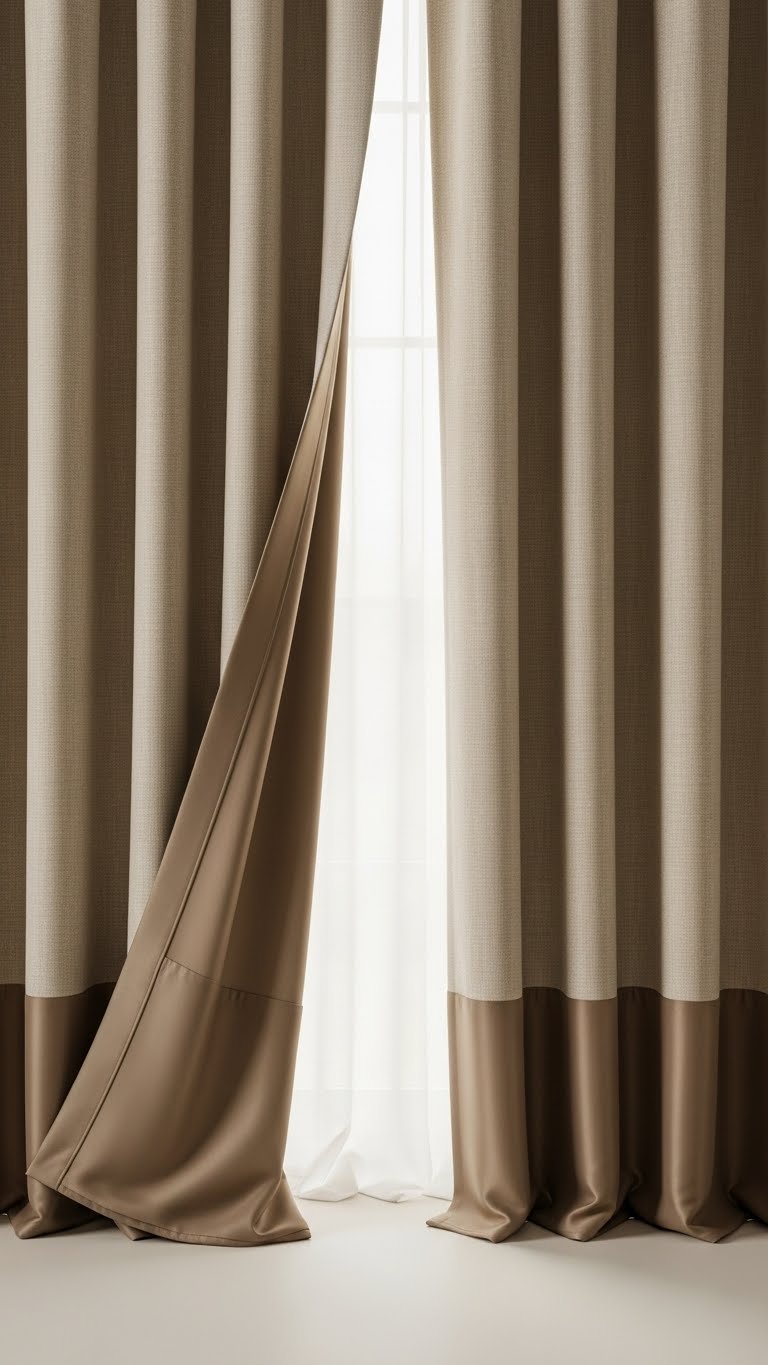
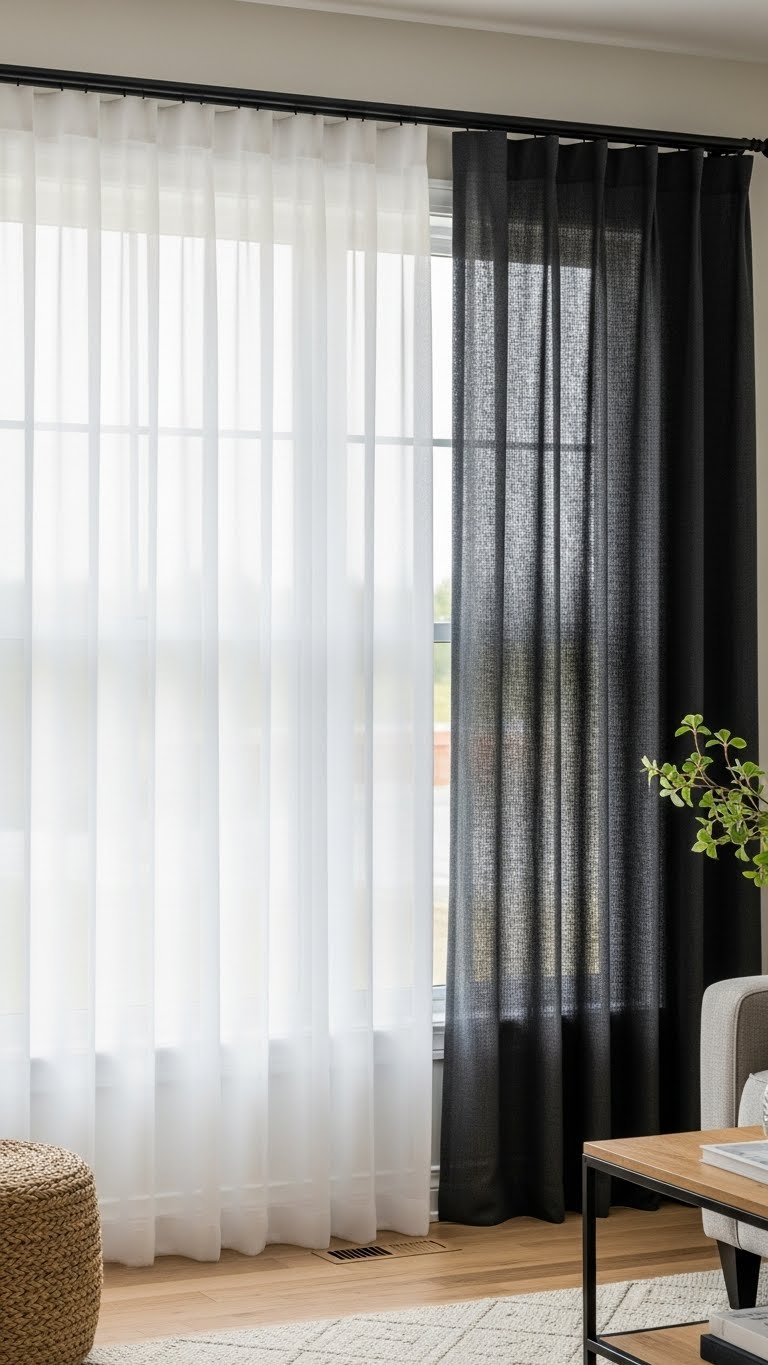
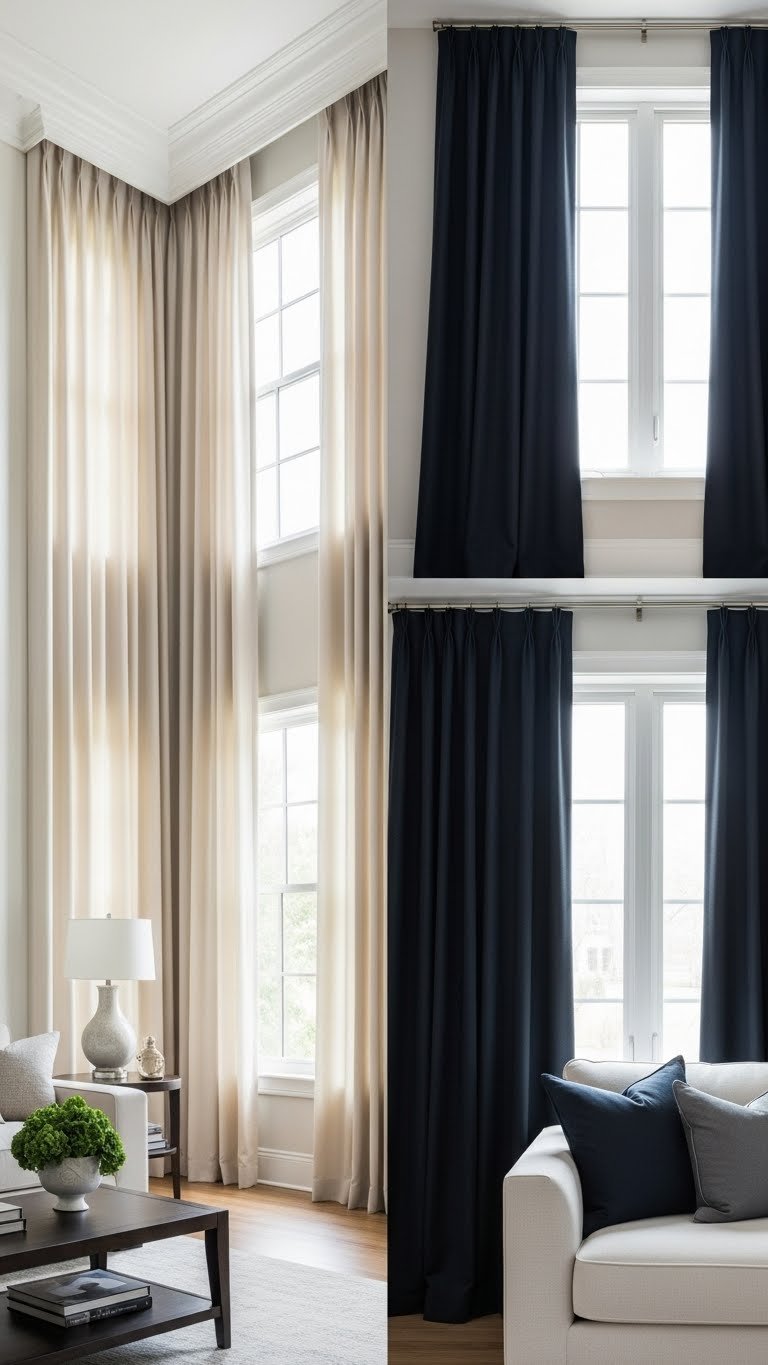
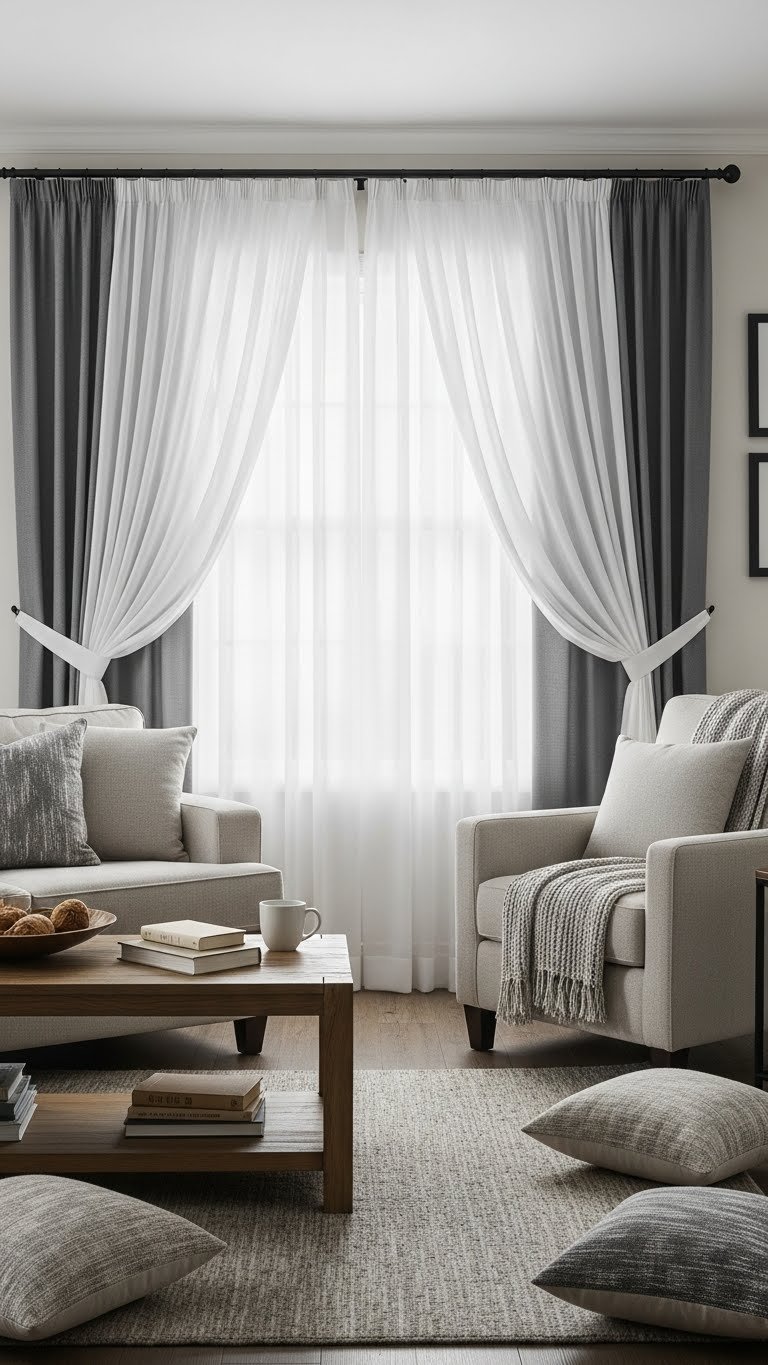
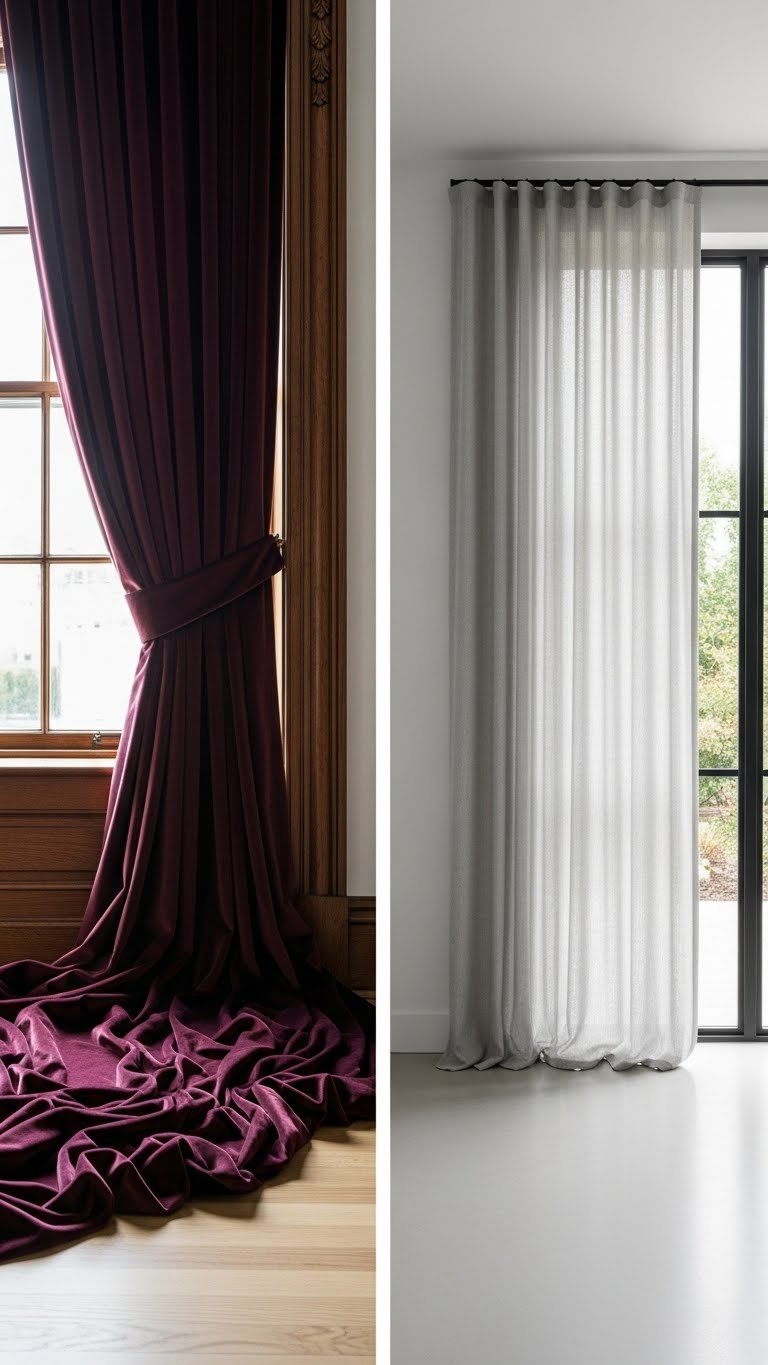
    19. Use Contrast for Bold Statement Layering

    If you want your curtains to make a statement, go high-contrast. Pairing crisp white sheers with deep charcoal or black drapes is striking and modern.

    Hang a bright white or cream sheer ($25–50 per panel) on your front rod, then layer a deep charcoal, navy, or black panel ($60–120 per panel) behind it from Wayfair, West Elm, or IKEA. The contrast is dramatic but sophisticated. Use sleek metal hardware in black or brushed nickel ($30–50 total). Installation: 25 minutes. This approach works beautifully in modern, industrial, or contemporary spaces. The strong contrast makes a visual statement without needing pattern or color.

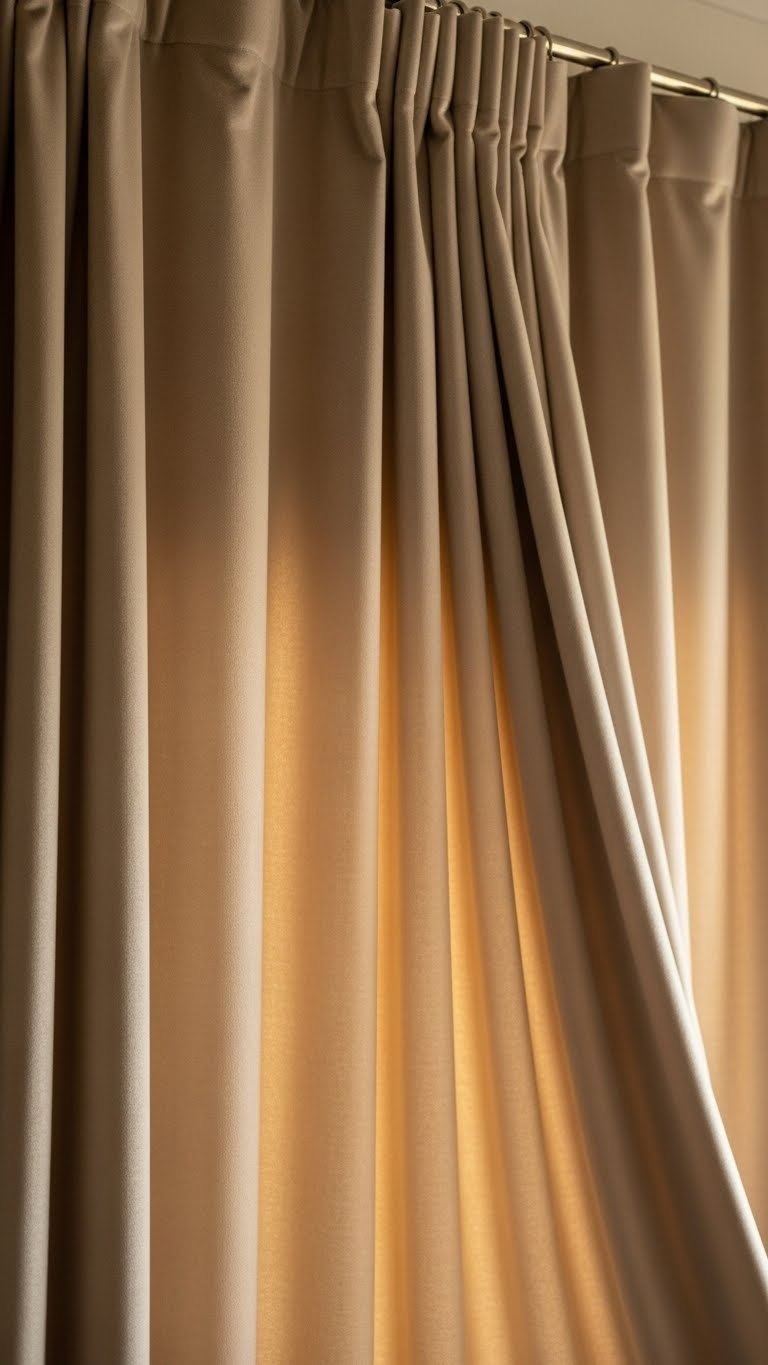
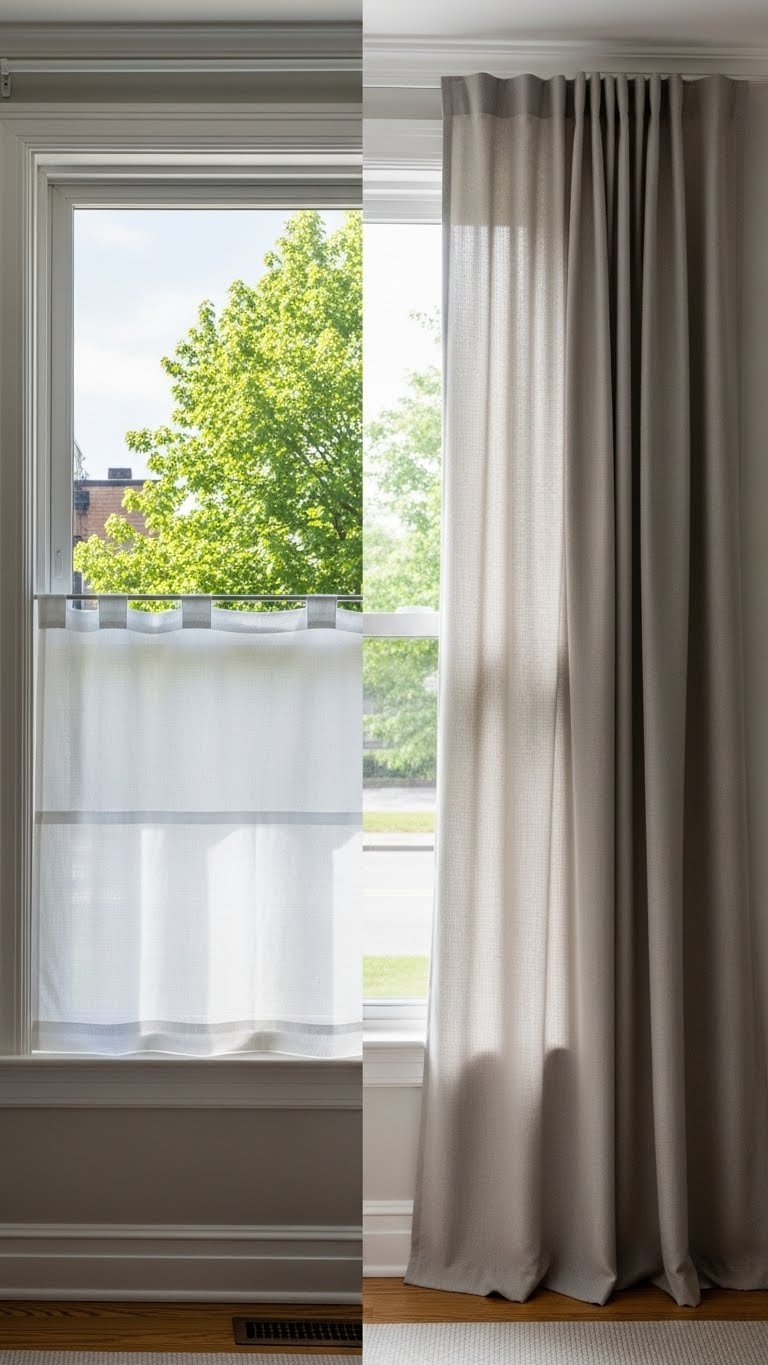
    20. Experiment with Puddling vs. Floating Hems

    The puddle vs. float debate has valid points on both sides. Puddling looks romantic and traditional; floating looks modern and practical. Layer both approaches for visual interest.

    Measure your window height, then decide: puddled curtains extend 6–12 inches past the floor (romantic, traditional), while floating curtains end 1–2 inches above (modern, easy to clean). For layering, try puddled sheers over floating blackout panels, or vice versa. Most fabric is priced the same regardless. Installation: 20–30 minutes. The benefit? You get to choose based on your aesthetic. If you’re unsure, buy fabric with a generous hem allowance so you can adjust later—most curtain shops offer free hemming with purchase.

    21. Create Summer-to-Winter Swaps with Two Sets

    If budget allows, buy two complete sets: lightweight sheers and linens for summer, heavier thermal-lined drapes for winter. You get maximum functionality and can swap seasonally.

    Invest in a lightweight summer set (sheer + linen, $80–150 per window) and a thermal winter set (insulated blackout or thermal-lined, $150–250 per window) from Wayfair, Amazon, or Target. Store off-season curtains in vacuum bags. Installation is the same, just swap rods out. Cost per window: $230–400 for both sets. Time to swap: 30 minutes per window. The benefit? In winter, thermal-lined curtains reduce heating costs by 10–15%. In summer, lightweight fabrics breathe and let breezes through. This approach is best if you have a storage space and the budget flexibility, but it’s the most functional long-term solution for climate control.

    22. Layer Sheer + Faux Silk for Affordable Luxury

    Faux silk gives you the sheen and drape of real silk without the delicate care or expense. Layering it with sheers creates a premium feel at a fraction of the cost.

    Choose a sheer in cream or white ($20–50 per panel) and layer it over a faux silk panel in champagne, blush, or warm white ($60–120 per panel from Ballard Designs, Wayfair, or Overstock). Faux silk is usually polyester but looks and feels remarkably similar to real silk. Use standard rings or a tension rod ($20–30). Installation: 20 minutes. The faux silk catches light beautifully and creates an elegant drape. Bonus: it’s machine-washable, so you skip the dry-cleaning costs of real silk. This is the perfect option if you want a luxury look on a mid-range budget.

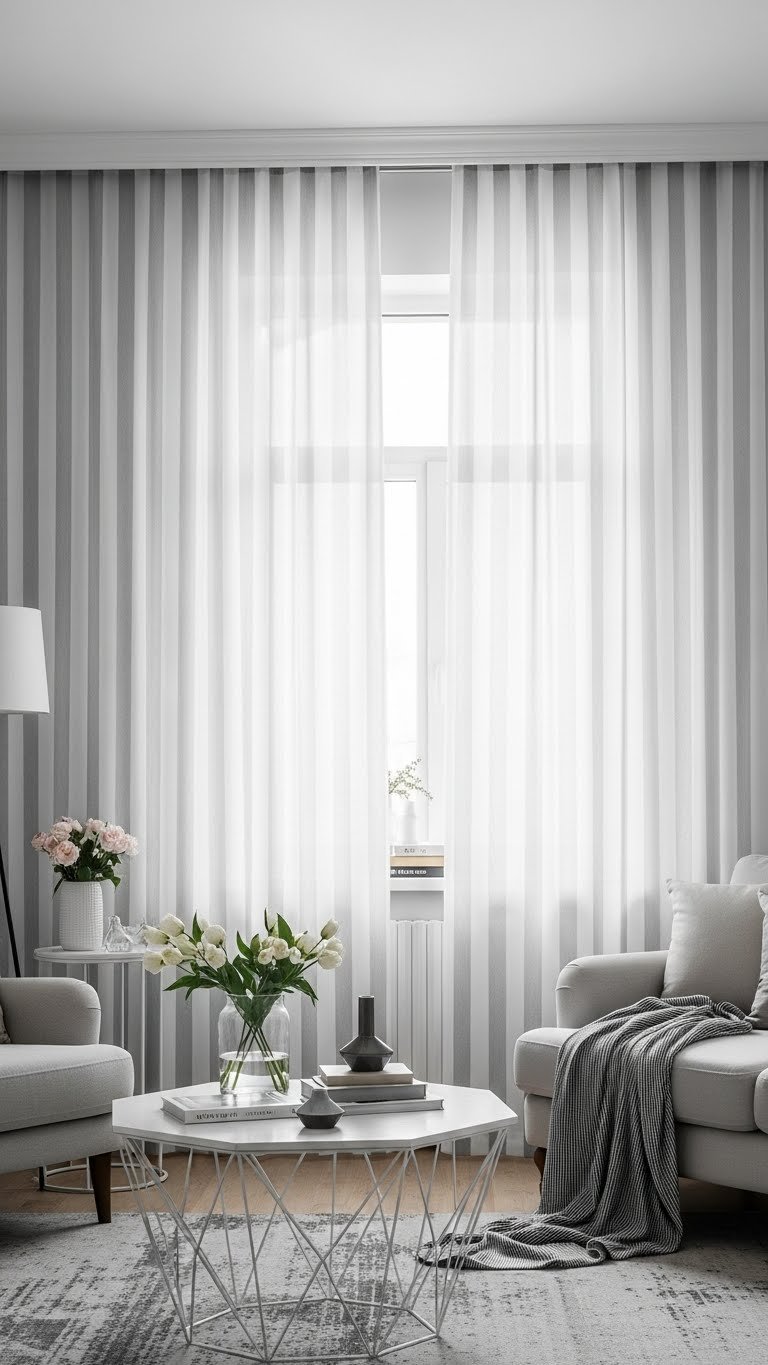
    23. Add Optical Illusions with Vertical Stripes

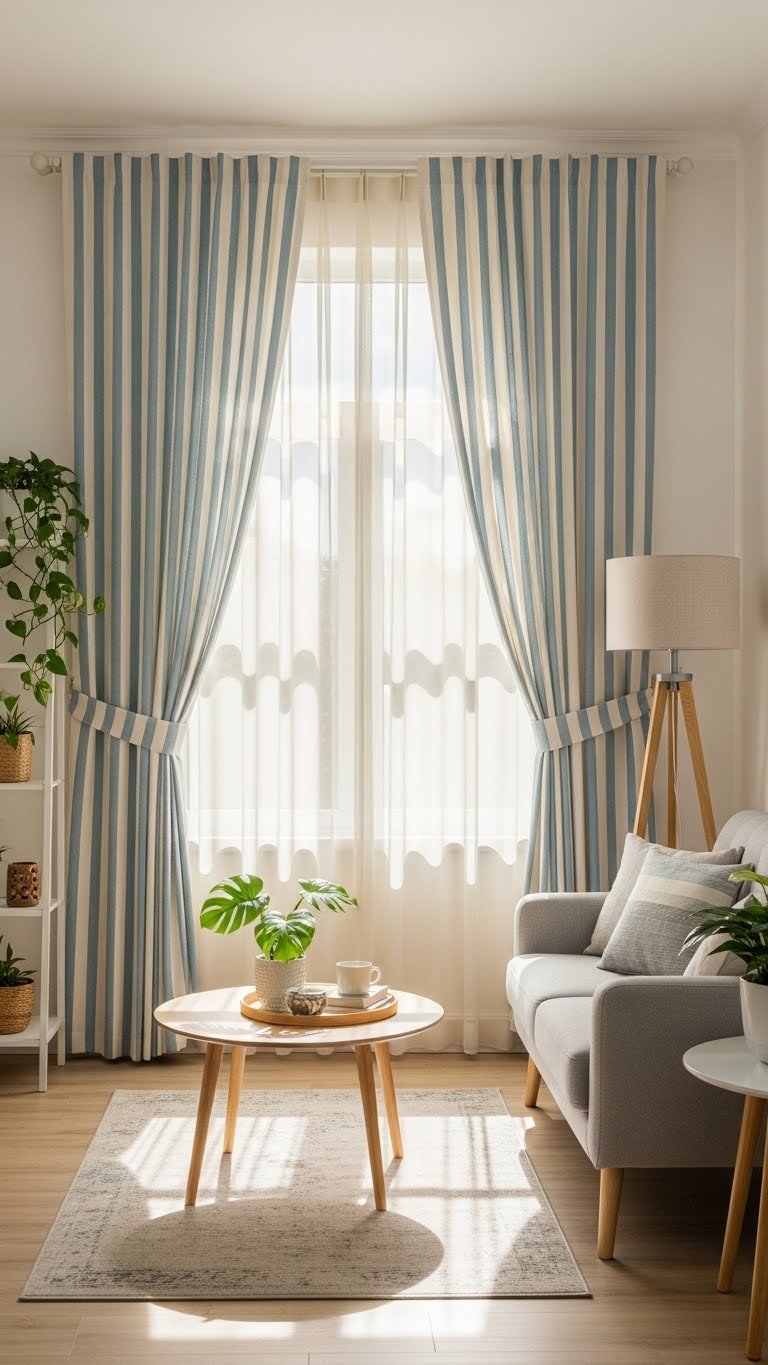
    Vertical stripes are a designer trick that elongates windows and makes rooms feel taller. Layer them with solids to balance the visual impact and keep things from feeling too busy.

    Hang a solid sheer in white or cream ($25–50 per panel) as your base layer, then add a striped panel with vertical lines ($50–100 per panel) in a complementary color from Wayfair, Target, or Etsy. Keep your stripe width moderate—too-thin stripes can look busy, too-thick ones flatten the illusion. Use simple metal hardware ($20–30) that doesn’t compete with the stripes. Installation: 25 minutes. The vertical lines naturally guide the eye upward, making ceilings appear higher. This optical illusion is especially helpful in rooms with low ceilings or small windows.


    Save this post and try just one layering idea this weekend—you’ll be amazed at how much depth and dimension two simple panels create. Whether you’re mixing textures, playing with light, or adding pattern, layered curtains are the easiest way to make your living room look intentionally designed. Which combination speaks to you?

  • 24 Beige Curtain Ideas That Create a Soft, Neutral Look

    24 Beige Curtain Ideas That Create a Soft, Neutral Look

    Introduction

    Beige curtains are the quiet MVP of any living room—they don’t shout, they whisper. If you’re tired of curtains that feel too bold or too boring, beige offers the perfect middle ground. It pairs with literally everything, won’t fight with your wall color, and creates a calm backdrop that lets your furniture and personality shine. Whether you’re renting, redesigning, or just ready for a refresh, these 24 beige curtain ideas will show you exactly how to use soft neutrals to create a sophisticated, welcoming space. From layering hacks to styling tricks that cost almost nothing, you’ll find practical solutions for every budget and style. Ready to discover how beige can be anything but bland?


    1. Layer Sheer Beige Over Blackout Linings

    Sheer beige curtains let light dance through your room while blackout linings give you control when you need it. This combination solves the constant battle between natural light and privacy—you get both without compromise.

    Pair lightweight linen or cotton sheers (around $25-40 per panel from IKEA or Target) with blackout-lined drapes in a matching or slightly deeper beige tone ($60-100 from Wayfair or Amazon). Install sheers on a lightweight rod closer to the window, then mount blackout panels on a standard rod about 2 inches higher. The whole project takes about 30 minutes per window. Pro tip: Use tension rods for renter-friendly installation with zero wall damage.

    The result feels purposeful and layered—not accidental. Mornings feel brighter, evenings feel private, and your room looks intentionally designed instead of hastily decorated.


    2. Go Floor-to-Ceiling for Instant Height

    Floor-length curtains create an optical illusion that makes even modest ceilings feel grand. Hanging curtain rods all the way to the top of your wall—not just above the window frame—tricks the eye into seeing more vertical space.

    Measure from your ceiling (not the top of the window frame) down to just above the floor, allowing for a 2-3 inch pool of fabric at the base. Order panels in that length from $40-80 each depending on width. Standard curtain rods work fine; just make sure the brackets can handle the weight ($15-30 for quality brackets). Install the rod as high as possible—even if it means drilling a bit. This takes about 45 minutes per window.

    Your living room immediately looks more elegant and spacious. This works in small apartments and large homes because the principle is the same: height creates drama and perceived openness.


    3. Match Curtains to Wall Color for Immersive Calm

    Color drenching—when your curtains match your walls—creates a cohesive, enveloping effect that feels like a luxury spa. Your eyes travel smoothly around the room instead of stopping at high-contrast edges.

    Paint your walls a soft beige like Benjamin Moore’s “Accessible Beige” or Sherwin-Williams “Urbane Bronze” (yes, it reads as warm beige). Then choose curtains in the exact same undertone—bring paint chips to the fabric store. Order $50-100 per panel in a natural linen or linen-cotton blend. Install standard rods and panels in 30 minutes. The subtle magic here is that your curtains become invisible architecture rather than a design statement.

    The space feels calming and intentional, not accidental. You’ll notice how much quieter the room feels—literally and psychologically. This approach works brilliantly in bedrooms, too.


    4. Add Texture with Linen for Organic Movement

    Linen isn’t just trendy—it’s practical. The natural weave catches light differently than smooth cotton, creating depth and visual interest without loud patterns. Plus, it’s breathable and hypoallergenic.

    Shop linen curtains at $60-120 per panel from Curtarra, West Elm, or Etsy sellers. Linen wrinkles are part of its charm—don’t fight it with heavy starch. Hang using standard rods in 15 minutes. The slight texture variations in beige linen read as sophisticated, not messy. Pro tip: Linen from sustainable producers costs only $10-20 more and often comes with transparency about manufacturing.

    The room gains character and feels more relaxed. Natural linen drapes create a lived-in elegance that stiff, synthetic fabrics can’t achieve. Your space looks thoughtfully curated, not decorator-perfect.


    5. Use Custom Side Panels with Blinds Underneath

    Pairing beige curtain panels just on the sides (like framing) with blinds in the center gives you maximum light control and a custom, high-end look for less money than full curtains.

    Install basic $15-30 roller blinds or cellular shades in cream or white in the window frame. Mount beige linen or linen-blend curtain panels on either side using standard rods. Order custom panels from Curtarra ($40-60 per panel) or use pre-made panels from Target and customize the width. Installation takes about 1 hour for two windows. This approach works in apartments and makes the room look professionally designed.

    You get clean lines, excellent light control, and a modern aesthetic. The side panels soften the look while blinds do the heavy lifting for privacy and temperature control. Budget-friendly and renter-friendly.


    6. Choose Subtle Stripes for Pattern Without Loudness

    If solid beige feels too plain but bold patterns seem risky, try beige-on-beige stripes. The pattern adds visual interest while staying completely cohesive with neutral decor.

    Look for subtle striped linen or linen-cotton at $50-90 per panel from retailers like Wayfair, IXA Curtains, or West Elm. The stripes should be thin and in closely matched beige tones—think oatmeal with cream, or taupe with sand. Hang using standard rods in 20 minutes. The vertical lines subtly draw the eye upward, making ceilings feel higher.

    The soft pattern reads as intentional design, not accidental plainness. Your curtains become a quiet anchor point that ties the whole room together without demanding attention. This works beautifully with minimalist and traditional styles alike.


    7. Install Motorized Beige Curtains for Hands-Free Living

    Smart motorized curtains sound luxurious, but they’re increasingly affordable and genuinely useful—especially if you have wide windows, mobility challenges, or just like the convenience factor.

    Brands like Lutron ($400-800 per window), Eve MotionBlinds ($100-150), or budget options from Amazon ($80-200) integrate with Alexa or Apple Home. You’ll need to hire an electrician for hard-wired systems ($150-300) or use battery-powered options yourself in 1-2 hours. Beige motorized curtains look identical to standard panels once installed.

    The wow factor is real, but the practical benefit is bigger—wake up to curtains opening automatically, close them without leaving the couch, or schedule them around sunset. It’s less about luxury and more about making your daily routine easier.


    8. Pair Beige Curtains with Decorative Trim Details

    A decorative trim or braid along the curtain edges instantly elevates beige from simple to statement-making. This revives the Austrian curtain trend without feeling costume-y.

    Purchase pre-made beige curtains ($40-70) and add trim yourself using fabric glue or basic hand-stitching, or order custom panels with trim from Curtarra or local seamstresses ($60-100 per panel). Choose trim in matching or complementary tones—cream braid, taupe velvet edging, or subtle fringe. This takes 30-45 minutes if you’re hand-gluing, or order it pre-trimmed to skip the work entirely.

    The result feels custom and intentional without breaking the bank. Your beige curtains become a design feature worth noticing, and guests will assume they cost far more than they did.


    9. Layer Beige with a Deeper Tone for Subtle Contrast

    Using two slightly different beige tones together creates dimension and visual interest while staying completely neutral. Light beige in front, warm taupe or greige behind—or vice versa.

    Order panels in two coordinating tones: lighter beige ($30-50) layered over medium taupe ($40-60) from IKEA, Target, or Wayfair. Install both on standard rods at slightly different depths so they overlap when drawn. Takes about 45 minutes total. The color difference should be subtle—you’re not going for contrast, just richness.

    The room gains complexity and elegance. What looks simple at first glance reveals thoughtful layering on closer inspection. This approach works especially well in formal living rooms or spaces where you want quiet sophistication.


    10. Use Beige Linen Sheers Alone for Minimalist Living

    Sometimes less really is more. Lightweight beige linen sheers hung alone create an airy, minimalist look that maximizes light while still providing soft privacy.

    Purchase linen or linen-cotton sheers at $25-50 per panel from IKEA, H&M Home, or Etsy. Hang on lightweight rods using simple hooks or rod pockets in 15 minutes. Linen sheers diffuse harsh sunlight into gentle, even illumination—no glare, no spots of brightness. The fabric choice matters here; thicker sheers look heavier and less elegant.

    Your room feels serene and intentionally sparse, not neglected or unfinished. This approach works brilliantly in bedrooms, studies, or any space where you want calm, natural light. The simplicity is actually more sophisticated than you’d expect.


    11. Incorporate Beige into a Modern Austrian Blind Setup

    Austrian blinds combine the softness of curtains with the functionality of blinds—beige linen versions offer the best of both worlds in a refined, European-inspired look.

    Order custom Austrian blinds from specialty retailers like Two Pages Curtains ($80-150) or seek local upholsterers who make them. Beige linen is ideal because it doesn’t look heavy when gathered. Installation takes 30-45 minutes or hire a professional for $50-100. This is a bigger investment but creates an architectural statement.

    The result feels polished and intentional. Austrian blinds suit both traditional and contemporary spaces when done in neutral linen. They’re especially gorgeous in formal living rooms or studies where you want elegance with function.


    12. Add Beige Curtains Over Existing Blinds for Softness

    If you already have blinds you like, add beige curtains in front for softness and visual interest without replacing anything. This is perfect for renters or anyone wanting a quick update.

    Measure your window frame and order simple beige panels in $20-40 per panel from budget retailers. Hang on lightweight rods mounted inside or outside the frame, depending on your preference. Installation takes 20 minutes per window. You get the light control of blinds plus the softness of curtains.

    The room instantly feels more finished and intentional. Functional blinds become part of a layered design rather than the only window treatment. This hack works in every room and costs almost nothing to implement.


    13. Use Taupe-Beige Curtains for Warmth with Sophistication

    Taupe—that perfect marriage of gray and brown—reads as more sophisticated than pure beige while staying equally neutral. It’s the beige for people who think beige is boring.

    Shop taupe-beige curtains at $40-80 per panel from Wayfair, West Elm, or IXA Curtains. Look for undertones that lean warm, not cool gray. Hang using standard rods in 20 minutes. Taupe pairs beautifully with gray accents, wood furniture, and art. It’s slightly more upscale than true beige without being trendy.

    Your space reads as thoughtfully designed and warm. Taupe curtains attract less dust visually and hide wrinkles better than bright white or pale beige. The sophistication factor is real, and guests will notice your good taste even if they can’t quite name the color.


    14. Create a Beige Ombré Effect with Two Panels

    Layer two similar but distinctly different beige tones so they overlap and create a gradient effect. It’s artistic, unique, and easier than it sounds.

    Order one panel in pale cream beige ($30-50) and one in warm sand beige ($40-60) from IKEA or Target. Install both on the same rod or use a double-rod setup so they overlap when closed. Position them so the color shift is visible. Takes 30 minutes to style properly. This creates custom, boutique-looking results for budget prices.

    The visual effect is elegant and intentional-looking. Your windows become an art installation, and the ombré catches people’s attention in a subtle way. This works especially well in spaces with good natural light where the color shift becomes most visible.


    15. Choose Sustainable Bamboo Fabric for Eco-Conscious Living

    Bamboo rayon is breathable, hypoallergenic, and produced more sustainably than cotton. Beige bamboo curtains have a gorgeous subtle sheen that feels luxe.

    Shop sustainable bamboo curtains at $50-90 per panel from Etsy makers, West Elm, or specialty eco-retailers. The fabric feels silky and drapes beautifully—it’s thinner than linen but more elegant. Hang on standard rods in 15 minutes. Bamboo requires gentle washing but looks amazing for years. Pro tip: Bamboo is ideal if anyone in your home has fabric sensitivities.

    The room gains an understated glamour. Bamboo’s sheen catches light differently than matte fabrics, making beige look richer and more intentional. You’re also supporting sustainable production, which feels good.


    16. Combine Beige Curtains with Wooden Rings for Casual Elegance

    Wooden curtain rings give beige panels a relaxed, intentional look that feels both casual and designer-approved. The natural materials complement each other beautifully.

    Purchase beige linen or linen-blend curtains ($40-70 per panel) and wooden or gold-finish rings ($15-25 per set of 12-15) from IKEA, West Elm, or Amazon. The rod stays visible (wood or black metal, $20-40), so presentation matters. Install in 30 minutes. This approach works in farmhouse, modern, and Scandinavian spaces.

    The look is polished but effortless—not fussy or over-decorated. Wooden rings add warmth that feels authentic and handmade. Your space looks like you have good design instincts, not like you hired an expensive decorator.


    17. Install Beige Curtains with Sheer Roman Shades Layered Behind

    Combine beige Roman shades with matching beige sheers for a layered, sophisticated look that offers flexibility you won’t get with curtains alone.

    Order sheer Roman shades in beige ($40-80) and pair with beige linen sheers ($25-50 per panel). Install the Roman shade on the inside of the window frame and mount curtain rods for sheers outside the frame. Takes about 1 hour total for one window. This setup looks expensive but costs less than motorized curtains.

    You have multiple light and privacy options—shades for total control, sheers for softness, both for maximum flexibility. The layered look is architectural and feels designed, not thrown together. This works beautifully in formal spaces where you want options.


    18. Use Beige Velvet Curtains for Warmth and Luxury

    Velvet is back, and beige velvet offers luxury without the boldness of darker jewel tones. It’s sumptuous, warm, and feels genuinely special.

    Shop beige velvet from IXA Curtains, West Elm, or specialty retailers at $70-120 per panel. Beige velvet feels less formal than deep burgundy or navy—it’s more intimate and inviting. Hang on sturdy rods because velvet is heavier than linen ($25-40 for quality hardware). Installation takes 30 minutes. Professional dry cleaning is recommended, adding to long-term costs, but the durability is excellent.

    Your room immediately feels cozier and more luxurious. Velvet’s texture adds depth and interest without requiring patterns. This works beautifully in formal living rooms, bedrooms, or any space where you want to feel indulged.


    19. Create Paneled Beige Curtains with Contrasting Tape

    Vertical tape or braid down the sides of beige panels adds structure and visual interest. This architectural detail elevates simple panels into something gallery-worthy.

    Order beige pre-made curtains ($40-70) and add contrasting tape using fabric glue or sew it on. Tape costs $5-15 per panel from craft stores or online. You can DIY this in 45 minutes per panel or hire a tailor for $20-30 per panel. Choose tape in cream, warm taupe, or subtle metallics—nothing too bold.

    The result looks intentional and tailored. The vertical lines subtly emphasize height and create a more formal, sophisticated aesthetic. This detail costs almost nothing but makes your beige curtains look custom-made.


    20. Pair Beige Curtains with Soft Metallic Accents

    Soft metallics—warm gold, brushed brass, champagne—are the neutral-friendly way to add luxury without color. They amplify beige’s warmth beautifully.

    Use gold or brass curtain rods ($30-60), rings ($15-25), and finials ($10-20) with your beige panels. The hardware becomes part of the design, so choose finishes thoughtfully. Install in 20 minutes. Warm metallics feel elevated without being showy. Avoid bright polished gold, which reads as dated.

    The metallic accents catch light and draw the eye upward, making the whole setup feel more intentional and polished. Your space reads as luxury without actually being expensive. This works across styles—modern, traditional, eclectic, or minimal.


    21. Use Asymmetrical Beige Curtain Panels for Modern Drama

    Asymmetrical arrangements break the traditional mold and feel more contemporary and artistic. Hang one full-length beige panel and pair it with a shorter one, or layer panels at different depths.

    Order two panels in different lengths: one floor-length ($40-70) and one to windowsill ($30-50) from IKEA or Wayfair. Use two separate rods or space hooks unevenly on one rod. Installation takes 30-40 minutes and requires a willingness to break the “rules.” This trend works better in modern and eclectic spaces than formal ones.

    The asymmetry reads as confident and intentional. You’re showing design know-how, not playing it safe. This approach works beautifully with minimalist decor and modern furniture.


    22. Layer Beige with Blackout Panels for Complete Light Control

    If you need serious light control (shift work sleep, sensitive to light), beige blackout panels layered with lighter sheers give you total flexibility while staying cohesive.

    Purchase lightweight beige sheers ($25-50) and beige or warm gray blackout panels ($60-100 per panel) from Wayfair or Amazon. Install sheers on an inner rod and blackout panels on an outer rod so you can use them independently. Takes about 1 hour for two windows. This is especially useful in bedrooms and media rooms.

    You get complete light control, excellent insulation, and a sophisticated layered look. The beige tones tie it all together so nothing feels clashing or chaotic. This functional approach doesn’t sacrifice aesthetics.


    23. DIY Beige Curtains from Linen Fabric for Custom Length

    Sewing your own beige curtains from linen yardage costs less than pre-made panels and lets you get exact lengths and widths. Plus, you control every detail.

    Purchase quality linen fabric at $12-18 per yard from local fabric stores or online retailers. For a standard window, plan on 4-6 yards per panel. Add basic rod pockets and hemming yourself if you sew, or pay a tailor $40-60 per panel. Total cost: $50-90 per panel versus $60-100 for pre-made. This takes a weekend project if you’re doing it yourself or a week if working with a tailor.

    Your finished curtains are perfectly fitted and often cost less than store-bought options. The customization is unbeatable, and DIY adds a special pride factor. This works especially well for oddly-sized windows where pre-made doesn’t fit.


    24. Combine Beige Curtains with Woven Wall Texture for Depth

    Pair beige curtains with textured walls or woven art to create depth without relying on color. Multiple textures in the same neutral family feel luxe and intentional.

    Hang beige linen curtains ($50-90 per panel) alongside woven wall hangings ($30-80), textured wallpaper ($20-30 per roll), or macramé pieces. These elements work together to create visual interest. Installation varies, but figure 1-2 hours total for window treatment plus wall styling. This approach is easier in spaces where you’re starting fresh.

    The room feels curated and rich, not sparse. Neutral textures layered together create the illusion of intentional design and wealth of detail. Your space reads as sophisticated and thoughtfully styled without any loud colors competing.


    25. Install Beige Curtains with Contrast Lining Peek

    Add a peek of contrasting or complementary lining visible at curtain edges and hem. This hidden-luxury detail is very designer-approved and costs almost nothing extra.

    Order beige curtains with contrast lining options from custom retailers like Curtarra ($60-100 per panel) or ask a tailor to add lining to store-bought curtains for $20-30 per panel. Choose lining in cream, soft gray, or warm white—colors that peek beautifully when curtains are drawn back. Installation takes 30 minutes.

    The contrast is a delightful surprise guests notice when curtains are open. It feels custom and expensive, proving you have design confidence. This detail works especially well with layered or asymmetrical curtain arrangements where the lining is most visible.


    26. Style Beige Curtains with Tiebacks in Coordinating Tone

    Tiebacks frame your window and let light in while adding a decorative, intentional touch. Beige-on-beige tiebacks feel cohesive and elegant.

    Purchase decorative tiebacks in coordinating beige tones ($10-30 per pair) from Target, IKEA, or Etsy, or make your own from linen scraps. Install tieback hooks $5-10 per pair about one-third down from the curtain rod for best proportions. Takes 15 minutes to install. Beige tiebacks in rope, braid, or fabric all work beautifully.

    Your curtains look styled, not just hung. Tiebacks add a finishing touch that signals intentionality and good taste. They’re also functional—you control how much light enters without fully opening curtains. This detail transforms a basic window treatment into a designed space.


    Save this post and try one idea this week—you might be surprised how much a single update elevates your entire room. Share it with anyone who needs a beige curtain confidence boost.

  • 27 Floor-to-Ceiling Curtain Concepts That Make Rooms Feel Taller

    27 Floor-to-Ceiling Curtain Concepts That Make Rooms Feel Taller


    Ceiling height is one of the first things you notice when you walk into a room—and it affects how comfortable a space feels. If your living room has standard 8-foot ceilings, you might think you’re stuck with that constraint. But here’s the truth: the right curtain strategy can make your room feel significantly taller without any renovation or construction. These 27 ideas show you exactly how to use curtains, rods, colors, and styling techniques to visually expand your vertical space. Whether you’re renting, own your home, or working with tricky window sizes, you’ll find solutions that work with your budget and timeline. Let’s dive into the best ways to make your living room feel more spacious than it actually is.


    1. Hang Curtains at the Ceiling Line

    Mounting your curtain rod as high as possible is the single most effective trick for visual height. Most people hang rods 8-10 inches below the ceiling, which actually makes ceilings look lower. Instead, install the rod directly at or within 2 inches of the ceiling.

    Use a stud finder to locate wall studs and mount brackets there for proper support. Expect to spend $20–$60 on a basic rod and brackets from Target or Home Depot. This 30-minute DIY project (or one professional installation call) instantly adds perceived height without any other changes. If you’re renting, use removable adhesive strips rated for heavy weight, though ceiling mounting can be trickier—talk to your landlord about small nail holes first.

    The visual difference is stark. Your eye travels from floor directly to ceiling, making the room feel taller immediately.


    2. Choose White or Cream Curtains for Seamless Height

    When your curtains match or nearly match your wall color, your eye doesn’t stop at the curtain edge—it keeps traveling upward. This color continuity creates an unbroken vertical line that naturally makes rooms feel taller. White and cream are the safest bets, but soft grays and warm taupes work equally well.

    Look for linen or linen-blend curtains in white ($40–$100 per panel from IKEA, Wayfair, or Amazon). Pair them with white or off-white walls, and the effect is nearly invisible—in the best way. Your walls appear to extend higher than they actually do. The fabric still filters light beautifully, and you get texture without color interruption.

    Avoid bold or dark curtain colors if height is your goal; those visually “cut” the wall and lower the perceived ceiling line.


    3. Use Sheer Layering for Airiness Without Bulk

    Sheer curtains create visual lightness because you can see through them—they don’t feel like a heavy barrier. When you layer sheers over the window (rather than heavy fabric from top to bottom), the upper portion of your window stays visually open and airy, which extends the sense of ceiling height.

    Hang sheers from the ceiling rod using tension wire or a lightweight track ($15–$40, available at IKEA or hardware stores). Add a blackout panel on a separate lower rod for privacy and light control without sacrificing the vertical effect. This setup takes about an hour and works for renters if you use damage-free adhesive strips on the ceiling.

    The result? Your windows look taller because the sheer fabric appears to float rather than anchor the room downward.


    4. Paint Walls Light to Expand Visual Space Vertically

    Light wall colors create visual continuity from floor to ceiling, making rooms feel more spacious. Pale colors reflect light upward, which emphasizes height. Pair light walls with curtains in the same or slightly lighter tone for maximum effect.

    Repaint walls in soft white, pale gray, or warm taupe—this is a weekend project or a $200–$500 professional job depending on room size. Use quality paint like Benjamin Moore or Sherwin-Williams ($25–$50 per gallon) for better coverage and durability. The paint-to-ceiling effect is immediate and transformative without touching your curtains at all.

    If you’re renting and can’t paint, use large tapestries or removable wallpaper in light tones to achieve a similar effect.


    5. Avoid Horizontal Patterns; Choose Vertical Stripes Instead

    Patterns matter when you’re trying to maximize height. Horizontal stripes or geometric patterns naturally draw your eye across the room, which makes ceilings feel lower. Vertical patterns (thin stripes, linear motifs) guide your eye upward, reinforcing the sense of height.

    Hunt for vertical-striped curtains on Wayfair, West Elm, or CB2 ($60–$150 per panel). Alternatively, find solid curtains and add a thin vertical stripe using fabric paint and a ruler ($10 DIY, takes 30 minutes per panel for a smaller project). The vertical line you create becomes a visual elevator for your room.

    Avoid busy horizontal checks, large-scale horizontal florals, or bold color blocking that cuts the wall in half.


    6. Install Double Rods for Layered Styling Drama

    Double rods give you practical light control and visual layering that emphasizes height. You hang lightweight sheers on one rod and heavier panels on another, both extending floor to ceiling. This creates visual depth without bulk.

    Purchase a double-rod system ($40–$80 at Home Depot or Lowe’s) and hang it at ceiling height. Use sheer panels on the inner rod and your choice of heavier fabric on the outer rod. Installation takes about an hour with basic tools. The effect is layered and architectural—your window becomes a design feature that draws the eye upward.

    This approach is renter-friendly with damage-free adhesive strips on the ceiling for the bracket.


    7. Extend Curtains Beyond the Window Frame

    Hanging curtains wider than your actual window—not just taller—creates an optical illusion that makes both the window and the room feel larger. Mount the rod beyond the window edges on both sides, so the curtain panels extend fully across the wall space. This pulls the eye outward and upward.

    Measure your window width and add 12–24 inches total (6–12 inches on each side) when ordering curtain panels. A standard 96-inch panel costs $40–$100; larger custom panels run $100–$200. Installation is the same as regular curtains; just mount the rod wider. This is a renter option using adhesive-strip brackets as long as you use damage-free products.

    The wider-framed effect makes your window and ceiling line feel more prominent in the room’s overall design.


    8. Use Lightweight Fabric That Moves and Flows

    Heavy, stiff curtains feel anchored to the room. Lightweight, flowing fabrics feel weightless—which visually expands the sense of space. Linen, cotton voile, and lightweight linen blends create movement and airiness.

    Shop for linen or cotton curtains ($50–$120 per panel at IKEA, Target, or specialty retailers like Etsy). Heavier velvet or thermal-backed panels are wonderful for warmth but visually compress the room. If you want blackout capability, choose a lightweight linen paired with a separate blackout shade rather than a heavy all-in-one curtain. The flowing motion of the fabric creates visual height as it drapes naturally.

    Your eye follows the gentle folds of the fabric upward, reinforcing the sense of vertical space.


    9. Add a Subtle Ombré or Gradient Effect

    An ombré or gradient effect—where color subtly shifts from light at the top to slightly deeper at the bottom—creates a visual “lift.” Your eye follows the lighter color upward, which subconsciously extends the ceiling line.

    Custom ombré curtains are available from boutique retailers like Etsy or Spoonflower ($150–$300 per panel for high-quality fabric). DIY option: buy fabric dye ($10) and bleach two panels with different concentrations to create a gradient effect (6–8 hours of work). The subtle shift in tone feels sophisticated and modern while serving your height-maximizing goal.

    This technique is more advanced but creates a refined, intentional look that screams good design.


    10. Mount Curtains on Clear or Invisible Rods

    When your rod disappears visually, your curtains appear to float from ceiling to floor without interruption. Clear acrylic rods and near-invisible tension systems create this effect. Your eye sees only the fabric’s vertical line, not the hardware.

    Purchase clear acrylic rods or tension-wire systems ($30–$80 at IKEA, West Elm, or Container Store). Tension-wire systems are particularly effective because the wire is almost impossible to see at normal viewing distance. Installation takes 30–45 minutes and works for renters using ceiling-mounted brackets. The minimal visual interruption maximizes the sense of unbroken height.

    The result is a clean, modern look where the curtains feel like an integral part of the room’s architecture.


    11. Use Minimal or No Pleats for a Streamlined Look

    Pleated curtain styles (pinch pleats, pencil pleats) add visual weight and horizontal bulk at the top of the window. Flat panels or simple grommet-top curtains create unbroken vertical lines that emphasize height. The cleaner the top, the taller the room feels.

    Look for grommet-top curtains, tab-top panels, or simple linen curtains without decorative pleats ($40–$100 per panel from IKEA, Target, or Wayfair). These styles hang flat and clean, creating a modern look that naturally extends your eye from floor to ceiling. Grommet styles are also easy to install yourself in about 20 minutes.

    The minimalist silhouette reinforces the sense of open space and vertical stretch.


    12. Pair Curtains with Tall Floor Lamps and Vertical Mirrors

    It’s not just about the curtains—surrounding them with other tall, vertical elements reinforces the height effect. Floor lamps that reach toward the ceiling and large vertical mirrors repeat the upward visual line.

    Add a tall arc lamp ($80–$200 from Target, West Elm, or Article) and a large vertical mirror ($60–$150 from IKEA or Wayfair) next to your curtained window. These elements don’t have to be expensive; they just need to be vertical. The grouping creates a visual emphasis on height that works in concert with your floor-to-ceiling curtains.

    When your eye scans the room, it naturally travels upward because multiple design elements point in that direction.


    13. Choose Neutral Colors Over Dark Tones

    Dark colors (navy, charcoal, black) feel heavy and visually “ground” a room. They make ceilings appear lower because they create contrast and visual weight. Neutral tones (cream, beige, soft gray, warm taupe) feel lighter and allow your eye to travel upward without stopping.

    Choose neutral curtains in off-white, cream, or soft gray ($40–$120 per panel from IKEA, Target, Wayfair, or specialty retailers). If you love dark colors, use them sparingly—perhaps as an accent shade in a double-rod setup with neutrals in front. This one color choice has an enormous impact on the perceived ceiling height without any structural changes.

    Neutral doesn’t mean boring; texture, pattern, and layering keep the look interesting while maintaining that visual openness.


    14. Install Valances or Cornices Just Below the Ceiling

    A shallow cornice or valance mounted at the ceiling creates a visual “cap” that frames the height of the room rather than cutting it off. Unlike traditional heavy valances that shorten windows, a thin, minimal version keeps the room feeling tall.

    Install a slim wood cornice ($50–$150, DIY or professional installation) just below ceiling level, then hang your curtains below it. Paint the cornice the same color as your walls for continuity. This adds architectural detail and polish while preserving the sense of vertical space. DIY installation takes a weekend if you’re comfortable with basic carpentry; otherwise, hire a pro for 1–2 hours of work.

    The cornice becomes a subtle crown molding effect that enhances the room’s sense of structure and height.


    15. Avoid Cafe Curtains; Go Full Height Instead

    Cafe curtains (which cover only the bottom half of the window) are charming but visually cut your window—and your room—in half. They create a horizontal line that actually makes ceilings feel lower. Full-height curtains eliminate that interruption and allow your eye to travel the entire vertical span.

    Measure from ceiling to floor and order curtains in that length ($50–$150 per panel depending on your height). If you currently have cafe curtains and want height, remove them and install full-length panels instead. This simple swap (30 minutes of work) is transformative. Standard windows are 36–48 inches tall; measuring your actual space ensures proper proportions.

    The unbroken vertical line immediately makes your room feel more spacious and sophisticated.


    16. Use Metallic Rods or Hardware for Visual Lightness

    Matte black or heavy wood rods can feel weighty and grounding. Metallic hardware (brushed gold, polished chrome, stainless steel) catches light and reflects it, which creates visual lift. The reflective quality makes hardware feel less substantial even though it’s there.

    Shop for metallic rods at Target, West Elm, or Home Depot ($30–$80). Installation is identical to standard rods; you’re simply upgrading the material. Brushed gold and champagne tones feel warm and contemporary; polished chrome feels modern and sleek. The light-reflecting quality adds a subtle shimmer that draws your eye upward.

    This detail is small but psychologically significant—your eye perceives reflective surfaces as lighter and more elevated.


    17. Pair Curtains with Stacked Wood or Floating Shelves

    Vertical design elements throughout the room reinforce the height effect of your curtains. Floor-to-ceiling shelving, vertical artwork, or stacked storage creates a visual “ladder” that emphasizes ceiling height.

    Install floating shelves or tall bookcase units next to your curtained window ($100–$400 for a quality unit from IKEA, Article, or West Elm). Arrange books and objects vertically on the shelves to reinforce the upward visual line. The grouping of vertical elements—curtains, shelves, artwork—works together to make the room feel taller.

    When multiple vertical elements occupy the same space, the cumulative effect on perceived height is stronger than any single element alone.


    18. Choose Sheers That Glow Rather Than Block Light

    Sheers that allow light to pass through and glow create a sense of openness and weightlessness. Opaque sheers that block light while you can’t see through them feel heavier. Choose thin, translucent options that create a luminous effect.

    Look for lightweight ivory or pale gold sheers ($20–$50 per panel from IKEA, Target, or Wayfair). Avoid thick, textured sheers; stick with smooth, flowing options. When backlit by sunlight, glowing sheers create a warm, inviting atmosphere that makes the space feel more open. This works especially well on windows that get morning or afternoon sun.

    The luminous quality of light passing through the fabric creates an airy, weightless feeling throughout your entire living room.


    19. Add Subtle Border Trim to Frame the Height

    A thin vertical trim or border running down the sides of your curtains adds a sophisticated frame that emphasizes height. Unlike heavy horizontal hems that ground the look, vertical trim draws the eye upward.

    Purchase or order curtains with a subtle vertical trim ($70–$150 per panel, or add DIY trim for $10–$20 in supplies from a fabric store). DIY: buy grosgrain ribbon or trim ($10 per yard) and hand-stitch or fabric-glue it down both sides of your curtain panels (4–6 hours of work for a pair). The subtle detail feels designed and intentional without being over-the-top.

    This small touch transforms basic curtains into a polished, designer-looking feature that visually extends the window’s height.


    20. Install Curtains Across a Wider Wall Span

    Rather than hanging curtains just around your window frame, extend them to span most or all of your wall width. This creates a dramatic backdrop that makes the room feel wider and—visually—taller by association.

    Measure your entire wall width and mount rods accordingly, adding 6–12 inches beyond the window on each side ($40–$100 for an extended rod setup). You’ll need 2–3 panels per side to cover the full width ($100–$300 total). This approach works beautifully for large living rooms or accent walls you want to highlight. Installation takes 1–2 hours.

    The expansive curtain backdrop creates a gallery-like atmosphere that elevates the entire room’s sense of scale.


    21. Layer Curtains with Roman Shades Below

    Pairing full-height curtains with a Roman shade or roller blind below adds functional layering without visual confusion. The shade hides inside the window frame while your curtains extend floor to ceiling, maintaining the height effect while providing flexible light control.

    Hang floor-to-ceiling curtains ($60–$150 per panel) and add a coordinating Roman shade ($80–$150 from IKEA, Wayfair, or a custom maker). The shade clips up inside the window frame when you don’t need it, so it doesn’t interrupt your vertical line. Installation: mount the shade track to the window frame (30 minutes), then hang your curtains above (30 minutes). Renters can use temporary adhesive strips for both.

    You get the height benefit of full curtains plus the flexibility of adjustable light control without compromise.


    22. Choose Unlined or Semi-Sheer Curtains for a Floating Effect

    Unlined or semi-sheer curtains feel lighter and more ethereal than fully lined or blackout-backed options. When light passes through the fabric, it feels less solid and more like a design accent than a functional barrier.

    Shop for unlined linen curtains ($50–$120 per panel from IKEA, Wayfair, or specialty makers like Schoolhouse Electric). Pair them with a separate roller shade for privacy and light control if needed. Unlined curtains are typically 30–40% cheaper than lined versions and feel fresher and more contemporary. Installation is identical; you’re just choosing a lighter fabric weight.

    The semi-translucent quality makes your curtains feel like a floating design element rather than a heavy window treatment.


    23. Paint Curtain Rods the Same Color as Your Walls

    When your rod matches your wall color, it becomes nearly invisible—which means your eye sees only the continuous vertical line of the curtain fabric. This visual merging extends the sense of height.

    Paint your curtain rod with wall-matching paint ($15–$30 total, DIY in 20 minutes). Use the same paint sample or match your wall color at the hardware store. Even a basic rod becomes visually refined when it blends with its surroundings. This is one of the cheapest height-maximizing tricks available.

    The disappearing rod creates an almost floating effect where your curtains appear to emerge directly from the ceiling line.


    24. Use Longer-Than-Necessary Curtains (Slight Puddle Effect)

    Most curtains touch the floor. Adding an extra 2–4 inches so the fabric gently puddles emphasizes the full height of your window frame. The slight excess draws attention to the length while adding a touch of luxury.

    Order curtains 2–4 inches longer than your floor-to-ceiling measurement ($60–$150 per panel, custom length typically costs $5–$15 more). This small detail signals intentionality and polish. The subtle puddle (not dramatic pooling, which reads dated) is chic and modern. Installation is standard; you’re simply specifying a longer length when ordering.

    The extra length emphasizes every vertical inch of your window and draws the eye upward.


    25. Install a Statement-Making Color Ombré (Darker at Bottom)

    An inverted ombré—lighter at the top, deeper at the bottom—creates visual interest while still maximizing perceived height because it starts with a light color that makes the ceiling feel higher, then adds depth below.

    Order custom ombré curtains from specialty makers like Spoonflower or Etsy ($150–$300 per panel for quality). The gradient should be subtle enough that the bottom color doesn’t feel too heavy; think pale cream to soft gray or ivory to warm taupe rather than cream to black. This is more of an investment but creates a truly custom, artistic look.

    The color gradient becomes a subtle focal point that adds personality while still honoring the height-maximizing goal.


    26. Mount Rods on Recessed or Mounted Brackets (Not Flange)

    Flush-mount or recessed brackets make rods appear to float rather than protrude from the wall. Standard flange brackets create visual weight and interruption. Minimal brackets keep the focus on the curtains themselves and the vertical line they create.

    Purchase recessed or surface-mount brackets ($30–$60 from hardware stores or online retailers like Restoration Hardware). Installation is straightforward with a drill and stud finder (30 minutes). The minimal hardware makes the entire setup feel more architectural and refined. Renters can use ceiling-mounted adhesive strips for temporary installation.

    The streamlined bracket system makes your entire curtain setup feel more intentional and less utilitarian.


    27. Combine Multiple Height Tricks: The Ultimate Setup

    Using one trick helps; combining several creates a compounded effect. Pair ceiling-mounted rods, light-colored walls, neutral curtains, minimal hardware, vertical accessories, and layered sheers for a cohesive, intentional look that maximizes every inch of perceived height.

    Investment: $300–$800 total for rods, quality curtains, paint, and accessories depending on window size and room. Timeline: 2–3 weekend projects (painting, installation, styling). Start with the highest-impact changes—ceiling mounting, light walls, floor-to-ceiling panels—then layer in secondary details like mirrors, trim, and accessories. This comprehensive approach transforms your entire space.

    The combined effect is undeniable: your living room becomes a tall, open, gallery-like space that feels significantly larger than its actual dimensions.


    Save this guide to your Pinterest board and pick one idea to tackle this weekend—the ceiling-mounted rod or light wall color will give you the fastest result. Which technique speaks to your space? Try combining two or three for maximum impact.

  • 26 TV Wall Decor Ideas That Look Clean, Modern & High-End

    26 TV Wall Decor Ideas That Look Clean, Modern & High-End

    Your TV wall doesn’t have to be boring—and it definitely shouldn’t scream “look at me.” The best TV walls feel intentional, layered, and like they belong in a designer’s home, but they’re actually way easier to achieve than you’d think. Whether you’re renting, renovating, or just ready to stop staring at a blank wall, these 26 ideas blend modern aesthetics with real-world budgets. You’ll find everything from zero-dollar styling tweaks to investment pieces that’ll make your space feel like it belongs in a magazine. By the end, you’ll have the blueprint to create a TV wall that’s clean, sophisticated, and totally yours.

    1. Go Deep with Jewel-Tone Paint

    Paint is the fastest way to anchor a TV wall and make it feel intentional. Deep emerald, burgundy, or navy create visual richness without clutter—2025’s biggest color shift. You’ll need two coats of quality paint ($30–$60 per gallon), a weekend afternoon, and basic supplies from Home Depot or Lowes.

    The trick is choosing a paint with good undertones. Emerald (currently 22% of designer preference) reads warmer than you’d expect, while true burgundy grounds a space without feeling dated. Test samples on your wall first and observe them at different times of day.

    Pair your jewel tone with a lighter wall color for contrast—this stops the room from feeling cave-like. Renter? Removable wallpaper in the same tone gives you the same impact for about $40–$80 per roll, with zero commitment.

    The result is instant sophistication. Your TV disappears into the background, and the wall becomes a design feature people actually notice.

    2. Layer Wallpaper with Unexpected Patterns

    Pattern drenching—covering your TV wall in a cohesive design—is having a massive moment. Geometric patterns, checks, and even subtle animal prints are seeing +194% and +5000% search spikes, which means people are ready to be bold.

    Choose a wallpaper with a pattern that feels balanced visually (not too chaotic). Peel-and-stick options from Spoonflower or Ruggable ($50–$150) are renter-approved and removable. Traditional wallpaper from Wayfair or Farrow & Ball ($35–$150 per roll) offers more texture but requires professional installation ($200–$400).

    Installation takes a weekend or a few hours if hired out. Pro tip: use a pattern that echoes your furniture or rug colors to avoid visual chaos.

    The payoff is a room that feels curated and intentional. You’re not just hiding your TV—you’re making a design statement.

    3. Install Floating Wood Shelving Above the TV

    Floating shelves serve double duty: storage and styling. They make a TV wall feel less like a theater and more like a curated gallery. Mount 2–3 shelves ($20–$80 each for quality wood) at varying heights using heavy-duty brackets from Home Depot.

    Installation typically takes 1–2 hours if you’re handy with a drill. Style them with books, small sculptures, and trailing plants—keep items to odd numbers and leave breathing room. This prevents the “cluttered shelf syndrome.”

    Renter-friendly alternative: adhesive shelves (under $30 each) work on most walls and leave no damage. Just don’t overload them with weight.

    Your TV wall now reads as a design feature rather than a tech necessity. Guests notice the thoughtful styling instead of the screen.

    4. Use a Textured Accent Wall (No Paint)

    Shiplap, textured wallpaper, or 3D wall panels add visual interest and dimension without color commitment. These materials cost $1–$3 per square foot and can be installed over a weekend (or professionally for $500–$1200).

    Shiplap boards from Home Depot are peel-and-stick or nailable. Textured wallpaper (like grasscloth or linen-look) offers a subtler impact at $30–$100 per roll. 3D wall panels (from companies like Art3D) run $20–$50 per panel and create dramatic shadow play.

    The texture catches light beautifully and hides minor wall imperfections. It also photographs incredibly well, which matters if you ever share your space on social media.

    This approach gives you design depth without feeling trendy or temporary. Your space looks intentional and finished.

    5. Mount Your TV Higher and Add Art Below

    Breaking the rule of TV-at-center-eye-level actually works beautifully. Mount your TV higher (around 60–65 inches from floor to screen center) and use the wall below for rotating art, a sculptural console, or architectural interest.

    This requires a sturdy VESA mount ($50–$150) and potentially professional installation if electrical rewiring is needed ($150–$300). The benefit: your TV doesn’t dominate the room visually.

    Add a large art piece, mirror, or sculptural object below to fill the space. You can rotate seasonal art or swap it seasonally. This transforms your TV wall into a flexible design canvas.

    The room feels more sophisticated because your TV becomes just one element of a larger composition, not the focal point.

    6. Create a Minimalist Wood Frame Around the TV

    A wooden frame built around your TV—often called a “TV nook”—sounds high-end but is surprisingly achievable. You’re essentially creating a border from 1×4 or 1×6 boards ($1–$2 per foot from Home Depot).

    Install the frame flush to the wall using studs and brackets ($50–$150 total materials). Stain or paint it to match your room’s palette. Time: 4–6 hours DIY, or $400–$800 professionally.

    The frame gives your TV a gallery-piece presence. It also provides a visual break if your wall is otherwise bare. Bonus: you can hide cables inside the frame or run lighting around it.

    Your TV now reads as intentional architecture rather than an appliance bolted to the wall.

    7. Add LED Backlighting Behind the TV

    LED strips ($15–$50 from Amazon or Best Buy) mounted behind your TV create ambient light that reduces eye strain and adds a spa-like quality. They come in warm white, cool white, and RGB options.

    Installation is simple: stick the adhesive strips behind your TV, plug in (or hard-wire for a cleaner look), and adjust the brightness via remote. Takes 15 minutes. If you want them hidden, hire an electrician ($150–$250) to hard-wire everything into your wall.

    Warm white light (2700K) feels cozy; cool white (4000K+) feels modern. Most people prefer warm for living rooms.

    The result is a room that feels like a hotel or high-end lounge. This detail alone makes your space feel thoughtfully designed.

    8. Style with Brass or Gold Accents

    Chrome and brass are having their moment in 2025. Incorporate metallic accents through shelving brackets, console legs, picture frames, or decorative objects.

    Shop for brass-legged media consoles ($200–$600 from West Elm or Article), brass shelving brackets ($20–$50 each), and decorative objects from HomeGoods, Target, or Amazon. Mixing metallics (brass + matte black, or chrome + gold) feels intentional, not matchy.

    Budget: $100–$300 to add brass accents across your TV wall. Time: 30 minutes to swap out existing hardware or rearrange accessories.

    Metallic accents catch light and draw the eye around your TV wall, creating visual rhythm. Your space feels curated and modern.

    9. Hang a Large Mirror to Reflect Light

    A statement mirror (36–48 inches) beside or above your TV bounces light around the room and creates the illusion of more space. Hang it asymmetrically for contemporary feel, or centered for balanced geometry.

    Quality mirrors start at $80–$300 from Article, CB2, or Wayfair. IKEA’s affordable options ($40–$100) work beautifully too. Installation is simple: find a stud, use a quality bracket, and hang.

    Brass or wood-framed mirrors feel more upscale than minimalist black frames. Choose based on your room’s existing metals and finishes.

    A mirror reflects light and makes your TV wall less “tech-focused” and more design-forward. It also visually softens the hard rectangle of your screen.

    10. Paint Your Media Console to Match Your Wall

    Color drenching—using the same hue on your wall AND furniture—is evolving from paint-only to mixed materials. Match your wall color by painting or staining your media console the same tone (or 1–2 shades lighter).

    Use quality furniture paint ($15–$30 per can from Home Depot or Benjamin Moore) and a primer designed for furniture ($10–$20). Time: 2–3 coats over a weekend. Or buy a console already in your wall color ($200–$600 from Article, CB2, or Target).

    This approach reads incredibly high-end because it shows intentional design thinking. Your TV wall becomes one unified composition.

    The result is a sophisticated, gallery-like appearance. Your space feels calm and intentionally curated.

    11. Install Ceiling Wallpaper for Extra Drama

    Ceiling wallpaper is the 2025 trend that separates boring from “wow.” Apply patterned paper to the ceiling above your TV wall for unexpected drama and visual depth.

    Choose a bold geometric or pattern-drenched design ($40–$150 per roll from Ruggable, Spoonflower, or specialty wallpaper shops). Professional installation runs $300–$600; DIY takes an afternoon on a ladder. Peel-and-stick makes it renter-friendly.

    Pro tip: pattern on the ceiling draws the eye upward, making rooms feel taller. Pair it with a simpler wall color or complementary wallpaper below.

    This detail signals that your space is thoughtfully designed. It’s a showstopper move that guests always ask about.

    12. Add Architectural Trim or Molding

    Trim work—crown molding, picture rails, or wainscoting—adds architectural interest and makes a space feel finished and intentional. Install pre-made trim ($1–$3 per foot from Home Depot) for budget-friendly height and visual polish.

    DIY installation takes a weekend and costs $100–$300 in materials. Professional installation runs $400–$800. Peel-and-stick trim ($20–$60 per kit from Amazon or Wayfair) works for renters but reads less permanent.

    Paint trim white, black, or a contrasting color to your wall for definition. This creates visual boundaries and draws attention to your TV wall’s architecture rather than the screen itself.

    Your space instantly feels more elevated and professionally designed. Trim is one of those details that people notice subconsciously but can’t quite name.

    13. Build Open Shelving That Leaves Space Above Cabinets

    Instead of floor-to-ceiling built-ins, end your cabinets a foot below the ceiling. This “floating” effect feels less heavy and more contemporary. It also prevents dust buildup and feels cleaner.

    Build or buy modular cabinets ($300–$800 from IKEA, Article, or custom makers) and have them installed to end 12 inches below the ceiling. DIY costs $200–$400 plus installation ($300–$600). Time: 1–2 days.

    The gap above makes the wall breathe. You can leave it empty (minimalist), add decorative objects on top of the cabinets, or hide lighting up there.

    This small detail reads incredibly high-end because it shows design restraint and planning. Your TV wall feels curated, not cluttered.

    14. Layer Artwork Around Your TV

    Turn your TV into the centerpiece of a gallery wall. Arrange 5–9 framed pieces around your screen in a mix of sizes (8×10, 11×14, 16×20). Mix frame colors: black, brass, natural wood.

    Art prints cost $5–$30 each from Etsy or Minted; framing adds $20–$80 per piece. Gallery wall kits (from Framebridge or Artifact Uprising, $200–$400) are pricier but include everything matted and ready to hang. Total budget: $150–$500.

    Arrange on the floor first to get spacing right, then install. Asymmetrical layouts feel more modern; symmetrical feels classic. Mix genres: botanical, abstract, black-and-white photography.

    Your TV becomes part of a larger design story rather than the focal point. Guests see curated art, not a tech setup.

    15. Install Patterned Tile or Shiplap Accent Wall

    Patterned tile, stacked stone, or shiplap adds tactile richness without requiring new furniture or decor. These materials run $2–$5 per square foot and create instant architectural interest.

    DIY installation is moderate difficulty ($200–$400 in materials). Professional installation costs $800–$2000 depending on pattern complexity and wall size. Peel-and-stick tile ($20–$80 per pack from Home Depot or Amazon) works for renters and takes 4–6 hours.

    Choose neutral colors (cream, gray, warm white) so the texture—not color—dominates. This keeps your space clean and modern.

    Texture catches light beautifully and hides minor wall flaws. Your TV wall feels curated and architectural.

    16. Style Your Console with Intentional Objects

    Your console styling makes or breaks the entire TV wall. The trick: three-object rule with intentional negative space. Odd numbers feel natural; even numbers feel staged.

    Invest in one quality object per section: a sculptural vase ($40–$100), a stack of art books ($20–$50 total), a plant ($10–$30), and a statement candle ($15–$40). Mix materials and heights.

    Spend 15 minutes arranging. Leave breathing room between pieces. Remove anything that doesn’t serve a design or functional purpose (no remote clutter visible).

    The result is a console that looks intentional and calm. Your TV wall reads as designed, not just functional.

    17. Add a Textured or Lacquered Finish on Your Console

    Lacquered or high-gloss finishes on your media console add retro glamour and read expensive instantly. A lacquered finish catches light and adds visual interest even when minimally styled.

    Buy a lacquered console ($300–$800 from CB2, Article, or West Elm), or have your existing console professionally refinished ($400–$700). High-gloss paint ($20–$40 per quart from Benjamin Moore) works for DIY updates—just use primer and 2–3 coats.

    Installation or paint time: 1–2 days. The glossy finish requires regular dusting but looks worth it.

    The shine makes your TV wall feel gallery-like and sophisticated. Light reflects off the surface, creating visual depth and movement.

    18. Create Negative Space with a Bare Wall

    Sometimes the best TV wall is a calm, bare wall. In contrast to clutter culture, negative space reads incredibly intentional and high-end in 2025.

    Paint your wall a soft, neutral tone ($20–$60 for quality paint). Mount your TV and add one floating console ($200–$500) with minimal styling. That’s it.

    This approach works beautifully if your room already has visual interest elsewhere (busy rug, statement furniture, or artwork elsewhere). It prevents your space from feeling overwhelming.

    The simplicity signals confidence and intentional design. Less becomes your statement.

    19. Incorporate a Statement Chandelier or Pendant Above

    Hanging a statement light above your TV (off to the side, not directly above) adds drama without interfering with viewing. Choose a sculptural pendant ($100–$400 from Article, Rejuvenation, or CB2) that complements your room’s style.

    Professional electrician installation: $150–$250. DIY installation (if you’re comfortable with electrical work): 30–60 minutes. You’ll need a light fixture rated for your ceiling height and electrical box location.

    Pro tip: position the pendant asymmetrically for modern feel, or directly above for classic symmetry.

    This detail draws the eye upward and adds personality. Your TV wall becomes part of a larger lighting design story.

    20. Use Colorful Cabinetry to Frame Your TV

    Colorful built-in cabinetry (not white or natural wood) is the 2025 shift in TV wall design. Paint cabinets in emerald, burgundy, navy, or muted sage to create richness without clutter.

    Build or buy modular units ($400–$1200 from IKEA, Wayfair, or custom carpenters) and paint with quality furniture paint ($20–$40). Or invest in pre-built colored cabinets ($600–$1500) from Article or CB2.

    Installation time: 1–2 days DIY or 1 day professionally ($300–$600). Pro tip: mix glass doors (upper shelves) with closed storage (lower shelves) for visual interest without overwhelming display.

    Deep-toned cabinetry is having a moment because it feels intentional, curated, and slightly bold without being risky. Your TV wall becomes design-forward.

    21. Mount Your TV on an Articulating Arm

    An articulating (or full-motion) TV mount lets you angle and pull your TV away from the wall, making it functional and less permanently fixed. These run $100–$300 from Amazon, Best Buy, or Monoprice.

    Professional installation adds $150–$250; DIY takes 1–2 hours with basic tools. The arm becomes nearly invisible when your TV is flat to the wall, but adds flexibility for viewing from different angles.

    This option works beautifully if your TV wall is also a work-from-home or multipurpose space. You’re not committed to one viewing angle.

    The arm adds a subtle high-tech element that feels intentional. Your TV becomes flexible rather than permanently anchored.

    22. Create a Two-Tone Wall with Contrasting Trim

    Split your TV wall into two colors with contrasting trim dividing them. Paint lower third in a neutral tone and upper in jewel tone (or reverse). Add a trim stripe between for architectural detail.

    Paint costs: $30–$60 for two colors. Trim paint: $10–$20. Painter’s tape ($5) and basic supplies complete it. DIY time: 4–6 hours. Professional painter: $400–$800.

    This technique makes your wall feel taller and adds visual interest. It’s grown up than a single color and feels intentional without being trendy.

    The two-tone approach reads magazine-quality. You’ve clearly thought about proportion and color.

    23. Add a Woven Wall Hanging or Macramé Accent

    A large woven accent (macramé, jute, or woven wool) adds warmth and softness to a modern TV wall. Hang it asymmetrically beside or above your TV for balance.

    Shop for weavings on Etsy, West Elm ($50–$200), or Anthropologie ($60–$150). DIY macramé kits ($20–$50) from Amazon let you create one. Installation: 15 minutes with a simple hook or nails.

    Woven textiles add “dopamine decor” vibes—joyful, personal, and tactile. They soften hard edges and prevent your space from feeling sterile.

    The weaving makes your TV wall feel more like a home and less like a showroom. It adds personality and warmth without clutter.

    24. Install a Room Divider or Bookcase Beside the TV

    A tall bookcase or room divider beside your TV defines the space and adds functional storage. This works beautifully in open-concept homes where you want to create visual separation.

    Buy a tall open bookcase ($150–$400 from IKEA, West Elm, or Wayfair) or a folding divider ($50–$200). Position it perpendicular to your TV wall to create a sense of boundary.

    Style the bookcase with books, plants, and objects. The divider becomes part of your TV wall’s design rather than just storage.

    This approach solves two problems at once: it styles your TV wall AND creates spatial definition in an open room.

    25. Use Textured Curtains or Pleated Fabric as a Backdrop

    Floor-to-ceiling curtains or fabric panels flanking your TV add theatrical drama and softness. Hang lightweight linen or patterned fabric from a minimal rod on either side of your TV.

    Fabric costs $15–$30 per yard from Joann or online. A pair of curtains (36–48 inches wide): $60–$150. Rod ($30–$100 from Target, IKEA, or specialty hardware stores). Sewn or hung: 1–2 hours DIY or $100–$200 professionally.

    This approach is renter-friendly if you use tension rods. It adds elegance without feeling fussy.

    Fabric softens the rectangular hardness of a TV and adds color or pattern flexibility. Your space feels more interior-design-forward.

    26. Pair Your TV Wall with Matching Side Tables

    Matching side tables flanking your TV create visual balance and functionality. They give you surfaces for lamps, plants, or decorative objects without making your TV wall look cluttered.

    Invest in a pair of tables ($200–$500 total from Article, CB2, IKEA, or Wayfair) in matching or complementary finishes. Height should be roughly 24–28 inches. Position them symmetrically on either side of your TV wall.

    Top each table with a small lamp ($20–$80 each) and one object (plant, sculpture, or book stack). This adds layered lighting and visual interest.

    Matching tables feel intentional and polished. They give your TV wall structure and purpose beyond just viewing.


    Save this post and pick just one idea to start with this weekend. Whether you go bold with color, add architectural details, or keep it minimal, you’ll be amazed how a intentional TV wall changes the feel of your entire room.

  • 26 Floating TV Wall System Ideas That Feel Sleek & Futuristic

    26 Floating TV Wall System Ideas That Feel Sleek & Futuristic


    Floating TV walls are the future of modern living rooms—and they’re easier to create than you think. If you’re tired of bulky entertainment centers and tangled cables visible behind your screen, a floating system offers the ultimate in clean, contemporary design. These setups combine minimalist aesthetics with smart functionality, letting your TV become part of the wall rather than sitting in front of it. Whether you’re renting, renovating, or just refreshing your space, we’ve rounded up 26 floating TV wall ideas that work for every budget, skill level, and room size. From DIY tricks to professional-grade upgrades, you’ll find practical solutions that make your entertainment area feel spacious, organized, and genuinely futuristic. Let’s dive in.


    1. Mount Your TV on a Floating Bracket Without a Backing Panel

    A floating bracket mount is the simplest path to a streamlined look. Unlike traditional stands, a floating bracket attaches directly to wall studs, letting your TV appear to hover with nothing underneath. This approach saves floor space and looks incredibly modern without any added materials.

    Installation takes 1–2 hours if you locate studs and have basic tools. Prices range from $30–$80 for the bracket itself (VESA-compatible models at Home Depot or Amazon). For drywall reinforcement, add a $15–$25 backing plate to safely support heavier TVs. Run all cables behind the wall using a low-voltage cable channel ($20–$40) that tucks along the baseboard. Drill one small hole behind the TV to feed wires into the wall cavity if possible—this keeps things completely hidden.

    The real magic happens when you paint the wall a warm neutral. Your TV becomes an integral part of your decor, not a black rectangle imposing on the room. Renters can use a removable bracket system and fill the holes when they move.


    2. Build a Floating Shelf System Around Your TV

    Floating shelves are the fastest way to turn a bare wall into a styled feature. By adding shelves above, beside, and below your TV, you create a gallery-like display that feels intentional and curated without overwhelming the space.

    Pick shelves in a material that matches your room—white painted wood ($40–$70 per shelf), natural oak ($60–$100 per shelf), or budget-friendly particleboard options from IKEA or Wayfair ($20–$50 each). Most floating shelves mount to hidden brackets secured into studs, so installation is straightforward with a drill and level. Arrange shelves asymmetrically to avoid a boxy look—stagger heights and widths for visual interest.

    Style your shelves with a mix of decor: small plants, framed photos, sculptural objects, and a few coffee table books. Keep the styling loose; too many items compete with your TV. The beauty is that you can rearrange seasonally or whenever you want a refresh without reinstalling anything.

    This approach works perfectly for renters using removable adhesive strips on shelves, though floating shelves typically need stud mounting for safety.


    3. Hide Cables in a Conduit Channel

    Visible cables are the enemy of a clean floating wall—and a conduit channel solves this instantly. These slim plastic or aluminum channels run along your wall (usually vertically) and contain all your HDMI, power, and audio cables inside.

    Low-voltage conduit channels cost $20–$50 depending on length and finish (paintable, white, or black). Installation is simple: measure your wall, run adhesive strips or small nails to secure the channel, feed cables inside, and paint if needed. For extra polish, choose a channel color that matches your wall or go with brushed metal for a high-end look.

    Route the channel from behind your TV down to your media console or outlet below. At the bottom, cables emerge into your receiver and power strip, all hidden from view. This single upgrade makes even a basic TV mount setup feel premium and intentional.

    For renters, adhesive-backed channels come off cleanly without wall damage, and you can touch up paint spots if needed.


    4. Use a Textured Wood Accent Wall Behind Your TV

    A textured wood wall transforms your TV into a design statement rather than a black void. Fluted or slatted wood panels add depth and visual interest, making the entire wall feel like intentional architecture.

    Fluted wood paneling runs $3–$8 per square foot, so a 10×8-foot wall costs $240–$640 in materials. Installation requires mounting panels horizontally or vertically onto a frame, which takes a weekend for a DIYer or one day for a professional. Paint them white, cream, or natural wood stain depending on your aesthetic.

    The grooves in fluted panels naturally hide cables and cords running vertically—another bonus. If you’re renting, removable peel-and-stick wood panels now exist ($40–$80 per panel) that adhere without damage, though they won’t cover as large an area.

    Beyond the visual impact, textured walls also improve acoustics slightly by breaking up sound reflections, so your TV audio sounds less harsh bouncing off flat drywall.


    5. Embrace the “Disappearing TV” with Dark Matte Panels

    The “disappearing TV” trend uses dark, light-absorbing panels to camouflage your screen when it’s off. This approach appeals to people who don’t want their living room to revolve around a black rectangle.

    Install matte black or charcoal panels behind and around your TV (peel-and-stick options at $30–$80 for a large area, or permanent panels at $100–$300). The dark color absorbs light instead of reflecting it, so your powered-off TV blends seamlessly into the wall. When the screen turns on, it obviously becomes visible, but the effect is subtle and sophisticated.

    Pair this with minimal floating shelves and warm wood tones elsewhere in the room to keep things from feeling too cave-like. Add warm LED strip lighting ($20–$50) above or below shelves to counterbalance the dark wall and prevent the space from feeling dim.

    This technique works beautifully in modern, minimalist, or even eclectic interiors where the TV isn’t the main decorative focus.


    6. Install Floating Shelves with Hidden Cable Management Backs

    Some premium floating shelves feature built-in cable management channels routed into the underside—a game-changer for a truly wire-free look.

    These engineered shelves cost $100–$300 each from specialized retailers (check Design Within Reach, CB2, or custom woodworkers on Etsy), but they’re worth it for the seamless appearance. The groove accommodates cables and keeps them perfectly hidden beneath the shelf surface. Installation is identical to standard floating shelves—secure brackets to studs and attach the shelf.

    If custom shelves aren’t in your budget, a DIY alternative: buy standard floating shelves and use adhesive-backed cable clips underneath to organize wires neatly. It’s less hidden but costs under $20 in materials.

    The payoff is a media wall that genuinely looks cable-free and meticulously designed, elevating your entire room’s perception of intentionality.


    7. Add LED Backlighting Behind Your TV Wall

    LED backlighting adds luxury ambiance and makes your floating wall feel like a high-end installation in a showroom. The light sits behind your TV or shelf system, casting a gentle glow onto the wall.

    LED strip lighting costs $20–$80 depending on quality and color options (RGB strips let you change colors; warm white is most popular). Installation takes 30 minutes: clean the wall, peel and stick the strip behind your shelving, connect to a power source (often a USB plug or low-voltage transformer), and hide the cord in your cable channel.

    Choose warm white LEDs (2700K color temperature) for a cozy feel, or go adjustable RGB if you like options. Smart bulbs that sync to music or adjust brightness via remote add another layer of sophistication. The effect instantly makes your setup look professional and layered.

    This upgrade is renter-friendly since strips peel off without damage, and the power cord hides easily behind your media console.


    8. Create a Floating Media Console Beneath Your TV

    A floating media console anchors your TV wall while keeping the floor visible beneath—maximizing the sense of space and height in any room.

    Floating media consoles range from $200–$800 depending on size, material, and finish (IKEA has budget options; West Elm and CB2 offer mid-range styles; custom wood pieces run pricier). Mount the console 18–24 inches below your TV using heavy-duty brackets attached to wall studs. Ensure your studs are properly anchored to support a receiver, soundbar, and decorative items.

    The console houses your cable box, streaming device, receiver, and power strip—all hidden behind a closed cabinet or beneath a tabletop. Open shelving on a console lets you display a plant or coffee table book for a styled look.

    Floating consoles instantly make a room feel larger because you see floor space underneath, not a bulky furniture base. This is one of the most impactful upgrades for a floating wall system.


    9. Mount Your TV on a Motorized, Rotating Bracket

    A motorized TV bracket lets your screen angle and rotate at the push of a button—perfect for open-concept homes or rooms where seating isn’t centered on the TV.

    Motorized brackets cost $150–$500 depending on the brand and weight capacity (check specs before purchasing). Installation requires a stud-mounted bracket and a low-voltage power connection run behind the wall. Brands like Vogel’s, Sanus, and Amazon Basics all offer motorized options. Some sync with smart home systems, so you can control positioning via voice or app.

    This setup is ideal if you watch TV from multiple angles—pull it out when you’re using that wall, angle it away when you’re not. It’s also a solution for rooms where wall space is limited; the TV can tuck almost flat when not in use.

    The investment pays off in flexibility and the wow factor of showing guests your TV’s capabilities.


    10. Paint Your Wall in a Soft, Neutral Tone to Frame Your TV

    Sometimes the simplest floating wall upgrade is the most effective: a fresh paint color that frames your TV without competing for attention.

    Paint costs $30–$80 per gallon, and a standard living room wall needs 1–2 gallons. Choose soft neutrals like greige, warm whites, pale taupe, or soft sage—colors that recede visually and let your TV and decor shine. Avoid stark white, which makes dark screens feel harsh, and avoid bold colors that compete with your entertainment.

    A high-quality matte or eggshell finish minimizes glare and reflects less light than glossy paint, which is important behind a screen. Hire a painter ($300–$600 for a room) or DIY with proper prep work.

    The color change alone transforms how your TV wall feels—more intentional, polished, and designed rather than an afterthought. This is one of the cheapest, highest-impact upgrades you can make.


    11. Install a Recessed TV Mount to Flush Your Screen With the Wall

    A recessed TV mount sinks your screen slightly into the wall, so the screen sits flush or nearly flush with the wall surface—the ultimate “disappearing TV” approach.

    This requires cutting into drywall and installing a recessed frame ($100–$300) plus a specialized mounting bracket ($80–$150). It’s not a renter-friendly project and demands fairly advanced DIY skills or professional installation ($400–$800 in labor). The payoff is extraordinary: your TV looks integrated into the architecture itself, not mounted on top of it.

    Recessed mounts work best if you’re planning a comprehensive wall renovation anyway (adding paneling, updating paint, etc.) because the installation is somewhat invasive.

    If a full recess isn’t possible, a semi-recessed bracket that sits halfway into the wall is a compromise—easier to install but still creates the floating effect.


    12. Use a Combination of Floating Shelves and Modular Storage Units

    Mixing open floating shelves with hidden modular storage creates the ideal balance of display and function on a floating wall.

    Combine floating shelves ($40–$100 each) with modular storage boxes or wall-mounted cubes ($60–$150 each). Stagger them across your wall so the visual rhythm feels interesting—open shelves for decor, closed storage for clutter. This approach is especially helpful if you have a lot of media, gaming systems, or cables to hide.

    Brands like IKEA (Kallax series), Wayfair, and CB2 offer modular wall-mounting systems that make this easy to plan and install. Map out your wall on paper first, then secure brackets and components following the manufacturer’s guide.

    The result is a wall that looks organized, styled, and intentional rather than like you’re showing off everything you own. You control what’s visible and what’s hidden.


    13. Mount Your TV Horizontally and Create a Gallery Wall Beside It

    Instead of centering your TV alone, mount it horizontally and surround it with a gallery wall of framed art. This “art wall” approach makes your TV feel like part of a curated collection rather than a separate element.

    Frame your TV with 4–6 framed prints or photographs ($30–$100 each, depending on frame quality and whether you print originals). Arrange them salon-style—asymmetrically clustered with varying sizes and orientations. This layout feels intentional and museum-like.

    Plan your layout on paper (or use painters tape on the wall) before hanging anything. Stagger frames at slightly different heights and distances from the TV. The gallery doesn’t have to match perfectly; eclectic is more interesting than uniform.

    When your TV is off, the wall reads as an art collection. When it’s on, the screen becomes part of the composition rather than dominating it. This approach works beautifully in eclectic, traditional, or artistic interiors.


    14. Integrate Your TV into a Floating Wall System with Built-In Lighting

    A full floating wall system combines your TV mount, shelving, storage, and lighting into one cohesive design—the premium approach to floating TV walls.

    These custom systems start at $2,000–$5,000 (and go much higher for high-end installations) and typically require professional design and installation. Modular systems from brands like Ligne Roset, String Shelving, and Hay offer premium floating setups with integrated lighting options.

    For a budget version, design your own system by combining separate floating shelves, LED strips, and a recessed mount. This DIY approach costs $500–$1,500 in materials and takes 2–3 weekends.

    The payoff is a wall that feels like it was designed by an architect—everything is proportionally balanced, functionally optimized, and visually stunning. This is the “investment piece” version of a floating wall.


    15. Use Stone or Marble Veneer Behind Your TV for Luxury Feel

    Real or faux marble veneer instantly elevates your floating wall to luxury status. The natural veining adds sophistication and texture without requiring the commitment of a full stone wall.

    Marble veneer runs $10–$30 per square foot depending on whether it’s real stone or engineered faux marble. A 10×8-foot wall costs $800–$2,400 in materials. Installation requires mortar or adhesive and grout, making this a professional job ($800–$1,500 in labor). Faux marble options are lighter and easier to install if you’re working with drywall that can’t handle real stone weight.

    Backlit marble (LED strips behind the veneer) costs an additional $100–$300 but creates an incredibly high-end effect. The light brings out the veining and creates depth.

    This is the ultimate splurge for a floating wall, and it genuinely transforms your space into something that feels like a luxury hotel or high-end home.


    16. Choose Micro-Cement Finish for a Smooth, Modern Accent Wall

    Micro-cement is a modern finish that creates a sleek, textured appearance somewhere between concrete and plaster—perfect for a minimalist floating wall.

    Micro-cement costs $15–$40 per square foot in materials and labor (professional application is recommended since the technique requires skill). A standard TV wall costs $1,200–$3,000 to professionally apply. The finish is durable, stain-resistant, and can be sealed in matte or satin for different aesthetics.

    If you’re handy, some DIY micro-cement kits exist ($200–$500 for smaller areas), though the learning curve is steep. The payoff is a custom, high-end look that feels contemporary and spa-like.

    Micro-cement pairs beautifully with warm wood tones, black accents, or minimalist steel shelving. It’s an especially smart choice if you want a neutral backdrop for a floating wall system that highlights other elements.


    17. Mount Your TV on a Slatted Wood Panel Wall

    Horizontal slatted wood panels create a rhythmic, calming backdrop for your floating TV—a softer alternative to fluted wood.

    Slatted wood panels cost $5–$12 per square foot, so a 10×8-foot wall runs $400–$960 in materials. Installation involves creating a framework on the wall and fastening slats (or mounting pre-made panel sections). This is a DIY-able weekend project if you’re comfortable with basic construction, or hire a professional ($500–$1,000 in labor).

    Space slats 1–2 inches apart for visual rhythm and shadow play. The gaps also naturally accommodate cables running vertically, making cable management effortless. Paint slats white, natural wood, or a soft color to match your room.

    Horizontal slats feel more relaxed than vertical fluting—they work beautifully in modern farmhouse, Scandinavian, or contemporary interiors.


    18. Create a Floating Corner TV Wall for Compact Spaces

    If your room is small or oddly shaped, a corner TV wall maximizes the floating aesthetic while solving the space challenge beautifully.

    Mount your TV on a corner bracket ($40–$80) at the junction of two walls. Add floating shelves to both adjacent walls, creating an asymmetrical display around the TV. This arrangement tricks the eye into feeling more spacious because it breaks up the corner and draws the eye upward.

    A corner setup is especially practical for renters and small apartments because it solves a tricky design problem without committing to a specific room layout.

    Add warm corner lighting ($30–$60) to emphasize the cozy nook and prevent the corner from feeling dark. The result is a corner that feels intentionally designed rather than like a leftover dead space.


    19. Use Peel-and-Stick Shiplap or Wallpaper for a Quick Floating Wall Refresh

    Peel-and-stick shiplap or textured wallpaper offers the floating wall look without damage or permanent commitment—perfect for renters and budget-conscious refreshes.

    Peel-and-stick shiplap costs $30–$80 per roll (one roll covers roughly 28 sq. ft.). A 10×8-foot wall needs 3–4 rolls ($90–$320 total). Installation takes one weekend: measure carefully, apply adhesive sheets (usually pre-applied), smooth out bubbles, and cut around outlets and TV bracket.

    The finish isn’t quite as premium as real shiplap or textured panels, but the payoff in ease and affordability is massive. Remove it whenever you want without wall damage—adhesive leaves no residue if applied correctly.

    Some peel-and-stick options even mimic fluted wood, marble, or micro-cement for a custom look at a fraction of the cost.


    20. Install a Floating TV Wall with Integrated Speaker Shelves

    If you take your audio seriously, design your floating wall shelves to perfectly house high-quality speakers at ear level—flanking your TV for optimal stereo sound.

    Mount speaker shelves on both sides of your TV at ear height (roughly 42–48 inches from the floor). Choose shelf depth that matches your speakers exactly so they don’t overhang or look awkward. Premium floating speaker shelves cost $80–$200 each; combine with quality bookshelf speakers ($300–$1,500 depending on brand).

    Position shelves so sound projects directly at your seating area. This setup eliminates the need for speaker stands, saving floor space and creating a seamless visual presentation.

    The technical benefit is obvious (better audio), but the design payoff is equally important: a symmetric, intentional wall that clearly prioritizes both visual and audio quality. This approach signals that you’ve thought carefully about your entertainment experience.


    21. Add a Floating Desk Below Your TV for a Media + Work Wall

    A floating desk beneath your TV creates a hybrid media and work wall—smart for home offices or media rooms that double as productivity spaces.

    Floating desks cost $200–$600 depending on size and material. Mount one 36–48 inches below your TV (allowing comfortable sight lines for both activities). The desk hides a power strip and cable management underneath via a recessed channel or cord cover.

    This setup lets you work by day and relax with your TV by night in the same space. It’s especially practical for smaller homes where rooms need to multitask. Position your monitor at eye level when seated so you’re not craning your neck.

    The visual payoff is a wall that feels purposeful and layered—not just a TV, but a thoughtfully designed entertainment and productivity zone.


    22. Incorporate Floating Open Shelving to Display Media Collections

    If you collect books, vinyl, movies, or media, floating shelves let you display your collection as part of your wall design instead of storing it in a cabinet.

    Open shelving encourages curation—you’ll display only items you genuinely love because they’re visible. Mix media with decor: books spine-out, vinyl records leaned vertically, framed photos, small plants, and sculptural objects.

    Shelves cost $40–$100 each; plan for 4–8 shelves depending on your collection size. Arrange them asymmetrically around your TV for visual interest. Keep styling loose; perfectly uniform arrangements feel sterile.

    The beauty of this approach is that your media wall becomes a reflection of your taste and interests, not just a utilitarian TV setup. Guests notice and appreciate a thoughtfully styled collection wall far more than a hidden media center.


    23. Choose a Floating Media Wall with Integrated Acoustic Panels

    If your room has echo or sound bounces off hard surfaces, integrate acoustic panels into your floating wall design to improve audio clarity without sacrificing aesthetics.

    Acoustic floating panels cost $100–$300 each depending on whether they’re premium designer pieces or basic sound-dampening boards. Fabric-wrapped acoustic panels integrate seamlessly into a modern wall while absorbing excess sound reflections that make TV audio sound harsh.

    Mount acoustic panels on 2–3 sections of your wall (typically behind and beside the TV) to trap sound reflections. This improves both your TV’s audio quality and the room’s overall acoustics.

    The practical benefit is noticeable—dialogue sounds clearer, and the space feels less echo-y. The design benefit is equally important: fabric-wrapped acoustic panels can be stylishly neutral or a statement color, adding depth to your floating wall without looking like functional sound equipment.


    24. Build a Floating Wall with a Hidden Door or Cabinet Access

    For tech enthusiasts or homes with lots of hidden equipment, a floating wall with a concealed access door offers ultimate stealth storage.

    This requires custom carpentry ($1,500–$3,500) to build cabinetry with a hidden-hinge door that blends seamlessly into your wall design. Inside, store your server, backup power supply, network router, and other tech equipment that you want hidden from view.

    The access door can be magnetic, push-to-open, or hinge-operated depending on your preference. When closed, the wall looks completely seamless.

    This is the luxury version of a floating wall system, best for homes where you want everything hidden but need regular access to manage it.


    25. Combine Your Floating TV Wall With a Floating Bench or Seating Nook

    A floating bench below your TV wall creates a dedicated media-watching perch while maintaining the clean, floating aesthetic above.

    Floating benches cost $300–$800 depending on material and whether you add storage underneath. Mount one 16–18 inches above the floor using the same bracket system as your shelving. Cushion it for comfort, or leave it bare for a minimalist look.

    A storage bench ($400–$1,000) hides media remotes, blankets, and throw pillows underneath—practical and stylish.

    This design move anchors your entire wall and creates a clear media-watching zone without clunky furniture. It’s especially smart for open-concept homes where you want to define a space without walls.


    26. Use a Combination of Warm Wood, Matte Black, and Brass Accents for a Collected Floating Wall

    The most sophisticated floating walls mix materials thoughtfully—combining wood, metal, and color for a look that feels collected and designed rather than matchy.

    Start with natural wood shelves ($60–$100 each), add matte black storage ($80–$150 each), and use brass or gold brackets ($20–$50 per pair) to tie it together. Paint your wall a soft neutral and add warm LED lighting ($30–$60) to emphasize the material variety.

    This approach works because each element serves a visual and functional purpose. Brass catches light and adds warmth; matte black provides contrast and definition; natural wood grounds everything in approachability.

    Style your shelves with a mix of materials too: ceramic objects, wooden decor, metal sculptures, plants, and books. The collected, eclectic look is far more interesting than a single, uniform material.


    Save this post for your next living room refresh—pick one or two ideas to start, and you’ll be surprised how quickly your TV wall transforms from a basic screen to a genuinely designed feature. Which approach speaks to you?

  • 26 Mirror Wall Design Inspirations Perfect for Modern Homes

    26 Mirror Wall Design Inspirations Perfect for Modern Homes

    Your mirror might be doing less work than it should. Whether your space feels cramped, dated, or just uninspiring, the right mirror can completely shift how a room functions and feels—without a full renovation. The 26 ideas below mix budget-friendly hacks, renter-approved solutions, and investment pieces that actually deliver results. You’ll find frameless minimalist options, bold statement shapes, coastal vibes, and smart multifunctional upgrades. Most take a weekend or less to install. Pick one idea that speaks to your space, and you’ll see why mirrors are the secret weapon of every designer’s toolkit.

    1. Hang an Arched Mirror to Soften Hard Edges

    Arched mirrors add instant softness to angular rooms. They work especially well in bathrooms and entryways where you want to welcome people in, not intimidate them.

    Look for arched mirrors $40–$150 at IKEA, Wayfair, or West Elm. Installation takes 20 minutes—just mark studs with a level and use mirror anchors. If you rent, lean a large arched mirror against the wall instead; it creates the same visual softness without drilling. The rounded top catches light differently than rectangular mirrors, making your space feel taller and more intentional. Pro tip: Pair your arched mirror with curved wall sconces on either side for balanced, flattering lighting.

    You’ll notice how much softer the room feels once that arch is up—and how much better you look in it, too.

    2. Create a Gallery Wall of Mixed Mirrors

    Gallery walls aren’t just for art. Mixing mirror sizes, shapes, and finishes creates visual interest and bounces light around like you hired an architect.

    Hunt for mirrors at thrift stores (often $5–$20 each), IKEA, Target, and Wayfair. Lay them on the floor first to find your arrangement, then measure and mark with painter’s tape before hanging. Time: 1–2 hours. Mix metals freely—gold, black, and silver actually complement each other when arranged thoughtfully. Leave 2–4 inches between frames for breathing room. Renter tip: Use removable adhesive strips rated for heavier items instead of nails.

    A curated gallery feels collected and personal, like you’ve been traveling and gathering treasures—except you did it in a weekend.

    3. Install Frameless Mirrors to Expand Small Bathrooms

    Frameless mirrors feel like they disappear into the wall, which makes tight bathrooms read as bigger than they actually are. The psychological trick works every time.

    Frameless mirrors run $30–$100 depending on size; find them at Home Depot, Lowe’s, or specialty glass shops. Installation is simple: mark your studs, use appropriate anchors for your wall type, and hang with a level. Takes 15 minutes. Check your wall first—if it’s uneven, a professional install ($50–$150) ensures a perfect hang. Renter-friendly: some adhesive-back frameless mirrors exist, though they’re less stable long-term.

    The biggest benefit is psychological—your small space suddenly reads as open and intentional rather than cramped.

    4. Add LED Backlighting for Vanity Glow

    LED-backlit mirrors solve two problems at once: they’re functional for grooming and they create moody, even light that photographs beautifully in your space.

    Buy LED strip mirrors $50–$300 (brands like Wayfair, Amazon, and Home Depot have solid options), or retrofit existing mirrors with adhesive LED strips ($15–$40). Installation: plug in the power cord, stick the strips to the mirror back, and hide the cord behind your vanity or through a wall gap. Time: 30 minutes. Anti-fog features on some models ($80–$150) are worth it if you shower and get mirror fog. Renter hack: buy a plug-in LED mirror that needs no installation.

    Your morning routine gets a spa-like upgrade, and you’ll actually see what you’re doing—game-changer for makeup application or shaving.

    5. Lean an Oversized Mirror Against Your Wall

    Leaning mirrors cost less than hanging (no installation stress) and create instant designer energy without commitment. Perfect for renters.

    Find oversized mirrors $60–$250 at Article, West Elm, Wayfair, or Facebook Marketplace. Lean it against your wall where studs exist behind (for safety if it’s very large), or use a leaning mirror stand. Takes 5 minutes to position. The visual weight makes small entryways feel intentional, and you can move it whenever you want. Pair it with a console table below to anchor it further.

    That one leaning mirror makes your entryway feel like you have a real design plan—and moving it around keeps your space feeling fresh.

    6. Paint Your Mirror Frame a Bold Matte Black

    A fresh coat of paint transforms a dated mirror frame into a statement piece. Matte black works with nearly every aesthetic, from minimalist to maximalist.

    Grab your mirror and painter’s primer ($10), matte black paint ($8–$15), and a small brush. Remove the mirror from the wall (or leave it if you’re comfortable painting in place). Apply two thin coats, letting each dry fully. Takes 2 hours plus drying time. Use painter’s tape where the frame meets the mirror to keep the reflective surface clean. Pro tip: If your mirror is plastic, use spray paint designed for plastic instead of brush-on paint.

    A black frame instantly grounds your space and makes the mirror read as intentional rather than afterthought.

    7. Add a Rattan or Woven Frame for Coastal Vibes

    Natural materials bring warmth and texture that hard metals can’t match. Rattan frames are trending and actually affordable right now.

    Look for rattan-framed mirrors $40–$150 at Target, Wayfair, IKEA, or HomeGoods. The weave catches light beautifully and adds visual interest without being loud. Installation is standard: mark studs and hang with appropriate anchors. Takes 20 minutes. Rattan does dust, so use a soft brush once a month to keep it fresh. Pair with woven baskets or natural fiber accessories to build a cohesive coastal story.

    The rattan frame makes your bedroom feel like a retreat instead of just a place to sleep—suddenly everything looks intentionally curated.

    8. Mount Multiple Small Round Mirrors as a Cluster

    Cluster small mirrors instead of one large one for a modern, artistic look that works especially well in living rooms or hallways.

    Mix rounds from $15–$60 each via IKEA, Target, Amazon, or thrift stores. Arrange on the floor first, then use painter’s tape to map positions on your wall. Stagger heights rather than lining them up for that curated, intentional feel. Time: 1.5 hours. This approach works great for renters too—use removable adhesive strips for lighter mirrors.

    The layered effect makes the wall feel like a real design moment, and clusters are easier to move or add to than one huge mirror.

    9. Install a Mirror Accent Wall in One Room

    A full accent wall of mirrors sounds dramatic, but it’s achievable with custom panels or assembled pieces—and it genuinely doubles perceived space.

    Budget $200–$800 depending on wall size and whether you DIY or hire help. Order custom mirror panels from Wayfair, Etsy artisans, or a local glass shop, or assemble beveled mirror tiles from Home Depot ($2–$5 per tile). Hire a professional for installation ($300–$600 labor) unless you’re very comfortable with drywall anchors and weight distribution. DIY timeline: 4–6 hours; professional: 1–2 hours. This is a commitment, so choose a wall you love.

    Your space reads as bigger, brighter, and infinitely more intentional—the kind of room that makes people say, “Wait, how is this small?”

    10. Hang a Sunburst Mirror as Your Statement Piece

    Sunburst mirrors are sculptural focal points that make any room feel collected and intentional. They work as art without being art.

    Find sunbursts $60–$300+ at West Elm, Article, Wayfair, or independent furniture stores. Larger statements ($150+) truly anchor a room. Installation takes 20 minutes with standard wall anchors—just find your center point and hang level. Pro tip: Group only one sunburst per large wall; they’re bold enough to dominate. Pair with minimal surrounding décor so the mirror gets all the attention.

    A sunburst mirror is the kind of piece that makes guests ask where you got it—instant conversation starter and the fastest way to feel like you have a real design vision.

    11. Mount an Oval Mirror for Organic Elegance

    Oval mirrors soften your reflection and make faces look more flattering than rectangular options. They’re having a major moment in 2025.

    Shop oval mirrors $45–$180 at Target, Wayfair, IKEA, CB2, or local furniture stores. Hang vertically for height or horizontally for width depending on your room. Installation: 15 minutes. Light wood frames feel warm and accessible; black frames feel modern; brushed gold feels luxe. Pair oval mirrors with rounded furniture pieces (curved nightstands, oval poufs) for a cohesive room.

    An oval mirror instantly looks more thoughtful than generic rectangular—it’s a small detail that changes how your entire room reads.

    12. Use Mirror Tiles to Create a DIY Feature Wall

    Mirror tiles are affordable, modular, and you can rearrange them anytime. They’re renter-friendly if you use removable adhesive.

    Buy beveled mirror tiles $2–$5 each from Home Depot or Wayfair; a 4×4 foot wall needs roughly 16–20 tiles depending on size. Use high-strength removable adhesive strips rated for your wall type (usually $8–$15 per pack) or low-temperature hot glue if you own. Time: 2–3 hours. Work in a grid or staggered pattern—the grid is easier for beginners. Mark your wall first with a level and painter’s tape as guides.

    Mirror tiles catch and scatter light beautifully, making your room look bigger and brighter without that “full accent wall” commitment.

    13. Lean Mirrors at Different Angles for Visual Interest

    Leaning mirrors at angles creates dynamic visual interest and adjustability—you can change the angle anytime the mood strikes.

    Find mirrors $40–$200 in various sizes at thrift stores, IKEA, or Wayfair. Lean them against your wall at slightly different angles (usually 10–20 degrees from vertical works). Use felt pads on the frame back to protect your wall. Takes 10 minutes to position. This works especially well if you have a long wall or behind a bed. Renter-friendly: zero installation required.

    Angled mirrors create the feeling of a curated space without looking staged—like you’re an artist who understands light and reflection.

    14. Frame a Mirror with Shiplap or Beadboard

    A shiplap or beadboard frame around an existing mirror costs less than buying a new framed mirror and completely changes the look.

    Grab shiplap boards ($15–$30 for a small project) from Home Depot or Lowe’s, paint or stain them, and attach with construction adhesive and nails around your existing mirror. Time: 4–6 hours including drying. This is a solid weekend project for someone comfortable with basic carpentry. Pre-made frames ($50–$150) are an easier option if DIY feels daunting.

    A custom frame makes your mirror look built-in and expensive—like you didn’t just grab something off the shelf.

    15. Choose a Geometric Hexagon or Polygon Shape

    Geometric shapes feel modern and playful without being trendy or dated. Hexagons, pentagons, and irregular polygons work as art.

    Find geometric mirrors $50–$200 at West Elm, Article, Etsy, or independent furniture boutiques. Installation is standard: mark studs and hang level. Takes 20 minutes. The shape alone makes the mirror feel intentional—pair it with minimal surrounding décor so the geometry gets attention. Works well in entryways or as a focal point above a console.

    A geometric mirror signals that you actually think about design rather than just filling space—instant sophistication.

    16. Add Decorative Mirror Corners or Brackets

    Metal brackets and corners transform a plain mirror into something with character. This is a budget hack that looks like you spent way more.

    Buy decorative brackets $10–$30 from Etsy, Amazon, or specialty hardware stores. Attach to your existing mirror frame with screws or construction adhesive depending on your frame material. Time: 30 minutes. Gold, brass, black, and copper brackets all add different vibes—gold feels warm and vintage; black feels modern and edgy. This works on any rectangular mirror.

    A simple mirror with decorative corners suddenly looks intentional and collected—like a piece you found at an estate sale.

    17. Mount a Mirror Inside a Floating Shelf

    Floating a mirror inside a shelf is practical for small spaces and creates a designer-looking vignette.

    Install a floating shelf ($20–$60) using brackets and wall anchors (or hire help for $50–$150 labor). Then simply place or lean a small-to-medium mirror on the shelf. Time: 1–2 hours DIY, 30 minutes professional. This works in bathrooms (shelf holds products), entryways (shelf holds keys), or bedrooms (shelf holds a lamp). The mirror becomes part of a curated display rather than floating alone.

    A shelf-mounted mirror looks intentional and functional—suddenly your mirror is part of a bigger design story.

    18. Paint a Decorative Border Around Your Mirror

    Paint a faux frame directly on the wall around your mirror for a custom look that costs basically nothing.

    Grab painter’s tape ($4), paint in your chosen color ($8–$15), a small brush, and a level. Mark your border width with tape (usually 2–4 inches works), paint carefully, let dry, and remove tape. Time: 2 hours. This works best on solid-color walls and adds personality without commitment—you can paint over it anytime.

    A painted border feels custom and considered—like you have a real eye for design detail.

    19. Install a Scalloped-Edge Mirror for Playful Elegance

    Scalloped mirrors bring femininity and playfulness without feeling childish. They’re trending hard right now in bedrooms and bathrooms.

    Look for scalloped mirrors $40–$150 at Target, Urban Outfitters, Wayfair, or specialty home stores. Installation is standard wall hanging. Takes 20 minutes. They work best in spaces with other curved or soft elements—pair with rounded side tables or curved wall art. Available in white, pastels, and metallics.

    A scalloped mirror is the kind of detail that makes your space feel designed and personal—like you’re not afraid of a little whimsy.

    20. Mount a Mirror on a Swing Arm for Flexibility

    Swing arm mirrors are practical and look expensive. They’re perfect for renters and spaces where you need flexibility.

    Find swing arm mirrors $30–$120 at Target, Wayfair, IKEA, or Amazon. Installation requires finding studs and using heavy-duty anchors. Time: 30 minutes. The adjustable arm lets you angle the mirror for different tasks or just move it around. Great for bathrooms where you need magnification for specific tasks.

    A swing arm mirror is functional and thoughtful—the kind of upgrade that makes daily routines feel easier.

    21. Layer a Frameless Mirror Over Wallpaper

    A frameless mirror over patterned wallpaper creates depth and visual interest without competing with the wallpaper design.

    Install wallpaper first ($30–$100 for small bathroom, or hire help for $200–$400), then hang your frameless mirror using standard wall anchors. Time: 1–2 hours after wallpaper dries. The frameless option lets the wallpaper peek through around the edges, creating a layered, intentional look. Works especially well with subtle, small-scale patterns.

    The layered effect makes your space feel collected and thoughtful—like each element was chosen to work together.

    22. Create a Sunflower or Mandala Round Mirror Look

    Mandala or nature-inspired round mirrors with detailed frames feel artistic and sculptural—they function as both mirror and wall art.

    Hunt for detailed round mirrors $60–$250 at Etsy, West Elm, Article, or specialty home décor stores. These often come with intricate wood or metal detailing. Installation: standard wall hanging, 20 minutes. The pattern and design are the star—surround with minimal décor. Perfect as a focal point above a console or bed.

    A patterned round mirror is the kind of piece people remember about your space—it says you care about aesthetics and aren’t afraid of visual interest.

    23. Hang a Vintage or Antique Mirror for Eclectic Charm

    Vintage mirrors carry character and story that new ones can’t replicate. They’re also usually cheaper than new statement pieces.

    Hunt at estate sales, thrift stores (Goodwill, local antique shops), and Facebook Marketplace for mirrors $15–$100. Check the back for stability before buying; reglue if needed with appropriate adhesive. Installation: 20 minutes. Vintage frames develop a patina over time that looks expensive and collected. Mix with modern pieces so it feels intentional, not dated.

    A vintage mirror grounds your space in history and warmth—it’s the kind of find that makes guests ask about its story.

    24. Use a Mirror to Reflect Art or a Window View

    Strategically placed mirrors reflect beautiful elements in your space, multiplying their visual impact without repeating them.

    Position your existing mirror or buy a new one ($40–$200) opposite artwork, a window, or a beautiful view. Mark placement before hanging to ensure the reflection works. Takes 30 minutes planning plus 20 minutes hanging. This is free design magic—use mirrors to amplify your favorite visual elements. Natural light reflected twice feels brighter; a favorite painting reflected feels like you have more art.

    Thoughtful mirror placement makes your room feel intentionally designed rather than randomly furnished.

    25. Build a DIY Mosaic Mirror Frame from Broken Tile

    A mosaic tile frame is a true DIY art project that costs very little and results in a one-of-a-kind statement piece.

    Gather broken tile pieces (free to $20 if you buy craft tiles), strong construction adhesive ($5–$10), grout ($8), and a small grout float. Break tiles into small pieces, adhere around your mirror frame, let dry 24 hours, then grout and wipe. Time: 6–8 hours spread over two days. This is a rainy-day project but the results feel gallery-worthy. Use colors that complement your space.

    A mosaic mirror frame is genuinely one-of-a-kind—the kind of piece that becomes a room’s hero.

    26. Mount a Full-Length Mirror on the Back of a Door

    A door-mounted full-length mirror is the ultimate space-saver for small apartments, bedrooms, or entryways. It’s practical and barely visible until you need it.

    Buy an over-the-door or adhesive full-length mirror ($25–$80) from Target, IKEA, Amazon, or Wayfair. Over-the-door style needs no tools; adhesive-back requires a clean, dry door. Time: 10 minutes. This is perfect for renters and anyone in a small space. Choose a lightweight option so the door doesn’t become hard to open.

    A door mirror is the space-saving hack every small-space dweller should know—suddenly you get a full-length mirror without taking up a single inch of wall.


    Save this guide and pick one mirror idea to tackle this week—you’ll be shocked how much one change shifts the entire room. Share this with anyone you know who’s been staring at the same boring mirror for years.

  • 25 Clustered Mirror Arrangement Ideas for a Chic Wall Display

    25 Clustered Mirror Arrangement Ideas for a Chic Wall Display


    Mirror clusters are having a major moment, and for good reason: they amplify light, create visual interest, and make any wall feel curated and intentional without screaming “try-hard.” Whether you’re working with a tiny apartment or a sprawling living room, a clustered mirror arrangement gives you an instant focal point that feels both artistic and functional. The best part? You don’t need to be a designer to pull this off. We’ve gathered 25 specific ideas—from free rearrangement tricks to investment-worthy gallery walls—so you can create a arrangement that matches your style, budget, and space. Each approach works for renters and homeowners alike, and most can be completed in a weekend.

    1. Create a Grid with Matching Frames

    A perfect grid layout brings order and modern sophistication to any room. This arrangement works particularly well in bathrooms, bedrooms, or above console tables because it’s visually predictable and calming.

    You’ll need four to nine mirrors in identical or similar frames. Measure your wall space first, then space each mirror evenly—aim for 2-3 inches between frames. Use a level and painter’s tape to mark your hanging points before drilling. Budget: $40–$150 depending on frame quality. IKEA, Target, and Amazon all carry affordable matching mirror sets. Time: 45 minutes to 1 hour including measurement and hanging.

    The symmetry creates a polished look that photographs beautifully for social media, and the uniform design grounds a busy room.

    2. Mix Round and Arched Shapes for Soft Flow

    Combining curved shapes breaks rigidity and adds personality without chaos. The mix of round and arched mirrors mimics natural forms and softens contemporary spaces.

    Start with one large arched mirror as your anchor (30–36 inches tall), then layer smaller rounds (12–20 inches) around it. Odd numbers (3, 5, 7) always look more intentional than even groupings. Vary frame finishes—wood, gold, and black together feel curated rather than random. Budget: $80–$250 for a five-piece cluster. Check Wayfair, West Elm, or local vintage shops for unique finds. Time: 1–2 hours to arrange, mark, and install.

    This approach creates visual movement and draws the eye around the wall in a pleasing flow.

    3. Stagger Heights for Dynamic Energy

    Staggering your mirrors vertically (instead of in a straight line) creates dynamic tension and prevents the “too neat” feeling. This works beautifully in entryways and hallways.

    Pick your tallest mirror and hang it slightly off-center. Then add shorter mirrors below and to the sides, varying the vertical spacing by 4–6 inches. Avoid perfect alignment—let some dip lower and others sit higher. Budget: $60–$200 depending on sizes and finishes. Time: 1.5 hours to plan your layout with painter’s tape first (seriously—map it out before any nails go in). This method works great in rentals because you can experiment with tape before committing.

    The asymmetrical heights keep the eye moving and make the arrangement feel more art installation than basic décor.

    4. Go Bohemian with Mixed Vintage Frames

    Thrifted and vintage mirrors bring character and history to a wall. This bohemian approach celebrates imperfection and tells a story.

    Hunt at thrift stores, estate sales, and Facebook Marketplace for mirrors in varying ornate frames. Aim for a mix of frame styles—carved wood, ornate metal, painted finishes—in a loose color palette (neutrals with one accent color works well). Hang them close together to create a “wall within a wall” effect. Budget: $20–$100 total if thrifting; higher if buying from online vintage shops. Time: 2–3 hours sourcing, plus 1.5 hours hanging. This is a weekend project that feels like treasure hunting.

    The collected, lived-in look adds soul and sparks conversation. Plus, you’re up-cycling, which feels good.

    5. Create a Sunburst Focal Point

    A sunburst mirror commands attention as a solo statement piece or can anchor a larger cluster. Its radial design draws the eye inward and feels both modern and timeless.

    Position your sunburst mirror at eye level (57–60 inches from floor to center) in a space with good light. If you’re clustering, let it be the dominant piece with only 2–3 smaller supporting mirrors nearby—overcrowding diminishes its impact. Budget: $80–$400+ depending on size and material (some are investment pieces). Wayfair, West Elm, and Urban Outfitters carry options. Time: 30 minutes hanging if you’re working with a sturdy wall anchor. If renting, use heavy-duty adhesive strips (rated for 16+ pounds).

    This single piece can refresh an entire room without any additional styling.

    6. Layer Circles in Graduated Sizes

    Graduating circle sizes from large to small creates visual rhythm and guides the viewer’s eye. This is particularly effective in narrow hallways or above sideboards.

    Hang your largest circle first, then add progressively smaller ones below and slightly offset. Leave 3–4 inches between each mirror. The stair-step effect feels intentional without being rigid. Budget: $70–$180 for five mirrors. IKEA, Target, and Amazon have affordable round mirrors in various sizes. Time: 1 hour for layout and installation.

    The graduated approach feels curated and gallery-like, elevating even affordable mirrors.

    7. Build a Rattan-Framed Coastal Wall

    Rattan and woven textures bring warmth and a relaxed, coastal vibe. This style works perfectly for beach houses, bohemian interiors, or anyone wanting to soften a modern space.

    Choose mirrors with natural rattan, jute, or seagrass frames in 16–24 inch sizes. Arrange in a loose cluster rather than strict grid. Pair with driftwood, woven baskets, or coastal-themed artwork nearby. Budget: $60–$150 for four mirrors. Check Wayfair, Etsy, or coastal home stores like Pottery Barn. Time: 45 minutes to an hour for hanging. This style is very on-trend for 2025 and photographs beautifully.

    You’ll create an instant vacation-ready retreat that makes your entryway feel like a beach escape.

    8. Hang an Asymmetrical Geometric Cluster

    Geometric shapes bring modern edge to a wall while asymmetrical placement keeps it from feeling cold or corporate. This approach appeals to design-forward folks and works especially well in home offices or hallways.

    Mix shapes (hexagons, triangles, ovals, rectangles) in the same frame color for cohesion while shapes vary for interest. Arrange without symmetry—let some angles point different directions. Budget: $90–$220 depending on size and frame quality. Check Etsy for custom geometric mirrors, or search “hexagon mirror” on Amazon. Time: 1.5–2 hours to arrange and install; take a photo of your layout first to reference.

    The result feels curated and artistic without reading as chaotic.

    9. Install a Mirror Accent Wall with Architectural Molding

    Adding molding around a mirror cluster creates a “built-in” focal wall that feels architectural and high-end. This is a bigger project but absolutely transforms a space.

    Map out your molding design using painter’s tape first. Install basic wooden trim (from Home Depot, $30–$80) around where your mirrors will hang, creating rectangular frames. Then install mirrors inside. Paint the molding to match your wall or go contrasting (black or gold edges create drama). Budget: $150–$400 including materials and molding. Time: 3–4 hours with basic DIY skills; consider hiring help if you’re uncomfortable with trimwork. This is a longer weekend project worth the effort.

    The finished wall reads as a design investment and instantly elevates your entire room.

    10. Pair Black Frames with Minimalist Spacing

    Black frames against white walls create stark, modern drama. Generous spacing between pieces keeps the look sophisticated rather than cramped.

    Select 2–4 rectangular mirrors (18–24 inches) in matte black frames. Hang them with 8–12 inches of white wall visible between each one—this negative space is key. Perfect for contemporary, minimalist, or Scandinavian-inspired spaces. Budget: $50–$150 for mirrors. IKEA’s black frames are a budget win. Time: 45 minutes including measurement and installation.

    The clean, high-contrast arrangement feels architectural and intentional.

    11. Float Mirrors at Varying Heights in One Column

    Stacking mirrors vertically in a single column creates drama and works beautifully in narrow spaces like hallways or beside stairs. This arrangement feels gallery-like and draws the eye upward.

    Select 4–6 mirrors in varying sizes (from 12 to 30 inches). Hang them along an imaginary vertical line, allowing some to overlap slightly for depth. Vary frame styles and finishes for interest. Budget: $80–$250 depending on sizes. Time: 1.5–2 hours to plan and hang carefully. Overlapping requires precise placement, so use painter’s tape to map it first.

    This approach creates an almost sculptural wall that makes narrow spaces feel intentional rather than cramped.

    12. Mix Matte Black and Gold for Two-Tone Drama

    Alternating black and gold frames creates sophisticated contrast while the two metallic finishes together feel upscale and intentional. This works beautifully in dining rooms, entryways, or bedrooms.

    Choose mirrors in similar sizes but alternate frame colors. Arrange in a checkerboard (black, gold, black, gold) or mix them more organically. Keep colors consistent within the blacks and golds—all matte or all shiny for each, not mixed. Budget: $100–$250 for eight mirrors. Time: 1 hour for layout and installation. This two-tone approach feels designer-curated.

    The color contrast keeps the arrangement from feeling one-note while the metallic finishes add luxury.

    13. Group Mirrors Above a Console Table

    Positioning mirrors above a console creates a styled vignette and makes the entire arrangement feel more curated than random wall hanging. This works great in entryways or living rooms.

    Select 4–6 mirrors ranging from 12–24 inches. Hang them 12–18 inches above a console table (leaving breathing room). The mirrors should be wider than the table below, creating visual weight. Add small décor pieces (candle, book, plant) on the table to ground the arrangement. Budget: $100–$300 depending on console and mirror quality. Time: 1.5 hours including hanging and styling.

    The complete vignette reads as polished and intentional—like you hired a designer.

    14. Create a Frameless Minimalist Wall

    Frameless mirrors with beveled edges create a minimalist illusion that dissolves into the wall. This approach maximizes the sense of space and light—perfect for small rooms.

    Choose frameless mirrors in 12–24 inch sizes with polished or beveled edges (the edges reflect light beautifully). Mount directly on the wall with minimal spacing—even let some edges nearly touch for a fluid look. Budget: $50–$150 for several frameless mirrors. IKEA, Wayfair, and Amazon carry affordable options. Time: 45 minutes to an hour, though precise spacing takes care. Use painter’s tape to map your layout first.

    The barely-there aesthetic makes any room feel more spacious and modern.

    15. Build a Scalloped-Edge Statement Cluster

    Scalloped edges balance playfulness with elegance—they’re whimsical without being kitschy. This style suits bedrooms, powder rooms, or anyone wanting feminine sophistication.

    Choose 2–4 scalloped mirrors (16–28 inches) in gold, rose gold, or brass frames. Arrange in a loose cluster rather than strict grid—let each mirror breathe. This detail works particularly well in bedrooms and bathrooms. Budget: $80–$200 for quality scalloped mirrors. Check Wayfair, Anthropologie, or specialty home goods stores. Time: 1 hour for installation. The detail alone makes these mirrors special.

    Scalloped edges add personality and a touch of glamour without overdoing it.

    16. Arrange Mirrors in a Loose Organic Cluster

    An organic cluster mimics how naturally collected items group together. This approach feels personal, artistic, and works in eclectic or bohemian spaces.

    Start with one focal mirror, then add pieces around it without overthinking. Vary sizes, shapes, and finishes. Allow for interesting negative space rather than filling every gap. Budget: $80–$250 depending on sourcing (thrift, new, mix of both). Time: 1.5–2 hours to arrange and rearrange until it feels right. This is one of those projects where you live with painter’s tape for a day or two before committing.

    The collected look feels curated by an artist, not assembled by algorithm.

    17. Install Round Mirrors with Overlapping Layers

    Overlapping round mirrors creates dimensional depth and a more sophisticated arrangement than simply spacing them apart. The layering effect is sculptural and gallery-like.

    Hang your largest round mirror first (28–32 inches). Position two or three slightly smaller rounds (16–20 inches) so they partially overlap the large one, creating visual layers. Use painter’s tape first to map placement, then install. Budget: $100–$200 for three quality round mirrors. Time: 1.5 hours with careful placement. This technique reads as more intentional than it actually is—simple but impactful.

    The overlap creates dimensional interest and makes a three-piece arrangement look carefully composed.

    18. Mix Mirrors with Floating Shelves and Planters

    Mixing mirrors with functional floating shelves and plants creates a living wall that’s both beautiful and practical. This approach works well in living rooms and entryways.

    Install 2–3 mirrors alongside 1–2 small floating shelves (12–18 inches). Style the shelves with small plants, books, candles, or meaningful objects. Vary heights and ensure good spacing. Budget: $100–$250 for mirrors, shelves, plants, and styling objects. Time: 2–3 hours including shelf installation and styling. This requires more planning but feels rewarding.

    You create a curated wall that’s visually interesting and reflects your personality.

    19. Hang Arched Mirrors in a Vertical Line

    Stacking arched mirrors vertically emphasizes height and creates an elegant, almost ecclesiastical feel. The arch shape softens a vertical arrangement beautifully.

    Select 3–4 arched mirrors (28, 22, 16 inches) in matching or similar frames. Stack vertically with 4–6 inches between each. The graduated sizes create visual interest without clutter. Budget: $120–$280 for three quality arched mirrors. Wayfair and West Elm have excellent arched options. Time: 1 hour for hanging. The arch detail alone makes this arrangement feel intentional.

    Arched mirrors in a vertical stack read as both modern and timeless.

    20. Create a Checker Pattern with Alternating Sizes

    Alternating mirror sizes in a grid creates visual rhythm and keeps the arrangement from feeling too formal. This pattern works especially well with matching frame colors.

    Arrange nine mirrors in a 3×3 grid, alternating sizes: large, small, large in row one; small, large, small in row two; and so on. Use the same frame color throughout for cohesion. Budget: $80–$160 for nine mirrors. IKEA and Target carry affordable mirror options. Time: 1.5 hours to map and hang precisely.

    The checkerboard rhythm feels playful and modern without sacrificing sophistication.

    21. Float Mirrors with Brass Frames and Patterned Wall

    Layering brass-framed mirrors over a patterned wall creates richness and visual depth. The brass catches light and adds warmth to patterned backgrounds.

    Choose mirrors with brushed brass or antique brass frames. Hang 3–5 mirrors on a subtly patterned wallpapered wall (geometric, damask, or subtle florals work best—avoid too-busy patterns). Let mirrors vary in size and spacing. Budget: $120–$280 for mirrors plus wallpaper if updating ($30–$80). Time: 2 hours if also installing wallpaper, or 1 hour if just hanging on existing wall.

    The combination of pattern and brass feels collected and intentional—like a vintage collected wall.

    22. Install a Full-Length Statement Mirror Surrounded by Smaller Pieces

    A full-length mirror as your anchor piece with smaller supporting mirrors creates a dramatic focal wall that’s both functional and artistic. This works beautifully in bedrooms, dressing rooms, or entryways.

    Hang a full-length mirror (36–48 inches tall) in a bold frame (black, gold, or natural wood). Cluster 4–6 smaller decorative mirrors around it asymmetrically, varying sizes. The full-length piece commands attention while smaller mirrors add visual interest. Budget: $150–$350 for the full-length mirror plus several smaller pieces. Time: 2 hours for layout and installation. This arrangement works in rooms with decent wall space.

    The combination of functional and decorative mirrors creates visual impact and serves a purpose.

    23. Group Mirrors Above a Fireplace Mantel

    Mirrors above a fireplace amplify light and create a secondary focal point while making the room feel taller. Fireplaces pair beautifully with mirror clusters.

    Hang mirrors 12–20 inches above your fireplace mantel, centering the arrangement. Mix frame styles and sizes, but aim for visual balance (heavier pieces on sides, lighter in center). Leave space for seasonal mantel décor below. Budget: $100–$250 depending on mirror sizes. Time: 1.5 hours to map, measure, and install. Consider hiring if your fireplace is high or your wall is tricky.

    The arrangement draws attention upward and makes fireplaces feel more intentional and styled.

    24. Mix Vintage Mirror Tiles for an Eclectic Wall

    Vintage mirror tiles bring character and a collected, well-traveled feel. Their imperfections are part of the charm and cost less than frameless mirrors.

    Source vintage or distressed mirror tiles from thrift stores, Etsy, or specialty shops ($5–$15 each). Arrange in a loose grid or organic cluster—imperfection is the point. Install with mirror adhesive or small nails. Budget: $40–$100 total if thrifting; $80–$150 if buying online. Time: 1.5 hours sourcing and hanging. This project has a treasure-hunt quality.

    The eclectic vintage vibe creates conversation and reflects personality beautifully.

    25. Create a Linear Hallway Mirror Installation

    A linear installation of identical mirrors down a hallway creates rhythm and makes narrow spaces feel intentional and designed. The repetition is calming and sculptural.

    Select 5–8 identical narrow rectangular mirrors (8×24 or 10×26 inches) in the same frame color. Install in a perfectly straight vertical line using a level—precision matters here. Spacing should be even (3–4 inches apart). Budget: $90–$180 for six mirrors. Time: 1.5 hours including careful measurement and installation. This works beautifully for renters using heavy-duty adhesive strips (rated for 16+ pounds per mirror).

    The repetitive line creates visual flow and makes a hallway feel intentional rather than transitional.


    Save this post and pick one arrangement style to start this weekend. Whether you go bold with sunbursts and gold or minimal with frameless pieces, your wall will thank you. Share this with anyone planning a refresh—they’ll be inspired.

  • 24 Minimal Line Art Wall Paint Ideas for Elegant Interiors

    24 Minimal Line Art Wall Paint Ideas for Elegant Interiors


    If your walls feel like blank canvases waiting for personality, but you’re hesitant about bold colors or busy patterns, minimal line art might be your answer. These elegant, understated designs bring sophistication and artistic flair without overwhelming your space. Whether you’re renting, own your home, or just prefer subtlety over drama, line art offers endless possibilities—from hand-drawn botanicals to geometric abstracts to architectural sketches. In this guide, you’ll discover 24 distinct ideas that blend affordability with impact, proving that “less is more” creates rooms that feel intentional, curated, and undeniably stylish. Ready to elevate your walls?


    1. Paint Single-Line Botanical Sketches on Accent Walls

    Hand-drawn line art feels personal in a way mass-produced prints never will. A single accent wall of botanical sketches brings organic beauty while staying understated and renter-friendly.

    Use a pencil to sketch your design first, then trace over it with a thin paintbrush and matte black or charcoal paint ($8-15 per quart). One-line continuous drawing style (where you don’t lift your brush) creates a flowing, meditative look. This takes 2-4 hours depending on complexity and wall size. If freehand drawing intimidates you, print your design, tape it to the wall, and trace through it with carbon paper ($3-5).

    Pro tip: Practice your design on kraft paper first so you can adjust proportions before committing to the wall.

    The result feels like your home was curated by an artist, and you’ll actually enjoy looking at something you created yourself.


    2. Create Geometric Line Patterns Using Painter’s Tape

    Geometric line art doesn’t require freehand skill when you use painter’s tape as your guide. These patterns feel modern and architectural without being cold.

    Decide on your pattern: triangles, hexagons, or interconnected lines. Use painter’s tape ($5-8 per roll) to map out your design directly on the wall, applying it carefully to ensure straight edges. Paint between the tape lines with two thin coats of your chosen color ($12-20). Remove tape while paint is slightly tacky for crisp edges. Budget 4-6 hours for a 10×12 wall, depending on complexity. This works beautifully in nurseries, home offices, or bedrooms.

    Pro tip: Test your pattern on cardboard first to see how colors interact with your existing décor.

    You’ll love how professional the result looks—this technique rivals expensive wall murals at a fraction of the cost.


    3. Use Removable Peel-and-Stick Line Art Decals

    When you’re renting or want zero commitment, removable decals give you gallery-quality line art in minutes. These stick cleanly and peel off without damage.

    Shop Etsy ($15-50 per sheet), Amazon ($12-40), or Target ($8-25) for peel-and-stick line art collections. Common designs include abstract botanicals, geometric faces, and architectural sketches. Installation takes 20-30 minutes per wall: clean the surface, peel slowly, and smooth out air bubbles with a plastic card. Quality brands like Removable Wall Art Decals hold up well even with cleaning. Mix and match different sheets to create an eclectic gallery wall effect.

    Pro tip: Apply decals to accent walls or create a feature wall by clustering them in one area rather than spreading them thin.

    Your walls stay pristine for when you move, and you can refresh the design whenever you want.


    4. Draw Architectural Line Drawings Inspired by Cities

    If you’re drawn to urban energy, architectural line art brings cosmopolitan style without feeling trendy or dated. These sketches work beautifully in offices, living rooms, or bedrooms.

    Use a fine-tip black marker or paint pen to sketch simple building silhouettes directly on the wall, or project a reference image and trace it lightly first. Focus on clean lines and geometric shapes—think simplified skyscrapers, bridges, or street grids. This costs under $10 for markers and paint pens. Budget 2-3 hours for a feature wall. Alternatively, print large-scale architectural line drawings from sites like Unsplash or Pexels, have them printed at Staples or FedEx Office ($20-40 for poster-size prints), and frame them in simple black frames ($15-30 each).

    Pro tip: Use a light pencil grid to keep your lines straight if you’re worried about wonky proportions.

    Your space immediately reads as sophisticated and design-conscious, perfect for making a home office or entryway feel intentional.


    5. Paint Interconnected Abstract Line Compositions

    Abstract line compositions feel artistic and improvisational while being surprisingly easy to execute. These work in any room and look more expensive than they cost.

    Plan your design using a pencil or light chalk: sketch flowing lines that connect and overlap across your wall without a predetermined pattern. Once you’re happy with the layout, paint one color, let it dry fully, then add a second complementary color ($12-18 per quart). Matte finish works best to avoid glare. Use fine paintbrushes or paint pens ($5-15) for precision. This project takes 4-6 hours plus drying time. No two compositions are identical—yours will be uniquely yours.

    Pro tip: Instagram abstract line art for inspiration, screenshot designs you love, and use them as loose references rather than exact replicas.

    The finished wall becomes a conversation starter—guests will ask if you hired an artist.


    6. Create Minimalist Horizon Lines for Calm Spaces

    Sometimes the simplest ideas hit hardest. Horizon lines are meditative, calming, and perfect for bedrooms, bathrooms, or meditation spaces. The minimalism feels intentional and expensive.

    Using a level and painter’s tape, mark three to five evenly-spaced horizontal lines across your wall ($5-8 for tape, $3-5 for a level if you don’t have one). Paint over the tape with matte charcoal, deep gray, or soft blue ($12-15 per quart) depending on your mood. Remove tape while paint is slightly tacky. The entire project takes 90 minutes to 2 hours. This is incredibly forgiving—imperfect spacing only adds to the hand-drawn appeal.

    Pro tip: The lines don’t have to be perfectly centered; slightly irregular placement feels more authentic.

    Your bedroom becomes a sanctuary rather than just a place to sleep—the understated design creates calm without fuss.


    7. Combine Line Art with Floating Shelves for Display

    Line art becomes a framework for your existing belongings when you pair it with floating shelves. This approach makes your walls feel curated and gallery-like.

    Paint or draw geometric frames, arches, or abstract shapes around where your shelves will be ($8-12 for paint markers, 2-3 hours for design). Install floating shelves ($30-80 per shelf from IKEA, Home Depot, or Target). Arrange items intentionally: books, small plants, ceramics, and sculptural objects. The line art acts as a backdrop that emphasizes what you’re displaying. This takes one full day between drawing, drying, and shelf installation, but the impact is significant.

    Pro tip: Keep shelf décor minimal—too many items compete with your line art rather than complementing it.

    You get gallery-quality presentation for objects you already own, making your space feel like a styled interior magazine shoot.


    8. Draw Celestial Line Patterns for Night-Time Appeal

    Celestial designs bring wonder and calm to bedrooms and kids’ spaces. Line-art constellations feel whimsical without being babyish or saccharine.

    Use a pencil to lightly mark dots where stars should be, then connect them with fine lines using black or deep blue paint markers ($5-10). You can reference actual constellations (Orion, Ursa Major, Pleiades) or create your own designs. Add constellation names in tiny letters if you want. This takes 2-3 hours and costs under $15. For a more polished look, use removable constellation decals ($20-35 from Amazon or Etsy) that achieve the same effect without the permanence.

    Pro tip: Add glow-in-the-dark paint to constellation lines ($12-18 per bottle) for a magical nighttime effect that’s perfect for kids’ rooms.

    Lying in bed, you’ll drift off looking at your personal map of the cosmos—a reminder that you created something beautiful in your own space.


    9. Paint One-Stroke Line Art Portraits or Faces

    One-line portraits feel artistic and modern. They work in entryways, offices, or living rooms where you want an immediate wow factor.

    One-line drawing means you draw a complete face without lifting your brush, creating continuous flowing lines. Sketch your design lightly first using a pencil, then trace with black paint pens or thin paintbrushes ($5-12). Common approaches: profile faces, frontal abstract faces, or mixed angles on the same wall. Each portrait takes 30-45 minutes. This costs under $20 and requires no special artistic training—the imperfection is part of the appeal. Print reference images from Pinterest or artist accounts like @onelinedrawing or @minimalist_art to inspire your work.

    Pro tip: Create an odd number of portraits (three, five, seven) for better visual balance than pairs or evens.

    Your entryway immediately signals that you’re creative, thoughtful, and have an artistic sensibility.


    10. Use Negative Space with Washi Tape Line Art

    Washi tape comes in endless patterns and colors, making it perfect for line art that’s fully removable and endlessly adjustable. This is ideal for renters and commitment-phobes.

    Buy quality washi tape ($2-5 per roll) in coordinating colors from craft stores, Target, or Amazon. Plan your design on paper first, then apply tape directly to walls in geometric patterns, grids, or abstract lines. Leave significant empty wall space—the negative space is crucial to the minimalist aesthetic. This takes 2-3 hours for a substantial wall and costs $15-40 depending on how many rolls you use. The beauty is you can peel it all off in minutes if you want to refresh your design.

    Pro tip: Mix tape widths for visual interest—combine wide and narrow tapes to create varied line weights.

    Your walls are playful and personalized without any permanent commitment, and you can adapt the design seasonally.


    11. Create Grid Line Art for Modern Geometry

    Grid line art feels contemporary and structured, perfect for offices, studies, or anywhere you want a sophisticated, orderly aesthetic. The geometry is calming and intentional.

    Using a level, pencil, and painter’s tape, mark out a grid pattern—squares can be 12 inches, 18 inches, or whatever proportion appeals to you ($5-8 for tape and level). Paint alternating squares in two related colors (cream and taupe, soft blue and white, gray and beige) or leave some unpainted. This creates dimensional depth. Use matte paint in your chosen colors ($12-20 per quart). The entire project takes 5-7 hours including drying between coats. This is absolutely doable as a weekend DIY project.

    Pro tip: Keep color contrast subtle for a sophisticated, restrained look rather than bold contrast that feels playful.

    Your office or workspace reads as intentional and designed, boosting productivity and creative energy.


    12. Draw Simple Line Art Landscapes with Mountains or Hills

    Landscape line art connects you to nature without the commitment of large-scale murals. Mountains, hills, and simple vegetation feel calming and aspirational.

    Sketch your landscape lightly with pencil—think layered mountain ranges, a simple horizon, and minimal vegetation details. Paint over your sketch with black, charcoal, or warm brown ($8-12 per quart). Use fine paintbrushes ($5-10) for detailed linework. Some people create depth by painting mountains in multiple shades of gray from darkest to lightest. This project takes 3-5 hours depending on complexity and costs under $25. No prior art experience required—simplicity is the point.

    Pro tip: Reference actual mountain ranges from places you love to create a personalized landscape tied to your memories.

    You create a personal retreat within your home, and every time you look at your wall, you remember why that landscape matters to you.


    13. Paint Oversized Leaf or Fern Line Drawings

    Sometimes one huge line drawing makes a bigger statement than many small ones. A floor-to-ceiling leaf or fern feels dramatic yet minimalist.

    Choose your leaf inspiration from nature references or botanical illustration accounts on Instagram. Use a pencil to lightly sketch the outline and vein details, then paint with black or deep green ($12-15 per quart). Use thin paintbrushes or paint pens ($5-15) for fine linework, especially for the delicate veins. This takes 4-6 hours including drying, but the payoff is huge. Keep the design single-color for maximum sophistication—multicolor reads as less refined.

    Pro tip: Place the large leaf drawing where it’s the first thing you see entering the room for maximum visual impact.

    Walking in, you’re greeted by nature-inspired art that feels gallery-quality and personally curated.


    14. Create Abstract Continuous Line Wall Mural

    Abstract continuous-line murals feel organic, energetic, and surprisingly meditative to create. They fill wall space without feeling busy.

    Plan your design with a pencil, mapping out a flowing pattern that connects various points across your wall without lifting the “brush.” You’ll trace this pattern with black paint or paint marker ($8-12). The pattern can include loops, curves, geometric intersections, or organic shapes. This project takes 5-8 hours depending on wall size and complexity, but it’s deeply satisfying. The imperfect, hand-drawn quality is essential to its charm—perfect lines would feel sterile.

    Pro tip: Work in sections of about 4 feet at a time to avoid fatigue and maintain consistent line weight.

    The mural becomes a meditation exercise as much as a design element, and your finished wall feels truly one-of-a-kind.


    15. Pair Line Art with Warm Neutral Painted Walls

    Line art shines when paired with warm neutral walls. This combination feels curated, balanced, and never boring—perfect if you’re transitioning away from gray fatigue.

    Paint your walls in warm neutrals like Benjamin Moore’s Wheat Sheath or Sherwin-Williams Stucco ($35-50 per gallon). Let this settle for a few days, then add your line art in black, charcoal, or warm brown ($8-12 per quart). The contrast between warm walls and cool-to-neutral line art creates visual interest without feeling chaotic. This combination works in every room and feels current without being trendy. Budget $60-80 for paint and 2-3 hours for wall preparation and line art execution.

    Pro tip: Stick with matte finishes for both wall paint and line art to avoid glare and maintain sophistication.

    Your space feels intentionally designed and warm, like a home that’s been thoughtfully considered rather than randomly decorated.


    16. Use Metallic Paint Pens for Glamorous Line Details

    Add a touch of glamour to line art with strategically placed metallic accents. Gold, copper, or silver details elevate minimalist designs without overwhelming them.

    Create your line art foundation in black or charcoal ($8-12 per quart). Once fully dry, use metallic paint pens in gold, copper, or silver ($5-12 for a set of three) to add delicate details: leaf veins, geometric highlights, constellation connections, or architectural accents. This takes an additional 1-2 hours and costs $15-25 total. The metallic elements should be subtle—think 10-15% of your overall design—to maintain sophistication rather than veering into “too much.”

    Pro tip: Test your metallic pen on scrap paper first; some brands are thicker and more opaque than others.

    Your walls catch light in unexpected ways, creating dimension that photographs beautifully and feels genuinely elegant.


    17. Paint Interlocking Circle Line Patterns

    Interlocking circles create visual rhythm and feel simultaneously playful and sophisticated. They work in offices, living rooms, or creative spaces.

    Use a compass ($5-8) to draw circles of varying sizes on your wall with light pencil first. Space them so they overlap slightly, creating an interlocking pattern. Paint the circle outlines with black or dark gray paint marker ($5-8). You could also make a circle template from cardboard ($0, using stuff you have) and trace around it repeatedly. This project costs under $20 and takes 3-4 hours. The repetitive nature of the work is meditative, and the result feels graphic and intentional.

    Pro tip: Vary circle sizes throughout the wall rather than making them uniform—this creates visual interest and organic flow.

    Your space reads as designed and thoughtful, with subtle depth that makes guests look twice.


    18. Create Line Art Inspired by Color of the Year Palettes

    Align your line art with current color trends by pairing minimal designs with 2025’s trending warm neutrals. This keeps your walls feeling current without being trendy.

    Paint your wall in Cinnamon Slate (Benjamin Moore’s 2025 Color of the Year) or similar warm, heathered neutrals ($40-50 per gallon). Add line art in complementary charcoal or warm brown ($8-12 per quart). The combination feels sophisticated and intentional because you’re working within a cohesive color story. Paint stores can mix custom shades, so ask for help matching colors if needed. This entire project runs $60-90 and takes 2-3 hours for line art once walls are painted.

    Pro tip: Check Benjamin Moore or Sherwin-Williams websites for their 2025 color capsule collections for instant inspiration.

    Your walls feel elevated and contemporary without screaming “trendy”—they’ll age beautifully because you started with a thoughtful color foundation.


    19. Draw Architectural Line Details Around Doorways and Trim

    Frame architectural elements like doorways, window trims, or built-ins with delicate line art. This draws attention to existing features and creates visual hierarchy.

    Use painter’s tape to mark out geometric patterns, arches, or abstract linework around your doorway or window trim ($5-8 for tape). Paint with black, charcoal, or a coordinating accent color ($8-12 per quart) using thin brushes or paint pens ($5-10). The framing effect makes small spaces feel more designed. This works beautifully in hallways, bedrooms, or home offices. Budget 2-3 hours for a doorway frame and $25-35 total for supplies.

    Pro tip: Photograph your doorway before you start, then sketch your design on a printout to visualize the finished result.

    Suddenly that standard doorway becomes an architectural moment—every time you walk through, your space feels more intentional and curated.


    20. Combine Line Art with Texture Paint for Depth

    Layer line art over textured walls for sophisticated depth that flat painted surfaces can’t achieve. This hybrid approach feels luxury-adjacent but remains budget-friendly.

    First, paint your wall with textured or matte paint in your chosen neutral ($15-25 per quart). Venetian plaster ($20-35 per quart) adds genuine depth, or use regular matte paint—the finish alone creates subtle variation. Once dry, add your line art with black paint marker or thin brush ($8-12). The line art pops against the textured background. This two-step process takes full weekend (accounting for paint drying time) and costs $35-55 total.

    Pro tip: Choose line designs with adequate spacing so the texture shows through and contributes to the overall composition.

    Your wall becomes visually interesting from every angle and lighting condition—texture and line art work together to create genuine dimension.


    21. Paint Minimalist Abstract Faces in Profile

    Abstract profile faces feel modern and human-centered without being representational. These work beautifully in entryways, hallways, or living rooms.

    Sketch profile faces with exaggerated, geometric features using a pencil. Keep details minimal: simple nose lines, eye curves, jawlines. Paint with black or charcoal ($8-12 per quart) using fine paintbrushes ($5-10). Create three to five faces pointing in different directions for visual interest. This takes 2-3 hours and costs under $25. The abstract quality means you don’t need anatomical accuracy—geometric simplification is the entire point.

    Pro tip: Reference fashion illustration or art deco design for inspiration; the intentional distortion is what makes it work.

    Your space reads as thoughtfully artistic and contemporary, signaling that you appreciate abstract beauty.


    22. Create a Gallery Wall Mix of Line Art and Frames

    Combine painted line art directly on walls with framed line art prints for a layered gallery effect. This approach maximizes visual interest without visual chaos.

    Paint one or two line art pieces directly on your wall ($8-12 for paint, 2-3 hours). Around or beside these, hang framed line art prints from Etsy ($20-50 per print), Minted ($25-60), or Amazon ($10-40). Mix frame types and sizes for contemporary gallery wall aesthetic. Include some empty mats or open frames ($5-15 each from IKEA) to maintain airiness. Arrange on the floor first using painter’s tape ($5) to mark positions, then hang. This creates depth and visual richness that feels intentional.

    Pro tip: Keep all artwork in black or grayscale for cohesion; mixing colors and themes reads as chaotic rather than curated.

    Walking past your wall feels like visiting a contemporary art gallery—every time you notice something new about how pieces relate to each other.


    23. Draw Line Art Representing Personal Meaningful Imagery

    The most meaningful line art is personal. Draw designs that reference your own memories, travels, or significant moments.

    Choose imagery that matters to you: a mountain range from a meaningful trip, constellations visible on your birthday, plants from your hometown, or abstract representations of important symbols. Sketch these on your wall lightly, then paint with black or a significant color ($8-12 per quart). Include subtle text if desired—coordinates of a meaningful location, a date, or a single meaningful word. This takes 3-5 hours but the emotional payoff is enormous. The uniqueness means it’s impossible to replicate online.

    Pro tip: Write out the story of why this image matters to you and keep it saved—it becomes part of your home’s narrative.

    Every glance at your wall reminds you of what matters most, turning your bedroom or living space into a personalized sanctuary.


    24. Paint Geometric Line Art Inspired by Sacred Geometry

    Sacred geometry patterns feel meditative, intentional, and deeply calming. These designs work beautifully in bedrooms, meditation spaces, yoga rooms, or wellness-focused areas.

    Research sacred geometry patterns like the flower of life, metatron’s cube, or mandala designs. Start at the center of your wall and work outward, sketching lightly with pencil. Paint with black as your primary color ($8-12 per quart) and add gold or copper metallic accents ($5-10) for delicate highlights. Maintain perfect symmetry or intentional asymmetry—both read beautifully. This is a meditative project taking 6-8 hours but the process itself is calming. Cost runs $25-35 total.

    Pro tip: Use a compass, protractor, or geometric rulers ($8-15 from art supply stores) to ensure accurate angles and proportions.

    Your space becomes a sanctuary for reflection and intention-setting, transforming daily moments into mindful practices.


    Save this post for your next wall project, and start with whichever idea resonates most—even one small piece of line art changes how your space feels. Pick one this weekend and watch how intentional design transforms your home.

  • 23 Stylish Mirror Frame Ideas That Elevate Your Home Aesthetic

    23 Stylish Mirror Frame Ideas That Elevate Your Home Aesthetic

    Your mirror frames do more than reflect—they set the entire mood for a room. Whether you’re drawn to soft curves, bold geometry, or natural textures, the right frame can turn a functional piece into a statement that ties your whole aesthetic together. But here’s the catch: finding 23 genuinely different ideas that actually work in real homes (not just design magazines) takes time. We’ve pulled together actionable frame styles, budget hacks, and styling tricks that work for renters, homeowners, and everyone in between. From DIY painting projects to investment pieces, you’ll find options at every price point. Let’s dive in and find the frame that makes your space feel like you.

    1. Paint an Old Frame in Matte Black

    Matte black frames add instant modern edge to any room without the price tag. If you have an old mirror collecting dust in your garage or attic, this is your answer.

    Grab some matte black spray paint or brush-on acrylic (both around $8–$15 at hardware stores) and give your frame a fresh coat. It takes about 30 minutes plus drying time. Pro tip: Use a primer first if your frame is glossy or stained—it helps the paint stick. Once dry, the matte finish softens the industrial vibe, making it less harsh than a shiny black frame.

    You’ve just created a custom frame for under $20 that looks intentionally designed, not thrifted.

    2. Add Thin Gold Trim to Frameless Mirrors

    Frameless mirrors can feel a bit cold, but adding a thin gold outline transforms them into something special. This costs almost nothing and works in modern, glam, or even coastal spaces.

    Pick up metallic paint markers or gold leaf tape ($5–$12 from craft stores like Michaels or Joann). Carefully outline your mirror’s edge, or apply tape as a thin frame border. You can do this in about 15 minutes. If you prefer a more permanent option, use thin adhesive gold trim ($10–$20) available on Amazon—just stick it on. The slight shimmer catches light beautifully and makes your mirror feel intentional.

    Your bare mirror now has personality without committing to a full frame.

    3. Layer Wooden Frames for a Gallery Wall Effect

    One mirror is nice, but a cluster tells a story. This renter-friendly approach uses no wall damage and creates instant visual interest.

    Hunt for wooden-framed mirrors at thrift stores or IKEA (ranging from $8–$50 each depending on size). Choose 3–5 mirrors in varying sizes and wood tones—warm honey, natural, weathered oak, or even light pine. Lean them against your wall at different heights, overlapping slightly for that curated feel. You can also hang them if your lease allows. This project costs $30–$150 total, takes about an hour to arrange, and zero construction skills required.

    Suddenly, that empty wall becomes a curated focal point that photographs beautifully.

    4. Wrap a Frame in Rattan or Woven Seagrass

    Coastal vibes don’t require a beach house—add rattan wrapping to any existing frame. This DIY hack brings warmth and texture without replacing the whole piece.

    Grab rattan or seagrass ribbon ($8–$15 from craft stores) and some clear-drying adhesive or hot glue. Wrap it around your frame’s edges, overlapping slightly as you go. Takes about 30–45 minutes depending on frame size. The natural material softens harder finishes and adds organic interest. If rattan feels too boho for your space, try jute twine for a more subtle texture.

    Your mirror now whispers “relaxed elegance” instead of “just functional.”

    5. Create a Sunburst Frame with Wooden Dowels

    Sunburst mirrors are trending hard, but designer versions cost $300+. Make your own for under $40 with dowels and spray paint.

    Purchase wooden dowels ($15–$20 at Home Depot), a round mirror ($10–$20 from IKEA or Target), and gold or black spray paint ($8–$10). Cut dowels to varying lengths (from about 6 to 12 inches), arrange them in a circle, and hot-glue them to the mirror’s back or frame. Paint everything in one go using spray paint. This weekend project costs $35–$50 and creates a statement piece that rivals store-bought versions costing triple.

    You’ll have a dramatic focal point that anchors any room and sparks conversations.

    6. Use Wallpaper or Fabric Behind a Frameless Mirror

    Create the illusion of a frame without hardware by treating the wall behind your mirror. This works beautifully in renters’ spaces since the mirror does the hiding.

    Install your frameless mirror as usual, then apply peel-and-stick wallpaper or fabric ($15–$40) around it in a contrasting color or pattern. The wallpaper peeks out as a “frame.” Takes about 20 minutes and zero damage to walls when you use removable adhesive. This trick also works if you’re renting—just peel it off when you move.

    Now your mirror feels layered and intentional, like it was designed as part of the wall itself.

    7. Stain or Refinish a Thrifted Wood Frame

    Thrift stores are treasure troves of cheap mirror frames that just need a refresh. A little stain transforms them into custom pieces.

    Find a wooden-framed mirror at Goodwill or Facebook Marketplace ($3–$15). Pick up wood stain in your desired shade—walnut, ebony, or honey ($8–$12 at hardware stores). Sand the frame lightly with 120-grit sandpaper, apply stain with a brush, and let it dry per instructions (usually 24 hours). Total investment: $15–$30. Time: about 1 hour active work plus drying. You’ve essentially created a custom frame for the price of a coffee.

    That dated thrifted find is now a curated piece that matches your decor perfectly.

    8. Add Tassel or Rope Details Around the Frame Edge

    Tassels and rope add dimension and personality to plain frames in minutes. This is pure styling without commitment.

    Purchase decorative tassel trim or braided rope ($12–$25 per yard from fabric stores like Joann or online from Amazon). Use fabric glue or hot glue to attach it around your frame’s perimeter. Choose gold tassels for glam, cream for soft elegance, or jewel tones for drama. Takes about 20–30 minutes depending on frame size. If you change your mind later, peel it off and try something new.

    Your frame now has that handcrafted, intentional-looking detail that costs pennies but reads like luxury.

    9. Spray Paint a Metal Frame in Unexpected Colors

    Metal frames are durable and perfect for spray paint experiments. Go bold with color instead of sticking to neutrals.

    Find a metal-framed mirror you own or grab one used ($5–$20). Pick spray paint in jewel tones, dusty rose, sage green, or even terracotta ($8–$12 per can). Mask off the mirror glass with painter’s tape, and spray 2–3 thin coats in a well-ventilated area. Total cost: $15–$35. Takes about 1 hour including drying time. The finish is permanent and hardwearing, perfect for bathrooms and high-traffic spaces.

    An unexpected color choice turns a standard mirror into a design focal point that reflects your personality.

    10. Create a Faux Scalloped Edge with Trim

    Love the scalloped trend but don’t want to commit? Glue decorative trim to create the look instantly.

    Hunt for adhesive scalloped trim, ribbon, or lace ($10–$20 per roll on Amazon or craft stores). Clean your mirror frame thoroughly, then carefully glue the trim around all edges. This takes about 30 minutes and costs $10–$25. For a modern take, use thin geometric trim instead of traditional lace. If your mirror is frameless, build up a thin base layer of foam trim first, then add the scallops.

    Your mirror now has playful personality that photographs beautifully and feels intentionally styled.

    11. Mosaic Tile or Broken Glass Frame Border

    This DIY project adds serious artistic flair if you’re willing to spend a weekend on it. Upcycled glass or tiles make it more affordable.

    Collect small mosaic tiles, sea glass, or broken ceramic pieces (free if you salvage, $8–$15 for a premade mosaic kit). Use tile adhesive and grout ($10–$15). Arrange your pieces around the frame edges, glue them down, and grout the gaps. Takes 2–3 hours plus drying time. This one requires patience but results in a genuinely one-of-a-kind piece. Perfect if you’re artistic or enjoy mindful crafting.

    You’ve created a conversation piece that feels handmade and special, with zero factory-produced feel.

    12. Paint a Geometric Pattern Directly on the Frame

    If you’re handy with a paintbrush, go full artist and design your own pattern. This one’s pure creative expression.

    Use acrylic paint in 2–3 complementary colors ($8–$15 total). Sketch a light pencil design first, then paint in your pattern—stripes, triangles, checkerboard, or abstract shapes. Seal it with clear matte or glossy sealant ($6–$10) to protect from moisture. Takes 2–3 hours depending on complexity. This works best on wood frames with good surface area. Bonus: it’s totally renter-friendly since paint stays on the frame, not the wall.

    You now own a custom art piece that’s completely unique and matches no one else’s decor.

    13. Install LED Lighting Inside a Floating Frame

    Combine function and aesthetics with LED lights integrated into or around your frame. This elevates bathrooms and small bedrooms instantly.

    Purchase adhesive LED strip lights ($20–$40 from Amazon or Best Buy—look for warm white, dimmable options) and a thin-framed or frameless mirror ($30–$80). Install the LED strips inside the frame’s lip or directly on the wall around the mirror’s perimeter. Most are plug-in or battery-powered, taking 15 minutes to install. This is renter-friendly if you use removable strips and avoid permanent wiring.

    Your mirror becomes a functional light source and atmospheric focal point—practical and pretty.

    14. Wrap the Frame in Leather or Faux Leather Cord

    Leather wrapping adds sophistication and texture, especially in masculine or modern spaces. This looks more expensive than it costs.

    Get leather or faux leather cord ($8–$15 from craft stores) and contact cement or hot glue ($3–$8). Wrap the cord tightly around your frame starting at one corner, overlapping slightly as you go. Use glue at the start and end to secure. Takes about 45 minutes for a standard mirror. The result feels designer-quality with that structured, intentional look. Faux leather is cheaper and equally effective.

    Your mirror now has a sophisticated, grown-up aesthetic that anchors any room beautifully.

    15. Create a Double-Frame Look with Two Mirrors

    Double frames create visual depth without major construction. This architectural trick works in modern and eclectic spaces.

    Find two mirrors in similar or complementary styles ($20–$60 total). Use thin wood strips or metal spacers ($8–$15) to create distance between them. Attach the smaller mirror to the spacers, then attach that assembly to the back of the larger frame using strong adhesive or small brackets. Takes about 1 hour. This creates an intentional, layered look that reads expensive and curated.

    Your mirror now has architectural interest that makes the wall feel designed, not just decorated.

    16. Stencil a Border Pattern Around the Frame

    Stenciling lets you add pattern and detail without free-hand painting skills. Perfect for adding custom flair to plain frames.

    Purchase a decorative stencil ($5–$12 from craft stores) and metallic or acrylic paint ($6–$10). Tape the stencil around your frame’s edge and carefully paint through the cutouts using a stencil brush or sponge. Takes 30–45 minutes and dries quickly. Dozens of patterns exist—geometric, floral, Art Deco, boho. Choose one that matches your style.

    You’ve added custom detail that looks like it was always part of the design.

    17. Use Brass or Copper Leaf for a Luxury Finish

    Metal leaf creates a high-end, handcrafted look that costs far less than it appears. This technique works on wood frames best.

    Grab adhesive brass or copper leaf ($15–$25 from art supply stores), a sizing glue (usually included), and a soft brush. Apply sizing according to package directions, then carefully press leaf onto the frame surface. It adheres instantly and looks like real metal coating. Takes about 1–2 hours depending on frame size. The result rivals expensive designer frames, and the material is durable and long-lasting.

    Your mirror frame now has that handcrafted, gallery-quality finish that elevates your entire space.

    18. Add a Floating Shelf Below or Above the Mirror

    A floating shelf isn’t technically a frame modification, but it completes the frame’s visual impact by creating a styled vignette below or above.

    Install a thin floating shelf ($20–$50 depending on material—wood, metal, or composite) using heavy-duty wall anchors ($5–$10 for a renter option) or wall studs if permanent. Takes 30 minutes to 1 hour to install depending on your comfort level. Style it with small potted plants, candles, or curated objects. This trick makes your mirror feel intentional and gallery-like.

    Now your mirror isn’t just a reflection—it’s part of a designed vignette that brings the whole wall to life.

    19. Paint the Frame to Match Your Wall (Monochromatic Frame)

    This minimalist approach hides the frame while highlighting the mirror’s reflection. Perfect for keeping walls clean and uncluttered.

    Paint your frame with the same paint color as your wall ($20–$30 for a quart of paint). This might seem counterintuitive, but it creates a serene, intentional look where the frame “disappears” and your reflected room becomes the focal point. Takes about 1 hour including drying. Best on matte or eggshell finishes for true blending.

    Your space feels calmer and more cohesive, with the mirror functioning as a subtle design element rather than a statement.

    20. Attach Dried Flowers or Branches to a Frame

    Dried botanicals are trending, and they transform frames into organic art pieces. Plus, they’re wallet-friendly and won’t wilt.

    Collect or purchase dried flowers, pampas grass, or branches ($10–$25 from craft stores like Michaels or online). Use hot glue or floral adhesive to attach them around your frame’s perimeter or in corner clusters. Takes about 30–45 minutes. The dried materials last indefinitely and create a cottagecore or bohemian vibe. Great for renters since nothing damages walls.

    Your mirror now doubles as botanical art, bringing organic warmth to any room.

    21. Wrap the Frame in Linen or Canvas Fabric

    Fabric wrapping adds tactile softness and texture while maintaining a natural aesthetic. This works for any style from farmhouse to modern.

    Choose natural linen or canvas fabric ($15–$25 per yard from fabric stores) in a color that complements your space. Wrap it tightly around your frame, stapling it securely on the back side (nobody sees that). Use fabric glue to seal edges if preferred. Takes about 45 minutes. If you’re renting or want flexibility, use removable fabric glue instead of staples.

    Your frame now has organic softness that catches light beautifully and adds depth to your wall.

    22. Create a Statement Frame with Oversized Molding

    Oversized molding creates impact without spending a fortune. This architectural approach works in any style when you choose the right profile.

    Buy thick wooden molding ($30–$60 for 8–10 linear feet from Home Depot) in a profile that matches your style—ornate for traditional, sleek for modern. Cut it to frame your mirror, miter the corners, and attach with wood glue and nails ($5–$10). Paint or stain to finish. This is a weekend project if you’re handy or have access to a chop saw. If not, hire a handyperson ($100–$200).

    You’ve created a custom frame that looks built-in and substantially elevated your mirror’s presence.

    23. Use Removable Adhesive Decorative Borders

    For maximum flexibility, use removable adhesive borders. This is the ultimate renter hack and costs almost nothing.

    Purchase peel-and-stick decorative borders ($8–$18 from Target, Amazon, or IKEA) in your desired pattern. Clean your frame thoroughly, then carefully apply the border around all edges, smoothing out bubbles as you go. Takes 15 minutes and requires zero tools. When you move or want to refresh, peel it off cleanly. Endless options exist—gold stripes, geometric, floral, minimalist.

    Your mirror gets an instant upgrade that you can change anytime without commitment or damage.


    SAVE THIS POST for your next decorating refresh and try just one idea this weekend. Whether you’re on a shoestring budget or ready to invest, there’s a frame solution here that’ll make you smile every time you look in that mirror.

  • 27 Wooden Slat TV Wall Ideas That Add Warm Texture

    27 Wooden Slat TV Wall Ideas That Add Warm Texture

    If your TV wall looks boring and flat, you’re not alone. Most living rooms have blank drywall behind the screen—nothing special, nothing memorable. But here’s the thing: wooden slat walls are one of the easiest ways to add texture, warmth, and visual interest without a full renovation. Whether you rent, own, or love DIY projects, there are solutions at every budget and skill level. In this guide, you’ll discover 27 specific wooden slat TV wall ideas—from affordable peel-and-stick options to custom installations, plus styling tricks that make the whole room feel more intentional. Let’s get started.

    1. Install Horizontal Shiplap for Classic Warmth

    Shiplap is the easiest slat style to install and instantly adds rustic charm. The overlapping boards create depth without requiring advanced carpentry skills.

    You can find shiplap boards at Home Depot, Lowes, or specialty lumber yards for $0.50–$2 per linear foot. Installation takes a full weekend if you DIY, or hire a handyman for $300–$800. Start by prepping your wall (remove outlet covers, locate studs), then cut boards to size and nail or adhesive-mount them horizontally from floor to ceiling. Most shiplap comes prefinished, but you can paint it any color after installation.

    The pro move? Leave small gaps between boards so they look authentic—don’t squeeze them too tight. Renters can use temporary adhesive-backed shiplap panels instead ($60–$150 per panel).

    Once installed, your TV becomes the secondary focal point. The wall itself becomes the star, framing everything beautifully.

    2. Go Vertical with Modern Slat Paneling

    Vertical slats feel more contemporary than horizontal options and make rooms look taller. They’re ideal if you have lower ceilings or want a modern, gallery-like vibe.

    Install vertical slats using the same stud-finding and mounting method as shiplap. Costs range $1–$3 per linear foot depending on wood type (pine, oak, or engineered wood). Spacing matters here—gaps of 1–3 inches between slats create visual rhythm and prevent a heavy, solid look. Use a spacer block to keep gaps consistent as you install.

    Leave accent lighting off initially to see how natural light plays across the slats. Add LED strip lighting later if you want to highlight texture at night.

    The result? A space that feels intentional and modern, like something from a design magazine—without the design magazine price tag.

    3. Create a Budget DIY Slat Wall with Trim Boards

    Don’t have thousands for premium paneling? Regular trim boards and wood strips from your local hardware store cost a fraction of prefab systems.

    Buy 1×3 or 1×4 pine boards for $1–$2 each and arrange them horizontally or vertically on your wall. Use construction adhesive and finish nails to attach them to studs. Sand lightly if you want a smooth finish, then stain or paint. A full wall (12–15 feet) costs about $80–$150 in materials. Install time: 4–6 hours for a DIYer.

    This approach gives you total control over spacing, stain color, and final look. It’s also fully removable if you rent or change your mind later.

    Your wall goes from blank to boutique-quality, and guests will be impressed by how put-together it looks.

    4. Use Peel-and-Stick Wooden Slat Panels (Renter-Friendly)

    Renters, this is your answer. Peel-and-stick wood panels look like real wood but apply like wallpaper—no nails, no damage, no landlord drama.

    Brands like Nextwall, RoomMates, and Stick On Tiles offer self-adhesive slat panels for $30–$80 per panel (each covers about 10–30 square feet). Installation takes 1–2 hours solo. Clean your wall, measure carefully, peel the backing, and press panels in place. Trim edges with a utility knife for a custom fit.

    The honest truth? These look good but feel slightly less premium than real wood. They’re perfect for rentals or if you love changing your space seasonally.

    After six months or two years, peel them off without residue and start fresh with a new design.

    5. Mix Wood Tones for Visual Interest

    One wood tone can feel boring. Combining light and dark slats creates movement and depth that photographs beautifully.

    Use two complementary woods—like natural pine mixed with dark walnut or ebony-stained boards. Arrange them in a striped pattern (alternating light-dark-light), herringbone, or chevron design. Plan your layout on paper first to avoid mistakes. Mixed-wood projects run $150–$400 depending on wall size and wood selection. Installation takes one full weekend.

    The trick is staining lighter wood darker or sanding dark wood lighter to ensure both woods coordinate. Test stain samples on scrap pieces first.

    The depth and visual movement turn a simple slat wall into a statement piece that grounds the entire room.

    6. Add Floating Shelves Within Slat Sections

    Don’t make the slat wall a one-note background. Break it up with floating shelves for storage, plants, or decor display.

    Mount 2–4 floating shelves (12–24 inches wide each) within your slat wall design. Shelves attach directly to studs with heavy-duty brackets (hidden inside the shelf). Shelves cost $40–$120 each, and installation takes an afternoon. This combo solves the “where do I store stuff?” problem while keeping your TV area looking curated.

    Style your shelves intentionally: plants on one, books on another, decorative boxes on the third. Leave some breathing room—don’t cram every inch.

    Now your TV wall isn’t just decorative—it’s functional and personal, reflecting your actual lifestyle.

    7. Stain Your Slats a Bold Color for Drama

    If you want drama, skip light wood and go dark. Deep charcoal, forest green, or navy stains create luxury vibes and make your TV pop visually.

    Install natural wood slats first, then apply stain in your chosen color. Quality interior stain costs $15–$30 per quart and covers about 400 square feet. Two coats give depth; three coats create richness. Staining takes 2–3 days total (including drying time between coats). Budget $200–$400 for a full wall if hiring a pro.

    Dark walls absorb light, so add accent lighting (recessed lights above, LED strips behind shelves) to prevent the room from feeling gloomy. Pair with light-colored furniture to maintain balance.

    The result? A moody, sophisticated space that feels high-end and intentional. Your TV area becomes a focal point that commands attention.

    8. Create a Geometric Slat Pattern (Herringbone or Chevron)

    Herringbone and chevron patterns cost more to install but create eye-catching geometry that’s pure art.

    Layout your pattern on paper before cutting a single board. Use 1×4 or 1×6 boards and cut them at 45-degree angles. Arrange them in a diagonal zig-zag (chevron) or brick-like offset pattern (herringbone). Materials cost $200–$500, and installation takes 2–3 full days. If you’re not confident with angled cuts, hire a handyman ($400–$800 labor).

    Pro tip: Start from the center and work outward to ensure symmetry. You’ll have slivers at the edges—that’s normal and actually looks intentional.

    The geometric flow naturally draws the eye to your TV, making the entire setup feel designed by a professional.

    9. Install Slats Behind Shelving for Open Shelving Walls

    Not ready for a full slat wall? Install slats only in specific sections behind shelves for a hybrid look that’s less commitment.

    Build or buy 2–3 floating shelves, mount them to your wall, then install slats in the visible gaps between and behind them. This approach uses fewer materials ($100–$250), takes one weekend, and looks polished. The shelves become the focal point while slats add texture underneath.

    This works great if you love displaying books, plants, or collections. Your decor tells a story on the shelves while the slats provide visual structure.

    You get the textured look you want with way more flexibility and less wall coverage.

    10. Use Reclaimed or Rustic Wood for Authentic Character

    Reclaimed wood has history, character, and irreplaceable warmth that new wood can’t match. Each board tells a story with its knots, grain variation, and natural weathering.

    Source reclaimed wood from salvage yards, specialty suppliers, or online retailers like Etsy or Reclaimed.com. Expect to pay $3–$8 per linear foot depending on wood species and age. These boards vary in width and finish, which is the whole charm. Installation follows standard mounting but takes longer due to irregular sizes. Budget one full weekend for DIY or $500–$1,200 for professional installation.

    The honest trade-off? Reclaimed wood requires more prep work (cleaning, potentially replacing damaged sections) and may have slight imperfections. That’s the appeal.

    Your wall becomes a conversation starter—authentic, warm, and undeniably special.

    11. Paint Slats Two Different Colors for a Modern Look

    Give your slats a fresh, modern twist by painting them in two complementary colors. Think soft white + warm gray, or cream + sage green.

    Install your slats first in natural wood, then mask off alternating boards with painter’s tape. Paint one color, let it dry fully, then paint the alternating boards the second color. Use quality interior paint ($20–$40 per gallon) in a matte or eggshell finish for a sophisticated look. Painting adds 2–3 days to your project timeline.

    This approach works especially well with wider spacing between slats. You’ll see both the wood grain and the paint, creating layered visual interest.

    The two-tone effect makes your wall feel intentional and gallery-like—modern without trying too hard.

    12. Install Acoustic Slat Panels for Sound Improvement

    Beyond looks, wooden slat walls can improve your room’s acoustics. Acoustic slats absorb sound and reduce echoes, making your TV experience actually better.

    Purchase acoustic wooden slat panels (brands like Auralex or Real Wood Acoustic Panels, $60–$150 per panel). These combine solid wood with sound-dampening materials inside. Install them like regular slats, spacing them slightly apart for maximum acoustic benefit. A full wall costs $300–$800 in materials. Install time: one weekend for DIY.

    Most people notice the difference immediately—your TV sounds richer, less echo-y, and more immersive. Bonus: the room feels quieter overall.

    Now your feature wall is beautiful and functional, improving your viewing experience every single day.

    13. Create a Curved or Arched Slat Design

    Straight lines are predictable. A curved or arched slat arrangement adds organic flow and modern sophistication.

    This requires planning and careful angling. Sketch your curve on the wall first using a chalk line or pencil. Cut slats at varying angles to follow the arc, then install them progressively along the curve. It’s a moderate DIY project or ideal for hiring a carpenter ($600–$1,500 labor). Materials run $150–$400 depending on complexity.

    Start small if this is your first curve—maybe a simple arch above the TV rather than a full wall curve.

    The curved design makes your TV wall feel like a focal point art installation, not just a functional screen mount.

    14. Space Slats Wide Apart for a Minimalist Look

    Less is more. Instead of covering your wall completely, space slats far apart to create breathing room and a gallery-like aesthetic.

    Mount slats horizontally or vertically with 4–6 inches of spacing between each board. This minimalist approach uses fewer materials ($60–$150 for a full wall) and makes your space feel more open. Installation is actually easier since you’re mounting fewer boards. Takes one afternoon to a half day.

    The negative space matters here—it’s part of the design, not a mistake. Your wall becomes a study in balance and restraint.

    The result is refined and modern, less busy than a fully covered slat wall but still visually interesting.

    15. Mix Wood Slats with Concrete or Stone Sections

    Combine wood with contrasting materials like concrete, stone, or shiplap sections for a high-design split-wall look.

    Install wooden slats on the left half of your wall, then add concrete panels, stone veneer, or shiplap sections on the right. Each material costs differently: wood ($100–$300), concrete or stone panels ($200–$500), shiplap ($80–$200). The combination takes one full weekend to complete. This mixed-material approach is trendy in 2025.

    Align materials at a natural visual dividing line—often at the TV’s horizontal center or slightly off-center for asymmetrical design.

    The contrast tells a story: natural meets industrial, warm meets cool. Your wall becomes genuinely design-forward.

    16. Install Slats With Hidden LED Lighting Behind Them

    Hidden LED strips behind slats add ambient lighting that creates atmosphere and makes your TV feel like it’s floating.

    Install slats as usual, then run LED strip lights ($10–$30 per 16-foot strip) along the top edge of each board, tucking the lights behind the wood. Use a dimmable remote-controlled system so you can adjust brightness for movie nights. Installation requires basic wiring knowledge or a handyman (add $150–$300 labor). Total cost: $150–$400 for materials and installation.

    Connect strips to a dimmer switch so you control the mood. Warm white (2700K) looks cozier than cool white.

    When the lights are on, your wall glows. When they’re off, it’s just beautiful wood texture. Both looks are Instagram-worthy.

    17. Use Bamboo Slats for an Eco-Friendly Japandi Vibe

    Bamboo is sustainable, beautiful, and pairs perfectly with minimalist or Japandi design aesthetics. It’s also surprisingly affordable.

    Source bamboo slats or panels from eco-focused retailers like Etsy, Wayfair, or specialty bamboo suppliers for $1–$3 per linear foot. Bamboo installs identically to wood slats but has a lighter, more organic feel. Full wall installation costs $100–$250 and takes one weekend.

    Bamboo is naturally harder than most softwoods, so it’s more durable long-term. It also shows minimal wear and ages beautifully.

    Your wall becomes a meditation on simplicity and nature—perfect if you love calm, collected interiors.

    18. Create a Feature Frame Around Your TV Using Slats

    Don’t cover your entire wall with slats. Instead, create a frame effect—build a slat border around your TV to make the screen look like framed art.

    Measure your TV and build a frame about 12–18 inches wider on all sides. Use 1×3 or 1×4 boards arranged horizontally, vertically, or in a mixed pattern just around the screen. Cost: $80–$180 in materials. Install time: 3–4 hours. The rest of your wall stays blank, keeping the space open and gallery-like.

    Center your TV carefully so the frame looks intentional and balanced. Add shelving or decor above the frame for additional visual interest.

    Your TV becomes a design focal point without the commitment of covering the entire wall. It’s polished and modern.

    19. Stagger Slats at Different Heights for Artistic Flair

    Forget uniform spacing and heights. Stagger your slats at different vertical positions to create dynamic, artistic movement.

    Plan your stagger pattern on graph paper first—maybe slats at 12 inches, then 18 inches, then 15 inches, repeating the pattern. Cut and install each slat at its designated height. This approach uses the same materials ($100–$300) but requires more precision. Install time: full day to one weekend.

    This technique works best with horizontal slat orientation. The irregular heights create rhythm without feeling chaotic.

    The staggered effect makes your wall feel intentional and artistic—like something from a modern art gallery, not a standard home.

    20. Use Thick Slats (2x4s or 2x6s) for Bold Impact

    Go bold with thick, chunky slats instead of thin boards. Thick timber creates dramatic shadow play and serious visual impact.

    Use 2×4 or 2×6 lumber (true thickness, not finished boards) and space them 6–12 inches apart for maximum shadow definition. Materials cost $150–$400 depending on wood type and wall size. Installation is identical to thin slats, just heavier—take a friend to help lift boards. Takes one full day.

    The thick timber casts deeper shadows and looks more substantial, almost sculptural. This approach pairs well with industrial or rustic design aesthetics.

    Your wall becomes a statement piece that defines the entire room’s character.

    21. Install Slats Diagonally for Maximum Visual Movement

    Diagonal slats are bold and dynamic—they create visual movement and make your eye travel across the wall.

    Install slats at a 45-degree angle instead of horizontal or vertical. This requires cutting slats at angles and careful layout planning. Use a full-size template on paper or cardboard first to plan cuts. Materials: $150–$350, install time: one full weekend for DIY. The complexity means hiring professional help isn’t a bad call ($600–$1,200).

    Diagonal slats work best if you plan the pattern to be symmetrical around your TV, so the diagonals frame the screen naturally.

    The diagonal flow transforms your TV wall into a dynamic design statement that feels intentional and gallery-worthy.

    22. Combine Slats With Wallpaper or Paint Behind Sections

    Mix materials: install slats in some sections while leaving other areas for wallpaper, bold paint, or textured finishes.

    Divide your wall into quadrants or sections. Install slats in two opposite sections, then add complementary wallpaper or paint color in the other sections. Choose colors and patterns that coordinate with your wood tone (warm neutrals, earthy tones). Combined costs: $150–$400 depending on your material choices. Full weekend installation for the mixed approach.

    This hybrid strategy gives you visual interest without the commitment of a full slat wall, and you can update the painted sections easily when trends change.

    Your wall becomes a mixed-media canvas—more artful and intentional than any single treatment alone.

    23. Install Slats on Just One Wall (Not the Full Media Wall)

    You don’t need to cover your entire wall with slats to get the effect. Install them on just the upper half or one side for a sophisticated, balanced look.

    Measure and mark where you want your slats to end—perhaps halfway up the wall, or in the upper third only. Install slats in that section only, leaving the lower area plain or painted. This uses fewer materials ($80–$180), takes one afternoon to one day, and feels modern rather than overwhelming.

    The visual balance between slats and negative space creates breathing room, especially important in smaller rooms or open-concept spaces.

    Your wall feels designed and intentional without consuming every inch of the space.

    24. Create a 3D Texture Effect With Slats of Varying Depths

    For serious sculptural impact, mount slats at different depths. Some sit flush to the wall, others protrude outward, creating 3D texture and shadow play.

    Use shims, spacers, or mounting brackets to control how far each slat projects from the wall. Plan your depth pattern before installing—maybe alternating deep and shallow, or random placement. This adds complexity but creates genuinely artistic impact. Materials: $150–$400, install time: full weekend to 1.5 days.

    The varying depths mean lights cast complex shadows, creating a living piece of art that changes throughout the day.

    Your TV wall becomes truly sculptural and deserves to be photographed—it’s that visually striking.

    25. Use Slats as a Frame Within a Frame (Slats + Shelving Surround)

    Create nested visual interest by building a slat frame around your TV, then surrounding that with floating shelves for a layered, gallery-wall effect.

    Build a slat frame 12–18 inches around your TV (see idea #18), then install floating shelves above, below, or beside the slat frame. This creates a layered, collected look that’s more visual dimension than any single treatment. Total cost: $250–$500. Install time: full weekend to 1.5 days. Style shelves with plants, books, and decor for a curated gallery-wall vibe.

    This approach works best if your TV isn’t your only focal point—your wall becomes a style statement.

    The nested frames and layered shelving create depth and personality that reflects your actual life and interests.

    26. Install Slats and Hide a Projector Screen Behind Them

    Take the “disappearing TV” trend to the next level: hide a motorized projector screen behind movable wooden slat panels.

    Install motorized slat panels on tracks that slide horizontally to reveal a projector screen behind them. Brands like Salamander Designs or custom installers offer these systems for $2,000–$5,000+ installed. When the screen is hidden, your wall looks like beautiful art. When you want to watch, press a button and slats slide away.

    This is an investment piece, ideal if you’re passionate about design and have the budget. It’s also rental-unfriendly.

    Your media wall becomes furniture and art combined—a true statement piece that wows every single person who sees it.

    27. Paint Slats White and Add Metallic Accents for Glam

    Go glam by painting your slats in crisp white or cream, then adding metallic trim frames or hardware accents for luxury polish.

    Install slats first, paint them in high-quality white paint ($20–$40 per gallon), then add gold or brass trim frames ($50–$150) around your TV or shelves. Metallic accents catch light beautifully and instantly elevate the look. Total cost: $150–$300. Painting adds 2–3 days to your timeline.

    This combination reads as high-end without being overdone. It works especially well in modern, transitional, or glam interiors.

    Your TV wall feels like a luxury hotel feature—polished, intentional, and impossibly sophisticated.


    PIN THIS FOR YOUR NEXT WEEKEND: Save this post and pick one wooden slat idea to tackle this weekend—whether it’s a quick peel-and-stick update or a full DIY installation. Your TV wall deserves to be gorgeous, and the best part? You’ve got options at every budget and skill level. Let us know which idea you try first—we love seeing transformations.