Category: Wall Decor

  • 24 Mirror Design Wall Ideas That Make Your Space Look Bigger

    24 Mirror Design Wall Ideas That Make Your Space Look Bigger


    Your space probably feels smaller and darker than it needs to. The good news? Strategic mirror placement can literally double how spacious your room appears while flooding it with natural light. Whether you’re working with a tiny apartment, a dark hallway, or a bedroom that needs breathing room, mirrors are the cheapest magic trick in interior design. We’ve gathered 24 game-changing mirror ideas—from free rearrangement hacks to investment statement pieces—that work in any room, any budget, and any style. Ready to make your space feel expansive and bright? Let’s dive in.


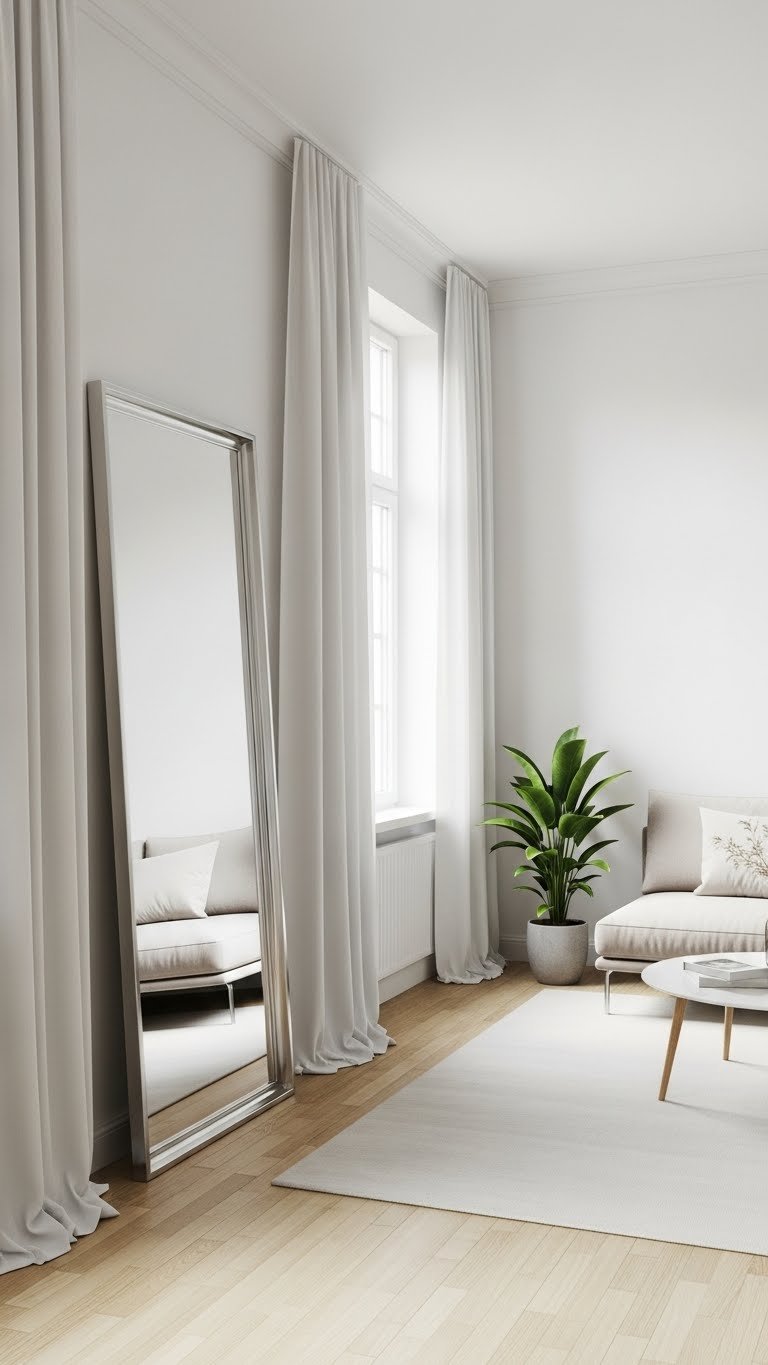
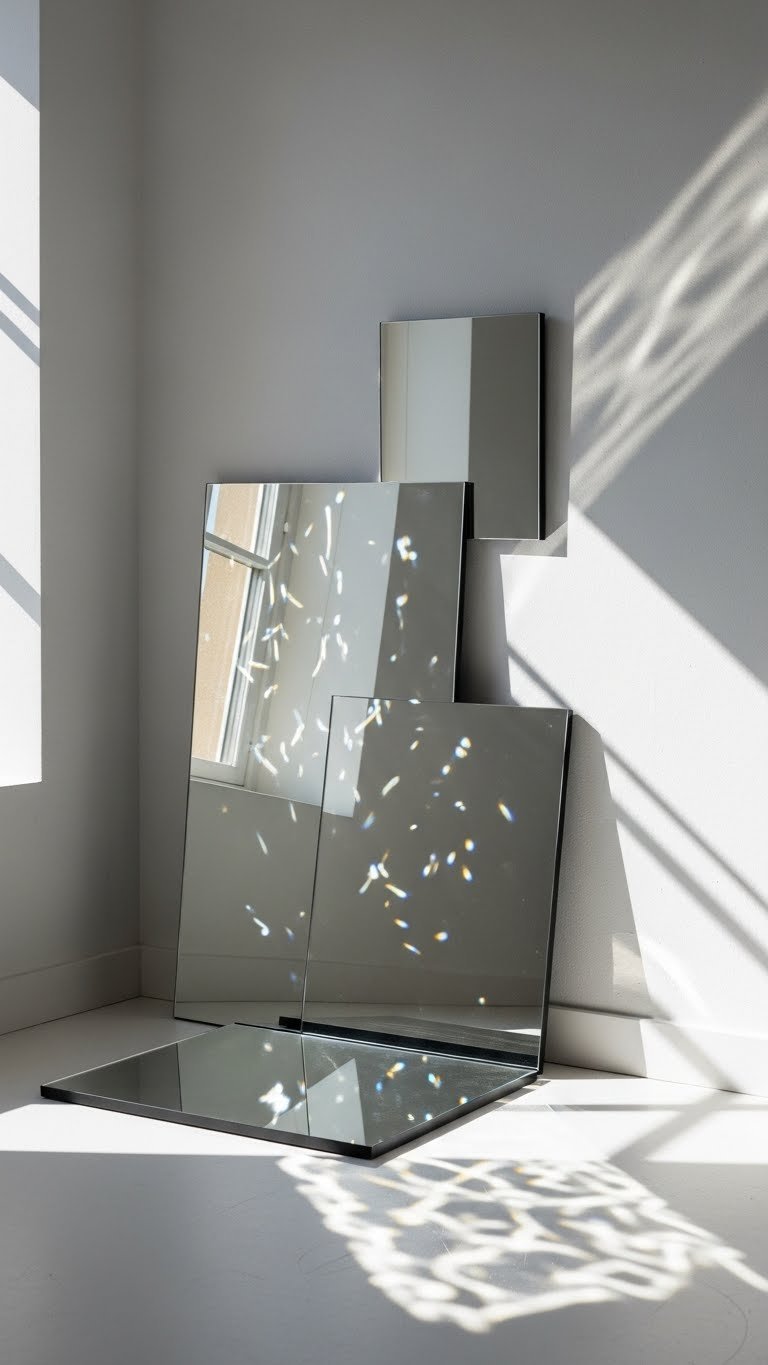
    1. Lean a Frameless Mirror Against Your Wall

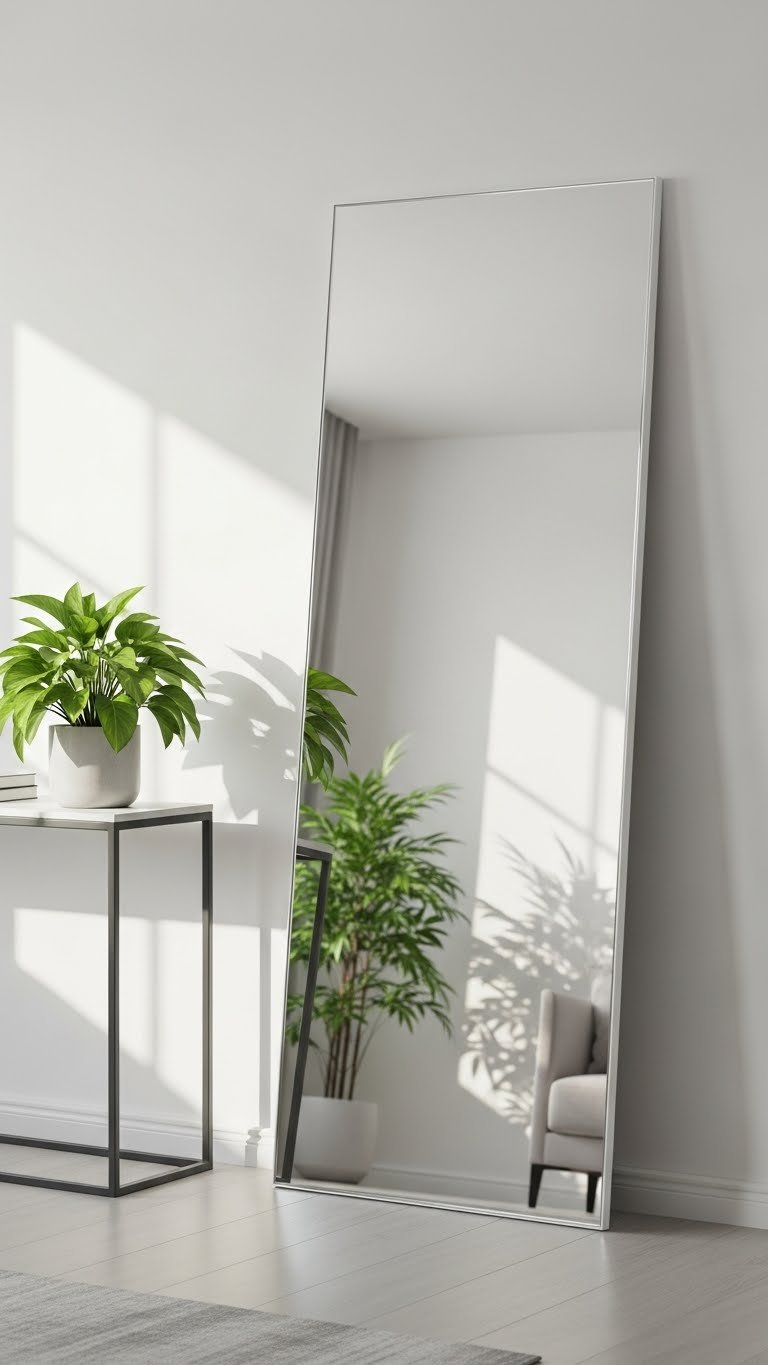
    A leaning frameless mirror does double duty: it expands your space visually while staying completely renter-friendly. The key is positioning it at a slight angle to catch natural light and reflect it around the room.

    Find a frameless mirror in your preferred size—$40–$150 depending on dimensions—at IKEA, Target, or Wayfair. No installation needed; just lean it against a wall where it catches morning or afternoon light. The angled positioning is crucial; it shouldn’t sit flat. Pair it with a simple console table or low shelving underneath to anchor the look and keep it from feeling precarious.

    The beauty of this approach is flexibility. You can move it whenever you want, and it works in entryways, bedrooms, or living rooms. You’ll immediately notice how the reflected light bounces around your space, making everything feel more open and brighter.


    2. Create a Full-Length Mirror Wall in Your Hallway

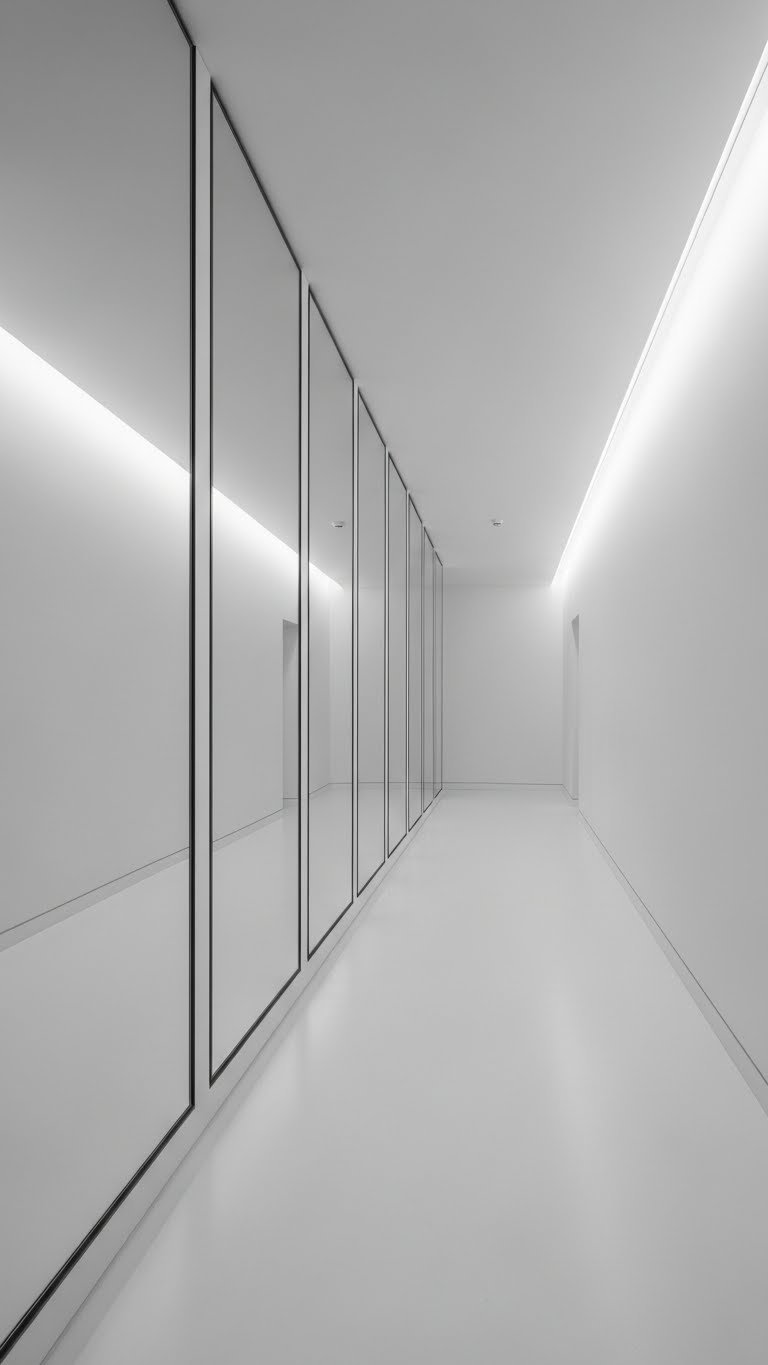
    Mirror walls are the ultimate space-expanding hack, especially in narrow hallways where you need to create an illusion of depth. Rather than covering every inch, try paneling—alternating mirror sections with your existing wall for a modern look.

    Install 3–5 mirror panels ($15–$40 per panel) using adhesive strips for renters or mounting brackets for permanence. The trick is leaving gaps between panels; this prevents the “fun house” effect and looks intentional. Position them to catch natural light from windows or hallway lighting. Installation takes one afternoon with basic tools. Pro tip: use beveled-edge mirrors for a sophisticated touch that reflects light more dynamically than standard glass.

    The result feels like your hallway extends forever. Visitors notice the spaciousness immediately, and you’ll love the way light travels through what used to feel like a dark corridor.


    3. Pair Matching Mirrors on Either Side of a Doorway

    Symmetry creates order and makes spaces feel more intentional. Two matching mirrors positioned on opposite sides of a doorway act as a visual anchor while doubling your light reflection.

    Choose mirrors in a style that matches your room’s vibe—arched mirrors work beautifully in traditional or bohemian spaces, while rectangular frames suit minimalist rooms. Budget $60–$200 per mirror depending on frame material. Hang them at eye level, ensuring they’re perfectly aligned. The symmetry naturally expands the visual space, and you get double the light benefit. Stores like CB2, Pottery Barn, and Wayfair have countless matching options in every price range.

    This setup creates a polished, gallery-like quality that makes your entryway or bedroom feel intentional and spacious. You’ll notice how the balanced arrangement actually makes your eye travel farther into the room.


    4. Use a Smoked or Tinted Mirror for Warmth

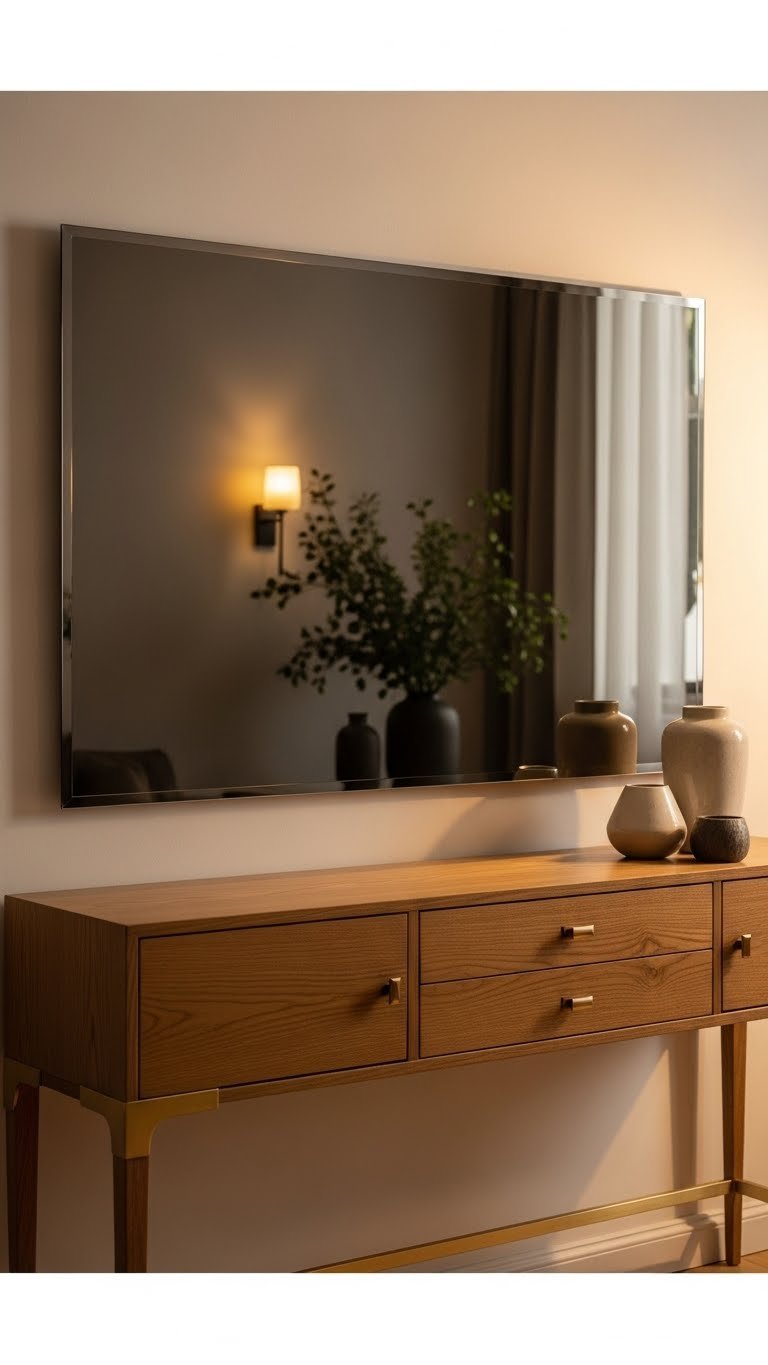
    Standard silvered mirrors can feel cold, especially in rooms with warm tones. Tinted or smoked mirrors add depth and sophistication while still reflecting light—just with more personality.

    Smoked mirrors have a subtle gray or bronze cast that complements warm color palettes beautifully. Expect to pay $80–$250 depending on size and frame, with custom options available through local glass shops or online retailers. They’re particularly stunning in living rooms, bedrooms, and dining areas. The tint filters light gently rather than bouncing it harsh and bright, creating a more spa-like atmosphere. Install like any standard mirror, and pair it with warm metals—brass, copper, or bronze accents—to enhance the luxe feel.

    The warmth of a tinted mirror makes your entire room feel more inviting and curated. Light still bounces around, but it’s softer and more flattering to your furnishings and complexion.


    5. Mount an Oversized Round Mirror Above Your Entryway Console

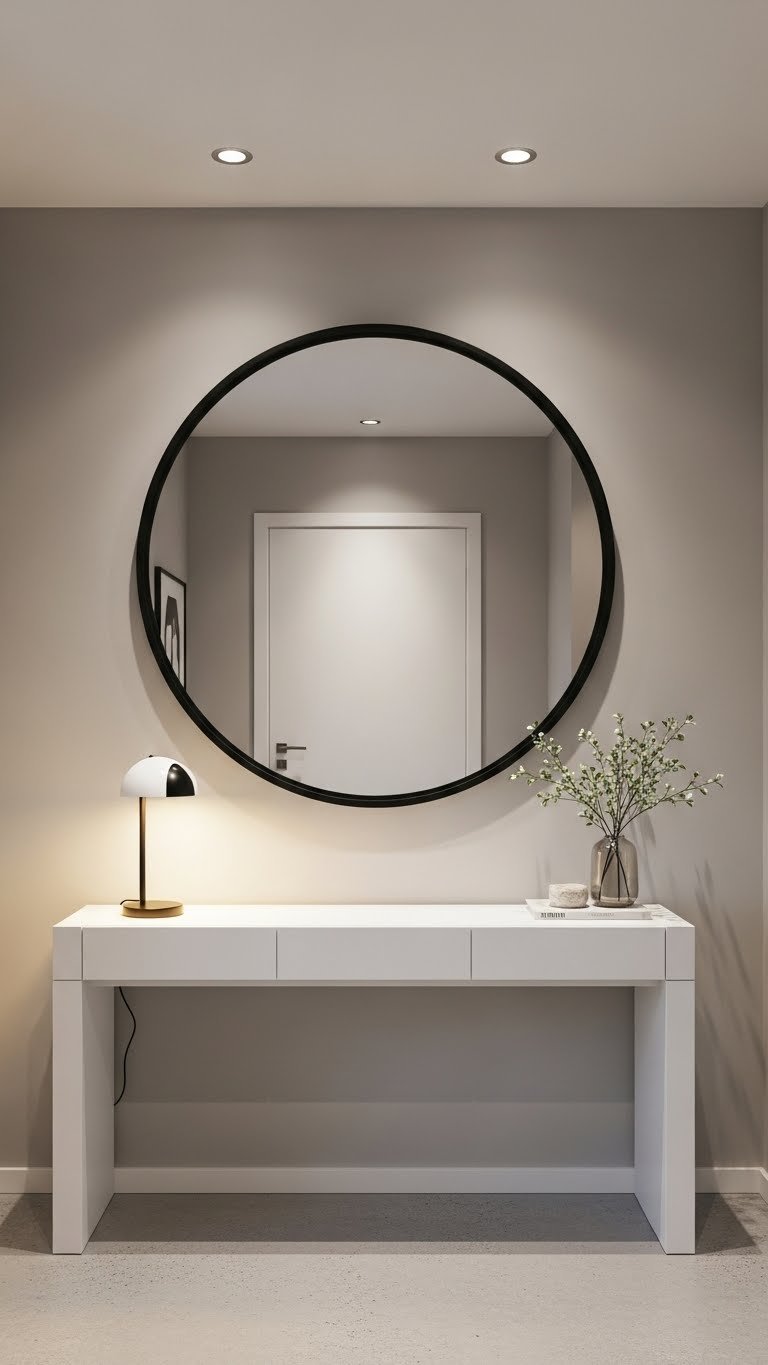
    A statement-sized round mirror creates instant visual impact in your entryway while serving a practical purpose—you can check your appearance before heading out. Round mirrors also make spaces feel less boxy and more dynamic.

    Choose a diameter of 36–48 inches for significant visual impact ($120–$300). Matte black or brushed gold frames look contemporary and sophisticated. Hang it centered above your console table, ensuring it’s at a height where the reflection hits the viewer at eye level. Installation requires a stud finder and sturdy anchors; hire a professional if you’re not comfortable with wall mounting ($50–$100). The size alone makes the entryway feel more generous, and the reflected light bounces back toward your living space.

    Your foyer instantly becomes a focal point that guests notice. The extra light and visual expansion make even small entryways feel welcoming and intentional.


    6. Install LED-Backlit Mirrors in Your Bathroom

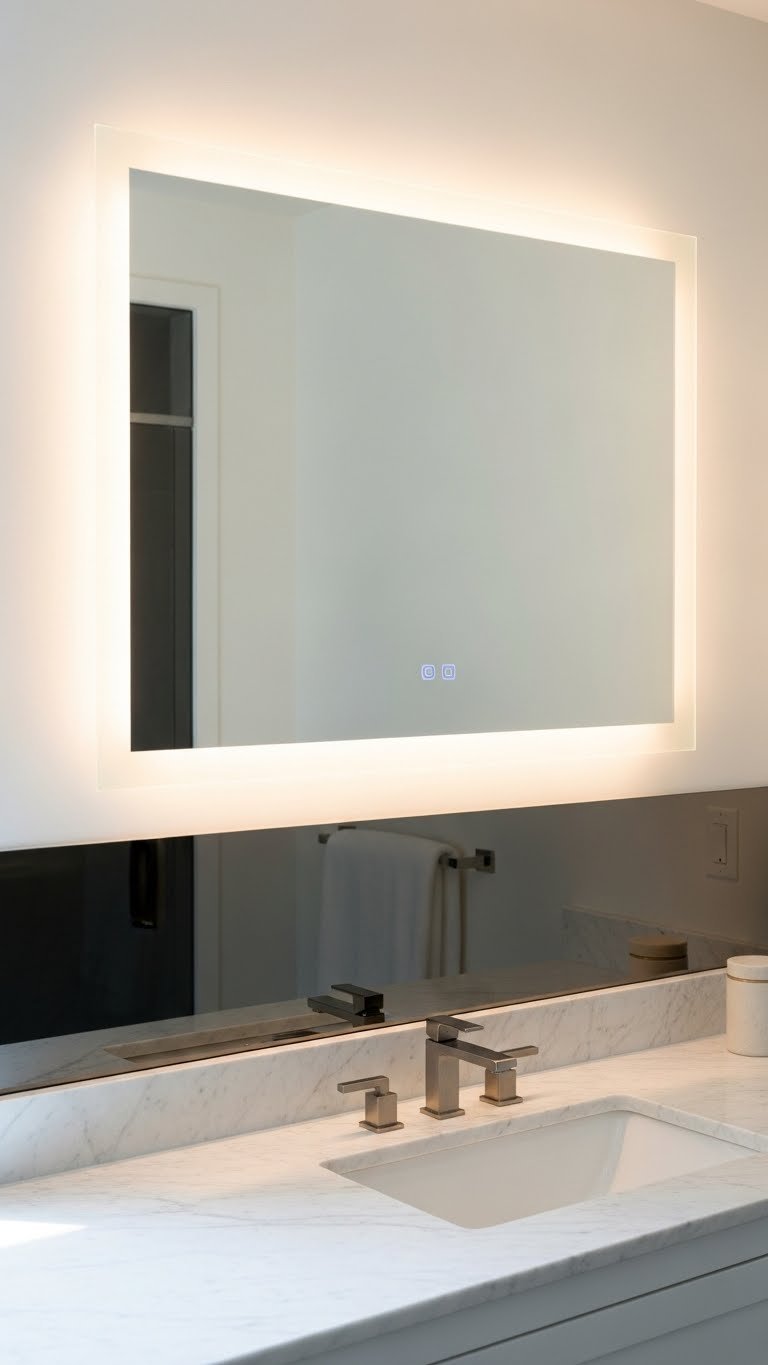
    LED mirrors combine function and style. The backlighting brightens your space while providing perfect vanity lighting, and it’s a game-changer for dark bathrooms.

    Backlit LED mirrors typically cost $150–$400 depending on size and features (many include dimmers, anti-fog capability, and touch controls). Installation usually requires a nearby outlet and basic wiring; budget $100–$200 for professional installation if you’re not comfortable with electrical work. These mirrors are available from brands like Kosmonia, IKEA, and Wayfair. The LED strips create ambient light while also reflecting natural and overhead light around your bathroom, making everything appear brighter and more spacious.

    Your morning routine improves immediately. The even lighting is flattering, and the ambient glow makes even a small bathroom feel spa-like and intentional.


    7. Hang a Gallery Wall of Mixed Mirror Shapes

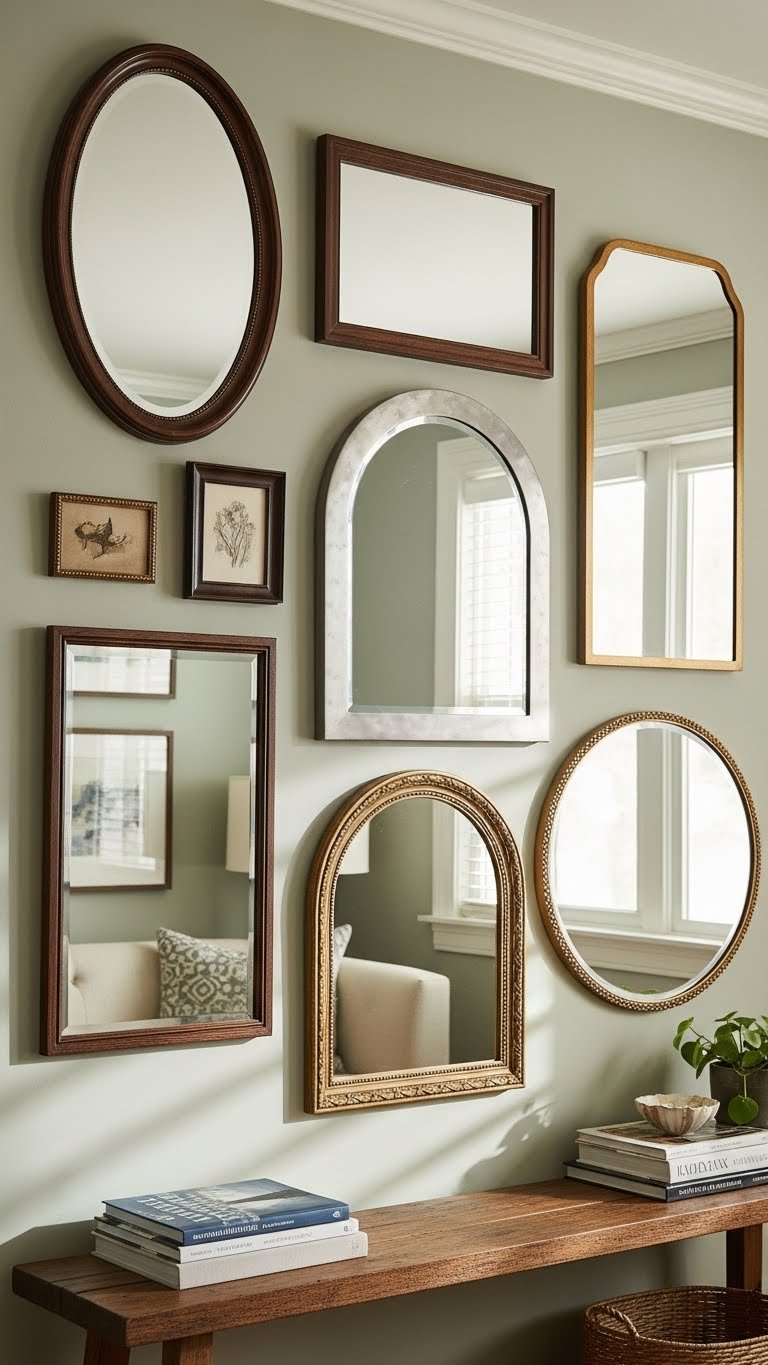
    A gallery wall of mixed mirrors creates visual interest while multiplying your light reflection points. The varied shapes and sizes feel curated and artistic rather than predictable.

    Collect 4–8 mirrors in complementary (but not matching) frames—think oval, geometric, arched, and round in similar finishes like brushed gold or matte black. Budget $50–$300 total depending on sizes and sources (IKEA, Target, Etsy, local thrift stores). Plan your layout on the floor first using painter’s tape on the wall as a guide. Install using wall anchors or studs, depending on mirror weight. The asymmetrical arrangement feels modern and intentional, and each mirror captures and reflects light from different angles.

    This approach makes your wall a focal point while maximizing light distribution. The result looks like you’ve carefully curated your space, and visitors often ask about your mirror arrangement.


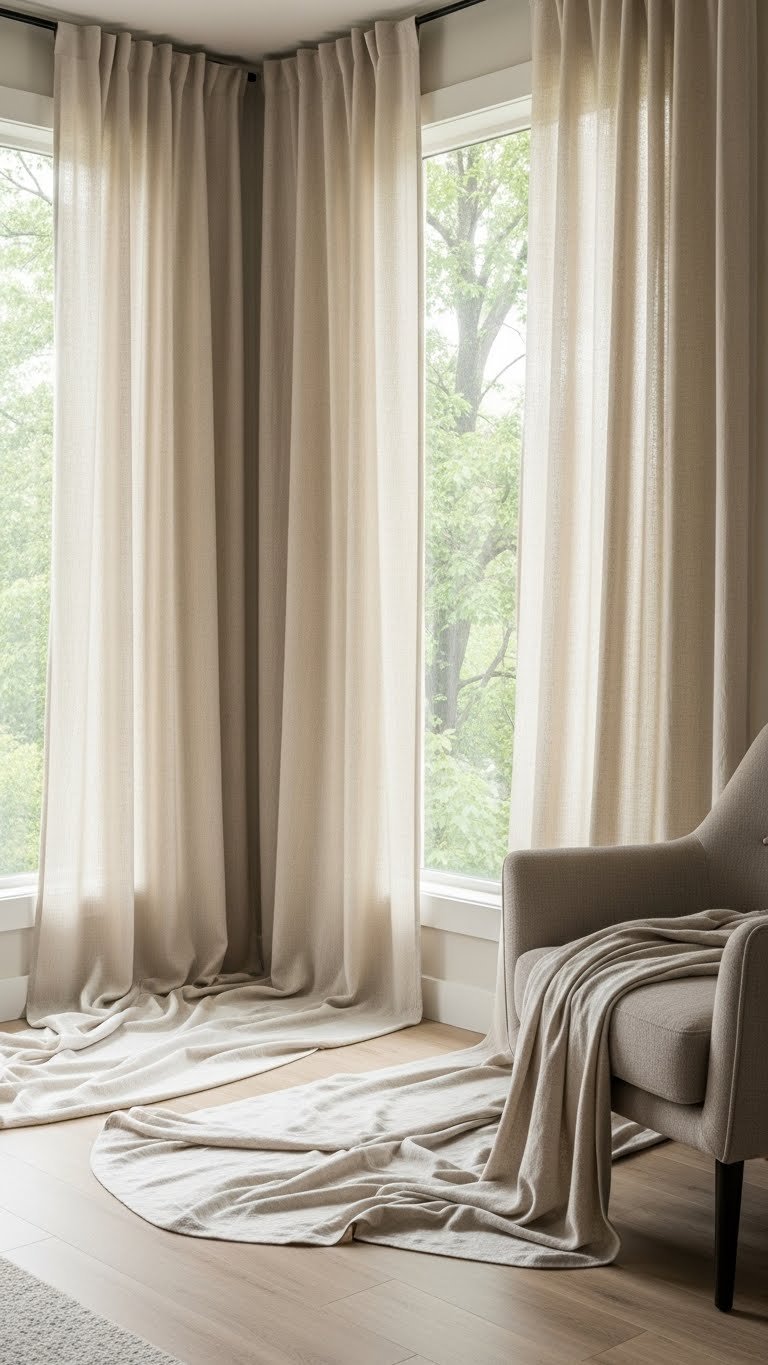
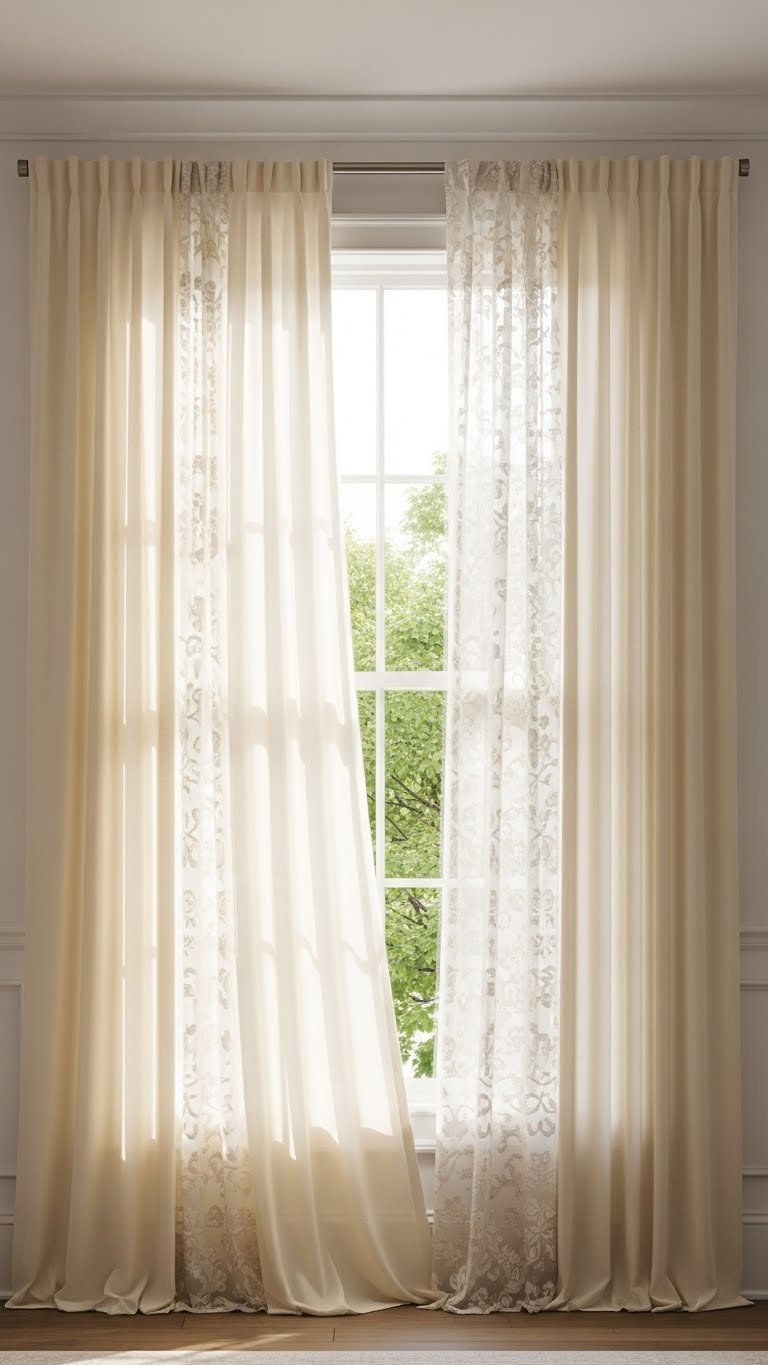
    8. Position a Mirror Opposite Your Window

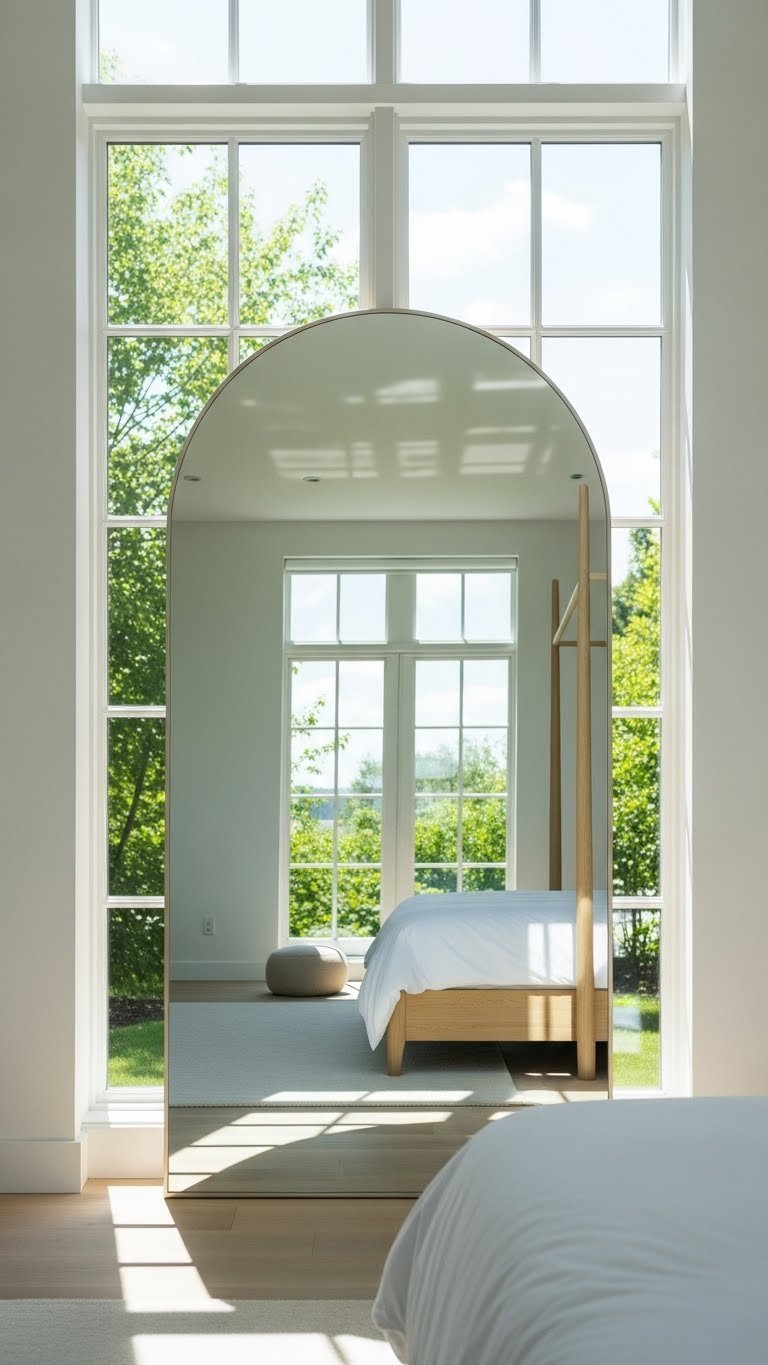
    Placement matters more than you’d think. A mirror positioned across from a window multiplies your natural light and creates the illusion of multiple windows—instantly making your space feel larger and brighter.

    This works in almost any room: bedrooms, living rooms, hallways, even bathrooms with windows. Simply lean or hang a mirror directly opposite your window so it catches and reflects incoming light back into the room. No special mirror required; any size works, though larger mirrors ($60–$200+) create more dramatic effects. This is one of the cheapest space-expanding hacks because it costs nothing to rearrange what you already have. If you don’t have a mirror, this is the perfect project to invest in one.

    You’ll see an immediate difference in how bright and spacious your room feels, especially during morning hours. The doubled light makes colors pop and everything appears more open.


    9. Create a Paneled Mirror Wall with Beveled Edges

    Paneled mirrors with beveled edges add sophistication and texture while still expanding your space. The bevels catch and refract light, creating subtle depth and movement.

    Install 6–12 beveled mirror tiles (usually 12″×12″, $10–$20 per tile) in a grid pattern using mirror adhesive or mounting brackets. Total cost runs $60–$250 depending on quantity and tile quality. Installation takes 2–3 hours and requires only a level, measuring tape, and adhesive. Leave small gaps between tiles (about ¼ inch) for a modern paneled look rather than seamless coverage. The beveled edges are key—they refract light beautifully and look intentional, not cheap.

    Your wall becomes an architectural feature. The light play creates visual interest even when the room isn’t brightly lit, and the paneled effect feels collected and thoughtful rather than overwhelming.


    10. Use a Scalloped-Edge Mirror for Playful Femininity

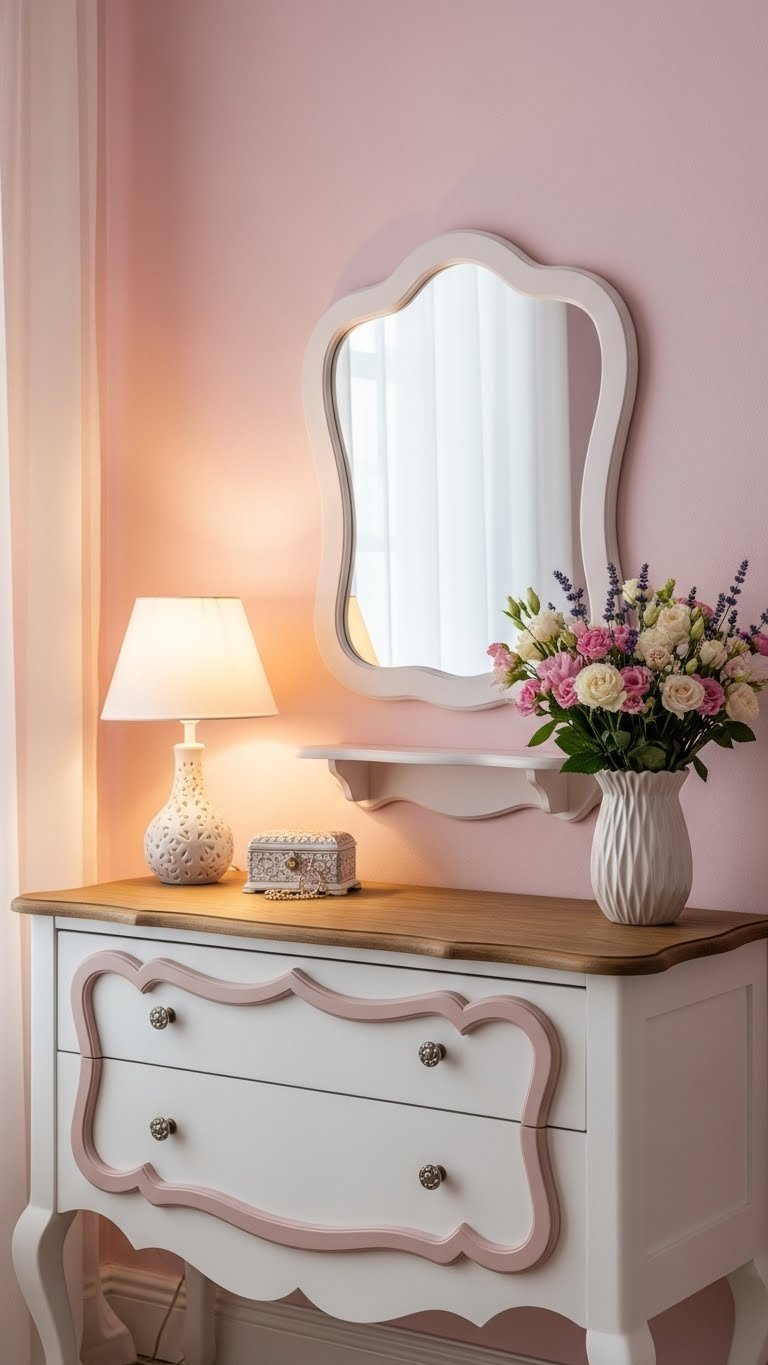
    Scalloped mirrors add a playful, vintage-inspired touch while still functioning as serious space-expanders. The soft, curved edges feel feminine and joyful without being juvenile.

    Scalloped mirrors come in multiple sizes ($30–$150 depending on frame material and size) and are widely available on Etsy, Wayfair, and boutique home stores. They work particularly well in bedrooms, bathrooms, and vanity areas. Choose a finish that complements your space—white for farmhouse vibes, brushed gold for glam, or natural wood for coastal feelings. Hang at a centered height above a dresser or vanity for a balanced arrangement. The scalloped shape makes your eye travel gently around the mirror rather than straight across, which actually subtly expands the visual space.

    This mirror becomes a style statement while still serving the practical purpose of reflecting light and making your room feel larger. The playful shape adds personality without overwhelming the space.


    11. Lean Multiple Mirrors at Varying Heights

    Leaning multiple mirrors at different heights creates visual rhythm and multiplies your light reflection points without commitment. Perfect for renters or anyone who likes to refresh their space frequently.

    Gather 3–5 mirrors of varying sizes (some standing upright, others slightly tilted) and lean them against a wall or propped on furniture. Budget $50–$200 total depending on sizes; thrift stores, IKEA, and Target all offer affordable options. Vary the heights by using different-sized bases or leaning some mirrors at slight angles. This creates a cascading effect that feels intentional and artistic. The varying angles catch light differently, multiplying the brightening effect throughout your room.

    The staggered arrangement looks gallery-like and contemporary. You’ll notice how the layered mirrors create depth while maintaining flexibility—you can rearrange whenever you want a refresh.


    12. Install Frameless Mirrors in a Small Bathroom

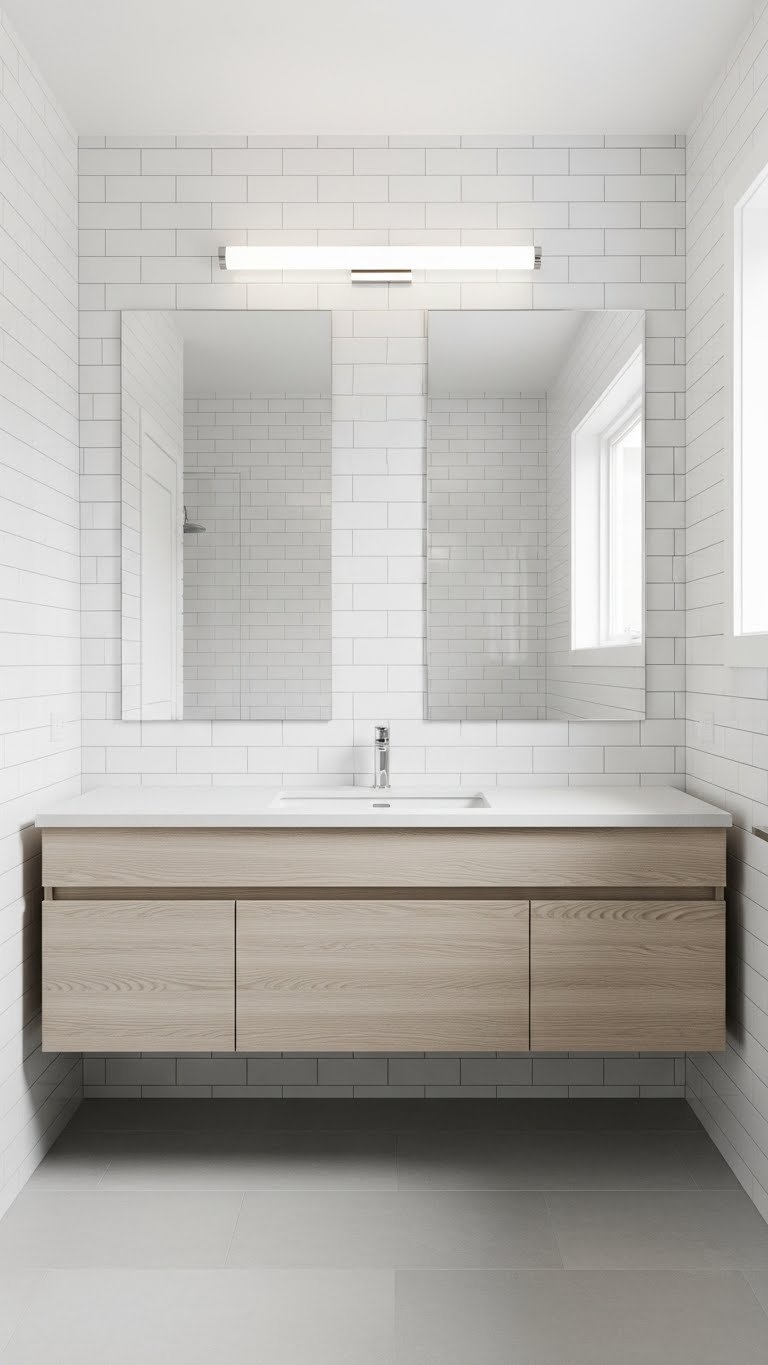
    In small bathrooms, frameless mirrors disappear into the wall visually, making the space feel less cluttered and more expansive. The clean lines are especially effective in tight quarters.

    Frameless mirrors are installed directly to the wall using mounting brackets (hidden or visible, depending on preference). Budget $50–$150 for a bathroom-sized mirror ($200+ for oversized pieces). Installation takes 30 minutes if you have a stud; use heavy-duty drywall anchors if you don’t. Frameless designs work beautifully with any aesthetic—they’re equally at home in minimalist, farmhouse, or contemporary bathrooms. Pair multiple frameless mirrors above a double vanity for maximum light and openness.

    Your bathroom immediately feels more spacious and intentional. The absence of a frame means there’s nothing visually interrupting the wall, which is particularly valuable in small spaces where every inch matters.


    13. Add an Antique Gold-Framed Mirror for Luxury

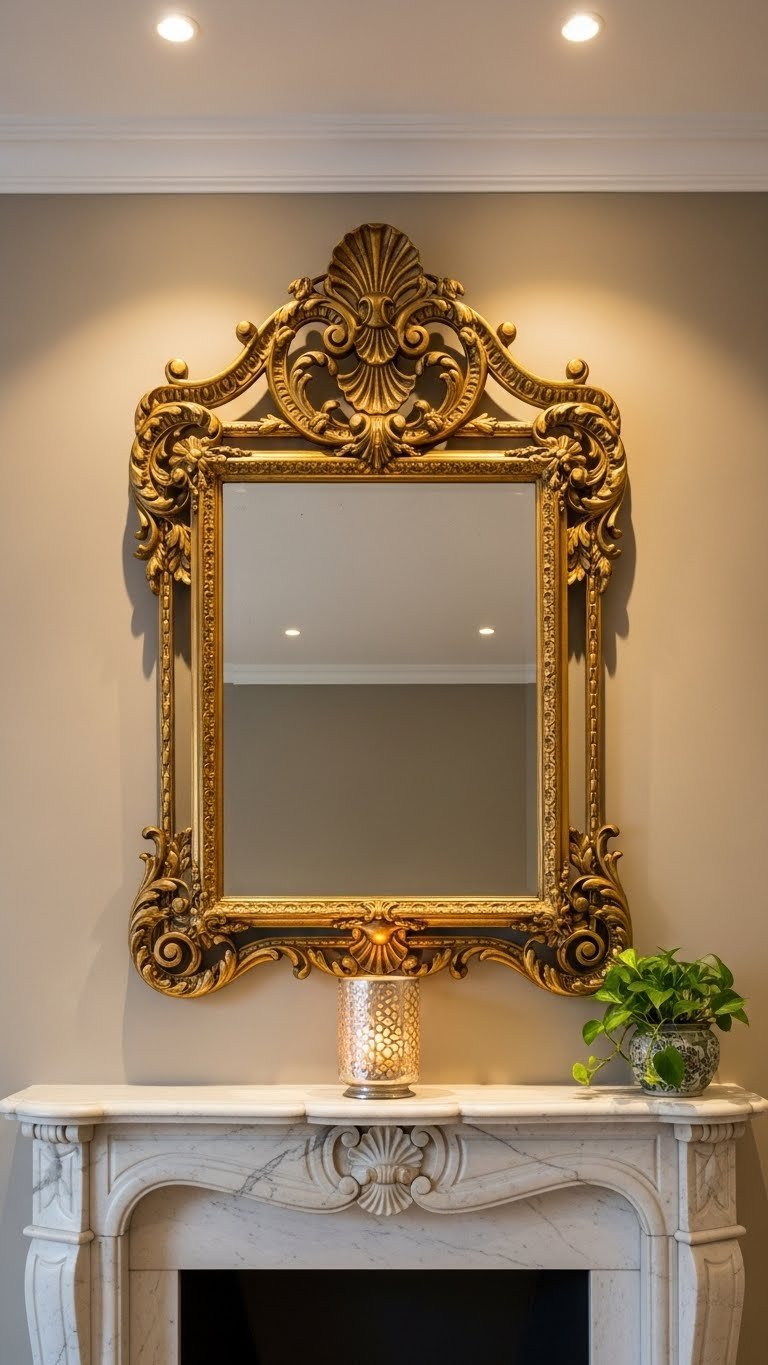
    An antique gold frame instantly elevates any room, adding warmth and a touch of luxury. Unlike bright gold, antique finishes feel sophisticated and timeless rather than flashy.

    Antique gold mirrors range from $80–$400+ depending on frame size and ornamentation. Look for pieces with visible texture, patina, or carved details—these feel more authentic and high-end than smooth finishes. Brands like Pottery Barn, West Elm, and vintage shops (both online and local) offer excellent options. Hang above a fireplace, console, or bedroom wall as a focal point. The warm gold tone bounces light beautifully and complements both cool and warm color palettes when chosen thoughtfully.

    Your room feels more curated and intentional. The warm glow of antique gold adds depth to your space while still serving the practical function of reflecting light and expanding your room visually.


    14. Create an Accent Wall with Mirrored Subway Tiles

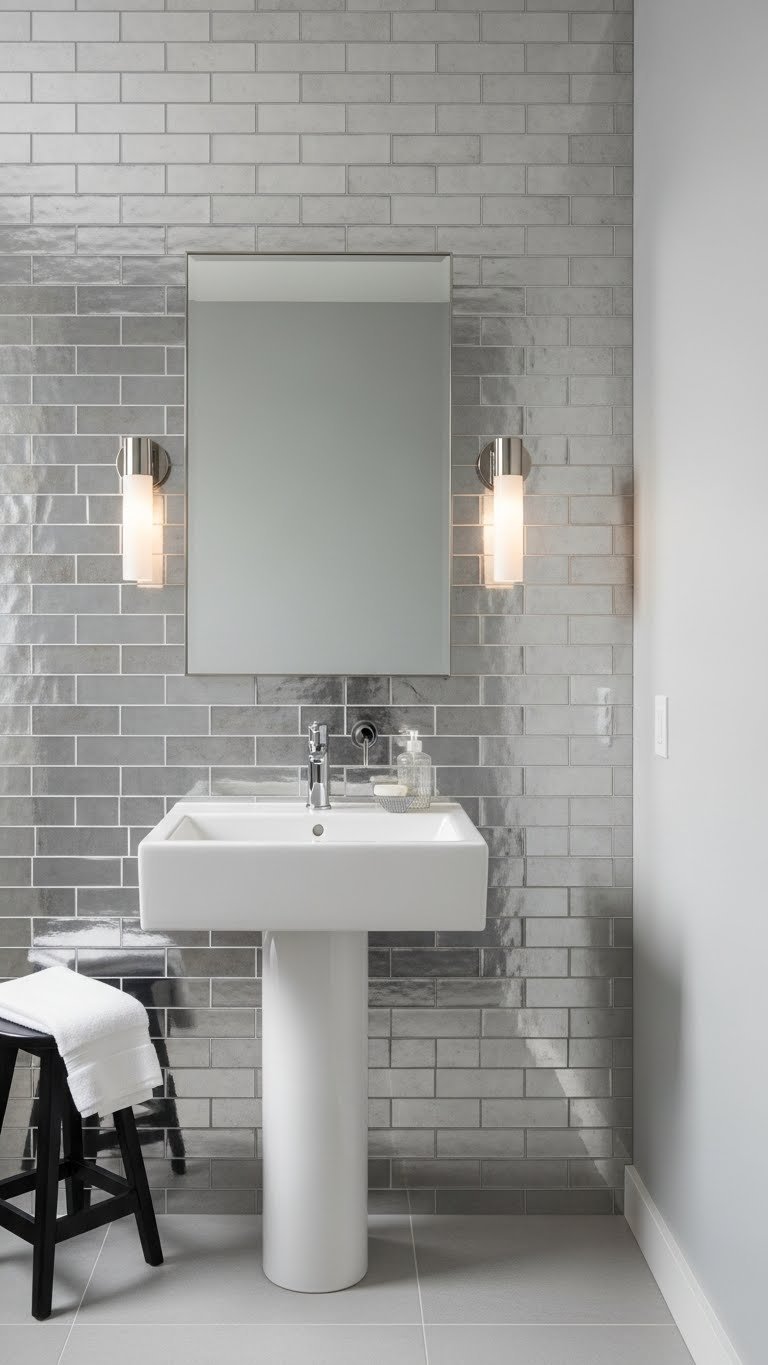
    Mirrored subway tiles create a sophisticated, textured accent wall that expands space while adding visual interest. Unlike flat mirrors, tiles have subtle variation that feels collected rather than cold.

    Install mirrored subway tiles ($15–$30 per square foot) in a brick pattern or running bond layout using tile adhesive and grout. Budget $200–$600 total for a bathroom-sized wall, or $500–$1,500 for a larger living room accent wall. This is a weekend DIY project if you’re comfortable with tile work, or hire a professional installer ($400–$800). The tiles catch light at slightly different angles due to grout lines, creating beautiful dimension. This works beautifully in bathrooms, powder rooms, or even as a feature wall in a kitchen or hallway.

    Your accent wall becomes a focal point that catches everyone’s eye. The reflective quality makes your room feel significantly larger and brighter, especially in naturally lit spaces.


    15. Mount a Sunburst Mirror as a Bedroom Focal Point

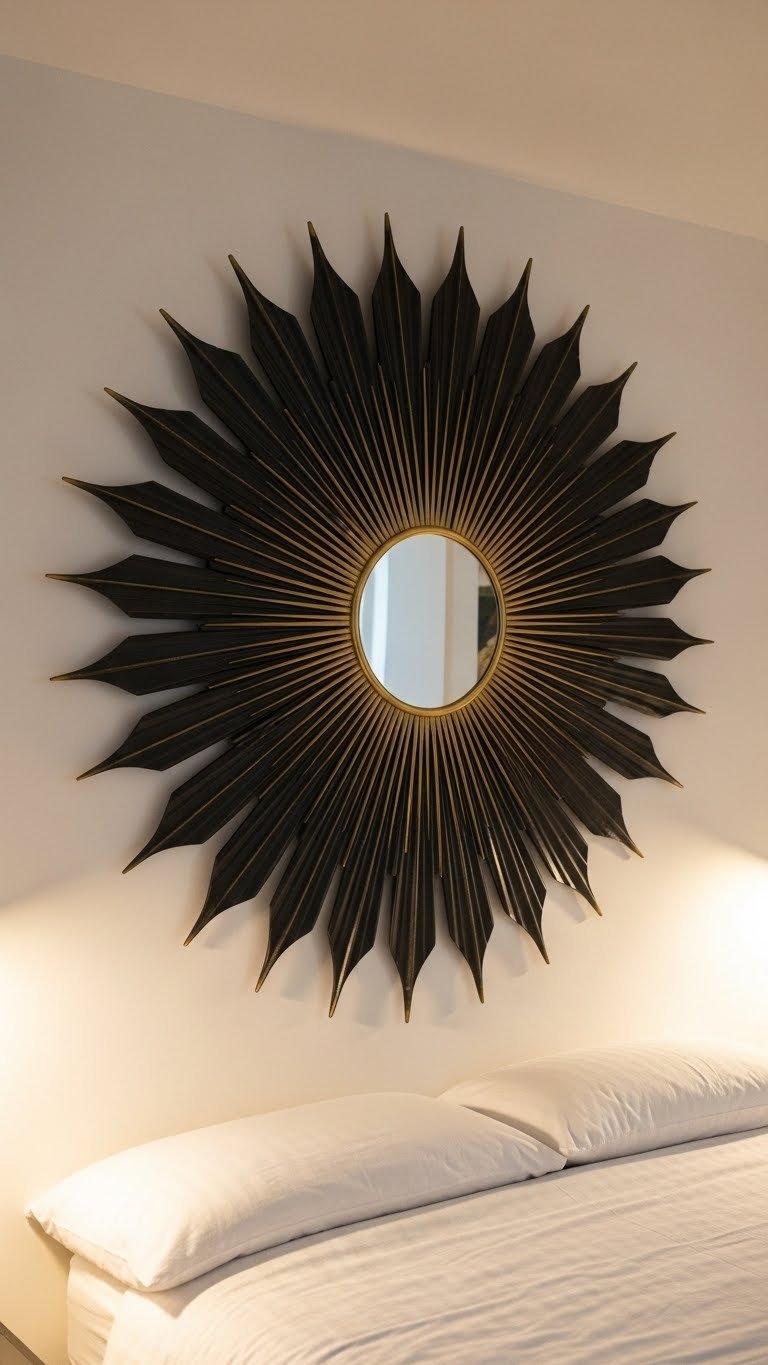
    A sunburst mirror is sculptural art that also functions as a space-expander. The radiating rays create visual movement and catch light from multiple angles.

    Sunburst mirrors come in sizes ranging from 24 to 48 inches ($100–$400) and are available in matte black, brushed gold, or natural wood finishes. Installation requires a stud or heavy-duty anchors; this is a one-person, 30-minute job. Hang centered on a bedroom wall behind your bed or on a prominent living room wall. The geometric rays create visual interest while reflecting light outward in all directions, making your room feel more expansive than a traditional round mirror would.

    This mirror doubles as art and function. Your bedroom instantly gains a focal point, and the light reflection makes the entire room feel brighter and more intentional.


    16. Install a Mirror Above Your Entryway Coat Hooks

    Positioning a mirror above hooks creates a practical station for checking your appearance before heading out, while reflecting light into often-dark entryways.

    A horizontal rectangular mirror ($40–$150) works best here, as it provides full-length or torso-length reflection depending on height. Mount it at eye level, about 18 inches above the hooks. This is a quick installation—15 minutes with basic tools. The mirror bounces hallway and entryway light around your space, making that often-neglected area feel more open and intentional. Pair it with a console table and task lighting underneath for a complete entry station.

    Your entryway transforms into a functional, welcoming space. Guests notice the thoughtful arrangement, and you’ll use that mirror daily as part of your routine.


    17. Hang Mirrors with Hidden Mounting Systems

    Hidden mounting systems create the illusion of floating mirrors, which feels incredibly sleek and modern. The hardware is completely concealed, leaving only the mirror itself visible.

    Invisible mounting systems ($20–$50 per mirror) use specialized brackets or adhesive strips that hide behind the mirror frame. Installation takes 15–20 minutes and requires only a level and stud finder. These systems work best with frameless mirrors or mirrors with deep frames that conceal the hardware. This is ideal for minimalist spaces where you want the mirror’s impact without visual clutter from brackets.

    The result feels intentional and curated, like your space was designed by a professional. The clean lines and floating appearance make your room look more spacious and thoughtfully planned.


    18. Position a Mirror to Reflect Artwork or a Feature Wall

    A strategically placed mirror can reflect and amplify other design elements in your room, multiplying visual interest without taking up additional wall space.

    Position a mirror opposite an accent wall, gallery wall, or piece of artwork to double its visual impact. Any size mirror works ($30–$200), and this is completely free if you already own one and just need to rearrange. Simply lean or hang the mirror so it directly reflects your chosen focal point. This works particularly well if you have colorful wallpaper, a statement wall, or an art collection you want to emphasize. The reflection extends your space visually while celebrating elements you love.

    Your room gains architectural interest and visual expansion without adding clutter. The doubled focal point makes your space feel more curated and intentional than a single feature alone.


    19. Use Mirrored Closet Doors for Bedroom Space-Expansion

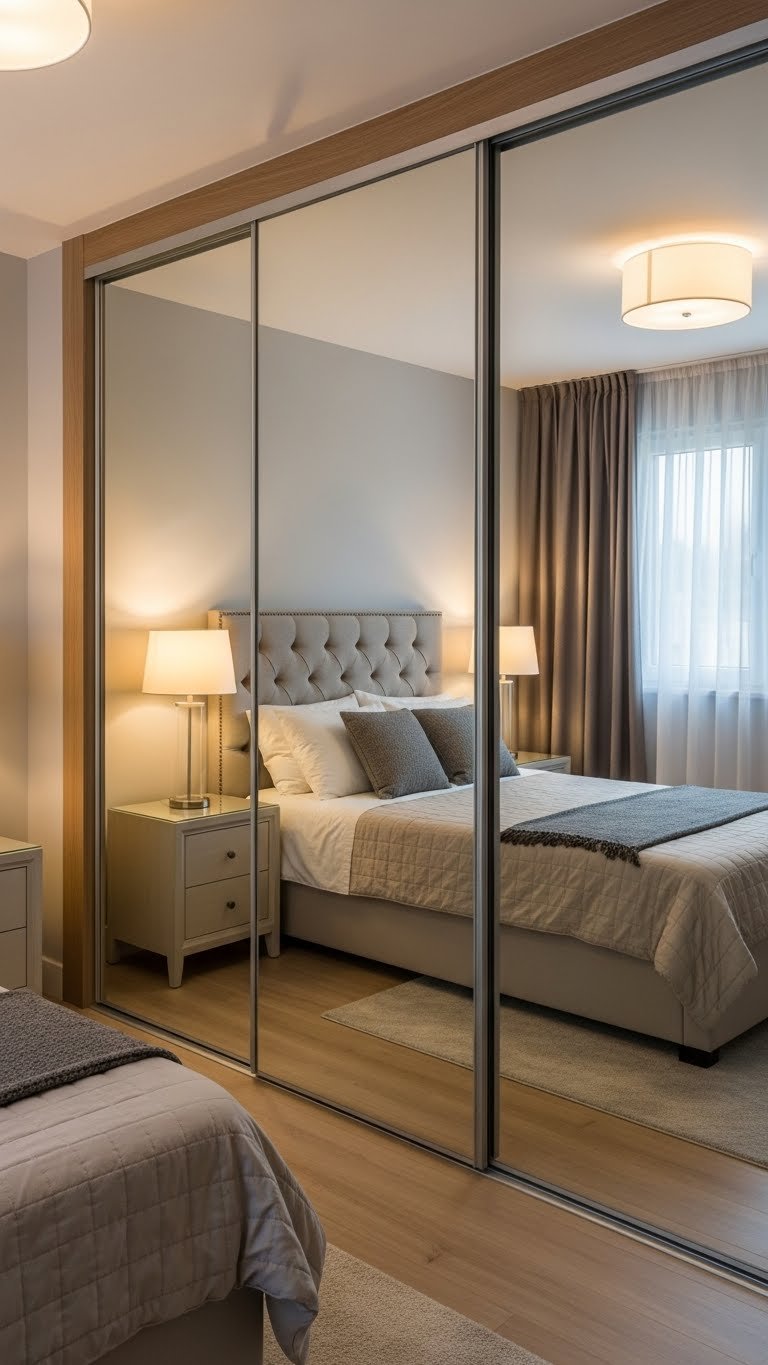
    Mirrored closet doors solve two problems at once: storage accessibility and space expansion. They’re the ultimate functional statement piece.

    Replace existing closet doors with mirrored versions by purchasing pre-made mirrored sliding or bifold doors ($150–$400 per set) from home improvement stores, or work with a local fabricator for custom options. Installation takes 1–2 hours and requires basic carpentry skills (or hire a professional for $150–$300). The reflection effectively doubles your bedroom’s visual space while providing the practical benefit of full-length mirror access. This is one of the smartest investments for small bedrooms.

    Your bedroom feels significantly larger, and you’ve gained full-length mirror functionality. The light bouncing off mirrored doors makes even dim bedrooms feel brighter and more open.


    20. Create a Coastal-Inspired Mirror with a Rattan Frame

    A rattan or wood-framed mirror brings warmth and coastal vibes while still serving the crucial function of light reflection and space expansion.

    Rattan-framed mirrors come in circular, oval, or slightly arched shapes ($60–$250 depending on size) and are available from Wayfair, CB2, and boutique home stores. The natural texture of rattan catches light subtly, adding warmth without the coldness of metal frames. Install in bedrooms, bathrooms, or living rooms with coastal, bohemian, or farmhouse aesthetics. The neutral, warm tone complements both light and dark color palettes beautifully.

    Your space gains organic warmth and texture. The mirror still functions beautifully for light reflection, but the rattan frame makes it feel more like curated art than a purely utilitarian object.


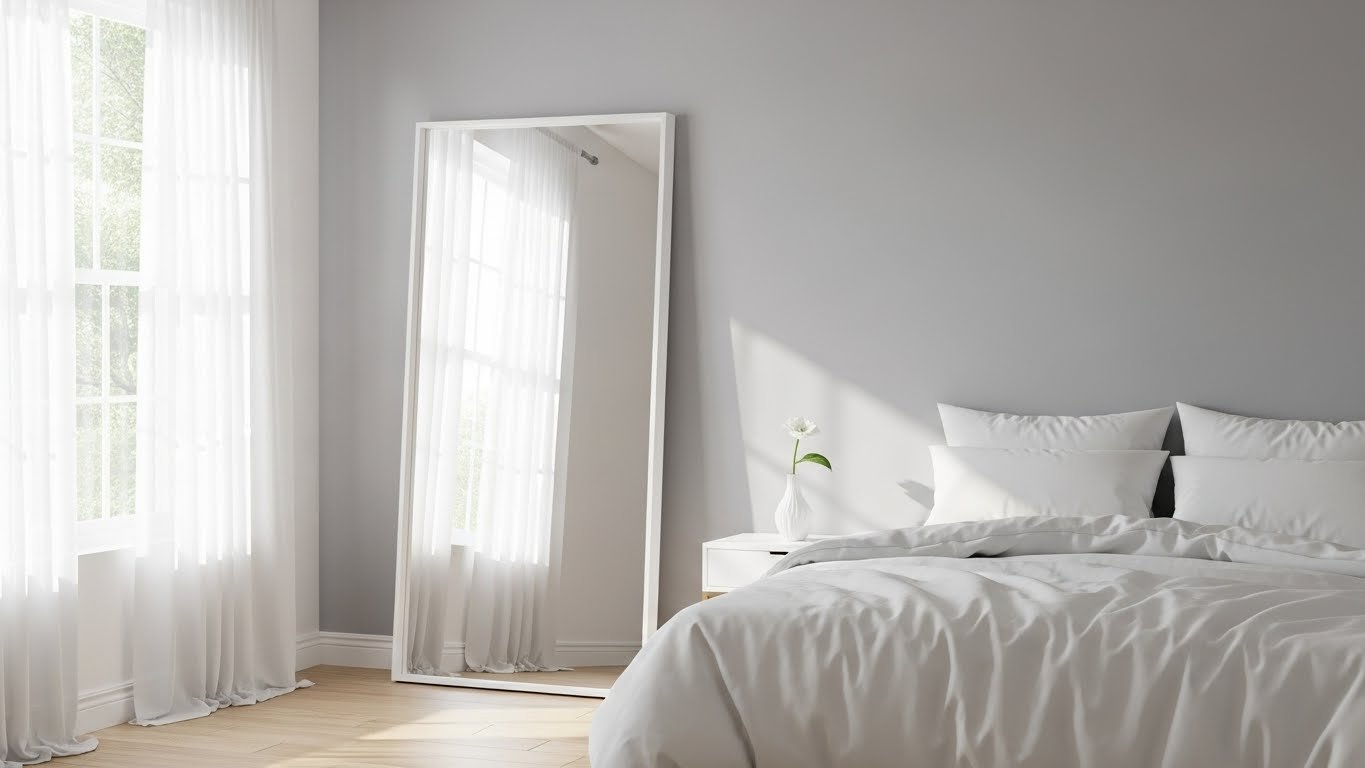
    21. Install a Tall Mirror Beside Your Bed for Light Reflection

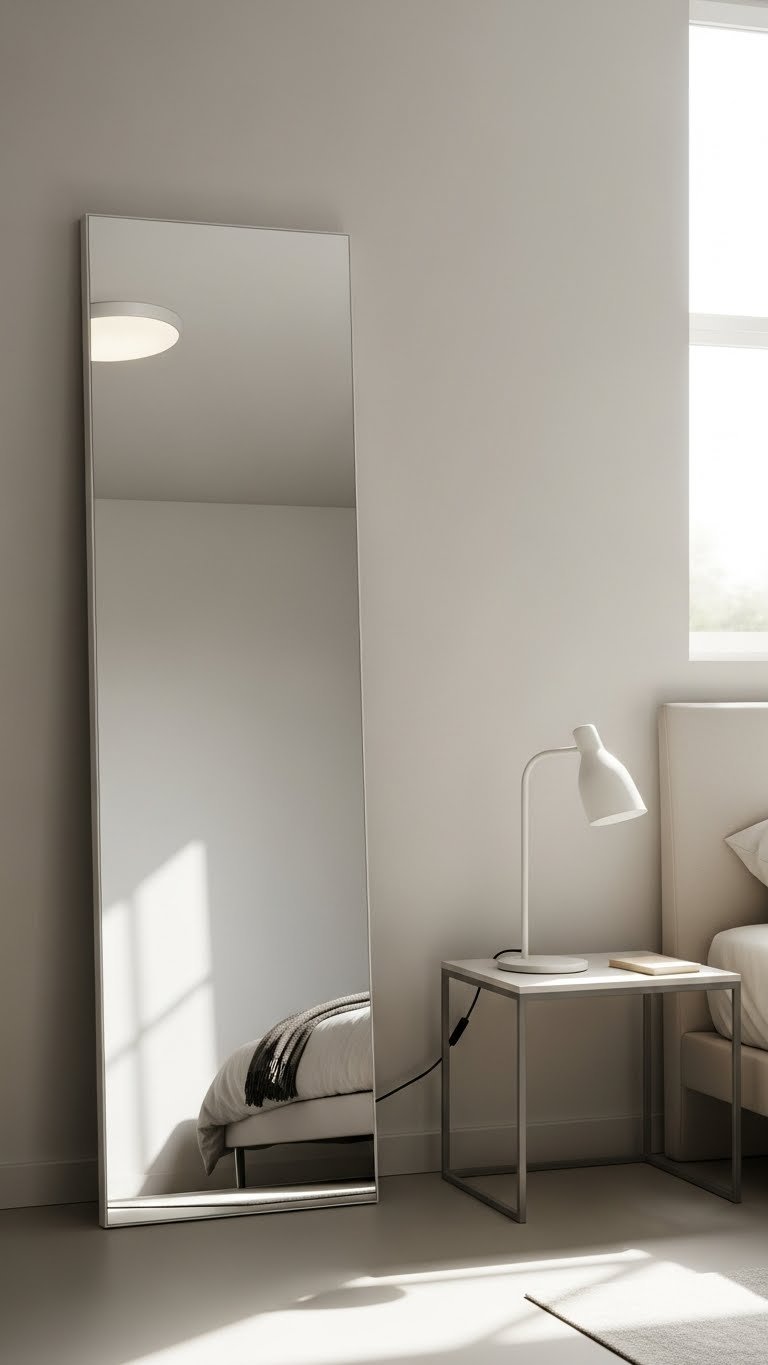
    A tall, narrow mirror beside your bed catches overhead light and reflects it across your bedroom, creating a bright, energized space even in rooms with limited window access.

    Choose a tall, vertical mirror (4–6 feet tall, $50–$200) that you can lean against the wall beside your bed or in a corner. Frameless or minimalist frames work best so the focus stays on the light-reflecting function. This is free if you already own a mirror; simply reposition it. The vertical orientation maximizes ceiling-height reflection, meaning light bounces further than a horizontal mirror would. Position it to catch overhead lights, pendant fixtures, or natural light from windows.

    Your bedroom feels more open and awake. Morning light hits the mirror and bounces around the room, making everything feel brighter and more spacious.


    22. Add Arched Mirrors in a Spa-Like Bathroom

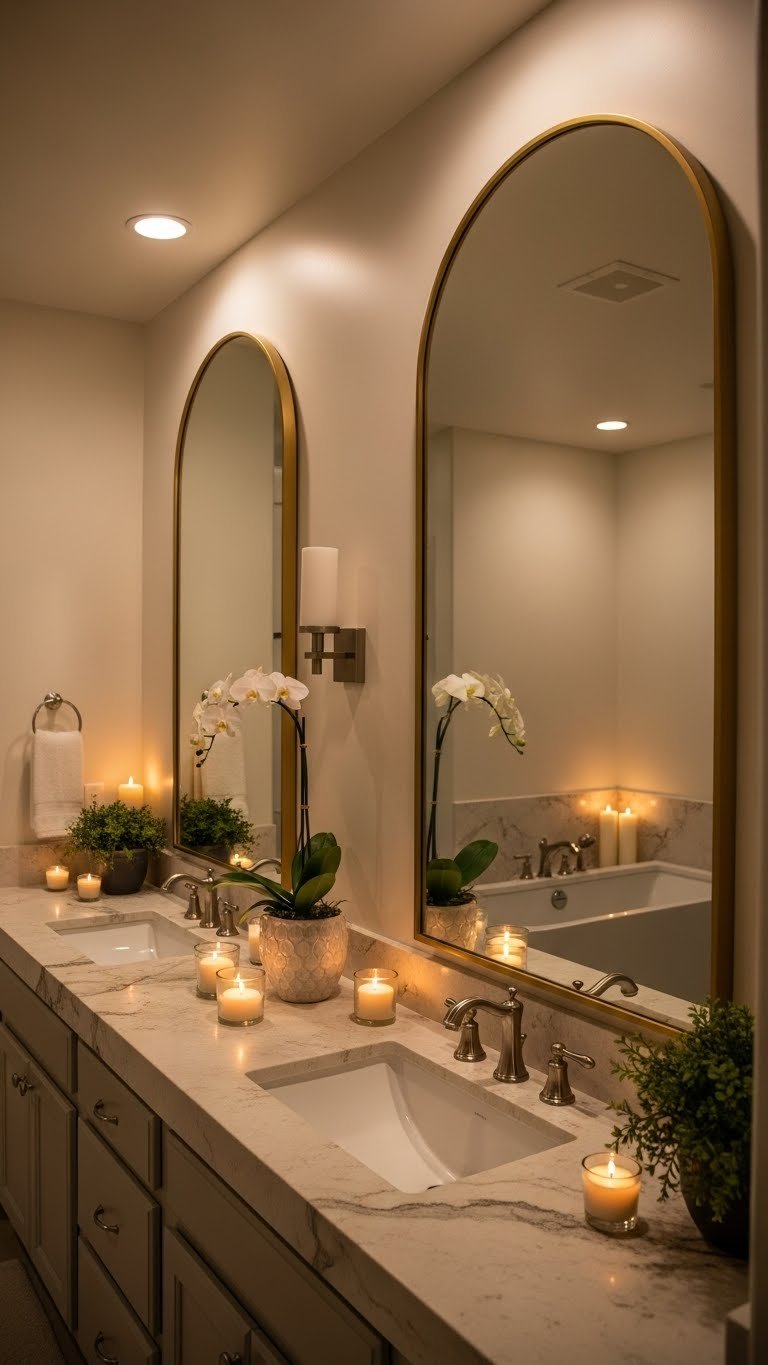
    Arched mirrors soften a bathroom’s straight lines while creating a spa-like aesthetic. The curved shape makes the space feel more relaxing and intentional.

    Arched mirrors in soft finishes—cream, white, or brushed gold—($80–$250 each) pair beautifully with marble or natural stone vanities. Install symmetrically on either side of a mirror or as a single focal point. The soft curves create visual balance and make your bathroom feel less institutional and more like a personal retreat. This is particularly effective in master bathrooms where you’re trying to create a spa-like sanctuary.

    Your bathroom transforms from functional to luxe. The arched mirrors’ soft lines combined with thoughtful lighting create a space where you actually want to spend time, not just rush through your routine.


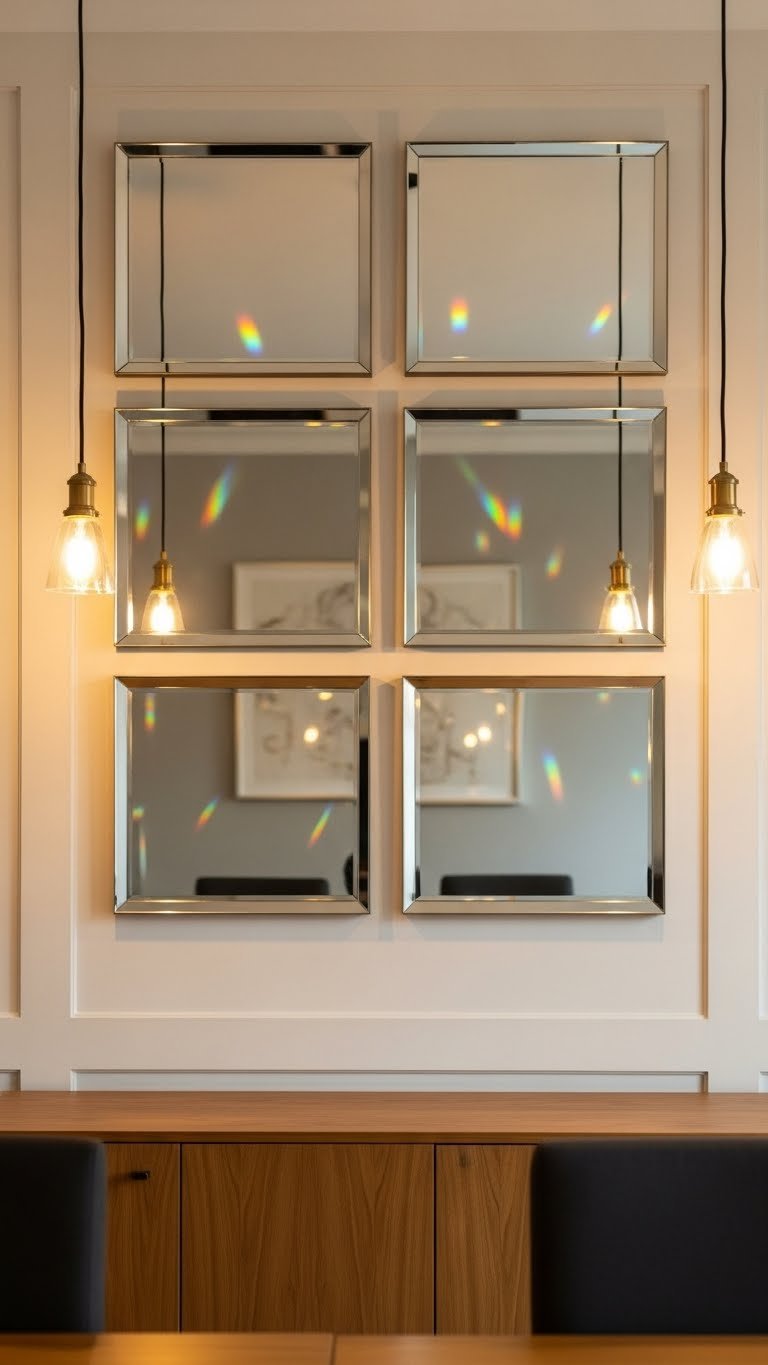
    23. Use a Beveled-Edge Mirror to Create Subtle Sophistication

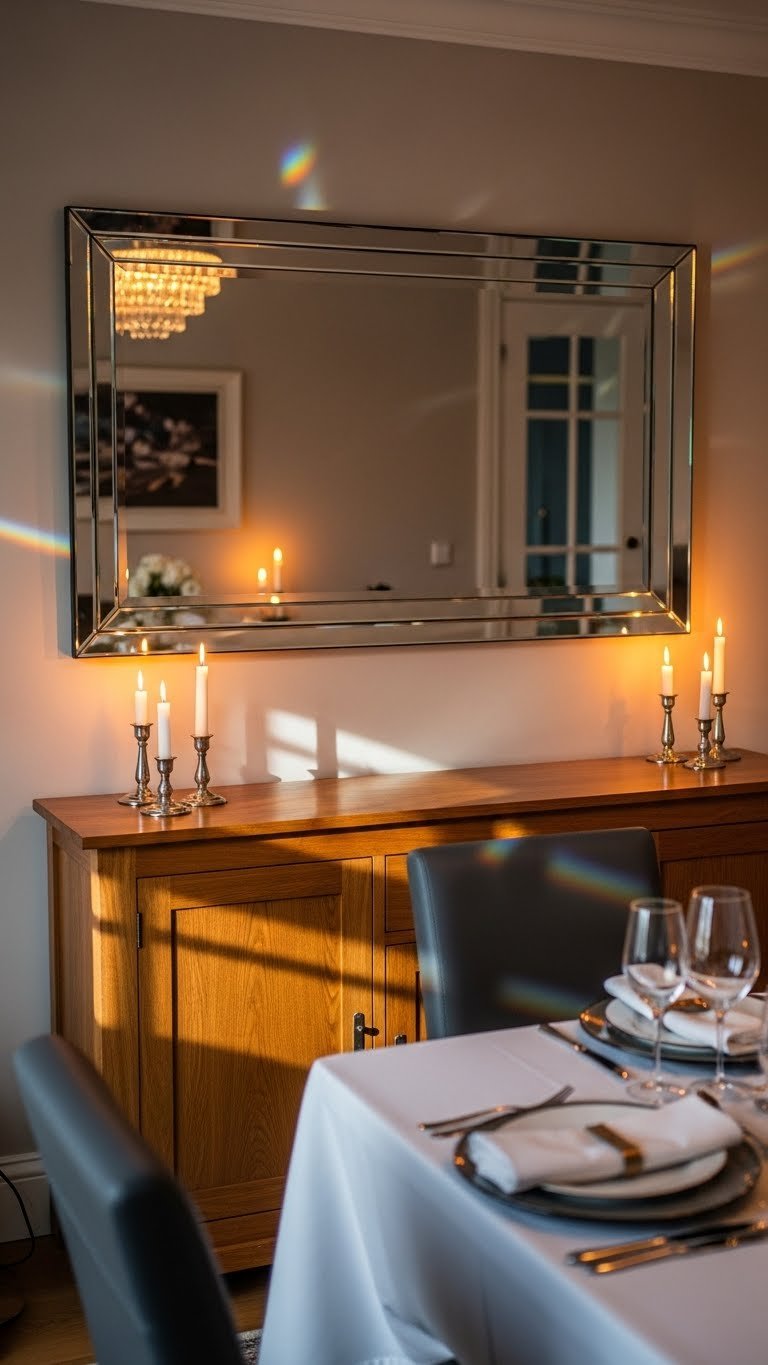
    Beveled-edge mirrors add a layer of sophistication through subtle light refraction. The edges catch and bounce light, creating visual interest without screaming “statement piece.”

    A beveled mirror ($60–$250 depending on size) has polished edges that refract light into subtle rainbows, particularly visible in the right lighting. This detail feels high-end without looking ostentatious. Hang in dining rooms, living rooms, or hallways where ambient lighting will highlight the bevels. Installation is identical to standard mirrors. The bevels look particularly beautiful when paired with warm lighting—candlelight, warm-white bulbs, or sunset light all create gorgeous effects.

    Your mirror becomes a functional art piece. The subtle light play creates sophistication that guests notice and appreciate, even if they can’t quite identify why the mirror feels special.


    24. Create a DIY Mirror Tiles Wall in an Apartment

    Small mirror tiles create dimensional texture while being completely renter-friendly. You can install them with adhesive strips and remove them without wall damage.

    Purchase small mirror tiles—typically 4″×4″ or 6″×6″ ($1–$3 per tile)—from hardware stores or online. Budget $30–$100 depending on wall size. Use removable adhesive strips (Command strips work well) rather than permanent mounting to keep your deposit safe. Arrange in a loose grid pattern with small gaps between tiles for an intentional, modern look. This is a 1–2 hour DIY project requiring only your hands and a level. The cumulative reflective effect makes your apartment feel significantly larger and brighter.

    You’ve created a custom accent wall that expands your space without sacrificing your security deposit. Your apartment feels immediately more curated, and you can reconfigure the tiles anytime you want a refresh.


    Save this post and pick just one idea to tackle this weekend—you’ll be surprised how dramatically a single mirror placement can shift how spacious and bright your room feels. Whether you lean one tonight or commit to a full mirror wall, your space is ready for an upgrade.

  • 26 Stylish Curtain Ideas Trending in Modern Homes

    26 Stylish Curtain Ideas Trending in Modern Homes

    Your curtains deserve to be more than functional—they’re the largest canvas in your room, and the right choice can completely change how your space looks and feels. Whether you’re drawn to calming earthy tones, making a bold statement with jewel-toned velvet, or solving the eternal light-and-privacy puzzle, 2025’s curtain trends offer something for every style and budget. We’ve gathered 26 achievable ideas that work for renters and homeowners alike, from quick styling fixes to investment pieces that’ll last years. Some are free tweaks you can do today, others are weekend projects, and a few are worth splurging on. By the end of this guide, you’ll know exactly which curtain approach matches your space—and your lifestyle.

    1. Layer Sheer and Blackout for Perfect Light Control

    Layering gives you the best of both worlds: soft diffused light during the day and total darkness at night. This classic combo solves the frustration of choosing between privacy and natural light—you don’t have to pick just one anymore.

    Install a blackout curtain rod behind your existing curtain rod (or use a tension rod for renters). Pair lightweight linen or cotton sheers ($15–$40 from IKEA or Target) with blackout panels ($30–$80 from Wayfair or Amazon). Takes about 30 minutes to hang. The sheer layer filters harsh sunlight beautifully, while the blackout panel hides behind it until evening when you need it.

    Pro tip: Match your sheer to your wall color for a seamless, cohesive look. Keep the blackout layer in a complementary neutral.

    You get complete control over your environment without the bulky, all-or-nothing feeling of single curtains. Your mornings feel brighter, your nights darker, and your room works harder for you.

    2. Go Floor-to-Ceiling for Instant Height

    Hanging curtains all the way to the floor (or even pooling slightly) creates an optical illusion that tricks your eye into seeing higher ceilings. This is one of the fastest, most impactful upgrades you can make—and renters can do it too.

    Mount your curtain rod 3–6 inches below the ceiling rather than at the typical window frame height. Measure from ceiling to just above the baseboards (add 2 inches for pooling). Custom lengths run $50–$150, but ready-made 108-inch panels ($20–$50) work fine if your ceilings are standard 8–9 feet. Hanging takes 20 minutes and zero damage if you use damage-free hooks.

    Pro tip: Light or white curtains amplify this effect more than dark colors.

    Your room immediately looks more spacious and intentional. That small bedroom or cramped living room suddenly feels airier, and the whole vibe shifts from “utilitarian” to “designed.”

    3. Embrace Earthy Olive Green for a Grounded Vibe

    Earthy tones like olive green are everywhere in 2025 because they create calm without feeling boring. This shade works in bedrooms, living rooms, and even kitchens—it’s just neutral enough to live with long-term.

    Look for olive green linen or linen-blend curtains ($40–$120 from brands like Etsy small shops, Wayfair, or H&M Home). If you already have white or cream curtains, a fabric dye project ($8 for dye, 1–2 hours) gives you custom color for nearly free. For renters, try removable curtain panels from Amazon ($25–$60).

    Pro tip: Pair olive with warm whites, warm grays, or terracotta accents for a cohesive earthy palette.

    The room takes on a naturally soothing quality that makes you want to spend more time there. You get that expensive, curated interior design feel without overthinking it.

    4. Add Texture with Velvet in Deep Jewel Tones

    Velvet curtains are having a major moment in luxury homes—they photograph beautifully and feel incredibly high-end. Deep jewel tones like emerald, sapphire, and ruby work in formal spaces where they’ll really shine.

    Velvet panels typically run $60–$150 per panel from brands like Anthropologie, West Elm, or Etsy. A single velvet panel layered over a sheer works if budget is tight. Installation is basic (velvet isn’t heavier than regular curtains), and dry cleaning costs $15–$30 per pair annually. Consider this an investment piece—quality velvet lasts 7–10 years.

    Pro tip: Lighter walls and metallic accents (brass rods, gold mirrors) make velvet feel intentional rather than heavy.

    You instantly elevate the formality and luxury of your room. Guests notice, and you notice every time you draw them—there’s something genuinely special about that tactile, rich texture.

    5. Try Monochromatic Color Drenching for Immersion

    Color drenching—matching your curtains to your walls in the same shade—sounds risky but creates a cohesive, high-design look that feels intentional. Your room becomes a sanctuary in one color family.

    Choose your wall color first, then find curtains in the exact same shade or one shade lighter ($30–$100 depending on fabric). Brands like Sherwin-Williams and Benjamin Moore offer paint-matching services; use those paint chips to find fabric matches at fabric stores or Etsy. Requires no special hanging technique—just standard installation.

    Pro tip: Add texture contrast with pillows, throws, or artwork in complementary colors so the room doesn’t feel flat.

    The result is a deeply cohesive, meditative space that feels more expensive than it probably was. Your eye rests, your mind settles, and the room feels like a sanctuary rather than a collection of mismatched pieces.

    6. Mix Bold Patterns Without Clashing

    Bold patterned curtains can overwhelm a room or become a showstopper—it’s all about what you pair them with. The key is anchoring them with neutrals and scale.

    Choose one large-scale pattern (florals, paisleys, retro prints) from retailers like Anthropologie, Etsy, or even Target ($25–$80). Keep walls, sofas, and other major pieces neutral or solid—cream, gray, white, or soft beige. Limit additional patterns to small accents (pillows, artwork) that pull colors from your curtains. Hanging takes standard time; no special considerations.

    Pro tip: If you’re nervous, buy one panel first and see how it feels in your space for a few weeks.

    Your curtains become artwork rather than background, and your room gains personality instantly. You’re not just decorating—you’re expressing something about your taste without the space feeling chaotic.

    7. Install Smart Motorized Curtains for Luxury Living

    Smart curtains are moving from luxury hotels into homes—they’re quieter and easier to install than they used to be. If you’re building a smart home, this is the upgrade that actually improves daily life.

    Budget around $200–$600 for a motorized rod system (brands like Eve, SOMA, or Lutron), plus standard curtain panels ($40–$100). Installation requires basic electrical work or professional help ($200–$400), so factor that in. Voice control through Alexa or Google Home means you open and close them hands-free. Requires WiFi connection and monthly app access.

    Pro tip: Motorized systems work best with heavier fabrics that won’t get tangled.

    You wake up to curtains opening automatically, adjusting light throughout the day without you thinking about it. It’s one of those features that sounds silly until you have it, then you can’t imagine living without it.

    8. Layer Neutrals with Two-Toned Curtain Panels

    Two-toned panels give you the visual interest of a bold choice with the safety of neutrals. This approach works for anyone hesitant about committing to strong color.

    Look for split-color or colorblocked curtains on Etsy or Wayfair ($40–$90 per panel), or create the effect by hanging two different neutral panels side by side. Pair a cream outer panel with a taupe or warm gray center, or reverse it. Installation is standard; this works as well as any other panel.

    Pro tip: Choose colors that sit next to each other on the color wheel (like cream and warm gray) rather than high-contrast opposites.

    You get design sophistication with zero risk. The curtains feel like a deliberate choice rather than “I couldn’t decide,” and the layered visual effect makes your window feel more intentional and styled.

    9. Use Sheer Curtains for Minimalist Breathing Room

    Sheer curtains alone create that minimalist, breathable aesthetic—perfect if you want softness without heaviness. This works especially well in small spaces where blackout curtains would feel oppressive.

    Choose 100% linen or linen-blend sheers ($20–$60 from IKEA, Etsy, or Target). These filter light beautifully without looking plastic-y like polyester sheers. You’ll still have soft privacy during the day; nighttime privacy requires strategic room placement or a roller shade underneath. Hanging takes 15 minutes.

    Pro tip: Layer a simple roller shade underneath for nighttime privacy without adding visual bulk.

    Your space feels open, calm, and intentionally minimal. Morning light feels softer and more pleasant, and the room breathes in a way heavy curtains can’t match. You’re not sacrificing privacy—just rethinking how you achieve it.

    10. Create Drama with Full-Length Linen Panels

    Linen’s casual drape and texture reads as expensive and thoughtful. Full-length panels that pool slightly on the floor amplify this effect—it’s like the curtains are part of your furniture collection.

    Buy linen or linen-blend panels specifically marketed as full-length ($40–$120 from Etsy, West Elm, or Wayfair). Hanging them only 2–3 inches below the ceiling maximizes the height illusion. Natural linen wrinkles are part of the charm—don’t iron them smooth. Installation takes 20 minutes.

    Pro tip: Cream and warm white linen works in almost any design style and never feels dated.

    You get that effortless, “I’ve always had this” feeling. The room looks styled without looking fussy, and the natural texture adds warmth that flat fabrics can’t achieve.

    11. Refresh with Pastel Blues and Greens for Calm

    Soft pastels are having a comeback—they’re calming without being boring, and they work across almost any design aesthetic. Pale blue and sage green are the top choices right now.

    Hunt for pastel linen or cotton at IKEA ($20–$40), Target ($25–$50), or Wayfair ($30–$70). These softer shades work beautifully in bedrooms and nurseries. Pair with white or cream walls and accessories for maximum calm. Standard hanging; takes 20 minutes.

    Pro tip: Avoid trendy millennial pink and lean into classic powder blue or sage green for something that’ll feel fresh for years.

    Your bedroom becomes a retreat instead of just a room where you sleep. You notice the difference in how quickly you relax there—soft color does more work than you’d expect.

    12. Make a Statement with Ruby Red or Sapphire Blue Velvet

    Jewel-toned velvet reads as bold, intentional, and genuinely luxurious. This works if you’re ready to commit to drama and want your window to be the room’s focal point.

    Jewel-toned velvet curtains range from $80–$200 per panel depending on quality (brands like Anthropologie, West Elm, or Etsy). These aren’t subtle—pair them with neutral everything else (walls, furniture, large pieces). Avoid busy patterns that compete. Professional dry cleaning is recommended; budget $20–$30 annually.

    Pro tip: Deep jewel tones work best in rooms with good natural light—otherwise they feel cave-like.

    Your room shifts from “nice” to “designed”—there’s a confidence that comes with committing to bold color. You’re not apologizing for your taste; you’re celebrating it.

    13. Layer Austrian Blinds for Romantic Ornate Details

    Austrian blinds and swags feel nostalgic in the best way—ornate and romantic without being overdone if you choose quality pieces. This approach works in traditional, eclectic, or maximalist spaces.

    Austrian blind kits or custom orders run $80–$250 per window depending on fabric and detail level (available from Etsy, specialty curtain shops, or custom upholsterers). Installation requires a steady hand and patience—30–45 minutes—or professional help ($100–$150). These need gentle cleaning; factor in occasional professional care.

    Pro tip: Pair with solid walls and minimal other window dressing so the ornate details shine.

    You get vintage charm that feels intentional, not accidental. The romantic details give your room character and make you smile every time you look at them—that’s what good design does.

    14. Mix Modern and Traditional with Pleated Headers and Minimalist Tiebacks

    Blending old-school details (pleats, structured headers) with minimalist elements (simple tiebacks, clean rods) creates a sophisticated, balanced look that feels current without being trendy.

    Start with high-quality curtains featuring pencil or pinch pleats ($50–$120 from Etsy, John Lewis, or Wayfair). Add minimalist tiebacks in simple brass, black metal, or fabric ($10–$30 from Target or Amazon). Pair with a sleek rod in matte black or brushed brass. Installation takes 30 minutes.

    Pro tip: Keep the color palette neutral (creams, soft grays, whites) so the hybrid styling stands out rather than competing with bold color.

    You get the tailored sophistication of traditional design with the clean, modern feel of today’s aesthetics. It’s refined without looking stuffy or dated.

    15. Brighten Small Spaces with White Curtains and Reflective Styling

    White curtains aren’t boring—they’re secretly the best tool for making tight spaces feel open and airy. Pair them with reflective elements and they work double-duty.

    Choose white linen, cotton, or linen-blend ($15–$50 from IKEA, Target, or Wayfair). Keep walls white or cream. Add a metallic mirror ($25–$80) on an adjacent wall to reflect light around the room. Hang curtains high and full-length to maximize height. Installation takes 20 minutes.

    Pro tip: White curtains show dust—keep a lint roller nearby for quick maintenance.

    Your tiny space suddenly feels three times larger. Light bounces around differently, the walls appear higher, and you get the open-concept feeling without the financial investment of renovating.

    16. Use Retro Patterns and Trims for 2025 Nostalgia

    Retro patterns (geometric, florals, plaids) are cool again, especially when paired with period-appropriate trim and accessories. This works if you love a bit of personality and aren’t afraid of pattern.

    Hunt for retro-inspired curtains on Etsy ($40–$100) or vintage shops, or find reproduction patterns from brands like Spoonflower ($20 for fabric, plus sewing costs if you DIY panels). Add coordinating trim ($5–$15 per yard from fabric stores) to the bottom or sides for extra visual interest. Sewing trim takes 1–2 hours if you’re handy; otherwise hire someone ($50–$100).

    Pro tip: Let the retro pattern be your statement—keep everything else relatively neutral so it doesn’t feel chaotic.

    Your room tells a story. It’s not following every 2025 trend mindlessly; it’s celebrating a specific era and style that matters to you. That authenticity is always in style.

    17. Install Recycled or Sustainable Linen for Eco-Conscious Decorating

    Sustainable materials matter—they look beautiful, perform well, and align with your values. Recycled or certified sustainable linen is increasingly available and affordable.

    Look for certified organic or recycled linen curtains from eco-brands like Parachute, Etsy sellers, or sustainable retailers ($50–$150). Check for GOTS (Global Organic Textile Standard) or similar certifications. The fabric quality and drape is identical to conventional linen, but you know the production was ethical. Installation is standard.

    Pro tip: Sustainable doesn’t mean sacrificing aesthetics—these fabrics are genuinely beautiful.

    You decorate your home while supporting practices that matter to you. It feels good knowing where your curtains came from, and that confidence shows in how you style your space.

    18. Layer Textured Blackout with Lightweight Linen for Seasonal Flexibility

    Textured blackout fabrics (often woven linen-look blends) are softer and more forgiving than plasticky polyester. Layering them with lightweight linen gives you flexibility to adjust your room’s vibe seasonally.

    Buy heavyweight textured linen-blend blackout ($40–$80) paired with lightweight sheer linen ($20–$40) from Wayfair, Target, or Etsy. Install on two rods (inner and outer). In summer, use mostly sheer for airiness. In winter, close the blackout for warmth and darkness. Takes 30 minutes to hang both layers.

    Pro tip: Choose textures that coordinate—solid linen pairs beautifully with woven textures.

    You get a system that adapts to your needs rather than one static solution. Your room feels fresh when you adjust the layers, and the texture adds visual interest year-round.

    19. Add Embroidered Details for Handmade Character

    Hand-embroidered or embellished curtains turn your window into art. This works if you love handmade details and are willing to pay slightly more for uniqueness.

    Find embroidered curtains on Etsy from artisan sellers ($60–$180 depending on detail level), or commission custom embroidery ($150–$400 total project cost). Alternatively, add embroidery trim yourself ($15–$30) using a sewing machine if you’re comfortable with basic sewing, or hire a seamstress ($30–$75 per panel).

    Pro tip: Keep the base curtain simple and neutral so the embroidery is the star.

    Your window becomes a conversation piece. The handmade quality is obvious, and guests notice the care you’ve put into your space. It’s the kind of detail that makes a room feel genuinely personalized.

    20. Use Bold Geometric Prints as Living Room Focal Points

    Geometric patterns are timeless and read as intentional rather than trendy. One pair of bold geometric curtains can anchor an entire room’s design.

    Source geometric-patterned curtains from Wayfair ($40–$100), Etsy ($50–$120), or even IKEA ($30–$60). Choose a bold, confident scale—small patterns get lost. Keep surrounding colors minimal: walls, sofa, and other major pieces should be solid neutrals. Installation is basic; takes 20 minutes.

    Pro tip: The larger your geometric scale, the bolder the statement. Test it first if you’re nervous.

    Your room gains sophistication through pattern rather than color. The geometric print becomes an artwork that you enjoy looking at daily, and it makes the space feel cohesive and designed.

    21. Install Thermal Lining for Winter Insulation and Year-Round Efficiency

    Thermal linings aren’t visible but work hard—they insulate, reduce outside noise, and cut heating costs. This is a practical upgrade that’s also environmentally responsible.

    Add thermal lining to existing curtains via a tailor or sewing professional ($50–$100 per panel), or buy pre-lined thermal curtains ($60–$150 from Wayfair, Amazon, or specialty curtain shops). Linings add minimal bulk but reduce heat loss by 30–40%. Installation is standard; no extra steps needed.

    Pro tip: Thermal linings work best with heavier fabrics like linen or cotton—lightweight sheers won’t benefit much.

    You notice lower heating bills and a quieter room. The curtains block street noise and maintain indoor temperature, which is practical magic you feel every day.

    22. Try Asymmetrical or One-Sided Curtain Arrangements

    Asymmetrical curtain styling feels intentional and modern—it breaks the “match everything” rule in a good way. This works in modern, eclectic, or minimalist spaces.

    Use one full-length panel instead of matching pairs ($20–$60). Hang it on one side or let it puddle in one corner. Works best on windows where you don’t need both sides covered, like kitchen windows or accent windows in hallways. Takes 15 minutes to hang.

    Pro tip: Pair with a wall-mounted rod so there’s visual interest above the window even when the curtain’s open.

    Your window feels like a deliberate design choice, not a default setup. The asymmetry is subtle enough to feel modern but bold enough that it’s clearly intentional—that confidence reads as good design.

    23. Layer Gauze for Soft Diffusion Without Blocking Light

    Gauze layers create that dreamy, soft-focus quality while maintaining transparency. This works if you want all the visual interest of layering without blocking natural light.

    Buy lightweight gauze panels ($15–$30 each from Target, IKEA, or Etsy) and hang 2–3 layers on the same rod or separate tension rods. Gauze is inexpensive enough to experiment. Installation takes 20 minutes for multiple layers. These don’t need special washing—throw them in the delicate cycle when dusty.

    Pro tip: Varying the spacing between layers creates more visual depth than bunching them together.

    The soft, ethereal quality instantly creates a peaceful mood. Your room feels like it’s slightly out of focus in the best way—calm, dreamy, and genuinely relaxing.

    24. Add Statement Tassels or Tie-Back Trims for Vintage Glamour

    Statement tassels and trims elevate basic curtains into something special. This works as a finishing touch that costs little but makes a big visual impact.

    Source coordinating tassels and trim from fabric stores ($5–$20 per yard for trim, $10–$30 for statement tassels) or Etsy. Sew or glue them to basic curtains following simple tutorials (DIY, 1–2 hours) or hire a seamstress ($30–$75). The customization feels expensive but costs far less than replacing the curtains.

    Pro tip: Gold and silver tassels work with almost everything; jewel tones are riskier but stunning with the right palette.

    Your basic curtains suddenly feel custom and high-end. The trims catch light and add visual interest that transforms “adequate” into “designed.” It’s one of those small touches that makes people ask where you bought the curtains.

    25. Use Sheer Overlay Patterns to Create Custom Designs

    Sheer patterned overlays (especially embroidered or damask designs) let you customize basic curtains without commitment. This is a renter-friendly way to add intricate visual interest.

    Layer a sheer patterned panel ($25–$60 from Etsy or specialty curtain shops) over your basic curtains. Attach with clips, tension rods, or magnetic strips—zero permanent installation. The overlay creates depth and visual texture without hiding your base layer. Takes 15 minutes to install.

    Pro tip: Keep your base curtains neutral so the overlay pattern reads clearly.

    Your window gains sophisticated detail and visual interest without the commitment of replacing curtains. It’s an affordable way to experiment with ornate designs before you invest in patterned curtains.

    26. Install Café-Style Curtains for Vintage Farmhouse Charm

    Café curtains (covering only the bottom half of the window) are vintage-charming and practical for kitchens and bathrooms where you need privacy below but light above. This style is having a major comeback.

    Look for café curtain kits or sets ($20–$60 from Target, Etsy, or IKEA), or make your own by hemming standard fabric to half-window height. Mount a simple rod halfway up the window frame. Takes 20 minutes. These are perfect for kitchens where you want to see out while maintaining privacy from street level.

    Pro tip: Pair with simple brass or black metal rods and basic tiebacks for authentic farmhouse vibes.

    Your kitchen or bathroom gains instant vintage charm without sacrificing light or views. The style feels intentional and cozy—it’s that farmhouse aesthetic that never actually goes out of style.


    SOFT CTA:

    Save this post for your next window refresh, and pick just one idea to try this month—whether it’s adding a thermal lining, testing a bold color, or layering your first sheer-and-blackout combo. Small curtain changes create surprisingly big room transformations.