Introduction
Your countertop coffee area probably feels chaotic—coffee grounds scattered, mugs piled up, supplies shoved in random corners. The good news? You don’t need a massive overhaul to create a functional, beautiful coffee station that actually stays organized. Over the next 24 ideas, you’ll discover smart storage solutions, styling tricks, and budget-friendly hacks that transform even the tiniest counter space into a place where everything has its spot. Whether you’re working with 2 feet or 20, renting or owning, these ideas work together or standalone to make your morning ritual smoother and your kitchen prettier in the process.
1. Use a Slim Rolling Cart for Movable Storage
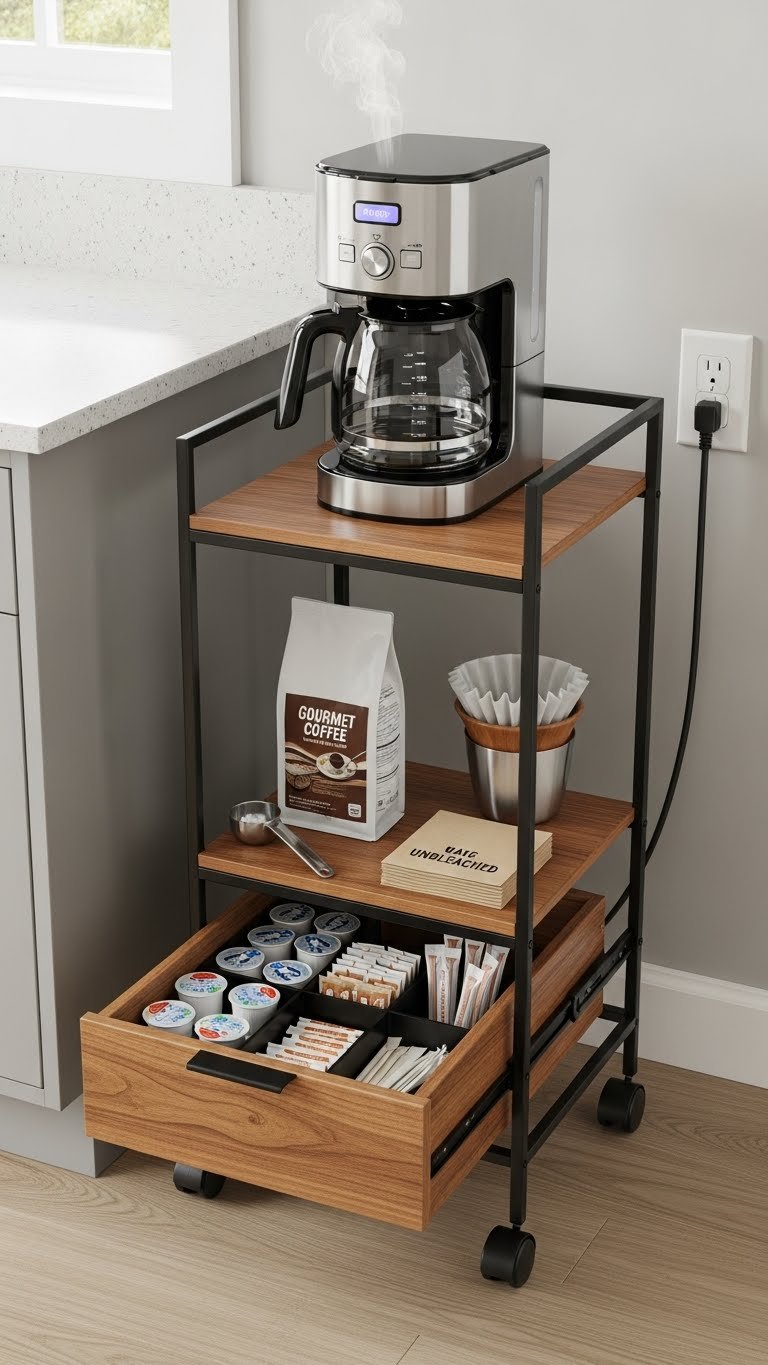
A rolling cart gives you dedicated coffee real estate without stealing permanent counter space. You can pull it out when you need it and tuck it into a corner or beside the fridge when guests arrive—perfect for renters who can’t commit to fixed storage.
Choose a slim cart 15–18 inches wide from IKEA (Raskog, $30–$50) or Target. Arrange your coffee maker on the top shelf for easy access, filters and beans on the middle tier, and mugs or supplies below. Add casters with locks so it won’t slide when you’re reaching for things. The whole setup takes under 10 minutes to assemble.
The best part? You can redecorate or relocate your entire station in seconds. If you move, it goes with you.
2. Install a Magnetic Knife Strip for Coffee Scoops and Spoons
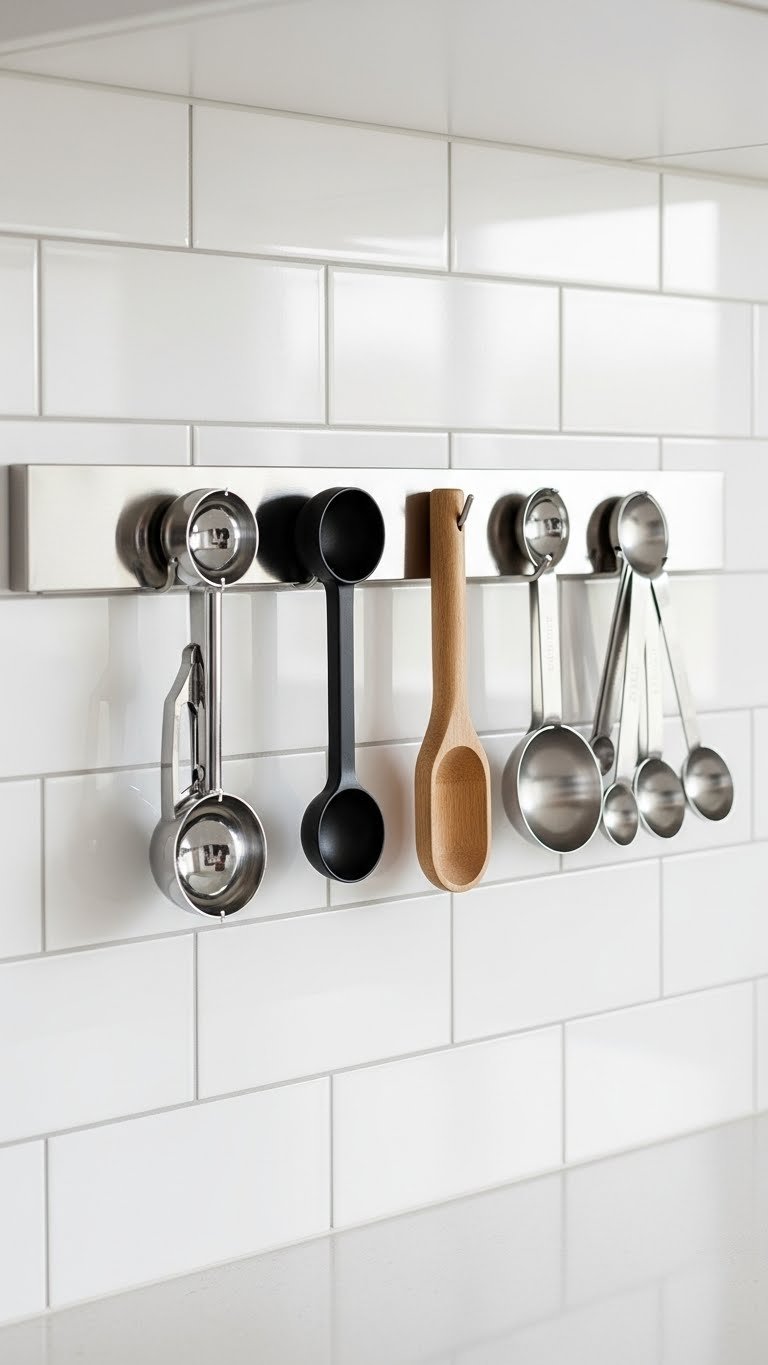
Magnetic strips aren’t just for knives—coffee scoops, spoons, and measuring clips stick right to them, freeing up drawer space. Mount one 12–18 inches above your counter with included screws ($8–$15 from Amazon or Home Depot).
Installation takes 15 minutes. Use a level to ensure it’s straight, drill pilot holes first if your walls are plaster, and secure with wall anchors if you hit studs. Make sure your scoops and spoons are stainless steel or have metal components—test them with a magnet before buying.
Now every tool you reach for is visible and within arm’s reach. Your drawers finally have breathing room.
3. Organize Beans in Airtight Glass Containers with Labels
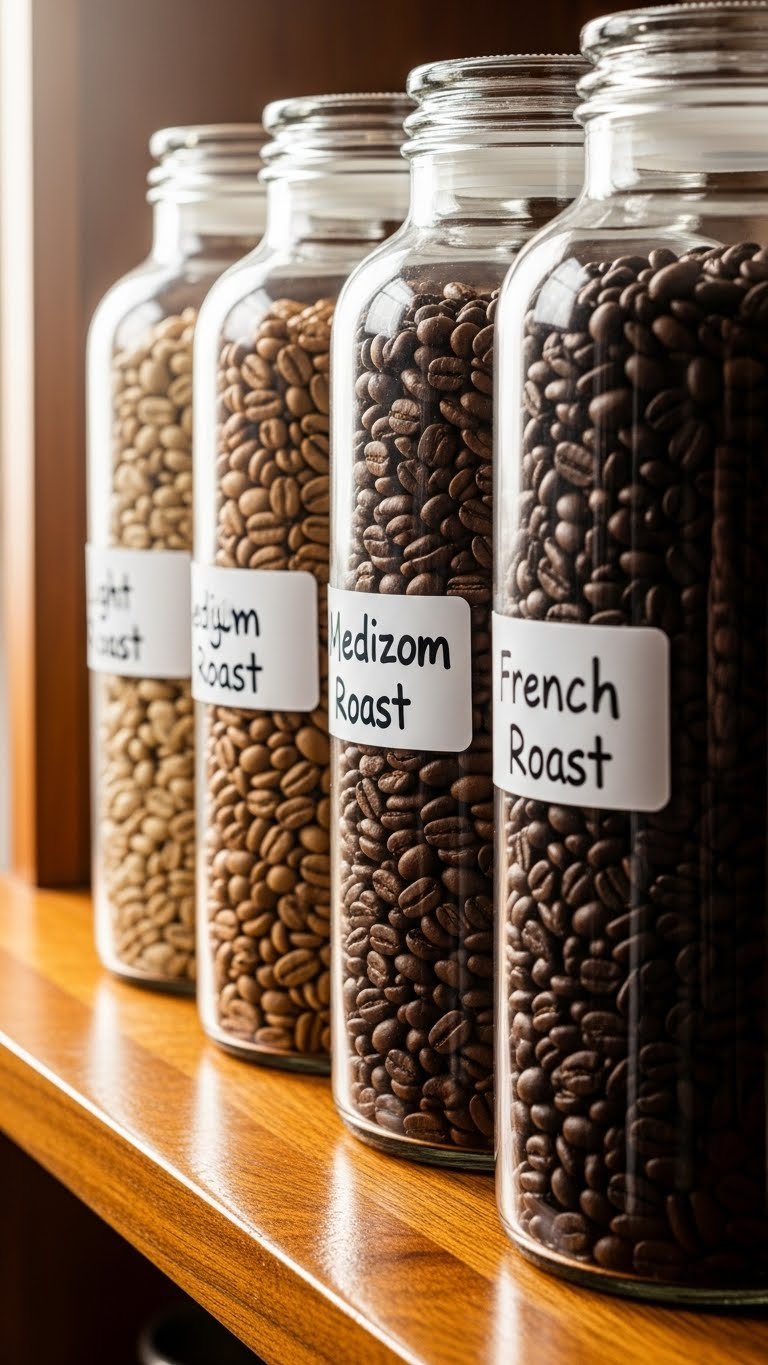
Clear containers let you see when you’re running low on beans, and airtight seals keep them fresh. Three matching containers cost $20–$40 at Container Store, Bed Bath & Beyond, or Amazon. Grab a label maker ($15–$30) or use white adhesive labels and a pen.
Transfer whole beans or grounds into containers, seal them tight, and label with the roast name and purchase date. Arrange them on a shelf or cart in order by roast level or purchase date. This setup takes 20 minutes and works for ground coffee too.
Your counter looks curated, and you’ll know exactly what you have without opening five bags.
4. Mount a Wall-Mounted Shelf Above the Station
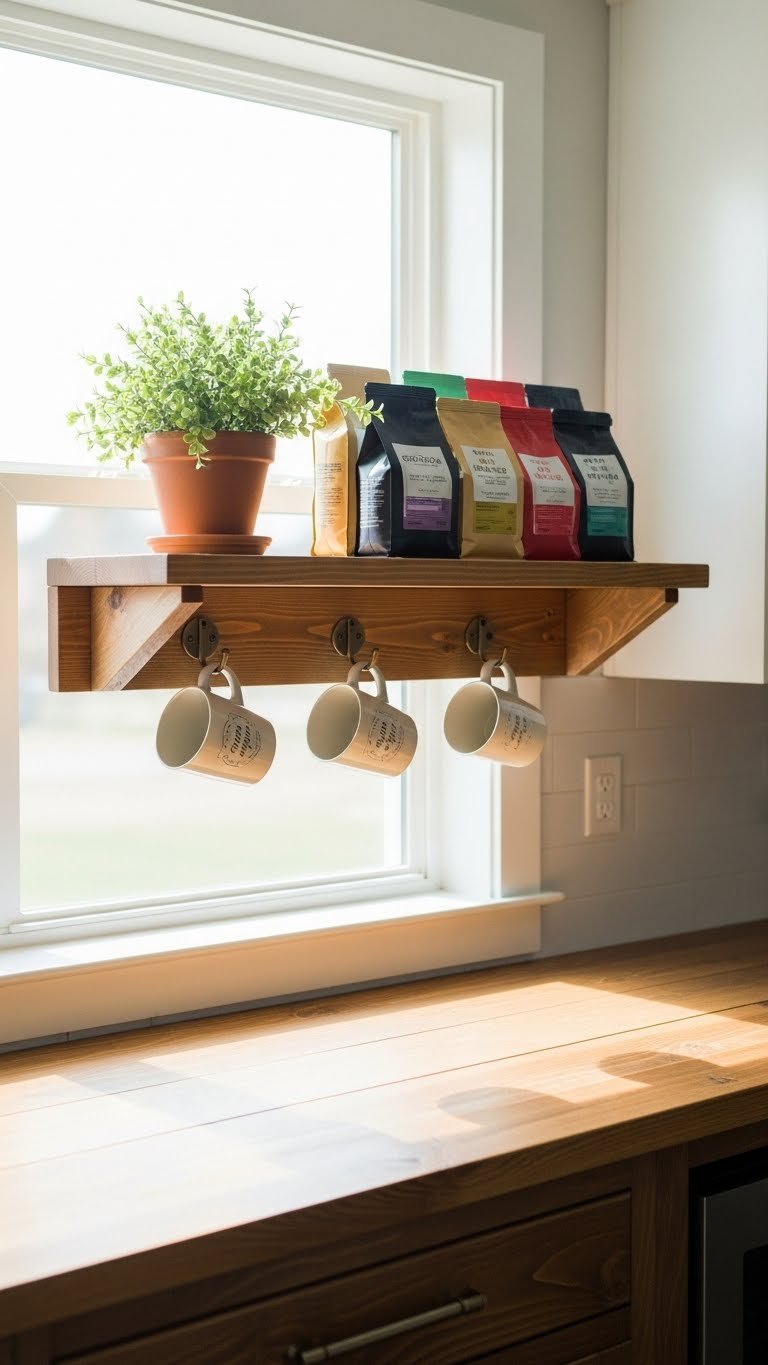
Wall space is prime real estate—use it to keep your counter clear. Install a 24–36 inch floating shelf ($30–$80 from IKEA, Home Depot, or Wayfair) about 18 inches above your countertop station.
Use a stud finder to locate wall studs, mark holes, and secure shelf brackets with heavy-duty screws. Most shelves arrive with installation hardware. The whole job takes under 30 minutes (or hire a handyperson for $50–$100 if you’re not comfortable drilling).
Hang mugs from hooks, stack coffee bags, or display a small plant. Your counter stays clear, and you’ve created a focal point.
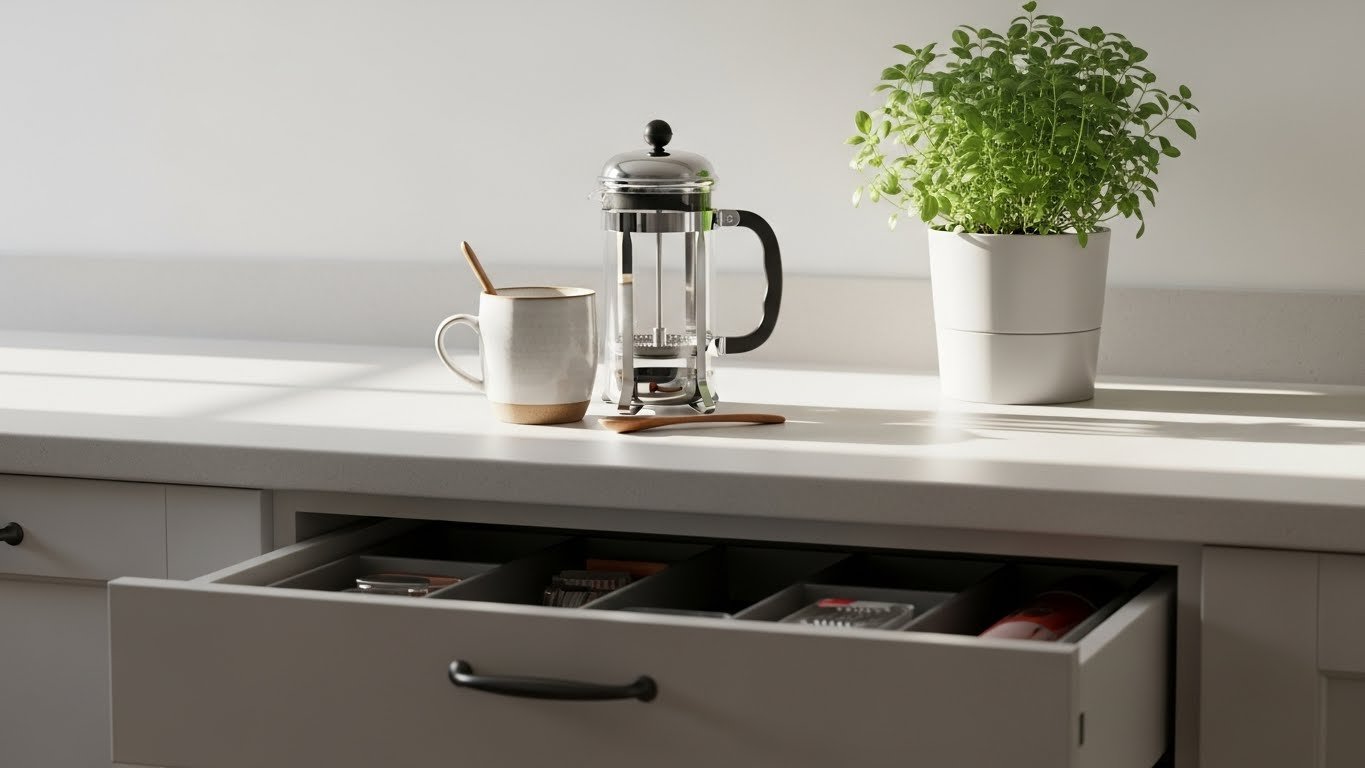
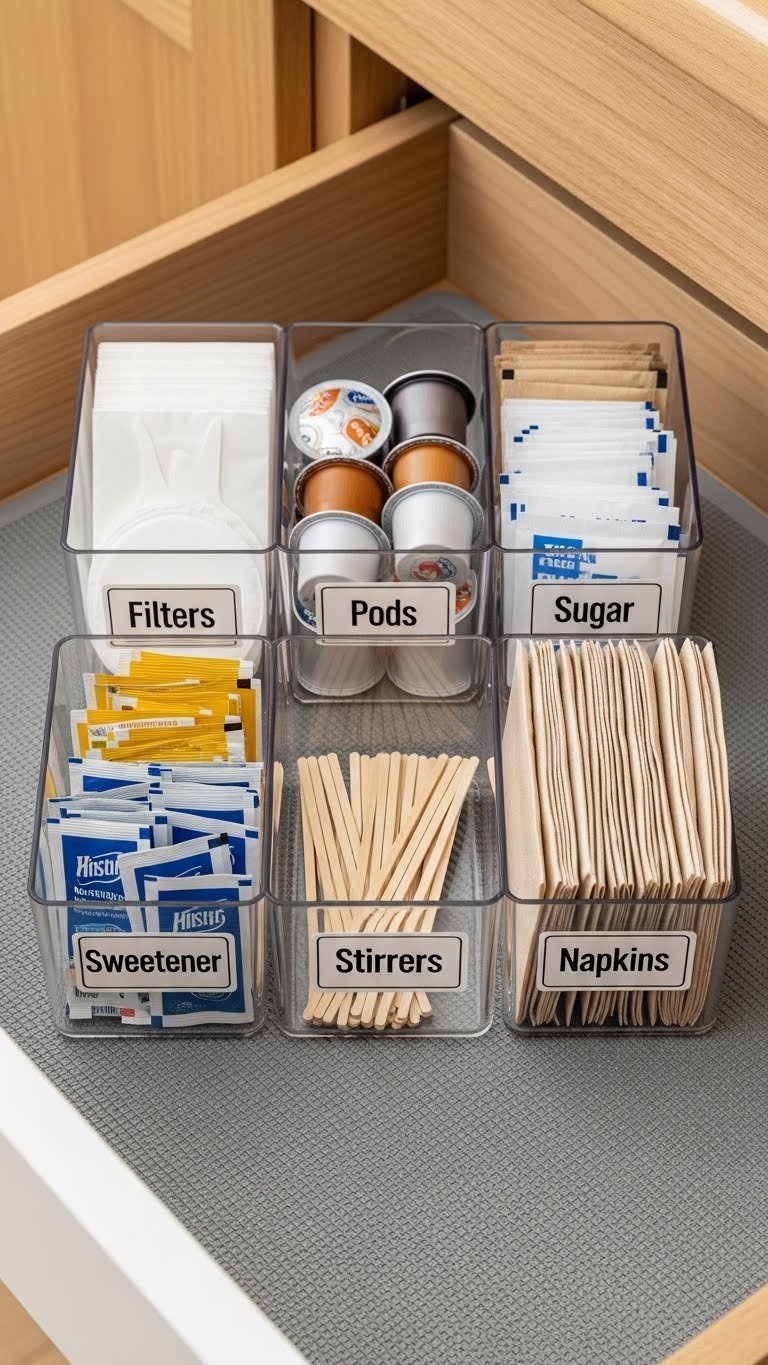
5. Use Drawer Dividers to Organize Coffee Pods or Filters

Filters, pods, and paper sleeves multiply fast in drawers. Bamboo dividers ($12–$20 on Amazon) create instant organization without removing anything from your counter.
Measure your drawer depth and width, choose dividers that fit snugly, and assign one section to each supply: filters in one, pods in another, sweeteners or cream packets in another. No sliding around, and you’ll grab what you need in seconds.
This $15-minute project eliminates “where are the filters?” moments forever.
6. Create a Coffee Prep Station with a Small Tray
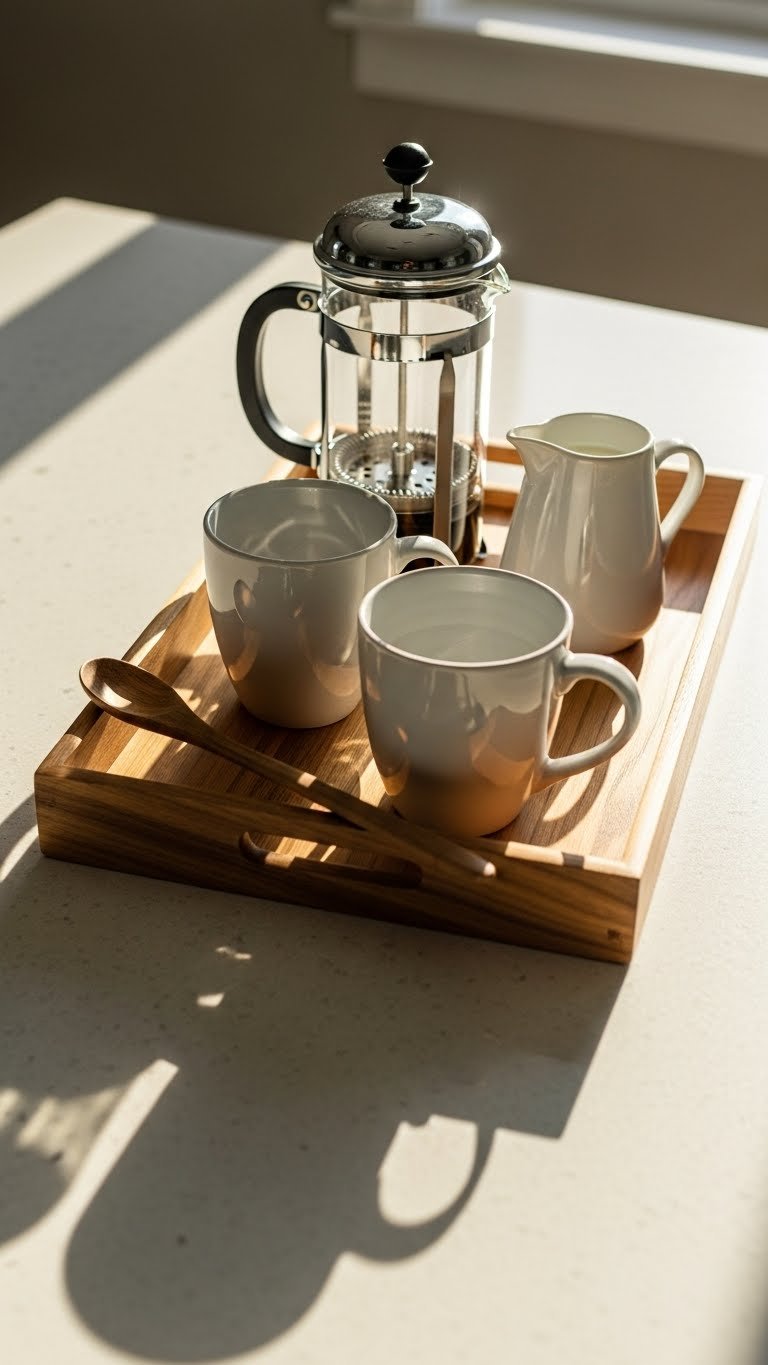
A tray contains everything in one visual space and moves easily if you need to reset your counter. Grab a wooden or metal tray ($15–$40 from Target, West Elm, or HomeGoods) that’s at least 18 by 12 inches.
Group your daily-use items on it: French press, one to two mugs, a small spoon, sugar bowl. Leave other supplies in drawers or on shelves. The tray becomes your “coffee zone”—organized, portable, and beautiful. If you spill something, you’re containing the mess.
Everything your morning needs sits in one spot, and your kitchen looks intentional.
7. Install a Pegboard for Customizable Storage

Pegboards let you arrange storage however you want and adjust it as your needs change. Grab a 24 by 24 inch pegboard ($15–$30 from Home Depot or Lowe’s), paint it to match your kitchen ($5–$10 for primer and paint), and install it with wall anchors.
Add wooden pegs ($10–$15 for a set) and hang small baskets, hooks, or cups. Hang your coffee scoop, a cloth, measuring cups, or small supply containers. Arrange them at eye level above your counter station. Installation takes under an hour, and rearranging takes minutes.
Your coffee tools are visible, accessible, and you’ve created a gallery-worthy wall.
8. Use Tension Rods Under Shelves to Add a Second Tier
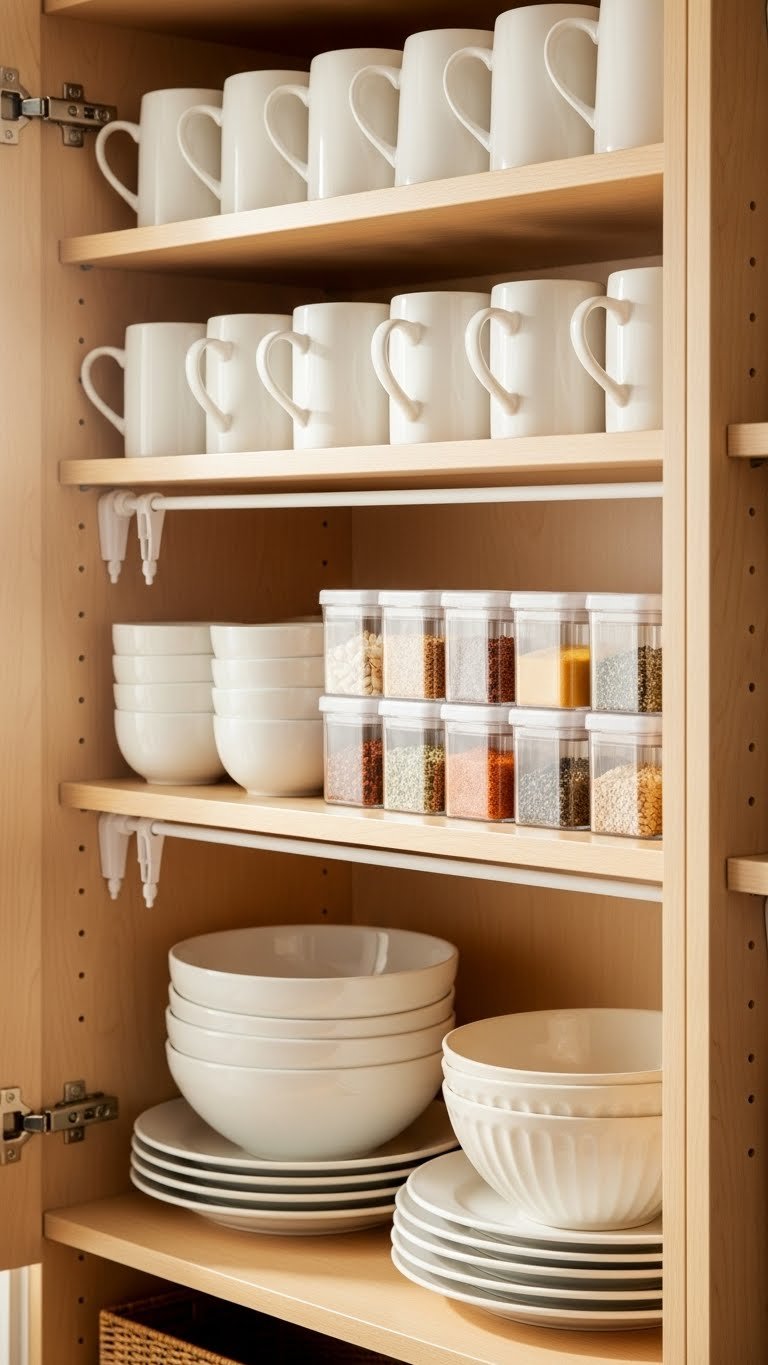
Tension rods fit inside existing shelves or cabinets, giving you an instant second tier for mugs or supplies. Grab two to four rods ($8–$15 each from Amazon, Target, or Home Depot) and adjust them to fit your shelf width.
Pop them in place, and you’ve instantly doubled shelf capacity. Slide stacked mugs or small containers underneath. No tools required—it’s renter-friendly and reversible. This 5-minute setup costs under $30.
You’ve squeezed more storage out of existing space and didn’t drill a single hole.
9. Label Everything with a Label Maker for Instant Organization
Labels prevent the “I know we had these” scramble and make it easy for family or guests to find what they need. A label maker ($15–$30 from Amazon or Target, or free if you use a pen and adhesive labels) is the fastest way to create uniform, professional-looking organization.
Print labels for all your containers, drawers, and shelves. Use consistent fonts and sizing. It takes 20 minutes and transforms a chaotic setup into something that looks curated. Even renting spaces benefit from removable labels.
Now you have a system anyone can follow, and your counter looks magazine-ready.
10. Store Mugs Vertically with a Mug Rack or Shelf

Vertical mug storage frees counter space and turns your collection into decor. Install a mug rack or shelf ($20–$50 from IKEA, West Elm, or HomeGoods) at eye level near your coffee station.
Mount it with wall anchors (no stud needed for lightweight racks), arrange mugs by color for a cohesive look, and leave two to three empty spots for rotation or guests. The installation takes 20 minutes, and you’ve reclaimed 2–3 square feet of counter.
Your favorite mugs are always visible and ready to grab, and you’ve created a focused coffee corner.
11. Use a Bamboo Utensil Holder for Spoons and Scoops

A bamboo utensil holder corrals small tools in one spot and costs just $8–$15 from Target, IKEA, or Amazon. Grab one that’s at least 4 inches tall and 3 inches in diameter.
Fill it with your coffee scoop, measuring spoons, small stirring spoons, and measuring clips. Place it right beside your coffee maker or on your prep tray. It takes 2 minutes to set up and immediately declutters your counter.
Everything you need is within arm’s reach, standing upright and easy to spot.
12. Mount a Small Shelf for Cream and Sweetener Bottles

A slim shelf or ledge ($15–$40) mounted right at counter height keeps bottles off the surface and visible. Install it 12–18 inches above your main coffee prep area using wall anchors or studs.
Arrange cream, sweetener, and syrup bottles on it in order of how often you use them. This works especially well for small kitchens where counter space is precious. Installation takes 15 minutes.
Your bottles are visible, accessible, and your counter suddenly feels twice as big.
13. Repurpose a Small Vintage Cabinet as a Coffee Bar
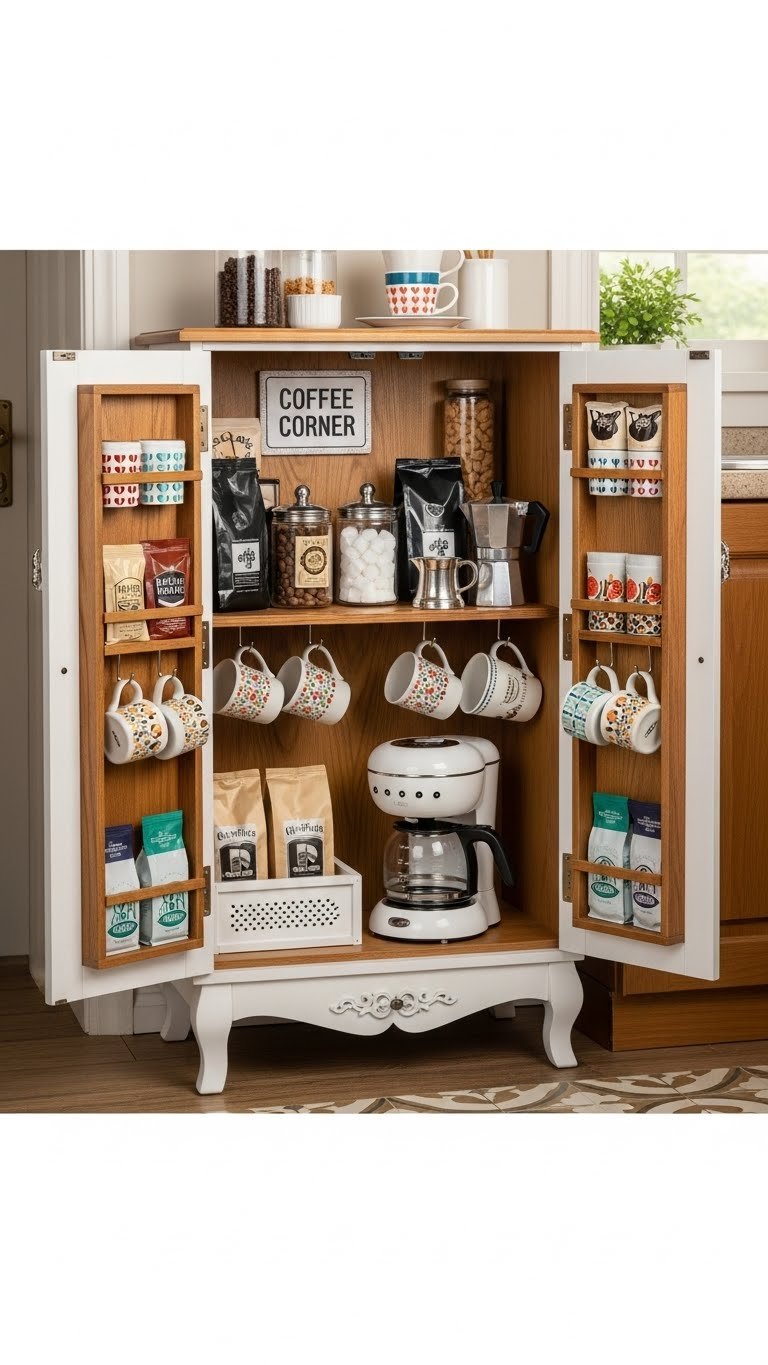
A small vintage or thrifted cabinet ($30–$100 from Facebook Marketplace, thrift stores, or Craigslist) creates an entire self-contained coffee station. Look for cabinets with a flat top and shelves inside.
Place your coffee maker, beans, mugs, and supplies inside, and close the doors when you’re done. This café core approach works beautifully in small kitchens or studio apartments. You’ve essentially created a coffee nook that takes up no visual counter space when closed.
Your kitchen looks curated, and you’ve given your morning ritual its own dedicated “room.”
14. Use Clear Acrylic Containers to Stack and Display Supplies

Stackable acrylic containers ($20–$35 for a set of three from Container Store, Target, or Amazon) let you stack supplies vertically while keeping everything visible. Choose containers with snap lids to protect contents from moisture.
Fill each tier with different supplies: pods or beans on top, filters in the middle, napkins or sweeteners below. Stack them neatly on a shelf or corner of your counter. This arrangement takes 10 minutes and saves significant counter real estate.
Your supplies are stacked efficiently, nothing gets lost, and the clear containers look intentional and clean.
15. Install a Over-the-Door Shoe Organizer for Coffee Pods

An over-the-door organizer ($10–$20 from Amazon, Target, or Dollar Tree) transforms cabinet doors into storage real estate. Choose one with 12–16 pockets.
Hang it on the inside of a cabinet door or a wall-mounted frame, and fill each pocket with a different pod variety, filters, or supplies. You’ve created vertical storage that’s completely hidden when the door closes. Installation takes 5 minutes—just adhesive strips or a few small nails.
This renter-friendly hack holds a huge volume of supplies in a space that was previously wasted.
16. Create a Coffee Station in a Small Corner with a Corner Shelf

Corner shelves ($30–$60 from IKEA, Wayfair, or Home Depot) make use of dead space most kitchens ignore. Install a corner shelf unit with two to three tiers.
Mount it 18–24 inches above your counter using wall anchors in both walls. Arrange your coffee maker on the top shelf, mugs on the middle tier, and supplies or decor below. This approach works in kitchens where counter space is extremely limited. Installation takes 30 minutes if you’re comfortable with a level and drill; otherwise, hire help for $50–$75.
You’ve claimed an overlooked corner and created a focused coffee zone that feels special.
17. Use a Tiered Shelf Riser to Add Vertical Display Space
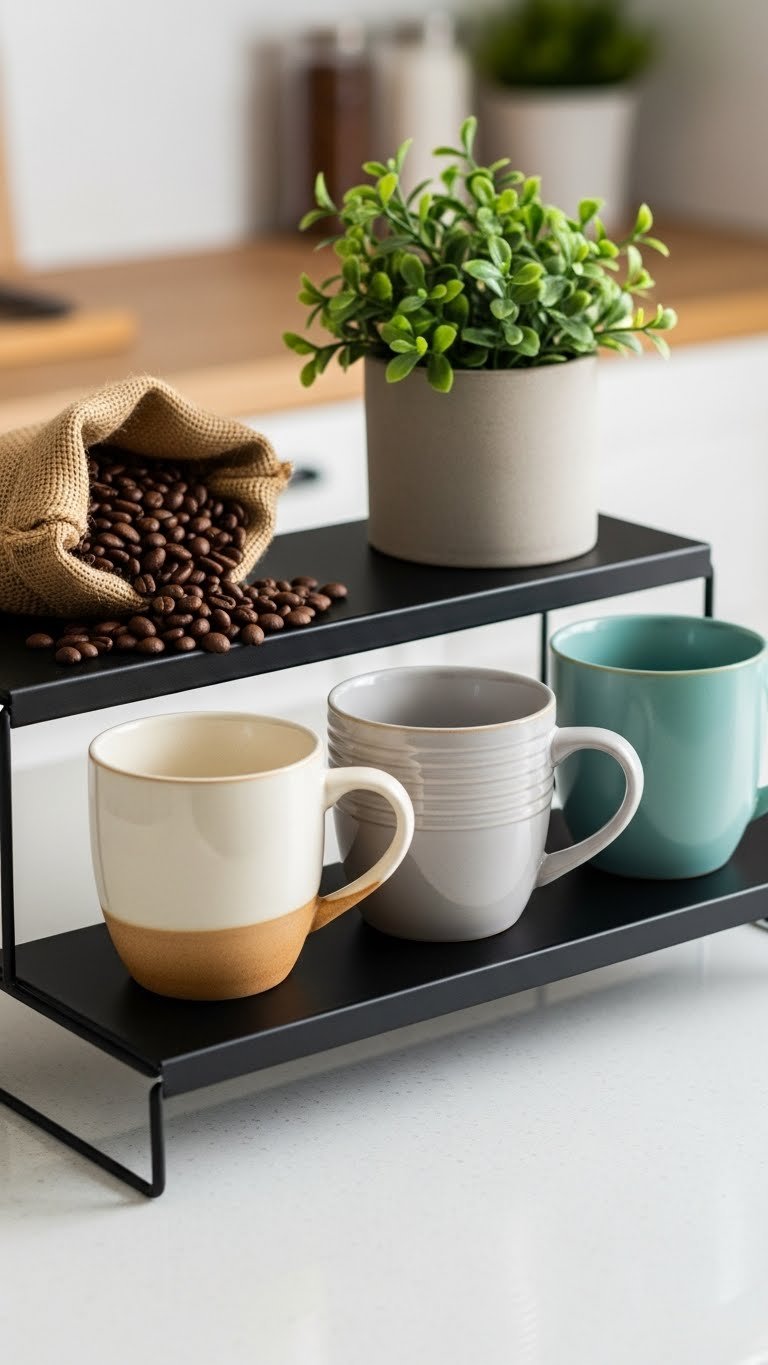
A tiered shelf riser ($20–$40 from Container Store, Target, or Amazon) adds visual depth and storage to a countertop without eating into counter real estate. Look for risers that are 12–15 inches tall.
Place your daily-use mugs in front, supplies or decor in back. The riser creates visual interest, makes your station look intentional, and lets you fit more in the same footprint. No installation needed—just place and arrange. Setup takes 10 minutes.
Your coffee area now has dimension and style, and nothing’s actually taking up more space.
18. Mount a Slim Spice Rack for Coffee and Extras
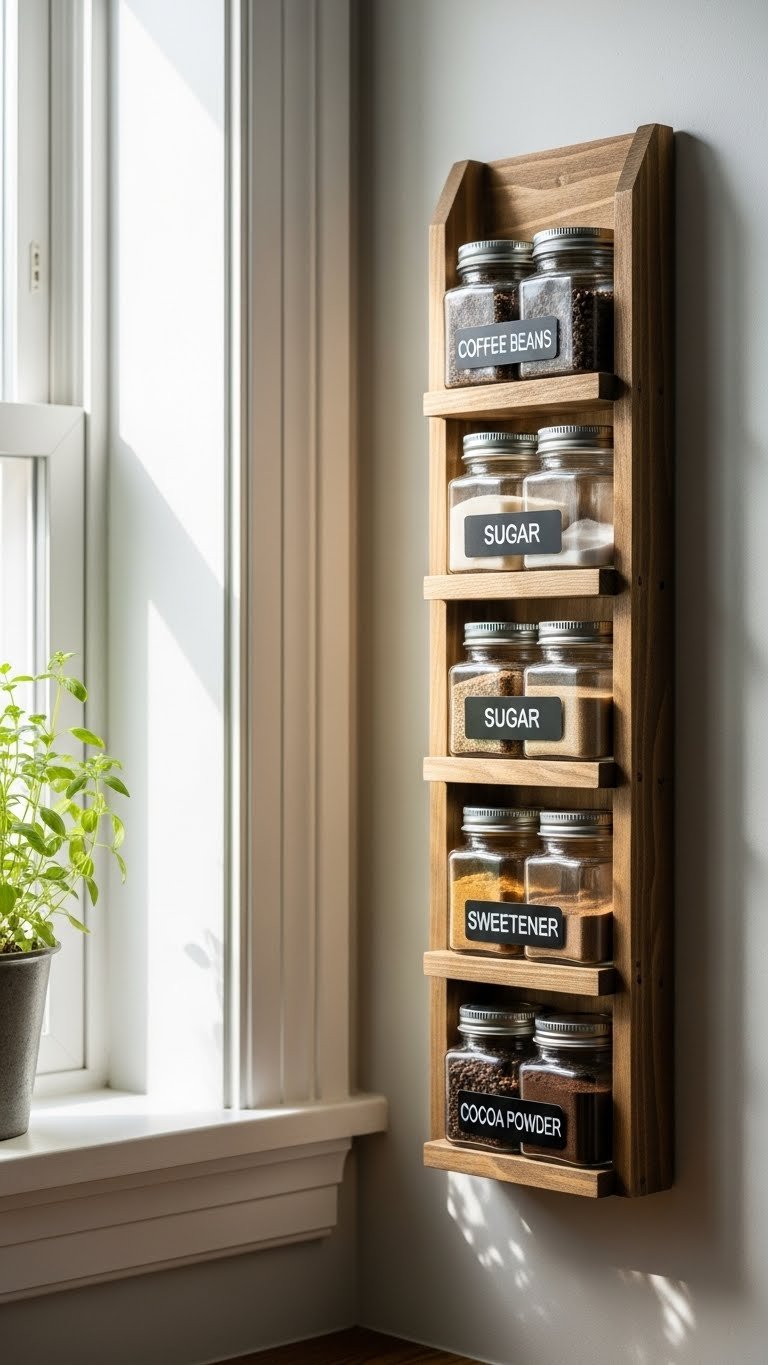
A thin wall-mounted spice rack ($15–$30 from IKEA, Target, or Amazon) holds small jars of beans, sugar, and sweetener in a footprint that’s only 4–6 inches wide. Look for racks with three to five shelves.
Install it above your counter or beside your main station using wall anchors. Fill small glass jars with supplies and label them. This approach works beautifully in tiny kitchens. Installation takes 15 minutes.
You’ve created an organized, vertical coffee supply zone that looks like part of your kitchen design, not a haphazard collection.
19. Use Lazy Susan Turntables for Easy Access to Supplies

Lazy susans ($15–$30 for a set from Target, Amazon, or HomeGoods) let you rotate supplies to the front without digging. Choose ones that are 10–12 inches in diameter.
Place one at your prep station holding cream, sweetener, and syrups. Place another beside it for mugs or filters. Spin them to reach what you need—no more stretching or fishing. They work beautifully on small counters or carts. Setup takes 3 minutes.
Now every supply rotates into reach, and your station feels more functional and easier to navigate.
20. Install Adhesive Under-Cabinet Lighting for Visibility

Under-cabinet LED strips ($25–$50 from Amazon, Home Depot, or IKEA, often wireless and rechargeable) brighten your prep area and make it feel like a dedicated café corner. Choose warm white bulbs for a cozy vibe.
Apply adhesive strips under your cabinet and turn them on during morning prep. Many versions are rechargeable and don’t require electrical work—perfect for renters. Installation takes 10 minutes, and you’ve created ambiance and functionality at once.
Your coffee station now has its own lighting, feels intentional, and looks Instagram-ready even at 6 a.m.
21. Use Clear Magazine Holders to Corral Coffee Bags

Clear magazine holders ($10–$20 for a set of three from Container Store, Target, or Amazon) keep coffee bags upright, visible, and protected. The vertical filing system works like a mini filing cabinet for beans.
Stand bags vertically so you see the label immediately and can grab one without toppling others. Place holders on a shelf or high counter spot. This method takes 5 minutes to set up and prevents bags from crumpling or getting lost in the back of a cabinet.
Your coffee bean rotation becomes clear, and you’ll use beans before they go stale.
22. Add Hooks Under Shelves or Cabinets for Tea Towels

Adhesive or screw-mounted hooks ($8–$15 for a set from Amazon or Home Depot) hang cloths and aprons right at your station. Choose hooks that complement your kitchen style.
Mount three to four hooks under your cabinet or shelf, and hang tea towels, cloths, or aprons for quick cleanup. Screw-mounted hooks are sturdier; adhesive hooks work on most surfaces and require no drilling. Installation takes 10 minutes.
You’ve created a cleanup station within your coffee zone, and cloths are always within reach instead of buried in a drawer.
23. Create a Coffee Caddy with a Divided Wooden Box

A wooden caddy or divided box ($15–$35 from IKEA, HomeGoods, or Etsy) combines storage and portability. Look for caddies with four to six compartments.
Fill each section with a different supply or tool: beans in one, filters in another, sweetener and spoon in others. The entire station becomes portable—you can move it to a different counter or table if needed. It takes 5 minutes to fill, and you’ve created a self-contained coffee bar.
Your supplies are organized by category, the setup looks curated, and you can move your whole station if you need more counter space for cooking.
24. Use Jar Labels and Matching Containers for a Cohesive Look
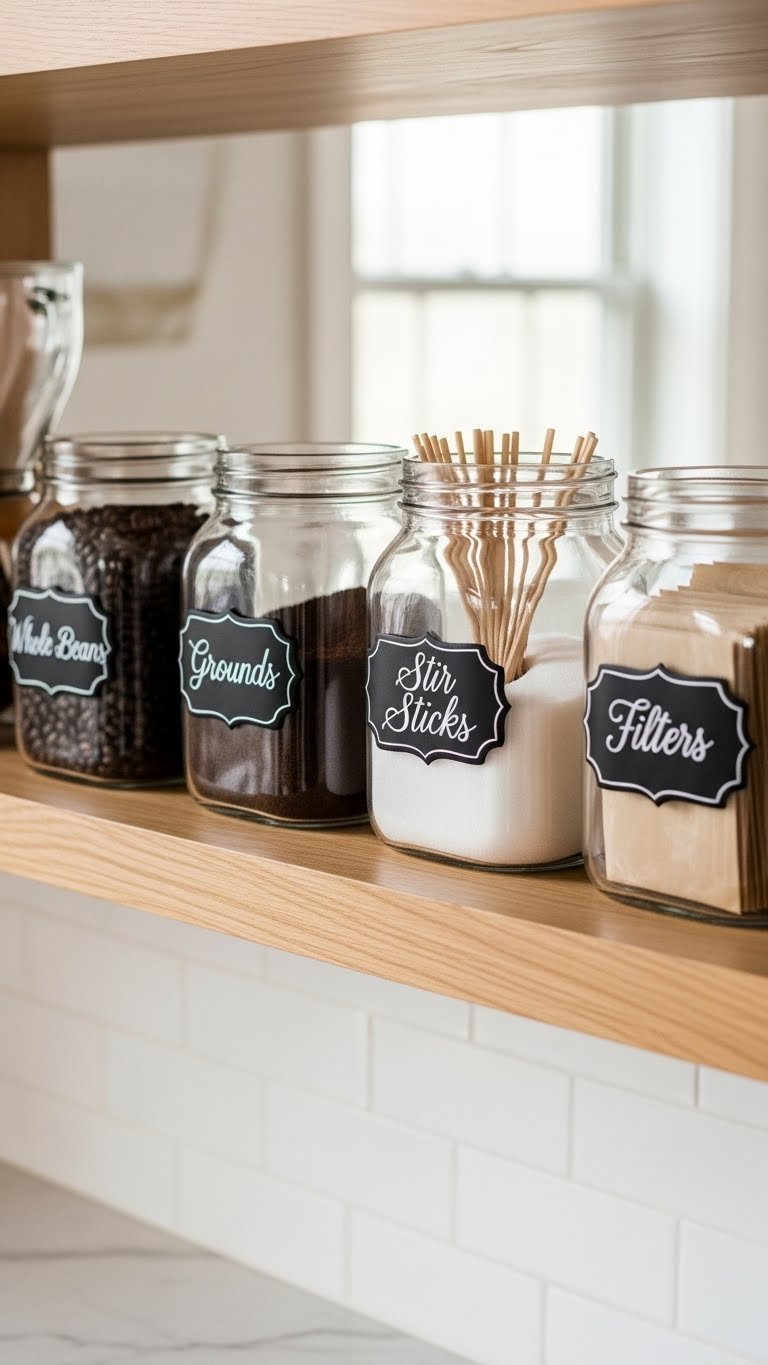
Matching jars and coordinated labels ($25–$50 for a starter set from Container Store, Target, or Amazon) create a cohesive, intentional look. Choose a style that matches your kitchen: glass and wood, clear with concrete lids, ceramic, whatever resonates.
Fill jars with beans, grounds, sugar, sweetener, and extras. Use chalkboard labels, printable tags, or hand-lettered stickers. Arrange them in size or color order. This entire project takes 30 minutes and transforms a functional setup into décor.
Your countertop looks curated and intentional, like you’ve actually designed a coffee zone—because you have.
25. Install a Small Under-Cabinet Drawer for Pod Storage
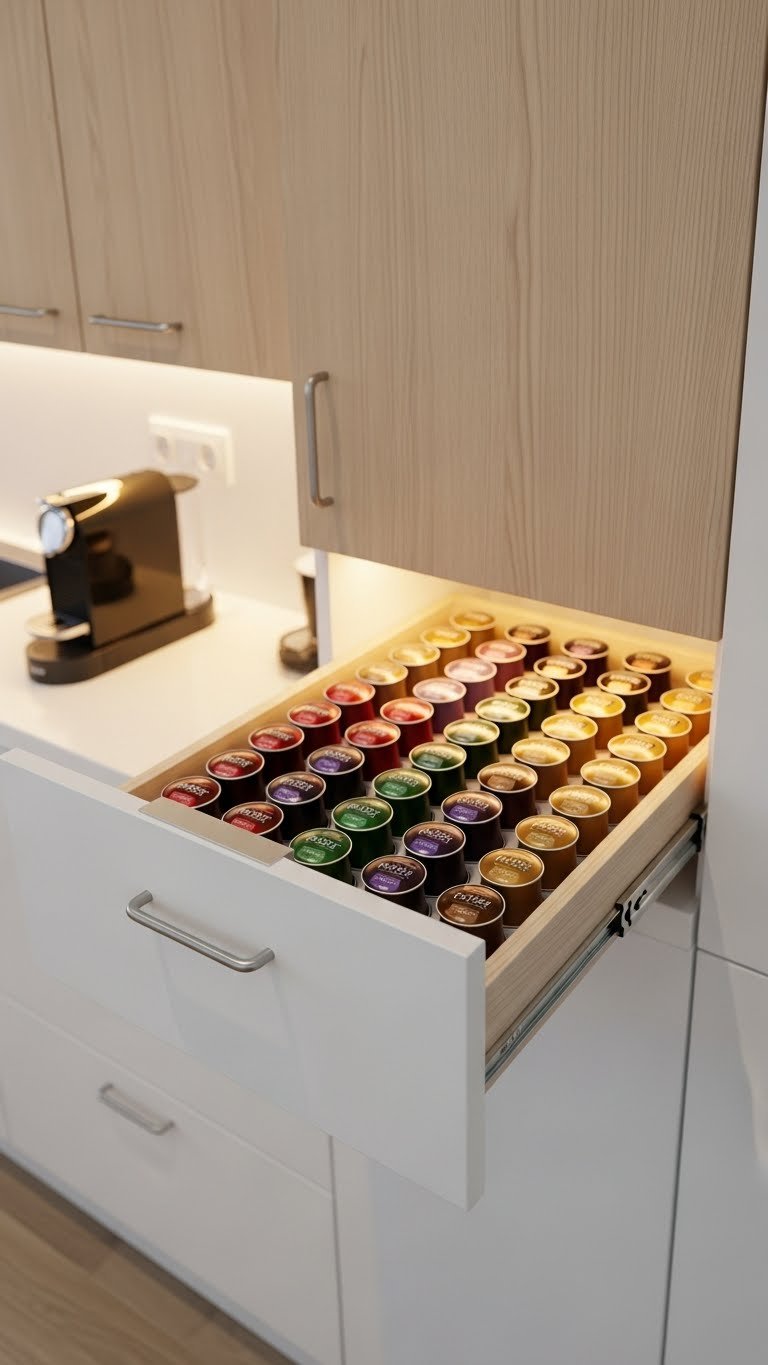
An under-cabinet pull-out drawer ($40–$80 from Amazon, Home Depot, or Wayfair) adds storage without eating counter space. Choose one that’s shallow (3–4 inches deep) to fit under most cabinets.
Mount it with the hardware provided (usually 15–20 minutes), and fill it with pods, filters, or supplies. Pull it open when you need something, and close it away. It’s a renter-friendly option if you use removable adhesive strips.
You’ve added storage capacity without changing your counter footprint.
26. Layer Your Station with a Wooden Serving Board as a Visual Base

A wooden serving board ($20–$40 from Target, West Elm, or IKEA) creates a visual anchor for your station and defines the space. Choose one that’s at least 18 by 24 inches.
Arrange your coffee maker, one to two mugs, a small spoon, and supplies on top of it as if you’re styling a table. The board visually contains your setup, makes it feel intentional, and looks beautiful even when things are slightly messy. It takes 3 minutes to style.
Your coffee corner now looks gathered, curated, and purposeful—like you planned it, not just threw things on the counter.
Save this post and tackle one idea this weekend. Pick something small if you’re starting out—mounting labels or grabbing a utensil holder takes 10 minutes and makes a noticeable difference. Your morning ritual deserves a corner that’s as organized as it is beautiful.
Leave a Reply