Category: Kitchen Decor

  • How to Design Kitchen Shelving Layout

    How to Design Kitchen Shelving Layout

    I stood in my kitchen, staring at the open shelves. They held a jumble of plates and jars, but the space felt heavy on one side. Everyday cooking felt cluttered instead of easy. I wanted shelves that pulled the room together, made it breathe.

    I'd tried random stacking before. Nothing worked. The key was seeing the shelves as part of the whole kitchen flow.

    How to Design Kitchen Shelving Layout

    This guide walks you through arranging kitchen shelves for balance and calm. You'll end up with shelves that feel lived-in and support daily routines. It's straightforward—I do it in my own kitchen when things get off.

    What You’ll Need

    Step 1: Clear the Shelves and Find the Focal Point

    I start by taking everything off the shelves. This lets me see the kitchen's natural lines—the window light, the counter below. I pick one spot as the focal point, like eye level in the center.

    Visually, the shelves go from cluttered to open. Air moves through now. People miss how empty space sets the rhythm—it's not about filling every inch.

    Avoid cramming back old items right away. Step back first. In my kitchen, this pause made the whole wall feel wider.

    Step 2: Anchor with Larger Pieces for Balance

    Next, I place bigger items like wooden boards and stacks of plates. I put the tallest board on one end, plates grouped opposite. This creates even weight across the shelf.

    The change? Shelves look grounded, not tippy. The insight folks overlook: height variation stops flat boredom—mix tall and low.

    Don't center everything perfectly. Off-center feels more comfortable in real life. My shelves steadied the kitchen's energy this way.

    Step 3: Layer in Everyday Groups

    I group jars with mugs on trays next. Three or five per cluster, odd numbers work best. Tuck linen towels loosely around for softness.

    Now, the shelves invite touch—they feel useful. Most miss repeating shapes, like rounds together, for quiet flow.

    Skip matching sets exactly. A slight color shift keeps it lived-in. In my space, this made mornings smoother.

    Step 4: Add Height and Life with Plants and Vases

    I bring in vases and potted herbs last, tallest in back. Lean one plant toward the edge for movement. Baskets below catch spillover.

    Shelves gain depth—light filters through leaves. The hidden tip: greenery draws the eye up, balancing heavy bottoms.

    Don't overplant; one or two per shelf. Too much crowds the air. My kitchen brightened without trying.

    Step 5: Step Back and Edit for Flow

    I walk back ten feet, coffee in hand. Pull one item per shelf if it blocks light. Adjust until the whole wall connects to the counters.

    Everything settles—cozy but open. People forget to check from the sink view; that's daily reality.

    Resist adding "just one more." Restraint keeps it clean. My shelves now frame the room right.

    Common Mistakes I Learned the Hard Way

    I once overloaded my shelves. They sagged visually. Balance comes first.

    • Stack plates too high—opt for two layers max.
    • Ignore negative space—it breathes life in.
    • Match everything—mix pulls the eye comfortably.

    Now, I check weight side-to-side every time. Simple fix.

    How to Keep Shelves Feeling Fresh

    Daily use shifts things. I rotate seasonal herbs.

    In my kitchen:

    • Dust weekly with a soft cloth.
    • Swap vases for pumpkins in fall.
    • Rearrange after grocery hauls.

    It stays intentional without constant work.

    Adapting for Smaller Kitchens

    Tight spaces need slim profiles. I pared down in my old rental.

    Focus here:

    • Use wall-to-wall low shelves.
    • Vertical stacks only.
    • Mirrors behind for depth.

    Mine felt bigger instantly.

    Final Thoughts

    Start with one shelf if it feels big. You'll see the difference fast.

    Trust your eye from across the room. These shelves support your days now.

    In my kitchen, they just work. Yours will too.

  • How to Build Kitchen Shelves

    How to Build Kitchen Shelves

    My kitchen wall stared back empty. No place for mugs or that one good bowl. It felt cold, like the room ended too soon. I wanted shelves that fit my mornings, not some perfect picture.

    I'd tried stacking crates before. They wobbled. Pushed everything to the counter. Then I figured a simple way to build shelves that hold real life.

    Now my coffee lives there. The space breathes.

    How to Build Kitchen Shelves

    This shows you how I build kitchen shelves that feel part of the room. They hold dishes, jars, everyday things. No fancy skills. Just balanced spots that make the kitchen warmer and easier to use.

    What You’ll Need

    Step 1: Pick Your Wall Spot

    I stand in my kitchen and look where my eyes go first. Near the sink, above the counter. That's where hands reach for mugs. This spot pulls the room together. It stops the wall from feeling blank.

    Visually, it frames the workspace. Light hits it right. One insight: most miss how it connects to daily paths. Don't pick a dead corner—your feet won't thank you.

    Mistake to avoid: hanging too high. Keep it at arm level. I did that once; everything stayed dusty.

    Step 2: Set the Shelf Heights

    I eye the space and mark where the bottom shelf sits. Eye level for plates, lower for jars. This creates rhythm. The wall gains depth without crowding.

    It changes the feel—air moves between shelves. People overlook spacing for reach. Make it 12 inches apart. My first try crammed them; felt heavy.

    Avoid centering perfectly. Offset a bit for lived-in balance. Now it flows when I cook.

    Step 3: Mount the Shelves Evenly

    I level the first shelf, then mirror it above. Brackets hidden underneath. They hug the wall tight. Why? Stability for heavy plates.

    The kitchen warms up. Layers appear. Insight missed: even weight distribution. Cluster too much on one side, it tips visually.

    Don't overtighten—wood can split. I learned slow. Now they sit solid, holding my routine.

    Step 4: Layer Items Thoughtfully

    I start low with plates, stack jars next. Baskets tuck in back. This builds weight downward. Feels grounded.

    Colors soften—white plates against wood. Most forget negative space. Leave gaps for light. My shelves breathe now.

    Skip symmetry. Lean one jar forward. Avoids stiff look I hated before.

    Step 5: Add the Finishing Touches

    Pots go high, hooks for mugs below. Herbs add green. Pulls it all home. Why? Daily use keeps it real.

    Wall feels complete, balanced. Insight: rotate items weekly. Stops dust buildup unnoticed.

    Don't overload top. I did—blocked light. Now it's open, easy.

    Styling Tips for Everyday Use

    I style my shelves for mornings, not guests. Plates face out, mugs hang ready.

    Keep it simple:

    • Group by color: whites with jars.
    • Turn handles away from light.
    • One plant per shelf max.

    This makes grabbing tea quick. Feels comfortable, not fussy.

    Balancing Act in Small Kitchens

    In my tiny kitchen, shelves hug one wall. No overwhelm.

    Watch the scale:

    • Shorter shelves if under 10 feet wide.
    • Mix heights for depth.

    Test by stepping back. Does it shrink the room? Adjust down. Balance comes first.

    Keeping Shelves Fresh

    I wipe weekly, swap jars monthly. Wood stays warm.

    Quick habits:

    • Dust from top down.
    • Rearrange after grocery shop.
    • Check brackets yearly.

    It stays intentional without work. Mine look better with age.

    Final Thoughts

    Start with one shelf. See how it sits. Builds confidence fast.

    Your kitchen will hold more than stuff—it'll hold your days better.

    Mine did. Simple change, real ease.

  • 15 Stylish Kitchen Wall Shelf Ideas

    15 Stylish Kitchen Wall Shelf Ideas

    I remember staring at my kitchen wall last year, empty and cold. Pots piled on counters, no spot for my favorite mugs. I finally hung shelves. That small change made mornings feel calmer, like the space breathed.

    Now, spices line up neat. Guests linger there. It's not perfect—I've swapped a few things—but it works.

    You can do this too. No big budget needed.

    15 Stylish Kitchen Wall Shelf Ideas

    I've pulled together 15 kitchen wall shelf ideas from homes I've decorated, including my own. These are real setups that last. Each one includes exactly what to grab.

    1. White Ceramic Plates on Warm Walnut Floating Shelves

    I put these walnut shelves above my sink last spring. Stacked white plates from thrift finds. The wood's warmth cut the white cabinets' chill. Mornings, I grab a plate easy—no digging in cupboards.

    Visually, it pulls your eye up, makes the room taller. Emotionally, it feels collected, not staged.

    Pay attention to shelf depth—12 inches holds plates steady without sagging.

    One mistake: I hung them too high at first. Eye level now works best.

    What You’ll Need for This Look

    2. Black Metal Wire Baskets Hanging from Open Shelves

    In a friend's tiny kitchen, we added black wire baskets under pine shelves. Potatoes and onions hide neat. The metal adds edge without overwhelming light wood.

    It freed counter space instantly. Feels organized, less chaotic for busy weeknights.

    Watch bracket strength—baskets get heavy. Space them 8 inches apart.

    What You’ll Need for This Look

    3. Potted Herbs Lined on Slim Glass Shelves

    My windowless kitchen got glass shelves for herbs. Basil, thyme in small pots. Greenery softens the stark walls, brings life right to cooking.

    Smells fresh all day. Makes chopping feel joyful.

    Glass shows dust quick—wipe weekly. 6-inch depth suits pots perfect.

    Insight: Start with plastic pots inside terracotta. Less mess if they tip.

    What You’ll Need for This Look

    4. Stacked Cookbooks with Brass Bookends on Oak Ladders

    Oak ladder shelves hold my cookbooks now. Brass ends keep them straight. Pulls focus from cluttered counters, adds height.

    Flipping pages while stirring feels easy. Cozy for recipe hunts.

    Ladders lean—anchor top to wall. Mix sizes for interest.

    What You’ll Need for This Look

    5. Vintage Mugs in Woven Rattan Holders on White Shelves

    White shelves over coffee station got rattan mug holders. My mismatched vintage mugs peek out charming.

    Grabbing coffee feels personal. Warms cold mornings.

    Rattan frays—choose tight weave. Hang low for reach.

    What You’ll Need for This Look

    6. Matte Black Spice Jars on Reclaimed Wood Planks

    Reclaimed planks above stove hold black spice jars. Labels face out. Rustic vibe grounds modern appliances.

    Cooking flows smooth—no label hunt. Feels pro kitchen.

    Planks warp if wet—seal ends. Uniform jars key.

    Mistake: Too many at first. Edit to favorites.

    What You’ll Need for This Look

    7. Color-Graded Glassware on Arched Iron Shelves

    Arched iron shelves display glasses by hue—clear to amber. Subtle color pop without chaos.

    Dinners feel special. Light catches them pretty.

    Iron rusts—paint if damp. Grade left to right.

    What You’ll Need for This Look

    8. Wicker Baskets for Linens on Beechwood Brackets

    Beech brackets support wicker baskets with tea towels. Hides clutter, adds texture.

    Wiping spills quick. Kitchen stays tidy.

    Baskets sag—line with board. Shallow ones fit best.

    What You’ll Need for This Look

    9. Copper Mugs and Trays on Marble-Look Floating Shelves

    Marble-look shelves hold copper mugs, small tray. Shine warms white tiles.

    Moscow mules handy. Luxe without effort.

    Copper tarnishes—polish yearly. Tray catches drips.

    What You’ll Need for This Look

    10. Minimalist Cutting Boards Leaning Against Bare Wall

    One low shelf, boards lean casual. Clean look, easy grab.

    Prep feels intentional. No visual noise.

    Boards slip—add lip. Rotate to avoid wear.

    Insight: Odd numbers look best. Three sizes.

    What You’ll Need for This Look

    11. Blue and White Pottery Collection on Pine Peg Shelves

    Pine peg shelves showcase blue-white pots. Inherited pieces shine.

    Baking display doubles storage. Guests ask about them.

    Pegs loose—tighten often. Cluster tight.

    What You’ll Need for This Look

    12. LED-Lit Jars for Dry Goods on Corner Units

    Corner shelves with LED strips light pasta jars. Uses dead space smart.

    Night snacking easy. Glow adds calm.

    LEDs warm white—avoid cool. Secure jars.

    What You’ll Need for This Look

    13. Seasonal Produce Baskets on Bamboo Rails

    Bamboo rails hold market baskets with veggies. Fresh feel year-round.

    Meals inspire quick. Rotates easy.

    Bamboo stains—line baskets. Swap seasonally.

    Mistake: Overfilled at first. Half full looks best.

    What You’ll Need for This Look

    14. Wooden Utensil Slots in Custom Recessed Shelves

    Recessed shelves with cut slots for spoons. Streamlines cooking.

    Less drawer rummage. Feels custom.

    Measure tools first. Sand edges smooth.

    What You’ll Need for This Look

    15. Faux Greenery Vines Draped Over Ash Floating Shelves

    Ash shelves with draped faux vines. Softens edges, hides brackets.

    Brightens without water mess. Low care joy.

    Dust vines monthly. Tuck ends neat.

    What You’ll Need for This Look

    Final Thoughts

    Pick one or two ideas that fit your routine. Start small—my kitchens improved that way.

    They don't need to match perfectly. Lived-in is best.

    You'll love how your kitchen pulls you in. Go for it.

  • 7 Minimalist Kitchen Shelving Ideas for Clean Spaces

    7 Minimalist Kitchen Shelving Ideas for Clean Spaces

    I remember staring at my kitchen walls, buried under cabinets that hid everything in chaos. One afternoon, I ripped them out. Open shelves changed it all. Suddenly, the room breathed. No more digging for a mug. Just calm, every day.

    That shift felt right. Clean lines, but warm. Not cold like a showroom.

    Now, my shelves hold what we use. It pulls you in, makes cooking easier. You can have this too.

    7 Minimalist Kitchen Shelving Ideas for Clean Spaces

    These 7 minimalist kitchen shelving ideas come from my own kitchens—the ones with kids' fingerprints and morning coffee spills. They're simple to pull off and keep spaces clean. Here's exactly what to try.

    1. Floating Shelves Stacked with Matching White Plates

    I put up floating shelves in my last rental kitchen because cabinets made it feel closed in. White plates from our daily set went right on them, stacked neat. No fancy china—just the ones we eat off. It opened the wall, made mornings smoother.

    Visually, the uniformity calms everything. No color clash. The space feels bigger, airier. I love how light hits the edges.

    Pay attention to weight—those brackets need to hold real dishes. I overloaded once, and a shelf sagged. Lesson learned: mount into studs.

    Space out stacks loosely. Add one plant for life.

    What You’ll Need for This Look

    White ceramic dinner plates, 10-inch set of 4

    Light oak floating shelves, 24-inch length

    Heavy-duty shelf brackets, matte white

    Small potted succulent in terracotta

    2. Slim Metal Racks for Lined-Up Glass Jars

    Glass jars transformed my pantry wall. I grabbed slim metal racks and filled them with pasta, rice—stuff we grab daily. Lined them up by size. No labels needed; the see-through look keeps it honest.

    It pulls the eye up, makes the kitchen feel taller. Less counter mess too. I cook faster now.

    Measure your jars first. Mine didn't fit at first—had to swap for narrower ones. Frustrating return, but worth it.

    Keep jars uniform. Wipe fingerprints weekly; they show on glass.

    What You’ll Need for This Look

    Clear glass storage jars, 1-quart set of 6

    Slim metal wall racks, 12-inch wide

    Brushed nickel mounting hardware

    3. Reclaimed Wood Ledges with Fresh Herbs

    Reclaimed wood ledges brought warmth to my all-white kitchen. I lined them with basil, mint pots—herbs we actually use. No fussy arrangements; just snipped greens daily.

    The texture softens the minimal vibe. Feels lived-in, not stark. Scents fill the air too.

    I hung them too high once—reaching hurt my back. Now eye-level works best.

    Group by height. Trim herbs often to keep shapes tidy.

    What You’ll Need for This Look

    Reclaimed wood floating ledges, 18-inch depth

    Clay herb pots, 4-inch set of 4

    Basil and mint starter plants

    Invisible shelf supports

    4. Matte Black Brackets Holding Cutting Boards

    Matte black brackets with our wood cutting boards lean against the wall. Everyday tools, displayed simple. No clutter below.

    It grounds the space. Black contrasts wood nicely, feels modern but cozy. Grabbing a board mid-chop saves time.

    Test the angle—boards slipped once before I tightened. Secure is key.

    Rotate boards to even wear. Dust weekly.

    What You’ll Need for This Look

    Matte black shelf brackets, 8-inch projection

    Bamboo cutting boards, 12×18-inch set

    5. Wire Mesh Panels for Mugs and Utensils

    Wire mesh panels with S-hooks hold mugs and spoons. Hung low for easy grab. Family favorites only—no extras.

    Lightweight, so walls stay unmarked. Air circulates; no musty smells.

    Overhung mugs once dripped—now hooks face down. Small fix.

    Cluster loosely. Feels intentional.

    What You’ll Need for This Look

    Galvanized wire mesh panels, 24×36-inch

    S-hooks large size, matte black set of 10

    White stoneware mugs, 12-ounce set

    Wooden utensil spoons

    6. Glass-Fronted Niches for Subtle Storage

    Glass-fronted niches in the wall hide extras but show jars neat. Linens folded below. Dust stays out.

    Keeps clean lines without empty feel. Light bounces through.

    Installed crooked first—shimmed it level. Patience pays.

    Curate inside. One style only.

    What You’ll Need for This Look

    Frosted glass niche doors, 12×24-inch

    Neutral linen tea towels, set of 6

    7. Ladder-Style Leaning Shelves with Oils

    A ladder shelf leans in the corner, oils and vinegars grouped. Slim profile, no wall holes.

    Frees floor space. Feels casual, like it grew there.

    Slid once—secured base. Stable now.

    Face labels out. Wipe oils' residue.

    What You’ll Need for This Look

    Slim wood ladder shelf, 18-inch wide

    Glass olive oil bottles, 250ml set of 4

    Anti-slip shelf pads

    Final Thoughts

    Pick one idea that fits your wall. Start small—my kitchens improved that way.

    You don't need all seven. Just what works for your daily flow.

    It'll feel clean, yours. Trust the process.

  • 21 Practical Kitchen Corner Shelf Ideas

    21 Practical Kitchen Corner Shelf Ideas

    I stared at my kitchen corner for months. Empty, awkward, collecting dust bunnies. One weekend, I grabbed scrap wood and fixed it with a basic shelf. Mugs went up. Spices too. Cooking felt calmer. That spot pulls its weight now.

    No more wasted space. Just everyday flow.

    You can do this in yours. It takes trial, a few returns, but it sticks.

    21 Practical Kitchen Corner Shelf Ideas

    These 21 practical kitchen corner shelf ideas come straight from my homes. Real fixes for tight spots. Exactly 21 here—pick what matches your mornings.

    1. Mugs Clustered on a Simple Wood Ledge

    I mounted a single wood ledge in my last kitchen's corner. Gathered my favorite mugs there—oversized ones for lazy coffee. They nestle close, handles out for easy grab. The space feels friendly now, not forgotten.

    Mornings changed. No rummaging cabinets. Just reach, pour, sit.

    Watch the depth—too deep, and mugs tip. Mine wobbled once; added rubber bumpers.

    Keeps the counter clear too. Coffee ritual starts right.

    What You’ll Need for This Look

    2. Spice Jars in a Spinning Bamboo Turner

    Bamboo turntable fit perfect in my current kitchen corner. Filled it with spice jars—cumin, paprika, the ones I grab daily. Spin it, everything shows. No more digging.

    Cooking sped up. Recipes flow without frustration.

    Size matters—mine's 10 inches, fits the angle just right.

    One tip: uniform jars look clean. Mixed sizes clashed at first.

    What You’ll Need for This Look

    3. Cutting Boards Leaning Like Open Books

    Two slim shelves hold my cutting boards upright in the corner. Bamboo and walnut ones lean easy, handles at shoulder height. Grab any for chopping onions.

    Counter stays open. Prep feels instant.

    Angle them slight—flat looks stiff. I learned that after photos.

    Wood warms the white cabinets around it.

    What You’ll Need for This Look

    4. Herbs Hanging in Metal Wire Baskets

    Wire baskets dangle from a corner shelf bracket. Basil and thyme grow there, snipped fresh for pasta. Greenery softens the hard edges.

    Smells alive when I cook. Kitchen breathes.

    Drainage holes prevent rot—key after one soggy mess.

    Reach easy from stove side.

    What You’ll Need for This Look

    5. Vintage Teacups Stacked with Gentle Care

    I collected mismatched teacups for the corner shelf. Stacked saucers first, cups rim-up. They add quiet pattern against plain walls.

    Afternoon tea feels special. Guests notice, smile.

    Mistake: overstacked once, toppled. Now limit to four high.

    Handles face out—practical pull.

    What You’ll Need for This Look

    6. Woven Baskets for Loose Fruits

    Seagrass baskets sit on corner brackets. Apples and lemons tumble in—no plastic bags. Natural texture pulls eyes up.

    Snacks handy. Kids grab without asking.

    Baskets breathable—fruit lasts longer.

    Tuck smaller one behind for onions.

    What You’ll Need for This Look

    7. Glass Jars of Grains and Nuts

    Clear jars line my corner shelf—oats, quinoa, almonds. Lids off for scoops, labels face front.

    Pantry feel without the door. Breakfast assembles fast.

    Square bases stable in tight angle.

    Wipe fingerprints weekly—glass shows them.

    What You’ll Need for This Look

    8. Cookbooks Propped with a Wooden Stand

    Favorites lean on a mini stand atop the shelf. Italian, baking ones—pages dog-eared. Flip while stirring.

    Inspiration right there. Less screen time.

    Stand prevents slide—flat shelves don't.

    Rotate books monthly for fresh looks.

    What You’ll Need for This Look

    9. White Plates in a Clean Stack

    Plain white plates stack neat on two corner shelves. Dinner and salad sizes. Rim protectors keep edges safe.

    Sets table vibe without clutter.

    Minimal lets walls show. Calm.

    Grip pads underneath—no shifts.

    What You’ll Need for This Look

    10. Oil Bottles on a Rustic Tray

    Wood tray catches drips from olive oil and balsamic bottles. Perched on corner shelf—drip-free cooking.

    Everything groups tidy. Dress salads quick.

    Matte finish hides spots.

    Wipe tray weekly.

    What You’ll Need for This Look

    11. Succulents in Low Terracotta Pots

    Terracotta pots hold succulents on the corner ledge. Echeveria, haworthia—low light tolerant. Adds green without fuss.

    Brightens sink area. Water weekly.

    Cluster odd numbers—three looks natural.

    Pebble mulch tops soil neat.

    What You’ll Need for This Look

    12. Blue and White Pottery Layers

    Blue and white pieces layer on corner shelves—bowls, small pitcher. Flea market finds, chips add story.

    Pulls calm color into chaos.

    Overdid patterns once—busy. Now sparse.

    Rotate for wear even.

    What You’ll Need for This Look

    13. Bamboo Utensil Cylinders

    Tall bamboo cylinders stand in corner shelf nook. Wooden spoons, spatulas inside—stir-ready.

    Drawers free up. Cook with both hands.

    Weighted bottoms—no tip.

    Group by use: baking one side.

    What You’ll Need for This Look

    14. Jam Jars on a Black Metal Tier

    Black metal tier holds homemade jam jars. Strawberry, apricot—twist-off lids.

    Toast station instant. Breakfast cozy.

    Tier saves space—three levels fit corner.

    Check seals yearly.

    What You’ll Need for This Look

    15. Rolled Linen Towels in Baskets

    Linen towels roll tight into wall baskets on corner shelf. Beige, gray—pull one, wipe hands.

    No soggy piles. Clean habit forms.

    Roll same way each time.

    Baskets hide folds.

    What You’ll Need for This Look

    16. Copper Mugs for Moscow Mules

    Hammered copper mugs stack on corner bracket. Four for evenings—gin and tonic nights.

    Shine warms steel appliances.

    Polish quarterly—tarnish sneaks.

    Nest saucers below.

    What You’ll Need for This Look

    17. Bread Board with Loaf Slicer

    Wide board leans, holds daily sourdough. Serrated knife beside on shelf.

    Slices fall right into bowl.

    Board absorbs smells—wash often.

    Rotate loaves.

    What You’ll Need for This Look

    18. Enamelware Bowls in Pastel Hues

    Pastel enamel bowls stack—mint for salads, peach for soup. Corner shelf holds three sets.

    Cheer without overload.

    Chipped one early—gentle stack now.

    Lightweight, easy lift.

    What You’ll Need for This Look

    19. Glass Canisters for Baking Supplies

    Tall glass canisters for flour, sugar on corner unit. Scoops inside—cookies bake fast.

    See levels at glance. No guesswork.

    Airtight seals freshen.

    Label backs for angle view.

    What You’ll Need for This Look

    20. Wooden Ladder Shelf for Pans

    Slim ladder shelf leans pans—cast iron, non-stick. Handles hook over rungs.

    No cabinet hunt. Fry eggs smooth.

    Dust monthly—tops collect.

    Light pans low.

    What You’ll Need for This Look

    21. Framed Recipe Cards in a Fan

    Handwritten recipe cards in thin frames fan out on corner shelf. Grandma's pie, mom's stew.

    Stories cook with meals. Family ties in.

    Frames slipped once—double-sided tape fixed.

    Slim frames fit tight.

    What You’ll Need for This Look

    Final Thoughts

    Start with one idea that bugs you most. My corners took years—some shelves came down, others stayed.

    Yours will feel right soon. Mix what you have.

    You've got this. Everyday kitchens win.

  • 11 Chic Apartment Kitchen Shelf Ideas

    11 Chic Apartment Kitchen Shelf Ideas

    I remember staring at my tiny apartment kitchen, shelves empty and cold. Everything felt cluttered on the counters. Then I started filling those shelves bit by bit.

    It changed everything. The space felt like mine, warmer, more alive.

    No more hiding dishes in cabinets. Now I grab what I need and smile.

    You can do this too, even in a rental.

    11 Chic Apartment Kitchen Shelf Ideas

    These 11 ideas come from my own kitchens over years of trial and error. They're renter-friendly, simple to pull off, and make small spaces feel bigger and cozier. Let's get into them.

    1. Mismatched Ceramic Plates Leaning Casually

    I grabbed old plates from thrift stores and leaned them against the back of my IKEA shelf. No drilling, just propped up with a wooden board underneath for stability. The mix of patterns—some speckled, some plain—adds quiet interest without overwhelming the white walls.

    It pulls your eye up, makes the kitchen feel taller. Before, that shelf was dead space; now it's the focal point when I cook.

    Pay attention to scale: bigger plates low, smaller ones high. I once overloaded the bottom and it tipped—lesson learned, space them out.

    What You’ll Need for This Look

    2. Woven Baskets Hiding Bulk Staples

    Woven baskets were my fix for ugly pantry overflow in my 400-square-foot place. I tucked rice, oats, and snacks inside, handles out for easy grab. The natural texture warms up stark white shelves.

    Counters cleared instantly. Now mornings feel calm, not chaotic.

    Choose open-weave ones so you see hints of contents. I bought cheap ones first—they sagged under weight. Go for sturdy seagrass.

    What You’ll Need for This Look

    3. Trailing Ivy in Simple Terracotta Pots

    I hung a few trailing ivies from my floating shelves using tension hooks—no wall damage. The vines soften the edges, drape just right over spices below. Fresh green against beige tiles makes everything breathe.

    Cooking feels lighter now, like a greenhouse corner. I mist them weekly; they thrive on neglect otherwise.

    Start small; mine grew wild once and blocked access. Trim back.

    What You’ll Need for This Look

    4. Stacked Wooden Cutting Boards as Backdrop

    I leaned three cutting boards vertically behind jars on my open shelves. Maple and walnut grains add depth, like built-in art. No need for fancy wallpaper.

    The wood warms the cool metal rack I use. Feels handmade, not store-bought.

    Mix thin and thick for rhythm. I stacked too many once—toppled easy. Two or three max.

    What You’ll Need for This Look

    5. Clear Glass Jars with Spice Labels

    Clear jars let spices show color—paprika's red pops against cumin's brown. I labeled with washi tape, grouped by use: baking left, savory right.

    Grabbing cumin mid-stir is effortless now. Kitchen smells better too.

    Test jar size; mine were too big at first, crowded everything. Go square for stability.

    What You’ll Need for This Look

    6. Brass Trays Holding Olive Oil Bottles

    A slim brass tray corrals my oils and vinegars. The metal glows soft in morning light, elevates everyday bottles without trying.

    Oils stay dust-free, easy to swap. Feels intentional, like a café counter.

    Polish occasionally; tarnish dulls it fast—I learned that.

    What You’ll Need for This Look

    7. Leaning Cookbooks with Sleeve Covers

    I slipped linen covers over my favorite cookbooks and leaned them at an angle. Spines face out—Italian on top, baking below. Adds height without bulk.

    Flipping through while prepping is joy now. No more buried books.

    Bookend lightly; heavy ones slid once. Fabric covers hide wear.

    What You’ll Need for This Look

    8. Fresh Herbs in White Porcelain Pots

    I lined up herb pots—basil, mint—in simple white porcelain. Roots visible through translucent sides, soil neat.

    Snip-and-cook freshness daily. Greenery softens the shelf line.

    Water from bottom; top-soaking made mine rot once.

    What You’ll Need for This Look

    9. Folded Linen Tea Towels in Rows

    Linen towels folded thirds, stacked by color—cream base, sage accents. Texture peeks out, invites touch.

    Wipe-downs are pretty now. Fabric softens hard shelves.

    Iron lightly; wrinkled ones looked messy at first.

    What You’ll Need for This Look

    10. Vintage Enamel Mugs Upside Down

    Enamel mugs from estate sales, rims down on a tray. Pastels nod to my tiles.

    Coffee routine brighter. Dust stays out.

    Group by size; mismatched heights threw balance once.

    What You’ll Need for This Look

    11. Salt Cellars and Pepper Mills Grouped

    Wooden mills next to ceramic salt cellars. Everyday tools look curated.

    Seasoning's instant. Feels pro without effort.

    Match heights; tall ones overshadowed once.

    What You’ll Need for This Look

    Final Thoughts

    Pick one or two ideas that fit your routine. My shelves evolved slowly—no rush.

    They make cooking homey, even in tight spots.

    You'll love reaching for your favorites. Start small, see what sticks.

  • How to Decorate Kitchen Shelves

    How to Decorate Kitchen Shelves

    I stared at my kitchen shelves one morning. Bare wood, a few mismatched jars. They made the whole room feel empty, even after meals there.

    I wanted them to hold everyday things without looking cluttered. Not perfect, just right.

    It took a few tries. Now they ground the space.

    How to Decorate Kitchen Shelves

    This shows you how I fill kitchen shelves so they feel balanced and lived-in. You’ll end up with shelves that pull the kitchen together. It’s simple once you see the rhythm.

    What You’ll Need

    Step 1: Clear and Measure Your Shelves

    I start by taking everything off my shelves. Wipe them down. Stand back and look.

    This empties the space so you see its real shape. Measure heights between shelves. Mine are uneven, which changes everything.

    People miss how light hits empty shelves. Note shadows now—they guide placement later. Don’t skip measuring; it avoids cramming.

    Now the shelves feel open. Ready for weight.

    Step 2: Anchor with Tall Pieces

    I pick my tallest items first—the pitchers. Place one at each end of the shelf. They frame it.

    This creates height right away. The shelf stops feeling flat. Visual weight settles.

    Most forget anchors make the middle safer for small things. Don’t center everything; ends pull eyes in.

    Step back five feet. See balance? Adjust one inch if needed.

    Step 3: Layer in Trays and Boards

    Next, I add trays and cutting boards in the middle. Lean a board against the back. Set a tray forward.

    Textures mix now—wood, metal. Depth appears. The shelf breathes.

    Insight: boards hide wall gaps people notice subconsciously. Avoid stacking flat; lean for air.

    Kitchen feels warmer already. Everyday tools belong.

    Step 4: Fill Gaps with Jars and Baskets

    I tuck jars and baskets into open spots. Group three jars loosely. Nestle a basket below.

    This softens hard lines. Curves balance straight edges. Shelf looks full, not stuffed.

    People overlook grouping odds—threes work best. Don’t line up rows; cluster for life.

    Touch the items. They should feel reachable.

    Step 5: Add Greenery and Plates

    Now greenery—olive branches drape over edges. Stack two plates nearby.

    Green pulls light in. Plates echo pitcher white. Harmony builds.

    Missed tip: plants lower energy visually. Avoid overcrowding one shelf; spread green.

    Stand in the kitchen. Feels complete.

    Step 6: Finish with Candle Holders

    Last, brass holders in quiet corners. One per shelf.

    They catch evening light. Warm glow promised. Balance holds.

    Insight: metal repeats without overwhelming. Don’t add more now; live with it first.

    Walk away. Come back. Tweak tomorrow if off.

    Common Mistakes I Learned the Hard Way

    I’ve crammed too much before. Shelves tipped. Looked busy.

    Here’s what trips people up:

    • Overfilling one shelf—spreads weight evenly.
    • Ignoring scale—big items first, always.
    • Forgetting negative space—gaps make it cozy.

    Now mine stay comfortable year-round.

    Tips for Small Kitchen Shelves

    My old rental had tiny shelves. Felt impossible.

    Keep it simple:

    • Use one tall anchor per shelf.
    • Vertical plants only—no sprawl.
    • Repeat two colors max.

    They punch above their size. Balanced, not lost.

    Refreshing Shelves by Season

    I swap twice a year. Keeps it fresh without overhaul.

    • Fall: Swap olives for dried pampas.
    • Winter: Add pine sprigs, keep whites.
    • Group loosely—easy to rotate.

    Feels lived-in, not bored.

    Final Thoughts

    Start with one shelf. See how it sits.

    You’ve got this—your kitchen knows what it needs.

    Mine greet me every morning now. Balanced. Home.

  • How to Install Floating Kitchen Shelves

    How to Install Floating Kitchen Shelves

    My kitchen wall above the counter always felt flat. Closed cabinets hid my dishes, and the space looked empty. I wanted open storage that felt right, not crowded.

    One day, I put up floating shelves. They changed the feel instantly. Now, everyday plates and jars sit there, easy to grab. The room breathes better.

    If your kitchen lacks that open layer, this is for you.

    How to Install Floating Kitchen Shelves

    I'll walk you through placing floating shelves so your kitchen feels balanced and useful. You'll end up with open storage that pulls the eye without overwhelming the counter below. It's straightforward—I do it this way every time.

    What You’ll Need

    Step 1: Pick Your Wall Spot

    I stand back and look at the wall first. Eye level from the sink matters most. The shelves should sit 18 inches above the counter—high enough to work below, low enough to reach.

    This placement makes the kitchen feel taller. The blank wall turns into a gentle backdrop. People miss how it frames your daily routine.

    Don't hang too high. It isolates the shelves. Keep them in the flow of cooking and glancing up.

    I trace lightly where the first shelf goes. Balance comes from aligning with the window or door edge. Now the wall has purpose.

    Step 2: Space Them for Flow

    Next, I mark spots for two or three shelves. 12 inches apart feels right—room for plates without stacking chaos.

    Visually, it creates rhythm. Your eye moves up naturally, like steps. The kitchen gains depth.

    Most overlook varying heights slightly. Identical spacing looks rigid. I adjust the top one a bit higher for ease.

    Avoid cramming too many. Two shelves often balance better than four. Test with books first to see the feel.

    Now the wall sections divide nicely. Prep area below, storage above—everything connects.

    Step 3: Set Them Level by Eye

    I lift the shelf and hold it against my marks. Use a straight edge to check side to side. It should hug the wall evenly.

    The change? Light bounces off the wood, warming the space. It draws you in softly.

    Insight: Test from across the room. Level there matters more than perfect measure. Crooked pulls the whole counter off.

    Skip rushing this. A tilt makes dishes slide visually. I pause, adjust, step back twice.

    Secure once happy. The shelf sits steady, inviting touch.

    Step 4: Layer Items Thoughtfully

    I start with plates leaning back. One stack per shelf, not full. Add jars in front, baskets tucked side.

    Balance shifts here—shelves feel lived-in, not bare or stuffed. Colors echo the counter.

    People forget negative space. Group in threes, leave gaps. It breathes.

    Don't center everything. Off-set keeps it casual. I rotate items daily for freshness.

    The wall lives now. Grabbing a mug feels natural.

    Step 5: Step Back and Tweak

    Walk back five steps. Does it balance with the fridge opposite? Adjust heights or items.

    The kitchen flows smoother—shelves tie upper and lower spaces.

    Missed often: Lighting changes feel. Morning sun highlights dust—dust lightly.

    Avoid overloading one side. Mirror weights visually. I swap jars until even.

    Done right, it settles in quietly.

    Styling Without Clutter

    I keep just 60% of shelf space filled. Plates back row, jars front staggered.

    • Lean two plates, widest apart
    • One plant per shelf, trailing vine softens edge
    • Baskets hide utensils, pull out easy

    This way, it stays comfortable for years. Dust settles less on open spots.

    Matching Your Kitchen Flow

    Shelves work best over sinks or prep zones. They echo the window rhythm.

    In small kitchens, shorter ones prevent boxiness.

    • Test with paper templates first
    • Align with cabinet doors below

    The counter stays clear, eyes lift up naturally.

    Everyday Upkeep Tips

    Wipe shelves weekly with a damp cloth. Rearrange seasonally—swap summer herbs for fall squash.

    • Vacuum behind monthly
    • Rotate heavy items to avoid sags

    It keeps the balanced feel without effort.

    Final Thoughts

    Start with one shelf if unsure. See how it sits.

    You've got this—your kitchen already has the bones.

    These shelves make mornings easier. Grab a mug, smile at the order. Simple as that.

  • 10 Cozy Farmhouse Kitchen Shelving Ideas

    10 Cozy Farmhouse Kitchen Shelving Ideas

    I remember staring at my bare kitchen walls, feeling like the room was just echoing. Then I added open shelves, and suddenly it breathed—warm, like a hug from an old friend. No more cold cabinets hiding everything.

    I'd tried fancy stuff before, but it gathered dust. Simple things, like jars I already had, changed it. Made cooking feel easier, more homey.

    Now, my shelves hold what we use daily. No perfection, just real life stacked right.

    10 Cozy Farmhouse Kitchen Shelving Ideas

    These 10 cozy farmhouse kitchen shelving ideas come straight from kitchens I've shaped over years. They're practical, forgiving, and make any space feel settled. You'll see exactly how to do each one.

    1. Vintage Mason Jars Lined Up for Spices and Grains

    I started with a dozen old mason jars from my grandma's attic, filling them with oats, rice, and spices we grab every morning. They turned my shelf from empty to full without trying too hard. The light catches the glass just right, softening the whole kitchen.

    Before, spices were lost in drawers. Now, everything's at eye level, and reaching for cumin feels calm, not frantic. I learned to group by color—whites and clears up top, deeper tones below—for that easy flow.

    One mistake: Overstuffing at first. Pull back, leave gaps for air. It keeps the look light.

    What You’ll Need for This Look

    2. Stacked Wooden Cutting Boards with Fresh Bread

    In my last rental, I leaned old cutting boards from thrift stores against the shelf, topping with a loaf under cloth. It grounded the space—wood echoing the table below. Mornings, I'd pull one down, and the kitchen smelled alive.

    Visually, the layers add depth without bulk. The worn edges tell stories, not showroom shine. Emotionally, it makes baking feel like ritual.

    I once bought new boards—too slick. Stick to used or matte ones; they settle in better. Space them an inch apart for breath.

    What You’ll Need for This Look

    3. Galvanized Metal Buckets for Root Veggies

    I hung two dented galvanized buckets on my shelf for potatoes and carrots—pulled straight from the garden. They swing light when full, adding quiet movement. The kitchen went from stark to farm-real overnight.

    The metal's cool tone warms with produce inside. No more veggie bags cluttering counters; now it's tidy chaos.

    Mistake I made: Full buckets tip. Line with newspaper first, and don't overload the bottom shelf.

    What You’ll Need for This Look

    4. Mismatched White Ironstone Pitchers

    Thrifted ironstone pitchers—three different sizes—sit on my middle shelf, one with wooden spoons poking out. They catch drips from dish drying, blending right into daily mess. The white pulls light around the room.

    It feels collected, not curated. Changed how I see dishes—as friends, not fillers.

    Bought a glossy set once; hated it. Hunt for matte, imperfect ones. Cluster tight, odd numbers work best.

    What You’ll Need for This Look

    5. Woven Seagrass Baskets for Linens

    Seagrass baskets from a market hold my tea towels—folded loose inside. They soften the shelf's edge, and pulling one out mid-cook feels easy. My kitchen's noise dropped; less clatter.

    Texture against wood is key—cozy without fussy. Towels stay fresh, no drawer hunts.

    Overpacked mine early on. Leave room to see inside; rotate fabrics seasonally.

    What You’ll Need for This Look

    6. Ceramic Honey Jars with Dipper Spoons

    Local pottery honey jars line my top shelf, dippers tucked in. Morning tea ritual got sweeter; the weight feels right in hand. Shelf gained quiet purpose.

    Amber through ceramic warms neutrals. No sticky counters anymore.

    Tried glass—too see-through. Opaque stoneware hides drips better. Space evenly, labels facing out.

    What You’ll Need for This Look

    7. Rolled Linen Napkins in Brass Trays

    Brass trays catch rolled napkins on the lower shelf—grab-and-go for meals. The patina blends with wood over time. Dinners feel more gathered.

    Soft linen against metal adds calm contrast. No wrinkled piles now.

    First trays were shiny; dulled them with vinegar. Roll loosely; it stays inviting.

    What You’ll Need for This Look

    8. Propped Vintage Cookbooks with Bookends

    Old Fannie Farmer books lean between wood blocks—recipes we actually use. Flipping pages mid-stir roots me here. Shelf tells our story now.

    Spines add color without overwhelming. Feels like company in the kitchen.

    Bought new ones—too crisp. Age them open on the counter first. Simple ends prevent slips.

    What You’ll Need for This Look

    9. Tin Canisters for Flour and Sugar

    Hammered tin canisters hold flour and sugar—stacked two high. Baking's faster; no measuring cup digs. The quiet clink suits mornings.

    Tin mutes light, keeps staples fresh. Uniform but not boring.

    Overfilled once, lids popped. Label with chalk; wipe and redo easy.

    What You’ll Need for This Look

    10. Dried Lavender Bundles in Glass Vases

    Bundles from the yard dry in short glass vases on the end shelf—scent lingers soft. It quiets the mind while chopping.

    Purple pops gentle against whites. Fills gaps without effort.

    Bought fake once—obvious. Grow or source real; refresh yearly.

    What You’ll Need for This Look

    Final Thoughts

    Pick one or two ideas that fit your routine—no need for all 10. Start small; your kitchen will settle into cozy over time.

    I've lived these, returned half my tries. You'll find what sticks.

    You got this—shelves that feel like home are waiting.

  • 23 Trendy Floating Kitchen Shelf Ideas

    23 Trendy Floating Kitchen Shelf Ideas

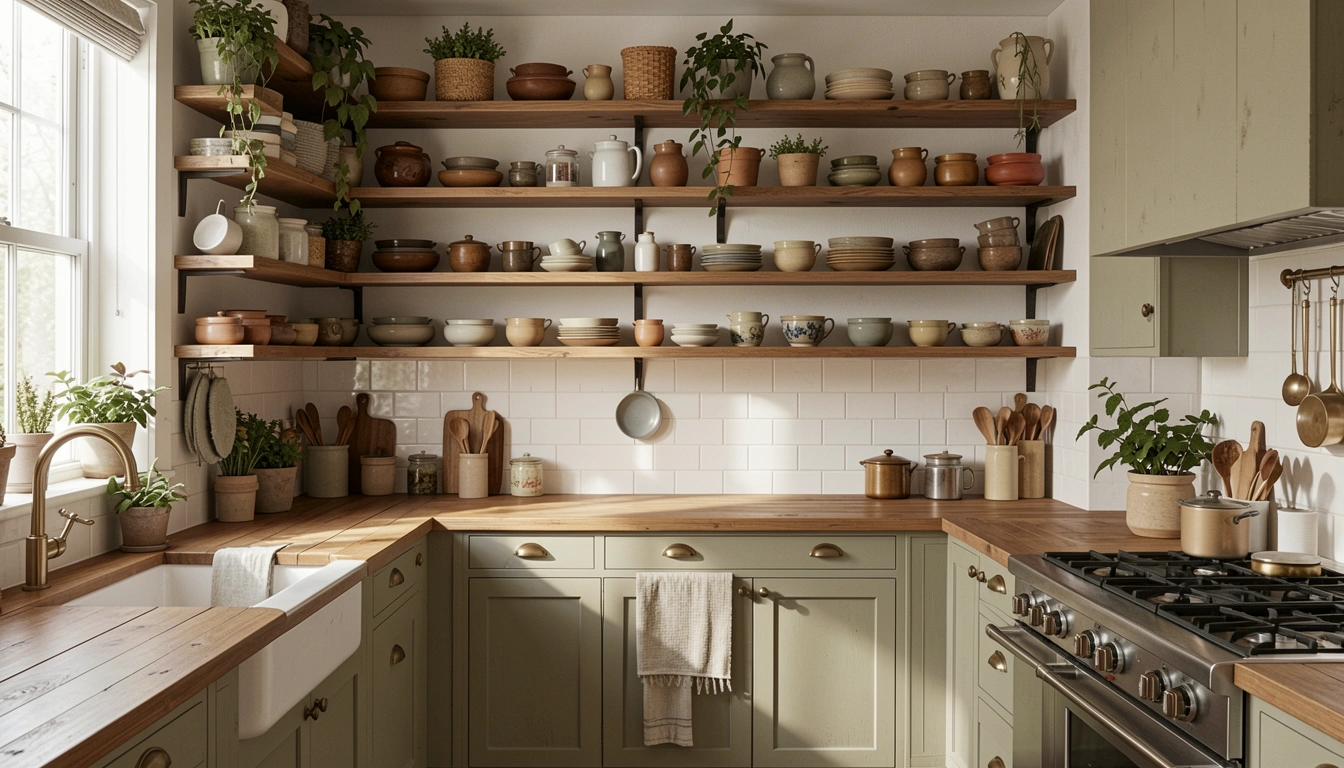
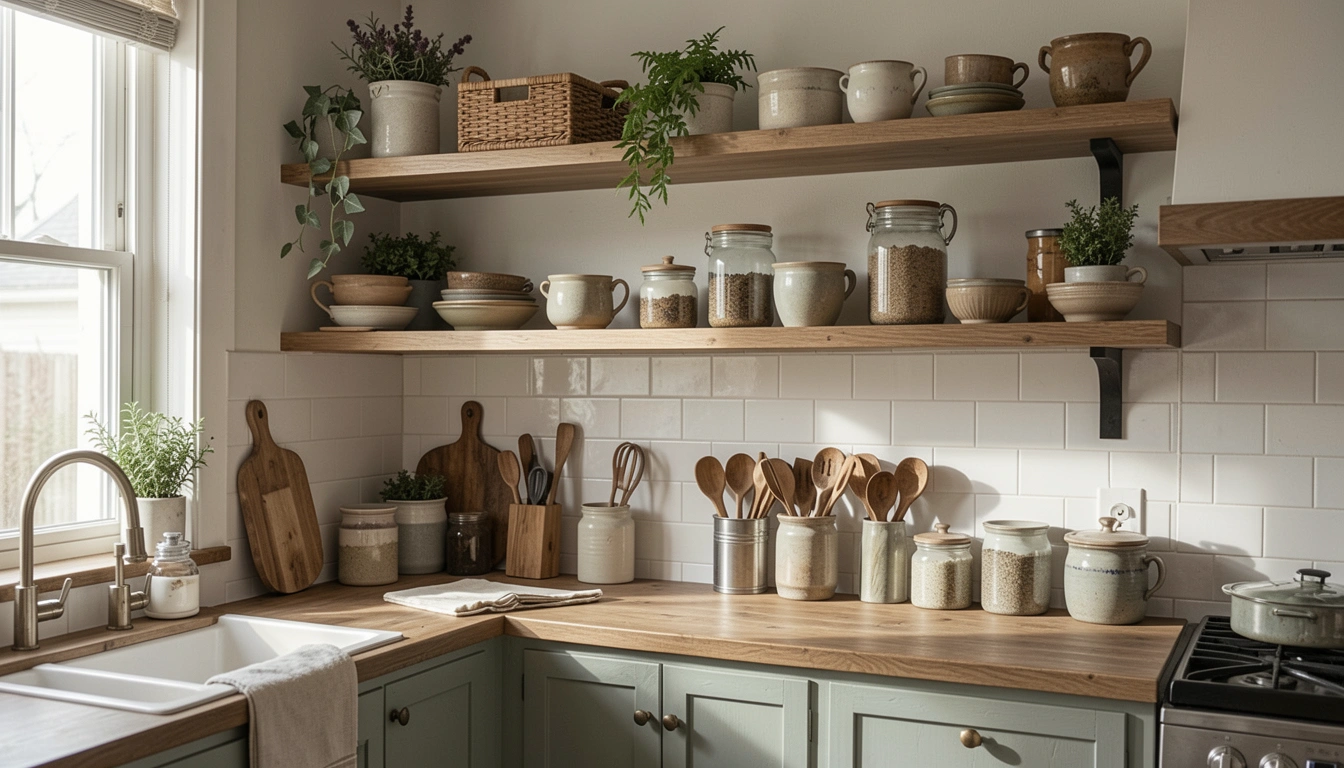
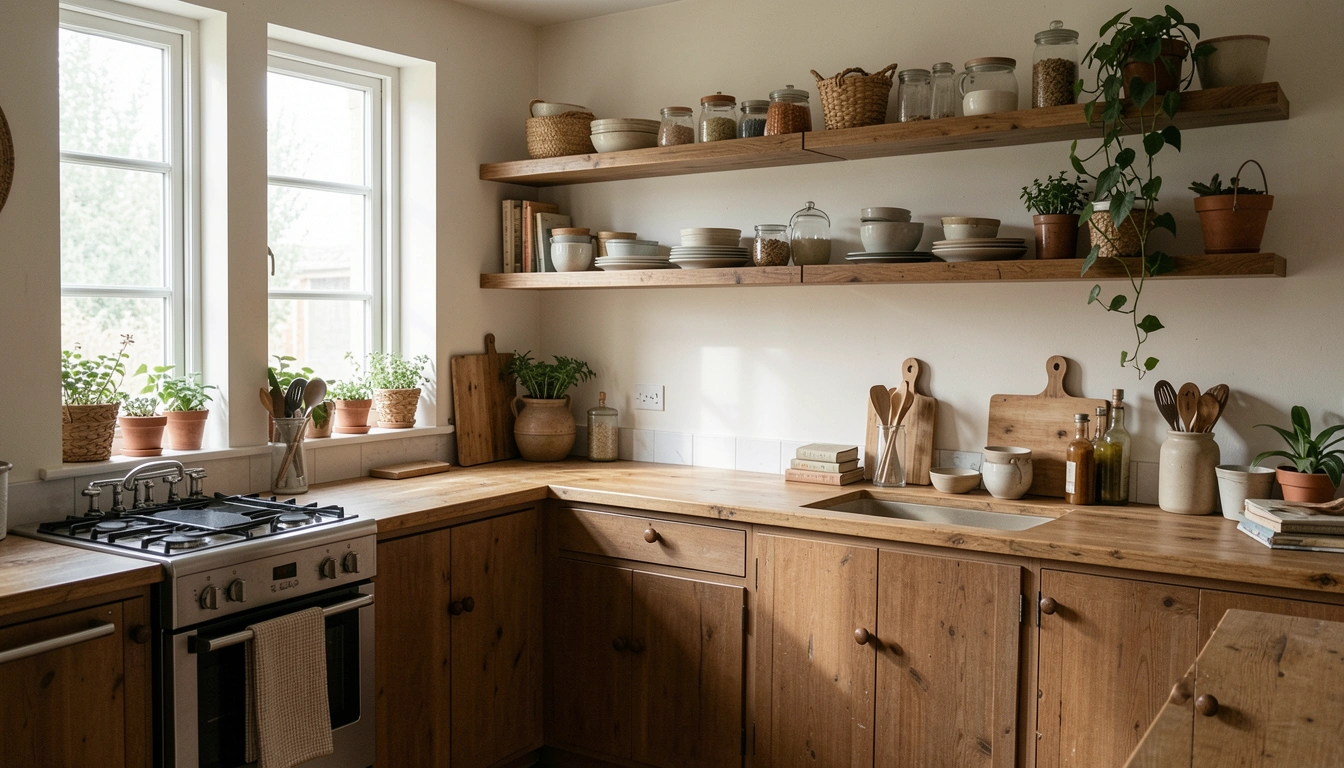
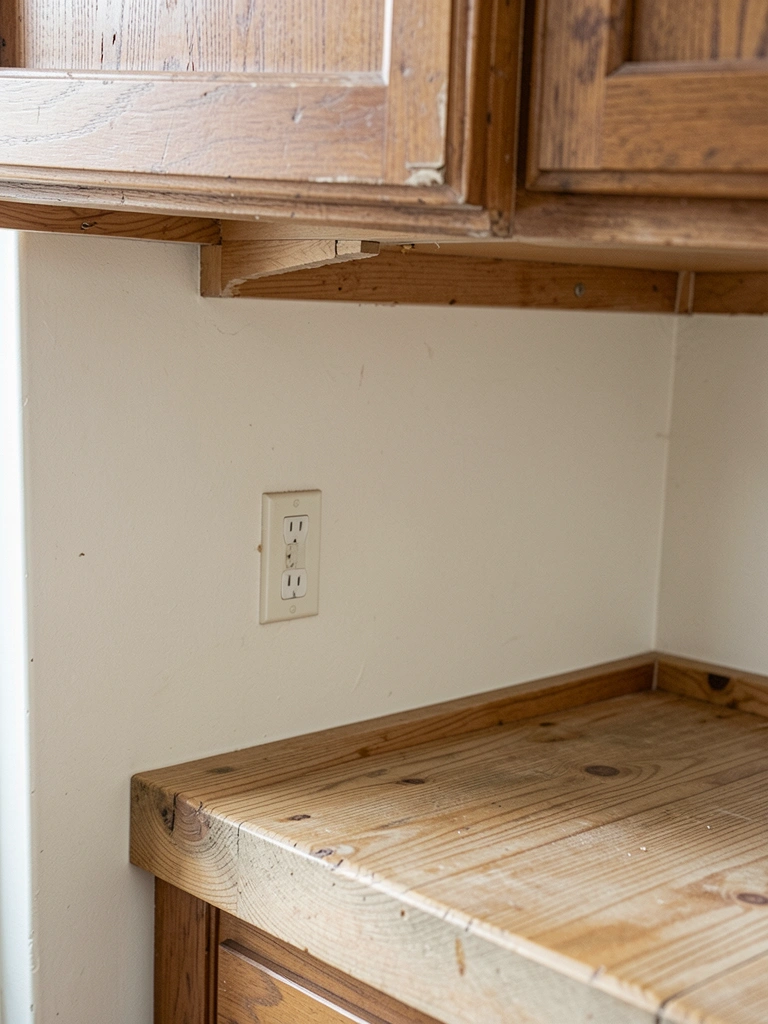
    I remember staring at my cluttered counters one morning, coffee in hand. Floating shelves changed everything. They pulled my eye up, made the room breathe.

    No more cabinets closing in. Just open space that felt like mine.

    I've installed them in three kitchens now. Some stuck, some I swapped. Here's what lasts.

    23 Trendy Floating Kitchen Shelf Ideas

    These 23 floating kitchen shelf ideas come from real homes I've shaped. Each one fits everyday life. You'll see exactly how to make them work in yours.

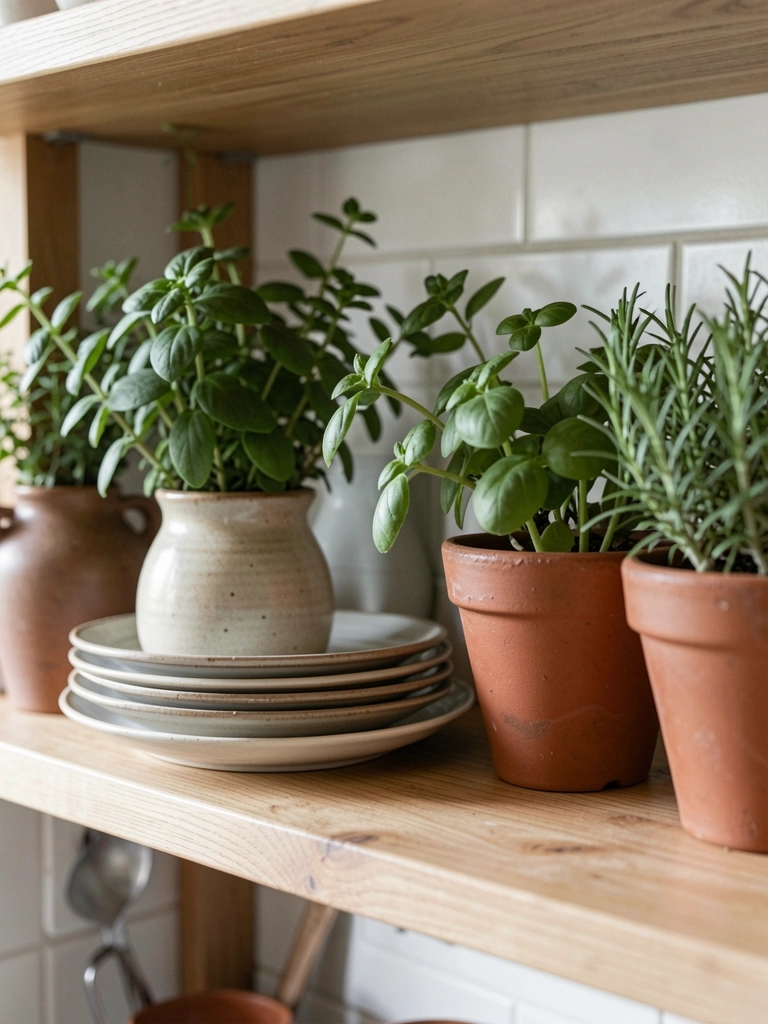
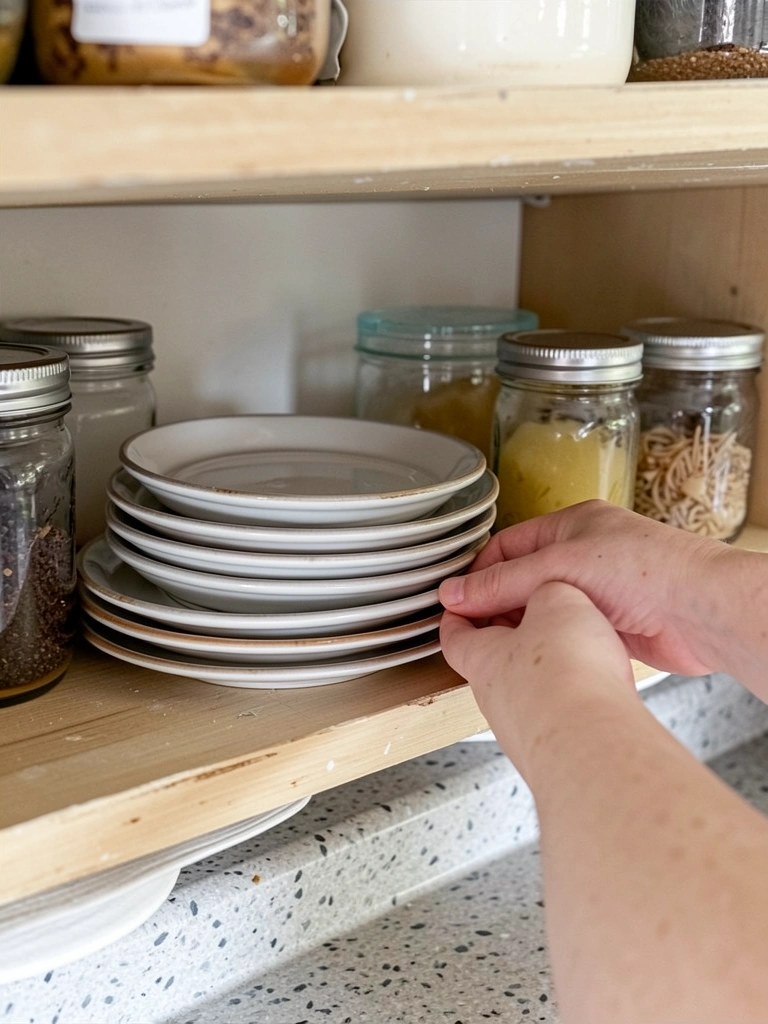
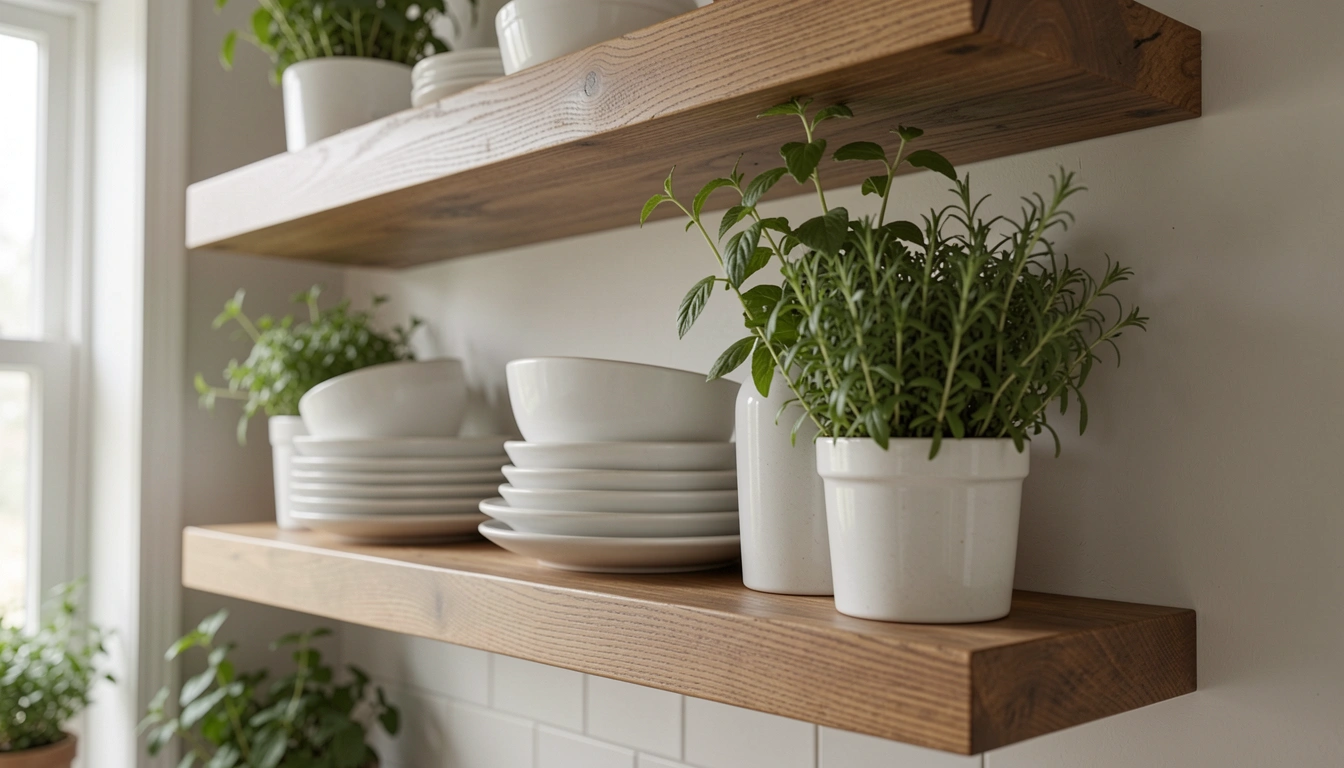
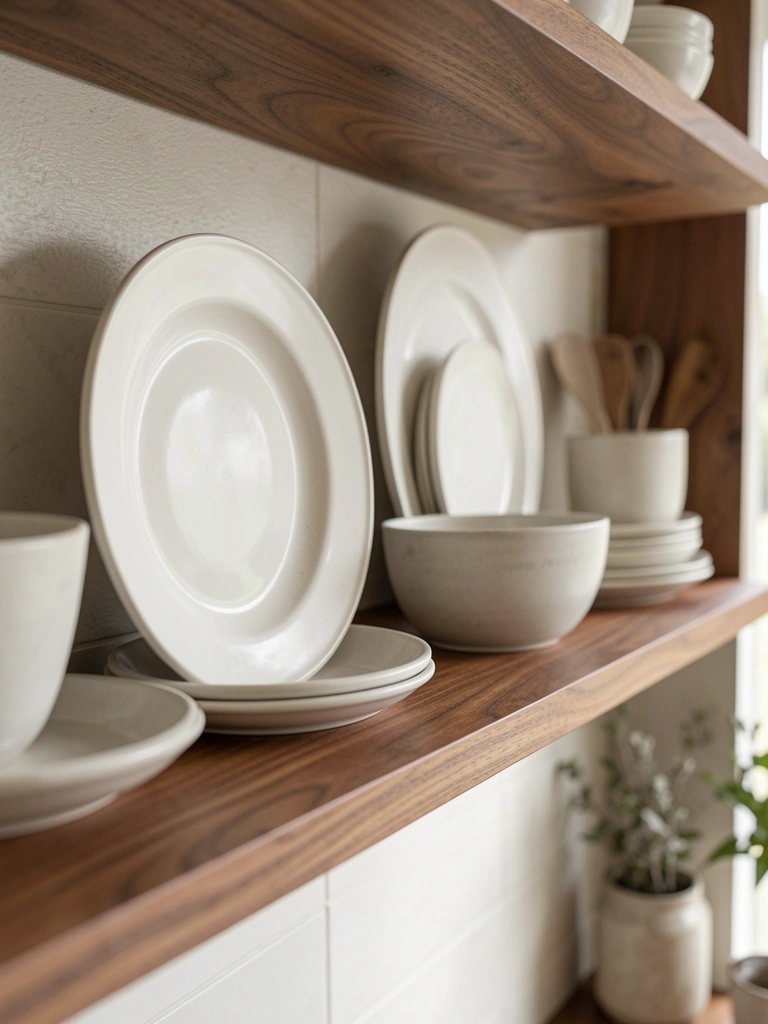
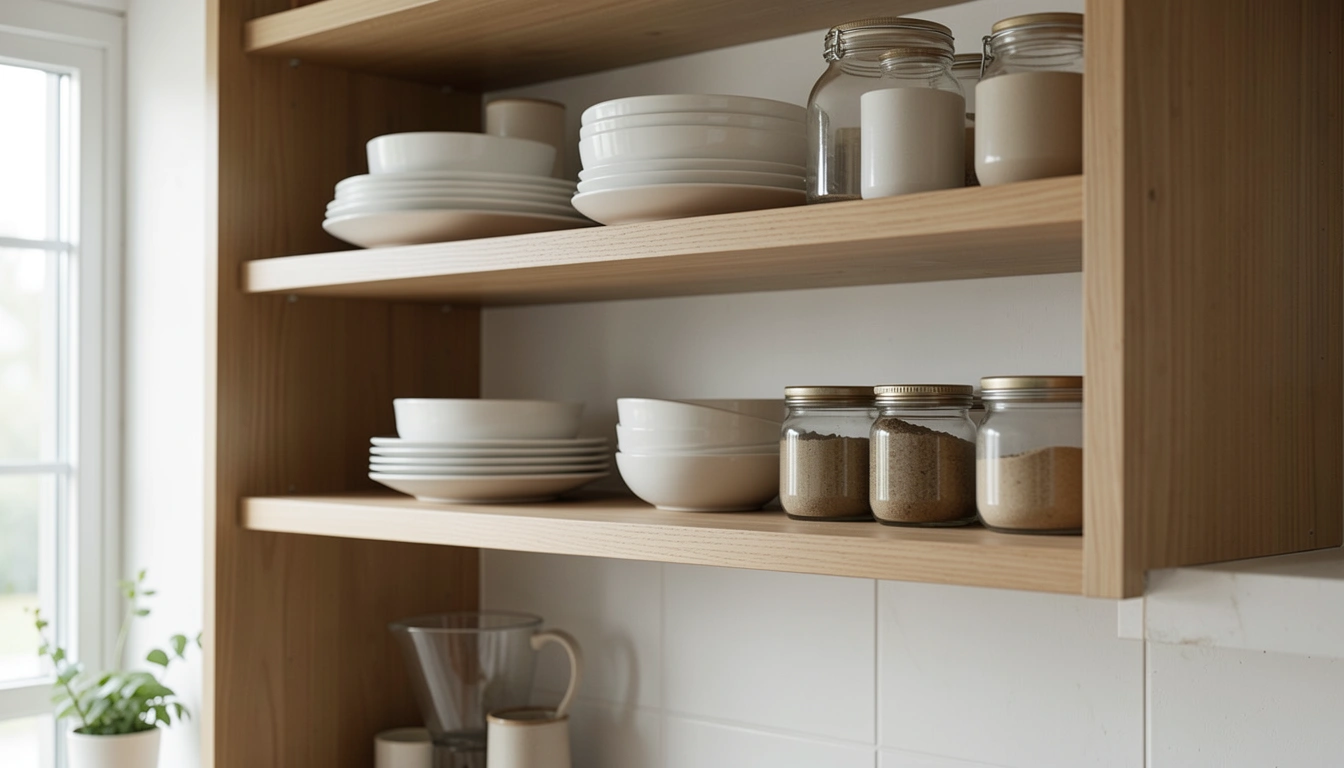
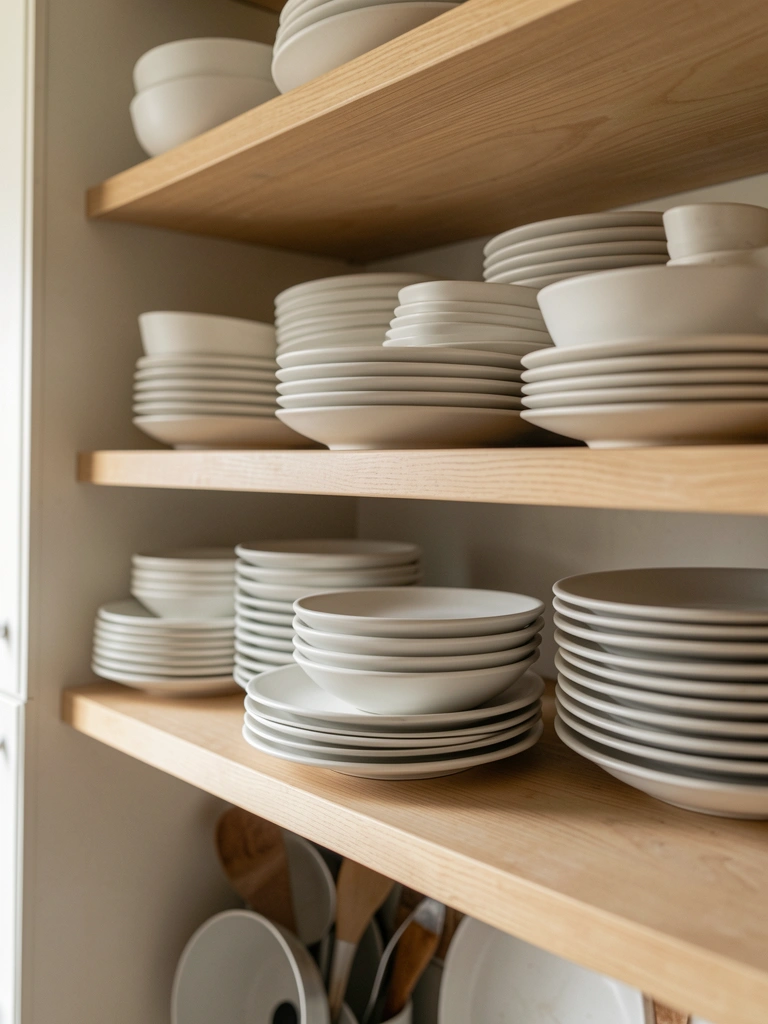
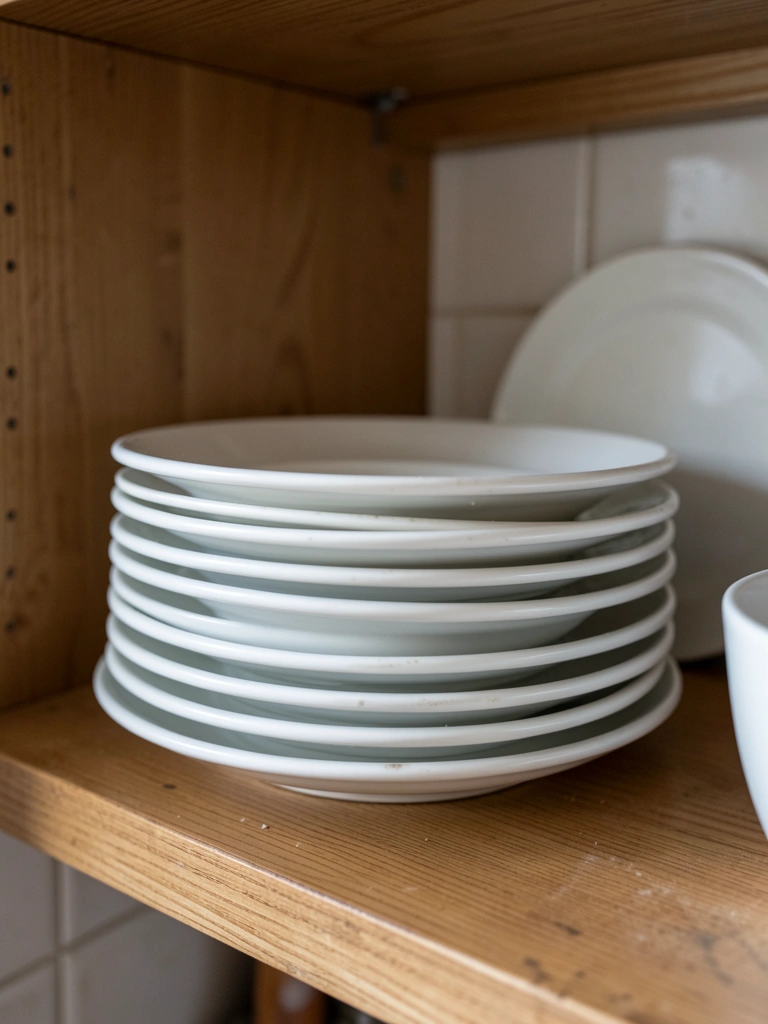
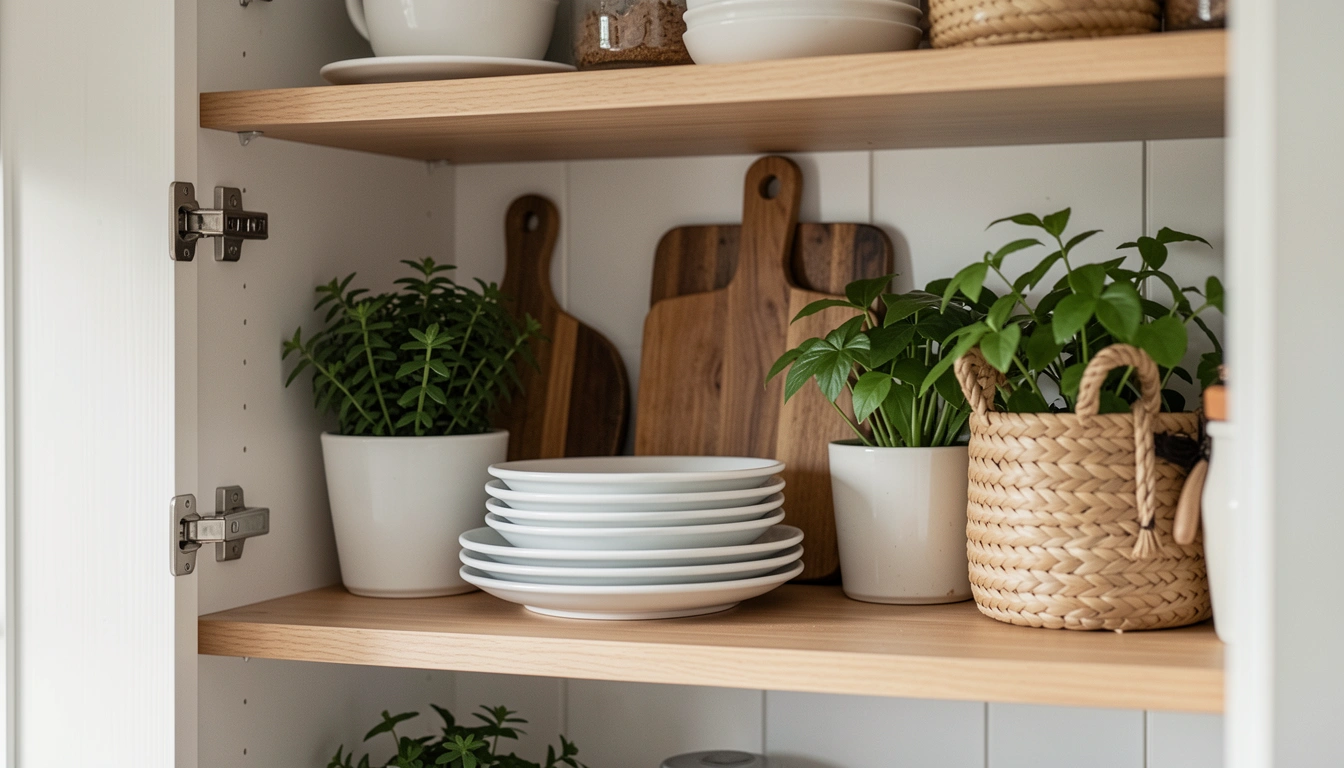
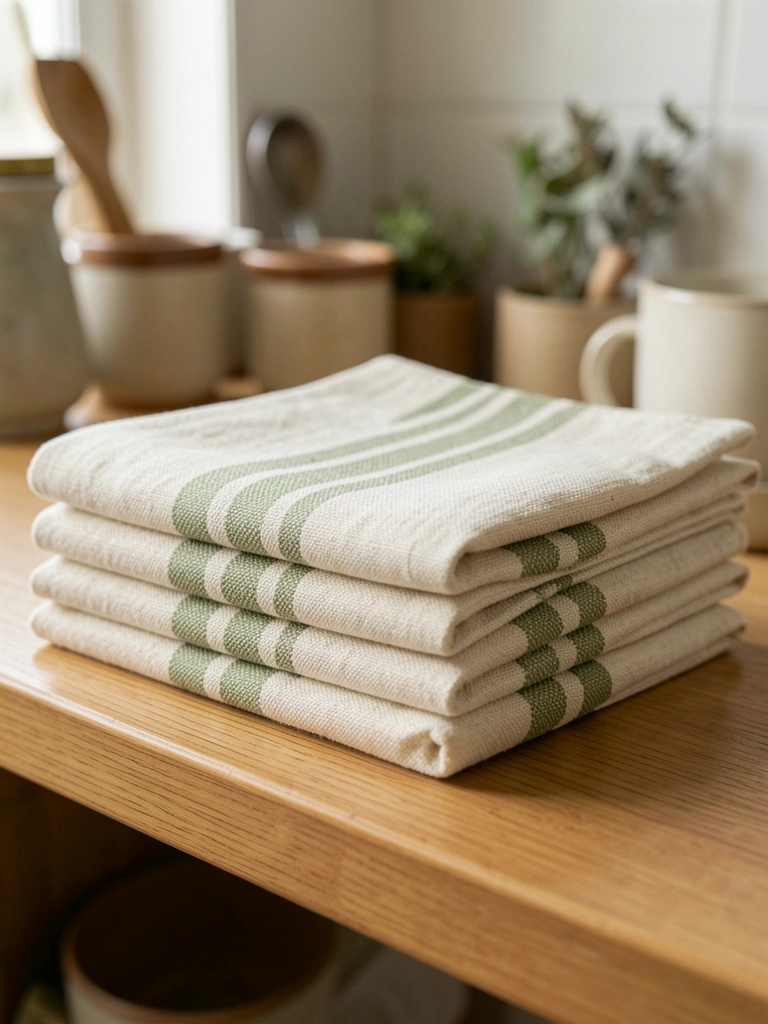
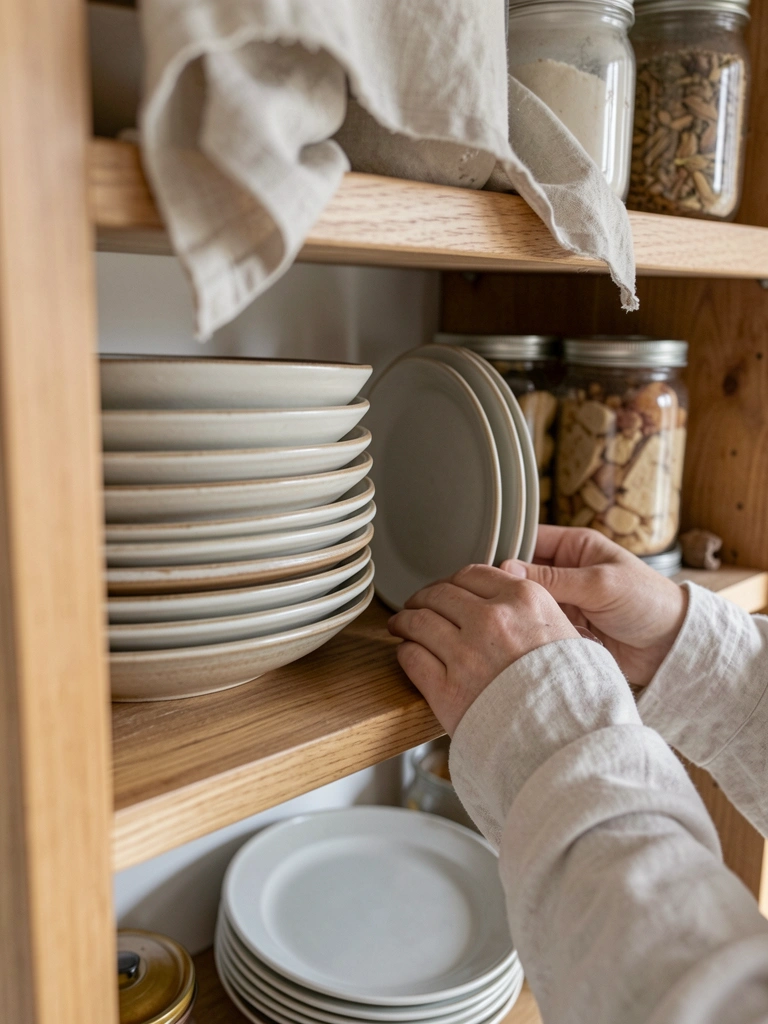
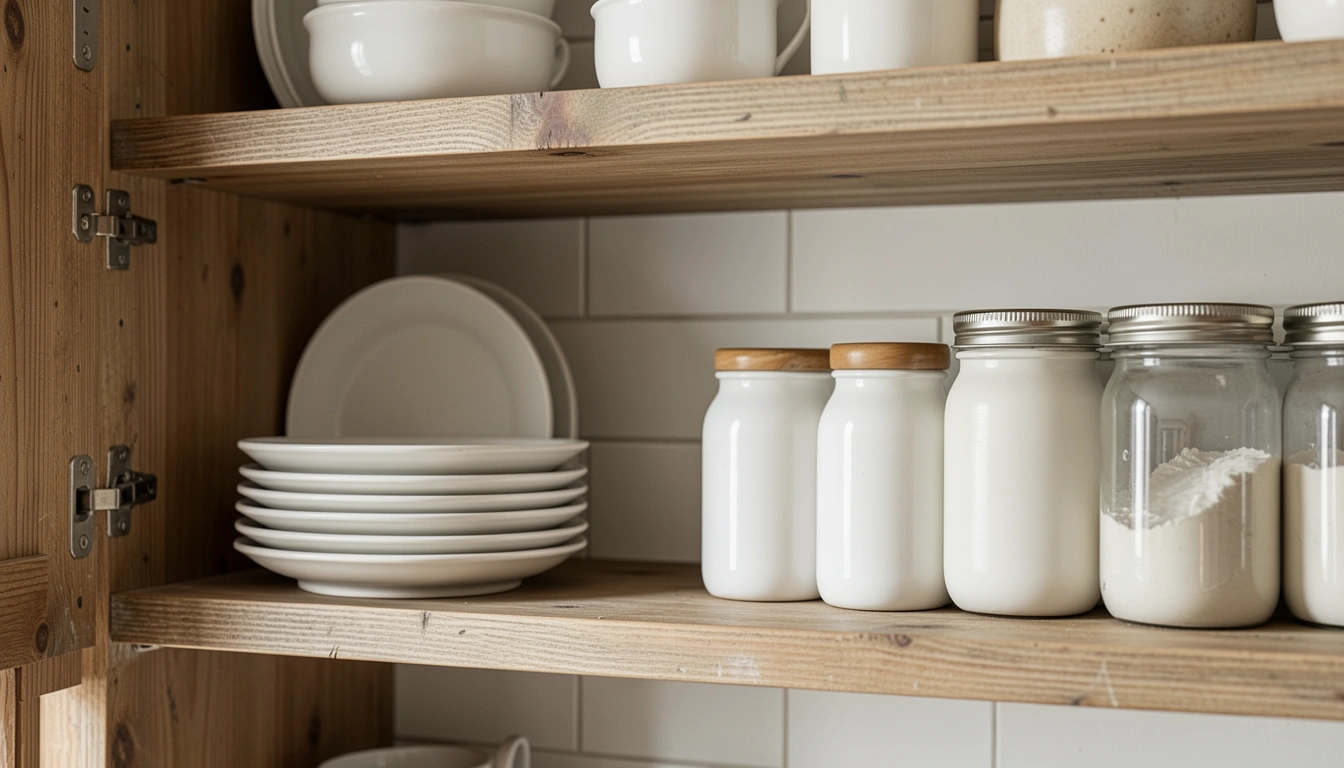
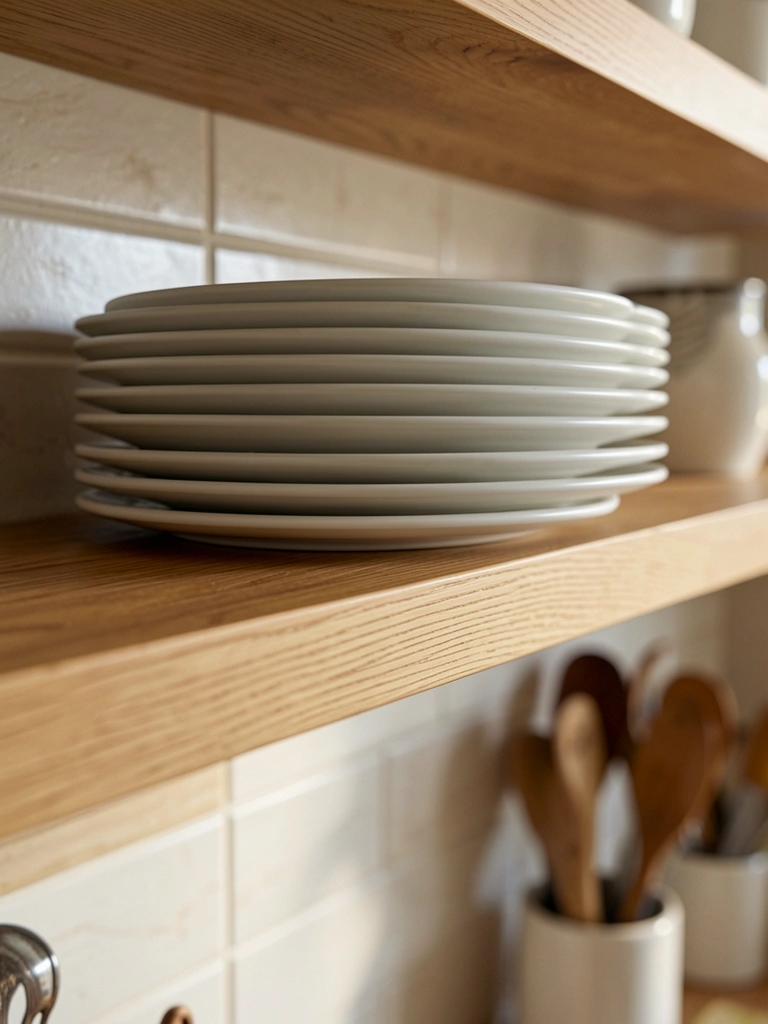
    1. Warm Wood Shelves with Everyday White Plates

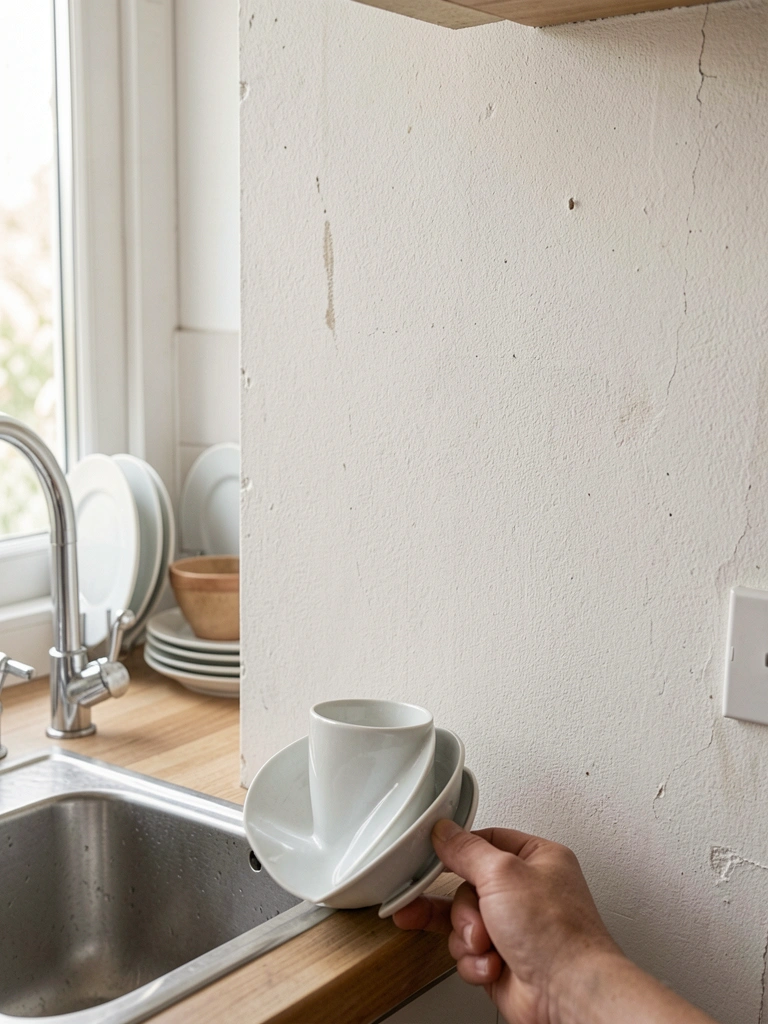
    I put these in my last rental kitchen. The wood warmed up the white walls right away. Plates stacked loose, not perfect— that's what made it feel homey.

    Before, counters drowned in dishes. Now, mornings start calm. I grab a plate, no hunt.

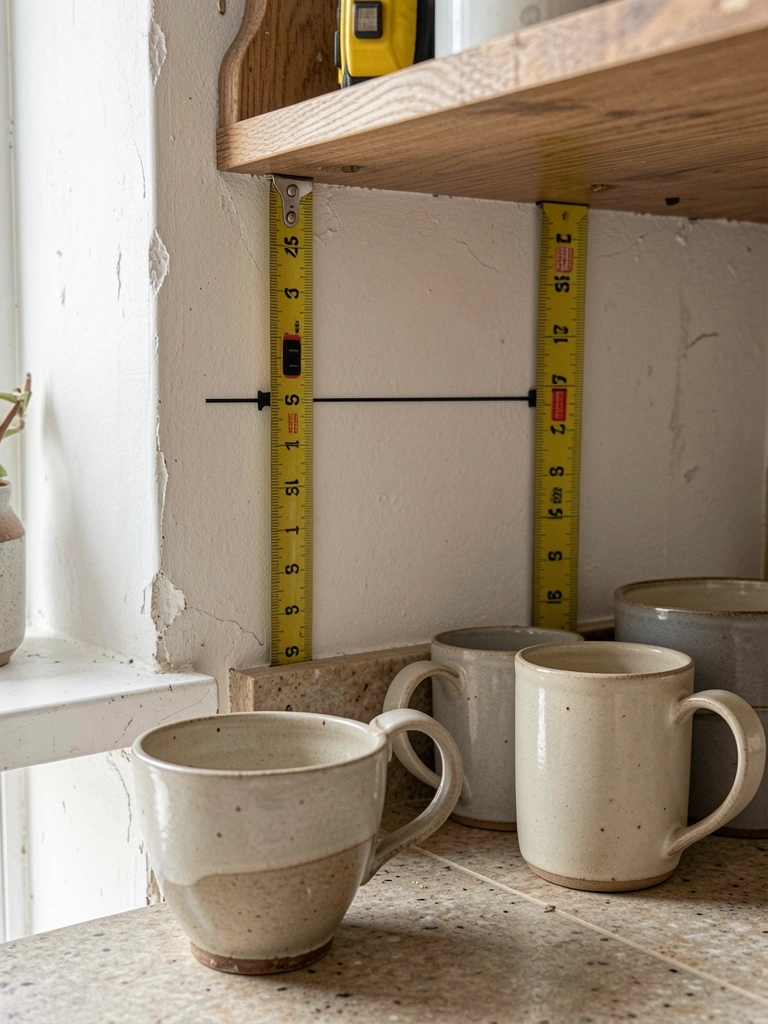
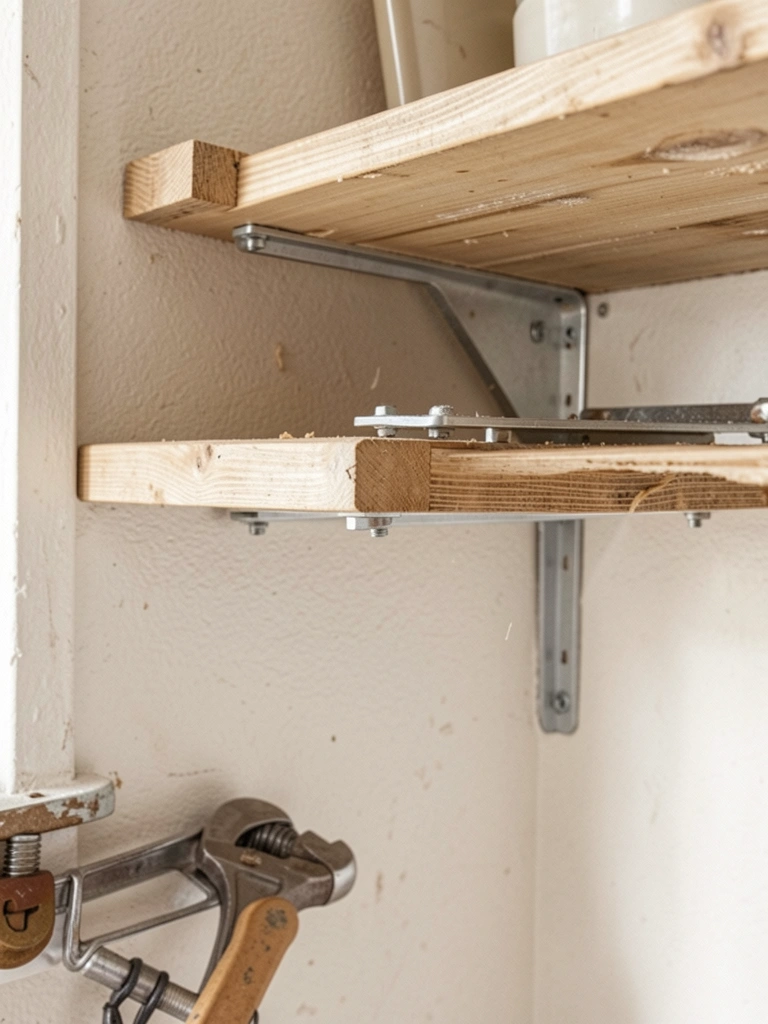
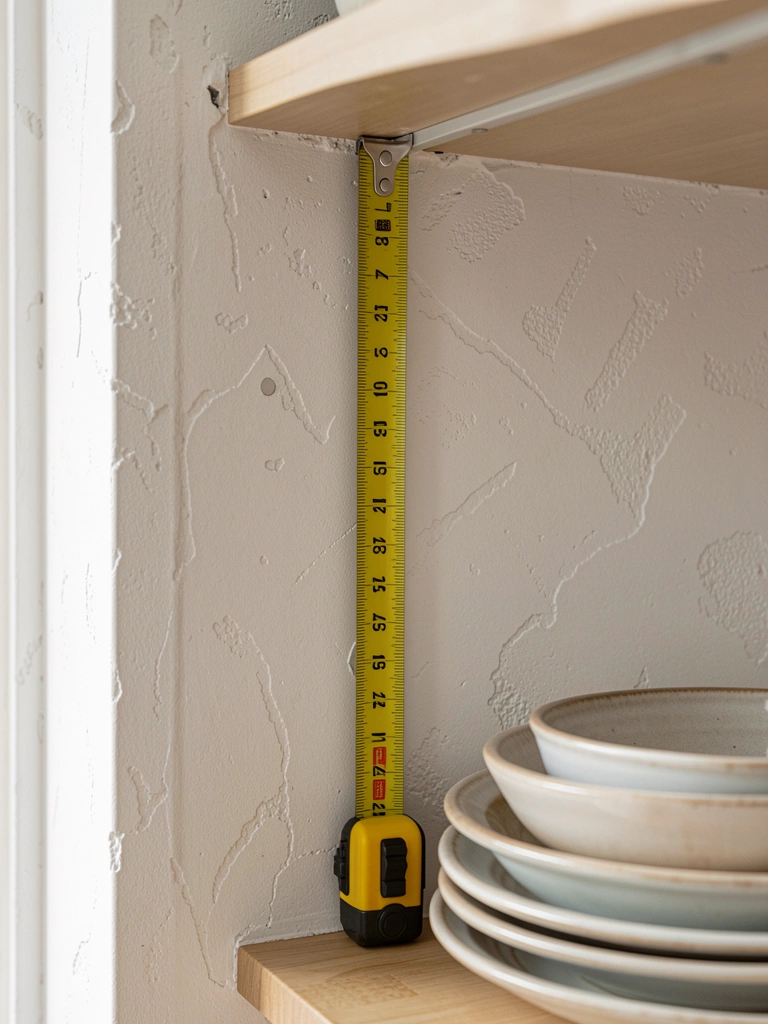
    Watch the depth. Too shallow, and plates tip. I went 10 inches deep. Hung them at eye level over the sink.

    One tip: Dust weekly. Wood shows fingerprints fast.

    What You’ll Need for This Look

    36-inch light oak floating shelf
    Set of 12 matte white ceramic dinner plates
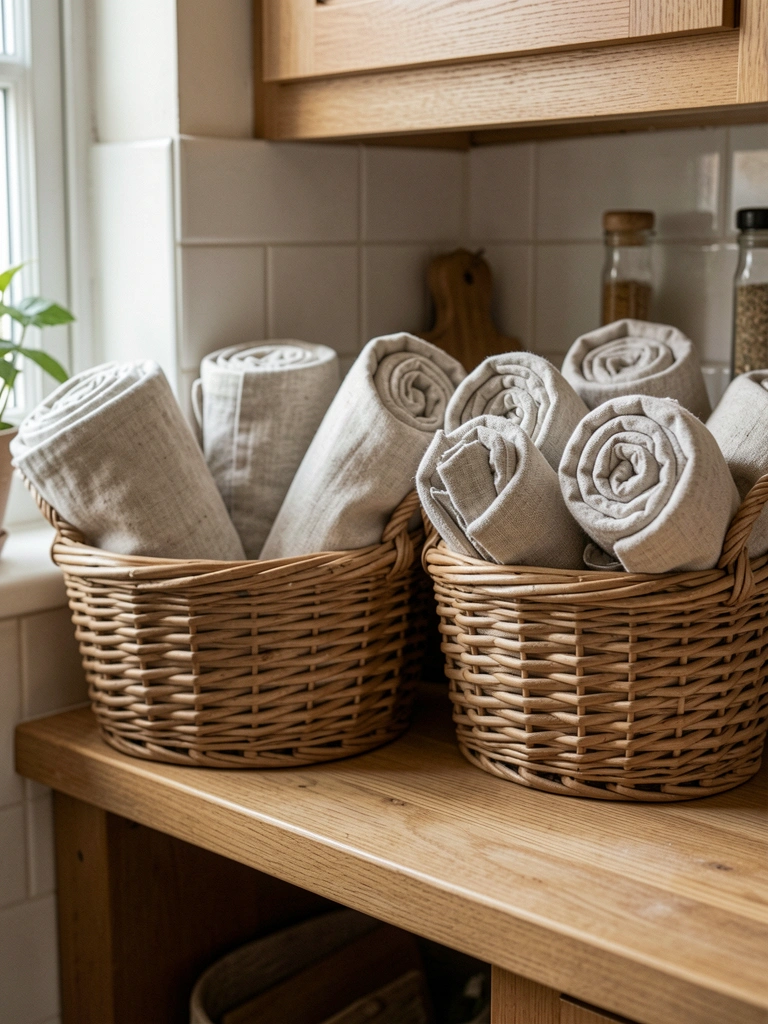
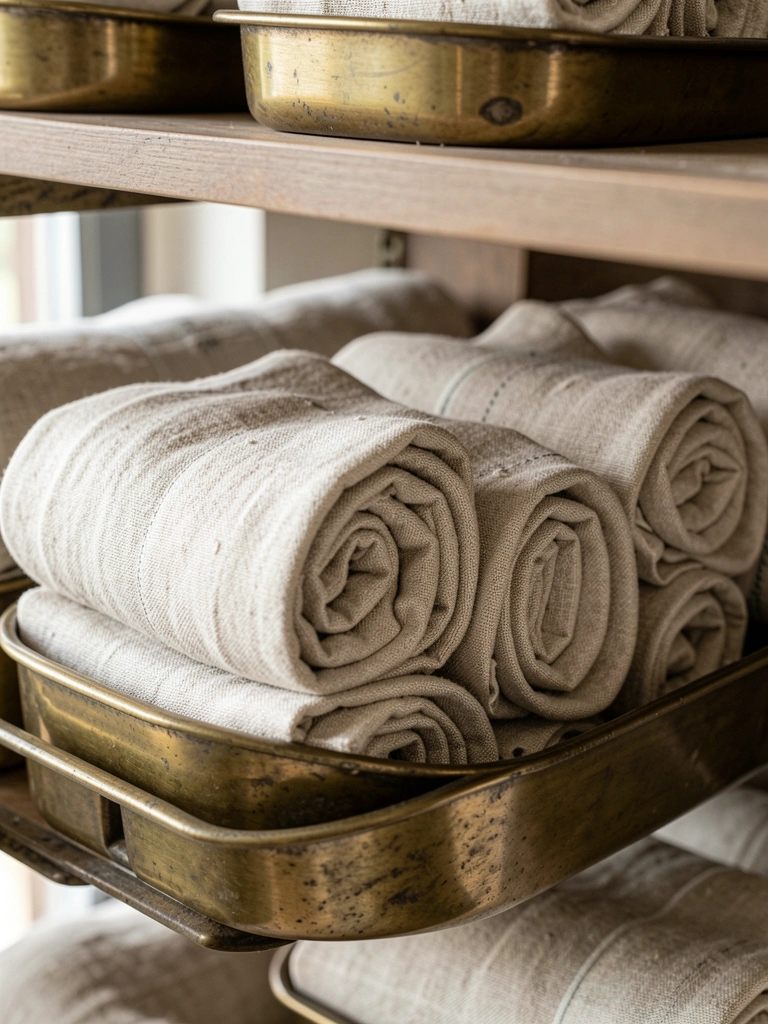
    White linen dish towels

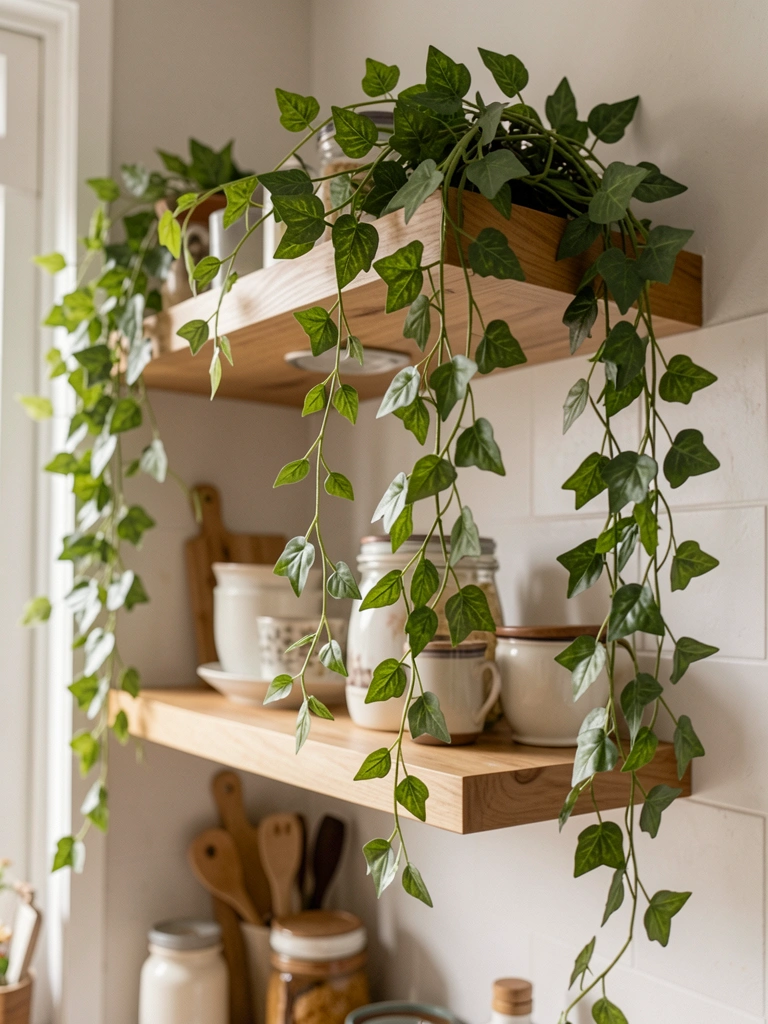
    2. Black Metal Shelves with Trailing Greenery

    Black metal cut through my bright galley kitchen. Added ivy pots that trail down— softens the edge.

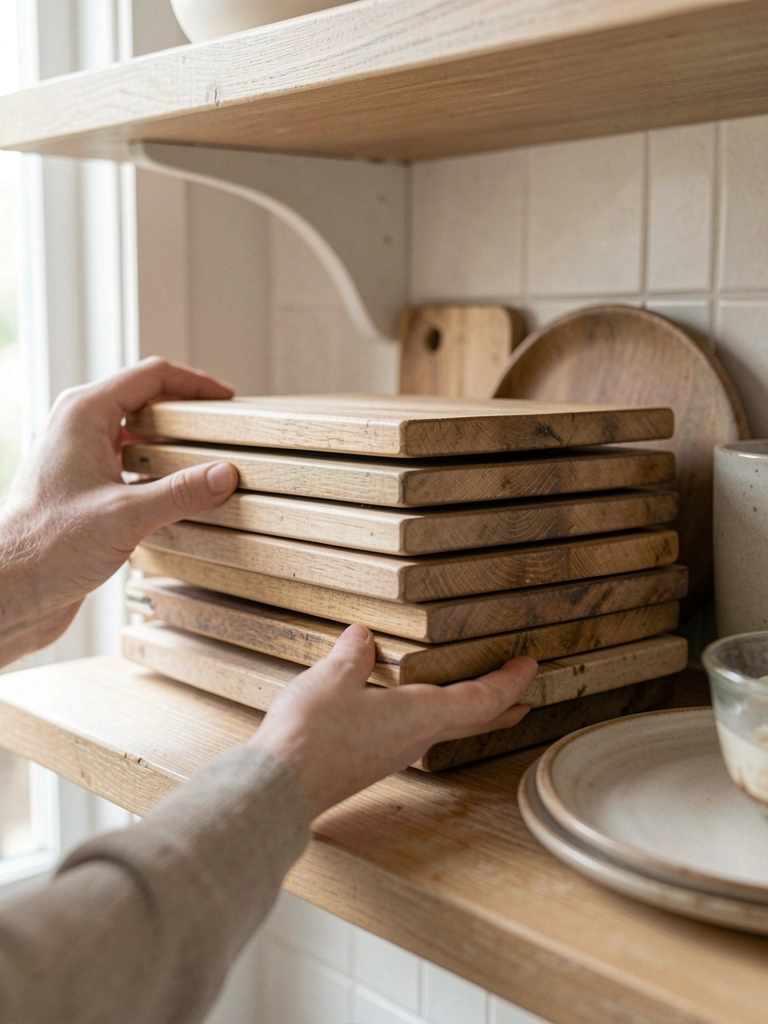
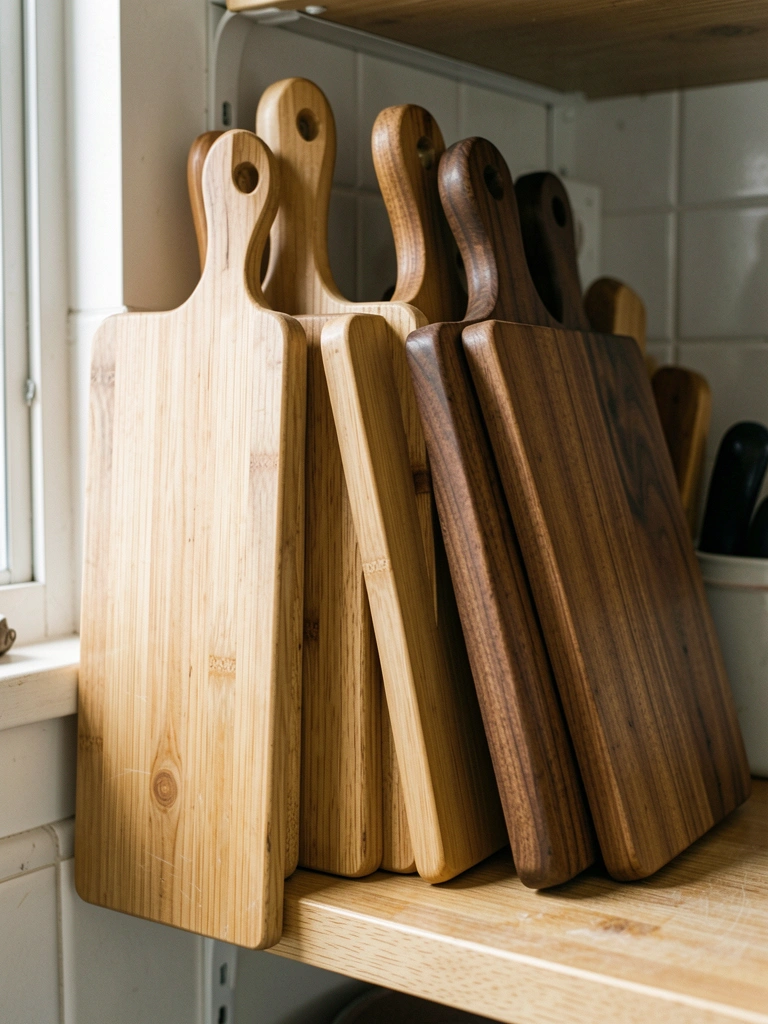
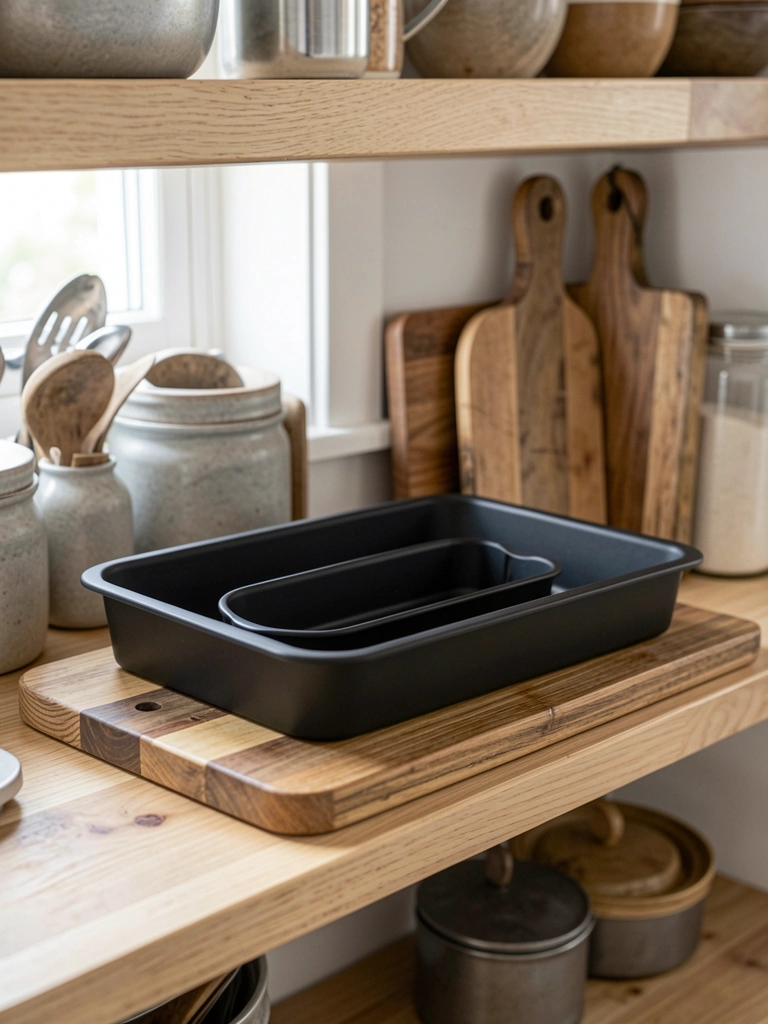
    It pulls the room together. Green against black feels grounded, not stark.

    Measure wall space first. I spaced shelves 12 inches apart. Lets plants drape without crowding.

    They hide the brackets clean. Worth the extra cost.

    What You’ll Need for This Look

    24-inch black metal floating shelf
    Trailing ivy plant in terracotta pot
    Clear glass apothecary jars
    Small brass plant hanger clips

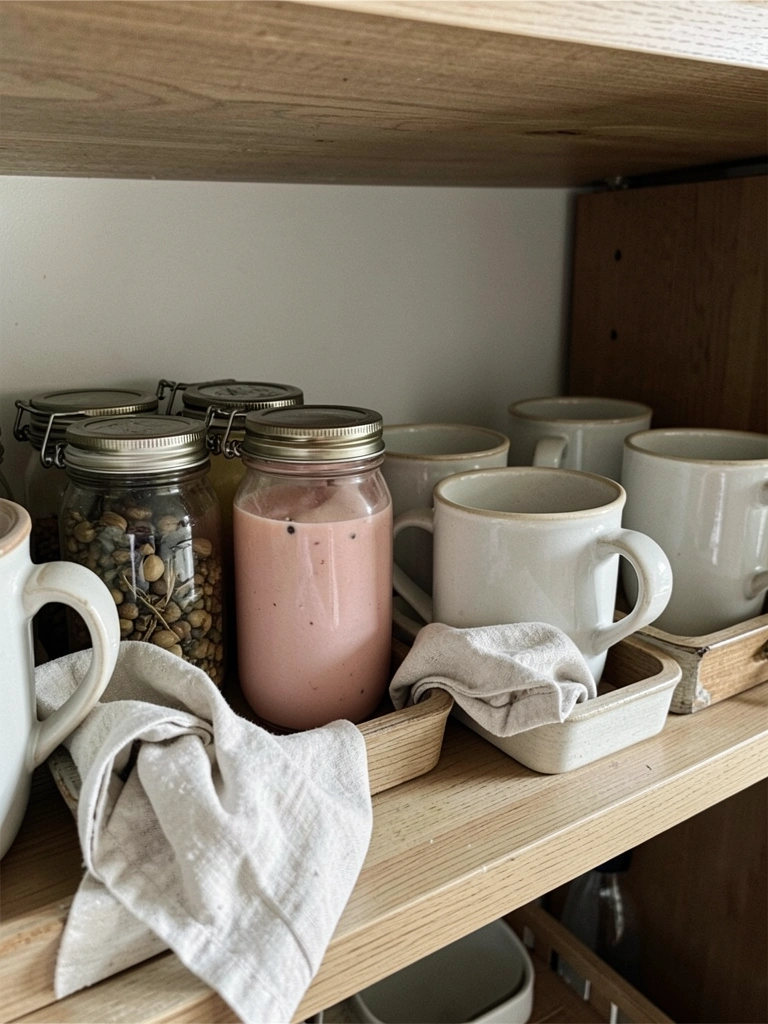
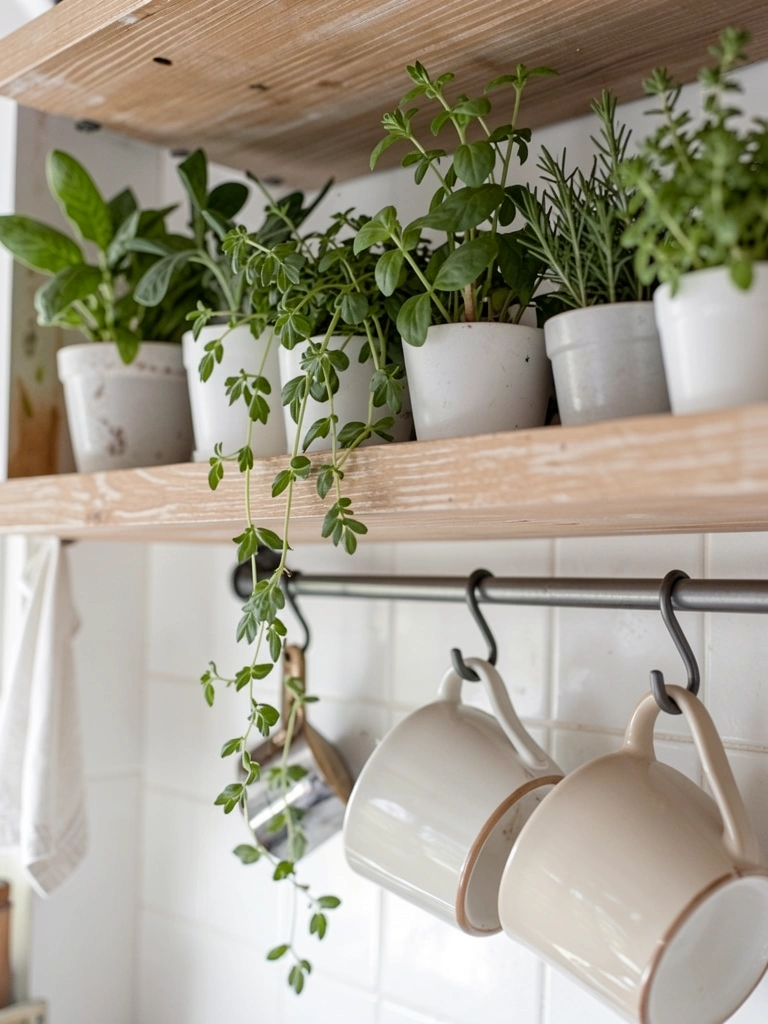
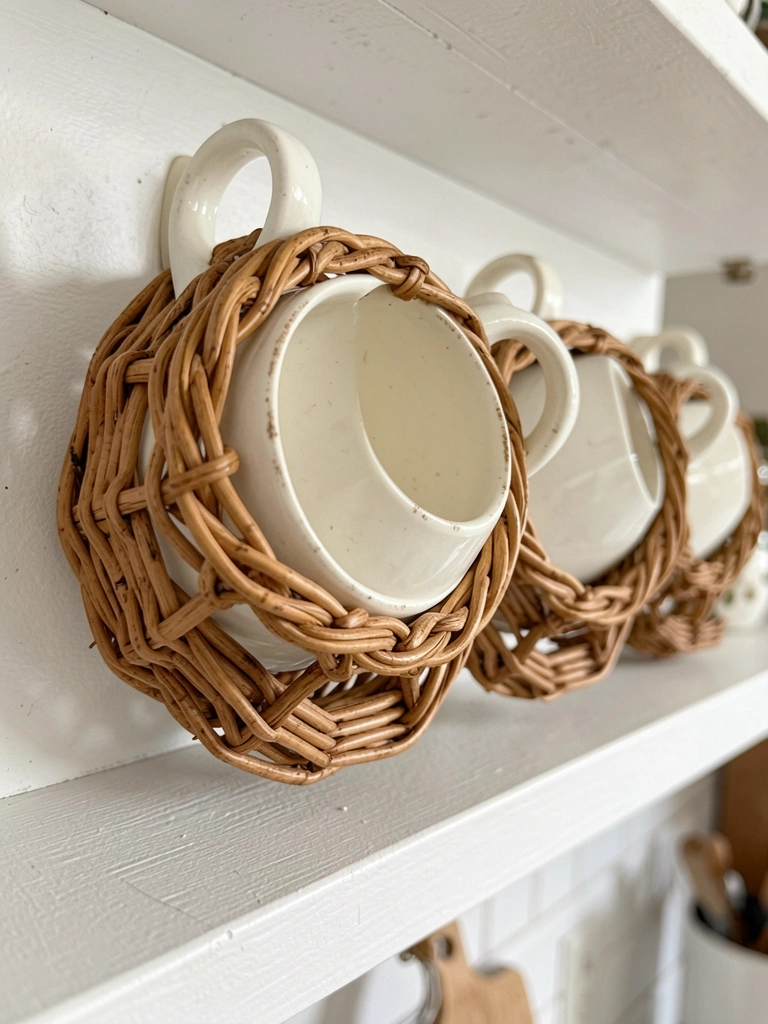
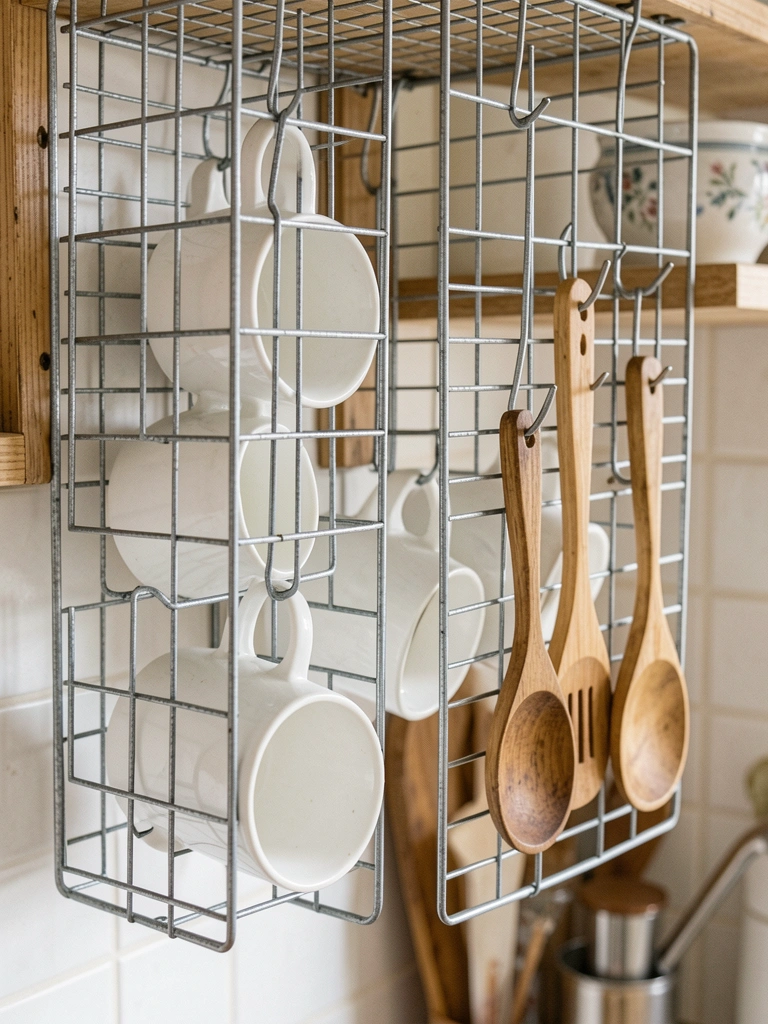
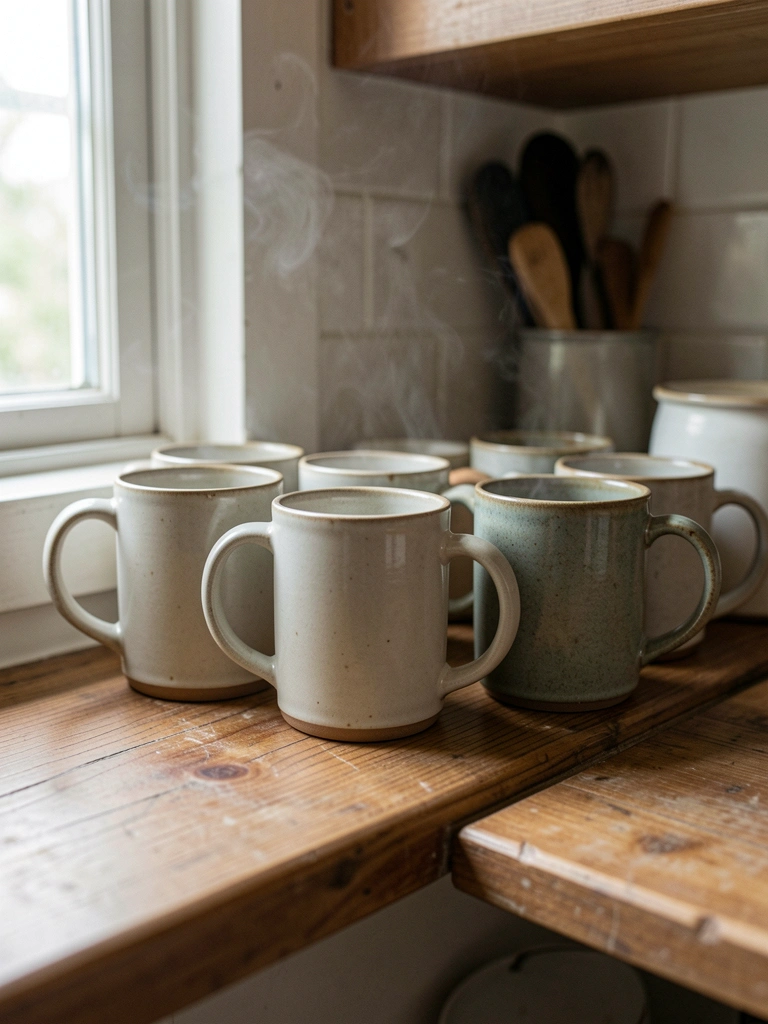
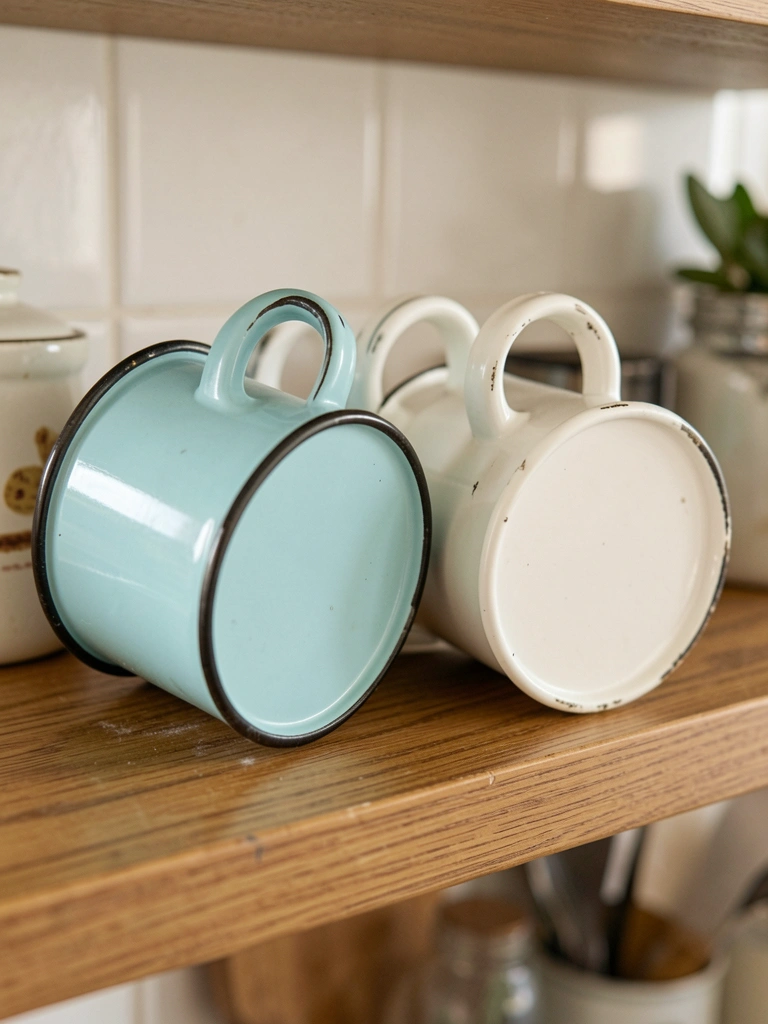
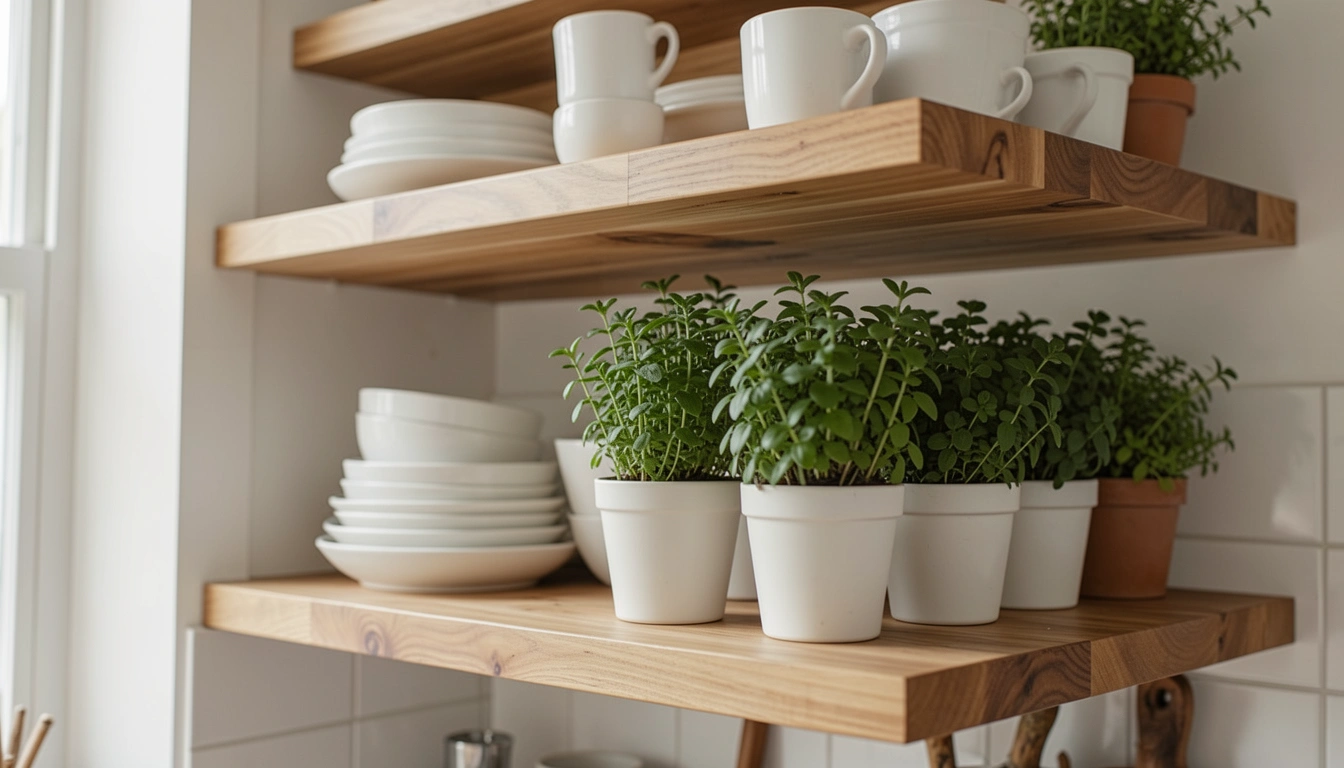
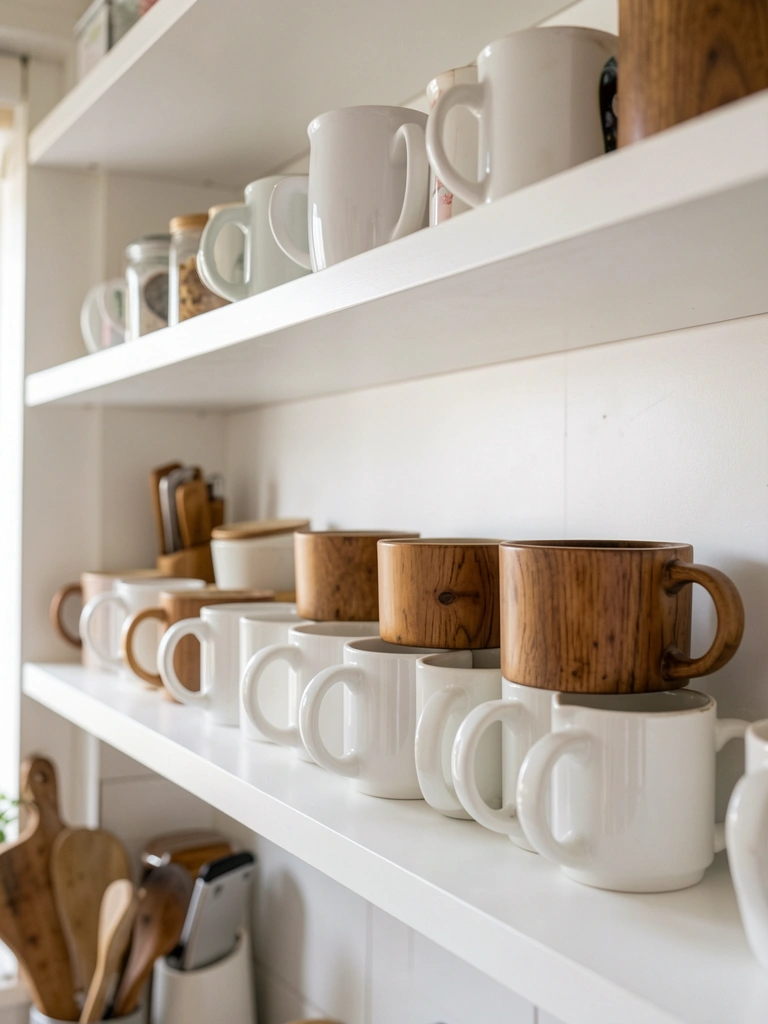
    3. Slim White Shelves for Coffee Mugs

    White shelves keep my coffee corner light. Mugs in a row, handles out— grab-and-go easy.

    The space feels bigger. No dark cabinets weighing it down.

    I chose 8-inch depth. Perfect for mugs, no wobble.

    Mix heights for interest. Tall one for the French press.

    What You’ll Need for This Look

    30-inch slim white floating shelf
    Set of 6 speckled ceramic coffee mugs
    Faux wood French press

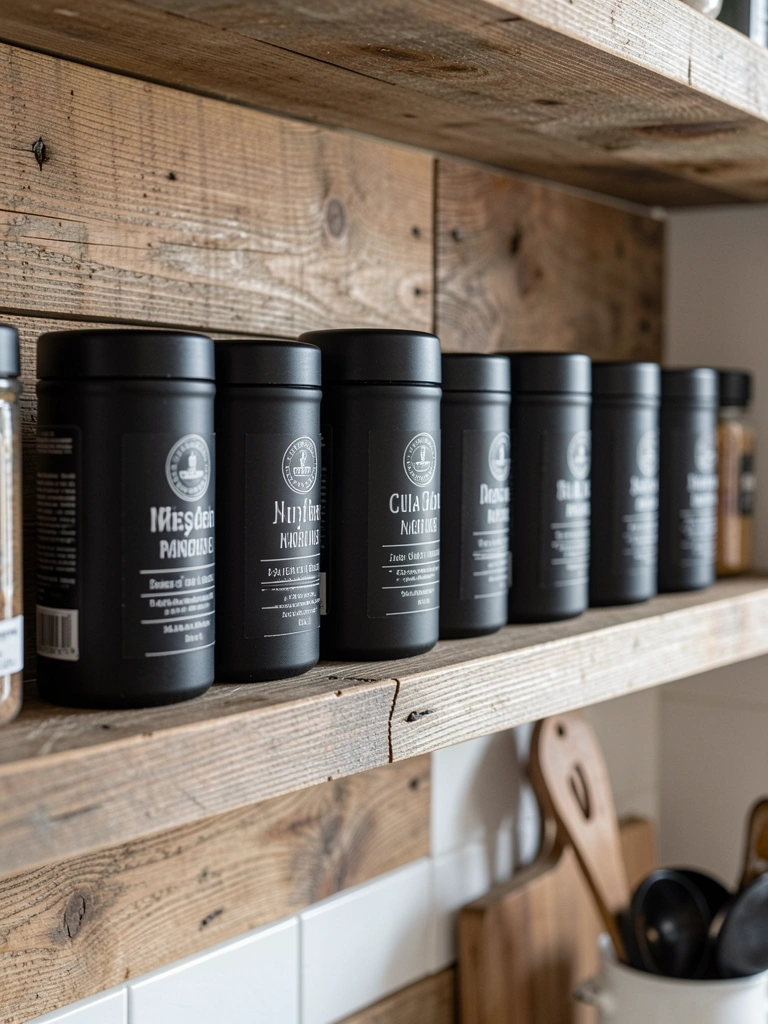
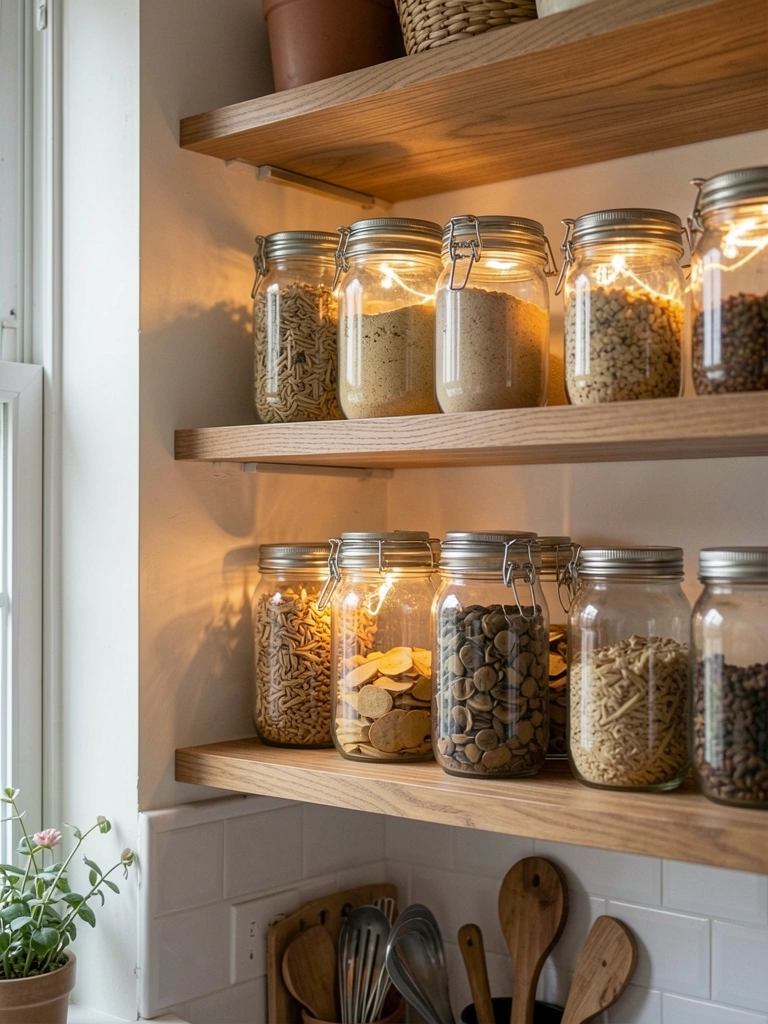
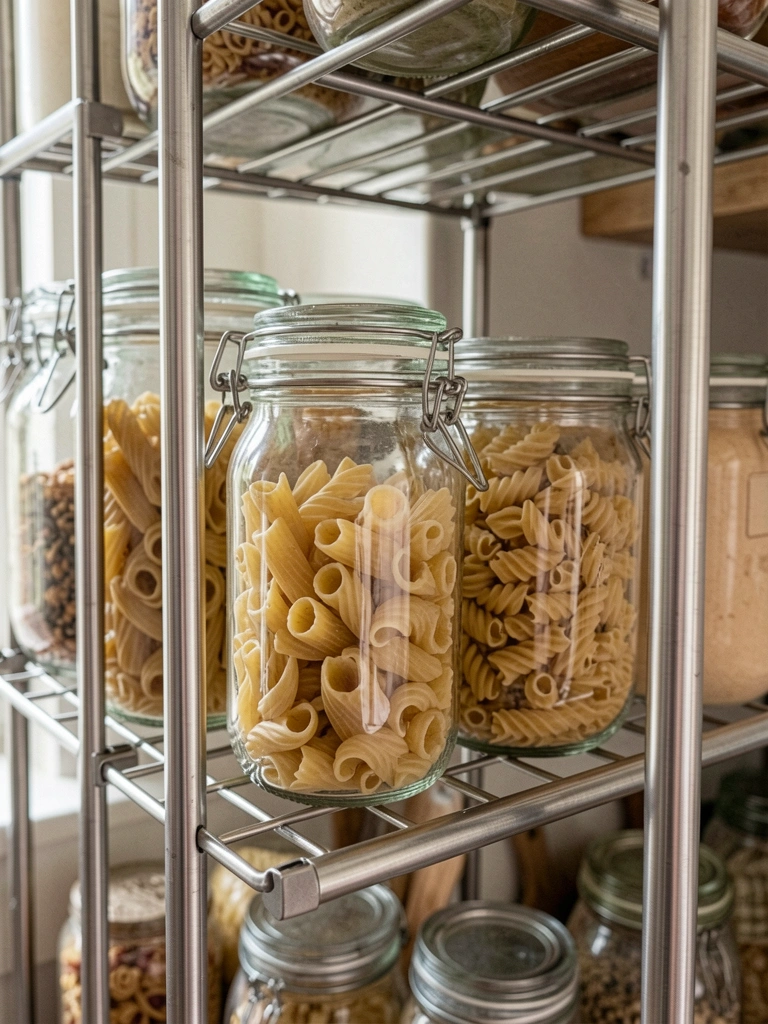
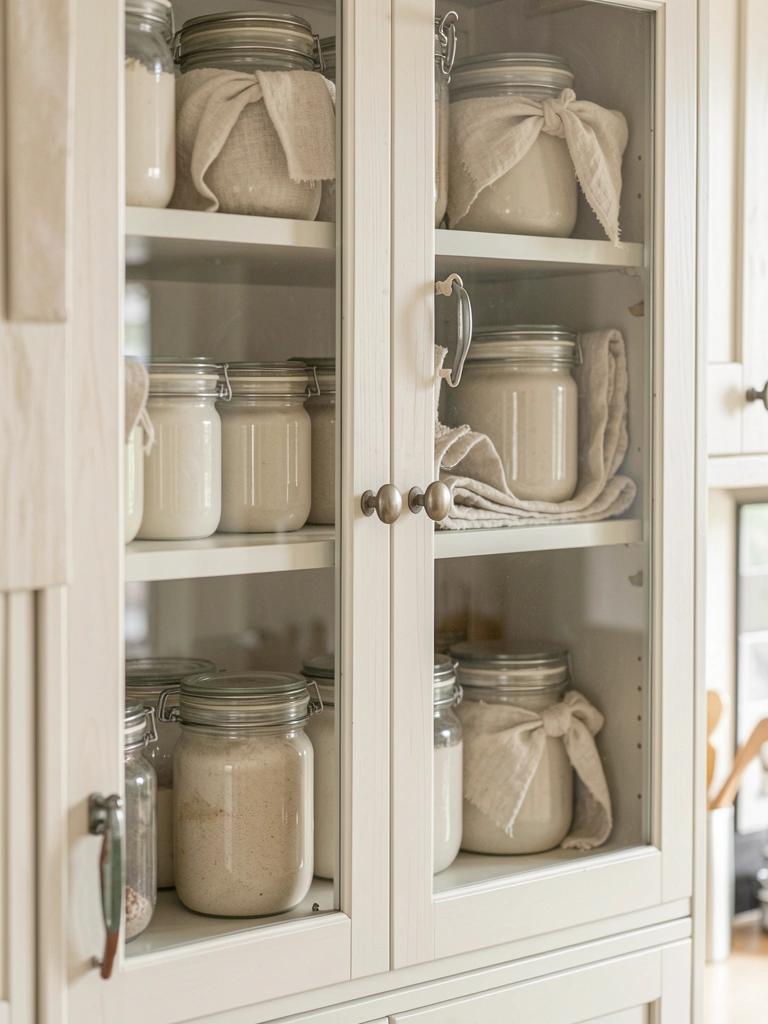
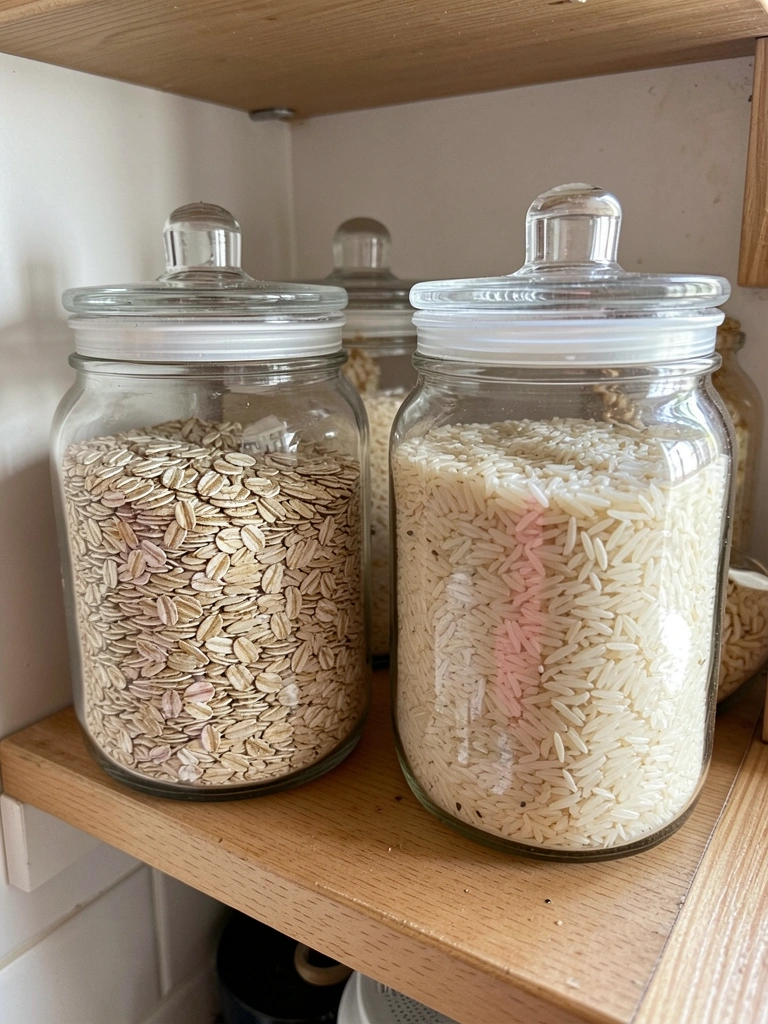
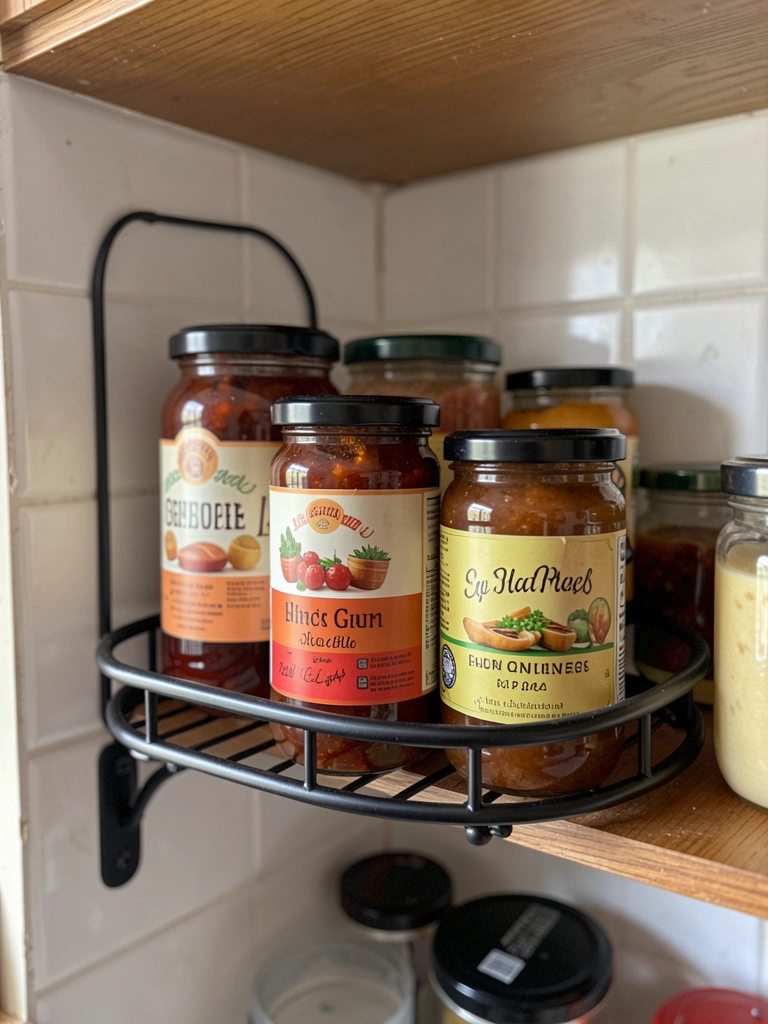
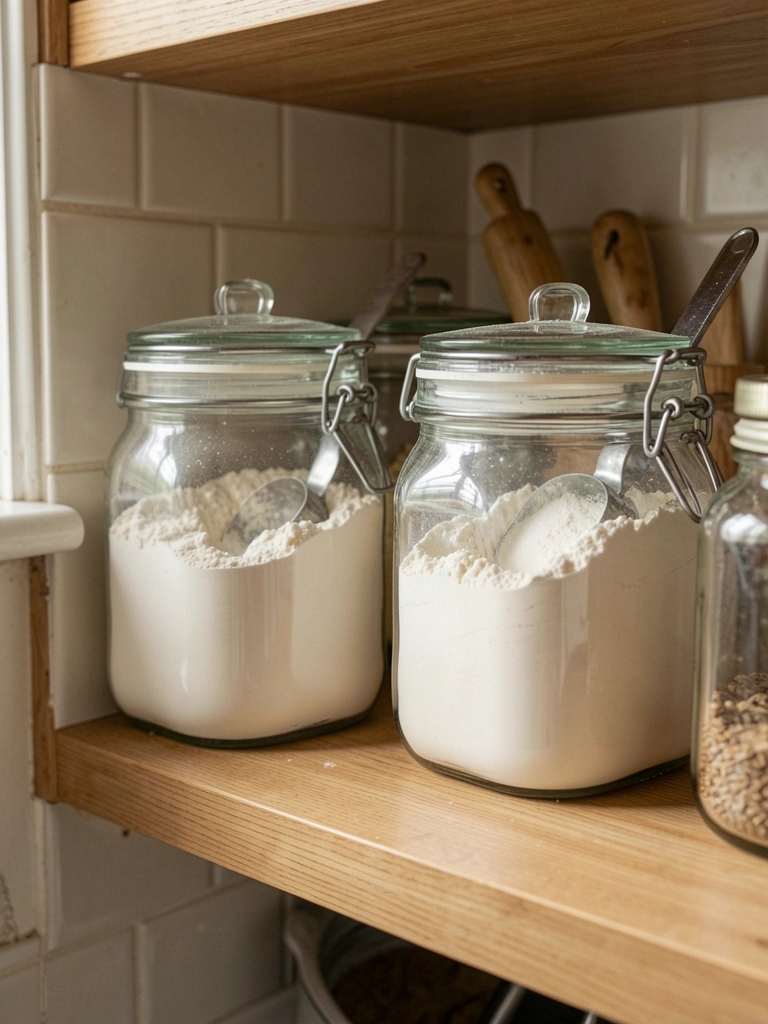
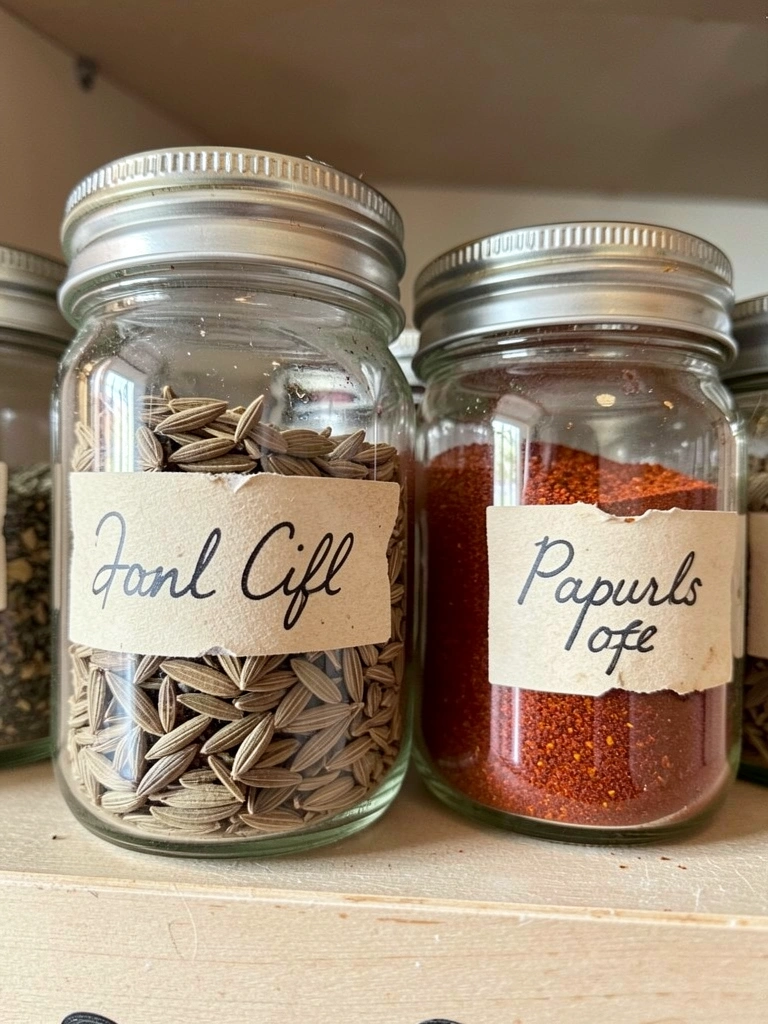
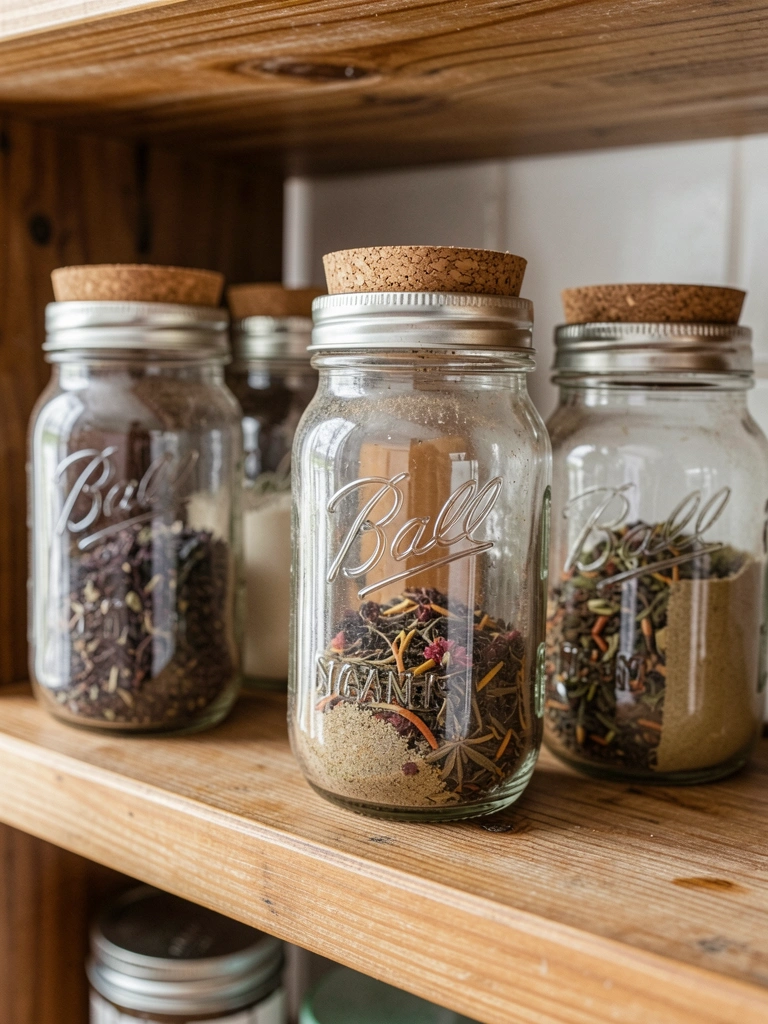
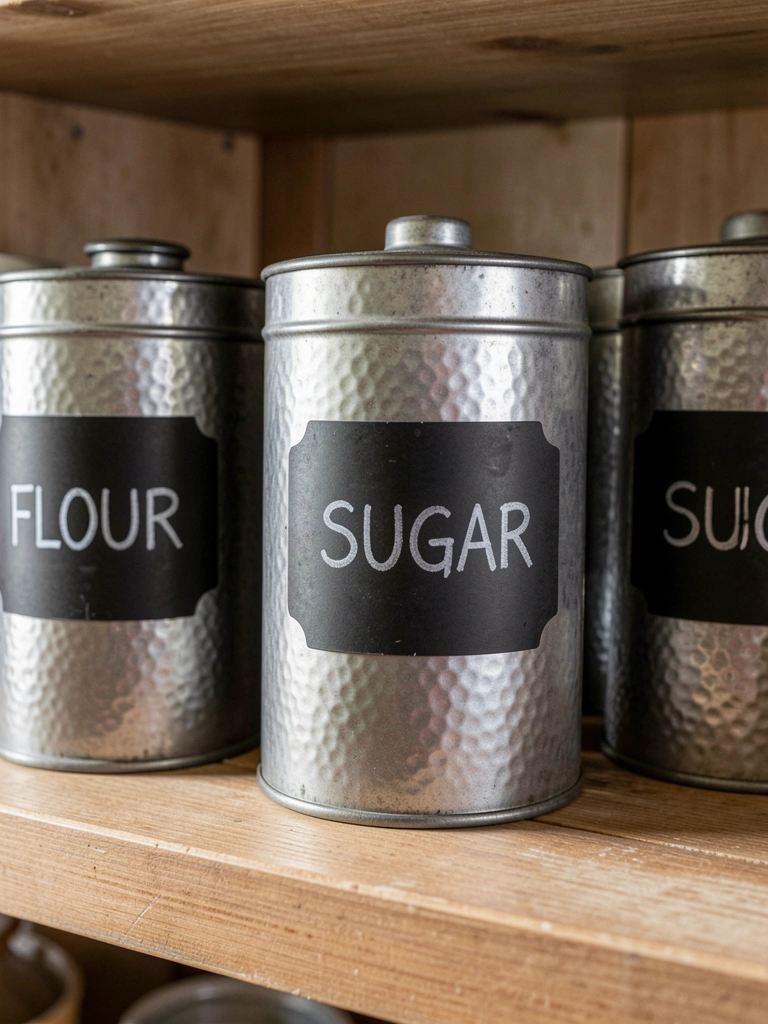
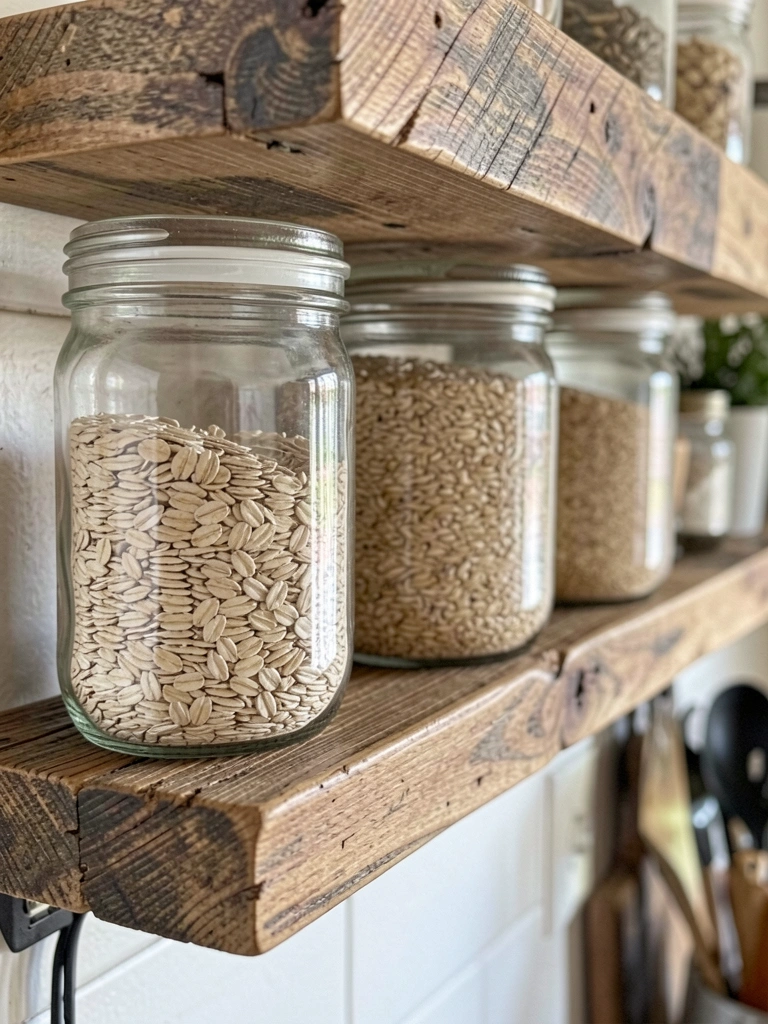
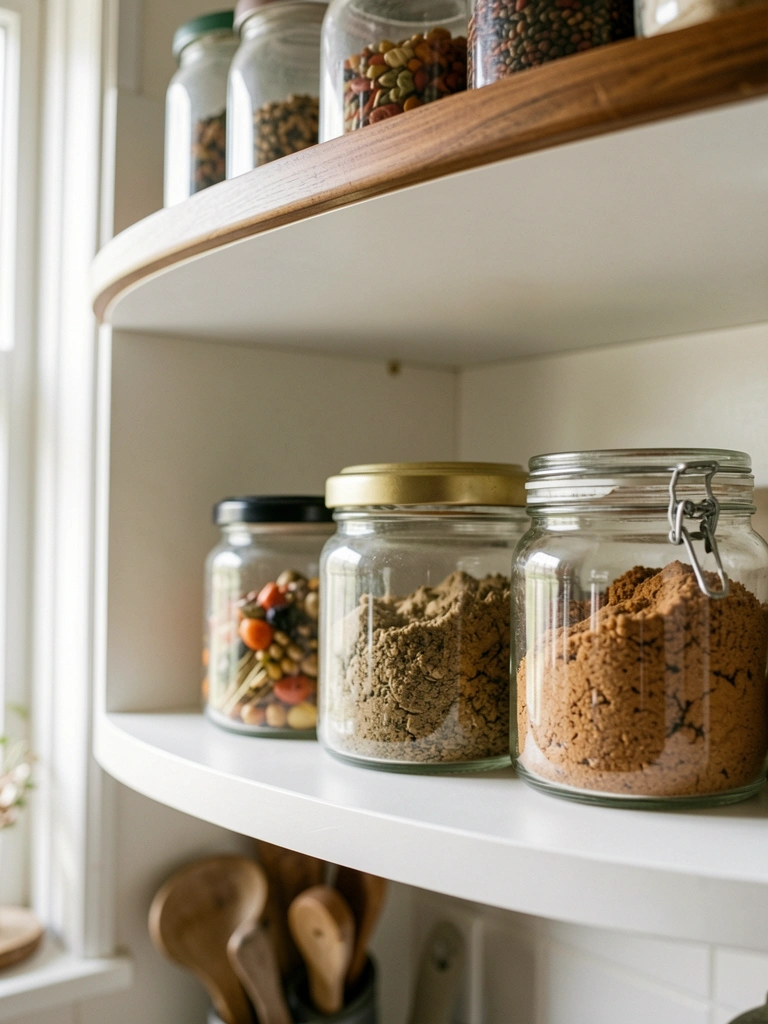
    4. Reclaimed Wood Ledges with Jars of Grains

    Reclaimed wood brought texture to my plain walls. Jars of oats and rice sit full, labels facing out.

    Kitchen smells like home now. Easy to see what I have.

    Rough edges catch dust, so I wipe often. Learned that quick.

    12-inch spacing lets me reach easy.

    What You’ll Need for This Look

    28-inch reclaimed wood floating shelf
    Clear glass storage jars with bamboo lids
    Bulk oats in pantry bags

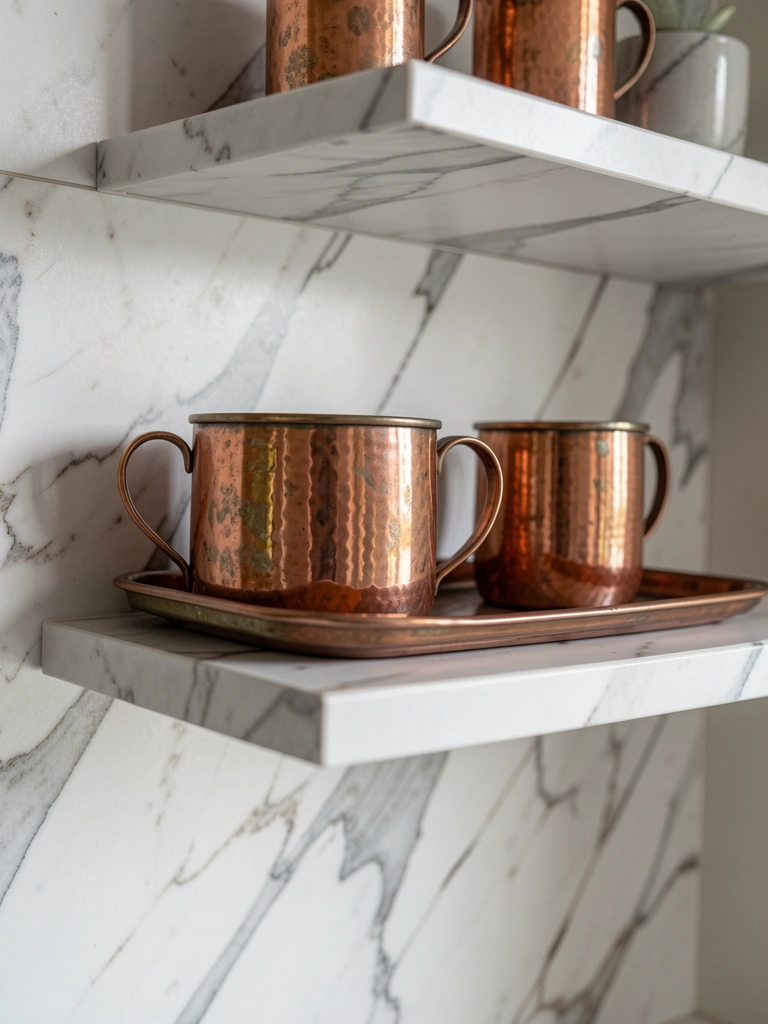
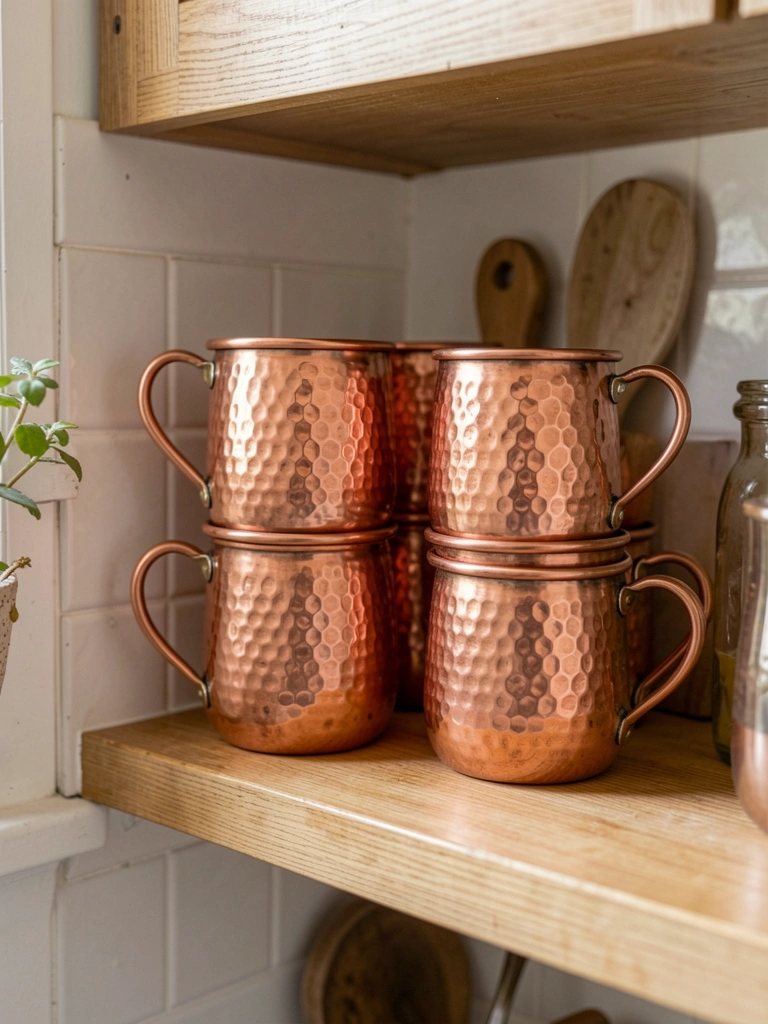
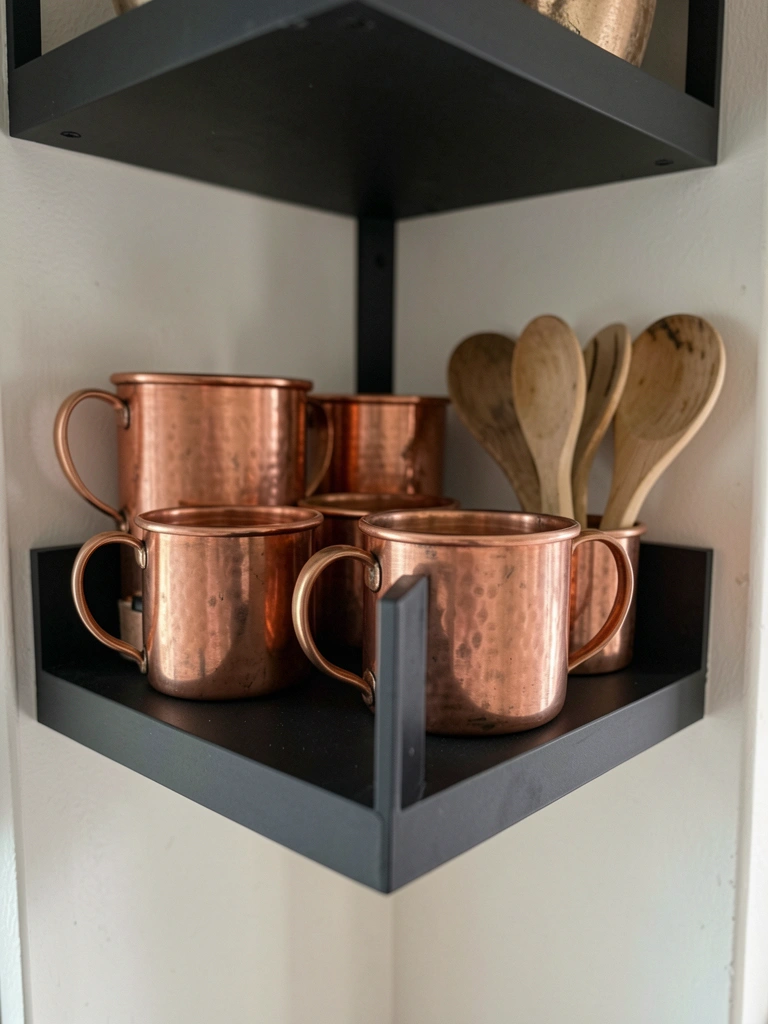
    5. Matte Black Shelves with Copper Accents

    Matte black shelves ground my warm-toned kitchen. Copper mugs gleam just right.

    Feels pulled together. Copper warms the black.

    Hung them low for easy grab. 14 inches deep holds mugs steady.

    What You’ll Need for This Look

    32-inch matte black floating shelf
    Copper Moscow mule mugs set
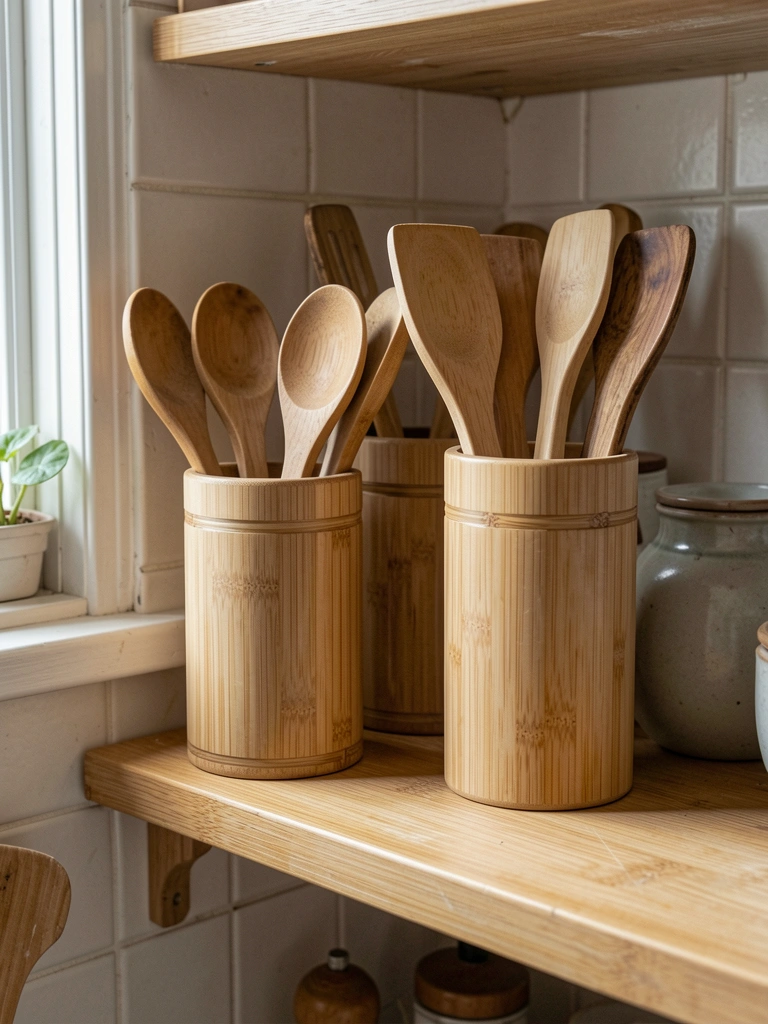
    Wooden utensil holder

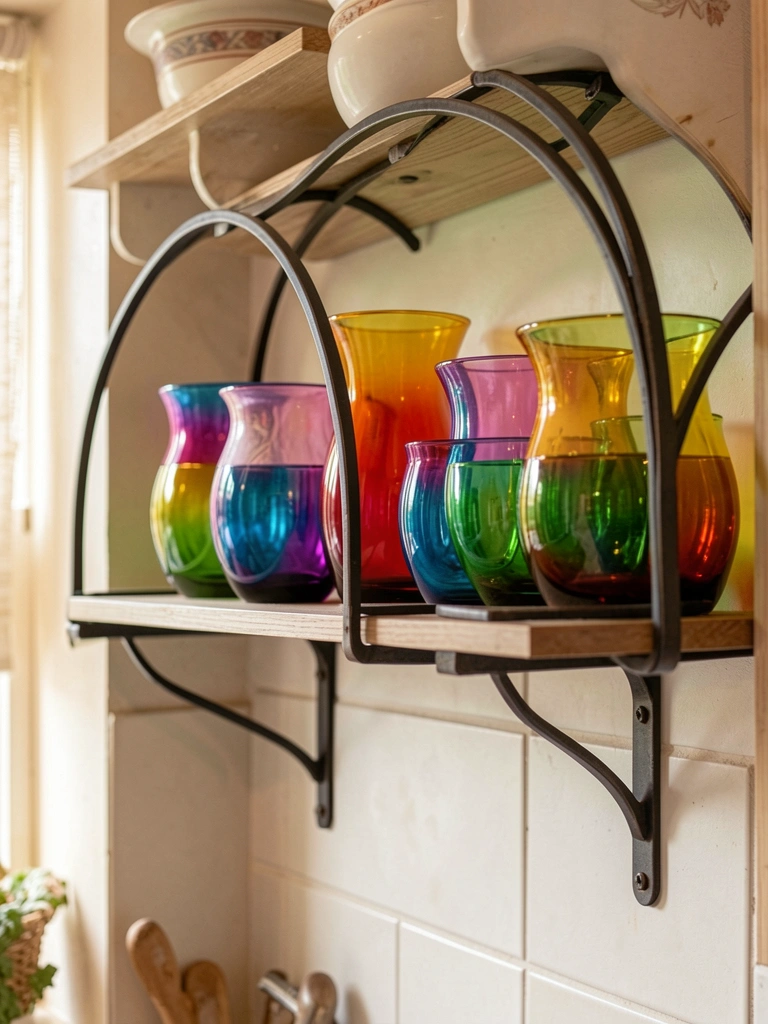
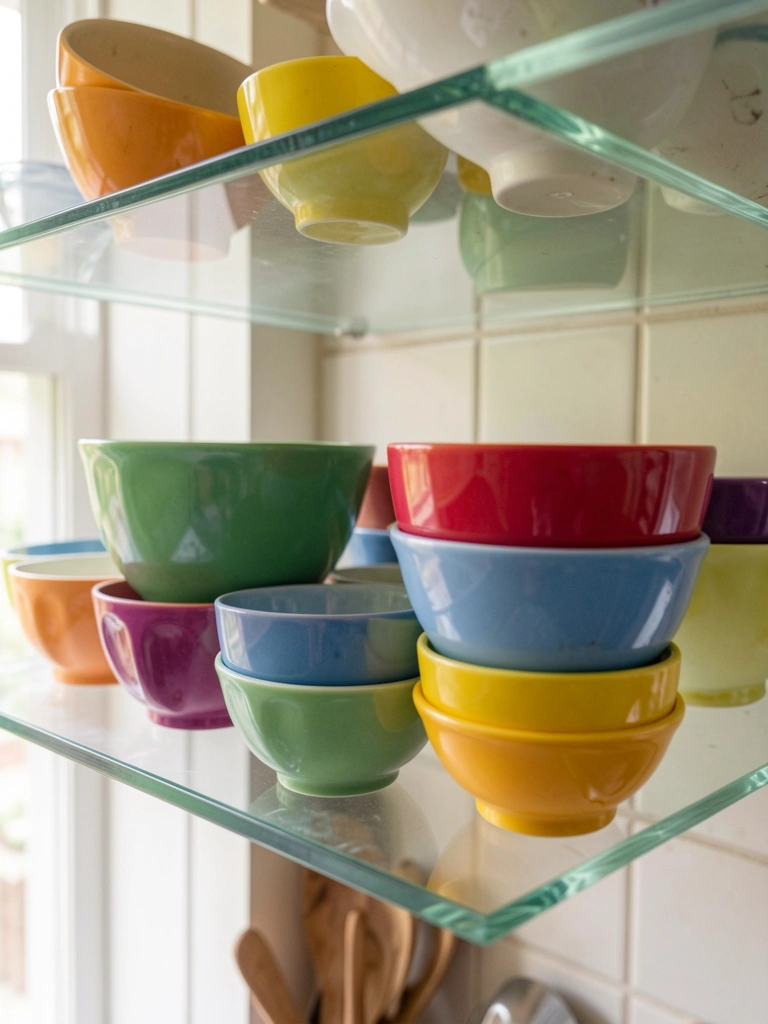
    6. Glass Shelves Letting Light Through

    Glass shelves make my small kitchen airy. Bowls show color pops without bulk.

    Light bounces everywhere. Room feels twice as big.

    Tempered glass won't shatter easy. I tested that.

    Space 15 inches apart. Lets bigger items fit.

    What You’ll Need for This Look

    36-inch tempered clear glass floating shelf
    Set of pastel ceramic mixing bowls
    LED under-shelf strip lights

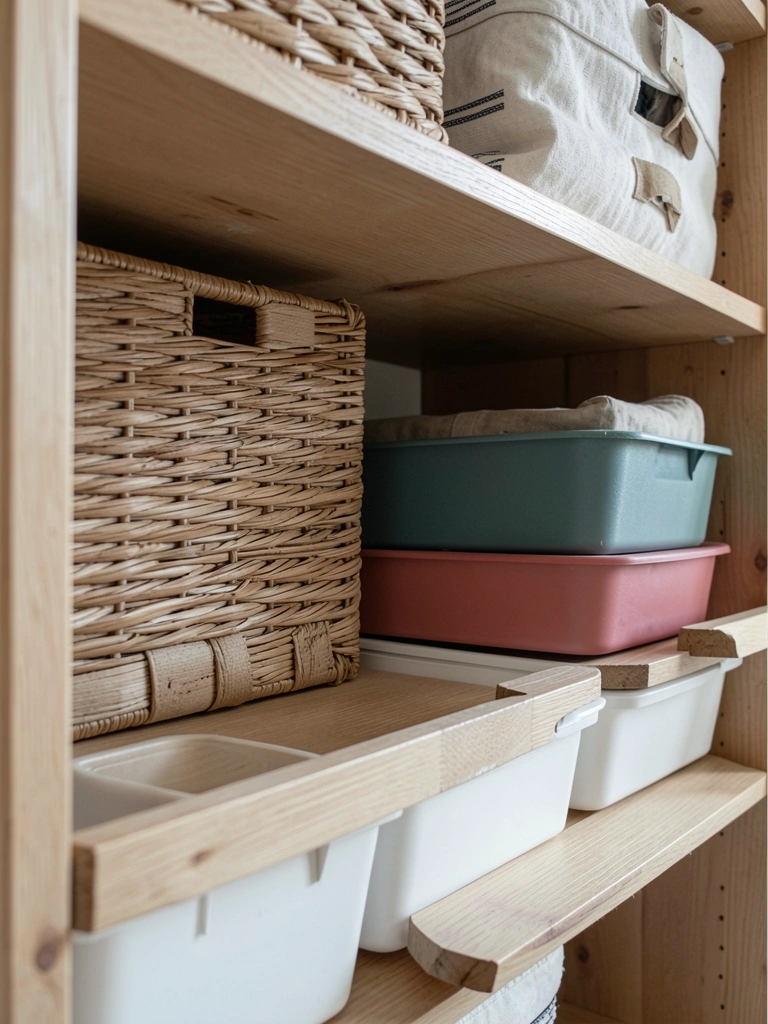
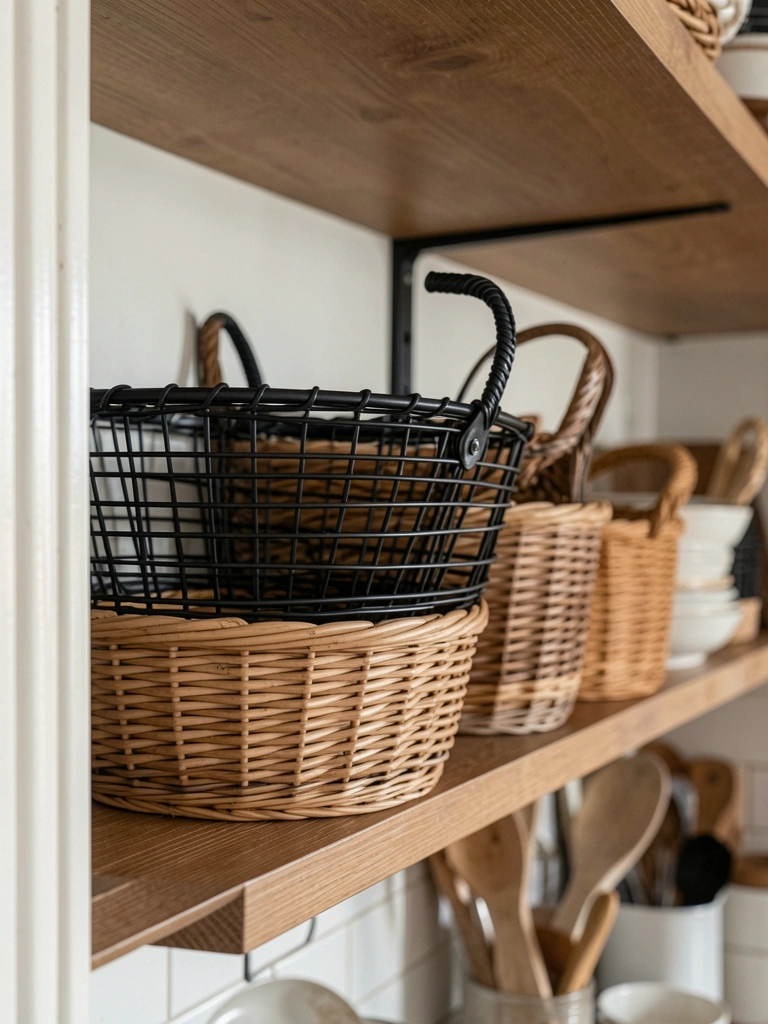
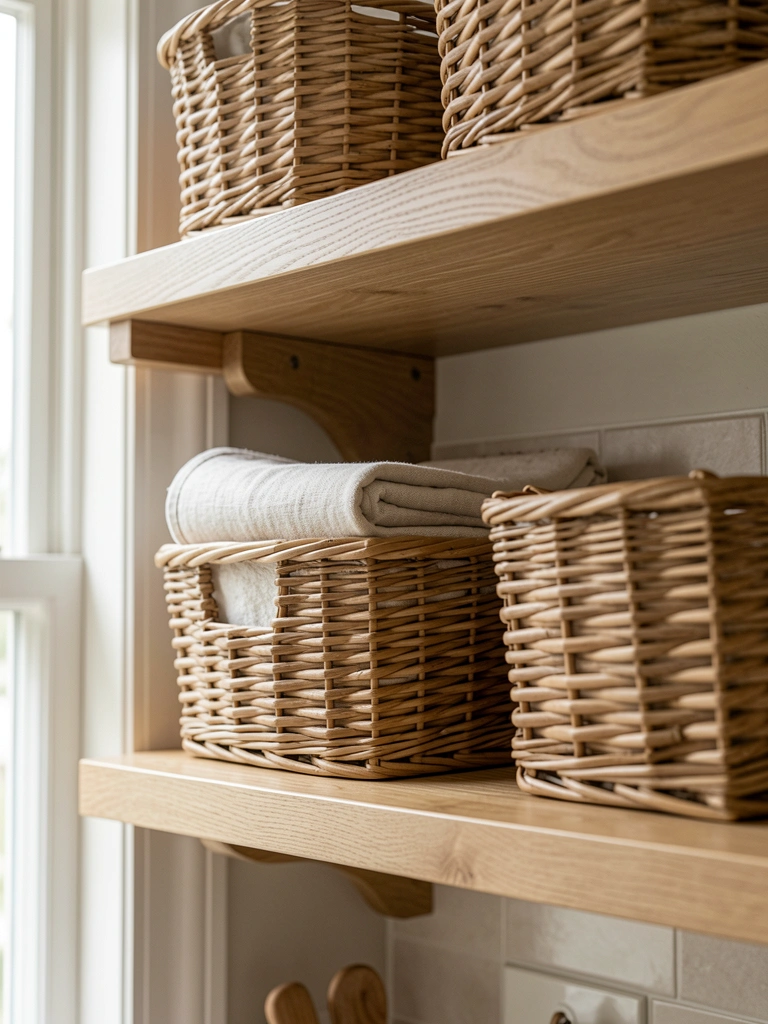
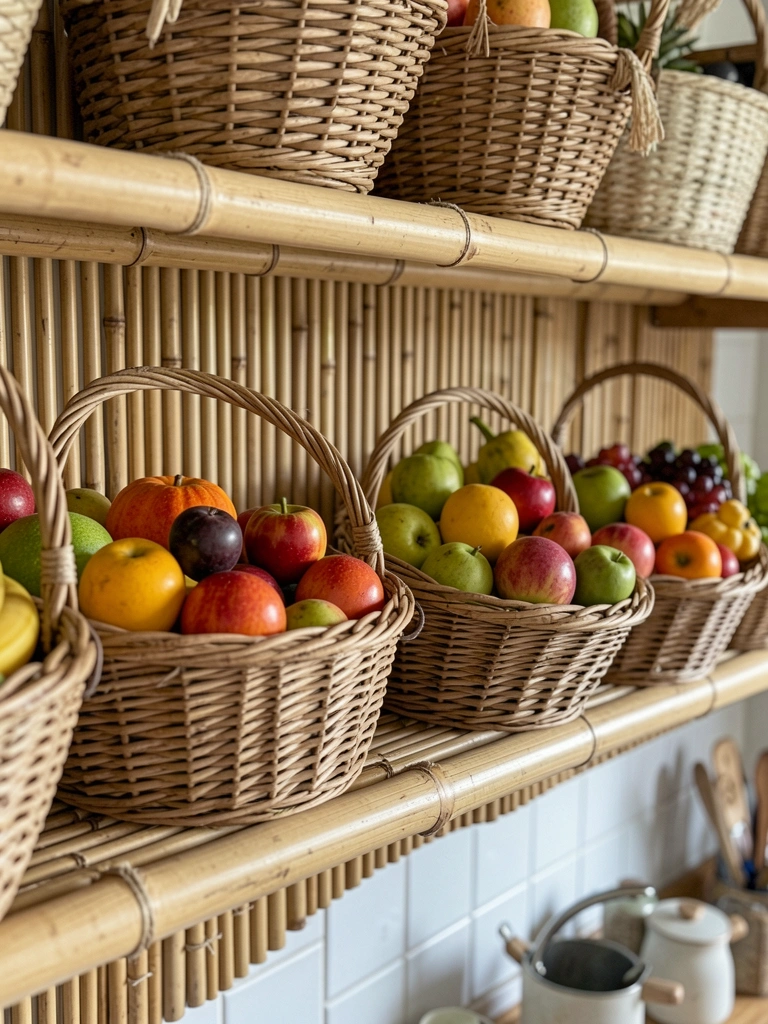
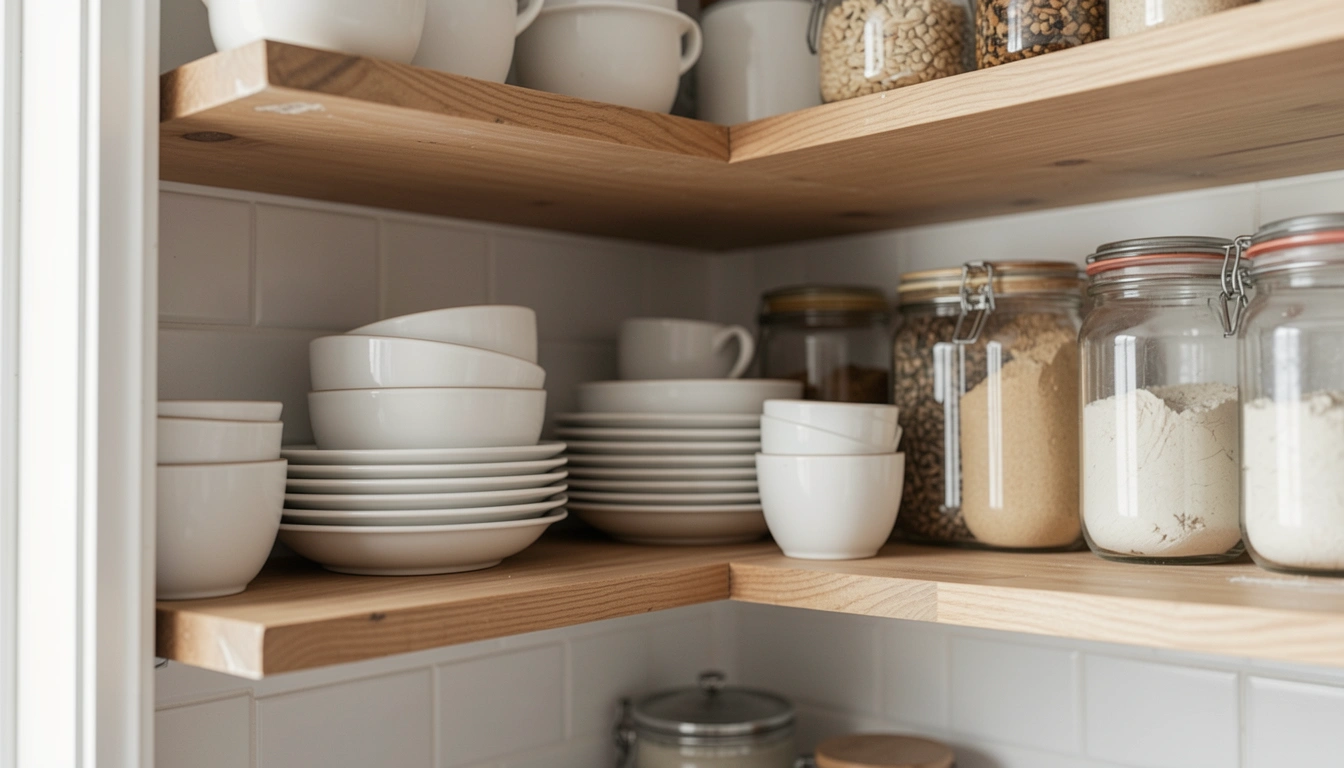
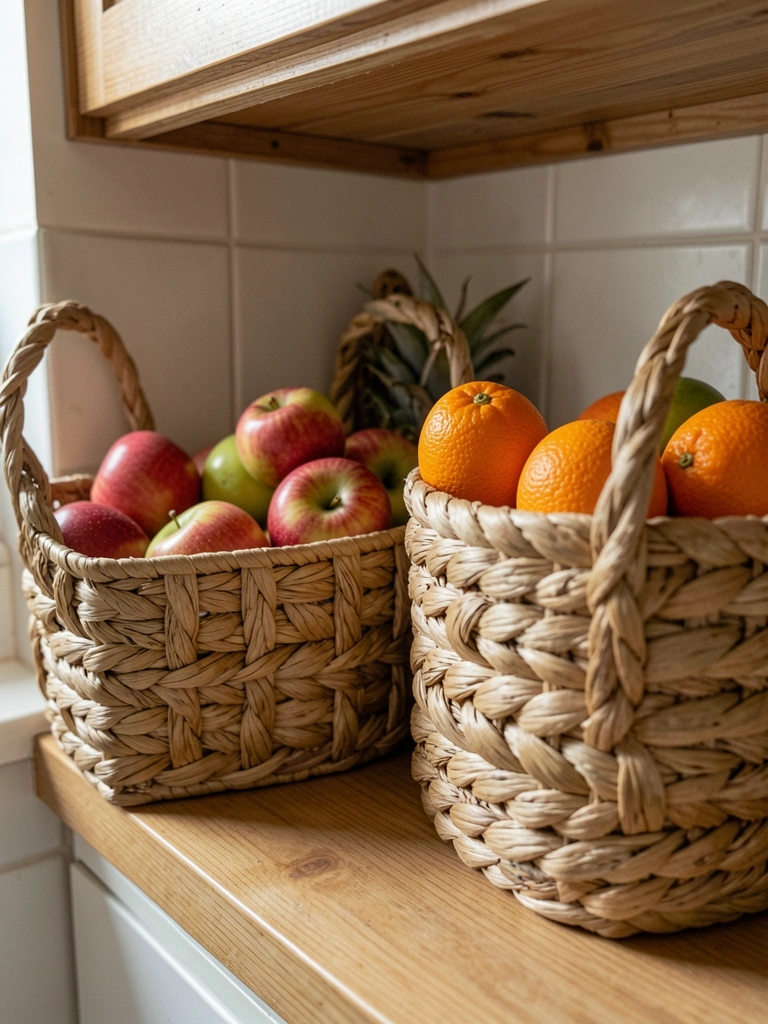
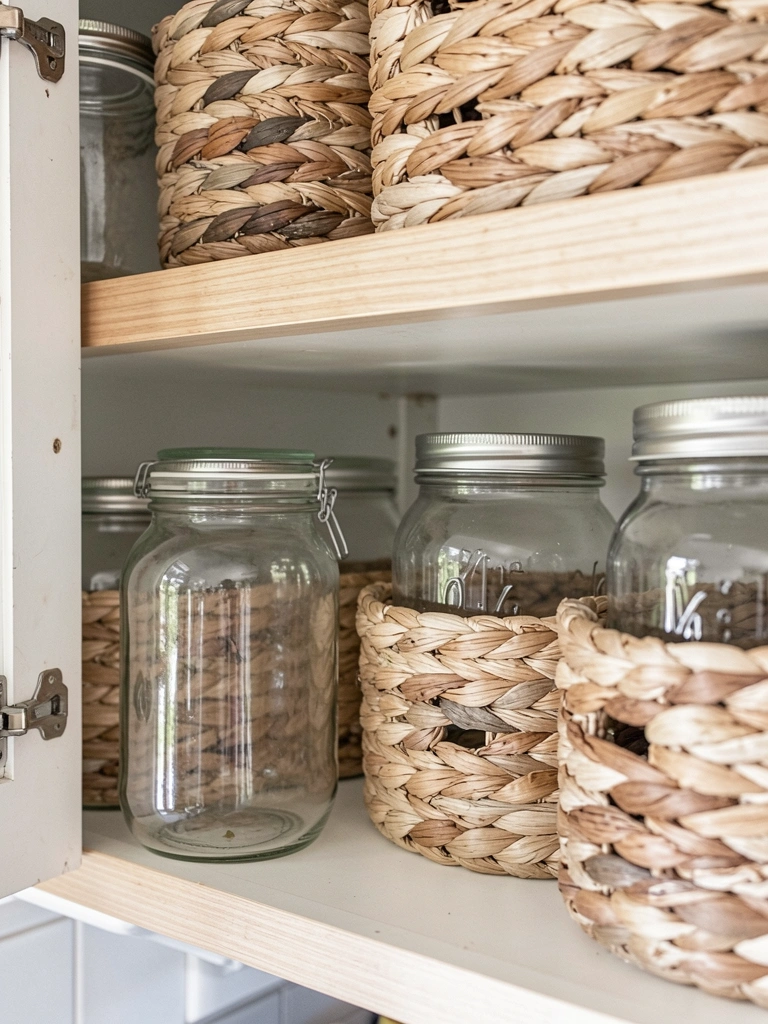
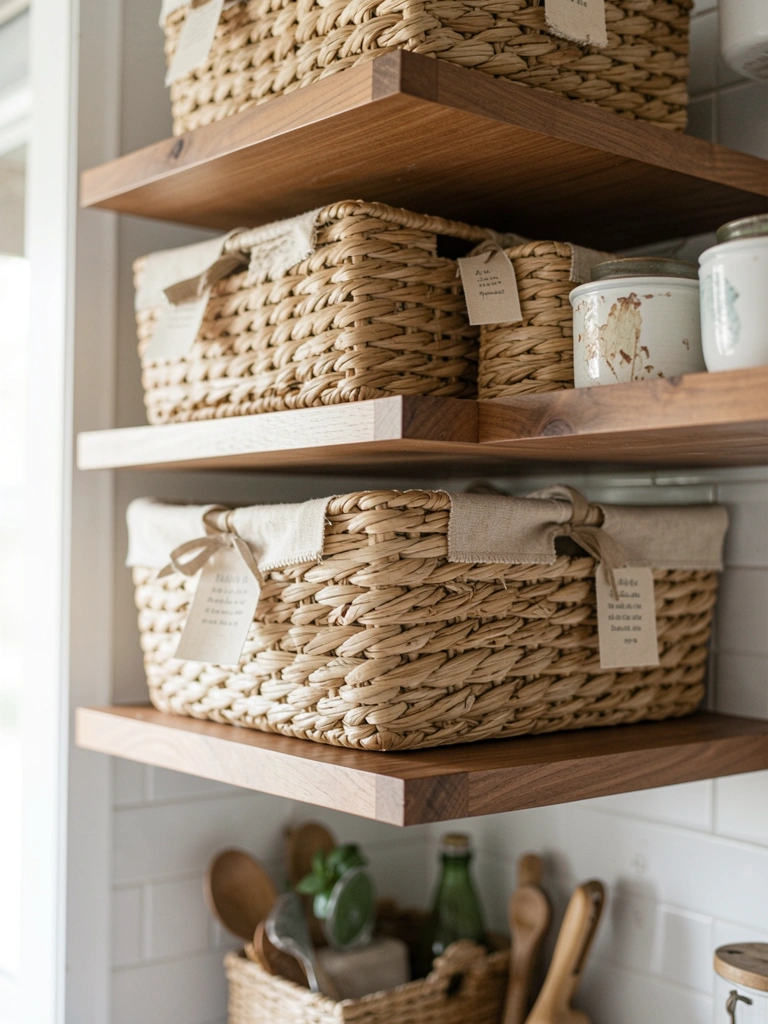
    7. Woven Basket Shelves for Pantry Staples

    Woven baskets on wood shelves hide pasta boxes neat. Pull one out, everything stays put.

    Less visual noise. Kitchen stays calm.

    Baskets swing if too heavy. I limit to 5 pounds each.

    Labels in my handwriting add touch.

    What You’ll Need for This Look

    24-inch walnut floating shelf
    Seagrass woven storage baskets medium
    Linen pantry labels

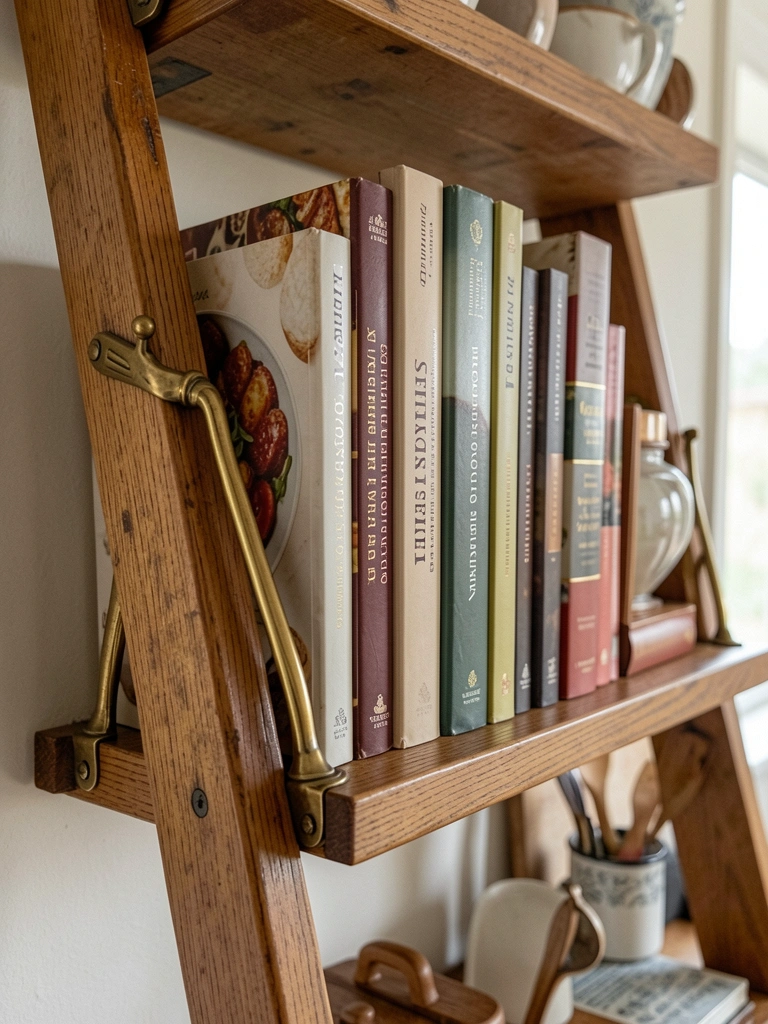
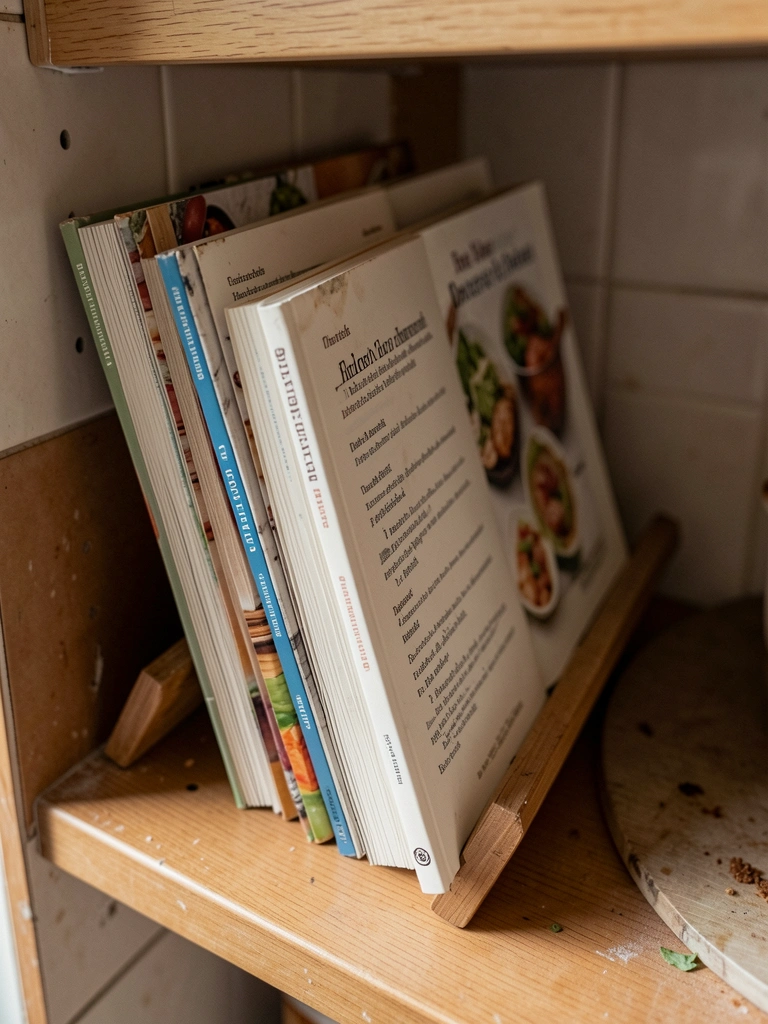
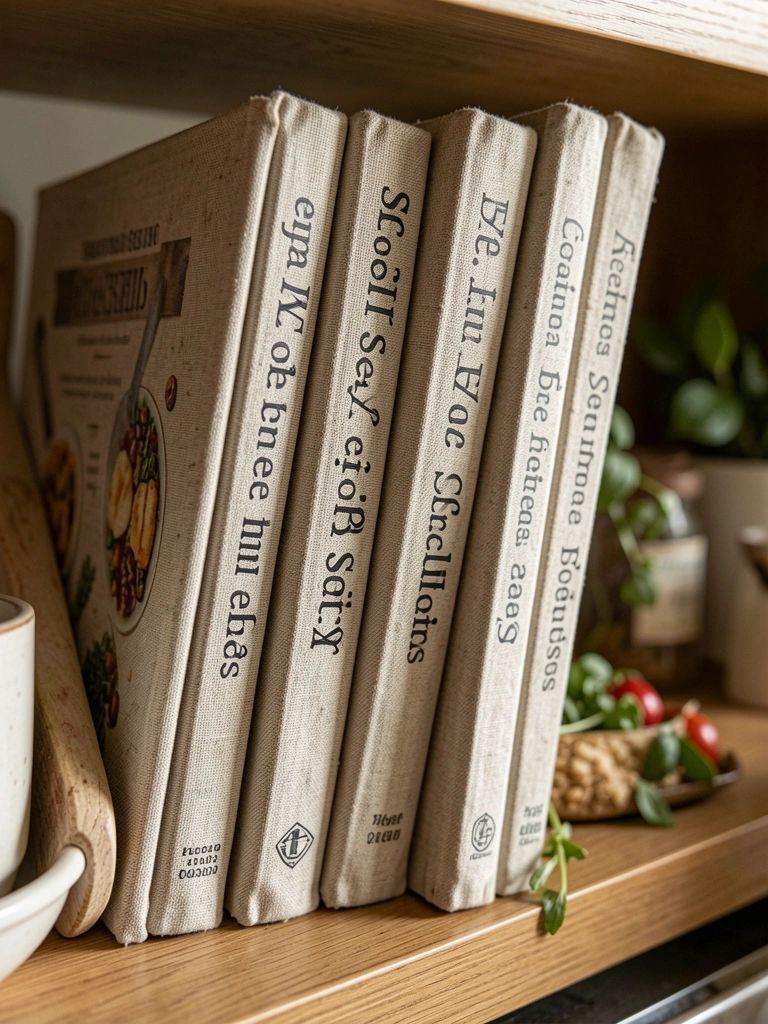
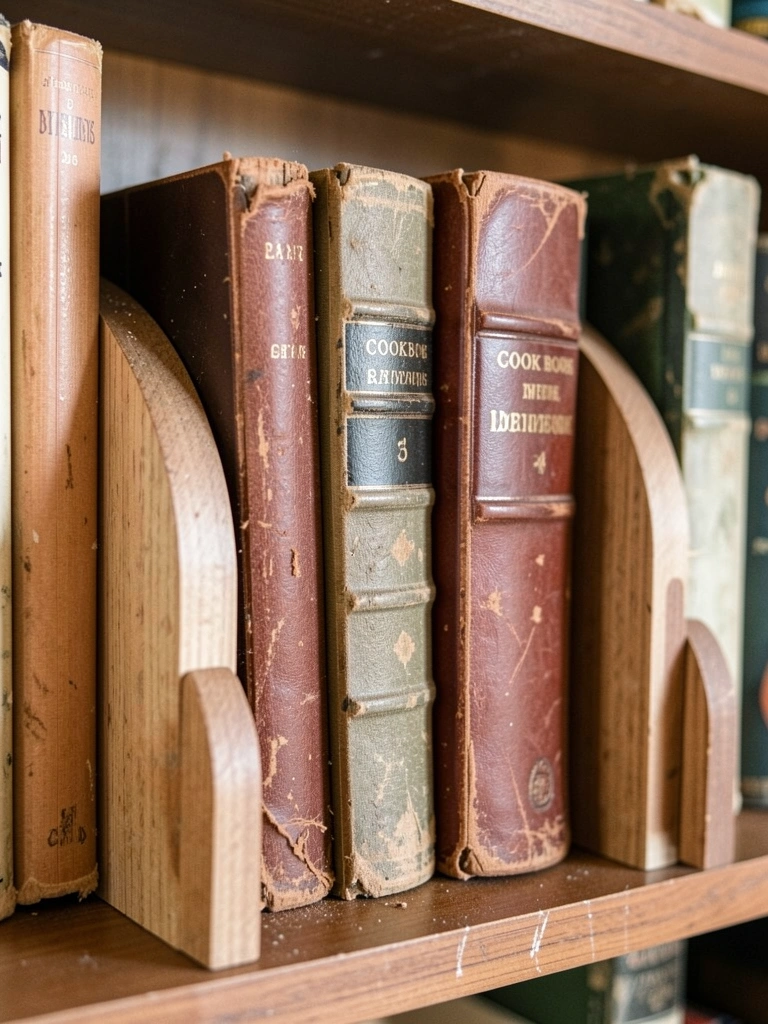
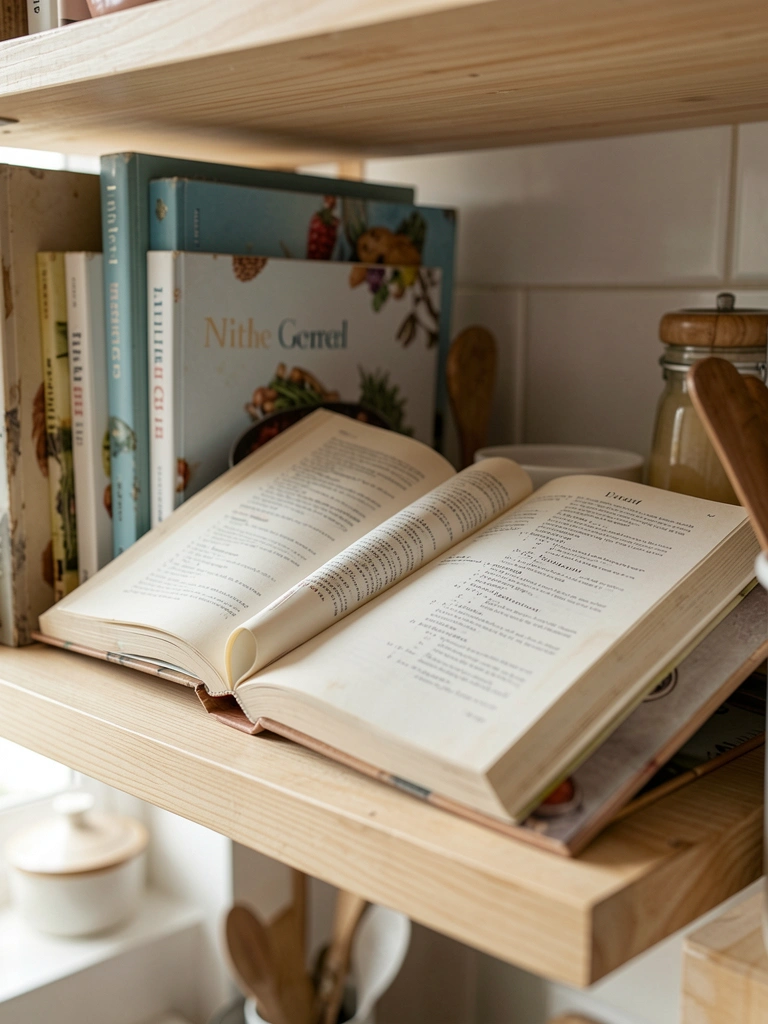
    8. Low-Hanging Shelves for Cookbooks

    Low shelves hold my favorite cookbooks open. Recipes at hand while I chop.

    No more digging stacks. Cooking flows better.

    Books dust fast down low. I cover loosely.

    Angle them slight for read easy.

    What You’ll Need for This Look

    40-inch light pine floating shelf
    Vintage-style hardcover cookbooks
    Book stands small wood

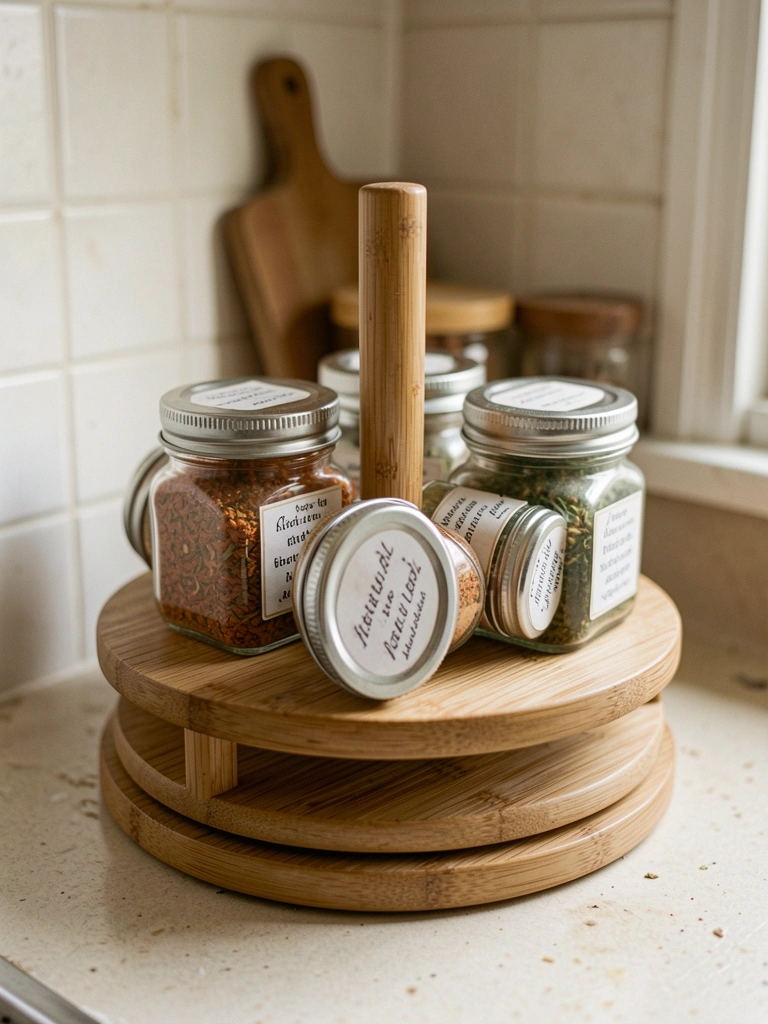
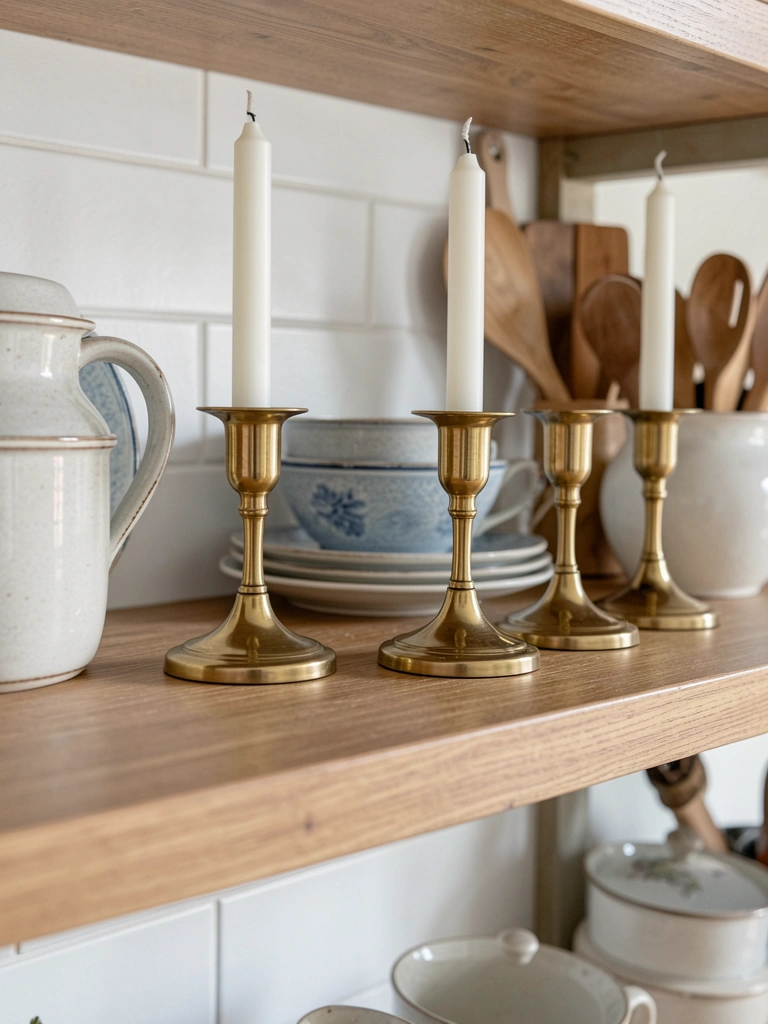
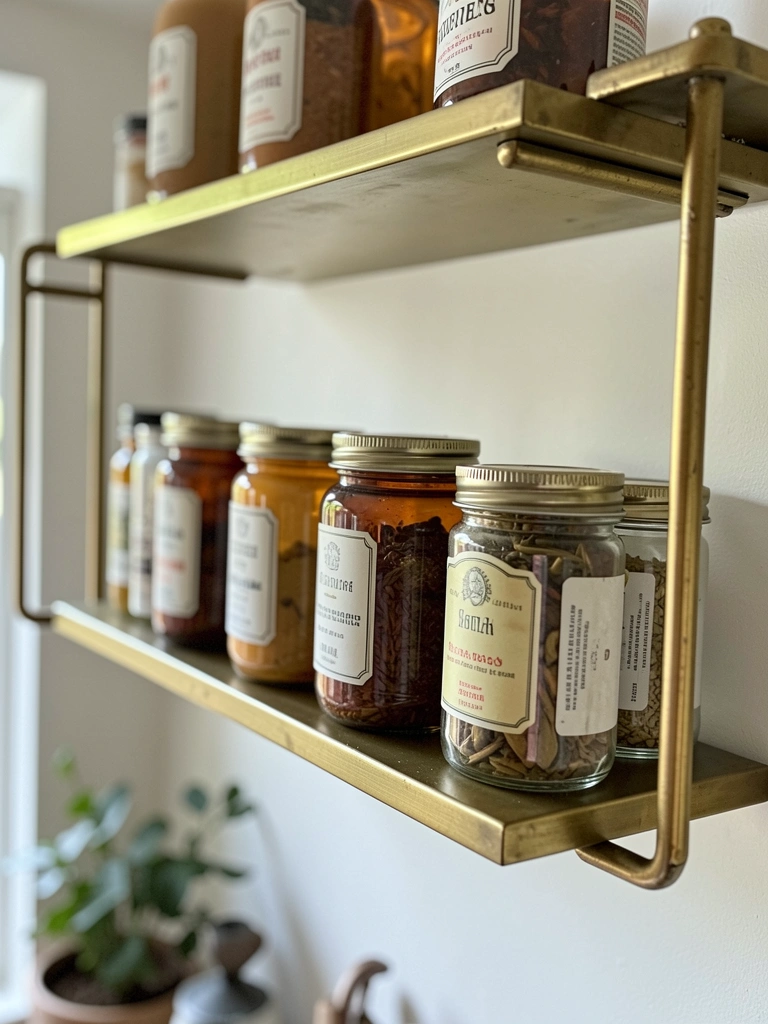
    9. Asymmetrical Brass Shelves for Spices

    Asymmetrical brass adds quiet interest. Spice jars grouped by use.

    Cooking station feels pro. Spices stay fresh.

    Brass polishes easy. Wipe monthly.

    Vary heights— keeps eye moving.

    What You’ll Need for This Look

    Brass asymmetrical floating shelf set
    Amber glass spice jars with shaker lids
    Chalkboard spice labels

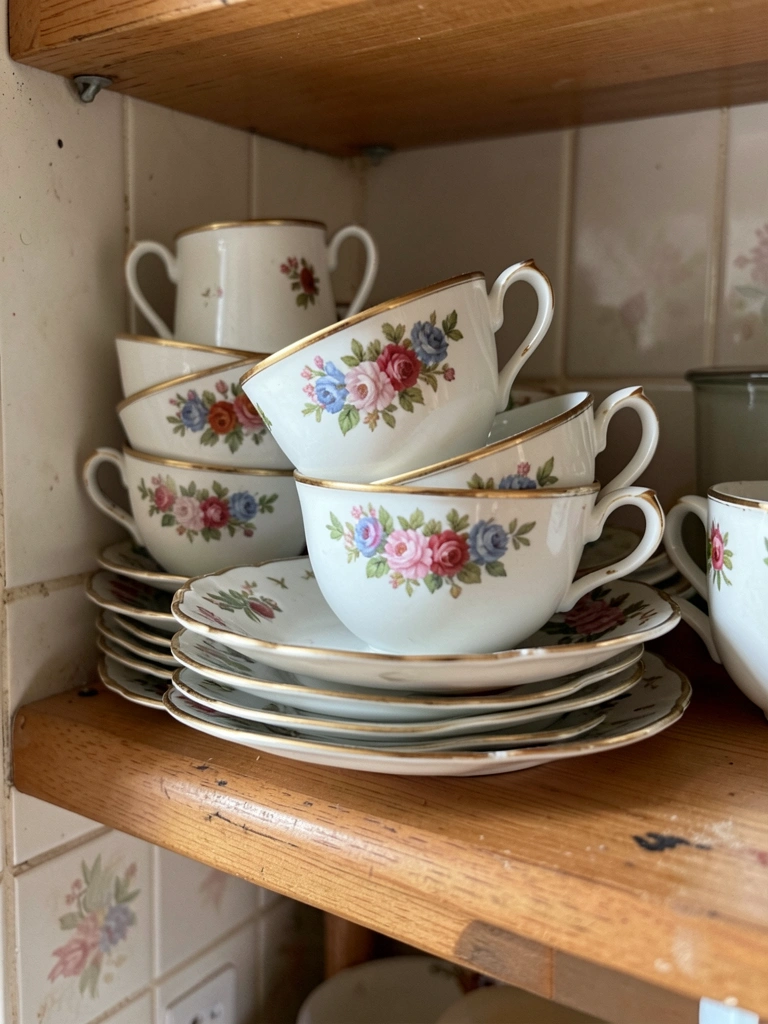
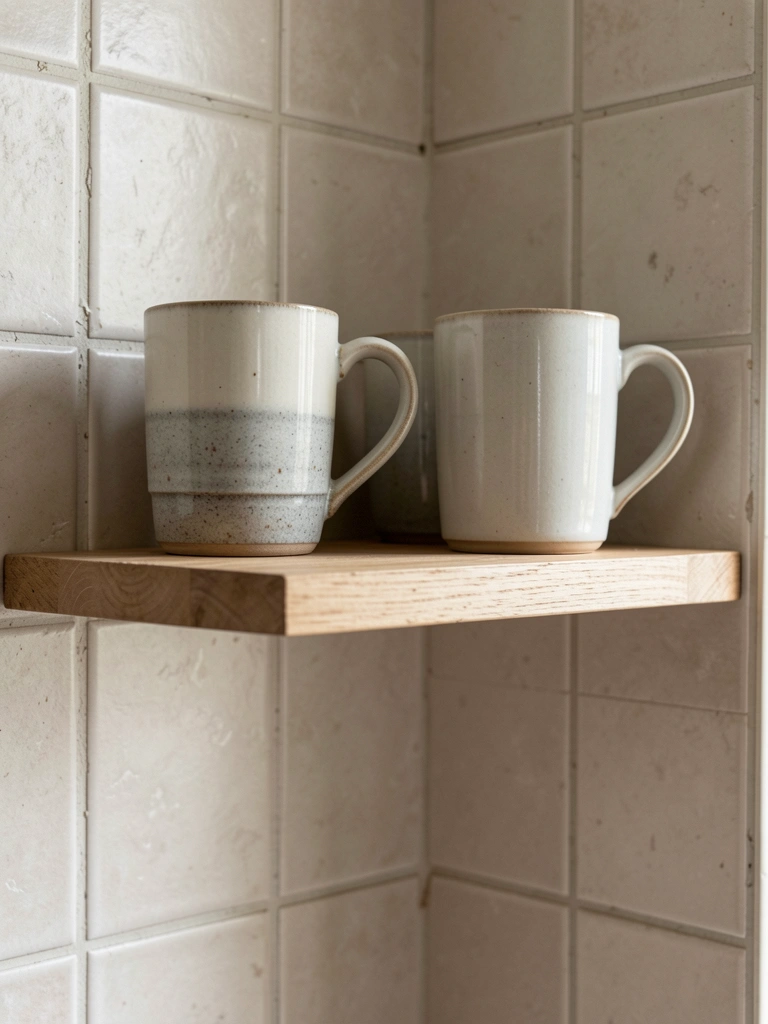
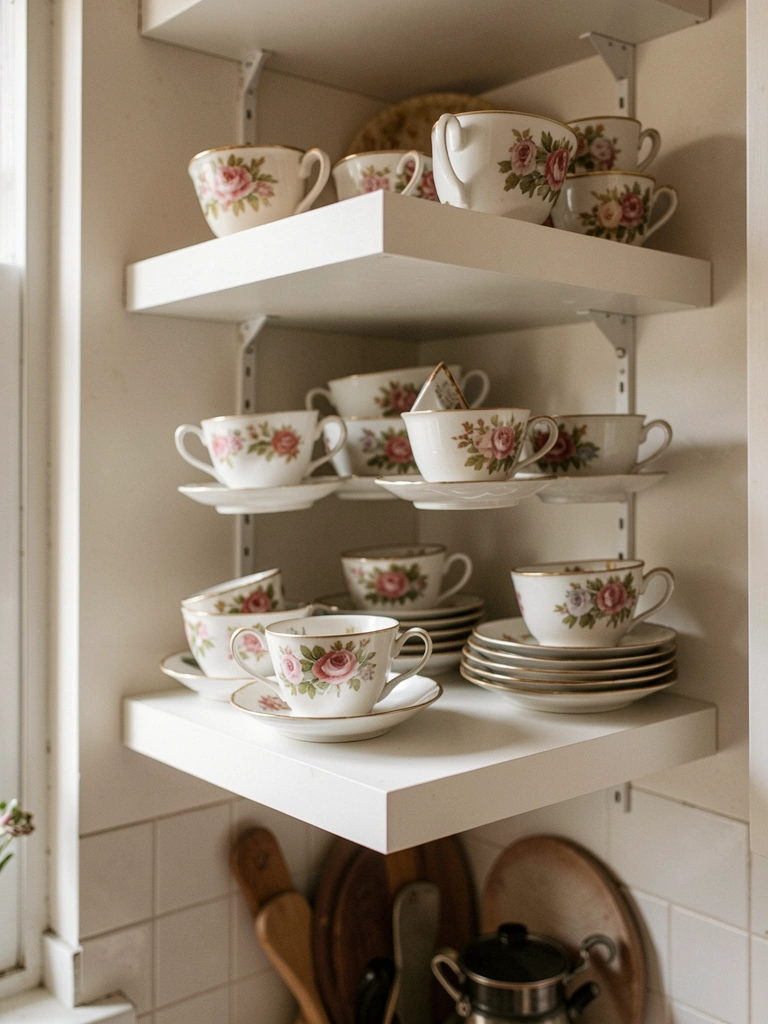
    10. Corner Wrap Shelves for Teacups

    Corner shelves use dead space. Teacups tucked neat around the bend.

    Morning tea ritual got cozy. No wasted wall.

    Install level— corners tricky. Used template.

    What You’ll Need for This Look

    Corner white floating shelf kit
    Floral porcelain teacup and saucer set
    Teaspoon rest ceramic

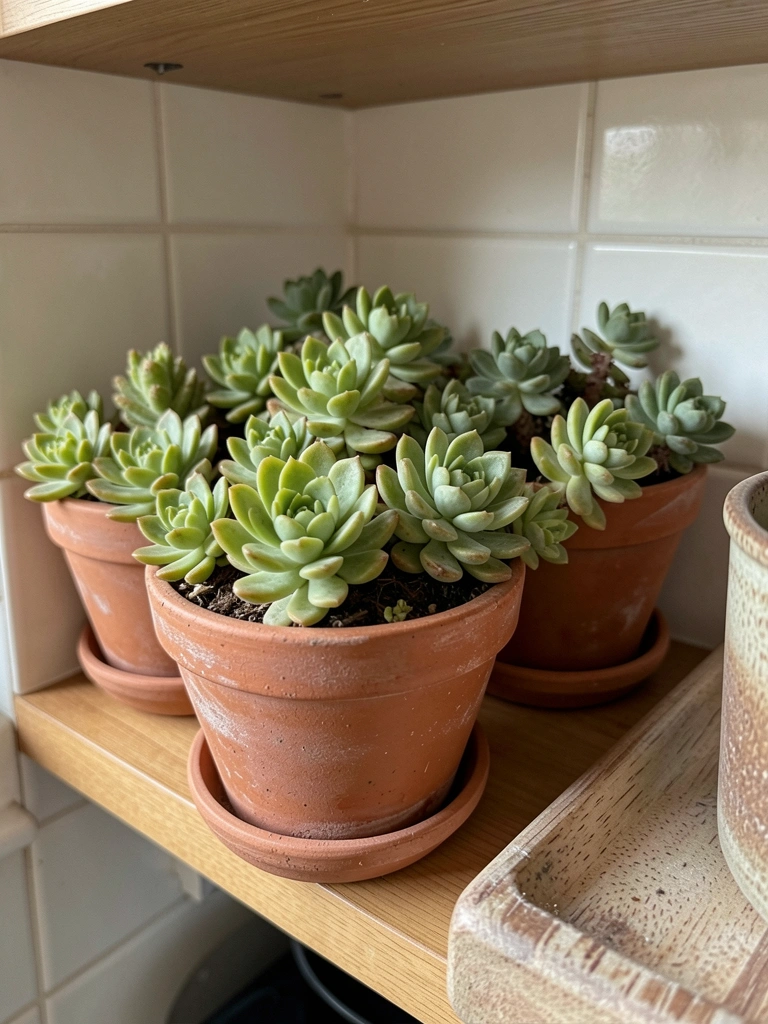
    11. Terracotta Shelves with Succulents

    I tried terracotta shelves once. They cracked under weight— lesson learned. Swapped to wood with terracotta pots.

    Succulents thrive there. Kitchen gets desert calm.

    Pots catch drips. Line with saucers.

    What You’ll Need for This Look

    36-inch oak floating shelf for pots
    Terracotta succulent pots small set
    Variety pack succulents live plants
    Saucers for terracotta pots

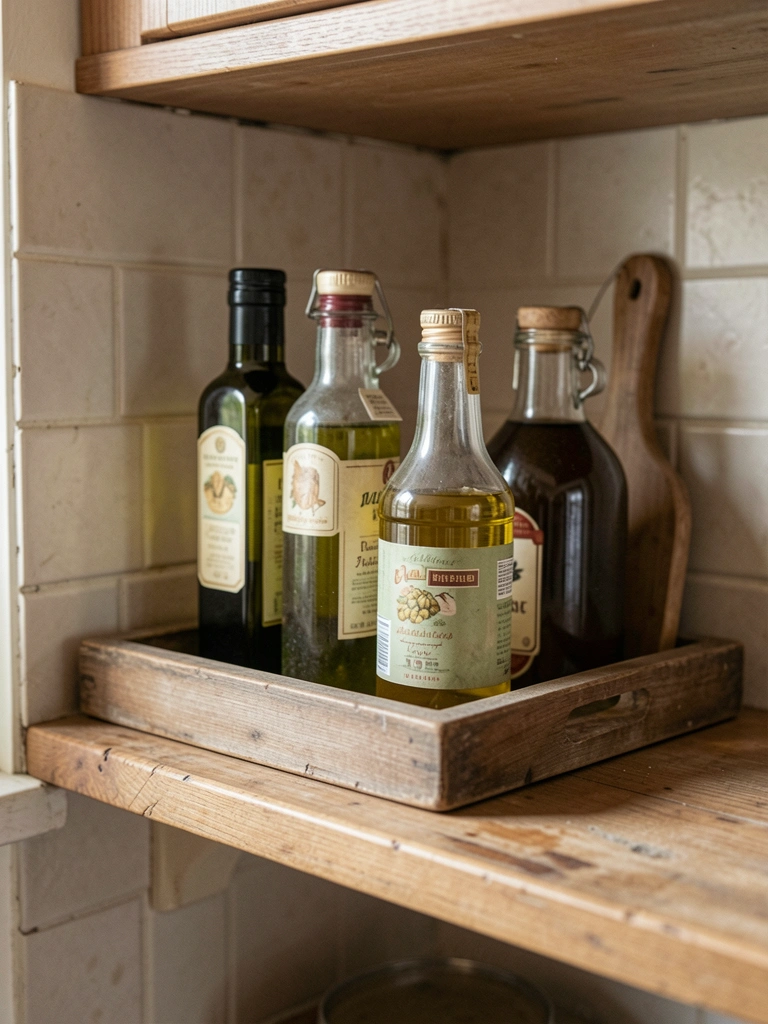
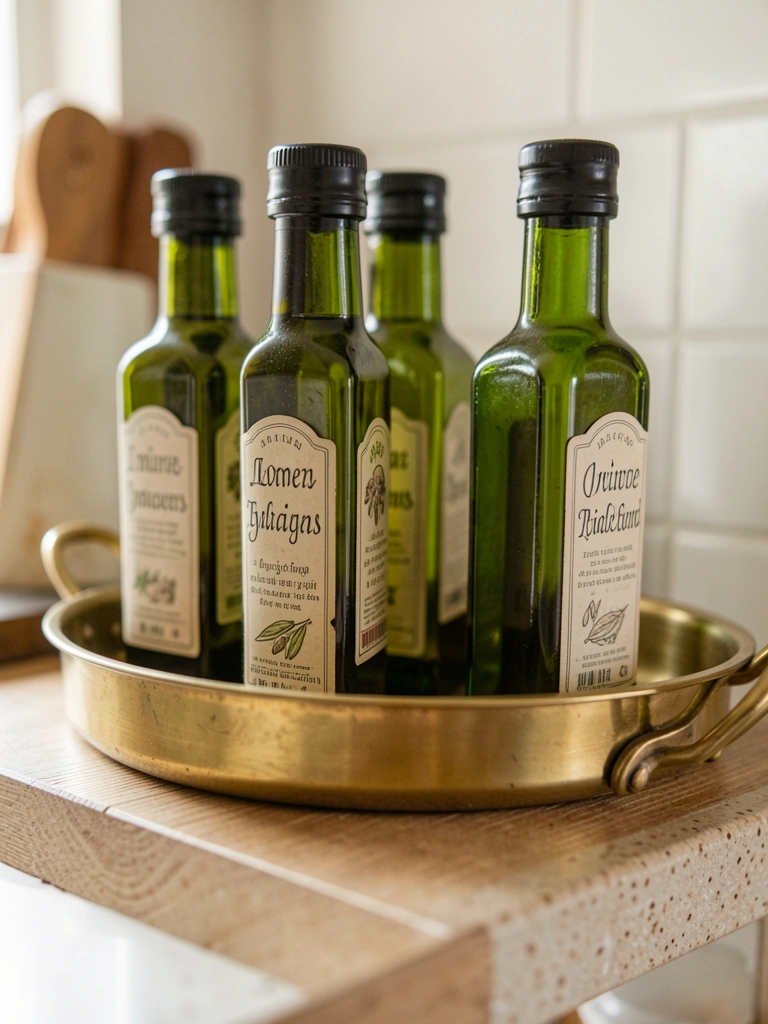
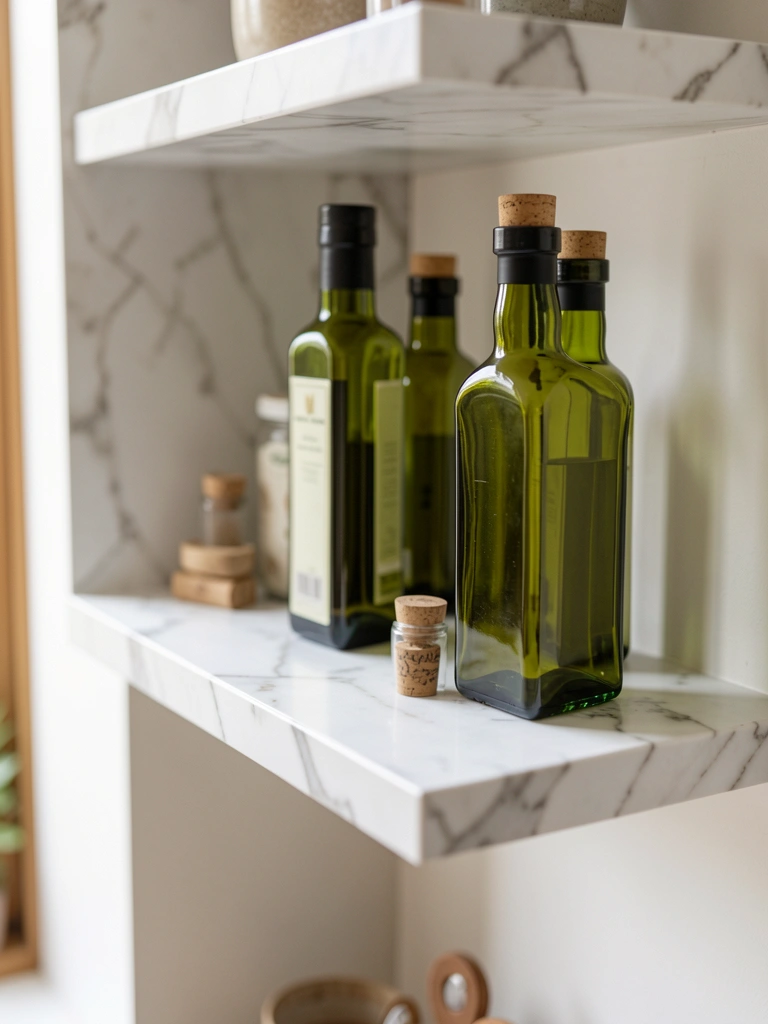
    12. Marble-Look Shelves for Oils

    Marble-look shelves hold my oils pretty. Bottles in a curve, corks out.

    Feels like a shop counter. Reach easy.

    I overloaded first— sagged. Now limit layers.

    What You’ll Need for This Look

    30-inch white marble-look floating shelf
    Green glass olive oil bottles
    Drip catch trays small

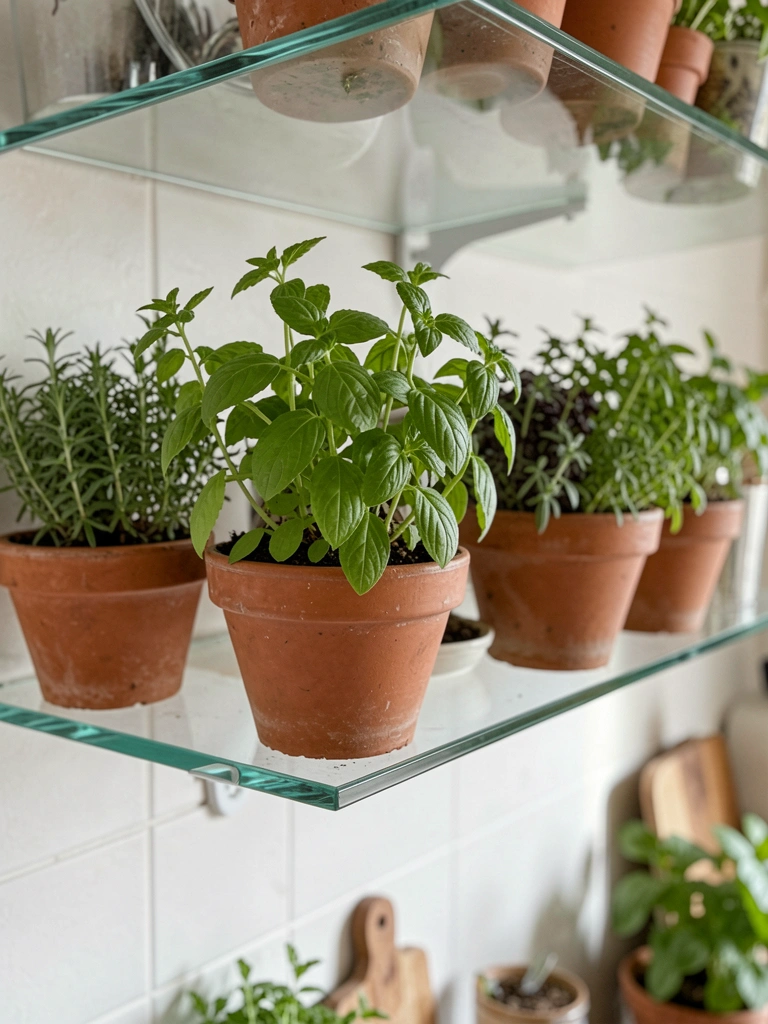
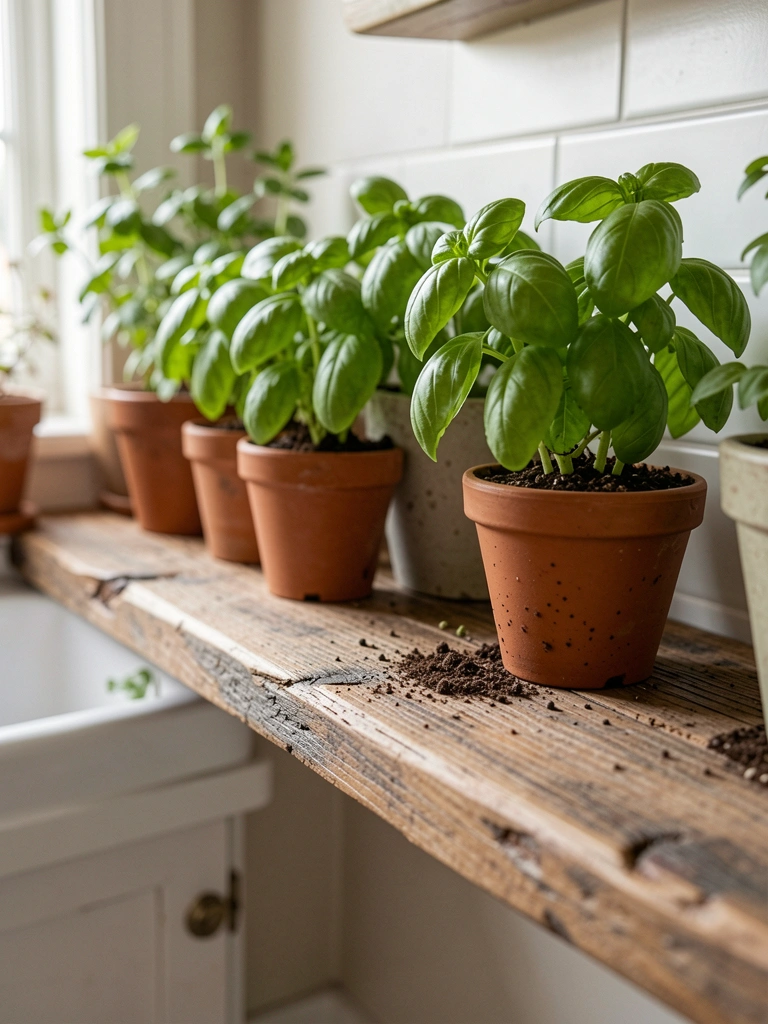
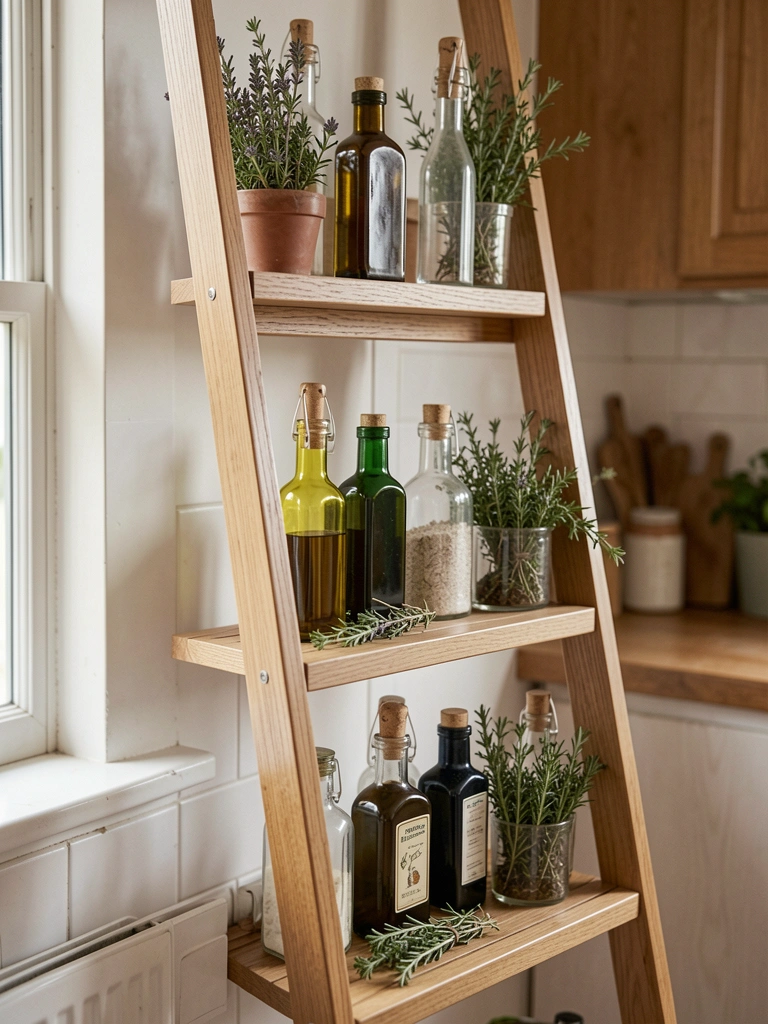
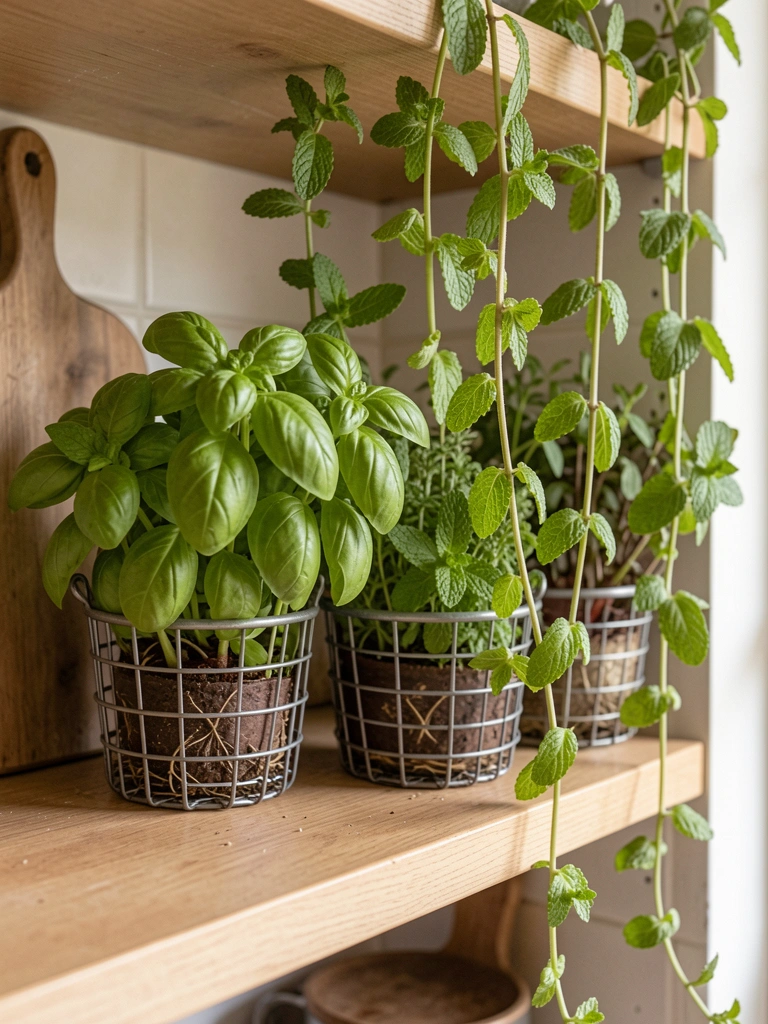
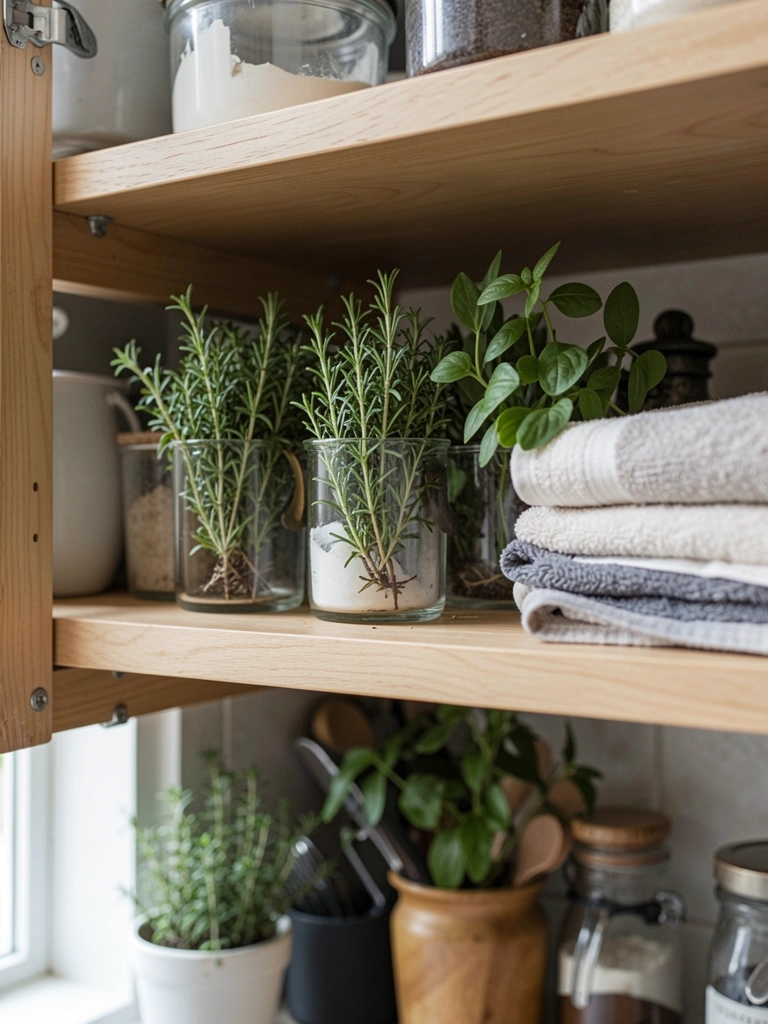
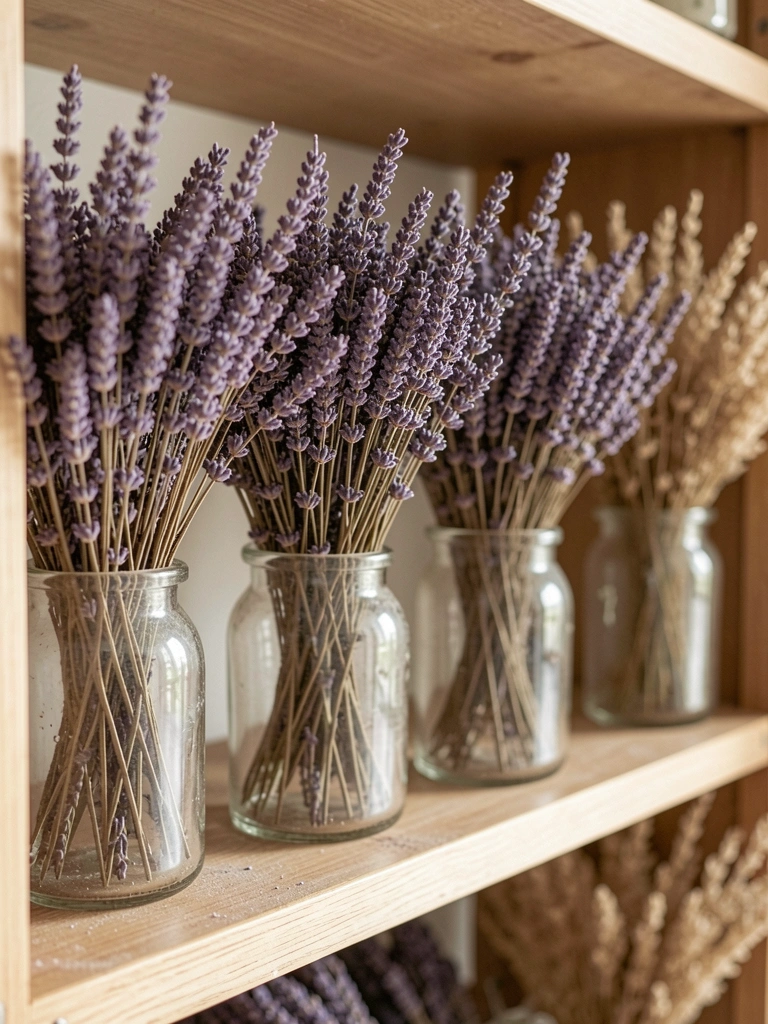
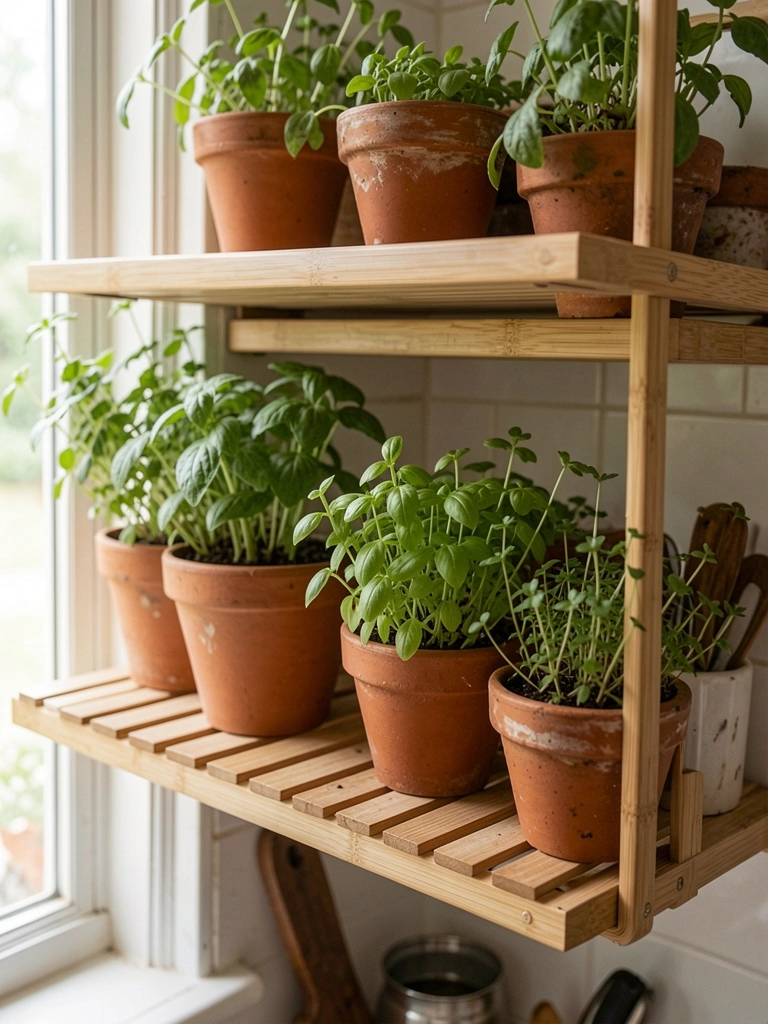
    13. Bamboo Shelves for Fresh Herbs

    Bamboo shelves bring kitchen garden feel. Basil, mint pots line up.

    Snip fresh daily. Air smells good.

    Water careful— bamboo warps if wet too much.

    What You’ll Need for This Look

    28-inch bamboo floating shelf
    Clay herb pots with drainage
    Fresh basil and mint starter plants

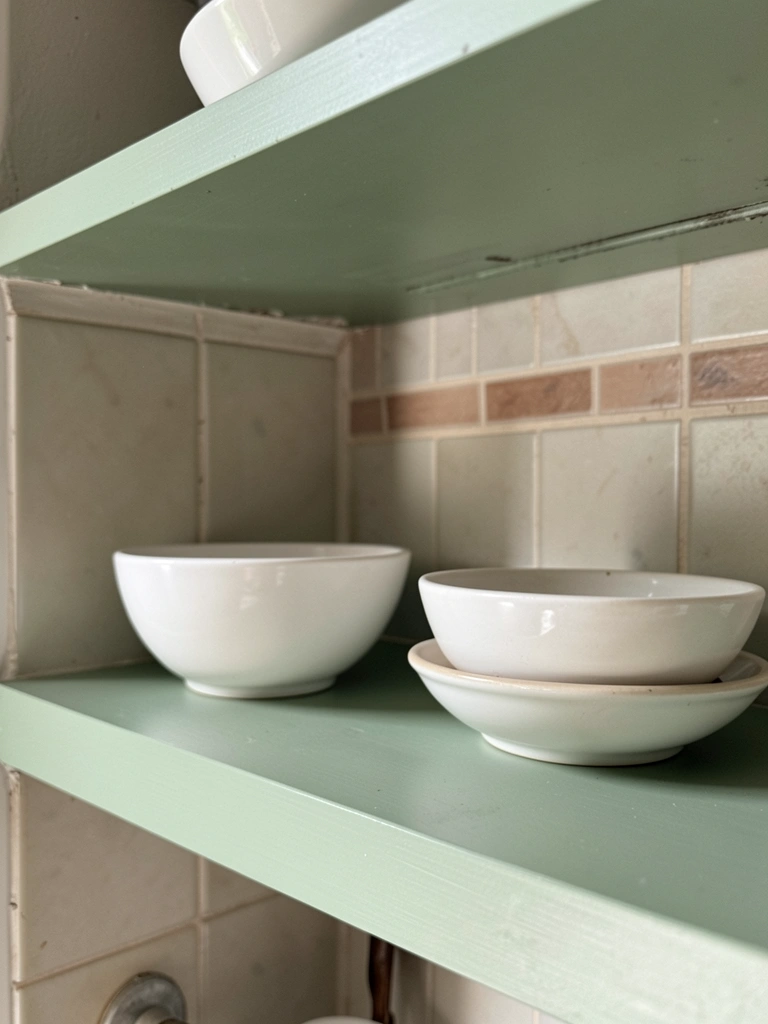
    14. Painted Shelves Matching Backsplash

    Painted shelves blend with my sage backsplash. Bowls nest white against green.

    Wall feels whole. No jarring lines.

    Primer first— paint chips without.

    What You’ll Need for This Look

    Sage green wood floating shelf blank
    Matte sage green wall paint sample
    Nested white ceramic bowls

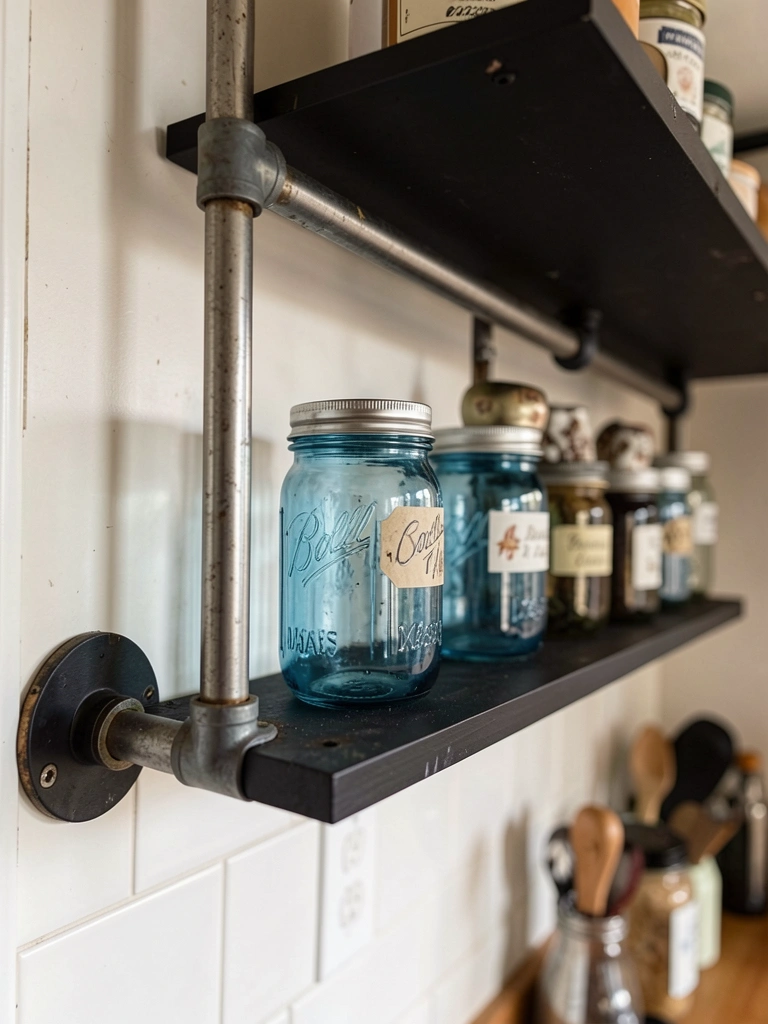
    15. Industrial Pipe Shelves for Jars

    Pipe shelves give factory edge. Mason jars full of beans.

    Tough look, soft contents balance.

    Pipes rattle if loose. Tighten fittings.

    What You’ll Need for This Look

    Black iron pipe floating shelf kit
    Quart mason jars with wire lids
    Dry beans bulk bag

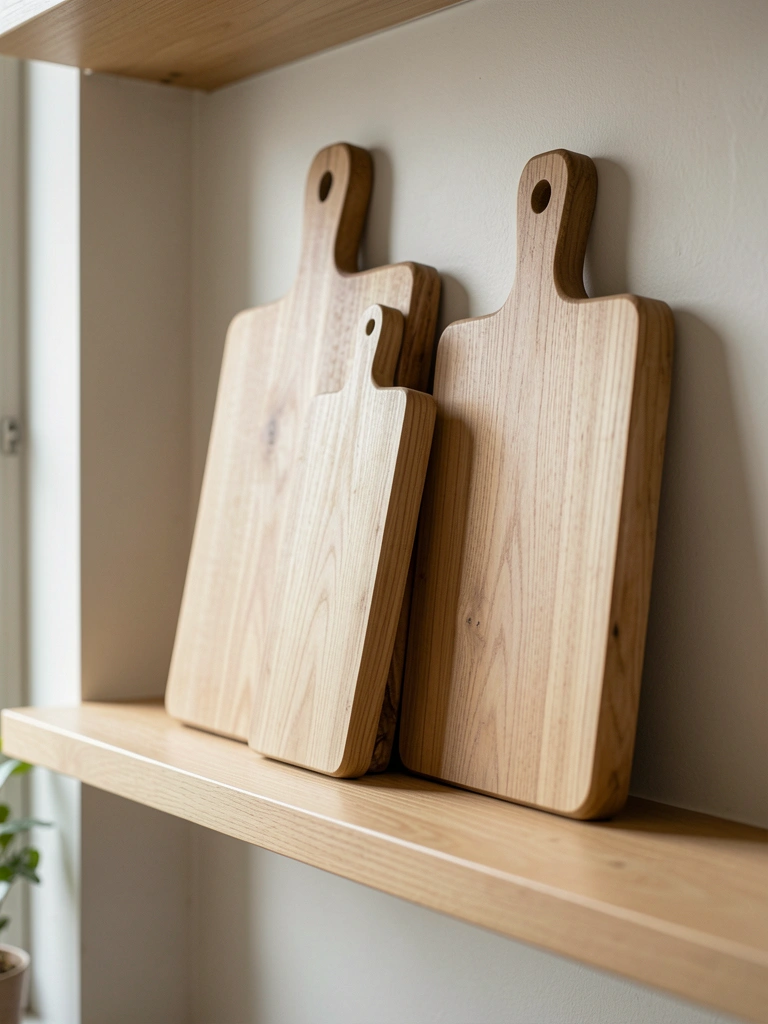
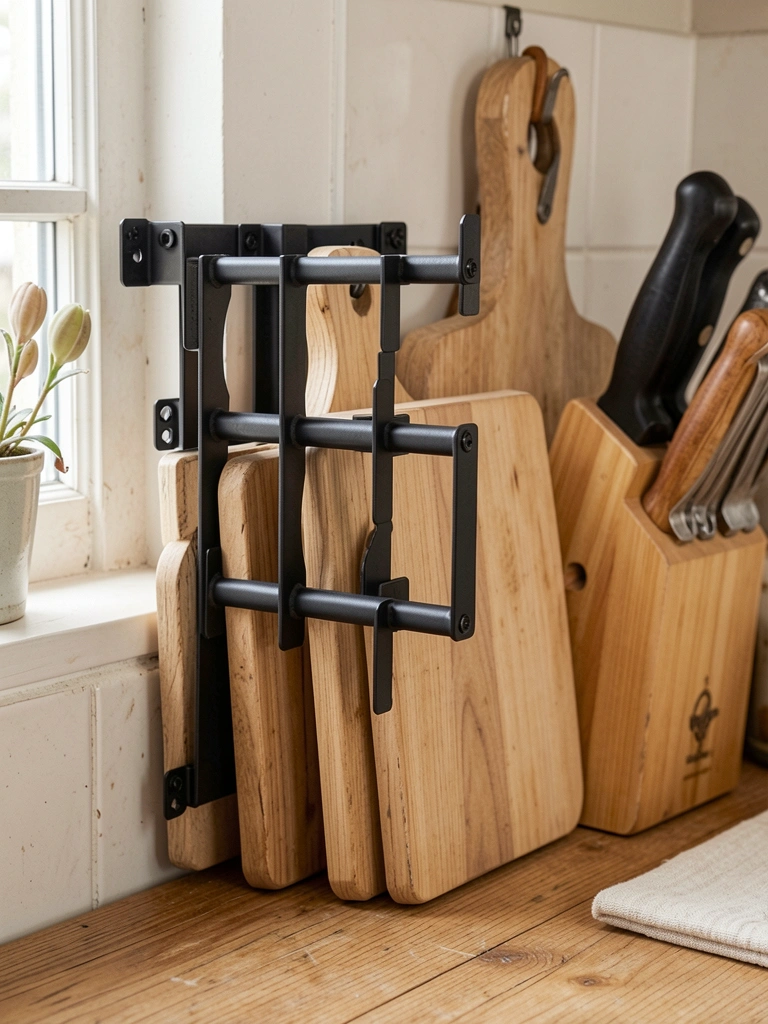
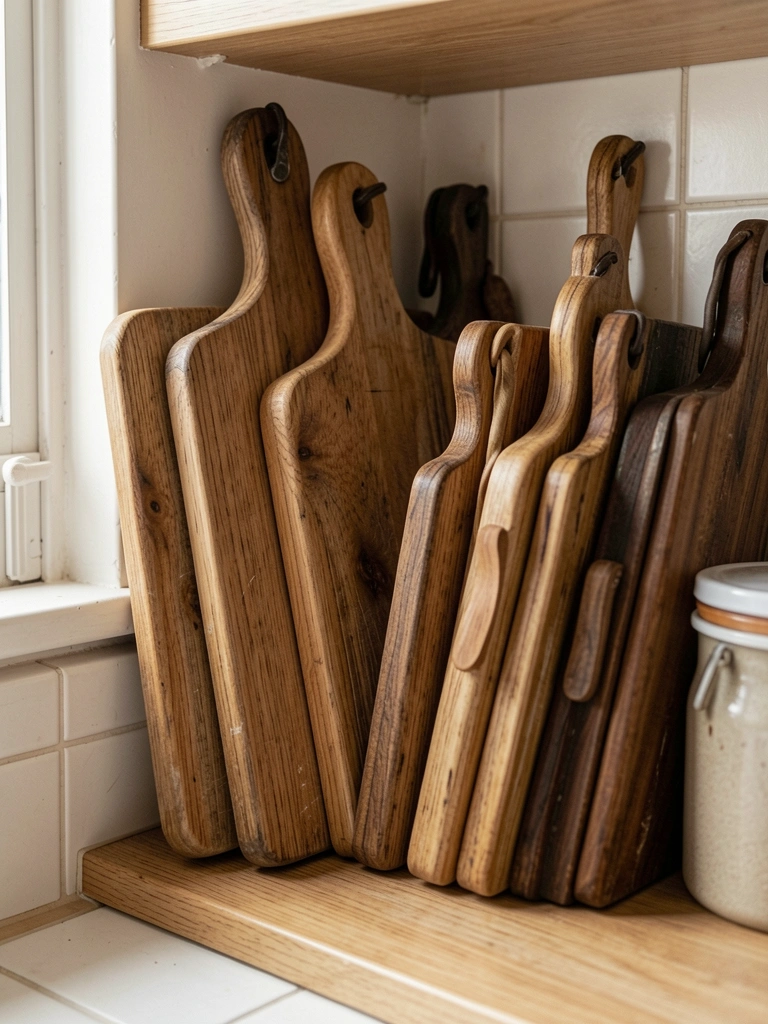
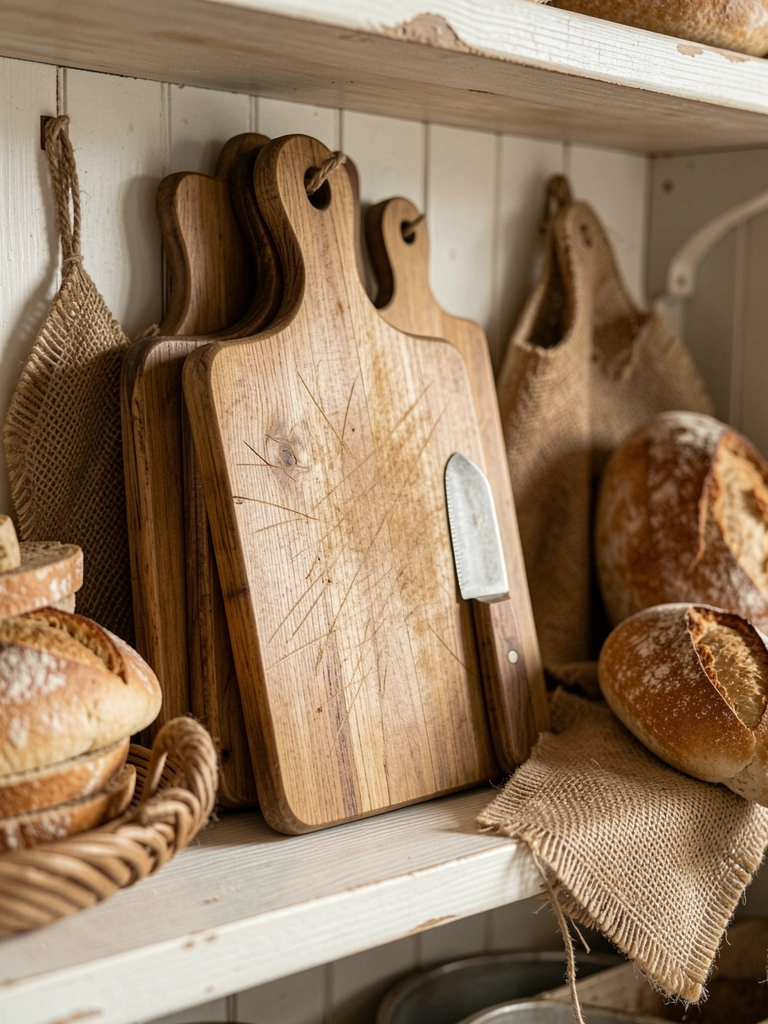
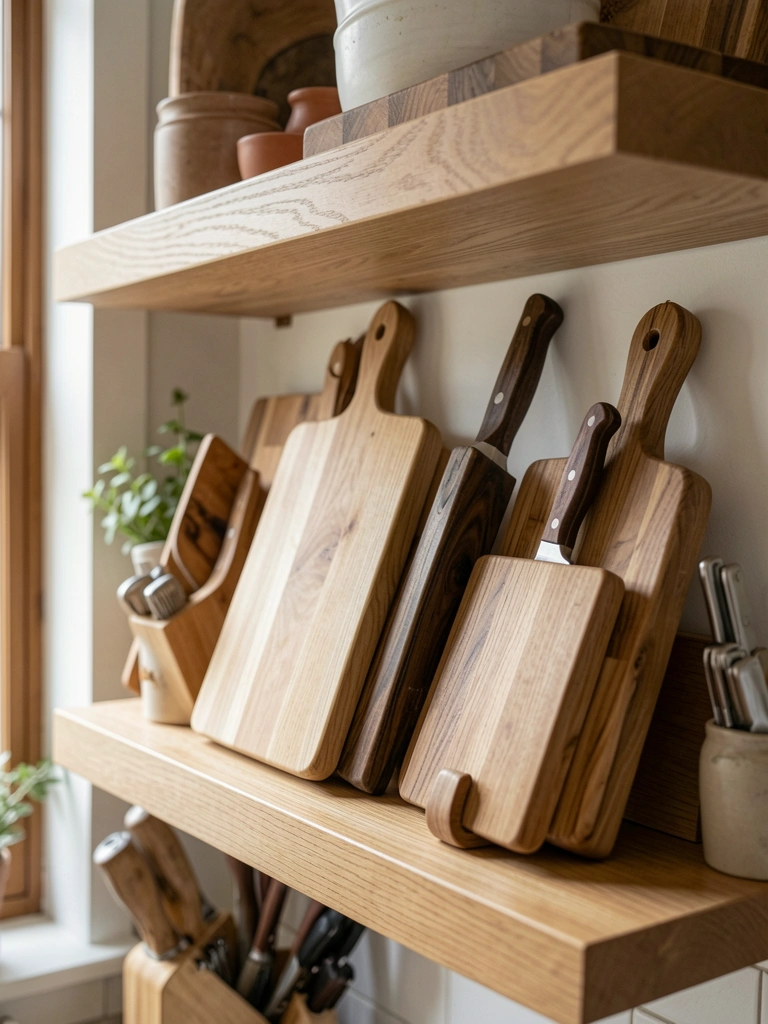
    16. Floating Ledges with Leaning Boards

    Boards lean on shelves casual. Ready for prep.

    Prep area stays tidy. Feels used right.

    Boards slip if smooth. Add rubber grips.

    What You’ll Need for This Look

    32-inch oak floating shelf
    End-grain acacia cutting boards set
    Non-slip shelf liners

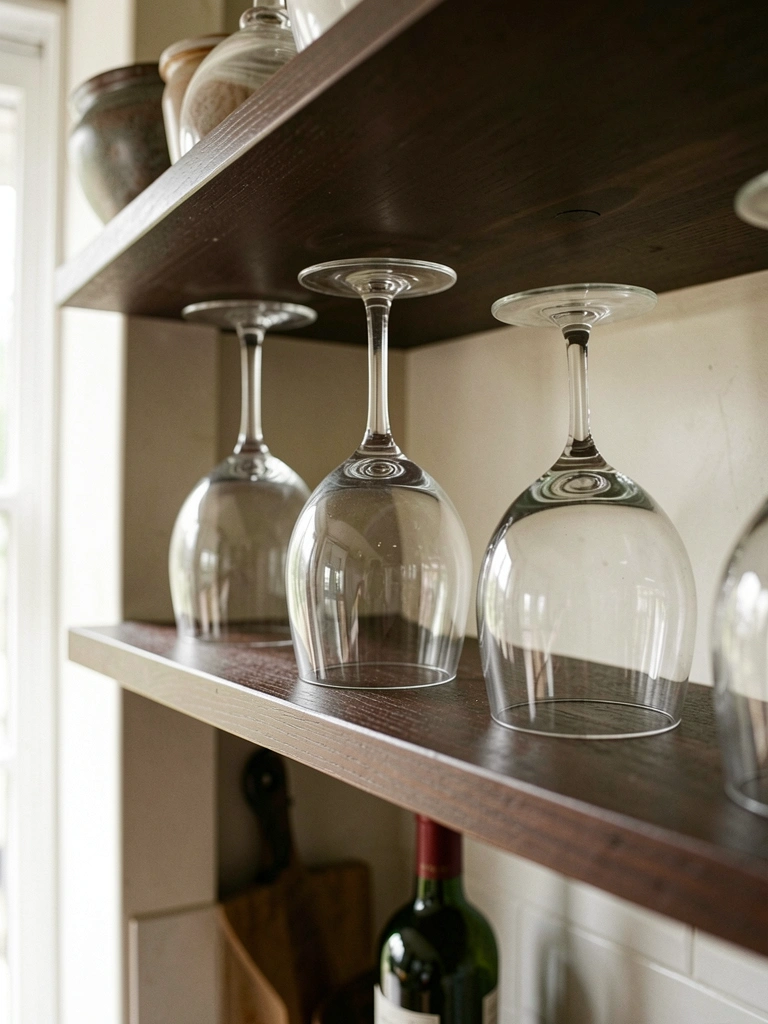
    17. Stemware Perch on Wide Shelves

    Wide shelves perch wine glasses upside down. Stems grip wood gentle.

    Bar corner got real. Dust inside less.

    Glass slips first time I loaded. Added felt pads underneath.

    What You’ll Need for This Look

    42-inch wide walnut floating shelf
    Stemmed wine glasses set of 6
    Felt pads for glass bottoms

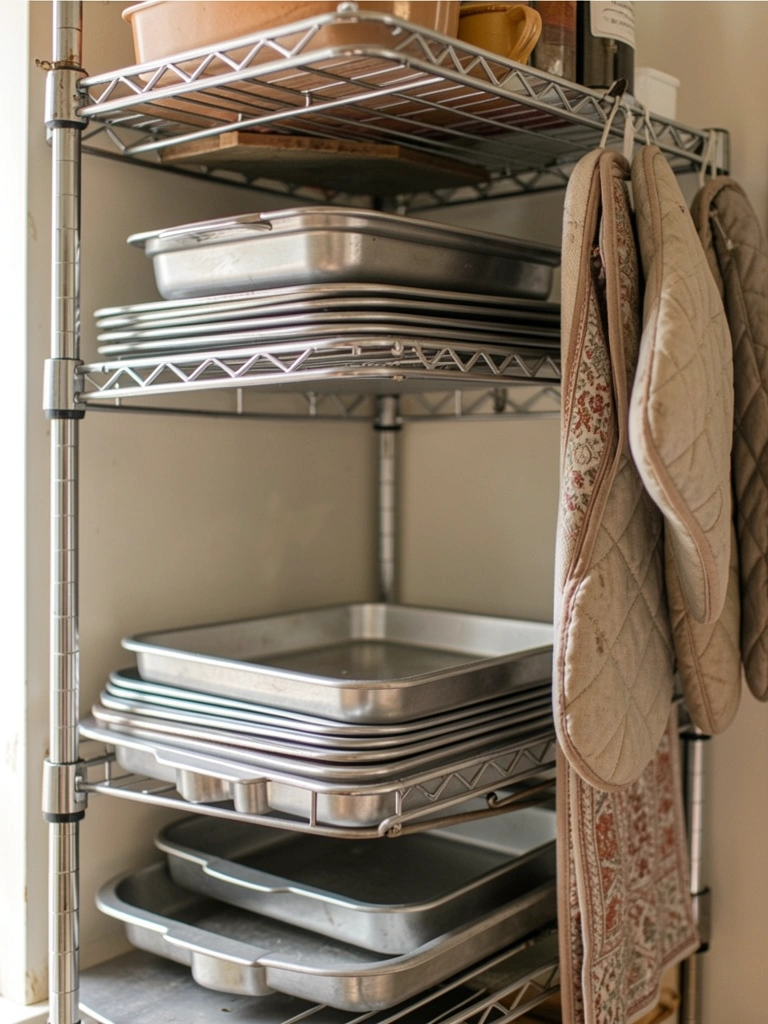
    18. Two-Tier Shelves for Baking Sheets

    Two tiers stack sheets vertical. Bake anytime.

    Drawer chaos gone. Space freed.

    Sheets bend if shelf thin. Chose heavy gauge.

    What You’ll Need for This Look

    Two-tier stainless steel floating shelf
    Non-stick baking sheet set
    Cotton oven mitts pair

    19. Curved Edge Shelves for Soft Lines

    Curved shelves soften sharp corners. Jars nest soft.

    Room flows gentle. Modern without cold.

    Curves hard to mount level. Shim as needed.

    What You’ll Need for This Look

    36-inch curved white oak floating shelf
    Matching curved glass jars

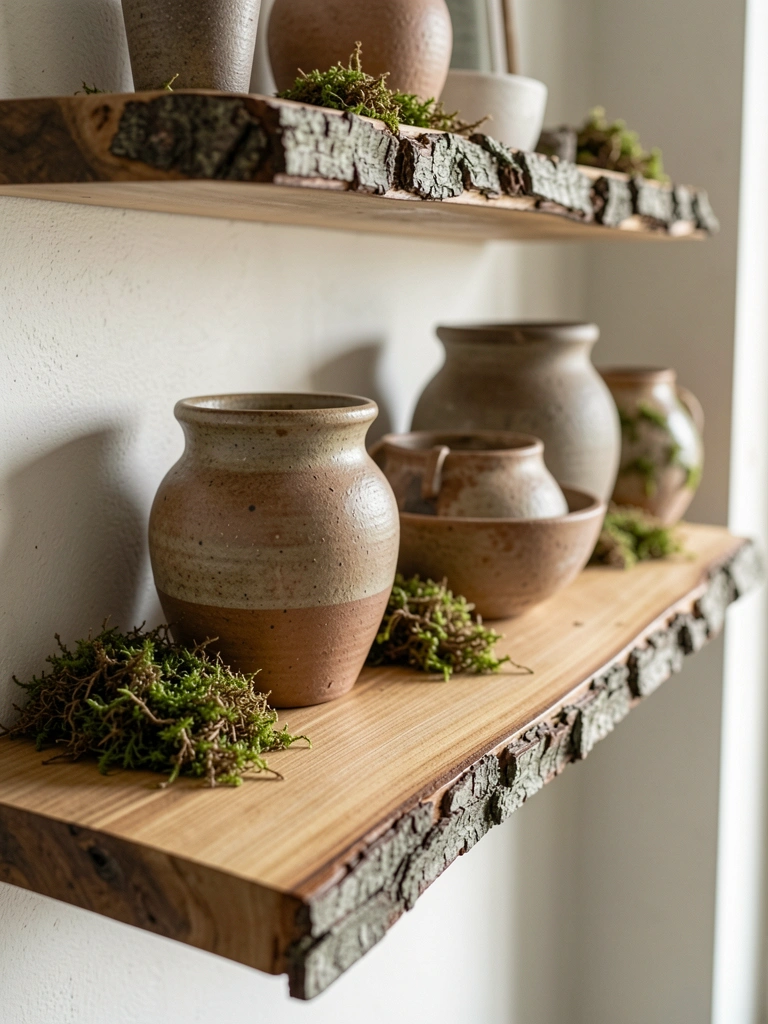
    20. Live Edge Wood for Organic Feel

    Live edge brings nature in. Pottery sits organic.

    Kitchen feels rooted. Calm amid chaos.

    Edges rough— sand light if kids around.

    What You’ll Need for This Look

    30-inch live edge wood floating shelf
    Hand-thrown stoneware pottery bowls
    Sanding block fine grit

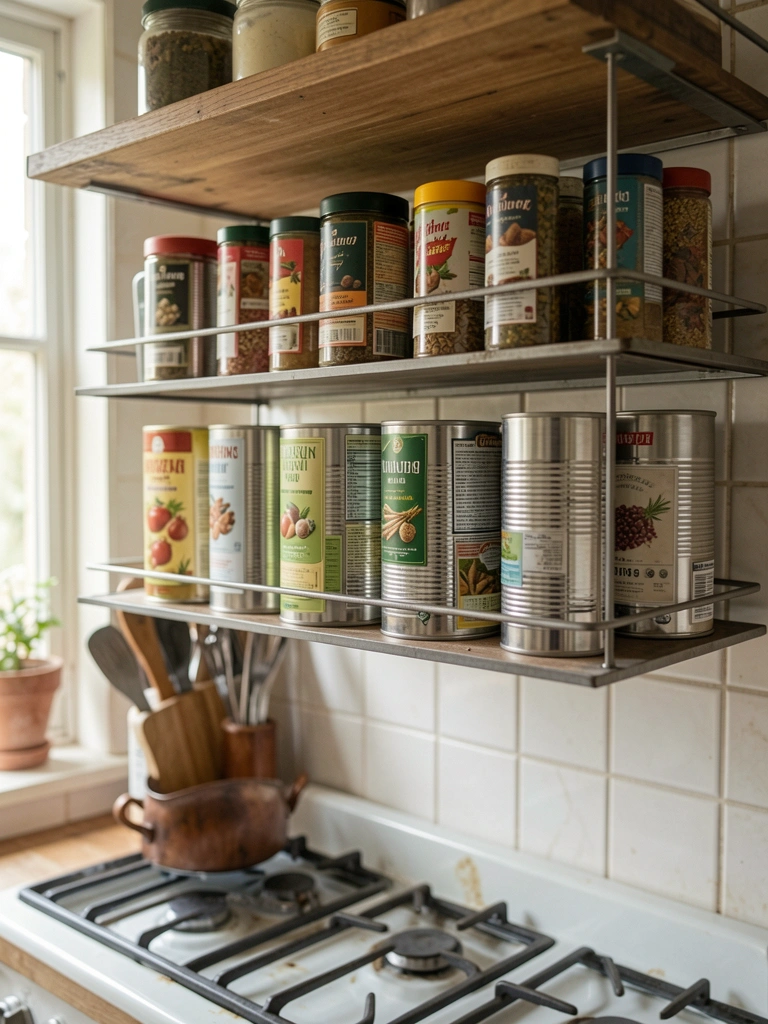
    21. Slim Profile Shelves Above Range

    Slim shelves over range hold tins. Spices at cook height.

    No hood block. Handy.

    Heat warps cheap ones. Went metal.

    What You’ll Need for This Look

    24-inch slim stainless floating shelf
    Metal spice tins labeled

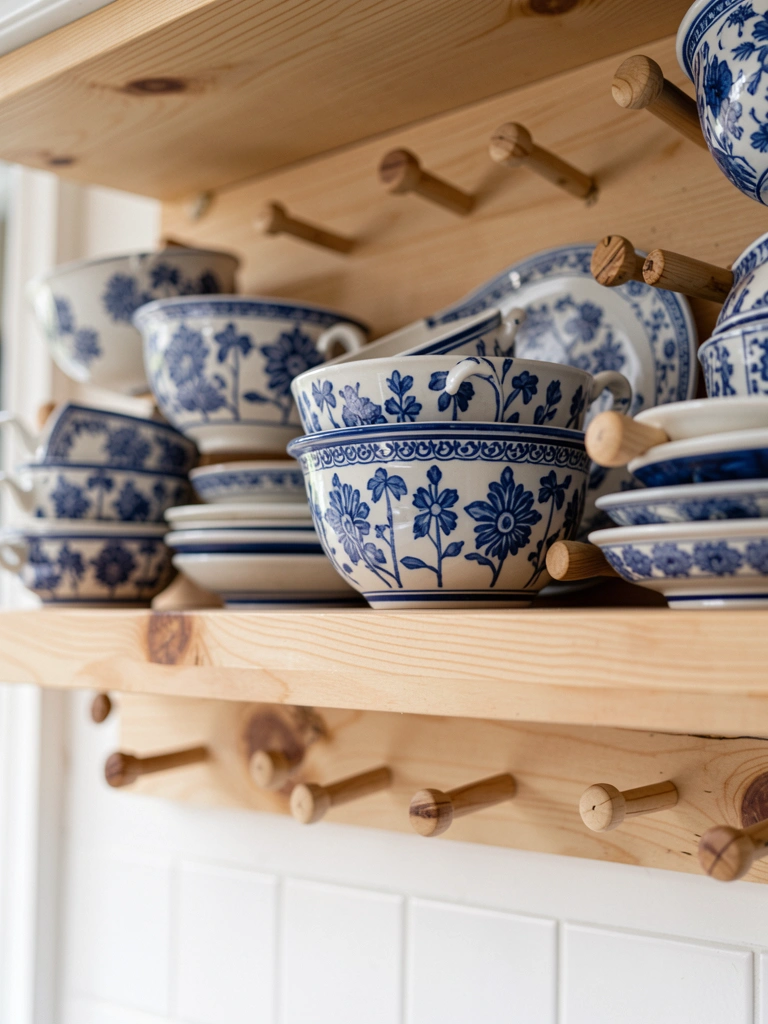
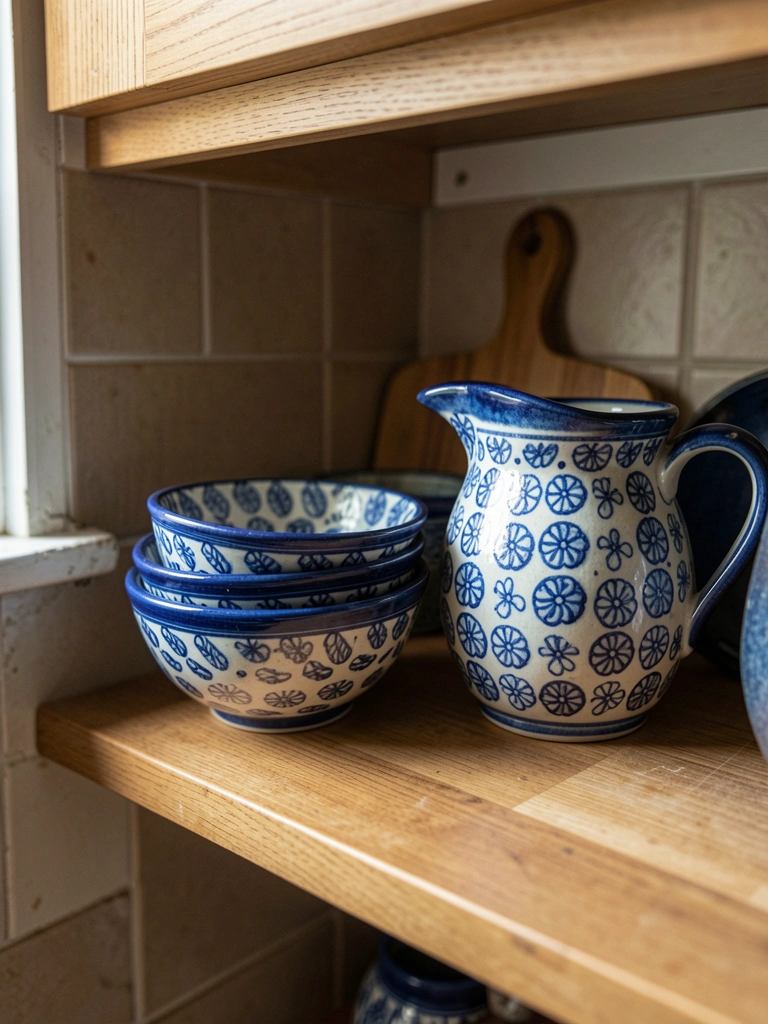
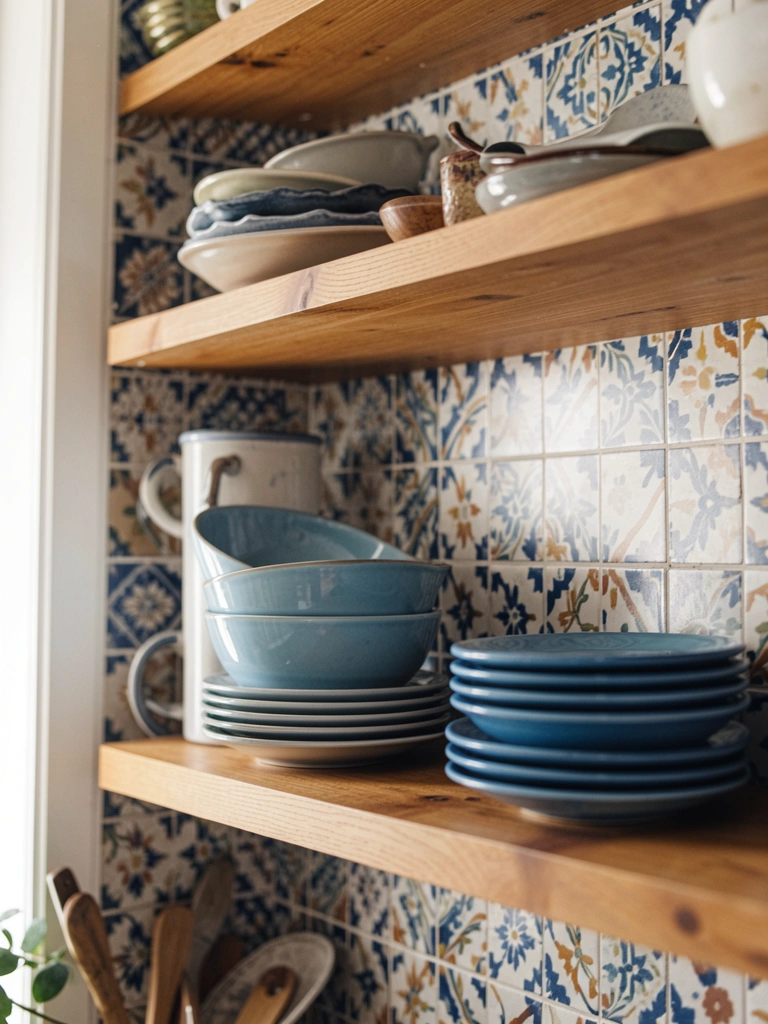
    22. Pattern Mix Shelves with Tiles

    Shelves against patterned tiles. Plates echo blue.

    Wall sings. Balanced busy.

    Overdid patterns first— too much. Pull back.

    What You’ll Need for This Look

    28-inch beech floating shelf
    Blue ceramic plates handmade
    Tile spacers if installing

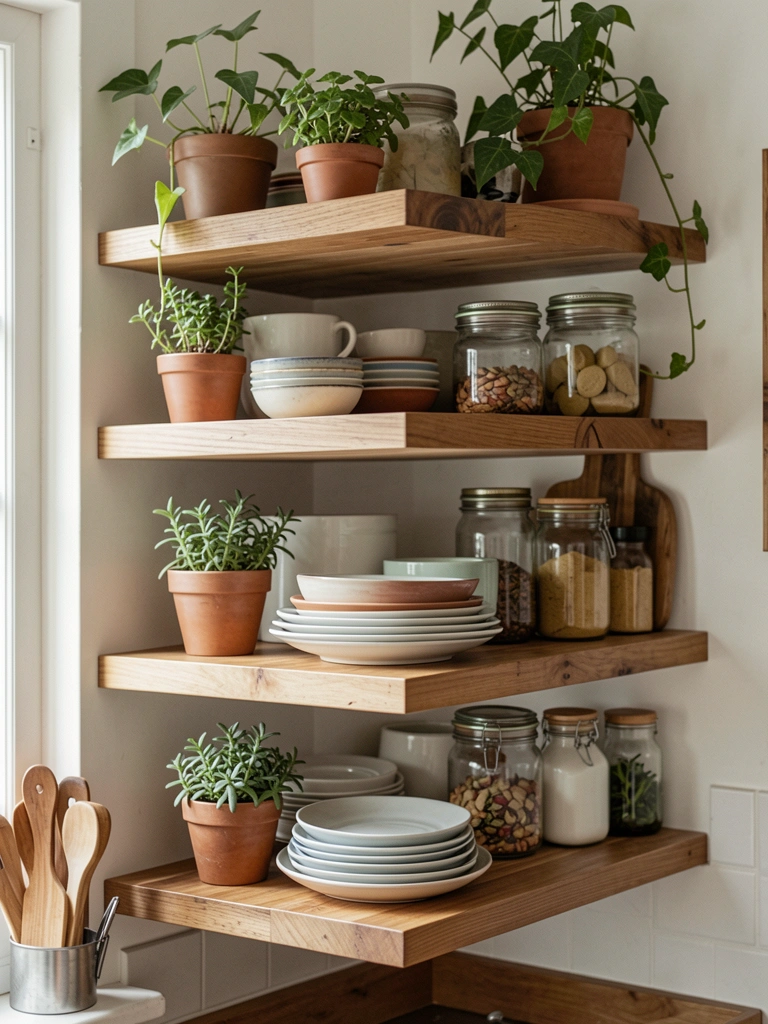
    23. Multi-Level Shelves for Full Display

    Multi-level staggers it all. Dishes, plants mix free.

    Full wall works. Eye travels happy.

    Levels compete if even. Vary 8-18 inches.

    What You’ll Need for This Look

    Multi-level floating shelf set oak
    Assorted white dishes stackable
    Small potted greenery mix

    Final Thoughts

    Pick one idea that matches your daily rhythm. Start small— maybe three shelves.

    They grow with you. Mine have, over years.

    You've got this. Your kitchen waits.