I stared at my kitchen shelves one morning. Bare wood, a few mismatched jars. They made the whole room feel empty, even after meals there.
I wanted them to hold everyday things without looking cluttered. Not perfect, just right.
It took a few tries. Now they ground the space.
How to Decorate Kitchen Shelves
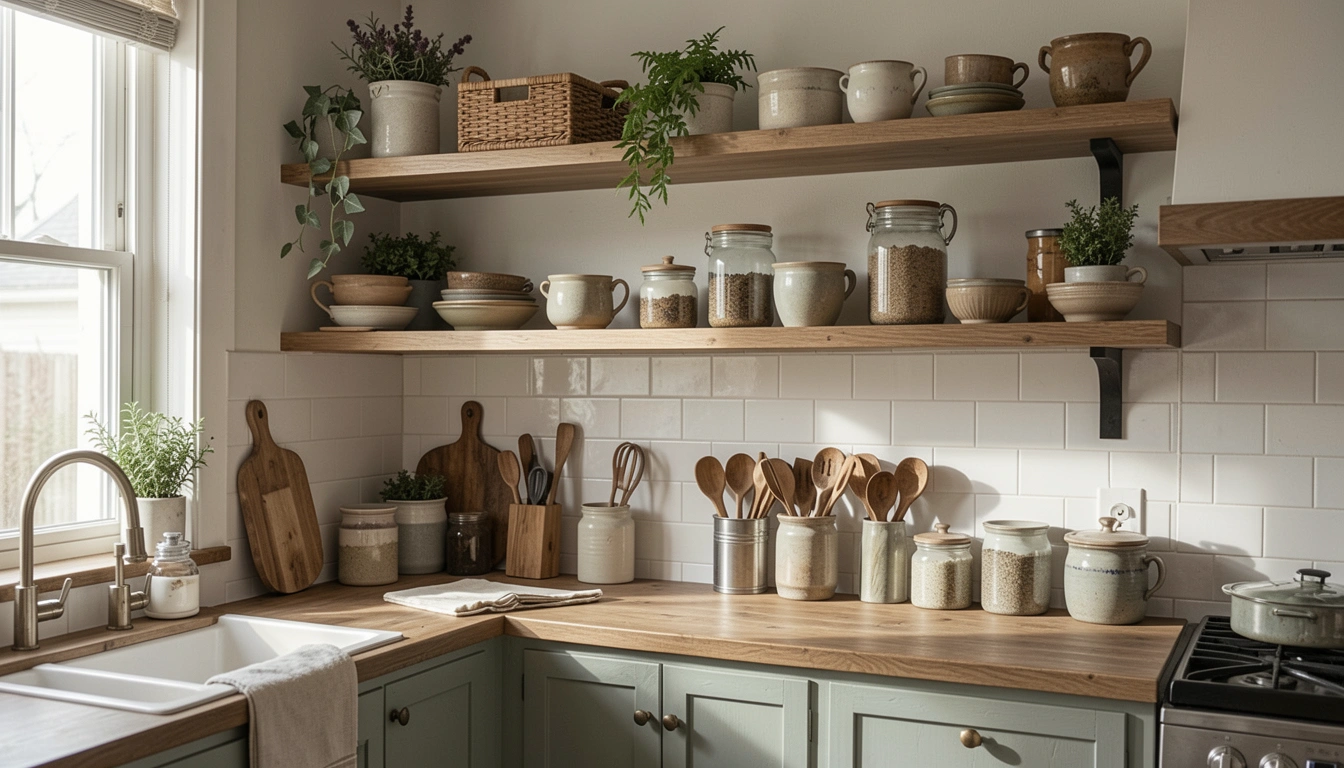
This shows you how I fill kitchen shelves so they feel balanced and lived-in. You’ll end up with shelves that pull the kitchen together. It’s simple once you see the rhythm.
What You’ll Need
- White ceramic pitchers (10-inch tall)
- Matte black metal trays (12×16 inches)
- Clear glass jars with lids (quart size)
- Faux olive branches (24-inch stems)
- Woven seagrass baskets (small, 8-inch)
- Vintage-style white plates (10-inch dinner plates)
- Wooden cutting boards (medium, 12×18 inches)
- Brass candle holders (short, 4-inch)
Step 1: Clear and Measure Your Shelves

I start by taking everything off my shelves. Wipe them down. Stand back and look.
This empties the space so you see its real shape. Measure heights between shelves. Mine are uneven, which changes everything.
People miss how light hits empty shelves. Note shadows now—they guide placement later. Don’t skip measuring; it avoids cramming.
Now the shelves feel open. Ready for weight.
Step 2: Anchor with Tall Pieces
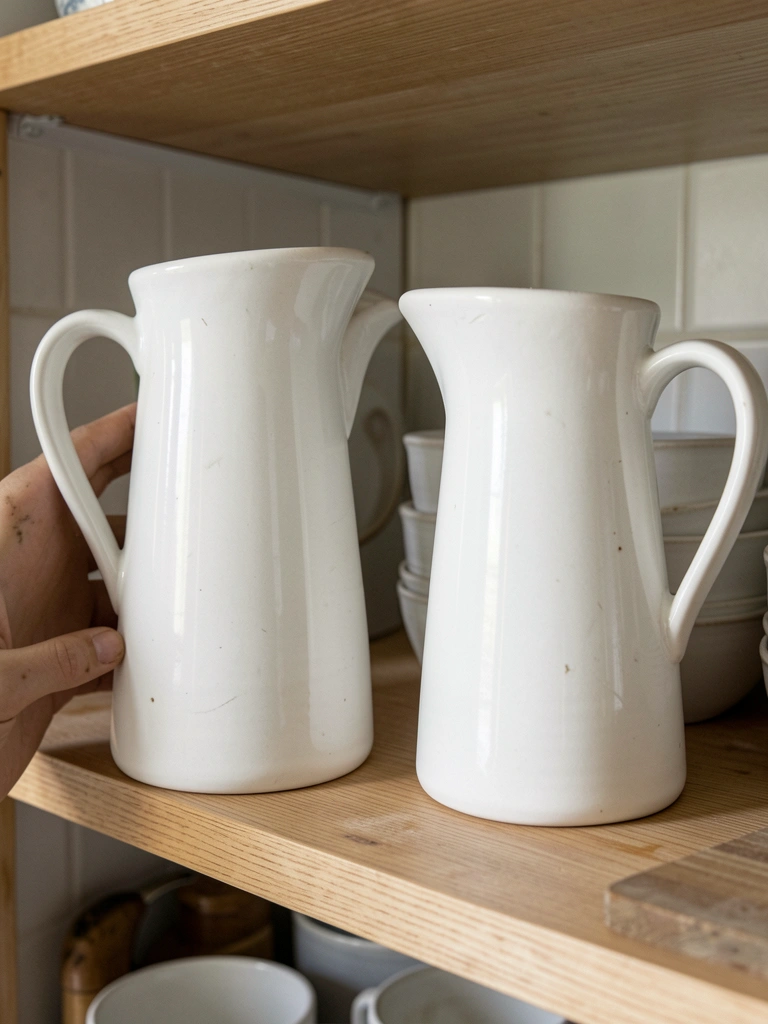
I pick my tallest items first—the pitchers. Place one at each end of the shelf. They frame it.
This creates height right away. The shelf stops feeling flat. Visual weight settles.
Most forget anchors make the middle safer for small things. Don’t center everything; ends pull eyes in.
Step back five feet. See balance? Adjust one inch if needed.
Step 3: Layer in Trays and Boards
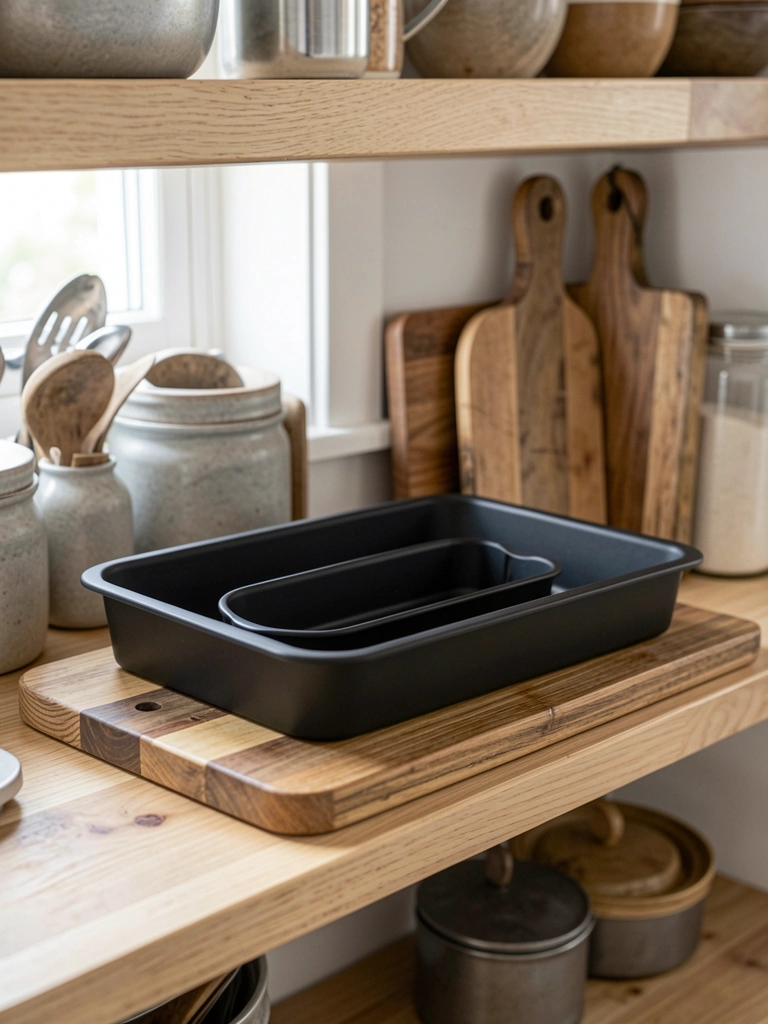
Next, I add trays and cutting boards in the middle. Lean a board against the back. Set a tray forward.
Textures mix now—wood, metal. Depth appears. The shelf breathes.
Insight: boards hide wall gaps people notice subconsciously. Avoid stacking flat; lean for air.
Kitchen feels warmer already. Everyday tools belong.
Step 4: Fill Gaps with Jars and Baskets
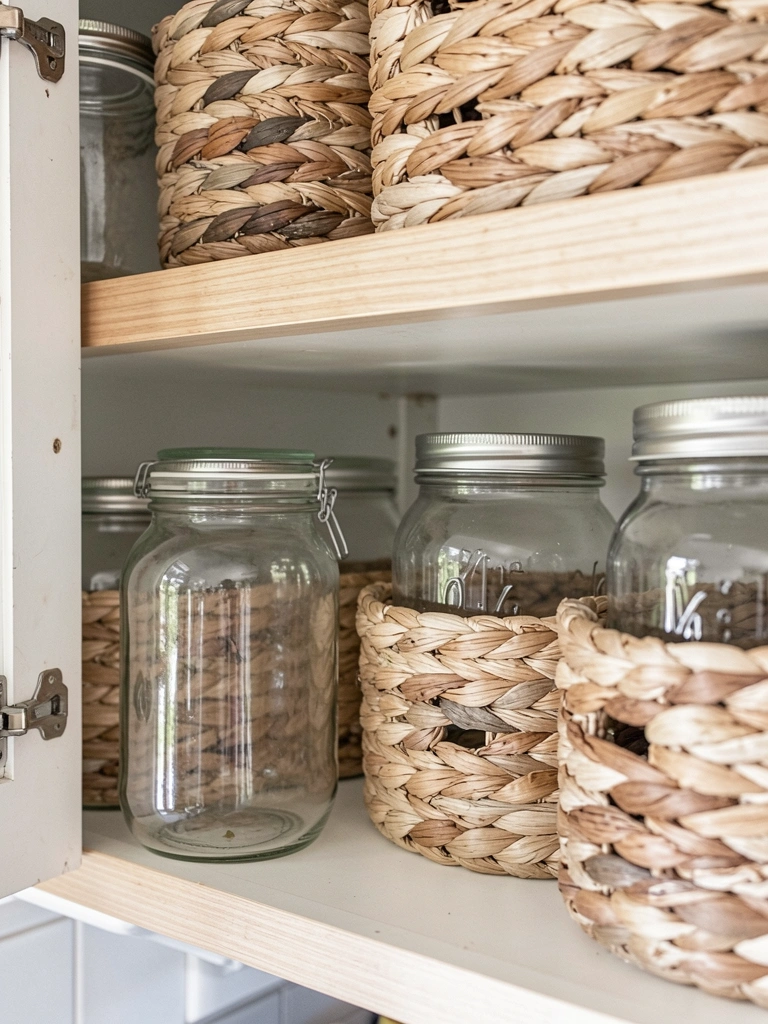
I tuck jars and baskets into open spots. Group three jars loosely. Nestle a basket below.
This softens hard lines. Curves balance straight edges. Shelf looks full, not stuffed.
People overlook grouping odds—threes work best. Don’t line up rows; cluster for life.
Touch the items. They should feel reachable.
Step 5: Add Greenery and Plates

Now greenery—olive branches drape over edges. Stack two plates nearby.
Green pulls light in. Plates echo pitcher white. Harmony builds.
Missed tip: plants lower energy visually. Avoid overcrowding one shelf; spread green.
Stand in the kitchen. Feels complete.
Step 6: Finish with Candle Holders
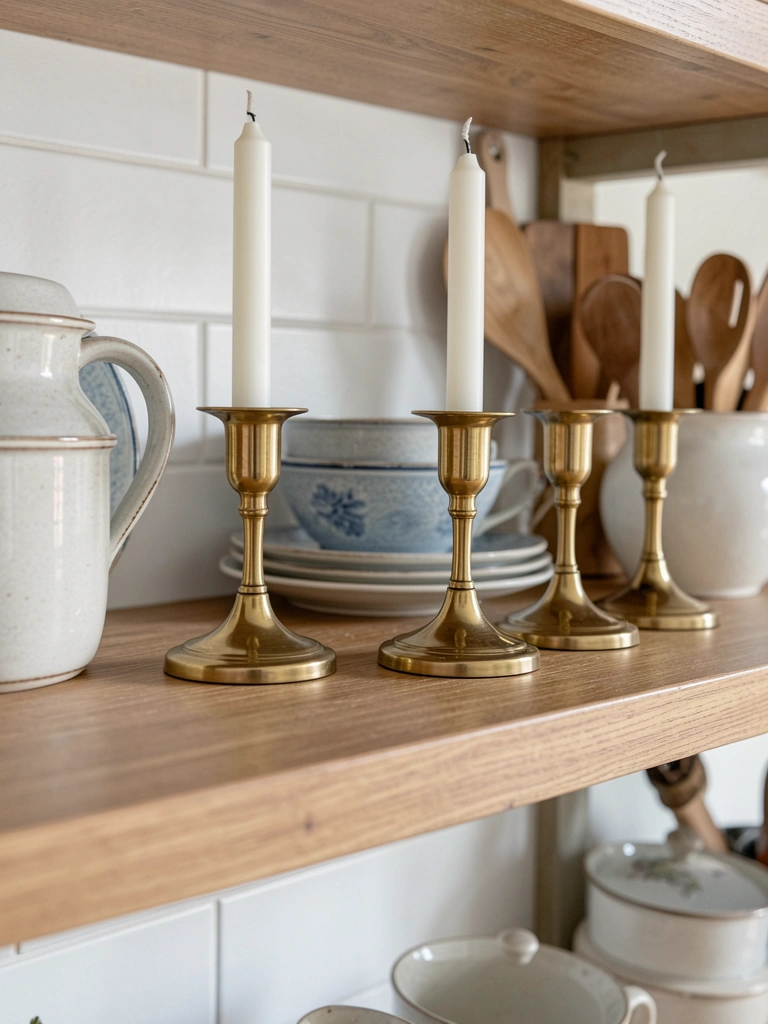
Last, brass holders in quiet corners. One per shelf.
They catch evening light. Warm glow promised. Balance holds.
Insight: metal repeats without overwhelming. Don’t add more now; live with it first.
Walk away. Come back. Tweak tomorrow if off.
Common Mistakes I Learned the Hard Way
I’ve crammed too much before. Shelves tipped. Looked busy.
Here’s what trips people up:
- Overfilling one shelf—spreads weight evenly.
- Ignoring scale—big items first, always.
- Forgetting negative space—gaps make it cozy.
Now mine stay comfortable year-round.
Tips for Small Kitchen Shelves
My old rental had tiny shelves. Felt impossible.
Keep it simple:
- Use one tall anchor per shelf.
- Vertical plants only—no sprawl.
- Repeat two colors max.
They punch above their size. Balanced, not lost.
Refreshing Shelves by Season
I swap twice a year. Keeps it fresh without overhaul.
- Fall: Swap olives for dried pampas.
- Winter: Add pine sprigs, keep whites.
- Group loosely—easy to rotate.
Feels lived-in, not bored.
Final Thoughts
Start with one shelf. See how it sits.
You’ve got this—your kitchen knows what it needs.
Mine greet me every morning now. Balanced. Home.
Leave a Reply