
Your creative space doesn’t need to be huge or expensive—it just needs to work for you. Whether you’re a painter, writer, crafter, or maker of any kind, the right setup removes friction and makes creating feel natural instead of forced. You’ll spend more time actually doing the work you love and less time hunting for supplies or fighting bad lighting. We’ve gathered 24 hobby room ideas that range from zero-dollar rearrangements to smart investments, all designed to make your creative process smoother and your space more inspiring. Let’s build a room that actually supports your hobbies instead of getting in the way.
1. Create Zones for Different Activities
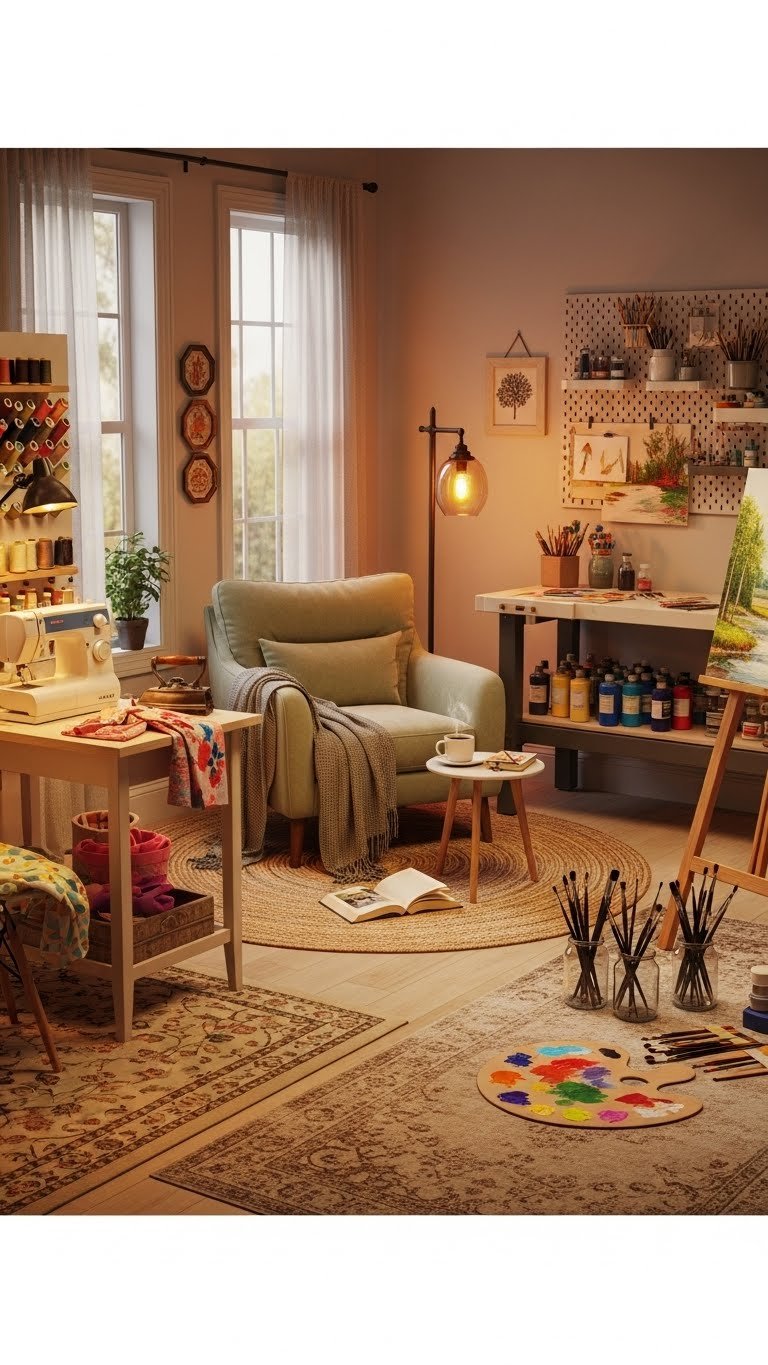
Trying to sketch, sort supplies, and take photos in one cramped corner leads to chaos. Dedicate specific zones for different tasks—one for active creation, one for sorting and storage, one for photographing or reviewing your work.
You don’t need walls to make this work. Use a tall bookshelf, a curtain rod, or even furniture placement to create subtle boundaries. A $30-$80 room divider from IKEA or Amazon works instantly, or rearrange what you already own. Taking one weekend to map out your space prevents constant setup and teardown every time you create.
Pro tip: Position your creation zone near your best natural light source. Your work deserves to be seen clearly while you’re making it.
The moment you have dedicated zones, you’ll notice you stay longer and create more. Your brain relaxes when it knows where things belong, so you can focus on the actual work.
2. Install Track Lighting for Flicker-Free Work
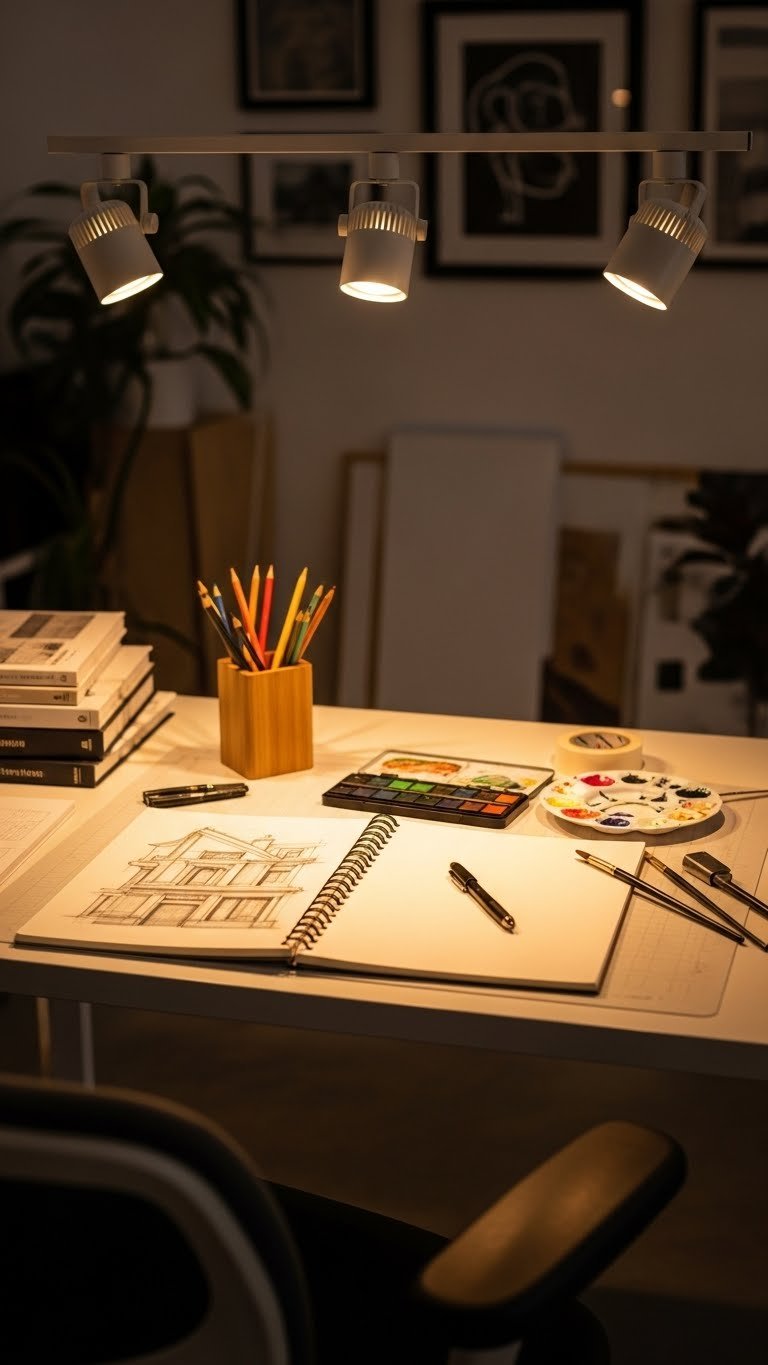
Overhead lights cast shadows exactly where you need them most—right on your work. Track lighting lets you angle light precisely where you’re creating, eliminating the frustration of squinting or shading your work with your own hands.
Track light kits run $60-$150 from Home Depot or Lowes and are renter-friendly if you use adhesive strips instead of drilling. Position at least two fixtures to avoid shadows. Installation takes about an hour for a basic setup. If you rent, under-cabinet LED strips ($20-$40) tape directly under shelves and provide focused light without permanent changes.
Pro tip: Choose 5000K color temperature (daylight) for detailed work or 3000K (warm white) if you also want ambiance.
No more squinting at your work or accidentally shading what you’re doing with your own body. You’ll notice details you missed before and finish projects faster.
3. Use a Rolling Cart for Mobile Storage
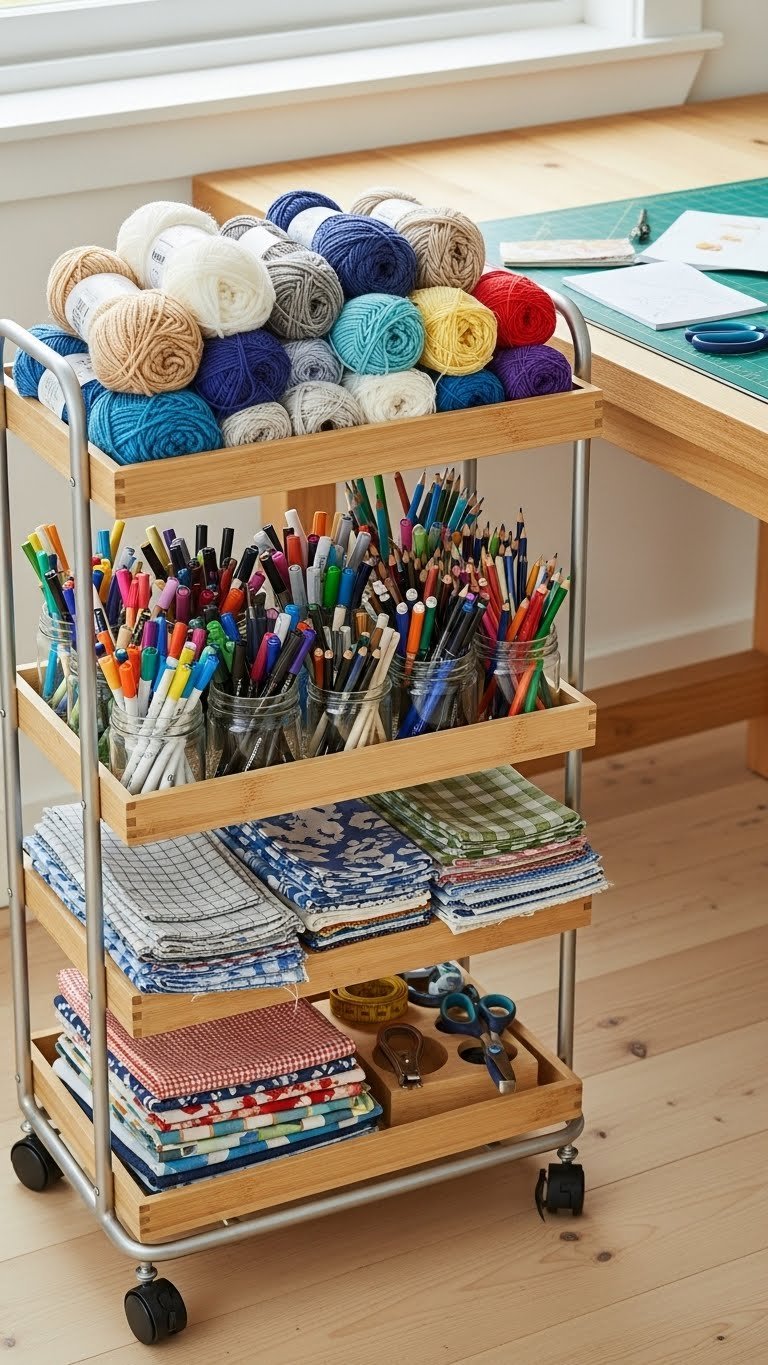
Hauling supplies from storage to your work area eats time and energy. A rolling cart keeps your most-used materials within arm’s reach and moves with you when you need to shift zones or work in different rooms.
$40-$100 carts from Target, IKEA, or Amazon come in various sizes and finishes. Choose one with at least three tiers to maximize vertical space. Stock it with your current projects and frequently-used supplies—pens, thread, paint palettes, reference books. Keep it near your main work surface and refill it weekly.
Pro tip: Use clear plastic bins on each tier so you can see what’s inside without opening them.
You’ll find you start and finish projects faster when setup takes 30 seconds instead of 10 minutes. Plus, you can wheel it out of sight when you want your room to look calm.
4. Add a Wall-Mounted Pegboard System
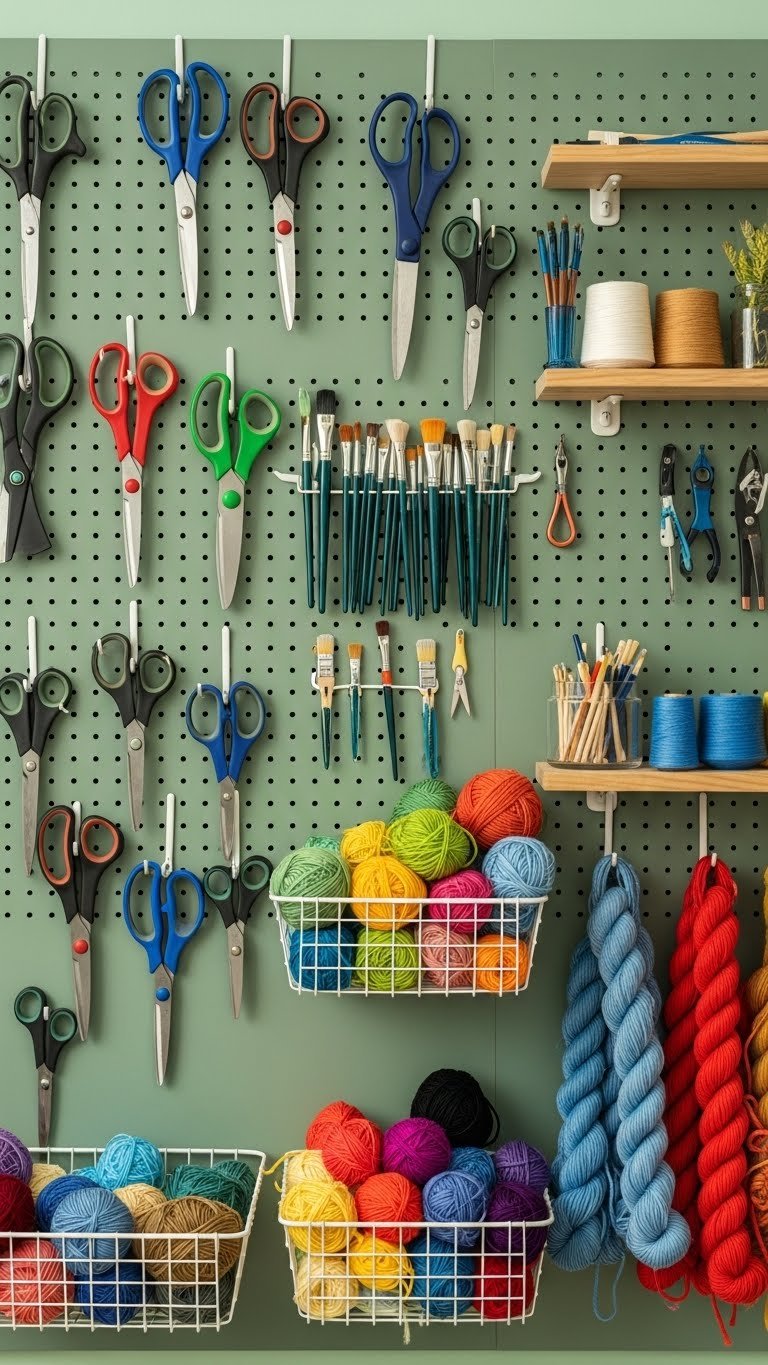
Small supplies scatter everywhere when there’s nowhere to put them. A pegboard wall gives you customizable storage that you can actually see and reach, keeping everything accessible without eating up floor or desk space.
Pegboard kits cost $25-$80 and install easily with a level and basic hardware from Home Depot. Paint it to match your space ($10-$20) for a polished look. Start with a 2’x4′ board—you can always add another. Choose hooks, baskets, and shelves based on what you actually use ($3-$8 per piece).
Pro tip: Arrange items by project type or frequency of use, leaving some empty space so it doesn’t feel cluttered and you can add new pieces.
Your supplies are now visible and within reach, which means less time digging through drawers and more time creating. Your space automatically looks more organized and intentional.
5. Invest in a Good Chair With Back Support
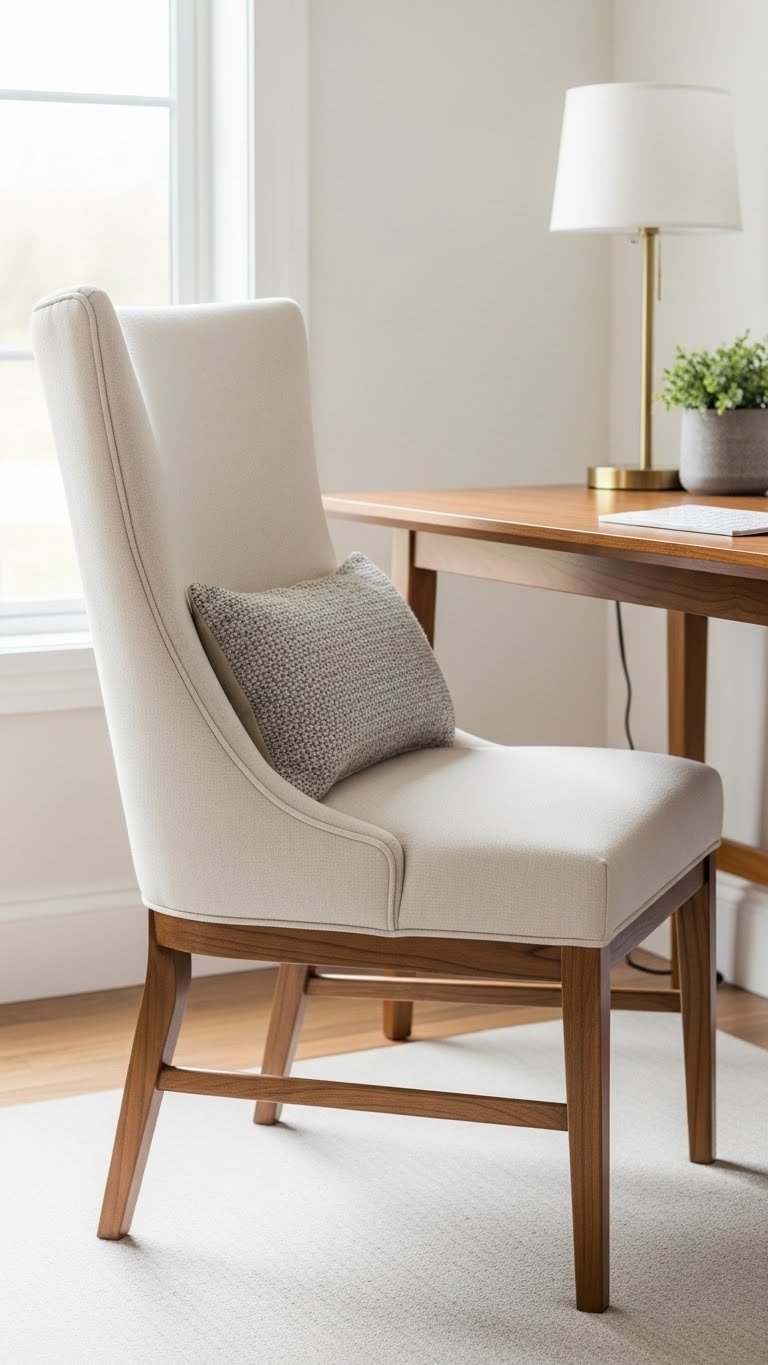
Cheap chairs punish you after an hour of sitting, leading to back pain that ruins your creative momentum. A chair with proper lumbar support lets you work longer and actually enjoy the time you’re spending on your hobby.
Quality office chairs range from $150-$400 at stores like Wayfair, Article, or even IKEA. Look for adjustable height, back support, and breathable fabric. If that’s too steep, check Facebook Marketplace or office furniture liquidators for used Herman Miller or Steelcase chairs at half price. Spend at least $80-$100 on something with back support—your spine will thank you.
Pro tip: Swap in a vintage wooden dining chair with a $20-$40 memory foam cushion if you’re on a tight budget.
You’ll create for hours instead of minutes without your back screaming. Better comfort means better focus and more finished projects.
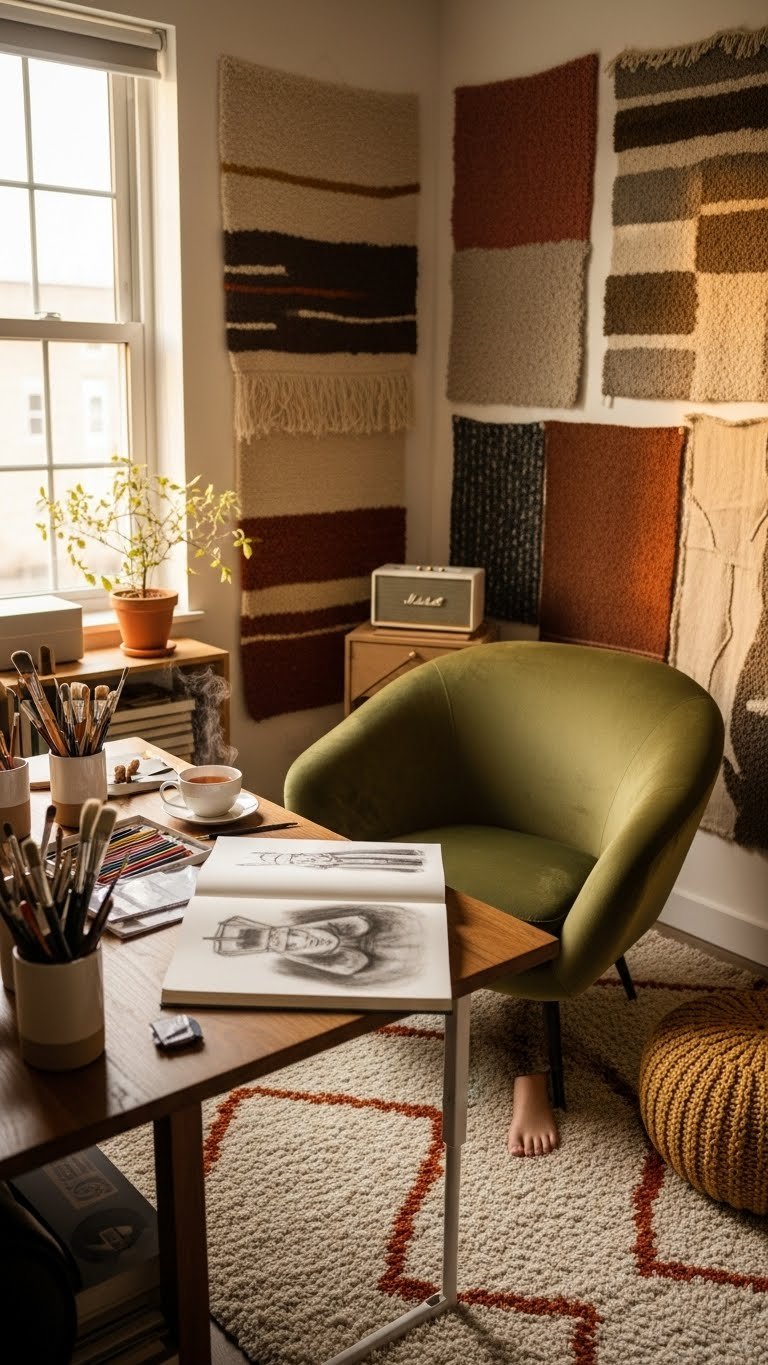
6. Hang Inspiration Boards Above Your Work Surface
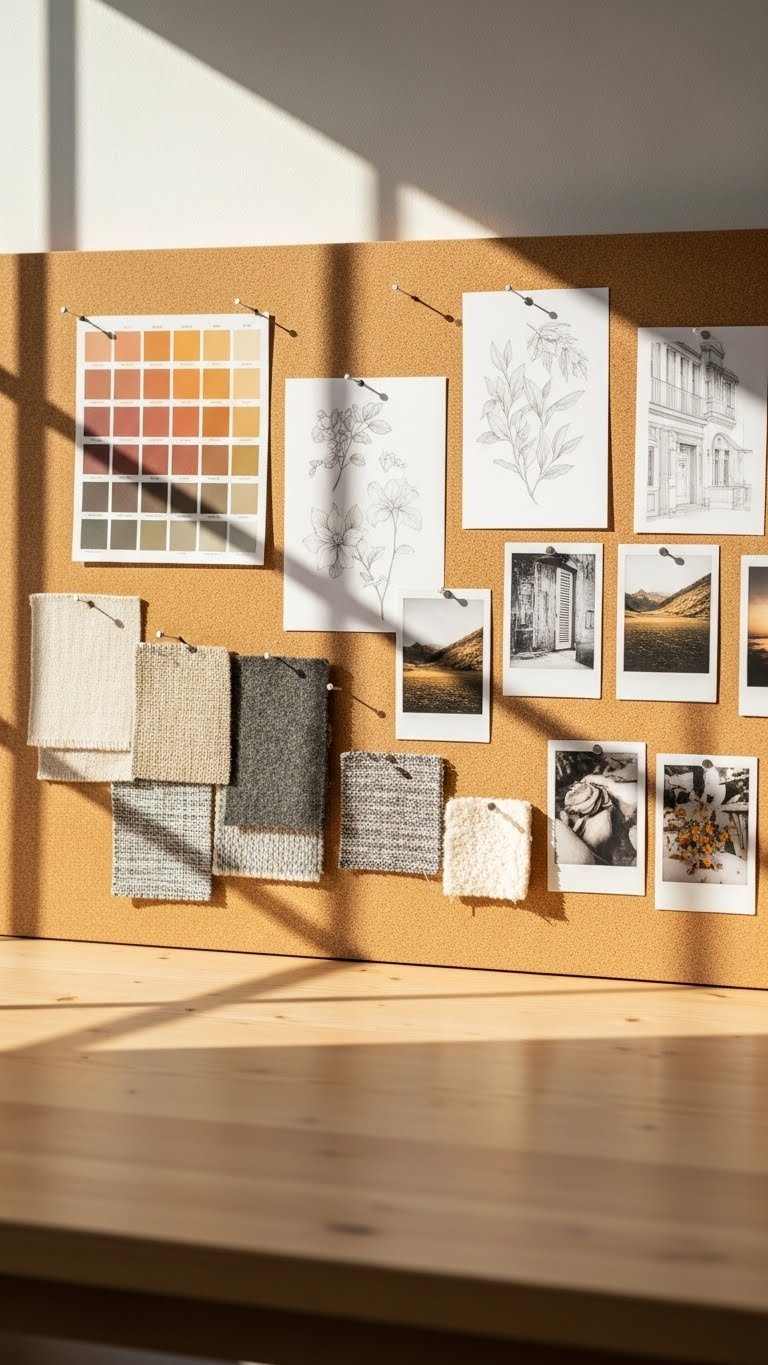
Staring at a blank wall while you work is uninspiring. An inspiration board keeps references, color palettes, and motivation visible so you can glance up for ideas instead of scrolling your phone or losing momentum.
Grab a $15-$40 cork board from Target or a fabric-covered bulletin board ($20-$50) for a softer aesthetic. Mount it 12-18 inches above your workspace where you can see it without straining. Pin up sketches, color swatches, magazine clippings, and finished pieces you admire. Refresh it monthly to keep ideas fresh.
Pro tip: Create a “mood board” section separate from “active project reference” so you have both inspiration and practical references visible.
You’ll notice yourself getting unstuck faster when visual inspiration is right there instead of buried in your phone. Your work often reflects the energy around you.
7. Set Up a Small Sink or Water Station
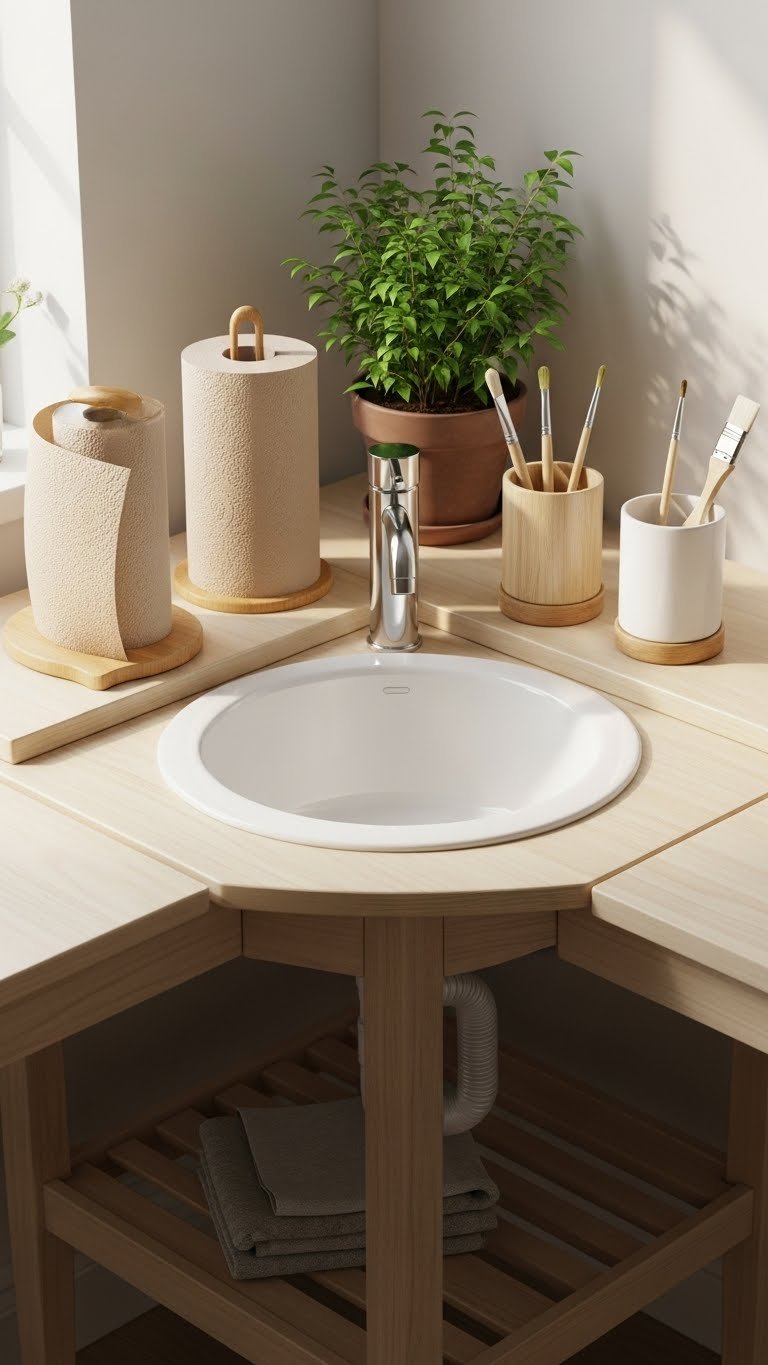
Running to the bathroom or kitchen to rinse brushes, refill water, or clean up tiny messes breaks your creative flow. A dedicated water station in your hobby room saves trips and keeps your supplies from migrating throughout your home.
A portable camping sink ($30-$50 from Amazon) or a simple basin on a small side table works if you can’t plumb a real sink. Stock it with paper towels, a small trash bin, and a brush holder. Position near a window for easy draining if you’re using a portable option.
Pro tip: Use a spray bottle with water ($5-$10) for quick brush rinsing instead of refilling the basin constantly.
You’ll stay in your creative zone longer without interruptions. Plus, cleanup feels less like a chore when supplies are contained in one spot.
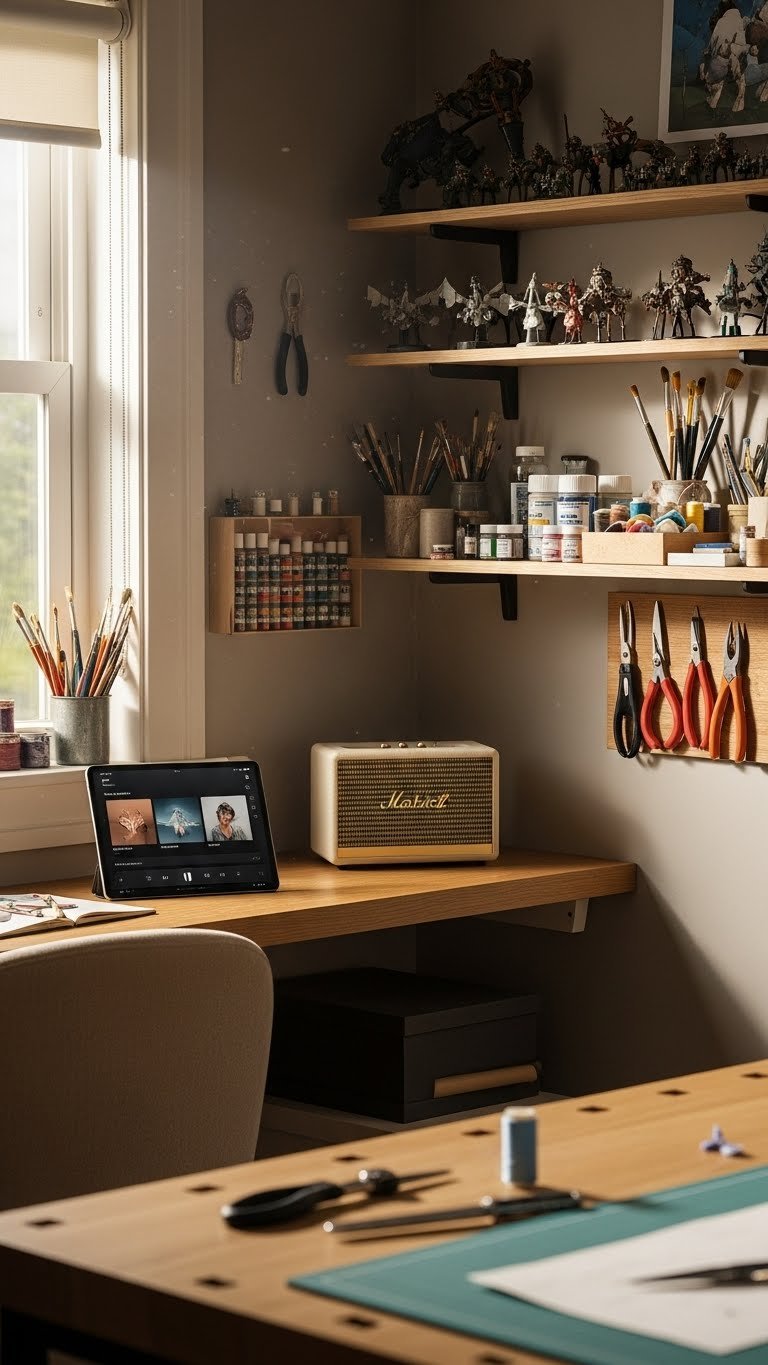
8. Layer Your Lighting With Ambient and Task Lights
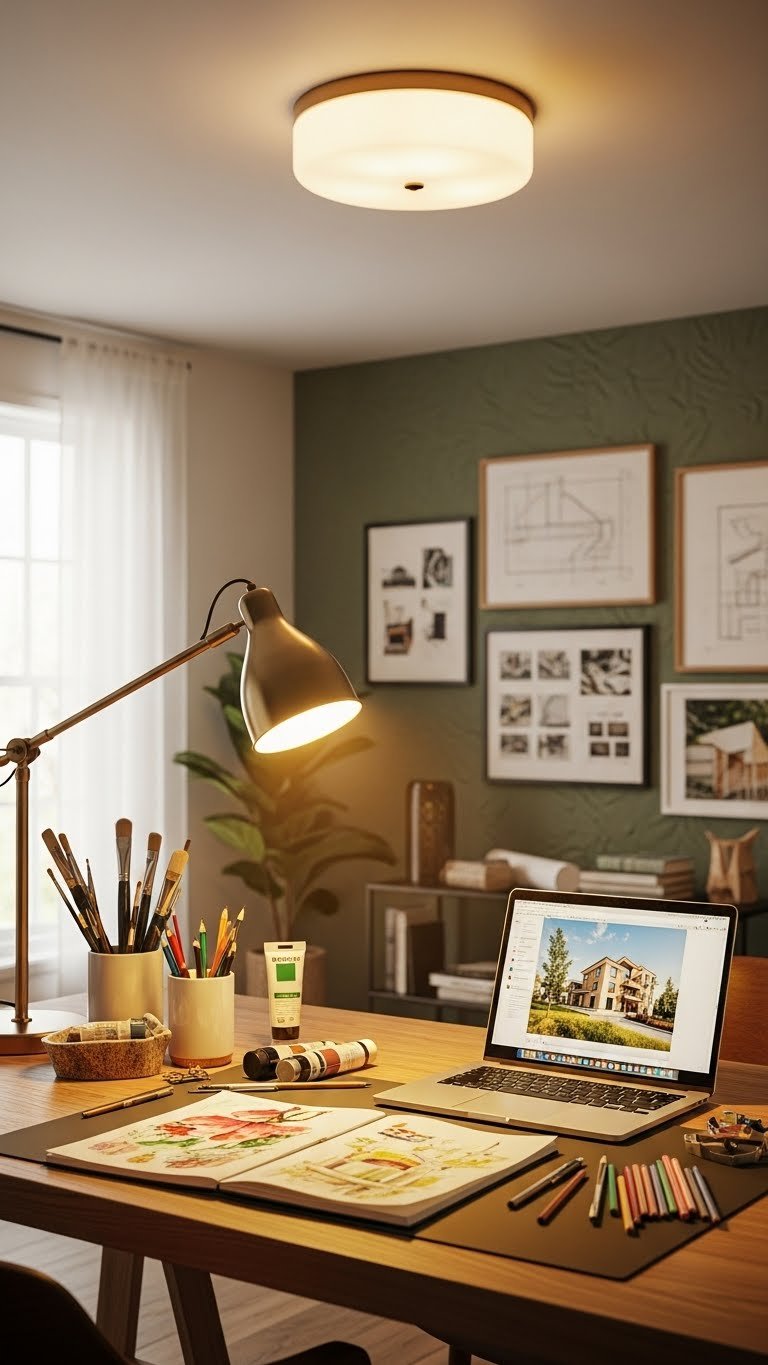
Single overhead lights create harsh shadows or feel too bright and clinical. Layering different light sources—ambient, task, and accent—makes your space feel inviting and functional for detailed work.
Combine your main ceiling fixture with a task lamp ($25-$60) positioned on your desk and optional string lights or LED strips ($15-$40) for ambiance in rest areas. Aim for at least 500 lumens on your work surface but softer light elsewhere. Use warm white bulbs (2700K) for comfort and daylight bulbs (5000K) directly on your work.
Pro tip: Install a dimmer switch ($15-$30) on ambient lights so you can adjust mood throughout the day.
Your space now feels both creative and calm instead of like a sterile studio. You’ll notice you spend more time here just being creative.
9. Dedicate One Shelf to Finished or In-Progress Projects
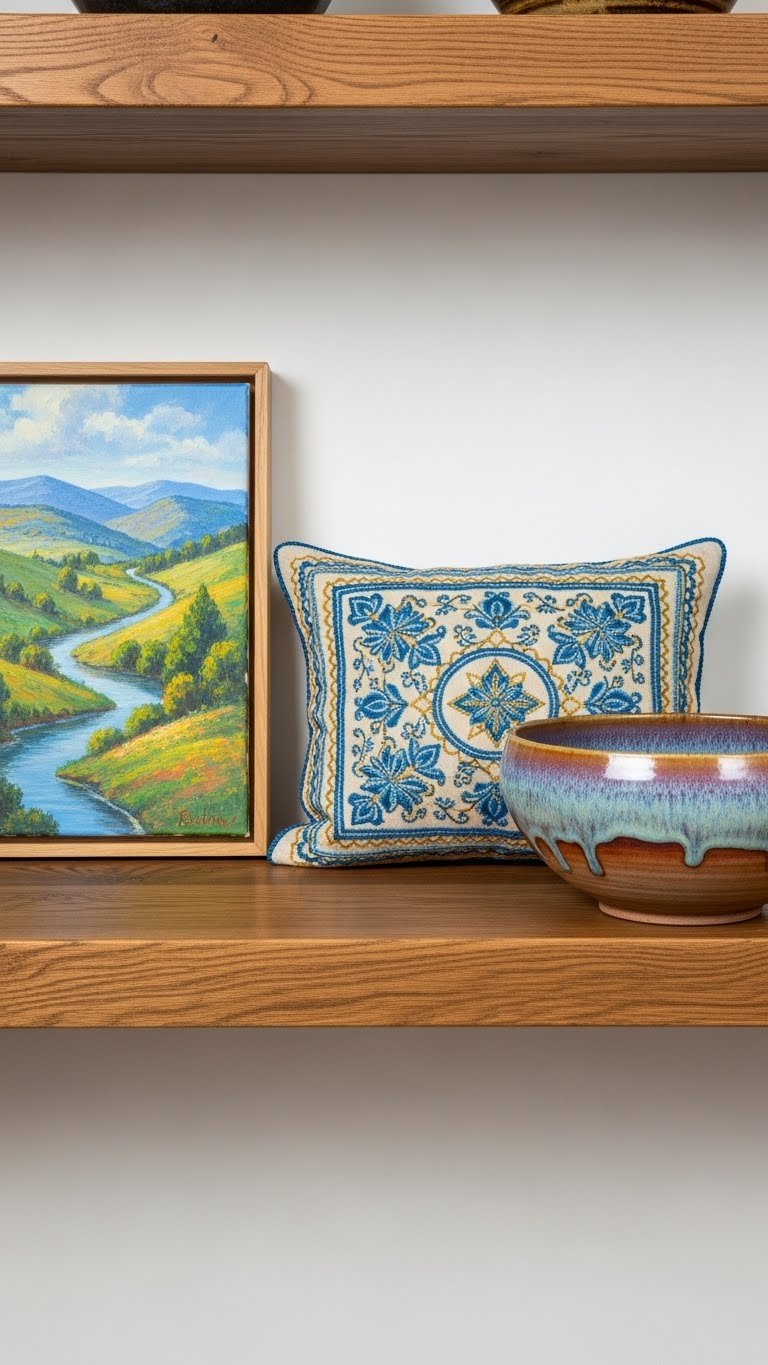
Works-in-progress pile up in dark corners and half-finished pieces sit in boxes for months. A dedicated display shelf for both active projects and finished pieces keeps momentum going and reminds you of what you’re capable of.
Use a $30-$80 floating shelf or repurpose a bookshelf you already own. Arrange projects so light hits them well and you can see details. Keep 3-5 active projects here at any time, rotating as you finish them. Photograph finished pieces before moving them so you have a visual record.
Pro tip: Rearrange this shelf monthly—seeing your own work in a new light sometimes sparks the next idea.
You’ll feel motivated by visual evidence of your progress instead of discouraged by invisible work. This becomes your own mini-gallery and proof that you are creating.
10. Use Adjustable Shelving for Supplies That Change
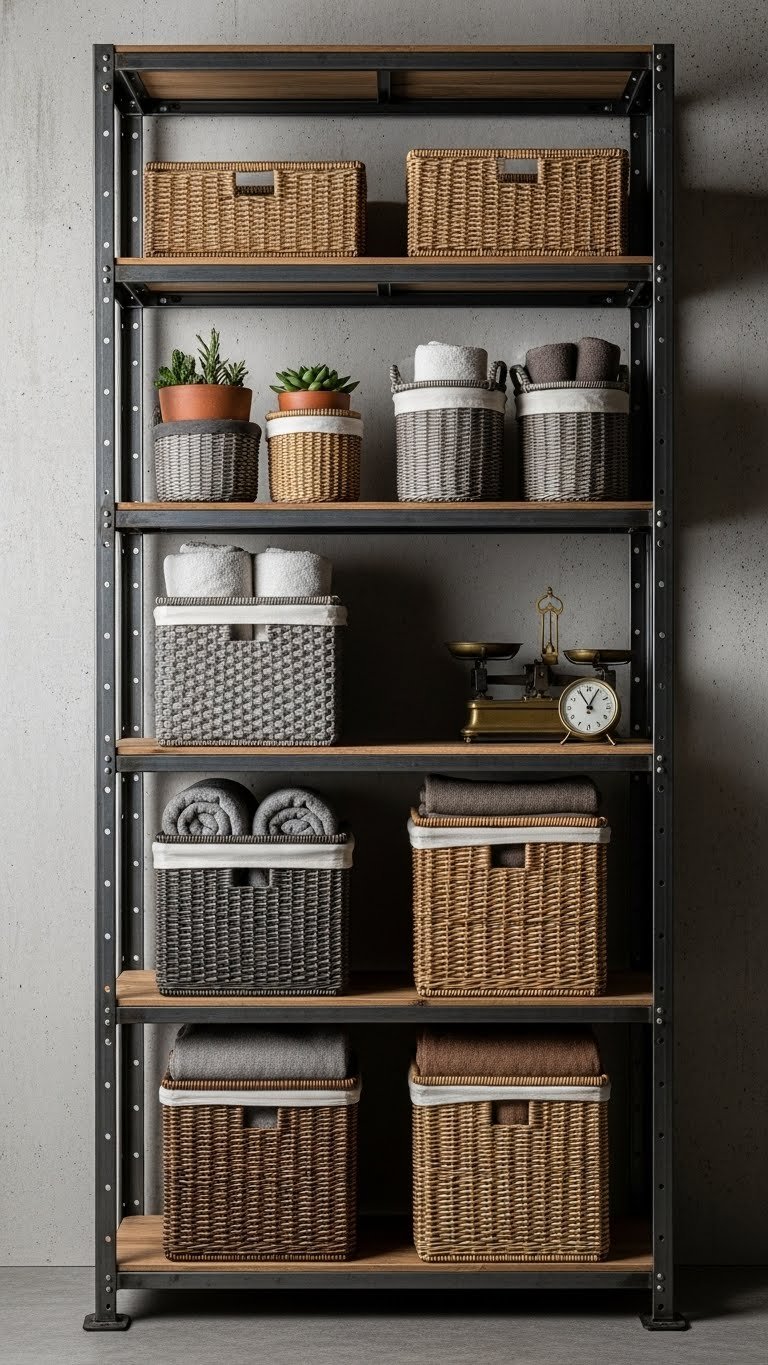
Fixed shelving wastes space when your supply collection changes or grows. Adjustable shelving adapts to what you actually need right now, whether you’re storing yarn, paint, wood, fabric, or a rotating mix.
Modular shelving systems range from $60-$200 at IKEA, Wayfair, or Home Depot. Choose open shelving if your supplies photograph well, or add $10-$30 baskets to corral items and hide clutter. Shelves are renter-friendly if you anchor them to studs or use brackets properly—check your lease first.
Pro tip: Label baskets on the front and side so you know what’s inside from multiple angles.
Your space adapts as your hobbies evolve instead of feeling cramped or wasted. You’ll use supplies more because you can actually see them.
11. Paint Your Walls a Soft, Focus-Friendly Color

Stark white walls feel cold and uninspiring; dark walls make small spaces feel cramped. A soft, muted color—sage, soft blue, warm gray, or pale yellow—supports creativity without being distracting.
Paint your main wall (or all walls) with quality interior paint ($30-$50 per gallon) in colors like Farrow & Ball “Pale Powder” or Benjamin Moore “HC-172 Healing Aloe.” You’ll need about 1.5-2 gallons for a small room. DIY with friends on a Saturday ($0 cost beyond paint) or hire pros ($200-$400 for a small room). Choose semi-gloss or satin finish so you can wipe smudges easily.
Pro tip: Paint one accent wall if committing to a color feels risky. You can always repaint.
You’ll notice your brain relaxes in this space instead of feeling overstimulated. The right wall color is like a soft background that lets your creative work take center stage.
12. Create a Small Library of References and Inspiration Books
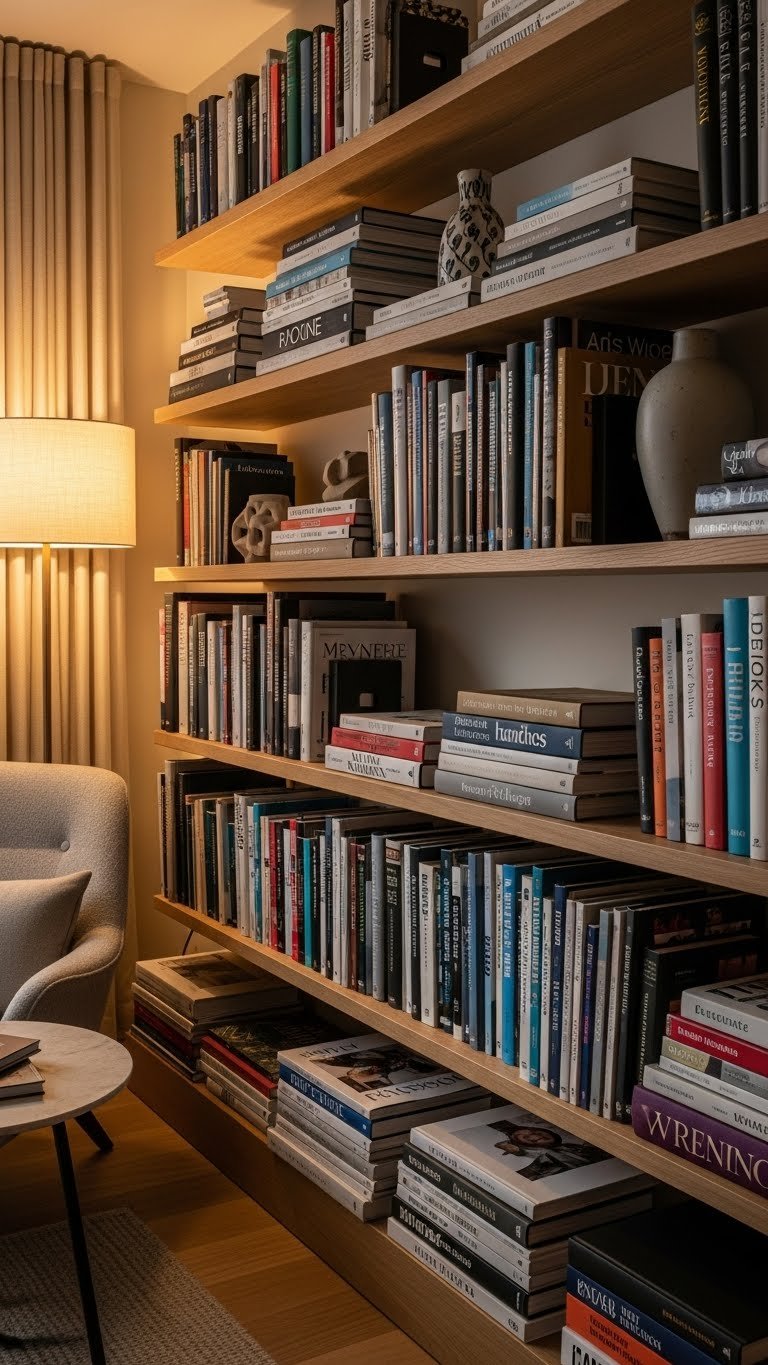
Digital inspiration is infinite but scattered. A small, curated collection of physical books and magazines keeps your best references right there without screen distraction or rabbit holes.
Gather 20-30 books and magazines that genuinely inspire you—art books, technique guides, design inspiration ($2-$15 each from thrift stores, used sites, or your library). Dedicate one shelf or small bookcase ($30-$80) nearby. Keep a notebook for quick sketches of ideas that pop up while browsing. This is not a library of every book—just your favorites.
Pro tip: Swap in new magazines or books quarterly so the collection stays fresh.
You’ll flip through these instead of mindlessly scrolling when you need a break, and you’ll often spark new ideas or remember forgotten techniques. Physical inspiration feels more grounded than endless digital options.
13. Install a Large Mirror to Amplify Light and Space

Small or dim hobby rooms feel claustrophobic. A large mirror opposite your light source doubles the brightness and makes the space feel bigger without any structural changes.
A large mirror ($40-$120) leans against the wall or mounts above a shelf or dresser. Position it to reflect your best light source—usually the window. Even a $20-$40 thrifted mirror works if you’re on a tight budget. This requires zero installation if you lean it instead of hanging.
Pro tip: Mirrors are especially helpful in spaces without windows or with only northern exposure.
Your space immediately feels more open and inviting. The extra light means you see your work better and feel more energized while creating.
14. Add Acoustic Panels or Soft Furnishings for Sound Control
Echo and external noise (neighbors, traffic, household sounds) make it hard to concentrate. Soft furnishings absorb sound, creating a quieter space where you can focus or play music without bothering anyone.
Add acoustic panels ($20-$60 each) designed to look like art, or simply layer rugs, curtains, and upholstered furniture ($0-$200 depending on what you add). Even a thick rug ($30-$80) and heavy curtains ($20-$50) make a noticeable difference. Position soft surfaces on hard walls and in corners where sound bounces.
Pro tip: A white noise machine or gentle background music ($15-$40) also helps mask distracting sounds.
You’ll find it easier to concentrate without constant interruptions. The quieter environment shifts your brain into creative mode faster.
15. Use Clear Storage Bins With Labels for Small Supplies
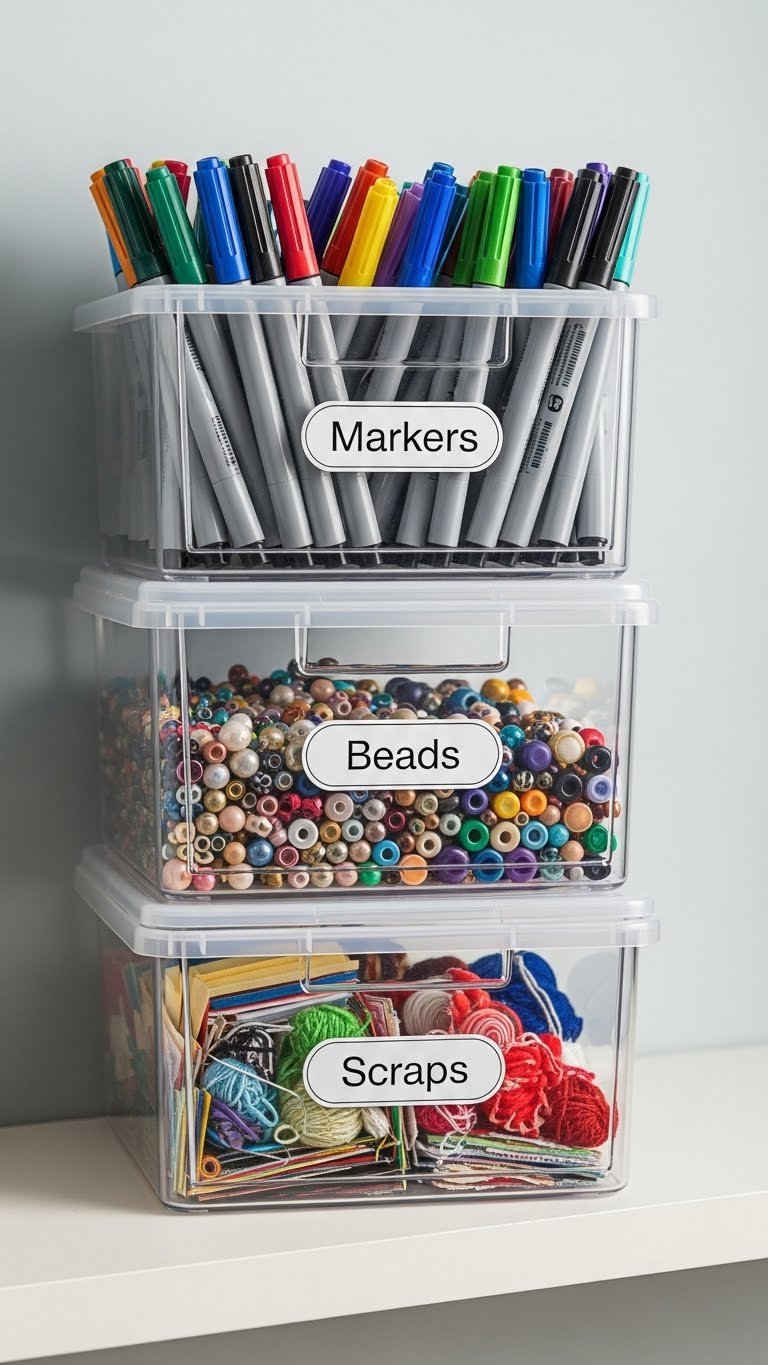
Small supplies—beads, buttons, thread, sketching pencils—scatter and get lost in regular drawers. Clear bins with labels let you see what you have at a glance and grab exactly what you need without hunting.
Grab 30-pack clear bins ($20-$40) from Container Store, IKEA, or Amazon, or repurpose jars and containers you have. Print or write durable labels ($5-$15) on each one. Group by material type or project category. Stock only active supplies so bins don’t get too crowded to see what’s inside.
Pro tip: Take a photo of each bin’s contents and tape it to the outside so someone else (or future you) knows what’s stored.
You’ll use supplies more when you can actually see what you have. The visual organization makes your whole space feel calmer and more intentional.
16. Set Up a Photo Corner for Documenting Your Work
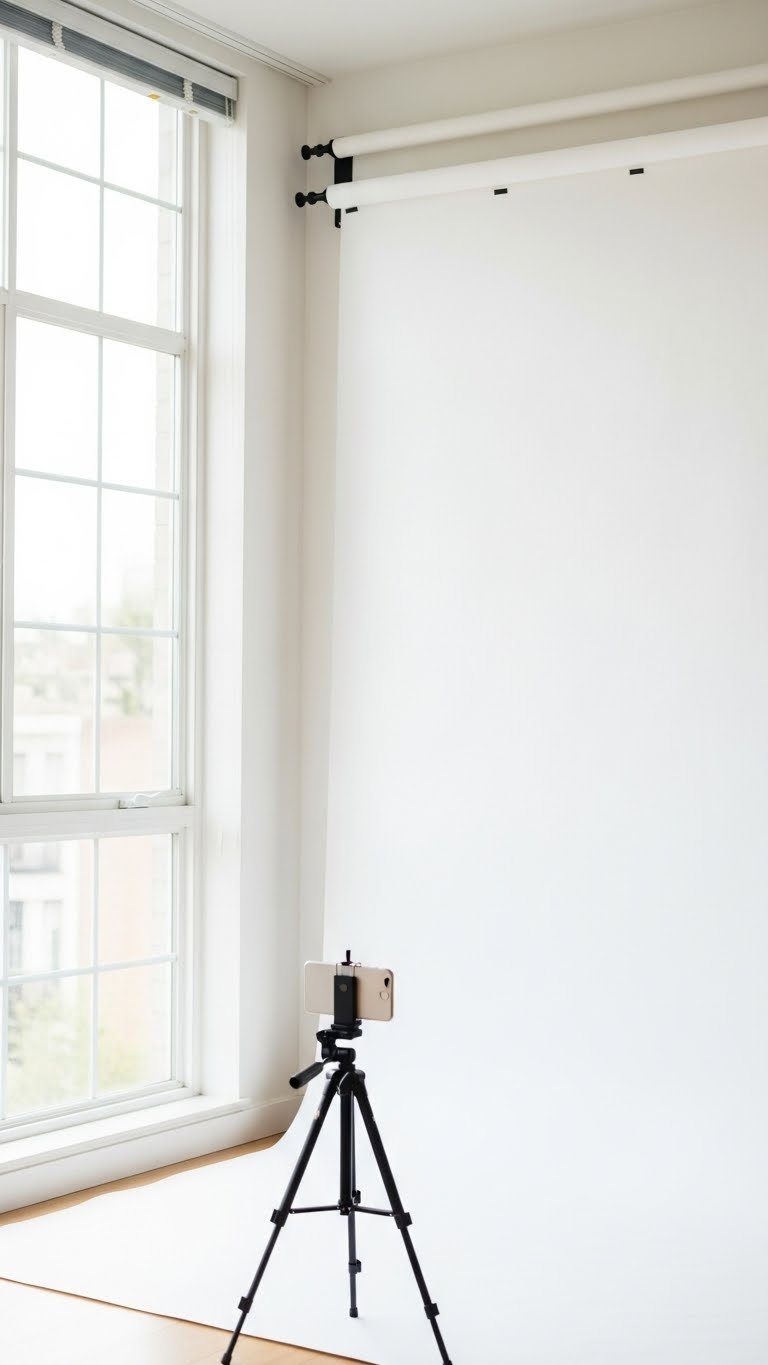
You finish something beautiful and it disappears into a drawer because you never photographed it. A simple photo corner lets you document your work with natural light and a clean background, building a visual portfolio.
Use a white or neutral fabric ($10-$20) pinned to the wall or hung on a clothesline as a backdrop. Position a phone tripod ($15-$40) nearby. Work near your window for the best light. No professional camera needed—your phone is perfect. Takes 10 minutes to set up the first time.
Pro tip: Batch-photograph projects weekly so they’re documented immediately instead of forgotten weeks later.
You’ll have a visual record of what you’ve created, which is both motivating and useful for social media, portfolios, or simply remembering your own ideas. Finishing something and photographing it adds closure.
17. Create a Dedicated Space for Messy Projects

Some hobbies are messy—painting, dyeing, sculpting—and mixing them with clean work creates stress. A dedicated messy corner with protective surfaces and easy cleanup means you can create without worrying about destroying your space.
Use a drop cloth or plastic sheeting ($10-$30), designate an old table or card table ($20-$50), and stock heavy-duty paper towels and a waste bin nearby. Keep this area separate from your clean desk. Set firm boundaries so mess doesn’t spread. Consider washable paint for your walls in this zone if you rent.
Pro tip: Use a shower caddy ($10-$20) to corral messy supplies so they don’t spread throughout your whole room.
You’ll be bolder with messy projects knowing you have a contained space. The separation of clean and chaotic zones means your whole room doesn’t feel chaotic.
18. Hang Your Most-Used Tools at Eye Level
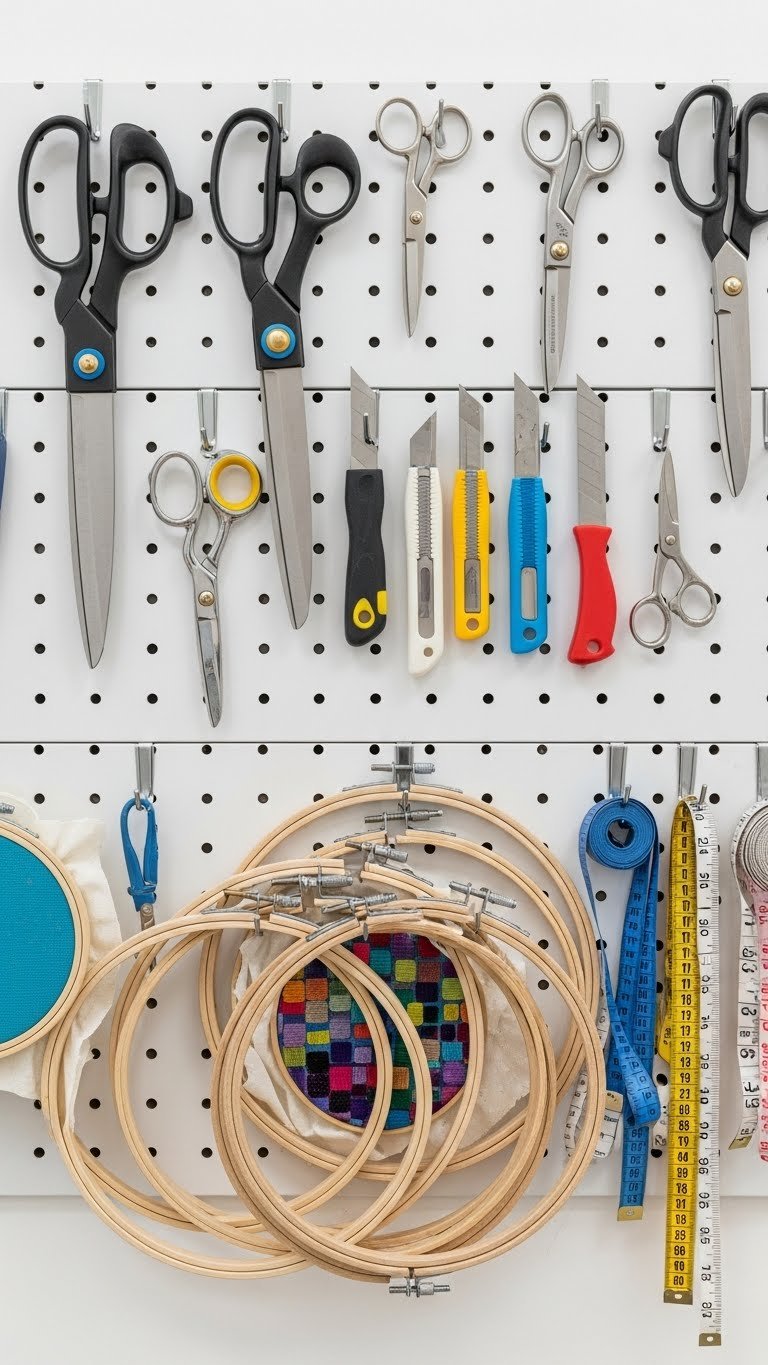
Digging through jars or drawers for frequently-used tools burns time and breaks focus. Hanging your top 5-10 most-used tools at eye level saves seconds that add up to hours over a month.
Install simple hooks or a pegboard section ($10-$30) at eye level on your wall. Choose the tools you reach for multiple times per session—scissors, measuring tape, brushes, embroidery hoops, whatever applies to your work. Everything else can stay in bins or drawers.
Pro tip: Keep a small basket nearby for tools you’re using in the current project so they’re even more accessible.
You’ll notice a significant speed bump in your workflow. Reaching for what you need becomes automatic instead of a hunt.
19. Add a White Noise Machine or Background Music Setup
Silence can feel awkward; distracting household noise breaks flow. White noise or gentle background music keeps your mind engaged without demanding attention, helping you settle into creative work faster.
A basic white noise machine ($25-$50) or affordable Bluetooth speaker ($30-$80) works well. Download free white noise apps or create playlists on Spotify. Experiment with lo-fi beats, nature sounds, ambient music, or silence to see what helps your focus.
Pro tip: Keep a dedicated charging station ($15-$30) so your speaker is always ready.
The right sound environment helps you drop into creative flow faster. You’ll notice deeper focus and longer work sessions. What seemed like a luxury becomes essential to your creative practice.
20. Use Vertical Space With Wall-Mounted Shelves

Horizontal storage eats up floor and desk space. Wall-mounted shelves keep supplies and finished work visible and accessible while freeing up room to actually move and create.
Install floating shelves ($40-$120 for a set of three) at varying heights using proper brackets and wall anchors. Position them within arm’s reach of your work surface. Start with shelves 12-18 inches deep so they don’t protrude too far. Renter-friendly if mounted to studs; check your lease first.
Pro tip: Mix practical storage with beautiful displays so your shelves serve both function and aesthetics.
Your room instantly feels larger and more organized. Supplies are visible but stored vertically, so you aren’t constantly moving piles around.
21. Paint a Feature Wall With Chalkboard or Whiteboard Paint
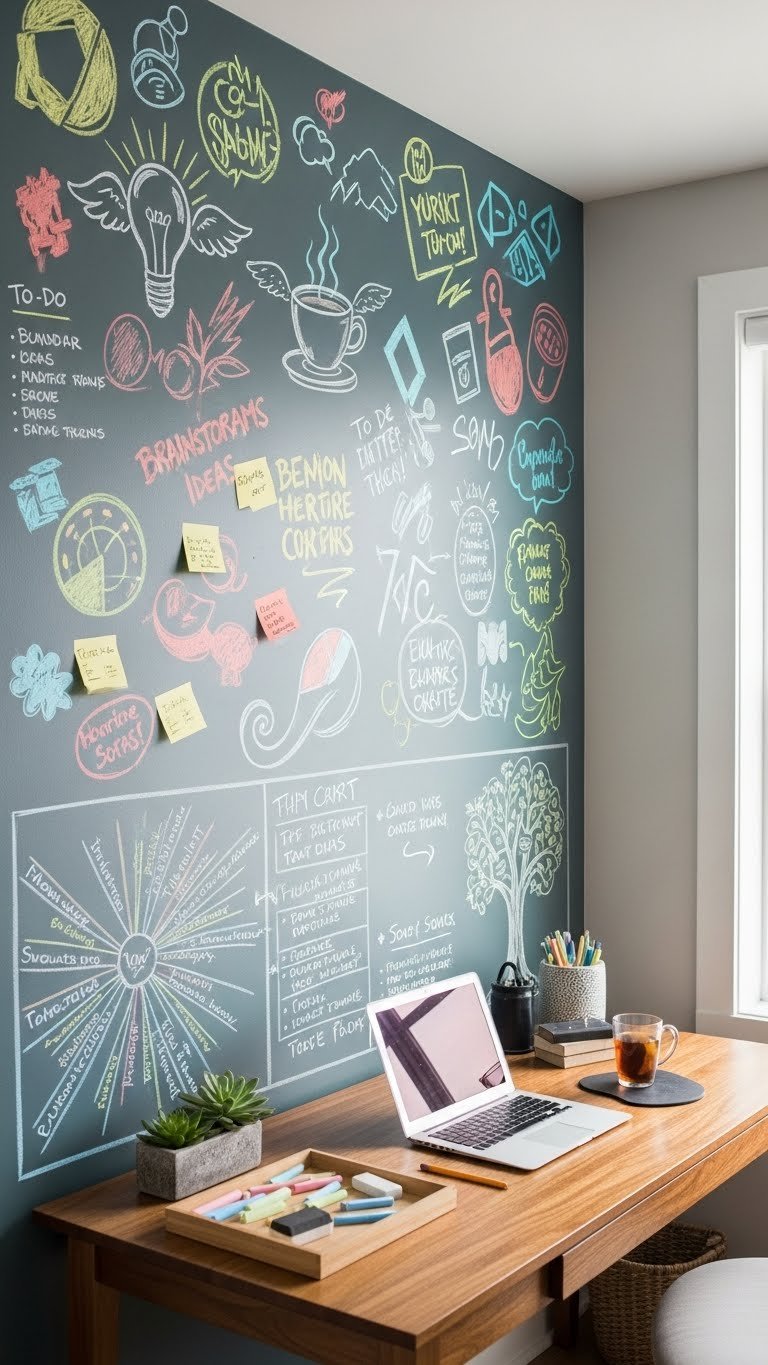
Inspiration strikes and you need to capture ideas quickly, but notebooks get buried or lost. A chalkboard or whiteboard wall lets you sketch, plan, and brainstorm directly without hunting for paper—and erase when you’re done.
One gallon of chalkboard paint ($20-$40) or whiteboard paint ($25-$50) covers roughly 400 square feet—enough for a feature wall. Paint over one wall or just a 3’x4′ section. Prime first if painting over existing color. Pair with inexpensive chalk or dry-erase markers ($5-$15). It takes one afternoon to paint.
Pro tip: Use whiteboard paint for a cleaner look, or chalkboard for a more artistic vibe. Whiteboard is easier to maintain.
You’ll sketch out ideas the moment they arrive instead of scrambling for paper. This becomes your planning surface, brainstorm wall, and inspiration board rolled into one.
22. Invest in a Small Humidifier for Year-Round Comfort
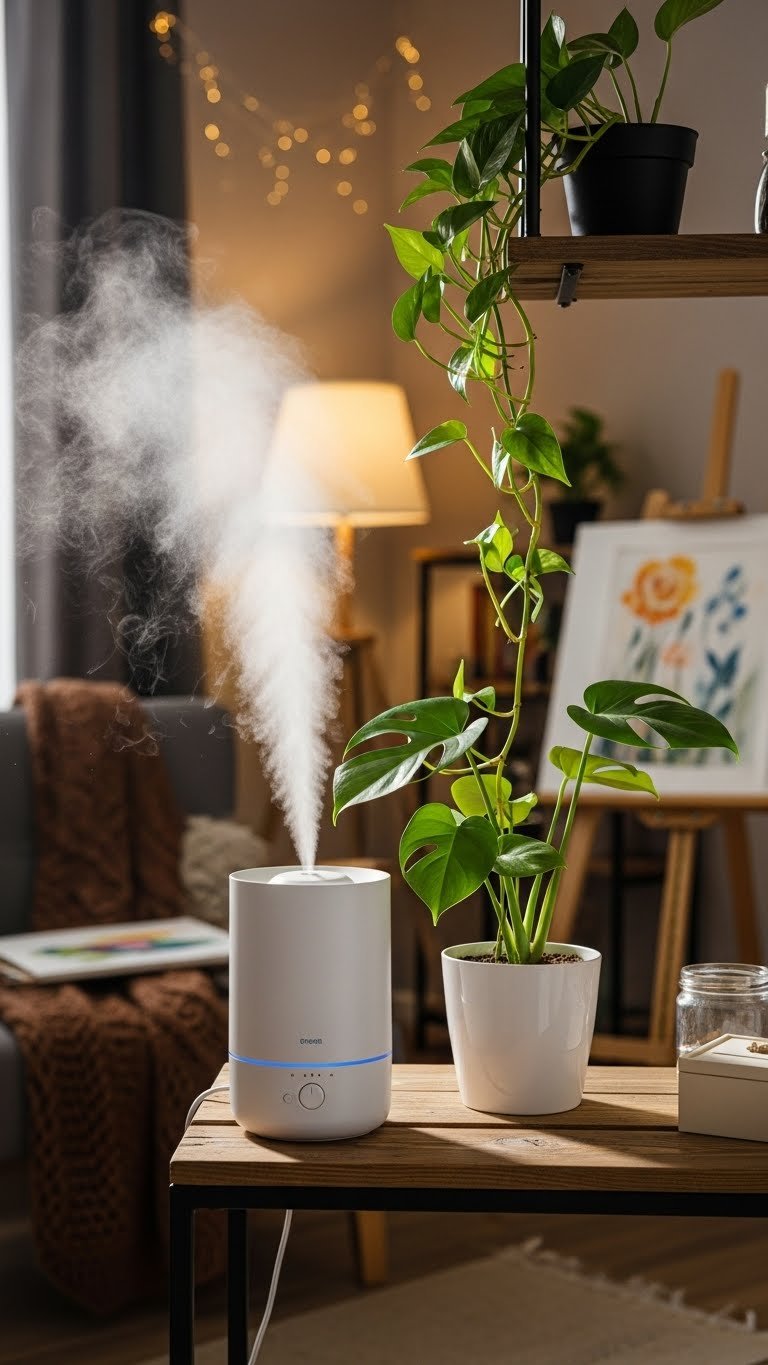
Dry air (especially in winter or air-conditioned spaces) makes you uncomfortable and can damage certain supplies—paper warps, paint dries too fast, wood cracks. A small humidifier keeps your space and supplies at a comfortable humidity level.
A compact humidifier ($30-$60) runs quietly on your shelf or desk. Use distilled water and clean it weekly. Pair with a small hygrometer ($10-$20) to monitor humidity levels. Aim for 40-60% relative humidity. This is especially helpful if you work with watercolor, woodworking, or delicate materials.
Pro tip: Place it away from your work surface so the mist doesn’t dampen your supplies or finished work.
You’ll stay more comfortable while creating, and your materials will hold up better over time. Small environmental controls make a bigger difference than you’d expect.
23. Create a “Done” Bin for Completed Projects
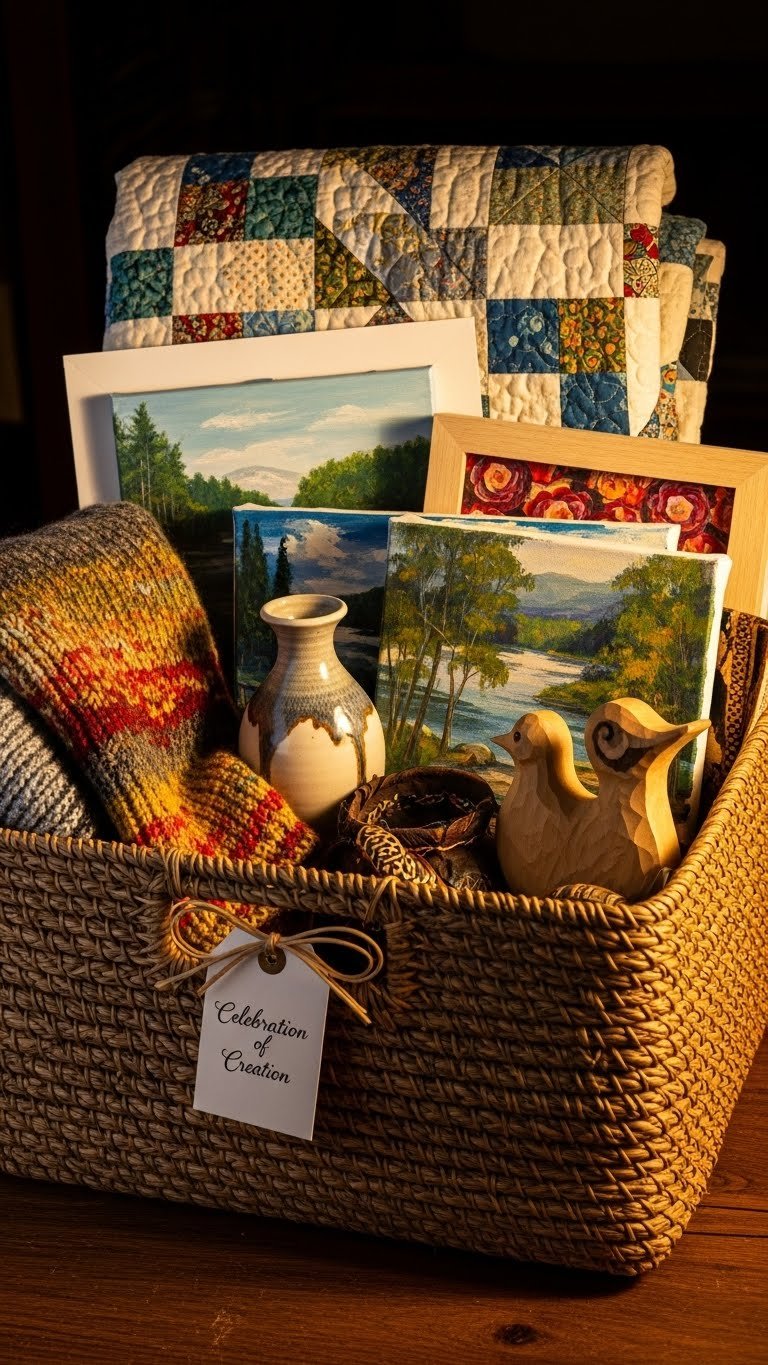
Half-finished projects pile up and completed ones get shoved in bags because there’s no home for them. A “Done” bin holds finished work so you can assess what you’ve created, decide next steps (gift, sell, donate, keep), and make room for new projects.
Use a medium-sized bin or basket ($20-$50) labeled clearly. Once it’s full, sort contents—give as gifts, photograph for portfolios, donate, or keep only your absolute favorites. This prevents accumulation and forces a monthly reset. Empty it every 4-6 weeks.
Pro tip: Before storing in the “Done” bin, photograph each finished piece for your records.
You’ll feel a real sense of accomplishment seeing a full bin of completed work. The visual proof that you finish things keeps motivation high for the next project.
24. Set Up a Small Rug to Define Your Creative Zone

If your hobby room shares space with other functions (bedroom, living room), it’s hard to feel “in the zone.” A rug visually and physically defines your creative territory, signaling to your brain that this is a sacred space.
Choose a durable, washable rug ($40-$100) that fits under at least part of your work surface and seating. Natural fiber (jute, sisal) or synthetic blends both work. Size matters—at least 5’x7′ for a proper zone, or 3’x5′ for smaller spaces. Anchor it with a non-slip rug pad ($10-$20) so it doesn’t shift.
Pro tip: Choose a color that either complements your wall color or adds warmth if walls are cool-toned.
Stepping onto your rug signals the start of creative time. This small boundary creates a psychological shift that helps you drop into focus faster, and it also absorbs sound and defines the space beautifully.
25. Add a Small Side Table for Current Projects or Snacks
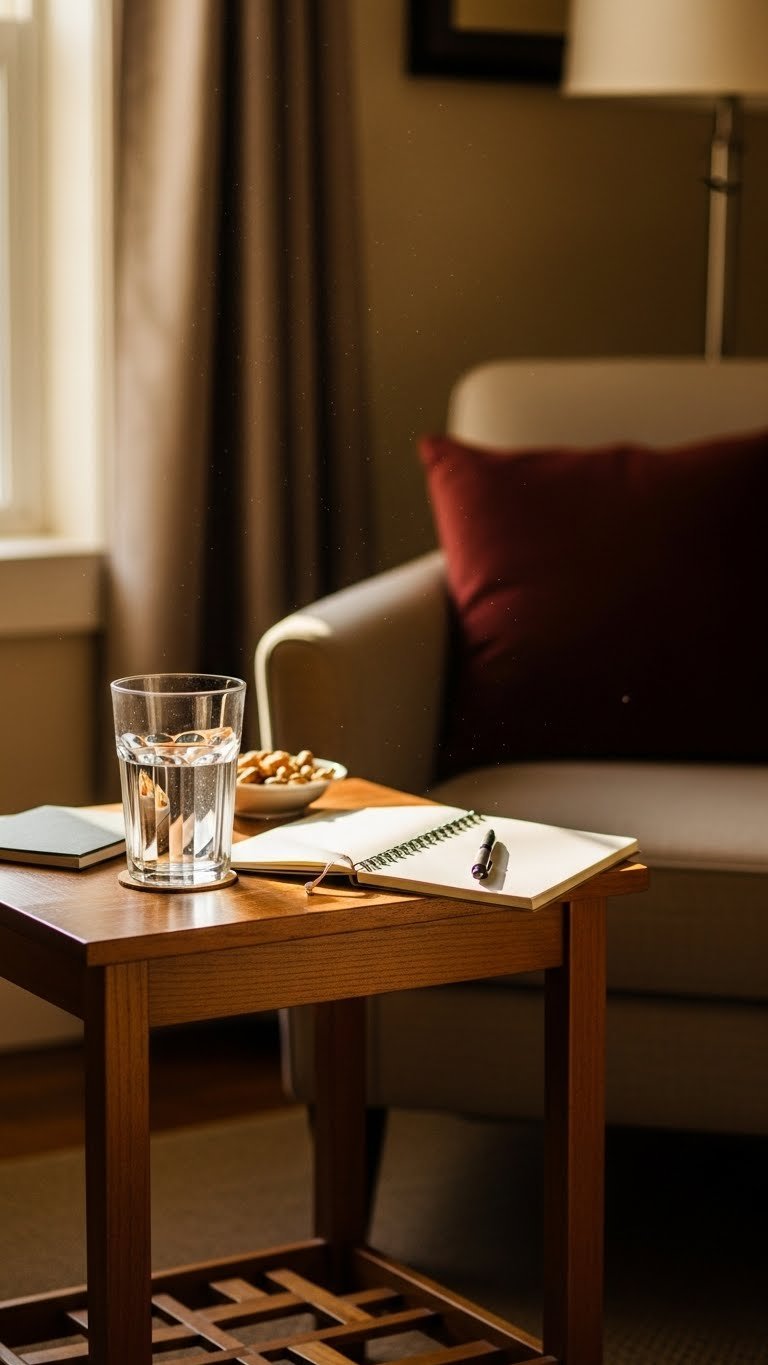
Long creative sessions are hard to sustain when you have to get up constantly for water, snacks, or a place to set down half-finished work. A small side table keeps essentials within arm’s reach so you stay in your zone longer.
A simple side table ($30-$80) from IKEA, Target, or thrift stores works perfectly. Keep it stocked with water, a small snack, your current sketch or reference, and a notebook for ideas. Position it next to your main seating or work surface. This takes zero installation.
Pro tip: Use a small tray ($10-$20) on top to corral items so they don’t scatter.
You’ll stay engaged in your creative work instead of jumping up for water or food every 15 minutes. The simple act of having essentials nearby extends your focus time significantly.
26. Create a Monthly “Reset Ritual” to Keep Your Space Fresh

Hobby rooms drift into chaos without regular maintenance. A simple monthly ritual—15-30 minutes to organize, clean, and assess what’s working—keeps your space functional and inspiring instead of overwhelming.
Pick one day each month to tidy, sweep, wipe surfaces, reorganize supplies, and evaluate what you’re using versus hoarding. Move finished projects to your “Done” bin. Delete or rearrange inspiration boards. Refresh that water in your supplies. Set a calendar reminder so you don’t forget. This takes one weekend afternoon per month.
Pro tip: Invite a friend over for “hobby room maintenance day” to make it fun and get a second set of eyes on the space.
Your room stays aligned with how you actually create instead of drifting into mess and overwhelm. This small ritual prevents burnout and keeps motivation high by maintaining an intentional, supportive space.
Save this post for your next hobby room setup and try just one or two ideas this week—you don’t need all 26 at once. Which idea are you tackling first? Share this with anyone else building their creative sanctuary.
Leave a Reply