
Laundry day doesn’t have to be a rushed chore squeezed into your evening. With the right folding station setup, you can actually make this task faster, easier, and even enjoyable. A dedicated folding space transforms how you approach laundry—giving your back relief, keeping clothes organized, and making the whole process less chaotic. Whether you’re working with a sprawling laundry room or a compact apartment corner, these 25 ideas will help you build a folding station that fits your space, your budget, and your lifestyle. Let’s get started.
1. Install a Wall-Mounted Drop-Down Folding Table
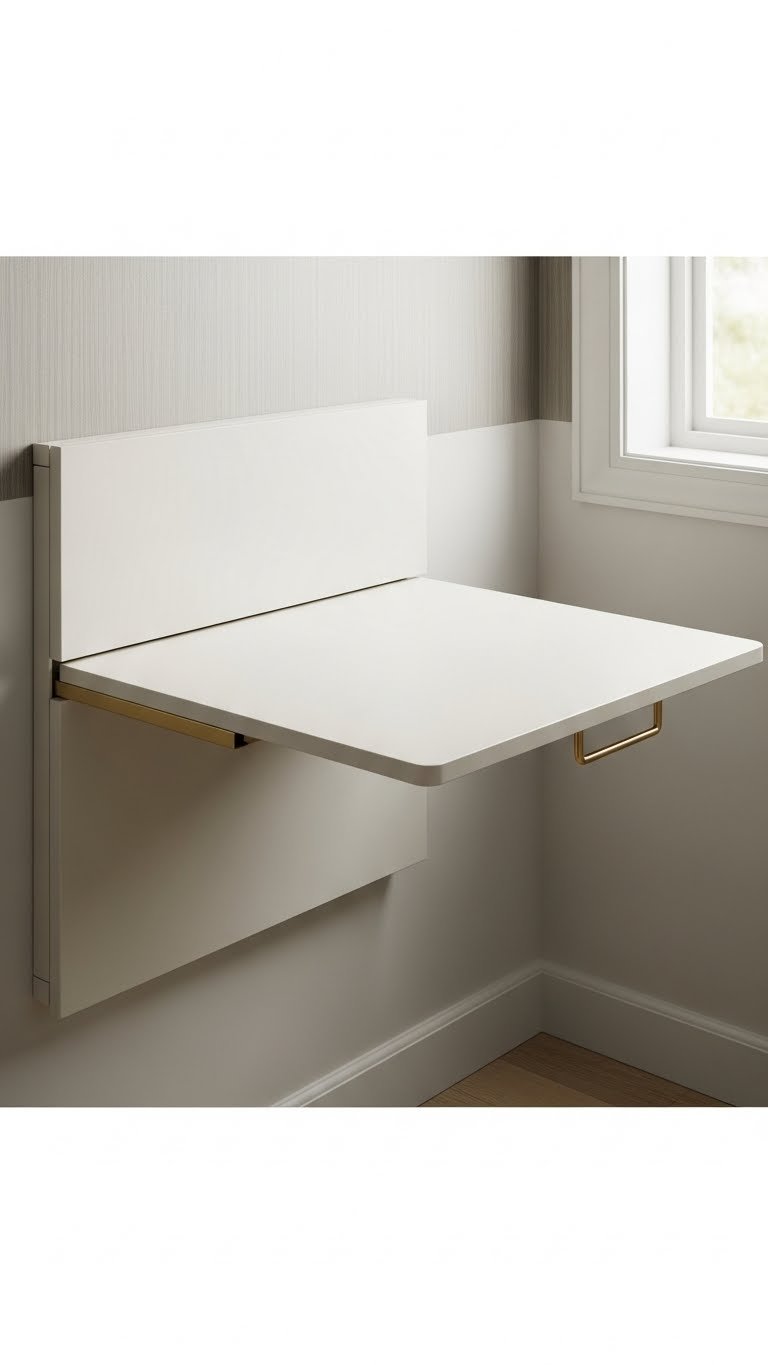
A wall-mounted drop-down table is a game-changer for renters and homeowners with tight spaces. When folded up, it takes up almost no room; pulled down, it gives you a full-sized work surface at perfect elbow height.
You can find sturdy options at IKEA, Home Depot, or Amazon starting around $80–$150. Installation takes about 30 minutes with basic tools (drill, wall studs, level). Look for tables that lock securely in both open and closed positions—safety matters. Pro tip: Mount it at 34–36 inches high to minimize strain on your back while standing.
Once closed, your wall looks clean and minimal, but you’ve got a professional-grade folding station ready whenever you need it.
2. Create a Floating Countertop Over Your Washer and Dryer
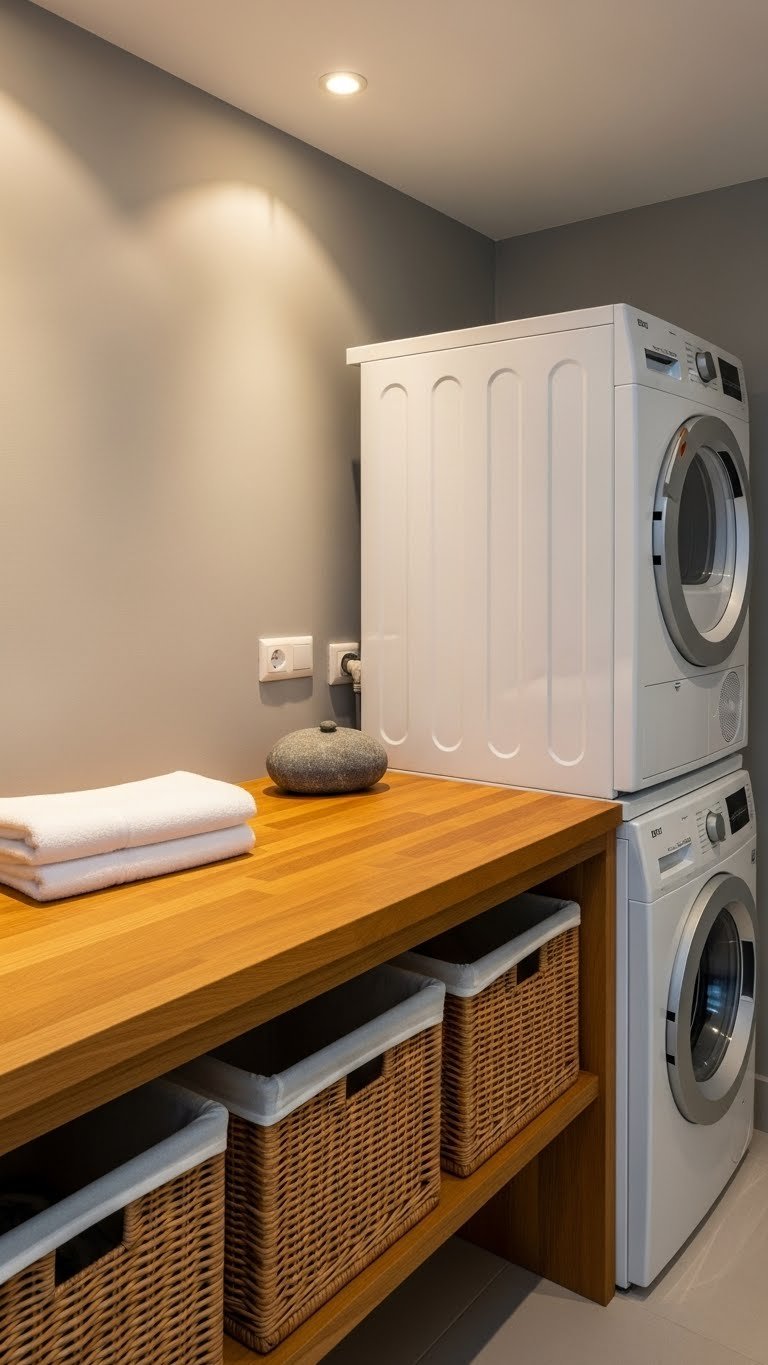
If your washer and dryer are stacked or positioned side-by-side, a floating countertop turns dead space into a useful folding area. This is an investment piece but worth every penny for convenience.
Solid wood or laminate countertops range from $200–$600 depending on depth and finish. You’ll need a handyperson or carpenter to install (budget $150–$300 for labor). The surface should extend at least 24 inches deep to give you real working room. Some people pair this with open shelving underneath for basket storage.
You gain a dedicated folding zone without eating into floor space, plus a spot to rest clean laundry baskets while you sort.
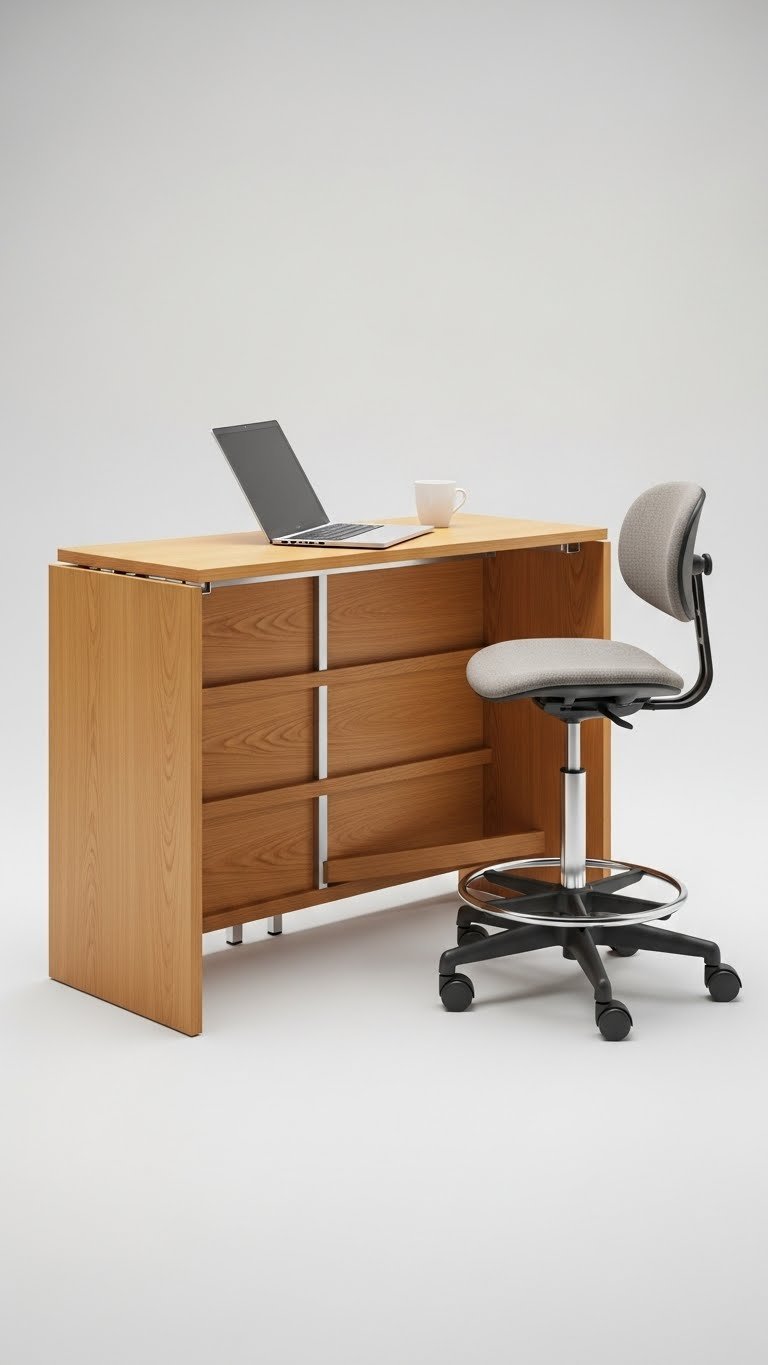
3. Use a Large Dresser as a Folding Station
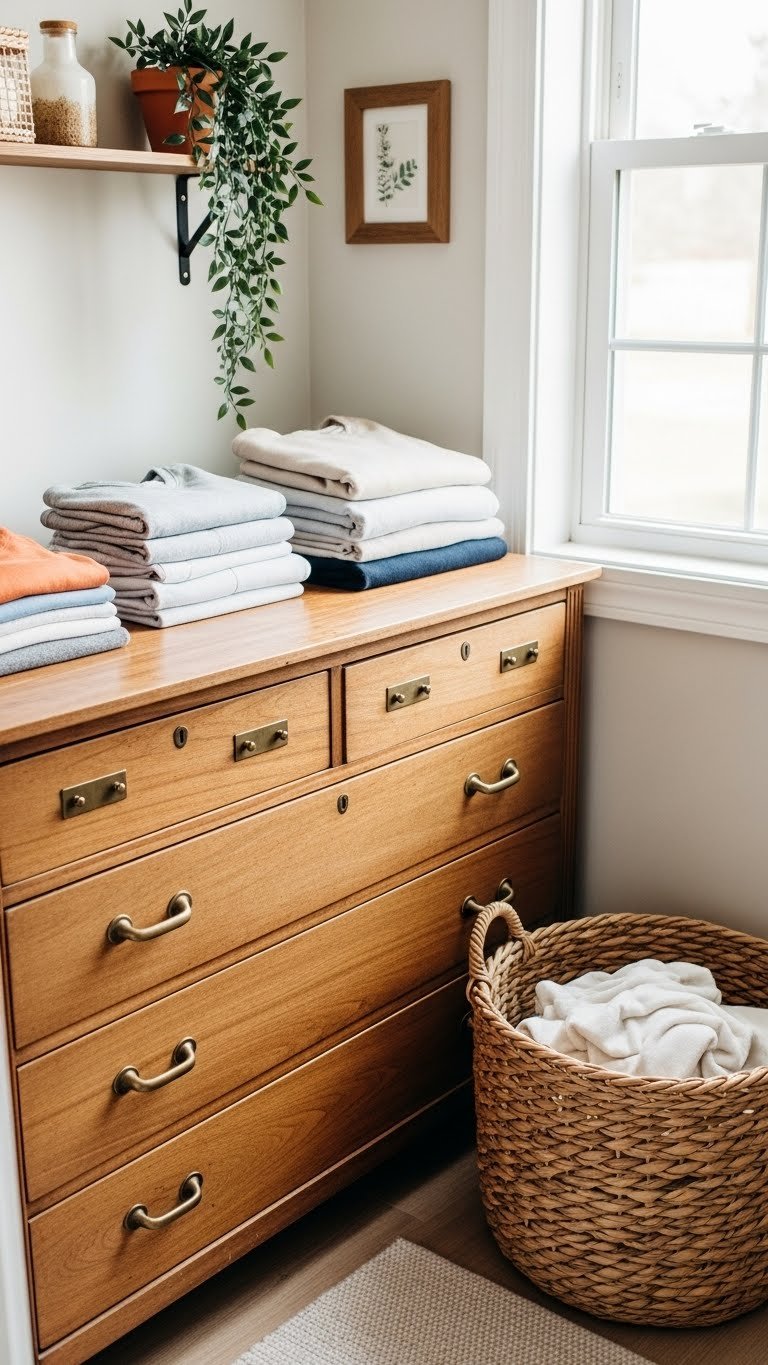
This is the budget-friendly hack that actually works. A dresser—thrifted, inherited, or from a secondhand store—becomes the perfect folding surface with built-in storage underneath for linens and seasonal items.
Hunt for one at thrift stores, Facebook Marketplace, or Craigslist for $30–$150. Look for sturdy wood construction and a flat, smooth top surface (avoid heavily textured finishes). A quick wipe-down and maybe a coat of paint or stain takes an afternoon. Pro tip: Roll it on lockable caster wheels ($20–$40) so you can move it when you need floor space.
You’ve created a charming, functional folding station with serious storage underneath—and paid a fraction of what new furniture costs.
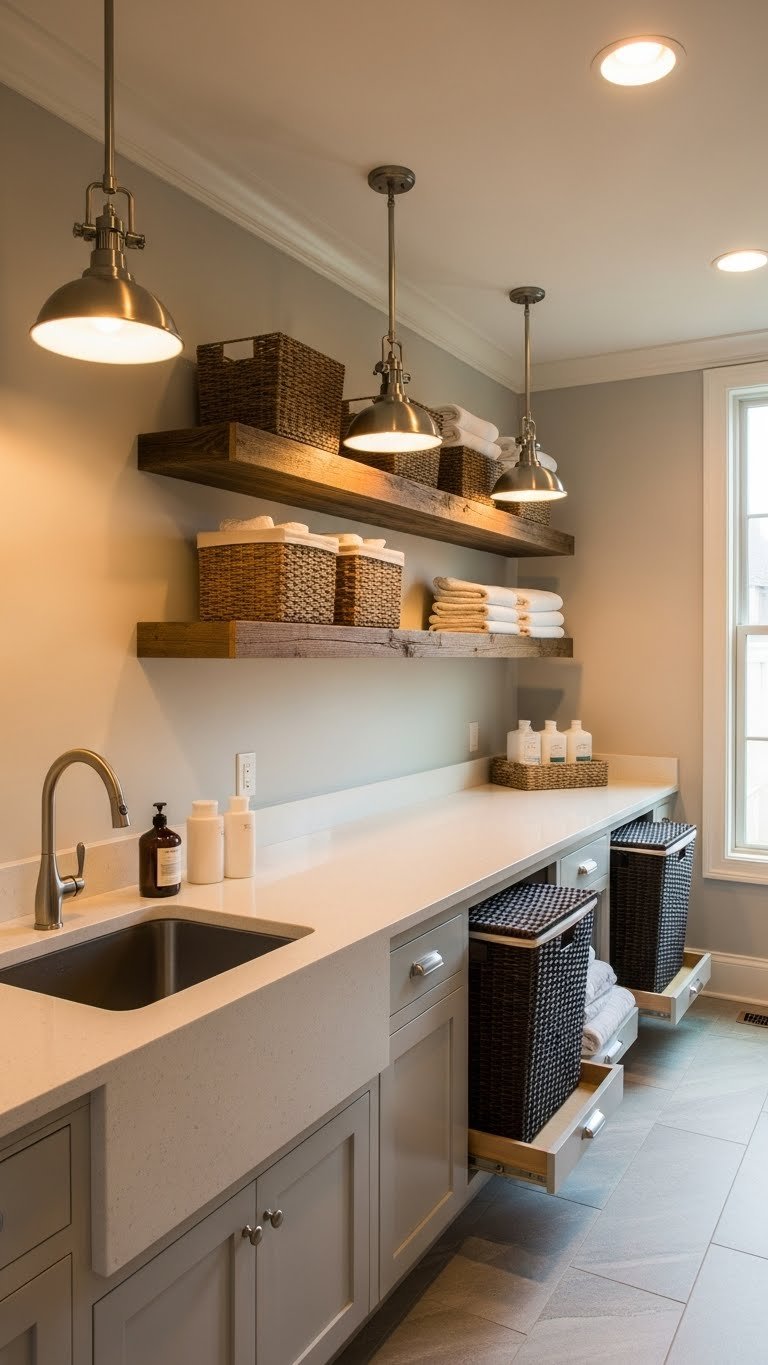
4. Mount Floating Shelves Above Your Folding Counter
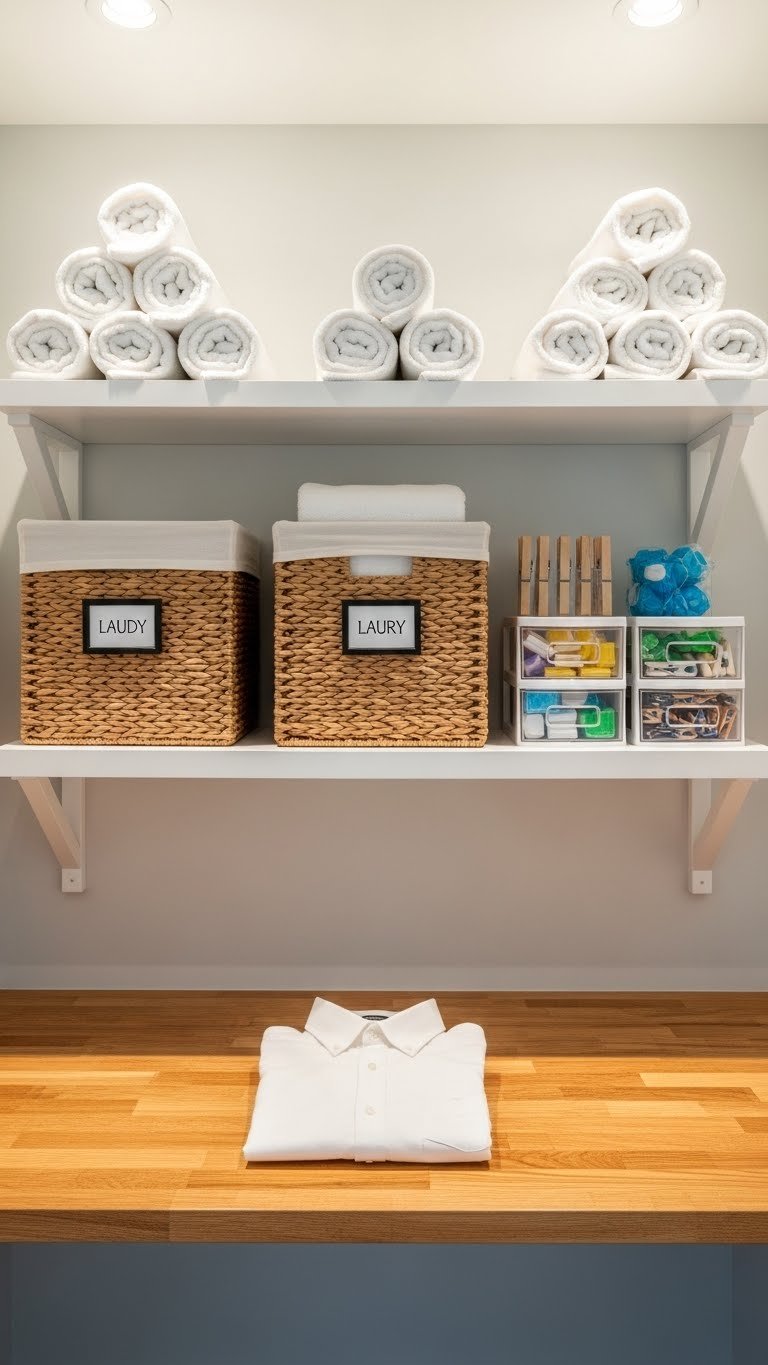
Vertical storage keeps supplies within arm’s reach and makes your station feel intentional rather than cluttered. Floating shelves above your folding counter hold rolled towels, stain treatments, lint rollers, and baskets.
Install 2–3 shelves at 12–18 inches apart using a wall stud finder and heavy-duty brackets. IKEA, Target, and Home Depot have basic options for $20–$50 per shelf, with installation taking about 1–2 hours. Load-bearing capacity matters—check limits before loading. Pro tip: Use matching bins or woven baskets on shelves to contain small items and look visually cohesive.
Now everything you need is visible and reachable without leaving your folding station, cutting your chore time significantly.
5. Add LED Task Lighting Directly Above Your Work Surface

Poor lighting makes folding harder and strains your eyes. LED task lighting positioned directly above your folding counter changes everything—you see stains, colors, and wrinkles clearly, and you work faster.
Pendant lights ($40–$120 per fixture) or under-cabinet LED strips ($25–$60) both work well. Installation depends on whether you have electrical access; if not, battery-operated LED strips ($15–$30) are renter-friendly. Use 4000K–5000K bulb temperature for natural, energizing light that won’t cast shadows. Time to install: 30 minutes to 2 hours depending on wiring.
You’ll notice the difference immediately—sorting is faster, you catch stains you’d miss in dim light, and the space feels more purposeful.
6. Invest in an Adjustable-Height Folding Table
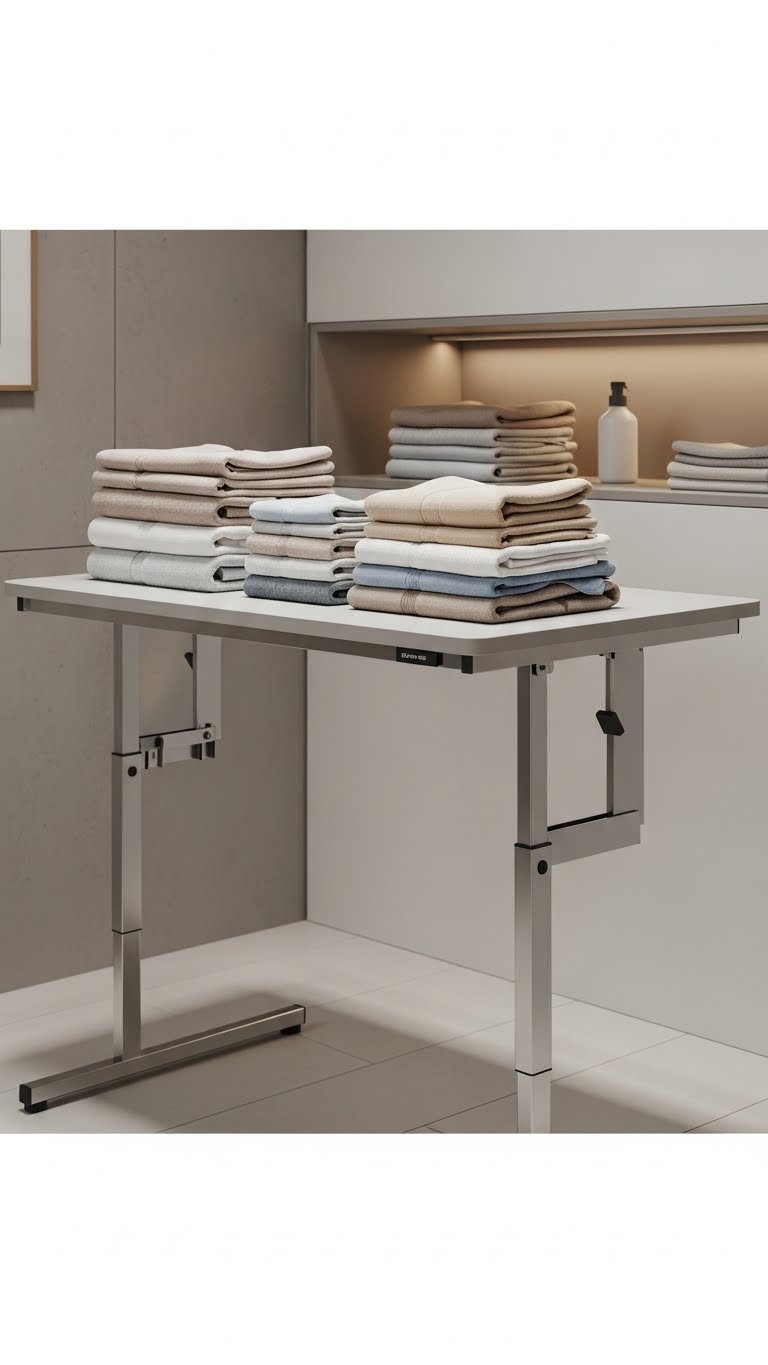
An adjustable-height table lets you customize your working comfort. If you fold sitting down sometimes and standing other times, or if multiple household members are different heights, this solves the problem.
Electric adjustable tables run $300–$800 (brands like FlexiSpot make laundry-room versions), while manual crank models cost $150–$300. Look for weight capacity of at least 150–200 lbs and smooth adjustment mechanisms. Installation takes 30–45 minutes and mostly involves assembling the base. Pro tip: Set your ideal standing height at 30–34 inches and remember it for future reference.
You get a personalized folding experience that reduces back strain and adapts to however you prefer to work.
7. Hang a Fold-Down Wall Desk Above Appliances
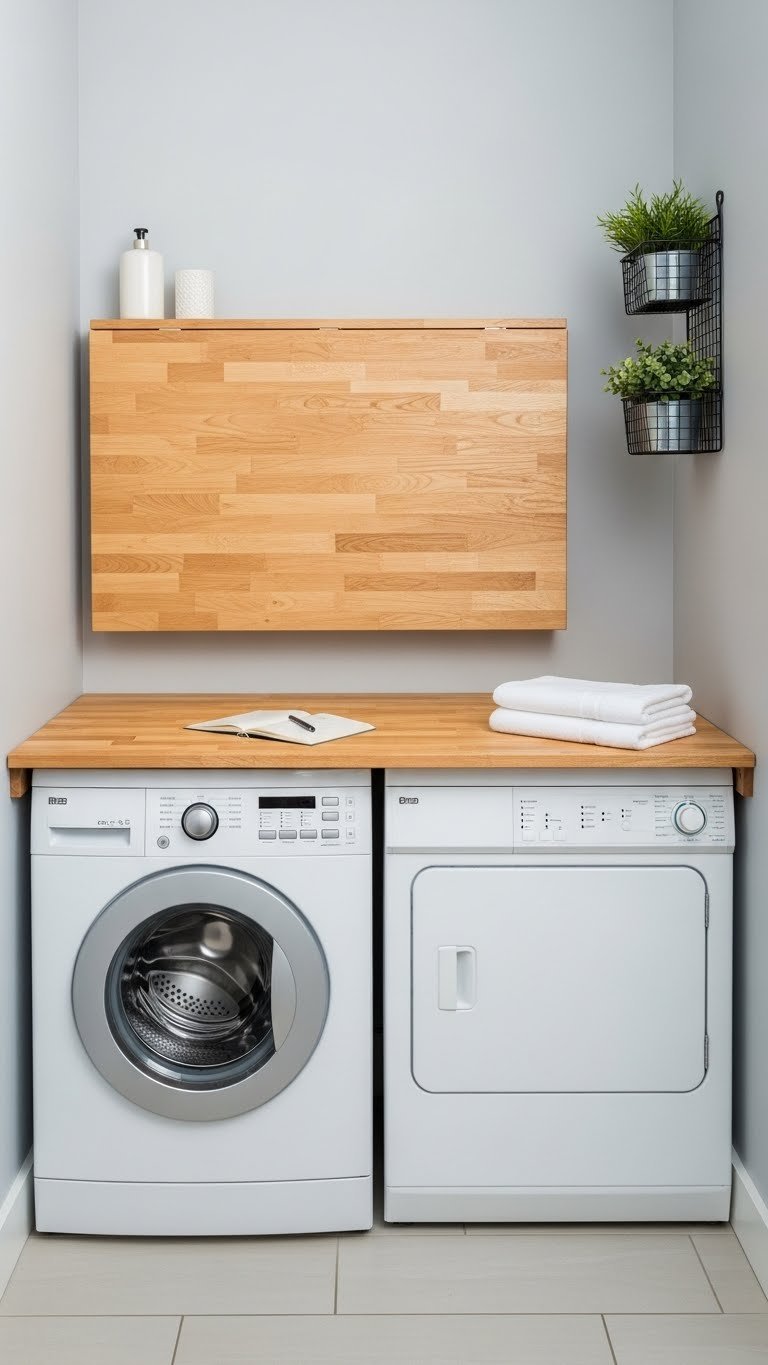
Similar to a drop-down table, but smaller and more minimal—a wall desk creates a folding surface where you had none. Ideal for apartments and studios where floor space is precious.
Wall-mounted desks cost $60–$180 from IKEA, Wayfair, or Amazon. They’re lighter than full folding tables, so installation with wall anchors (if not hitting studs) is often simpler—20–30 minutes. Maximum surface area is usually 24–36 inches wide, so it’s perfect for one person folding at a time. Pro tip: Add a cushioned mat on top to make standing more comfortable during longer sessions.
You transform an unused wall into a functional work zone that disappears when not in use.
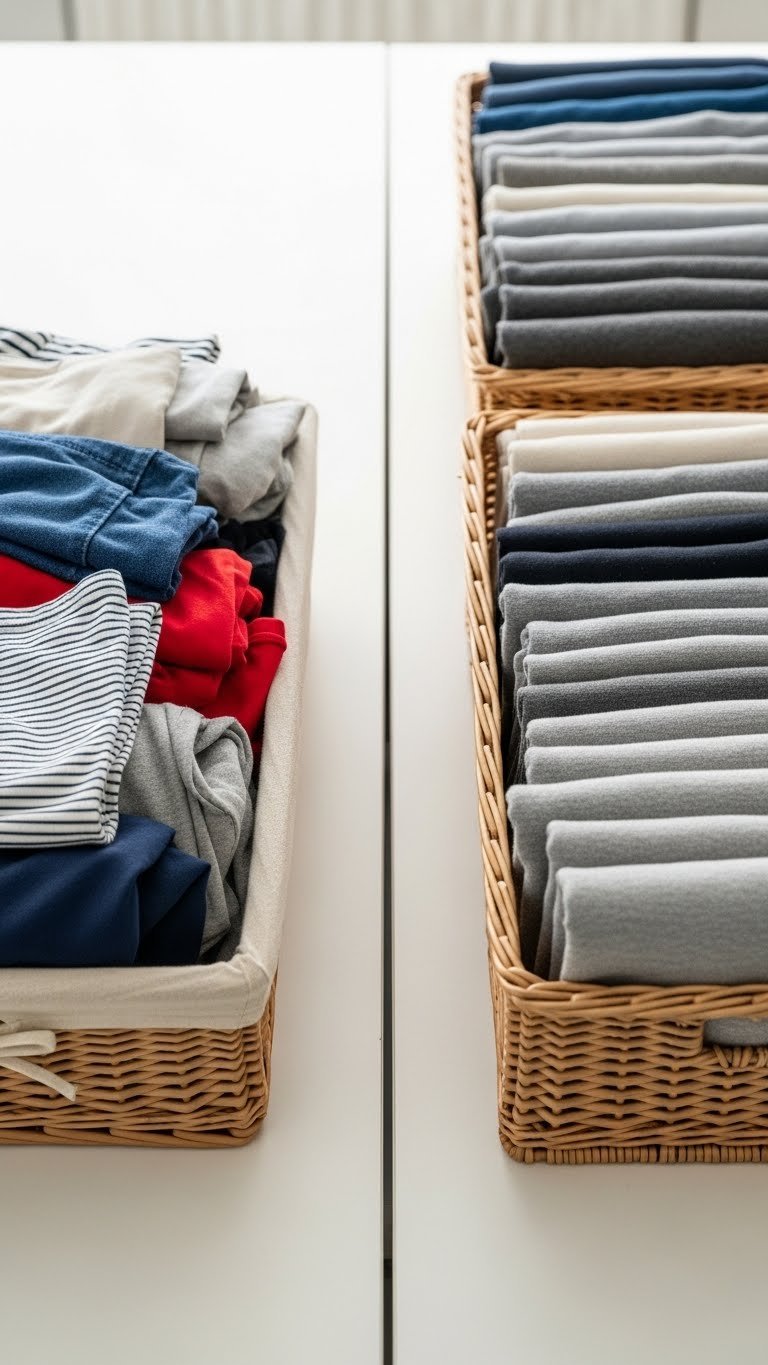
8. Create a Pull-Out Hamper-to-Basket System
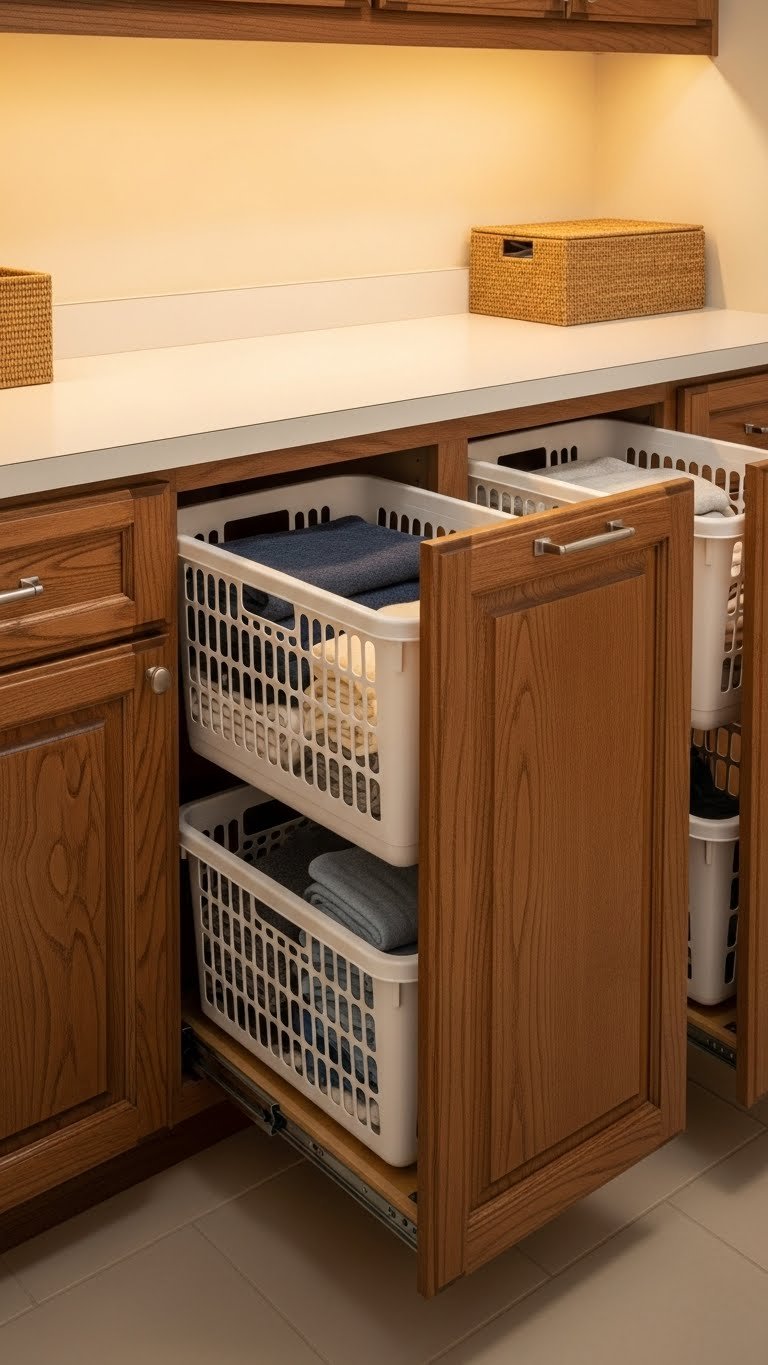
Having separate baskets for clean, folded, and ready-to-put-away items keeps your folding station organized and speeds up the whole process. Pull-out hampers built into cabinetry make sorting effortless.
You can buy ready-made pull-out basket systems ($80–$250 per set of 2–3) from Container Store, Wayfair, or Home Depot, or have a carpenter build custom drawers into existing cabinetry ($300–$600 labor). The baskets should be at least 18–20 inches wide so clothes don’t get jammed. Installation takes 1–3 hours depending on whether you’re retrofitting existing cabinets or building new.
Now folding flows into organization—one basket catches clean items, another holds folded clothes, and a third waits for socks and underthings to pair.
9. Paint Your Folding Wall a Soft, Energizing Color

A fresh paint color makes your folding station feel intentional and even pleasant—and it costs almost nothing. Soft greens, warm taupes, or pale blues are trending and make the space feel less utilitarian.
A gallon of quality paint costs $20–$40, and you’ll need 1 gallon for most rooms. Paint the wall yourself over a weekend—about 2–4 hours for a small space. Use low-VOC or zero-VOC paint for better air quality in a room where you’re working regularly. Pro tip: Paint just the wall behind your folding counter if doing the whole room feels like too much.
Suddenly your folding station has personality and feels less like a chore zone and more like a personal project space.
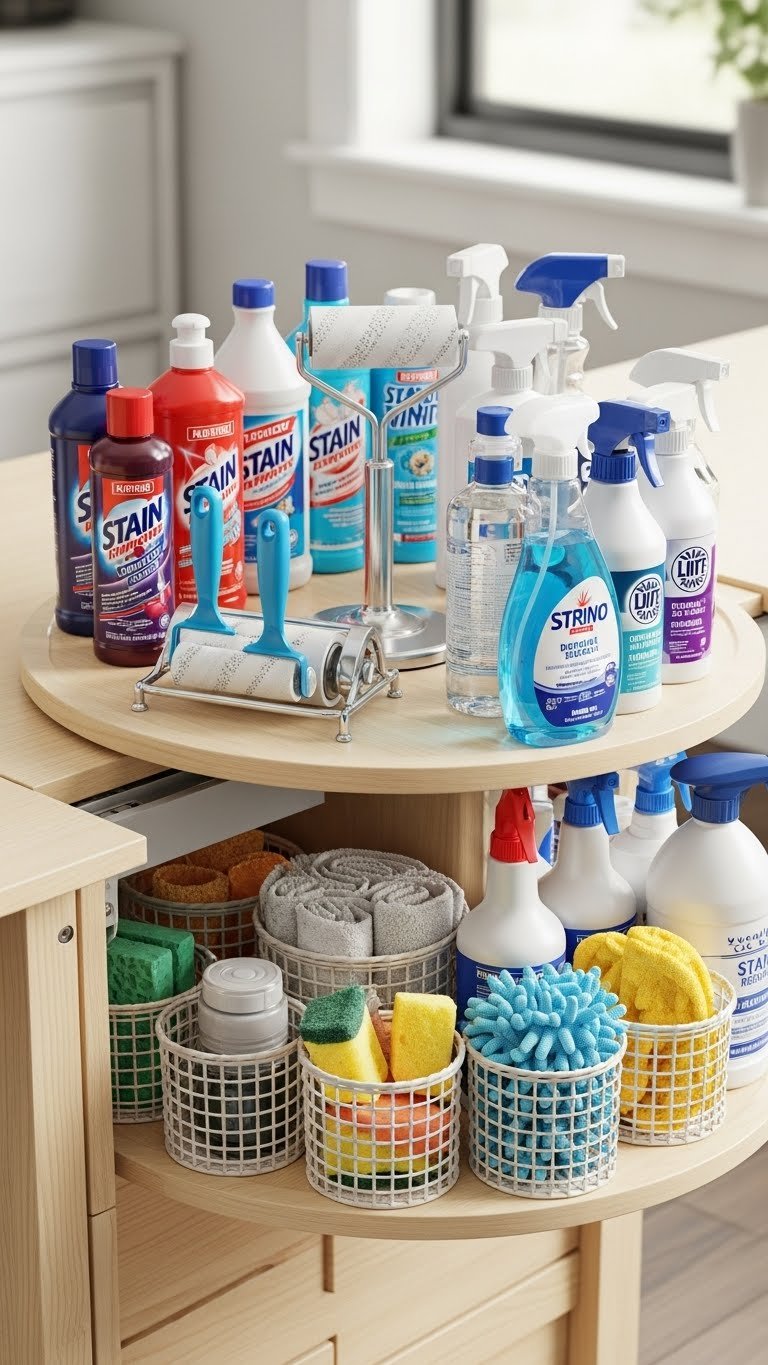
10. Set Up a Stain-Treatment Station Next to Folding Area
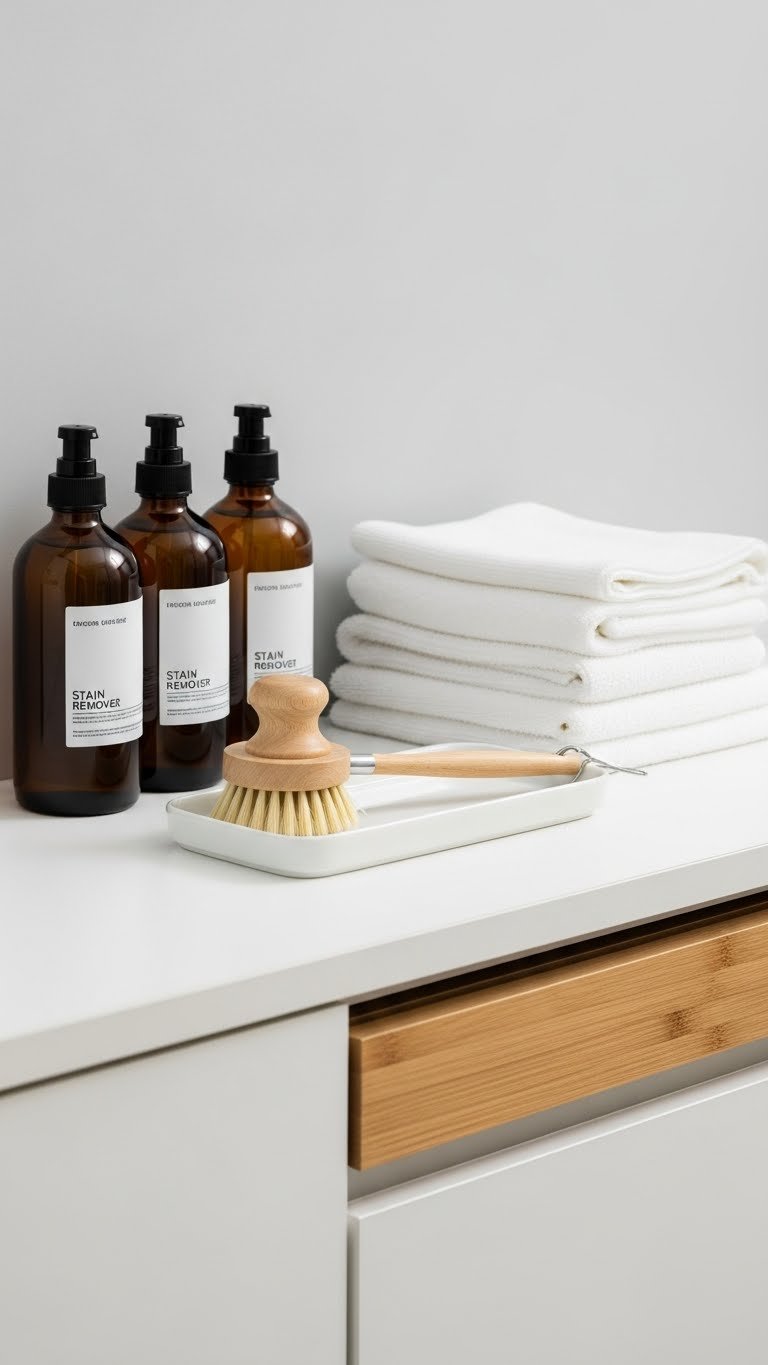
Treating stains before folding saves time and prevents you from missing marks. A dedicated stain station right next to your folding counter means you catch problems immediately.
You need about 2–3 linear feet of counter or shelf space. Stock it with stain remover spray ($5–$12), a soft brush ($3–$8), white cloths, and a small spray bottle of water. A small rolling cart ($40–$80) from IKEA or Target gives you mobile storage that rolls between laundry and folding areas. Setup takes 30 minutes and costs under $50 if you’re starting from scratch.
You’ll catch and treat stains while they’re fresh, making your clothes last longer and reducing frustration when you find mysterious marks later.
11. Use a Rolling Cart as a Mobile Folding Station
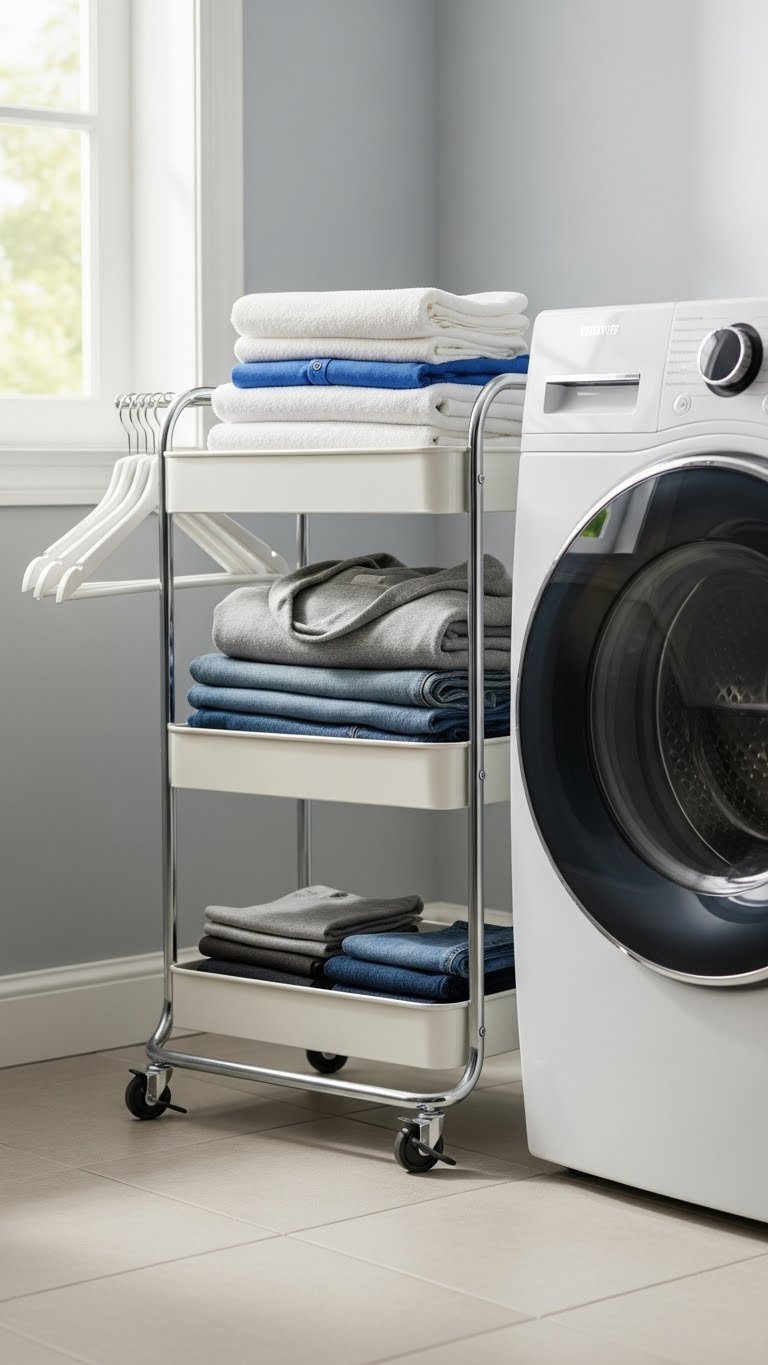
A rolling cart with multiple tiers gives you a folding station that moves where you need it. Perfect for small spaces, apartments, or if you fold in different rooms (laundry room, bedroom, living room).
Metal or wood rolling carts range from $40–$150 depending on size and material. Look for sturdy construction with lockable wheels (non-locking carts are frustrating). IKEA’s PINNIG cart is popular at $40–$60, while fancier versions from Container Store run higher. Assembly takes 15–30 minutes. Pro tip: Use each tier for different categories—bottom tier for folded items, middle for items being worked on, top for small accessories.
You get a portable folding station that adapts to your space and can tuck into a corner when not in use.
12. Install Pull-Out Drying Racks Below Folding Counter

Integrating drying space into your folding station means delicate items air-dry within arm’s reach of where you sort. Pull-out racks are sleek and don’t dominate your space when closed.
Wall-mounted pull-out drying racks cost $60–$150 and take 1–2 hours to install (may need a handyperson if complex plumbing is involved). You can also use hinged racks ($30–$80) that swing out from under cabinetry. Pro tip: Position racks at chest height for easy reach and good air circulation. Some people stack multiple racks for volume.
Now sweaters, delicates, and air-dried items have a permanent home near your folding zone—no more hunting for hangers or draping clothes over chairs.
13. Add a Pegboard for Tool and Supply Organization
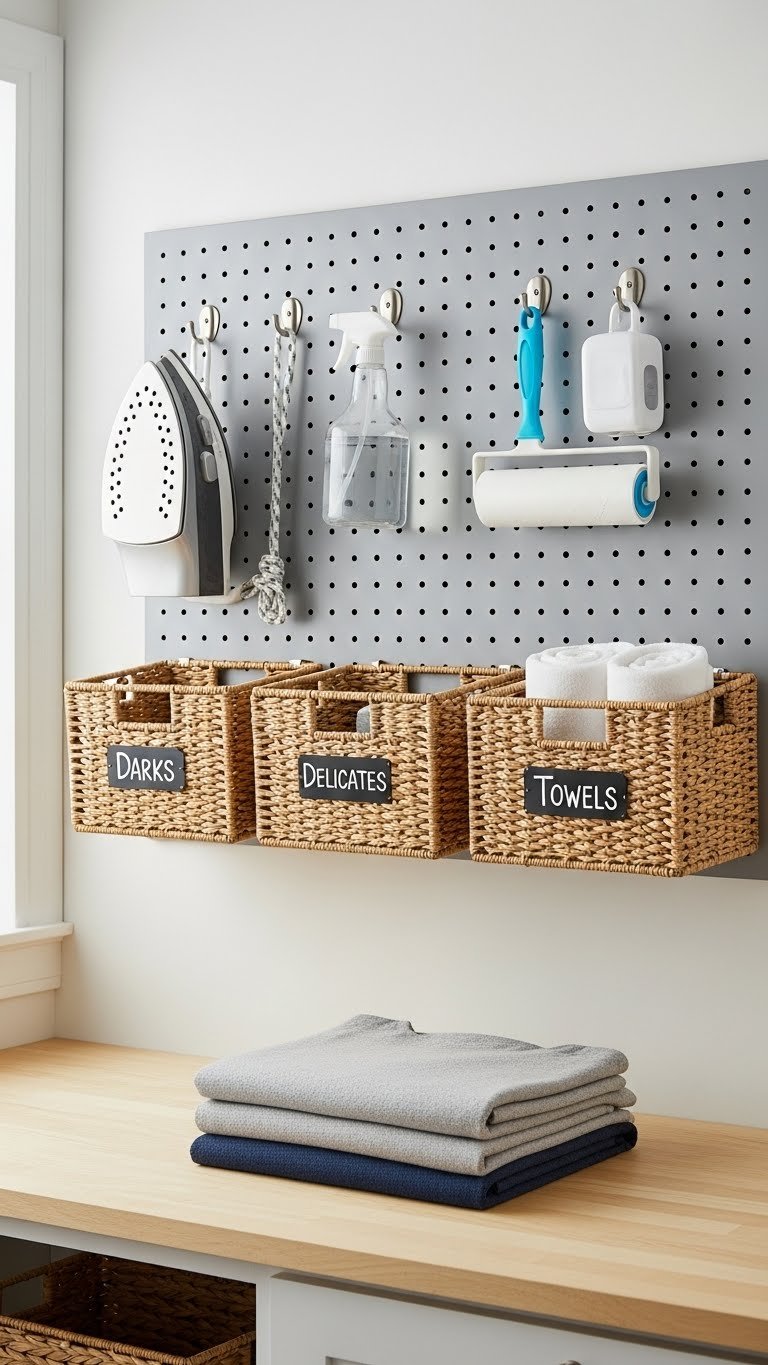
A pegboard keeps small tools and supplies visible and within reach, reducing clutter on your folding counter itself. This is especially useful if you iron, use stain remover frequently, or need quick access to lint rollers.
A pegboard costs $15–$30, hooks are $10–$25 for a set, and paint is $20–$40 if you customize the look. Installation takes 1–2 hours and involves marking studs, drilling, and securing the board. You can rearrange hooks anytime to fit your workflow. Pro tip: Use labeled containers on the pegboard for socks, hair ties, or small items that disappear.
Everything has a visible home, your counter stays clear, and you work more efficiently because nothing’s buried in drawers.
14. Pair Your Folding Counter with a Deep Utility Sink
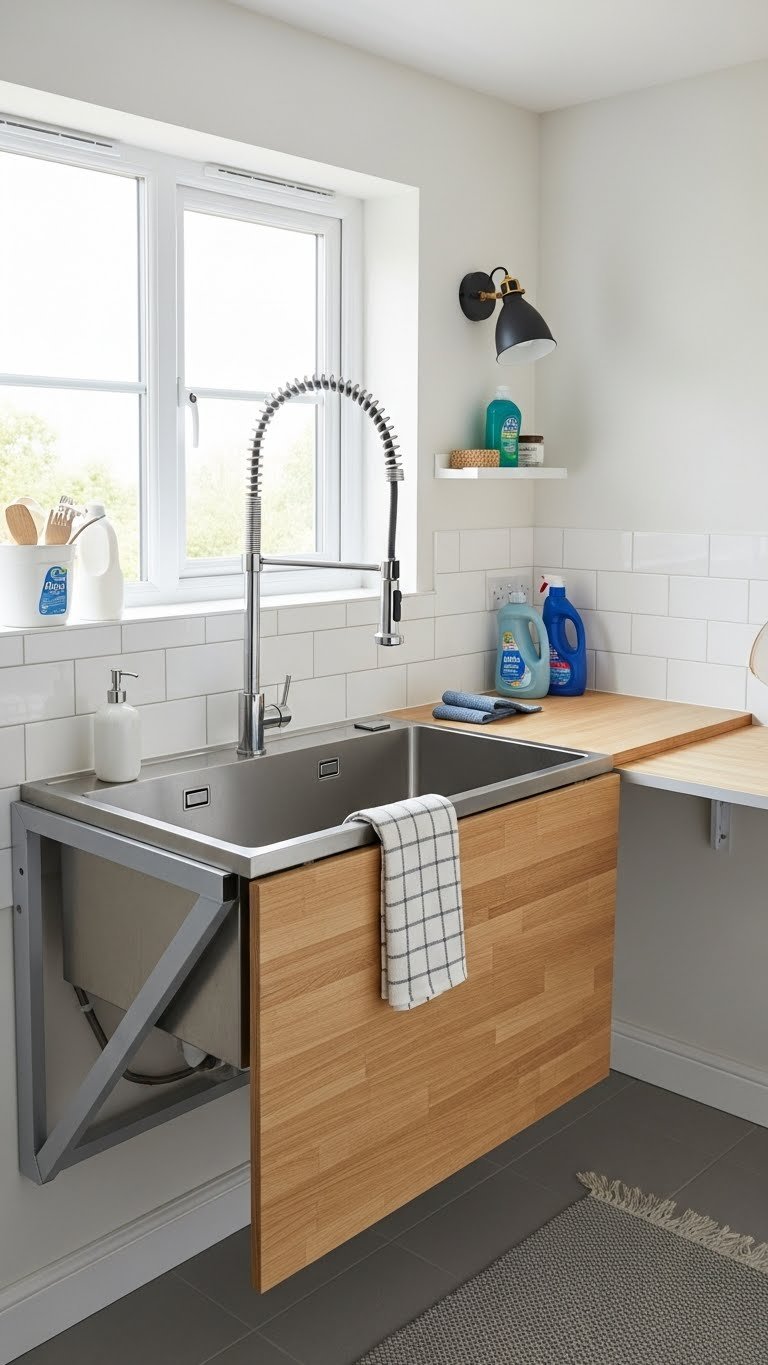
A utility sink lets you rinse stains, soak delicates, and dampen clothes for stubborn wrinkles—all without leaving your laundry zone. It’s a legitimate upgrade that saves countless trips.
Utility sinks cost $150–$400 depending on material and size; installation with plumbing runs $200–$500 (call a plumber). If you rent, this isn’t an option, but homeowners find it worth the investment. Faucets are separate ($50–$150). Installation takes a half-day to a full day depending on existing plumbing. Pro tip: Choose a 24–30 inch wide sink with at least 12 inches of depth.
You’ve created a complete laundry processing center—washing, treating, folding, and drying all in one zone.
15. Use Tension Rods to Hang Folded Clothes Temporarily

Tension rods strung across a wall or between shelves create temporary hanging space for items waiting to be put away or for pieces that don’t need to be folded (like button-ups or sweaters).
Tension rods cost $10–$25 each, and you’ll need 2–3 for a functional system. Installation takes 15 minutes with no tools—they wedge between studs or shelves. Add some basic wooden hangers ($20–$40 for a set of 10) and you’re done. Pro tip: Use this system for sorting—delicates that need careful folding on one rod, everyday items on another.
Clothes have a holding zone instead of piling on your counter, so your work surface stays clear and organized.
16. Create a Label-Maker Station Within Arm’s Reach
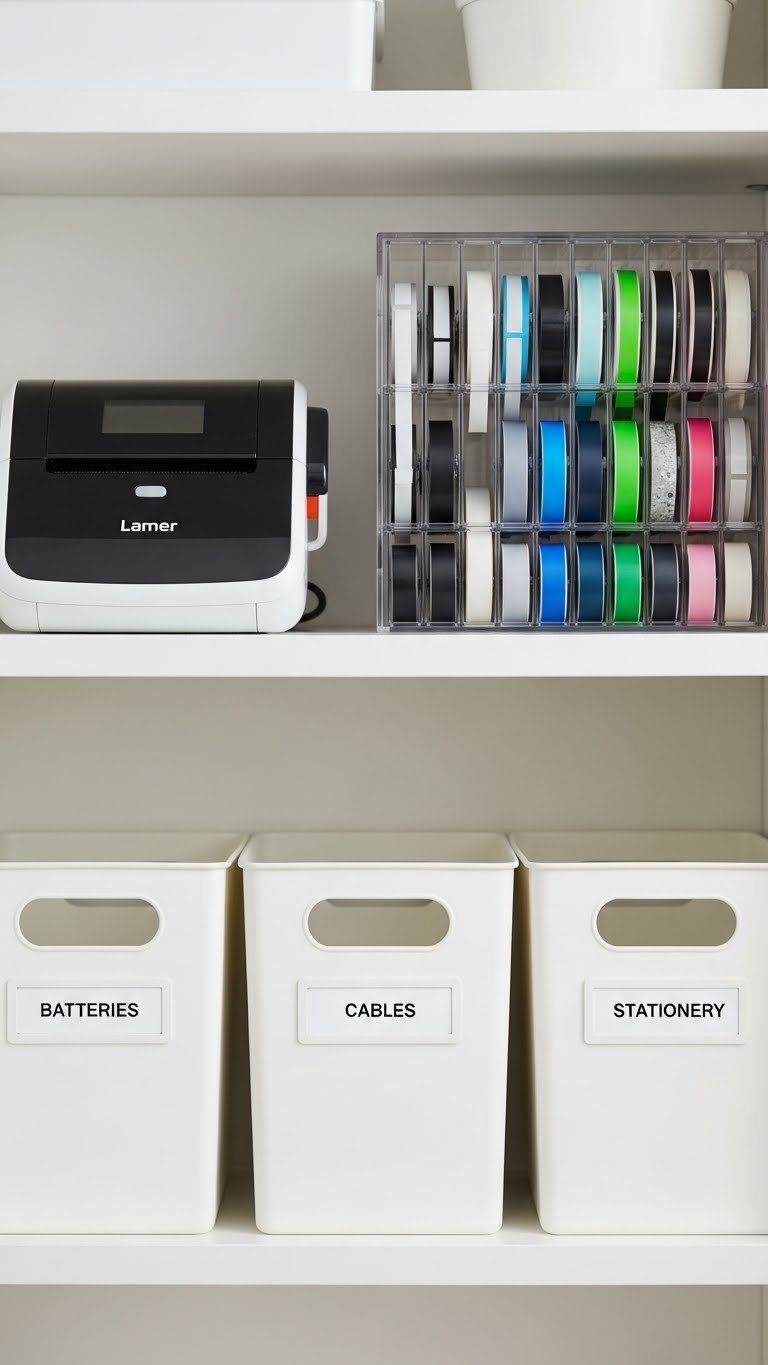
Labeling baskets, shelves, and drawers for socks, underwear, seasonal items, and delicates makes it faster to sort and put away—and keeps the whole family on the same page. A label maker feels small but changes everything.
A basic label maker costs $15–$30 (Brother and Dymo make affordable ones), and label tape is $5–$15 per roll. The label maker sits on your folding counter or nearby shelf and takes seconds per label. Setup time: 10 minutes. Pro tip: Use color-coded label tape for different room categories or family members.
Now sorting transitions smoothly to putting away because everyone knows exactly where things belong.
17. Mount a Fold-Down Ironing Board Above or Behind Your Counter

An integrated fold-down ironing board means you can press wrinkled items without leaving your laundry zone. This is especially useful if you’re someone who likes crisp clothes but doesn’t have a separate ironing space.
Wall-mounted ironing boards cost $80–$200 depending on size and quality. Installation takes 45 minutes to 1 hour and requires wall studs or heavy-duty anchors. Some are reversible or have mesh surfaces for better airflow. Pro tip: Mount it at chest height so you’re not straining to reach, and position it perpendicular to your folding counter if space allows.
Pressing and folding happen in the same zone, cutting your laundry workflow time by eliminating transitions.
18. Add a Small Counter-Top Steamer Station

A compact steamer offers a quick alternative to ironing for delicate fabrics and touch-ups. Many people find it faster and gentler than traditional pressing.
Handheld steamers cost $30–$80 and take up minimal space (about 12 inches tall). Small tabletop steamers run $50–$120 but have slightly more power. They need only 5–10 minutes to heat up, and you can use tap water. Setup involves storing the steamer and a small container for water on your counter or nearby shelf—takes 5 minutes. Pro tip: Keep a microfiber cloth nearby to smooth fabric after steaming.
You now have a quick wrinkle-removal option that’s faster than ironing for many fabrics and lighter to use.
19. Design an Accessible Folding Station for Mixed Heights
If your household includes kids, elderly family members, or anyone with mobility concerns, an accessible folding station works for everyone. A combination of standing and sitting options ensures comfort for all.
Your base counter stays at 30–34 inches for standing comfort. Add an adjustable stool ($40–$100 from IKEA, Amazon, or Target) so people can sit if needed. Ensure counter depth is at least 24 inches for comfortable reach. A cushioned mat underneath reduces fatigue while standing. Setup time: 30 minutes, cost is under $150 if you’re adding seating only.
Everyone in your household can participate in laundry without strain, and the setup encourages shared responsibility.
20. Use Drawer Dividers to Keep a Folding Drawer Organized
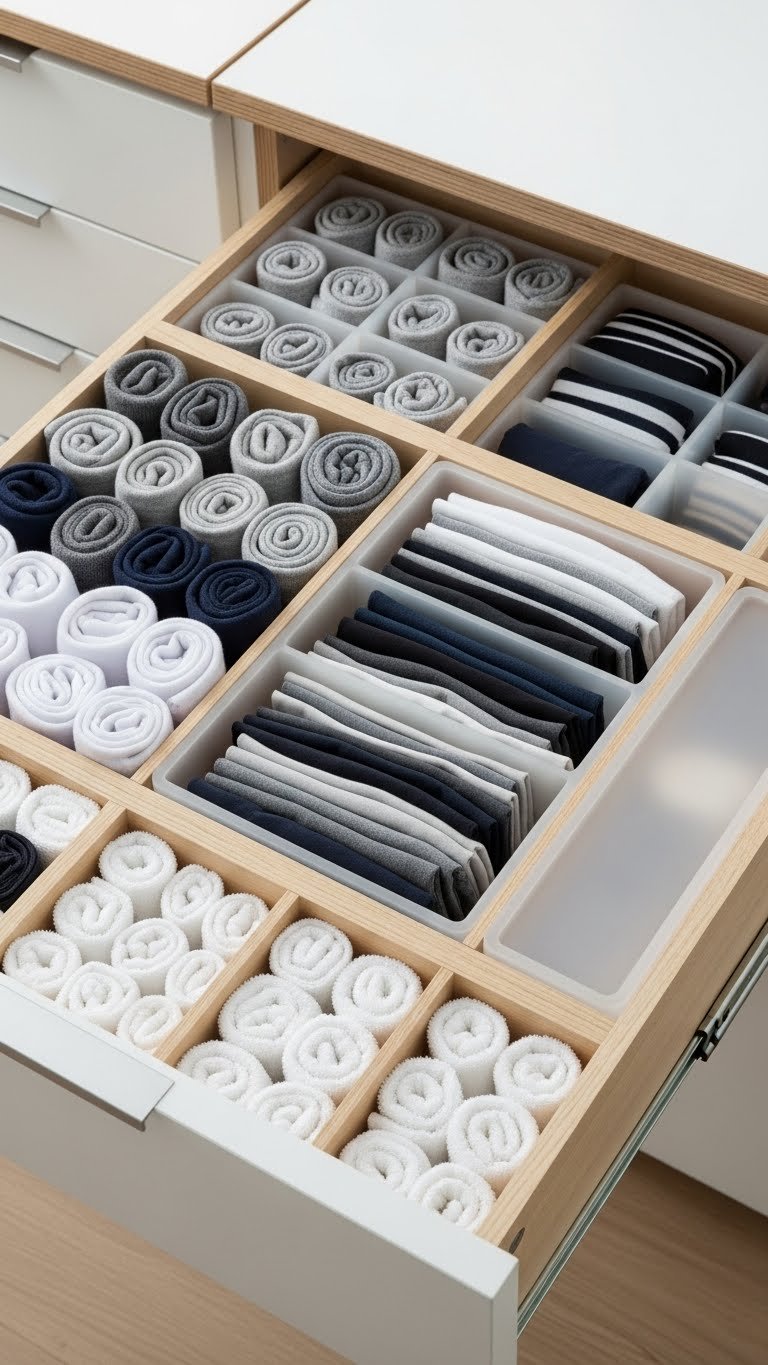
If your folding counter has drawers underneath, dividers turn them into organized sorting zones. This keeps your work surface clear and prevents items from shifting during the fold.
Wooden or plastic drawer dividers cost $15–$40 per set, and you can customize lengths. Installation takes 15 minutes (most are just wedged in place or stick on). Use one drawer for socks and small items, another for towels, another for delicates. Pro tip: Choose adjustable dividers so you can reconfigure as needs change.
Your workflow streamlines because sorted items have designated homes, and your counter stays a clear work surface instead of a staging area.
21. Install a Countertop Carousel for Small Supplies
A lazy Susan or rotating carousel keeps small supplies organized and within a rotation’s reach. Everything’s visible, nothing gets lost in the back of a shelf, and you use floor or counter space efficiently.
Small carousels cost $15–$40 and take seconds to place on your counter. Stock it with stain remover, lint rollers, wrinkle spray, hair-tie holders, or sock bins. Metal or wood versions match different styles. Pro tip: Use small containers or baskets on the carousel so items don’t roll around and everything looks intentional.
Your supplies are always accessible and visible, meaning you work faster and nothing disappears into the clutter.
22. Build a Rolling Basket System for Multi-Person Households
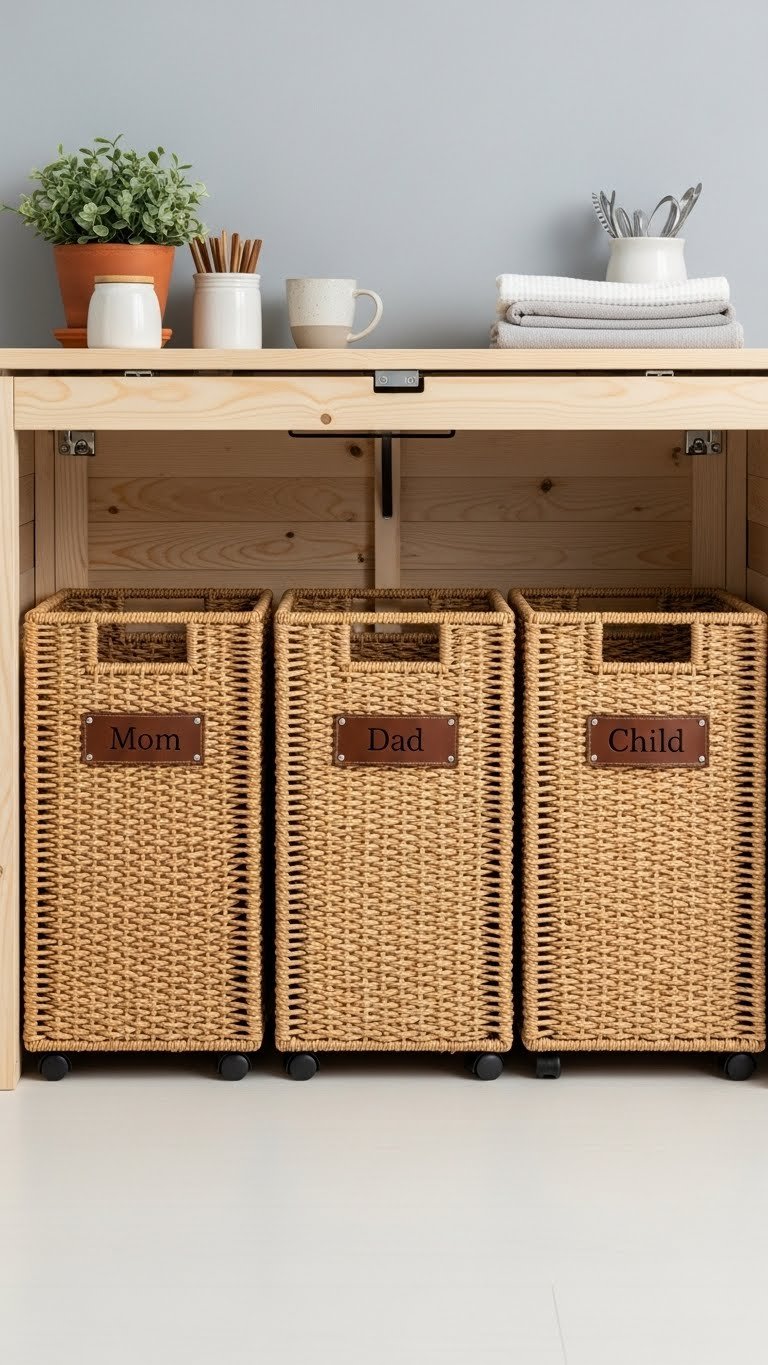
For households with multiple people, personalized rolling baskets turn the folding station into a distribution hub. Each person’s clean laundry goes into their basket, ready to take to their room.
Rolling baskets cost $20–$60 each from Target, IKEA, or Container Store. Get 3–5 depending on household size. Label each basket with names or use color-coding. Total investment: $60–$300. Setup takes 20 minutes. Pro tip: Keep baskets under the counter when not in use so your folding space stays open.
Folding becomes sorting, and everyone knows where to grab their clean clothes—reducing the “where’s my shirt?” chaos.
23. Add a Fold-Down Changing Station for Households with Small Children

If you have young children, a fold-down changing station next to your folding counter lets you fold and dress kids without carrying loads of laundry to bedrooms. It’s efficient and makes sorting by child easy.
Wall-mounted changing pads cost $80–$180 and installation takes 1–2 hours (requires wall studs). Fold them up when not in use to reclaim counter space. Some parents add a small shelf above for commonly grabbed items like diapers or wipes. Pro tip: Position it low enough (20–24 inches) so you’re not straining to reach.
Your laundry zone becomes a one-stop station for processing, folding, and dressing little ones—cutting multiple steps out of your routine.
24. Create a Before-and-After Staging System
A visual system where one side of your counter holds unfolded clothes and the other holds folded items keeps you on track and gives you a sense of progress. This sounds simple but genuinely speeds up the process.
You need two baskets or containers ($15–$40 combined) and about 3–4 feet of counter space. Place your unfolded basket on the left, folded basket on the right. As you finish items, they move to the right—instant visual proof of progress. Setup time: 5 minutes. Pro tip: Use different colored baskets for even clearer visual separation.
You’ll work faster because you can see progress, and the system keeps you focused instead of letting your mind wander.
25. Install Ambient Lighting to Make the Space Feel Inviting
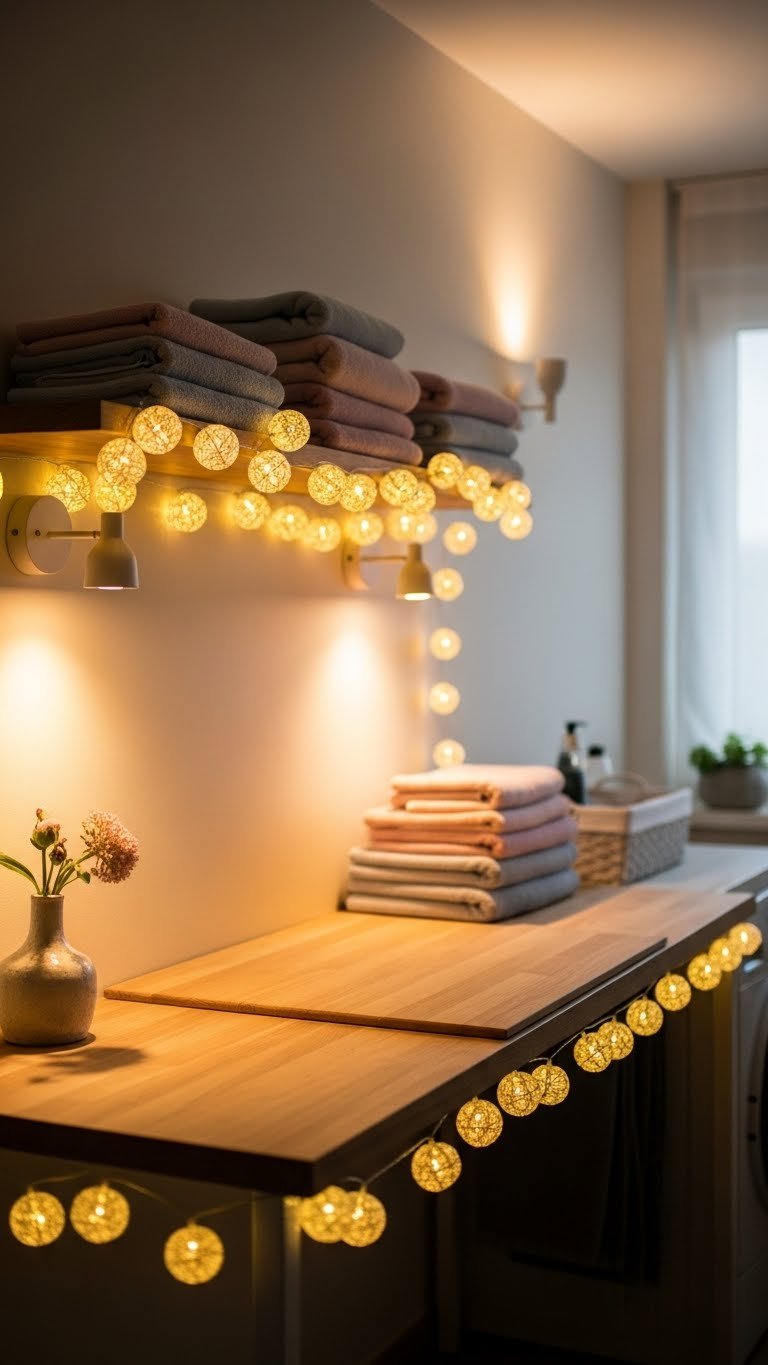
Beyond task lighting, ambient light makes your folding station feel less like a chore zone and more like a pleasant space. Warm lighting specifically improves mood and makes you more likely to fold promptly.
Warm LED strip lights ($20–$50), battery-operated sconces ($25–$60 each), or even small string lights ($15–$40) work beautifully. Choose bulbs in the 2700K range for warm tone. Installation takes 30 minutes to 1 hour depending on type. Pro tip: Install dimmers so you can adjust brightness based on time of day or your energy level.
Your laundry room stops feeling utilitarian and starts feeling like a space where you actually want to spend time—making chores feel lighter.
26. Combine All Systems: Design Your Complete Folding Station
The magic happens when you layer these ideas into a cohesive system tailored to your space and workflow. Your perfect folding station combines storage, lighting, accessibility, and organization into one streamlined zone.
Start with your base: counter at 32–36 inches high, at least 24–30 inches deep. Layer in task lighting overhead ($50–$150), floating shelves above for supplies ($60–$100), pull-out storage below ($100–$300), and ambient lighting for mood ($30–$80). Add a utility sink if you can ($300–$800 with installation) and organizational accessories like label makers and dividers ($50–$100). Total time to design and install: 1–4 weeks depending on complexity. Total budget: $500–$2,000 for a full setup (scale up or down based on your priorities).
You’ve created a personalized laundry command center that makes every step smoother and faster—transforming a dreaded chore into an efficient, almost pleasant part of your routine.
Save this post and start with just one idea this weekend. Whether it’s better lighting, a simple shelving system, or a rolling cart, even one upgrade will make your folding station work harder for you. Share this with anyone drowning in laundry piles—we could all use a little laundry room inspiration.
Leave a Reply