If your kitchen feels stuck between sterile and cluttered, you’re not alone. The all-white, perfectly uniform kitchens we see everywhere? They’re out. What’s in is something smarter: spaces that layer textures, play with soft color, and actually work for how you live. This isn’t about overhauling everything—these 26 ideas mix small styling tweaks, budget-friendly swaps, and strategic upgrades that add personality without chaos. Whether you’re renting or planning a full renovation, you’ll find ideas that fit your timeline and budget. Let’s build a kitchen that feels like both a retreat and a real, lived-in home.
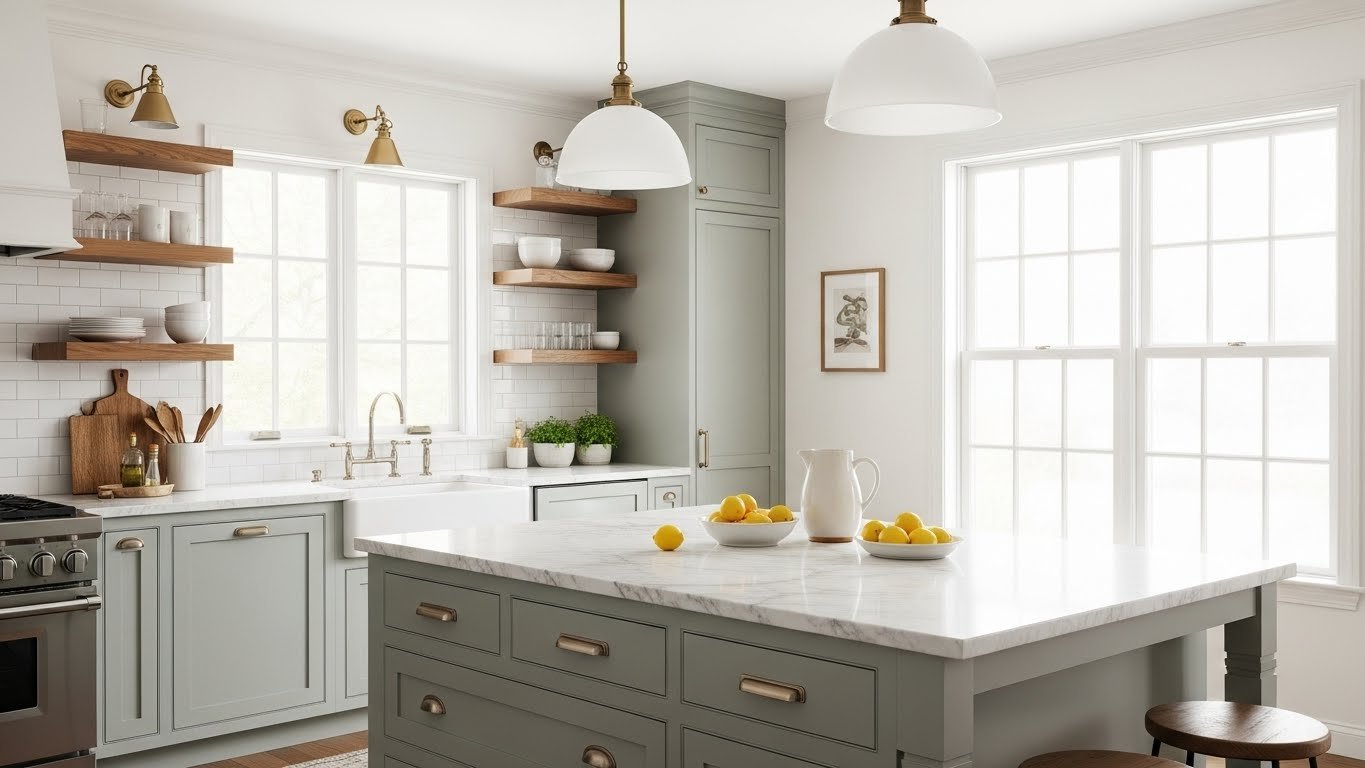
1. Paint Lower Cabinets Sage Green
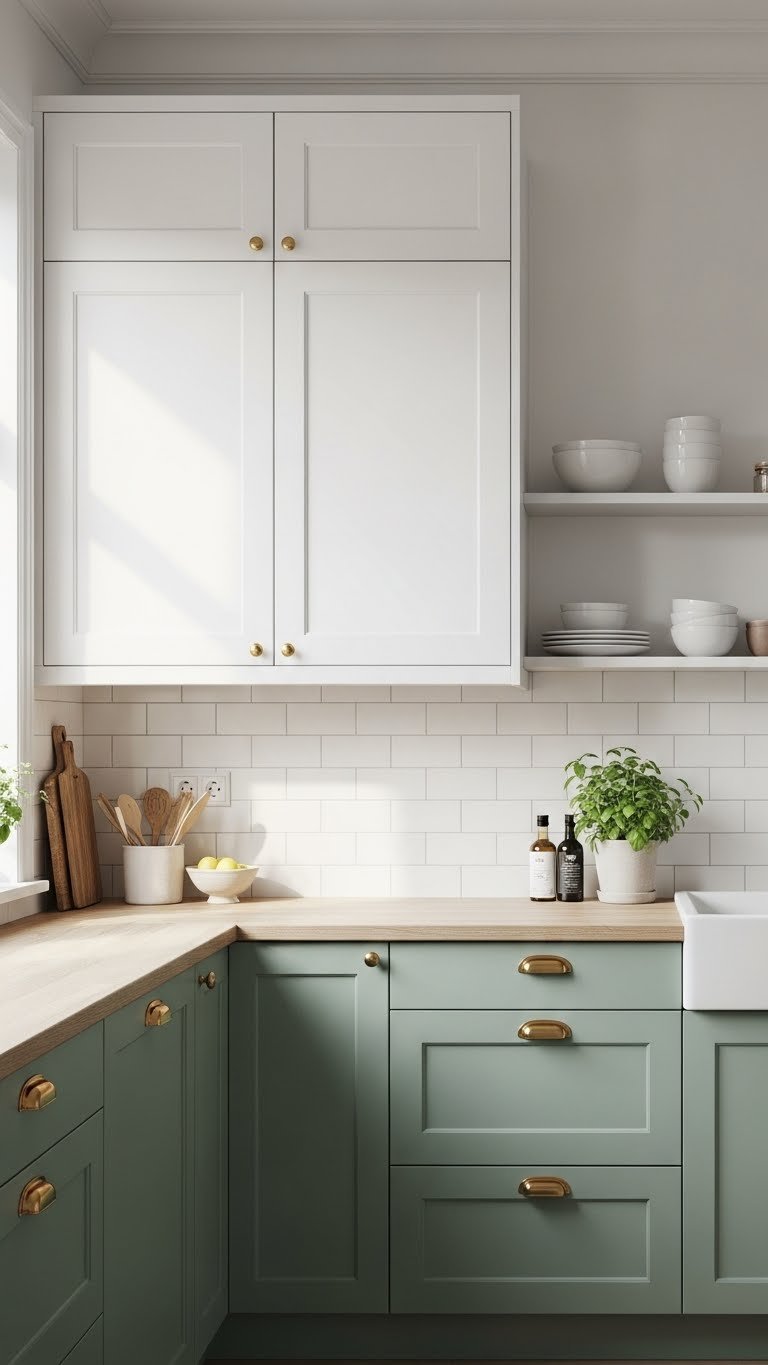
Sage green is the color taking over kitchens right now—it’s the perfect balance between bold and calming. Rather than committing to all-green, paint just your lower cabinets and keep uppers white or natural wood for a fresh, layered look that doesn’t feel overwhelming.
Use high-quality cabinet paint (Benjamin Moore, Farrow & Ball, or Sherwin-Williams) in a soft sage like “HC-137 Healing Aloe” or similar. Plan for $150–$300 in paint and primer, plus 2–3 hours of prep work if you’re DIY-ing (remove hardware, sand lightly, prime, paint two coats). If hiring a pro, expect $800–$1,500 total. For renters, peel-and-stick cabinet film in sage ($40–$100) gives nearly the same impact without commitment.
The result? Your kitchen instantly gains sophistication without feeling cold. This one change makes the whole room feel intentional and modern.
2. Mix Metal Finishes on Hardware
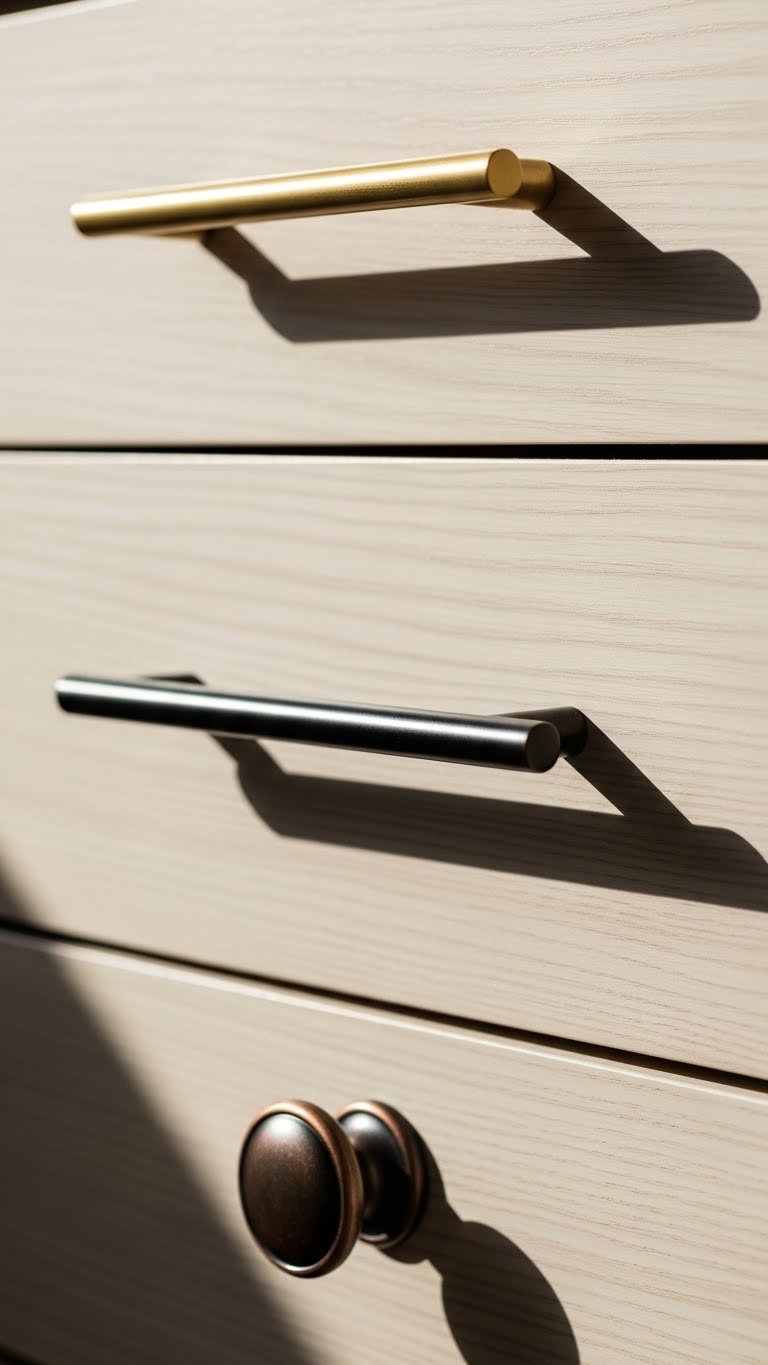
Matching all your hardware is so 2010. The new approach is intentional mixing—brushed gold with black matte, brass with gunmetal—to add dimension and personality.
Choose hardware from brands like Anthropologie, Rejuvenation, or even IKEA ($5–$20 per piece). Mix two to three finishes across your drawers and cabinets in no particular pattern—asymmetry is the point. Takes 30 minutes to swap them out yourself with just a drill. The beauty? You can change this anytime and it costs under $100 to completely refresh.
You’ll notice how the different metals catch light throughout the day, making your cabinetry feel expensive and collected rather than matchy-matchy.
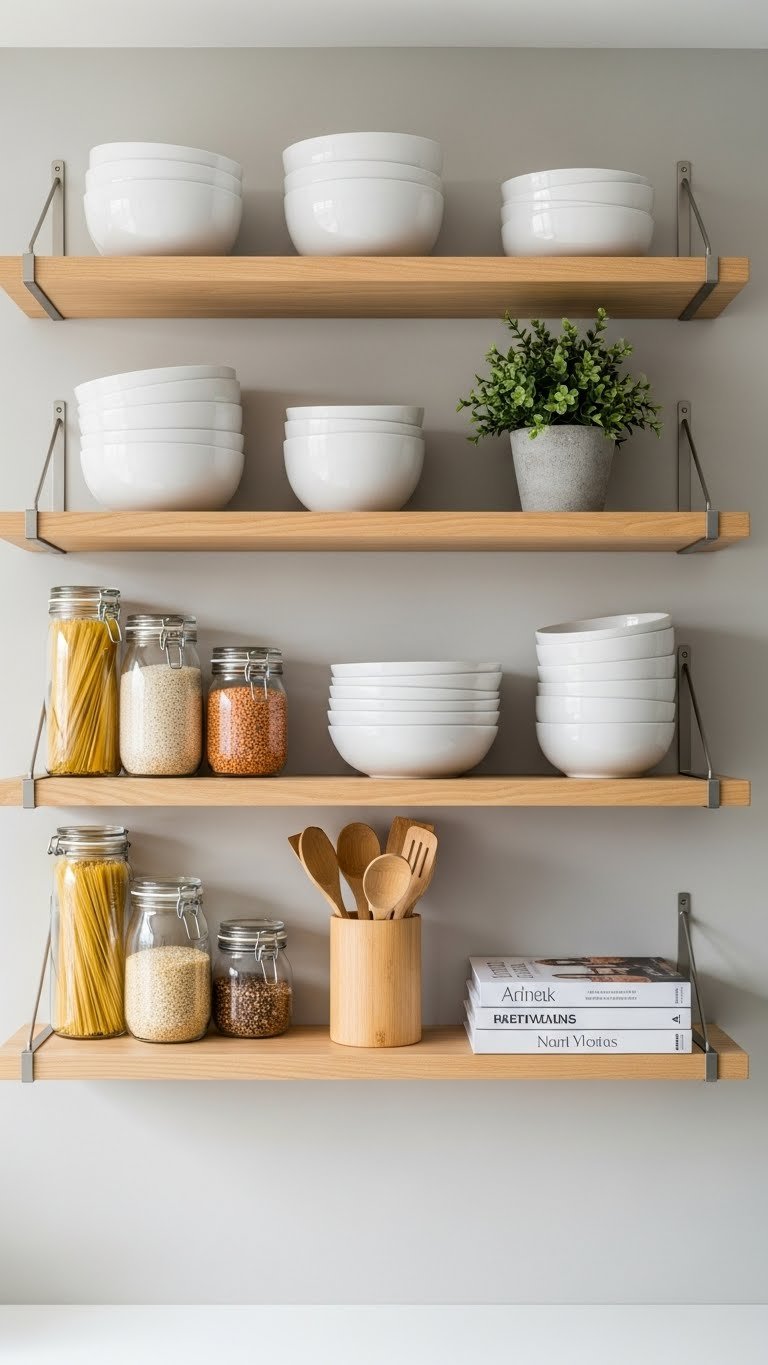
3. Install Open Shelving Above the Sink
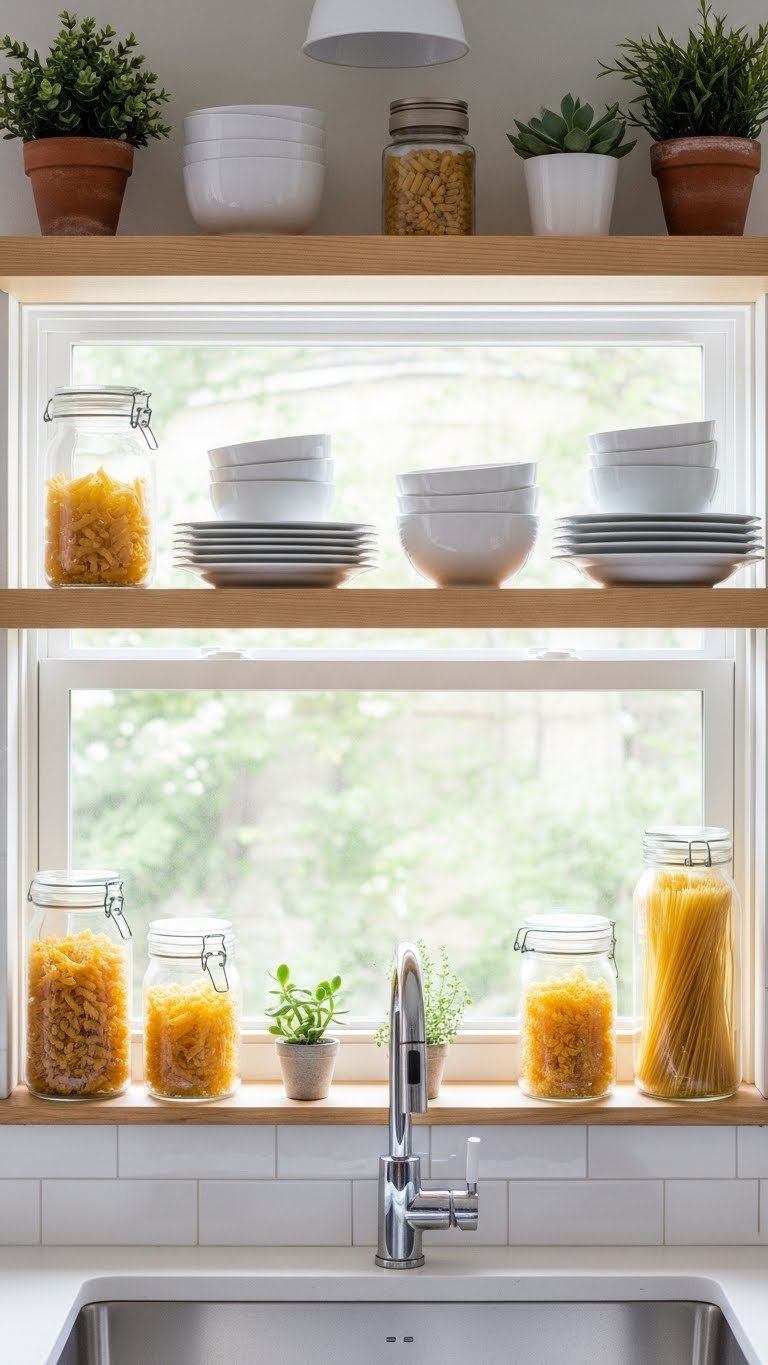
Open shelving brings air and light to a kitchen while giving you a spot to style and display. Above your sink is perfect because you see it constantly and the window light makes it a natural focal point.
Floating shelves in solid wood or metal-reinforced run $80–$300 per shelf depending on material and length. Install with heavy-duty brackets (most need wall studs or toggle bolts for safety). 2–3 hours for installation if DIY, or hire a handyperson for $150–$300 labor. Keep styling minimal and functional: white dishes, glass jars, one small plant. The key is restraint—too much “stuff” defeats the purpose.
This small zone becomes a quiet visual break in your kitchen, making the whole space feel more intentional and less cramped.
4. Add Textured Backsplash with Mixed Patterns
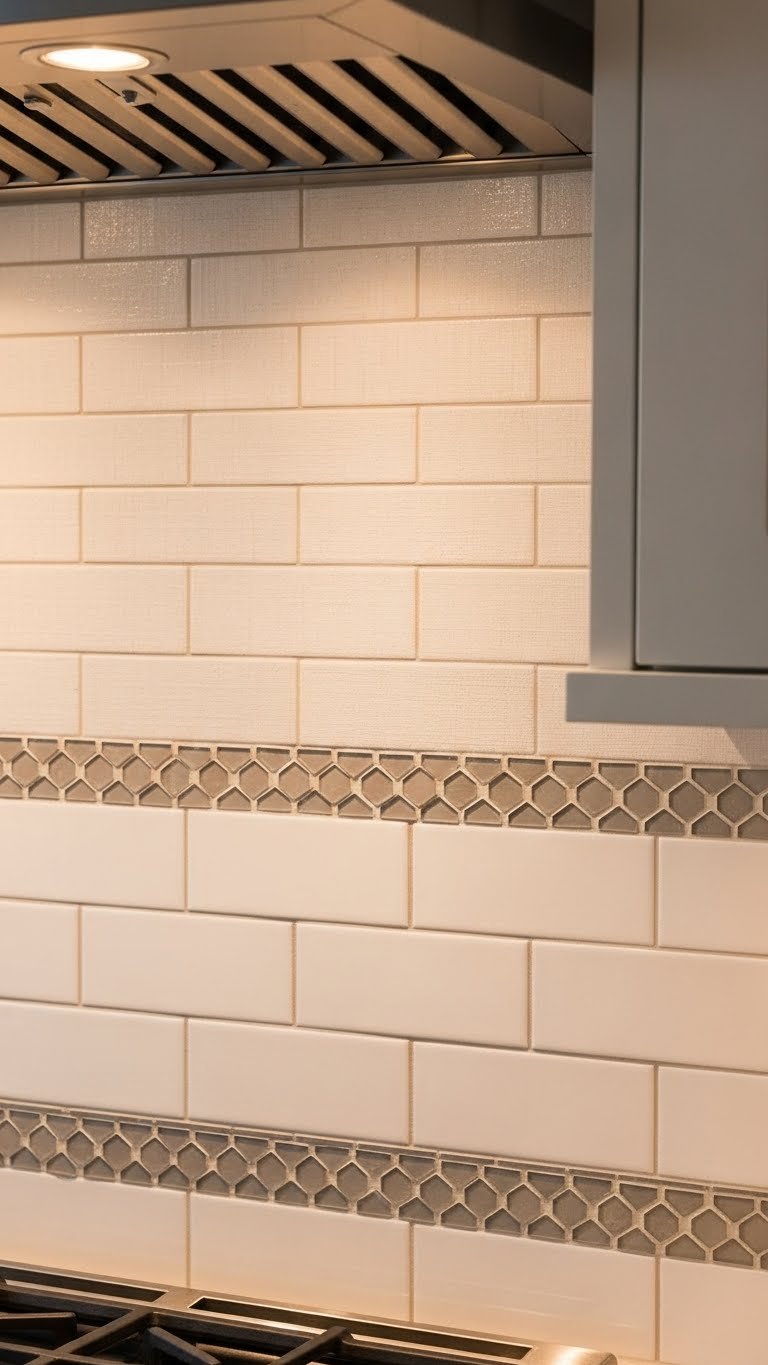
One flat backsplash is predictable. Mixing tile textures and patterns—matte with gloss, large format with tiny hex, smooth with fluted—creates visual richness that photographs beautifully.
Choose complementary tiles from suppliers like Wayfair, Floor & Decor, or local tile shops. A mixed backsplash typically runs $300–$1,200 depending on size and tile cost. DIY backsplash takes 8–12 hours; hire a pro for $800–$2,000 labor for a standard 3-foot-by-4-foot area. Keep your color palette tight (whites, grays, one accent tone) so the texture does the talking, not the color.
The result is a backsplash that draws the eye and makes your kitchen feel curated and modern rather than basic.
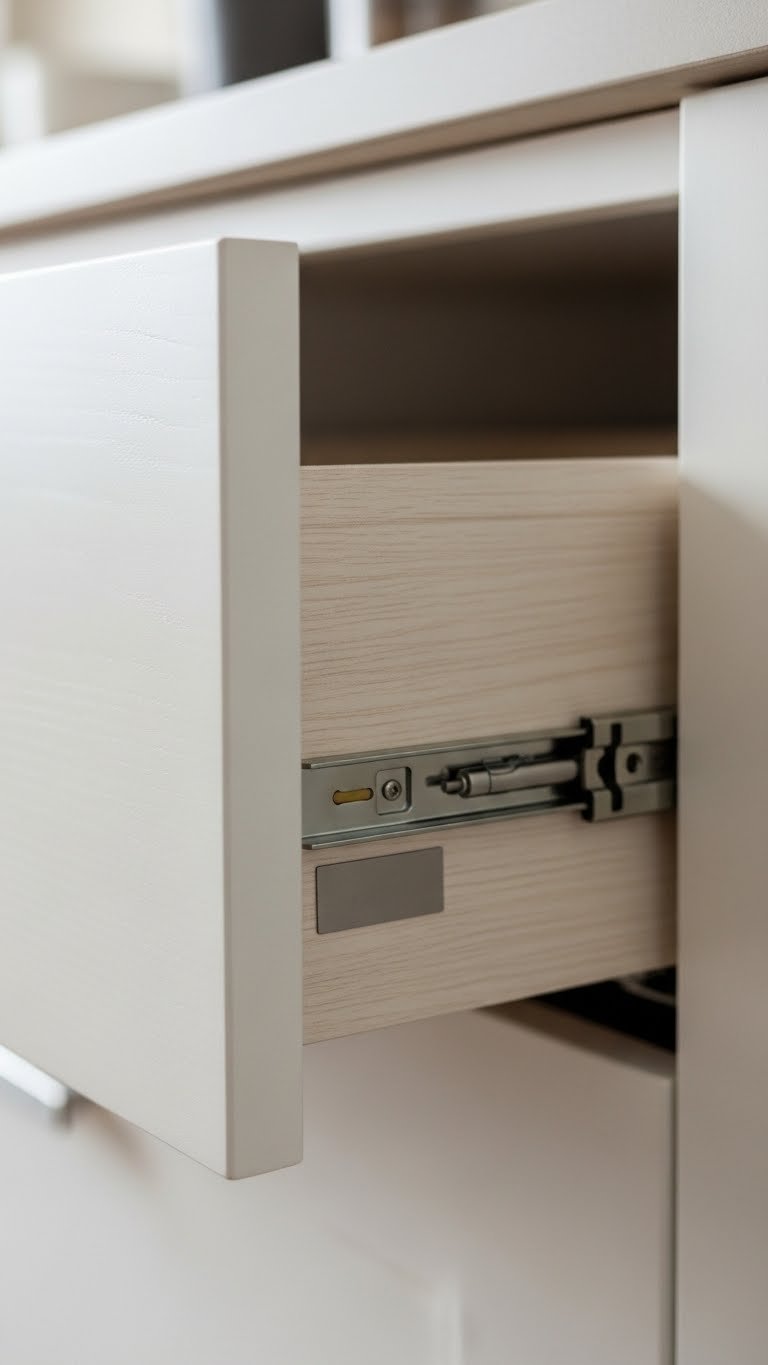
5. Swap Knobs for Push-to-Open Drawers
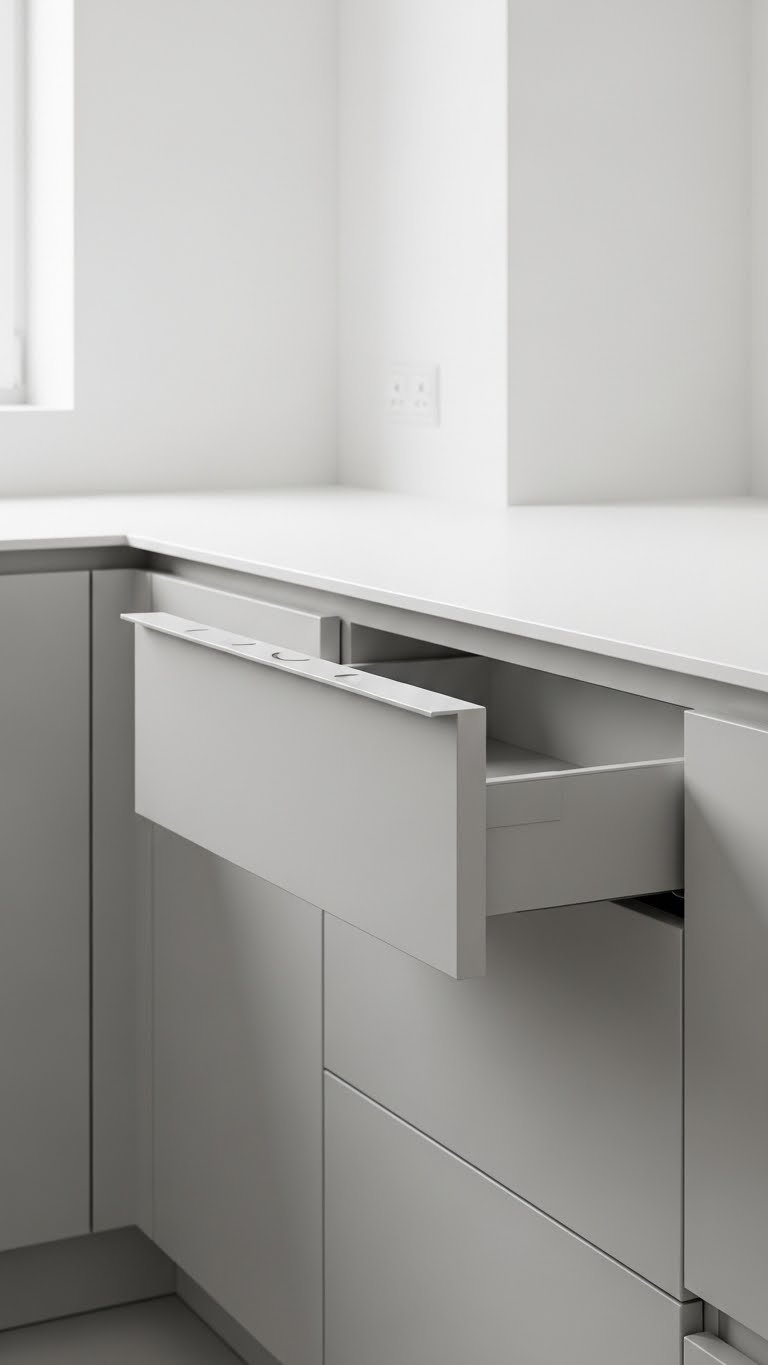
Handle-free cabinets are the ultimate minimalist move—they clean up your sight lines and create an almost invisible, seamless look that feels expensive and uncluttered.
Budget option: Peel-and-stick finger pulls ($20–$40, no tools needed). Mid-range: Retrofit your existing cabinets with soft-close push latches ($15–$40 per drawer, $100–$200 total install). Investment: Custom cabinet doors with push-to-open built in ($2,000–$5,000+ for full kitchen). DIY latch installation takes 30 minutes to 1 hour per drawer.
Your kitchen immediately feels more sophisticated and contemporary. Plus, no more fingerprints on hardware.
6. Layer Warm Lighting with Mixed Fixtures
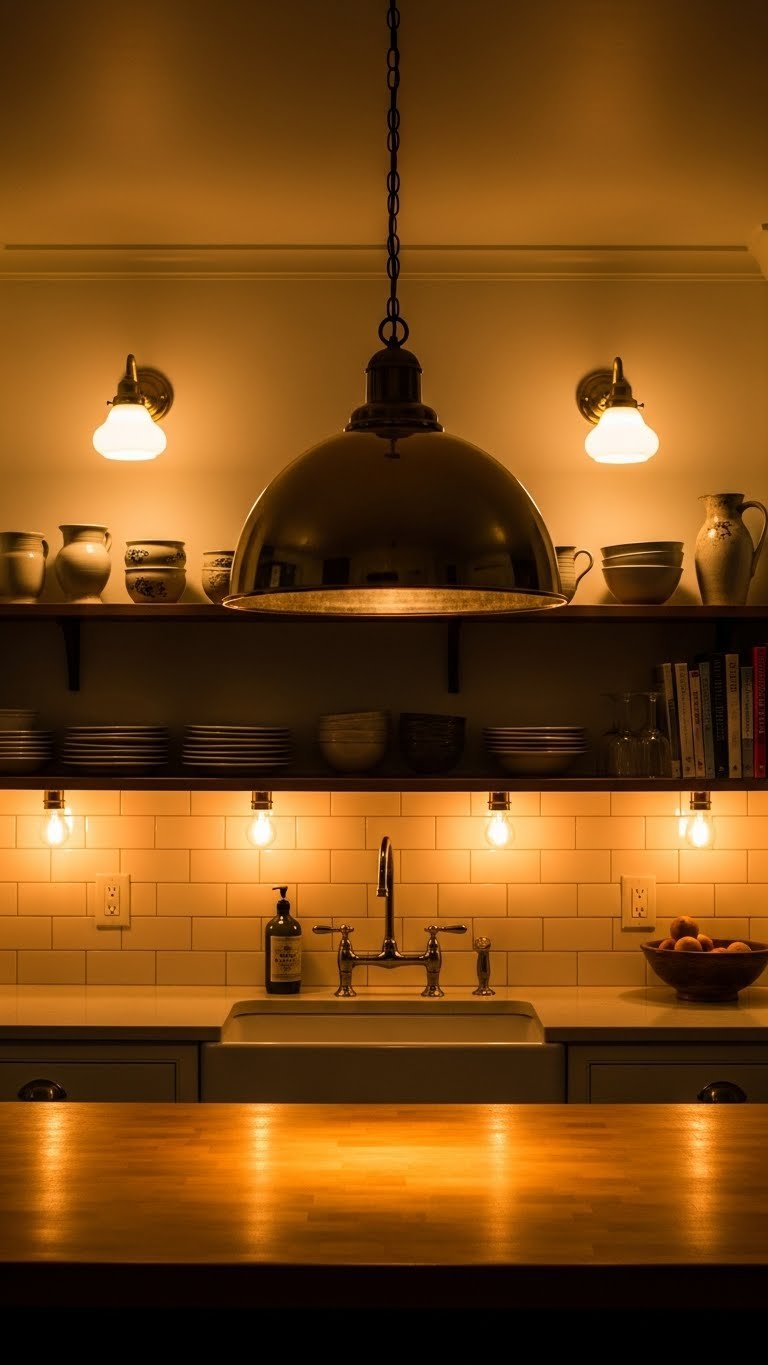
One overhead light is boring. Layer pendant lights, sconces, and under-cabinet lights in mixed metals (brass, blackened brass, brushed copper) to create depth, warmth, and visual interest.
Pendant lights: $60–$400 each (West Elm, Rejuvenation, IKEA). Sconces: $40–$300 per pair. Under-cabinet LED strips: $30–$100 (Philips Hue, basic options from IKEA). 4–6 hours DIY with proper wiring, or hire an electrician for $500–$1,200. Mix warm white (2700K) bulbs for that golden glow that photographs like a dream.
This layered approach makes your kitchen feel more like a designed space than a kitchen, with different moods available depending on what you light.
7. Create a Minimalist Dining Nook
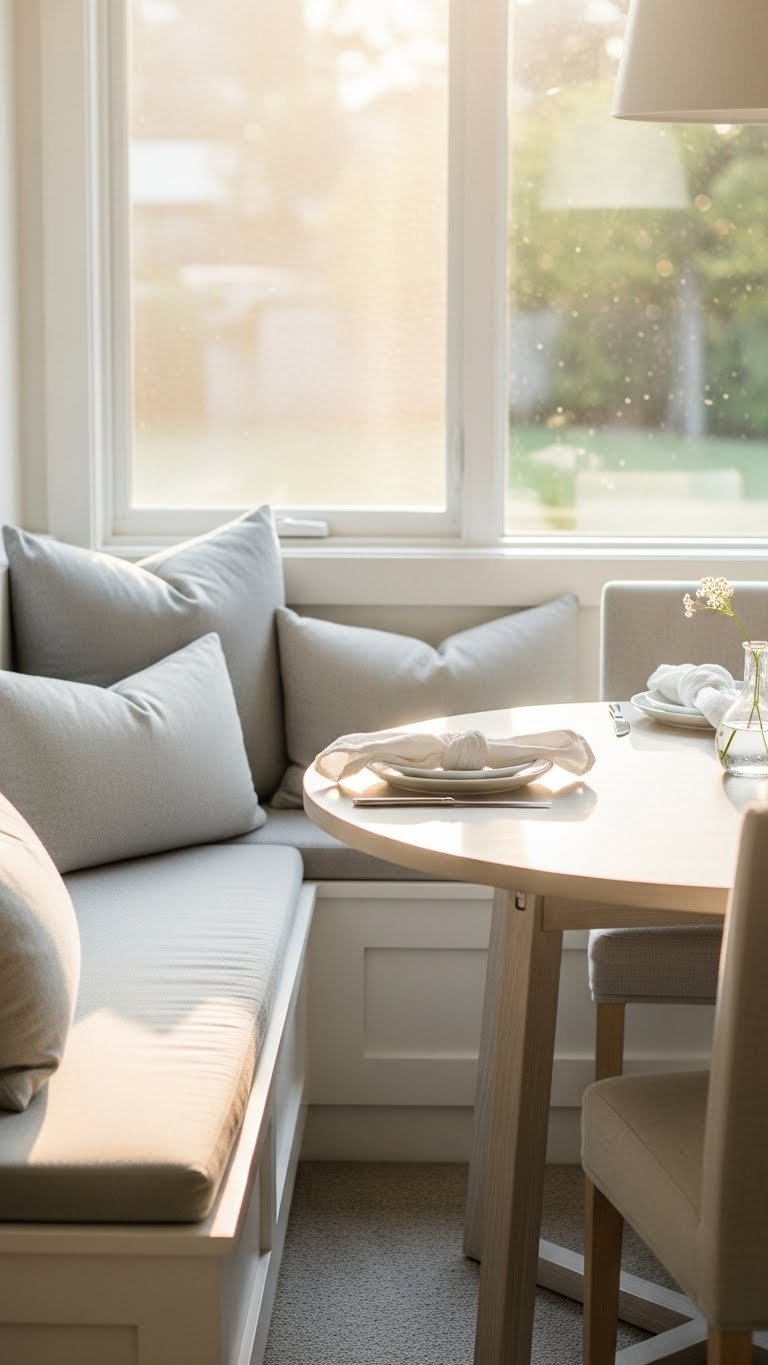
A dining nook tucked into a corner of your kitchen turns unused space into a cozy, functional gathering spot that feels intentional and luxury without taking up much room.
Use a simple wood table ($200–$600), a custom or stock bench ($300–$800), and mismatched vintage or new chairs ($100–$300 each). Total DIY install with basic tools: 2–3 hours. Alternatively, buy a banquette-style dining set from IKEA or Wayfair ($400–$1,000 all-in). For renters, a standalone table and bench work just as well.
You’ve added seating, style, and a reason to gather—and your kitchen now has a secondary function that makes it feel more like home.
8. Install Plaster Range Hood

Plaster hoods are having a moment—they soften the kitchen and add organic texture that’s unexpected and deeply calming. This is a design move that feels collected rather than cookie-cutter.
Budget option: Stainless steel hood with a DIY plaster-effect finish ($200–$400 + supplies). Investment: Custom plaster hood from a specialist ($2,000–$5,000+). If DIY-ing, use plaster-effect paint or venetian plaster on an existing hood ($50–$100 in supplies, 4–6 hours). Standard hood installation (if new): $300–$800 labor.
A plaster hood becomes a focal point that makes your kitchen feel like a thoughtfully designed space rather than standard builder-grade.
9. Paint Kitchen Island a Contrasting Color

Your island is prime real estate for personality. A contrasting color—deep navy, forest green, warm charcoal—makes it a design statement while keeping walls neutral and calm.
Use cabinet-grade paint in Benjamin Moore, Sherwin-Williams, or Farrow & Ball ($40–$80 per quart). Prep and paint your island: $0 DIY (4–6 hours) or $300–$600 with a pro. Consider the undertones of your flooring and countertops to choose a color that complements rather than clashes. Navy + white is foolproof; sage green + natural wood is sophisticated; charcoal + brass is moody.
Your kitchen instantly has a focal point that draws the eye and anchors the whole space with confidence.
10. Mix Wood Types and Finishes
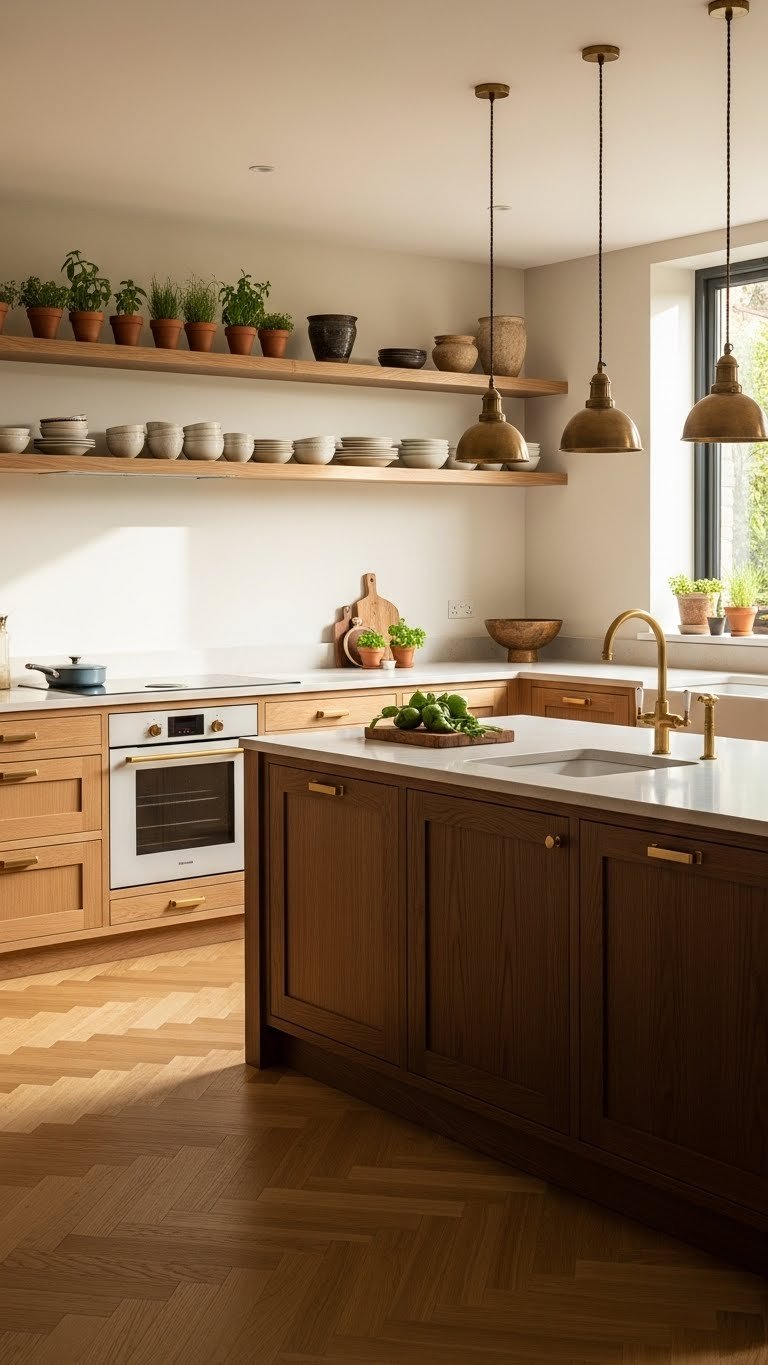
Uniform wood finishes feel flat. Mixing light and dark woods—a natural oak shelf next to walnut cabinetry, a light birch island base with darker wood flooring—creates richness and visual complexity.
You can mix existing pieces or update new ones with stain ($20–$50 per project + time) or paint. Shelving in one tone, cabinets in another, island in a third creates intentional layering without feeling chaotic. Key: keep the metal hardware consistent (brass or blackened brass throughout) to tie it all together.
This approach makes your kitchen feel collected and thoughtfully designed, like pieces came together over time rather than all at once from one showroom.
11. Add Fluted or Textured Cabinet Doors

Flat cabinet doors are basic. Fluted or ribbed doors add texture and catch light beautifully, giving your kitchen depth and visual interest without bold colors or patterns.
Budget: Peel-and-stick textured film ($30–$60 per door, renter-friendly). Mid-range: Order new fluted doors from IKEA, Wayfair, or custom cabinet makers ($150–$400 per door). Full kitchen: $2,000–$6,000+ depending on number of doors. Install new doors yourself in 1–2 hours per door with a drill, or hire help for $300–$800 labor.
Textured doors catch morning and afternoon light differently, creating a dynamic, expensive-looking kitchen that’s calm rather than clinical.
12. Create Hidden Scullery or Pantry
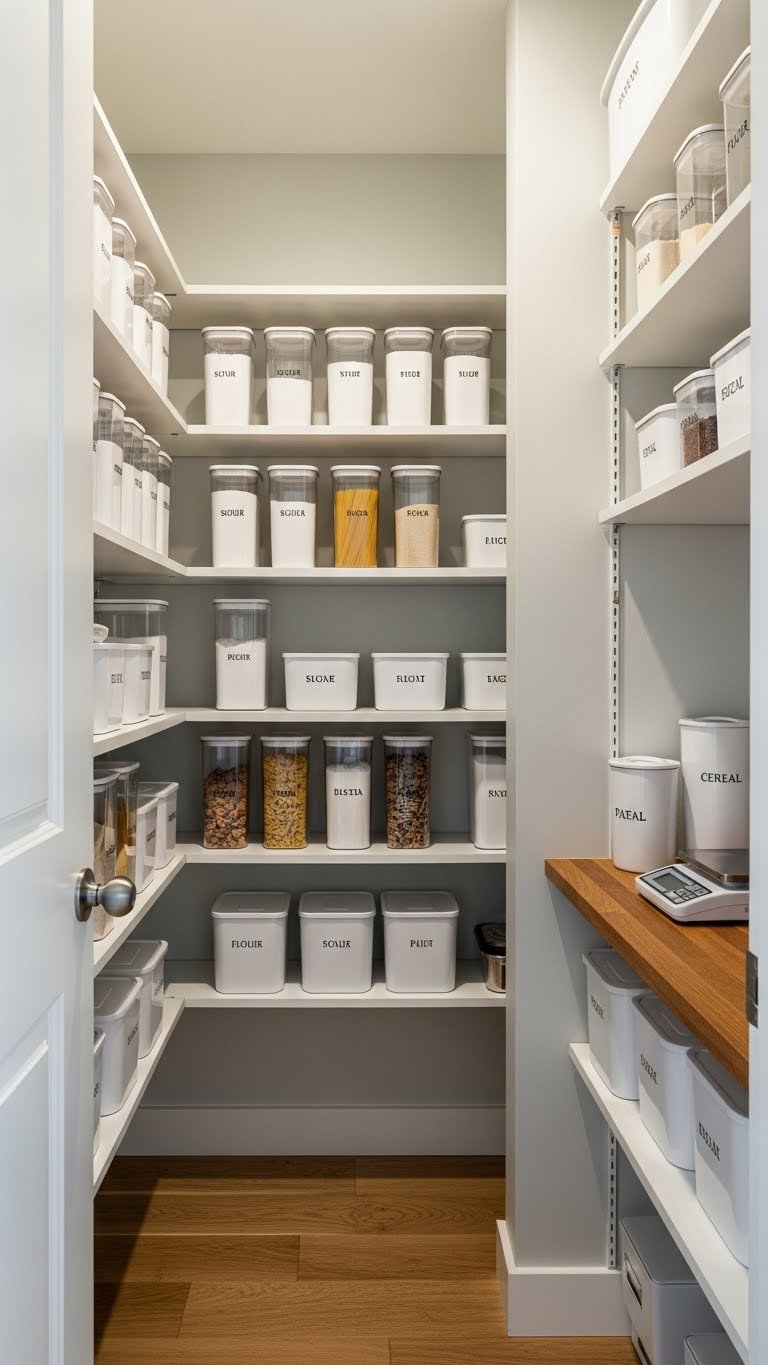
Keeping mess hidden is the secret to a minimalist kitchen that actually functions. A scullery (small prep kitchen) or hidden pantry keeps appliances, supplies, and clutter out of sight while keeping them accessible.
Use a shallow closet, alcove, or dead space and add wire shelving or custom shelves ($100–$400). Add a simple barn door or pocket door ($200–$600) for concealment. Organize with matching bins and labels ($50–$150). Total DIY: 4–8 hours depending on complexity. Renters can use a clothing rack with a tension rod curtain ($40–$80) for a temporary solution.
Now your open kitchen feels serene because the real work happens behind closed doors—and you have room for appliances, bulk items, and supplies without them cluttering your visual space.
13. Install Under-Cabinet Lighting
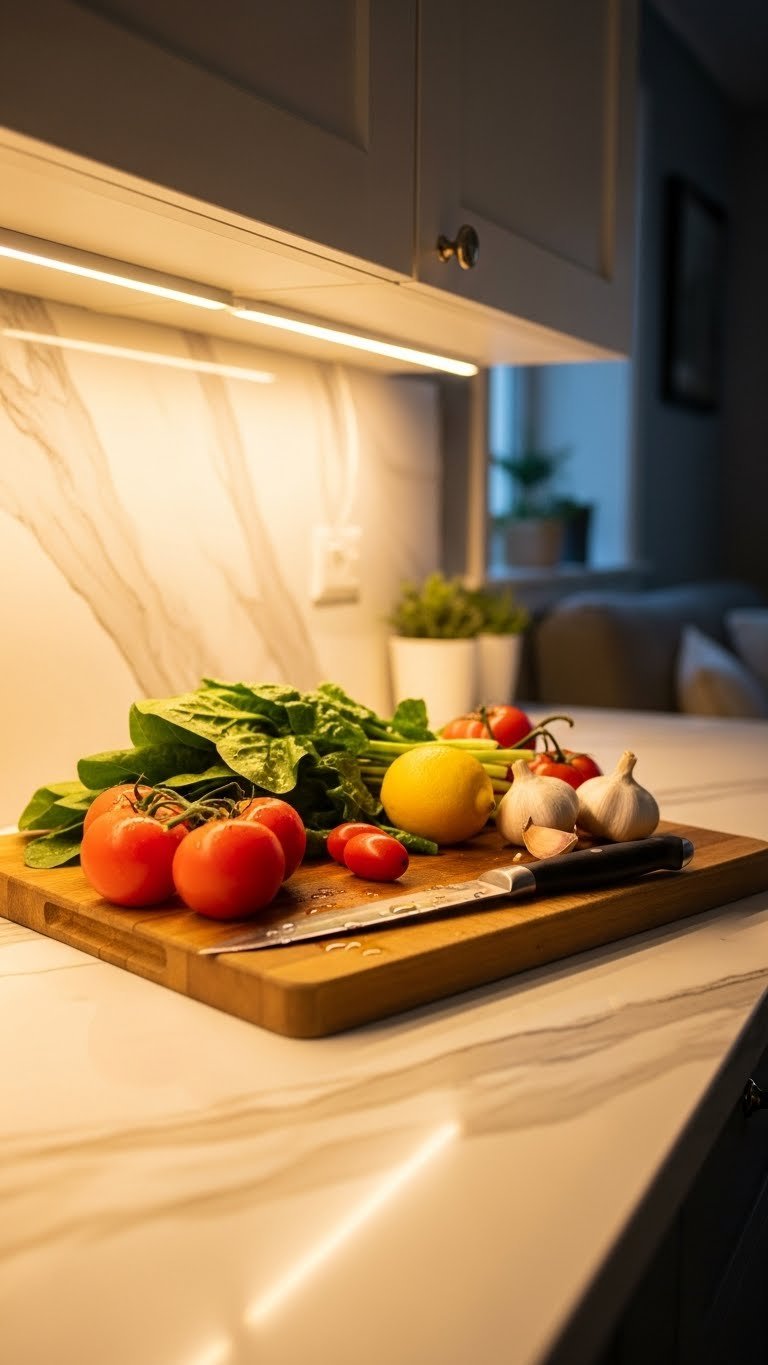
Under-cabinet lighting is functional and beautiful—it illuminates your workspace while adding a warm glow that makes your kitchen feel like a restaurant-quality space.
LED strip lights from IKEA, Home Depot, or Amazon: $30–$100 total. Hardwired under-cabinet lights: $100–$300 + $200–$500 installation by electrician. DIY peel-and-stick LED strips take 15 minutes. Choose warm white (2700K) for that golden, flattering light. Many systems are dimmable, so you can adjust mood and intensity.
Your kitchen suddenly has depth and ambiance, and prepping food becomes easier and more enjoyable with proper task lighting.
14. Mix Countertop Materials
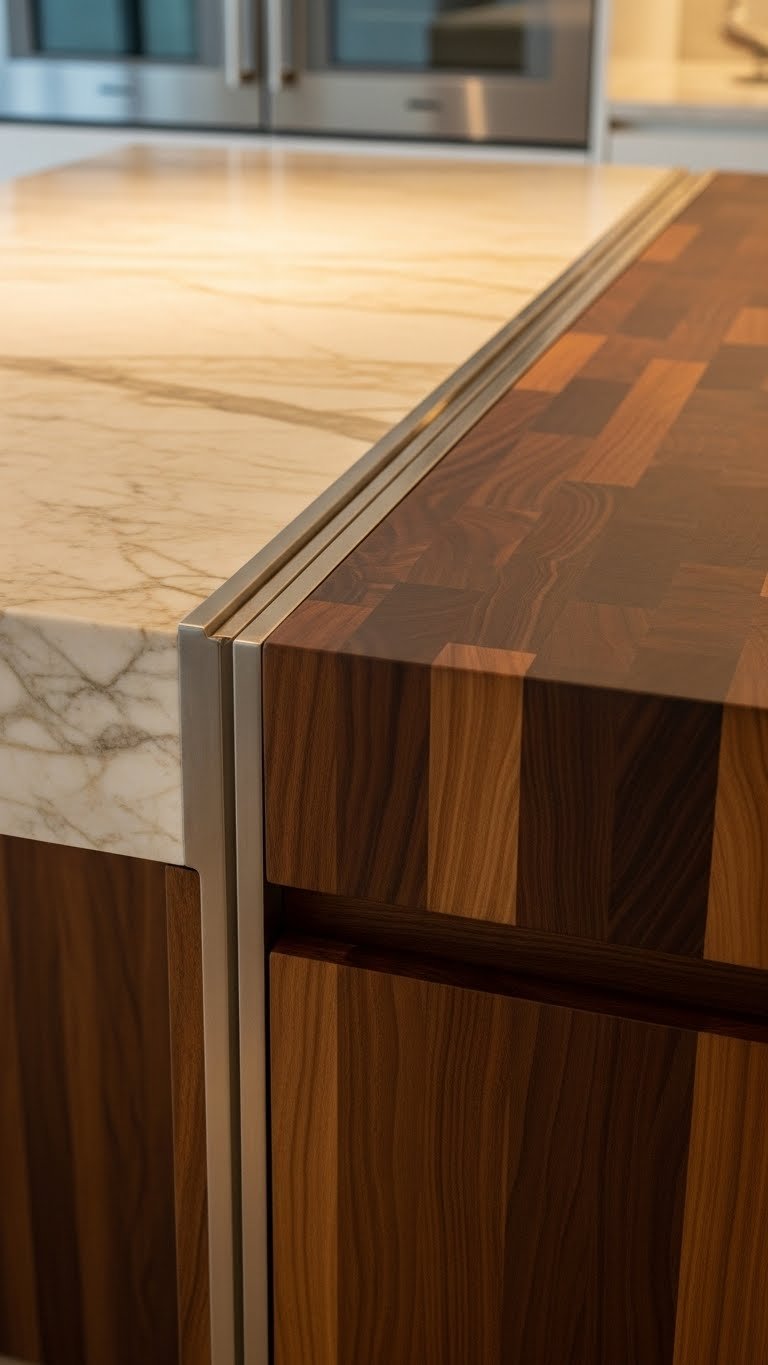
One continuous countertop is predictable. Mixing marble, butcher block, concrete, or stainless steel—different materials on island versus perimeter, or sections within the same counter—creates visual interest and functionality (wood for prep, stone for durability).
Marble or quartz: $40–$100+ per square foot installed. Butcher block: $30–$80 per square foot. Concrete: $50–$150 per square foot. A mixed approach for a 15-linear-foot kitchen runs $2,000–$5,000. Hire a fabricator to handle transitions and sealing ($500–$1,500 labor). For renters, removable countertop covers or butcher block sheets ($100–$300) can create zones without permanent changes.
Your kitchen looks thoughtfully designed and high-end, with materials chosen for both beauty and function rather than uniformity.
15. Swap Cabinet Hardware for Brass or Blackened Brass

Hardware is jewelry for your kitchen. Upgrading from basic silver to brushed brass, blackened brass, or matte gold instantly makes your cabinets look premium without a full renovation.
Pulls and knobs from Anthropologie, Rejuvenation, or hardware-focused shops: $8–$25 per piece. A kitchen with 20–30 drawers and cabinets runs $200–$700 total. DIY swap takes 30–45 minutes with just a drill. The change is immediate and completely reversible.
Your cabinets instantly feel intentional and collected, like they were chosen for their beauty, not just function.
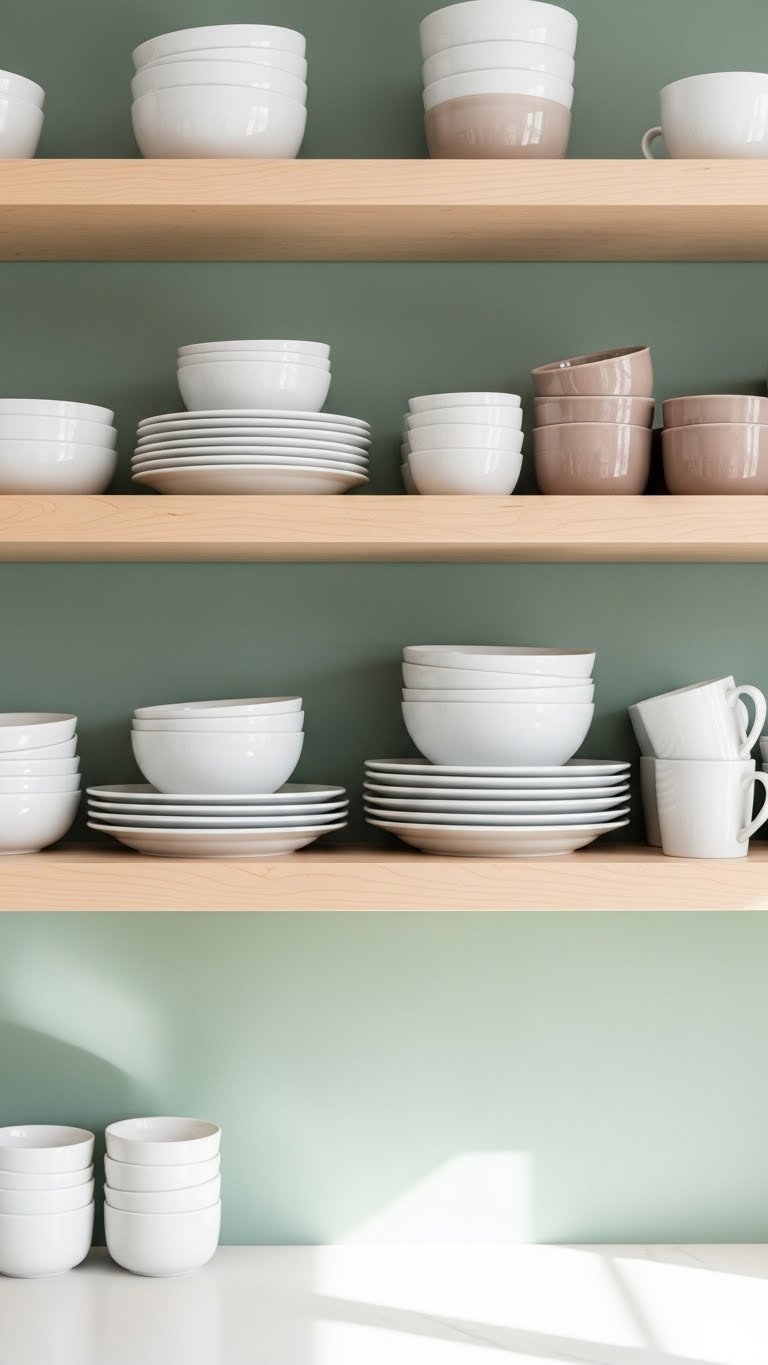
16. Create Open Shelving Display Zone
Instead of cramming shelves everywhere, create one focused display zone—above a peninsula, along one wall, beside a window—where you intentionally style a small collection of beautiful items you actually use.
Floating shelves: $80–$300 each. 2–3 shelves create visual impact without overwhelming. Keep styling to 8–12 items maximum (white dishware, glass jars, one small plant, books). Installation: 2–3 hours DIY or $150–$300 with a pro. Budget for styling: you likely already own most items.
This approach gives you open shelving aesthetics without the chaos—you get that airy, designed feeling while keeping most storage closed.
17. Paint Interior Cabinet Walls Contrasting Color
Paint the interior walls of open shelves or glass-front cabinets in a contrasting color—a soft sage, warm taupe, or dusty blue—to add depth and make displayed items pop.
Cabinet-grade paint: $20–$40 per pint. Prep and paint interior walls: $0 DIY (2–3 hours) or $150–$300 with help. Choose colors that complement your main palette but feel slightly different—not a shocking contrast, just enough to add dimension. This works beautifully in glass-front uppers or open shelves.
You’ve added visual interest and made your displayed items look more curated and intentional, like they’re in a designed showroom rather than just sitting on shelves.
18. Introduce Stone or Concrete Range Wall

A textured stone or concrete wall behind your range becomes a dramatic, grounding focal point that feels organic and high-end without being trendy.
Concrete peel-and-stick panels: $100–$200 (easy, renter-friendly). Real concrete finish: $300–$800. Stone veneer: $400–$1,200. Installation: DIY 2–4 hours for panels, or hire professional for $300–$1,000 labor. Pair with minimal styling (no upper cabinets, just range and stone) for maximum impact.
Your kitchen gains an anchor point that feels intentional and luxe, drawing focus to the most-used zone in your space.
19. Style Island with Open Shelving and Closed Storage Hybrid
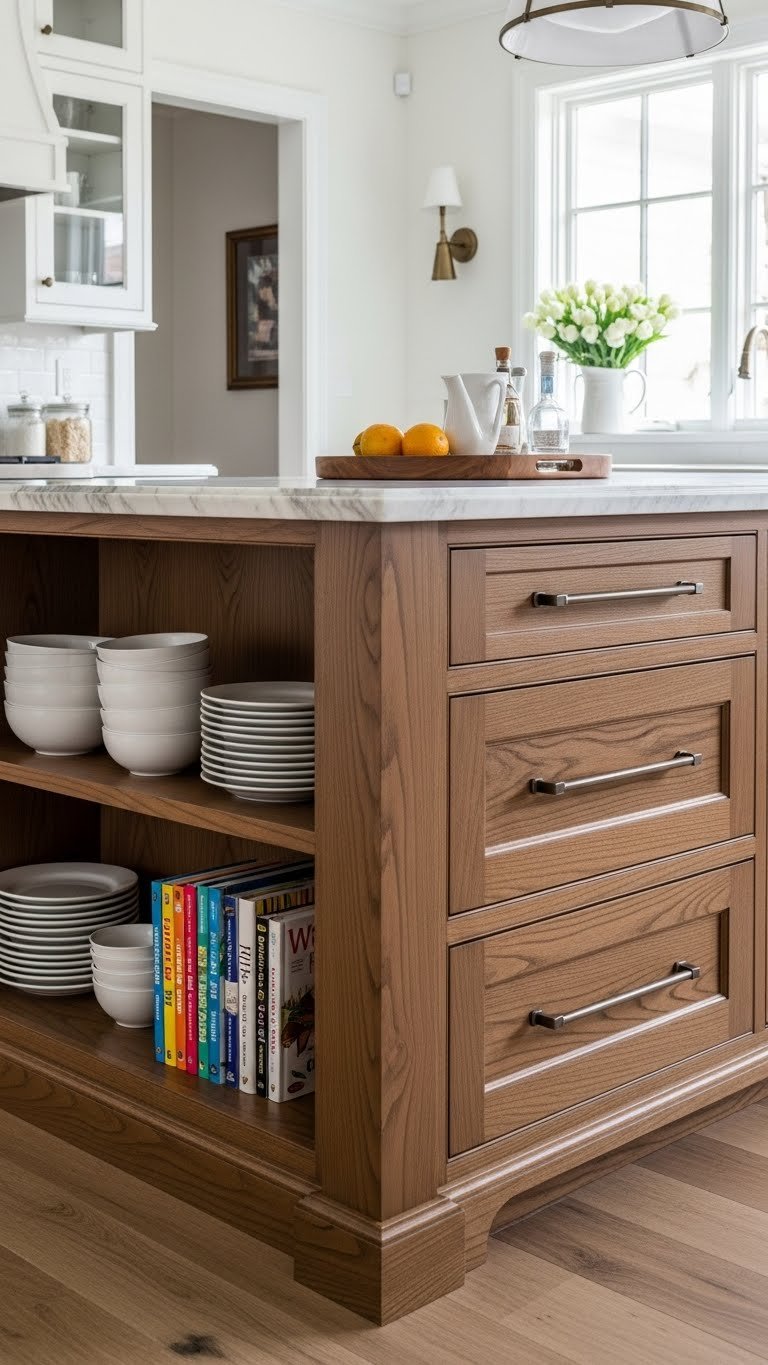
An island with both open and closed storage lets you display beautiful items while hiding everyday clutter—the best of both worlds for a polished, functional kitchen.
Use a stock or semi-custom island base ($500–$2,000) with mixed door and shelf configurations, or DIY with shelving units and furniture-style pieces ($300–$800). Add open shelving on one side and drawer cabinets on the other. Total install: DIY 4–6 hours or hire $300–$800.
This approach gives you the visual benefit of open shelving with the practical storage of closed cabinets, so your kitchen stays calm and functional.
20. Add Greenery and Natural Elements
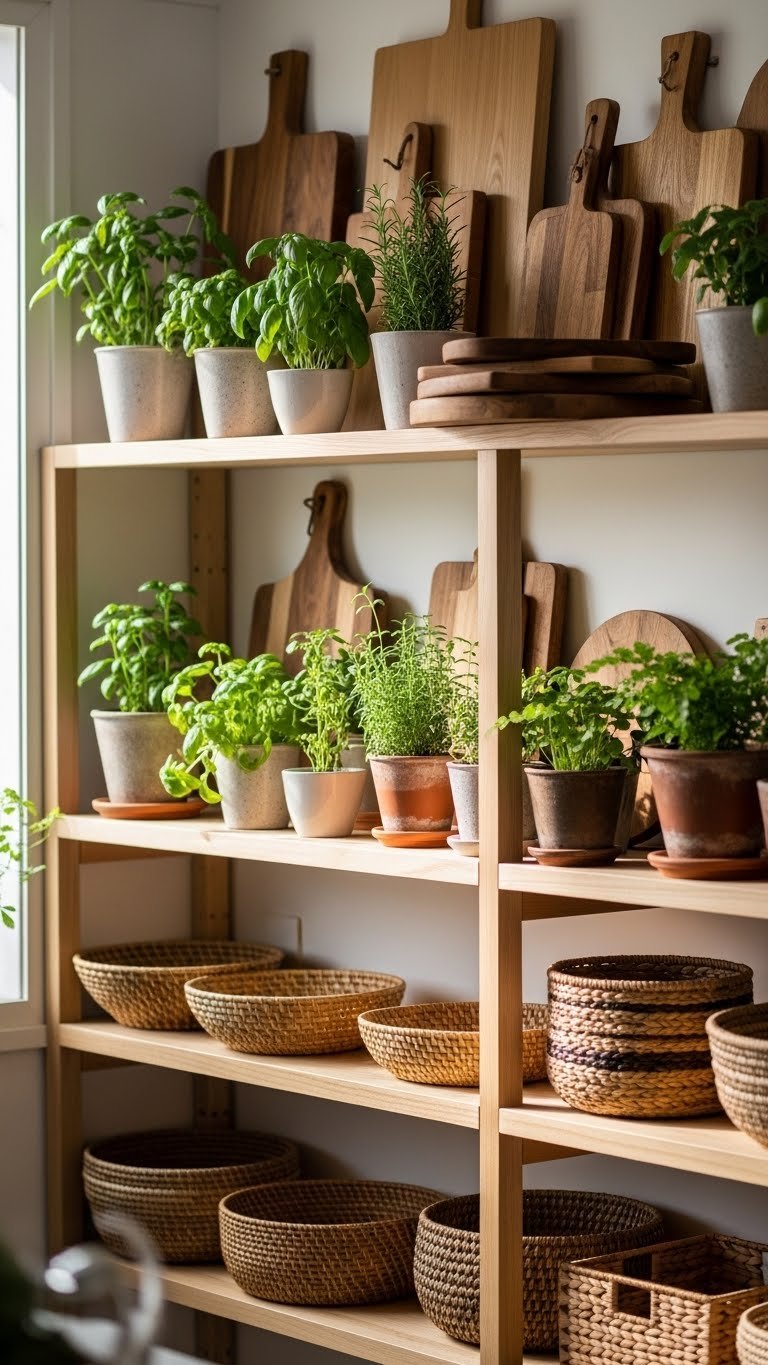
Plants and natural materials soften a kitchen and connect it to nature, making the space feel alive and warm rather than sterile or cold.
Small potted plants: $15–$50 each (low-light tolerant options: pothos, snake plant, ZZ plant). Wooden serving boards, bowls, utensils: $20–$80 each. Woven baskets for storage: $25–$100 each. No install time—just styling. Group plants near windows or use grow lights ($20–$60). Choose items with natural, warm tones (wood, ceramic, woven fibers) to tie them together.
Your kitchen feels like a sanctuary rather than just a functional space—a room where you want to linger, not just grab coffee and go.
21. Install Brass or Gold-Toned Faucet
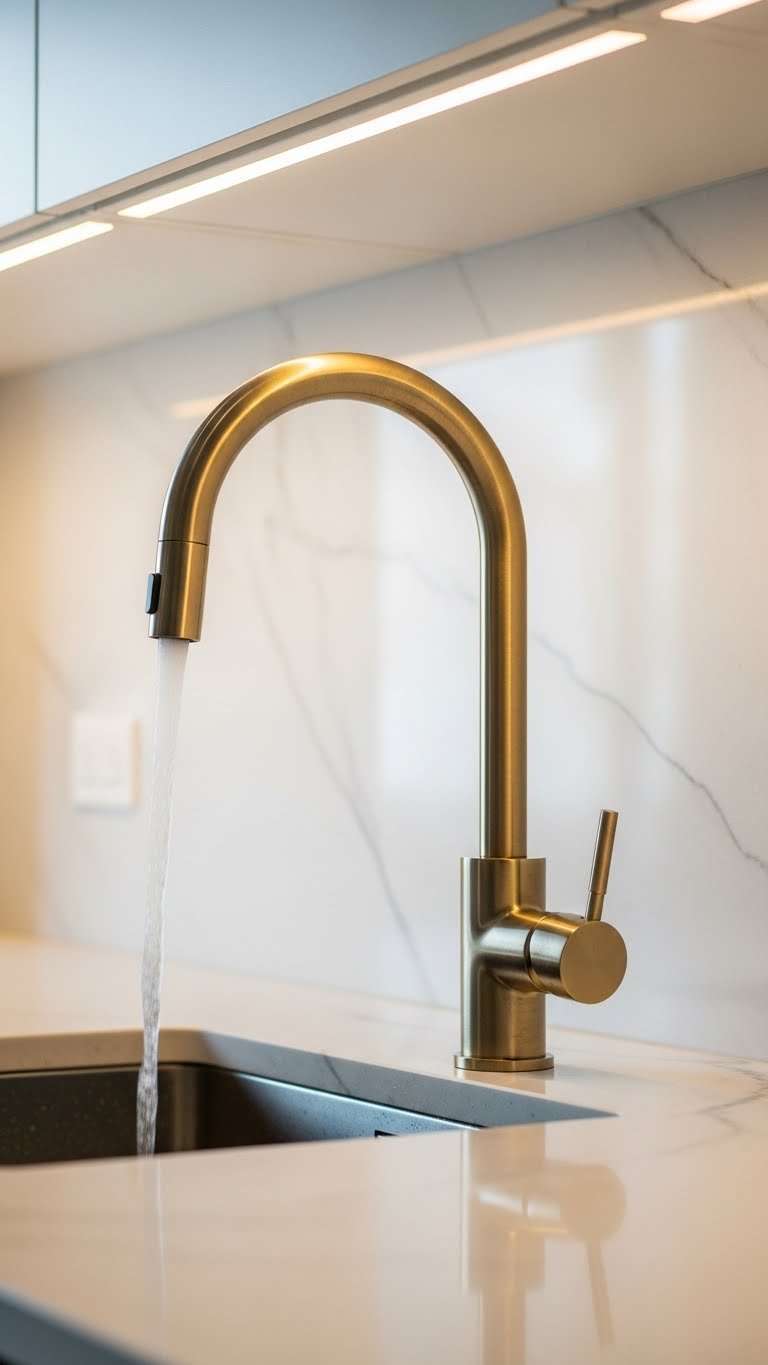
A brass or gold faucet is an instant luxury upgrade that transforms how your sink area looks and feels, catching light and adding warmth.
Brushed brass or champagne gold faucets: $150–$600 from brands like Wayfair, Rejuvenation, or hardware stores. Installation: DIY 30 minutes (if replacing existing) or $100–$300 with a plumber. Pair with minimal styling—keep the sink area clear—so the faucet becomes the focal point.
This single swap makes your entire kitchen feel intentional and high-end, and you interact with your faucet multiple times daily, so the investment pays back in joy.
22. Create Prep Zone with Specialized Surfaces
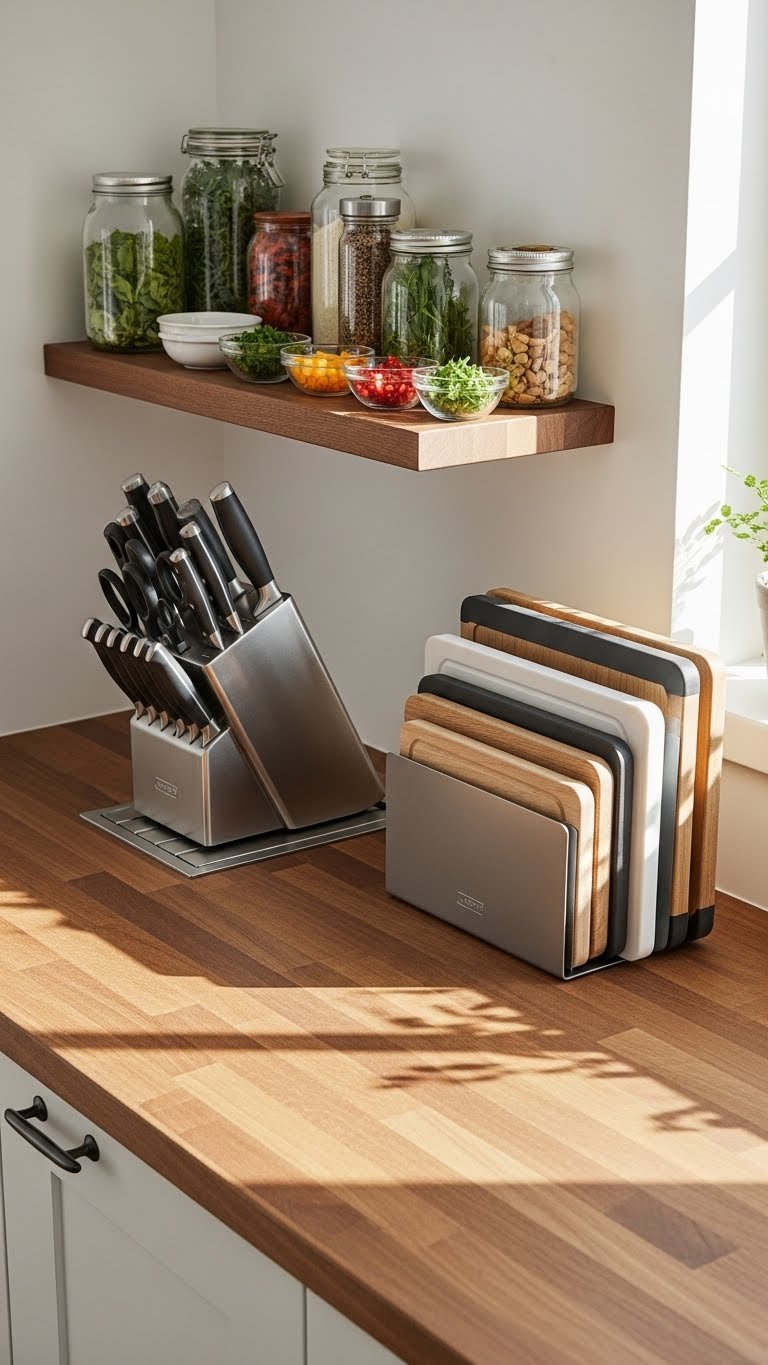
Designating a specific prep zone with the right surfaces and storage—a butcher block section, a knife block, a small shelf for frequently used ingredients—makes cooking easier and more enjoyable.
Use butcher block or wood for the prep area ($30–$80 per square foot), add a knife block ($30–$100), and one small open shelf ($60–$200). Total cost: $200–$500. Install yourself in 2–4 hours or hire help for $300–$500. Stock it with items you use daily so the zone stays functional and doesn’t become a styling prop.
Your kitchen becomes more efficient and enjoyable to cook in, plus this organized zone signals intentionality to anyone who sees it.
23. Mix Metallic Accents Across Finishes
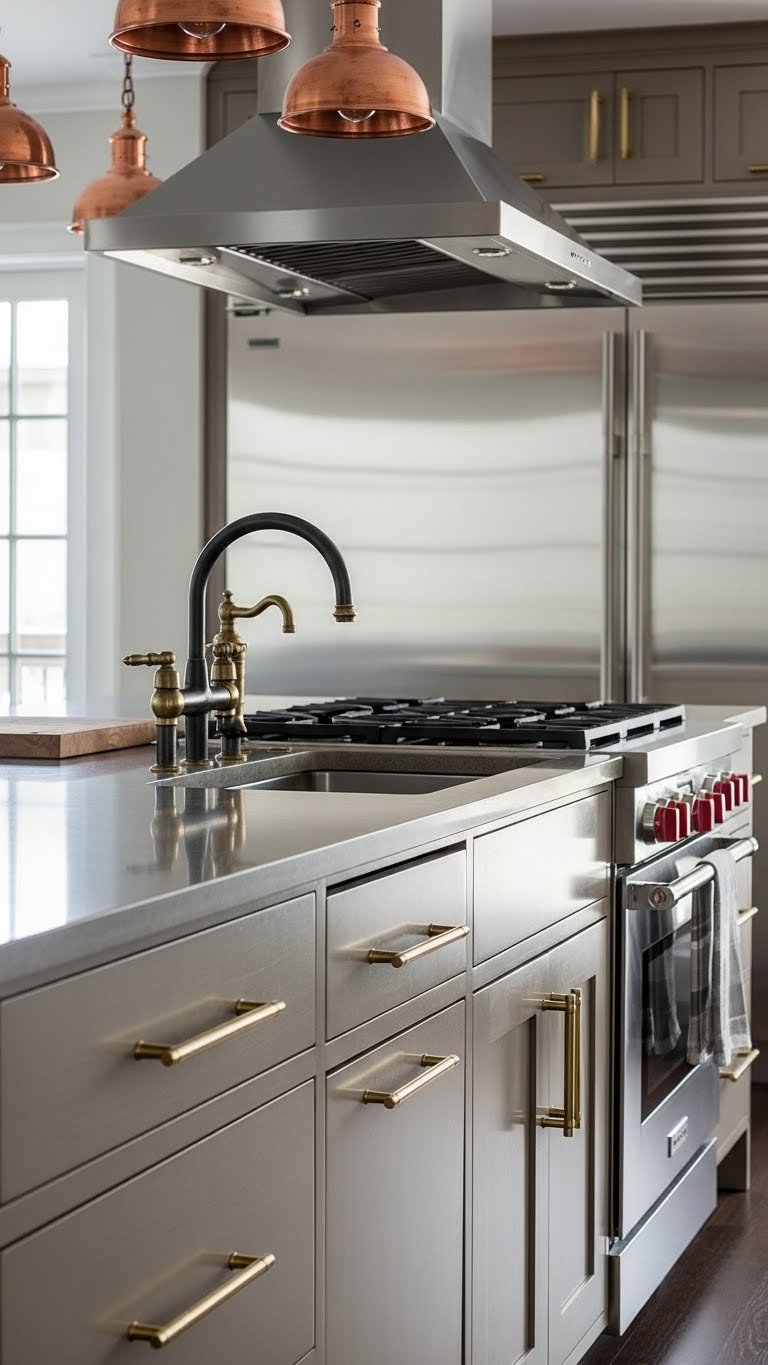
Gone are the days of matching all your metals. Layer brass, bronze, copper, and blackened finishes across hardware, faucet, lighting, and accents for a collected, high-end look.
Budget per piece: $40–$300 depending on item type. Keep metals in the same undertone family (warm metals together: brass, bronze, rose gold; cool metals together: chrome, stainless, gunmetal). Total cost for full kitchen: $500–$2,000 depending on scale. The beauty is you can add metals gradually as you upgrade pieces.
Your kitchen feels designed and intentional, like you’ve curated pieces over time rather than buying everything at once from one source.
24. Add Woven or Textured Wall Baskets for Storage
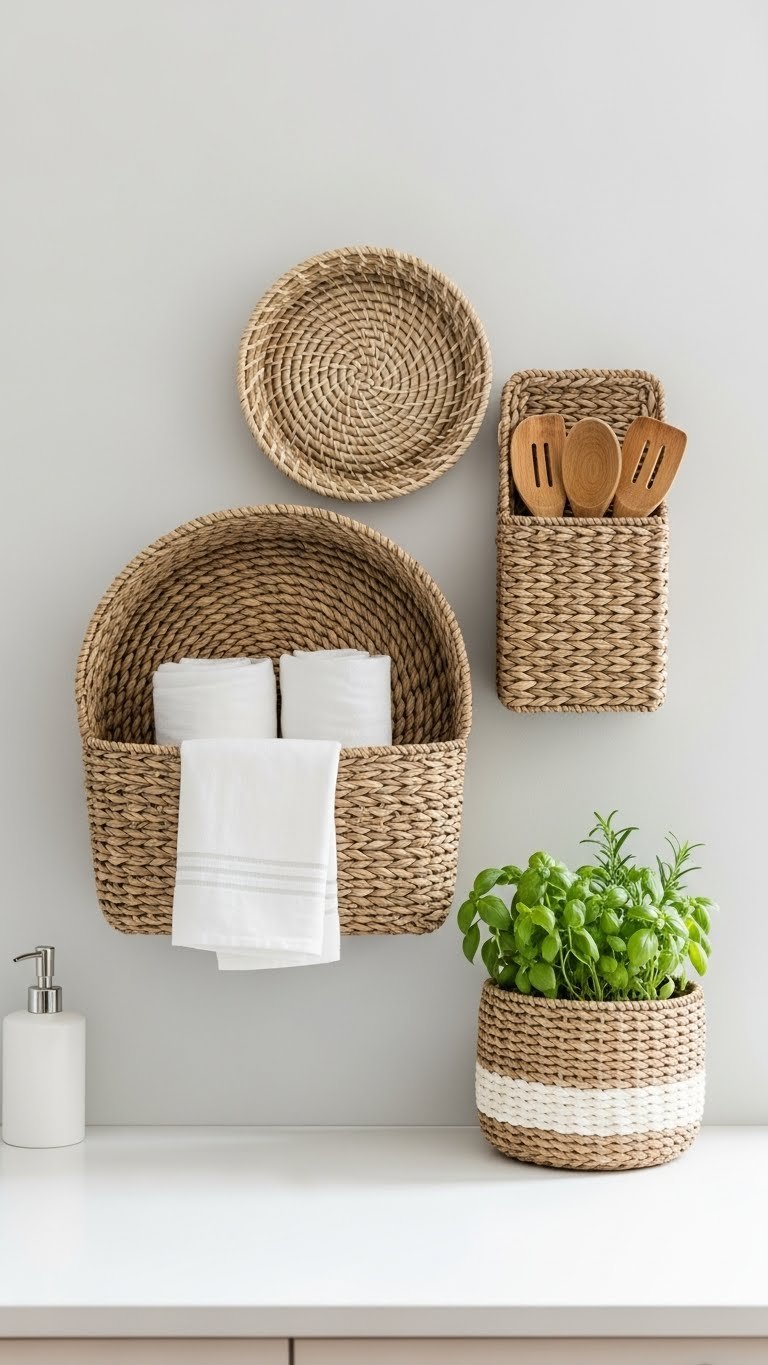
Wall-mounted woven baskets add texture, storage, and organic warmth without taking up counter space—perfect for a small kitchen or renter who needs hidden storage with style.
Wall baskets: $20–$80 each (Wayfair, Target, IKEA, Etsy). Mounting hardware: $10–$30 total. Install: 30 minutes DIY with just a drill and level. Fill with kitchen linens, small supplies, or nothing—just let them add visual interest. Choose baskets in similar weaves or colors for cohesion.
You’ve gained functional storage that looks beautiful and feels organic, turning a blank wall into a designed, intentional zone.
25. Install Soft-Close Drawers and Doors
Soft-close drawers and doors are a small upgrade with big impact on daily experience—no more slamming, no more pinched fingers, and your kitchen feels more refined and considered.
Soft-close hinges and slides: $15–$40 per drawer or door. Full kitchen retrofit: $200–$600 total. Installation: DIY 30 minutes to 1 hour per door/drawer with a drill, or hire a handyperson for $300–$800. If you’re building new, most stock cabinets offer soft-close as an upgrade ($50–$200 more).
Your kitchen suddenly feels like a luxury space—the smooth, quiet operation makes every interaction feel intentional and peaceful.
26. Curate Open Shelves with Negative Space

The secret to open shelving that looks designed (not cluttered) is negative space—leaving room between items so your eyes can rest and each piece feels important.
This is free to implement—just edit your existing items down. Keep only 8–12 items per shelf spread across the entire surface with gaps. Style with items you actually use: white dishware, cookbooks, one plant. If shelves feel empty, that’s the point. The goal is calm, not maximum coverage. Rearrange seasonally to keep it fresh without adding more stuff.
Your open shelves become a restful visual break in your kitchen, making the whole space feel intentional and high-end—like a designed showroom, not a storage unit.
Closing
Save this post for your next kitchen refresh and try one idea this weekend. Whether you start with paint, hardware, or just rearranging your open shelves, small changes add up fast—and your kitchen deserves to feel both functional and beautiful.
Leave a Reply