
Your kitchen doesn’t need a complete gut renovation to feel fresh and modern. Whether you’re renting, own your home, or have a tight budget, these 28 ideas blend trending 2025 styles with real-world practicality. You’ll discover affordable hacks alongside investment pieces, DIY projects you can tackle this weekend, and shopping recommendations that won’t break the bank. From mixing textures to choosing the right color palette, we’re walking you through every decision that makes a kitchen feel sleek, intentional, and absolutely yours. Ready to refresh your space? Let’s go.
1. Paint Walls a Soft Sage Green
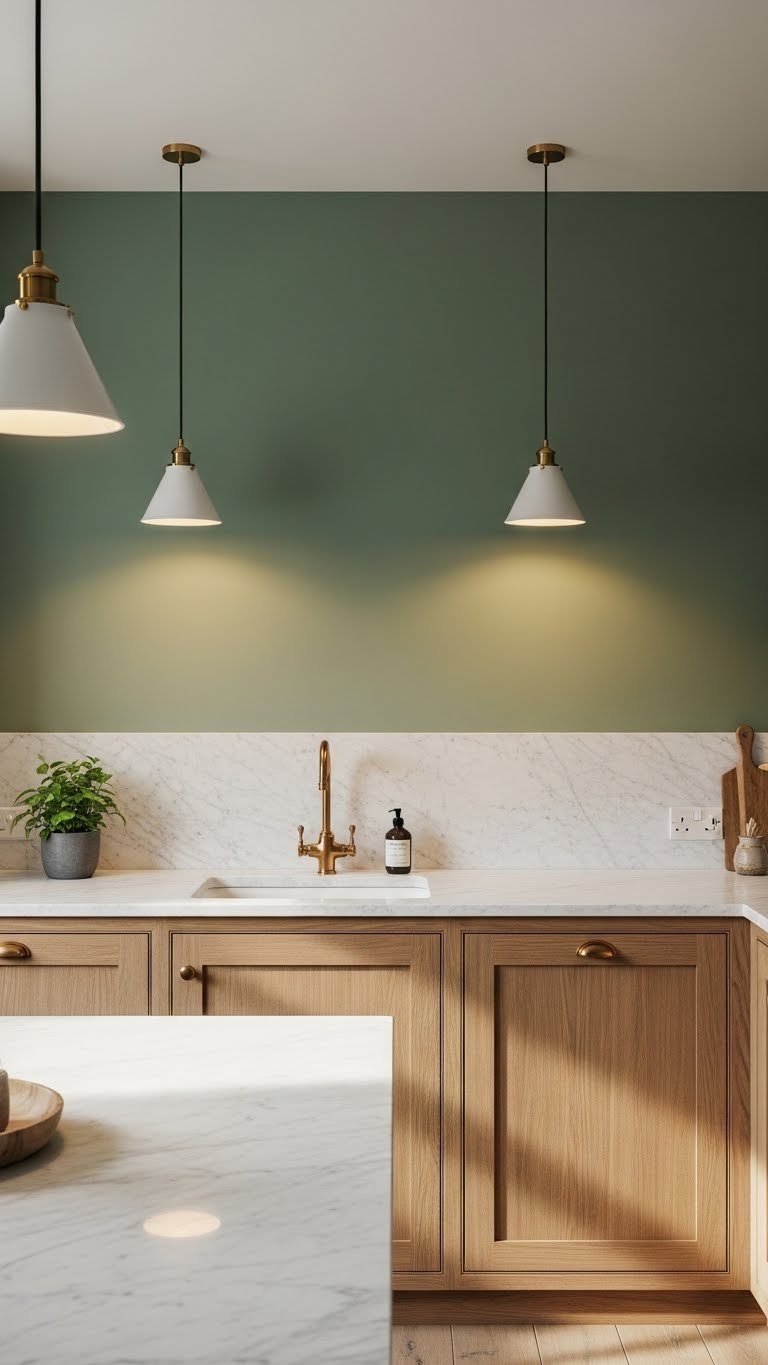
Sage green is the 2025 color everyone’s choosing—76% of design pros voted it as the top kitchen color. Unlike trendy pastels that feel temporary, sage works as a sophisticated backdrop that makes wood tones and metallics pop.
Pick a mid-tone sage (not too light, not too dark) like Sherwin-Williams Accessible Beige or Benjamin Moore’s 2050-50. One gallon covers about 400 square feet, so budget $30-$50 for paint and supplies. Grab painter’s tape, a roller, and primer from Home Depot or Lowe’s. Expect 4-6 hours for one room if you prep properly. Roll in thin, even coats and let dry completely between coats.
Pro tip: Test your color on a large patch of wall first—sage looks different depending on your lighting. If green feels too bold, soft blue or warm taupe offer similar modern vibes with less commitment.
This single change makes your kitchen feel curated and calm while keeping the space feeling open and airy.
2. Mix Metallic Finishes for Visual Depth
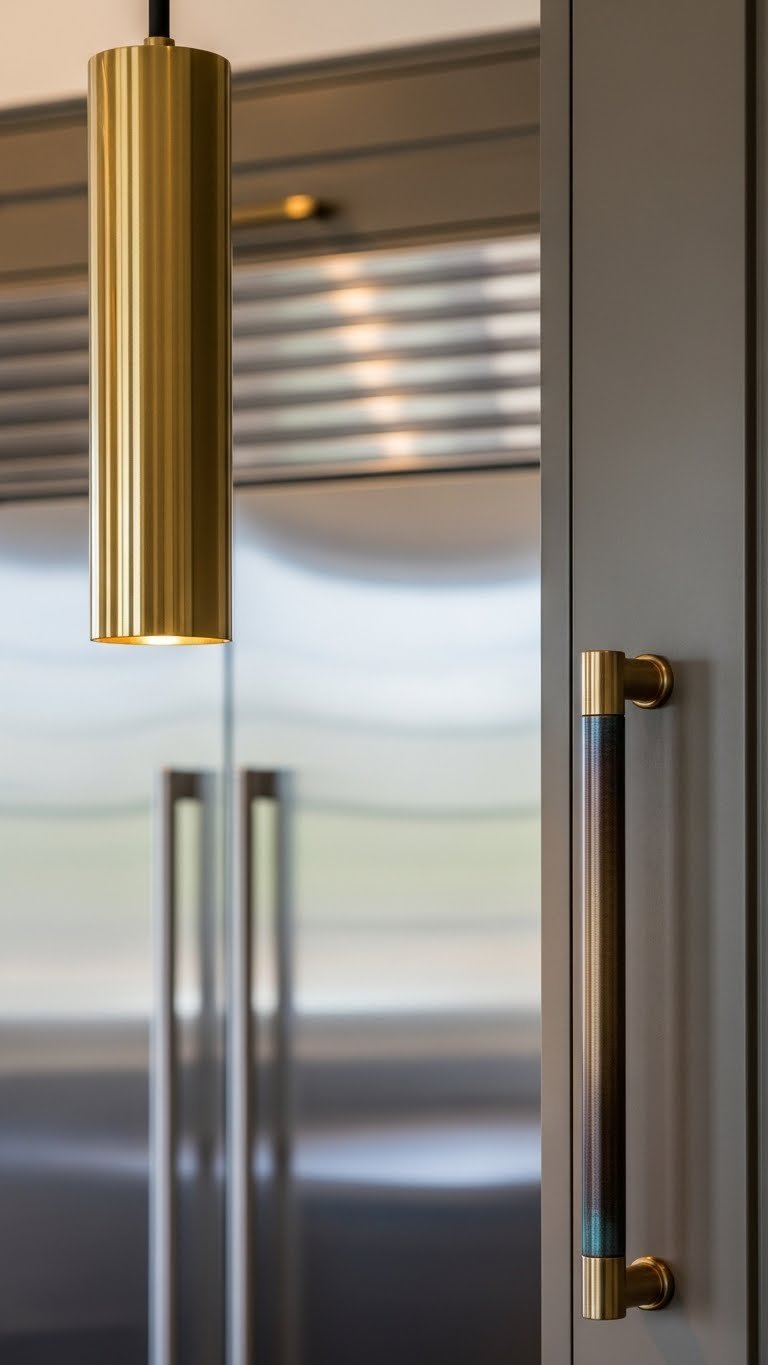
Matching all your metal finishes went out years ago. Mixing brass, bronze, stainless steel, and matte black creates depth and keeps the space from feeling one-note or sterile.
Start by choosing one “anchor” finish—brass is trending for warmth, or stainless steel if you want contemporary cool. Add 1-2 complementary finishes through hardware, fixtures, and appliances. Swap out cabinet knobs for mixed-metal options ($2-$8 per knob from Target, IKEA, or Wayfair)—total project costs $30-$100 depending on how many cabinets you have. Pendant lights are another easy mix point; grab one brass + one matte black for $40-$150 each. Takes 30 minutes if you’re just swapping hardware.
The trick? Make sure finishes have slightly different undertones—warm brass pairs beautifully with cool stainless steel or matte bronze.
Your kitchen instantly gains sophistication and personality without major renovation, and the mixed metals photograph beautifully for sharing.
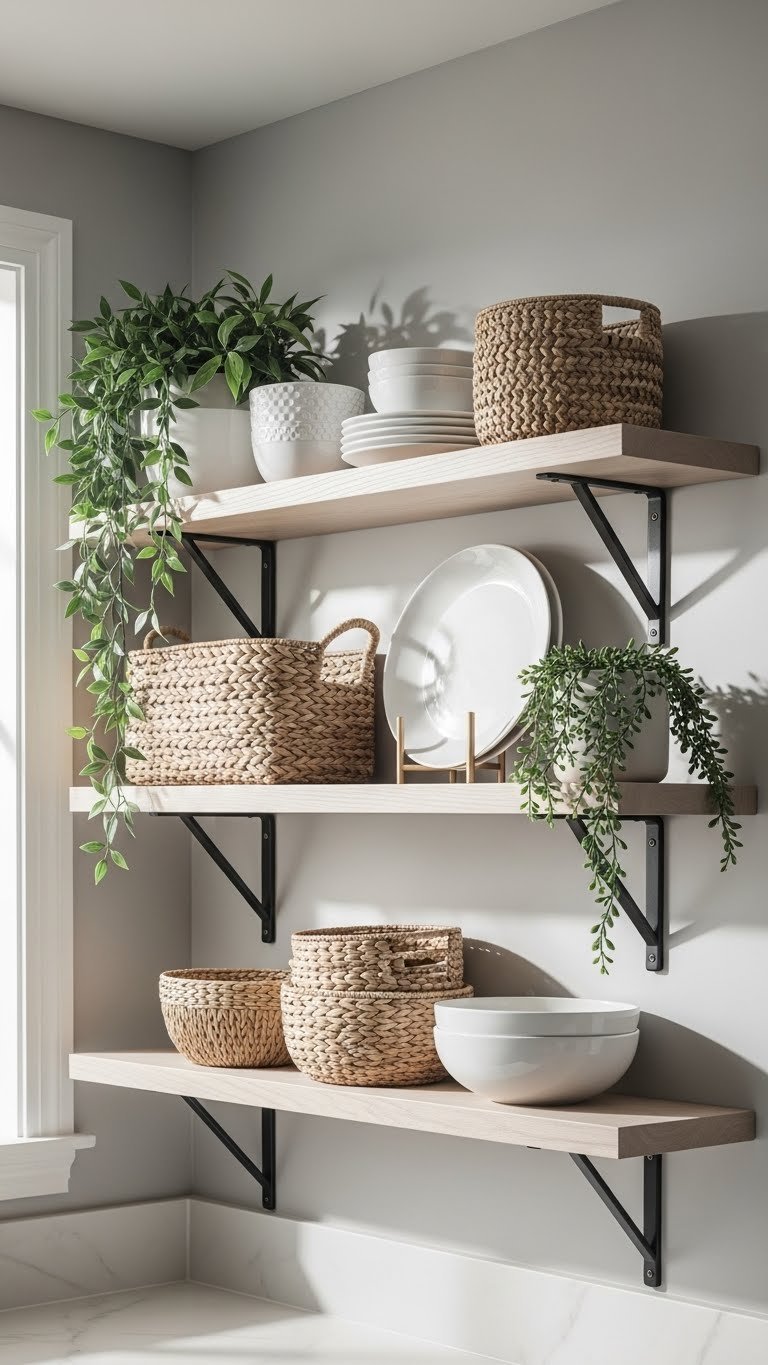
3. Add Open Shelving Above the Sink
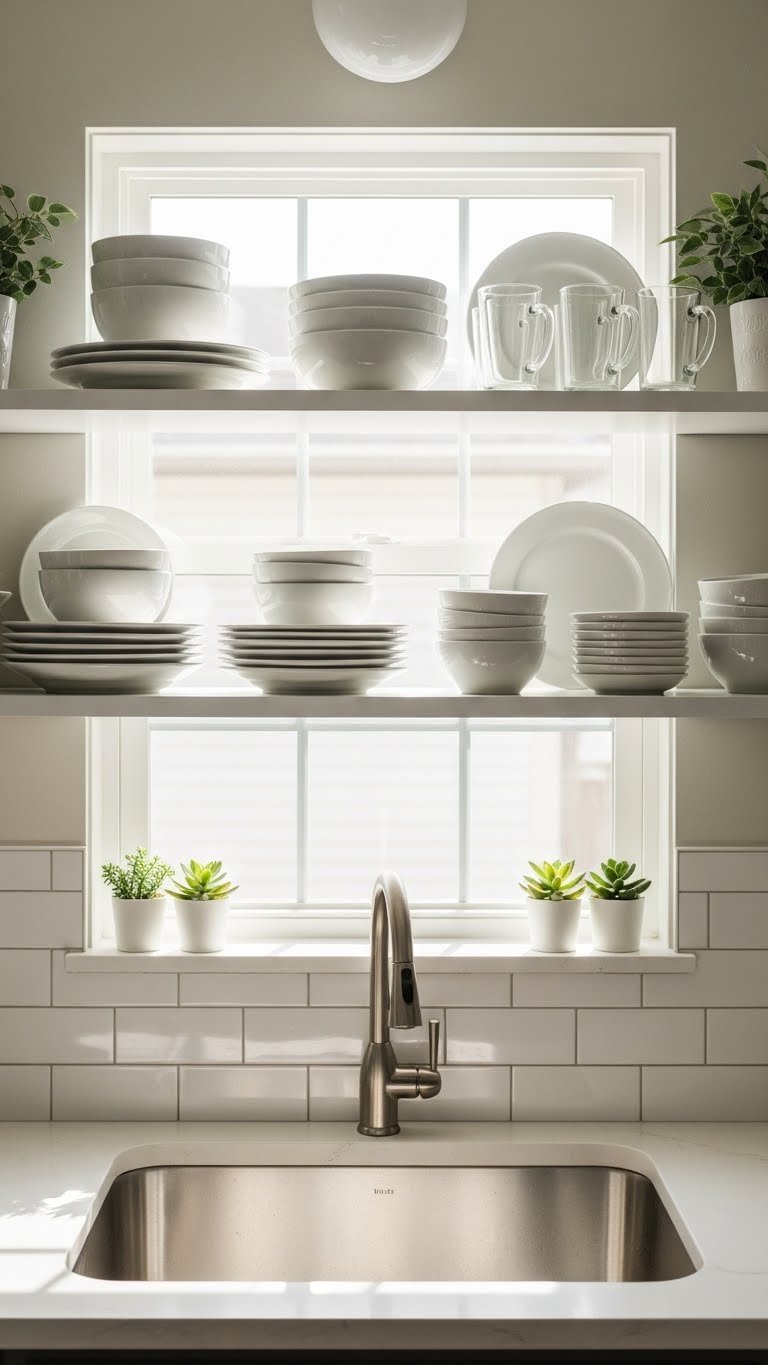
Open shelving makes kitchens feel larger, more accessible, and modern. Floating shelves above the sink create storage that’s both functional and beautifully styled.
Install 2-3 floating shelves in stainless steel or wood-look brackets. Floating shelf kits from IKEA run $25-$40 each, or go higher-end with Anthropologie for $80-$150 per shelf. You’ll need a stud finder, level, and drill—budget 1-2 hours total. If drilling into tile feels risky, adhesive shelves like Command offer a renter-friendly $15-$25 alternative (though weight capacity is lower). Style with everyday dishes you actually use plus a few decorative pieces—the key is keeping it uncluttered so it reads as intentional, not chaotic.
Pro tip: Use clear glass or mismatched vintage mugs to add visual interest without heaviness.
Now you’ve created a focal point that serves double duty as storage and decor, plus everything you reach for constantly is at eye level.
4. Swap Cabinet Hardware for a Statement Look
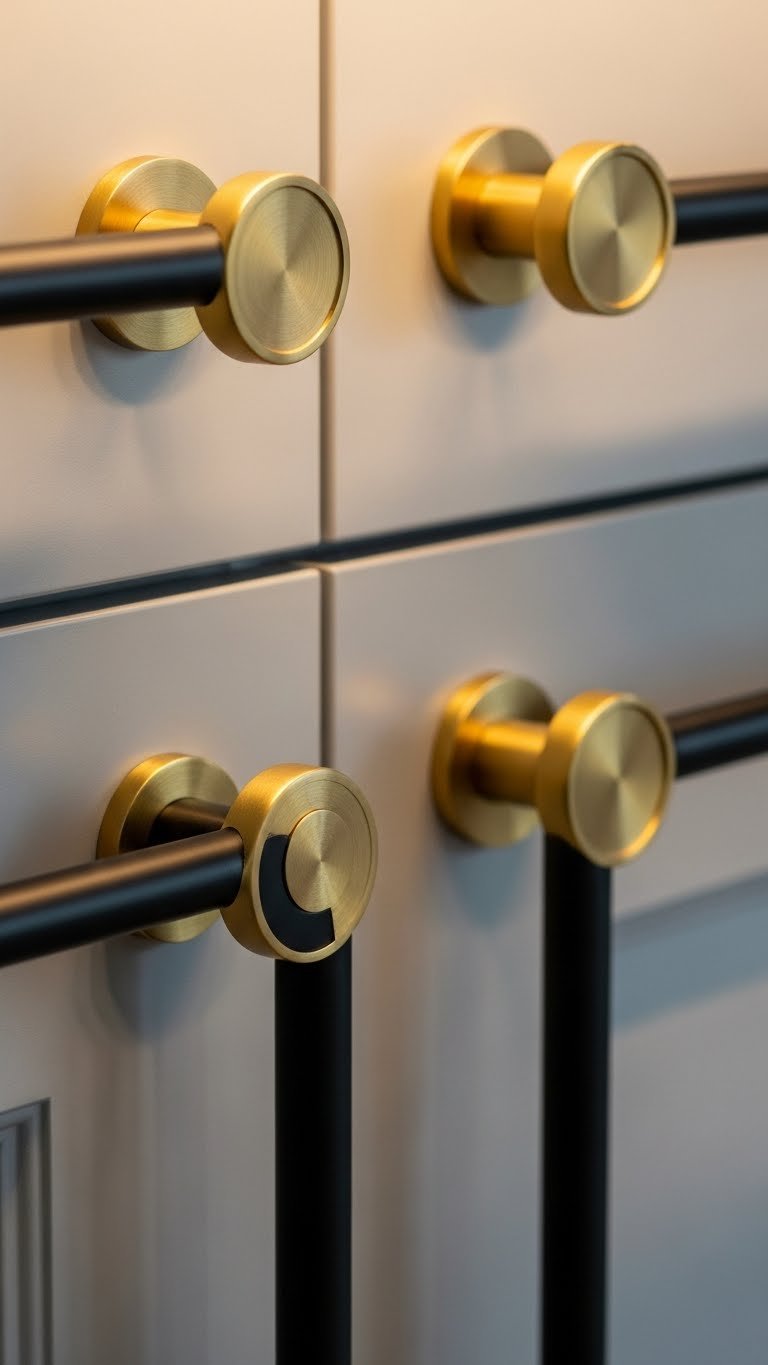
Hardware is the jewelry of your kitchen, and upgrading it takes literally 15 minutes but changes everything. This is one of the highest-impact, lowest-effort updates you can make.
Choose between bold geometric shapes, vintage-inspired cup pulls, or minimalist bar handles—whatever speaks to your style. Mix metals here: try brass + matte black or bronze + brushed nickel. Packages of 5-10 knobs run $25-$60 from IKEA, Target, or Wayfair; higher-end hardware from Anthropologie or CB2 is $8-$15 per piece. Grab a drill with a small bit, remove old hardware (usually two screws), and swap in new pieces. Takes 15-30 minutes even if you’re going slow.
Order extra in case you mess up installation—returns are easy, and you want matching hardware across drawers.
Your cabinets go from builder-grade to designed overnight, and it costs less than dinner out.
5. Install a Textured Backsplash for Visual Interest

67% of designers favor mixed backsplashes because they add personality without going overboard. A textured backsplash pulls your whole look together and becomes a focal point.
Combine subway tiles with 2-3 other tile shapes—try mixing 3×6 subway with 1-inch hexagon or small square tiles in complementary colors or finishes. Peel-and-stick tiles from brands like Aspect or Smart Tiles are $20-$30 per sheet and renter-approved; traditional tile from Home Depot runs $1-$5 per square foot. DIY installation takes a weekend for most kitchens; hire a pro for $500-$1,500 labor if you want perfection. Pre-plan your layout on graph paper, measure twice, and take your time with spacing.
Pro tip: Use light grout on light tile to minimize lines, or go dark grout on light tile for dramatic contrast.
The textured, layered backsplash becomes something people notice and compliment—it’s the detail that makes your kitchen feel thoughtfully designed.
6. Choose Warm Wood Tones Over Gray Cabinetry
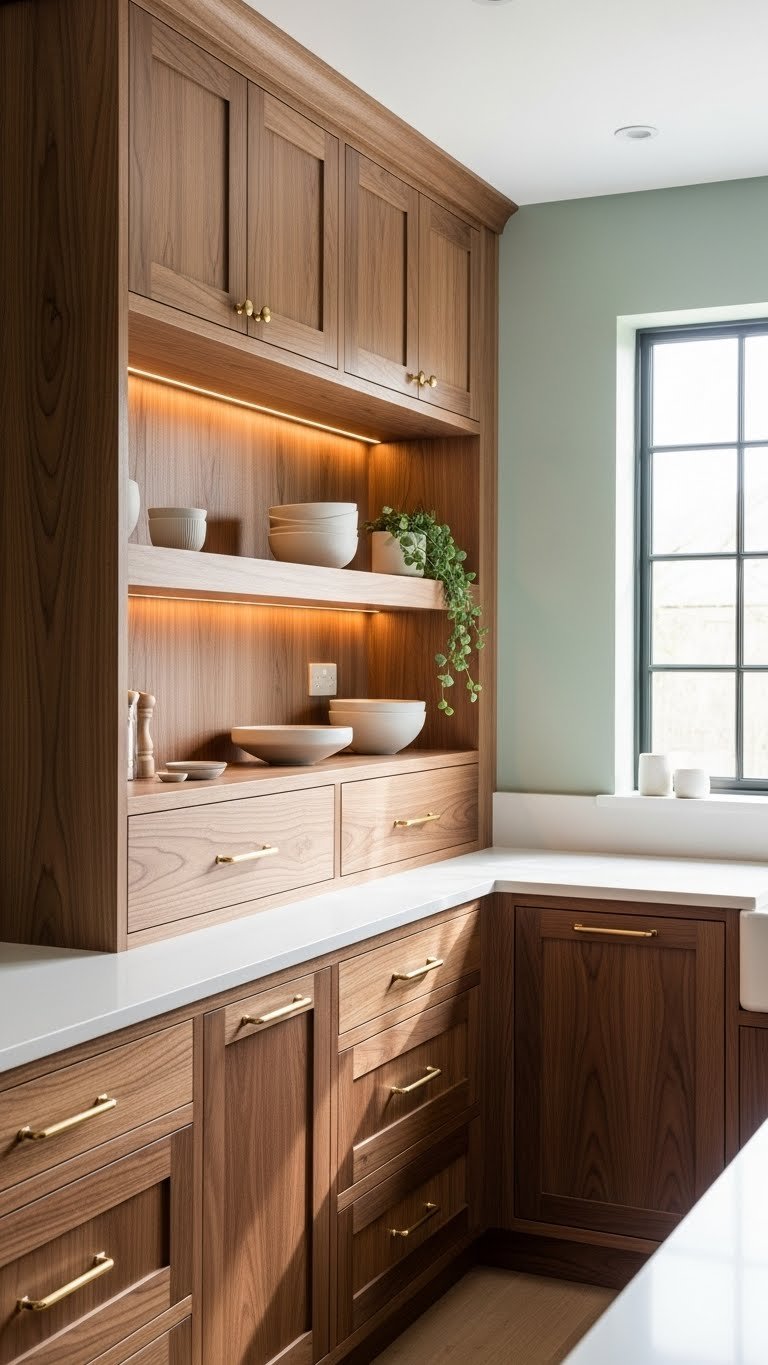
Gray cabinetry dominated 2020-2023, but it’s fading fast. Warm wood tones—walnut, oak, cherry—are back and feel infinitely warmer and more livable than cool grays.
If you’re replacing cabinets, walnut or honey oak run $3,000-$8,000 for a full kitchen depending on size; consider brands like IKEA, Lowe’s, or local cabinetmakers. Alternatively, stain or paint existing cabinets: pick a warm-toned stain like Minwax Dark Walnut ($8-$12 per can) or go with a warm wood-look paint. Budget 2-3 days for stripping, sanding, staining, and drying if DIYing; hire a pro for $1,500-$3,000. Pair with brass hardware and warm lighting to maximize the cozy factor.
If you’re renting, warm wood-look peel-and-stick contact paper ($15-$30 per roll) temporarily upgrades cabinet look for zero commitment.
Suddenly your kitchen feels warm, inviting, and less sterile—like a space people actually want to spend time in.
7. Upgrade to Motion-Sensor Faucets for Smart Living
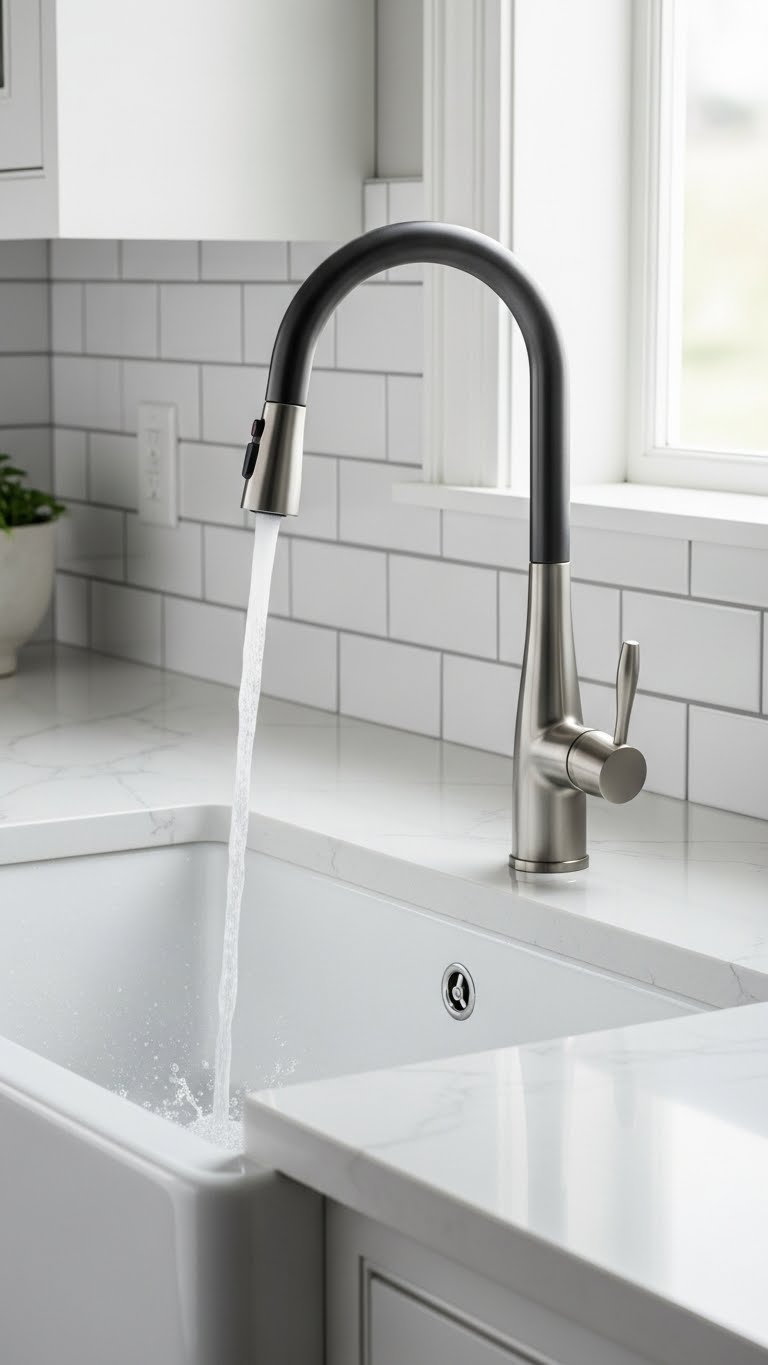
Smart kitchen tech isn’t just futuristic—it’s practical. Motion-sensor faucets let you turn water on and off with a wave, keeping your hands clean while prepping food and making cleanup easier.
Motion-sensor faucets from brands like Moen, Delta, or Kohler run $150-$400; look for models with adjustable sensitivity to avoid false triggers. DIY installation takes 30-45 minutes if you’re mechanically inclined; plumbers typically charge $100-$150 for labor. Some models come with batteries; others need electrical connection. Alternative: touchless faucets ($100-$250) require a single touch anywhere on the spout, which feels almost as futuristic but costs slightly less.
Pro tip: Skip the cheapest models (under $80)—they have higher failure rates.
You’ll notice how much easier cooking and cleaning become when you’re not juggling a faucet handle covered in raw chicken or dough.
8. Create a Multi-Functional Island with Hidden Storage
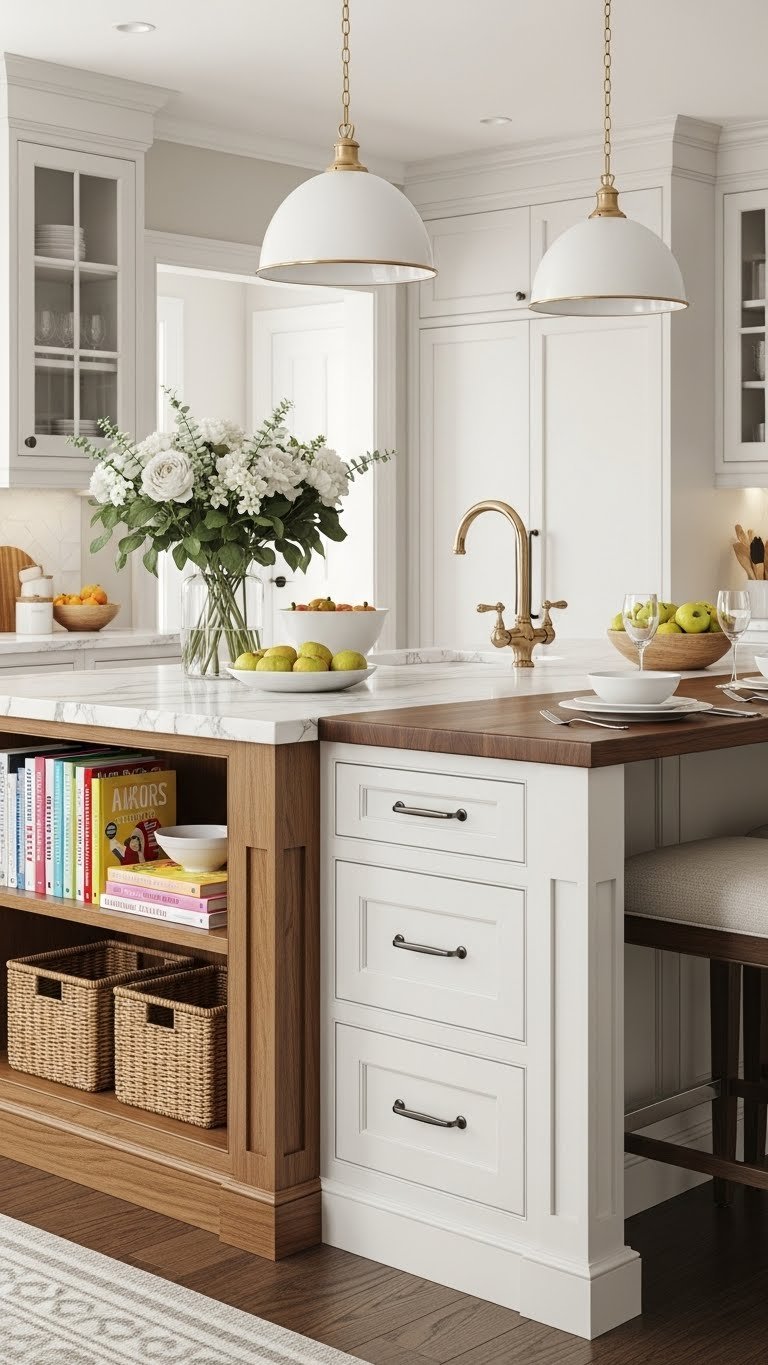
50% of kitchen designers are building combination islands with both storage and open seating. This hybrid approach maximizes tiny spaces while keeping everything accessible.
Look for islands with built-in shelving, deep drawers for pots/pans, and enough overhang (at least 12-15 inches) for comfortable seating. IKEA’s STENSTORP island ($150-$200) is a renter-friendly standalone option. Custom islands run $1,000-$5,000 depending on size and materials. Open shelves hold pretty baskets for produce or cookbooks; closed drawers hide the mess. Pair with 2-3 simple stools ($40-$120 each from Target or IKEA). If building custom, allow 2-4 weeks for construction.
Pro tip: Size your island to leave at least 36 inches of walkway on all sides—too small and it blocks flow.
Now you have a real gathering spot that’s also hiding all your kitchen chaos, and you’ve reclaimed countertop space for actual food prep.
9. Paint Kitchen Cabinets a Bold, Moody Color

If full sage green walls feel too subtle, go bold on your cabinets instead. Deep forest green, navy blue, or even warm charcoal create personality while hiding stains better than white.
Painting cabinets yourself costs $100-$300 in supplies (primer, paint, brushes, sandpaper); hiring a pro runs $1,500-$3,500. DIY takes 3-5 days total (prep, prime, paint, cure time); professionals finish in 1-2 days. Start by removing cabinet doors and hardware, sand lightly for paint adhesion, apply primer, then 2-3 coats of quality cabinet paint (not regular wall paint). Top with polycrylic for durability.
Popular colors: Sherwin-Williams Naval (dark navy), Benjamin Moore Woodland Green (deep forest), or Farrow & Ball Hague Blue.
Pro tip: Don’t skimp on primer—it prevents stains from bleeding through and ensures your color actually looks like the sample.
Your entire kitchen suddenly feels designed and intentional, and you’ve done a massive refresh for a fraction of remodel cost.
10. Layer Lighting for Ambiance and Function
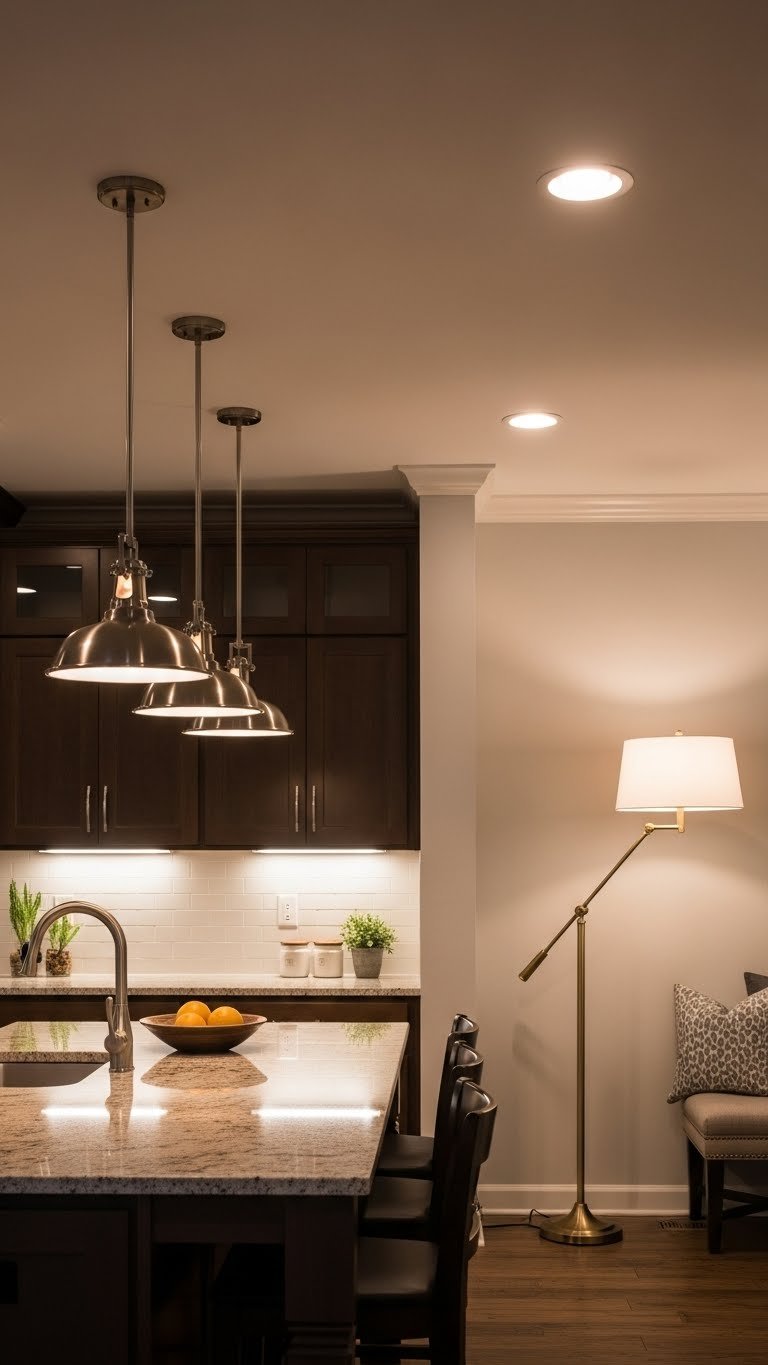
84% of design pros name lighting as a standout feature. Layered lighting—task, ambient, and accent—makes your kitchen feel intentional and photograph beautifully.
Install under-cabinet LED strips ($20-$50 per kit from Amazon or Home Depot) for task lighting and ambiance. Add 2-3 pendant lights over the island ($40-$150 each) for focal-point style. Keep overhead recessed lights on a dimmer ($15-$30 per dimmer switch) so you can adjust mood. Total investment: $150-$400 if DIYing; electricians charge $200-$400 labor. LEDs cost less to run than incandescent and last years longer.
Pro tip: Choose warm-toned bulbs (2700K) for coziness; avoid harsh white (5000K) unless you want a clinical feel.
When dinner guests arrive, you can dim overhead lights and highlight the island—suddenly your kitchen feels like a restaurant-quality space.
11. Install Floating Shelves with Decorative Styling
Floating shelves add modern storage while keeping spaces feeling open. They’re perfect for renters and work in any kitchen style.
Brackets from IKEA, Wayfair, or Target run $20-$50 per shelf; premium options from Rejuvenation are $80-$150. Floating shelf kits include hardware and clear instructions—installation takes 1-2 hours per shelf if you locate studs. Display items that serve a purpose: everyday bowls, cookbooks, or plants. Keep styling asymmetrical and uncluttered; too many items looks chaotic, not chic.
Alternative: Self-adhesive shelves ($15-$30) work for lighter items and require zero drilling—perfect for renters who can’t make holes.
Pro tip: Mix closed and open storage on one wall for balance and function.
Your kitchen gains visual interest and personality while staying organized and Instagram-worthy.
12. Upgrade to Stainless Steel or Integrated Appliances
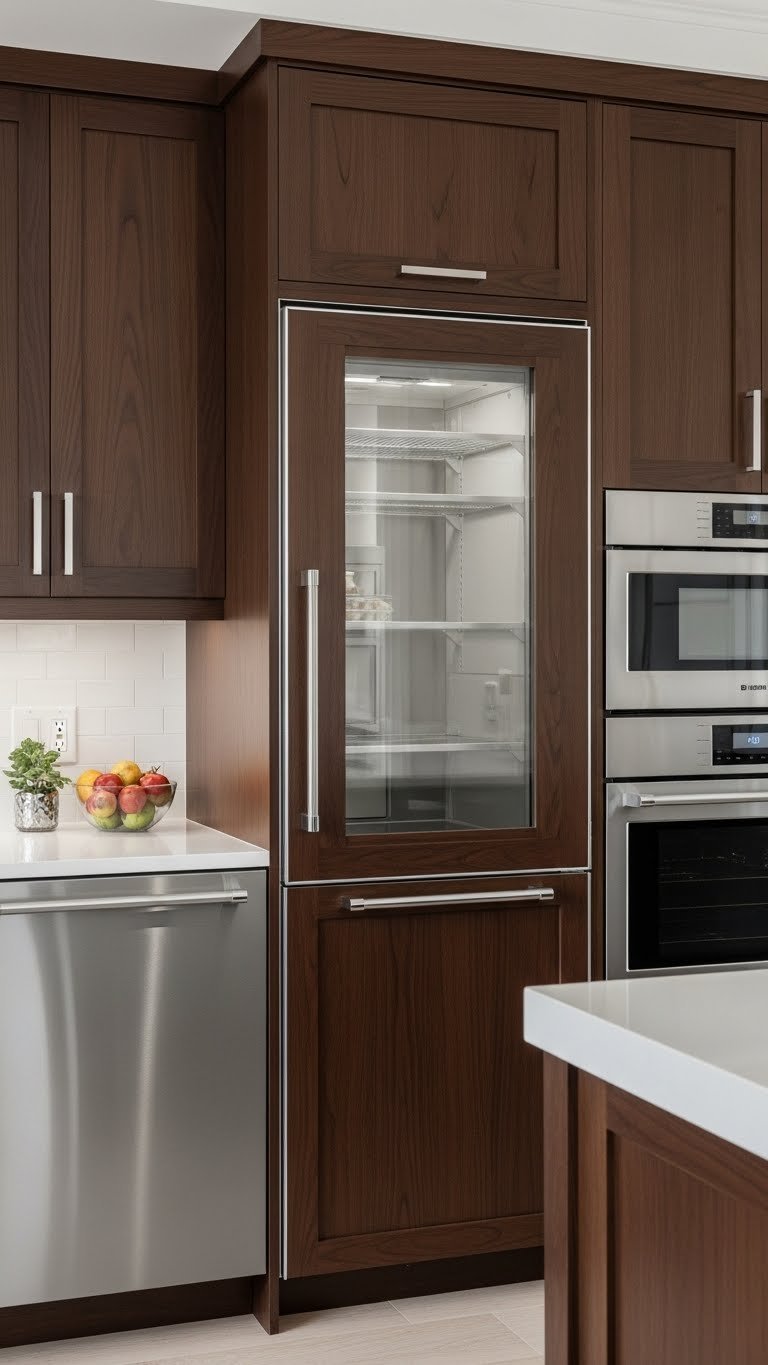
Built-in or “hidden” appliances are trending because they make kitchens feel more intentional and less cluttered. Panel-ready appliances blend seamlessly with cabinetry.
Panel-ready refrigerators from brands like Miele, Sub-Zero, or Liebherr run $3,000-$8,000 (pricey but seamless). Standard stainless steel upgrades from Lowe’s or Home Depot are $600-$1,500 per appliance and feel premium without the extreme cost. If replacing large appliances, budget $2,000-$5,000 total for fridge, oven, and dishwasher as a package. Installation typically runs $200-$500 depending on your current setup.
Budget hack: Keep existing appliances but paint the fridge with stainless steel contact paper ($25-$40) for a quick visual upgrade.
Pro tip: Measure twice—appliance sizes vary and fit matters.
Your kitchen instantly looks more cohesive, expensive, and designed rather than thrown together.
13. Add Warm Brass Fixtures for Modern Warmth
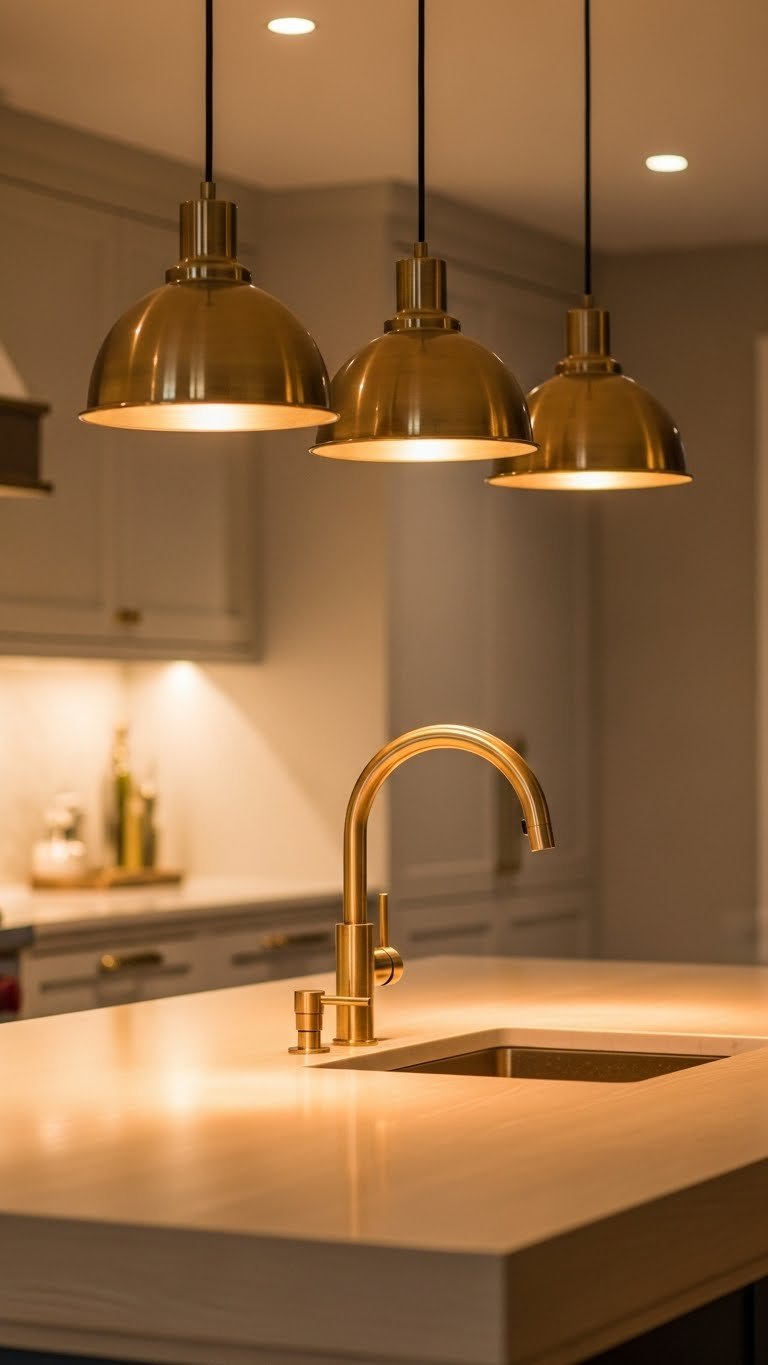
Brass is the unexpected hero of 2025 kitchen design. Unlike cold stainless steel, warm brass brings richness and feels both modern and timeless.
Swap out cold silver fixtures for warm brass throughout: pendant lights ($40-$120 each), cabinet hardware ($3-$8 per piece), faucet ($150-$400), and even a decorative towel bar ($20-$50). Total investment: $300-$800 for a few key pieces. Start with lighting since it’s most visible, then add hardware and faucet over time if budget is tight. Brass develops a natural patina over years, which adds character (or clean with lemon juice to keep it shiny).
Pro tip: Mix warm brass with cool matte black or brushed nickel for balance—all brass can feel heavy.
The warm glow of brass fixtures makes your entire kitchen feel more intentional, expensive, and photogenic.
14. Incorporate a Butcher Block Island or Countertop

Butcher block counters bring warmth and texture while staying practical for everyday cooking. They feel artisanal without sacrificing function.
Butcher block countertop material runs $30-$60 per square foot from Home Depot or local mills; installation and finishing adds $500-$1,500 labor. Smaller butcher block islands are $300-$800 and work as instant styling. The wood requires occasional sealing (annually or every 2 years) with food-safe mineral oil ($10-$15). Treat stains immediately with lemon juice and salt. If you’re concerned about durability, modern sealed butcher block is harder than you’d expect.
Budget hack: Reclaimed wood counters from salvage yards run $20-$40 per square foot and feel unique while being eco-conscious.
Pro tip: Butcher block pairs beautifully with sage green walls and warm brass—it’s the wood-and-warmth trend everyone’s embracing.
Your kitchen gains organic warmth and becomes a place where you actually want to cook instead of rushing through meals.
15. Install a Range Hood with Texture or Plaster Finish

Plaster or textured range hoods are an emerging trend that breaks from standard stainless steel. They add organic softness while staying deeply functional.
Custom plaster hoods from specialized makers run $2,000-$5,000; more affordable textured alternatives from mainstream brands are $800-$1,500. Standard stainless hoods remain $400-$1,000 if budget is tight. Installation usually requires professional venting work ($300-$600 labor). The textured finish catches light beautifully and feels intentional in photos without looking trendy or temporary.
Pro tip: Pair a plaster hood with warm wood cabinetry and brass accents for full organic-modern vibes.
This architectural element becomes a focal point that makes your kitchen feel designed by someone with actual taste.
16. Create a Scullery or Hidden Butler’s Pantry

Sculleries (hidden prep zones) keep messy cooking out of sight while maintaining elegant main kitchen aesthetics. It’s a luxury touch that actually solves a real problem.
Repurpose a hallway closet, spare corner, or galley space into a mini prep kitchen with a sink ($300-$800), open or closed storage ($200-$1,000), and counter space ($400-$1,500). Total project runs $1,500-$4,000 depending on complexity. Install a door or pocket door to hide the chaos when entertaining. This works beautifully in open-concept homes where you want the main kitchen polished for guests but need realistic storage elsewhere.
Pro tip: Add a small dishwasher drawer ($700-$1,200) if space allows.
Now you have a chic kitchen for entertaining and a private zone where cooking actually happens—best of both worlds.
17. Mix Patterned and Textured Tile on Backsplash
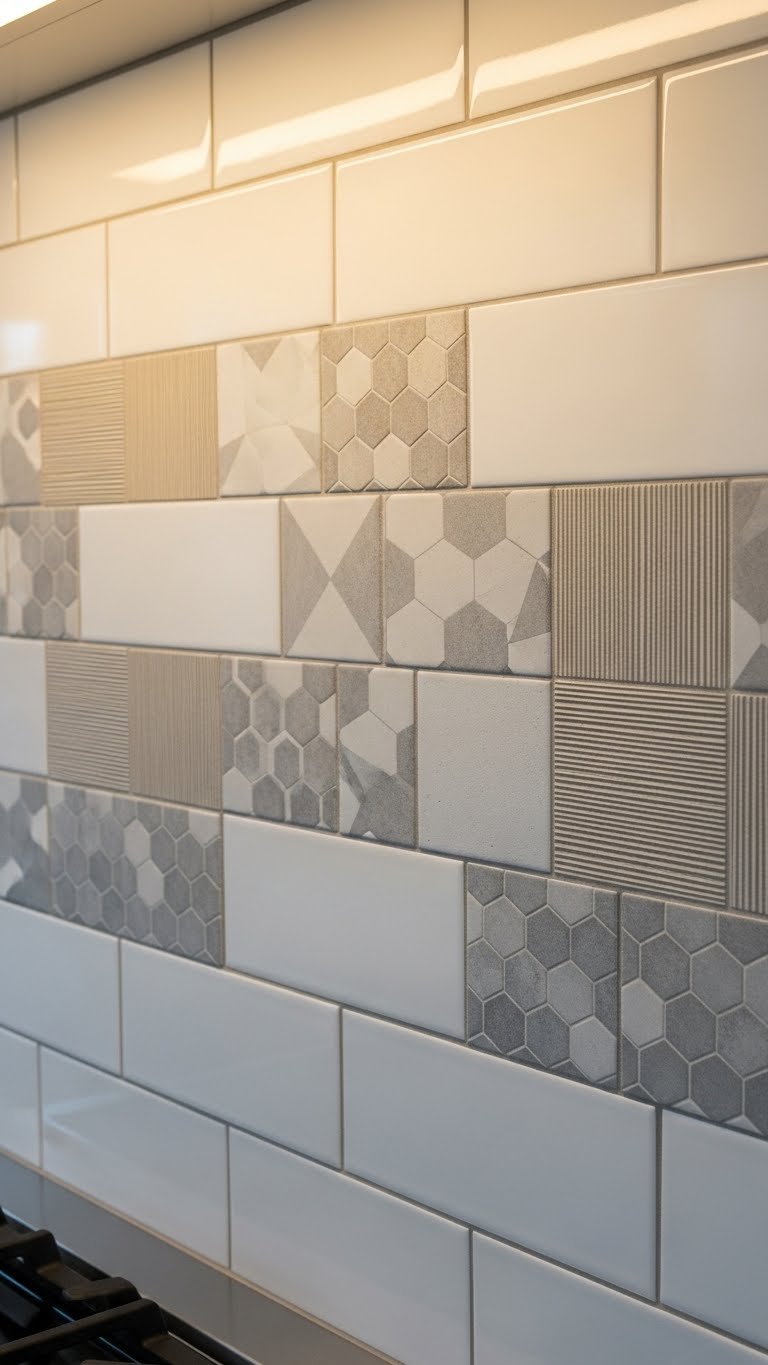
Mixing tile patterns and textures prevents backsplashes from feeling boring or dated. This approach feels curated rather than generic.
Combine 2-4 tile types in a planned pattern: subway base with geometric or patterned accents, or mix matte and glossy finishes for depth. Peel-and-stick mixed tile sheets from Aspect or Smart Tiles are $20-$40 per sheet; traditional mixed tile installation from Home Depot costs $2-$8 per square foot plus labor. Plan your layout first on graph paper to avoid awkward cuts. DIY takes 2-3 days; professionals finish in 1 day for smaller kitchens.
Pro tip: Use a light grout to unify different tiles, or go dark grout for dramatic separation between patterns.
Your backsplash becomes a textural focal point that photographs beautifully and makes your kitchen feel intentionally designed.
18. Add an Open Shelving Pantry for Easy Access

Open pantry shelving replaces closed cabinets with accessible, beautiful storage that keeps everyday items within reach. It’s practical and Instagram-worthy.
Install 4-6 floating shelves in a corner or one wall using brackets from IKEA ($20-$50 each). Stock with matching jars ($2-$5 each from Target, IKEA, or HomeGoods), woven baskets ($10-$30 each), and cookbooks. Total investment: $300-$600 for shelves and styling supplies. Take time organizing before installing—label jars with a label maker ($15-$25) and group items by category. The key is keeping it genuinely organized; chaos on open shelves looks sloppy, not chic.
Pro tip: Style 70% function, 30% decor—keep it real and usable, not overly curated.
You’ll reach for items more often because they’re visible and accessible, and your pantry becomes a design feature instead of hidden chaos.
19. Upgrade Cabinet Interiors with Drawer Dividers and Organization

Organized interiors matter even if guests never see them—you’ll feel the difference every single day. Drawer dividers and cabinet organizers transform functionality and reduce daily frustration.
Bamboo or plastic drawer dividers cost $15-$40 per set from Target, IKEA, or Amazon. Pull-out shelf inserts ($25-$80) maximize deep cabinet space. Lazy Susans ($10-$30) let you reach back corners easily. Corner shelf risers ($20-$50) add vertical storage. Total organization overhaul: $200-$400 for a full kitchen. Takes a weekend to install and reorganize. Focus on frequently-used items first; less-used stuff can stay in harder-to-reach spots.
Pro tip: Use clear containers so you can see what’s inside without opening everything.
Every time you open a drawer or cabinet, you’ll appreciate the calm organization—it makes cooking faster and reduces stress.
20. Choose Earth-Tone Colors Beyond Sage Green

Sage green is trending, but earth tones in general—warm terracotta, soft tan, muted blue, warm brown—are replacing cool grays everywhere. You have options beyond the standard sage.
Paint walls in warm terracotta ($30-$50), soft clay taupe ($35-$55), or muted dusty blue ($30-$50). These colors feel warmer and more livable than cool grays while staying sophisticated. Benjamin Moore’s HC-172 Borscht, Farrow & Ball’s Tunsgate Blue, or Sherwin-Williams’ Urbane Bronze all work beautifully in kitchens. Expect 4-6 hours for one room with primer and two paint coats.
Pro tip: Get paint samples and test on your walls at different times of day—lighting changes how colors read dramatically.
Warm earth tones make your space feel grounded, intentional, and more inviting than cool grays that dominated the last few years.
21. Add Fluted or Ridged Texture to Cabinet Doors

Fluted cabinet textures add sophistication without going overboard. Subtle ridges catch light and create dimension that flat doors can’t match.
Factory-made fluted cabinet doors from premium brands are $150-$300+ per door; budget-friendly textured cabinet kits from Wayfair run $100-$200 per door. Alternatively, add texture with peel-and-stick adhesive film ($25-$50 per door) for renters. Installation requires removing doors and swapping hardware—allows 2-3 hours if you’re hands-on. Hire a pro if replacing full cabinet doors; expect $2,000-$4,000 labor.
Pro tip: Fluted doors pair beautifully with smooth counters and simple hardware—let the texture be the star.
Your cabinets shift from basic builder-grade to thoughtfully designed with one architectural upgrade.
22. Blend Indoor and Outdoor Kitchen Spaces

Outdoor kitchen integration creates flow and makes small spaces feel larger. Matching materials inside and out blur boundaries beautifully.
Install matching countertops (concrete, stone, or composite) both inside and outside ($5,000-$15,000+ depending on size). Use similar cabinetry or finishes to create visual continuity. Outdoor appliances like grills or pizza ovens ($2,000-$10,000) pair with indoor options. This project typically requires contractors and builders—budget 4-8 weeks for planning and installation.
Budget hack: Paint an outdoor wall to match interior colors and add matching outdoor rugs and furniture ($200-$500 total) for less expensive visual connection.
Pro tip: Weatherproof all materials; concrete and wood outdoor surfaces need sealing annually.
Your kitchen suddenly feels expanded, and entertaining becomes seamless—guests flow naturally from cooking indoors to lounging outside.
23. Install Smart Appliances with WiFi and Automation

WiFi-enabled appliances let you preheat ovens from your phone, monitor fridge temperatures, and get alerts if doors are left open. It’s practical tech that actually improves daily life.
Smart refrigerators from LG or Samsung run $2,500-$4,500; WiFi ovens are $1,200-$2,500; smart dishwashers are $800-$1,500. Mid-range smart appliances from mainstream brands cost $500-$1,200 per item. These typically cost $300-$600 more than non-smart versions. Installation and WiFi setup take 30 minutes to 2 hours. Start with one smart appliance (a WiFi fridge or oven) rather than replacing everything at once.
Pro tip: Check WiFi compatibility before buying—you need 2.4GHz networks for most appliances.
The convenience feels subtle until you realize how much easier cooking and maintenance become with real-time alerts and remote control.
24. Create a Dining Nook Within the Kitchen
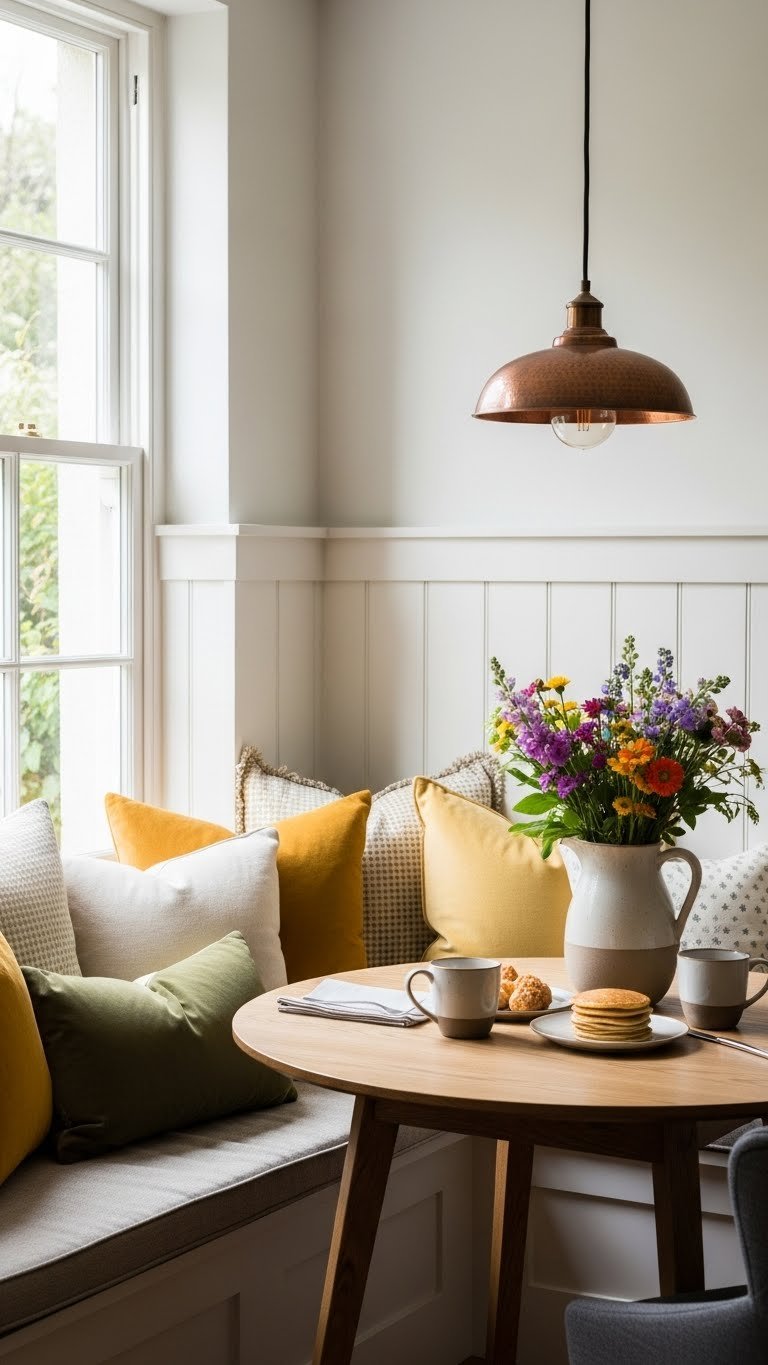
Breakfast nooks and dining corners maximize small kitchens while creating intimate gathering spaces. They transform kitchens from purely functional to truly livable.
Install a built-in bench with storage ($800-$2,000) paired with a small table ($200-$800) and 2-3 chairs ($100-$300 each). Total investment: $1,500-$3,500 for a quality setup. Alternatively, a simple round table ($200-$500) and vintage chairs ($50-$150 each) create the same vibe for less. Lighting is key—add a small pendant or wall sconce ($40-$120) to define the zone. Space needs at least 6×6 feet to feel comfortable.
Budget hack: Use a narrow console table ($150-$300) against a wall plus 2 stools for tight spaces.
Now your kitchen isn’t just where you cook—it’s where your family eats breakfast and lingers over coffee.
25. Incorporate Sustainable Materials and Eco-Appliances
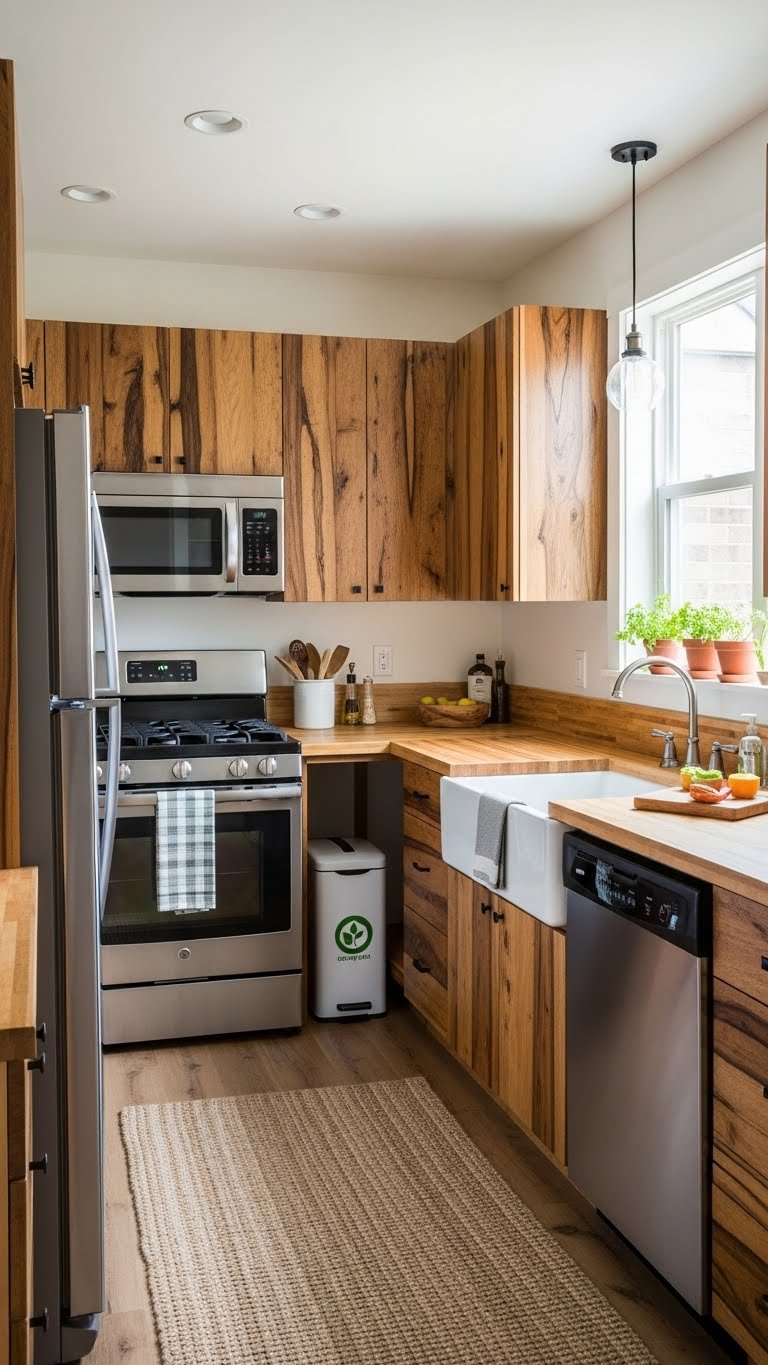
Sustainable kitchen choices reduce environmental impact while creating spaces that feel authentic and grounded. Eco-conscious materials are increasingly affordable and beautiful.
Recycled wood cabinets from sustainable brands run $2,000-$6,000; bamboo countertops are $40-$60 per square foot. Energy Star appliances cost $200-$500 more than standard but save $100-$200 yearly in utilities. Built-in compost bins ($50-$200) and water-filtering faucets ($100-$300) complete the eco-kitchen. These upgrades cost more upfront but pay dividends in reduced utility bills and fewer trash trips over years.
Pro tip: Start with one sustainable swap (like recycled glass backsplash) rather than overhauling everything at once.
Your kitchen aligns with your values, costs less to operate long-term, and feels genuinely thoughtful rather than performative.
26. Install Warm Under-Cabinet Lighting
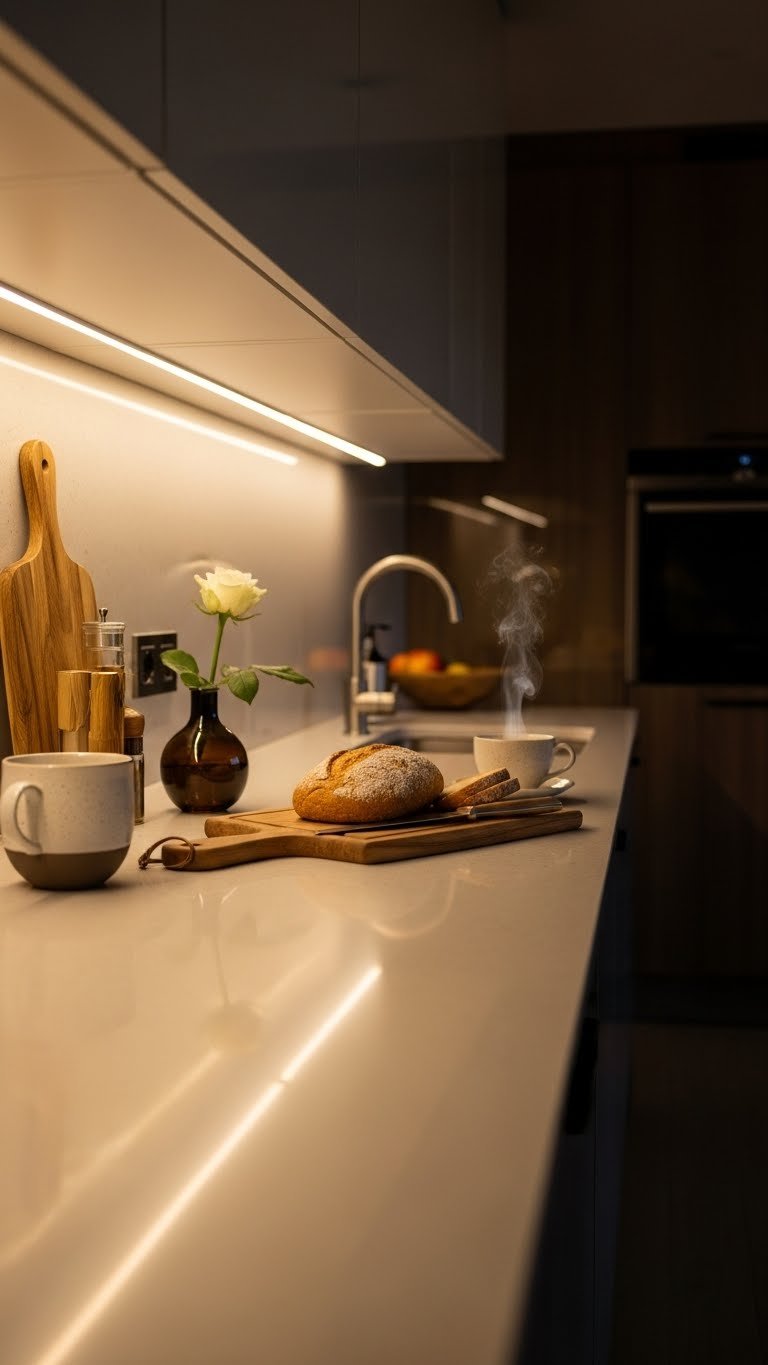
Under-cabinet LED strips solve the practical problem of dark countertops while adding ambiance and visual interest. They’re affordable and impactful.
Peel-and-stick LED strip lights from Amazon or Home Depot cost $20-$50 per kit and install in minutes—no electrician needed. Hardwired options from Lowe’s are $100-$200 per kit but feel more permanent. Choose warm-toned bulbs (2700K) for coziness and focus; cool white (5000K) feels clinical and harsh. Install strips underneath cabinets so light hits counters directly, not your face. Total project: 30 minutes DIY.
Pro tip: Dimmer switches ($15-$30) let you adjust brightness for cooking versus entertaining.
When dusk falls, your kitchen glows beautifully without overhead lights—suddenly it feels like a restaurant you’d actually want to spend time in.
SAVE THIS POST FOR YOUR NEXT KITCHEN REFRESH. Pick one idea that excites you—whether it’s a color change, hardware swap, or lighting upgrade—and tackle it this weekend. Small changes add up fast, and you’ll be amazed at how intentional your space feels with just one thoughtful update.
Leave a Reply