Introduction
Open-concept living sounds amazing until you need privacy—or want to hide last night’s dishes. Sliding partition doors give you the best of both worlds: the spacious, connected feel of an open home plus the flexibility to close off noise, cooking smells, or that home office chaos when life gets real. Whether you’re renting or own your place, work from home or just crave better sound control, these 26 sliding partition door ideas will help you maximize your space without knocking down walls or committing to permanent changes. From sleek glass installations to DIY barn door hacks, you’ll find budget-friendly solutions and investment pieces that actually work in modern homes. Let’s find the option that fits your lifestyle and your wallet.
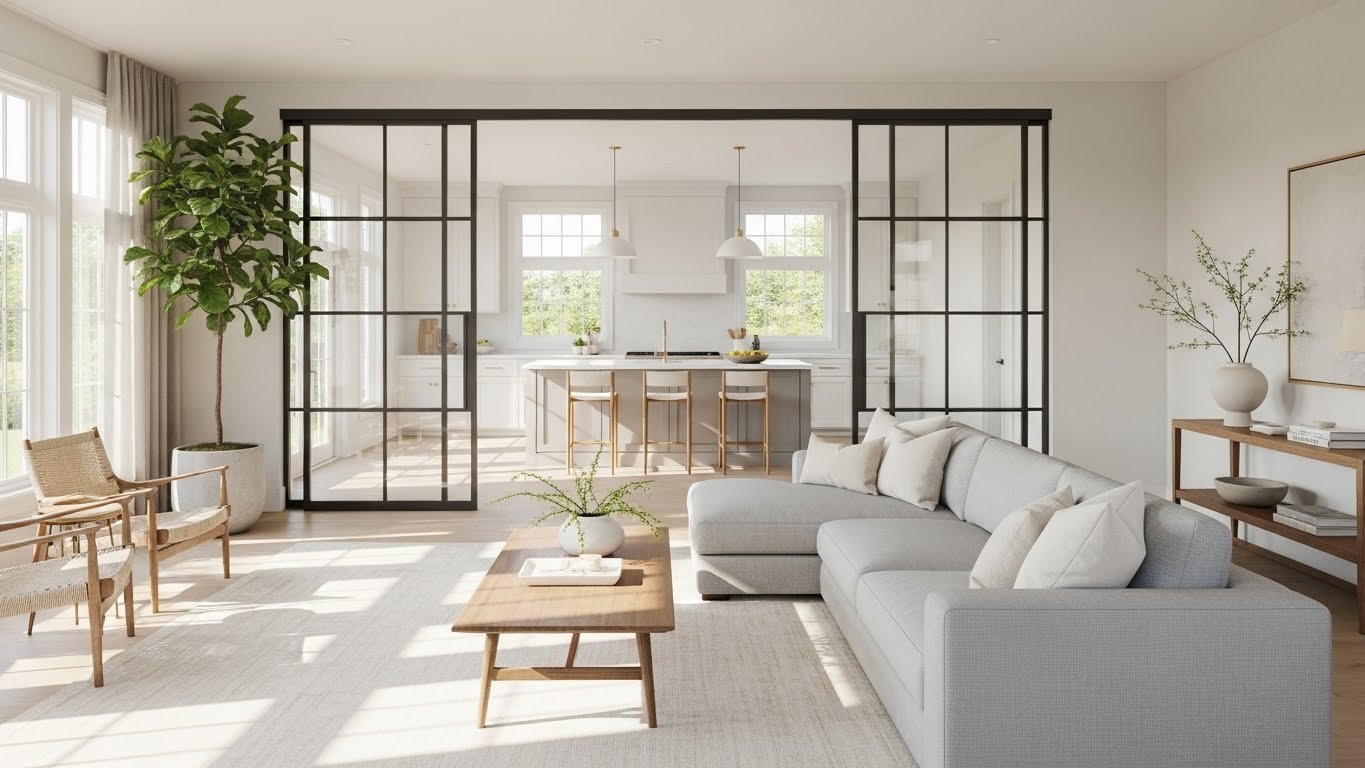
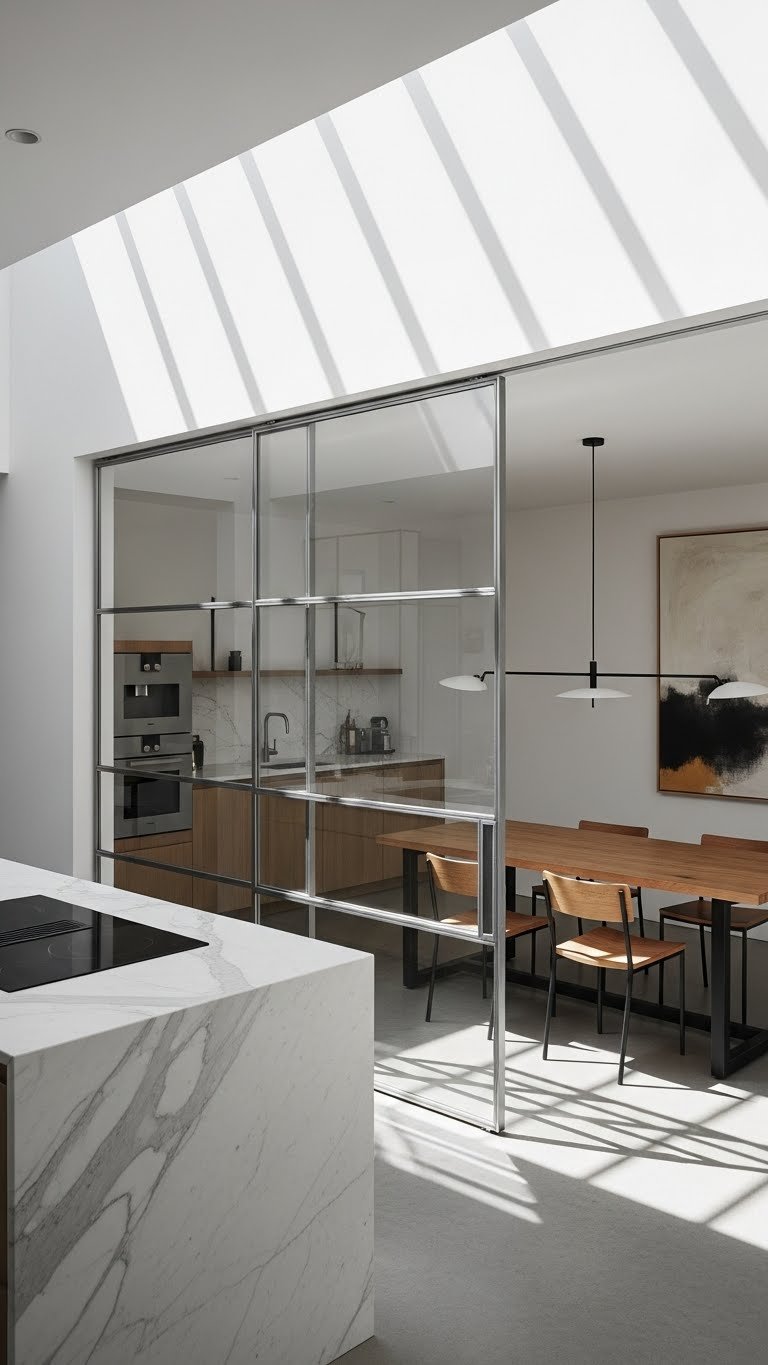
1. Install Floor-to-Ceiling Crittall-Style Glass Doors
Crittall-style doors bring that trendy industrial vibe while keeping your open concept connected. The narrow metal frames maximize glass and light—meaning you can close off a workspace or bedroom without the room feeling caved in.
These typically cost $400–$1,200 per pair for quality versions from brands like Crittall, Crittal UK, or similar suppliers. Installation is usually a weekend project if you’re handy, though you might hire a glass installer for precision. The payoff? You get the Instagram-worthy aesthetic plus real sound dampening that makes your home office actually feel separate from the living room.
Pro tip: If you rent or don’t want to commit, look for temporary Crittall-style screens or folding partitions under $300.
You’ll notice the difference immediately—the space feels curated, intentional, and way more polished than before.
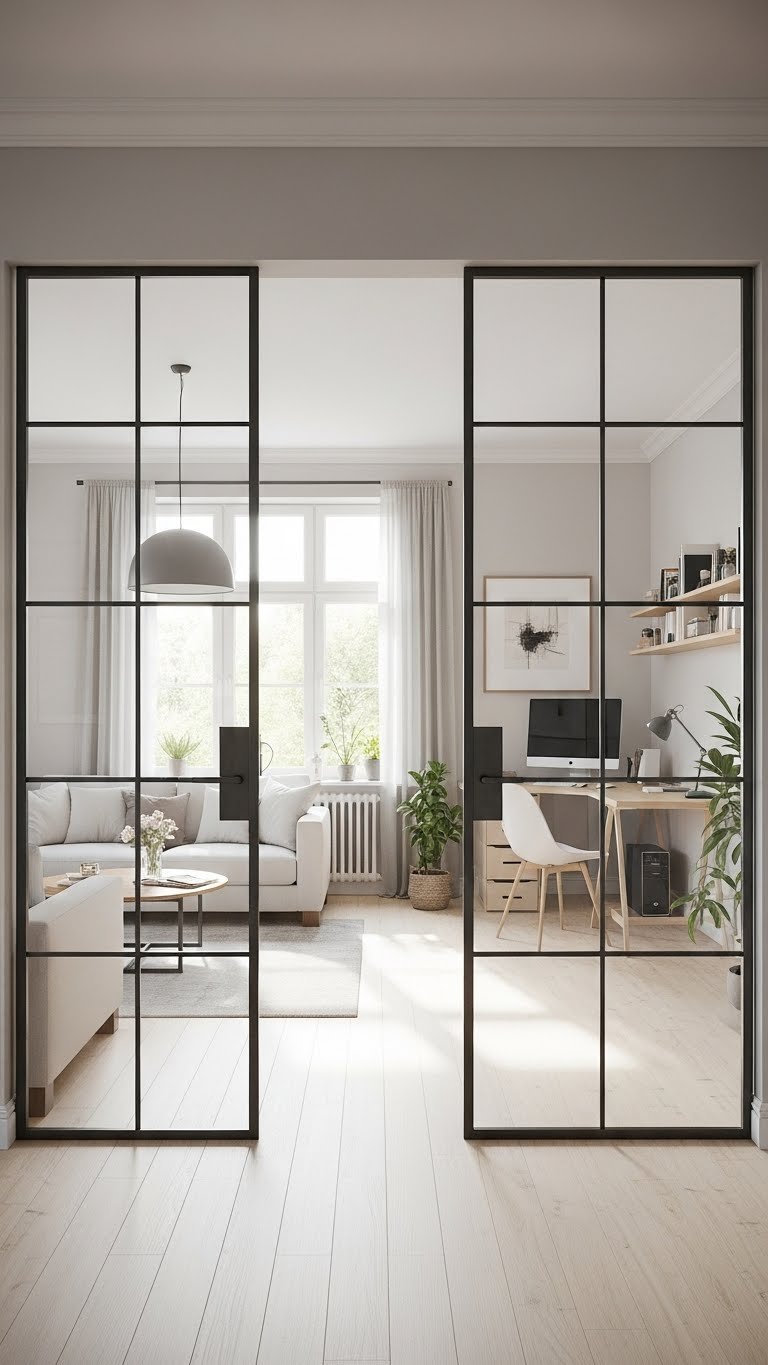
2. Opt for Minimalist Frameless Sliding Glass Panels

Frameless glass doors take minimalism to the extreme—almost like the wall disappeared, but you get the sound barrier when you need it. Ultra-slim profiles mean maximum light and that clean, contemporary vibe everyone’s craving right now.
Expect to spend $600–$2,000 for quality frameless systems from brands like Möller, Technal, or premium options through Wayfair. These usually require professional installation ($300–$500) since precision is everything. The result? Your space feels bigger, brighter, and way more modern. Plus, zero visual clutter when the doors are open.
If you’re on a tighter budget, temporary clear acrylic sliding panels exist but won’t offer the same durability or sound control.
The clean lines make every room feel calm and organized—even when life’s a little messy behind the glass.
3. Use Matte Black Steel Frames for Bold Impact
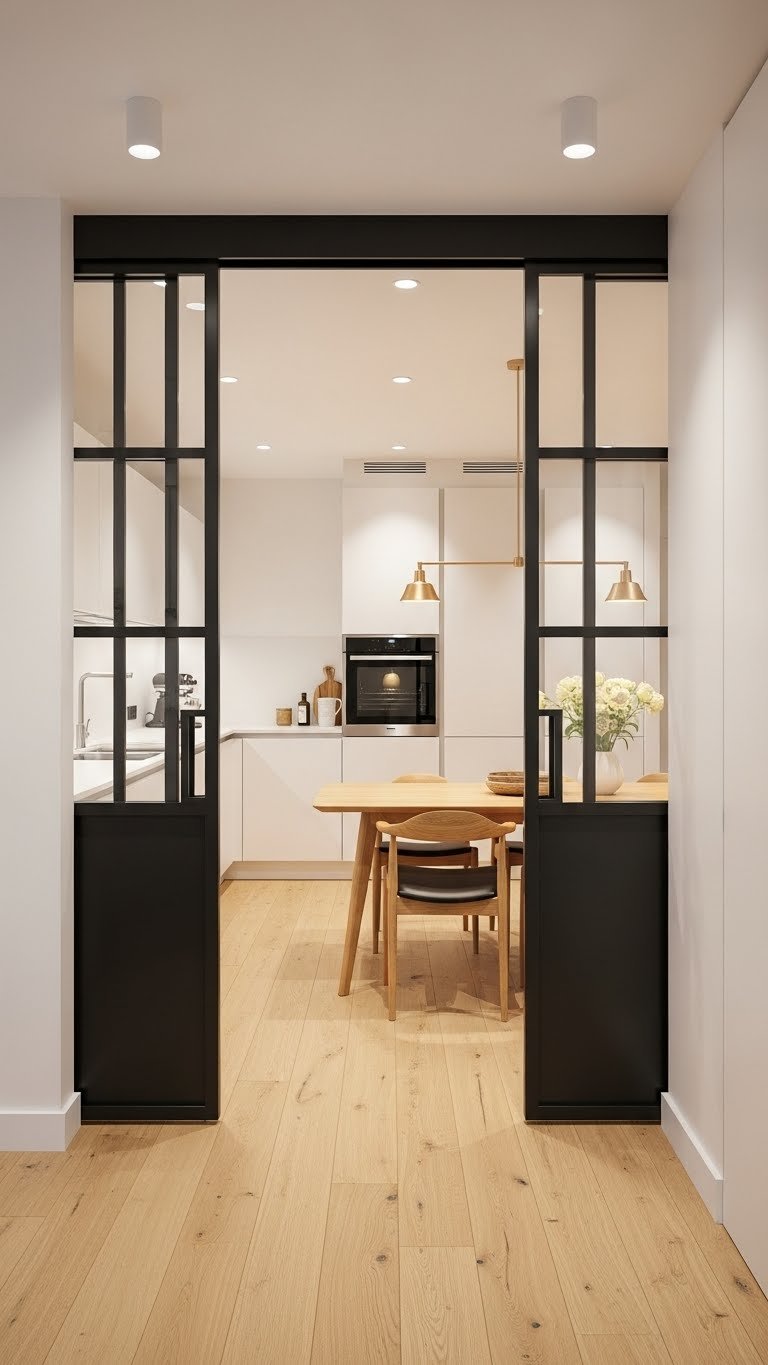
Matte black frames are having a major moment, and for good reason—they photograph beautifully and add instant sophistication to any space. The contrast pops against light walls, brick, or even natural wood, giving your home that high-end gallery feel.
Hunt for these on Amazon, Wayfair, or Home Depot in the $300–$900 range for sliding glass doors with matte black aluminum frames. Some brands offer pre-made sizes, while custom orders run higher. Installation typically takes a weekend for confident DIYers, or hire a pro for $250–$400. The payoff is huge: your home suddenly looks intentionally designed, not hodgepodge.
The beauty of matte black is it works with almost every style—industrial, modern, farmhouse, even traditional.
Your space gets that “professionally decorated” feeling without the designer price tag.
4. Try Budget-Friendly Tension Rod Curtain Partitions
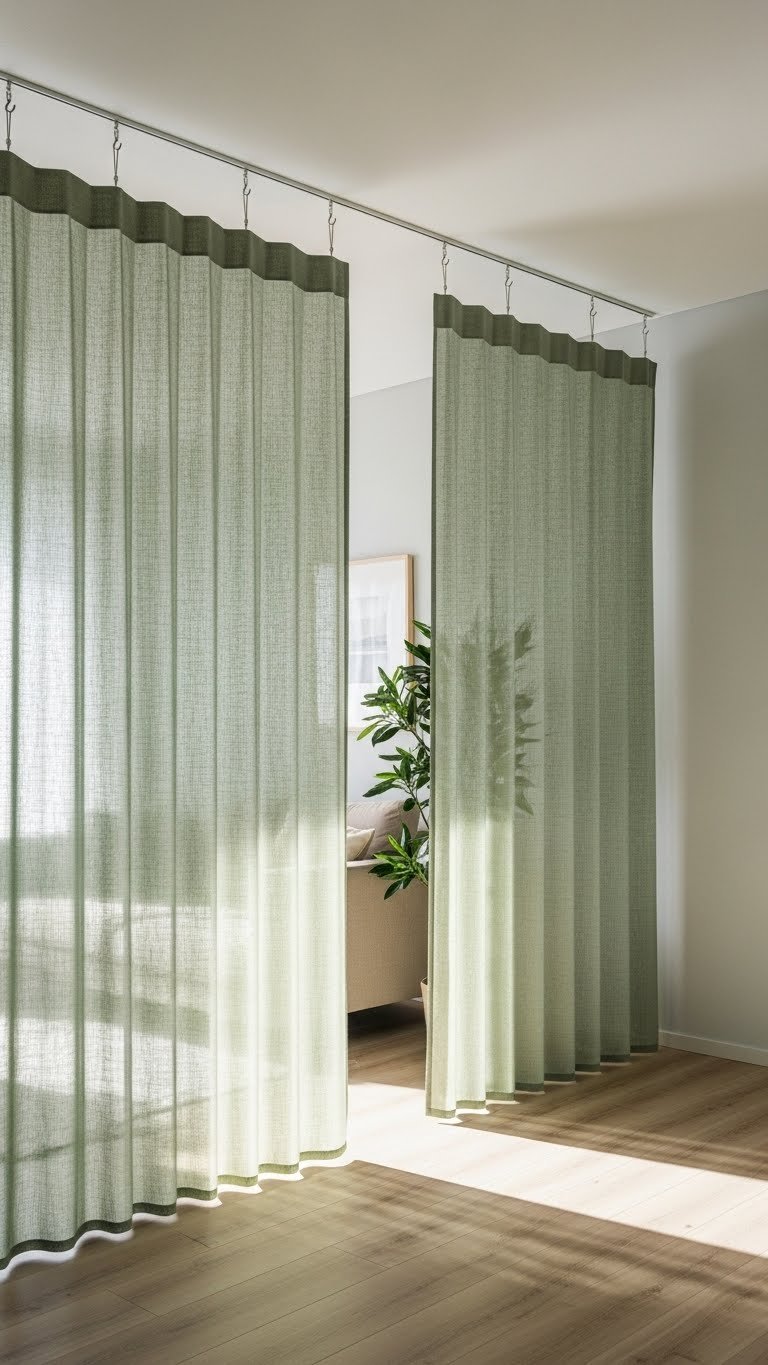
Not ready to commit to glass? Fabric partitions hung from tension rods are a $20–$80 solution that feels way more expensive. Grab white, sage green, or neutral linen-look fabric from Target, IKEA, or Amazon, plus tension rods that don’t require installation.
Just measure your ceiling-to-floor height, grab your fabric, tension rods, and optional curtain rings. Takes 30 minutes, zero damage to walls (hello, renters). Swap the fabric whenever you want a refresh—this isn’t permanent, which is the whole point.
You get privacy, sound dampening, and the flexibility to open everything back up when you’re hosting or want that spacious vibe.
The layered, soft look makes your home feel intentional and gives you design control on a shoestring budget.
5. Add Sleek Barn Door Sliders in Matte Black
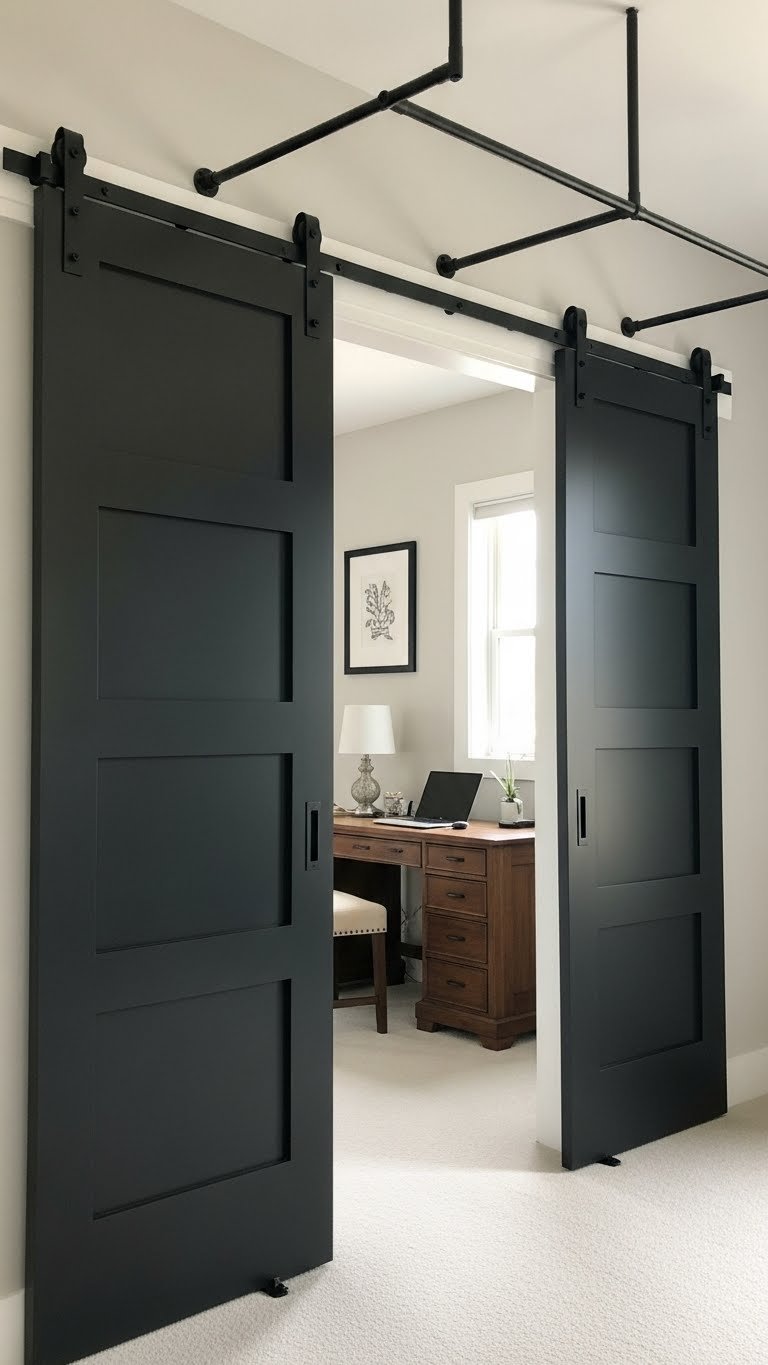
Barn doors scaled down and modernized? Yes. Matte black barn door sliders give you that farmhouse charm with contemporary edge, and they’re way more budget-friendly than glass alternatives.
Expect $150–$400 per set from Home Depot, Wayfair, or IKEA. The hardware typically costs another $50–$150, and installation is a solid weekend project (or hire help for $200–$300). They’re great for bedrooms, home offices, or pantries because they take up zero swing space—just slide them open and closed.
Pro tip: Matte black barn doors hide fingerprints better than glass, making maintenance easier for busy households.
You get that stylish, expensive-looking aesthetic with the practicality of a sliding door that actually works.
6. Create a Frosted Glass Privacy Wall

Frosted glass gives you the best of both: you see light and shadows but no details. It’s perfect when you want privacy without fully closing yourself off, and it’s way more interesting than plain glass.
Order frosted sliding glass panels from Wayfair ($400–$900) or visit a local glass shop for custom frosting on existing doors ($200–$400). DIY frosted glass film from Amazon ($15–$40) works temporarily and is renter-approved—just apply, smooth out bubbles, and peel it off when you leave.
The light still flows through, so your space never feels cramped, but people can’t see what’s happening on the other side.
Your home gets privacy without sacrificing the airy, open feeling that makes open-concept homes so appealing.
7. Install Track-Mount Sliding Wooden Doors

Wooden sliding doors add warmth that glass can’t match, and they’re excellent for sound dampening. Solid wood absorbs noise way better than glass, making this ideal if you have a noisy household.
Budget $250–$800 for pre-made wooden sliding door kits from Home Depot, Wayfair, or specialty sites. The track hardware runs $80–$200. Installation is doable over a weekend, though you’ll want to be comfortable with measuring and leveling. If you’re hiring help, budget $300–$500.
Look for sustainable options like FSC-certified walnut or reclaimed oak to feel good about your choice—you’ll reduce carbon footprint by choosing responsible wood sources.
The warmth and natural grain bring coziness that makes your space feel like a real home, not a showroom.
8. Use Accordion-Style Folding Glass Doors

Accordion doors are genius for maximum flexibility—fully open your space when you’re hosting, or close multiple sections for privacy and climate control. They’re compact when folded and look surprisingly modern.
Accordion sliding glass door systems run $800–$2,200 from brands like NanaWall or Wayfair. Installation typically requires a pro ($500–$800). They’re a bigger investment, but the payoff is huge if you host frequently or run a home business where you need on-demand privacy.
Pro tip: These fold to the side completely, so they don’t block any wall space when open—perfect for awkward layouts.
You’re investing in flexibility that actually changes how you use your home, making it adapt to your life instead of the other way around.
9. Paint Existing Walls with Contrasting Colors to Define Zones

Sometimes you don’t need a door—you just need visual separation. Painting one zone a different color (especially jewel tones or soft pastels) signals “this is a different space” without closing anything off.
Paint costs $20–$50, and you’ll spend a weekend doing two walls (or hire a painter for $300–$600). Pick calming colors like sage green, dusty blue, or warm taupe to define zones without feeling overwhelming.
This is renter-friendly if you use removable paint or get landlord permission. It’s also the cheapest way to psychologically divide your space.
The color shift makes your brain register different rooms, which gives you psychological privacy even though the space is technically open.
10. Mount Sliding Shoji-Style Doors for Zen Aesthetics
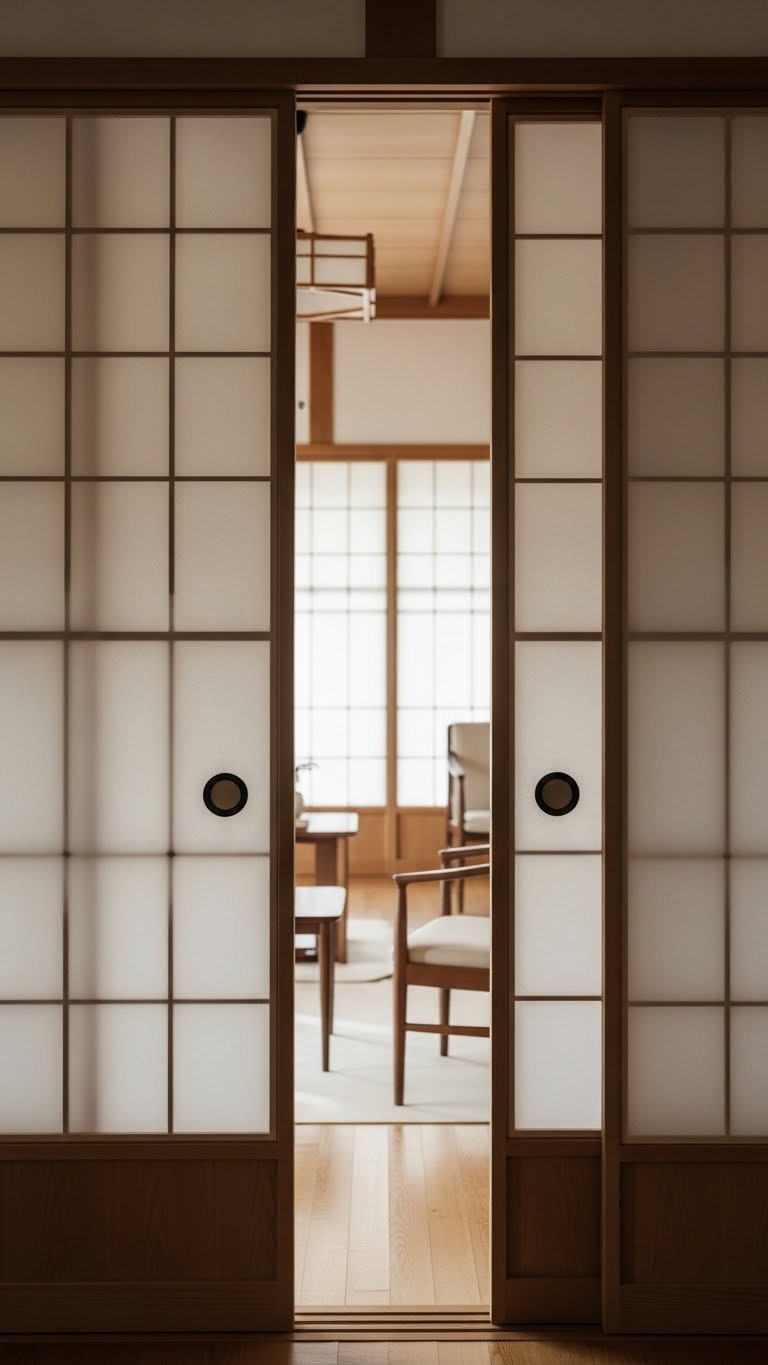
Shoji doors bring Zen-like calm to any space—the translucent rice paper panels filter light beautifully while giving you privacy. It’s a sophisticated look that feels intentional and curated.
Pre-made shoji door kits cost $200–$600 from specialty home stores or Amazon. Custom options run higher. Installation is straightforward—basically mounting lightweight panels on tracking. DIY-friendly, takes 2–3 hours.
If you rent, temporary shoji screens ($80–$200) give you the same aesthetic without permanence.
The soft, diffused light and clean lines create a calming effect that makes your whole home feel more serene.
11. Install Operable Glass Walls That Double as Room Dividers

Operable glass walls are the ultimate flexibility investment—slide them all the way open for full connection, or position them partway to divide the room without full commitment. It’s like having two rooms that can become one.
These high-end systems run $2,000–$5,000+ installed, but some mid-range options exist around $1,200–$2,500. Brands like NanaWall and Wayfair Premium have options. Installation is professional-only territory, so budget $800–$1,500 for experts.
This is an investment piece, but it completely changes how you can use your space—perfect for busy households or people who work from home sometimes.
You’re buying flexibility and the ability to customize your space daily based on what you need that day.
12. Add Sliding Screens with Geometric Patterns

Geometric screens combine privacy with visual interest—they’re functional room dividers that work as art. Perfect if your style is contemporary or minimalist.
Sliding screens with patterns run $200–$600 from Wayfair, IKEA, or etsy artisans. Installation takes an afternoon with basic tools. If you’re handy, you can DIY a lattice screen from wood slats and paint ($60–$120).
These block the direct line of sight while still allowing light and air to flow through—you get privacy without the closed-off feeling.
The geometric patterns add visual interest that makes your space feel designed and intentional, not like an afterthought.
13. Use Sliding Fabric Panels on Ceiling Tracks
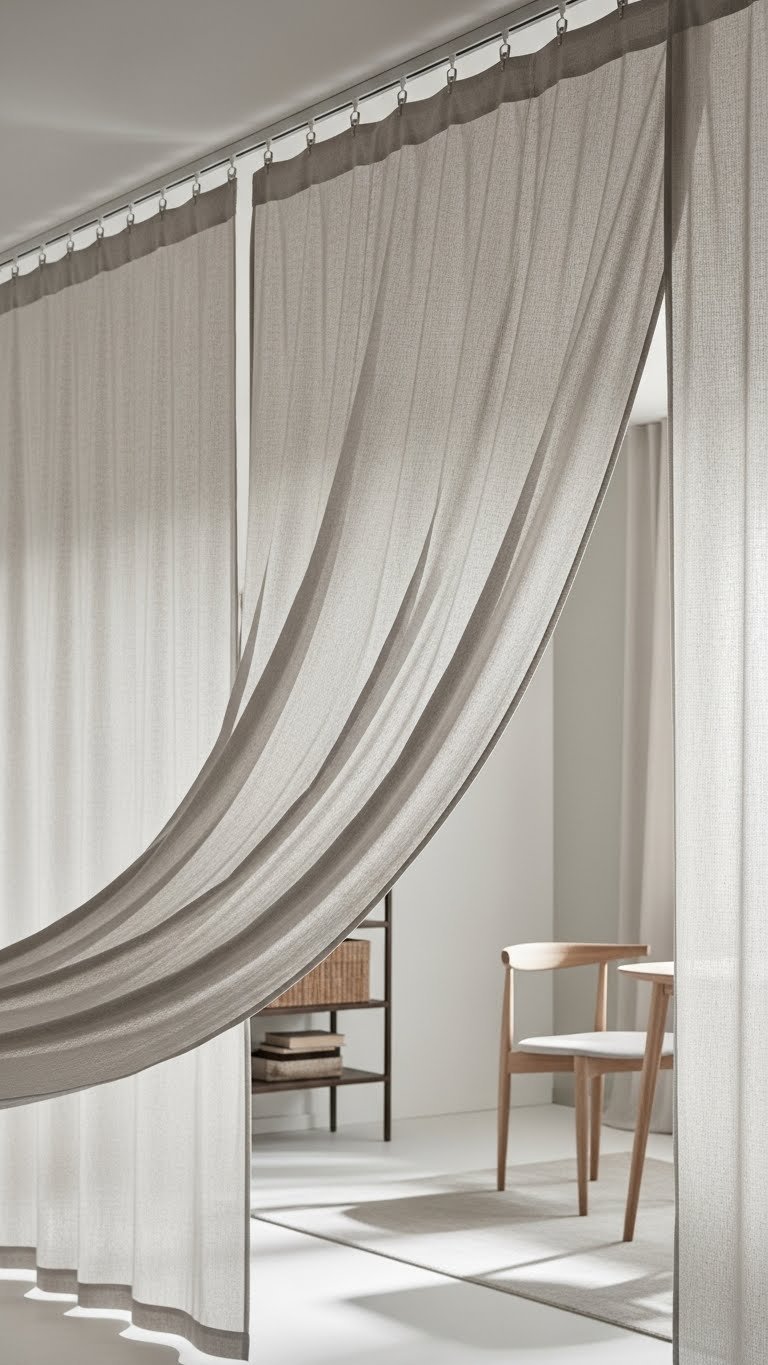
Ceiling-mounted fabric panels give you sound dampening plus the flexibility to open or close instantly. They’re lighter than barn doors, more stylish than curtains, and work in modern or minimalist spaces.
Heavy-duty track systems cost $200–$500, and fabric panels run $100–$300 depending on material and size. Total project is usually a day’s work if you’re comfortable with basic installation (or hire help for $250–$400).
Choose acoustic fabric for extra sound control, or go with linen-look cotton for aesthetics.
You get a soft, sophisticated look that feels way more designed than regular curtains while keeping your budget reasonable.
14. Install Sliding Louvered Doors for Adjustable Privacy
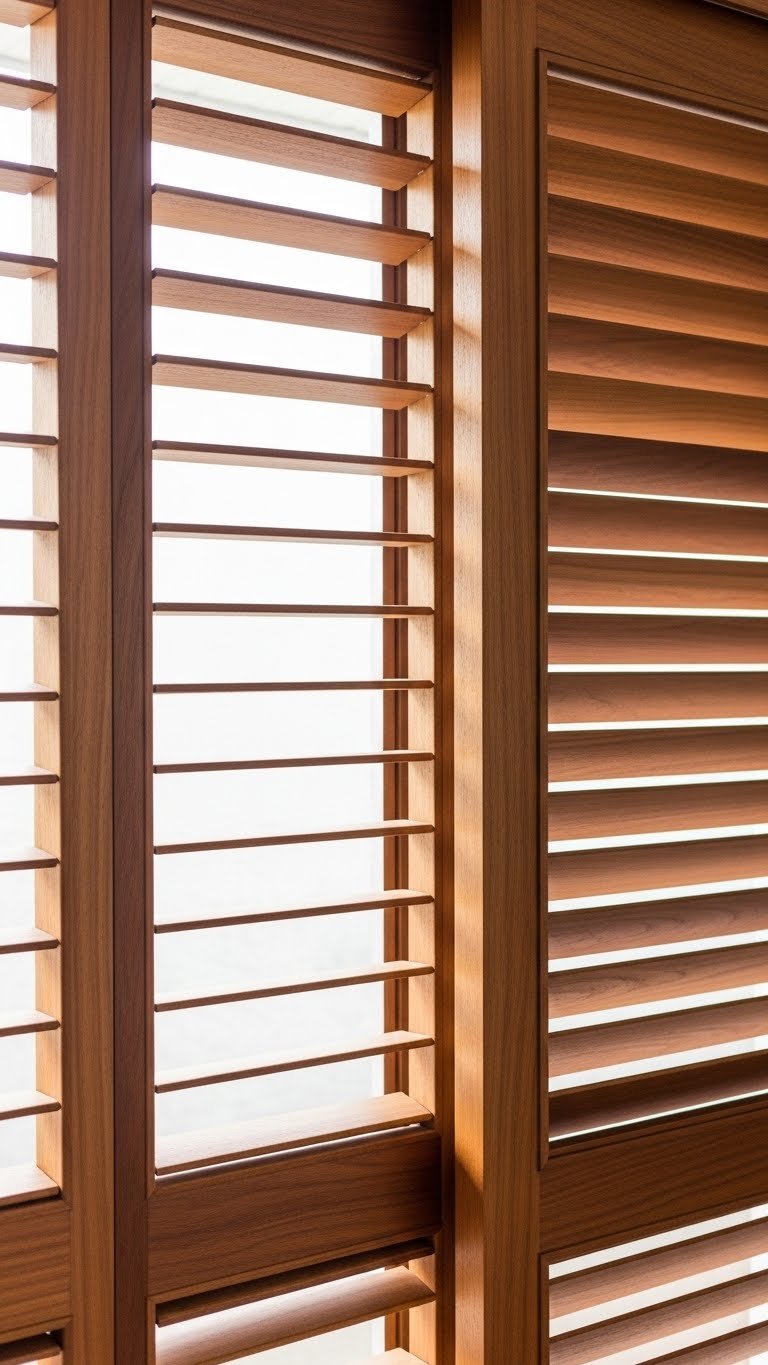
Louvered doors let you control privacy and light simultaneously—adjust the slats to let light through while blocking the view, or close them fully for complete separation. It’s genius.
Louvered sliding door kits cost $300–$800 from Home Depot or Wayfair. Track and installation runs another $100–$300. You can usually DIY this over a weekend if you’re comfortable with basic tools.
The adjustability means you’re never stuck with one configuration—morning light? Open the slats. Movie time? Close them fully.
The ability to customize your privacy and light situation by simply adjusting slats gives you control without the commitment of permanent walls.
15. Create a Lightweight Steel-Frame Partition
Lightweight steel frames are the sweet spot between durability and visual lightness—they look more substantial than aluminum while staying sleek and modern.
Steel-frame sliding glass systems cost $500–$1,500 from industrial-style home stores or Wayfair. Installation requires either DIY expertise or professional help ($300–$600). The payoff is industrial chic that actually looks intentional and well-built.
Pro tip: Powder-coated steel resists rust better in humid climates, so if you live near water or in a damp area, spend the extra $100–$200 for the upgrade.
The refined industrial look makes your home feel thoughtfully designed while the steel construction promises real durability.
16. Hang Sliding Japanese Noren Curtains

Noren curtains are gorgeous fabric dividers with cultural charm—they hang loose and layered, creating separation without blocking airflow. Super affordable and easy to switch out for different seasons or moods.
Authentic noren curtains cost $30–$100 from specialty stores or Etsy. Basic wooden mounting hardware is $20–$40. Install in 15 minutes—drill two holes, mount the rod, hang the curtains. Done.
This is incredibly renter-friendly and budget-conscious. Swap them seasonally or whenever you want a design refresh.
The soft, fabric-based approach makes your home feel welcoming and artistic while giving you flexible, easy-to-adjust privacy.
17. Install Opaque Sliding Polycarbonate Panels
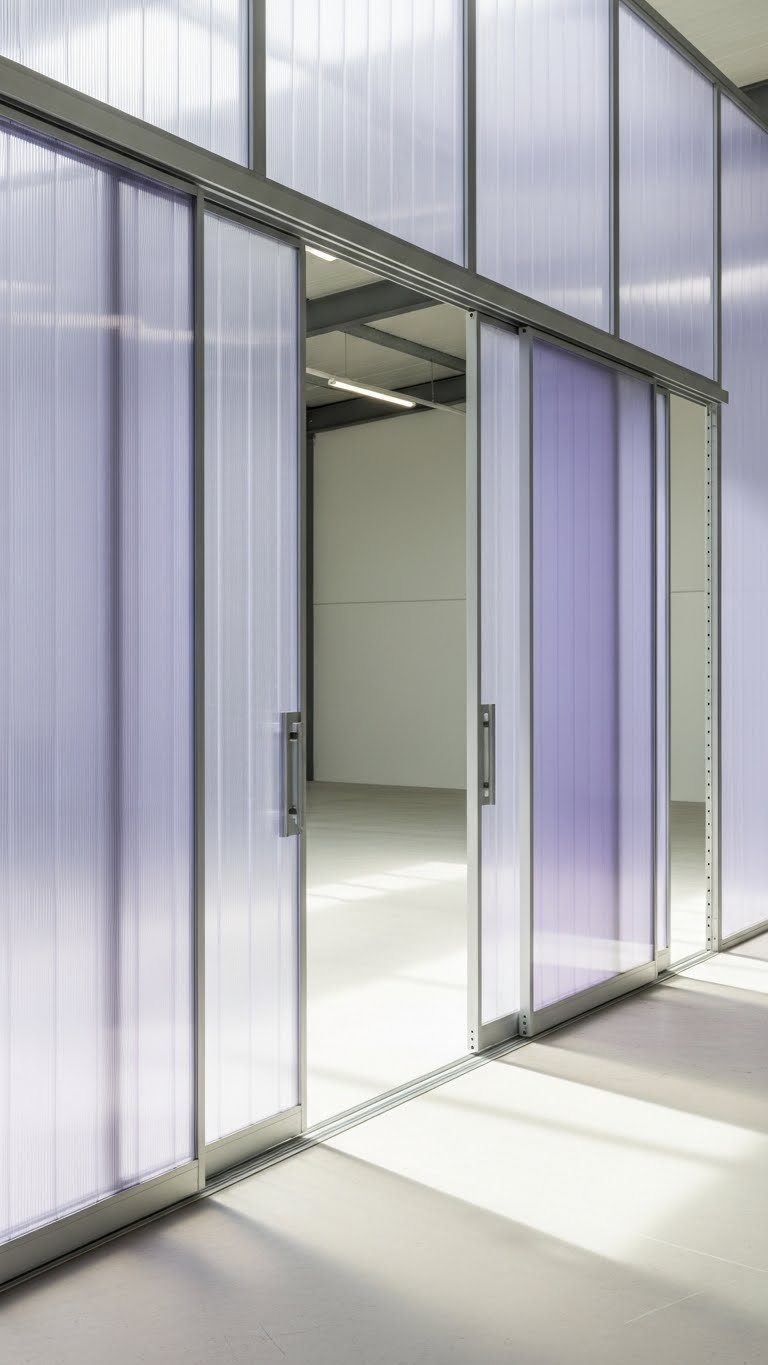
Polycarbonate is incredibly durable, affordable, and industrial-chic—it filters light beautifully while hiding what’s behind it. Great for home offices that need privacy but not darkness.
Polycarbonate sliding panel kits run $200–$600 with track hardware included. Installation is DIY-friendly, taking 2–3 hours. This material is also incredibly sustainable, making it a smart eco-conscious choice.
The translucent quality means light keeps flowing, so you never feel boxed in, but you’ve still got clear boundaries between spaces.
You’re getting industrial-modern aesthetics with practical durability and a smart price point.
18. Use Sliding Pegboard Walls for Open Storage + Privacy

Pegboard sliding doors are brilliant if you need privacy plus storage—the perforated design lets light through while blocking sightlines, and the pegboard itself becomes functional storage.
DIY this for $80–$200 using plywood, pegboard sheets from Home Depot ($20–$40), track hardware ($60–$100), and some assembly. It’s a fun weekend project that saves you money while adding actual utility. Pre-made options run $300–$700.
Perfect for hiding a messy home office, mudroom, or craft space while keeping light and air flowing.
You’re not just getting privacy—you’re gaining storage and a modern design feature that actually serves your daily life.
19. Mount Sliding Blackout Panels for Media Rooms or Bedrooms
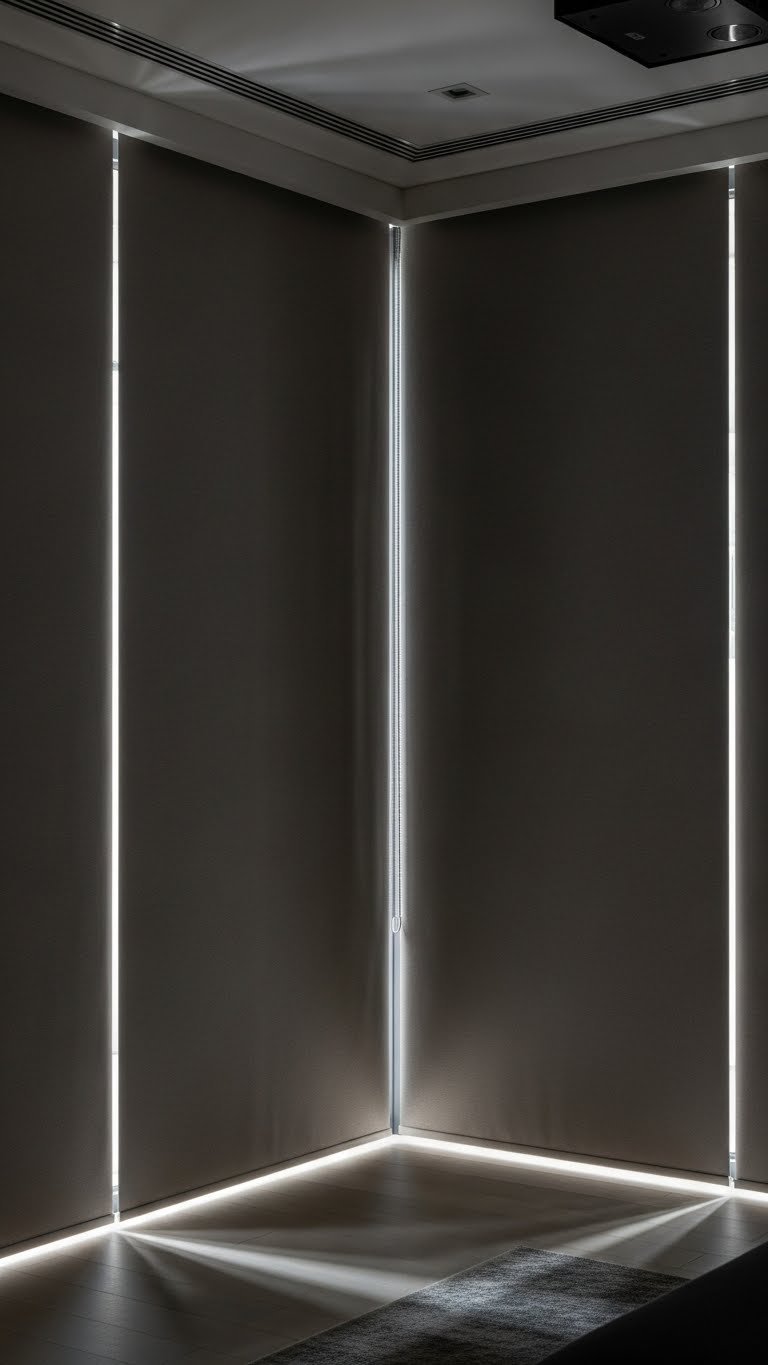
Blackout sliding panels are essential if you have a media room, bedroom, or need light control for a night shift schedule. They block light completely while looking sleek when open.
Blackout fabric sliding systems cost $150–$400 for decent quality from Wayfair or Amazon. Installation is straightforward—track mounts to ceiling, panels hang on simple runners. DIY-friendly, takes 1–2 hours.
The complete light control makes sleep better and movie watching actually enjoyable—this is an investment in comfort that actually pays dividends.
You’re solving a real problem (light control) while keeping your space flexible and maintaining that open-concept vibe during the day.
20. Create a Rolling Library Divider with Glass and Wood

A rolling library divider gives you partition + storage + the ability to move it around. Genius for spaces where you don’t want a permanent wall but need flexible separation.
Rolling shelf units run $300–$800 from Wayfair, IKEA, or furniture stores. You can also DIY this using shelving units, glass panels, and furniture casters ($40–$80). Total DIY cost: $150–$400. Takes a weekend to assemble and customize.
Best part? When you need your space open, just roll it to the side or another room. Zero permanence.
You’re combining storage, design, and flexibility into one functional piece that actually makes your home more organized.
21. Install Sliding Stained Glass Panels for Artistic Privacy

Stained glass sliding panels are statement pieces that turn functional room dividers into art installations. The colored light filtering through creates an instantly elegant, gallery-like vibe.
Stained glass panels run $400–$1,200+ depending on custom design complexity. Order from artisans on Etsy or specialty glass shops. Installation is professional-recommended ($200–$400). This is an investment, but you’re literally art-collecting while solving a design problem.
The play of colored light throughout your day changes the entire feeling of your home—it’s like living with constantly shifting mood lighting.
You’re not just dividing spaces; you’re creating something beautiful that makes people stop and stare.
22. Use Magnetic Sliding Panels for Easy Reconfiguration

Magnetic panel systems let you reposition your dividers instantly without tools—just slide, snap, and you’re done. Perfect for people who like to rearrange their space frequently.
Magnetic modular wall systems cost $300–$800 and are available from design-forward retailers like Wayfair Premium or specialty stores. Installation is DIY-simple—basically assembling modular pieces and securing to floor and ceiling. Takes 2–3 hours.
You can reconfigure your space in minutes, which is perfect if your needs change or you just get bored.
The flexibility means your home actually evolves with your lifestyle instead of staying locked into one configuration forever.
23. Add Sliding Acoustic Panels for Soundproofing
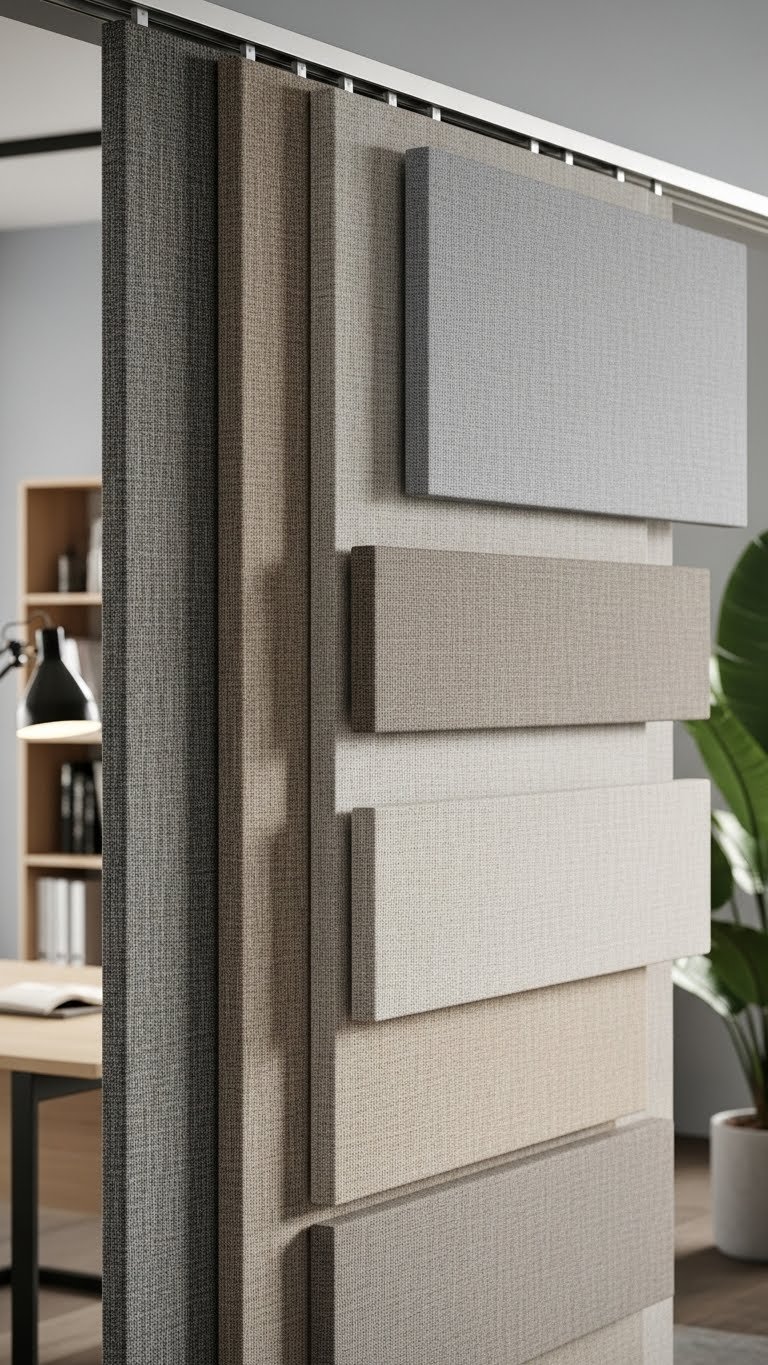
Acoustic panels aren’t just for studios—they’re brilliant for open-concept homes where you need serious sound control. They absorb noise while looking intentional and designed.
Sliding acoustic panel systems run $250–$700 depending on size and coverage area. Brands like Audimute and GIK Acoustics have options, plus Wayfair carries budget versions. Installation is usually DIY-simple or hire help for $200–$400.
The sound dampening is noticeable immediately—phone calls sound clearer, music doesn’t echo through the whole house, and ambient noise gets swallowed.
You’re solving a real problem (noise in open spaces) while keeping the space visually interesting and professionally finished.
24. Install Sliding Doors with Integrated Smart Controls
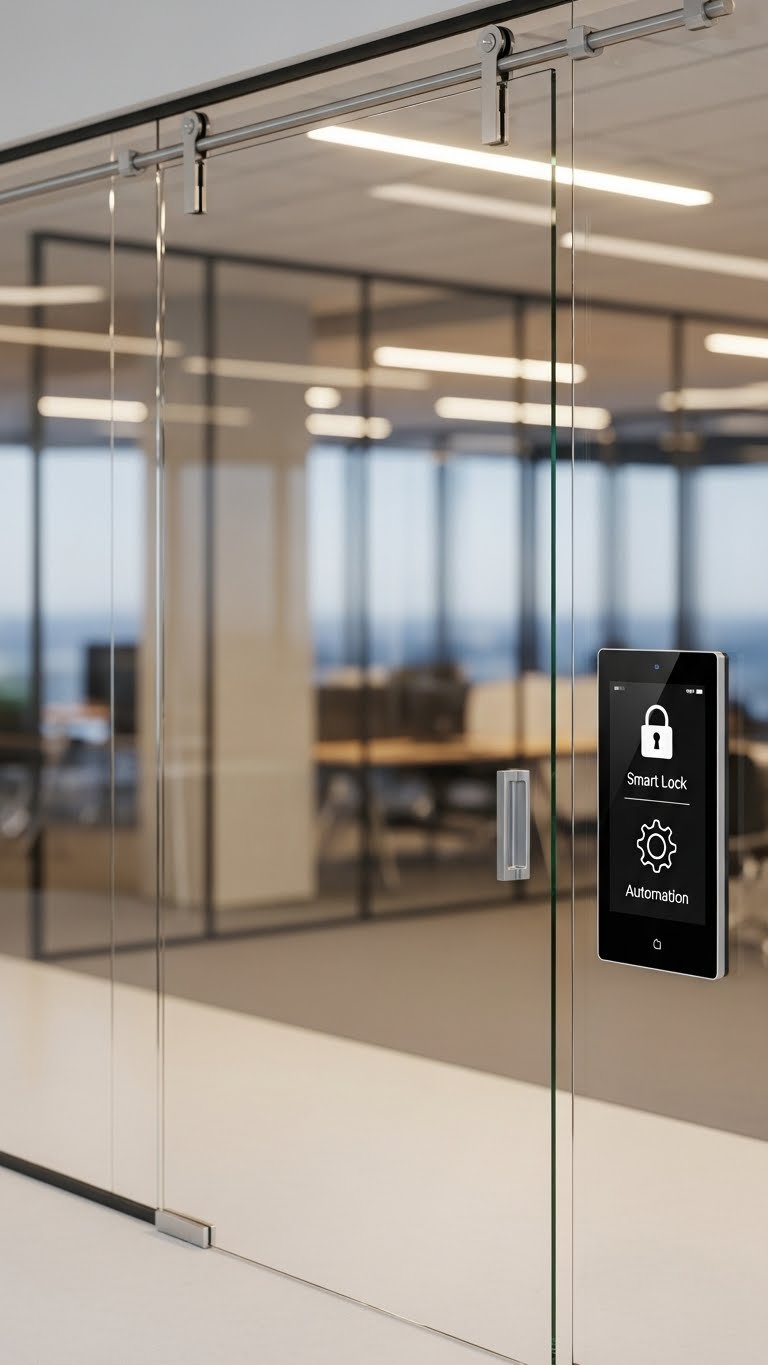
Smart sliding doors with app-controlled locks, automated open-close, and sensors are the future—and they’re actually getting affordable. Perfect for tech-forward homes or those managing multiple spaces.
Smart sliding door systems start around $800–$2,000 with brands exploring this space through Wayfair Tech, Amazon Smart Home, or specialized retailers. Installation typically runs $400–$800 because wiring and setup matter here.
The automation means you can lock down privacy remotely, set doors to close at specific times, and integrate with your overall smart home system.
You’re getting convenience, security, and that “future home” feeling while keeping your spaces flexible and responsive to your life.
25. Create a DIY Sliding Barn Door from Reclaimed Wood

DIY barn doors from reclaimed wood are budget-friendly, sustainable, and incredibly satisfying to build. You’re literally creating a custom piece that no one else has.
Reclaimed wood costs $100–$300 depending on source, black track hardware runs $60–$150, and you need basic tools. Total project: $200–$500 and a solid weekend of work. You’ll have the satisfaction of building something real and unique.
This option keeps carbon footprint low—you’re reusing existing materials instead of buying new. Bonus: reclaimed wood often looks better than new wood anyway.
The handmade quality means your space feels personal and authentic, not like you ordered it from a catalog.
26. Install Sliding Doors with Built-In LED Lighting in Frames
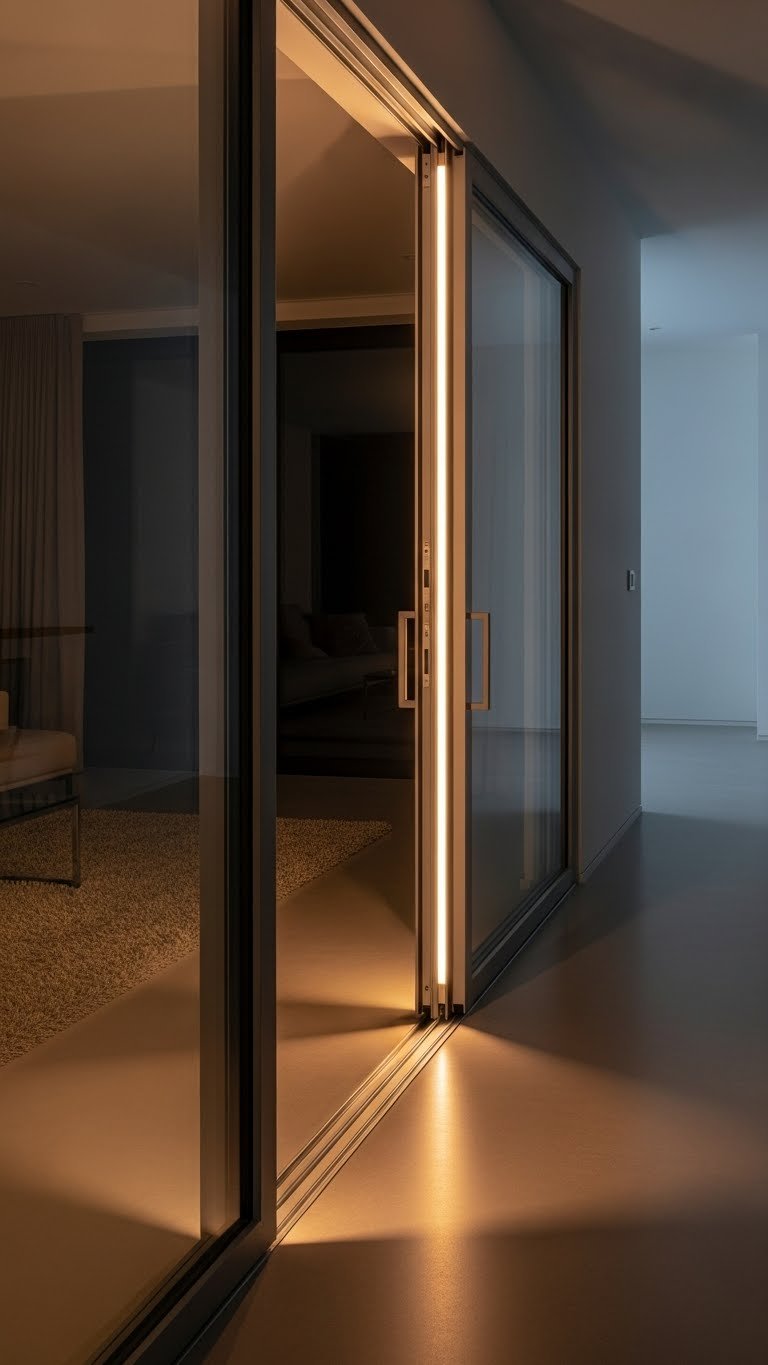
This is the pinnacle of modern design—sliding doors with integrated LED lighting that illuminates edges, creates ambiance, and serves as wayfinding at night. It’s sophisticated and functional.
LED-integrated sliding glass systems run $1,200–$2,500 installed from premium brands and specialty retailers. Installation is professional-only since it involves electrical work ($600–$1,000). This is definitely an investment piece, but the ambiance is unmatched.
The warm lighting creates an upscale hotel-like feeling in your home while solving the practical problem of nighttime navigation.
You’re transforming a functional divider into a design feature that changes how your home feels, especially after dark—this is where form and function truly merge.
Save this post and pick one idea to tackle this month—even the budget-friendly options make a surprising difference in how your space feels and functions. Which style speaks to you?
Leave a Reply