
Living in a small dorm doesn’t mean sacrificing comfort or style. Whether you’re in a traditional residence hall or a cozy off-campus studio, maximizing every inch transforms your space from cramped to cozy—and makes studying, sleeping, and hanging out actually enjoyable. The challenge isn’t just fitting your stuff in; it’s creating a layout that feels intentional and works for you, not against you. We’ve gathered 27 proven layout ideas that college students have tested and loved, from vertical storage hacks to furniture placement tricks that make rooms feel bigger than they actually are. You’ll find budget-friendly solutions, DIY projects, and strategic shopping picks that won’t drain your account. Let’s get started.
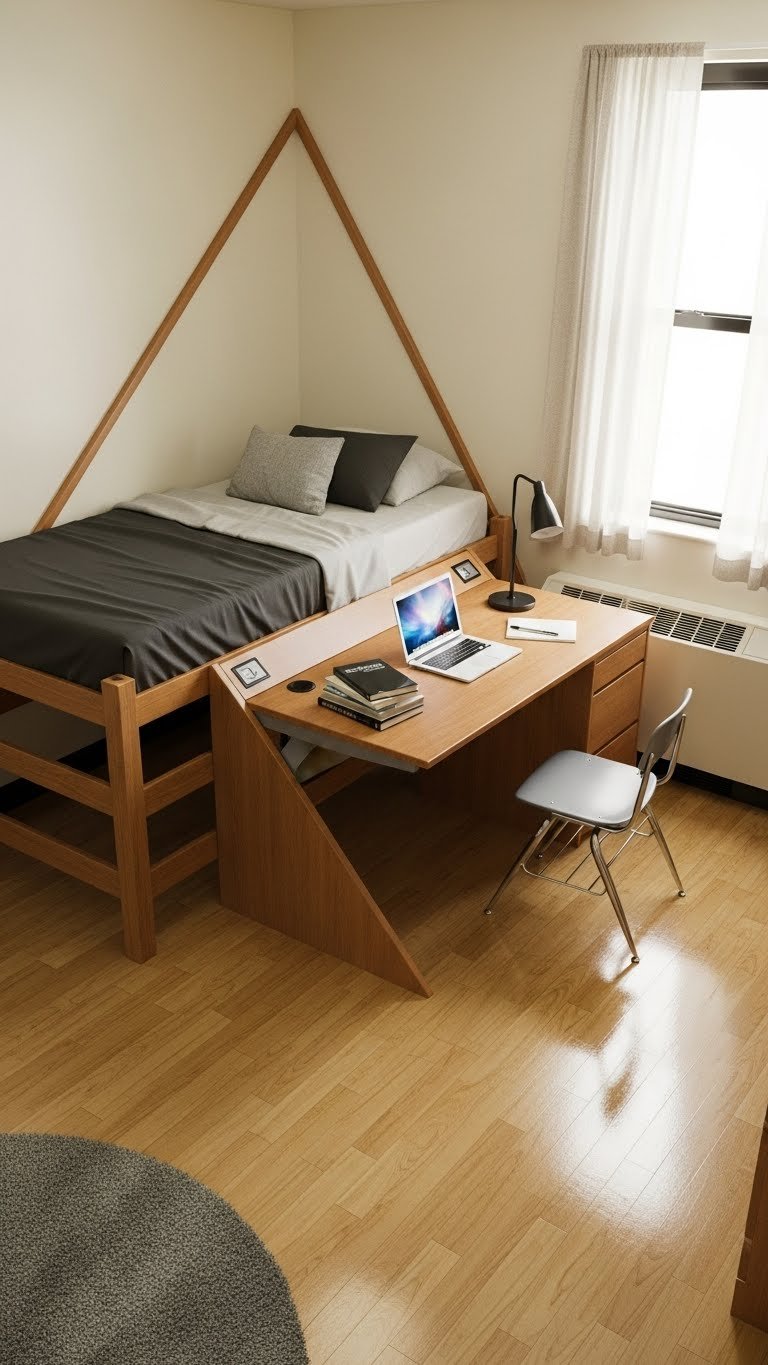
1. Loft Your Bed to Unlock Hidden Real Estate Below
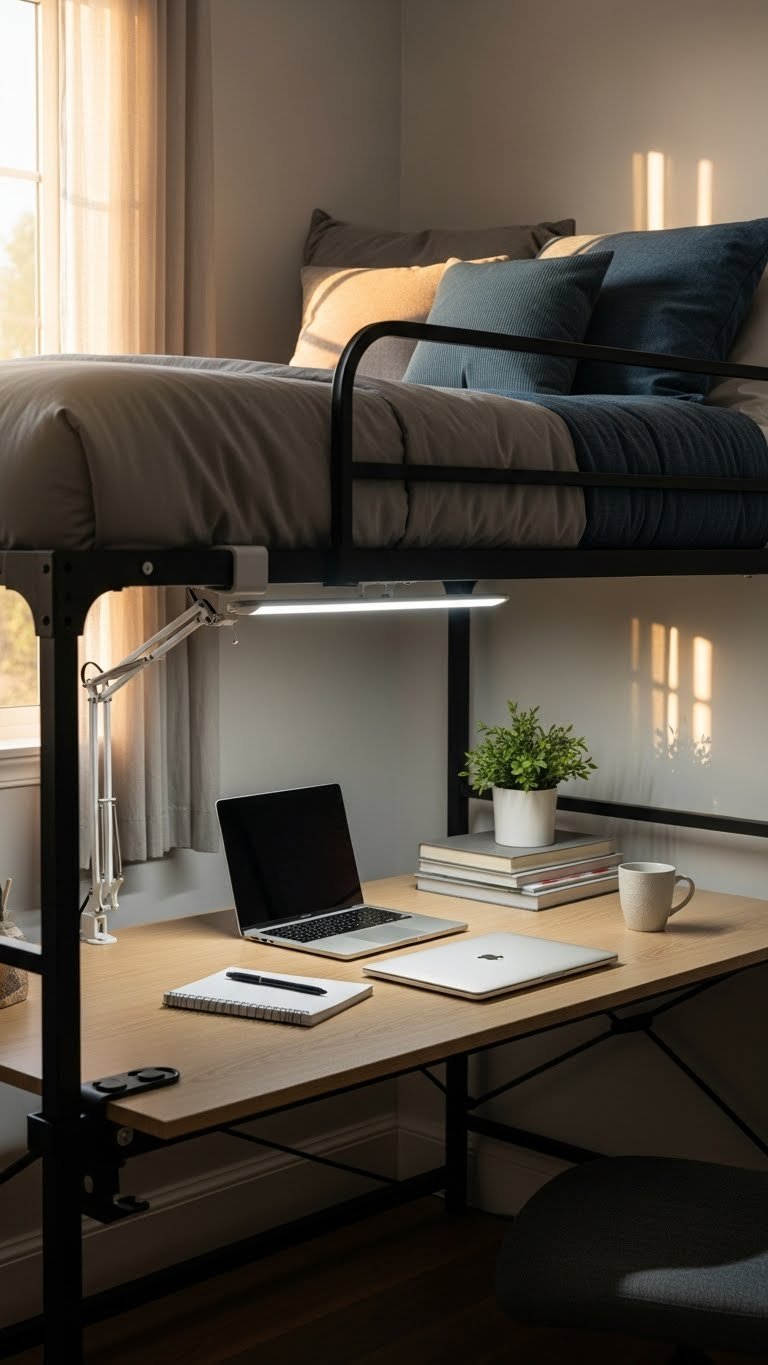
A lofted bed instantly opens up prime floor real estate you can claim for a desk, seating area, or additional storage. Instead of your bed anchoring the center of the room, lifting it frees up that footprint for actual living space.
You can buy bed risers ($25–$50 at Target or Amazon) that stack under each corner leg, or opt for a full loft frame ($150–$400 on Wayfair or IKEA). The risers take 10 minutes to install; a frame takes an hour and may need a friend’s help. Check your dorm policies first—some restrict drilling or permanent fixtures, but risers are usually fine. The space underneath becomes a productivity zone or hangout spot that changes how you use your room.
Your square footage suddenly doubles in functionality. You go from “bed takes up half my room” to “I have a whole other zone to work with.”
2. Float Your Desk Away From the Corner
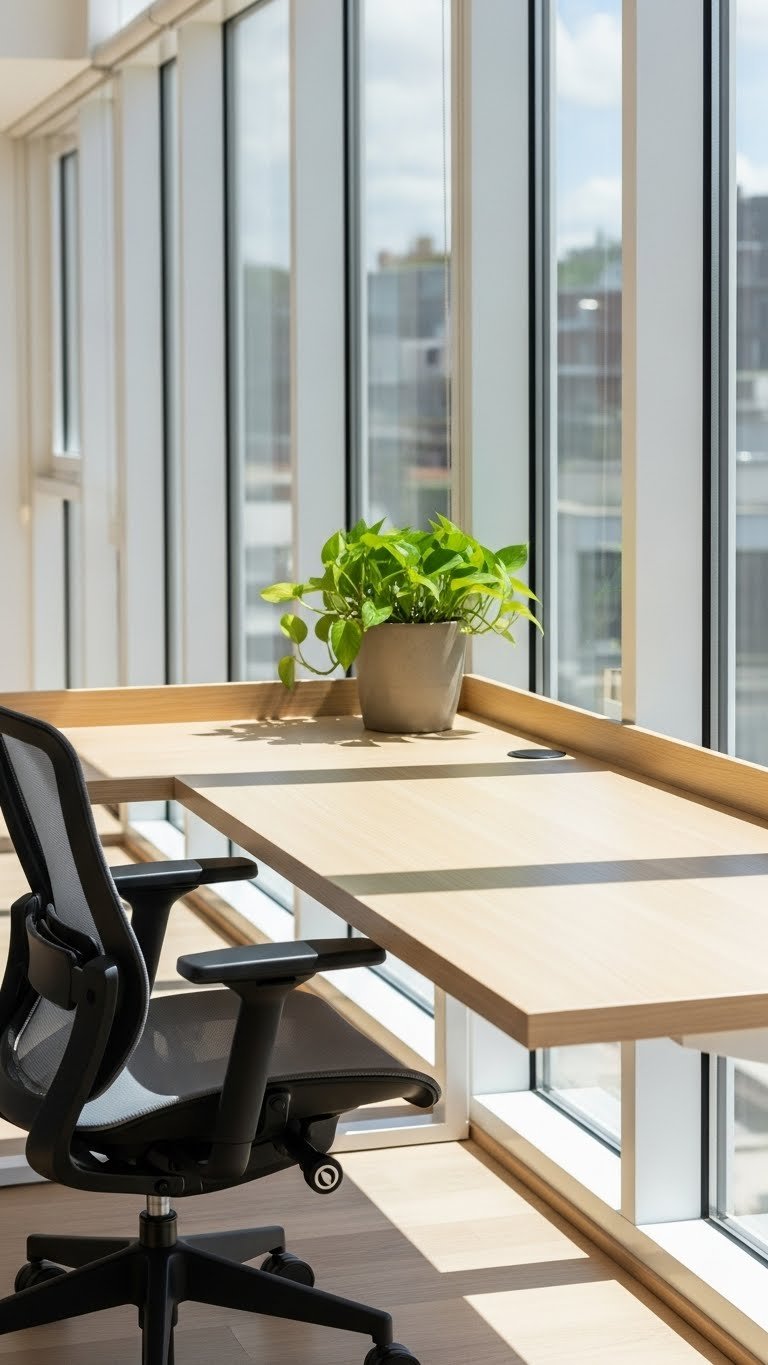
Pushing your desk into the corner is the easiest—and smallest—layout choice. Floating it into the room (even a few feet out) breaks up the monotony and actually makes the space feel larger because your eye sees multiple zones instead of a line of furniture.
Use a slim desk ($80–$200) from IKEA, Wayfair, or Target and angle it toward natural light if possible. You’ll need a chair with wheels ($60–$150) so you’re not constantly rearranging. Takes about 20 minutes to set up. The angle also helps with focus—you’re facing into the room rather than into a wall, which feels psychologically roomier and keeps you alert while studying.
This layout choice costs $150–$350 for furniture but saves you from feeling like you’re in a cubicle. Your brain will thank you during those long study nights.
3. Use Under-Bed Storage Bins to Reclaim Floor Space
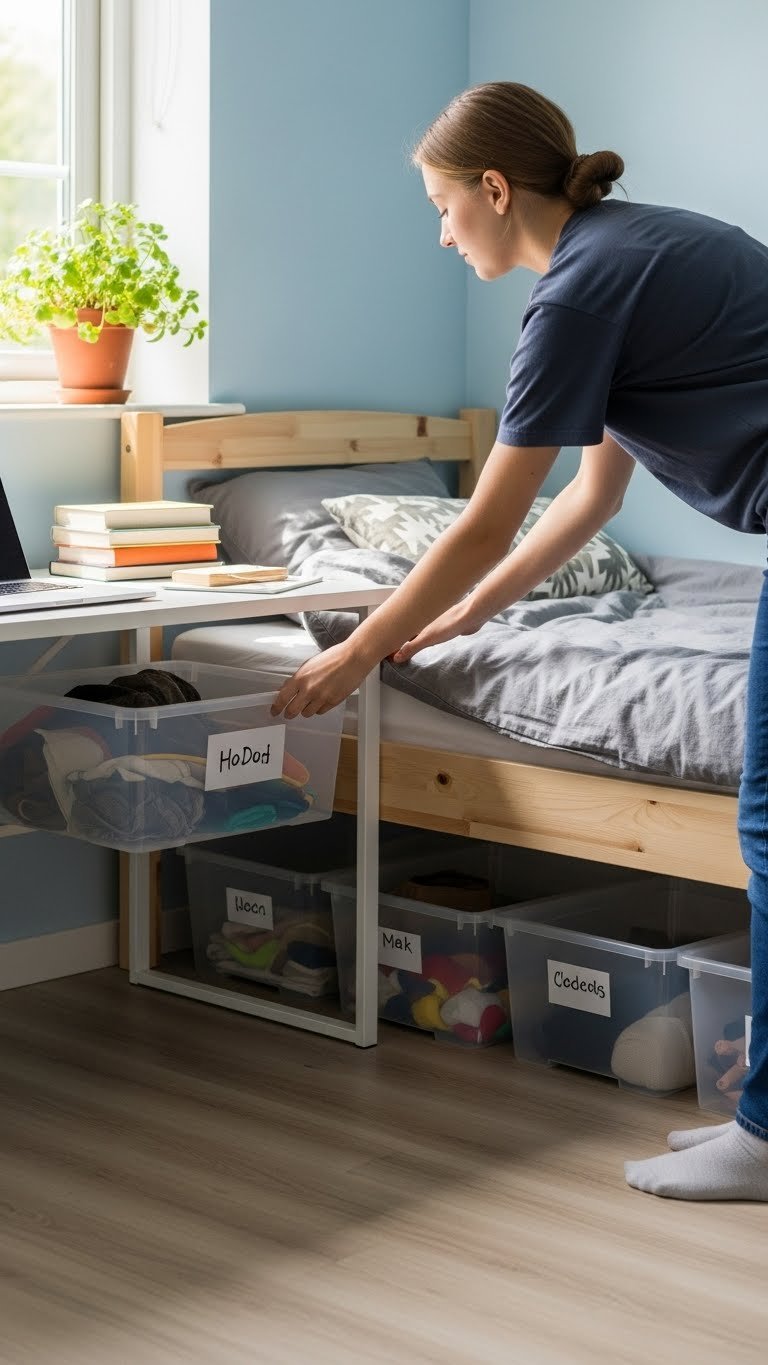
Dead space under your bed is prime real estate that most students ignore. Flat, rolling storage bins ($8–$25 each at IKEA, Target, or Amazon) slide under easily and hold off-season clothes, textbooks, or holiday decorations without cluttering your visible room.
Buy 2–3 bins that fit your bed’s undercarriage and label them clearly. They take five minutes to organize and instantly clear shelf and closet space you can use for daily items. Pro tip: get bins with wheels ($15–$30) so you’re not wrestling with heavy containers. The under-bed storage keeps your room feeling open because clutter is hidden, not eliminated.
With everything tucked underneath, your floor stays clear and open, making the room visually and actually larger. You can move around without stepping over piles, and finding seasonal items becomes simple.
4. Install Floating Shelves to Add Storage Without Floor Footprint
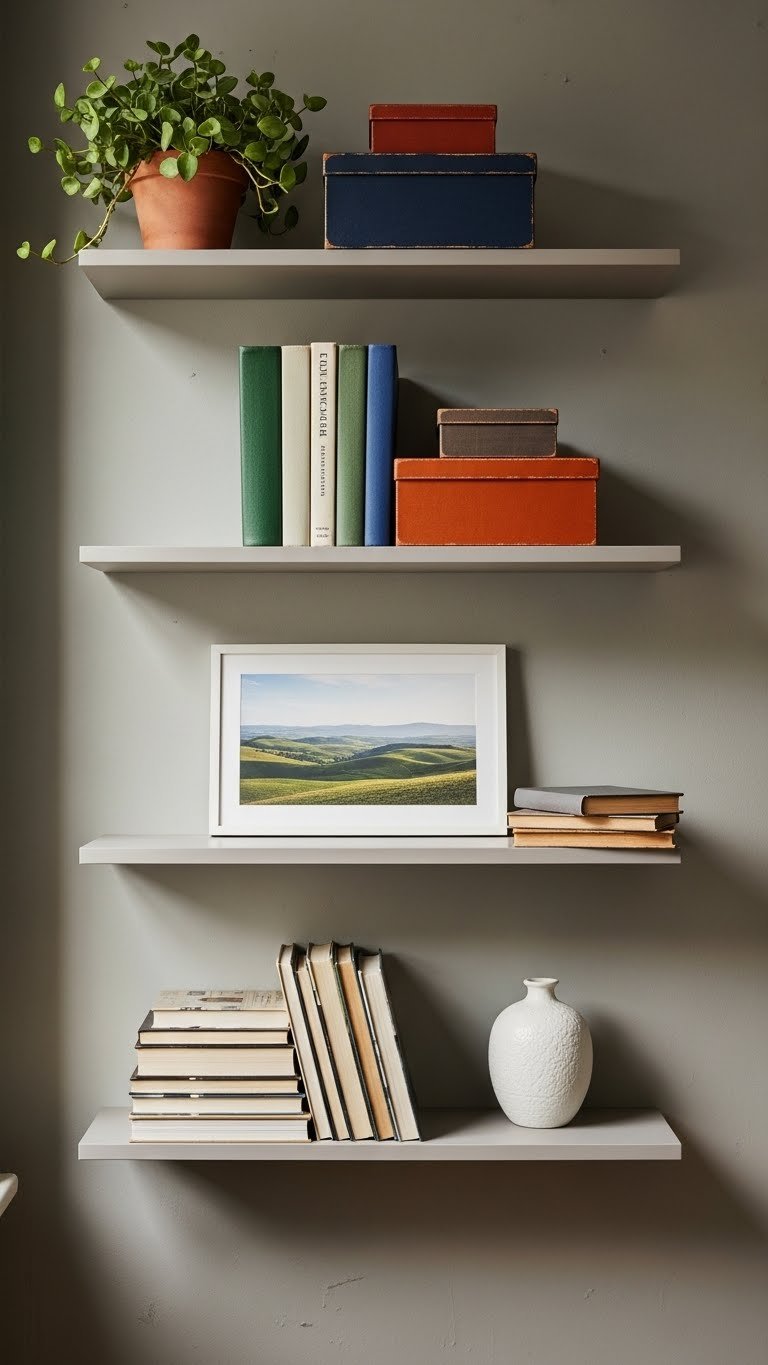
Floating shelves ($30–$80 per shelf at Home Depot, IKEA, or Wayfair) mount directly on walls and hold books, plants, photos, and containers without eating into your limited floor space. They work in rentals if you use damage-free adhesive mounting strips or fill holes before you leave.
Installation takes 30–45 minutes with a level and drill (or ask a handy RA). Mount them 12–18 inches apart vertically to create visual rhythm. Style each shelf with a mix of functional items (books, folders) and decorative pieces (plants, framed photos) so the wall feels curated. One student can handle installation, though a second pair of hands makes it easier.
Your walls become storage, which means your floor and furniture stay clearer. You go from feeling cramped to feeling organized, and the shelves photograph beautifully for your room pride.
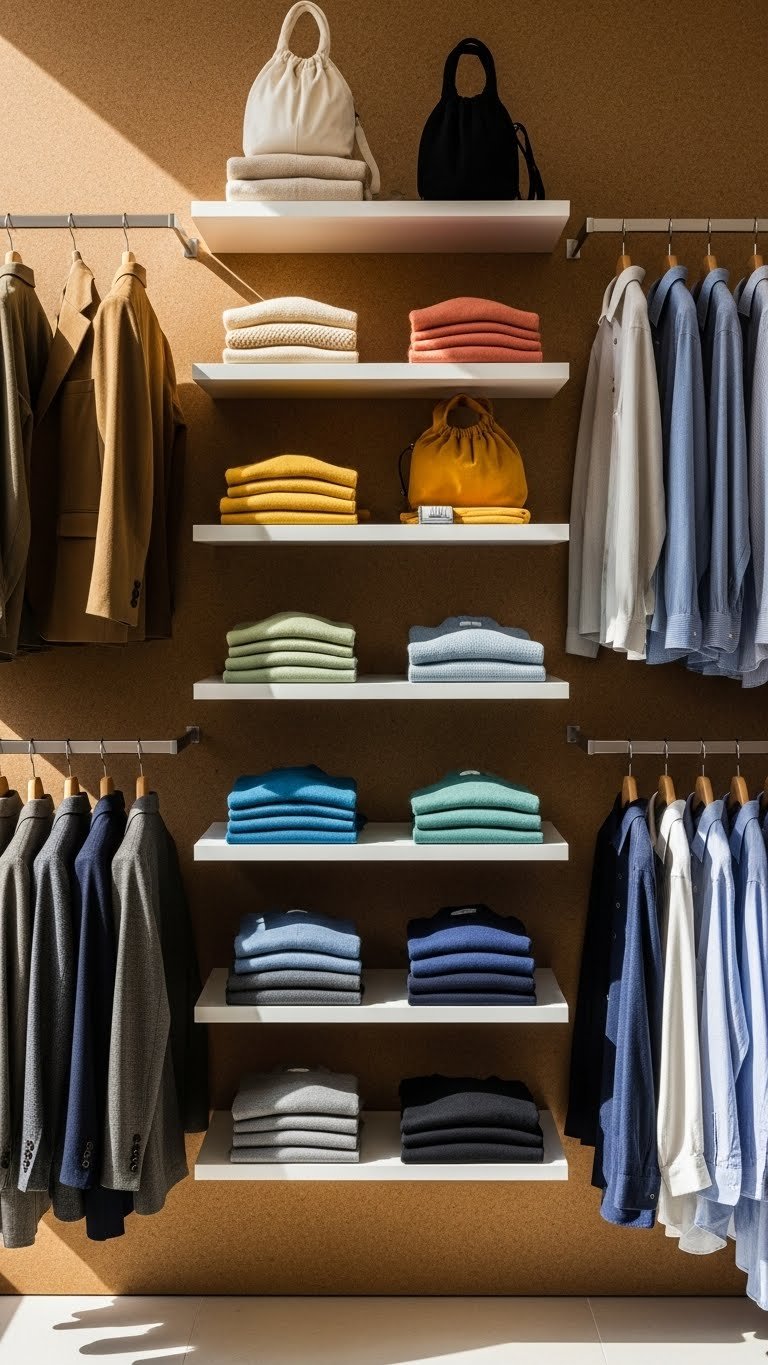
5. Create a Vertical Closet System With Slim Hangers and Shelf Dividers
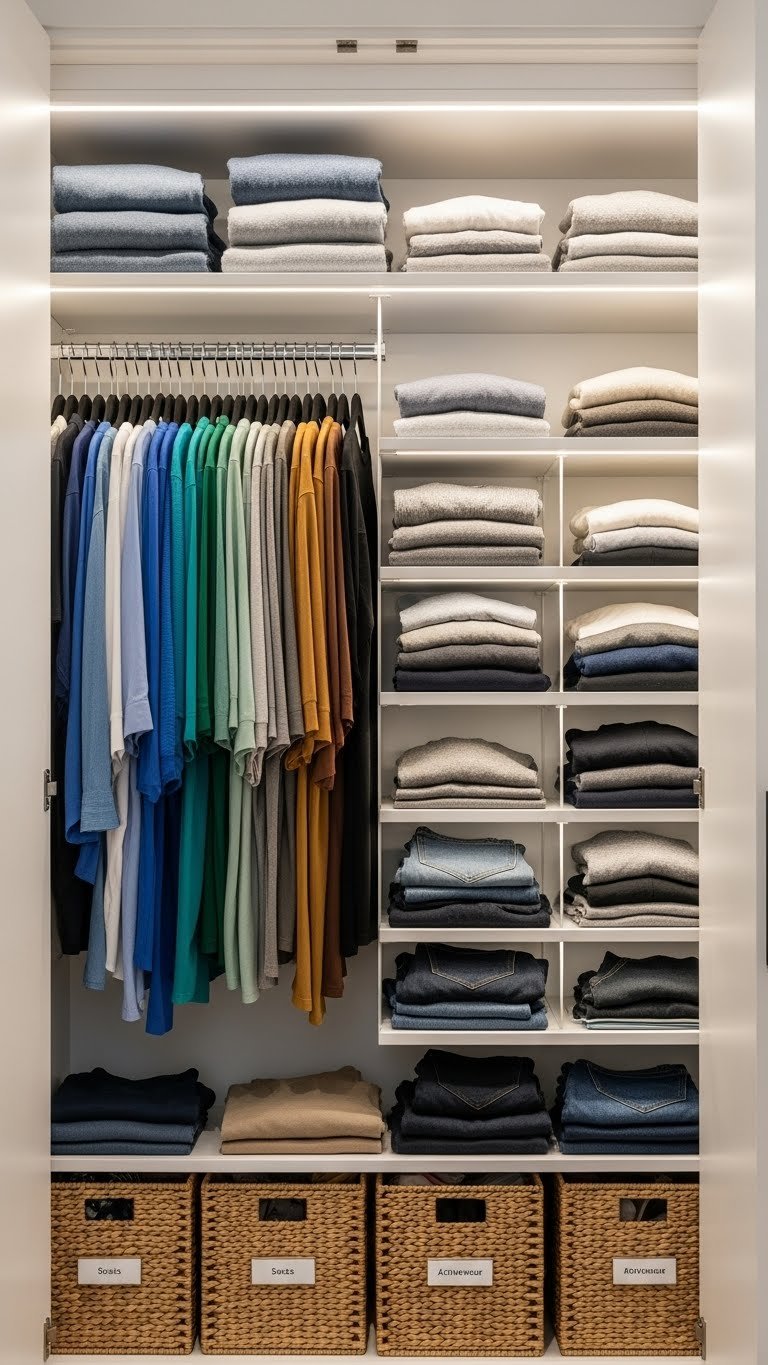
Closet space is usually the bottleneck in small dorms. Swapping standard hangers for slim velvet or plastic hangers ($15–$30 for a pack) and adding shelf dividers ($10–$20) can fit 30–40% more items in the same footprint.
Hang similar-colored clothing together and use dividers to prevent folded stacks from toppling over. This 45-minute project costs $30–$50 total and doesn’t require any tools or landlord approval. Group by category (jeans, sweaters, casual shirts) so getting dressed becomes faster. Many students combine slim hangers with a hanging shoe organizer ($15–$25) on the inside of the closet door for even more storage.
Once your closet is maximized, you don’t need additional dressers or storage furniture in the main room. Everything’s contained, and your floor stays open and functional.
6. Position Your Bed as a Room Divider to Create Zones
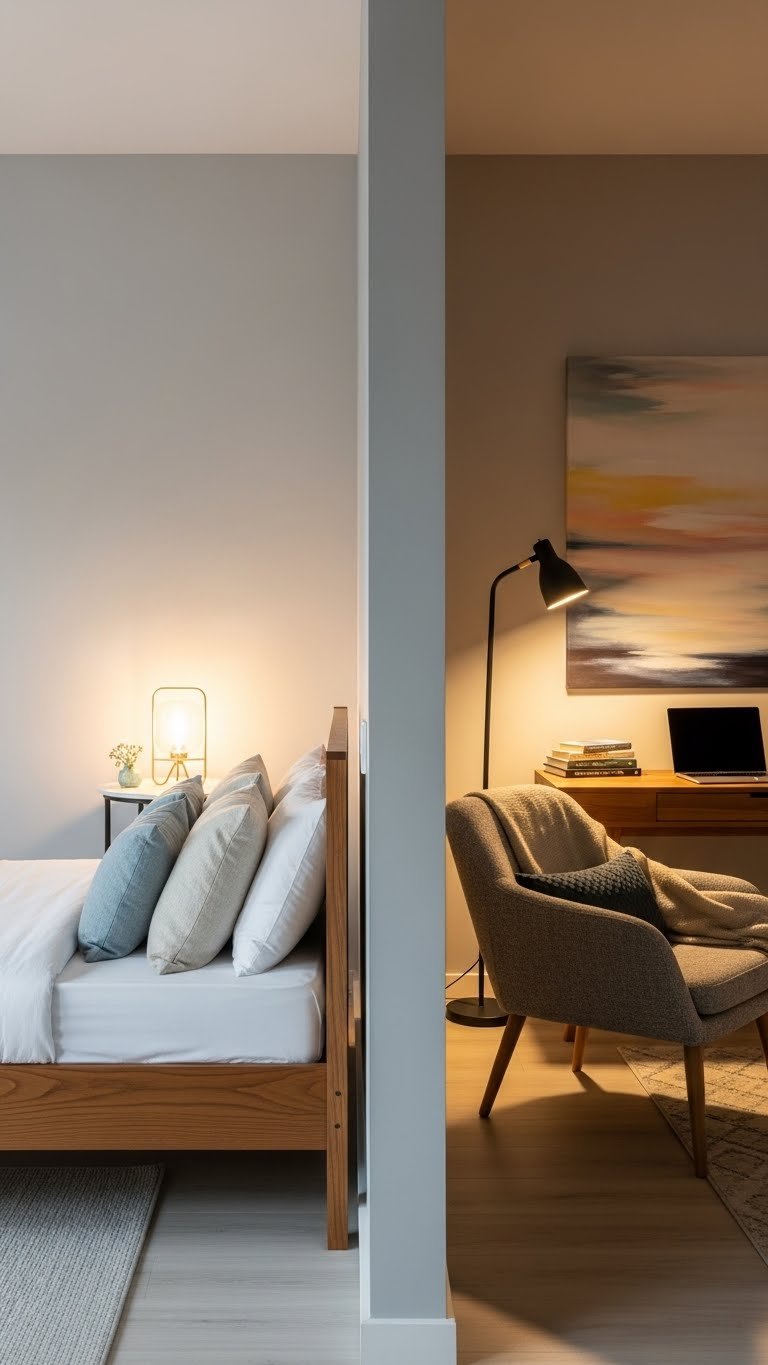
Instead of pushing your bed against a wall, angle it to create a natural boundary between your sleeping zone and your study/hangout space. This layout choice costs nothing and instantly makes your small room feel like it has multiple purposeful areas.
No additional furniture needed—just rethink your bed’s angle. A headboard ($100–$300 optional, or use pillows) makes the visual division even clearer. Takes 20 minutes to rearrange and no tools required. This works especially well in large single dorms or small studios where everything happens in one room. Your brain compartmentalizes activities (rest vs. work) based on which side of the room you’re on, which actually improves focus and sleep quality.
Visitors will notice the intentional layout, and you’ll feel like you have more than just a bedroom—you have distinct spaces for different activities.
7. Use a Pegboard Wall for Customizable Storage and Style
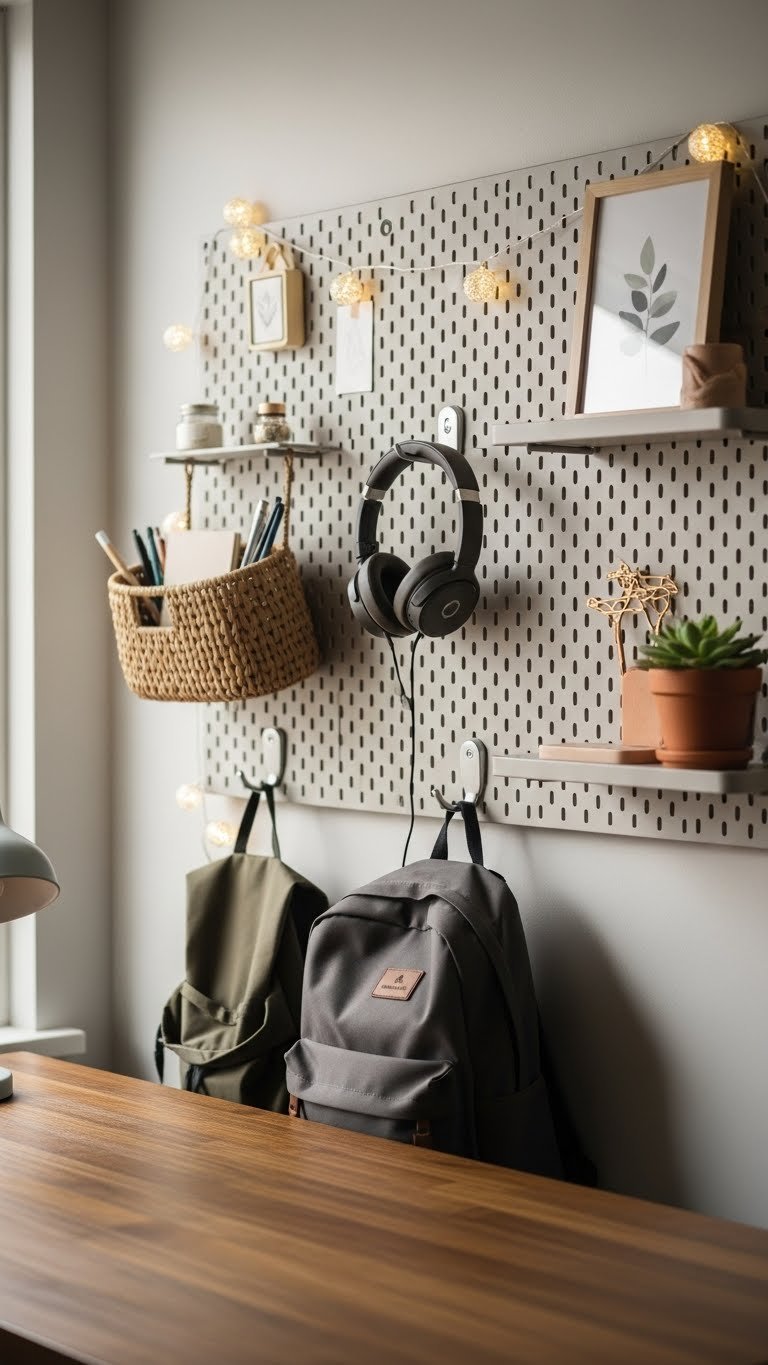
A pegboard ($20–$50 at Home Depot or Lowes) with removable pegs and hooks is endlessly customizable, renter-friendly, and keeps frequently used items off your desk surface. Mount it above your desk or on any wall with damage-free strips if you’re renting.
Installation takes 30 minutes with basic tools (drill or just use adhesive strips). You can reorganize it weekly if you want because pegs pop in and out. Start with hooks ($1–$3 each) for headphones, bags, and cables; small baskets ($5–$10) for pens and chargers; and shelves ($5–$8) for books or decorative items. This $40–$80 project keeps your desk clear while making frequently used items instantly accessible. No studying session gets derailed by hunting for earbuds.
Your desk becomes a focused workspace instead of a catch-all pile. Everything has a home, and rearranging it becomes fun rather than frustrating.
8. Invest in a Rolling Storage Cart for Mobile Organization
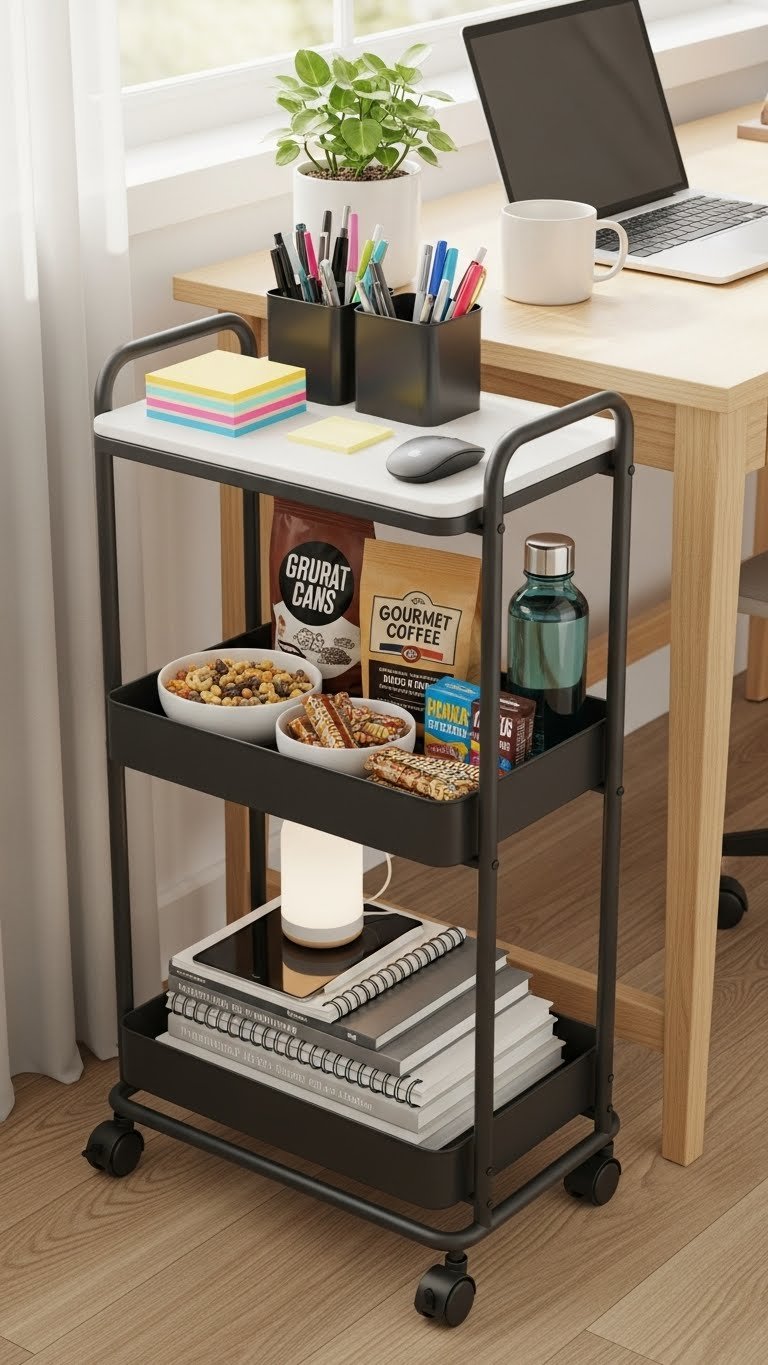
A rolling cart ($30–$80 from Target, IKEA, or Amazon) holds supplies, snacks, and textbooks while staying mobile enough to tuck into corners or roll under your bed when guests arrive. It’s like portable storage that doesn’t waste permanent floor space.
Get a slim cart (under 15 inches wide) so it fits in tight spaces. Stock it with supplies you use frequently: chargers, notebooks, snacks, headphones, medications. You can roll it to the library, move it around your room as your layout evolves, or hide it completely. Takes 15 minutes to assemble. At $30–$50 for a basic model, it’s one of the cheapest storage investments with the most flexibility. One student per room can manage this easily.
You gain mobile storage that doesn’t claim permanent real estate. When parents visit, roll it into a closet. During study marathons, park it next to your desk. It’s like having an extra pair of hands for organization.
9. Mount a Mirror Across From Your Window to Amplify Natural Light

A strategically placed mirror ($30–$100 at Target, IKEA, or Wayfair) bounces natural light across your room, making it feel larger and brighter without adding any square footage. This is science-backed, not just decorative.
Mount it directly across from your window with damage-free strips if renting, or nail it up if you own. 20-minute install, zero cost if you already own a mirror. Bonus: mirrors visually expand small rooms by reflecting the opposite wall, making your dorm seem deeper. A full-length mirror ($50–$100) serves double duty—you see your whole outfit, and it maximizes light bounce. A leaning mirror against a wall works too if mounting feels risky.
Your room instantly looks brighter and more spacious. You’ll also study better because natural light is proven to boost focus and mood. This one change affects how you actually feel in your space.
10. Create a Cozy Reading Nook in an Unused Corner
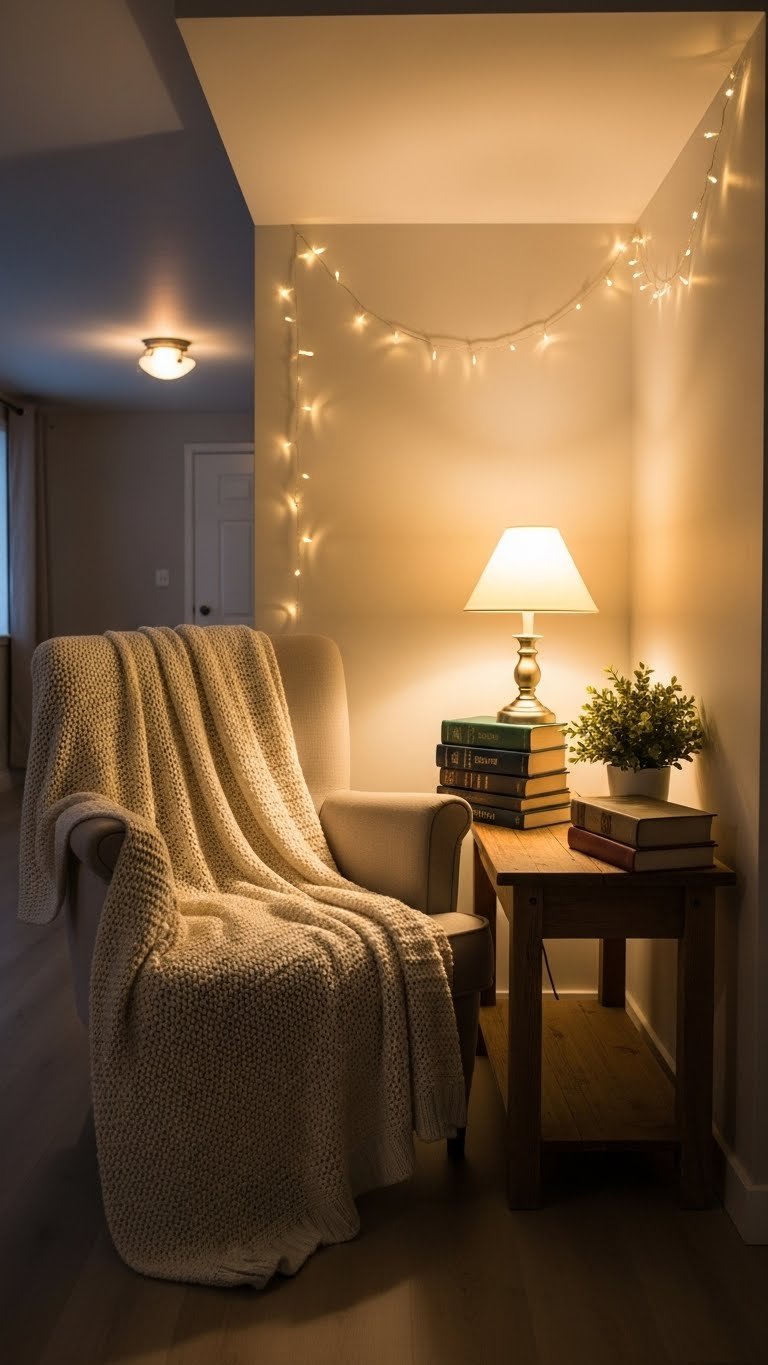
Every dorm has that awkward corner that seems useless. A small reading chair ($50–$150), a side table ($30–$80), and good lighting ($20–$60 for a floor lamp) transform it into your personal retreat where you can decompress between classes.
Choose a slim accent chair or even a cushioned floor seat if space is extremely tight. Add a throw blanket ($15–$40) and a small lamp with warm bulbs so the corner feels distinct from your study zone. Takes an hour to set up and costs $100–$300 total depending on quality. This works well for students who share rooms because it gives you a separate space for downtime. The corner becomes your reading, journaling, or phone-scrolling sanctuary.
Instead of collapsing on your bed when exhausted, you have an intentional rest space. Your bed stays reserved for sleep and intimate hangouts, which actually improves sleep quality.
11. Use Furniture That Doubles as Storage (Ottomans, Benches)
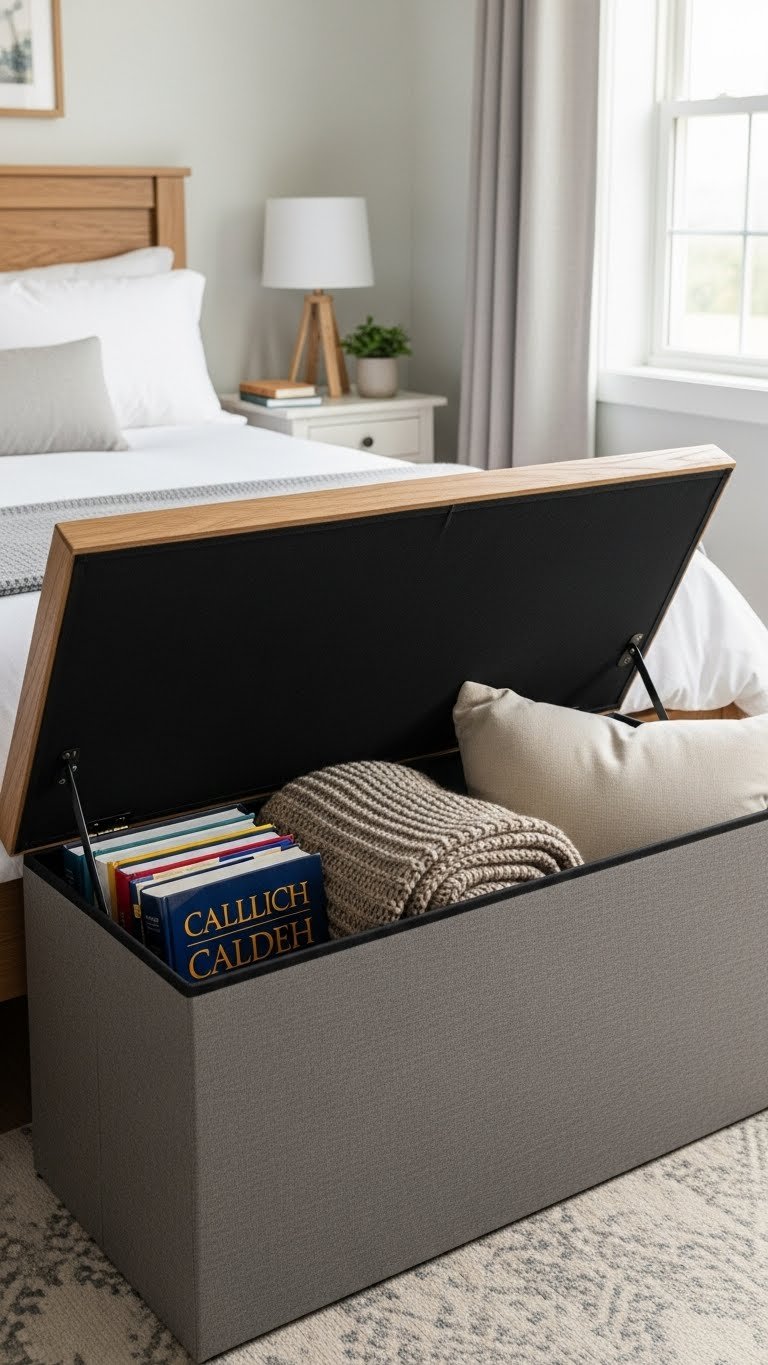
An ottoman with built-in storage ($50–$150 at Target, IKEA, or Wayfair) acts as a seat, footrest, and storage box in one. This is the golden ticket for small spaces where every piece must earn its place.
Choose one that opens from the top and holds off-season clothes, books, or blankets. Dimensions usually run 18–24 inches square, so it fits at the foot of your bed or beside a chair. Assembly takes 20–30 minutes. At $80–$120 for a quality ottoman, you’re getting seating and storage for less than buying them separately. Guests can sit on it when they visit. Bonus: if your dorm allows it, a storage bench ($100–$200) works the same way and can tuck against a wall.
You eliminate the need for a separate dresser or storage chest. Seating and storage merge, and your room stays uncluttered. This piece literally does double duty and justifies its footprint.
12. Angle Your Furniture to Create Flow and Avoid a Grid-Like Layout
Pushing every item against walls makes small rooms feel static and cramped. Angling furniture at 45 degrees or positioning pieces perpendicular to walls breaks the monotony and makes the space feel larger.
This costs nothing but a 30-minute furniture rearrangement. Your bed doesn’t have to be flush left; your desk doesn’t have to be flush right. Create diagonal sight lines that your eye naturally follows. Pair this with a small area rug ($30–$80) to anchor the angled furniture and define the space. This layout approach requires zero additional purchases but feels intentional and sophisticated. Most student dorms look boxy because everything is gridded; yours will stand out.
Angled furniture keeps your eyes moving, which makes rooms feel dynamic rather than cramped. Visitors will think you’re a design pro instead of realizing you just rearranged things—it’s that effective.
13. Hang a Tension Rod Across a Corner for Extra Hanging Space
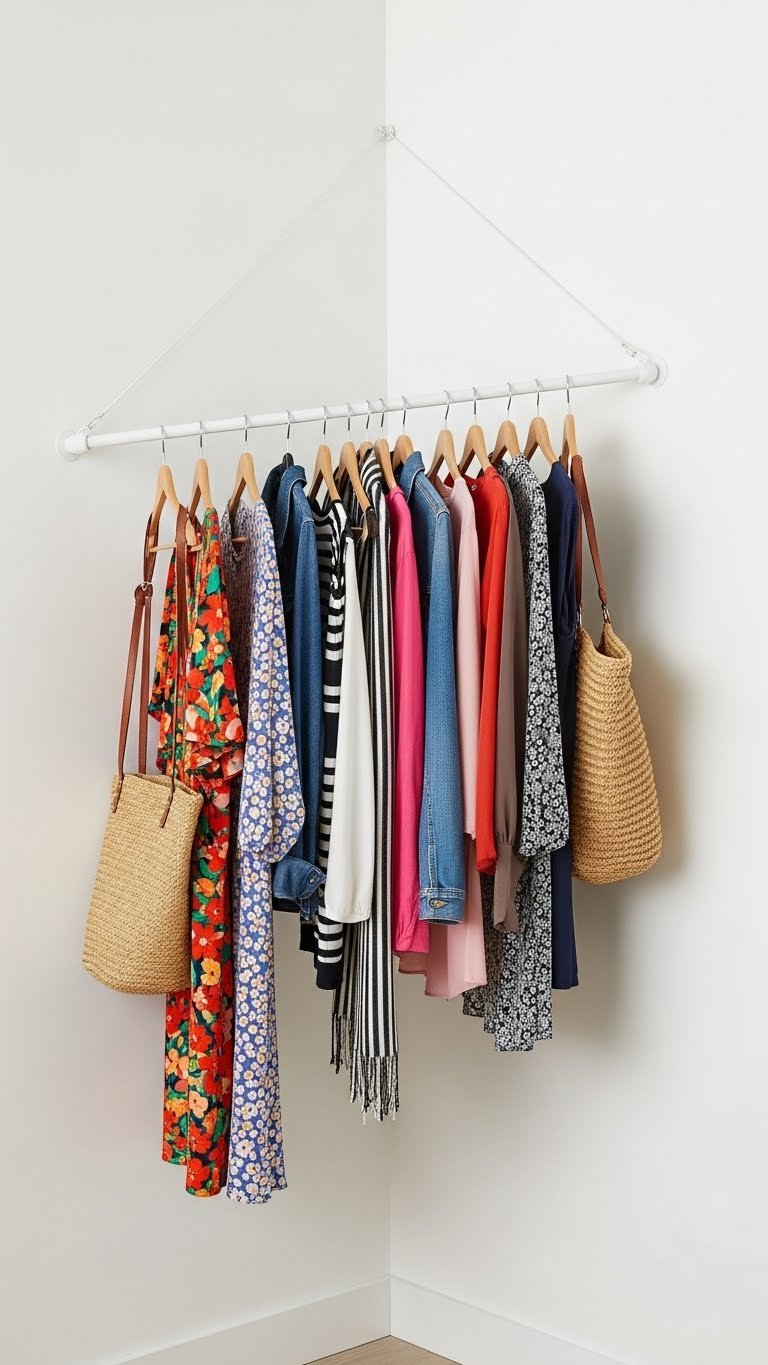
A tension rod ($15–$30 at Target or hardware stores) strung corner-to-corner holds extra hanging clothes, bags, or scarves without requiring wall mounts or taking up closet space. It’s an overlooked hack that most students never consider.
Install it at waist height or higher using damage-free tension technology that doesn’t require drilling. Takes 10 minutes. Cost is minimal, and you gain probably 3–4 feet of hanging space. This works especially well for seasonal items, bags you use weekly, or accessories you want visible. The corner would otherwise stay empty, so you’re using truly dead space.
Your closet stays organized for everyday items while this secondary rod holds overflow. Getting dressed becomes easier because you see everything at a glance, and your room looks intentionally styled rather than messy.
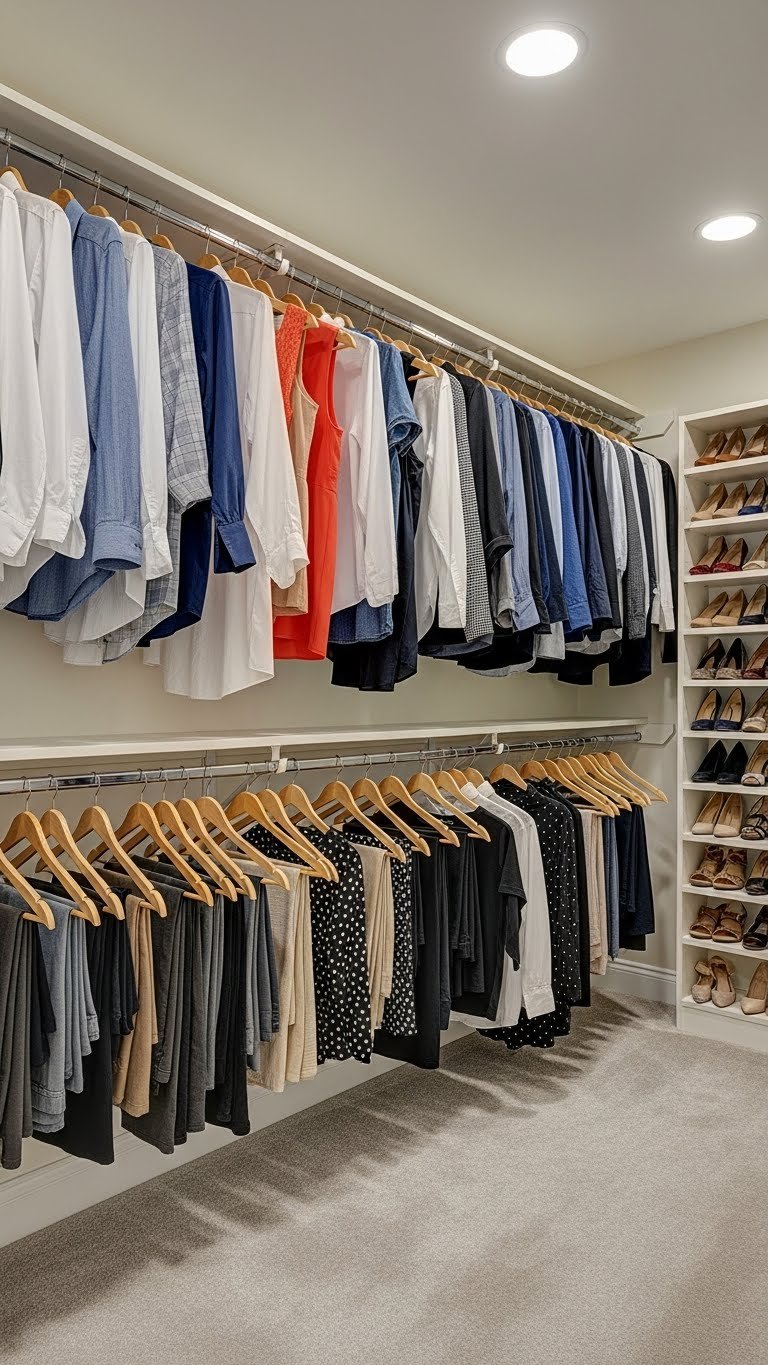
14. Swap a Dresser for Wall-Mounted Shelves and Hanging Rods
If a dresser takes up 30% of your floor space, wall-mounted storage does the same job while freeing up that footprint entirely. Combine open shelves with hanging rods to replace a traditional dresser completely.
Mount 2–3 open shelves ($30–$80 per shelf) and two small hanging rods ($20–$40 each) on one wall. Takes 2–3 hours if you’re installing everything, or hire building maintenance if your dorm allows it. Total cost is $100–$250 depending on quality and quantities. Style it by color or category so it looks intentional and doubles as decoration. This is a bolder move than typical dorm decor, but it reclaims enormous floor space.
You go from feeling squeezed to feeling open. Every square foot of floor becomes usable, and your room actually feels spacious. Visitors notice the smart organization immediately.
15. Use Clear Storage Containers So You Can See Everything at a Glance
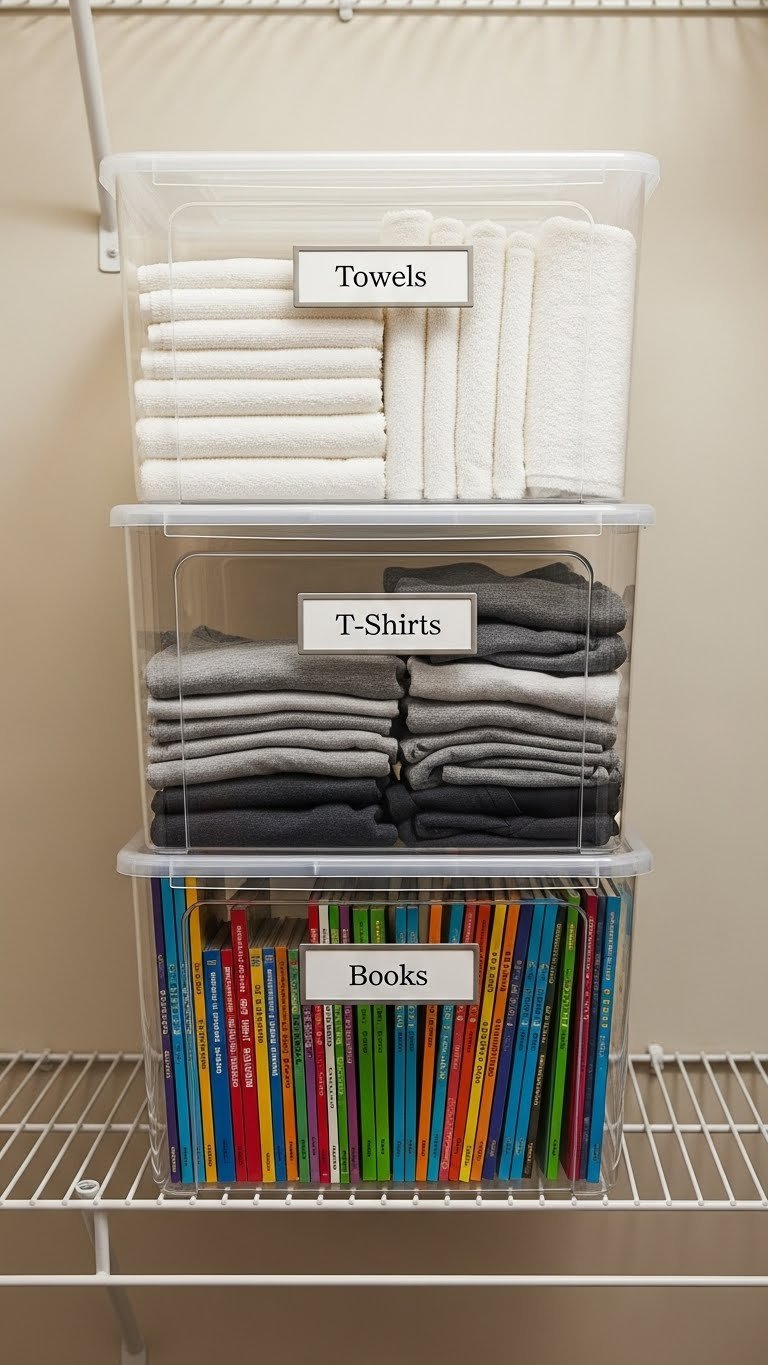
Clear storage containers ($1–$3 each at Dollar Tree, Target, or Walmart) let you see what’s inside without opening them, which saves time and prevents that “I can’t find anything” panic. They’re especially useful for closet shelves and under-bed storage.
Buy a set of 6–10 containers in graduated sizes ($15–$30 total) and label each one clearly. Spend 30 minutes sorting items by category: seasonal clothes, accessories, documents, art supplies. This costs almost nothing but saves enormous amounts of mental energy. You’ll actually know what you own, which means you won’t buy duplicates or waste time searching. Stackable containers maximize vertical closet space too.
Organization becomes effortless because you can see everything. You stop feeling disorganized and start feeling in control of your space. That psychological shift actually affects how you use your room.
16. Install a Tension Rod in Your Closet for Extra Hanging Space
Most closets have one rod at the top, leaving tons of dead space below. A tension rod installed halfway down ($15–$30) doubles your hanging capacity without any permanent changes. Perfect for renters.
Takes 10 minutes to install using the tension technology that grips the inside walls. Hang shorter items (shirts, jackets) on the lower rod and longer items (dresses, coats) on the upper rod. This one hack can fit 30–40% more clothes in your closet, which means you need zero additional dressers or hanging racks in your main room. Your closet essentially grows without any floor footprint impact.
Your room stays clear because everything is closet-contained. The tension rod costs less than $30 and pays for itself immediately by eliminating the need for additional storage furniture.
17. Invest in a Compact Desk to Replace Your Dining Table
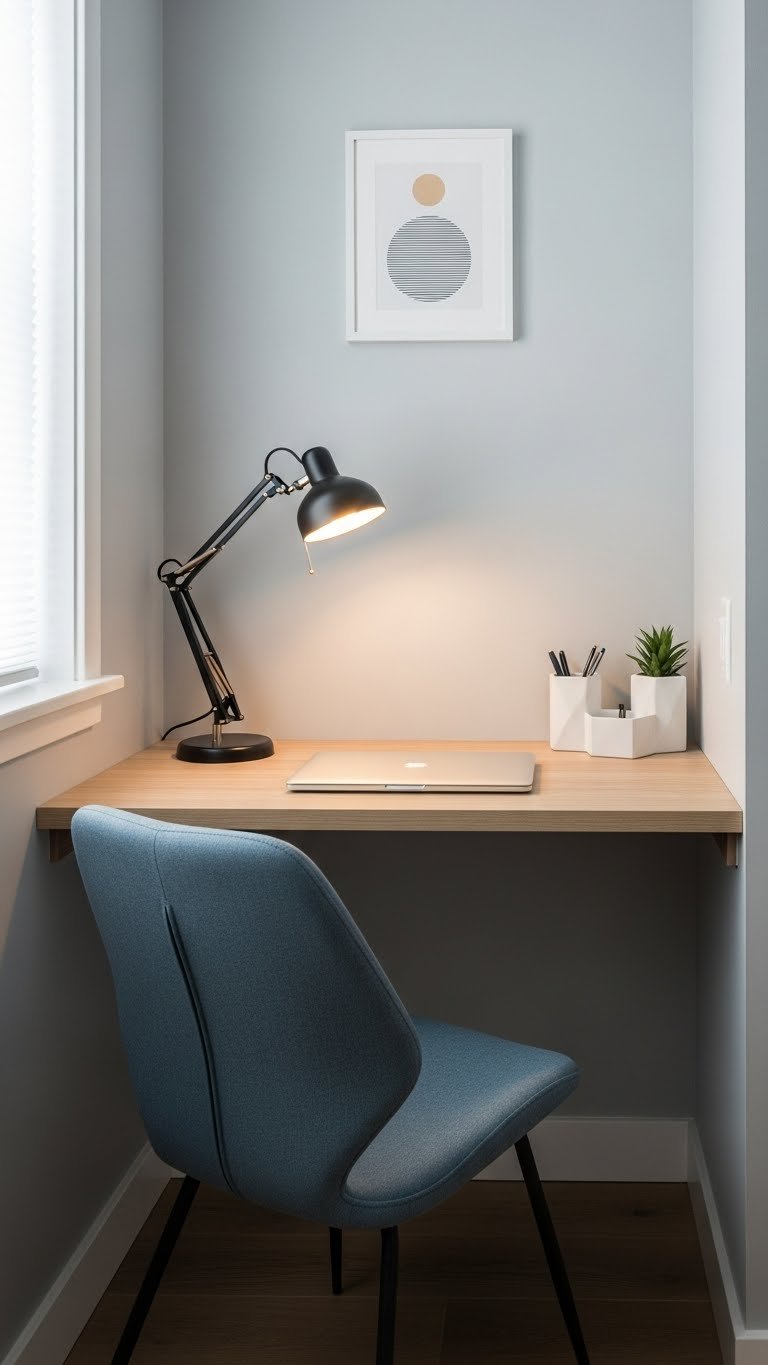
Many dorms include a tiny table that looks dinky but eats tons of space. Replace it with a compact desk ($80–$200) designed for small rooms. These run 36–48 inches wide versus 48–60 inches for traditional tables.
Brands like IKEA, Wayfair, and Target offer slim desks with cable management built in. Takes 45 minutes to assemble and costs $100–$150 for a solid option. You keep workspace for studying and eating, but it doesn’t dominate the room. Pair it with a comfortable desk chair ($60–$150) so you’re not tempted to work from bed (which wrecks sleep quality). This is an investment that dramatically improves your daily experience.
Your room feels more open because the furniture is proportionate to the space. You also create a clear boundary between “study zone” and “relax zone,” which helps with focus and sleep.
18. Create a Charging Station to Eliminate Cable Chaos
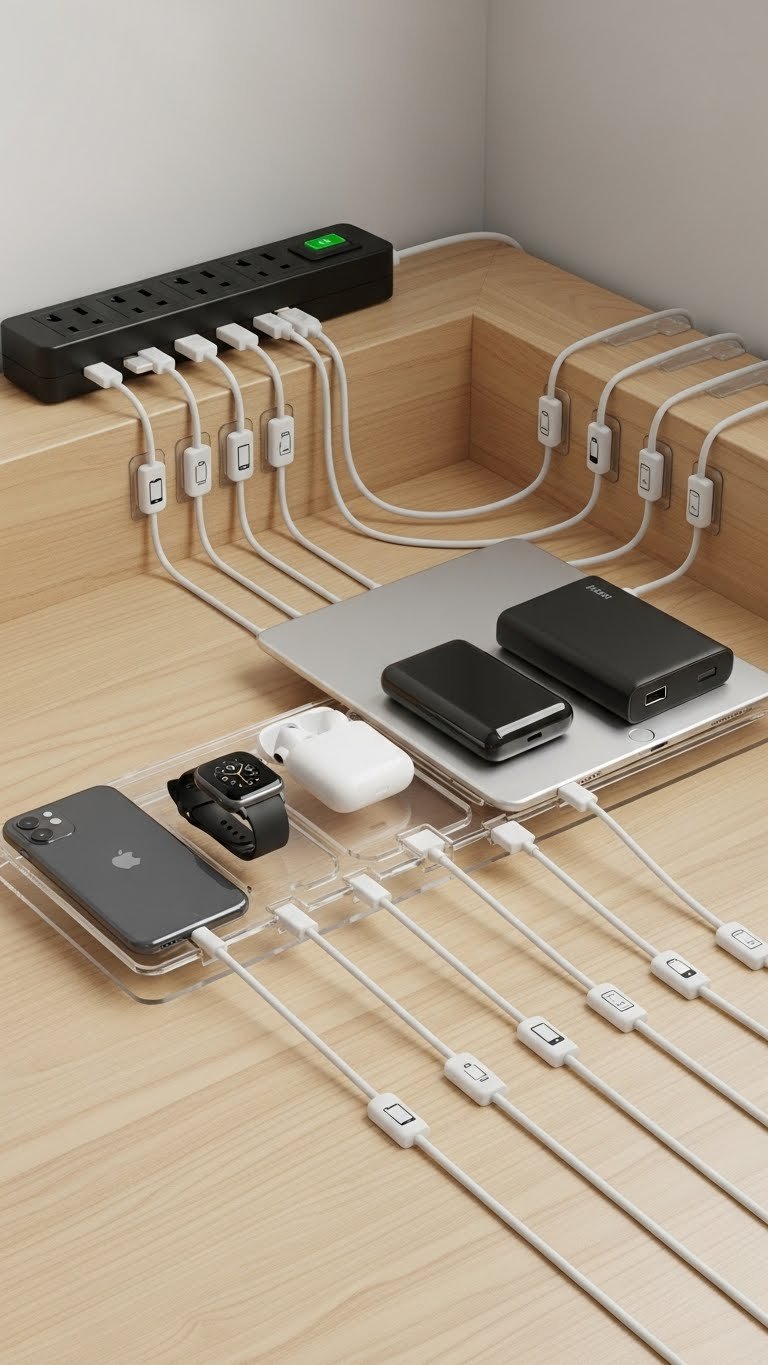
Cable clutter makes small rooms feel chaotic and dirty even when they’re clean. A dedicated charging station ($25–$60) consolidates all your chargers, cords, and devices in one contained spot.
Buy a multi-port power strip ($15–$25), cable organizer clips ($8–$12), and a small charging dock or stand ($10–$25) to keep devices upright while charging. Takes 15 minutes to set up on a shelf, corner of your desk, or nightstand. Label each cord with a label maker ($5–$15) so you stop grabbing the wrong charger. This system saves time every morning and makes your room look intentional. Even guests notice the organization immediately.
Your desk and nightstand stay clutter-free because cables have a home. You also stop losing chargers because everything is visible and accounted for. This one organizational system removes hundreds of mental tasks.
19. Use a Curtain Room Divider to Create Privacy or Separate Zones
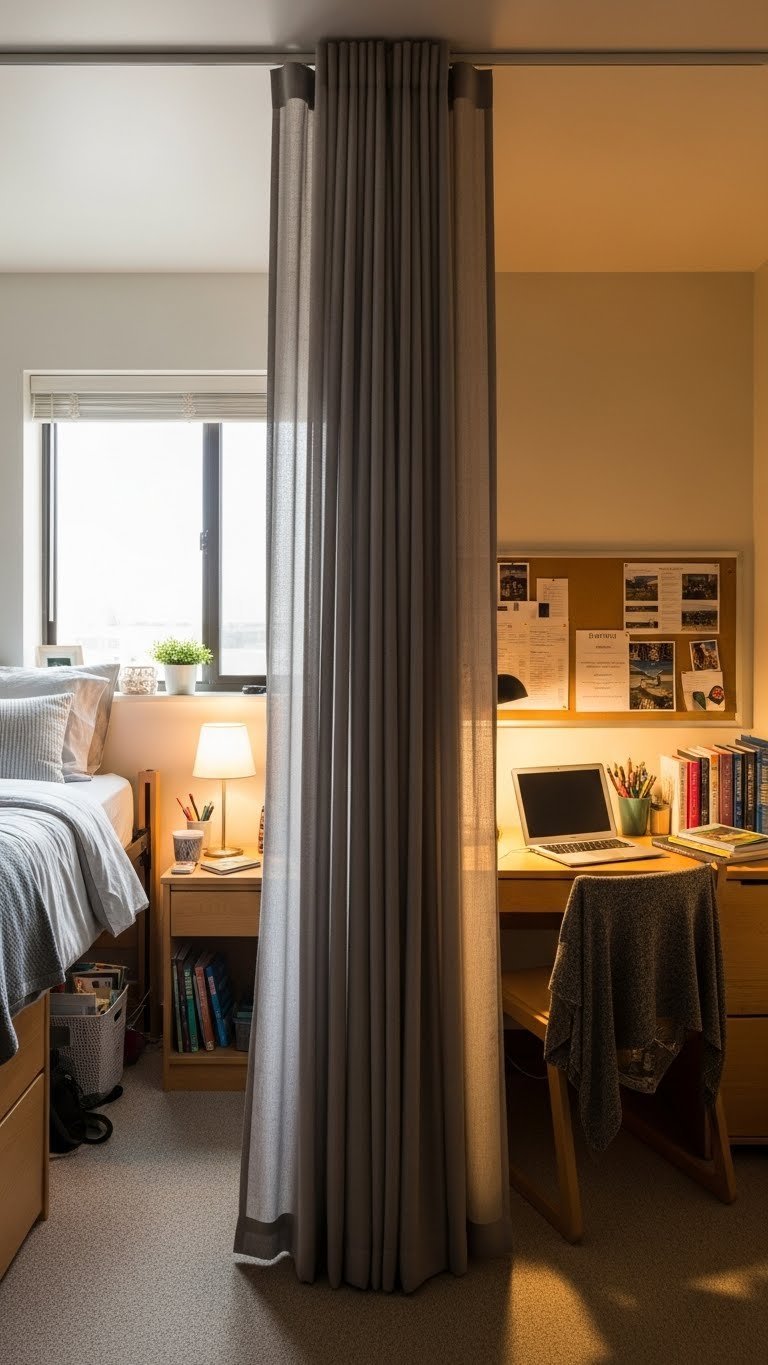
If your dorm mate’s schedule doesn’t align with yours, or you simply want visual separation between zones, a curtain divider ($40–$100) is renter-friendly and instantly creates privacy without permanent walls.
Install a tension rod ($15–$30) ceiling-to-floor and hang a blackout or semi-sheer curtain ($30–$70). Takes 20 minutes with zero damage. You can pull it open during the day to keep the room feeling spacious and close it at night for privacy. This is game-changing for shared rooms where one person studies late while the other sleeps. A blackout curtain also helps regulate light and temperature, which improves sleep quality.
You gain privacy without losing square footage. Your room functionally becomes larger because you’re not constantly visually aware of your roommate’s space. Sleep and study quality both improve.
20. Maximize Closet Corners With a Slim Shelf Organizer
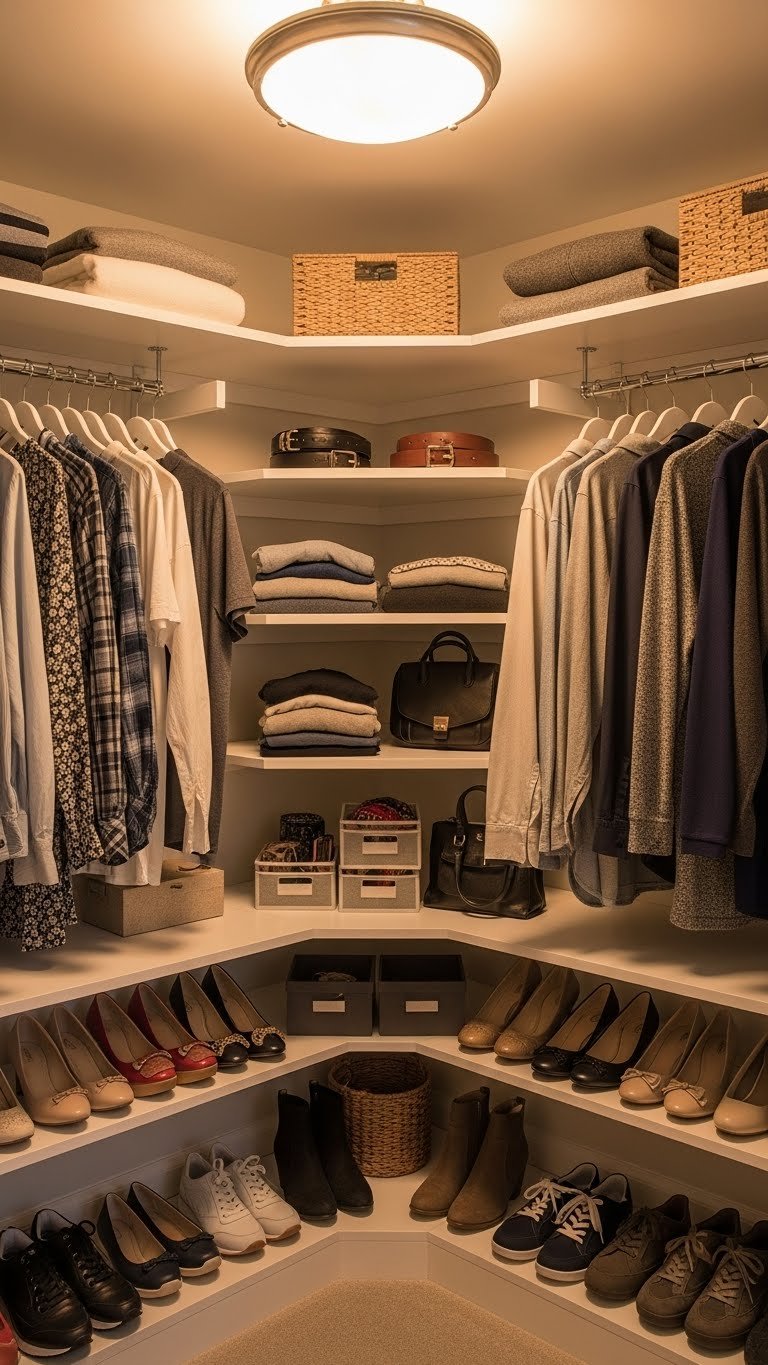
Closet corners are dead space that most people ignore. A slim corner shelf organizer ($20–$50) fits snugly and holds shoes, folded items, or boxes that would otherwise take up floor or hanging space.
These units are usually 18–24 inches tall and designed specifically for corners. Takes 30 minutes to install and costs $25–$40 for a basic model. This reclaims probably 4–5 square feet of previously useless closet space. You keep more items in your closet instead of needing dressers or bins in your main room. It’s a subtle change that has a massive cumulative impact.
Your closet becomes fully optimized, which means your bedroom floor stays clear and open. Every square inch of closet is now functional rather than wasted.
21. Hang Floating Shelves in a Staircase Pattern to Add Visual Height
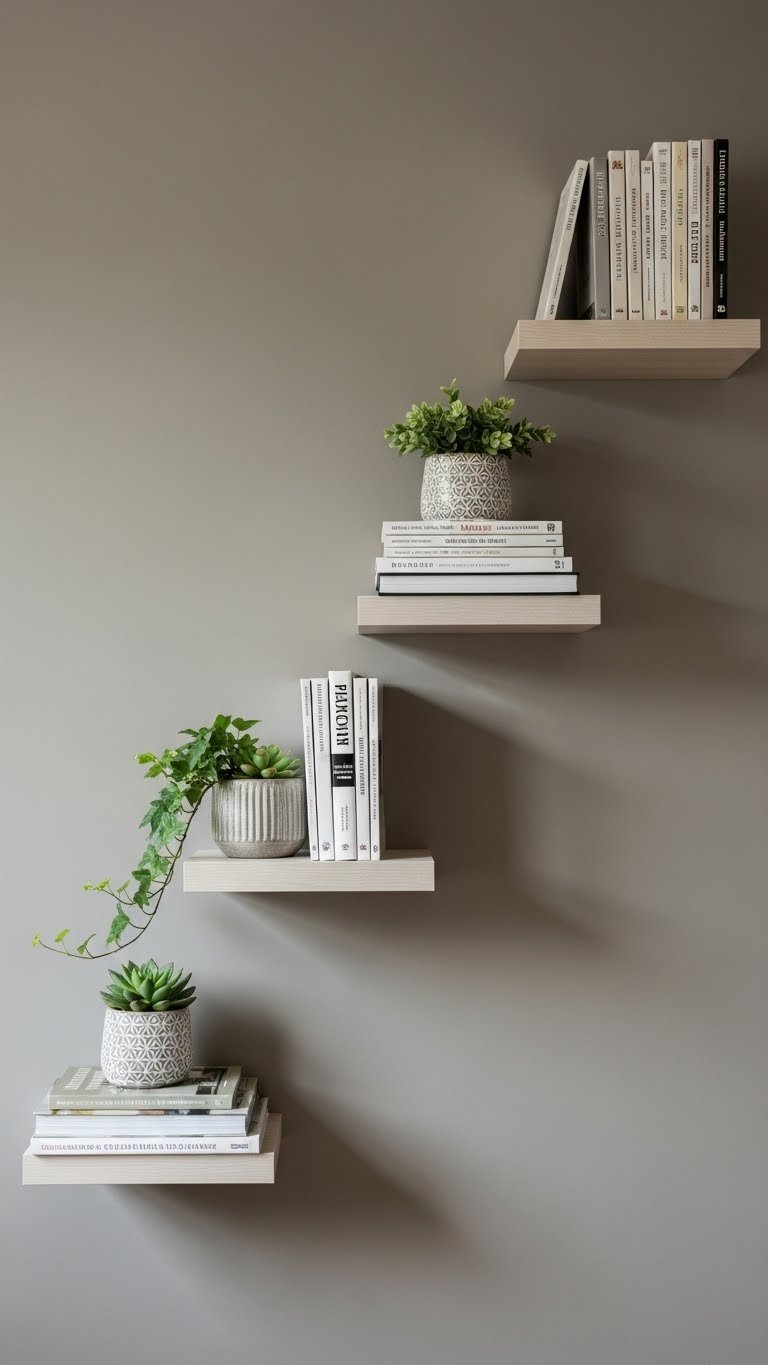
Instead of hanging shelves in a straight line, mount them in a diagonal staircase pattern ($30–$80 per shelf) to draw the eye upward. This makes rooms feel taller and more sophisticated, especially in dorms with low ceilings.
Mount 3–5 shelves at increasing heights using a level and damage-free strips if renting. Takes 45–60 minutes depending on how many you install. Style them with a mix of books, plants, and decorative items so they feel curated rather than random. This costs $100–$150 total but creates the illusion of height and makes your room feel intentionally designed.
Your eyes follow the diagonal pattern, which tricks your brain into perceiving more vertical space. Visitors will think your room is larger and more sophisticated than it actually is. It’s a design hack that costs less than it looks.
22. Use Bed Risers With Built-In Drawers to Add Hidden Storage
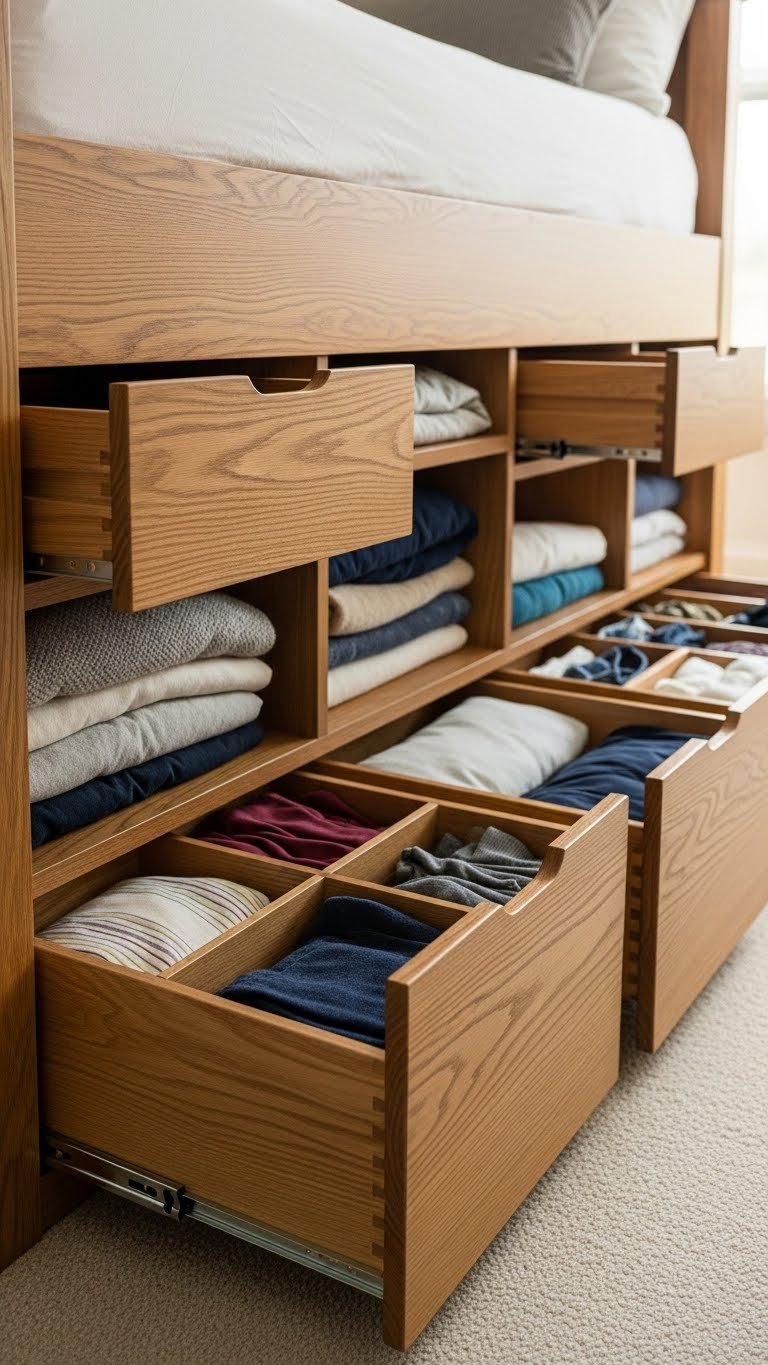
Regular bed risers are great, but risers with built-in drawers ($60–$150) add storage capacity while lifting your bed. You get height and storage in one purchase.
These come in sets of four ($100–$150 from Amazon or Wayfair) and install like regular risers. Takes 30 minutes and doesn’t require tools if you’re just stacking them (though some models bolt together). The drawers hold clothes, bedding, shoes, or textbooks—items you want hidden but accessible. This is pricier than basic risers but cheaper than buying risers plus additional storage bins separately.
You get that lofted-bed feeling with the bonus of integrated storage. The space beneath your bed becomes fully functional rather than just open and available. This small investment pays off in organization and functionality.
23. Create a Study Pod With a Desk Lamp, Acoustic Treatment, and Headphones Holder

Designate your desk area as a focused study pod by adding a quality desk lamp ($40–$80), a small acoustic panel ($30–$70) behind your desk to minimize echo and noise, and a headphone stand ($10–$20). These tools create a focused, intentional workspace.
Mount the acoustic panel on the wall behind your desk to absorb sound and reduce distractions. Position your lamp to eliminate screen glare. The headphone stand keeps your headphones off your desk surface. Total cost: $80–$170 for all three. Takes 45 minutes to set up. This creates a psychological boundary between study zone and relaxation zone, which dramatically improves focus. Even in a small room, you’ve created a space that says “serious work happens here.”
Your study pod becomes noticeably different from the rest of your room. You’ll feel more productive because the environment supports focus rather than casual browsing.
24. Use a Hanging Organizer Over Your Door for Shoes and Accessories

An over-the-door shoe organizer ($15–$30) holds way more than just shoes: belts, scarves, bags, chargers, and small accessories all fit in the clear pockets. It’s hidden behind your door but instantly accessible.
Mount it on the back of your closet door or bedroom door using over-the-door hooks (no nails needed). Takes 5 minutes. Cost is minimal—around $20 for a decent one. This reclaims drawer and shelf space for larger items and keeps frequently used accessories visible and organized. You’ll stop forgetting about items because you see them every time you open the door.
Your drawers and closet shelves suddenly have more breathing room. You can store seasonal items and bulky things instead of a scattered collection of smaller pieces. This simple organizer has an outsized impact on how functional your room feels.
25. Install Smart Lighting to Change Ambiance Without Rearranging Furniture
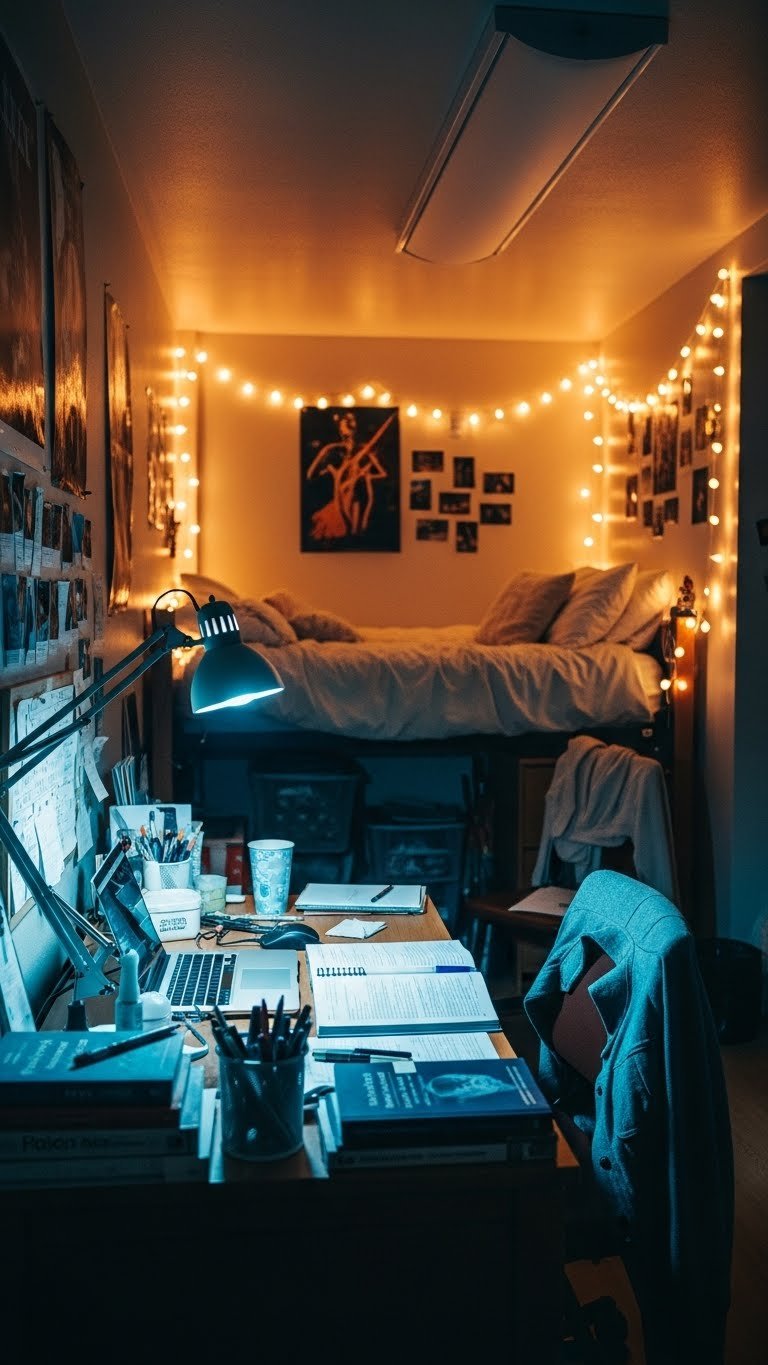
Your room’s lighting affects how you feel and function in it. Smart bulbs ($20–$40 each) and smart strips ($30–$80) let you change color and brightness without moving anything or buying new lamps.
Install smart bulbs in your overhead fixture and desk lamp, then control them from your phone. Use cool, bright light for studying and warm, dim light for relaxing. Takes 10 minutes to install bulbs and download an app. At $40–$80 for two smart bulbs, this is cheaper than buying multiple lamps. You can set schedules so lights automatically shift to warm tones at night, which supports better sleep. Bonus: you can change lighting to match your mood or music when friends visit.
Your room becomes flexible without any furniture changes. Studying gets easier because you can dial up brightness, and sleep improves because you can dial down warm lighting at night. This is a productivity hack that works on everyone.
26. Position a Small Bookshelf as a Room Divider to Define Zones

A slim bookshelf ($50–$120) positioned parallel to but not flush against a wall acts as a visual divider while providing storage. It’s furniture that actually serves multiple purposes.
Choose a narrow bookshelf (under 12 inches deep) and position it perpendicular to a wall to create a boundary between your sleeping zone and study zone. Fill it with textbooks, decorative books, and small plants so it looks intentional. No installation required—it just sits there. Cost is $80–$120 depending on height and material. This creates psychological separation between activities without eating up much actual square footage.
Your room instantly feels like it has multiple purposeful areas. Visitors will see intention rather than clutter. The bookshelf does double duty as storage and space-dividing architecture, making it one of the smartest furniture choices for small rooms.
27. Create a Gallery Wall With Removable Adhesive for Instant Personalization
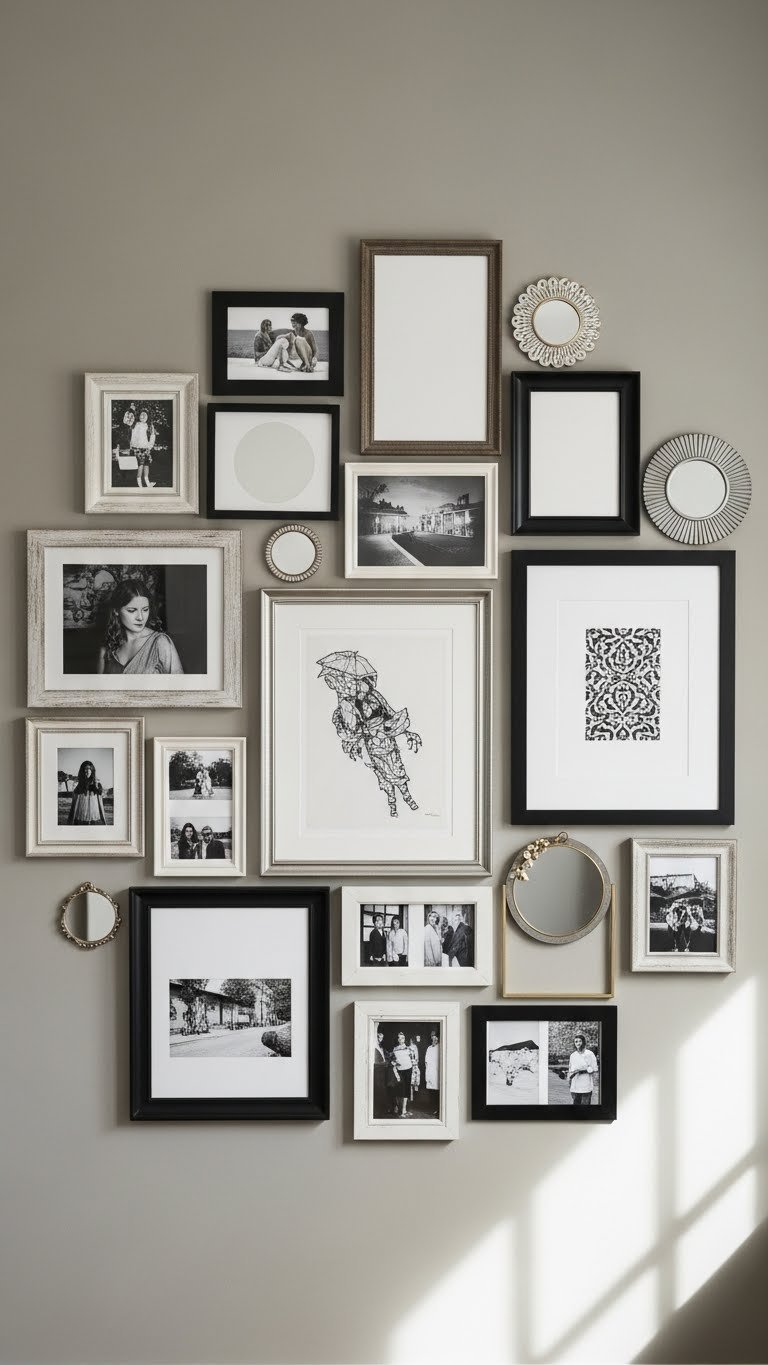
A gallery wall costs minimal money but instantly makes your room feel like home. Use removable adhesive strips ($10–$20 for a pack), affordable frames ($5–$15 each), and prints or photos to create a custom wall that’s renter-friendly.
Start by printing photos on your printer ($0.25 per photo) or downloading free prints from sites like Unsplash. Arrange frames on your floor in the pattern you want, take a photo for reference, then hang them using damage-free strips. Lay out odd numbers (3, 5, 7 frames) for visual balance. Takes 1–2 hours depending on how many pieces you use. Cost runs $50–$100 if you’re buying frames, or under $20 if you repurpose frames you already own. Change it seasonally or whenever you want—no damage, no commitment.
Your wall becomes uniquely yours in a way mass-produced posters can’t replicate. It’s a simple change that completely transforms how your room feels and photographs. This is the fastest way to feel at home in a new space.
Save this guide and try even one idea this weekend—you’ll be shocked at how much a small layout tweak improves how you actually live in your space. Which idea are you tackling first? Tag us when you share your dorm glow-up.
Leave a Reply