Introduction
You’re staring at your kitchen cabinets and thinking, “I need more storage, but I don’t have more floor space.” Sound familiar? Vertical storage is the secret weapon that changes everything—it’s about going UP, not OUT. Whether you’re in a tiny apartment, a sprawling suburban home, or renting a place you can’t permanently alter, vertical cabinet extensions transform dead space into functional storage that actually looks intentional. The 24 ideas ahead mix budget-friendly hacks, renter-approved solutions, and investment pieces that’ll make you wonder why you didn’t maximize your walls sooner. From floating shelves that feel designer-level to stackable organizers and DIY overhead solutions, you’ll find options that fit your lifestyle, your budget, and your exact aesthetic. Ready to reclaim your space? Let’s go vertical.
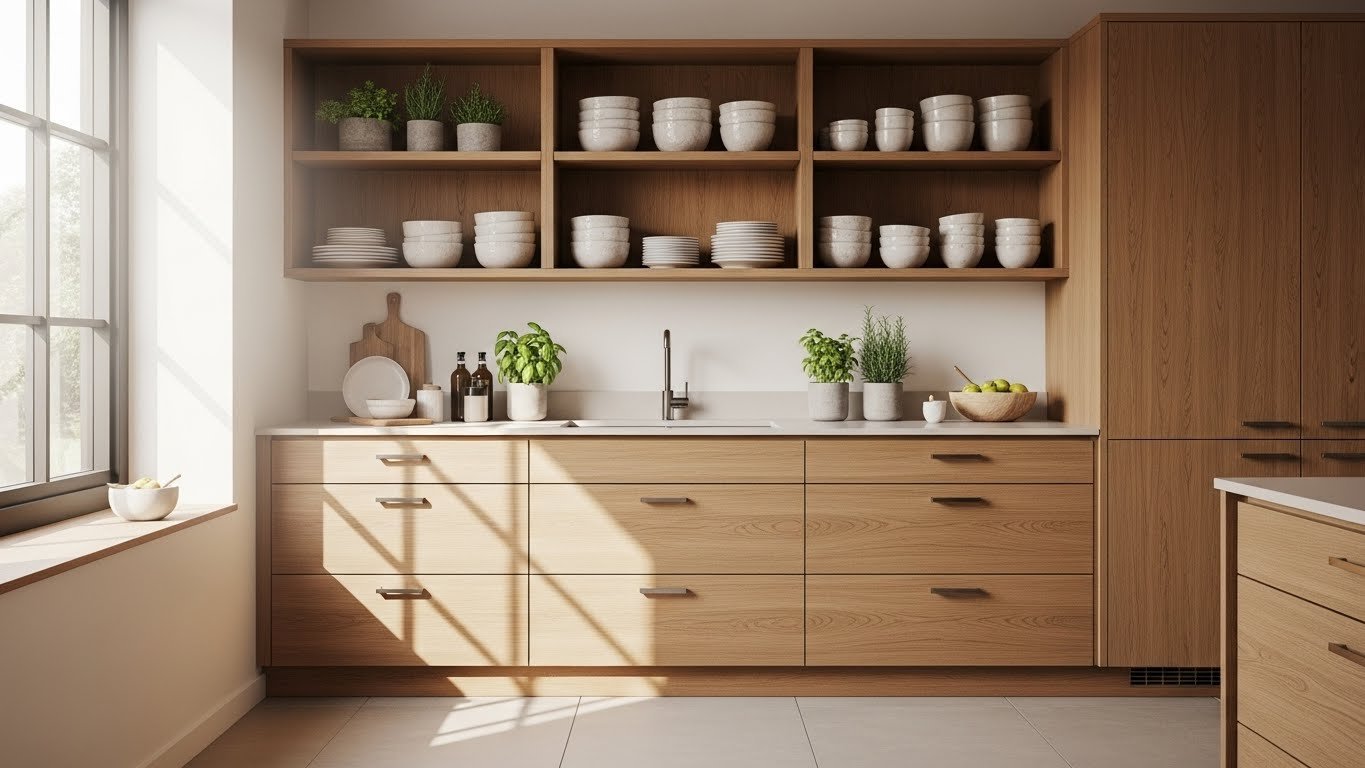
1. Float Extra Shelving Above Cabinet Tops

Wall space above your existing cabinets is prime real estate that most people ignore. Floating shelves here give you instant extra storage without taking up counter or floor room.
Install floating shelves 8–12 inches above cabinet tops using heavy-duty brackets rated for at least 25 pounds each (they’re hidden behind the shelves). Amazon, Home Depot, and Wayfair carry options in wood, metal, or mixed materials ranging from $30–$120 per shelf depending on depth and style. Most are renter-friendly if you use heavy-duty anchors instead of studs. Measure twice, mark your bracket holes, and use a level to ensure they’re straight—installation takes about 30 minutes per shelf.
Style with cookbooks, serving pieces you don’t use daily, or decorative containers that match your kitchen’s vibe. The best part? You’ve just added a whole new display layer that makes your kitchen feel more curated and spacious at once.
2. Install Tall Pantry Cabinets to the Ceiling
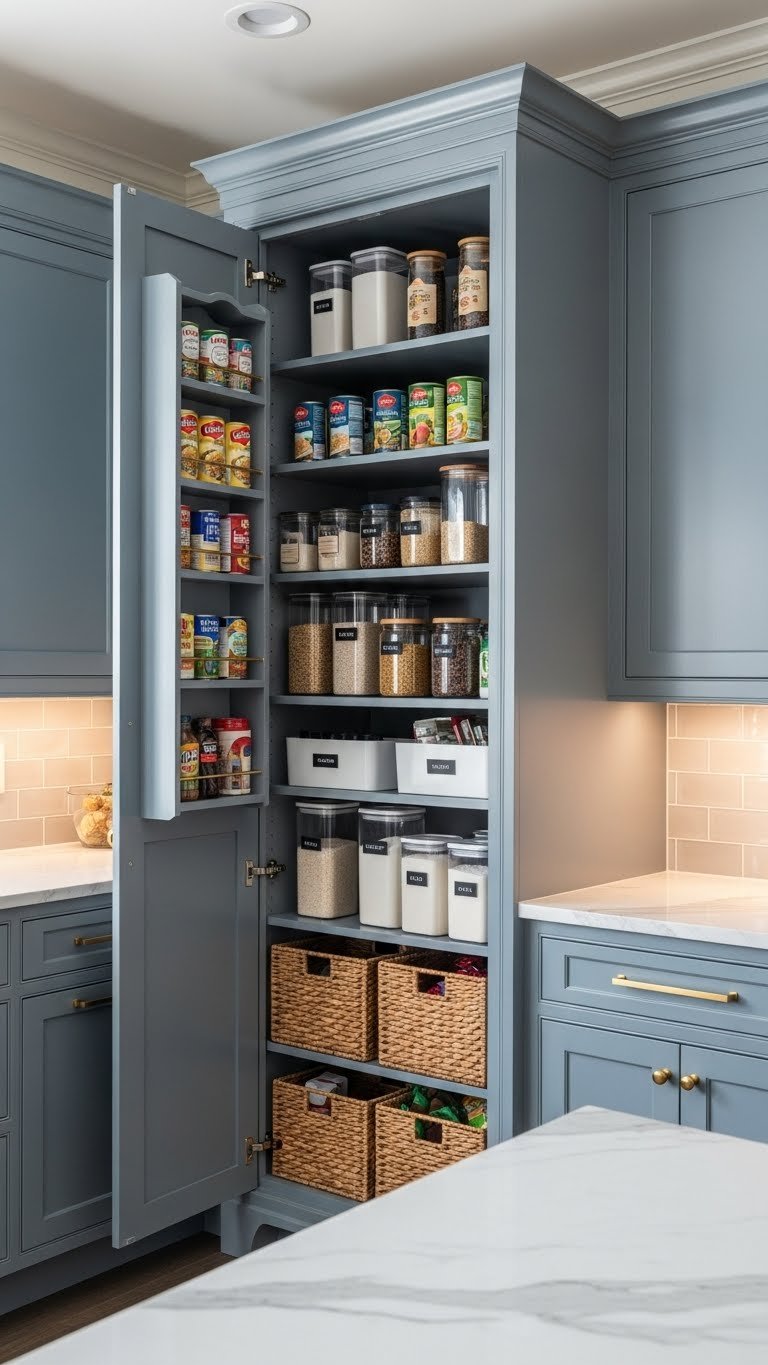
Going full height with your pantry cabinet is a game-changer if you have the vertical clearance (typically 9–10 feet in most homes). You’re essentially doubling your storage capacity by not stopping at standard 84–inch cabinet height.
Custom floor-to-ceiling pantry cabinets run $800–$2,500 depending on materials and finish, while semi-custom options from brands like kraftmaid or IKEA’s PAX system run $400–$1,200. This is a project to hire a professional for (expect $500–$1,000 in installation), or you can stack standard IKEA cabinets and trim the top unit to fit—a DIY option that saves money but takes a full weekend. Add pull-out organizers inside ($100–$300) to access items at the top without a step stool.
You’ll have space for 40+ percent more inventory, and everything stays hidden behind closed doors. It’s the ultimate “stuff it and shut it” solution that keeps your kitchen looking polished.
3. Add Pegboard Organizer Above Counter Workspace

Pegboard isn’t just for garages anymore—it’s the renter’s best friend for adding vertical storage without permanent installation. You get customizable, adjustable storage that photographs beautifully.
Grab a sheet of pegboard ($15–$40 for 2’x4′), paint it to match your kitchen (free if you have paint, or $10–$25 for a pint of quality paint), and mount it to studs with heavy-duty anchors if you can’t use nails. Add hooks, shelves, and baskets ($20–$60 for a starter set) to hang frequently used tools, measuring cups, or cutting boards. Total investment: $50–$120 and a Saturday afternoon of work. For renters: use removable adhesive strips and damage-free anchors.
Now your most-used kitchen items are visible, accessible, and styled like a purposeful display. You’ve turned what was probably just blank wall into functional art that actually makes cooking easier.
4. Use Corner Carousel Inserts in Base Cabinets
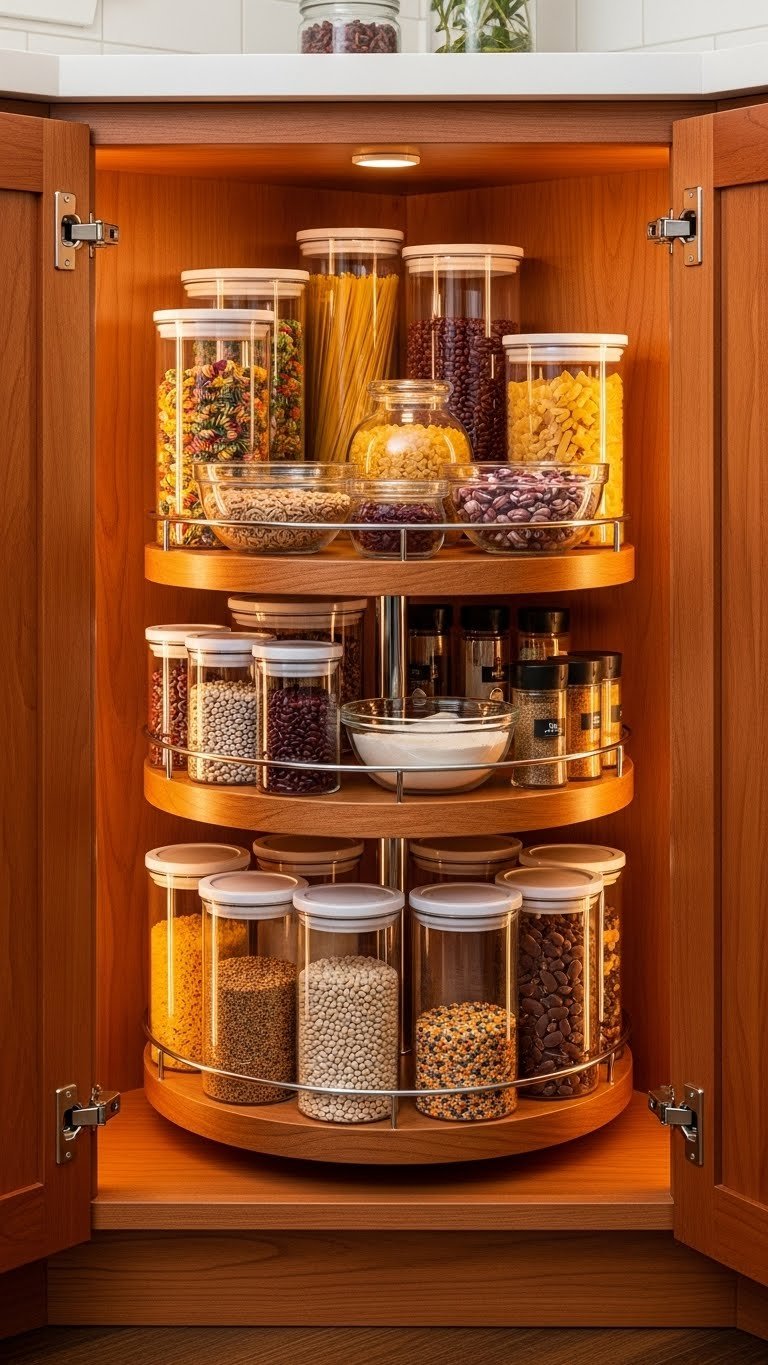
Corner cabinets are notorious dead zones—stuff goes in and disappears forever. A corner carousel (also called a Lazy Susan turntable for cabinets) solves this with rotating access to items you’d otherwise reach blindly.
Install a pull-out corner carousel ($80–$250 depending on quality and size) in existing base cabinets. If your cabinet doesn’t have one built-in, brands like Knape & Vogt and Hardware Resources sell aftermarket units that slide into standard 36–42 inch corner cabinets. Professional installation is recommended ($150–$300), though handy DIYers can do it in 1–2 hours. No drilling required if you use the gliding system.
Everything in that corner is now rotating-accessible—no more lost storage. You’ll use that corner space intentionally instead of as a black hole for forgotten containers.
5. Mount Magnetic Spice Rack on Cabinet Side
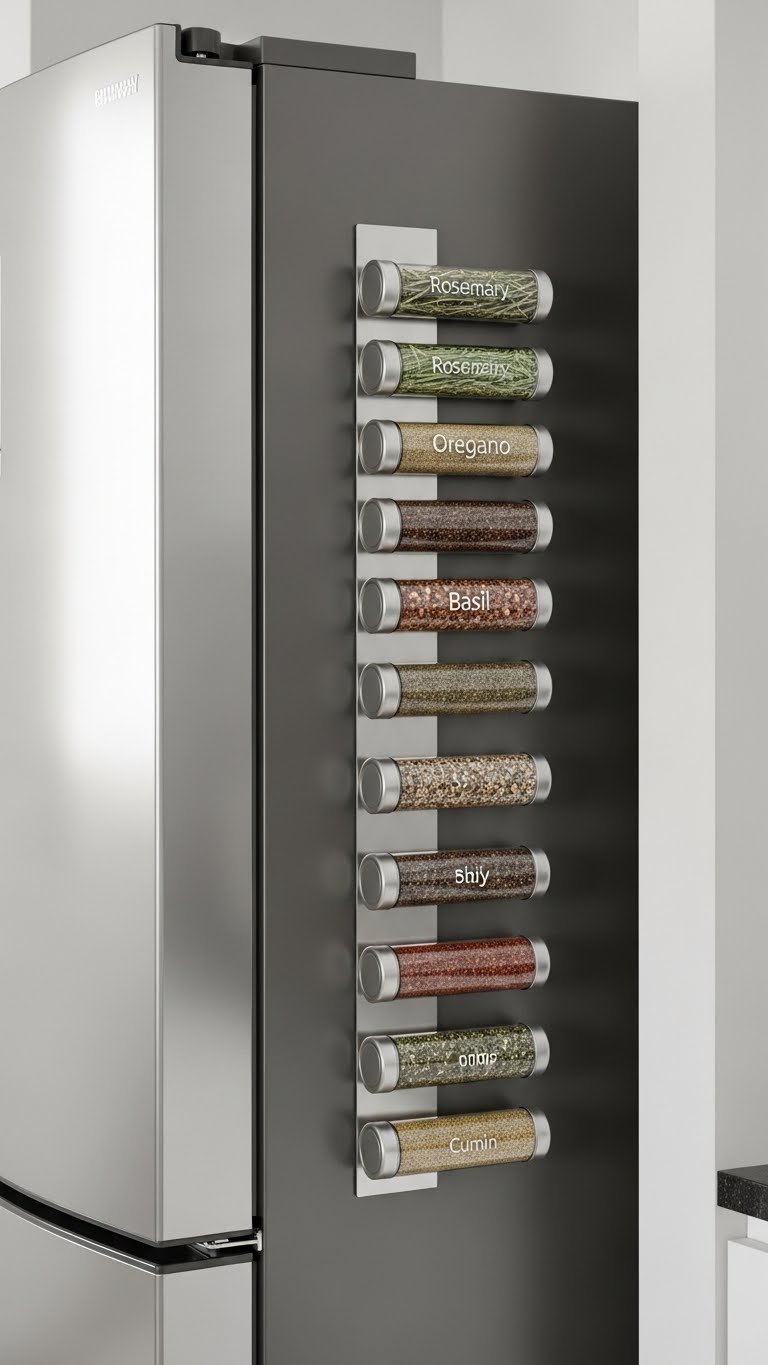
If your spices live in a cabinet, they’re hard to see and easy to duplicate-buy. Moving them to a vertical magnetic rack on a cabinet’s side puts them at eye level and saves precious shelf space.
Choose a magnetic spice container set ($25–$60 for 12–20 containers with labels) designed to stick to metal surfaces or use magnetic strips mounted to cabinet sides. If your cabinet is wood, mount a thin metal sheet first ($15–$30) and then add the magnetic containers on top. Installation takes 20 minutes and requires just a level and painter’s tape. Renters: use damage-free adhesive strips underneath the metal sheet.
Your spices are now instantly visible, organized alphabetically if you want, and taking up zero cabinet real estate. Cooking becomes faster because you’re not hunting through a cabinet pile for cumin.
6. Install Open Shelving in Upper Cabinet Frames
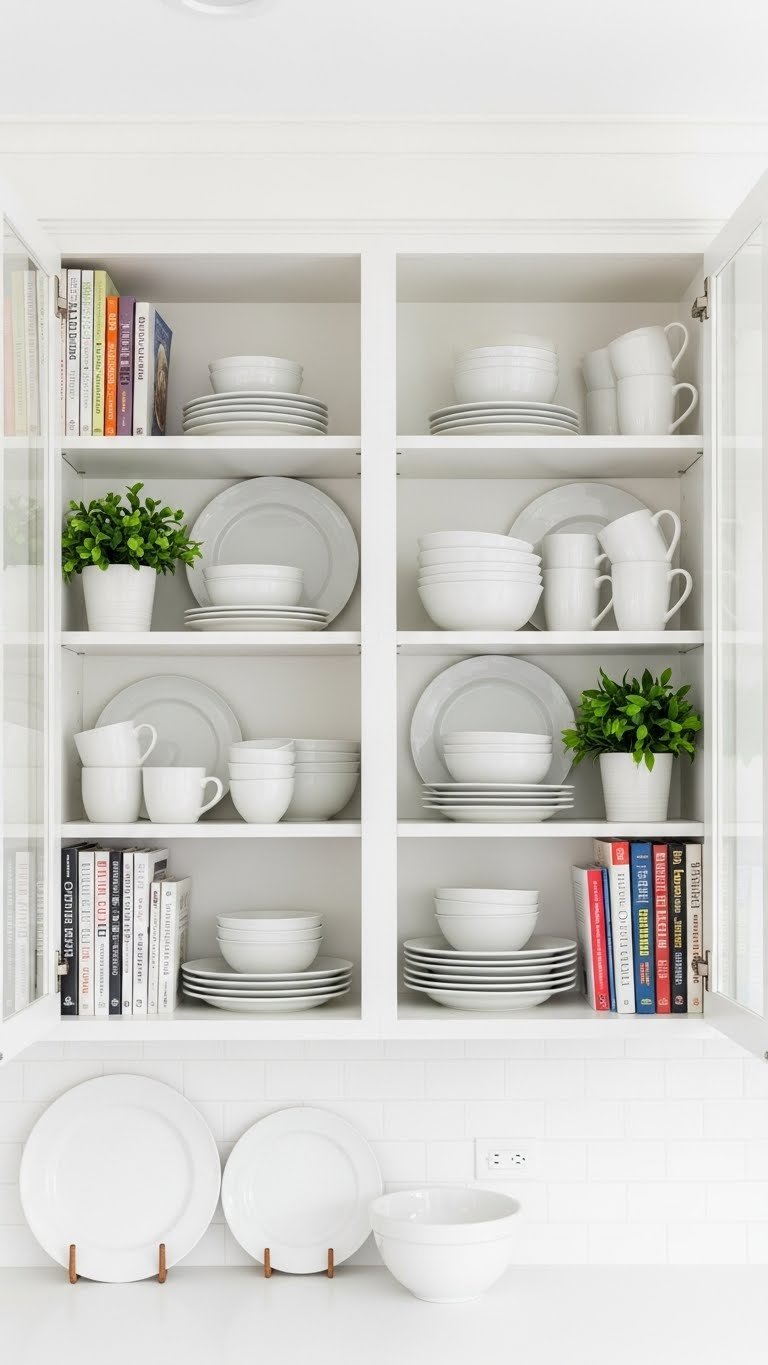
Converting solid upper cabinets to open shelving (or removing doors entirely) maximizes storage visibility and makes your kitchen feel taller and more open. This works especially well for frequently used items or things beautiful enough to display.
Remove cabinet doors (takes 15–30 minutes with just a screwdriver), or replace them with glass doors ($40–$120 each from IKEA, Home Depot, or Amazon). If you want shelves inside without doors, add adjustable shelf supports ($15–$40 per set) to customize spacing. Total cost: $0–$300 depending on your approach. Renters should stick with glass door replacements rather than permanent modifications.
Now you can grab everyday dishes or glasses in seconds instead of reaching and searching. Plus, the visual openness makes your kitchen feel 20 percent larger.
7. Add Overhead Pot Racks with Hanging Storage

Hanging pots from a ceiling rack isn’t just decorative—it’s smart vertical storage that frees up cabinet space for things that need to stay hidden. You’re using the fifth wall (your ceiling) as storage.
Install a ceiling-mounted pot rack ($60–$300 depending on style and material—stainless steel or wrought iron options from Williams Sonoma, Wayfair, or Amazon). This requires finding ceiling joists and using appropriately rated hardware, so hire a pro if you’re unsure ($100–$250 installation). DIYers with stud finders can do it in 1–2 hours. Add S-hooks ($10–$20 for a set) to hang pots, pans, and cooking utensils.
Your cabinet shelves are now free for storing bowls, containers, or appliances. Plus, your most-used cookware is visible, accessible, and adds visual interest to your kitchen design.
8. Stack and Secure Small Appliances Vertically
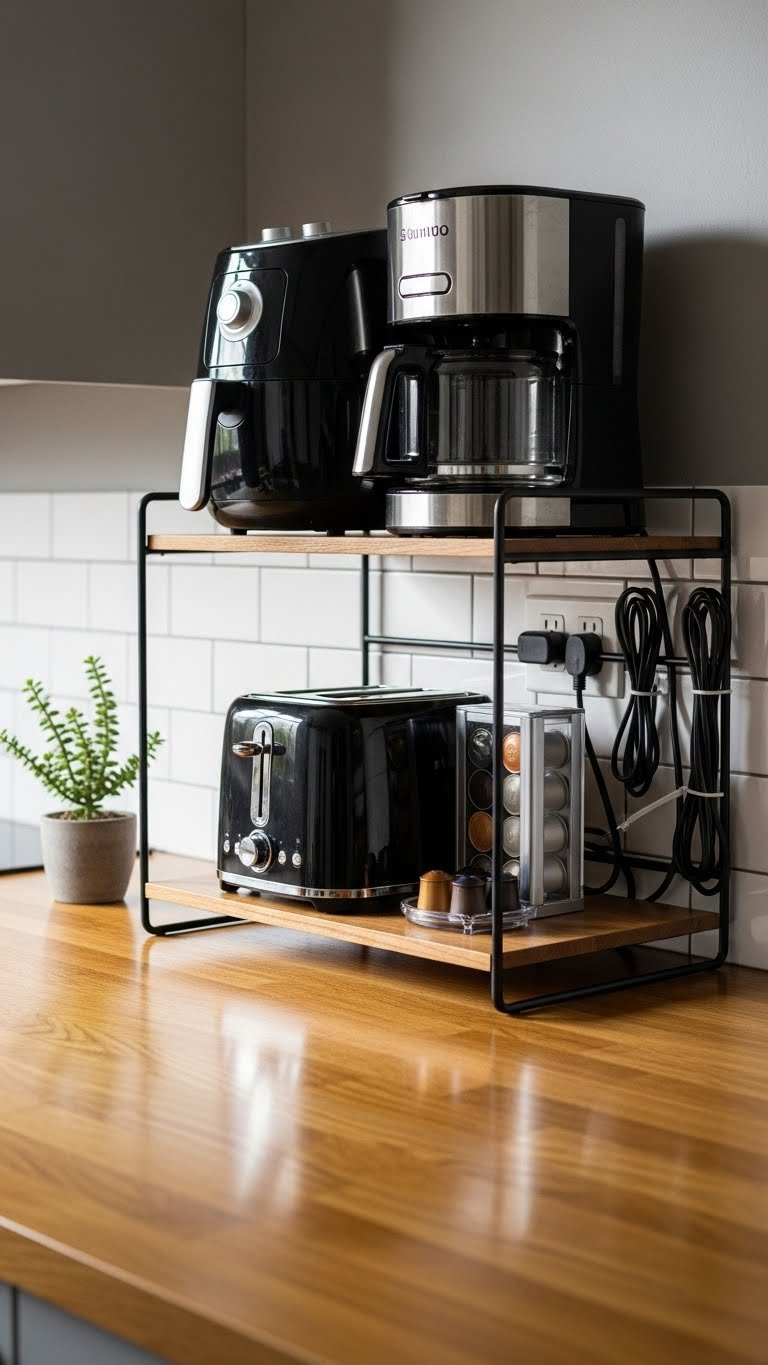
Small appliances multiply faster than you expect, and they chew up counter space. Stacking them vertically on a tiered shelf or stackable organizer keeps them accessible without the clutter.
Use an adjustable kitchen shelf unit ($40–$100 from IKEA, Target, or Amazon) or a stackable appliance riser ($20–$60) that fits on your counter. Arrange appliances by frequency of use—daily coffee maker on the middle shelf, air fryer one level up, toaster oven on top. Secure power cords with cable clips ($5–$15) to keep everything tidy and safe. Total setup time: 20 minutes.
You reclaim half your counter space while keeping appliances in arm’s reach. Everything looks intentional instead of haphazard, and your kitchen immediately feels bigger.
9. Install Dish Drying Rack Shelving Above Sink

That wall space above your sink is perfect for a narrow shelving unit that holds your dish rack AND storage in one vertical footprint. You’re consolidating what used to need counter space.
Mount a wall-mounted dish rack shelf ($50–$120 from Wayfair, Amazon, or Etsy—look for bamboo or stainless steel styles) directly above the sink using studs or heavy-duty anchors. The top typically holds a dish drying rack, and lower shelves store canisters, soap, or cleaning supplies. Installation takes 30–45 minutes and requires a level, drill, and appropriate fasteners. Renters should use removable adhesive strips if available, though drilling is usually okay for this weight.
Dishes drip directly into the sink below, and you’ve eliminated the need for a bulky counter-top drying rack. Everything you need near the sink is now within arm’s reach in a compact vertical zone.
10. Use Tension Rods to Create Vertical Dividers in Cabinets
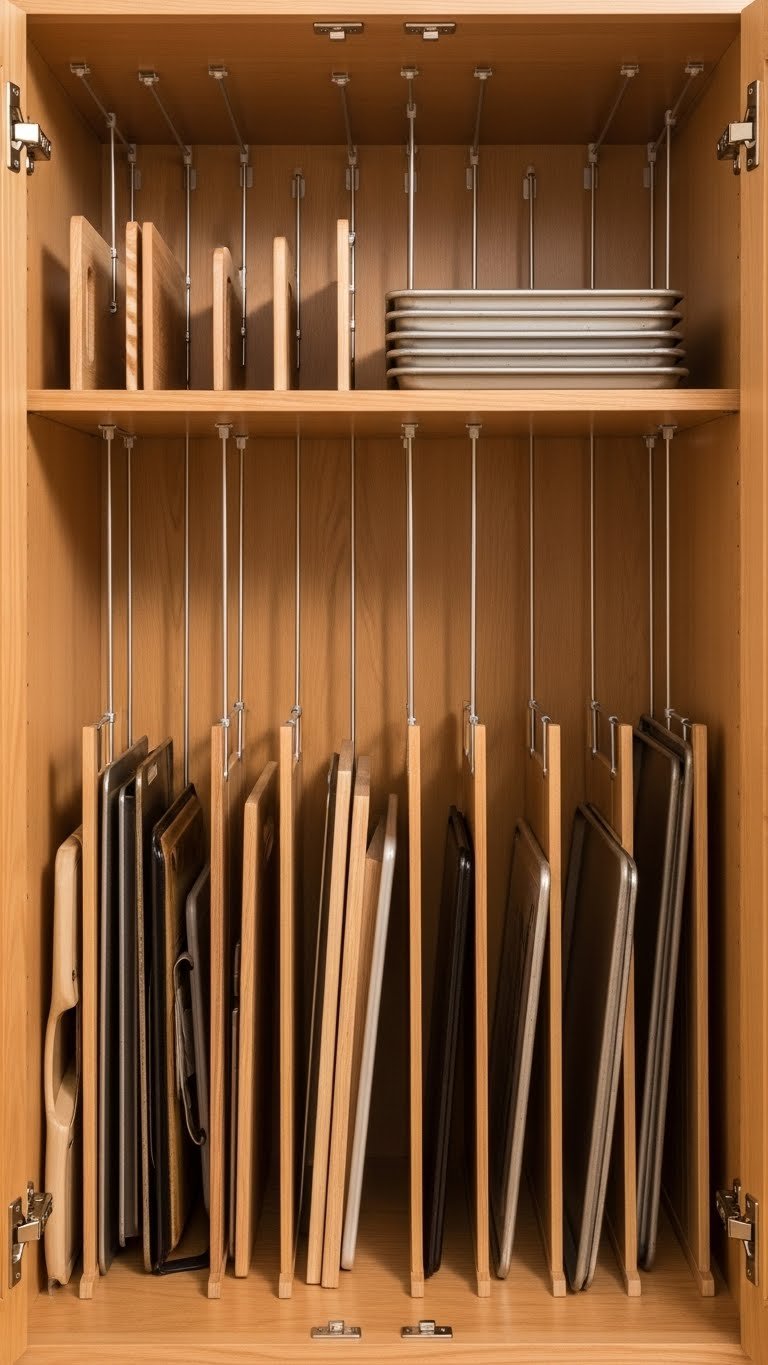
Baking sheets, cutting boards, and serving platters take up huge cabinet real estate when laid flat. Tension rods create vertical dividers so they stand upright and take up a fraction of the space.
Install tension rods ($8–$20 per pair from Target, IKEA, or Amazon) horizontally in a cabinet and slide flat items between them vertically. You can stack 5–7 baking sheets or cutting boards in the space one flat stack would have taken. Installation: 5 minutes—just twist the tension rods to fit the cabinet width. Costs: under $30 for a full cabinet setup.
Now you can grab the exact baking sheet or board you need without pulling out a whole stack. Your cabinet interior stays organized, and you’ve doubled the usable space for these items.
11. Add Wall-Mounted Spice Drawers
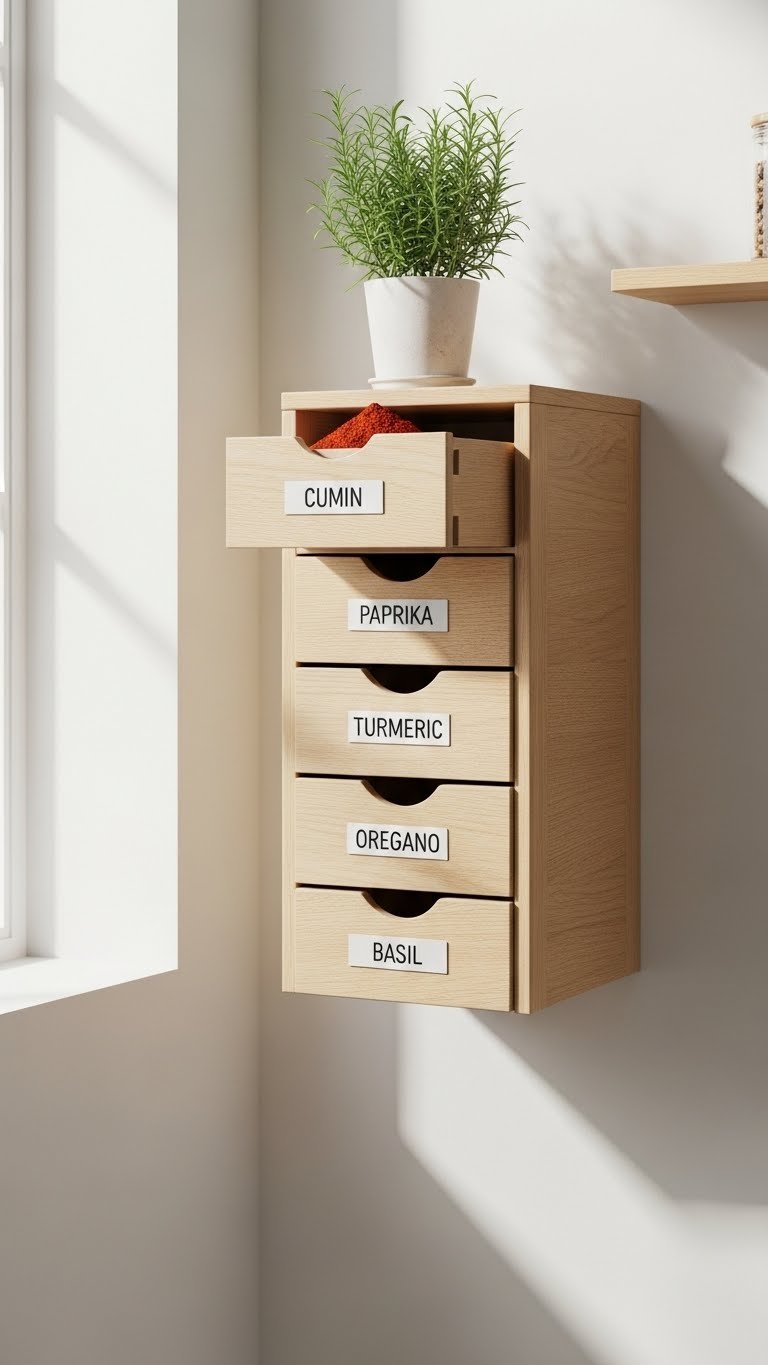
Spice drawer units are a step up from carousels—they give you dedicated, labeled, vertical storage specifically designed for dried herbs and spices. They’re kitchen organization that actually looks like a design choice.
Install a wall-mounted spice drawer cabinet ($80–$200 depending on wood quality and number of drawers—brands like The Container Store, Etsy, and Amazon have options). Most are 12–18 inches tall and only 4–6 inches deep, making them perfect for tight spaces. Mounting requires studs or heavy-duty anchors; professional installation runs $100–$150, or DIYers can handle it in 1–2 hours. Add label makers ($10–$30) to keep things organized long-term.
Your spices are now vertical, labeled, and accessible without opening a cabinet. You’ve turned functional storage into a design feature that pulls your kitchen’s organization style together.
12. Install Pegboard Inside Cabinet Doors
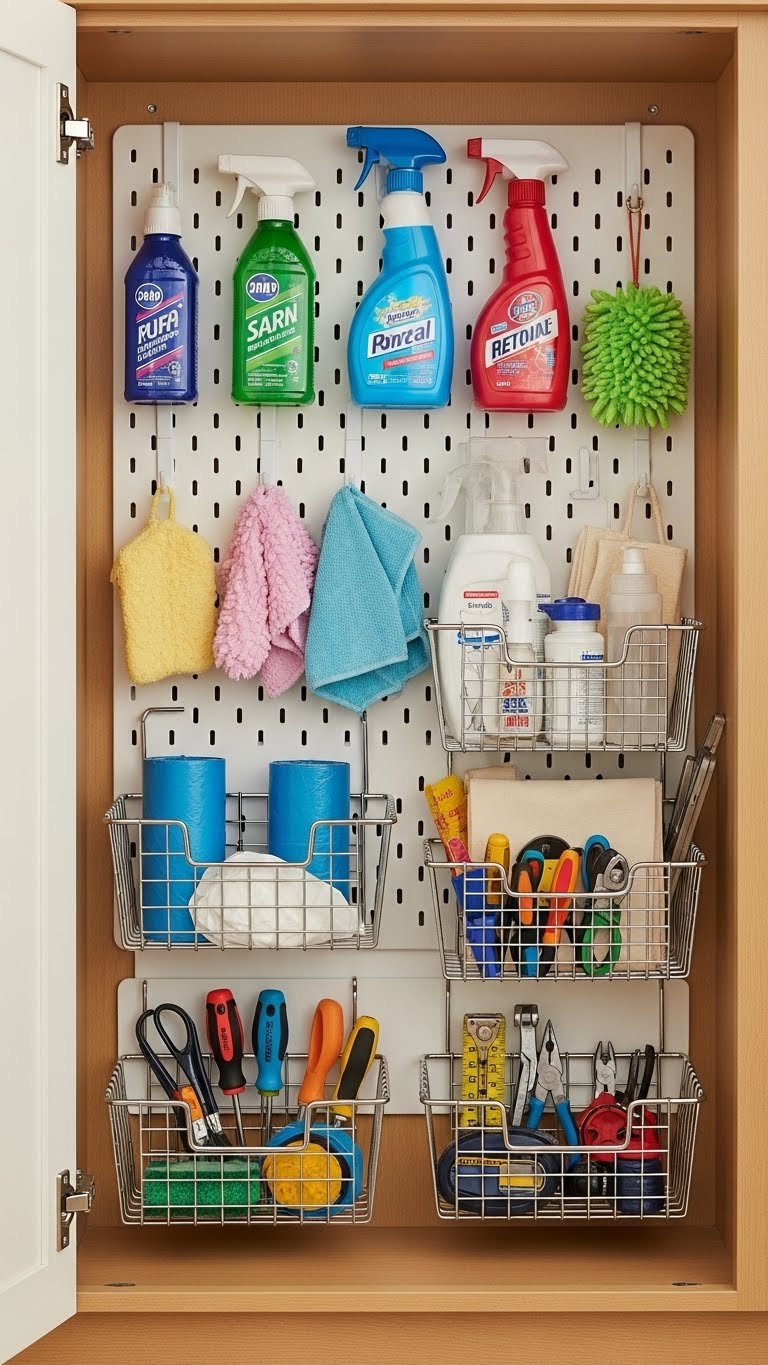
The inside of cabinet doors is unused real estate. Add pegboard there and you’ve created hidden vertical storage that stays out of sight until you open the door.
Cut pegboard sheets to fit inside your cabinet door ($1–$3 per square foot at hardware stores), paint if desired (free to $10), and secure with liquid nails or small brackets ($5–$15 total). Add hooks and small baskets ($10–$30) to hold cleaning supplies, extra shopping bags, or small tools. Total cost: $20–$60 and 30 minutes of work per door.
When the cabinet closes, this storage vanishes from view. It’s perfect for things you use frequently but don’t want cluttering your visible kitchen—like extra foil, plastic wrap, or cleaning rags.
13. Mount Magnetic Strips for Knives and Metal Tools
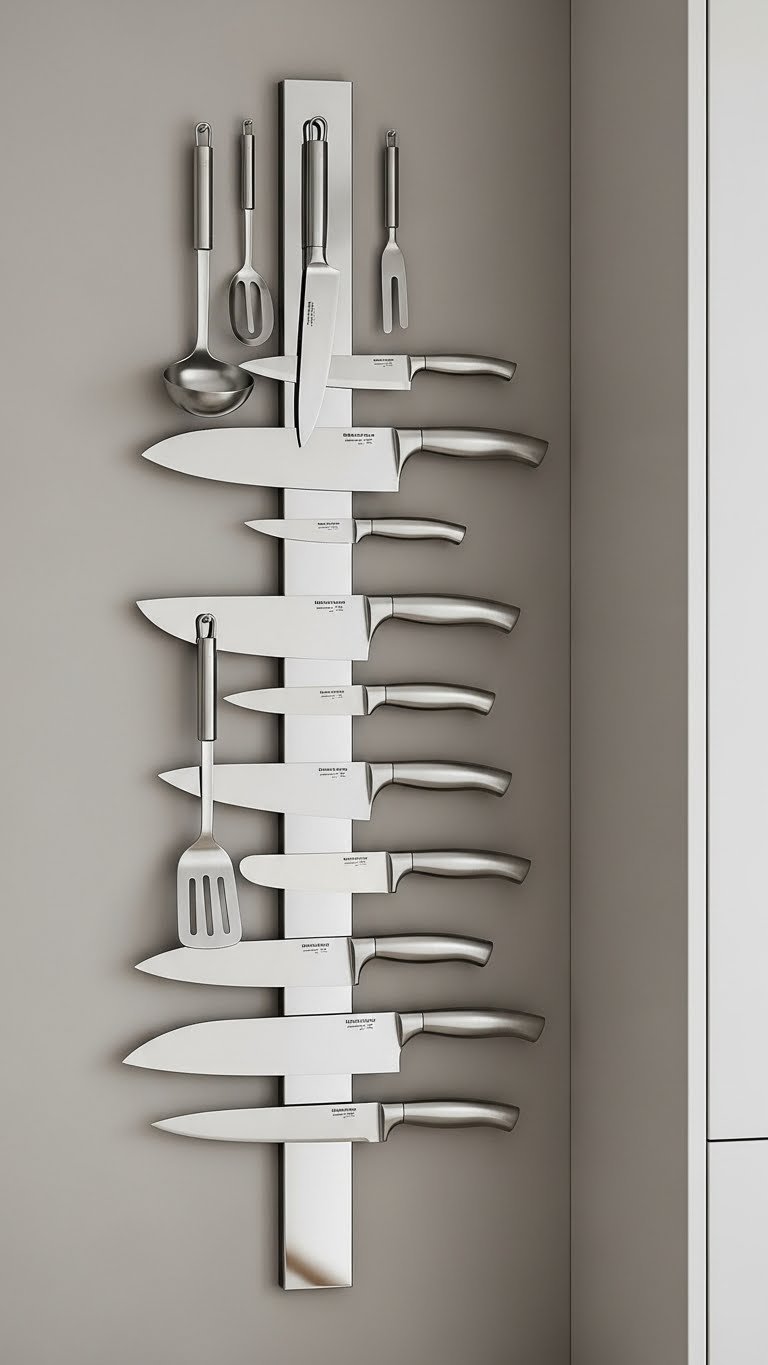
Knife blocks take up counter space, and drawer storage hides your best knives. A magnetic strip mounted vertically gives you visible, accessible knife storage that takes up almost no space.
Install a wall-mounted magnetic knife strip ($20–$60 from IKEA, Target, Amazon, or Williams Sonoma). Mount it at waist height for safety using studs or heavy-duty anchors; takes 15 minutes. This also works for metal utensils, scissors, and small tools—anything magnetic. Renters can use removable adhesive strips if the manufacturer offers them, though wall-mounting is typically okay.
Your best knives are now on display, within instant reach, and taking up zero drawer space. Plus, they’re safer because kids can’t accidentally reach into drawers, and you’ll actually use your quality knives because they’re visible.
14. Use Over-Cabinet Door Organizers for Thin Spaces
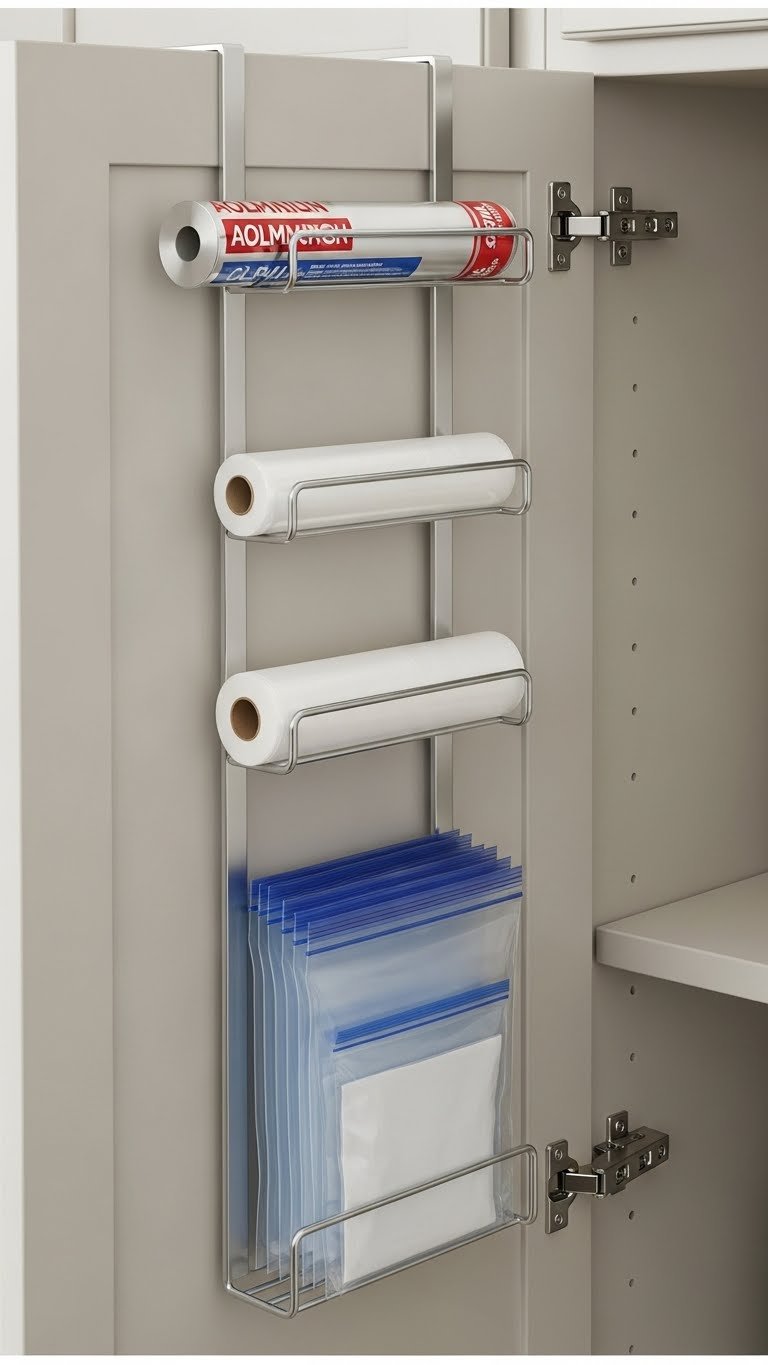
If you have a narrow cabinet that doesn’t need interior shelves, an over-door organizer lets you use that edge for vertical storage. It’s perfect for foil, plastic wrap, bags, or other thin items.
Install an over-cabinet-door organizer ($15–$40 from Target, IKEA, or Wayfair—look for models with slots or pockets). These hang on top of an existing cabinet door and provide instant slots for storing flat items without any drilling. Setup: 5 minutes, just hang and fill.
You’ve claimed an entire vertical zone that had zero function before. Your cabinets now work harder without taking up more floor or counter space.
15. Create a Wall-Mounted Beverage Station
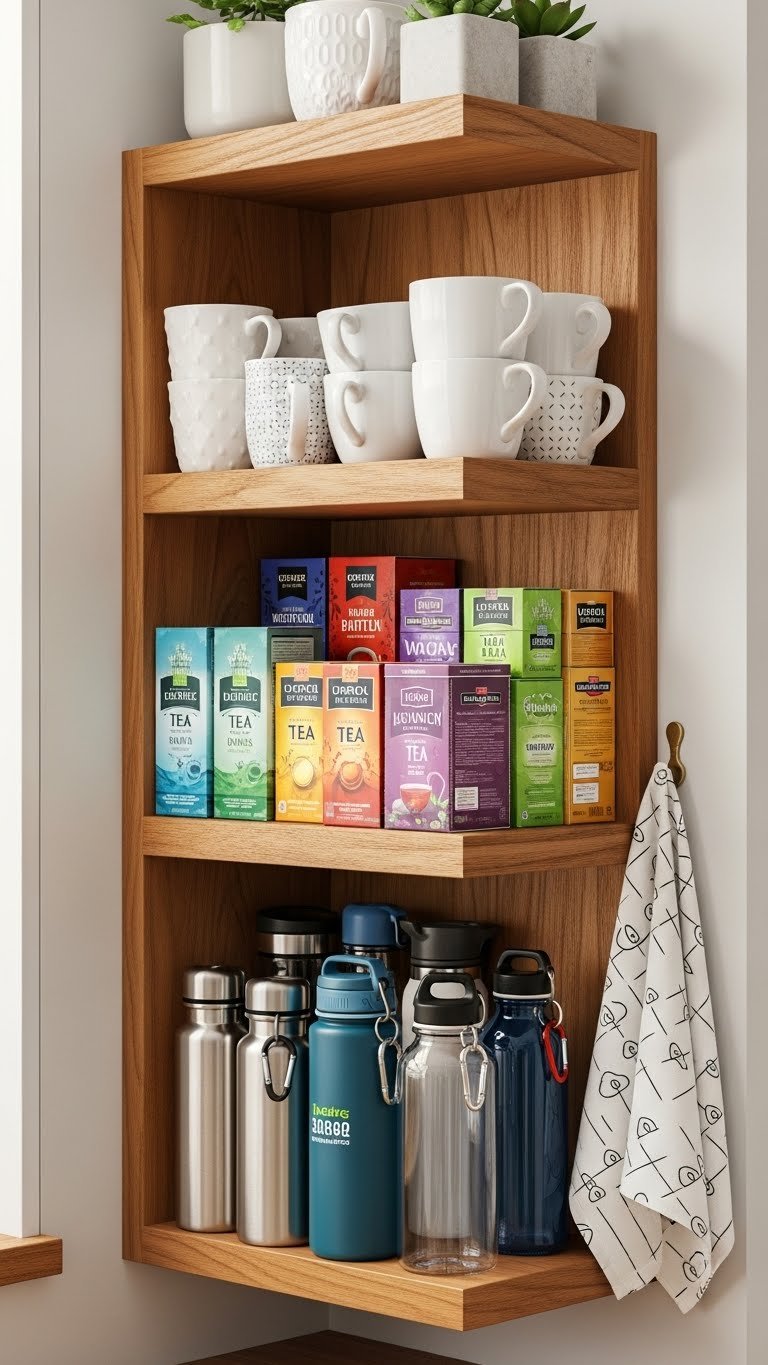
If you drink coffee, tea, or keep water bottles handy, a dedicated vertical beverage station consolidates these items into one styled zone. It’s functional storage that doubles as décor.
Mount 3–4 floating shelves ($60–$150 total for brackets and shelves from IKEA, Home Depot, or Wayfair) 12 inches apart vertically. Top shelf holds coffee mugs, second holds tea or coffee supplies, third holds water bottles or cups, bottom holds small appliances like a milk frother or electric kettle. Installation: 1–2 hours if using studs; DIY-friendly with level and drill. Add a small hooks below ($5–$10) for hanging towels or promotional bags.
Every morning you walk to one organized zone instead of hunting through cabinets. Guests immediately see you’ve thought about your kitchen’s function, and everything stays at arm’s reach.
16. Stack Glass Storage Containers on Pull-Out Shelves

Deep cabinets are tough to access—things get buried in the back. Adding a pull-out shelf inside lets you see everything vertically and grab what you need without reaching into darkness.
Install a pull-out sliding shelf ($50–$120 from Knape & Vogt, Hardware Resources, or Amazon) inside an existing cabinet. These glide smoothly and support 50+ pounds. Pair them with stackable glass storage containers ($30–$80 for a set of 8–12 from Pyrex, Rubbermaid, or Amazon). Professional installation: $100–$200; DIYers can do it in 1–2 hours with a level and drill.
Now when you open the cabinet, everything slides toward you and stays visible. No more forgotten containers in the back. You’re using vertical space within cabinets more efficiently.
17. Add Open Shelving Between Wall Studs
If you have wall studs close together (typically 16 inches apart), you can build or install shelving directly between them. It looks built-in, doesn’t protrude into the room, and feels custom.
Hire a carpenter to install between-stud shelves ($400–$800 depending on number of shelves and finish) or buy a pre-made between-stud shelving unit ($100–$300 from Wayfair or Etsy). If you’re handy, you can build it yourself with 1×12 boards, brackets, and paint—materials run $50–$150. This is permanent, so it’s for homeowners, not renters.
You’ve gained beautiful, integrated storage that looks like it was designed into your kitchen from day one. The shelves appear to float out of the wall, and you’ve used dead space that did nothing before.
18. Use Stackable Wire Shelving on Top of Cabinets
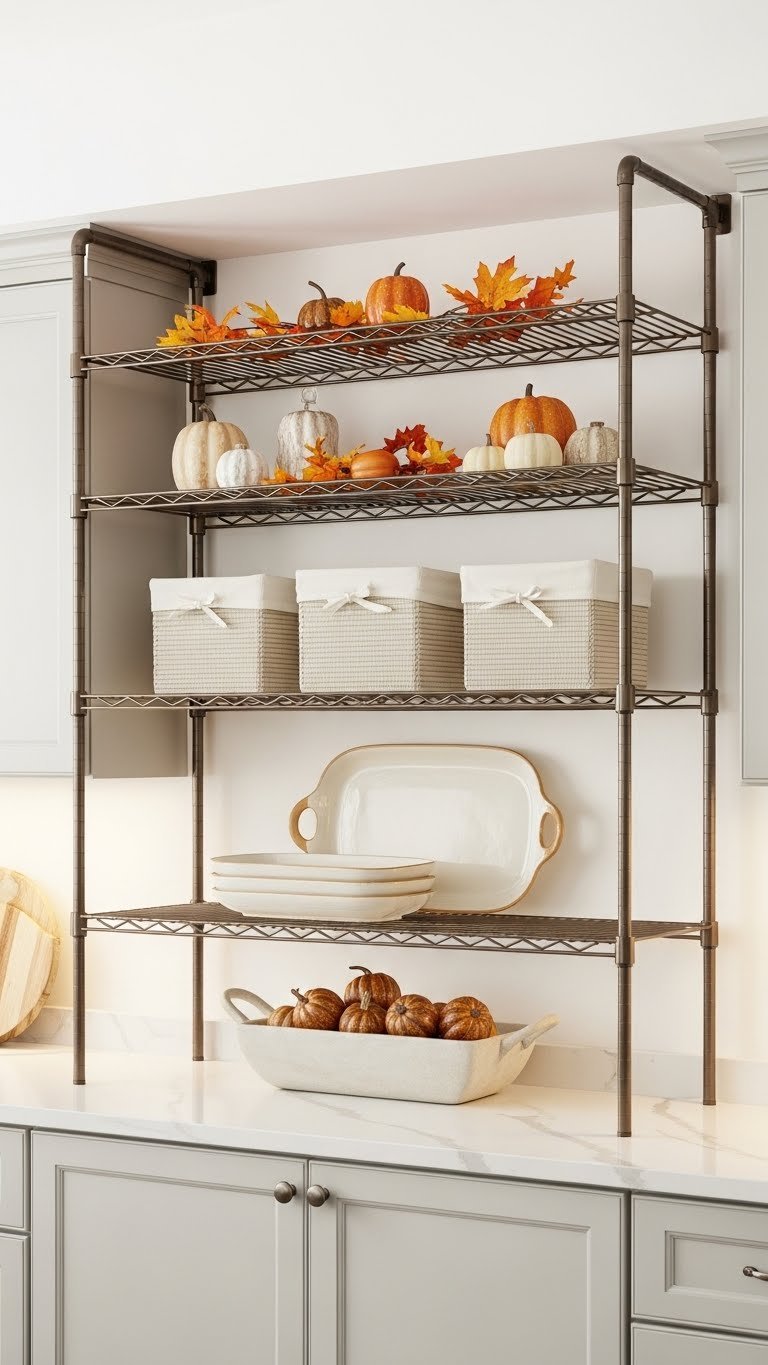
The space above your cabinets doesn’t need to be just a dust collector. A compact stackable metal shelf gives you organized vertical storage for items you don’t use daily.
Place a stackable wire shelf unit ($30–$80 from The Container Store, Target, or Amazon) on top of your existing cabinets. These are lightweight, modular (you can add more shelves later), and create a second storage layer. Add woven baskets ($15–$40 each) to keep items organized and looking styled. Setup: 10 minutes, no installation needed.
You’ve created a display zone for seasonal items, serving pieces, or decorative baskets without any construction. Everything stays accessible but out of everyday sight.
19. Install a Corner Cabinet Lazy Susan with Multiple Shelves
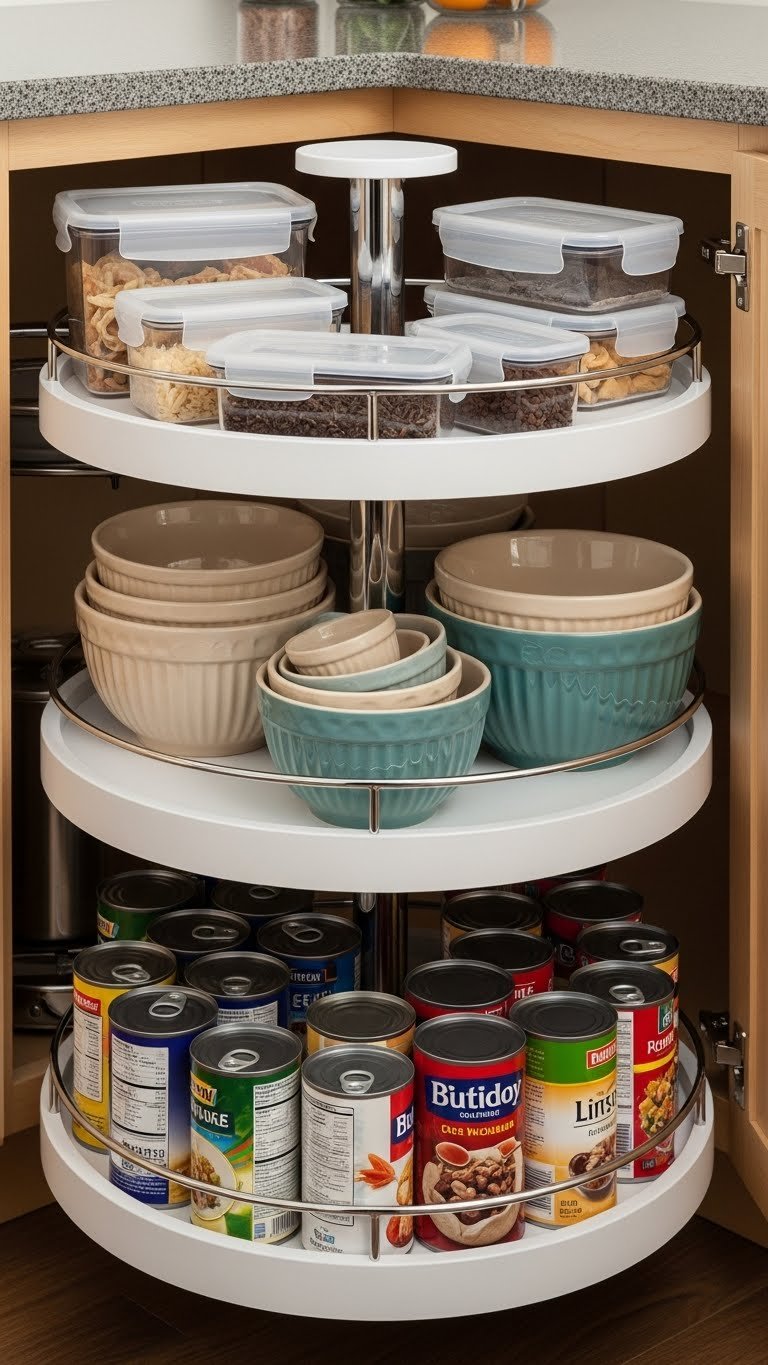
Standard single-shelf corner carousels are okay, but multi-shelf versions give you 3–4 storage levels in that awkward corner. You’re maximizing a typically wasted space with rotating access.
Install a multi-tier corner carousel system ($120–$300 depending on shelves and quality—brands like Hardware Resources and Knape & Vogt offer excellent options). Professional installation: $200–$350; DIY-capable in 2–3 hours with basic tools. This requires some modification to cabinet interior, so it’s better for homeowners than renters.
That problematic corner now holds 2–3 times more usable storage, all rotating within reach. You’ll actually use the corner intentionally instead of it being a “lose it there and forget it” zone.
20. Mount Utensil Rails with Hooks Above Counter

Utensil containers on your counter take up valuable real estate. A simple mounted rail with hanging hooks moves these items to the wall above your prep space, keeping them visible and accessible.
Install a wall-mounted utensil rail ($25–$60 from Williams Sonoma, Target, or Amazon) at 36–42 inches height above your counter. Use S-hooks or magnetic hooks ($10–$20 for a set) to hang wooden spoons, spatulas, tongs, and other frequently used tools. Mounting takes 30 minutes and requires finding studs or using heavy-duty anchors. Renters: use removable adhesive options if available.
Your counter loses clutter, and your tools are organized exactly where you need them. Cooking becomes faster because you’re not rooting through a drawer for the right utensil.
21. Add a Narrow Vertical Pantry Tower in Corners

Awkward kitchen corners cry out for vertical storage. A slim pantry tower fits perfectly in that dead corner space and holds 3–4 times more than a standard cabinet would in that footprint.
Place or build a narrow vertical pantry unit ($200–$500 for semi-custom; $600–$1,500 for custom) in an unused corner. These are typically 12–18 inches deep and 24–30 inches wide—perfect for corners. IKEA’s PAX system or custom builders from local carpentry shops can create this. Hiring installation: $300–$500. This is excellent for renters if it’s a standalone piece you can take with you.
You’ve reclaimed an entire corner while maximizing vertical storage capacity. The pantry tower holds significantly more than a standard base cabinet would in that same footprint.
22. Use Magnetic Spice Containers on Cabinet Exterior

If your cabinet side or refrigerator is metal, magnetic spice containers on the exterior give you visible, accessible spice storage without taking up any interior cabinet space. It’s storage that doubles as design.
Apply adhesive-backed metal sheets ($15–$30 if your surface isn’t naturally magnetic) and add magnetic spice containers ($25–$60 for 12–20 containers with labels from Etsy, Amazon, or specialty kitchen stores). No drilling needed if you use adhesive-backed metal. Setup: 20 minutes.
Your spices are now at eye level, labeled, and styled like a purposeful kitchen feature. Interior cabinet space opens up, and you’ve created a functional design element.
23. Install Adjustable Shelf Supports in Upper Cabinets

Standard cabinet shelving is fixed—you can’t adjust spacing to fit taller items. Adding adjustable shelf supports lets you customize vertical spacing and use cabinet height more efficiently.
Replace fixed shelves with adjustable shelf supports and shelving ($40–$100 per cabinet from hardware stores or online). These use pegs or clips that slide into holes, letting you move shelves up or down by an inch or two. You can accommodate everything from cereal boxes to wine glasses to serving platters by adjusting each shelf height to fit what you’re storing. Installation: 30–45 minutes per cabinet with a hand saw (if custom-cutting shelves) or drill (if pre-cut).
You’re now using every inch of your cabinet height intentionally. Taller items fit where they couldn’t before, and you can rearrange shelves when your storage needs change.
24. Create a Vertical Coffee and Tea Nook

Coffee lovers need a compact coffee station. A vertical nook with tiered shelves consolidates mugs, beans, tea, and equipment in one organized, beautiful zone. It’s like a mini café in your kitchen.
Mount 2–3 floating shelves ($40–$80 for brackets and shelves) 12 inches apart, then style them: top shelf for mugs (group by color), middle shelf for coffee beans/grinder and tea selection, bottom shelf for French press or electric kettle. Add a small shelf for sugar/creamer if space allows. Mounting: 45 minutes to 1 hour with studs or heavy-duty anchors. Total cost: $50–$150 including styling.
Every morning you walk to one organized zone instead of opening multiple cabinets. Guests see your coffee preferences on display, and everything you need for your caffeine ritual is within arm’s reach.
25. Use Tension Rods and Baskets for Pull-Out Pantry Organization
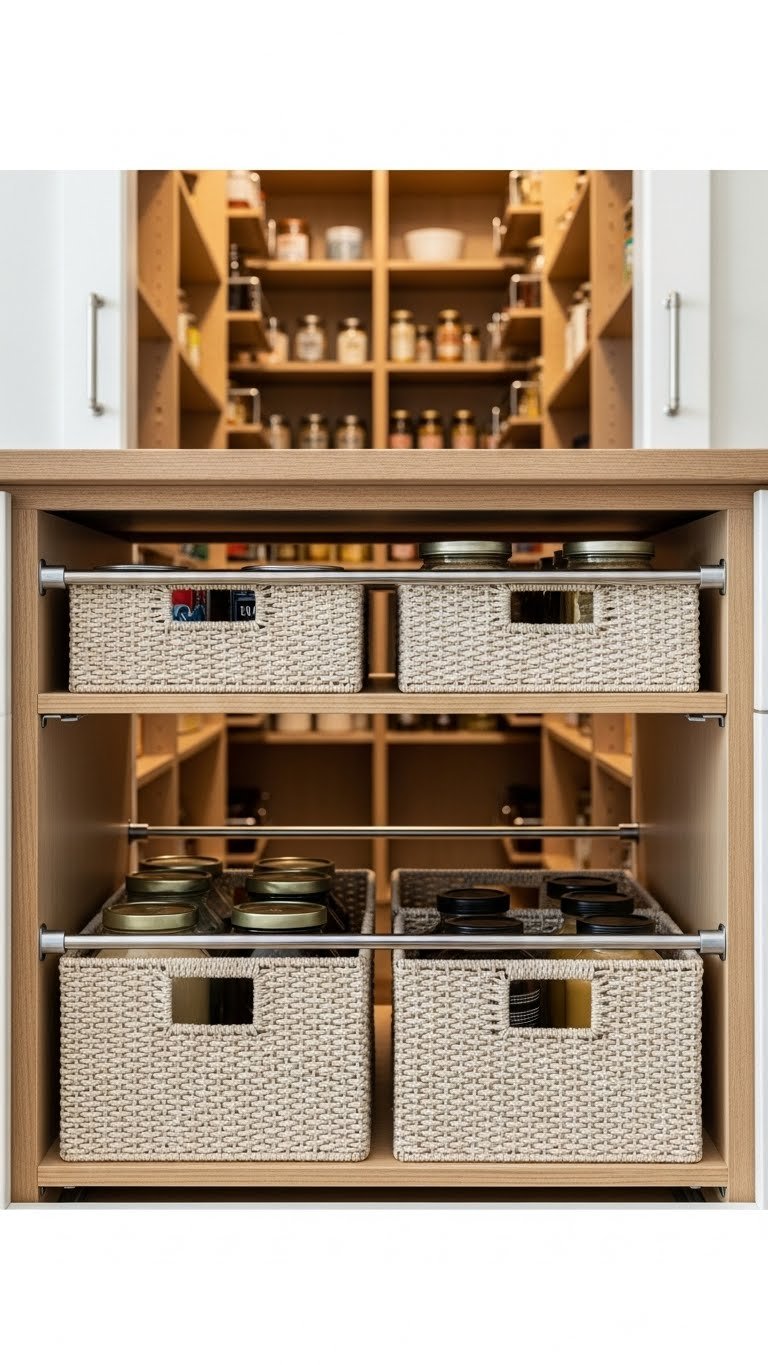
Pull-out pantry shelves are game-changers, but they need internal organization. Adding tension rods and small baskets to pull-outs creates vertical dividers within that already-smart storage.
Install a pull-out pantry shelf ($60–$150 from hardware suppliers) in a deep cabinet, then add tension rods ($8–$15 per pair) vertically to divide sections. Underneath, stack small storage baskets ($10–$30 each) for snacks, grains, or baking supplies. Label everything ($5–$10 for a label maker tape if you don’t have one). Total cost: $90–$200 and 1–2 hours setup.
When you pull out the shelf, everything is visible, organized by category, and easy to grab. You’ve created a mini pantry that slides out to you instead of making you reach or crouch.
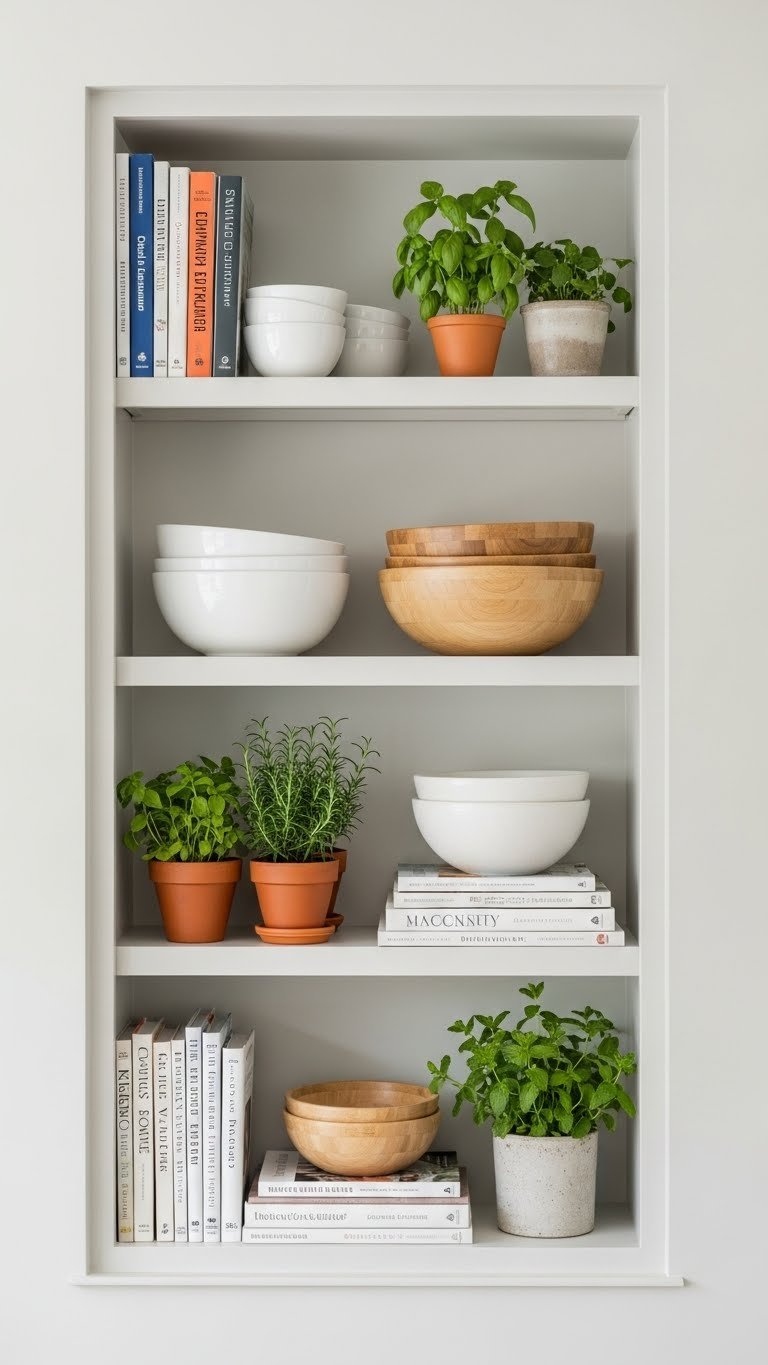
26. Mount Open Shelving in Kitchen Alcoves

Awkward alcoves in kitchen walls feel like wasted space until you build shelving into them. Open shelves in an alcove look like they were built into your kitchen’s original design and use space that otherwise does nothing.
Build or install shelving directly into the alcove ($200–$600 for a professional carpenter; $100–$250 in materials for DIY approach). Depth is typically 12–16 inches, and shelves can be wood, metal, or glass. Paint shelves to match kitchen walls or choose a contrasting accent color. Installation: 4–6 hours for a handy DIYer or 1–2 days for a pro. Permanent, so homeowner-focused.
You’ve created custom-looking storage that appears intentional and designed. The alcove now pulls its weight instead of being a blank, empty-looking space.
Save this post and try one or two ideas this weekend—start with the budget-friendly hacks like tension rods or floating shelves, and you’ll be shocked how much vertical storage transforms your space. Your kitchen will suddenly feel bigger, more organized, and way more functional.
Leave a Reply