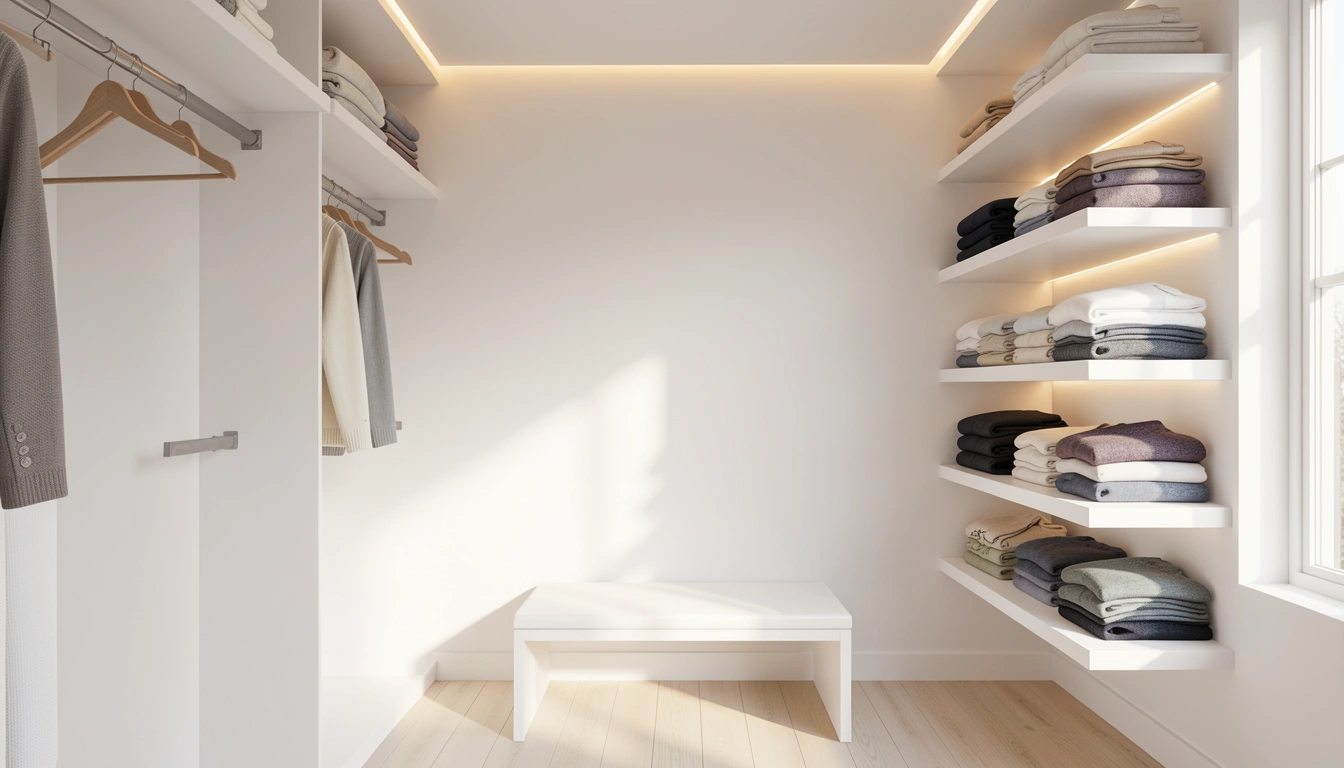
You already know that small walk-in closets don’t have to feel cramped or chaotic—but knowing it and actually making it happen are two different things. The trick isn’t magically expanding your square footage; it’s using every inch strategically so your closet feels bigger and works harder for you. In this guide, you’ll find 25 practical ideas that combine smart storage solutions, lighting upgrades, visual tricks, and styling hacks to turn your compact closet into a space that’s both functional and inviting. Whether you’re renting or planning permanent upgrades, you’ll find ideas at every budget level—from free rearrangements to investment pieces that earn their keep. Let’s dig in.
1. Double Your Hanging Space with Slim Hangers
Slim hangers are one of the easiest wins for small closets because they immediately reclaim wasted space. Standard plastic hangers are bulky and waste inches; velvet or non-slip slim hangers reduce thickness by up to 50%, which means you fit nearly double the clothes on the same rod.
Swap out your existing hangers first—it costs between $15–$40 for a set of 50. Velvet hangers ($20–$35 per set) grip delicate fabrics without slipping and look polished; slim wood or plastic hangers ($15–$25) work just as well if budget is tight. The best part? This takes 30 minutes and requires zero tools or installation. You’ll immediately see how many more pieces fit without touching the walls.
Pair this with a lightweight cascading hanger hook ($5–$10 on Amazon) to stack multiple items vertically within your closet space.
2. Paint Walls a Light, Reflective Shade
Light-colored walls are a free visual expansion tool—they bounce light around and make compact spaces feel airier instantly. White, soft gray, or warm cream are all smart choices for small closets because they brighten the entire room.
A gallon of paint costs $20–$40, and a small closet typically needs just half a gallon. Self-priming paint speeds up the job. Prep time (clearing the closet, taping trim) takes 2–3 hours, and paint dries in 4–8 hours. If you’ve never painted before, it’s a gentle first project—there are no visible brush strokes in a small space, and imperfections disappear once your clothes are back. This change makes your closet feel noticeably more spacious without any structural changes.
Skip the bold accent walls in a small closet; save those for larger rooms where they add drama without reducing perceived space.
3. Install LED Strip Lighting Along Upper Shelves
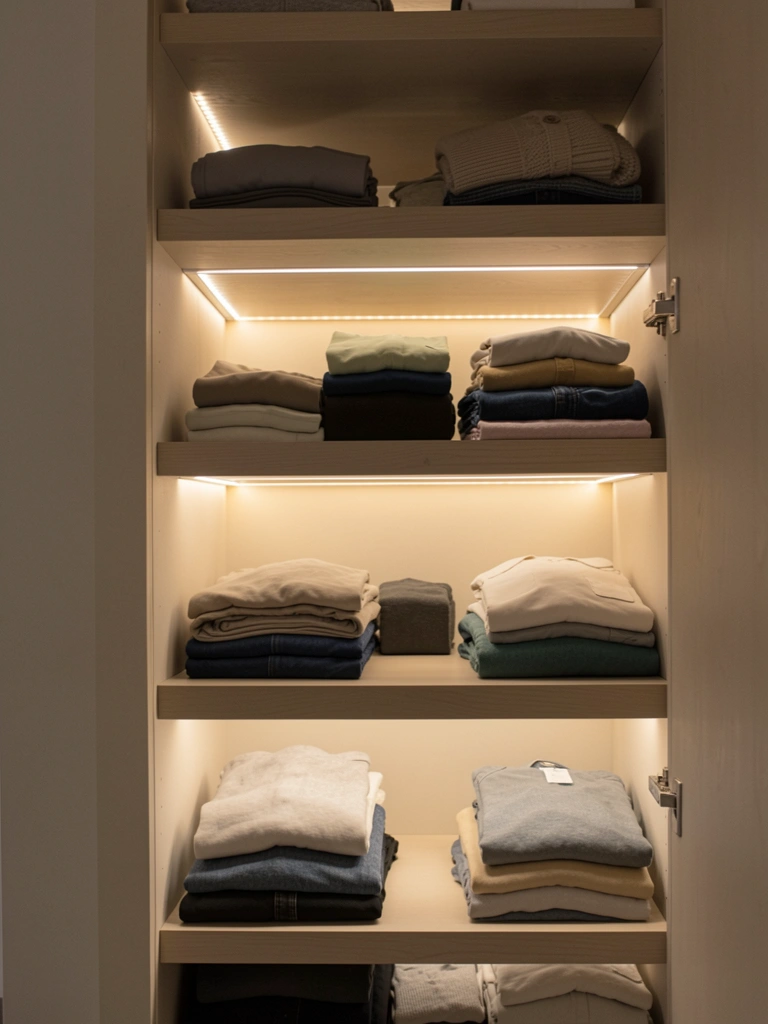
Overhead ceiling lights cast shadows and make small closets feel darker; LED strips mounted under shelves or along the crown create even, shadow-free lighting that makes everything visible and the space feel bigger.
Strip lights cost $15–$50 for a motion-sensor or dimmer-enabled set from Amazon or Home Depot. Installation is simple: clean the shelf underside, peel the adhesive backing, and press the strip in place—10 minutes, no electrician needed. Warm white LEDs (2700K–3000K) feel cozier than cool white and won’t wash out your skin tone when you’re getting dressed. Motion sensors add convenience; you walk in and the closet lights automatically. The lighting becomes part of your morning ritual, and you’ll stop wasting time searching for items buried in shadows.
Pair this with a small mirror opposite the light source to reflect illumination deeper into the closet.
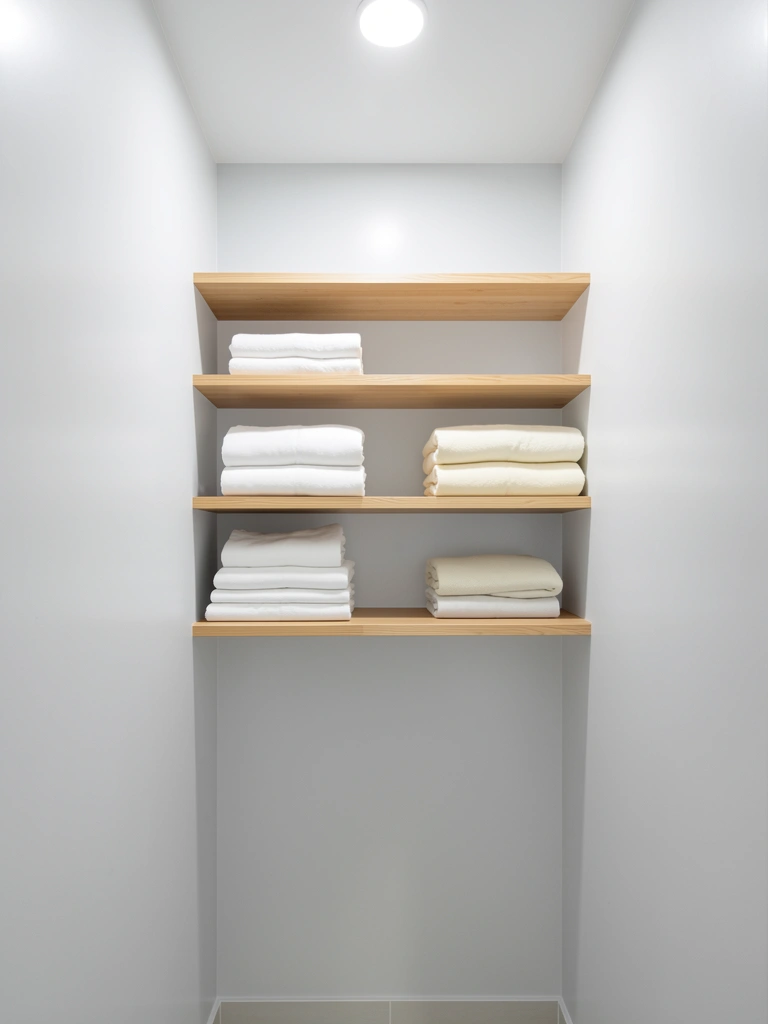
4. Add a Narrow Floating Shelf Above the Rod
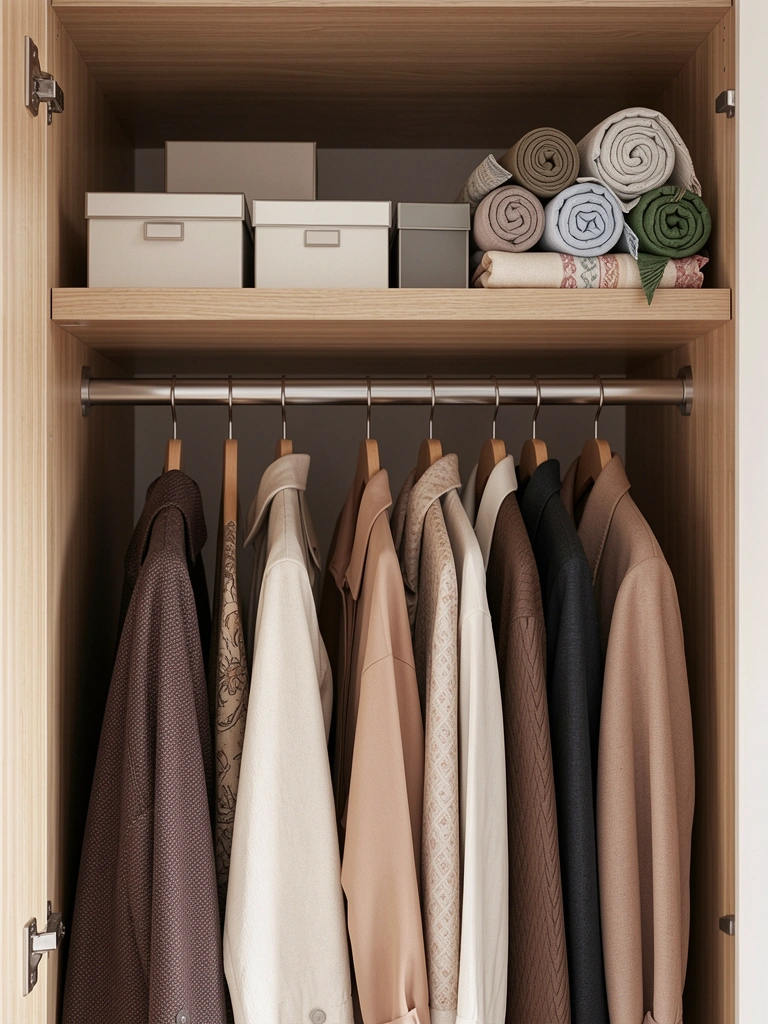
Vertical real estate is precious in a small closet. A narrow floating shelf (6–8 inches deep, 24–36 inches wide) installed 12 inches above your hanging rod stores off-season accessories, hats, rolled scarves, or small storage boxes without eating floor space.
Floating shelves run $20–$60 for a simple wood or laminate option; brackets are often included. Installation takes 30–45 minutes with a stud finder and drill—or hire a handyman for $75–$150. Keep the shelf narrow so it doesn’t create a headbump or visual clutter. Use matching clear or white storage boxes on top to keep the look clean. You gain storage without reducing the hanging rod functionality, and the upper area becomes a secondary zone for out-of-sight organization.
Renters: wall-mounted shelves require drilling; ask your landlord first or choose a tall freestanding shelf unit instead ($80–$200).
5. Use Clear Acrylic Drawer Inserts for Folded Items

Drawer dividers are a game-changer for small closets because they prevent the dreaded “dig through a pile” moment. Clear acrylic inserts let you see every folded item without disturbing the stack.
A set of adjustable clear dividers costs $10–$25 on Amazon. Divide drawers into 3–5 sections per drawer, with one section per clothing category (t-shirts, tank tops, camis, etc.). You save time getting dressed because items are visible and separated; no more excavating. If your closet has open shelves instead of drawers, apply this same principle using small open acrylic boxes ($2–$5 each). This simple organizing system keeps folded clothes from collapsing into a jumble and saves you mental energy when choosing what to wear.
Pair this with a labeling system: small adhesive labels on drawer fronts or box edges make it easy to return items to the right spot.
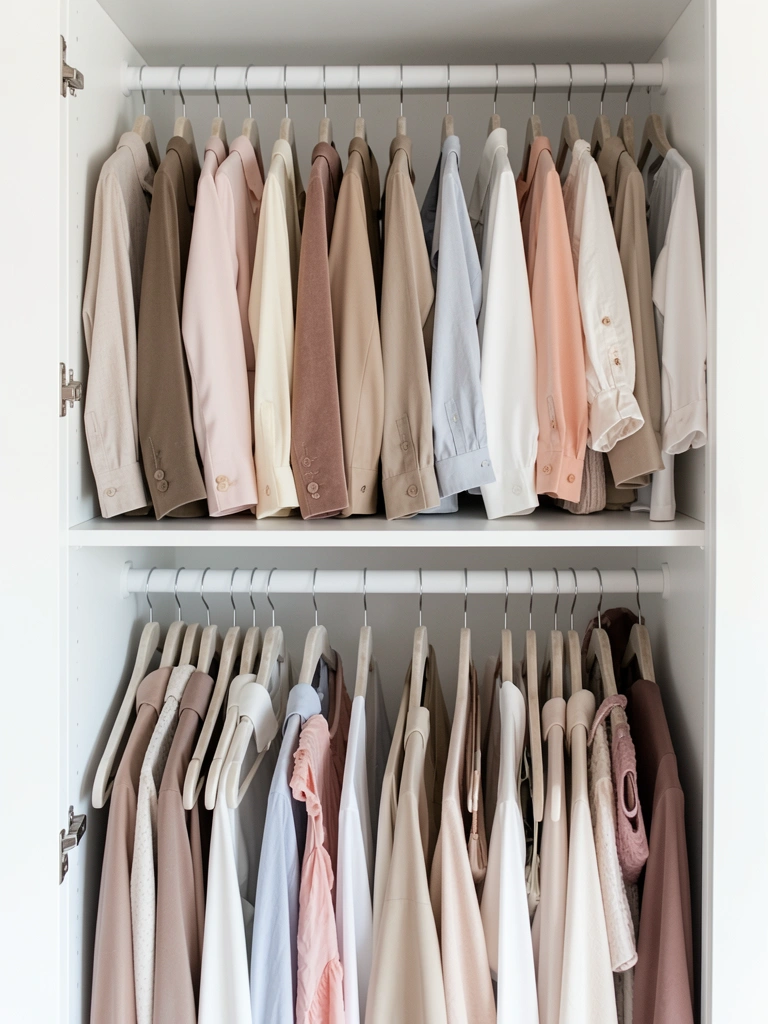
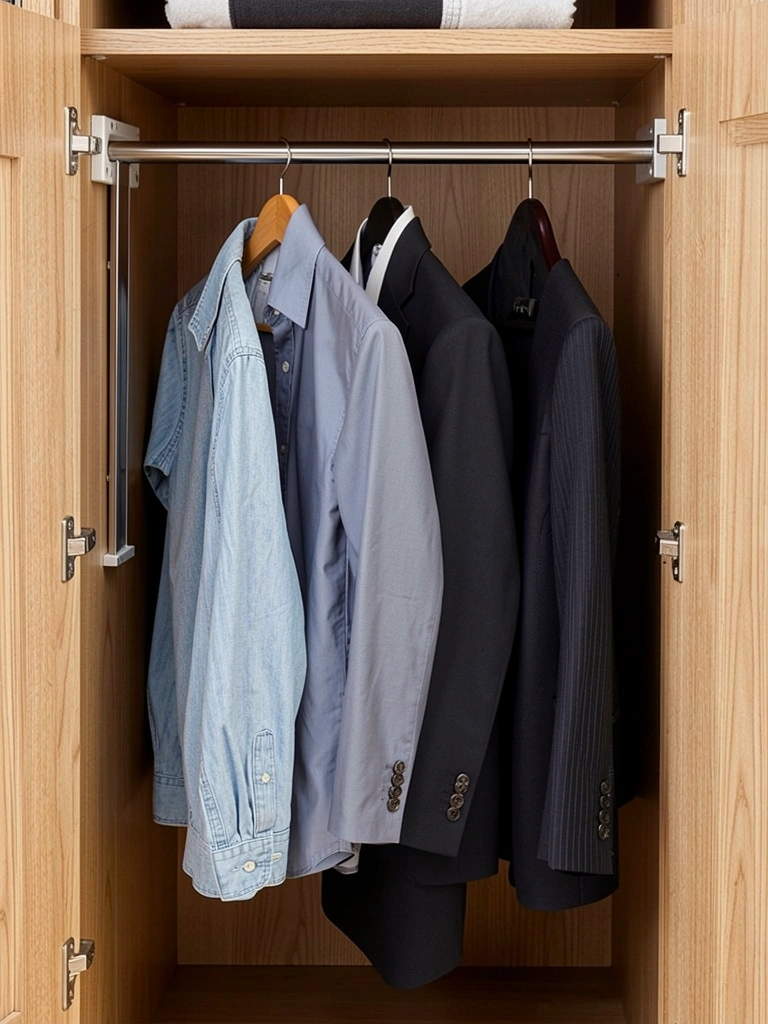
6. Maximize Vertical Space with Double Hanging Rods
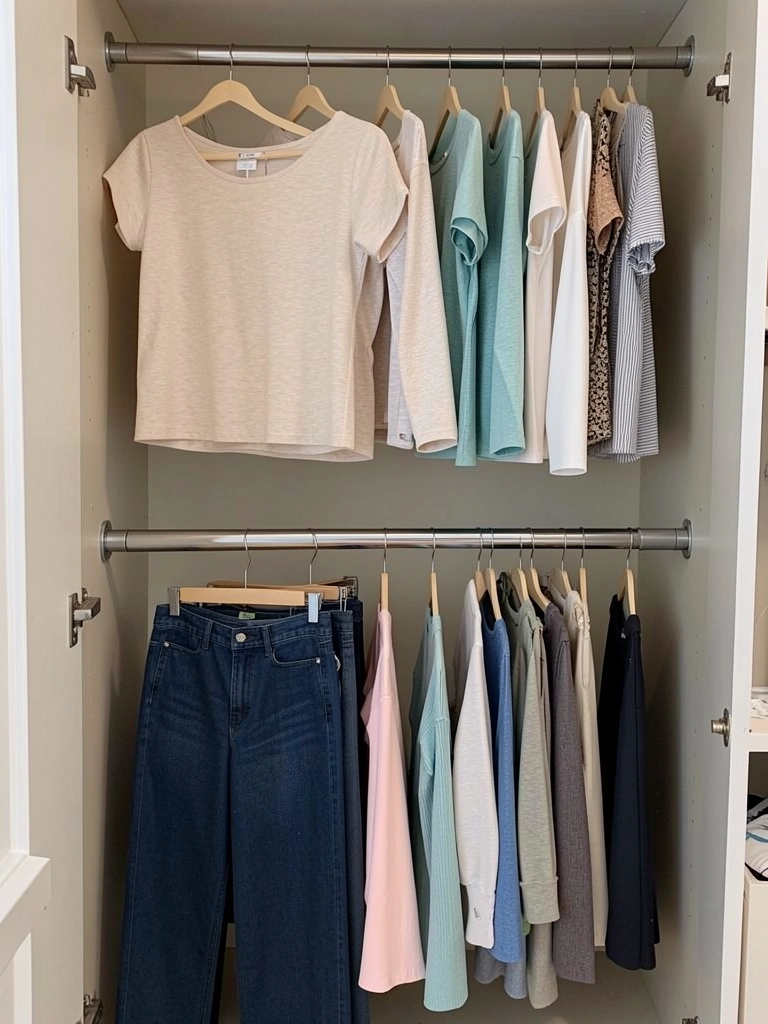
Double hanging rods are the secret weapon for small closets because they let you hang twice as many items in the same footprint. Install one rod at standard height (5–6 feet) and a second rod 30–36 inches below it for shorter items like folded pants, t-shirts, or jackets.
A basic double rod kit costs $20–$50 and installs with simple brackets in 1–2 hours. Make sure the upper rod holds lighter items (tanks, blouses, dresses) to avoid overweight stress; the lower rod can handle heavier pieces like jeans or sweaters. You’ll be shocked at how many more clothes fit this way. Best for one side of your closet or a corner; keep the other side single-rod for longer dresses or coats if needed.
Some spaces work better with one full-width double rod instead of splitting left and right; test the layout before committing.
7. Install Corner Shelving for Dead Space
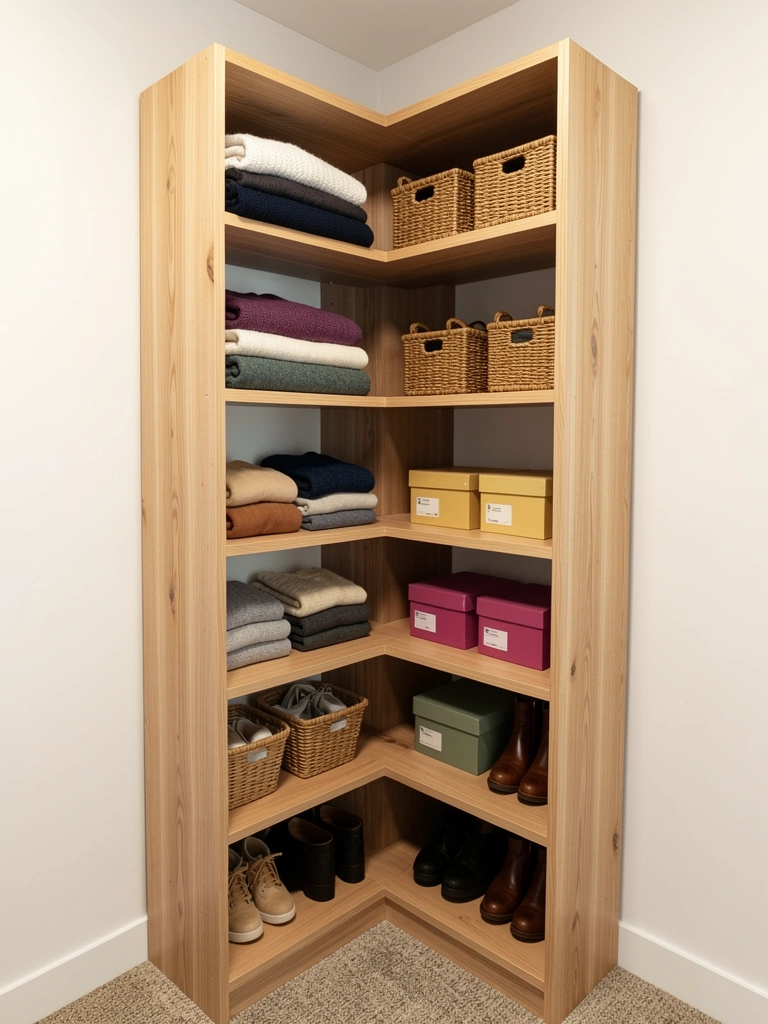
Closet corners often go unused—they’re awkward to reach and hard to fill with hanging rods. A corner shelf unit (usually L-shaped or two-shelf wall units meeting at a corner) transforms dead space into functional storage.
Corner shelf kits run $40–$100; installation takes 1–2 hours with basic tools. Stack your sweaters, seasonal storage boxes, or shoe organizers here. The corner becomes a secondary storage zone that doesn’t compete with your hanging and shelf areas. Small wall-mounted corner baskets ($15–$30) also work well for scarves, belts, or small accessories if you want something more minimal.
Renters: freestanding tall corner shelves ($80–$150) work too and don’t require any wall anchors or drilling.
8. Hang a Slim Shoe Rack on the Back of the Door
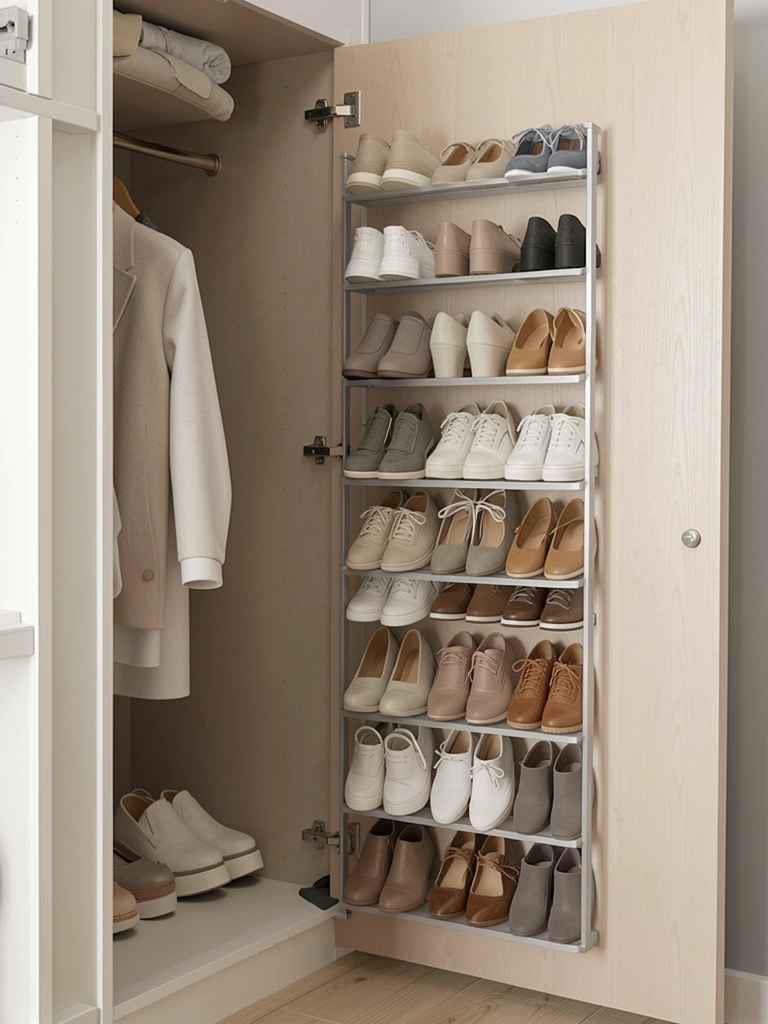
Most closet doors are prime real estate that goes unused. An over-the-door shoe rack (the slim, hanging type, not a tall bulky unit) holds 8–15 pairs without taking any floor space.
A slim over-the-door rack costs $15–$35 and installs in 5 minutes—no tools needed, just hang it from the door frame. Choose neutral shoes (black, white, beige, gray, navy) to keep the door visually calm. Rotate seasonal shoes out quarterly to keep the display fresh. This single move frees up floor space for a small bench or additional shelving. Bonus: shoes are visible at a glance, so you’re more likely to actually wear them.
If your closet door opens inward and crowds the space, skip this and use a wall-mounted rack on the side wall instead.
9. Roll Sweaters Instead of Folding or Hanging
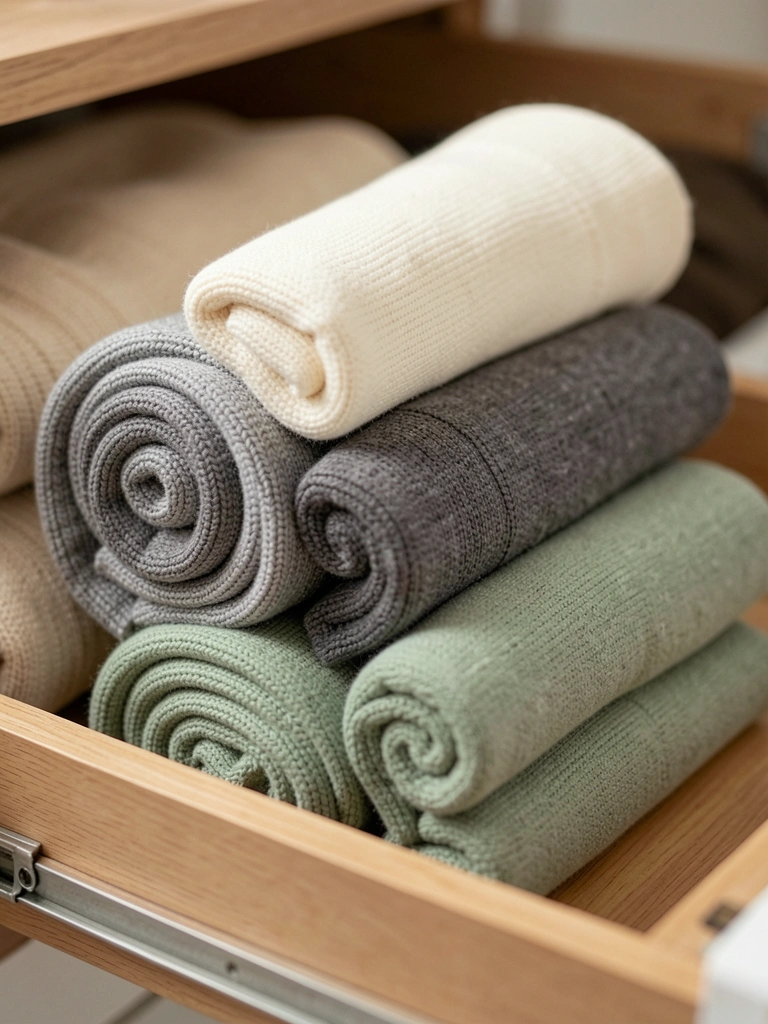
Rolling sweaters instead of folding or hanging saves incredible space while protecting knitwear from hanger marks. This method condenses your sweater collection by about 30% compared to hanging them.
Here’s how: fold your sweater in half lengthwise, then tightly roll from the bottom up. Store rolls standing upright in a shallow drawer or stack them on a shelf. Each roll takes about 30 seconds once you get the rhythm. You fit 4–6 rolled sweaters in the space of 2–3 hanging ones. Rolling also protects delicate fabrics because there’s no hanger pressure. Start with a weekend project to roll your entire collection; it’s meditative and takes about 1–2 hours for 15–20 sweaters.
This method works for lightweight jackets, cardigans, and structured tops too—just avoid heavy coats that hold their shape better hanging.
10. Add a Narrow Bench Seat for Outfit Staging
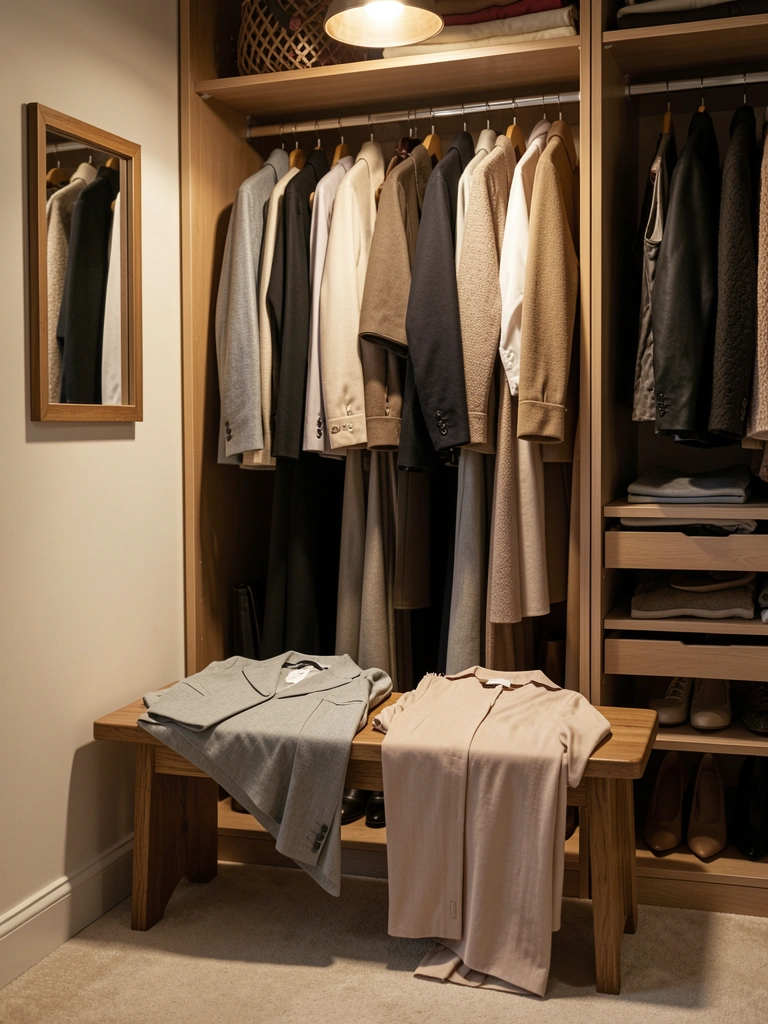
A narrow bench (24–36 inches wide, 12–16 inches deep) at the back or side of your closet serves double duty: it stages outfits before you wear them and provides a seat to put shoes on. This becomes your personal styling station.
A slim wooden bench costs $40–$150 depending on material. You can also DIY one by stacking a cushion on top of storage cubes. Position it where it won’t block your main walkway. Use the bench to lay out tomorrow’s outfit, style jewelry and accessories, or simply sit while getting ready. It brings a spa-like, intentional feel to your morning routine and makes your closet feel like a boutique dressing room instead of just storage.
Renters: a cushioned stool ($30–$80) works just as well and moves with you to the next place.
11. Install a Valet Rod for Outfit Planning
A valet rod is a thin pull-out rod (usually 18–24 inches) mounted at shoulder height on your closet side wall. You pull it out to hang tomorrow’s outfit or three options while you decide, then slide it back in when done.
A basic valet rod costs $25–$60 and installs with two simple brackets in 30 minutes. This tool saves decision time in the morning—you pre-stage complete outfits (top, bottom, outerwear) and grab them ready-to-go. It’s especially useful on busy weekdays or for travel. The rod stays hidden when not in use, so it doesn’t add visual clutter. If you work from home or have video calls, you’ll appreciate styling your outfit the night before instead of last-minute scrambling.
Mount it on the side or back wall where it won’t block your main pathway—shoulder height is ideal so you don’t have to bend or reach.
12. Use Cascading Hangers for Tanks and Camis
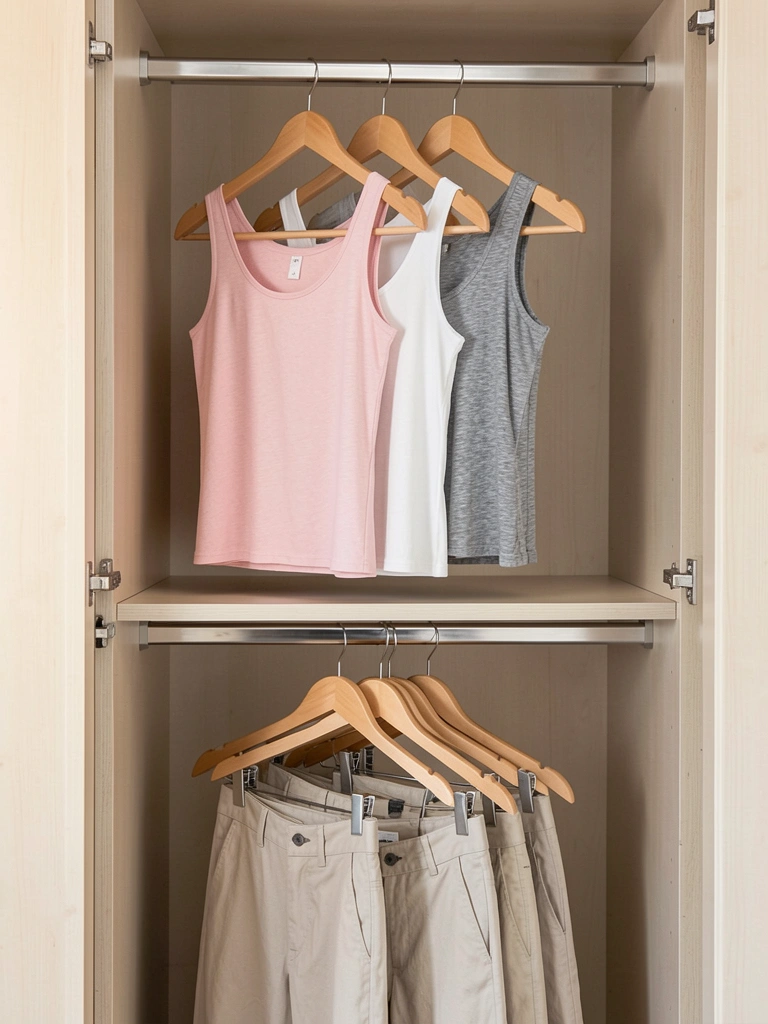
Cascading hangers (also called tiered or cascade hangers) hold 4–5 lightweight items vertically on a single rod space. They’re perfect for tanks, camis, lightweight tees, or scarves that waste rod real estate when hung individually.
A set of 3–5 cascading hangers costs $10–$20 on Amazon. Each hanger has graduated clips or hooks that let you hang multiple pieces without tangling. You can fit 15–20 tank tops in the space of 3–4 standard hangers. They work especially well for seasonal items you rotate frequently. Keep them reserved for lightweight, flexible fabrics; heavy sweaters or structured blazers should hang individually to maintain their shape.
Pair cascading hangers with matching wooden or slim velvet hangers throughout your closet for a cohesive, polished look.
13. Create Zones: Tops, Bottoms, Dresses, Outerwear
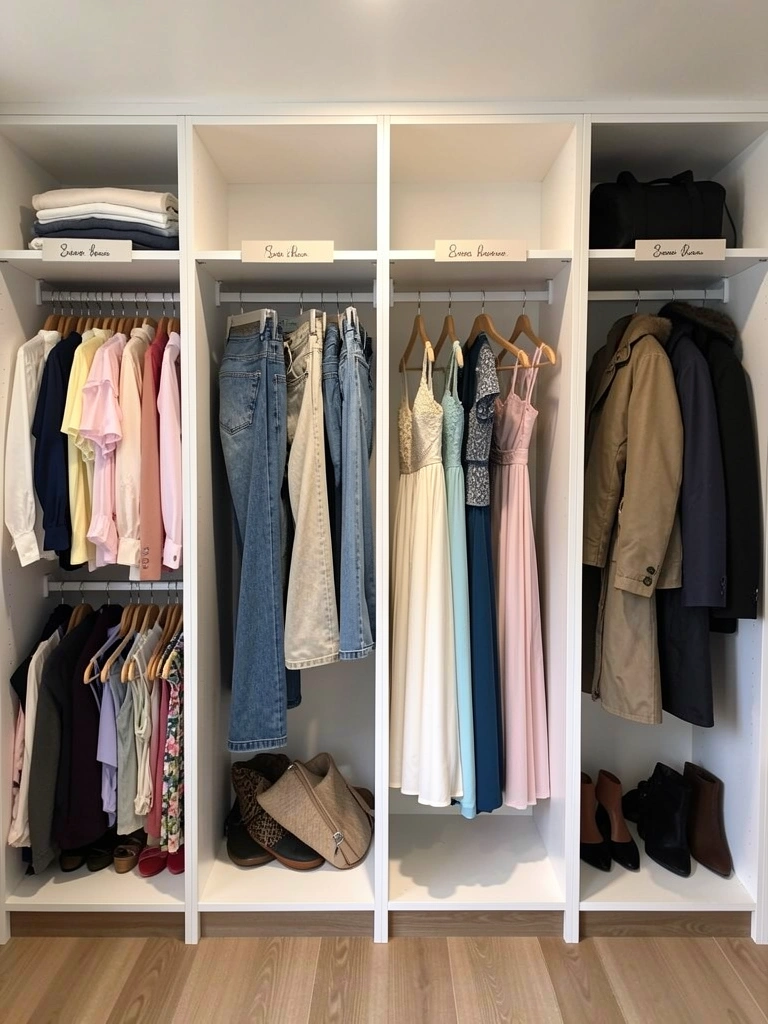
Zoning your closet by clothing category is one of the most efficient organizational tactics. Your brain finds items faster when they’re logically grouped instead of randomly scattered.
Rearrange your existing rods and shelves so that tops occupy one zone (left wall, for example), bottoms another (center), dresses a third, and outerwear a fourth. Use a small shelf divider or even a piece of painter’s tape on the rod to mark boundaries. Getting dressed becomes faster because you know exactly where to look; “I need a top” takes 10 seconds instead of 2 minutes of browsing. This also reveals what you actually own (you might discover you have 30 similar tops), which helps with future shopping decisions. Rearrange zones seasonally—winter coats take up more space in December, so give them more rod real estate.
A clear zone system means your partner, roommate, or family member can find things too, reducing friction in shared closet spaces.
14. Use Under-Shelf Baskets for Hidden Storage
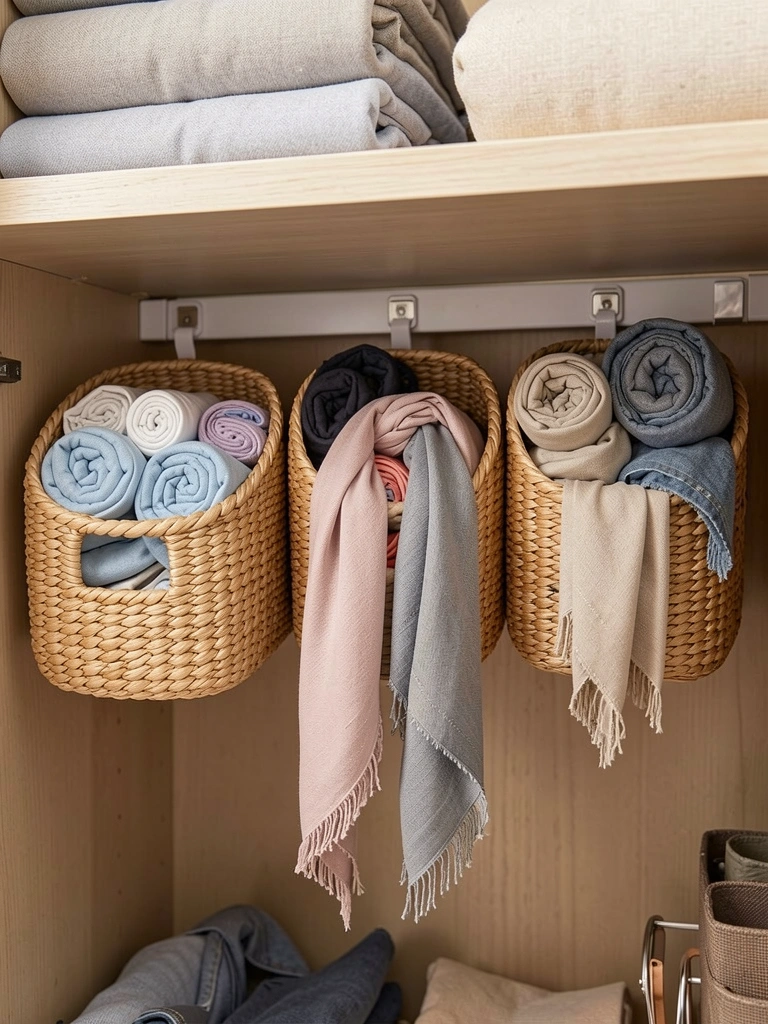
Under-shelf baskets hang from the bottom of existing shelves, creating a hidden storage tier without using floor space. They’re perfect for off-season clothes, undergarments, or accessories you use less frequently.
Adhesive hooks ($5–$10 for a pack) or small brackets ($2–$3 each) attach shallow woven baskets ($8–$15 each) to your existing shelf bottoms. Install takes 10 minutes per shelf. You gain an entire hidden storage layer. The baskets stay tucked enough that they don’t catch your eye but are easy to access when you need them. Natural woven baskets look polished; plastic storage boxes ($3–$5 each) work for utilitarian storage if you hide them deeper in the closet.
This method works best for shelves that are 12 inches or taller with at least 6 inches of clearance below.
15. Install a Thin Over-Door Organizer for Accessories

An over-door fabric organizer with shallow pockets (not a full shoe rack) holds belts, scarves, jewelry, tights, or small folded items without consuming any floor or shelf space.
A slim fabric organizer costs $12–$25 and hangs in 2 minutes. Keep pockets reserved for lightweight, flexible items; heavy jewelry or solid items feel awkward in pockets. Use small zippered pouches inside pockets to organize tiny things like hair clips or earrings. This solution is especially useful if your closet lacks drawer or shelf space for accessories. Renters love this because it requires zero tools or commitment—just hang and remove when you leave.
Choose a neutral color (beige, gray, white) so the organizer fades into the background.
16. Fold Jeans Vertically to See Every Pair
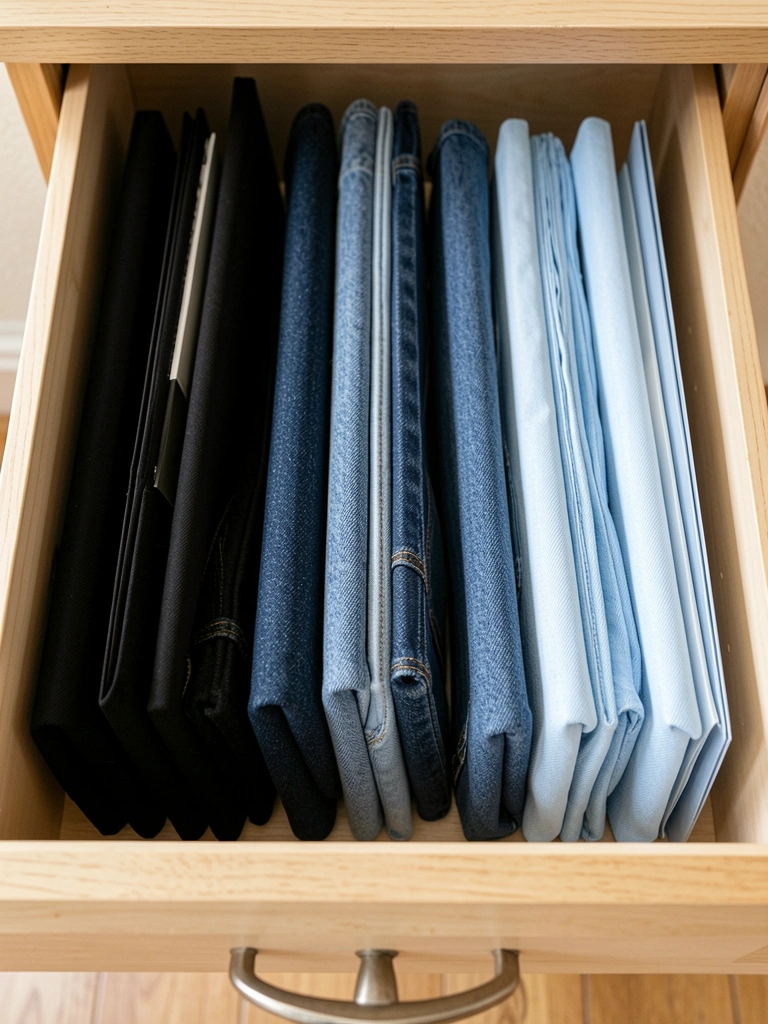
The KonMari-style vertical fold for jeans (and all clothes) lets you see every piece without digging through a pile. You fold each pair into a neat rectangle and stand them upright like files.
This takes 5 minutes to learn and 1–2 hours to apply to your entire jean collection. The payoff is huge: you stop buying duplicate styles because you can actually see what you own. You fit 30% more jeans in the same drawer space. The only downside is that it requires a shallow drawer (3–4 inches deep) rather than a deep storage bin. Watch a quick tutorial on YouTube to nail the folding technique; it feels awkward the first time but becomes automatic. Once you master jeans, apply it to pants, t-shirts, and other foldable items.
Paired with drawer dividers, the vertical fold system creates a magazine-style closet that’s both functional and beautiful.
17. Add Soft Lighting Puck Lights Inside Shelves
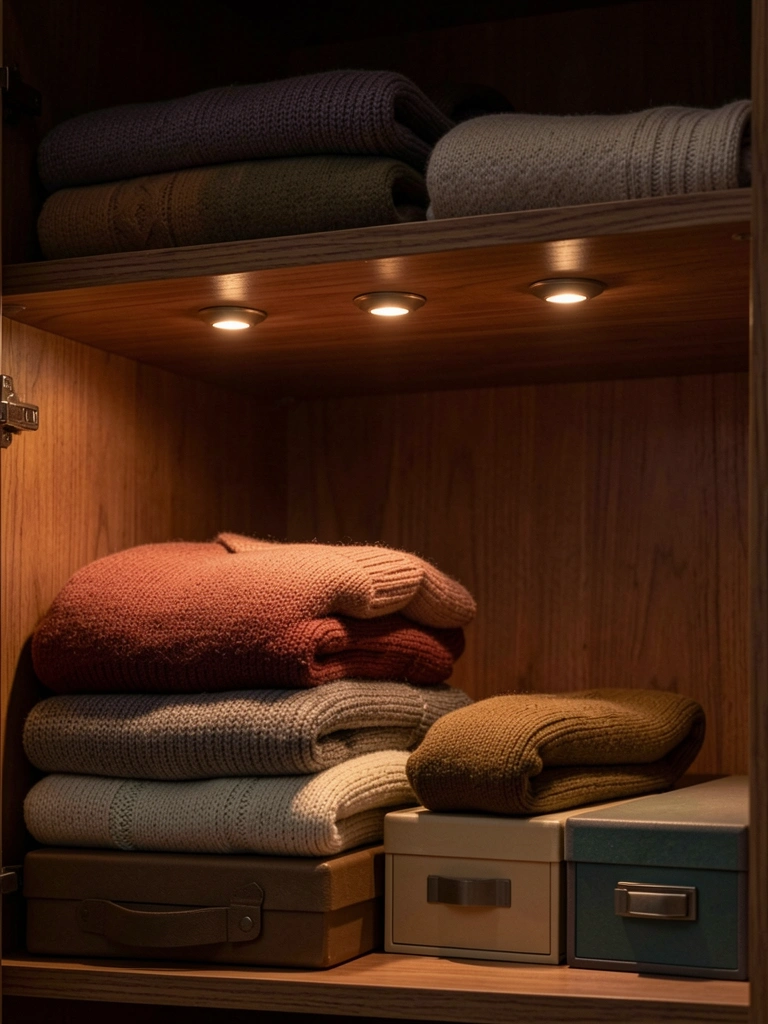
Puck lights are small, battery-operated circular lights (2–3 inches wide) that mount inside shelves. Unlike LED strips, they’re subtle and work on any shelf without installation.
A set of 3–4 puck lights costs $15–$30. Install with adhesive strips in 10 minutes—no wiring or tools needed. Warm white or soft white LEDs feel cozier than bright white. Battery-operated puck lights last 6–12 months per battery set; rechargeable versions ($20–$40) reduce battery waste. This layered lighting approach makes your closet feel high-end and spa-like; it’s not just functional, it’s mood-setting. Perfect for closets that lack built-in shelf lighting or for renters who can’t install permanent fixtures.
Position one puck light per 24 inches of shelf width for even illumination without hot spots.
18. Use Shelf Dividers to Prevent Stack Collapse
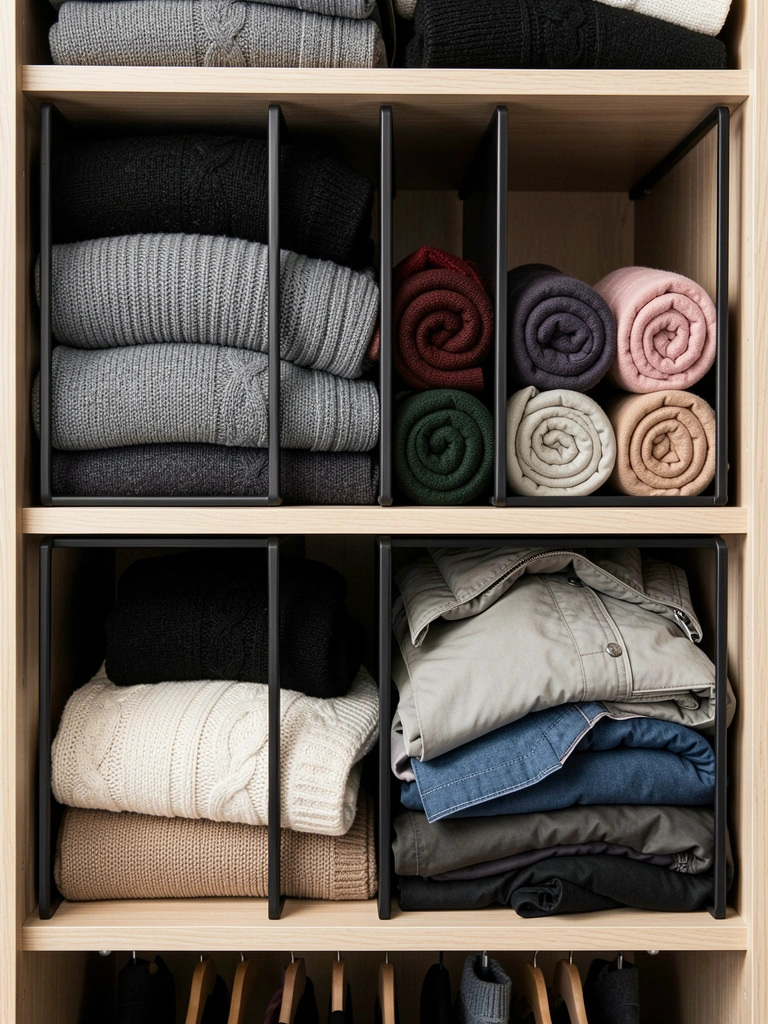
Shelf dividers (vertical separators) are simple metal or wood pieces that prevent stacks of folded clothes from sliding into one another. One divider can make the difference between organized and chaotic.
A set of 2–4 dividers costs $8–$20. They require no installation—they simply stand upright on your shelf. Use one divider per 12–18 inches of shelf width to create separate compartments for different items. This means your sweater stack stays upright; your scarf roll doesn’t tumble into your cardigan pile. It’s a small detail that makes a huge difference in the functionality and visual calm of your closet. Metal dividers ($10–$15) look sleeker; wooden ones ($8–$12) feel warmer.
Pair dividers with a small label on the edge of the shelf so you remember what goes in each section.
19. Install a Low Shelf or Step Stool to Reach High Storage
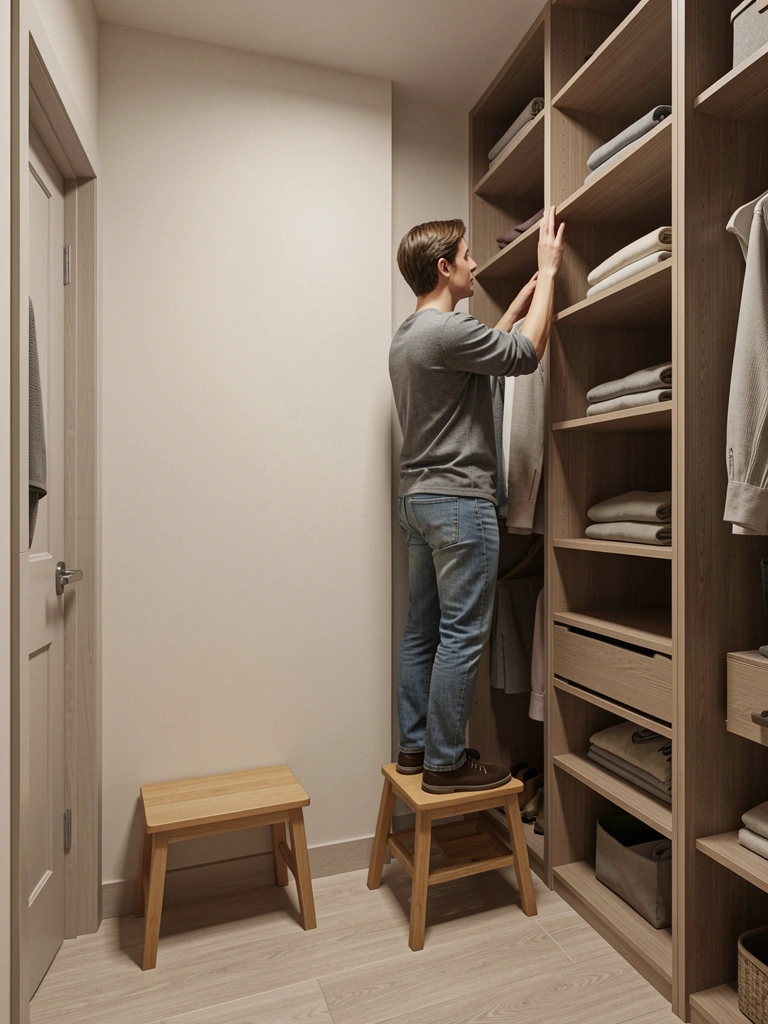
If your closet has high shelves, a small step stool makes them accessible and safe to reach. You avoid dangerous climbing or stretching that risks toppling items.
A compact wooden or plastic step stool costs $15–$30 and stores in a closet corner or against the wall. Choose one with a wide, stable base (not a ladder). This small tool encourages you to actually use high shelves for off-season storage or less-frequently worn items instead of leaving them as dead space. Safety first: only use shelves up to 6–7 feet high; anything higher is awkward even with a stool. A step stool is a small investment that extends your vertical storage without risk.
Foldable step stools ($20–$40) are great for renters because they collapse and travel easily.
20. Repurpose Small Furniture: Nightstands as Shelf Units
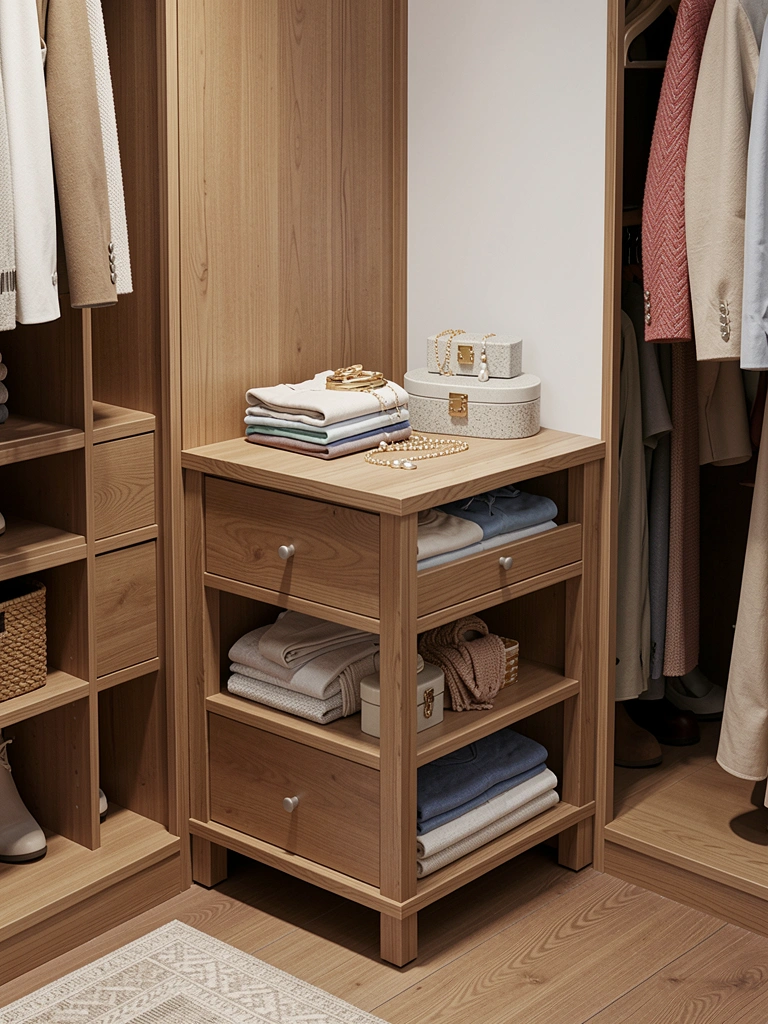
A small dresser, nightstand, or storage console inside your closet adds vertical storage without permanent installation. It’s a clever way to repurpose furniture you already own or find secondhand.
Dimensions matter: a piece 24–30 inches wide and 18–20 inches deep fits most closets without blocking your pathway. Thrifted nightstands cost $30–$80; new small dressers run $80–$200. This piece holds jewelry, undergarments, accessories, or off-season items in drawers while using the top surface for decorative baskets or folded sweaters. It creates a mini lifestyle display that makes your closet feel boutique-like. Renters can move the piece with them, and homeowners can anchor it to the wall for safety.
Source furniture from Facebook Marketplace, Craigslist, or IKEA’s affordable modular pieces ($60–$150).
21. Color-Coordinate Your Clothes for Visual Calm
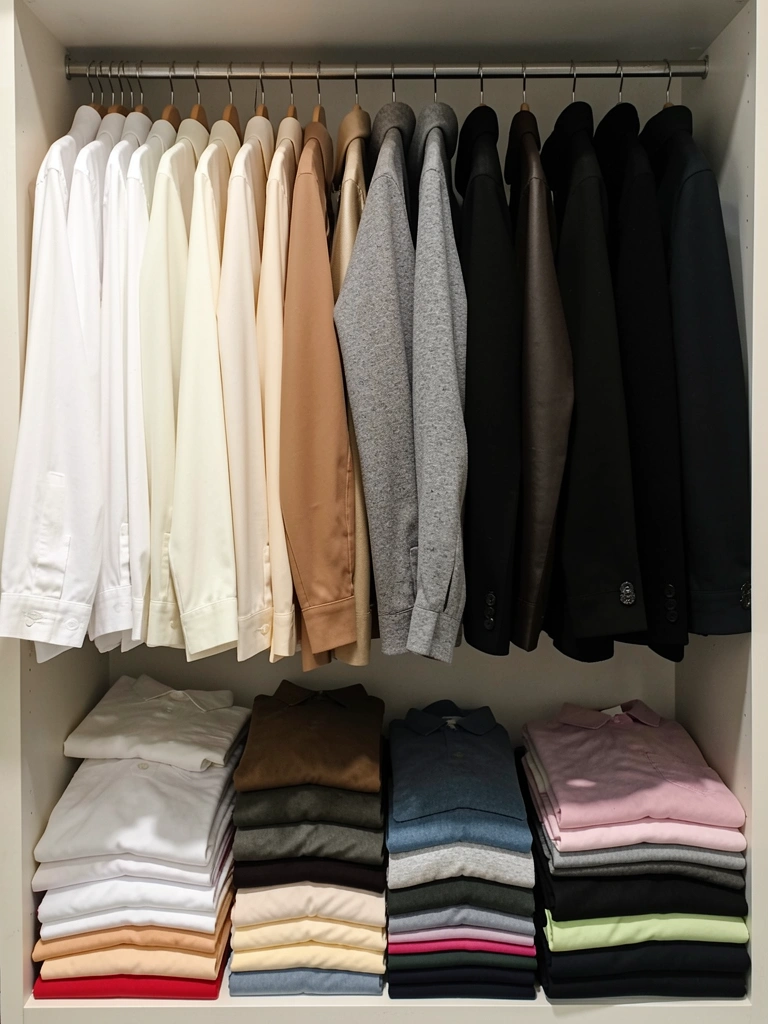
Color coordination is both functional and visually soothing. Arranging clothes by color makes your closet feel intentional and spa-like, and it speeds up getting dressed because similar items are grouped together.
This takes 2–4 hours depending on your collection size but requires zero money. Start with one section: arrange tops from white/cream through neutrals to black, or organize by seasonal palette. Next, tackle bottoms, then folded items. Once coordinated, it’s easy to maintain—just return items to the correct color zone. You’ll notice patterns in your wardrobe (maybe you own eight white tanks and zero green tops), which helps with future shopping. The visual payoff is huge: your closet looks curated and calm instead of chaotic.
Pair color coordination with matching slim hangers for an even more polished, high-end appearance.
22. Use Vacuum Storage Bags for Seasonal Off-Season Items
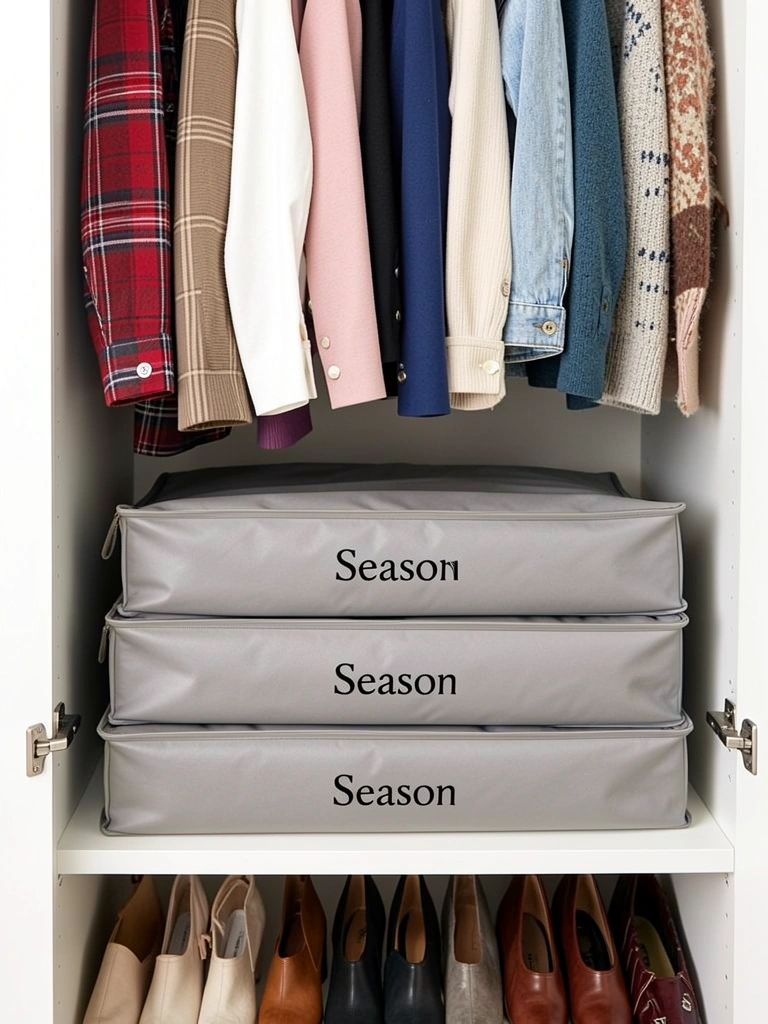
Vacuum bags compress bulky off-season clothes (winter coats, sweaters, summer sundresses) down to a fraction of their size, freeing precious closet real estate for current-season wear.
A pack of 5–10 vacuum bags costs $10–$20 on Amazon or Target. Label each bag with the contents (e.g., “Winter Coats 2024”) and season. Fold your out-of-season items, pack them in the bag, seal, and remove air with a vacuum. The bags compress by 50–75%, storing effortlessly on high shelves or under-shelf areas. Rotate them seasonally. The only downside: you need to unseal and re-seal them twice yearly, but the space savings far outweigh the minor inconvenience. This is a game-changer for small closets with no separate storage closets.
Buy quality vacuum bags ($12–$25 for premium versions); cheaper ones sometimes leak or tear.
23. Mount a Narrow Mirror on the Closet Wall
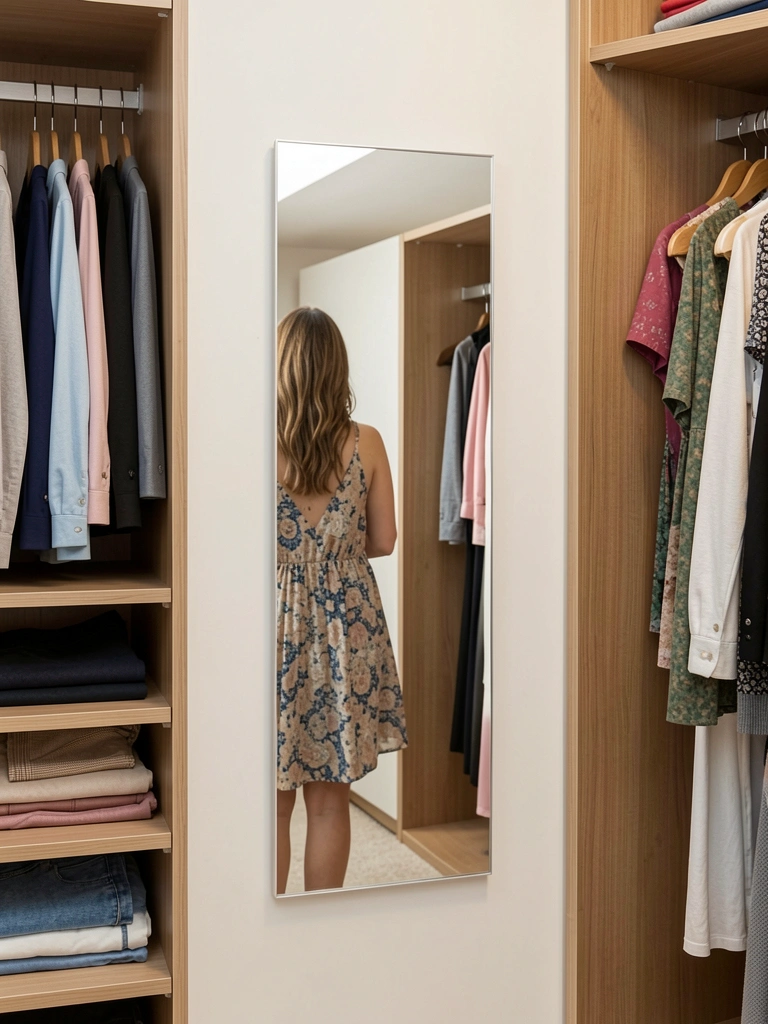
A narrow mirror (12–18 inches wide) mounted on one closet wall serves two purposes: it lets you see outfit details without leaving the closet, and it reflects light, making the space feel bigger.
A slim mirror costs $15–$40; installation with brackets takes 20 minutes. Mount it at eye level on a side wall where it won’t block your main walkway. A full-length mirror is ideal but takes more space; a half-length mirror (down to the knees) is a smart compromise for small closets. This allows you to check proportions and overall outfit cohesion without stepping into your bedroom. Bonus: the reflected light from your LED strips or puck lights bounces around, creating a brighter, more open-feeling space.
Renters: adhesive mirror tiles ($1–$2 each) can be arranged into a custom size and removed without damage.
24. Create a Seasonal Rotation Calendar and Checklist
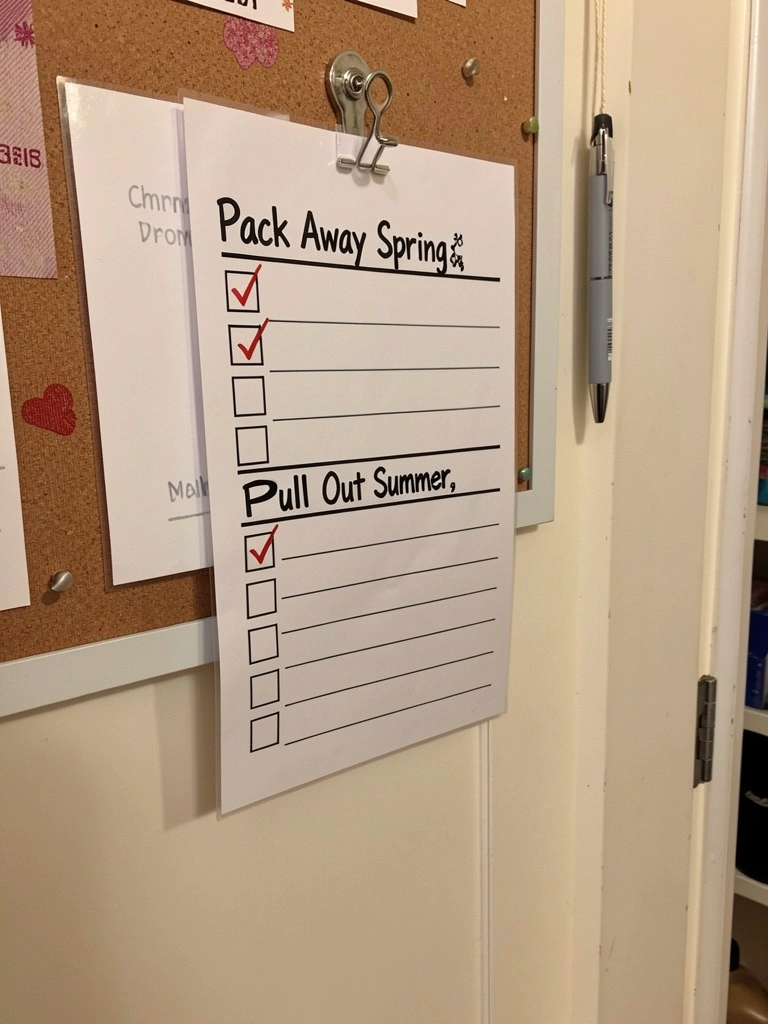
A simple seasonal rotation calendar is a low-cost organizational hack that prevents you from living out of season and keeps your closet focused on what’s current.
Create a one-page checklist (free template via Canva or printable PDFs online) that outlines what to pack away and what to pull out each season. Print and laminate it ($2–$5), or save it as a note on your phone. The checklist includes specific items (e.g., “Pack winter coats by May 1”) and dates to do it. Check off items as you complete them. This prevents summer dresses from lingering in fall when they take up space, and it forces you to revisit your wardrobe seasonally (which helps you discover forgotten favorites or items you’ve outgrown). A simple system saves mental energy and keeps your closet intentional year-round.
Set phone reminders for seasonal rotation dates so you don’t forget.
25. Install a Tie/Belt Rack for Small Accessories
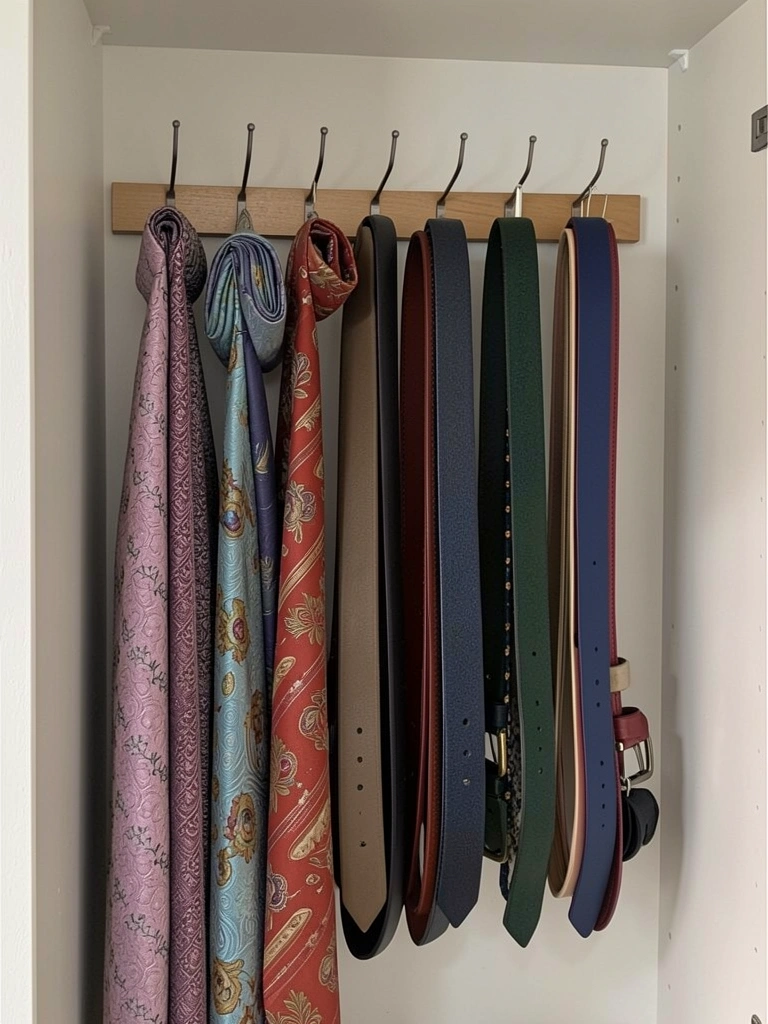
A dedicated tie and belt rack keeps these small accessories untangled, visible, and easy to grab without consuming shelf space or drawer depth.
A simple wooden or metal tie rack costs $10–$20 and installs in 15 minutes with two wall anchors. It typically holds 8–12 ties/belts/scarves. Mount it on a side wall at shoulder height where you can easily see and reach it. The alternative is drawer dividers with slots ($5–$10), which work if you prefer belts folded in a drawer. Rolled or coiled scarves also fit on a tie rack without wrinkling. This single rack prevents the “tangled belt nightmare” and ensures your accessories actually get worn instead of buried.
Renters: adhesive hooks ($2–$3 each) can create a DIY version with simple dowel rods (free or $2–$5 from Home Depot).
26. Use Slim Wooden Hangers to Create a Cohesive Look
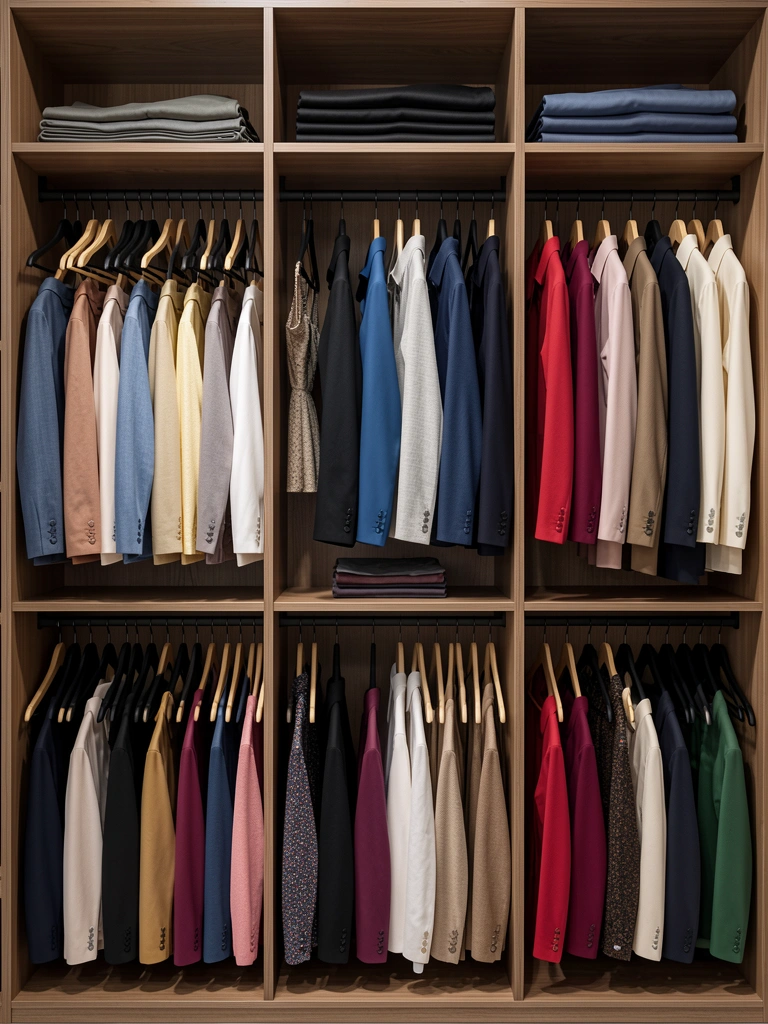
Swapping all your hangers to matching slim wooden or sleek plastic ones is a simple, inexpensive upgrade that immediately makes your closet feel cohesive and intentional. Mismatched wire, plastic, and wooden hangers read as chaotic; unified hangers feel curated.
A set of 30–50 matching slim hangers costs $25–$50. Donate or recycle your old hangers; the upgrade takes 45 minutes. Choose natural wood (warm, timeless), matte black (sleek, modern), or natural wood with black accents. The investment is minimal, but the psychological shift is huge—your closet instantly feels like a high-end boutique instead of a storage room. This is one of the easiest ways to elevate your space without any structural changes or DIY skills. Combined with color coordination, the effect is dramatic.
Wooden hangers also protect delicate fabrics better than wire hangers and last for years.
Save this post and try just one idea this weekend. Whether you start with the hanger swap, the lighting, or one simple shelf hack, small changes compound fast. Your morning routine will feel calmer, you’ll actually wear more of what you own, and your small closet will function like it’s twice the size.
Leave a Reply