Category: Bedroom Decor

  • 27 Y2K Room Ideas That Bring Back Vintage Pop Aesthetic

    27 Y2K Room Ideas That Bring Back Vintage Pop Aesthetic

    Remember when Y2K aesthetic ruled? Low-rise jeans, baby tees, butterfly clips—it was the vibe. Here’s the good news: that playful, maximalist energy is making a comeback in bedroom design, and it’s way more sophisticated than you’d think. If you’re craving color, personality, and that unapologetic fun feeling in your sleep space, these 26 Y2K-inspired ideas will get you there. We’re talking vintage posters, bold pastels, curved furniture, and nostalgic touches that feel fresh and intentional—not like a time capsule. Whether you’re a full Y2K devotee or just want to sprinkle in some playful nostalgia, you’ll find budget-friendly hacks and investment pieces that work for renters and homeowners alike. Let’s bring back the best decade of pop culture, bedroom style.

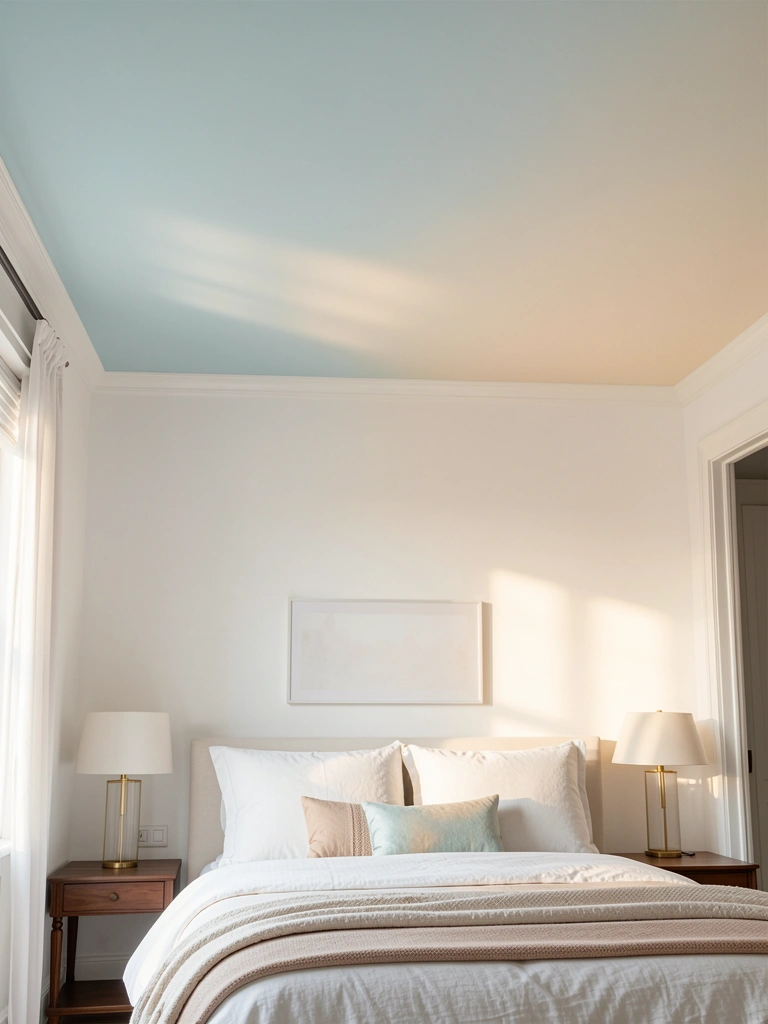
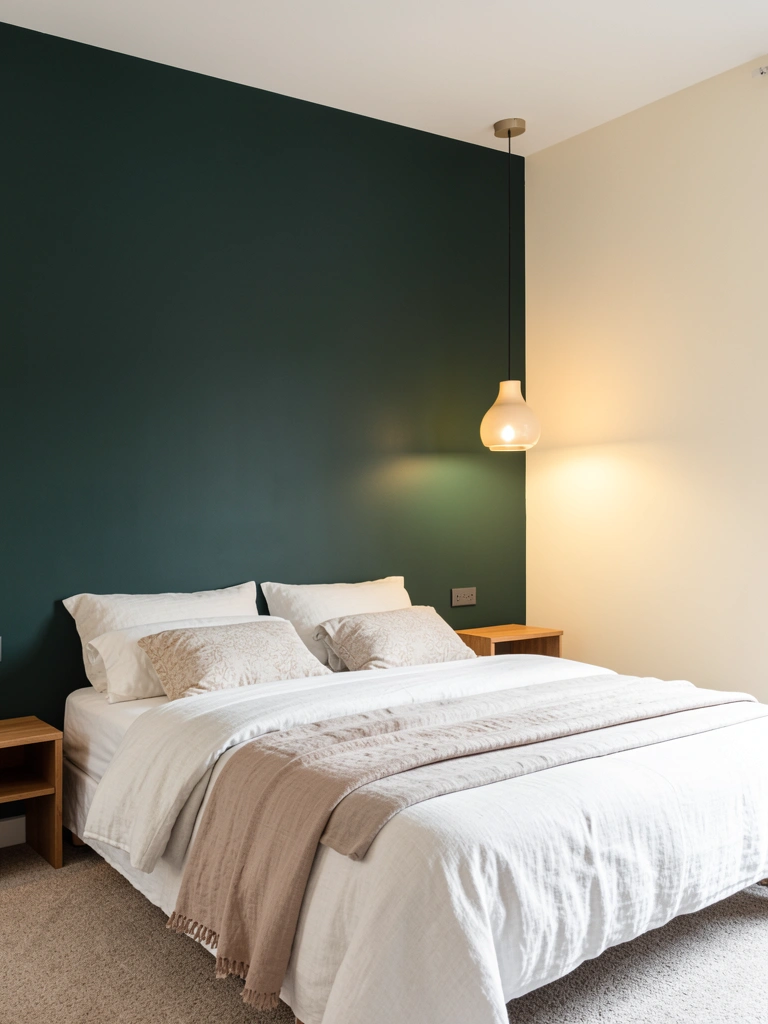
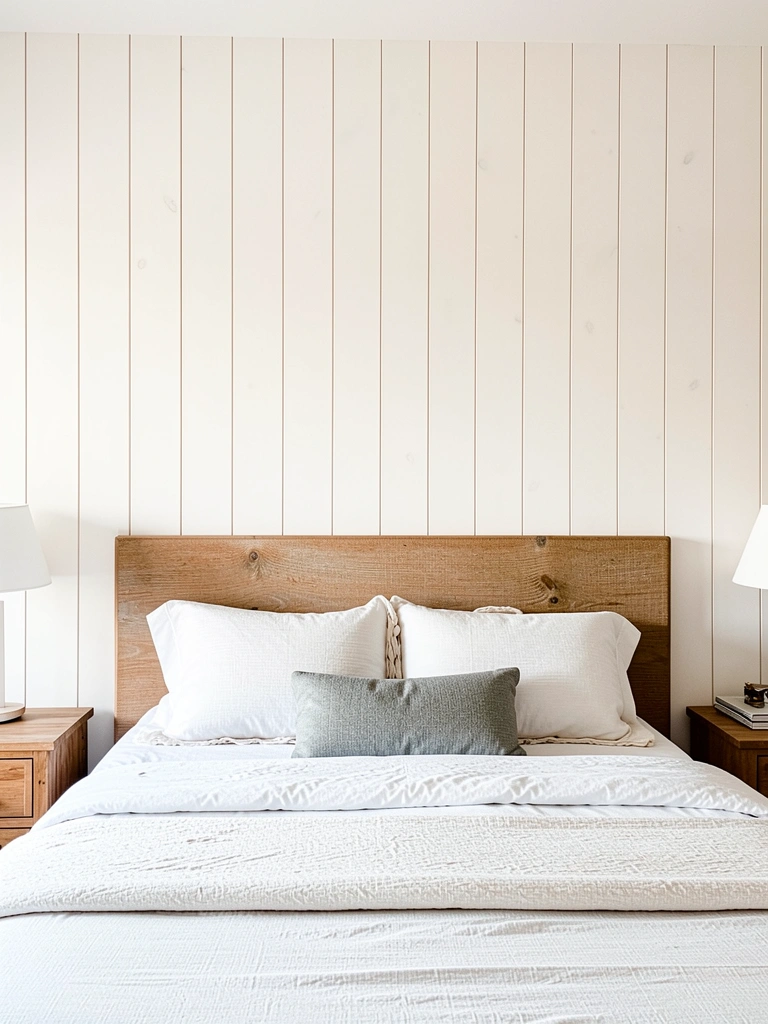
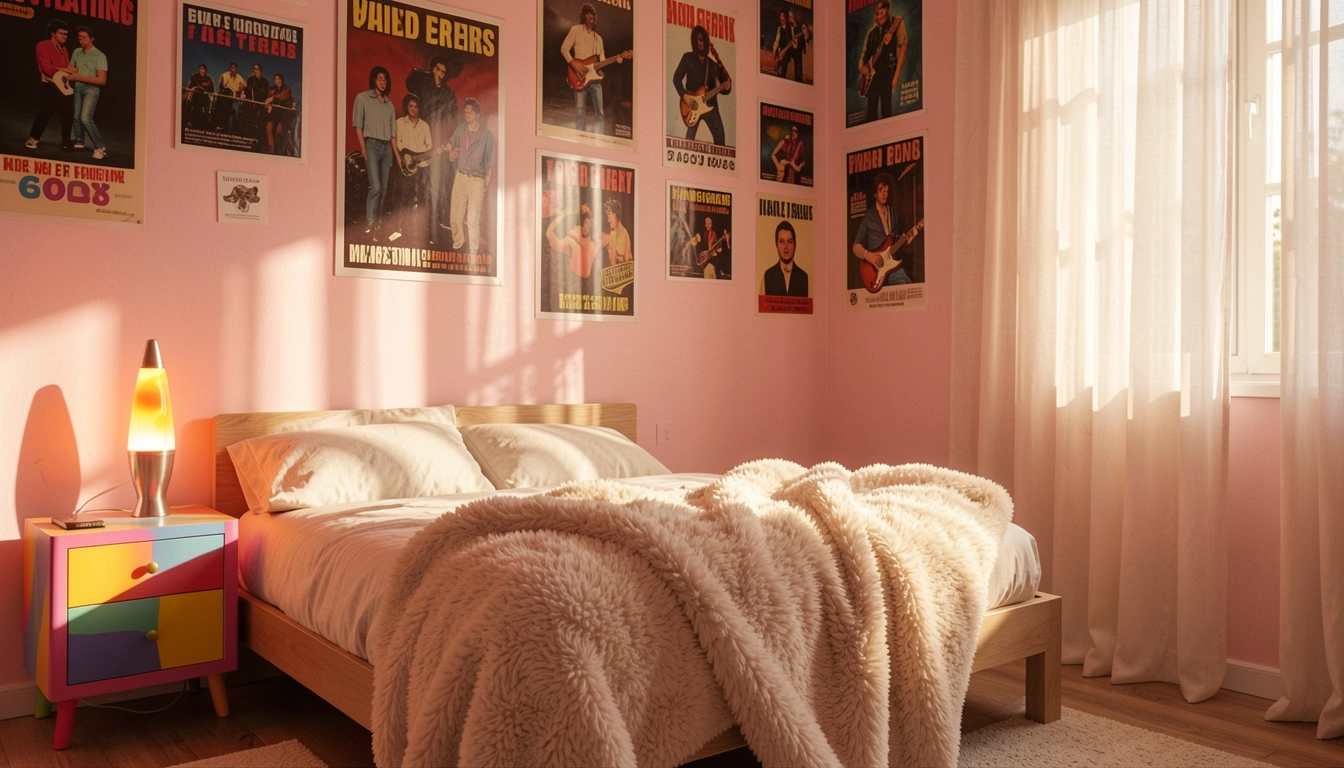
    1. Paint an Accent Wall in Hot Pink or Baby Blue

    An accent wall in Y2K pastels instantly grounds the entire room’s energy. Hot pink, baby blue, or even peachy coral work best—they’re bold enough to make a statement but not so intense they feel claustrophobic.

    Use Benjamin Moore’s “Ballet Pink” or Sherwin-Williams “Bashful Pink” for a true Y2K vibe ($30-$40 per gallon). A single wall takes 3-4 hours for beginners with two coats. Pair it with neutral furniture so the wall becomes the star. If you’re renting, peel-and-stick wallpaper in similar colors runs $25-$60 and removes cleanly when you move. Apply it to one wall or even just behind your bed as a headboard backdrop.

    The moment you finish, your entire room clicks into place. That one pop of color makes everything else feel intentional and cohesive.

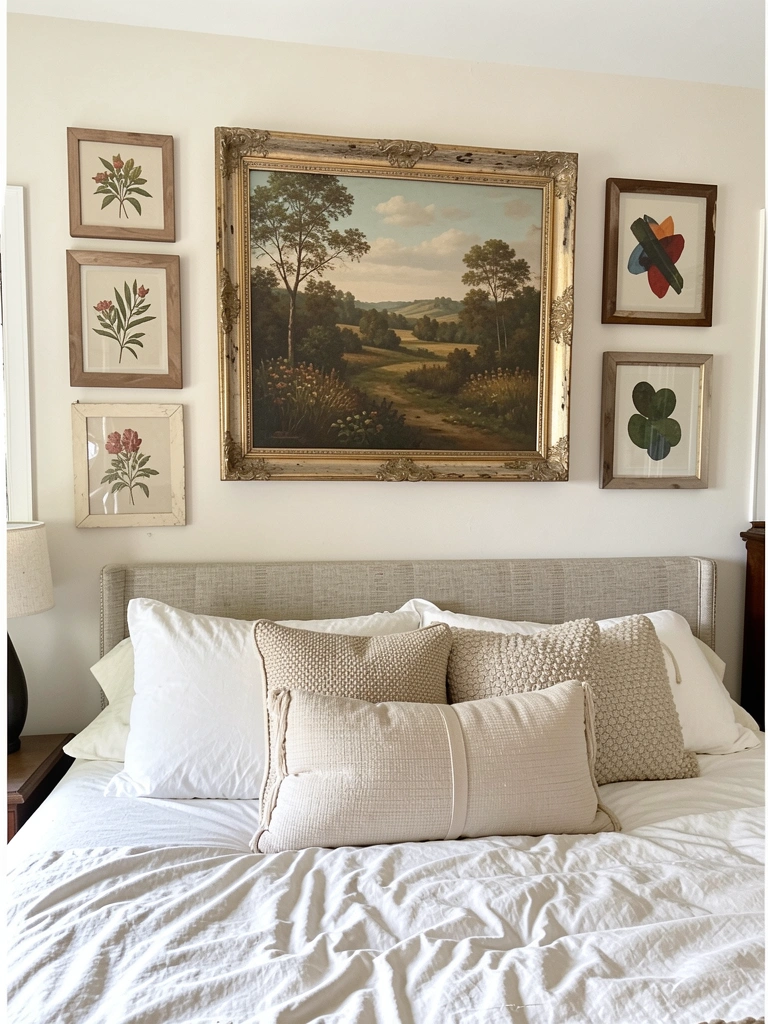
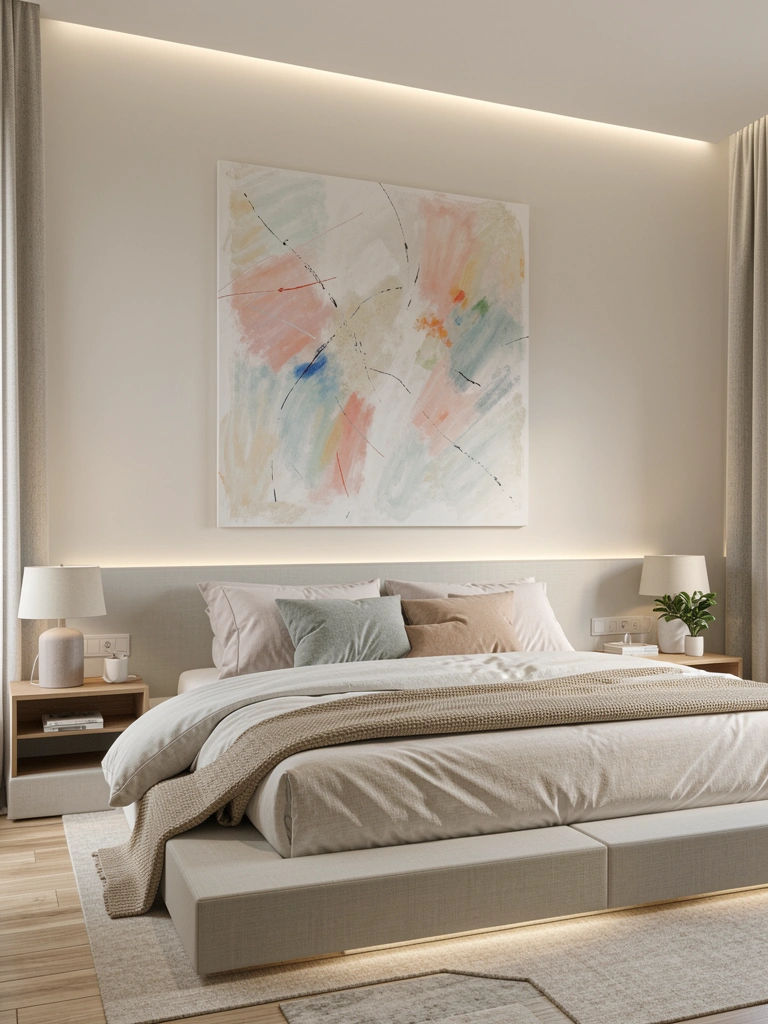
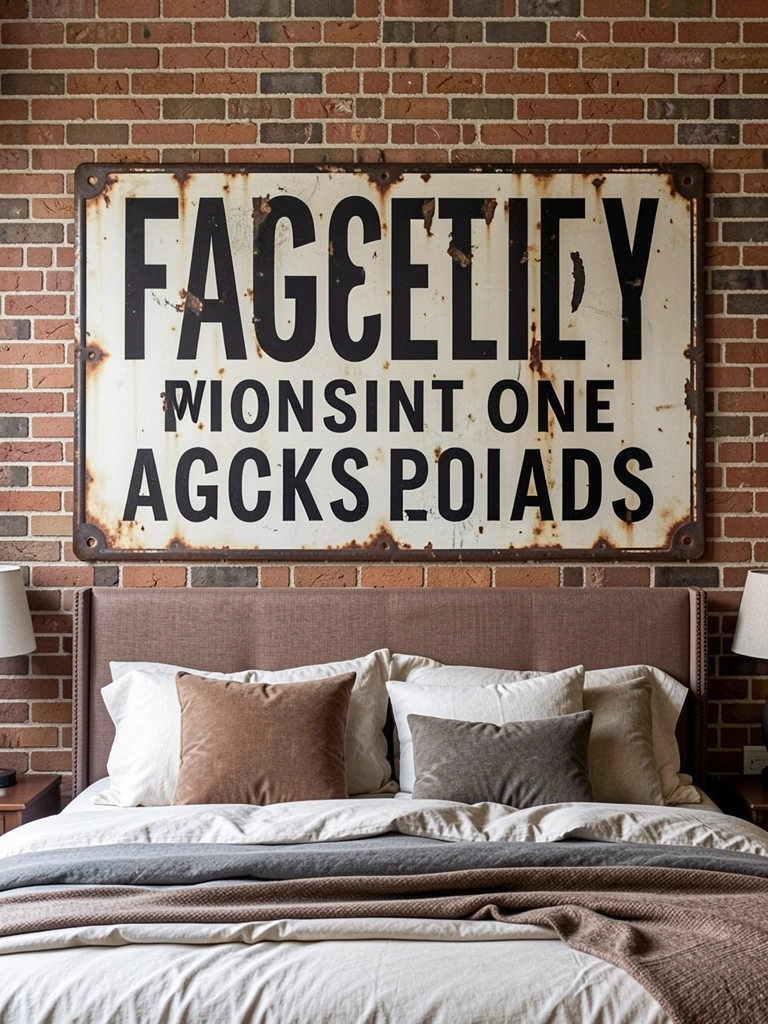
    2. Add Oversized Vintage Band and Movie Posters

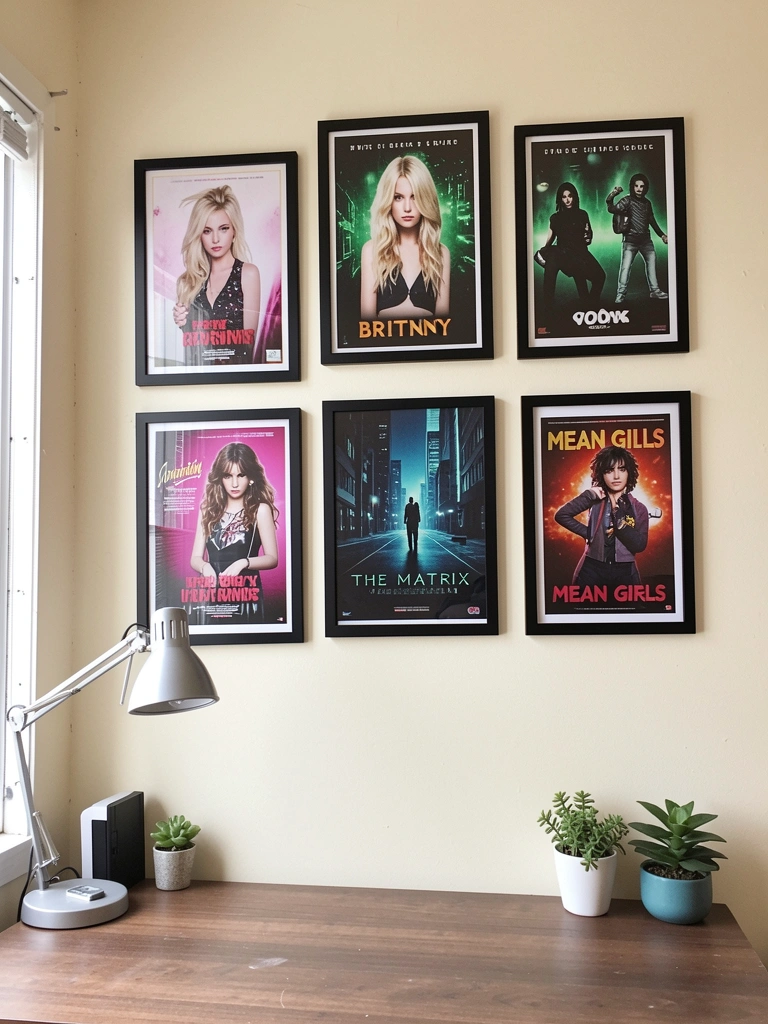
    Nothing screams Y2K like iconic concert and movie posters from the 2000s. These become instant wall art and set the room’s personality without needing expensive original artwork.

    Hunt for originals or high-quality reprints on Etsy ($10-$30 each), eBay, or Depop. Frame them in cheap black or white frames from IKEA ($8-$15 per frame) or leave them unframed with washi tape for that dorm-room authenticity. Mix sizes and create a salon-style wall layout—asymmetrical feels more intentional than rows. Budget $80-$150 total for 8-10 framed posters.

    Once they’re up, your room tells a story about you—your favorite movies, bands, and moments. It’s way more personal than generic art.

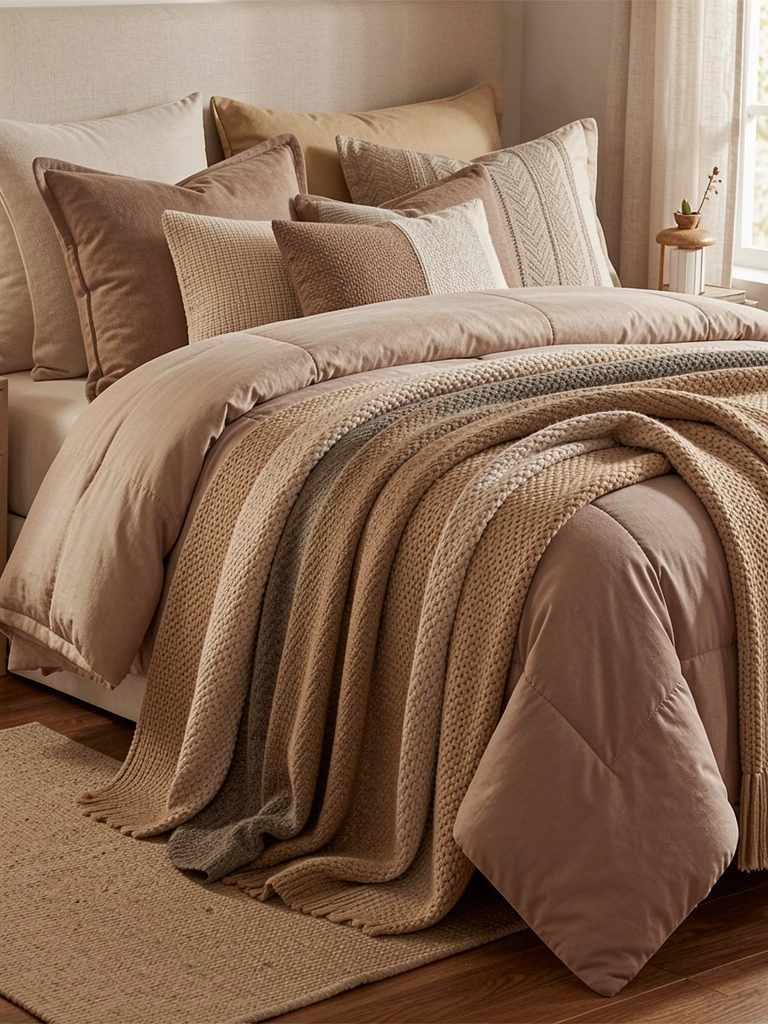
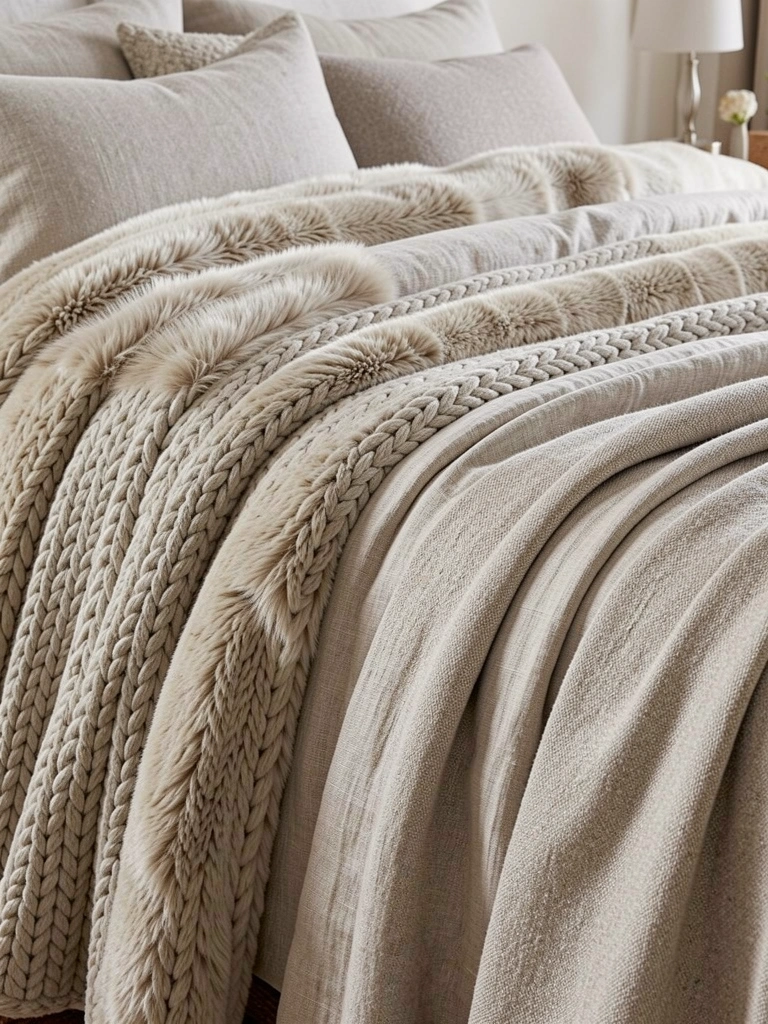
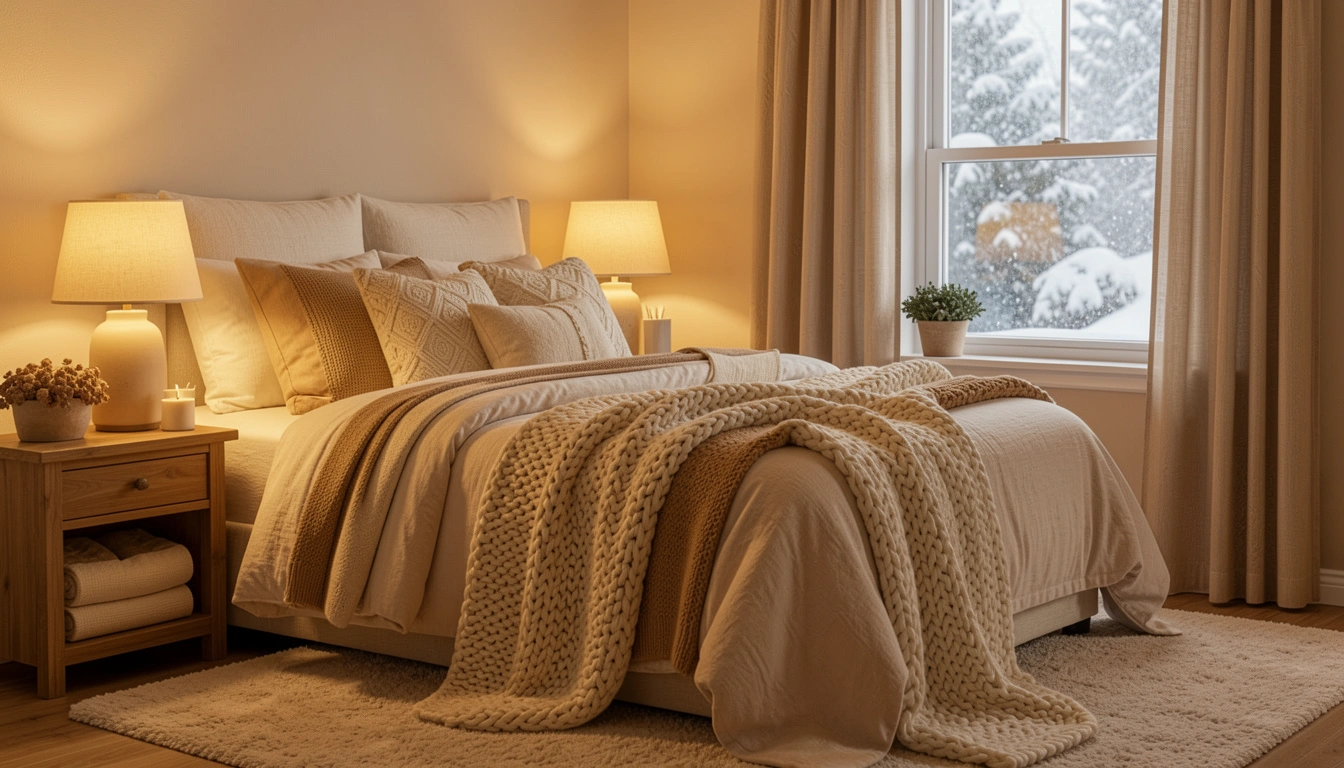
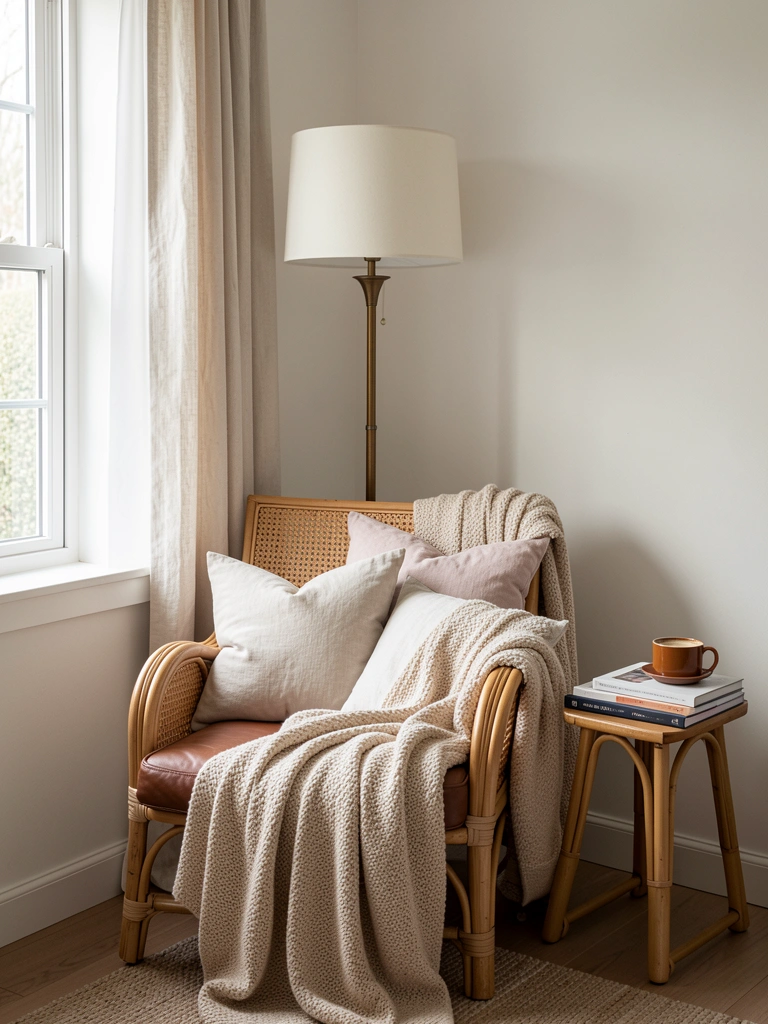
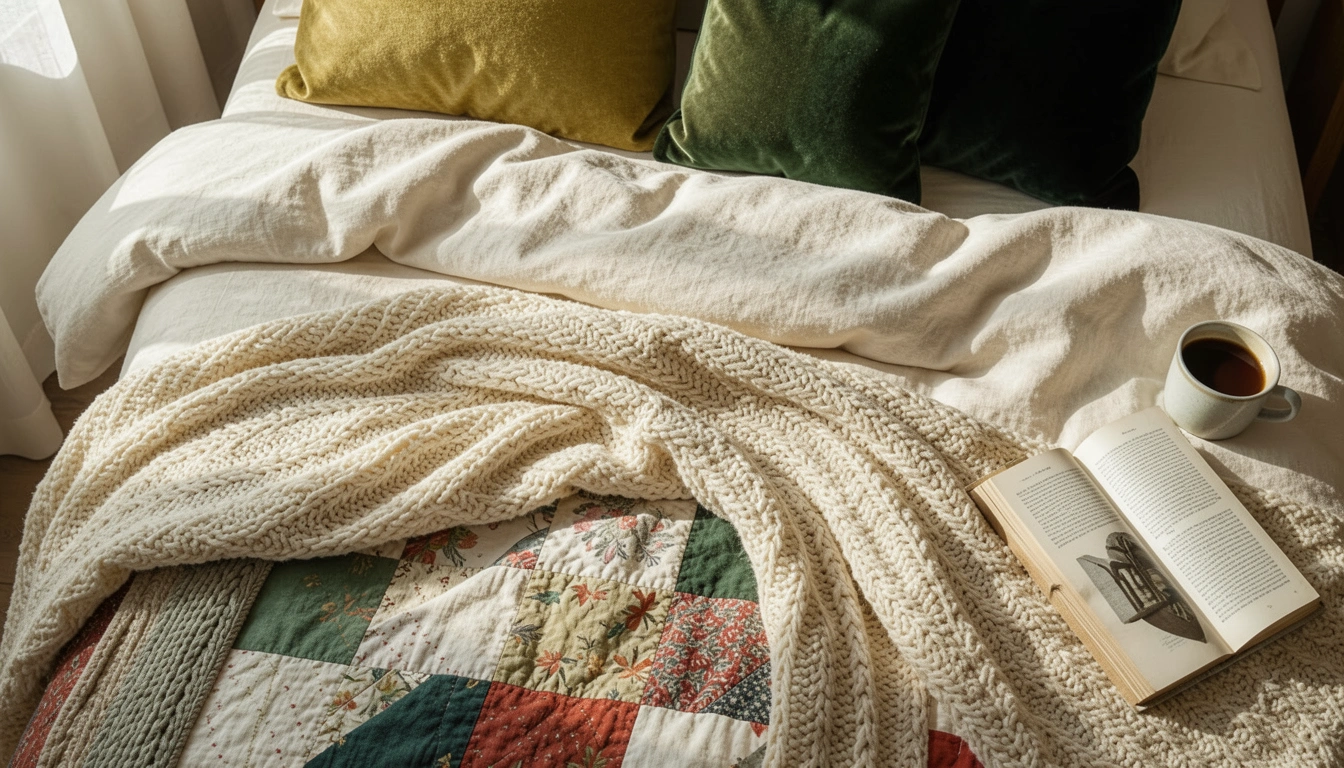
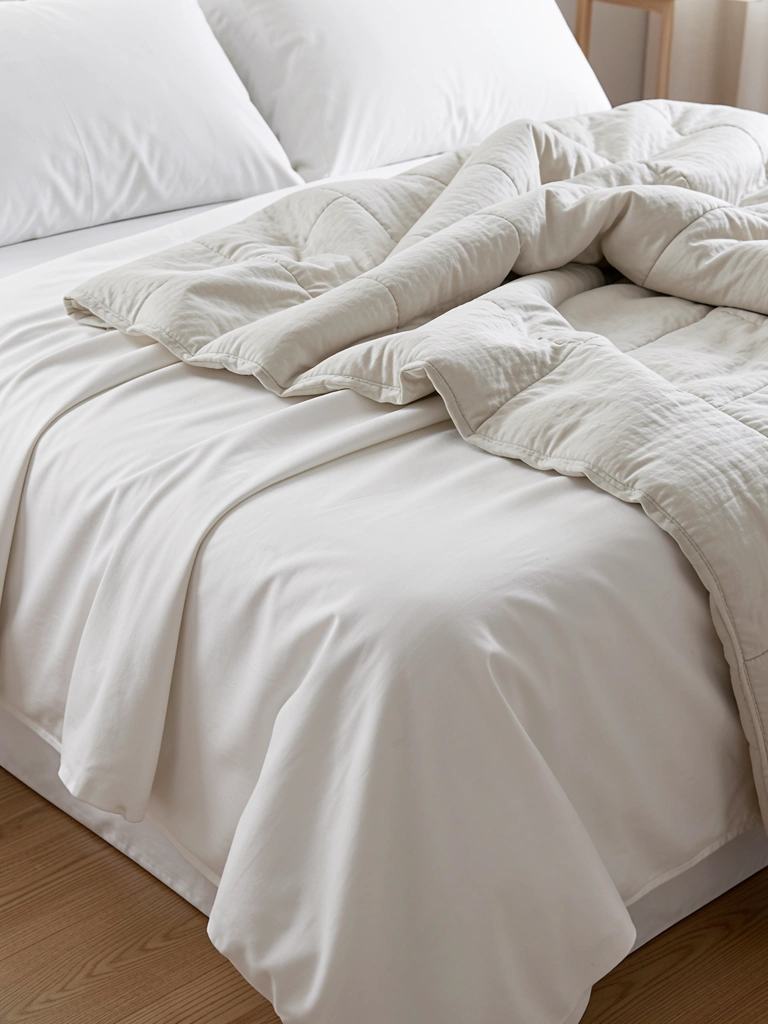
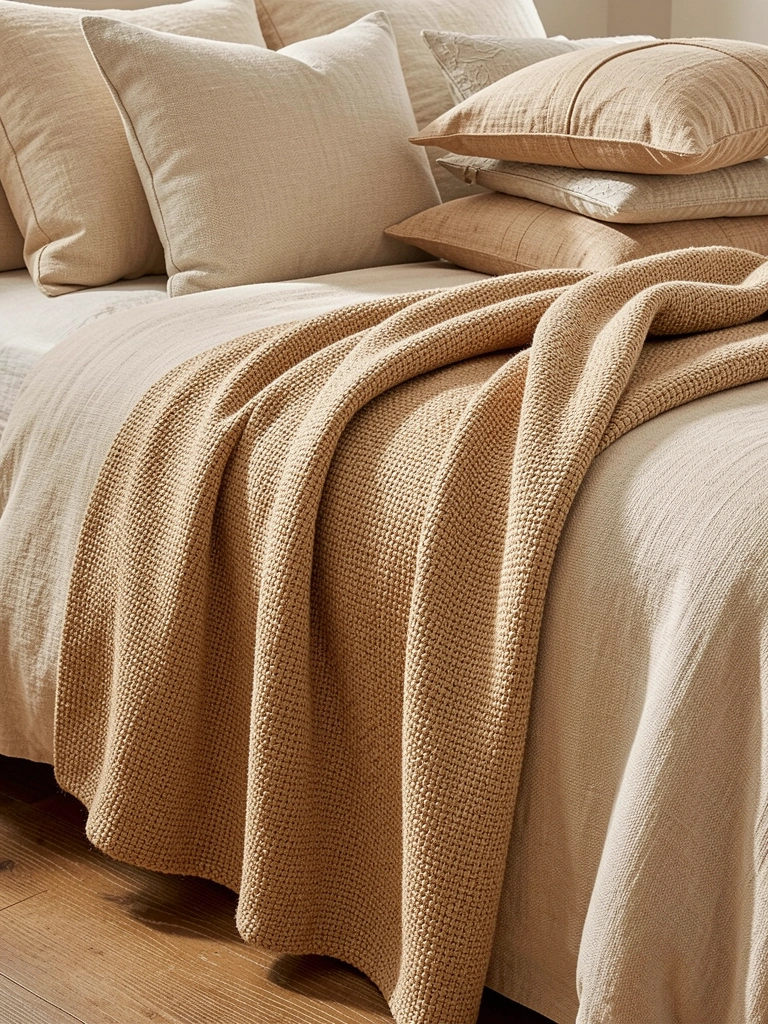
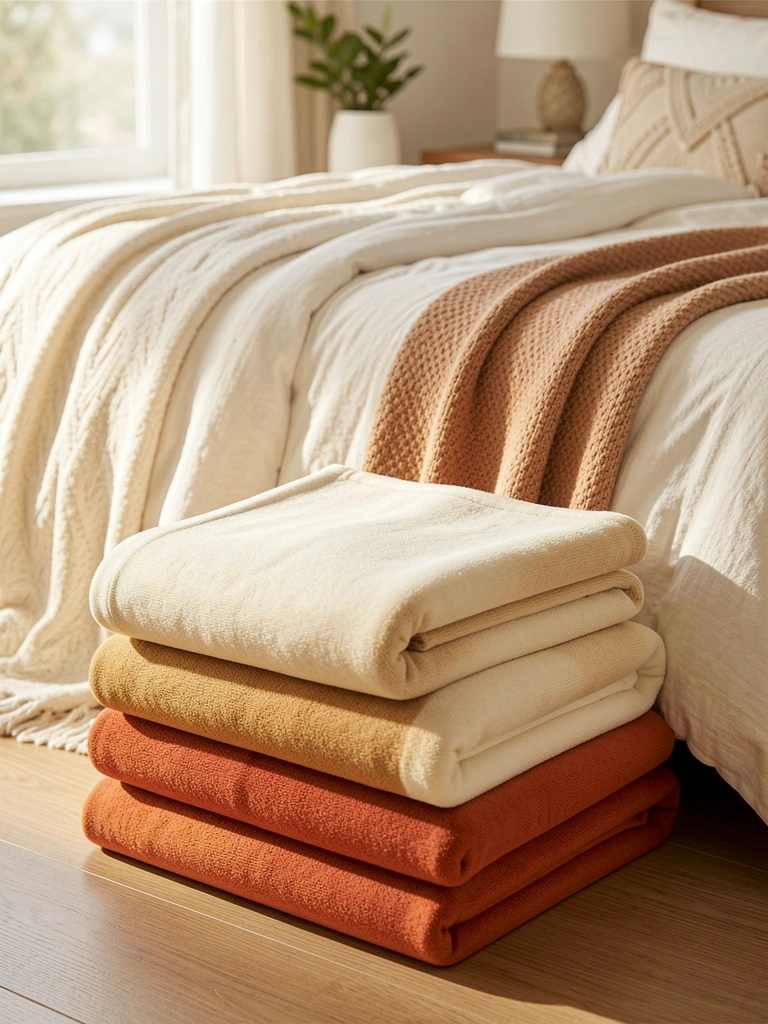
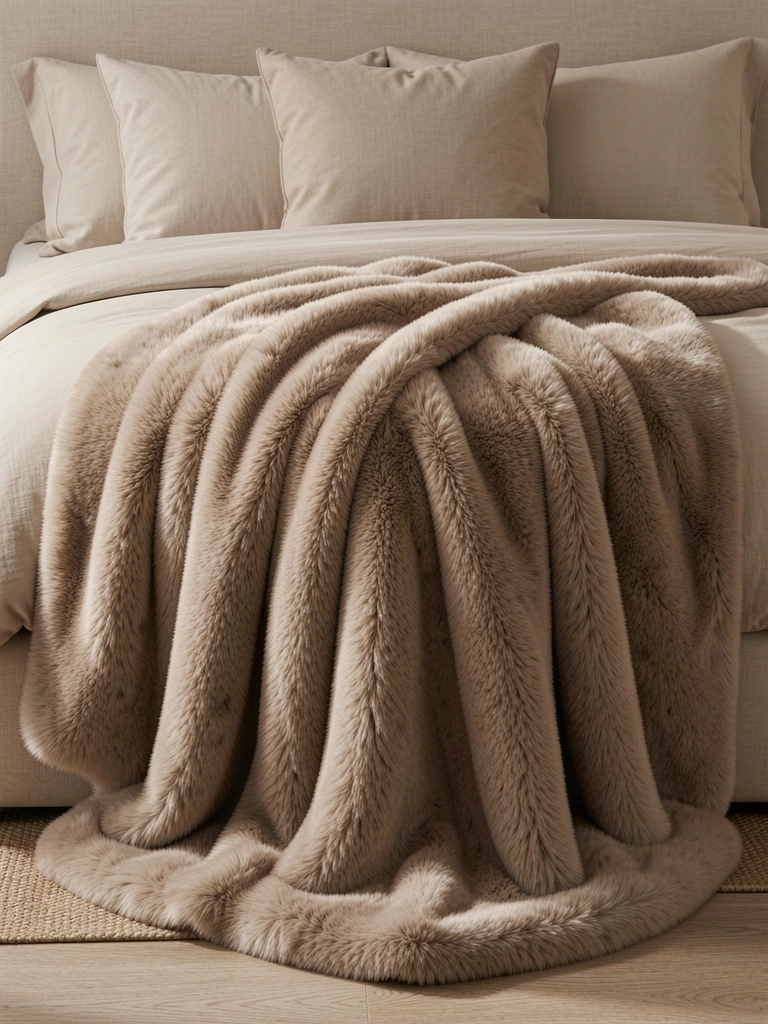
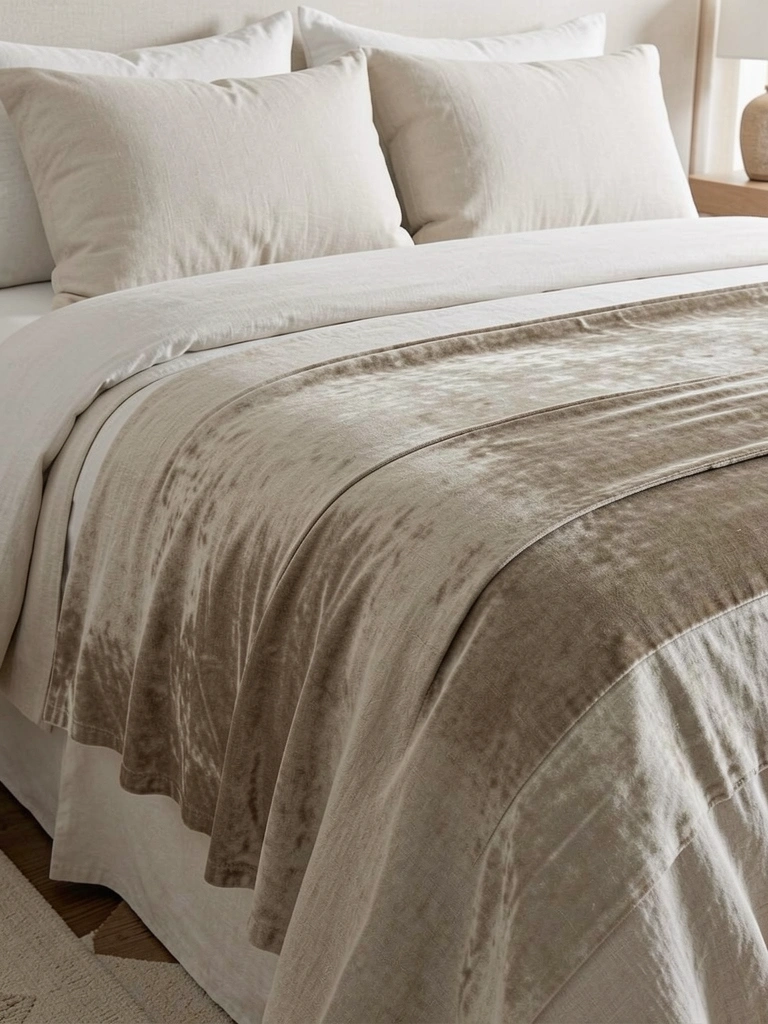
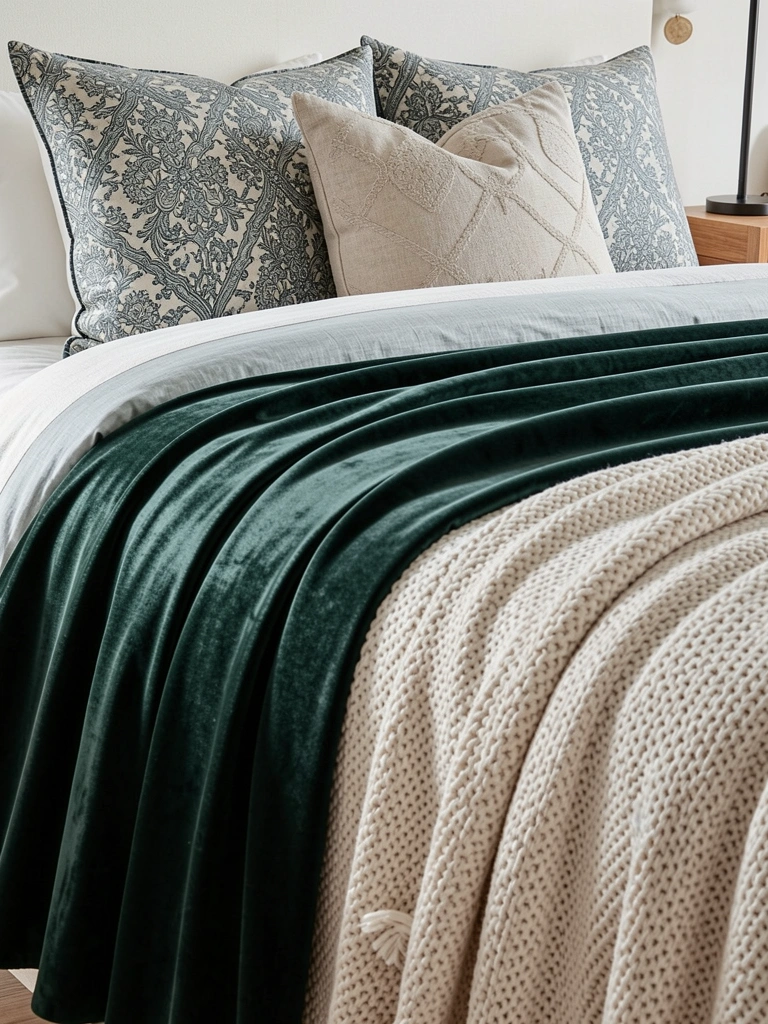
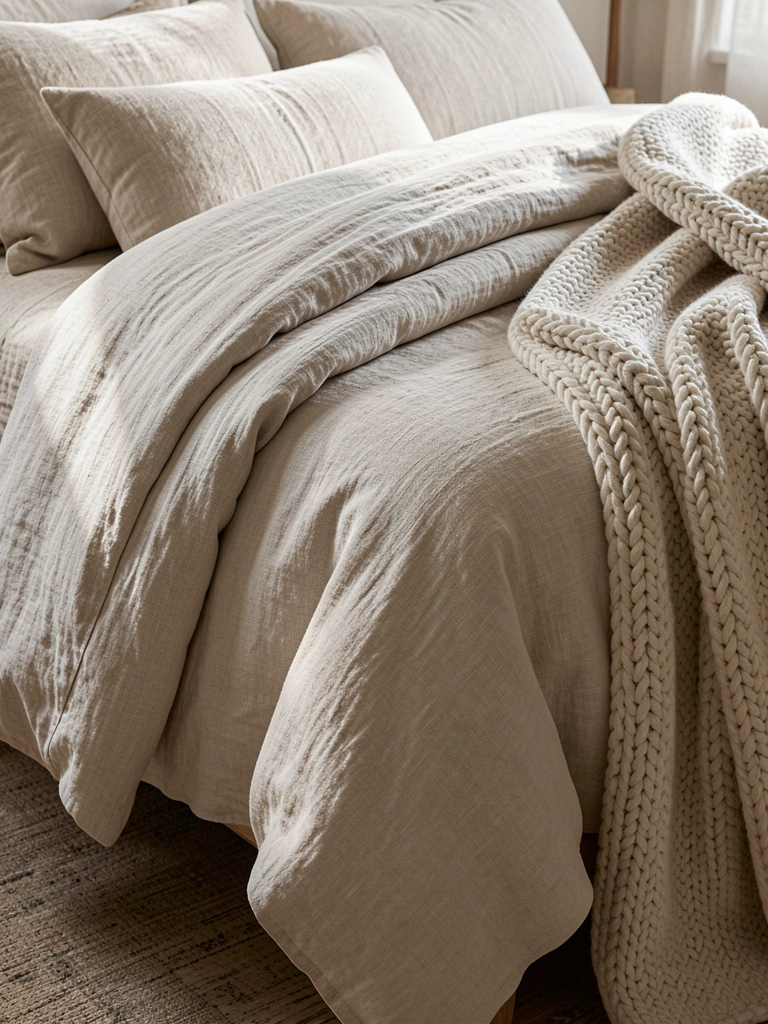
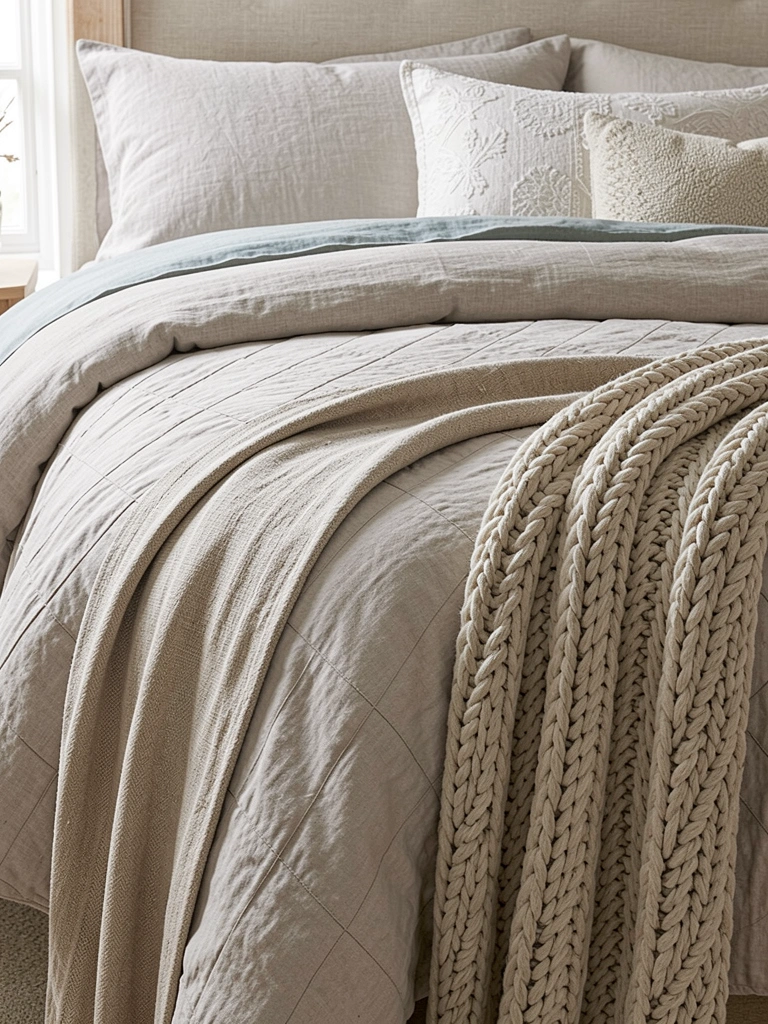
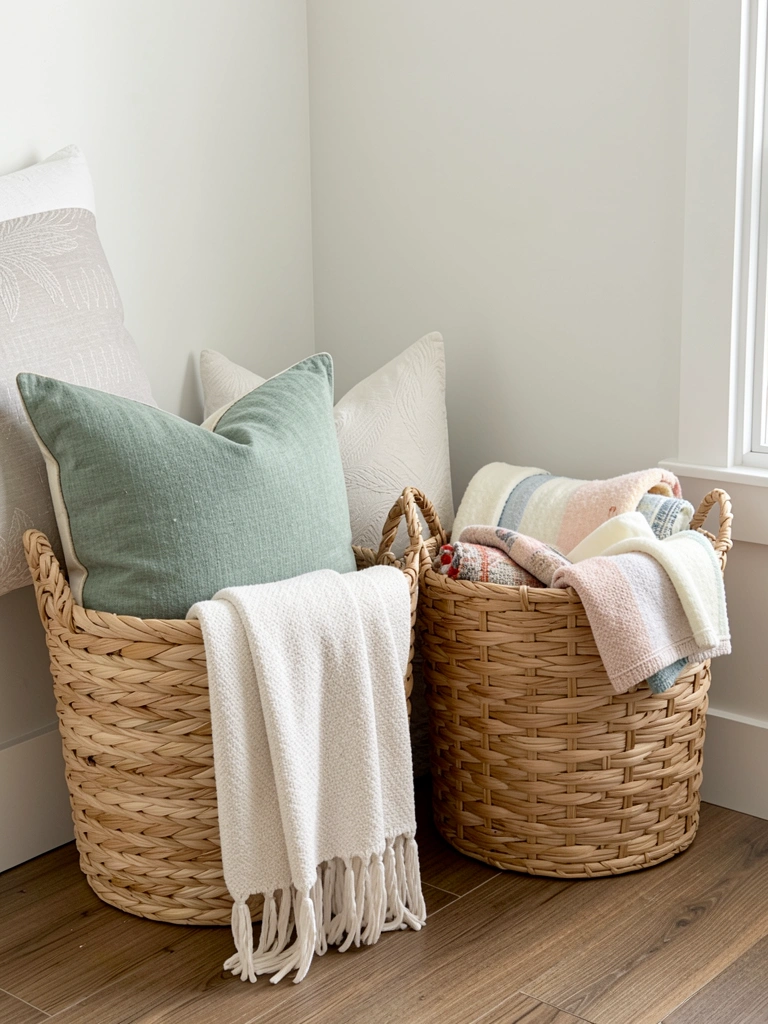
    3. Layer a Fuzzy Throw Blanket in a Bold Hue

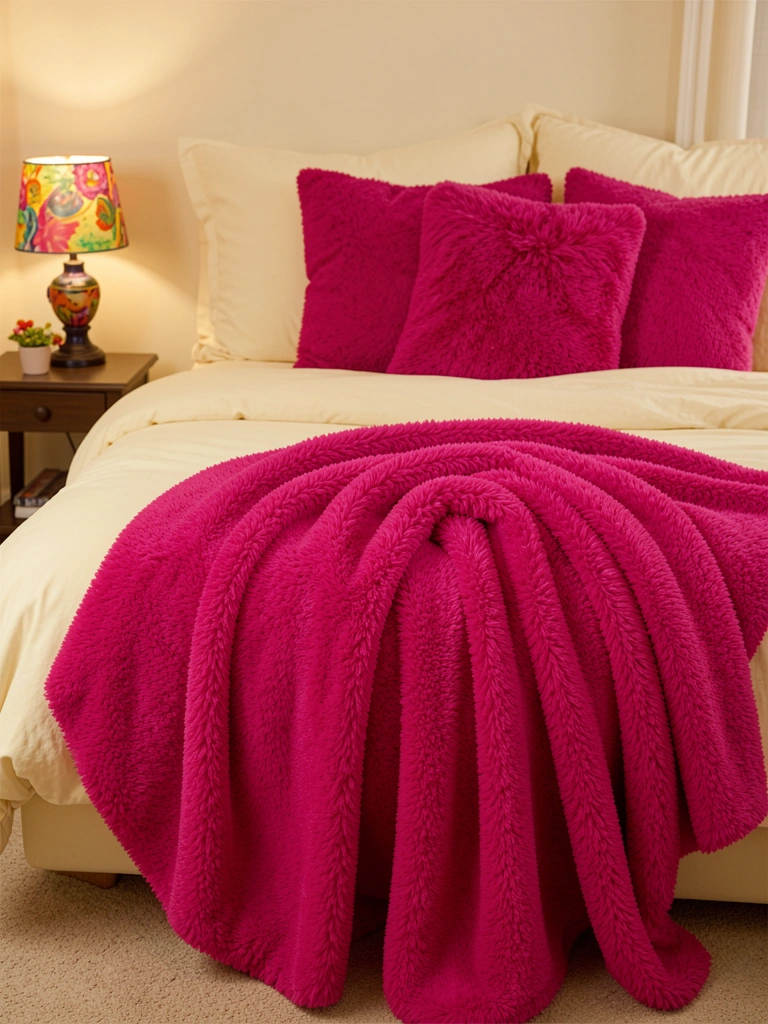
    Fuzzy blankets are quintessentially Y2K—think Paris Hilton’s Beverly Hills bedroom. A bold-colored throw ($30-$80 from Urban Outfitters, Amazon, or Target) adds texture and that signature playful warmth without requiring a full redesign.

    Layer it over a neutral duvet or leave it draped over a chair. Choose jewel tones like magenta, baby blue, or even lime green. Budget around $50 for a quality fuzzy throw that won’t pill after one wash. Wash in cold water and lay flat to dry to keep it plush. Pro tip: Thrifted vintage faux-fur throws often have the most authentic Y2K feel ($10-$25 at Goodwill or Depop).

    The texture alone makes your bed look styled and magazine-worthy. Plus, it’s genuinely cozy on chilly nights.

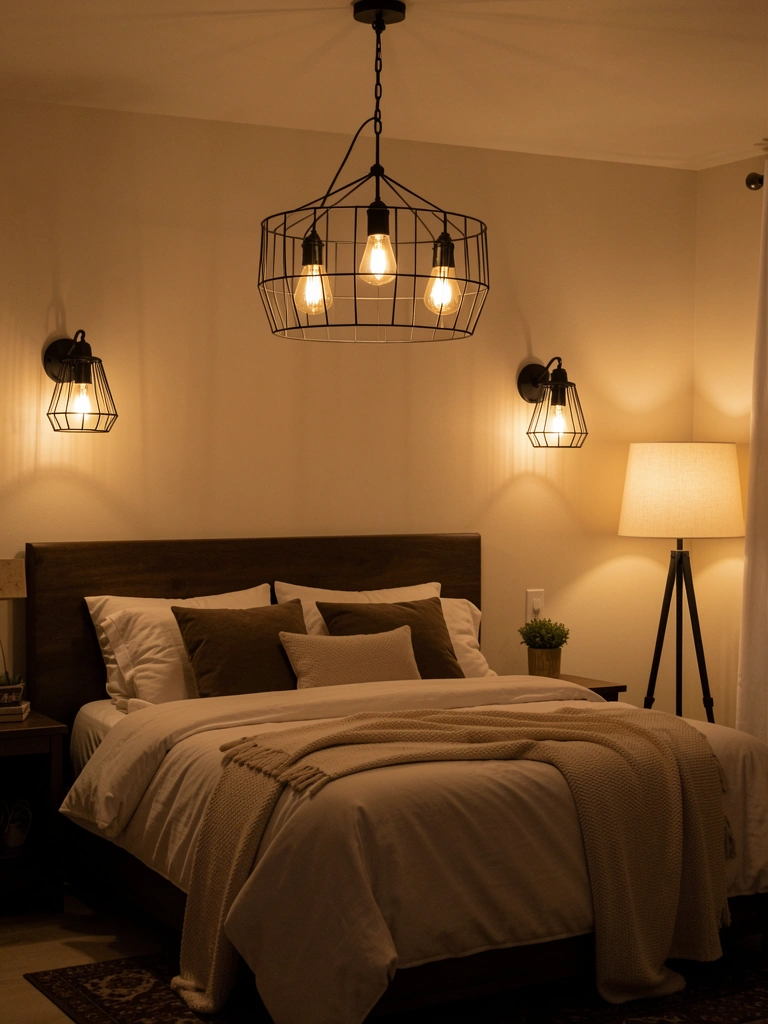
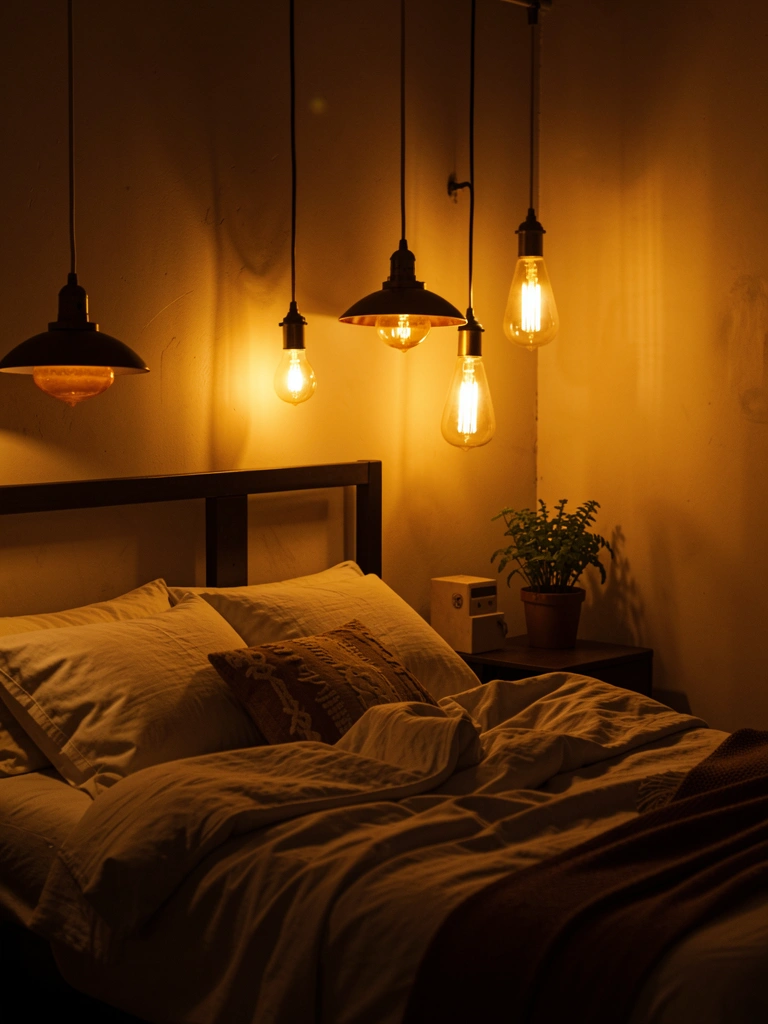
    4. Install a Disco Ball or Glitter Light Fixture

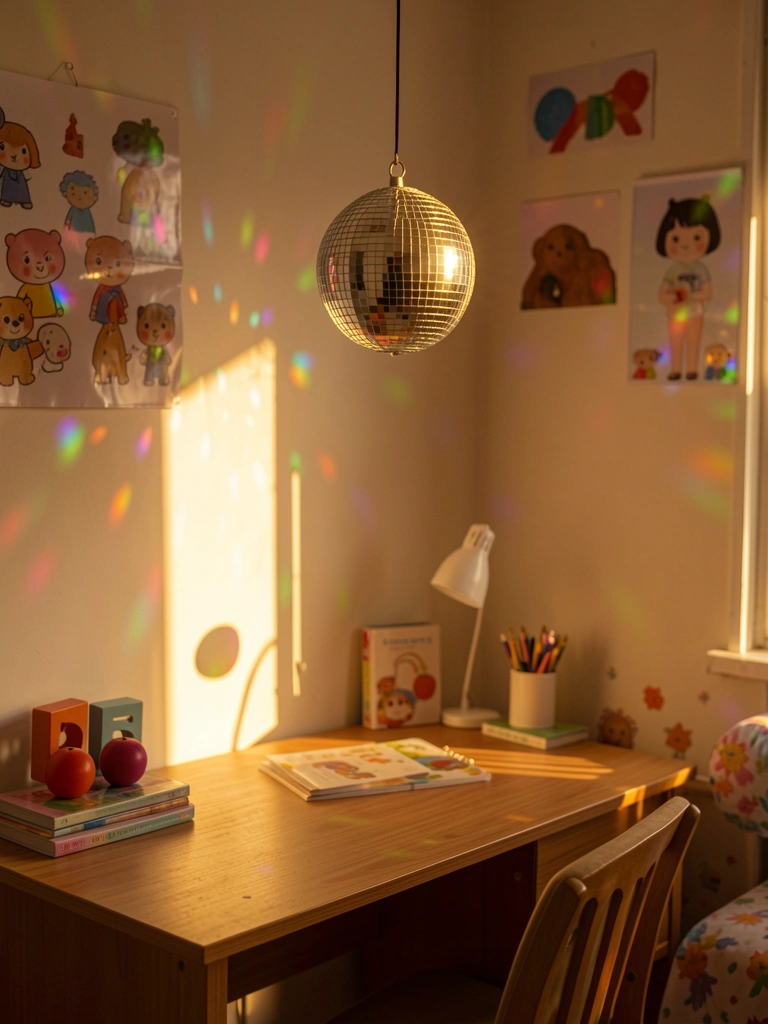
    A disco ball ($15-$40 from Amazon or Urban Outfitters) sounds extra, but it’s actually the ultimate Y2K accessory. Hang it from your ceiling fan, over your bed, or above a desk using a simple hook and fishing line.

    When natural light hits it, the room sparkles without any effort. If you want electricity, LED disco ball lights ($25-$60) project colorful patterns and work as mood lighting. Installation takes 10 minutes max, and renters can use adhesive hooks (removable). Pair it with fairy lights or a lava lamp for maximum Y2K energy.

    Your bedroom becomes a subtle party space—fun enough for hangouts, but still calm when you need to wind down.

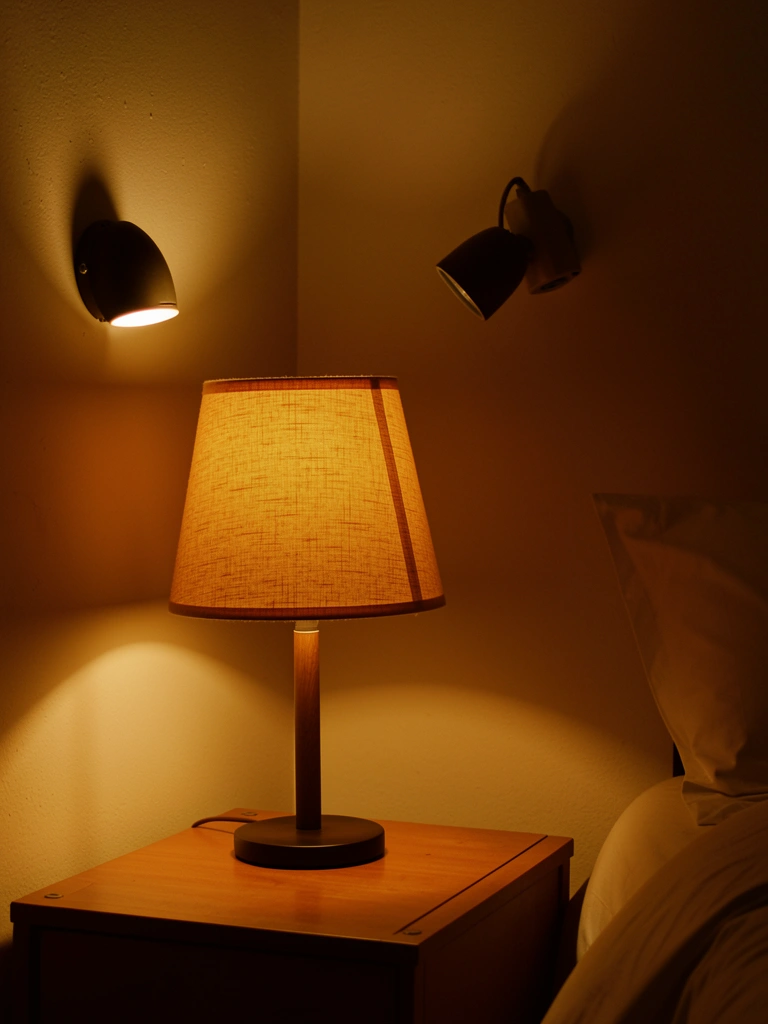
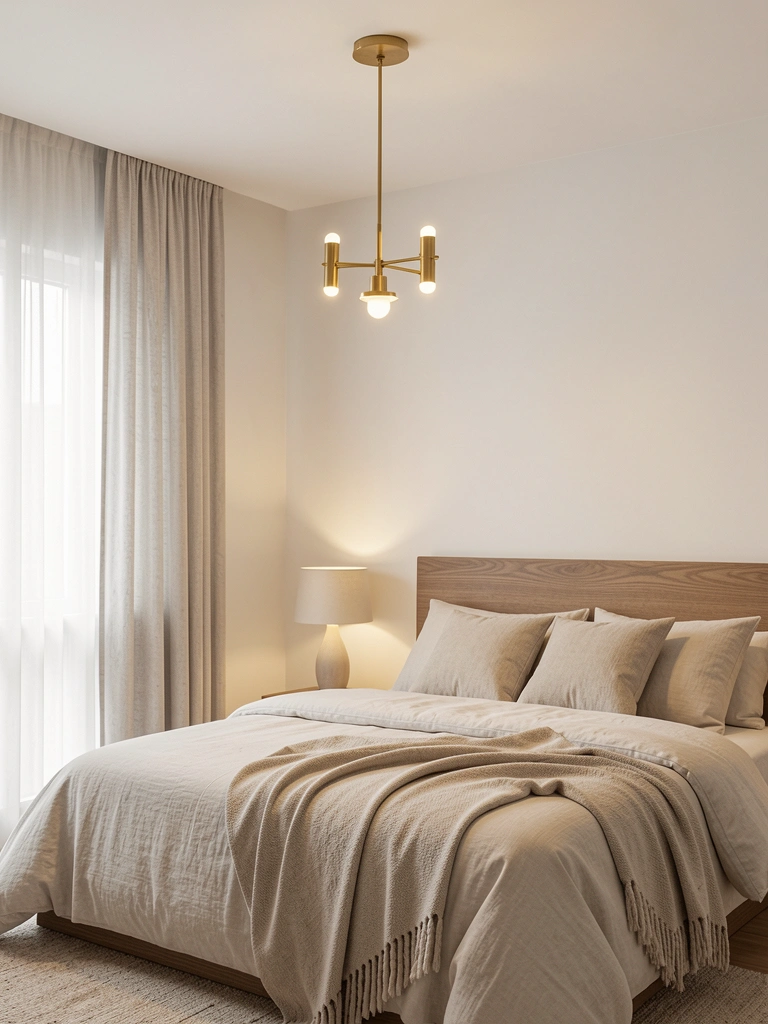
    5. Use a Lava Lamp as Your Nightstand Light

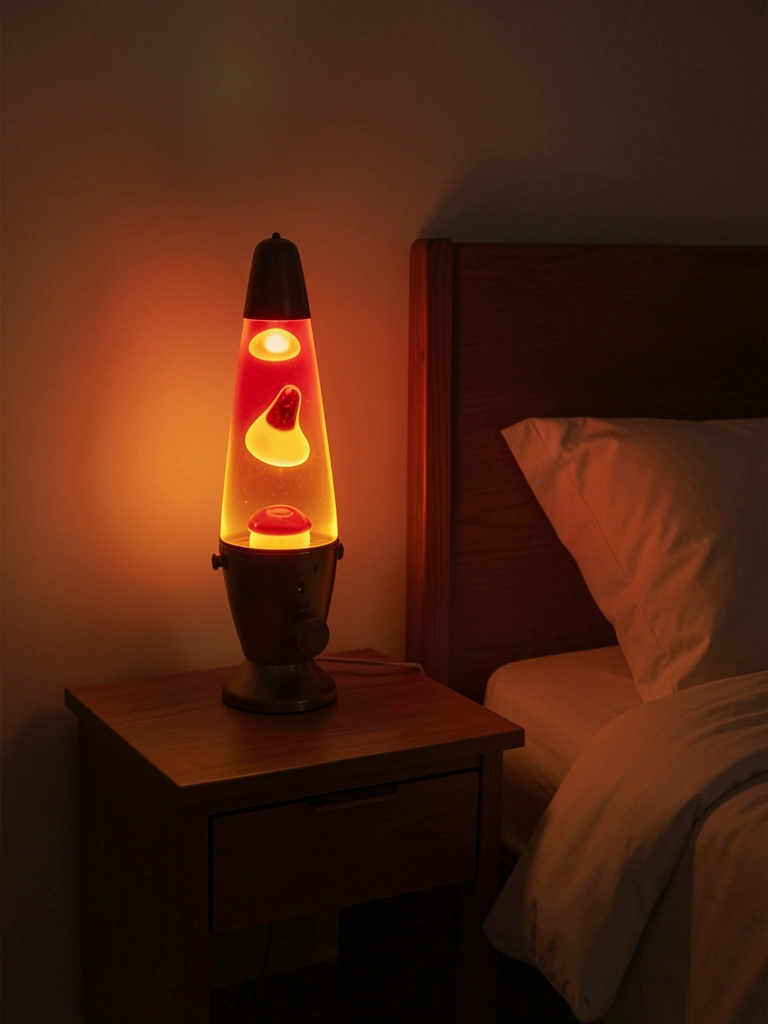
    A lava lamp ($20-$60 depending on size) is peak Y2K nostalgia and actually works as functional mood lighting. Place it on your nightstand to replace a harsh lamp, or use it as ambient lighting when you need to unwind.

    Brands like Mathmos (pricier, $50-$90) make quality versions that last decades, while Amazon basics options run $20-$35 and work just fine. Let it warm up for 5 minutes before fully enjoying the effect. The soft, flowing glow is naturally calming and makes reading before bed feel intentional and special.

    Instead of scrolling on your phone before sleep, the lava lamp becomes your wind-down ritual. It’s cozy, nostalgic, and genuinely helps you disconnect.

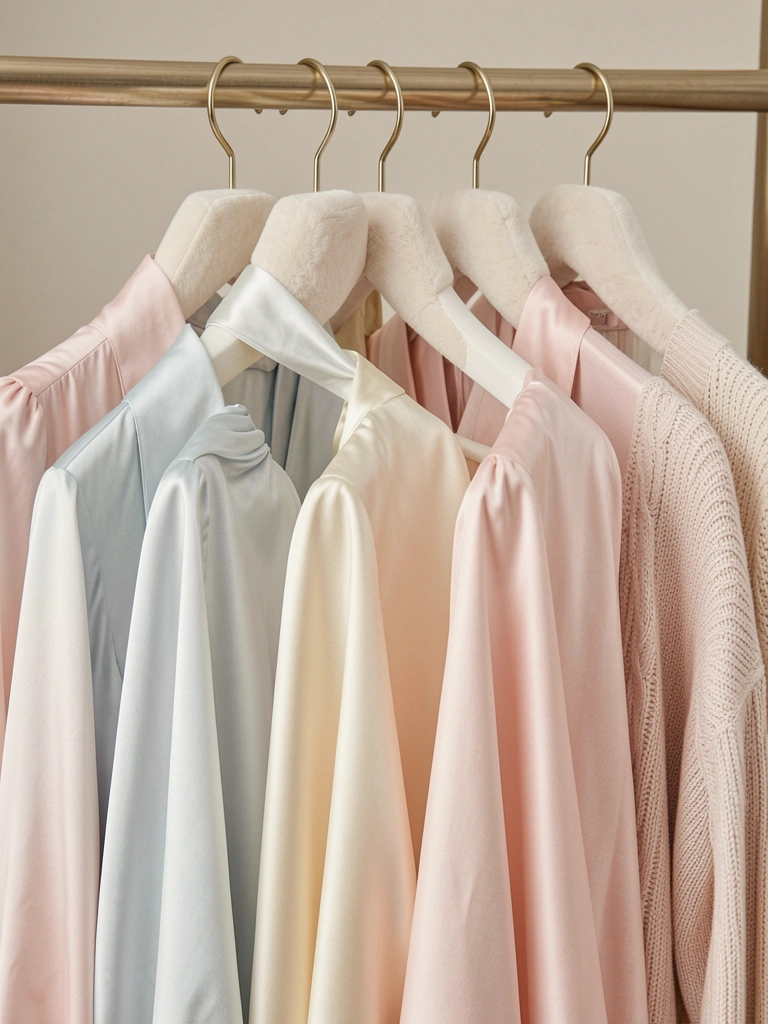
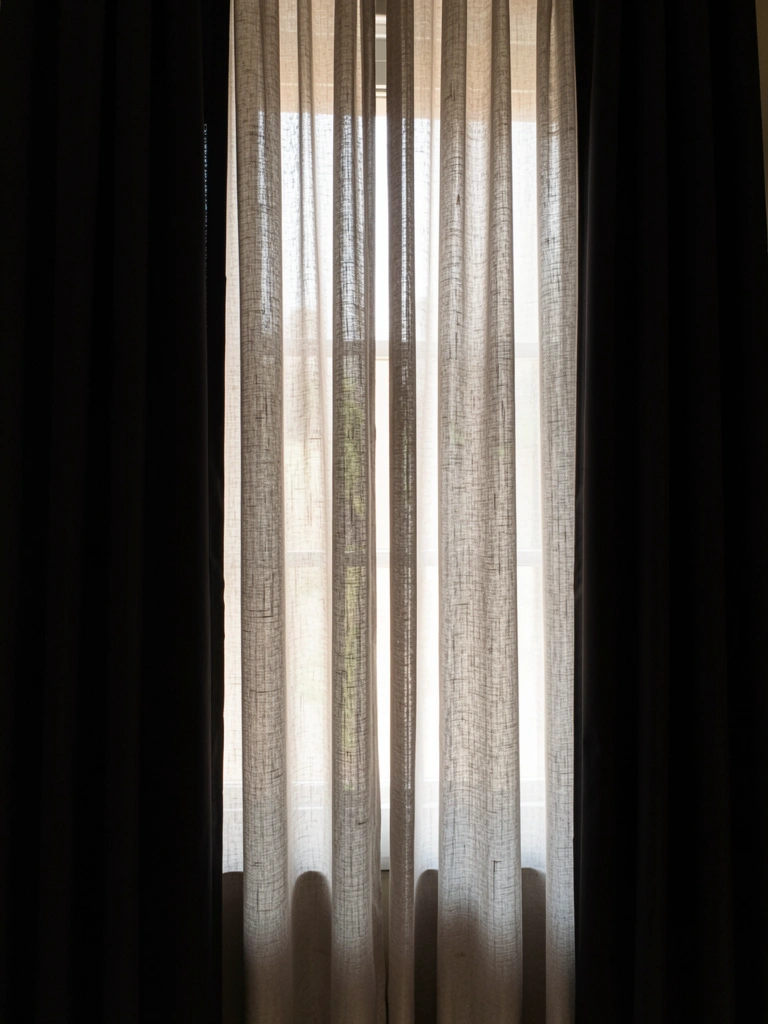
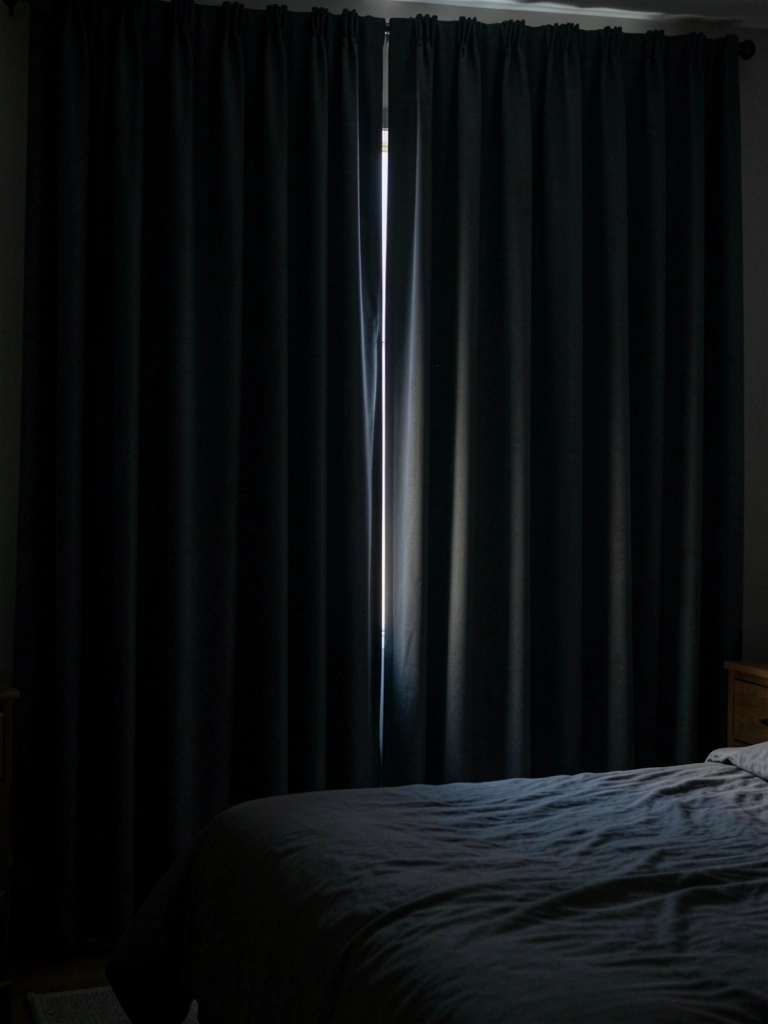
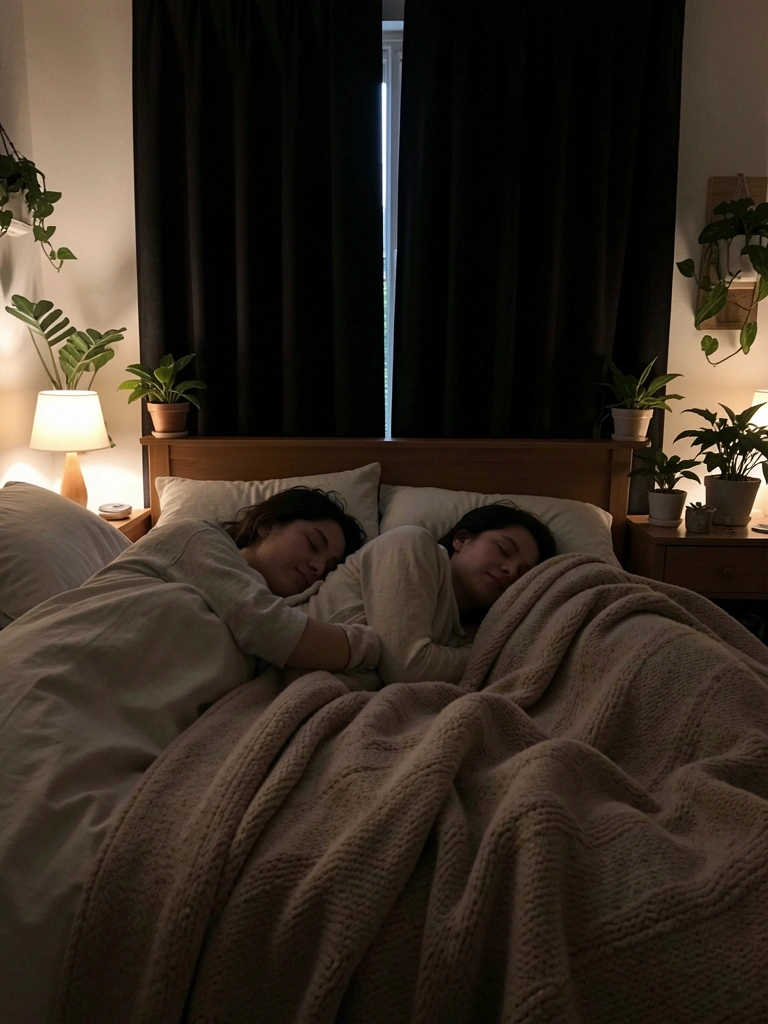
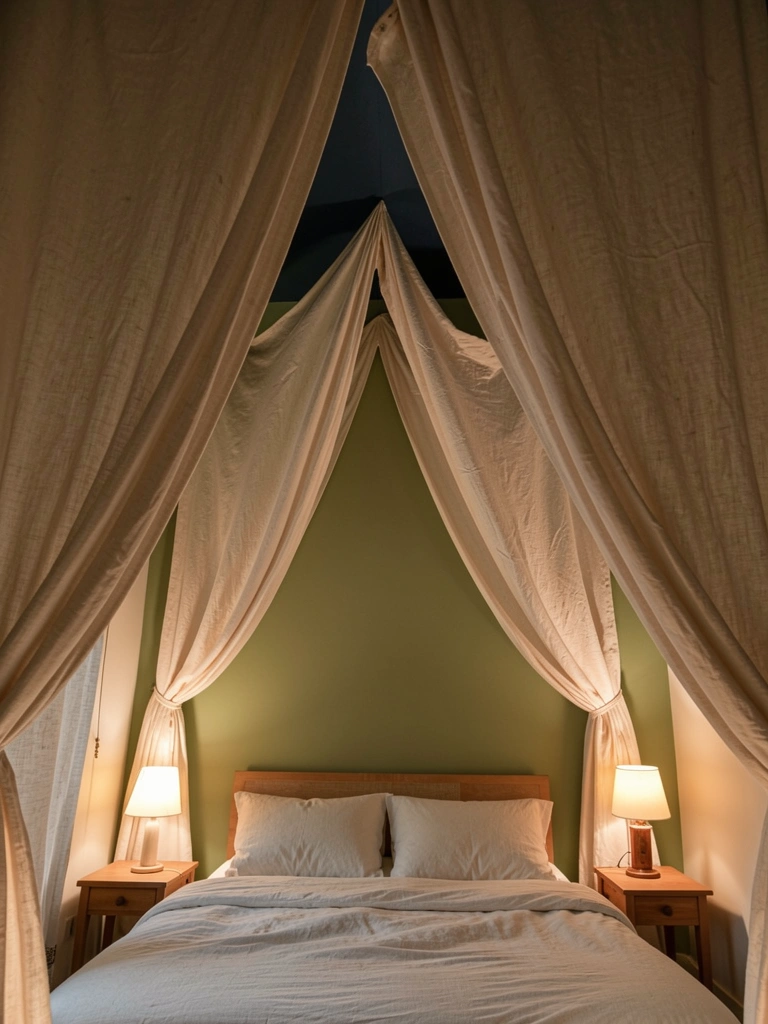
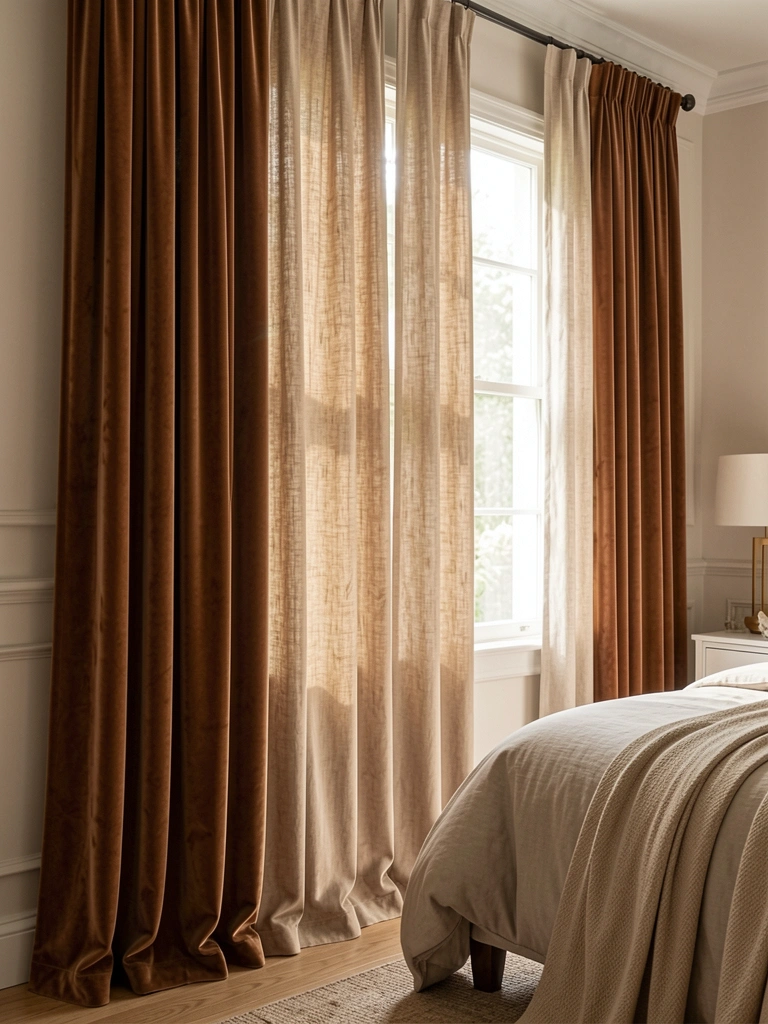
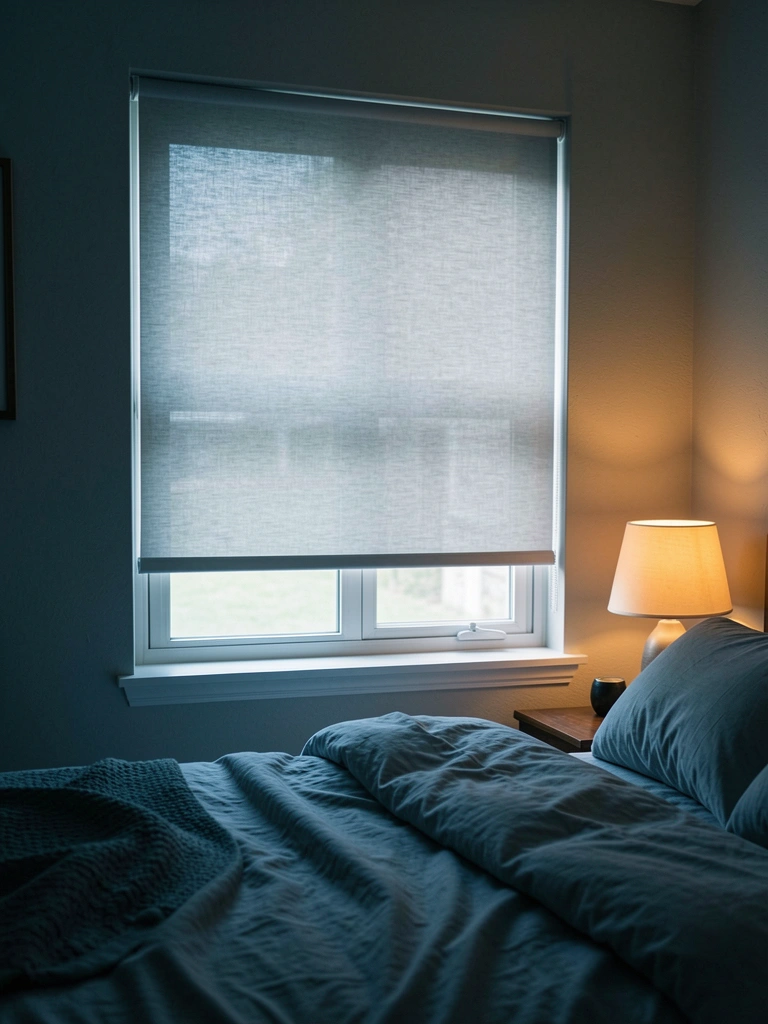
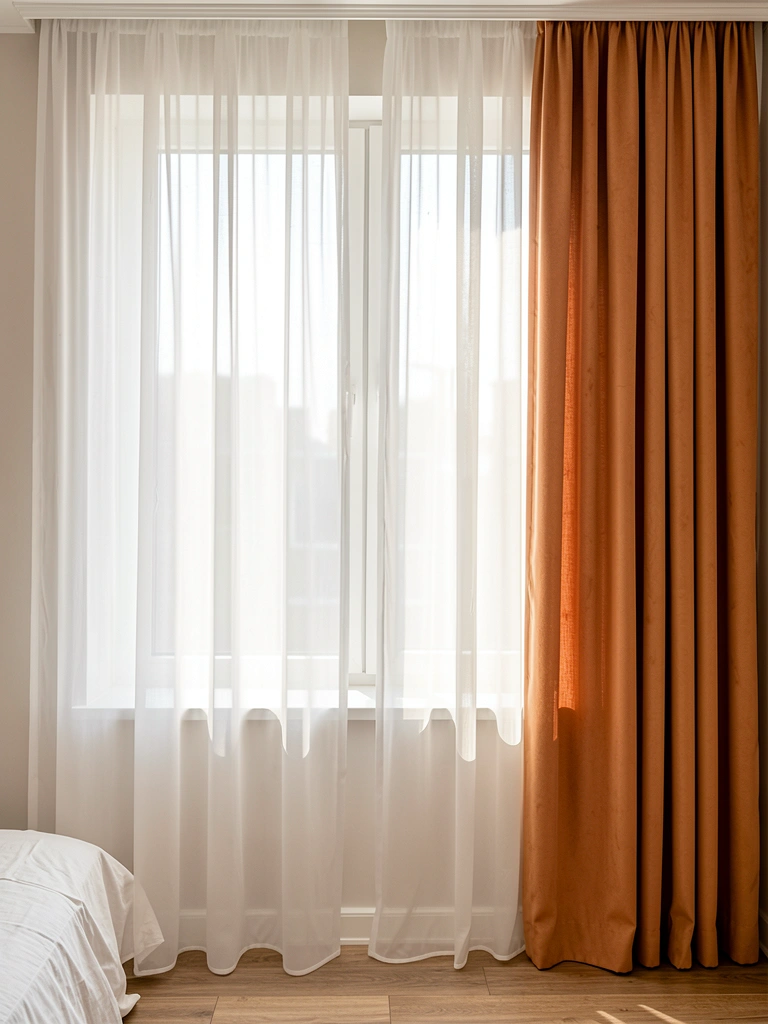
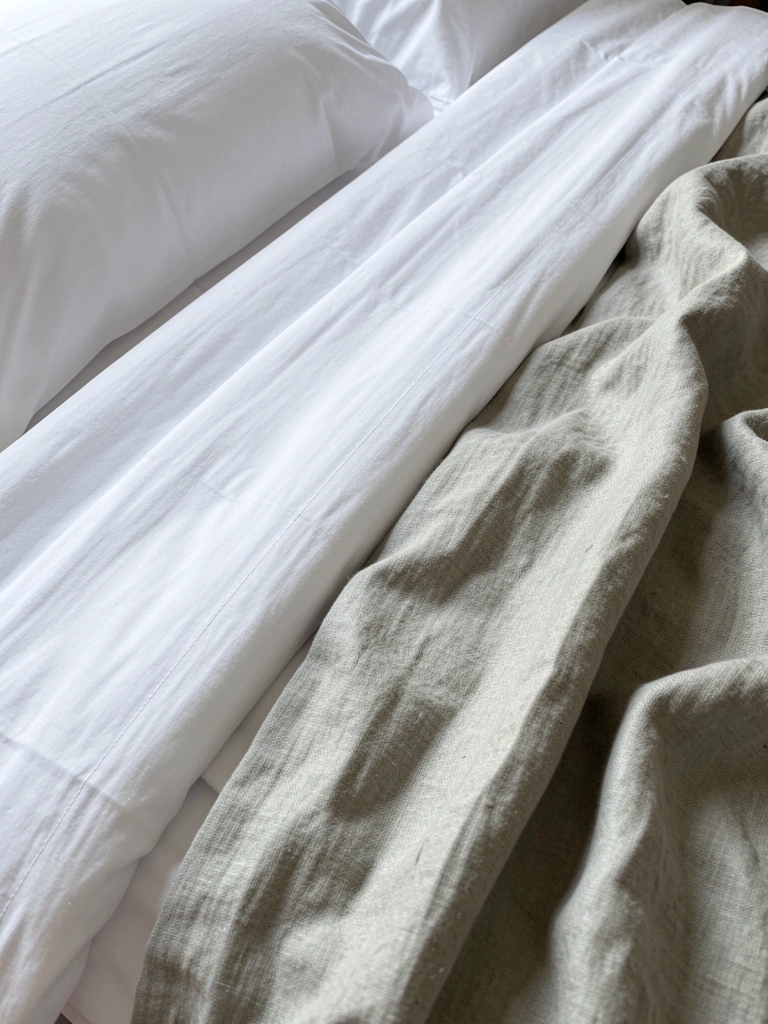
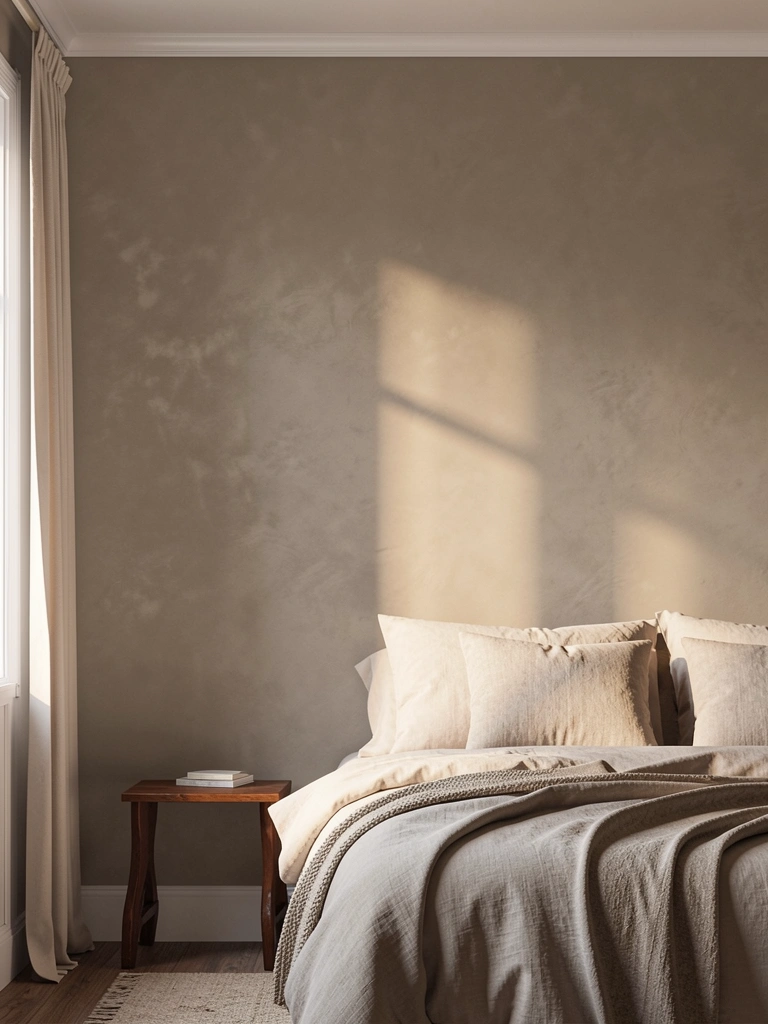
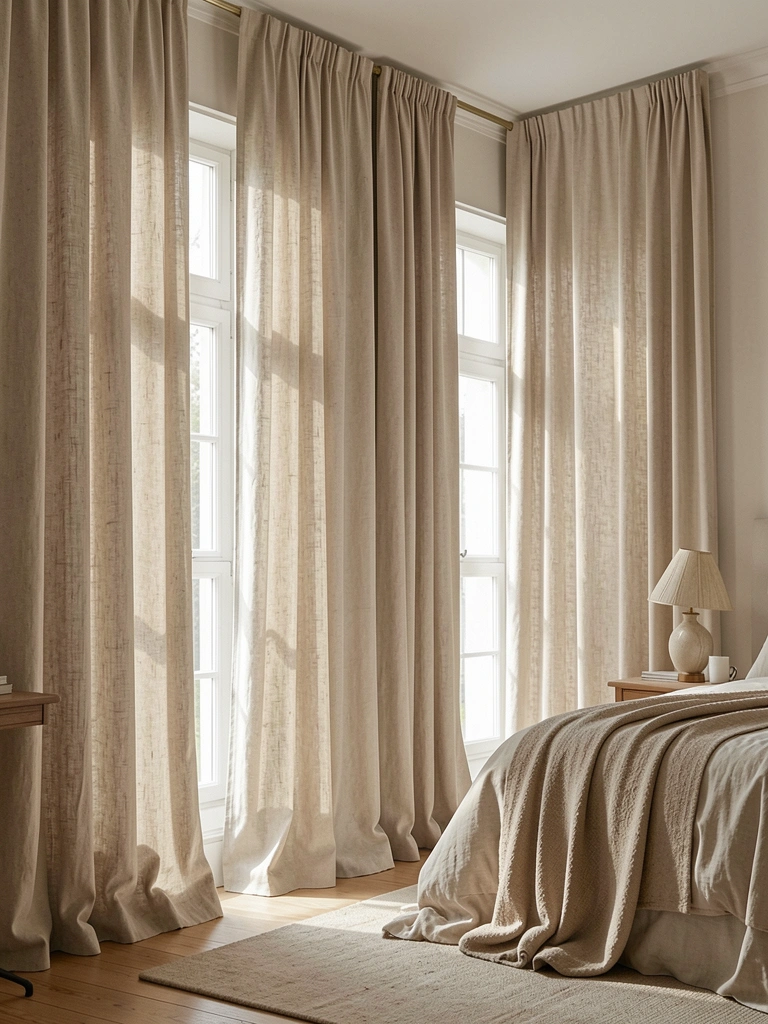
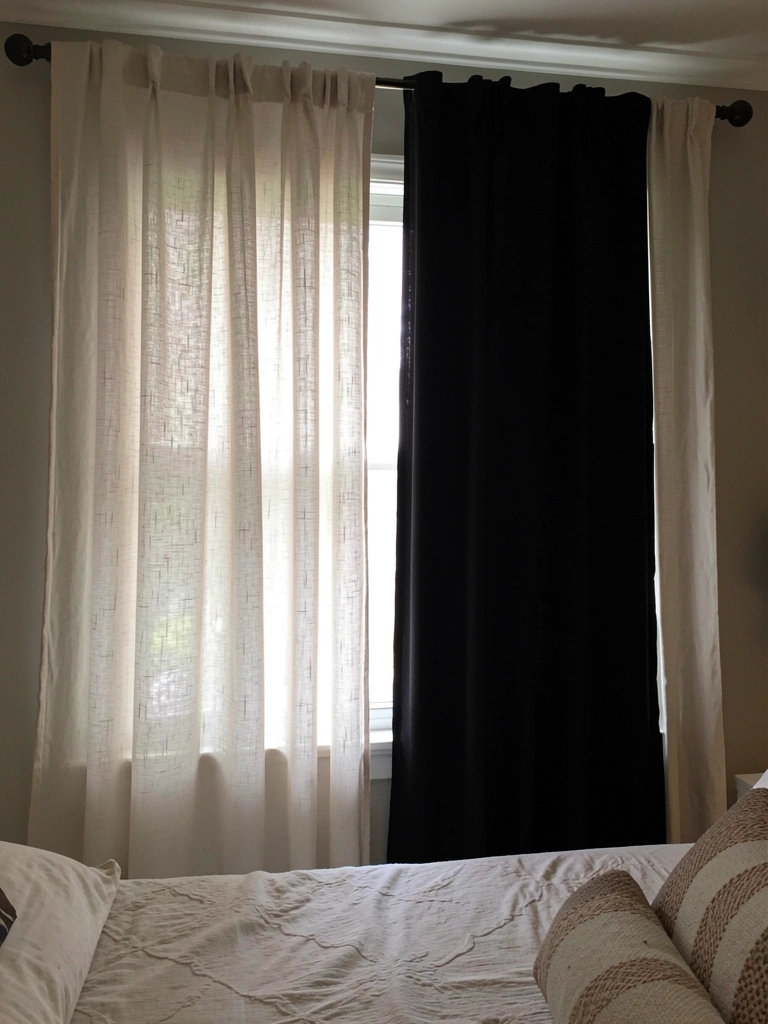
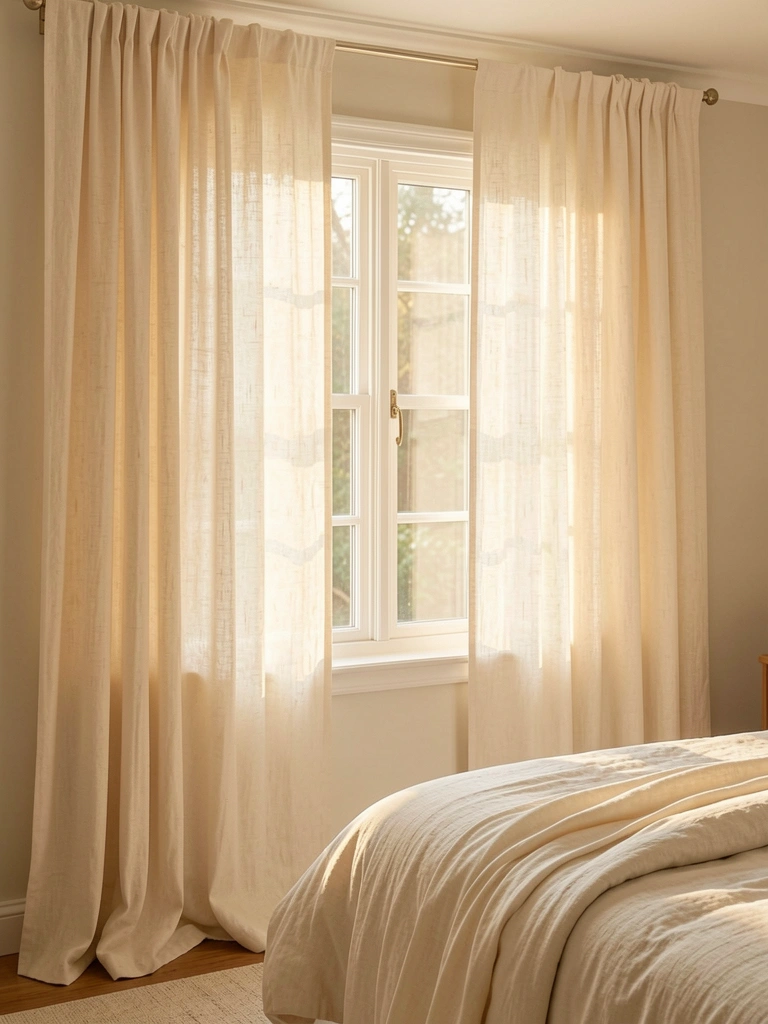
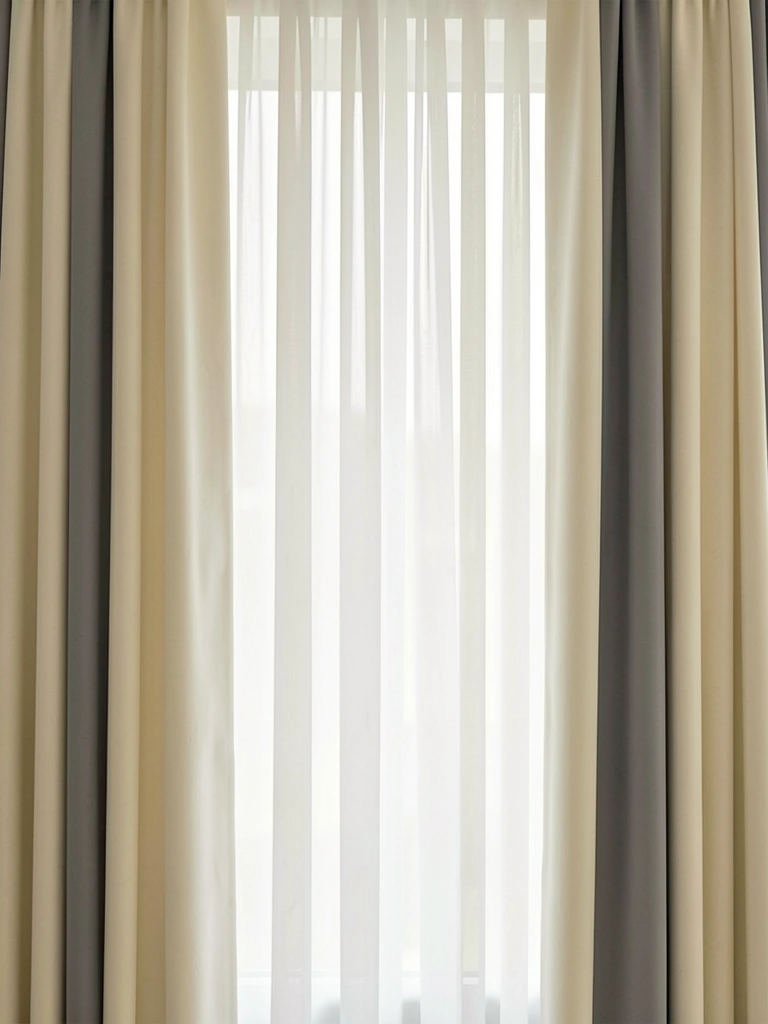
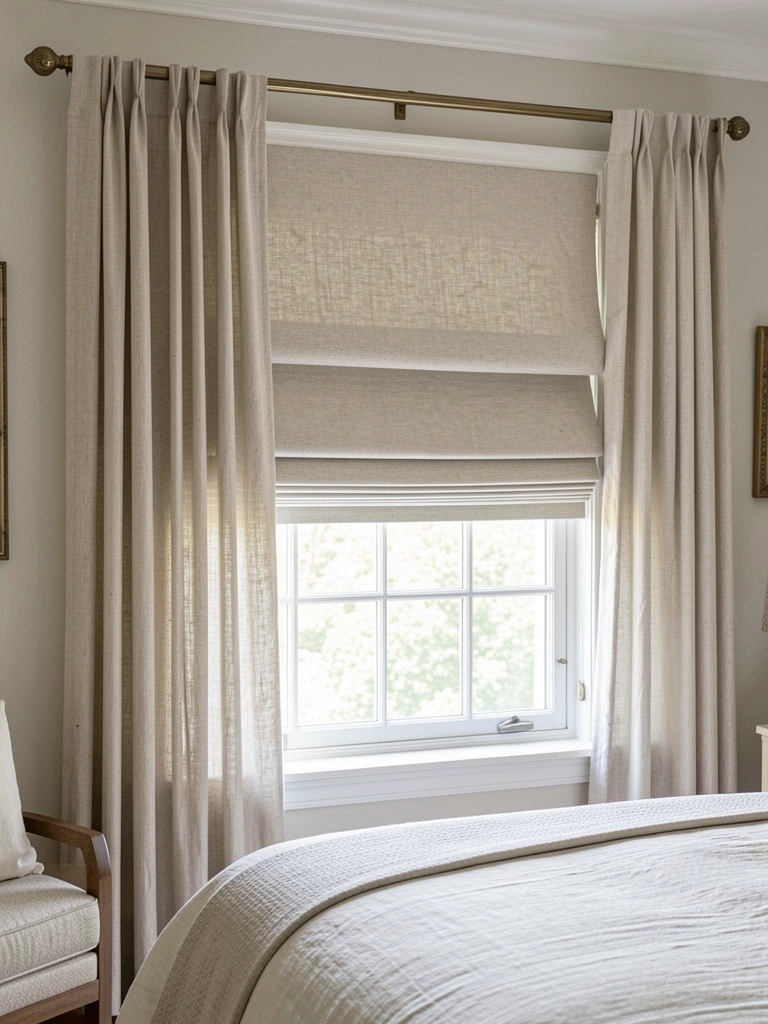
    6. Hang Sheer Curtains in a Fun Pastel Shade

    Floor-to-ceiling sheer curtains in pastels ($30-$80 from Target, IKEA, or Anthropologie) add drama and softness at the same time. Baby pink, mint green, or lavender work beautifully.

    Hang them high and wide to make your windows look bigger and your ceilings feel taller. Pair them with blackout curtains underneath for light control. A basic rod and hardware from IKEA runs $15-$25. DIY installation takes under an hour with a drill. Renters can use tension rods ($15-$30) that require no holes.

    Every morning, you wake up bathed in soft, colored light. It’s like living inside a soft drink commercial—in the best way.

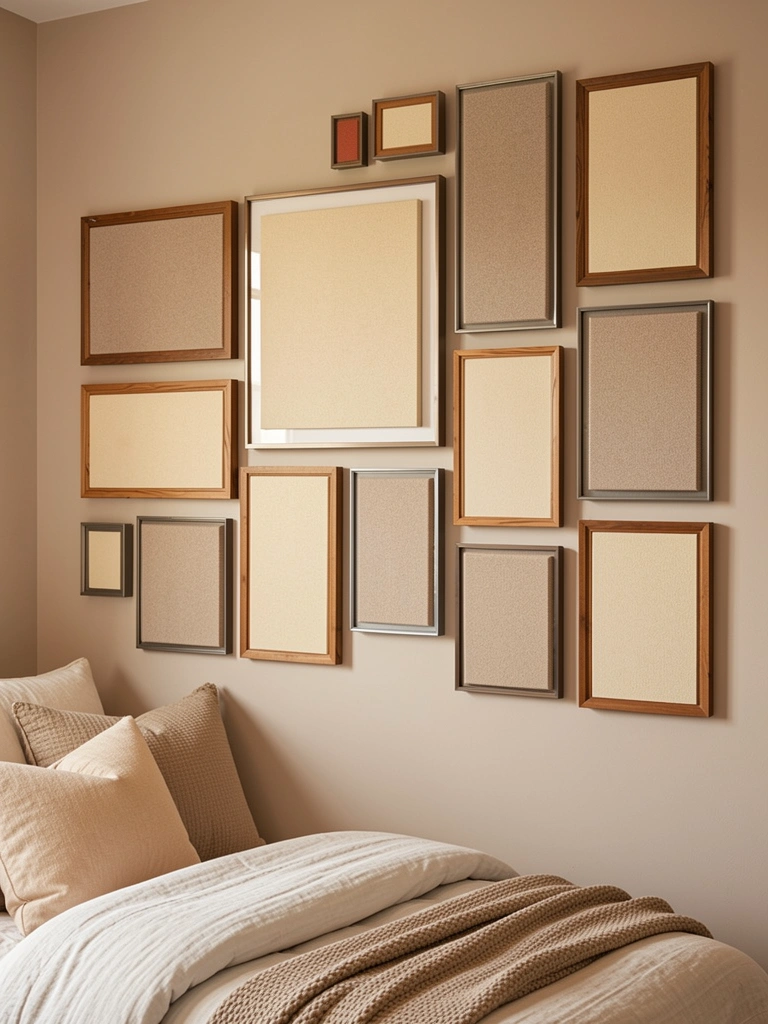
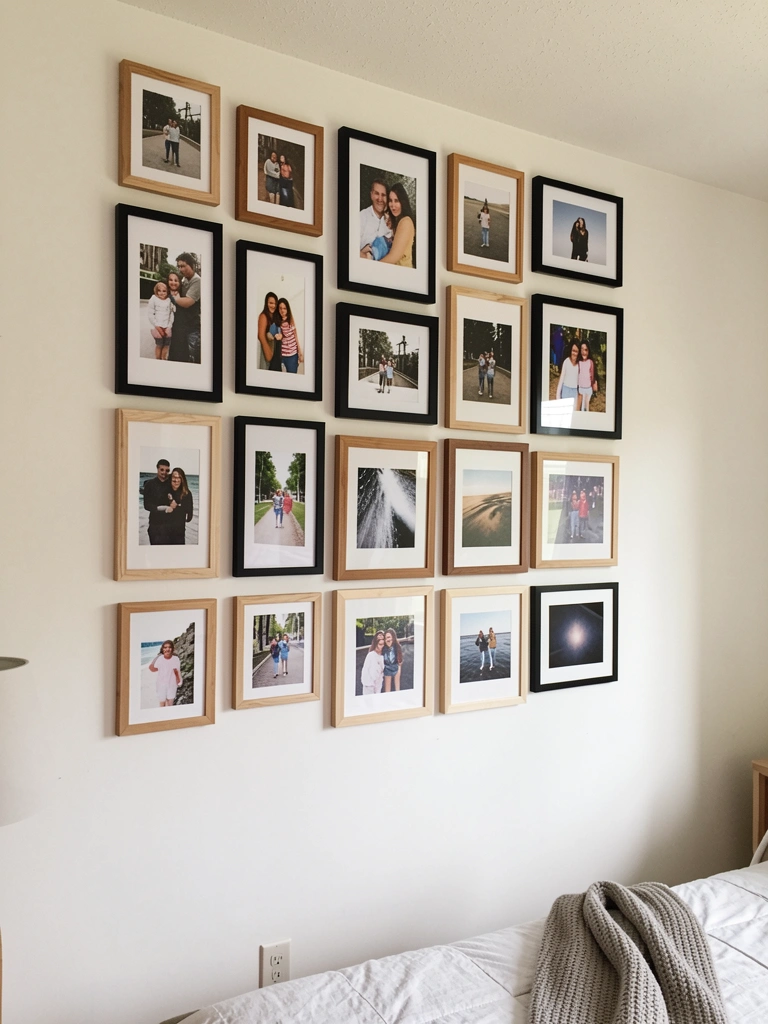
    7. Create a Photo Wall with Printed Memories

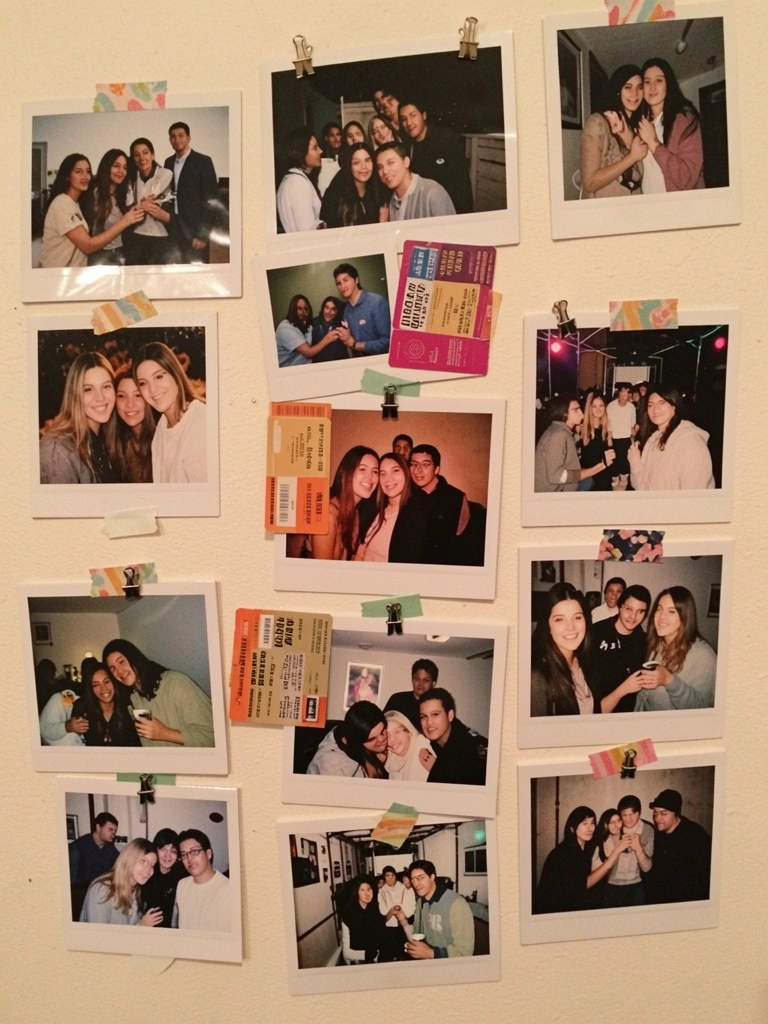
    Print your favorite digital photos ($0.15-$0.50 each at Walgreens, CVS, or Shutterfly) and create a collage using washi tape, photo clips, or small frame. Mix sizes and arrange loosely for that authentic Y2K scrapbook vibe.

    Renter-friendly alert: Washi tape doesn’t damage walls and peels off cleanly. Budget $20-$40 for 30-50 prints plus tape and clips. Add concert tickets, magazine cutouts, or printed song lyrics between photos for extra personality. This takes a few hours but costs almost nothing.

    Your wall becomes a moving scrapbook of your actual life—way more meaningful than generic art.

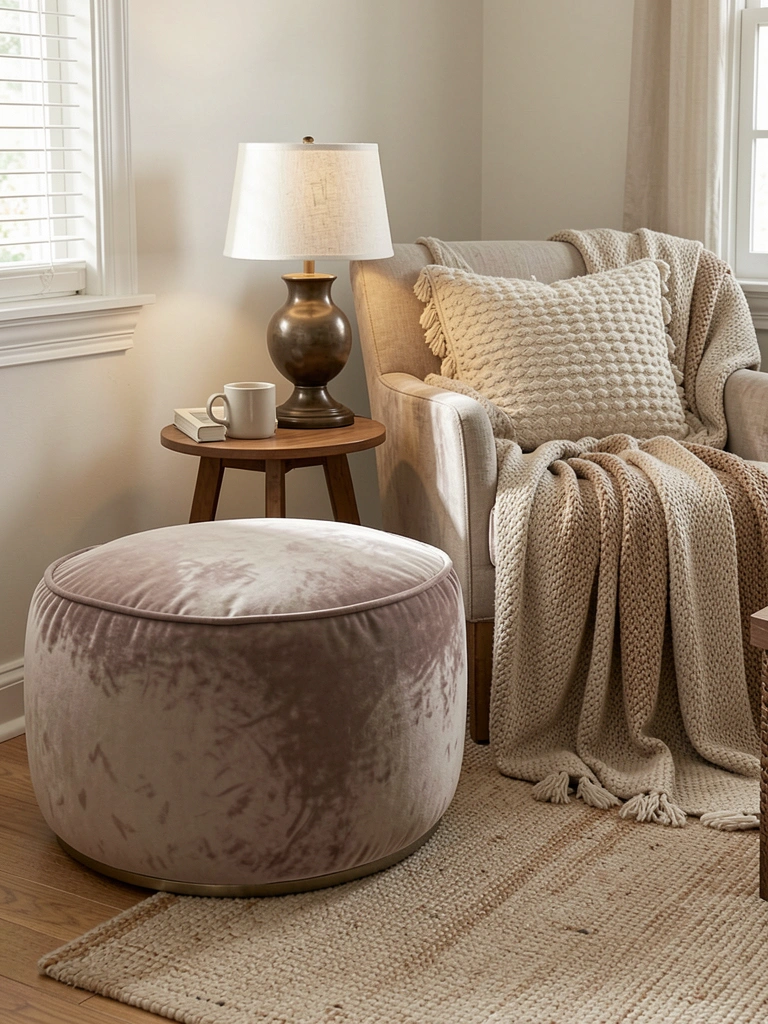
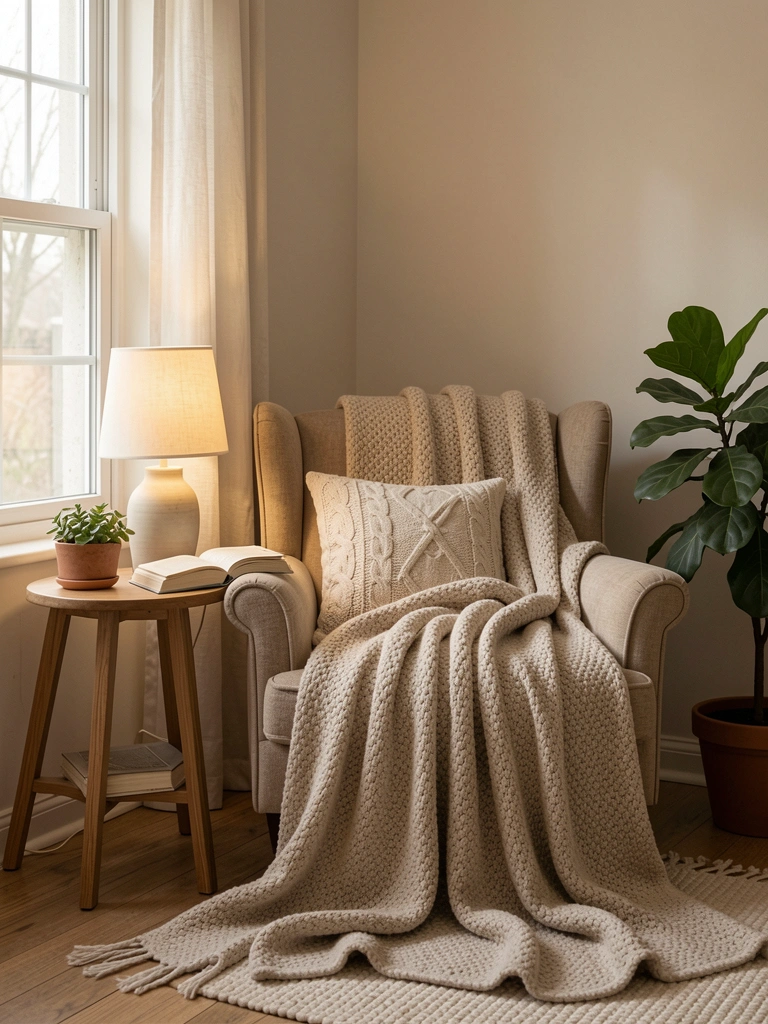
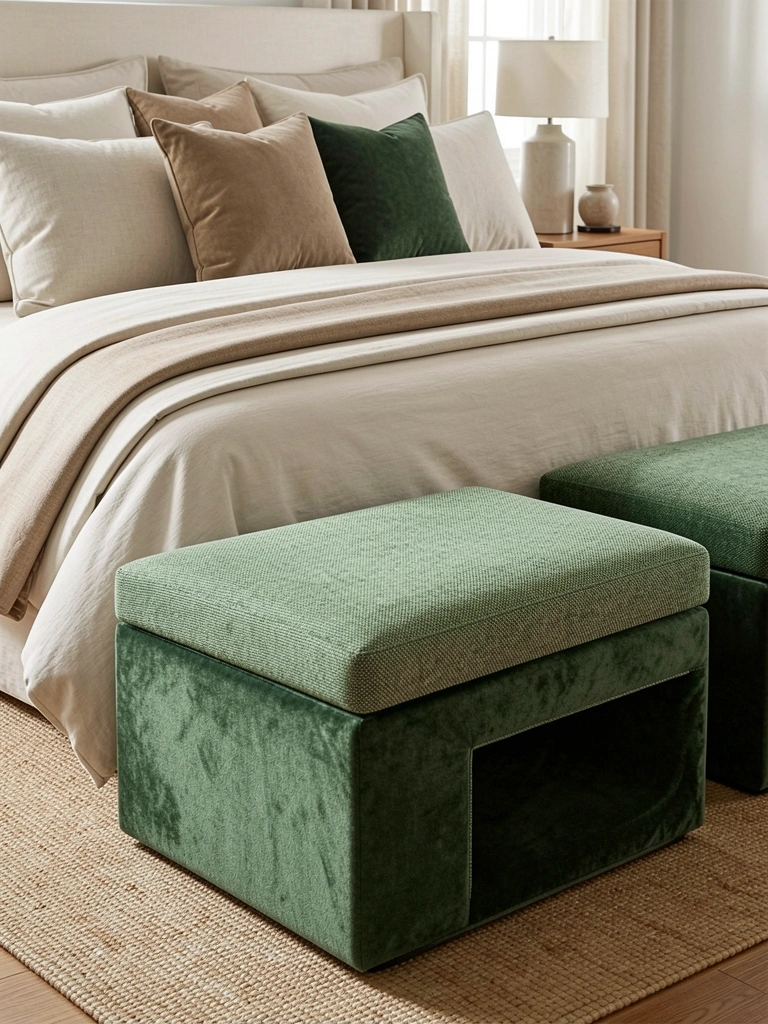
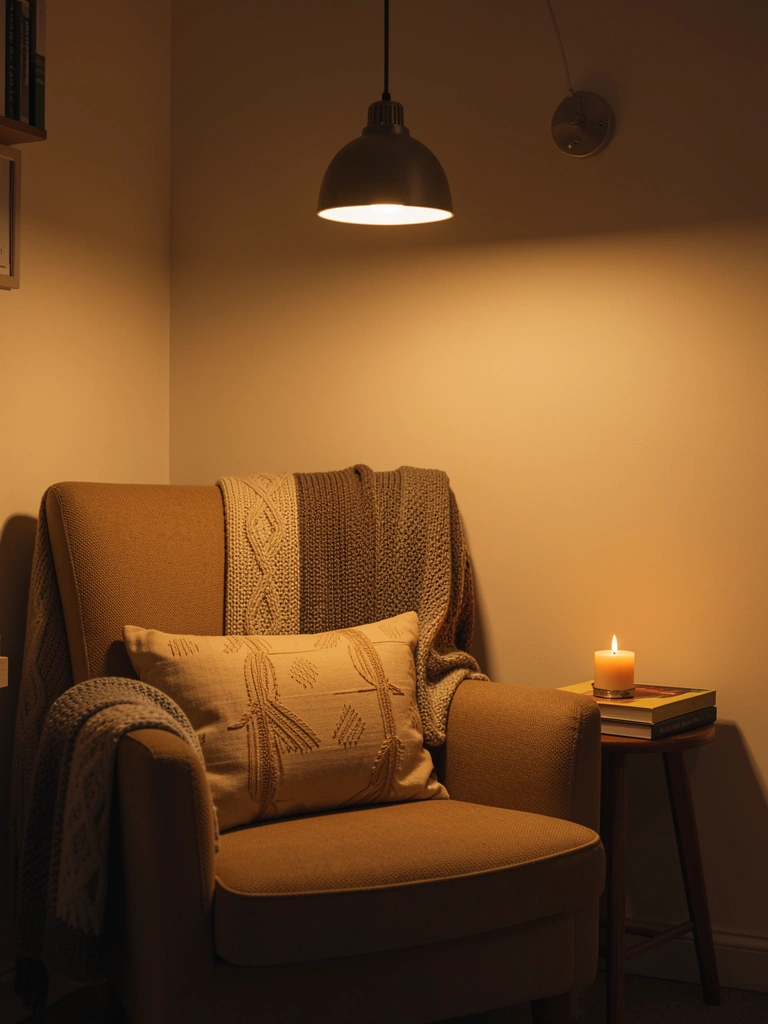
    8. Add a Bean Bag Chair in a Bold Fabric

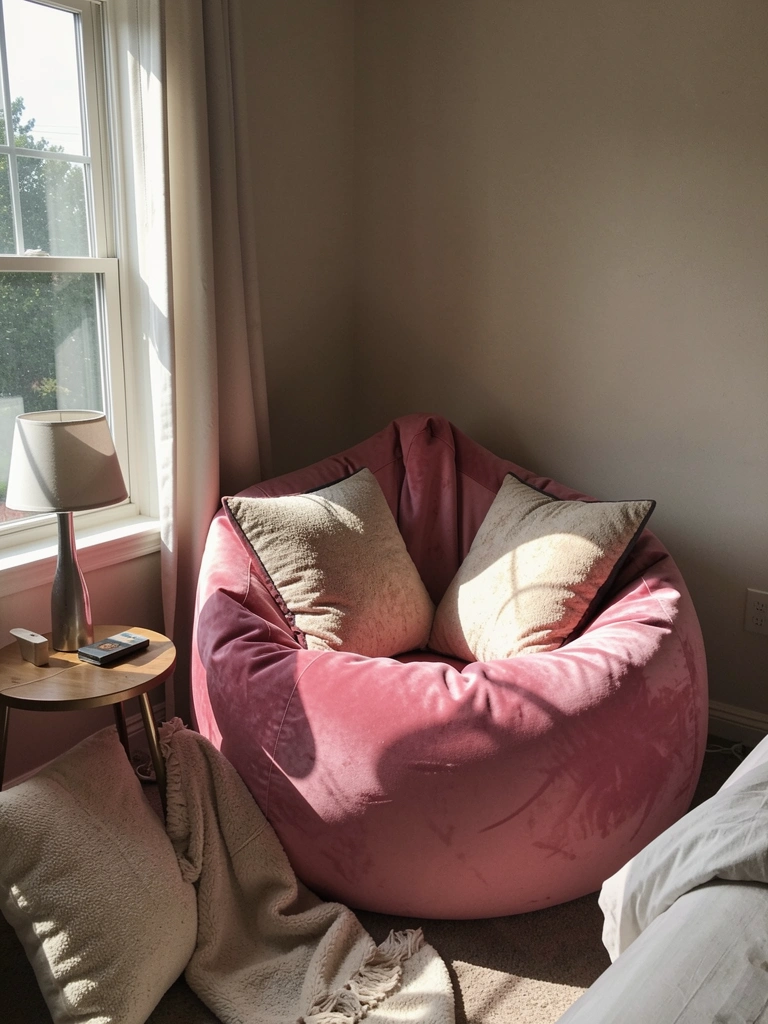
    Bean bags aren’t just for dorms—they’re the ultimate Y2K comfort essential. Oversized versions ($80-$150 from Amazon, Urban Outfitters, or Article) in velvet, corduroy, or faux fur add major vibes.

    Look for jewel tones or pastels to match your room’s color palette. Brands like Lovesac make high-end versions ($200+) that last forever, but Pottery Barn Teen and West Elm offer mid-range options ($100-$150) with removable covers you can wash. Position it in a corner by a window for a reading nook.

    This becomes your favorite spot to curl up with a book, watch movies, or just chill. It’s functional, cozy, and undeniably Y2K.

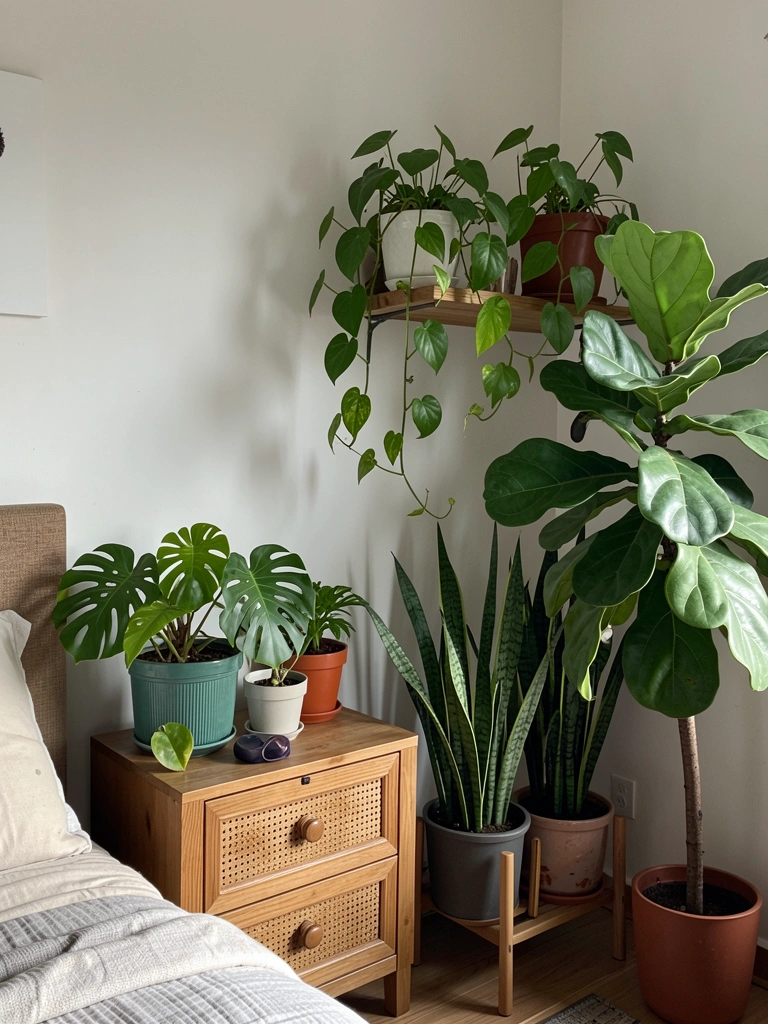
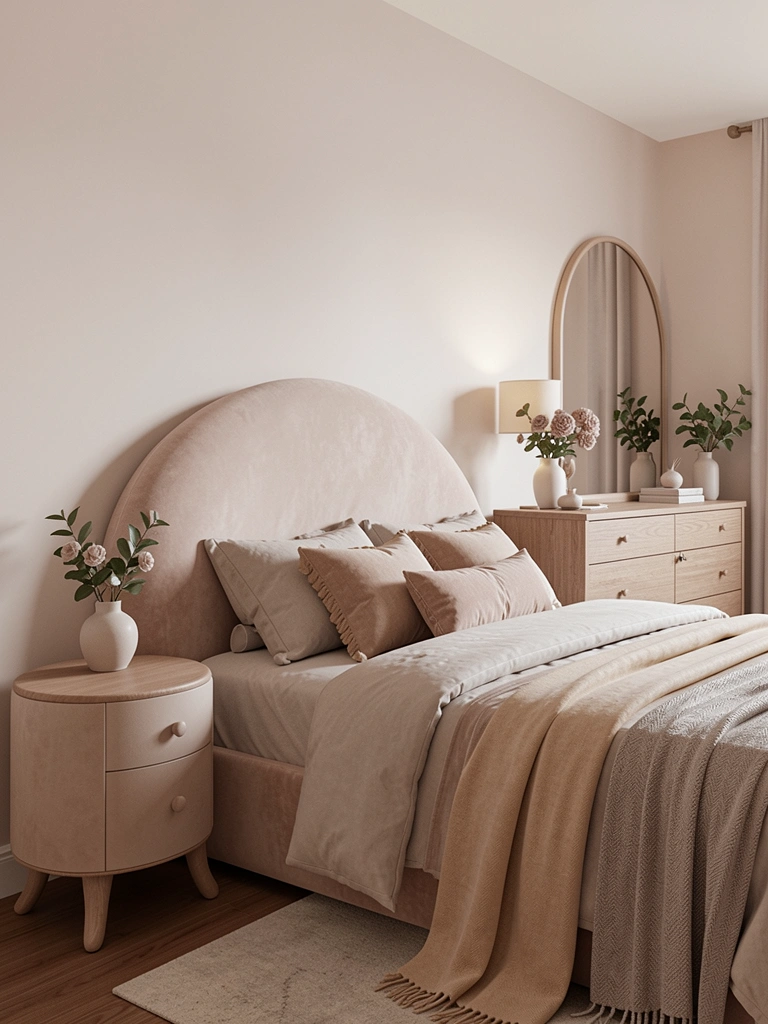
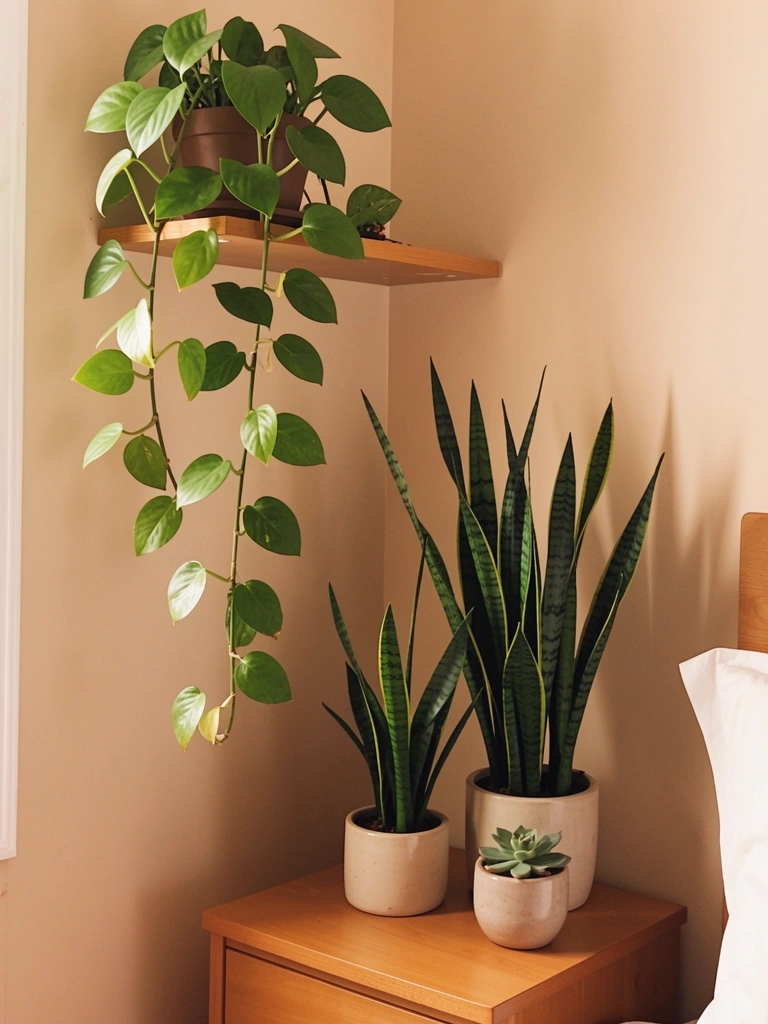
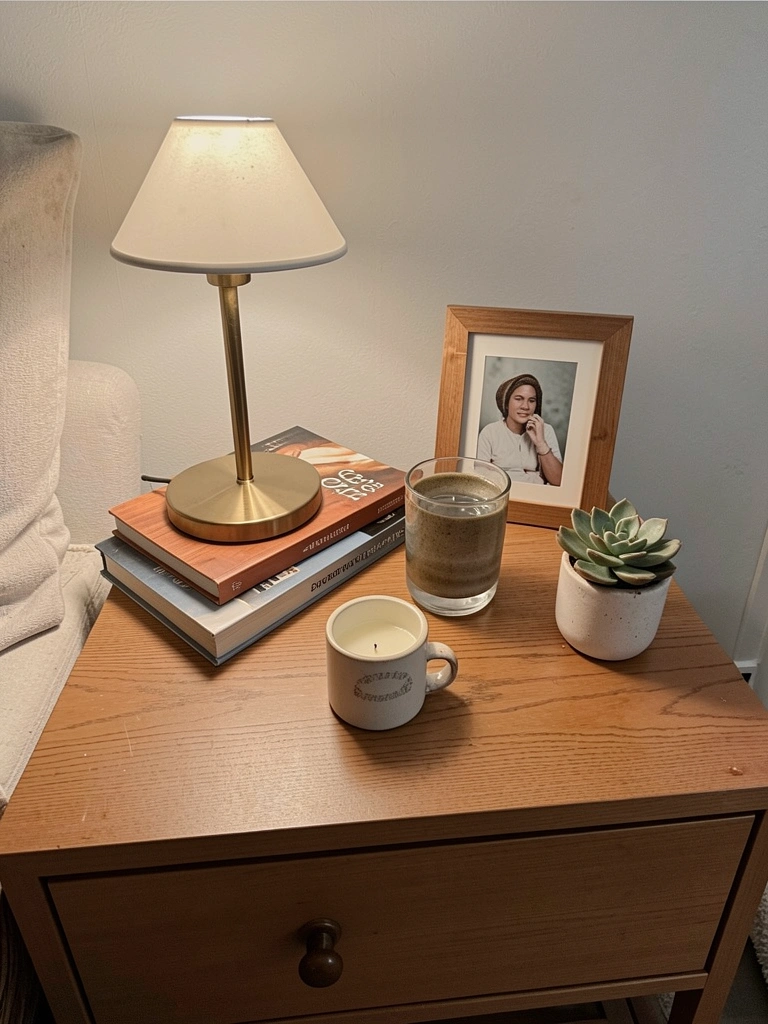
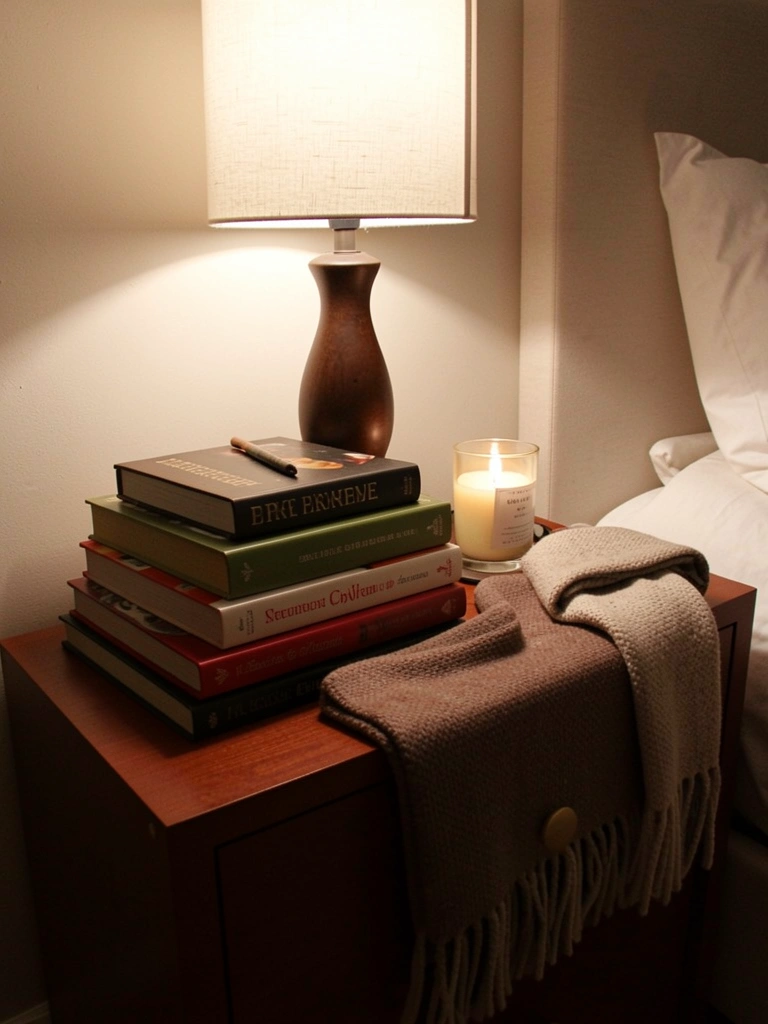
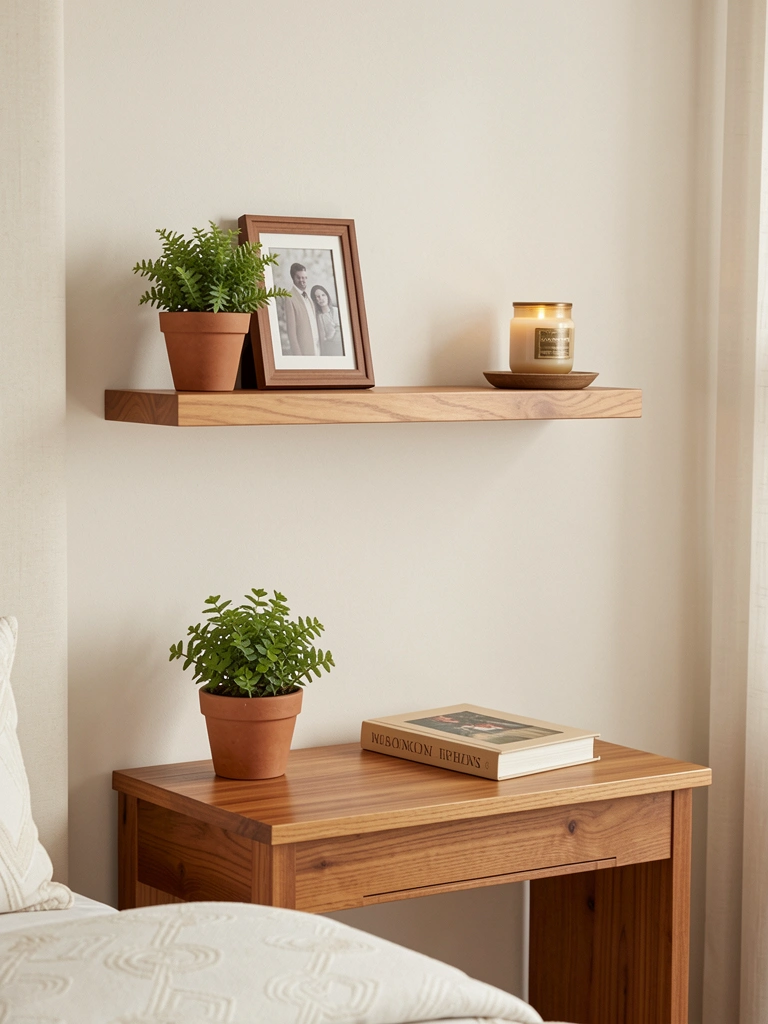
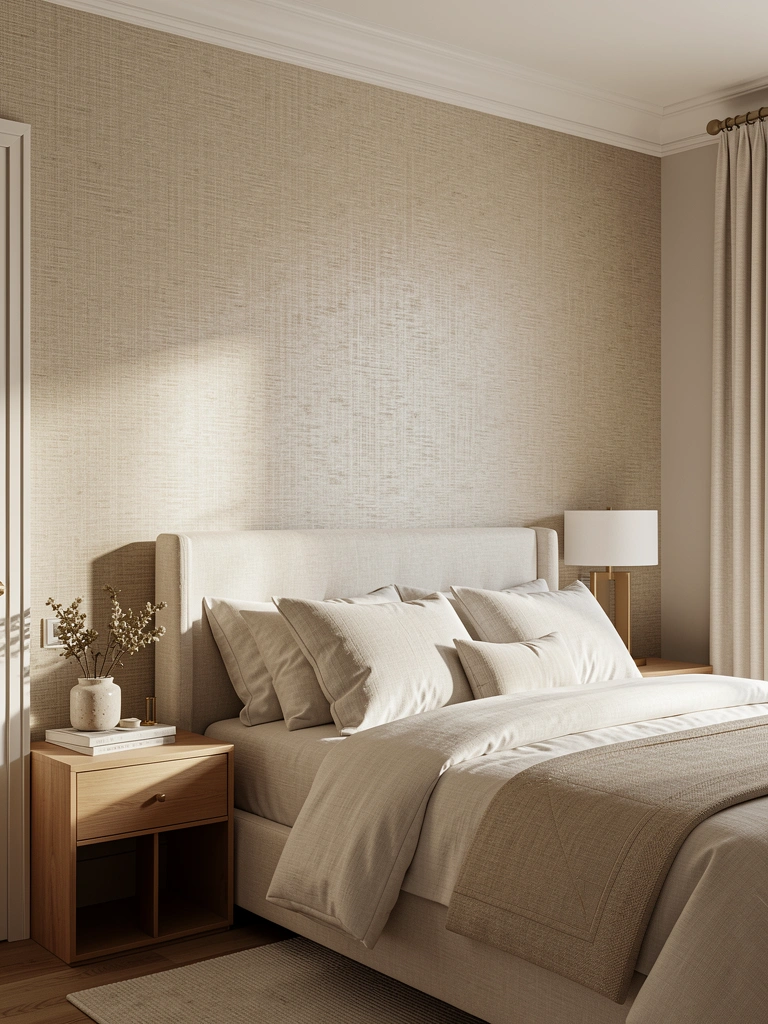
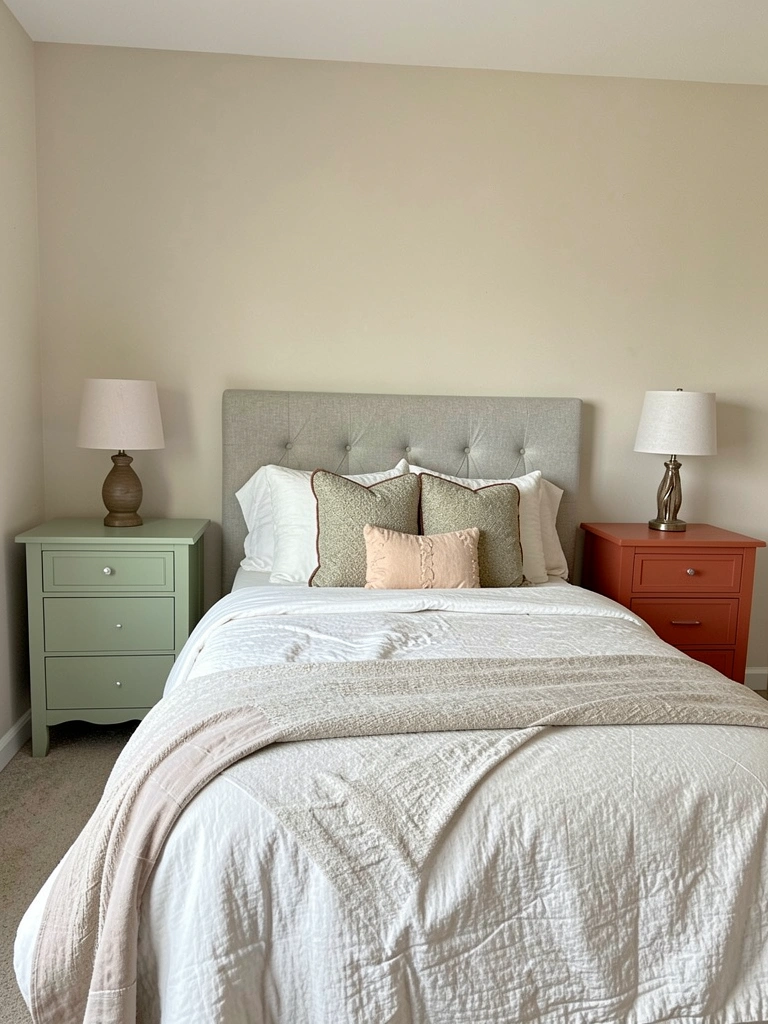
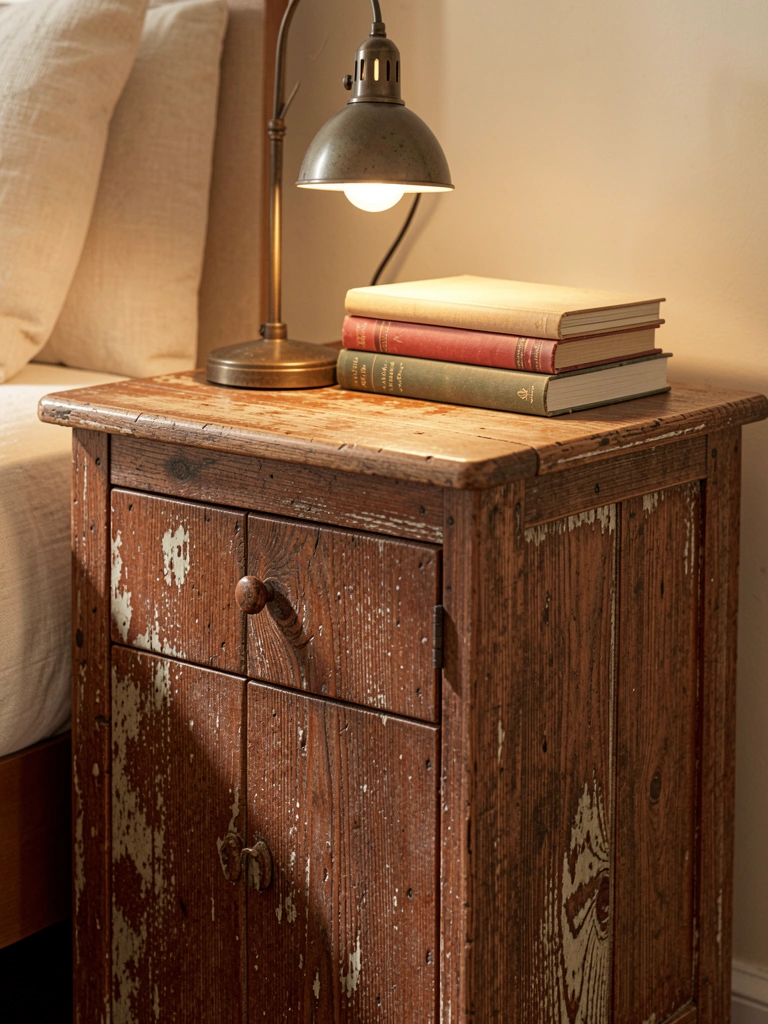
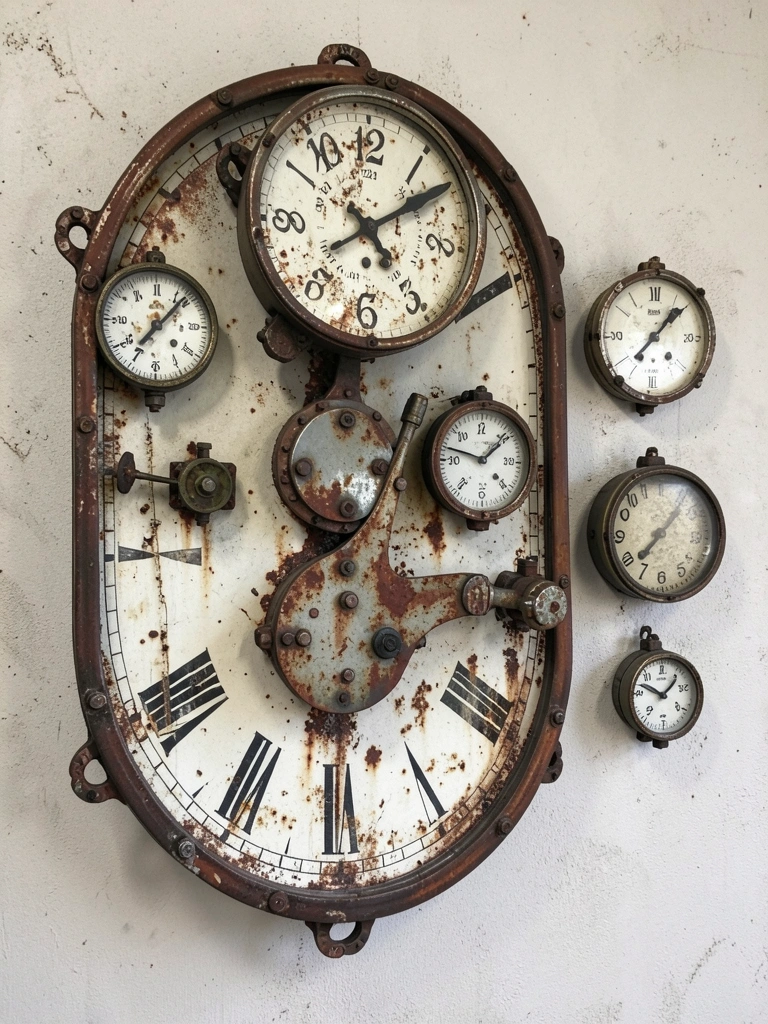
    9. Style Your Nightstand with Quirky Accessories

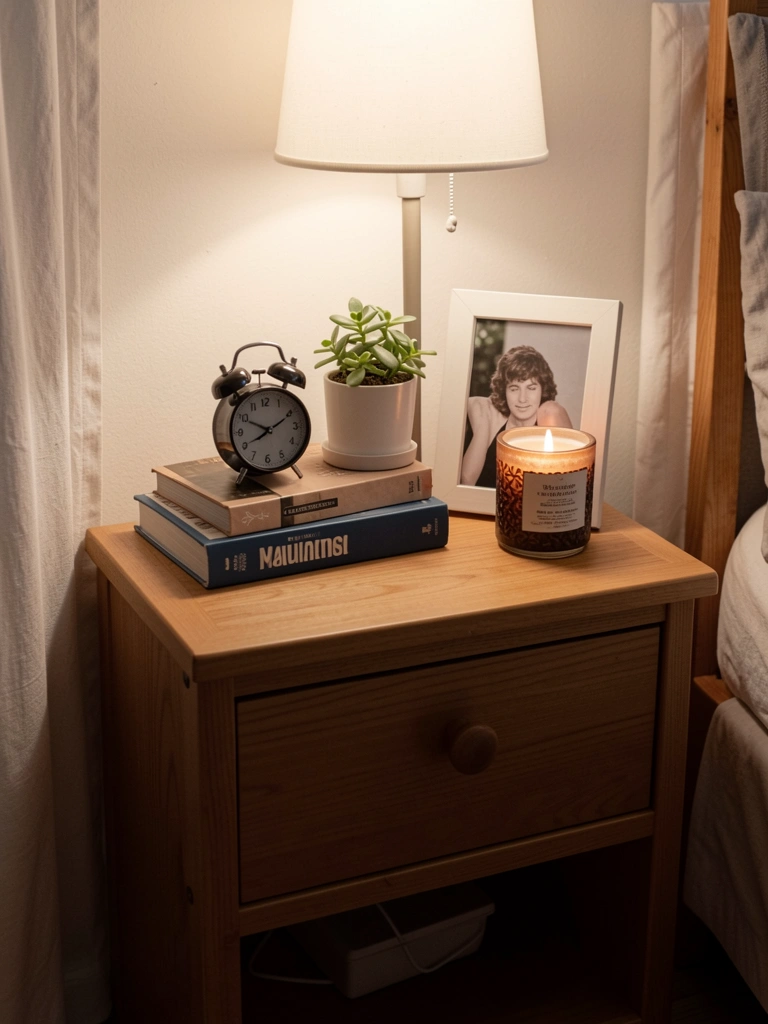
    Your nightstand tells a story. Fill it with small treasures: a vintage alarm clock ($15-$40 from Urban Outfitters or thrift stores), a stack of your favorite books, a mini succulent ($5-$15), a Jo Malone candle ($60) or affordable dupe ($8-$15 from Target), and a framed photo.

    Keep it balanced—not too cluttered, not empty. This takes 30 minutes to style and costs nothing if you use what you already have. Swap items seasonally to keep it fresh. A small tray ($10-$20) anchors everything and makes cleaning easier.

    When you wake up and reach for your phone or book, you’re surrounded by things that make you smile. That small ritual matters.

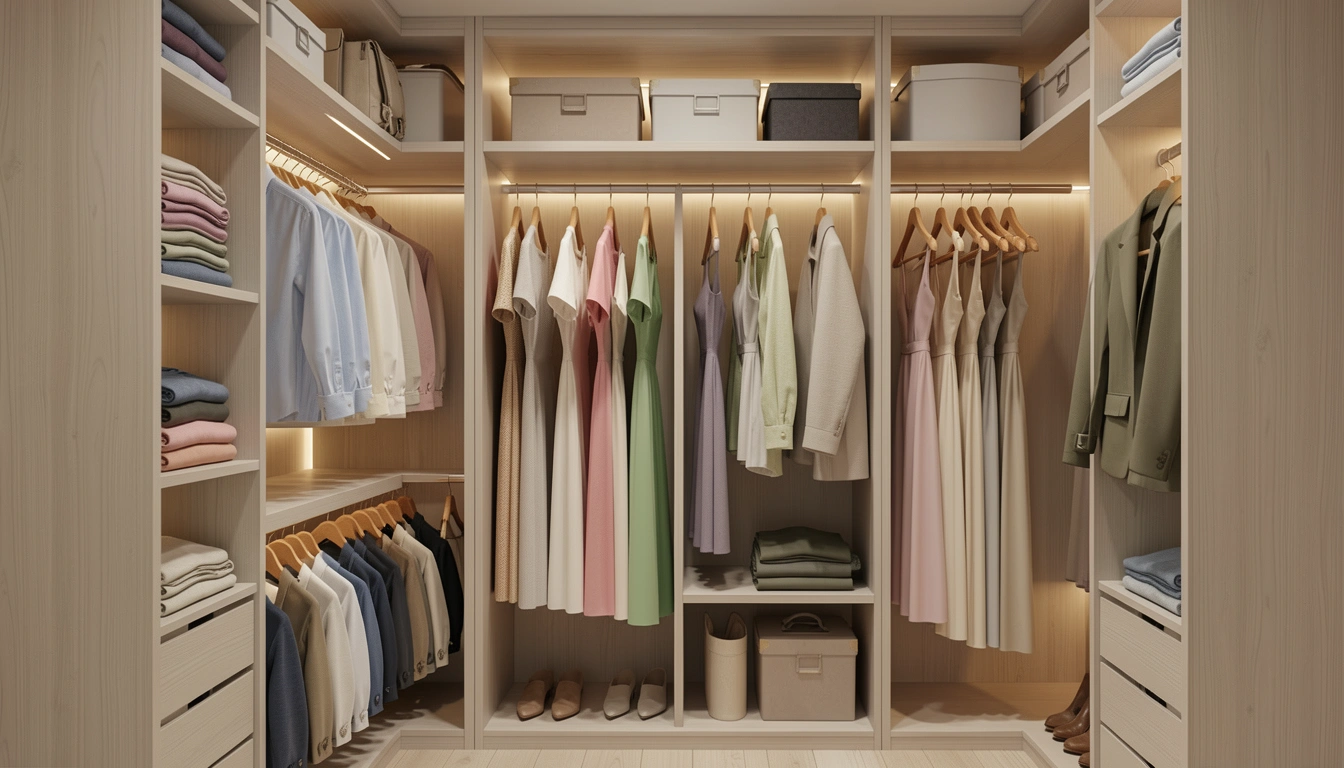
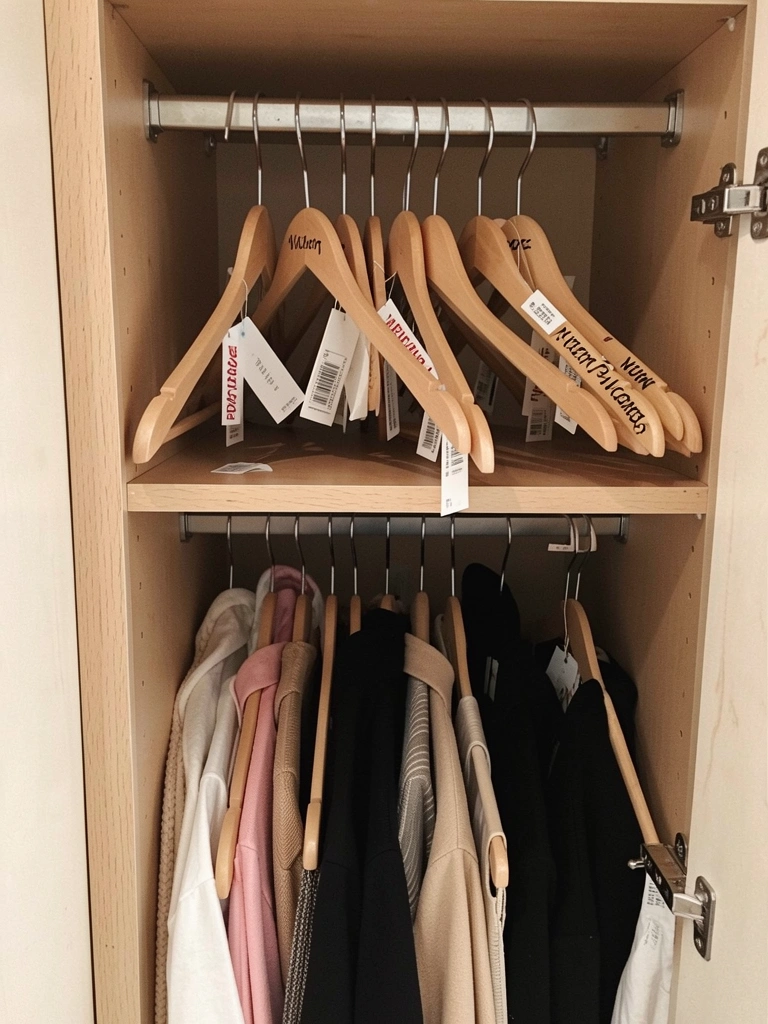
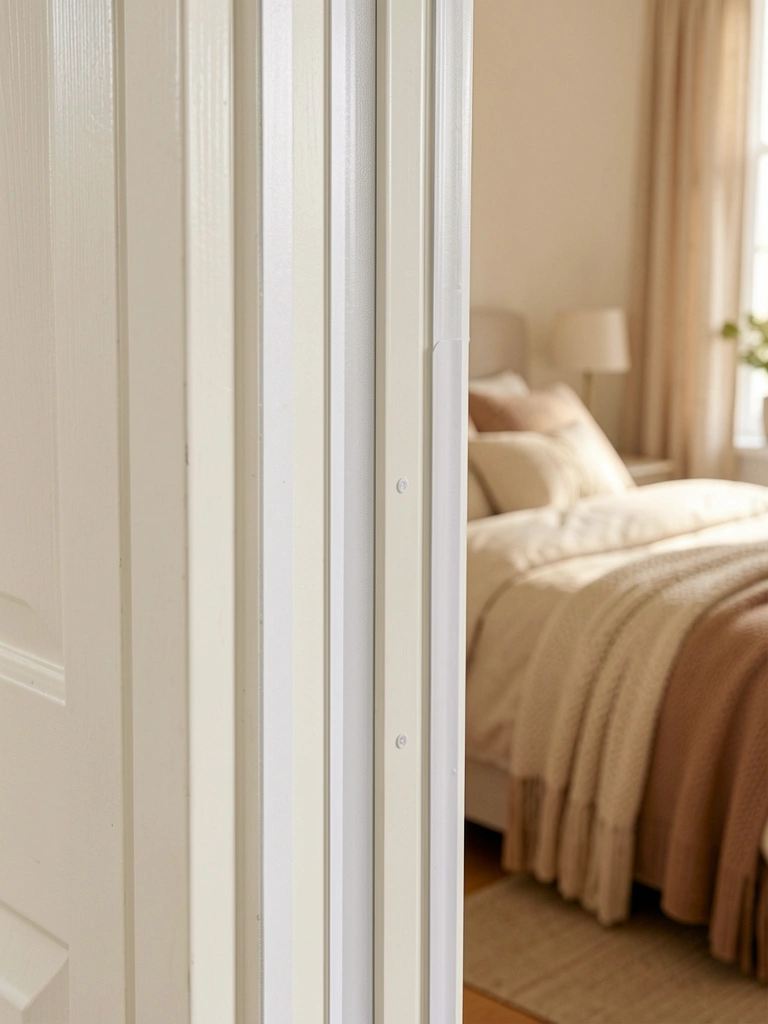
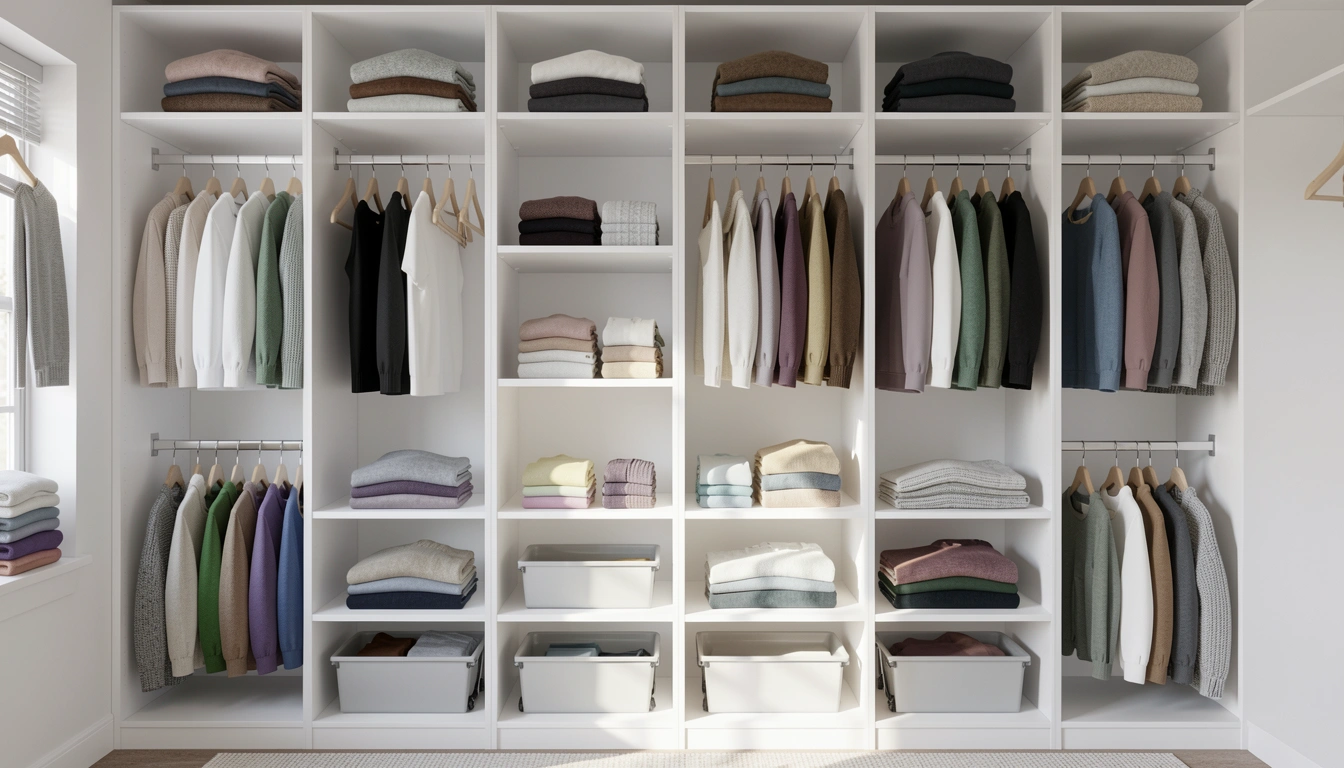
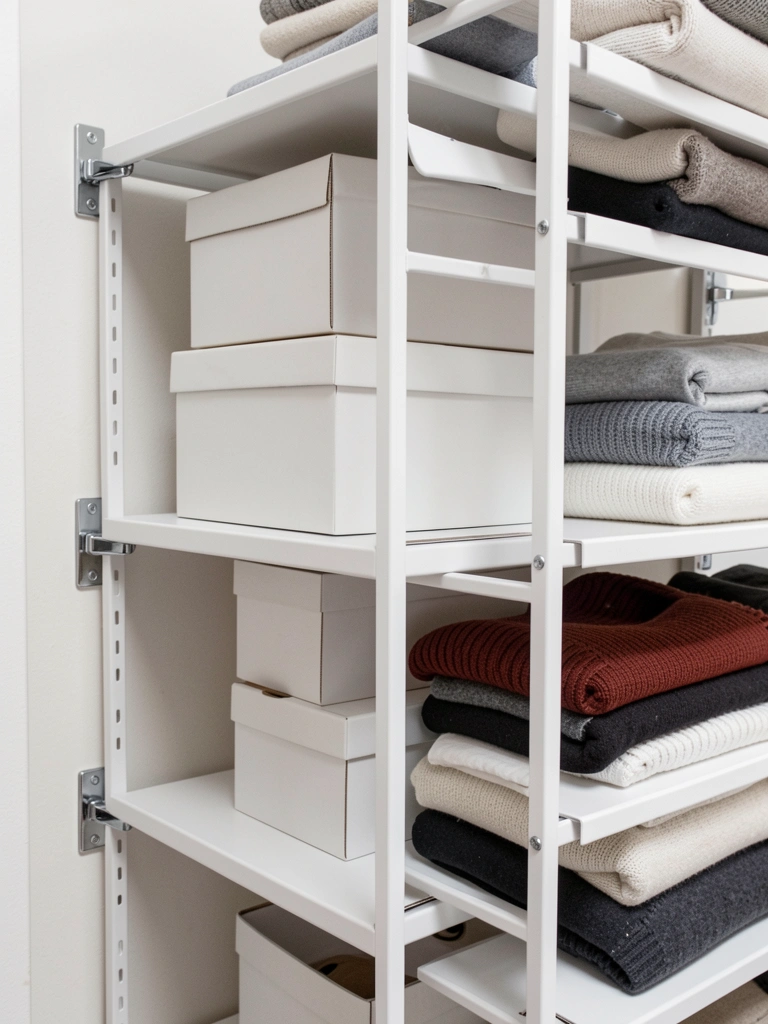
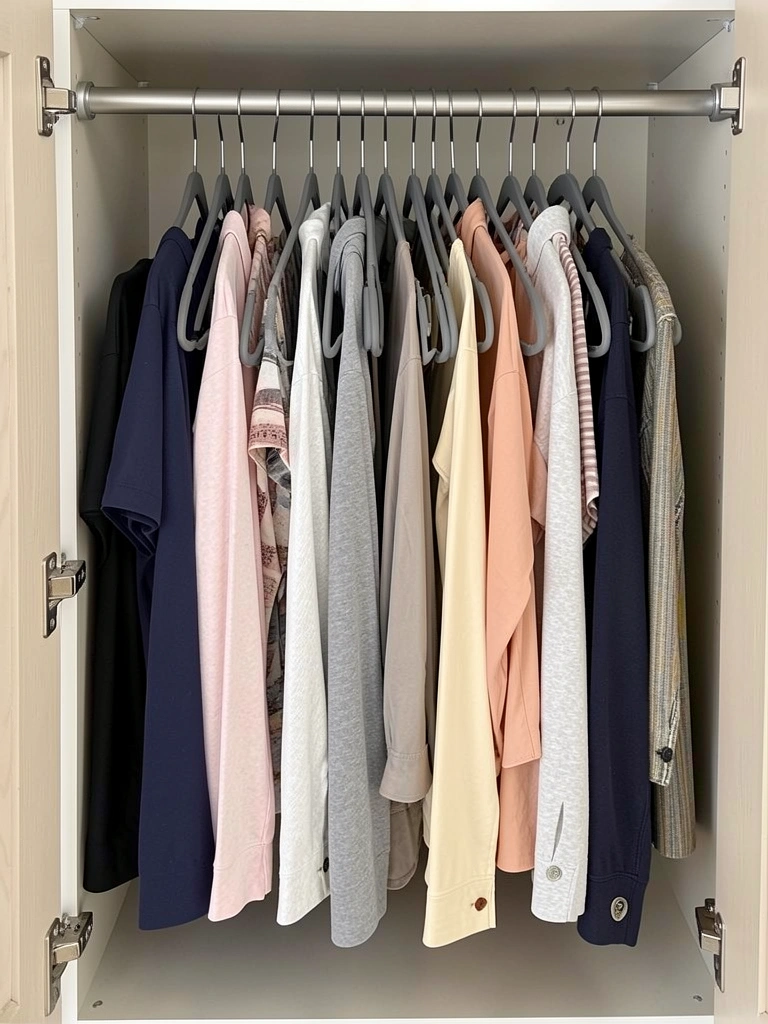
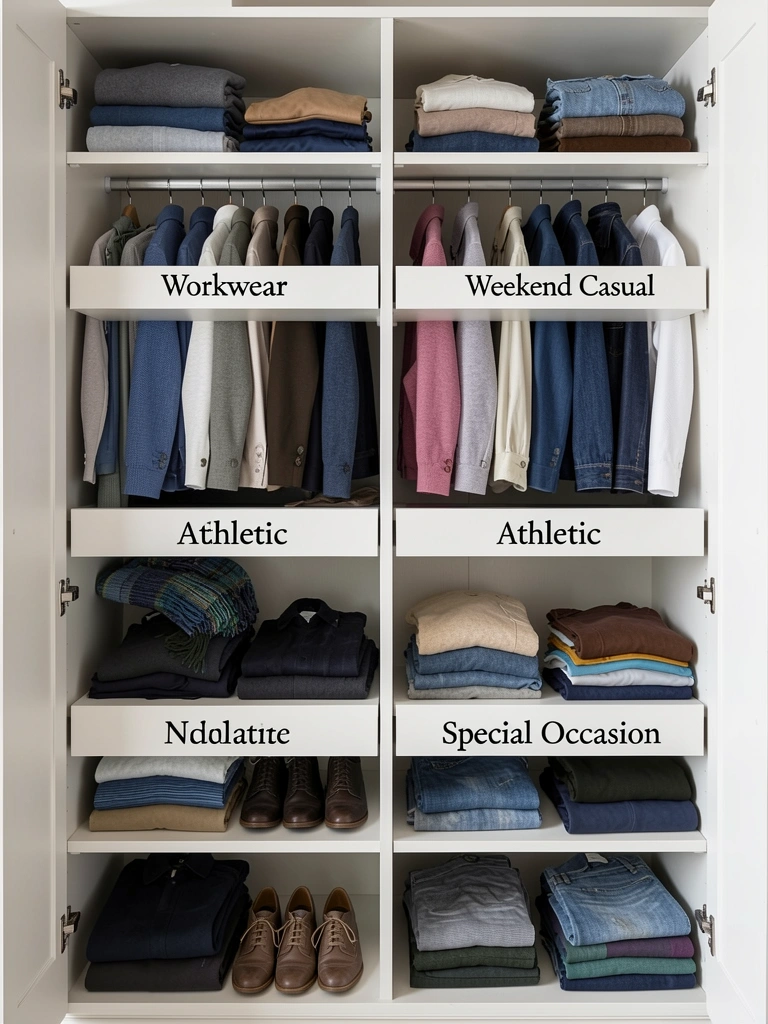
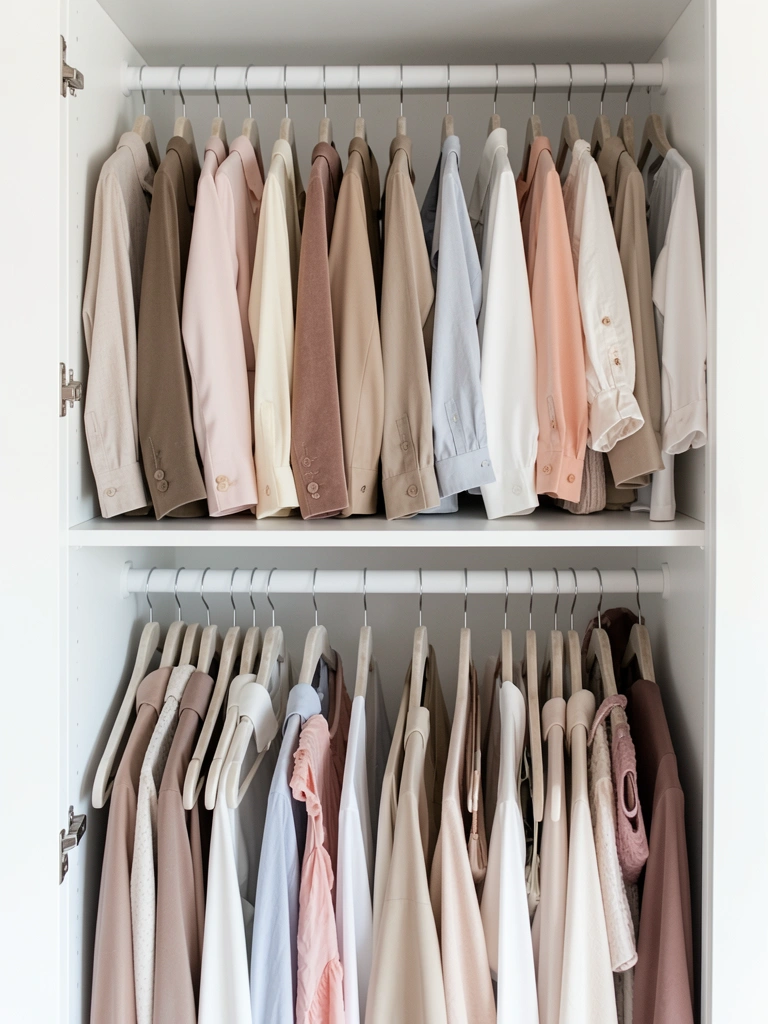
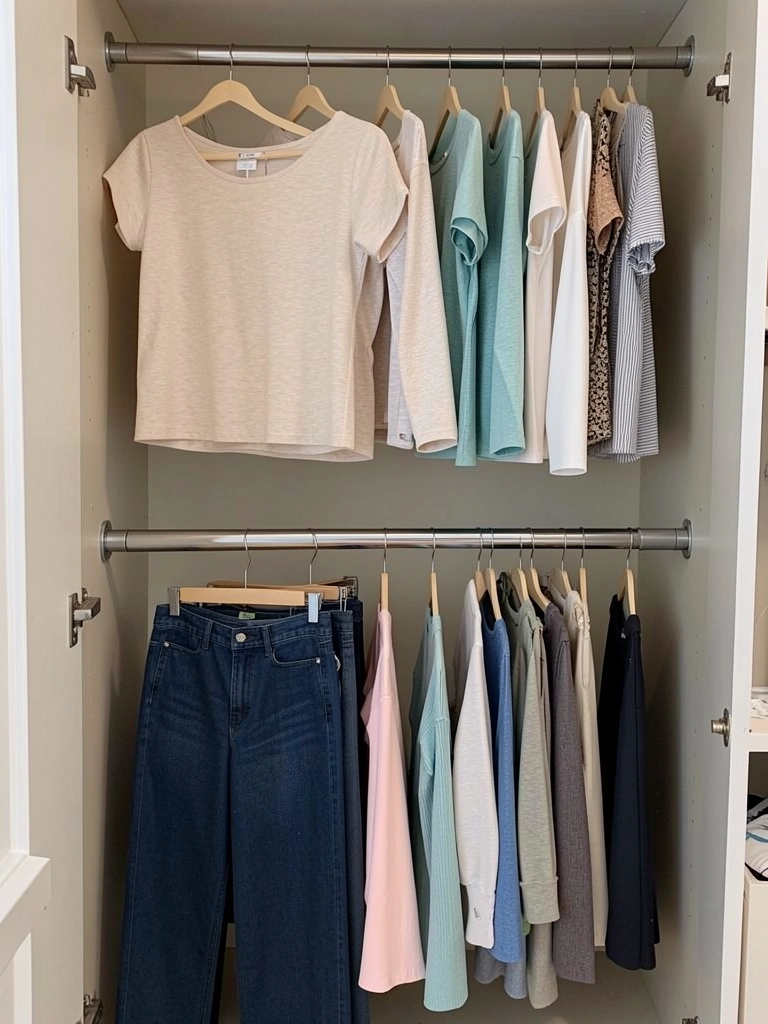
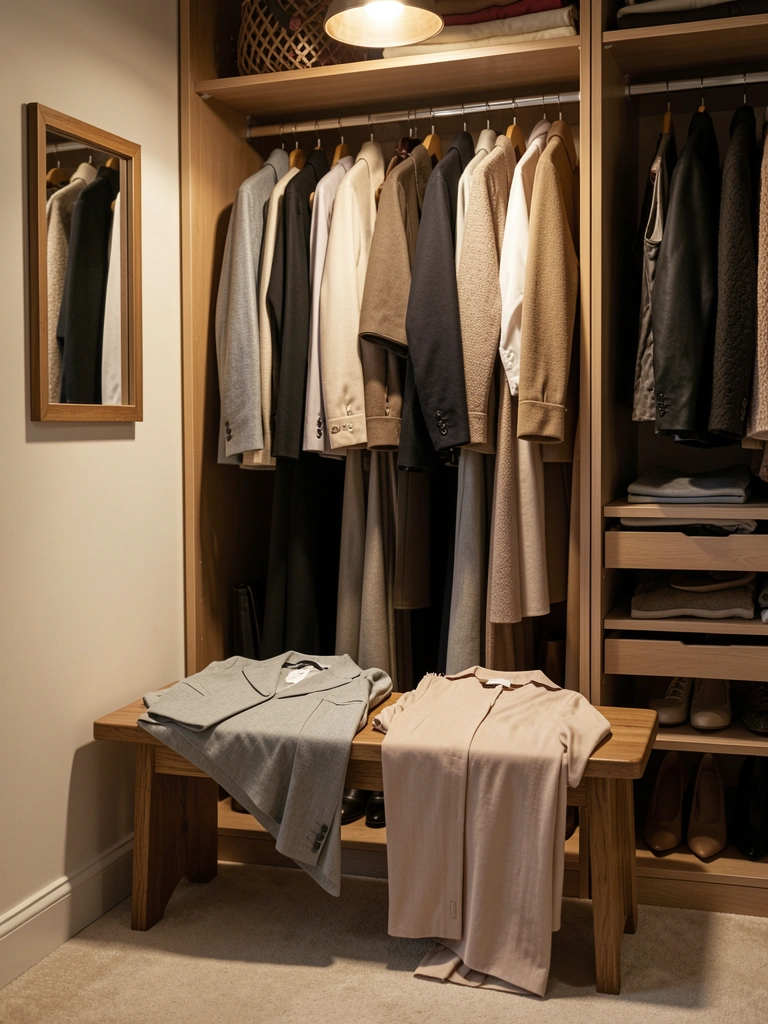
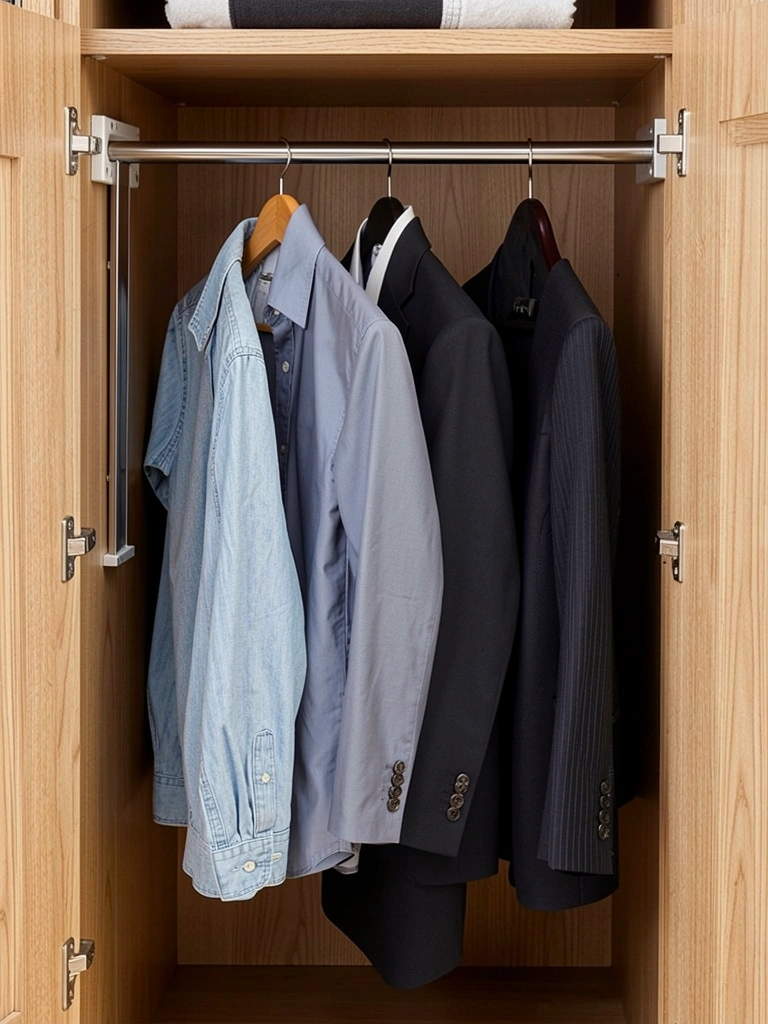
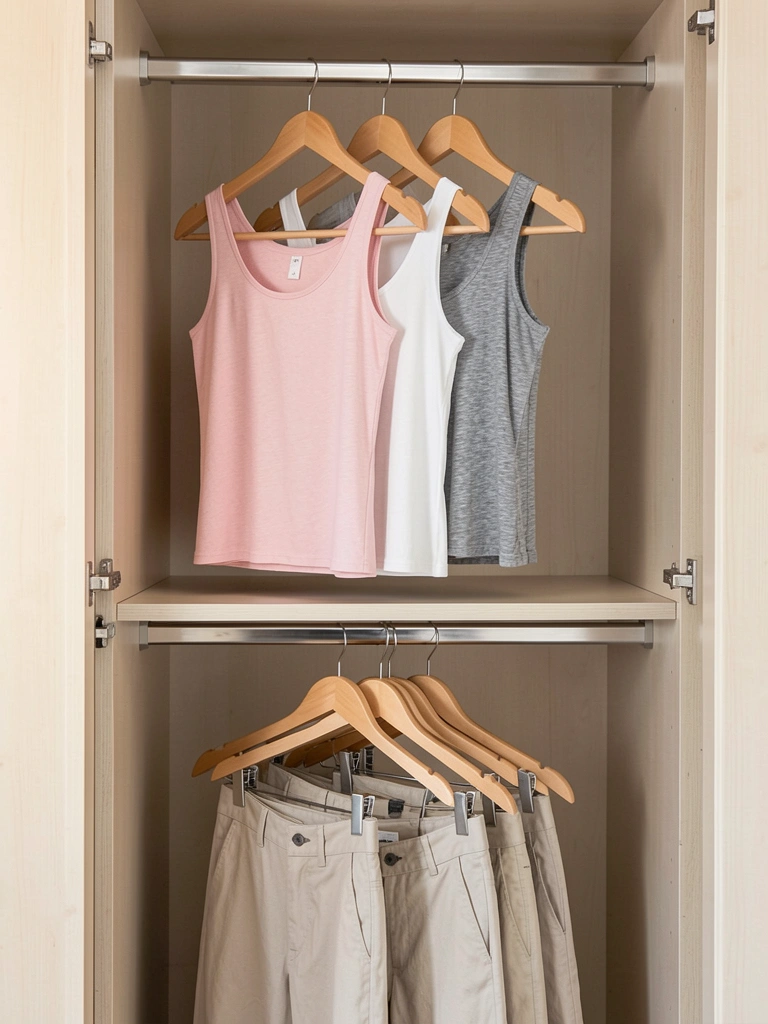
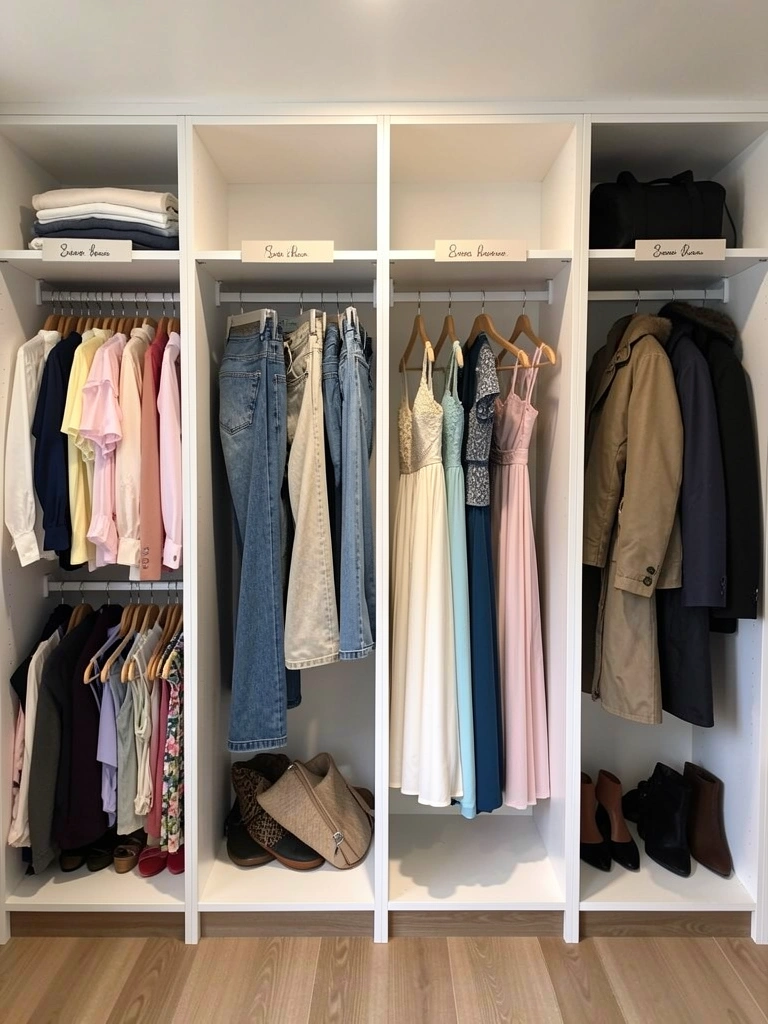
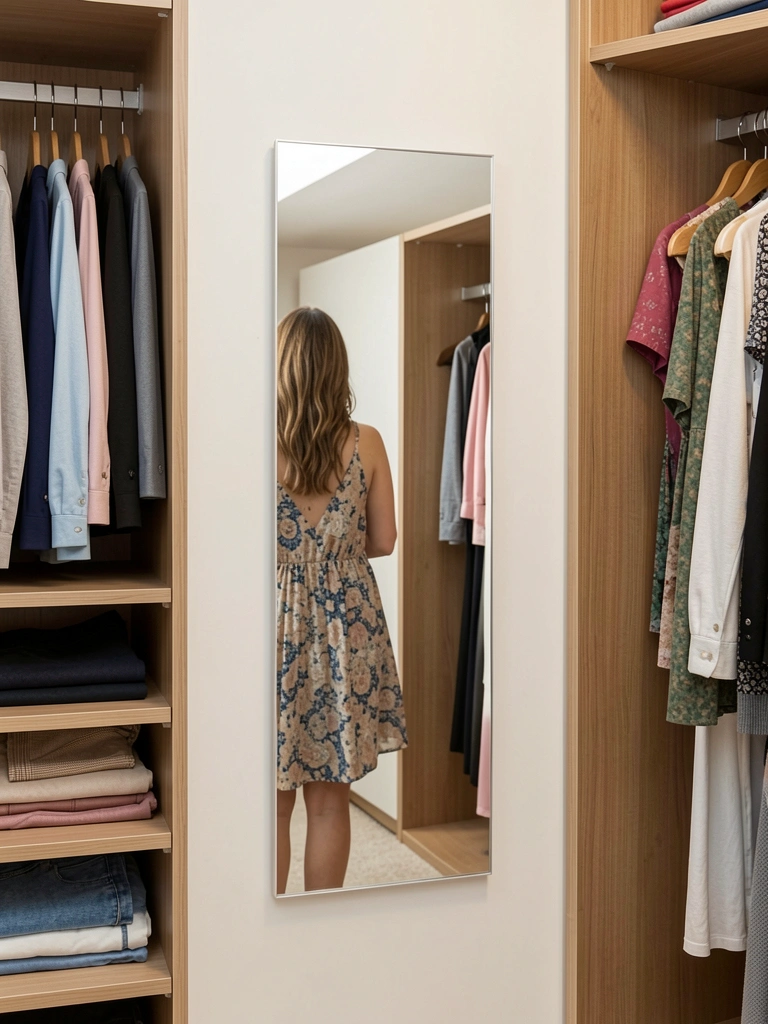
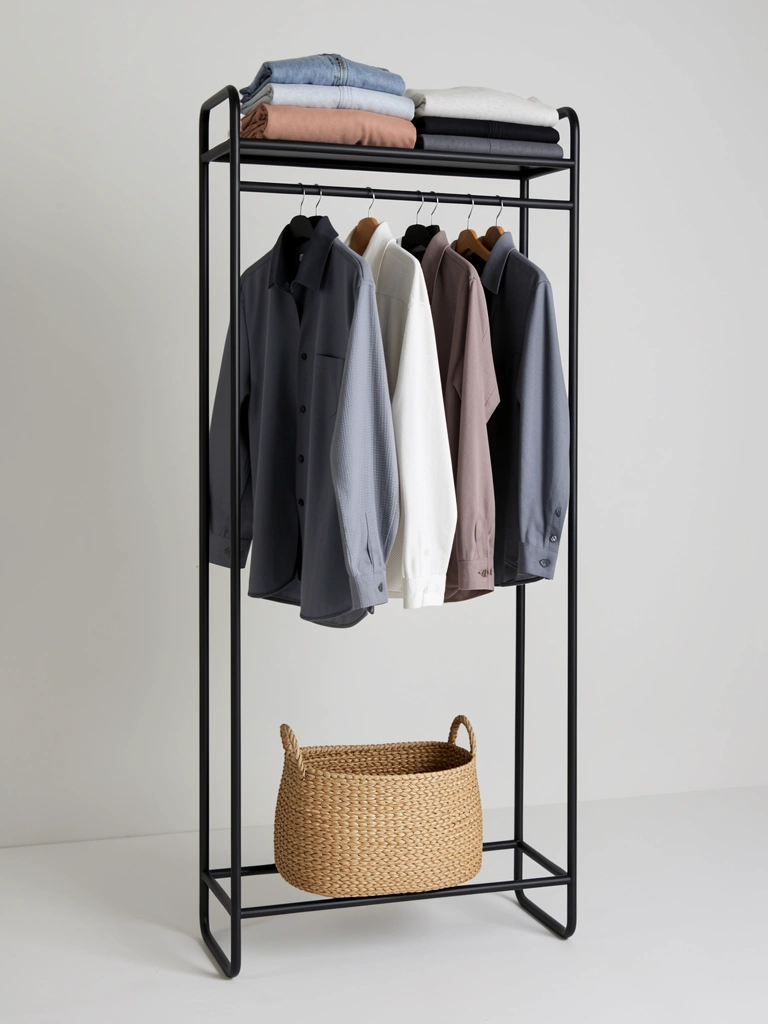
    10. Paint Your Closet Interior in a Contrasting Color

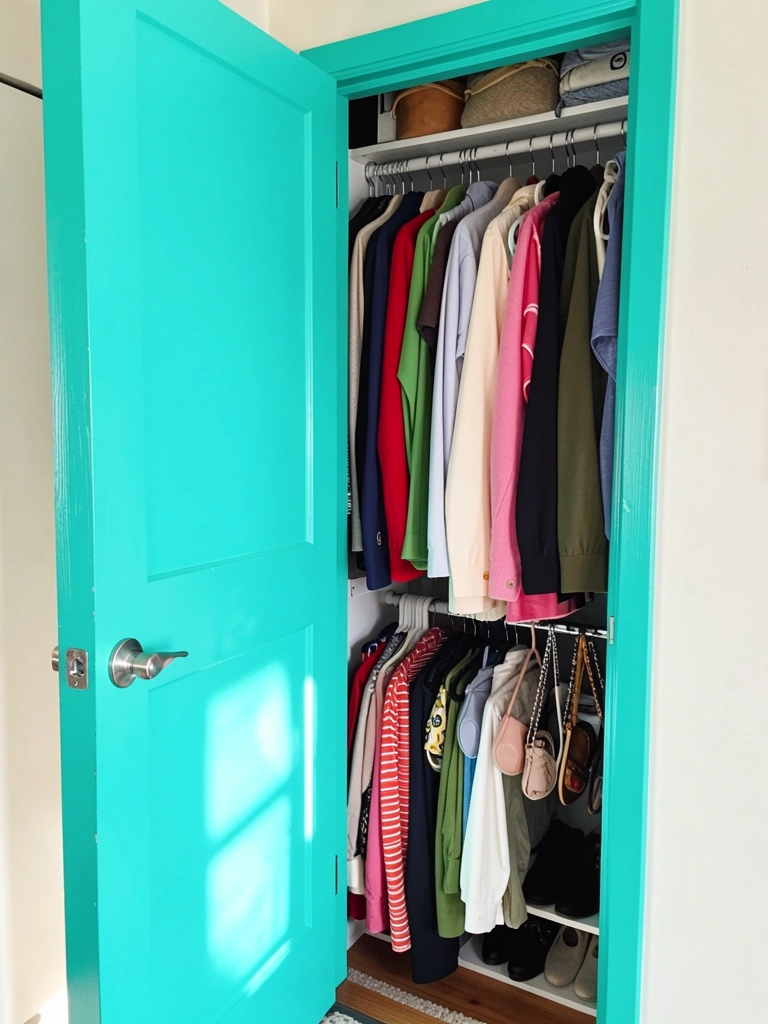
    Paint the inside of your closet (especially the door) in a contrasting color—hot pink, baby blue, or even lime green. It’s bold, hidden from guests, and makes getting dressed fun.

    Use Benjamin Moore or Sherwin-Williams semi-gloss paint ($25-$35 per quart) for moisture resistance. One quart covers most closets, taking 2-3 hours with two coats. Semi-gloss resists dust and wipes clean. If you’re renting, skip this idea—but you could line shelves with bright contact paper ($10-$15) instead.

    Every time you open your closet, there’s a pop of unexpected color. It sounds small, but it genuinely brightens your morning.

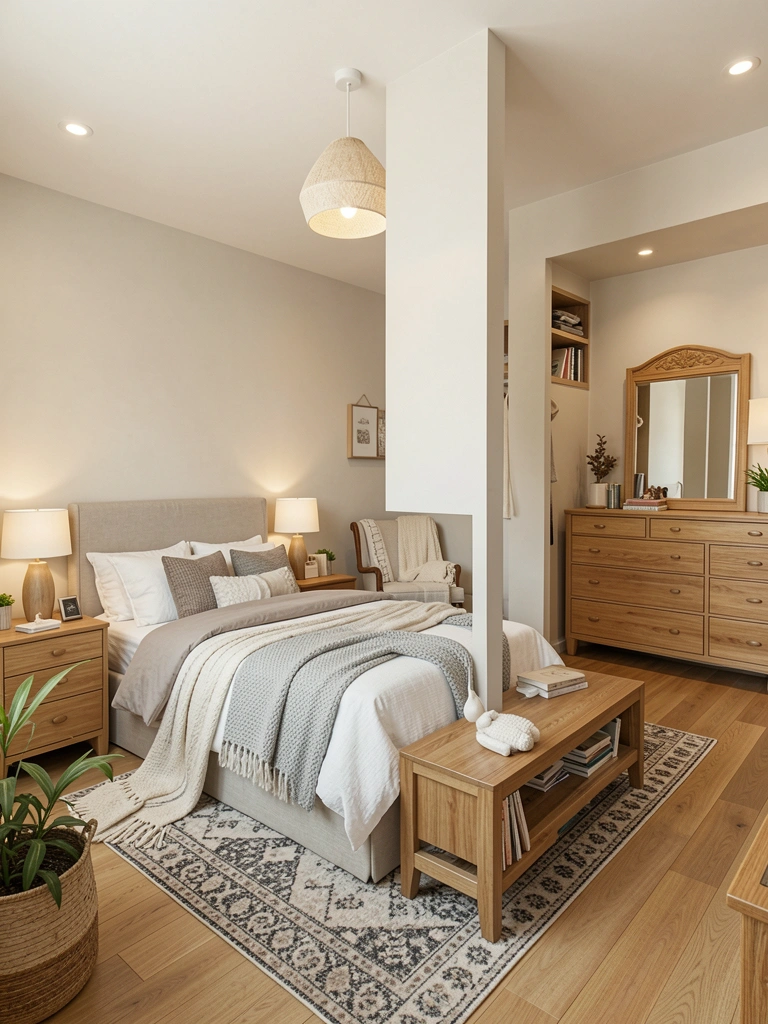
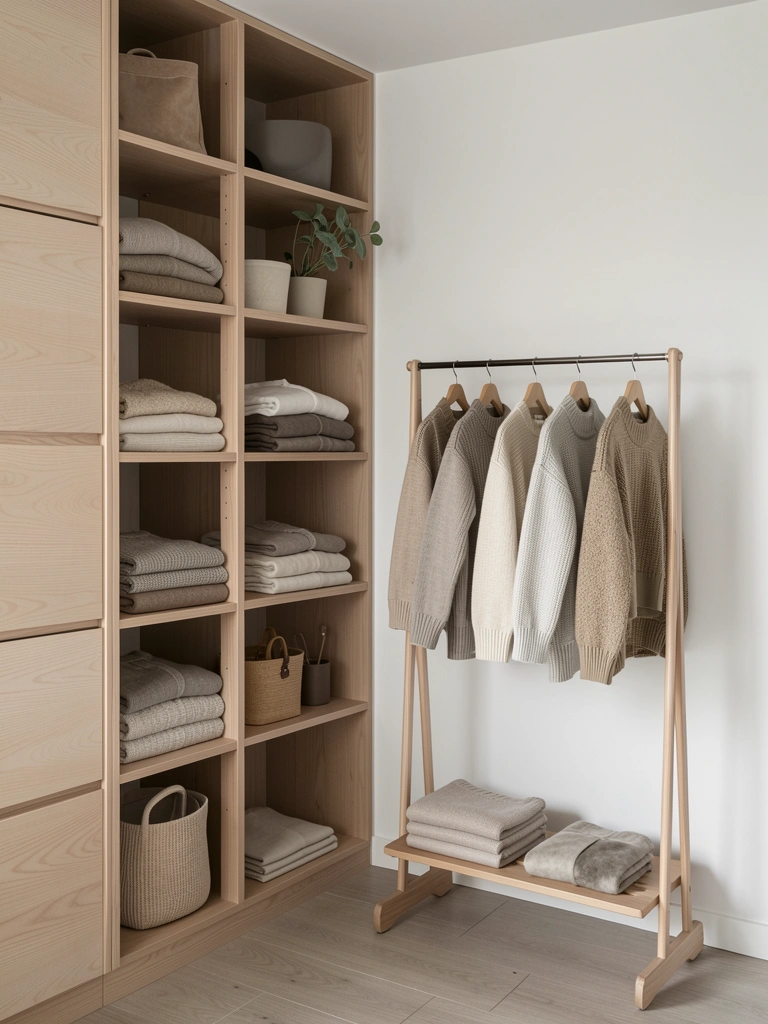
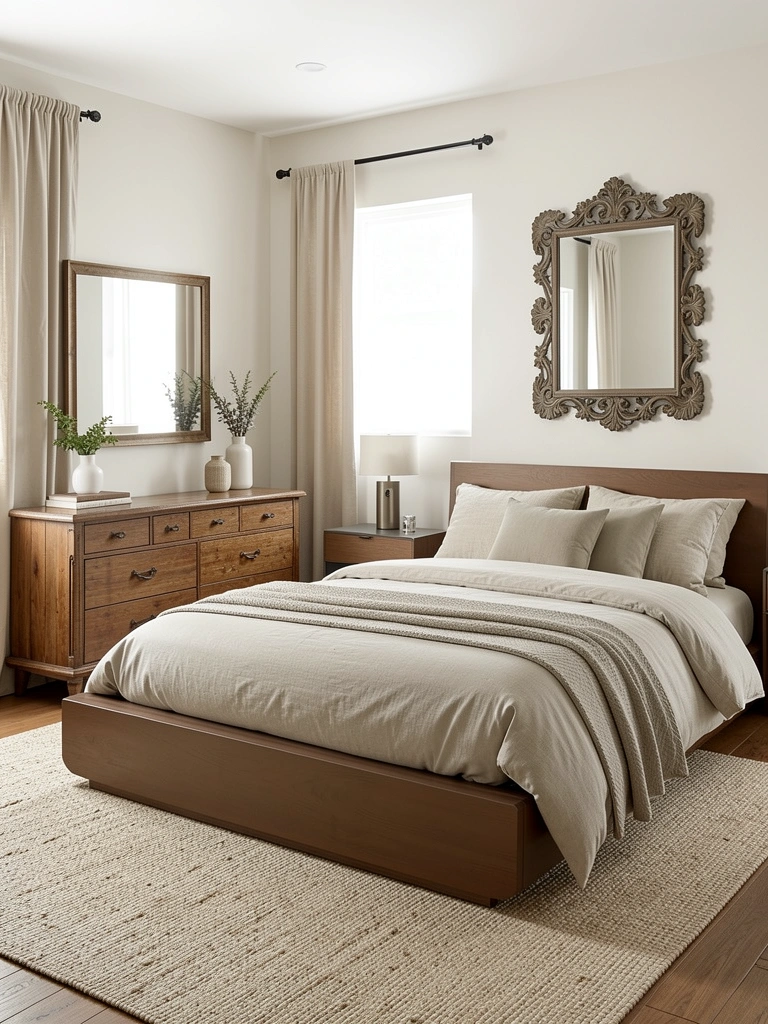
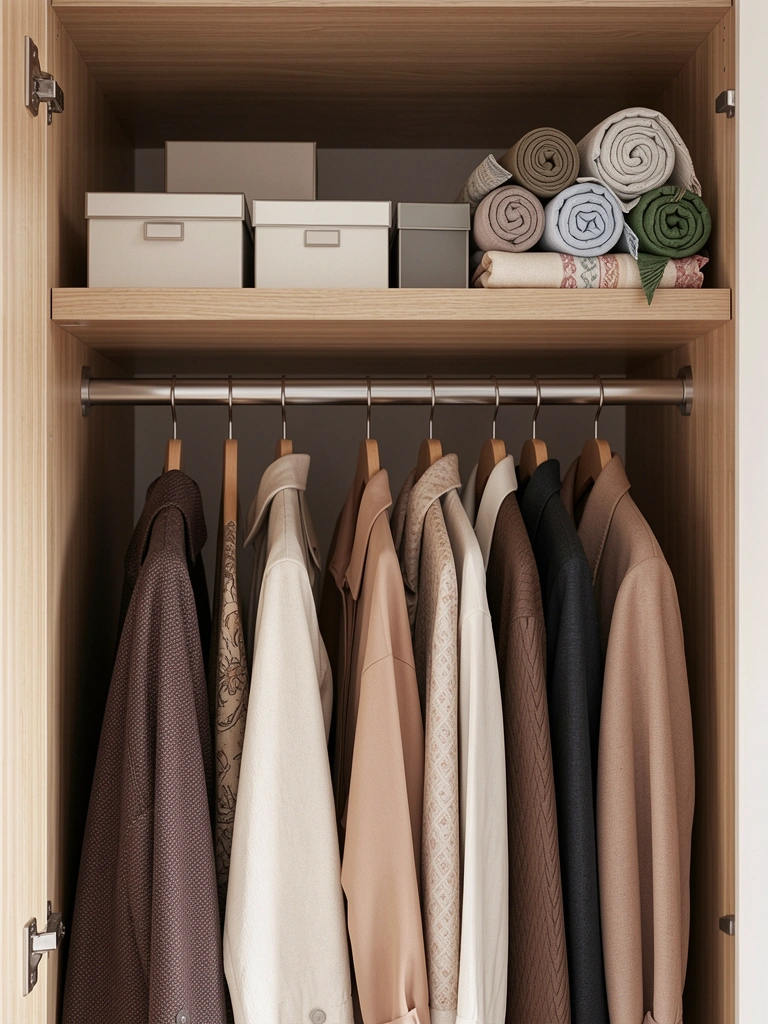
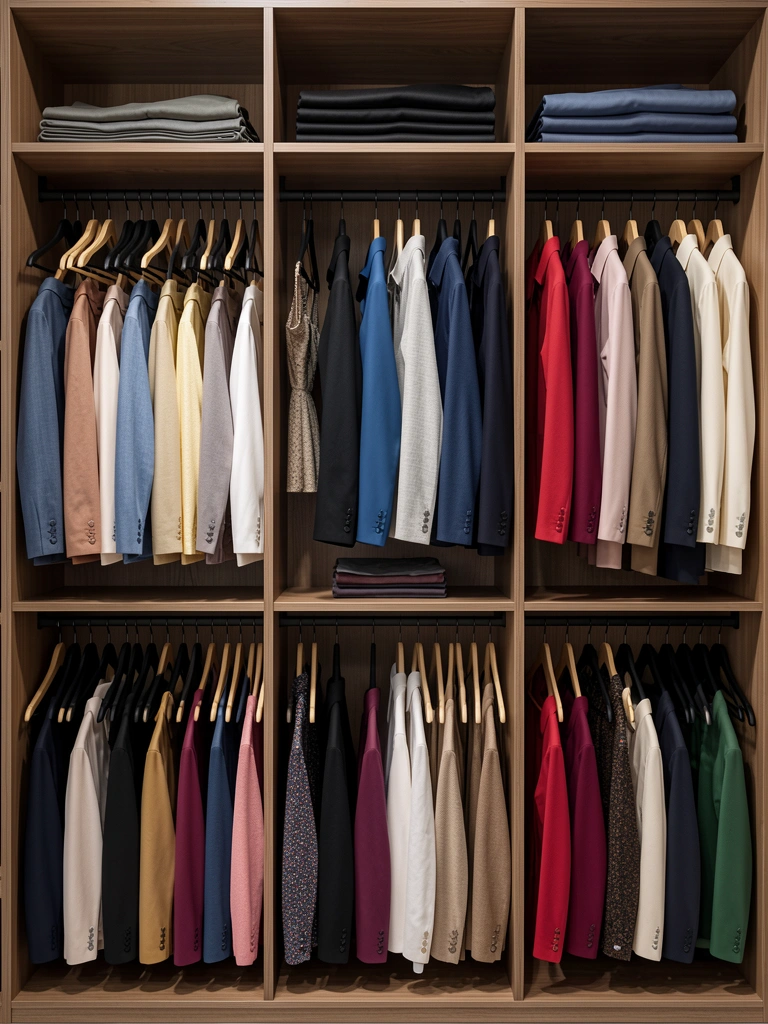
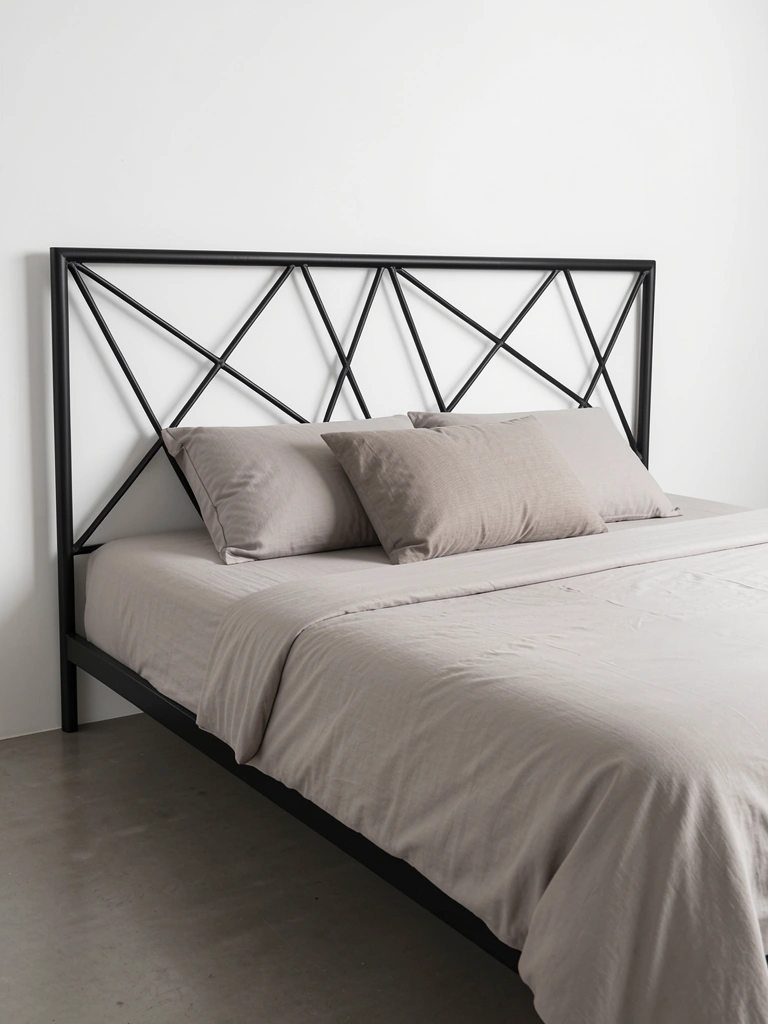
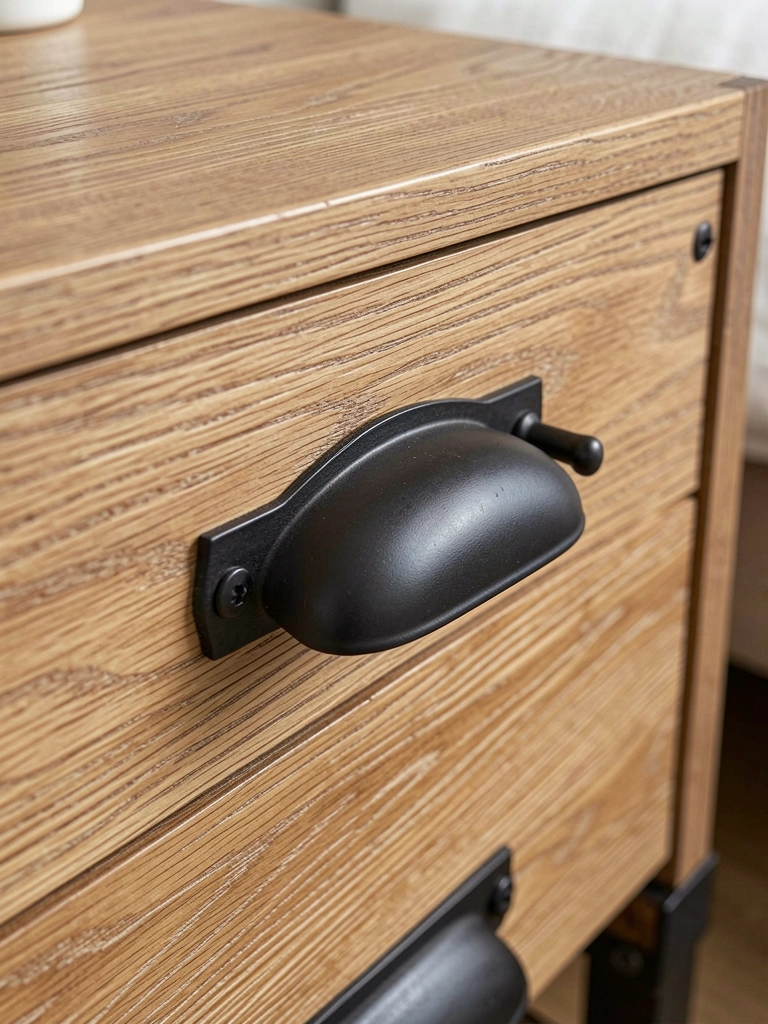
    11. Mix Vintage Furniture with Modern Pieces

    Y2K rooms thrive on contrast—mixing old and new creates depth. Hunt for vintage dressers, side tables, or chairs ($50-$200 on Facebook Marketplace, Craigslist, or Etsy) and pair them with modern pieces from IKEA, West Elm, or Article.

    Look for solid wood pieces with good bones (even if they’re scratched or dated). A fresh coat of paint or stain transforms them instantly. This approach is budget-friendly because used furniture costs way less than new. Takes time to source but saves money long-term.

    Your room feels collected and intentional—like you’ve been gathering pieces for years, not bought everything at once.

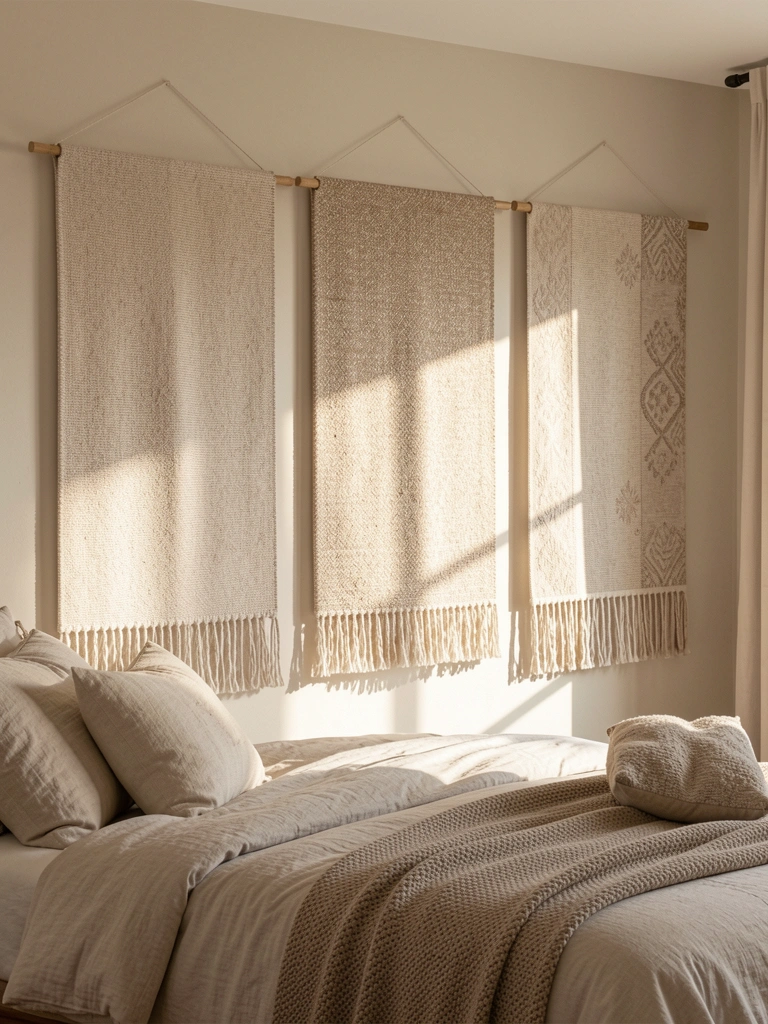
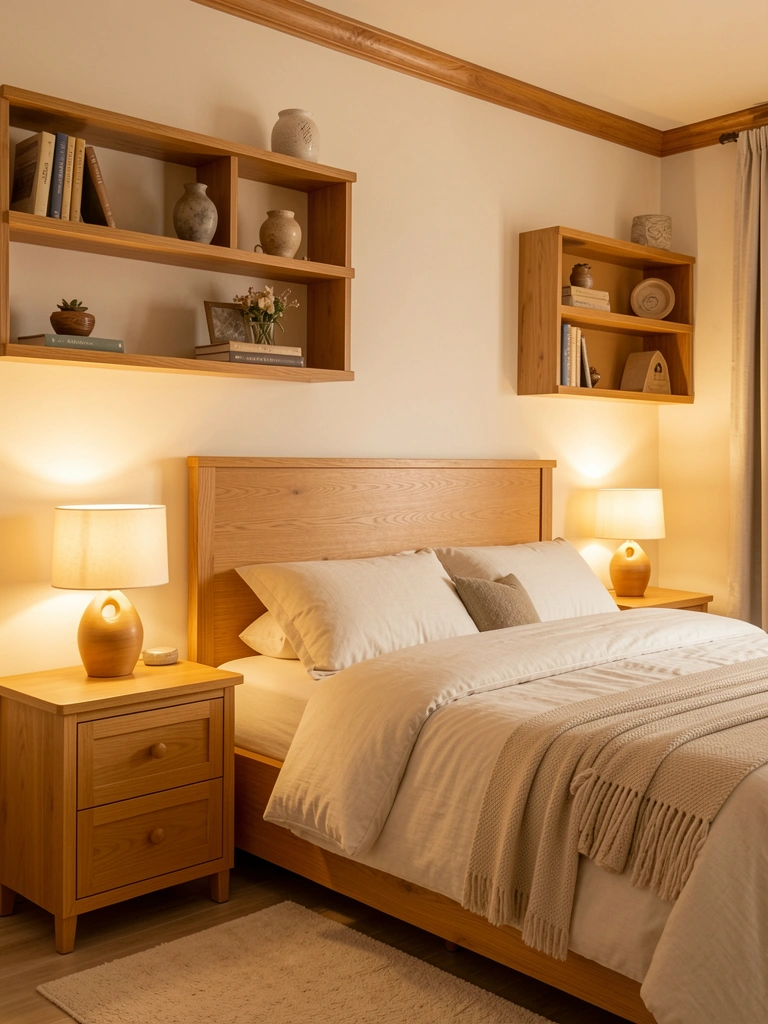
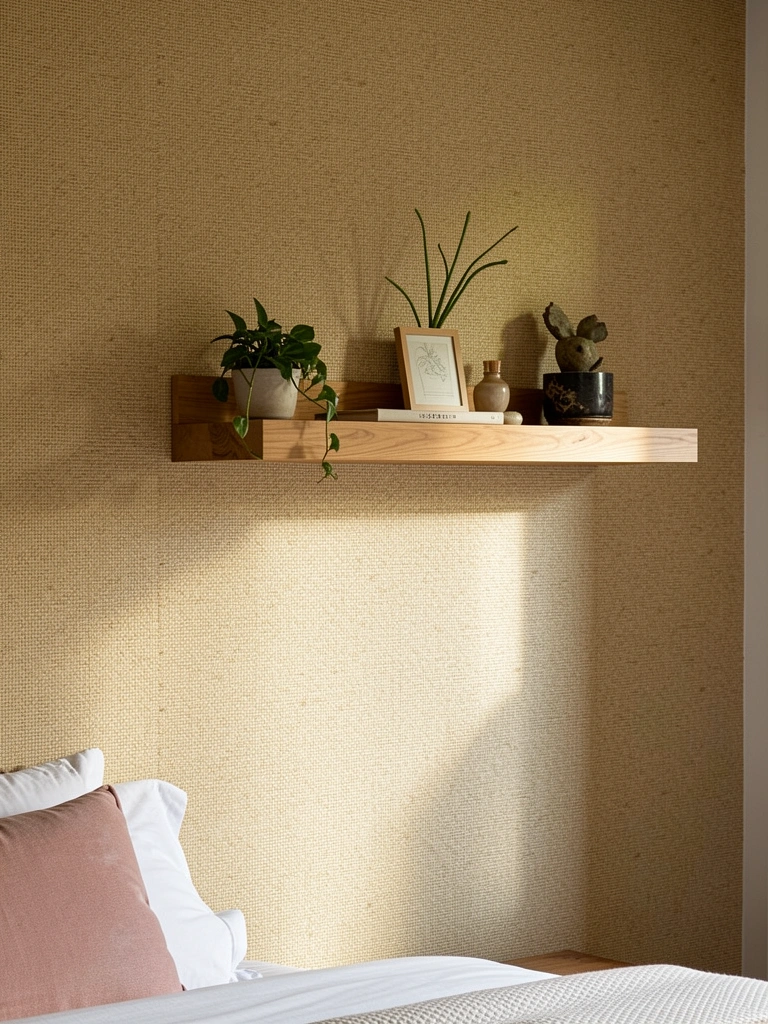
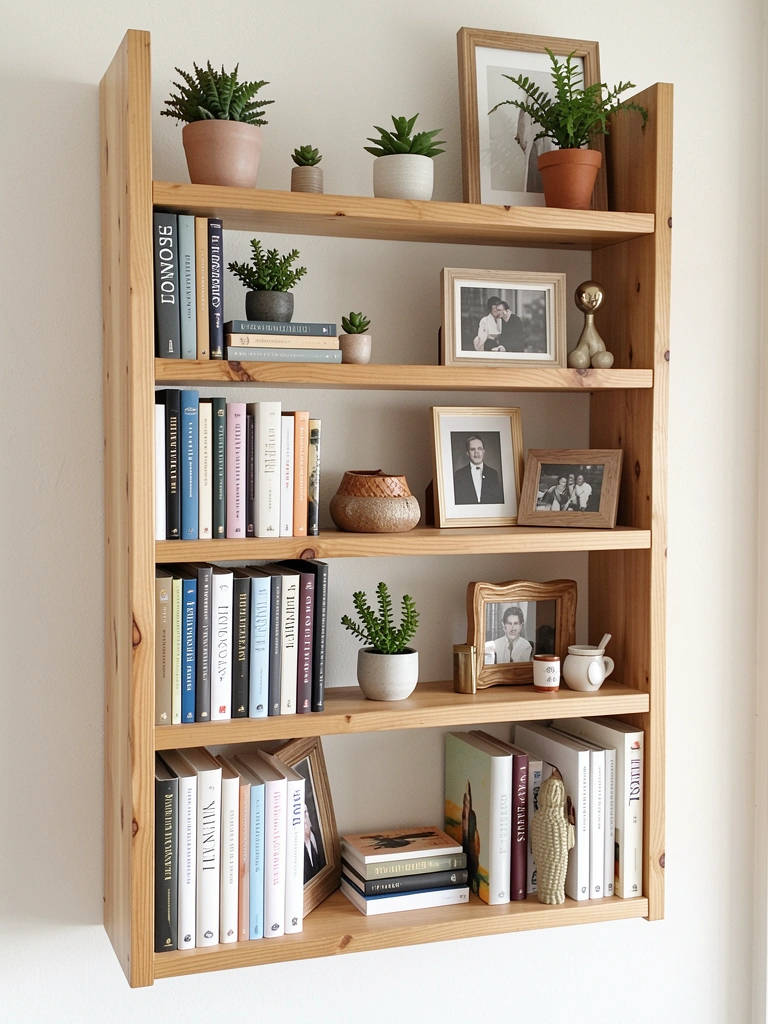
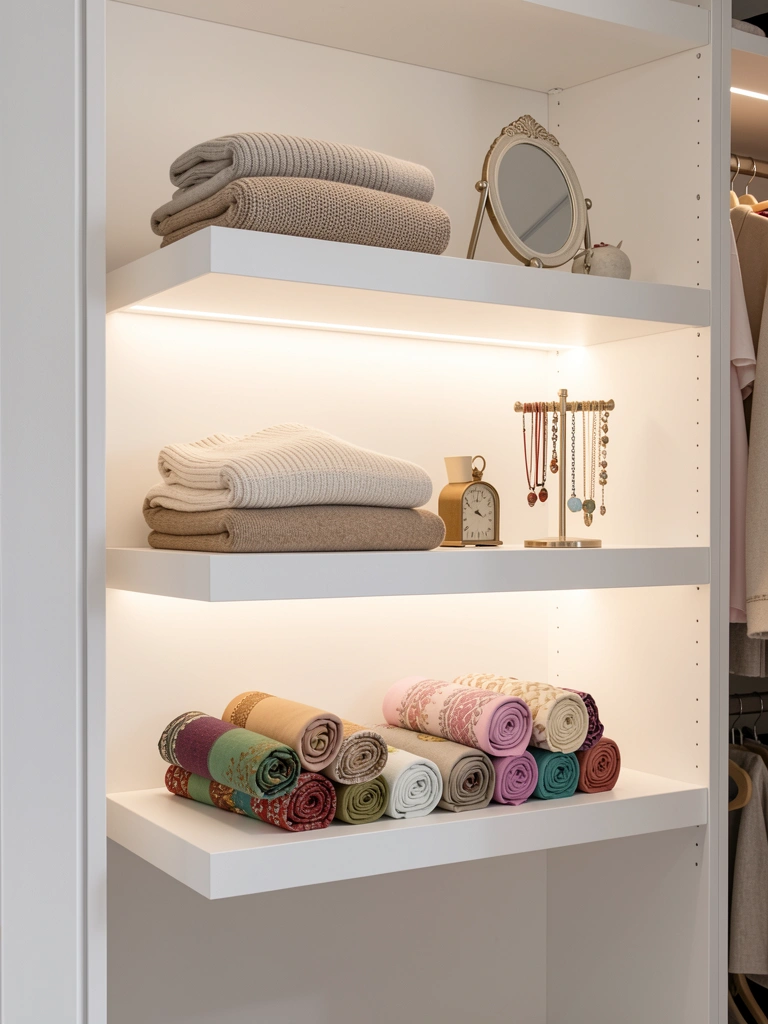
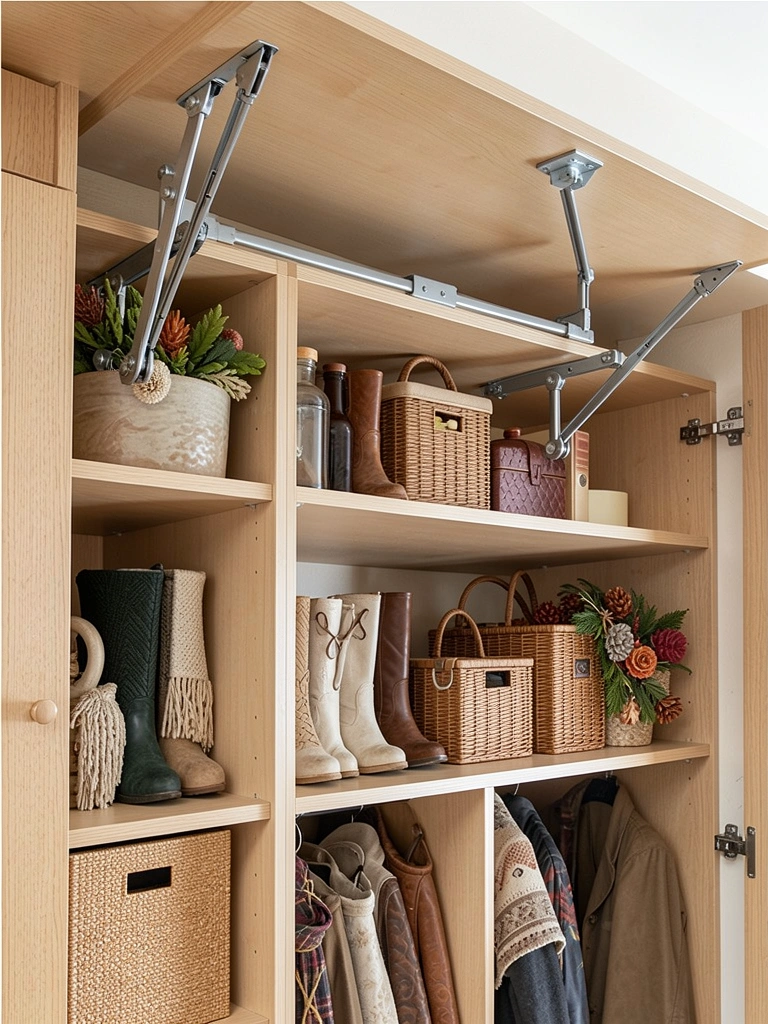
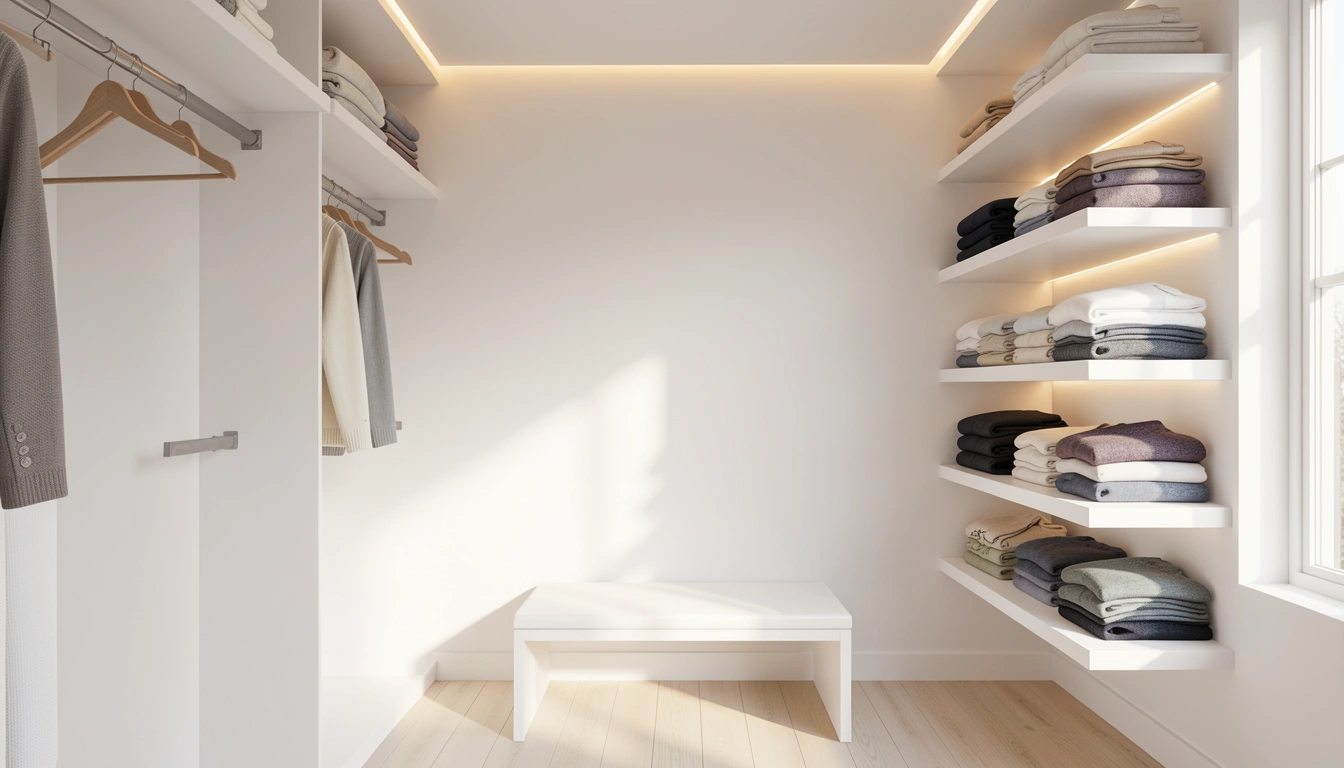
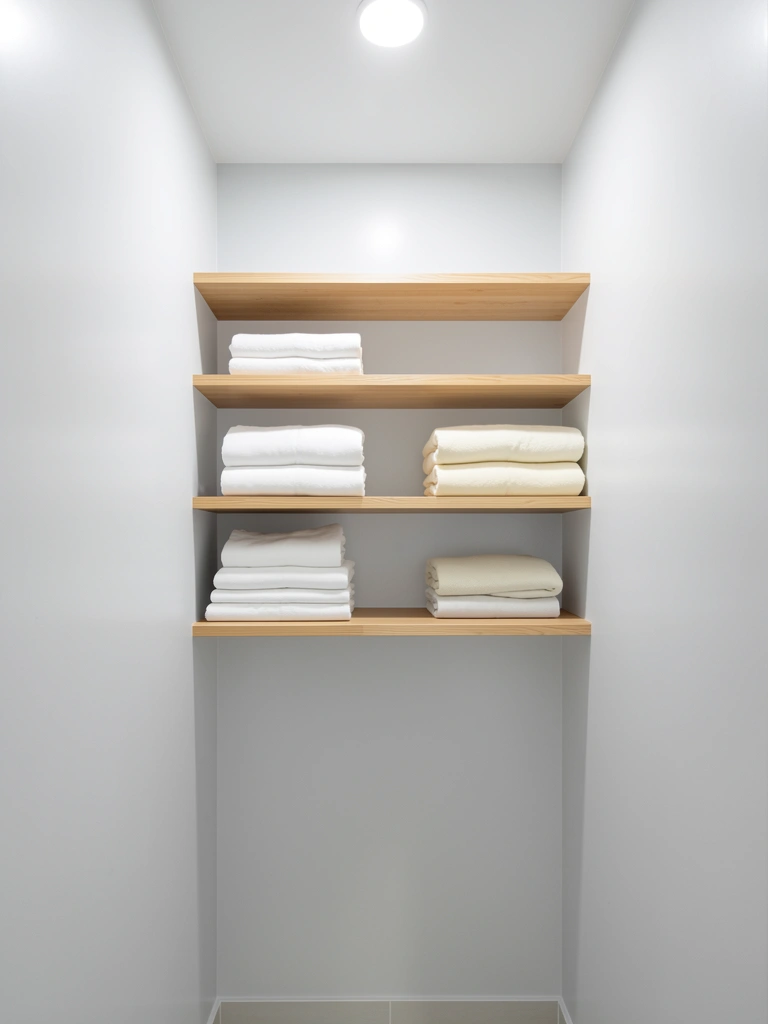
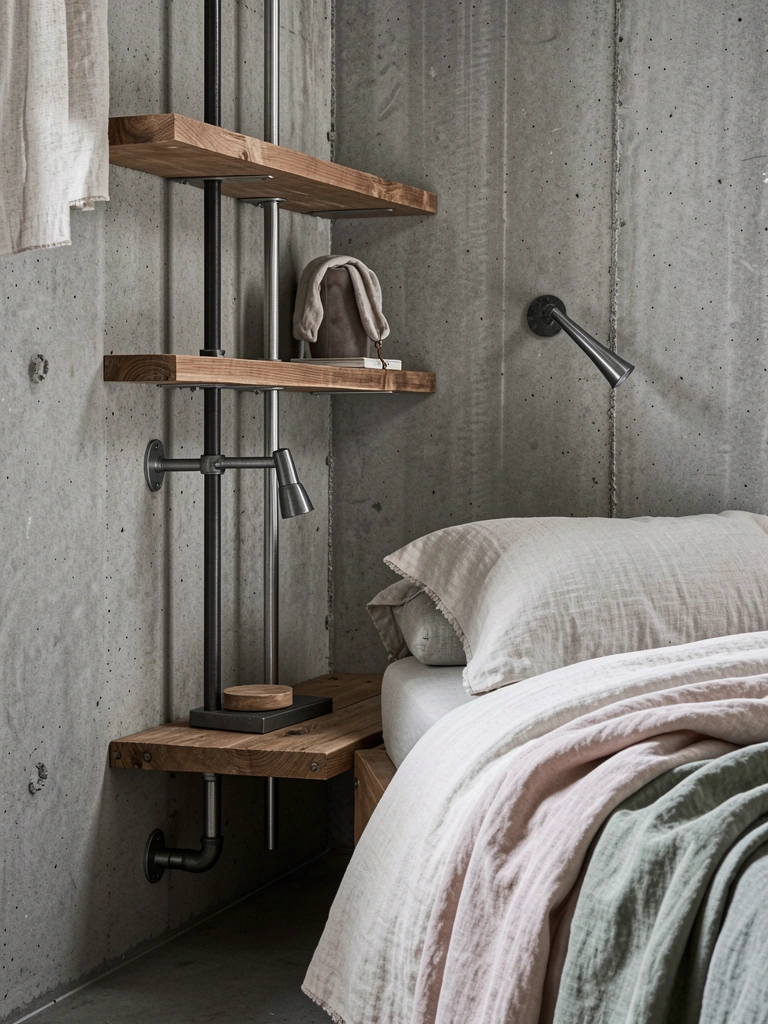
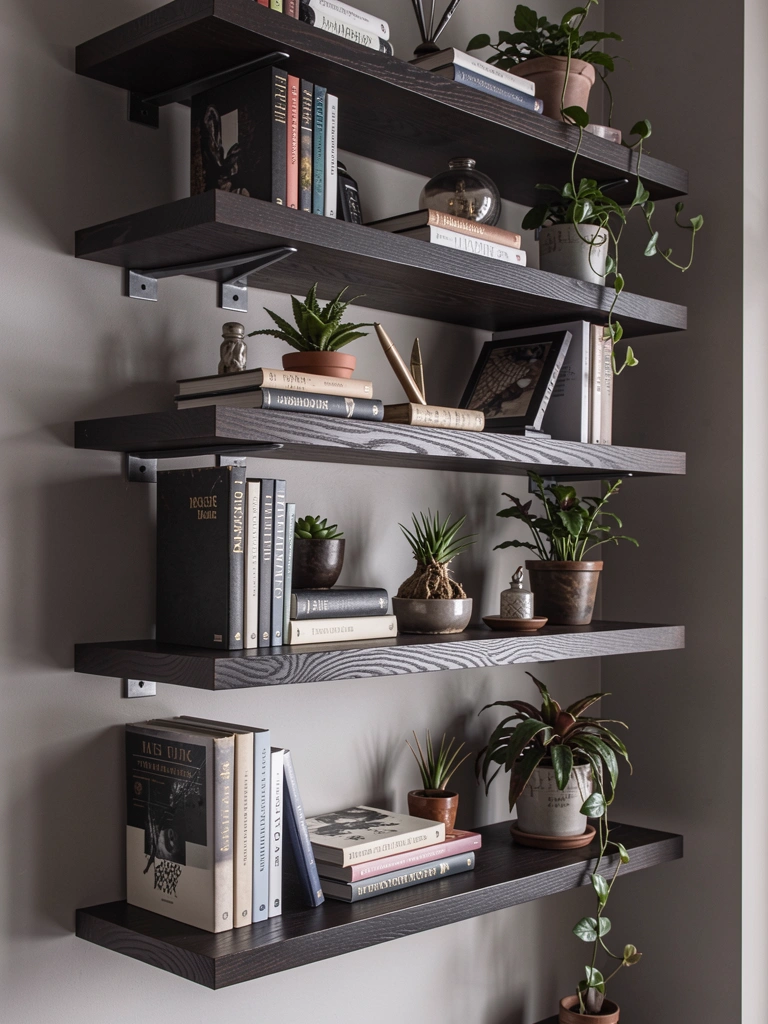
    12. Hang a Wall-Mounted Shelf for Display

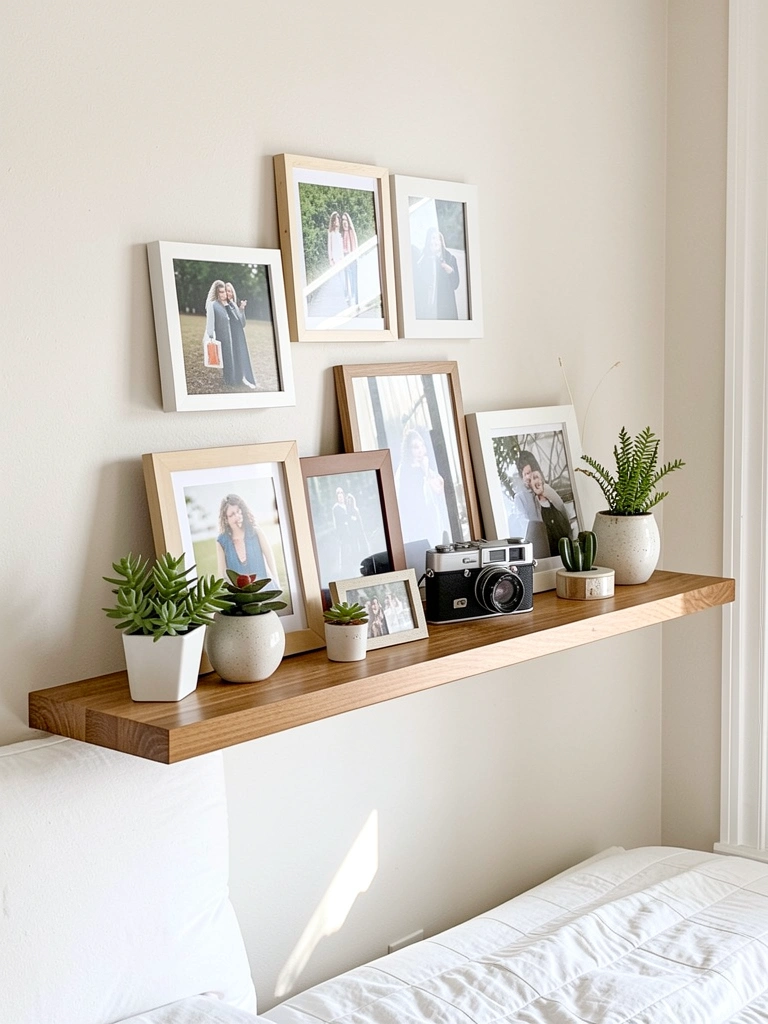
    Floating shelves ($20-$50 from IKEA or Home Depot) instantly add visual interest and storage. Install one above your desk, nightstand, or dresser at IKEA’s “LACK” shelf is perfect for beginners.

    Hardware and installation take 15-30 minutes with a drill. Renters can use removable adhesive shelves ($30-$60) that peel off cleanly. Style it with books, plants, photos, and small treasures. Keep it balanced—not too minimal, not cluttered.

    Your wall becomes a mini gallery that shows off your personality without taking up floor space.

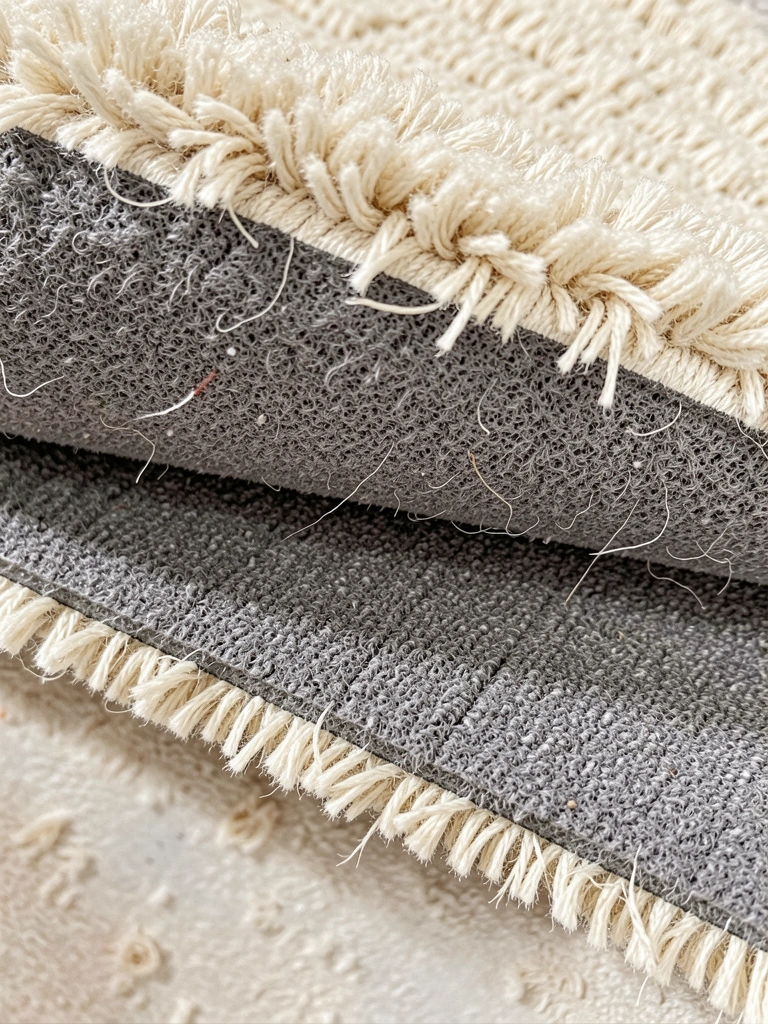
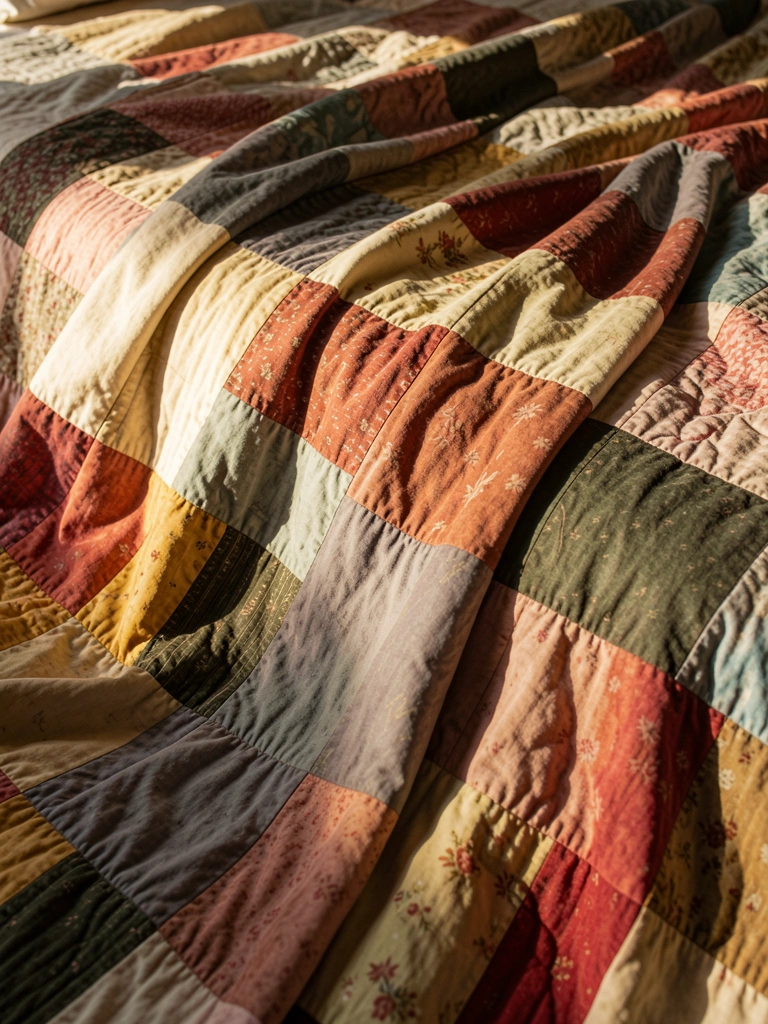
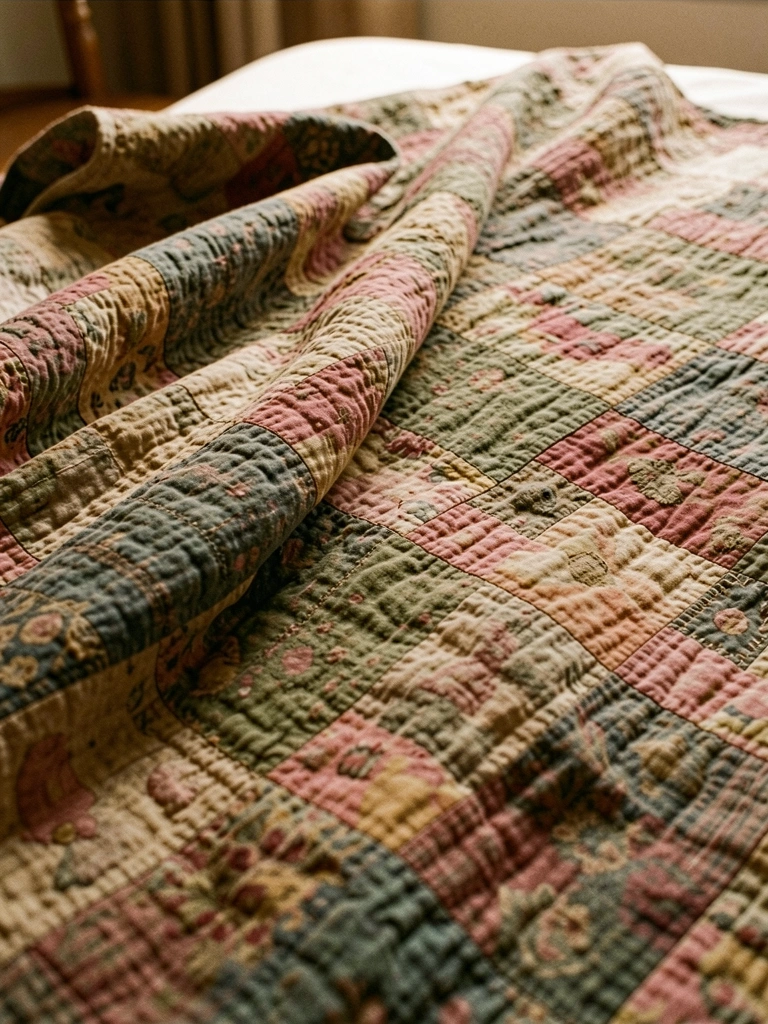
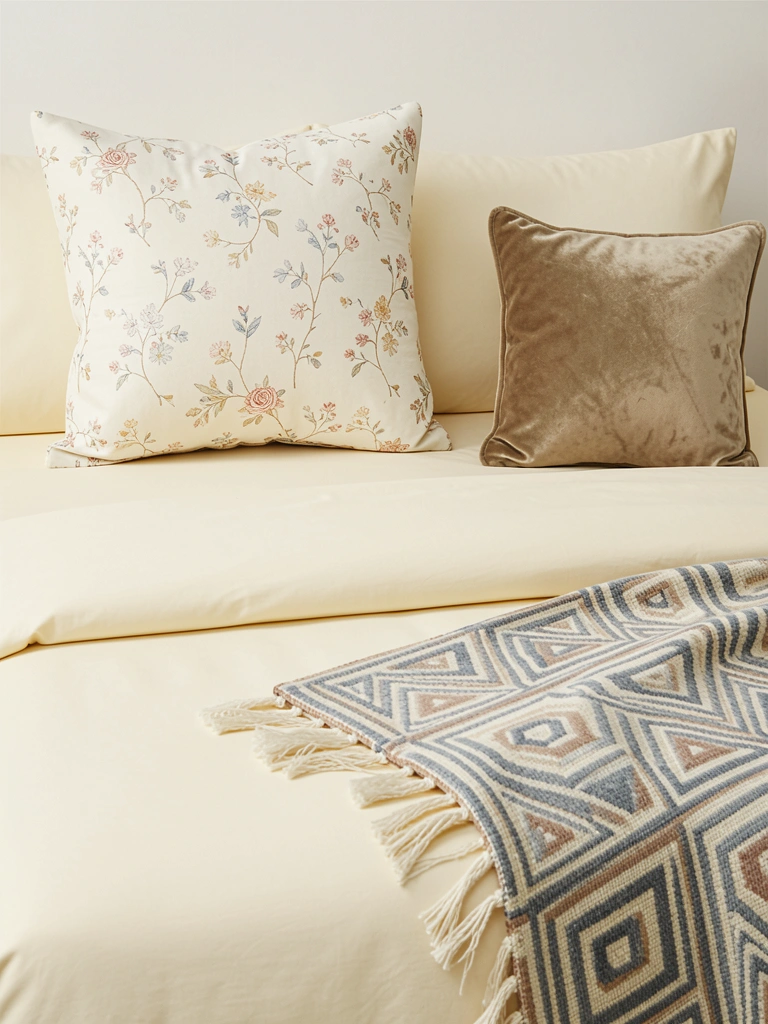
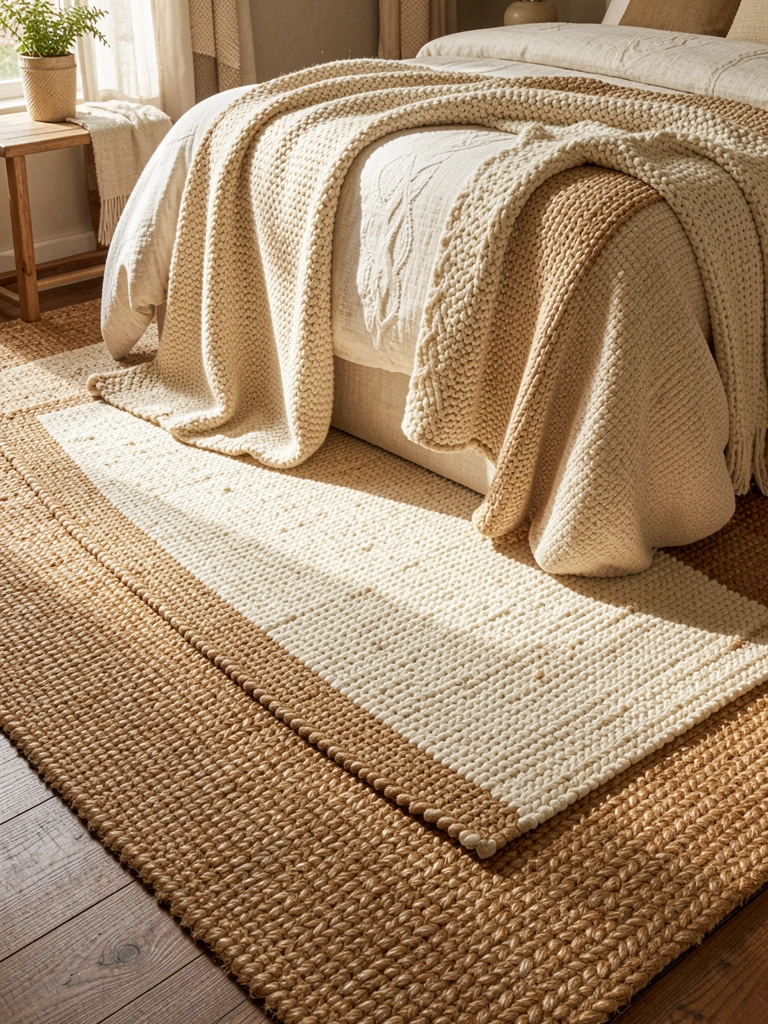
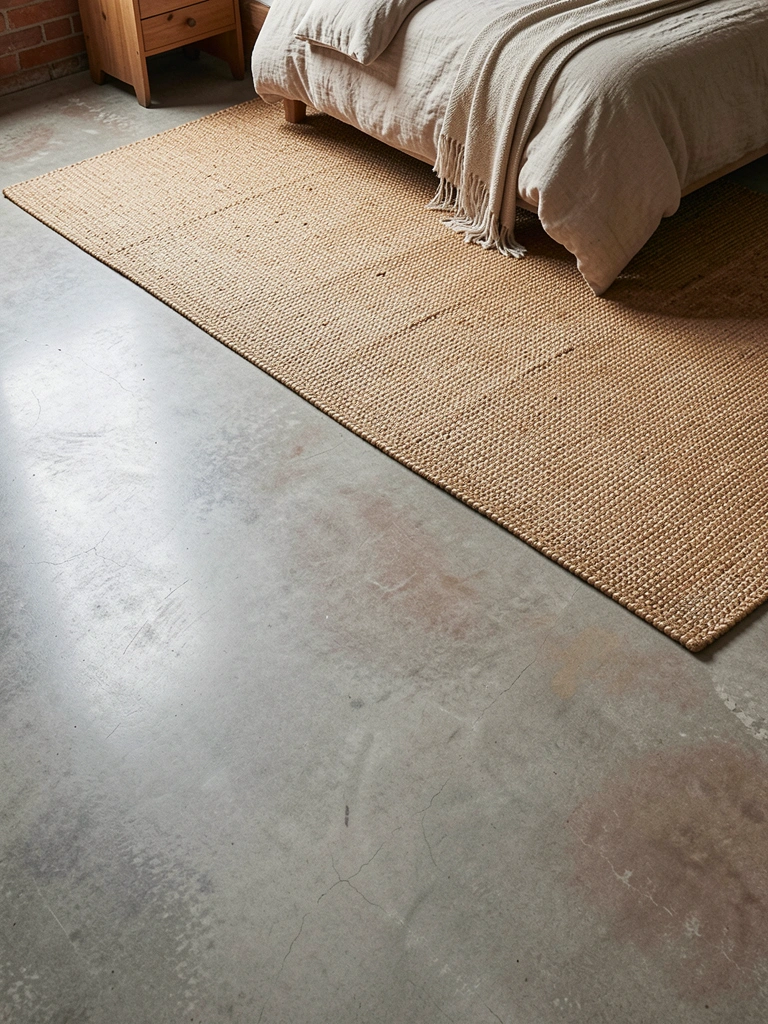
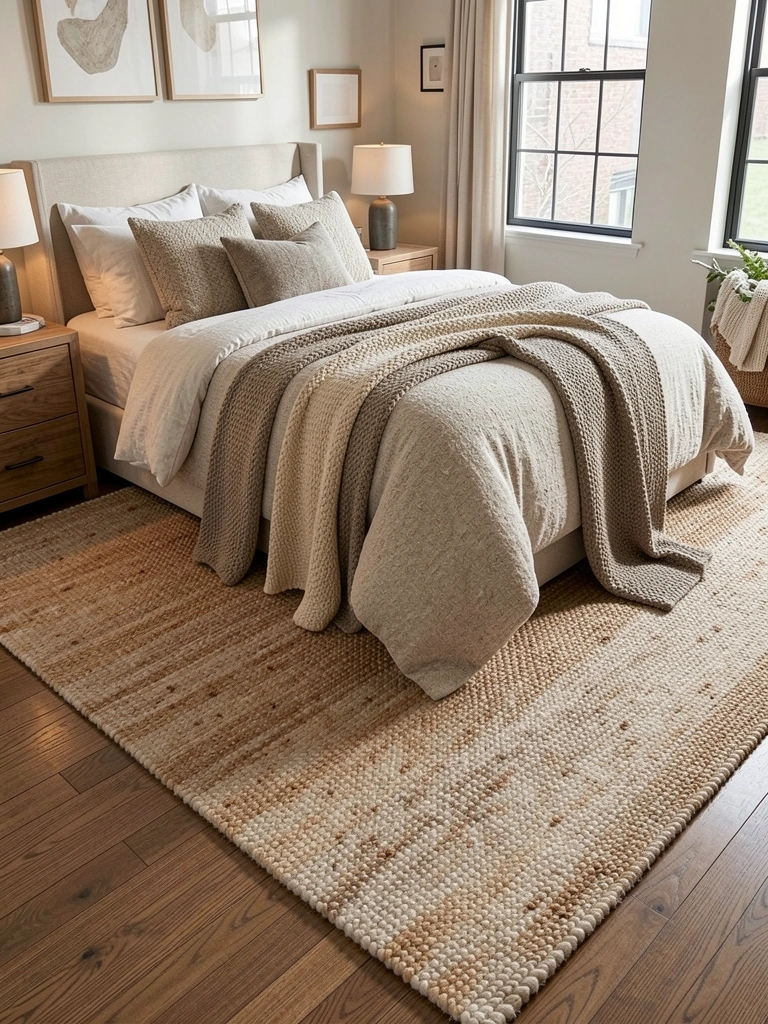
    13. Layer Patterned Rugs for Texture

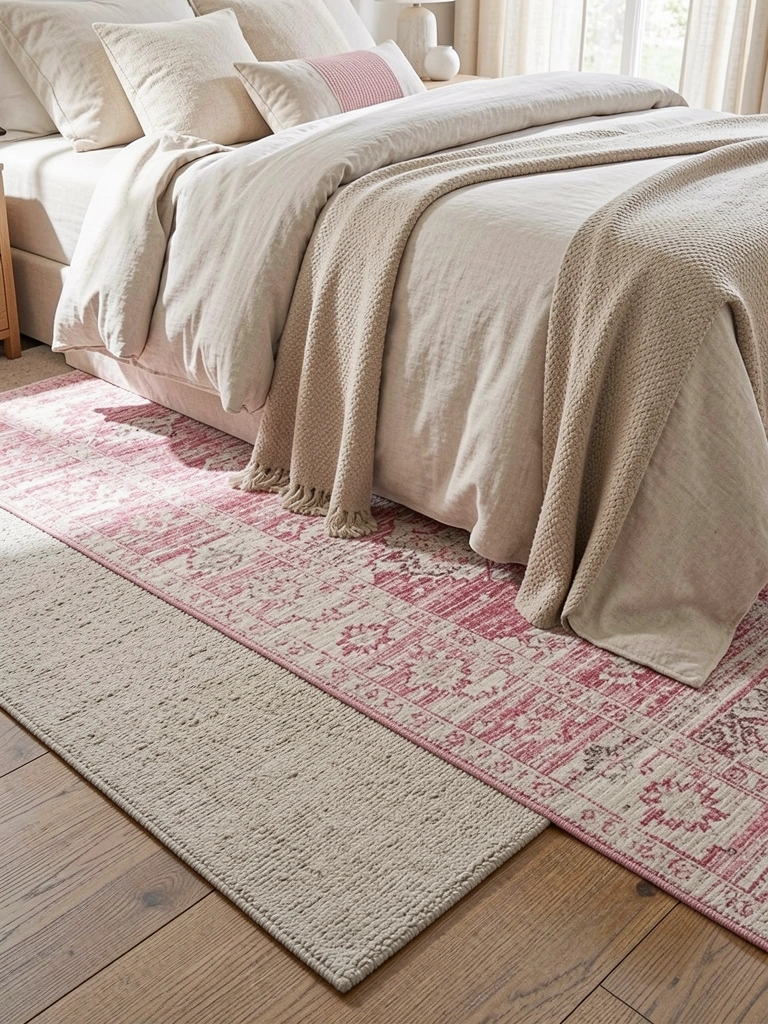
    Layering rugs ($30-$80 for smaller pattern rug, $50-$150 for base rug from Wayfair, Target, or Amazon) adds dimension and that layered Y2K aesthetic. Use a larger neutral base with a smaller patterned rug on top.

    Mix textures: a jute base with a fuzzy or woven pattern layer. This works especially well if you have hardwood or tile floors. Takes 10 minutes to arrange and costs less than one large statement rug. Source secondhand rugs ($10-$40) from thrift stores to save even more.

    Your floor becomes part of the room’s design—cozy, textured, and inviting.

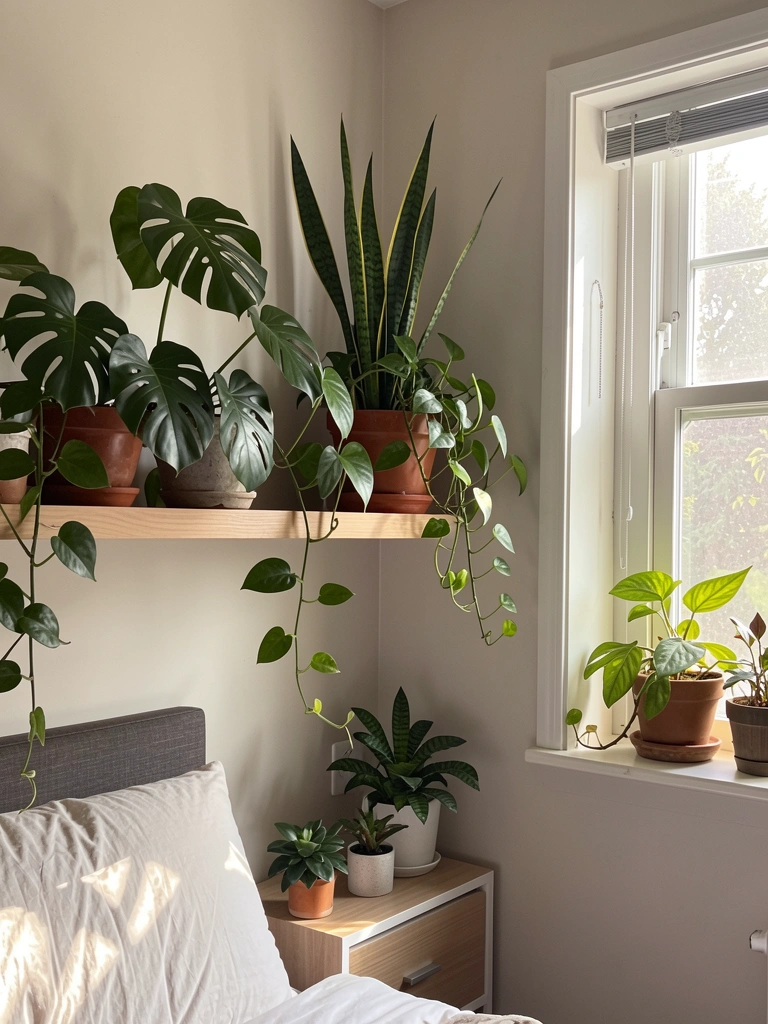
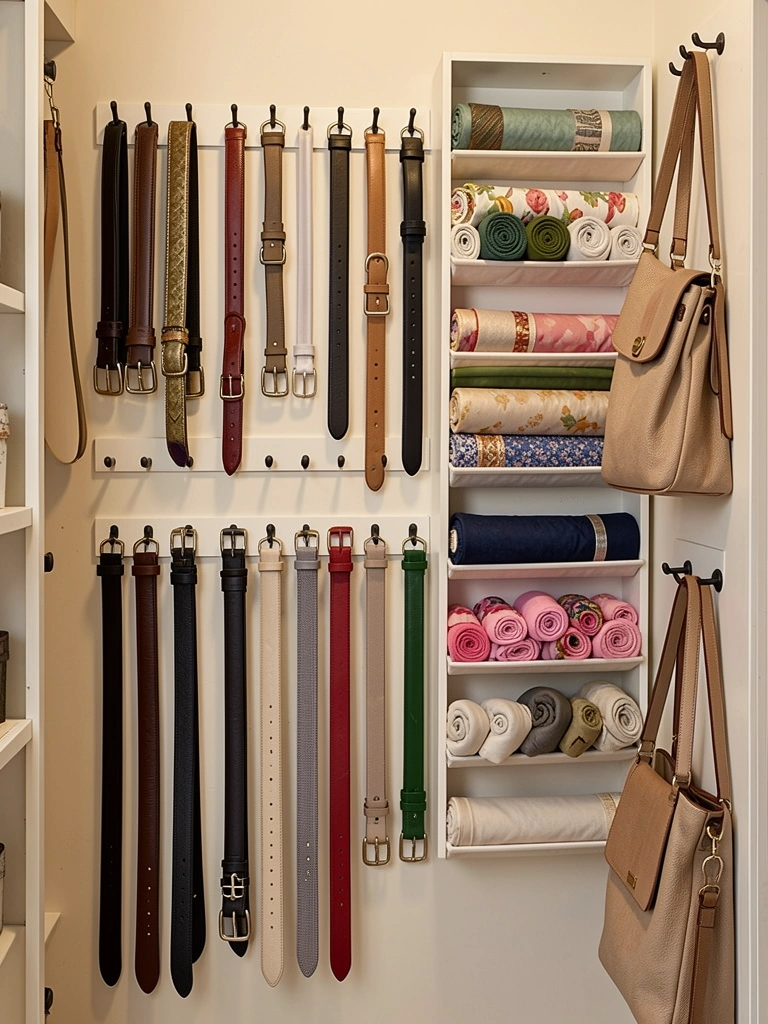
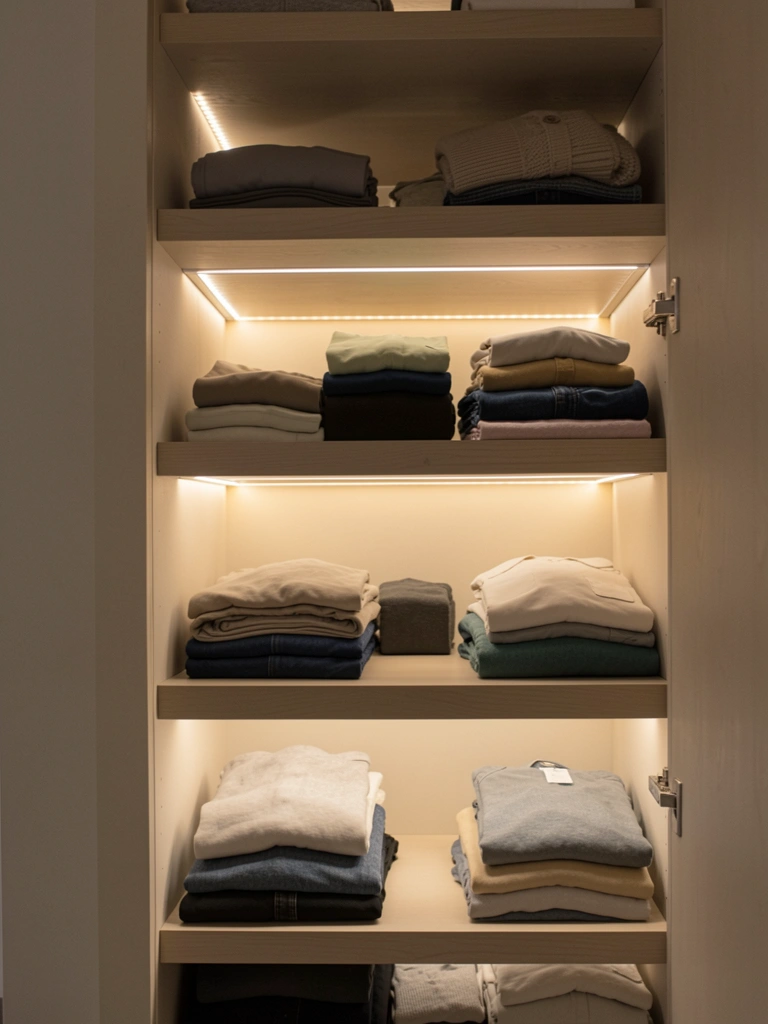
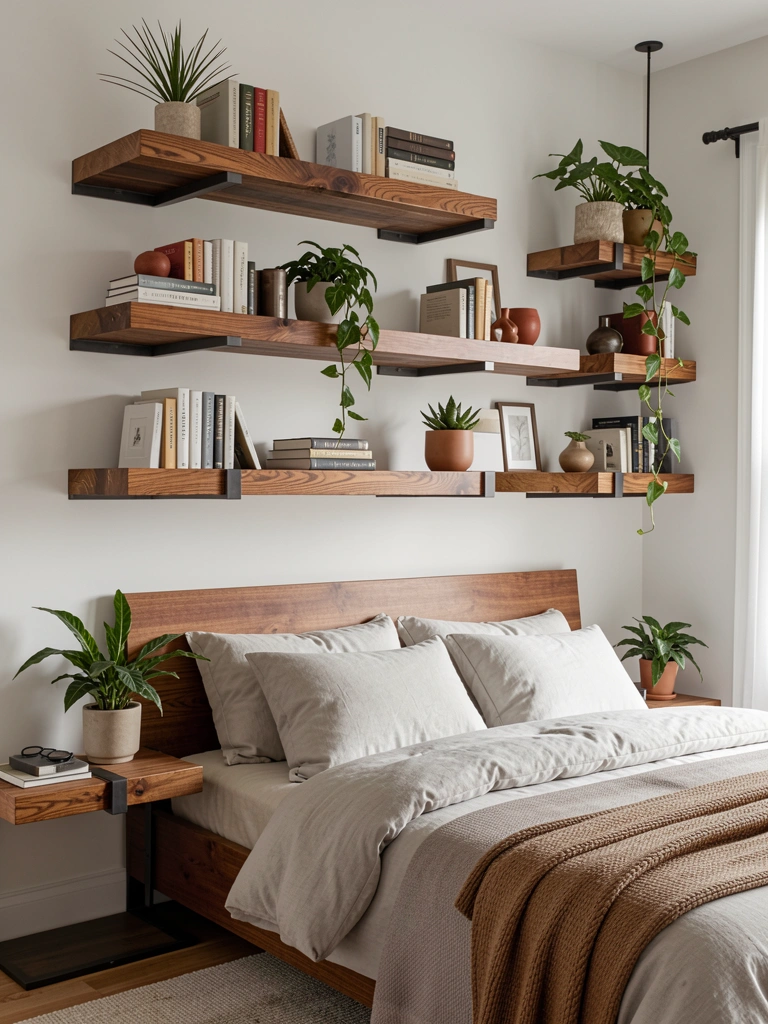
    14. Install Small Wall Shelves for Collections

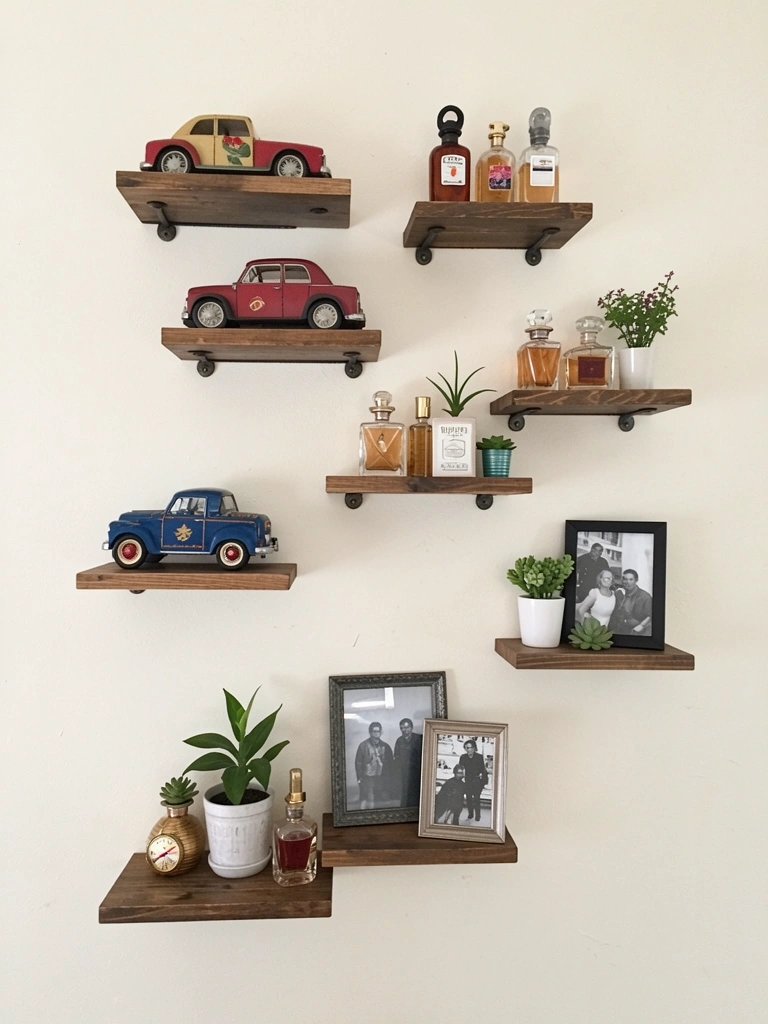
    Small wall shelves ($15-$40 each from IKEA, Target, or Amazon) create a gallery wall without needing space for a full dresser. Install 5-8 at different heights for visual interest.

    Perfect for displaying collections: small plants, vintage cameras, perfume bottles, figurines, or books. Each shelf becomes a mini-story. Installation takes 1-2 hours for an experienced DIYer. Renters, use adhesive shelves ($25-$50).

    Your wall transforms into a curated museum of your interests—functional, beautiful, and deeply personal.

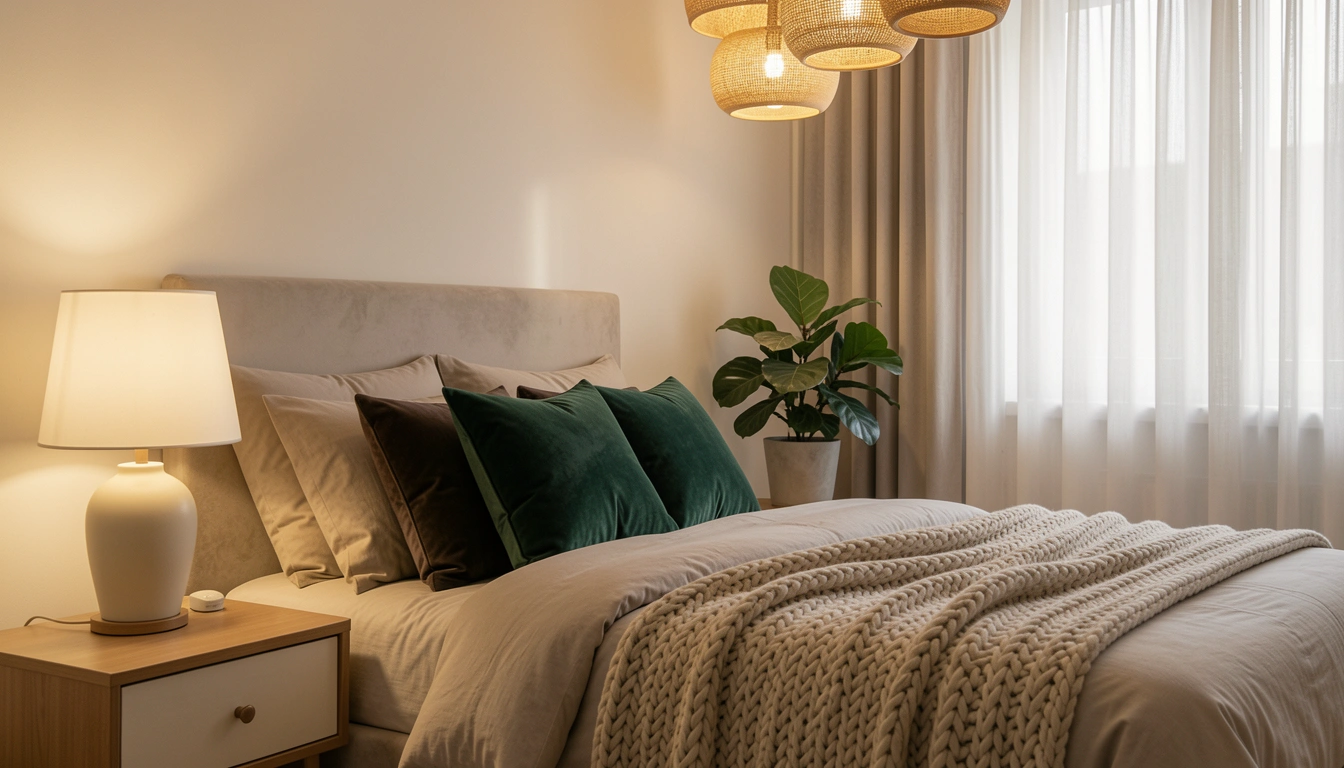
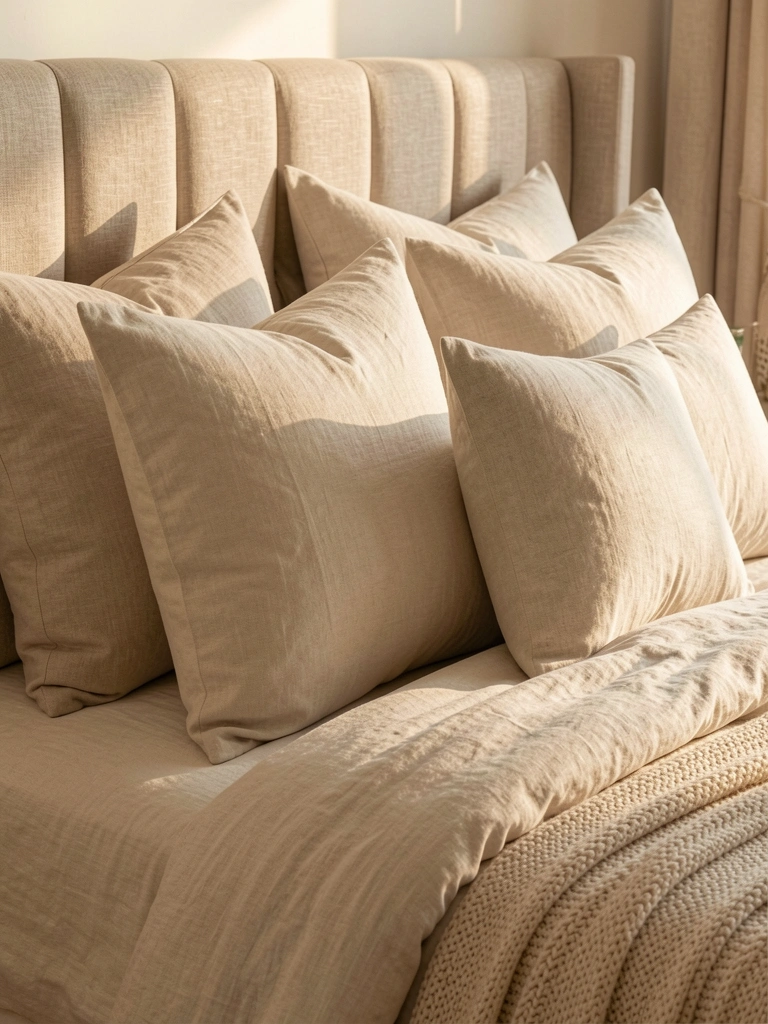
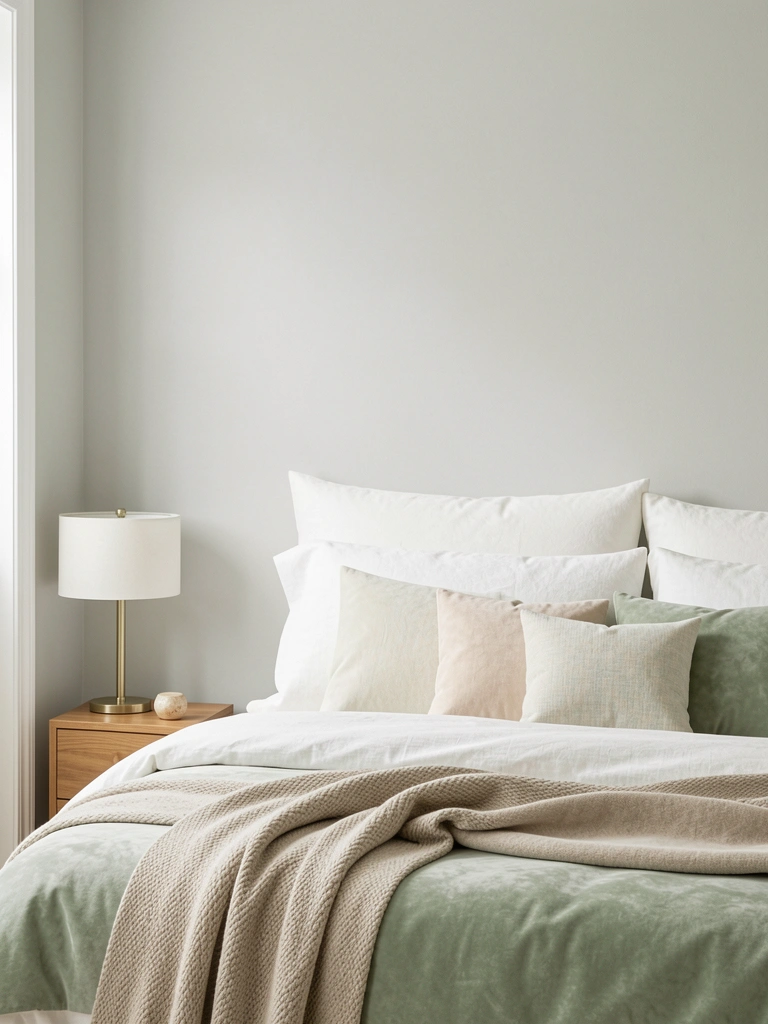
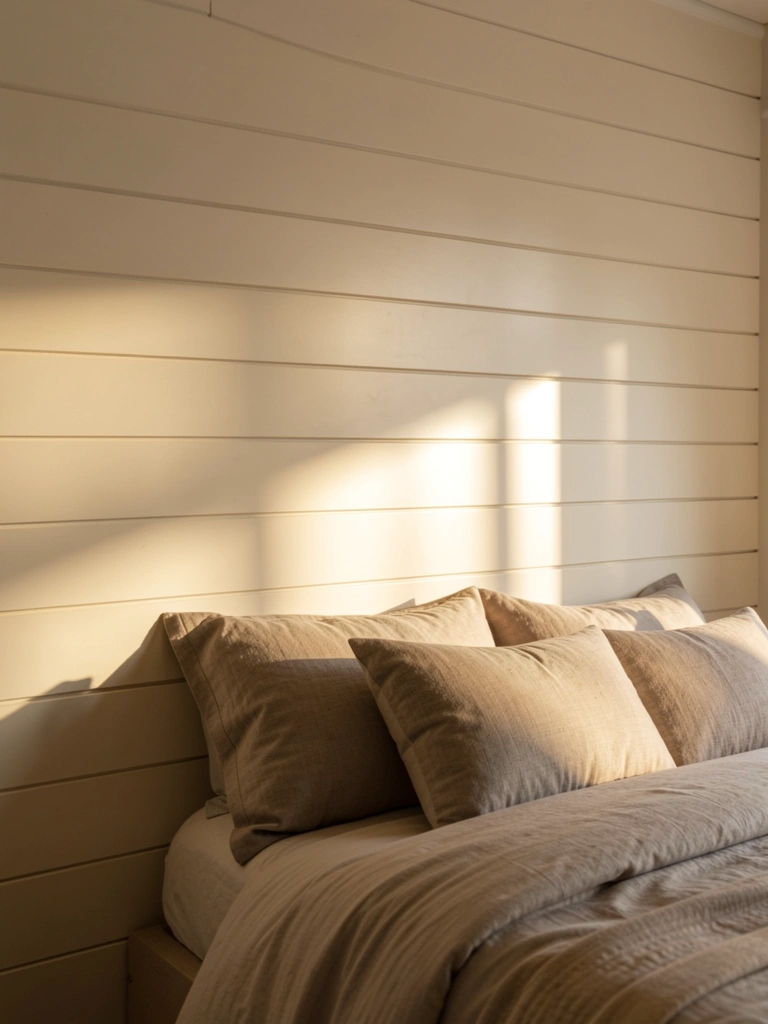
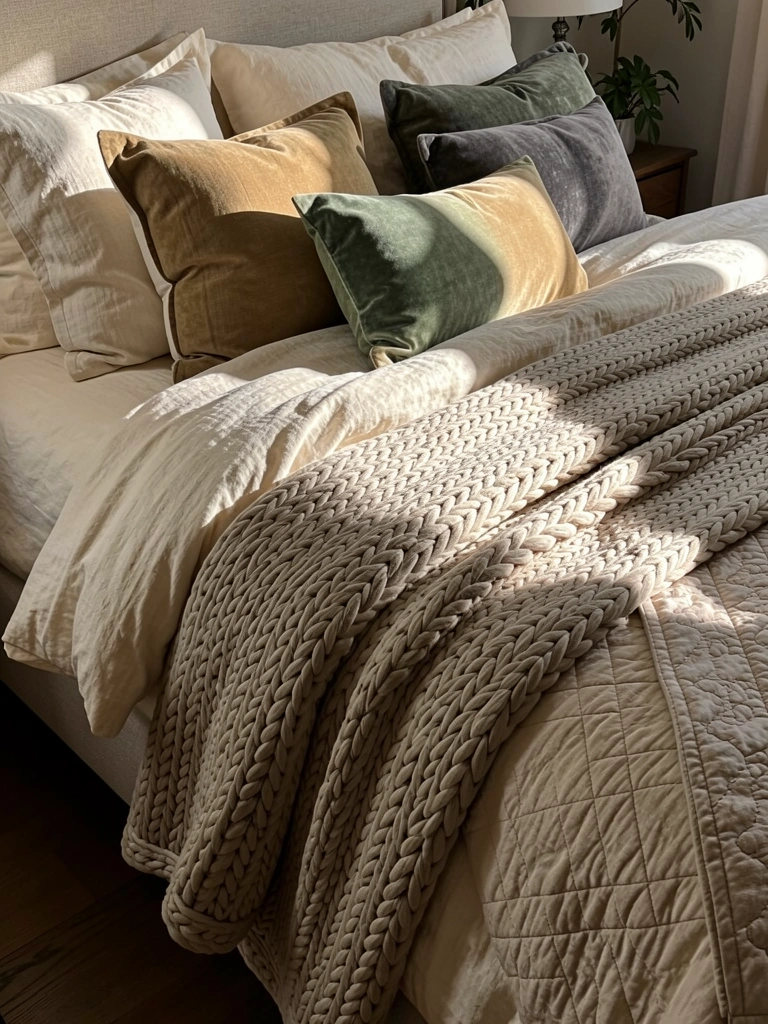
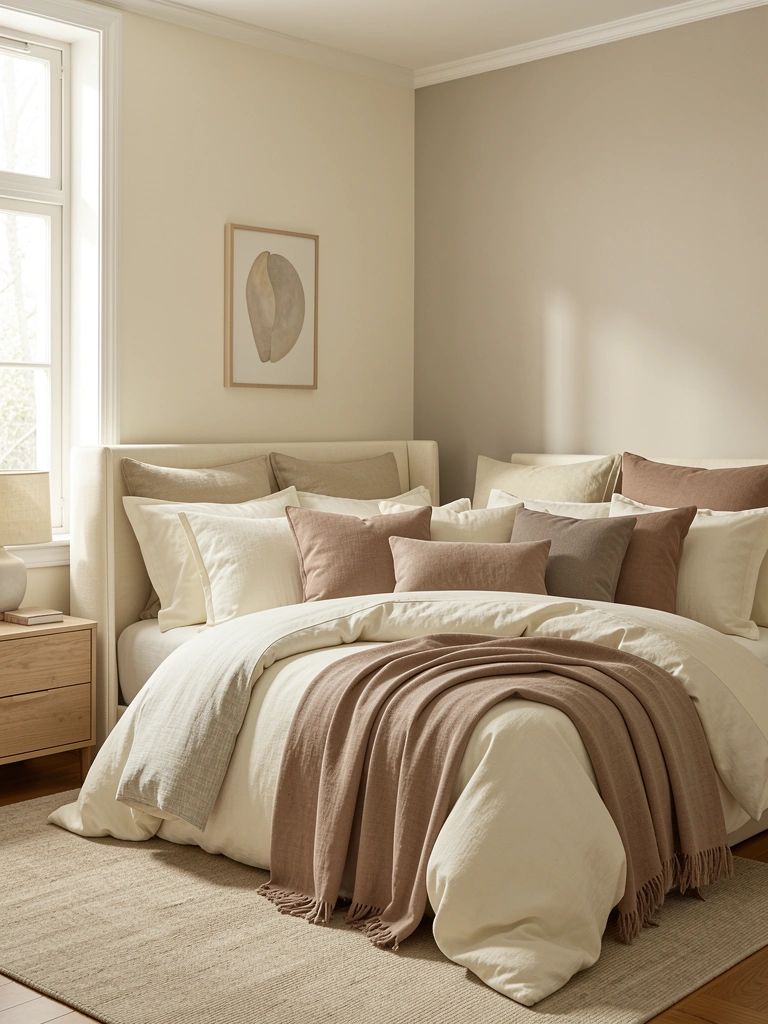
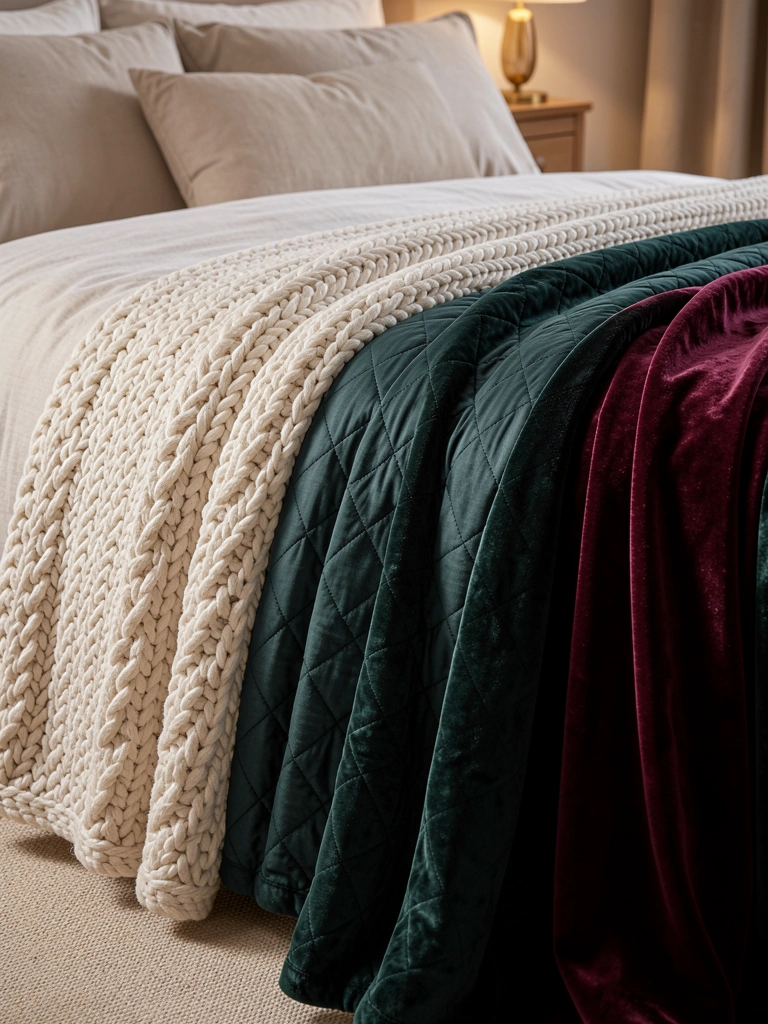
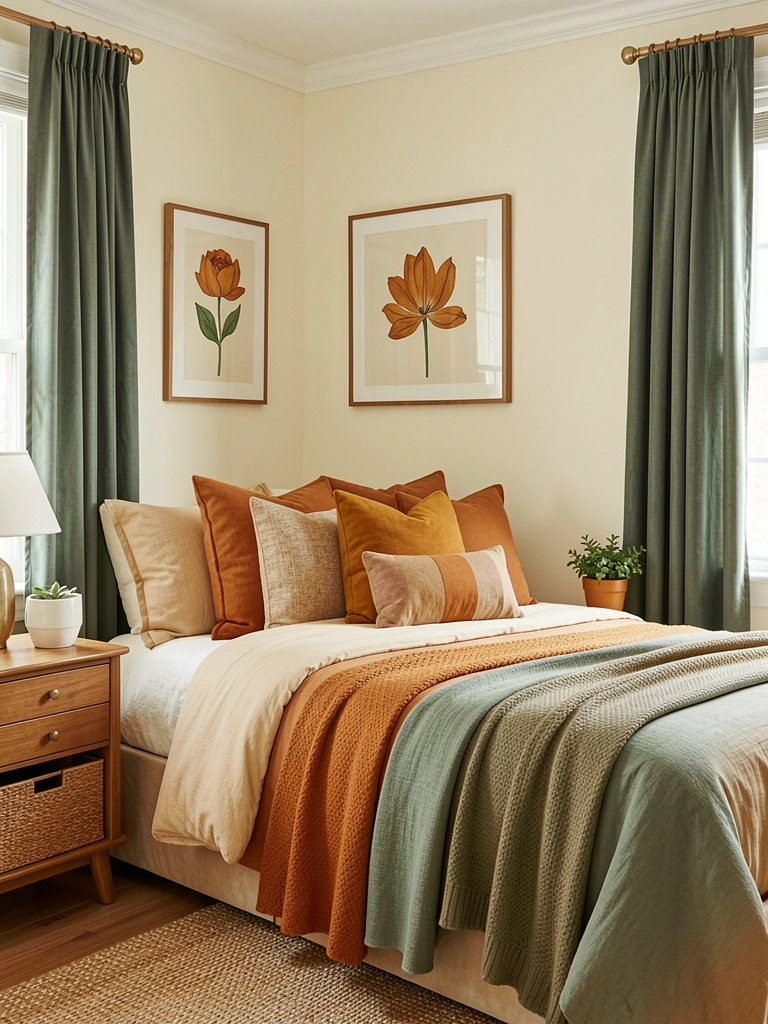
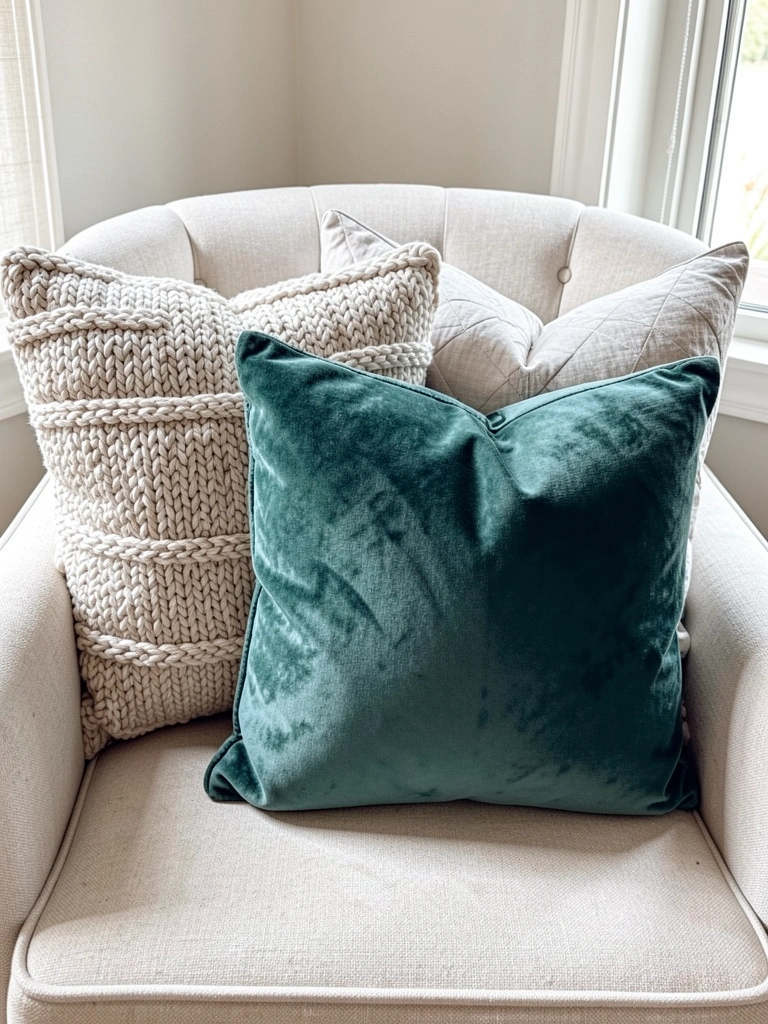
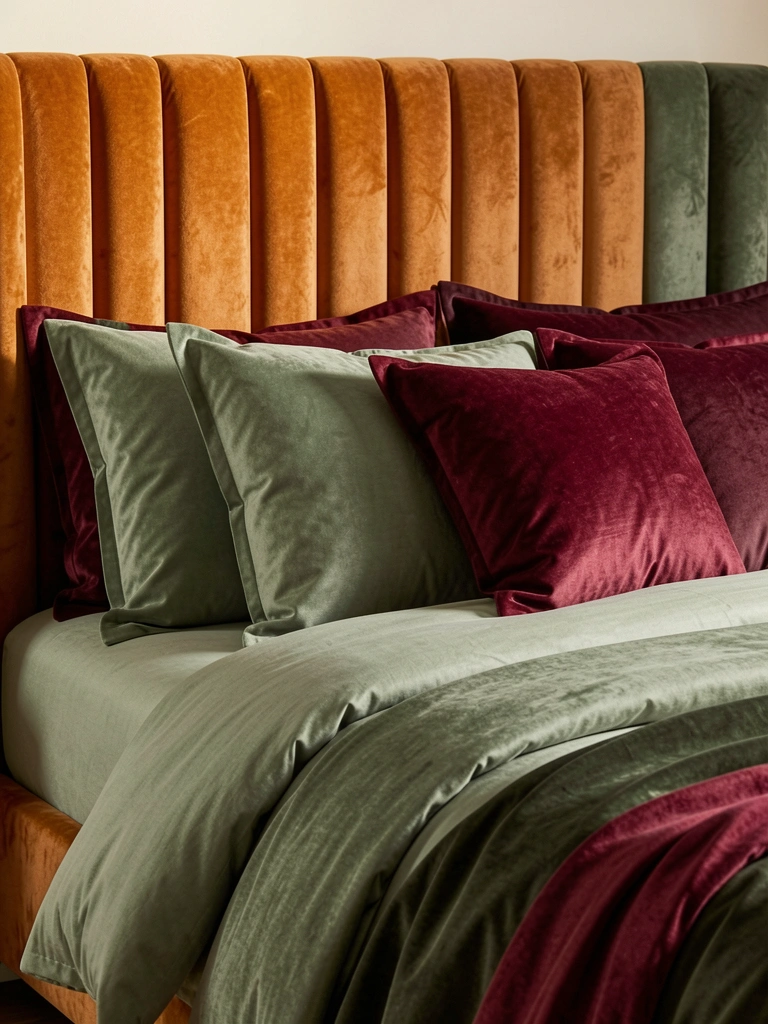
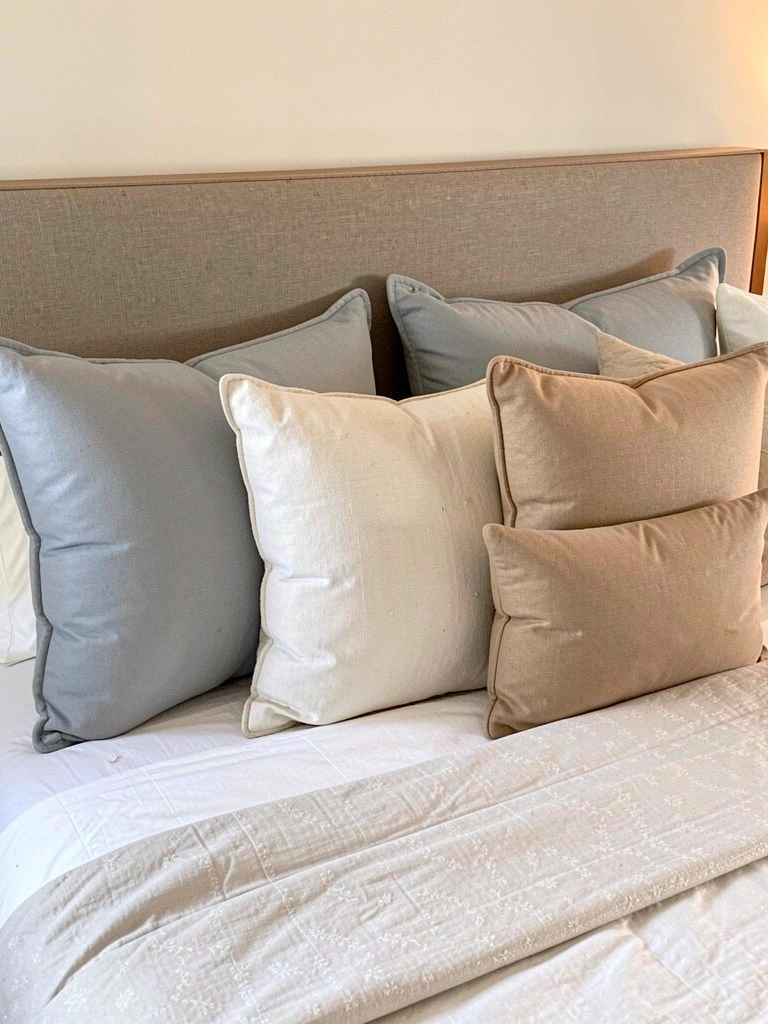
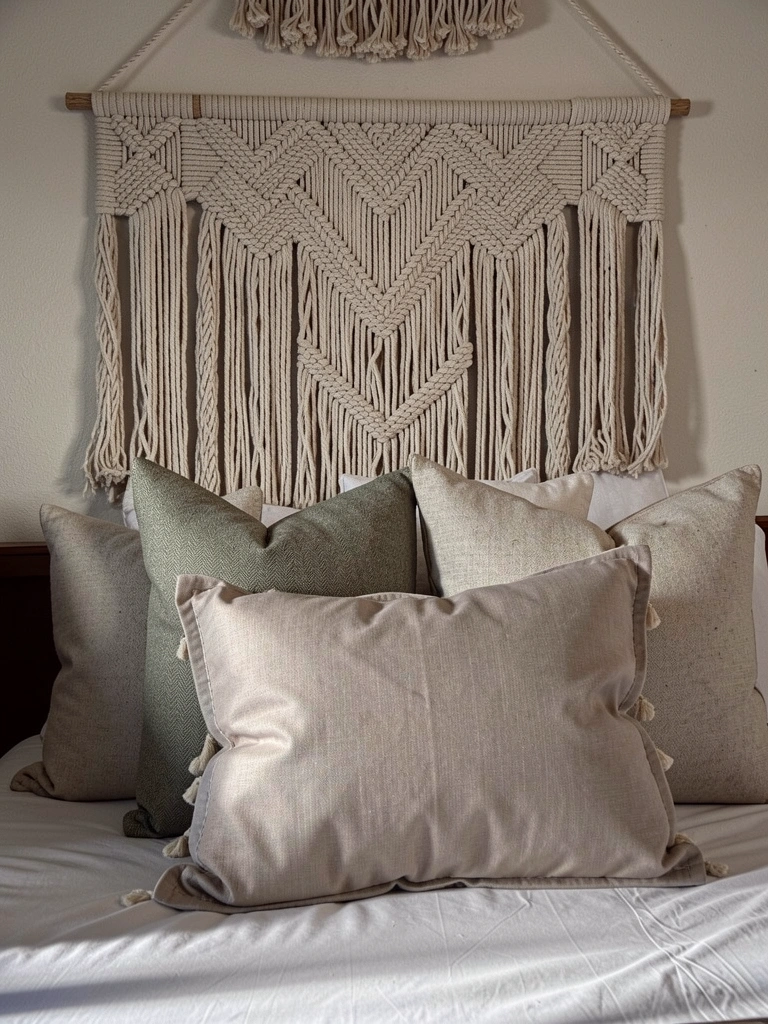
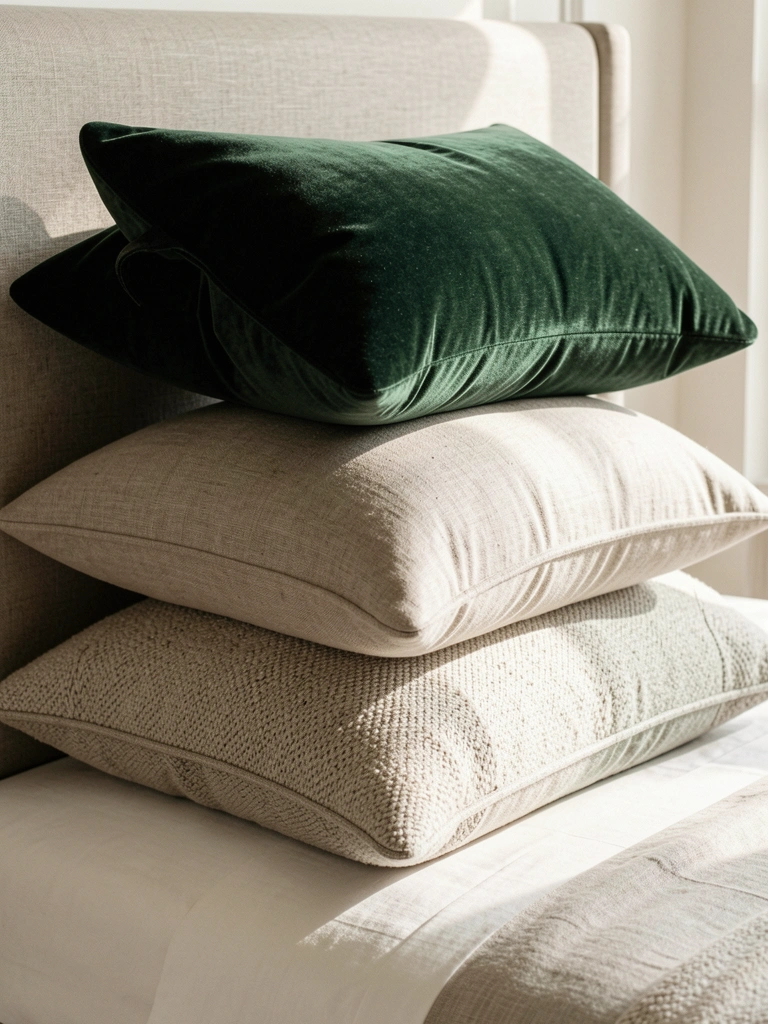
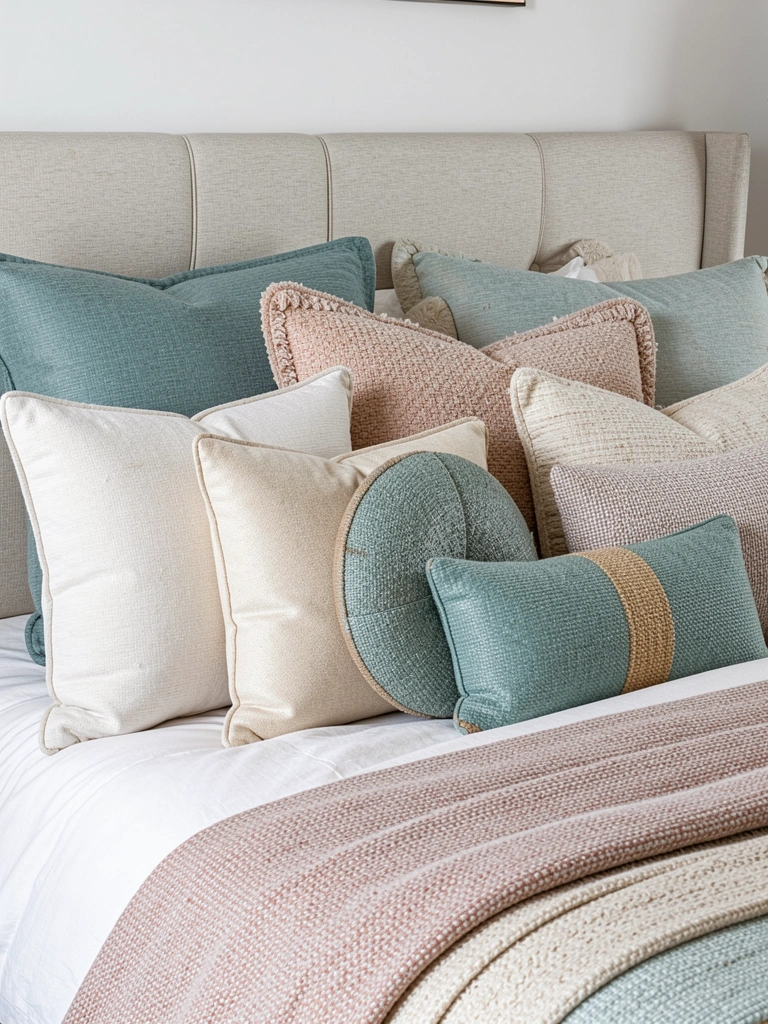
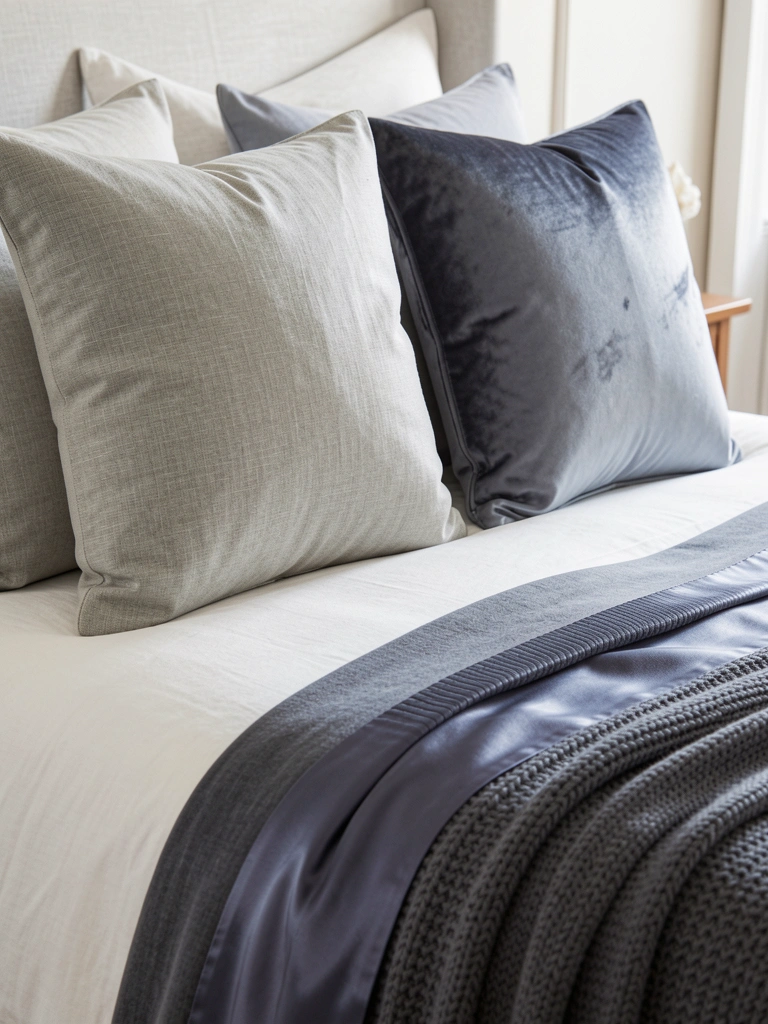
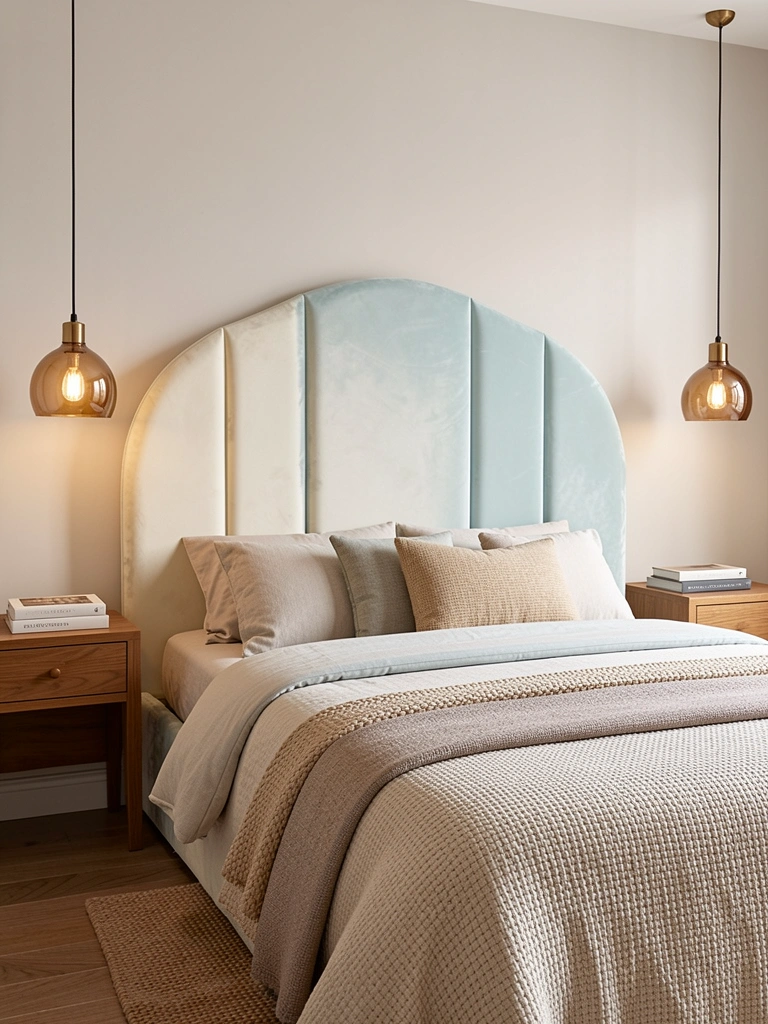
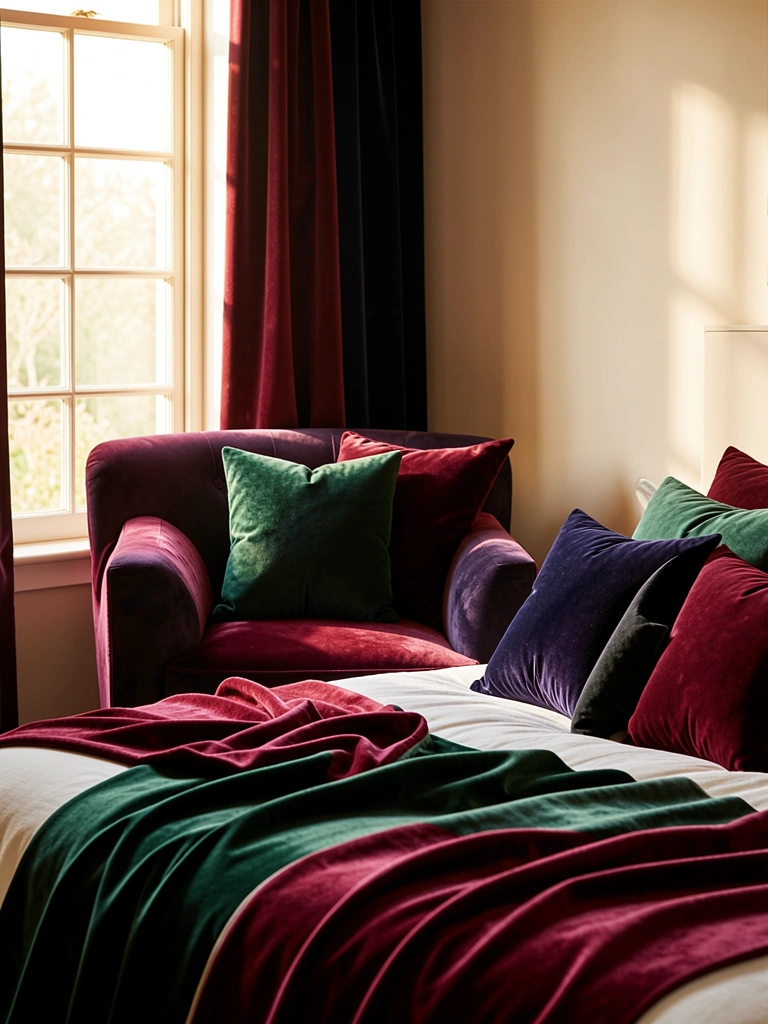
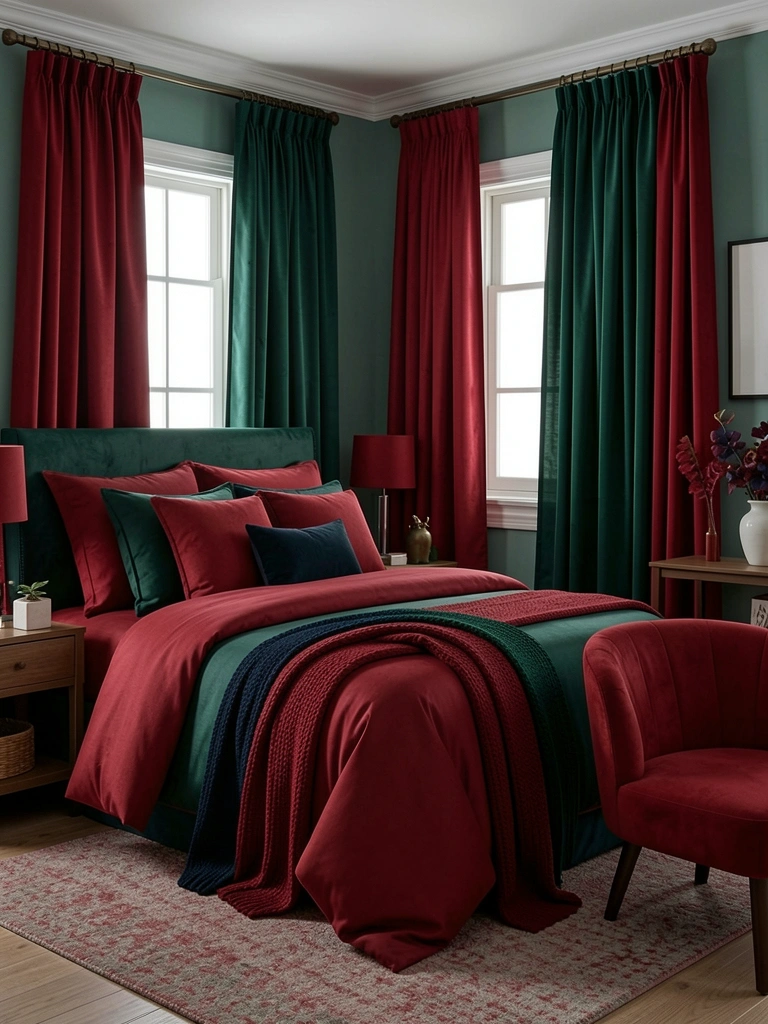
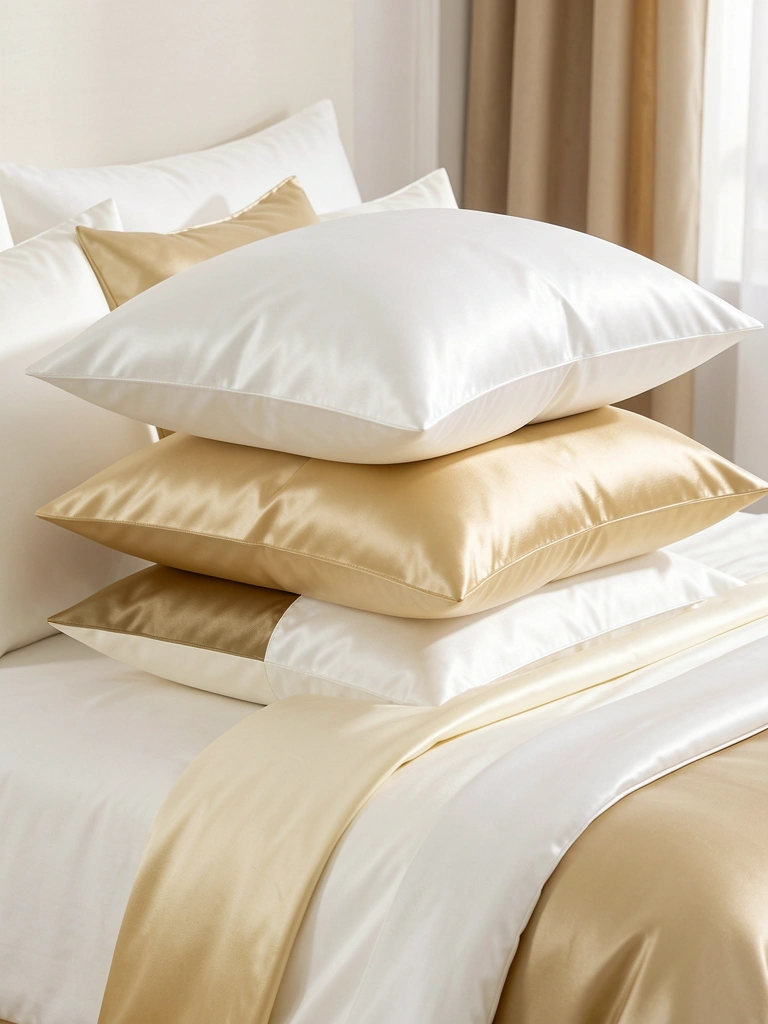
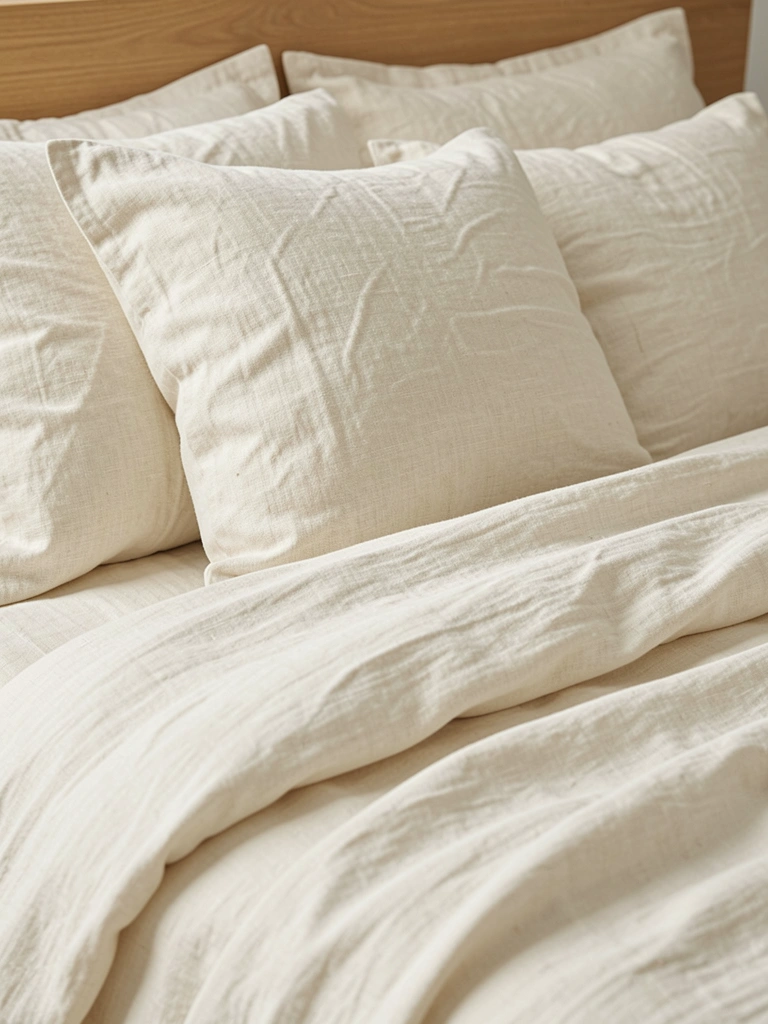
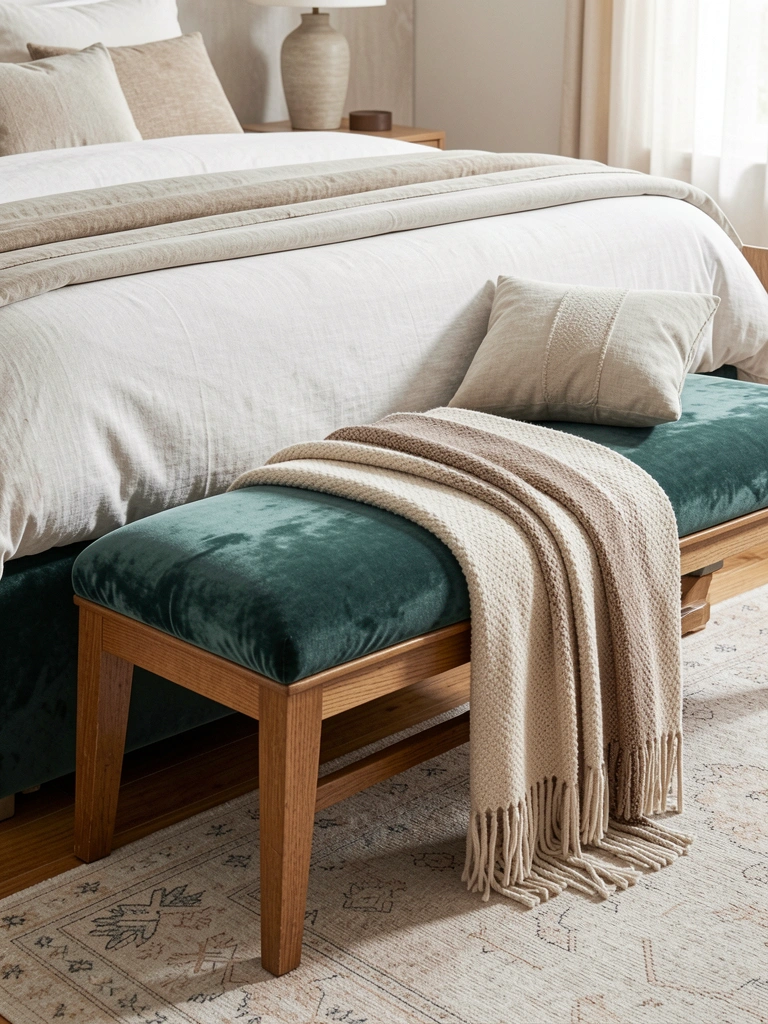
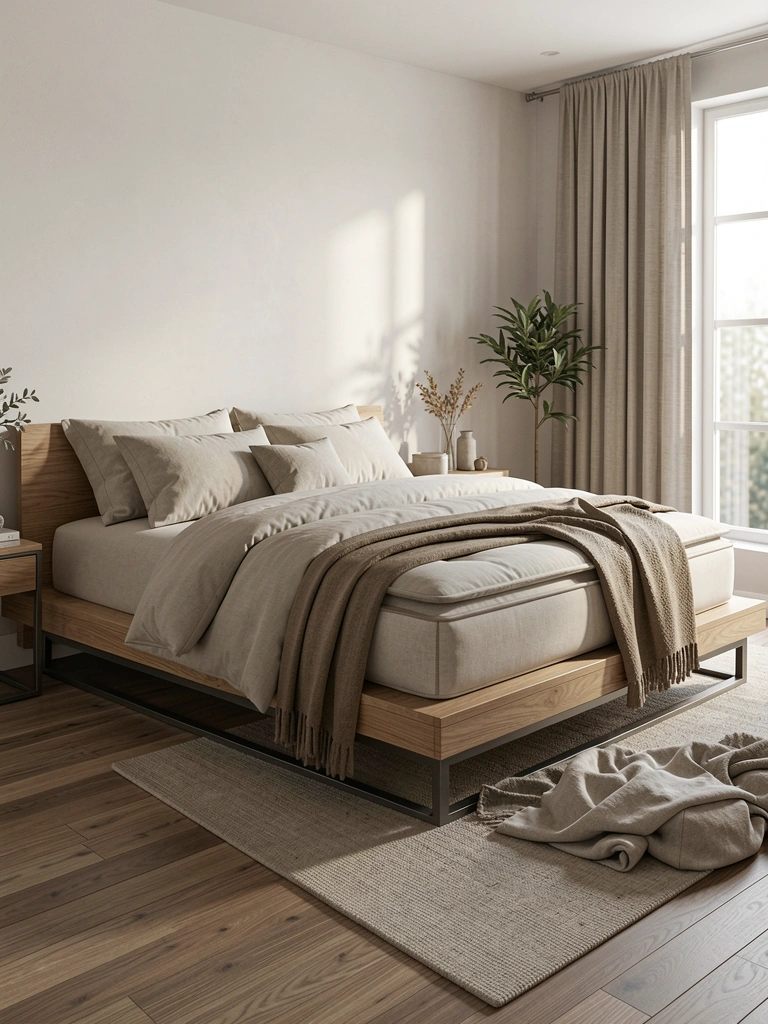
    15. Add Velvet Pillows in Jewel Tones

    Velvet pillows ($25-$80 each from West Elm, Anthropologie, or Target) add that luxe Y2K texture. Mix 3-5 jewel-toned pillows on your bed for maximum impact.

    Layer them: one large pillow, one medium, two smaller accent pillows. Vary textures—pair velvet with linen or corduroy. Look for Serena & Lily dupes on Amazon ($20-$40) if budget is tight. Budget $100-$200 for a full pillow set.

    Your bed becomes an actual focal point—styled, cozy, and ready for Instagram. Plus, velvet feels incredible against your skin.

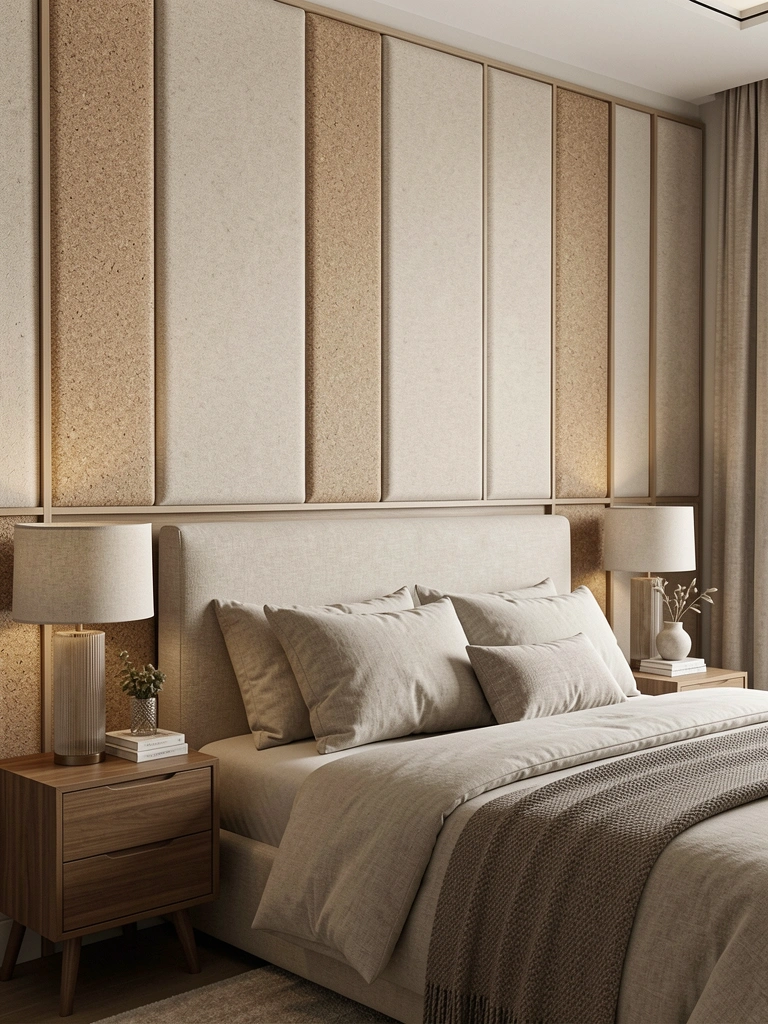
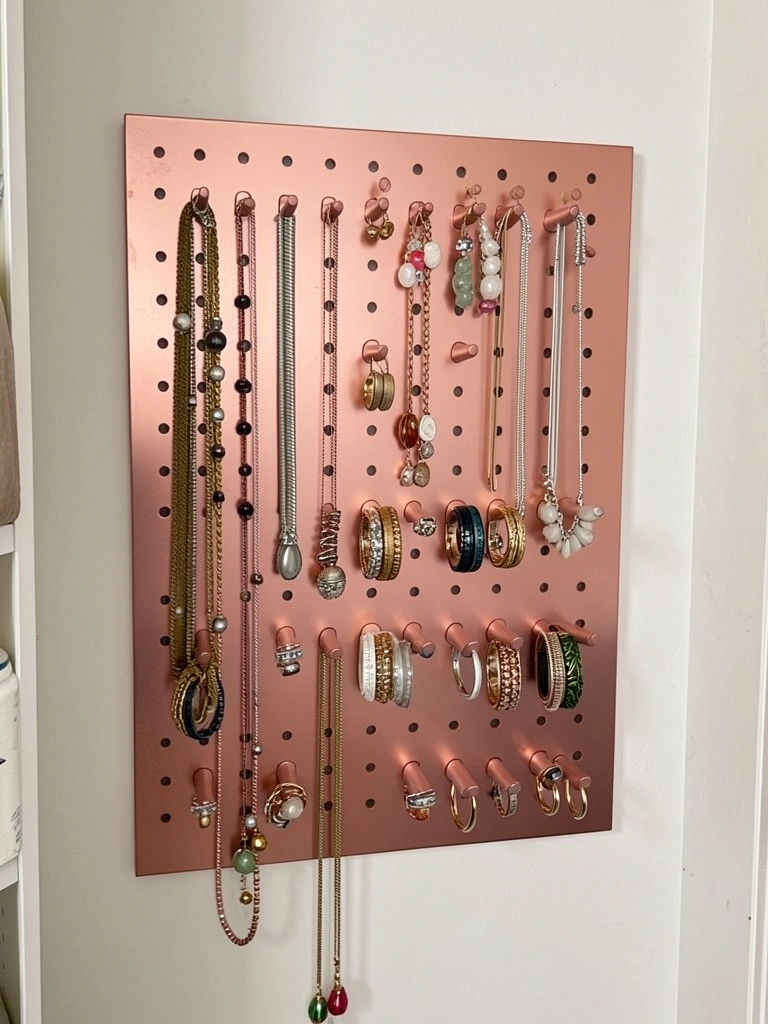
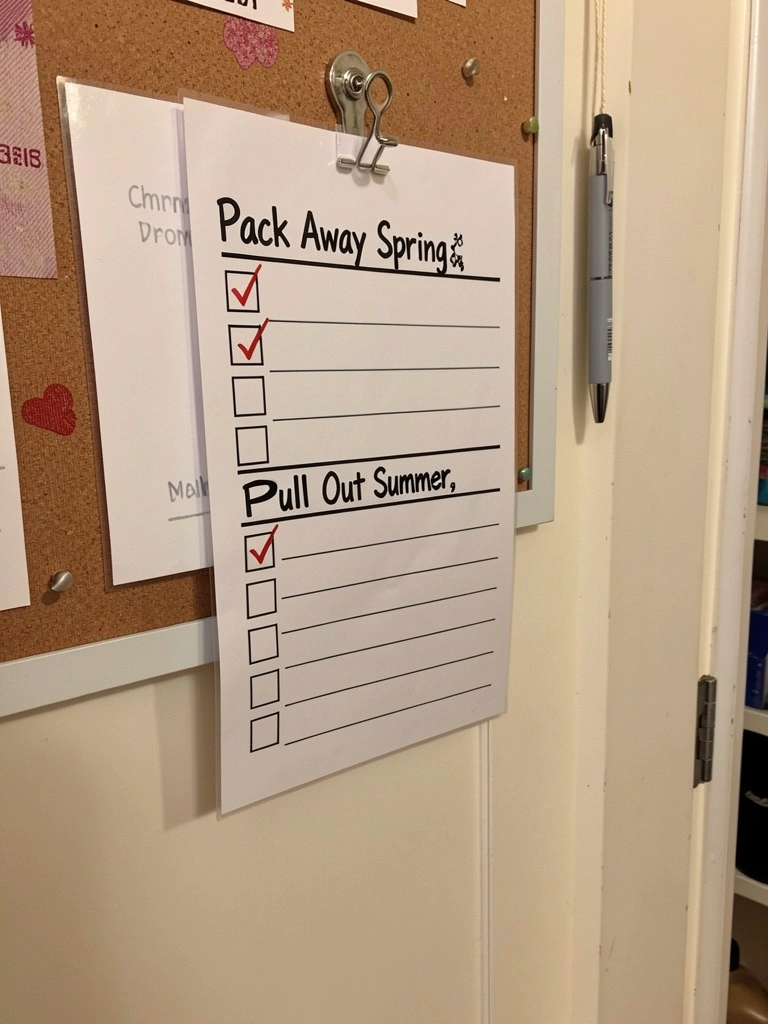
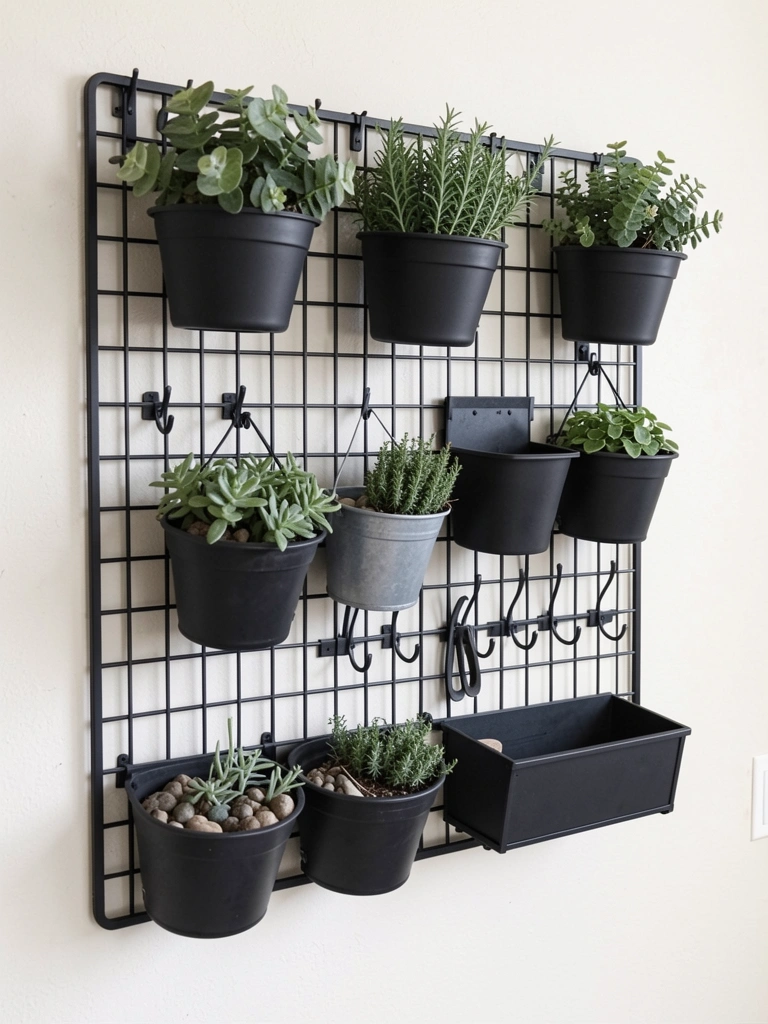
    16. Create a Mood Board Wall with Cork or Pegboard

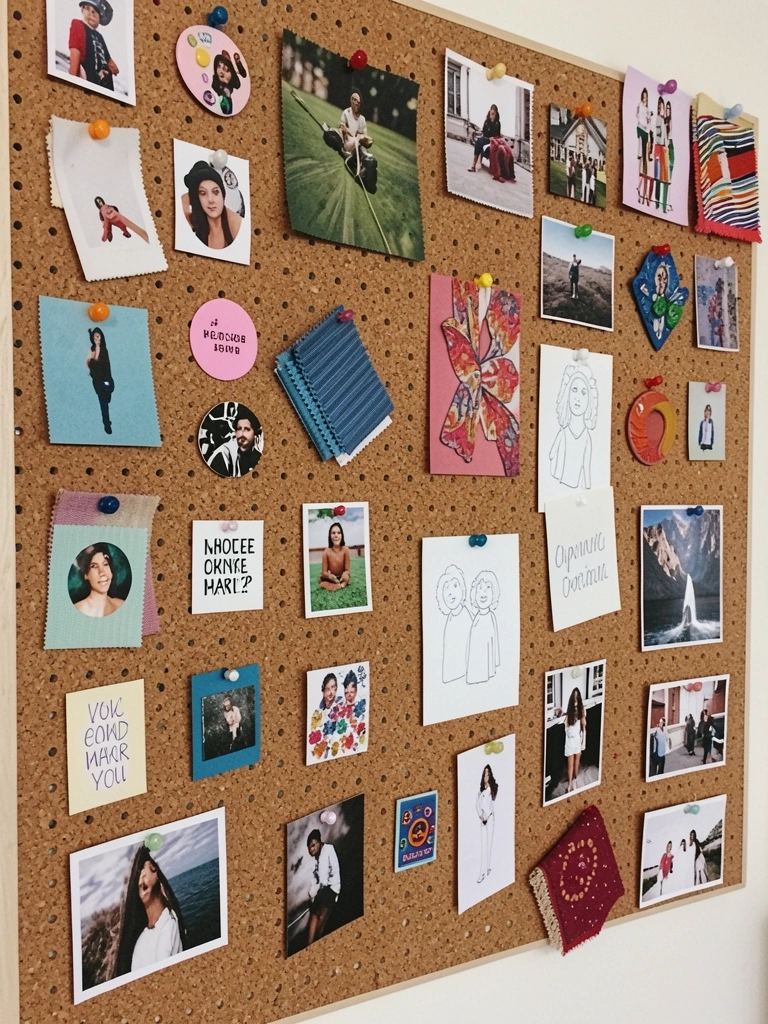
    Cork boards ($30-$80) or pegboards ($40-$100 from Home Depot or Amazon) create an interactive inspiration wall. Pin photos, fabric swatches, mood boards, and quotes—you can change it whenever you want.

    Pegboards in fun colors (white, pink, black) add instant style. Use matching pegs ($15-$30 for a set) and keep it organized but creative. This takes 1-2 hours to install and costs $60-$130 total. Renters can use adhesive cork sheets ($20-$50).

    You get a functional design tool that’s also genuinely beautiful. Plus, refreshing it regularly keeps your room feeling new without buying anything.

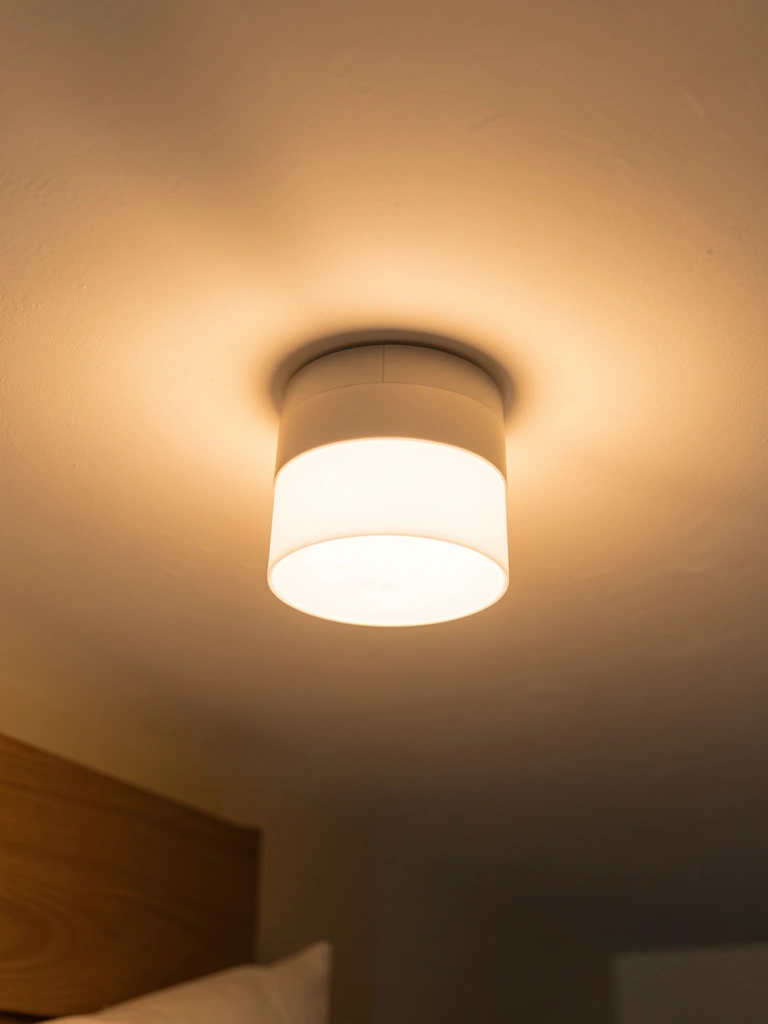
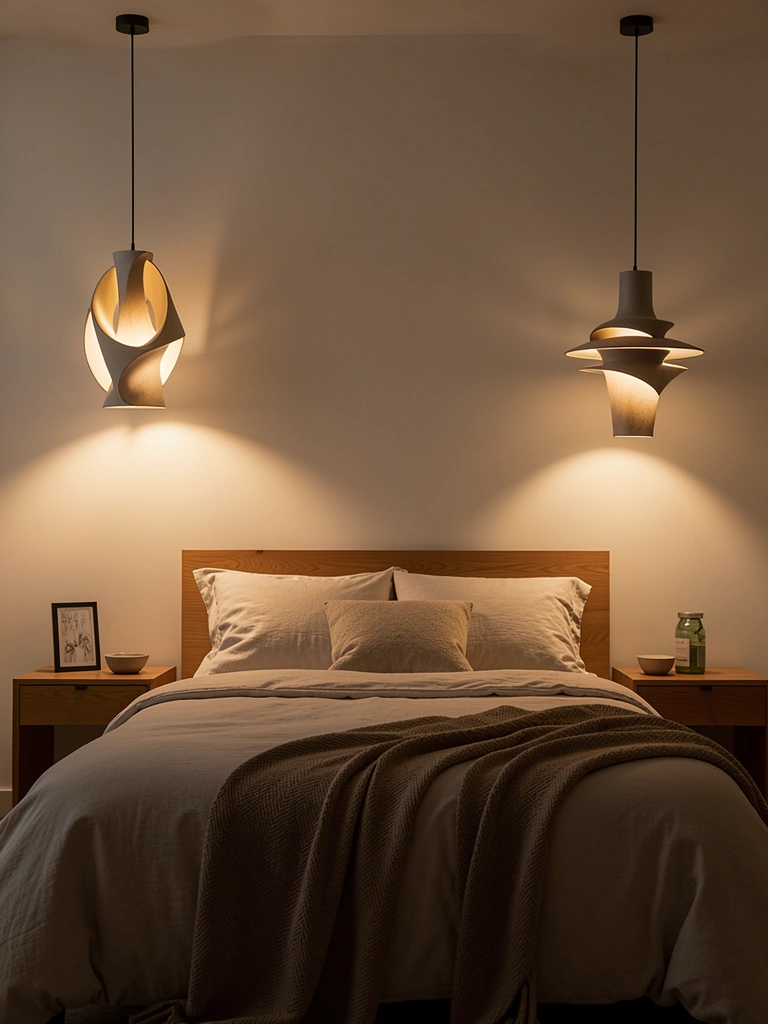
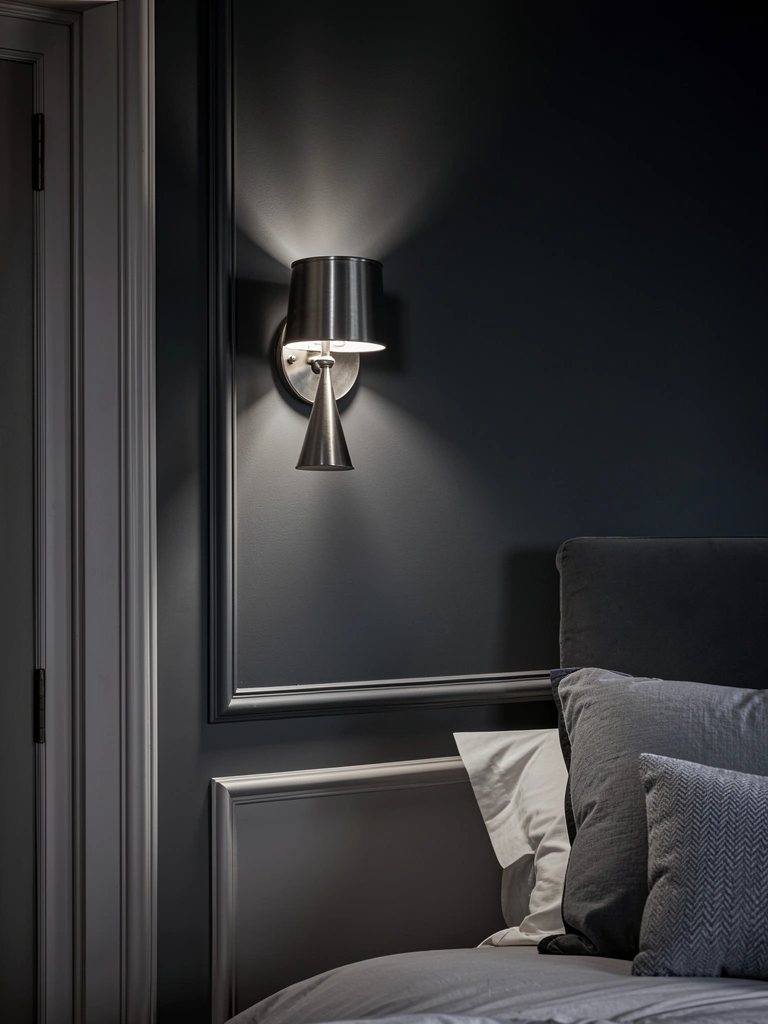
    17. Swap Out Your Lighting for Colorful Bulbs

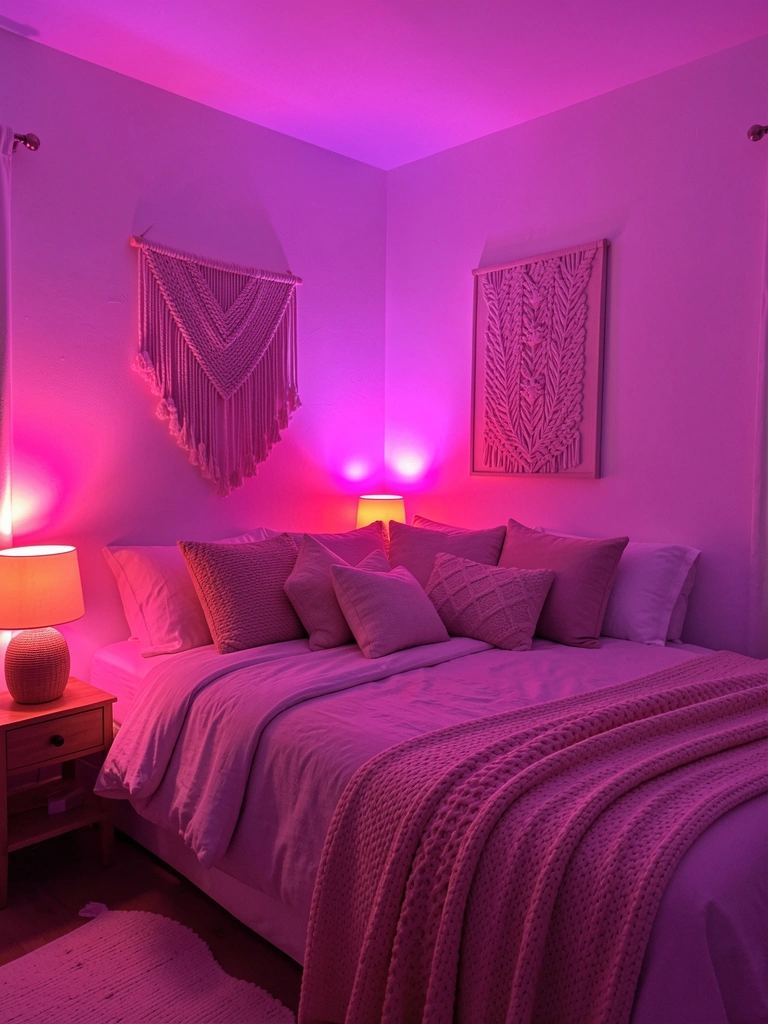
    Smart bulbs ($15-$25 each from Amazon, Target, or LIFX) let you change your room’s mood instantly. Choose ones that support color-changing and dim settings.

    Install them in existing lamps and overhead fixtures—no rewiring needed. Create presets: warm pink for relaxing, brighter white for morning, purple for evening. Budget $40-$80 for 3-4 bulbs to outfit your main lighting. A huge upgrade for minimal cost and zero commitment.

    Your room adapts to your mood. Early morning? Bright white. Winding down? Soft pink. It’s like having a built-in mood ring for your space.

    18. Hang a Beaded or Chain Curtain as Room Divider

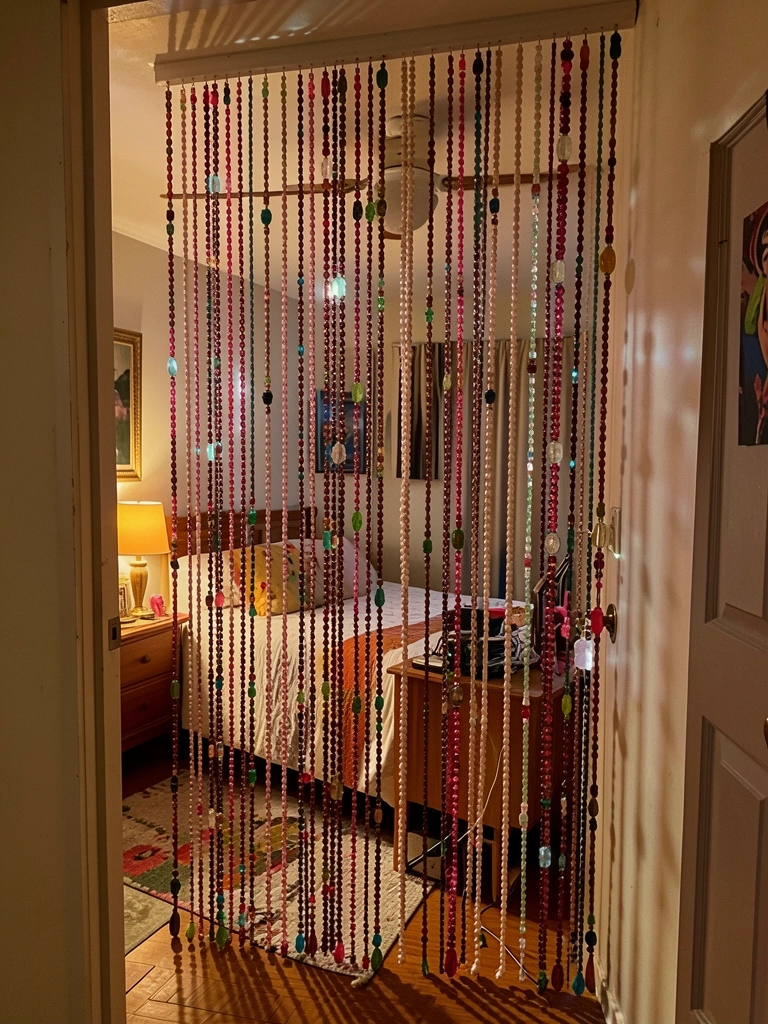
    Beaded or chain curtains ($20-$50 from Amazon, Urban Outfitters, or thrift stores) instantly evoke early-2000s nostalgia. Hang one in a doorway, over a closet, or between sleeping and lounging zones.

    Installation takes 15 minutes with a command hook (renter-friendly) or small nails. The beads create visual separation while keeping the room open. They’re also weirdly meditative to walk through. Mix materials: some glass beads, some metal chains for variety.

    Your room feels larger and more intentional. Plus, they’re a true Y2K icon—immediate nostalgic impact.

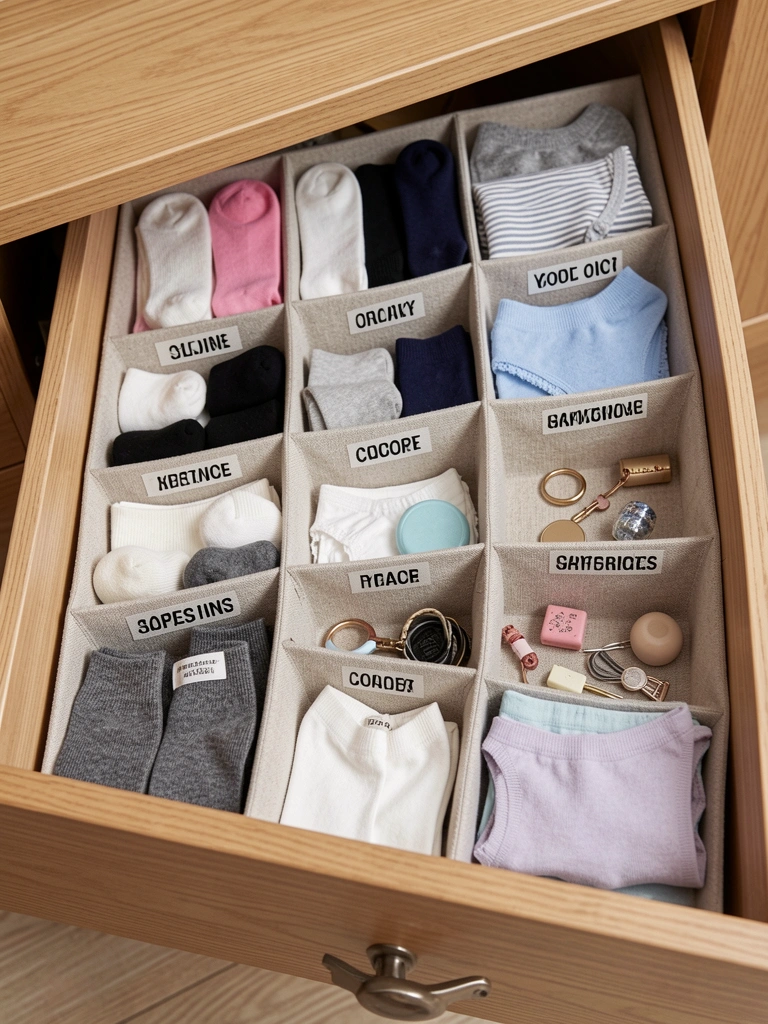
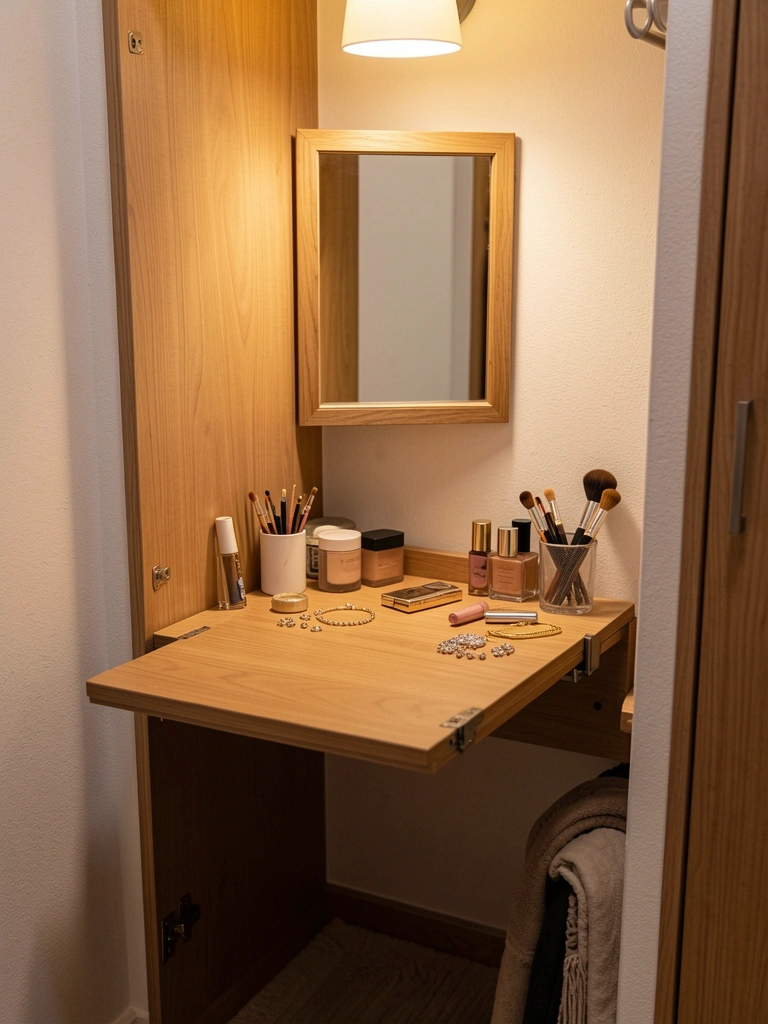
    19. Style a Vanity or Desk with a Makeup Organizer

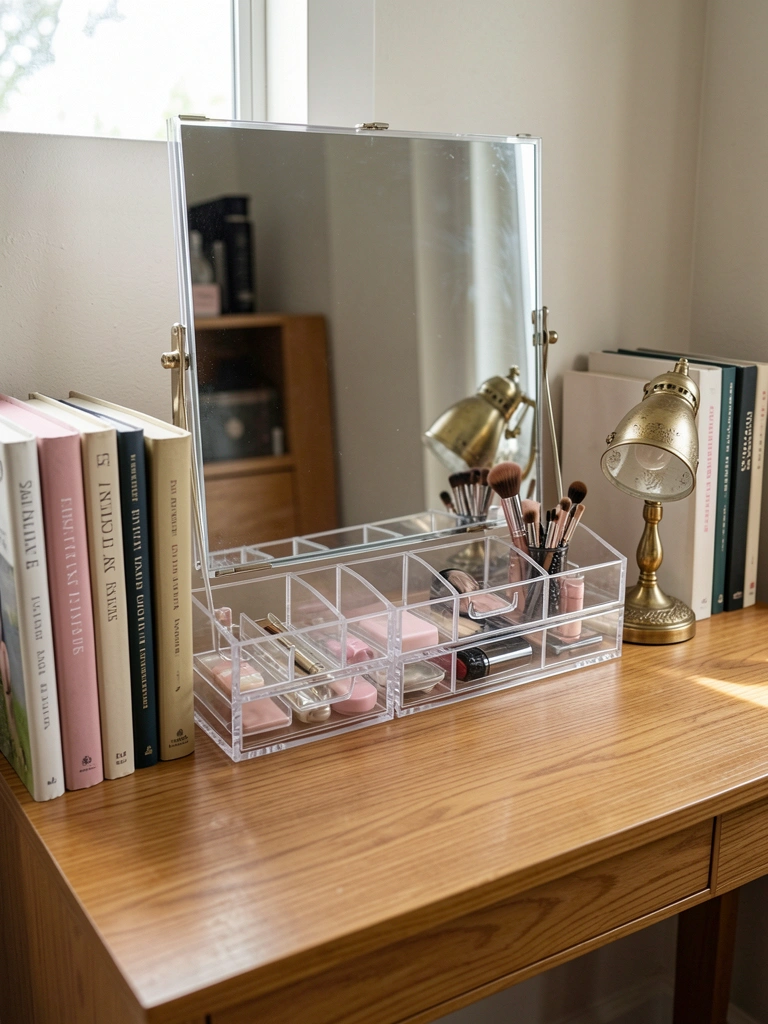
    Even if you don’t wear much makeup, a small vanity ($80-$200 from IKEA, Target, or Amazon) with an organizer ($15-$50) becomes a functional styling station and design statement.

    Use it for skincare, jewelry, hair accessories, or office supplies. A IKEA Alex desk ($100-$130) with a simple mirror ($15-$40) creates a complete setup. Add a cute organizer from The Container Store or Target for $20-$40. Budget $150-$250 total for a full vanity. Takes 1-2 hours to assemble.

    You get a dedicated space to prepare for your day—feels hotel-like and helps you actually use your products instead of losing them.

    20. Add Glow-in-the-Dark Stars or Moon Phase Decals

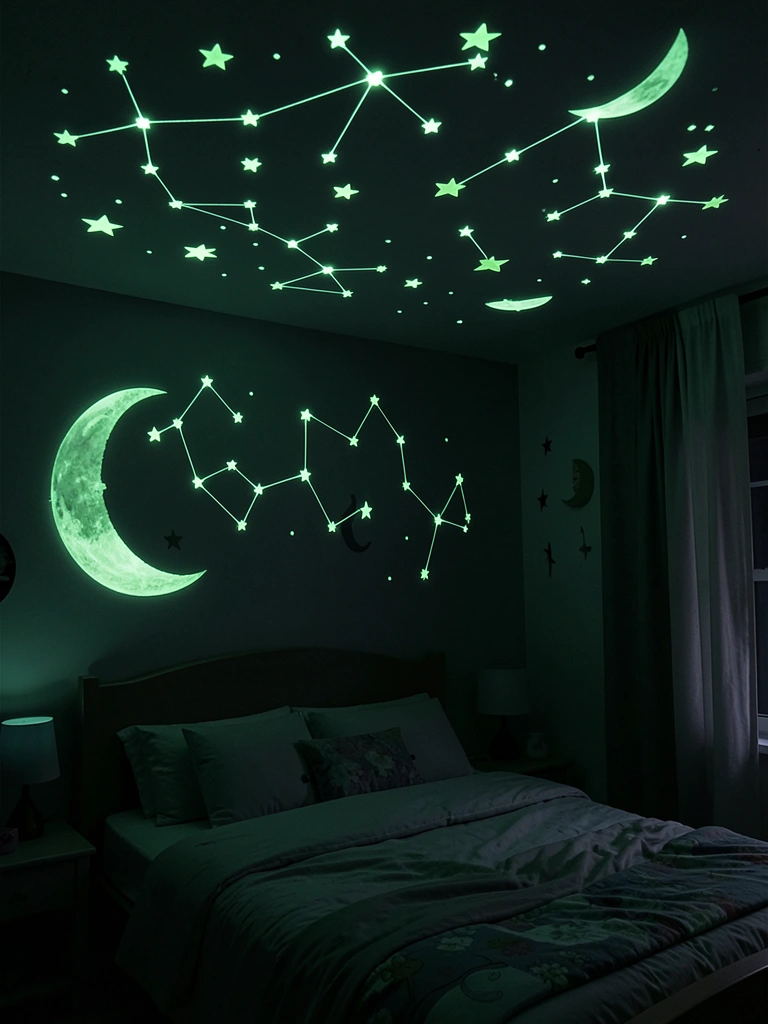
    Glow-in-the-dark stars ($10-$20 from Amazon or Target) take 30 minutes to apply and bring serious Y2K nostalgia. Arrange them in constellations or just scatter them randomly across your ceiling.

    These actually glow at night without electricity—charge them with your phone light or a lamp before bed. Add moon phase decals ($8-$15) for even more celestial vibes. Budget $20-$30 total. Renter-friendly: they peel off cleanly.

    Looking up at a glowing sky before sleep is genuinely calming. It’s like having a planetarium in your bedroom.

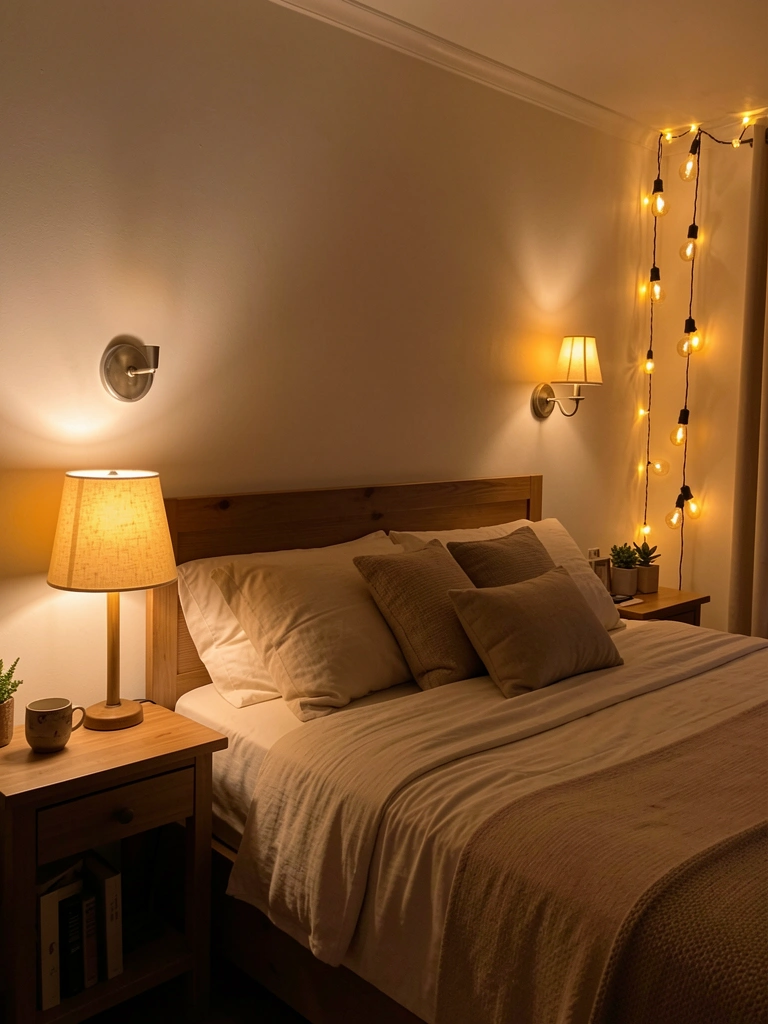
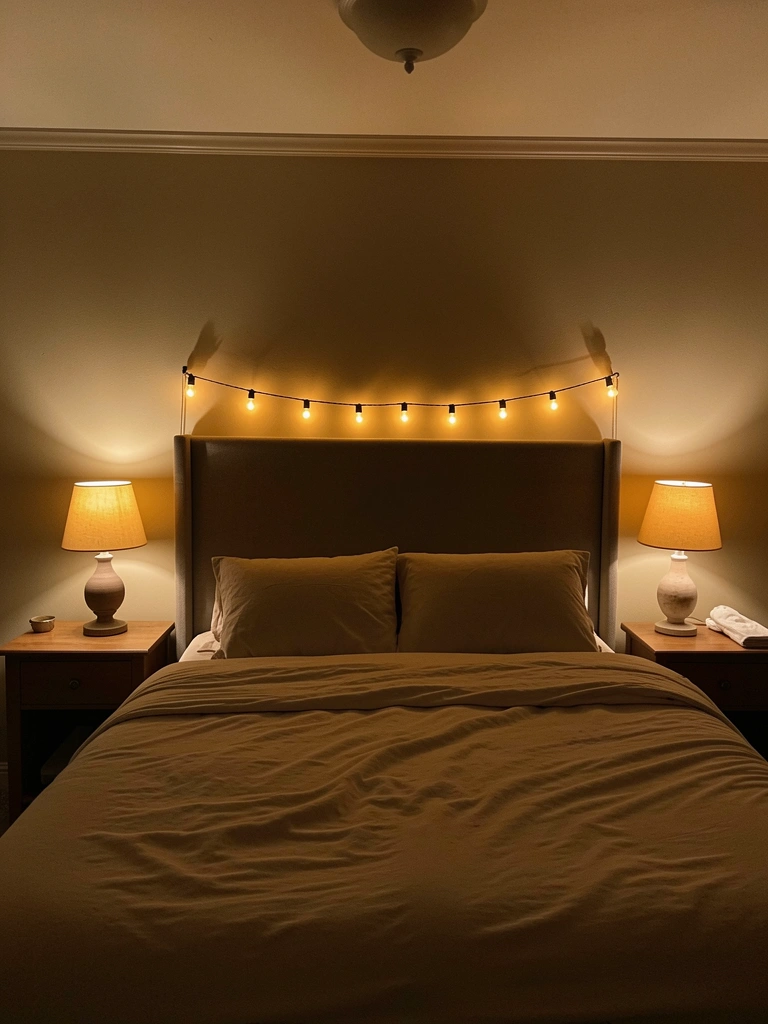
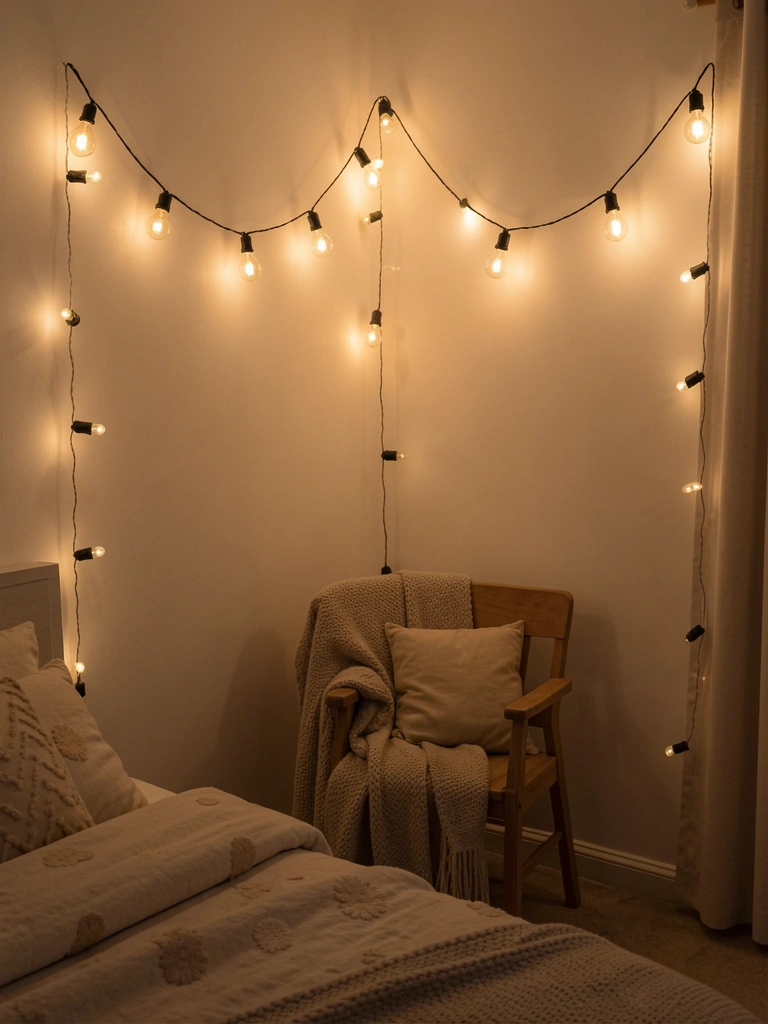
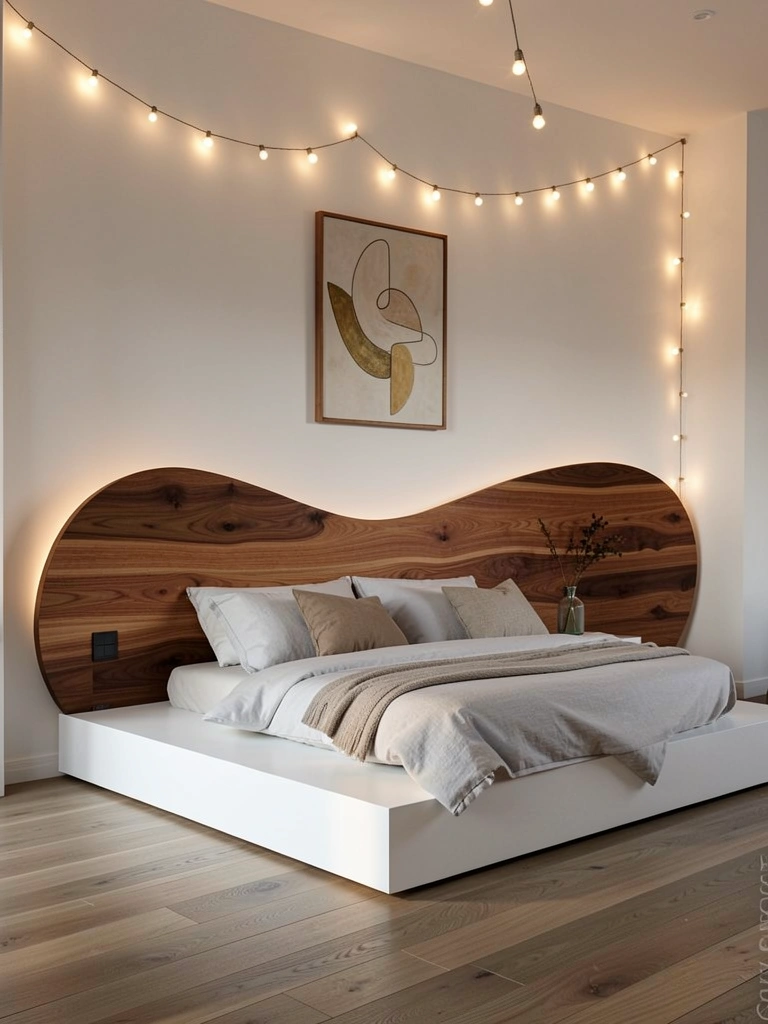
    21. Hang Colorful String Lights Around Your Bed

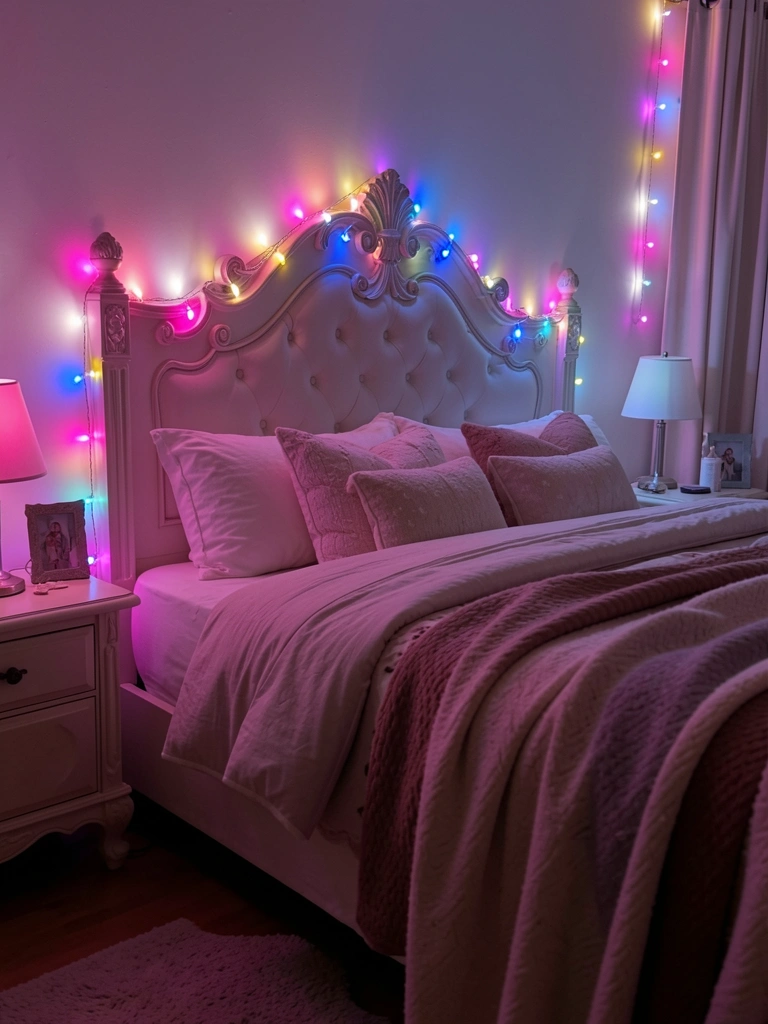
    String lights ($15-$40 from Amazon, Target, or Urban Outfitters) are Y2K standard. Drape them around your bed frame, along walls, or in a corner for soft ambient light.

    Look for warm white or multicolor LED lights ($20-$35) that don’t get hot. They’re safer than old incandescent versions. Installation takes 15 minutes with sticky hooks or small nails. Plug into a nearby outlet or use battery-operated versions ($25-$40) if outlets aren’t accessible.

    Your bed becomes a cozy cocoon. Turn them on for movie nights, reading, or just winding down—instant mood setting without trying.

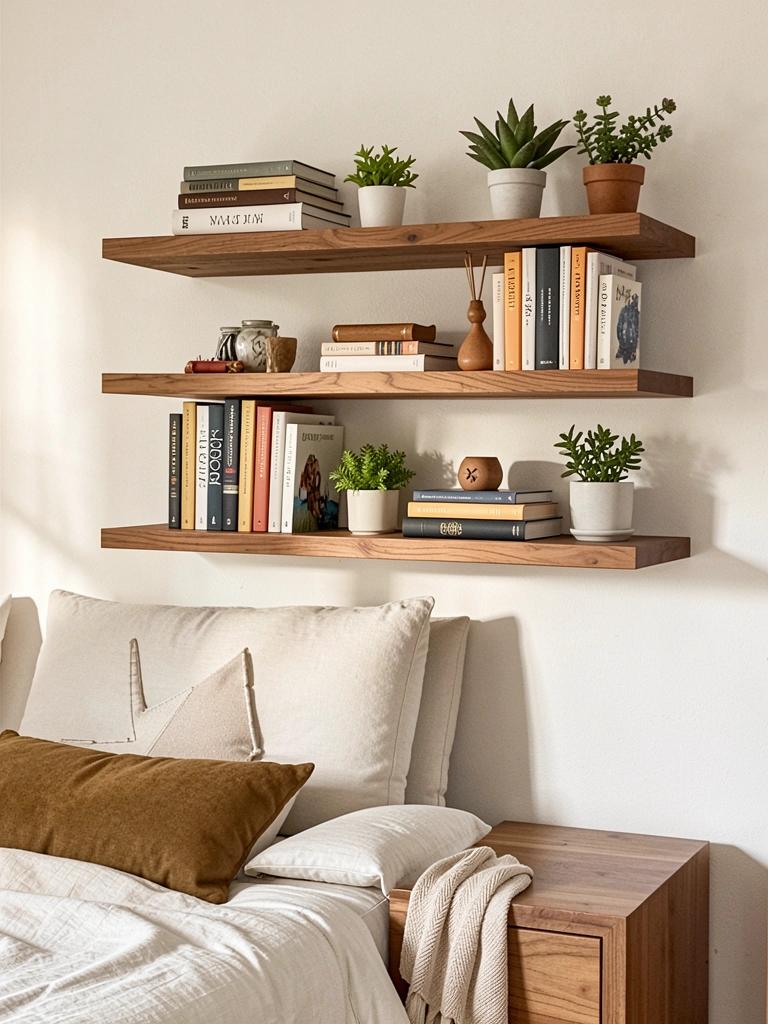
    22. Display Your Favorite Books on Floating Shelves

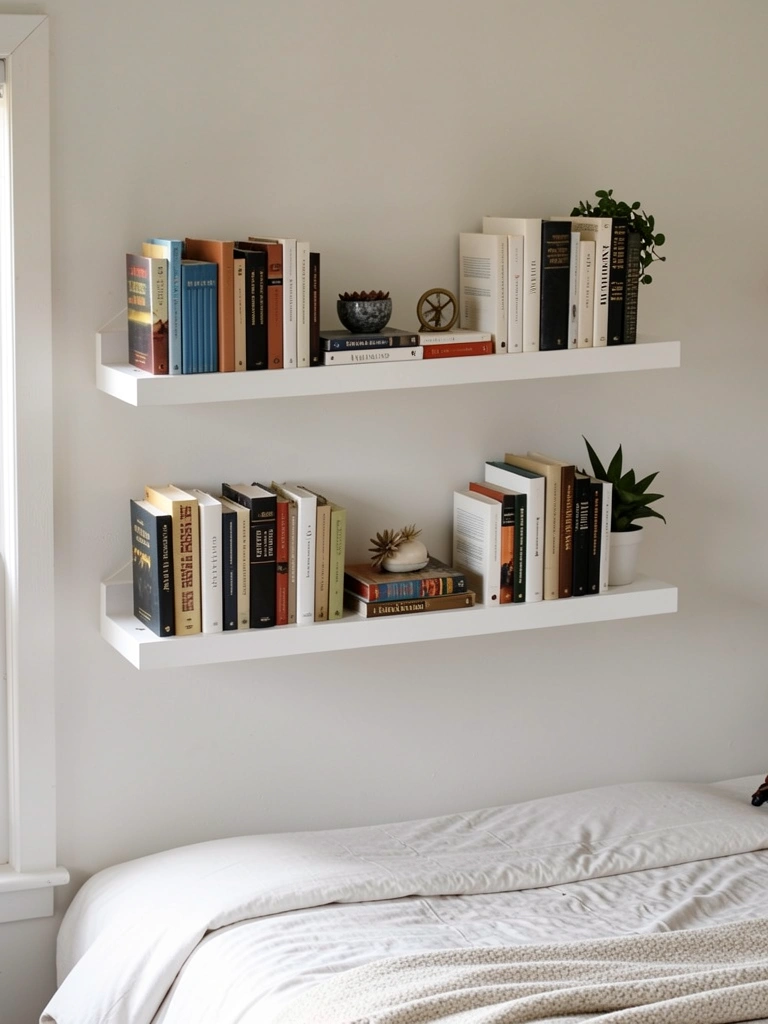
    Book styling ($0 if you use books you own, plus $20-$50 for shelves) becomes wall art. Arrange books horizontally and vertically, mix colors, and tuck small plants or figurines between them.

    Floating shelves from IKEA ($20-$30 each) work perfectly. Arrange books with spines visible or facing, creating rhythm and visual interest. This works for renters too with adhesive shelves. Costs nothing if you already own books.

    Your bedroom looks like a cozy bookstore. It’s visually interesting, functional, and shows off what you actually read—way more personal than generic decor.

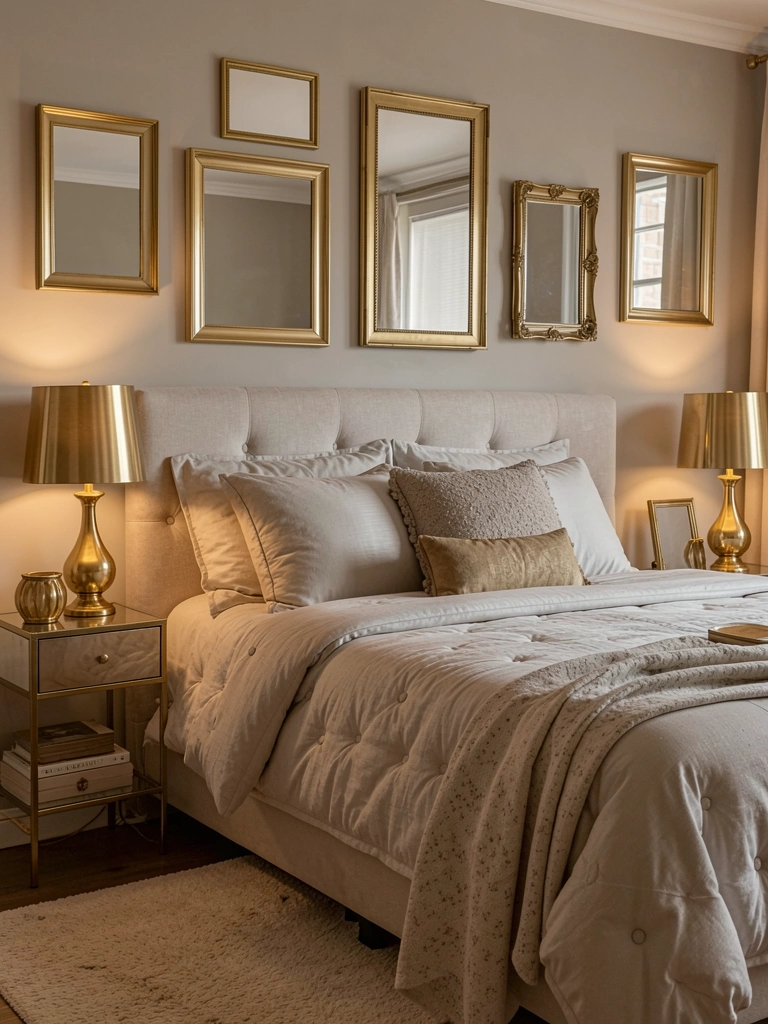
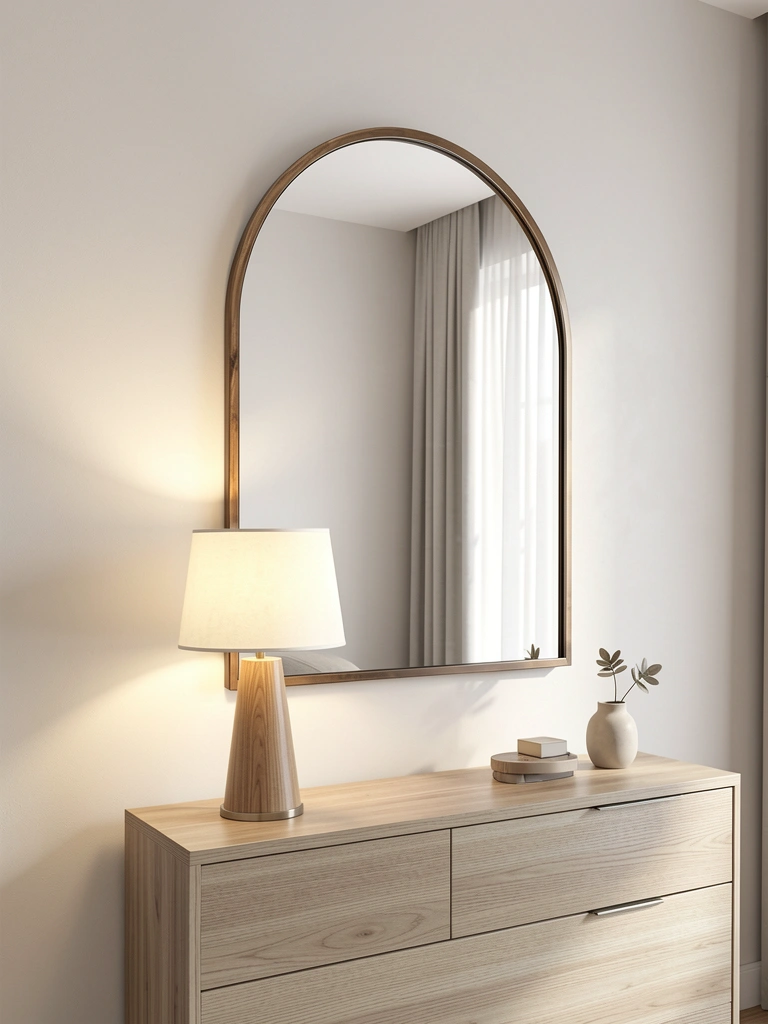
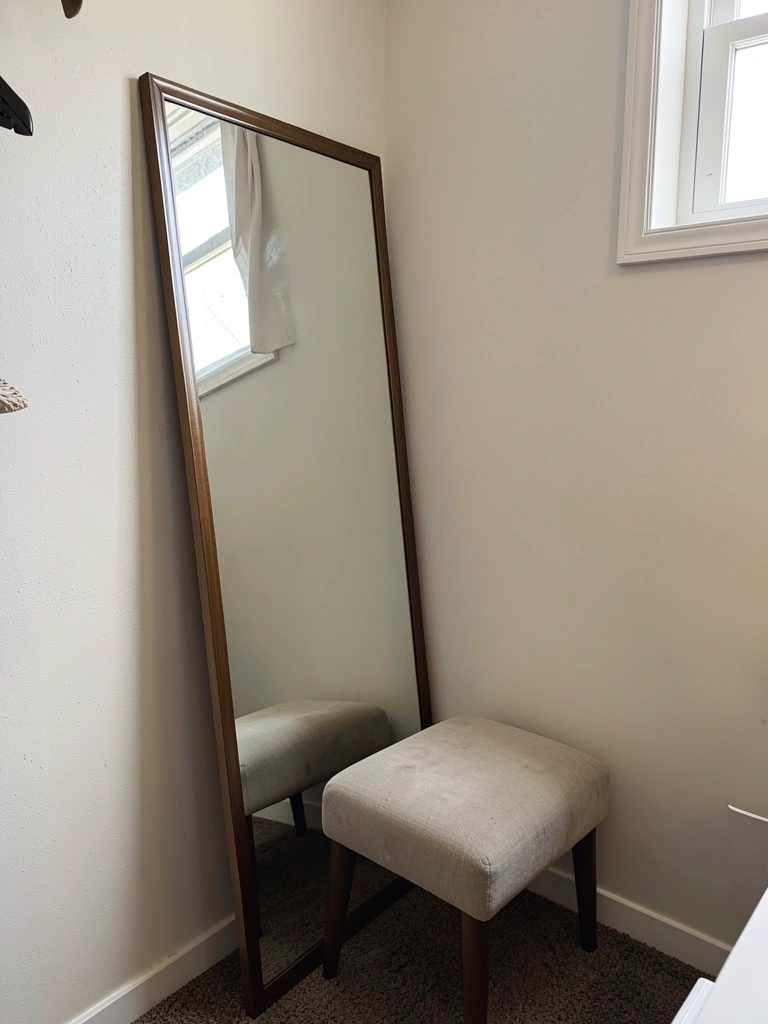
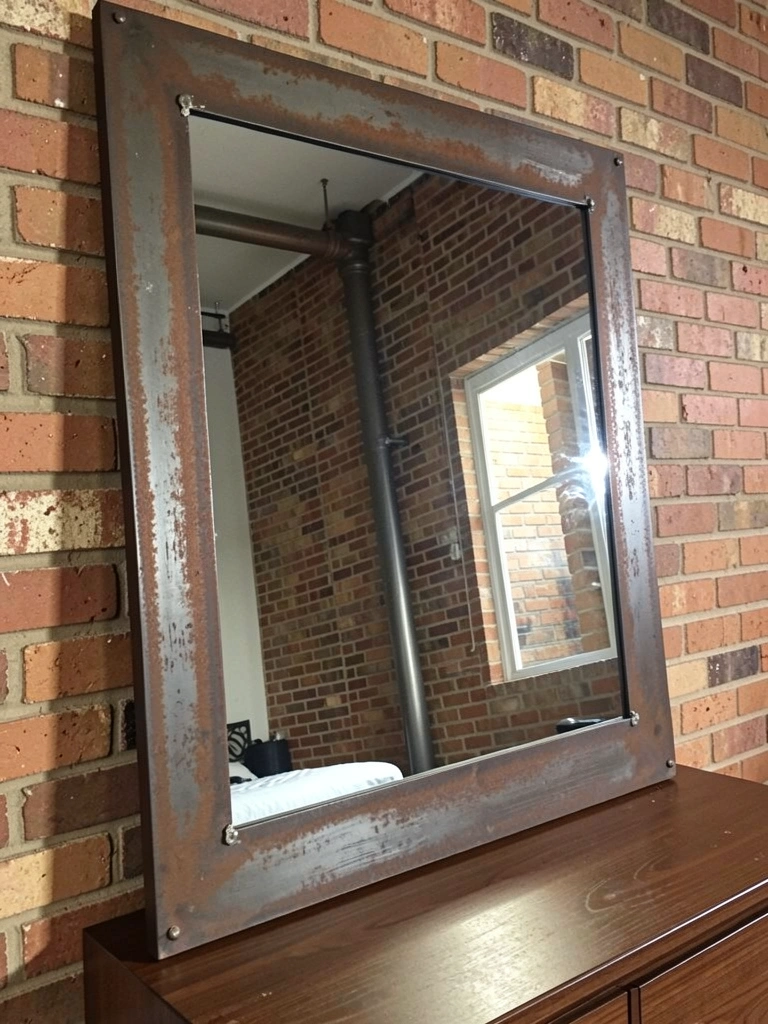
    23. Create a Photo Corner with a Vintage-Style Mirror

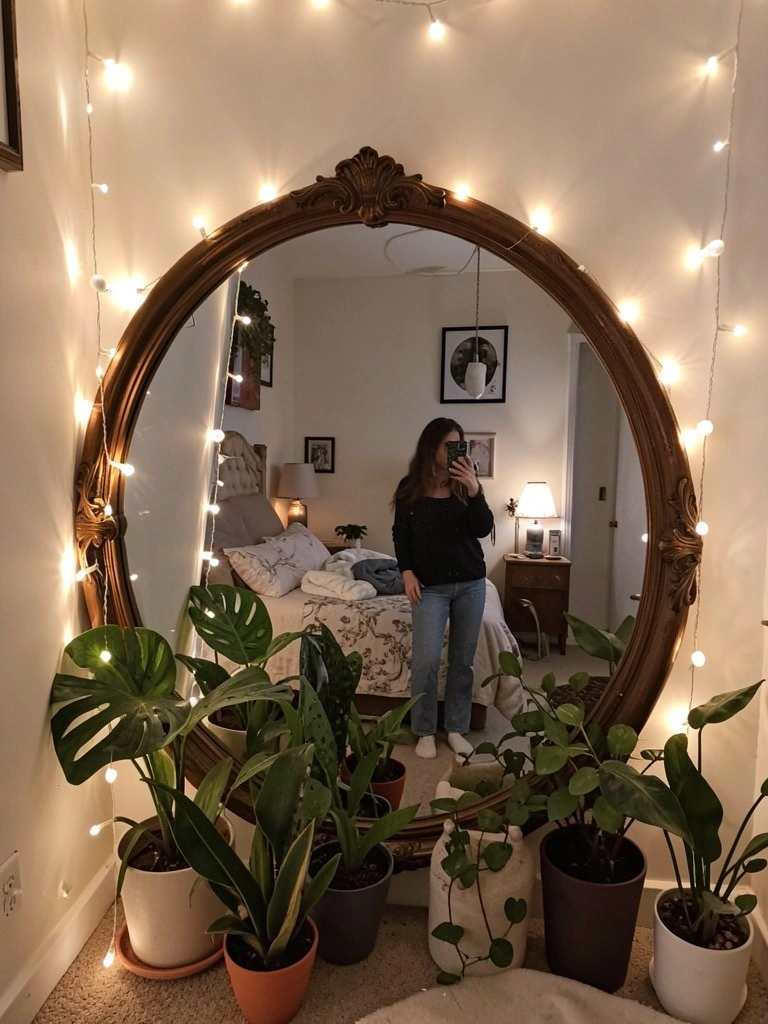
    A large mirror ($60-$150 from Wayfair, West Elm, or Amazon) becomes both functional decor and a photo backdrop. Choose one with a metal frame (gold, brass, or black) for Y2K vibes.

    Lean it against a wall rather than hanging it for renter-friendly flexibility. Surround it with plants, string lights, or a small bench. This takes 15 minutes to style and creates an instant photo moment. Budget $80-$120 for a statement mirror.

    You get a functional mirror plus an Instagrammable corner that makes your room feel intentional and styled.

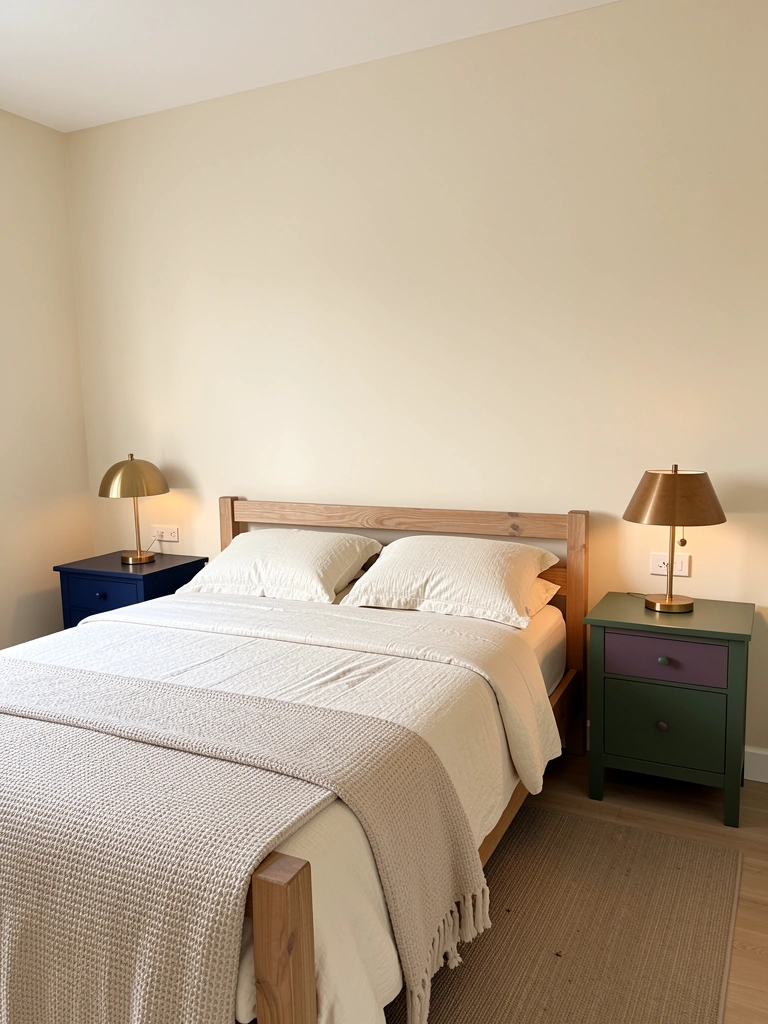
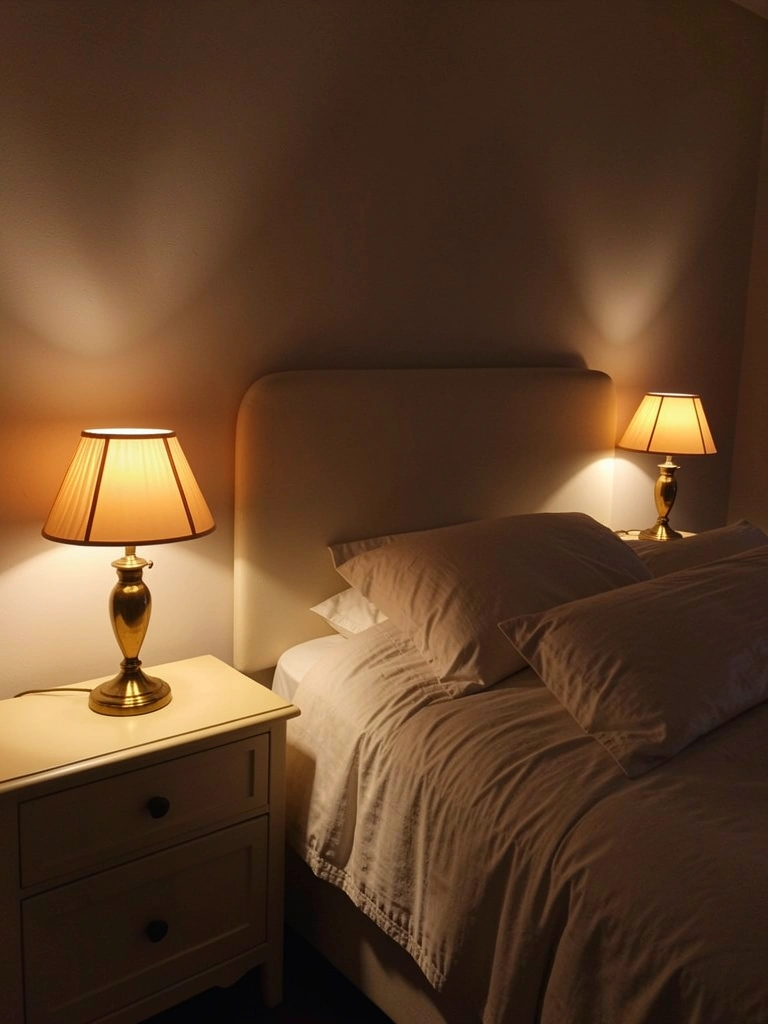
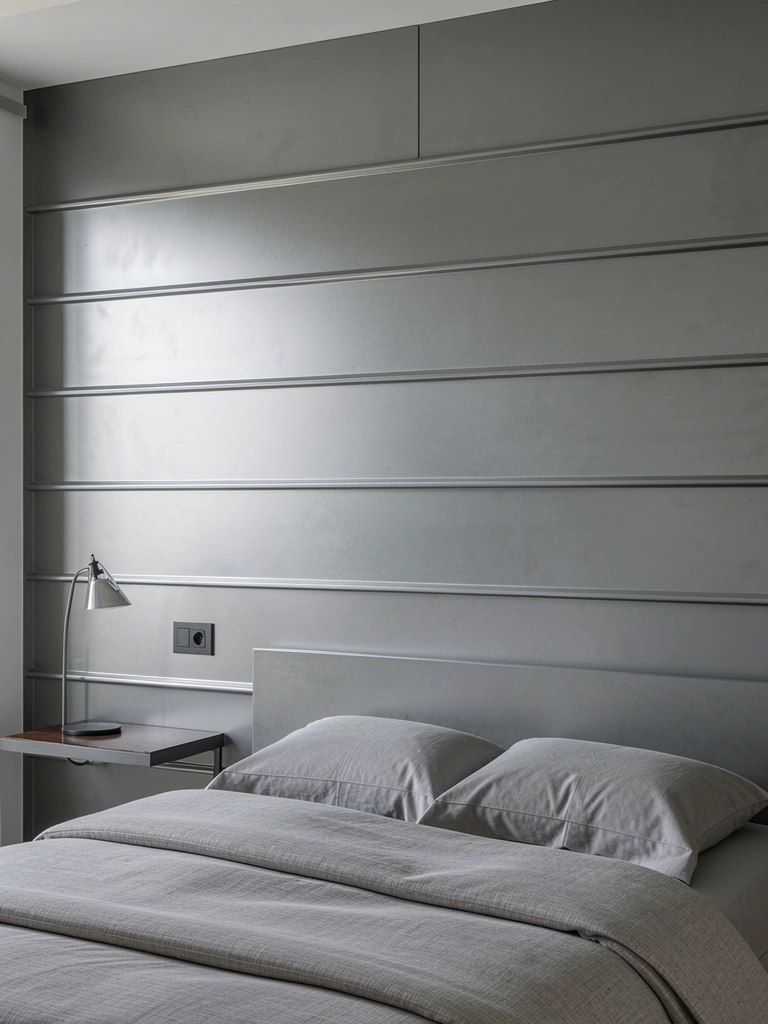
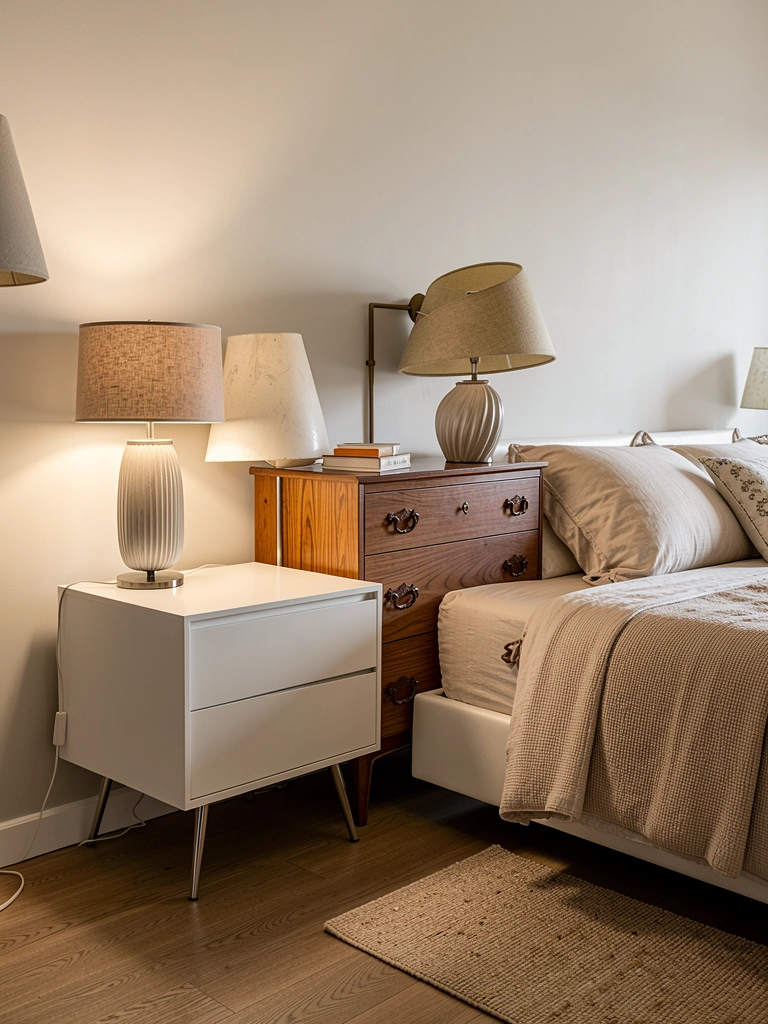
    24. Mix Thrifted Nightstands for Asymmetrical Balance

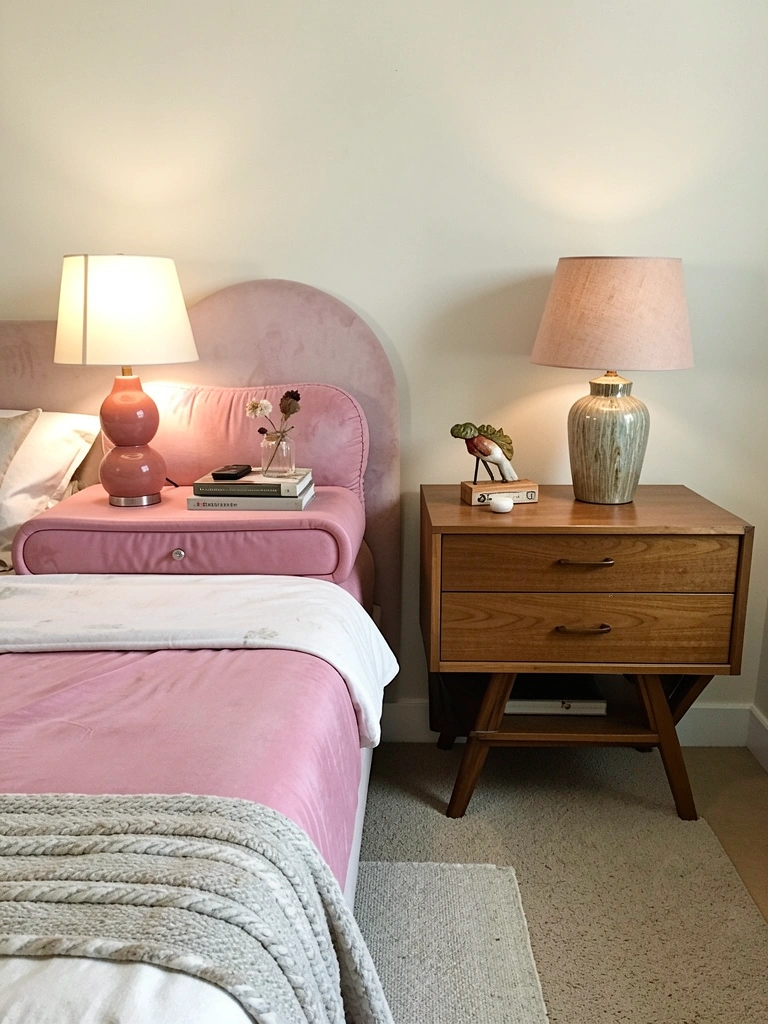
    Instead of matching nightstands, source two different vintage ones ($30-$80 each from thrift stores or Facebook Marketplace) for that eclectic Y2K vibe. Different colors, styles, and heights create visual interest.

    Hunt for solid wood pieces with good bones, even if they need refinishing. A coat of paint ($15-$25) transforms them instantly. This approach is budget-friendly and WAY more interesting than a matched set. Hunting takes time, but saves money long-term.

    Your room tells a story—collected, intentional, and uniquely you. It’s way more interesting than cookie-cutter matching furniture.

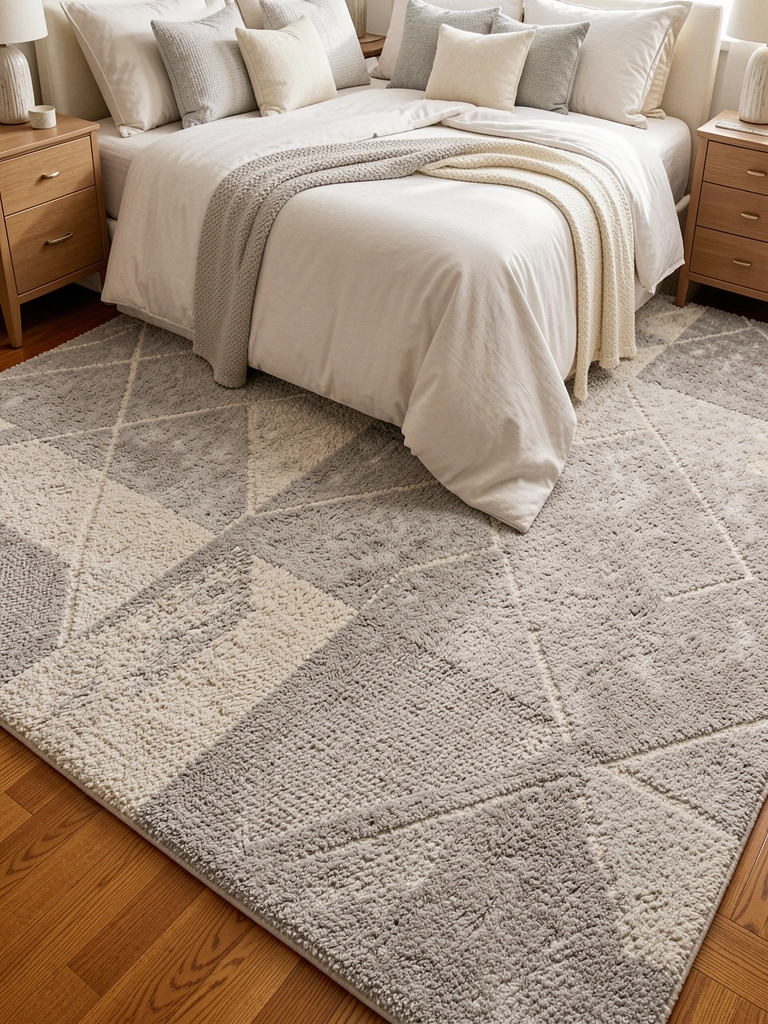
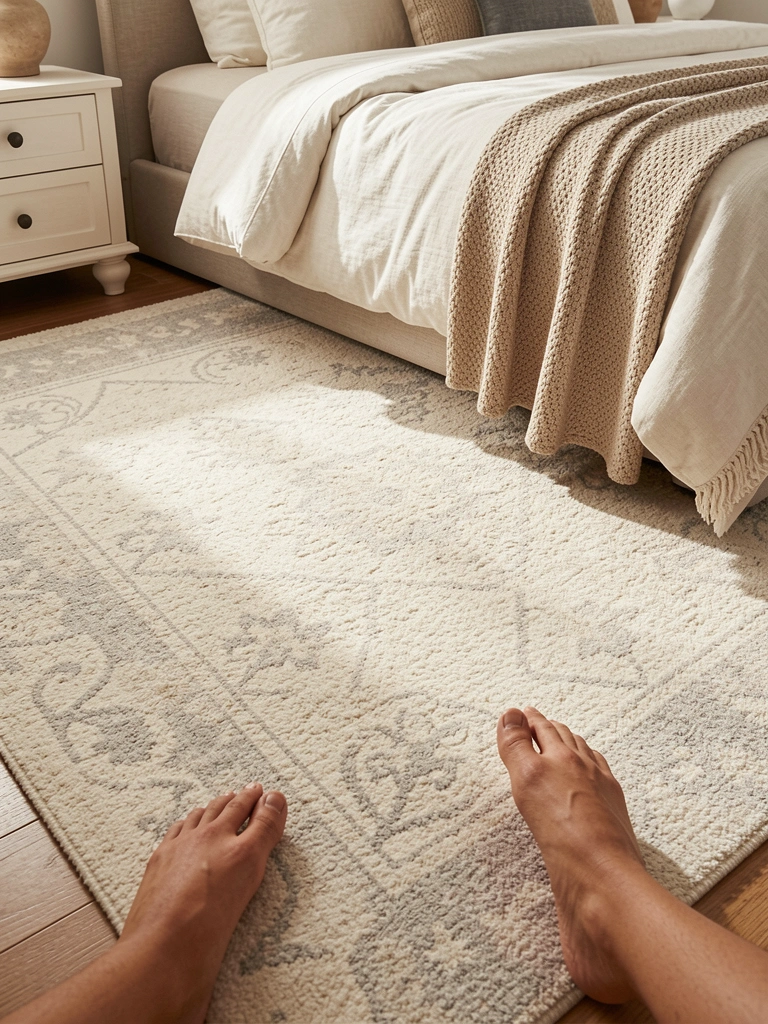
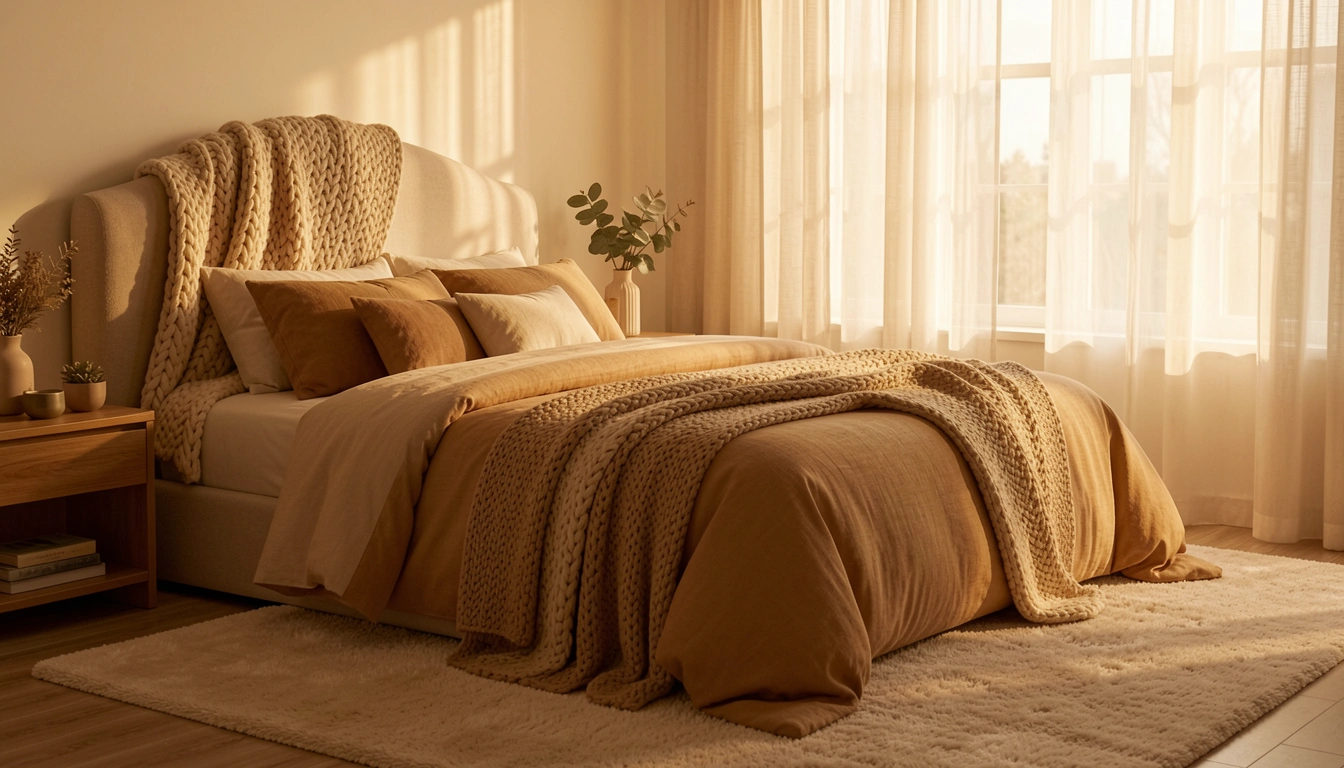
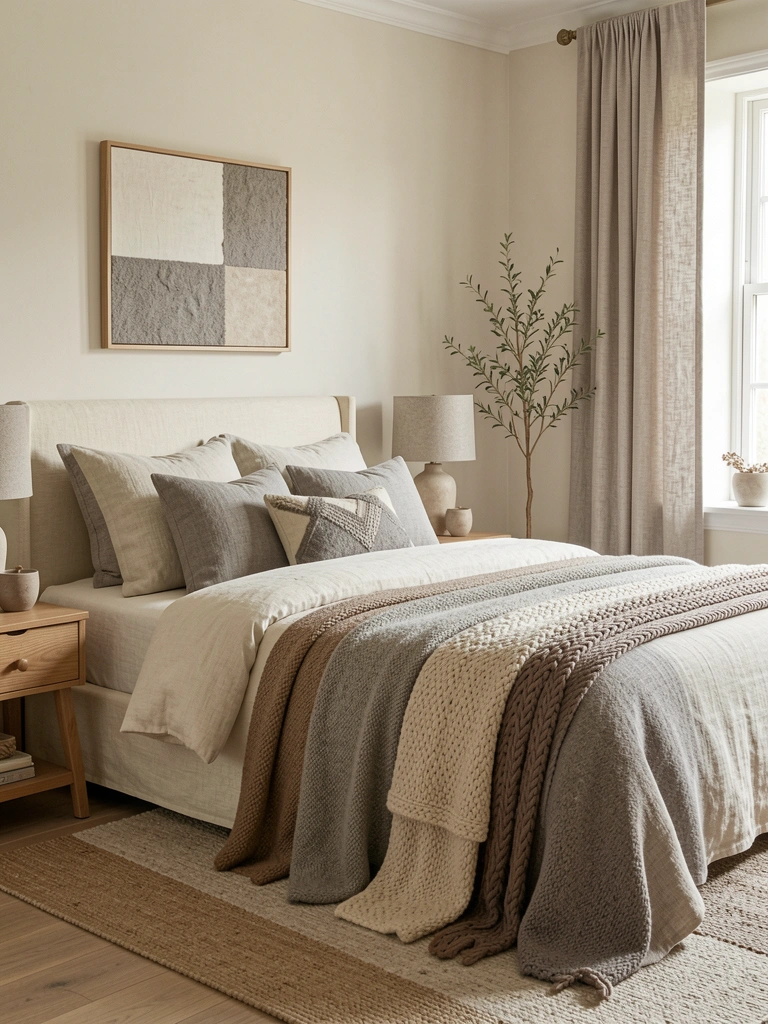
    25. Add a Fluffy Area Rug in a Pastel Shade

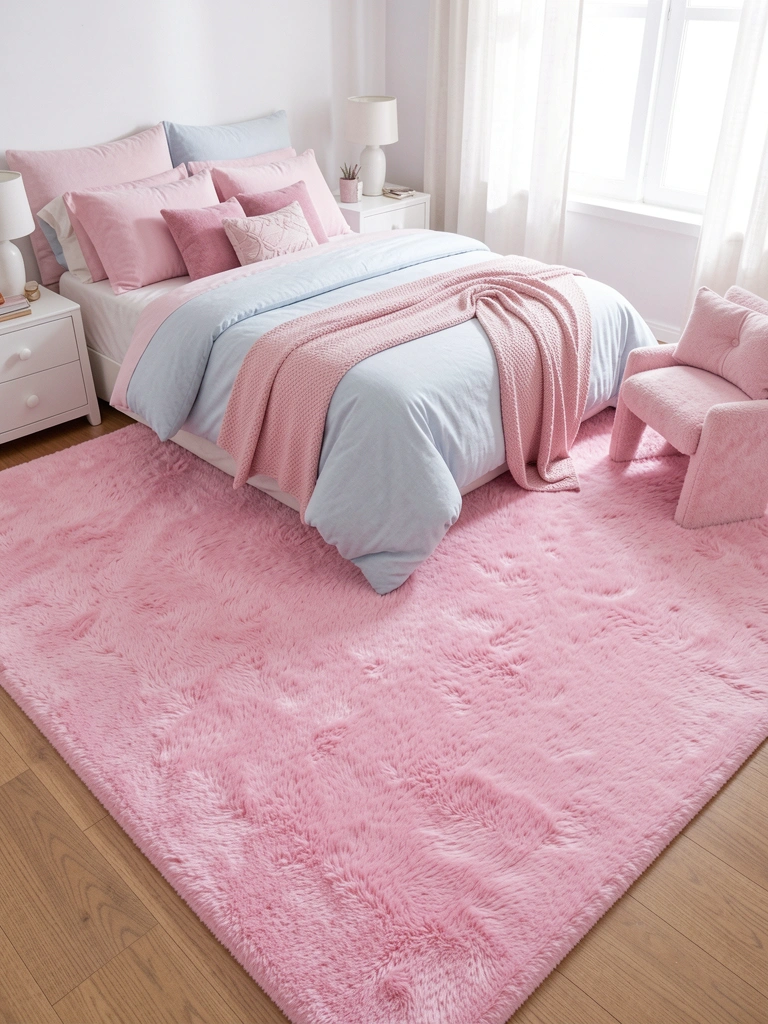
    A fluffy area rug ($60-$150 from Target, Wayfair, or Amazon) in pastels grounds the entire room and adds serious comfort. Baby pink, mint green, or powder blue work beautifully.

    Choose a rug that’s large enough to anchor your bed (8×10 is standard). Synthetic materials ($60-$100) are budget-friendly and washable. Natural wool ($150+) lasts longer but costs more. This ties together all your Y2K elements and makes the room feel intentional.

    Walking barefoot on a plush rug is genuinely comforting. Plus, it visually defines your space and adds warmth to hard floors.

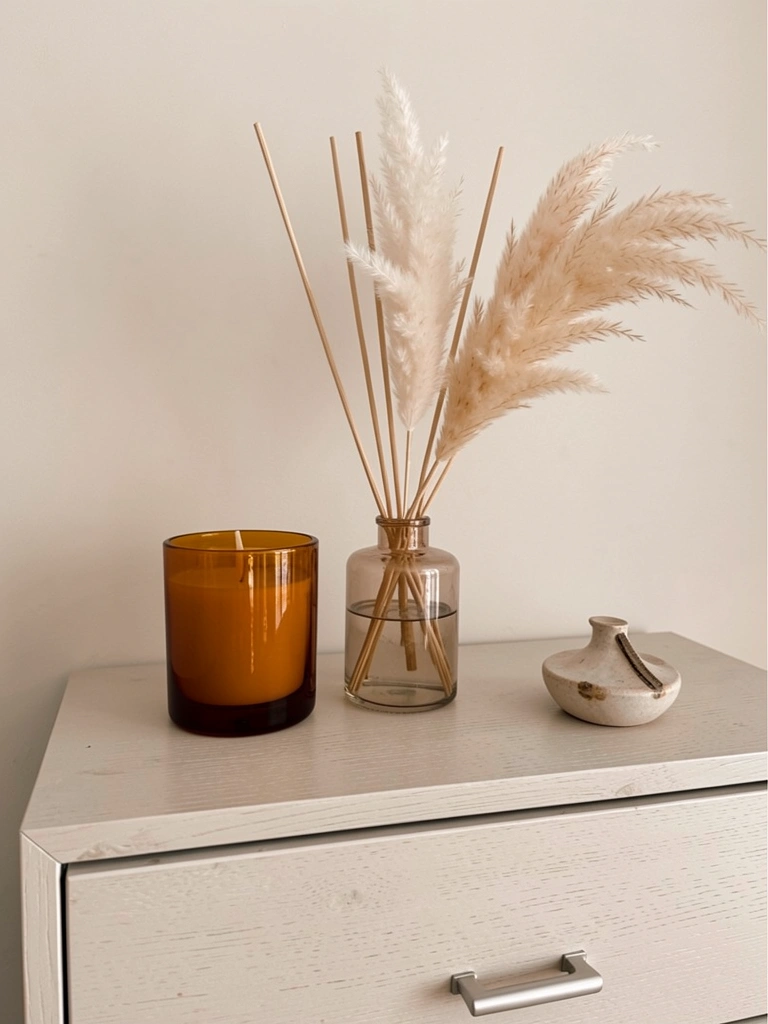
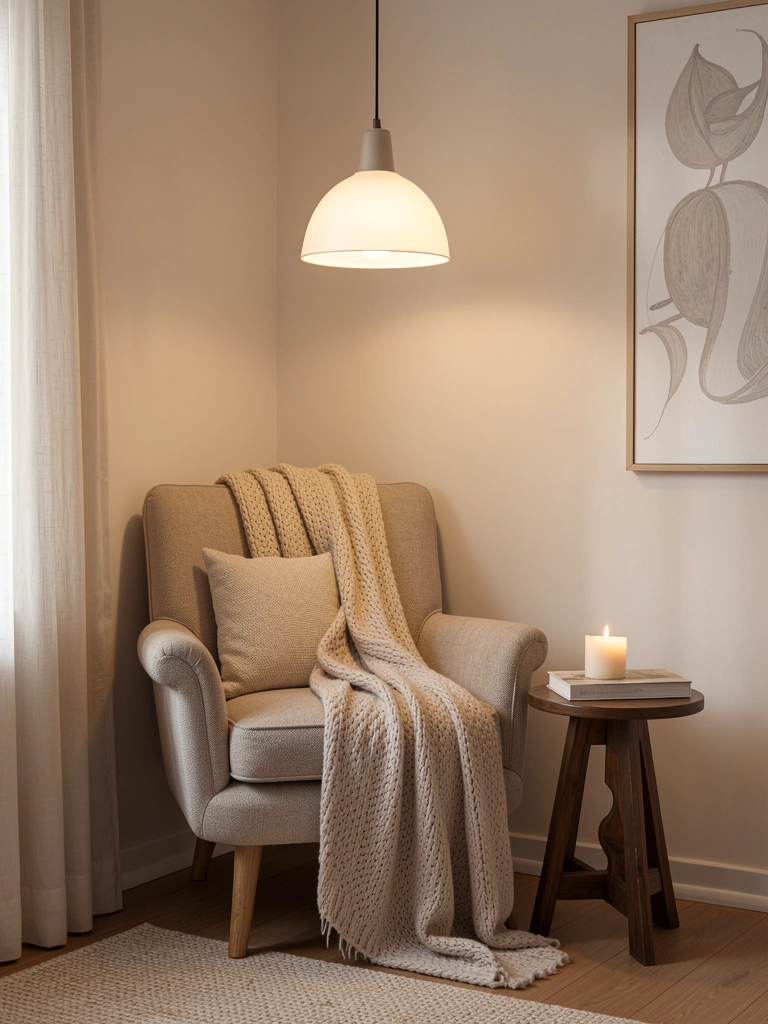
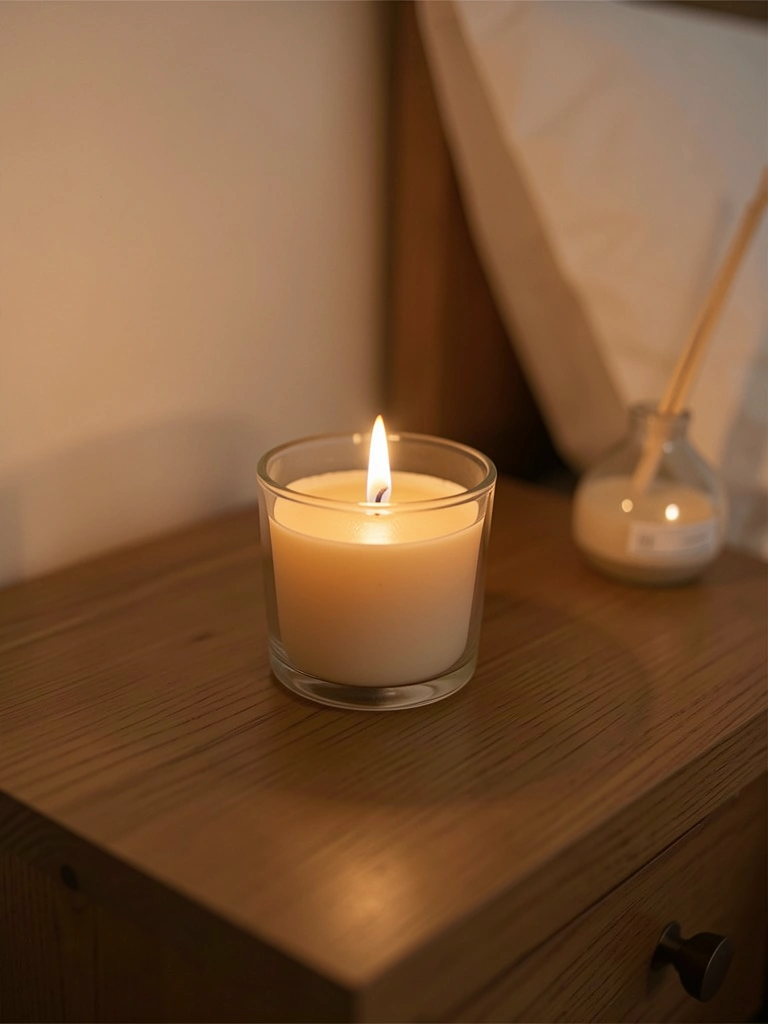
    26. Curate a Shelf of Scented Candles and Diffusers

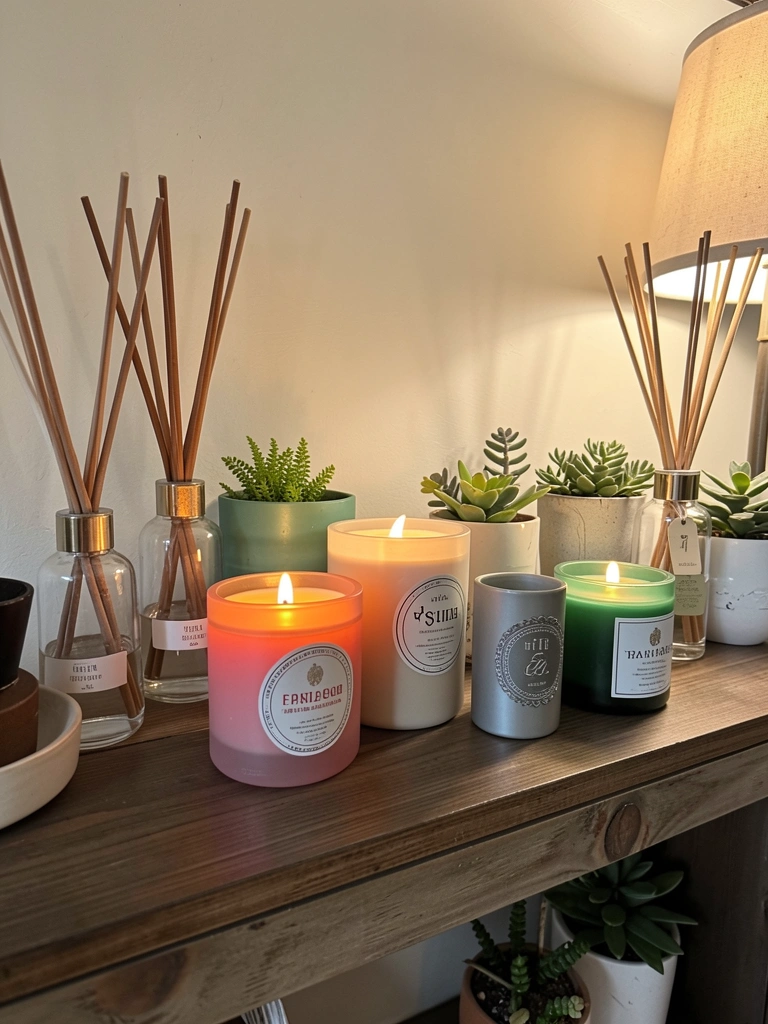
    Scented candles and diffusers ($8-$60 each from Target, Jo Malone, Diptyque, or Amazon) create an instant sensory experience. Curate a collection of 5-7 on a shelf or shelf unit.

    Mix price points: Target candles ($6-$12), Voluspa candles ($30-$40), and splurge Diptyque candles ($60+) for variety. Arrange by color or scent intensity for visual interest. Budget $80-$200 to start a collection you’ll actually use. Rotate them seasonally to keep things fresh.

    Your room smells amazing and becomes a true sanctuary. Lighting a candle becomes a ritual—part of your wind-down routine.

    Save this post and try one idea this weekend—you’ll be surprised how fast your room goes from basic to personality-packed. Which Y2K throwback are you most excited about?

  • 23 Hanger Layout Solutions That Create a Clean, Streamlined Look

    23 Hanger Layout Solutions That Create a Clean, Streamlined Look


    The difference between a chaotic closet and a serene one often comes down to one thing: how your hangers work for you. When your hangers are strategically arranged, getting dressed becomes effortless instead of frustrating. You’ll spend less time searching and more time enjoying your clothes. The 23 solutions in this guide range from zero-cost hacks to smart investments that completely change how you interact with your wardrobe. Whether you’re working with a tiny bedroom closet or a sprawling walk-in, these strategies will help you create a layout that’s both beautiful and functional. Let’s explore the hanger techniques that transform your daily routine.


    1. Group by Color After Decluttering

    Color blocking is the simplest way to make your closet look intentional. When similar colors hang together, your brain processes your options faster, cutting down the time you spend choosing outfits.

    Start by removing everything and deciding what stays. Donate or sell items you haven’t worn in a year. Then arrange hangers from light to dark: whites, pastels, neutrals, jewel tones, blacks. This takes about an hour depending on your closet size.

    The beauty of this system? It works for every closet type and requires zero purchases. Even renters benefit instantly since you’re just organizing what’s already there.

    You’ll notice your mornings move faster because your eyes naturally scan and match pieces without thinking about it.


    2. Invest in Uniform Velvet or Wooden Hangers

    Mismatched hangers are visual clutter that makes any closet feel chaotic. Switching to uniform hangers—whether velvet, wood, or slim plastic—instantly elevates your space’s appearance and prevents clothes from slipping.

    Buy a set of 50-100 matching hangers for $30-$80 from IKEA, Target, or Amazon. Velvet grips clothes without damage and looks high-end. Wooden hangers feel premium but take more space. Slim plastic hangers maximize rod capacity while staying organized. You can do this gradually, replacing old hangers one at a time.

    This small investment pays off in both function and aesthetics. Your closet immediately looks curated and intentional, even if you haven’t changed anything else.


    3. Use Cascading Hangers for Outfits

    Cascading hangers let you hang multiple items vertically while saving horizontal rod space. They’re game-changers for small closets and outfit planners.

    Attach cascading hangers to a single rod hanger and build outfits: shirt on top, matching bottoms below, scarf or belt on the lowest hook. Buy a pack of 5-10 cascading hangers for $10-$20 on Amazon. This takes 5 minutes to set up but saves hours over time since outfits are pre-planned.

    You can reuse the same cascading hangers for different outfit combinations throughout the season, making them incredibly versatile.

    Mornings become automatic—grab your pre-planned outfit and go. No second-guessing or trying on five different combinations.


    4. Create a Front-Row “Favorites” Section

    Your most-worn clothes deserve prime real estate. Creating a small “favorites” section at eye level (about 5-6 hangers) means you see the pieces you actually love every time you open your closet.

    Place this section at the center of your closet at eye level. Rotate items into this zone weekly. This costs nothing but takes intentional curation. Spend 10 minutes each Sunday moving pieces in and out based on the upcoming week.

    This system prevents decision fatigue because you’re working from a curated subset rather than scanning everything. You naturally reach for pieces that make you happy instead of defaulting to the same three items.


    5. Separate Hangers by Material Type

    Different fabrics need different hanger types. Heavyweight coats slip off slim hangers, while heavy wood hangers damage delicate fabrics. Matching the hanger to the garment protects your clothes and looks more organized.

    Use sturdy wooden or plastic hangers for coats and sweaters ($15-$30 per 10-pack). Thin plastic or velvet hangers work for shirts and lightweight items. Specialty padded hangers fit delicate silks and knits ($20-$40 per set). Group by type so your eye naturally goes to the right section.

    This prevents stretching, slipping, and unnecessary wear on your favorite pieces. Clothes last longer when they’re supported properly, which saves money on replacing worn items.


    6. Install a Second Rod for Double Hanging

    If your closet has high ceilings, you’re wasting precious hanging space. A second rod positioned below existing clothes doubles your capacity without taking up floor space.

    Add a secondary rod kit for $30-$60 from Home Depot or Lowe’s. Most are adjustable and require basic installation. Position the lower rod about 40-42 inches from the floor, leaving room to hang shirts and pants comfortably underneath longer dresses or coats. Installation takes 30 minutes with a drill.

    This is renter-friendly if you use tension rods or removable mounting brackets. You get significantly more hanging capacity without permanent damage.

    Suddenly you have room for everything without overstuffing a single rod, which means hangers spread out nicely and clothes stay wrinkle-free.


    7. Angle Hangers Slightly Inward for Visual Cohesion

    A small detail makes a big difference: angling all hangers slightly inward creates a polished, curated look. It’s a trick used in luxury boutiques and high-end closets.

    This costs nothing and takes 10 minutes total. As you rehang items after laundry, position each hanger hook slightly tilted inward at about a 5-10 degree angle. The entire row will appear unified and intentional.

    It’s a subtle shift but psychologically satisfying—your closet immediately looks more carefully arranged, like you have it all figured out.


    8. Use Wooden Dowels to Divide Hanger Sections

    Visual dividers help your brain process different clothing sections instantly. Thin wooden dowels inserted horizontally through hangers create low-cost separators without permanent changes.

    Buy wooden dowels (½-inch diameter) from craft stores for $3-$5, then cut to your rod width. Insert them through hanger loops to create barriers between sections (work clothes, casual, dresses, etc.). This takes 5 minutes to set up and works for renters.

    Alternatively, use decorative hanger dividers ($10-$15 per set on Amazon) designed specifically for this purpose. Either way, you’re creating visual stopping points that make the closet feel organized.

    Your eye naturally flows through distinct sections, making outfit selection feel less overwhelming.


    9. Install LED Strip Lighting Above Hangers

    Poor lighting makes it impossible to see true colors and details. LED strip lights mounted above your rod transform how you see your clothes and make the closet feel like a personal boutique.

    Install warm-white LED strips ($20-$40 on Amazon) with adhesive backing—no tools required. Mount them on the inside top edge of the closet above where hangers hang. Plug into a USB outlet or battery pack. Takes 5 minutes to install and makes outfit selection easier and more enjoyable.

    Renter-friendly option: use removable LED strip lights ($15-$30) that peel off without damage. Warm white (around 2700K) is more flattering than cool white.

    Suddenly you can see every piece clearly, colors match perfectly, and your closet feels elevated and functional.


    10. Reverse Hangers to Track Actual Wear

    The reverse hanger trick reveals which clothes you actually wear versus which ones just take up space. This data helps you make smarter purchasing and organizing decisions moving forward.

    Turn all hangers around backward at the start of a season. When you wear something, hang it back normally facing forward. After 4-6 weeks, backward-facing hangers are pieces you genuinely don’t wear. This costs nothing and reveals honest patterns about your wardrobe.

    It’s eye-opening how quickly you see which items aren’t working, which frees up mental and physical space for pieces you love.


    11. Group by Occasion or Activity

    Organizing by occasion (work, casual, workout, formal) aligns your closet with your actual life. You grab what you need without scanning everything.

    Create 3-4 main zones. Left side: work clothes. Center: everyday casual wear. Right side: weekend/leisure items. High rod or shelf: seasonal or occasional pieces. This takes one weekend and costs nothing.

    You can use dividers (from tip #8) to make sections even clearer, or just remember mentally where each category lives. The key is consistency—always put similar items back in the same zone.

    Your daily routine becomes smoother because you know exactly where to look for what you need, eliminating decision fatigue.


    12. Use Slim Space-Saving Hangers Exclusively

    If you’re working with a small closet, slim hangers are non-negotiable. They hold the same garment weight but take up half the space, letting you see and access everything.

    Buy a bulk pack of 50 slim plastic hangers for $15-$30 from IKEA or Amazon. The trade-off? They’re less durable than wooden hangers and slightly less attractive, but they’re renter-friendly and genuinely functional.

    Pair them with consistent color organization and this one change unlocks significantly more capacity. Items spread out instead of bunching, reducing wrinkles and making everything more visible.


    13. Hang Heavy Items Separately on Sturdy Hooks

    Bulky winter coats and heavy blazers shouldn’t share closet rods with delicate items—they create crowding and put stress on your entire system. Heavy pieces belong on separate sturdy hooks.

    Install heavy-duty wall hooks ($15-$30 for a set of 3-4) inside or just outside your closet. Use bolts or heavy-duty anchors for safety. Position them at a comfortable grabbing height. This takes 30 minutes with a drill.

    Renters can use over-the-door heavy hooks ($10-$20) instead. Removing heavy coats from the main closet rod frees up significant space and immediately makes your closet feel less packed.


    14. Create a “Laundry Day” Dedicated Hanger Spot

    Most people waste time hunting for empty hangers on laundry day. Designating a small zone for clean hangers keeps the system flowing smoothly.

    Reserve the first or last 10-15 hangers on your rod as “empties.” When you do laundry, grab from this zone and rehang clean items back in their proper sections. This takes zero money and 5 minutes to establish.

    Alternatively, hang a slim hanger holder ($8-$15) on the inside of your closet door to keep empty hangers corralled and visible. It sounds small, but this system eliminates the “I can’t find a hanger” frustration.

    Your laundry process becomes a streamlined routine instead of a hunt-and-grab situation.


    15. Use Hanger Dividers to Define Categories

    Purpose-made hanger dividers mark section breaks and add polish to your closet. They’re visual cues that help you stay organized long-term.

    Buy a set of hanger dividers ($10-$20 on Amazon) in wood, metal, or acrylic. Place them between clothing categories: work, casual, dresses, activewear, etc. They look more intentional than random dividers and are easy to adjust as your wardrobe shifts.

    Some versions are labeled (“Work,” “Weekend,” “Formal”), making the system crystal clear for household members or after you forget over time.

    Your closet looks intentional and curated—the kind of space you actually enjoy opening every morning.


    16. Alternate Hanger Direction for Visual Break

    Alternating hanger direction (hook facing left, then right, then left) creates a visual rhythm that makes the closet feel organized without adding anything new.

    This costs nothing and takes 10 minutes initially, then a few seconds per item when rehanging laundry. The alternating pattern helps you space items consistently and prevents the “crowded rod” feeling that happens when everything bunches together.

    It’s subtle but satisfying—you notice the visual difference immediately, and it has a small practical benefit of preventing hangers from sliding together.


    17. Store Off-Season Items on High Shelves or Rods

    Your active wardrobe shouldn’t compete for space with winter coats in summer or summer dresses in winter. Moving off-season items to high storage frees up your prime hanging real estate.

    Invest in a shelf divider system ($20-$40) or use clear bins ($15-$30 per set) to store off-season pieces. Label with the season and contents. This keeps your active closet lean and focused while preserving pieces you’ll wear again.

    Renter-friendly: use over-the-door organizers ($10-$20) or high shelf space instead of installing new rods. Takes one weekend to pack and relocate, but you get immediate breathing room in your closet.

    Your everyday hangers now represent only what you’re actually wearing, making decisions faster and the closet feel spacious.


    18. Hang Matching Coordinates Together on One Hanger

    For pieces you always wear together (white button-up with a matching blazer, favorite jeans with a specific belt), hanging them together saves decision-making time and looks organized.

    Use multi-clip hangers ($5-$10 per hanger) or cascading racks to keep coordinates united vertically. This works especially well for work outfits or go-to casual combinations. You can grab one hanger instead of hunting two pieces.

    Mentally note which combinations you repeat weekly and hang them together for the next laundry day. No permanent commitment needed—just convenient grouping.

    You start getting dressed and grab one hanger instead of assembling pieces, which genuinely saves time on busy mornings.


    19. Use a Thin Rod Divider to Separate Hang Lengths

    Long items and short items together create visual confusion and wasted hanging space. Separating by length maximizes your closet layout.

    If you have double rods (tip #6), designate the top for longer pieces and the bottom for short items like shirts and sweaters. If you have one rod, hang long pieces on one side and short items on the other. This costs nothing and works with any closet size.

    Your eye instantly finds what you’re looking for because lengths are predictable. The closet automatically looks more organized because similar items group together visually.


    20. Install Hooks Below Hangers for Accessories

    Small accessories (scarves, belts, statement necklaces) often disappear or create clutter. Hanging them on hooks below your main rod keeps them visible and organized.

    Install small adhesive hooks ($10-$15 for a set of 5-8) on the inside of your closet wall just below your hangers. Or clip hooks directly onto your existing rod using clip-on hanger hooks ($5-$10 for a set). Takes 10 minutes and works for renters.

    Hang scarves, belts, and lightweight jewelry here. You see them while picking outfits and naturally incorporate them more often.

    Accessories are no longer hidden or tangled—they’re accessible and part of your styling strategy.


    21. Maintain 1.5-Inch Spacing Between Hangers

    Overcrowding kills everything: wrinkles appear faster, you can’t see what you own, and grabbing one item tangles five others. Maintaining consistent spacing makes your closet functional and beautiful.

    Aim for about 1.5 inches between hanger hooks. This feels like plenty of breathing room without wasting space. When you rehang laundry, take 30 seconds to redistribute items so spacing stays consistent. It costs nothing and prevents the “compressed closet” look.

    If your closet is packed to capacity, this might mean moving some items to storage or donating items that don’t spark joy.

    Items become visible and accessible instead of lost in a sea of crowded fabric.


    22. Hang Delicate Items on Padded or Silk Hangers

    Silk blouses, delicate dresses, and cashmere deserve protection from metal and plastic hanger marks. Padded or silk hangers prevent damage that shortens your clothes’ lifespan.

    Buy padded hangers ($2-$5 per hanger) for your delicate pieces, or invest in specialty silk hangers ($3-$8 each) from high-end retailers. Collect these gradually as your budget allows. The investment protects pieces you likely paid good money for.

    Designate one section of your closet for these premium hangers so delicate items are clearly identified. Your favorite pieces last longer and look better over time.


    23. Create a “Try Again” Zone for Recent Purchases

    New pieces need time to integrate into your existing wardrobe. Creating a temporary zone for recent purchases helps you actually wear them instead of letting them hide in your closet.

    Use a small divider or mental zone to corral new items. When you buy something, hang it here for a week or two. Challenge yourself to style it with existing pieces so it becomes part of your regular rotation. No cost involved—just intentional placement.

    After two weeks, move successful pieces into their regular homes. If you haven’t worn them, return them if possible or donate. This keeps your closet honest and prevents impulse purchases from piling up unused.

    You’re more likely to actually wear what you buy, making shopping feel valuable instead of wasteful.


    Save this post and pick just one or two ideas to try this weekend. Even small changes—like switching to matching hangers or adding an LED light—shift how you feel about your closet. Which tip will you implement first?

  • 26 Noise-Softening Additions That Make Sleep Spaces Feel Serene

    26 Noise-Softening Additions That Make Sleep Spaces Feel Serene

    You know that feeling when you walk into a room and instantly relax? That’s what a noise-softening bedroom does for your sleep space. Whether you’re dealing with street traffic, noisy neighbors, or just want your bedroom to feel like a sanctuary, small acoustic and sensory additions make a huge difference. The best part? Most of these ideas are budget-friendly, renter-approved, and don’t require any special skills. In this guide, you’ll discover 26 specific ways to make your bedroom quieter, calmer, and more conducive to deep, restorative sleep. From textiles and plants to lighting and layout tweaks, each idea tackles noise absorption or creates psychological calm—sometimes both. Let’s start building your serene sleep space.

    1. Layer Your Curtains for Sound Dampening

    Heavy curtains are your first defense against outside noise and light pollution. A single curtain panel won’t absorb much sound, but layering multiple weights creates an air gap that traps noise and muffles outside disturbance.

    Install a sheer curtain close to the window, a medium-weight linen or cotton panel in the middle, and a blackout curtain on the outside track. This trio costs $60–$200 depending on size and quality. Most hardware stores sell tension rods (under $20) that make layering renter-friendly without permanent installation. The setup takes about 30 minutes, and you’ll immediately notice quieter mornings and faster sleep onset.

    Pro tip: Leave a small gap between layers so air can flow and prevent moisture buildup. The visual effect also photographs beautifully for inspiration feeds.

    Your window becomes a sound barrier that also controls light—the two biggest sleep disruptors. You’re not just reducing noise; you’re signaling to your brain that the bedroom is a protected space.

    2. Add an Area Rug for Acoustic Absorption

    Hard floors—wood, tile, laminate—bounce sound around your room and make every footstep and noise echo. A large area rug absorbs sound waves and dampens reflections, making the space feel quieter and warmer underfoot.

    Choose a rug at least 8×10 feet with a thick pile or textured weave (wool, jute, or wool-blend rugs perform best acoustically). Budget $100–$400 depending on material and quality. Layering a smaller rug on top adds even more absorption for $50–$150 extra. Place it so the bed sits mostly or entirely on the rug. This takes 10 minutes to lay out and requires no tools.

    Pro tip: Jute or sisal rugs are budget-friendly ($80–$150) and excellent sound absorbers, though slightly less plush than wool. Synthetic high-pile rugs offer a middle ground at $100–$250.

    The room feels less echoey and acoustically “dead” in the best way. You’ll notice your own movements sound quieter, and outside noise feels more muffled and distant.

    3. Hang Acoustic Panels or Tapestries Disguised as Decor

    Acoustic panels don’t have to look clinical. You can disguise sound-absorbing panels as decorative tapestries, macramé wall hangings, or quilted fabric art—all of which dampen sound while looking intentional and beautiful.

    Commercial acoustic panels run $30–$100 each, but DIY tapestries or heavy fabric hangings (think vintage quilts or woven textiles) cost $20–$80 and absorb sound just as well. Hang 2–4 pieces on walls where sound tends to bounce (opposite the window, behind the bed). Mount with simple adhesive hooks or tension rods for renter safety. Installation takes 20–30 minutes.

    Pro tip: Macramé wall hangings, vintage kilim tapestries, and linen wall textiles do double duty as decor and acoustic treatment. Layer different textures for visual depth and maximum sound absorption.

    Your walls stop reflecting noise back at you, and the room gains an artist’s retreat aesthetic. The space feels both quieter and more personalized.

    4. Use Thick Curtain Liners for Added Sound Blocking

    Curtain liners—especially quilted or thermal varieties—add acoustic mass to existing curtains without replacing them entirely. This is a fast upgrade for renters or anyone who already loves their current curtains.

    Thermal curtain liners cost $15–$40 per panel and hook onto your existing curtain rod using small clips or a separate rod. Quilted liners are heavier and more sound-absorbing than basic thermal options. Installation takes 15 minutes, and you don’t need to alter or change your main curtains.

    Pro tip: If you prefer a hidden solution, hang the liner on an inner rod behind your existing curtains so only the nicer fabric shows from inside the room. Measure your curtain width and length first—most liners come in standard sizes (36″–84″ wide).

    The added layer significantly dampens outside noise without changing your room’s appearance. Your current curtains now work harder at blocking both sound and light.

    5. Place Furniture Against Exterior Walls for Mass

    Mass absorbs sound. By positioning heavier furniture—dressers, bookshelves, bed frames—against exterior walls (the ones facing outside or neighbors), you create a physical barrier that weakens noise transmission.

    This costs $0 if you rearrange existing furniture. If you need to buy new pieces, a solid wood dresser runs $150–$400, and a tall bookshelf ranges $80–$300. Positioning takes 30 minutes to an hour, depending on what you’re moving. Don’t push furniture flush against the wall; leave a tiny 1–2 inch gap for air circulation and to prevent moisture issues.

    Pro tip: Fill bookshelves with books (which absorb sound) rather than leaving them empty. The mass of books plus the wooden structure creates excellent acoustic dampening.

    Your bedroom becomes quieter because sound has to travel through more material to reach you. The furniture arrangement also feels more intentional and purposeful.

    6. Install Weatherstripping Around Doors

    A huge amount of noise leaks through gaps around bedroom doors. Weatherstripping seals these gaps and stops sound (and drafts) from entering your sleep space.

    Weatherstripping foam tape costs $5–$15 per door and takes 10 minutes to install. Clean the door frame, peel and stick the foam strip along the top and both sides, and you’re done. For the bottom gap, install a door sweep (which hangs from the door and closes the gap when the door is shut) for $10–$25.

    Pro tip: If you rent and can’t install permanent weatherstripping, removable adhesive tape (like Command strips) works well. Replace it yearly as the adhesive weakens. Silicone weatherstripping is more durable than foam if you’re buying for the long term.

    The room becomes noticeably quieter because hallway noise and ambient house sounds stop seeping in. Sleep feels deeper when you’re not subconsciously processing background disturbance.

    7. Add Soft Furnishings Like Ottomans and Poufs

    Soft furnishings—ottomans, poufs, upholstered benches—absorb sound while adding comfort and style. Fabric-covered items dampen reflections and create acoustic “soft spots” throughout the room.

    A quality ottoman or pouf costs $80–$250 depending on material and size. Budget options from IKEA, Target, or Wayfair run $40–$100. Place one or two in corners or under windows. No installation required—just unbox and position.

    Pro tip: Choose dense, textured fabrics (velvet, wool, linen) over sleek ones. The more surface irregularity, the better the sound absorption. Bonus: ottomans with storage let you hide bedding and seasonal items while keeping the room calm and clutter-free.

    Your bedroom gains functional seating that also makes the space feel quieter and more grounded. The soft surfaces catch sound you didn’t even realize was bouncing around.

    8. Install a White Noise Machine or Sound-Masking App

    Sometimes the best way to deal with unavoidable noise is to mask it with consistent, neutral sound. White noise machines emit steady tones that cover up irregular noises (traffic, voices, sirens) that jolt you awake.

    Quality white noise machines cost $30–$150 (Marpac Dohm, LectroFan are popular). Free alternatives include apps like myNoise, Noisli, or YouTube videos ($0–$10 monthly for ad-free versions). Choose a machine or app with adjustable volume and multiple sound options (rain, fan, brown noise, ocean). Setup takes 5 minutes. Many machines come with sleep timers so sound turns off during deep sleep cycles.

    Pro tip: Experiment with different noise types. Some people sleep better with fan sounds, others prefer rain or white noise. What’s soothing to one person might be annoying to another, so test before investing in a pricey machine.

    Outside noise becomes unnoticeable because your brain focuses on the steady, predictable masking sound instead. You sleep through disturbances you’d normally wake to.

    9. Upgrade Your Pillow to a Thicker, Denser Style

    Beyond comfort, a high-quality pillow with denser fill contributes to acoustic dampening around your head and neck—the area most sensitive to sound disturbance during sleep. Thicker pillows also prop your head at better angles for breathing and neck support.

    A quality pillow costs $50–$150 depending on fill (memory foam, down alternative, latex). Budget options start around $25–$50. Look for pillows with 4–5 inches of fill height and medium-firm density. Two pillows create more sound-absorbing mass than one.

    Pro tip: Memory foam and down-blend pillows are denser and absorb more sound than feather pillows. Test in-store if possible, or buy from retailers with easy returns (Amazon, Costco, major department stores). The right pillow also improves sleep quality independent of sound control.

    You’re more insulated from noise because the pillow mass around your head creates a buffer. Sleep feels more supported and undisturbed because your body is properly aligned.

    10. Hang Blackout Curtains to Control Light and Reduce Perceived Noise

    Complete darkness doesn’t directly reduce sound, but it dramatically improves sleep quality—and better sleep makes you less sensitive to noise. Blackout curtains also provide acoustic benefits as a bonus.

    Blackout curtains run $40–$150 per panel depending on size and quality. Installation on an existing rod takes 15 minutes. For renters, tension rods with blackout panels cost $30–$80 total and require zero permanent installation. Consider blackout curtains in deeper colors (charcoal, navy, black) for maximum light-blocking and slight acoustic enhancement.

    Pro tip: Pair blackout curtains with a blackout window shade or film for maximum darkness, or layer them over existing curtains. If you travel or want flexibility, removable blackout panels (adhesive-backed) cost $20–$40 and peel off cleanly.

    Your body produces more melatonin in darkness, helping you fall asleep faster and stay asleep longer. This better baseline sleep means you’re naturally more resilient to ambient noise.

    11. Place Plants Around the Room for Softening and Air Quality

    Live plants add visual softness and improve air quality, which contributes to sleep-friendly atmosphere. Their soft leaves and varied textures also provide subtle acoustic absorption, though not as much as dedicated materials.

    Common bedroom plants like pothos, snake plants, and monsteras cost $10–$30 per plant at nurseries or big-box stores. A collection of 3–5 plants runs $30–$120. Pots add another $20–$50 depending on material and size. Placement takes 10 minutes, and ongoing care is just weekly watering.

    Pro tip: Choose low-maintenance plants (pothos, snake plant, ZZ plant) if you’re not confident in your plant skills. Larger plants provide more acoustic benefit because of their mass and surface area. Position them on shelves, nightstands, and corners rather than just clustered in one spot.

    Your room becomes noticeably greener and more alive, which calms your nervous system before sleep. The subtle rustling of leaves adds gentle, nature-based sound masking, and you’re breathing cleaner air throughout the night.

    12. Install a Soft Padded Headboard

    A padded headboard absorbs sound that would otherwise bounce off a hard wall behind your bed. It’s both functional and aesthetic—a win for acoustic treatment disguised as furniture.

    Upholstered headboards run $150–$600 depending on size, materials, and whether you’re buying or DIYing. Budget alternatives include wall-mounted fabric panels ($50–$150) or adhesive padded wall tiles ($30–$80). DIY enthusiasts can staple fabric over a plywood frame mounted to the wall ($40–$80 in materials). Installation takes 1–3 hours for DIY or is handled by the retailer for purchased headboards.

    Pro tip: Quilted or tufted headboards look more finished and absorb sound better than smooth padded versions. If you’re renting, adhesive fabric panels work without damaging walls.

    Sound bounces less chaotically around your sleeping area, and the room feels quieter and more enclosed. You’ve also created a visual focal point that makes the bed feel more intentional and spa-like.

    13. Switch to Heavier Bedding for Mass and Comfort

    Heavier bedding (duvets, weighted comforters, layered blankets) adds mass around your body that absorbs sound and also provides the tactile coziness that supports better sleep. The weight itself is calming.

    A quality weighted comforter costs $100–$400 depending on fill weight (15–25 lbs is typical). Standard duvets run $60–$200. Layering multiple throw blankets adds another $30–$100. The whole setup, including pillows and sheets, totals $200–$600 for a complete refresh. Swapping out bedding takes 15 minutes.

    Pro tip: Weighted comforters designed for anxiety or sensory sensitivity are worth the premium—they reduce nighttime stress. Natural materials (cotton, bamboo) sleep cooler than synthetics. If you’re sensitive to weight, even a heavier-than-normal duvet (not weighted) provides acoustic and comfort benefits.

    You feel more held and grounded, which reduces anxiety and allows deeper sleep. The room also looks more inviting and intentional, signaling to your brain that this is a space designed for rest.

    14. Reduce Echo with Soft Wall Treatments

    Echoing walls make rooms feel less cozy and amplify ambient noise. Soft wall treatments dampen reflections without requiring paint or renovations, making them renter-friendly.

    Options include adhesive fabric wall panels ($30–$80), cork tiles ($20–$60), or DIY fabric-wrapped frames ($15–$40 in materials). Install 2–3 panels on walls opposite windows or behind the bed where sound tends to bounce. Application takes 30–60 minutes depending on method.

    Pro tip: Removable peel-and-stick wall treatments (fabric, cork, or padded panels) work beautifully for renters. Neutrals and soft textures integrate seamlessly into bedroom design. Layer different treatments (one fabric panel, one cork, one tapestry) for visual interest and varied acoustic properties.

    The room stops sounding hollow or echoey. Sound feels absorbed rather than reflected, and the space acoustically shrinks to feel more intimate and enclosed.

    15. Create a Reading Nook Away from the Bedroom Window

    If your bedroom faces a loud street or neighbors, positioning your bed away from the window and creating a quiet nook on an interior wall moves you further from the noise source. This simple layout change reduces the sound reaching your sleeping body.

    This costs $0 if you rearrange existing furniture or $100–$300 if you buy a reading chair or add seating. Rearranging takes 1–2 hours. Choose interior walls facing closets, hallways, or neighboring bedrooms rather than external walls.

    Pro tip: If you can’t move your bed, at least position your headrest away from the exterior wall. Even a few feet of distance weakens noise transmission. Use your reading nook for wind-down time before bed, which also improves sleep onset.

    You’re sleeping in a quieter zone of your bedroom, and the space gains functional purpose beyond just sleeping. Wind-down time in the quiet nook naturally transitions your brain into sleep mode.

    16. Add Plush Throw Blankets Layered on Your Bed

    Layered throw blankets add mass and softness while creating visual interest. The more fabric layers on your bed, the more sound absorption happens around your sleeping body.

    Quality throw blankets cost $20–$80 each, depending on material (wool, cotton, faux fur, cable knit). Layer 2–3 throws on your bed for $40–$240 total. This setup takes 10 minutes to arrange and rearrange as needed for seasons. Buy throws that coordinate with your bedding color palette for intentional styling.

    Pro tip: Mix textures—cable knit, faux fur, linen, wool—rather than using identical blankets. The variety absorbs different sound frequencies. Fold them casually at the foot of the bed or drape them over the headboard for a styled look.

    Your bed becomes a cozy cocoon that muffles noise and makes you feel held. The visual effect is also more dynamic and inviting, encouraging you to prioritize bedtime.

    17. Seal Air Leaks Around Outlets and Light Switches

    Tiny air leaks around electrical outlets and light switches let noise (and cold air) escape. Sealing these gaps is less visible than other treatments but makes a real acoustic difference.

    Acoustic caulk or paintable sealant costs $5–$15 per tube. Foam outlet gaskets cost $3–$8 per unit. Sealing an average bedroom takes 30–45 minutes and requires basic caulking skills (or hire a pro for $100–$200). This is a long-term solution if you own your home; renters should check lease terms first.

    Pro tip: For renters, removable foam gaskets behind outlet and switch covers work without damaging walls. Just remember to remove them if you move.

    Sound transmission through walls drops noticeably because you’ve closed the small passages that leaked noise. This combines with other acoustic treatments for cumulative effect.

    18. Invest in Quality Noise-Canceling Earplugs or a Silk Sleep Mask

    Sometimes the most direct solution is personal noise protection. Quality earplugs and a sleep mask block external stimuli while signaling to your brain that it’s time to sleep.

    Foam earplugs cost $5–$15 per pair and are disposable. Reusable silicone earplugs run $10–$20. Premium noise-blocking earplugs (like Loop or Flents) cost $15–$40. Silk sleep masks run $15–$50. Together, a complete personal acoustic setup is $30–$90 and lasts months to years depending on care. Using them takes 30 seconds each night.

    Pro tip: Test different earplug styles because fit varies. Some people prefer foam, others silicone or wax. A silk mask feels softer on skin than cotton and reduces light penetration better. Use these as backup solutions on high-noise nights rather than relying on them nightly (continued earplug use can impact ear health).

    You have a personal noise barrier that blocks external disturbance completely. Combined with room treatments, this provides comprehensive sound control.

    19. Paint Walls in Soft, Matte Finishes Rather Than Glossy

    Matte paint finishes absorb sound and light better than glossy finishes, which reflect both. While the acoustic difference is subtle, the visual and sensory difference supports a calmer bedroom overall.

    Paint costs $20–$50 per gallon and covers about 350 square feet. A bedroom typically needs 1–2 gallons. Professional painting costs $200–$600 for a bedroom; DIY takes 6–10 hours depending on prep. Matte or eggshell finishes are nearly identical in cost to glossy paint, so there’s no budget trade-off.

    Pro tip: Soft, muted colors (pale grays, warm whites, soft greens, muted blues) pair beautifully with matte finishes and naturally create a calming atmosphere. Avoid bright whites or high-contrast colors in matte finish, which can look flat rather than restful.

    The room stops feeling echoey, and the matte surfaces create a softer, more forgiving visual environment. Light distributes gently rather than bouncing harshly, which calms your nervous system.

    20. Install a Door Seal or Acoustic Door

    A standard hollow bedroom door transmits noise readily. A solid core door or acoustic door blocks much more sound than hollow alternatives. This is an investment but transforms noise transmission.

    Acoustic doors cost $150–$400 depending on style and quality. Solid core doors run $100–$300. Standard hollow doors are $50–$150 (not recommended for quiet bedrooms). Professional installation adds $150–$300. Installation takes a few hours. For renters, this isn’t an option, but weatherstripping a hollow door (previous tip) helps significantly.

    Pro tip: If replacing your door, measure the frame first and ensure the new door fits the existing opening. Hollow core doors weigh 20–30 lbs; solid core doors are 40–50 lbs, so the frame needs to support extra weight.

    Outside noise transmission drops dramatically because the door no longer vibrates in response to sound. This single change might be the most impactful acoustic upgrade available.

    21. Use Acoustic Foam Panels Disguised as Art

    Acoustic foam panels don’t have to look industrial. Framing them or choosing panels with attractive finishes makes them look like intentional art while serving an acoustic purpose.

    DIY framing costs $30–$60 per panel (foam plus frame materials). Pre-framed acoustic art runs $50–$150 per piece. Install 3–5 panels for noticeable acoustic improvement at $150–$750 total. Adhesive mounting takes 30 minutes.

    Pro tip: Choose warm tones (cream, soft gray, pale tan) rather than bright colors. Thick foam (2–4 inches) absorbs sound better than thin. Varying panel sizes on a wall creates visual interest while maximizing acoustic coverage.

    Your bedroom walls stop bouncing sound around chaotically, and you’ve disguised acoustic treatment as intentional design. The room looks thoughtfully curated rather than industrial.

    22. Create Soft Zoning with Furniture Arrangement

    Defining zones within your bedroom with strategic furniture placement creates natural sound barriers and signals to your brain that different areas serve different purposes. This separation reduces noise perception in the sleeping zone.

    This costs $0 with rearrangement or $100–$400 if buying additional furniture (side table, reading chair, shelving). Planning takes 15 minutes; rearranging takes 1–2 hours. Position larger pieces (dressers, bookshelves) as dividers between zones.

    Pro tip: Use an area rug to anchor each zone visually. This creates psychological “rooms within a room” without construction, and soft rugs add acoustic benefits too.

    Your brain perceives the sleeping area as more protected and separate from activity zones. Sound seems to bounce less across the space, and you fall asleep faster because the zone signals rest mode.

    23. Invest in a Premium Mattress with Acoustic Properties

    A high-quality mattress with dense layers and good construction absorbs vibrations and reduces motion transfer, which indirectly contributes to a quieter sleep experience. You’ll sleep deeper and be less disturbed by subtle movements.

    Premium mattresses cost $800–$3,000+ depending on brand and materials. Mid-range quality runs $400–$800. Budget options start around $200–$400. A good mattress lasts 7–10 years, so cost-per-night is often reasonable. Delivery and setup usually take 1–2 hours.

    Pro tip: Memory foam and hybrid mattresses dampen vibrations better than coil-only models. Test in-store if possible, or buy from retailers with extended trial periods (100 nights). This is one of the highest-ROI investments for sleep quality, which automatically makes you more noise-resilient.

    You sleep deeper and wake less frequently because your body isn’t disturbed by minor movements or vibrations. Better sleep quality means noise affects you less.

    24. Add Soft Ambient Lighting to Reduce Stress Before Sleep

    Stress impairs sleep quality, making you more sensitive to noise. Soft, warm lighting before bed activates your parasympathetic nervous system, reducing anxiety and improving sleep resilience to disturbances.

    Dimmer switches cost $15–$30 and take 20 minutes to install (or hire an electrician for $100–$200). Bedside lamps run $30–$100. String lights or fairy lights cost $10–$40. Wall sconces run $40–$150 each. Together, a comprehensive soft lighting setup is $150–$400. Turn on soft light 1–2 hours before bed.

    Pro tip: Use warm bulbs (2700K color temperature) rather than cool white. Avoid bright overhead light after sunset. Dimmers let you adjust intensity to your preference throughout the evening.

    Your nervous system relaxes because warm light mimics sunset and cues melatonin production. You fall asleep faster and sleep deeper, so noise bothers you less.

    25. Layer Sound-Dampening Materials Under Floor Rugs

    Rug pads under area rugs add another layer of sound absorption while preventing rugs from sliding. This simple addition multiplies the acoustic benefits of your rug investment.

    Quality rug pads cost $20–$80 depending on size and material. Installation takes 10 minutes. Eco-friendly or non-slip rubber pads are worth the slightly higher cost ($30–$60) because they won’t damage hardwood floors.

    Pro tip: Use a rug pad even if you have carpet underneath. Rug pads create an air gap that improves acoustic properties. They also protect both your rug and floor from friction and wear.

    Sound vibrations passing through your floor are captured and absorbed by the pad, further reducing noise transmission. The cumulative effect of rug plus pad is noticeably quieter than rug alone.

    26. Practice Sleep Hygiene and Consistency to Build Noise Resilience

    The most underrated acoustic solution is your own sleep quality. When you maintain consistent sleep schedules, limit caffeine, and establish a wind-down routine, you sleep deeper and more soundly—making you naturally more resilient to noise disturbances.

    This costs $0 and takes commitment rather than money. Key practices: go to bed and wake at the same time daily, avoid caffeine after 2 PM, create a 30–60 minute wind-down routine, keep your bedroom temperature cool (65–68°F), and avoid screens 1 hour before bed. Start with one or two habits and build from there.

    Pro tip: Log your sleep quality for one week before implementing acoustic changes, then again after. You’ll see how much noise-resilience improves with better baseline sleep. Good sleep hygiene amplifies the benefits of every physical acoustic treatment.

    Your body becomes a better sleeper overall, and noise stops being the barrier. You’re falling asleep faster, staying asleep longer, and waking less frequently—sometimes because the noise is truly reduced, and sometimes because your sleep is simply deeper and more resilient.


    Ready to design your serene sleep space? Pick one or two ideas to start with this week—maybe weatherstripping and a throw blanket if you’re on a tight budget, or layered curtains and an area rug if you have more flexibility. Stack a few of these changes together and watch your bedroom transform into a true acoustic sanctuary. Which idea are you trying first?

  • 27 Warm Bedroom Aesthetic Ideas That Make Winter Cozier

    27 Warm Bedroom Aesthetic Ideas That Make Winter Cozier

    Winter doesn’t have to mean sacrificing style for comfort—but honestly, that’s the best part about a cozy bedroom aesthetic. You can have both. The right mix of textures, lighting, and warmth creates a space that actually feels like a retreat on cold nights, not just somewhere you sleep. Whether you’re dealing with a tiny apartment or a sprawling master, these 27 ideas work for any budget and skill level. We’re talking free styling shifts, quick thrifted finds, and a few investment pieces that’ll make you never want to leave your bedroom. Let’s make your space feel like a warm hug.

    1. Layer Your Lighting for Instant Coziness

    Cold, bright overhead lighting is the enemy of a cozy bedroom. Layered lighting—combining bedside lamps, wall sconces, and string lights—gives you control and warmth year-round. Start by adding warm-bulb bedside lamps ($20-$60 at Target or IKEA) with dimmers if your fixtures allow it. Position them on nightstands to create pools of light rather than one harsh overhead glow.

    If you’re renting, adhesive wall sconces ($25-$50 on Amazon) work without drilling. String Edison bulbs or fairy lights around the headboard or along shelves for an extra layer of soft ambiance. The key is using warm white bulbs (2700K color temperature) instead of bright white—they genuinely feel warmer. This takes 30 minutes to set up and costs nothing if you’re switching bulbs you already own.

    You’ll notice the difference the moment you turn off the overhead light. Your room stops feeling clinical and starts feeling like a sanctuary.

    2. Add a Textured Accent Wall Without Paint

    Painting requires commitment, but textured wall treatments don’t. Removable shiplap panels, peel-and-stick wallpaper with tactile finishes, or even fabric panels create visual warmth and dimension without permanent changes. Removable shiplap ($1-$3 per square foot) comes pre-finished and installs with construction adhesive or nails.

    For renters, textured peel-and-stick wallpaper ($20-$50 per roll, 2-3 rolls cover one accent wall) mimics plaster, grasscloth, or woven textures. Apply it to one wall behind your bed for maximum impact. If you want to go budget-friendly, hang neutral-colored fabric (linen or cotton) using removable picture hangers—creates soft texture for $15-$30 and peels off without damage.

    A textured wall catches light differently than flat paint, adding depth and visual interest without requiring a weekend project. Your room instantly feels more intentional and less like a blank slate.

    3. Invest in Quality Bedding That Feels Like Heaven

    You spend a third of your life in bed—cheap sheets aren’t worth it. High-quality linen or organic cotton bedding ($80-$200 for sheets) actually costs less over time since it lasts years longer than budget alternatives. Look for 300+ thread count cotton (Egyptian or Pima) or European linen that softens with every wash.

    Brands like Brooklinen, Parachute, or even mid-range options from Target ($40-$80) work if high-end feels out of reach. Pair sheets with a weighted blanket ($80-$250) designed specifically for sleep support—they’re scientifically proven to reduce anxiety and improve rest. Layer in a quilted throw ($30-$80) at the foot of the bed for extra texture and warmth you can pull up without overheating.

    High-quality bedding doesn’t just feel luxurious when you slide in at night—it actually improves sleep quality and lasts through dozens of washes.

    4. Create a Reading Nook in the Corner

    A bedroom without a reading corner misses prime real estate for coziness. If you have even 4 feet of corner space, claim it. Start with a comfortable chair ($100-$300 for secondhand upholstered options or IKEA staples like Strandmon) or even a cushioned bench if space is tight. Layer it with pillows and a throw blanket.

    Add a narrow side table ($25-$60 at IKEA) for books and tea, and position a floor lamp with adjustable arms ($30-$80) behind the chair for task lighting. String a small shelf above for book storage ($15-$50). The beauty of this corner is that it costs nothing to use it—no one forces you to sit elsewhere.

    This becomes the most-used spot in your bedroom, especially on winter evenings. You’ll have a designated sanctuary that feels separate from sleep, giving your brain permission to actually rest in bed.

    5. Swap Harsh White for Warm Neutrals

    Bright white walls and bedding feel clinical, not cozy. Warm neutrals—cream, greige (gray-beige blend), warm taupe, or soft sand tones—make everything feel more inviting. If repainting feels too much, start by swapping bedding to warm neutrals ($40-$150 for a full set) and see how it shifts the room’s energy.

    Paint is the bigger investment ($200-$400 for one room) but worth it if you’re staying put for a while. Sherwin-Williams “Accessible Beige,” “Urbane Bronze,” or Benjamin Moore “Hale Navy” are tested warm neutrals that work year-round. If you’re renting, peel-and-stick wallpaper in warm tones ($30-$60) covers accent walls temporarily.

    The moment you move away from clinical white, your bedroom stops feeling like a hotel room and starts feeling like home. Everything—including you—looks warmer and more relaxed.

    6. Layer Multiple Throw Blankets at the Foot

    One throw blanket is practical. Three creates abundance and coziness. Layering throws in different textures—chunky knit, quilted linen, and velvet—gives your bed visual depth and lets you grab whatever feels right that day. Buy quality throws at different price points: a chunky knit ($30-$80), a quilted throw ($25-$60), and one splurge-worthy cashmere or faux fur piece ($40-$150).

    Drape or fold them loosely at the foot of the bed rather than neatly folding (more visual impact for Instagram-worthy styling). Mix textures intentionally—if one is smooth, pair it with something ribbed or chunky. Rotate them seasonally to keep your room feeling fresh.

    Your bed becomes a visual anchor that looks styled and inviting rather than bare. Plus, you have options depending on your mood and how cold the night gets.

    7. Add a Ceiling Detail That Changes Everything

    Most people ignore the ceiling, but it’s prime real estate for coziness. If you have a high ceiling, a fabric drape canopy ($20-$80 in fabric plus inexpensive hooks) creates an intimate, den-like feeling. Cream or neutral linen works best for warm vibes.

    For lower ceilings or renters, paint the ceiling in a warm color—sage green, warm gray, or soft navy ($100-$200 including materials and effort)—and keep walls lighter. This makes the room feel wrapped and contained rather than echoing and empty. If painting feels extreme, adhesive ceiling tiles ($30-$50) add texture without commitment.

    The ceiling is the fifth wall no one thinks about. Once you add detail up there, the whole room feels more intentional and designed specifically for you.

    8. Choose Rounded Furniture Over Sharp Angles

    Sharp angles feel stimulating; rounded shapes feel calming. Your brain registers the difference, even if you don’t consciously think about it. Swap rectilinear furniture for curved alternatives when possible. Start with a rounded or arched headboard ($150-$500) in upholstered fabric—it’s often the room’s focal point anyway.

    Add nightstands with curved legs ($100-$300 each) instead of box-like options, and hang an arched or round mirror ($50-$150) instead of rectangular. These swaps don’t cost significantly more but completely shift the room’s energy. You don’t need to replace everything at once; prioritize the headboard since you see it every day.

    Renter-friendly option: a peel-and-stick mural ($25-$60) of an arched window or doorway creates the illusion of curved architecture without actual furniture changes.

    The softer shapes make your brain relax the moment you enter the room. It’s psychological, but it works—cozy spaces have fewer sharp angles.

    9. Thrift Statement Art for Personal Style

    Mass-produced art from big-box stores feels generic. Thrifted or vintage pieces instantly make a space feel personal and layered. Hit local thrift stores, Goodwill, or Facebook Marketplace ($5-$50 per piece) and look for large landscape paintings, botanical prints, or abstract pieces that feel warm and inviting. Frame mismatches are intentional—they look more collected and less “designer catalog.”

    Create a gallery wall behind your bed with an odd number of pieces (3, 5, or 7) at varying heights. You’re not trying to match perfectly; you’re curating a story. Mix frame styles and painting sizes. If you find one incredible statement piece, let it stand alone and build around it with smaller framed pieces.

    Original art—even if it’s $10 thrifted—makes your room feel like it belongs to you specifically, not to a rental company or a design template.

    10. Use Warm Wood Tones in Furniture and Accents

    Cool-toned or gray wood feels cold; warm wood feels welcoming. Prioritize warm honey, oak, or walnut tones over cool grays or blacks. Start with wooden nightstands ($80-$250) in warm tones, and build from there. If you can’t replace large furniture, add warm wood shelving ($30-$100 per shelf) or a wooden accent headboard ($150-$400).

    Thrifting is your friend here—older furniture often has richer warm wood tones than new pieces. Look for mid-century wooden pieces that add both warmth and character. Even small touches like a wooden picture frame ($10-$30), wooden bowl for bedside ($15-$40), or wooden floor lamp ($40-$120) shift the room’s temperature.

    Warm wood automatically makes a room feel more grounded and less sterile. Combined with soft lighting, it’s instant coziness.

    11. Keep Your Color Palette to 3-4 Tones Maximum

    Too many colors fight for attention and create chaos. Stick to 3-4 main colors to make your room feel cohesive and calm. Start with a neutral base (cream, warm gray, or soft taupe) for walls, then choose one warm accent color (terracotta, warm caramel, or soft rust) and one cool accent color (sage, dusty blue, or soft forest green).

    Your fourth color (optional) is for pops—a deep color used sparingly in art, pillows, or throws. Map this out before buying anything. Take photos of color swatches in your lighting and compare them side by side to ensure they harmonize.

    A cohesive color palette requires zero extra money but completely changes how “finished” your room feels. Everything looks intentional instead of accidental.

    12. Install Floor-to-Ceiling Curtains or Drapes

    Floor-to-ceiling curtains create luxury and drama instantly. Hang curtain rods as close to the ceiling as possible (even 6 inches higher than the window) and let fabric reach the floor or pool slightly. Use heavyweight linen, cotton, or velvet ($15-$40 per yard) in warm neutrals or soft jewel tones.

    Budget option: Buy basic curtain panels from IKEA or Target ($20-$50 per panel) and hang them from a higher rod. Pricey investment option: custom curtains from Etsy ($100-$300) in fabrics you love. Renter hack: Use tension rods and removable adhesive hooks to install temporary curtains without drilling.

    Tall curtains visually expand the room, block light for better sleep, and add acoustic softness (a bonus for noise reduction). The payoff is worth the small investment.

    13. Create Layers with Pillows in Mixed Textures

    Pillow styling separates “made bed” from “luxury hotel vibes.” Layer 4-6 pillows of different sizes and textures for maximum coziness. Buy a standard pillow ($30-$80), add a body pillow ($40-$100), include smaller throw pillows ($15-$50 each), and vary the covers between linen, velvet, quilted cotton, and chunky knit.

    Mix colors within your palette (whites, creams, taupes, and one accent color) but ensure they coordinate. Lean pillows against the headboard at different angles rather than rigid rows—it looks more inviting and lived-in. You’ll actually use them for reading or propping yourself up, not just decoration.

    Layered pillows add visual abundance and practical comfort. Your bed becomes a place you actively want to spend time, not just somewhere you sleep.

    14. Add Plants for Air Quality and Visual Interest

    Plants improve air quality and add organic texture that screams cozy. Start with low-light tolerant varieties like pothos, snake plants, or ZZ plants if your bedroom isn’t bright ($10-$30 each). Place them on nightstands, shelves, or corners where they won’t get knocked over during sleep.

    Choose ceramic or woven pots that coordinate with your color palette ($10-$40 each) to make the display intentional. Trailing plants like pothos add movement, while upright plants like snake plants add structure. Group three plants at varying heights for impact without clutter.

    Low-maintenance plants (water monthly, tolerate neglect) are actually the coziest because you won’t stress about killing them. The greenery shifts the room’s energy from cold to organic and alive.

    15. Install Blackout Shades for Better Sleep

    External light disrupts sleep, and blackout shades solve it. Install thermal blackout shades ($40-$100 per window) that block light and regulate temperature or use removable blackout liners ($15-$30) on existing curtains if you’re renting. They’re not glamorous but absolutely functional.

    Pair them with soft fabric curtains in your chosen color—the blackout shade behind serves a purpose while your pretty curtains serve aesthetics. This combination gives you both function and style. Install shades or liners in 30 minutes per window with basic tools.

    You’ll sleep deeper and longer once light is truly blocked out. The cozy bedroom aesthetic loses all appeal if you’re exhausted.

    16. Add Warmth with a Quality Area Rug

    Cold floors are cozy’s enemy. A large area rug (at least 8×10, ideally larger) under the bed creates softness and warmth underfoot. Choose natural fiber rugs like wool, jute, or sisal ($100-$400) for longevity and texture, or budget options like plush synthetic blends ($50-$150).

    Position the rug so your feet land on it when getting out of bed—this is the only moment that matters. Neutral tones (cream, warm gray, soft taupe) let the room’s color palette shine; patterns add visual interest if your palette feels too plain. A quality rug worth having professionally cleaned will last years and actually improve over time.

    The difference between cold hardwood underfoot and warm rug is immediately felt (literally). This elevates the coziness factor more than you’d expect.

    17. Hang Fabric or String Lights for Ambient Glow

    String lights are cozy’s shortcut. Warm white Edison bulbs or fairy lights ($15-$40) create ambient glow perfect for winter evenings. Drape them around the headboard, along a shelf, or above a reading nook. Avoid bright white or cool-toned lights—warm (2700K) is essential.

    Plug-in options work for renters; hardwired is permanent for owners. Space lights 6-12 inches apart for even glow and avoid bunching. Start with one strand and add more if you want dense coverage. The key is using them as ambient lighting, not reading light.

    The moment you turn these on, your room shifts into “sanctuary mode.” String lights signal relaxation to your brain in a way other lighting can’t.

    18. Layer Your Window Treatments with Sheers and Sheers

    Single curtain panels are practical but lack sophistication. Layer sheer curtains with heavier drapes for both function and aesthetics. Hang lightweight sheer panels ($20-$50) inside and heavier curtains ($30-$80) outside to control light and privacy while looking intentional.

    This works in any space—you can use two separate rods or a double curtain rod ($25-$60). Sheers diffuse harsh daylight, and heavier curtains block it entirely. In winter, this layering also adds slight insulation. Renter-friendly: Use tension rods with one lightweight and one heavy panel for the same effect.

    Layered windows look professionally designed and give you precise control over your light and privacy.

    19. Curate a Nightstand That Serves You

    Your nightstand should be functional and beautiful, not a catch-all for random items. Keep only what you use: a reading lamp, water glass or mug, current book, and optionally a plant or candle. Curate these items intentionally rather than letting things accumulate.

    Choose matching or coordinating containers ($10-$30) for drawer organization. A small tray ($15-$40) groups items and prevents them from scattering. Rotate your current book and one or two backups rather than piling the whole collection there. The nightstand should feel calm, not cluttered.

    A curated nightstand feels intentional and restful. You reach for what you need without visual noise surrounding it.

    20. Incorporate Textured Throw Pillows Beyond the Bed

    Pillows aren’t just for beds. Add textured throw pillows ($20-$60 each) to chairs, benches, or window seats. Mix a chunky knit pillow, a quilted one, and a velvet option in coordinating colors. Vary sizes (12×12, 14×14, and a smaller accent) for visual interest.

    Thrift or buy covers from IKEA, Target, or Etsy and fill them with inexpensive pillow inserts. Swap pillows seasonally or whenever you want a refresh (costs nothing, just moving things around). Pillows are the easiest way to add texture without commitment.

    Textured pillows scattered throughout the room multiply the cozy factor. They’re also the most affordable way to add personality and warmth.

    21. Choose Velvet or Linen Upholstery for Headboards

    An upholstered headboard is the bedroom’s focal point. Choose velvet or linen upholstery ($150-$500 for a full headboard) in a warm tone or jewel color that complements your palette. Velvet feels luxurious and catches light beautifully; linen feels organic and slightly textured.

    If a full headboard investment is too much, a fabric wall hanging or tapestry ($30-$80) behind the bed creates the same focal point feel. Panel it with contrasting fabric on either side for depth. Renter option: removable fabric wall panels ($40-$100) that stick on without damage.

    An upholstered or fabric headboard instantly elevates the room from “basic bedroom” to “considered space.” It’s where your eye lands first.

    22. Create a Diffuser or Candle Station on the Dresser

    Scent is cozy’s often-overlooked element. Place a warm-scented candle ($15-$40) and an essential oil diffuser ($25-$60) on your dresser or nightstand. Scents like vanilla, sandalwood, cedar, or amber create warmth, while floral or citrus can feel cold.

    Light the candle during evening wind-down and run the diffuser while you sleep (using gentle, watery blends). Keep candles in warm-toned holders or vessels ($10-$30) to align with your aesthetic. Swap scents seasonally or when you want variety (costs minimal).

    A scented room feels cozier than an unscented one. Scent memories are powerful—over time, your bedroom’s specific scent becomes part of its identity.

    23. Add Wooden Shelving for Books and Décor

    Wooden shelves in warm tones add depth and practicality. Install floating shelves ($40-$100 per shelf, including installation materials) in honey or warm oak finishes above nightstands or along an empty wall. Style them with books, small plants, and meaningful objects.

    If you’re renting, tall bookcases ($80-$200) achieve the same effect without drilling. Style shelves with intention—alternate between stacked books, standing books, small plants, and objects in a rhythm that feels balanced, not chaotic. Leave breathing room (one-third empty space) so it doesn’t feel cluttered.

    Styled shelving adds visual interest, storage, and a sense of layered coziness. Books and plants make any space feel more personal and lived-in.

    24. Use Warm Metallics Sparingly for Glam

    Metallics add warmth and subtle glamour. Choose warm metals like brass or gold ($10-$50 per item) over cool silvers or chrome. Limit yourself to 3-5 metallized items: picture frames, lamp bases, a mirror frame, or shelf brackets. The key is sparse placement—one item per surface feels intentional; scattered everywhere feels cluttered.

    Mix metals if needed (brass and copper work together), but consistency within the warm family is safer. Thrift brass frames and lamps ($5-$20 each) from antique stores for affordable glamour. Avoid chrome or brushed nickel unless your room skews modern rather than cozy-warm.

    Warm metallics catch light and add visual richness without requiring bold statement pieces. It’s an understated way to add luxury.

    25. Create Zones Within the Room

    If you have space, divide your bedroom into functional zones. A bed zone, a reading zone, and optionally a work zone each get their own lighting and furniture. This helps your brain compartmentalize—sleep happens in one area, relaxation in another, work in a third.

    Use area rugs ($50-$150) to define each zone, different lighting for different activities, and subtle visual separators like plants or shelving. Even in smaller rooms, a chair in a corner plus a small side table creates a “reading zone” distinct from the bed.

    Zoning makes a bedroom feel larger and more multifunctional. It also signals to your brain: “Here is where I sleep,” “Here is where I relax,” preventing that weird space where everything blends together.

    26. Invest in Luxe Pillowcases for Face and Scalp

    Sleep isn’t just about comfort—it’s about reducing friction on your skin and hair. Silk or satin pillowcases ($30-$80 per pillowcase, or lower-cost sateen options at $15-$40) reduce creasing and breakage while feeling absolutely luxurious. They regulate temperature better than cotton, making them perfect for warm sleepers.

    Brands like Slip, Fishers Finery, or even budget-friendly Amazon options work. Wash on delicate or hand wash to protect the fibers. Use these for sleeping and swap them with regular cotton pillowcases if you prefer (though why would you after feeling the difference?).

    Silk pillowcases are a small investment that impacts you personally every single night. That’s cozy.

    27. Keep One Wall Intentionally Bare for Balance

    In the quest for cozy layering, resist the urge to fill every square inch. One bare wall (or mostly bare) creates visual rest and prevents overwhelm. Leave negative space intentionally rather than feeling like you need to fill it. This applies to shelves, too—leave one-third to one-half of shelving empty.

    Cozy doesn’t mean cluttered. Strategic emptiness actually enhances the coziness because your brain isn’t overstimulated. It’s like visual breathing room.

    A balanced room with intentional empty space feels more curated and restful than one where every surface is styled.


    Save this post and try just one or two ideas this weekend. Which will you start with? Whether it’s rehanging your curtains higher or swapping out one pillow, these small changes add up fast—and your bedroom deserves to feel like a retreat.

  • 26 Layered Bedding Styling Methods That Add Depth & Softness

    26 Layered Bedding Styling Methods That Add Depth & Softness


    You know that feeling when you walk into a beautifully styled bedroom and just want to sink into the bed? That’s not magic—it’s layering done right. A cozy bed isn’t about having expensive sheets (though quality helps). It’s about combining different textures, weights, and materials so your bed looks inviting AND feels amazing to crawl into. Whether you’re working with a tight budget or ready to invest in comfort, these 26 layering methods will show you exactly how to build a bed with real depth. From free styling tricks to thoughtful textile swaps, you’ll discover how to make your bedroom feel like the retreat you actually want to spend time in. Let’s get started.


    1. Start with Quality Basics, Not Quantity

    Good layering starts with a solid foundation. Cheap, thin sheets won’t hold texture or drape well, and they wrinkle into chaos when you pile things on top. You don’t need luxury brand prices—you need sheets with a reasonable thread count (300-400 for cotton) that actually feel substantial in your hands.

    Target quality sheets around $60–$120 for a set (Brooklinen, Target’s Threshold, or Amazon Basics all work). You’ll notice the difference immediately when you add throws and quilts on top. Better sheets hold their shape, drape naturally, and make everything else look more intentional. Splurging here saves money later because everything else will look better on a solid base. Time to invest: 30 minutes shopping. The payoff? Your bed looks professionally styled from day one.


    2. Layer Your Mattress Before the Sheets

    Most people skip this step, but adding a mattress topper or quilted pad under your top sheet is a game-changer. It creates volume and visual interest right away, plus it adds cushioning that makes your bed feel more luxe when you sit down.

    A quilted mattress pad runs $30–$80 (Brookstone, Target, Amazon). Put your fitted sheet down first, then layer the quilted pad, then your top sheet. The topper peeks out subtly at the foot and sides, adding texture you can actually see. This takes 10 minutes to arrange and immediately makes your bed look fuller. Pro tip: Choose a quilted pad in a warm neutral tone (cream, oatmeal) so it complements, not clashes with, your sheets. The result is a bed with visual dimension even before you add pillows.


    3. Use a Fitted Sheet + Top Sheet Combination, Not Just a Duvet

    Duvets flatten everything. They’re practical but they visually compress your bed into a single, boring plane. Switching to a fitted sheet plus a top sheet gives you immediate texture from the way fabric naturally folds and drapes.

    The combo takes 5 minutes longer to arrange than a duvet but looks dramatically better. Tuck your fitted sheet, lay your top sheet across loosely (let it wrinkle—that’s the point), and fold it back casually at the foot of the bed. This creates natural folds and shadows that look intentional and lived-in. Cost: $0 if you already own sheets, or around $40–$60 for good linen. Pair it with throws and quilts for even more texture. You get the warmth and function of a duvet with the visual appeal of thoughtful layering.


    4. Add a Patchwork or Quilted Throw Blanket Across the Bed

    Quilts are having a major moment, and for good reason. They add instant character, visible texture, and that “heirloom” feeling without needing to actually own a family heirloom. A patchwork quilt tells a story visually in a way solid throws simply can’t.

    Layer a quilted throw across the foot and lower third of your bed. Budget options: $40–$80 (check Etsy for secondhand quilts or Target’s new craft collections). Investment pieces: $150–$300. The patchwork creates visual interest and breaks up the monotony of solid sheets. Best part? Quilts photograph beautifully, so your bed will look even better in natural light. Time to arrange: less than a minute. The texture alone makes your whole bed feel warmer and more approachable.


    5. Layer Velvet Pillows for Tactile Luxury

    Velvet pillows are the fast track to a cozy-looking bed. They catch light differently than cotton, adding depth immediately. You don’t need many—just 2–3 velvet pillows mixed in with your standard pillows creates that “designed” look.

    Mid-range velvet pillows: $25–$60 each (Target, West Elm, Wayfair). Mix velvet with linen, cotton, and knit for variety. The different sheens and textures create visual layering that makes your bed look intentional. Pro tip: Stick to warm neutrals (cream, blush, warm gray) or earthy tones (terracotta, olive) to keep the cozy feeling cohesive. Arrange them in graduating heights—taller ones in back, shorter ones in front—so everything is visible. Five minutes to arrange, instant impact.


    6. Mix Pillow Heights and Shapes for Visual Interest

    Uniform pillow heights are boring. Real layering means mixing a standard pillow, a king pillow, a lumbar pillow, and a small square cushion. The variety reads as “I know what I’m doing” even if you’re just experimenting.

    Invest in 4–5 pillows in different sizes: $80–$150 total (mix budget brands with one nicer piece). Arrange taller ones behind shorter ones so everything’s visible. This takes 10 minutes to style but completely changes how your bed reads. The staggered heights create a sense of abundance and comfort. Pro tip: Use different fabric textures for each pillow—smooth velvet, chunky linen, knitted wool—so the variation feels intentional, not accidental. Your bed now looks like it belongs in a design magazine.


    7. Add a Woven Throw Blanket Folded at the Foot

    Woven blankets add both texture and an organic, handmade feel. Unlike smooth throws, woven fabrics show structural interest—you can actually see the weaving pattern, which reads as intentional styling.

    Layer a woven throw—linen, jute-blend, or chunky cotton—at the foot of your bed. Budget: $30–$70 (Etsy, Target, H&M Home). The loose folds create organic-looking dimension. Time to position: 2 minutes. Pro tip: Choose a throw in a warm neutral or soft earth tone (cream, tan, rust) that complements your other textiles. The visible weave pattern makes your bed look curated. Best of all? You can actually use it when you’re cold, so it’s as functional as it is beautiful.


    8. Use a Chunky Knit Throw for Texture and Warmth

    If woven throws feel too formal, go chunky knit. The three-dimensional knit stitching creates shadow and depth that photographs beautifully and feels amazing to touch. It’s the ultimate cozy texture.

    Chunky knit throws: $40–$100 (Pottery Barn, West Elm, Amazon). Drape it loosely over the foot of your bed or fold it casually over a corner. The bulky weave catches light differently from smooth fabrics, creating dimension. Time to arrange: 2 minutes. This works especially well in neutral or warm earth tones. Pro tip: Pair it with a smoother throw in a complementary color for contrast. The tactile combination makes your bed irresistible. You’ll reach for this throw constantly, so the investment pays off fast.


    9. Layer Multiple Throw Blankets in Graduating Colors

    One throw is fine. Three throws in a color progression? That’s styled. Layering throws in warm-to-warmer tones (cream → tan → terracotta) creates visual depth without looking cluttered.

    Budget for 3 throws: $80–$180 (mix budget and mid-range brands). Fold each one loosely and stack them so you can see all three—the graduated color effect is everything. Arrange them at the foot of your bed where they’re visible. Time: 5 minutes. This technique instantly makes your bed look more designed. Pro tip: Keep all throws in warm neutrals or soft earth tones so the progression feels intentional, not random. The cascading colors add warmth and dimension in a way single throws can’t match.


    10. Introduce a Vintage or Heirloom Quilt as Your Star Layer

    If you have access to a vintage or inherited quilt, this is your moment to feature it. Even worn quilts (especially worn quilts) add authenticity and warmth that new textiles can’t replicate. Real layering often means mixing new pieces around one special vintage item.

    If you own a family quilt, drape it prominently—either across the bed or over a chair nearby. No budget here (you likely already own it), but it becomes your design anchor. Can’t find a family quilt? Etsy has authentic vintage quilts for $50–$200. Layer your new throws and pillows to complement the quilt’s colors. Time to arrange: 10 minutes for the perfect lay. The beauty of vintage quilts is they come pre-weathered, so imperfections add character. Your bed now tells a story beyond just looking cozy.


    11. Mix Linen with Cotton for Natural Texture Contrast

    Linen and cotton age differently and have distinct visual personalities. Linen looks relaxed and textured; cotton looks crisp and clean. Mixing them creates contrast that reads as intentional styling, not accident.

    Use linen sheets ($80–$150 for a set) with cotton pillowcases or pair a linen throw with cotton sheets. The combination gives you visual interest and practical texture variation. Linen wrinkles beautifully (that’s a feature, not a bug in this context), adding movement to your bed. Time: 0 minutes—just style as normal. Pro tip: Warm-tone linens (cream, flax) pair best with cozy aesthetics. The slightly rough feel of linen against smooth cotton creates a sensory experience that makes your bed feel intentional and tactile.


    12. Add a Textured Headboard Covering or Tapestry Behind Pillows

    Your headboard is prime real estate for adding texture. If you don’t have a textured headboard, hang a tapestry, macramé, or woven textile directly behind your pillows. This instantly frames your bed and adds depth.

    Tapestries and macramé: $25–$80 (Urban Outfitters, Etsy, Amazon). Hang it at pillow height so it creates a backdrop. This takes 30 minutes to hang (use a tension rod or removable hooks for renters). The texture behind your pillows makes the entire bed composition look more designed. Pro tip: Choose a neutral or earth-tone tapestry so it complements, not competes with, your throw pillows. The layering now extends to the wall, creating a cohesive, framed effect.


    13. Layer Lumbar Pillows for Back Support and Visual Interest

    Lumbar pillows serve dual purpose: actual back support and visual layering. Unlike square pillows, their elongated shape creates lines that make your bed look more intentional and designed.

    Lumbar pillows: $20–$60 each (Target, Wayfair, CB2). Add 2–3 in varying textures and colors. Stack them vertically or position them at slight angles so they’re all visible. Time to arrange: 5 minutes. Pro tip: Use lumbar pillows in contrasting textures—pair a smooth velvet lumbar with a chunky knit one—so the visual interest is obvious. The rectangular shape breaks up the monotony of square pillows and draws the eye upward. Your bed now has architectural interest.


    14. Use Faux Fur or Shearling Accents for Luxury Feel

    Faux fur and shearling add an instant luxury signal without the ethical concerns of real fur. The pile texture catches light beautifully and feels incredibly soft to touch. It’s a fast way to add “spa-like” vibes.

    Faux fur throws: $40–$120 (check for quality—high-pile faux fur looks better than cheap versions). Drape it casually over the foot of your bed or fold it loosely for texture. Time: 2 minutes. The plush texture contrasts beautifully with smoother fabrics. Pro tip: Stick to white, cream, or gray faux fur so it reads as sophisticated, not costume-y. The tactile luxury of faux fur makes your bed feel like a splurge, even if the throw cost less than $100. Everyone who touches it will want one.


    15. Layer a Duvet Inside a Duvet Cover for Extra Dimension

    This sounds silly but works: put a thinner duvet inside your duvet cover, then layer throws on top. The extra layer creates volume and visual thickness without needing a heavy quilt.

    Thin duvets: $30–$60 inside your existing cover. This costs nothing if you already have both items. Time: 10 minutes to layer. The result is a bed that looks fuller and more luxurious. The hidden duvet adds cushioning and structure to your layered look. Pro tip: Use a plain duvet inside a patterned cover, or vice versa, so the layering is intentional. Your bed now has the visual fullness of a luxury hotel bed without the price tag.


    16. Mix Solid and Patterned Textiles Strategically

    Too many patterns clash. Too many solids feel boring. The sweet spot is 60% solids, 40% patterned. This gives you visual interest without chaos.

    Choose one statement pillow or throw in a subtle pattern (small florals, gentle geometric, classic stripes) and keep everything else neutral. Budget: $30–$80 for one patterned piece. This takes zero time—just choose pieces intentionally. Pro tip: Make sure your patterned piece uses the same color palette as your solids (if your base is cream and terracotta, choose a pattern that echoes those tones). The strategic mix of solid and pattern creates a curated, styled look. Your bed reads as designed, not chaotic.


    17. Add a Bed Runner Across the Foot for Texture and Function

    A bed runner isn’t just decorative—it protects your foot of your bed and adds a horizontal line of texture that breaks up vertical layering. It’s a small detail that reads as intentional styling.

    Bed runners: $40–$100 (Target, Wayfair, Etsy). Choose a textured fabric (linen, cotton velvet, or jute-blend) in a complementary color. Lay it horizontally across the foot, centered. Time: 2 minutes. This creates a visual anchor point and adds texture without adding bulk. Pro tip: Choose a runner in a slightly deeper tone than your sheets (if sheets are cream, try warm tan) to create subtle depth. The layered effect makes your bed look professionally styled.


    18. Incorporate Decorative Pillows in Mixed Sizes and Shapes

    Decorative pillows aren’t just decorative—they’re your main layering tool. Go beyond standard sizes. Add round pillows, square cushions, lumbar supports, and body pillows in mixed textures.

    Budget for 5–7 decorative pillows: $100–$250. Mix brands (one nicer piece with several budget finds works great). Arrange them in graduating heights so everything’s visible. Time: 10 minutes to perfect the arrangement. The variety in size and shape makes your bed feel curated and intentional. Pro tip: Use 3–4 colors maximum across all pillows (cream, warm gray, soft terracotta, for example) so the variety reads as cohesive, not chaotic. The layered pillow composition becomes the focal point of your whole room.


    19. Use Contrasting Pillow Backs for Double Impact

    Style hack: use pillow covers that are reversible or have a contrasting back. Position some pillows so you see the reverse side peeking out. This doubles your visual interest without buying more pillows.

    Many pillow covers are reversible or have a contrasting back (check product descriptions on Target, Wayfair, or Etsy). Position 1–2 pillows so the back shows. Time: 2 minutes to rearrange. Pro tip: Choose contrasting backs that complement your palette (cream pillow with terracotta back, gray pillow with rust back). The peeking color creates depth and visual interest. This technique makes your bed look more layered than it actually is—perfect for budget decorating.


    20. Add a Lightweight Gauze or Muslin Layer for Airiness

    For a softer, more ethereal layering approach, add a gauze or lightweight muslin layer. It adds texture and visual interest without the weight or formality of a heavy quilt.

    Gauze layers or lightweight throws: $20–$50 (Urban Outfitters, Etsy, Amazon). Drape it loosely so it creates soft folds—the wrinkles are the point. Time: 5 minutes. This works especially well in minimal or bohemian-style bedrooms. Pro tip: Keep gauze in cream or white so it feels light and airy. The translucent layer adds romantic texture while keeping things feeling open and breathable. Best for warmer months or lighter sleepers.


    21. Layer a Structured Ottoman or Bench at the Foot

    Furniture layering counts. An ottoman or bench at the foot of your bed adds dimension and serves as a styling piece. It creates horizontal interest and a place to fold throws.

    Ottomans or benches: $150–$400 (IKEA has budget options at $80–$150). Choose one in a textured fabric that complements your palette. Time to position: 5 minutes. The structured furniture contrasts beautifully with soft textiles, creating visual interest. Pro tip: Drape one of your throws over the bench back so the layering extends beyond just the bed. The combination of soft textiles and structured furniture creates sophisticated depth.


    22. Use Layered Nightstands for Balanced Visual Weight

    Your nightstands are part of your bed’s visual composition. Layer them with books, a lamp, a candle, and maybe a small throw. This extends your layering beyond just the bed itself.

    Gather books you actually love, add a quality bedside lamp ($30–$80), a candle ($10–$30), and drape a small decorative throw. Arrange these in varying heights. Time: 15 minutes to style. Pro tip: Use odd numbers of objects (3 books, not 2) and vary heights so nothing looks flat. The styled nightstands frame your bed and add to the overall cozy aesthetic. Your whole sleeping zone now feels intentionally designed.


    23. Add Textured Wall Decor Above Your Bed

    Extend your layering vertically. Hang a textured piece—macramé, woven textile, or fabric art—on the wall above your bed. This creates a frame for your whole bed composition.

    Wall textiles: $30–$120 (Etsy, Urban Outfitters, West Elm). Hang at eye level when lying down (usually 12–18 inches above your headboard). Time: 30 minutes to install. Choose something in warm neutrals or earth tones that echoes your bedding palette. The textured backdrop makes your bed feel like a designed vignette. Pro tip: Layer a few pieces if you’re confident (one large piece + two smaller ones), or stick with one statement piece for simplicity. The layering now extends to your walls, creating a cohesive, textured sleeping retreat.


    24. Mix Matte and Shiny Fabrics for Subtle Depth

    Light reflection matters. Mixing matte fabrics (linen, cotton, knit) with subtle-sheen fabrics (velvet, silk, satin) creates depth because they catch light differently. Your eye sees movement and dimension.

    No extra budget needed—just be intentional about mixing finishes. Pair a matte linen throw with a velvet pillow. Use cotton sheets with a subtle-sheen duvet cover. Time: 0 minutes—just style with intention. The different light reflections make your bed look more complex and designed. Pro tip: Avoid too much shine (this isn’t disco ball territory)—stick to subtle sheen in one or two pieces. The finish variety creates sophisticated depth without looking busy.


    25. Create a Seasonal Layer Rotation System

    Real layering means rotating your textiles seasonally. Heavy quilts in winter, lightweight gauze in summer. Building a rotation system keeps your bed looking fresh and relevant.

    Stock 2–3 extra throws and quilts ($100–$300 total) that you rotate seasonally. Store off-season pieces in a labeled bin under the bed or in a closet. Time: 30 minutes quarterly to swap. Pro tip: Photograph each seasonal setup so you remember which combinations worked best. Your bed stays cozy and intentional all year. The rotation system also extends the life of your textiles by reducing wear.


    26. Layer with Intention: The Styling Rule of Three

    The final rule: layer with intention, not accident. Choose 3 main textural elements (example: soft sheets + plush throw + woven blanket) and let them be the stars. Everything else supports these.

    No additional budget—just edit ruthlessly. Remove pillows that don’t add texture or color. Replace flat throws with textured ones. Keep your palette to 3–4 colors maximum. Time: 30 minutes for a full edit. The result is a bed that looks curated, not cluttered. Pro tip: Step back and photograph your bed from across the room. If it reads as cozy and intentional in a photo, it’s working. The rule of three keeps your layering sophisticated and achievable.


    Save this post for your next bedroom refresh. Pick one layering idea this weekend and test it out—you’ll be surprised how one intentional textile addition changes how your whole room feels. Which texture will you add first?

  • 25 Cozy Bedroom Ideas That Turn Nights Into Pure Comfort

    25 Cozy Bedroom Ideas That Turn Nights Into Pure Comfort

    There’s something magical about a bedroom that actually feels like a sanctuary. You know the feeling—that moment when you walk in and immediately exhale, when everything in the space seems designed just for rest and comfort. But creating that feeling doesn’t require a major renovation or a designer budget. We’ve rounded up 25 achievable ideas that combine the trending styles we’re seeing everywhere (curved furniture, textured layers, warm colors) with practical upgrades that actually improve how you sleep and feel. Whether you’re renting, homeowning, or working with a small space, you’ll find mix-and-match solutions that fit your budget and timeline. Let’s turn your bedroom into the cozy retreat you deserve.

    1. Paint Your Walls a Warm Neutral with Depth

    Color matters more than you’d think when it comes to how restful your bedroom feels. Instead of going stark white or cold gray, a warm neutral like greige, warm taupe, or soft mushroom creates an envelope of calm that actually makes you want to stay in bed longer.

    Paint is one of the cheapest ways to completely reset a room’s energy. One gallon of quality paint costs $25–$45, and you can DIY it in a single afternoon. Brands like Benjamin Moore, Sherwin-Williams, or even budget-friendly options from Home Depot give excellent results. If you’re renting, ask your landlord about using washable paint or test a removable peel-and-stick wallpaper alternative.

    Pro tip: Paint one accent wall first to test how the color shifts with your bedroom’s lighting before committing to all four walls.

    The payoff is immediate—your entire room feels more intentional, and the warm undertones make you feel held rather than exposed.

    2. Layer Your Lighting for Mood and Function

    Single-bulb overhead lighting is the enemy of coziness. Layered lighting—ambient, task, and accent—lets you adjust the room’s mood based on what you need: winding down, reading, or getting ready.

    Start with a dimmer on your ceiling fixture ($15–$30 for the dimmer, professional installation adds $50–$100 if needed). Add a warm bedside lamp (Target or West Elm, $40–$80) and consider a wall-mounted reading light or LED strip behind a floating shelf ($20–$60 on Amazon). The key is using bulbs with warm color temperature—look for 2700K on the packaging, which mimics sunset and signals your brain it’s time to rest.

    Bonus: Smart bulbs let you set schedules that gradually dim in the evening, supporting your natural sleep cycle.

    You’ll notice the difference the first night—your brain finally gets the signal to wind down instead of staying in alert-mode under harsh white light.

    3. Invest in Quality Sheets and Swap Seasonally

    You spend a third of your life in bed, so sheets are worth the investment. Quality sheets make a measurable difference in how well you sleep—they breathe better, feel softer, and hold their texture for years.

    Look for linen or high-thread-count cotton (400–600 is the sweet spot; anything higher is marketing fluff). Brands like Parachute ($100–$150 per set), Brooklinen ($80–$120), or even target’s Threshold line ($30–$50) offer solid options. Seasonal swaps matter too: lightweight linen for summer, brushed cotton for winter. Most people spend $50–$100 per set and rotate 2–3 sets so you always have one in the wash.

    Pro tip: Egyptian cotton and linen blends offer the softness of cotton with linen’s durability—often cheaper than pure linen.

    Great sheets don’t just feel better—they actually improve sleep quality, and you’ll wake up feeling less crumpled and more rested.

    4. Add a Statement Headboard with Curves

    A curved headboard has become the focal point of choice in 2025—it’s softer than traditional geometric shapes and creates instant visual interest without taking up more floor space.

    You can buy pre-made curved headboards on Wayfair, West Elm, or 1stDibs (usually $200–$600 for mid-range quality), or DIY one by attaching upholstered panels to your wall using a template from Pinterest (materials cost $75–$150, takes a weekend). Even renters can use a freestanding curved headboard that leans against the wall. Look for upholstered versions in linen, velvet, or performance fabric so they’re easy to clean.

    Bonus: A curved headboard makes the space feel more intentional and photographs beautifully—your bedroom will look magazine-worthy instantly.

    This single piece anchors the entire room and actually makes smaller bedrooms feel larger by softening harsh corners.

    5. Layer Textured Rugs for Warmth and Sound

    Bare floors feel cold—both literally and emotionally. Layered rugs (one large base rug, one accent rug on top) add warmth, reduce noise, and create that cushioned-step feeling you get in luxury hotels.

    Start with a jute or low-pile wool base rug in a neutral tone ($100–$300 for 8×10, available at Target, IKEA, or Amazon). Layer a smaller high-pile or woven accent rug on top ($50–$150). This combo costs less than a single expensive rug, gives you more texture, and lets you swap the accent rug seasonally for a fresh look without breaking the bank.

    Pro tip: Use a non-slip rug pad underneath (about $15–$25) so layers don’t slide when you walk on them.

    The moment your bare feet hit layered texture, your nervous system knows this is a comfort zone—the sensory experience alone makes sleep easier.

    6. Hang Floor-to-Ceiling Curtains for Height and Drama

    Floor-to-ceiling curtains make any bedroom feel more intentional and expensive—the eye follows the vertical line upward, visually expanding the room and making ceilings feel higher.

    Measure from ceiling to floor (include 2 extra inches so curtains pool slightly at the base—this looks intentional, not accidental). For $60–$150, you can get linen or natural-weave curtains from Anthropologie, West Elm, or even budget options from Target. Install a ceiling-mounted track or rod (Home Depot, $20–$50 plus hardware) rather than wall-mounted, which emphasizes height. For renters, damage-free adhesive rods work in a pinch.

    Pro tip: Choose a neutral or soft tone that complements your wall color for maximum impact without visual noise.

    The transformation is almost immediate—your bedroom instantly gains a sense of architectural intention and calm.

    7. Create a Cocooning Effect with Velvet Textures

    Velvet isn’t just luxurious—it actively absorbs sound and light, creating an acoustic and visual cocoon that dampens stimulation. This matters for sleep more than you’d expect.

    Add velvet through small pieces first: a throw pillow ($25–$50 from Etsy or West Elm), a chair ($150–$400), or even a headboard ($300–$600). Rich jewel tones (burgundy, forest green, midnight blue, or cherry red) are trending and feel more sophisticated than pastels. Look for performance velvet if you have pets or kids—it’s softer and more durable than traditional velvet, and the price difference is minimal ($5–$10 more per item).

    Bonus: Velvet pillows can be mixed with linen and cotton for a layered-texture look that’s more visually interesting than all one fabric.

    The sensory input shifts when you’re surrounded by velvet—it mutes harshness and creates that “held” feeling luxury hotels are known for.

    8. Paint or Paper Your Ceiling for Subtle Drama

    Ceilings are the most-overlooked design real estate in bedrooms. A soft color overhead (instead of stark white) creates visual depth and changes how the entire room feels—it’s like adding another layer of coziness above you.

    Paint a ceiling in the same color family as your walls but slightly lighter (if walls are warm taupe, ceiling could be light greige, $25–$50 for paint plus a few hours of effort). Or try wallpaper with a subtle pattern ($30–$60 per roll, usually needs 1–2 rolls). For renters, removable wallpaper is your friend ($25–$45 and peels off cleanly). Peel-and-stick textured panels are another option ($40–$80 for a kit).

    Pro tip: Start with just one wall’s worth of peel-and-stick as a test before committing to a full room.

    This subtle shift changes how light plays in your room and makes the space feel more thoughtfully designed—your eye settles differently.

    9. Choose Bedding in One Bold, Repeated Color

    Instead of mixing multiple colors, choosing one bold color and repeating it strategically creates cohesion and feels intentional rather than chaotic.

    Pick one color you love (cherry red, forest green, deep navy, or dusty plum are trending right now) and use it in your sheets or duvet ($50–$150), throw pillows ($15–$30 each), and maybe a small accent piece like a chair or throw blanket ($60–$200). The repetition signals design sophistication even on a budget. Brands like Woolroom specialize in colored natural bedding and are worth the investment if you want durability and sustainability built in.

    Pro tip: Stick to one bold color and balance it with neutrals (cream, greige, natural wood) so the room doesn’t feel overwhelming.

    This approach makes your bedroom feel curated and intentional—like you know exactly what you’re doing, even if you just picked one color you loved.

    10. Add Plants for Biophilic Warmth and Air Quality

    Plants aren’t just decoration—they genuinely improve air quality, reduce stress, and create a sense of aliveness in your space. Biophilic design (connecting with nature indoors) is one of the top bedroom trends right now.

    Start with low-maintenance plants that tolerate low light: pothos, snake plants, or ZZ plants ($10–$25 each from local nurseries or Home Depot). Add a larger statement plant like a monstera or rubber plant ($20–$60) and a few smaller trailing plants for windowsills ($8–$15 each). Use simple ceramic or wooden planters that match your aesthetic ($10–$30 per planter). If you’re a serial plant killer, dried pampas grass or eucalyptus ($15–$30 from Etsy) gives the same visual effect with zero maintenance.

    Bonus: Plants add texture and movement without adding clutter—they soften hard lines and fill empty corners.

    The presence of living plants actually shifts your energy—your space feels more alive and your nervous system recognizes it as a place where growth happens.

    11. Create a Designated Calm-Down Corner

    Having a dedicated space within your bedroom for reading, journaling, or just sitting creates psychological separation between “sleep zone” and “activity zone”—both improve sleep quality.

    Use a corner of your room and add: a comfortable chair ($100–$300 from IKEA, Wayfair, or thrifted), a small side table ($30–$80), a soft throw blanket ($20–$60), and warm lighting via a floor lamp or pendant ($40–$100). Even in small rooms, a small cushioned bench at the foot of the bed or a reading chair in a corner works. The key is making it feel separate from your sleeping area—use a small rug to define the space (about $40–$80).

    Pro tip: Keep books, a journal, or art supplies in a small basket nearby—this area should feel intentionally designed, not like an accident.

    Your brain learns to associate that corner with calm activities, so when you move to the bed, your mind is already primed for sleep.

    12. Swap Out Standard Pillowcases for Silk or Linen

    The surface touching your face for 8 hours matters—standard cotton pillowcases create friction that disrupts sleep and ages your skin. Silk and linen alternatives are game-changers.

    Silk pillowcases ($20–$50 from Amazon, Etsy, or Target) reduce friction, help your hair stay smooth, and feel luxurious. Linen pillowcases ($25–$60) are more durable and get softer with every wash. Both types improve sleep quality by reducing heat and allowing your head to move smoothly. Start with one set and swap seasonally or as needed. Pro brands include Parachute and Brooklinen, but honestly, budget options from Amazon work surprisingly well.

    Pro tip: Wash silk in cool water and air-dry to maintain the finish; linen can handle a normal wash cycle.

    You’ll notice less hair breakage, smoother skin, and better sleep within the first week—your face and head feel less restless.

    13. Build a Minimal Sustainable Wardrobe Display

    If your bedroom includes a dressing area or even just visible clothing storage, making it intentional (instead of chaotic) changes the room’s entire energy.

    Choose 5–7 key pieces per season in a neutral color story (creams, grays, blacks, earth tones) and display them on open shelving, a clothing rack ($40–$100 from IKEA or Amazon), or via selective hangers ($20–$40 for nice ones). This approach is called a “capsule wardrobe” and it actually makes mornings easier while keeping your bedroom visually calm. If you prefer closed storage, use matching hangers and baskets so what’s visible feels curated.

    Pro tip: Donate or rotate out pieces seasonally—your bedroom shouldn’t feel like a storage unit.

    A curated clothing display makes your bedroom feel more like a styled sanctuary and less like a pile of laundry waiting to happen.

    14. Layer Throw Blankets and Quilts for Visual Richness

    Layering blankets serves two purposes: you can adjust warmth easily throughout the night, and visually it creates depth and coziness that makes a bedroom feel intentionally designed.

    Start with a duvet or quilt as your base ($100–$250), add a flat sheet or lightweight throw ($30–$60), and top with a chunky knit or woven blanket draped casually over the edge ($40–$100). Mix materials: linen, cotton, wool, and knit together create visual interest. Brands like Etsy artisans, West Elm, and even Target’s Threshold line offer affordable layered options. The whole setup costs $150–$400 depending on quality.

    Bonus: You can swap blankets seasonally or based on mood without buying new sheets.

    This creates a bed that looks like it came from a magazine spread—inviting enough that you actually want to get into it.

    15. Paint Your Nightstands a Contrasting Color

    Small furniture pieces are the easiest way to add color without overwhelming the room. Painted nightstands give you that design hit of personality instantly.

    Grab two simple nightstands from IKEA, thrift stores, or Facebook Marketplace ($30–$100 each used, $50–$150 new) and paint them using chalk paint, acrylic paint, or furniture spray paint ($10–$20 per can). Choose a color that complements your wall color—if walls are neutral, try dusty jewel tones or warm charcoal ($15–$30 in paint total). The project takes 2–3 hours plus drying time, and it costs under $100 total for a major visual upgrade.

    Pro tip: Protect surfaces with a clear polyurethane topcoat (about $10) so the paint holds up to daily use.

    Suddenly your bedroom has a point of view and personality—this one detail signals intentional design.

    16. Install a Floating Shelf for Styled Storage

    Floating shelves add storage and display space without taking up floor area—perfect for small rooms and renters who want to avoid permanent fixtures.

    Install a shelf at $30–$80 (IKEA, Wayfair, or hardware stores have simple options) above your nightstand, desk, or a blank wall. Style it with 3–5 objects max: a small plant ($10–$25), a framed photo ($5–$15), a candle ($8–$20), and a book. This creates a calm, intentional look instead of clutter. For renters, damage-free floating shelf systems (like Command hooks plus lightweight shelves) cost about $25–$50 and leave no marks.

    Pro tip: Odd numbers of objects look more intentional than even numbers, and leave white space between items.

    A styled shelf becomes a focal point that makes your bedroom feel more designed and less chaotic.

    17. Add a Dimmer Switch for Evening Relaxation

    Light intensity changes your nervous system’s state—bright light keeps you alert, while dimmed warm light signals it’s time to wind down. A dimmer switch is one of the easiest upgrades with the biggest impact.

    Install a simple dimmer switch (about $15–$30 for the switch itself) by replacing your existing light switch—takes 15 minutes with a screwdriver if you’re comfortable with basic electrical work, or hire an electrician for $50–$100 of labor. Use warm-toned bulbs ($5–$15 each, any hardware store) at 2700K color temperature. Set a routine: dim to 50% two hours before bed, then 25% as you’re getting into bed.

    Bonus: Smart dimmers (about $35–$80) can auto-dim on a schedule, supporting your circadian rhythm without you thinking about it.

    Your sleep quality will improve noticeably once your body learns that dimming light means rest is coming.

    18. Display One Large-Scale Piece of Art or Photography

    One large piece of art changes how a whole room feels—it gives the space a focal point and signals sophistication without looking cluttered.

    Choose artwork that speaks to you (landscape photography, abstract art, or even a enlarged family photo) in a size 24×36 inches or larger. Frame it simply in natural wood, black, or metal ($40–$100 for a quality frame from IKEA, Michaels, or custom framers). Hang it centered above your headboard, dresser, or a blank wall. Total investment: $50–$300 depending on whether you buy art or print your own photos. For renters, use damage-free picture hanging strips ($5–$15).

    Pro tip: If you’re unsure, start with black-and-white photography—it pairs with any style and feels timeless.

    One meaningful piece of art becomes the visual anchor your eye lands on—it tells a story about who you are.

    19. Mix Vintage and Modern Furniture for Personality

    Mixing eras and styles (grandmillennial aesthetic) is trending because it feels authentic and avoids looking like a catalog room—it tells your personal story.

    Start by thrifting one vintage piece (dresser, mirror, nightstand, chair) from Facebook Marketplace, estate sales, or local thrift shops ($20–$150 depending on condition and quality). Pair it with simpler contemporary pieces (bed frame, nightstands, lighting) from IKEA or Wayfair ($100–$300 for basic pieces). The trick is keeping a consistent color story (neutrals + one accent color) so the mix feels intentional, not random. A fresh coat of paint on thrifted wood furniture costs $10–$20 in paint and a weekend of effort.

    Pro tip: Mix eras through shared materials (wood, brass, ceramic) rather than trying to blend every texture.

    Your bedroom feels curated and unique—like it actually reflects who you are instead of looking like everyone else’s room.

    20. Upgrade Your Door Hardware and Hinges

    Small hardware details (door handles, hinges, hooks) are like jewelry for your room—they cost almost nothing but signal intentional design.

    Replace your current door hardware with coordinated pieces ($20–$50 total for a doorknob and hinges from hardware stores or Etsy). Choose brass, matte black, or brushed nickel to coordinate with your existing lighting and accessories. While you’re at it, add a hook on the inside of your door for a robe or daily outfit ($5–$10). This takes 20 minutes and requires just a screwdriver. All hardware should match or coordinate with your other metal finishes (lamp bases, shelf brackets, etc.).

    Pro tip: Match your door hardware to your lighting fixtures—if your lamps are brass, make hardware brass too.

    This detail-oriented approach makes your bedroom feel like a luxury hotel—small things noticed subconsciously shift how the space feels.

    21. Create a Reading Nook with Adequate Task Lighting

    A dedicated reading space changes how your bedroom functions—it separates “wind-down activities” from “sleep,” improving sleep quality through habit stacking.

    Find a corner and add: a comfortable chair ($100–$300 from thrift stores, IKEA, or Wayfair), a small side table ($30–$80), and a task light that doesn’t spill light across the room—try a wall-mounted reading light ($40–$100) or an adjustable floor lamp ($50–$120). A small bookshelf or basket nearby ($30–$80) keeps reading material contained. Total investment: $250–$700 depending on what you already own. For small rooms, even a cushioned bench at the foot of the bed with good lighting works.

    Pro tip: Use warm, dimmable task lighting (not bright overhead light) so this area supports evening relaxation.

    Having a separate place to read signals to your brain that the bed is for sleep—this separation alone improves rest quality.

    22. Add Texture Through Grasscloth or Linen Wallpaper

    Textured wallpaper adds visual and tactile interest without being loud—it’s the secret to that high-end hotel bedroom feeling.

    Grasscloth or linen wallpaper ($30–$60 per roll) applied to one accent wall costs about $100–$200 total (usually 2–3 rolls needed). Hire a professional installer ($200–$400 labor) or DIY if you’re confident with tools and patience ($0 labor, takes 3–4 hours). For renters, peel-and-stick textured wallpaper ($25–$45 per roll**) removes cleanly and costs *$50–$100 for one accent wall*. Warm neutrals (cream, warm gray, soft taupe) photograph beautifully and pair with any color scheme.

    Pro tip: Apply textured wallpaper to the wall behind your headboard for maximum visual impact.

    Textured walls catch light beautifully in photos and create subtle depth that makes a room feel more intentionally designed.

    23. Swap Out Overhead Light Fixture for a Pendant or Chandelier

    Your ceiling fixture matters aesthetically and functionally—a stylish light changes how the whole room feels while improving light quality.

    Replace your basic flush-mount fixture with a simple pendant light ($50–$150 from IKEA, West Elm, or Wayfair) or a small chandelier for statement impact ($100–$300). Installation requires basic electrical knowledge or hire an electrician ($100–$150 labor). Use warm-toned bulbs ($5–$15 each) at 2700K so the fixture doesn’t look harsh. The total cost: $50–$450 depending on style and whether you hire help.

    Pro tip: Choose a fixture that coordinates with your other metals (if you have brass lamps, get a brass fixture).

    A stylish overhead light instantly elevates the room’s aesthetic and actually improves ambient light quality.

    24. Install Blackout Curtains for Deep Sleep Support

    Blackout curtains support circadian rhythm by blocking light while you sleep—this is especially important if you live on a bright street or in a place with early sunrise.

    Add a blackout layer behind your decorative curtains using thermal blackout panels ($30–$60 per pair from Amazon or Target) or a blackout shade inside the window frame ($40–$100 for a motorized option or manual pull-down). This layered approach lets you keep pretty linen curtains visible while getting blackout benefits. Total cost: $30–$150 for the functional layer plus whatever you’ve already spent on decorative curtains.

    Bonus: Blackout curtains also improve temperature regulation, reducing heating/cooling costs.

    You’ll sleep deeper and wake less frequently—your body gets the dark it needs even if streetlights or early sunrise normally interfere.

    25. Curate a Signature Scent Through Candles or Diffusers

    Scent anchors memory and emotion—a signature bedroom scent becomes part of your wind-down routine and signals your brain it’s time to relax.

    Choose one scent you love (vanilla, lavender, cedarwood, or something personal) and use it consistently through a candle ($15–$30 from Jo Malone, Paddywax, or even Yankee Candle) or diffuser ($20–$50). Burn your candle or run your diffuser during your evening routine—reading time, bath time, journaling. The scent-memory association builds quickly; within weeks, smelling that scent will trigger relaxation. Brands like P.F. Candle Co., Diptyque, and even budget options from Target work equally well for this.

    Pro tip: Avoid candles with synthetic “bedroom” scents—choose something you genuinely love, even if it’s not marketed for sleep.

    The moment that signature scent hits your nose, your nervous system recognizes it as a cue for rest—it becomes part of your sleep ritual.


    Save this post and pick one or two ideas to tackle this weekend. You don’t need to overhaul everything at once—small, intentional changes compound into that cozy sanctuary you deserve. Which idea are you trying first?

  • 26 Modern Bedroom Ideas That Look Sleek & Sophisticated

    26 Modern Bedroom Ideas That Look Sleek & Sophisticated

    Your bedroom should be the one room in your home where everything feels intentional—the colors soothe you, the furniture fits perfectly, and there’s zero visual clutter. If your current space feels chaotic or uninspiring, you’re not alone. The good news? You don’t need a complete overhaul to create a bedroom that looks and feels sophisticated. We’ve pulled together 26 modern bedroom ideas that range from quick $15 fixes to thoughtful investment pieces—all designed to work whether you’re renting or own your home. You’ll find styling tricks that photograph beautifully, layout solutions that maximize your square footage, and texture combinations that make your room feel layered and intentional. Let’s dive in and find the ideas that match your space and budget.

    1. Paint an Accent Wall in a Deep, Moody Tone

    An accent wall in a rich, saturated color instantly adds sophistication and depth without overwhelming your entire space. Deep jewel tones like forest green, navy, or charcoal are having a major moment—they feel luxe and calming at the same time.

    Choose a quality interior paint (Benjamin Moore, Sherwin-Williams, or a budget option from Home Depot runs $30–$60 per quart). Pick the wall behind your bed or the wall you see first when entering. Prep with painter’s tape, prime if needed, and apply two coats. Budget 3–4 hours for a single wall, or hire a painter for $200–$400. The trick? Keep everything else neutral—white bedding, natural wood furniture, and simple accessories let that color shine without competing for attention.

    You’ll immediately notice how the room feels more curated and design-forward. That one wall becomes a natural focal point that makes your whole bedroom feel intentional.

    2. Layer Your Bedding in Unexpected Textures

    Forget the matching duvet-and-pillowcase sets. Modern, sophisticated bedrooms build comfort and visual interest by layering different textures and fabrics together.

    Start with a quality fitted sheet and pillowcases in linen or high-thread-count cotton (Brooklinen, Target, or IKEA, $25–$100). Add a lightweight quilt or coverlet in a contrasting pattern or tone ($50–$150). Layer a chunky knit throw across the foot or side ($40–$80). Finish with 4–5 pillows mixing linen, velvet, and textured cotton. The goal is creating depth and a lived-in look rather than a perfectly matched set. This takes about 30 minutes to style but feels completely different from what you woke up to.

    Your bed becomes a visual anchor that makes the whole room feel more thoughtfully designed and inviting.

    3. Swap Out Your Headboard for a Curved Option

    Curved headboards are having a major design moment because they soften hard lines and create a focal point that actually looks contemporary instead of dated. This one change can shift your entire room’s vibe.

    Look for curved headboard styles on Wayfair, Article, or West Elm ($150–$600, depending on size and material). Wood, velvet, and linen options all work. If you’re renting or want to test the idea, a removable fabric headboard ($60–$150) mounts easily with adhesive strips and comes off damage-free. For a DIY approach, build a plywood curve using a template and upholster it yourself (advanced skill, but tutorials are everywhere). Installation takes 1–2 hours, or hire a handyperson for $50–$100.

    Suddenly your bed doesn’t look like a plain rectangle—it becomes a designed element that anchors the whole room.

    4. Install Floor-to-Ceiling Curtains for Drama and Height

    Floor-to-ceiling curtains create the illusion of higher ceilings and add a layer of softness that reads as intentional and high-end. Even in a modest room, this simple change feels luxurious.

    Measure from ceiling to floor, adding 8–12 inches of extra length so panels can puddle slightly or graze the floor. Buy linen, linen-cotton blends, or lightweight curtain fabric ($15–$40 per yard, typically need 2–3 yards per panel). Hang rods as close to the ceiling as possible using quality mounting hardware ($30–$60). Pair with simple rings or clips for a modern look. Total cost: $100–$250 depending on window size. Installation takes 2–3 hours, or hire a handyperson for $75–$150.

    The moment those curtains hang, your room gains architectural presence and feels more polished than before.

    5. Add Textured Wallpaper to One Wall

    Textured wallpaper—grasscloth, jute, linen, or embossed finishes—adds personality and visual interest without the commitment of paint or a full pattern.

    Peel-and-stick options (Spoonflower, Etsy, Target) cost $25–$60 per roll and are perfect for renters. Traditional wallpaper ($20–$80 per roll) lasts longer but requires adhesive and paste. One accent wall typically needs 2–3 rolls. Prep the wall with primer, apply paste or adhesive, and smooth out bubbles. Budget 3–5 hours for a DIY project or hire a wallpaper installer for $150–$300. The beauty of texture is that it photographs differently depending on lighting, so it’s always visually interesting.

    Your walls gain depth and dimension that plain paint simply can’t match, making the room feel more considered.

    6. Use a Curved Mirror as a Focal Point

    A curved or arched mirror serves double duty—it bounces light around the room and adds a sculptural design element that feels current and intentional.

    Look for arched mirrors at Article, West Elm, CB2, or wayfair ($80–$400 depending on size and frame material). Gold, black, natural wood, or brushed metal frames all feel modern. A 36–40 inch mirror works for most bedrooms without overwhelming the space. Mount securely to wall studs or use heavy-duty drywall anchors. Installation takes 30–45 minutes. For renters, lean a large mirror against the wall (it’s technically less permanent, though still requires a secure base).

    Placing a statement mirror across from a window instantly makes your room feel brighter, larger, and more gallery-like.

    7. Build a Nightstand with Open Shelving

    Open shelving as a nightstand keeps your bedroom feeling airy while adding character and display space for objects you love.

    Floating shelves (IKEA, Home Depot, Wayfair) cost $15–$50 per shelf. Mount 2–3 shelves at varying heights on either side of your bed using appropriate hardware for your wall type (studs, drywall, brick all differ). Keep styling minimal: a lamp, a small plant, a few books, a water glass. DIY installation takes 1–2 hours; hire help for $50–$100 if you’re unsure about wall anchoring. The key is restraint—resist filling the shelves, which defeats the purpose.

    Your bedroom gains visual lightness and a more curated, gallery feel while maintaining practical storage.

    8. Hang Large-Scale Abstract Art Above Your Bed

    Art-led personalization is a 2025 trend because it tells your story and creates a sense of intentionality that generic decor can’t achieve. A large canvas or sculptural piece becomes the room’s anchor.

    Commission an artist (Etsy, local galleries), buy gallery-quality prints (Minted, Society6, $50–$200), or invest in an original ($300–$1,500+). Size matters: aim for a piece that’s at least 3 feet wide for visual impact. Hang at eye level (56–60 inches from floor to center) using picture rails or traditional hanging hardware. Pair with minimal surrounding accessories so the art takes center stage.

    Suddenly your bedroom reflects your actual taste and feels like a designed space rather than a collection of furniture.

    9. Create a Warm Lighting Layer with Bedside Lamps

    Layered lighting is non-negotiable in a sophisticated bedroom. Overhead lights feel clinical; warm bedside lamps create ambiance and make the space feel more intentional.

    Choose table lamps with 40–60 watt bulbs or dimmable LED equivalents in warm white (2700K color temperature). Brass, wood, or ceramic bases feel modern ($40–$150 per lamp at Target, West Elm, CB2). Install a dimmer switch on your overhead if you have one ($20–$60 for the dimmer plus installation). Add LED strip lights behind floating shelves or under the bed for additional ambient warmth ($20–$40). Proper lighting takes about 2–3 hours to install if adding a dimmer, or it’s immediate if just swapping lamps.

    The moment you turn off the overhead and switch to warm bedside lamps, your entire room shifts from functional to sanctuary-like.

    10. Paint Your Ceiling a Soft Neutral or Warm Tone

    Most people ignore the ceiling, but painting it a soft warm tone (cream, greige, pale taupe) instead of stark white makes your bedroom feel more enveloping and intentionally designed.

    Use ceiling-grade paint in a satin or flat finish from Benjamin Moore, Sherwin-Williams, or Behr ($25–$50 per gallon). Choose a tone that’s 2–3 shades warmer or deeper than your walls to create subtle cohesion. You’ll need a roller, extension pole, and possibly a ladder. Budget 4–6 hours for a standard bedroom or hire a painter for $300–$600. This is easier than it sounds, though hiring help removes the neck strain.

    Your whole room suddenly feels more intentional and warm, with the ceiling adding architectural interest rather than blank space.

    11. Swap to Linen Pillowcases and Sheets

    Linen feels expensive and intentional, wrinkles beautifully, regulates temperature, and improves with every wash. It’s the fabric of choice for people who prioritize quality and texture.

    Quality linen sheets run $100–$300 for a full set (Parachute, Brooklinen, Etsy vendors). Budget linen from IKEA or target starts around $50–$80. The natural wrinkles are part of the charm—no ironing required. Wash in cool water and hang dry to extend the life. Your initial investment pays off because quality linen lasts 5+ years.

    The moment you sleep on real linen, you’ll notice the difference in comfort, and your bedroom immediately looks more designed.

    12. Create a Gallery Wall of Personal Photos

    A gallery wall of personal photos adds narrative and warmth that generic decor can’t match. It tells your story and makes the room feel authentically yours.

    Choose 8–12 frames in matching styles (all black, all natural wood, or mixed metals). Mix print sizes for visual interest. Use a template printout to plan layout before hanging. Frame sizes typically run $10–$30 per frame depending on quality; printing photos costs $1–$5 each. Installation takes 2–3 hours; pay attention to spacing (2–3 inches between frames typically looks balanced). Use picture hanging strips for renter-friendly installation.

    Your bedroom shifts from a blank slate to a space that reflects who you actually are and what you value.

    13. Add a Floating Shelf for Plants and Styling

    A single well-styled floating shelf adds dimension, personality, and practical storage without overwhelming your space. Plants on shelves add life and biophilic design.

    Floating shelves (IKEA, Wayfair, Home Depot) cost $15–$50. Mount at 36–48 inches high using appropriate wall anchors ($10–$20 in hardware). Style with 3–5 objects max: plants, books, a ceramic vessel. The key is negative space—avoid visual clutter. Installation takes 45 minutes to an hour. Alternatively, use a picture ledge (narrower, perfect for lightweight styling) for $20–$40.

    Your room gains a curated, magazine-worthy element that shows intentionality and personality.

    14. Install Sheer Curtains Behind Blackout Panels

    Layered curtains let you control light and privacy while adding visual richness and softness. This is a designer trick that looks intentional and functions beautifully.

    Install a double curtain rod ($40–$80) or two separate rods. Use sheer linen or cotton voile ($15–$30 per yard) on the inner rod and a heavier fabric ($20–$40 per yard) on the outer. Total cost typically runs $150–$300 for materials. Installation takes 2–3 hours or hire help for $75–$150. The beauty is waking to soft filtered light or closing the heavier panels for complete darkness.

    You gain both functionality and visual elegance—the room feels more layered and intentionally designed.

    15. Paint Your Nightstands a Complementary Accent Color

    Painting existing nightstands (or thrifted ones) a soft accent color ties your room’s palette together and adds personality without major expense.

    Choose a color that complements your walls—soft sage, muted terracotta, warm gray, or soft blue work well. Use interior-grade acrylic or chalk paint ($15–$30). Prime if needed, then apply 2–3 coats. Budget 6–8 hours total (including drying time between coats), spread over a few days. This is a perfect weekend DIY project that requires only basic supplies (brush, drop cloth, primer).

    Suddenly your nightstands aren’t just functional—they’re a design moment that brings cohesion and personality to your whole room.

    16. Hang Pendant Lights Instead of a Ceiling Fixture

    Pendant lights over your bed provide both ambient light and visual interest, and they read as significantly more designed than standard ceiling fixtures.

    Pendant styles run $30–$150 each at IKEA, West Elm, Wayfair, or CB2. You’ll need to wire them into your ceiling (hire a licensed electrician for $200–$400 or DIY if experienced). Brass, ceramic, glass, or sculptural metal options all feel current. Hang them 12–18 inches from the ceiling and position to avoid direct glare on the bed.

    The moment those pendants are up, your room feels more intentionally lit and substantially more sophisticated.

    17. Layer a Large Area Rug Beneath Your Bed

    A large area rug anchors your bedroom and adds warmth, softness, and visual definition. It’s a design move that immediately makes the space feel more intentional.

    Choose a rug that’s at least 8×10 feet for a queen or king bed; it should extend 2–3 feet on all sides. Neutral tones (gray, cream, natural jute, soft taupe) work with any palette. Quality wool or wool-blend rugs run $300–$800; budget options from IKEA or Wayfair start at $100–$200. Lay down a rug pad underneath ($20–$40) to prevent slipping. This is technically a zero-installation purchase—just place and adjust as needed.

    Your room instantly gains warmth, defines the bedroom zone, and feels more designed with this foundational element in place.

    18. Style Your Wall Behind the Bed with Shiplap or Paneling

    Wall paneling or shiplap adds architectural depth and visual interest without requiring paint or wallpaper. It’s a subtle design move with major impact.

    Shiplap planks from Home Depot or Lowe’s cost $50–$150 depending on material (solid wood vs. engineered). DIY installation takes a full weekend for one wall if you’re comfortable with basic carpentry; hire a handyperson for $200–$500. Alternative: peel-and-stick shiplap ($30–$80) is renter-friendly but less durable. Paint or stain in white, natural wood, or a soft tone to complement your palette.

    Your wall gains texture and dimension that creates visual interest and makes the room feel more architecturally intentional.

    19. Declutter and Style Your Nightstands Minimally

    Sophisticated bedrooms are typically minimal on nightstands. Removing visual clutter creates calm and makes the space feel intentional rather than chaotic.

    Keep only essentials: a lamp, a book or two, a water glass, a small plant. Remove anything else—cords, random papers, clutter. Tuck cords behind furniture or use cable organizers ($5–$10). This takes 30 minutes to an hour and costs nothing. The transformation is immediate because negative space feels luxurious.

    The moment you clear those nightstands, your whole bedroom feels calmer, more organized, and more deliberately designed.

    20. Add a Velvet or Linen Upholstered Bench at the Foot of Your Bed

    A bench at the foot of your bed adds functionality (seating, storage, styling surface) and visual weight that feels more designed than just empty floor space.

    Look for upholstered benches at Article, West Elm, Wayfair, or CB2 ($150–$400). Alternatively, buy a wooden bench and drape a throw blanket over it for casual elegance ($80–$200). Wood or upholstered options both work; pair with natural materials. This is a low-labor addition—just position and style with a throw or cushions.

    You gain both practical seating and a visual anchor that makes your bed area feel more curated and complete.

    21. Use Woven Baskets for Hidden Storage and Texture

    Woven storage baskets solve the “where do I keep extra pillows and throws?” problem while adding natural texture and warmth.

    Baskets from IKEA, Wayfair, or HomeGoods cost $20–$80 depending on size and material. Rattan and seagrass feel intentional; woven wood offers another textural option. Use them to store extra bedding, pillows, books, or throws. The hidden storage keeps your room feeling calm while the baskets add organic texture that reads as designed.

    Your bedroom stays organized and visually clean while gaining warmth from the natural materials.

    22. Install a Bookshelf as a Bedroom Feature

    A bookshelf in your bedroom adds personality, functionality, and a curated feel—especially if you actually use it to display books and meaningful objects.

    Wall-mounted shelves (IKEA, Wayfair, floating shelves) cost $30–$150 depending on material and size. Freestanding bookshelves run $100–$400. Style with a mix of books, plants, and small objects; aim for visual balance rather than chaos. Install properly to wall studs or use heavy-duty anchors. A full bookshelf takes 2–3 hours to style thoughtfully but becomes a focal point that reflects your personality.

    Your bedroom gains depth and personality, showing visitors what you actually read and what you value.

    23. Upgrade to a Quality Mattress and Bed Frame

    Your bed is the anchor of your bedroom. A quality mattress and a well-designed frame instantly elevate the entire space.

    Mattresses range from $300 (budget) to $2,000+ (luxury). Mid-range quality options run $600–$1,200 (Tuft & Needle, Helix, Saatva, Purple). Bed frames from IKEA, West Elm, or Article run $150–$600. A low-profile platform frame in natural wood or metal feels more contemporary than a traditional frame. This is an investment, but a good mattress lasts 7–10 years and affects both sleep and room aesthetics.

    The moment you upgrade your bed, your entire bedroom looks more intentionally designed and feels dramatically more comfortable.

    24. Add Soft, Warm Overhead Lighting with a Dimmer

    Overhead lighting with a dimmer switch gives you flexibility—bright for cleaning and getting dressed, dimmed for relaxation and evening wind-down.

    Add a dimmer switch ($20–$60) and replace your fixture with warm white bulbs or a dimmer-compatible LED. Electrician installation costs $100–$200; DIY takes 1–2 hours if comfortable with electrical work. The ability to adjust light temperature changes your bedroom’s functionality and feel throughout the day.

    You gain control over your bedroom’s ambiance and can set the perfect mood for sleep, relaxation, or getting ready.

    25. Create a Cohesive Neutral Palette with Accent Textures

    A neutral palette unified by textural variety reads as significantly more sophisticated than random colors or a matchy-matchy approach. Texture becomes your design language.

    Choose 2–3 neutral base colors (cream, warm gray, soft taupe) and layer different textures: linen, wool, woven materials, natural wood, metal accents. Keep paint, bedding, curtains, and upholstery within this tight range. Add visual interest through surface variation—rough, smooth, woven, matte, subtle sheen. This approach costs nothing beyond what you’d spend on regular updates, but the intentionality feels luxurious.

    Your room feels cohesive, calm, and designed even though it’s technically a monochromatic palette.

    26. Invest in Quality Window Treatments that Function Beautifully

    Quality window treatments that actually work smoothly (no stuck shades, no tangled cords) look more expensive and feel more intentional than basic options.

    Custom Roman shades or high-quality roller shades run $80–$250 per window depending on size and material. Budget options start at $30–$60. Pair with decorative curtains for layered interest. Motorized options ($200–$500+) feel particularly luxury but aren’t necessary. Proper installation ensures smooth operation and professional appearance—hire a window treatment specialist for $50–$100 per window.

    The moment you open and close functioning, well-designed window treatments, your entire room feels more intentional and well-made.


    Save this post and tackle one idea this weekend—even a single change shifts how your whole bedroom feels. Whether you start with a new headboard, layered lighting, or a simple nightstand refresh, each idea builds toward a space that actually looks as sophisticated as it feels. Share this with anyone you know who’s ready to upgrade their sleep sanctuary.

  • 26 Modular Closet System Ideas That Adapt to Any Lifestyle

    26 Modular Closet System Ideas That Adapt to Any Lifestyle

    Your closet doesn’t have to stay the same forever—and honestly, it shouldn’t. Life changes: your work wardrobe evolves, your family grows, your hobbies shift. A rigid closet system locks you into yesterday’s choices, but a modular one grows with you. Whether you’re a renter with limited wall space, a parent juggling kids’ and adults’ clothes, or someone who likes to refresh their space seasonally, a modular closet system solves the “this doesn’t fit my life anymore” problem.

    These 26 ideas mix DIY hacks, affordable tweaks, and smart product swaps that adapt to whatever comes next. You’ll find solutions for tiny reach-ins, sprawling walk-ins, and everything in between—plus renter-friendly options that don’t require a drill. Ready to build a closet that actually works for your life right now? Let’s go.


    1. Start with Adjustable Shelving Instead of Fixed Shelves

    Fixed shelves waste space because one shelf height doesn’t fit everything. Adjustable shelving lets you set heights based on what you actually store—tall heels up top, flat sweaters below, handbags on custom-spaced shelves.

    Installation takes about an hour per unit and requires basic tools: a drill, level, and metal brackets (around $15–$40 per shelf unit). Popular options include Elfa from The Container Store ($120–$200 per kit) or metal utility shelving from Amazon ($60–$120). For renters, tension rods with clips offer temporary adjustability without wall damage.

    The payoff is massive: you’ll stop cramming items into mismatched spaces and start using your vertical real estate efficiently. Your closet instantly works harder and holds 30% more without getting cramped.


    2. Add a Pull-Out Hamper That Hides When Not Needed

    A stationary hamper takes up valuable floor space year-round. A pull-out model lives under a shelf or in a corner and slides out only when you need it—no wasted real estate.

    Install one in about 30 minutes using a basic drawer-slide kit ($30–$60 from IKEA or Amazon) and a fabric basket or laundry bag. Companies like Organized Living and Closet Factory offer custom versions, but DIY kits work just as well. Measure twice before you buy; standard widths are 15″, 18″, and 21″.

    Best part: you choose when the hamper “exists” in your space. When it’s pushed in, your closet looks cleaner and more spacious. When guests come over, you’ve got a place to stash it completely out of sight.


    3. Use Modular Shelving Units on Casters for Total Flexibility

    Closet layouts change. Kids outgrow rooms. You move apartments. Fixed built-ins trap you in one configuration. Shelving units on casters let you slide sections around, pull them out for deep cleaning, or remove one entirely when you need the space back.

    Buy standalone modular units like IKEA’s Kallax or Ivar on wheels ($60–$150 per unit) or metal utility carts ($40–$120). Install lockable casters on the bottom in 20 minutes using a wrench. Stack 2–3 units vertically for floor-to-ceiling coverage without permanent installation.

    The freedom is addictive: you reorganize without guilt, adapt when life shifts, and can take everything with you if you move. Renter? This is your closet hack.


    4. Install Double Hanging Rods at Different Heights

    A single rod wastes about half your vertical hanging space. Most closets can accommodate a second rod below the first, instantly doubling capacity without taking up a single square foot of floor area.

    Installation takes 45 minutes with basic tools: a drill, stud finder, and adjustable rods ($20–$50 from Home Depot or IKEA). Mount the upper rod 65″ from the ground and the lower at 32–36″ depending on your clothes. For renters, tension rods with brackets offer a damage-free alternative.

    You’ll fit twice as many hanging pieces without a cramped, overlapping mess. Blazers, tees, and casual dresses stay wrinkle-free and visible. Your closet went from cluttered to generous in one afternoon.


    5. Mix Open Shelving and Closed Storage for Visual Balance

    Open shelving looks great and saves money, but too much exposed storage creates visual chaos. The sweet spot: combine open shelves for pretty pieces you want to see with closed cabinets for items you’d rather hide.

    Install 2–3 open shelves for display ($40–$80 per shelf from IKEA or Wayfair) and add one lower cabinet with doors ($60–$150). This takes a weekend to install if you’re adding to existing shelving. The visual break lets your curated pieces shine while keeping seasonal stuff, backups, and less-attractive storage bins hidden.

    Your closet looks intentionally styled and deliberately organized rather than haphazardly stuffed. Guests see your “good side,” and you get breathing room for the not-so-pretty necessities.


    6. Create Zones Within Your Closet Using Dividers and Labels

    A closet without zones becomes a “where is everything?” disaster. Creating clear sections for pants, dresses, work clothes, and casual wear cuts your search time and keeps similar items together so you can actually see what you own.

    Use hanging organizers with divided sections ($25–$60 from Container Store or Amazon), wood dividers on shelves ($10–$30), or even washi tape dividers ($5) on rods. Label everything with a label maker ($15–$30) or printed tags. This setup takes 30 minutes to arrange and zero installation required.

    Finding what you want takes seconds instead of minutes. You stop buying duplicates because you can actually see what you already have. Your morning routine gets faster, and your clothes last longer because they’re not crushed under a pile.


    7. Add a Small Valet Rod for Next-Day Outfit Planning

    Outfit indecision is real, especially on rushed mornings. A dedicated valet rod—a small extra rod, often just 12–18″ wide—holds tomorrow’s outfit so you grab and go without second-guessing.

    Mount a valet rod ($20–$50 from Amazon, Target, or Wayfair) at shoulder height in a visible spot. No installation skills needed; most hang from existing rods or mount with simple brackets. Some models are freestanding and fit in any closet corner.

    You stop the “what should I wear” spiral at night and make calm choices. Your morning moves faster. Clothes stay fresh because they’re chosen with intention, not desperation. This one small rod saves time and mental energy every single day.


    8. Use Clear Acrylic Bins for Visible Seasonal Storage

    You can’t remember what’s in opaque bins, so seasonal items get forgotten or repurchased. Clear bins let you see contents without opening them—and that visibility changes everything about maintaining your rotation.

    Buy clear plastic bins with lids ($10–$30 per bin from Container Store, Amazon, or Target) in standard sizes that stack neatly. Label the front and spine so you can read them from across the closet. Set up takes 20 minutes; rotating seasonally takes another 15–20 minutes twice yearly.

    Your seasonal pieces don’t go missing anymore. You use what you have instead of buying duplicates. When spring arrives, you know exactly what’s packed away and can decide what stays and what goes.


    9. Install Pegboard Sections for Customizable Accessory Storage

    Accessories get lost because there’s nowhere to hang them. Pegboard with adjustable hooks lets you customize storage for belts, scarves, bags, and hats—and rearrange whenever your collection grows.

    Install a pegboard section ($20–$40 from Home Depot or IKEA) and add metal hooks ($1–$3 each). Paint it a color that matches your closet for a polished look. Installation takes an hour and requires a drill and level. Renters can use adhesive pegboard that removes cleanly.

    Everything hangs visible and accessible instead of tangled in a bin. You actually use your scarves and belts because you see them. Adding more hooks is effortless when your collection grows—no major reconfiguration needed.


    10. Create Pull-Out Drawers for Folded Basics

    Folded clothes stacked on shelves get crushed and messy because you dig through them constantly. Pull-out drawers let you access everything without disturbing the pile, and they’re modular so you add them as needed.

    Use drawer organizer kits ($30–$80 from Container Store or Wayfair) or DIY solutions with fabric bins on sliding tracks. Installation takes 1–2 hours for a basic setup. Budget versions use stacking fabric bins under a shelf edge; higher-end systems include wood-frame drawers with metal slides.

    Your basics stay organized and pristine. You see all your options without excavating a pile. Adding a second or third drawer later is simple—no major changes required.


    11. Add Accent Lighting to Make Everything Visible and Styled

    Poor lighting makes closets feel cramped and dreary, and you can’t actually see colors properly. LED strip lights and puck lights are cheap, easy to install, and transform your closet into a space you enjoy spending time in.

    Install LED strip lights ($15–$40 from Amazon or Target) along the top shelves or along the closet rod using adhesive backing (no tools needed). Add puck lights ($10–$25 each) to highlight a display shelf or dark corner. Motion-activated versions add convenience; battery-operated options work for renters.

    Your closet looks brighter, bigger, and way more inviting. You actually see color accurately so you stop wearing that sweater that clashes. Getting ready feels less like a chore and more like a moment in a space you care about.


    12. Use Vacuum-Seal Bags for Off-Season Bulky Items

    Bulky winter coats and summer duvets waste huge amounts of closet space. Vacuum-seal bags compress them to a fraction of their size, freeing up shelf and hanging rod space for your active wardrobe.

    Buy vacuum-seal bags ($10–$20 for a set of 3–5 from Amazon, Target, or Bed Bath & Beyond) and a basic handheld or electrical vacuum sealer ($15–$40). Packing takes 30 minutes per season; unpacking takes 15 minutes and lets the items naturally fluff back up.

    You reclaim 40% of your seasonal storage space without getting a bigger closet. Your active-season wardrobe gets room to breathe. Come winter or summer, you pull items down, unseal, and everything’s ready to wear within an hour.


    13. Install a Narrow Sliding Door or Curtain Rod System for Hidden Hanging Space

    Awkward closet corners and nooks waste potential hanging space. A slim sliding door or a curtain rod with a fabric panel hides hanging space while keeping it accessible and looking intentional.

    Install a sliding barn door kit ($80–$150 from IKEA or Amazon) or a tension rod with a linen curtain ($20–$50 total). The barn door option takes 2 hours; the curtain solution takes 15 minutes and works for renters. Both create a visual break in your closet that looks designed, not makeshift.

    You’ve created bonus hanging space without it looking chaotic. Special occasion dresses or seasonal pieces stay protected and out of the way but instantly accessible. Your closet looks more intentional and polished.


    14. Set Up a Tiered Shoe Rack System That Adapts to Your Collection

    Shoes get buried in piles or crammed into boxes because standard shoe storage doesn’t fit all shoe types. A tiered system with slanted shelves, hanging organizers, and tiered stands lets each shoe type live in its ideal home.

    Combine slanted shelf risers ($15–$30), a hanging shoe organizer ($15–$40), and a small tiered stand ($20–$50). Mix and match from Target, IKEA, Amazon, or Container Store based on your shoe volume. Setup takes 45 minutes and requires zero permanent installation.

    Every shoe stays visible and accessible instead of hidden in a box somewhere. You stop buying similar shoes because you actually see what you own. Your morning routine moves faster because your shoes are organized by type, not buried in chaos.


    15. Create a Jewelry Wall or Hanging Display Panel

    Jewelry tangles in drawers and gets lost because you can’t see what you actually own. A display panel or jewelry organizer keeps everything visible, prevents tangling, and adds a styled element to your closet.

    Install a jewelry organizer panel ($30–$100 from Target, Wayfair, or Amazon) or DIY a pegboard ($20–$40) with small hooks and holders. Installation takes 30 minutes. Choose finishes that match your closet aesthetic: rose gold, brass, matte black, or natural wood.

    Your jewelry collection becomes part of your closet’s visual appeal instead of a hidden frustration. You reach for pieces you’d forgotten about. Getting ready includes a moment of selecting jewelry you can actually see, which makes the whole routine feel more intentional.


    16. Add Modular Drawer Inserts to Maximize Small Drawers

    Small drawers become junk drawers without dividers. Modular inserts compartmentalize socks, underwear, accessories, and small items so nothing gets lost and everything stays accessible.

    Buy fabric drawer dividers ($10–$25 per set from Container Store or Amazon) or wood organizers ($15–$40) and arrange them to fit your drawer dimensions. Setup takes 10 minutes and requires nothing but a gentle hand; no screwing or gluing required unless you want permanence.

    You find what you need instantly instead of fishing through a tangled mess. Your mornings move faster. Items stay in good condition because they’re not crushed or wrinkled under piles of other stuff.


    17. Install Floating Shelves at Eye Level for Styled Display

    Hidden-away closets don’t feel special, and you end up not caring about organization because nobody sees it. One or two floating shelves at eye level become a styled display that inspires you to maintain organization and looks intentional.

    Install floating shelves ($30–$80 per shelf from IKEA, Target, or Home Depot) at 36–60″ from the ground depending on your closet layout. Installation takes 1–2 hours and requires a stud finder and drill. Style them with folded sweaters, rolled scarves, a small mirror, and plants for a boutique feel.

    Your closet becomes a space you enjoy looking at, not just a functional storage room. This visual motivation keeps you organized because the styled area inspires maintenance. You stop throwing clean clothes on a shelf and start purposefully placing them. Your closet feels like a design choice, not an afterthought.


    18. Use Slim Cascading Hangers to Double Hanging Capacity

    Standard hangers waste rod space because each hanger sits beside its neighbor taking up precious inches. Cascading hangers hang one below another, turning one rod into multiple tiers of hanging space.

    Buy cascading hangers ($15–$30 for a set of 6–8 from Amazon, Target, or Container Store). Swap them in for your regular hangers—no installation required. They work best for lightweight items like tees, tank tops, and blouses; avoid hanging heavy coats or winter jackets on these.

    Your hanging rod holds 3–4 times more items without looking cramped. Lightweight pieces stay wrinkle-free and visible. You’ve essentially added another rod of capacity without any installation or permanent changes.


    19. Create a “Try On” Station with a Mirror and Small Seating

    Getting dressed in a cramped closet doorway or in front of a far-away bedroom mirror adds friction to your routine. A small seating area with a mirror in your closet turns outfit selection into a moment you actually enjoy.

    Add a simple standing or leaning mirror ($30–$80 from IKEA, Target, or Wayfair), a small upholstered stool ($40–$100), and ensure good lighting ($15–$40 for puck lights). This takes 30 minutes to arrange and zero installation. The stool gives you a place to sit while pulling on boots or deciding between options.

    Your morning routine shifts from stressful to intentional. You try on outfits in your actual closet instead of rushing. This small ritual makes getting dressed feel like self-care instead of a chore. You make better outfit choices because you have time to think and adjust.


    20. Use Vertical Wall Space for Belts, Scarves, and Lightweight Items

    Accessories live on shelves where they get buried, or in drawers where they get tangled. Your walls are free real estate for lightweight items that look great displayed and stay accessible.

    Install wall-mounted hooks ($1–$3 each), a hanging organizer panel ($20–$50), or slim metal rods ($10–$20 each). Hang belts, scarves, lightweight bags, and hats. Setup takes 30–45 minutes and requires a drill and level. Renters can use adhesive hooks that remove cleanly.

    Your walls become functional design instead of wasted space. Everything you want is visible and within arm’s reach. Accessories get used instead of forgotten because they’re not hidden away. Your closet looks bigger because you’ve eliminated piles on shelves.


    21. Create Modular Sections for Different Family Members’ Clothes

    Family closets become disasters when everyone’s clothes tangle together. Creating modular zones with labeled sections for each person keeps clothes sorted and makes it clear whose stuff lives where.

    Assign one section of shelving or hanging rod to each person using color-coded labels ($5–$15 for label makers or tags) and zone dividers ($10–$30). Adjust shelf heights and rod positions for each person’s clothing types. This takes 1–2 hours to set up and requires zero installation.

    Everyone finds their own clothes without digging through someone else’s stuff. Morning routines move faster. You stop the “where are my shirts?” argument. Kids learn organization from seeing their labeled section and maintain it. Your family’s shared closet actually works for everyone.


    22. Install a Pulling-Down Shelf for Hard-to-Reach Top Spaces

    Top shelves hold seasonal items and backups, but reaching them means a ladder or strained reaching. A pull-down shelf brings items to arm’s reach without the ladder gymnastics.

    Install a motorized pull-down shelf ($150–$400 from custom closet companies) or a manual mechanical rack ($80–$150 from Amazon or specialty hardware stores). Installation takes 2–4 hours and may require professional help for motorized versions. Budget-conscious option: use a closet pole extender ($15–$25) to gently pull items down.

    Your hard-to-reach storage becomes actually usable. You rotate seasonal items without calling for backup. Top-shelf inventory becomes part of your active closet management instead of a mystery zone. This one upgrade saves your shoulders and makes your entire closet height functional.


    23. Use a Rolling Cart as a Flexible Shoe and Accessory Station

    A stationary shoe rack takes up permanent floor space, but a rolling cart can slide into a corner when you need space or pull out when you’re getting dressed. The mobility makes it modular and adaptable.

    Buy a slim three-tier rolling cart ($40–$80 from Target, Amazon, or IKEA) with locking wheels. Load shoes on bottom tiers and accessories on top. Takes 10 minutes to assemble and zero installation. Choose one in black, white, or natural wood to match your closet aesthetic.

    You reclaim floor space instantly by moving the cart to a corner. When you’re getting dressed, pull it into your work area for easy access. When you rearrange your closet layout, the cart comes along without any adjustment needed. This flexibility makes sense if your closet needs change seasonally or if you ever move.


    24. Create Labeled Sections for Different Clothing Categories

    Without labels, similar items scatter across your closet and you forget what you have. Clear labeling by category keeps your outfits grouped logically so you can grab everything you need at once.

    Print or purchase category labels ($5–$15 for a set from Target or Amazon, or DIY them using a label maker). Arrange your hanging rod and shelves by category: workwear, casual, athletic, special occasion, and seasonal. Takes 30 minutes to organize and 10 minutes to label.

    Getting dressed becomes faster because everything for each occasion lives together. You stop buying multiple white tees because you see all of them in one spot. Outfit selection shifts from stressful to strategic. Your closet becomes a tool that supports your actual life instead of random storage.


    25. Add a Fold-Down Wall Desk for a Closet Dressing Area

    If your closet has a corner, add a tiny fold-down desk that serves as a getting-ready station. Fold it up when not in use to reclaim the space.

    Install a fold-down wall desk ($80–$200 from IKEA, Wayfair, or specialty hardware stores) with a bracket system that supports it. Add a small wall mirror ($20–$50) above. Installation takes 2–3 hours and requires a drill and stud finder. Pair it with task lighting ($15–$40).

    Your closet transforms from purely storage into a functional getting-ready space. You do final makeup checks, grab last-minute jewelry, and check your outfit without leaving your closet. Mornings move faster and feel more organized. The desk folds flat so you lose no closet capacity when you’re not actively getting ready.


    26. Create a Seasonal Rotation System with Dated Storage Zones

    Mixing active-season and off-season clothes wastes space and creates decision fatigue. A dedicated rotation system with dated zones keeps your active wardrobe smaller and your closet less overwhelming.

    Set up three zones: one for active-season clothes (the most accessible shelf or rod space), one for next-season items waiting (a middle shelf), and one for off-season storage (top shelf in vacuum-sealed bags). Use seasonal labels ($5–$15) and a rotation calendar (free downloadable template). Takes 1–2 hours to organize and 20 minutes each season to rotate.

    Your everyday closet shrinks to only what you’re actually wearing, making mornings easier and choices clearer. You know exactly when to pull out winter coats or summer dresses. Off-season items don’t take up mental space. Your closet feels bigger and more intentional because you’re not juggling four seasons at once.


    Save this post for your next closet refresh and try just one idea this weekend. Start small—maybe a set of cascading hangers or a small label-maker purchase—and watch how even one change makes getting dressed feel better. Which idea are you tackling first?

  • 25 Small Walk-In Closet Ideas That Feel Bigger Than They Are

    25 Small Walk-In Closet Ideas That Feel Bigger Than They Are

    You already know that small walk-in closets don’t have to feel cramped or chaotic—but knowing it and actually making it happen are two different things. The trick isn’t magically expanding your square footage; it’s using every inch strategically so your closet feels bigger and works harder for you. In this guide, you’ll find 25 practical ideas that combine smart storage solutions, lighting upgrades, visual tricks, and styling hacks to turn your compact closet into a space that’s both functional and inviting. Whether you’re renting or planning permanent upgrades, you’ll find ideas at every budget level—from free rearrangements to investment pieces that earn their keep. Let’s dig in.

    1. Double Your Hanging Space with Slim Hangers

    Slim hangers are one of the easiest wins for small closets because they immediately reclaim wasted space. Standard plastic hangers are bulky and waste inches; velvet or non-slip slim hangers reduce thickness by up to 50%, which means you fit nearly double the clothes on the same rod.

    Swap out your existing hangers first—it costs between $15–$40 for a set of 50. Velvet hangers ($20–$35 per set) grip delicate fabrics without slipping and look polished; slim wood or plastic hangers ($15–$25) work just as well if budget is tight. The best part? This takes 30 minutes and requires zero tools or installation. You’ll immediately see how many more pieces fit without touching the walls.

    Pair this with a lightweight cascading hanger hook ($5–$10 on Amazon) to stack multiple items vertically within your closet space.

    2. Paint Walls a Light, Reflective Shade

    Light-colored walls are a free visual expansion tool—they bounce light around and make compact spaces feel airier instantly. White, soft gray, or warm cream are all smart choices for small closets because they brighten the entire room.

    A gallon of paint costs $20–$40, and a small closet typically needs just half a gallon. Self-priming paint speeds up the job. Prep time (clearing the closet, taping trim) takes 2–3 hours, and paint dries in 4–8 hours. If you’ve never painted before, it’s a gentle first project—there are no visible brush strokes in a small space, and imperfections disappear once your clothes are back. This change makes your closet feel noticeably more spacious without any structural changes.

    Skip the bold accent walls in a small closet; save those for larger rooms where they add drama without reducing perceived space.

    3. Install LED Strip Lighting Along Upper Shelves

    Overhead ceiling lights cast shadows and make small closets feel darker; LED strips mounted under shelves or along the crown create even, shadow-free lighting that makes everything visible and the space feel bigger.

    Strip lights cost $15–$50 for a motion-sensor or dimmer-enabled set from Amazon or Home Depot. Installation is simple: clean the shelf underside, peel the adhesive backing, and press the strip in place—10 minutes, no electrician needed. Warm white LEDs (2700K–3000K) feel cozier than cool white and won’t wash out your skin tone when you’re getting dressed. Motion sensors add convenience; you walk in and the closet lights automatically. The lighting becomes part of your morning ritual, and you’ll stop wasting time searching for items buried in shadows.

    Pair this with a small mirror opposite the light source to reflect illumination deeper into the closet.

    4. Add a Narrow Floating Shelf Above the Rod

    Vertical real estate is precious in a small closet. A narrow floating shelf (6–8 inches deep, 24–36 inches wide) installed 12 inches above your hanging rod stores off-season accessories, hats, rolled scarves, or small storage boxes without eating floor space.

    Floating shelves run $20–$60 for a simple wood or laminate option; brackets are often included. Installation takes 30–45 minutes with a stud finder and drill—or hire a handyman for $75–$150. Keep the shelf narrow so it doesn’t create a headbump or visual clutter. Use matching clear or white storage boxes on top to keep the look clean. You gain storage without reducing the hanging rod functionality, and the upper area becomes a secondary zone for out-of-sight organization.

    Renters: wall-mounted shelves require drilling; ask your landlord first or choose a tall freestanding shelf unit instead ($80–$200).

    5. Use Clear Acrylic Drawer Inserts for Folded Items

    Drawer dividers are a game-changer for small closets because they prevent the dreaded “dig through a pile” moment. Clear acrylic inserts let you see every folded item without disturbing the stack.

    A set of adjustable clear dividers costs $10–$25 on Amazon. Divide drawers into 3–5 sections per drawer, with one section per clothing category (t-shirts, tank tops, camis, etc.). You save time getting dressed because items are visible and separated; no more excavating. If your closet has open shelves instead of drawers, apply this same principle using small open acrylic boxes ($2–$5 each). This simple organizing system keeps folded clothes from collapsing into a jumble and saves you mental energy when choosing what to wear.

    Pair this with a labeling system: small adhesive labels on drawer fronts or box edges make it easy to return items to the right spot.

    6. Maximize Vertical Space with Double Hanging Rods

    Double hanging rods are the secret weapon for small closets because they let you hang twice as many items in the same footprint. Install one rod at standard height (5–6 feet) and a second rod 30–36 inches below it for shorter items like folded pants, t-shirts, or jackets.

    A basic double rod kit costs $20–$50 and installs with simple brackets in 1–2 hours. Make sure the upper rod holds lighter items (tanks, blouses, dresses) to avoid overweight stress; the lower rod can handle heavier pieces like jeans or sweaters. You’ll be shocked at how many more clothes fit this way. Best for one side of your closet or a corner; keep the other side single-rod for longer dresses or coats if needed.

    Some spaces work better with one full-width double rod instead of splitting left and right; test the layout before committing.

    7. Install Corner Shelving for Dead Space

    Closet corners often go unused—they’re awkward to reach and hard to fill with hanging rods. A corner shelf unit (usually L-shaped or two-shelf wall units meeting at a corner) transforms dead space into functional storage.

    Corner shelf kits run $40–$100; installation takes 1–2 hours with basic tools. Stack your sweaters, seasonal storage boxes, or shoe organizers here. The corner becomes a secondary storage zone that doesn’t compete with your hanging and shelf areas. Small wall-mounted corner baskets ($15–$30) also work well for scarves, belts, or small accessories if you want something more minimal.

    Renters: freestanding tall corner shelves ($80–$150) work too and don’t require any wall anchors or drilling.

    8. Hang a Slim Shoe Rack on the Back of the Door

    Most closet doors are prime real estate that goes unused. An over-the-door shoe rack (the slim, hanging type, not a tall bulky unit) holds 8–15 pairs without taking any floor space.

    A slim over-the-door rack costs $15–$35 and installs in 5 minutes—no tools needed, just hang it from the door frame. Choose neutral shoes (black, white, beige, gray, navy) to keep the door visually calm. Rotate seasonal shoes out quarterly to keep the display fresh. This single move frees up floor space for a small bench or additional shelving. Bonus: shoes are visible at a glance, so you’re more likely to actually wear them.

    If your closet door opens inward and crowds the space, skip this and use a wall-mounted rack on the side wall instead.

    9. Roll Sweaters Instead of Folding or Hanging

    Rolling sweaters instead of folding or hanging saves incredible space while protecting knitwear from hanger marks. This method condenses your sweater collection by about 30% compared to hanging them.

    Here’s how: fold your sweater in half lengthwise, then tightly roll from the bottom up. Store rolls standing upright in a shallow drawer or stack them on a shelf. Each roll takes about 30 seconds once you get the rhythm. You fit 4–6 rolled sweaters in the space of 2–3 hanging ones. Rolling also protects delicate fabrics because there’s no hanger pressure. Start with a weekend project to roll your entire collection; it’s meditative and takes about 1–2 hours for 15–20 sweaters.

    This method works for lightweight jackets, cardigans, and structured tops too—just avoid heavy coats that hold their shape better hanging.

    10. Add a Narrow Bench Seat for Outfit Staging

    A narrow bench (24–36 inches wide, 12–16 inches deep) at the back or side of your closet serves double duty: it stages outfits before you wear them and provides a seat to put shoes on. This becomes your personal styling station.

    A slim wooden bench costs $40–$150 depending on material. You can also DIY one by stacking a cushion on top of storage cubes. Position it where it won’t block your main walkway. Use the bench to lay out tomorrow’s outfit, style jewelry and accessories, or simply sit while getting ready. It brings a spa-like, intentional feel to your morning routine and makes your closet feel like a boutique dressing room instead of just storage.

    Renters: a cushioned stool ($30–$80) works just as well and moves with you to the next place.

    11. Install a Valet Rod for Outfit Planning

    A valet rod is a thin pull-out rod (usually 18–24 inches) mounted at shoulder height on your closet side wall. You pull it out to hang tomorrow’s outfit or three options while you decide, then slide it back in when done.

    A basic valet rod costs $25–$60 and installs with two simple brackets in 30 minutes. This tool saves decision time in the morning—you pre-stage complete outfits (top, bottom, outerwear) and grab them ready-to-go. It’s especially useful on busy weekdays or for travel. The rod stays hidden when not in use, so it doesn’t add visual clutter. If you work from home or have video calls, you’ll appreciate styling your outfit the night before instead of last-minute scrambling.

    Mount it on the side or back wall where it won’t block your main pathway—shoulder height is ideal so you don’t have to bend or reach.

    12. Use Cascading Hangers for Tanks and Camis

    Cascading hangers (also called tiered or cascade hangers) hold 4–5 lightweight items vertically on a single rod space. They’re perfect for tanks, camis, lightweight tees, or scarves that waste rod real estate when hung individually.

    A set of 3–5 cascading hangers costs $10–$20 on Amazon. Each hanger has graduated clips or hooks that let you hang multiple pieces without tangling. You can fit 15–20 tank tops in the space of 3–4 standard hangers. They work especially well for seasonal items you rotate frequently. Keep them reserved for lightweight, flexible fabrics; heavy sweaters or structured blazers should hang individually to maintain their shape.

    Pair cascading hangers with matching wooden or slim velvet hangers throughout your closet for a cohesive, polished look.

    13. Create Zones: Tops, Bottoms, Dresses, Outerwear

    Zoning your closet by clothing category is one of the most efficient organizational tactics. Your brain finds items faster when they’re logically grouped instead of randomly scattered.

    Rearrange your existing rods and shelves so that tops occupy one zone (left wall, for example), bottoms another (center), dresses a third, and outerwear a fourth. Use a small shelf divider or even a piece of painter’s tape on the rod to mark boundaries. Getting dressed becomes faster because you know exactly where to look; “I need a top” takes 10 seconds instead of 2 minutes of browsing. This also reveals what you actually own (you might discover you have 30 similar tops), which helps with future shopping decisions. Rearrange zones seasonally—winter coats take up more space in December, so give them more rod real estate.

    A clear zone system means your partner, roommate, or family member can find things too, reducing friction in shared closet spaces.

    14. Use Under-Shelf Baskets for Hidden Storage

    Under-shelf baskets hang from the bottom of existing shelves, creating a hidden storage tier without using floor space. They’re perfect for off-season clothes, undergarments, or accessories you use less frequently.

    Adhesive hooks ($5–$10 for a pack) or small brackets ($2–$3 each) attach shallow woven baskets ($8–$15 each) to your existing shelf bottoms. Install takes 10 minutes per shelf. You gain an entire hidden storage layer. The baskets stay tucked enough that they don’t catch your eye but are easy to access when you need them. Natural woven baskets look polished; plastic storage boxes ($3–$5 each) work for utilitarian storage if you hide them deeper in the closet.

    This method works best for shelves that are 12 inches or taller with at least 6 inches of clearance below.

    15. Install a Thin Over-Door Organizer for Accessories

    An over-door fabric organizer with shallow pockets (not a full shoe rack) holds belts, scarves, jewelry, tights, or small folded items without consuming any floor or shelf space.

    A slim fabric organizer costs $12–$25 and hangs in 2 minutes. Keep pockets reserved for lightweight, flexible items; heavy jewelry or solid items feel awkward in pockets. Use small zippered pouches inside pockets to organize tiny things like hair clips or earrings. This solution is especially useful if your closet lacks drawer or shelf space for accessories. Renters love this because it requires zero tools or commitment—just hang and remove when you leave.

    Choose a neutral color (beige, gray, white) so the organizer fades into the background.

    16. Fold Jeans Vertically to See Every Pair

    The KonMari-style vertical fold for jeans (and all clothes) lets you see every piece without digging through a pile. You fold each pair into a neat rectangle and stand them upright like files.

    This takes 5 minutes to learn and 1–2 hours to apply to your entire jean collection. The payoff is huge: you stop buying duplicate styles because you can actually see what you own. You fit 30% more jeans in the same drawer space. The only downside is that it requires a shallow drawer (3–4 inches deep) rather than a deep storage bin. Watch a quick tutorial on YouTube to nail the folding technique; it feels awkward the first time but becomes automatic. Once you master jeans, apply it to pants, t-shirts, and other foldable items.

    Paired with drawer dividers, the vertical fold system creates a magazine-style closet that’s both functional and beautiful.

    17. Add Soft Lighting Puck Lights Inside Shelves

    Puck lights are small, battery-operated circular lights (2–3 inches wide) that mount inside shelves. Unlike LED strips, they’re subtle and work on any shelf without installation.

    A set of 3–4 puck lights costs $15–$30. Install with adhesive strips in 10 minutes—no wiring or tools needed. Warm white or soft white LEDs feel cozier than bright white. Battery-operated puck lights last 6–12 months per battery set; rechargeable versions ($20–$40) reduce battery waste. This layered lighting approach makes your closet feel high-end and spa-like; it’s not just functional, it’s mood-setting. Perfect for closets that lack built-in shelf lighting or for renters who can’t install permanent fixtures.

    Position one puck light per 24 inches of shelf width for even illumination without hot spots.

    18. Use Shelf Dividers to Prevent Stack Collapse

    Shelf dividers (vertical separators) are simple metal or wood pieces that prevent stacks of folded clothes from sliding into one another. One divider can make the difference between organized and chaotic.

    A set of 2–4 dividers costs $8–$20. They require no installation—they simply stand upright on your shelf. Use one divider per 12–18 inches of shelf width to create separate compartments for different items. This means your sweater stack stays upright; your scarf roll doesn’t tumble into your cardigan pile. It’s a small detail that makes a huge difference in the functionality and visual calm of your closet. Metal dividers ($10–$15) look sleeker; wooden ones ($8–$12) feel warmer.

    Pair dividers with a small label on the edge of the shelf so you remember what goes in each section.

    19. Install a Low Shelf or Step Stool to Reach High Storage

    If your closet has high shelves, a small step stool makes them accessible and safe to reach. You avoid dangerous climbing or stretching that risks toppling items.

    A compact wooden or plastic step stool costs $15–$30 and stores in a closet corner or against the wall. Choose one with a wide, stable base (not a ladder). This small tool encourages you to actually use high shelves for off-season storage or less-frequently worn items instead of leaving them as dead space. Safety first: only use shelves up to 6–7 feet high; anything higher is awkward even with a stool. A step stool is a small investment that extends your vertical storage without risk.

    Foldable step stools ($20–$40) are great for renters because they collapse and travel easily.

    20. Repurpose Small Furniture: Nightstands as Shelf Units

    A small dresser, nightstand, or storage console inside your closet adds vertical storage without permanent installation. It’s a clever way to repurpose furniture you already own or find secondhand.

    Dimensions matter: a piece 24–30 inches wide and 18–20 inches deep fits most closets without blocking your pathway. Thrifted nightstands cost $30–$80; new small dressers run $80–$200. This piece holds jewelry, undergarments, accessories, or off-season items in drawers while using the top surface for decorative baskets or folded sweaters. It creates a mini lifestyle display that makes your closet feel boutique-like. Renters can move the piece with them, and homeowners can anchor it to the wall for safety.

    Source furniture from Facebook Marketplace, Craigslist, or IKEA’s affordable modular pieces ($60–$150).

    21. Color-Coordinate Your Clothes for Visual Calm

    Color coordination is both functional and visually soothing. Arranging clothes by color makes your closet feel intentional and spa-like, and it speeds up getting dressed because similar items are grouped together.

    This takes 2–4 hours depending on your collection size but requires zero money. Start with one section: arrange tops from white/cream through neutrals to black, or organize by seasonal palette. Next, tackle bottoms, then folded items. Once coordinated, it’s easy to maintain—just return items to the correct color zone. You’ll notice patterns in your wardrobe (maybe you own eight white tanks and zero green tops), which helps with future shopping. The visual payoff is huge: your closet looks curated and calm instead of chaotic.

    Pair color coordination with matching slim hangers for an even more polished, high-end appearance.

    22. Use Vacuum Storage Bags for Seasonal Off-Season Items

    Vacuum bags compress bulky off-season clothes (winter coats, sweaters, summer sundresses) down to a fraction of their size, freeing precious closet real estate for current-season wear.

    A pack of 5–10 vacuum bags costs $10–$20 on Amazon or Target. Label each bag with the contents (e.g., “Winter Coats 2024”) and season. Fold your out-of-season items, pack them in the bag, seal, and remove air with a vacuum. The bags compress by 50–75%, storing effortlessly on high shelves or under-shelf areas. Rotate them seasonally. The only downside: you need to unseal and re-seal them twice yearly, but the space savings far outweigh the minor inconvenience. This is a game-changer for small closets with no separate storage closets.

    Buy quality vacuum bags ($12–$25 for premium versions); cheaper ones sometimes leak or tear.

    23. Mount a Narrow Mirror on the Closet Wall

    A narrow mirror (12–18 inches wide) mounted on one closet wall serves two purposes: it lets you see outfit details without leaving the closet, and it reflects light, making the space feel bigger.

    A slim mirror costs $15–$40; installation with brackets takes 20 minutes. Mount it at eye level on a side wall where it won’t block your main walkway. A full-length mirror is ideal but takes more space; a half-length mirror (down to the knees) is a smart compromise for small closets. This allows you to check proportions and overall outfit cohesion without stepping into your bedroom. Bonus: the reflected light from your LED strips or puck lights bounces around, creating a brighter, more open-feeling space.

    Renters: adhesive mirror tiles ($1–$2 each) can be arranged into a custom size and removed without damage.

    24. Create a Seasonal Rotation Calendar and Checklist

    A simple seasonal rotation calendar is a low-cost organizational hack that prevents you from living out of season and keeps your closet focused on what’s current.

    Create a one-page checklist (free template via Canva or printable PDFs online) that outlines what to pack away and what to pull out each season. Print and laminate it ($2–$5), or save it as a note on your phone. The checklist includes specific items (e.g., “Pack winter coats by May 1”) and dates to do it. Check off items as you complete them. This prevents summer dresses from lingering in fall when they take up space, and it forces you to revisit your wardrobe seasonally (which helps you discover forgotten favorites or items you’ve outgrown). A simple system saves mental energy and keeps your closet intentional year-round.

    Set phone reminders for seasonal rotation dates so you don’t forget.

    25. Install a Tie/Belt Rack for Small Accessories

    A dedicated tie and belt rack keeps these small accessories untangled, visible, and easy to grab without consuming shelf space or drawer depth.

    A simple wooden or metal tie rack costs $10–$20 and installs in 15 minutes with two wall anchors. It typically holds 8–12 ties/belts/scarves. Mount it on a side wall at shoulder height where you can easily see and reach it. The alternative is drawer dividers with slots ($5–$10), which work if you prefer belts folded in a drawer. Rolled or coiled scarves also fit on a tie rack without wrinkling. This single rack prevents the “tangled belt nightmare” and ensures your accessories actually get worn instead of buried.

    Renters: adhesive hooks ($2–$3 each) can create a DIY version with simple dowel rods (free or $2–$5 from Home Depot).

    26. Use Slim Wooden Hangers to Create a Cohesive Look

    Swapping all your hangers to matching slim wooden or sleek plastic ones is a simple, inexpensive upgrade that immediately makes your closet feel cohesive and intentional. Mismatched wire, plastic, and wooden hangers read as chaotic; unified hangers feel curated.

    A set of 30–50 matching slim hangers costs $25–$50. Donate or recycle your old hangers; the upgrade takes 45 minutes. Choose natural wood (warm, timeless), matte black (sleek, modern), or natural wood with black accents. The investment is minimal, but the psychological shift is huge—your closet instantly feels like a high-end boutique instead of a storage room. This is one of the easiest ways to elevate your space without any structural changes or DIY skills. Combined with color coordination, the effect is dramatic.

    Wooden hangers also protect delicate fabrics better than wire hangers and last for years.


    Save this post and try just one idea this weekend. Whether you start with the hanger swap, the lighting, or one simple shelf hack, small changes compound fast. Your morning routine will feel calmer, you’ll actually wear more of what you own, and your small closet will function like it’s twice the size.

  • 25 Industrial Bedroom Ideas With Raw, Urban Charm

    25 Industrial Bedroom Ideas With Raw, Urban Charm

    Industrial style doesn’t mean cold or unwelcoming—it’s actually one of the warmest, most personable design directions right now. If you’re drawn to exposed brick, metal accents, and that authentic warehouse vibe, you’re in luck: industrial bedrooms feel like home the moment you walk in. The key is mixing raw materials with soft textures so your space looks cool and edgy without feeling like you’re sleeping in an abandoned factory. Whether you’re renting or redecorating, these 25 ideas show you exactly how to bring industrial charm into your bedroom—from big statement pieces to small touches that make a massive impact. Let’s dig in.

    1. Embrace Exposed Brick as Your Focal Wall

    Exposed brick is the holy grail of industrial design—it’s authentic, textured, and instantly cool. If you’re lucky enough to have brick already in your space, leave it visible. If not, don’t panic: you can still achieve this look by removing drywall in sections (if you rent, skip this) or using peel-and-stick brick panels that look shockingly real.

    Real brick removal: Hire a contractor for $200–$600 depending on wall size and asbestos testing (necessary in older buildings). DIY peel-and-stick option: $40–$150 for a 10-by-12 wall from Amazon or Home Depot. Installation takes 2–3 hours and requires just a utility knife and smoothing tool. For renters, removable adhesive panels are your best friend—they peel off cleanly without deposit-threatening damage.

    The texture and color variation of brick does the design heavy lifting, so keep furnishings minimal around it. Your bedroom suddenly feels like a converted loft without any actual renovation.

    2. Install Metal Pipe Shelving for Storage With Character

    Metal pipe shelving looks like authentic factory infrastructure while solving real storage problems. These aren’t just pretty—they’re functional and surprisingly affordable.

    DIY kits from Home Depot or Lowe’s run $50–$200 per shelf unit depending on size. You’ll need black metal pipes, fittings, and wooden boards (you can buy pre-cut or use reclaimed wood for extra character). Installation takes 1–2 hours with a power drill and level. Alternatively, brands like Wayfair and Article sell pre-assembled versions for $150–$400. Renters should look for wall-mounted options that don’t require permanent installation.

    Layer books, plants, and vintage metal boxes on your shelves to keep things visually interesting. The open shelving also makes your bedroom feel bigger since you’re not using a bulky dresser or cabinet.

    3. Choose a Black Metal Bed Frame for Instant Impact

    A metal bed frame is the anchor piece of any industrial bedroom. Black steel, wrought iron, or powder-coated metal instantly sets the tone for everything else.

    Budget options start at $150–$300 from IKEA, Wayfair, or Amazon. Mid-range quality frames (better welds, sturdier construction) run $300–$600 from Article or West Elm. High-end custom pieces can hit $800+, but the budget versions hold up great for most sleepers. Assembly takes 45 minutes to an hour with an Allen wrench and a partner (moving it solo is rough). Look for frames with visible bolts, welded joints, or geometric designs—these details scream industrial.

    Pair your metal frame with quality bedding in neutral tones (white, cream, gray, or soft black) to balance the industrial edge. The contrast between hard metal and soft linens is what makes industrial bedrooms feel livable.

    4. Layer Your Bedding for Depth and Warmth

    Industrial bedrooms risk feeling sterile if your bedding is thin or basic. Layer strategically to add softness without sacrificing the aesthetic.

    Start with quality cotton sheets ($40–$100 per set from Target, Brooklinen, or Parachute), add a lightweight linen blanket ($60–$120), then drape a chunky knit throw ($50–$150) over the foot. Top with 3–4 pillows mixing textures: one standard pillow, one euro sham, one textured lumbar, one decorative. Your bed should look like something from a magazine while actually being comfortable.

    The layering also provides crucial visual warmth against all that metal and concrete. When visitors see your bed, they think “cozy loft,” not “cold factory.”

    5. Add Concrete or Concrete-Look Flooring

    Concrete flooring is the ultimate industrial bedroom statement. It’s durable, easy to clean, and screams authenticity—but it’s also cold and hard underfoot.

    If you’re doing a full bedroom refresh and can pour concrete, budget $3–$12 per square foot installed (typically $900–$3,600 for a 12-by-14 bedroom). For renters or if concrete isn’t feasible, concrete-look luxury vinyl planks from Lowe’s or Home Depot cost $1–$4 per square foot installed and look genuinely convincing. You can also use large-format concrete tiles ($2–$6 per square foot) for a high-end version.

    The cold, hard surface is exactly why you need area rugs. A large jute or wool rug under your bed makes the space feel warmer and more intentional. Concrete floors also mean minimal noise and maximum durability—they’ll look good for decades.

    6. Install Edison Bulb Pendant Lights Over Your Nightstands

    Edison bulbs and pendant lighting are industrial design’s signature move. They’re nostalgic, warm, and way more interesting than a standard ceiling fixture.

    A pair of Edison bulb pendants runs $40–$80 each from Amazon, Wayfair, or Etsy. You’ll need electrical work if you’re hardwiring them ($200–$400 for a licensed electrician) or you can use battery-operated or plug-in versions for $25–$50 each (less authentic but renter-friendly). Hang them 24–30 inches above your nightstand for optimal reading light and visual balance.

    Pair them with dimmer switches if possible so you can control the mood. The warm glow of Edison bulbs softens the industrial edge and makes your bedroom feel intimate rather than stark.

    7. Use Reclaimed or Distressed Wood for Nightstands

    Reclaimed wood is the perfect counterpoint to metal and concrete in industrial bedrooms. It adds warmth, history, and authenticity—three things cold materials need.

    Hunt for reclaimed wood nightstands at thrift stores, Facebook Marketplace, or Etsy for $30–$150. Alternatively, buy new-but-distressed versions from IKEA (Mörbylånga line), West Elm, or Article for $150–$400. If you’re handy, you can age new wood with stain and strategic sanding for under $50 in materials. Reclaimed pieces typically need a weekend refresh (cleaning, light sanding, sealing) but the character is unmatched.

    Pair distressed wood with metal accents (a brass lamp, iron drawer pulls) to keep the industrial vibe cohesive. Your nightstand becomes a design feature, not just storage.

    8. Paint Walls in Moody Industrial Tones

    Industrial bedrooms don’t need to be all concrete-gray. Deep charcoal, matte black, slate blue, or even a muted sage work beautifully if you want sophistication over stark minimalism.

    Quality paint runs $35–$60 per gallon from Sherwin-Williams, Benjamin Moore, or Behr. One gallon covers about 350 square feet, so a typical bedroom needs 1.5–2 gallons ($50–$120 total). DIY painting takes a weekend; hiring a pro costs $400–$800. Consider painting all walls one moody color and keeping trim white or natural wood for contrast.

    Moody wall colors make metal fixtures pop and create depth. Your bedroom feels intentional and designed rather than plain. Bonus: darker walls hide dust better in industrial spaces where you might have more visible texture.

    9. Hang Industrial Cage Pendant Lights From the Ceiling

    If a central ceiling fixture is your only option, make it count with an industrial cage pendant. These sculptural pieces work as both lighting and art.

    Cage pendant lights start at $25–$50 from Amazon or Wayfair, mid-range options run $50–$150, and high-end designer versions hit $200+. Installation takes 30–45 minutes if you’re replacing an existing fixture. For renters, plug-in swag versions ($40–$80) hang from a hook and need no electrical work.

    Choose black metal, rust finishes, or even bare Edison bulb cages depending on your vibe. The negative space of the cage design keeps it from feeling heavy, while the geometric structure adds visual interest above your head.

    10. Add a Metal Accent Wall or Shiplap Detail

    Metal accent walls might sound extreme, but they’re surprisingly striking when done subtly. Think corrugated metal sheets, tin panels, or even metal shiplap alternatives.

    Real corrugated metal sheets cost $10–$30 per piece and require professional installation ($400–$1,200 for a feature wall). For renters and easier installation, peel-and-stick metal-look wallpaper runs $30–$80 from Amazon or Etsy and applies in a few hours. There’s also metal shiplap-look paneling ($50–$150 per panel) that’s lighter and faster to install than the real thing.

    A metal accent wall behind your bed or above a dresser creates instant drama without overwhelming the space. It reflects light and adds dimension, making your bedroom feel more designed and intentional.

    11. Incorporate Vintage Industrial Signage or Art

    Original vintage industrial signage is sculptural art that tells a story. A single large piece transforms your bedroom from decorated to genuinely designed.

    Hunt for authentic pieces at flea markets, antique shops, or Etsy for $50–$300 depending on rarity and condition. Reproduction industrial signs start at $20–$80 from Amazon, Wayfair, or Etsy. Mounting is simple: use heavy-duty picture hangers or wall anchors (rental-friendly) for lighter pieces, or lag bolts for heavier metal.

    One well-chosen sign becomes the focal point of your room. Keep other wall decor minimal so your statement piece doesn’t get lost. This is your bedroom’s personality showing.

    12. Use Steel or Metal Bars as a Headboard

    A metal bar headboard is sculptural, functional, and distinctly industrial. It doesn’t require padding or upholstery, just raw geometric beauty.

    Custom metal headboards from blacksmiths or metal fabricators run $400–$1,500 depending on complexity. For budget options, Wayfair and Article sell pre-made versions starting at $200–$600. Installation involves wall-mounting metal frames at headboard height, which takes 1–2 hours with a drill and level.

    Unlike traditional upholstered headboards, metal bars create visual interest through negative space and shadow play. They photograph beautifully and work with any bedding style. You’re investing in something that will last decades.

    13. Layer with a Large Area Rug for Warmth

    Industrial bedrooms have lots of hard surfaces (concrete, metal, brick), so a substantial area rug is essential for comfort and visual warmth.

    Quality wool rugs start at $200–$400 for a 8-by-10 from Ruggable, Wayfair, or Rugs USA. Natural fiber rugs (jute, sisal) run $150–$300 and have a more industrial aesthetic. High-end options like Restoration Hardware rugs cost $500+. Choose neutral tones (cream, gray, warm brown) that ground the space without competing with other design elements.

    Position your rug under the bed so it extends 2–3 feet on all sides. This anchors the sleeping area and makes the hard flooring feel less stark. Bonus: a good rug improves acoustics in industrial spaces, which can feel echo-y otherwise.

    14. Install Metal Grid Wall Organization System

    Metal grid wall systems are functional industrial design. Use them to display art, hang jewelry, organize books, or store small items without permanent wall damage.

    Metal grid panels run $15–$40 each from IKEA, Home Depot, or Etsy. Add hooks, baskets, and shelves ($5–$25 each depending on style). Total setup for a 4-by-4 grid system costs $60–$150. Installation is renter-friendly: use adhesive strips or simple hooks if you don’t want to drill.

    Layer different basket sizes, hang artwork, clip photos, or display small plants on your grid. It’s practical organization that doubles as wall art. Your bedroom stays tidy while looking intentional and styled.

    15. Choose Industrial-Style Lighting Fixtures Throughout

    Industrial lighting isn’t just about pendants—it’s about creating layers of light with fixtures that have visible structure, raw finishes, and honest design.

    A bedroom needs three types of light: task (bedside reading), ambient (general), and accent (mood). Mix styles: wall sconces ($30–$100 each), a ceiling pendant ($40–$150), and a floor lamp ($50–$200). Pairing different fixture styles keeps the space from feeling too matchy or sterile.

    Install dimmer switches where possible so you can shift from bright morning light to soft evening glow. Moody industrial lighting makes your bedroom feel like a sanctuary, not just a place to sleep.

    16. Add a Black Metal Clothing Rack as a Dresser Alternative

    A metal clothing rack solves storage while looking like industrial furniture design. It’s perfect for renters who can’t install built-ins or drill into walls.

    Black metal racks start at $30–$60 from IKEA, Target, or Amazon, mid-range options run $60–$150, and high-end versions hit $200+. Assembly takes 15–30 minutes. Layer it with hanging clothes, folded sweaters on the top shelf, and a basket beneath for socks and underwear.

    Your clothes become part of your decor while staying accessible. A metal rack adds vertical interest to your bedroom and actually saves floor space compared to a full dresser.

    17. Use Black Metal Hardware on Wooden Furniture

    You don’t need to replace every piece of furniture. Upgrading hardware on existing wooden pieces creates industrial style instantly.

    Replace drawer pulls, knobs, and hinges with black metal or iron hardware from Home Depot, Lowe’s, or Etsy ($2–$15 per piece). A dresser with four drawers costs $15–$60 to update. Installation takes 1–2 hours with a screwdriver and drill. This is a perfect renter hack: keep the original hardware and reinstall when you move.

    Metal hardware transforms a basic wood dresser into industrial furniture. It’s the easiest update with massive visual impact.

    18. Paint Your Ceiling Dark or Leave It Exposed

    A dark ceiling is bold but makes your bedroom feel intimate and gallery-like. Exposed structural elements (beams, pipes, ductwork) are industrial gold.

    Paint ceiling costs $200–$600 if you hire someone; DIY takes a weekend and $20–$40 in paint. If you have popcorn ceiling, professional removal runs $1–$3 per square foot ($500–$2,000 for a bedroom). For renters, this isn’t an option, but exposed structural elements you can’t change are actually a feature—work with them instead of hiding.

    A dark or exposed ceiling draws the eye upward and creates architectural drama. Your bedroom instantly feels more designed and sophisticated.

    19. Install Vintage Factory Clocks or Gauges as Wall Decor

    Oversized vintage clocks and industrial gauges are functional art that screams industrial authenticity. Find originals or reproductions that match your vibe.

    Authentic vintage clocks and gauges run $100–$500+ from flea markets, antique shops, or specialized Etsy sellers. Reproduction versions start at $30–$100 from Amazon, Wayfair, or Urban Outfitters. Mounting requires standard picture hangers ($5–$10) and takes 15 minutes.

    Layer different sizes and finishes on one wall to create a gallery-like effect. These pieces tell a story—they’re conversation starters that add personality to your industrial bedroom.

    20. Mix Textures With Concrete, Wood, Metal, and Fabric Strategically

    Industrial design thrives on contrasts. Mix hard (concrete, metal, brick) with soft (linen, wool, leather) so your bedroom feels cool and inviting.

    No specific budget—this is about intentional arrangement. Pair a metal bed frame with soft linen bedding. Position a concrete accent wall next to a wooden shelving unit. Layer metal fixtures with fabric throws and pillows. The contrast is what makes industrial design work instead of feeling cold.

    Balance is everything in industrial bedrooms. Too much hard material feels unwelcoming; too much soft material dilutes the aesthetic. Aim for 60% hard elements, 40% soft.

    21. Hang Metal or Wooden Beam Shelving Above Your Bed

    Substantial shelf systems above your bed create architectural interest while providing storage and display space. Think real wood beams or heavy metal frames, not delicate shelves.

    Reclaimed wood beam shelves (often 8–12 inches deep) run $50–$200 per shelf from reclaimed wood suppliers or Etsy. Metal frame versions with wood tops cost $80–$250 from Article or Wayfair. Installation requires wall studs and heavy-duty brackets ($20–$50 each). Professional installation costs $200–$400. This is worth hiring help—floating shelves need precision.

    Display a curated collection: books, small plants, vintage metal boxes, and a few personal items. Avoid clutter; each object should have purpose. These shelves become your bedroom’s focal point.

    22. Add Vintage or Industrial Mirrors to Reflect Light

    Industrial mirrors have heavy metal frames (iron, steel, or aged brass) and honest finishes. They reflect light, add dimension, and look like authentic factory fixtures.

    Metal-framed mirrors start at $50–$150 from Wayfair, West Elm, or Article. Vintage or custom options run $150–$500 from Etsy or antique dealers. Lean it against a wall or mount it above a dresser with simple hardware ($5–$20). Installation takes 15 minutes if you’re hanging it, instant if you’re leaning.

    A substantial mirror catches light and makes your bedroom feel bigger. The metal frame adds design detail without cluttering the space.

    23. Create Mood With Warm-Toned Lighting, Not Bright White

    Industrial style often defaults to cool lighting, but warm light is what makes your bedroom actually feel good to sleep in. Swap harsh white bulbs for warm white (2700K) or amber-tinted options.

    Warm white Edison bulbs cost $5–$15 each and work in any fixture. Philips Hue and LIFX smart bulbs ($10–$20 each) let you adjust warmth via app, perfect for shifting from task light to relaxation mode. Install throughout your bedroom—overhead fixture, pendants, lamps, and sconces.

    Warm lighting softens the industrial edge while maintaining the aesthetic. Your bedroom becomes a retreat instead of a showroom.

    24. Use Woven or Leather Accents for Softness

    Woven baskets, leather throws, and textile details humanize industrial bedrooms. They’re the softness that makes you want to actually spend time there.

    Woven baskets ($20–$80 from Target, IKEA, or Wayfair), leather throws ($50–$200 from West Elm or Etsy), and chunky-knit blankets ($40–$150) create tactile warmth. Layer these throughout your bedroom—baskets for storage, throws on your bed or chair, textured pillows on the mattress.

    These details make the difference between a bedroom that looks cool and one that feels like home. Tactile elements invite comfort.

    25. Paint or Stain Wood Shelving in Rich, Dark Tones

    Wooden shelving in rich stains (espresso, walnut, dark mahogany) adds warmth while keeping that industrial edge. The deep tones pair beautifully with metal hardware and concrete walls.

    Pre-stained wood shelves from lumber suppliers cost $15–$40 each. Staining raw wood yourself takes a weekend and $10–$30 in stain and supplies. Metal brackets ($10–$30 each) support the shelves and add industrial flair. Installation takes 2–3 hours with a drill, level, and studs.

    Dark wood shelving becomes a design feature, not just storage. It anchors your space and adds the warmth industrial bedrooms often need.


    Save this post and start with whichever idea speaks to you most—whether that’s exposed brick, metal fixtures, or textured layers. These industrial bedroom ideas work together, so pick three or five and build your space gradually. Your bedroom deserves to feel as cool as it looks.