You know that feeling when you walk into a room and instantly relax? That’s what a noise-softening bedroom does for your sleep space. Whether you’re dealing with street traffic, noisy neighbors, or just want your bedroom to feel like a sanctuary, small acoustic and sensory additions make a huge difference. The best part? Most of these ideas are budget-friendly, renter-approved, and don’t require any special skills. In this guide, you’ll discover 26 specific ways to make your bedroom quieter, calmer, and more conducive to deep, restorative sleep. From textiles and plants to lighting and layout tweaks, each idea tackles noise absorption or creates psychological calm—sometimes both. Let’s start building your serene sleep space.
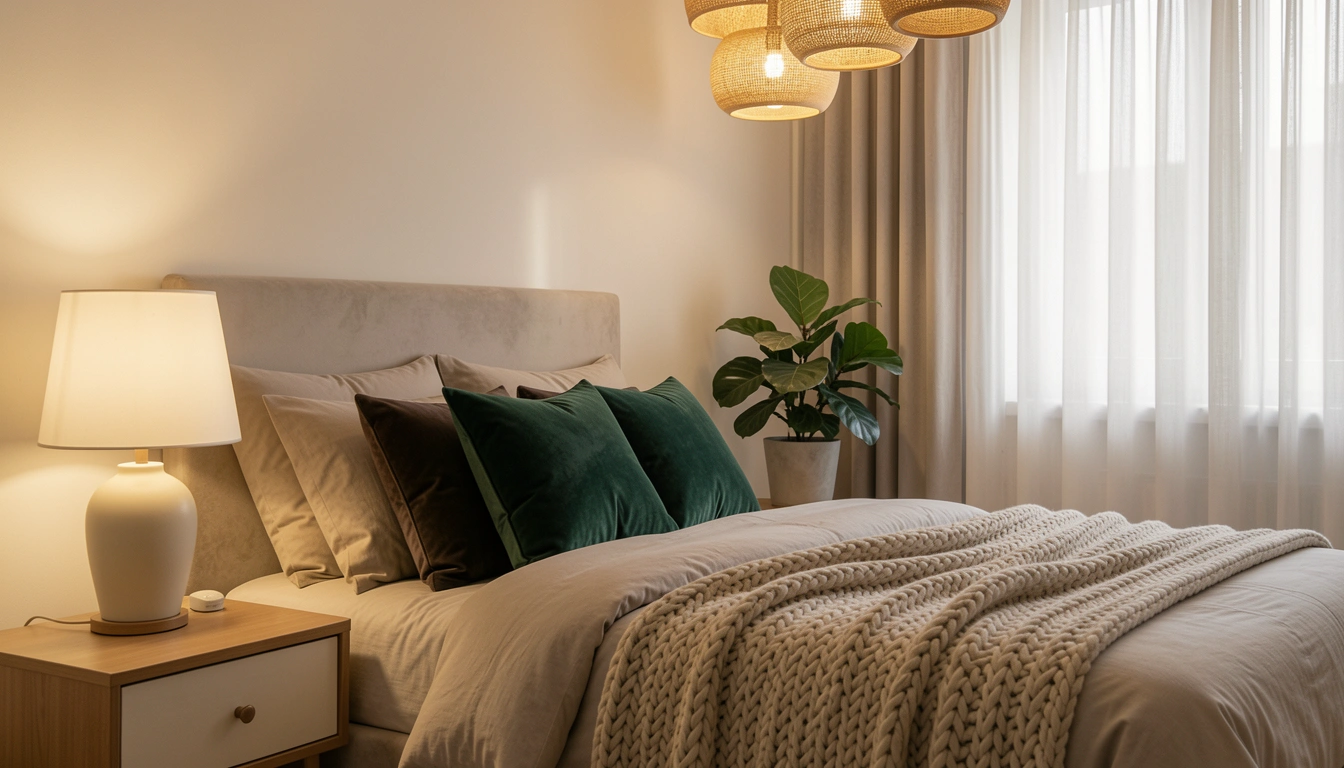
1. Layer Your Curtains for Sound Dampening
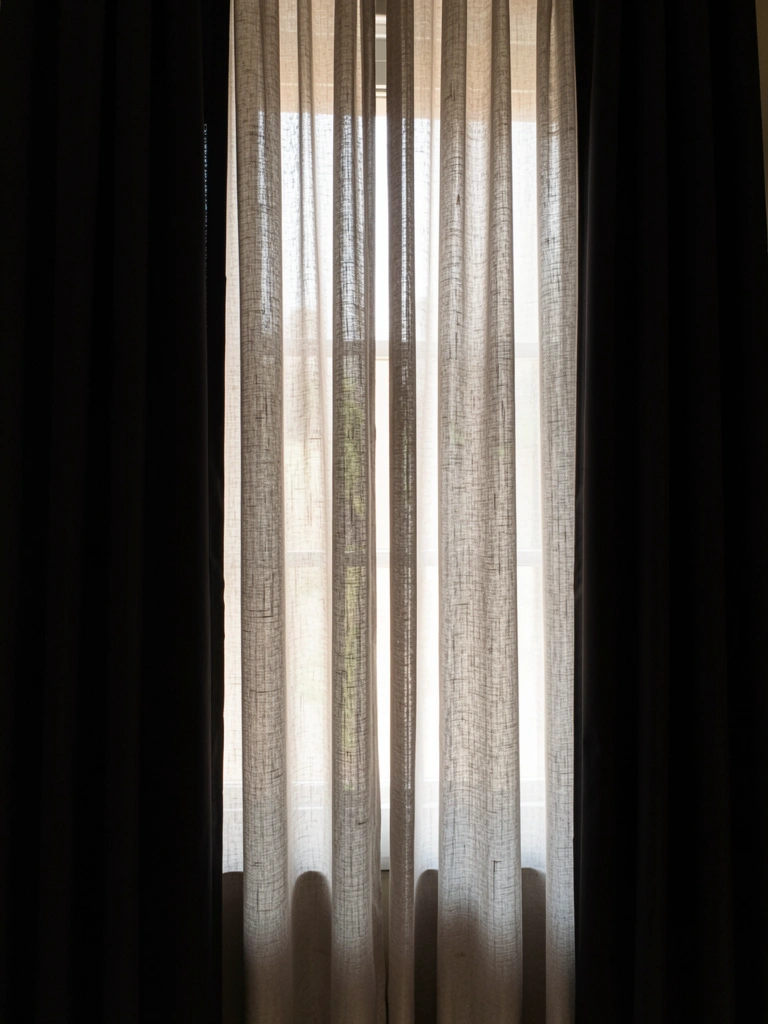
Heavy curtains are your first defense against outside noise and light pollution. A single curtain panel won’t absorb much sound, but layering multiple weights creates an air gap that traps noise and muffles outside disturbance.
Install a sheer curtain close to the window, a medium-weight linen or cotton panel in the middle, and a blackout curtain on the outside track. This trio costs $60–$200 depending on size and quality. Most hardware stores sell tension rods (under $20) that make layering renter-friendly without permanent installation. The setup takes about 30 minutes, and you’ll immediately notice quieter mornings and faster sleep onset.
Pro tip: Leave a small gap between layers so air can flow and prevent moisture buildup. The visual effect also photographs beautifully for inspiration feeds.
Your window becomes a sound barrier that also controls light—the two biggest sleep disruptors. You’re not just reducing noise; you’re signaling to your brain that the bedroom is a protected space.
2. Add an Area Rug for Acoustic Absorption
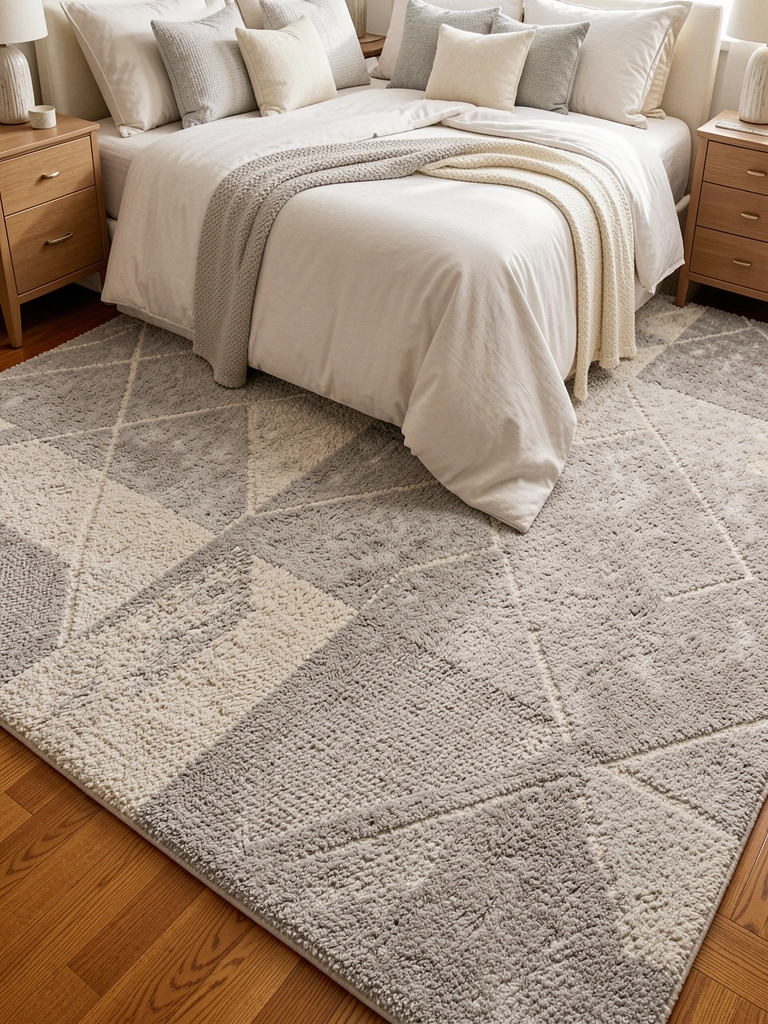
Hard floors—wood, tile, laminate—bounce sound around your room and make every footstep and noise echo. A large area rug absorbs sound waves and dampens reflections, making the space feel quieter and warmer underfoot.
Choose a rug at least 8×10 feet with a thick pile or textured weave (wool, jute, or wool-blend rugs perform best acoustically). Budget $100–$400 depending on material and quality. Layering a smaller rug on top adds even more absorption for $50–$150 extra. Place it so the bed sits mostly or entirely on the rug. This takes 10 minutes to lay out and requires no tools.
Pro tip: Jute or sisal rugs are budget-friendly ($80–$150) and excellent sound absorbers, though slightly less plush than wool. Synthetic high-pile rugs offer a middle ground at $100–$250.
The room feels less echoey and acoustically “dead” in the best way. You’ll notice your own movements sound quieter, and outside noise feels more muffled and distant.
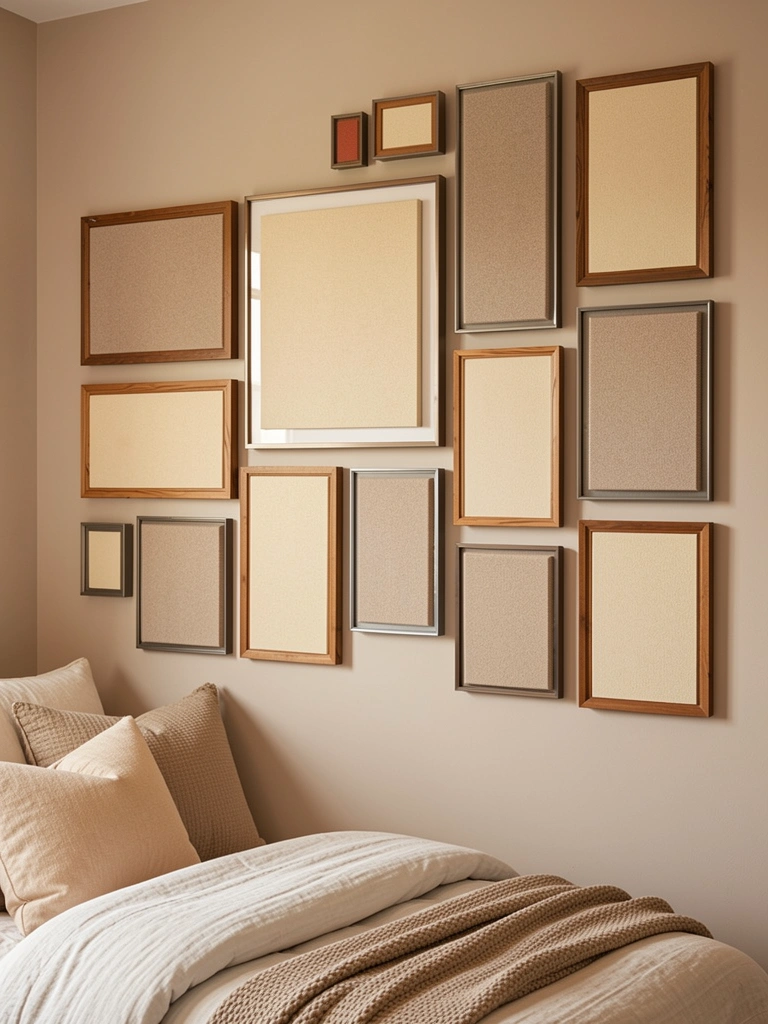
3. Hang Acoustic Panels or Tapestries Disguised as Decor
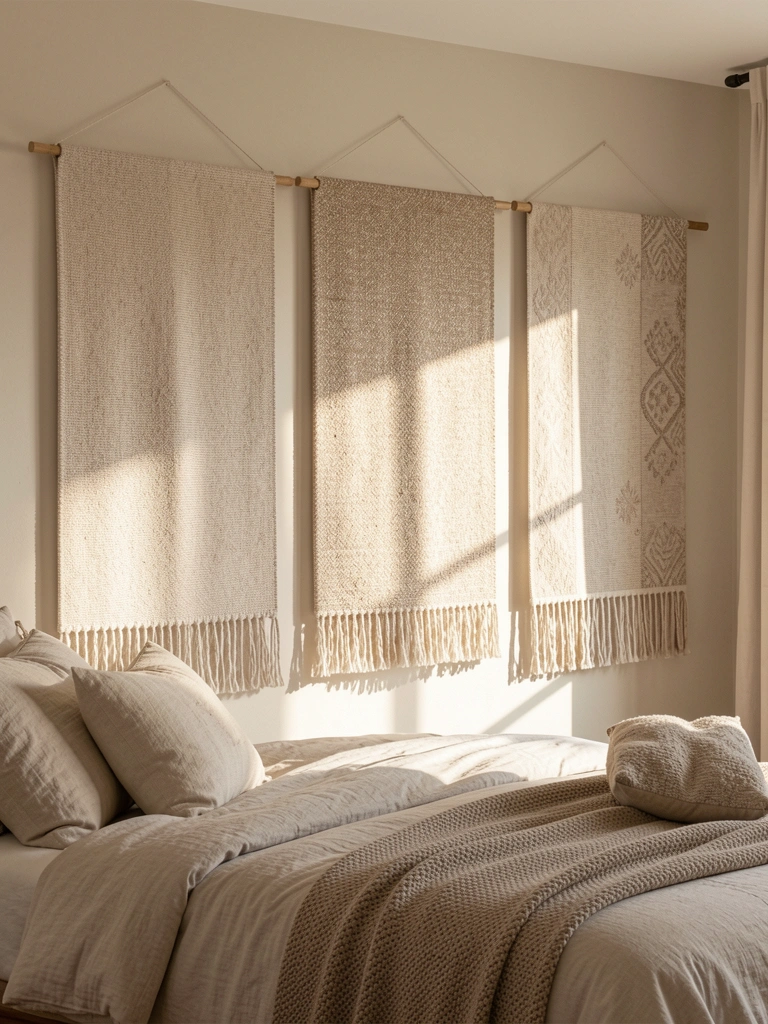
Acoustic panels don’t have to look clinical. You can disguise sound-absorbing panels as decorative tapestries, macramé wall hangings, or quilted fabric art—all of which dampen sound while looking intentional and beautiful.
Commercial acoustic panels run $30–$100 each, but DIY tapestries or heavy fabric hangings (think vintage quilts or woven textiles) cost $20–$80 and absorb sound just as well. Hang 2–4 pieces on walls where sound tends to bounce (opposite the window, behind the bed). Mount with simple adhesive hooks or tension rods for renter safety. Installation takes 20–30 minutes.
Pro tip: Macramé wall hangings, vintage kilim tapestries, and linen wall textiles do double duty as decor and acoustic treatment. Layer different textures for visual depth and maximum sound absorption.
Your walls stop reflecting noise back at you, and the room gains an artist’s retreat aesthetic. The space feels both quieter and more personalized.
4. Use Thick Curtain Liners for Added Sound Blocking

Curtain liners—especially quilted or thermal varieties—add acoustic mass to existing curtains without replacing them entirely. This is a fast upgrade for renters or anyone who already loves their current curtains.
Thermal curtain liners cost $15–$40 per panel and hook onto your existing curtain rod using small clips or a separate rod. Quilted liners are heavier and more sound-absorbing than basic thermal options. Installation takes 15 minutes, and you don’t need to alter or change your main curtains.
Pro tip: If you prefer a hidden solution, hang the liner on an inner rod behind your existing curtains so only the nicer fabric shows from inside the room. Measure your curtain width and length first—most liners come in standard sizes (36″–84″ wide).
The added layer significantly dampens outside noise without changing your room’s appearance. Your current curtains now work harder at blocking both sound and light.
5. Place Furniture Against Exterior Walls for Mass

Mass absorbs sound. By positioning heavier furniture—dressers, bookshelves, bed frames—against exterior walls (the ones facing outside or neighbors), you create a physical barrier that weakens noise transmission.
This costs $0 if you rearrange existing furniture. If you need to buy new pieces, a solid wood dresser runs $150–$400, and a tall bookshelf ranges $80–$300. Positioning takes 30 minutes to an hour, depending on what you’re moving. Don’t push furniture flush against the wall; leave a tiny 1–2 inch gap for air circulation and to prevent moisture issues.
Pro tip: Fill bookshelves with books (which absorb sound) rather than leaving them empty. The mass of books plus the wooden structure creates excellent acoustic dampening.
Your bedroom becomes quieter because sound has to travel through more material to reach you. The furniture arrangement also feels more intentional and purposeful.
6. Install Weatherstripping Around Doors
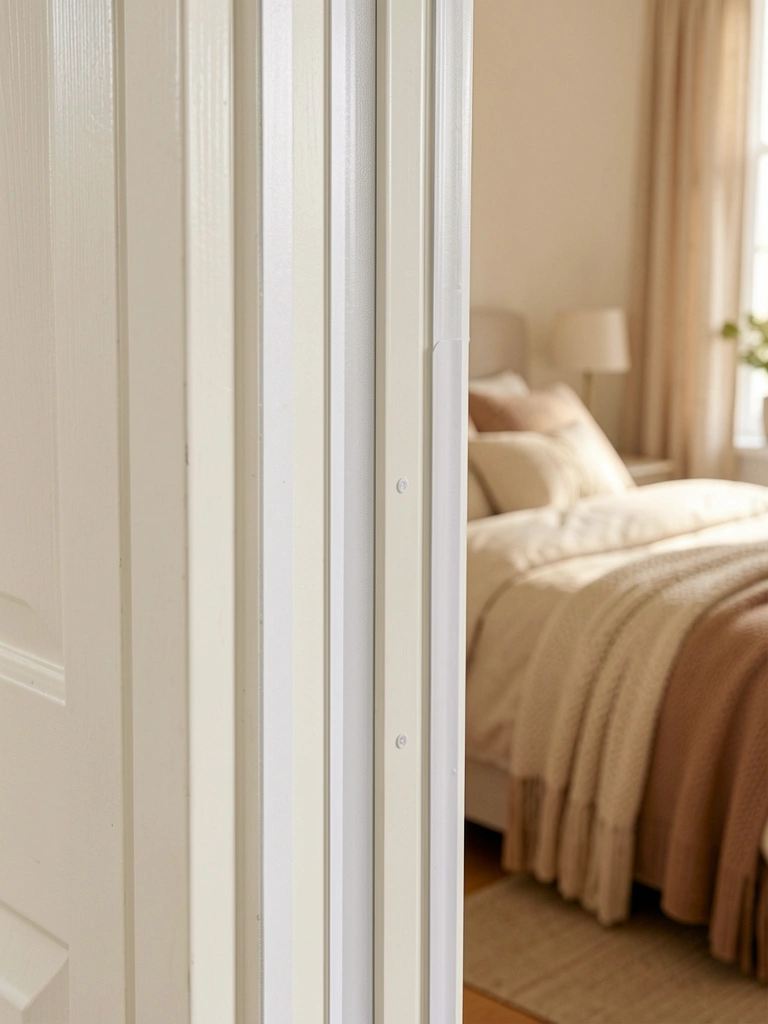
A huge amount of noise leaks through gaps around bedroom doors. Weatherstripping seals these gaps and stops sound (and drafts) from entering your sleep space.
Weatherstripping foam tape costs $5–$15 per door and takes 10 minutes to install. Clean the door frame, peel and stick the foam strip along the top and both sides, and you’re done. For the bottom gap, install a door sweep (which hangs from the door and closes the gap when the door is shut) for $10–$25.
Pro tip: If you rent and can’t install permanent weatherstripping, removable adhesive tape (like Command strips) works well. Replace it yearly as the adhesive weakens. Silicone weatherstripping is more durable than foam if you’re buying for the long term.
The room becomes noticeably quieter because hallway noise and ambient house sounds stop seeping in. Sleep feels deeper when you’re not subconsciously processing background disturbance.
7. Add Soft Furnishings Like Ottomans and Poufs
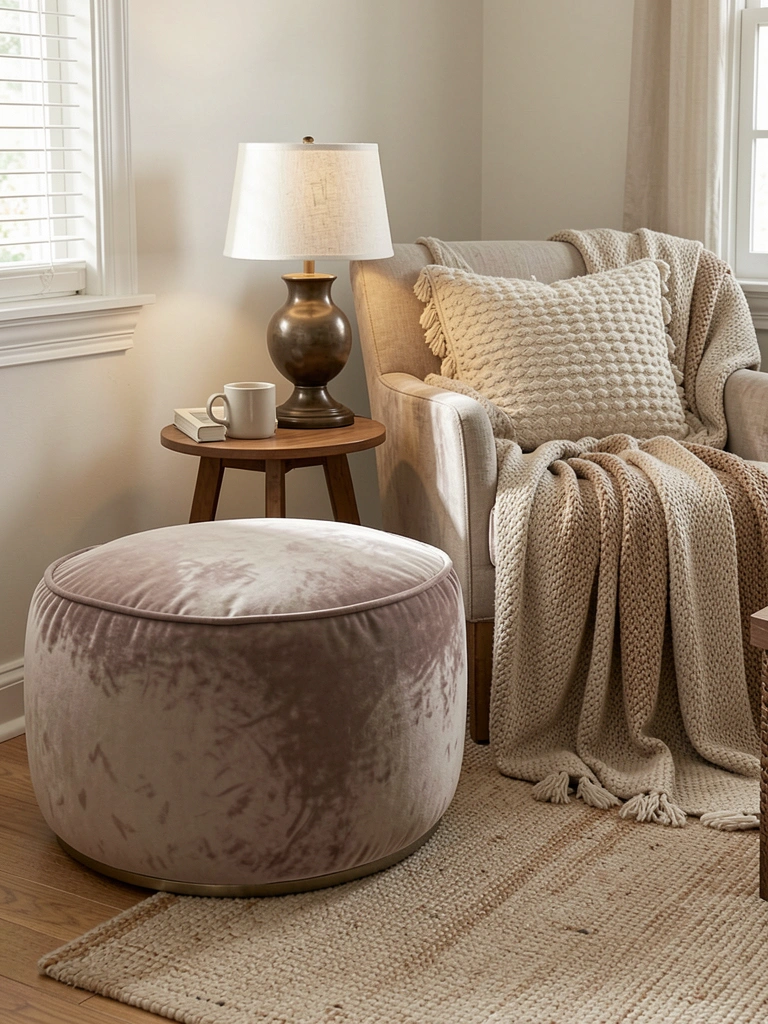
Soft furnishings—ottomans, poufs, upholstered benches—absorb sound while adding comfort and style. Fabric-covered items dampen reflections and create acoustic “soft spots” throughout the room.
A quality ottoman or pouf costs $80–$250 depending on material and size. Budget options from IKEA, Target, or Wayfair run $40–$100. Place one or two in corners or under windows. No installation required—just unbox and position.
Pro tip: Choose dense, textured fabrics (velvet, wool, linen) over sleek ones. The more surface irregularity, the better the sound absorption. Bonus: ottomans with storage let you hide bedding and seasonal items while keeping the room calm and clutter-free.
Your bedroom gains functional seating that also makes the space feel quieter and more grounded. The soft surfaces catch sound you didn’t even realize was bouncing around.
8. Install a White Noise Machine or Sound-Masking App

Sometimes the best way to deal with unavoidable noise is to mask it with consistent, neutral sound. White noise machines emit steady tones that cover up irregular noises (traffic, voices, sirens) that jolt you awake.
Quality white noise machines cost $30–$150 (Marpac Dohm, LectroFan are popular). Free alternatives include apps like myNoise, Noisli, or YouTube videos ($0–$10 monthly for ad-free versions). Choose a machine or app with adjustable volume and multiple sound options (rain, fan, brown noise, ocean). Setup takes 5 minutes. Many machines come with sleep timers so sound turns off during deep sleep cycles.
Pro tip: Experiment with different noise types. Some people sleep better with fan sounds, others prefer rain or white noise. What’s soothing to one person might be annoying to another, so test before investing in a pricey machine.
Outside noise becomes unnoticeable because your brain focuses on the steady, predictable masking sound instead. You sleep through disturbances you’d normally wake to.
9. Upgrade Your Pillow to a Thicker, Denser Style
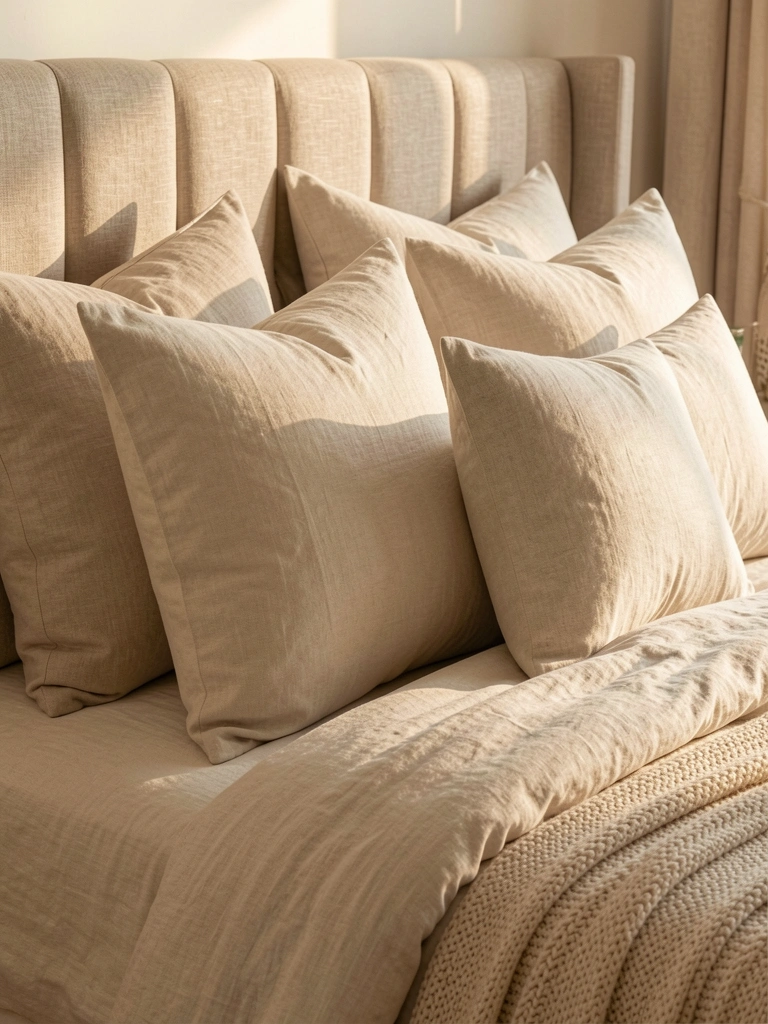
Beyond comfort, a high-quality pillow with denser fill contributes to acoustic dampening around your head and neck—the area most sensitive to sound disturbance during sleep. Thicker pillows also prop your head at better angles for breathing and neck support.
A quality pillow costs $50–$150 depending on fill (memory foam, down alternative, latex). Budget options start around $25–$50. Look for pillows with 4–5 inches of fill height and medium-firm density. Two pillows create more sound-absorbing mass than one.
Pro tip: Memory foam and down-blend pillows are denser and absorb more sound than feather pillows. Test in-store if possible, or buy from retailers with easy returns (Amazon, Costco, major department stores). The right pillow also improves sleep quality independent of sound control.
You’re more insulated from noise because the pillow mass around your head creates a buffer. Sleep feels more supported and undisturbed because your body is properly aligned.
10. Hang Blackout Curtains to Control Light and Reduce Perceived Noise
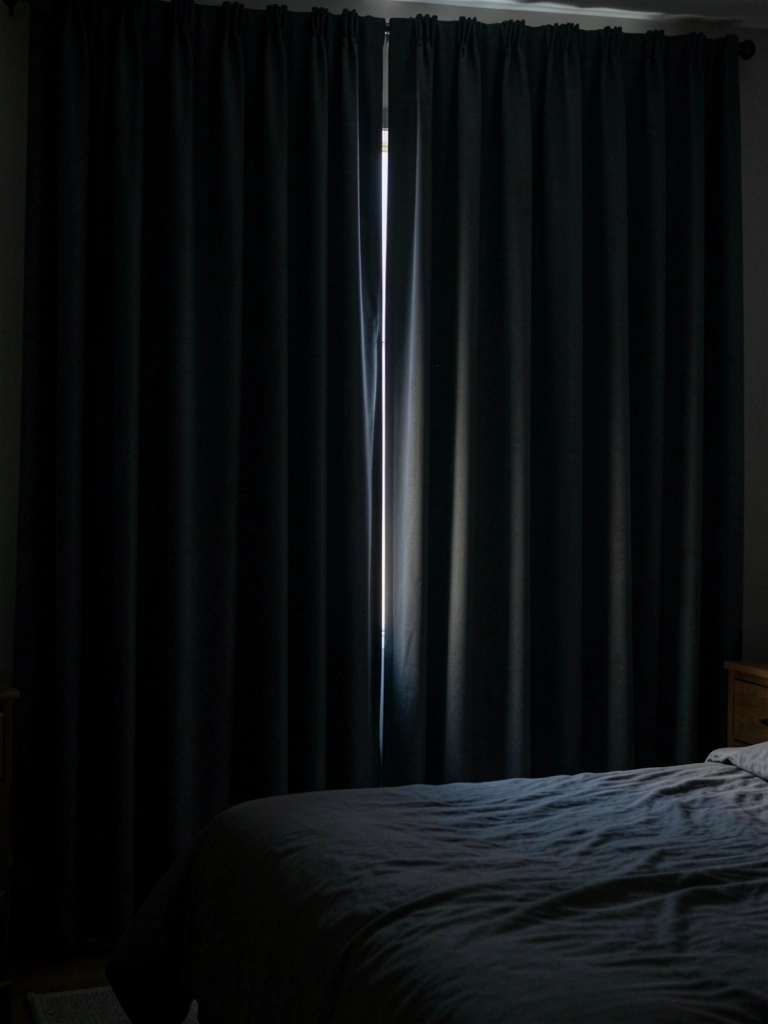
Complete darkness doesn’t directly reduce sound, but it dramatically improves sleep quality—and better sleep makes you less sensitive to noise. Blackout curtains also provide acoustic benefits as a bonus.
Blackout curtains run $40–$150 per panel depending on size and quality. Installation on an existing rod takes 15 minutes. For renters, tension rods with blackout panels cost $30–$80 total and require zero permanent installation. Consider blackout curtains in deeper colors (charcoal, navy, black) for maximum light-blocking and slight acoustic enhancement.
Pro tip: Pair blackout curtains with a blackout window shade or film for maximum darkness, or layer them over existing curtains. If you travel or want flexibility, removable blackout panels (adhesive-backed) cost $20–$40 and peel off cleanly.
Your body produces more melatonin in darkness, helping you fall asleep faster and stay asleep longer. This better baseline sleep means you’re naturally more resilient to ambient noise.
11. Place Plants Around the Room for Softening and Air Quality
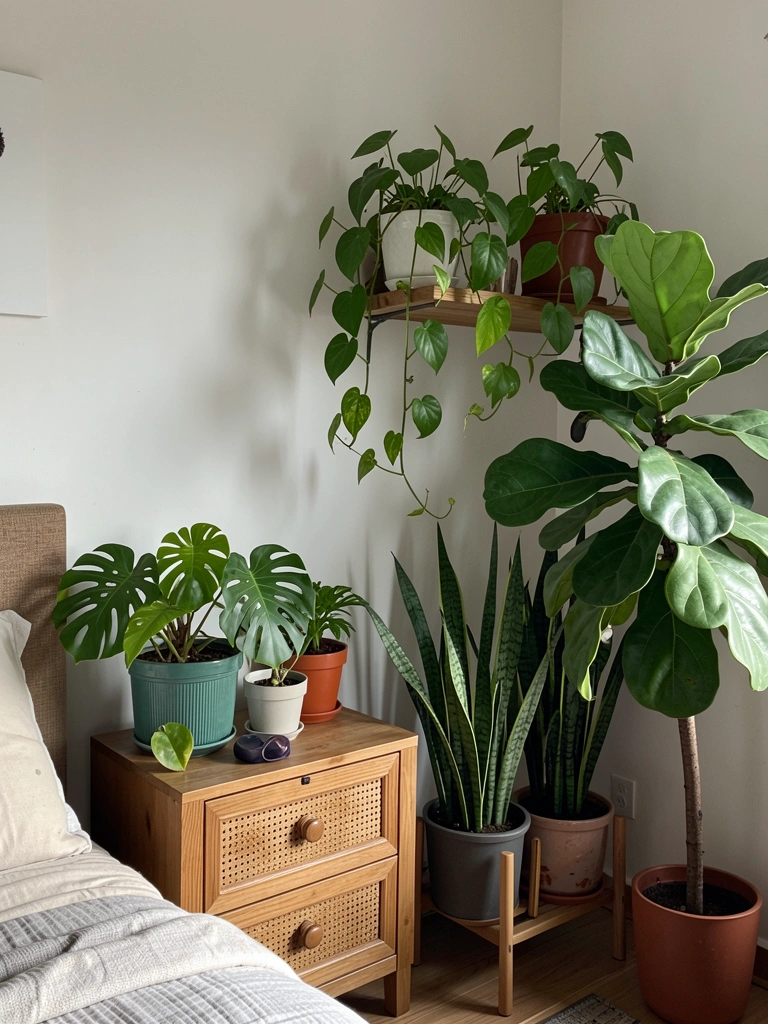
Live plants add visual softness and improve air quality, which contributes to sleep-friendly atmosphere. Their soft leaves and varied textures also provide subtle acoustic absorption, though not as much as dedicated materials.
Common bedroom plants like pothos, snake plants, and monsteras cost $10–$30 per plant at nurseries or big-box stores. A collection of 3–5 plants runs $30–$120. Pots add another $20–$50 depending on material and size. Placement takes 10 minutes, and ongoing care is just weekly watering.
Pro tip: Choose low-maintenance plants (pothos, snake plant, ZZ plant) if you’re not confident in your plant skills. Larger plants provide more acoustic benefit because of their mass and surface area. Position them on shelves, nightstands, and corners rather than just clustered in one spot.
Your room becomes noticeably greener and more alive, which calms your nervous system before sleep. The subtle rustling of leaves adds gentle, nature-based sound masking, and you’re breathing cleaner air throughout the night.
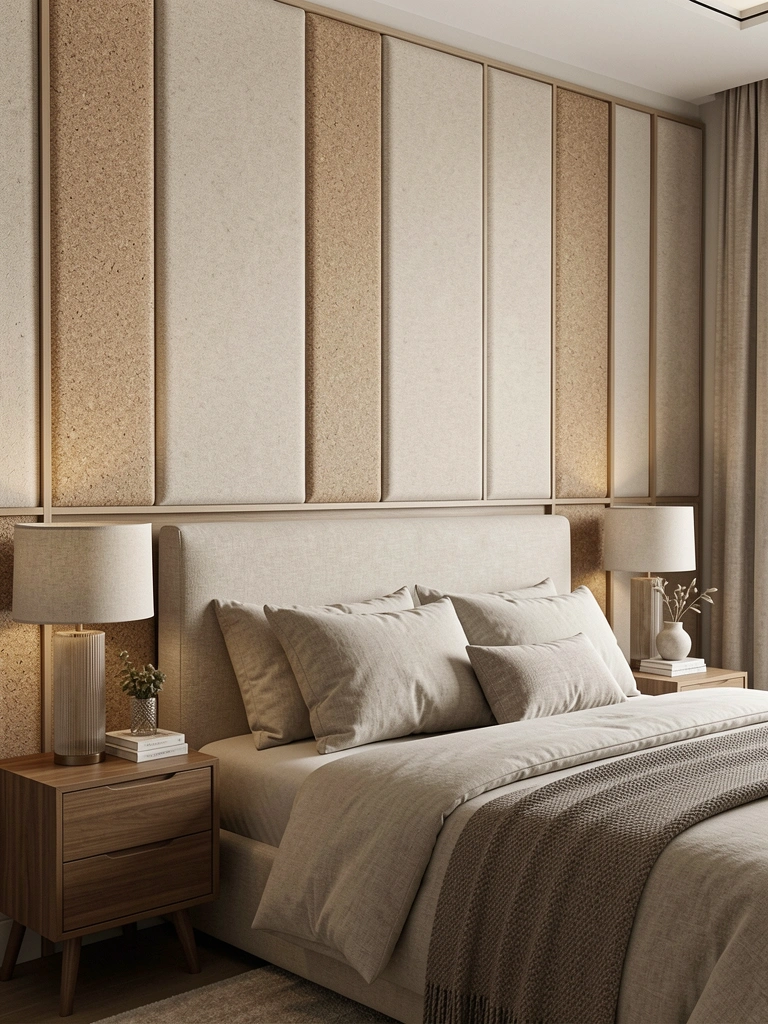
12. Install a Soft Padded Headboard

A padded headboard absorbs sound that would otherwise bounce off a hard wall behind your bed. It’s both functional and aesthetic—a win for acoustic treatment disguised as furniture.
Upholstered headboards run $150–$600 depending on size, materials, and whether you’re buying or DIYing. Budget alternatives include wall-mounted fabric panels ($50–$150) or adhesive padded wall tiles ($30–$80). DIY enthusiasts can staple fabric over a plywood frame mounted to the wall ($40–$80 in materials). Installation takes 1–3 hours for DIY or is handled by the retailer for purchased headboards.
Pro tip: Quilted or tufted headboards look more finished and absorb sound better than smooth padded versions. If you’re renting, adhesive fabric panels work without damaging walls.
Sound bounces less chaotically around your sleeping area, and the room feels quieter and more enclosed. You’ve also created a visual focal point that makes the bed feel more intentional and spa-like.
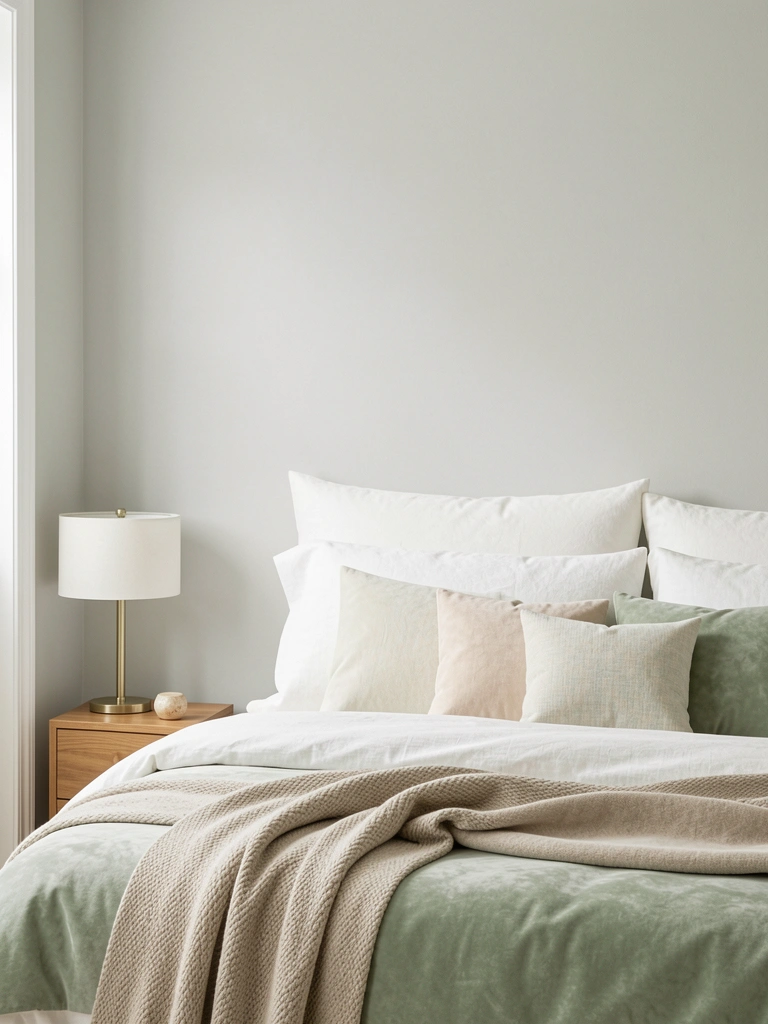
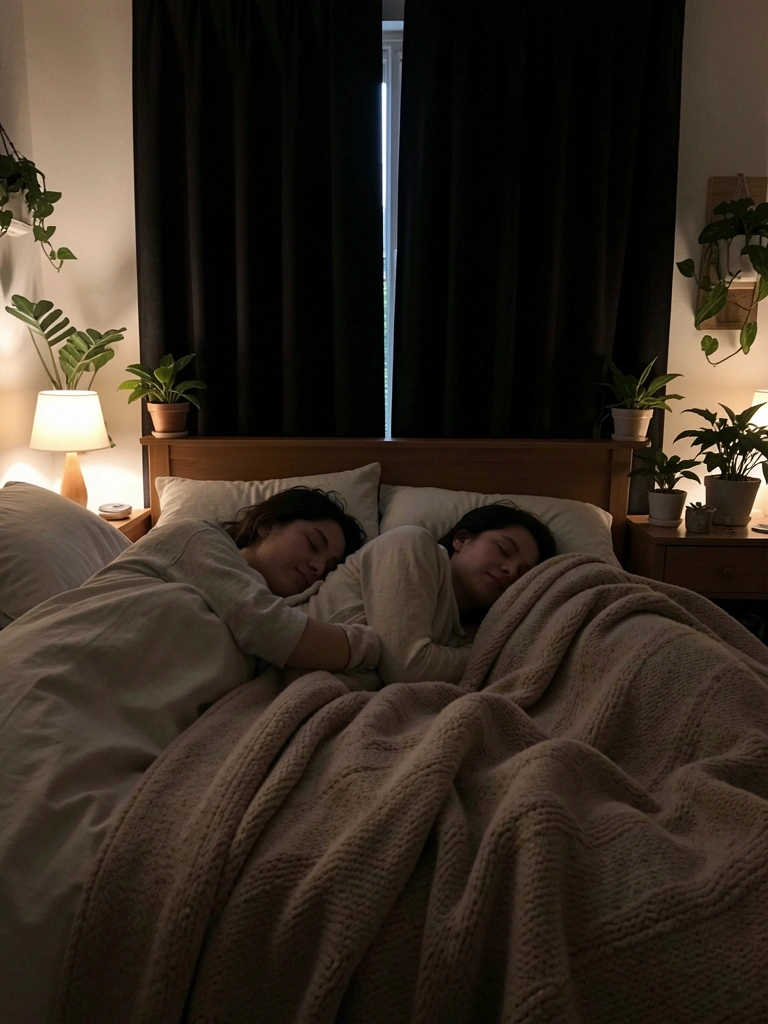
13. Switch to Heavier Bedding for Mass and Comfort
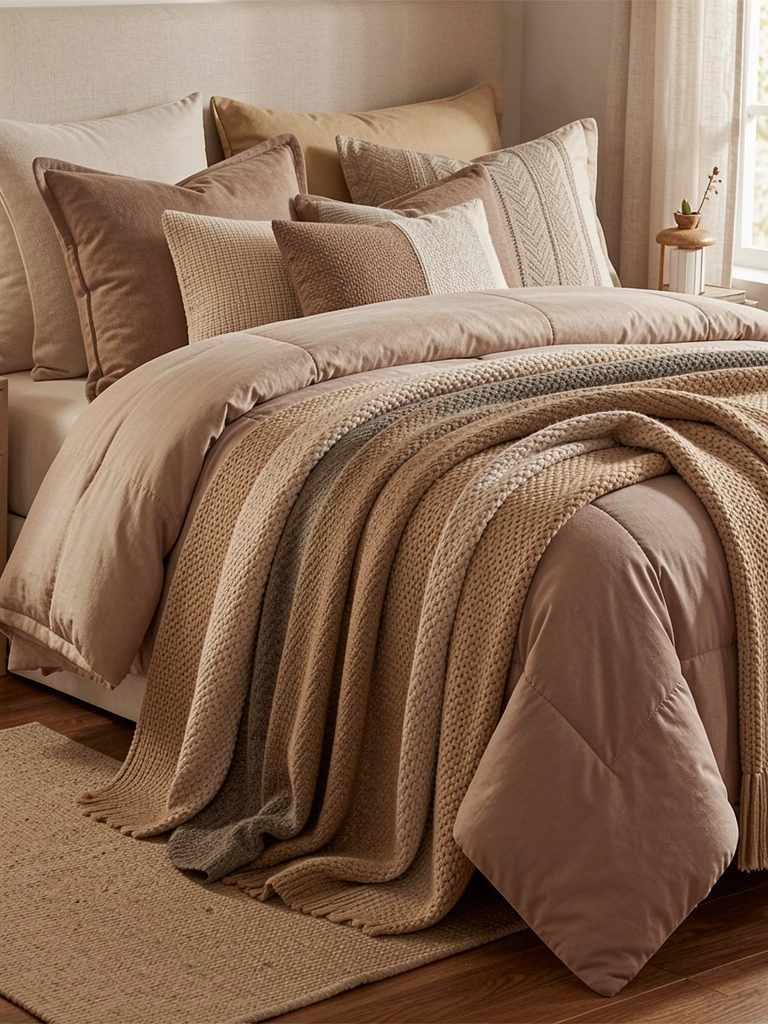
Heavier bedding (duvets, weighted comforters, layered blankets) adds mass around your body that absorbs sound and also provides the tactile coziness that supports better sleep. The weight itself is calming.
A quality weighted comforter costs $100–$400 depending on fill weight (15–25 lbs is typical). Standard duvets run $60–$200. Layering multiple throw blankets adds another $30–$100. The whole setup, including pillows and sheets, totals $200–$600 for a complete refresh. Swapping out bedding takes 15 minutes.
Pro tip: Weighted comforters designed for anxiety or sensory sensitivity are worth the premium—they reduce nighttime stress. Natural materials (cotton, bamboo) sleep cooler than synthetics. If you’re sensitive to weight, even a heavier-than-normal duvet (not weighted) provides acoustic and comfort benefits.
You feel more held and grounded, which reduces anxiety and allows deeper sleep. The room also looks more inviting and intentional, signaling to your brain that this is a space designed for rest.
14. Reduce Echo with Soft Wall Treatments
Echoing walls make rooms feel less cozy and amplify ambient noise. Soft wall treatments dampen reflections without requiring paint or renovations, making them renter-friendly.
Options include adhesive fabric wall panels ($30–$80), cork tiles ($20–$60), or DIY fabric-wrapped frames ($15–$40 in materials). Install 2–3 panels on walls opposite windows or behind the bed where sound tends to bounce. Application takes 30–60 minutes depending on method.
Pro tip: Removable peel-and-stick wall treatments (fabric, cork, or padded panels) work beautifully for renters. Neutrals and soft textures integrate seamlessly into bedroom design. Layer different treatments (one fabric panel, one cork, one tapestry) for visual interest and varied acoustic properties.
The room stops sounding hollow or echoey. Sound feels absorbed rather than reflected, and the space acoustically shrinks to feel more intimate and enclosed.
15. Create a Reading Nook Away from the Bedroom Window
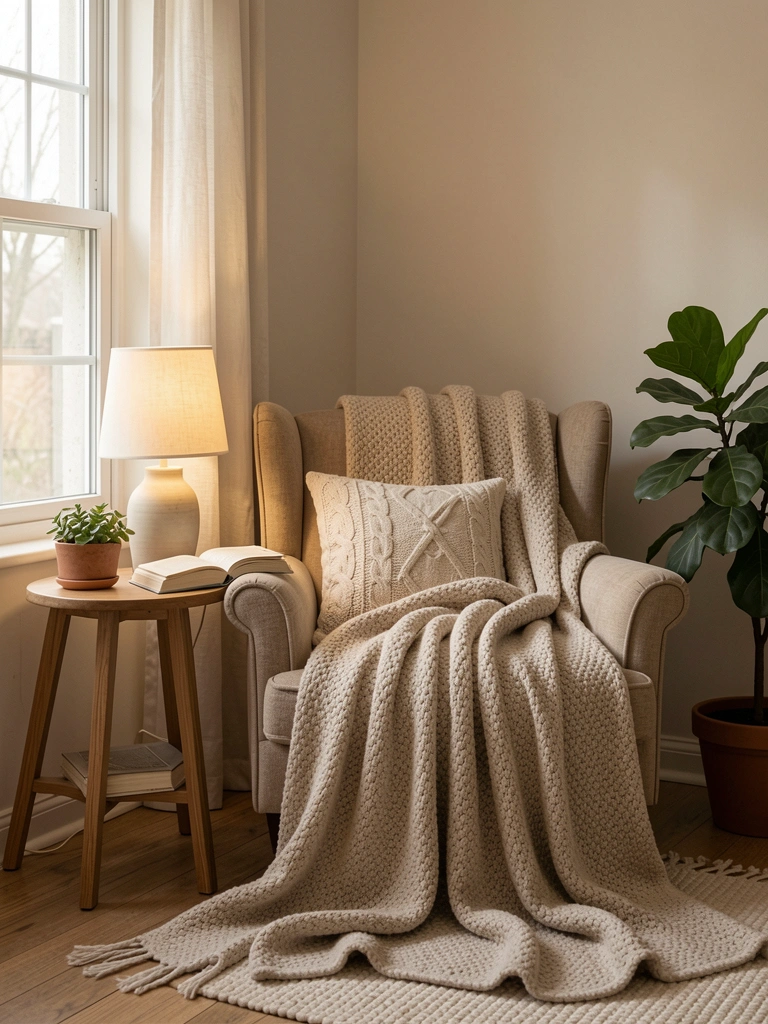
If your bedroom faces a loud street or neighbors, positioning your bed away from the window and creating a quiet nook on an interior wall moves you further from the noise source. This simple layout change reduces the sound reaching your sleeping body.
This costs $0 if you rearrange existing furniture or $100–$300 if you buy a reading chair or add seating. Rearranging takes 1–2 hours. Choose interior walls facing closets, hallways, or neighboring bedrooms rather than external walls.
Pro tip: If you can’t move your bed, at least position your headrest away from the exterior wall. Even a few feet of distance weakens noise transmission. Use your reading nook for wind-down time before bed, which also improves sleep onset.
You’re sleeping in a quieter zone of your bedroom, and the space gains functional purpose beyond just sleeping. Wind-down time in the quiet nook naturally transitions your brain into sleep mode.
16. Add Plush Throw Blankets Layered on Your Bed
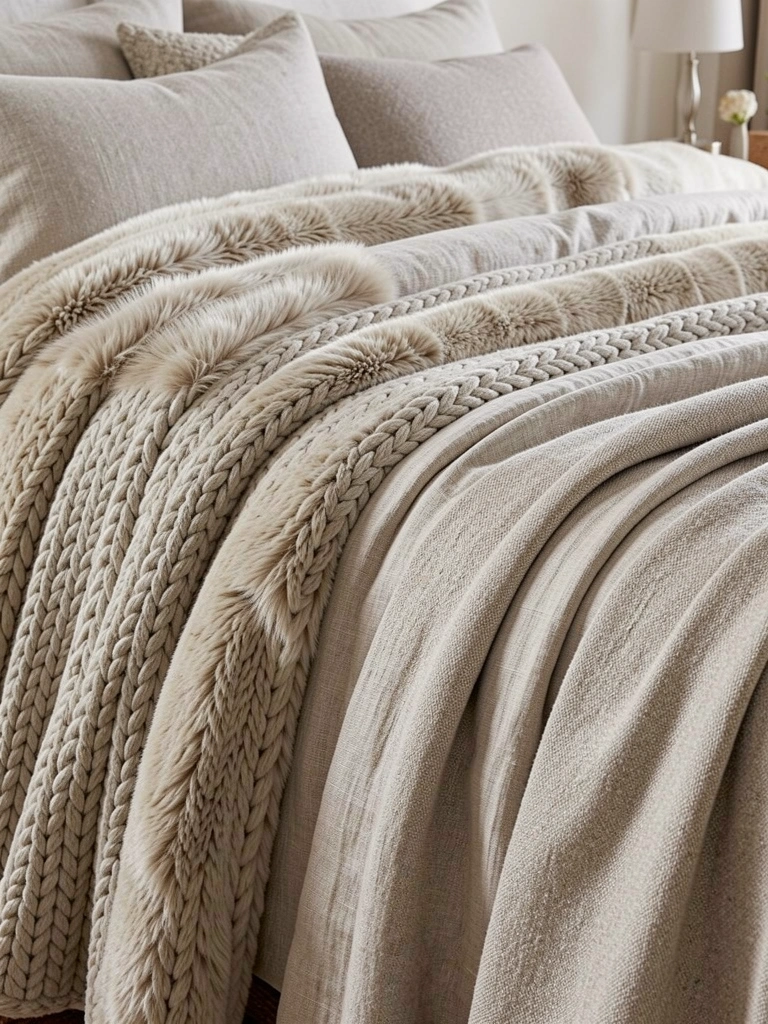
Layered throw blankets add mass and softness while creating visual interest. The more fabric layers on your bed, the more sound absorption happens around your sleeping body.
Quality throw blankets cost $20–$80 each, depending on material (wool, cotton, faux fur, cable knit). Layer 2–3 throws on your bed for $40–$240 total. This setup takes 10 minutes to arrange and rearrange as needed for seasons. Buy throws that coordinate with your bedding color palette for intentional styling.
Pro tip: Mix textures—cable knit, faux fur, linen, wool—rather than using identical blankets. The variety absorbs different sound frequencies. Fold them casually at the foot of the bed or drape them over the headboard for a styled look.
Your bed becomes a cozy cocoon that muffles noise and makes you feel held. The visual effect is also more dynamic and inviting, encouraging you to prioritize bedtime.
17. Seal Air Leaks Around Outlets and Light Switches
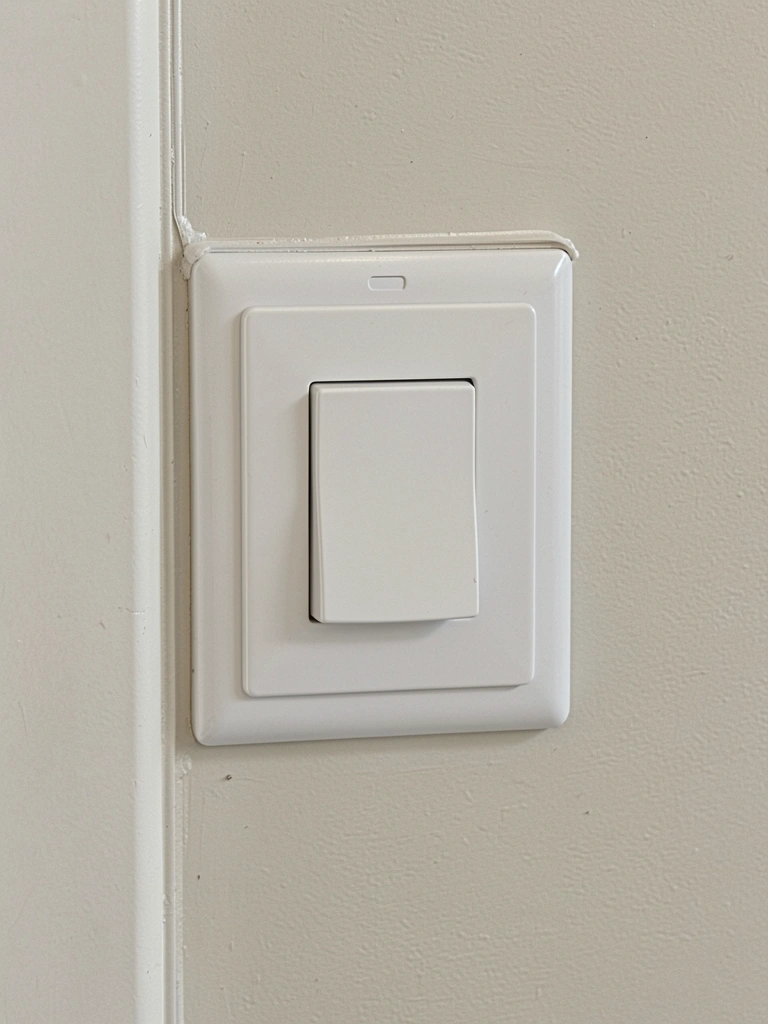
Tiny air leaks around electrical outlets and light switches let noise (and cold air) escape. Sealing these gaps is less visible than other treatments but makes a real acoustic difference.
Acoustic caulk or paintable sealant costs $5–$15 per tube. Foam outlet gaskets cost $3–$8 per unit. Sealing an average bedroom takes 30–45 minutes and requires basic caulking skills (or hire a pro for $100–$200). This is a long-term solution if you own your home; renters should check lease terms first.
Pro tip: For renters, removable foam gaskets behind outlet and switch covers work without damaging walls. Just remember to remove them if you move.
Sound transmission through walls drops noticeably because you’ve closed the small passages that leaked noise. This combines with other acoustic treatments for cumulative effect.
18. Invest in Quality Noise-Canceling Earplugs or a Silk Sleep Mask
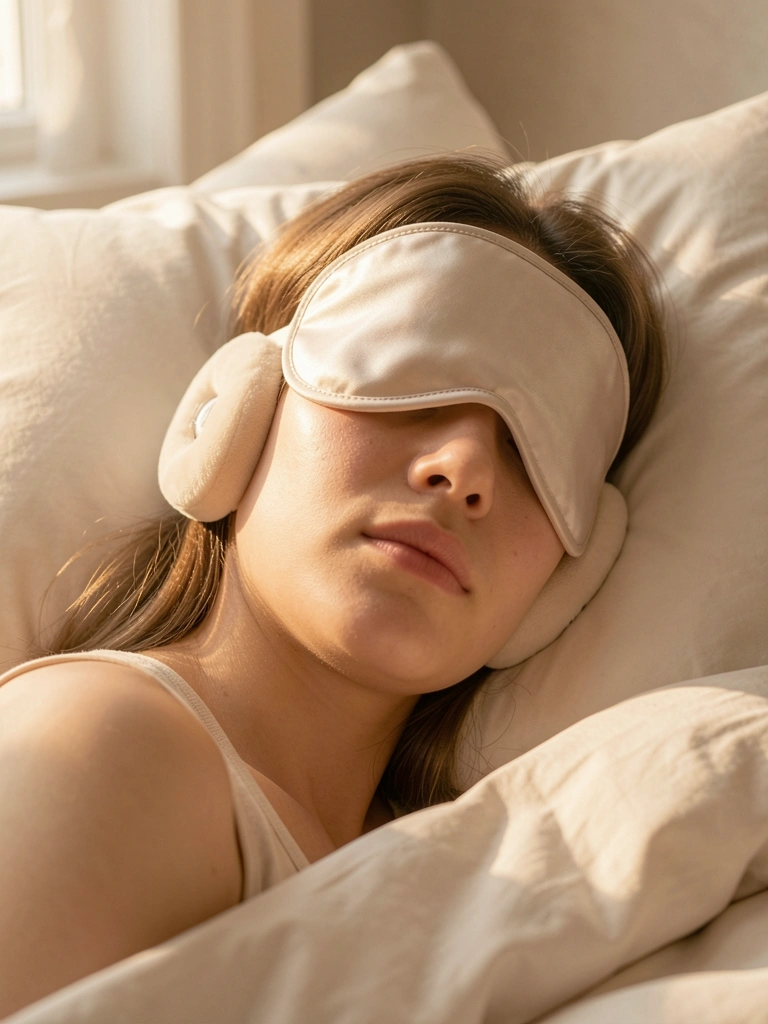
Sometimes the most direct solution is personal noise protection. Quality earplugs and a sleep mask block external stimuli while signaling to your brain that it’s time to sleep.
Foam earplugs cost $5–$15 per pair and are disposable. Reusable silicone earplugs run $10–$20. Premium noise-blocking earplugs (like Loop or Flents) cost $15–$40. Silk sleep masks run $15–$50. Together, a complete personal acoustic setup is $30–$90 and lasts months to years depending on care. Using them takes 30 seconds each night.
Pro tip: Test different earplug styles because fit varies. Some people prefer foam, others silicone or wax. A silk mask feels softer on skin than cotton and reduces light penetration better. Use these as backup solutions on high-noise nights rather than relying on them nightly (continued earplug use can impact ear health).
You have a personal noise barrier that blocks external disturbance completely. Combined with room treatments, this provides comprehensive sound control.
19. Paint Walls in Soft, Matte Finishes Rather Than Glossy
Matte paint finishes absorb sound and light better than glossy finishes, which reflect both. While the acoustic difference is subtle, the visual and sensory difference supports a calmer bedroom overall.
Paint costs $20–$50 per gallon and covers about 350 square feet. A bedroom typically needs 1–2 gallons. Professional painting costs $200–$600 for a bedroom; DIY takes 6–10 hours depending on prep. Matte or eggshell finishes are nearly identical in cost to glossy paint, so there’s no budget trade-off.
Pro tip: Soft, muted colors (pale grays, warm whites, soft greens, muted blues) pair beautifully with matte finishes and naturally create a calming atmosphere. Avoid bright whites or high-contrast colors in matte finish, which can look flat rather than restful.
The room stops feeling echoey, and the matte surfaces create a softer, more forgiving visual environment. Light distributes gently rather than bouncing harshly, which calms your nervous system.
20. Install a Door Seal or Acoustic Door
A standard hollow bedroom door transmits noise readily. A solid core door or acoustic door blocks much more sound than hollow alternatives. This is an investment but transforms noise transmission.
Acoustic doors cost $150–$400 depending on style and quality. Solid core doors run $100–$300. Standard hollow doors are $50–$150 (not recommended for quiet bedrooms). Professional installation adds $150–$300. Installation takes a few hours. For renters, this isn’t an option, but weatherstripping a hollow door (previous tip) helps significantly.
Pro tip: If replacing your door, measure the frame first and ensure the new door fits the existing opening. Hollow core doors weigh 20–30 lbs; solid core doors are 40–50 lbs, so the frame needs to support extra weight.
Outside noise transmission drops dramatically because the door no longer vibrates in response to sound. This single change might be the most impactful acoustic upgrade available.
21. Use Acoustic Foam Panels Disguised as Art
Acoustic foam panels don’t have to look industrial. Framing them or choosing panels with attractive finishes makes them look like intentional art while serving an acoustic purpose.
DIY framing costs $30–$60 per panel (foam plus frame materials). Pre-framed acoustic art runs $50–$150 per piece. Install 3–5 panels for noticeable acoustic improvement at $150–$750 total. Adhesive mounting takes 30 minutes.
Pro tip: Choose warm tones (cream, soft gray, pale tan) rather than bright colors. Thick foam (2–4 inches) absorbs sound better than thin. Varying panel sizes on a wall creates visual interest while maximizing acoustic coverage.
Your bedroom walls stop bouncing sound around chaotically, and you’ve disguised acoustic treatment as intentional design. The room looks thoughtfully curated rather than industrial.
22. Create Soft Zoning with Furniture Arrangement
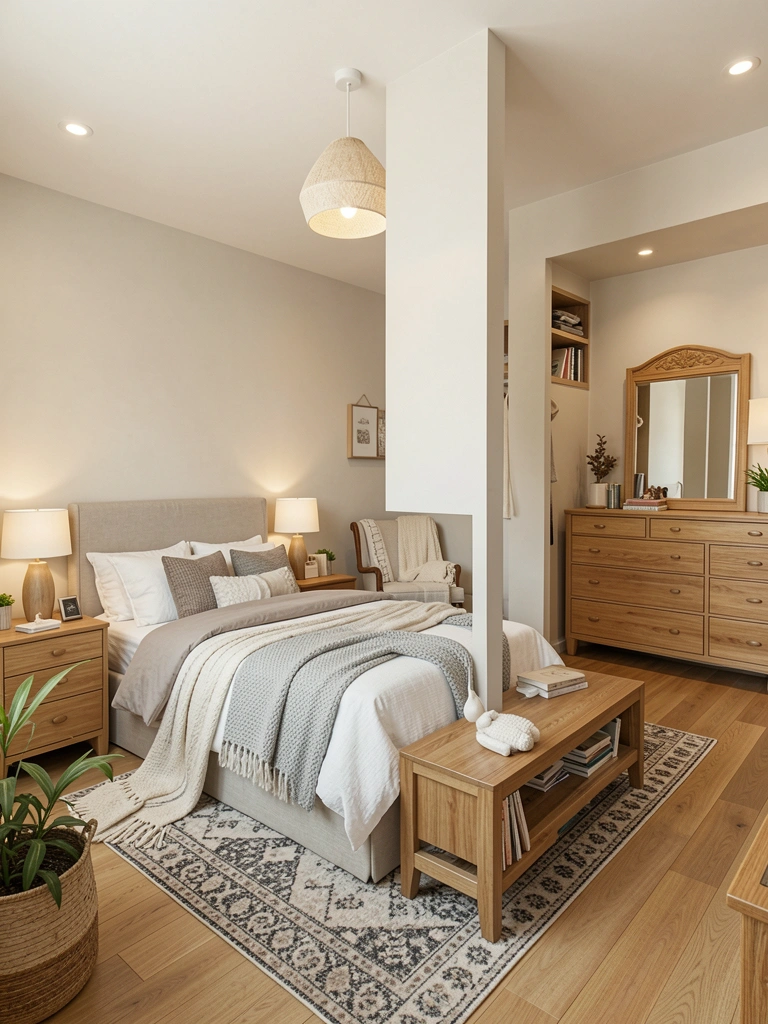
Defining zones within your bedroom with strategic furniture placement creates natural sound barriers and signals to your brain that different areas serve different purposes. This separation reduces noise perception in the sleeping zone.
This costs $0 with rearrangement or $100–$400 if buying additional furniture (side table, reading chair, shelving). Planning takes 15 minutes; rearranging takes 1–2 hours. Position larger pieces (dressers, bookshelves) as dividers between zones.
Pro tip: Use an area rug to anchor each zone visually. This creates psychological “rooms within a room” without construction, and soft rugs add acoustic benefits too.
Your brain perceives the sleeping area as more protected and separate from activity zones. Sound seems to bounce less across the space, and you fall asleep faster because the zone signals rest mode.
23. Invest in a Premium Mattress with Acoustic Properties
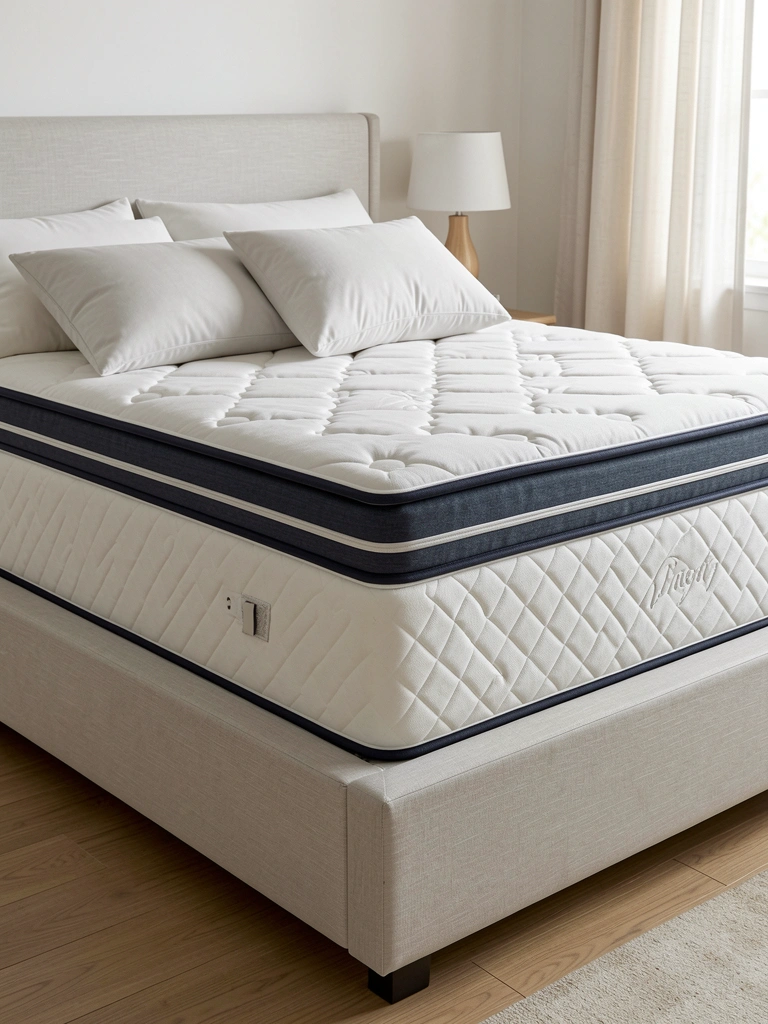
A high-quality mattress with dense layers and good construction absorbs vibrations and reduces motion transfer, which indirectly contributes to a quieter sleep experience. You’ll sleep deeper and be less disturbed by subtle movements.
Premium mattresses cost $800–$3,000+ depending on brand and materials. Mid-range quality runs $400–$800. Budget options start around $200–$400. A good mattress lasts 7–10 years, so cost-per-night is often reasonable. Delivery and setup usually take 1–2 hours.
Pro tip: Memory foam and hybrid mattresses dampen vibrations better than coil-only models. Test in-store if possible, or buy from retailers with extended trial periods (100 nights). This is one of the highest-ROI investments for sleep quality, which automatically makes you more noise-resilient.
You sleep deeper and wake less frequently because your body isn’t disturbed by minor movements or vibrations. Better sleep quality means noise affects you less.
24. Add Soft Ambient Lighting to Reduce Stress Before Sleep
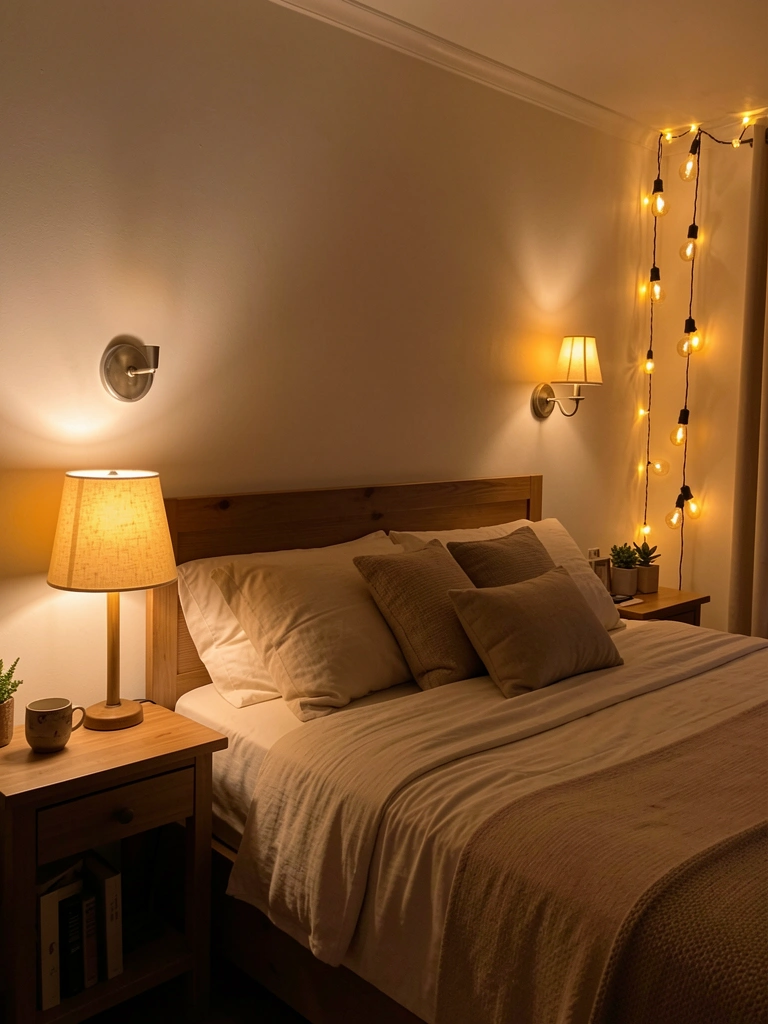
Stress impairs sleep quality, making you more sensitive to noise. Soft, warm lighting before bed activates your parasympathetic nervous system, reducing anxiety and improving sleep resilience to disturbances.
Dimmer switches cost $15–$30 and take 20 minutes to install (or hire an electrician for $100–$200). Bedside lamps run $30–$100. String lights or fairy lights cost $10–$40. Wall sconces run $40–$150 each. Together, a comprehensive soft lighting setup is $150–$400. Turn on soft light 1–2 hours before bed.
Pro tip: Use warm bulbs (2700K color temperature) rather than cool white. Avoid bright overhead light after sunset. Dimmers let you adjust intensity to your preference throughout the evening.
Your nervous system relaxes because warm light mimics sunset and cues melatonin production. You fall asleep faster and sleep deeper, so noise bothers you less.
25. Layer Sound-Dampening Materials Under Floor Rugs
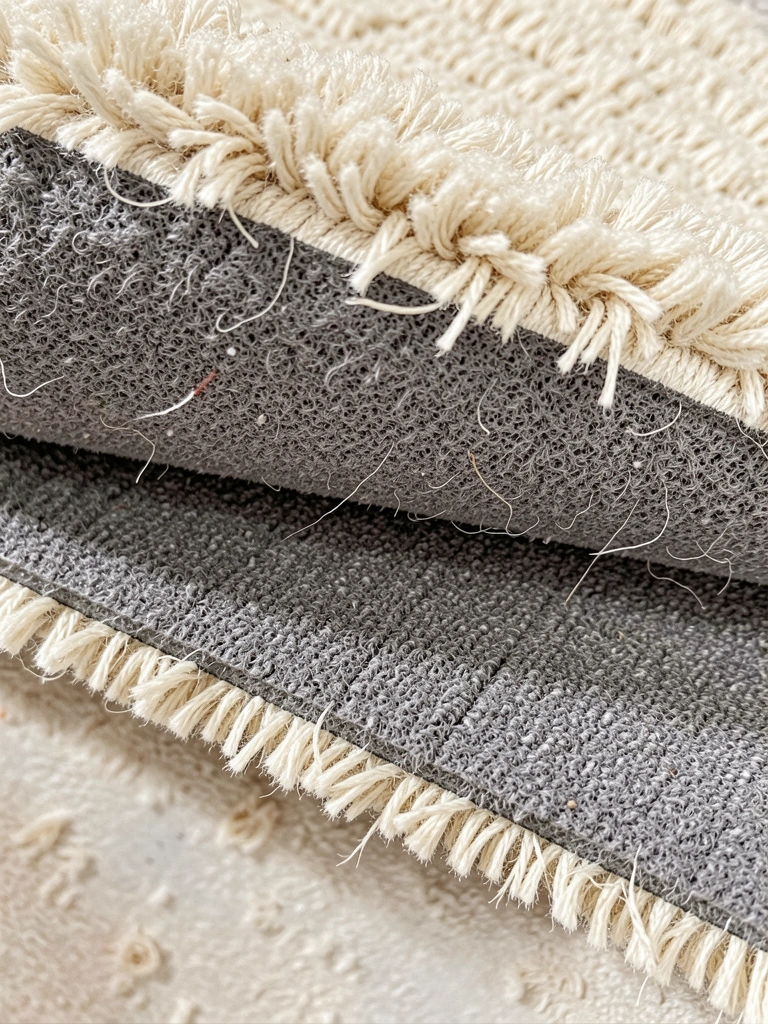
Rug pads under area rugs add another layer of sound absorption while preventing rugs from sliding. This simple addition multiplies the acoustic benefits of your rug investment.
Quality rug pads cost $20–$80 depending on size and material. Installation takes 10 minutes. Eco-friendly or non-slip rubber pads are worth the slightly higher cost ($30–$60) because they won’t damage hardwood floors.
Pro tip: Use a rug pad even if you have carpet underneath. Rug pads create an air gap that improves acoustic properties. They also protect both your rug and floor from friction and wear.
Sound vibrations passing through your floor are captured and absorbed by the pad, further reducing noise transmission. The cumulative effect of rug plus pad is noticeably quieter than rug alone.
26. Practice Sleep Hygiene and Consistency to Build Noise Resilience
The most underrated acoustic solution is your own sleep quality. When you maintain consistent sleep schedules, limit caffeine, and establish a wind-down routine, you sleep deeper and more soundly—making you naturally more resilient to noise disturbances.
This costs $0 and takes commitment rather than money. Key practices: go to bed and wake at the same time daily, avoid caffeine after 2 PM, create a 30–60 minute wind-down routine, keep your bedroom temperature cool (65–68°F), and avoid screens 1 hour before bed. Start with one or two habits and build from there.
Pro tip: Log your sleep quality for one week before implementing acoustic changes, then again after. You’ll see how much noise-resilience improves with better baseline sleep. Good sleep hygiene amplifies the benefits of every physical acoustic treatment.
Your body becomes a better sleeper overall, and noise stops being the barrier. You’re falling asleep faster, staying asleep longer, and waking less frequently—sometimes because the noise is truly reduced, and sometimes because your sleep is simply deeper and more resilient.
Ready to design your serene sleep space? Pick one or two ideas to start with this week—maybe weatherstripping and a throw blanket if you’re on a tight budget, or layered curtains and an area rug if you have more flexibility. Stack a few of these changes together and watch your bedroom transform into a true acoustic sanctuary. Which idea are you trying first?
Leave a Reply