Your closet doesn’t have to stay the same forever—and honestly, it shouldn’t. Life changes: your work wardrobe evolves, your family grows, your hobbies shift. A rigid closet system locks you into yesterday’s choices, but a modular one grows with you. Whether you’re a renter with limited wall space, a parent juggling kids’ and adults’ clothes, or someone who likes to refresh their space seasonally, a modular closet system solves the “this doesn’t fit my life anymore” problem.
These 26 ideas mix DIY hacks, affordable tweaks, and smart product swaps that adapt to whatever comes next. You’ll find solutions for tiny reach-ins, sprawling walk-ins, and everything in between—plus renter-friendly options that don’t require a drill. Ready to build a closet that actually works for your life right now? Let’s go.
1. Start with Adjustable Shelving Instead of Fixed Shelves
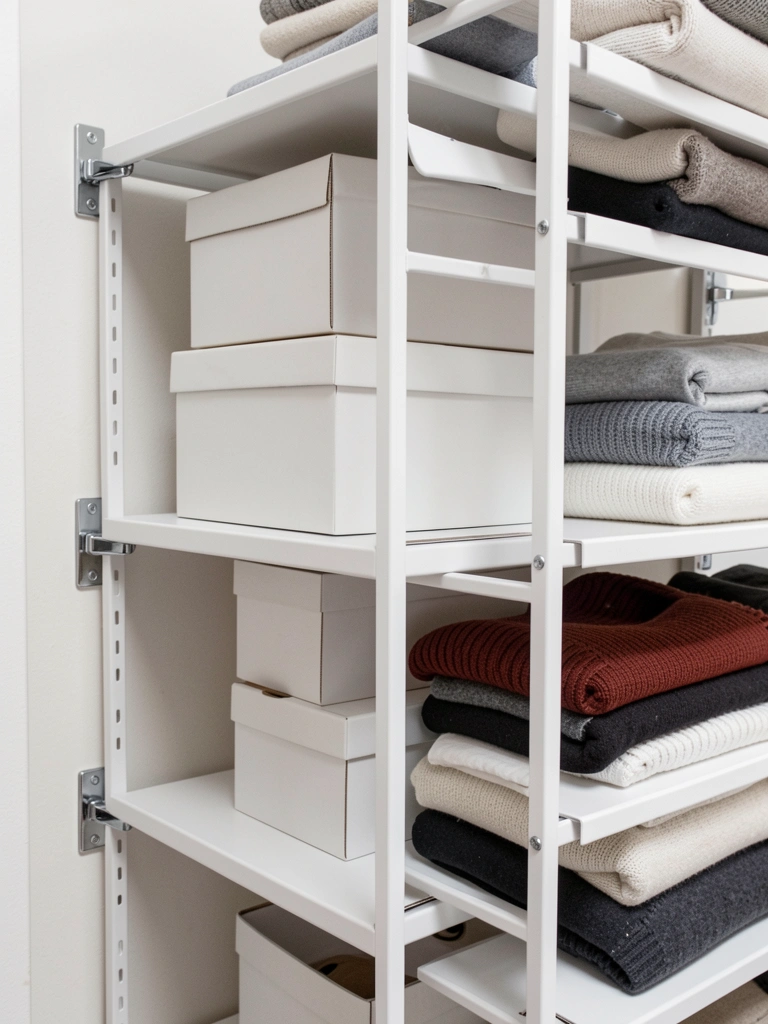
Fixed shelves waste space because one shelf height doesn’t fit everything. Adjustable shelving lets you set heights based on what you actually store—tall heels up top, flat sweaters below, handbags on custom-spaced shelves.
Installation takes about an hour per unit and requires basic tools: a drill, level, and metal brackets (around $15–$40 per shelf unit). Popular options include Elfa from The Container Store ($120–$200 per kit) or metal utility shelving from Amazon ($60–$120). For renters, tension rods with clips offer temporary adjustability without wall damage.
The payoff is massive: you’ll stop cramming items into mismatched spaces and start using your vertical real estate efficiently. Your closet instantly works harder and holds 30% more without getting cramped.
2. Add a Pull-Out Hamper That Hides When Not Needed
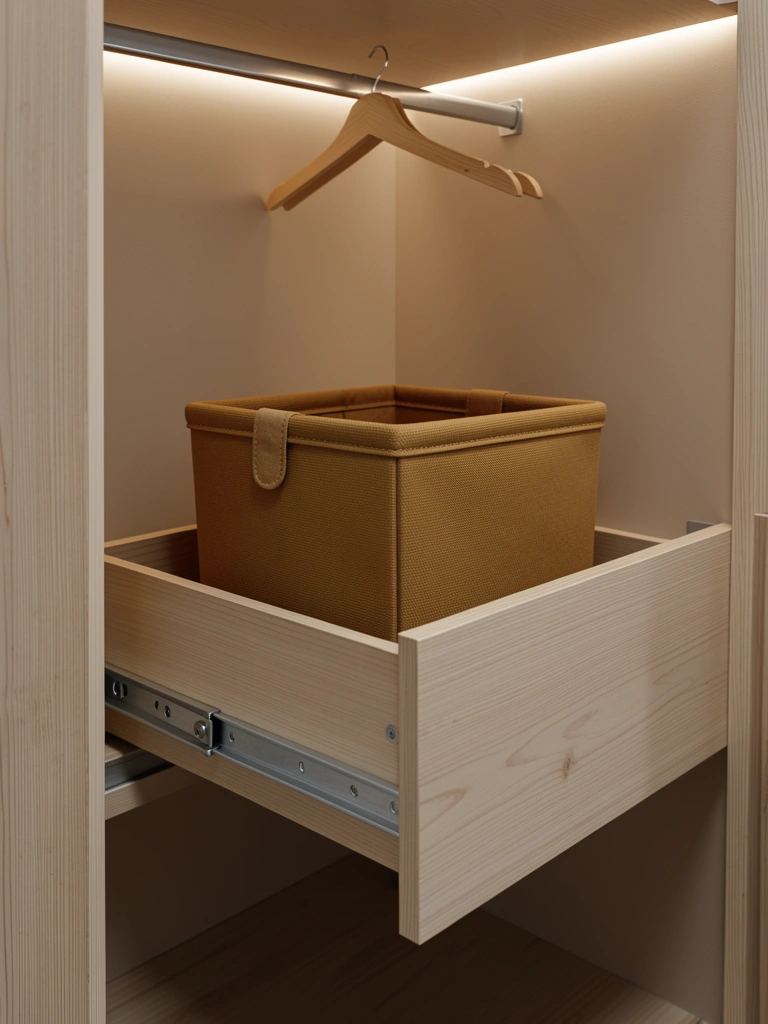
A stationary hamper takes up valuable floor space year-round. A pull-out model lives under a shelf or in a corner and slides out only when you need it—no wasted real estate.
Install one in about 30 minutes using a basic drawer-slide kit ($30–$60 from IKEA or Amazon) and a fabric basket or laundry bag. Companies like Organized Living and Closet Factory offer custom versions, but DIY kits work just as well. Measure twice before you buy; standard widths are 15″, 18″, and 21″.
Best part: you choose when the hamper “exists” in your space. When it’s pushed in, your closet looks cleaner and more spacious. When guests come over, you’ve got a place to stash it completely out of sight.
3. Use Modular Shelving Units on Casters for Total Flexibility

Closet layouts change. Kids outgrow rooms. You move apartments. Fixed built-ins trap you in one configuration. Shelving units on casters let you slide sections around, pull them out for deep cleaning, or remove one entirely when you need the space back.
Buy standalone modular units like IKEA’s Kallax or Ivar on wheels ($60–$150 per unit) or metal utility carts ($40–$120). Install lockable casters on the bottom in 20 minutes using a wrench. Stack 2–3 units vertically for floor-to-ceiling coverage without permanent installation.
The freedom is addictive: you reorganize without guilt, adapt when life shifts, and can take everything with you if you move. Renter? This is your closet hack.
4. Install Double Hanging Rods at Different Heights
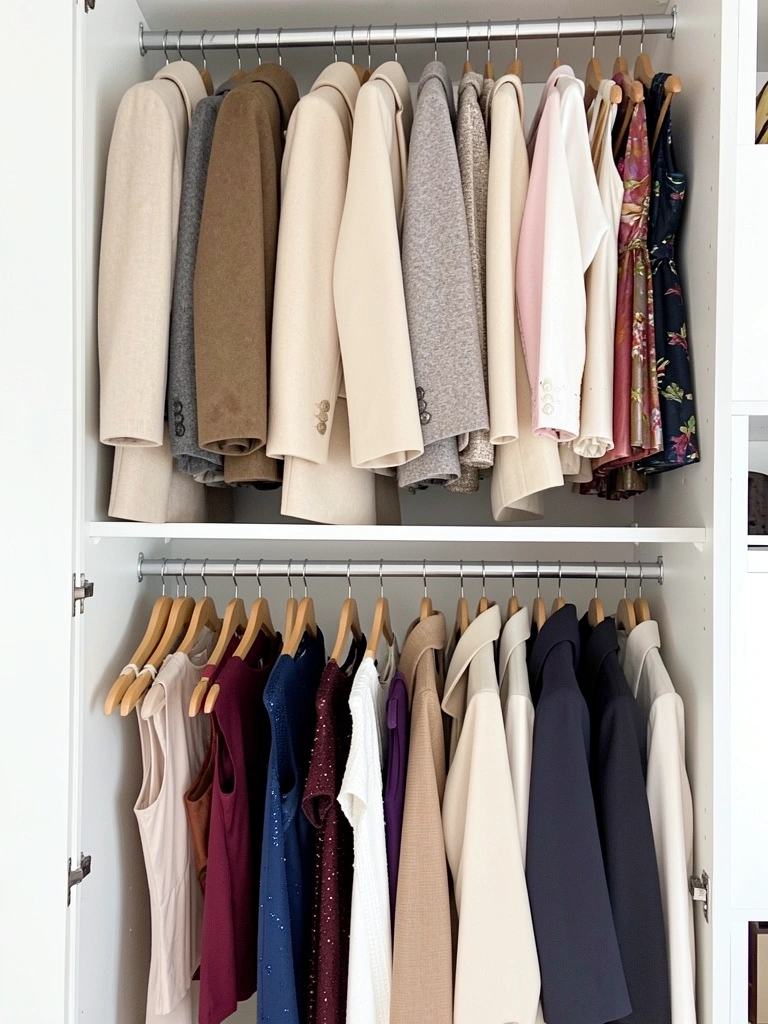
A single rod wastes about half your vertical hanging space. Most closets can accommodate a second rod below the first, instantly doubling capacity without taking up a single square foot of floor area.
Installation takes 45 minutes with basic tools: a drill, stud finder, and adjustable rods ($20–$50 from Home Depot or IKEA). Mount the upper rod 65″ from the ground and the lower at 32–36″ depending on your clothes. For renters, tension rods with brackets offer a damage-free alternative.
You’ll fit twice as many hanging pieces without a cramped, overlapping mess. Blazers, tees, and casual dresses stay wrinkle-free and visible. Your closet went from cluttered to generous in one afternoon.
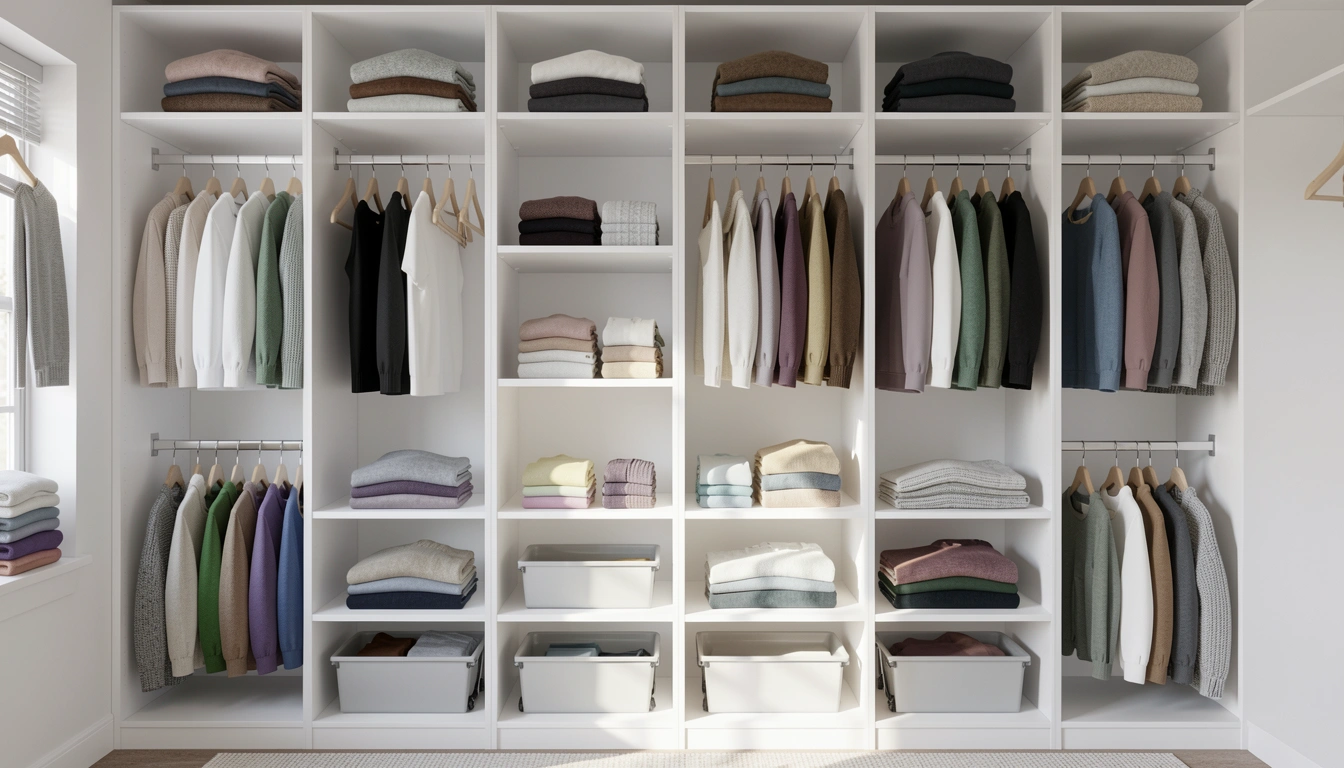
5. Mix Open Shelving and Closed Storage for Visual Balance

Open shelving looks great and saves money, but too much exposed storage creates visual chaos. The sweet spot: combine open shelves for pretty pieces you want to see with closed cabinets for items you’d rather hide.
Install 2–3 open shelves for display ($40–$80 per shelf from IKEA or Wayfair) and add one lower cabinet with doors ($60–$150). This takes a weekend to install if you’re adding to existing shelving. The visual break lets your curated pieces shine while keeping seasonal stuff, backups, and less-attractive storage bins hidden.
Your closet looks intentionally styled and deliberately organized rather than haphazardly stuffed. Guests see your “good side,” and you get breathing room for the not-so-pretty necessities.
6. Create Zones Within Your Closet Using Dividers and Labels
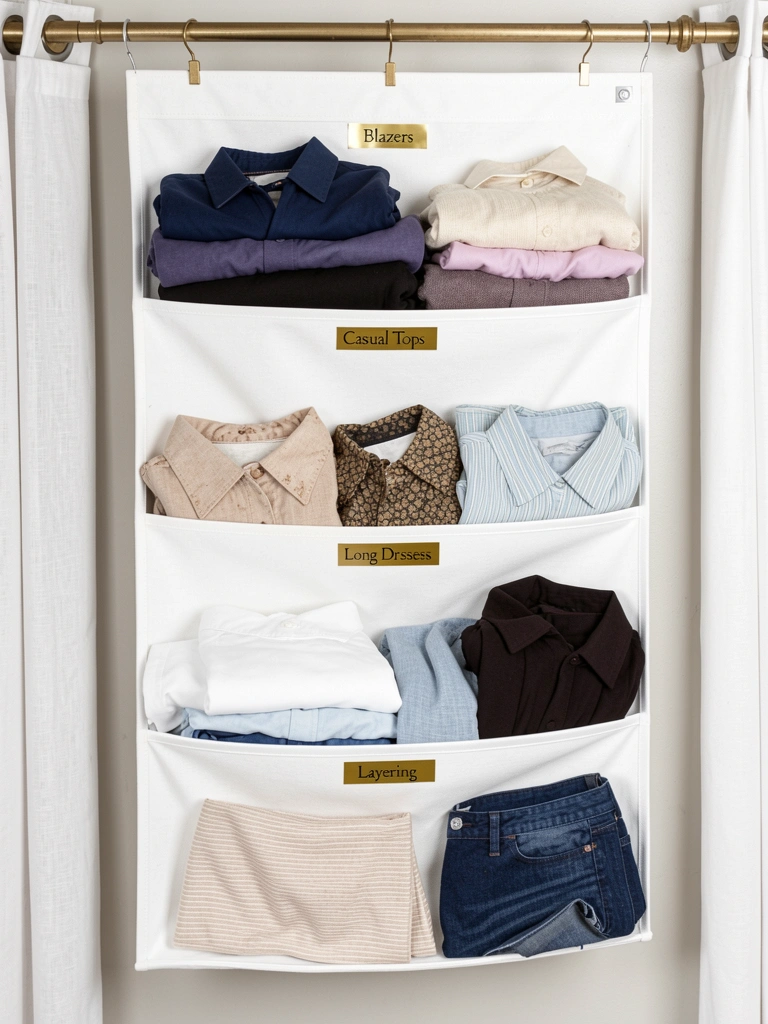
A closet without zones becomes a “where is everything?” disaster. Creating clear sections for pants, dresses, work clothes, and casual wear cuts your search time and keeps similar items together so you can actually see what you own.
Use hanging organizers with divided sections ($25–$60 from Container Store or Amazon), wood dividers on shelves ($10–$30), or even washi tape dividers ($5) on rods. Label everything with a label maker ($15–$30) or printed tags. This setup takes 30 minutes to arrange and zero installation required.
Finding what you want takes seconds instead of minutes. You stop buying duplicates because you can actually see what you already have. Your morning routine gets faster, and your clothes last longer because they’re not crushed under a pile.
7. Add a Small Valet Rod for Next-Day Outfit Planning

Outfit indecision is real, especially on rushed mornings. A dedicated valet rod—a small extra rod, often just 12–18″ wide—holds tomorrow’s outfit so you grab and go without second-guessing.
Mount a valet rod ($20–$50 from Amazon, Target, or Wayfair) at shoulder height in a visible spot. No installation skills needed; most hang from existing rods or mount with simple brackets. Some models are freestanding and fit in any closet corner.
You stop the “what should I wear” spiral at night and make calm choices. Your morning moves faster. Clothes stay fresh because they’re chosen with intention, not desperation. This one small rod saves time and mental energy every single day.
8. Use Clear Acrylic Bins for Visible Seasonal Storage
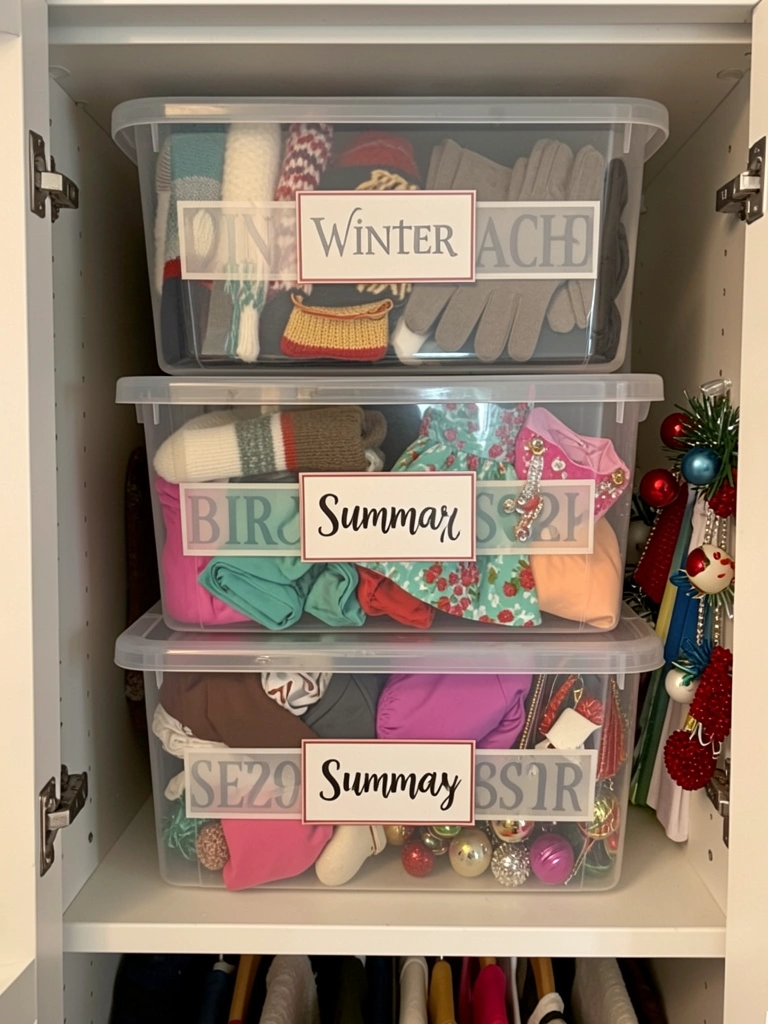
You can’t remember what’s in opaque bins, so seasonal items get forgotten or repurchased. Clear bins let you see contents without opening them—and that visibility changes everything about maintaining your rotation.
Buy clear plastic bins with lids ($10–$30 per bin from Container Store, Amazon, or Target) in standard sizes that stack neatly. Label the front and spine so you can read them from across the closet. Set up takes 20 minutes; rotating seasonally takes another 15–20 minutes twice yearly.
Your seasonal pieces don’t go missing anymore. You use what you have instead of buying duplicates. When spring arrives, you know exactly what’s packed away and can decide what stays and what goes.
9. Install Pegboard Sections for Customizable Accessory Storage
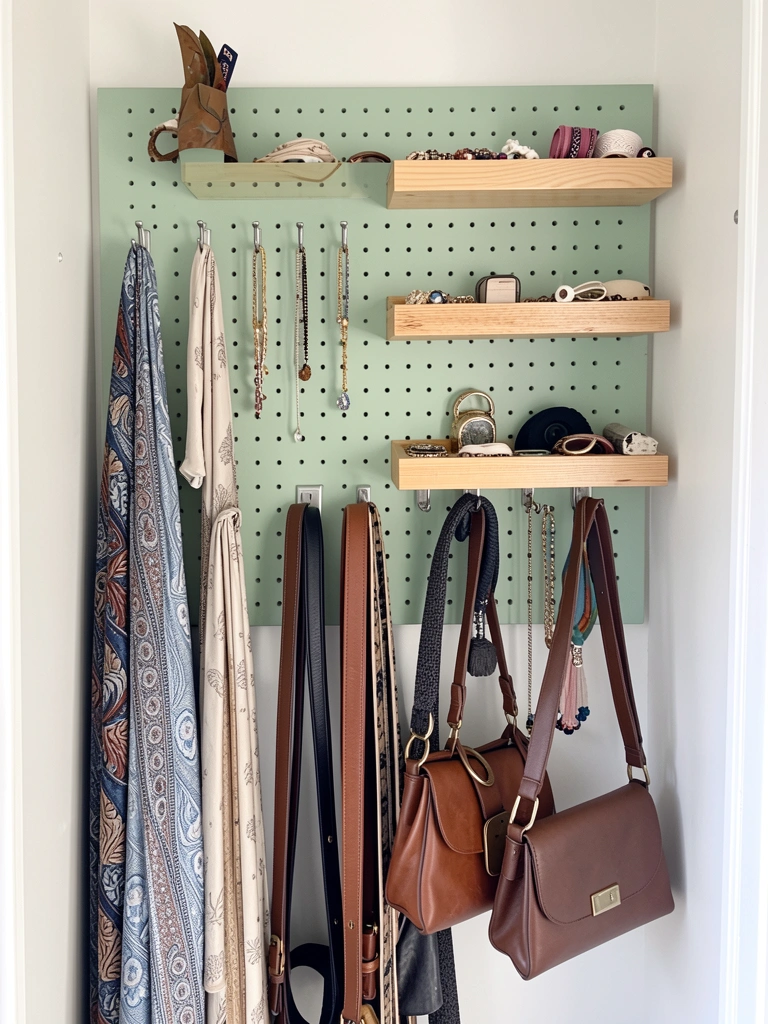
Accessories get lost because there’s nowhere to hang them. Pegboard with adjustable hooks lets you customize storage for belts, scarves, bags, and hats—and rearrange whenever your collection grows.
Install a pegboard section ($20–$40 from Home Depot or IKEA) and add metal hooks ($1–$3 each). Paint it a color that matches your closet for a polished look. Installation takes an hour and requires a drill and level. Renters can use adhesive pegboard that removes cleanly.
Everything hangs visible and accessible instead of tangled in a bin. You actually use your scarves and belts because you see them. Adding more hooks is effortless when your collection grows—no major reconfiguration needed.
10. Create Pull-Out Drawers for Folded Basics
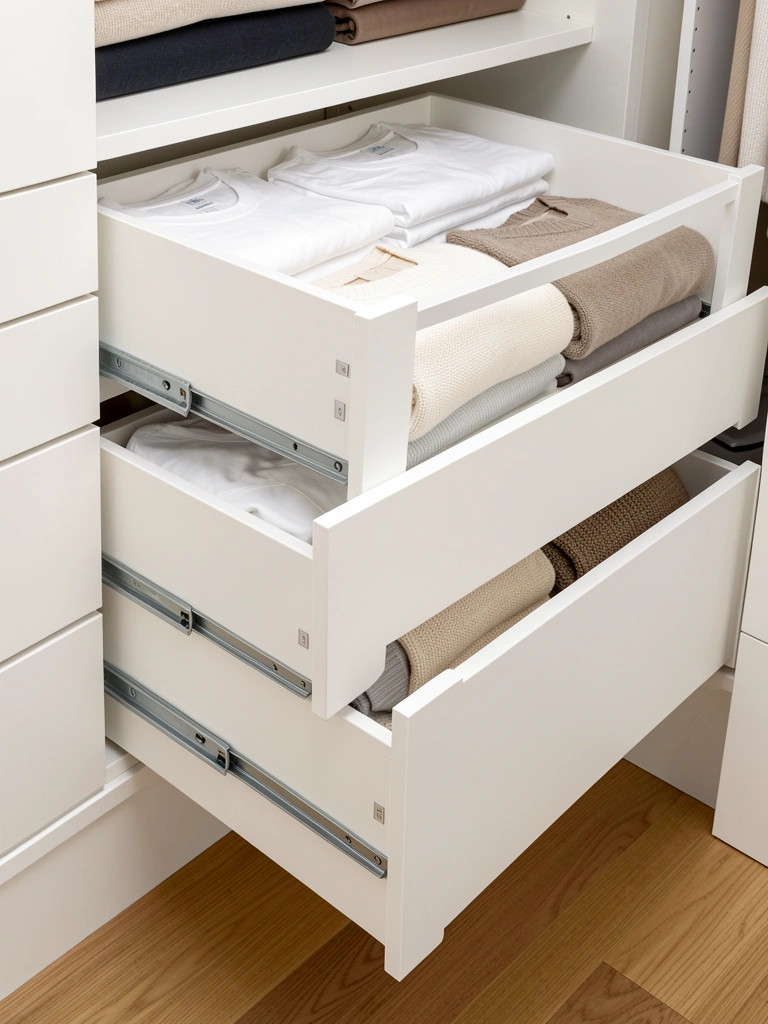
Folded clothes stacked on shelves get crushed and messy because you dig through them constantly. Pull-out drawers let you access everything without disturbing the pile, and they’re modular so you add them as needed.
Use drawer organizer kits ($30–$80 from Container Store or Wayfair) or DIY solutions with fabric bins on sliding tracks. Installation takes 1–2 hours for a basic setup. Budget versions use stacking fabric bins under a shelf edge; higher-end systems include wood-frame drawers with metal slides.
Your basics stay organized and pristine. You see all your options without excavating a pile. Adding a second or third drawer later is simple—no major changes required.
11. Add Accent Lighting to Make Everything Visible and Styled
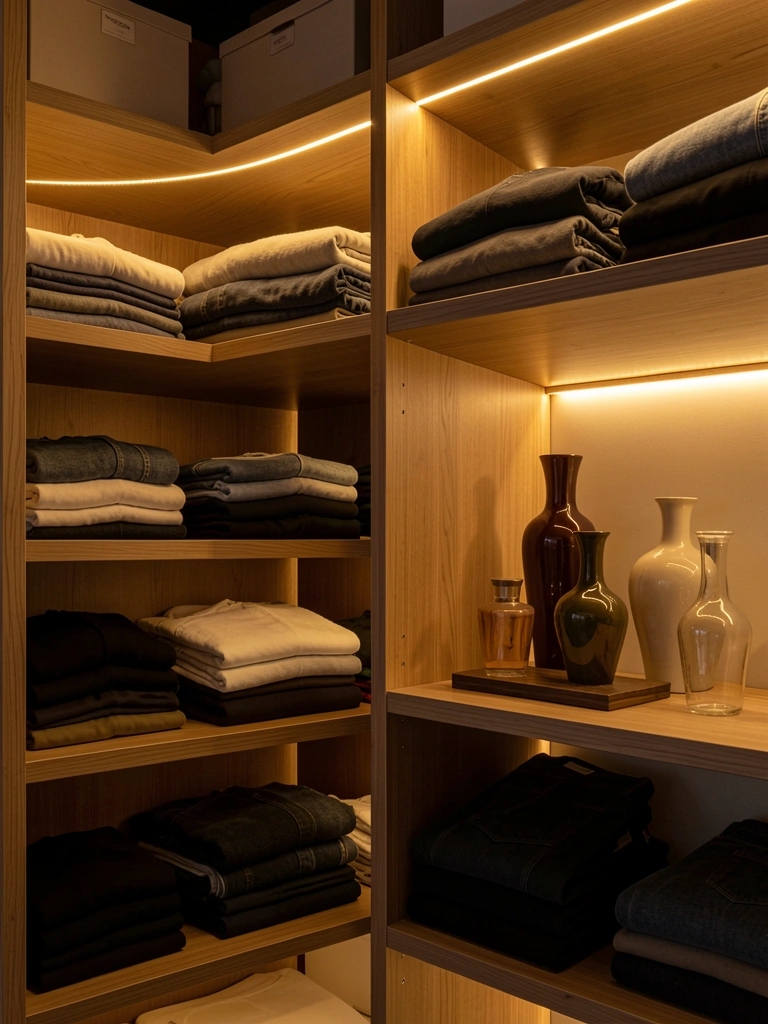
Poor lighting makes closets feel cramped and dreary, and you can’t actually see colors properly. LED strip lights and puck lights are cheap, easy to install, and transform your closet into a space you enjoy spending time in.
Install LED strip lights ($15–$40 from Amazon or Target) along the top shelves or along the closet rod using adhesive backing (no tools needed). Add puck lights ($10–$25 each) to highlight a display shelf or dark corner. Motion-activated versions add convenience; battery-operated options work for renters.
Your closet looks brighter, bigger, and way more inviting. You actually see color accurately so you stop wearing that sweater that clashes. Getting ready feels less like a chore and more like a moment in a space you care about.
12. Use Vacuum-Seal Bags for Off-Season Bulky Items
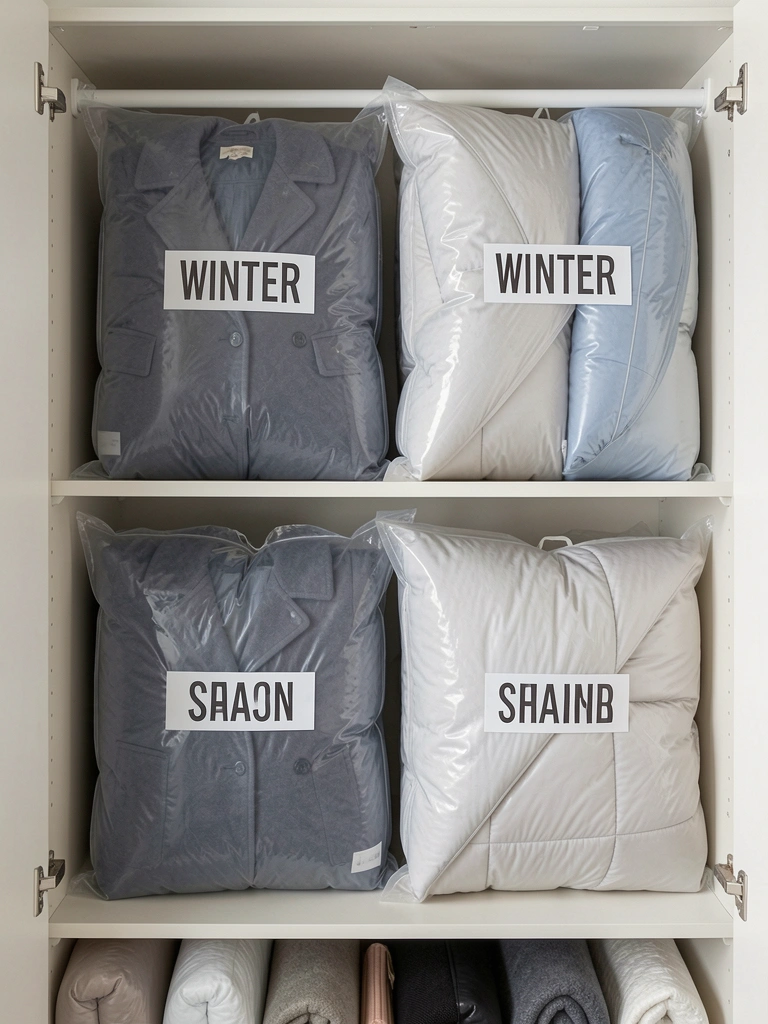
Bulky winter coats and summer duvets waste huge amounts of closet space. Vacuum-seal bags compress them to a fraction of their size, freeing up shelf and hanging rod space for your active wardrobe.
Buy vacuum-seal bags ($10–$20 for a set of 3–5 from Amazon, Target, or Bed Bath & Beyond) and a basic handheld or electrical vacuum sealer ($15–$40). Packing takes 30 minutes per season; unpacking takes 15 minutes and lets the items naturally fluff back up.
You reclaim 40% of your seasonal storage space without getting a bigger closet. Your active-season wardrobe gets room to breathe. Come winter or summer, you pull items down, unseal, and everything’s ready to wear within an hour.
13. Install a Narrow Sliding Door or Curtain Rod System for Hidden Hanging Space
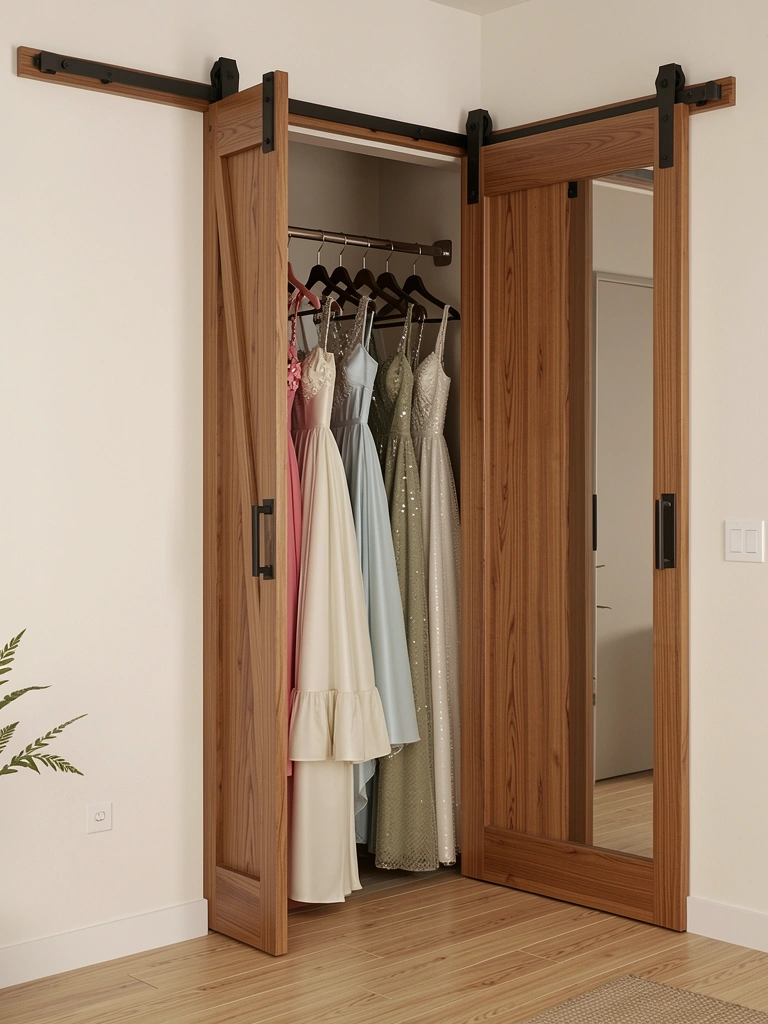
Awkward closet corners and nooks waste potential hanging space. A slim sliding door or a curtain rod with a fabric panel hides hanging space while keeping it accessible and looking intentional.
Install a sliding barn door kit ($80–$150 from IKEA or Amazon) or a tension rod with a linen curtain ($20–$50 total). The barn door option takes 2 hours; the curtain solution takes 15 minutes and works for renters. Both create a visual break in your closet that looks designed, not makeshift.
You’ve created bonus hanging space without it looking chaotic. Special occasion dresses or seasonal pieces stay protected and out of the way but instantly accessible. Your closet looks more intentional and polished.
14. Set Up a Tiered Shoe Rack System That Adapts to Your Collection
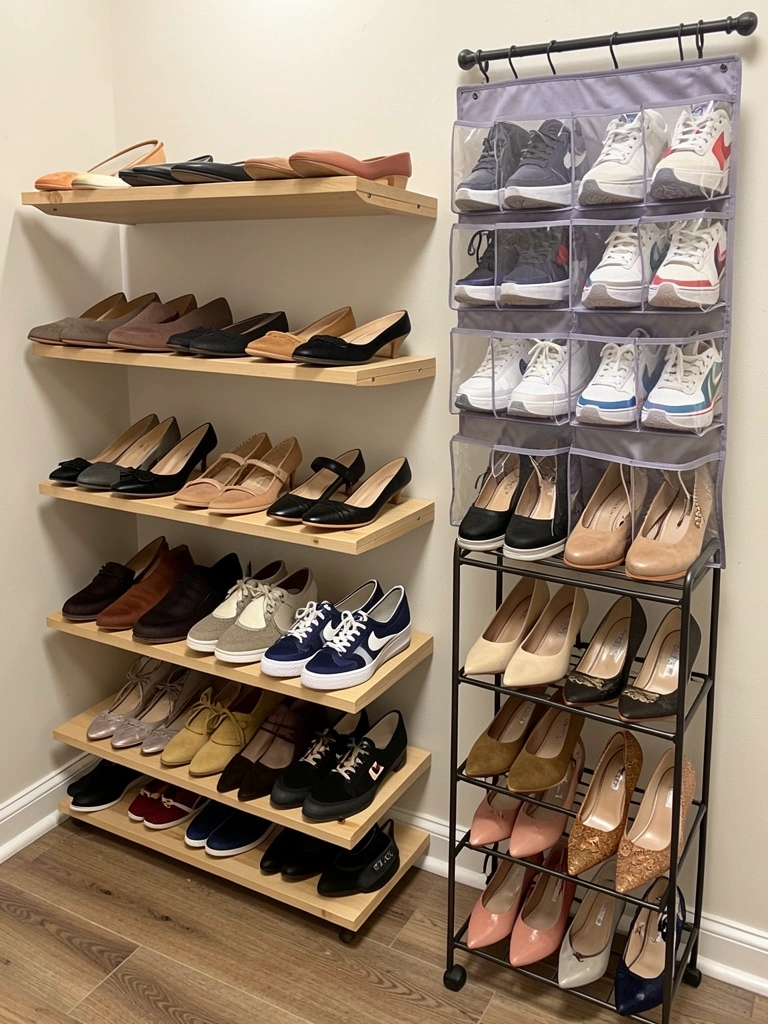
Shoes get buried in piles or crammed into boxes because standard shoe storage doesn’t fit all shoe types. A tiered system with slanted shelves, hanging organizers, and tiered stands lets each shoe type live in its ideal home.
Combine slanted shelf risers ($15–$30), a hanging shoe organizer ($15–$40), and a small tiered stand ($20–$50). Mix and match from Target, IKEA, Amazon, or Container Store based on your shoe volume. Setup takes 45 minutes and requires zero permanent installation.
Every shoe stays visible and accessible instead of hidden in a box somewhere. You stop buying similar shoes because you actually see what you own. Your morning routine moves faster because your shoes are organized by type, not buried in chaos.
15. Create a Jewelry Wall or Hanging Display Panel
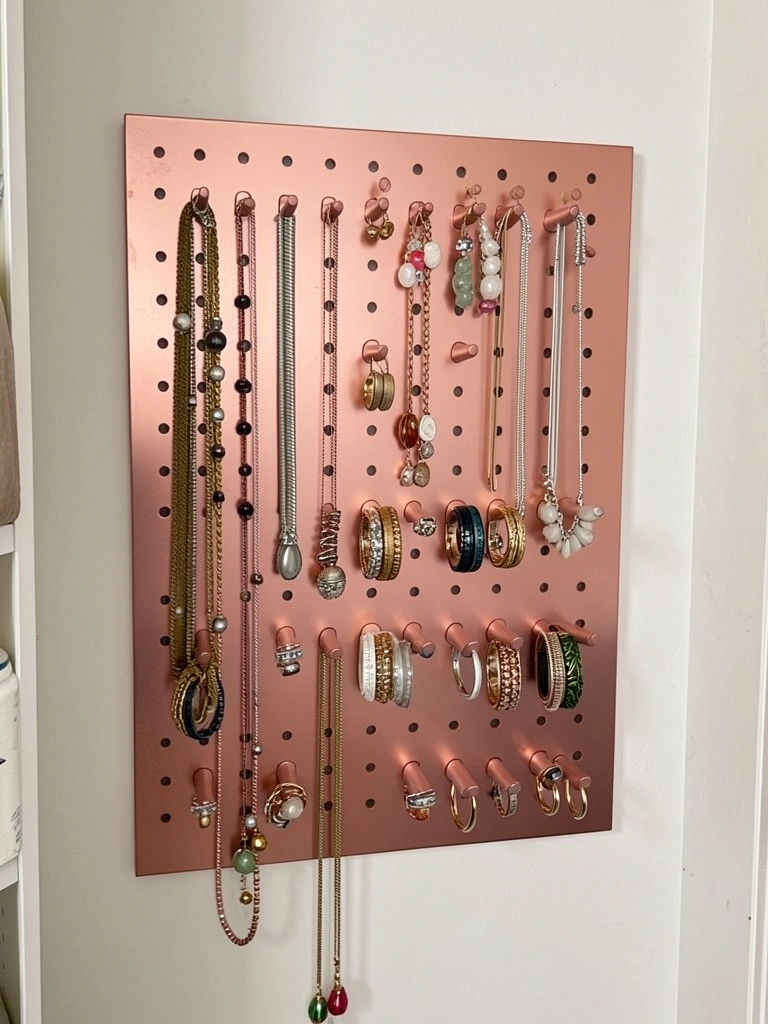
Jewelry tangles in drawers and gets lost because you can’t see what you actually own. A display panel or jewelry organizer keeps everything visible, prevents tangling, and adds a styled element to your closet.
Install a jewelry organizer panel ($30–$100 from Target, Wayfair, or Amazon) or DIY a pegboard ($20–$40) with small hooks and holders. Installation takes 30 minutes. Choose finishes that match your closet aesthetic: rose gold, brass, matte black, or natural wood.
Your jewelry collection becomes part of your closet’s visual appeal instead of a hidden frustration. You reach for pieces you’d forgotten about. Getting ready includes a moment of selecting jewelry you can actually see, which makes the whole routine feel more intentional.
16. Add Modular Drawer Inserts to Maximize Small Drawers
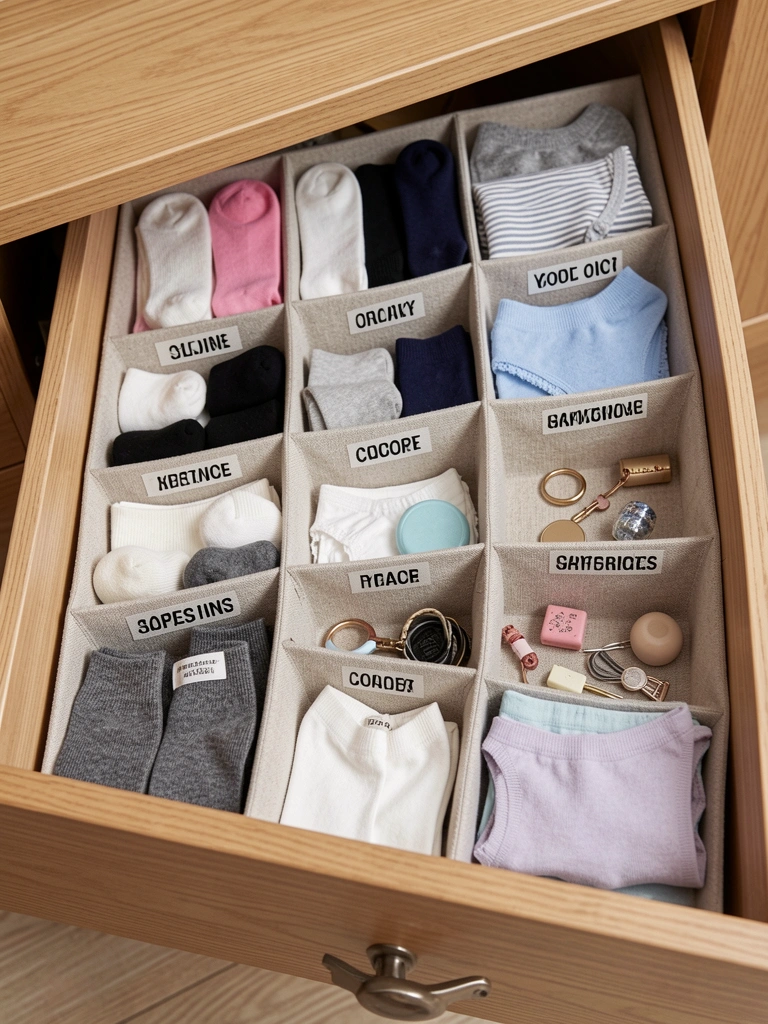
Small drawers become junk drawers without dividers. Modular inserts compartmentalize socks, underwear, accessories, and small items so nothing gets lost and everything stays accessible.
Buy fabric drawer dividers ($10–$25 per set from Container Store or Amazon) or wood organizers ($15–$40) and arrange them to fit your drawer dimensions. Setup takes 10 minutes and requires nothing but a gentle hand; no screwing or gluing required unless you want permanence.
You find what you need instantly instead of fishing through a tangled mess. Your mornings move faster. Items stay in good condition because they’re not crushed or wrinkled under piles of other stuff.
17. Install Floating Shelves at Eye Level for Styled Display
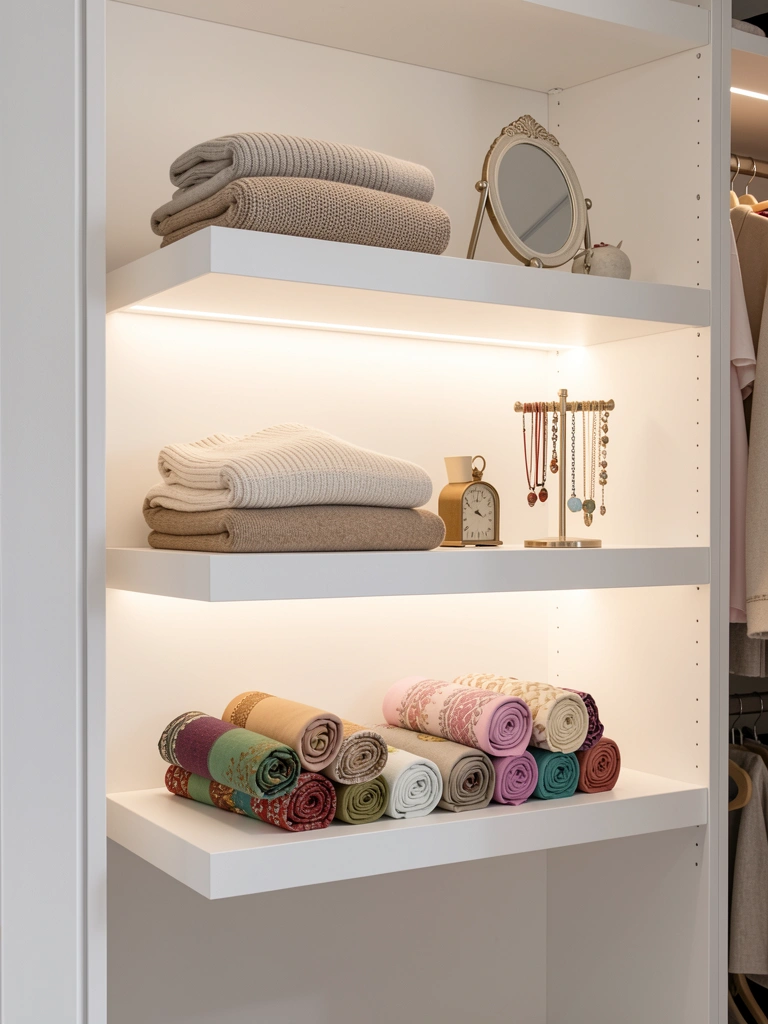
Hidden-away closets don’t feel special, and you end up not caring about organization because nobody sees it. One or two floating shelves at eye level become a styled display that inspires you to maintain organization and looks intentional.
Install floating shelves ($30–$80 per shelf from IKEA, Target, or Home Depot) at 36–60″ from the ground depending on your closet layout. Installation takes 1–2 hours and requires a stud finder and drill. Style them with folded sweaters, rolled scarves, a small mirror, and plants for a boutique feel.
Your closet becomes a space you enjoy looking at, not just a functional storage room. This visual motivation keeps you organized because the styled area inspires maintenance. You stop throwing clean clothes on a shelf and start purposefully placing them. Your closet feels like a design choice, not an afterthought.
18. Use Slim Cascading Hangers to Double Hanging Capacity
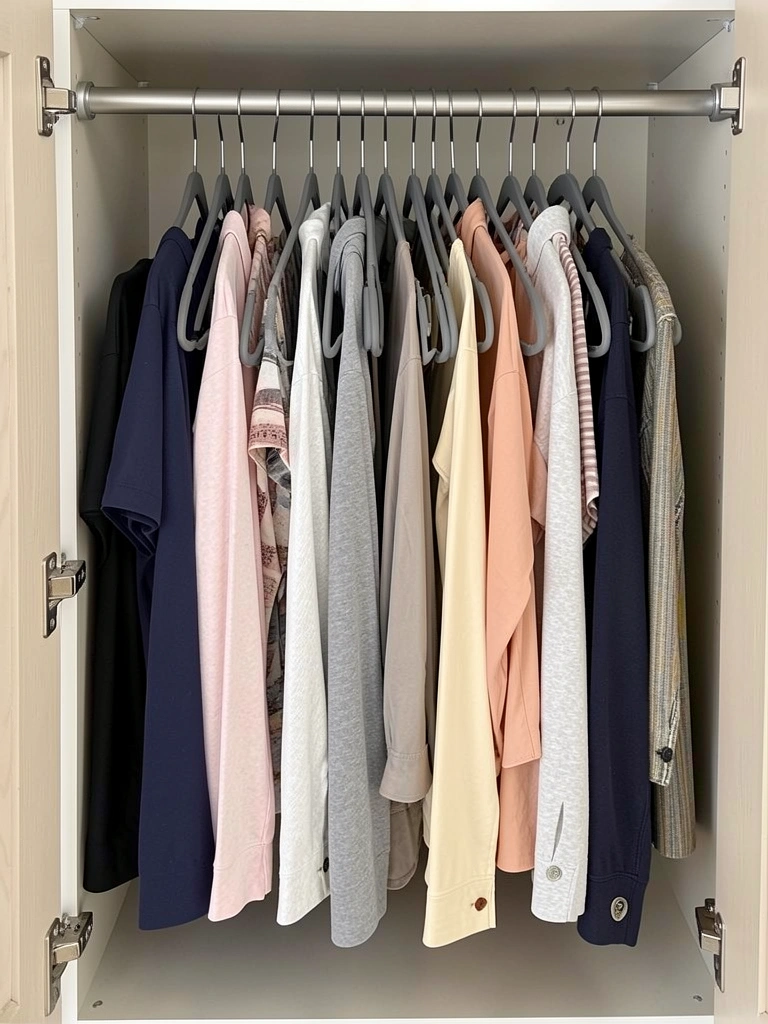
Standard hangers waste rod space because each hanger sits beside its neighbor taking up precious inches. Cascading hangers hang one below another, turning one rod into multiple tiers of hanging space.
Buy cascading hangers ($15–$30 for a set of 6–8 from Amazon, Target, or Container Store). Swap them in for your regular hangers—no installation required. They work best for lightweight items like tees, tank tops, and blouses; avoid hanging heavy coats or winter jackets on these.
Your hanging rod holds 3–4 times more items without looking cramped. Lightweight pieces stay wrinkle-free and visible. You’ve essentially added another rod of capacity without any installation or permanent changes.
19. Create a “Try On” Station with a Mirror and Small Seating
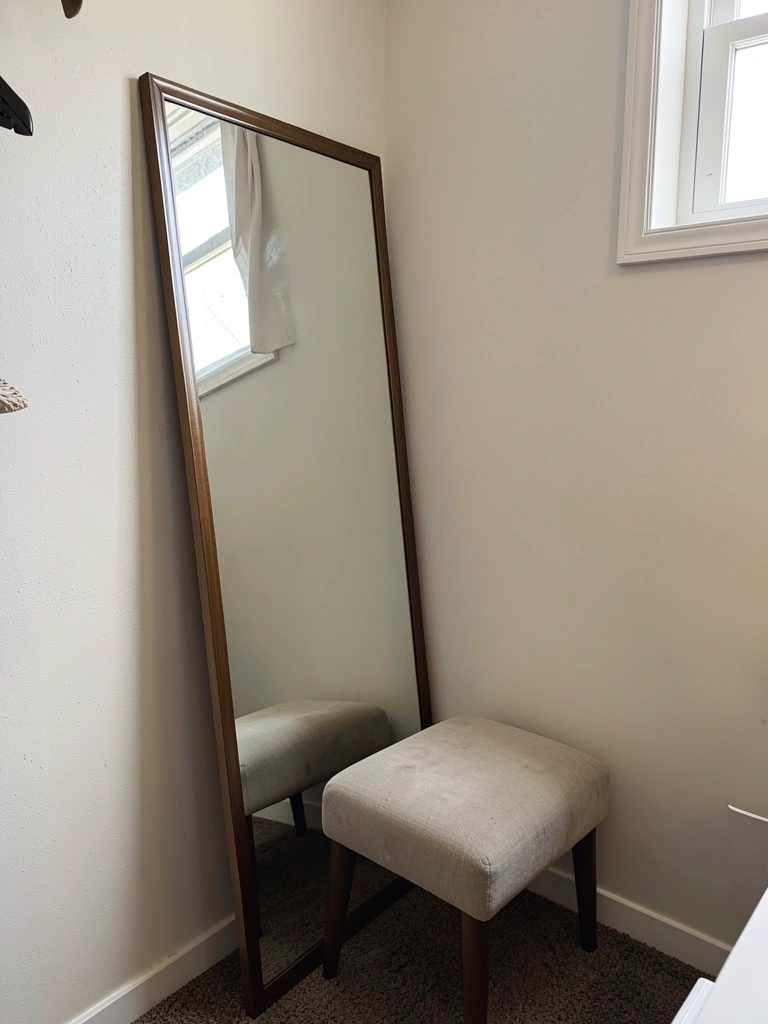
Getting dressed in a cramped closet doorway or in front of a far-away bedroom mirror adds friction to your routine. A small seating area with a mirror in your closet turns outfit selection into a moment you actually enjoy.
Add a simple standing or leaning mirror ($30–$80 from IKEA, Target, or Wayfair), a small upholstered stool ($40–$100), and ensure good lighting ($15–$40 for puck lights). This takes 30 minutes to arrange and zero installation. The stool gives you a place to sit while pulling on boots or deciding between options.
Your morning routine shifts from stressful to intentional. You try on outfits in your actual closet instead of rushing. This small ritual makes getting dressed feel like self-care instead of a chore. You make better outfit choices because you have time to think and adjust.
20. Use Vertical Wall Space for Belts, Scarves, and Lightweight Items
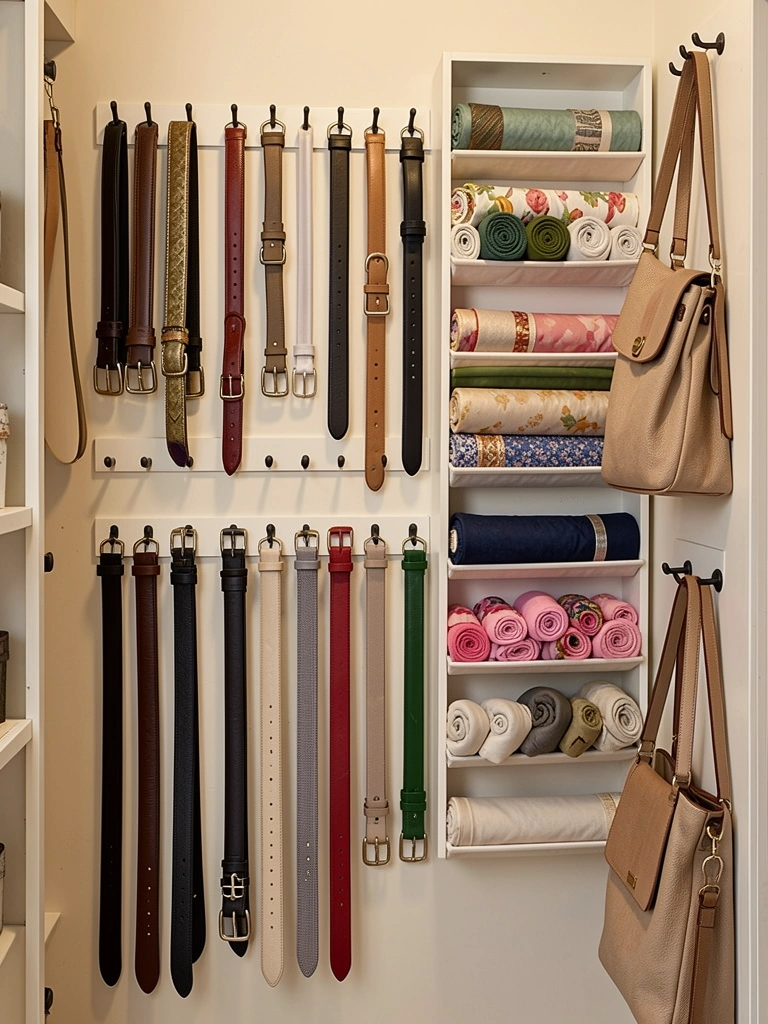
Accessories live on shelves where they get buried, or in drawers where they get tangled. Your walls are free real estate for lightweight items that look great displayed and stay accessible.
Install wall-mounted hooks ($1–$3 each), a hanging organizer panel ($20–$50), or slim metal rods ($10–$20 each). Hang belts, scarves, lightweight bags, and hats. Setup takes 30–45 minutes and requires a drill and level. Renters can use adhesive hooks that remove cleanly.
Your walls become functional design instead of wasted space. Everything you want is visible and within arm’s reach. Accessories get used instead of forgotten because they’re not hidden away. Your closet looks bigger because you’ve eliminated piles on shelves.
21. Create Modular Sections for Different Family Members’ Clothes

Family closets become disasters when everyone’s clothes tangle together. Creating modular zones with labeled sections for each person keeps clothes sorted and makes it clear whose stuff lives where.
Assign one section of shelving or hanging rod to each person using color-coded labels ($5–$15 for label makers or tags) and zone dividers ($10–$30). Adjust shelf heights and rod positions for each person’s clothing types. This takes 1–2 hours to set up and requires zero installation.
Everyone finds their own clothes without digging through someone else’s stuff. Morning routines move faster. You stop the “where are my shirts?” argument. Kids learn organization from seeing their labeled section and maintain it. Your family’s shared closet actually works for everyone.
22. Install a Pulling-Down Shelf for Hard-to-Reach Top Spaces
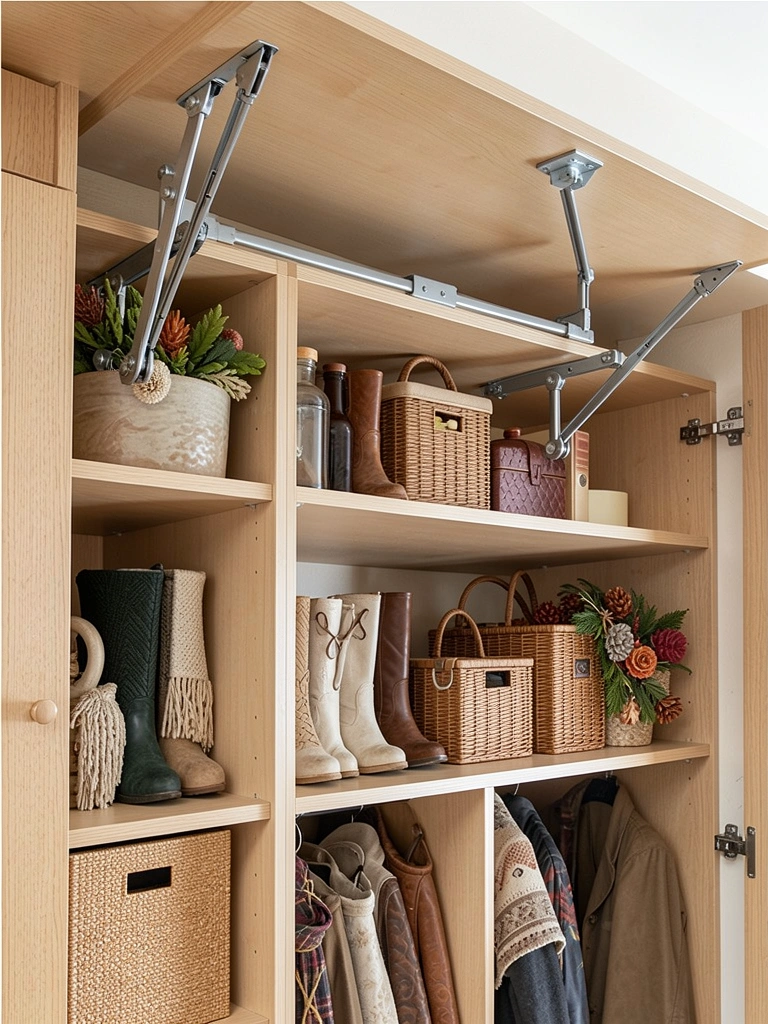
Top shelves hold seasonal items and backups, but reaching them means a ladder or strained reaching. A pull-down shelf brings items to arm’s reach without the ladder gymnastics.
Install a motorized pull-down shelf ($150–$400 from custom closet companies) or a manual mechanical rack ($80–$150 from Amazon or specialty hardware stores). Installation takes 2–4 hours and may require professional help for motorized versions. Budget-conscious option: use a closet pole extender ($15–$25) to gently pull items down.
Your hard-to-reach storage becomes actually usable. You rotate seasonal items without calling for backup. Top-shelf inventory becomes part of your active closet management instead of a mystery zone. This one upgrade saves your shoulders and makes your entire closet height functional.
23. Use a Rolling Cart as a Flexible Shoe and Accessory Station

A stationary shoe rack takes up permanent floor space, but a rolling cart can slide into a corner when you need space or pull out when you’re getting dressed. The mobility makes it modular and adaptable.
Buy a slim three-tier rolling cart ($40–$80 from Target, Amazon, or IKEA) with locking wheels. Load shoes on bottom tiers and accessories on top. Takes 10 minutes to assemble and zero installation. Choose one in black, white, or natural wood to match your closet aesthetic.
You reclaim floor space instantly by moving the cart to a corner. When you’re getting dressed, pull it into your work area for easy access. When you rearrange your closet layout, the cart comes along without any adjustment needed. This flexibility makes sense if your closet needs change seasonally or if you ever move.
24. Create Labeled Sections for Different Clothing Categories
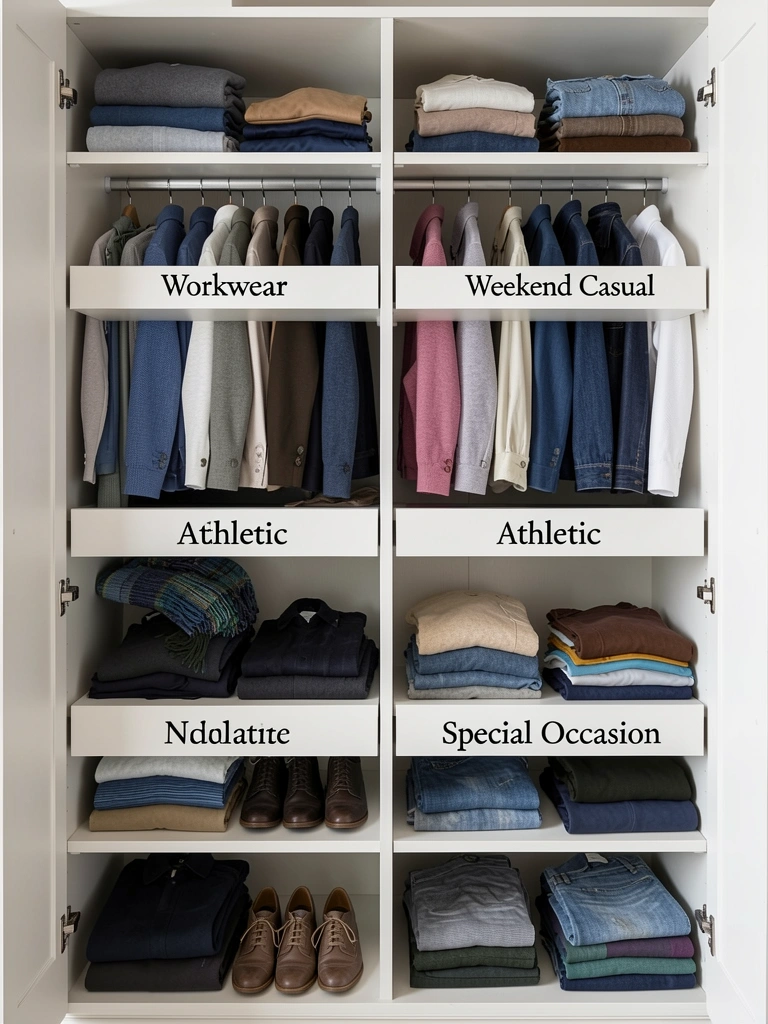
Without labels, similar items scatter across your closet and you forget what you have. Clear labeling by category keeps your outfits grouped logically so you can grab everything you need at once.
Print or purchase category labels ($5–$15 for a set from Target or Amazon, or DIY them using a label maker). Arrange your hanging rod and shelves by category: workwear, casual, athletic, special occasion, and seasonal. Takes 30 minutes to organize and 10 minutes to label.
Getting dressed becomes faster because everything for each occasion lives together. You stop buying multiple white tees because you see all of them in one spot. Outfit selection shifts from stressful to strategic. Your closet becomes a tool that supports your actual life instead of random storage.
25. Add a Fold-Down Wall Desk for a Closet Dressing Area
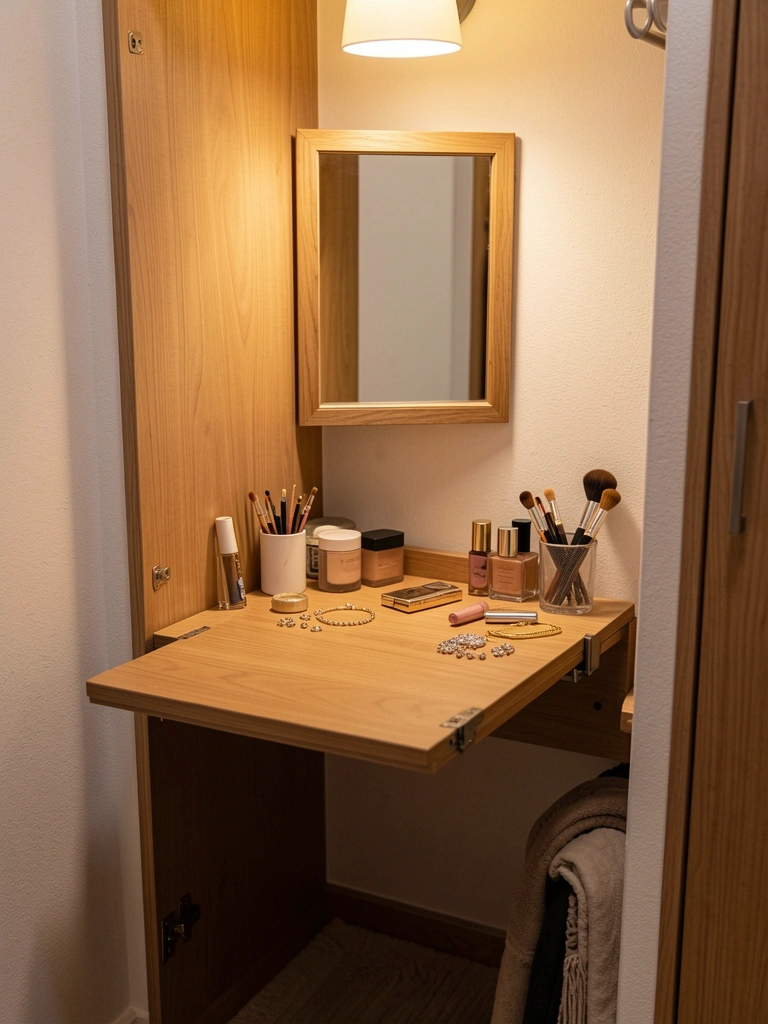
If your closet has a corner, add a tiny fold-down desk that serves as a getting-ready station. Fold it up when not in use to reclaim the space.
Install a fold-down wall desk ($80–$200 from IKEA, Wayfair, or specialty hardware stores) with a bracket system that supports it. Add a small wall mirror ($20–$50) above. Installation takes 2–3 hours and requires a drill and stud finder. Pair it with task lighting ($15–$40).
Your closet transforms from purely storage into a functional getting-ready space. You do final makeup checks, grab last-minute jewelry, and check your outfit without leaving your closet. Mornings move faster and feel more organized. The desk folds flat so you lose no closet capacity when you’re not actively getting ready.
26. Create a Seasonal Rotation System with Dated Storage Zones
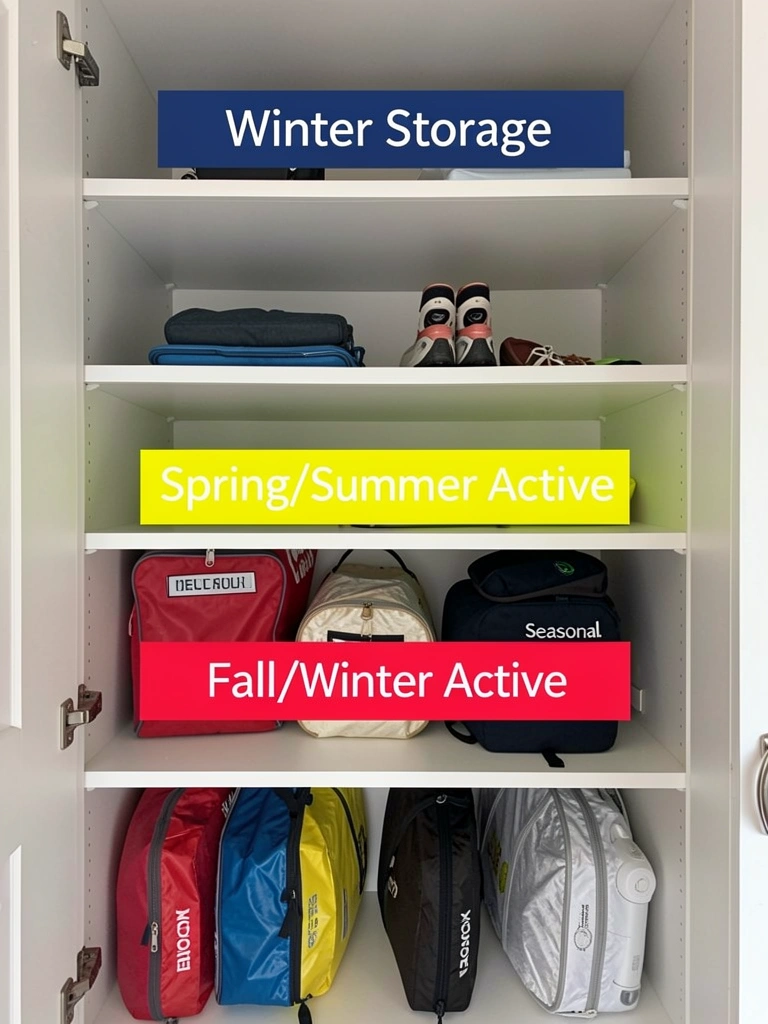
Mixing active-season and off-season clothes wastes space and creates decision fatigue. A dedicated rotation system with dated zones keeps your active wardrobe smaller and your closet less overwhelming.
Set up three zones: one for active-season clothes (the most accessible shelf or rod space), one for next-season items waiting (a middle shelf), and one for off-season storage (top shelf in vacuum-sealed bags). Use seasonal labels ($5–$15) and a rotation calendar (free downloadable template). Takes 1–2 hours to organize and 20 minutes each season to rotate.
Your everyday closet shrinks to only what you’re actually wearing, making mornings easier and choices clearer. You know exactly when to pull out winter coats or summer dresses. Off-season items don’t take up mental space. Your closet feels bigger and more intentional because you’re not juggling four seasons at once.
Save this post for your next closet refresh and try just one idea this weekend. Start small—maybe a set of cascading hangers or a small label-maker purchase—and watch how even one change makes getting dressed feel better. Which idea are you tackling first?
Leave a Reply