Category: Bedroom Decor

  • 23 Minimal Joinery Bed Ideas for Clean, Architectural Style

    23 Minimal Joinery Bed Ideas for Clean, Architectural Style


    If you’re drawn to Scandinavian calm and architectural design, minimal joinery beds might be exactly what your bedroom needs. These pieces celebrate honest construction—visible joints, natural wood grain, and structural beauty instead of fussy details. The result? A bedroom that feels intentionally curated, timeless, and genuinely relaxing. Whether you’re a maximalist looking to scale back or someone who loves clean aesthetics, these 23 ideas show you how to choose, style, and live with a minimal joinery bed that becomes the focal point your space deserves. Let’s explore options for every budget and space.

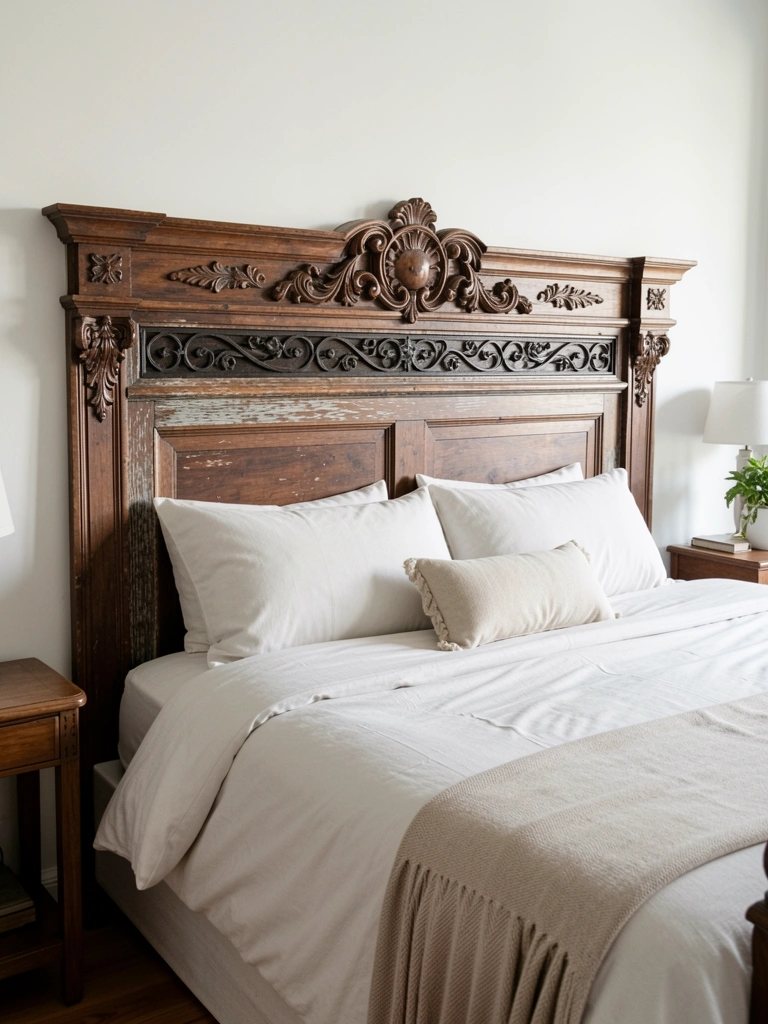
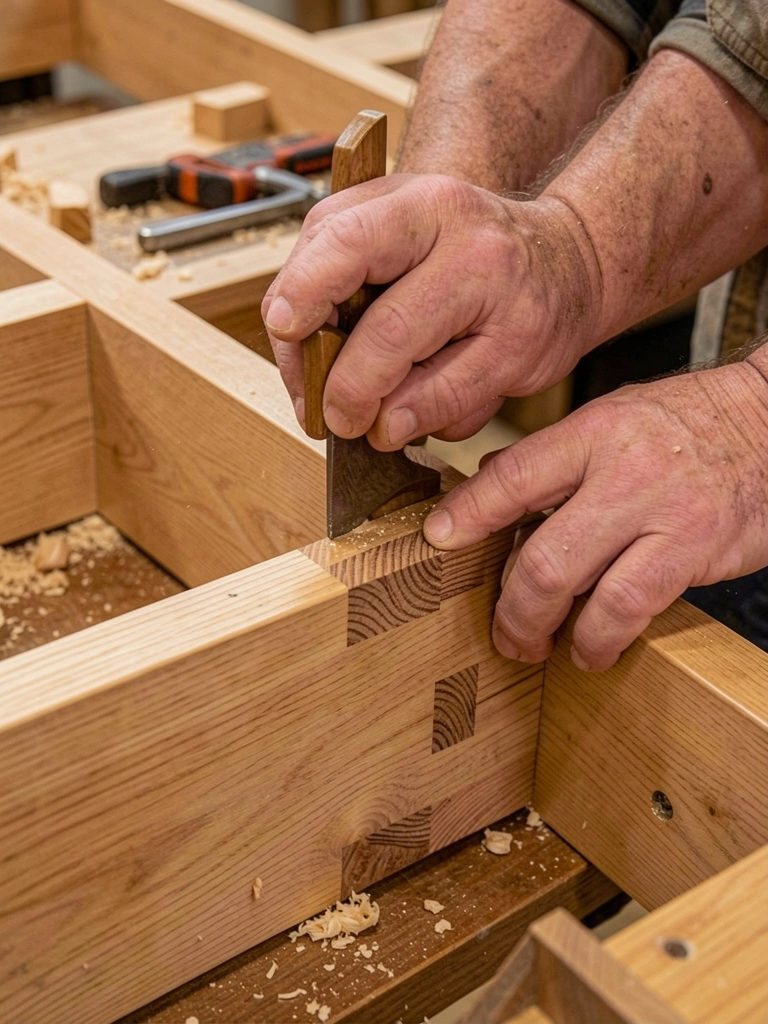
    1. Choose Exposed Mortise-and-Tenon Joinery Frame

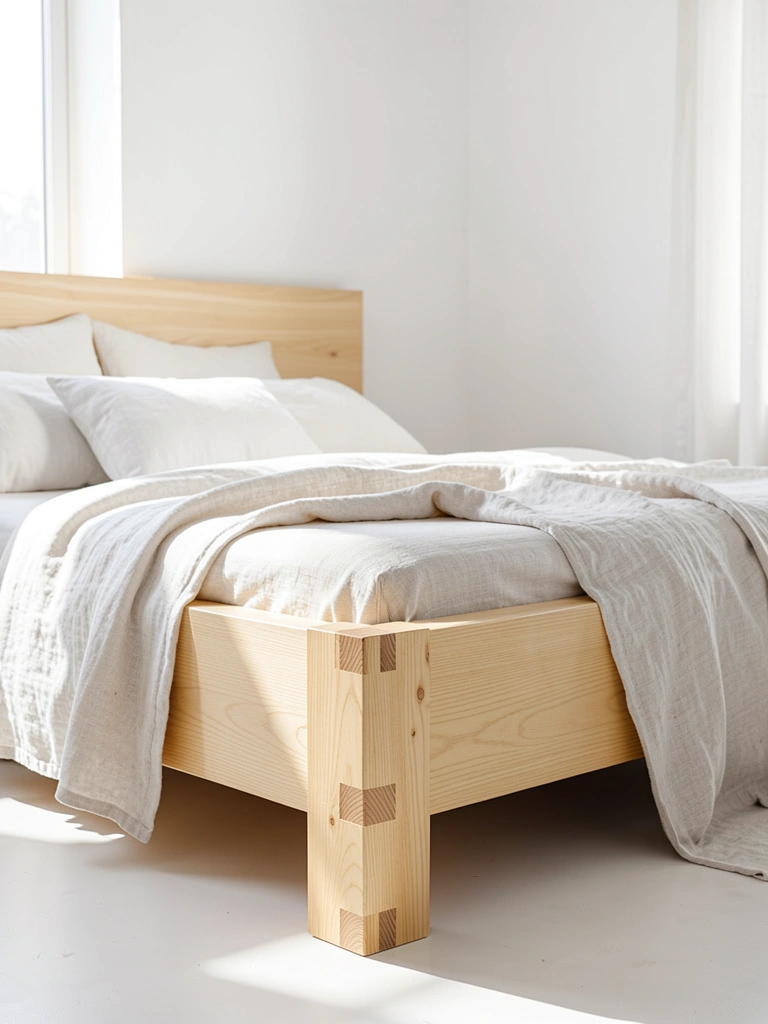
    A mortise-and-tenon joint is the gold standard of visible woodworking—where one piece slots perfectly into another. You see the craftsmanship, not hidden hardware. This traditional technique creates a bed that looks architectural and honest, reminding you daily that quality construction matters.

    Look for beds labeled “mortise-and-tenon joinery” from makers like Muuto, Blu Dot, or West Elm’s mid-century line. Expect to invest $800–$2,500 depending on wood type and size. If budget’s tight, scan Facebook Marketplace or estate sales for solid wood vintage frames you can refinish yourself. The beauty of this style is it never feels trendy—it’s timeless. Assembly takes about 2–3 hours with a partner and basic tools.

    You’ll notice how the visible joints make the bed feel substantial and real. No mystery, no wobble, just honest joinery you can trust.

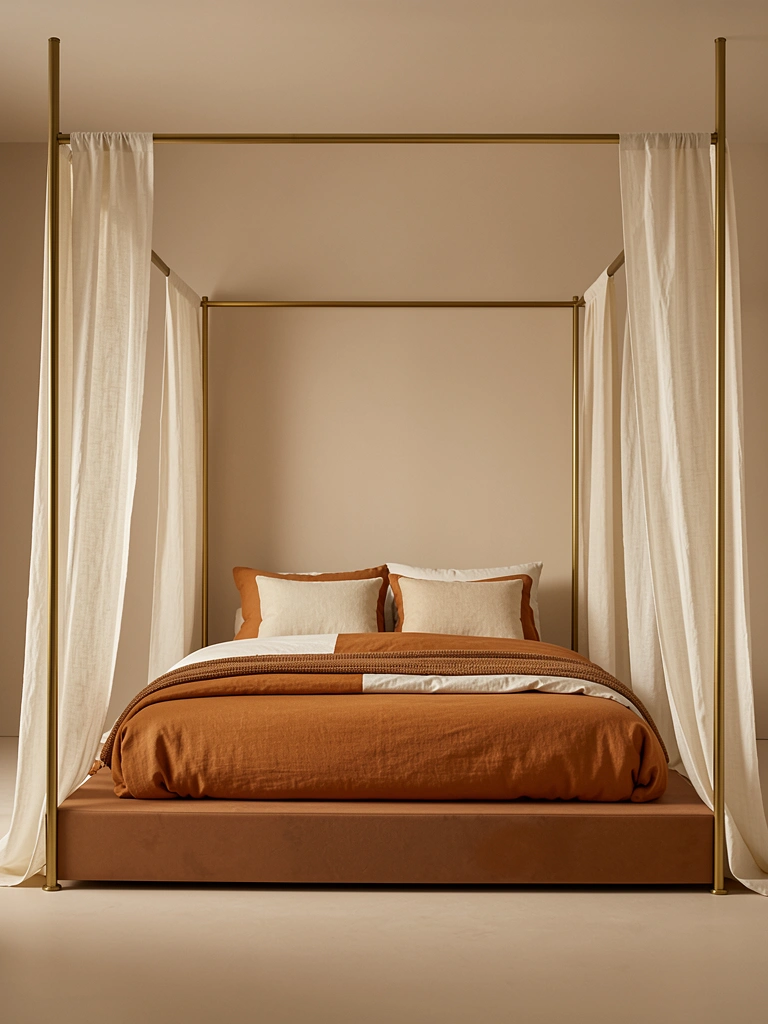
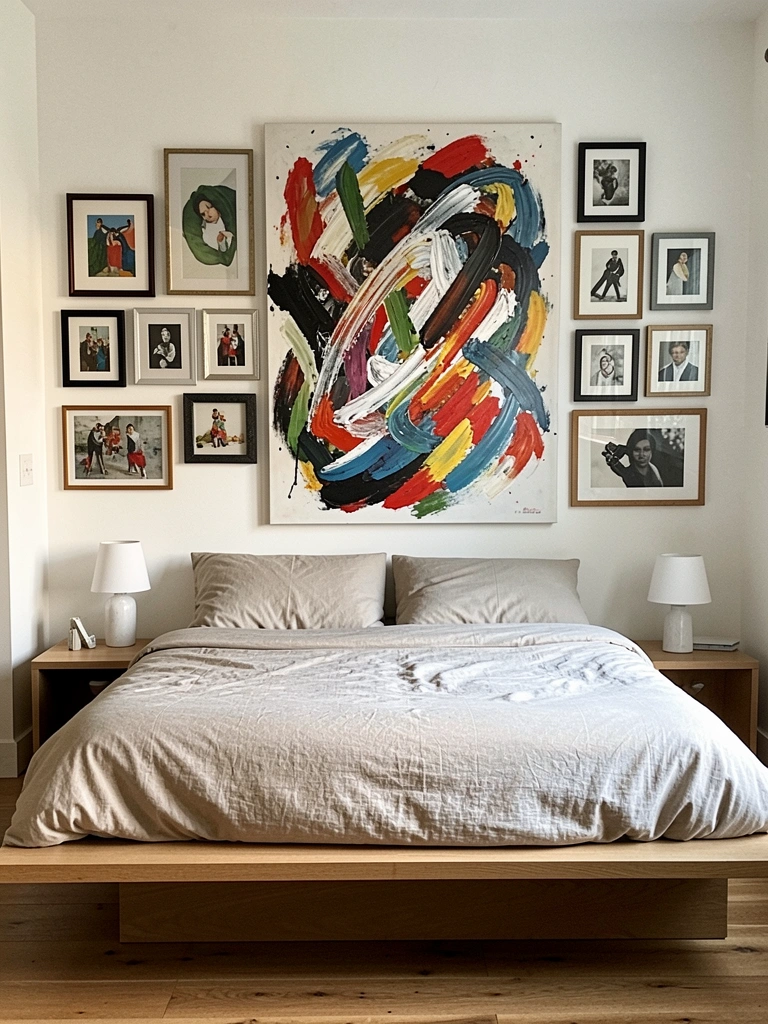
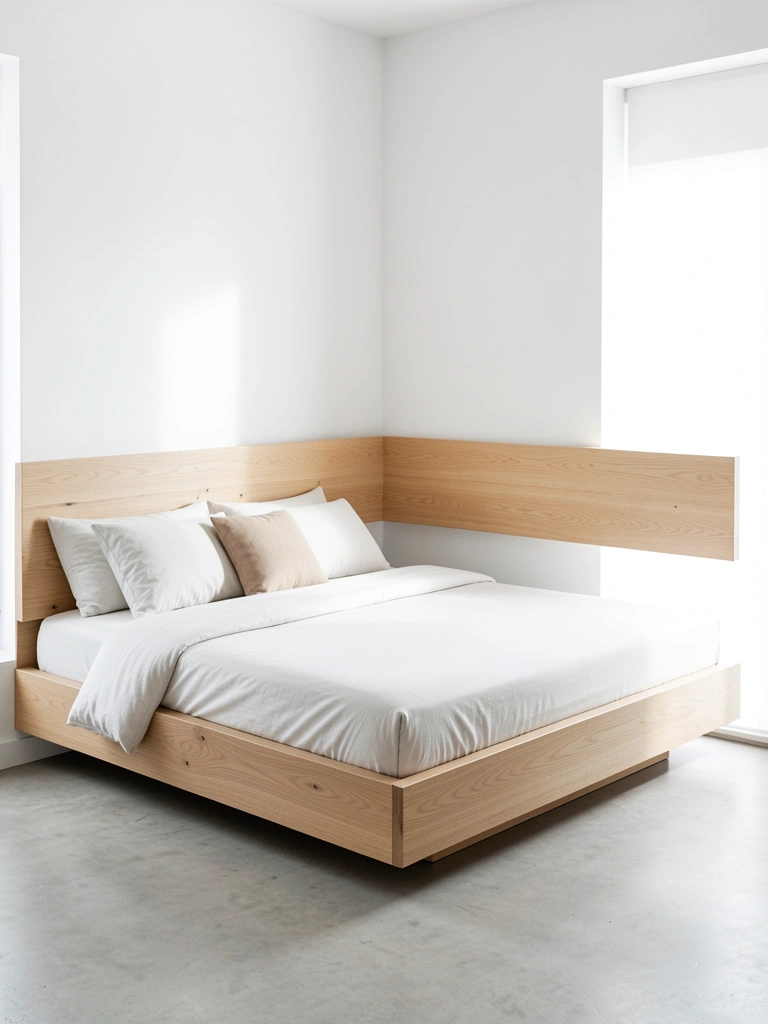
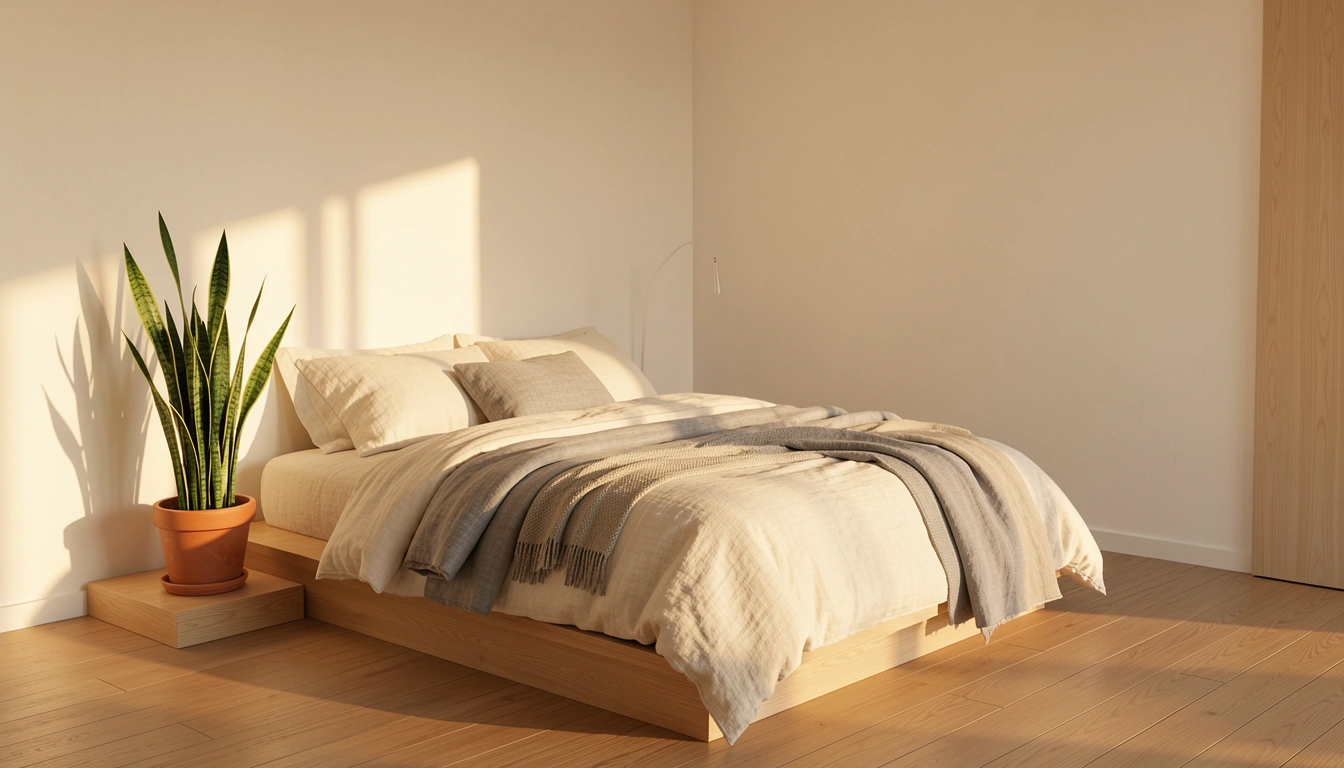
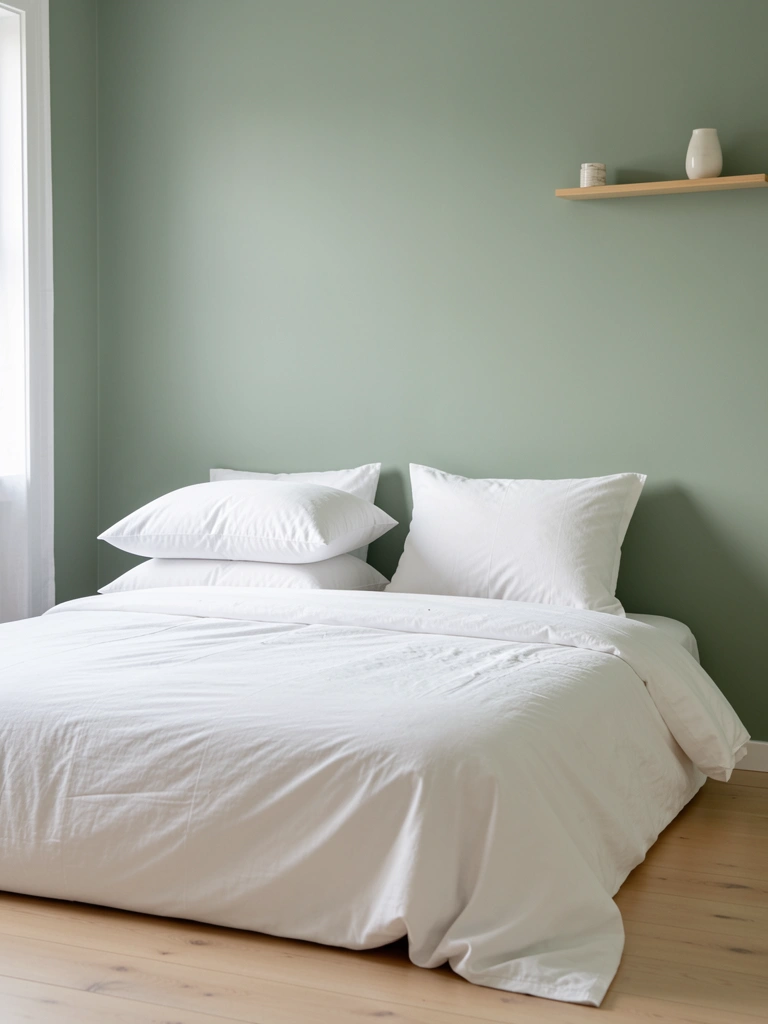
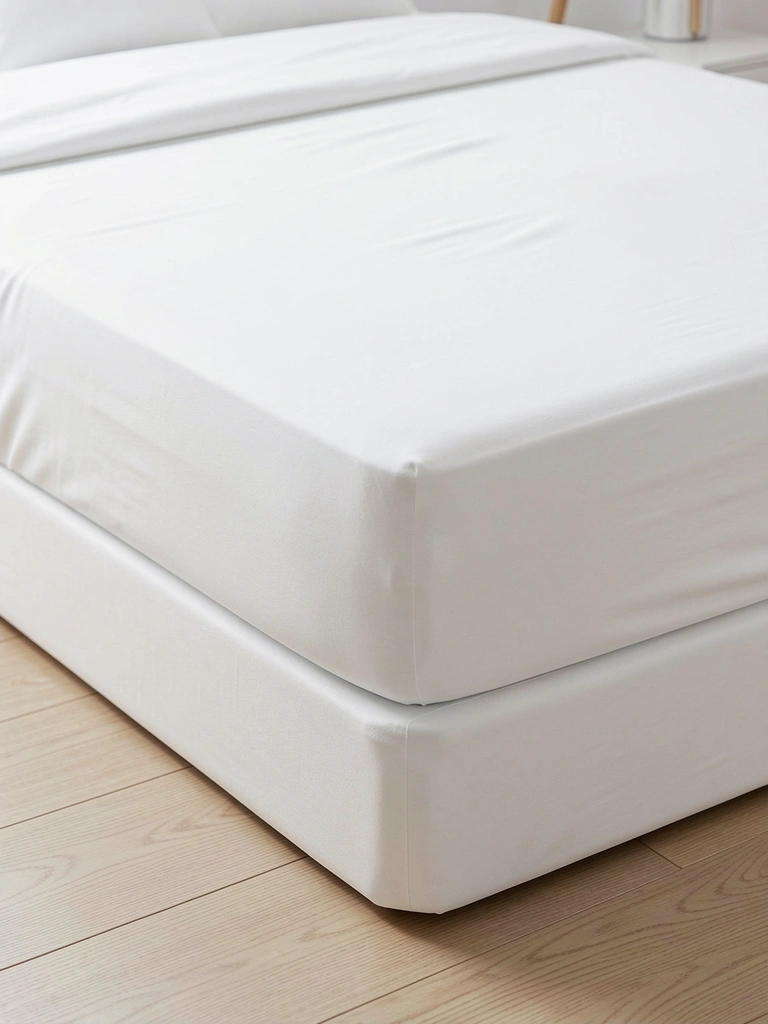
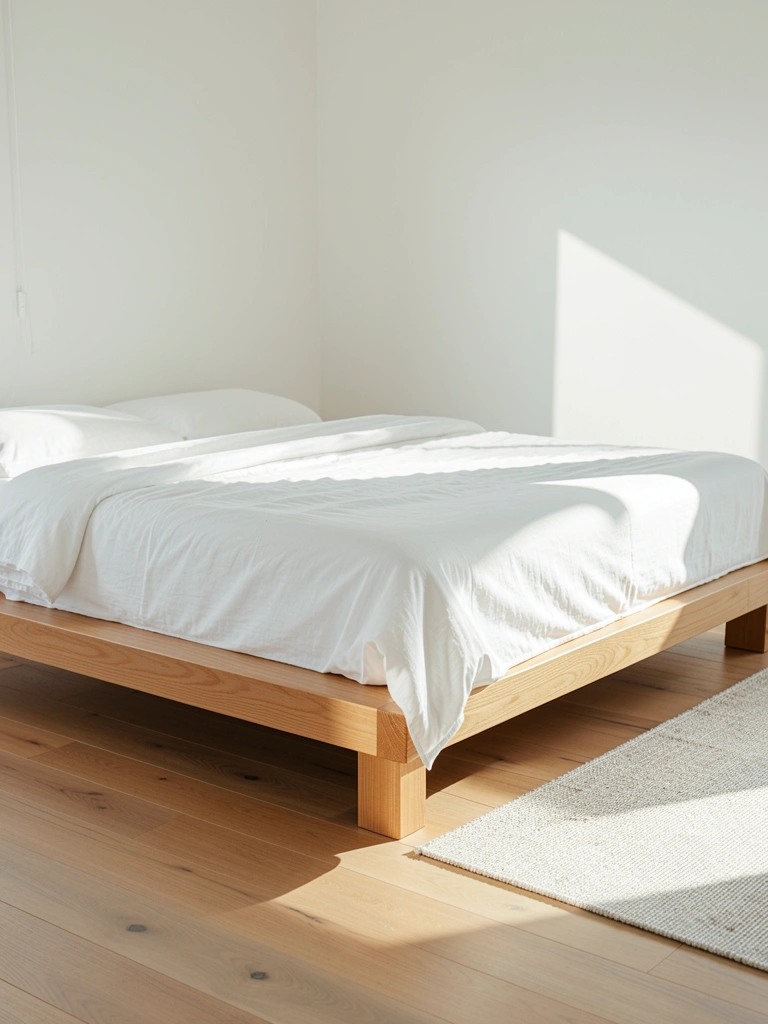
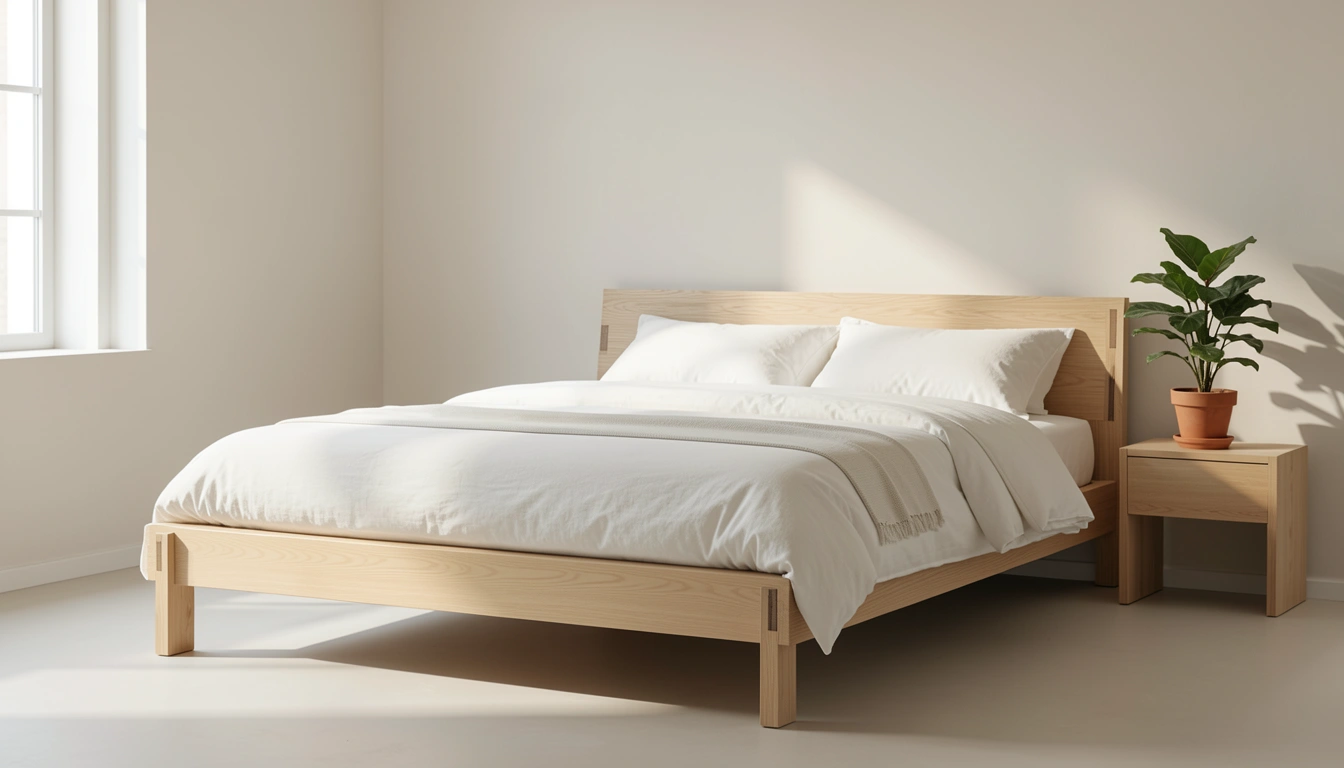
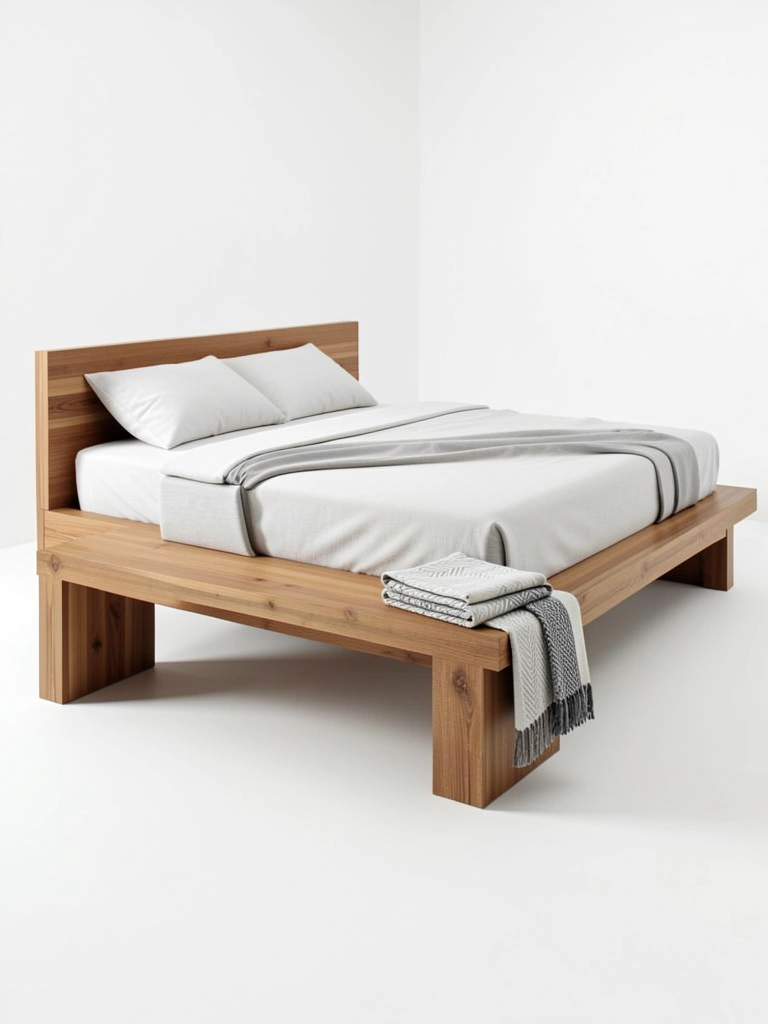
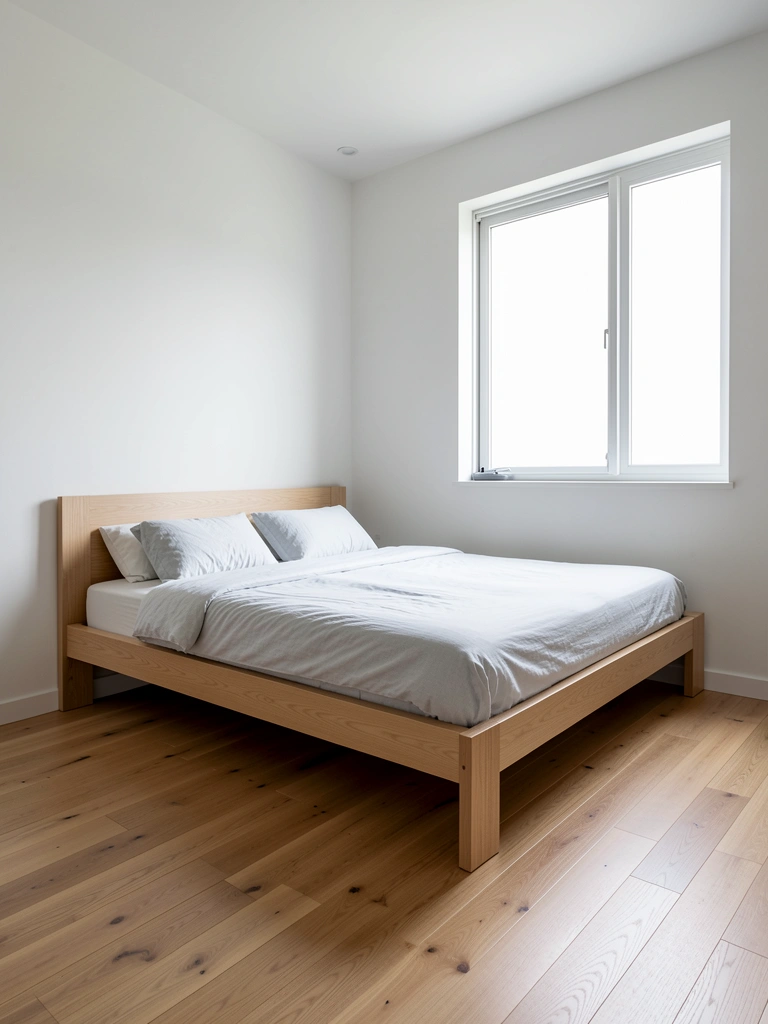
    2. Opt for a Low-Profile Platform Bed

    Platform beds sit close to the ground, eliminating the frame-and-box-spring combo. This minimal approach saves visual clutter and makes small rooms feel bigger. The joinery work is highlighted because there’s nowhere to hide—every detail matters.

    Hunt for platform beds at Article, CB2, or IKEA’s better ranges ($300–$1,200). Japanese-inspired designs often nail this aesthetic with simple slat construction visible underneath. If you’re handy, plans for DIY platform beds with visible joinery are free on Etsy and Instructables—budget $200–$400 in materials and a weekend. The lower profile creates an immediate sense of calm and makes bedmaking easier since you’re not reaching over a high frame.

    Your bedroom feels more spacious and serene. Plus, platform beds are renter-friendly if your frame breaks down into modular pieces.

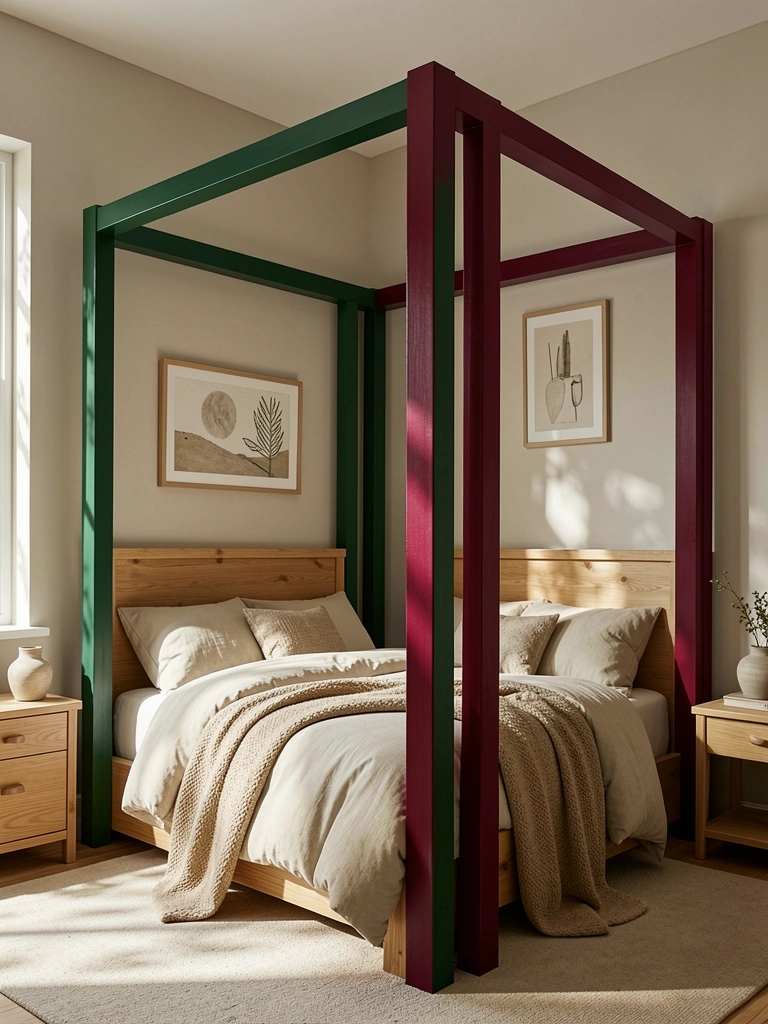
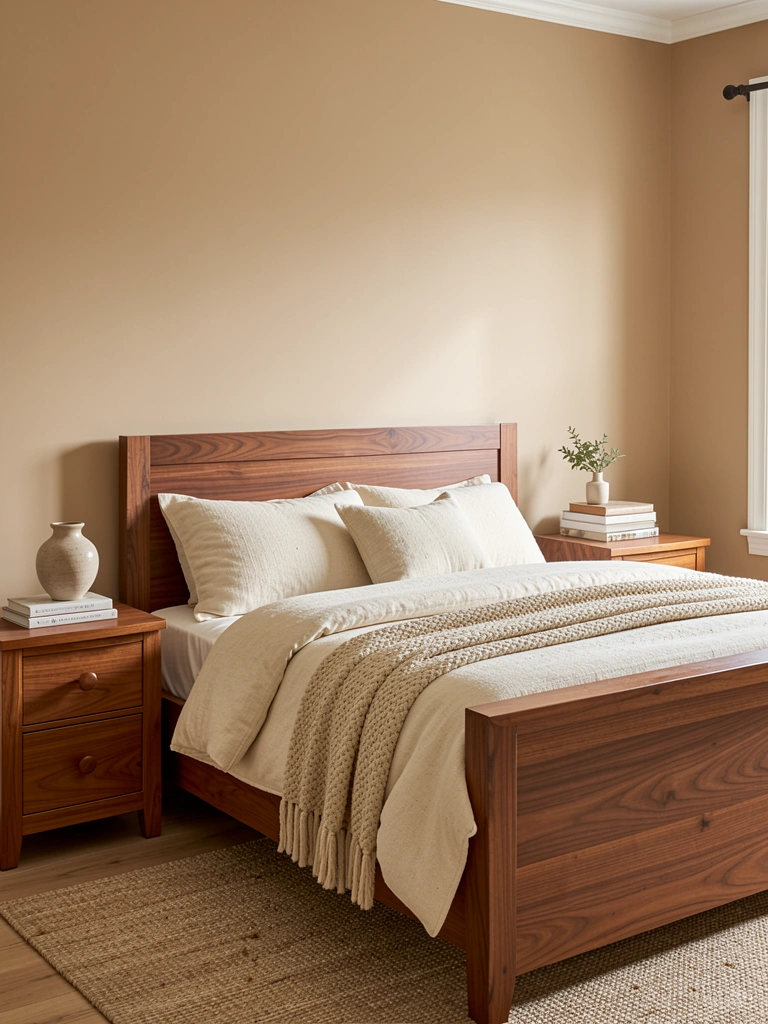
    3. Combine Walnut and White Oak for Contrast

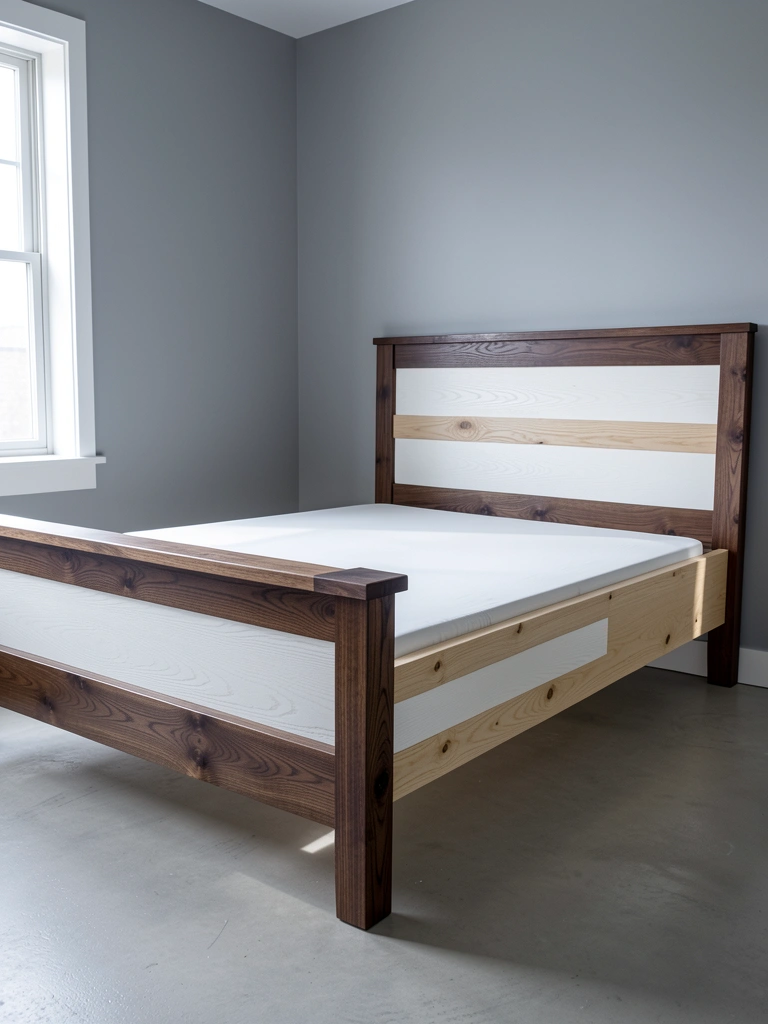
    Using two complementary wood tones in one bed frame creates subtle visual interest without clashing. Dark walnut legs with lighter oak rails, for example, showcase the joinery differences and draw the eye to the construction details.

    Custom makers on Etsy create this combo starting around $1,200–$2,500, or order from studios like Artifact Home or Norm Architects-inspired retailers ($1,800–$3,200). If you’re commissioning a custom piece, this is where you control every detail. Ready-made options with mixed wood tones pop up at Article and Design Within Reach ($1,500–$2,800). The mixed tones highlight the different wood properties and make the joinery feel like intentional design, not accident.

    This approach brings warmth and sophistication without requiring a decorator’s touch.

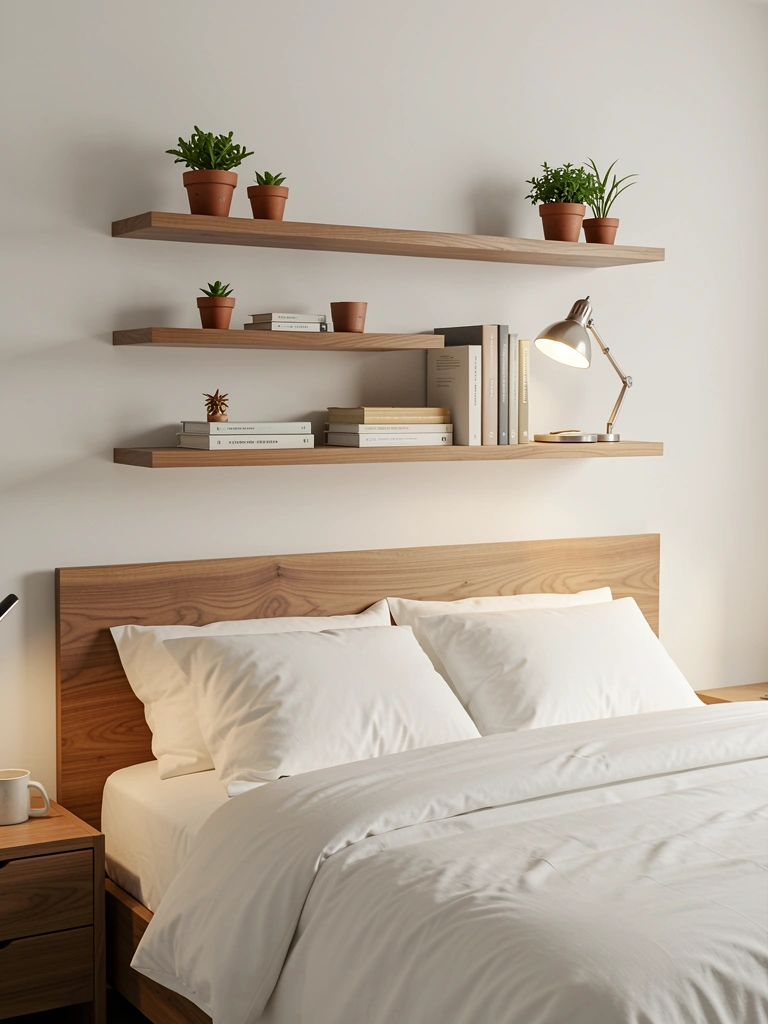
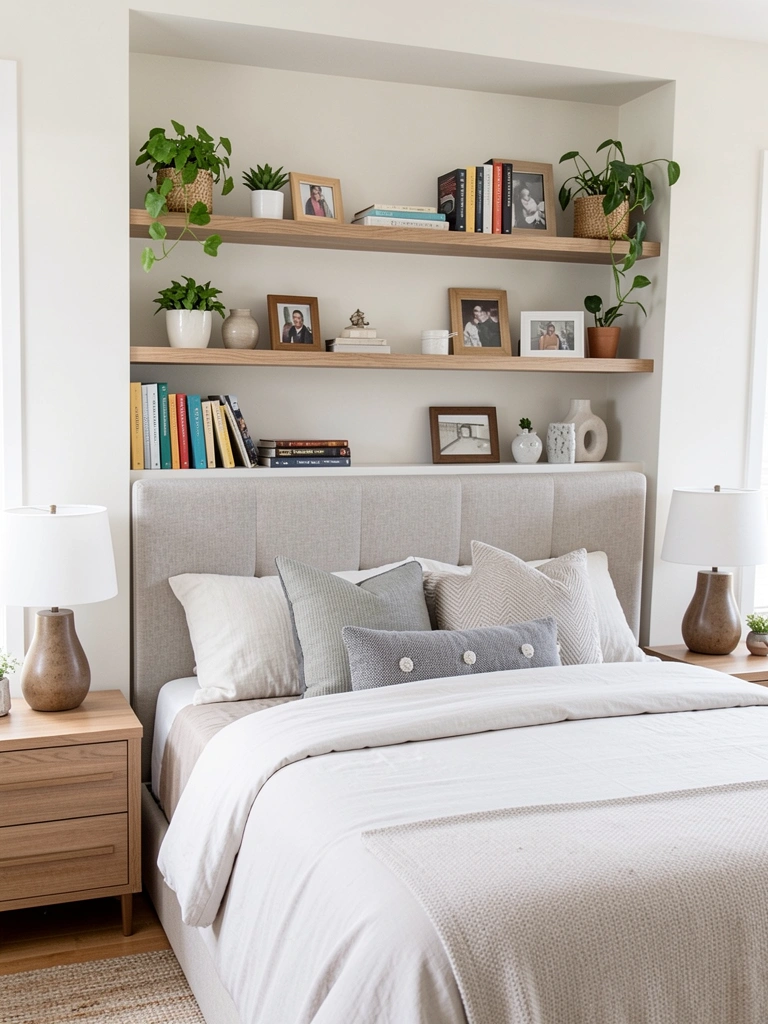
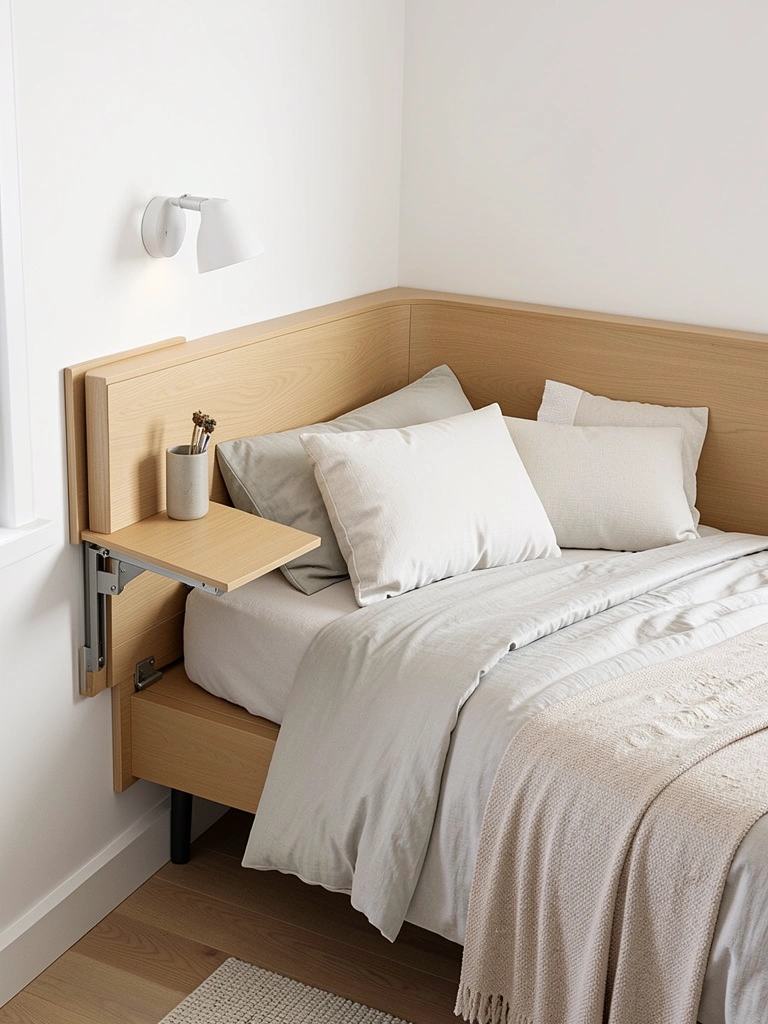
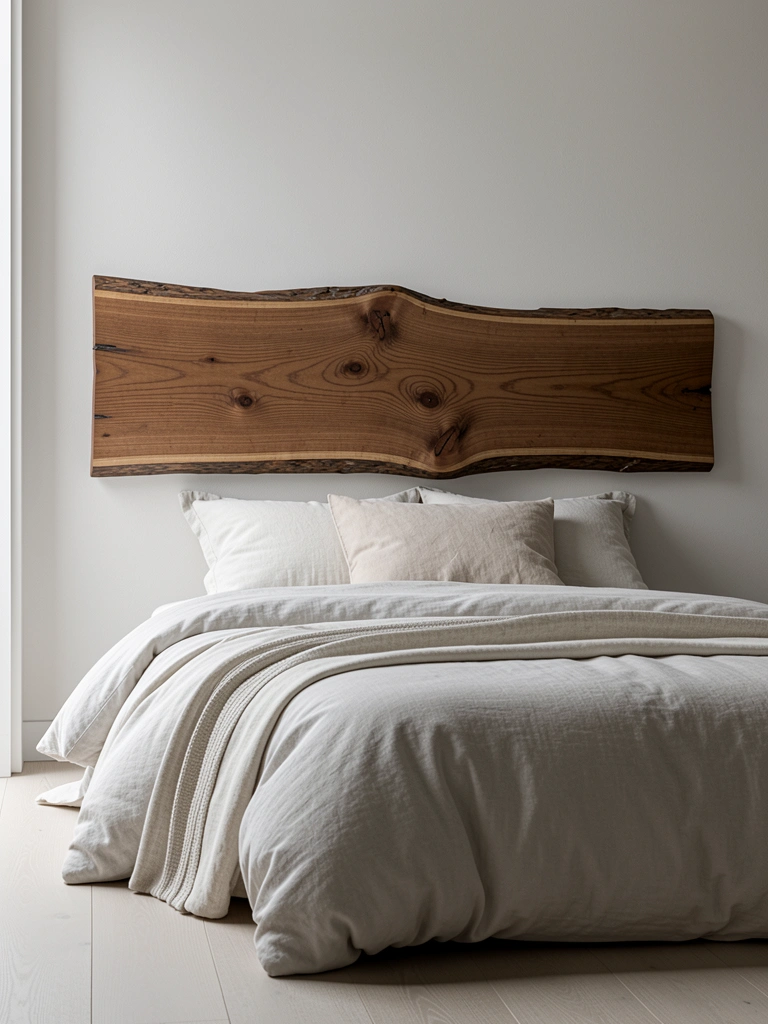
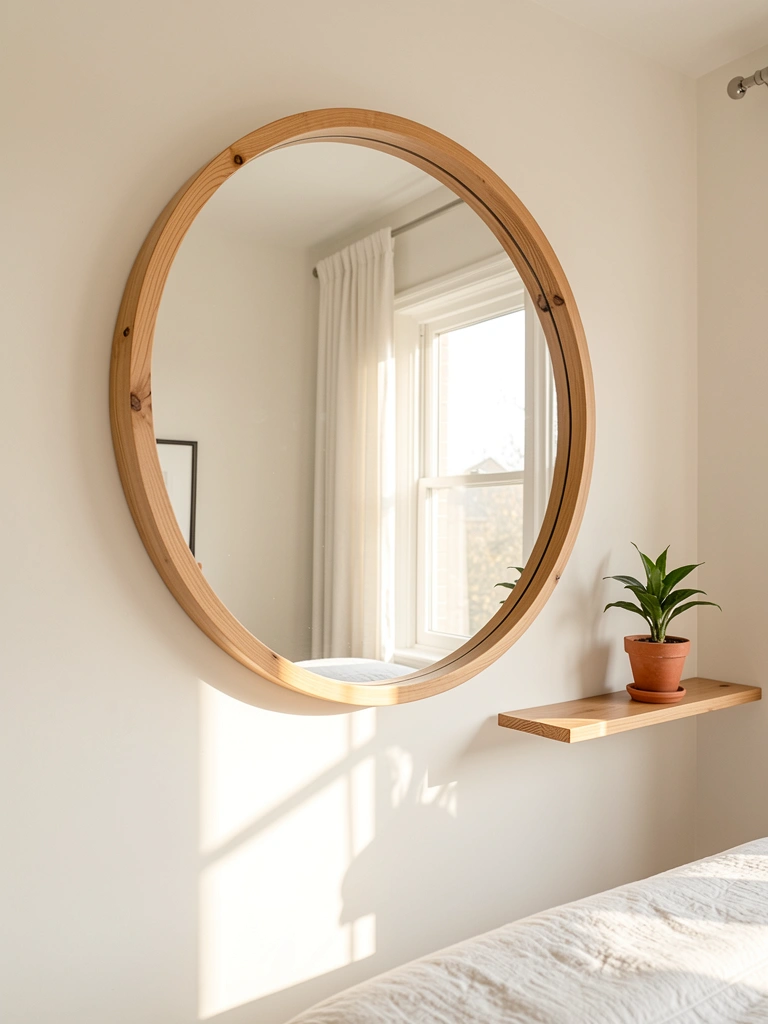
    4. Install a Floating Headboard Separately

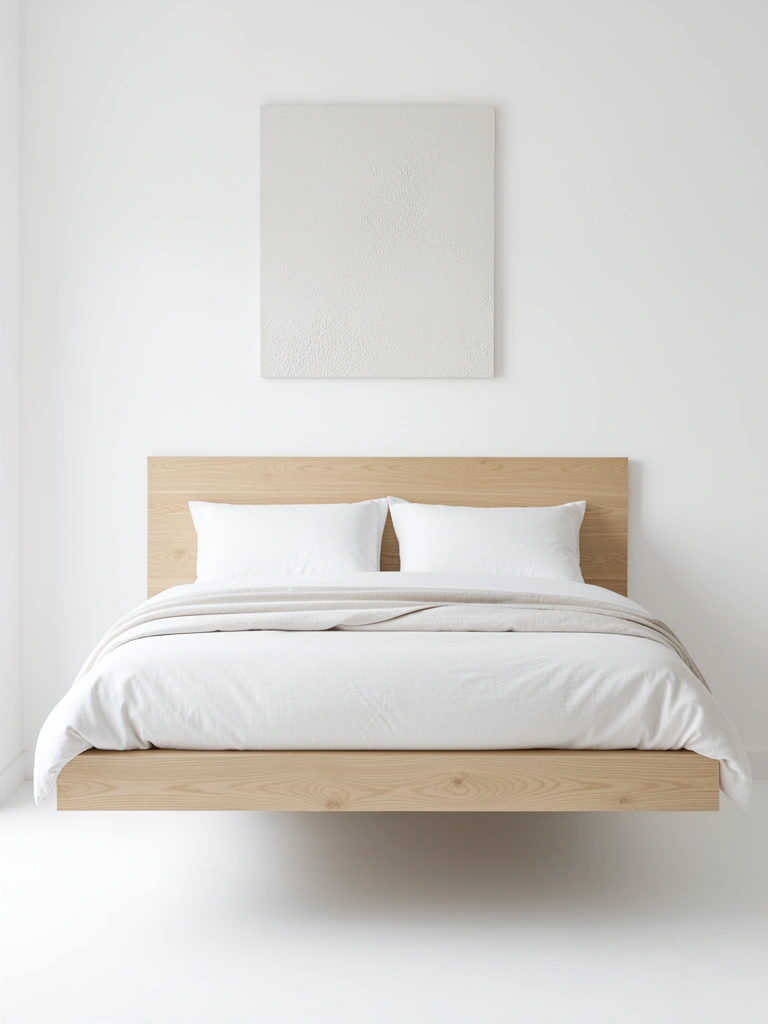
    Floating headboards mounted to wall studs rather than attached to the bed frame create an illusion of weightlessness. This works especially well with minimal joinery since the joints become a focal point against the wall.

    Purchase a floating headboard panel from Etsy ($200–$600 depending on size and wood), IKEA’s Malm headboards ($80–$150), or commission a custom piece from a local woodworker. Installation takes a handyperson 1–2 hours and costs nothing if you DIY. The visual effect makes your bed feel sculptural and intentional. Bonus: floating headboards are renter-friendly if you use toggle bolts and patch afterward.

    Your room gains architectural interest without the bed feeling heavy or bulky.

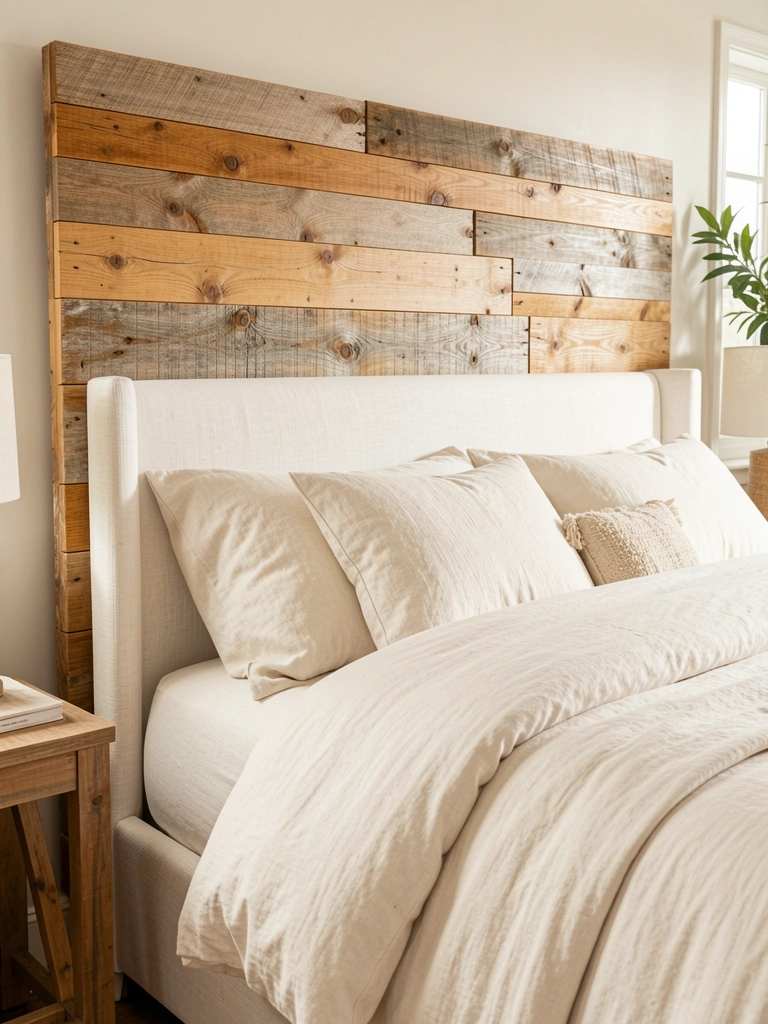
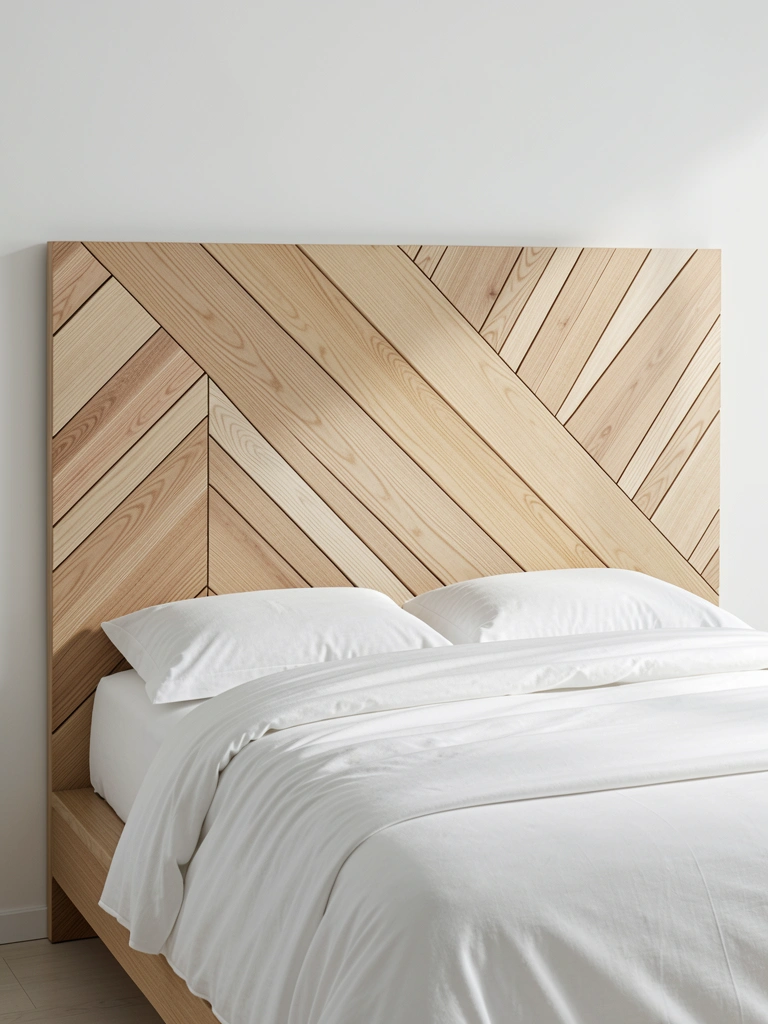
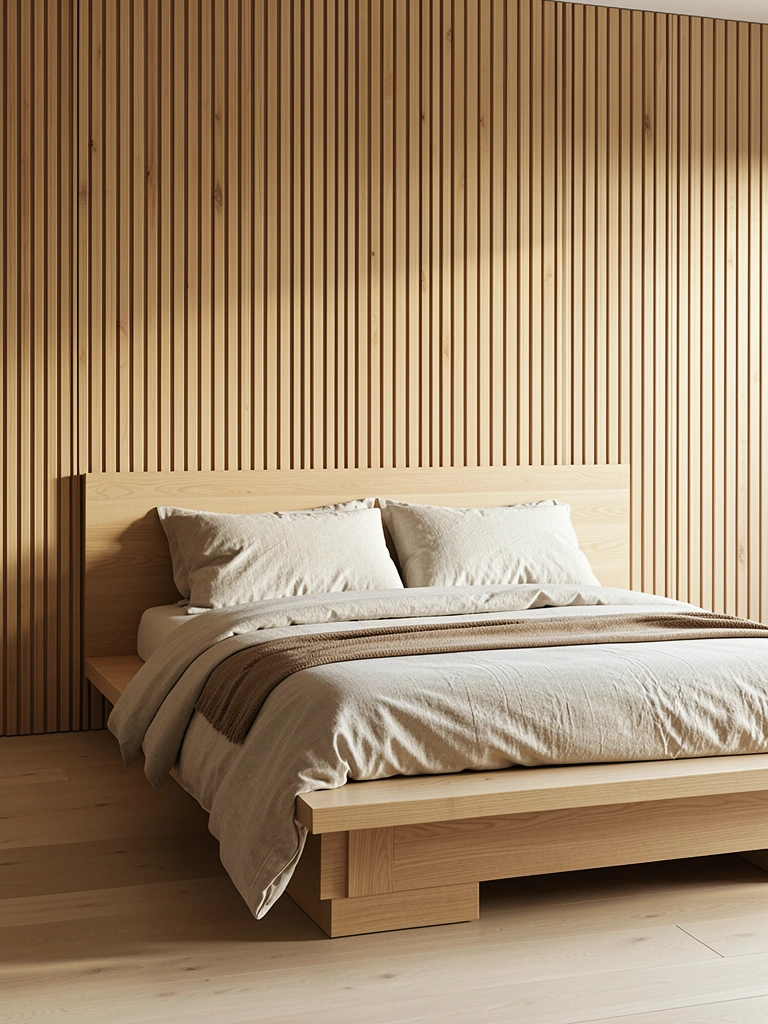
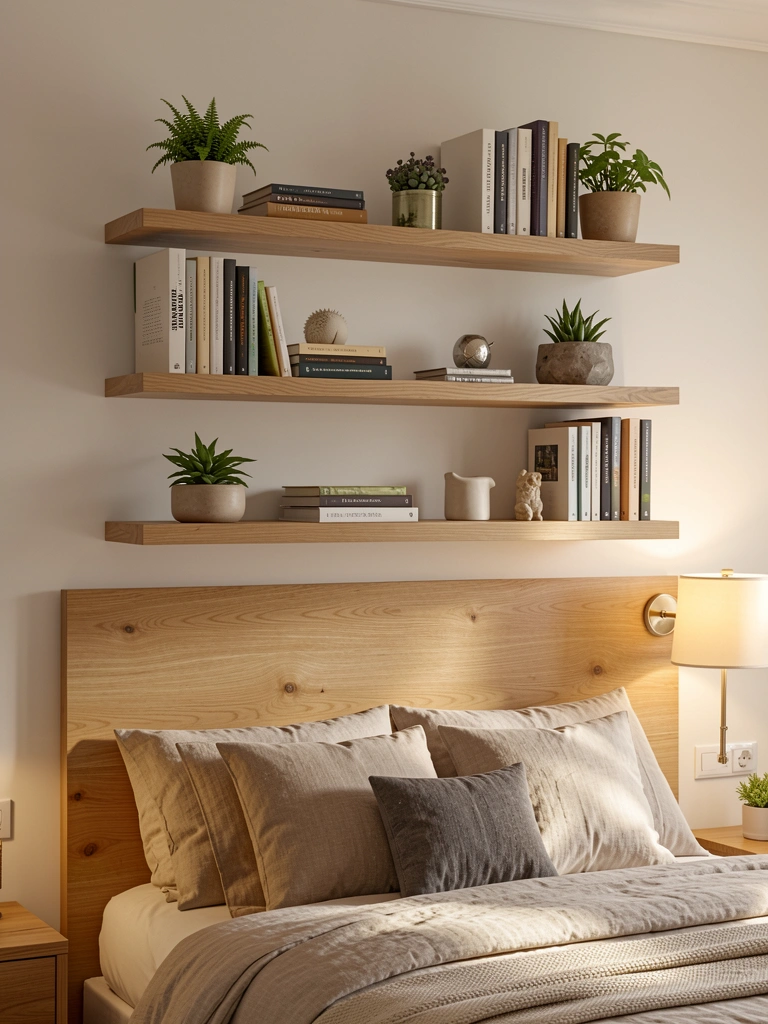
    5. Select a Slatted Headboard with Visible Joins

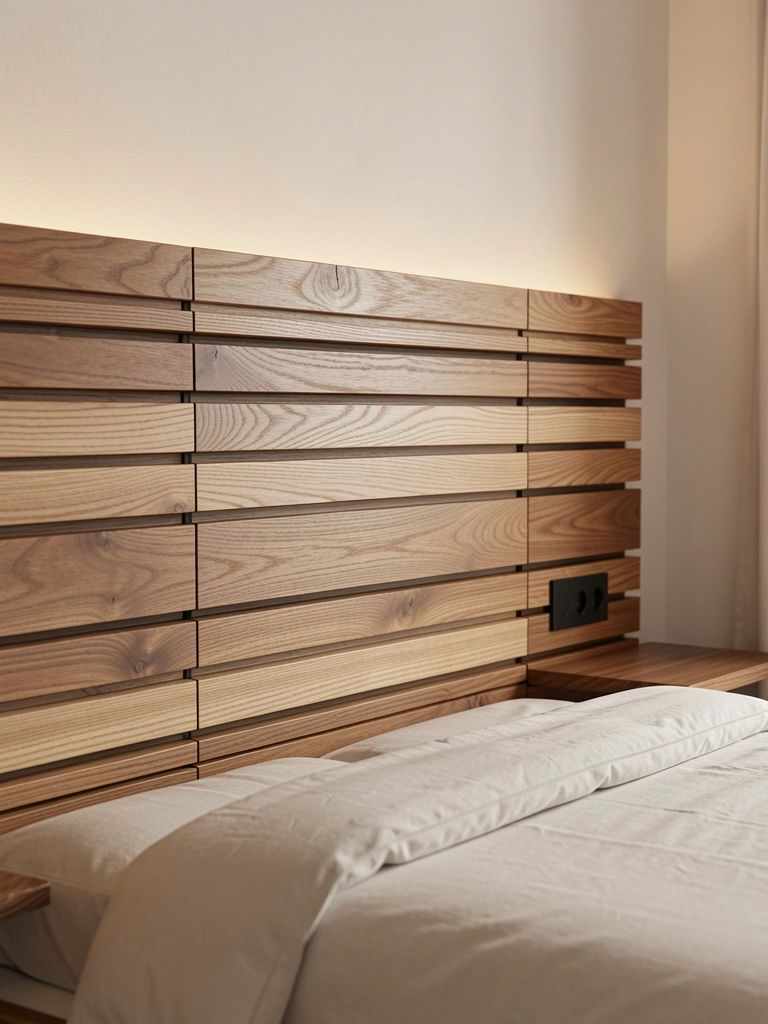
    Slatted headboards—horizontal or vertical wood strips joined together—celebrate construction. Every visible join tells a story of the craftsmanship. This style pairs beautifully with minimal joinery beds since it extends the architectural language.

    Find slatted options at West Elm ($400–$900), Muuto ($600–$1,200), or DIY with 1×4 pine boards, wood glue, and dowels (materials: $100–$200, time: one weekend). The slats can be mounted directly to wall studs or attached to your bed frame. Pro tip: Sand and stain the slats yourself to save $300–$500 on custom finishing. The DIY route teaches you exactly how the joinery works and lets you customize spacing and width.

    You end up with a genuinely unique headboard that becomes a conversation piece.

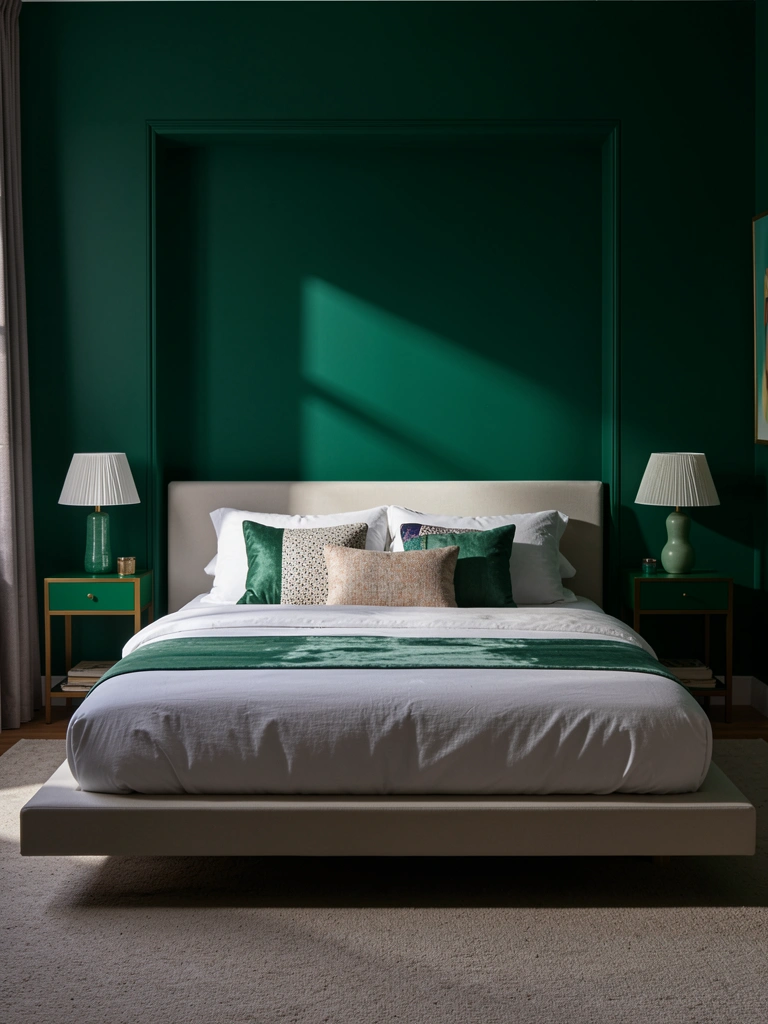
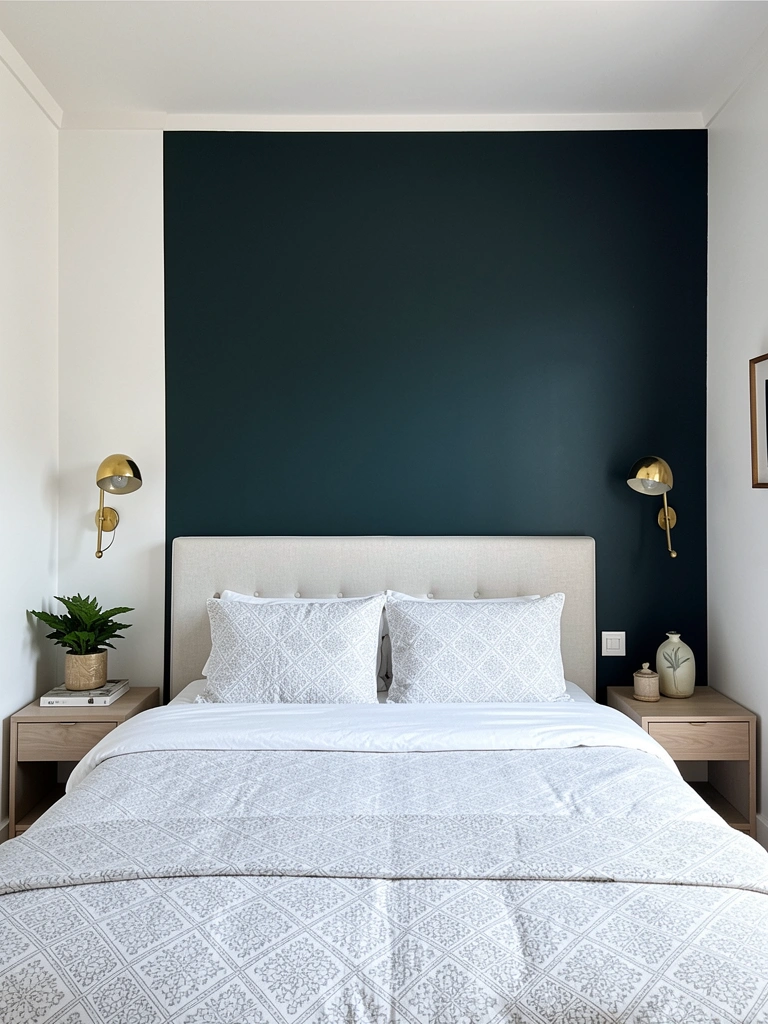
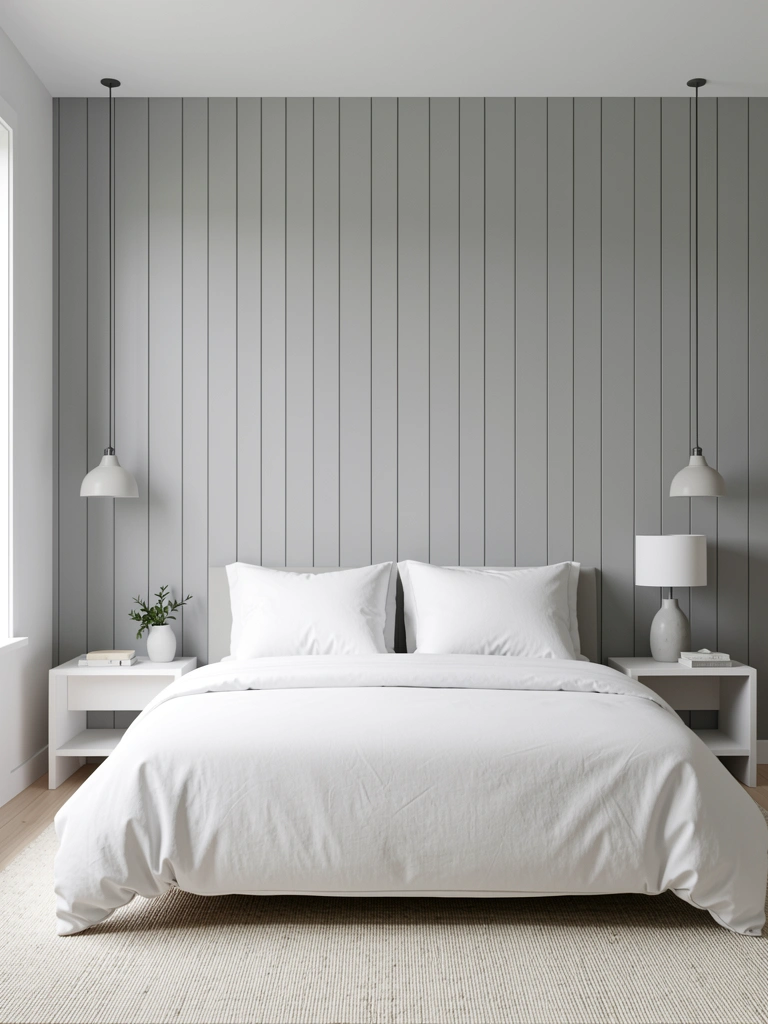
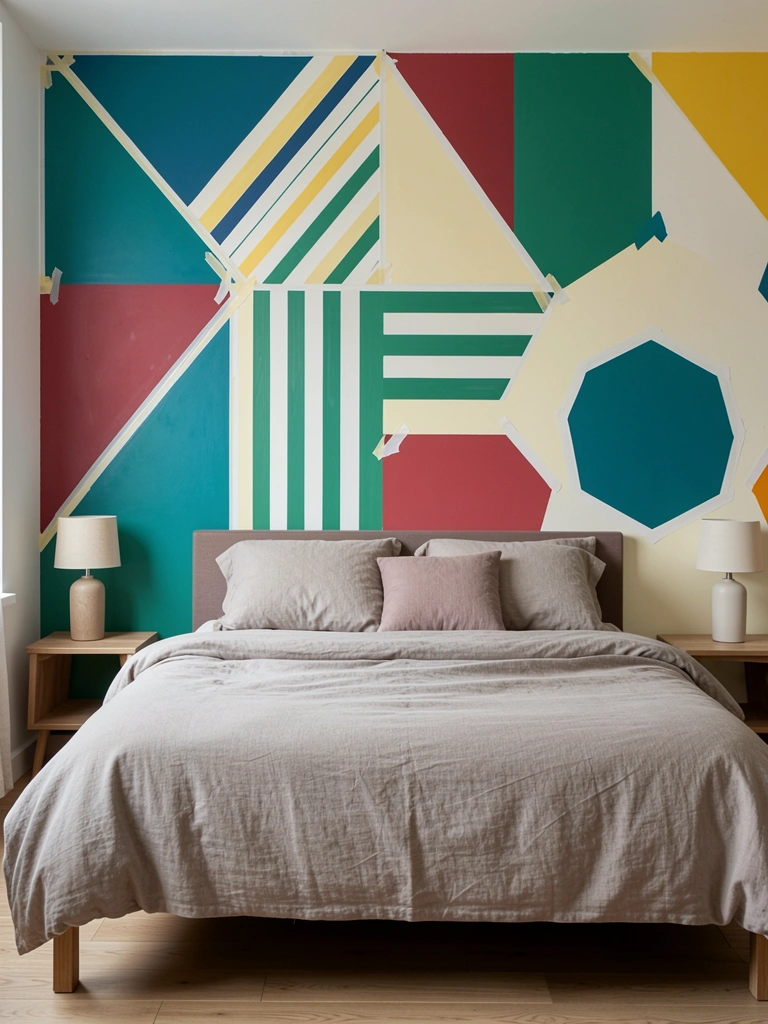
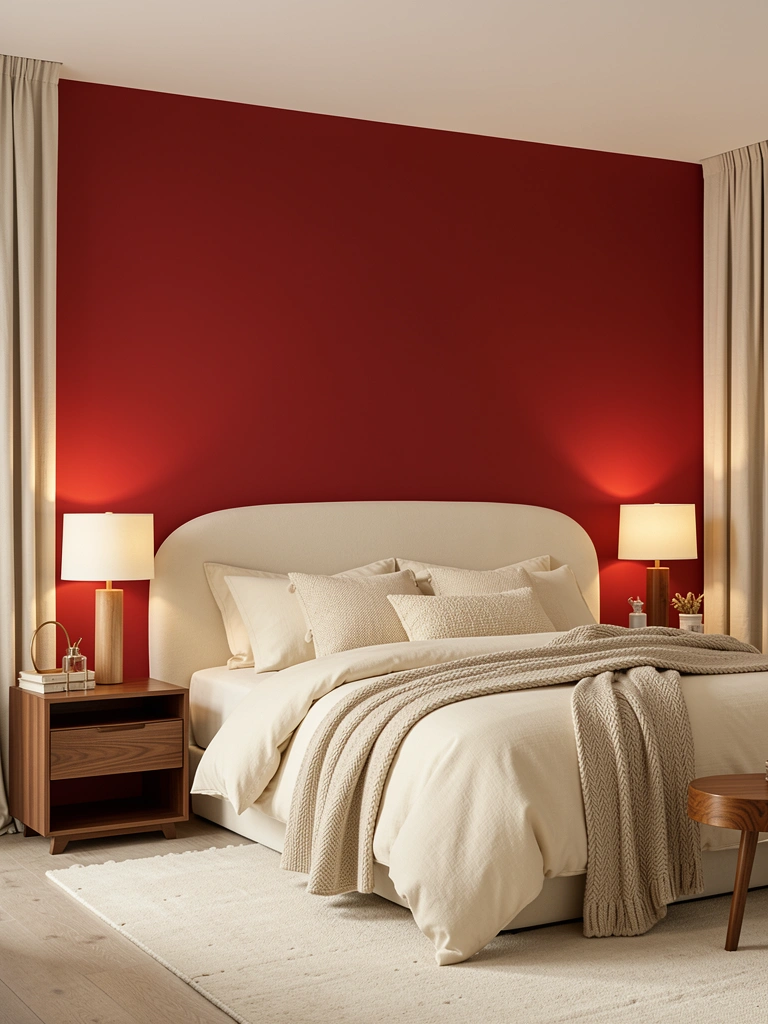
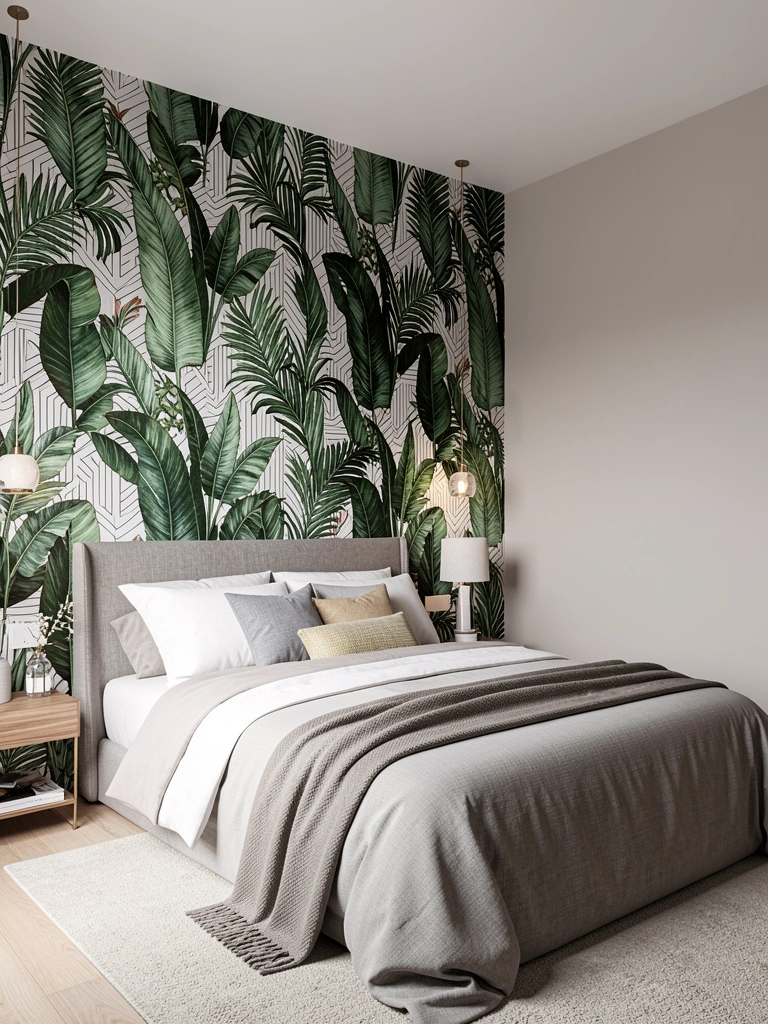
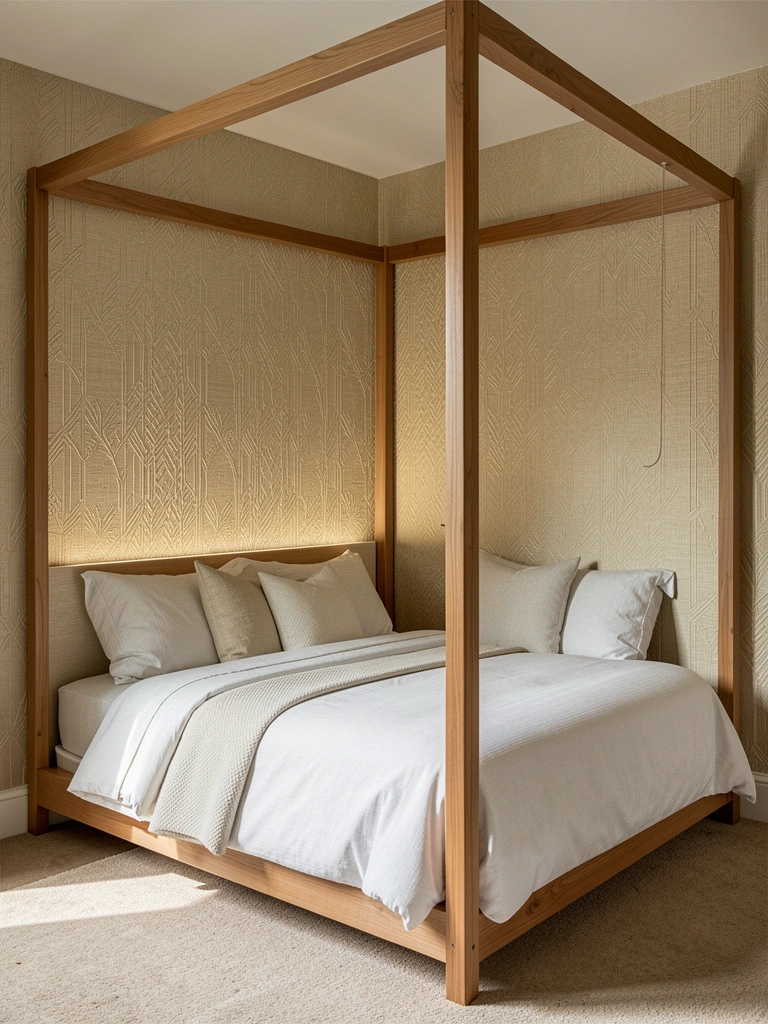
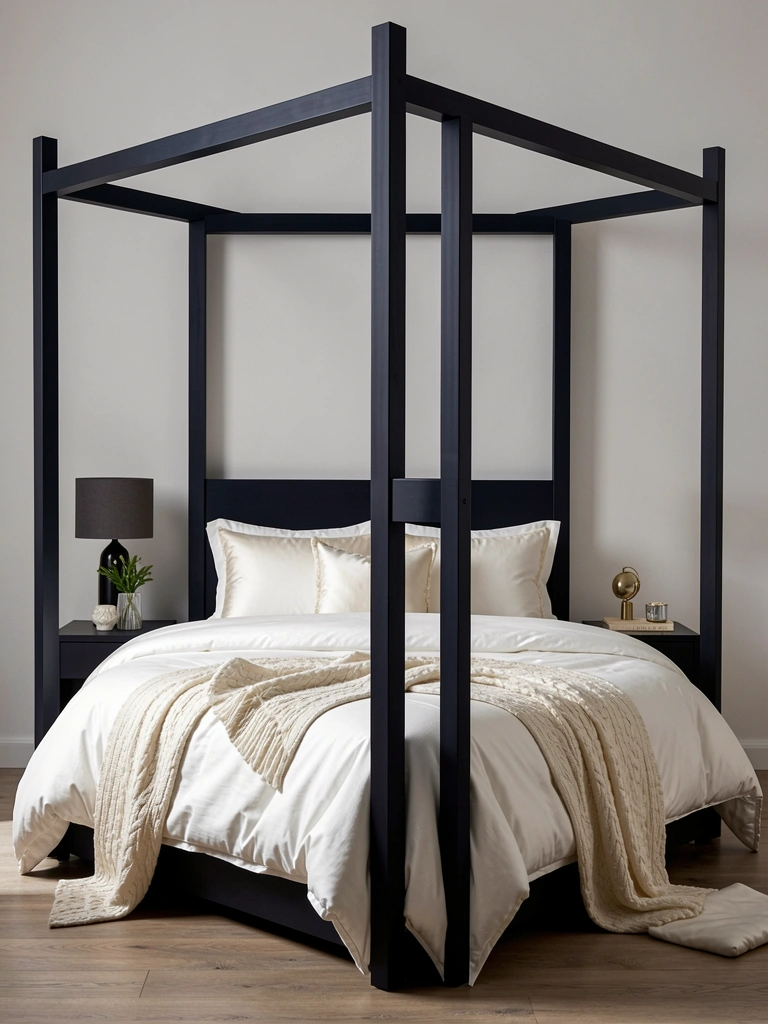
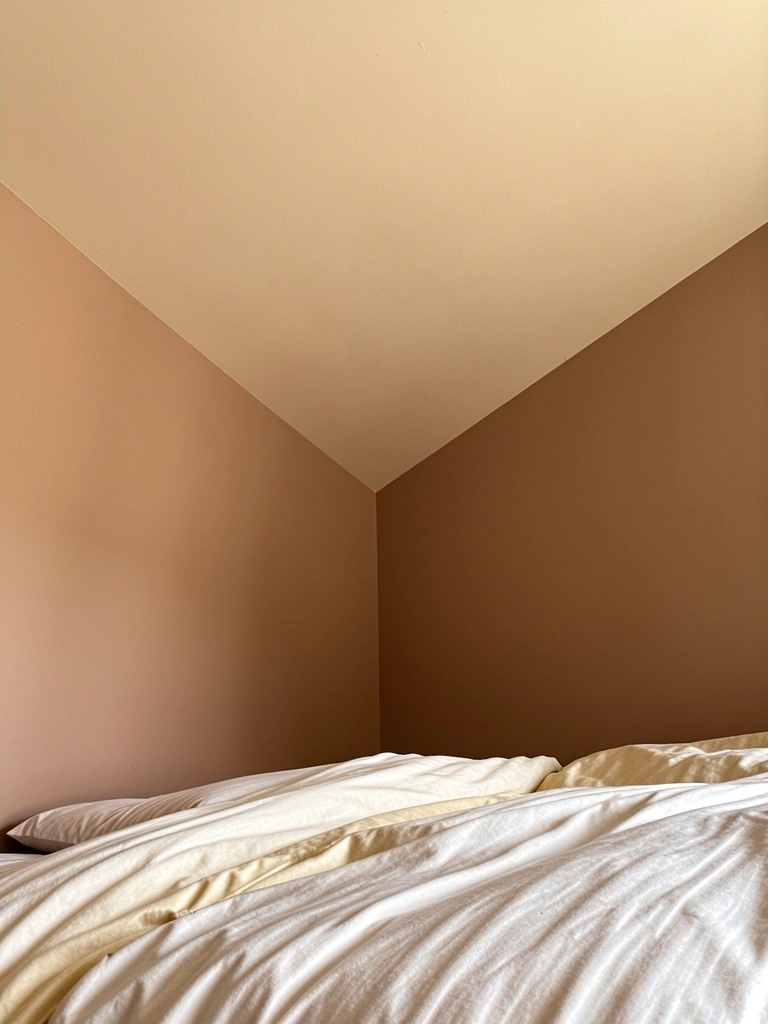
    6. Go Minimalist with a Bed Rail Only (No Headboard)

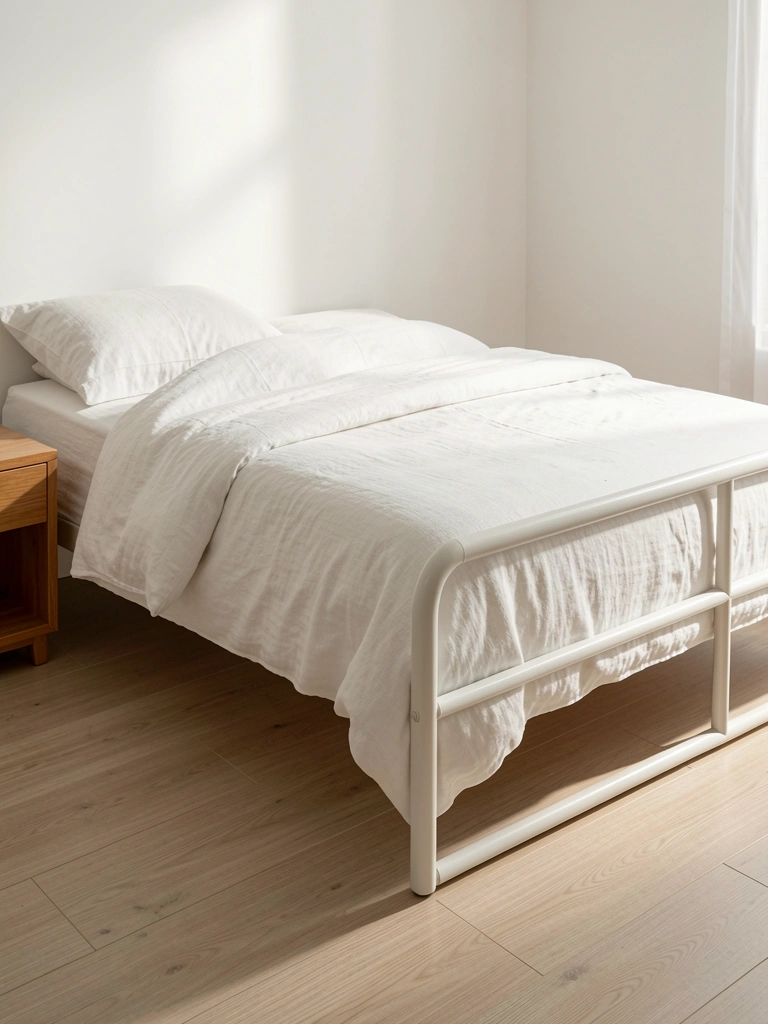
    The ultimate minimal approach: a bed that’s just a frame with visible joinery and no headboard at all. This works if your bedroom has strong wall color or art that becomes the visual anchor instead.

    Japanese platform bed frames or Scandinavian designs from Muuto and String often offer headboard-free options ($600–$1,500). IKEA’s Fjellse beds are budget-friendly alternatives ($150–$300). This approach requires your bedroom wall styling to pull weight—consider one piece of large art or a textured paint finish. Renter note: This is incredibly easy to move when you relocate. The frame alone tells the design story through joinery, not decoration.

    Your bed becomes pure function and form. Everything else in the room matters more visually.

    7. Add Tapered Legs for Visual Lightness

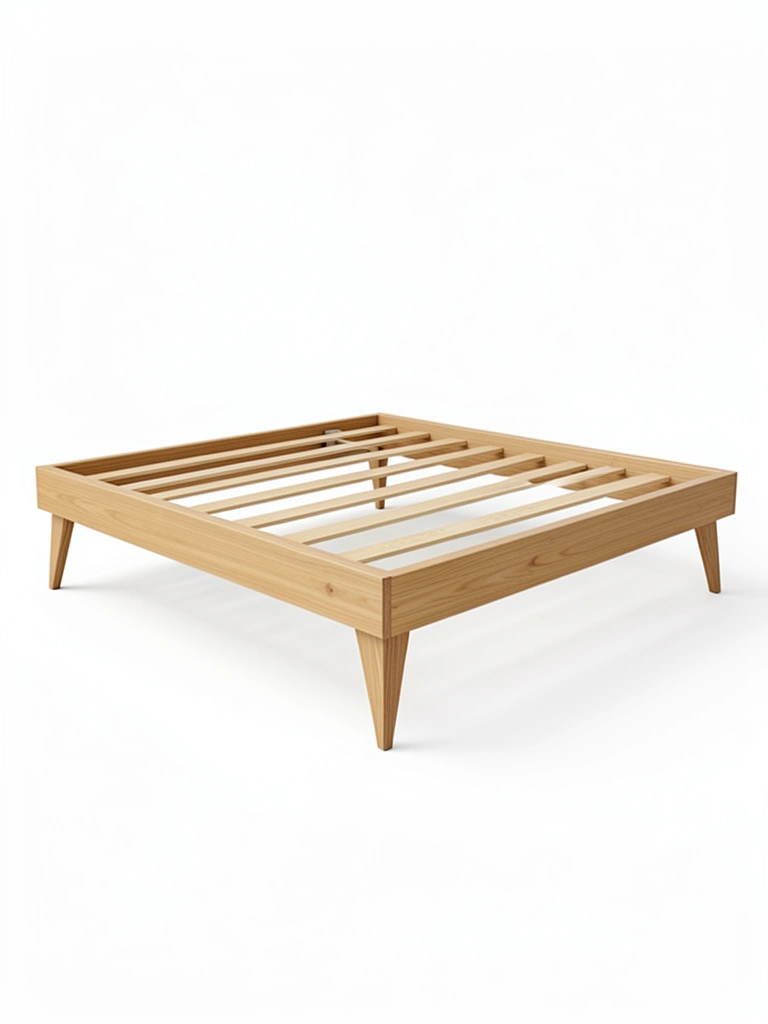
    Tapered legs (narrower at the bottom, wider at the top) create an optical illusion that the bed weighs less than it does. Paired with visible joinery at the frame, tapered legs become an elegant design detail that anchors the whole aesthetic.

    Most mid-century modern style beds feature tapered legs—look at West Elm’s Mid-Century collection ($800–$1,600), Article ($700–$1,400), or Blu Dot ($900–$1,800). If your current bed has bulky legs, a woodworker can reshape them (cost: $300–$600, time: 2–3 weeks). The angle of the taper matters: even subtle angles (3–5 degrees) change how the bed reads visually. No taper requirement means your space feels lighter and more refined.

    The room gains breathing room and sophistication from this single detail.

    8. Incorporate Visible Wood Pegs or Dowels

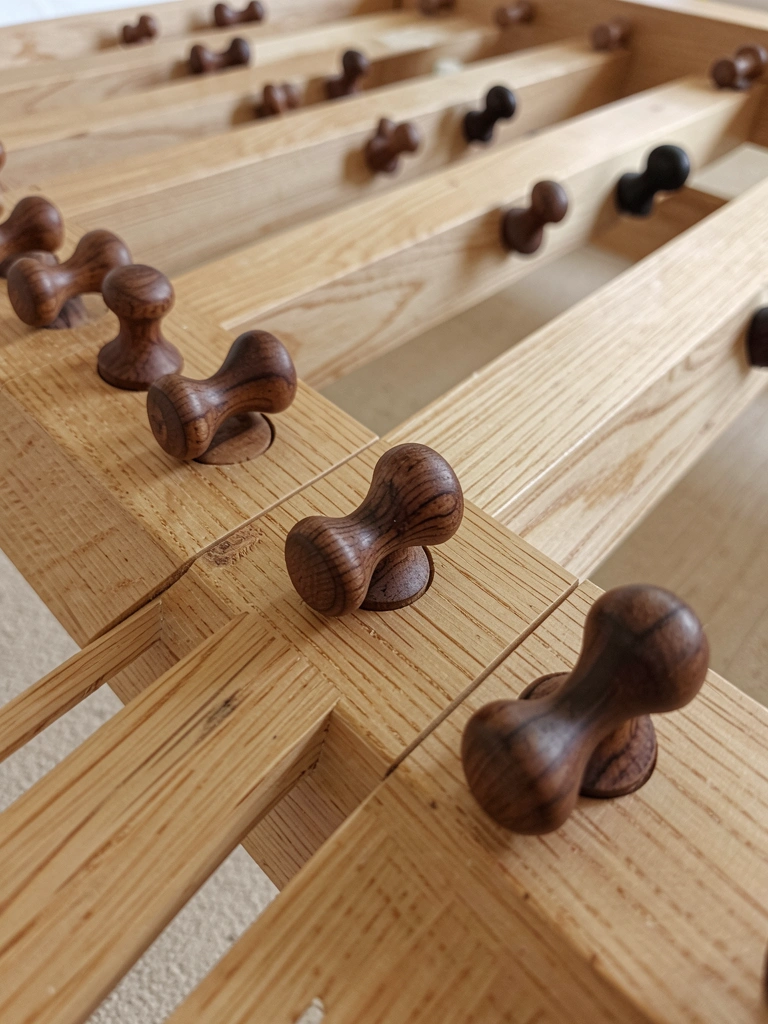
    Traditional joinery often uses wooden pegs or dowels through joints for both function and beauty. Leaving these pegs visible turns technical construction into intentional design. This detail says “handmade” and “built to last.”

    Most custom makers include visible pegs in their designs ($1,200–$2,800). Ready-made options at Etsy sellers specializing in Arts and Crafts or Mission-style beds ($900–$2,200) showcase this feature. If you’re commissioning work, specifically request visible pegs in contrasting wood (walnut pegs in oak, for example). The pegs are functional—they lock the joints—and aesthetic simultaneously. Pro tip: Measure peg diameter and spacing before ordering to ensure they photograph well and feel intentional, not random.

    Those pegs become focal points that celebrate the construction process.

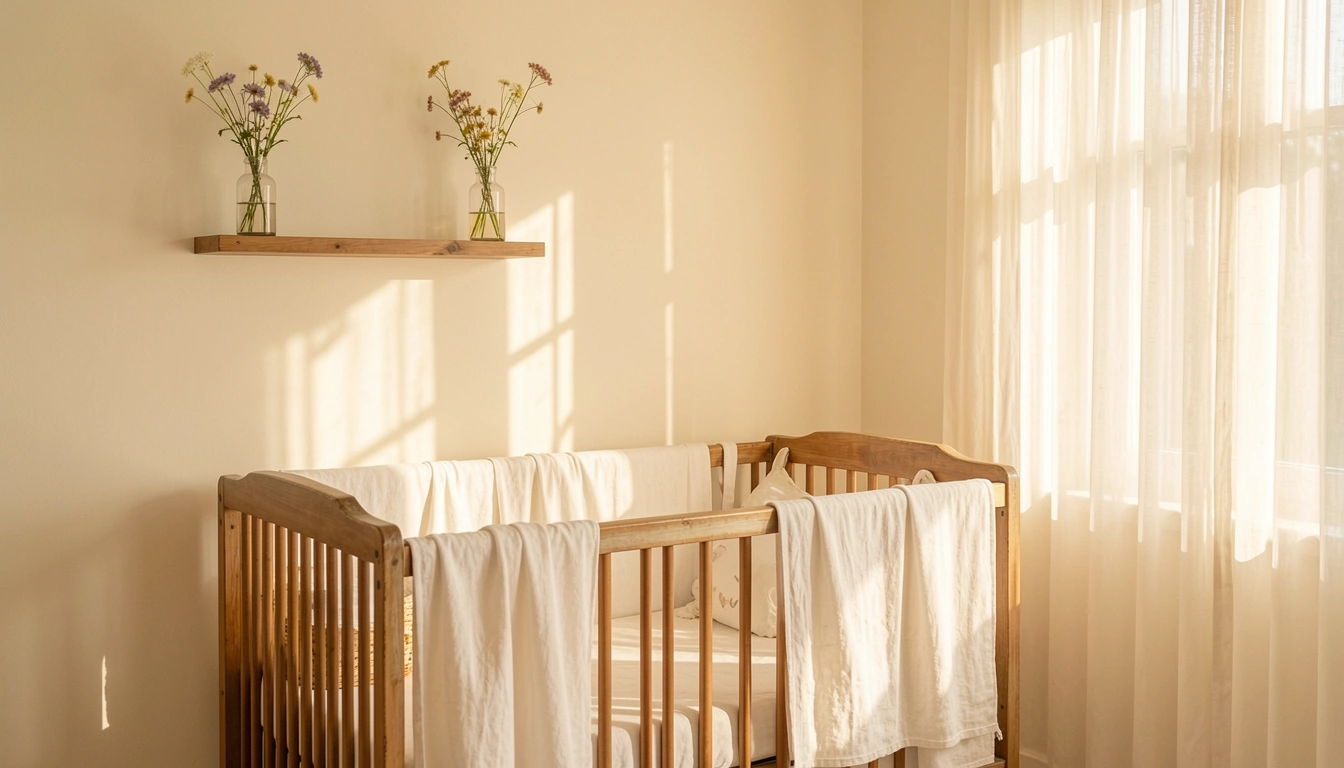
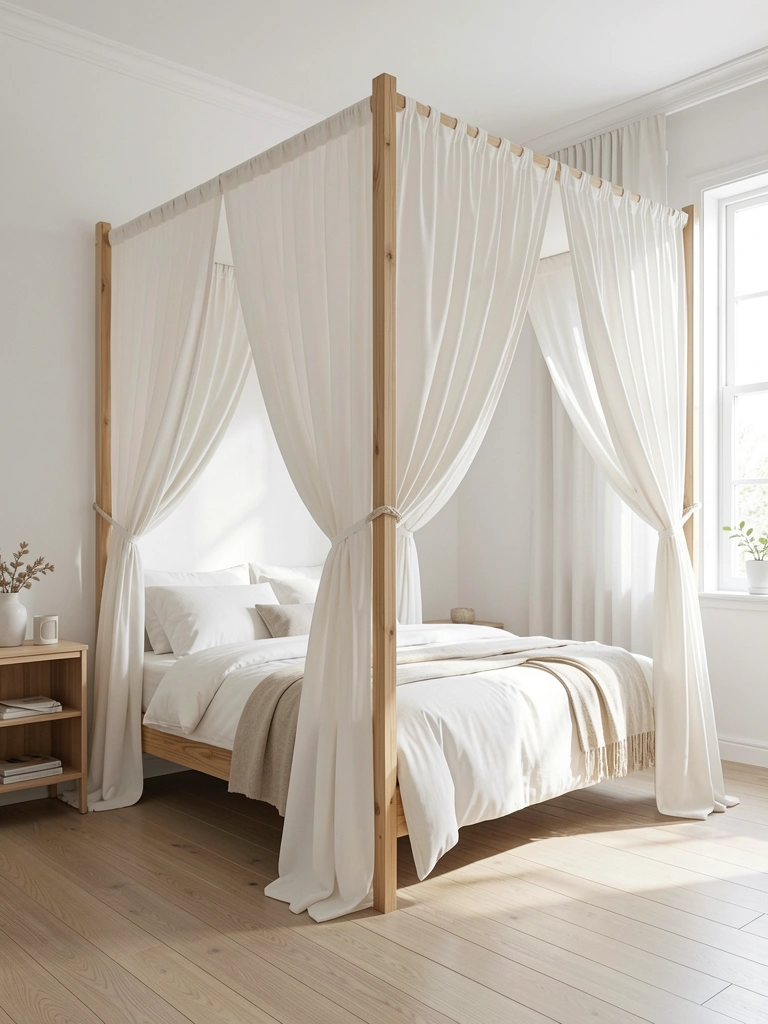
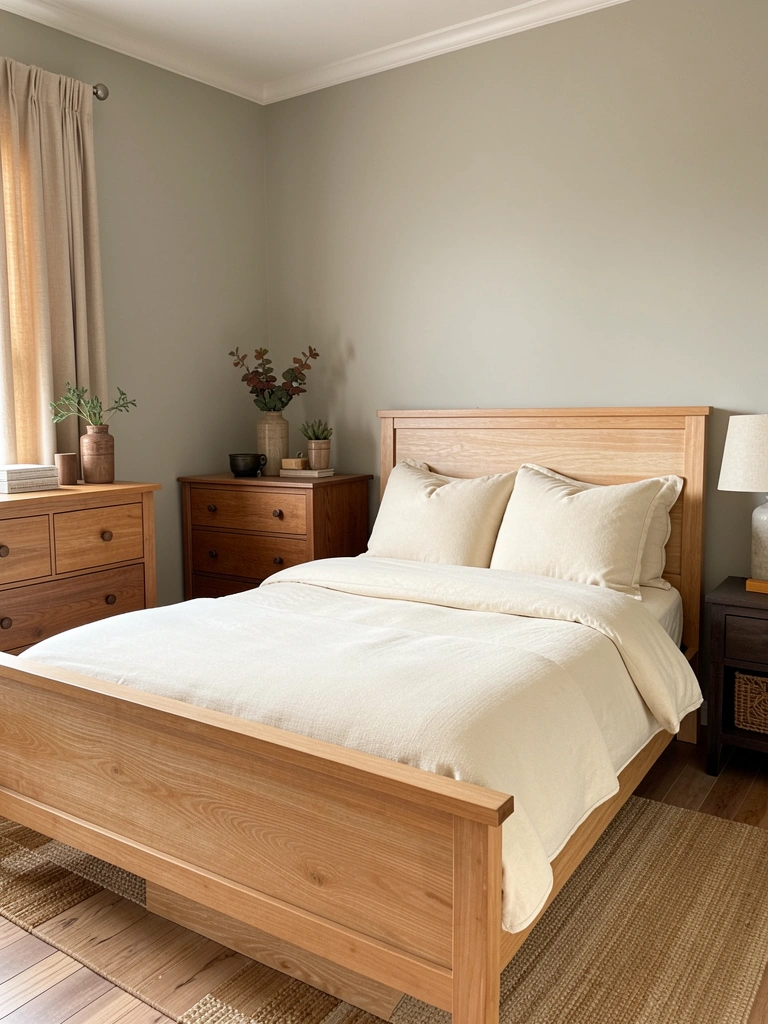
    9. Use Natural Wood Finish (No Stain or Paint)

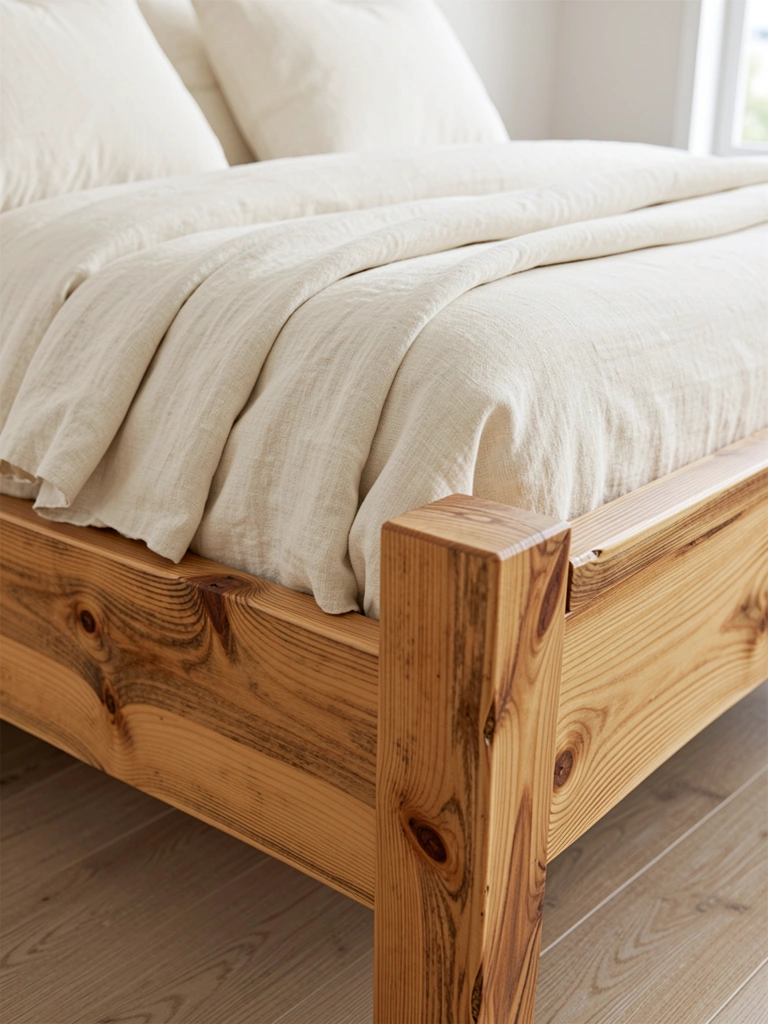
    Skipping stain or paint lets the wood’s true character shine. Minimal joinery looks best in natural finish where grain patterns and color variations become the visual interest. You see exactly what you’re getting—honest materials, honest design.

    Natural finish beds are increasingly common at sustainable brands like Bloom & Blossom ($1,200–$2,400), Pottery Barn’s better lines ($800–$1,600), or custom makers (since natural finish reduces production time, often $100–$300 less than stained versions). Maintenance is simple: dust regularly, use touch-up oil annually. A natural finish shows wear beautifully—scratches and patina become character. Renter note: Natural wood is your friend since it hides marks better than light stain.

    Your bedroom feels grounded and organic. The wood’s natural evolution becomes part of the bed’s story.

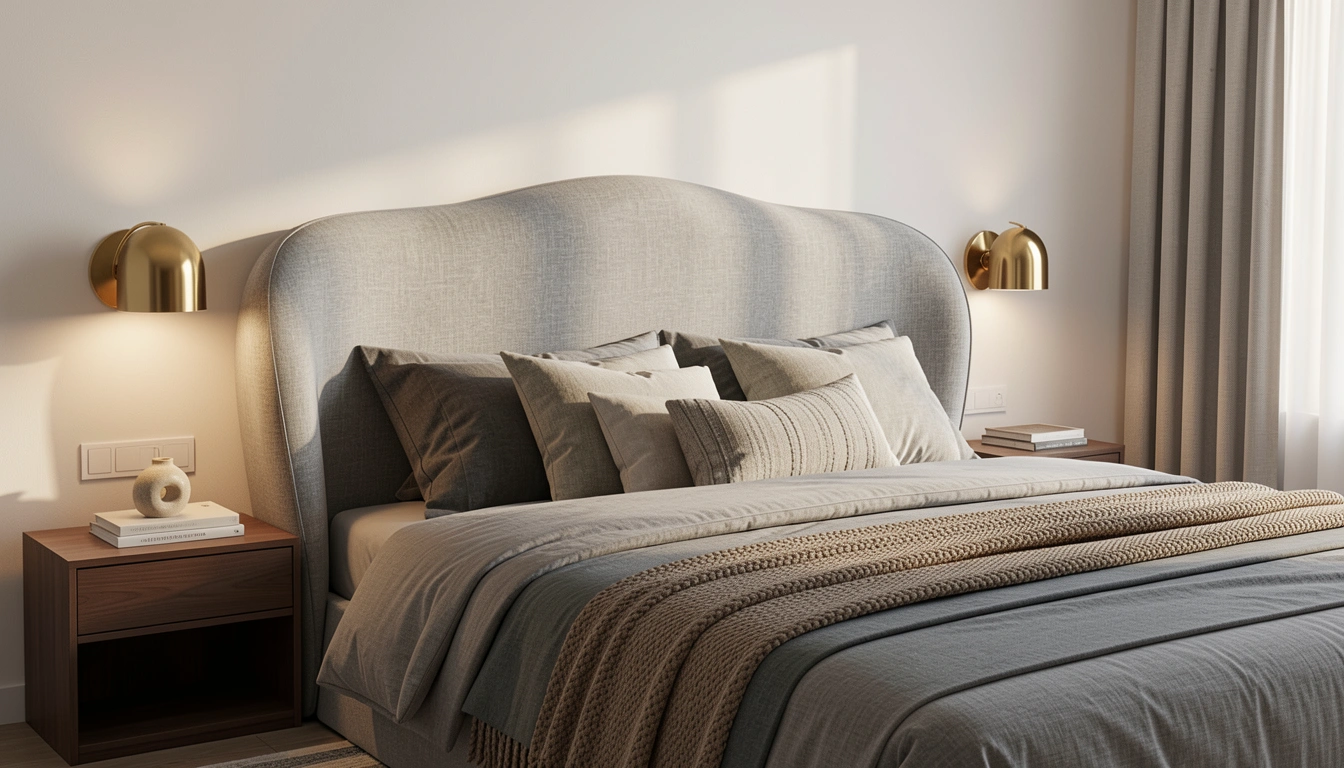
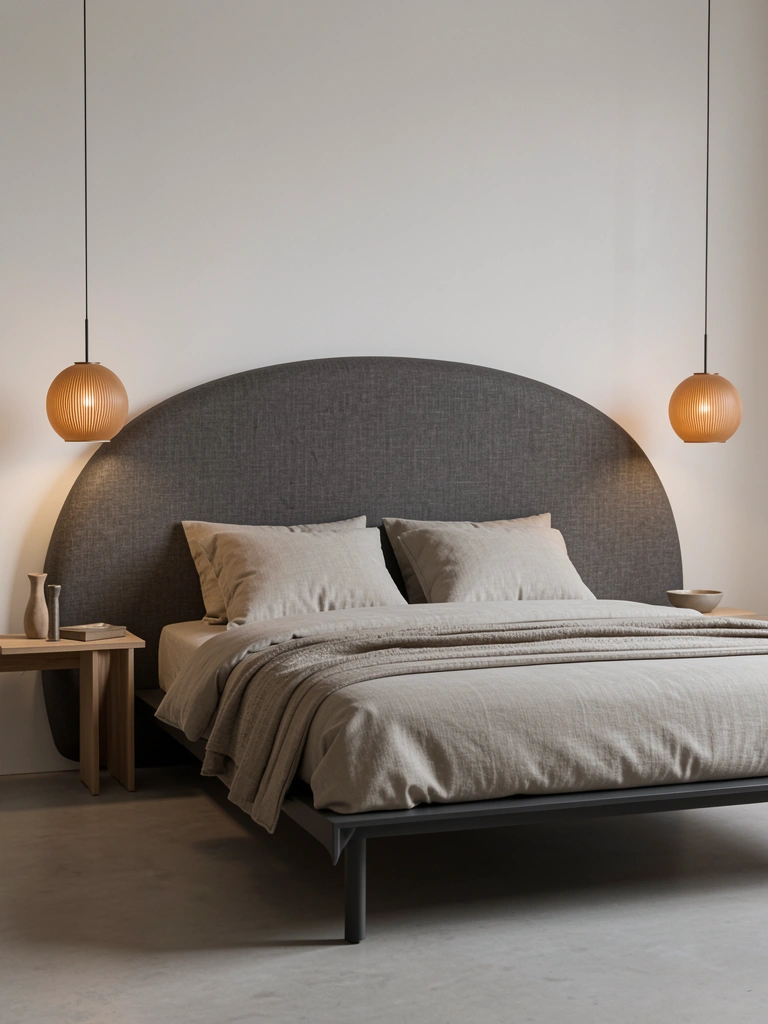
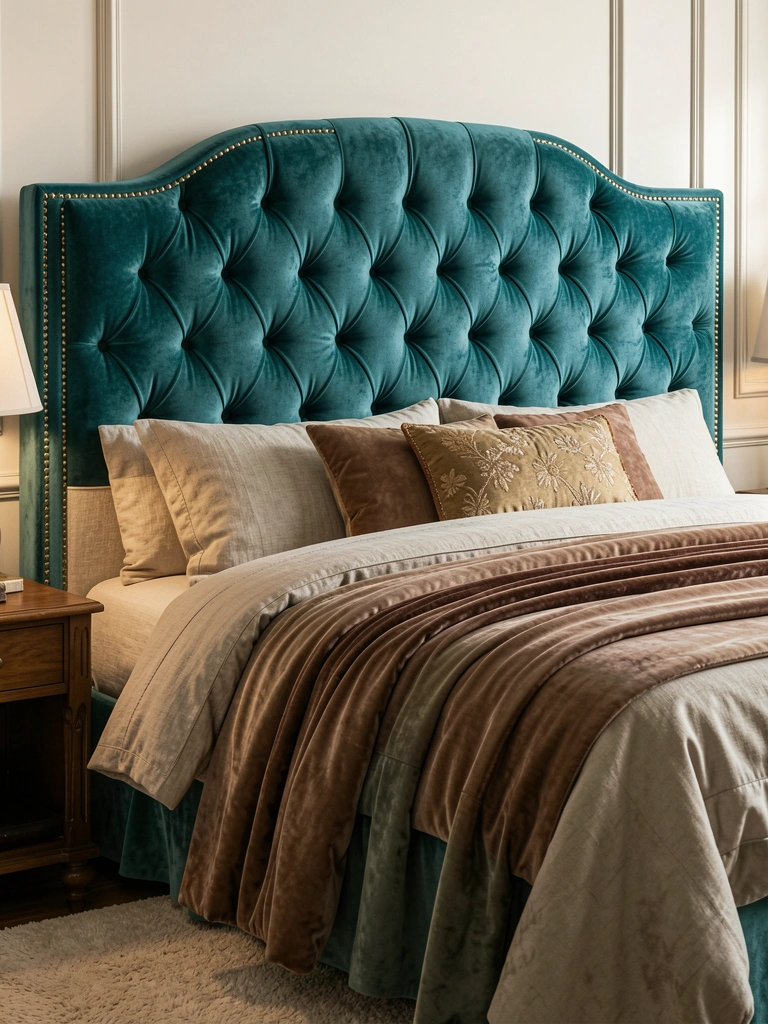
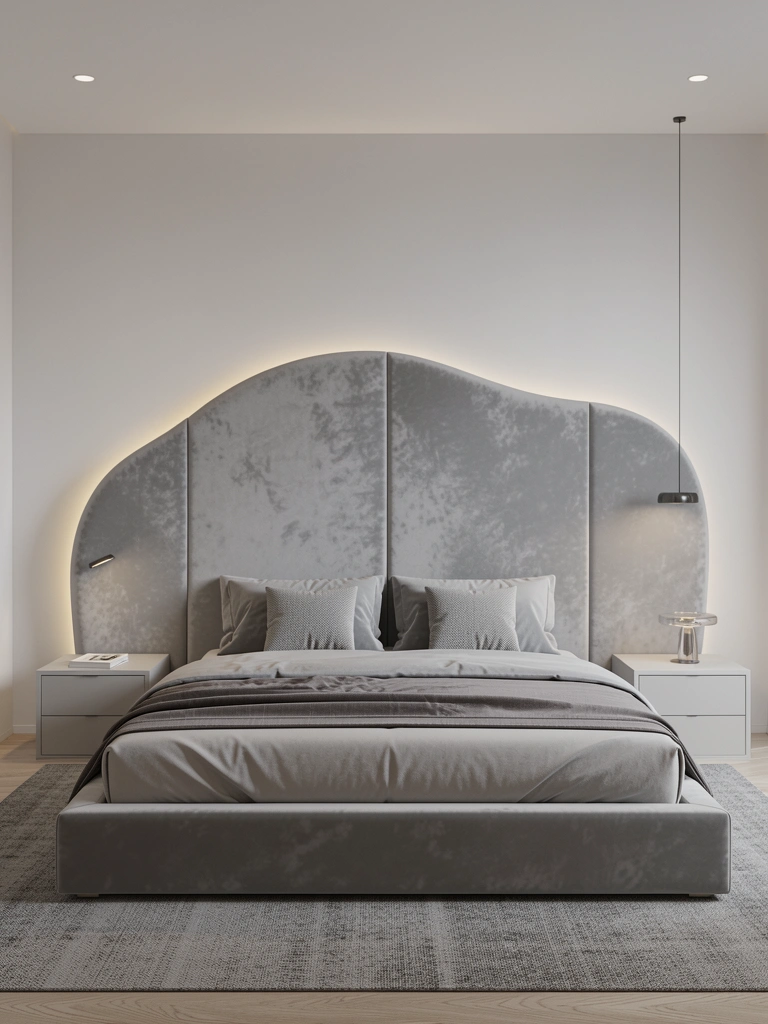
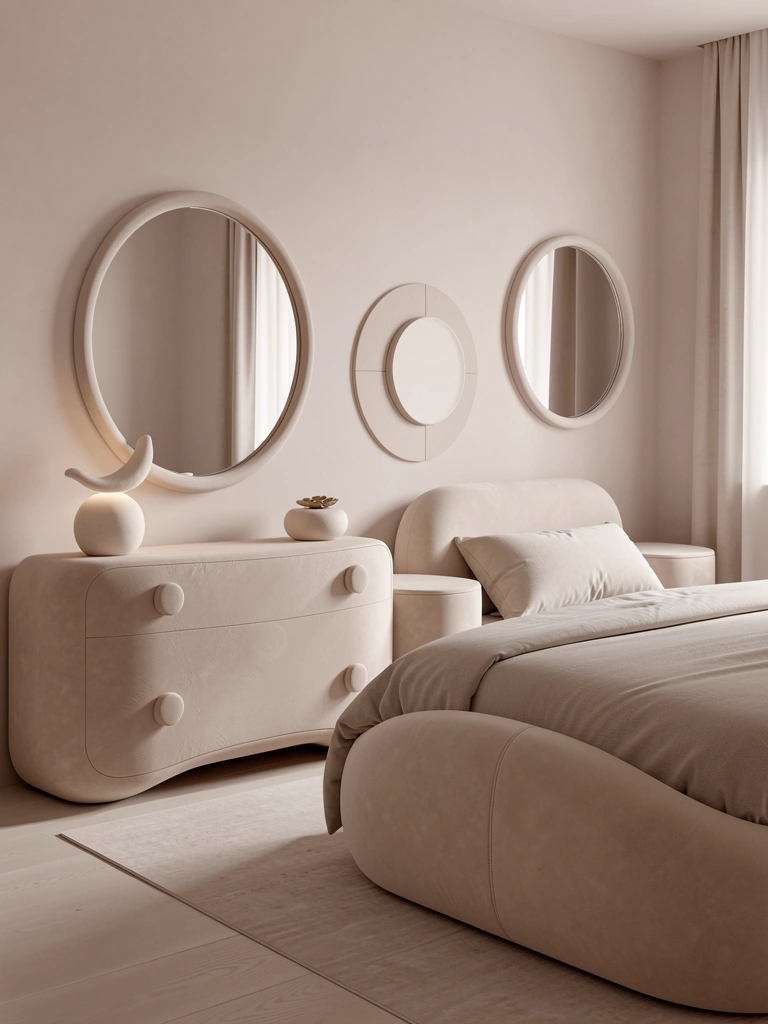
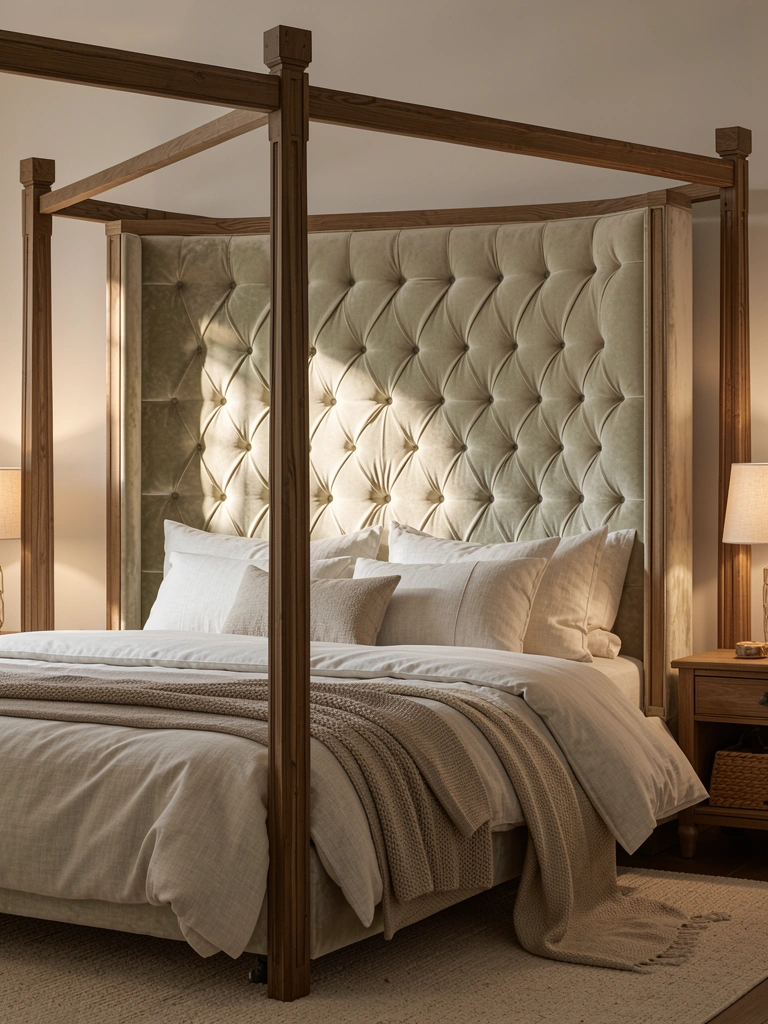
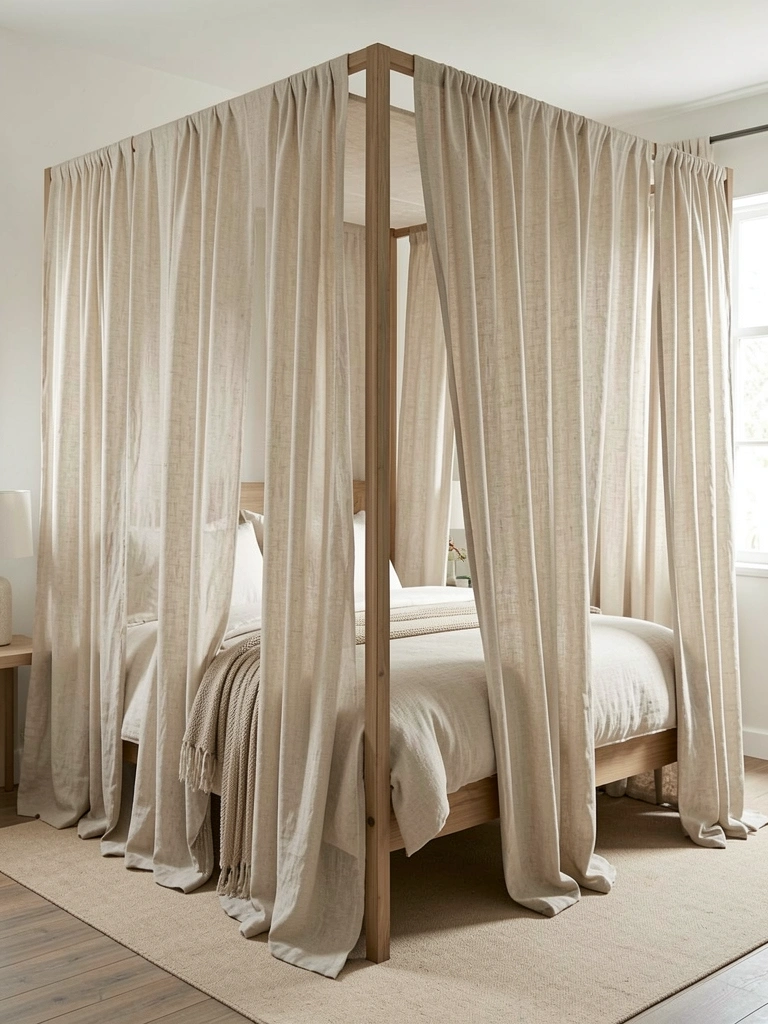
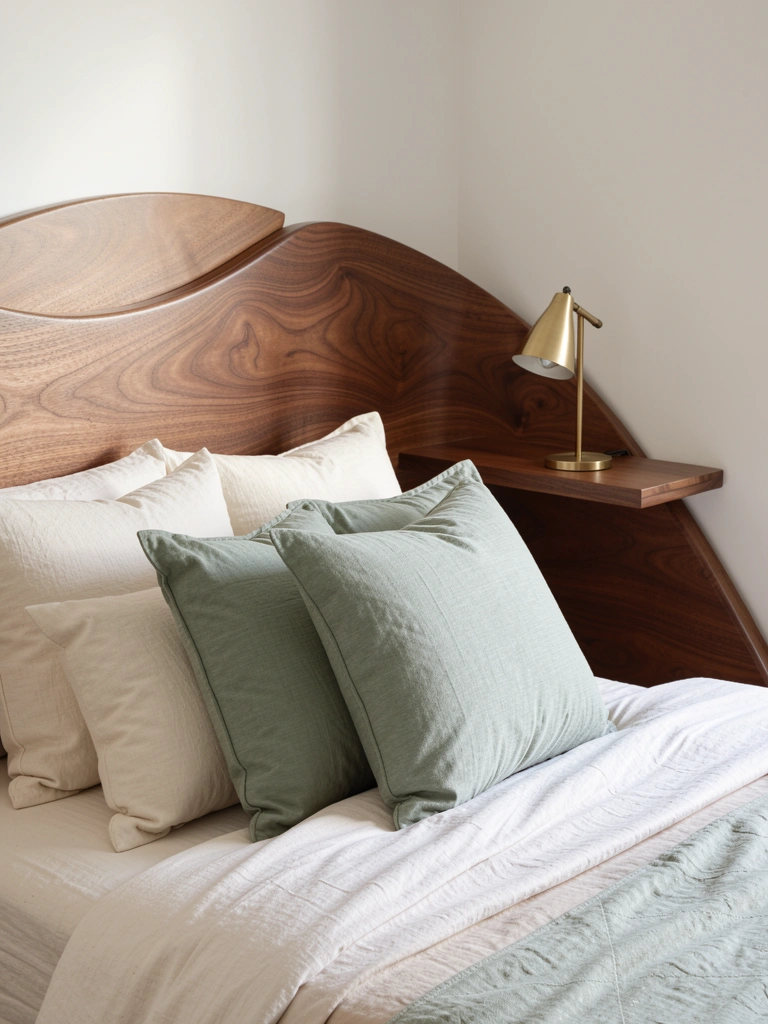
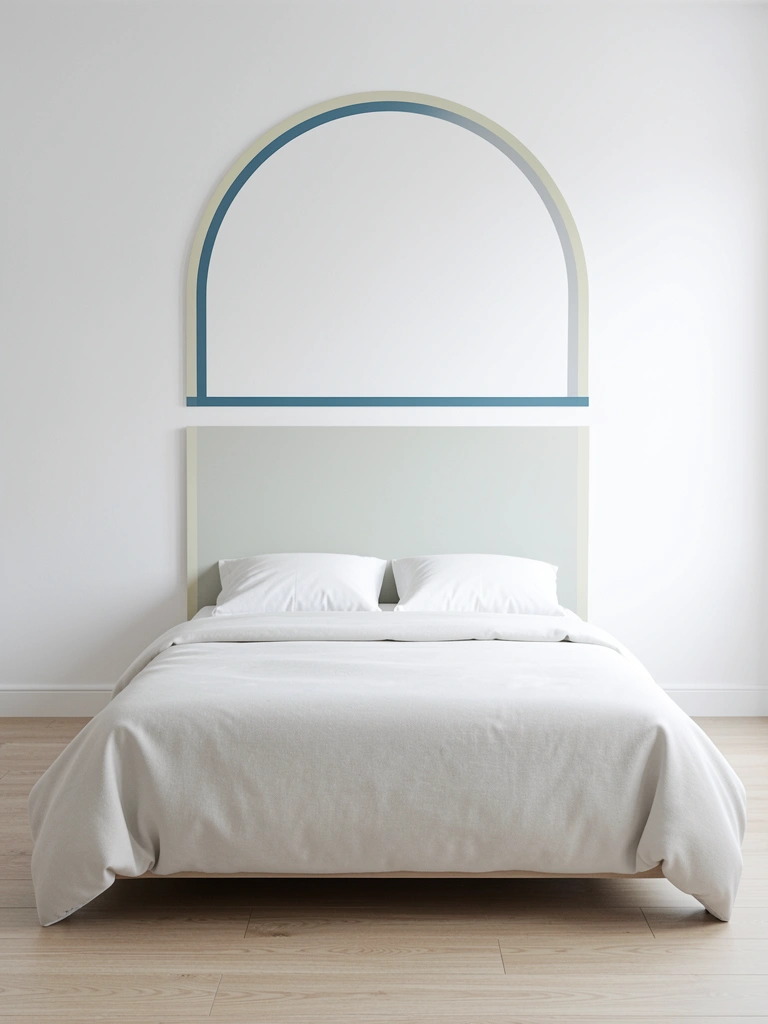
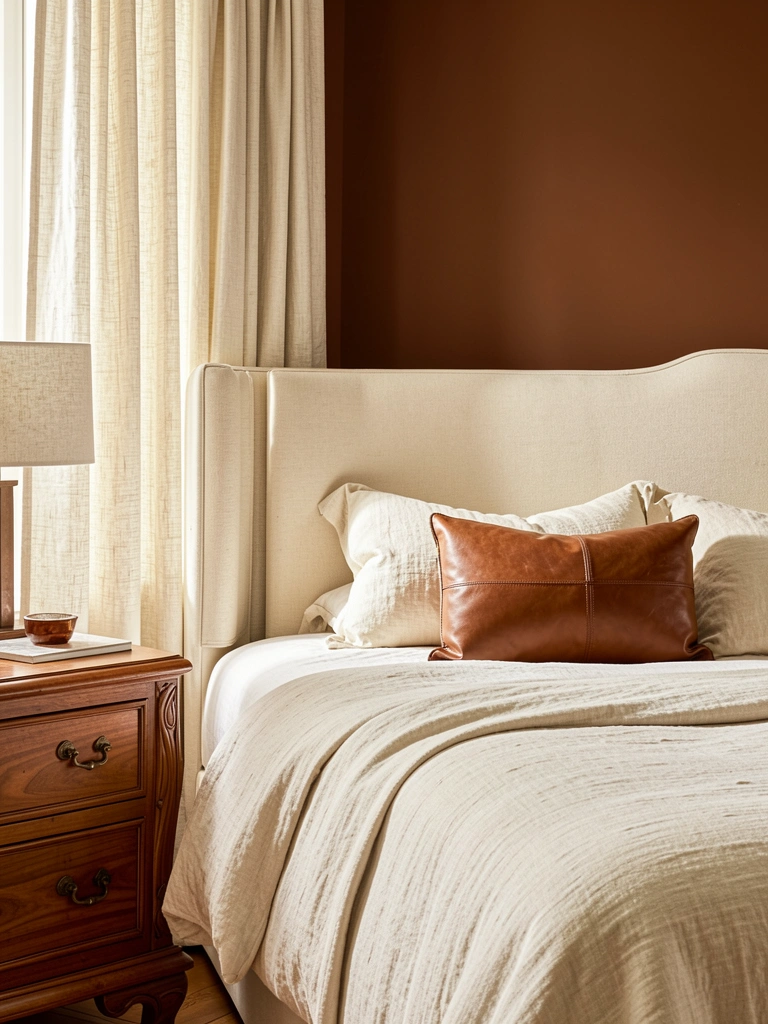
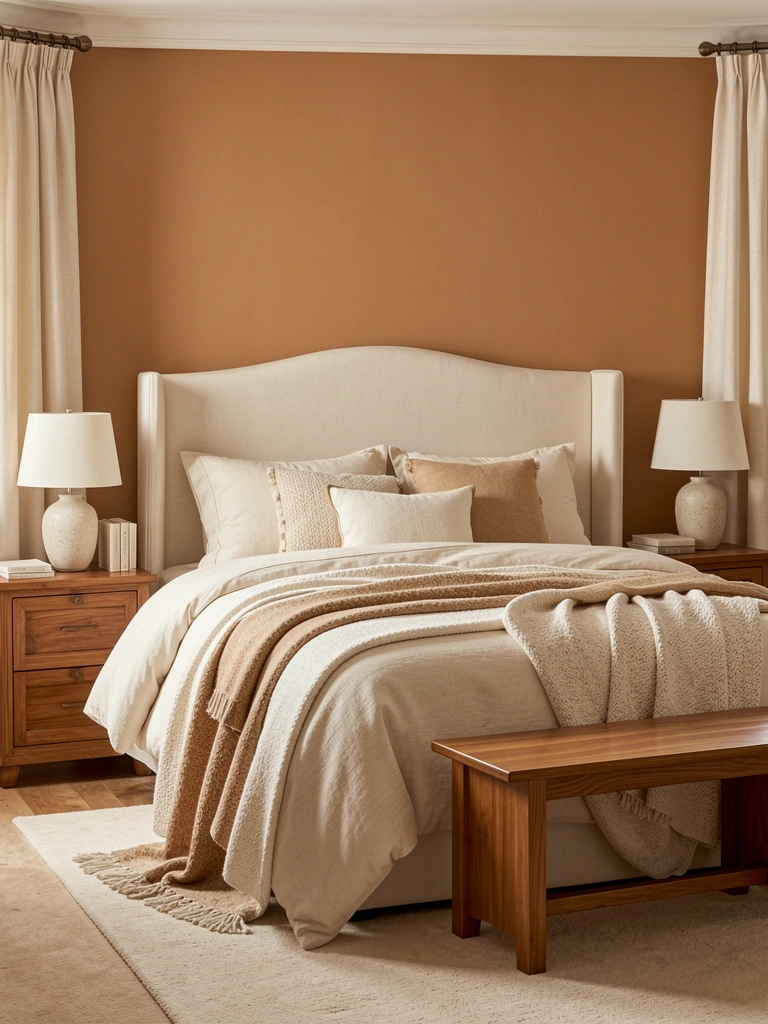
    10. Layer Minimal Joinery with Curved Headboard

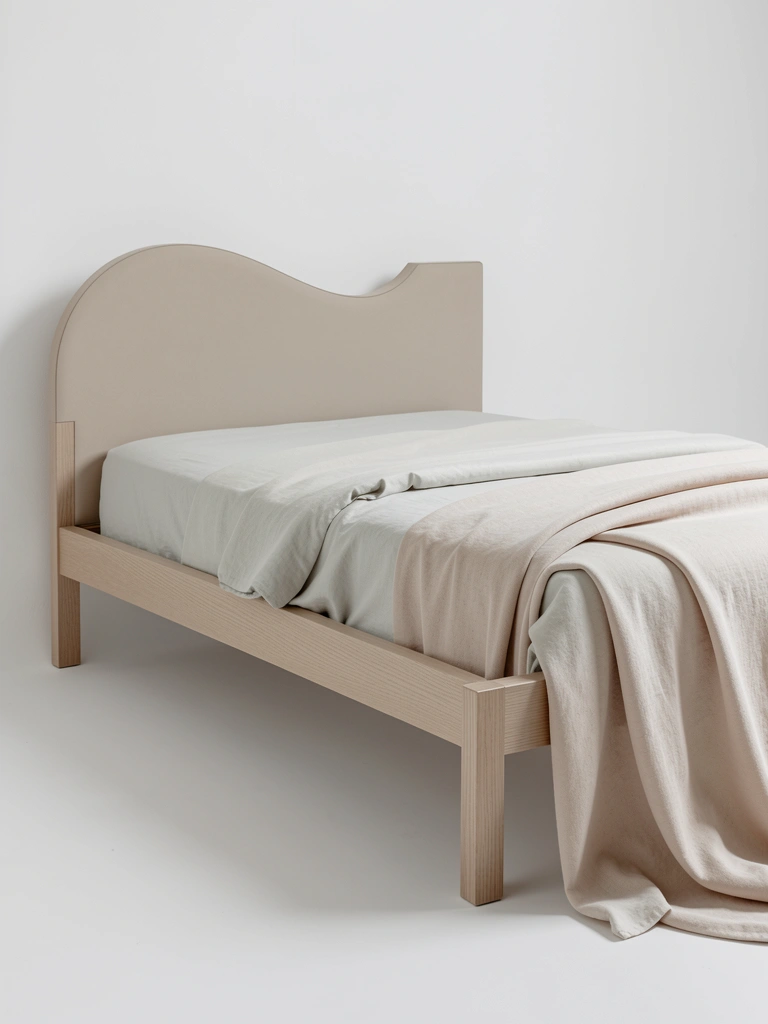
    Mixing minimal joinery’s angular geometry with a curved headboard element creates sophisticated tension. The frame stays pure and structural while the headboard adds one organic, softer note.

    Designers like HAY and String excel at this combination ($1,400–$2,600). Another option: commission a curved headboard from a woodworker to pair with your existing minimal frame ($400–$1,000 for custom piece). The curves should be gradual, not dramatic—this isn’t about drama, it’s about nuance. Assembly is straightforward since the frame and headboard are separate. Time: 2–3 hours with help. The contrast between linear and curved elements feels intentional and modern while honoring craftsmanship.

    You get visual interest without compromising the minimal aesthetic you love.

    11. Choose a Bed with Angled Joinery Details

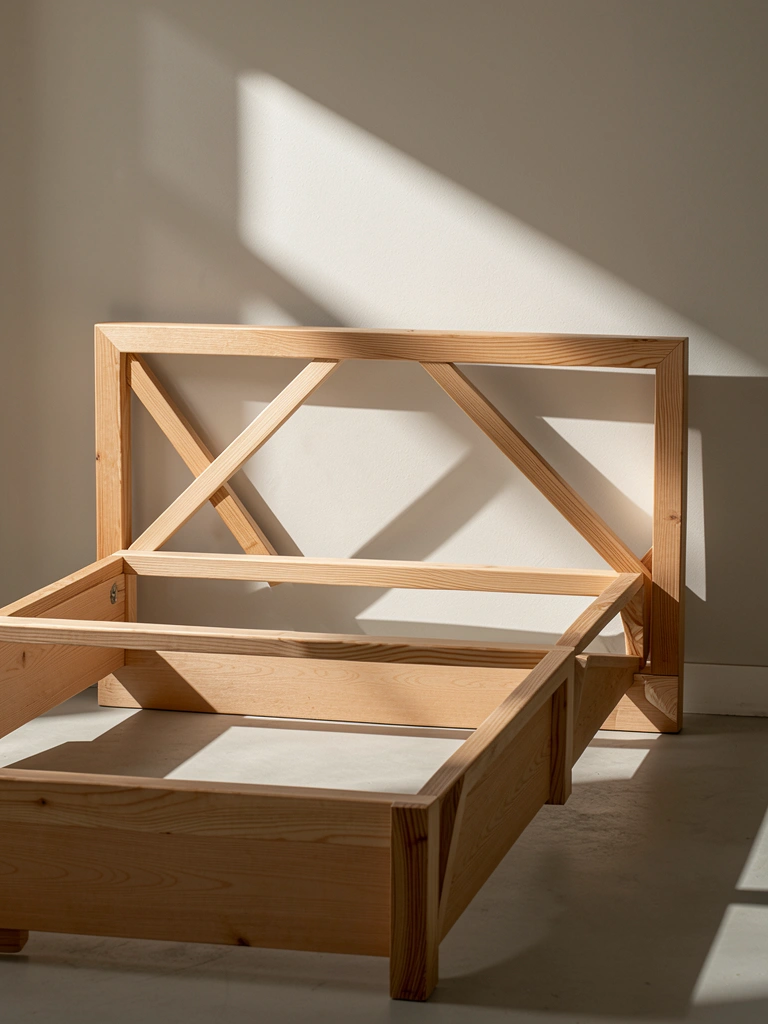
    Some contemporary minimal beds use slight angles in their joinery—not traditional right angles. Think subtle bracing or angled leg-to-frame connections. This keeps the minimal vibe while adding unexpected architectural character.

    Sculptural bed designers like Jonas Wagell for String or contemporary makers on Etsy ($1,300–$2,500) play with these angles. Look for beds described as having “angled frame construction” or “diagonal bracing.” These beds cost slightly more because the angles require precision joinery. The payoff: your bed becomes a mini-sculpture that engages from different viewing angles. Pro tip: Angle placement affects how the bed photographs on social media—subtle angles create interesting shadow play.

    People notice the thoughtful engineering even if they can’t quite name what makes it distinctive.

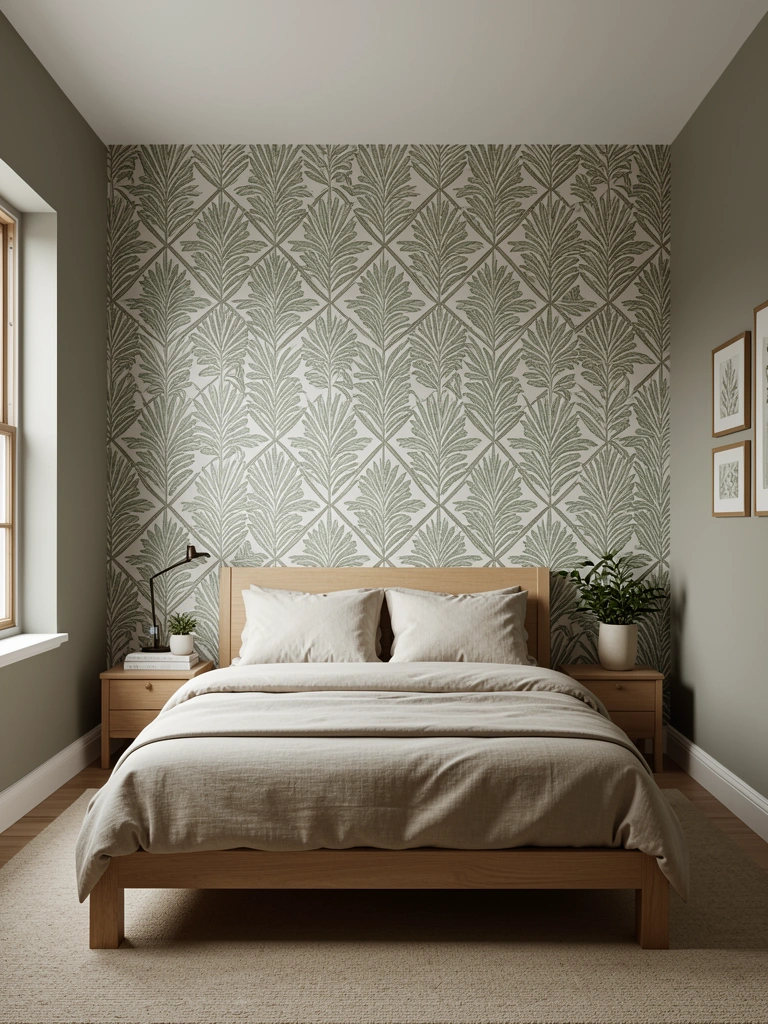
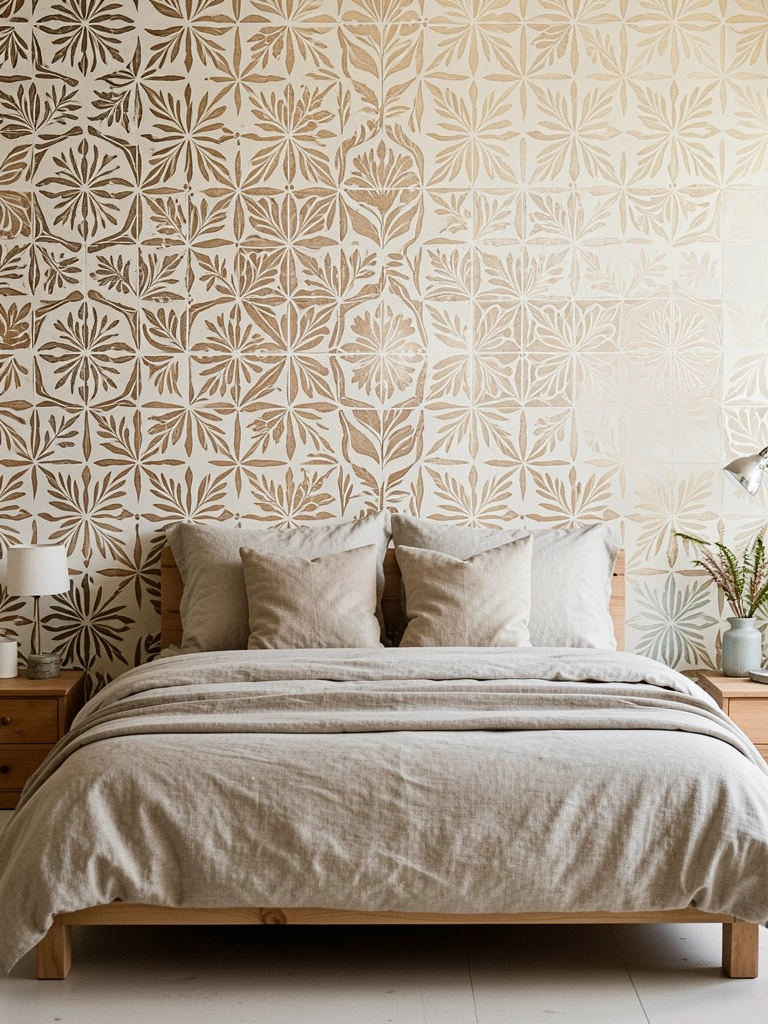
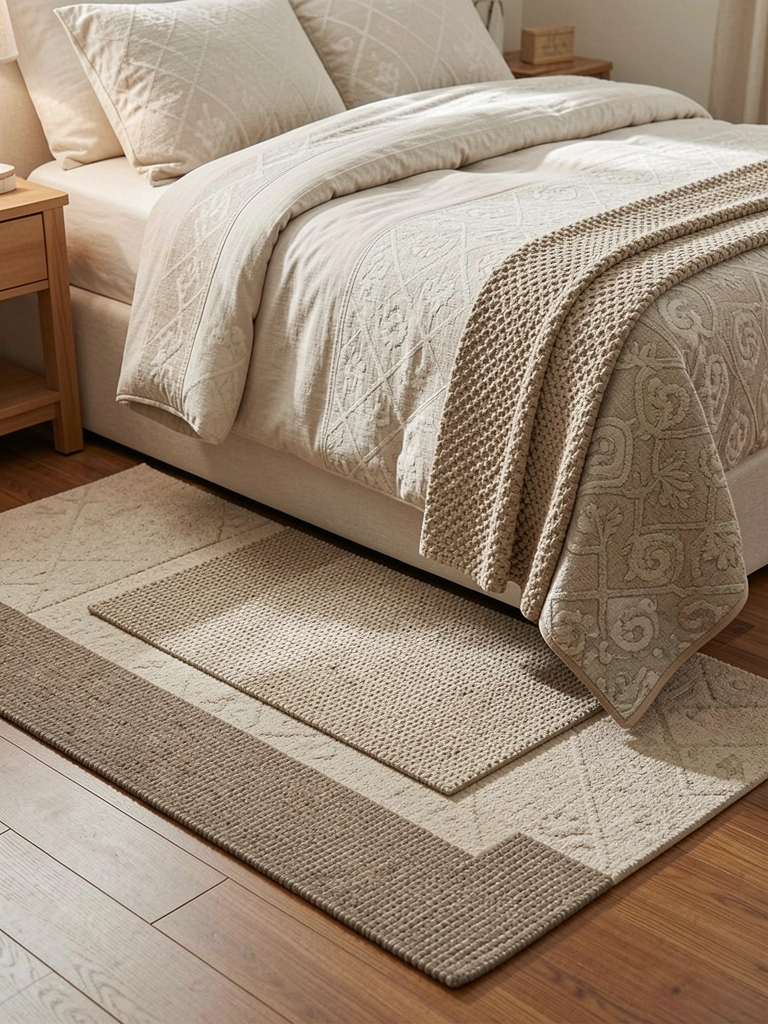
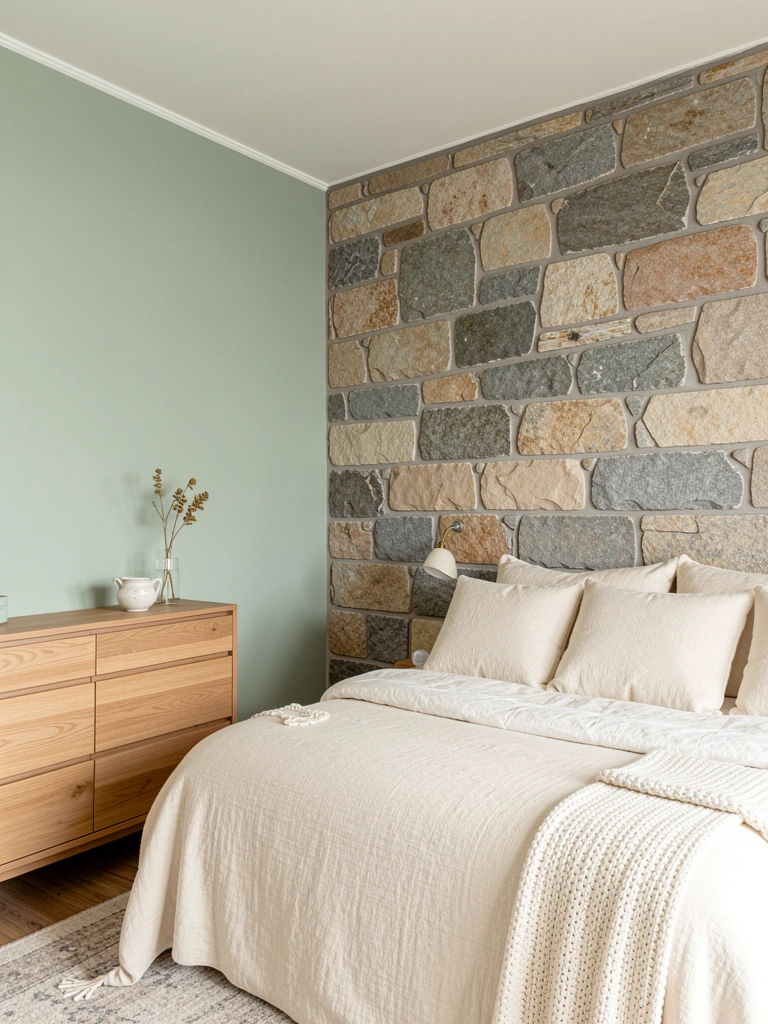
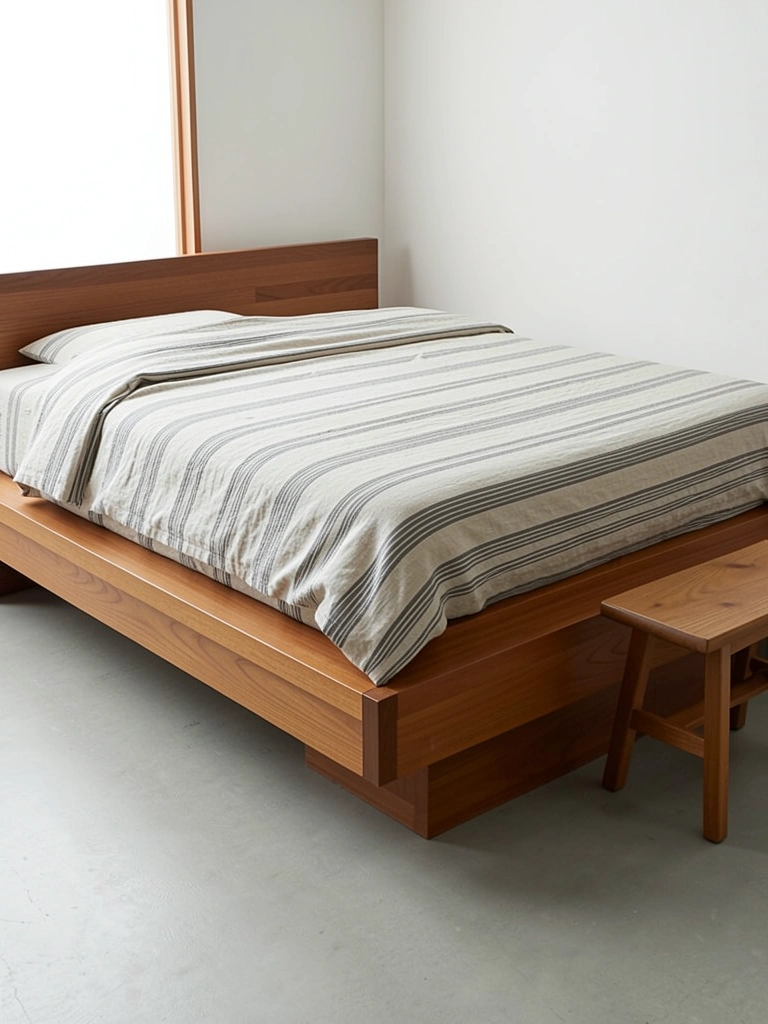
    12. Match Bed Joinery Style to Your Flooring Material

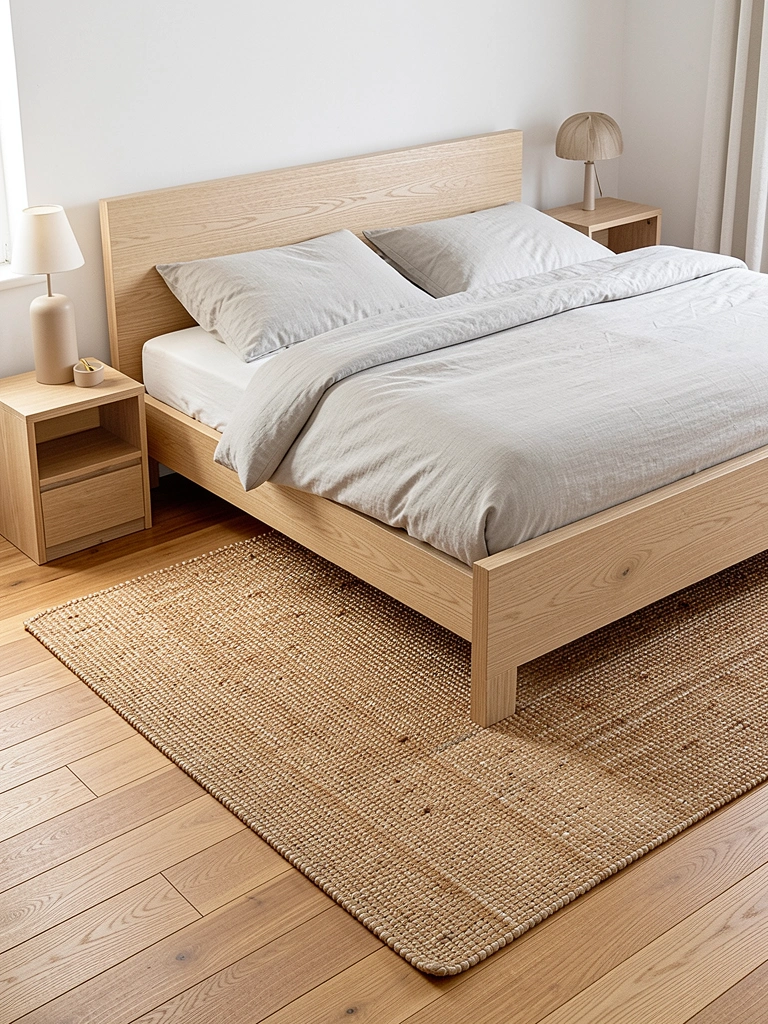
    If your flooring is wood, selecting a bed in a complementary (not identical) tone creates harmony. Minimal joinery emphasizes the wood itself, so coherence between bed and floor matters visually.

    If you have walnut floors, choose a walnut bed or light oak for contrast. Pine or light oak floors pair beautifully with white oak or ash beds. Test samples at home before committing. Most makers will send wood samples (usually free). The alignment between flooring and bed joinery creates a sense of intentional design and makes rooms feel larger. No need to match perfectly—thoughtful coordination is enough. Time to plan: 30 minutes studying samples. Cost of samples: $0–$25.

    The room reads as purposefully designed rather than randomly assembled.

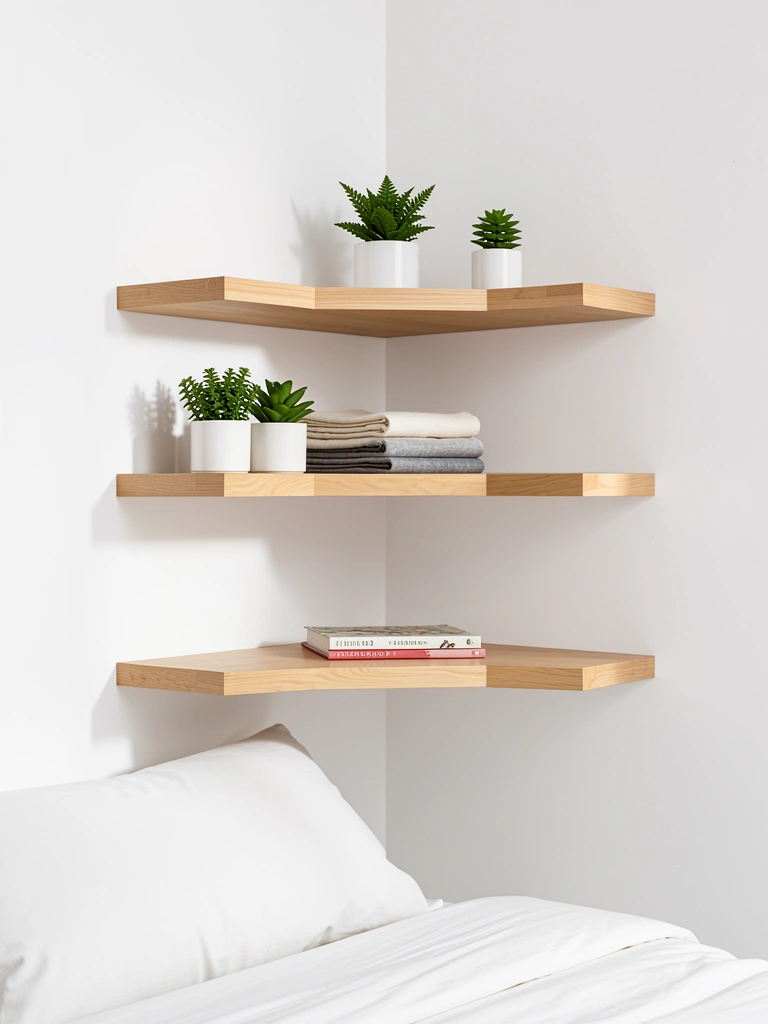
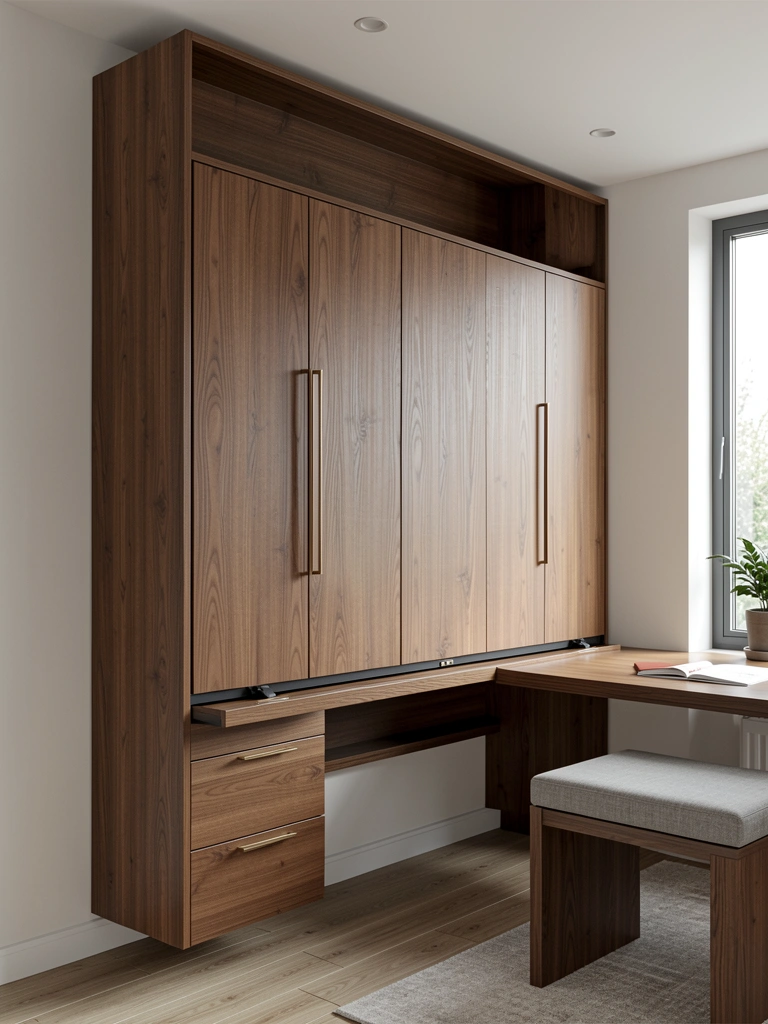
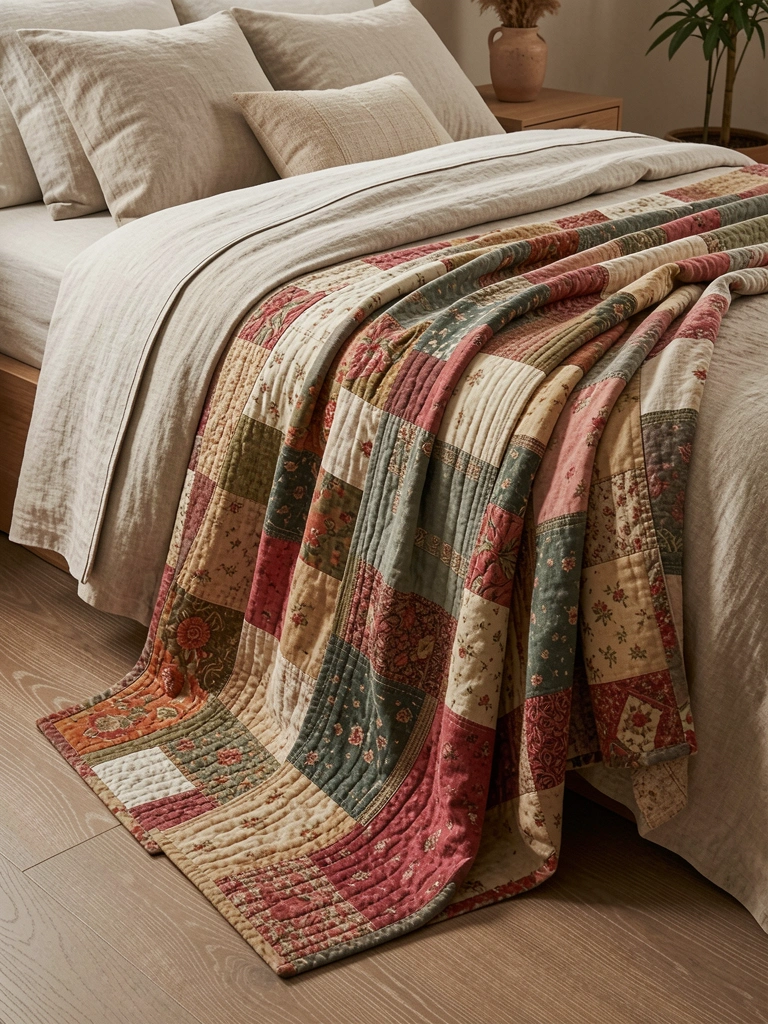
    13. Add a Minimal Wood Bench at the Foot

    A bench at the bed’s foot extends the joinery language and adds functional storage for extra blankets or morning clothes. Keep the bench as minimal as the bed—same wood tone, visible joinery, clean lines.

    Find benches from the same makers as your bed—Article, West Elm, Muuto often sell coordinating pieces ($300–$700). DIY option: have a woodworker create a matching bench from leftover materials of your bed frame (cost: $200–$500, timeline: 2–3 weeks). The bench should be approximately 15–18 inches tall and the bed’s width minus a few inches. Pro tip: Choose a bench with visible joinery matching your bed’s style—if your bed has mortise-and-tenon joints, the bench should too.

    Functionality and aesthetics merge. Your bedroom gains storage and visual continuity.

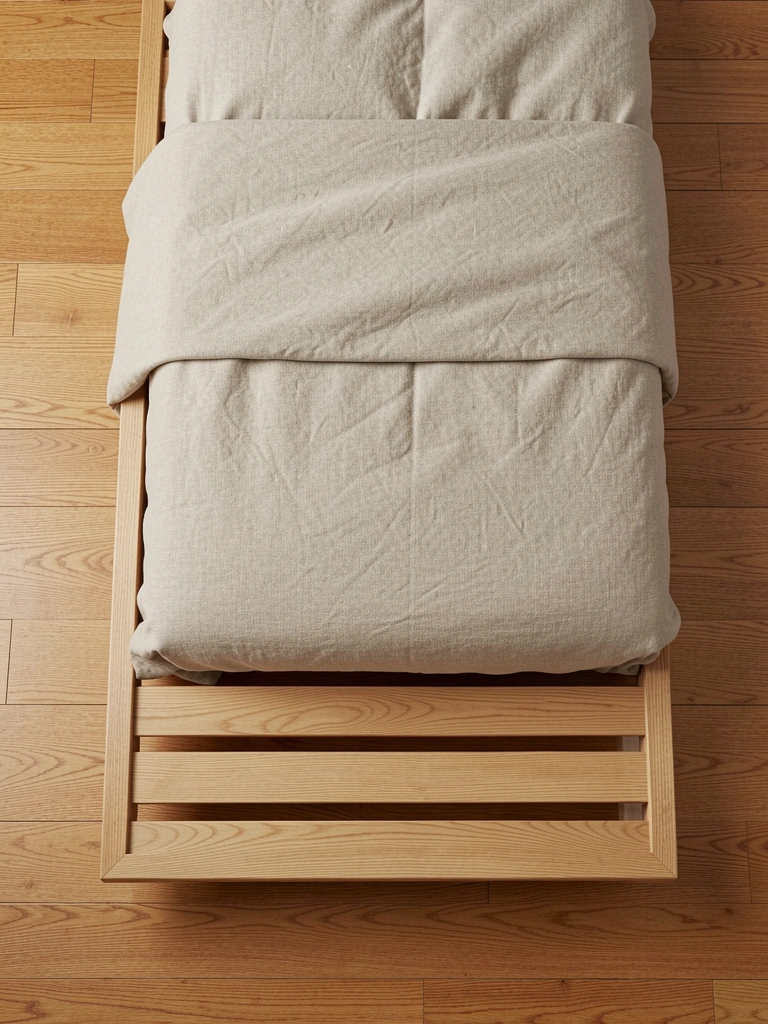
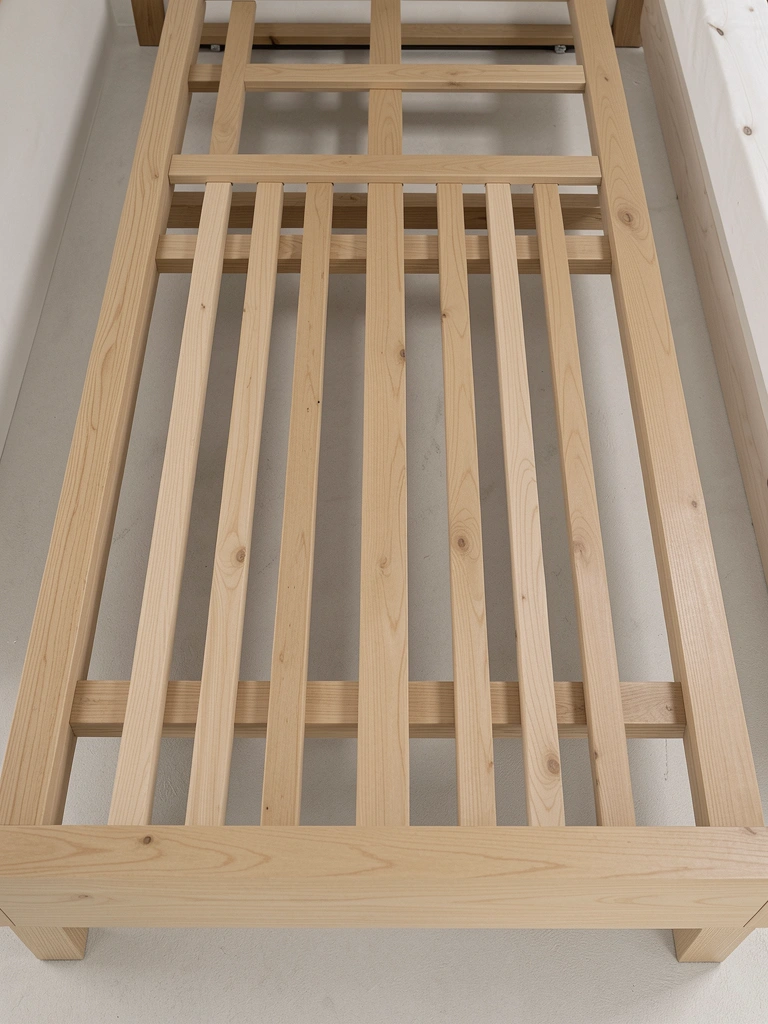
    14. Incorporate a Wooden Slat Support System Visibly

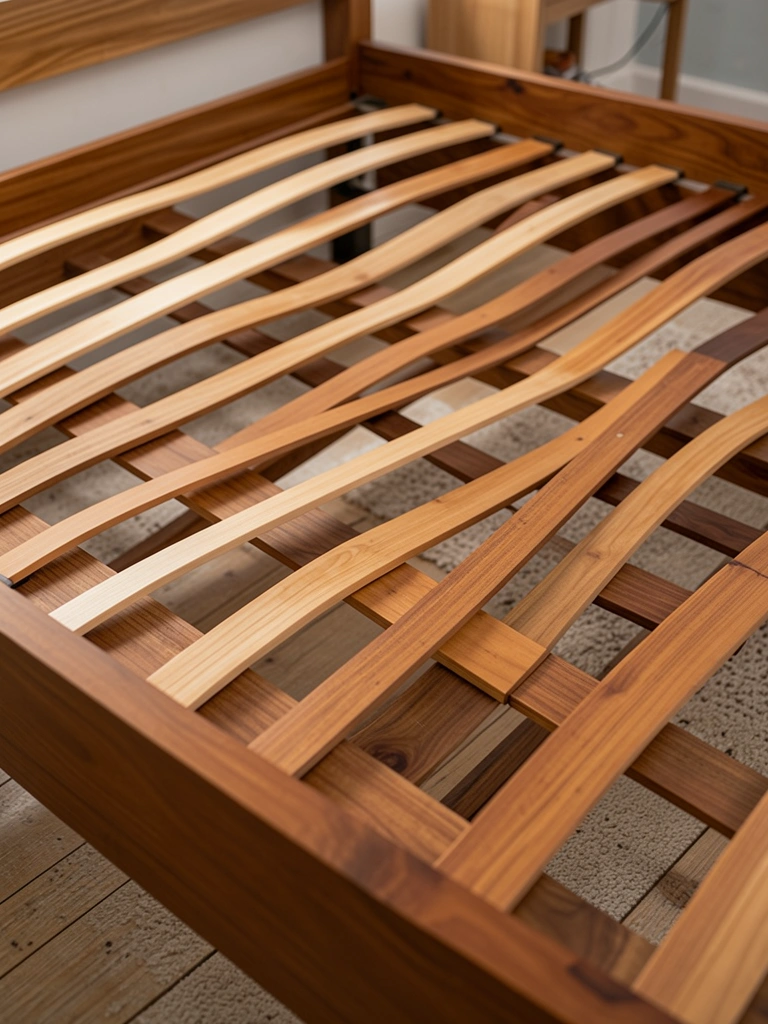
    Most beds hide their support structure with a dust skirt or platform. Minimal joinery celebrates honesty, so leaving slats visible makes engineering a feature. This works best with platform beds or ones with low frames.

    Slat-visible designs appear at Blu Dot ($1,200–$1,800), Artifact Home ($1,400–$2,200), and custom makers (proportionally less expensive since they’re skipping the skirt: $800–$1,500). The slats should be finished as carefully as the frame—sanded smooth, stained or natural, no rough edges. Space them evenly (typically 2–4 inches apart depending on mattress). The slat system becomes part of the design vocabulary, not a hidden shame. Renter note: Visible slats let air circulate better, reducing moisture under the mattress.

    The bed reads as completely transparent in its construction—no mysteries, no hiding.

    15. Select a Bed Frame That’s Renter-Friendly and Modular

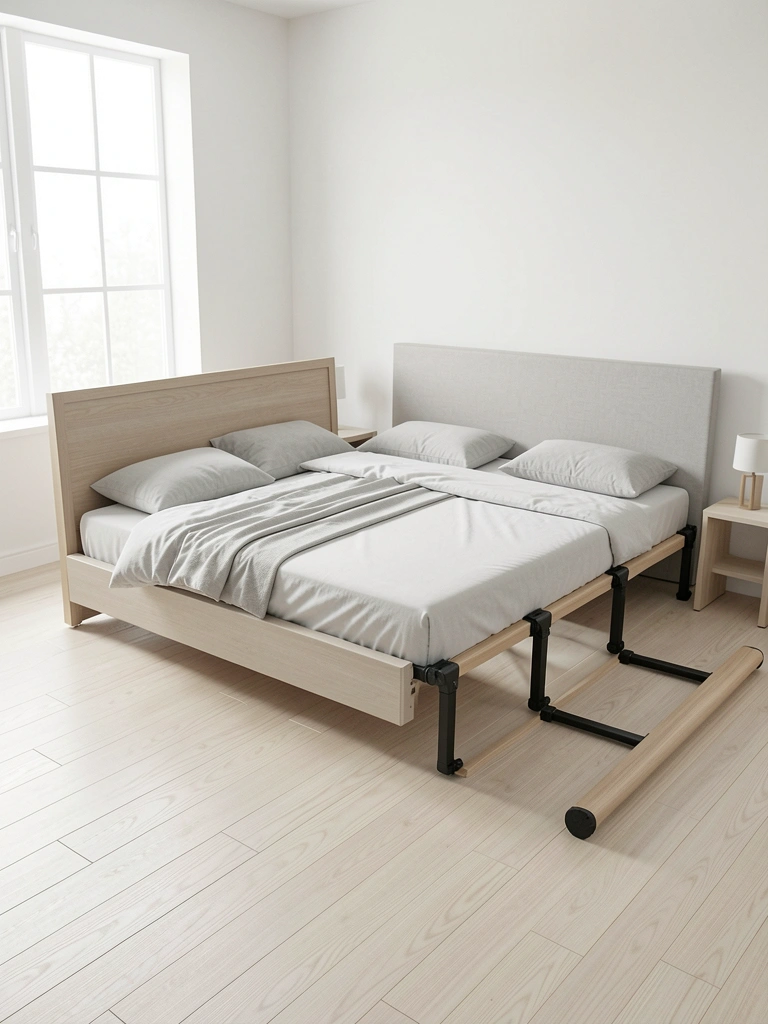
    Minimal joinery often means simpler construction, which makes modular beds more feasible. If you rent or anticipate moving, a bed that breaks into pieces is a game-changer. The joinery should allow for easy disassembly and reassembly without tools beyond an Allen wrench.

    IKEA’s higher-end frames ($400–$800) break down relatively easily. Blu Dot’s modular options ($1,200–$1,600) are engineered for moves. Check reviews specifically for “disassembly ease.” Better yet, watch assembly videos before buying to confirm. Time to disassemble and reassemble: typically 1–2 hours with a friend. The advantage: you can take this bed through multiple moves or apartments without guilt or damage concerns.

    Moving day becomes less stressful. Your bed adapts to your life, not the other way around.

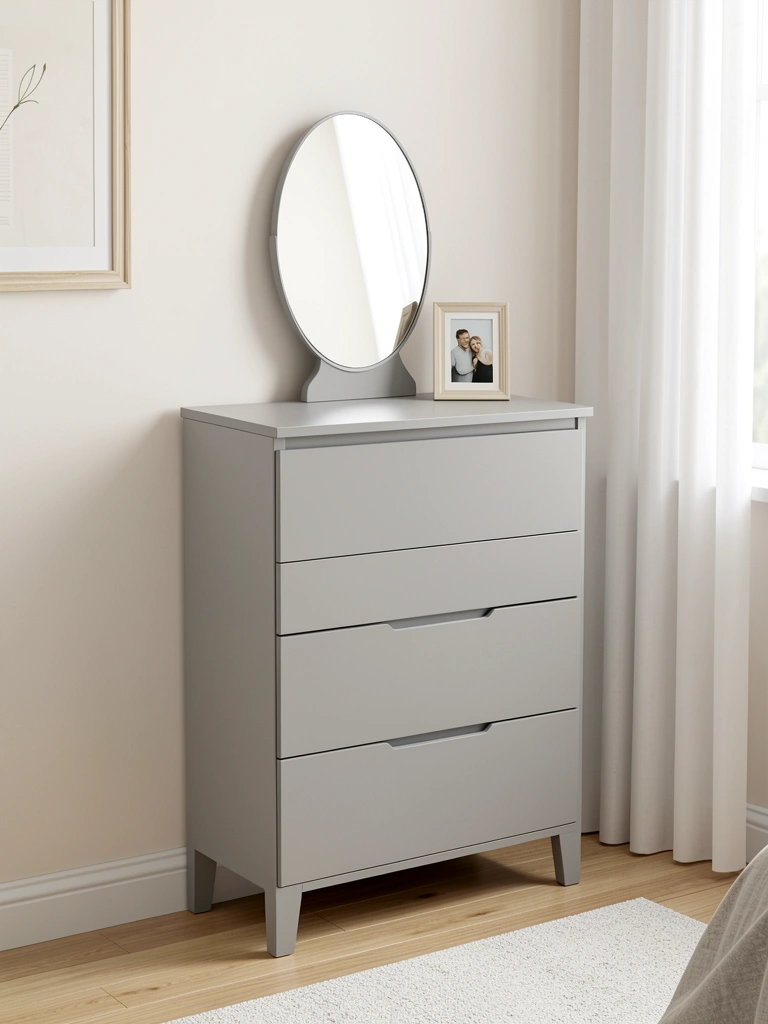
    16. Paint the Bed Frame a Soft, Neutral Tone

    While natural wood is classic, painting a minimal joinery bed in soft white, warm gray, or barely-there cream keeps the joinery visible while creating a softer aesthetic. The joints read clearly against the paint.

    Start with an unfinished bed frame ($600–$1,400 for quality unfinished pieces) or refinish an existing bed yourself. Use sanded wood primer and two coats of water-based paint like Benjamin Moore’s Chantilly Lace or Farrow & Ball’s Off-White ($40–$80 total paint cost). Time: 8–10 hours spread over 2–3 days for drying. The joinery remains visible and gains a sculptural quality against the neutral backdrop. Pro tip: Slightly uneven paint application makes the piece feel less factory-perfect, more handmade.

    The painted frame feels both minimalist and approachable—less austere than natural wood.

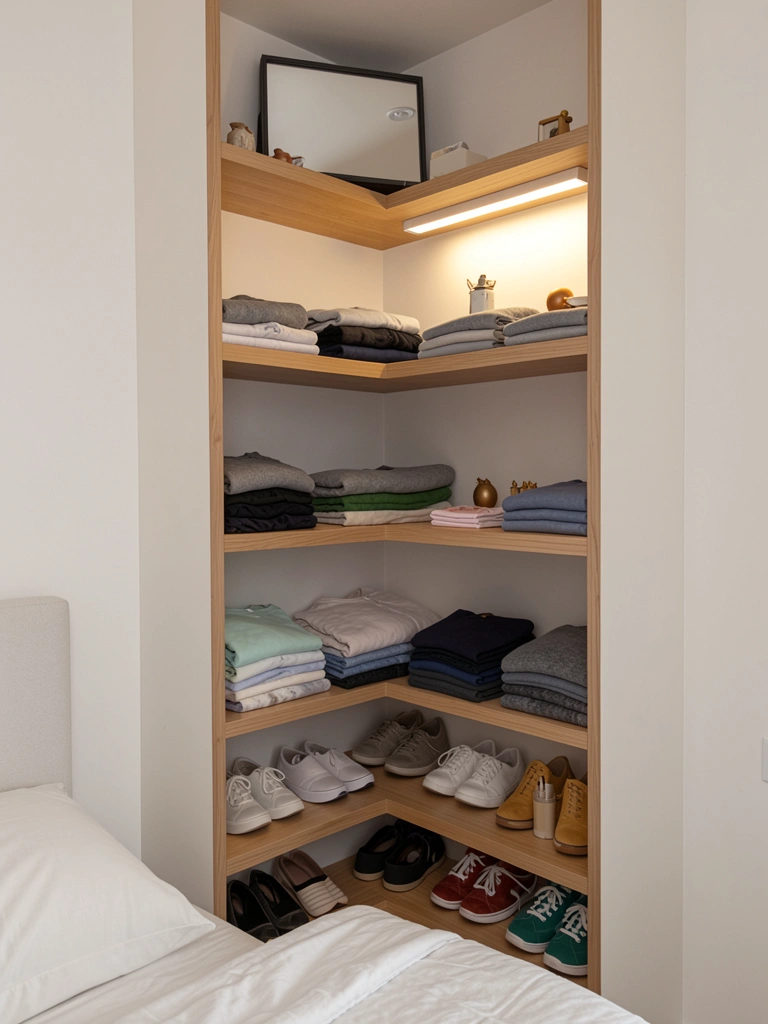
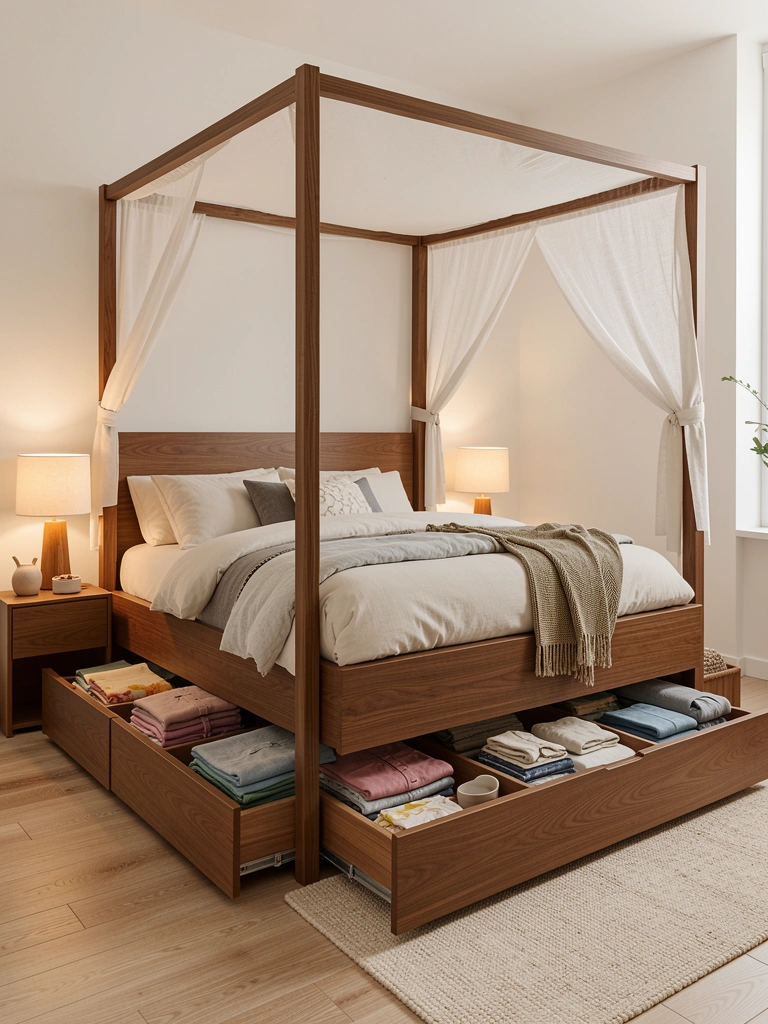
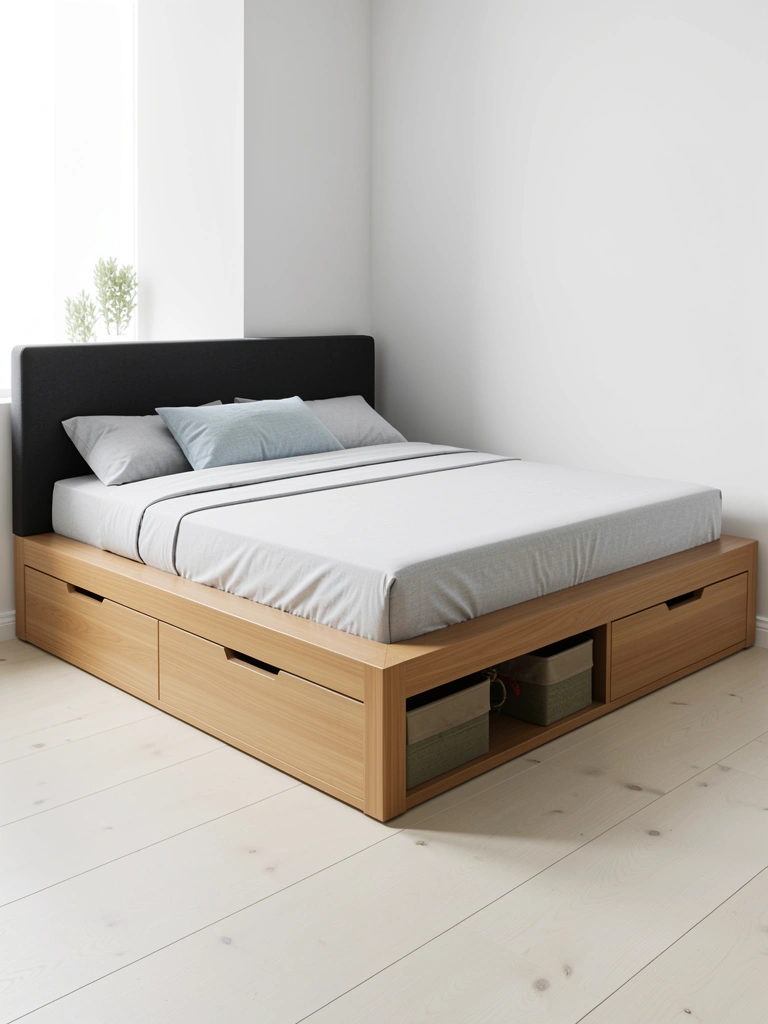
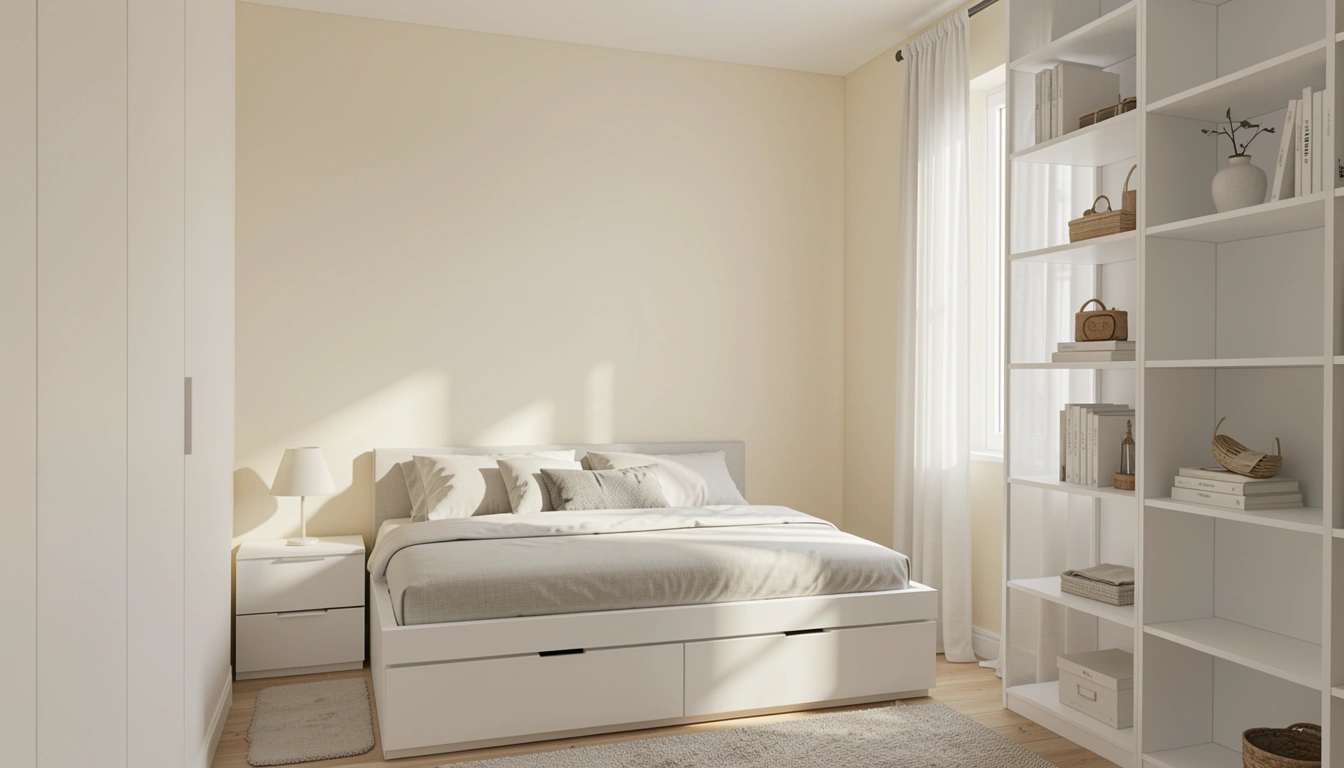
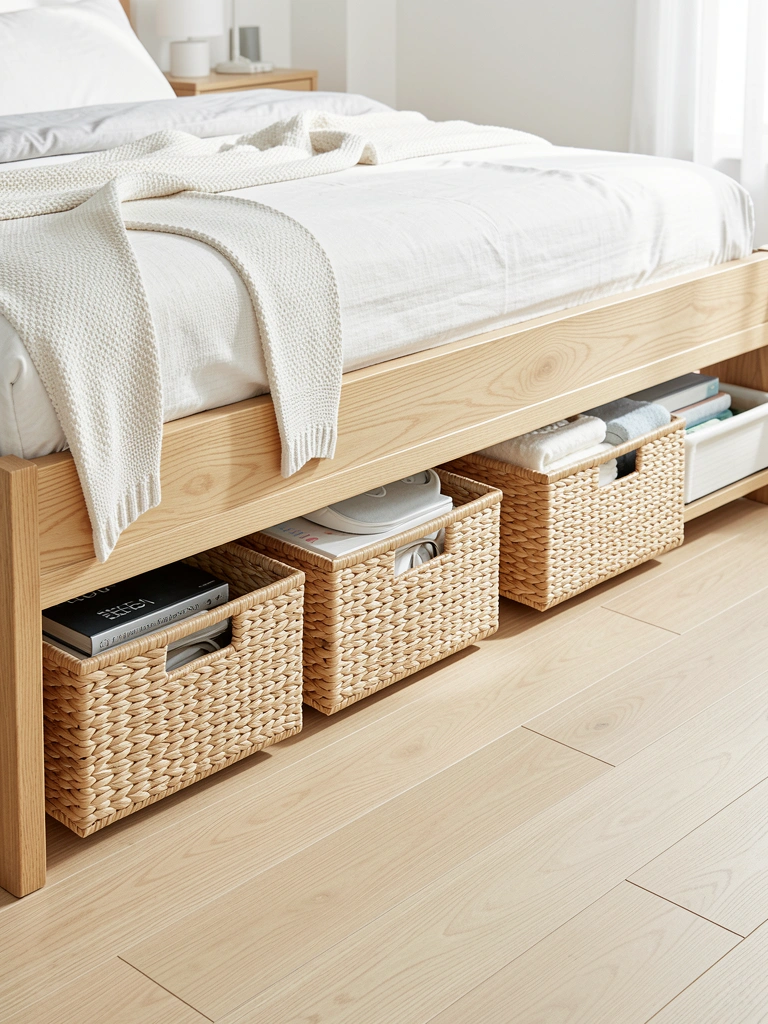
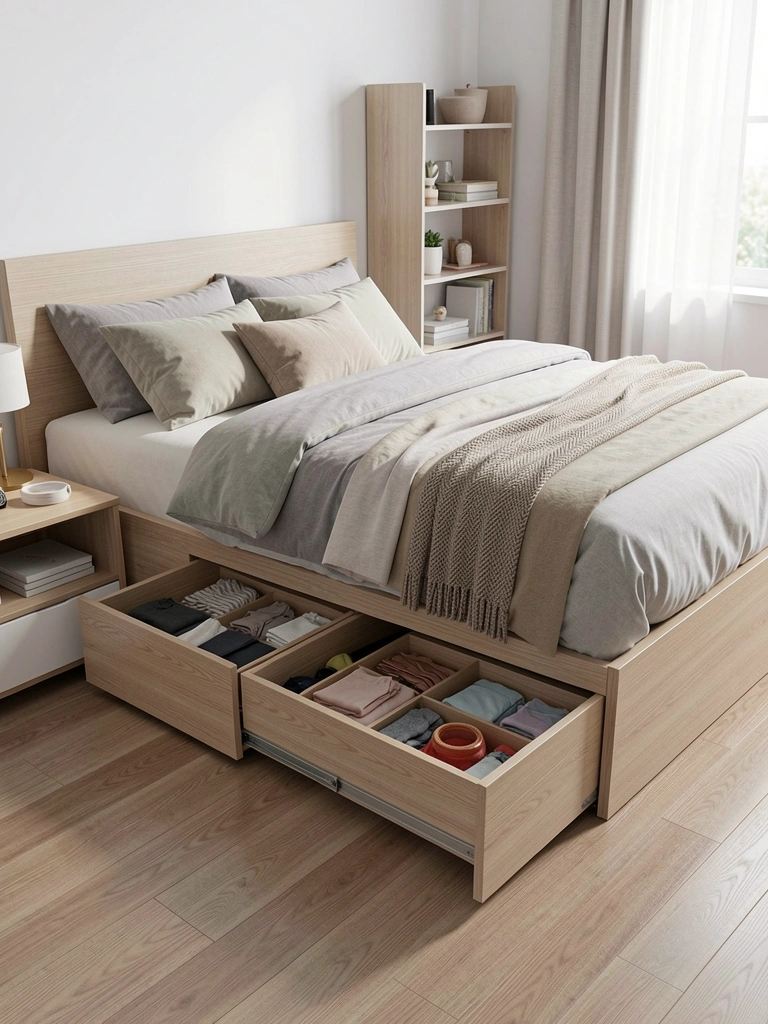
    17. Create a Platform Bed with Internal Storage Joinery

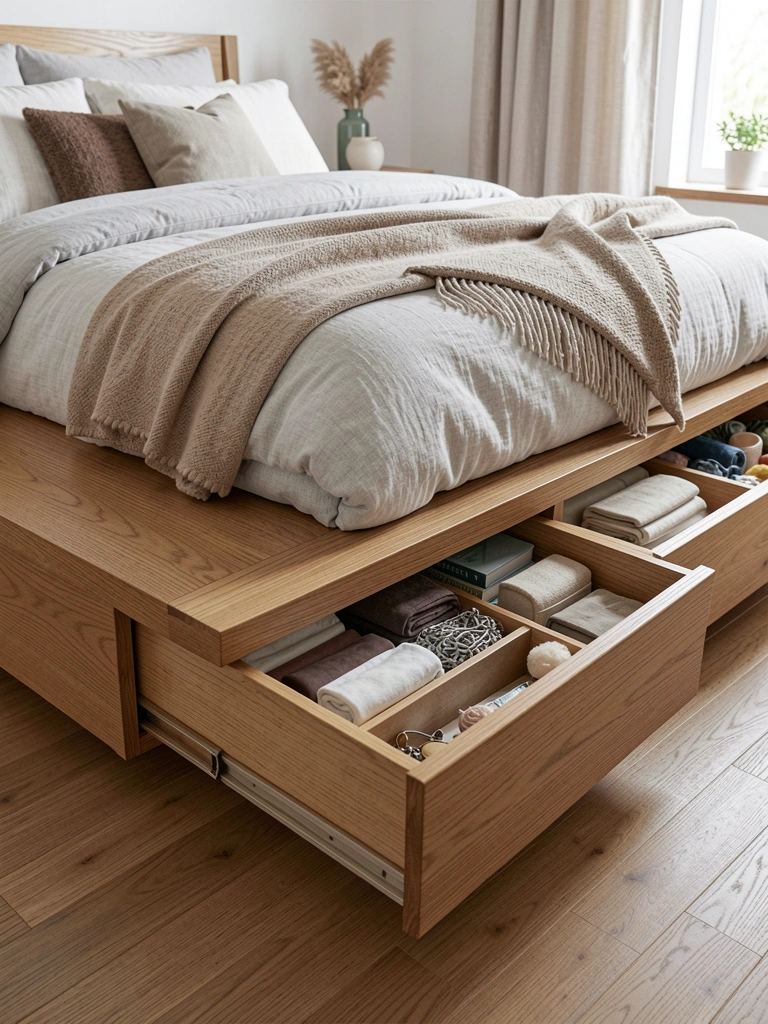
    Internal storage drawers within the bed frame maximize function while keeping joinery honest. Drawers become part of the construction story rather than hidden afterthoughts.

    Custom makers excel at this ($1,500–$2,800). Etsy sellers specializing in Japanese-inspired storage beds ($1,200–$2,000) often include this feature. Ready-made options at West Elm’s storage platform beds ($1,100–$1,600) provide budget-friendly alternatives. The drawers should glide smoothly and be finished identically to the frame. Measure your under-bed storage needs first—decide if you want one large drawer or several small ones. Time to spec custom: 1–2 hours of planning. The payoff: bedroom clutter disappears and your frame’s joinery tells a functional story.

    Hidden storage stops being hidden—it becomes part of the design’s integrity.

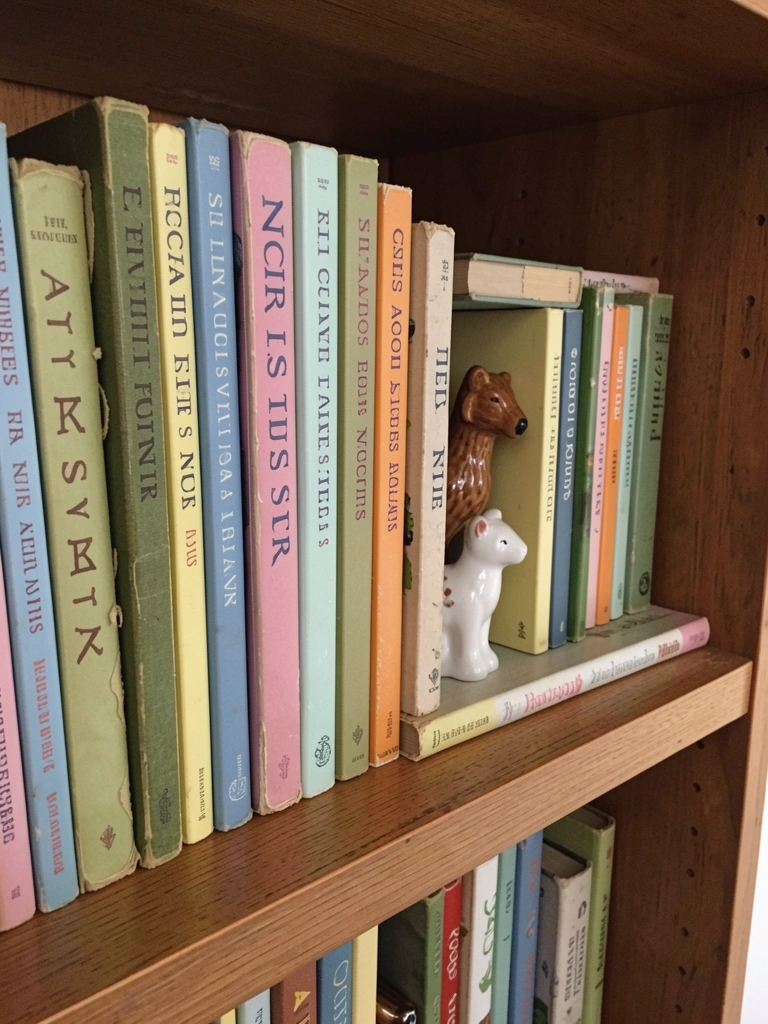
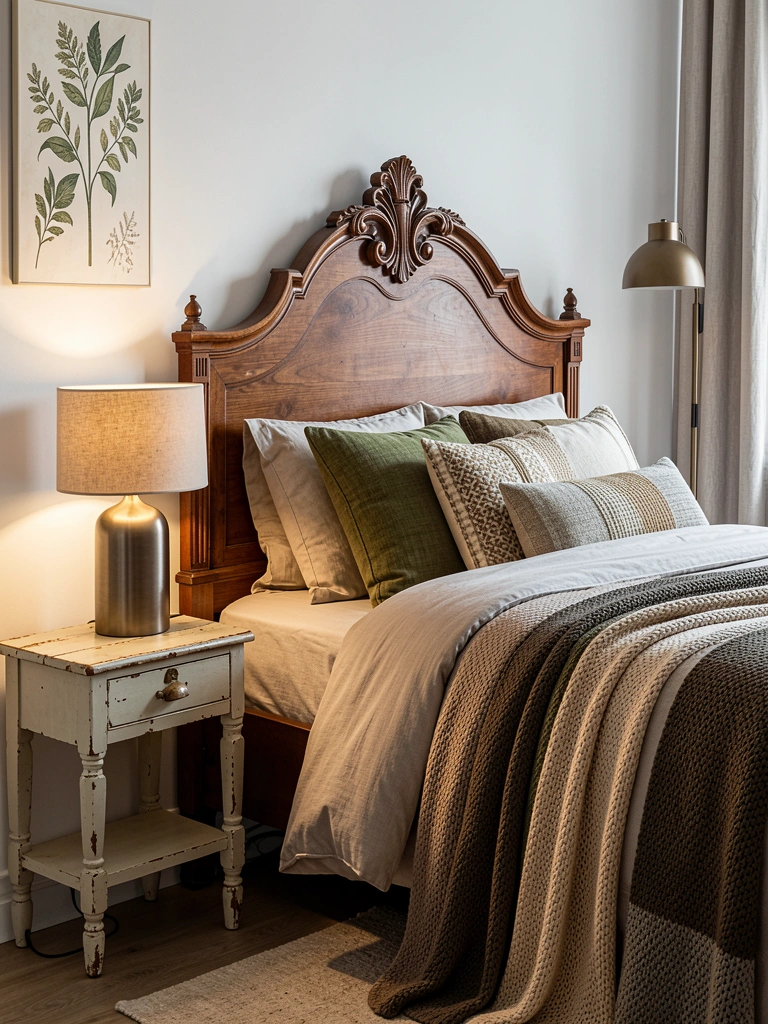
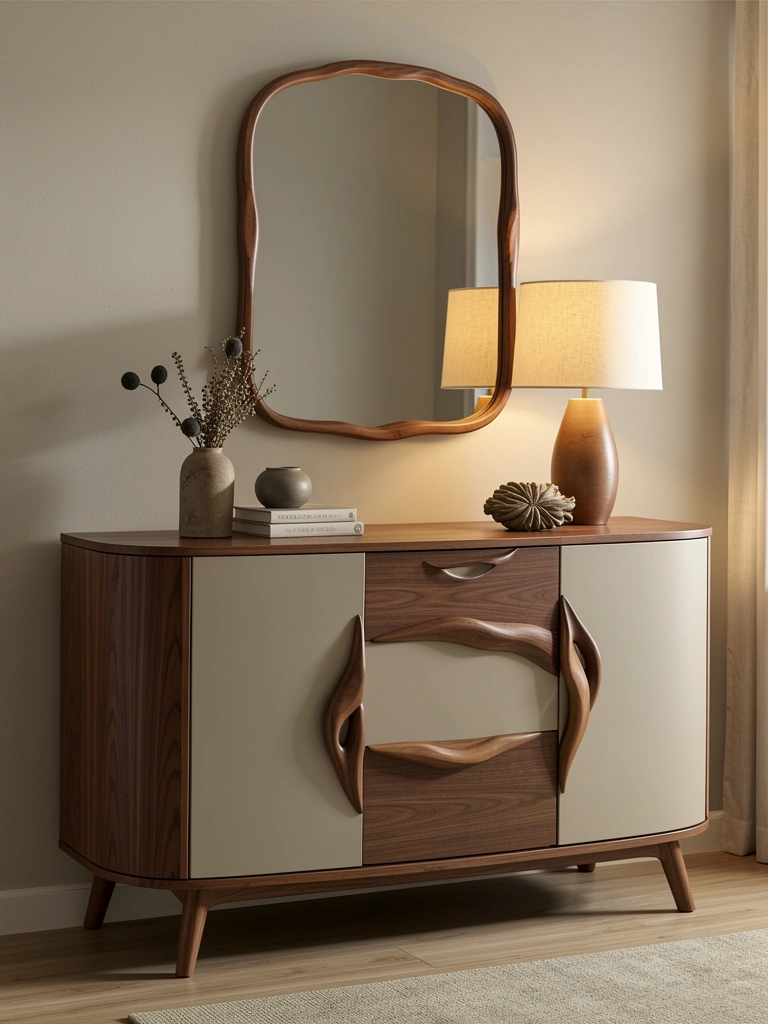
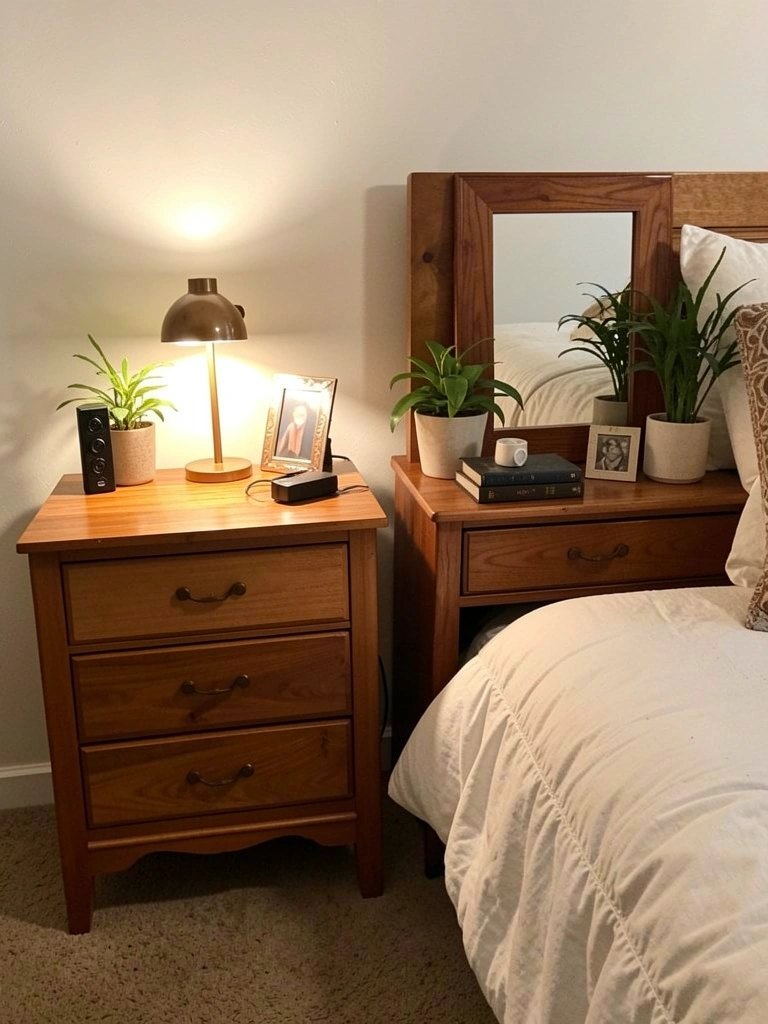
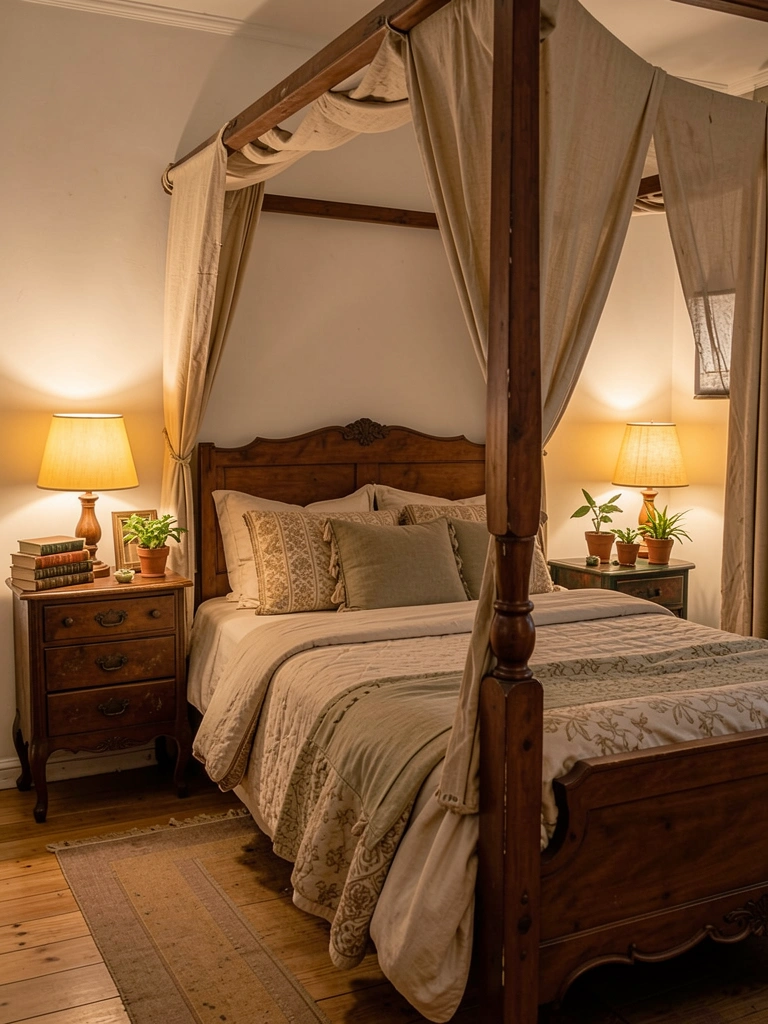
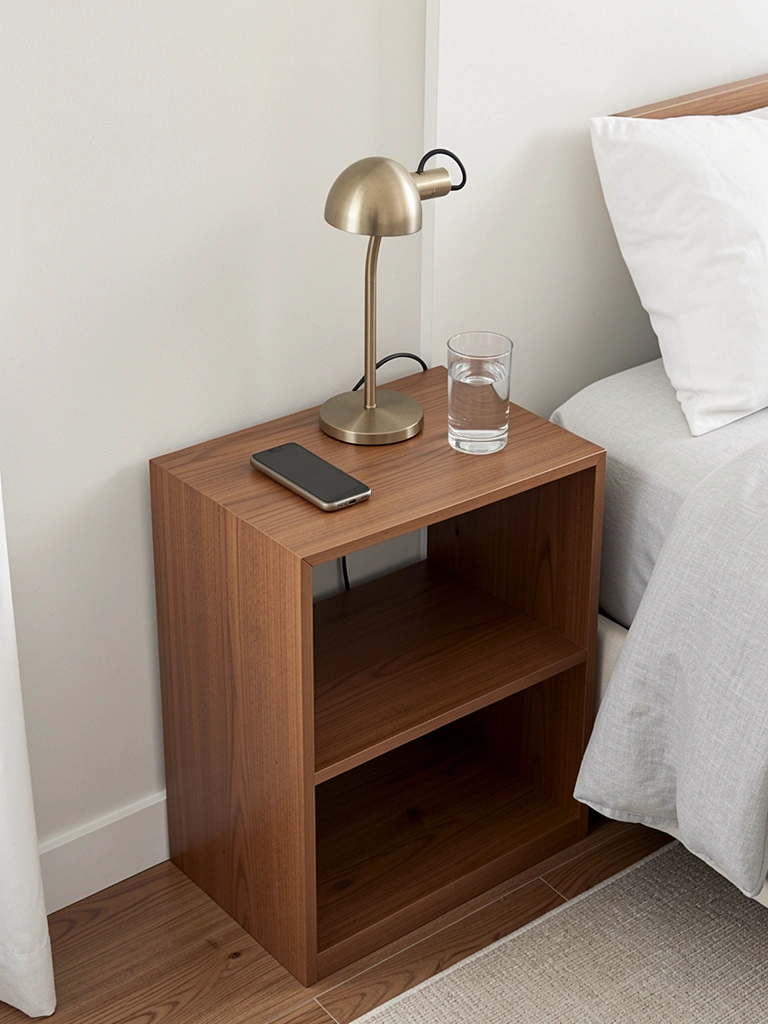
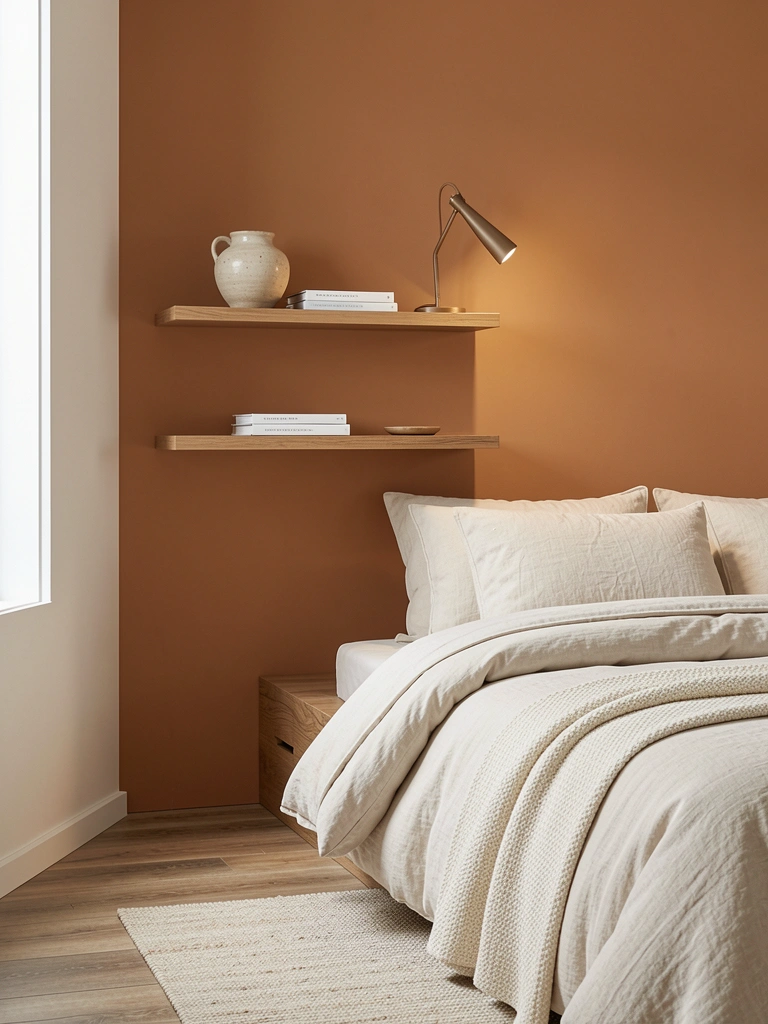
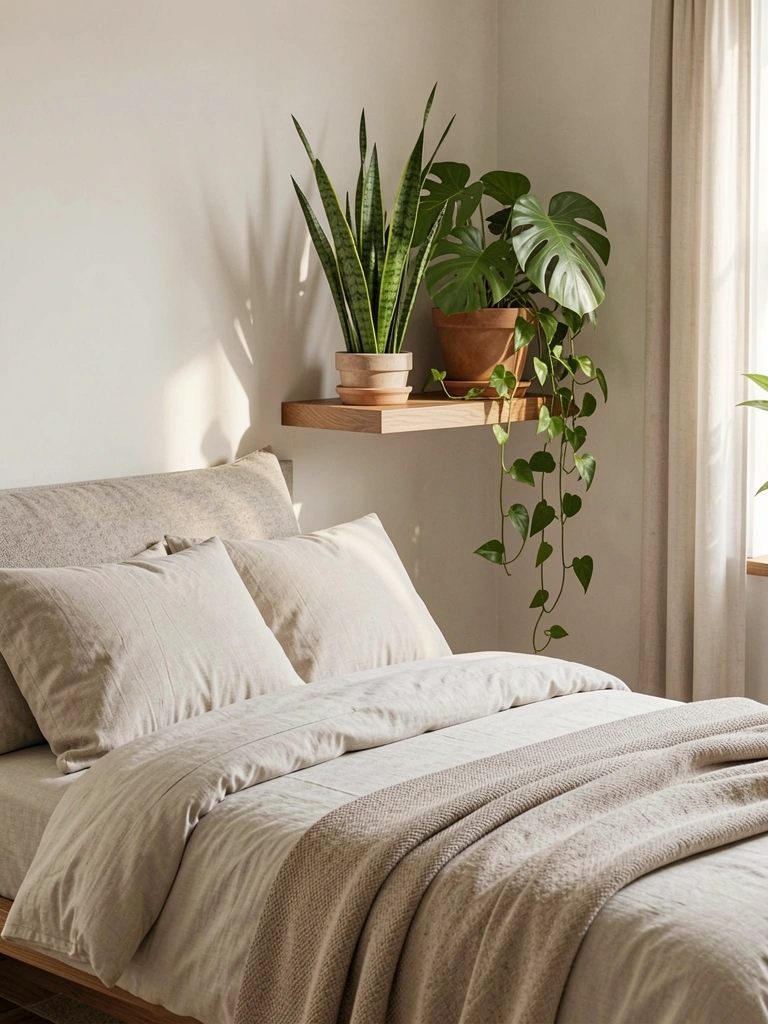
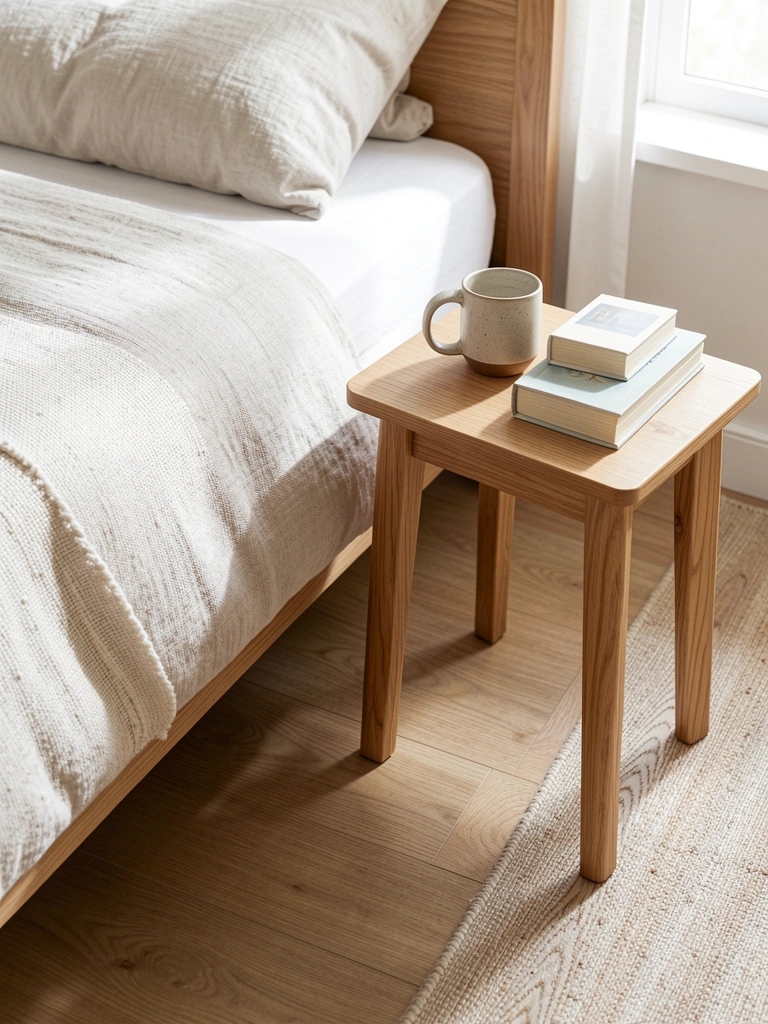
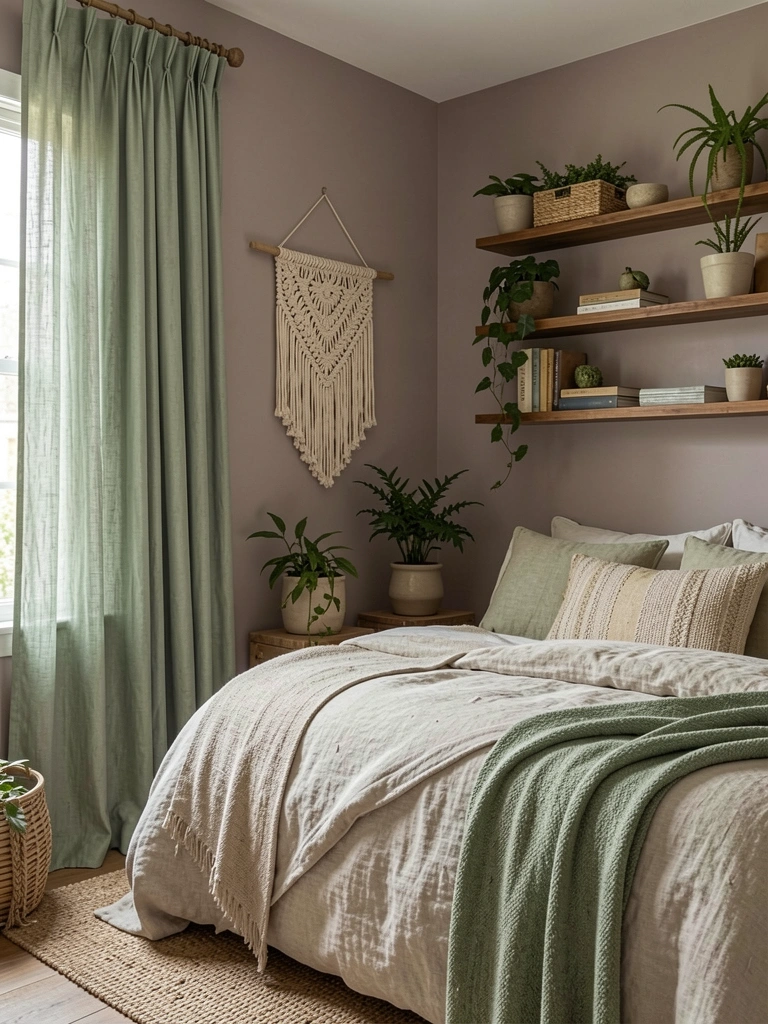
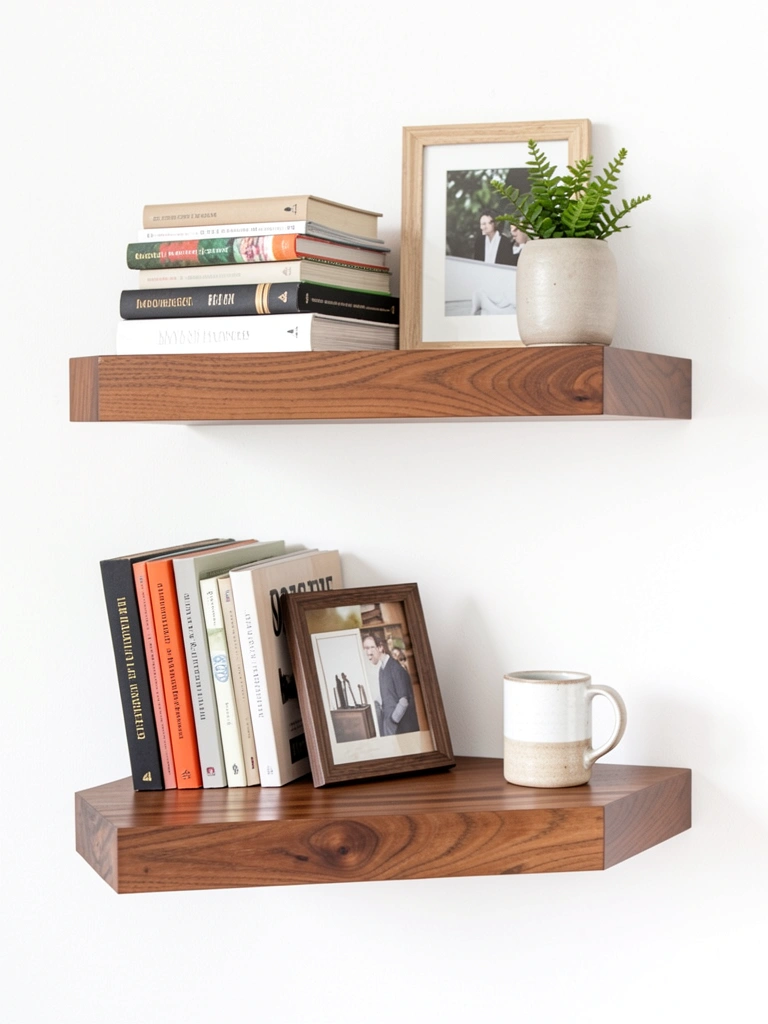
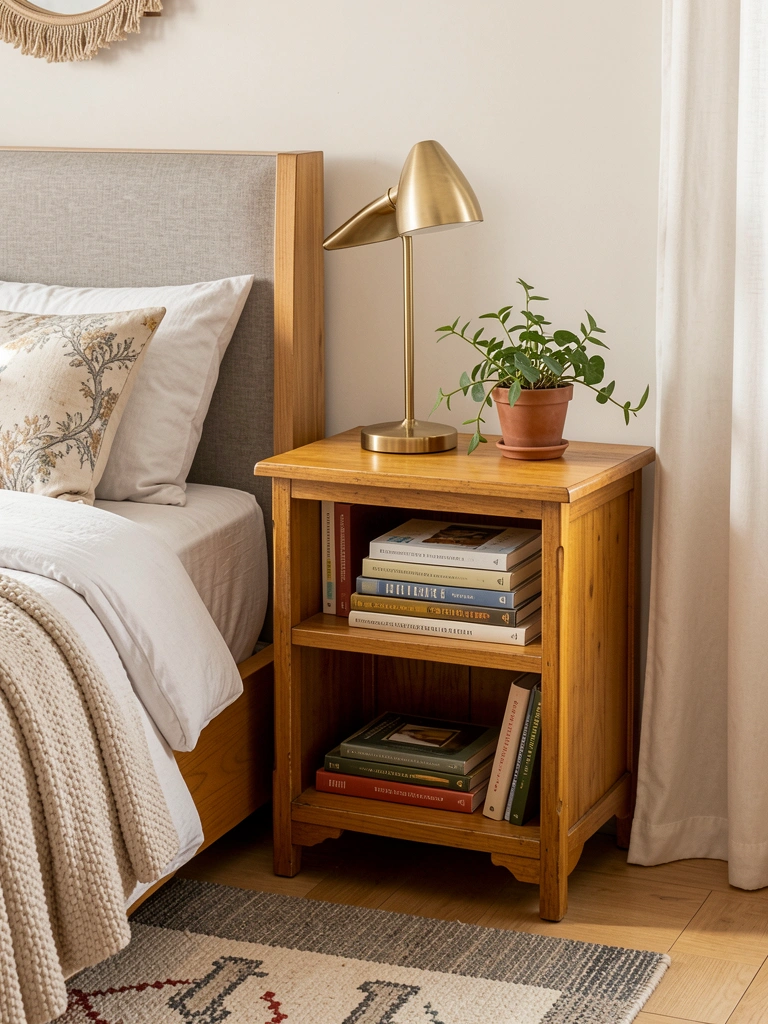
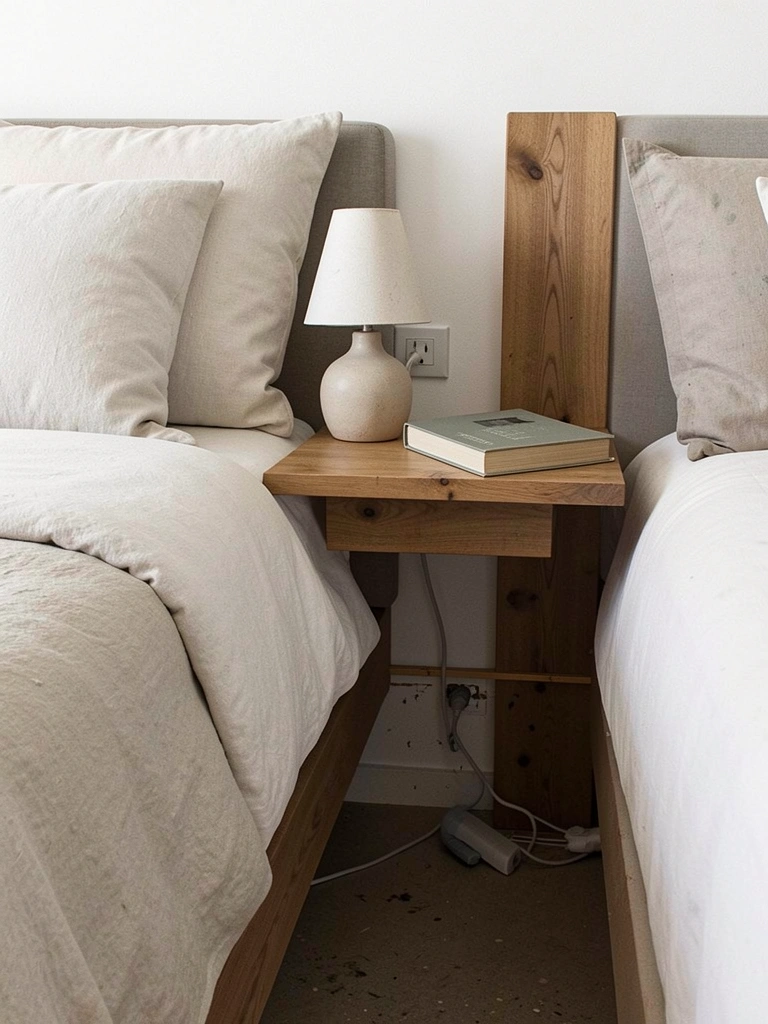
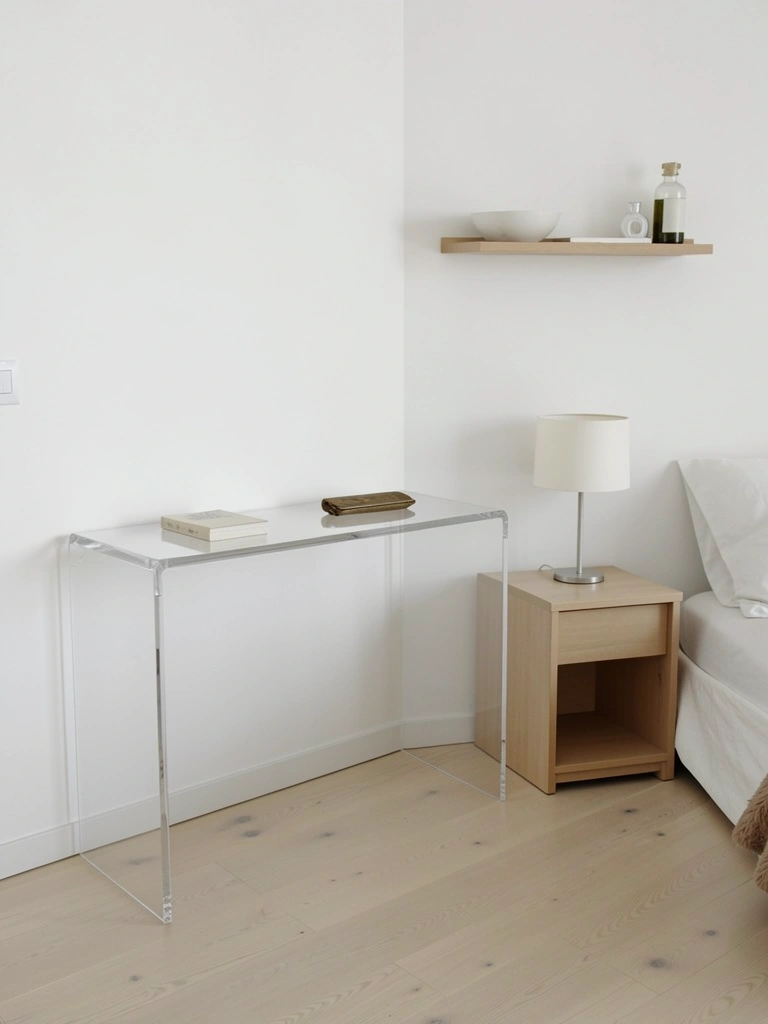
    18. Combine Minimal Joinery Bed with Live-Edge Nightstands

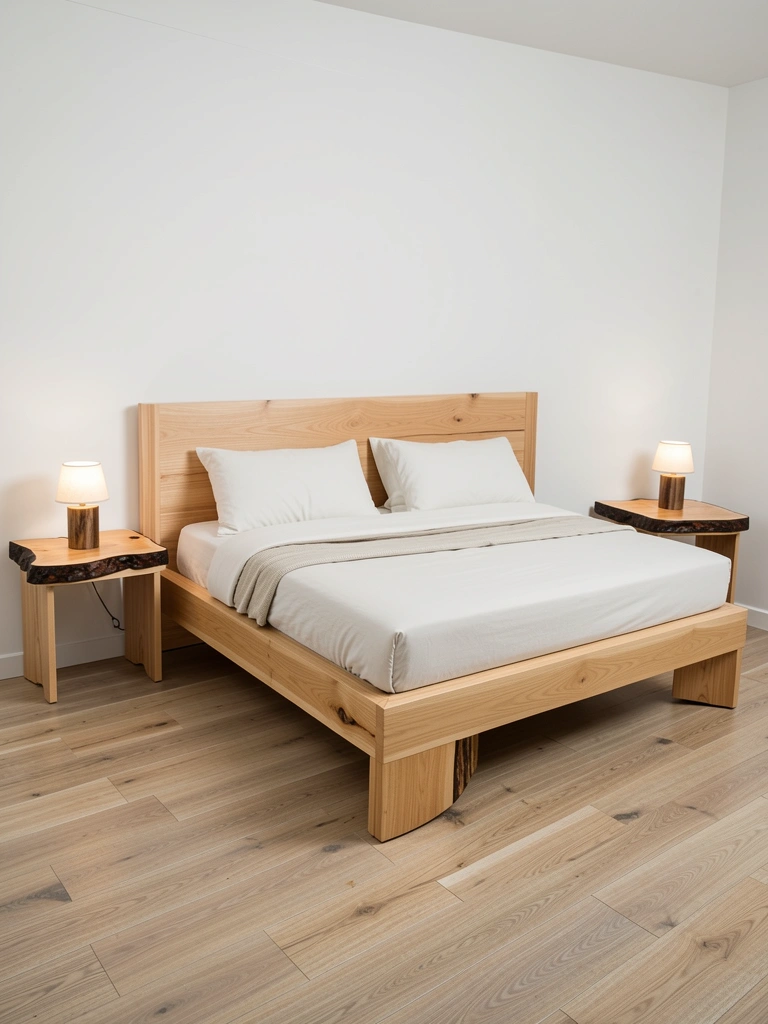
    Minimal joinery beds pair gorgeously with live-edge wood nightstands—where the tree’s natural irregular edge is preserved. The contrast between your bed’s structured joinery and the nightstand’s organic edge creates sophisticated visual balance.

    Find live-edge nightstands from Etsy woodworkers ($200–$400 each), West Elm ($300–$600), or Article ($250–$500). Make sure the wood tone complements your bed frame. DIY option: source a live-edge slab from a local sawmill ($80–$150), mount it on simple wooden legs ($40–$80, time: 3–4 hours). The pairing says your bedroom aesthetic is thoughtful, not accidental. One live-edge piece balances multiple pairs perfectly.

    The juxtaposition between structured and organic becomes the room’s design story.

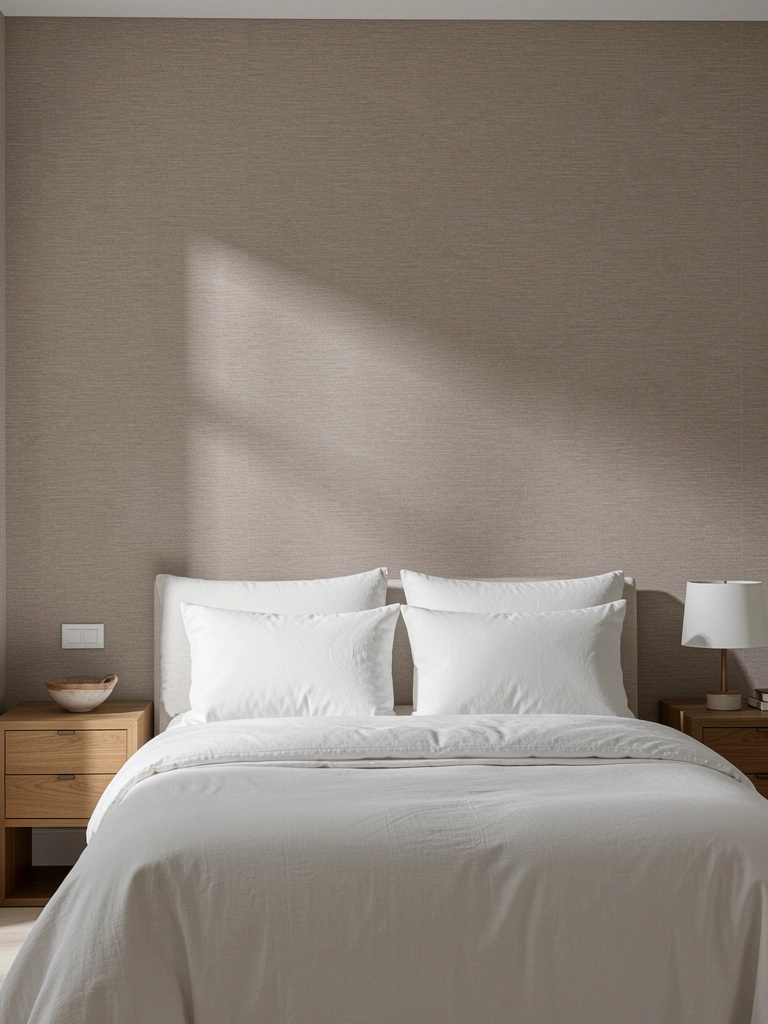
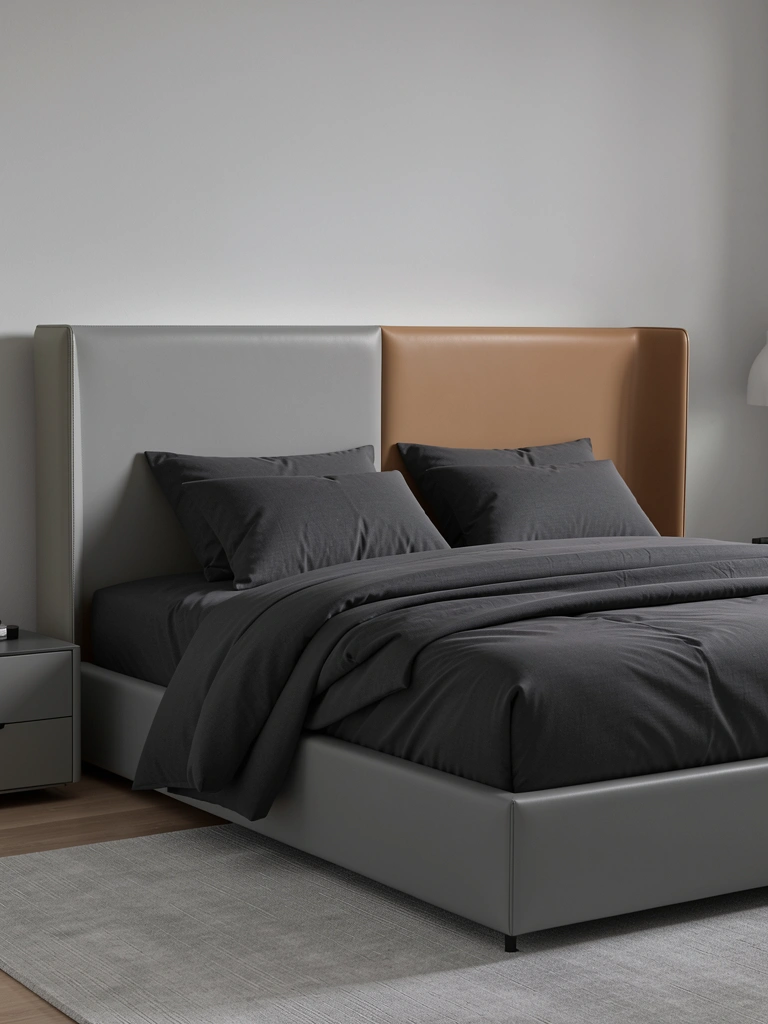
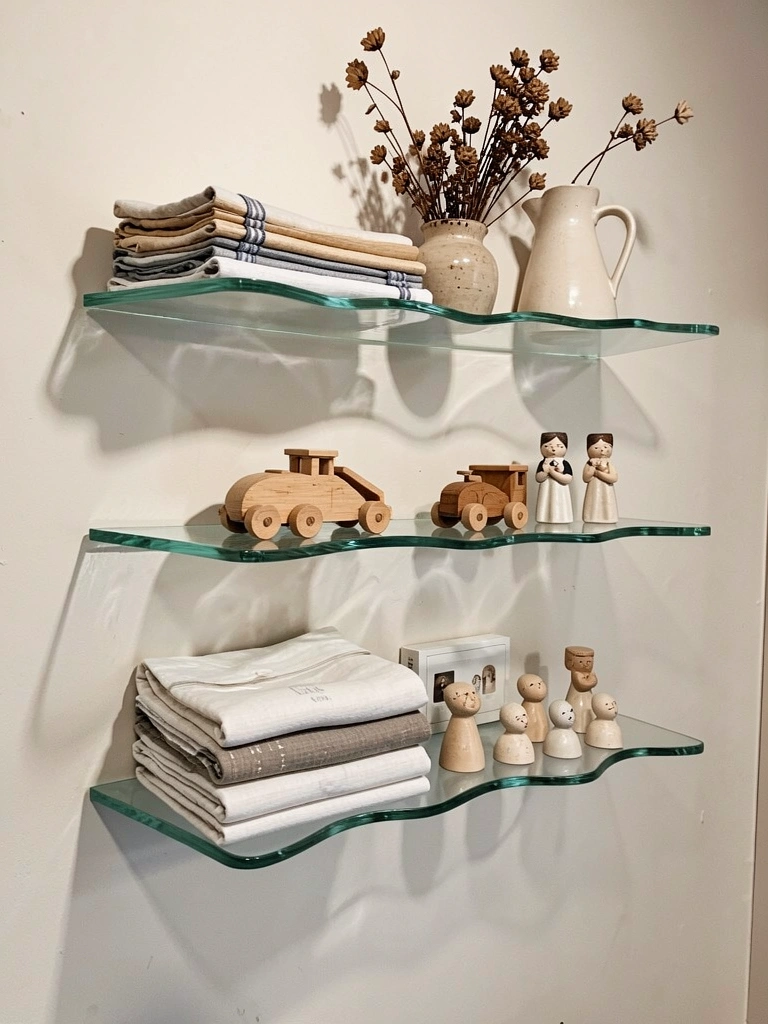
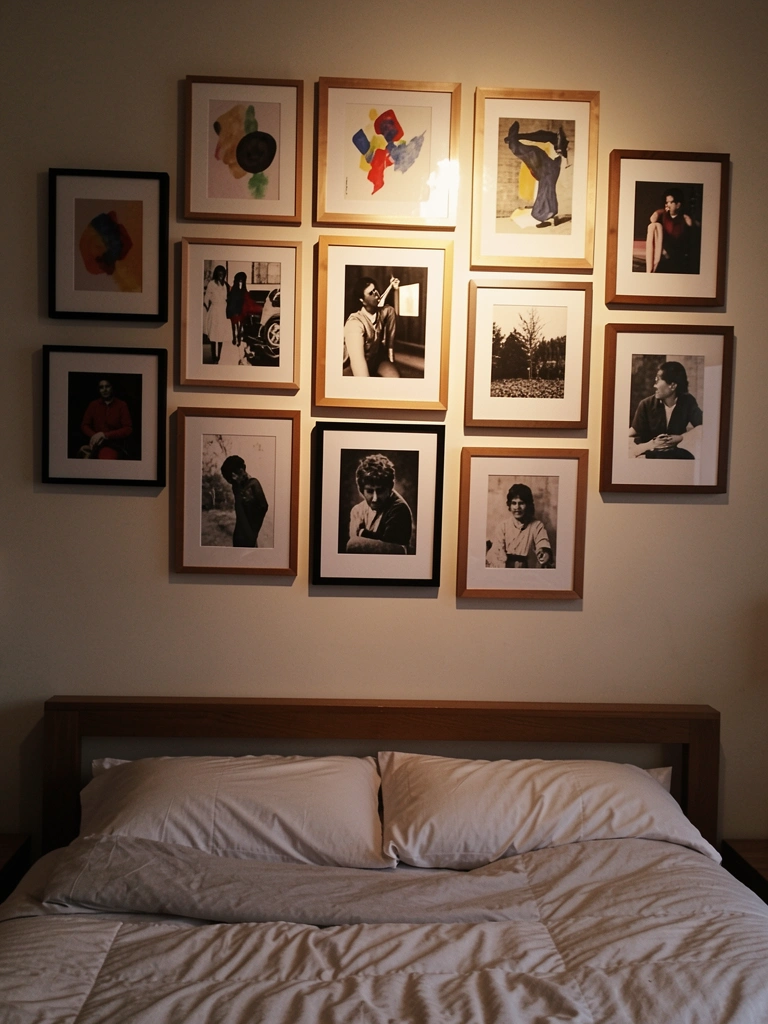
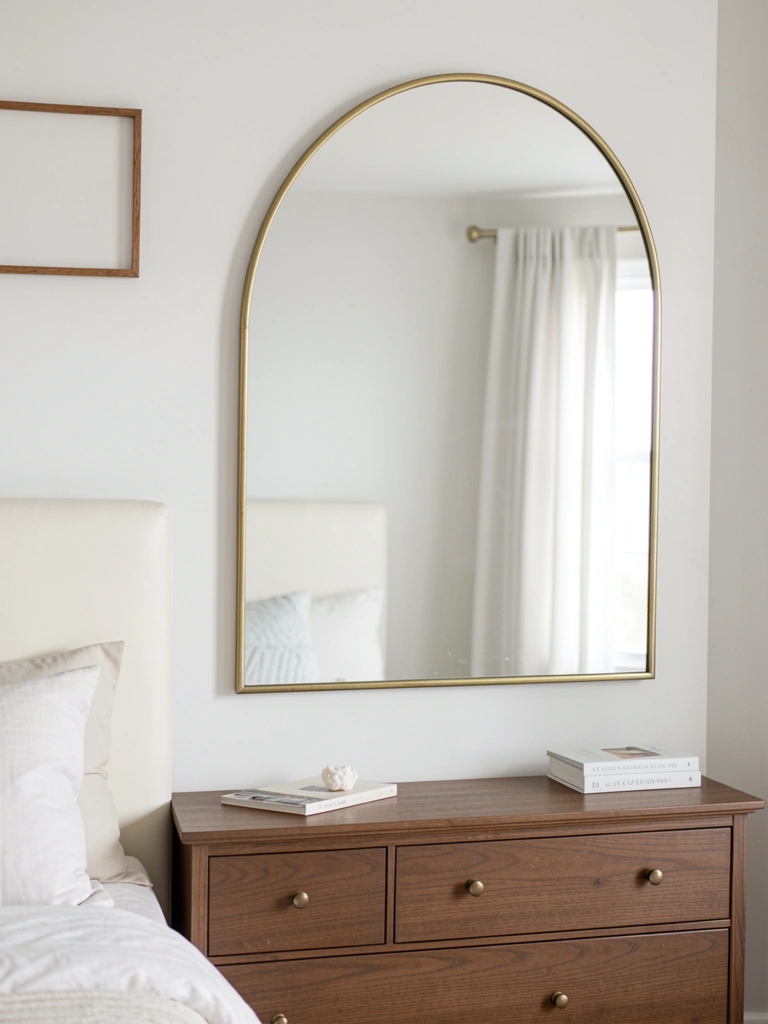
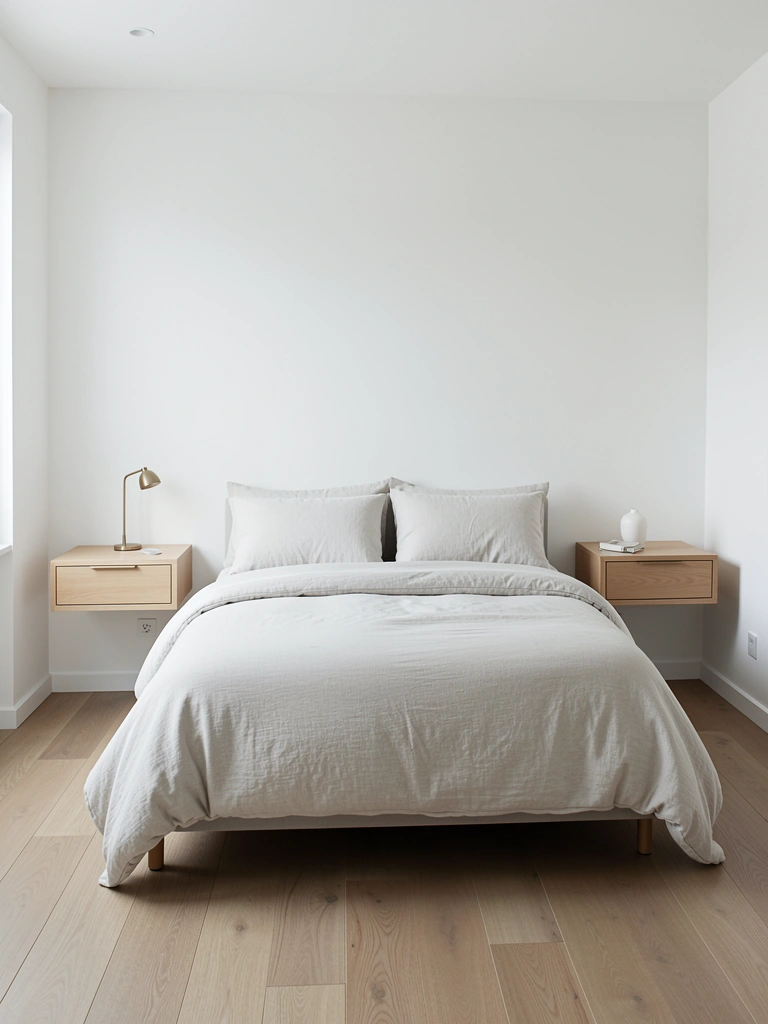
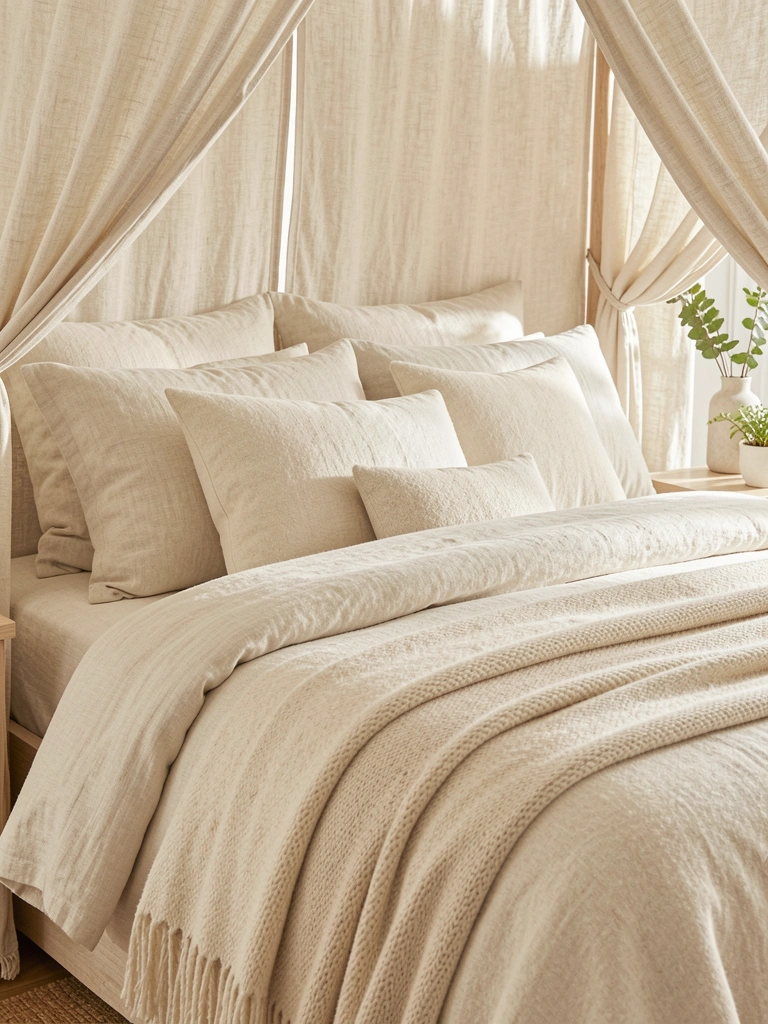
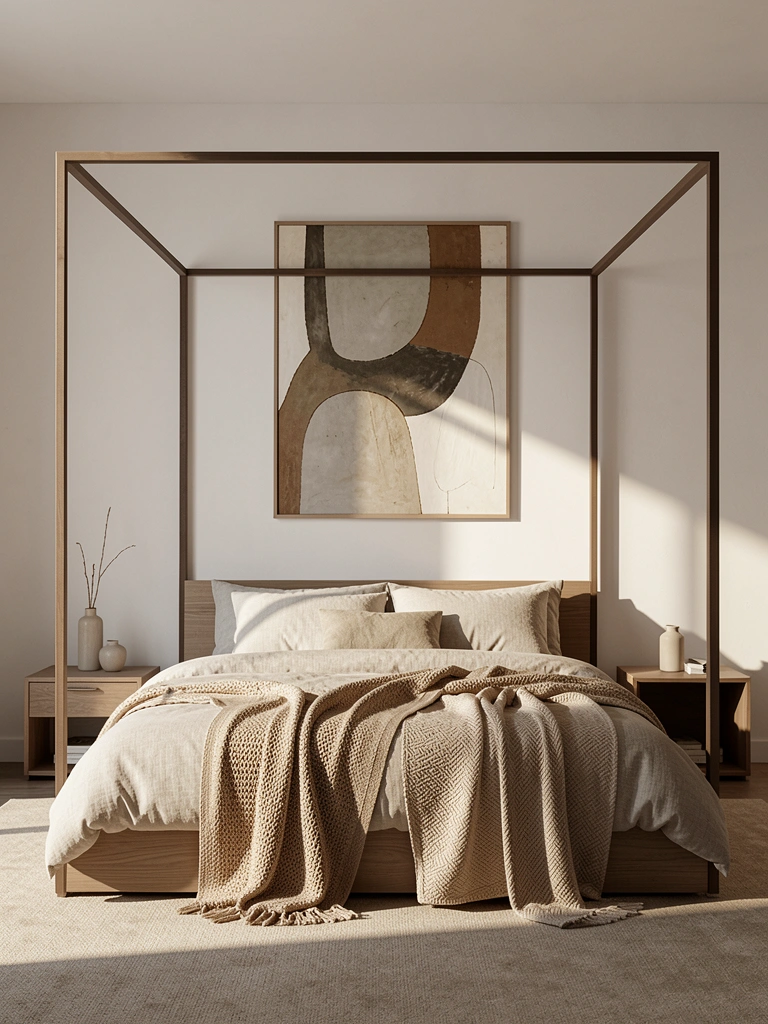
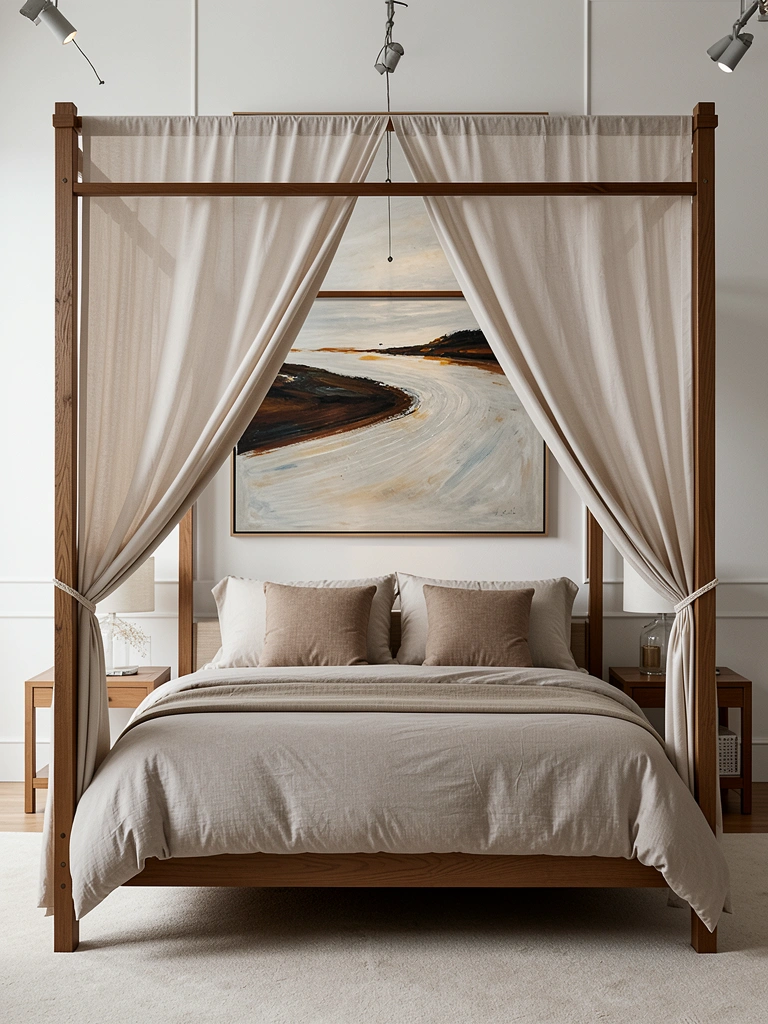
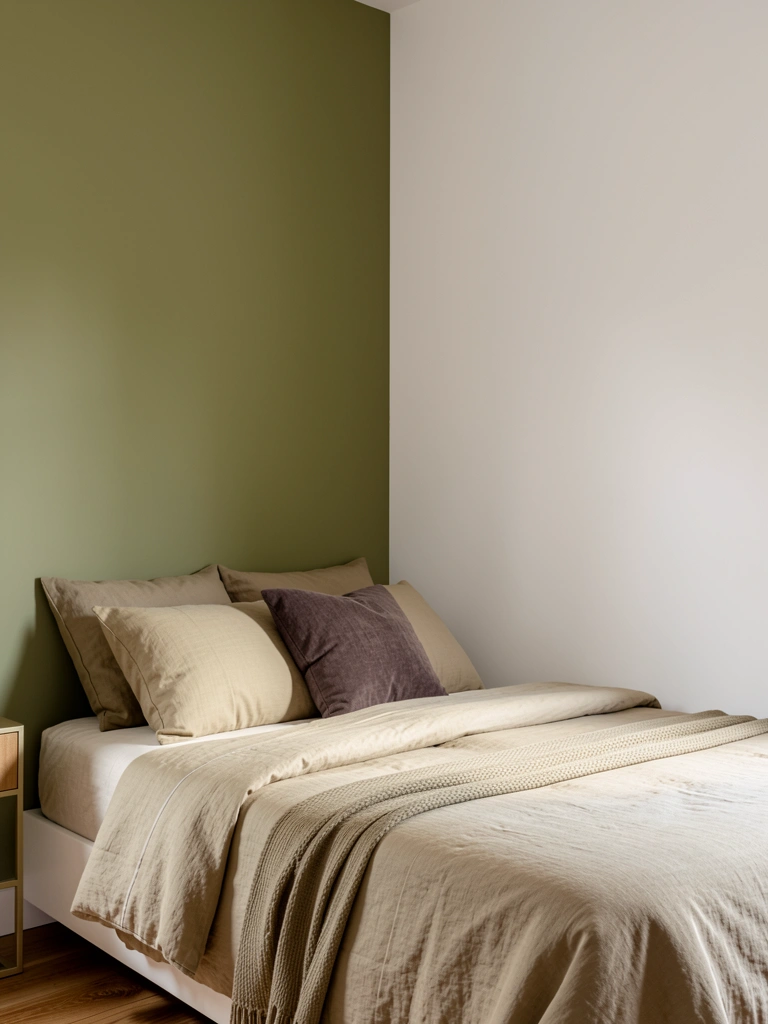
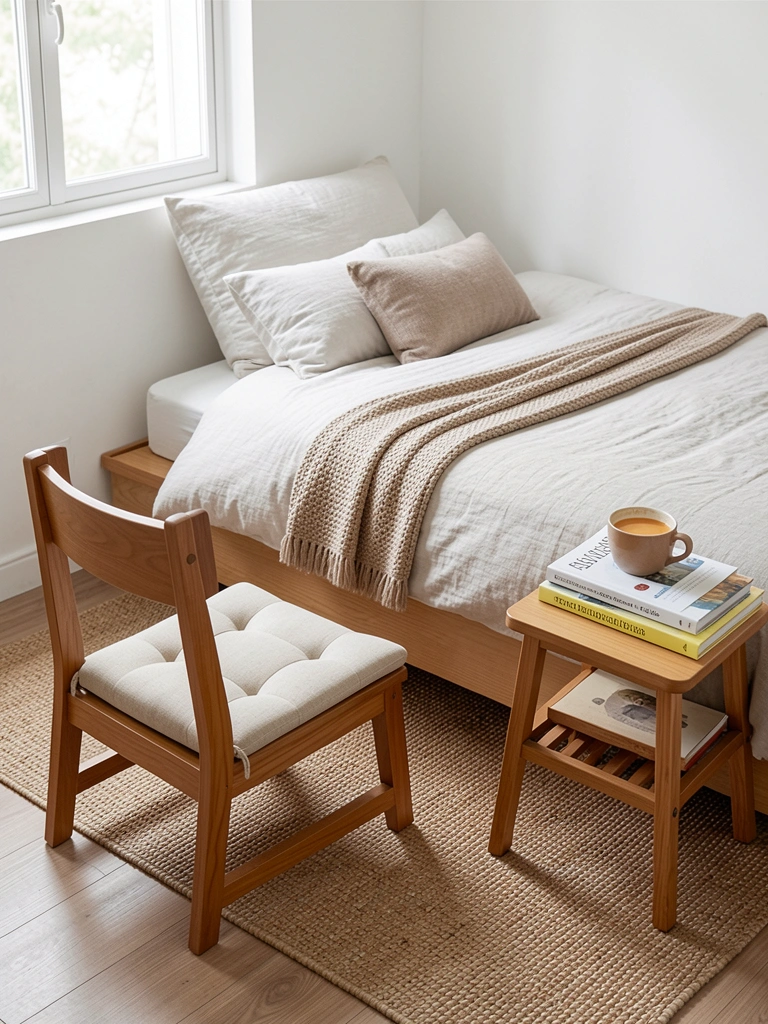
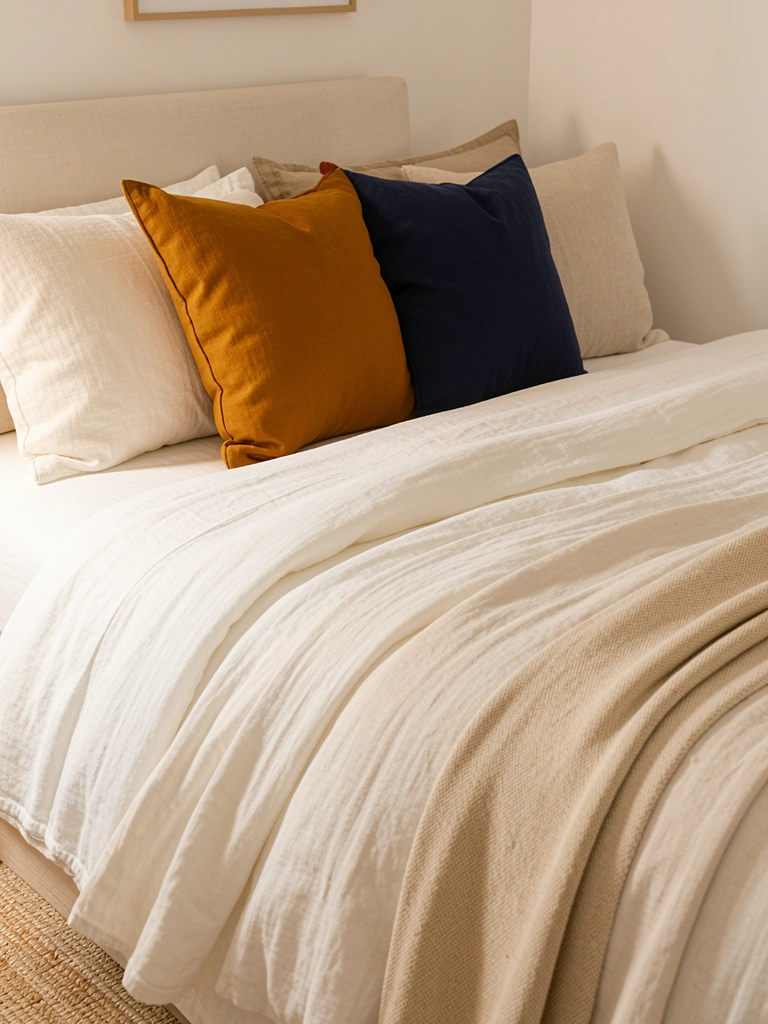
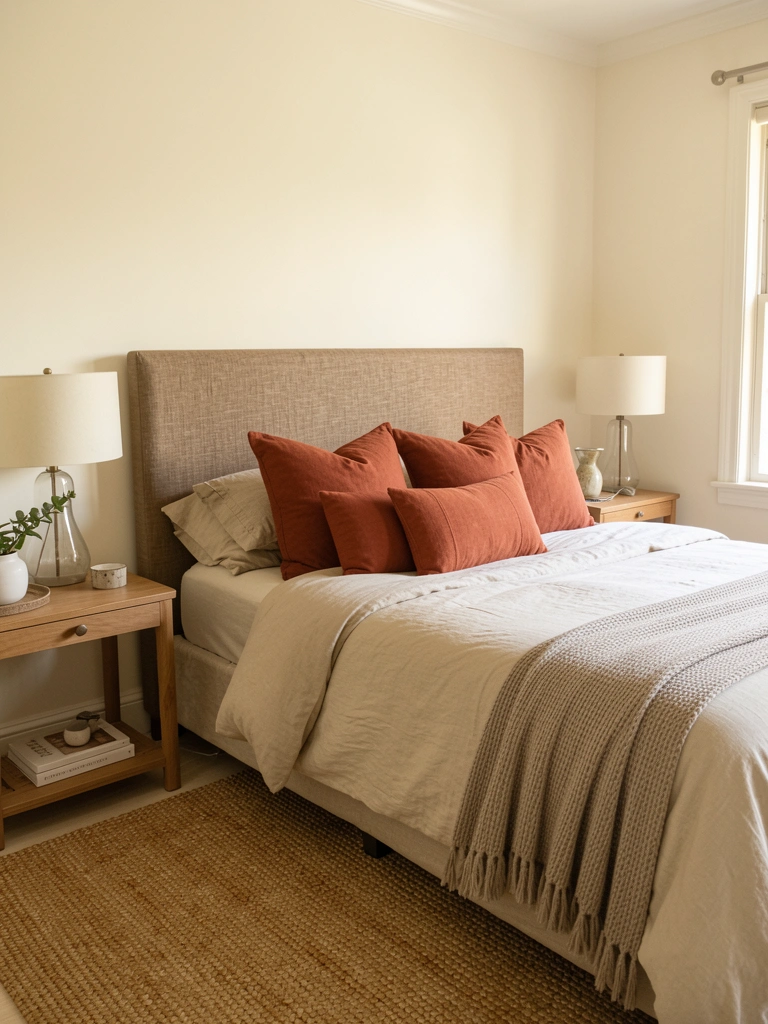
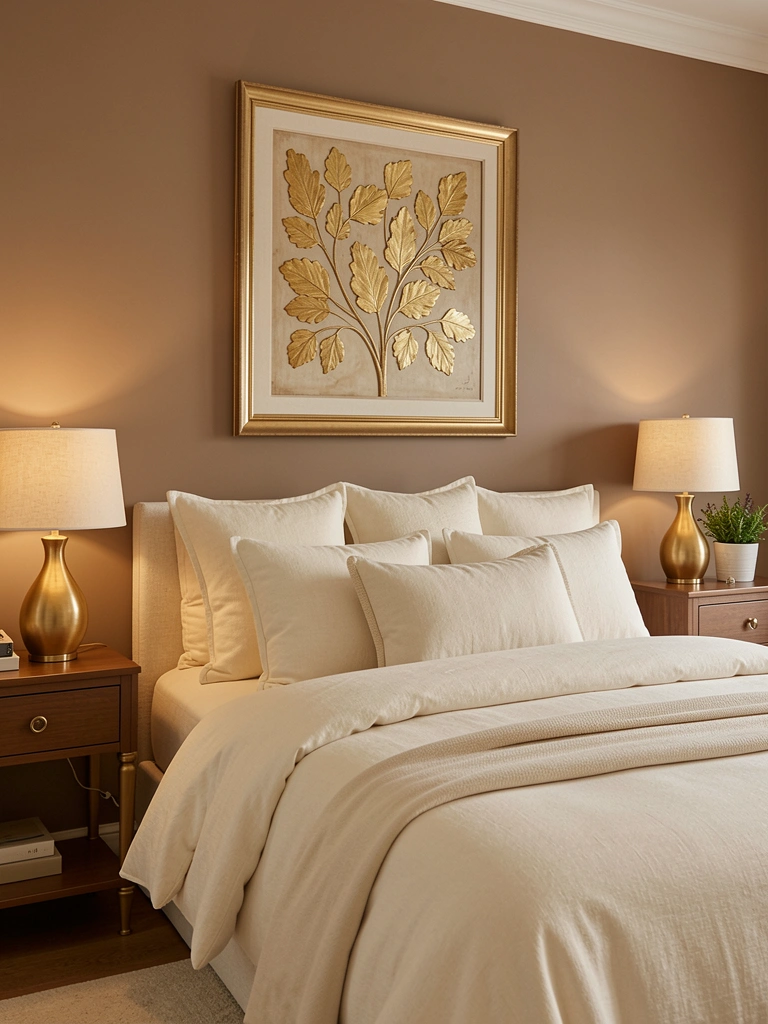
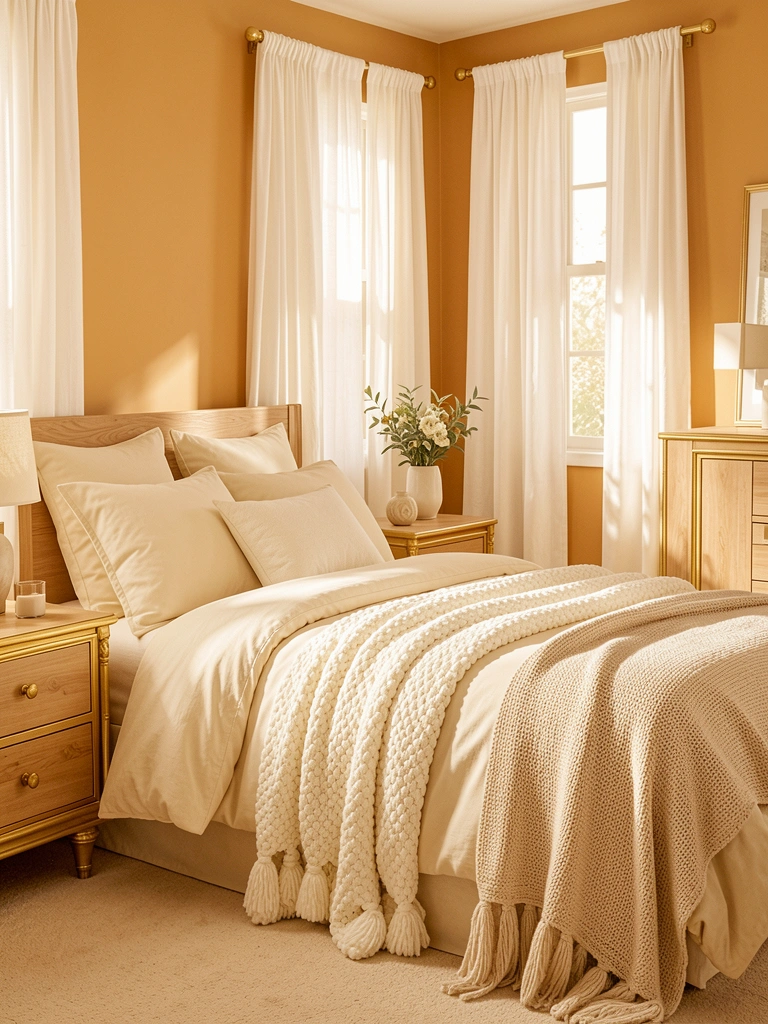
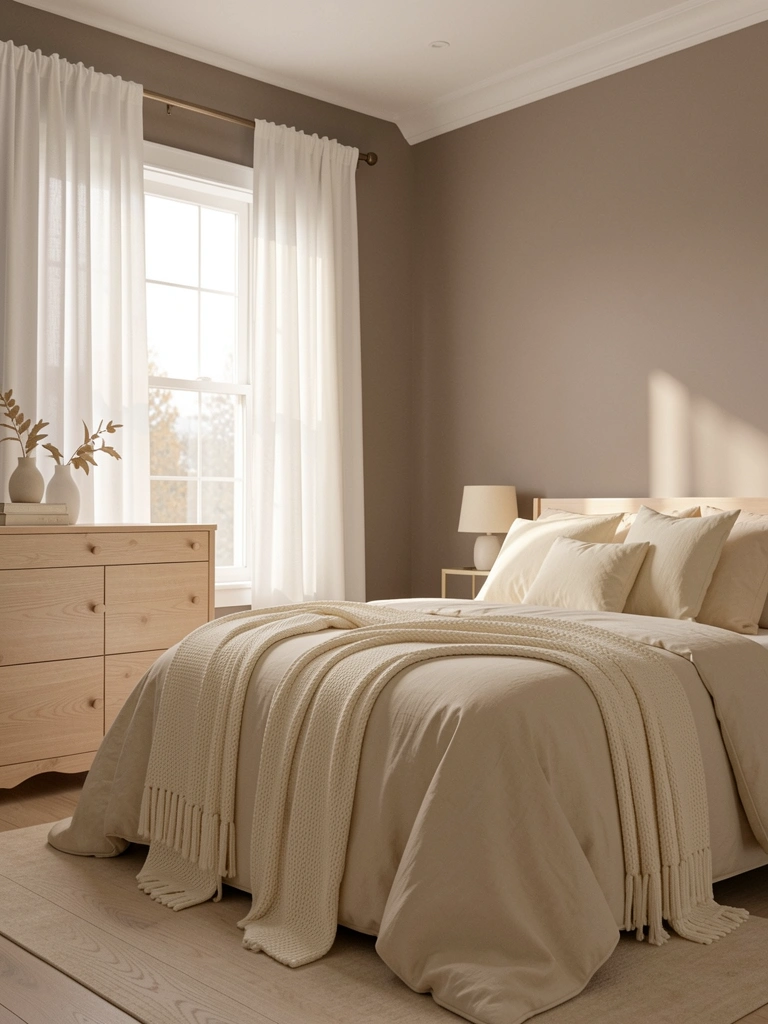
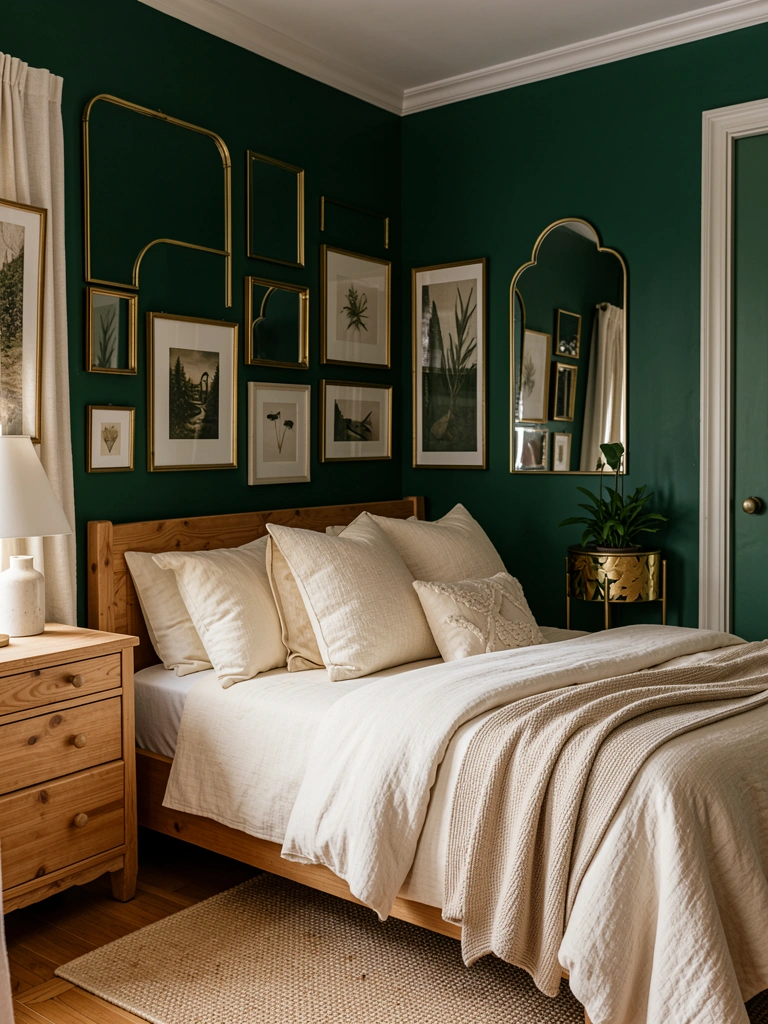
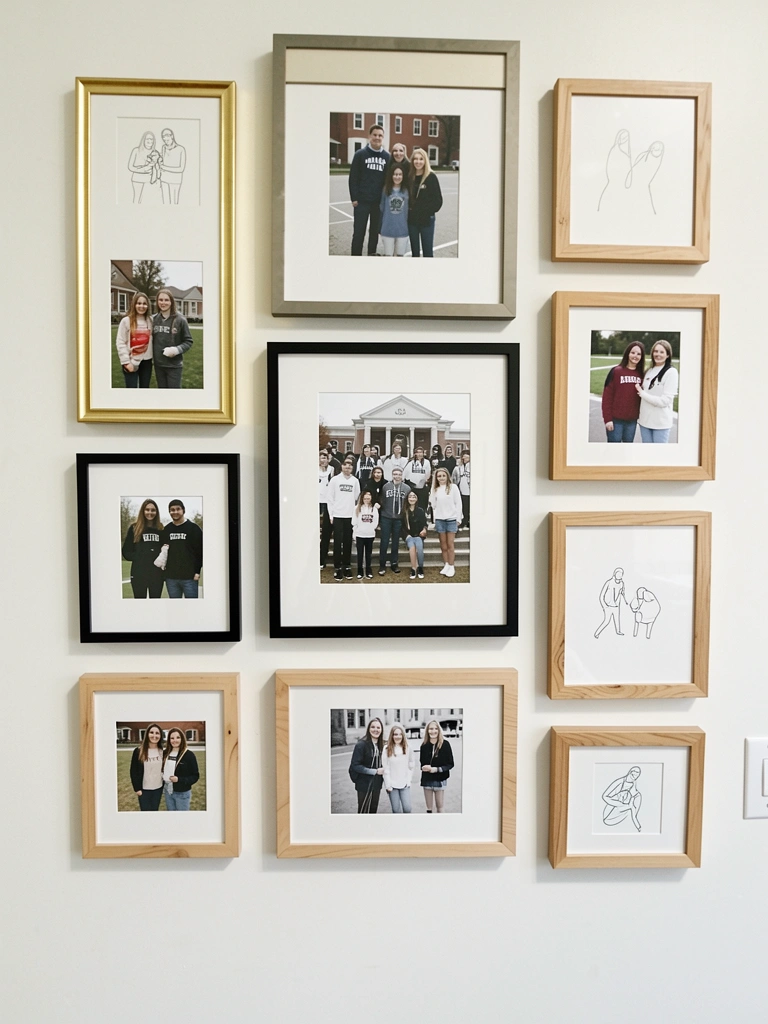
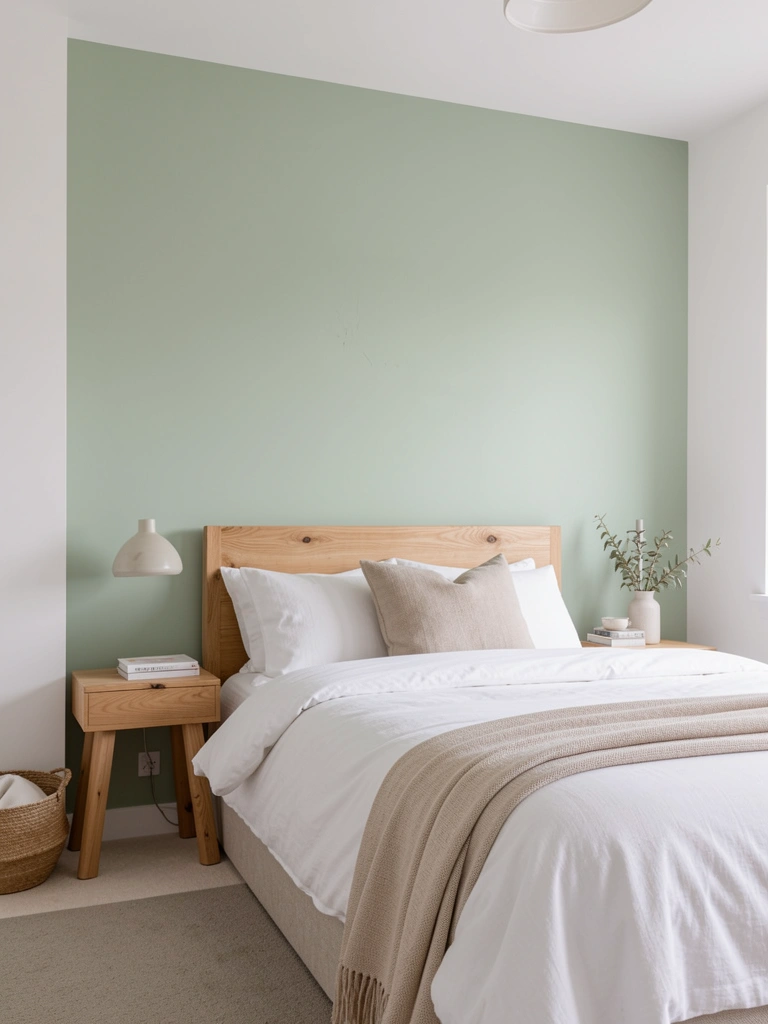
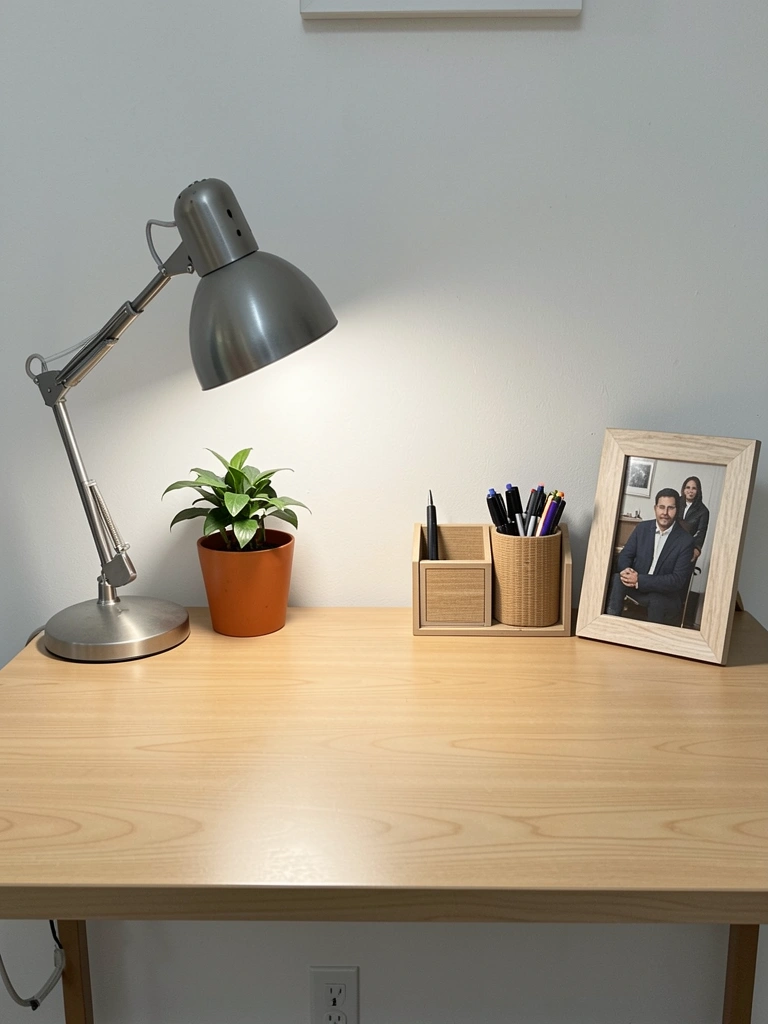
    19. Use Minimal Joinery Bed as Anchor, Everything Else Flexible

    Here’s a strategy: invest in a beautiful minimal joinery bed and then keep everything else simple. Let the bed be the statement while nightstands, decor, and bedding stay neutral and understated.

    Choose your bed investment ($1,000–$2,500), then budget $500–$1,000 for everything else. This approach works because the joinery bed doesn’t compete with other visual noise. Your eye goes straight to the craftsmanship. Bedding: cream linen, one throw. Nightstands: simple, minimal. Wall art: one piece or none. The restraint amplifies the bed’s impact. Time to plan: 1–2 hours styling. Renter note: This strategy is affordable since you’re not buying expensive matching sets.

    The bedroom becomes calming because it’s focused. Your bed leads the design conversation.

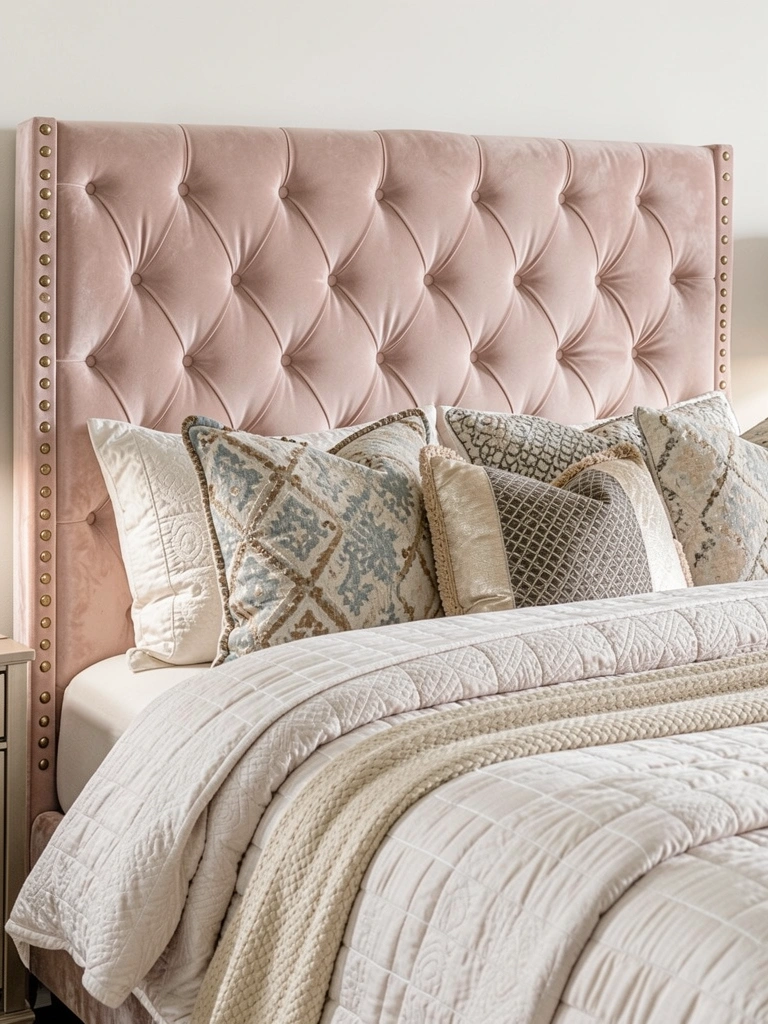
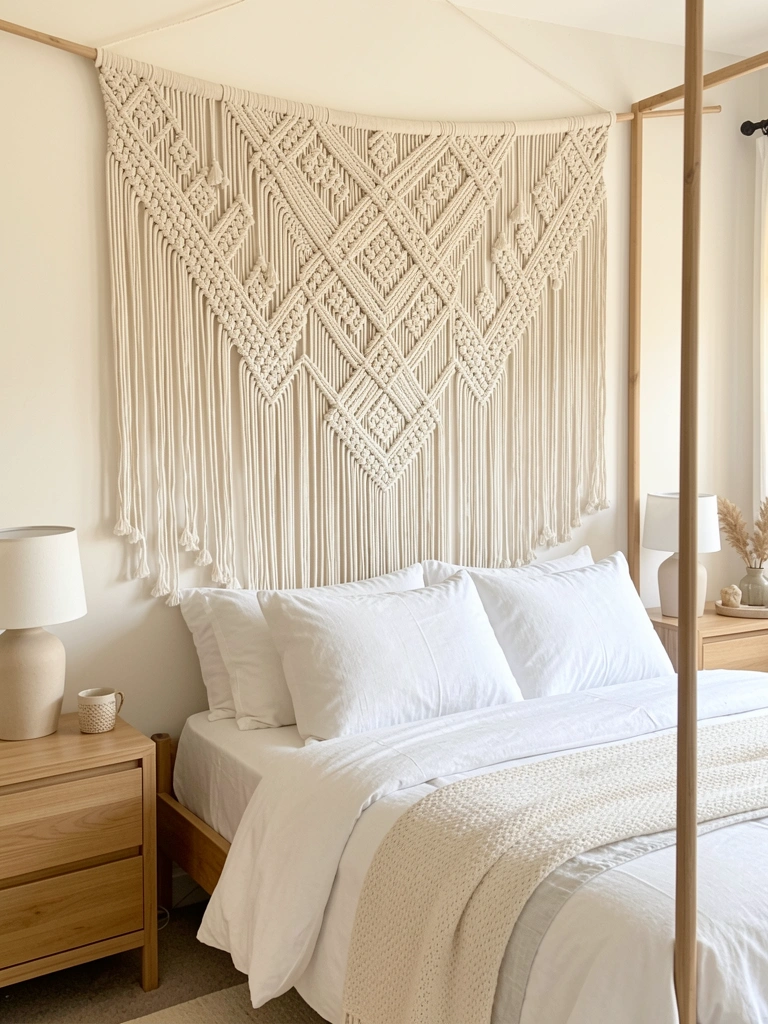
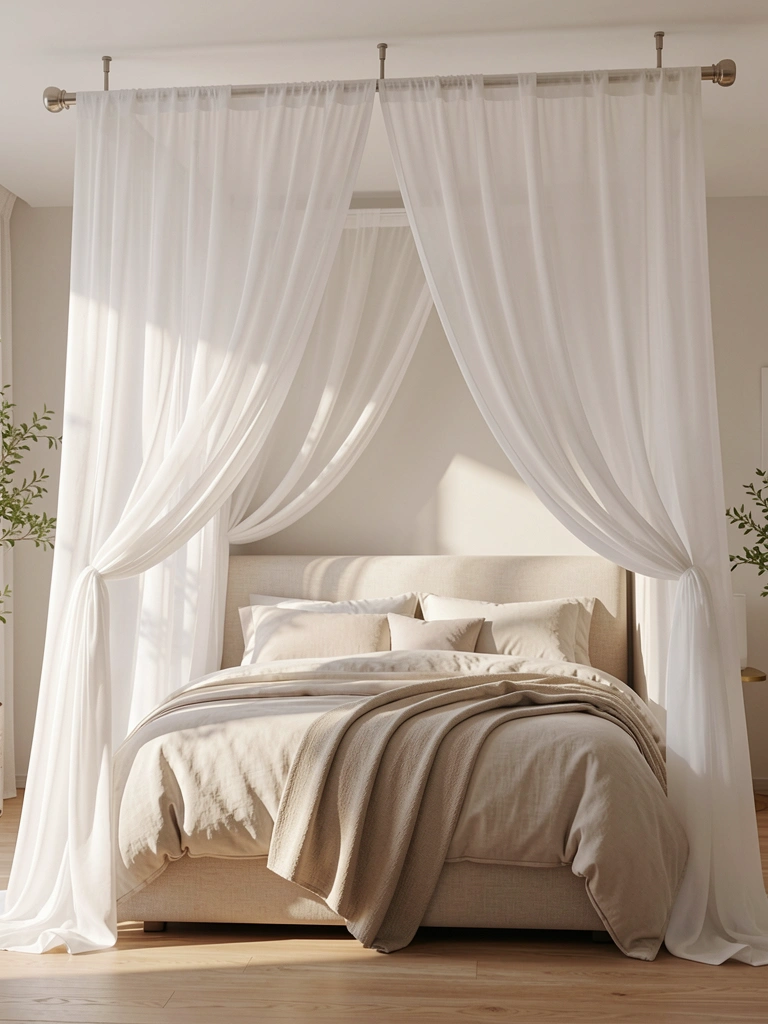
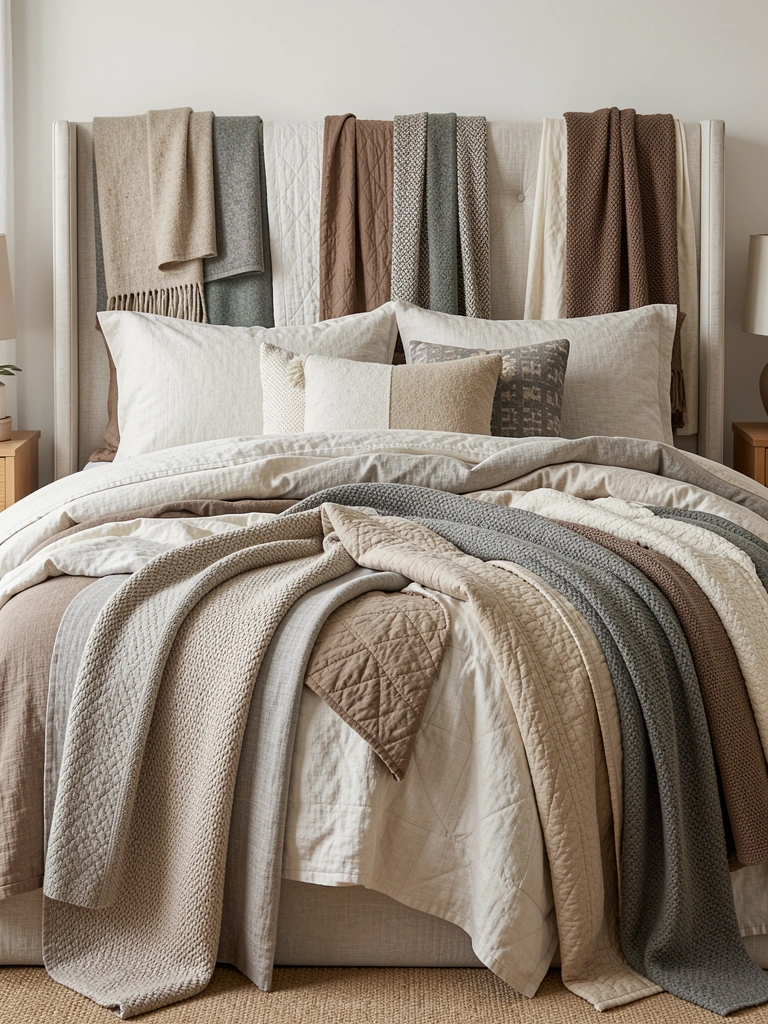
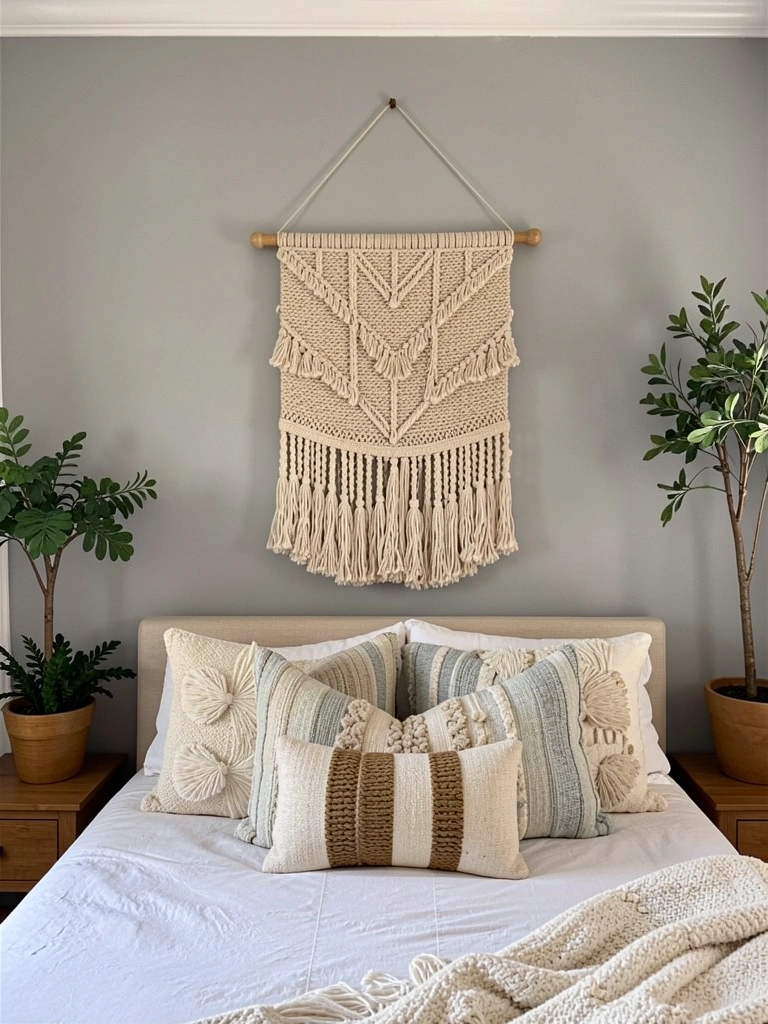
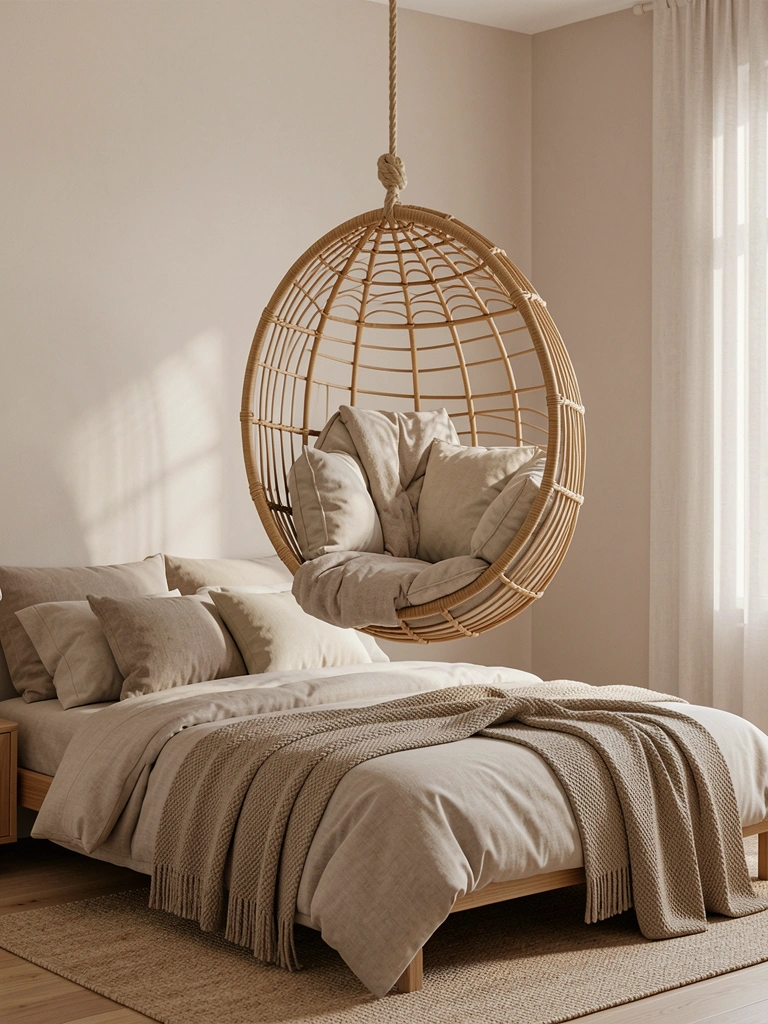
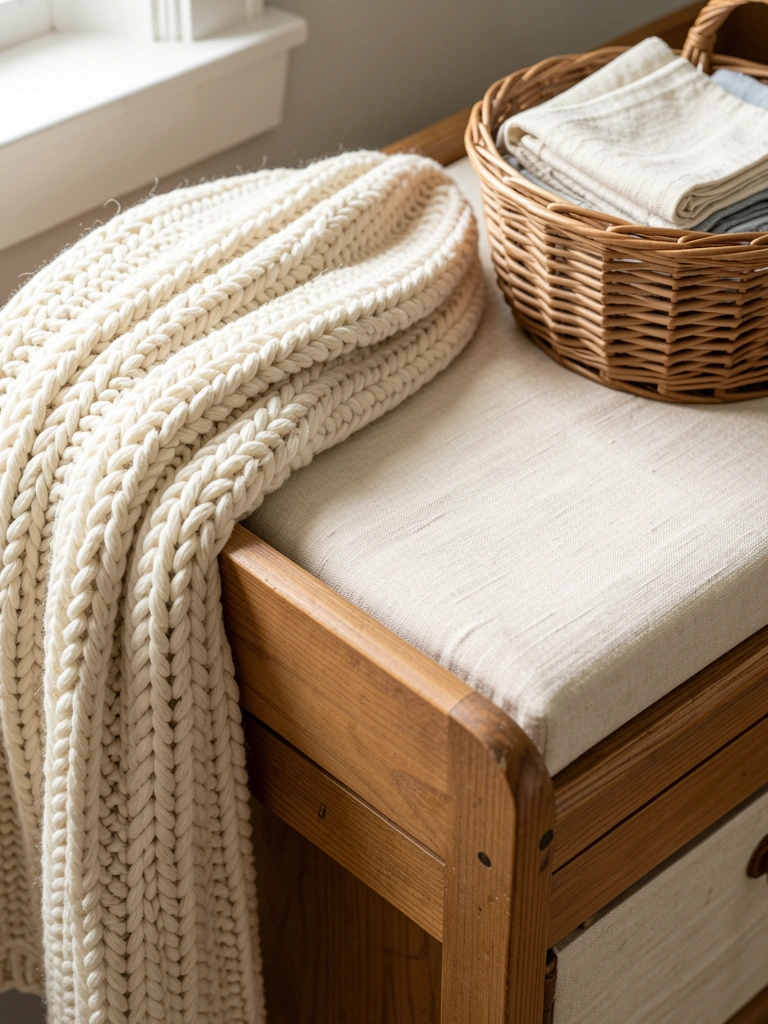
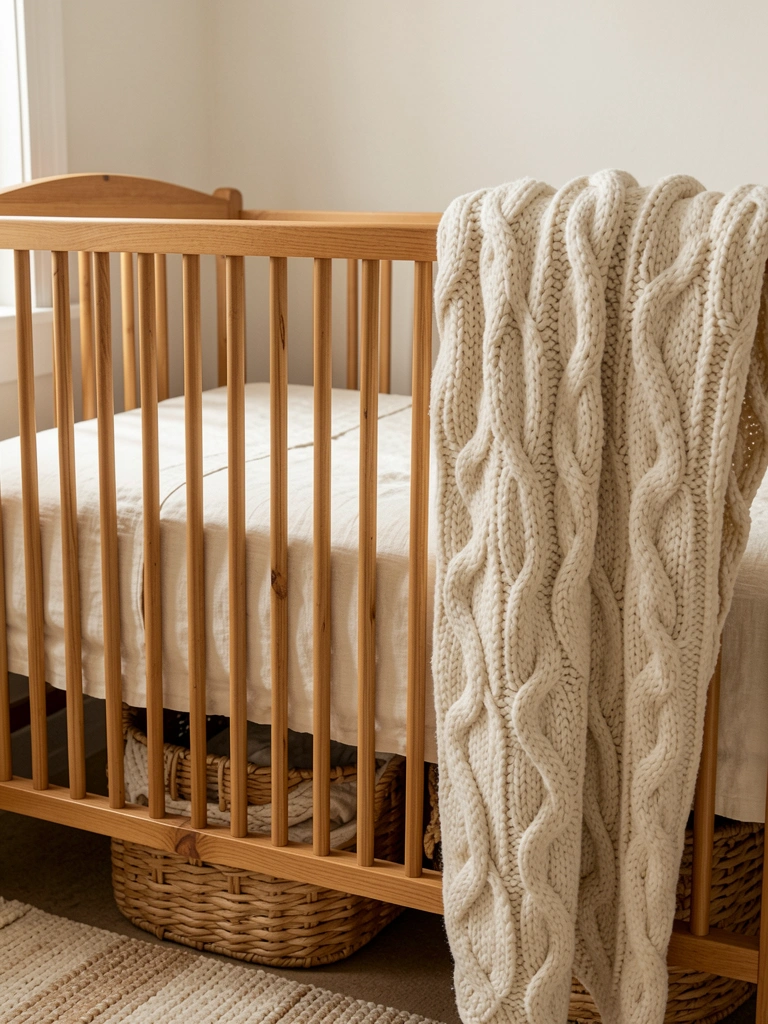
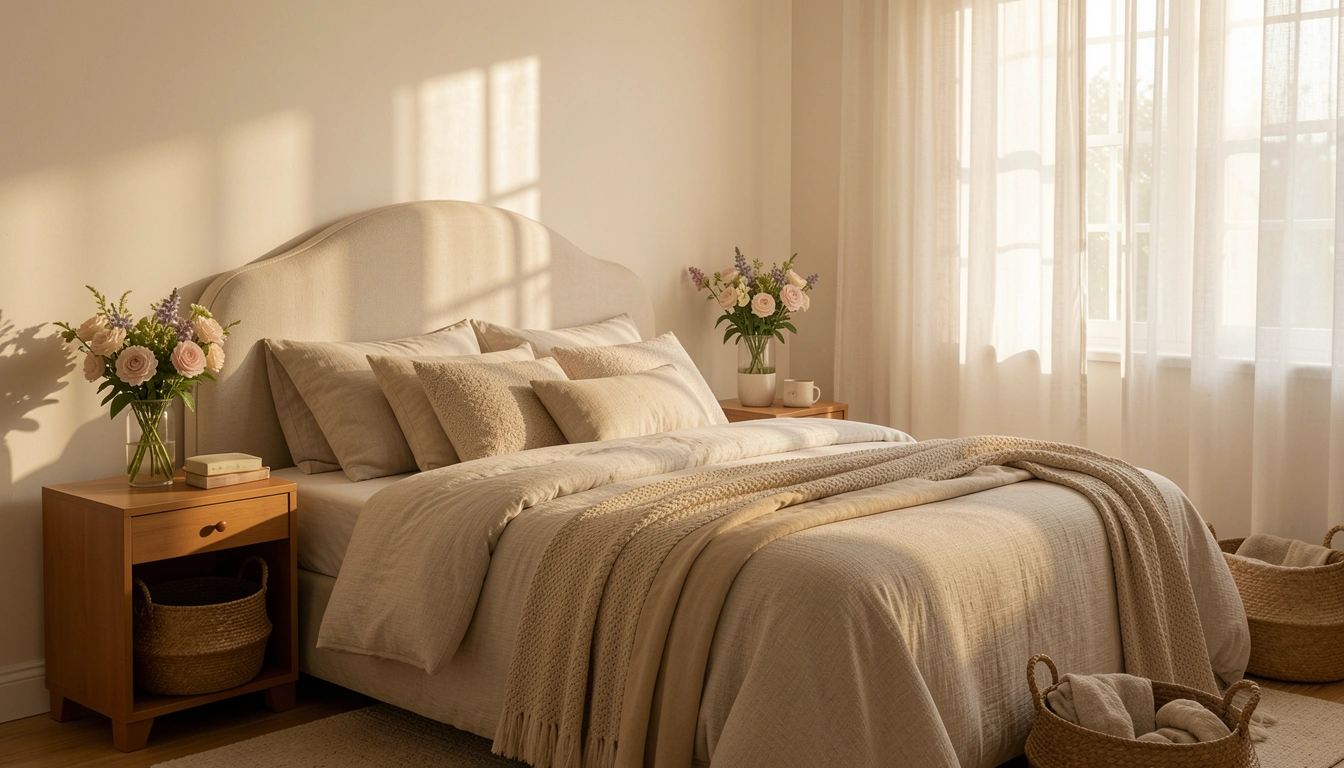
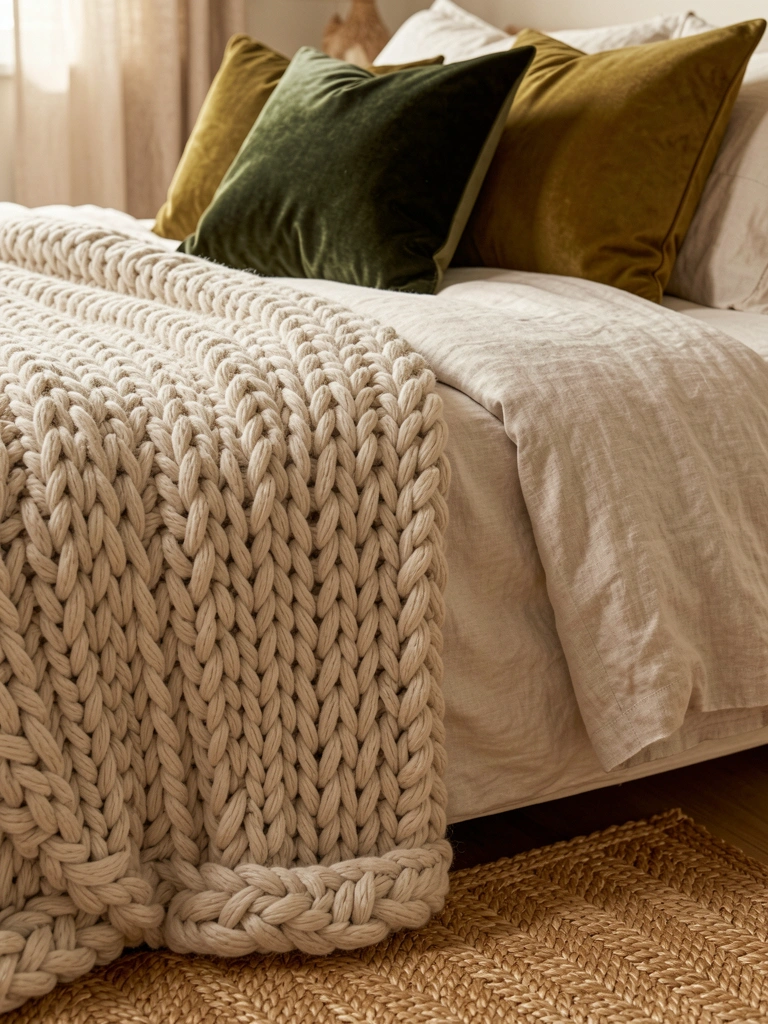
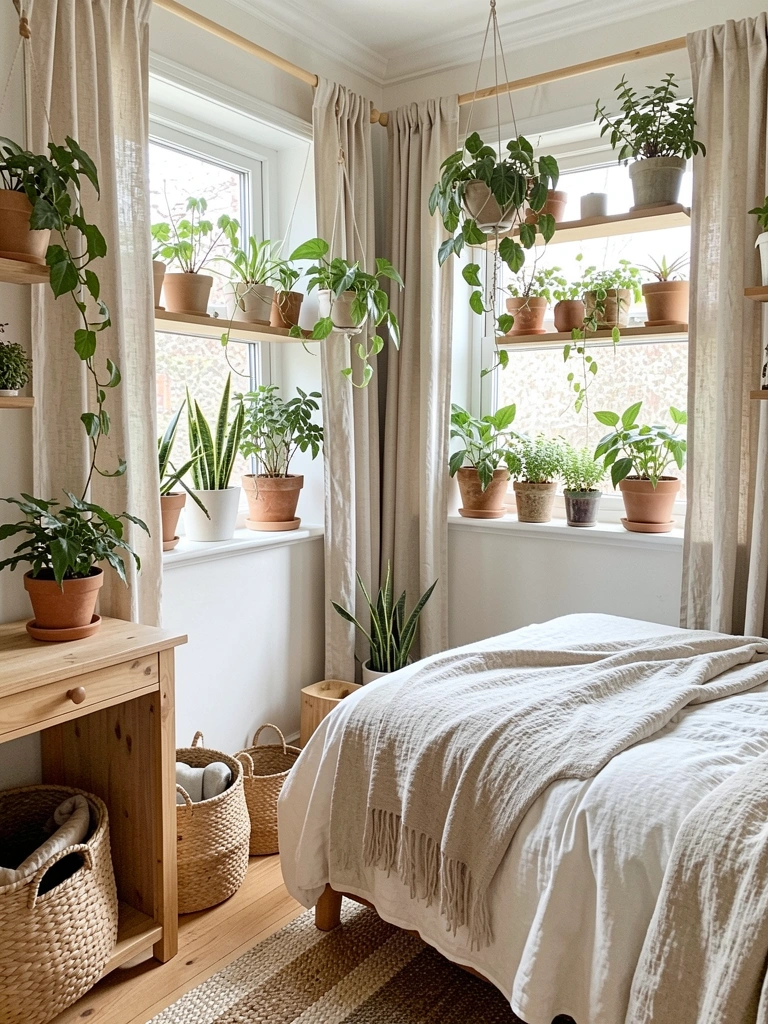
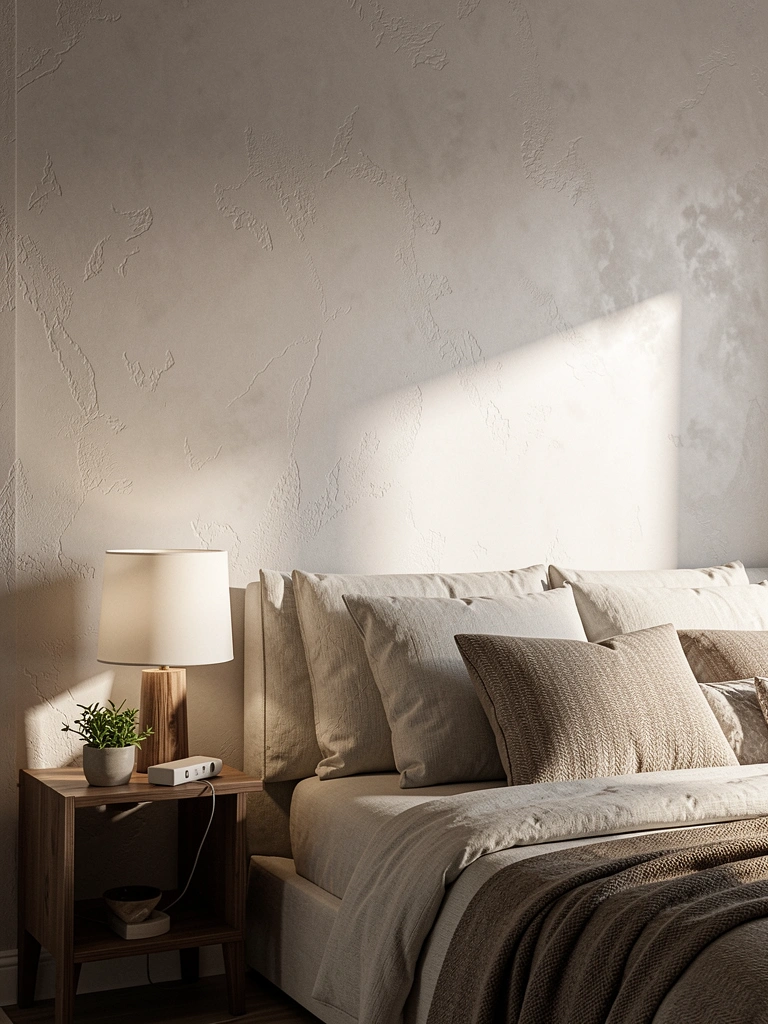
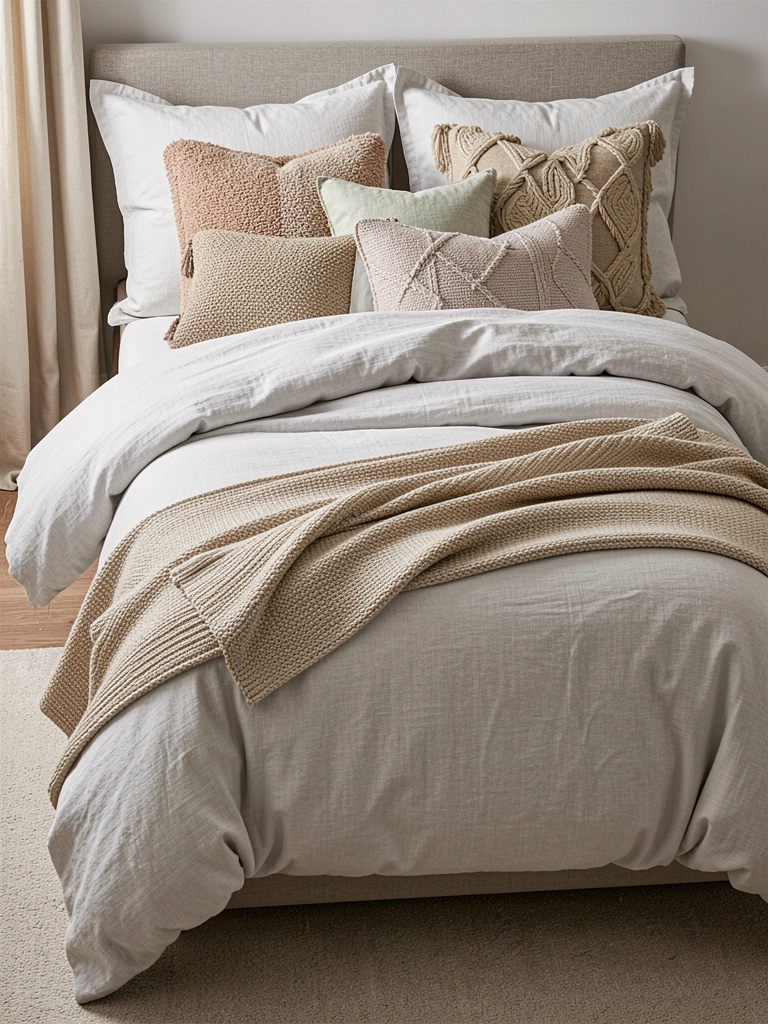
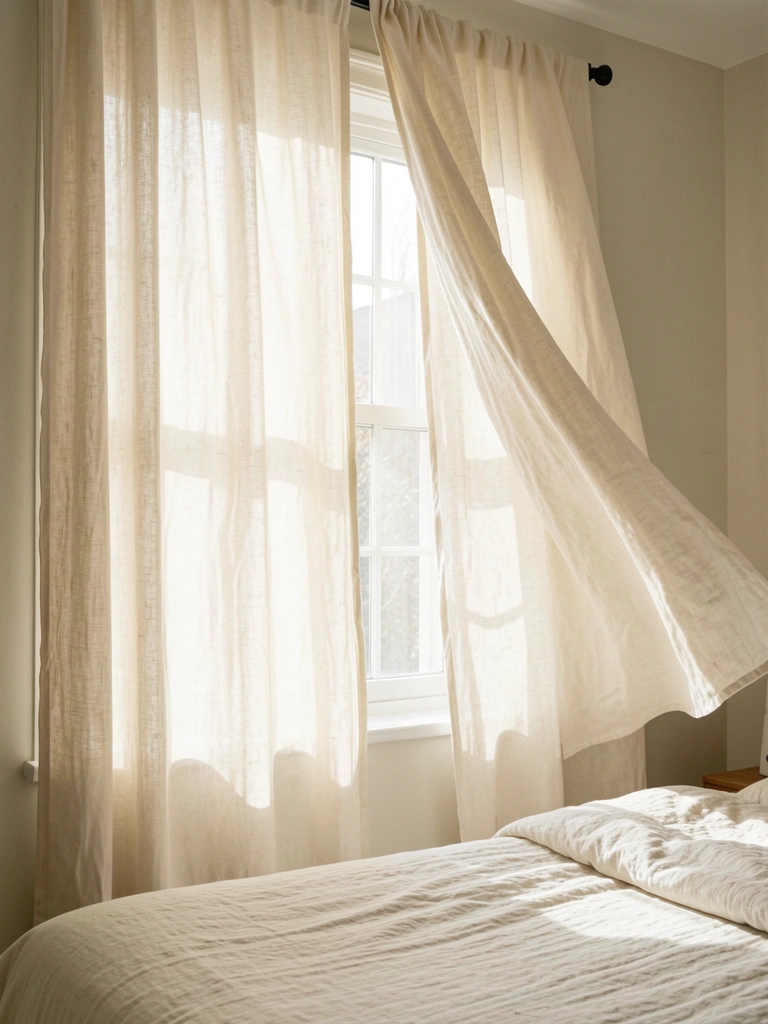
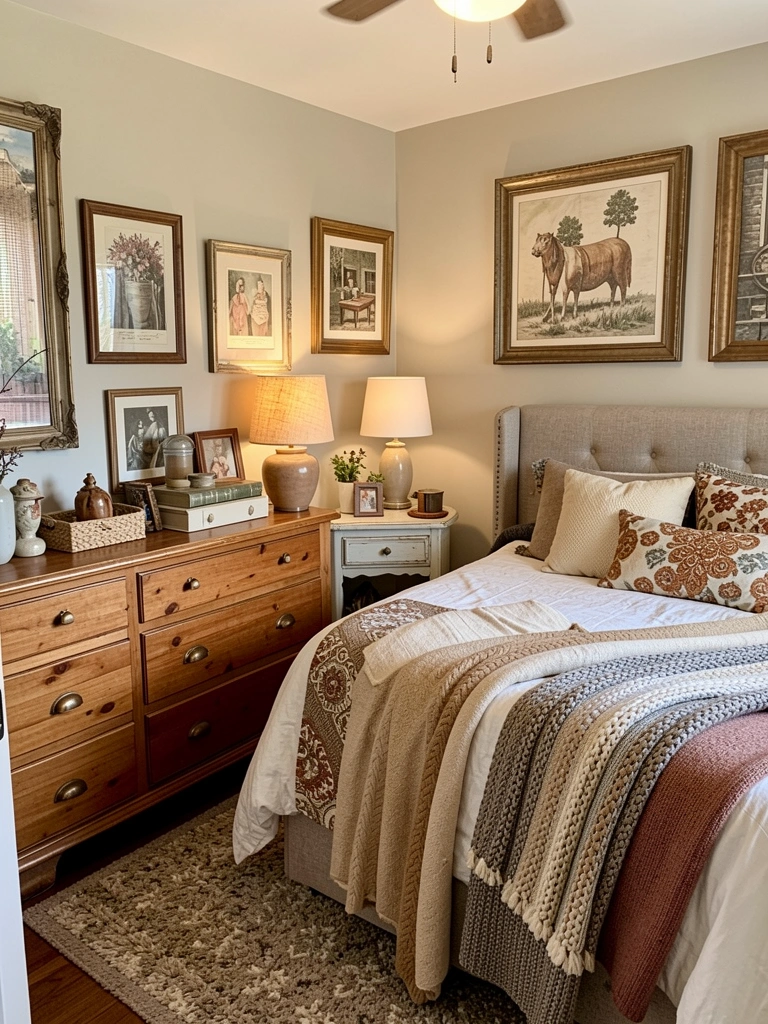
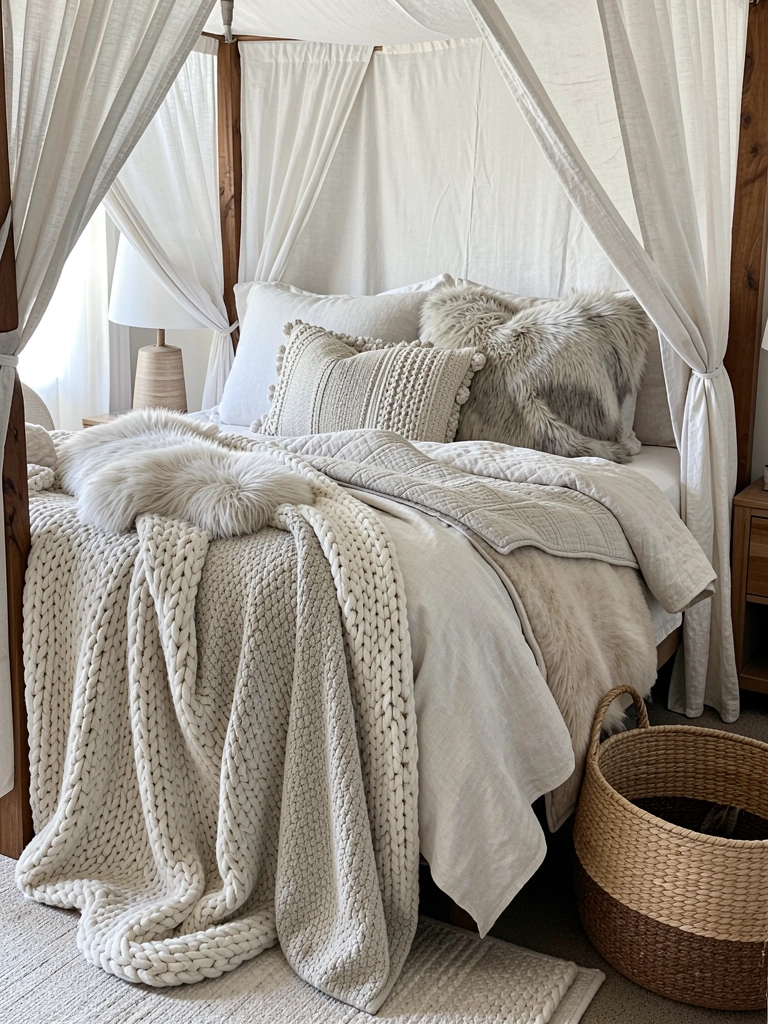
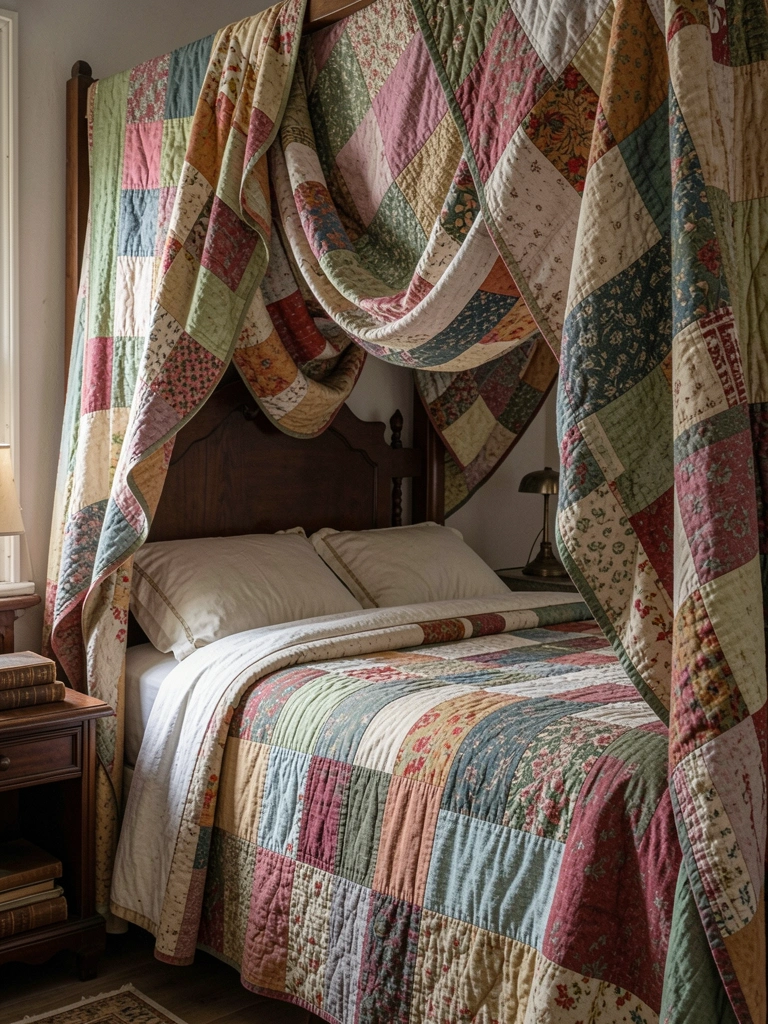
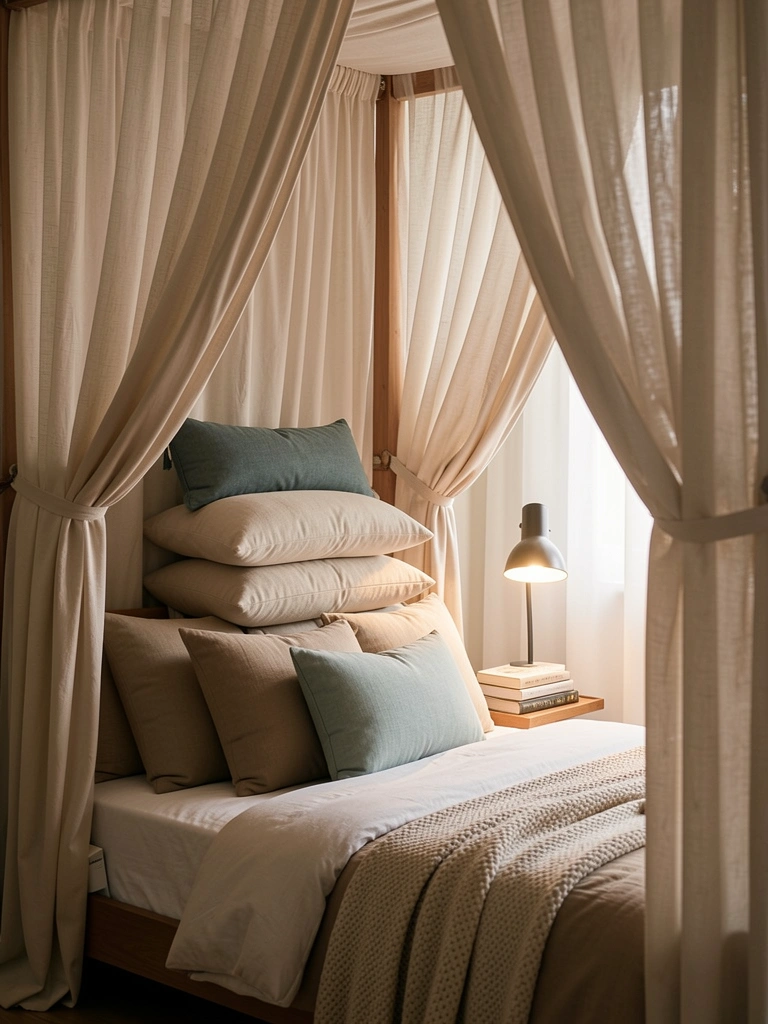
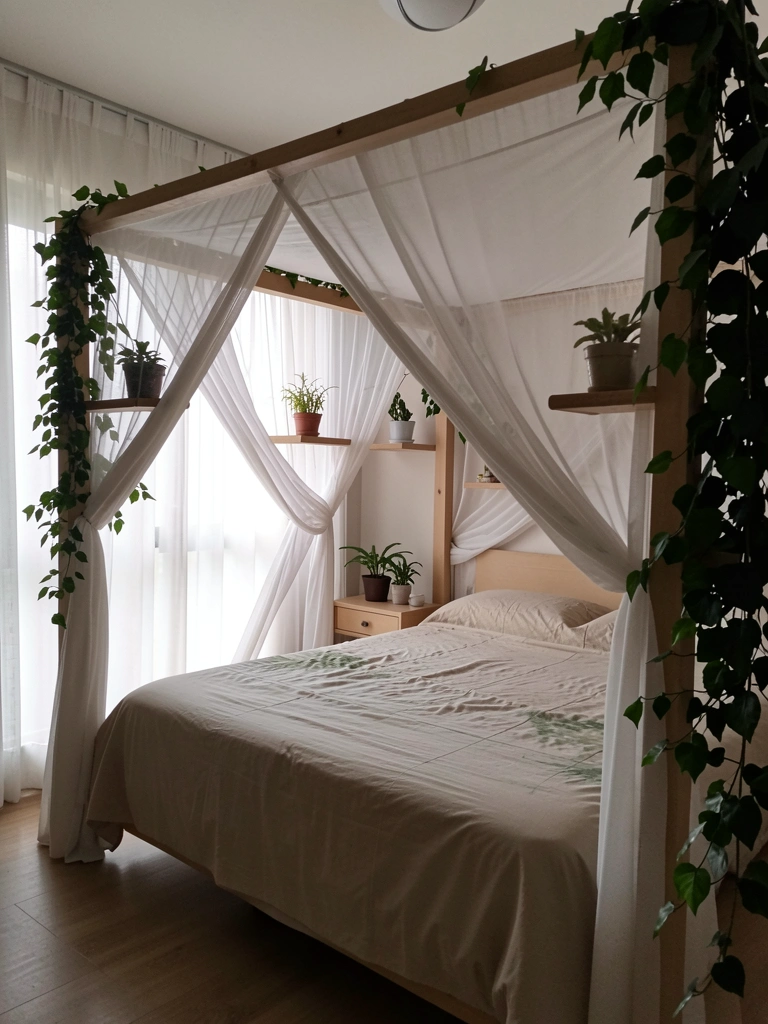
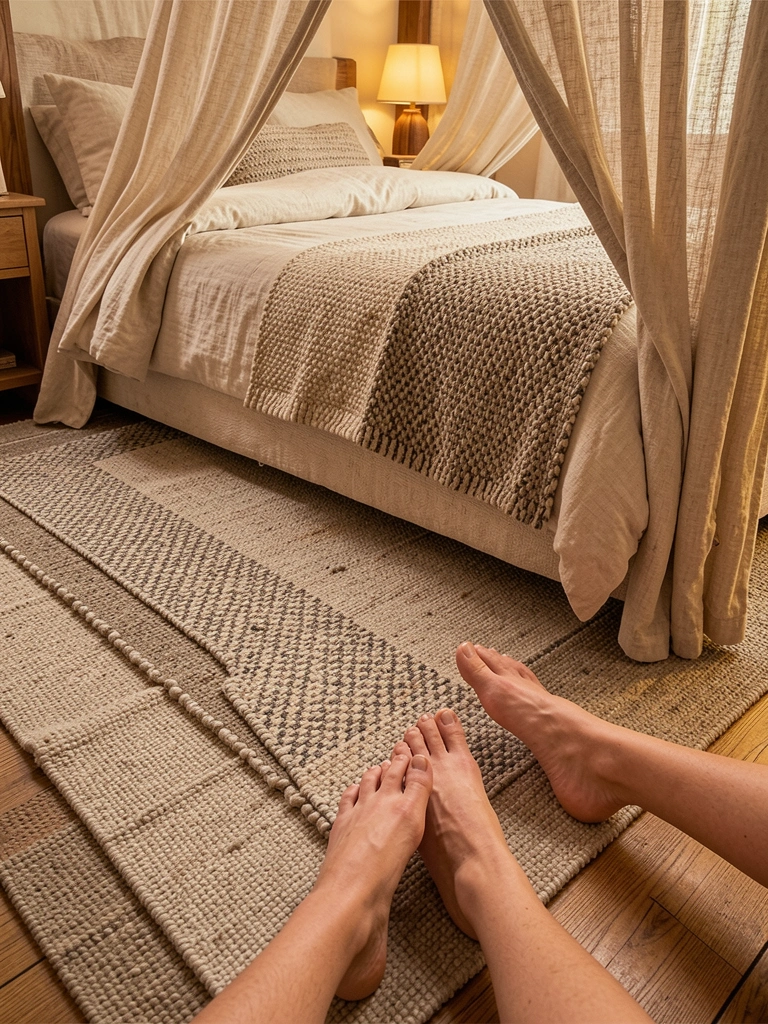
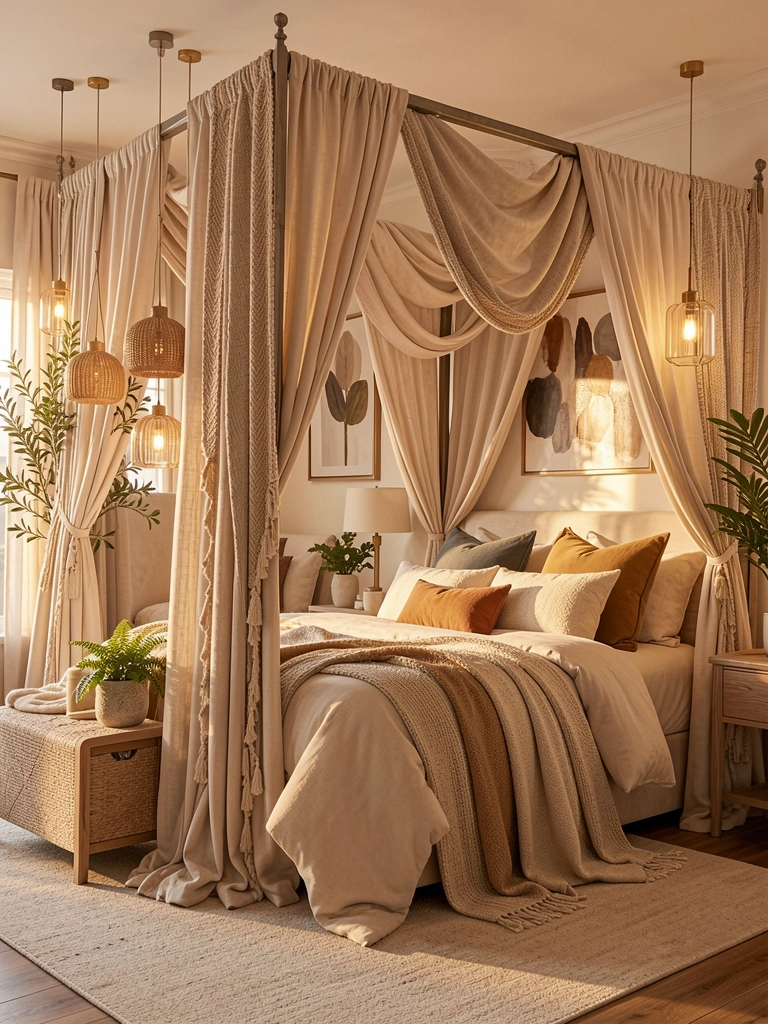
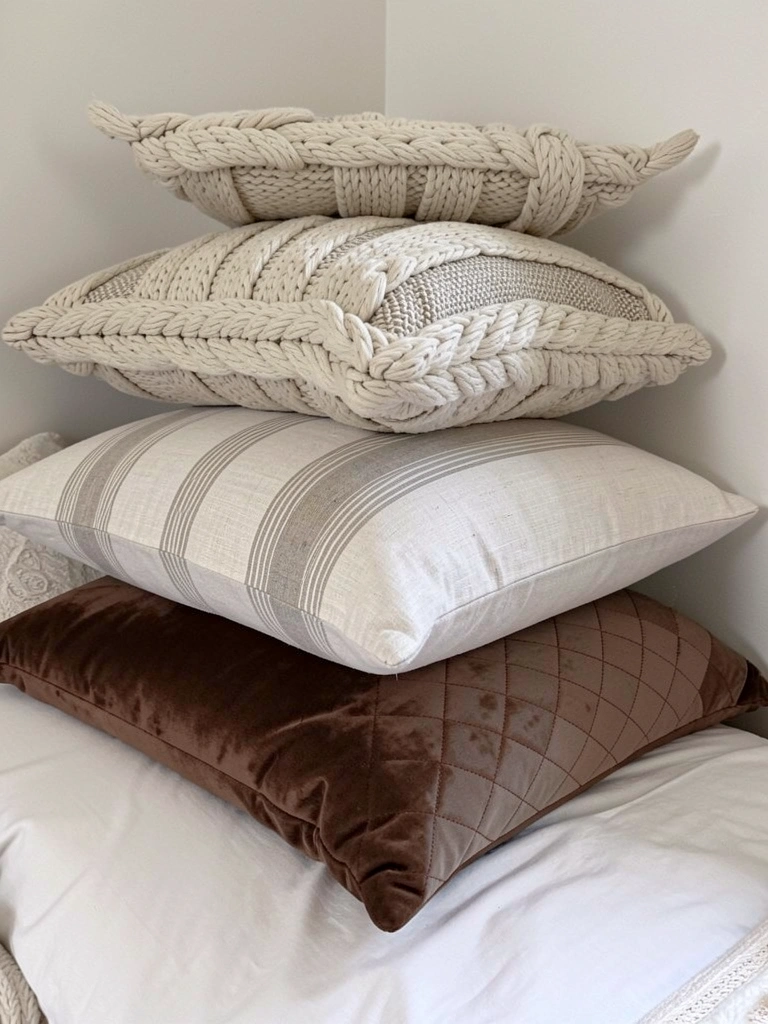
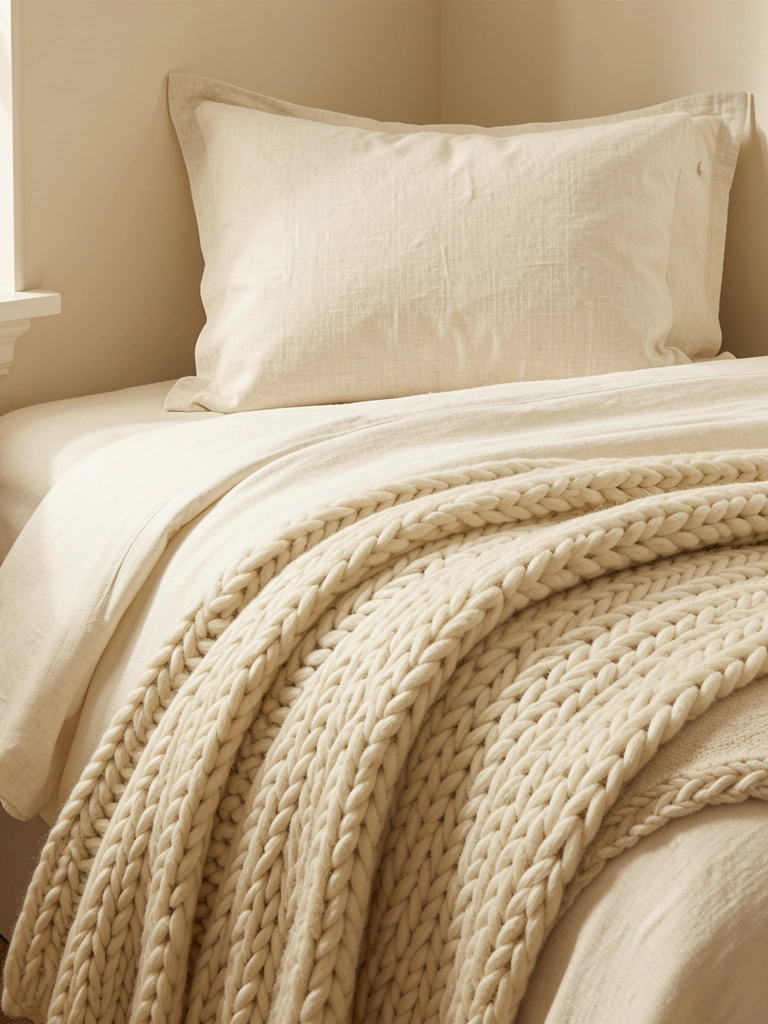
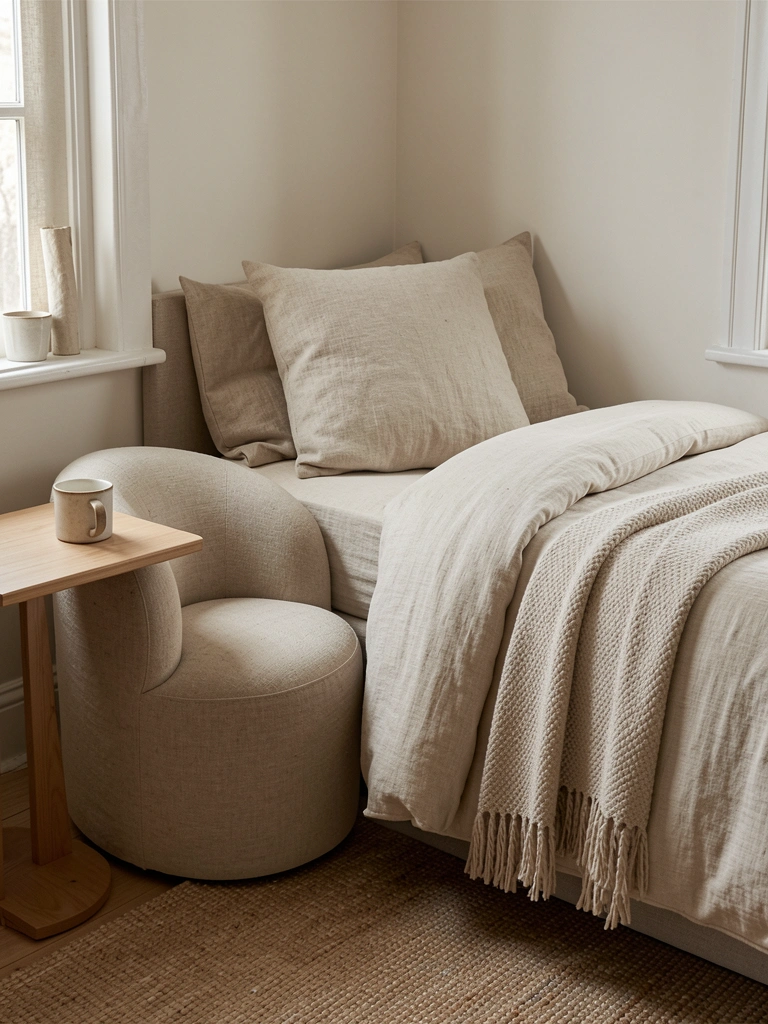
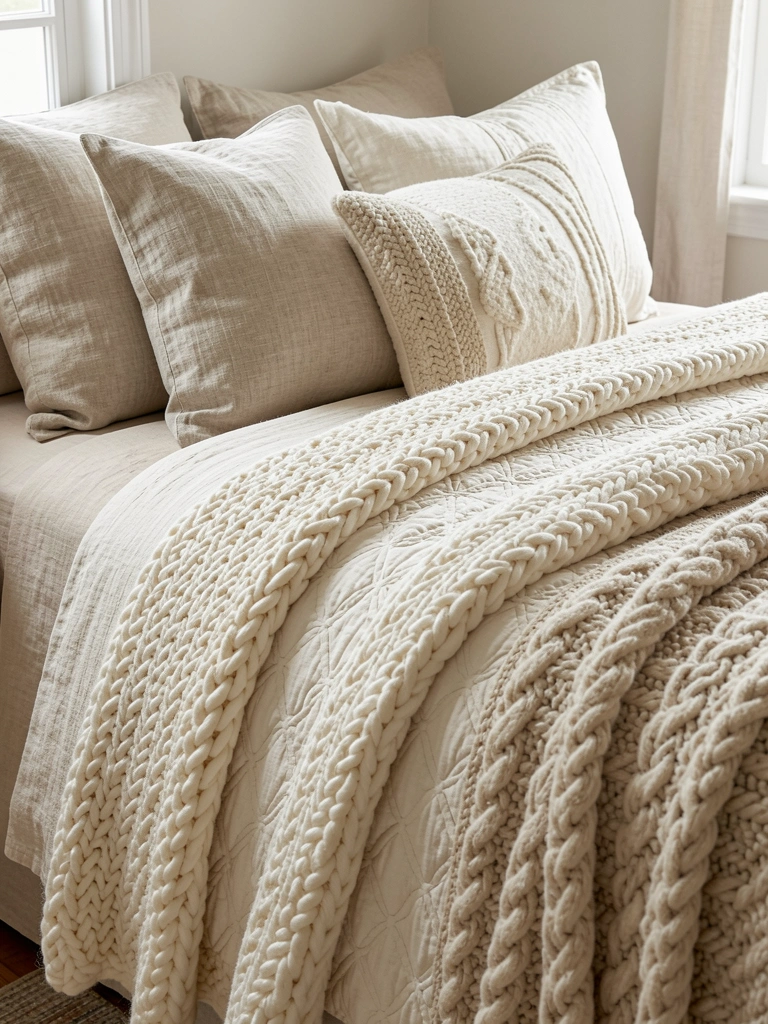
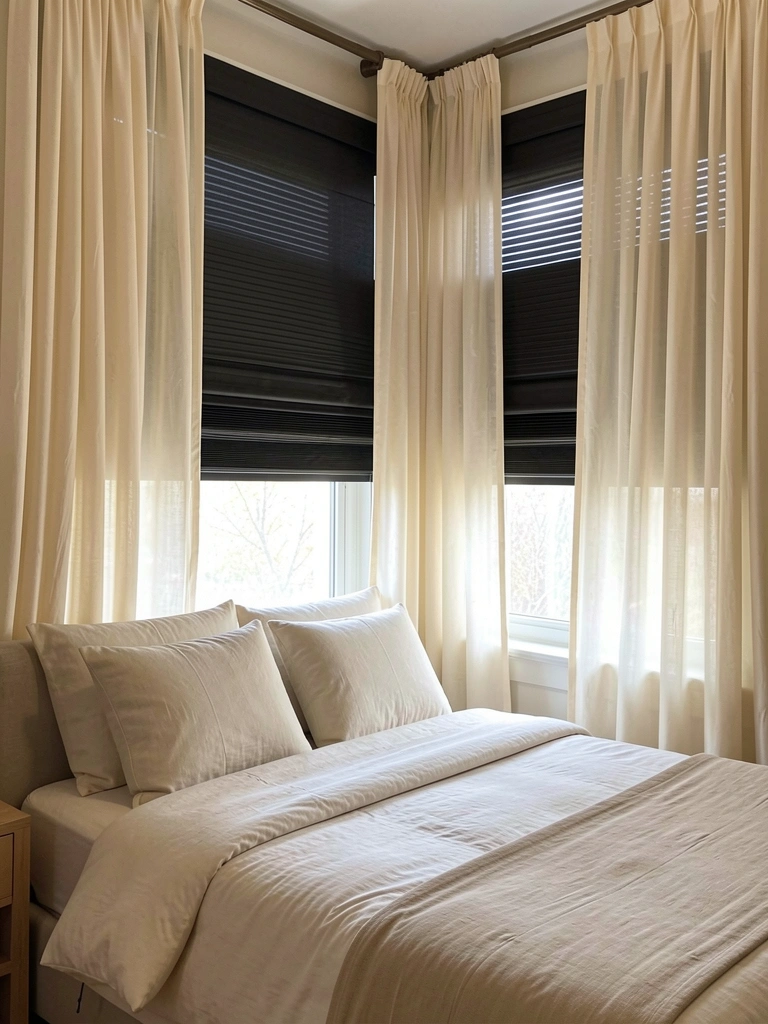
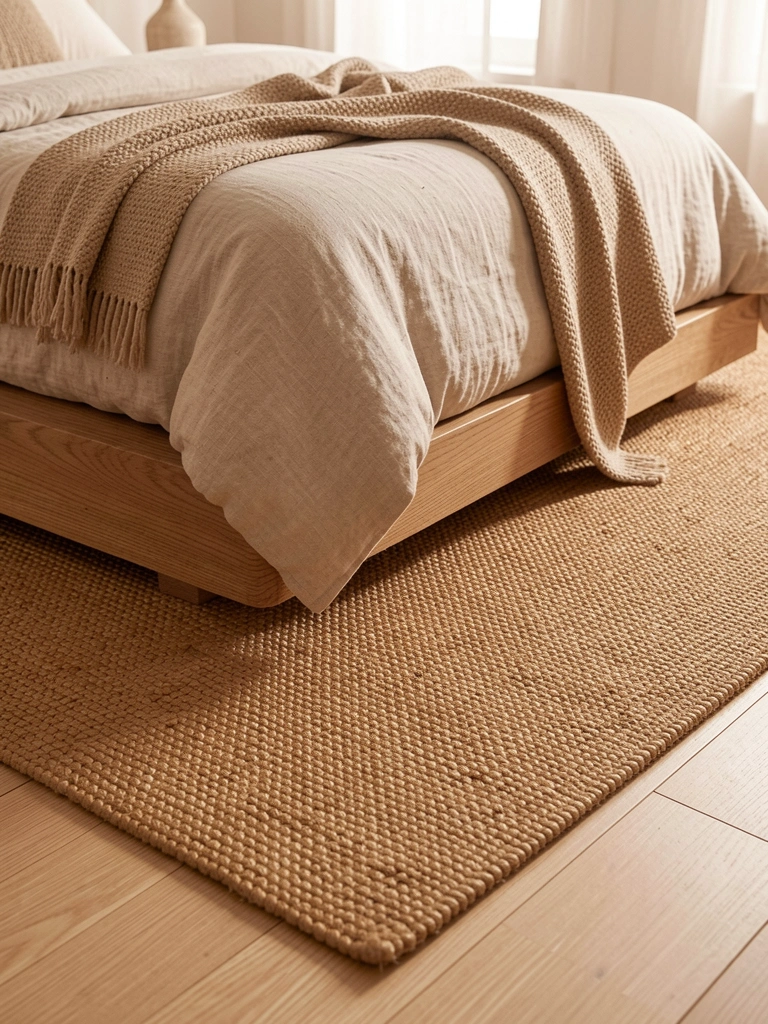
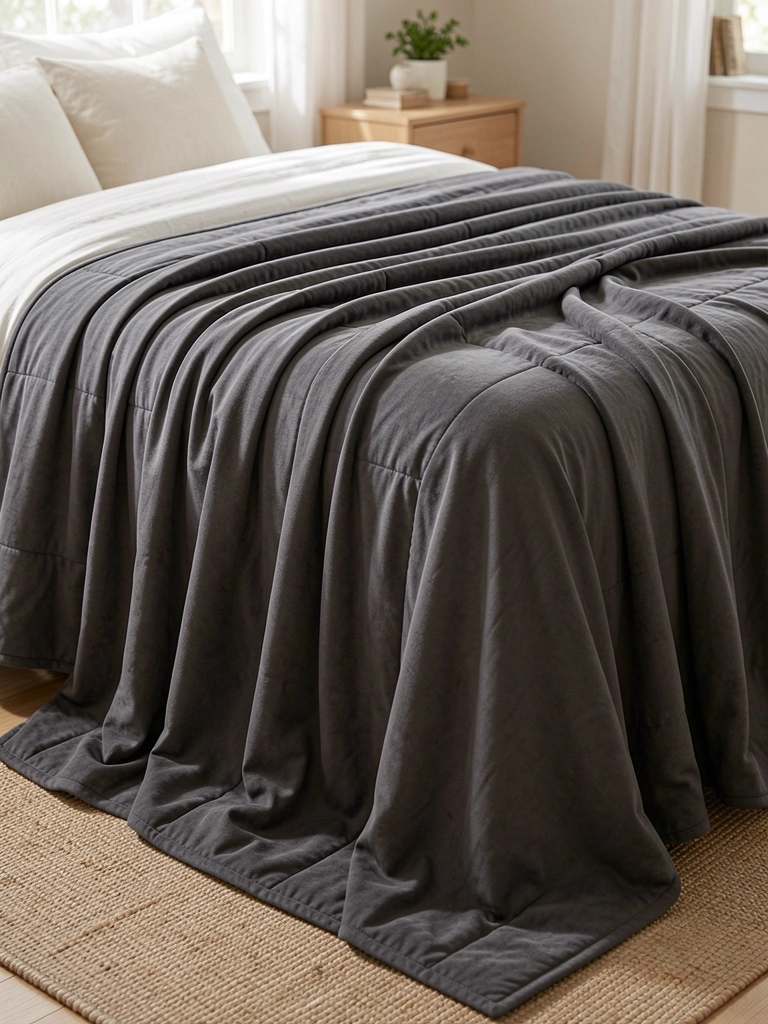
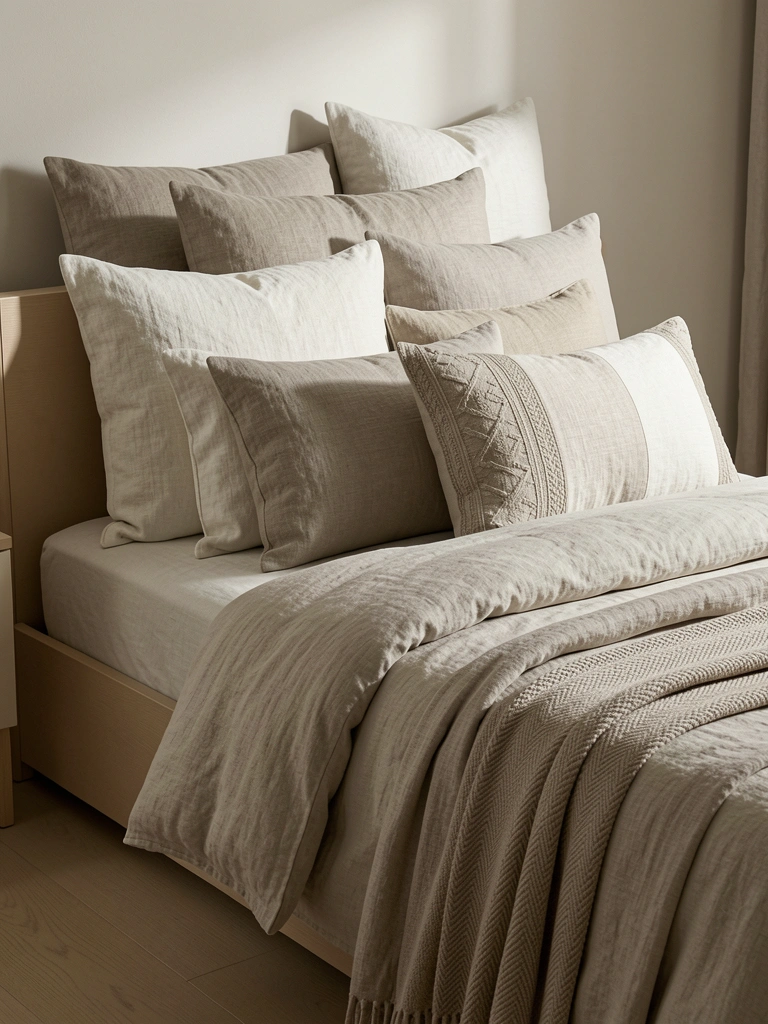
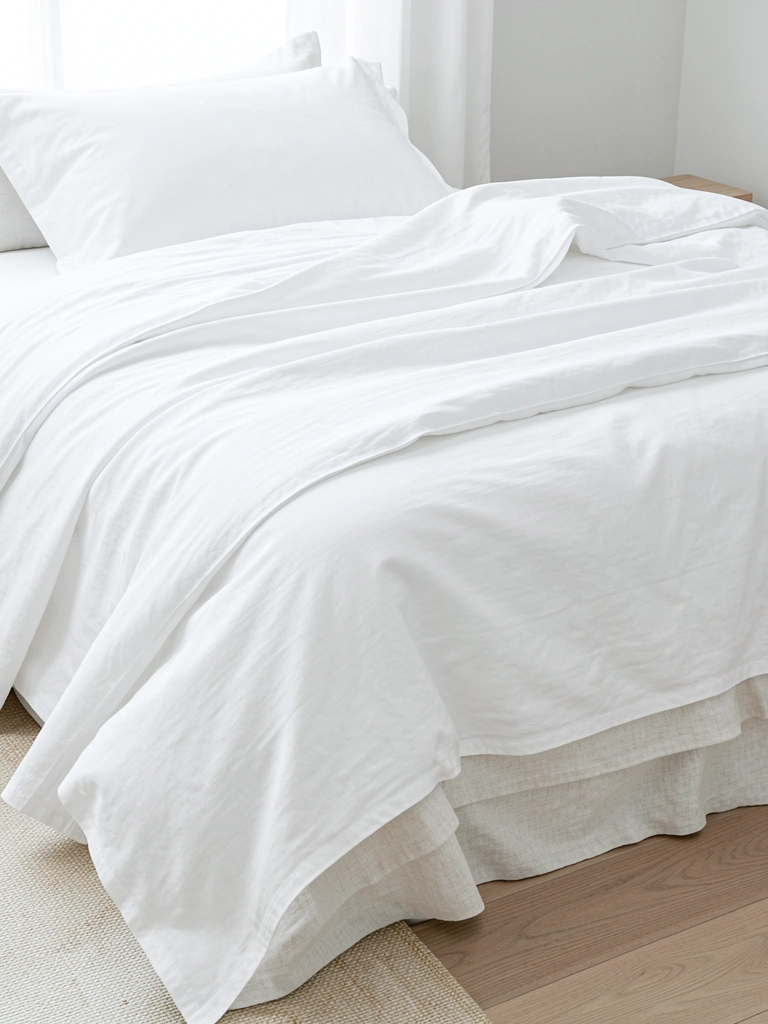
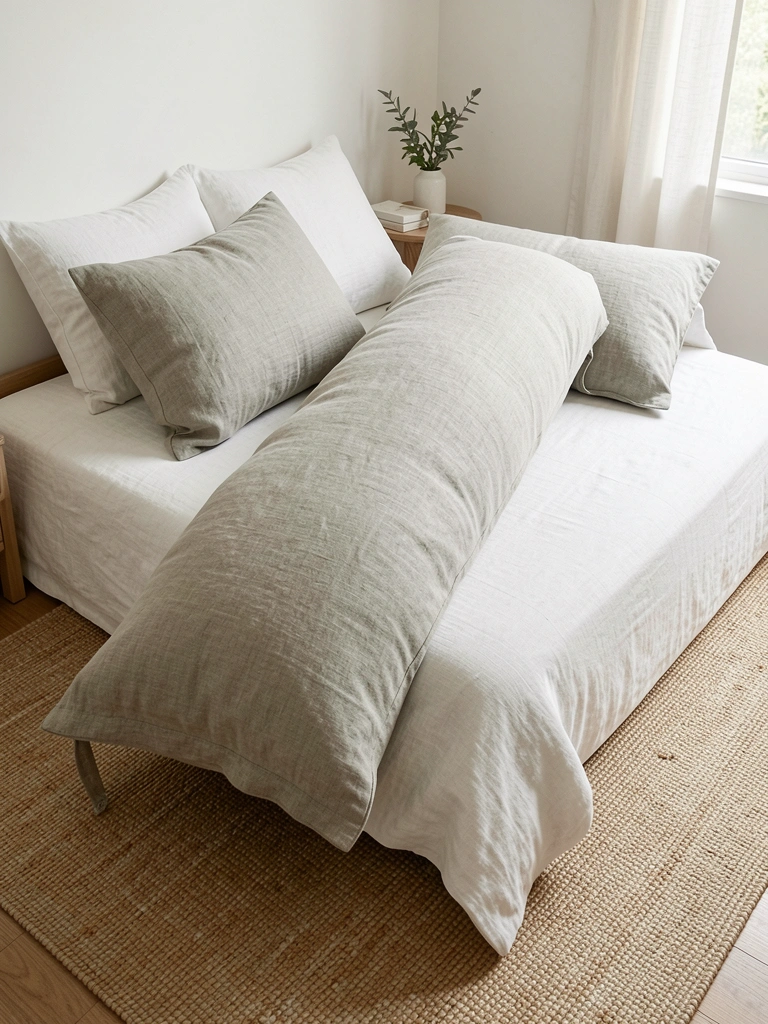
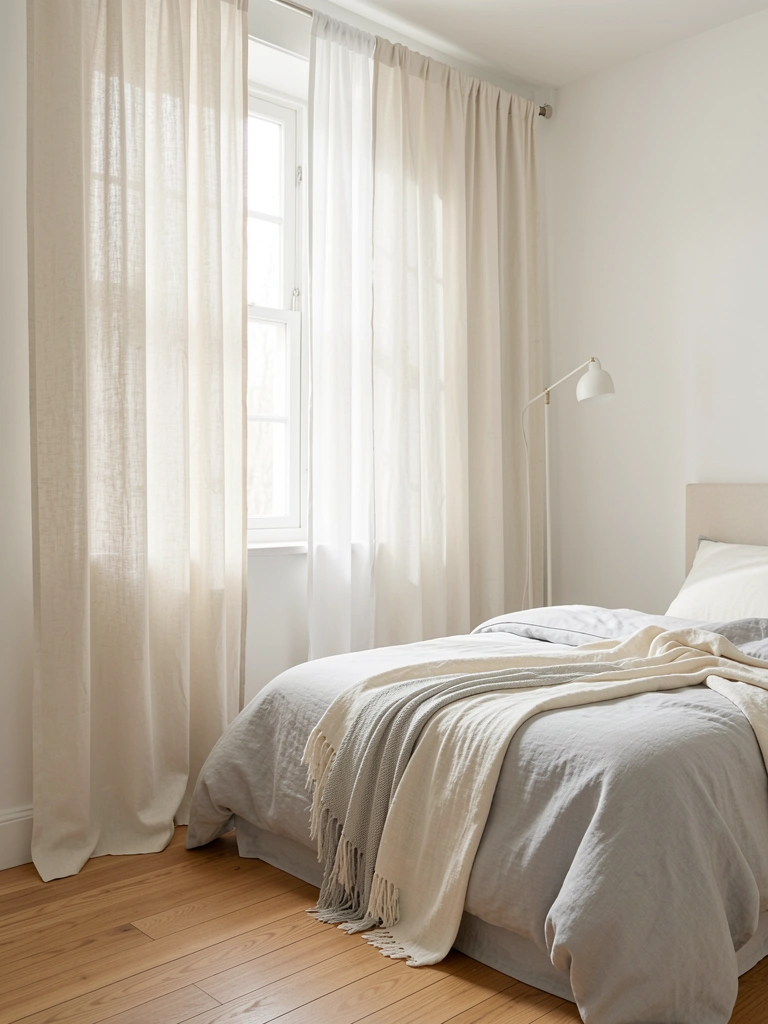
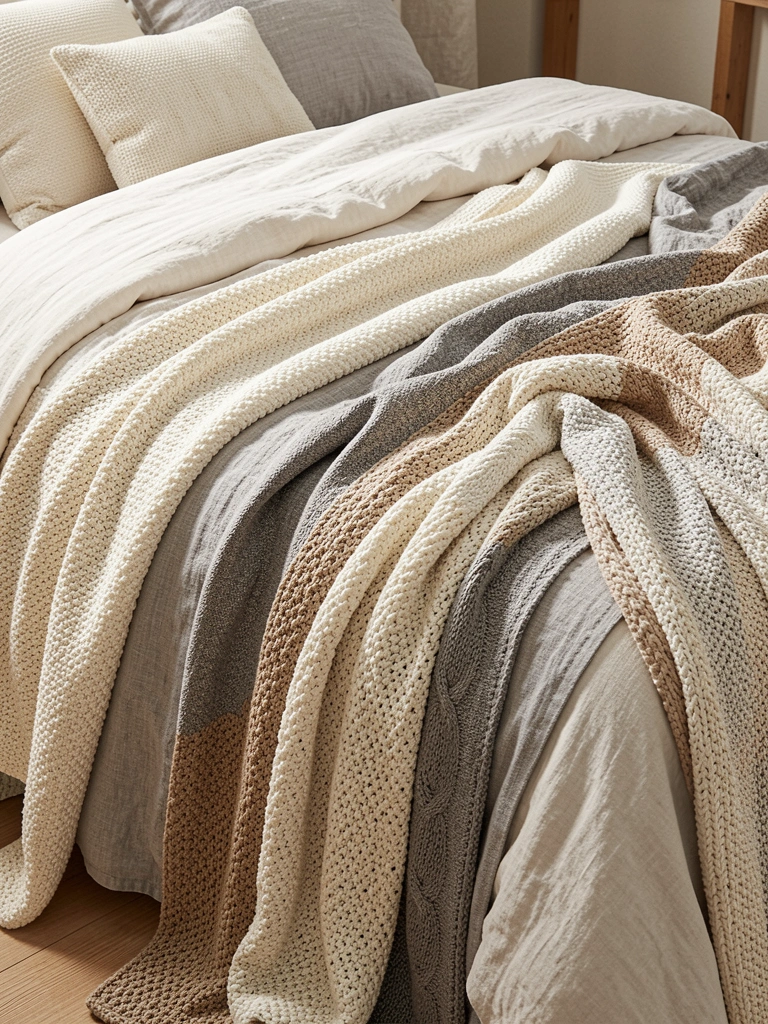
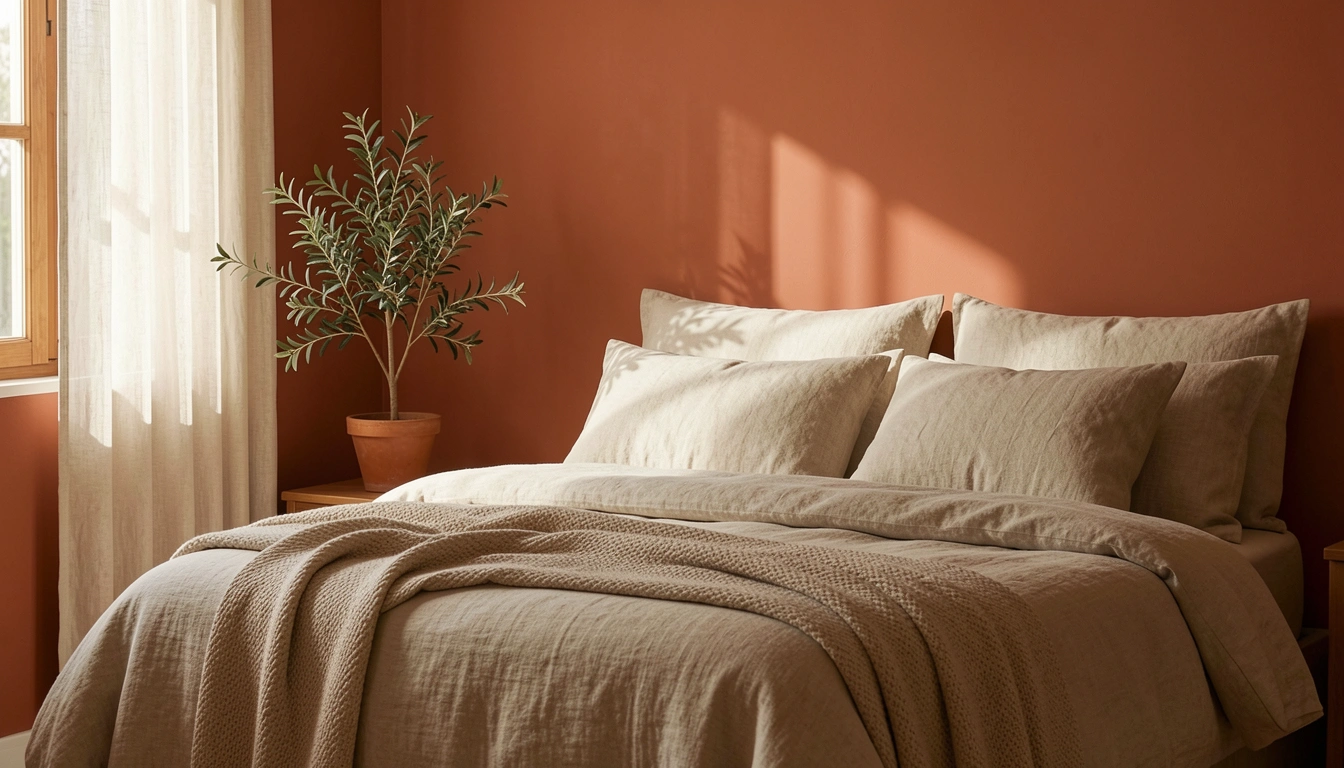
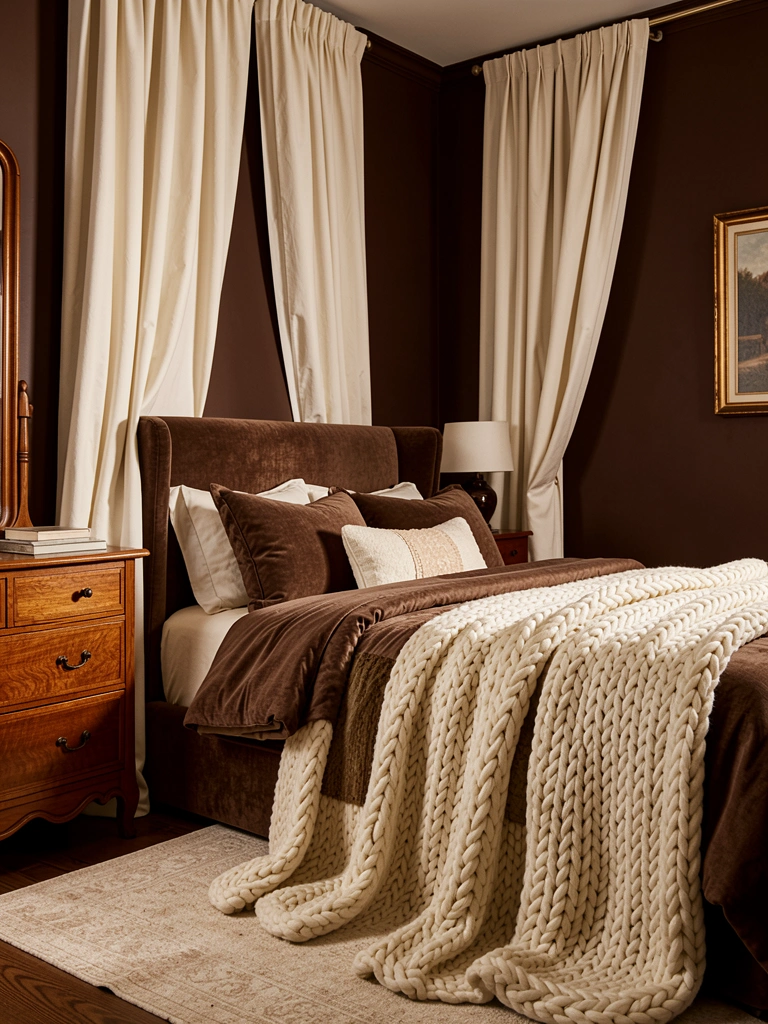
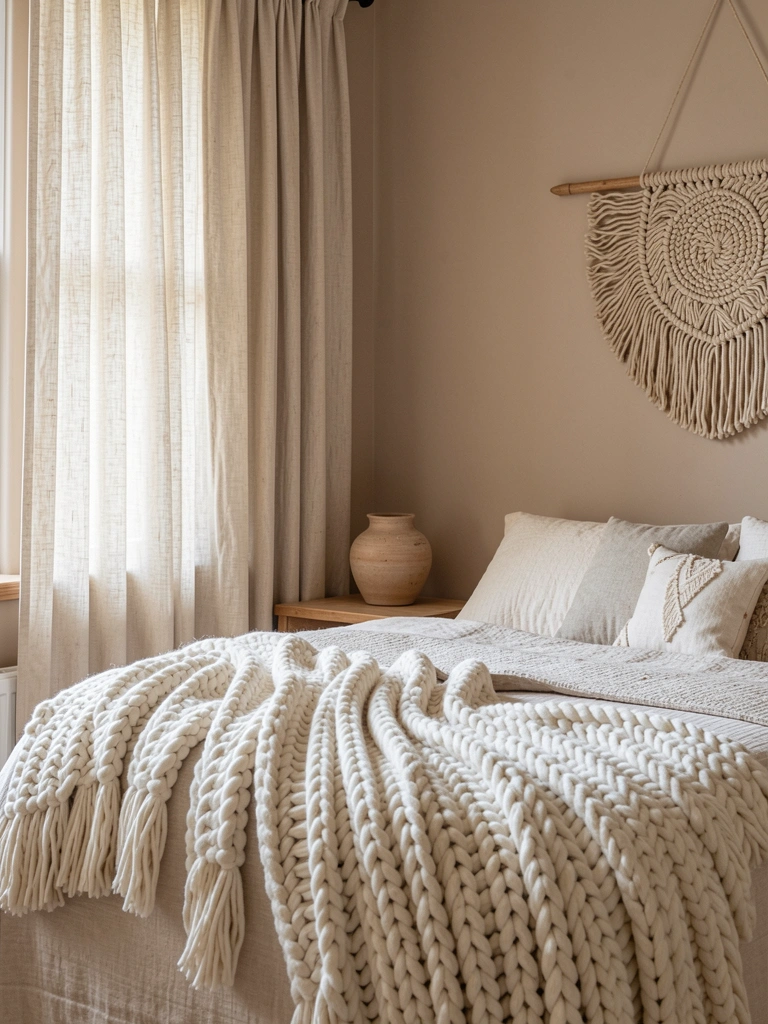
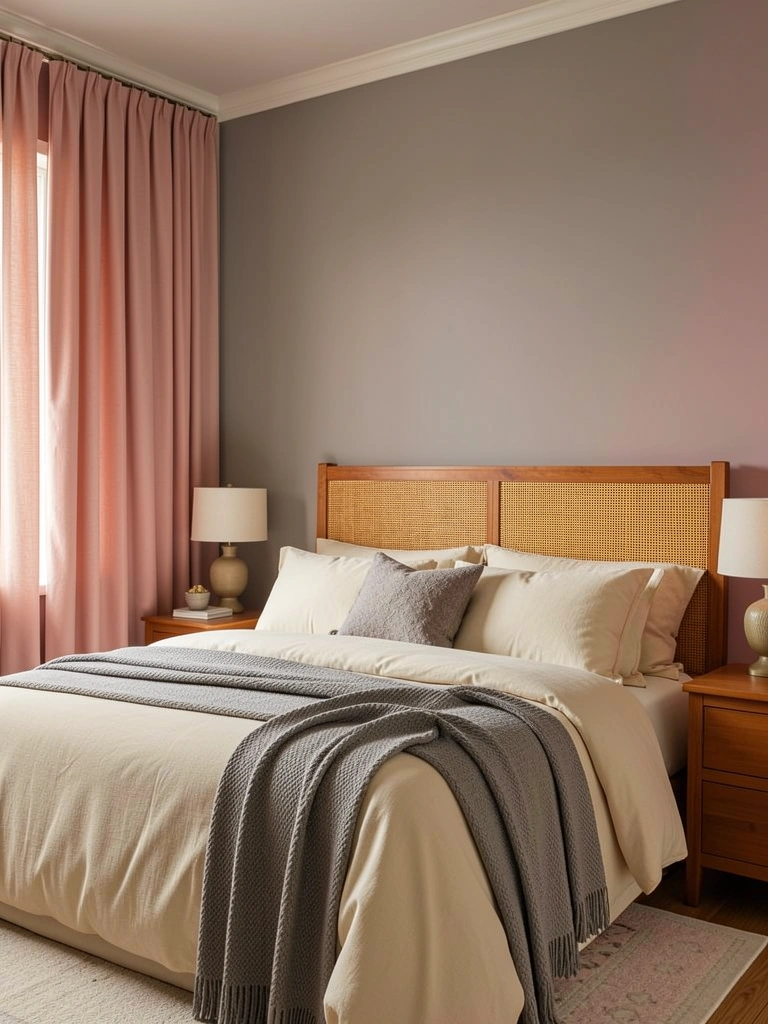
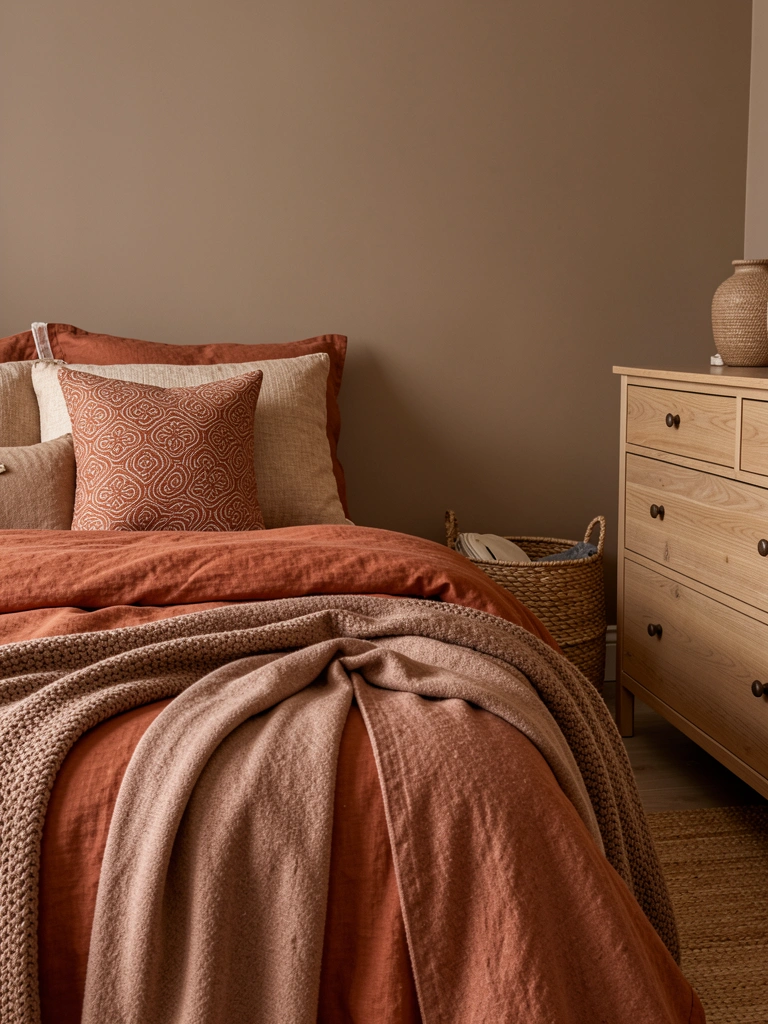
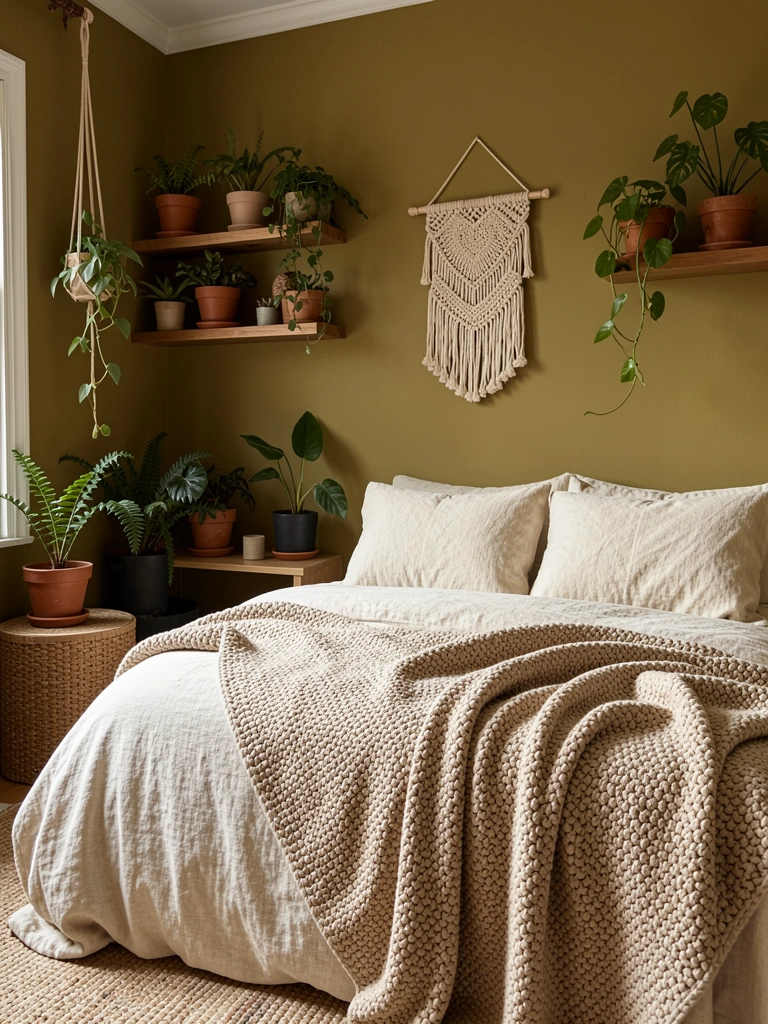
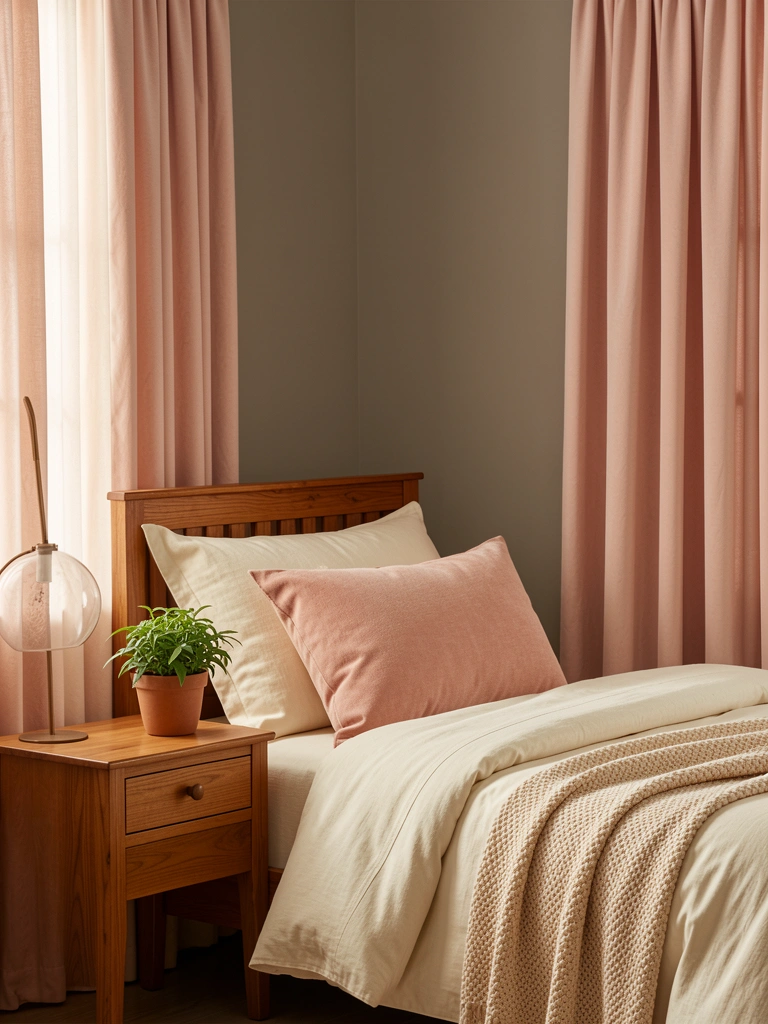
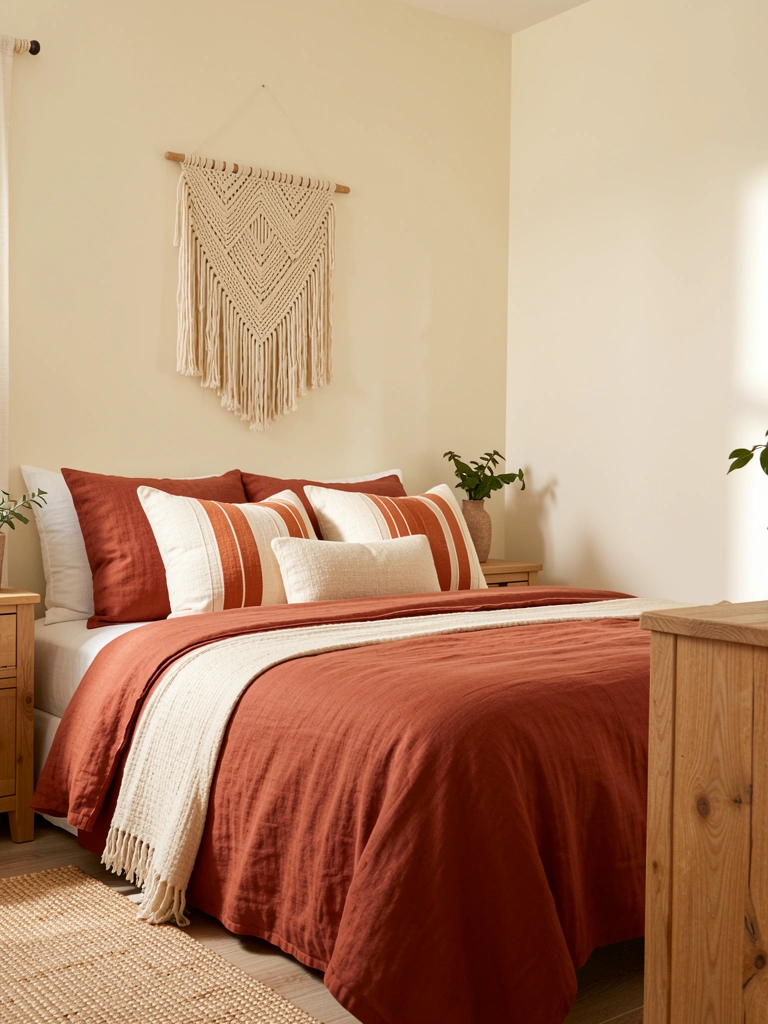
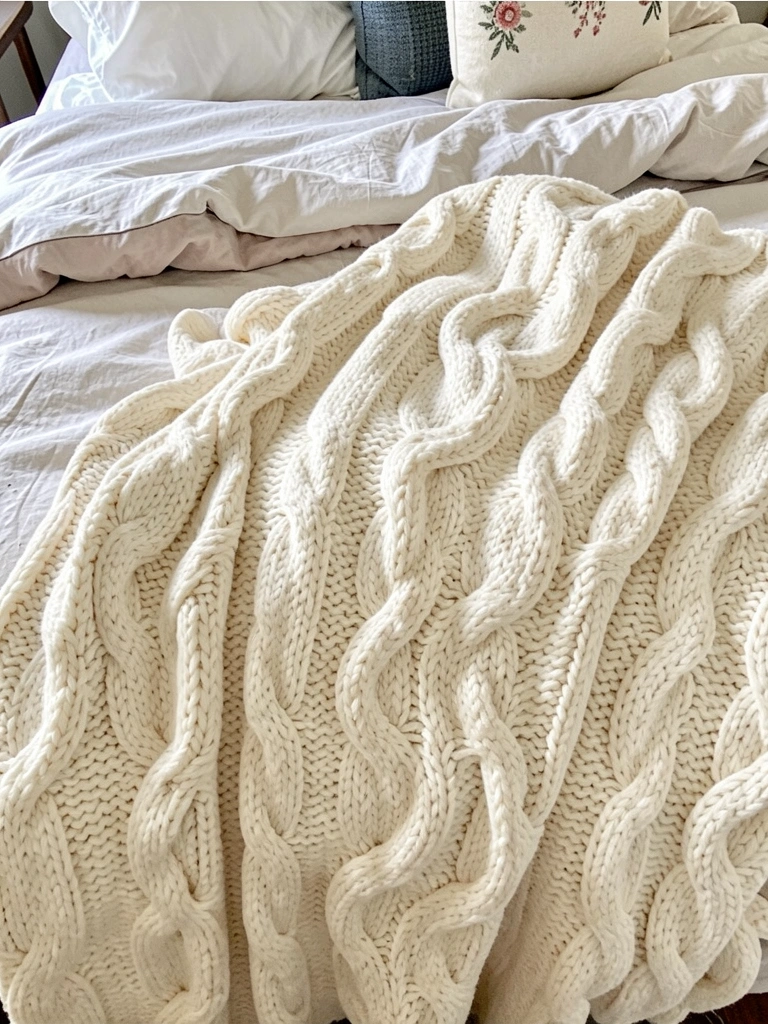
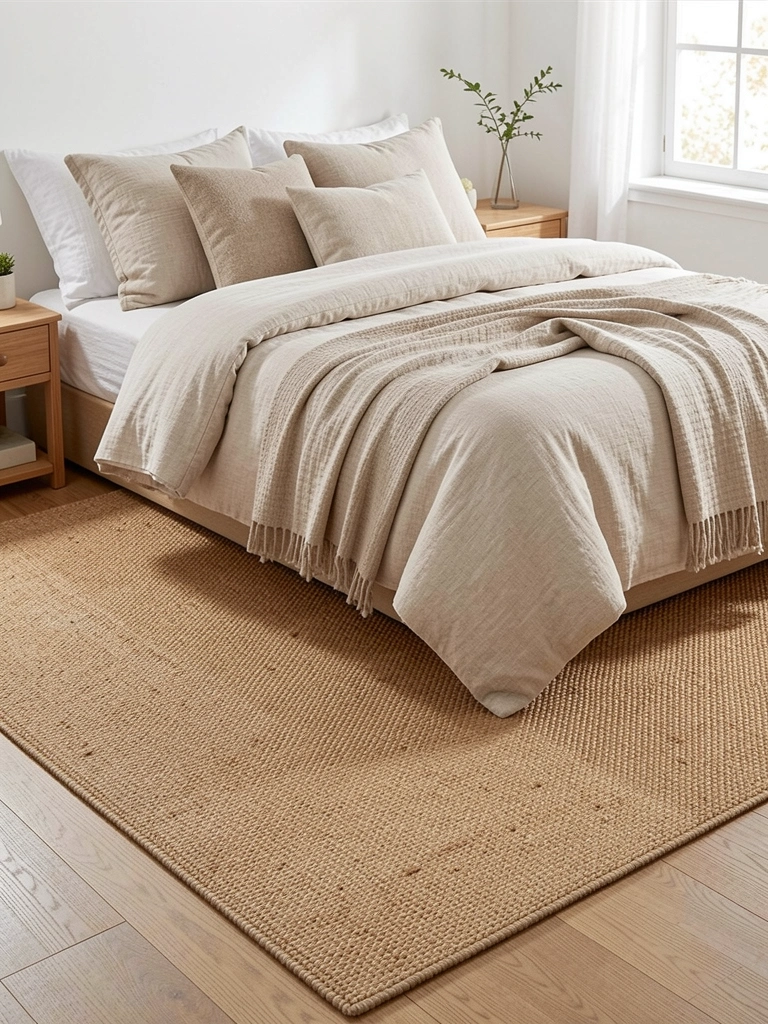
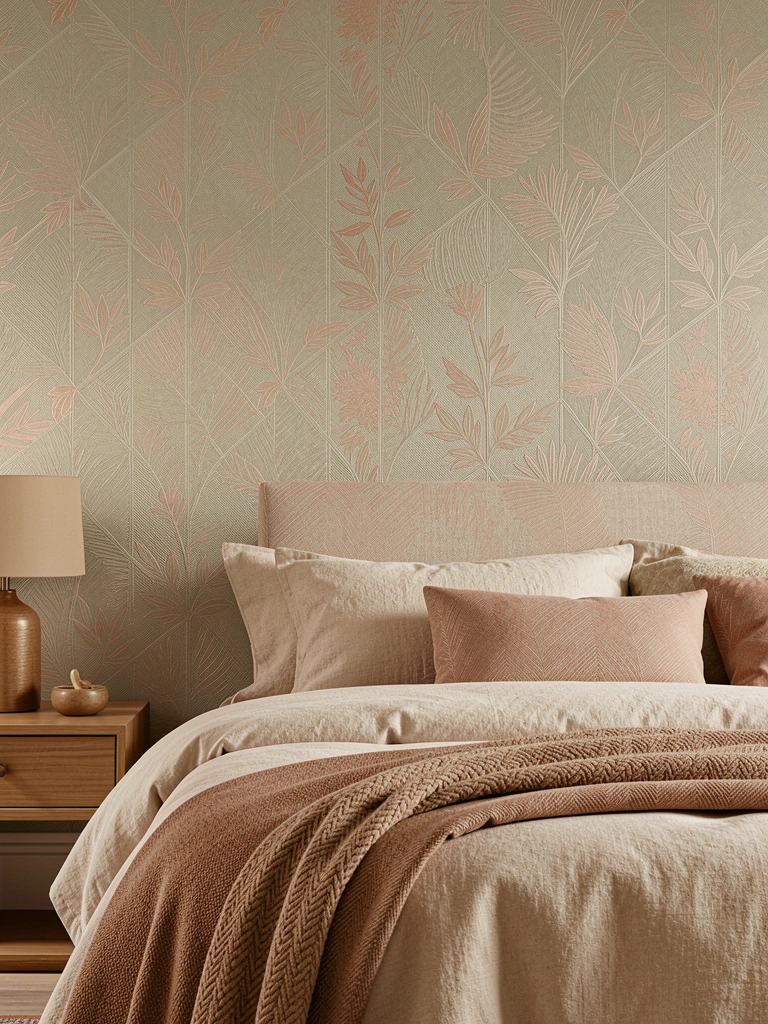
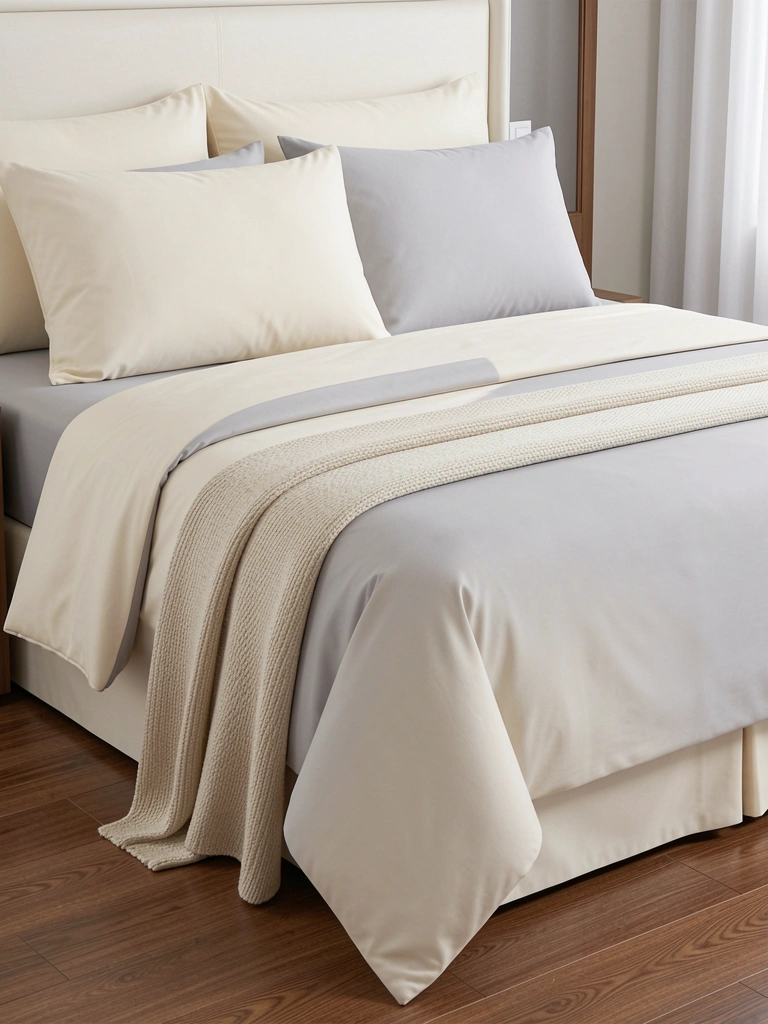
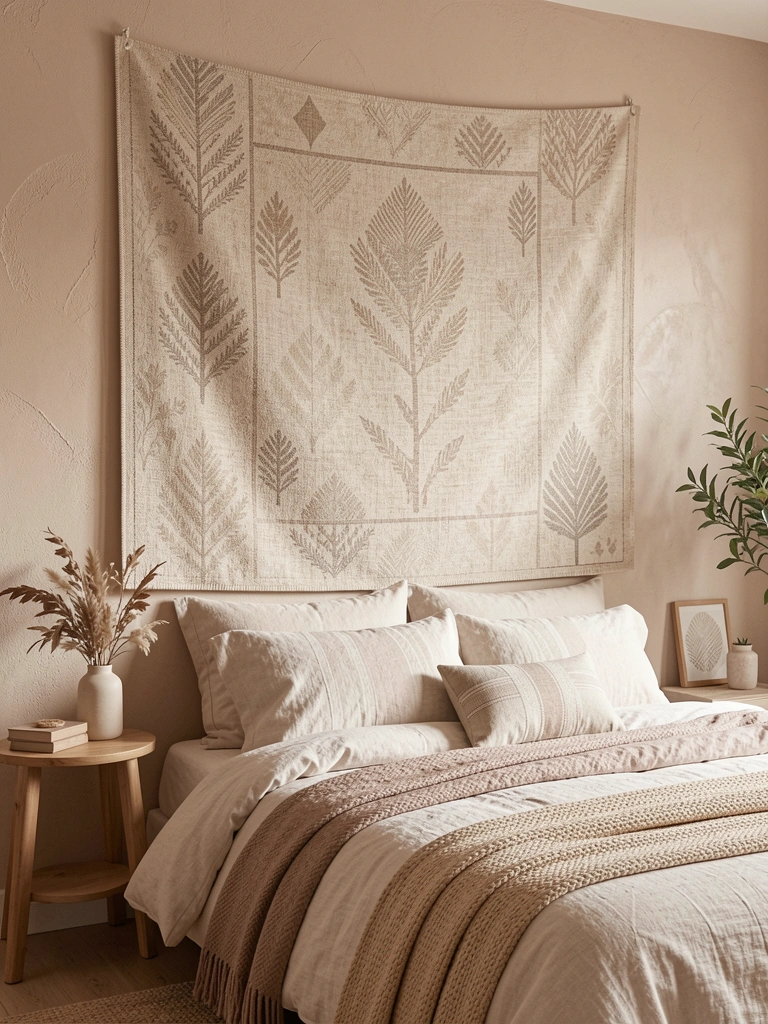
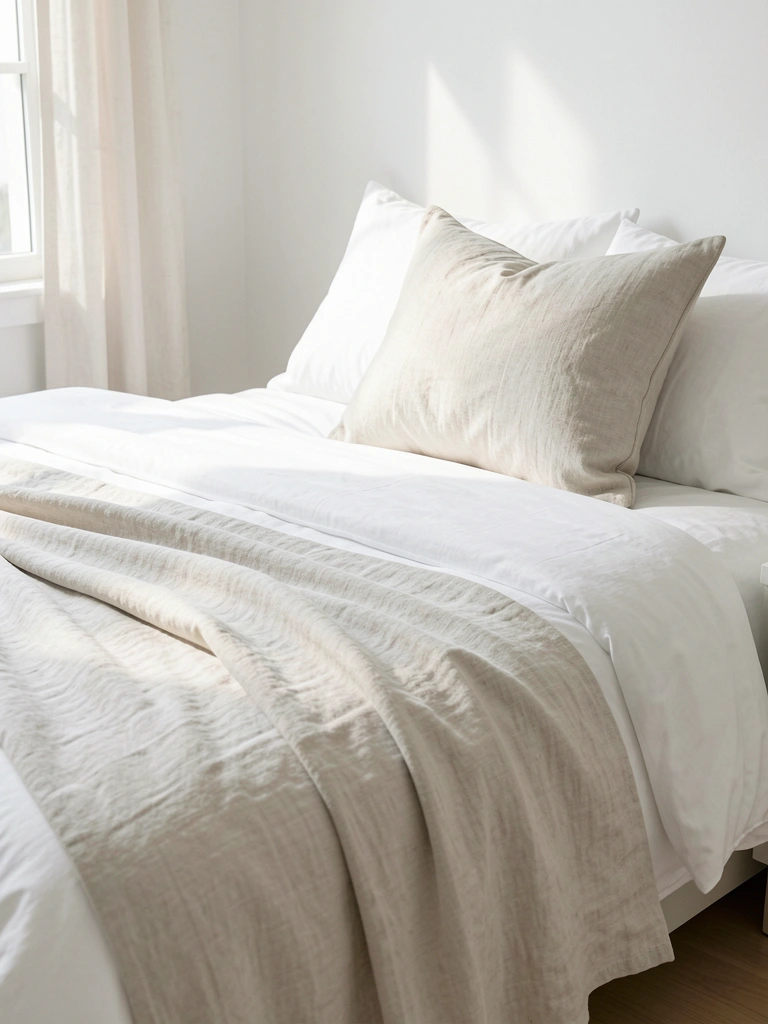
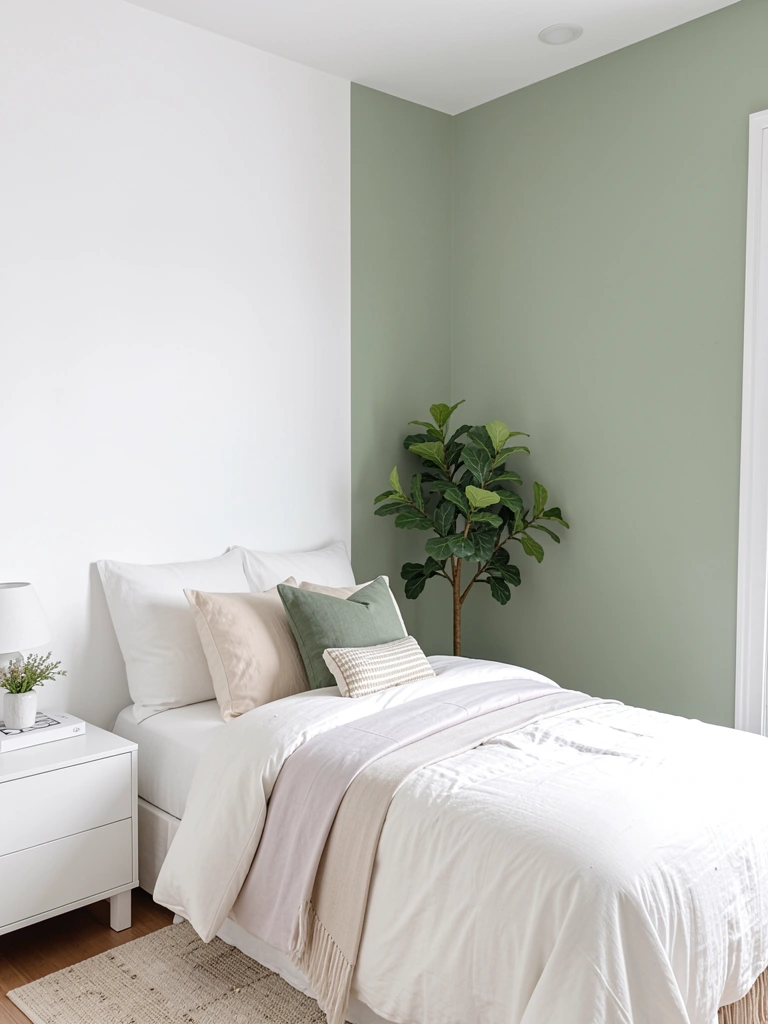
    20. Layer Minimal Joinery with Soft Textiles Strategically

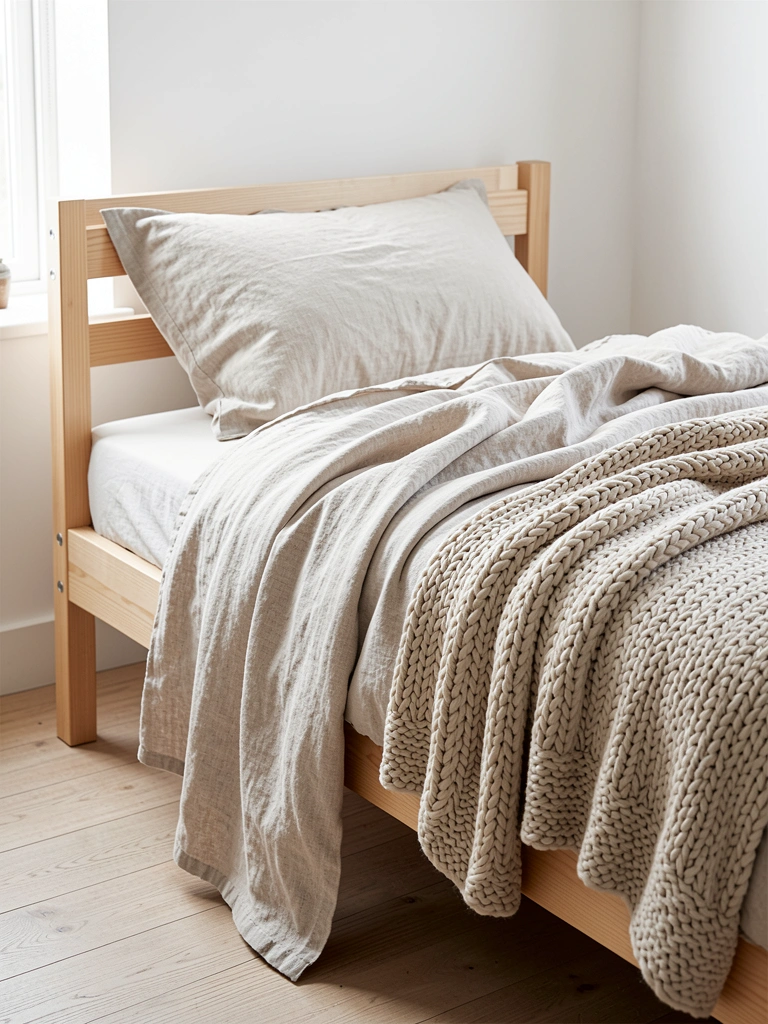
    Minimal joinery reads cold without softness. Layer one or two quality textiles—a chunky knit throw, linen bedding, a sheepskin accent—to warm the aesthetic without compromising the clean lines.

    Invest in one quality linen duvet ($150–$300) and one throw blanket ($80–$150). Brands like Parachute, Brooklinen, and Etsy sellers create beautiful pieces with visible texture. Drape the throw intentionally—across one corner or folded at the foot—not everywhere. The idea is strategic warmth, not coverage. Styling time: 10 minutes. Pro tip: Natural fiber textiles (linen, cotton, wool) photograph beautifully and improve with age.

    Texture softens the bed’s architectural lines while maintaining integrity and intentionality.

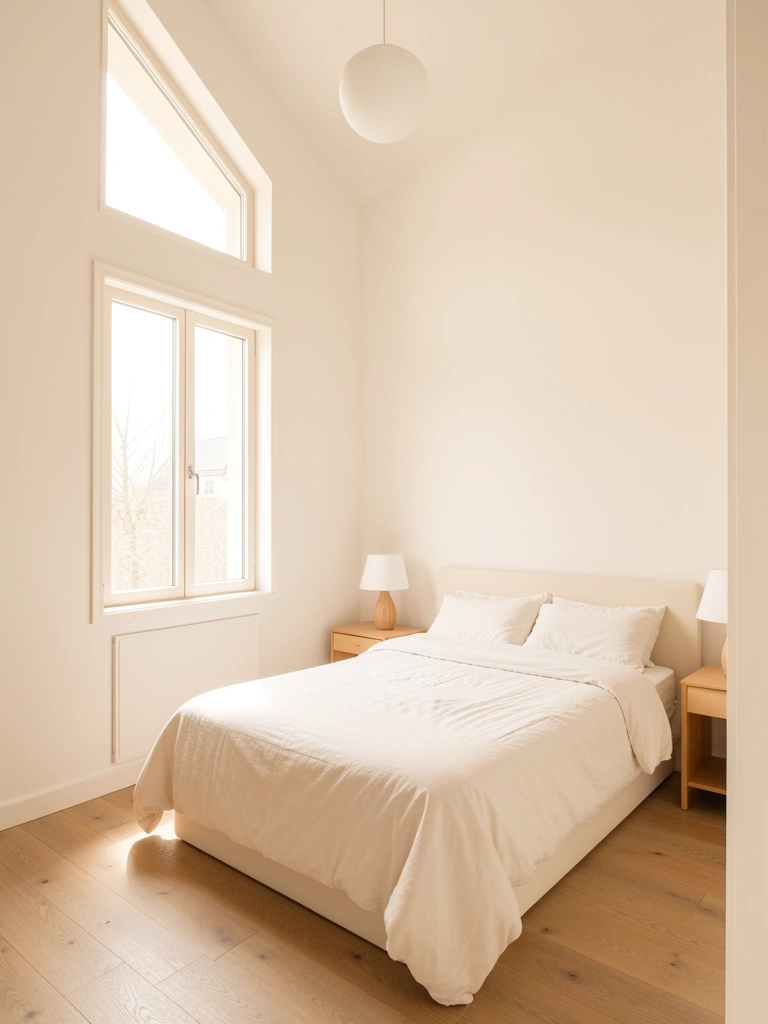
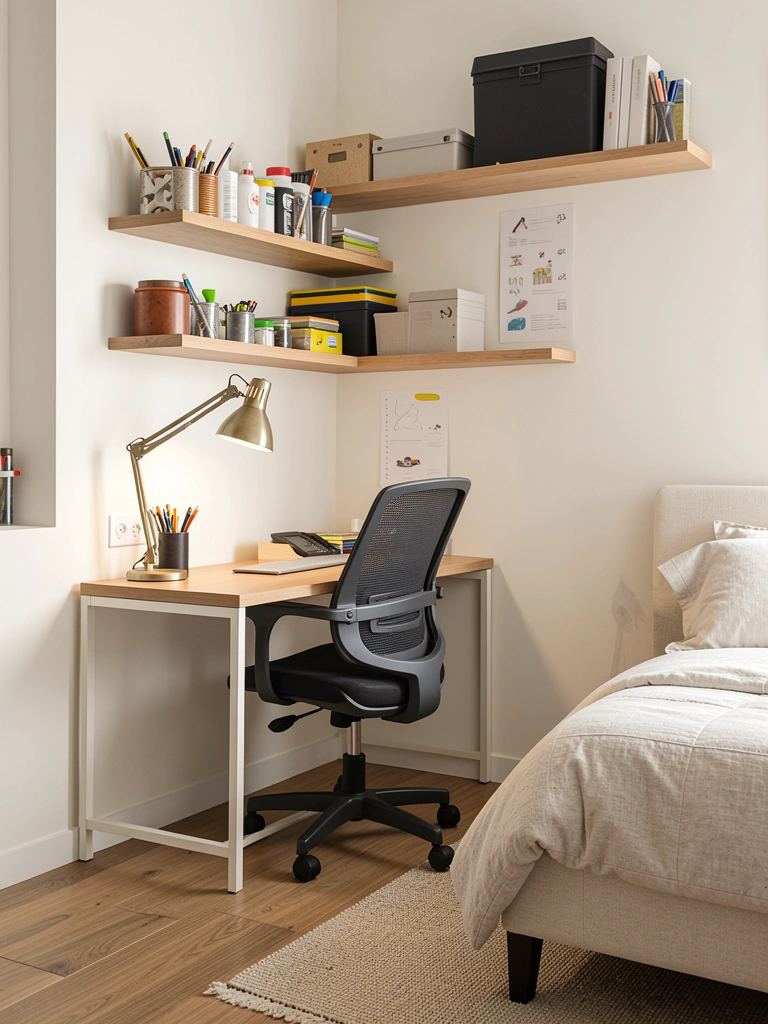
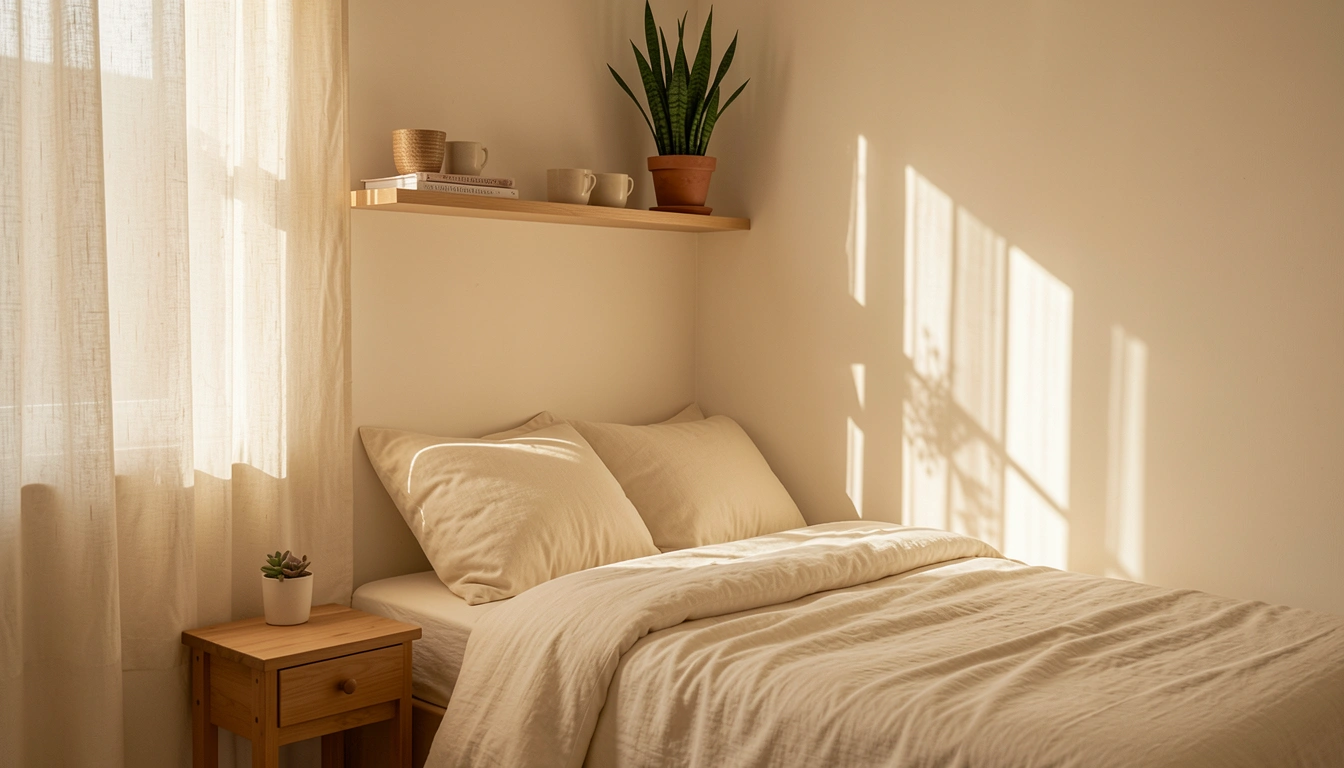
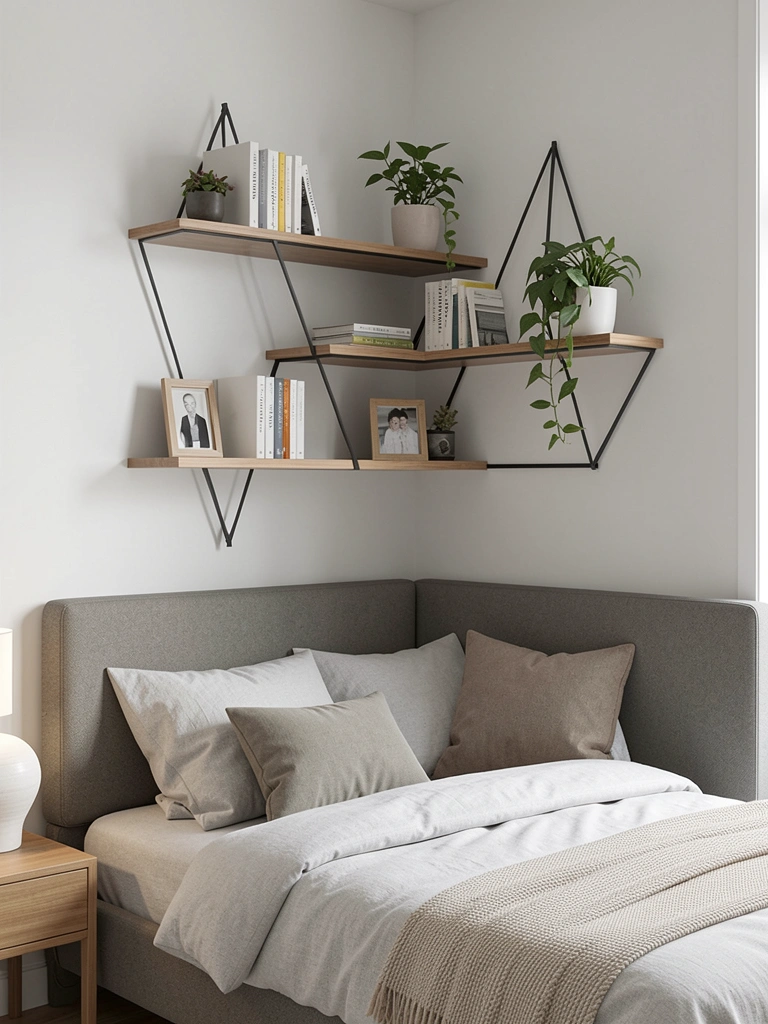
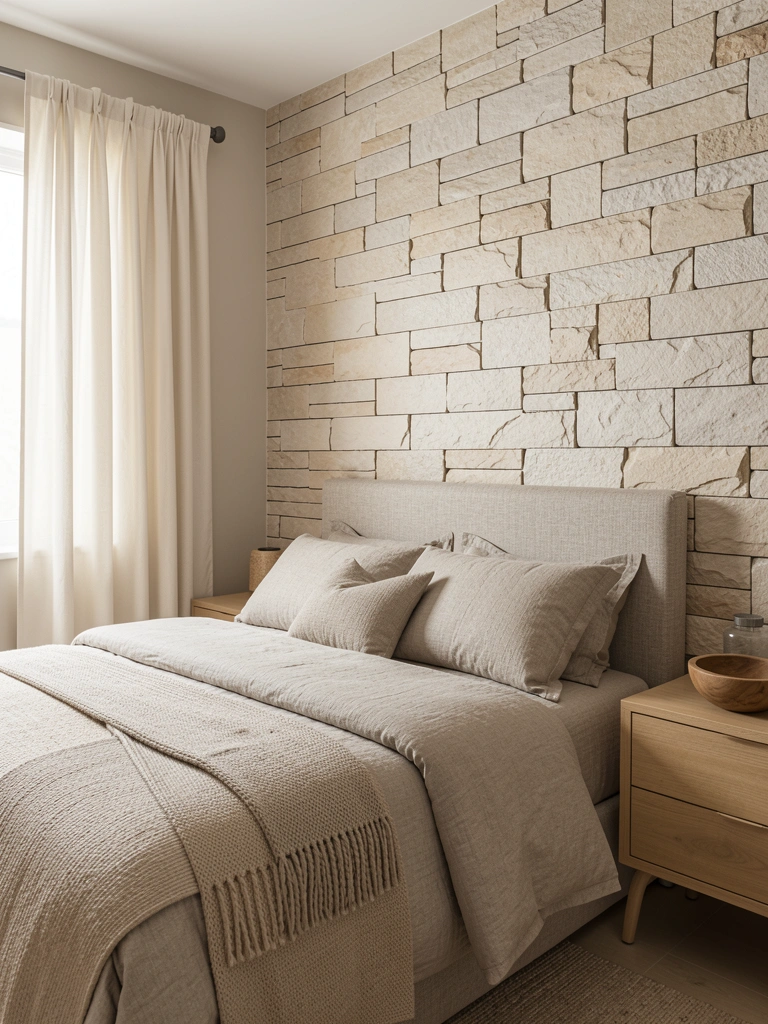
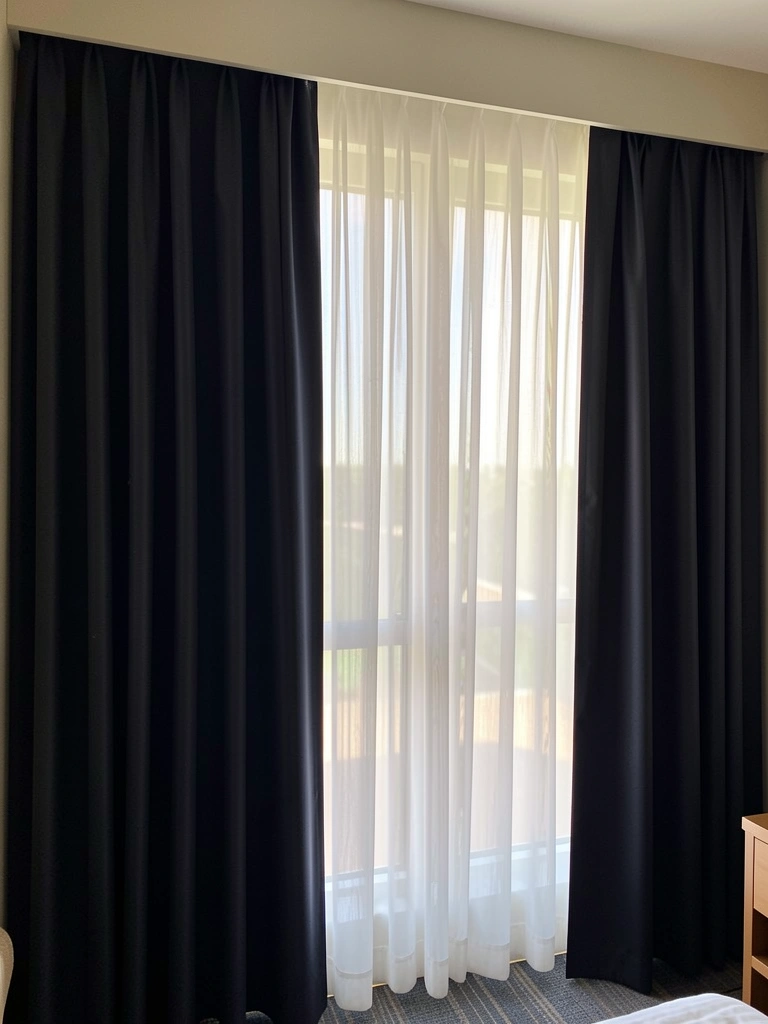
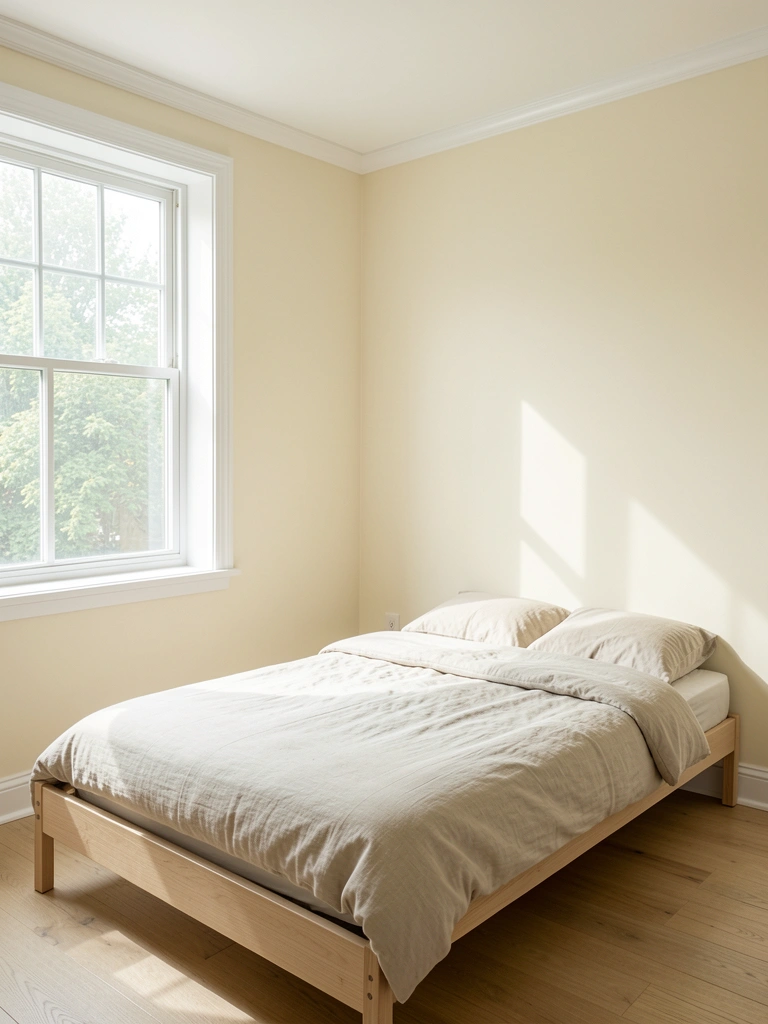
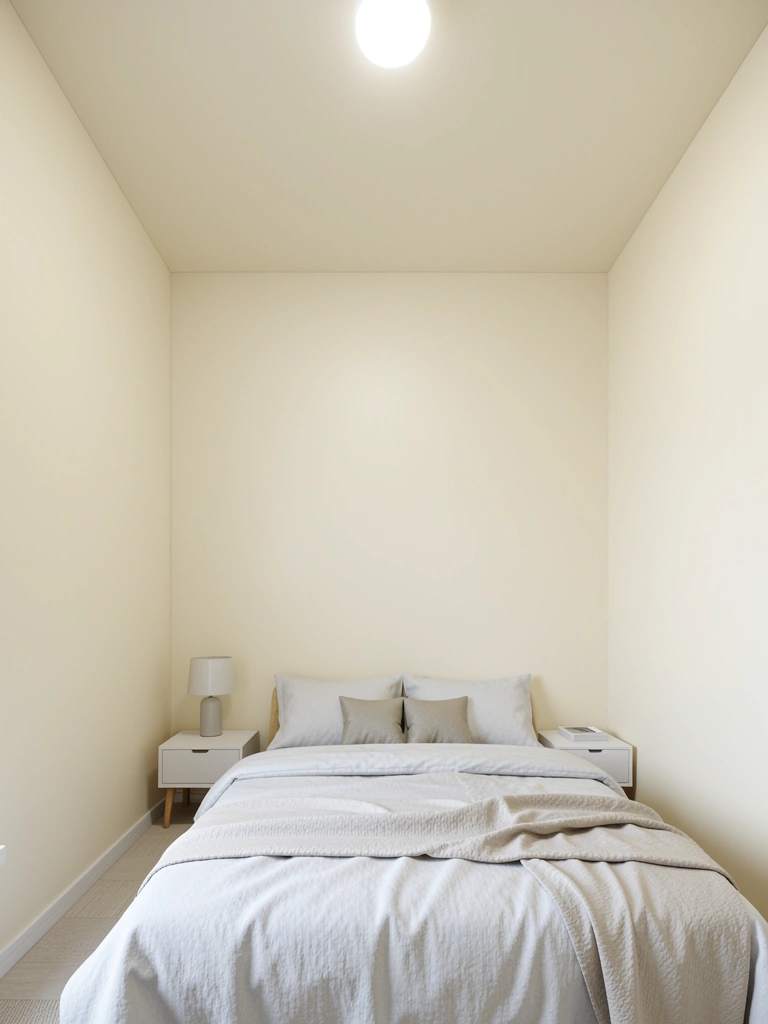
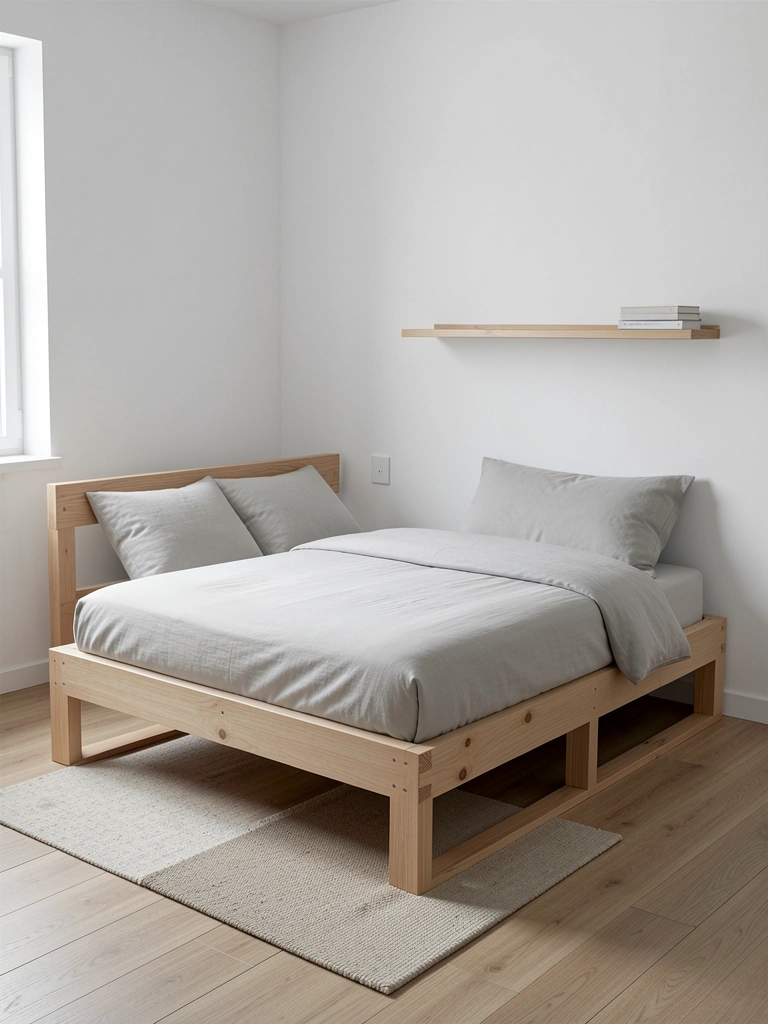
    21. Install a Minimal Joinery Bed in a Small Space Strategically

    Minimal joinery beds work brilliantly in small spaces because they don’t visually bulk up the room. Clean lines and visible structure create an illusion of spaciousness rather than crowding.

    Choose platform or low-profile designs ($600–$1,200) for small rooms—they float rather than anchor. Position the bed where it opens up the rest of the space (usually against the longest wall). Measure your room before committing—this bed only works if there’s walking room. Time to position: 30 minutes of planning. Pro tip: Paint walls light neutral colors to amplify the spacious feeling. Renter note: This bed style works in dorms, small apartments, and tiny homes equally well.

    Small spaces gain breathing room. The bed disappears slightly, making the room feel larger.

    22. Commission a Custom Minimal Joinery Bed from a Local Maker

    Working with a local woodworker lets you specify every detail—wood species, joinery style, dimensions, finish. This is the ultimate way to own a bed that’s truly yours.

    Find woodworkers through local maker communities, Etsy, or Instagram. Budget $1,500–$3,500 depending on complexity and materials. Timeline: typically 6–12 weeks. Set clear expectations: provide photos of styles you love, discuss wood samples, and be specific about dimensions and joinery preferences. Pro tip: Start the conversation with a clear budget—a good maker will work within it. The emotional payoff of a custom bed is enormous. You know exactly how it was made and who made it.

    You’ll sleep better knowing the story behind your bed. Commissioning becomes an investment in craft and relationship.

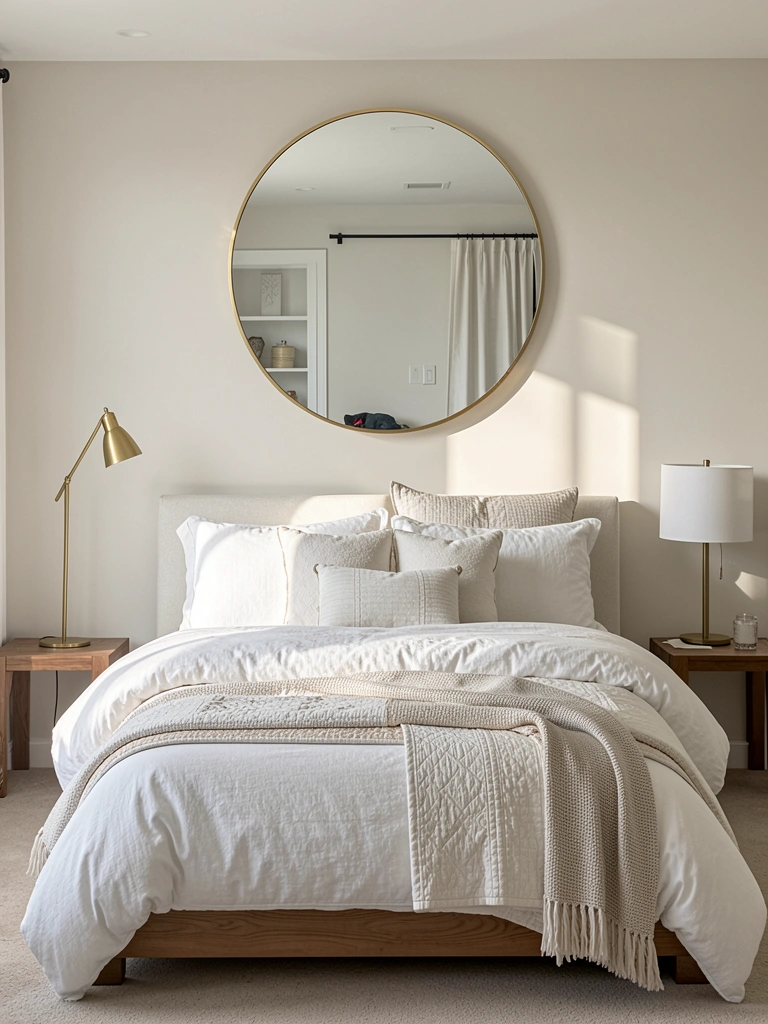
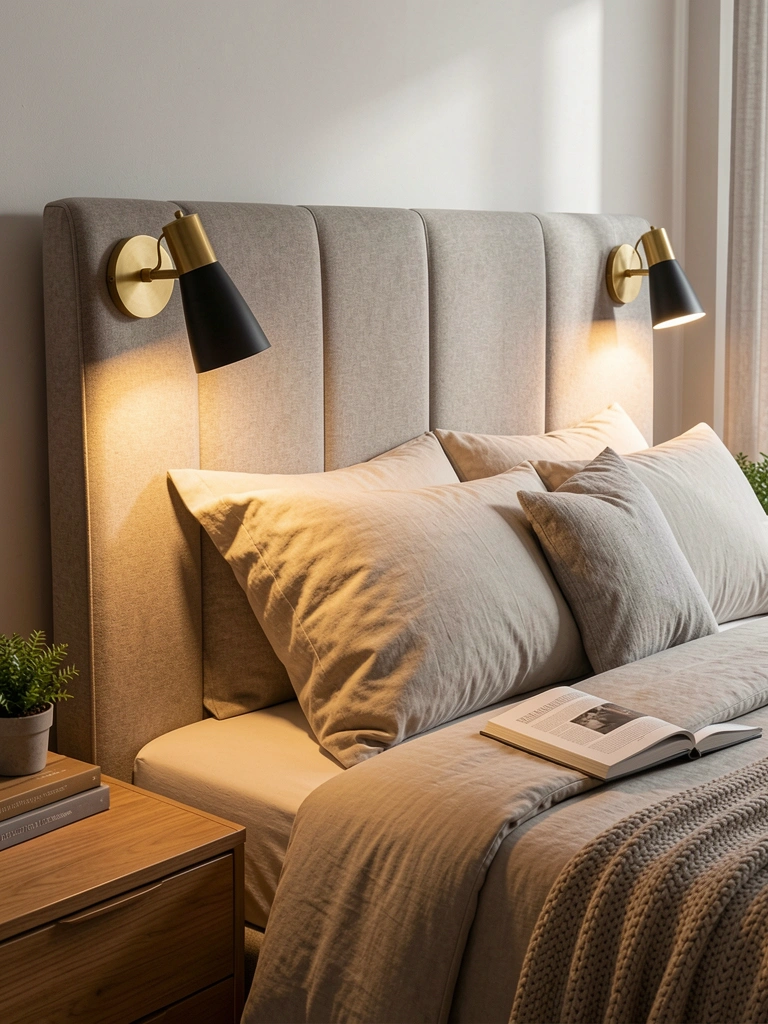
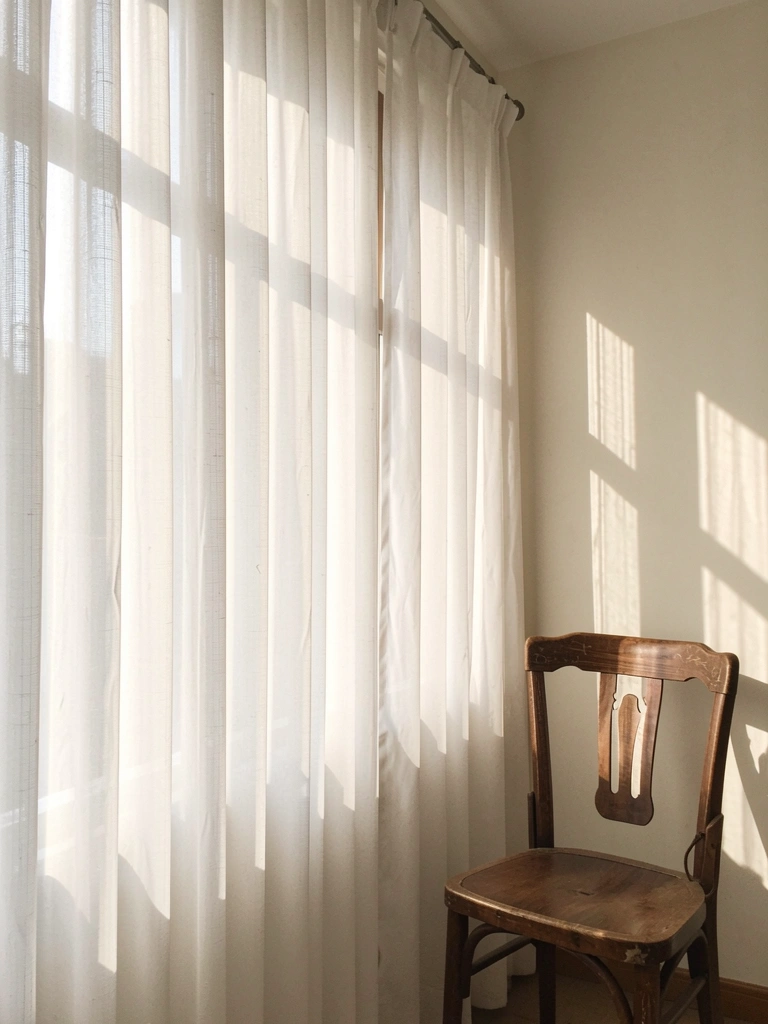
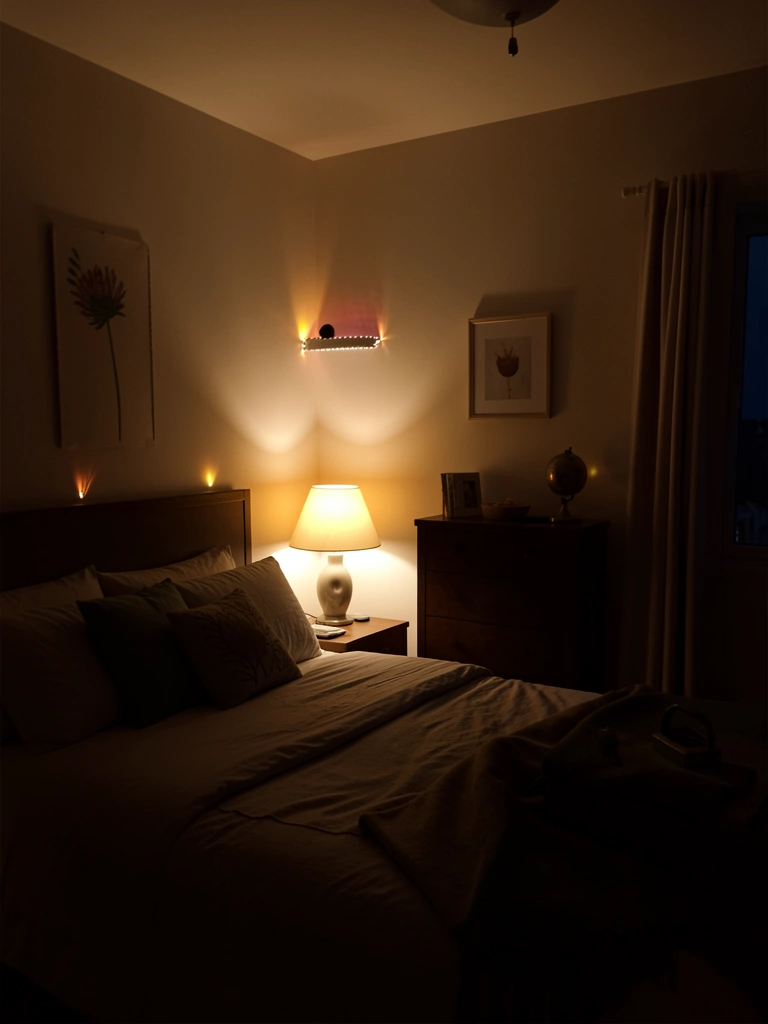
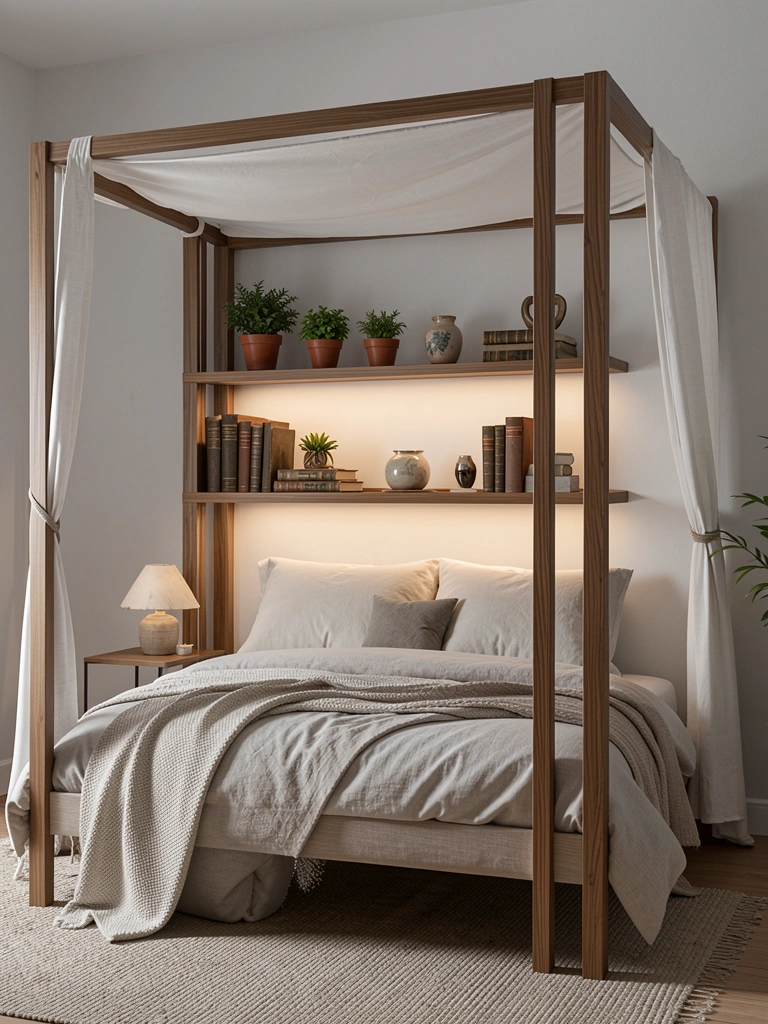
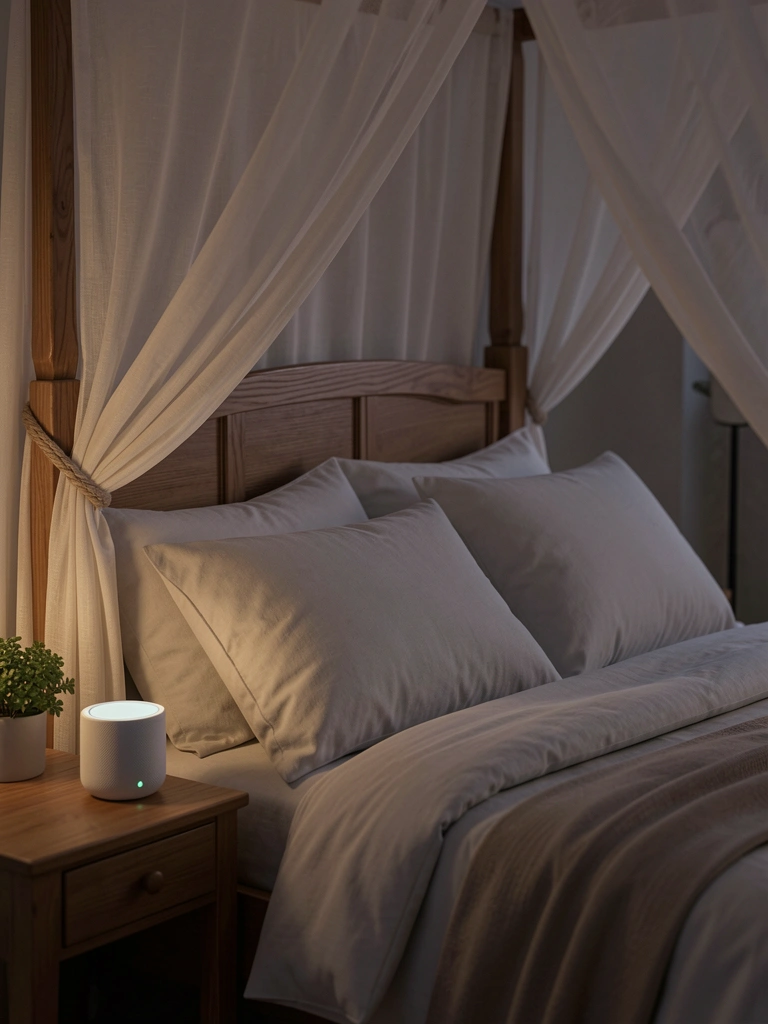
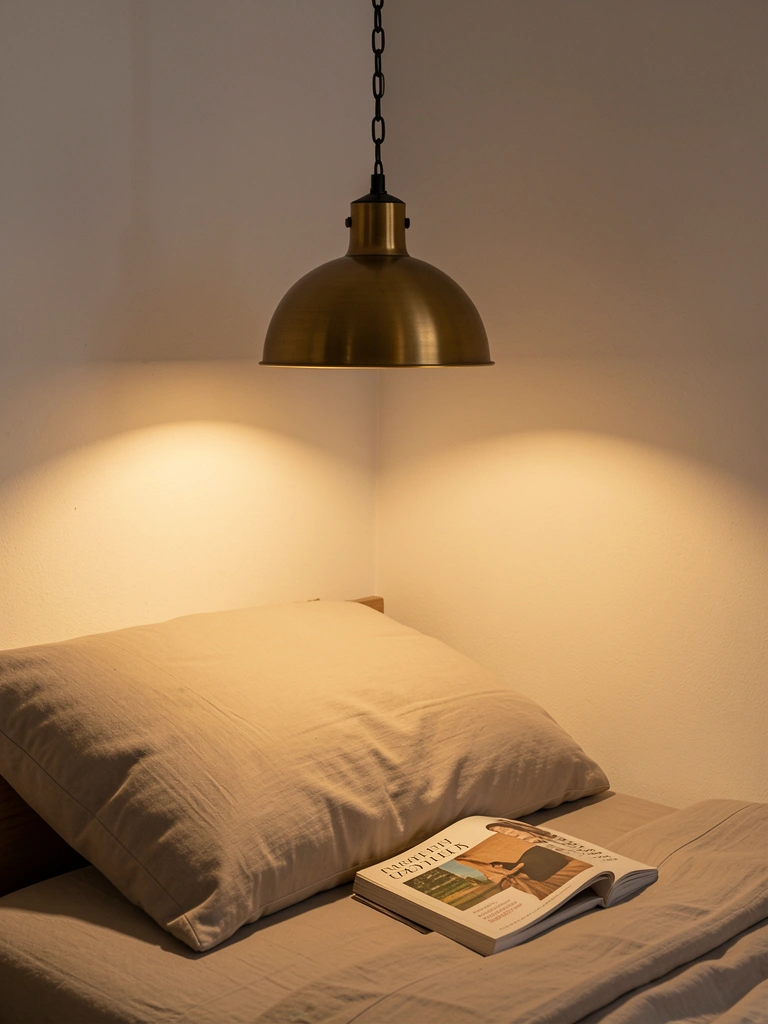
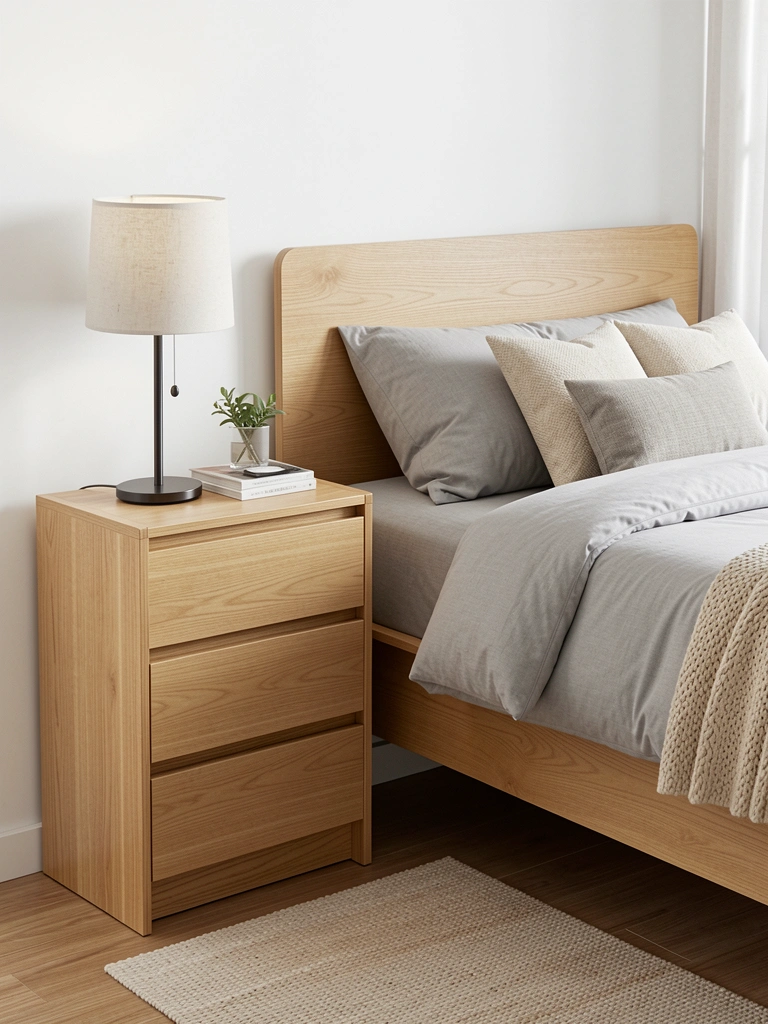
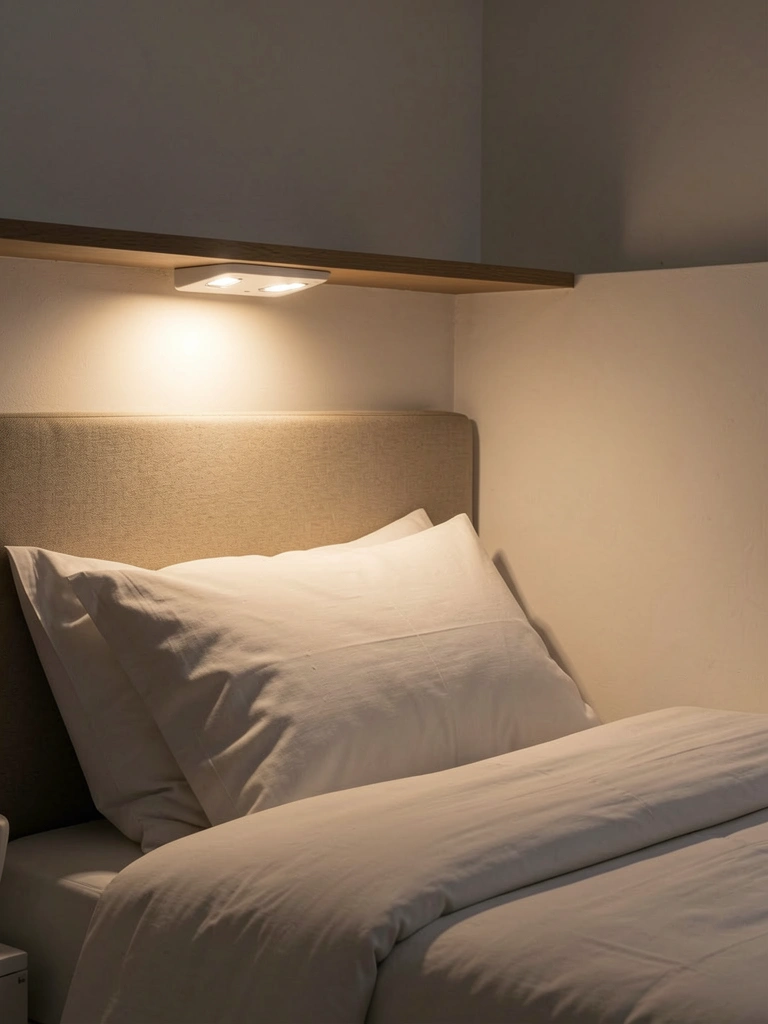
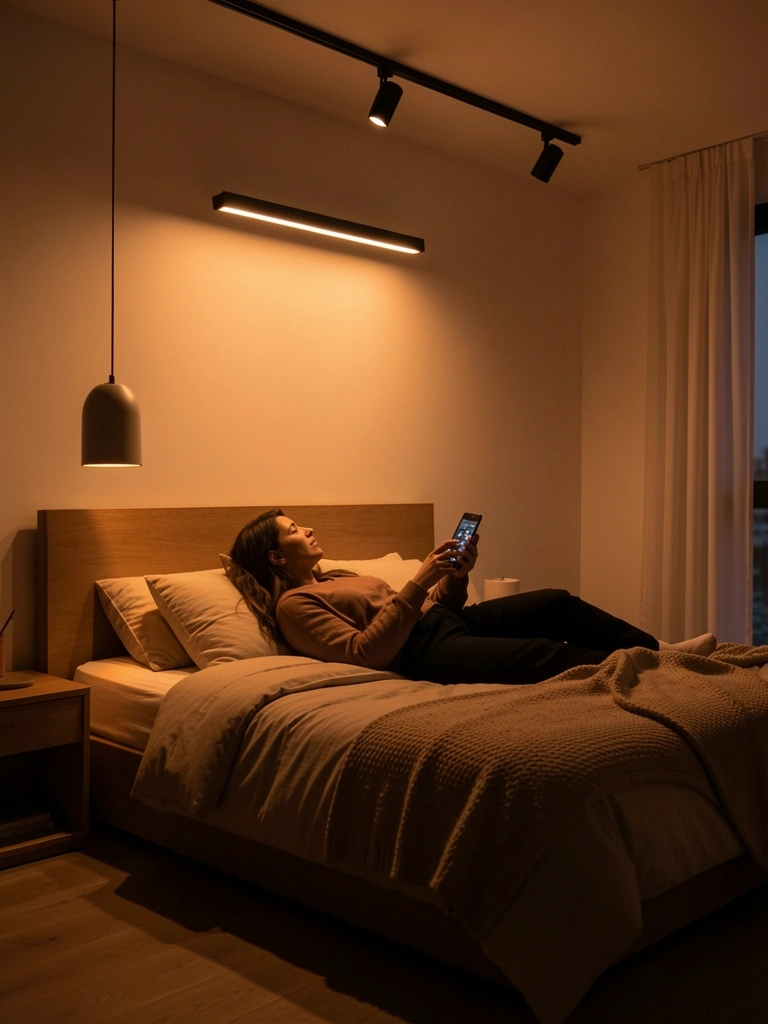
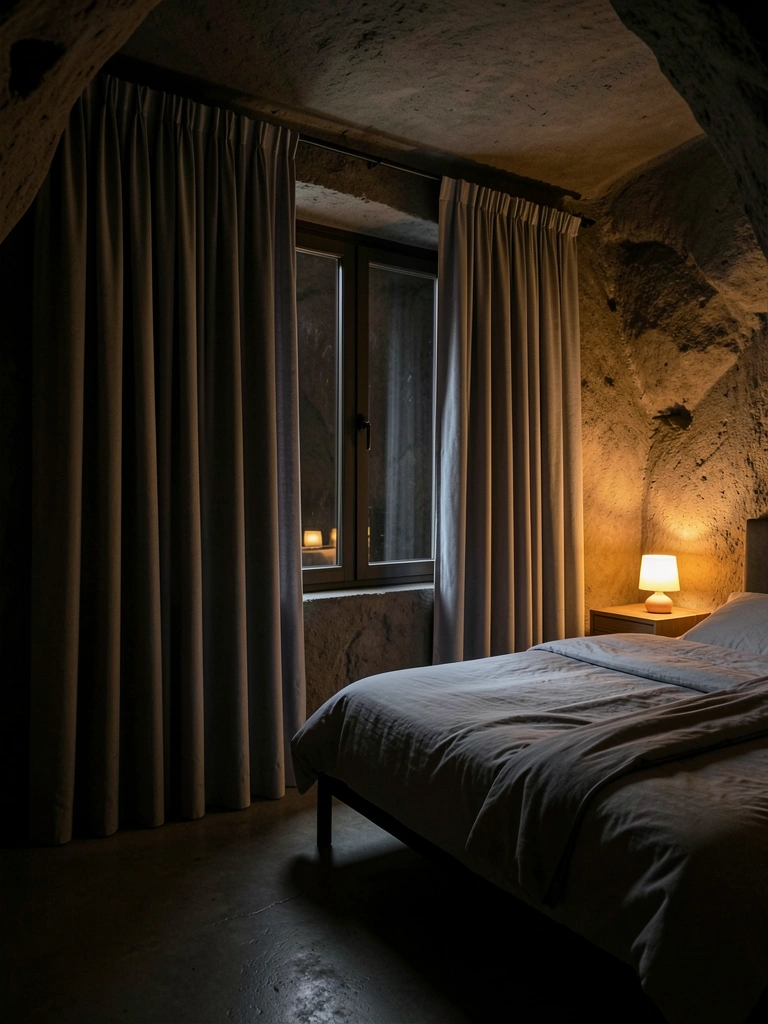
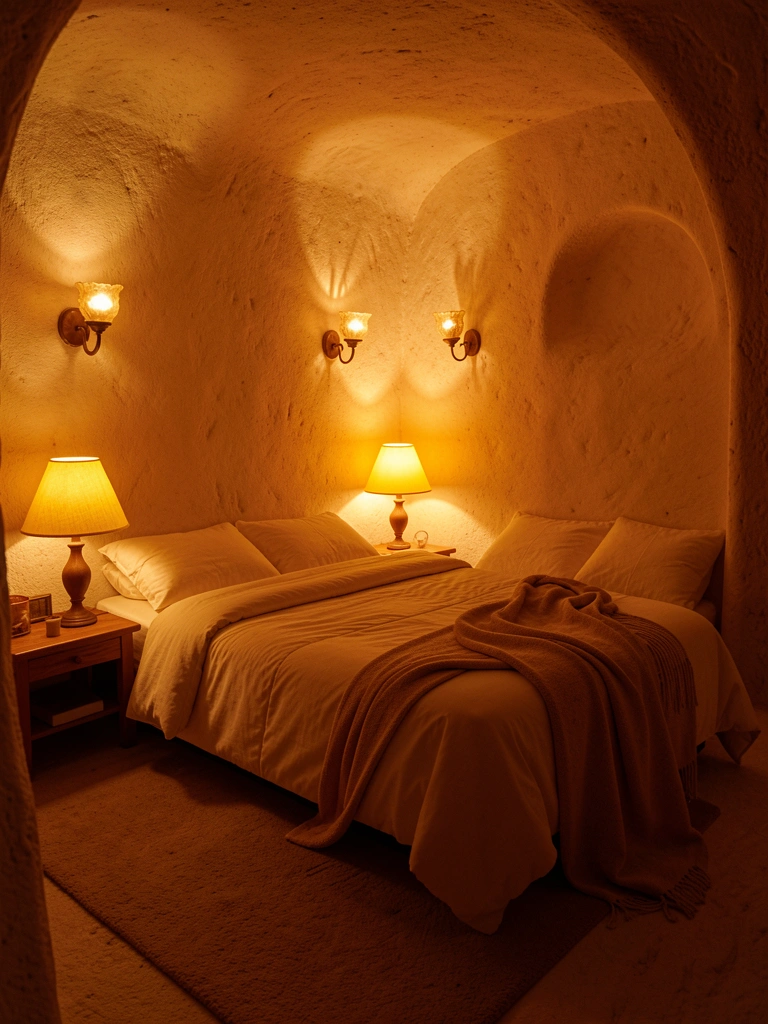
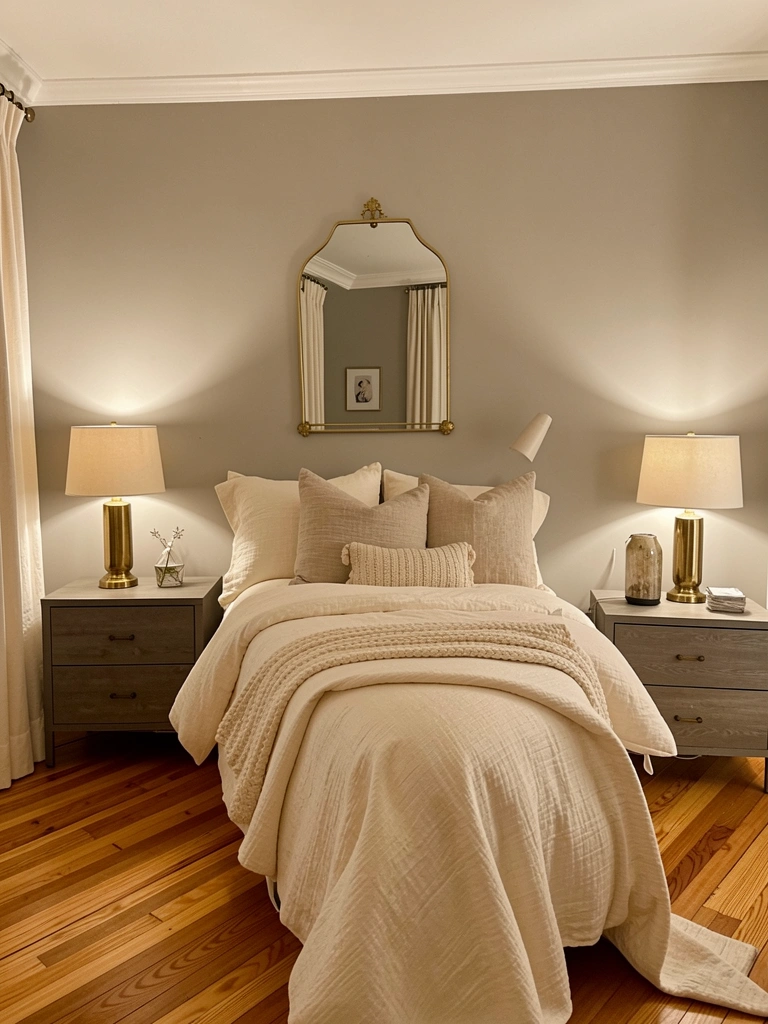
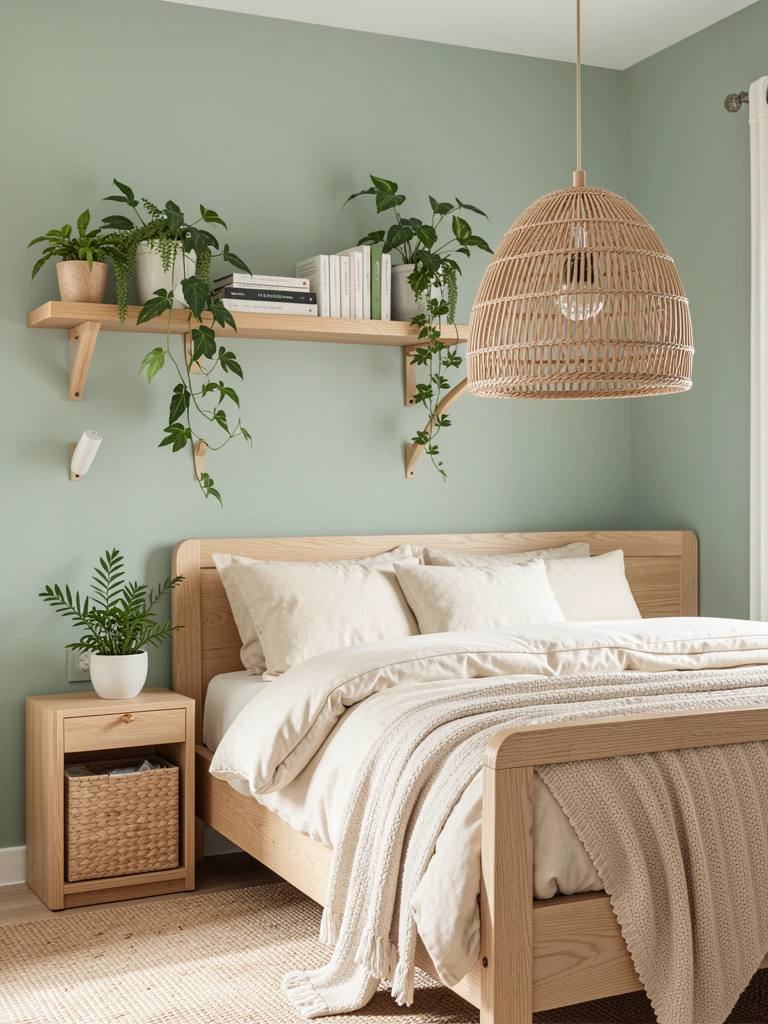
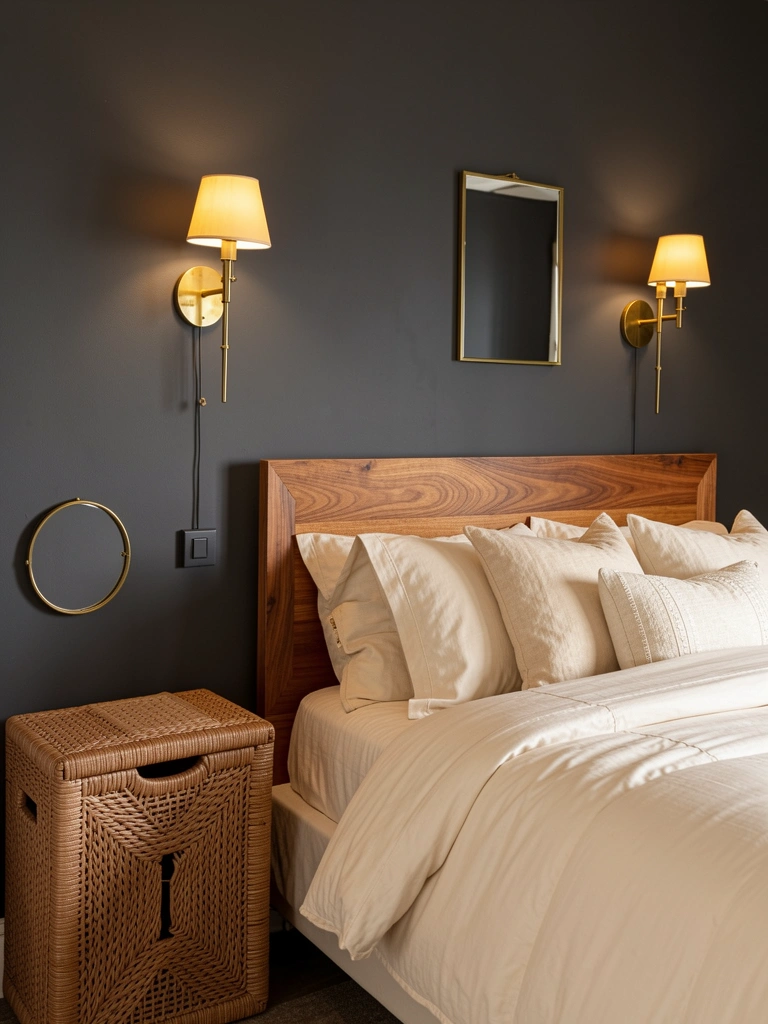
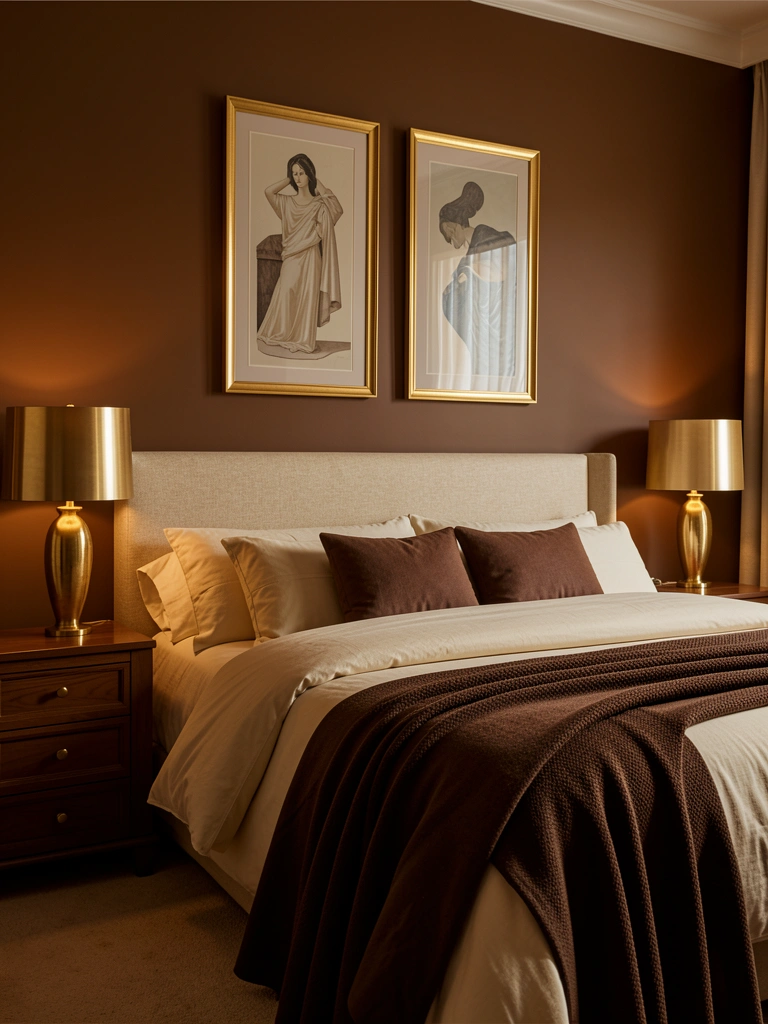
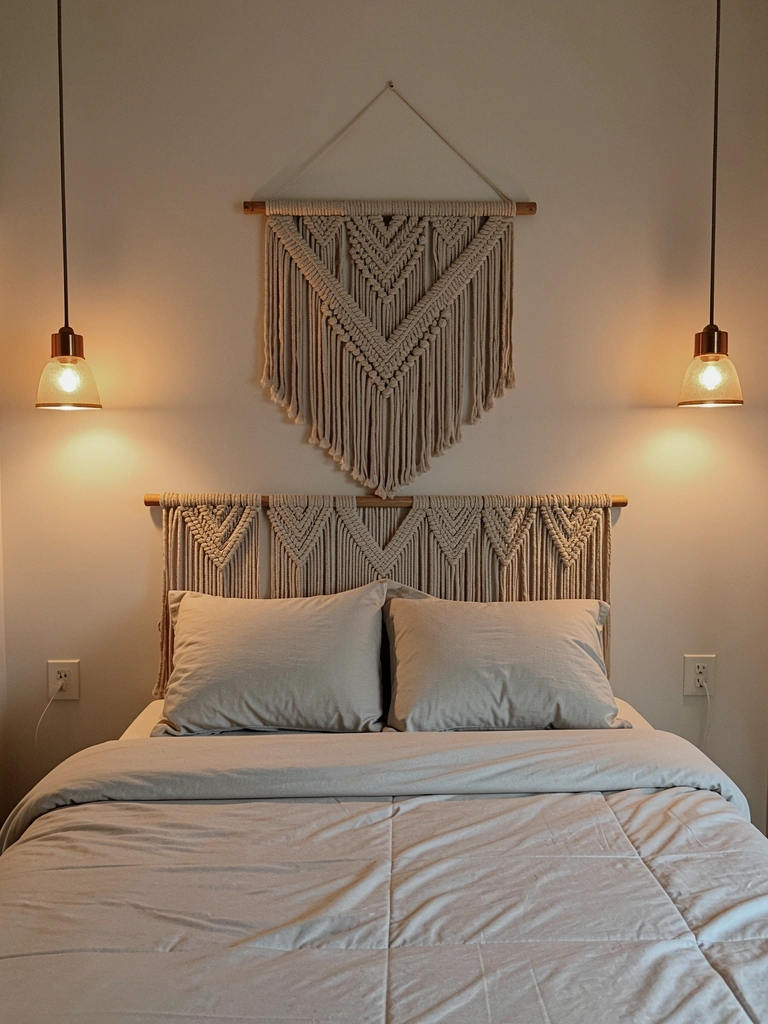
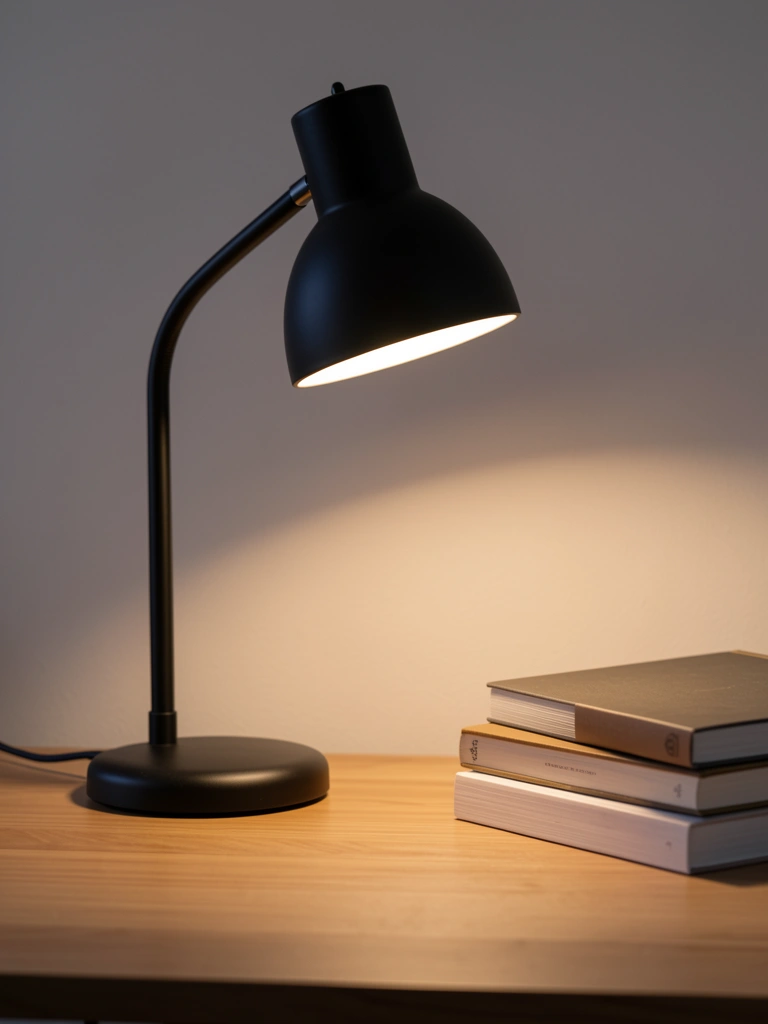
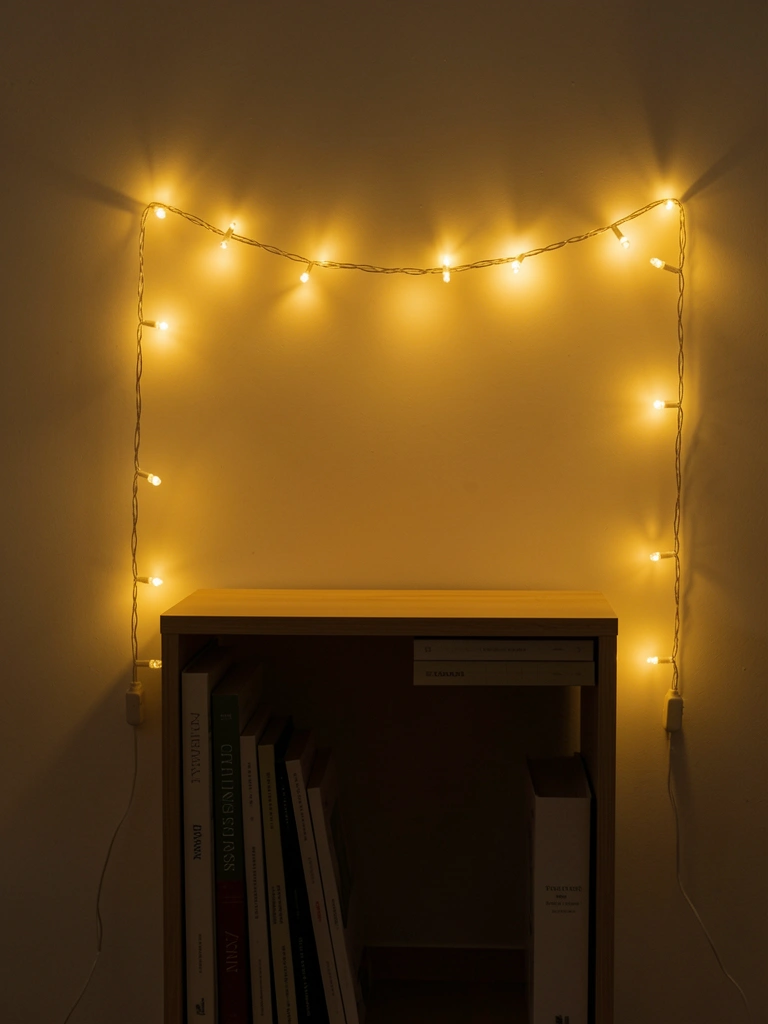
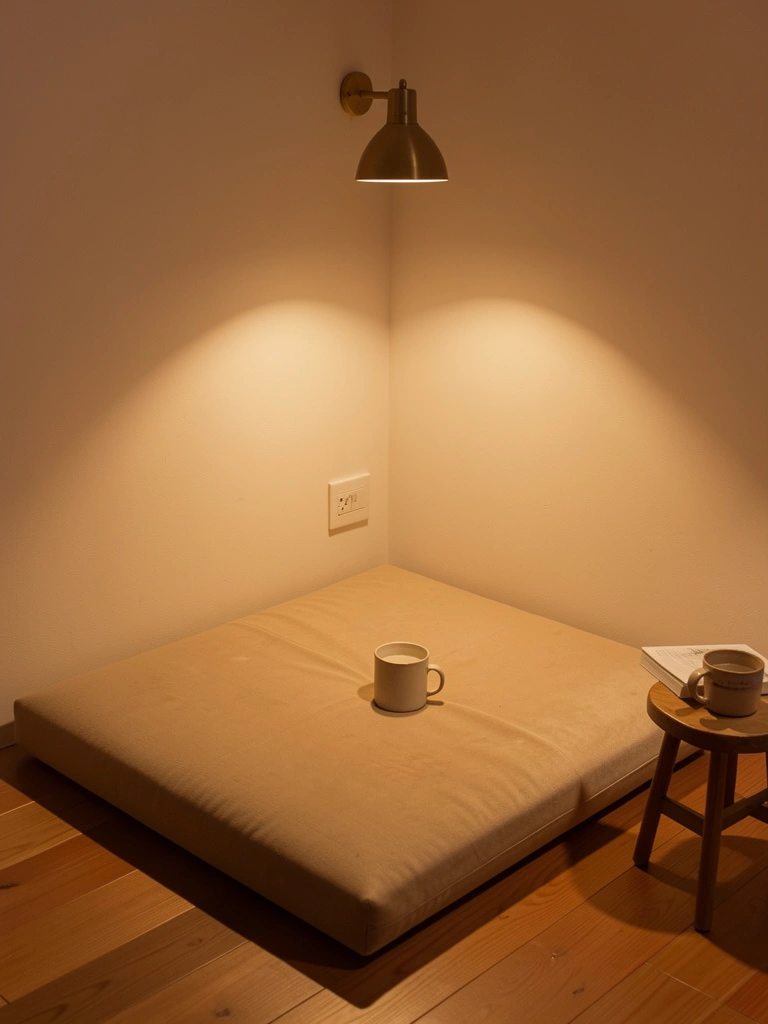
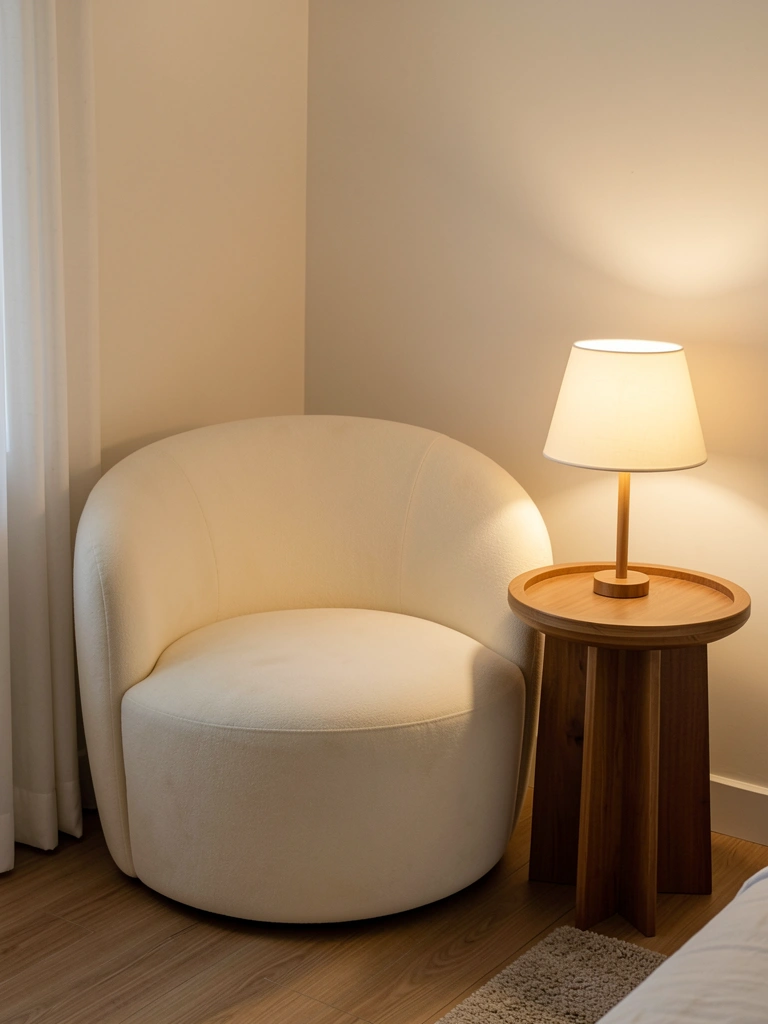
    23. Pair Minimal Joinery Bed with Architectural Lighting

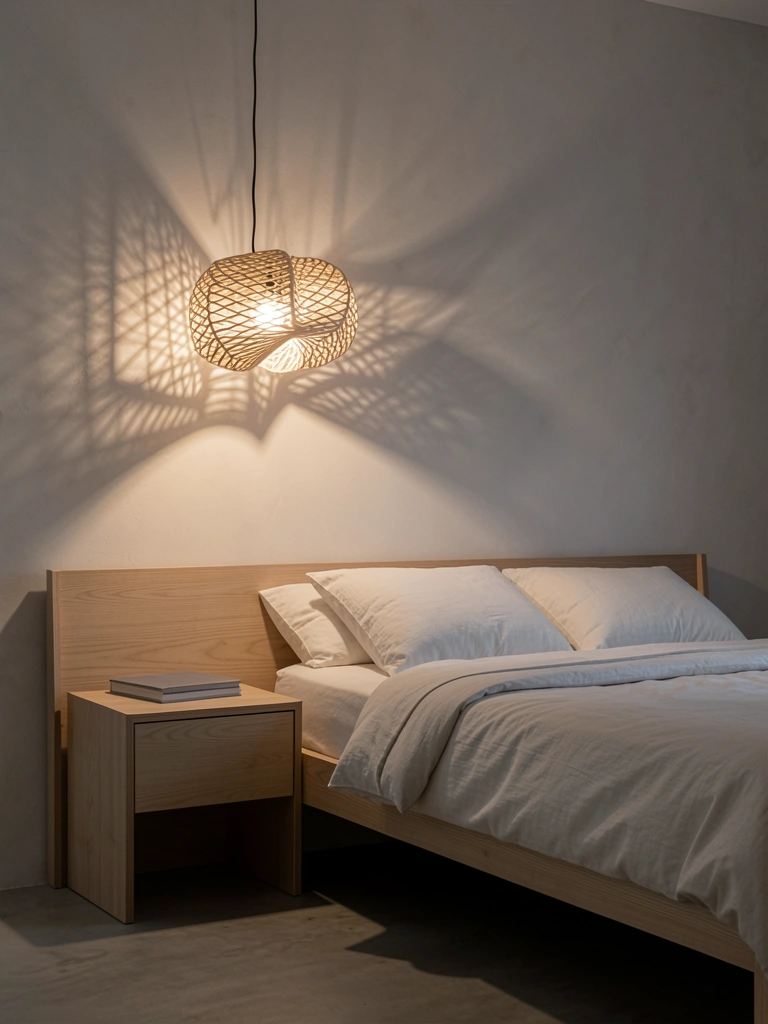
    Minimal joinery pairs beautifully with sculptural lighting that echoes the bed’s clean lines and construction honesty. Choose fixtures with visible components and interesting geometry.

    Pendant lights with exposed elements from brands like Muuto ($200–$400), Apparatus Studio ($300–$600), or Etsy ($100–$250) work perfectly. Wall sconces with visible brass or metal details also enhance the aesthetic. Installation time: 1–2 hours if electrical runs exist, more if rewiring is needed. Budget for professional installation if you’re uncertain: $150–$300. The lighting becomes another design layer that speaks to craftsmanship and intentionality. Pro tip: Choose warm bulbs (2700K) to soften the geometric lines slightly.

    The lighting transforms your bed into a genuine focal point. Shadows and geometry create depth and interest nightly.


    Save this post and pick one or two ideas to start with—whether it’s researching makers, visiting a showroom, or measuring your space. One thoughtful bed choice changes how you feel every single morning.

  • 26 Headboard Ideas That Add Style, Texture & Impact

    26 Headboard Ideas That Add Style, Texture & Impact

    Your headboard sets the tone for your entire bedroom—it’s the first thing you see when you wake up and the focal point when you’re scrolling through your phone before bed. But a great headboard does more than just look good; it can add texture, define your space, and make a small room feel intentional or a plain bedroom feel like a sanctuary. Whether you’re renting, working with a tight budget, or ready to invest in a statement piece, there’s a headboard idea here that fits your style and your situation. Let’s explore 26 creative ways to frame your bed and turn it into the focal point your bedroom deserves.

    1. Layer Natural Wood for Warmth and Texture

    A wooden headboard brings instant warmth and visual interest to any bedroom. Real wood—whether reclaimed, live-edge, or simple planks—catches light beautifully and creates a grounding, biophilic backdrop that makes you want to stay in bed longer.

    The easiest approach is to install shiplap or tongue-and-groove boards directly behind your bed. You can use pre-finished boards from Home Depot or Lowe’s ($50–$300 depending on coverage) and attach them with a stud finder and wood screws—a weekend DIY project. For a softer look, opt for painted shiplap in warm white or soft gray. If full installation feels daunting, floating a single live-edge wood slab above your headboard creates the same visual impact with zero commitment. Pair it with warm brass sconces on either side to highlight the grain.

    The texture and natural tones make even a simple bed frame feel curated and expensive. Your bedroom instantly becomes a retreat rather than just a sleeping space.

    2. Paint an Accent Wall Behind Your Bed

    An accent wall is the quickest way to anchor your bed as a focal point without spending a lot or committing to permanent changes. Bold color—emerald, navy, terracotta, or even deep charcoal—creates drama and makes your headboard zone feel intentional.

    Choose a quality paint (Benjamin Moore, Sherwin-Williams, or budget-friendly Valspar from Lowe’s run $25–$40 per gallon). You’ll need roughly 1–2 gallons for most bedrooms. Tape off the wall carefully, apply two coats, and you’re done in a day. Renters: check your lease, but removable wallpaper or peel-and-stick paint alternatives exist—though they’re pricier ($30–$60 per roll). The key is picking a color you genuinely love, not something trendy you’ll tire of in six months.

    A bold backdrop makes even a basic bed feel curated and stylish. You get maximum impact for minimal effort and cost.

    3. Upholster a DIY Headboard for Comfort and Style

    An upholstered headboard adds softness, sound absorption, and a high-end feel—perfect if you sit up in bed to read or watch shows. DIY upholstery is more approachable than you’d think.

    Buy a basic plywood base (4×8 sheet, ~$25) and cut it to your desired headboard height. Wrap it in batting ($10–$15), then stretch your chosen fabric taut over top and staple the back using a heavy-duty stapler ($15 for the tool, or borrow one). Fabrics range from budget linen ($8–$12/yard) to luxury velvet ($20–$40/yard); aim for 5–8 yards depending on size. Add brass nail head trim for $15–$30 for a designer touch. Total cost: $100–$250 and 3–4 hours of work. Alternatively, buy a pre-made upholstered headboard from IKEA, Wayfair, or West Elm ($150–$400).

    Sitting up in bed now feels intentional and supported. The soft texture invites you to linger, and guests instantly notice the upgrade.

    4. Mount a Floating Shelf Headboard for Practical Style

    A floating shelf headboard combines storage, display space, and style—perfect for small bedrooms or renters who want impact without permanent fixtures. It’s functional art.

    Mount two to four shelves (walnut, white oak, or painted MDF) at varying heights above your bed using heavy-duty brackets rated for 25+ pounds each. IKEA’s Lack shelves run $10–$25 each; high-end options from Wayfair run $40–$80. Secure with wall anchors if you can’t hit studs. Dress the shelves with small plants, a table lamp, stacked books, and a few framed photos—nothing too cluttered. Installation takes 1–2 hours with basic tools (drill, level, stud finder). Renters can remove these easily.

    Your bed area now functions as both sleeping space and bedroom library. It feels open, airy, and infinitely more interesting than blank wall.

    5. Hang Fabric or Macramé as a Soft, Renter-Friendly Backdrop

    Fabric and macramé hangings offer instant bohemian style with zero commitment. They’re renter-friendly, movable, and add organic texture that photographs beautifully.

    Source a large fabric tapestry, macramé wall hanging, or woven textile from Urban Outfitters, Free People, Amazon, or local makers on Etsy. Sizes run 4×6 feet and up; prices range from $30–$150 depending on craftsmanship. Hang using a tension rod, removable adhesive hooks, or a basic curtain rod mounted just below ceiling height behind your bed. Layer a smaller hanging or two to the side for asymmetrical interest. The beauty is you can swap these seasonally or when you want a refresh.

    Your bedroom gains a cozy, collected feel without feeling cluttered. Macramé especially catches light and shadow, creating texture that shifts throughout the day.

    6. Create a Curved Headboard for Soft, Modern Impact

    Curved headboards dominate 2025 design trends—and for good reason. The soft, rounded shape softens hard bedroom edges and creates a focal point that reads as intentional and contemporary.

    You can DIY a curved headboard using bendable plywood (Home Depot, $40–$60), batting, and your chosen fabric, then upholster as described above. Alternatively, invest in a pre-made curved headboard bed frame from Article, West Elm, or Wayfair ($400–$800 for the full bed). If budget is tight, try a curved headboard panel that attaches to an existing frame—IKEA and Amazon offer options for $100–$250. The key is choosing a subtle curve (not too extreme) and pairing it with minimalist bedding so the shape stays the star.

    The curved silhouette makes your bed feel like a design statement rather than just furniture. Your bedroom immediately reads as thoughtfully styled.

    7. Use Sheer Curtains to Frame Your Bed Like a Canopy

    Canopy-style curtains create an enclosed, intimate feeling without the visual heaviness of a full four-poster frame. Sheer fabrics especially feel contemporary and airy.

    Mount a sturdy curtain rod (or two perpendicular rods for a full frame) from the ceiling above your bed using heavy-duty brackets rated for fabric and rod weight. Hang floor-length sheer curtains (linen or cotton voile, $8–$15/yard from Joann Fabrics, Etsy, or Amazon) from the rod. You’ll need roughly 10–15 yards depending on fullness and ceiling height. Total cost: $50–$150 plus 2 hours for installation. The effect is romantic yet modern—especially if you keep bedding and surrounding decor minimal and neutral.

    Your bed becomes an intentional retreat within your room. Light filters through the fabric beautifully, and you get a sense of enclosure that’s deeply comforting.

    8. Install a Statement Mirror as a Headboard Focal Point

    A large mirror behind your bed serves double duty: it expands the visual space of your bedroom and reflects light beautifully. Plus, it’s a functional, stylish alternative to traditional headboards.

    Choose an oversized mirror (36 inches or larger) in a frame that matches your style—brass, wood, black metal, or ornate. Hunt on Wayfair, Article, or local vintage shops for $80–$400 depending on size and materials. Hang it securely with heavy-duty wall anchors or by hitting studs. The mirror will reflect your bedding and lighting, making the bed feel more open and curated. Layer a smaller mirror or two to the side for asymmetry, or keep it singular and centered for maximum impact.

    Your bedroom feels larger and brighter instantly. Morning light bounces around the room, and the mirror becomes a beautiful architectural element.

    9. Mix Wallpaper with Paint for a Patterned Accent

    Wallpaper on just the headboard wall (or even just a smaller area framing the bed) gives you pattern without overwhelming the room. It’s bold, temporary, and surprisingly affordable now.

    Peel-and-stick wallpaper (removable, renter-friendly) runs $25–$50 per roll and covers roughly 27–30 square feet. Brands like Spoonflower, Etsy, and Amazon offer thousands of designs. Traditional wallpaper ($15–$35/roll) requires paste and removal later but lasts longer. Choose a pattern that complements your bedding—botanical prints, geometric shapes, or subtle damask all work well. Installation takes 2–4 hours depending on your patience and the wall’s smoothness.

    Your headboard wall becomes a design moment. Even from across the room, pattern adds personality and makes your bed feel curated rather than default.

    10. Combine Textured Wallpaper with Minimalist Bedding

    Textured wallpaper—grasscloth, linen-look, or embossed finishes—adds depth and visual interest without bold color or pattern. It’s sophisticated and works in any style.

    Textured wallpaper runs $20–$60 per roll and pairs beautifully with neutral bedding for a calm, intentional look. The texture catches light differently throughout the day, creating subtle visual movement. Brands like Schoolhouse Electric, Anthropologie, and traditional wallpaper shops carry beautiful options. Installation is similar to standard wallpaper and takes 2–3 hours. For renters, high-quality peel-and-stick textured options exist ($40–$70/roll) from Spoonflower and Etsy.

    Your bed area gains dimension and sophistication. Guests notice the subtle texture before realizing what makes the space feel so thoughtfully designed.

    11. Paint Your Headboard a Rich, Deep Color While Walls Stay Light

    Instead of an accent wall, paint just the headboard area—perhaps 3–4 feet high or in a defined rectangular frame around the bed. This creates bold impact without committing to an entire wall and keeps the rest of the room feeling open.

    Using quality paint ($25–$40/gallon), mask off a clean rectangle or arch shape above your bed, then apply two coats. This is a half-day DIY project. Choose a color that’s 2–3 shades deeper than your wall color for definition. Paired with neutral bedding and brass or brass-toned lighting, a deep color reads as luxurious rather than heavy.

    Your bed becomes the room’s anchor without overwhelming it. The technique works in tiny studios and sprawling master bedrooms alike.

    12. Layer Quilts and Throws Behind Your Bed for Soft Texture

    Instead of a traditional headboard, use textiles as your backdrop. Layer quilts, throws, and decorative blankets for an abundant, cottage-core feel that’s deeply inviting.

    Source vintage quilts from flea markets, estate sales, or Etsy ($15–$80 each), along with new throws from Schoolhouse Electric, Etsy, or Woolroom ($40–$150). Drape them casually over a simple headboard frame or hang them loosely from a tension rod behind the bed. The beauty is layers—mix patterns, textures, and tones. Include at least one handmade or secondhand piece for character. This approach also solves the “what to do with all my favorite throws” problem.

    Your bed feels intentional and abundantly cozy. Guests see personality and craftsmanship rather than a generic furniture piece.

    13. Install a Geometric Wooden Slat Headboard

    Wooden slat headboards create a modern, architectural look. Geometric patterns (chevron, starburst, or simple lines) add visual interest while remaining clean and contemporary.

    You can DIY this using 1×2 or 1×3 boards ($2–$5 each), cutting them to angles and mounting to a plywood base or directly to the wall. Plan your pattern on graph paper first, then cut and install—a full weekend project requiring a miter saw. Alternatively, order a pre-made slat headboard from Etsy makers or Article ($300–$600). Sand and finish in natural wood, white, or paint a moody color for contrast.

    The geometric pattern adds architectural interest without weight. Your bedroom feels designed and contemporary.

    14. Hang Floating Plants Above Your Bed for Living Texture

    Live plants suspended above your bed create a living headboard that’s beautiful, air-purifying, and deeply biophilic. It’s an unexpected, nature-forward approach.

    Mount sturdy hooks into ceiling studs or use removable adhesive hooks (rated for 10+ pounds each). Hang pothos, string of pearls, monstera, or other trailing plants in simple macramé hangers ($10–$30 each from Urban Outfitters, Free People, or Etsy) or small pots. Start with 3–5 plants and add more as your confidence grows. Water weekly and rotate for even growth. Total investment: $50–$150 for plants and hangers. The effect is serene and distinctly your style.

    Your bedroom becomes a peaceful retreat filled with living energy. Morning light filtering through leaves is unmatched for mood and well-being.

    15. Create a Tufted Statement Headboard for Vintage Glamour

    Button tufting is the ultimate high-end detail. It’s romantic, vintage, and makes any headboard feel curated and expensive—even budget versions work beautifully.

    Upholster a plywood base as described in item #3, but add button tufting by marking diamond or grid patterns and pulling thread through the fabric and foam, securing buttons on the back of the headboard. This requires patience but isn’t technically difficult—YouTube tutorials abound. Alternatively, order a pre-made tufted headboard from Wayfair, Article, or specialty furniture makers ($300–$800). Pair with a jewel-tone velvet or linen for maximum impact.

    The tufted detail instantly elevates your bedroom to luxury hotel status. It becomes a statement piece guests notice and admire.

    16. Use Leather or Faux Leather for a Modern, Streamlined Look

    Leather or faux leather headboards feel expensive, contemporary, and effortlessly chic. The material is durable, easy to clean, and works in modern, eclectic, and maximalist spaces alike.

    Upholster a plywood base in faux leather (no fuss, still looks premium) using contact cement or staples. Faux leather runs $10–$25/yard from fabric retailers or Etsy, and you’ll need 5–8 yards. The seam-free appearance is especially sleek. Alternatively, buy a pre-made leather headboard from West Elm or Article ($250–$500). The neutral tone pairs beautifully with colorful bedding and bold art above the bed.

    Your headboard reads as designer and intentional. The smooth material invites touch, and the clean lines keep the room feeling open.

    17. Frame Your Bed with Floating Brass Rods and Sheer Fabric

    Brass framing with sheer fabric is minimalist, architectural, and surprisingly elegant. It’s a modern take on the canopy without the full-coverage feeling.

    Mount two sturdy brass rods (or stainless steel for a different vibe) vertically on either side of your bed using heavy-duty ceiling and floor mounts. Drape lightweight linen or cotton fabric loosely from rods—fabric doesn’t need to be sewn, just gracefully arranged. Brass rods run $50–$150 per rod from Etsy or specialty hardware stores; fabric costs $8–$15/yard. Total project: 2–3 hours and $150–$300. The effect is gallery-like and unexpectedly luxe.

    Your bed becomes an architectural focal point. The simplicity makes the space feel curated and intentional.

    18. Stencil a Pattern Directly Onto Your Wall

    Stenciling is an affordable, renter-friendly way to add pattern without wallpaper. It’s also deeply customizable and makes you feel like an artist.

    Purchase stencils from Etsy, Amazon, or craft stores ($10–$30 each) or print your own from templates online. Secure the stencil to your wall with painter’s tape, then apply paint using a stencil brush and stippling motions (don’t drag the brush). Multiple passes create depth. Test on cardboard first. Choose a pattern—geometric, botanical, or abstract—that complements your bedding. The whole project takes a day and costs $30–$80. Mistakes are part of the charm; the imperfection reads as handmade and intentional.

    Your headboard wall becomes a personal art installation. Visitors instantly notice the craftsmanship and care you’ve taken.

    19. Install a Headboard with Built-in Reading Light

    A headboard with integrated reading lights is the ultimate fusion of form and function. No bedside table needed, and your lighting is built into your design.

    Some pre-made headboards come with this feature—check Wayfair, Article, or specialty bedframe brands. Alternatively, commission a DIY version by having an electrician install wall sconces directly into an upholstered headboard frame. This is a project for someone with electrical experience or a hired pro (call an electrician, $200–$400 plus fixture cost). Standard wall sconces run $30–$100 each from Target, IKEA, or design retailers. The result feels custom and expensive.

    Your bed becomes a complete sleep and reading sanctuary. You’ll actually use the lighting, and it becomes a cherished detail of your daily routine.

    20. Layer a Wall Hanging with Paint for Dual-Texture Impact

    Combine two headboard ideas by painting an accent wall and layering a textile or wall hanging on top. The combination creates depth and visual interest that feels collected and curated.

    Paint your accent wall (tutorial in item #2), then mount a large woven tapestry, macramé, or fabric hanging using hooks or a tension rod. This layering technique works beautifully and feels effortlessly high-end. The textile breaks up the expanse of color and adds dimension. Pair with simple bedding in the same color family for cohesion.

    Your headboard zone reads as a carefully curated gallery wall. The layering makes the space feel more thoughtful and intentional.

    21. Use Large-Format Artwork or a Gallery Wall as Your Headboard Backdrop

    Oversized art or a gallery wall is an unconventional headboard choice that works beautifully—especially if you love collecting art and want your bedroom to feel like a personal gallery.

    Commission a large abstract painting from a local artist (Etsy or Instagram), order an oversized print from Minted or Society6 ($50–$150), or curate a gallery wall using mismatched frames from IKEA, Target, or thrift stores and prints from Unsplash or your own photography. Frame prices run $5–$30 depending on quality. Gallery walls take time to arrange but feel deeply personal and visually dynamic.

    Your bedroom becomes an expression of your taste and personality. Guests see art and intentionality rather than a generic bedroom setup.

    22. Install Wood Paneling or Shiplap in a Single Color for Cohesion

    Instead of painting just behind the bed, extend shiplap or wood paneling floor-to-ceiling for a fully integrated, high-end effect. The cohesion reads as intentional design.

    Use pre-finished shiplap boards ($50–$300 depending on coverage), paint them in your chosen color (or leave natural), and install using a stud finder and screws—a weekend DIY project if you’re handy. For full-wall coverage, budget 8–16 hours depending on room size. Renters: this one’s permanent, so check your lease first. The monochromatic, seamless look is deeply calming and makes the room feel intentionally designed rather than decorated.

    Your bedroom becomes a serene retreat. The unified texture and color create a cohesive space that’s restful and sophisticated.

    23. Hang a Swing or Hanging Chair Over Your Bed for Unexpected Whimsy

    A hanging chair or swing suspended behind or above your bed adds unexpected whimsy and functionality. It’s a conversation starter and actually useful for lounging.

    Rattan egg chairs run $150–$400 from Wayfair, Article, or IKEA; fabric swings run $100–$250. You’ll need to install a heavy-duty ceiling mount (hire an electrician if you’re unsure about hitting studs—$150–$200). The chair becomes a reading nook, meditation spot, and visual anchor. It works especially well in eclectic, bohemian, or maximalist bedrooms.

    Your bedroom gains unexpected character and function. Visitors always comment on the chair, and you gain a cozy spot for morning coffee or evening reading.

    24. Create a Geometric Headboard Using Tape and Paint

    Painter’s tape and two paint colors can create a graphic geometric headboard—perfect for renters and budget-conscious designers. The effect is modern and surprisingly sophisticated.

    Sketch your pattern lightly on the wall with pencil, then apply painter’s tape along the design lines. Paint one section with your first color (one coat), let dry, then carefully remove that tape and paint the next sections with your second color. Take your time with tape application—crisp lines make the difference. This takes 4–6 hours but costs only $30–$50 in paint and tape. Geometric patterns work best—stripes, triangles, hexagons, or abstract asymmetry.

    Your headboard looks designed and intentional. Guests won’t believe you didn’t hire someone to paint it.

    25. Install a Headboard with Open Shelving for Display and Storage

    A headboard with integrated shelving merges form and function beautifully. It’s perfect for displaying collections, storing bedside necessities, and adding visual interest all at once.

    Order a headboard with built-in shelves from IKEA, Wayfair, or custom makers ($200–$600 depending on size and materials), or DIY by building a simple wooden frame with shelves using 2×4s and shelf brackets. Stock the shelves intentionally: books you actually read, small plants, framed photos, candles, and a few decorative objects. Keep about 60% of the shelf space open for breathing room. The curated collection tells a story about who you are.

    Your bed area becomes both functional and deeply personal. Guests see a curated collection rather than random objects, and you have easy access to everything you need while in bed.

    26. Use Reclaimed Architectural Elements for One-of-a-Kind Character

    Repurposed architectural salvage creates a truly one-of-a-kind headboard that’s impossible to find anywhere else. Every piece has history and character baked in.

    Hunt architectural salvage shops, vintage markets, estate sales, or Facebook Marketplace for doors, gates, wrought iron railings, ornate mantels, or decorative trim ($50–$300 depending on size and materials). Mount securely to wall studs using appropriate hardware. The asymmetry and imperfection are the point—your bedroom becomes a gallery for your finds. This works beautifully in eclectic, maximalist, or bohemian spaces.

    Your headboard becomes a conversation starter with genuine history. It’s proof that thoughtful design comes from imagination, not just buying matching sets.


    Ready to frame your bed in style? Save this post and pick one headboard idea that speaks to you—or try combining two ideas for a hybrid approach. Your bed is too important to be boring, and your bedroom deserves to feel like a retreat that’s entirely you.

  • 25 Cottage Core Nursery Ideas Full of Whimsy & Warmth

    25 Cottage Core Nursery Ideas Full of Whimsy & Warmth

    Introduction

    Creating a cottage core nursery means filling your little one’s room with warmth, whimsy, and the kind of cozy charm that makes you want to linger in the space. It’s about mixing vintage finds with soft textures, natural materials, and just enough playful detail to spark imagination—without going overboard or breaking the bank. If you’re drawn to pastoral prints, hand-me-down furniture, and rooms that feel like they belong in a storybook, you’re in the right place. This guide covers 25 achievable ideas that range from free styling tweaks to thoughtful investment pieces, all designed to help you build a nursery that feels both timeless and deeply personal. Whether you’re starting from scratch or refreshing an existing space, you’ll find concrete solutions that work for renters and homeowners alike.


    1. Layer Soft Textures on the Changing Table

    A changing table doesn’t have to feel clinical—layering different fabrics makes it cozier and more inviting for both you and baby. Start with a quality changing pad, then add a chunky knit throw or quilted blanket draped casually over one edge, and tuck a wicker basket of soft cloths and wipes underneath for easy access.

    You can source a vintage wooden changing table from Facebook Marketplace or estate sales for $40–$120, or repurpose a sturdy dresser with a changing pad on top (under $30 for the pad alone). The throws and blankets can be thrifted or found at Target and West Elm for $25–$80. This setup takes about 10 minutes to arrange once everything’s in place.

    The real benefit? Your changing station becomes a calming focal point that invites you to slow down during diaper changes instead of rushing through them.


    2. Use Vintage Botanical Prints as Wall Art

    Botanical prints capture the cottage core spirit perfectly and give your walls a thoughtful, collected-over-time feel. Mix and match frame styles (wood, painted metal, natural wicker) and sizes to create an eclectic gallery that tells a story rather than looking too polished.

    Hunt for original prints on Etsy ($15–$50 each) or print high-quality reproductions from sites like Minted or Rifle Paper Co. ($8–$25 per print). Frames from IKEA, thrift stores, or antique shops run $5–$30 each. Renter tip: use removable picture-hanging strips so you can take the gallery with you. Arranging takes about an hour but feels like decorating magic once it’s done.

    This approach teaches your child about plants and nature from day one while creating a room that grows with them—the art works just as well for a toddler’s room or an older kid’s bedroom later.


    3. Choose a Wooden Crib Instead of White Metal

    A wooden crib immediately sets a cottage tone and feels warmer than industrial metal frames. Look for simple spindle designs in natural or warm finishes that complement your existing furniture and create visual cohesion in the room.

    Budget-friendly options exist at stores like IKEA ($150–$300) or Wayfair ($200–$500). Higher-end pieces from brands like Restoration Hardware or specialty nursery shops run $600+, but vintage wooden cribs from estate sales or Facebook Marketplace offer character for $80–$250. Check safety certifications before buying used.

    Once your baby graduates to a toddler bed, many wooden cribs convert or can be repurposed as a plant stand or decorative piece in another room—making it a piece you’ll treasure long after the nursery phase ends.


    4. Add Wavy Glass Shelving for Styling

    Wavy or curved glass shelves add playful movement to your walls and give you space to display (and rotate) small cottage core treasures without taking up floor space. The wavy edges feel more organic and less severe than straight shelving.

    Shelves with wavy edges run $20–$50 each from Urban Outfitters, Etsy, or Amazon. Installation takes about 20 minutes if you’re comfortable with a drill; otherwise budget $50–$100 for a handyperson. Use them to display folded linen, small ceramic pieces, dried flowers, or wooden toys that match your palette.

    The beauty here is flexibility—you can refresh the shelves seasonally or as your child grows, keeping the room feeling fresh without major redecoration work.


    5. Hang Gauzy Curtains for Softness and Light Control

    Gauzy, semi-sheer curtains create that quintessential cottage core bedroom feeling while still allowing light to filter through during the day. Layer them with blackout curtains on a second rod for nap time and nighttime sleep.

    Affordable gauze options are available at IKEA ($15–$30 per panel), Target ($20–$40), or Etsy ($30–$60). Blackout curtains run $25–$50 per panel. If your windows don’t have existing rods, a simple wooden or metal rod costs $15–$40. Hanging curtains takes about 30 minutes and no special tools—just a level and a power drill.

    Your nursery transforms instantly with the right lighting, and gauzy layers give you both beauty and function without looking overly designed or trendy.


    6. Display Vintage Children’s Books on Open Shelving

    Cottage core spaces celebrate storytelling and nostalgia, so fill your shelves with a mix of vintage and new children’s books that become both décor and reading material. Hunt for editions with beautiful illustrated covers that double as wall art.

    Thrift stores and library sales offer books for $1–$3 each. Invest in a few special editions from Etsy or independent bookstores ($15–$40) to mix with your budget finds. Open wooden shelving units run $30–$150 depending on size and source. Arranging books artfully takes about an hour but creates an heirloom-quality focal point.

    Your child grows up surrounded by stories and illustration, and visitors immediately sense the thoughtfulness of the space—not to mention you’ve built a library you’ll actually use and love.


    7. Incorporate a Rocking Chair with a Quilted Cushion

    A rocking chair becomes your anchor for nighttime routines and daytime cuddles. Choose wood tones that match your crib and other furniture, and add a quilted or patchwork cushion for that handmade cottage feel.

    Vintage rocking chairs from estate sales or thrift stores run $30–$100; new solid wood options at Wayfair or West Elm cost $150–$400. Custom cushions are pricey ($60–$150), but you can buy or make a quilted throw blanket ($25–$80) to drape instead. Setting up your chair takes 10 minutes and instantly makes night wakings feel more peaceful.

    This one piece transforms your mindset during late-night feedings—you’re no longer just managing a task; you’re settling into a ritual that feels intentional and grounded.


    8. Create a Woven Wall Hanging as a Focal Point

    A statement wall hanging adds handcrafted charm and creates a focal point that draws the eye without being too busy or overstimulating for baby. Choose natural fiber pieces in cream, ivory, or soft greens that echo the cottage core palette.

    Etsy offers stunning woven hangings for $40–$120; HomeGoods and Urban Outfitters carry mid-range options for $35–$80. If you have weaving skills or want to try macramé, DIY kits cost $15–$40 and take a weekend to complete. Hanging takes 15 minutes with a nail and level.

    This textile becomes a conversation piece and a touchstone in the room—something you’ll photograph and remember as part of your baby’s earliest memories.


    9. Use Linen Bedding in Cream or Soft Sage

    High-quality linen breathes beautifully, ages gracefully, and feels authentically cottage core. Cream, ivory, or soft sage greens work best and coordinate with almost any secondary color you choose for the room.

    Target and West Elm offer quality linen sheets for $50–$120 per set. Splurge-worthy options from Parachute or Etsy reach $150–$200, but they last for years through multiple kids. Budget options at IKEA run $25–$40. Quality linen actually improves with washing, so this is money well spent.

    The texture of real linen teaches your child to appreciate natural materials from day one, and the neutral color palette means you can easily swap accent pieces to refresh the room without replacing everything.


    10. Paint an Accent Wall in Soft Sage or Dusty Yellow

    A single accent wall in a soft, muted tone adds color and personality without overwhelming the space. Pale sage, dusty yellow, or soft blush all work beautifully for cottage core rooms and won’t overstimulate a sleeping baby.

    Paint costs $30–$50 per gallon; you’ll likely need one gallon for a nursery. If you’re renting, peel-and-stick wallpaper in similar tones ($25–$60 per roll) offers a no-commitment alternative. Professional painting runs $150–$400, but DIY application takes a Saturday afternoon if you’re comfortable with a roller and tape.

    One accent wall changes the entire room’s energy and creates a natural backdrop for photography and memories—plus, you’ve limited your commitment to just one wall if you want to pivot the design later.


    11. Layer Different Rug Textures for Softness

    Layering rugs adds depth, defines different zones in the nursery, and creates a wonderfully tactile space. Combine natural fiber base layers (jute or sisal) with softer wool or cotton rugs on top for comfort and visual interest.

    A jute rug runs $30–$80 for a 5×7 size; wool rugs cost $60–$150. Mix high and low—thrift a vintage rug for $15–$40 and pair it with an affordable new rug from Wayfair or Target. Layering takes 10 minutes and costs nothing beyond the rugs themselves.

    Walking barefoot in this cozy layering becomes a small daily pleasure, and the softness underfoot makes tummy time more inviting for your baby.


    12. Install Floating Shelves at Different Heights

    Floating shelves (without visible brackets) create a streamlined look while giving you practical storage and display space. Vary the heights and depths to keep things visually interesting without fussy styling.

    Wooden floating shelves from IKEA run $20–$40 each; nicer options from West Elm or Etsy cost $50–$150. Installation takes about 30 minutes per shelf if you’re comfortable with a drill and stud finder; hire help for $50–$100 if needed. Renter tip: look for command-brand adhesive shelves ($15–$30) that come off cleanly.

    This smart storage keeps necessities accessible while keeping the floor clear and the room feeling open—essential in smaller nurseries where floor space is at a premium.


    13. Add Dried Flowers and Greenery in Glass Vases

    Dried botanicals bring life to your space without requiring care, and they capture the cottage core essence perfectly. Vary your vessel types—glass bottles, ceramic pitchers, even vintage milk bottles—for collected charm.

    Dried flowers cost $5–$15 per bunch at farmers markets or Whole Foods; online options run $8–$20 per bundle. Vases from thrift stores run $2–$10 each; splurge on one or two special ceramic pieces for $15–$40. Arranging takes 20 minutes and requires zero maintenance.

    These arrangements become a peaceful focal point that teaches your child to appreciate natural beauty, and dried botanicals last for months without wilting or needing water.


    14. Repurpose Vintage Wooden Boxes for Storage

    Vintage wooden boxes and crates provide beautiful, functional storage that looks intentional rather than cluttered. Stack them, mount them on walls, or group them on the floor to corral supplies while adding visual interest.

    Wooden crates from hardware stores or Etsy cost $10–$30 each. Estate sales and thrift stores often have vintage wooden boxes for $3–$15. You can leave them natural, paint them in soft colors ($5–$15 for paint), or stain them to match your crib ($8–$20). No installation needed if you’re stacking them; wall mounting takes about 30 minutes.

    This approach kills two birds with one stone—you get practical storage and decorative pieces that earn their space in your room’s design.


    15. Hand-Embroider or Commission a Custom Birth Announcement

    A personalized embroidered hoop becomes an heirloom keepsake and adds handcrafted soul to your nursery. Commission an artist on Etsy or learn embroidery yourself for a meditative project during pregnancy or the fourth trimester.

    Commissioned embroidered hoops cost $40–$80 from Etsy artists. DIY embroidery kits and thread run $15–$30, and a hoop costs $5–$10. If you’re new to embroidery, it takes about 5–10 hours over several sessions; if you hire it out, turnaround is typically 1–2 weeks.

    This piece marks your child’s arrival in a permanent, tangible way and becomes something you’ll treasure as they grow and eventually pass down.


    16. Stencil a Simple Pattern onto Wooden Furniture

    Stenciling a simple pattern onto a thrifted dresser or crib elevates it from basic to bespoke. Choose subtle designs—vines, wildflowers, or geometric patterns—in muted colors that complement your palette.

    Stencils cost $5–$15 from craft stores; acrylic paint runs $3–$8 per color. A thrifted dresser to paint costs $20–$60. The project takes 2–4 hours depending on complexity and how many coats you apply. Practice on cardboard first if you’re new to stenciling.

    Your painted piece becomes a conversation starter and shows your child that you put thought and care into their space—something they’ll notice and appreciate as they grow.


    17. Hang a Fabric Canopy Over the Crib

    A fabric canopy transforms your crib into a cozy nest and adds instant whimsy without being fussy. Drape cream, ivory, or soft blush linen or cotton from the ceiling to frame the crib and create a sense of enclosure.

    Sheer fabric by the yard costs $8–$15 at fabric stores; you’ll need about 2–3 yards. Canopy rods or rings run $15–$40 from hardware or craft stores. Installation takes 30 minutes to an hour and requires hooks in the ceiling or a tension rod system. Renter tip: use adhesive ceiling hooks ($10 for a set) that remove cleanly.

    This simple addition becomes a visual anchor in the room and creates a peaceful, protected space for your baby to rest—psychologically powerful for both child and parent.


    18. Decorate with Handmade Ceramic Pieces

    Display handmade ceramics from local artists or craft fairs on shelves and surfaces throughout the room. Each piece tells a story and adds authentic, unrepeatable charm that mass-produced décor can’t match.

    Handmade ceramics at craft fairs or from local artists run $15–$50 per piece. Support small makers on Etsy, where prices range $20–$100 depending on complexity. Budget-friendly options exist at HomeGoods or target stores for $8–$25. No installation needed—just place them where they make you smile.

    These pieces become part of your child’s sensory world and teach them to value handcrafted, imperfect beauty from the very beginning.


    19. Build a Mobile from Natural Materials

    A mobile made from natural materials—wood, felt, dried flowers, and soft string—feels cohesive with cottage core aesthetics and engages your baby without overstimulation. Avoid bright plastics in favor of muted, natural tones.

    DIY mobile kits cost $20–$40 on Etsy; ready-made options run $50–$150. If you’re crafty, you can make one with wood pieces ($10–$20), felt ($5–$10), and string ($3–$8) in about 2–3 hours. Hanging from the ceiling takes 15 minutes with an adhesive hook or ceiling bracket.

    A handmade mobile becomes a conversation starter and a gentle, ever-moving focal point that calms both baby and caregivers during late-night hours.


    20. Use Vintage Wooden Toy Baskets for Organization

    Woven baskets provide open storage that keeps essentials accessible while maintaining the room’s aesthetic. Vintage wooden baskets have more character than plastic storage and integrate seamlessly into your design.

    Thrift store baskets cost $5–$15 each; Etsy artisan baskets run $25–$60. Target and IKEA offer quality woven options for $10–$30. Filling them with rolled linens and toys takes 15 minutes and requires no installation—just placement on shelves or the floor.

    The ease of grabbing what you need without searching through drawers makes late-night changes and diaper emergencies feel less frantic, while visitors see an organized, beautiful space.


    21. Apply Peel-and-Stick Wallpaper to One Wall

    Peel-and-stick wallpaper lets renters and hesitant homeowners add pattern and texture without permanent commitment. Choose vintage florals, subtle botanicals, or gingham patterns in soft, muted palettes.

    Quality peel-and-stick wallpaper runs $25–$60 per roll from Etsy, Spoonflower, or Amazon. One accent wall typically needs 2–3 rolls. Application takes 1–2 hours and requires only a squeegee and sharp knife. Removal leaves no damage when done carefully.

    This update makes the biggest visual impact for minimal effort and cost, and you can swap it out seasonally or when you want a refresh without guilt or damage.


    22. Frame and Display Handwritten Baby Milestone Cards

    Frame handwritten milestone cards to document your baby’s growth in a cottage core way. DIY cards with calligraphy or simple handwriting feel more authentic and memorable than printed versions.

    Blank cardstock costs $5–$10 for a pack; wooden frames from thrift stores or craft stores run $2–$10 each. If you want calligraphy, hire a local artist for $25–$50, or practice the lettering yourself (it’s easier than you think). Displaying takes 20 minutes and costs nearly nothing.

    Over time, these cards become a visual record of your baby’s first year and transform your wall into a deeply personal family archive.


    23. Install a Small Wooden Ladder Shelf for Blanket Display

    A wooden ladder shelf serves double duty as storage and display, showing off beautiful blankets and quilts while keeping them accessible for diaper changes and bedtime. The rustic aesthetic fits perfectly with cottage core design.

    Wooden ladder shelves run $50–$150 from West Elm, Wayfair, or Target. Thrift store finds cost $15–$40. Blankets to drape range from $25–$100 depending on quality and source. Placement takes five minutes—just lean it against the wall.

    This piece becomes a textural focal point and solves the practical problem of where to keep blankets while making them part of your décor rather than hidden in a closet.


    24. Create a Vision Board with Fabric Scraps and Swatches

    A small vision board lets you see how colors and patterns work together and gives you flexibility to adjust your vision as your child grows. Pin fabric swatches, paint samples, magazine cutouts, and inspirational quotes.

    Cork board costs $10–$20; pushpins run $3–$8. Fabric swatches are free or cheap from fabric stores; paint samples from hardware stores are free. Assembling takes 30 minutes and gives you an evolving, personalized piece that represents your design journey.

    This tactile, visible inspiration keeps your design cohesive and reminds you why you chose each piece—helpful when second-guessing design decisions at 3 a.m.


    25. Sew or Commission a Patchwork Crib Quilt

    A patchwork quilt becomes an heirloom that your child can pass to their own kids. Commission from an Etsy artist or make it yourself during pregnancy as a meditative project—each square tells a story.

    Commissioned quilts from artisans cost $150–$400 depending on size and complexity. DIY kits run $30–$60, and fabric scraps from thrift stores cost $10–$20. Making it takes 20–40 hours over several weeks. Professional machine quilting adds $50–$150 if you want that finish.

    This piece evolves from nursery décor to a tangible connection to your love and care—something your child will treasure as a physical reminder of their earliest days.


    26. Add a Small Side Table for Nighttime Essentials

    A small wooden table beside your rocking chair or changing area becomes command central for nighttime—easy access to water, a lamp, wipes, and whatever else you need without stumbling in the dark.

    Thrift store side tables cost $10–$30; new options from IKEA or Target run $40–$100. A simple cloth or lamp costs $15–$50. Setting up takes 10 minutes and makes a shocking difference in your comfort during late-night routines.

    This simple addition transforms your nighttime experience from rushed and stressful to managed and calm—one of the most underrated nursery upgrades possible.


    Pin this post and bookmark it for your next nursery refresh. Start with just one or two ideas that resonate most—you don’t need to do everything at once. Small, thoughtful touches add up to create a room that feels like a storybook, and that’s the whole point.

  • 28 Bedroom Design Styles That Transform Your Home

    28 Bedroom Design Styles That Transform Your Home

    Your bedroom should be the one room where you feel completely at home—a sanctuary that reflects your style and actually supports better sleep and relaxation. Whether you’re renting, working with a small space, or ready to invest in a complete refresh, there are bedroom design styles that fit every budget, aesthetic, and lifestyle.

    This guide walks you through 28 distinct bedroom design approaches, from free styling tricks to investment pieces. You’ll find budget-friendly hacks you can do this weekend, mid-range upgrades that make an instant impact, and aspirational styles that inspire bigger changes. Each idea is actionable, renter-friendly when possible, and designed to help you create a bedroom you actually love waking up in.


    1. Go Bold with Cherry Red Accents

    Cherry red is having a major moment, and you don’t need to paint your entire room to tap into this trend. Instead, use deep cherry tones in one accent wall, bedding, or large furniture piece to create visual impact without overwhelming your space.

    Start by testing the color on sample boards or with temporary wallpaper before committing. A single accent wall behind your headboard costs $30–$80 in paint and takes one weekend. Alternatively, invest in a cherry-velvet headboard ($200–$600) or layer the color through throw pillows and a blanket ($50–$150 total). You can also find cherry-wood nightstands or a statement dresser at thrift stores for $40–$120. The key is repeating the color in at least two other places—perhaps in artwork or a rug—so it feels intentional rather than random.

    This bold choice signals personality and sophistication. Your bedroom instantly becomes a retreat that feels purposeful and curated, not bland or sterile.


    2. Layer Textures for Maximum Coziness

    Texture is what separates a bedroom that looks nice from one that feels amazing. Mixing velvet, linen, high-pile rugs, woven throws, and natural wood creates depth and makes your space feel intentional and lived-in.

    Start with your foundation: organic cotton or linen sheets ($60–$150). Add a velvet or corduroy throw ($40–$100), then layer in at least two different pillow textures—maybe a chunky knit cover paired with a smooth linen one. Include a high-pile or jute rug ($80–$250) and consider a textured wall treatment like mineral plaster ($150–$400 installed) or peel-and-stick textured wallpaper ($30–$60). Mix in wooden furniture with natural grain and one woven basket for storage. The combination should feel rich but never cluttered.

    You’ll notice the difference the moment you walk in—the space feels inviting and sensory-rich, like somewhere you actually want to spend time.


    3. Adopt Grandmillennial Style (Modern Meets Vintage)

    Grandmillennial design merges your grandmother’s vintage charm with modern minimalism—think collected antiques and heirloom pieces paired with clean lines and contemporary art. It’s personal, cozy, and surprisingly accessible.

    Hunt for vintage pieces at thrift stores, Facebook Marketplace, or estate sales ($20–$150 per piece). Mix in one or two statement vintage items—a carved wood headboard, a brass mirror, or an ornate dresser—with modern bedding (white or soft neutrals) and a few contemporary touches like a sleek nightstand or minimalist wall art. Keep your color palette cohesive: choose a base of creams, warm whites, and soft grays, then repeat one vintage color (sage, dusty blue, or terracotta) in textiles. Add botanical prints, old books stacked on nightstands, and quilts or embroidered pillows for authenticity.

    This style tells a visual story and makes your bedroom feel curated and unique. You’re not following a trend—you’re building something that’s entirely yours.


    4. Create a Curved Headboard Focal Point

    A curved headboard is the easiest way to soften your bedroom and create a design anchor point. Curved and organic shapes are dominating 2025 bedroom trends, and a headboard is the perfect place to invest.

    Look for curved headboards in fabric ($150–$400), wood ($200–$600), or upholstered options at IKEA, Wayfair, Article, or West Elm. If you’re renting or want to DIY, you can create a curved headboard using adhesive velvet or linen fabric ($40–$80) applied to plywood or cardboard. Alternatively, hang a large curved mirror or piece of curved wall art for visual interest without furniture. Pair your curved headboard with a simple bed frame (to let the headboard be the star) and minimal nightstands.

    The curve immediately softens the room’s visual energy. Even a small bedroom feels more sophisticated and intentional when anchored by this one strong design choice.


    5. Paint Walls Light to Expand a Small Space

    If your bedroom feels cramped, the wall color matters more than square footage. Light, warm neutrals make rooms feel bigger and more restful—two wins for the bedroom.

    Choose soft whites, warm creams, or pale gray ($20–$40 for quality paint). Avoid stark white, which can feel cold; instead, look for whites with warm undertones (often labeled “ivory,” “cream,” or “warm white”). One gallon typically covers a small bedroom. Paint yourself ($0 labor) or hire pros ($300–$600). You can also test colors with peel-and-stick wallpaper ($15–$30) before committing to paint. Keep trim and doors the same color to maximize the expansive effect.

    Your small bedroom immediately feels airier and more peaceful. Better lighting reflection means you’ll actually spend time there without feeling boxed in.


    6. Add Biophilic Design with Plants and Natural Light

    Biophilic design—bringing nature into your interior—is proven to reduce stress and improve sleep quality. It’s not just about plants; it’s about natural materials, light, and a connection to the outdoors.

    Start with 3–5 low-maintenance plants like pothos, snake plants, or monstera ($10–$30 each). Add natural-fiber baskets for storage ($30–$80), swap synthetic curtains for linen ($50–$150), and incorporate wood furniture or reclaimed-wood accents ($100–$400). Place plants on floating shelves or in the corner to draw the eye upward. Use natural light whenever possible—opt for sheer curtains that filter light rather than block it. Add one or two pieces of nature-inspired wall art to anchor the theme.

    This approach creates a calm, restorative environment that actively supports better sleep and mental clarity. You’ll feel the difference within days.


    7. Install Floating Shelves for Style and Storage

    Floating shelves give you storage without visual weight and work in any bedroom style. They’re affordable, renter-friendly (with removable options), and instantly make your space feel more curated.

    Install shelves 12–18 inches apart at eye level using wall anchors ($40–$80 for three shelves plus installation hardware). Wood shelves in various finishes are available at IKEA ($20–$50 each), Home Depot, or Amazon. Renter option: use no-damage adhesive shelves ($15–$30) that leave no marks. Style them with a mix of books, plants, framed photos, and small decorative objects, keeping each shelf about 60 percent empty so it doesn’t feel cluttered. This layering adds personality without overwhelming the space.

    Suddenly you have a focal point that’s both functional and beautiful. Your bedroom goes from basic to thoughtfully designed in one afternoon.


    8. Invest in Quality Organic Bedding for Better Sleep

    Quality bedding is the one investment in your bedroom that directly affects your sleep—and your sleep affects everything. Organic materials like linen and cotton are breathable, durable, and worth the splurge.

    Organic cotton or linen sheets run $80–$200 (brands like Parachute, Brooklinen, or Boll & Branch). Add an organic cotton quilt or duvet ($150–$300) and organic wool blankets for temperature regulation ($80–$150). Yes, it’s pricier than synthetic options, but these sheets last 5+ years and actually feel better on your skin. Look for certifications like GOTS (Global Organic Textile Standard) or OEKO-TEX to verify authenticity. Mid-range options from Target or Amazon start around $40–$60 for decent organic basics.

    You’ll fall asleep faster and wake up more refreshed. The texture difference is real, and your skin will thank you.


    9. Design a Work Nook in Your Bedroom

    If your bedroom doubles as a workspace, creating a visual boundary between sleep and work zones helps your brain shift gears. A small, thoughtfully designed work nook keeps you productive without sacrificing the room’s tranquil vibe.

    Choose a corner away from your bed (if possible) and add a slim desk ($80–$250), a comfortable chair ($100–$300), and a small area rug underneath to define the zone ($40–$100). Use a floating shelf or wall-mounted storage ($30–$80) to keep supplies out of sight. Add task lighting ($20–$60) separate from bedroom ambient lighting. Use a room divider, curtain, or tall plant to physically separate the zones if space allows. Keep the work area minimal—a pen holder, desk pad, and one small plant only.

    You’ll find it easier to focus during work hours and to actually relax when you’re off the clock. The visual separation matters more than the physical distance.


    10. Hang Statement Wallpaper on One Accent Wall

    Wallpaper is back, and you don’t need to cover every wall. One bold, patterned accent wall behind your bed creates personality and visual interest without the commitment or cost of full coverage.

    Peel-and-stick wallpaper runs $30–$80 per roll and is renter-approved (removable). Traditional wallpaper costs $40–$150 per roll plus installation ($200–$500). Choose florals, geometric patterns, or vintage-inspired prints that complement your color scheme. Measure your wall carefully and order slightly more than you think you’ll need. Apply to a smooth, clean wall surface (or hire a pro for best results). Keep other walls neutral so the pattern stays the focal point rather than overwhelming the space.

    One patterned wall transforms your bedroom from generic to distinctive. It’s a bold choice that absolutely works—especially when everything else stays calm and minimal.


    11. Swap Sharp Furniture for Rounded Silhouettes

    Minimalism is softening. Angular, sharp furniture is being replaced by curved and rounded shapes that feel more welcoming and visually gentle. This shift affects everything from headboards to nightstands to mirrors.

    Look for rounded dressers ($300–$800), curved nightstands ($150–$400), and circular or arched mirrors ($60–$200) at Article, Wayfair, or mid-century modern shops. Round off your space with curved shelving units ($200–$500) or a round side table ($80–$150). Even simple swaps matter—replace sharp-edged wall art with arched frames or add a rounded pouf ($40–$100). The cumulative effect of multiple curved pieces creates a cohesive, softened aesthetic.

    This furniture style makes your bedroom feel warmer and more approachable. The organic lines create visual flow and a sense of calm that sharp angles simply can’t match.


    12. Layer Deep Jewel Tones Using the Three-Point Rule

    Deep jewel tones—forest green, aubergine, navy, or midnight blue—are having a major moment. The secret to pulling off bold color without it feeling overwhelming is the three-point rule: repeat your chosen color in at least three distinct places.

    Choose one jewel tone and repeat it in: (1) a wall or large furniture piece ($0–$400), (2) bedding like a duvet or throw ($60–$150), and (3) a smaller accent like a pillow, artwork, or rug ($20–$100). This creates visual harmony and makes the color feel intentional rather than accidental. Keep the rest of your palette neutral—creams, warm whites, or soft grays—so the jewel tone is the star. Use samples or temporary wallpaper ($15–$30) to test before committing.

    Your bedroom becomes a sophisticated jewel box. The repeating color ties the room together and signals thoughtful design choices.


    13. Use Textured Walls to Add Depth

    Smooth drywall is fine, but textured finishes add tactile interest and hide imperfections. Textured walls have moved beyond popcorn ceilings and now include sophisticated options like mineral plaster, limewash, and specialty finishes.

    Mineral plaster ($150–$400 installed, or $50–$100 DIY) creates an organic, spa-like feel. Textured peel-and-stick wallpaper ($30–$80) mimics the look without commitment. Limewash ($100–$300 installed) offers a matte, earthy aesthetic. If you’re handy, you can apply texture yourself using troweling techniques or add a textured primer. Start with one accent wall behind your bed to test the effect before expanding.

    The subtle texture makes your walls feel alive and sophisticated. Lighting plays off the surface, creating depth and visual interest that flat paint simply can’t provide.


    14. Create Ambient Lighting Layers

    Bedroom lighting matters more than most people realize. Layered lighting with dimmers, bedside lamps, and ambient fixtures helps you set the mood and supports better sleep.

    Install a dimmer switch ($20–$60) on your overhead light so you can adjust brightness. Add two bedside lamps ($30–$100 each) with warm bulbs (2700K color temperature). Include ambient lighting like LED strip lights behind shelves ($20–$40) or a statement floor lamp ($80–$200). Use warm white bulbs throughout, never cool white or harsh LED. Position lights so they create pools of warm glow rather than flat, all-over brightness. This combination takes 15 minutes to set up but dramatically changes how the room feels, especially after dark.

    You’ll fall asleep easier and wake more gently. The warm, layered light actively supports better sleep and makes your bedroom feel like a sanctuary even on stressful days.


    15. Mix Vintage Art Deco with Modern Bedding

    Art Deco is resurging in 2025, and mixing it with modern pieces creates a visually interesting, curated aesthetic. The key is balance—let one bold vintage piece anchor the room, then keep everything else simple.

    Invest in one statement Art Deco piece: a patterned headboard, a geometric mirror with brass framing ($80–$200), or a geometric wall art print ($30–$80). Pair it with contemporary bedding in neutrals—crisp white sheets, a soft gray duvet, minimal pillows. Add one or two brass or gold accents (a lamp, mirror frame, or drawer pulls) to tie the Art Deco element together. Keep walls and other furniture minimal and modern so the vintage piece stands out as intentional rather than cluttered.

    This layering creates visual interest and shows your design sensibility. Your bedroom looks collected and thoughtful rather than matchy or boring.


    16. Build a Gallery Wall Above Your Bed

    A gallery wall above your bed is an instant personality injection. It’s affordable, renter-friendly, and completely customizable to your aesthetic.

    Start by collecting 6–12 frames ($8–$25 each from IKEA, Target, or thrift stores) and choosing artwork—prints from Etsy ($5–$30), thrifted art, your own photography, or posters. Plan your layout on the floor first, then use painter’s tape on the wall to map placement before hanging. Use command strips ($1–$5) for renter-friendly hanging. Mix frame colors and sizes for visual interest—black, white, wood, and brass tones all work together. Vary your artwork: include abstract, photography, typography, and botanical prints for diversity.

    Your bedroom instantly transforms from blank walls to a curated space that tells your story. This one project might be the most visible change you make.


    17. Add a Statement Dresser for Storage and Style

    A beautiful dresser serves double duty: it’s essential storage and a design anchor. Choosing the right one instantly elevates your entire bedroom.

    Look for dressers with interesting details: curved edges ($400–$800), interesting wood grain or finishes ($300–$700), or brass/gold hardware ($200–$600). IKEA offers budget options ($100–$300), while Wayfair, Article, and Facebook Marketplace have mid-range and vintage finds ($150–$500). Mix thrifted dressers ($50–$200) with fresh hardware for a custom look. Style the top with a mirror, table lamp, and 3–5 decorative objects (avoid clutter). Place it where it becomes a focal point—opposite the bed or anchoring one wall.

    Your dresser becomes more than storage—it’s a design statement. This one piece often determines whether your bedroom feels intentional or haphazard.


    18. Layer Your Bedding for Better Sleep and Looks

    Layered bedding looks luxe and actually improves sleep by letting you adjust warmth throughout the night. This is one of those ideas that’s simple but makes a real difference.

    Start with quality sheets ($60–$150), add a fitted duvet ($100–$250), then layer in a cotton throw blanket ($40–$100). Include 2–3 decorative pillows in varied textures ($20–$60 each). Use white, cream, or soft grays as your base, then add one color or pattern through the throw or pillows. The key is leaving the throw slightly rumpled at the foot of the bed—it should look lived-in, not stiff. This takes 5 minutes to arrange but photographs beautifully and feels intentional.

    You’ll sleep better and your bed becomes an inviting focal point. The layering creates visual richness and practical comfort in one move.


    19. Install a Fabric Headboard for Softness

    An upholstered headboard softens your bedroom instantly and adds luxury that feels achievable. Unlike hard wood or metal, fabric feels inviting and works in almost any style.

    Upholstered headboards range from $150–$600 depending on size and material. Linen is soft and casual ($200–$400), while velvet is more luxe ($250–$500). DIY option: cover a piece of plywood with fabric, add padding underneath ($100–$200 total). Mount it directly to the wall using French cleats ($20–$40). Choose a neutral like cream, gray, or soft taupe for versatility, or go bold with a jewel tone. Pair with minimal bed frame styling to let the headboard shine.

    The moment you lean against a soft headboard, your bedroom feels spa-like and intentional. It’s a small luxury that changes how you experience your space.


    20. Create a Vintage-Sourced Nightstand Pairing

    Matching nightstands are predictable. Mixing two vintage pieces in different styles, woods, and finishes creates visual interest and tells a personal story.

    Hunt for nightstands at thrift stores ($20–$60 each), Facebook Marketplace ($30–$80), or estate sales ($25–$100). Look for pieces in different woods (one oak, one walnut, for example) or different heights. Refinish or paint if needed ($0–$100 in supplies). The mismatch should feel intentional, so stick to a cohesive color palette—both in warm tones, or both with brass hardware, for example. Add matching lamps ($30–$80 each) to tie them together visually.

    This approach creates a collected, thoughtful aesthetic that reads as design-forward rather than accidental. Your nightstands become conversation pieces instead of just functional pieces.


    21. Use Curved Mirrors to Reflect Light and Soften Angles

    Mirrors serve two purposes: they make spaces feel bigger and more open, and curved frames follow the 2025 trend toward organic shapes. A large curved mirror is an investment that pays dividends.

    Arched or circular mirrors range from $80–$300 depending on size and material. Position it opposite a window to reflect natural light and maximize the expansive effect. A 36–48 inch mirror works for most bedrooms. Brass frames feel luxe ($150–$250), while wood frames feel warmer ($100–$200). Budget option: a simple circular mirror from IKEA or Target ($40–$80). Hang it at eye level above a dresser, console, or against a feature wall.

    Your bedroom immediately feels brighter and larger. The curved shape adds softness while the reflective surface opens up the space.


    22. Swap Heavy Curtains for Sheer Linen

    Heavy blackout curtains are practical for sleep, but they make bedrooms feel dark and cave-like during the day. Sheer linen allows light while maintaining privacy and creates a softer, more open feeling.

    Linen curtains in cream or soft white run $50–$150 per panel from Etsy, Parachute, or Amazon. Install a curtain rod ($30–$60) and hang panels on either side of your window. If you need blackout privacy, layer sheer linen with a lightweight roman shade ($40–$100) behind it. The combination lets you control light while keeping the daytime aesthetic airy. Linen wrinkles slightly, which adds to the relaxed, intentional vibe.

    Your bedroom feels fresher and more open. The natural light filtering through soft fabric changes the entire mood of the space without sacrificing privacy.


    23. Add a Woven Wall Hanging or Macramé Accent

    Textile wall hangings add bohemian warmth without demanding too much visual attention. A single large piece feels more intentional than a gallery of smaller items.

    Woven wall hangings range from $40–$200 depending on size and complexity. Macramé pieces ($30–$150) add a handmade feel. Look on Etsy, Anthropologie, or local artisan markets for one-of-a-kind pieces. Choose neutral tones like cream, tan, or soft gray to blend with most bedrooms. Position above a dresser, nightstand, or as a focal point behind your bed. Pair with one or two smaller pieces if you want layering, but keep it minimal.

    This textile adds warmth and visual interest without screaming for attention. It signals that you care about your space while maintaining the calm, restful vibe a bedroom requires.


    24. Design a Dressing Nook with Open Shelving

    If you have a corner or wall space, a dressing nook with open shelving turns storage into a design feature. It works especially well in small bedrooms where a full closet isn’t feasible.

    Install 3–4 floating shelves ($80–$200 installed) at varying heights. Keep to a strict color palette—fold clothes neatly in similar tones (whites, creams, grays, blacks). Store shoes on lower shelves and smaller items in woven baskets ($15–$40 each) on upper shelves. Add a simple mirror ($40–$100) and task lighting ($25–$60) for functionality. This works best if you naturally gravitate toward minimalist wardrobes, as open storage only works when it’s tidy.

    You create dedicated, curated storage that actually looks like part of your design rather than cluttered. Every item visible is one you genuinely use and love.


    25. Invest in a Quality Bedside Table Lamp

    A good bedside lamp is one of the easiest ways to improve your bedroom’s nighttime vibe. Quality lighting matters more than most people realize for both aesthetics and sleep quality.

    Bedside lamps start at $30–$60 for basic options, but investing $80–$150 gets you better design and functionality. Look for warm brass finishes, ceramic bases, or sculptural shapes that complement your aesthetic. Choose linen shades ($20–$50) over plastic, and make sure the bulb is warm white (2700K). Position lamps on both sides of your bed if possible—this creates balanced, cozy light and eliminates harsh shadows. Pair with a simple nightstand ($80–$150) styled with 2–3 small objects only.

    Your nighttime routine becomes more pleasant immediately. Warm, gentle bedside lighting actually supports better sleep while making your bedroom feel like a luxury hotel.


    26. Layer Rugs to Define Zones and Add Warmth

    Layering rugs (yes, really) adds depth, defines zones in open-concept bedrooms, and creates visual interest. It’s an unexpected design trick that actually works beautifully.

    Start with a large base rug ($80–$300) in a neutral tone—jute, sisal, or light gray. Layer a smaller patterned or textured rug ($40–$150) on top, offset slightly for an intentional look. This works best in rooms where you want to define the bed area without furniture walls. Choose rugs in complementary colors or let one pattern and one neutral balance each other. This setup takes 10 minutes but makes your bedroom feel more designed and intentional.

    The layered approach creates visual depth and makes small bedrooms feel more defined. It’s a design-forward choice that adds sophistication without major expense or effort.


    27. Install Floating Nightstands for Small Spaces

    Floating nightstands save floor space and make tiny bedrooms feel larger. They’re renter-friendly (removable options exist) and work in minimalist, modern, or transitional styles.

    Wall-mounted nightstands cost $60–$200 from Wayfair, IKEA, or specialty retailers. Installation requires studs or heavy-duty wall anchors ($20–$40). Renter option: command-strip mounted shelves ($15–$30) do the job temporarily. Keep floating nightstands minimal—a lamp, small plant, and maybe a book. The sparse styling keeps the space from feeling cluttered and maintains the open, airy vibe. Paint them the same color as your wall ($0 if already painted) or choose a contrasting finish for visual pop.

    Your tiny bedroom suddenly feels less cramped. Without nightstand legs taking up floor space, the room breathes and feels larger than it actually is.


    28. Curate a Secondhand Bedroom for Style and Sustainability

    Building your bedroom from thrifted and secondhand pieces is budget-friendly, sustainable, and results in a truly unique space that reflects your personality rather than a design catalog.

    Hunt thrift stores, Facebook Marketplace, estate sales, and local vintage shops for unique pieces. Aim for 60–70 percent of major furniture from secondhand sources ($200–$600 total if patient and selective). Choose one or two investment pieces—a beautiful wooden dresser or vintage mirror—and fill in with smaller items. Keep a cohesive color palette so pieces feel intentional rather than random. Refinish or repaint pieces if needed ($20–$100 in supplies and time). This approach takes longer but results in a one-of-a-kind space and costs 40–50 percent less than buying new.

    Your bedroom becomes a true reflection of your taste and values. Every piece has history and character, and you’re creating something beautiful while supporting sustainability.


    Save this post for your next bedroom refresh. Pick one idea this weekend—even a small change like better lighting or a new pillow arrangement makes a tangible difference. Which style speaks to you?

  • 26 Canopy Bed Aesthetic Ideas That Feel Magical & Elegant

    26 Canopy Bed Aesthetic Ideas That Feel Magical & Elegant

    There’s something undeniably magical about a canopy bed—it instantly transforms a bedroom into a personal retreat that feels both elegant and cozy. Whether you’re working with a dramatic four-poster frame or a minimalist modern design, a canopy can anchor your entire room’s aesthetic and create the sanctuary you’ve always wanted. The beauty is that you don’t need a huge budget or design experience to make it work. From flowing fabrics and mood lighting to unexpected color choices and layered textures, there are countless ways to style a canopy that feels uniquely yours. In this guide, you’ll discover 26 distinct ideas to elevate your canopy bed—including free styling hacks, budget-friendly upgrades, and investment pieces that’ll last for years. Whether you’re a renter or homeowner, beginner or seasoned decorator, you’ll find options that fit your space, style, and wallet.

    1. Layer Sheer Curtains for Dreamy Softness

    Layering sheer curtains creates depth and an ethereal quality that makes your canopy feel like it belongs in a luxury hotel. This approach uses volume and translucence instead of heavy fabric, which keeps the space feeling open and airy while still delivering that wrapped-in-luxury sensation.

    Start by hanging a base layer of lightweight curtains from your canopy frame using tension rods or curtain rings (avoid attaching directly to wood if you’re renting). Add a second layer in a complementary neutral shade, slightly offset for visual interest. The total cost runs $40–$150 depending on fabric quality, and you can find affordable sheer panels at Target, IKEA, or Amazon. Installation takes about 30 minutes with basic supplies. The layered effect softens hard lines and bounces light beautifully, especially if your bedroom gets morning sun.

    Pro tip: Use different fabric weights—a crisp linen layer paired with a gauzy voile creates unexpected textural contrast that photographs beautifully.

    This layering approach gives you flexibility to adjust privacy while maintaining that dreamy, open-concept feel that makes your bedroom feel bigger than it is.

    2. Paint Walls a Rich Earth Tone Behind the Frame

    Choosing a statement wall color directly behind your canopy creates instant architectural impact without overwhelming the entire room. Rich earth tones—terracotta, warm taupe, muted olive, or deep clay—ground a canopy and make it feel intentional rather than just furniture.

    Pick one wall directly behind your bed and commit. Paint costs $20–$60 depending on whether you DIY (rent a paint sprayer for $30 from Home Depot) or hire help. If you’re renting, peel-and-stick wallpaper in earth tones works equally well for $25–$80. Application takes 2–4 hours for a single wall. The color acts as a backdrop that makes your bed a focal point while complementing natural textiles and wood tones.

    Budget hack: Test the color first with large paint chips taped to the wall for 3 days; lighting changes how it’ll look before you commit.

    A rich backdrop transforms your canopy from bedroom furniture into a design anchor, making the entire room feel more curated and intentional.

    3. Add Floating Shelves Inside the Canopy Frame

    Converting your canopy’s interior space into functional floating shelves combines storage with style and creates a bookshelf-meets-bed vibe that’s both practical and Instagram-worthy. This works best with modern or minimalist canopy frames where you can mount shelves to existing posts or frame supports.

    Measure the interior dimensions of your canopy, then purchase slim floating shelves (6–12 inches deep) from IKEA, Wayfair, or Home Depot. Cost: $60–$200 for a set of 3–4 shelves plus mounting hardware. Installation requires a drill and level, taking about 1.5 hours; hire a handyperson for $50–$100 if you prefer. Fill shelves with small plants, meaningful books, vintage finds, and mood lighting to create a personal gallery above your bed.

    Pro tip: Alternate the height of items (tall plant, flat book, small object, candle) to avoid a cluttered look.

    You’ll gain storage space while creating a cocoon effect that makes bedtime feel like entering a cozy library.

    4. String Café Lights Along the Canopy Frame

    Café lights (bistro string lights) instantly add warmth and a romantic ambiance without requiring a redesign. They’re one of the quickest, cheapest ways to make a canopy feel magical and work with nearly any bedroom style.

    Drape warm white café lights (avoid cool white) along your canopy’s top frame and down the interior edges. String lights cost $20–$60 from Target, Amazon, or Home Depot. They’re renter-friendly if you use adhesive hooks or sticky clips instead of drilling. Hanging takes 15–20 minutes. Make sure you have a nearby outlet or use battery-operated lights ($30–$40) to avoid running extension cords. Adjust brightness settings to shift the mood from energizing to cozy.

    Safety note: Check light specifications to ensure they don’t overheat fabric, and never leave them on unattended overnight.

    The warm glow instantly transforms your bedroom into a cozy retreat that feels both intimate and sophisticated.

    5. Mix Textured Throws and Layered Blankets

    Layering throws with different textures creates visual interest while making your bed irresistibly touchable and cozy. This approach embraces the “grandmillennial” aesthetic of mixing handmade and vintage pieces with modern comfort.

    Start with a neutral base layer (cotton or linen), then add 2–3 accent throws in contrasting textures: chunky knit, faux fur, quilted linen, or woven wool. Cost: $30–$150 depending on material quality; thrifted options at Goodwill, Facebook Marketplace, or estate sales cost $5–$30 each. Drape throws casually across the foot of the bed and one side, then tuck a pillow here and there for an effortlessly styled look. This takes 10 minutes to arrange and rearrange as you like.

    Budget hack: Mix one luxury piece (like a wool throw from Woolroom, $80–$120) with affordable knits from Target to balance cost and quality.

    The result is a bed that looks magazine-worthy while feeling deeply personal and inviting to curl up in.

    6. Hang Macramé or Woven Tapestry from the Top

    A macramé or woven tapestry hung from the center of your canopy frame adds bohemian elegance without requiring fabric draping. This approach works especially well if you prefer a cleaner, less-draped aesthetic while still maximizing visual impact.

    Source a large macramé hanging or woven textile ($25–$100 from Urban Outfitters, Etsy, or World Market). Measure the center point of your canopy’s top frame and use a simple hook or loop attachment to suspend the piece. Installation takes 10 minutes. Ensure the hanging doesn’t block airflow or feel cramped; it should float about 12–18 inches below the frame. Layer minimal bedding beneath it to let the tapestry be the star.

    Thrifty alternative: Vintage woven wall hangings from Facebook Marketplace or thrift stores often cost $10–$30 and carry more character than new pieces.

    This single element transforms your canopy into a design-forward anchor that says you have a cohesive vision for your space.

    7. Create a Tufted Canopy Headboard

    A tufted upholstered headboard built into or attached to your canopy frame elevates the entire structure from simple bed frame to statement furniture piece. The deep button detailing creates texture and luxury that instantly upgrades your bedroom’s aesthetic.

    You can either commission a custom piece ($400–$1,200 from local upholsterers or Etsy makers) or purchase a pre-made tufted headboard from Wayfair, Article, or CB2 ($300–$600) and mount it to existing canopy posts. DIY option: cover plywood with upholstered fabric using a staple gun and add buttons yourself for $150–$300 in materials and 6–8 hours of work. Alternatively, hire an upholsterer to customize your existing headboard for $200–$500.

    Budget-friendly: Use peel-and-stick wallpaper with a tufted pattern for $40–$80 on the back of an existing headboard for a tufted effect without the real craftsmanship cost.

    A tufted backdrop instantly communicates that your bedroom is a priority and a place meant for rest and comfort.

    8. Install Dimmer Switches for Mood Control

    Dimmer switches are often overlooked but game-changing for creating a magical bedroom atmosphere. They let you adjust lighting from energizing morning brightness to intimate evening glow without changing bulbs or fixtures.

    If your bedroom has a ceiling light controlled by a standard switch, install a dimmer switch for $15–$40 and about 30 minutes of work (or hire an electrician for $75–$150 if wiring intimidates you). Pair this with LED bulbs that are dimmable-compatible ($5–$15 each from Home Depot) for smooth adjustments. Renters can use plug-in dimmer adapters ($20–$30) for table lamps instead. Program dimmers to your preferred levels: 100% for cleaning/getting ready, 50% for working from bed, and 20% for winding down.

    Tip: Amber or warm-white bulbs (2700K color temperature) feel more soothing than cool white when dimmed.

    The ability to adjust light shifts your entire bedroom’s energy and makes it instantly feel more like a designed space rather than just a room.

    9. Layer Organic Bedding Materials for Better Sleep

    High-quality organic bedding isn’t just luxurious—it actually impacts sleep quality by regulating temperature and reducing skin irritation. Natural materials like linen, wool, and organic cotton breathe better than synthetic blends and develop a soft patina over time.

    Invest in organic bedding gradually: start with sheets ($80–$150 for quality linen from Parachute, Brooklinen, or Woolroom), then add an organic cotton duvet cover ($100–$180), then upgrade to a wool blanket for layering ($120–$200). Thrifted vintage quilts and linen sheets ($10–$40 from estate sales) offer character while being budget-friendly. Wash bedding weekly to maintain softness; this entire setup takes time to acquire but lasts 5–10+ years.

    Budget option: Start with one quality set of organic cotton sheets ($50–$80) and layer with affordable throws until you can add premium pieces.

    Your bed becomes a wellness sanctuary that you’ll actually want to spend time in, and better sleep follows naturally.

    10. Use a Canopy as a Statement Headboard Alternative

    Sometimes the frame itself is the statement. A modern, unfitted canopy creates architectural interest and draws the eye without requiring heavy textile work. This approach suits minimalist, mid-century modern, or industrial aesthetics.

    Choose a canopy frame in natural wood, black metal, or mixed materials from Article, CB2, IKEA, or West Elm ($400–$1,200). Leave it bare or add minimal accessories like small pendant lights at the corners. The frame acts as sculptural headboard alternative, perfect if you have high ceilings or want to showcase wall color or art. Setup takes a full day if assembling from scratch; professional assembly costs $100–$200.

    Renter hack: Look for adjustable canopy frames that don’t require wall anchoring, using floor-to-frame tension instead.

    A bare or minimally dressed canopy frame brings architectural sophistication without feeling overdone.

    11. Add Pendant Lights at Canopy Corners

    Hanging small pendant lights at each corner of your canopy creates functional ambient lighting while adding sculptural interest. This approach is both practical for reading and atmospheric for winding down.

    Install small pendant lights or globe lights ($15–$40 each from IKEA, West Elm, or Etsy) at each canopy corner using simple hooks and chain. Wire them to a central dimmer or separate switch if possible, or use plug-in pendant lights ($25–$50 each) with cord covers for a cleaner look. Professional electrical installation runs $150–$300; DIY takes 2–4 hours if you’re comfortable with basic wiring. Total investment: $100–$300 for fixtures plus installation.

    Budget option: Use clip-on reading lights ($10–$20 each) on canopy posts for a renter-friendly solution.

    Corner lighting eliminates harsh overhead fixtures while making your canopy feel like a personal retreat with its own ambient atmosphere.

    12. Drape Vintage Quilts as a Fabric Canopy

    Vintage quilts bring handmade authenticity and storytelling to your canopy while offering an affordable alternative to buying new fabric. Each quilt carries history and character that new textiles simply can’t replicate.

    Hunt for vintage quilts at estate sales, Facebook Marketplace, Etsy, or thrift stores for $15–$80 each depending on condition and size. You’ll typically need 2–4 quilts to adequately drape a full canopy frame. Drape them loosely rather than securing tightly; the casual arrangement feels intentional and allows for easy repositioning. This approach takes 20–30 minutes to style and restyle. Vintage quilts add instant warmth and make your bed feel like a family heirloom rather than store-bought furniture.

    Quality check: Look for quilts with sturdy stitching and minimal stains; small imperfections add character, but structural damage affects durability.

    Your canopy becomes a showcase for textiles with actual history, creating a bedroom that tells your personal story.

    13. Paint or Stain the Canopy Frame a Bold Color

    Painting your canopy frame a bold, saturated color makes it an undeniable design focal point without requiring any fabric work. This approach embraces the 2025 trend of intentional statement colors in unexpected places.

    Choose a deep, rich tone—forest green, warm charcoal, deep aubergine, or terracotta—that complements your overall palette. Use quality wood paint or stain ($15–$40) applied with a brush or roller; preparation (sanding, priming) takes 4–6 hours, and drying requires 24 hours between coats. Rent the canopy bed slightly so you can work, or remove it if possible. If you’re renting, skip this; it’s a commitment. The payoff is a completely transformed bed that costs just paint and time.

    Pro tip: Test the color on a small section first; lighting changes how dark tones read in your specific room.

    A bold frame color elevates your canopy from standard bedroom furniture to an intentional design statement that commands the room.

    14. Create a Reading Nook Inside with Cushions

    Transform your canopy’s interior space into a reading sanctuary by filling it with plush cushions, a small lamp, and minimal furniture. This approach maximizes comfort while creating a defined escape within your bedroom.

    Gather cushions in coordinating neutral tones and varied sizes ($5–$25 each from Target, IKEA, or thrift stores) and layer them inside your canopy to create a nest-like seating area. Add a small plug-in reading lamp ($25–$60) clipped or mounted to the frame. Keep books, tea, and a small side table just outside the canopy to maintain the intimate feel. This setup costs $80–$150 and takes 1 hour to arrange. It works especially well if your canopy has a high frame that allows room to sit upright comfortably.

    Tip: Use washable cushion covers so you can freshen them without replacing the pillows themselves.

    You’ll create a bedroom within your bedroom—a personal retreat perfect for reading, journaling, or simply decompressing from the day.

    15. Mix Metallic Accents with Organic Textures

    Pairing metallic accents (brass, copper, gold) with raw, organic textures creates a balanced aesthetic that feels both modern and grounded. This contrast is at the heart of the 2025 “organic modernism” trend.

    If your canopy frame is wood, add metallic elements through hanging fixtures (brass pendant lights, $30–$80), frame hardware upgrades (brass corner brackets, $20–$50), or styling accessories (brass bookends, candlestick holders, $15–$40 each from West Elm, CB2, or Etsy). Pair these with natural textiles (linen, wool, cotton) and raw wood tones. This approach costs as much or as little as you want to spend and works with any budget since you’re layering accents over existing pieces.

    Budget option: Thrift brass and copper decor ($2–$10 each) and place strategically on nightstands and shelves.

    The interplay between cool metallics and warm organics makes your canopy feel sophisticated and intentionally curated.

    16. Install a Canopy Tent for Renters

    If you’re renting and can’t commit to a permanent canopy frame, a freestanding canopy tent creates the aesthetic without landlord drama. These collapse easily when you move and work in any bedroom size.

    Purchase a freestanding canopy tent bed ($200–$500 from Amazon, Wayfair, or Overstock) in styles ranging from minimalist metal frames to complete fabric tents. Assembly takes 2–4 hours with minimal tools; no drilling required. They’re fully portable and pack into a large storage bag for moves. Quality varies, so read reviews carefully. Once set up, drape with your own fabrics, add string lights, and style exactly as you would a permanent frame.

    Pro tip: Measure your bedroom doorway before ordering to ensure the packaged tent fits through.

    You get all the magic and personality of a canopy bed with the flexibility that rental life requires.

    17. Layer Textured Wallpaper Inside the Canopy

    Wallpapering just the visible interior of your canopy creates a surprise design detail that you see every morning and evening. This approach adds personality without overwhelming your entire room.

    Choose a textured wallpaper—grasscloth, embossed geometric, or subtle patterned—in a neutral or coordinating color. Peel-and-stick wallpaper ($25–$60 per roll from Spoonflower, Etsy, or Amazon) works best for renters and easy removal. You’ll need 2–3 rolls depending on your canopy size. Application takes 3–4 hours and requires a clean, smooth surface. If you own your home, traditional wallpaper ($20–$50 per roll) offers more options and durability, with professional installation costing $100–$200.

    Budget hack: Paint the interior with a coordinating color using peel-and-stick primer ($15–$30) to avoid permanent marks.

    Every time you look up in bed, you see intentional design detail that makes your canopy feel custom-built for you.

    18. Add a Under-Bed Storage System for Organization

    A well-organized under-bed storage system keeps your bedroom clutter-free while maximizing every inch of your canopy space. This practical approach is especially valuable in smaller bedrooms.

    Install low-profile storage drawers, bins, or a platform bed with built-in drawers ($200–$600 from IKEA, Wayfair, or Amazon) or add rolling under-bed storage containers ($20–$60 each). Label everything clearly and store off-season bedding, extra pillows, or rarely-used items. This keeps your bedroom looking serene and calming—a key element of sanctuary design. Setup takes 1–2 hours depending on your system; some options require no assembly at all.

    Renter-friendly: Use fabric under-bed storage containers ($15–$30 each) with no installation required.

    Organized storage means a clutter-free floor and visual calm, making your canopy feel like a true retreat rather than a storage closet.

    19. Incorporate Biophilic Elements: Plants and Natural Light

    Bringing plants and natural light into your canopy’s vicinity creates a biophilic design that connects you to nature and improves wellbeing. Plants and sunlight reduce stress and make bedtime feel more restorative.

    Position your canopy near a window if possible to maximize natural light. Add small potted plants—pothos, snake plants, or peperomia—on floating shelves, nightstands, or hanging planters ($5–$25 each from IKEA, Home Depot, or local garden centers). Total plant investment: $30–$100 for 4–6 small plants. Ensure plants get appropriate light for their species and water them weekly. If your room lacks natural light, add a full-spectrum grow light ($30–$60) near plants to support both plant health and your circadian rhythm.

    Low-maintenance option: Invest in high-quality faux plants ($10–$30 each) if you travel frequently or forget to water.

    The presence of greenery creates a calm, grounded atmosphere that makes your canopy feel like a sanctuary rather than just furniture.

    20. Use Statement Art Above or Inside the Frame

    A significant piece of art hung above or behind your canopy becomes the visual anchor for your entire bedroom. This approach lets you express personal style while grounding the design.

    Commission or purchase a large art print, original painting, or textile artwork ($50–$500+ depending on artist and medium) from Etsy, local galleries, or online platforms like Minted. Hang it centered on the wall directly behind your canopy’s frame so it’s visible when you’re in bed or entering the room. The art should measure at least 24×36 inches to have impact in a bedroom. Frame it ($40–$150 for framing) or leave it unframed for a modern look. This becomes the conversation starter and personality injection your space needs.

    Budget option: Print an oversized digital art piece ($10–$30) at a local print shop and frame it yourself using Ikea frame sets ($20–$50).

    Art-led design instantly communicates that your bedroom is curated and reflects your taste, making the entire space feel more intentional.

    21. Create Contrast with a Dark Canopy and Light Bedding

    Playing with contrast—a dark canopy frame against pale, luminous bedding—creates visual sophistication and makes your bed pop as the room’s focal point. This approach feels modern and intentional.

    Choose bedding in white, cream, or pale gray (organic cotton, linen, or cotton blend; $80–$200 from Parachute, Brooklinen, or Target) and pair it with a dark-toned canopy frame in black, deep charcoal, navy, or forest green. The contrast creates definition and makes both elements feel more impactful. If your frame is already dark, introduce pale bedding; if your frame is light wood, add dark bedding. This costs just the investment in quality bedding since you’re working with what you have.

    Pro tip: Add one accent pillow in a third color (rust, sage, or warm gray) to bridge the contrast without muddying it.

    The high contrast between frame and bedding creates a design moment that feels gallery-quality and deeply intentional.

    22. Accessorize with Vintage Nightstands and Styling

    Flanking your canopy with vintage or secondhand nightstands adds character while supporting the nostalgic elements that make a canopy feel magical. Mismatched vintage pieces tell a story better than matching sets.

    Hunt for vintage nightstands at estate sales, Facebook Marketplace, thrift stores, or Craigslist for $30–$150 each depending on condition and style. Look for wood pieces with interesting hardware or unique shapes rather than generic modern designs. You don’t need them to match—eclectic variety is more interesting. Style the tops with vintage books ($2–$10 each), small plants ($5–$20), brass or ceramic objects ($5–$30), and a reading lamp ($25–$80). Total setup cost: $100–$300 for two tables plus styling, taking 1–2 hours to arrange and decorate.

    Pro tip: Source pieces that complement your canopy frame material and color for visual cohesion.

    Vintage nightstands give your bedroom an intentionally collected feel, as if you’ve curated pieces over time rather than buying everything new.

    23. Layer Sensory Textures with Rugs and Runners

    Layering rugs beneath your canopy adds underfoot comfort and visual interest while defining the bed as a separate zone within your bedroom. Different rug textures create sensory richness.

    Start with a larger base rug (8×10 or 9×12 feet) in a neutral tone—natural jute, wool, or cotton blend—for $100–$300 from IKEA, Wayfair, or West Elm. Layer a smaller runner or patterned rug on top (4×6 or 5×8 feet) in a complementary texture or pattern for $50–$150. This creates visual interest and defines your sleeping zone without feeling cramped. If you’re renting, use non-slip rug pads ($10–$20) to secure layers safely. Total cost: $150–$450 with immediate visual impact.

    Budget hack: Thrifted vintage rugs ($15–$40 each) layered together often feel more interesting than new pieces.

    Layered rugs make your bedroom feel intentionally designed while adding comfort and acoustic warmth to an otherwise hard floor.

    24. Use Flowing Linen Curtains as Side Drapes

    Floor-length linen curtains hung from your canopy’s side posts create elegant vertical lines and add romance without overwhelming the space. This approach is simpler than full-fabric canopies but equally impactful.

    Purchase linen curtain panels ($30–$80 per panel from IKEA, Target, or Etsy) in cream, natural, or a soft neutral. You’ll need 2–4 panels depending on your canopy width. Hang them from ceiling-mounted rods or tension rods attached to your frame’s top corners. Let them pool slightly on the floor for added drama; this takes 30 minutes to hang and style. The flowing movement catches light beautifully and creates an ethereal effect, especially in rooms with good natural light.

    Renter option: Use removable adhesive hooks and tension rods (no drilling) for $20–$40.

    Flowing linen side curtains create romance and architectural interest while maintaining a clean, unfussy aesthetic.

    25. Add Ambient Sound or White Noise for Sanctuary Effect

    While not strictly visual, adding ambient sound or white noise completes your canopy sanctuary by engaging another sense. This transforms your bed into a true retreat where sleep and relaxation are prioritized.

    Invest in a small white noise machine ($20–$60 from Target or Amazon) or use a smart speaker ($25–$100 from Amazon, Google, or Apple) to stream ambient sounds, sleep meditations, or gentle music. Many apps like Calm, Headspace, or Spotify offer sleep soundscapes for free or as part of subscriptions. Position the device on a nightstand or shelf inside or near your canopy, keeping it visually subtle. This creates a multisensory experience that makes your canopy feel like a wellness sanctuary rather than just a bed.

    Pro tip: Use noise-masking sounds (white noise, ocean waves, rainfall) rather than music to avoid sleep disruption.

    The addition of thoughtfully chosen soundscapes makes your canopy a true retreat where your mind and body feel safe to rest.

    26. Combine All Elements with Cohesive Color Grounding

    The final piece to canopy magic is ensuring all your design elements work together through cohesive color grounding. When every piece relates to a unifying palette, your canopy feels designed rather than random.

    Start by choosing 2–3 neutral base tones (cream, warm taupe, soft gray) that appear across bedding, curtains, and larger elements. Add one accent color—terracotta, forest green, sage, or warm charcoal—that appears in artwork, accents, or the frame itself. Ensure all metals match (all brass, all black, all silver) and all wood tones coordinate (warm or cool). Review your canopy as a whole: does it feel cohesive, or are there jarring color clashes? Small adjustments—swapping one pillow, repositioning art, changing a throw color—can instantly make everything feel intentional. This costs nothing and takes 30 minutes to assess and adjust.

    Design shortcut: Pick a canopy frame color or your bedding first, then build your entire palette around that anchor.

    When all elements work together harmoniously, your canopy transcends being a furniture piece and becomes a holistic sanctuary that looks and feels magazine-quality.


    Save this guide and tackle one idea this weekend—you’ll be amazed how quickly your bedroom transforms. Which element speaks to you most? Share this with anyone dreaming of their perfect canopy sanctuary.

  • 23 Corner Bed Ideas That Maximize Small Spaces Beautifully

    23 Corner Bed Ideas That Maximize Small Spaces Beautifully

    Small spaces don’t mean you have to sacrifice comfort or style—especially when it comes to your bed. A corner bed setup is one of the smartest layout tricks for maximizing square footage while creating a cozy, nest-like retreat. Whether you’re working with a tiny studio, a kid’s room, or a guest bedroom in a compact home, these 23 ideas show you how to make your corner bed work harder. You’ll discover budget-friendly styling tricks, space-saving furniture pairings, and design solutions that make even the tightest corners feel intentional and beautiful. Let’s explore ways to turn that awkward corner into your bedroom’s most appealing feature.

    1. Anchor with a Curved Headboard for Soft Visual Impact

    A curved headboard softens the hard angles of a corner while adding instant personality without taking up extra floor space. Unlike straight headboards, curves draw the eye inward and create a focal point that makes the area feel designed, not just squeezed in.

    Look for curved headboard options at IKEA (around $150–$300), Wayfair, or local wood craftspeople on Etsy. A DIY option: use plywood, cut a gentle curve with a jigsaw, and upholster with fabric—supplies run $40–$80 and take a weekend. Mount it directly to the wall studs at your bed’s head so it doesn’t eat into floor space.

    Pro tip: Paint the curved headboard a statement color (like clay or eucalyptus green) against white walls for impact without overwhelming the corner.

    This choice makes your corner feel like an intentional design moment instead of a space-filling necessity.

    2. Install Floating Shelves Above for Hidden Storage

    Floating shelves above a corner bed add storage without requiring floor space or bulky nightstands. This vertical solution works beautifully in tight quarters and gives you spots for plants, books, and personal items you actually use.

    Install shelves 18–24 inches above your headboard at studs using a level and bracket kit (Home Depot or Amazon, $25–$60 for a set of three). Keep the look light by storing only beautiful items: rolled linens, potted plants, and a few favorite books. Avoid cluttering the shelves, which defeats the purpose of creating calm in a small space.

    Time estimate: 1–2 hours with basic tools. Renter-friendly alternative: use command strips and lightweight shelves (though weight capacity is lower).

    You’ll gain practical storage and make your corner feel curated without losing any walking space.

    3. Layer Textured Throw Pillows for Depth Without Width

    Throw pillows add visual interest and comfort without consuming extra square footage. By mixing textures—linen, velvet, knits, and quilts—you create depth and make a small corner bed look designed and collected.

    Buy pillows in varying sizes (16×16″, 20×20″, decorative square shapes) from Target, IKEA, or thrift stores. Aim for a neutral palette (creams, grays, sage) with 2–3 textural contrasts. Expect to spend $15–$40 per pillow if buying new, or $3–$8 at secondhand shops. The trick: fewer, better pillows beat a cluttered stack. Start with four quality pillows and add one more if space allows.

    Swap pillows seasonally to keep the corner feeling fresh without replacing furniture.

    4. Add a Reading Nook with a Small Pendant Light

    A single pendant light hanging above your corner bed creates a dedicated reading nook and provides softer, more flattering light than overhead fixtures. It’s also the quickest way to make a corner feel special.

    Install a pendant 24–30 inches above your headboard using a ceiling-mounted hook kit ($20–$40 from hardware stores). Choose a 40–60 watt bulb in warm white (2700K) to encourage relaxation. Pendant options range from $30 (IKEA) to $150+ (design brands). A budget hack: hang a simple drum shade pendant over your existing ceiling fixture using a swag hook kit.

    Fifteen-minute installation if you’re just using a swag setup (renter-friendly).

    You’ll notice the difference immediately—reading becomes more inviting, and the corner transforms into a retreat space rather than just a bed.

    5. Use Corner Space for Slim Nightstands

    Corner bedrooms are perfect for slim, angled nightstands that fit exactly where a traditional nightstand would waste space. These narrow tables give you a surface for essentials without eating floor space.

    Hunt for slim nightstands (8–14 inches wide) at IKEA ($50–$100), Article, or West Elm. Alternatively, use a floating shelf mounted on both walls in the corner angle, creating a natural shelf-table hybrid ($30–$60 in hardware). Look for open shelves on models so you gain storage below the tabletop too.

    Pro tip: A corner nightstand becomes a design feature if you choose wood grain or a soft color that complements your headboard.

    You’ll have everything within arm’s reach while keeping your floor open and walkable.

    6. Layer Rugs to Define the Corner as a Room Zone

    Layering two rugs under a corner bed creates a visual “room within a room” that makes the space feel grounded and intentional. This works especially well in studios or open-plan bedrooms where you need to signal where the bed zone ends.

    Buy a base rug (5×7 or 6×8 feet) in a neutral tone ($40–$120 from Target, Wayfair, or Amazon), then layer a smaller textured rug on top ($25–$60). Look for natural materials like jute or wool for a biophilic feel. The layered approach hides imperfections and feels more curated than a single rug.

    This visual separation signals to your brain: “This corner is for rest,” which supports better sleep psychology.

    7. Paint an Accent Wall Behind the Bed

    An accent wall behind your corner bed creates a backdrop that makes the area feel designed rather than crammed. Color draws the eye and can make even a small corner feel intentional.

    Choose an earthy tone—clay, sage green, warm gray, or soft terracotta—that complements your bedding. Paint only the wall behind the bed (and possibly the two adjacent corner walls) to avoid overwhelming the space. DIY with quality paint like Sherwin-Williams or Benjamin Moore ($30–$60 per gallon). A gallon covers about 350 square feet; most corner walls need less than half a gallon. Hire a painter if ladders intimidate you ($150–$400 for a small wall).

    Two-day project if DIY (including drying time between coats).

    The right color makes your corner feel like a sanctuary, not a storage area.

    8. Install a Wall-Mounted Reading Shelf System

    A creative shelf arrangement above your corner bed transforms blank wall space into display area. Asymmetrical wall-mounted shelves feel more modern and less corporate than standard bookcases.

    Install shelves in staggered heights (24″, 30″, 36″ from the floor) using floating shelf kits. Popular options: Pottery Barn’s modular shelf system ($60–$150 per shelf), IKEA’s Lack shelves ($20–$40 each), or custom metal-frame shelves from Etsy makers ($50–$200). Keep display items intentional: books you love, a few plants, one or two personal objects. Avoid the Pinterest trap of overcrowding; less is more in small spaces.

    Two to three hours to install multiple shelves; renter-friendly alternatives exist but have weight limits.

    You’ll create a gallery-like vibe that makes your corner bedroom feel curated and personal.

    9. Choose Bed Linens in Temperature-Regulating Wool

    Quality wool bedding isn’t just luxurious—it’s functional in small bedrooms where air circulation is already tight. Wool regulates temperature naturally, keeping you cool in summer and warm in winter without overheating a cramped space.

    Invest in wool sheets from Woolroom, Parachute, or affordable options like Brooklinen’s performance line ($100–$250 for a set). Alternatively, layer a wool duvet ($150–$300) with cotton sheets underneath. Wool is naturally hypoallergenic and moisture-wicking, which matters when your bed’s proximity to walls can trap humidity.

    Pro tip: A wool throw ($60–$120) works as both a design element and a functional temperature tool.

    You’ll sleep better in a small corner bed because the bedding actively manages your comfort instead of adding bulk.

    10. Use a Slim Dresser as a Nightstand Alternative

    A slim dresser fills double duty in a corner bedroom: it provides both storage and a surface for a lamp or alarm clock. This approach eliminates the need for a separate nightstand, freeing up precious floor space.

    Look for narrow dressers (20–28 inches wide) at IKEA ($80–$200), Article, or thrift stores. Solid wood dressers feel less flimsy than particleboard and last longer in tight spaces where everything shows wear. You can also use a vintage dresser (Craigslist, Facebook Marketplace, estate sales) for $30–$150 and refinish it to match your color scheme.

    Pro tip: Position the dresser perpendicular to the bed to create a subtle room divider visually.

    You’ll gain organized storage and a functional surface without sacrificing the openness your corner bedroom desperately needs.

    11. Hang Sheer Curtains from the Ceiling to the Floor

    Floor-to-ceiling curtains turn your corner bed into a sanctuary without requiring expensive built-ins. Sheer fabrics filter light beautifully and create a cocoon feeling in even the tiniest bedroom.

    Hang a ceiling-mounted curtain rod system ($30–$80 from IKEA or Target) and choose linen or cotton blend curtains in cream or soft green ($40–$100 per panel from West Elm, Pottery Barn, or Amazon). Hang the rods on both walls of the corner for a nested effect. Sheer fabrics won’t block light completely—perfect for bedrooms where blackout isn’t necessary but a soft visual frame is.

    Weekend installation; renter-friendly with command hooks if you’re cautious about drilling.

    The curtains soften your corner and create a visual separation from the rest of the room without clunky room dividers.

    12. Install a Floating Headboard to Maximize Wall Space

    A floating headboard creates the illusion of more floor space because nothing touches the wall directly. This simple visual trick makes corner bedrooms feel roomier than they are.

    Mount a custom headboard on wall-mounted brackets ($40–$100) that are hidden behind the headboard itself. IKEA’s Malm headboard system ($70–$150) works similarly. Keep the wall beneath the floating headboard clear or add a narrow console for plants—this exposed space tricks the eye into seeing more room.

    DIY option: Build a simple plywood headboard, paint it, and mount on invisible shelf brackets ($50 total materials).

    Three-hour installation if you’re comfortable with wall anchors and a level.

    The floating effect makes your corner bed look intentional and modern instead of space-filling.

    13. Create a Cozy Corner with a Reading Chair

    If your corner bedroom has any extra square footage, a small reading chair transforms the space into a dual-purpose retreat. The chair doesn’t have to be large—even 24 inches wide works.

    Search for compact chairs at Article ($400–$800), IKEA’s STRANDMON chair ($150–$200), or thrift stores ($20–$100). Look for curved, organic shapes that fit snugly without feeling cramped. Pair the chair with a small side table (12–18 inches) for a cup of tea or book. Position the chair across from the bed to create visual balance in the room.

    Budget hack: A cushioned ottoman can double as a chair alternative for $50–$150.

    You’ll transform your bedroom from a sleeping space into a place where you actually want to spend time.

    14. Use Multifunctional Furniture Like a Bed with Built-in Storage

    A bed frame with built-in drawers or storage compartments saves you from needing a separate dresser entirely. In small corners, this consolidation is a game-changer for keeping clutter hidden and organized.

    Invest in a platform bed with under-bed storage from Article ($700–$1,500), West Elm ($500–$1,200), or IKEA’s MALM bed ($300–$600). These beds typically hide two to four full-size drawers that hold off-season clothing, extra linens, or bedding. The bed sits lower to the ground, making the room feel airier.

    Pro tip: Measure your ceiling height before buying—lower platform beds suit rooms with 8-foot ceilings better than tall slatted frames.

    This one furniture piece replaces both your bed and dresser, freeing up floor space for movement and air.

    15. Paint the Ceiling a Soft Warm Tone

    Painting your bedroom ceiling a soft warm tone instead of stark white makes the space feel enveloping rather than clinical. Warm ceilings visually lower high ceilings (making rooms feel cozier) and create a spa-like atmosphere in compact spaces.

    Use a warm off-white, pale cream, or soft greige paint (Sherwin-Williams “Accessible Beige” or Benjamin Moore “Swiss Coffee,” around $30–$50 per gallon). Apply with an extension roller to avoid neck strain. One gallon covers most bedroom ceilings. Hire a painter if ceiling work intimidates you ($200–$400 for a small room).

    Two to three hours DIY; three to five hours with a professional.

    The psychological shift is noticeable—a warm ceiling makes your corner bedroom feel like an embrace instead of a small box.

    16. Add a Murphy Bed for Maximum Space Savings

    If your corner bedroom doubles as a workspace or guest room, a Murphy bed (wall bed) saves 50%+ of your floor space during the day while providing a full-size sleeping surface at night.

    Murphy bed kits range from $300 (DIY IKEA-style) to $3,000+ (custom installations). Companies like Expand Furniture, Deskbeds, or local carpenters can build one into your corner. Install in a weekend with a kit or hire a professional ($500–$1,500 labor).

    Pro tip: Mount a desk or small console beneath the folded bed to use the space productively during the day.

    You’re not just gaining a corner bed—you’re gaining an entire second function for your room.

    17. Layer Soft Textures with Wool and Linen Mix

    Mixing natural fiber textures—linen, wool, cotton—creates visual interest without adding bulk to a small corner bed. Natural materials also support biophilic design, which research shows improves sleep quality.

    Buy linen sheets ($60–$150 from Parachute, Brooklinen, or Target), a wool throw ($50–$120), and quilted pillowcases ($20–$40 per pillow). Mix cream, oatmeal, and warm white tones so everything coordinates. Expect to spend $150–$300 total for quality pieces, or $50–$100 if buying budget-friendly versions.

    Wash linen with cool water to maintain softness; wool requires gentler care.

    The mix of textures makes your bed feel intentionally styled and gives you tactile comfort that encourages rest.

    18. Install Blackout Shades Behind Sheer Curtains

    Layering blackout shades behind decorative sheer curtains gives you both style and sleep-optimized darkness. This combo works beautifully in corners where windows are unavoidable.

    Install cellular shades or roller blackout shades ($30–$80 from Home Depot, Lowes, or Amazon) as your base layer, then hang sheer curtains in front ($40–$100 per panel). Choose white, cream, or soft gray for both layers so they coordinate. The system takes 30 minutes to install and is renter-friendly if you use tension rods for curtains.

    Pro tip: Look for blackout shades with noise-dampening properties if your corner bedroom is in a noisy neighborhood.

    You’ll sleep deeper because your corner bed finally has the darkness your brain needs, while maintaining visual softness during waking hours.

    19. Add Live-Edge Wood Shelving for Biophilic Design

    Live-edge wood shelving brings natural elements into your corner bedroom, supporting biophilic design principles that research links to better sleep and reduced stress. The organic shape of live-edge wood feels curated and intentional.

    Purchase live-edge shelves from local woodworkers ($50–$200 per shelf depending on size), Etsy sellers ($40–$150), or IKEA’s nature-inspired options ($30–$80). Mount with invisible brackets ($20–$40). Top the shelves with air-purifying plants: snake plants, pothos, or peace lilies ($15–$40 each from local nurseries or big-box stores).

    Weekend installation; budget $100–$300 total for shelves and starter plants.

    You’ll create a corner that feels like a retreat—not just a bedroom packed into a small space.

    20. Use a Curved Bench at the Foot of the Bed

    A curved bench at the foot of your corner bed adds seating, storage opportunity, and follows 2025’s trend toward organic, soft furniture shapes. Benches tuck neatly into corners without eating much floor space.

    Look for upholstered benches at Article ($300–$600), West Elm ($200–$500), or IKEA ($80–$200). Choose curved designs in natural fabrics like linen or wool. Some benches open to reveal storage inside—perfect for extra bedding or off-season clothing. Sizes typically range from 36–48 inches long.

    Budget alternative: Buy a vintage wooden bench at a thrift store ($30–$80) and add an upholstered cushion ($40–$100).

    You’ll gain a multifunctional piece that looks intentional while serving practical storage and seating needs.

    21. Mount a Fold-Down Desk for a Multipurpose Corner

    If your corner bedroom needs to work as both bedroom and home office, a fold-down desk maximizes function without consuming floor space. When folded up, it’s barely visible.

    Install a wall-mounted drop-leaf table ($40–$120 from IKEA, Amazon, or hardware stores) 30 inches high beside your bed. The surface area (usually 24–36 inches wide) is enough for a laptop, but folds up flush with the wall when not in use. Some models include hidden storage shelves above for supplies.

    Installation takes 20–30 minutes with basic tools; renter-friendly if using heavy-duty command strips (though weight capacity is lower).

    Your corner bedroom becomes a flexible space where you can work during the day and rest at night.

    22. Create a Canopy Effect with Fabric Drapes (No Frame Needed)

    A fabric canopy without a frame gives you the cozy, enclosed feeling of a canopy bed while taking up minimal space and zero floor footprint. This works beautifully in corners where a traditional canopy frame would feel cramped.

    Screw two sturdy ceiling hooks into studs above your bed ($20–$30 for a pair). Drape lightweight linen or cotton fabric (4–6 yards at $8–$15 per yard from fabric stores) between the hooks. Let the fabric pool slightly on the bed for a romantic, layered look. Alternatively, use sheer curtain panels ($20–$40 per panel) for a quicker setup.

    Two hours including shopping and installation; fully renter-friendly if using damage-free hook alternatives (though they hold less weight).

    The fabric creates a visual sanctuary and makes your corner bed feel intentional and designed rather than squeezed into leftover space.

    23. Add Motion-Sensor Smart Lighting for Convenience

    Motion-sensor lights turn on automatically when you move, perfect for corner bedrooms where reaching a wall switch is awkward. Smart lighting is preferred by 70% of homeowners for convenience and mood control—especially useful in tight layouts.

    Install a motion-sensor puck light ($15–$40 from Amazon or Target) on a floating shelf or mount it directly to the wall. Choose warm white bulbs (2700K) to avoid jarring awakening at night. Program the light to dim automatically after 30 seconds so it doesn’t keep you awake.

    Fifteen-minute installation; battery-powered options are renter-friendly and require zero tools.

    You’ll never fumble in the dark again, and your corner bed becomes genuinely functional for nighttime movement without harsh overhead lights.


    Ready to transform your corner into a bedroom you actually love? Pick one idea that speaks to your space and budget, then try it this weekend. Whether you start with paint, lighting, or a cozy rug, small changes add up fast—and your corner bed deserves to feel like a retreat, not an afterthought. Save this post for later, and don’t hesitate to share it with friends navigating small-space bedrooms too.

  • 24 Floor Bed Ideas That Create a Minimal, Cozy Retreat

    24 Floor Bed Ideas That Create a Minimal, Cozy Retreat


    Introduction

    Tired of beds that feel too high, too bulky, or too disconnected from your space? Floor beds are having a major moment—and for good reason. They create an instant sense of calm, make small rooms feel bigger, and work beautifully in minimalist, Scandinavian, and Japanese-inspired designs. Whether you’re renting, downsizing, or just craving a bedroom that feels like a peaceful retreat, a floor bed might be exactly what you need. The best part? You don’t need much money or DIY skills to make it work. From simple platform solutions to styled sanctuary spaces, here are 24 ideas to help you create a cozy, minimal bedroom that actually makes you want to go to bed early.


    1. Start With a Basic Platform Frame

    A solid platform bed frame is the foundation for everything. Unlike traditional beds with box springs, platforms sit just 12–18 inches off the ground, creating that grounded, minimal look instantly.

    Look for frames with clean wood slats (no box spring needed). IKEA’s Malm frame ($150–$300) is a budget-friendly starting point, while Article and Wayfair carry more design-forward options in the $400–$800 range. If you rent, consider a low-profile platform that requires minimal assembly—most can be set up in under an hour with just a screwdriver.

    The lower profile also makes your room feel more spacious because your eye naturally travels across the floor first. Your ceiling seems higher when the furniture isn’t fighting for that visual real estate.


    2. Layer Natural Linen for Texture

    Natural linen bedding isn’t just beautiful—it regulates temperature, softens with every wash, and adds authentic texture that makes your bed look intentionally styled.

    Invest in quality linen sheets in neutral tones: Parachute ($200–$350 per set) offers OEKO-TEX certified linen, while Etsy sellers and Target’s Threshold collection ($100–$150) provide affordable alternatives. Layer with a chunky knit throw ($50–$120) for depth. The result feels both luxe and lived-in—like a bed you actually want to fall into, not just look at. These fabrics also age beautifully, developing a softer hand over time.


    3. Create a Grounding Anchor With a Low Rug

    A rug pulls your floor bed into the room’s layout and creates a visual anchor that makes the low profile feel intentional, not like you’re sleeping on the floor.

    Choose a natural fiber rug (jute, sisal, or wool blend) in a size that extends at least 3 feet on both sides of the bed. Ruggable offers washable options ($150–$400), while West Elm ($200–$600) and Etsy vintage sellers ($80–$300) have unique finds. Place the bed so one-third to one-half sits on the rug. This simple positioning trick grounds the whole arrangement and defines your sleep space without walls or dividers.


    4. Paint an Accent Wall Behind Your Headboard

    An accent wall behind your bed creates a focal point and adds personality without overwhelming your minimal aesthetic. Soft, muted tones work best for sleep spaces.

    Choose warm whites, soft greens (sage, celadon), warm grays, or dusty blues—colors that calm rather than stimulate. Paint only one wall (or the wall section behind your bed) to keep things minimal. One gallon of quality paint costs $30–$50, and a DIY paint job takes one afternoon. If you rent, ask your landlord about temporary removable wallpaper ($20–$60 per roll) in similar tones. The right color makes your bedroom feel like a spa—instantly more restful and curated.


    5. Use Bed Slats Instead of a Box Spring

    Bed slats replace the box spring entirely, keeping your mattress low to the ground while providing essential support and airflow.

    Most modern platform frames come with slats, but if you’re using a basic frame, verify spacing is 3–4 inches apart for proper support. Metal slat systems cost $50–$150, while wooden options run $100–$300. This setup also prevents dust accumulation under the mattress and makes cleaning easier. You’re literally sleeping closer to the ground—a design choice that feels intentional and helps your brain associate your bed with rest.


    6. Add Floating Shelves for Bedside Storage

    Floating shelves replace traditional nightstands, keeping the floor clear and maintaining the minimal vibe while providing practical storage.

    Mount shelves 24–30 inches above the mattress surface (roughly shoulder height when lying down). Install two shelves on each side: one for essentials (lamp, phone, water glass), one for display items. Floating shelves cost $40–$150 per pair installed; IKEA’s Lack shelves ($15–$30) are budget-friendly if you have wall studs. This setup saves floor space, looks architectural, and keeps your bedroom clutter-free.


    7. Invest in a Weighted Blanket for Better Sleep

    A weighted blanket uses deep pressure stimulation to calm your nervous system, helping you fall asleep faster and stay asleep longer—a wellness upgrade that really works.

    Quality weighted blankets (12–20 lbs) cost $150–$400; brands like Bearaby ($265–$399) use organic cotton, while Gravity Blanket ($225–$395) and Amazon Basics ($80–$150) offer solid options. Choose a weight that’s 8–10% of your body weight. Drape it over your regular bedding for a styled, inviting look that also signals to your brain it’s time to wind down. Layering it on top creates visual interest and that luxe hotel aesthetic.


    8. Install Dimmable Smart Lighting Above the Bed

    Smart lighting lets you adjust color temperature and brightness without leaving bed—essential for a bedroom that supports your sleep cycle and reading habits.

    Install dimmable LED lights or smart bulbs ($15–$50 each) in existing fixtures, or add track lighting ($100–$300 installed) for more control. Brands like Philips Hue offer app-controlled color options, while LIFX provides affordable smart bulbs ($20–$40). Set lights to warm amber (2700K) at night to support melatonin production, and brighter white light for reading. You’ll notice the difference in how quickly you fall asleep and how rested you feel in the morning.


    9. Mix Pillow Heights for Visual Softness

    Layering pillows in different sizes (standard, Euro square, body pillow) creates a styled, resort-like look that’s also more comfortable for reading and lounging in bed.

    Mix pillow types: start with a standard pillow in front, add Euro shams (26×26 inches) behind, and tuck a body pillow on one side. Use matching or complementary linen or cotton covers in whites, creams, and soft neutrals. Budget $80–$200 for quality pillow inserts and covers. This layering makes your bed look intentionally styled and gives you flexible comfort for different activities—sleeping, reading, working from bed on weekends.


    10. Create a Reading Nook With a Low Chair

    A low, paired-down chair beside your floor bed creates a dedicated reading space without cluttering your bedroom or competing with the bed as the focal point.

    Look for chairs with clean lines: Article’s Sven Chair ($500+), IKEA’s Poäng ($80–$150), or a simple wooden frame with a linen cushion (DIY or Etsy, $100–$300). Position it close to a window for natural reading light. This companion piece makes your bedroom feel like a retreat rather than just a sleeping space—you’re giving yourself permission to rest, read, and do nothing, all in one room.


    11. Use a Live-Edge Wood Headboard

    A live-edge headboard brings natural, organic beauty to your minimal bedroom while giving you a visual anchor without taking up floor space.

    Mount a live-edge wood slab ($200–$1,000+) directly to the wall at bed height, or prop a smaller piece ($50–$300) behind your pillows for a renter-friendly option. This biophilic design choice connects you to nature and creates a focal point that feels intentional. The organic shape and wood grain add personality and warmth while keeping your aesthetic calm and grounded.


    12. Layer In a Cotton Duvet for Easy Adjustability

    A cotton duvet lets you adjust your warmth without adding bulk—you can fold it down on warm nights or pull it up on cool ones, making your bed visually interesting and functionally flexible.

    Choose a natural cotton duvet cover ($60–$150 from Parachute, Etsy, or Target) in white, cream, or soft gray. Fold it casually at the foot of the bed rather than making it tight and formal. This styling choice looks relaxed and intentional, and gives you temperature control without the weight of a comforter. You’re creating a bed that looks effortlessly styled, not perfectly made.


    13. Add Black-Out Curtains for Deep Sleep

    Blackout curtains block light that disrupts melatonin production, helping you sleep deeper and wake more naturally. Plus, they add a luxe, cave-like quality to minimal bedrooms.

    Install floor-to-ceiling blackout panels ($50–$200 per window from Target, Amazon, or Wayfair) in neutral tones. Choose thermal-lined options for temperature control too. Pair with sheer curtains for daytime privacy and softer aesthetics. The impact is immediate: your room becomes a true sleep sanctuary, and you’ll likely sleep 30–60 minutes longer without light pollution waking you early.


    14. Introduce One Statement Pillow for Color

    A single statement pillow in a bold, warm tone (mustard, rust, deep teal) adds personality to a neutral bed without making the space feel busy or chaotic.

    Look for one pillow in a complementary color that reflects 2025’s playful statement trend. Etsy, West Elm ($60–$100), and Schoolhouse Electric ($80–$120) have beautiful options. Place it among neutral pillows to let it stand out. This tiny pop of intentional color makes your bedroom feel curated and personal while keeping the overall aesthetic calm and minimal. It’s an easy way to refresh your space seasonally too.


    15. Install a Simple Wooden Slat Headboard

    Wooden slats create texture and visual interest without the bulk of a traditional headboard, and they’re totally renter-friendly if you use removable paneling.

    Mount thin wooden slats vertically or horizontally ($100–$400 DIY, $300–$800 installed) on the wall behind your bed, or use peel-and-stick wood paneling ($50–$150) if you rent. Space them 2–4 inches apart for a clean, minimal look. This architectural treatment becomes the focal point of your room and adds warmth without fuss. It also helps soften sound, making your bedroom feel more private and cocoon-like.


    16. Use a Body Pillow for Side Support

    A body pillow supports your spine and joints while sleeping on your side, reducing back and neck pain. It also creates a visual anchor on your bed.

    Place a body pillow lengthwise along one side of your bed, dressed in matching linen. Quality body pillows cost $30–$80 from Parachute, Target, or Amazon. This setup is especially helpful if you’re a side sleeper or pregnant. You’re creating a bed that doesn’t just look minimal—it’s also optimized for physical comfort and better sleep quality.


    17. Create a Minimal Headboard With Paint

    Skip the physical headboard and paint one directly onto the wall—it’s minimal, renter-friendly (use removable wallpaper), and completely customizable.

    Paint or apply removable wallpaper in a simple geometric shape (rectangle, arch, or simple lines) on the wall behind your bed, or use painter’s tape to create a stripe pattern. Materials cost $20–$50, and you can DIY in one afternoon. Renters can achieve the same look with removable peel-and-stick wallpaper ($15–$40). This graphic approach keeps your bedroom feeling intentional and artistic without physical clutter or installation hassles.


    18. Layer in a Vintage Quilt for Warmth and Character

    A vintage or handmade quilt adds handcrafted warmth and personality to a minimal bedroom while supporting sustainable practices (you’re giving a piece a second life).

    Hunt for quilts on Etsy ($50–$300), estate sales ($20–$100), or fabric swaps. Fold it casually at the foot of your bed or drape it over one corner. Vintage textiles tell a story and make your space feel less sterile. The mix of old and new creates visual interest while keeping your aesthetic grounded in simplicity. Plus, knowing the quilt has history makes resting under it feel more meaningful.


    19. Mount a Small Floating Shelf for Plants

    Live plants beside your bed improve air quality, reduce stress, and add life to your minimal space. A floating shelf keeps them accessible without taking floor space.

    Mount a shallow shelf ($20–$60) at pillow height and add low-maintenance plants like snake plants, pothos, or ZZ plants ($10–$30 each). These thrive in bedroom light conditions and improve sleep quality by increasing oxygen and reducing CO2. The greenery becomes a calming focal point and makes your bedroom feel like a sanctuary. You’re literally surrounding yourself with nature, which supports biophilic design trends for 2025.


    20. Incorporate a Cotton Mattress Protector

    A cotton mattress protector keeps your mattress clean and extends its life—essential for a low bed that sits close to dust and debris.

    Choose an organic cotton protector ($40–$100) over synthetic options; they breathe better and feel more comfortable. Brands like Parachute and Etsy organic makers ($50–$150) offer chemical-free versions. This simple layer protects your investment and keeps your bed fresh longer. Renters especially appreciate this, as it protects against accidental spills and dust.


    21. Use Neutral Linen Curtains for Softness

    Lightweight linen curtains filter light gently while maintaining your minimal aesthetic—they’re functional, beautiful, and totally aligned with natural material trends.

    Hang linen curtains in white, cream, or pale gray ($60–$150 per panel from Target, West Elm, or Etsy) from ceiling to floor. This creates height and elegance without bulk. Pair with blackout curtains on the inside for sleep support and privacy. Linen ages beautifully and becomes softer over time, so your curtains improve with use. You get a bedroom that feels serene during the day and restful at night.


    22. Add a Low Side Table in Natural Wood

    A low wooden side table keeps essentials within arm’s reach while maintaining the grounded, minimal aesthetic of a floor bed.

    Choose a simple wooden table 12–18 inches tall, leaving space below for visual lightness. IKEA’s Lisabo ($50–$80), Article ($100–$200), or Etsy makers ($80–$300) have beautiful options. Use it for a water glass, book stack, and a small lamp. This piece stays proportional to your low bed and prevents you from reaching across your body for essentials. It’s functional furniture that also looks intentional and designed.


    23. Layer Textured Throws for Visual Interest

    Multiple throws in different textures (chunky knit, lightweight linen, woven) create depth and visual interest without overcomplicating your space.

    Layer 2–3 throws in complementary neutral tones and textures. Mix chunky knits ($40–$80) with lightweight linens ($30–$60) and woven cotton pieces ($25–$50) from Target, West Elm, or Amazon. Drape them casually rather than folding them neatly—this relaxed styling looks intentional and inviting. The layered textures make your bed look magazine-worthy while giving you functional warmth options for different seasons and moods.


    24. Install Warm Ambient Lighting (Not Overhead)

    Overhead lights disrupt sleep and feel harsh. Warm, ambient lighting from multiple low sources creates a calm, inviting bedroom that supports your sleep cycle.

    Skip the overhead fixture or keep it off. Install instead: a warm-toned table lamp ($30–$80), wall sconces ($40–$150 each), or LED strip lighting ($20–$50) mounted low on walls. Choose lights in the 2700K color temperature (warm white) that you can dim. Lighting is 90% of bedroom atmosphere—switching from bright overhead lights to warm ambient lighting is genuinely transformative for how your space feels and how well you sleep.


    Save this post for your next bedroom refresh. Pick one or two ideas to start with this weekend—even a simple rug or new pillows can completely shift how your space feels and how well you rest in it.

  • 26 Earth-Toned Bedroom Palette Ideas for a Calm Natural Space

    26 Earth-Toned Bedroom Palette Ideas for a Calm Natural Space


    If your bedroom feels cold or sterile, you’re not alone. Gray minimalism and cool tones have dominated for years, but what your space really needs is warmth—the kind that makes you want to stay in bed a little longer. Earth tones create that cozy, grounding feeling that helps you actually relax instead of just sleep. The best part? These 26 palette ideas work whether you’re renting, decorating on a budget, or ready to invest in a full refresh. From soft terracotta accents to deep forest greens layered over warm neutrals, you’ll find ideas that match your style and your bank account. Let’s build a bedroom that feels like a retreat instead of just a room.


    1. Layer Warm Neutrals with Terracotta Accents

    Terracotta brings instant warmth without overwhelming your space. This color works because it sits between orange and brown, grounding you without feeling heavy or dated.

    Start with neutral walls in cream, oatmeal, or soft taupe. Then layer terracotta through easy-swap pieces: throw pillows ($20–40 each), a chunky knit throw ($50–80), or a small accent rug ($60–120). You can find these at Target, West Elm, or Amazon. If you want something bolder, paint one accent wall in a soft terracotta ($30–50 in supplies). This usually takes a weekend and doesn’t require professional help.

    The beauty of this combo is flexibility—terracotta pairs with nearly any other earth tone, so you can add more colors later without clashing. Your bedroom becomes a space that actually feels like a calm morning, not a showroom.


    2. Add Depth with Warm Sage and Stone

    Sage green feels trendy but timeless—it’s been around forever and will stick around longer. Pairing it with natural stone textures gives you visual interest without clutter.

    Paint walls in a warm sage (not cool gray-green) using brands like Sherwin-Williams Tricorn Black’s lighter cousins or Farrow & Ball’s Cornforth White with a green undertone. The accent wall can be real stone cladding ($400–800 installed) or peel-and-stick stone tiles ($50–150 for a wall). For a budget option, use textured wallpaper that mimics stone ($30–60). Keep bedding neutral—cream, tan, or warm white—so the walls become the star.

    You’ll notice the room feels more connected to nature, which research shows actually helps you sleep better. Plus, this palette photographs beautifully, so your space looks gallery-ready without trying hard.


    3. Combine Soft Greige with Brass Accents

    Greige is the bridge between cool and warm—it’s basically the Switzerland of paint colors. Adding brass metallics gives you a subtle shine without looking glitzy.

    Paint walls in greige using Benjamin Moore Accessible Beige or Sherwin-Williams Urbane Bronze (lighter sheen). Then bring in brass through: a mirror frame ($60–150), table lamps ($40–100 each), or curtain rods ($50–120). Look for these at West Elm, Wayfair, or even HomeGoods. You can also thrift brass pieces and spray-paint frames for under $20 total. These small updates take about an hour to install.

    The brass catches light beautifully at sunrise and sunset, making your room feel more sophisticated. It’s the kind of detail that makes people ask, “What did you do differently?”—even though the changes were simple.


    4. Go Deep with Chocolate Brown and Cream

    Deep chocolate brown might sound dark, but in a bedroom it’s actually calming—it wraps around you like a cozy sweater. Paired with cream, it creates contrast that feels intentional rather than stark.

    Paint walls in a warm chocolate brown like Benjamin Moore Espresso or Sherwin-Williams Cavern Clay. Since it’s dark, ensure your room has decent natural light (a northern-facing room might feel too dim). Use cream for bedding, curtains, and one accent wall to balance the richness. This palette works best if you invest in good lighting—bedside lamps ($50–100) and a dimmer switch ($30) are worth it. Paint costs around $50–80 for supplies.

    Your space becomes a sanctuary where you actually want to spend time. The darkness helps with melatonin production too, which means better sleep quality. It’s dramatically different from beige, but still calming.


    5. Mix Warm Taupe with Soft Gold Details

    Taupe feels mature without being boring, especially when you add warm metallics. This combo works for any age and any style of furniture.

    Paint walls in warm taupe like Sherwin-Williams Accessible Beige or Benjamin Moore Hopsack. Then layer gold accents through: picture frames ($20–60), lamp bases ($40–80), or even a gold-rimmed mirror ($80–200). Target, Wayfair, and thrift stores all have budget options. You can also wrap existing frames with gold leaf tape ($5–10) for a DIY refresh. This takes about 30 minutes and costs next to nothing.

    The gold brings richness without feeling trendy, so you won’t wake up in three years wishing you’d chosen differently. Your bedroom looks like it’s been carefully curated, even if you started with hand-me-downs.


    6. Layer Soft Clay with Natural Textiles

    Clay tones are having a major moment because they’re versatile—they work with bohemian, modern, and minimalist styles. The secret is pairing them with textured fabrics that you actually want to touch.

    Paint walls in soft clay using Sherwin-Williams Urbane Bronze (in a lighter tint) or Benjamin Moore Hopsack. Layer in textures: a linen duvet ($200–400), chunky knit throw ($60–120), and woven curtains ($80–150). Check Etsy, West Elm, or even Ikea for affordable options. The wall hanging can be DIY macramé ($5 in supplies) or thrifted ($10–30). Budget $300–500 total if you’re starting fresh.

    When you walk into this room, your brain immediately relaxes. There’s something about natural materials that our nervous systems just respond to—it’s science, not just aesthetics. You’ll sleep deeper.


    7. Create Drama with Burnt Orange and Deep Navy

    This combo pushes you past safe beige, but stays totally grounded. It’s bold enough to feel intentional but warm enough to stay cozy.

    Paint one accent wall in burnt orange like Benjamin Moore Caliente or Sherwin-Williams Energetic Orange. Keep other walls neutral cream or soft taupe. Bedding in deep navy ($150–300) balances the orange, and a cream throw ($40–80) softens the contrast. Wayfair, West Elm, and Target carry navy bedding in every style. You can thrift the throw. Total paint cost: $30–50.

    This palette works beautifully for anyone tired of beige-on-beige. The colors are bold enough to feel current but classic enough that you won’t tire of them. Your bedroom becomes a statement instead of an afterthought.


    8. Soften Warm Gray with Blush Undertones

    Warm gray with blush undertones walks the line between modern and cozy. It’s the color equivalent of cashmere—refined but never cold.

    Use paint like Sherwin-Williams Accessible Beige mixed with a touch of blush (or buy pre-mixed “warm gray” from Benjamin Moore or Farrow & Ball). Layer in blush through curtains ($60–120), throw pillows ($20–40 each), or an area rug ($100–250). Stick with cream bedding to keep it light. If you’re renting, swap everything except the walls—use stick-on wallpaper ($40–80) instead of paint. Total investment: $150–300.

    This palette is forgiving—it works with gold or silver metallics, modern or vintage furniture. You won’t second-guess yourself in three months. It just quietly works, day after day.


    9. Build Richness with Cognac Brown and Cream

    Cognac is richer than standard brown—it has depth and warmth that feels like a high-end hotel room. It’s the color of leather and aged wood, so it pairs perfectly with natural materials.

    Paint walls in cognac using Benjamin Moore Bennington Gray Brown or Sherwin-Williams Cavern Clay. Keep furniture and bedding neutral (cream, warm white, natural wood). A leather accent pillow ($50–100) or leather ottoman ($150–300) ties the theme together beautifully. This is one of the pricier palettes to execute, but you can do it gradually—start with paint, then add one investment piece per season. Budget $400–800 for a full room.

    This is the palette for people who want their bedroom to feel like a sanctuary, not just a sleeping spot. The richness makes you feel cared for, which sounds simple but changes how you actually rest.


    10. Layer Soft Ochre with Warm Whites

    Ochre is mustard’s sophisticated cousin—it’s earthy and warm without the intensity of bright yellow. It glows beautifully in natural light.

    Paint walls in soft ochre using Benjamin Moore Golden Straw or Sherwin-Williams Harmless Yellow. The key is finding one that leans brown, not bright. Layer whites and creams in bedding ($150–300), curtains ($80–150), and throws ($40–80). This palette is especially beautiful if your room gets good morning or afternoon light. Check Target, Wayfair, and Etsy for affordably priced whites with warm undertones—they’re key.

    Your room becomes sunny and welcoming without being aggressively cheerful. It’s the kind of palette that makes you want to open the curtains in the morning instead of hiding under them. Better mood, better sleep.


    11. Anchor with Walnut Wood and Warm Beige

    Walnut wood has always been beautiful, but pairing it consciously with warm beige (instead of cool gray) makes it feel intentional. This is a no-fuss palette that just works.

    Paint walls in warm beige like Benjamin Moore Accessible Beige or Sherwin-Williams Kilim Beige. If you already have walnut furniture, you’re set—just ensure your bedding and accents lean warm (cream, warm taupe, soft terracotta). If you’re shopping for furniture, walnut pieces last decades and don’t feel trendy or dated. Thrifting solid wood is cheaper than buying new—check Facebook Marketplace and estate sales for walnut dressers ($100–400).

    This combination never looks wrong. It’s what designers call “timeless” because it works with your taste five years from now just as well as today. Your bedroom becomes a place you keep, not a space you’ll feel like refreshing constantly.


    12. Embrace Soft Sage with Wooden Accents

    Sage green pairs beautifully with natural wood because both feel organic. This palette is having major momentum right now—designers love it for its calming effect.

    Paint walls in soft sage like Farrow & Ball Cromarty or Benjamin Moore October Mist. Layer in natural wood through a bed frame ($400–800, or $100–300 thrifted), shelving ($50–150 for floating shelves), and even small wood accessories like a cutting board as decor ($15–30). Add plants in ceramic pots ($10–40 each) on shelves and the nightstand. You can start with paint ($30–50) and add wood pieces gradually.

    Studies show sage green actually reduces anxiety, so this isn’t just pretty—it’s functional. You’ll notice yourself feeling calmer the moment you walk in. Pair it with plants and wood, and your brain registers it as a natural space, which deepens relaxation.


    13. Mix Warm Taupe with Terracotta Textiles

    Warm taupe serves as a neutral backdrop for richer earth tones—it lets terracotta textiles shine without competing. This combo is budget-friendly because paint is cheap and bedding is the splurge.

    Paint walls in warm taupe ($30–50 in supplies). Invest in a terracotta linen duvet ($180–350)—linen breathes well and gets softer with washing, so it’s worth the splurge. Layer with terracotta pillows ($20–40 each) and a warm taupe throw ($50–80). All of this feels cohesive because the colors are close family. Check Etsy, Parachute, or West Elm for quality bedding. Total investment: $250–500.

    This is the palette for people who want intentional style without overthinking it. Everything coordinates effortlessly, and your room looks curated even though you just followed a simple formula. That’s the win.


    14. Go Moody with Charcoal and Warm Accents

    Charcoal can feel cold, but when you anchor it with warm wood and brass, it becomes moody and sophisticated instead. This palette works for anyone who loves drama but needs calm too.

    Paint walls in soft charcoal like Benjamin Moore Wrought Iron or Sherwin-Williams Iron Ore. Keep bedding light (cream, warm white) to balance the dark walls. Add warmth through brass fixtures ($50–150), warm wood furniture ($200–500 thrifted or new), and perhaps one warm-toned accent pillow ($20–40). Ensure you have good lighting—this palette needs it. Total setup: $400–800.

    Your bedroom becomes a cozy cave that feels like a sanctuary. The contrast between dark walls and light bedding creates visual interest, and the warm metallics prevent it from feeling cold or institutional. You’ll sleep like you’re tucked away from the world.


    15. Layer Soft Taupe with Cream Everything Else

    Sometimes less is more. A single warm neutral walls with creams layered throughout creates a cohesive, calming space that doesn’t feel bland—it feels intentional.

    Paint walls in soft taupe like Benjamin Moore Hopsack or Sherwin-Williams Accessible Beige ($30–50). Everything else: cream. Bedding, curtains, throw pillows, rugs—all in the cream family but different textures (linen, cotton, knit). This costs $200–400 depending on your choices, but the result feels so calm your nervous system relaxes the moment you enter. Target, Ikea, West Elm all have affordable creams in every category.

    This palette is perfect if you’re overwhelmed by choices or live in a small space. Monochromatic warmth makes rooms feel larger and more coherent. You’re not scrambling to match colors; you’re just going deeper into texture and material. It’s subtle but incredibly effective.


    16. Warm Olive Green with Natural Textiles

    Olive green is the sophisticated older sibling of sage—it’s earthier and pairs beautifully with natural fabrics. This palette feels collected and thoughtful.

    Paint walls in warm olive like Sherwin-Williams Rookwood Dark Green or Benjamin Moore Calico Green ($30–50). Layer in natural textiles: linen duvet ($200–350), chunky knit throw ($60–100), linen curtains ($80–150). Add one or two potted plants ($10–40 each) and perhaps a woven wall hanging ($30–80). The beauty is you can collect these pieces over time—start with paint, add bedding, then gradually bring in plants and textiles. Total possible investment: $400–700.

    This palette works for people who want their bedroom to feel like a retreat from the modern world. The olive and natural textiles create an almost cottagelike feeling—cozy without being precious. You’ll actually want to spend time here.


    17. Soft Caramel Brown with Cream Layering

    Caramel is warmer and more inviting than standard brown—it has sweetness to it. Layering creams on top creates depth without clashing.

    Paint walls in soft caramel like Benjamin Moore Autumn Leaf or Sherwin-Williams Caramel ($30–50). Invest in a cream upholstered headboard ($300–600) or thrift one for $50–150. Layer with cream bedding ($150–300), a tan throw ($50–80), and a cream throw ($40–80). The layering of creams and tans creates visual interest even though everything’s in the warm neutral family. Budget $350–800 depending on how much you thrift.

    This palette makes your room feel like a high-end hotel—wrapping and protective. The layered neutrals catch light differently at different times of day, so your room looks alive instead of static. You’ll notice how the light changes your mood throughout the day.


    18. Balance Deep Forest Green with Warm Accents

    Deep forest green is bold but calming—it’s the color of nature at its most peaceful. Warm brass accents prevent it from feeling too serious.

    Paint one wall (or all walls if you’re feeling brave) in deep forest green like Sherwin-Williams Tricorn Black with green mixed in, or use Farrow & Ball’s Green Smoke ($30–80). Keep other walls cream or warm white to avoid a cave-like feeling. Add warmth through brass mirrors ($60–150), brass wall sconces ($50–120), and natural wood furniture ($200–500, thrifted or new). Bedding stays light (cream, warm white). Total: $350–750.

    This palette is for people ready to be a bit bold. Forest green makes a statement without screaming for attention. Paired with brass and natural wood, your room feels like a curated gallery—the kind of space where everyone asks for decorating tips.


    19. Combine Honey Beige with Soft Terracotta

    Honey beige is literally the color of honey—warm and golden without being yellow. Terracotta accents tie it to earth without overwhelming the space.

    Paint walls in honey beige like Benjamin Moore Golden Straw or Sherwin-Williams Kilim Beige ($30–50). Layer terracotta through: throw pillows ($20–40 each), a small area rug ($80–200), or pottery pieces ($15–50 total). Keep bedding cream or ivory to stay light. These colors work best in rooms with warm natural light—if your room is north-facing, they might feel muted. Budget $150–350 total.

    This palette has a golden, welcoming feel—like walking into a sun-filled space. The terracotta grounds the honey, preventing it from feeling too light or washed out. Your room becomes a place you want to retreat to, not escape from.


    20. Layer Soft Stone with Greige and Cream

    Stone tones (think sandy, gravelly colors) create a naturally calm backdrop. Layering with greige and cream adds subtle variation without visual chaos.

    Paint walls in soft stone like Benjamin Moore Balanced Beige or Sherwin-Williams Urbane Bronze (in lighter tint) ($30–50). Add texture with peel-and-stick stone wallpaper on one wall ($40–80)—this is renter-friendly and takes 30 minutes. Bedding in greige ($150–300), curtains in cream ($80–150), and keep accessories minimal (wooden bowl, ceramic vase). This palette is calming because it mirrors natural rock and sand.

    Your room becomes a blank slate for your mind—there’s nothing jarring to process, so you relax immediately. This is ideal if you’re sensitive to visual stimulation or if you work a high-stress job. Your bedroom becomes actual refuge.


    21. Warm Putty Gray with Soft Blush Details

    Putty gray sits perfectly between warm and cool—it’s gray without feeling cold. Blush adds femininity without being saccharine.

    Paint walls in warm putty gray like Farrow & Ball Elephant’s Breath or Benjamin Moore Gray Owl ($30–50). Layer blush through: curtains ($80–150), throw pillows ($20–40), or an area rug ($100–250). Keep most bedding cream so the blush pops subtly. This palette works for anyone who loves soft color but worries it’ll feel dated. It won’t—it’s classic and flexible.

    This combo makes your room feel both calm and intentional. The blush adds personality without overwhelming, and the putty gray keeps everything grounded. You get a space that’s distinctly yours but also timeless.


    22. Build with Warm Chocolate and Soft Gold

    Warm chocolate and soft gold together feel like a spa—expensive, calm, intentional. This is the palette for anyone ready to go a bit richer.

    Paint walls in warm chocolate like Benjamin Moore Espresso or Sherwin-Williams Cavern Clay ($30–50). Layer gold through: picture frames ($20–60), lamp bases ($50–100), curtain rods ($60–120), or even gold-leaf wallpaper ($80–150). Bedding stays cream or warm white to balance the dark walls. This palette needs good lighting—ensure you have bedside lamps and perhaps a dimmer switch ($30). Budget $300–700.

    Your room becomes a sanctuary that feels like the luxury hotel you’d save up to visit—except it’s your everyday space. The richness makes you feel cared for, which sounds simple but genuinely affects your sleep quality and daily mood.


    23. Soft Taupe with Sage Accents and Natural Materials

    Combining two earth tones (taupe and sage) with natural materials creates a biophilic space—one that genuinely calms your nervous system because it registers as “natural.”

    Paint walls in soft taupe like Benjamin Moore Hopsack ($30–50). Layer sage through: curtains ($80–150), throw pillows ($20–40), or even one small accent wall ($30–50). Add natural materials: linen bedding ($200–350), wooden shelves ($50–150), potted plants ($10–40 each). Budget $400–800, but you can build this gradually. Every addition amplifies the calming effect.

    This is the palette for people who feel stressed in urban environments or high-stimulation spaces. Your bedroom becomes a biophilic retreat where your body actually relaxes. Studies show rooms like this improve sleep quality significantly.


    24. Rich Terracotta Walls with Cream and Natural Fiber

    Rich terracotta (not pale) as a main color is bold but creates instant warmth. Paired with cream and natural fibers, it feels curated and intentional.

    Paint walls in rich terracotta like Benjamin Monroe Caliente or Sherwin-Williams Energetic Orange ($30–50). Keep bedding cream ($150–300) and layer with natural fibers: a jute rug ($80–200), macramé ($30–80 or DIY for $5), woven baskets ($20–60). This palette works best if your room has good natural light. If you’re renting, use peel-and-stick wallpaper ($50–100) instead of paint.

    This palette says “I’m intentional and not afraid of color.” It’s bold enough to feel current but grounded enough in earth tones to stay timeless. Your bedroom becomes the kind of space guests notice and comment on—that’s how distinctive it is.


    25. Soft Greige Base with Layered Warm Wood Tones

    Here’s a secret: mixing wood tones (light, medium, dark) in one room looks intentional when the wall color is greige. It reads as “curated” instead of “mismatched.”

    Paint walls in soft greige like Benjamin Moore Accessible Beige ($30–50). Layer wood tones through your furniture—don’t stress if your pieces don’t match. This is the trend right now: collected wood rather than matched sets. Add cream bedding ($150–300), keep accessories minimal, and let the wood do the talking. You can gather pieces gradually from thrift stores ($50–300 each) or invest in new ($300–800 per piece).

    Your room feels like it was designed over time, like you actually live there instead of just sleep there. Mixed wood tones with greige walls create a home feeling that sterile matching sets never achieve. This is the palette for people who value authenticity over perfection.


    26. Warm Ivory with Deep Terracotta and Natural Textiles

    Warm ivory is the best of whites—it’s lighter than cream but warmer than stark white. Deep terracotta as a main textile creates richness without overwhelming.

    Paint walls in warm ivory like Benjamin Moore Swiss Coffee or Sherwin-Williams Alabaster ($30–50). Invest in a deep terracotta linen duvet ($200–350)—this becomes your main visual anchor. Layer with cream and terracotta throw pillows ($20–40 each), a woven wall hanging ($30–80), and natural wood furniture ($200–500 thrifted). The palette stays warm and cohesive without feeling matchy.

    This is the final palette because it combines everything beautiful about earth tones: richness, warmth, natural materials, and intentional layering. Your room becomes a complete retreat that works whether it’s morning, noon, or night. This is the palette that makes people ask, “Did you hire a designer?”


    Save this post and pick one palette to test this weekend—grab a paint sample or fabric swatch and live with it for a few days. You’ll know immediately if it’s right for your space. Share this with anyone who’s ready to move past gray and actually enjoy their bedroom.

  • 24 Luxury Dorm Room Ideas That Make College Living Feel Premium

    24 Luxury Dorm Room Ideas That Make College Living Feel Premium

    Your dorm room doesn’t have to feel like a temporary holding cell. With the right mix of smart purchases, styling tricks, and budget-friendly hacks, you can create a space that feels genuinely premium—somewhere you’ll actually want to spend time. College is expensive enough without sacrificing style, so I’m sharing 24 ideas that work whether you’re in a tiny double or a spacious single. Most of these take minutes to set up, cost less than $100, or use things you already have. By the time you’re done, your room will feel more like a boutique hotel retreat than a standard dorm setup. Let’s make this space feel like yours.

    1. Invest in High-Quality Sheets That Actually Feel Good

    Good sheets transform how much you actually enjoy being in your room. Dorm-issued bedding is often thin and scratchy, which makes your bed feel more like a chore than a retreat.

    Splurge on one set of Egyptian cotton or linen sheets (200+ thread count minimum) around $50–$80 from Brooklinen, Parachute, or even Amazon Basics. You’ll sleep better and wake up actually wanting to make your bed. Pair them with your standard twin XL dorm sheets for layering. The difference between rough and silky sheets is honestly life-changing, and you’ll use them every single night.

    Pro tip: Wash them inside-out to keep colors vibrant longer. The best part? Your room instantly feels more mature the moment people see quality bedding.

    2. Add a Textured Throw Blanket Over Your Bed

    A good throw blanket does triple duty: it makes your bed look intentional, adds warmth for chilly dorm rooms, and gives you something cozy to grab while studying.

    Look for weighted or cable-knit throws in neutral tones (cream, gray, tan) around $30–$60 at Target, IKEA, or Wayfair. Drape it casually over one corner of your bed or fold it at the foot—it instantly looks styled. Avoid thin polyester throws; cotton, linen, or chunky knit fabrics photograph better and feel genuinely nice. This small addition makes your space look like you actually tried, without any real effort.

    Your room suddenly looks curated instead of bare.

    3. Hang a Statement Headboard (Even If It’s Temporary)

    A headboard instantly makes your bed feel like the centerpiece of your room instead of just furniture shoved against a wall.

    Skip expensive built-ins and go for peel-and-stick or fabric headboards (around $40–$80 on Amazon). Macramé, woven, or upholstered options all rent-proof and removable. Alternatively, hang a tapestry or large fabric from command strips for a similar effect at $15–$30. You could even DIY one using a bed sheet and some creative hanging. The impact is huge—suddenly your bed looks intentional and styled, like the focal point of an actual bedroom.

    This change makes your Instagram-worthy bed photo actually possible.

    4. Create a Gallery Wall of Personal Photos and Art

    A gallery wall transforms a blank dorm wall into a personal style statement and makes the space feel unmistakably yours.

    Gather 10–15 printed photos from home, mix in some affordable art prints from Etsy or Desenio ($5–$15 each), and use matching or mixed frames from Target or IKEA ($15–$50 total for frames). Arrange them in a loose grid using painter’s tape first to plan, then hang with command strips. Stick to a cohesive color scheme (black frames with warm tones, or all natural wood) to keep it looking intentional. This takes about an hour and costs under $100, but it looks like you spent serious money.

    Suddenly, the room feels like it belongs to someone with actual taste.

    5. Upgrade Your Lighting With a Dimmable Desk Lamp

    Dorm fluorescent or overhead lighting is harsh and unflattering. Good lighting changes everything about how a space feels.

    Buy a matte black or brass dimmable desk lamp around $30–$50 from IKEA, Target, or Amazon. LED bulbs that let you adjust brightness create instantly better ambiance than standard dorm lighting. Position it on your desk for studying, then flip off the overhead when you want the room to feel calm. This single upgrade makes your room feel more sophisticated and actually usable for different moods—studying mode, hangout mode, relaxing mode.

    The difference is noticeable the first time you dim those lights.

    6. Layer Your Lighting With String Lights (Strategically Placed)

    String lights are such a dorm staple they can feel cliché—but placed strategically, they actually look grown-up.

    Swap chaotic random strings for a single strand of warm LED fairy lights draped neatly above a shelf or along your headboard (around $15–$25). Look for designs with adjustable brightness and go for warm white, not cool blue. The key is restraint—one intentional strand looks premium; covering your entire room looks theme-park. Pair with your dimmable desk lamp for layered lighting that actually works.

    This gives your room that effortless boutique hotel vibe.

    7. Use a Quality Area Rug to Define Your Space

    An area rug anchors your room and makes a small space feel intentional instead of cramped.

    Invest in a 2×3 or 3×5 natural fiber rug (jute, sisal, or wool blend) around $40–$80 from IKEA, Wayfair, or Rugs USA. Place it under your bed so it extends slightly on either side. This grounds your sleeping area and creates visual separation in a small dorm. Neutral tones work best for rental spaces. If you want something softer, add a smaller fuzzy rug on top ($20–$30) for texture contrast. The rug makes your room feel designed, not randomly furnished.

    The space suddenly feels more intentional and layered.

    8. Paint Your Accent Wall (With Permission)

    A single accent wall in a deep or muted tone gives your room personality without overwhelming the space.

    Check with your RA first—most dorms allow one accent wall in student-approved colors. Choose sage green, soft gray, warm terracotta, or navy ($15–$30 per gallon at any hardware store). Paint just one wall behind your bed for maximum impact with minimum risk. Use quality painter’s tape and do this over a weekend. If painting isn’t allowed, create the same effect with peel-and-stick wallpaper ($20–$40 on Amazon) for a renter-friendly option. Either way, one colored wall instantly makes your room feel curated.

    You’ve just added sophistication with a single weekend project.

    9. Swap Out Basic Pillows for Textured Ones

    Pillow styling is where most dorm rooms fall flat. Basic white pillows look institutional; textured ones look intentional.

    Keep your standard white pillow for sleeping, then add 2–3 accent pillows in mixed textures around $20–$50 total. Look for linen, velvet, chunky knit, or corduroy covers in cream, tan, or soft gray. Arrange them against your headboard or wall during the day and toss them aside when you sleep. This takes zero effort but makes your bed look styled and sophisticated. Brands like Target, IKEA, and West Elm have affordable options that look high-end.

    Your bed just went from bare to editorial in seconds.

    10. Install Floating Shelves for Display and Storage

    Floating shelves add storage, display space, and vertical interest without taking up floor space in a tiny dorm.

    Get 2–3 small wooden shelves ($20–$40 each from IKEA or Wayfair) and mount them with command strips if you can’t drill. Style them with books, photos, a small plant, and a candle—grouping items in odd numbers looks more designed. This gives you display space for things you actually love instead of letting them pile up on your desk. The shelves also make your room look taller and more organized.

    Suddenly you have real storage that also looks intentional.

    11. Add a Small Plant for Biophilic Calm

    A single plant improves air quality, adds color, and makes your room feel less institutional—with almost zero maintenance required.

    Get a low-maintenance plant like pothos, snake plant, or ZZ plant (around $10–$20 from a garden center or grocery store). Add a simple ceramic pot ($8–$15) if needed. Water once a week, place it where it gets some light, and you’re done. If you forget plants, a faux plant looks surprisingly good and requires zero guilt ($15–$30). Plants add life to shelves or desk corners and remind you that you’re a person who cares about their space.

    Your room now feels alive instead of temporary.

    12. Use Removable Wallpaper on One Accent Wall

    Peel-and-stick wallpaper gives you all the impact of paint without any permanent commitment—perfect for renters.

    Choose a geometric, botanical, or subtle stripe pattern in muted tones (around $20–$40 per roll on Amazon, Etsy, or Wayfair). One roll covers roughly 30–50 square feet depending on pattern. Follow the application instructions carefully and use a credit card to smooth out bubbles. This takes 1–2 hours but looks professional. Unlike paint, it peels off cleanly when you move out. Your room instantly gains personality and texture.

    You’ve added a high-end design element without breaking your lease.

    13. Curate a Minimal Desk Setup That Actually Works

    A cluttered desk makes your entire room feel chaotic. Curated desk styling makes everything feel controlled.

    Keep only what you actually use: desk lamp, pencil holder, small plant, one framed photo. Add a desktop organizer ($10–$20) for chargers and cables so they don’t sprawl everywhere. Use drawer dividers ($5–$15) to keep small supplies contained. A clear desk surface with just a few intentional items looks sophisticated and makes studying feel less stressful. You’ll also be more productive when you’re not surrounded by clutter.

    Your desk (and mental state) just got way more manageable.

    14. Invest in Blackout Curtains for Better Sleep

    Dorm windows often face hallways or early morning sun. Blackout curtains improve sleep and look way more finished than standard dorm blinds.

    Buy blackout curtains in a dark neutral ($30–$60 from Target, Amazon, or IKEA) and hang them with a tension rod if you can’t drill. Layer sheer white curtains underneath for daytime softness. This combination looks intentional, controls light for sleep, and adds texture to your window. Quality curtains make your room feel less like a dorm and more like an actual bedroom. Blackout curtains are especially worth it if you have early classes or late-night roommates.

    You’ll sleep better and your room looks instantly more sophisticated.

    15. Create a Reading Nook With a Floor Cushion

    A dedicated reading nook gives you a separate zone to relax, study, or just escape—even in a small dorm room.

    Grab a large square floor cushion or pouf ($25–$50 from IKEA, Target, or Amazon) and place it in a corner with a small side table ($20–$40) for your mug or book. Add a reading lamp overhead for ambiance. Drape a throw blanket nearby. This creates a visual separation and gives you a designated “chill zone” that’s not your bed. It’s especially useful if your roommate is studying when you want to relax.

    You’ve created a sanctuary in a tiny space.

    16. Add Wooden Elements for Warmth

    Dorm furniture is often cheap plastic or basic metal. Adding wooden pieces warms up the space instantly.

    Hunt for wooden desk organizers, picture frames, shelves, or side tables from thrift stores ($5–$20 each), Target, or Wayfair ($15–$50 per piece). Natural wood in varying tones adds richness and makes your space feel less institutional. Focus on one wood tone (warm honey, natural, or whitewashed) for cohesion. Even small touches like wooden desk accessories and frames add sophistication. Thrifted wood pieces also have character and cost way less than new furniture.

    Your room suddenly feels warmer and more lived-in.

    17. Hang a Large Mirror to Expand the Space

    A large mirror makes a small dorm feel bigger and bounces light around the room—plus it’s functional.

    Invest in a statement mirror with a frame in gold, wood, or black ($40–$100 from Target, West Elm, or Wayfair). Hang it opposite your window to reflect natural light, or on a wall that feels bare. Avoid cheap plastic mirrors; a solid frame looks intentional. A large mirror also means you don’t need a separate full-length mirror taking up floor space. It’s functional, decorative, and makes your room feel more spacious.

    Suddenly your room feels airier and more polished.

    18. Style Your Window Sill With Small Decor

    Window sills are prime real estate—use them for styling instead of letting them collect dust.

    Arrange a small plant, a candle, and a framed photo or two on your window sill in odd-number groupings. Vary the heights for visual interest. Keep it minimal so it doesn’t block too much light. This small touch makes your room look curated and gives you a pretty focal point. Bonus: it looks good from outside your window too, which is honestly kind of nice.

    Your window just became an intentional design feature.

    19. Use a Duvet Cover for Easy Freshness

    A quality duvet cover protects your comforter, is easy to wash, and makes your bed look intentional and changeable.

    Buy a high-thread-count duvet cover in cream, gray, or soft tan ($40–$80 from Parachute, Target, or Brooklinen). This is your main bed layer, so invest in something that feels nice and looks good. You can swap it out seasonally or when you want a refresh—way easier than washing an entire comforter. A quality duvet cover makes your bed look polished and hotel-like. Tuck it in neatly for a styled look or let it drape casually depending on your vibe.

    Your bed just leveled up from “college dorm” to “actual bedroom.”

    20. Create Ambient Lighting With Candles (Smart Placement)

    Candles add warmth and sophistication way better than random string lights everywhere.

    Use unscented or lightly scented candles ($10–$20 each from Target, Anthropologie, or Amazon) in glass holders for safety. Place them on shelves, your side table, or desk—just one or two, intentionally positioned, not dozens scattered everywhere. This creates ambient lighting that feels grown-up and calming. Make sure they’re far from curtains and fabrics, and never leave them unattended. Candles add a spa-like quality to your space with minimal effort.

    Your room now has the kind of lighting that makes you actually want to relax in it.

    21. Organize Your Closet With Matching Hangers

    An organized closet makes your entire room feel more put-together, even if nobody sees inside.

    Swap mismatched hangers for uniform wooden or velvet hangers ($15–$30 for a set of 10–20 from Target, IKEA, or Container Store). Organize clothes by color or type, fold sweaters on a shelf, and use drawer dividers for smaller items. Hang bags and accessories on hooks inside the door. Even if your closet is tiny, this organization system makes it feel controlled. Plus, when you open your closet, you actually feel calm instead of overwhelmed.

    Suddenly your room feels more organized than just what people see.

    22. Add a Vintage or Thrifted Piece for Character

    One thrifted piece adds personality and makes your room feel less like a dorm and more like actual home.

    Hunt thrift stores, Facebook Marketplace, or Craigslist for a vintage nightstand, small bookshelf, or wooden stool ($15–$50). Look for solid wood pieces with good bones—a coat of paint can refresh anything. This single vintage item becomes a conversation starter and gives your space character. Mixing one thrifted piece with newer furniture looks intentional and eclectic, not mismatched. You’re supporting sustainable shopping and getting something nobody else has.

    Your room now has a story instead of just standard dorm furniture.

    23. Hang a Large Tapestry or Textile as Wall Art

    A large tapestry adds texture, color, and instant personality to a blank wall—and it’s completely removable.

    Find a quality textile or tapestry ($20–$60 from Etsy, Urban Outfitters, or Anthropologie) in a neutral or muted tone with pattern depth. Hang it with command strips above your bed as your main wall art. Choose textiles with actual weave or texture, not thin printed fabric. This adds visual richness and makes your room feel intentional. Unlike posters, a nice tapestry looks sophisticated and gallery-like.

    Your walls now have dimension instead of looking flat and bare.

    24. Set Up a Coffee Station on Your Desk

    A designated coffee station makes mornings better and adds coziness to your desk setup.

    Keep your electric kettle or mini coffee maker ($15–$30 from Amazon), your favorite mugs on a small mug tree ($15–$25), and coffee or tea organized in a small jar or container ($5–$10). This takes up minimal space but makes waking up in your dorm feel intentional. Add a small plant or candle nearby for ambiance. Your desk becomes a gathering spot instead of just a study zone. This small ritual makes your space feel more like home.

    You’ve created a morning moment worth savoring.

    Save this post and pick just one idea to tackle this weekend. You don’t need all 24—even three or four of these shifts will make your dorm room feel intentional, sophisticated, and genuinely yours. Which one are you trying first?

  • 22 Minimal Bedroom Concepts That Make Small Spaces Feel Bigger

    22 Minimal Bedroom Concepts That Make Small Spaces Feel Bigger

    Small bedrooms don’t have to feel cramped or cluttered. With the right design choices, you can make your compact sleeping space feel open, airy, and surprisingly luxurious—without knocking down walls or breaking the bank. The key? Strategic furniture placement, smart color choices, vertical storage solutions, and lighting that makes your room breathe. Whether you’re renting a studio apartment or working with a tiny master bedroom, these 22 concepts will help you maximize every inch while creating a bedroom that feels intentional and calming. From vertical storage hacks to curved furniture that softens tight corners, you’ll discover practical, achievable updates that actually work in real life. Ready to make your small space feel bigger? Let’s dive in.

    1. Paint Walls in Soft, Light Neutrals

    Light wall colors are your secret weapon for making any room feel larger and more open. Soft whites, pale creams, warm beiges, and barely-there grays reflect light and create visual spaciousness without feeling cold or clinical.

    Paint is one of the cheapest ways to refresh your room—budget $30–$60 for paint and supplies. Pair your light walls with white or light-colored trim and baseboards for maximum impact. If you’re renting, ask your landlord; many allow neutral paint updates. The entire project takes one afternoon, and you’ll notice the difference the moment light hits those fresh walls.

    Pro tip: Choose warm neutrals over cool grays—they feel more inviting while still expanding the space.

    You’ll instantly feel like your room has grown. The soft color becomes the foundation for everything else you add, making your small bedroom feel like an intentional retreat rather than a box.

    2. Choose a Low-Profile Bed Frame

    A bed that sits high off the ground steals visual real estate. Low-profile and platform beds keep sightlines open and let more floor space show, making the room feel less crowded.

    Look for platform beds or low-profile frames at IKEA ($150–$300), Wayfair ($200–$400), or Target ($250–$500). The lower your bed sits, the more open your ceiling appears. This works in every room size but feels especially powerful in small spaces. Installation takes 30 minutes to two hours depending on the style—most come flat-packed and need assembly.

    Alternative: If you already have a high bed, add a bed skirt in a color matching your walls to minimize its visual weight.

    Your room immediately feels more spacious because sightlines travel freely across the floor. Plus, under-bed storage suddenly becomes usable without crowding the eye.

    3. Use Vertical Storage to Reclaim Floor Space

    Floor clutter makes small rooms feel smaller instantly. By building storage upward, you keep belongings accessible while freeing up precious floor square footage.

    Install floating shelves ($40–$150 per unit from IKEA, Home Depot, or Wayfair) or lean into a tall bookcase ($150–$400). Measure your wall carefully and go as high as comfortable reach allows. Installation takes one to two hours if you’re confident with a drill; hire a handyperson for $50–$100 if needed. Use matching storage boxes or baskets on shelves to contain small items and maintain visual calm.

    Pro tip: Paint shelves the same color as your walls for a seamless, space-expanding effect.

    Your bedroom gains functional storage without eating into floor space. You’ll have room to move and breathe, and everything has a designated home—no more piles on the dresser.

    4. Add Mirrors to Reflect Light and Space

    Mirrors are a designer’s favorite trick for small rooms. They bounce light around the space and create the illusion of depth and doubled square footage.

    A large leaning mirror costs $50–$200, while a wall-mounted mirror runs $60–$300 depending on size and frame style. Position it opposite a window to amplify natural light, or place it on a wall that’s typically shadowed. Hanging takes 15 minutes with the right hardware. Avoid placing mirrors directly opposite harsh artificial light—aim for natural light reflection instead.

    Alternative on a budget: Lean a large mirror against the wall without hanging it (renter-approved).

    Light bounces around your room, making it feel brighter and somehow bigger. The psychological effect is real—your brain registers more space when it sees depth via reflection.

    5. Install Wall-Mounted Nightstands

    Traditional nightstands claim valuable floor space. Floating wall-mounted options keep your floor open while still giving you a spot for a lamp and phone.

    Wall-mounted nightstands run $40–$150 each from retailers like West Elm, IKEA, or Wayfair. You’ll need a stud finder and basic hardware—installation takes 20–30 minutes per nightstand. If drilling sounds intimidating, a handyperson can install both for $40–$80. Pair with a $20–$50 swing-arm wall lamp to save more floor space and improve functionality.

    Pro tip: Match the nightstand color to your walls for a streamlined look.

    Suddenly you have an extra few feet of floor space that makes movement through your room feel smoother. Your bedroom becomes more navigable and less cramped.

    6. Choose a Narrow Dresser or Wall-Mounted Shelving Instead

    A traditional wide dresser overwhelms a small bedroom. Narrow, tall dressers or vertical storage solutions use the same footprint but feel far less bulky.

    Look for slim dressers at IKEA ($150–$250), Target ($180–$350), or Wayfair ($200–$400). Aim for pieces under 20 inches deep. You get the same storage capacity in a footprint that doesn’t dominate your room. Alternatively, install three to four narrow floating shelves ($60–$150 total) for a more customizable approach.

    Pro tip: A tall, narrow dresser can do the work of a wider piece while looking more proportional to your space.

    Your room gains breathing room without sacrificing storage. The eye moves more freely, and the space feels deliberately curated rather than overstuffed.

    7. Embrace Minimalist Bedding to Reduce Visual Weight

    Piles of pillows and heavy comforters visually weigh down a small bed and make the room feel busy. Clean, minimal bedding opens up sightlines and creates calm.

    Invest in high-quality sheets ($40–$80) and a lightweight linen or cotton comforter ($80–$200). Skip the decorative pillow overload—one or two high-quality pillows look intentional and modern. This entire refresh costs $150–$300 but pays dividends in both aesthetics and sleep quality. You’ll actually want to make your bed because it looks so clean and inviting.

    Alternative on a budget: Use what you have and simply remove excess pillows and blankets. Free instant refresh.

    Your bed becomes a visual anchor rather than a visual cluttered mess. The room feels serene and intentionally designed, making the entire space appear more spacious.

    8. Use Curved or Round Furniture to Soften Tight Corners

    Sharp corners and angular furniture can feel restrictive in small spaces. Curved and round pieces soften the room and create a more flowing, comfortable atmosphere.

    Look for curved accent chairs ($200–$500) at Article, West Elm, or Wayfair, or round side tables ($80–$200) at IKEA or Target. Curved headboards ($300–$800) also work beautifully in compact rooms. The slight rounding takes up similar floor space but feels infinitely less harsh. This is an investment piece, but furniture with organic shapes lasts decades and makes your space feel intentional.

    Budget option: Swap sharp corner tables for a round ottoman ($80–$150) that serves as both seating and storage.

    Rounded shapes make your small room feel more livable and comfortable. You’ll notice the difference in how the space flows and how you move through it.

    9. Maximize Under-Bed Storage with Low-Profile Containers

    If your bed sits low to the ground, that under-bed real estate is prime storage opportunity. Low-profile containers keep things organized and hidden from view.

    Invest in flat storage containers or rolling under-bed drawers ($30–$80 each) from IKEA, Target, or Amazon. You can typically fit three to four containers depending on your bed’s height. Cost ranges $80–$250 for a full set. Fill them with off-season clothing, extra bedding, or shoes. Rolling drawers make accessing items far easier than stationary boxes. This project takes 20 minutes to set up and organize.

    Pro tip: Label containers so you know exactly what’s stored where and don’t create hidden clutter.

    You’ve essentially doubled your storage capacity without adding a single piece of furniture. Your bedroom stays tidy and spacious because everything has a hidden home.

    10. Install Shelving Above Your Headboard

    The wall space above your headboard is often wasted opportunity. Installing narrow shelves there gives you storage and display space without sacrificing floor area.

    Floating shelves cost $40–$100 each and installation is a 30-minute to one-hour project with basic tools. A handyperson can install three shelves for $60–$100 labor. Use these shelves for books, small plants, or sentimental objects. Keep styling minimal to avoid a cluttered look—five to seven items per shelf feels curated, not crowded.

    Alternative: Use adhesive shelves ($20–$40) if you can’t drill into walls. They’re renter-friendly and surprisingly sturdy.

    You’ve created display space and storage that draws the eye upward, making your room feel taller and more open. Plus, it’s personal and visually interesting without eating into floor space.

    11. Choose Light, Sheer Curtains or Roman Shades

    Heavy, dark curtains visually shrink a small room. Light, sheer options maintain airiness while still providing privacy and light control.

    Sheer curtains run $30–$80 per panel from IKEA, Target, or Wayfair. Pair them with Roman shades ($40–$120) underneath for light-blocking capability. Together, this costs $100–$200 and transforms your window’s visual weight. Installation takes 20 minutes with a basic rod and brackets. Sheer fabrics filter light beautifully and make your room feel connected to the outside world—psychologically expanding the space.

    Budget option: Use tension rod sheer curtains ($20–$40) for instant, renter-approved window dressing.

    Your room feels brighter and more open without losing privacy. Light flows through beautifully, and the space no longer feels boxed in by heavy fabric.

    12. Paint the Ceiling a Soft White or Pale Color

    Ceilings painted the same color as your walls (or a slightly lighter shade) create visual continuity and make the room feel taller. Dark ceilings visually drop and compress the space.

    Ceiling paint costs $15–$40 plus supplies—an afternoon project taking two to four hours depending on your comfort level. Use an extension roller to reach comfortably. If DIY feels overwhelming, hire a painter for $200–$400 for a small bedroom. The investment pays off immediately in perceived height and openness.

    Pro tip: Pale blue or soft gray ceilings work beautifully if you want subtle color without breaking the light, open feel.

    Your room instantly feels taller because your eyes travel uninterrupted from wall to wall. The subtle unity makes everything feel more spacious and intentional.

    13. Declutter and Commit to a One-In, One-Out Rule

    The fastest way to make a small room feel bigger is to remove stuff that doesn’t belong. Clutter visually shrinks any space and emotionally registers as chaos.

    Spend a weekend going through your belongings. Donate, sell, or discard anything you haven’t used in a year or doesn’t bring you joy. This costs nothing and takes one to two days. Moving forward, adopt a strict one-in, one-out rule—every new item that comes in means something leaves. This mindset keeps your room perpetually open and intentional.

    Pro tip: Use closed storage (bins, closets, drawers) for items you need but don’t display. Let open surfaces breathe.

    Immediately your room feels larger and calmer. You’ll notice the psychological shift—less stuff means less mental clutter and more mental peace.

    14. Use Narrow Console Tables Instead of Full Desks

    A full desk dominates a small bedroom. A narrow console table ($60–$150 from IKEA, Target, or Wayfair) gives you workspace without overwhelming your room. Look for tables under 12 inches deep—they disappear into the wall visually while remaining functional.

    Installation is typically just pushing it against the wall—no tools required unless you want to secure it. Add a narrow chair or stool ($40–$100) that tucks completely under the table when not in use. Total investment: $100–$250. This setup lets you work while maintaining the bedroom’s openness and calm.

    Alternative: Wall-mounted drop-down desks ($80–$200) fold away completely when not in use.

    You have a functional workspace that doesn’t dominate your room. The space remains flexible and calm, shifting between bedroom and office seamlessly.

    15. Add Ambient Lighting with Layered Light Sources

    Bright overhead lighting makes small rooms feel harsh and institutional. Layered lighting sources create warmth, comfort, and visual interest without harsh glare.

    Combine a main light source ($20–$60), a table lamp ($30–$80), and accent lighting like a small pendant ($40–$100) or string lights ($15–$40). Total cost: $100–$250. Use warm-temperature bulbs (2700K color temperature) for an inviting atmosphere. Install dimmer switches ($15–$40) if you’re handy, or hire an electrician ($50–$100). This creates flexibility—bright when you need it, soft when you’re winding down.

    Budget option: Add string lights and a table lamp for under $50 and skip the main fixture initially.

    Lighting becomes purposeful instead of utilitarian. Your small room gains layers of atmosphere, making it feel cozier and more intentionally designed.

    16. Choose a Single Statement Color as an Accent

    Covering all walls in bold color compresses small rooms. A single accent wall in a statement color (forest green, aubergine, deep blue, or warm terracotta) adds personality without overwhelming the space.

    Paint one wall with premium paint ($40–$80) in a color you love. The project takes three to four hours and costs $40–$100 total. Pair this with minimal, neutral furniture and decor so the color becomes the intentional focal point. This approach works beautifully in small spaces because it’s bold but contained.

    Pro tip: Choose the wall you see first when entering—maximum impact with minimum overwhelming.

    Your room gains character and intentionality without feeling smaller. The accent wall becomes a sophisticated focal point that elevates the entire space.

    17. Opt for Furniture with Built-In Storage

    Every piece of furniture should work overtime in a small bedroom. Beds with built-in drawers, ottomans with storage, and benches with cubbies maximize functionality without adding bulk.

    Storage beds run $300–$800 and give you a massive storage advantage. Storage ottomans cost $150–$400. While these are investments, they replace three separate pieces—your bed, a dresser, and possibly a storage bench. Quality pieces last decades and grow with you. Many retailers offer these (Article, West Elm, Wayfair) and delivery typically includes setup for $50–$150.

    Budget alternative: Add affordable storage benches ($80–$150 from IKEA) to the foot of your bed.

    You’ve eliminated the need for separate storage furniture, freeing up precious floor space. Your room remains uncluttered and everything has a clear purpose.

    18. Use a Tall, Narrow Bookcase as a Room Divider

    If your small bedroom also functions as a workspace or dressing area, a tall, narrow bookcase ($100–$300) can visually divide the space without walls or permanent changes—perfect for renters.

    Look for thin, tall bookcases at IKEA ($80–$200) that you can position strategically. This creates the illusion of separate zones within your room. Style both sides thoughtfully so it looks intentional rather than random. Installation is typically just pushing it into place—no mounting needed.

    Alternative: Use a tall plant shelf or hanging curtain to achieve a similar effect more affordably.

    Visually, your room now feels larger because the eye divides it into intentional zones. You’ve created purpose and flow within a limited footprint.

    19. Hang Shelves Around a Small Window to Frame It

    Windows are natural focal points. Flanking yours with slim floating shelves turns it into a designed feature while adding storage.

    Install narrow floating shelves ($30–$60 each) on either side of your window, leaving the window itself clear and unobstructed. A typical arrangement uses six to eight shelves total ($200–$400). Style them sparsely with plants, small books, and sentimental objects. This project takes two to three hours and transforms an ordinary window into a designed element.

    Pro tip: Group items in odd numbers (three or five) and mix heights for a curated, non-cluttered look.

    Your window becomes an intentional focal point and your room gains beautiful storage display space. The visual interest makes the room feel more thoughtfully designed.

    20. Keep Flooring Clear with Wall-Mounted Organizers

    Clutter on floors instantly makes small rooms feel cramped. Wall-mounted organizers, hooks, and narrow shelves pull everything off the ground.

    Install wall hooks ($10–$30 per set), over-door organizers ($15–$30), and fabric wall pockets ($20–$40) strategically around your room. Total investment: $50–$100 for a completely organized system. Hang bags, scarves, hats, and frequently-used items on these. Nothing sitting on the floor means visual openness and easy cleaning. Installation takes 30 minutes to one hour total.

    Budget option: Use adhesive hooks ($5 for a pack of five) for renter-friendly organization.

    Your floor becomes a clean, open canvas. Psychologically, visible floor space makes any room feel significantly larger and more intentional.

    21. Choose a Bedroom Rug Under 6 x 9 Feet

    An oversized rug fills a small bedroom. A properly-scaled rug (under 6 x 9 feet) anchors your space without consuming it.

    Quality rugs run $150–$400 from retailers like Rugs USA, Article, or Wayfair. Choose neutral tones or subtle patterns that echo your wall color. Placement matters: position it so at least 18 inches of flooring is visible on all sides. This creates visual breathing room while still defining your sleeping zone. A good rug lasts years and immediately improves a room’s coziness and sound quality.

    Budget option: IKEA rugs ($40–$80) offer solid quality and neutral designs.

    Your floor remains visible and open while your bedroom gains warmth and definition. The rug becomes a grounding element that makes the space feel intentional rather than cramped.

    22. Install Floating Corner Shelves for Dead Space

    Bedroom corners are often wasted vertical real estate. Corner shelves ($20–$50 each) fit snugly and use space that would otherwise sit empty.

    Install three to four corner shelves ($60–$200 total) in corners that are typically dark or unused. These take 30 minutes to one hour to install and instantly give you storage without eating into floor or wall space. Style them sparsely with plants, books, or small decorative objects. Corner shelves feel purposeful rather than cluttered when you edit what you display.

    Pro tip: Pair corner shelves with small corner lighting to make them feel intentional, not like storage accidents.

    Dead corner space becomes functional and beautiful. Your room gains usable storage while maintaining the clean, open aesthetic you’ve created.

    Save this post and tackle one idea this weekend—small changes add up faster than you’d think. Which tip are you trying first?