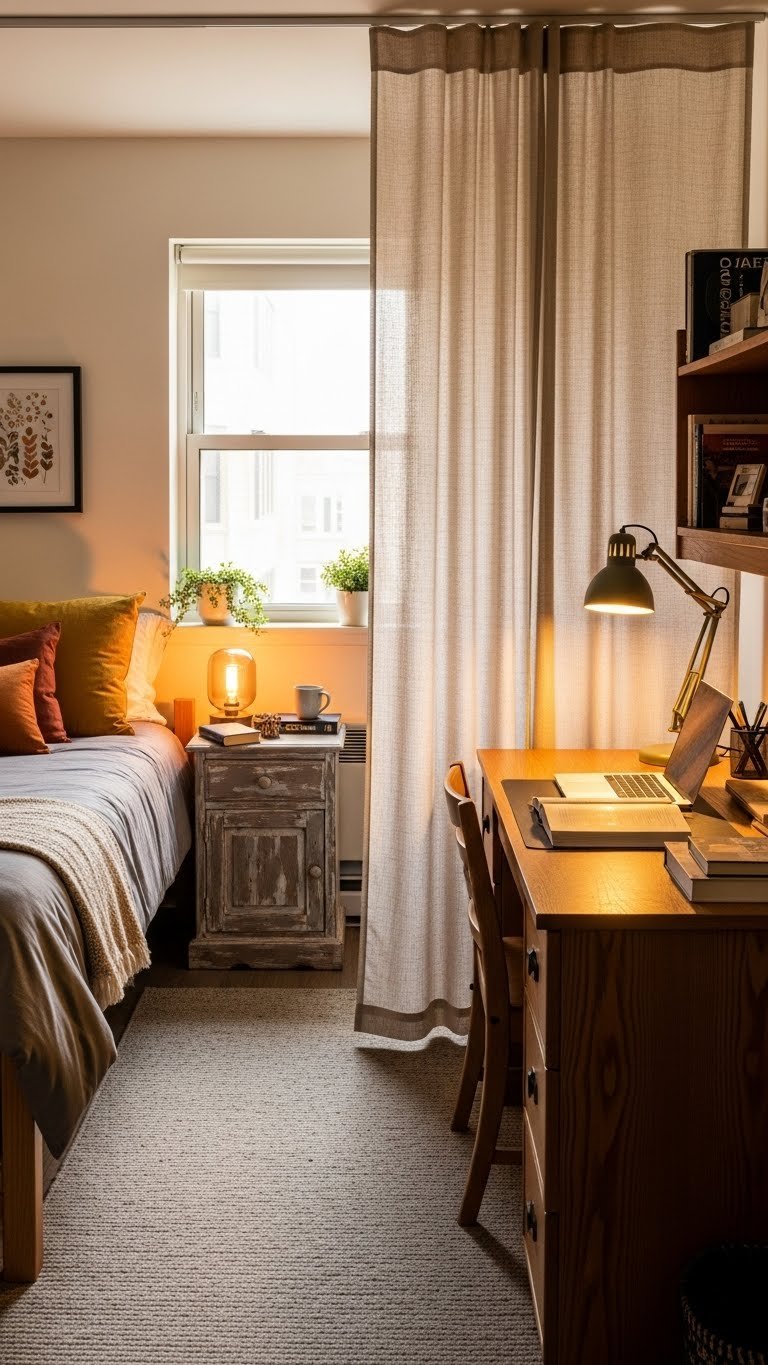
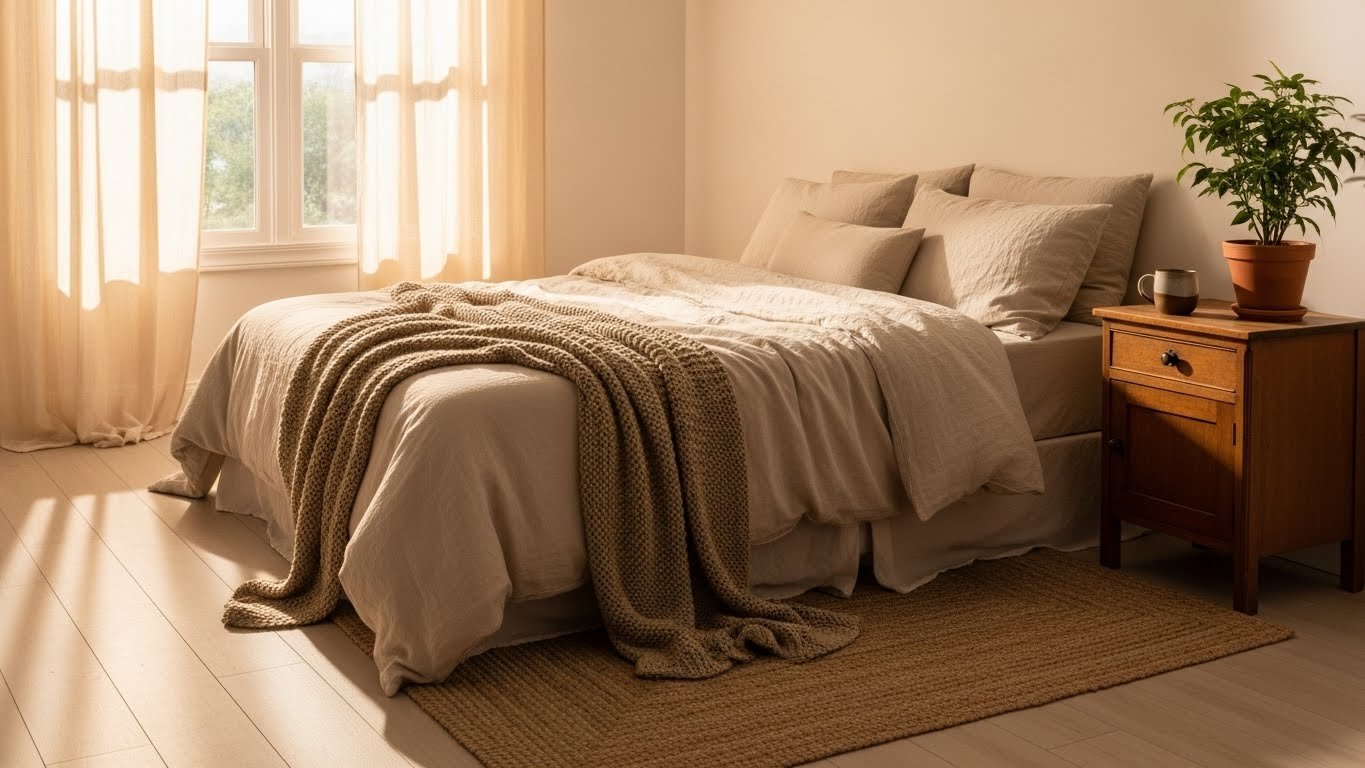
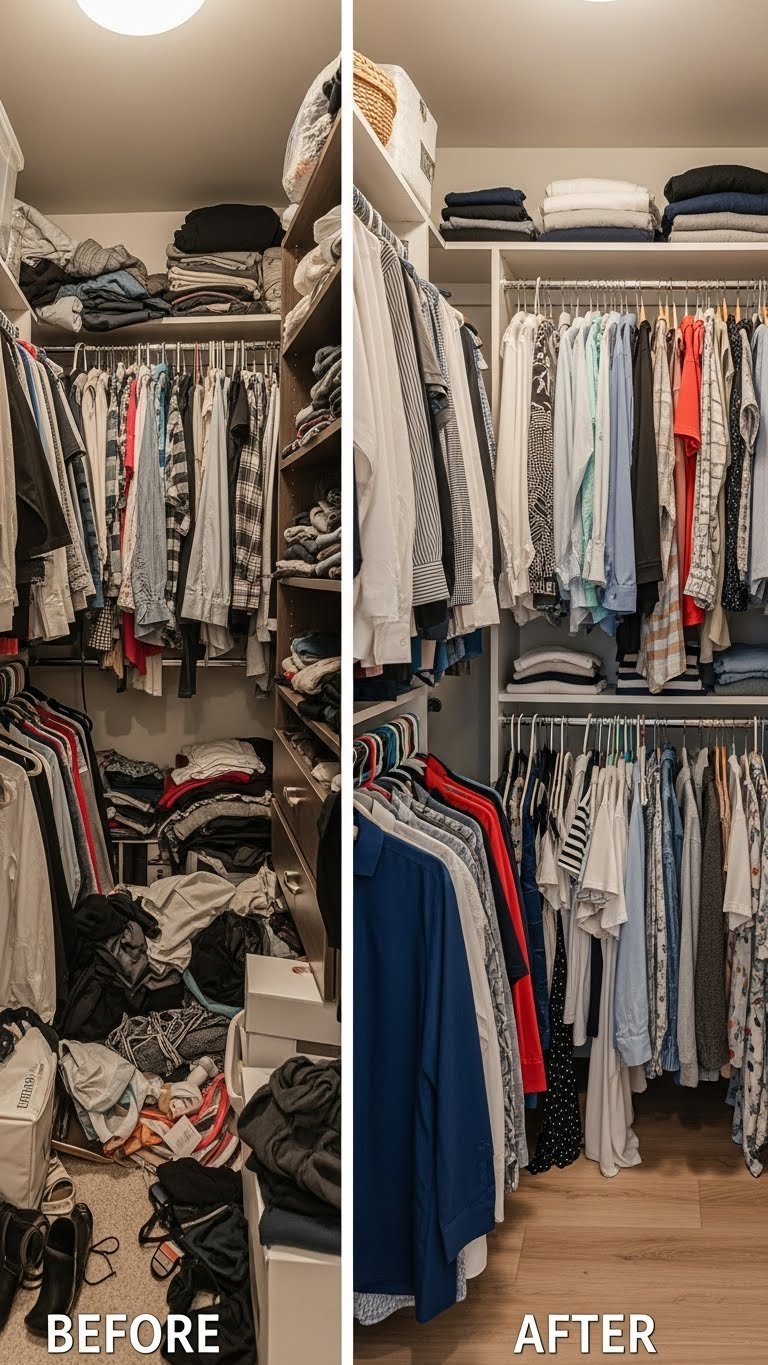
Category: Bedroom Decor

  • 27 Tiny Closet Organization Ideas That Maximize Every Inch

    27 Tiny Closet Organization Ideas That Maximize Every Inch

    Introduction

    Your closet doesn’t need to be a bedroom-sized luxury suite to feel organized and functional. Whether you’re working with a tiny apartment closet, a narrow hallway space, or just a cramped corner, smart organization can make you feel like you have twice the room. The secret isn’t more space—it’s using every vertical inch, choosing the right containers, and arranging your items strategically so you can actually see and reach everything. In this guide, you’ll discover 27 practical, budget-friendly ideas that transform small closets into spaces where you can find what you need in seconds. From hanging hacks to lighting upgrades to labeling tricks, these solutions work whether you’re renting or own your home.


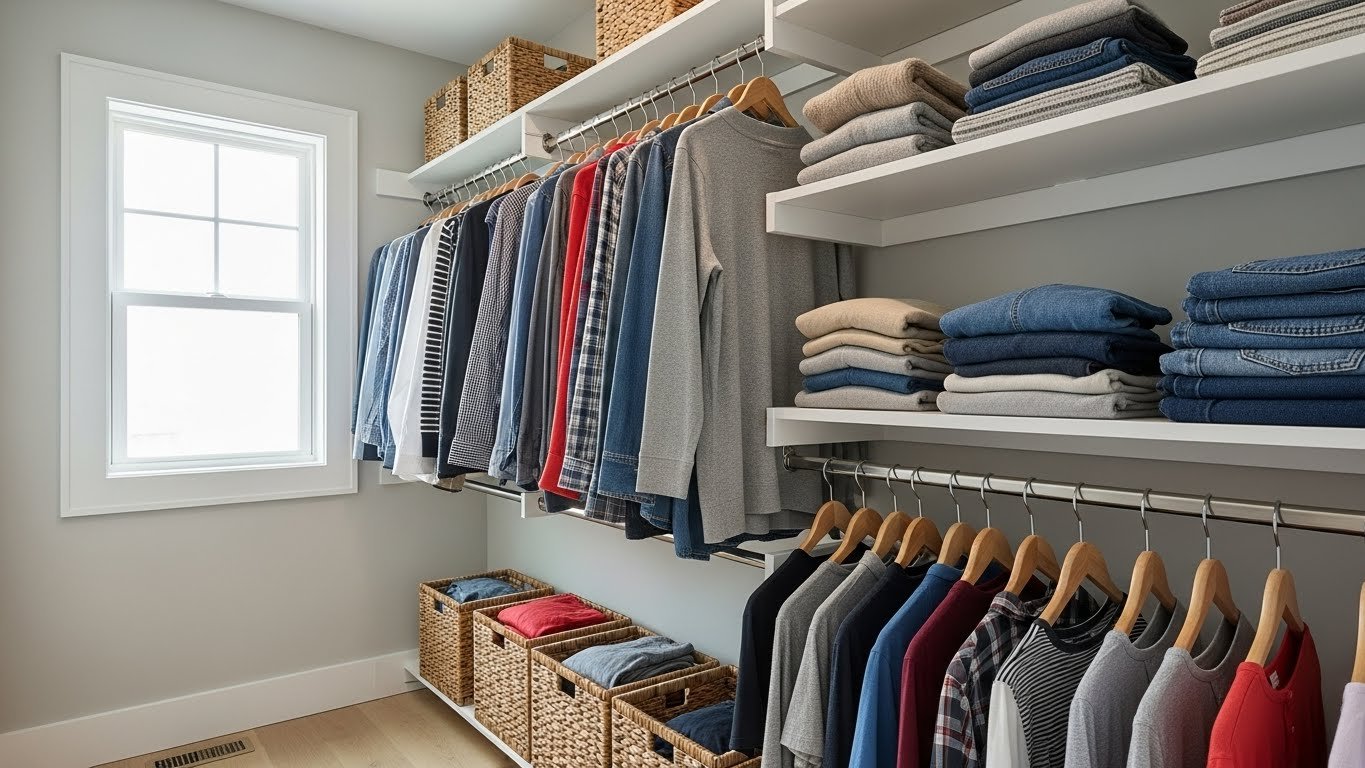
    1. Double Your Hanging Space with a Second Rod

    Doubling your hanging rod turns your vertical space into actual storage real estate. Install a second rod about 40 inches below the first one, creating two levels of hanging storage in the same footprint.

    Most closets waste 3–4 feet of height below standard rods. A removable tension rod (around $20–$35) takes 10 minutes to install and works beautifully for renters. If you own, a permanent installation with simple brackets runs $30–$60 total. Use the top rod for long items (dresses, coats) and the lower rod for folded pants, shorter blouses, or skirts. You’ll be shocked how much more fits.

    The best part? You’ll finally use all that dead space above your head without any permanent damage to walls.


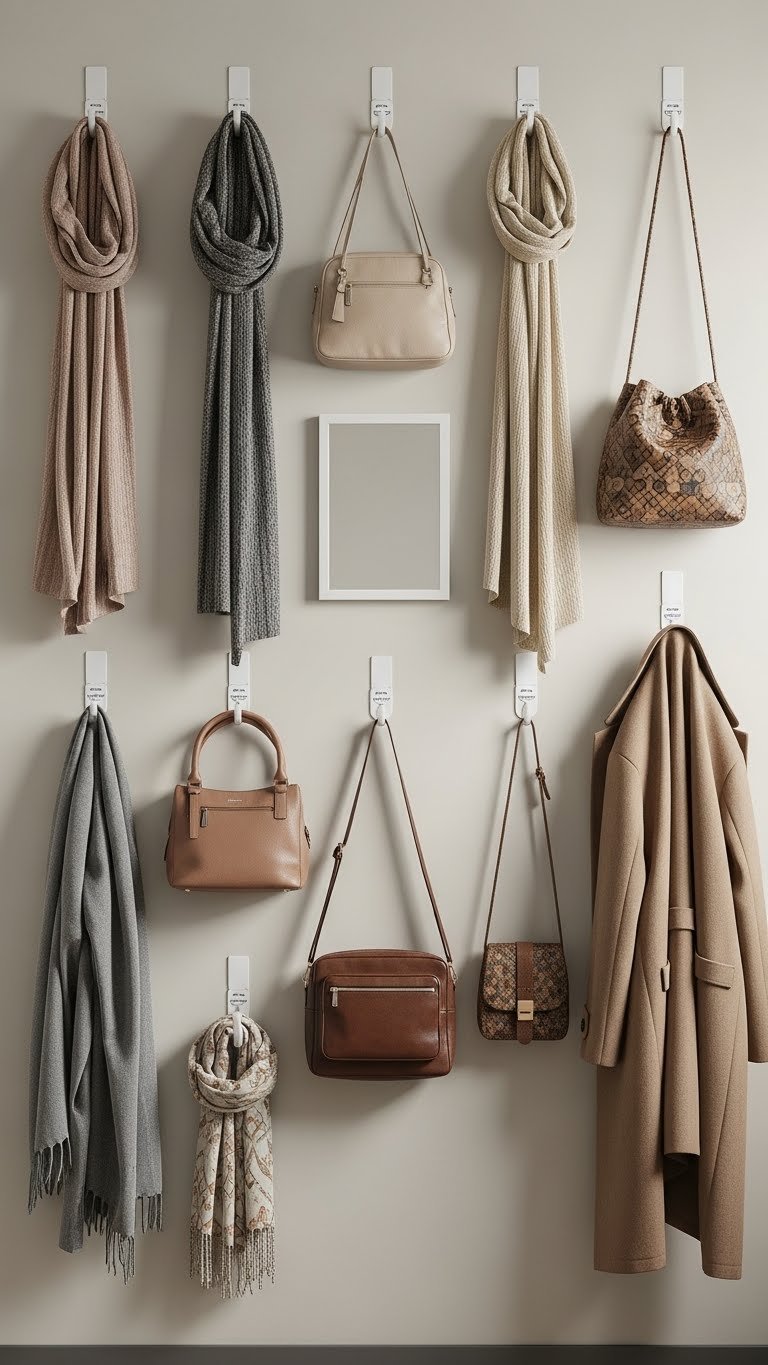
    2. Mount a Slat Wall for Flexible Hanging

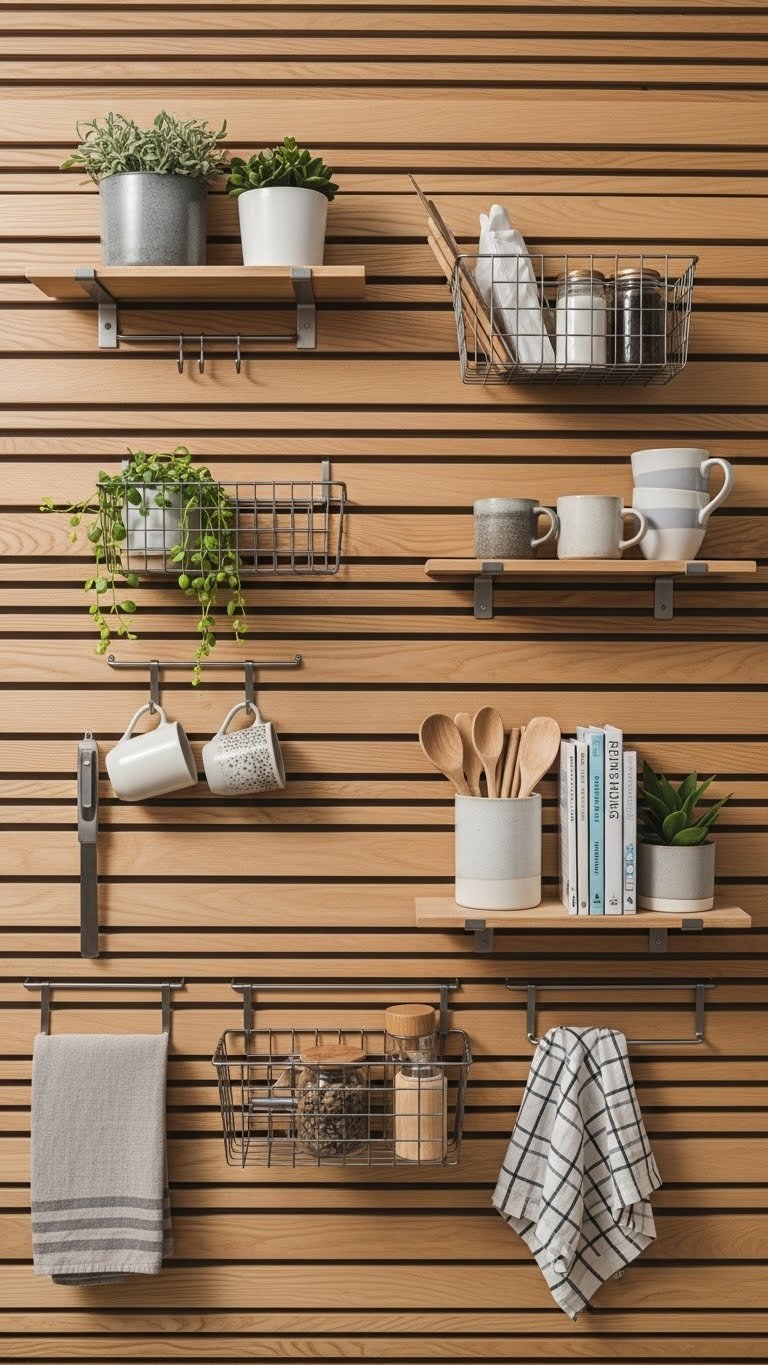
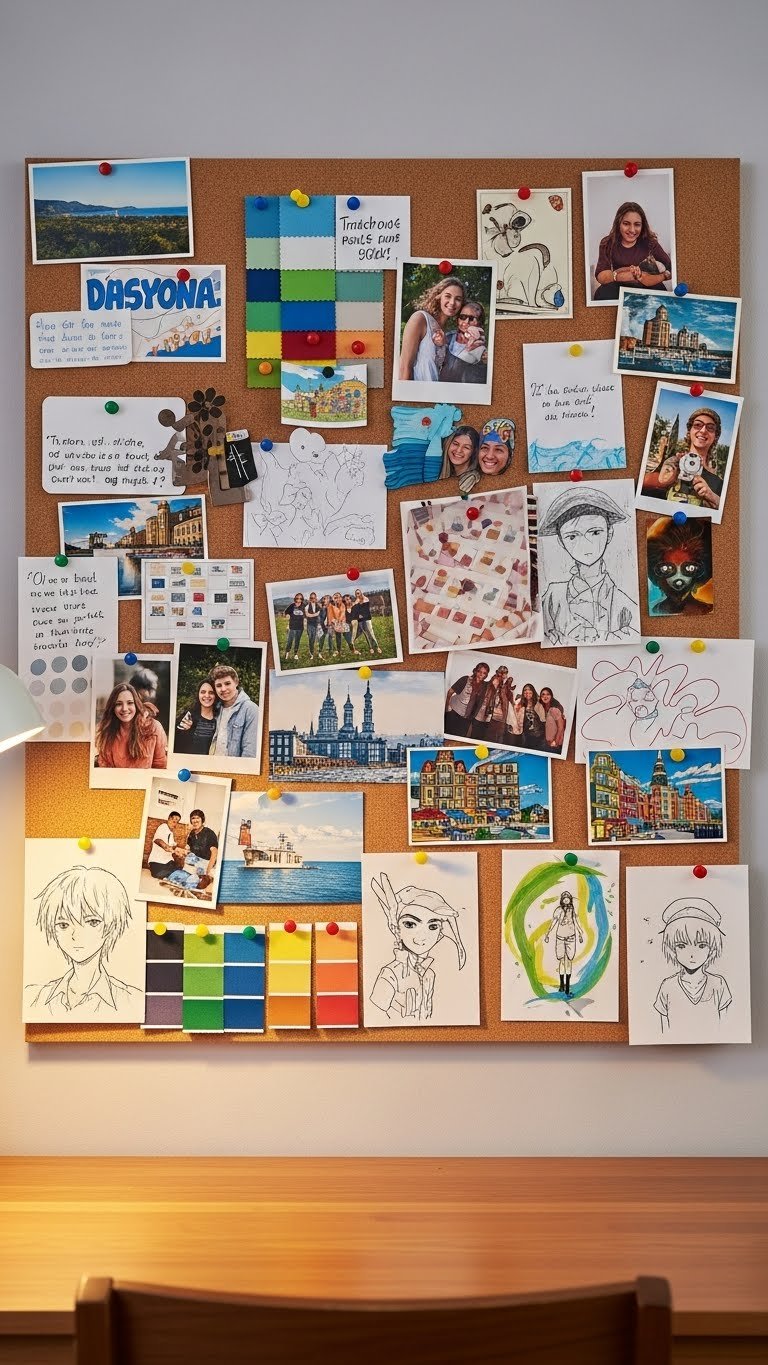
    Slat walls are the renter’s secret weapon—and they look intentional, not temporary. These lightweight panels give you a customizable system where you can hang hooks, shelves, and baskets anywhere, anytime.

    Pre-made slat wall panels from IKEA or Wayfair run $40–$150 depending on size. They mount with adhesive strips (removable) or simple nails. Use them to create a dedicated zone for accessories, bags, or scarves at eye level. You can rearrange hooks and storage without replanning the entire system. Installation takes an afternoon and transforms a blank wall into usable real estate.

    You get a styled, Pinterest-worthy look plus total control over your storage layout—no commitment required.


    3. Use Clear Shoe Organizers for Vertical Stacking

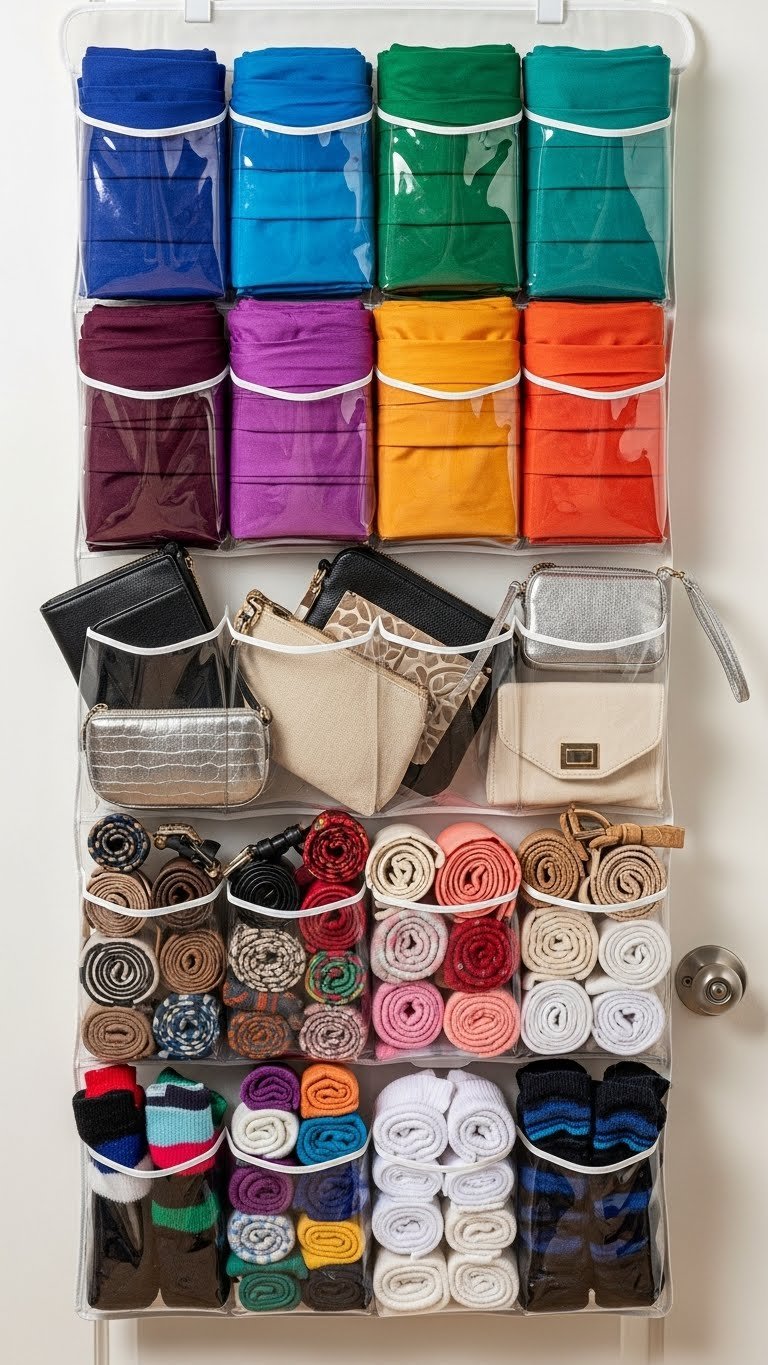
    Over-the-door shoe organizers aren’t just for shoes—they’re secret vertical storage that works in tiny closets. Each pocket holds folded items, rolled scarves, belts, small bags, or undergarments.

    Grab a clear over-the-door organizer for $12–$25 at Target or Amazon. Mount it on the back of your closet door in seconds. You now have 10–20 pockets of additional storage that was completely wasted. Transparent pockets mean you see everything without opening a single drawer. Renters love this because there’s zero permanent installation.

    Your door becomes a working storage wall instead of dead space—and you’ll actually remember what’s in those pockets.


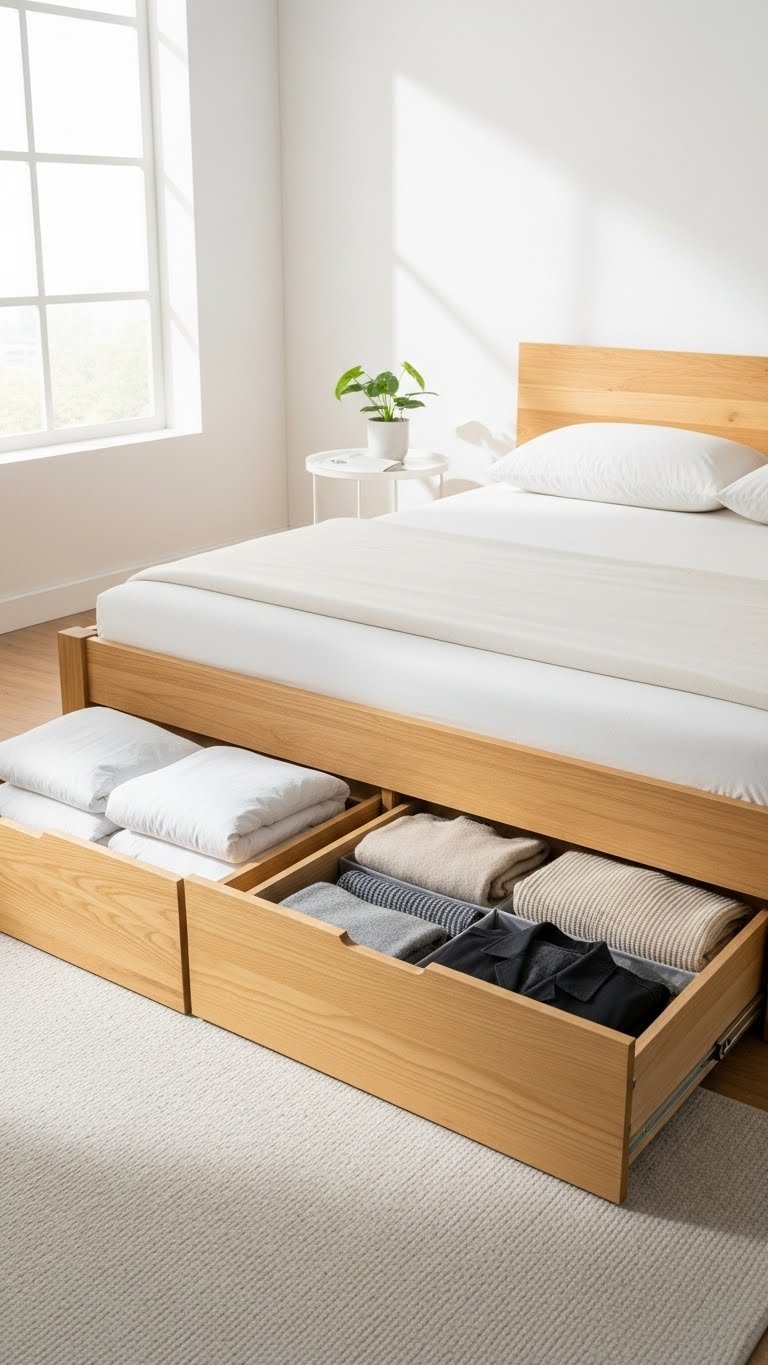
    4. Install Narrow Drawer Dividers for Small Spaces

    Drawer dividers aren’t just for drawers—use them in closet shelves to create compartments and prevent small stacks from toppling over. This works especially well in narrow closets where you can’t fit many items side by side.

    Buy adjustable dividers for $15–$30 at Container Store or IKEA. Set them up in under 15 minutes. The compartments keep like items together (all sweaters in one section, all t-shirts in another) so grabbing one item doesn’t trigger an avalanche. This system prevents the “organized pile collapse” that happens in cramped closets.

    Everything stays exactly where you put it, making mornings faster and maintenance easy.


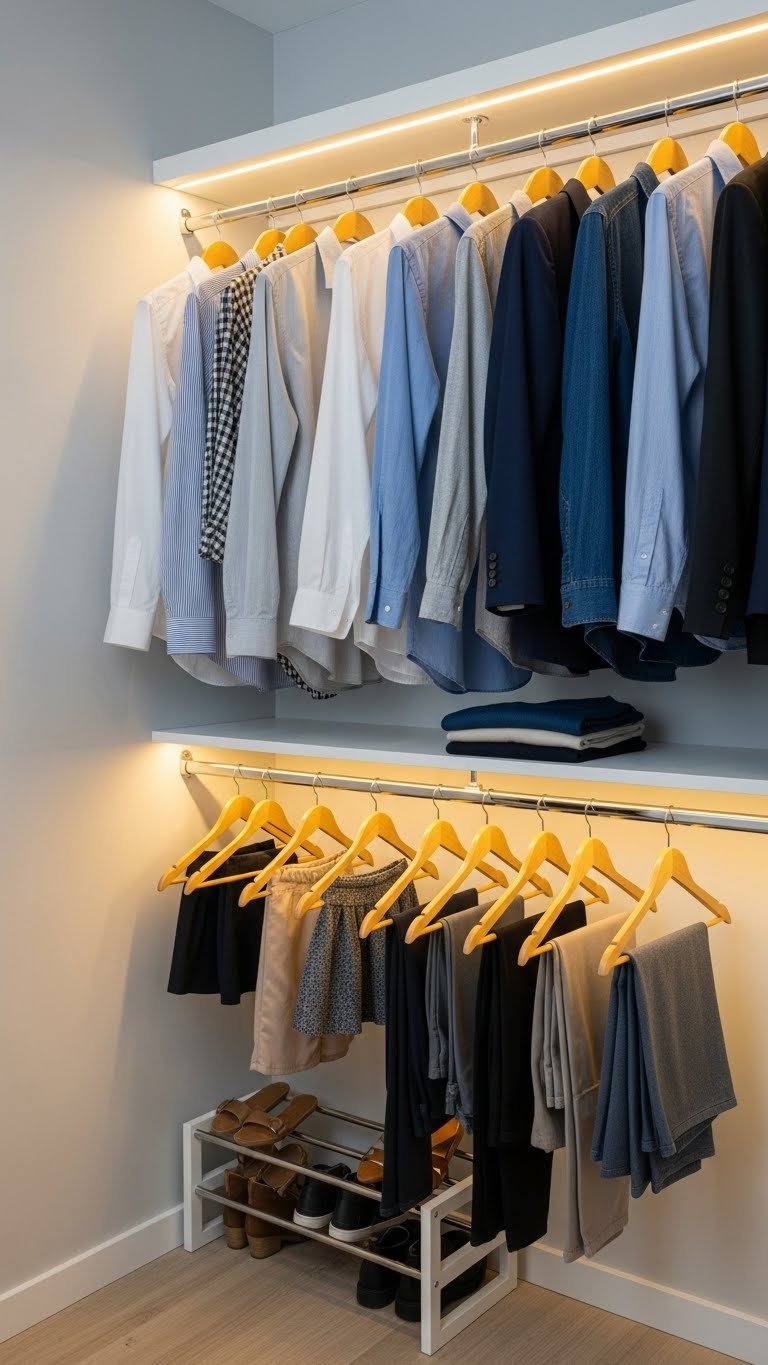
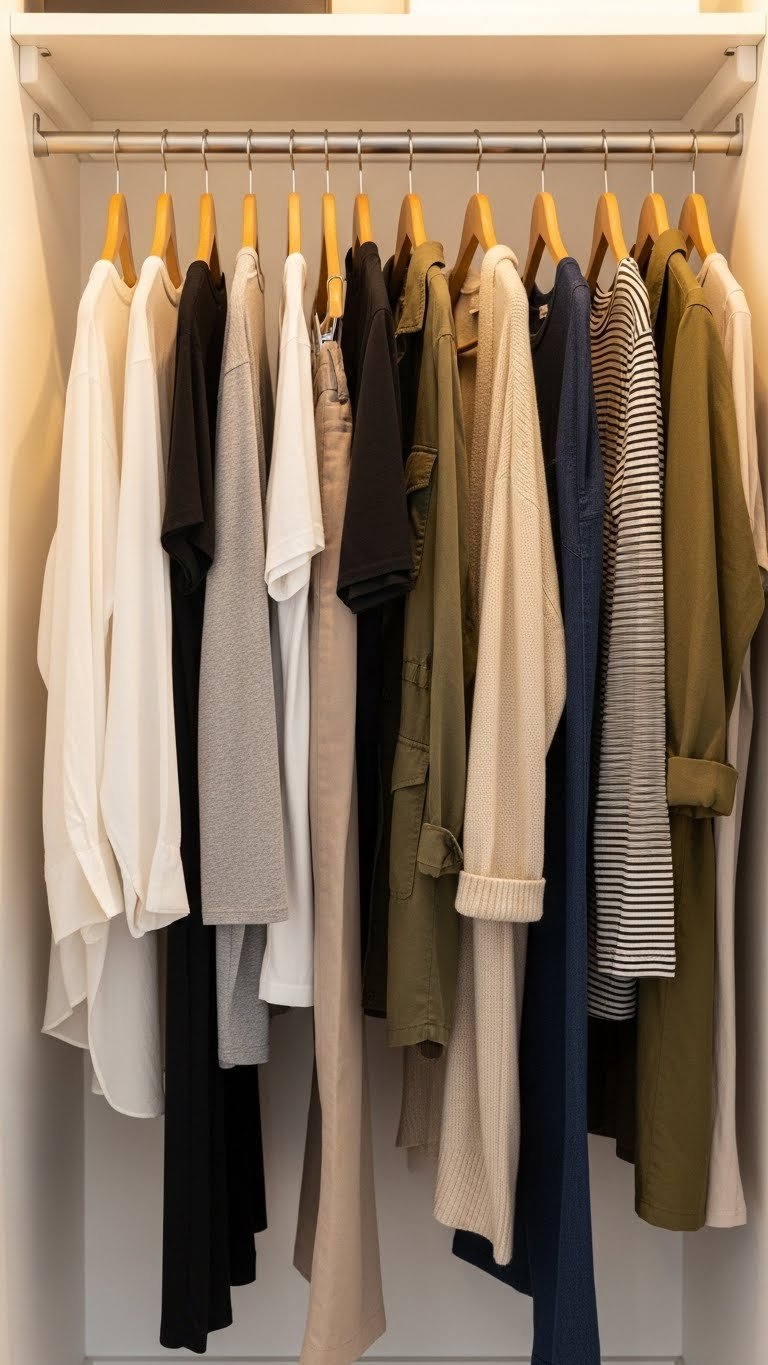
    5. Choose Slim, Space-Saving Hangers

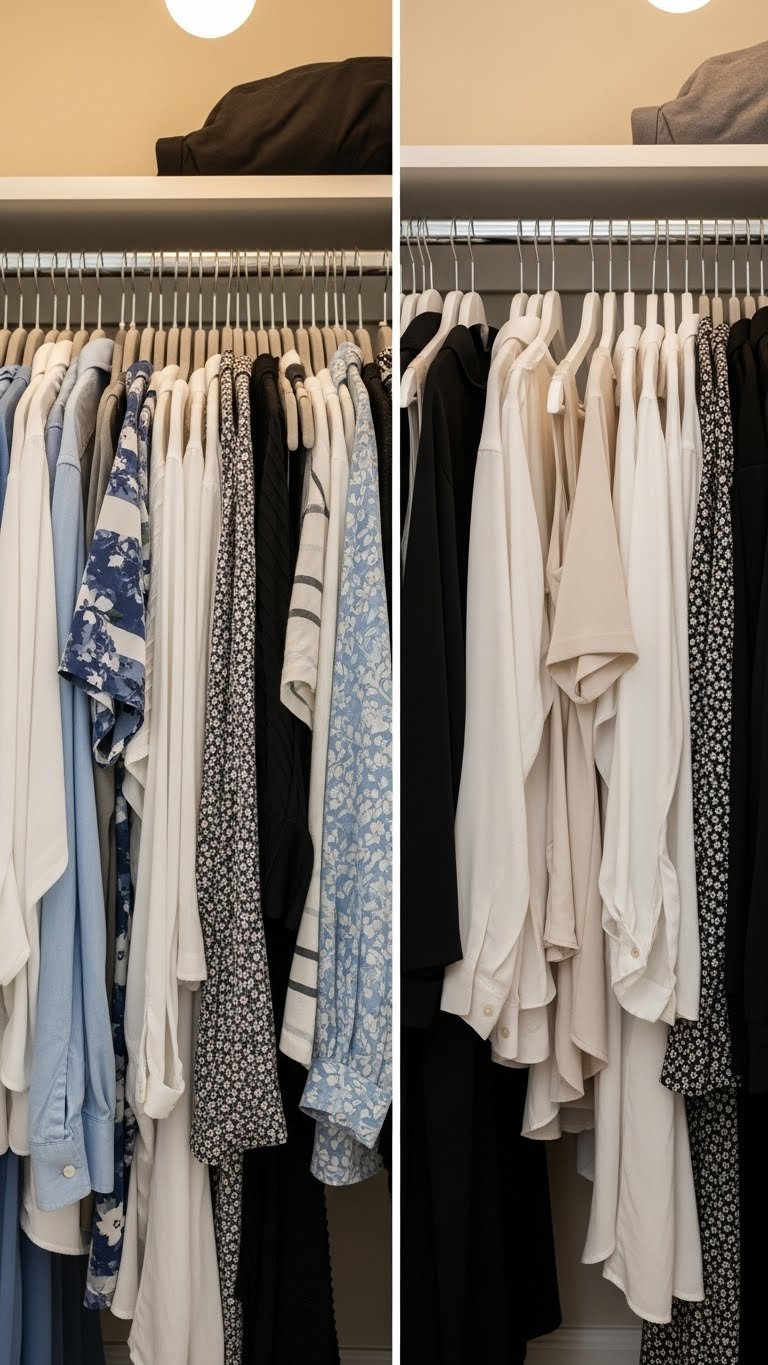
    Switching from bulky plastic hangers to slim velvet or wooden hangers saves 2–3 inches of width per garment. In a small closet, that adds up to 20–30% more capacity.

    A set of 50 slim velvet hangers runs $20–$40 on Amazon. They fit more items per linear inch of rod space while also keeping clothes from slipping off. Slim wooden hangers work too and last longer (around $40–$80 for 20). Spend one evening rehinging everything—it takes about an hour and completely changes your closet’s density.

    Your clothes will look more uniform, fit more snugly on your rod, and stay put instead of sliding around.


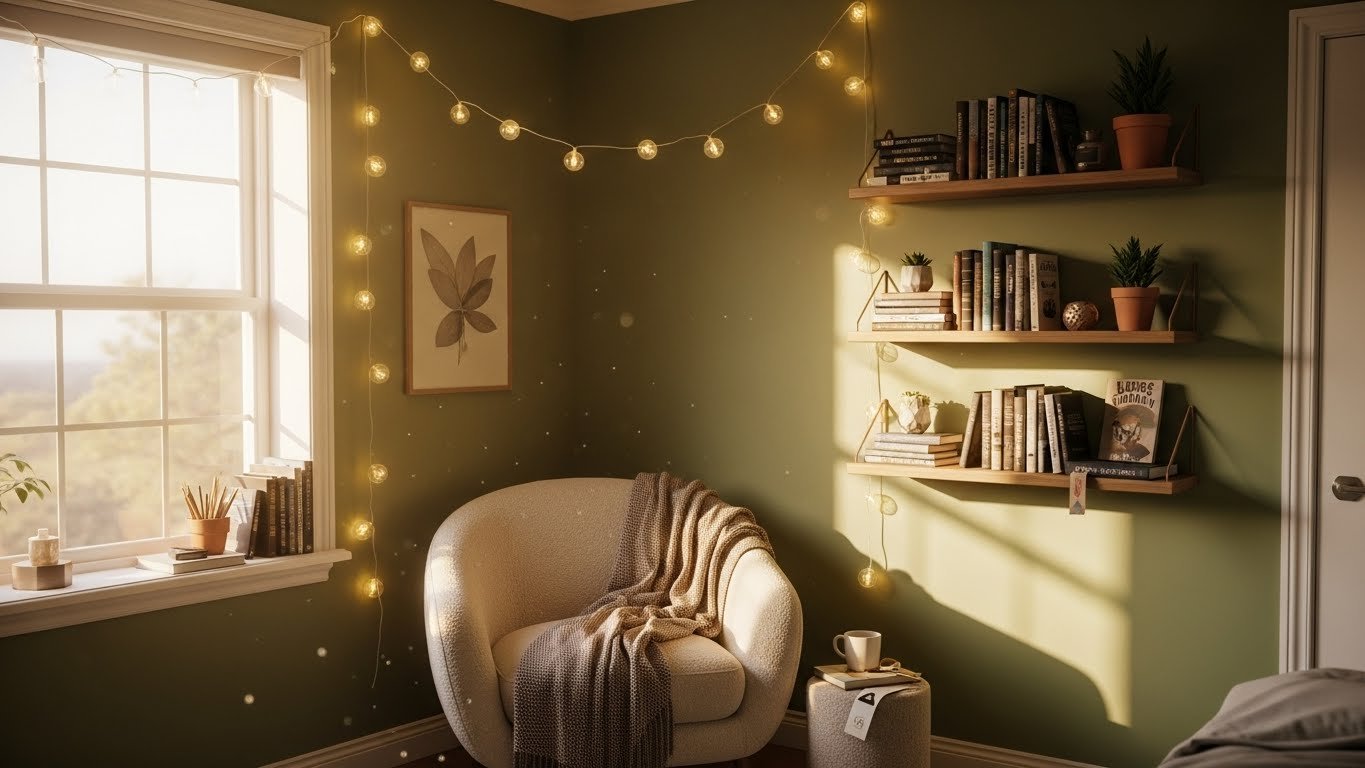
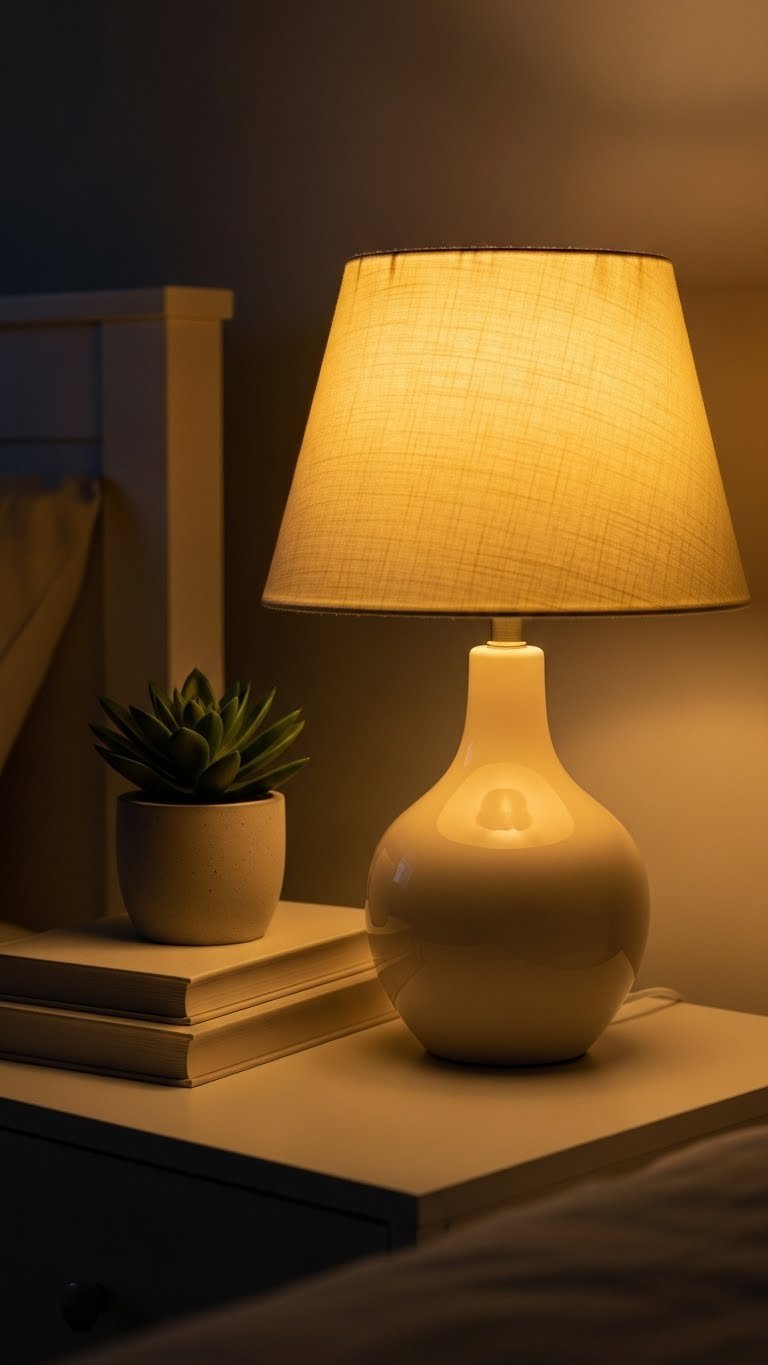
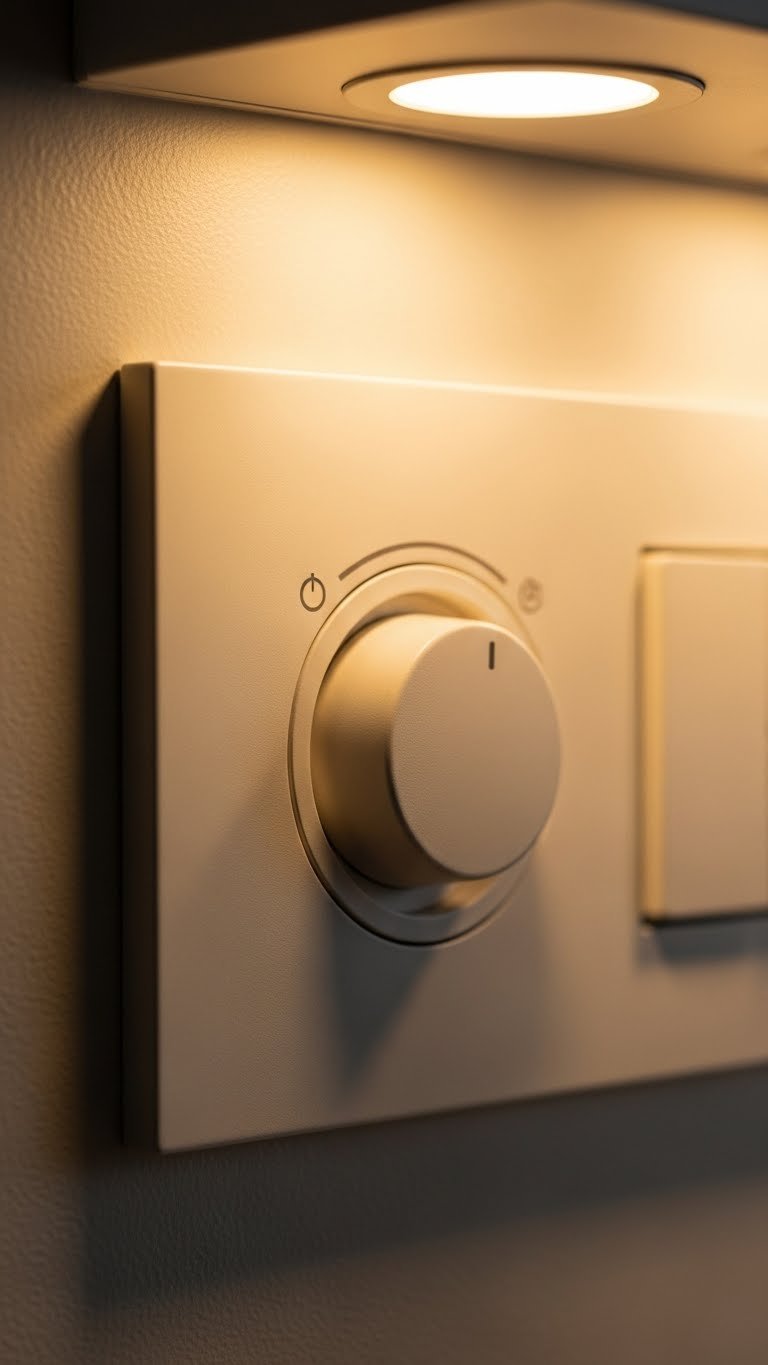
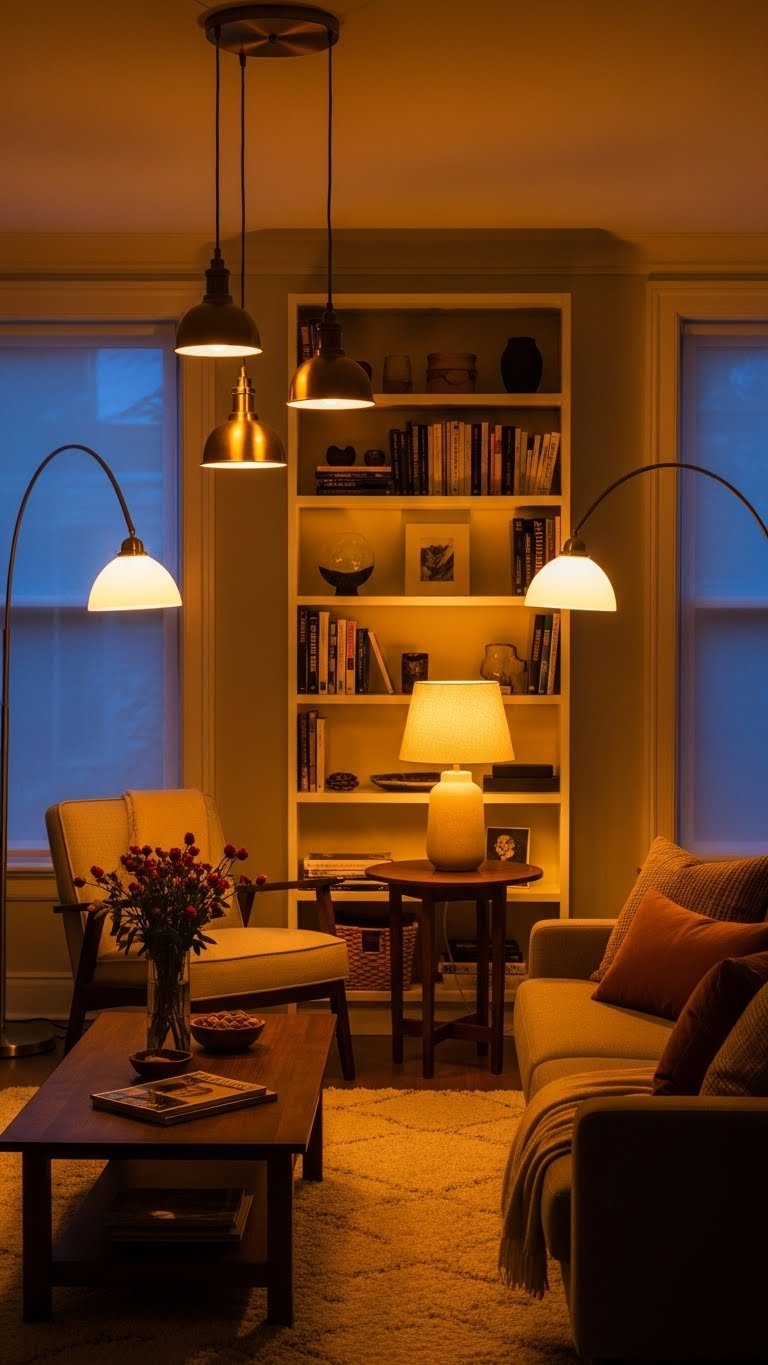
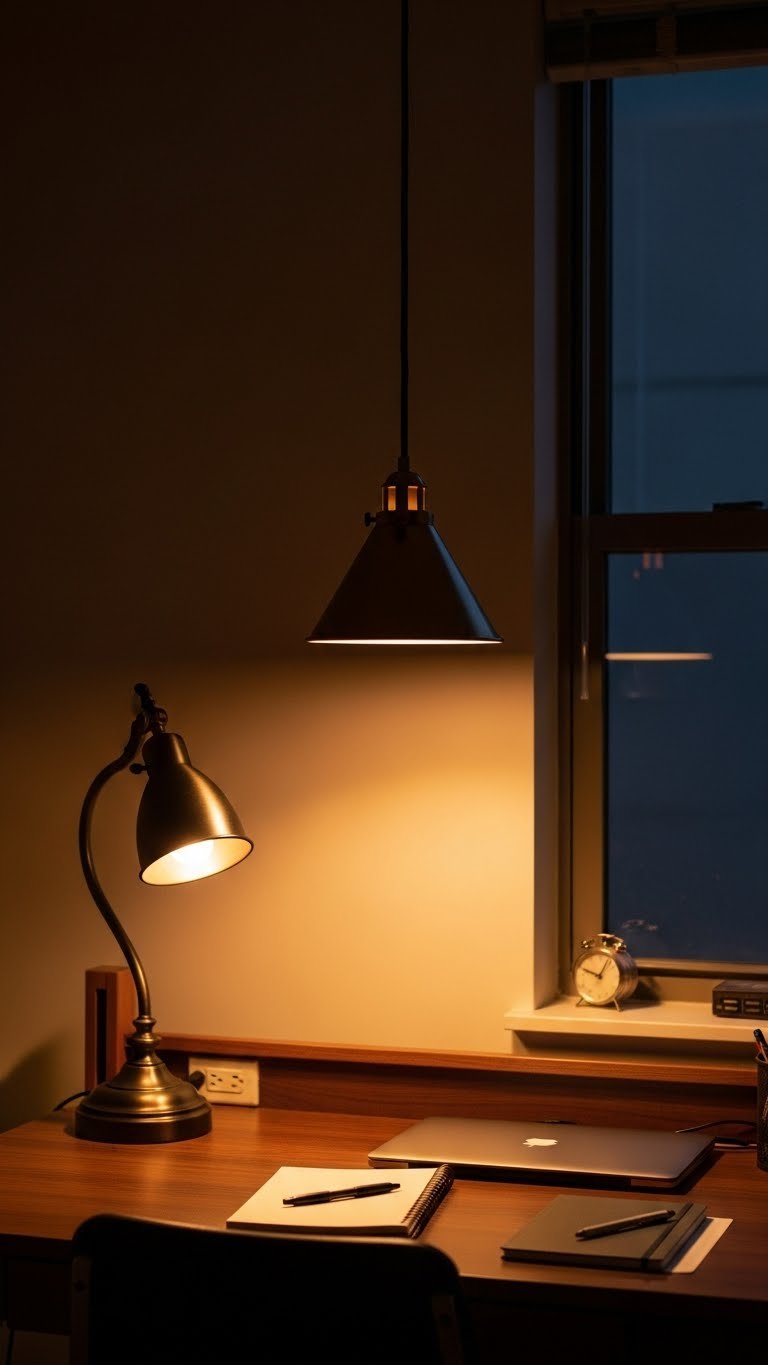
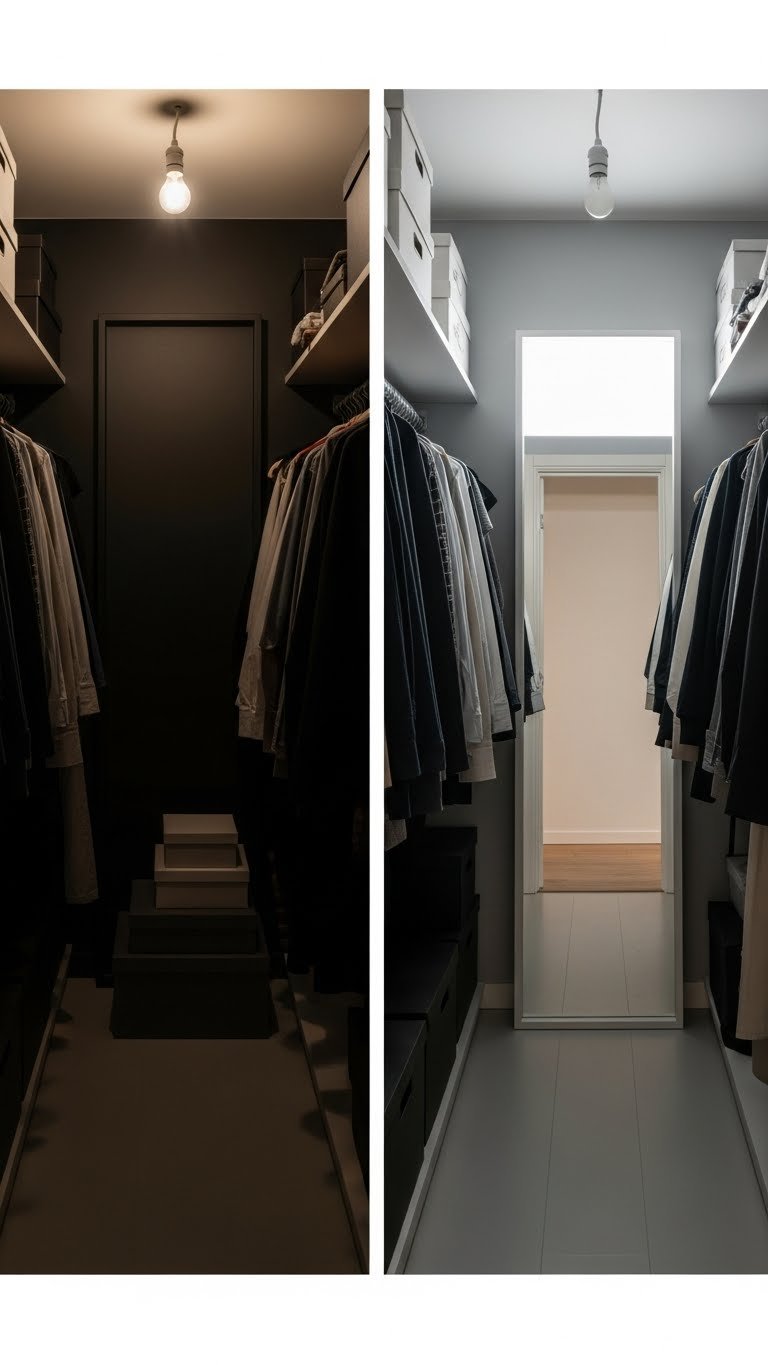
    6. Add Peel-and-Stick LED Strips for Visibility

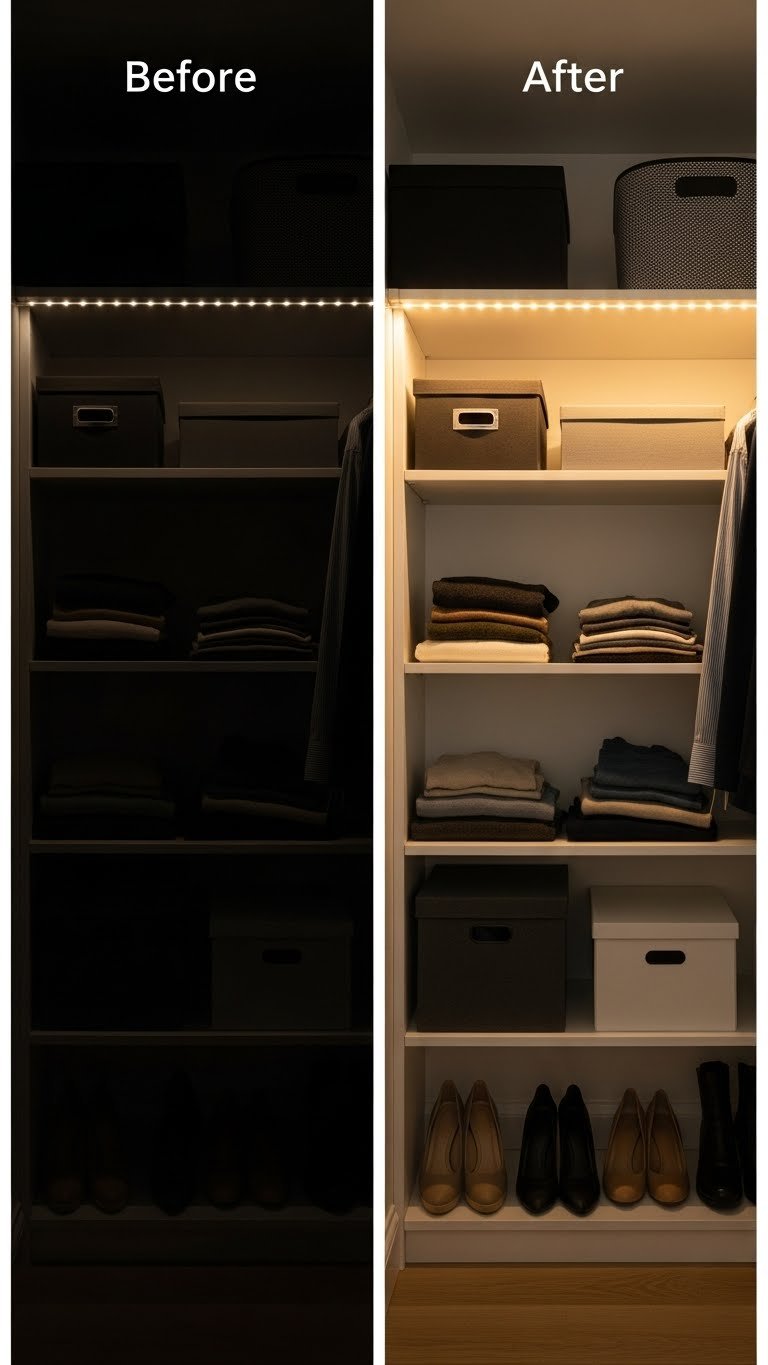
    Lighting transforms a cramped closet from frustrating to functional. Peel-and-stick LED strips install in 2 minutes and make finding items 10 times faster.

    Buy a warm white LED strip kit for $20–$40 at Home Depot or Amazon. Stick one along the top edge of your shelving or around the inside of your door frame. Plug it in (or use battery backup) and suddenly you can see colors and details instead of shadows. Battery-operated strips are perfect for renters. Install them on a Saturday morning and use them that same day.

    Good lighting makes even a tiny closet feel bigger and more functional—plus you’ll stop grabbing the wrong color by accident.


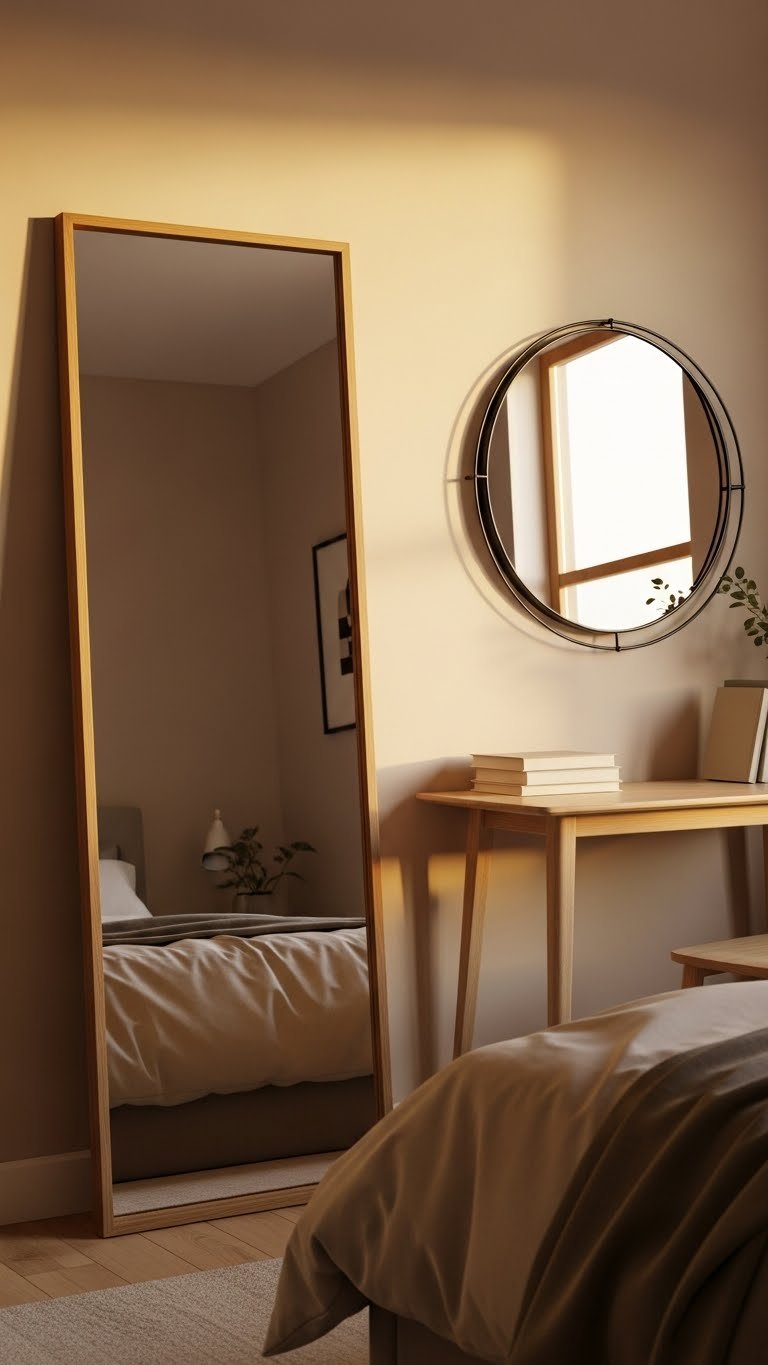
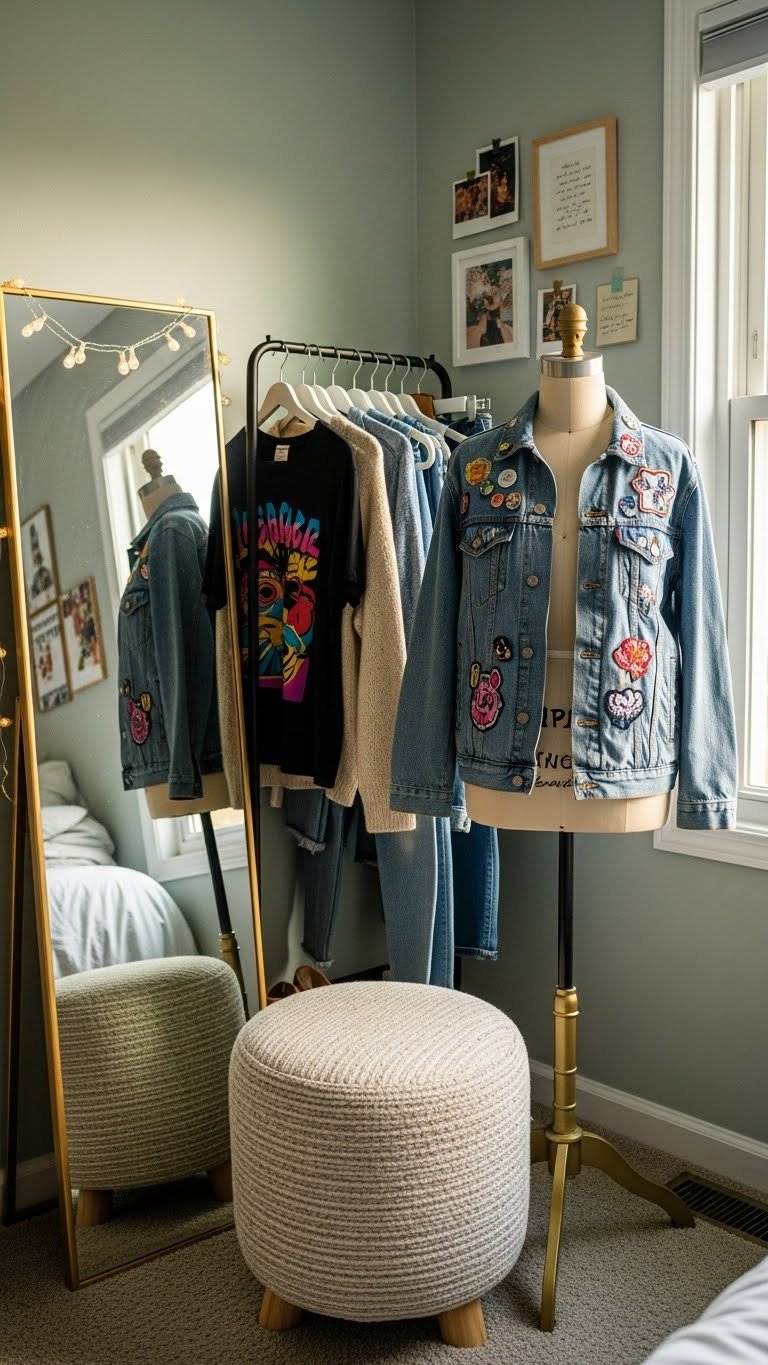
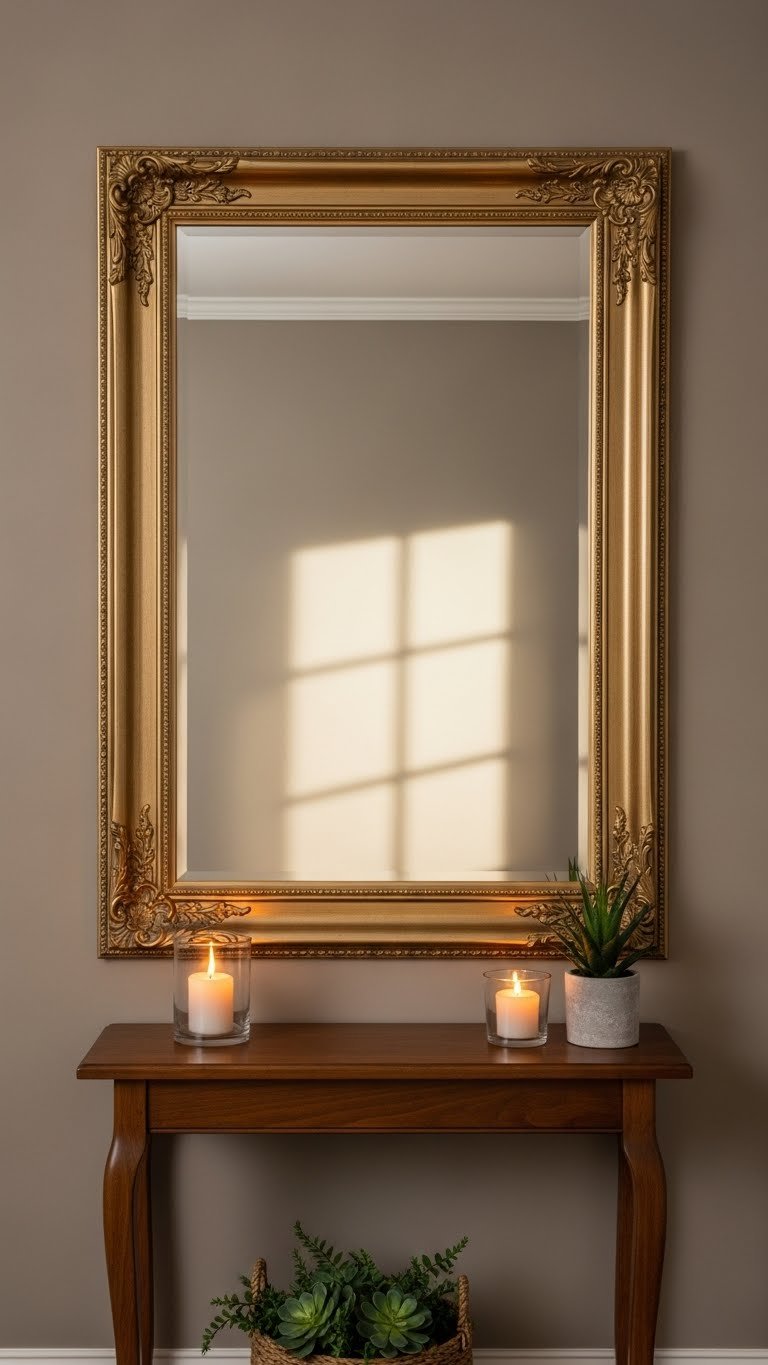
    7. Hang a Slim Mirror for Morning Outfits

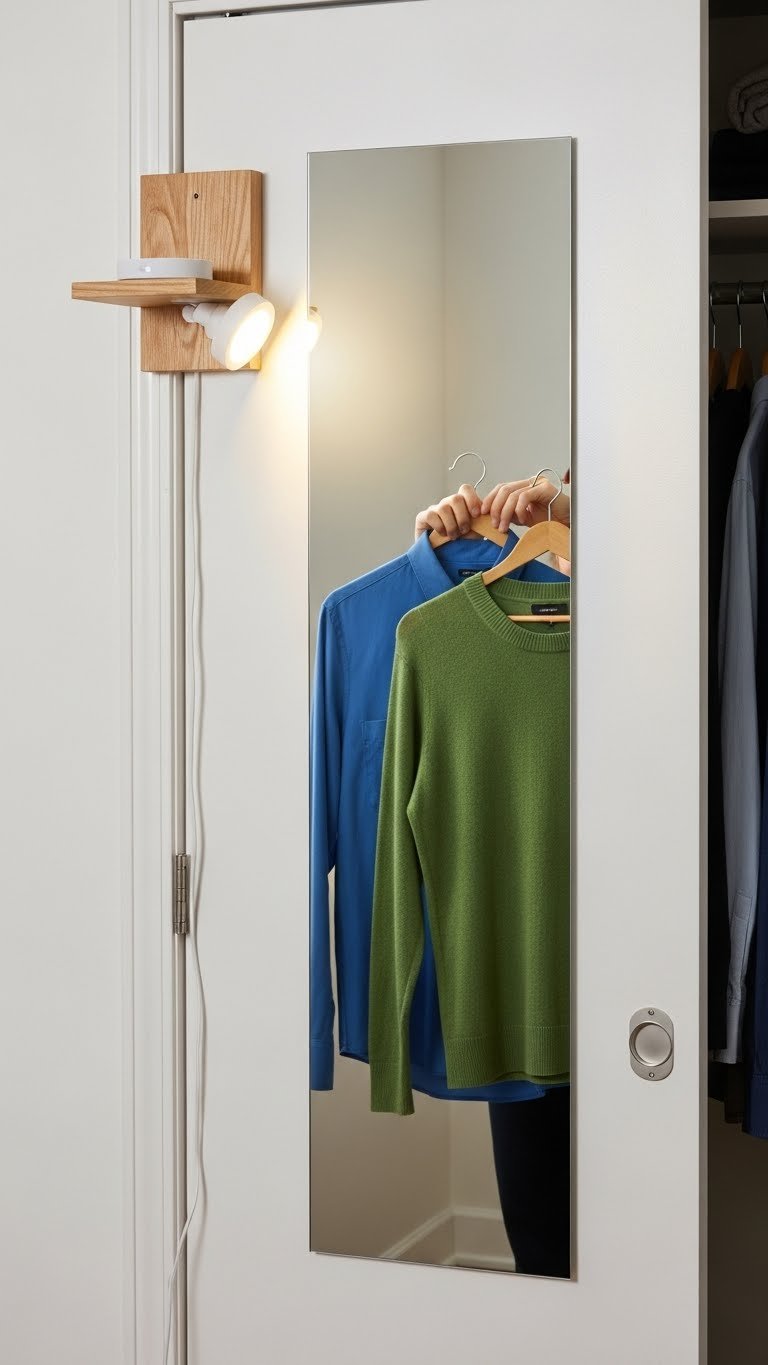
    A slim full-length mirror takes up almost no floor space and lets you approve outfits before committing to wearing them. This prevents the “change three times” morning spiral.

    Find a thin over-the-door mirror for $30–$60 at IKEA or Target. Mount it with adhesive strips (removable for renters) or two small hooks. Position it opposite or beside a light source so you see accurate colors. Pair it with one of the LED strips mentioned above for a complete “get-ready station” in your closet. Assembly takes 10 minutes.

    You’ll make better outfit choices faster and feel more confident walking out the door.


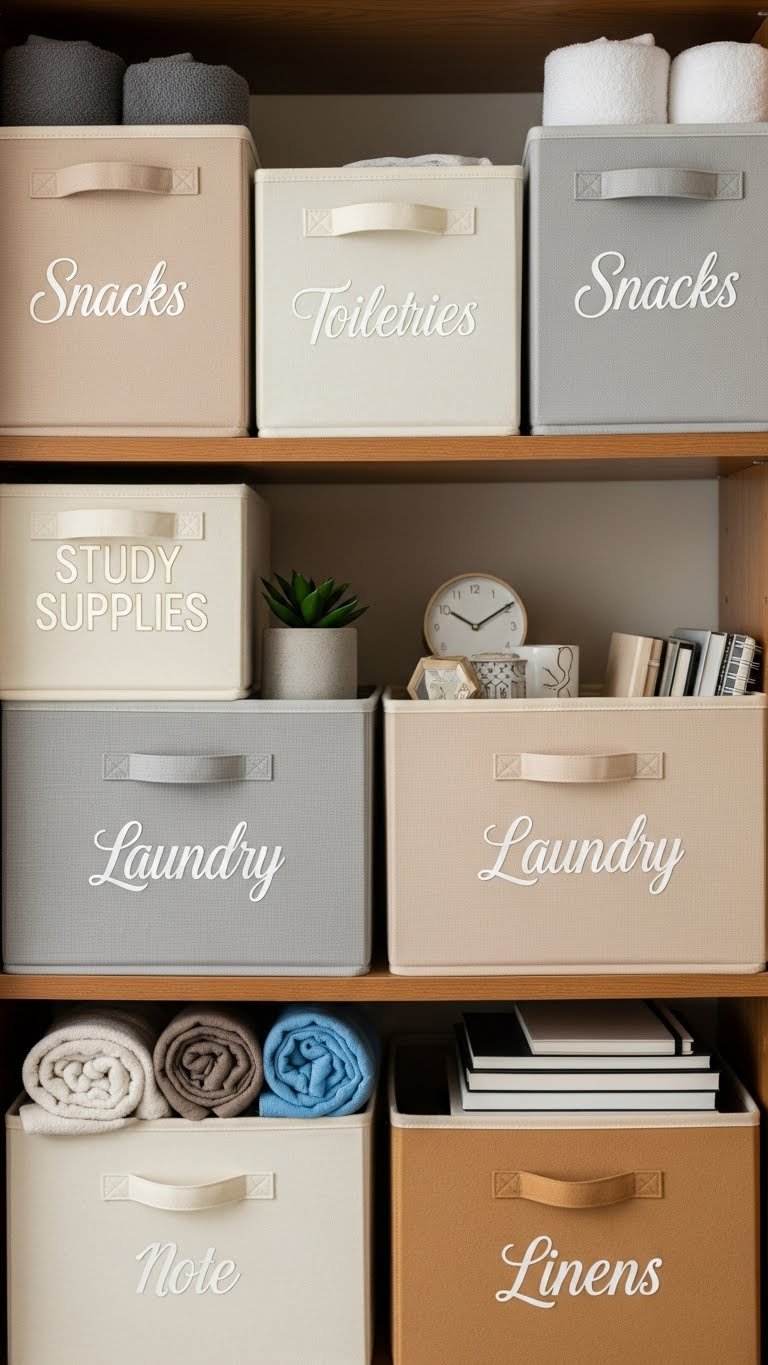
    8. Label Everything with a Label Maker

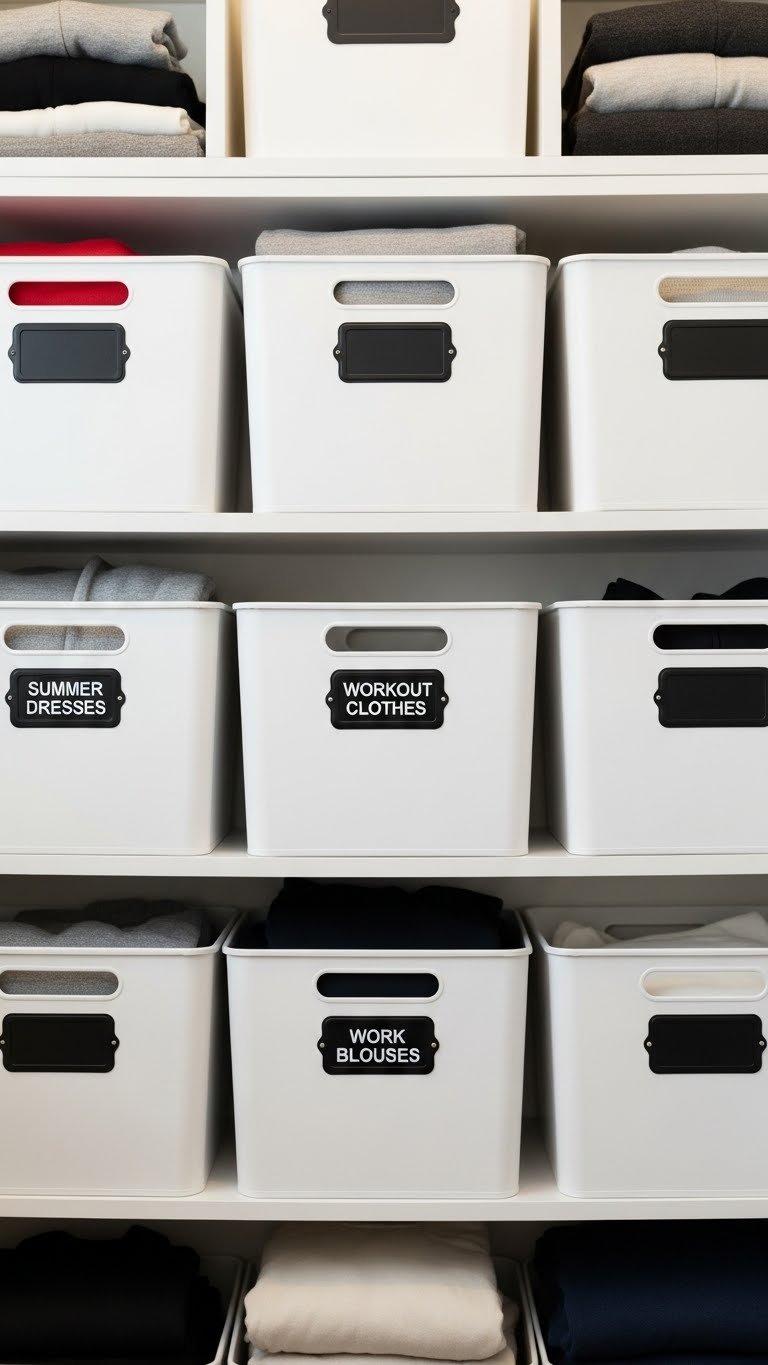
    Labeling is the easiest step you skip—and it changes everything. A label maker costs almost nothing and saves hours of searching.

    Grab an inexpensive label maker for $15–$25 at Target or Amazon. Print labels for your bins, shelves, and baskets. Use categories like “Workout Clothes,” “Summer Dresses,” or “Work Blazers”—whatever makes sense for your closet. Takes about 30 minutes to label everything. The result? You and anyone else who needs to find something can navigate your closet instantly.

    Everyone in your household suddenly understands your system, and you stop wasting time digging for one specific item.


    9. Roll Clothes Instead of Folding Them

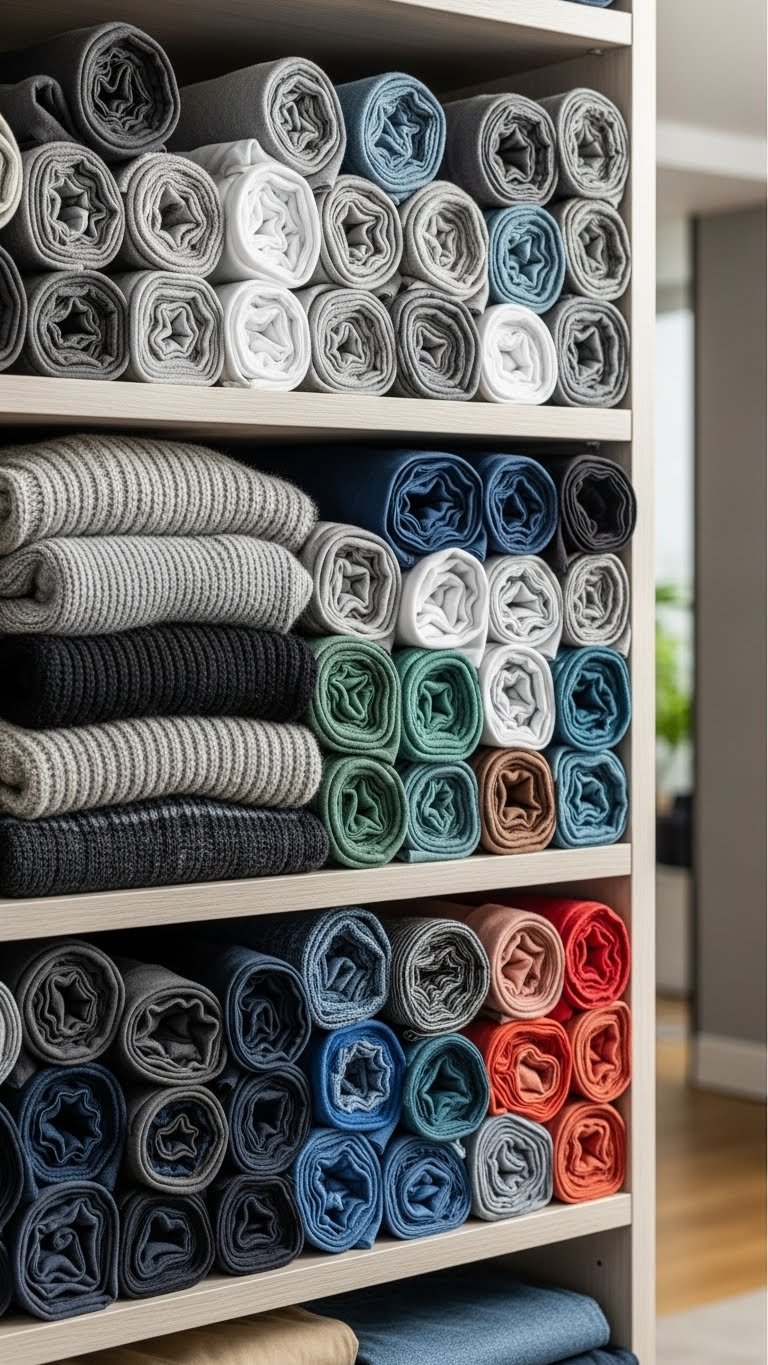
    Rolling takes up 30% less space than traditional folding and lets you see every item at once—like a filing system for clothes.

    This costs zero dollars and works with items you already own. Fold each piece in half lengthwise, then roll it tightly from one end. Stand the rolls upright on a shelf like books in a bookcase. You see the top of each roll, so you know what you have without unrolling everything. This method works especially well for t-shirts, sweaters, and casual pants. A shelf that holds 5 folded stacks now holds 12–15 rolls.

    Your closet becomes instantly more spacious, and getting dressed becomes a visual browse instead of a dig.


    10. Swap Bulky Wooden Hangers for Slim Plastic

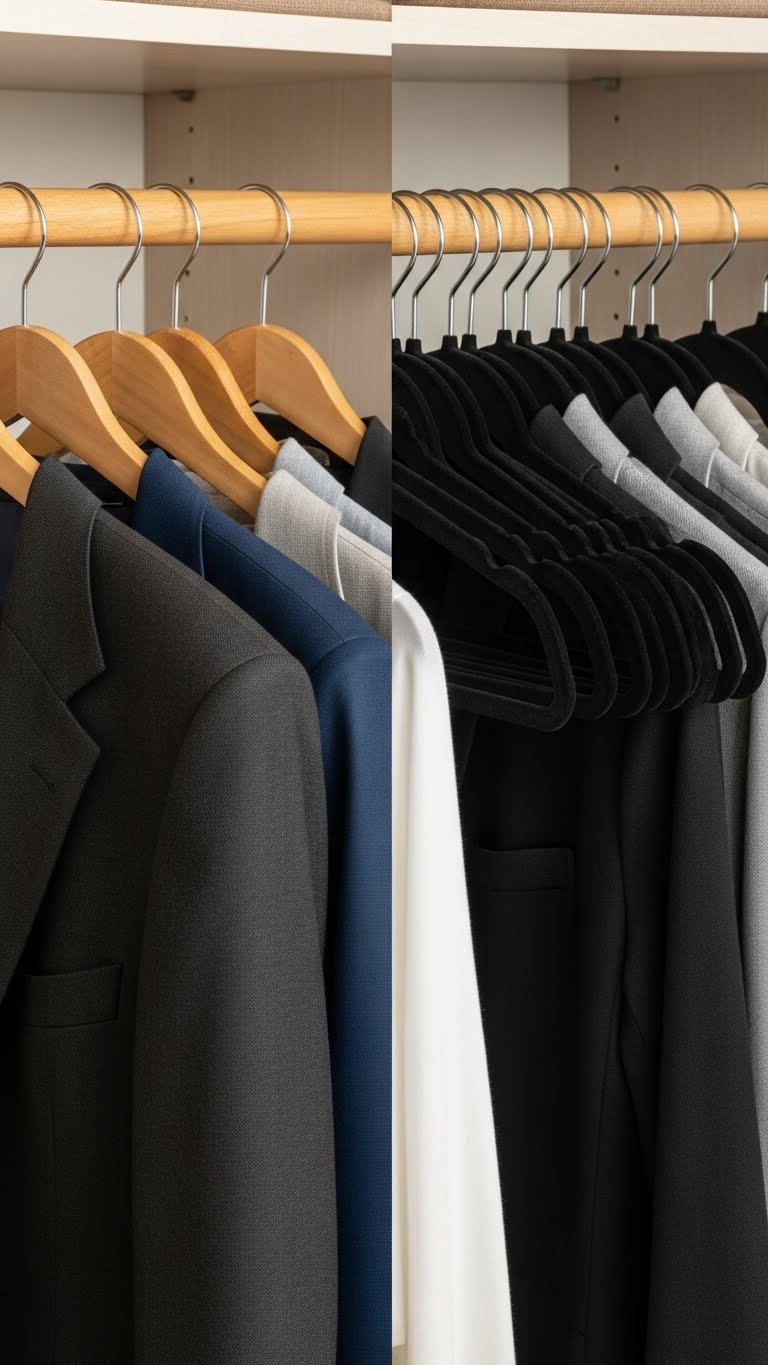
    Similar to thin velvet hangers, basic slim plastic hangers are dirt cheap and save serious space in crowded closets.

    Buy bulk slim plastic hangers for $10–$20 for 50 on Amazon. They’re not as premium-looking as velvet, but they work perfectly and add minimal thickness. One evening of rehinging gives you 20–30% more capacity. They’re lightweight, don’t slip, and you can get coordinating colors to make your closet look more intentional.

    You’ll gain instant breathing room on your rod without spending much money or effort.


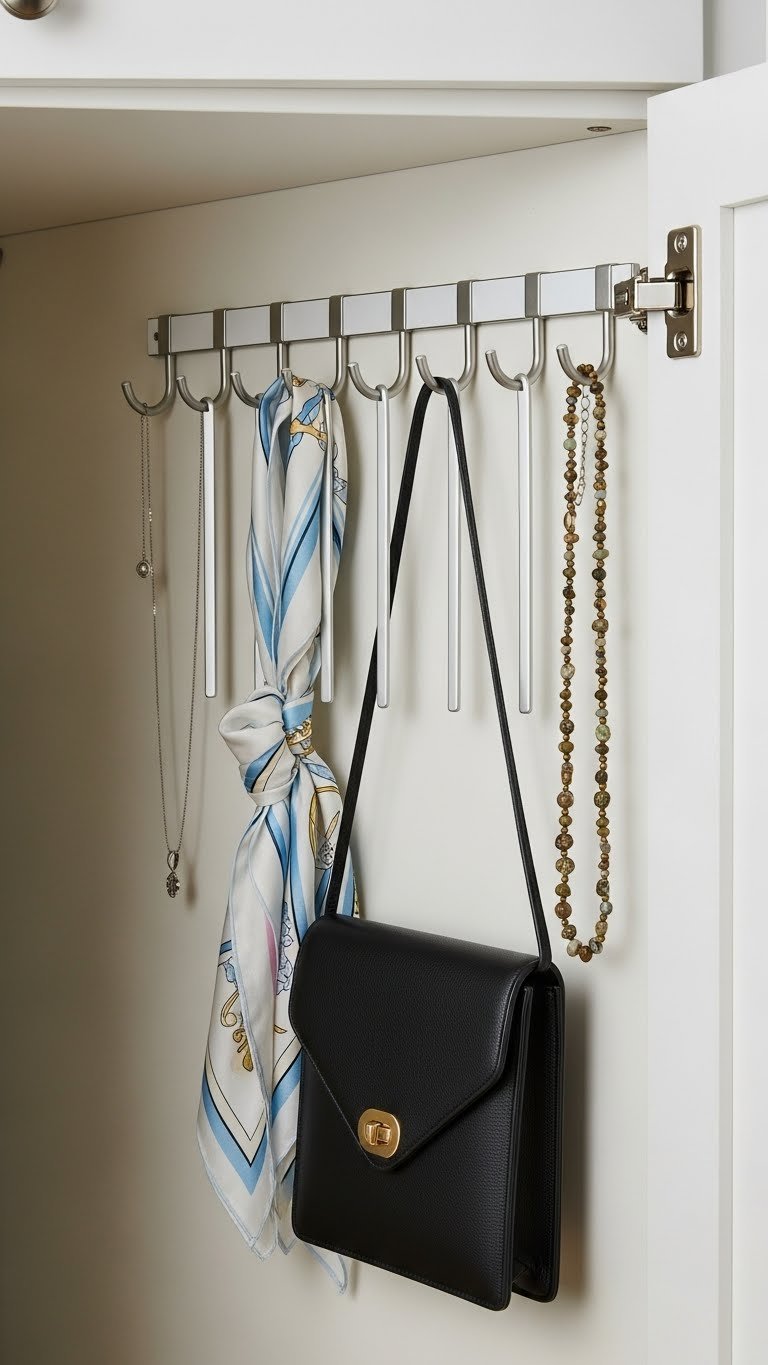
    11. Install a Tension Rod in Narrow Gaps

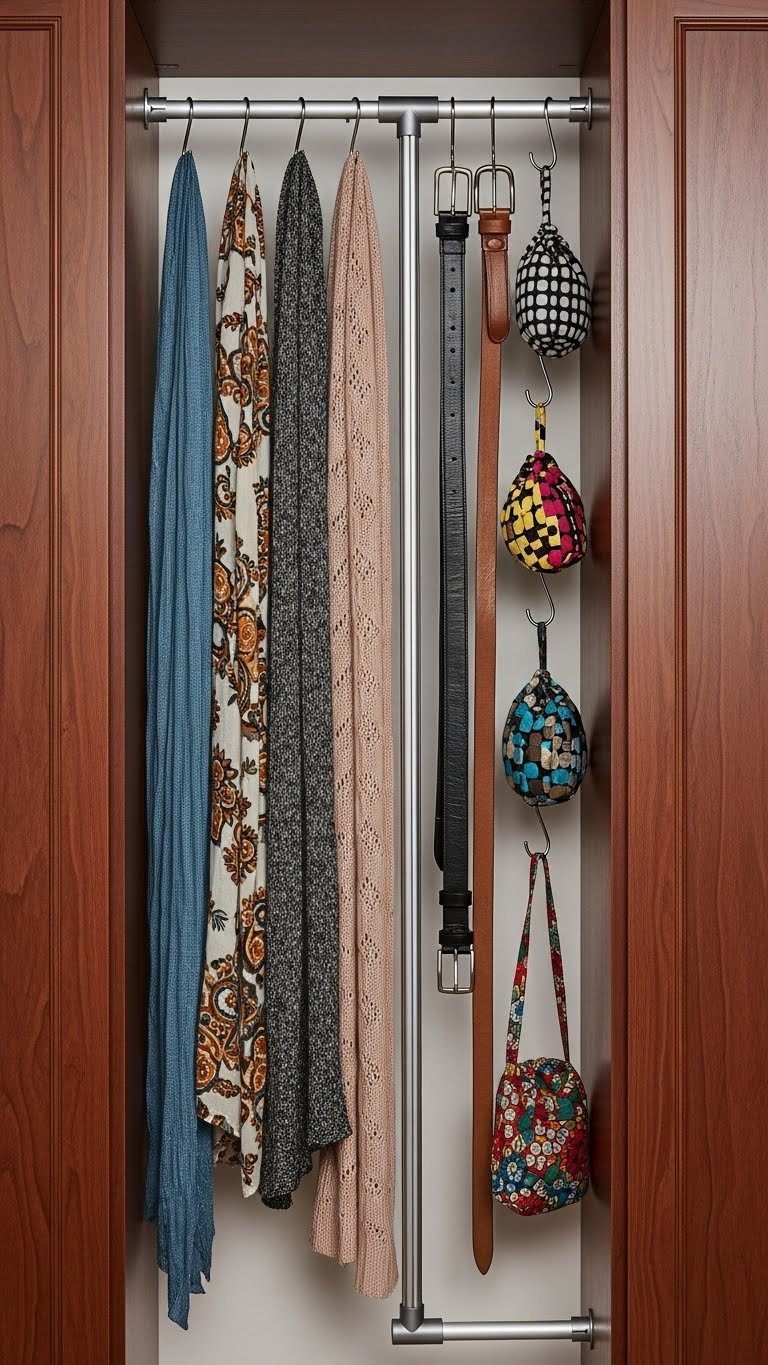
    Tension rods don’t have to be horizontal. Use them vertically in narrow gaps between shelves or walls to create a narrow hanging area for scarves, belts, or small bags.

    A tall tension rod costs $15–$30. Install it in 5 minutes between two shelving units or in a corner gap. Hang small S-hooks on it (around $8 for 10) and suddenly you have a dedicated display for accessories. This is especially useful in walk-in closets where you have awkward leftover spaces.

    You’ve claimed real storage from what was previously dead space.


    12. Use Bed Risers Under Low Shelving for Extra Room

    If your closet has low shelving, raise it up with bed risers to create underspace for storage bins or shoe boxes.

    Adjustable bed risers run $15–$35 for a set of four. Lift your shelf up 4–6 inches and suddenly you can store flat bins, shoe boxes, or seasonal gear underneath. This works great for renters because you just slide the shelf off when you move. Takes 10 minutes to adjust.

    You’ve created an entire new storage tier without adding anything to your walls or rods.


    13. Create a Capsule Section for Daily Outfits

    Crowded closets make getting dressed harder. Create a tiny “capsule zone”—just 15–20 favorite items in coordinating colors—where you can always grab a complete outfit.

    This costs zero dollars. Pick 4–5 neutral pants or skirts, 8–10 tops in compatible colors, and a few layering pieces. Hang them together in one spot (ideally with the best lighting). You now have a go-to section for busy mornings when you don’t want to think. The rest of your closet becomes “special occasion” or “seasonal” storage.

    Mornings get easier, and you stop feeling overwhelmed by too many choices.


    14. Hang a Pull-Out Hamper or Laundry Bag

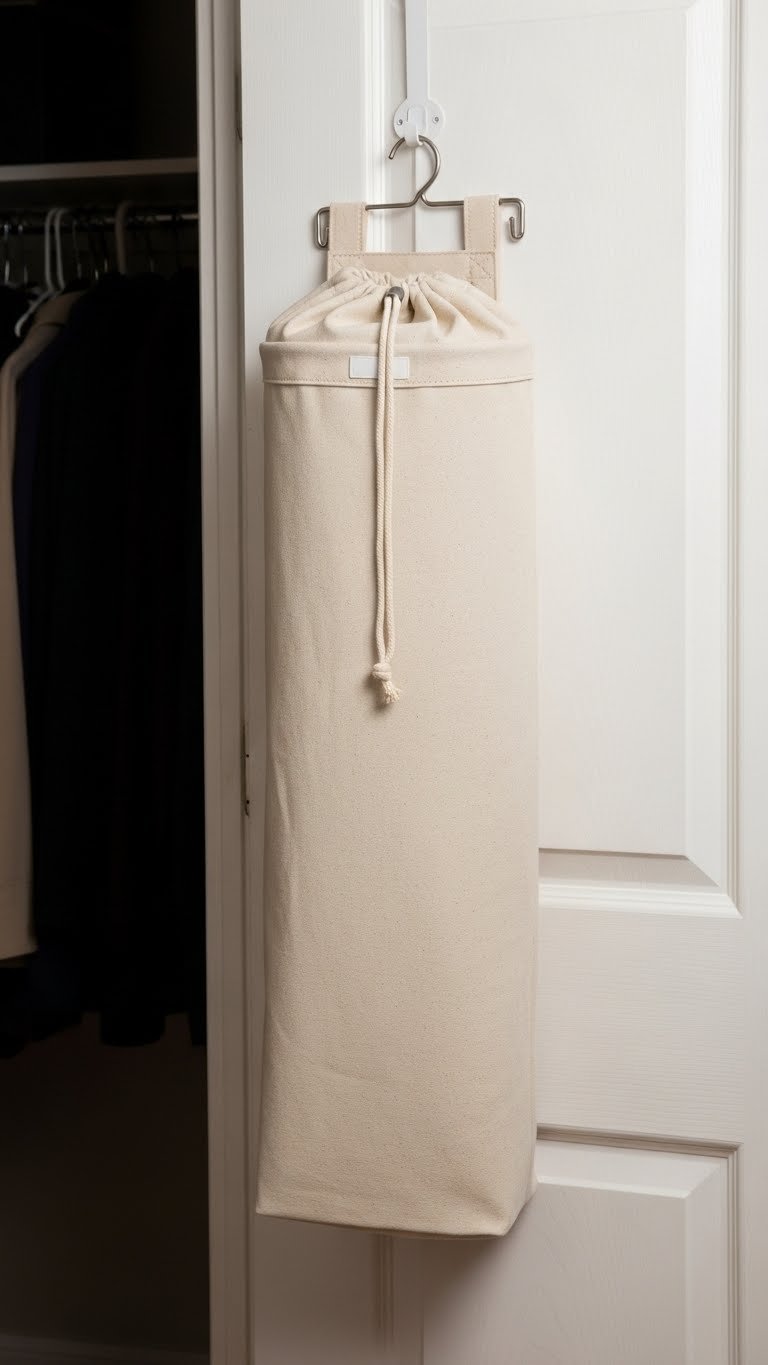
    A wall-mounted pull-out hamper or canvas laundry bag keeps dirty clothes out of your floor space and contained in your closet.

    Find a slim over-door hamper for $20–$40 or a basic canvas laundry bag for $8–$15. Hang it on the inside of your closet door or on a wall hook. Your hamper no longer takes up precious floor real estate. This is especially important in tiny closets where every inch counts. Installation takes 5 minutes.

    Dirty clothes stay corralled and your closet floor stays clear for actual access and movement.


    15. Add a Shelf Divider to Prevent Toppling

    Shelf dividers (simple vertical separators) keep stacks from leaning into each other and eventually toppling over in cramped closets.

    Grab acrylic or metal shelf dividers for $12–$25 per pair at Container Store or Target. Set them up in 5 minutes on any shelf. They section your shelf into neat compartments so one toppled stack doesn’t create a domino effect. Especially useful if your closet is so narrow that stacks lean naturally.

    Your organized stacks stay put, and you can add or remove items without triggering a reorganization emergency.


    16. Use Vacuum Bags for Seasonal Storage

    Vacuum bags compress bulky seasonal items (winter coats, thick sweaters) down to a fraction of their size, freeing up prime closet real estate.

    A set of 6 vacuum bags costs $15–$25 at Target or Amazon. Fill them with off-season clothing, seal, and either vacuum or use the hand-pump option. Stack the flattened bags on high shelves, under the bed, or in a storage closet. You now have room for current-season items. Label each bag with the season and contents so you know what’s inside.

    Your active closet instantly has more breathing room, and seasonal items stay protected and compact.


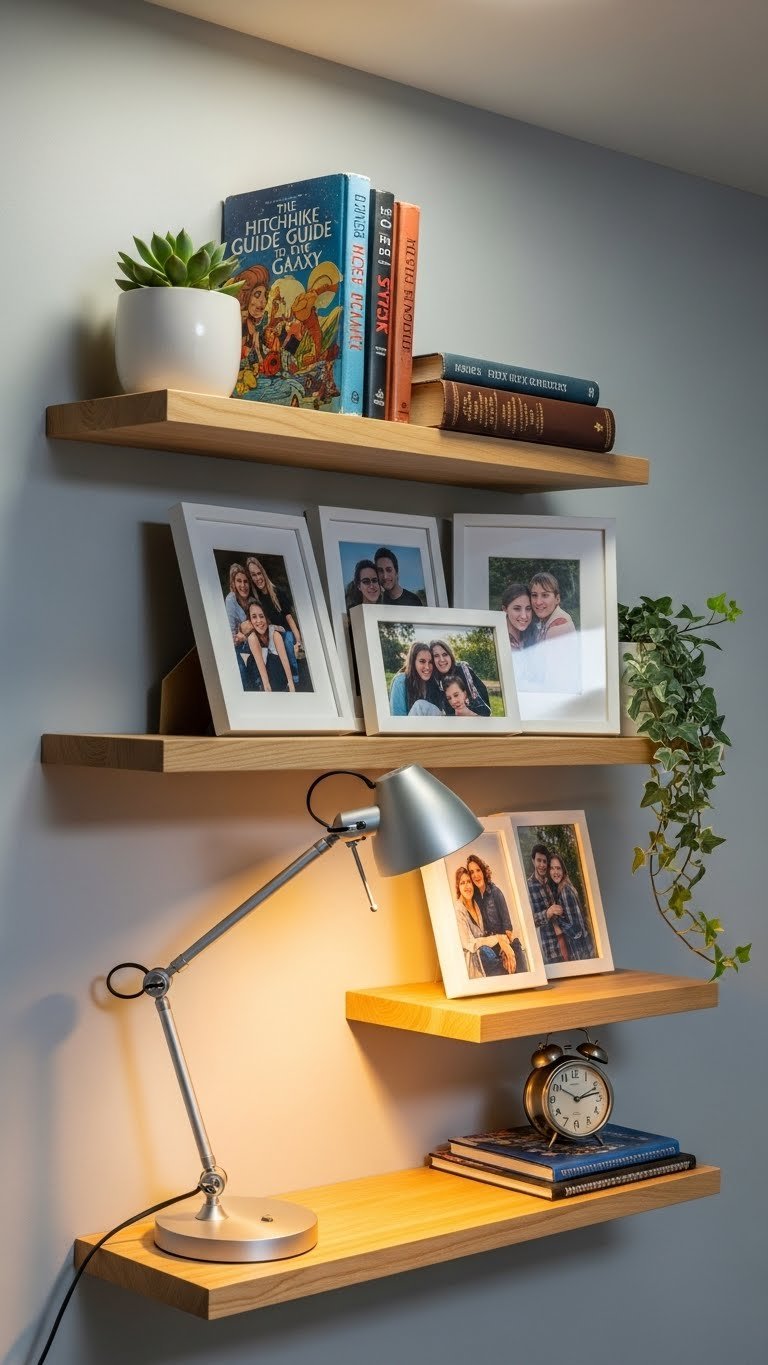
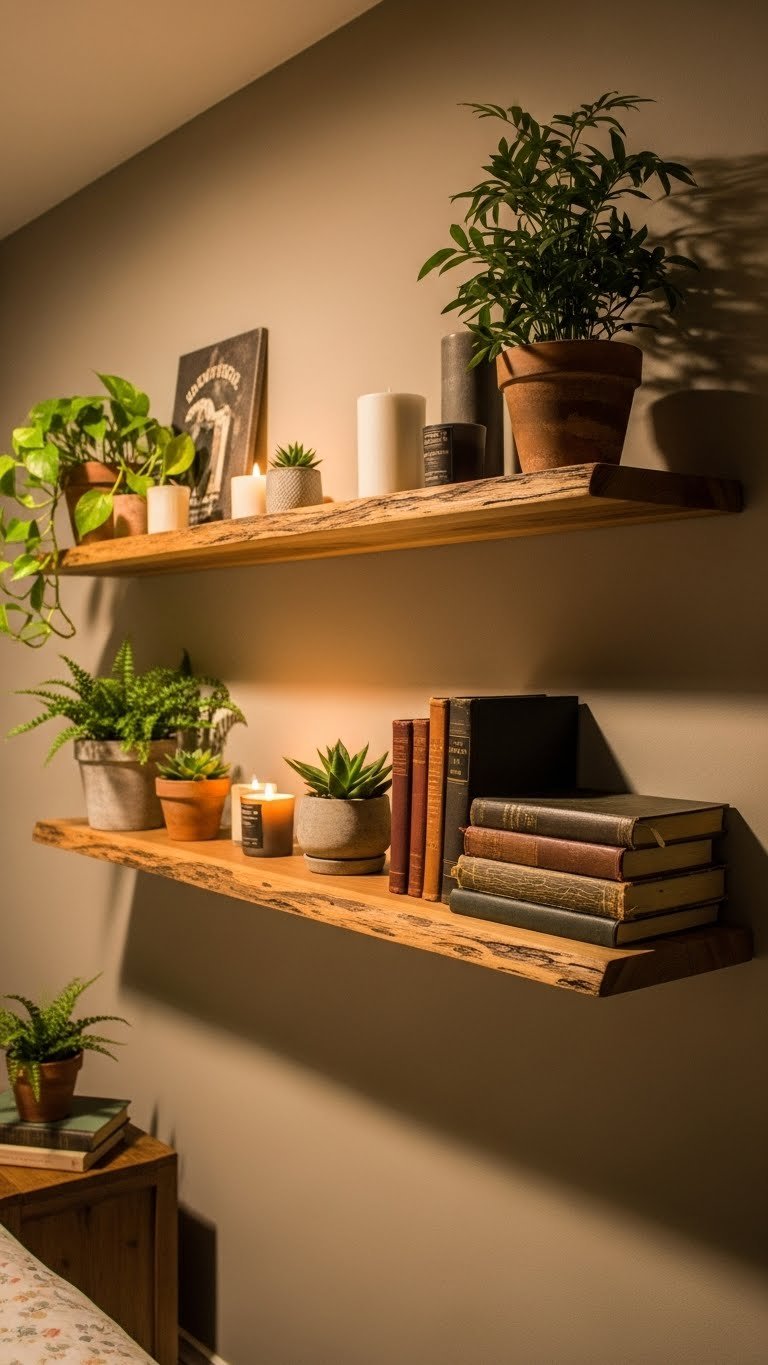
    17. Mount Shelves Above Your Rod for Dead Space

    Most closets have several feet of wasted wall space above hanging rods. Mount a shallow shelf there and you’ve added an entire storage tier.

    Floating shelves run $30–$80 installed (or DIY for $15–$40 if you’re handy). They take about an hour to install properly. Use them for off-season items, rarely-used bags, or decorative storage boxes. This works for renters if you use adhesive shelves, though they’re less sturdy than wall-mounted. Every closet has this unused space—reclaim it.

    You’ve essentially added a new shelf without losing any floor or rod space.


    18. Declutter Using the One-Year Rule

    A tiny closet feels manageable when it only contains items you actually wear. Use the one-year rule: if you haven’t worn it in a year, it goes.

    This costs zero dollars. Go through your closet and tag anything you haven’t worn since this time last year. Be honest. Do you actually like it, or are you keeping it out of guilt? Donate, sell, or give away. You’ll likely remove 20–40% of your closet volume. One afternoon of ruthless editing makes more space than any shelf hack. Your closet suddenly feels spacious and full of things you love.

    Less stuff means faster mornings, easier maintenance, and a closet that actually feels functional instead of suffocating.


    19. Add a Pegboard Wall for Accessory Display

    A pegboard wall turns closet accessories into a visual display while keeping everything accessible and off your shelves.

    Get a pegboard sheet for $20–$40 and basic hooks and shelves for $15–$30. Install it on one wall (takes about 30 minutes). Use hooks for belts and scarves, small shelves for jewelry or bags. You’ve created a feature wall that’s also highly functional. Renters can use adhesive-backed pegboards that remove cleanly. Rearrange your display anytime to match your mood.

    Your accessories become decorative and organized at once—no more digging through bins to find the right scarf.


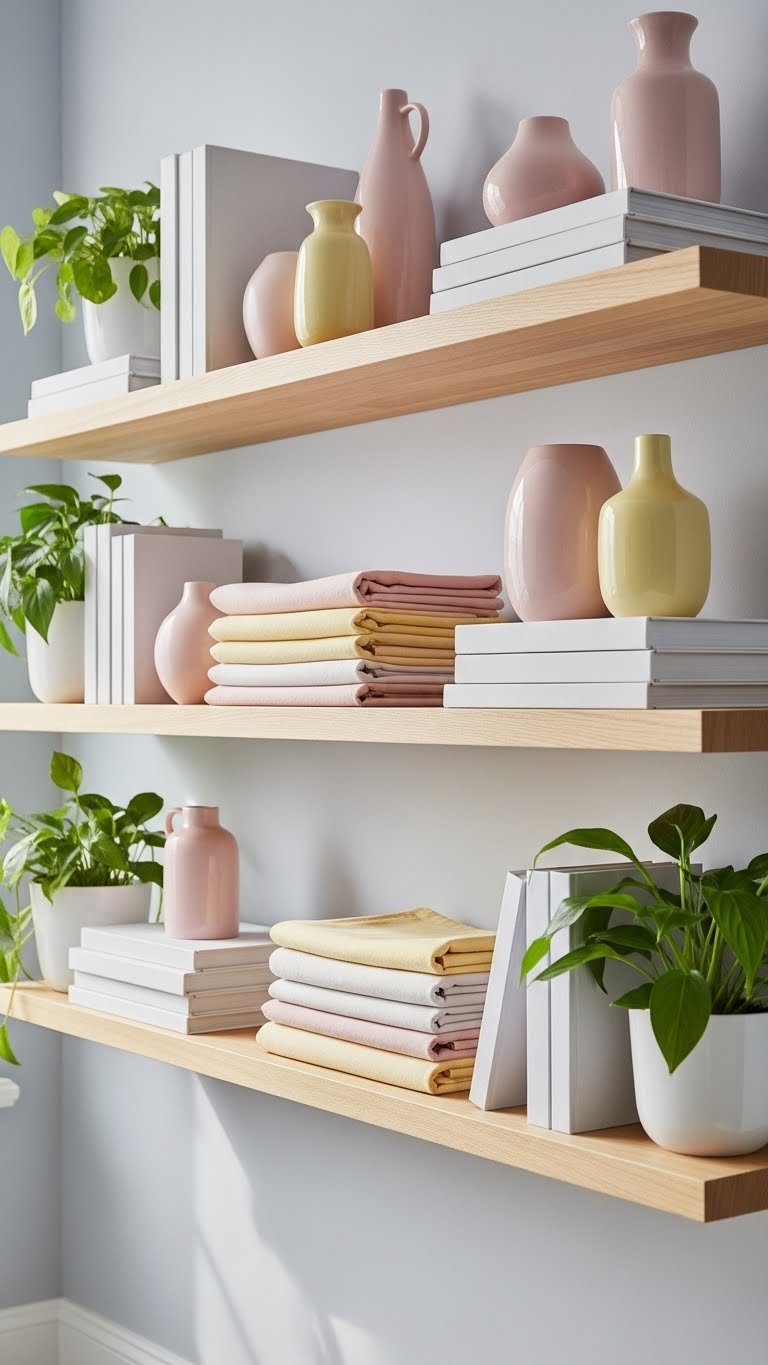
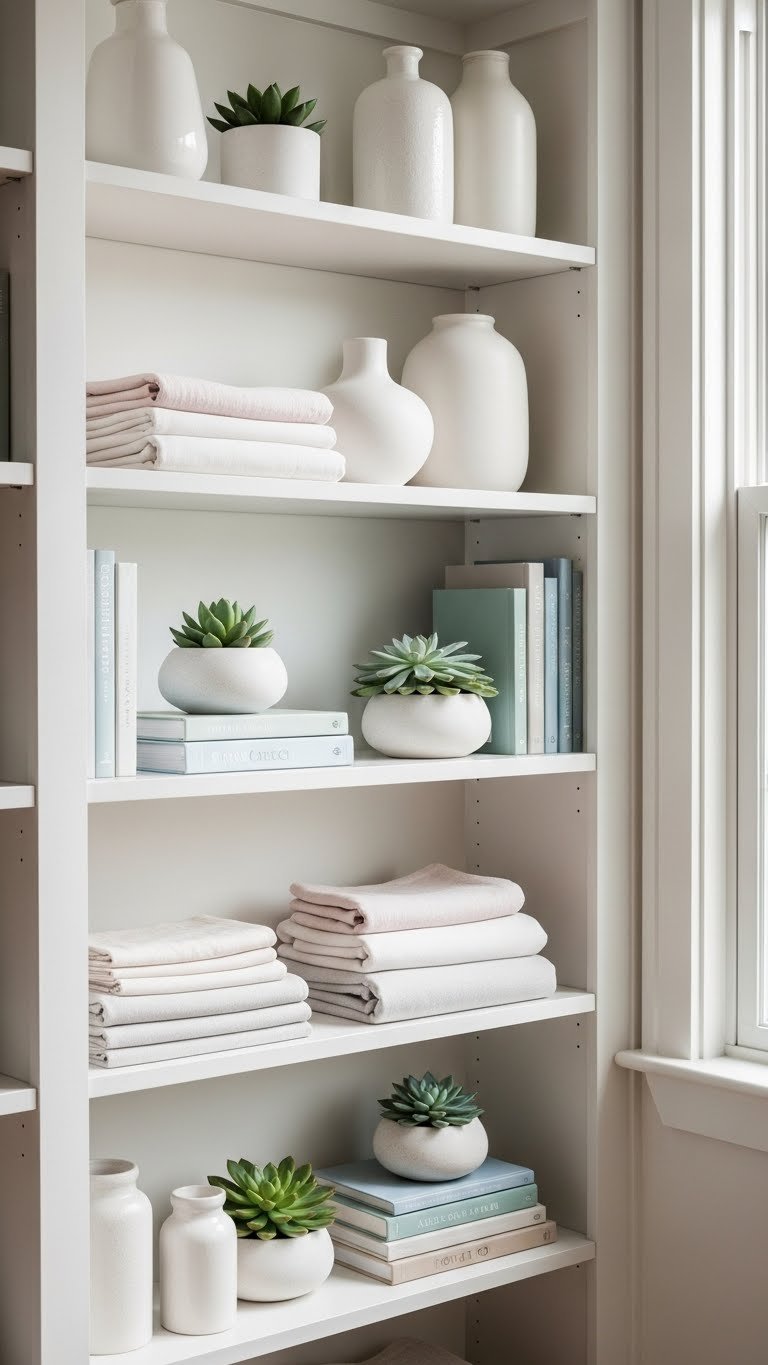
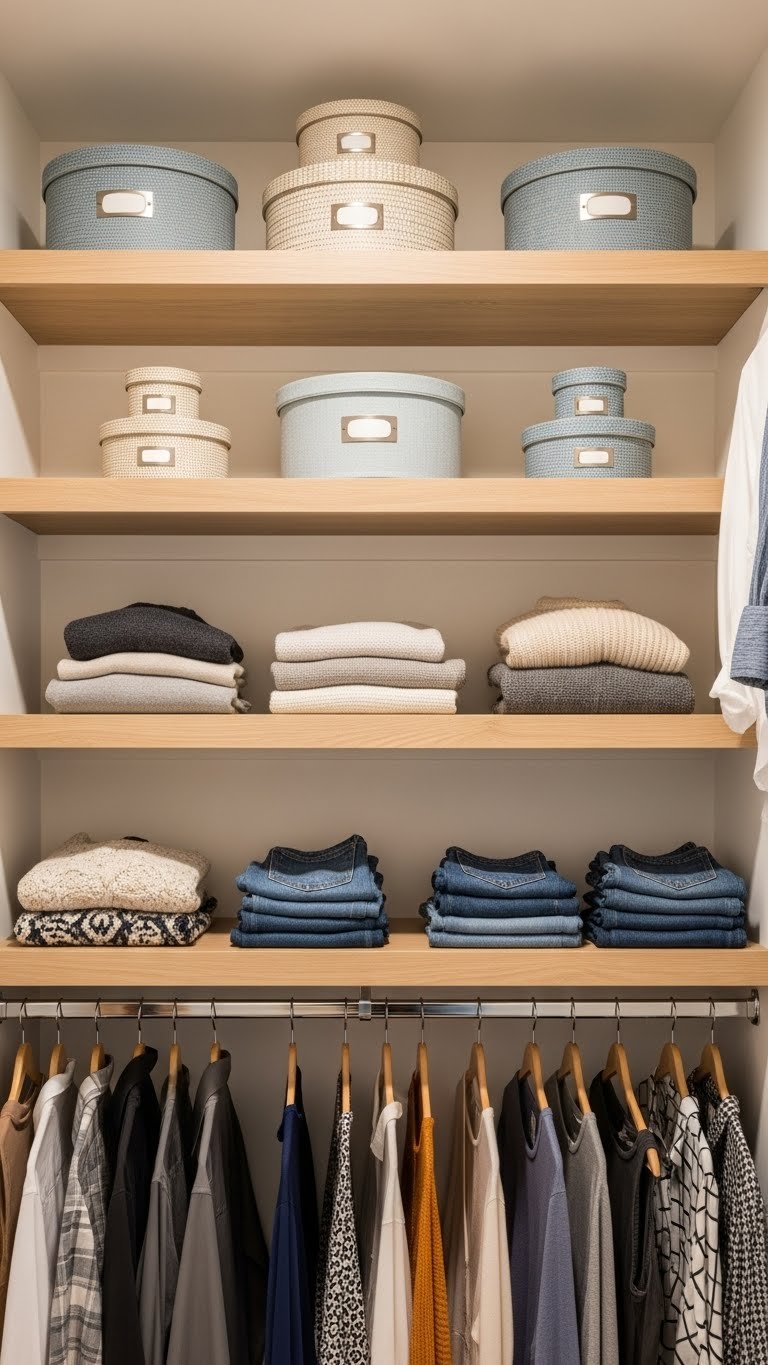
    20. Use Slim Woven Baskets for Soft Storage

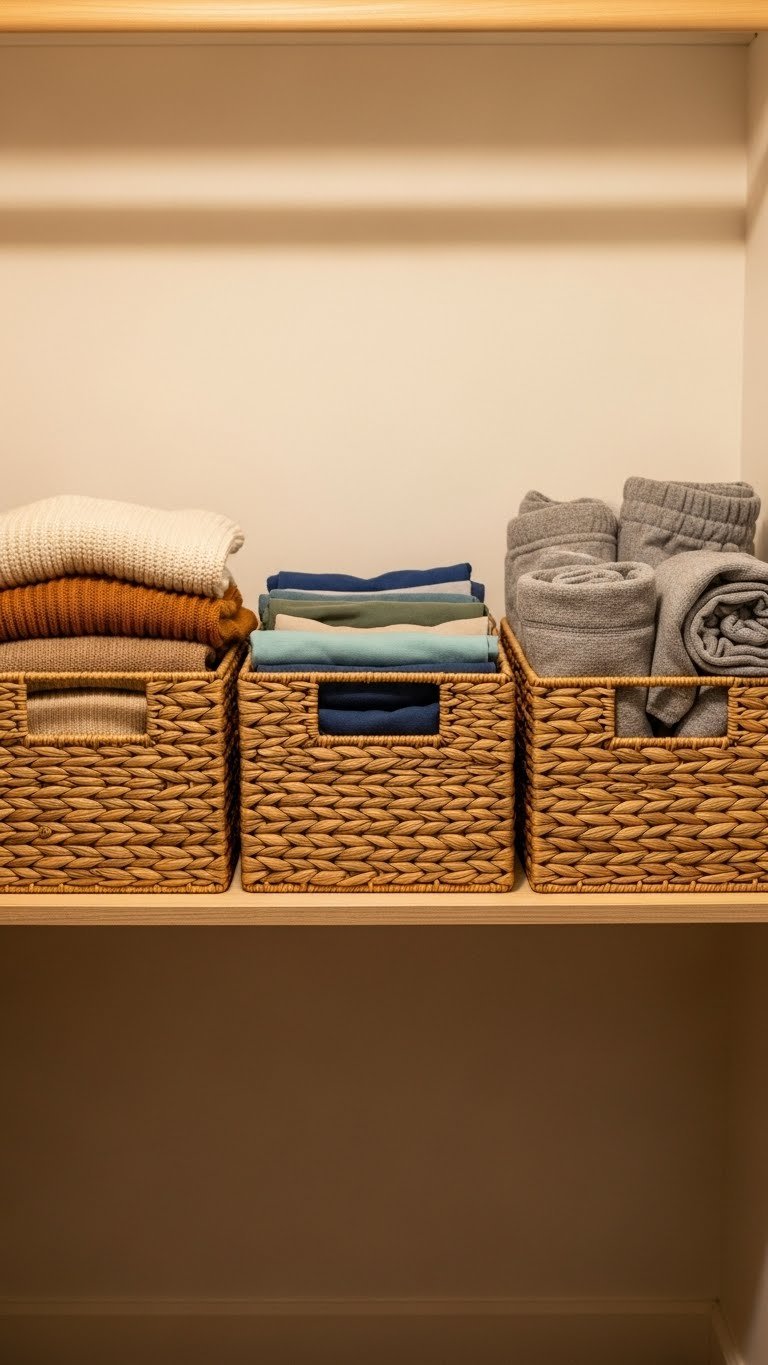
    Woven baskets add texture and warmth while keeping soft items contained and protected from dust. They’re especially good for small closets because they organize chaos beautifully.

    Find slim woven baskets for $15–$40 each at Target, West Elm, or IKEA. Label the front of each basket so you know what’s inside without opening them. Stack them on shelves or use them in your closet floor (if you have any). Sweaters, loungewear, and delicate items stay organized and dust-free. Baskets last years if you choose quality options.

    Your closet looks intentional and styled, not cluttered—and everything stays protected.


    21. Install a Slim Pull-Out Rack for Bags

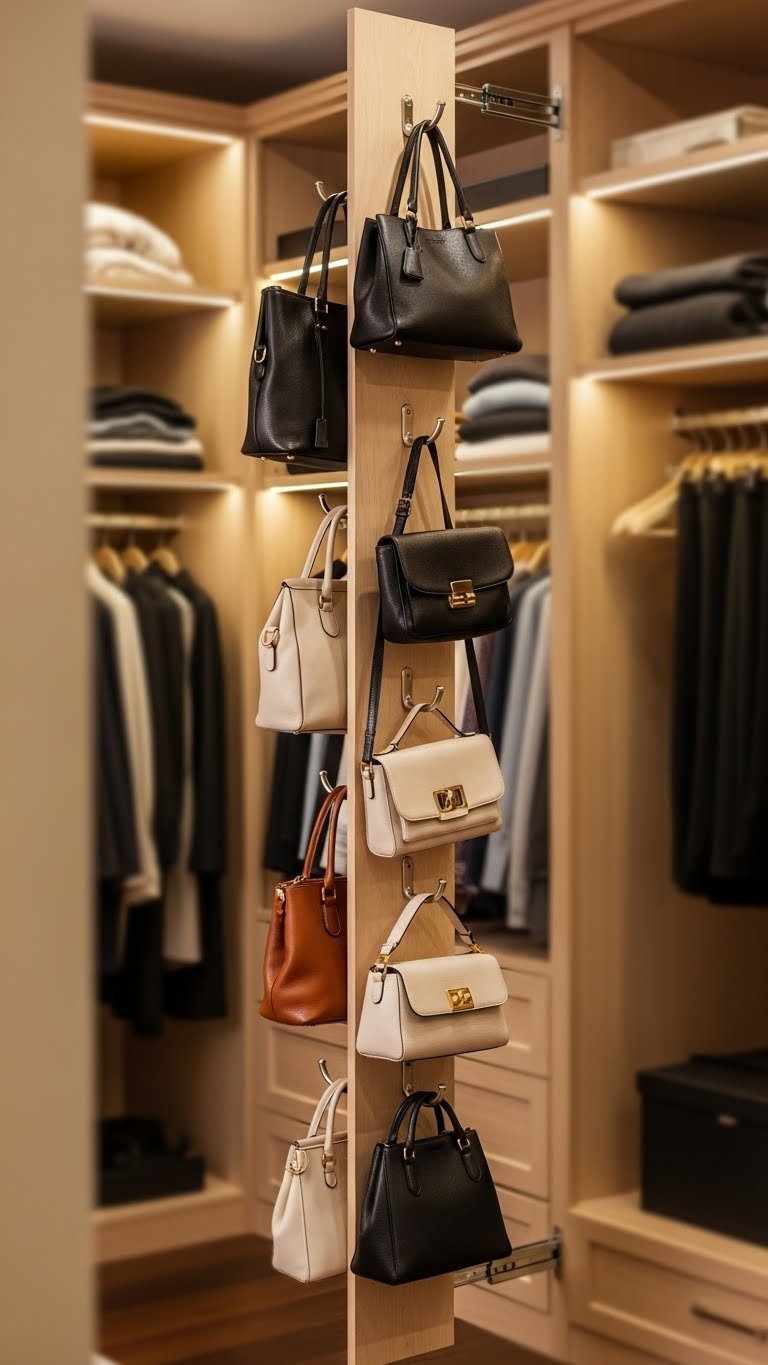
    Bags take up enormous amounts of space when they’re just piled on shelves. A vertical pull-out rack holds multiple bags in a fraction of the space.

    Find a slim pull-out closet organizer or bag rack for $40–$80. Install it on a side wall or in a corner. Hang your bags from hooks and they’re instantly visible and accessible. Pull the rack out to browse or grab one. For renters, look for freestanding slim racks (around $30–$60) that don’t require installation.

    Your bag collection is finally organized and you can actually see what you own.


    22. Paint Walls a Light, Reflective Color

    Color psychology works in closets: light colors reflect light and make small spaces feel bigger. Dark colors absorb light and make closets feel smaller and more cramped.

    A gallon of paint runs $20–$40, and you’ll use about half a gallon in a closet. Choose soft white, pale gray, or warm cream. Paint the walls yourself in an afternoon (about 2 hours). Don’t paint built-in cabinets or fixtures unless you’re renting—just the walls. The difference is instant: your closet suddenly looks bigger and brighter. Renters can use peel-and-stick wallpaper for $15–$50 as a reversible option.

    A tiny closet painted light feels spacious and functional instead of cramped and gloomy.


    23. Use Thin Shelf Liners to Protect and Stabilize

    Shelf liners protect your closet from dust and damage while providing subtle grip so items don’t slide around on smooth shelves.

    Adhesive shelf liner runs $8–$15 per roll. Cut it to size and stick it to your shelves in 10 minutes. Choose neutral colors or subtle patterns that complement your closet aesthetic. It prevents dust from settling on the shelf surface and keeps folded items from shifting when you add or remove things. Easy to replace yearly.

    Your closet looks more finished and organized, and your items stay exactly where you put them.


    24. Hang Thin Hooks Inside Cabinet Doors

    The inside of cabinet doors is prime real estate that most people ignore. Thin hooks hold lightweight items (jewelry, small scarves, bags) without adding bulk.

    Buy a strip of 4–6 thin hooks for $8–$15. Mount them inside any cabinet doors in your closet. Hang lightweight items and close the door—instant hidden storage. This works for jewelry, belts, small bags, or scarves. Installation takes 10 minutes. When you open the door, everything is visible; when closed, it’s hidden and out of the way.

    You’ve claimed hidden storage from a space everyone overlooks.


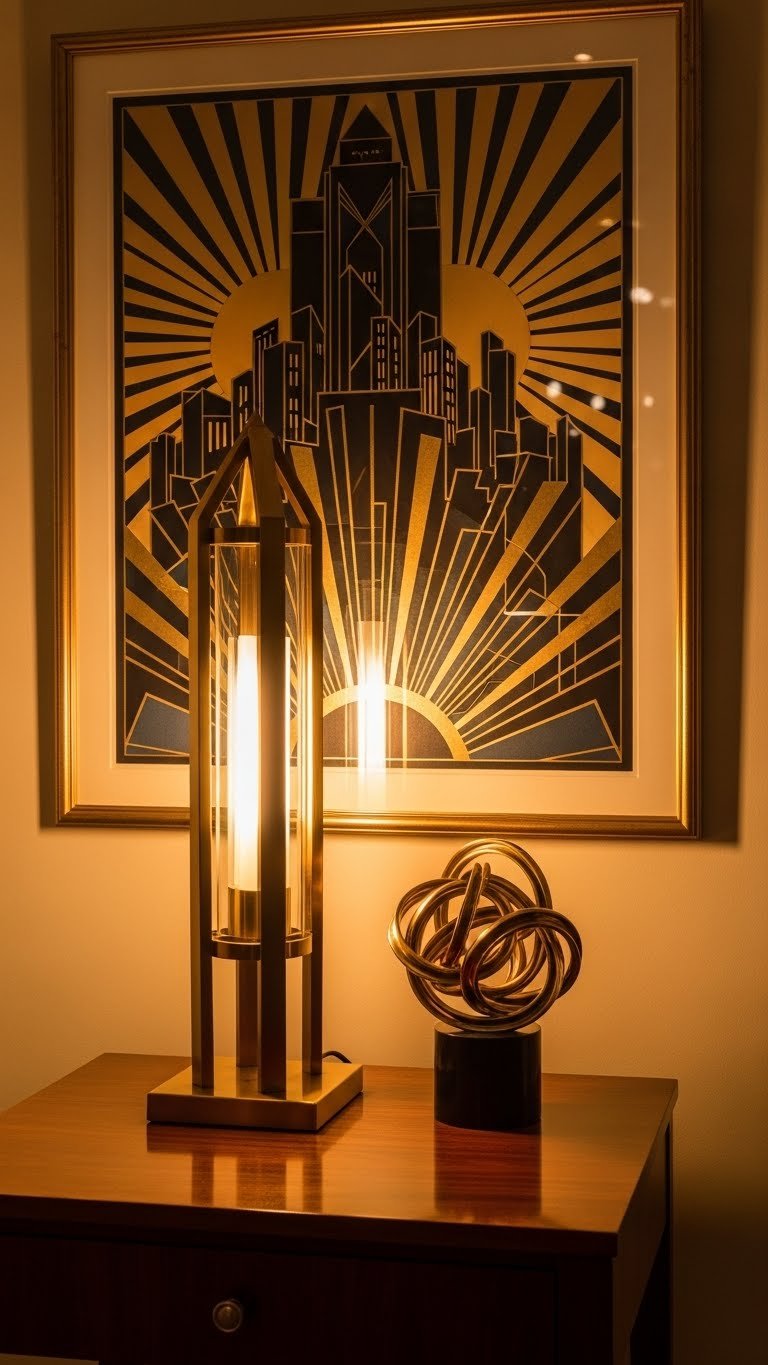
    25. Create a “Try-On” Corner with Good Lighting

    A dedicated try-on zone with a mirror and light saves you from standing in hallways half-dressed or making decisions in poor lighting.

    This setup costs $50–$100 total: a slim mirror ($30–$60), an adjustable lamp ($15–$30), and optional seating like a small bench ($25–$50). Install the mirror and lamp in 20 minutes. If space allows, add a tiny bench or ottoman to sit while deciding. The result is a functional getting-dressed station right inside your closet. No more holding clothes up to the hallway light to check colors.

    You make better outfit decisions, approve fit and color instantly, and keep your closet organized instead of scattered with “maybe” piles.


    26. Label Your Hangers by Category or Season

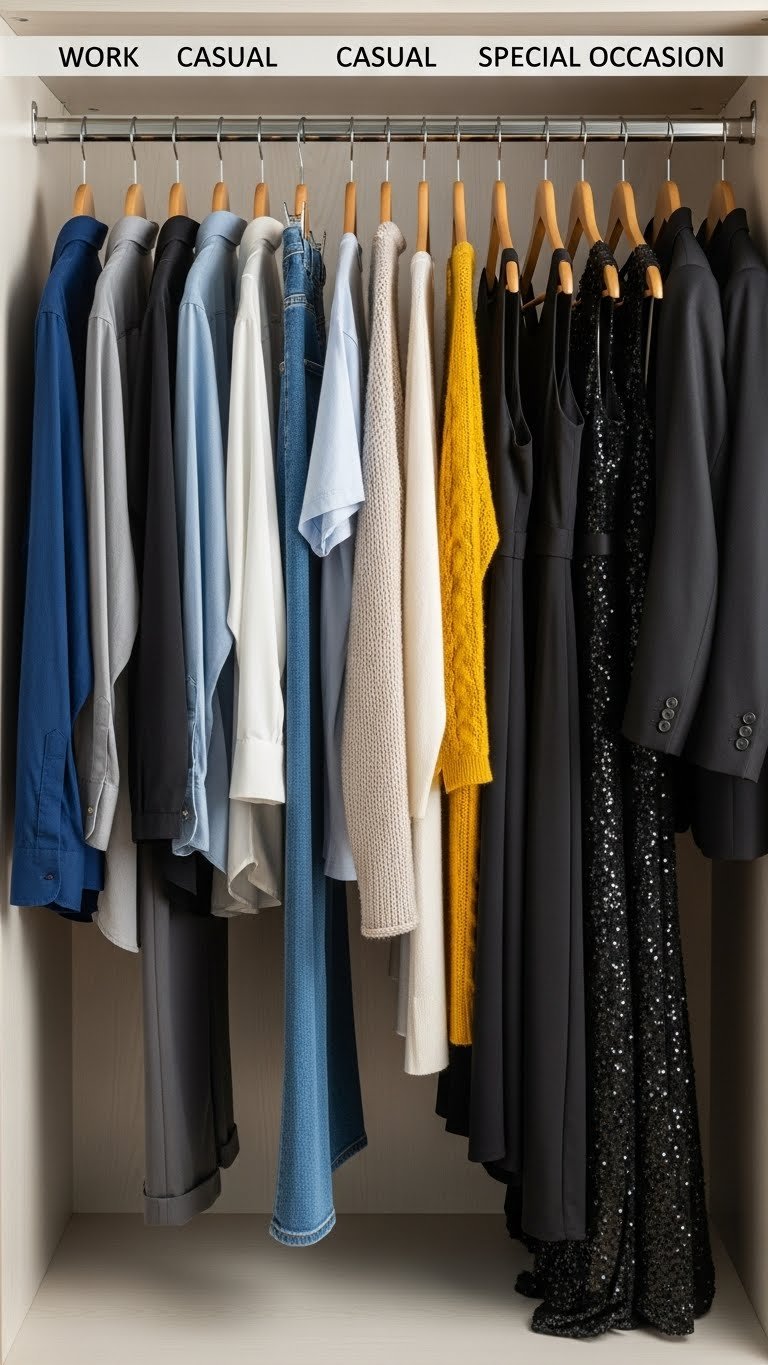
    Color-coded or labeled hangers create instant visual organization. You see at a glance where categories are, making outfit selection faster.

    Buy multi-colored hangers or get adhesive labels to tag existing ones for $10–$20 total. Assign each color or label to a category (work, casual, special occasion, seasonal) and rehang accordingly. Takes about an hour to reorganize. The visual feedback makes mornings faster and helps you build complete outfits because you can see what you have in each category.

    Your closet becomes navigable at a glance, and you make faster, more confident outfit choices.


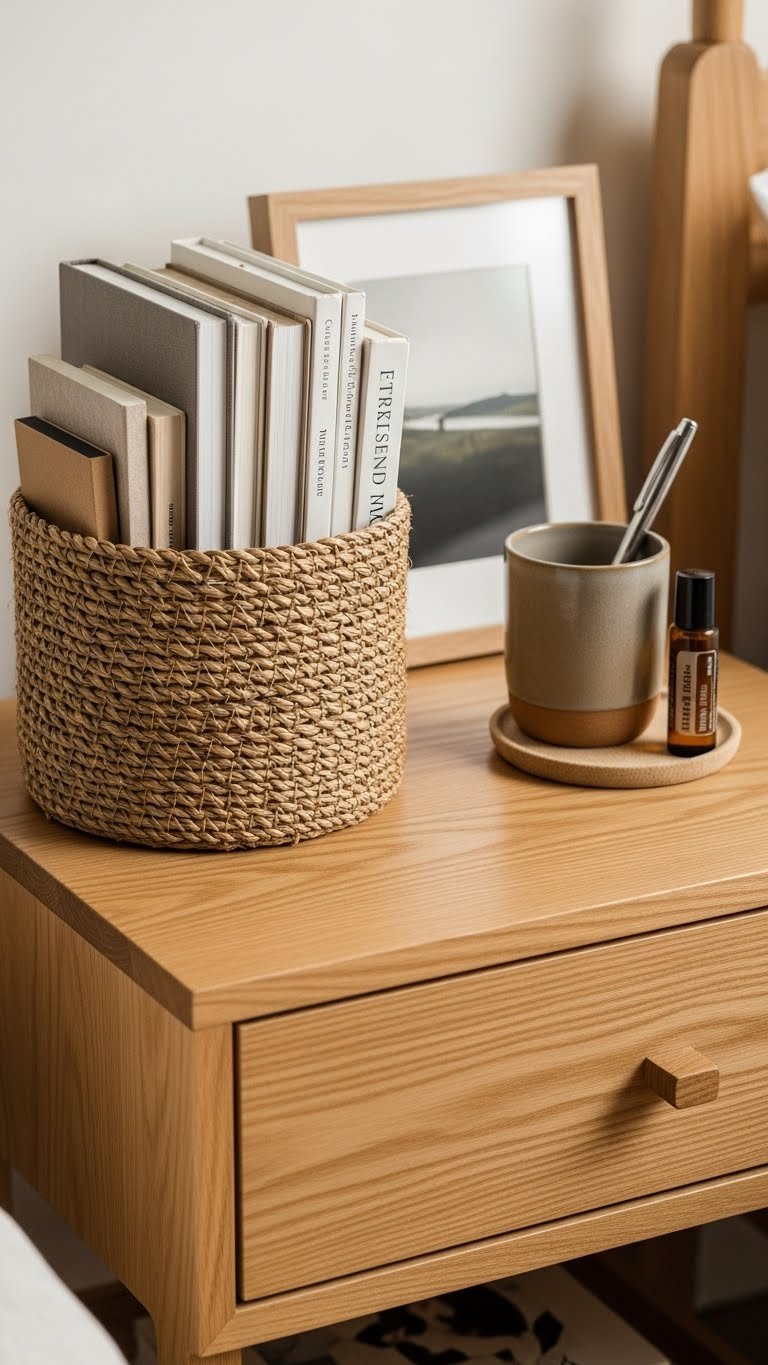
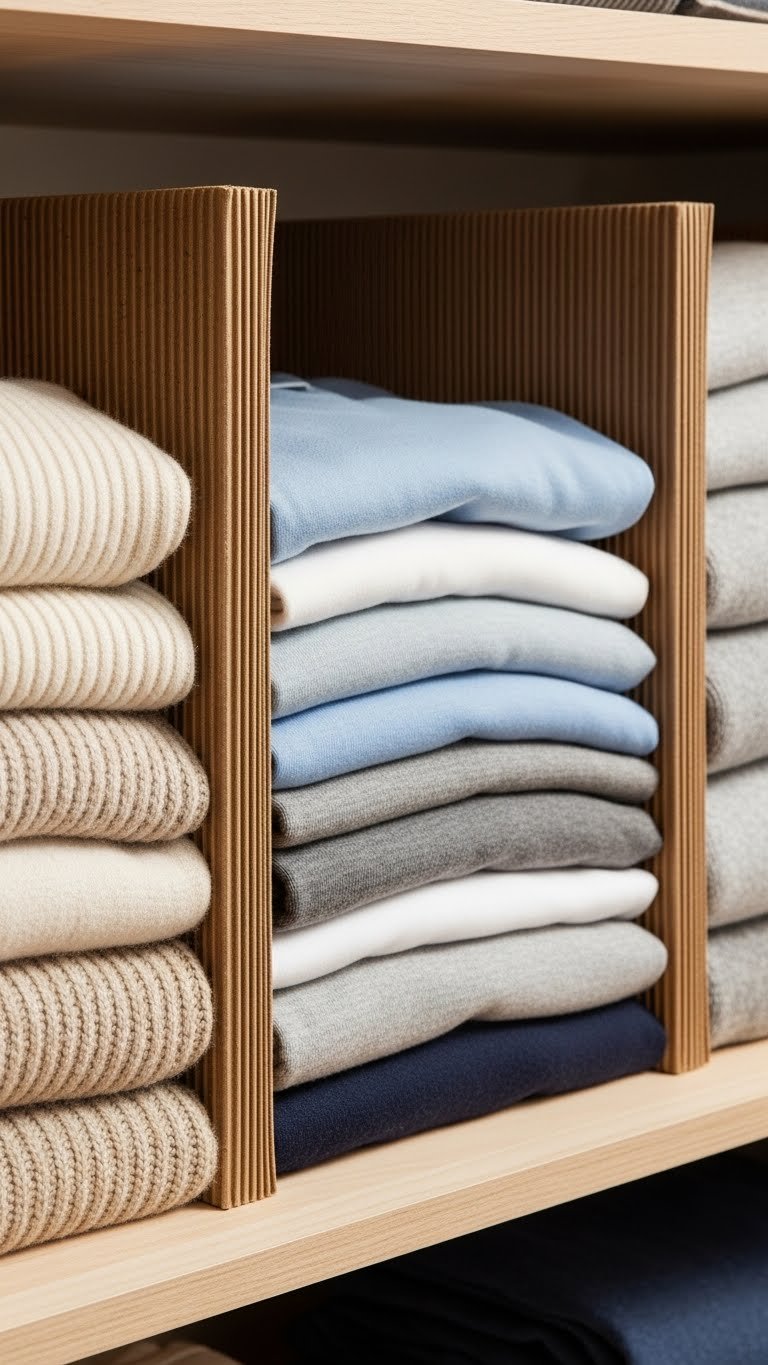
    27. Use Vertical Magazine Holders for Flat Items

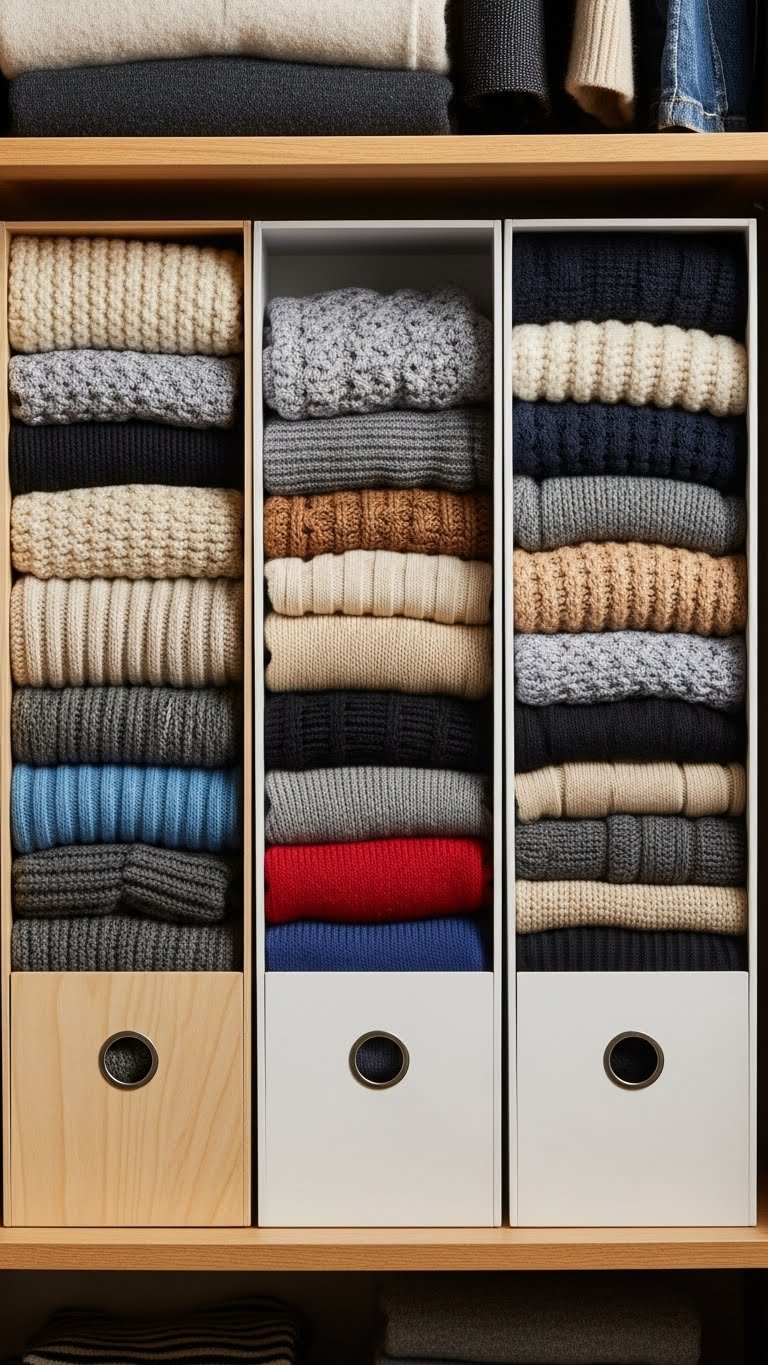
    Magazine holders (vertical dividers designed for magazines) work beautifully for storing flat items upright—like a filing system for clothes.

    Buy basic magazine holders for $12–$25 for three at IKEA or Target. Place them on a shelf and stand folded sweaters, thick sweatshirts, or sweater dresses inside them. You see every item by glancing down instead of digging through a stack. Each holder keeps items from toppling. They work especially well for small closets where horizontal stacking wastes visibility.

    Your folded items stay neat, organized, and instantly visible.


    Save this post and try just one idea this weekend—start with whichever speaks to your closet’s biggest pain point. Even one small change (new hangers, a second rod, or labels) makes your mornings easier and your closet feel twice as big. Share this with anyone drowning in a tiny closet situation.

  • 26 Teen Room Decor Ideas They’ll Actually Love

    26 Teen Room Decor Ideas They’ll Actually Love

    Introduction

    Your teen’s room should feel like their space—a place where they actually want to hang out, not just sleep. Whether they’re into studying, streaming, gaming, or just decompressing, the right décor makes all the difference. The good news? Most teens don’t need a complete renovation; they need thoughtful touches that show personality and creativity without breaking the bank.

    We’ve put together 26 ideas that mix budget-friendly hacks, DIY projects, and smart shopping picks. You’ll find everything from wall treatments and lighting upgrades to furniture rearrangements and storage solutions that actually work for real teenage life—clutter, hobbies, and all. Let’s build a room they’ll love.


    1. Paint Walls in Warm Earthy Tones

    Warm earthy colors like chocolate brown, sage green, or muted terracotta instantly make a room feel more grown-up and cozy than stark white or bright primaries. These tones work especially well for focus areas like study zones because they’re calming without feeling babyish.

    Pick one wall color and commit—Benjamin Moore, Sherwin-Williams, or budget option Behr all have solid earth-tone ranges. A gallon costs $25–$50, and you can paint most teen rooms with two gallons. DIY takes a weekend; hire a pro for $300–$600. Prep walls (patch holes, sand imperfections), use painter’s tape, and apply two coats. This works for renters too if you get permission and use peel-and-stick removable wallpaper instead.

    Your walls become a calming backdrop that makes everything else (furniture, posters, artwork) look more intentional and pulled-together.


    2. Add Curved Furniture for Visual Softness

    Straight lines and sharp corners feel rigid; curved furniture brings comfort and movement into a space. A curved chair, ottoman, or headboard adds visual interest and actually feels better to lounge in.

    Hunt for curved armchairs on IKEA, Wayfair, or Amazon in the $150–$400 range, or find secondhand options on Facebook Marketplace or Craigslist for $50–$150. A curved nightstand or side table runs $100–$250 new. The beauty is you only need one statement piece to shift the whole room’s energy. Pair it with straight pieces to keep balance—don’t curve everything or the space feels chaotic.

    This one investment piece becomes your room’s conversation starter and the most comfortable spot for homework or decompressing.


    3. Use Color Drenching to Go Bold

    Forget accent walls. Color drenching means painting all four walls (and sometimes the ceiling) in one saturated hue. Instead of drawing focus to one wall, you create an immersive mood that makes the room feel intentional and magazine-worthy.

    Choose a color you genuinely love—deep jewel tones (emerald, sapphire, burgundy) and moody teals work great for teen spaces. Paint + supplies: $40–$70. This is a weekend DIY project or $400–$700 with a pro. The key is committing; this works best when you’re not second-guessing yourself. Pair with white or light-wood furniture so the room doesn’t feel cave-like.

    The payoff is huge: a room that feels designed, mature, and totally different from anything your teen has experienced before.


    4. Install Floating Shelves for Storage + Style

    Floating shelves do double duty: they store stuff and display personality. Books, plants, trophies, photos, and collectibles become décor when arranged intentionally.

    IKEA or Home Depot floating shelves run $20–$80 per shelf; installation takes 30 minutes with a level and drill. Go for wood shelves ($40–$100) if you want warmth or metal + wood ($60–$150) for an industrial vibe. Arrange items in odd numbers (3, 5, 7) and mix heights for visual interest. Leave 30% of shelf space empty so it doesn’t feel cramped. This works for renters if you use damage-free mounting strips, though actual hardware is more secure.

    Your teen now has a spot to show off what matters to them—and it’s way cooler than posters taped to drywall.


    5. Upgrade Lighting Beyond the Ceiling Fixture

    Most teen rooms have one harsh overhead light. Layering multiple light sources—desk lamp, floor lamp, pendant lights, string lights—creates ambiance and makes the room actually functional for different activities (studying, relaxing, gaming).

    Skip string lights alone (too trendy, kinda juvenile) and mix in real lighting. A quality floor lamp costs $40–$150; a good desk lamp runs $30–$100; pendant lights for above a desk go $50–$200. Thrifting lamps saves money—hunt vintage brass or ceramic bases on Facebook Marketplace. Swap the shade if needed ($15–$40 new shade). Warm white bulbs (2700K) feel cozy; cool white (4000K) works better for study zones.

    Layer these lights on different switches or dimmers so your teen can set the mood or brighten up for homework.


    6. Create a Defined Study Zone with Area Rug

    Open-concept teen rooms feel chaotic. An area rug under the desk carves out a focused work zone without building walls or rearranging furniture.

    A 5×8 rug runs $80–$250 from IKEA, Target, or Wayfair; thrift for $20–$80. Choose a neutral or subtle pattern that won’t compete with walls or bedding. Position the rug so the front legs of the desk sit on it, anchoring the zone. This works for small rooms especially because it tricks the eye into seeing separate spaces. Bonus: a rug softens sound and makes the room feel warmer underfoot.

    Your teen gets a psychological “work zone” that helps them focus—plus the room feels more designed and less cramped.


    7. Layer Textures on the Bed

    A single matching duvet set looks flat. Layering different textures—chunky knits, velvet, linen, faux fur—makes a bed look expensive and feel like a real refuge.

    Start with a solid duvet ($60–$150), then add 2–3 throw pillows ($20–$50 each) in different fabrics—velvet for softness, linen for structure, knit for coziness. Drape a chunky knit throw ($30–$80) across the foot. All these pieces can come from IKEA, Target, West Elm, or thrifted for half price. Mix neutral tones (whites, grays, taupes, warm browns) so it coheres instead of clashing. The bed becomes the room’s anchor, and your teen actually wants to sit on it.

    Your teen’s bed goes from “I have to sleep here” to “I want to hang out here”—perfect for studying, journaling, or just scrolling in comfort.


    8. Paint Cabinetry or Dresser for Personality

    Furniture doesn’t have to stay its original color. Painting a dresser, nightstand, or bookcase totally changes a room’s vibe and costs way less than replacing it.

    Use furniture paint or chalk paint ($15–$25 per can) and primer. Most small pieces need one can. Paintbrushes and supplies: $20–$40. Total project cost: $35–$65 plus a weekend of work. Pick a color that complements your wall shade—if walls are neutral, try a muted jewel tone or warm earth color on the furniture. Seal with polyurethane for durability, especially on dressers that get heavy use. Renters can do this to dressers they own and take them along when they move.

    Your teen’s dresser becomes a statement piece, and the whole room feels more cohesive and styled.


    9. Hang Wallpaper on One Accent Wall

    Wallpaper adds pattern and interest without the commitment of painting all walls. One patterned wall anchors the room and gives it designer energy.

    Peel-and-stick removable wallpaper runs $25–$50 per roll; traditional wallpaper + paste costs $15–$40 per roll plus installation. Most accent walls need 2–4 rolls depending on size. Install peel-and-stick yourself in an hour; traditional wallpaper takes longer or hire someone. Pick a pattern that feels mature—geometric, botanical, or subtle abstracts work better than juvenile themes. Pair with solid walls so it doesn’t feel overwhelming.

    One patterned wall gives your teen’s room that “magazine-worthy” polish without feeling overdone.


    10. Add a Skirted Ottoman or Poufs

    Skirted ottomans add drama and old-school charm while serving as extra seating, a footrest, or hidden storage. That little skirt detail makes furniture feel curated and intentional.

    Hunt for skirted ottomans on Wayfair, West Elm, or Article ($150–$400), or find secondhand options ($40–$120). Brands like Restoration Hardware have pricier versions ($400+). Pair with a solid-colored armchair for a mini lounge zone. This works especially well in larger teen rooms where you can carve out a seating corner separate from the bed. Some have hidden storage—bonus for stashing extra blankets or off-season clothes.

    Your teen goes from “I sit on my bed” to “I have a whole seating nook”—perfect for friends coming over.


    11. Install a Pegboard for Organization + Display

    Pegboards are the Swiss Army knife of organization—they hold whatever you need and look intentional while doing it. They’re renter-friendly and adjustable as needs change.

    A basic pegboard costs $20–$50 from Home Depot or IKEA; hooks, baskets, and shelves add $30–$100. Install with simple anchors (renter-safe) or wall studs. Paint it a color that matches your room ($10–$20 for paint). Arrange items by category—art supplies in one basket, writing tools in another, headphones on a hook. Leave some negative space so it doesn’t look cluttered. This is perfect for teens with hobbies (art, music, gaming) because everything has a spot and stays visible.

    Your teen’s essentials become organized and decorative at the same time—no more digging through drawers.


    12. Swap Out Hardware on Existing Furniture

    New drawer pulls and handles on existing furniture cost almost nothing and feel like a mini renovation. It’s one of the easiest upgrades with outsized impact.

    New drawer pulls run $3–$15 each; a dresser with 6 drawers needs 6 pulls, so $20–$90 total. Find them at Home Depot, Wayfair, Amazon, or vintage hardware shops. Swap them out with a simple drill or screwdriver in 20 minutes. Choose brass for warmth, black metal for modern edge, or ceramic for personality. This works on nightstands, dressers, and cabinets—basically any furniture with hardware. Renters can do this if they keep the original hardware in a box.

    Your teen’s furniture suddenly looks intentional and upgraded, like you actually decorated with a plan.


    13. Create a Gallery Wall of Personal Photos + Art

    A gallery wall displays who your teen actually is—their friends, travels, art they love—instead of generic wall décor. It’s personal, and guests see instantly what matters to them.

    Frame options run $5–$20 each from IKEA, Target, or thrifted. Get 8–12 frames to fill a wall. Print photos at CVS or Walgreens ($0.50–$2 per print). Arrange on the floor first to plan your layout, then hang with a level. Mix frame styles and sizes for visual interest, or go uniform (all black frames, all wood) for a cleaner look. This is a renter-dream because it’s removable and you only need picture hangers, not permanent damage.

    Your teen’s walls become a reflection of their life instead of just background space.


    14. Add a Canopy or Fabric Drape Over the Bed

    A bed canopy (fabric or frame-based) creates an instant retreat within the room—cozy, private, and visually striking. It doesn’t have to be frilly; modern versions are minimal and sophisticated.

    Sheer fabric drape kits cost $30–$80 from IKEA or Etsy; wooden canopy frames run $150–$400. For a renter option, use command hooks and sheer curtain fabric ($20–$50 total). Hang fabric from ceiling corners or a simple frame and drape down the sides. Layer string lights underneath for ambiance. This is especially great for teens who want a cozy study nook or need sensory breaks. Bonus: it defines the bed zone visually in an open room.

    Your teen’s bed becomes a sanctuary—a space within a space where they can decompress without closing a door.


    15. Install Shelves Above the Headboard

    Shelves above the headboard add storage and a curated display without eating floor space. It’s a designer move that makes a small room feel intentional.

    Floating shelves cost $20–$80 each; you’ll likely need 2–3 for above a bed. Install with a level and stud finder (crucial here—don’t mount shelves above a bed on drywall alone). Total install cost: $60–$240. Arrange books with spines facing out, a small plant, and artwork. Keep the styling balanced—if shelves are above the bed, don’t overload them or they’ll feel top-heavy and weird when lying down.

    You create a focal point that’s both functional and beautiful, instantly elevating the room’s design.


    16. Use Fabric Wall Hangings Instead of Paint

    For renters or commitment-phobes, fabric wall hangings give that “I painted my walls” vibe without actually painting. Tapestries, scarves, and fabric panels are cheap, easy to swap, and zero-damage.

    A large tapestry costs $20–$60 from Urban Outfitters, Etsy, or Amazon. Smaller fabric scarves run $5–$20 and layer beautifully. Mount with fabric tacks, command strips, or just thumbtacks. Hang a tapestry behind the bed as a headboard substitute, or layer multiple fabrics on one wall for texture and pattern. Swap them seasonally or whenever your teen wants a new vibe. This is the most renter-friendly wall treatment available.

    Your teen’s wall becomes a canvas for expression that can change as often as they want—no commitment necessary.


    17. Create a Reading or Homework Nook in the Corner

    A dedicated nook for reading, studying, or just decompressing gives your teen space to focus—or escape—without hogging the whole room. This works even in small rooms by using corner space efficiently.

    Angle a comfy chair ($100–$300) or secondhand option ($20–$80) in a corner with a small side table ($30–$100). Add a floor lamp ($40–$150) and a basket for blankets ($15–$50). This whole setup runs $200–$600 new or $80–$250 thrifted. Position near a window for natural light if possible. The psychology is powerful: a designated “focus zone” helps your teen actually settle in and concentrate or relax, depending on what the space is designed for.

    Your teen gains a micro-retreat where they can study, read, or just exist away from the bed—game-changer for mental health.


    18. Paint Inside the Closet Doors

    Closet doors are blank canvas most people ignore. Paint them a fun, contrasting color and suddenly opening the closet becomes a little joy moment—plus the room looks more curated.

    Use the same furniture paint or regular interior paint ($15–$25). One closet door needs maybe $15–$40 worth of paint. This is a quick DIY: 2–3 coats, minimal prep, done in an afternoon. Paint them a darker shade than the walls for drama, a complementary color for visual interest, or a bold accent if you’re nervous about painting all walls. Pair with an organized closet interior so opening the doors is satisfying, not chaos-revealing.

    Your teen’s closet becomes a fun detail instead of something to hide—and every time they open it, they smile at the detail.


    19. Add a Desk Organizer System

    A focused study zone needs organization, or it devolves into chaos. A desk organizer system keeps supplies accessible and the desk surface clear for actual work.

    Desk organizer sets run $30–$100 from Container Store, Wayfair, or IKEA. Go for wood ($40–$80) for warmth or metal/acrylic ($25–$60) for modern vibes. Include compartments for pens, notepads, sticky notes, and small supplies. Add desktop file sorters ($15–$40) for papers and homework. If your teen is a maximalist, use drawer organizers ($20–$50) inside the desk to hide clutter. This setup takes 30 minutes to assemble and organize—totally worth it.

    Your teen’s desk stays functional and uncluttered, making homework and creative projects actually possible instead of frustrating.


    20. Hang Mirrors to Expand the Space Visually

    Mirrors make small rooms feel bigger and bounce light around, instantly improving both space perception and lighting. Plus, your teen has a mirror without eating floor space.

    A large floor mirror costs $50–$200; smaller wall-mounted mirrors run $20–$80. Lean a mirror against the wall (renter-friendly) or hang it with simple hardware. Position across from a window to bounce natural light, or opposite the desk lamp to brighten work zones. A round mirror ($30–$100) adds softness; a rectangular mirror ($40–$150) feels contemporary. Thrift options for $10–$40.

    Your teen’s room feels more open and brighter instantly—plus they have a mirror for getting ready without crowding the bathroom.


    21. Create a Pin Board for Inspiration + Planning

    A visual pin board is a place for inspiration, goals, reminders, and random things your teen loves—way better than random stuff tacked all over walls.

    A 24×36 cork board costs $20–$50 from IKEA or Michaels. Fabric or felt versions run $30–$80. Use colorful push pins ($3–$10 per pack) to attach photos, postcards, lyrics, quotes, sketches, and color swatches. This is a renter-friendly, damage-proof way to personalize walls. Your teen arranges and rearranges as interests shift—it’s a living piece of décor that actually means something.

    Your teen has a dedicated spot for inspiration and self-expression that’s organized and intentional instead of chaotic and tape-filled.


    22. Swap Bedding Seasonally

    Instead of one permanent bedding set, rotate seasonally or by mood. This makes your teen’s room feel refreshed without major renovation and keeps it comfortable year-round.

    Invest in 2–3 quality sheet sets ($30–$80 each), a lightweight duvet for warm months ($50–$120), and a heavier one for winter ($60–$150). Mix fabrics—linen for summer (breathable), flannel or cotton for winter (cozy). Keep off-season sets in a storage bin under the bed. Total investment: $200–$500 for a complete rotation, way less than redecorating. Seasonal swaps happen in 10 minutes and make the space feel like a refresh.

    Your teen’s room feels intentional about comfort—cozy in winter, cool in summer—without looking like the same space all year.


    23. Install Task Lighting at the Desk

    Good desk lighting is essential for focus and eye comfort. Most ceiling fixtures alone don’t cut it for studying, art, or detail work.

    A quality desk lamp costs $30–$100 and should be positioned to the side of your teen’s dominant hand to avoid shadows. Look for adjustable arms ($40–$80) so light angles where needed. LED bulbs ($5–$15) last forever and stay cool. Pair with warm white (2700K) for comfort or cool white (4000K) for focus tasks. This is money well spent because eye strain is real, especially for teens doing hours of homework.

    Your teen’s workspace becomes functional and comfortable—no more squinting, no more headaches from poor lighting.


    24. Add a Statement Rug Under or Beside the Bed

    A bold rug anchors the bedroom and adds pattern or color without committing to painted walls. It’s also functional—soft underfoot in the morning.

    A quality rug runs $100–$300 from Wayfair, Article, or Rugs USA; budget options cost $40–$100 from IKEA or Target. Go for geometric patterns, florals, or abstract for visual interest. Pair with neutral bedding so the rug shines. Position it so the front corners of the bed sit on it, anchoring the space. Thrift for $20–$80. A rug also softens sound and adds warmth textually and visually.

    Your teen’s bedroom feels designed and has a clear focal point—the rug ties the whole space together.


    25. Paint an Ombré or Gradient Wall

    An ombré gradient wall is a step up from a single color—it’s sophisticated, visually interesting, and screams “I actually designed this.”

    You’ll need 2–3 paint colors in the same family ($25–$50 total). Paint the darkest shade bottom third, medium shade middle third, lightest shade top third, then blend where they meet with a damp sponge. It takes patience and 4–6 hours, but it’s a wow factor that photographs beautifully. This is an advanced DIY—if your teen is game for it, great; otherwise, hire a painter ($400–$800). The result is a focal wall that looks expensive and intentional.

    Your teen’s room becomes conversation-worthy—friends ask about that wall, and they feel proud showing it off.


    26. Curate a Styling Corner with a Dress Form or Mirror

    If your teen cares about fashion, giving them a dedicated styling corner—with a dress form, mirror, and small clothing rack—makes getting dressed feel intentional and is genuinely useful.

    A dress form costs $40–$120 from Amazon, Etsy, or craft stores. Pair with a full-length mirror ($50–$150) and a small clothing rack ($60–$150). Hang their current-rotation favorites so they’re visible and inspiring. This is practical (helps with outfit planning) and decorative (looks cool). If space is tight, a dress form alone + mirror combo ($100–$200 total) works great.

    Your teen’s clothing becomes part of their room’s décor, and getting dressed goes from “ugh, what do I wear” to “let me pick from my inspiration rack.”


    Closing

    Save this post and pick one idea to tackle this weekend—whether it’s swapping hardware, adding a rug, or creating a study nook. Small changes add up fast, and your teen will notice the difference immediately. Share this with other parents or teens who need a room refresh!

  • 27 Trending Bed Designs That Transform Any Bedroom Instantly

    27 Trending Bed Designs That Transform Any Bedroom Instantly


    Your bedroom should feel like a retreat, but most of us sleep in spaces that feel more like an afterthought. Whether you’re working with a tiny studio, a shared room, or just outdated furniture, the right bed design can completely change how you feel when you walk through that door. The good news? You don’t need a total overhaul or a huge budget to make a real difference. These 27 ideas mix affordable hacks, DIY projects, and investment pieces that actually deliver results. You’ll find solutions for hot sleepers, back pain sufferers, couples who need space, small-room warriors, and anyone who just wants their bedroom to look like the spaces they pin on their phone. Let’s dig into ideas that work with your life, your space, and your wallet.


    1. Choose Bouclé Fabrics for Subtle Textured Depth

    Bouclé has exploded in searches this year—up 35% overall and white bouclé up an absolutely wild 7,800%. This textured fabric adds serious visual interest to neutral bedrooms without feeling busy or dark.

    You can find bouclé headboards, bed frames, or even just swap your regular headboard cover with bouclé upholstery. Retailers like Saatva, Wayfair, and Article offer bouclé beds ranging from $400–$1,200. If you’re renting or on a budget, grab a bouclé throw blanket ($30–$80) from Target or Amazon to layer on top. The fabric feels luxurious and photographs beautifully for social media, which means you’ll actually want to spend time in your bedroom.

    This one change makes your bedroom feel intentional and high-end without overdoing it.


    2. Install a Murphy Bed to Reclaim 50% More Floor Space

    If you’re in a small space, a Murphy bed is a game-changer—it literally doubles your usable square footage. When closed, it looks like a regular wall unit or cabinet. When open, you get a full sleeping surface without a bed frame eating up your whole room.

    Installation costs range from $400–$2,000 depending on size and quality. Companies like Wayfair, Amazon, and IKEA sell DIY-friendly kits if you’re handy. Hire a professional installer (check Thumbtack or TaskRabbit) if the wall-mounting part stresses you out—they charge $200–$500 for labor. Setup takes a weekend if you’re doing it yourself, or a few hours professionally. The payoff? You go from a cramped bedroom to a room where you can actually move around.

    Your small space suddenly functions like it’s twice as big.


    3. Layer Cooling Sheets with Moisture-Wicking Properties

    Cooling sheets are having a moment—searches jumped 8,300% because people are finally admitting they get hot at night. If you’re sleeping under regular cotton sheets and waking up damp, this is your fix.

    Look for sheets made from bamboo viscose, linen blends, or performance fabrics that wick moisture away. Brooklinen, Saatva, and BEDGEAR make excellent options ranging from $80–$200 per set. Budget-friendly alternatives from Target or Amazon ($30–$60) also work surprisingly well. The fabric feels cool to the touch and actually regulates temperature instead of trapping heat. If you’re a hot sleeper, pair these with a cooling blanket ($40–$120) for an extra layer of relief.

    You’ll wake up refreshed instead of sticky and exhausted.


    4. Add an Adjustable Base for Reading, Posture, and Muscle Relief

    Adjustable bases aren’t just for aging—31% of people deal with chronic back pain, and a good base actually helps. You can prop yourself up for reading, lower your legs to reduce pressure, or find the exact angle that stops your snoring (hello, sleep divorce prevention).

    Prices start around $300 and go up to $1,500+ depending on features. Look for ones with USB ports, under-lighting, and reading angle presets. Saatva, BEDGEAR, and King Koil offer quality options. Many come with remote controls so you can adjust without getting up. Installation is straightforward—they usually arrive semi-assembled and take 20–30 minutes to finalize. Pro tip: Pair with a mattress designed for adjustable bases (many brands offer this now).

    Your back will thank you every single morning.


    5. Go Canopy for a Focal Point That Feels Luxe

    Canopy beds create that “wow” moment the second you walk in—they work in modern, traditional, and eclectic rooms depending on the style. You don’t need heavy velvet drapes; simple sheer panels feel just as sophisticated.

    Look for metal canopy frames (way easier to install than wooden ones) at Wayfair, Article, or Crate & Barrel starting around $300–$800 for basic styles, $1,200+ for statement pieces. IKEA has a basic option under $100 if you want to test the vibe first. Hang lightweight linen or cotton curtains ($40–$100 per panel) to soften the look. If you rent, look for freestanding canopies that don’t require wall mounting. The whole project takes an afternoon.

    Your bedroom goes from forgettable to somewhere you actually want to spend time.


    6. Mix Vintage Pieces with New Furniture for Authentic Character

    Rooms feel more personal when they tell a story instead of looking like they came from a single catalog. Mixing one or two vintage or secondhand pieces with new furniture gives you authenticity without the “staged” feeling.

    Hunt for vintage nightstands, dressers, or bed frames at local thrift stores, Facebook Marketplace, or Craigslist ($20–$150 each). Pair with modern bedding from Target or IKEA to keep it current. Layer in a handmade quilt or vintage throw blanket ($30–$200) as a focal point. If you find a frame you love but it needs refinishing, factor in $100–$300 for professional restoration, or DIY it with paint and new hardware (weekend project, $20–$50 in supplies).

    You’ll have a bedroom that feels collected and intentional, not mass-produced.


    7. Use Live-Edge Wood Frames to Connect with Nature

    Live-edge wood brings nature into your bedroom in a way that feels warm and grounding. The organic curves and visible grain create focal points that polished furniture just can’t match.

    These frames come from specialty furniture makers on Etsy, Wayfair, and West Elm ranging from $600–$2,000 depending on size and wood type. Walnut, oak, and reclaimed wood are common choices. If you’re on a budget, look for live-edge shelves or a headboard instead ($200–$500) and pair with a standard bed frame. Some sellers ship unfinished versions ($300–$800) so you can customize the stain—DIY finishing takes a weekend and costs $30–$60 in materials. The wood requires minimal maintenance beyond occasional dusting.

    Your bedroom feels like a serene escape rather than a standard bedroom setup.


    8. Install Blackout Curtains for Better Sleep Quality

    Your brain needs darkness to produce melatonin and sleep properly. If you’re waking up at dawn or dealing with street lights, blackout curtains are a science-backed fix that actually works.

    Thermal blackout curtains from Target, IKEA, or Amazon cost $30–$80 per panel. They’re heavier than regular curtains and block 95–99% of light. Measure your window height (include wall space above for maximum coverage) and install a sturdy rod ($15–$40). Most people hang them themselves in 30 minutes using basic tools. For renters, there are adhesive options that won’t damage walls. Bonus: they also insulate, so your room stays cooler in summer and warmer in winter.

    You’ll sleep deeper and wake up more refreshed.


    9. Add Curved Headboards to Soften Your Space

    Sharp corners feel jarring; curved furniture makes a room feel calmer and more intentional. Curved headboards are trending right now because they’re visually softer while still being statement pieces.

    Look for arched or rounded headboards at Article, Wayfair, or West Elm starting around $300–$800 for mid-range options. IKEA and Target have budget versions ($150–$300). You can also DIY this by adding padding and fabric to a curved wooden frame ($100–$200 in materials, afternoon project). Pair your headboard with a matching curved dresser or nightstand to amplify the effect—furniture companies are making these sets together now. The soft geometry makes your whole room feel more sophisticated.

    Your bedroom instantly feels more designed and put-together.


    10. Layer Natural Wool, Linen, and Cotton Bedding for Breathability

    Natural materials regulate temperature better than synthetics, which means you stay comfortable year-round. Plus, they’re sustainable and actually get softer with every wash.

    Wool blankets ($80–$200) from Woolroom or Parachute are worth the investment—they last forever. Linen sheets ($100–$180) from Brooklinen or Parachute wrinkle charmingly and breathe beautifully. Organic cotton pillowcases ($30–$60) bridge budget and quality. Mix and match depending on your budget—you don’t need to buy everything at once. Wash in cool water and air dry to extend the life of natural fibers. If you’re on a tighter budget, start with one quality piece (like wool or linen) and build from there.

    You’ll notice the difference in sleep quality and comfort within a week.


    11. Create a Digital-Free Sleep Zone with Aromatherapy

    Blue light from phones disrupts melatonin production and keeps your brain alert. Creating a charging station outside your bedroom sounds simple, but it genuinely improves sleep quality and presence.

    Move your phone charger to another room or a hallway outlet. Replace your alarm clock with a basic mechanical or wooden one ($15–$40). Add a essential oil diffuser ($20–$60) and use lavender or chamomile oils for sleep support. A bedside carafe of water ($10–$25) means you stay hydrated without reaching for your phone. Keep a journal or book ($5–$20) instead of doom-scrolling before bed. This takes zero money if you already have the basics, or $60–$100 to fully outfit your zone.

    You’ll fall asleep faster and sleep more soundly.


    12. Switch to Performance Fabrics That Resist Stains and Odors

    Performance fabrics were designed for high-traffic furniture, but they’re perfect for beds too—they resist stains, don’t retain odors, and actually feel nice (not plastic-y like older versions).

    Brands like BEDGEAR, Saatva, and Crate & Barrel use performance fabrics on their beds and headboards. Prices range from $500–$1,500 depending on the piece. If you’re buying a headboard separately, expect $200–$600. The fabric typically costs a bit more upfront but saves you money on cleaning—just spot-clean with soap and water. Perfect if you have kids, pets, or just prefer low-maintenance furniture. Most performance fabrics still feel soft and come in neutral colors.

    Your bed stays looking fresh and pristine even with daily use.


    13. Install Smart Lighting for Mood and Sleep Cycle Support

    70% of homeowners want better lighting control, and smart bulbs let you adjust brightness and color temperature to match your sleep schedule. Warm light at night supports melatonin; you can gradually brighten in the morning to wake naturally.

    Smart bulbs ($10–$25 per bulb) from Philips Hue, LIFX, or Wyze work with your phone or voice assistant. You’ll need compatible fixtures or to replace existing bulbs. Total setup cost: $50–$150 for 2–3 key fixtures. Install them in bedside lamps or overhead fixtures where you spend your pre-sleep time. Many apps let you set schedules—so lights automatically warm up at 8 PM and brighten at 7 AM. The learning curve is shallow (most are plug-and-play), and the sleep benefits are real.

    Your bedroom adapts to your natural sleep rhythm instead of fighting it.


    14. Use Modular/Adjustable Mattresses for Couple Compatibility

    Sleep divorce is real—one person wants a firm mattress while the other prefers soft, and one’s a hot sleeper while the other freezes. Modular mattresses let both of you win.

    Companies like BEDGEAR make split-comfort designs where each half has different firmness levels ($1,200–$2,000 for a queen). Some mattresses let you adjust firmness with air chambers ($1,500–$2,500). You’re paying a premium for this flexibility, but it’s worth it if you’ve been compromising on sleep quality. They work in standard frames and come with full trial periods, so you can test if it’s right for you. Perfect if you and your partner have completely different sleep needs.

    Both of you actually sleep well for the first time in years.


    15. Layer Statement Pillows in Bold Colors (Neutrals Don’t Have to Be Boring)

    Neutrals are still ruling 2025, but boring gray doesn’t have to be your reality. One or two statement pillows in unexpected colors add personality and visual interest without overwhelming your space.

    Pick a pillow cover in a color that feels a bit brave—terracotta, sage, deep teal, or warm ochre—from Target, H&M Home, or Etsy ($20–$60 each). Pair with 2–3 neutral pillows so the color feels intentional rather than random. Budget option: Find colorful vintage or handmade pillows ($15–$40) at thrift stores. Swap out your pillows seasonally to refresh the space for zero extra cost. The key is restraint—one bold color usually hits harder than three.

    Your neutral bedroom suddenly feels curated and personal.


    16. Invest in a Quality Mattress Protector That Actually Works

    A mattress protector isn’t glamorous, but it’s the difference between a mattress that lasts 10 years and one that needs replacing in 5. It protects against spills, dust mites, allergens, and general wear.

    Look for encasement-style protectors (full zippers all the way around) rather than basic covers—they’re better at actually sealing out stuff. Saatva, Purple, and Helix offer waterproof versions ($60–$150). Budget-friendly options from Amazon or Target ($30–$60) also work well. Install it under your fitted sheet so it’s invisible. Most are machine washable—toss in the wash every 1–2 months. This one investment extends your mattress lifespan significantly and protects your sleep surface.

    Your mattress stays fresh and protected for years to come.


    17. Create a Platform Bed with Under-Bed Storage for Small Spaces

    Platform beds eliminate the need for a box spring and create built-in storage opportunities underneath. Perfect for studios and small bedrooms where every inch counts.

    Look for platform beds with drawers on Wayfair, IKEA, or West Elm starting around $300–$600 for basic styles, $700–$1,200 for nicer finishes. IKEA’s solid options cost $150–$300. The storage underneath holds 2–3 plastic containers of seasonal clothes, extra bedding, or shoes—reclaim your closet space. Low-profile designs make rooms feel bigger, and you don’t lose any surface area. Installation is straightforward for most models (2–3 hours DIY, or hire help for $100–$150).

    Your bedroom gains storage without sacrificing an inch of floor space.


    18. Add a Low-Pile Area Rug for Warmth and Visual Grounding

    An area rug defines your sleeping space, adds warmth underfoot, and makes your bedroom feel complete instead of floating in an empty room. Low-pile is practical—easier to clean and won’t slip.

    Pick a neutral or soft-colored rug from Target, IKEA, Wayfair, or a local rug store in sizes 5’x7′ or 6’x9′ ($50–$300 depending on quality). Jute and sisal blends are budget-friendly and durable ($50–$150). A rug pad underneath prevents slipping and protects your floor ($15–$30). Vacuum weekly and spot-clean spills immediately. If you rent, rugs add personality and hide floor imperfections—they’re totally movable.

    Your bedroom feels anchored and intentional instead of unfinished.


    19. Install Floating Shelves Above Your Bed for Storage + Style

    Floating shelves give you storage without bulky nightstands, and they photograph beautifully. The key is styling them so they look collected, not cluttered.

    Floating shelves ($30–$80 each) and brackets ($15–$40 per pair) come from Target, IKEA, Home Depot, or Amazon. Installation takes an hour if you locate studs and use proper anchors (or hire a handyman for $50–$100). Style with 3–4 items max per shelf: a small plant, a decorative book, a candle, a framed photo. The negative space is part of the design. This works great for renters too if you fill the holes before moving. Budget option: Use removable adhesive shelves ($15–$25) that don’t damage walls.

    Your bedroom gets functional storage that looks like intentional decor.


    20. Use Bunk Beds with Trundles for Multi-Gen and Guest Spaces

    If you have kids, guests, or a multi-generational home, bunk beds with trundles let you maximize sleeping capacity in minimal space. A trundle slides under the top bunk when not in use—game-changer for small homes.

    Wooden bunk beds with trundles start around $300–$600 from IKEA, Wayfair, or Amazon, and go up to $1,000–$1,500 for solid wood versions. Metal frames are lighter and easier to move ($250–$500). Make sure ceilings are high enough for the top bunk (typically need 6.5 feet). Trundles themselves sleep surprisingly comfortably with a good mattress ($100–$300). Safety rails, ladder style, and mattress quality matter more than you’d think.

    You solve the “where does everyone sleep?” problem without needing a bigger house.


    21. Layer Textured Throw Blankets for Visual and Physical Comfort

    Throw blankets add texture, warmth, and that “styled” feeling without committing to expensive furniture. Layering different textures creates visual depth and invites you to actually use them.

    Start with 2–3 throws in varying textures: chunky knit ($30–$80), bouclé ($40–$100), linen ($25–$60), and faux fur ($20–$50) from Target, H&M Home, or Etsy. Mix neutral tones—cream, gray, taupe, oatmeal—for cohesion. Drape them casually over the foot of the bed or a bedroom chair. Budget hack: Thrift quality blankets for $5–$15 each at secondhand stores, or buy on-sale throws during seasonal sales (up to 40% off). These are the first things people reach for—make them count.

    Your bed becomes a cozy anchor that makes your whole room feel more intentional.


    22. Paint an Accent Wall Behind Your Bed for Impact

    An accent wall behind your bed is the easiest architectural-style change you can make. It draws the eye, defines your sleeping space, and costs way less than replacing furniture.

    Choose a muted or warm neutral—soft sage, warm gray, muted terracotta, or deep navy—that feels calming rather than energizing. Matte or eggshell finish paint ($20–$40 per gallon) from any hardware store works perfectly. The project takes a weekend and costs $30–$80 in supplies (tape, primer, brush, roller). Prep is key: tape edges carefully and use primer for better coverage. If you rent, discuss with your landlord—many landlords are fine with it if you agree to paint it back when you leave.

    Your bedroom transforms with one wall of color and barely any money spent.


    23. Upgrade Your Pillow Game with Supportive, Quality Pillows

    Your pillow makes or breaks your sleep quality, yet people often sleep on worn-out, unsupportive pillows for years. The right pillow supports your neck and lasts through hundreds of washes.

    Invest in quality pillows ($80–$150 each) from Helix, Saatva, Parachute, or Brooklinen. Get 2–3 different firmness levels so you can adjust based on your sleep position. Memory foam pillows ($50–$100) are popular for support; down-alternative ($40–$80) feels softer; buckwheat hulls ($60–$120) run cooler. Replace pillows every 2 years for hygiene and support. Budget option: Start with one quality pillow and add more gradually. This is the most underrated upgrade people can make—better pillow + better sheets = dramatically better sleep.

    You’ll sleep better and wake without neck pain.


    24. Install a Bed Canopy Curtain Rod for Romance Without Commitment

    If you want the canopy vibe but don’t want to commit to a full bed frame, a ceiling-mounted curtain rod gives you 80% of the aesthetic at 20% of the cost.

    Mount a sturdy curtain rod ($30–$60) and brackets ($15–$30) to your ceiling or wall above the bed. Hang lightweight linen or cotton curtains ($40–$80 per panel). This takes 1–2 hours with basic tools and yields huge visual impact. For renters, adhesive-mount rod systems exist, though they’re less stable for heavy fabric. The rod needs secure mounting (not just drywall anchors) so check ceilings carefully. Your DIY cost is $100–$200 total vs. $500–$2,000 for a full canopy bed.

    You get a romantic focal point that feels boutique and intentional.


    25. Choose a Platform Bed Base to Eliminate Box Spring Clutter

    Platform beds eliminate the need for a box spring, which means less bulk under your bed and a cleaner look. Most people don’t realize this until they switch and suddenly their bedroom feels more open.

    Look for platform beds at IKEA, Article, Wayfair, or West Elm starting around $200–$400 for basic designs, $600–$1,500 for nicer versions. Solid wood looks better than particleboard if you’re keeping it long-term. The low profile makes rooms feel bigger. Make sure your mattress is compatible—platform beds work with any standard mattress. Assembly time is 2–4 hours depending on complexity; hire help if needed ($100–$150). This is one of the easiest ways to modernize your space.

    Your bedroom instantly looks more intentional and less cluttered.


    26. Add a Bedroom Scent Ritual with Luxury Candles or Diffusers

    Scent is the most underrated tool for making your bedroom feel like a retreat. The right fragrance triggers relaxation and becomes part of your wind-down routine.

    Quality candles ($25–$60) from Jo Malone, Diptyque, or Byredo are an investment, but budget candles ($8–$15) from Target or Amazon still do the job. Essential oil diffusers ($20–$60) with lavender, chamomile, or sandalwood support sleep. Light your candle or turn on your diffuser 30 minutes before bed as a ritual signal to your brain. Unscented options work too—the ritual itself matters more than the specific scent. Rotate scents seasonally to keep things fresh. This costs $20–$80 to fully set up depending on how fancy you go.

    Your bedroom becomes a multisensory retreat that signals rest to your whole nervous system.


    27. Organize Your Nightstand with Purpose-Driven Containers

    A cluttered nightstand stresses you out every time you look at it. A few simple containers instantly make this high-stress zone feel calm and intentional.

    Use 2–3 containers on your nightstand: a small woven basket ($10–$25) for books, a ceramic or glass cup ($5–$15) for pens and remedies, and one small decorative tray ($10–$20) for essentials like your phone (if you keep it there), keys, or a water glass. The goal is “every item has a place.” Everything fits, nothing looks scattered. This costs $30–$60 total and takes 20 minutes to set up. Bonus: it’s easier to clean around your nightstand when everything’s contained. Use items you already have if possible.

    Your nightstand becomes a calm, organized extension of your bedroom instead of a stress trigger.


    Save this post and start with one idea this weekend. Whether you pick texture, smart lighting, or better sleep support, even one upgrade shifts how you feel in your bedroom. Your sleep sanctuary is worth the effort—small changes add up fast.

  • 23 Pastel Room Aesthetic Ideas That Feel Soft & Dreamy

    23 Pastel Room Aesthetic Ideas That Feel Soft & Dreamy

    If you’re craving a bedroom or living space that feels like stepping into a cloud, a pastel room aesthetic might be exactly what you need. Pastels aren’t just for nurseries—soft, muted tones create a calming sanctuary that works beautifully for adults too. The trick is layering different pastel shades, textures, and lighting to build depth without feeling flat or boring. In this guide, we’ve gathered 23 actionable ideas to help you create a soft, dreamy space that feels intentional and cohesive. Whether you’re renting, redecorating on a budget, or ready to invest in your bedroom refresh, you’ll find ideas that fit your timeline and wallet. Let’s dive in and discover how pastel hues can make your space feel like a peaceful retreat.

    1. Start With a Soft Accent Wall in Pale Lavender

    A soft lavender wall instantly anchors a pastel room without overwhelming the space. Lavender works especially well if you want a hint of color without committing to an entire room—pair it with white or cream walls to keep things airy.

    Choose a warm lavender shade like Sherwin-Williams Potentially Purple or Benjamin Moore Provence (both under $40 per gallon). You can paint it yourself in one afternoon using roller and painter’s tape from any hardware store. The key is picking a finish—matte for a softer look or eggshell for durability in bedrooms.

    Pro tip: Test your color on a large swatch first; lavender can look blue or pink depending on your room’s lighting. The best part? You can always paint over it without guilt, making this a renter-friendly risk.

    2. Layer Soft Textures in Your Bedding

    Flat, basic bedding kills a pastel aesthetic faster than anything else. Instead of a bed-in-a-bag set, mix and match textures: start with high-quality linen sheets in cream or pale gray ($80–150 for a set), add a quilted throw blanket in blush pink ($40–80), and scatter 3–4 decorative pillows in complementary pastels.

    Mix fabric types—combine smooth linen, chunky knit, and velvet for visual interest. Brands like Brooklinen or Target’s Threshold line offer affordable bases, while Etsy sellers specialize in handmade quilts in custom pastels. This project takes zero time if you’re buying ready-made; just swap out your current bedding this weekend.

    Layering textures creates that lived-in, intentional look that makes your bed feel like an actual retreat—not a showroom display.

    3. Paint Your Ceiling a Barely-There Blush

    Most people leave ceilings white, but painting yours a barely-there pastel—like the palest blush or soft peach—adds unexpected depth. This trend (called ceiling drenching) makes a room feel more intentional and envelope-like.

    Use a light color like Benjamin Moore Pale Powder or Sherwin-Williams Alabaster with a hint of pink (ask your paint store to mix it). Rent an extension pole for $5–10, use two coats of paint ($30–50 total), and dedicate an afternoon to the project. You’ll need good ventilation and patience with the overhead work.

    The payoff? When you lie in bed, you see soft color above you instead of stark white—it genuinely makes the room feel calmer.

    4. Add Soft Lighting With Fabric Lampshades

    Harsh overhead lighting destroys a pastel aesthetic. Instead, invest in soft fabric lampshades in warm pastels (cream, pale yellow, or soft pink) that diffuse light gently across your room.

    Look for linen or cotton shades from IKEA ($15–25), Target ($20–35), or Etsy ($30–60 for custom). Pair them with warm white bulbs (2700K color temperature) for that dreamy, spa-like glow. You can swap a lampshade in literally five minutes—no tools needed.

    Pro tip: Layer multiple light sources (bedside lamps, a standing lamp, string lights) instead of relying on one ceiling fixture. You get more control over ambiance and can adjust brightness throughout the day.

    5. Hang Sheer Curtains in a Soft Sage or Pale Blue

    Sheer curtains in pastel tones soften your windows and filter light beautifully. Sage green, pale blue, or cream sheers layer well over blackout curtains and add color without blocking natural light.

    Purchase from IKEA ($20–35), Wayfair ($40–80), or Amazon ($25–50 for quality curtains). Hang them using a standard rod—takes 20 minutes. If you’re renting, use a tension rod ($15–25) that requires no drilling.

    Bonus: Sheer curtains create that soft, diffused light that photographs beautifully, making your space look like a magazine spread naturally.

    6. Use Pastel Throw Pillows to Add Depth

    Don’t settle for matching pillows. Mix complementary pastels and textures to create visual interest on your sofa or bed. Vary shapes too—mix square, rectangular, and round pillows for dimension.

    Buy from Target ($15–30 each), West Elm ($40–80 for higher quality), or Etsy ($20–50 for unique finds). Start with three pillows and add more as budget allows; this project costs $0 if you’re repurposing existing pillows and just rearranging them.

    Each pillow you add makes the space feel more intentional and comfortable—it’s the easiest way to introduce multiple pastels without repainting.

    7. Create a Gallery Wall With Pastel Artwork

    A gallery wall gives personality to blank walls while staying soft and cohesive. Choose artwork in your pastel palette—watercolor florals, abstract pastels, or minimalist line drawings work beautifully.

    Source prints from Etsy ($15–40 each), Minted ($30–60), or Society6 ($25–80). Mix frame types (white, natural wood, pale metal) for visual interest. Print and frame artwork yourself using Ikea frames ($10–15 each) to keep costs down, or buy pre-framed sets.

    Arrange your gallery before nailing—use paper templates or take a photo first. Takes one to two hours total. The result makes your room feel curated and personal, like you’ve intentionally designed it over time.

    8. Paint Furniture in Soft Pastels for Impact

    Instead of replacing furniture, paint it. An old dresser, nightstand, or bookshelf in a soft pastel becomes an instant focal point and costs far less than buying new pieces.

    Use chalk paint or furniture paint like Annie Sloan ($35–50 per tin) or budget-friendly Rust-Oleum Chalked Paint ($10–15). Prep the piece with sandpaper, apply two coats, seal with a topcoat, and let it cure 24 hours. Plan a weekend afternoon for a single piece.

    Pro tip: Paint only the front and sides if you’re short on time. The transformation instantly makes your space feel intentional—you’ve literally created a custom piece instead of generic store furniture.

    9. Add a Pastel Area Rug to Define Your Space

    An area rug in soft pastels grounds your room and makes it feel more intimate. Choose a color that’s lighter than your walls (cream, pale gray, soft blush) to keep the airy feeling while adding definition.

    Look at Rugs USA ($100–300), Wayfair ($80–250), or IKEA ($50–150 for budget options). Natural fiber rugs (jute, wool) in pale colors age beautifully and feel grounded. Size matters—aim for one large rug rather than multiple small ones.

    A rug instantly makes your space feel more curated and creates a visual anchor for furniture. Plus, it’s cozy underfoot—a sensory bonus to the aesthetic.

    10. Style Open Shelving With Pastel Accessories

    If you have open shelving in a bedroom, bathroom, or living room, style it intentionally. Combine practical items (folded blankets, books) with decorative touches (small vases, plants) all in your pastel palette.

    Group items by color and function—keep sections unified but varied. Use Etsy ceramics ($15–40), Target vases ($8–20), or even thrifted vintage pieces in complementary pastels. This styling is free if you’re using what you own; just rearrange intentionally.

    Pro tip: Leave some breathing room on shelves—don’t overcrowd. The negative space makes your items feel more curated. Styled shelving transforms any room from cluttered to magazine-worthy.

    11. Swap Hardware for Soft Brass or Rose Gold

    Small details matter. Swapping basic black or silver hardware to soft brass, rose gold, or brushed gold instantly elevates furniture. This works on dressers, nightstands, kitchen cabinets, or bathroom vanities.

    Purchase hardware from Wayfair ($3–8 per knob), Amazon ($10–30 for a set), or Anthropologie ($5–15 per piece) for higher-end options. Changing knobs takes five minutes per drawer—just unscrew, replace, and tighten. Totally renter-friendly if you keep the old hardware.

    The payoff is disproportionate to the effort—soft metallic hardware makes everything feel more intentional and cohesive.

    12. Create Dimension With Textured Wallpaper

    Wallpaper adds depth and personality faster than paint. Choose subtle textured or patterned wallpaper in your pastel palette—geometric shapes, woven textures, or delicate floral prints all work.

    Brands like Spoonflower ($20–30 per roll, custom printable), Schoolhouse Electric ($60–100 per roll), or Etsy sellers ($15–50) offer pastel designs. You can hire a pro to install ($300–500) or DIY with a kit ($30–50) if you’re patient.

    If you’re renting, removable wallpaper like Peel & Stick options ($15–40 per roll) work beautifully and leave no damage. Wallpaper transforms a room faster than almost any other single change—one accent wall takes an afternoon and creates drama.

    13. Use Dried Flowers and Pampas Grass as Decor

    Dried botanicals in soft, neutral tones add organic texture and longevity to your pastel aesthetic. Pampas grass, dried eucalyptus, baby’s breath, and bunny tails all complement pastels beautifully.

    Buy dried flowers from Etsy ($8–20 per bunch), Trader Joe’s ($5–8), or grocery store floral sections ($10–15). Arrange them in simple glass or ceramic vases—no special skills needed, just place them in and enjoy. Dried flowers last months or years, making them one of the cheapest decorative investments.

    Pro tip: Spray-paint white or dried stems in soft pastels if you want to customize them (spray paint is $3–5 per can). Dried botanicals make any space feel curated and calm.

    14. Install Soft Dimmer Switches for Mood Control

    Dimmers let you control ambiance throughout the day—bright enough for morning, soft and dreamy for evening. This is one of the most underrated changes for creating a mood.

    Hire an electrician to install a dimmer switch ($100–200 total), or DIY if you’re comfortable with basic electrical work ($15–30 for the switch itself). Takes 30 minutes to an hour professionally. Look for warm-white dimmable bulbs to pair with it.

    Your room transforms throughout the day based on lighting alone—suddenly it feels spa-like in the evening and energized in the morning. It’s the difference between a room and a sanctuary.

    15. Layer Lightweight Linen Bedding Under a Quilt

    The best pastel bedding combines breathable basics with cozy layers. Start with linen sheets in a soft neutral (cream, pale gray, or barely-blush), then add a quilted comforter or weighted throw in a complementary pastel.

    Invest in one quality linen sheet set ($80–150 from Brooklinen, Parachute, or Etsy) and layer a budget quilted throw ($40–80 from Target or Wayfair) on top. The contrast of smooth and quilted feels intentional and looks magazine-worthy.

    Pro tip: Wash linen in cold water and line-dry to maintain softness. Your bed instantly becomes the focal point of your room—so inviting that you’ll actually want to make it every day.

    16. Paint Your Door a Soft Pastel for Personality

    Your bedroom or bathroom door is like a blank canvas. Paint it a soft pastel that complements your walls—it’s a small change that surprises and delights every time you open it.

    Use the same high-quality paint as your walls ($30–50 per gallon). Prep with primer, apply two coats, and let cure 48 hours before closing it. Takes two to three hours total. Choose a shade that either matches your accent wall or complements your palette—soft sage, dusty blue, or pale pink all work.

    The result is a cohesive, intentional look—your space tells a story rather than feeling random.

    17. Add a Small Pastel Bookshelf or Corner Display

    Even a small corner shelf becomes a design moment when styled intentionally. This works in bedrooms, living rooms, or bathrooms where you need storage that’s also beautiful.

    Find a small bookshelf from IKEA ($40–80), Target ($50–100), or thrift stores ($15–40). Paint it if needed, then style with folded textiles, ceramics, and books all in your pastel palette. This is a free project if you already own a shelf—just rearrange and edit what you display.

    Styling even a small shelf transforms it from generic storage into a focal point that makes you smile.

    18. Use Soft Pastel Paint for a Powder Room Refresh

    Powder rooms are perfect for bold pastel choices since they’re small and temporary-feeling. Paint one wall or all four walls in a soft pastel you love—pale peach, dusty rose, or soft lavender work beautifully in tight spaces.

    Choose a paint like Benjamin Moore Calico (pale peach) or Sherwin-Williams Sensitive Tint (soft lavender)—$35–50 per gallon. Paint in one afternoon; with good ventilation, the smell clears within a day. Pair with soft lighting and simple white fixtures for maximum impact.

    The result: guests step into a curated, peaceful space instead of a utilitarian bathroom. Small rooms gain personality with bold color choices.

    19. Layer Soft Rugs in Complementary Pastels

    Instead of one rug, layer two in complementary pastels for depth and interest. Combine a larger base rug in cream or pale gray with a smaller runner in a soft color (pale blue, blush, or sage).

    Use budget rugs from IKEA ($30–80), Wayfair ($50–150), or mix budget and investment pieces. Layering creates visual interest without overwhelming the space. This styling trick costs nothing if you already own rugs—just rearrange them.

    Layered rugs make a room feel collected and intentional—like you’ve gathered pieces over time rather than buying everything at once.

    20. Style Your Nightstand With Intentional Accessories

    Your nightstand should feel calm and curated, not cluttered. Keep only essentials and style them intentionally with pastel-palette accessories.

    Include: one soft lamp ($20–50), a simple plant in a pale pot ($10–20), a small dish for jewelry or keys ($5–15), and a stack of beautiful books ($5–15 each). Everything serves a purpose and stays in your color story. This is a free refresh if you’re editing what you already own.

    Pro tip: Keep surfaces mostly clear—negative space matters. A calm nightstand supports calm sleep.

    21. Paint Your Closet Interior in a Soft Pastel

    Most closets are plain white—boring and uninspiring. Paint the interior of your closet a soft pastel to make getting dressed feel like a ritual.

    Use the same paint as your room ($30–50 per gallon). The closet takes one to two hours to paint. Choose a shade that complements your bedroom palette—soft blush, pale yellow, or dusty blue all work.

    Every time you open your closet, you step into intentional beauty. It’s a small luxury that costs less than $50 but feels disproportionately luxe.

    22. Add Soft Linen Curtains for Texture and Movement

    Beyond sheers, linen curtains in soft neutral pastels add movement and texture to windows. Cream, pale gray, or barely-blush linen curtains filter light beautifully and feel substantial.

    Purchase from Etsy ($40–100 for custom), Parachute ($80–150), or Wayfair ($50–120). Hang using standard or tension rods ($20–50). Install takes 15 minutes. Linen wrinkles beautifully—don’t fight it; embrace the lived-in look.

    Linen curtains make your space feel high-end and intentional. They catch light differently than other fabrics, adding visual interest throughout the day.

    23. Create a Soft Color Palette Board Before Committing

    Before painting or buying anything, create a physical color palette. Gather paint swatches, fabric scraps, and inspiration images in your desired palette so you see how colors interact in your actual lighting.

    Grab free paint swatches from any hardware store ($0), cut fabric samples from stores like Target or thrift stores ($0–5), and arrange them on a board or in a notebook. Live with them for a week—check them morning, afternoon, and evening as light changes. This prevents costly mistakes and takes zero time.

    Pro tip: Take photos of your palette in your actual room lighting when deciding on big purchases. What looks beautiful in a store might look different under your specific light.


    Save this post and pick one pastel idea to start with this weekend—maybe something small like a lamp or throw pillow if you’re testing the waters. Small changes add up fast, and your space will reward you with the calm, dreamy vibe you’ve been craving.

  • 26 Aesthetic Room Decor Ideas for a Modern, Artistic Look

    26 Aesthetic Room Decor Ideas for a Modern, Artistic Look

    If you’re tired of bland, one-note rooms that don’t reflect who you are, you’re not alone. Whether you’re renting or own your home, creating an artistic, modern space doesn’t require a complete renovation or a huge budget. The key is layering small, intentional touches—color, texture, pattern, and sculptural pieces—that work together to tell your story. This guide gives you 26 concrete ideas to build a room that feels gallery-curated but lived-in, maximalist but balanced, and undeniably you. From color-drenching tricks to furniture styling hacks, you’ll find solutions for every budget and skill level. Let’s get started.

    1. Drench Your Walls in a Single Rich Color

    A single saturated wall color in every direction creates an immersive, gallery-like feeling that accent walls can’t match. Instead of limiting color to one wall, you’re committing to a full color experience—chocolate brown, sage green, or warm burgundy work beautifully for this trend.

    Choose a color that speaks to you and paint all four walls and the ceiling the same shade. This costs $30–$80 in paint and takes a weekend, depending on room size. Consider Benjamin Moore, Sherwin-Williams, or budget-friendly Behr as starter options. The trick: lighter trim or white trim against the color makes walls feel intentional rather than dark or cave-like.

    Pro tip: Test your color choice on a large poster board and observe it at different times of day before committing. If you’re renting, removable wallpaper in solid colors offers the same impact without permanent changes.

    You’ll notice how this single decision anchors your entire room. Furniture and art suddenly feel more curated because they have a unified backdrop.

    2. Layer Patterned Textiles to Build Maximalist Energy

    Maximalism thrives when patterns work together instead of fighting. Mix geometric prints, florals, and solids in a cohesive color palette so your room looks curated rather than chaotic.

    Start with one main pattern (geometric or botanical) and layer in two supporting patterns in the same color family. Budget $40–$120 for three quality throw pillows from IKEA, West Elm, or Target. Add a textured throw blanket in a solid or subtle pattern ($30–$70). The key is limiting your color palette to 3–4 hues so patterns read as intentional.

    Quick rule: If all your patterns have at least one color in common, they’ll harmonize even if they look different at first glance.

    You’ll create a room that photographs beautifully and feels inviting rather than sterile. Guests will ask about your styling sense.

    3. Paint Kitchen or Bathroom Cabinetry a Bold, Unexpected Shade

    Painted cabinets instantly elevate a kitchen or bathroom without the cost of replacement. Deep sage green, warm charcoal, or even muted mustard add personality and warmth while staying sophisticated.

    Sand your cabinets lightly (120-grit sandpaper), apply primer, then two coats of high-quality cabinet paint. Budget $60–$150 in materials and plan for a full weekend project, or hire a pro for $500–$1,500. Benjamin Moore Advance or Sherwin-Williams ProClassic are durable choices. Swap out hardware for brass or matte black pulls ($50–$150) to complete the refresh.

    Alternative: If full cabinet painting feels overwhelming, paint just the inside of open shelving or the base cabinets for impact without full commitment.

    Your kitchen transforms from dated to intentional with one bold move. Every time you open a cabinet, you’ll feel that personal touch.

    4. Add Curved, Sculptural Furniture to Soften Hard Edges

    Curved furniture—sofas, chairs, tables, and ottomans—creates fluidity and comfort in ways sharp corners never do. These pieces instantly make a room feel more intentional and contemporary.

    Look for curved accent chairs ($300–$800), rounded sofas ($800–$2,500), or curved side tables ($150–$400) from West Elm, CB2, or Article. Even a simple curved floor lamp ($100–$300) adds the sculptural effect. If budget is tight, start with a single curved chair or ottoman and build from there.

    Renter hack: Round or curved rental-friendly pieces like poufs and side tables offer the same visual benefit without permanent commitment.

    The softness of curved furniture makes your whole room feel more inviting and modern. Hard angles give way to a space that genuinely welcomes you and your guests.

    5. Use Hand-Stenciling for Textured, Lived-In Charm

    Hand-stenciled walls or cabinet fronts add artisan charm that feels personal and imperfect in the best way. Unlike pristine wallpaper, stenciling embraces slight variations that make spaces feel curated rather than manufactured.

    Purchase a stencil pattern ($10–$30) from Etsy, Stencil Revolution, or craft stores. You’ll need stencil paint ($15–$25), brushes, and tape. Plan 4–6 hours to stencil a feature wall or cabinet set, depending on pattern complexity. The beauty of hand-stenciling is that imperfections add charm—slight variations read as artisanal.

    Pro tip: Practice on cardboard first, or start with a small, less visible area to build confidence.

    The result is a room that looks like you actually created it, not something pulled from a catalog. That human touch makes spaces feel alive.

    6. Swap Out White Bedding for Layered, Curated Linens

    Curated bedding in warm, coordinated tones beats generic bed-in-a-bag sets. Layering different textures and shades creates a bedroom that looks intentional and spa-like.

    Choose base sheets in a neutral (cream, warm white, or tan) and layer with a quilted coverlet in chocolate brown or sage green ($80–$200 total). Add throw pillows in complementary solids and one subtle pattern ($60–$120 for the set). Brands like Parachute, Brooklinen, or even Target’s Threshold offer quality options at varied price points.

    Budget hack: Wait for sales at Target or West Elm to score discounts on bedding bundles, or mix affordable basics with one investment-quality piece.

    Your bedroom becomes a retreat you actually want to spend time in. The tactile pleasure of quality layers makes sleep feel like a luxury ritual.

    7. Install Black-Framed Windows or Window Film for Modern Edge

    Black window frames—or black trim around existing windows—modernize cozy, cottage-core aesthetics while framing views like living artwork. This works for new homes and renters with removable film.

    If your rental has standard white or clear frames, apply black window film ($15–$40 per window) for a temporary, damage-free update. Homeowners can install actual black-framed windows ($200–$500 per window installed) for permanent impact. Brands like Pella, Marvin, or local glaziers offer options.

    Renter alternative: Black adhesive tape positioned around window panes (peeling off cleanly later) gives the illusion of black frames at zero cost.

    Suddenly your windows become architectural features, not just functional openings. Natural light feels intentional and styled.

    8. Create Defined Zones in Open-Concept Spaces with Furniture Arrangement

    Open-concept layouts lack the privacy and defined purpose that make rooms feel intentional. Using furniture, rugs, and low dividers creates separate zones without closing off space.

    Arrange a sofa to define a living area, place a console table or low bookshelf behind it to separate zones, and layer a large area rug (5’x8′ or larger, $100–$300) to anchor each space. This costs nothing if you’re rearranging existing pieces, or $200–$600 if you’re buying dividers or rugs.

    Pro tip: Rugs are the cheapest way to visually “close” a zone. A rug signals “this is the living room,” while the adjacent space becomes a work or dining area.

    You’ll reclaim privacy and functionality without renovating. Each zone feels purposeful instead of one sprawling, undefined space.

    9. Mix Maximalist Patterns (Geometric, Floral, and Animal Prints) with Intention

    Maximalism isn’t about random chaos—it’s strategic layering where each pattern shares at least one color with its neighbors. This creates richness without visual noise.

    Start with one dominant pattern (wallpaper, large art, or area rug) in your color palette. Layer in two supporting patterns (pillows, throws, or smaller art) that echo one or two colors from the main piece. Budget $50–$300 depending on whether you’re using wallpaper ($40–$100), pillows ($30–$80 each), or art ($50–$200).

    Rule of thumb: 60% of your room should be one or two neutral colors, with patterns filling the remaining 40%. This prevents visual overwhelm.

    Your room becomes a personality-filled sanctuary. Visitors will sense the intentionality and ask where you found everything.

    10. Incorporate Skirted Furniture (Sofas, Ottomans) for Soft Drama

    Skirted furniture—sofas and ottomans with fabric that drapes to the floor—adds cottage elegance and visual softness. This trend bridges minimalism and maximalism beautifully.

    Hunt for skirted pieces at Article, CB2, or Wayfair ($400–$1,200 for a sofa, $200–$500 for an ottoman). If you already own pieces, add a slipcover with a gathered skirt ($150–$400 from Etsy designers or rental companies like Feather). Linen or cotton skirts work best and look intentional while hiding worn legs or dog damage.

    Renter hack: Throw a large, gathered fabric (tablecloth or lightweight curtain panel) over a standard sofa back and let it drape to the floor for a removable skirt effect.

    The softness changes how your room feels—less hard-edged and more inviting. There’s something undeniably luxe about furniture that touches the floor.

    11. Create a Cohesive Earthy Color Palette with 3–4 Primary Shades

    Building a room around 3–4 warm, earthy tones (chocolate brown, sage green, cream, burgundy) creates instant cohesion without feeling sterile. This palette works across furniture, walls, and textiles.

    Choose your dominant color (walls), secondary color (large furniture like sofa or bed), accent colors (pillows, throws, art), and neutral (trim, bedding base). Start by collecting images on Pinterest of rooms using colors you love, then use a color-picking tool like Coolors to identify the exact shades.

    Budget hack: Use what you already own as your starting point. If you have a burgundy sofa, build your palette around it with chocolate brown walls and sage green accents.

    Your room feels instantly more designed because colors aren’t random—they’re deliberate. Cohesion reads as intentional and sophisticated.

    12. Add a Statement Wallpaper Accent Wall or Removable Wallpaper

    A single feature wall in bold pattern—botanical, geometric, or floral—anchors a room without overwhelming it. Removable wallpaper makes this accessible to renters.

    Peel-and-stick wallpaper ($25–$75 per roll) from Spoonflower, Etsy, or Target applies to any wall in under an hour and removes cleanly. Traditional wallpaper ($40–$100 per roll) installed professionally ($200–$400) offers more durability. You’ll typically need 2–3 rolls for a standard wall.

    Renter favorite: Removable wallpaper from brands like Wallternatives or Chasing Paper apply like stickers and leave no damage.

    Your room gains personality and visual interest from a single bold choice. The accent wall becomes the conversation starter.

    13. Use Warm Lighting to Create Ambiance and Depth

    Lighting is the secret weapon for making rooms feel cozy and intentional. Warm, layered lighting (multiple sources at different heights) beats a single overhead fixture.

    Swap harsh overhead lights for warm-toned options (2700K color temperature). Layer with table lamps ($50–$150 each), floor lamps ($100–$300), pendant lights ($150–$400), or string lights ($20–$50). Start with one good lamp and build your collection over time.

    Pro tip: Brass, copper, or ceramic lamp bases feel more artistic than plastic. The base matters as much as the light it casts.

    Your room transforms at night. Warm lighting makes everything feel intentional and inviting, turning even a small space into a sanctuary.

    14. Style Open Shelving with Books, Objects, and White Space

    Open shelves invite styling opportunities, but they need balance: books, objects, and breathing room working together. The key is avoiding cluttered chaos.

    Arrange books in mixed orientations (some stacked, some standing), add 2–3 decorative objects per shelf, and leave 20–30% of each shelf empty. This costs nothing if you’re styling existing items, or $50–$200 if buying a few statement pieces (vase, sculpture, or decorative object).

    Styling trick: Odd numbers work. Three books, two vases, and one object per shelf feels more intentional than perfection.

    Your shelves become functional art. They tell a story about what you value and read, making your space feel deeply personal.

    15. Add Texture Through Woven Elements (Baskets, Rugs, Wall Hangings)

    Woven elements—jute rugs, woven baskets, macramé wall hangings, or rattan accents—add tactile richness and organic warmth to any room. These pieces feel natural and crafted, not mass-produced.

    Layer a jute or wool area rug ($80–$250), add a woven wall hanging ($30–$150), and tuck in a few storage baskets ($20–$80 each). These items work in any room and often improve with age.

    Budget hack: Check thrift stores and estate sales for vintage woven baskets and textiles at a fraction of retail cost.

    Your room gains depth and texture without adding clutter. Natural fibers warm up even modern, minimal spaces.

    16. Incorporate Vintage or Nostalgia-Inspired Art Deco Lighting and Accessories

    Art Deco’s geometric lines and brass finishes feel fresh in modern rooms. Incorporating nostalgic lighting and accessories adds sophistication without kitsch.

    Hunt for brass pendant lights, sculptural lamps, or geometric mirror frames at Wayfair ($100–$400), West Elm ($150–$500), or thrift stores ($10–$50). Pair with Art Deco prints from Etsy ($20–$60 framed). Even a single statement piece anchors the trend.

    Renter option: A brass floor lamp or sculptural object achieves the look without permanent installation.

    Your room gains unexpected sophistication. Vintage-inspired touches make spaces feel curated and intentional, not derivative.

    17. Use Furniture to Create Cozy Nooks in Underused Formal Spaces

    Formal spaces (dining rooms, media rooms) often go unused. Reclaim them by swapping formality for comfort: a reading nook, work zone, or gathering spot.

    Swap a formal dining table for a curved sofa and side table ($600–$1,500), add layered textiles ($100–$300), and light with warm lamps ($100–$200). The room shifts from “occasions only” to daily-use retreat.

    Alternative: Use a formal space for half its original purpose (one end of a dining room becomes a small office or reading corner) without abandoning the room entirely.

    Your unused space becomes your favorite room. Comfort-first design makes you actually want to spend time there.

    18. Blend Modern Cottage Core with Black Accents and Sleek Details

    Modern cottage core—think rustic warmth meets contemporary clean lines—avoids dated farmhouse vibes by adding black accents, geometric touches, and minimalist elements.

    Start with cream or warm white walls, add black-framed windows or prints, incorporate sleek furniture (curved not ornate), and layer with linen textiles ($100–$300 for bedding). Brass or black hardware instead of gold keeps the look current.

    Pro tip: Black and cream is your friend here. It prevents cottage core from feeling dated or over-decorated.

    Your room feels inviting and current, not stuck in a farmhouse trend. This balance honors cozy without sacrificing sophistication.

    19. Create Visual Interest with Layered, Coordinated Area Rugs

    Layering two rugs—a large neutral base with a smaller patterned rug on top—defines space and adds dimension. This budget-friendly trick works in any room.

    Start with a large, neutral rug ($100–$300, 8’x10′) and layer a smaller patterned rug ($50–$150, 4’x6′) on top. Angle the top rug slightly for visual interest. This costs $150–$450 total and takes five minutes to arrange.

    Budget hack: One good rug matters more than two mediocre ones. Invest in the larger base rug; the patterned layer can be more affordable.

    Your space gains depth and sophistication. Layered rugs signal intentional design without requiring renovation.

    20. Embrace Color Drenching in a Small Room for Maximum Impact

    Color drenching—painting all four walls and the ceiling in one saturated shade—works especially well in small, intimate spaces like powder rooms, closets, or bedrooms. It creates immersive galleries.

    Choose a deep, warm tone (chocolate brown, sage green, burgundy) and commit fully. Paint walls and ceiling the same color for maximum impact. Budget $30–$80 in paint and one weekend of work. The entire room becomes a cohesive experience instead of separate surfaces.

    Pro tip: Lighter trim (white or cream) prevents drenched rooms from feeling oppressive.

    A tiny powder room transforms into a sophisticated, memorable space. Guests will absolutely notice.

    21. Display Art Collections as Salon-Style Walls

    Salon-style gallery walls—multiple frames of varying sizes arranged purposefully—create a personalized, artistic backdrop without looking chaotic.

    Start by collecting frames in 2–3 tones (black, brass, and white work well together). Print images or find affordable art on Etsy ($5–$30 per print), use your own photos, or mix both. Arrange on your wall first using kraft paper as templates before hanging. Budget $100–$400 depending on frame quantity and art choices.

    Styling rule: Odd numbers and asymmetrical spacing feel intentional. Cluster frame sizes rather than alternating large-small-large.

    Your wall tells a visual story and becomes a conversation starter. Salon walls feel undeniably curated and intentional.

    22. Incorporate Statement Throw Pillows with Varied Textures and Patterns

    Throw pillows are the easiest way to layer patterns, textures, and personality. Mixing geometric, solid, velvet, and textured pillows creates richness.

    Invest in 3–4 quality pillows ($25–$80 each from West Elm, CB2, or Etsy) in coordinating colors but different textures. Rotate them seasonally or rearrange frequently to keep your space feeling fresh.

    Budget hack: Affordable pillows from Target or IKEA ($10–$20 each) work fine; invest your money in a larger piece like the sofa itself, then accessorize with cheaper pillows.

    Your sofa (and bed) instantly look styled and magazine-worthy. Pillows are the quickest refresh when you’re craving change.

    23. Add Sculptural Plants and Planters for Organic Energy

    Living plants in sculptural or interesting pots add organic energy and visual height variation. Styling plants like objects (not just green accents) makes them part of your design.

    Choose 2–3 plants that fit your light situation ($10–$30 per plant) and pot them in visually interesting vessels ($15–$50 each). Tall plants create vertical interest, trailing plants soften shelves, and low plants add weight to consoles.

    Pro tip: Mismatched pots in coordinating finishes (ceramic, brass, woven) feel more intentional than matching sets.

    Your room gains life and freshness. Plants add movement and organic shape that hard furnishings can’t provide.

    24. Layer Window Treatments for Privacy and Softness (Curtains Plus Shades)

    Layering curtains and shades—sheer plus solid, or patterned curtain plus simple shade—creates visual depth, privacy options, and softness that single treatments can’t match.

    Add linen curtain panels ($40–$100 each, standard window) and a simple roller or roman shade ($50–$150). Warm neutrals or sage green coordinate with most palettes. This costs $150–$350 per window but completely changes how light and privacy feel.

    Renter hack: Use tension rods with removable curtains and adhesive-backed shades to avoid damage deposit concerns.

    Your windows become design elements, not just functional openings. Layered treatments feel intentional and sophisticated.

    25. Commission Custom or Thrift One Large Statement Artwork

    One large, meaningful artwork anchors a room better than a gallery of smaller pieces. Commissioning a piece or finding a substantial thrifted painting creates the focal point.

    Commission an artist on Etsy ($200–$1,000 depending on size and complexity) for a custom painting, or hunt estate sales and thrift stores ($20–$200) for vintage originals. A 24″x36″ or larger piece makes real impact.

    Budget option: A large, high-quality print ($30–$80 framed) from Etsy or Minted offers statement-making size at lower cost.

    Your room gains a focal point that grounds everything else. One bold artwork makes a space feel curated and finished.

    26. Use Matte Black Hardware and Fixtures to Modernize Any Room

    Swapping hardware—drawer pulls, cabinet knobs, faucet finishes, light switch plates—to matte black instantly modernizes dated spaces. This small change reads as intentional sophistication.

    Replace existing hardware with matte black pulls ($1–$5 each from IKEA, Home Depot, or Wayfair). On kitchen cabinets with 15 pulls, budget $15–$75 in hardware. A faucet swap costs $150–$400 installed, or self-installation saves on labor.

    Pro tip: Black hardware pairs beautifully with brass, warm wood, or sage green—pick metals that echo your palette.

    Suddenly everything feels more considered. Modern hardware lifts even older rooms into contemporary territory.


    Save this list and try just one idea this weekend. Pick the one that speaks to your room’s biggest challenge, and watch how one intentional change ripples through your entire space. Which idea will you tackle first?

  • 24 Bed Back Wall Decor Ideas That Create a Stunning Focal Point

    24 Bed Back Wall Decor Ideas That Create a Stunning Focal Point

    Your bed’s back wall is prime real estate—it’s the first thing you see when you wake up and the focal point of your entire room. Yet so many of us leave it blank or default to boring paint. This is your chance to create a stunning backdrop that sets the tone for your whole space. Whether you’re renting, working with a small budget, or ready to invest in something special, these 24 ideas blend 2025’s hottest trends—textured layers, warm earth tones, biophilic touches, and personal style—with practical solutions you can actually execute. From DIY projects that take an afternoon to shopping-list upgrades, you’ll find inspiration to make your wall something you genuinely love. Ready to turn that blank space into your bedroom’s hero? Let’s dive in.

    1. Layer Textured Wallpaper With Woven Wall Hangings

    Textured wallpaper alone is beautiful, but layering a woven piece on top adds unexpected dimension and personality. This combo is huge in 2025 design—it’s how you get that cozy, lived-in look without feeling chaotic.

    Start with a subtle textured wallpaper in cream, terracotta, or sage ($15–$40 per roll from Wayfair or Peel and Stick Wallpaper brands). Once it’s up, hang a large macramé or woven wall hanging (12–24 inches) dead center or slightly off-center above your headboard. Brands like Urban Outfitters, Etsy, and Article have options ranging from $30–$120. The installation takes about two hours for wallpaper (very renter-friendly if you use peel-and-stick), plus 10 minutes for the hanging.

    Pro tip: Choose a wall hanging in a complementary neutral tone—think cream, natural jute, or soft gray—so it enhances rather than competes with your wallpaper.

    This layering approach gives you textural depth that photographs beautifully and makes your wall feel intentional and curated.

    2. Paint a Warm Accent Wall in Deep Earth Tones

    Cool grays are officially out in 2025. Instead, designers are embracing warm earth tones that make you feel wrapped in comfort rather than cold minimalism.

    Choose a warm, saturated tone like terracotta, burnt sienna, forest green, or aubergine. Brands like Benjamin Moore, Sherwin-Williams, and Behr have color-match tools online (free) so you can preview before committing. Buy 2–3 cans of quality paint ($15–$30 per can) and painter’s tape ($5–$8). A single accent wall takes 4–6 hours for a first-timer, including prep and drying time between coats. If painting isn’t your style, hire a pro for $200–$400.

    Pro tip: Test your color choice on a large poster board first and place it on your wall at different times of day—colors shift with light.

    A rich accent wall creates instant drama and becomes a background so stunning you’ll want to keep your bedding simple and let the wall steal the show.

    3. Install Floor-to-Ceiling Curtains for Drama and Light Control

    Floor-to-ceiling curtains add architectural drama and solve a huge problem: light control without the harsh look of blinds. They also work beautifully for renters since you can hang them on tension rods.

    Measure from your ceiling (or 6 inches above your window frame) all the way to the floor. Buy heavy linen, velvet, or blackout fabric in cream, warm gray, or charcoal ($12–$25 per yard from Fabric.com or Joann). You’ll need roughly 4–6 yards depending on width. Add a quality tension rod or standard curtain rod ($20–$80 from IKEA or Target). Total cost: $80–$200 for a professional look. Installation takes 1–2 hours, mostly hanging the rod and hemming (or use iron-on hem tape for a quick fix).

    Alternative: Skip custom sewing and order pre-made floor-to-ceiling panels from Wayfair or West Elm ($100–$300 per pair).

    Your wall gains height, sophistication, and the ability to control your sleep environment—plus the layered fabric adds texture that ties into 2025’s tactile trends.

    4. Create a Gallery Wall of Oversized Art Prints

    Art-led design is dominating 2025. Instead of one small print, go bold with a collection of larger pieces that tell a story and command attention.

    Decide on your layout using a digital tool like Canva (free) or by taping kraft paper cutouts to your wall first. Choose 5–7 prints (8×10″ to 11×14″) in a cohesive color palette: think botanical prints, abstract art, or vintage photography. Sources: Etsy ($15–$40 per print), Minted ($20–$50), or even print-at-home options from Adobe Stock. Frames from IKEA, Target, or Wayfair cost $10–$30 each. Total investment: $150–$300. Hanging takes 1–2 hours, and it’s completely renter-friendly with removable wall anchors.

    Pro tip: Print larger-format pieces than you think—they create more impact and feel more intentional.

    A curated gallery wall becomes the conversation starter of your room and reflects your personality in a way a single poster never could.

    5. Add Raw Wood Floating Shelves With Natural Materials

    Raw wood shelves tap into 2025’s biophilic and organic modernism trend while giving you functional display space that looks intentional, not cluttered.

    Install 2–3 floating shelves in untreated or lightly finished wood (12–18 inches deep, $40–$100 each from IKEA, Home Depot, or Etsy). Use a level and wall studs for secure installation—this takes 1–2 hours if you’re handy, or hire someone for $50–$150. Style each shelf sparsely: a small potted plant, a stack of 2–3 books, a candle, a framed photo. The beauty is in negative space.

    Alternative: Use salvaged wood shelves from Etsy or reclaimed wood retailers for a more rustic, authentic feel ($60–$150 each).

    Your wall gains visual interest and a place to display objects that matter to you—plus real wood instantly warms up the space and connects to nature-inspired design.

    6. Hang a Large Woven Wall Tapestry as a Headboard Alternative

    A statement tapestry does the job of an expensive headboard at a fraction of the cost and brings serious texture and warmth to your wall.

    Search for large woven tapestries (40–60 inches wide) on Etsy, Urban Outfitters, or Anthropologie in neutral or warm tones ($50–$150). Hang it using a tapestry rod (looks like a curtain rod but sturdier, $15–$30 from Amazon) or simple picture hooks. Installation takes 15 minutes. For renters, tension rods work too (though tapestries are heavy, so use appropriate anchors).

    Pro tip: Layer a smaller woven piece off to one side for visual interest without looking too “matchy.”

    A large tapestry becomes an instant focal point that adds warmth, texture, and bohemian elegance—plus it’s one of the easiest wall upgrades you can make.

    7. Install Shiplap or Peel-and-Stick Wooden Panels for Texture

    Shiplap adds architectural interest and that cozy farmhouse warmth that pairs beautifully with 2025’s comfort-focused trends. The good news: peel-and-stick versions make it renter-friendly.

    Install real shiplap (labor-intensive, $200–$600 for one wall) or go the renter route with peel-and-stick wooden panels ($50–$150 for a 10×10 wall from Amazon, Home Depot, or Wayfair). The panels come pre-finished in white, light gray, or natural wood. Installation takes 3–4 hours for DIY; you just stick and trim to fit. No nails, no permanent damage.

    Alternative: Paint horizontal stripes to mimic shiplap for a budget-friendly ($20–$40 in paint) but less textured option.

    Your wall gains depth, character, and that cottage-core warmth that makes a bedroom feel like a retreat instead of just a sleeping space.

    8. Stencil a Botanical or Geometric Pattern

    Hand-stenciling lets you create a custom, artistic wall without the commitment of wallpaper or the cost of a mural artist. It’s also totally doable as a weekend DIY project.

    Buy a reusable stencil ($10–$30 from Etsy or Michaels) in a botanical, geometric, or mandala design. Choose one or two wall colors: a neutral base and an accent color for the stencil. Pick up stencil paint or regular acrylic paint ($5–$15 per pot). Apply painter’s tape to map out your pattern, then stencil one repeat at a time using a foam roller or brush. The entire wall takes 6–8 hours but is deeply meditative and totally customizable.

    Pro tip: Start with one accent wall to build confidence before committing to all four walls.

    A stenciled wall becomes a one-of-a-kind artistic backdrop that costs way less than hand-painted murals and feels like you commissioned something special.

    9. Mount a Statement Mirror With a Decorative Frame

    A large, decorative mirror serves triple duty: it reflects light (making your room feel bigger), adds visual interest, and creates a practical getting-ready spot without taking up floor space.

    Find a statement mirror with a frame that matches your aesthetic—think black metal, natural wood, rattan, or ornate gold ($60–$250 from Article, West Elm, Wayfair, or Etsy). Mount it using heavy-duty wall anchors or into a stud. Hang a console table below it ($100–$300 from IKEA or Wayfair) and style with small plants, a candle, or trinket dishes.

    Alternative: Use a large round mirror for a softer look, or a rectangular one for a modern edge.

    Your wall becomes a functional beauty station that also opens up the entire room visually and adds another layer of style and sophistication.

    10. Commission or DIY a Large Canvas Painting

    An oversized canvas painting makes a statement without the gallery-wall complexity. Whether you paint it yourself or commission an artist, it becomes a deeply personal focal point.

    DIY option: Grab a large canvas (30×40″ or bigger, $30–$80 from Michaels or Blick Art Materials) and acrylic paint ($2–$5 per pot). Follow a YouTube tutorial or just let your creativity flow—abstract or nature-inspired work is forgiving. Cost: $50–$100. Time: 2–4 hours, plus drying time.

    Commission option: Hire an artist on Etsy or Fiverr to create a custom piece based on your style ($150–$500 depending on size and complexity).

    Hang using a large picture frame or wire and nails ($10–$30). Installation takes 15 minutes.

    A personally created or commissioned canvas makes your wall feel curated and artful—like you know exactly who you are and what you love.

    11. Layer Fabric Headboard With Decorative Throw Pillows

    An upholstered headboard instantly softens your wall and creates a cozy focal point. Pair it with layered pillows for textural richness that ties into 2025’s “layered comfort” trend.

    Buy a fabric headboard ($150–$400 from Wayfair, Article, or West Elm) or DIY one using plywood, batting, and fabric ($50–$100 in materials). Mount it behind your bed using a standard bed frame bracket or wall anchors. Add 3–5 throw pillows in varying sizes and textures: a large lumbar pillow, smaller decorative pillows, and maybe a faux fur or velvet accent. Mix patterns like florals, stripes, and solids in warm neutrals ($15–$60 each from Target, Anthropologie, or Etsy).

    Pro tip: Choose a mix of fabrics—linen, velvet, wool, cotton—to maximize texture without looking overdone.

    Your wall becomes an inviting focal point that says “this room is for rest and comfort,” and the layers give your space depth and personality.

    12. Install Statement Lighting Flanking the Headboard

    Strategic lighting isn’t just functional—it’s a decor statement that frames your bed and creates instant ambiance. 2025 is all about warm, human-scale lighting, so skip the harsh overhead fixture.

    Choose wall-mounted sconces in a material that matches your aesthetic: brass, matte black, natural wood, or ceramic ($40–$100 each from IKEA, West Elm, or Wayfair). Install them at eye level (roughly 60–66 inches from the floor) on either side of your headboard. This requires drilling into studs and running simple wiring—hire an electrician for $100–$300, or DIY if you’re comfortable with wiring (watch tutorials first).

    Alternative: Use plug-in sconces with cord covers for a renter-friendly option ($30–$80 each).

    The right lighting transforms your entire room’s mood and gives your wall a layered, designed look that feels intentional rather than ad hoc.

    13. Hang a Vintage Quilt or Textile as Wall Art

    Vintage quilts bring warmth, storytelling, and handmade authenticity—all huge in 2025’s “grandmillennial” trend that blends nostalgia with modern style. Hanging one elevates your wall instantly.

    Hunt on Etsy, estate sales, local thrift shops, or your grandmother’s closet for a quilt with colors and patterns that complement your room ($20–$100 for vintage, $50–$200 for handmade). Install a slim quilt hanging rod ($15–$25 from Amazon) or use museum-quality hanging clips ($30–$50 from conservation suppliers) to preserve the textile. Mounting takes 30 minutes and is totally renter-friendly.

    Pro tip: Pair your quilt with a small placard or card below explaining its origin—this adds storytelling to your space.

    A vintage quilt becomes a deeply personal focal point that honors craftsmanship and tells your story in a way new decor never could.

    14. Create a Warm Minimalist Wall With Creamy Textured Paint

    Not all minimalism is cold. 2025’s “warm minimalism” trend keeps things simple but adds soul through color, texture, and thoughtful spacing.

    Paint your wall in a creamy, warm neutral: off-white, cream, warm greige, or soft taupe. Use quality paint with a subtle texture finish (matte, eggshell, or suede finish) that catches light and adds dimension. Benjamin Moore, Sherwin-Williams, and Behr all offer warm neutrals ($15–$30 per can). One coat of quality paint over a prepped wall takes 2–3 hours. Keep decorations minimal: maybe one framed piece, a small shelf, or a single plant. The beauty is in restraint.

    Pro tip: Use different sheens on trim versus walls to add subtle visual interest without clutter.

    A warm, textured neutral wall becomes a calming backdrop that lets you sleep better and frees up mental space—minus the soullessness of cool grays.

    15. Add Climbing Ivy or Large Potted Plants for Biophilic Design

    Biophilic design—bringing nature indoors—is booming in 2025. Live plants on your wall transform it into a breathing, living focal point that improves air quality and well-being.

    Install a wooden trellis ($30–$80 from Home Depot or Etsy) and mount it using wall anchors. Choose low-maintenance climbing plants like pothos, philodendron, or climbing fig. Alternatively, mount multiple potted plants on shelves or use adhesive plant hangers ($10–$30 from Amazon). Water weekly and trim as needed.

    Alternative: Opt for faux plants ($20–$100 per plant) if you don’t have time for real plants—modern faux greenery is incredibly realistic now.

    Your wall becomes a living, breathing focal point that cleans the air, soothes the mind, and gives your bedroom the calm, retreat-like quality everyone craves.

    16. Paint a Mural or Geometric Wall Mural (DIY or Commissioned)

    A mural is the ultimate personalization—it’s 100% yours and becomes the conversation starter of your entire room. The good news: you don’t need to be an artist.

    DIY option: Sketch or project a design onto your wall using painter’s tape, grid method, or a projector. Paint freehand or by-numbers style using acrylics. Cost: $30–$80 in supplies. Time: 4–8 hours depending on complexity.

    Commission option: Hire a mural artist ($400–$1,500 depending on size and detail) on Etsy or through local artist networks. Most artists will work with you on design.

    Alternative: Use a large decal (essentially a sticker mural, $50–$150 from Etsy or Amazon) for instant art without painting.

    A mural transforms your wall from blank to bold and becomes a daily reminder of your creativity and individuality.

    17. Install Curved or Sculptural Wall-Mounted Shelving

    Curved furniture replaces harsh lines in 2025—and that includes wall shelves. Sculptural shelving adds softness, visual interest, and storage without rigidity.

    Hunt for curved shelves on Etsy, Article, or Design Within Reach ($80–$200 each). Mount 2–3 shelves at varying heights using a level and wall studs. Style each shelf sparsely with 2–3 meaningful items: a small plant, a book, a ceramic piece. The curves themselves are the statement; don’t overcrowd.

    Alternative: Buy straight shelves and add curved brackets underneath ($30–$60 per bracket) to soften the look.

    Curved shelving adds organic, sculptural beauty that makes your wall feel designed and intentional—plus it’s a subtle nod to 2025’s move away from rigid minimalism.

    18. Drape a Vintage Fabric Scarf or Runner Across the Wall

    A draped textile is the easiest, most renter-friendly way to add color, pattern, and luxury to your wall. Zero commitment, maximum impact.

    Find a large silk scarf, vintage runner, or fabric piece ($10–$50 from thrift shops, Etsy, or Goodwill). Use removable wall hooks or sticky adhesive strips ($5–$15 from Amazon) to anchor the corners. Drape it loosely for an effortless, artful look. Installation takes 10 minutes.

    Pro tip: Choose a fabric in warm tones or bold patterns that complement your bedding and paint color.

    A draped textile adds instant bohemian elegance and warmth—and if you want to change it, you simply swap it out. Zero regrets, maximum flexibility.

    19. Apply Removable Wallpaper in Floral or Geometric Patterns

    Floral wallpapers are having a moment in 2025, blending nostalgia with modern minimalism. Peel-and-stick versions make them renter-approved and commitment-free.

    Choose a peel-and-stick wallpaper in a design you love: botanical florals, geometric patterns, or even abstract art ($15–$40 per roll from Wayfair, Amazon, or Spoonflower). Measure your wall, prep the surface (clean, smooth, and dry), then carefully apply one panel at a time. For a 10×10 wall, you’ll need 2–3 rolls. Total time: 2–3 hours for a first-timer.

    Pro tip: Order a sample first ($5–$10) to see how the pattern and colors look in your actual light.

    Your wall gains instant pattern and personality—and if you move or get tired of it, you simply peel it off with zero damage.

    20. Mount a Wooden Art Ledge for Rotating Display

    An art ledge lets you rotate decor seasonally or as your mood shifts—it’s a gallery wall that doesn’t require commitment to every piece.

    Install a wooden ledge ($40–$100 from Etsy, IKEA, or West Elm) using wall studs and screws. The lip should be at least 2 inches deep to hold items safely. Arrange a mix of framed photos, small prints, small plants, and objects you rotate seasonally. Update your display every few weeks or months.

    Alternative: Use multiple narrow ledges (12 inches each) for a staggered, modern look ($30–$50 each).

    A ledge gives you permission to play with decor without committing—plus it displays items that might be lost in a crowded shelf.

    21. Paint Color Blocking or Geometric Panels Behind the Bed

    Color blocking is a 2025-approved way to add visual interest and warmth without pattern overload. It’s graphic, modern, and totally doable with painter’s tape.

    Choose two warm, complementary colors: perhaps cream and terracotta, or soft green and cream. Use painter’s tape to create a clean horizontal, diagonal, or geometric division. Paint each section with quality paint ($15–$30 per can). The tape ensures crisp lines. Total cost: $40–$70. Time: 3–4 hours including tape removal (remove tape while paint is slightly tacky for best results).

    Pro tip: Use a laser level to ensure your line is perfectly straight.

    Color blocking adds intentional, modern style that photographs beautifully and makes your bedroom feel like you actually have a design plan.

    22. Hang a Leather or Macramé Wall Hanging With Shelf Space

    Macramé and leather wall hangings are seeing a resurgence—but instead of chaotic boho, look for edited, sculptural pieces with built-in storage pockets.

    Search Etsy, Anthropologie, or Urban Outfitters for a macramé or leather wall hanging with integrated shelf pockets ($60–$150). These often have 2–4 pockets perfect for small plants, journals, or trinkets. Hang using a sturdy rod or hooks ($15–$30). Installation takes 20 minutes.

    Pro tip: Keep the hanging itself uncluttered and style with just 3–5 minimal items—that’s how you avoid boho overload.

    A sculptural wall hanging with storage adds functional beauty that doesn’t scream “cluttered bedroom”—it reads as intentional and edited.

    23. Layer Raw Wood Tones With Cork or Jute Accents

    Raw, natural materials are defining 2025’s biophilic trend. Combining raw wood with cork or jute adds texture, warmth, and a connection to nature.

    Install raw wood shelves or paneling ($50–$150 per shelf or $100–$300 for a wall treatment). Add a cork bulletin board or cork accessories ($20–$60 from IKEA or Etsy). Incorporate jute rope detailing ($10–$30 from craft stores) as a shelf edge or as a wall divider. Mix wood tones—raw, light, and dark—for visual interest.

    Pro tip: Let the raw materials be the star; keep decor minimal so their natural beauty shines.

    Your wall becomes a tactile, nature-inspired focal point that makes you feel grounded and connected—exactly what a bedroom should feel like.

    24. Create a Statement Headboard Wall With Texture and Lighting

    Go all-in with a layered headboard wall that combines texture, lighting, and structure. This is the “investment” option that becomes the absolute hero of your room.

    Combine elements: textured wallpaper ($40–$80 for the wall) + a fabric or wood headboard ($200–$500) + wall sconces on either side ($80–$200 for the pair) + a floating shelf above for plants or decor ($50–$100). Total investment: $400–$900. Hire professionals for installation ($300–$600) or tackle it yourself over a weekend if you’re confident.

    Alternative: Build this over time, starting with wallpaper, then adding the headboard, then lighting.

    A complete headboard wall becomes the focal point of your entire bedroom—the kind of statement that makes you slow down, breathe, and appreciate your space every single day.


    Save this post and pick just one idea to start with this weekend. Whether you go simple (a draped textile, 15 minutes) or ambitious (a full headboard wall, a weekend project), your back wall deserves to be as thoughtful as the rest of your room. You’ll be amazed at how one wall can shift everything.

  • 27 Dorm Room Ideas That Make Your Space Feel Like Home

    27 Dorm Room Ideas That Make Your Space Feel Like Home

    Your dorm room doesn’t have to feel like a temporary hotel space. With the right mix of budget-friendly updates, smart organizing, and personality-packed styling, you can turn your dorm into a cozy sanctuary that actually feels like home. Whether you’re working with a tiny single or sharing a double, these 27 ideas blend today’s hottest design trends—warm earthy tones, defined zones, and maximalist flair—with real-world constraints like limited space, no-damage rental rules, and a student budget. You’ll find free solutions, quick weekend projects, and investment pieces that’ll make your room feel intentional and lived-in. Ready to stop counting down the days until you can redecorate? Let’s start here.

    1. Paint Your Walls with Warm Earthy Tones

    Forget white walls—they make dorm rooms feel sterile and impersonal. Warm earthy colors like chocolate brown, sage green, or soft burgundy create instant coziness and work as the perfect backdrop for everything else in your room.

    Paint is technically a dorm violation in many places, so check your contract first. If you get permission, use removable paint (brands like Tempaper make peel-and-stick options, $15-$30) or negotiate with your RA. If traditional paint is off-limits, adhesive fabric wallpaper or large tapestries ($20-$50) give you the same vibe without permanent changes.

    A single accent wall takes one afternoon. The payoff? Your entire room looks more sophisticated and grounded instantly.

    2. Use Color Drenching to Make Small Spaces Feel Intentional

    Color drenching means picking one warm tone and layering it throughout your room via walls, textiles, and decor instead of just one accent wall. It creates an immersive, curated feel that makes cramped quarters seem more intentional.

    Start with your wall color ($15-$30 for removable paint or fabric), then add matching or complementary bedding ($40-$80), throw pillows ($15-$25 each), and a rug ($30-$70). You’re not matching everything perfectly—vary the texture and shade slightly so it looks lived-in, not sterile.

    Your room becomes a cohesive retreat rather than a random collection of furniture. The continuity makes the space feel bigger and more sophisticated.

    3. Invest in Curved, Sculptural Furniture for Comfort and Flow

    Curved furniture pieces add softness and flow to angular dorm rooms while actually providing more comfort than rigid, modern shapes. A curved chair or rounded ottoman becomes a statement piece that makes your room feel less like a typical college setup.

    Shop for curved accent chairs at IKEA ($150-$250), Wayfair ($200-$400), or thrift stores ($30-$100 for vintage finds). If budget is tight, even a curved side table ($50-$100) or rounded mirror ($40-$80) introduces that sculptural vibe without taking up much space.

    These pieces look great in photos (major Pinterest energy) and actually create a more relaxed atmosphere where you want to study and hang out.

    4. Create Defined Zones Without Walls

    Open-concept dorm rooms lack privacy and make it hard to separate sleep from study mode. Instead of asking for wall removal (obviously not happening), use sheer curtains, a decorative room divider, or a tall bookshelf to define sleeping, studying, and relaxing areas.

    A tension rod with lightweight curtain fabric costs $25-$50 and takes 10 minutes to install. Freestanding room dividers run $40-$120. Even a tall plant stand with trailing pothos ($20-$40) creates a subtle boundary without blocking light or views.

    You’ll find it easier to focus at your desk and actually feel like you have privacy in your own space. Roommates appreciate the boundary too.

    5. Layer Patterned Throw Pillows and Textiles for Maximalist Energy

    Minimalist dorm rooms are boring. Maximalist rooms feel collected and personal—like someone actually lives there. Start with 3-5 throw pillows in different patterns (geometric, striped, floral) that share a color palette so they don’t clash.

    Buy pillows from Target ($10-$20 each), IKEA ($8-$15), or thrift stores ($2-$5). Mix new with vintage finds for authenticity. Add a chunky knit throw ($25-$50) draped over your chair or bed and suddenly your room looks styled.

    The layered texture and pattern mix creates visual interest and makes your space feel curated, not bare. Plus, all those pillows make your bed actually comfortable for studying and lounging.

    6. Add Vintage or Art Deco Lighting as a Centerpiece

    Standard dorm lighting is harsh and unflattering. Vintage or Art Deco-style lighting (pendant fixtures, table lamps with brass or colored glass) elevates your entire room and creates the warm, intentional vibe you want.

    Hunt thrift stores for vintage brass lamps ($10-$30), or invest in a quality new pendant ($50-$120 from West Elm or Anthropologie). String lights ($15-$30) work too but feel more generic. Use a plug-in fixture if you can’t hardwire anything.

    Good lighting makes your room feel like a boutique hotel corner, not institutional housing. It’s also better for studying and makes you actually want to spend time in your space.

    7. Try Pattern Drenching for an Immersive Bedroom Retreat

    Pattern drenching goes a step beyond color drenching—you’re layering repeated motifs (florals, geometric shapes, abstract designs) throughout your room to create an immersive, almost cinematic feel. It’s bold but surprisingly sophisticated when done in a cohesive color palette.

    Use peel-and-stick wallpaper on one accent wall ($30-$60), add patterned bedding ($50-$100), and layer in patterned pillows or a rug. Keep your palette tight (two or three colors max) so patterns don’t feel chaotic.

    Your room becomes a distinct personality zone that’s impossible to ignore. Visitors immediately sense that someone thoughtful lives here, and you get a personal retreat that recharges you.

    8. Swap Generic Bedding for Curated, Layered Sheets and Blankets

    Those “bed-in-a-bag” sets are matchy and impersonal. Instead, curate your bedding by mixing fitted sheets, top sheets, blankets, and pillows in coordinating but distinct textures and tones. This approach looks more sophisticated and gives you options for different seasons and moods.

    Buy quality sheets from Target or Amazon ($15-$30 per set), add a weighted blanket ($40-$80) or chunky knit throw ($25-$50), and invest in good pillows ($30-$60 each). Total investment: $100-$200, but you’re not replacing it all next year.

    Your bed becomes the anchor of your room—a place you actually want to rest and read. Quality sleep setup means better rest during stressful exam weeks.

    9. Install Floating Shelves for Display and Storage

    Floating shelves add vertical storage without eating floor space, and they give you room to display books, plants, photos, and small decor that shows off your personality. No drilling required if you use adhesive shelves (though they’re less stable for heavy items).

    Adhesive shelves run $15-$40 per shelf; traditional floating shelves need installation but cost $20-$50. Arrange books, potted plants ($5-$20 each), and a small plant stand ($15-$30) on them to create a styled, intentional look.

    You’re maximizing your tiny wall space and creating a focal point that makes your dorm feel like an actual home office, not just a study desk crammed in a corner.

    10. Use a Large Mirror to Reflect Light and Expand Space

    Mirrors bounce light around small spaces and make dorm rooms feel bigger and brighter. A large statement mirror (especially one with a pretty frame) also serves as decor, not just a functional item.

    Leaning floor mirrors cost $30-$80 and don’t require installation. Wall-mounted mirrors in wooden or brass frames run $25-$60. Position it across from a window or light source to maximize its effect.

    Suddenly your room looks lighter, airier, and more spacious. You get a practical tool plus a design element that works hard for your space.

    11. Paint or Update Your Desk for a Personalized Workspace

    Generic particle-board desks come with the territory, but you can upgrade yours with paint, adhesive wood veneer, or a decorative desktop cover. A personalized desk makes studying feel less institutional and more intentional.

    Use removable paint ($15-$30), self-adhesive wallpaper or wood grain film ($20-$40), or even a large cork or fabric desktop cover ($30-$50). The whole project takes one weekend.

    You’ll actually enjoy sitting down to study when your workspace reflects your style. It’s a small change that impacts your daily life significantly.

    12. Add Indoor Plants for Warmth and Air Quality

    Plants add life, texture, and warmth to dorm rooms while improving air quality. Low-maintenance varieties like pothos, snake plants, and monstera thrive even if you forget to water them regularly (perfect for student schedules).

    Buy small potted plants from grocery stores or garden centers ($5-$15 each) and add them to shelves, windowsills, and corners. A simple plant stand ($15-$30) creates a plant corner display.

    Your room instantly feels more organic and grounded. Plus, having greenery actually boosts mood and focus during long study sessions—it’s science.

    13. Create a Skirted or Draped Seating Area

    Skirted furniture adds drama and coziness while making basic pieces look more intentional. You can add a skirted slipcover to a chair or ottoman, or simply drape quality fabric over seating to create that upholstered, boutique feel.

    Pick up a plain chair or ottoman ($30-$80 secondhand) and add a fitted fabric skirt ($20-$40 from craft stores or Etsy). Alternatively, just drape a high-quality throw blanket for a similar effect without sewing.

    Your seating area becomes a statement piece instead of something purely functional. It makes your dorm feel more grown-up and design-forward.

    14. Use Removable Wallpaper for Pattern Without Commitment

    Removable wallpaper ($20-$60 per roll) gives you all the pattern impact of traditional wallpaper without the permanent commitment or landlord drama. Modern options look just as good and stick to walls cleanly.

    Measure your wall, order enough for coverage with extra, and spend 2-3 hours installing. Peel & Stick wallpaper from Spoonflower, Etsy, or Target makes it accessible. Apply to one accent wall or even your closet door for surprise personality.

    You get a designer-level statement wall that comes off clean when you move. It’s the perfect compromise between boring dorm walls and actual rebelliousness.

    15. Repurpose Your Closet Space as a Mini Retreat or Display Area

    Most dorm closets are small and cramped, but you can transform yours into a mini reading nook, meditation spot, or display area. Add lights, a small cushion, and organized storage to make it actually functional and inviting.

    String lights ($10-$20), adhesive shelves ($15-$30), and fabric storage bins ($5-$15 each) turn a dark closet into a styled space. Add a small cushion ($15-$30) and suddenly you have a quiet spot to escape.

    You’re maximizing every inch of your room and creating a hidden retreat that gives you privacy and peace during chaotic dorm life.

    16. Layer Rugs to Define Zones and Add Warmth

    Layering rugs (a large neutral base with a smaller patterned rug on top) defines zones, adds texture, and makes cramped dorm rooms feel more intentional. It’s a maximalist move that actually works in small spaces.

    Buy a large neutral rug ($30-$80) and layer a smaller runner or accent rug ($20-$50) on top. Look for natural textures like jute or wool to keep it warm and organic.

    Your floor becomes a design moment instead of just bare linoleum or carpet. The layering creates visual interest and makes your room feel curated and comfortable.

    17. Create a Gallery Wall with Framed Prints and Memories

    A gallery wall displays your personality and fills blank dorm walls without feeling chaotic. Mix framed prints ($5-$20 each), personal photos, and posters ($10-$30) in coordinating frames to create a cohesive, artistic focal point.

    Gather frames from thrift stores ($2-$8 each) or buy matching sets from IKEA ($5-$12). Print affordable art from Etsy or free sources, then arrange on your wall using the grid or salon layout method. Takes one afternoon, lasts the whole year.

    Your room looks intentional and mature. Visitors immediately know you have taste and personality, and you have a conversation starter that’s also deeply personal.

    18. Invest in Quality Task Lighting for Your Study Area

    Harsh overhead dorm lighting strains your eyes during long study sessions. A quality task lamp ($30-$80) provides targeted, warm light that’s better for focus and actually flattering to your space.

    Look for adjustable desk lamps with warm LED bulbs (2700K color temperature) from IKEA, Amazon, or West Elm. Brass, wood, or matte black finishes look more intentional than generic plastic.

    You’ll study more comfortably and your desk area becomes a functional, styled workspace instead of an institutional study carrel. Better lighting also makes your room look more sophisticated in photos.

    19. Use Under-Bed Storage Containers for Hidden Organization

    Under-bed storage maximizes your limited floor space by hiding seasonal clothes, extra bedding, and supplies where they don’t create visual clutter. Rolling containers make them even more accessible.

    Fabric storage bins ($10-$25 each) or rolling underbed containers ($20-$40) keep things organized and hidden. Label them so you know what’s where without opening each one.

    Your room stays clean and organized-looking without sacrificing storage. It’s the behind-the-scenes infrastructure that lets you actually live comfortably in a small space.

    20. Add a Statement Headboard Using Fabric or Wallpaper

    A headboard grounds your bed visually and makes a tiny dorm room feel more like an actual bedroom. Use temporary materials that don’t require drilling or permanent installation.

    Peel-and-stick wallpaper ($30-$60), adhesive fabric panels ($20-$40), or even a hanging tapestry ($15-$35) creates the headboard effect. Measure your bed width and create a shape behind it—doesn’t have to be perfect.

    Your bed becomes the focal point instead of just a mattress on a frame. It instantly makes your dorm room feel more intentional and bedroom-like.

    21. Organize Your Desk with Stylish Desk Accessories

    A messy desk makes your whole room feel chaotic. Matching desk accessories (pen holders, file organizers, desk pads, storage boxes) keep things tidy while adding a design cohesion that elevates your workspace.

    Buy coordinating sets from IKEA ($15-$40 for a bundle), or mix-and-match from Target, Wayfair, or thrift stores. Look for materials like wood, brass, or ceramic that feel more intentional than plastic.

    Your desk stays organized and functional, which actually helps you focus better. Plus, a styled workspace makes your room look more mature and together.

    22. Hang a Tapestry or Fabric Wall Hanging as Instant Decor

    A tapestry instantly covers blank wall space and adds warmth, pattern, and personality without permanent damage to walls. It’s one of the easiest dorm upgrades and instantly transforms a basic room.

    Buy tapestries from Urban Outfitters ($20-$50), Etsy ($15-$60), or thrift stores ($5-$20). Hang with removable hooks ($5-$10). You can change it seasonally or whenever you want a refresh without any commitment.

    Your walls immediately feel less bare and institutional. A good tapestry becomes a focal point that defines your room’s vibe and shows off your taste.

    23. Create a Cozy Reading Nook with Layered Seating and Lighting

    Even in a tiny dorm, you can carve out a small reading nook where you can actually relax between classes. Layer a comfortable chair, warm lighting, a small table, and pillows to create a functional escape.

    A secondhand armchair ($40-$100), a small side table ($20-$50), warm string lights or a pendant fixture ($15-$40), and cozy pillows ($10-$25 each) total around $100-$200 but create a meaningful retreat.

    You have a designated space to actually rest and recharge instead of constantly working from your bed. It’s a small investment in mental health that pays off throughout your college years.

    24. Use Adhesive Hooks and Command Strips for Renter-Friendly Organization

    Maximize vertical space with damage-free adhesive hooks and strips (Command brand is reliable, $5-$15 for a pack). Hang bags, scarves, jackets, and accessories to keep your floor clear and your items accessible.

    Buy the right hooks for your items’ weight and follow application instructions carefully. Test on a less-visible wall first. They remove cleanly when you move.

    You suddenly have functional storage that doesn’t require landlord approval or compromise your security deposit. Your room feels more organized and intentional.

    25. Add Warm-Toned Curtains or Sheer Panels for Softness

    Bare dorm windows feel harsh and institutional. Warm-toned curtains or sheer panels soften light, add texture, and make your room feel cozier while providing privacy and light control.

    Tension rods with lightweight curtain fabric cost $25-$50 total. Sheer panels ($20-$40) diffuse sunlight beautifully. Look for natural linen textures or soft colors that complement your warm palette.

    Your window becomes a design moment instead of just an opening. You control light quality, get privacy, and add visual warmth that changes how your whole room feels.

    26. Style Open Storage with Coordinating Bins and Labels

    If you have open shelving or storage, make it beautiful by using matching bins and clear labels. Coordinating containers hide clutter while looking intentional and styled.

    Fabric bins in neutral tones ($8-$20 each) and a label maker or printed labels ($10-$30 total) transform chaotic storage into a designed element. Keep your color palette tight—no more than two or three bin colors.

    Your room looks organized and curated instead of cluttered. Open storage becomes an opportunity to show off your style rather than expose chaos.

    27. Personalize Your Space with Meaningful Objects and Collections

    The most important element of making your dorm feel like home is filling it with objects that mean something to you. Arrange framed photos, collected souvenirs, small plants, and meaningful items that remind you of home, friends, and your travels.

    No budget needed—use what you already have and display it intentionally. Group items on shelves or a small side table rather than scattering them randomly.

    Your room becomes a reflection of you instead of just a generic dorm setup. These personal touches transform the space from a temporary college housing situation into an actual home you’re proud to spend time in.


    Save this post and try one idea this weekend—you’ll be surprised how fast a bare dorm room becomes a space you actually love. Small changes add up, and your room deserves to feel like yours.

  • 24 Calm Color Palette Ideas for a Restful Sleep Environment

    24 Calm Color Palette Ideas for a Restful Sleep Environment


    Introduction

    Color sets the emotional tone for your entire bedroom—it’s the first thing you feel when you wake up and the last thing you see before sleep. If you’re waking tired or struggling to wind down, your walls might be working against you instead of for you. The right palette doesn’t have to be boring beige; it’s about choosing hues that actually support rest and make you want to linger.

    We’ve gathered 24 color combinations that research backs up and real people have tested in their own homes. These aren’t trendy one-year wonders—they’re timeless, achievable palettes that work in apartments and houses, with budget pieces and investment finds. Whether you’re repainting this weekend or planning a slower refresh, you’ll find options that fit your style, your timeline, and your wallet. Let’s find the colors that make your bedroom feel like the retreat it should be.


    1. Pair Warm White Walls with Soft Taupe Bedding

    Warm whites feel nothing like clinical hospital rooms—they create a neutral canvas that never feels cold or stark. Taupe bedding adds just enough warmth without introducing a distracting color, making it easier for your brain to settle down.

    Paint your walls a warm white like Benjamin Moore’s “Swiss Coffee” or Sherwin-Williams’ “Alabaster” (around $30–$40 per gallon). Layer a taupe linen duvet ($80–$200 depending on quality) over neutral sheets. The combination takes 30 minutes to style and works in any size room. Taupe hides stains better than white and doesn’t require constant washing, which means less stress about keeping it pristine.

    This pairing gives you a blank slate for adding personality through pillows, throws, or wall art without overstimulating your senses.


    2. Soft Sage Green with Creamy Ivory Accents

    Sage green sits somewhere between gray and green—it pulls in nature’s calming effect without feeling like you’re sleeping in a forest. Studies show green reduces stress and lowers heart rate, making it one of the most sleep-friendly colors available.

    Choose a muted sage like Sherwin-Williams “Sea Salt” or Benjamin Moore “Healing Aloe” ($35–$45 per gallon). Pair it with ivory or cream bedding to prevent the room from feeling too monochromatic. Paint one weekend afternoon (3–4 hours for a standard bedroom). Add ivory linen curtains ($60–$150) to diffuse morning light. The soft contrast keeps the room interesting without jarring your nervous system awake.

    Sage works brilliantly in renters’ apartments when used with removable wallpaper as an alternative to painting.


    3. Pale Blue Base with White Trim and Gray Accents

    Pale blue taps into the psychology of water and sky—both associated with calm and safety. The white trim keeps it from feeling too cool or sad, while gray grounds the palette and prevents it from feeling babyish.

    Paint walls a soft blue like Farrow & Ball “Parting” or Benjamin Moore “Palladian Blue” ($40–$50 per gallon, premium brands). Add white trim or baseboards if your budget allows, or keep existing trim as-is. Layer in gray bedding ($100–$250) and you’re done. The palette costs under $200 to implement and takes one weekend.

    Light blues photograph beautifully and create that sought-after “magazine room” feeling without requiring designer-level expertise.


    4. Warm Gray Walls with Linen White Bedding

    Warm gray (not cool gray) sits between beige and true gray, offering sophistication without the cold sterility that cool grays sometimes bring. Linen white bedding adds texture and movement to what could otherwise feel flat.

    Select a warm gray like Sherwin-Williams “Accessible Beige” (yes, it reads as gray here) or Benjamin Moore “Revere Pewter” ($35–$40 per gallon). Pair with natural linen bedding in cream or white ($120–$300 depending on thread count and brand). The combination works in any lighting and doesn’t show dust or slight discoloration the way pure white does.

    This palette creates a “lived-in luxury” feeling that makes you feel hotel-calm without the sterile perfection.


    5. Soft Blush Pink with Warm Gray Walls

    Blush pink has moved beyond girly stereotypes—it’s become a sophisticated choice for adults seeking warmth without aggression. Combined with gray, it feels curated rather than cutesy.

    Paint three walls in warm gray ($35–$40 per gallon) and one accent wall in blush pink like Benjamin Moore “Pale Oak” with a drop of rose added, or use a pre-mixed option like Sherwin-Williams “Rosy Outlook” ($35–$40). Add white or cream bedding as your base. The blush picks up on pillows, throws, or artwork. This update costs $80–$120 and transforms the room in one Saturday.

    Renter-friendly? Use blush pink removable wallpaper ($25–$60) on just one wall instead of painting.


    6. Soft Sage with Warm Beige and Natural Wood

    This palette brings together biophilic design elements—wood, green, and earth tones—that genuinely calm your nervous system. The combination feels organic without requiring an interior design degree.

    Paint walls sage green ($35–$40 per gallon). If you don’t have natural wood furniture, prioritize a wooden nightstand or bed frame ($150–$500 depending on style and quality). Layer beige bedding ($80–$200) and a jute or sisal rug ($60–$150). The room naturally invites slower living. You can build this palette over time, adding pieces as budget allows.

    The natural materials actually improve air quality, a bonus benefit most color palettes can’t claim.


    7. Charcoal Gray with Cream and Soft White

    Charcoal gray feels intimate and enveloping—like your room is giving you a hug. The light bedding prevents it from feeling cave-like or depressing. This is cozy without being trendy.

    Choose a true charcoal like Sherwin-Williams “Iron Ore” or Benjamin Moore “Cavern Clay” ($35–$45 per gallon). Pair with cream or white bedding ($100–$250) to maintain brightness and balance. The contrast is what makes this work; don’t go too dark on both walls and bedding or you’ll overshadow the restfulness. Paint one weekend and watch the room instantly develop atmosphere.

    Charcoal hides dust and marks better than lighter colors, so maintenance is lower.


    8. Pale Lavender with Soft Gray Accents

    Lavender is science-backed for sleep—lavender oil is widely recommended for relaxation, and the color itself carries those associations. A pale, grayish lavender reads more sophisticated than typical lavender and works in grown-up spaces.

    Paint walls a muted lavender like Sherwin-Williams “Potentially Purple” or Benjamin Moore “Provence” ($35–$40 per gallon). These read almost gray in certain light, so they won’t feel overly purple. Add gray or white bedding to keep the room balanced. Curtains in soft gray ($50–$150) tie the palette together. The total investment is $150–$300 for walls, bedding, and curtains.

    This palette works especially well if you’re sensitive to stimulation—lavender naturally reduces alertness.


    9. Warm White with Terracotta Accents

    Terracotta brings earth-grounded warmth without the heaviness of deeper oranges or reds. Used as an accent rather than a wall color, it adds personality while keeping the room restful.

    Keep walls a warm white ($30–$40 per gallon). Introduce terracotta through a linen throw blanket ($40–$100), decorative pillows ($20–$60 each), or small pottery pieces ($15–$100). A terracotta area rug ($80–$200) anchors the palette. You can layer these in over time, so the initial cost can be as low as $80–$150. This approach is perfect for renters—no painting required.

    The earth-tone accent makes the room feel rooted and warm, especially during cooler months.


    10. Pale Yellow with Soft Gray Walls

    Pale yellow brings subtle happiness without overstimulation—think soft butter, not neon. The gray headboard and accents prevent it from feeling too cheerful or children’s-room-like.

    Paint walls a soft yellow like Benjamin Moore “Pale Oak” (yes, it reads as soft yellow here) or Sherwin-Williams “Buttercream” ($35–$40 per gallon). Add a gray upholstered headboard ($200–$600) or use a removable headboard decal ($30–$80). Layer with white bedding and gray accents. The room gains warmth and subtle light without sacrificing calm. Total cost: $100–$400 depending on whether you DIY the headboard or buy pre-made.

    Pale yellow naturally reflects light, making small rooms feel slightly larger.


    11. Soft Greige (Gray-Beige Mix) Throughout

    Greige is the chameleon of paint colors—it reads differently depending on your lighting, shifting between gray and beige. This adaptability means it feels right in any season or time of day, which keeps it from becoming monotonous.

    Choose a true greige like Sherwin-Williams “Urbane Bronze” (warmer than it sounds) or Benjamin Moore “Accessible Beige” ($35–$45 per gallon). Paint all walls in this single color to create a cocoon effect—your eye rests because there’s no jarring contrast. Add layers through bedding ($100–$250), throws, and pillows in cream, white, or warm taupe. The simplicity is the strength here; you’re decorating around a perfect neutral base.

    Greige works beautifully in any natural light, which means the room never feels “off” or dated.


    12. Soft Teal with Cream and Wood Tones

    Teal sits between blue and green, capturing the calming properties of both. A muted, dusty teal (not bright or saturated) feels sophisticated and grounding rather than trendy.

    Paint walls a soft teal like Sherwin-Williams “Sea Salt” or Benjamin Moore “Palladian Blue” with a touch of green added ($35–$45 per gallon). Pair with cream bedding ($100–$200), natural wood furniture, and a cream or jute area rug ($60–$150). The palette costs $200–$400 to implement. If painting feels like too much commitment, use teal removable wallpaper ($25–$60) on one or two walls instead.

    The wood tones ground the teal and prevent the room from feeling cold or clinical.


    13. Soft Blush with Pale Blue Walls

    Color-blocking two gentle hues creates visual interest without chaos. Both pale blue and soft blush are calming on their own, so combining them maintains the restful vibe while adding sophistication.

    Paint two adjacent walls pale blue ($35–$40 per gallon) and two in soft blush ($35–$40 per gallon). Keep bedding white or cream as your anchor. Add accents in both colors through pillows, throws, or artwork ($30–$100). The painting takes a full Saturday but creates a unique, curated look. This approach costs $100–$200 for paint alone.

    Color-blocking photographs beautifully and gives your room a high-design appearance without hiring a professional.


    14. Warm White with Muted Sage Accents

    This reverses the typical sage-walls approach—keeping walls neutral and bringing green in through larger furniture pieces or textiles. It gives you the biophilic benefits while maintaining flexibility.

    Paint or keep walls warm white ($30–$40 per gallon if painting). Source a sage upholstered headboard or bed frame ($300–$800) or use removable fabric panel wallpaper in sage ($30–$80) behind your existing bed. Add a sage linen throw ($40–$100) and white bedding. The total investment is $150–$400, but you’re getting the calming effect of green without committing walls to the color.

    This setup works beautifully in rentals—remove the fabric panel when you leave, and you’ve left no permanent changes.


    15. Deep Gray with Warm Cream Everything Else

    Deep gray as an accent wall (rather than all-over) gives you drama and coziness without making the room feel cave-like. The cream everywhere else balances the darkness and keeps it feeling open.

    Paint one accent wall (behind the bed is classic) in deep charcoal ($35–$40 per gallon). Keep other walls creamy white ($30–$35 per gallon). Layer cream and white bedding ($100–$250). Add a cream area rug ($80–$200). The cost is $200–$400, but the visual impact is significant. Painting one wall takes 2–3 hours on a Saturday morning.

    One accent wall is a renter-friendly approach—you’re making a statement without overwhelming your space.


    16. Pale Peach with Soft Gray and Natural Materials

    Pale peach is warm and inviting without being loud or childish. When paired with grays and natural wood, it feels timeless and layered rather than dated or trendy.

    Paint walls a soft peach like Benjamin Moore “Peach Beige” or a custom pale peach ($35–$40 per gallon). Add gray bedding ($100–$200), a peach linen throw ($40–$100), natural wood furniture, and a jute rug ($60–$150). The entire palette costs $250–$400. The warm peach feels particularly good in rooms that get afternoon light, as it glows without needing artificial warmth.

    Peach is underrated—it brings warmth without the aggression of orange or coral.


    17. Soft Charcoal with White Bedding and Gold Accents

    Charcoal creates a dramatic, adult backdrop. White bedding keeps it from feeling heavy, and gold accents add warmth and a touch of luxury without feeling costumer or overdone.

    Paint walls soft charcoal like Sherwin-Williams “Urbane Bronze” ($35–$45 per gallon). Layer white bedding ($100–$250), then add gold-finish lighting ($30–$100 per lamp), a gold-framed mirror ($40–$150), and possibly gold drawer pulls or hardware ($10–$30 each). The palette costs $250–$500 depending on how many gold accents you add. Start with just lighting and mirror, then add more if it feels right.

    Gold feels warm and grounded against charcoal—not cold or sterile.


    18. Pale Green-Gray with Soft White and Natural Textures

    Green-gray is a newer neutral that combines the calming properties of green with the sophistication of gray. Natural textures amplify the grounded, biophilic feeling.

    Paint walls a pale green-gray like Sherwin-Williams “Sea Salt” or Benjamin Moore “Palladian Blue” with an extra touch of gray added ($35–$45 per gallon). Prioritize natural materials: a wood or rattan headboard ($150–$500), natural wood nightstands ($80–$300), and a jute area rug ($60–$200). Layer with white or cream bedding ($100–$250). The total investment is $350–$700 for a fully cohesive room, but you can build it over time.

    Natural textures are worth the investment—they actually improve how you feel in the space.


    19. Warm Beige Walls with Taupe Bedding and Wood Accents

    Warm beige is the safe, timeless choice—and there’s nothing wrong with that. It creates a backdrop that lets you add personality through other elements without the walls competing for attention.

    Paint walls a warm beige like Benjamin Moore “Accessible Beige” or Sherwin-Williams “Kilim Beige” ($30–$40 per gallon). Add taupe bedding ($100–$250), warm wood furniture in honey or oak tones ($200–$1000+ depending on quality), and a cream area rug ($60–$200). This palette costs $300–$500 to build. Warm beige works in any lighting and never feels dated, making it ideal if you’re not sure about bold color choices.

    The beauty of this palette is its flexibility—you can decorate it neutrally or add color through pillows and artwork.


    20. Soft Blue-Gray with Cream Linens and Brass Details

    Blue-gray (called “greige” with a blue lean) feels calming and slightly elevated. Cream linens keep it soft, and brass details add warmth and a subtle luxury feel.

    Paint walls a soft blue-gray like Farrow & Ball “Calluna” or Benjamin Moore “Pale Oak” with blue undertones added ($35–$50 per gallon, premium brands). Layer with cream linen bedding ($100–$250), and add brass-finish lighting ($40–$150 per fixture) or a brass-frame mirror ($50–$200). A cream area rug ($80–$200) ties it together. Total investment: $300–$600. If brass is outside your budget, use gold or even matte black for a different vibe.

    Blue-gray feels sophisticated and works beautifully in both traditional and modern spaces.


    21. Soft Sage with Cream and Touches of Dusty Rose

    This palette combines green’s calming effect with rose’s subtle warmth. The muted dusty rose (not bright pink) keeps the room feeling grown-up and thoughtful.

    Paint walls soft sage ($35–$40 per gallon). Keep bedding cream or white as your anchor ($100–$200). Add dusty rose through throw blankets ($40–$80), pillows ($20–$50 each), or small decorative objects ($15–$100). A rose-tinted ceramic piece on your nightstand ($20–$60) ties the color through. The total cost is $200–$350. You can start with just green walls and cream bedding, then add rose accents over time as budget allows.

    The combination feels botanical and curated, like you’ve thought through every choice.


    22. Pale Warm White with Soft Mushroom Accents

    Mushroom (a soft, warm brown) is having a moment as a sophisticated neutral. Paired with pale white, it creates subtle contrast without visual noise.

    Paint walls pale warm white ($30–$40 per gallon) or keep existing white walls. Introduce mushroom through a linen throw ($40–$100), pillows ($20–$60 each), an upholstered bench ($150–$400), or even a removable wallpaper accent ($25–$80). Wooden furniture in honey or natural tones ($100–$500+) echoes the mushroom without repeating it exactly. The palette costs $150–$400 depending on how many pieces you add.

    Mushroom feels cozy without the heaviness of true brown, making it perfect for all seasons.


    23. Deep Teal Feature Wall with Pale Gray Everywhere Else

    Deep teal as a feature wall gives you color and sophistication without overwhelming the entire room. Pale gray walls keep the space feeling open and calm.

    Paint one feature wall (behind the bed is standard) in deep teal like Sherwin-Williams “Sea Salt” or a custom deep teal ($35–$40 per gallon). Paint other walls pale gray ($30–$35 per gallon). Layer white or pale bedding ($100–$250), add a teal accent pillow ($20–$50), and include natural wood furniture. Total cost: $200–$400. The feature wall gives you the benefit of bold color without committing the entire room.

    This approach works for people who like color but worry about commitment—one wall is a test run.


    24. Soft Cream with Muted Green and Wooden Elements

    This final palette brings together calm color (cream), biophilic design (green), and natural materials (wood) into one cohesive, research-backed approach to bedroom serenity.

    Paint walls soft cream ($30–$40 per gallon). Source a sage or soft green upholstered headboard ($200–$600) or bed frame if that fits your budget, or use a removable fabric panel ($30–$80). Layer cream bedding ($100–$250), prioritize wooden furniture ($150–$500+), and add a live plant ($15–$50). The entire palette costs $350–$600 to build thoughtfully. You can start with cream walls and cream bedding, then add the green and wood elements over time.

    This combination taps into everything research shows makes bedrooms restorative—natural materials, soft colors, and biophilic elements working together.


    Save this post for your next bedroom refresh. Pick one palette and live with it for a few days before committing—paint samples on your walls or order fabric swatches to see how colors read in your specific light. You’ll be amazed at how the right palette makes falling asleep easier and waking up gentler.

  • 24 Romantic Soft Bedroom Decor Ideas That Feel Dreamy & Warm

    24 Romantic Soft Bedroom Decor Ideas That Feel Dreamy & Warm

    There’s a difference between a bedroom that looks nice and one that actually feels like a sanctuary. If your space feels sterile, cold, or just… blah, you’re not alone. The good news? You don’t need a complete overhaul to create that dreamy, warm bedroom you’ve been craving. Whether you’re working with a tiny studio or renting in a no-paint apartment, these 24 ideas blend the 2025 trends everyone’s loving—organic shapes, rich earth tones, textural layers, and vintage touches—into practical, achievable upgrades. Most of these you can do this weekend, many cost under $50, and all of them prioritize comfort without clutter. Ready to turn your bedroom into a retreat that actually feels like yours? Let’s get started.

    1. Swap Hard Angles for a Curved Headboard

    Harsh lines and sharp angles can unconsciously keep your nervous system on alert—not ideal for a sleep space. A curved headboard signals safety and calm, and it photographs beautifully too.

    Replace your existing headboard or shop IKEA’s curved options (around $150–$300), Wayfair’s upholstered styles ($200–$500), or go DIY by padding an existing headboard with foam and fabric for under $80. The real magic? A rounded top edge makes the whole room feel softer. Installation is straightforward—most mount directly to your bed frame in about 30 minutes.

    This one change makes bedtime feel less utilitarian and more like stepping into a hug. You’ll notice the difference the first night you look at it before sleep.

    2. Layer in a Chunky Knit Throw (Not Just for Winter)

    Texture is the secret ingredient that makes minimalist rooms feel cozy. A chunky knit throw adds visual interest, warmth, and that lived-in feeling without taking up real estate.

    Woolroom, Etsy, or Target stock quality chunky knits for $60–$150. Look for natural wool or linen blends that feel substantial in your hands. Drape it across the foot of your bed or fold it over one corner—the casual styling actually enhances the dreamy vibe. Pro tip: cream, beige, and soft gray are easier to style than bold colors, and they work year-round.

    You get instant texture and a functional layer you’ll actually use on cooler evenings. The casual drape also makes your bed look styled without effort.

    3. Introduce Warm Earth Tones Through Paint or Peel-and-Stick Wallpaper

    Cool grays have had their moment. Warm neutrals—terracotta, caramel, sage, warm taupe—are having a major moment in 2025, and they instantly make a room feel like home instead of a showroom.

    Paint is the investment route ($30–$100 in supplies for a DIY job or $300–$800 hired out). For renters, peel-and-stick wallpaper from Spoonflower or Amazon ($40–$100 per roll) gives you the same warmth without permanence. One accent wall is enough; you don’t need to commit to the whole room. Most paint jobs take one to two evenings.

    The psychological shift is real. Warm walls make you feel held. Your bedroom becomes the cozy refuge you imagined, and the color shift elevates every piece of furniture inside it.

    4. Add a Woven Wall Hanging for Organic Texture

    A statement wall hanging grounds the room, adds softness, and replaces harsh blank walls without the permanence of wallpaper. It’s the 2025 answer to minimalist wall art.

    Shop Etsy, West Elm, or Anthropologie for woven pieces in the $40–$250 range. Macramé hangs easily (just needs a hook), and most pieces work well above the bed or on a feature wall. Installation takes five minutes. Look for natural fibers—jute, wool, cotton—that complement your color palette. A 24″–36″ width is usually perfect for above a standard bed.

    This adds layers and interest while staying true to the warm, organic aesthetic. Your walls become part of the cozy feeling, not just backdrop.

    5. Invest in Quality Linen Bedding That Actually Feels Good

    Cold, slippery polyester sheets won’t cut it if you’re building a sanctuary. Natural linen feels like luxury and gets softer with every wash.

    Quality linen runs $150–$350 for a full set, but it lasts for years—Brooklinen, Parachute, and Etsy sellers all offer excellent options. The wrinkled texture is part of the charm, not a flaw. You literally just pull them out of the wash and put them on; no ironing required. Budget option: start with one set and invest as you can afford it.

    You’ll sleep differently on linen. It breathes, it feels sensual, and it changes how you feel getting into bed. This is one investment that pays dividends every single night.

    6. Display Quilts Over Your Dresser or Bed Rail

    Quilts are having a major comeback as an alternative to duvets, and they tell a story in a way store-bought bedding never can. They’re practical and deeply soulful.

    Thrift quilts for $10–$50 (check Etsy, Facebook Marketplace, local antique shops), or commission a custom one from Etsy makers for $200–$600. Hang one on a simple wooden quilt rack ($30–$80 from IKEA or Wayfair), drape it over a bed rail, or fold it at the foot of your bed. Each quilt has history and personality baked right in.

    This approach makes your bedroom feel like a family heirloom space, not a hotel. The visual layering also adds dimension and warmth that mass-produced bedding can’t match.

    7. Hang Floor-to-Ceiling Curtains on Budget

    Floor-to-ceiling curtains create instant luxury and drama without actually requiring an expensive layout or professional installation. They’re a renter’s secret weapon too.

    Skip the pricey versions from Restoration Hardware ($300–$800). Instead, grab affordable options from IKEA ($20–$50), Target ($30–$70), or Amazon ($25–$60 per panel). Pair them with a tension rod ($15–$30) from any hardware store for truly renter-friendly installation—no holes, no landlord drama. You need two to four panels depending on your window width. Measurement and hanging takes about an hour.

    The visual effect is transformational. Your room immediately feels more curated and intentional. Bonus: sheer curtains filter harsh morning light, which improves sleep quality.

    8. Create a Gallery Wall with Personal Art and Prints

    Generic art or bare walls don’t invoke feeling. A personal gallery wall—even a small one—tells visitors (and you) exactly who you are and what you love.

    Start with affordable prints from Etsy ($8–$25 each), Minted ($12–$30), or even download and print your own from local print shops ($2–$5 per print). Frame them yourself using simple wood frames from IKEA or Michael’s ($5–$15 each). Mix frame styles, sizes, and finishes. Lay everything on the floor first to plan your layout, then hang with a level. Budget: $50–$150 for a 5–7 piece wall. Time: one evening.

    Your art becomes the visual anchor of your room. Waking up to images you actually love makes your bedroom feel purposeful and uniquely yours.

    9. Add Vintage or Thrifted Nightstands for Personality

    Mass-produced nightstands are forgettable. Thrifted pieces add character, are often better-built, and cost a fraction of retail price.

    Hunt Facebook Marketplace, Craigslist, local thrift stores, and Etsy for wooden nightstands in the $20–$80 range per piece. Don’t worry if they’re slightly different—mismatched pairs are hugely on-trend. A fresh coat of paint ($10 in supplies) updates them instantly if needed, or embrace the patina. Look for pieces with one or two drawers and sturdy legs. Delivery or DIY transport takes planning but is worth it.

    Your nightstands become conversation starters with real history. Plus, they’re built to last, unlike flat-pack alternatives. You get durability and soul in one purchase.

    10. Layer Rugs to Define Your Sleep Zone and Add Warmth

    A single rug can feel cold and institutional. Layering two—a natural base layer plus a softer accent—creates intimacy and visual warmth without clutter.

    Start with a jute base rug ($60–$200 from IKEA, Wayfair), then layer a smaller wool or vintage rug on top ($40–$150 from Etsy, thrift stores). Your top layer should be slightly smaller so both are visible. This combo adds insulation (floors feel warmer), visual interest, and a nested feeling. Takes five minutes to arrange once you have both pieces.

    The layering technique makes your sleep zone feel intentionally designed, not accidental. Plus, it’s cozy underfoot during those first steps out of bed in the morning.

    11. Install Warm Lighting with Dimmable Bulbs and Layered Fixtures

    Harsh overhead lighting tanks your bedroom’s coziness factor. Warm, dimmable lighting is the fastest way to create that sanctuary feeling.

    Replace all bulbs with warm-toned (2700K) LED bulbs ($5–$15 each from any hardware store). Swap your overhead fixture for a dimmer switch ($15–$30 at Home Depot) or add layered task lighting: a bedside lamp ($30–$100), a wall sconce ($40–$120), even string lights ($15–$30). Use bulbs that dim together for maximum control. Installation varies (dimmer is 30 minutes for handy folks; sconce might need an electrician at $150–$300).

    The difference is immediate. Warm light makes your room feel like a resort, not an office. Dimming options mean you can adjust the mood for reading, winding down, or just cozying up.

    12. Use Velvet or Textured Accent Pillows to Add Softness

    Flat, basic pillows miss the chance to add texture. Tactile pillows make your bed an actual place you want to sink into.

    Shop Etsy ($20–$60), West Elm ($40–$80), or Target ($15–$40) for pillows in velvet, linen, corduroy, or knit textures. Aim for three to five pillows in coordinating neutral tones—cream, taupe, dusty sage, soft gray. Mix sizes and shapes (square, rectangular, round). Takes five minutes to style; no additional setup needed.

    The tactile experience transforms how you feel about your bed. You’ll actually want to lounge there, not just sleep in it. Texture also photographs beautifully, which means your room looks intentional on camera too.

    13. Add a Statement Mirror to Reflect Light and Expand Space

    Mirrors reflect light, make small spaces feel bigger, and add architectural interest. A statement mirror is a non-permanent way to completely shift your room’s energy.

    Look for mirrors with wood frames ($60–$250 from IKEA, West Elm, Wayfair) or hunt thrifted ornate mirrors for $20–$80. Go oversized—a 24″–36″ width makes the biggest impact. Lean it against the wall (renter-friendly, no hanging required) or mount it with brackets ($20–$40). Either way, installation is straightforward and takes under an hour.

    Your room instantly feels brighter, bigger, and more refined. The light bounce also makes your space feel more energized during the day without any electrical changes.

    14. Introduce Fresh Flowers or Faux Botanicals Weekly

    Living (or beautiful faux) plants add life, improve air quality, and create that biophilic connection everyone craves. Fresh flowers change the mood instantly and cost less than you’d think.

    Fresh grocery store flowers ($5–$15 from Whole Foods, farmer’s markets) last a week. Dried botanicals ($3–$15 per bunch from Etsy, Trader Joe’s) last months and look endlessly chic. Faux botanicals ($10–$30 from Target, IKEA) require zero maintenance and work if you travel. Invest in a few ceramic or glass vases ($10–$30 each) that you can reuse. Arrange fresh flowers on Sunday for an easy weekly refresh—takes five minutes.

    A bedroom with greenery feels alive and nurturing instead of sterile. It’s a small weekly ritual that shifts your whole mood when you walk into the room.

    15. Layer Sheers with Heavier Curtains for Control and Romance

    Sheer alone lets in harsh light and kills privacy. Layering sheers with blackout or heavier curtains gives you total control over light, mood, and your sanctuary feeling.

    Buy sheer curtains ($20–$60 from IKEA, Target) and heavier linen curtains ($40–$150 from Wayfair, CB2). Hang sheers on one rod, heavier curtains on another (two rods side-by-side cost $30–$60 total). Use a tension rod for renter-friendly install (no holes). You now have complete light control without sacrificing softness. Setup takes about an hour.

    This layering approach makes your room feel intentionally designed and gives you agency over your environment. You can wake to soft light or sleep in complete darkness—your choice.

    16. Style Your Dresser Top Like a Hotel Nightstand

    A cluttered dresser stresses you out. A styled dresser—even a simple one—makes your whole room feel more intentional and calming.

    Keep your dresser top to five objects maximum: a lamp ($30–$80), a small plant ($5–$20), a stack of books ($0, from your shelf), a decorative dish or tray ($10–$30), and one candle ($5–$15). Swap items seasonally or monthly for freshness without clutter. Takes 10 minutes to style and makes your brain feel more at ease.

    This small curation makes your room feel like a deliberate, adult space instead of a place where stuff accumulates. It’s also the easiest way to make your bedroom photograph well.

    17. Hang a Fabric Canopy Above Your Bed for Dreamy Drama

    A fabric canopy instantly makes your bedroom feel like a retreat. No commitment needed—it’s installed in minutes and renter-friendly.

    DIY Canopy: Hang sheer fabric or muslin ($20–$50 from fabric stores, Amazon) from adhesive hooks ($10 for a set of 4) or command strips ($5). No drilling, no damage. Or buy a pre-made bed canopy frame ($80–$250 from IKEA, Wayfair) if you want structure. Installation takes 20–30 minutes and requires zero tools.

    The canopy creates a cocooning effect that signals safety to your nervous system. You literally sleep better under one. It’s also the most Instagram-worthy bedroom detail for minimal effort.

    18. Replace Metal Furniture with Warm Wood Pieces

    Metal furniture—especially chrome or industrial styles—feels cold in a bedroom. Warm wood creates the organic, grounding energy that 2025 is all about.

    Gradually swap out metal pieces for wood versions from IKEA ($150–$500 for bed frames), Facebook Marketplace ($50–$300 thrifted), or invest in one statement piece like a wood dresser ($300–$800 new). You don’t have to replace everything at once; even swapping a metal nightstand for wood shifts the room’s vibe significantly. No installation needed beyond what you’d do anyway.

    Wood grounds a room instantly. It feels stable, warm, and connected to nature—all things your nervous system craves before sleep. Plus, it ages beautifully instead of looking dated.

    19. Create a Reading Nook with a Small Chair and Good Light

    Your bed shouldn’t be your only place to relax. A cozy reading nook gives your bedroom function beyond sleep and adds visual interest.

    Shop IKEA’s armchairs ($150–$300), Target ($100–$250), thrifted wooden chairs ($30–$100), or invest in a mid-century lounge chair ($300–$800 from Article, West Elm). Add a side table ($40–$100), a task lamp ($30–$80), and a throw. Position near a window if possible. Setup takes an afternoon.

    This creates a secondary purpose for your bedroom—a place to journal, read, or simply sit with your thoughts. It also makes the room feel more layered and less like a furniture showroom.

    20. Swap Your Comforter for Layered Bedding (Duvet + Throw)

    A single thick comforter looks flat and isn’t as flexible as layered bedding. Layers let you adjust warmth, look more intentional, and photograph better.

    Start with fitted and flat sheets ($40–$80), add a lightweight duvet ($100–$250), then layer a throw blanket or quilt on top ($50–$150). Use a duvet cover so you can wash everything without destroying the duvet itself. This approach gives you flexibility for temperature changes and adds visual texture. Setup takes five minutes—literally just arrange pieces on the bed.

    Your bed becomes a design focal point instead of just a place to sleep under one blanket. The visual layers also make your room feel more luxurious and intentional.

    21. Add Cork or Rattan Drawer Pulls for Organic Details

    It’s the small details that make a room feel cohesive. Swapping out basic hardware for cork or rattan pulls takes five minutes and costs under $30.

    Buy cork or rattan drawer pulls ($15–$30 for a set of 4–6 from Anthropologie, Etsy, Schoolhouse Electric). Unscrew your existing pulls and screw in the new ones—literally takes five minutes with a screwdriver. No other skill needed. Look for natural wood, cork, or rattan materials to match your warm aesthetic.

    These small touches make your dresser look curated and intentional. They’re also completely reversible if you rent or change your mind down the line.

    22. Bring in Warm Metallics (Brass, Copper) Instead of Silver

    Cool silver and chrome metallics are out. Warm brass and copper metallics play beautifully with earth tones and add subtle luxury.

    Replace light fixtures with brass versions ($50–$150), add brass wall sconces ($40–$120), swap your picture frames to copper or brass ($10–$30 each). Even small metal accents—a brass plant stand ($30–$60) or copper trinket dish ($15–$40)—shift your room’s warmth factor. Look for authentic brass or brass-plated options that won’t tarnish quickly.

    These warm metallics catch light beautifully and make your space feel refined without trying too hard. They tie together all your warm wood and earth tone choices.

    23. Display Books Horizontally and Stack with a Decorative Object

    Open book stacks look messy. Horizontal stacks topped with a decorative object look intentional and take up less visual space.

    Gather books you actually love ($0, from your shelf), find a small sculptural object ($10–$50 from Etsy, thrift stores, or home goods stores), and stack. Keep stacks to three to five books maximum and top with one object. This works on nightstands, dressers, or shelves. Takes five minutes to arrange and adds instant sophistication.

    Book styling tells a story about who you are without feeling showy. It’s an easy way to add personality without clutter, and it invites conversation.

    24. Install Blackout Curtain Liners to Improve Sleep Quality (Without Sacrificing Style)

    Dark rooms improve sleep quality significantly. Blackout liners let you keep your beautiful sheer or linen curtains while still getting complete darkness.

    Buy blackout curtain liners ($20–$50 from IKEA, Amazon, Target) that attach to your existing curtains with tape or clips. No sewing required. Install takes 15 minutes and completely blocks light without changing the look of your curtains. Alternatively, use thermal-backed curtains ($60–$150 from Wayfair, West Elm) that look good and block light.

    Sleep quality improves noticeably when your room is genuinely dark. This is a science-backed upgrade that feels luxurious and functional at the same time.


    Save this post and pick one idea to tackle this week. You’ll be surprised how one small change shifts how you feel when you walk into your bedroom. Which one will you try first?