Category: Bedroom Decor

  • 27 Cute Room Ideas That Make Any Space Feel Charming

    27 Cute Room Ideas That Make Any Space Feel Charming


    Your bedroom should feel like a retreat, not just a place to sleep. But making a space feel charming doesn’t require a total gut renovation or a huge budget. Whether you’re renting, own your home, or just want to refresh what you already have, small intentional changes create the biggest impact. These 27 ideas blend current design trends with practical, beginner-friendly solutions—from zero-dollar styling tweaks to thoughtful investment pieces that pay dividends. You’ll discover ways to layer textures, play with color, add vintage charm, and create a space that actually reflects who you are. Let’s dive in.


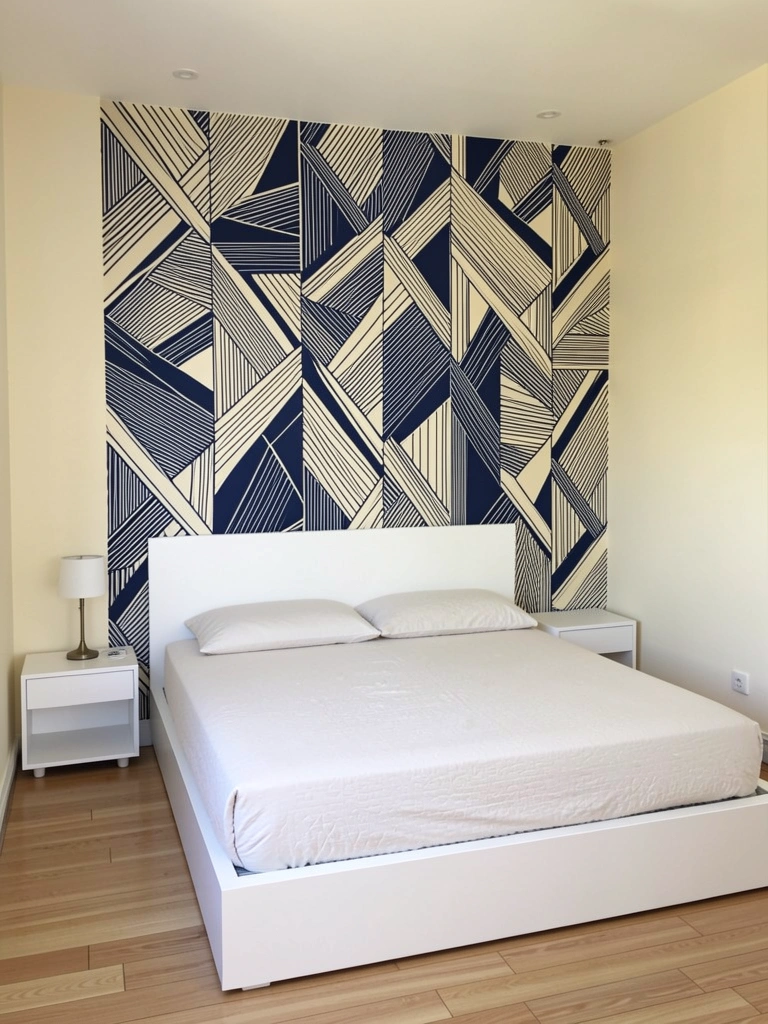
    1. Layer Your Walls With Soft Texture

    Textured walls add personality without feeling overwhelming or trendy. They catch light beautifully and create visual interest that flat paint can’t match.

    You can add texture through paint techniques (popcorn, knockdown, or venetian plaster finishes), removable wallpaper, or even DIY methods like sponging. Knockdown texture is popular and renter-friendly if you use a smooth finish first. Hire a pro ($300-$800 for a bedroom) or tackle it yourself with supplies from Home Depot or Lowe’s ($50-$150). A weekend project if you’re confident; otherwise, save it for professionals.

    The result? Your walls become a design element themselves, creating a cozy, dimensional backdrop that photographs beautifully and genuinely improves how the room feels.


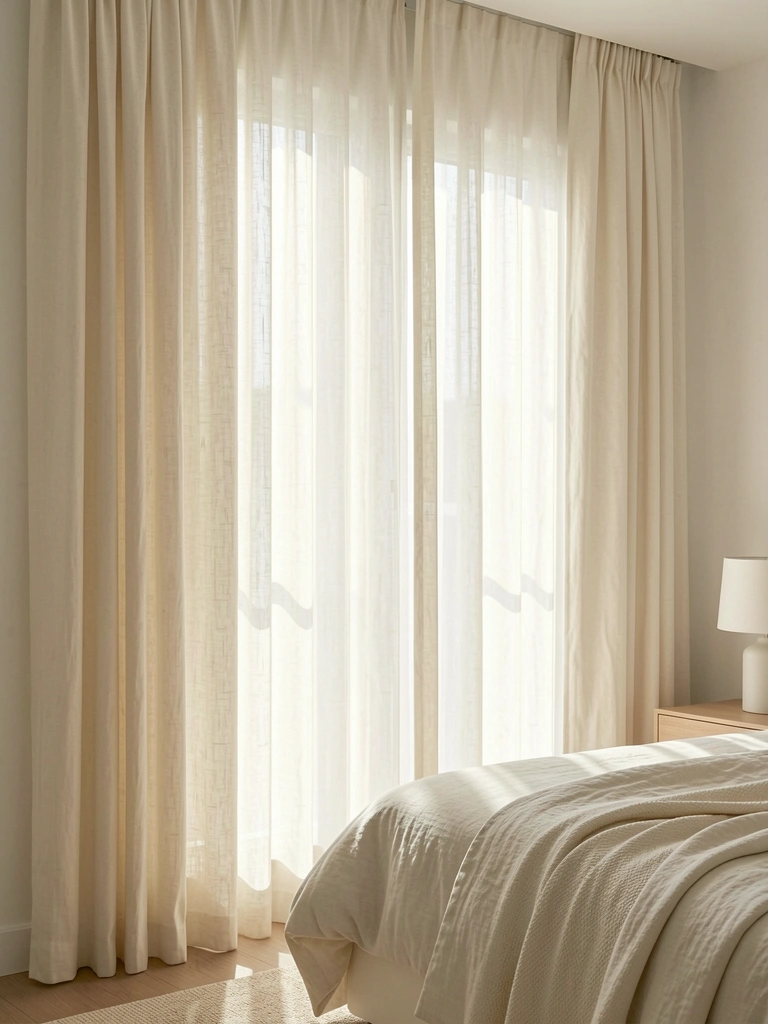
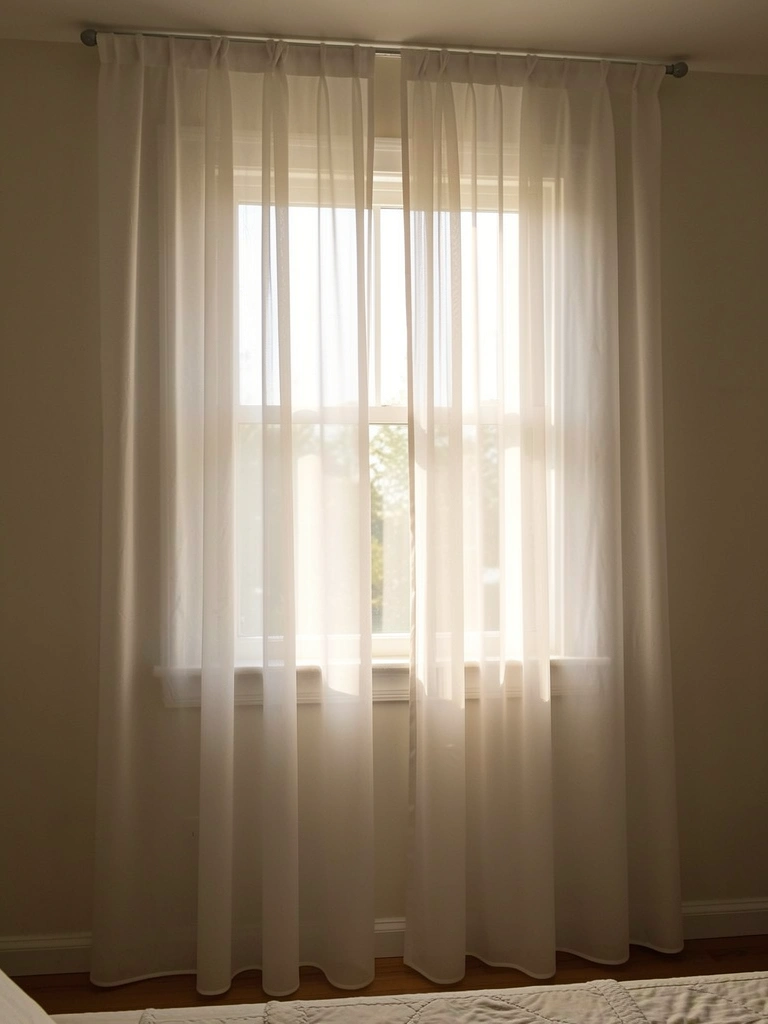
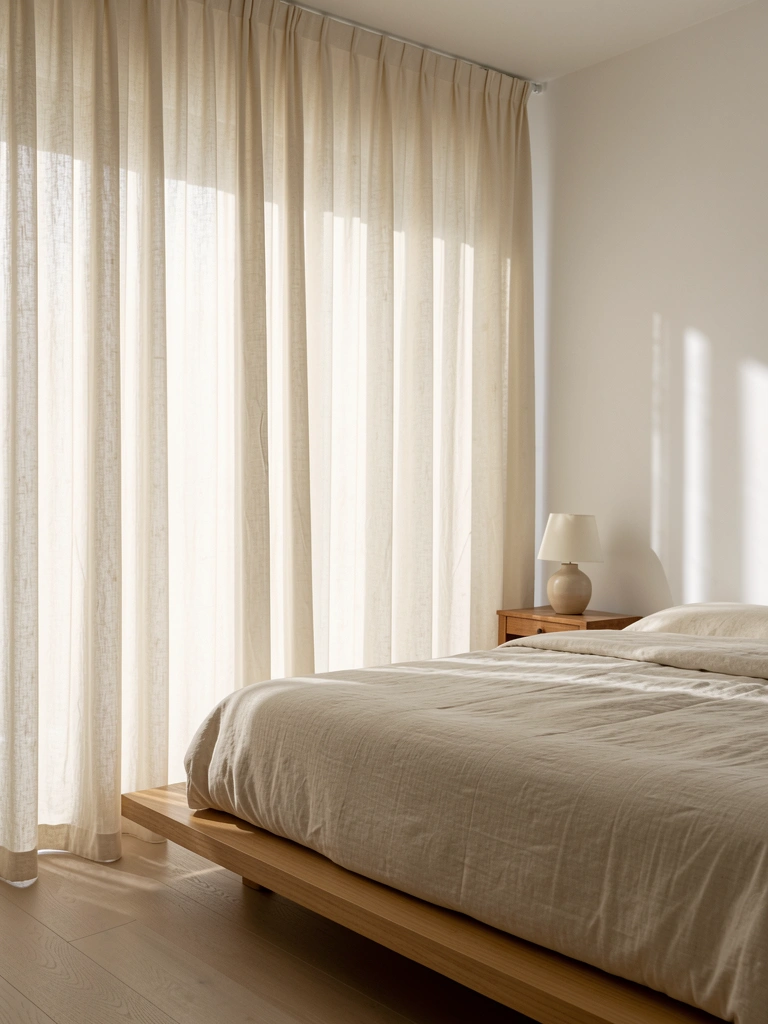
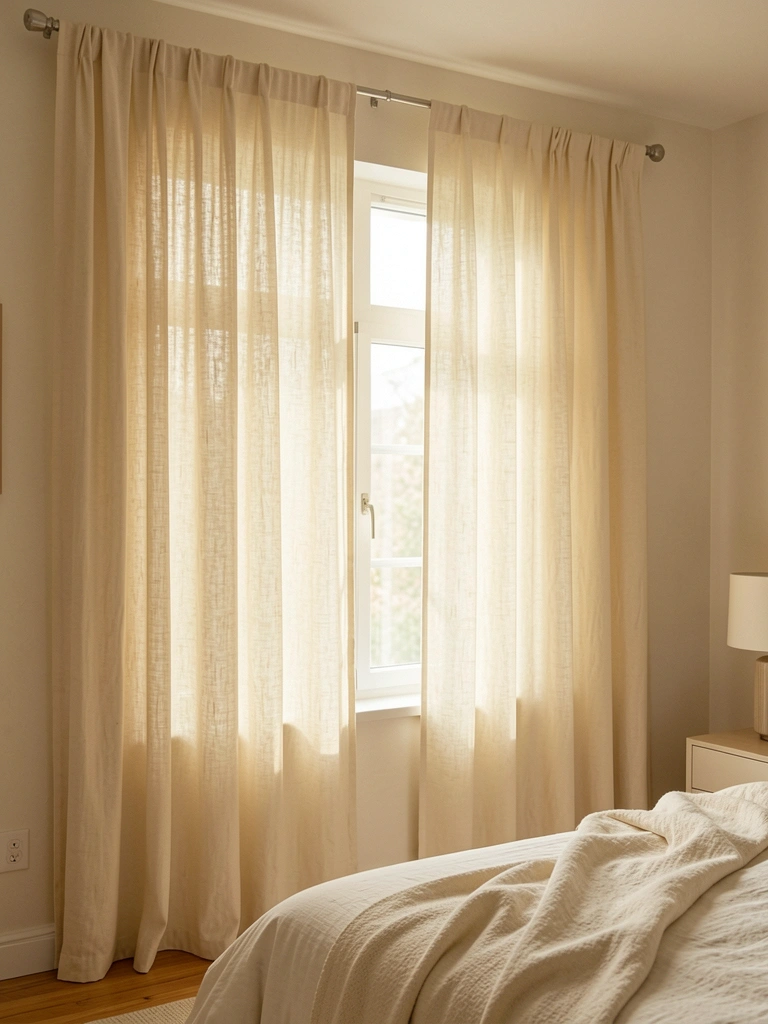
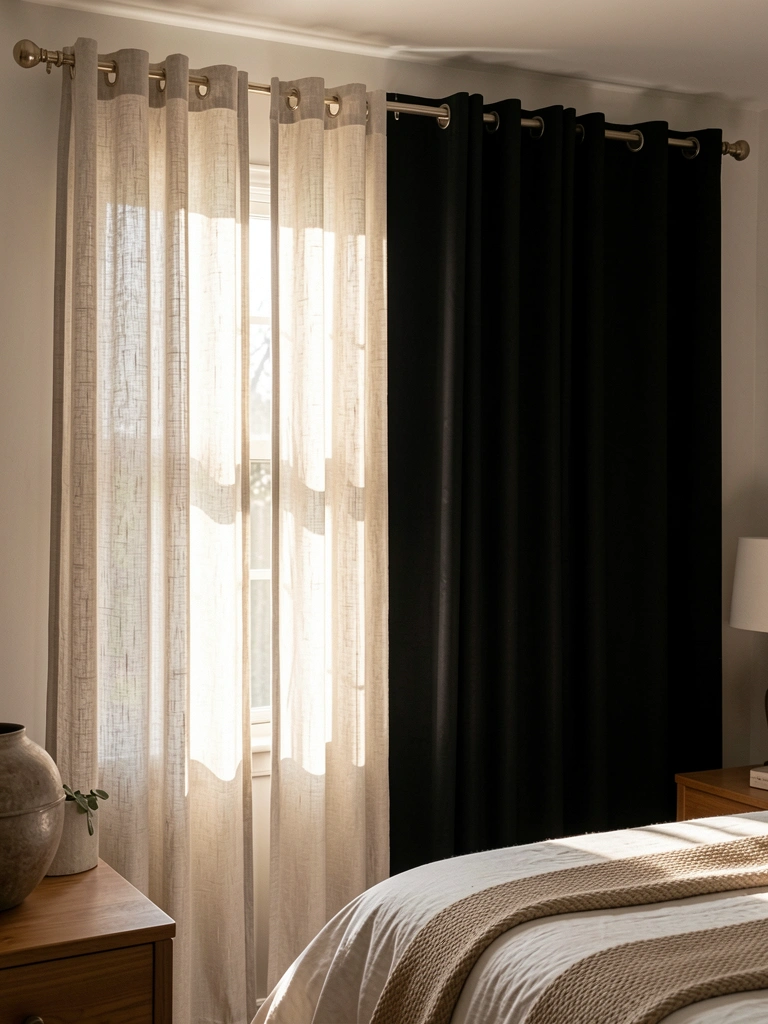
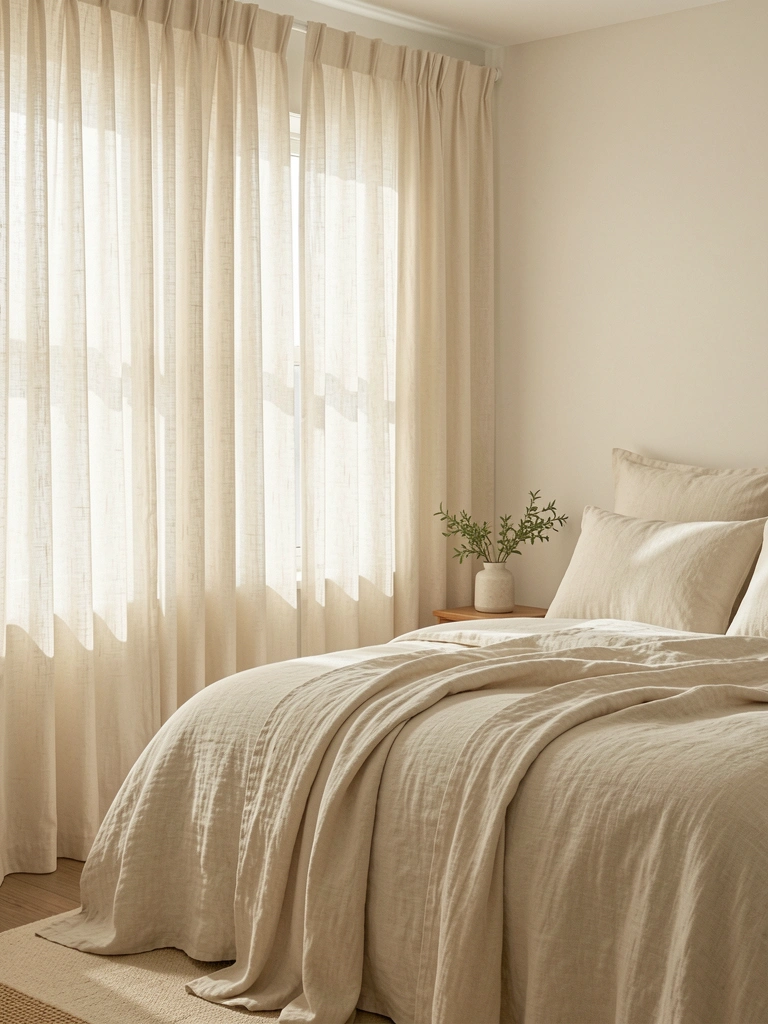
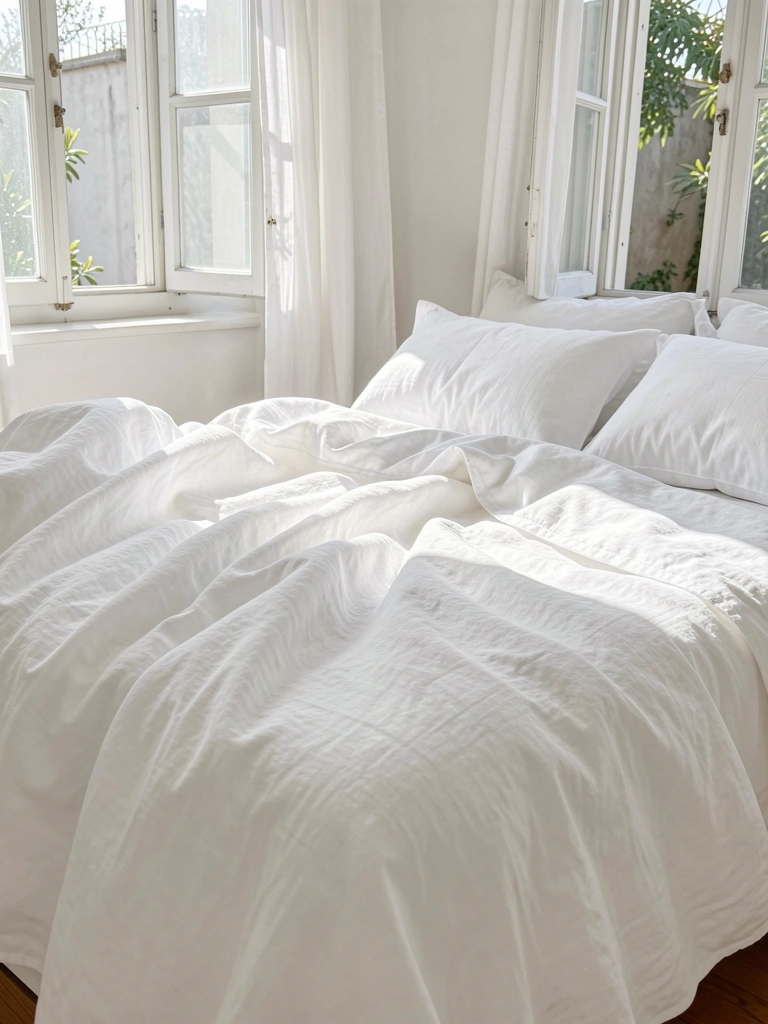
    2. Hang Floor-to-Ceiling Curtains for Drama

    Floor-to-ceiling curtains create height and lushness instantly, even in smaller rooms. They’re a budget-conscious alternative to investing in new furniture.

    Hang rods near the ceiling (not at window height) and let fabric cascade down. Affordable options: Amazon basics ($20-$40 per panel), IKEA ($15-$30), or thrifted linen ($10-$25). For a DIY budget hack, buy muslin from fabric stores and dye or leave natural ($5-$15). Measure ceiling-to-floor, add 3-4 inches for subtle pooling. Installation takes an hour with a drill.

    Your bedroom immediately looks taller, more intentional, and dramatically cozier. Light filters beautifully, and you gain privacy without the cramped feeling of standard-height curtains.


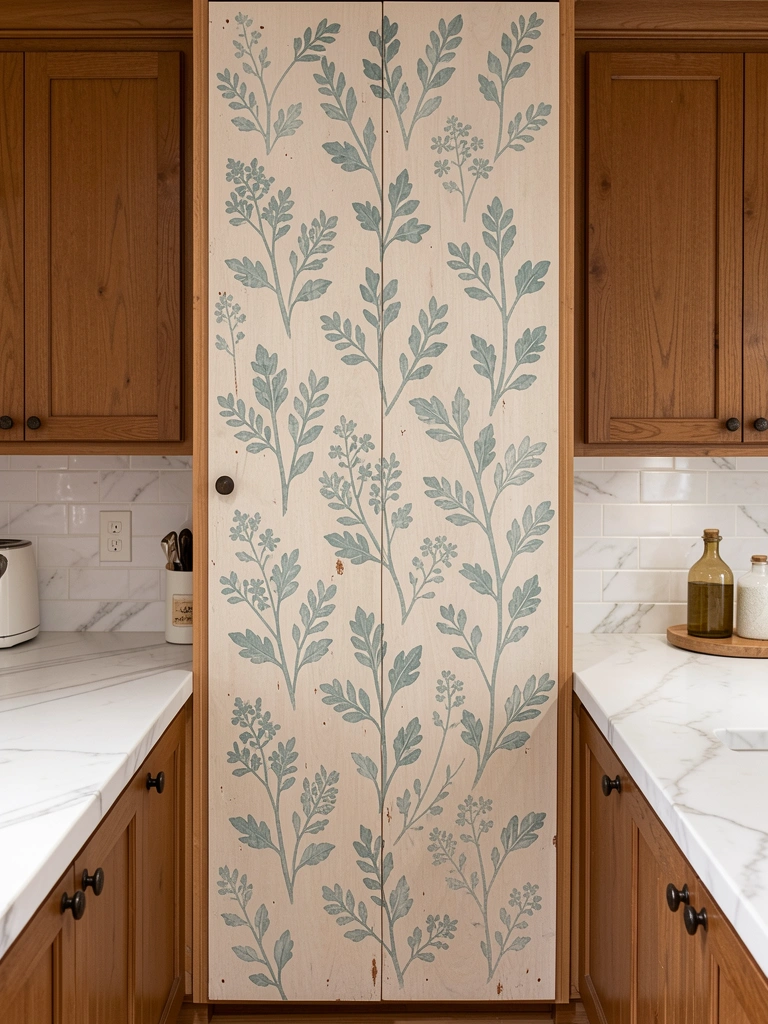
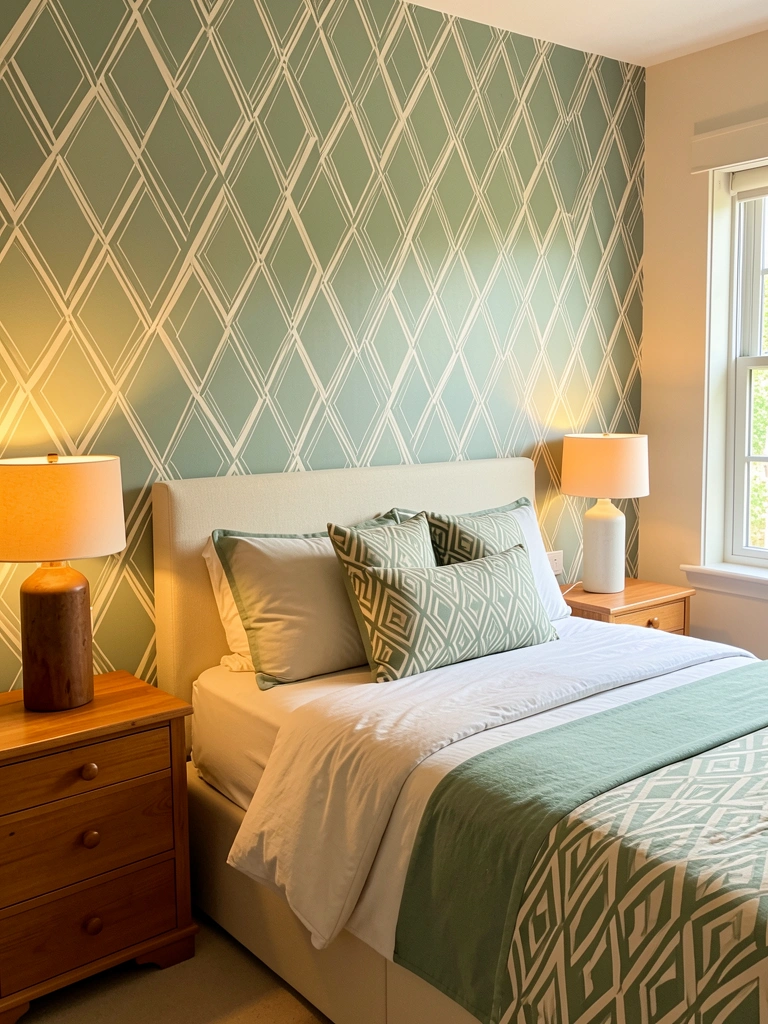
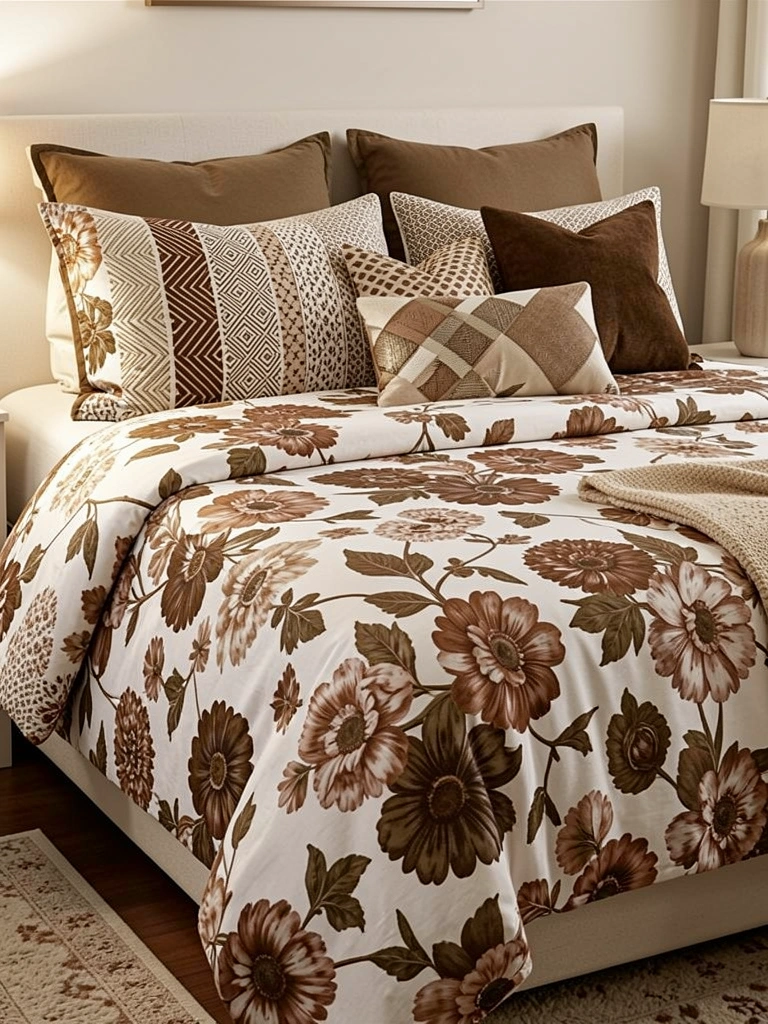
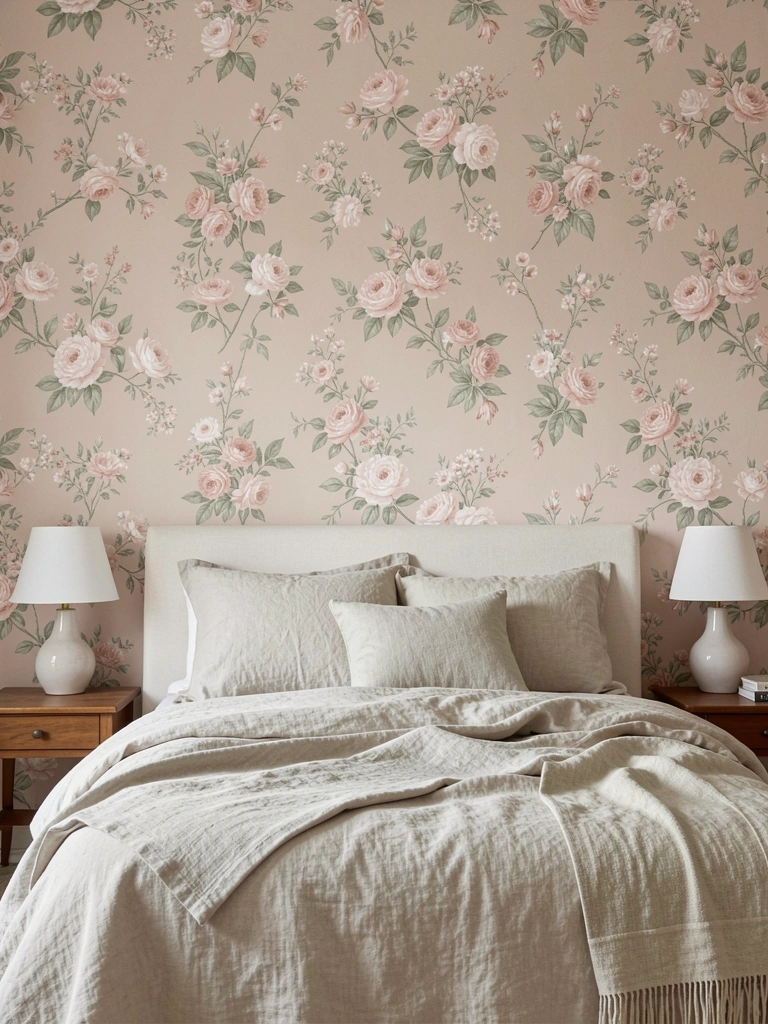
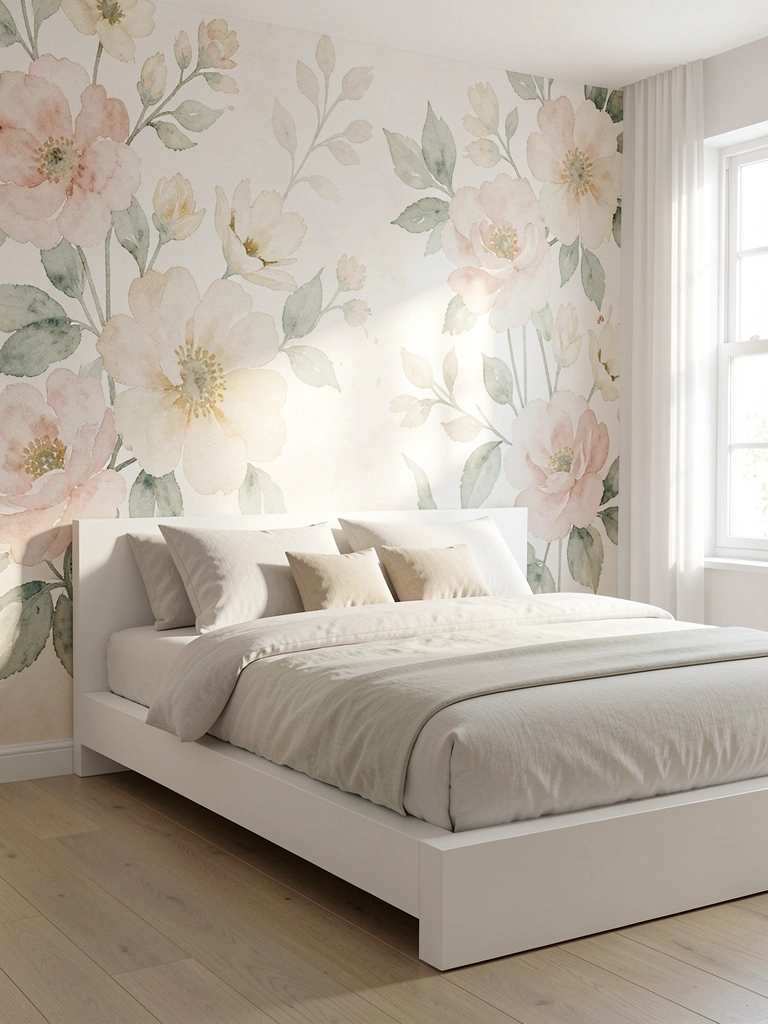
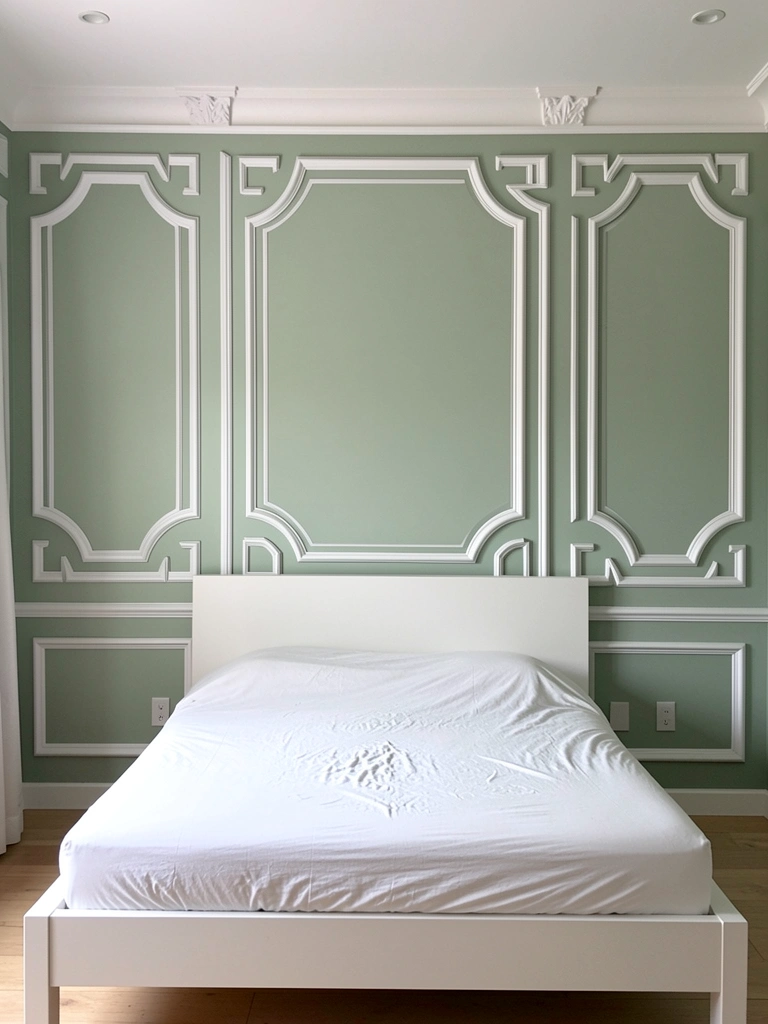
    3. Embrace Floral Wallpaper (Without Dating Your Space)

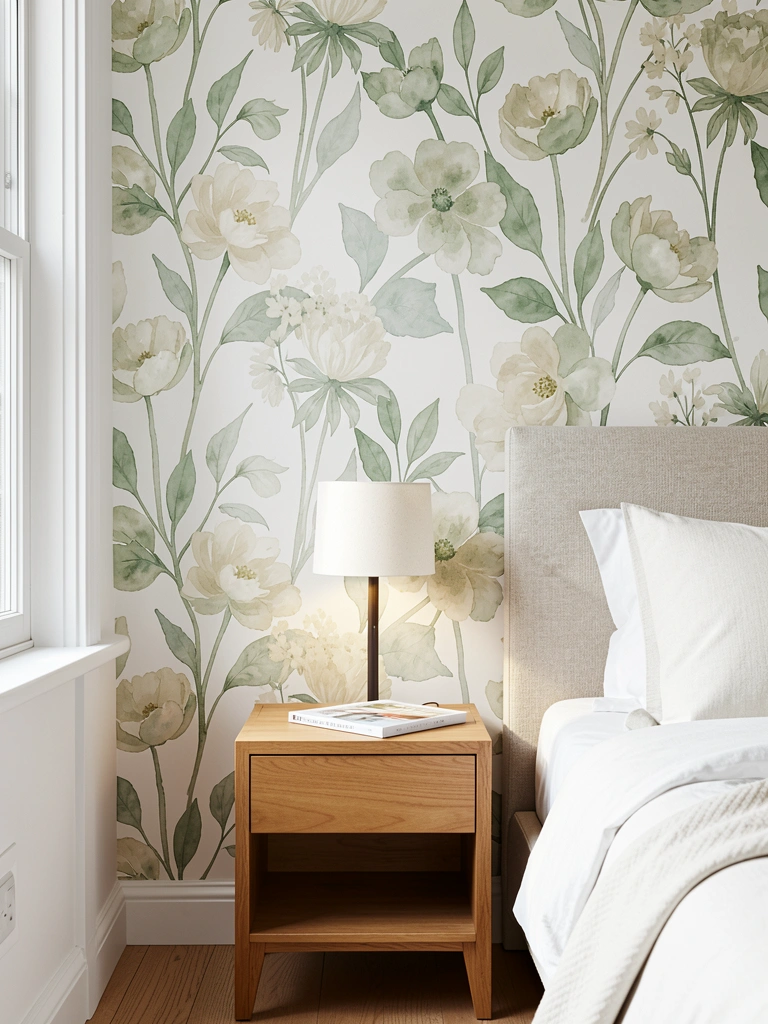
    Floral wallpaper is having a moment because designers are choosing sophisticated, loose patterns instead of tight, oversaturated prints. When selected thoughtfully, florals feel timeless.

    Look for watercolor-style patterns in muted palettes (sage, blush, cream, deep green) rather than bright, dense florals. Removable wallpaper ($20-$60 per roll via Spoonflower, Wayfair, or Amazon) works great for renters. Install one accent wall or all four for impact. Budget 4-6 hours for a single wall; hire help if daunting ($200-$500). Choose patterns with asymmetrical, loose layouts that won’t feel “stuck” in 2025.

    The payoff is a bedroom that feels curated and personal. Florals add softness and nostalgia while modern interpretations keep your space from ever looking dated or themed.


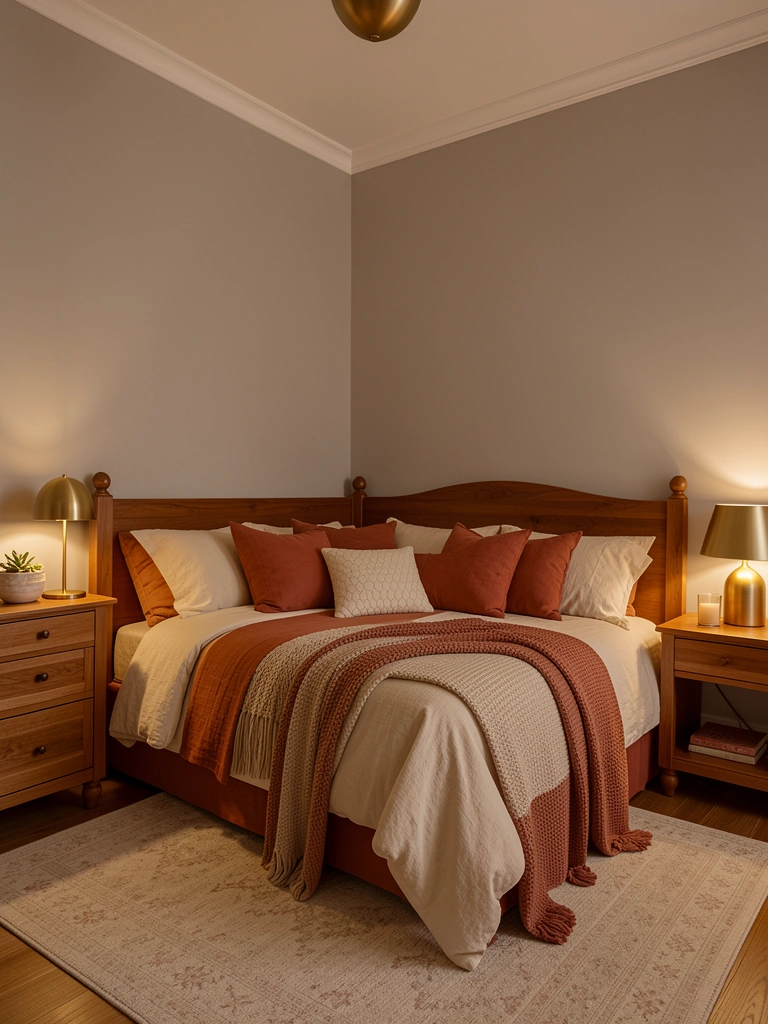
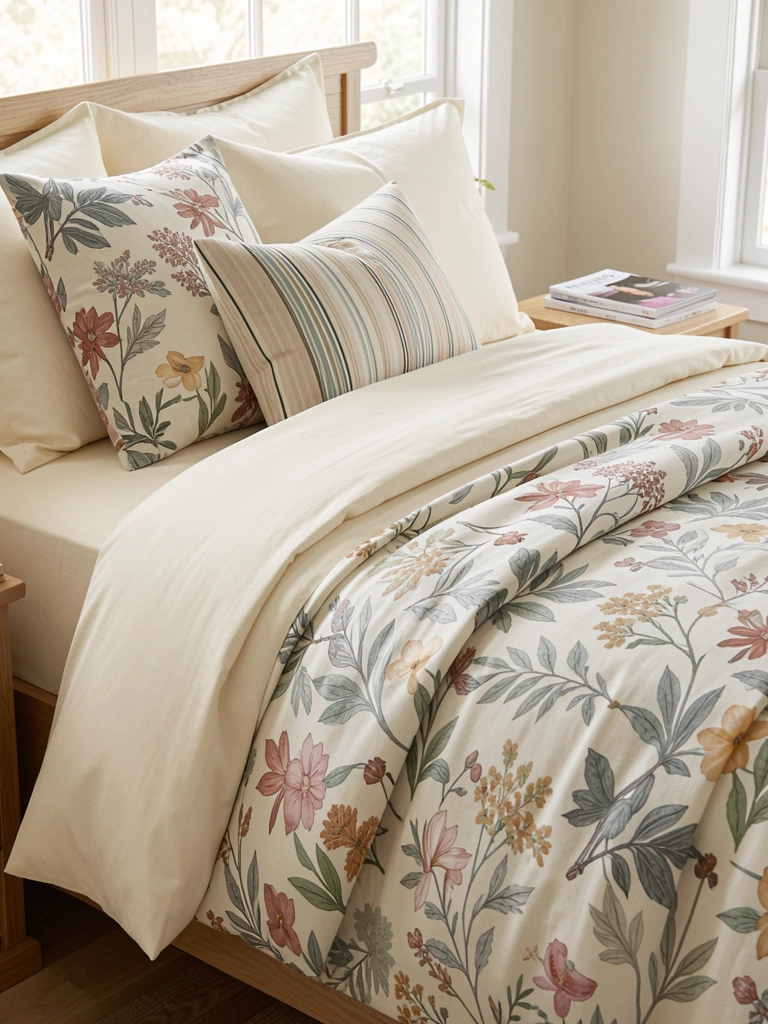
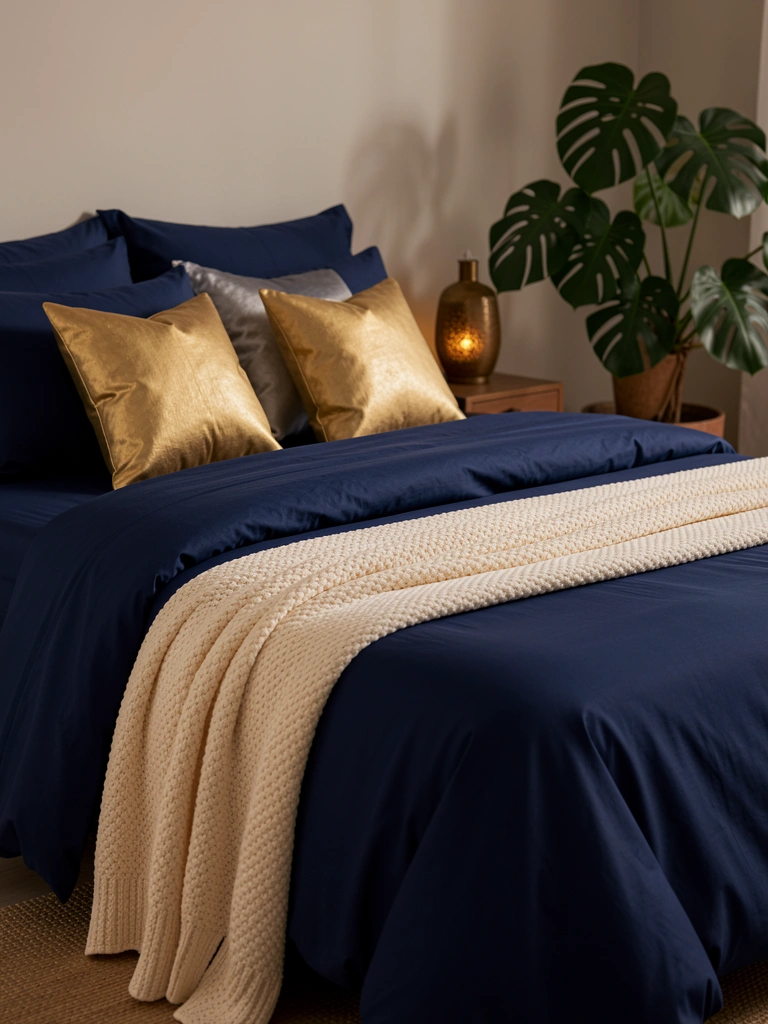
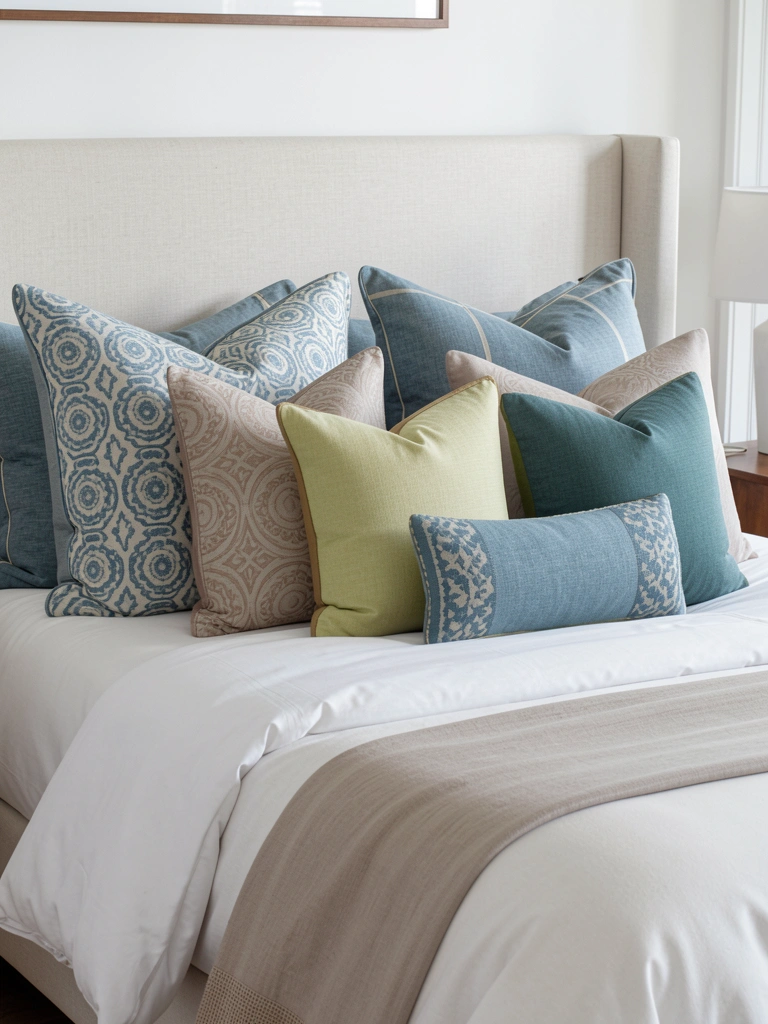
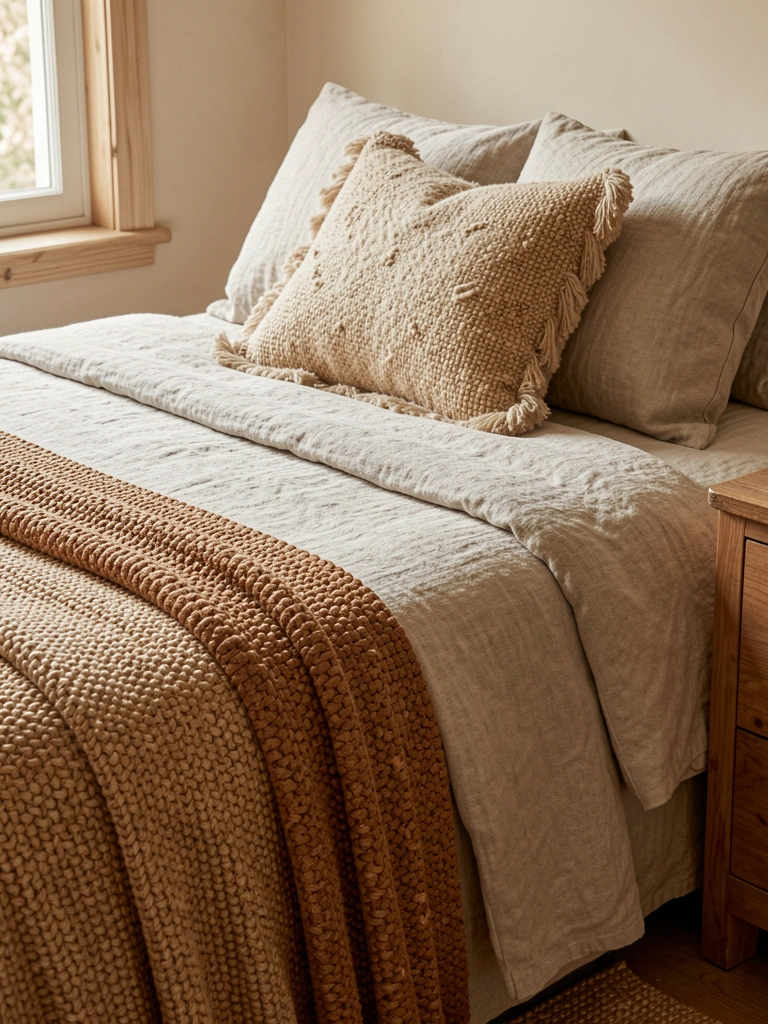
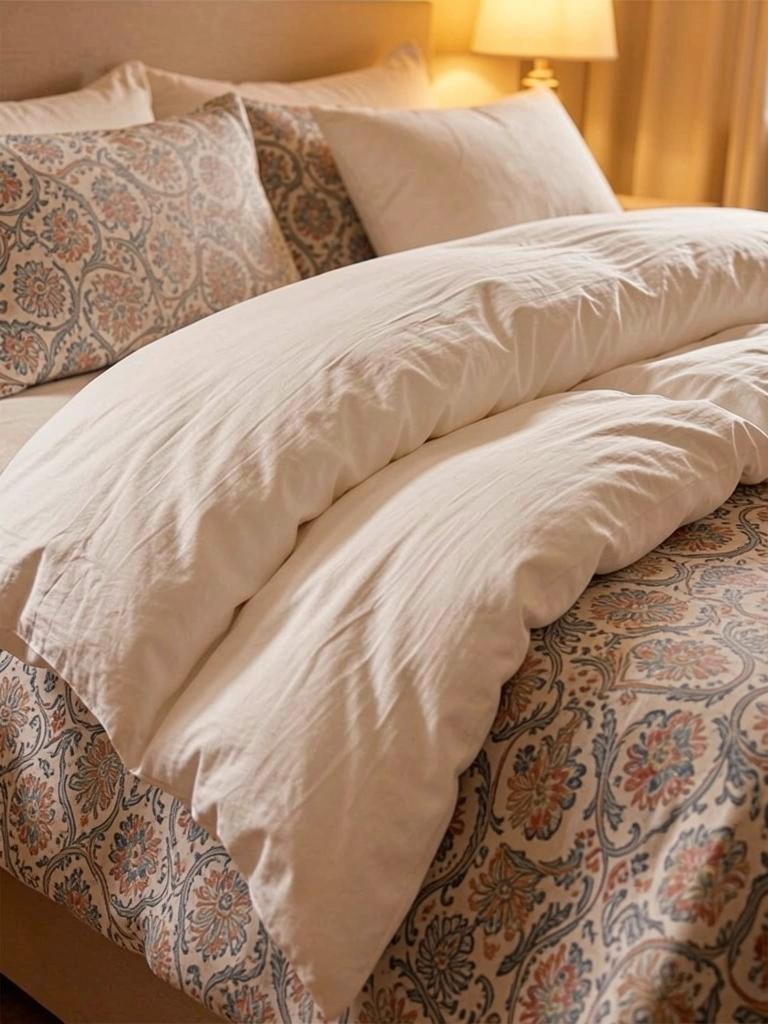
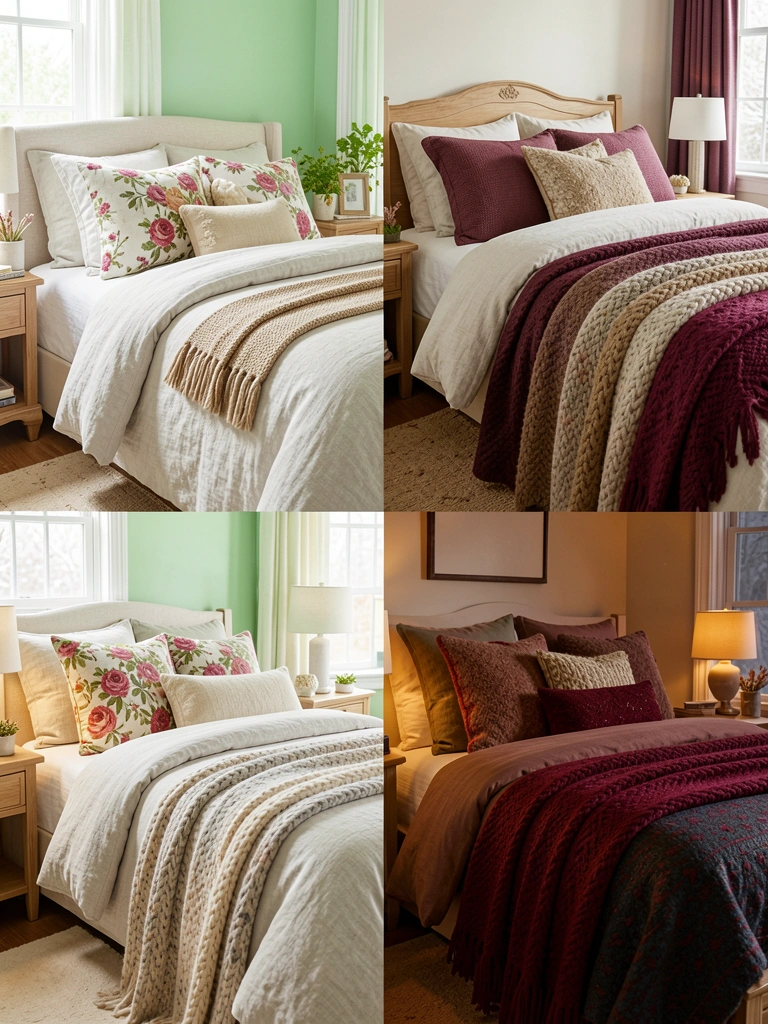
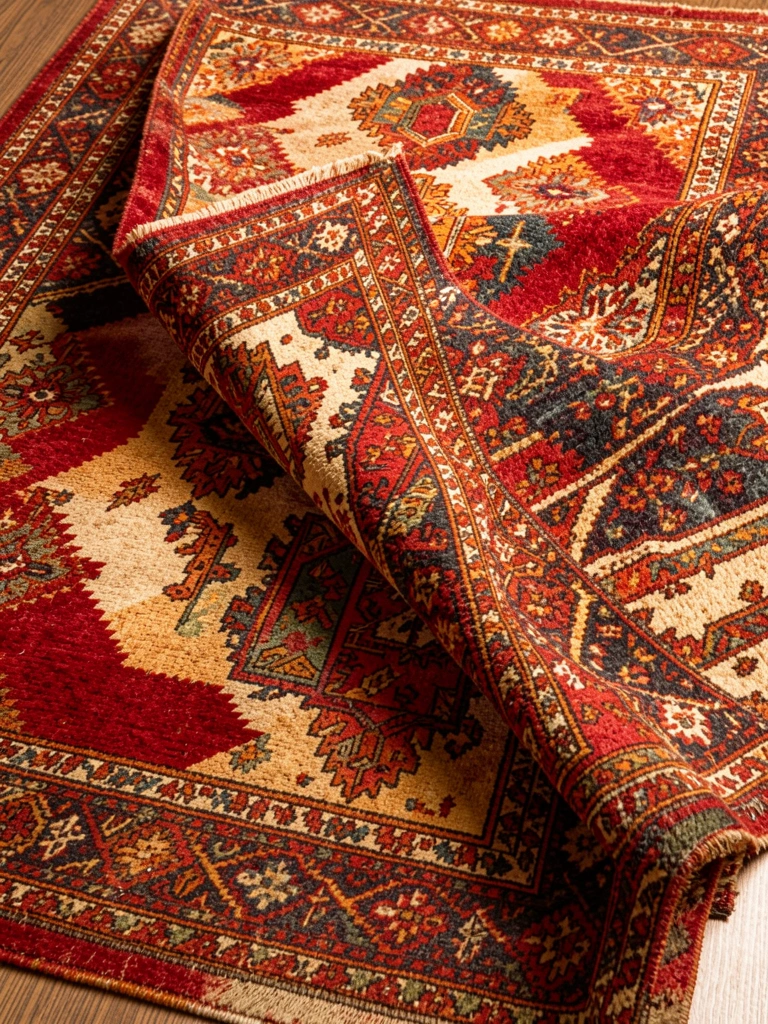
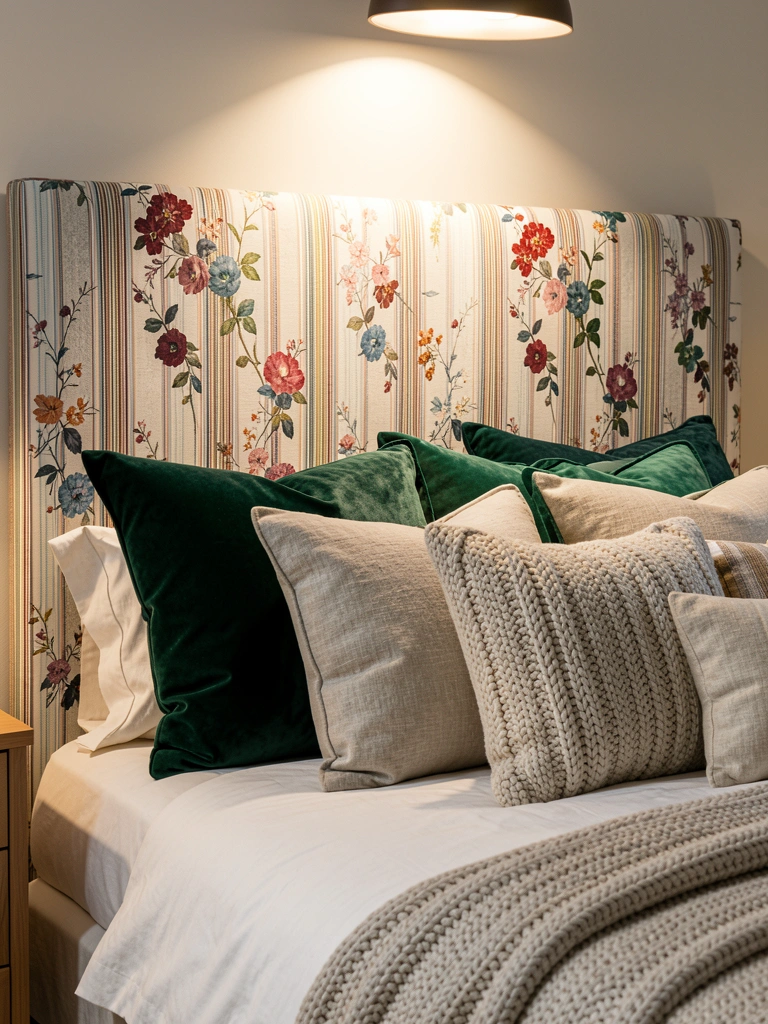
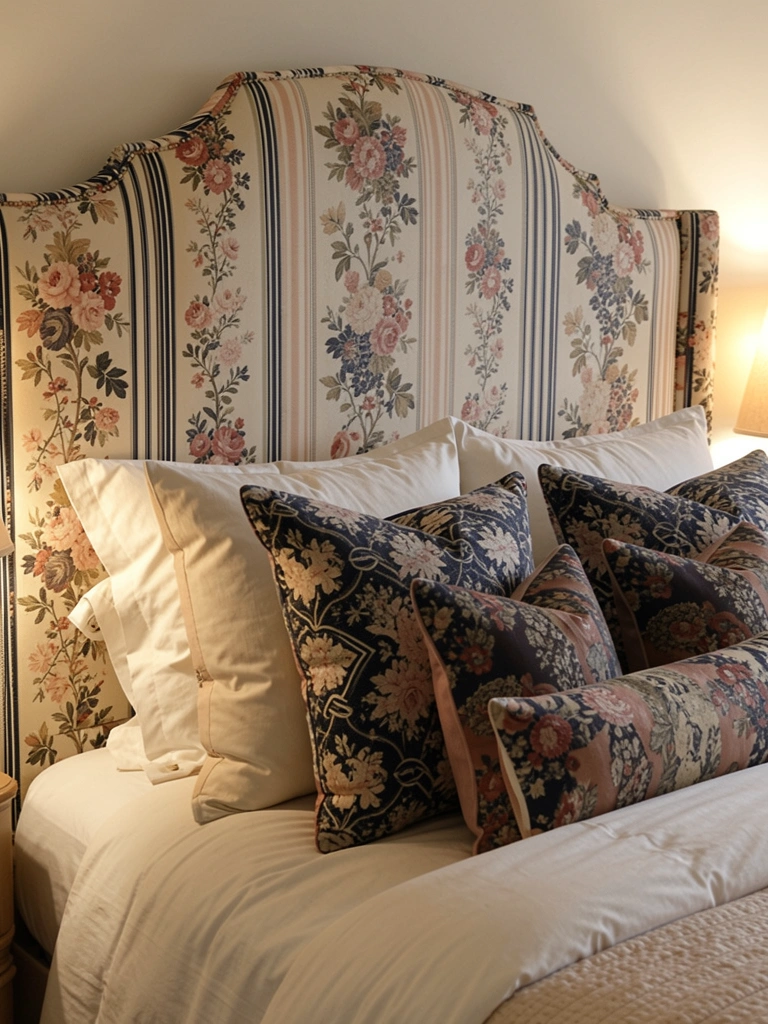
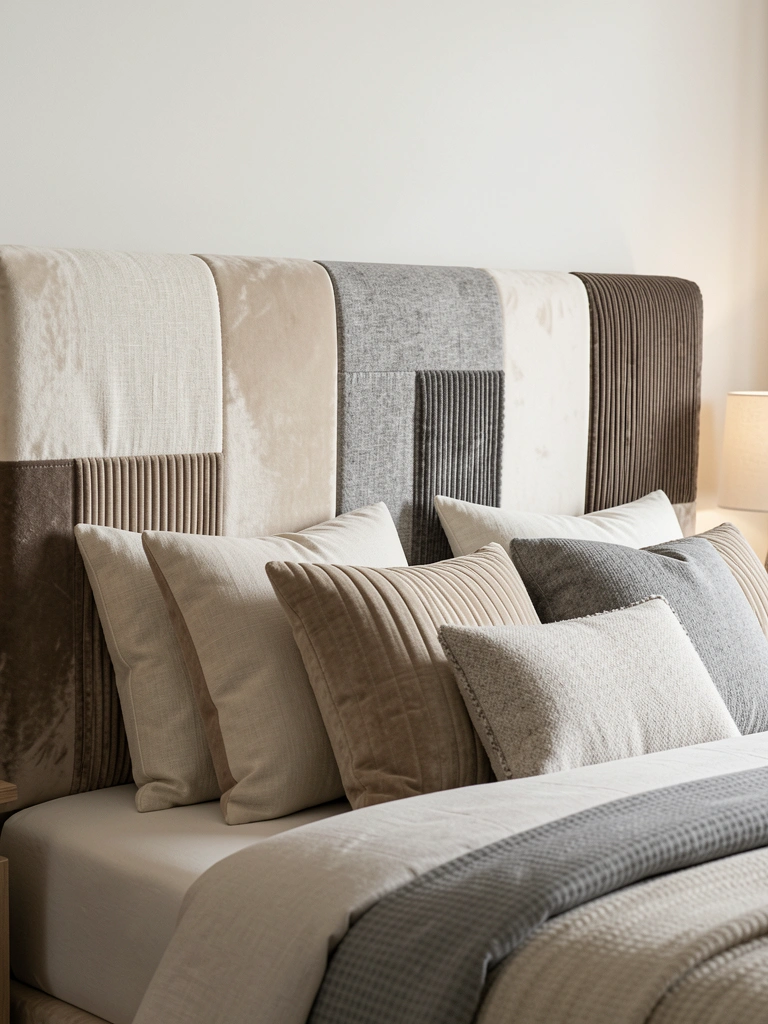
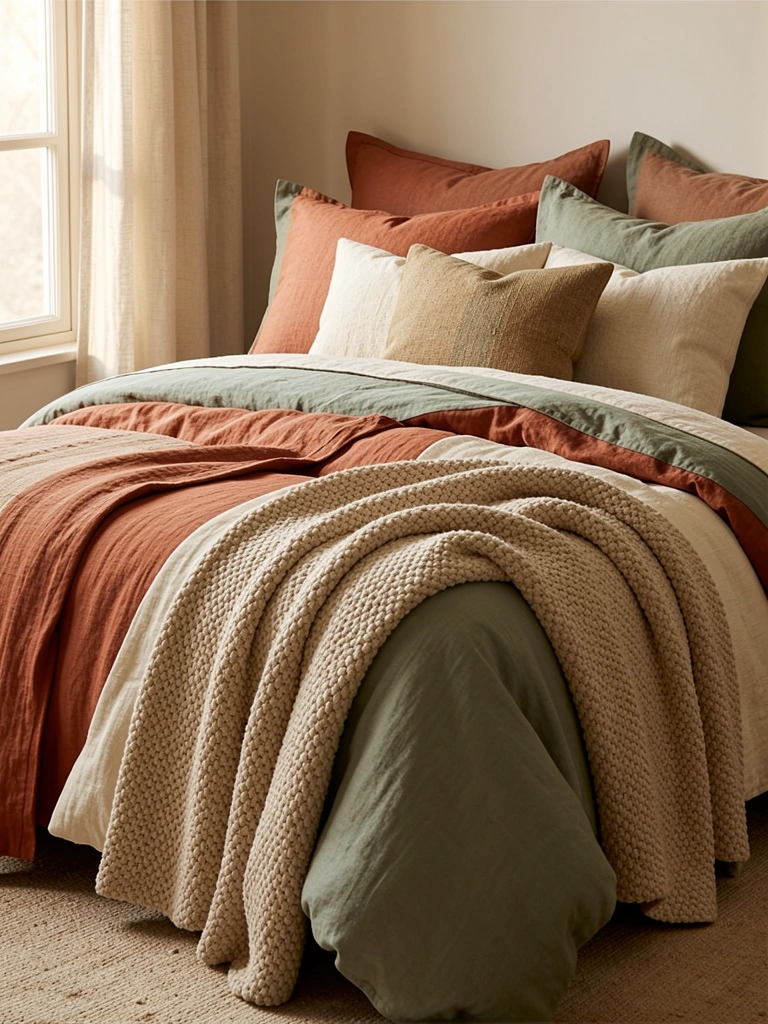
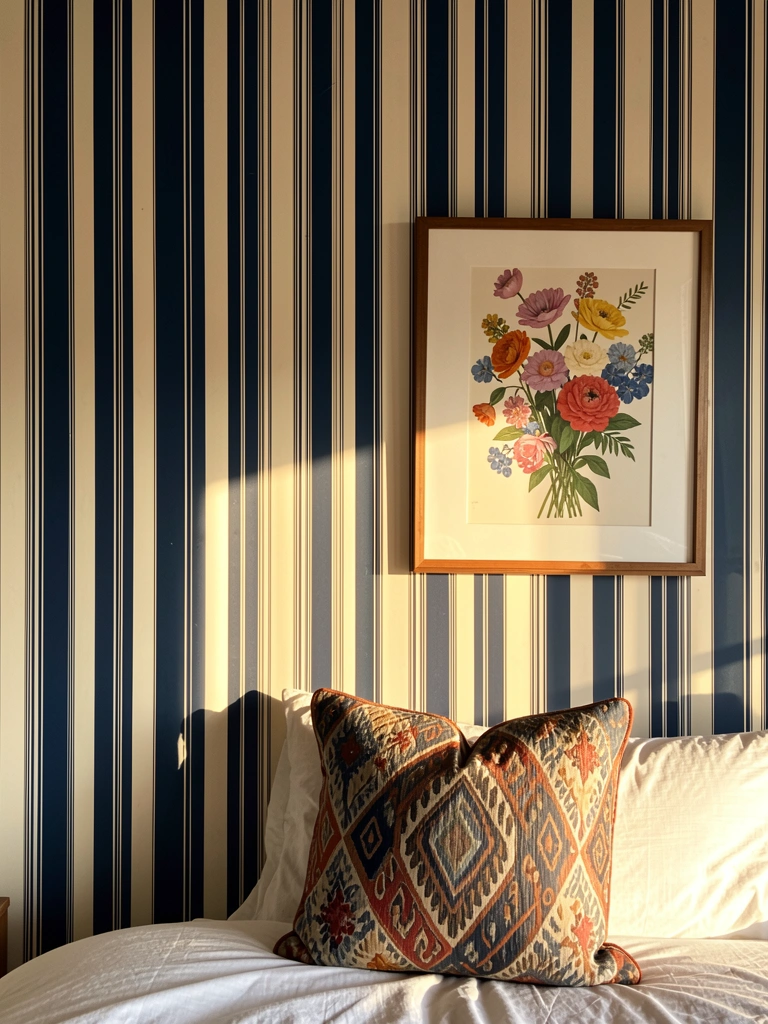
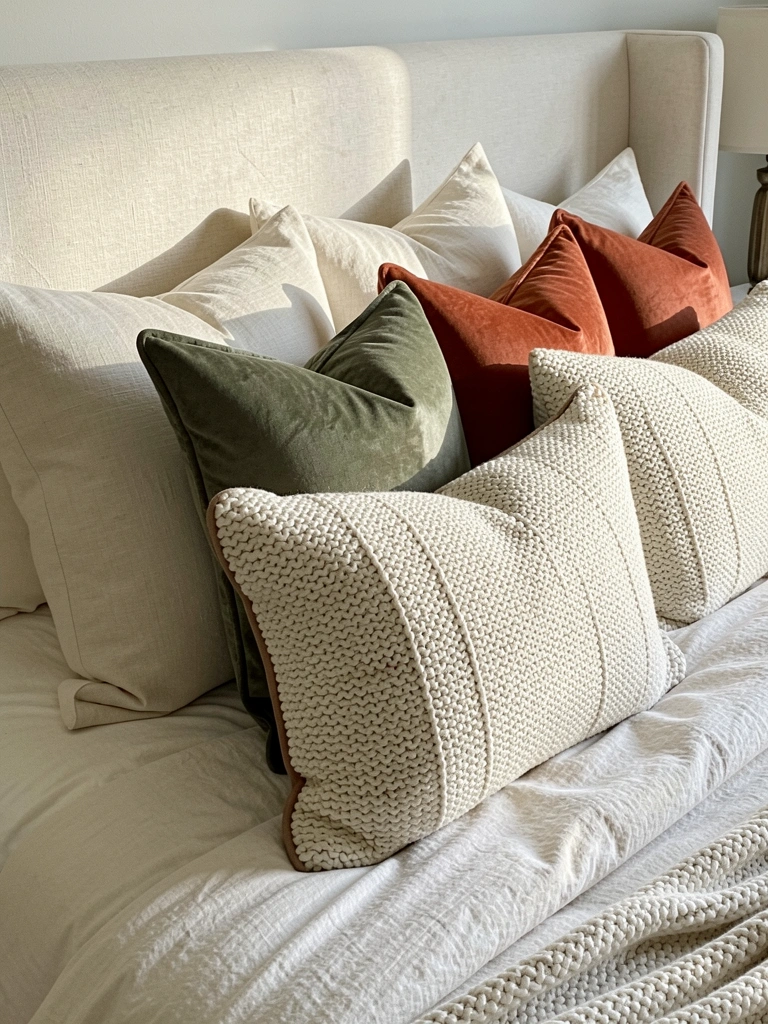
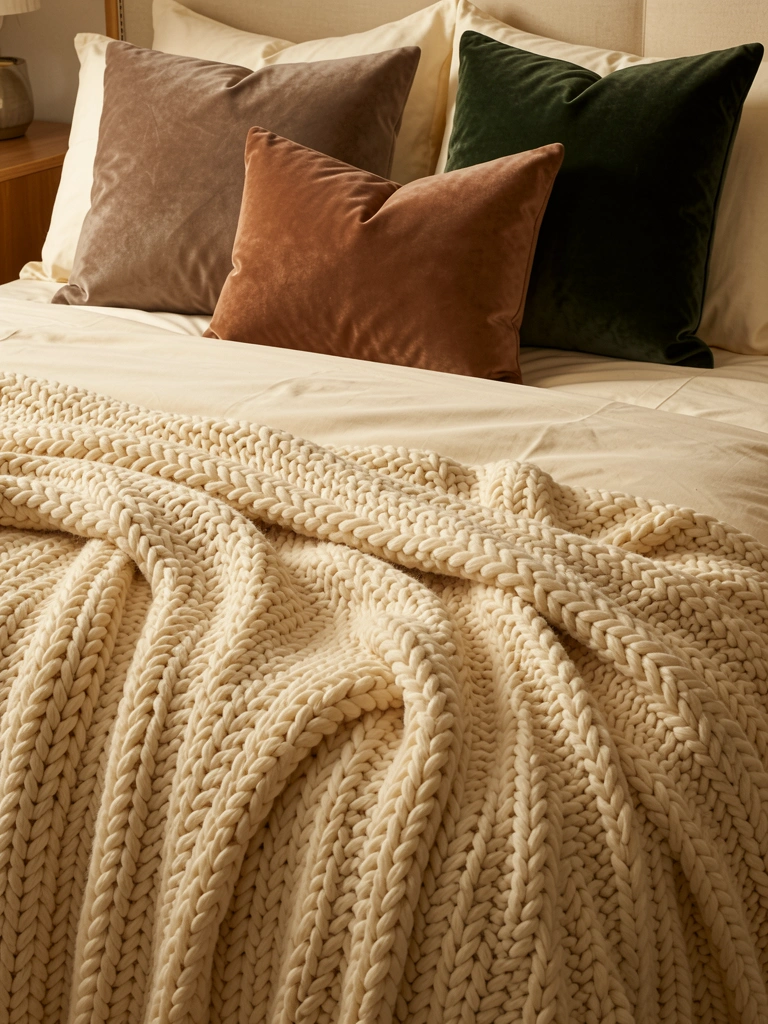
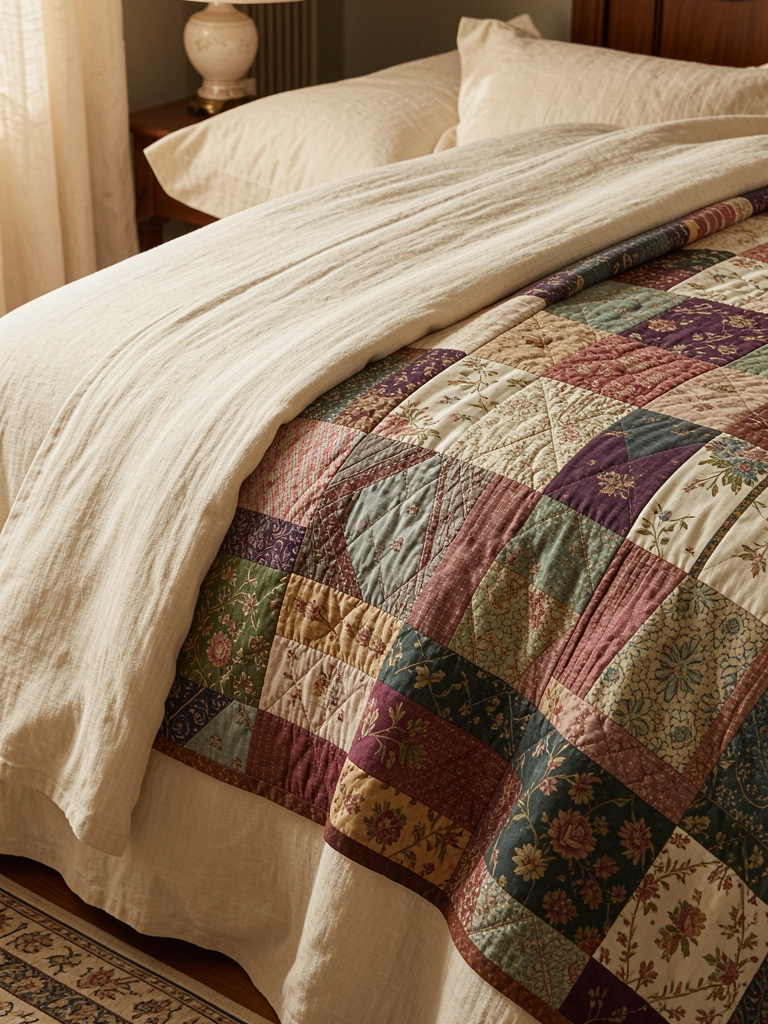
    4. Mix Patterns Like a Grandmillennial

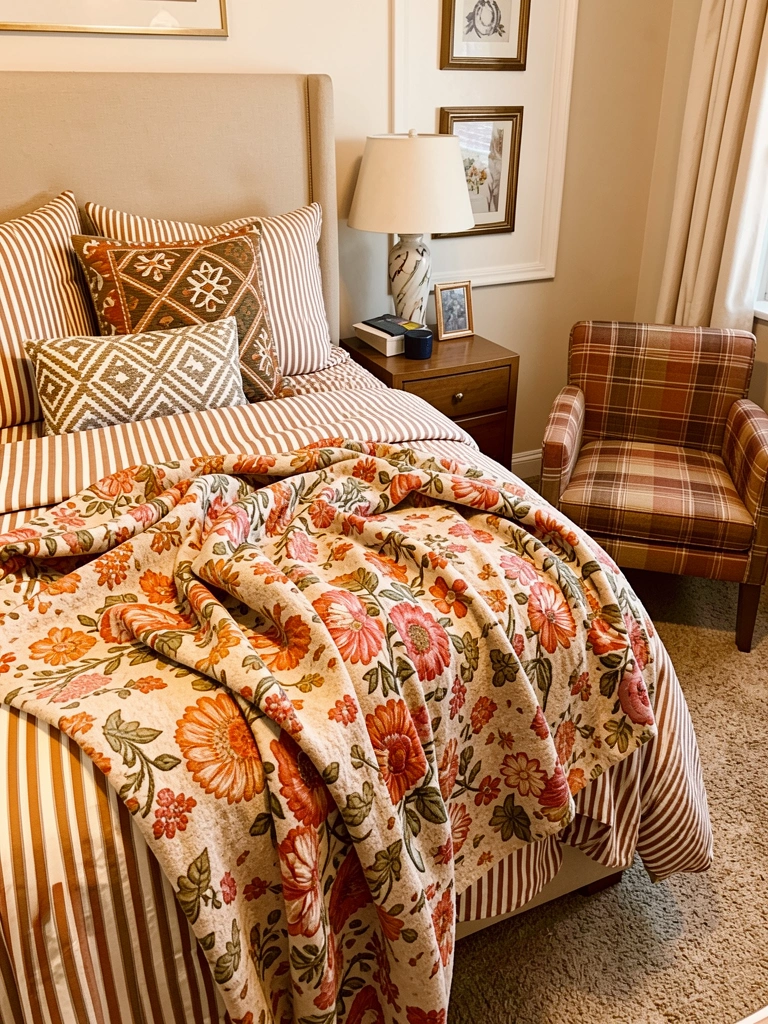
    Grandmillennial style layers contrasting patterns by sticking to a unified color story. It sounds chaotic but actually creates warmth and personality.

    Start with a base color palette (e.g., cream, terracotta, sage). Then mix: one large-scale pattern (striped duvet), one geometric (pillow), one floral (throw), and one texture (chunky knit). Thrift pillows ($3-$8 each), buy affordable throws from Target or Urban Outfitters ($20-$50), and layer a quality duvet ($60-$150). The key is variety in scale and pattern type, not a rainbow of colors.

    Your bedroom stops looking matchy-matchy and starts looking like a real person lives there. Guests notice the thoughtfulness, and you get a space that’s genuinely cozy and uniquely yours.


    5. Add a Bunk Room Setup (Even in Small Spaces)

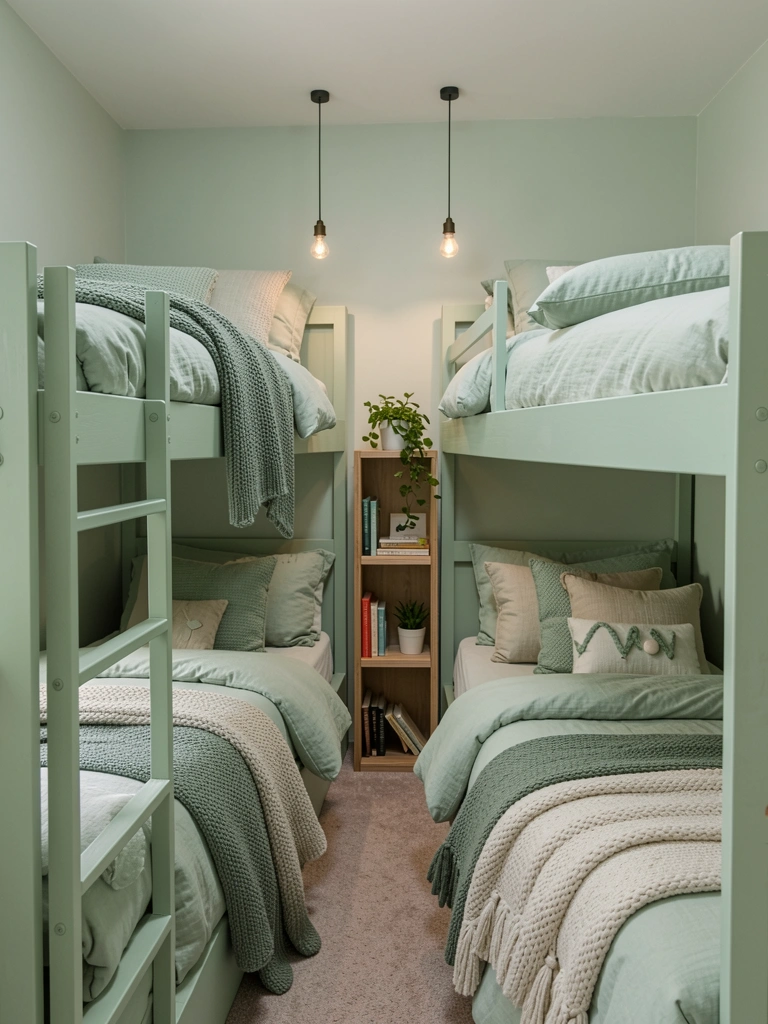
    Bunk rooms maximize sleeping spaces for families, guests, or creative multi-gen living. They’re trending because they’re practical and, when styled right, genuinely charming.

    Install loft-style bunks (vertical stacking for floor space) or side-by-side twins with a shared nightstand. Budget options from IKEA or Wayfair ($200-$600 per bed); higher-end custom builds ($1,500+). Personalize with individual reading lights ($15-$40 each), different pillow covers for each person ($10-$20), and small shelves for personal items. Takes a weekend to assemble and style.

    A well-designed bunk room becomes a destination—cozy, intentional, and surprisingly luxe-looking. Your guests feel genuinely welcomed, and the space gets used and loved.


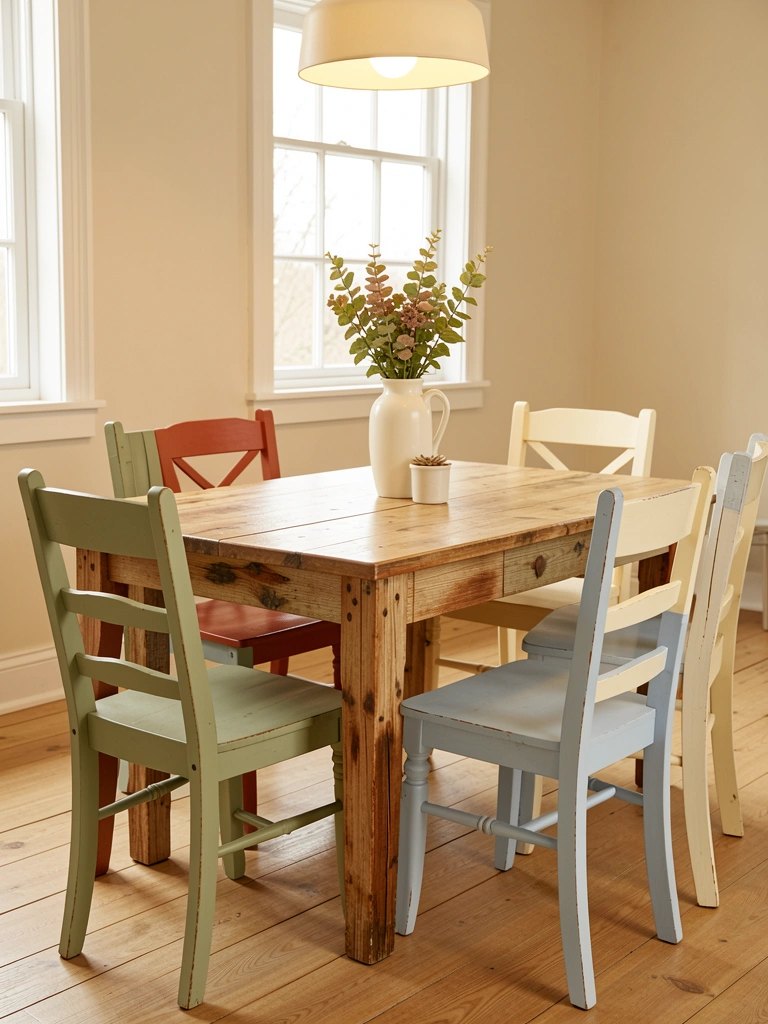
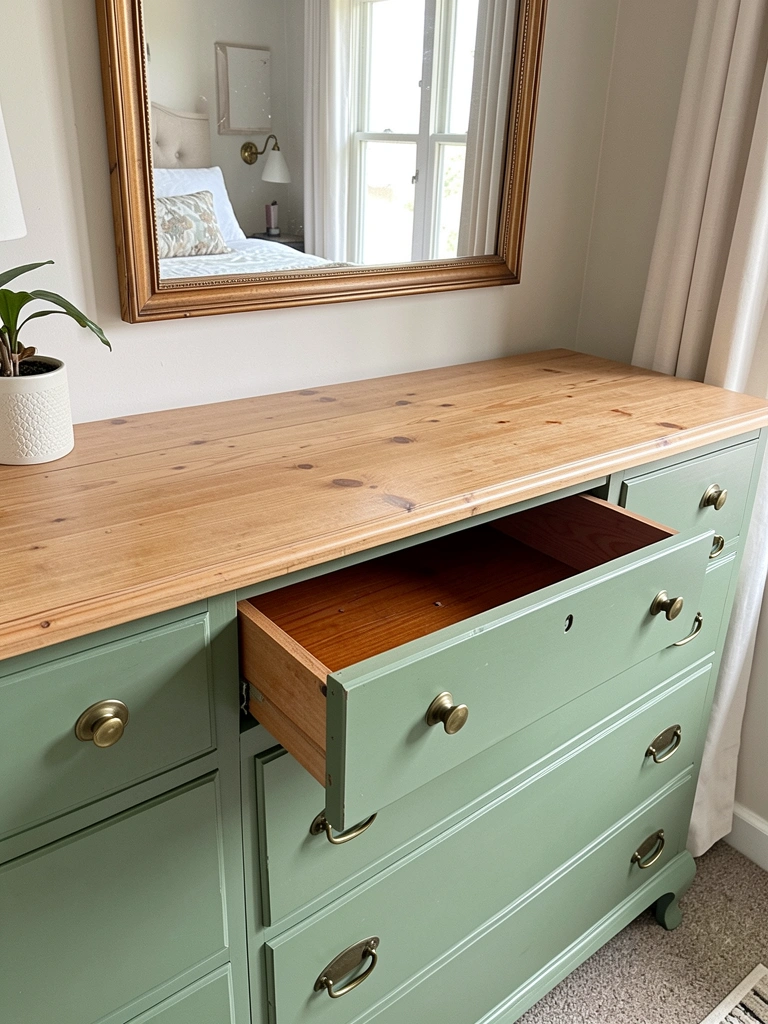
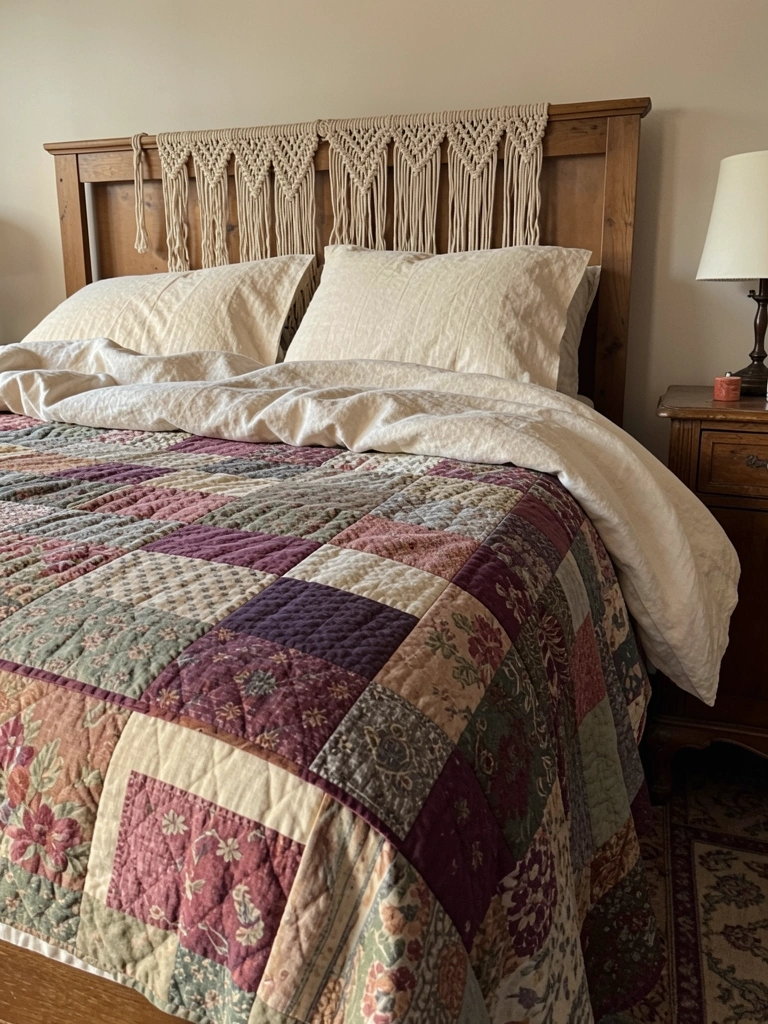
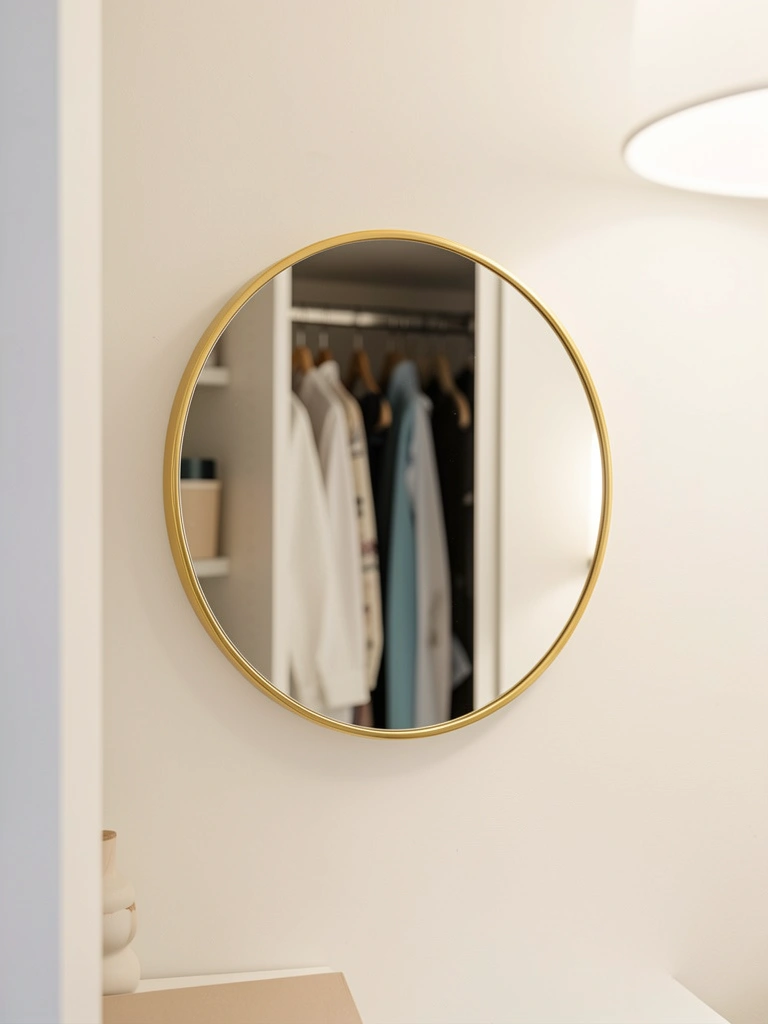
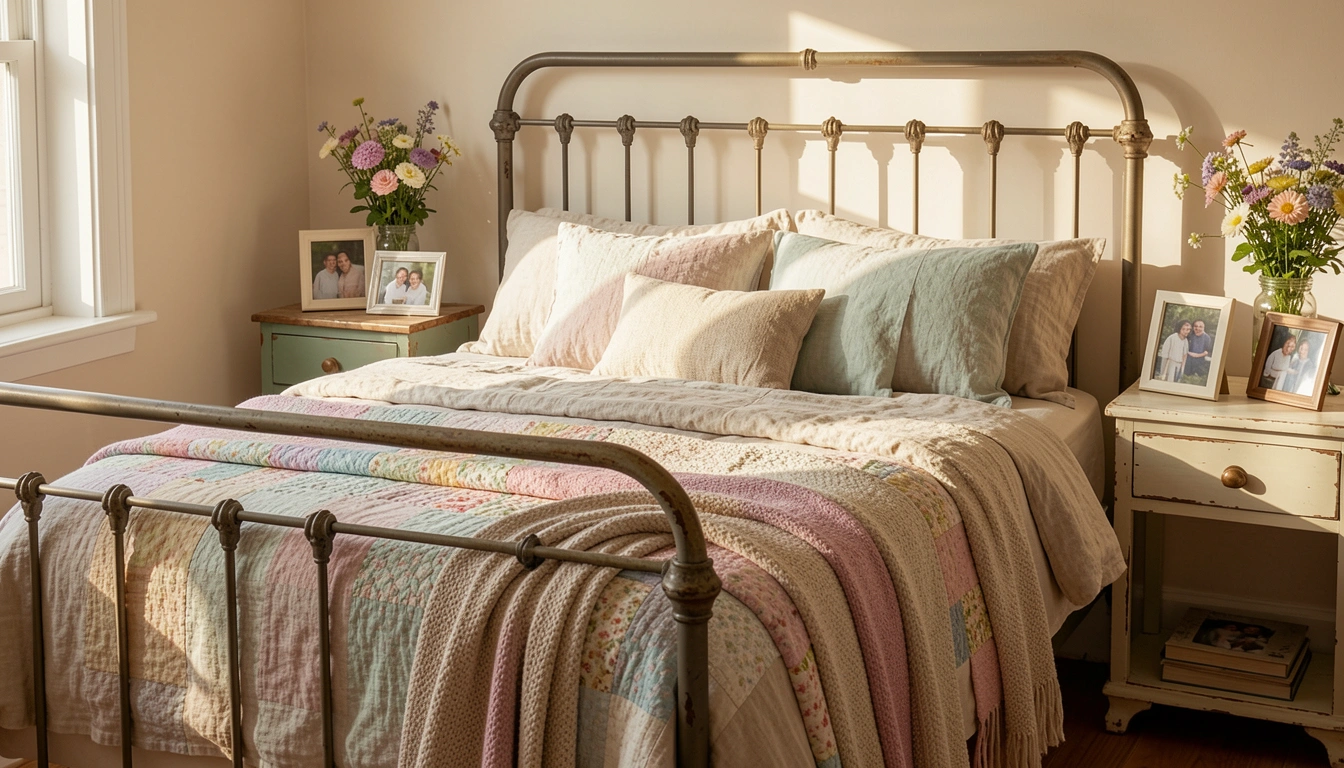
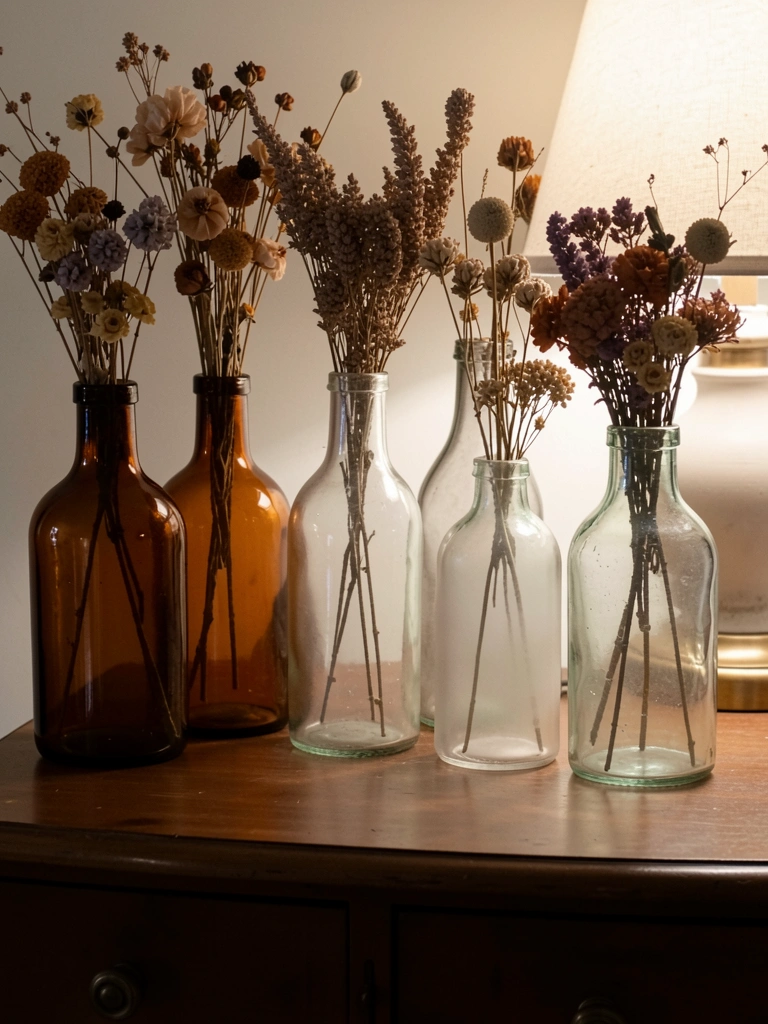
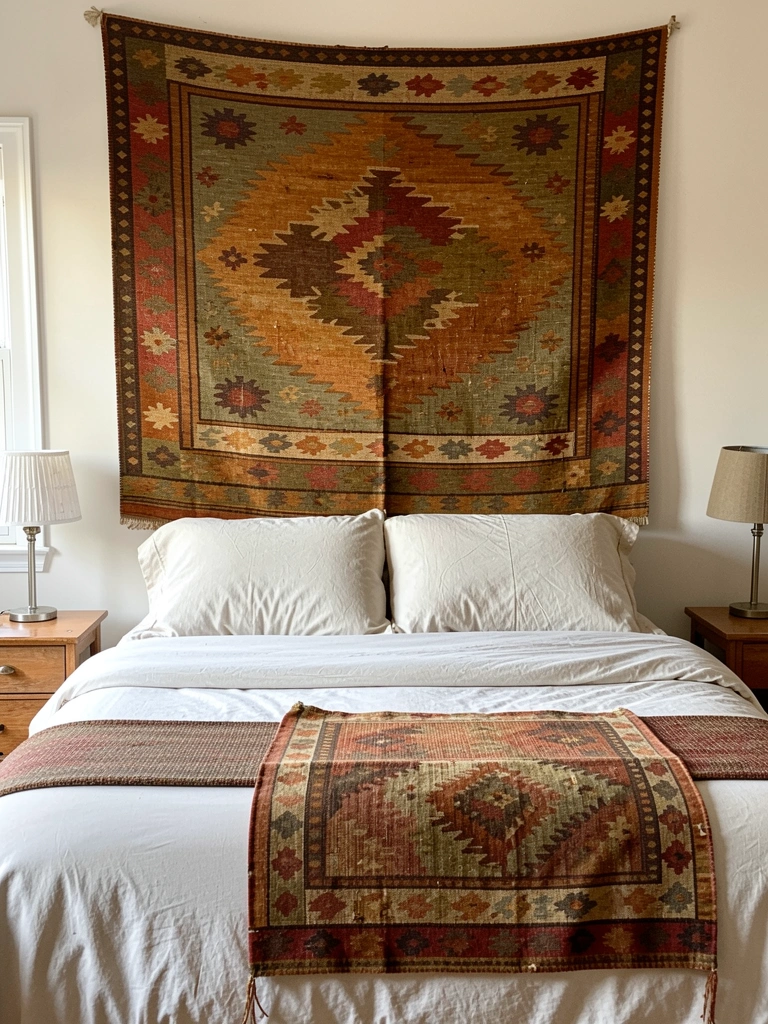
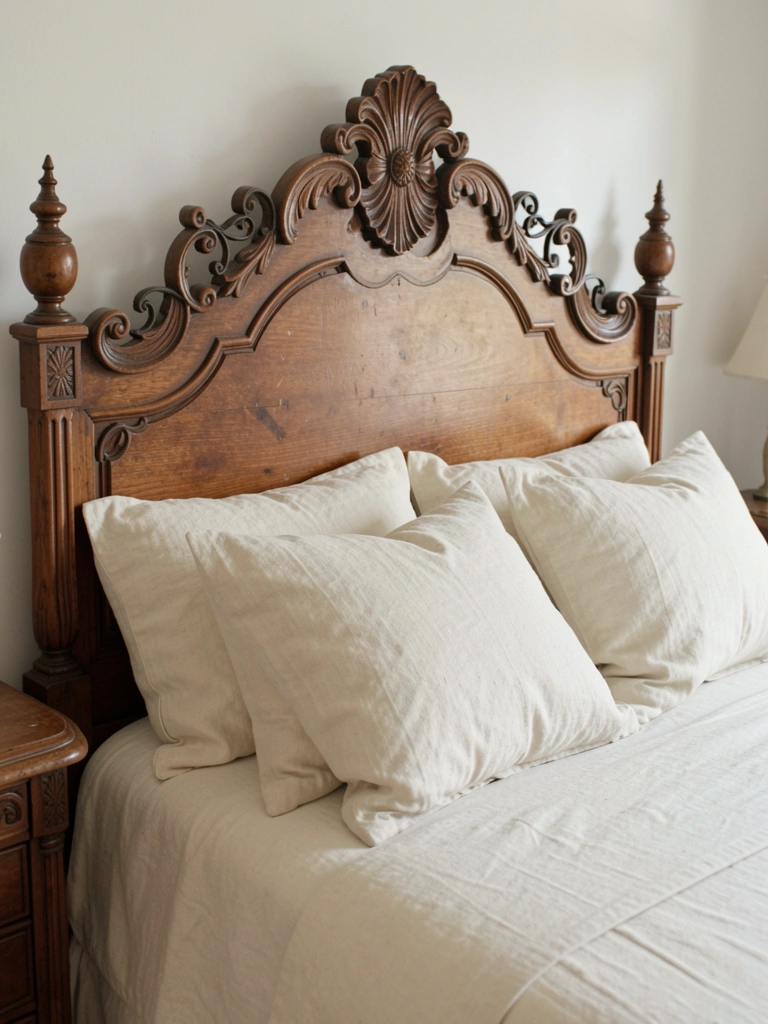
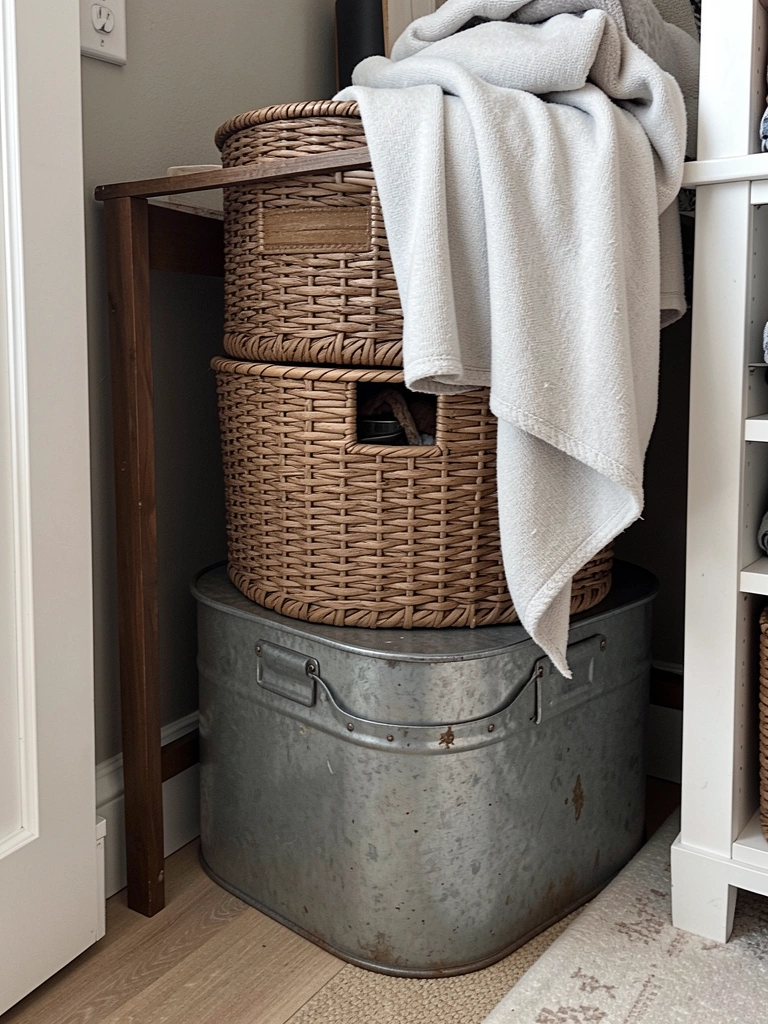
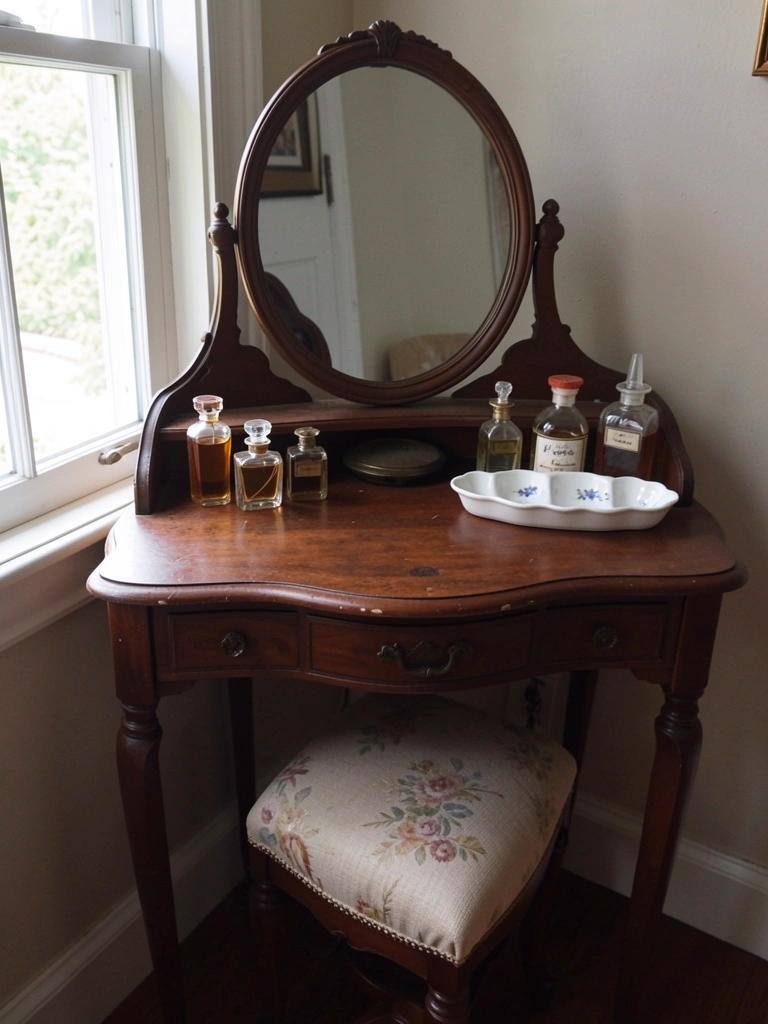
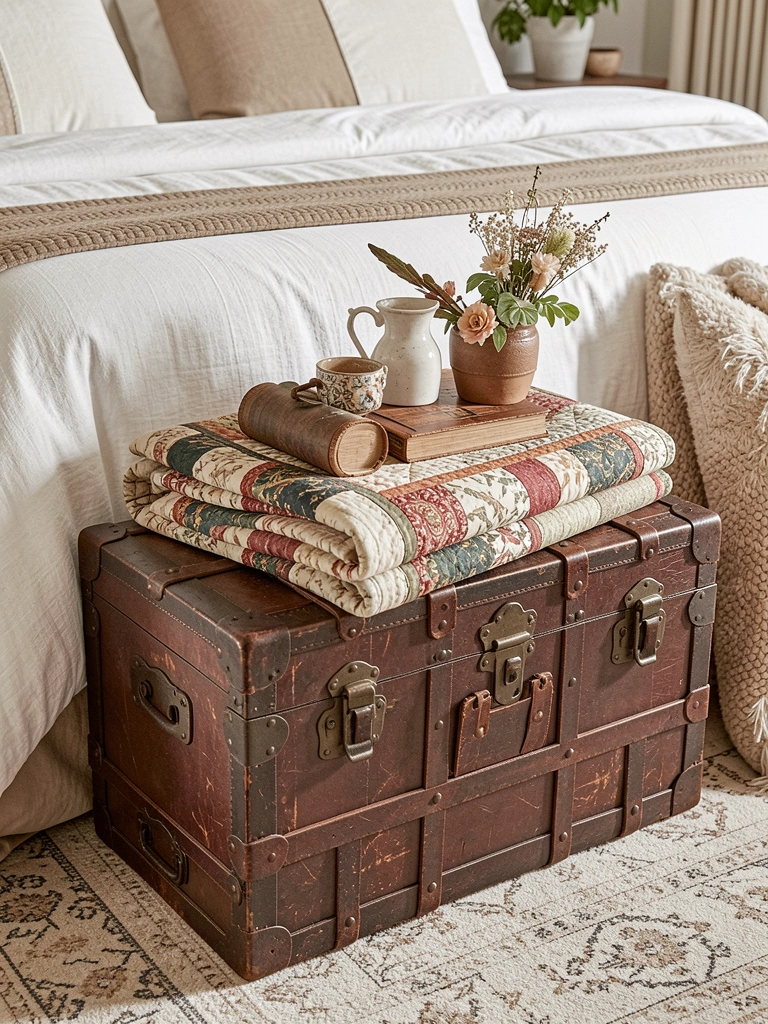
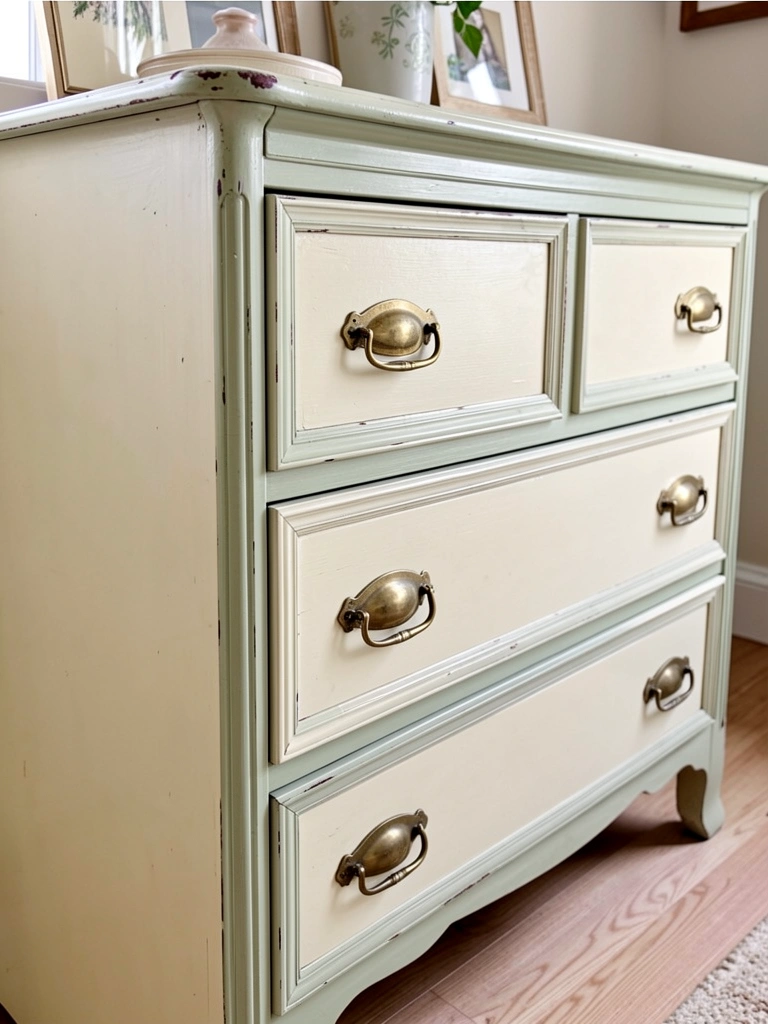
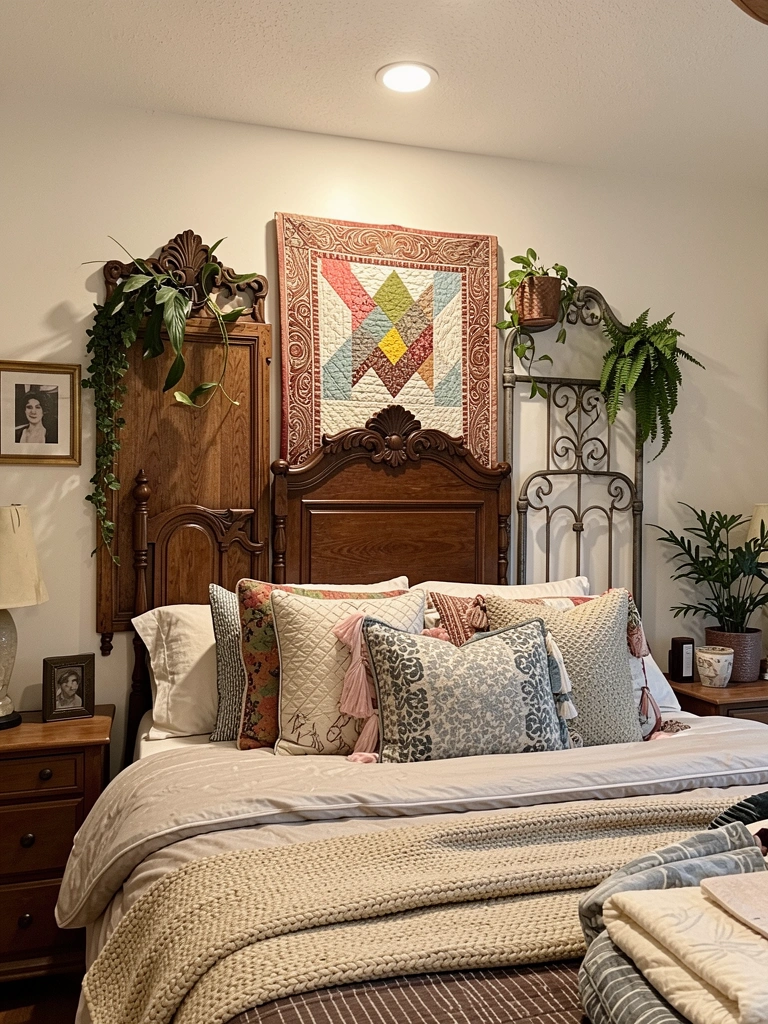
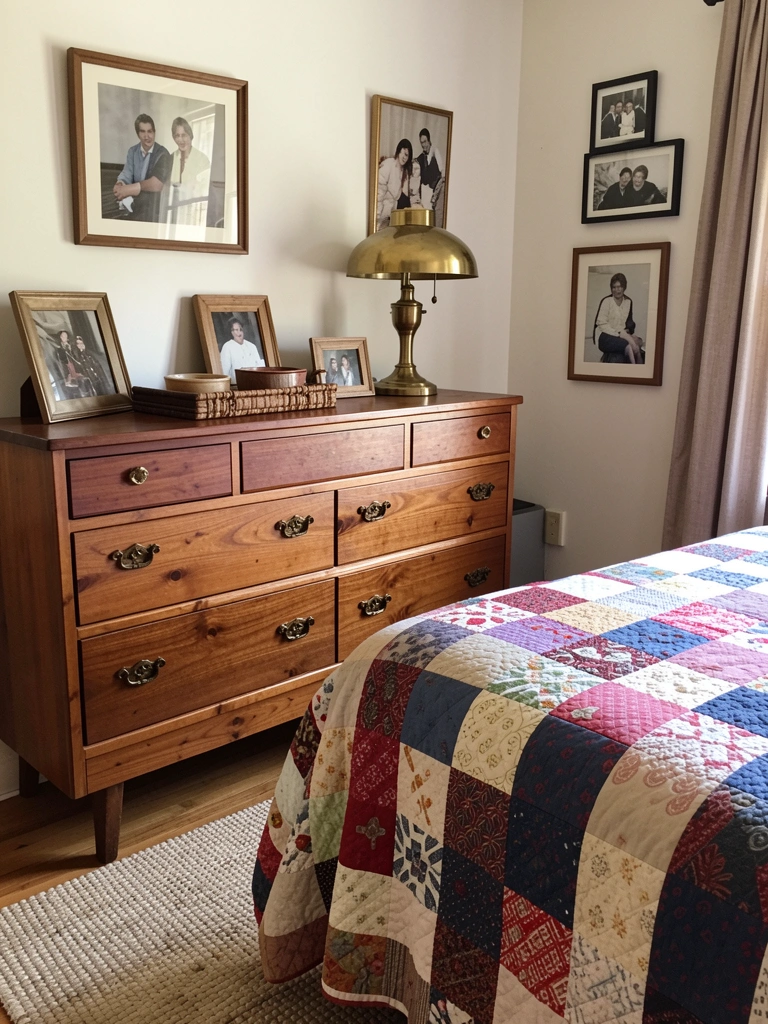
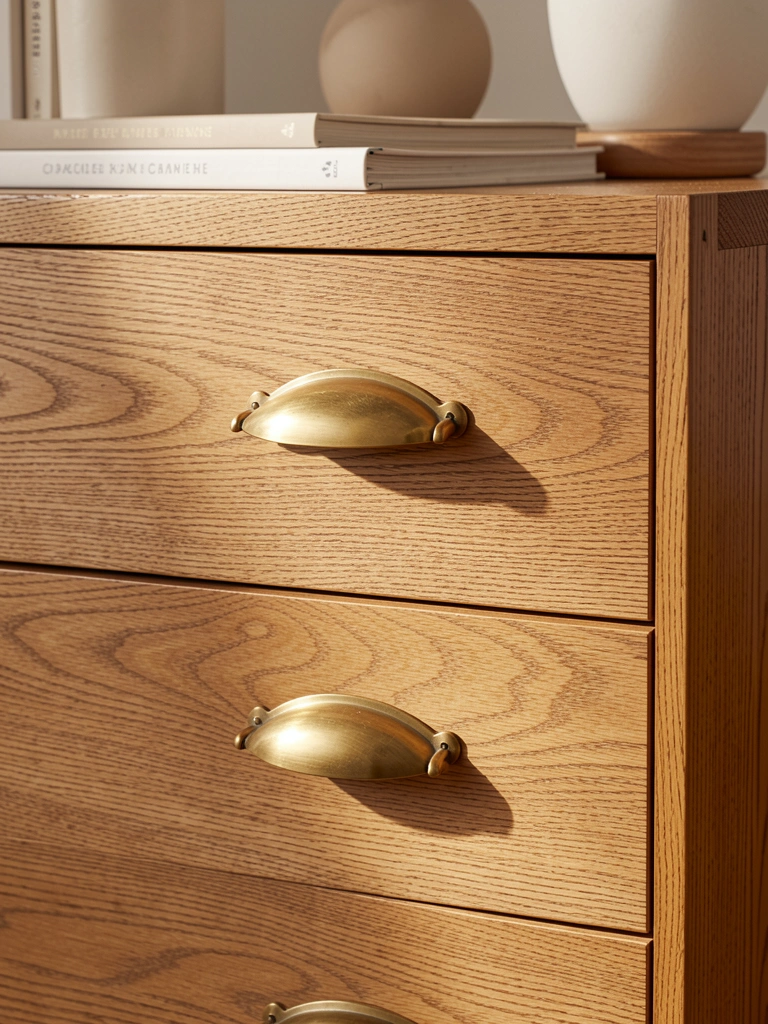
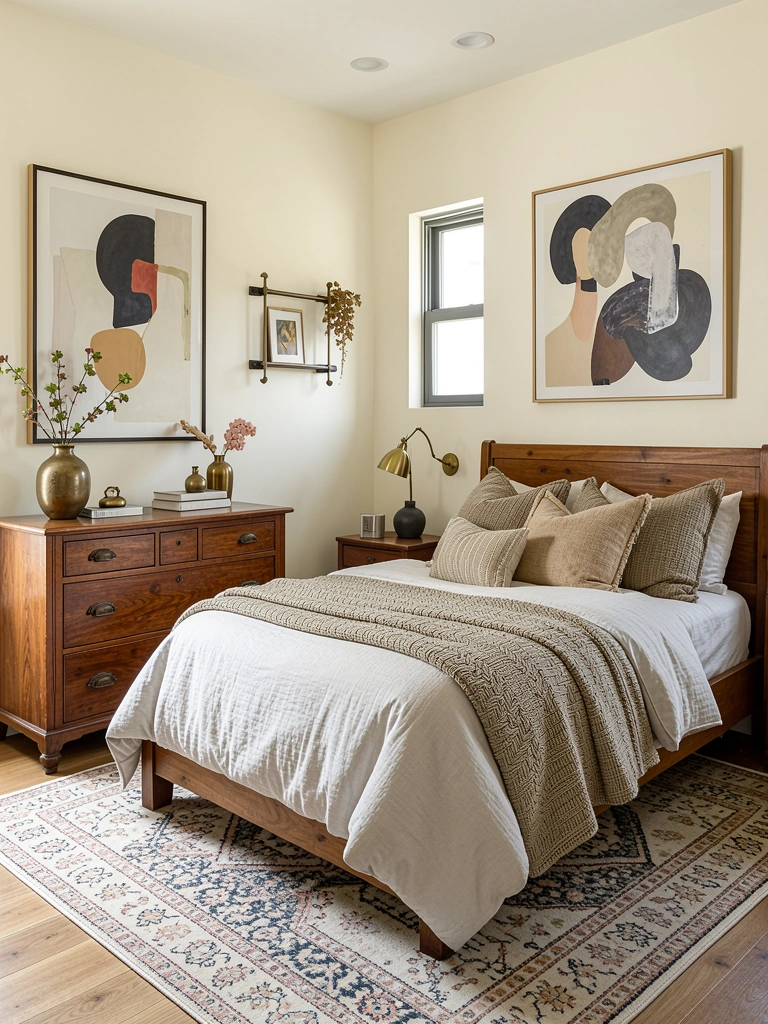
    6. Incorporate Handmade and Vintage Pieces

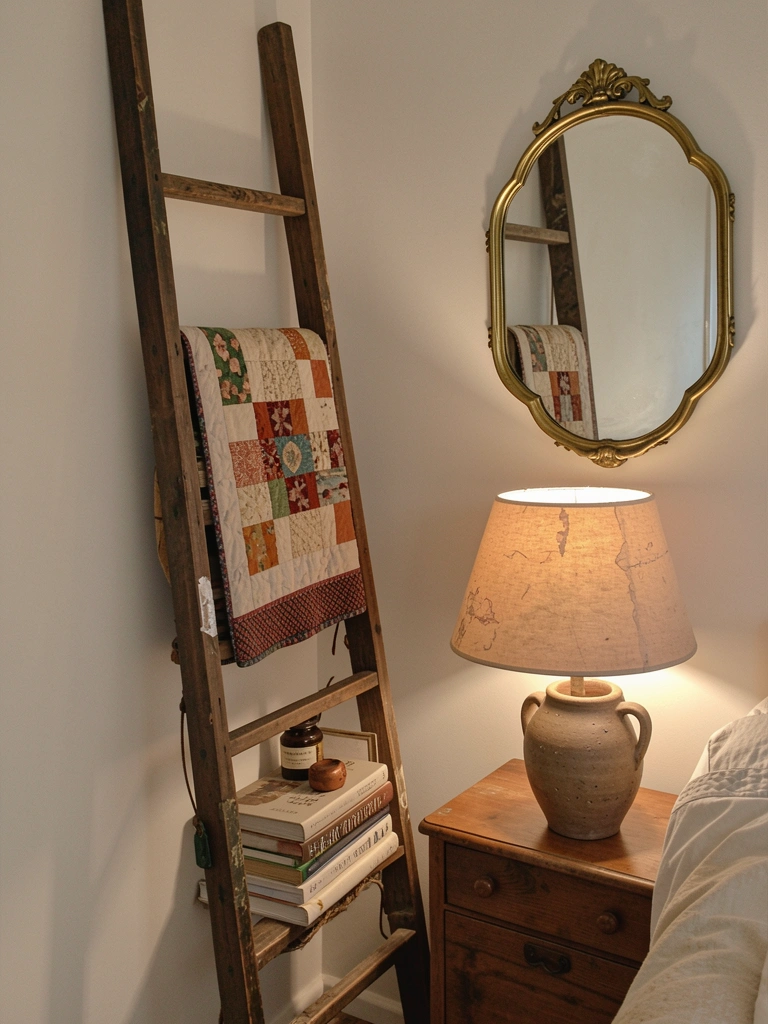
    Handmade and vintage pieces add authenticity that no mass-produced item can match. They create rooms that feel lived-in and genuinely personal.

    Hunt thrift stores, estate sales, and Facebook Marketplace for one-of-a-kind finds. Budget breakdown: vintage quilts ($10-$40), brass mirrors ($15-$50), wooden side tables ($20-$80), handmade ceramics ($20-$100). Spend time sourcing rather than money—patience is the investment. Mix them with new basics to avoid a “thrift store” feeling. Display a vintage quilt on a ladder or folded at the bed’s foot.

    Your bedroom becomes a conversation piece. Friends notice items with stories, and you surround yourself with beauty that has real character instead of cookie-cutter appeal.


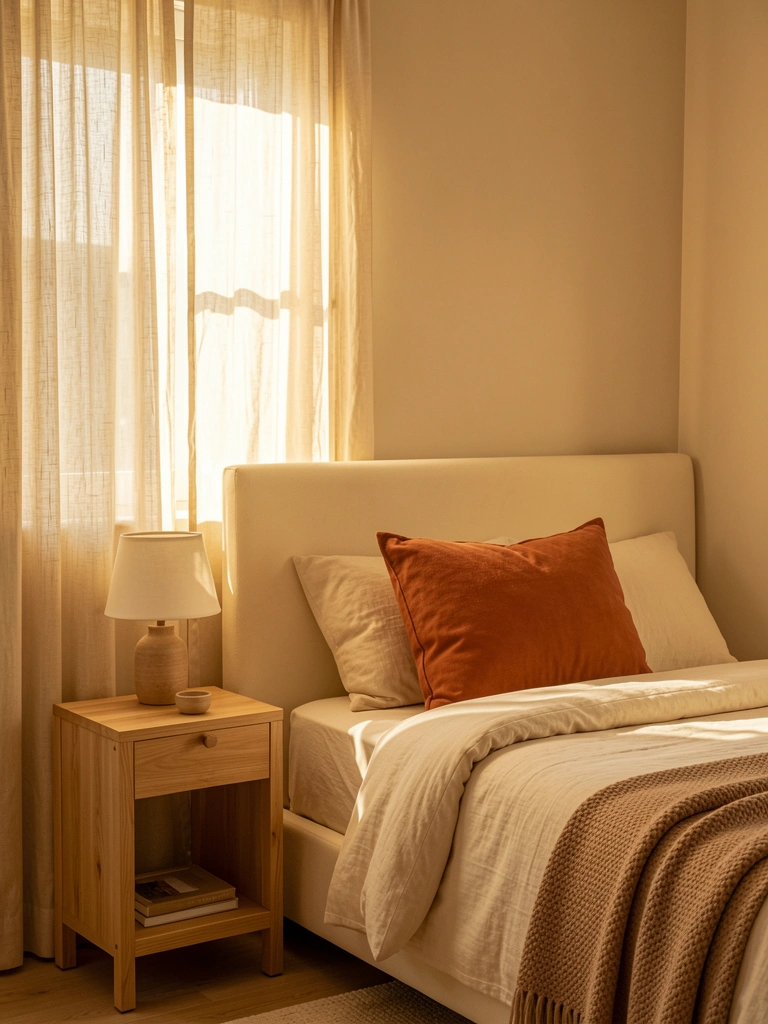
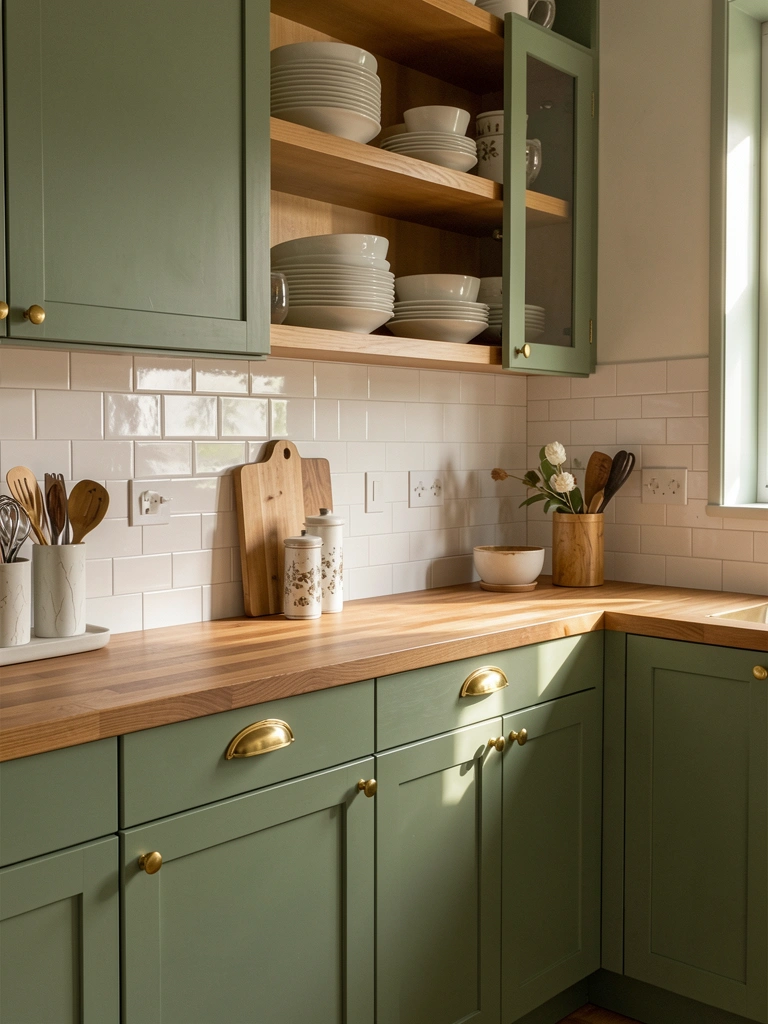
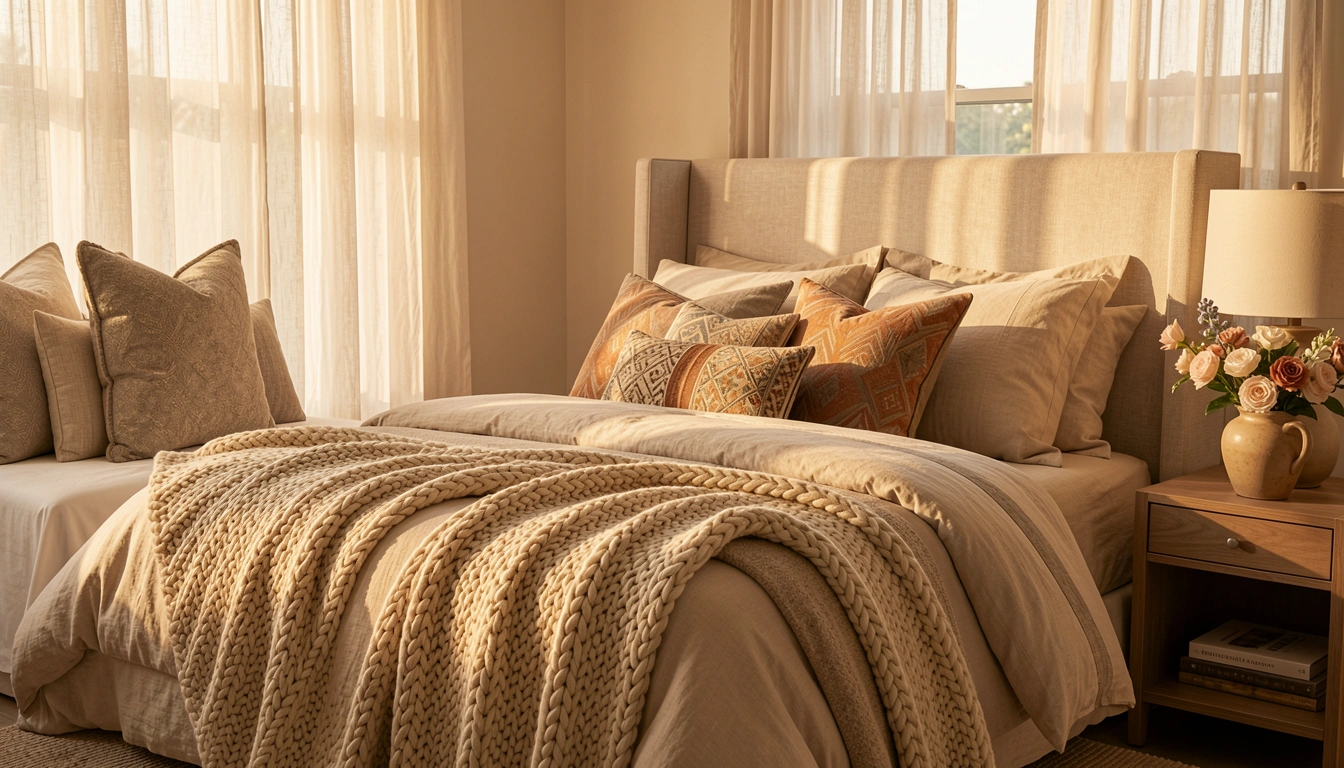
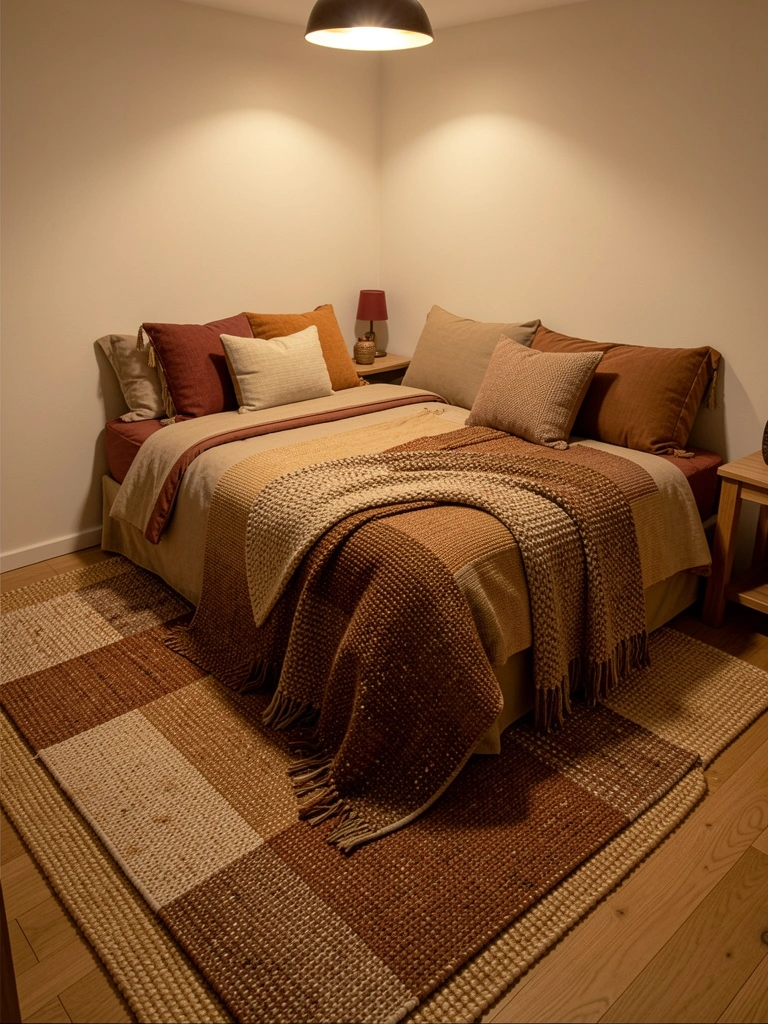
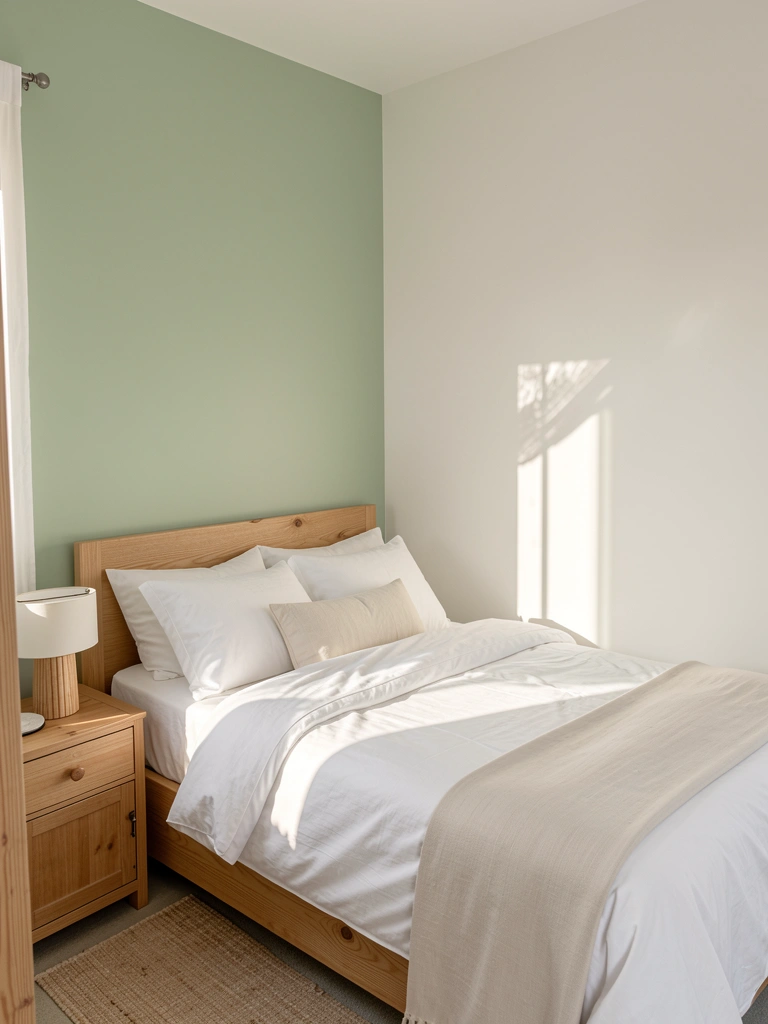
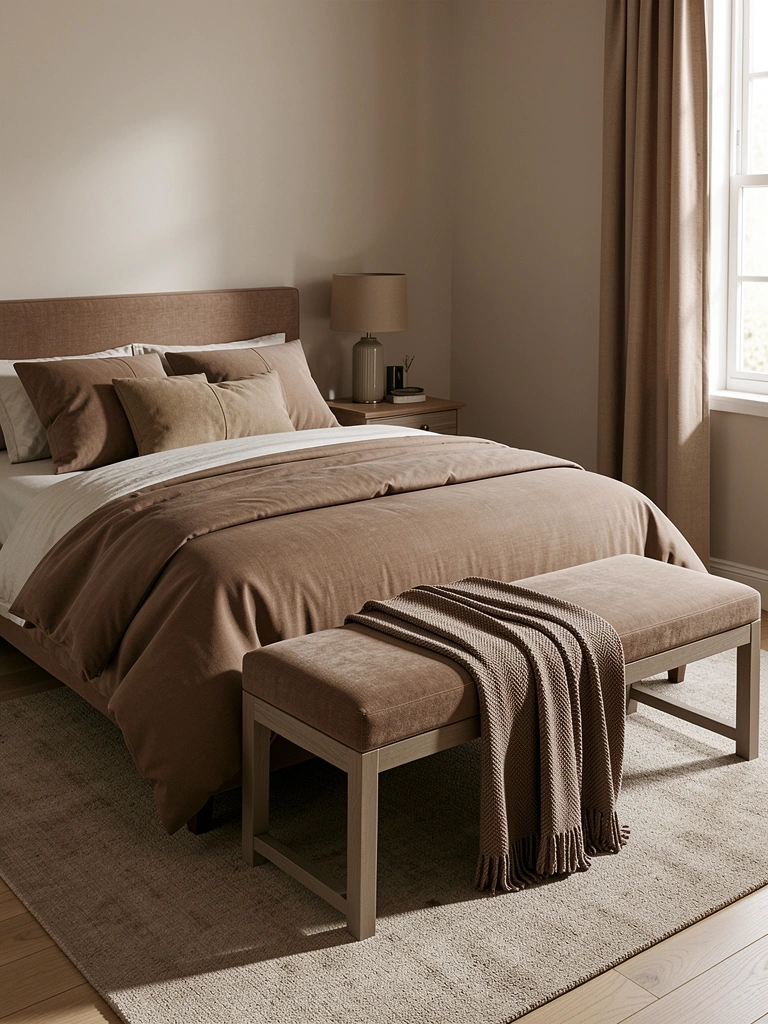
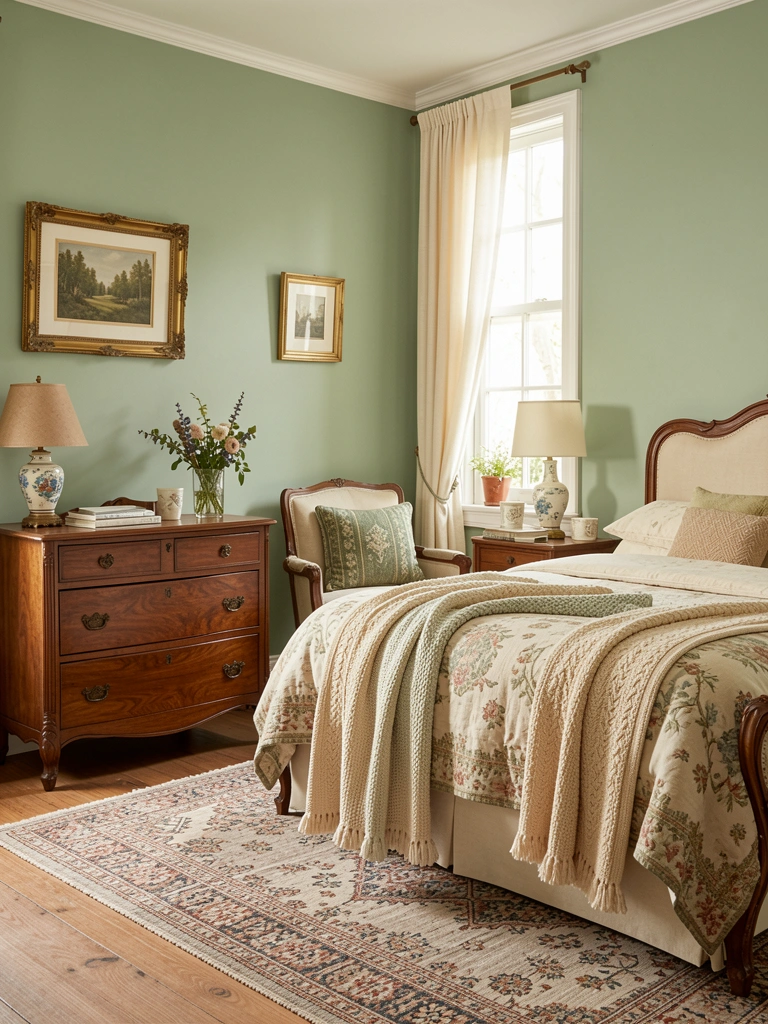
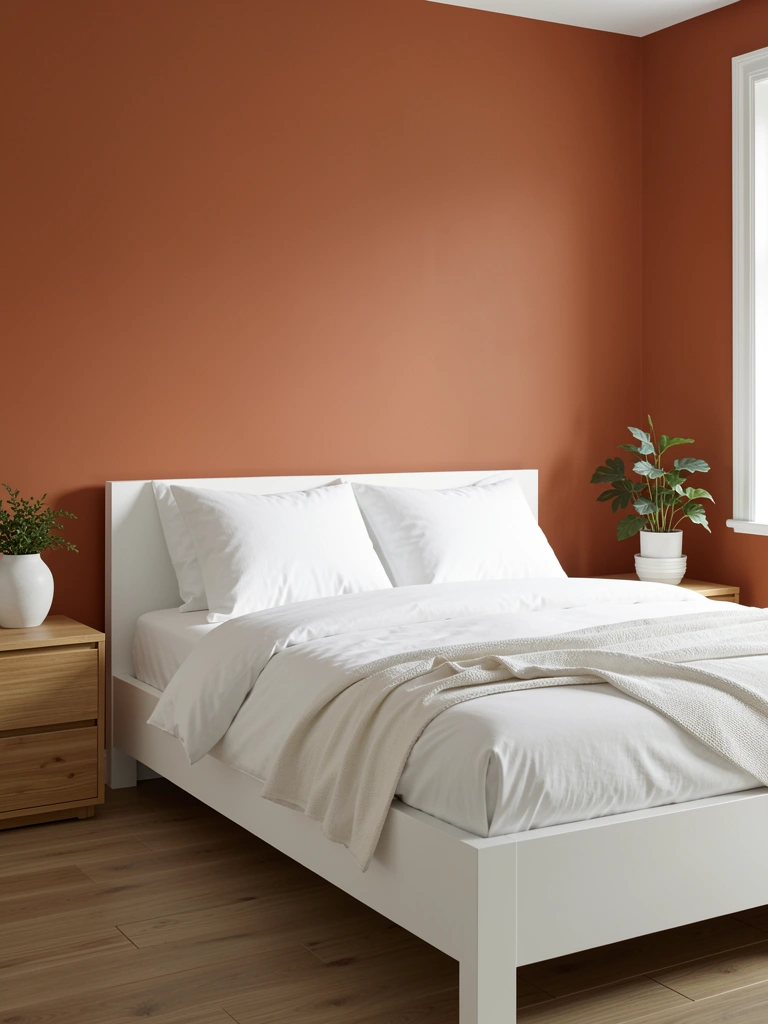
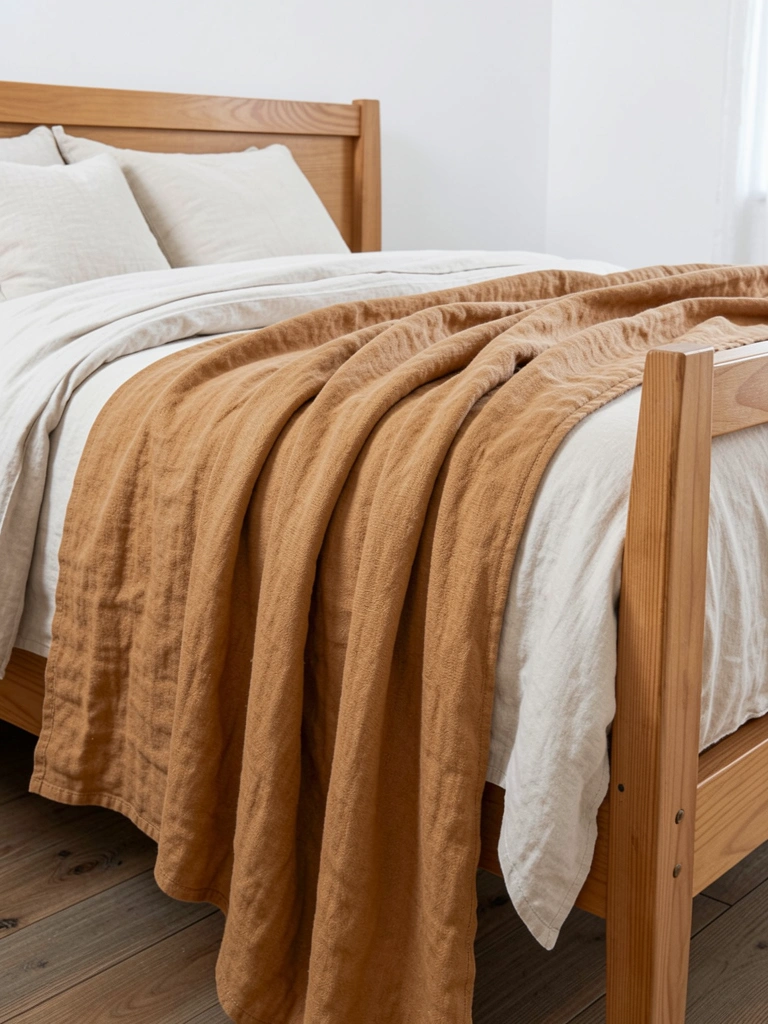
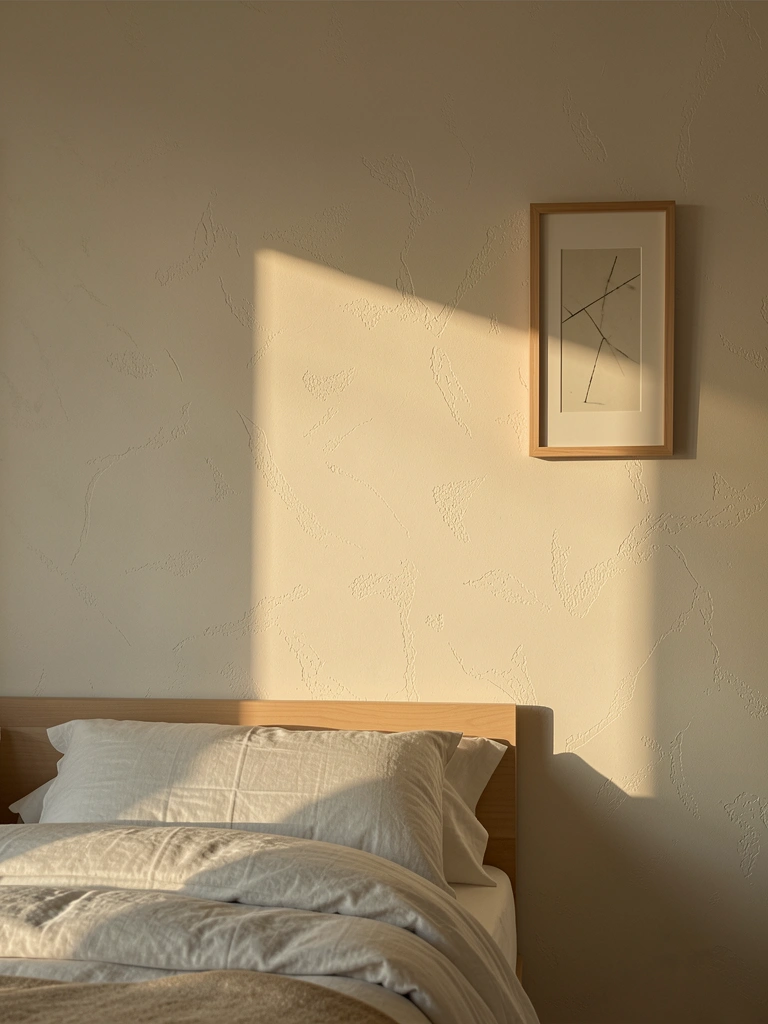
    7. Paint with Warm Earthy Tones

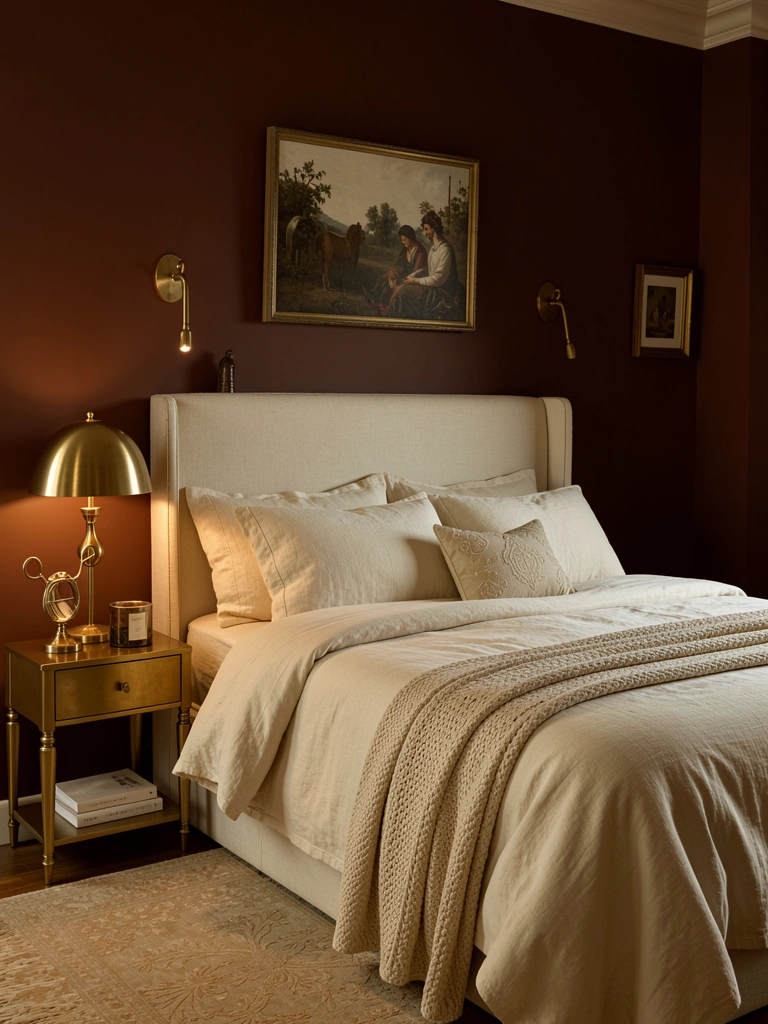
    Warm earthy tones like chocolate brown, sage green, and terracotta create cozy, sophisticated backdrops that feel modern and timeless simultaneously.

    Choose your base (chocolate, sage, or soft terracotta) and test with paint samples on multiple walls—lighting changes everything. Most bedroom paint jobs cost $20-$50 (DIY) or $300-$800 (professional). Pick quality paint from Sherwin-Williams, Benjamin Moore, or even Behr (budget-friendly). A bedroom takes a weekend to paint yourself; hire pros if you prefer perfection. Pair with warm lighting and natural wood accessories for the full effect.

    Your space instantly feels grounded and intentional. Warm tones make rooms feel smaller but more intimate—perfect for bedrooms. Everything you already own looks better against these sophisticated backdrops.


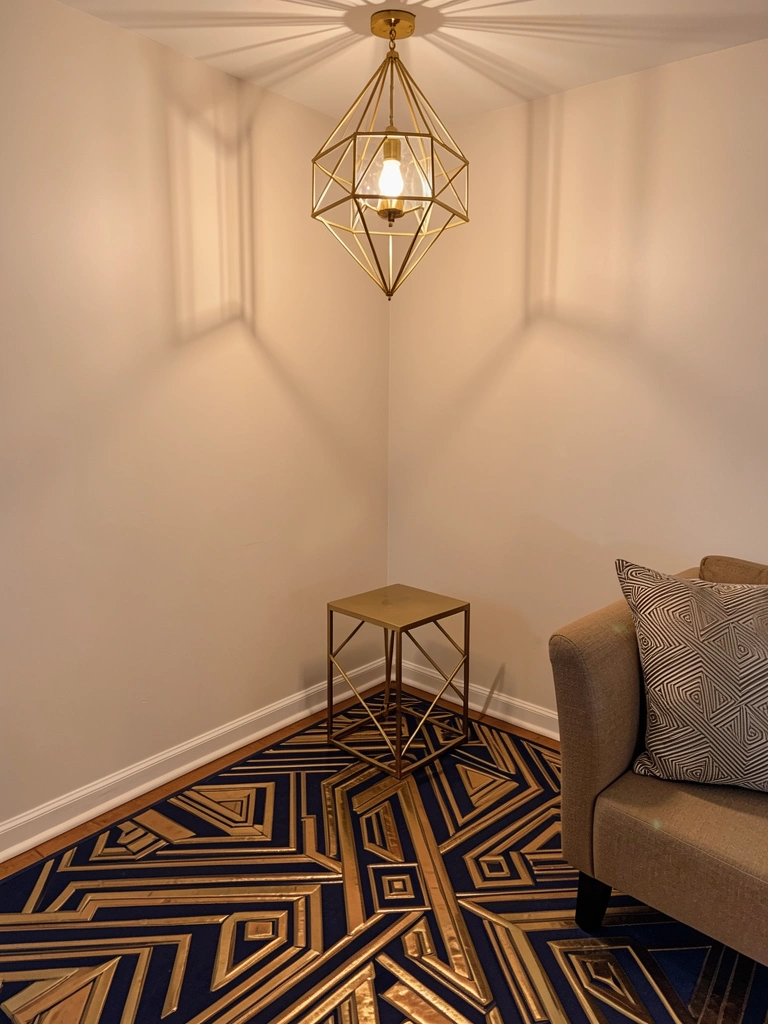
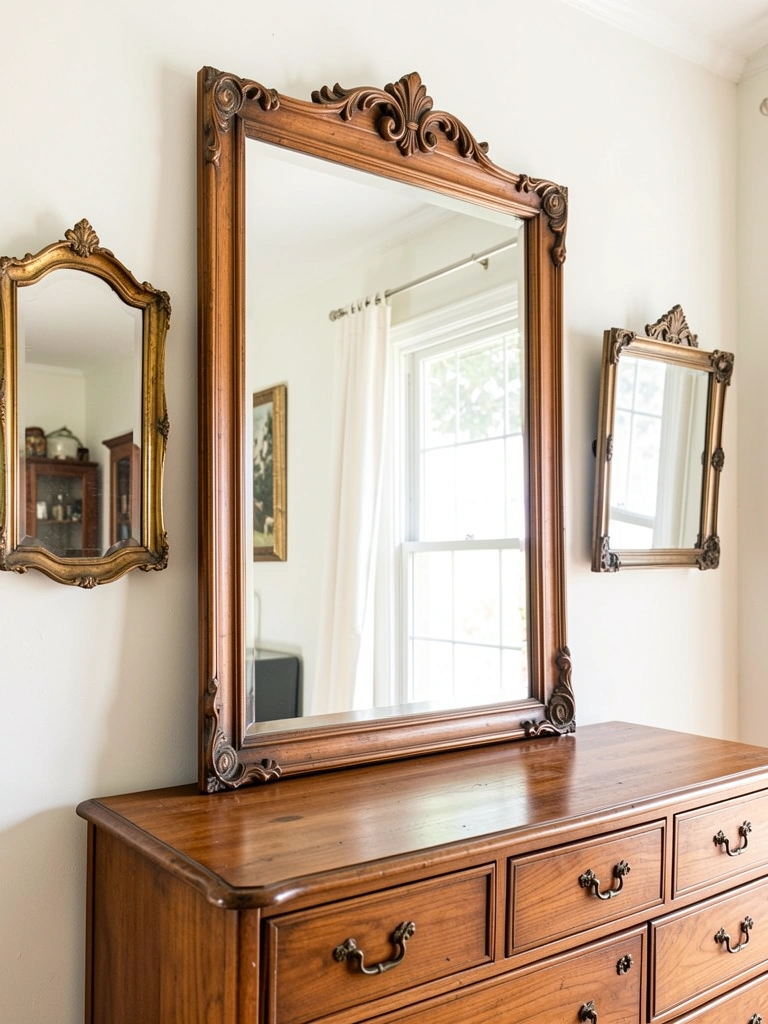
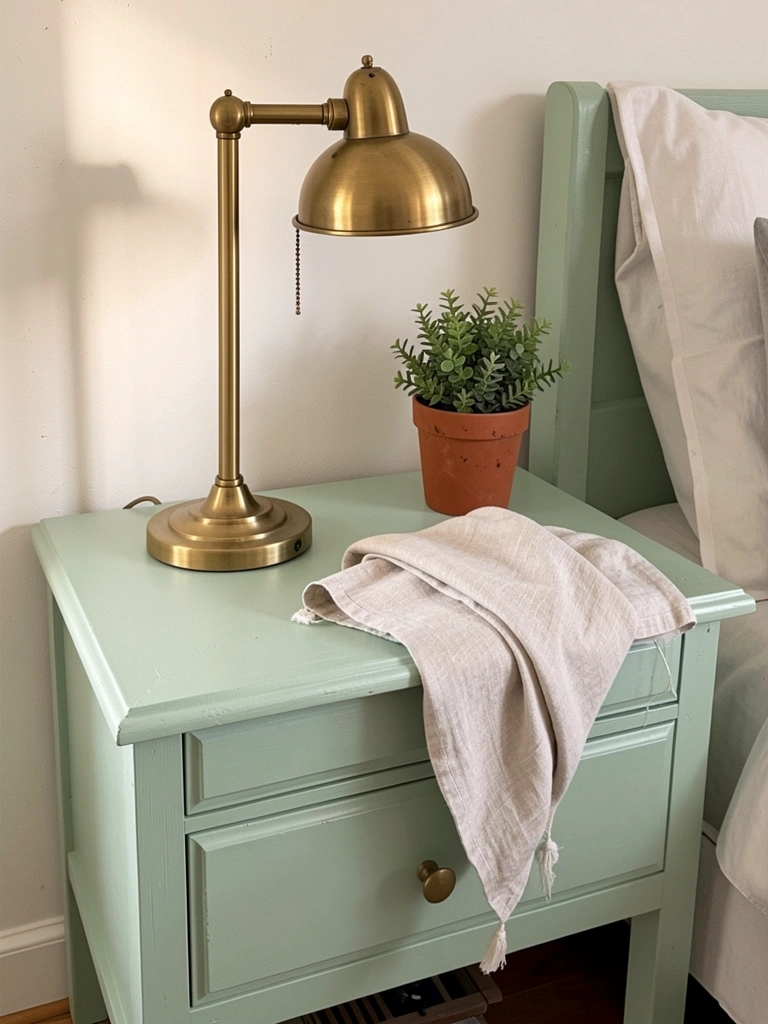
    8. Recreate the Art Deco Revival

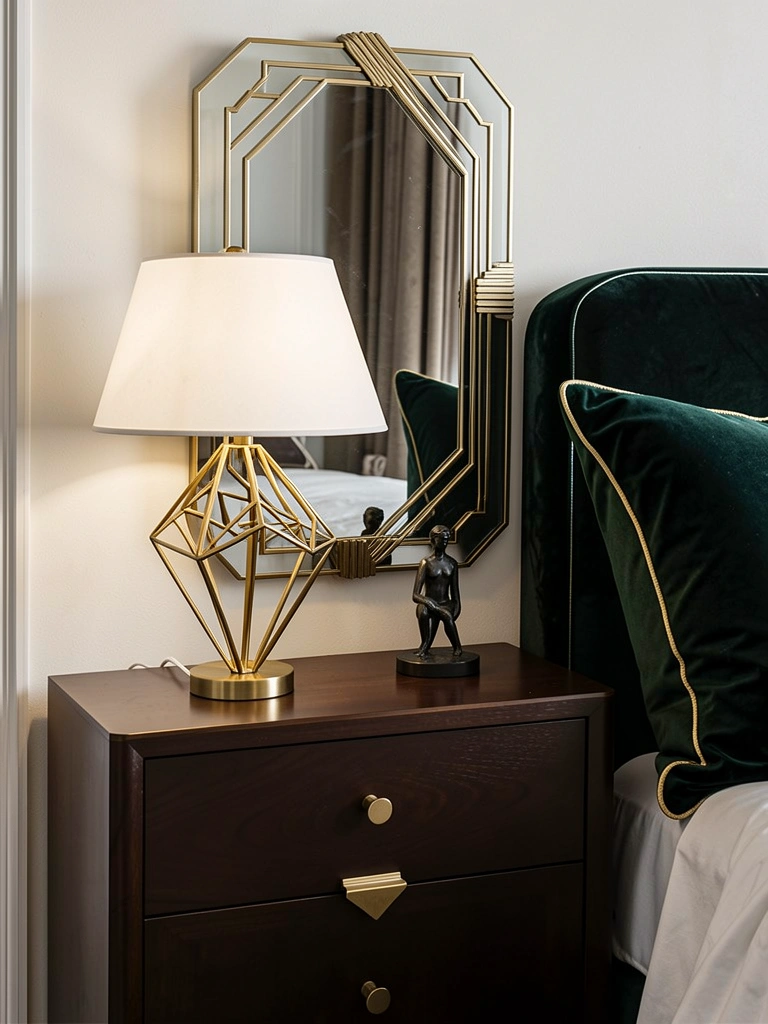
    Art Deco’s geometric patterns and glamorous materials are trending hard. This ’20s/’30s revival feels modern because it’s paired with contemporary comfort and minimal clutter.

    Invest in one statement piece: a geometric brass lamp ($40-$150), a vintage mirror with geometric framing ($50-$200), or art deco nightstands ($200-$600). Layer with affordable accents like geometric throw pillows from Target ($15-$35), or hunt thrift stores for original pieces ($20-$80). Mix art deco sparkle with soft textures (velvet, marble) and warm lighting for balance.

    Your bedroom becomes hotel-adjacent luxe without feeling cold or sterile. The geometric elements add visual interest, and pairing them with soft textures keeps everything approachable and genuinely comfortable.


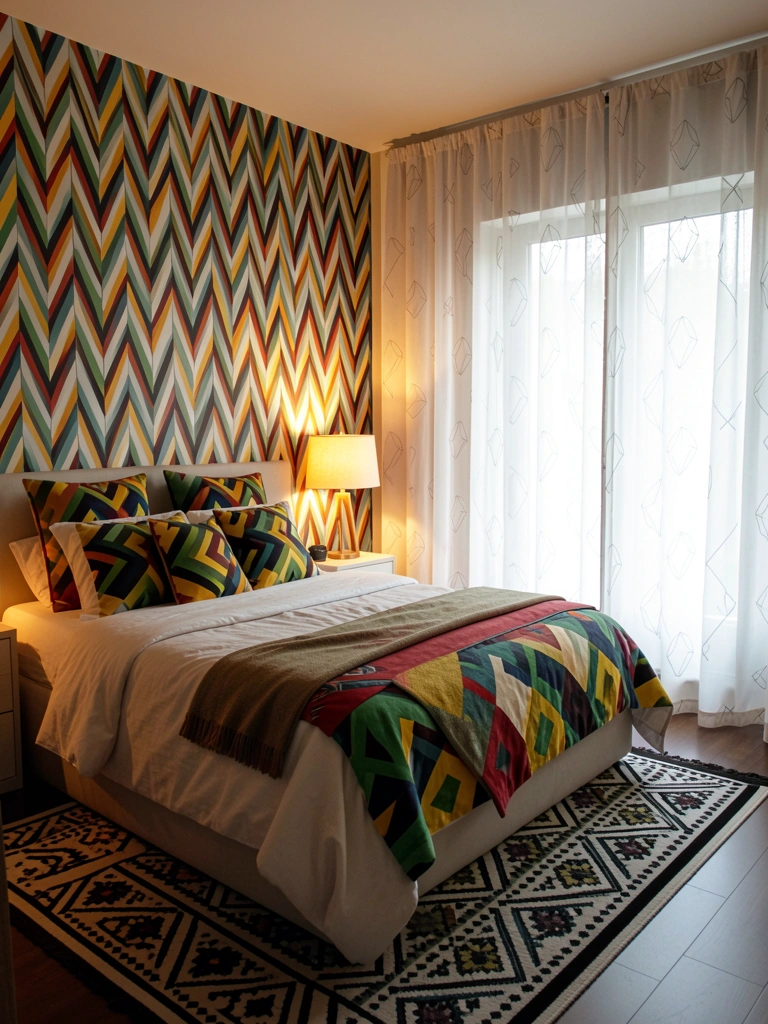
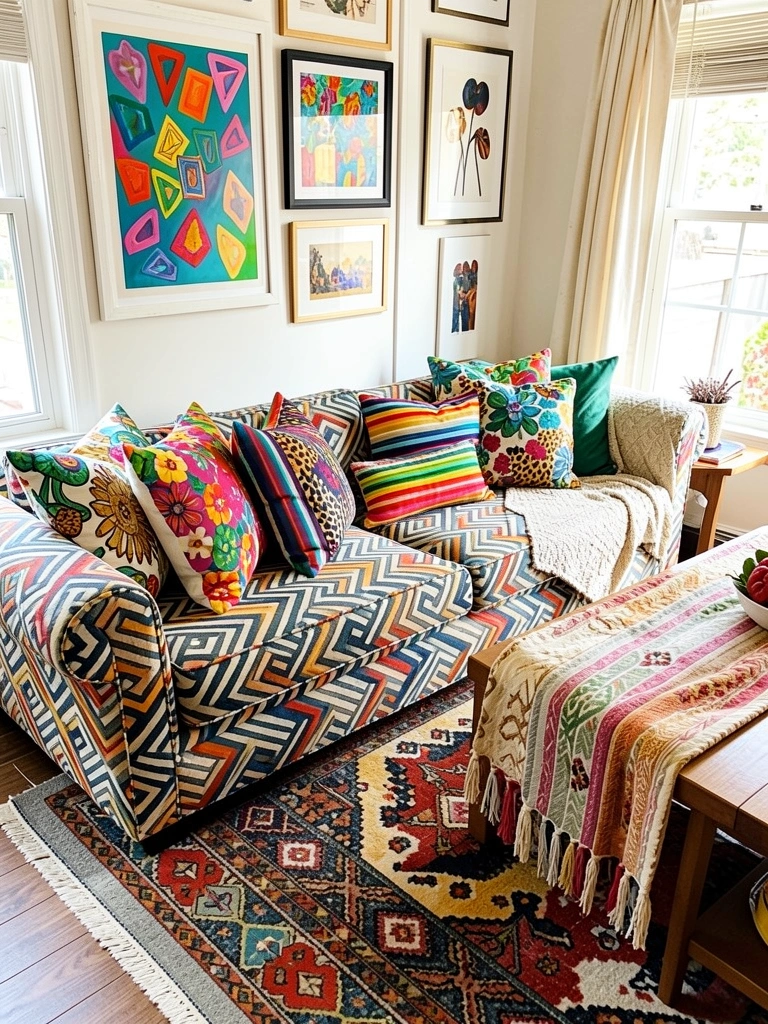
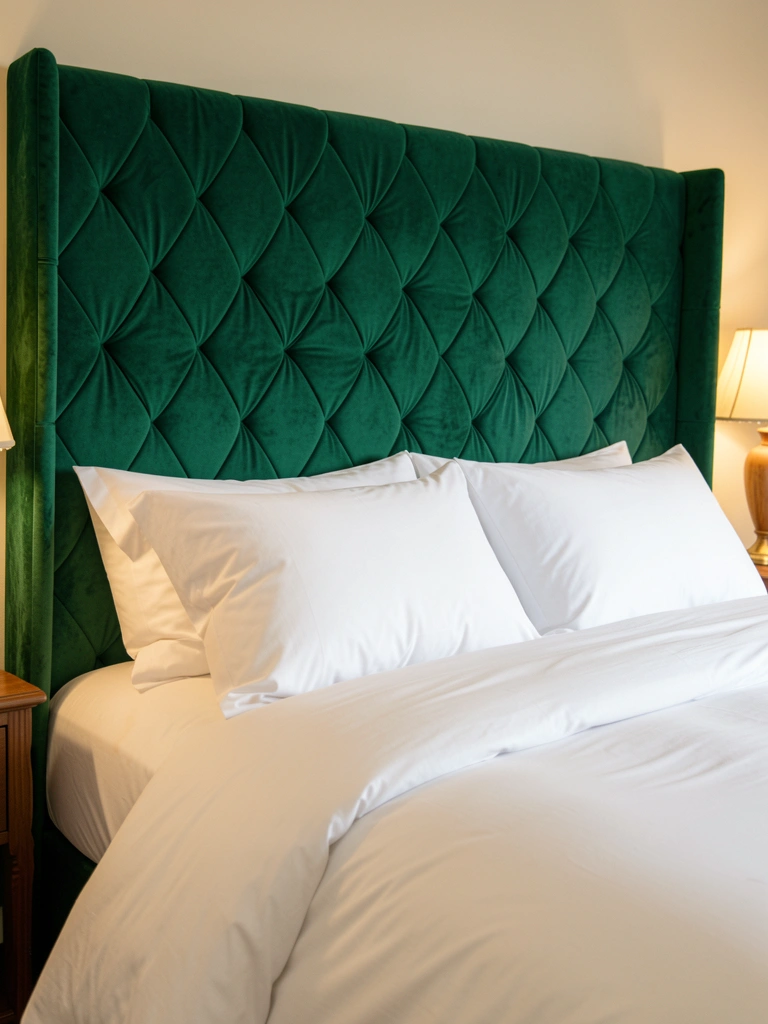
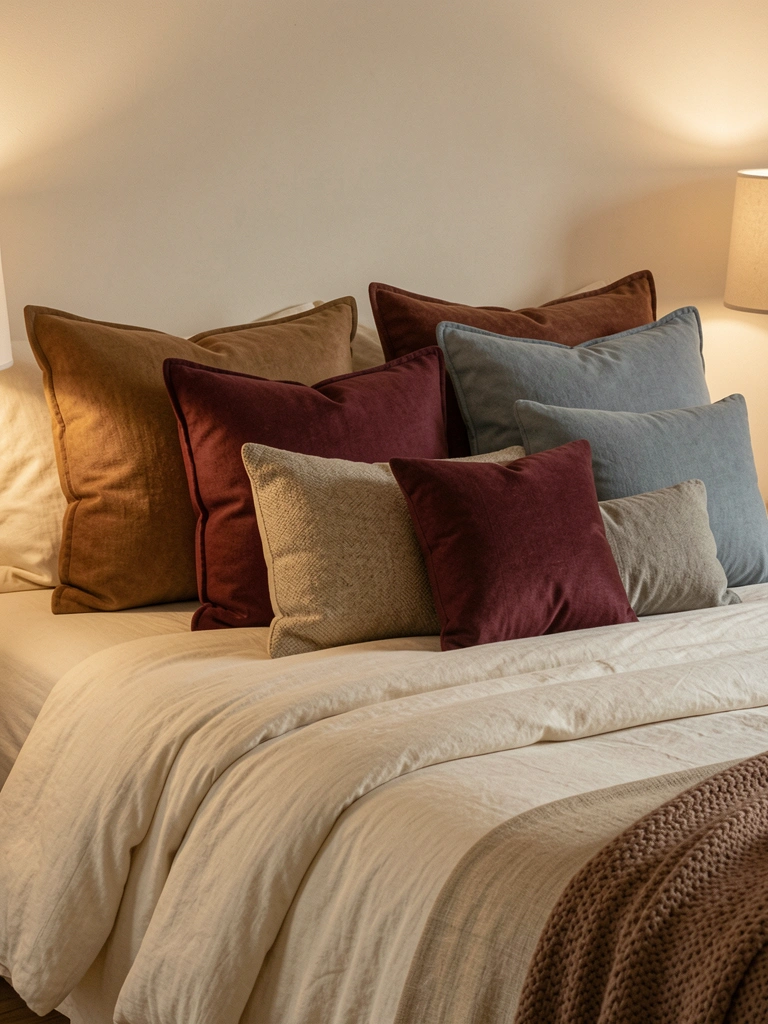
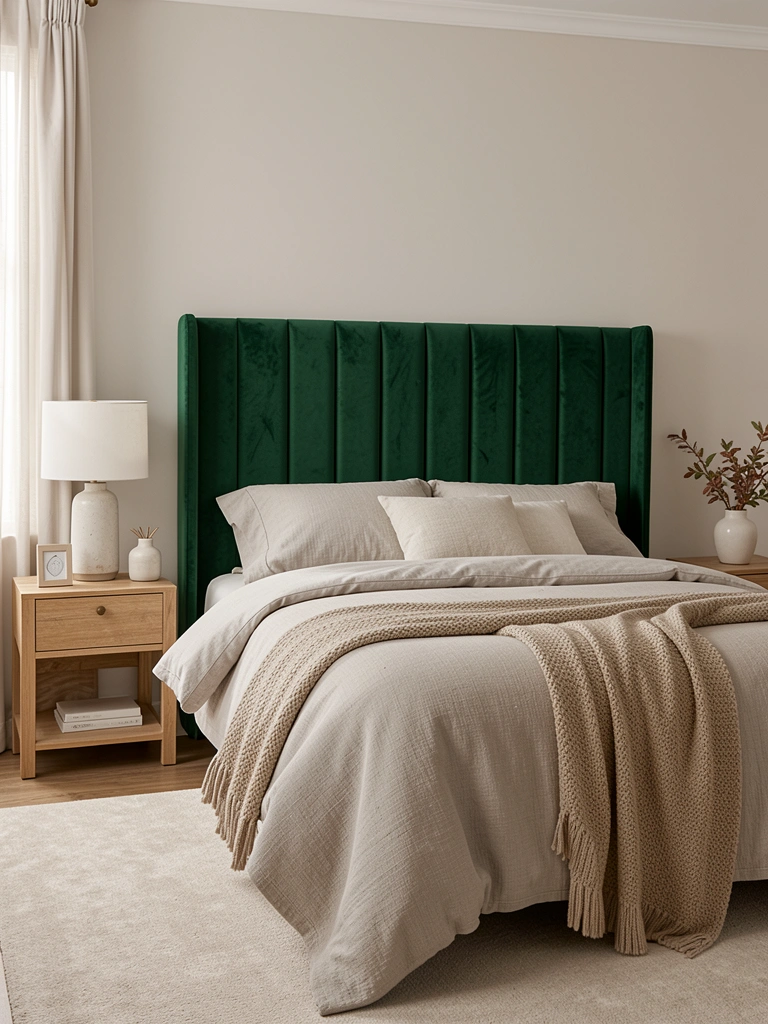
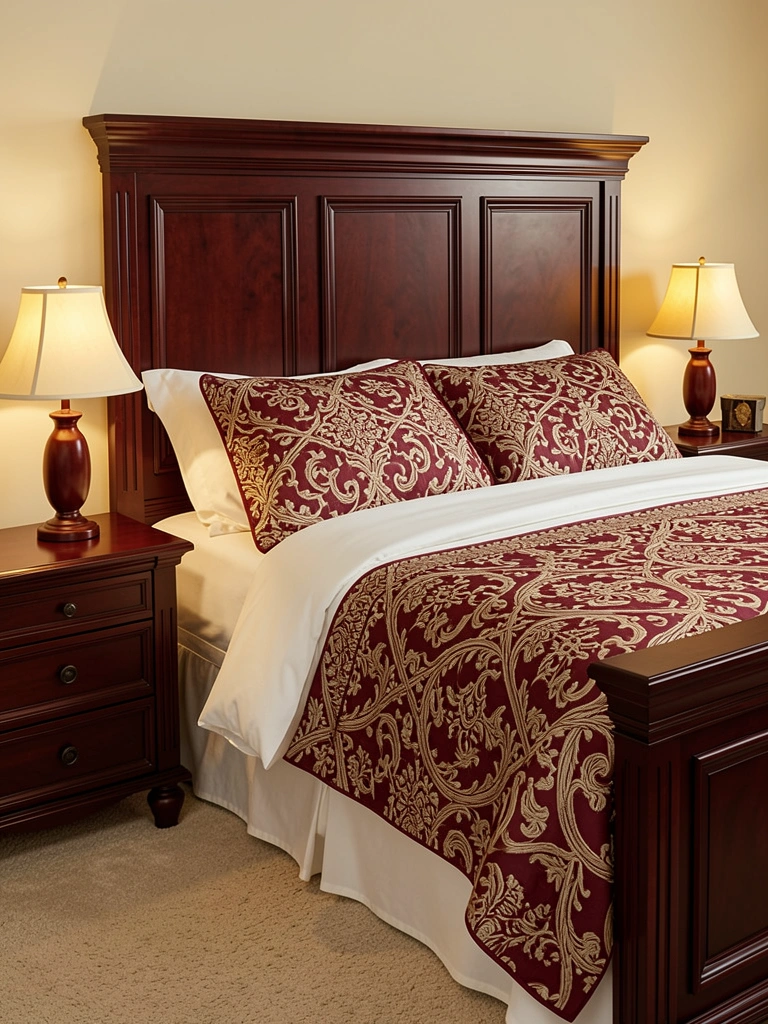
    9. Go Bold With Maximalist Patterns

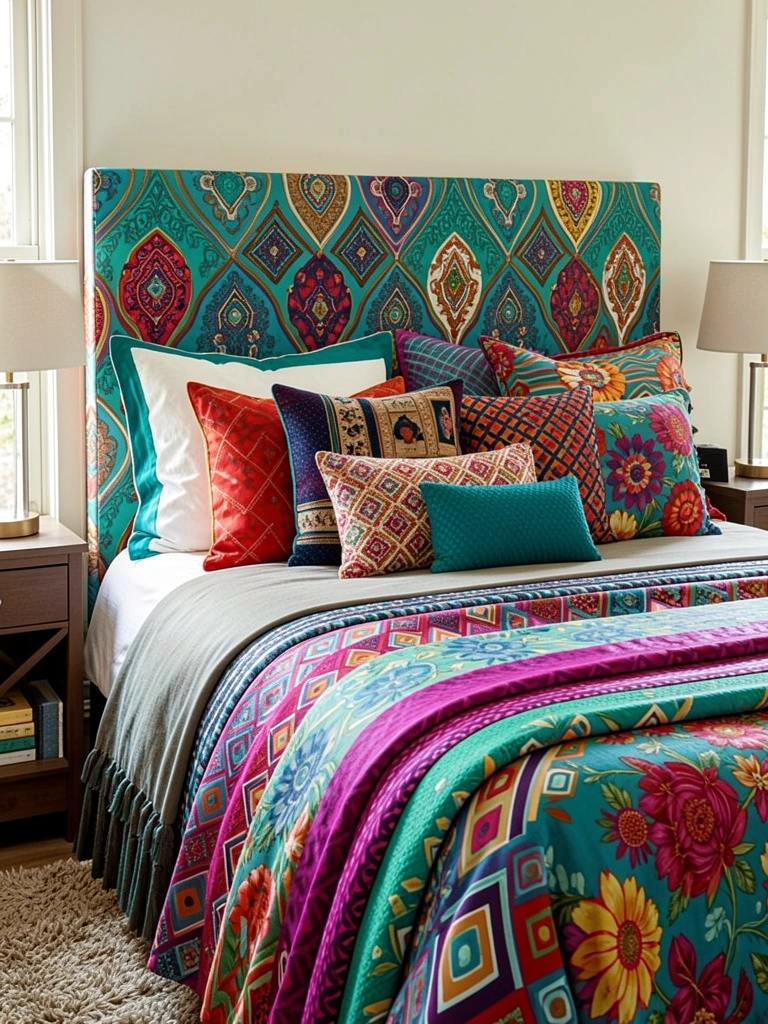
    Maximalism rejects the “less is more” mentality in favor of bold patterns, rich colors, and personal storytelling. It’s trending because people crave warmth over sterile perfection.

    Start with a color story (e.g., emerald, burgundy, gold, cream) and collect pieces that fit: bold patterned fabric for a headboard ($30-$100 for DIY, or $200-$600 for custom upholstery), mixed throw pillows ($15-$40 each), layered throws ($20-$80), and patterned bedding ($60-$150). Thrift markets are gold for affordable maximalist finds. Takes patience to curate but no special skills required.

    The result is a bedroom that feels gallery-like and deeply personal. Your space reflects your actual tastes, not a magazine spread. It’s cozy, visually rich, and genuinely yours.


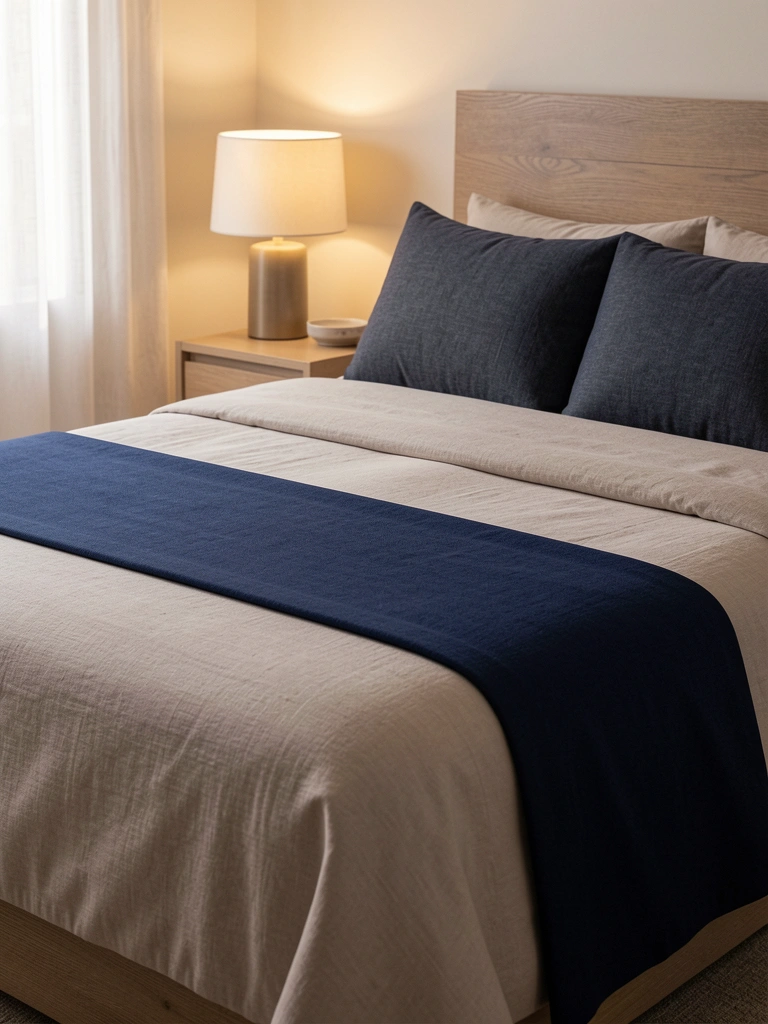
    10. Try Color Drenching for Moody Impact

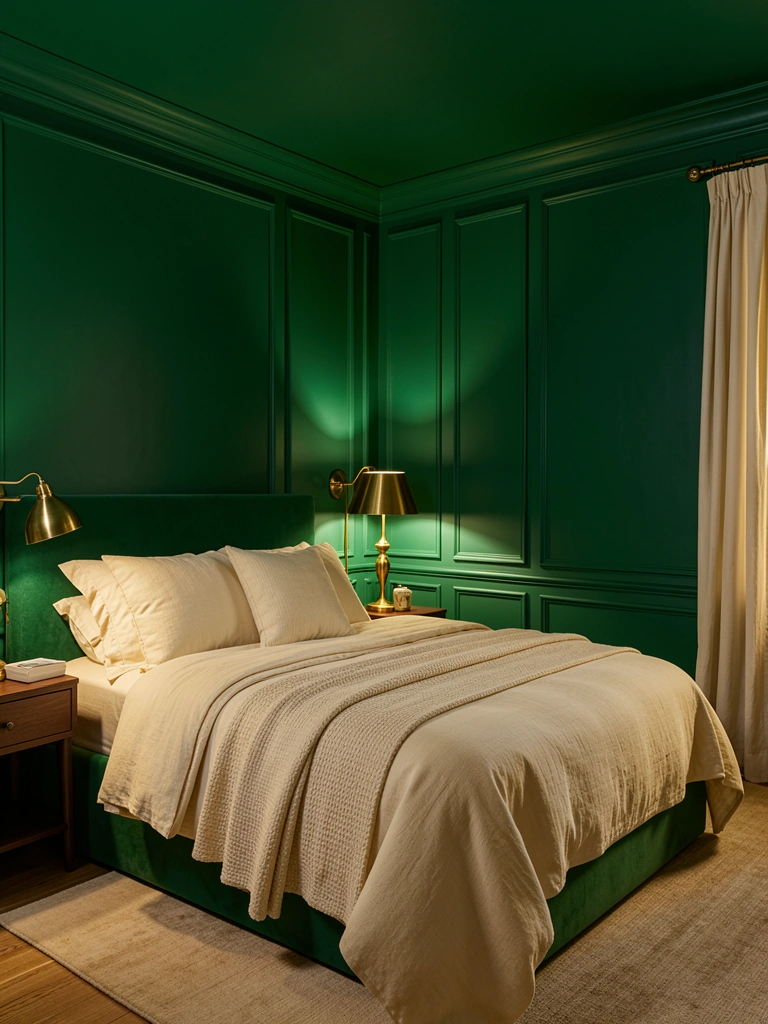
    Color drenching saturates an entire room in one hue (walls, ceiling, trim) for a cohesive, immersive effect. It replaces the outdated accent wall trend.

    Pick a moody color (deep emerald, burgundy, navy, or even soft terracotta) and commit to all surfaces. Invest in quality paint ($40-$100 per gallon from Benjamin Moore or Sherwin-Williams). Budget $400-$1,200 for professional painting, or $100-$250 for DIY supplies. Pair with warm lighting and lighter bedding to avoid feeling cave-like. The trend leans toward jewel tones and warm neutrals, not grays.

    Your bedroom becomes a sanctuary instantly. The saturated color creates an enveloping, hotel-like atmosphere that genuinely changes how restful the space feels. It photographs beautifully and makes everything else in the room feel curated.


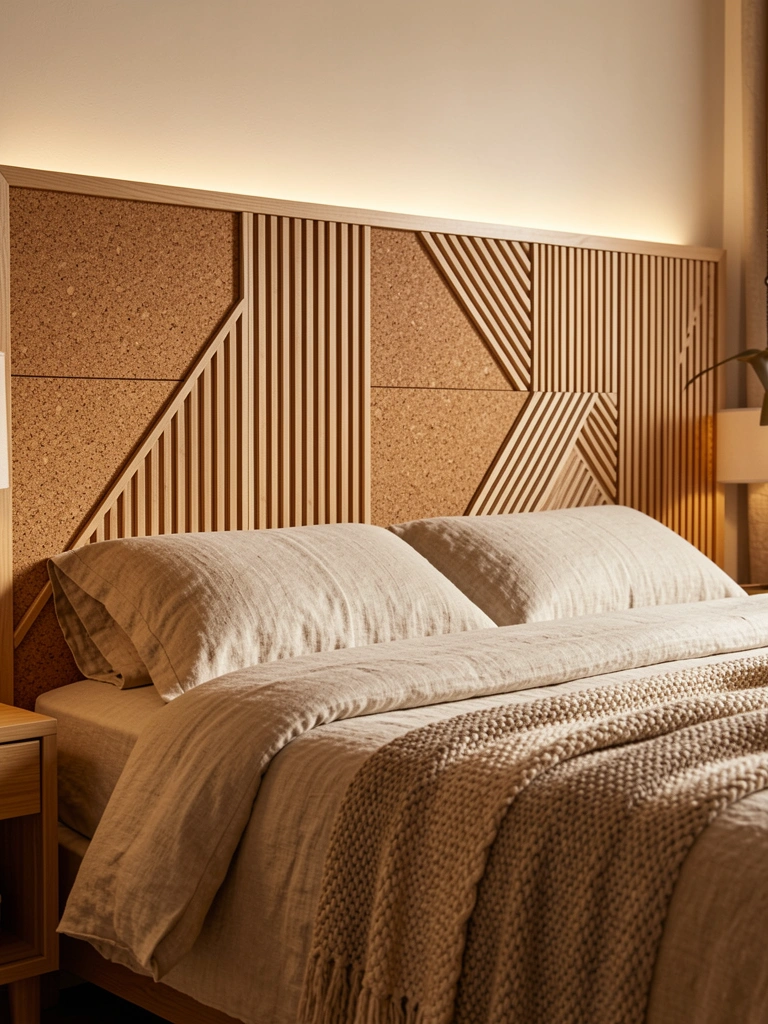
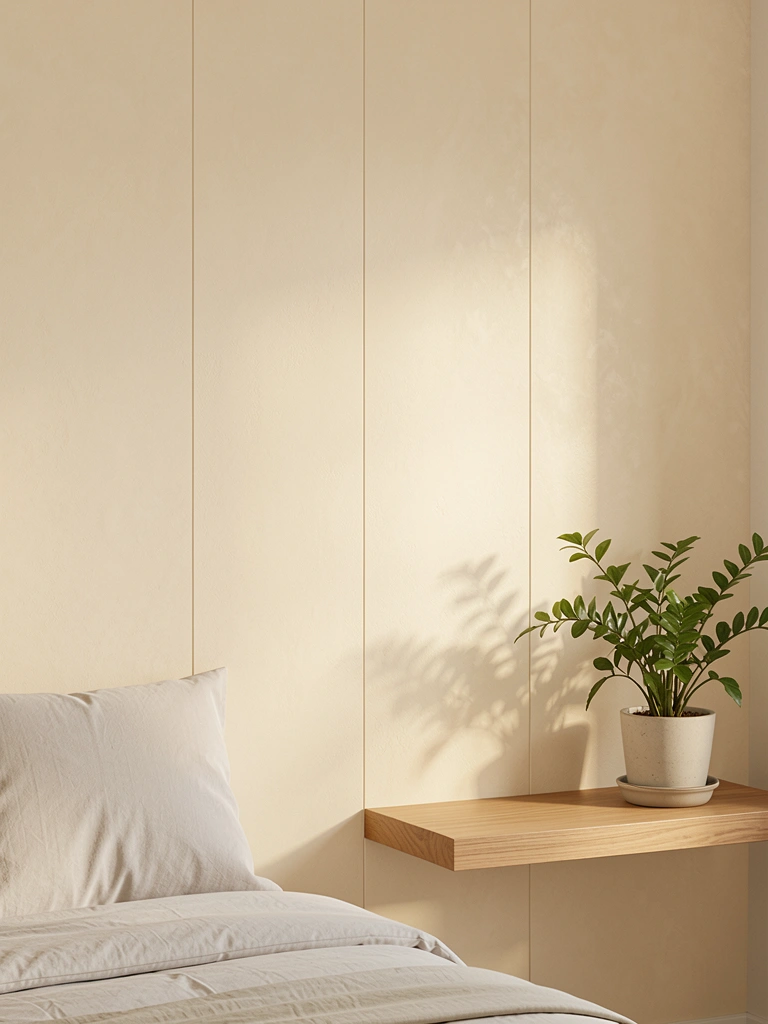
    11. Incorporate Natural Wood Paneling

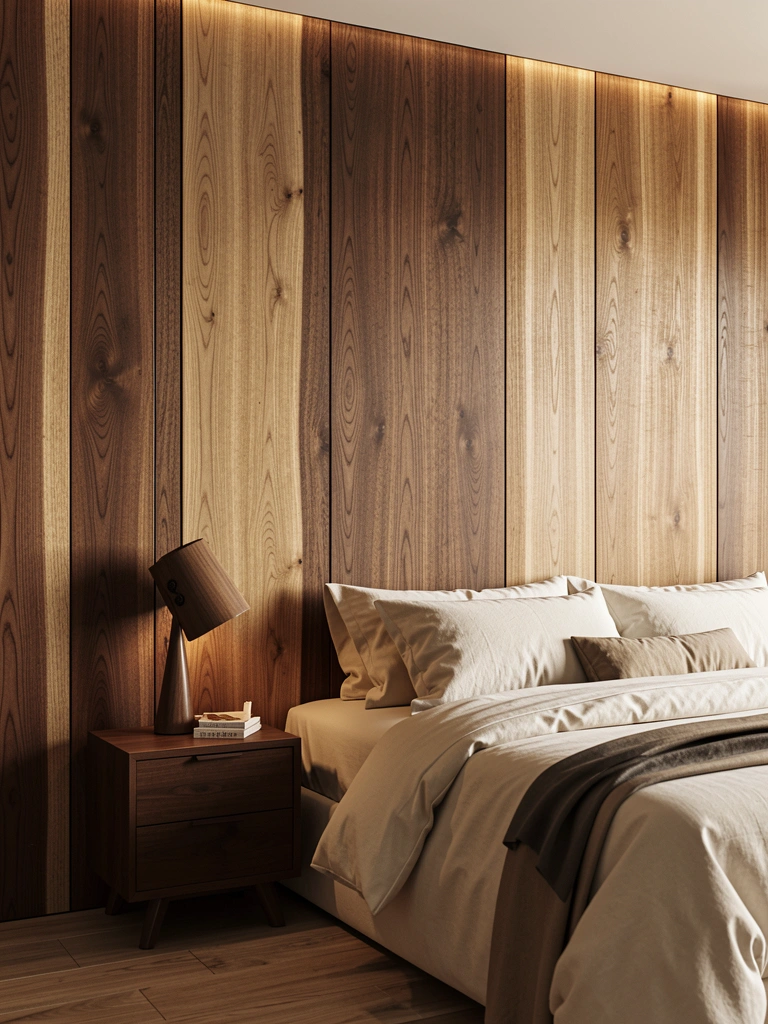
    Wood drenching—using rich oak, walnut, or cedar on walls and ceilings—brings organic warmth without feeling rustic or dated. Modern interpretations use clean lines and lighter wood tones.

    Install shiplap, tongue-and-groove, or board-and-batten paneling ($2-$15 per square foot, depending on material and installation). DIY installation is weekend-friendly if you’re handy; hire pros ($1,500-$4,000 depending on room size). Alternatively, use peel-and-stick wood panels ($20-$60 per panel) as a renter-friendly option. Pair with soft lighting to highlight the grain.

    Your bedroom gains organic warmth and visual texture. The wood creates a natural focal point and makes everything feel grounded. It’s an investment that adds lasting value and genuinely luxe appeal.


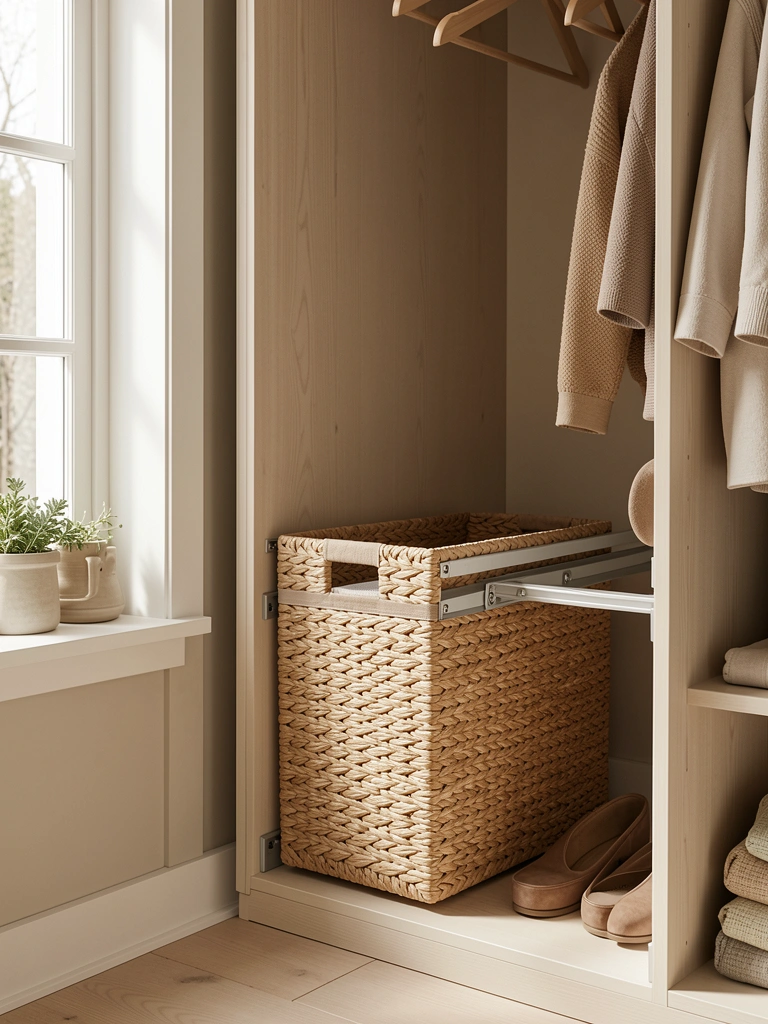
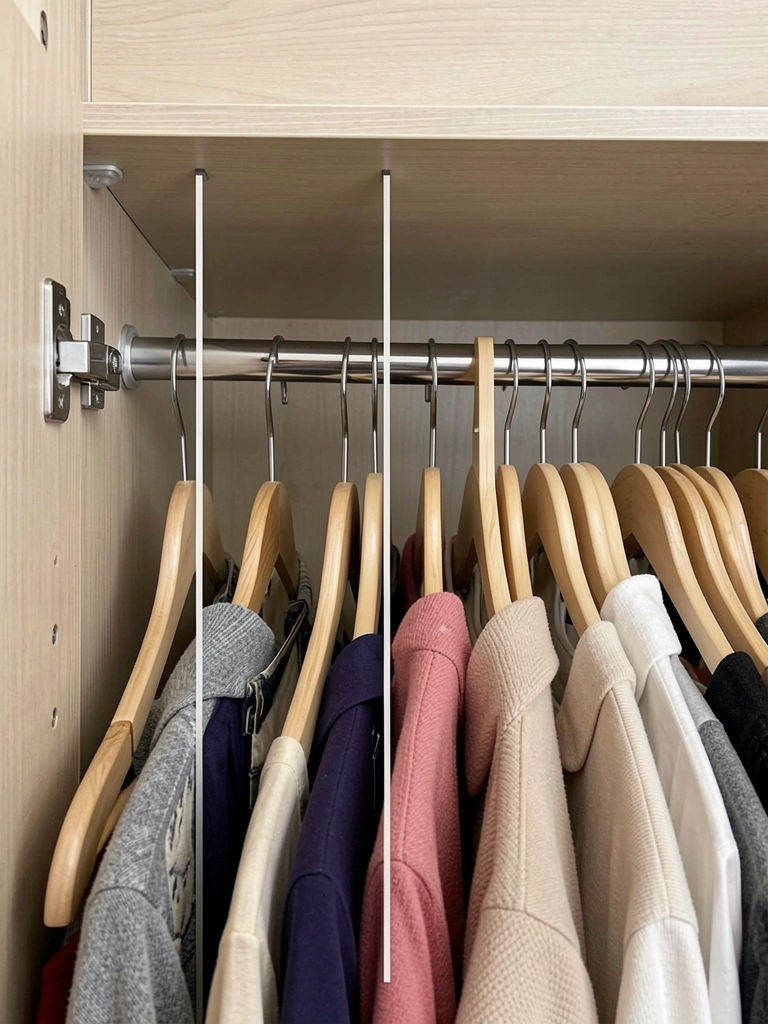
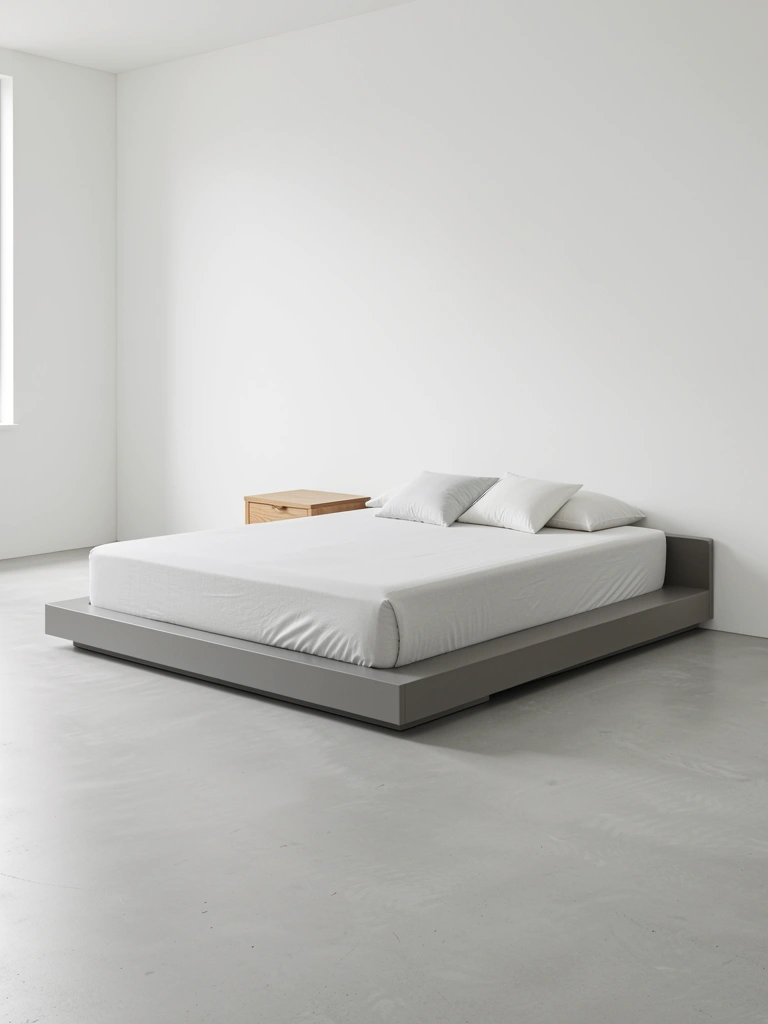
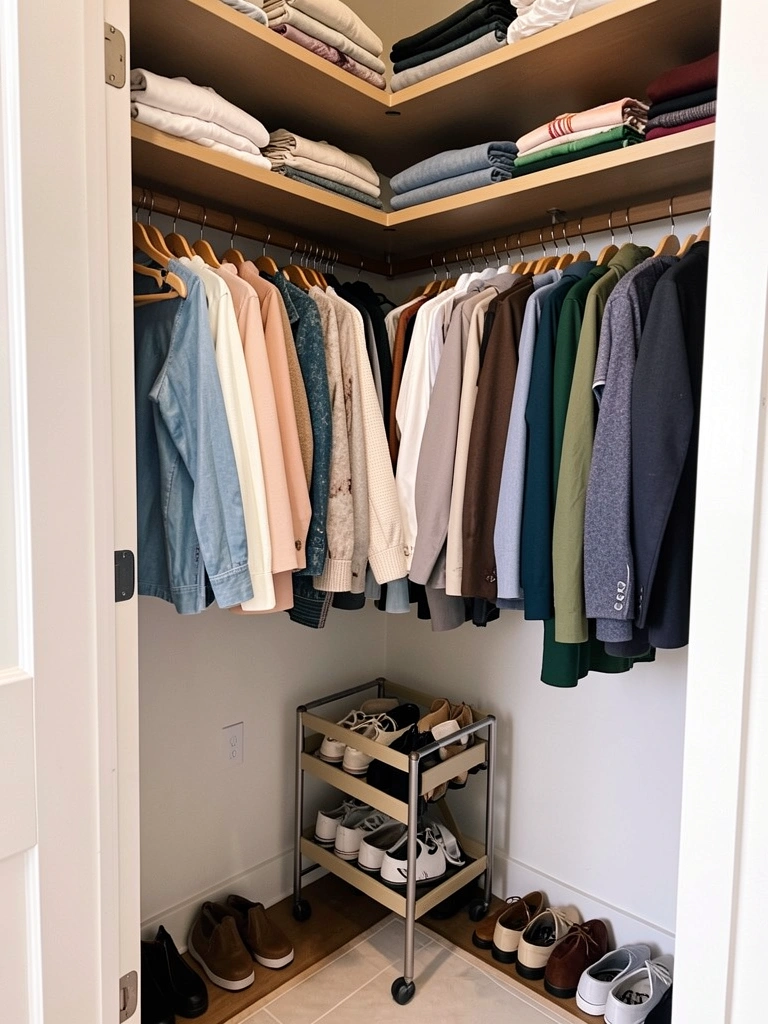
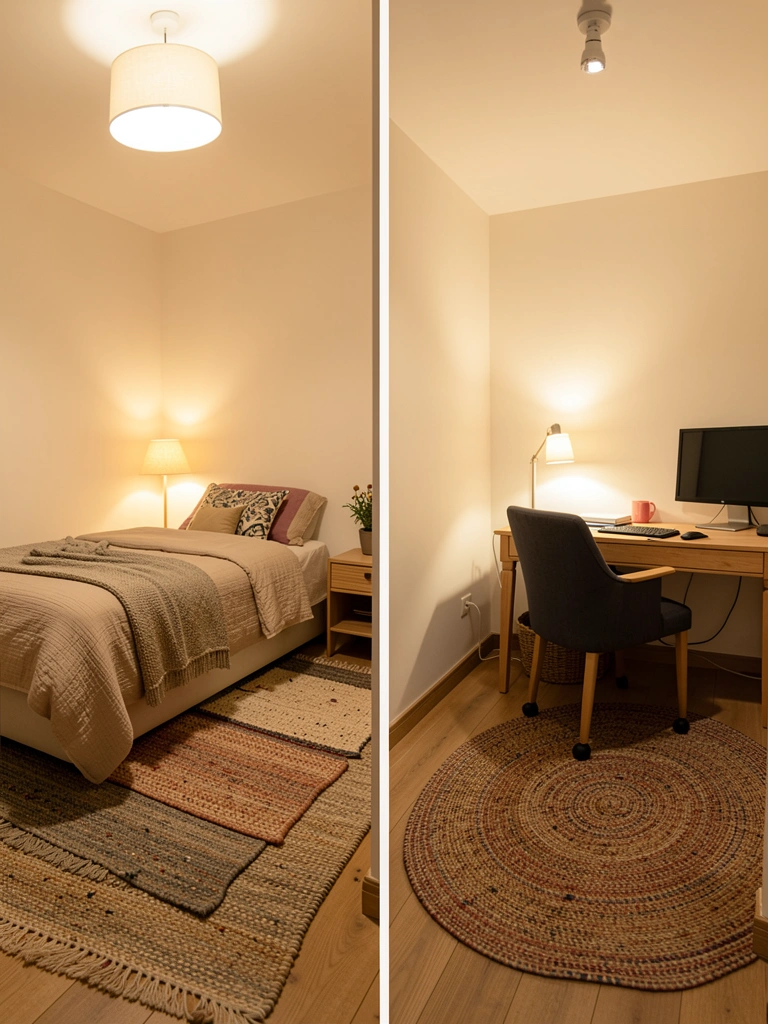
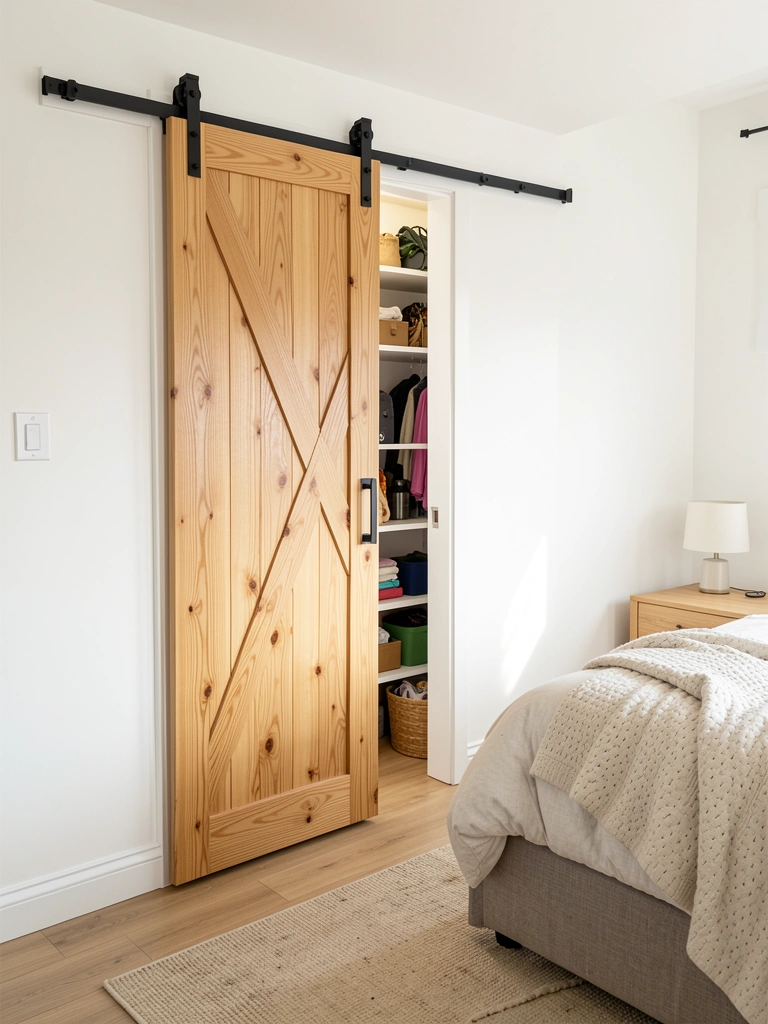
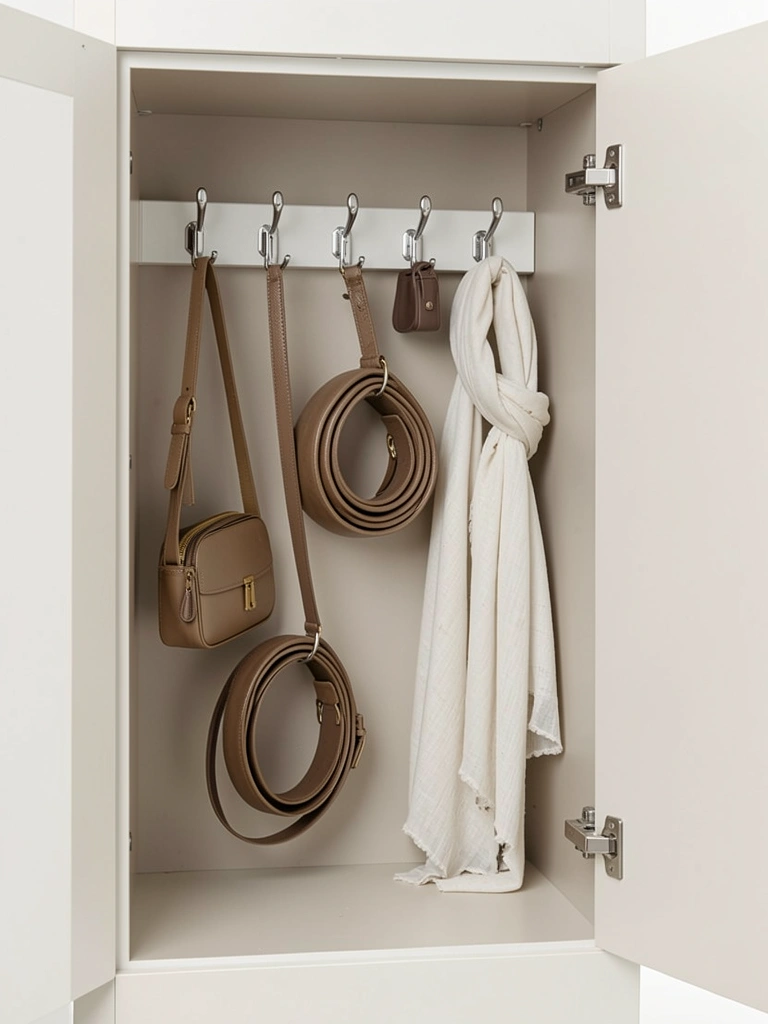
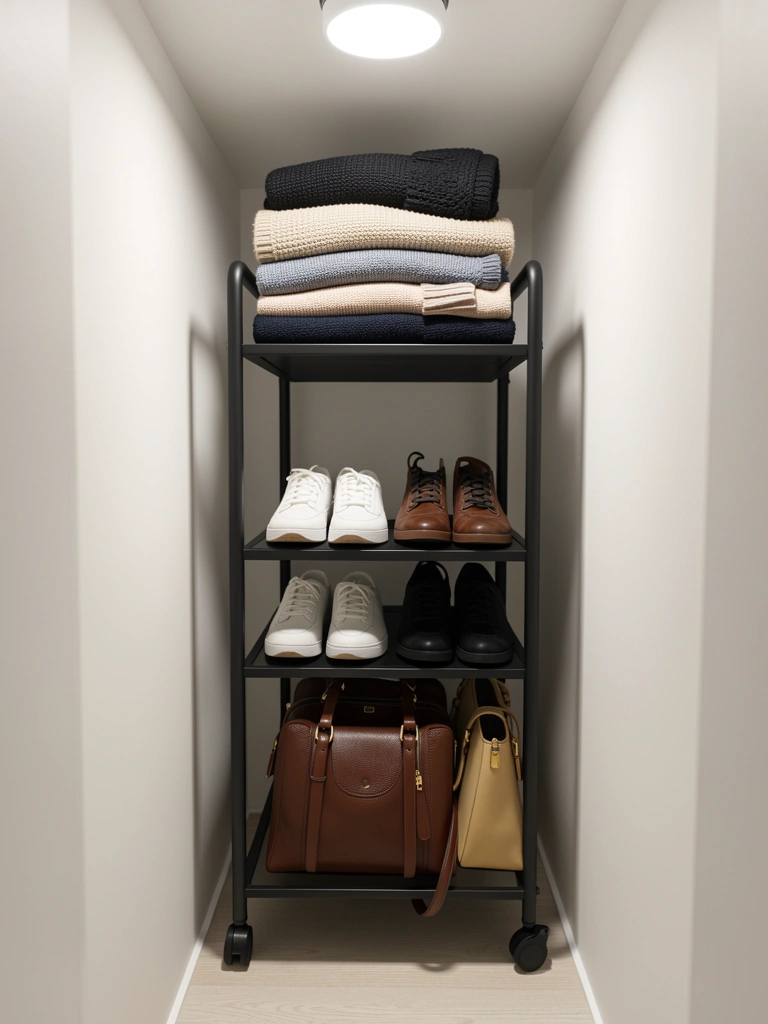
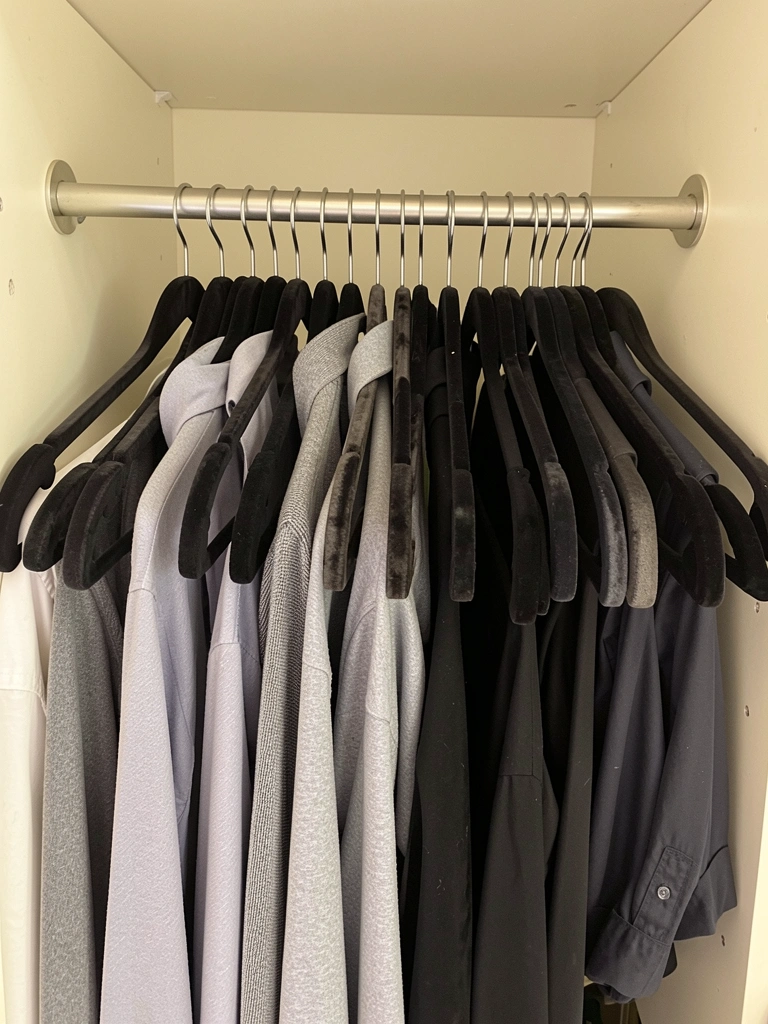
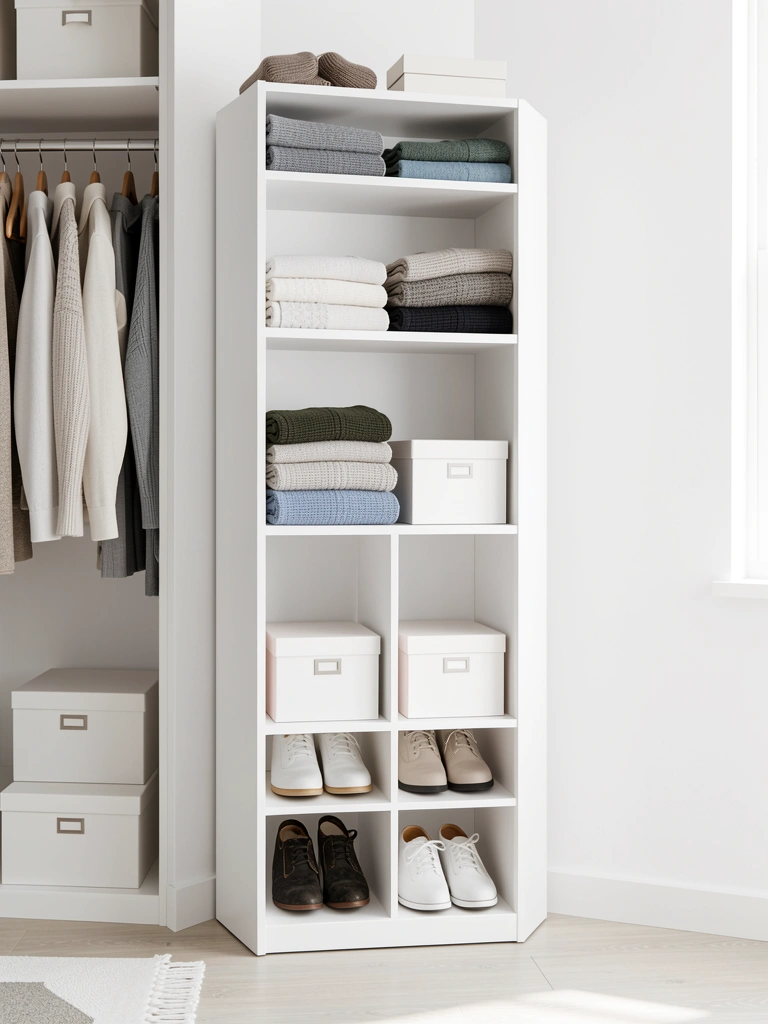
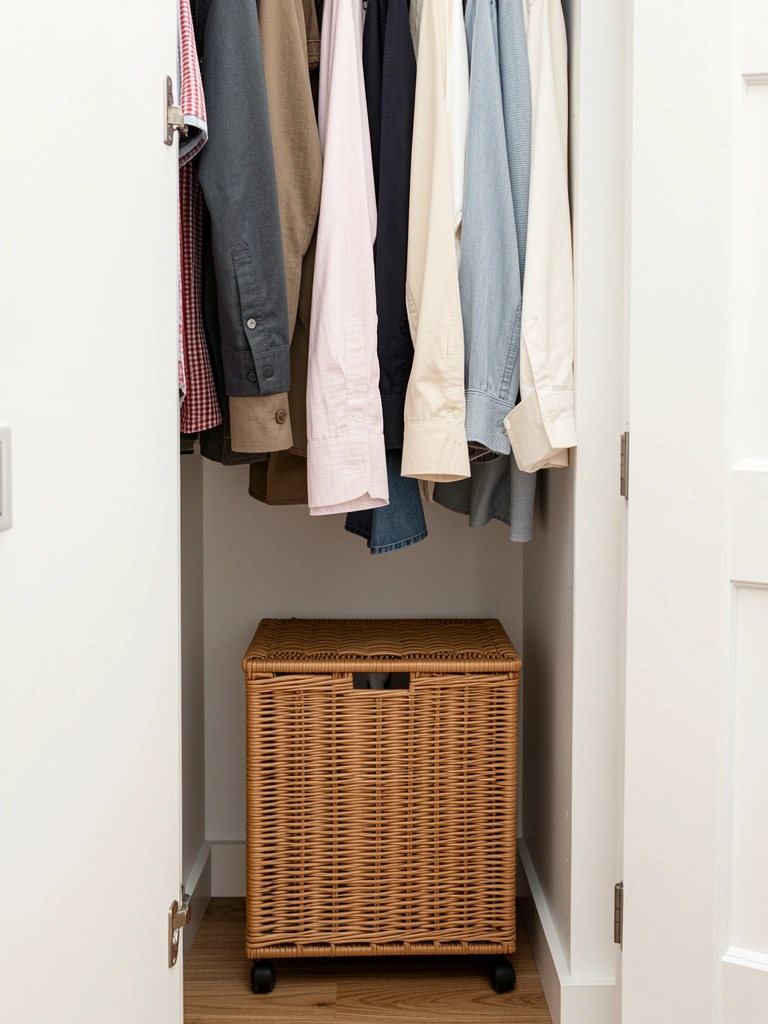
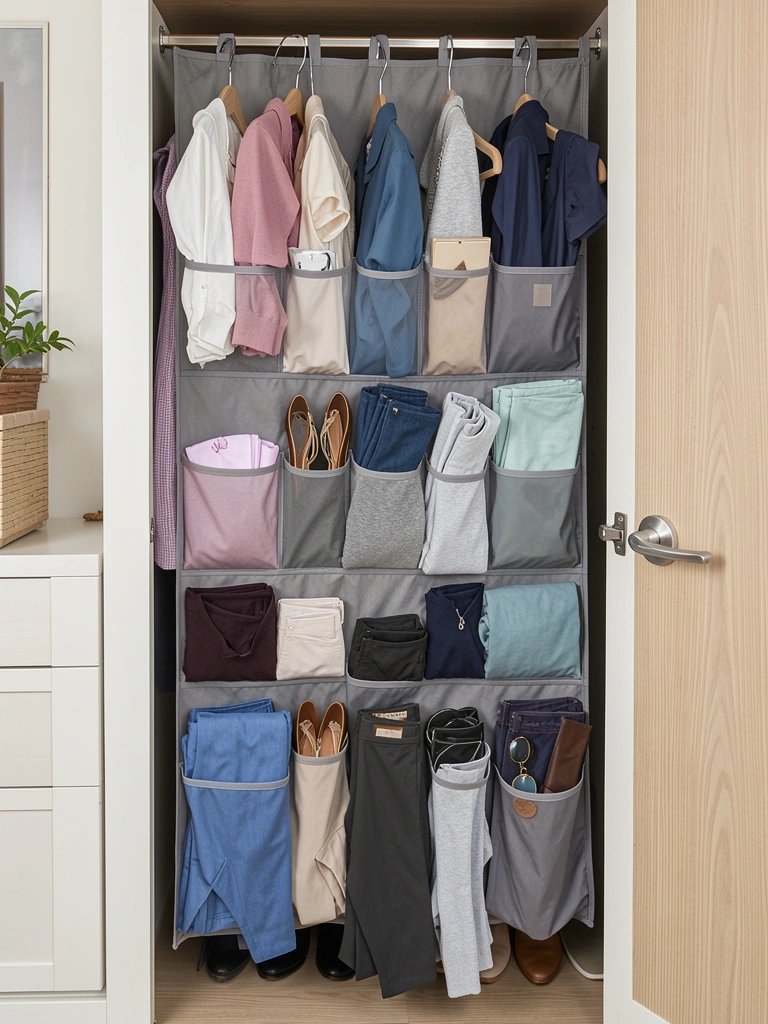
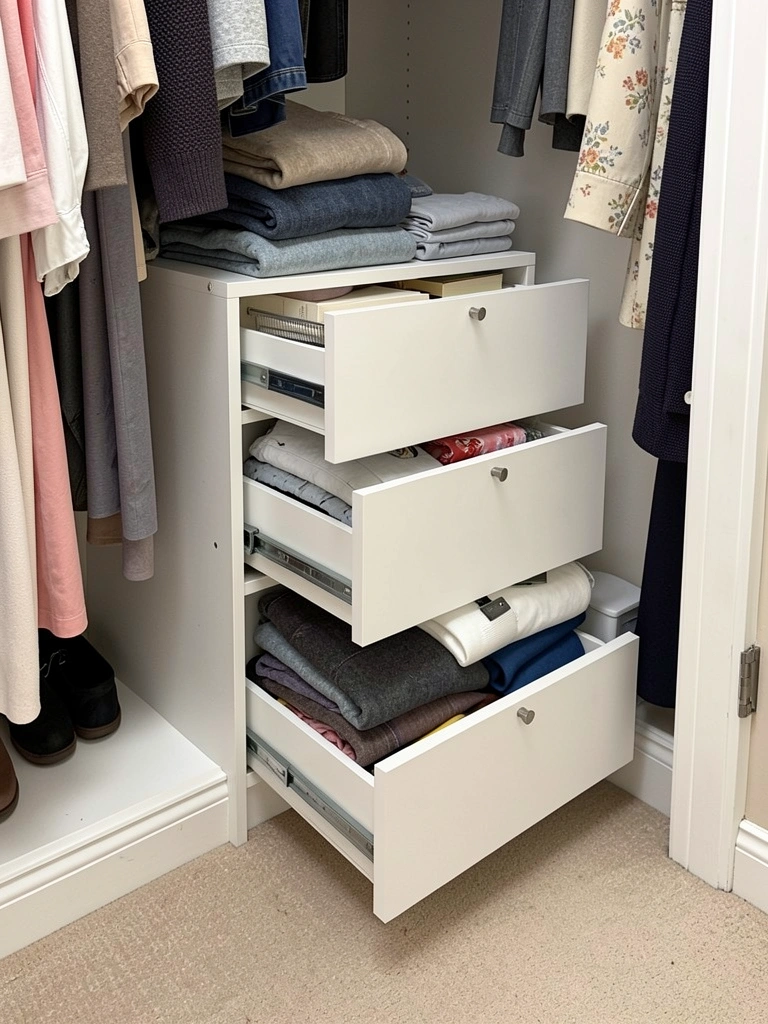
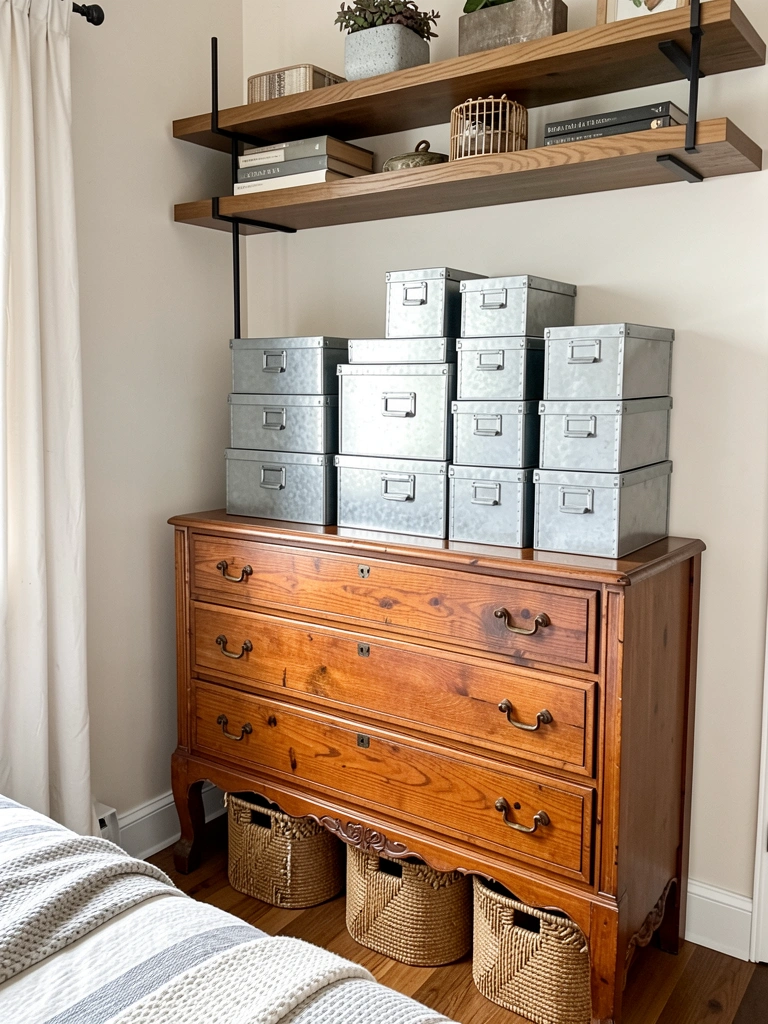
    12. Design Multifunctional Modular Spaces

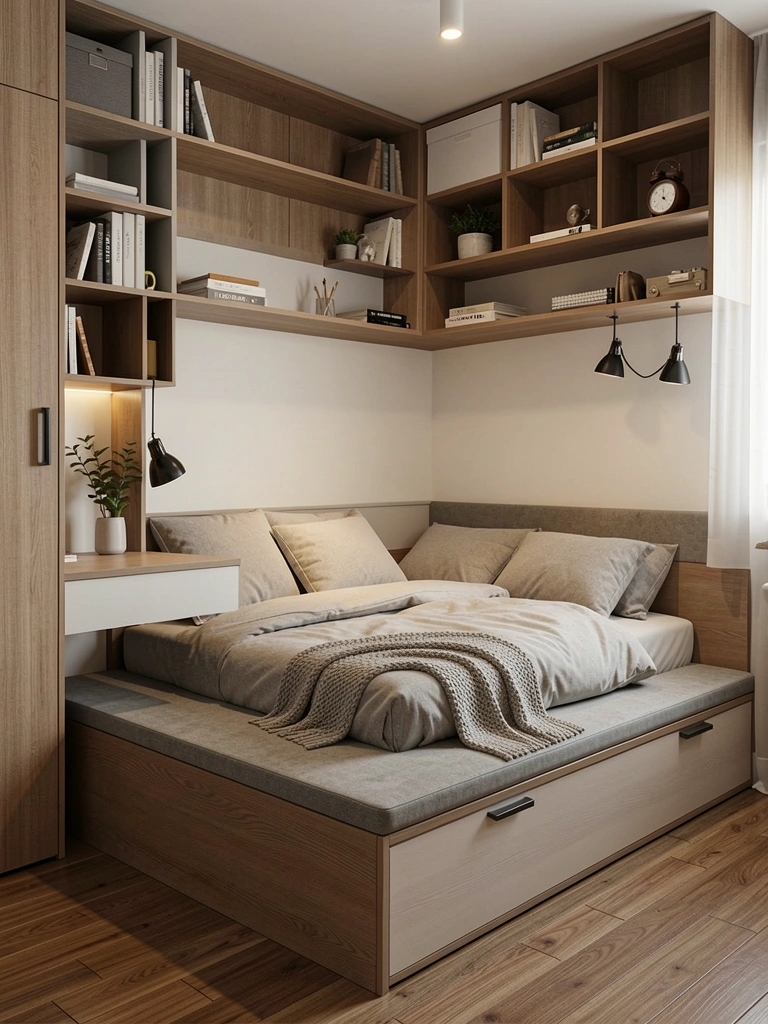
    Multifunctional furniture works harder for small bedrooms or shared spaces. Modular pieces adapt to changing needs without requiring a full redesign.

    Invest in convertible pieces: a storage bench ($150-$400), wall-mounted desks with fold-down surfaces ($100-$300), or modular shelving systems ($200-$800 from IKEA, Wayfair, or custom builders). These pieces cost slightly more upfront but eliminate the need for separate furniture. Installation varies but most modular systems are straightforward. Measure your space precisely before buying.

    Your bedroom stops feeling cramped and starts feeling intentional. Every piece serves multiple purposes, and you gain flexibility as your life changes. Small spaces suddenly feel both organized and generous.


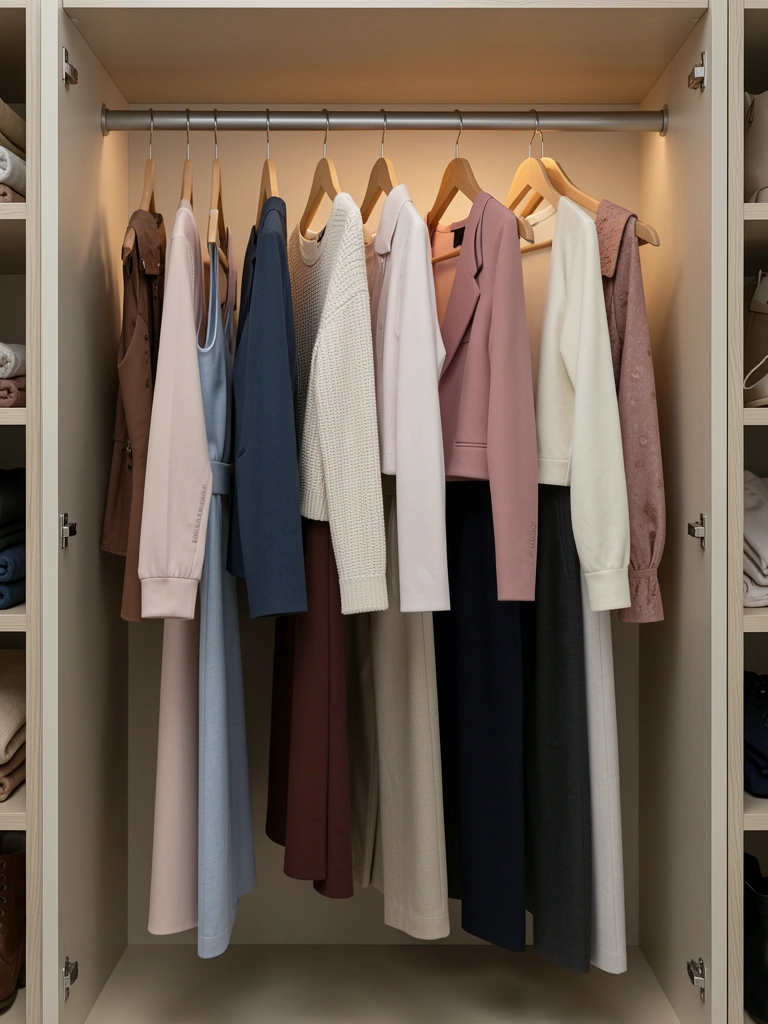
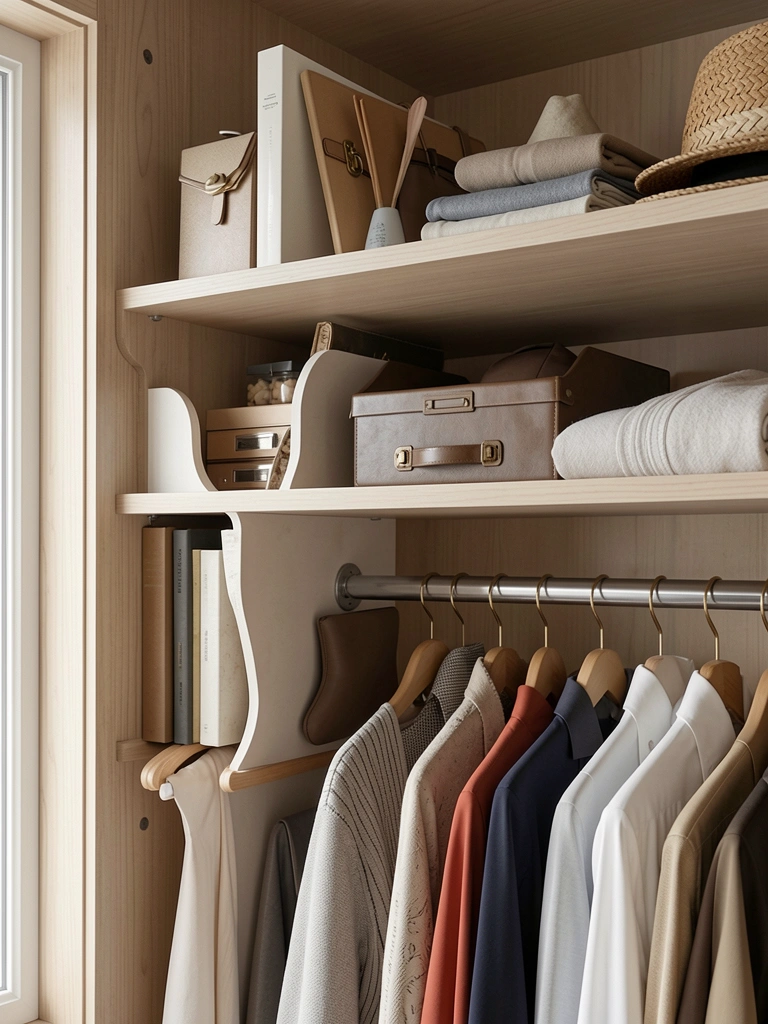
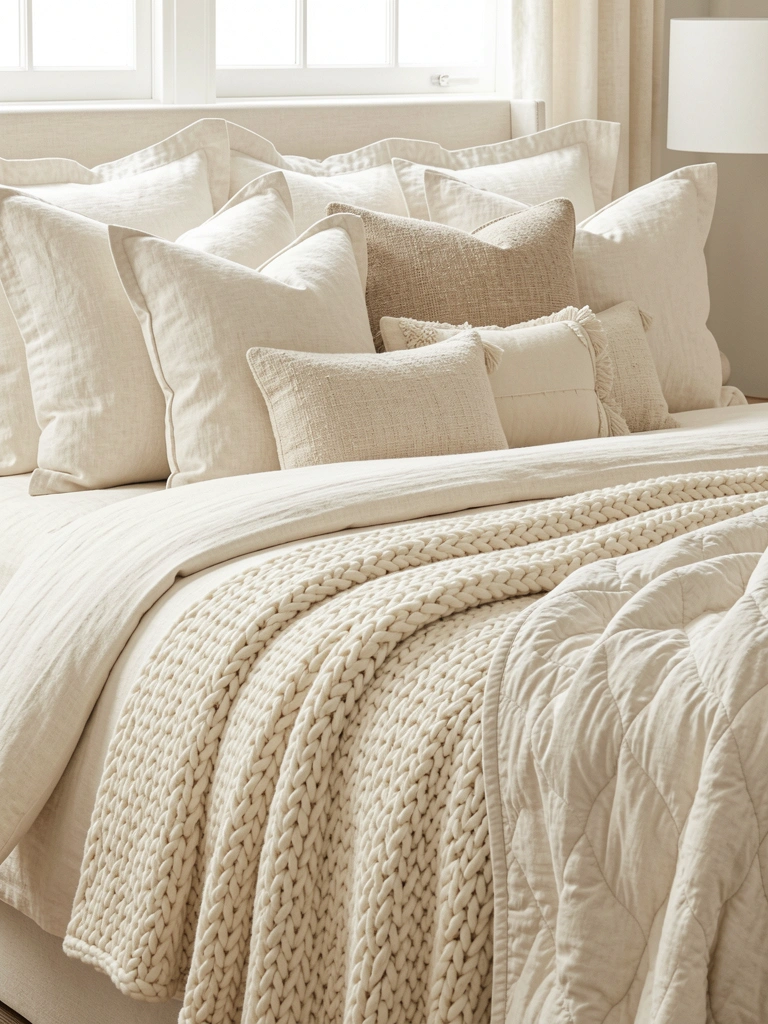
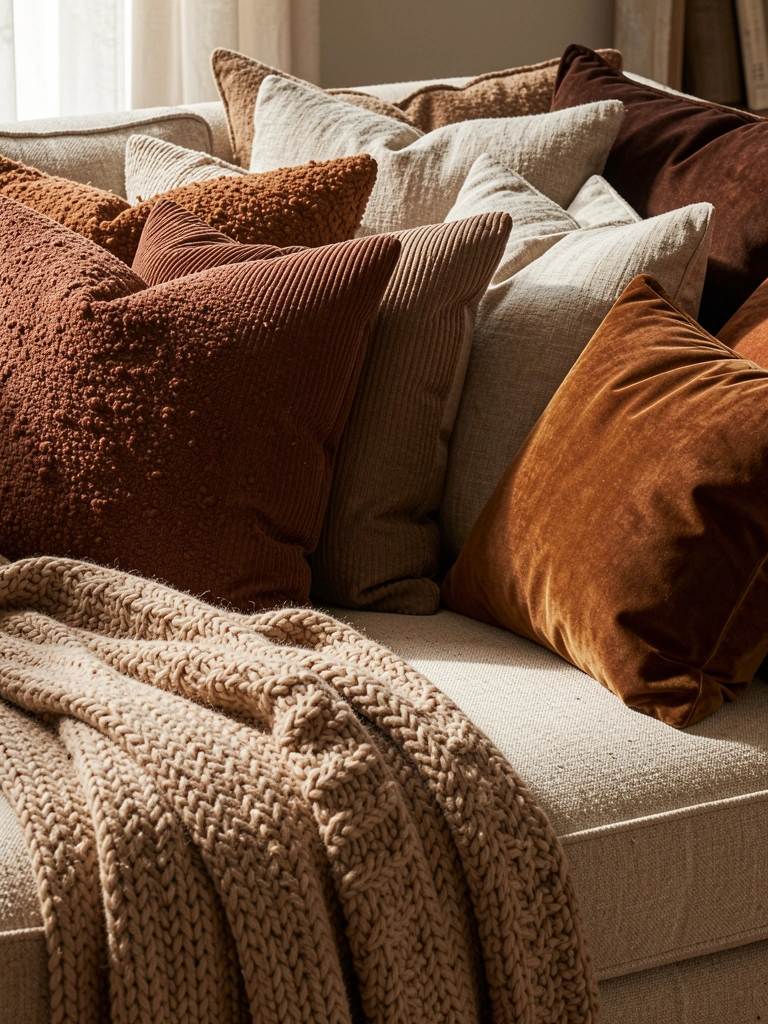
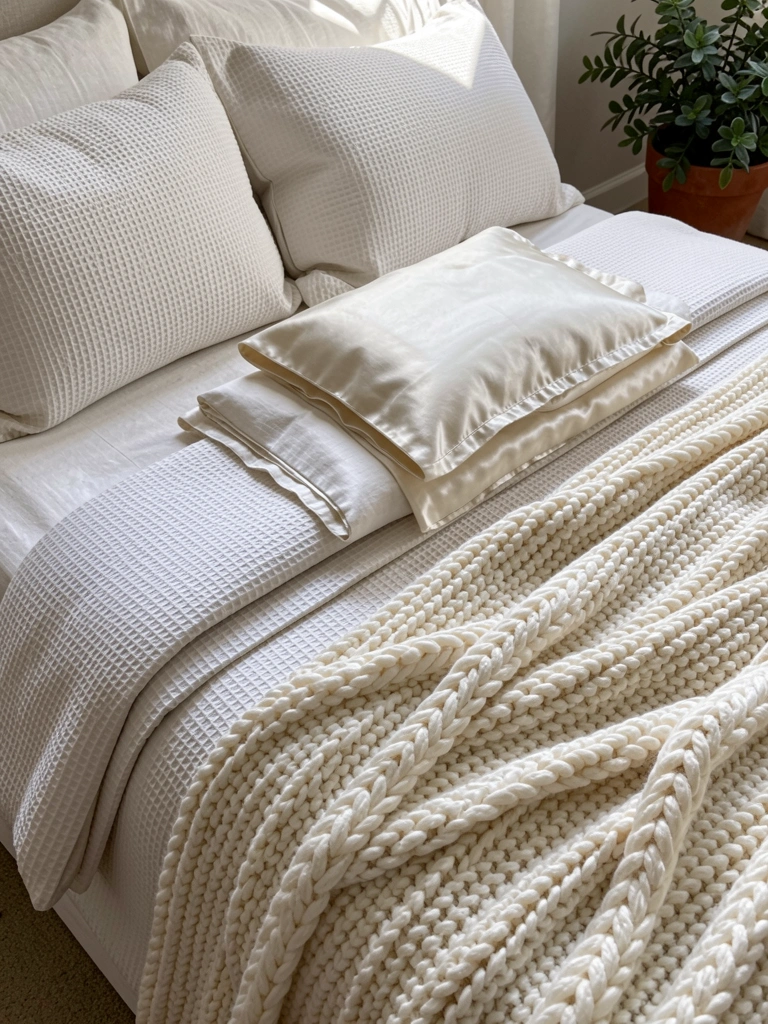
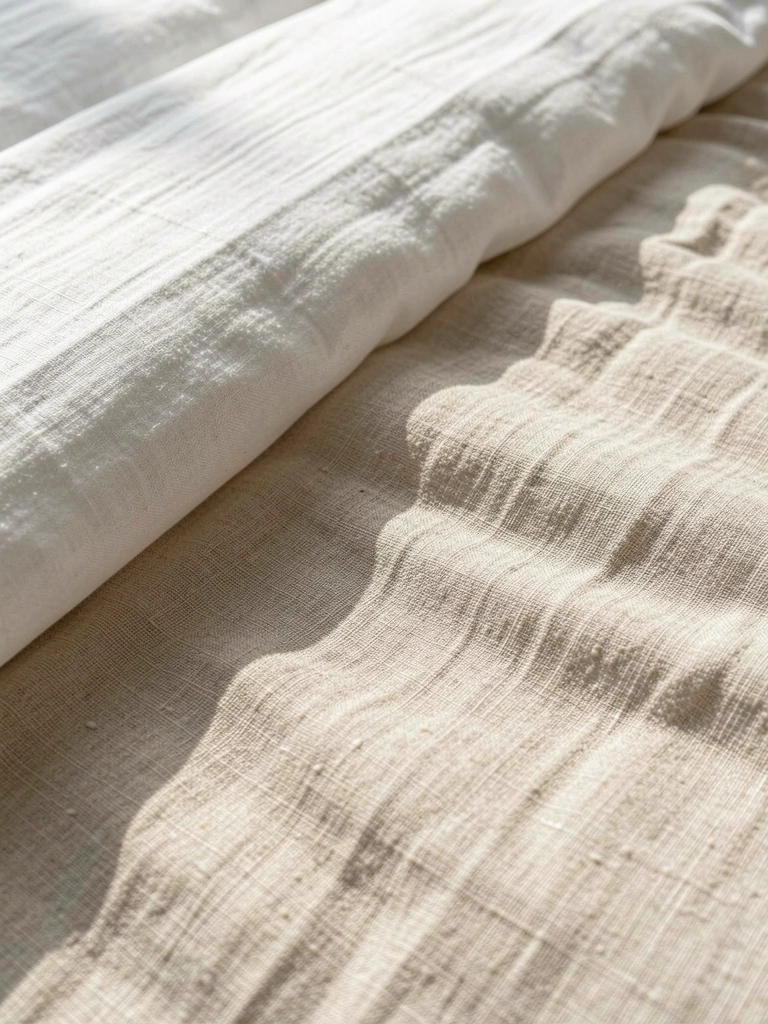
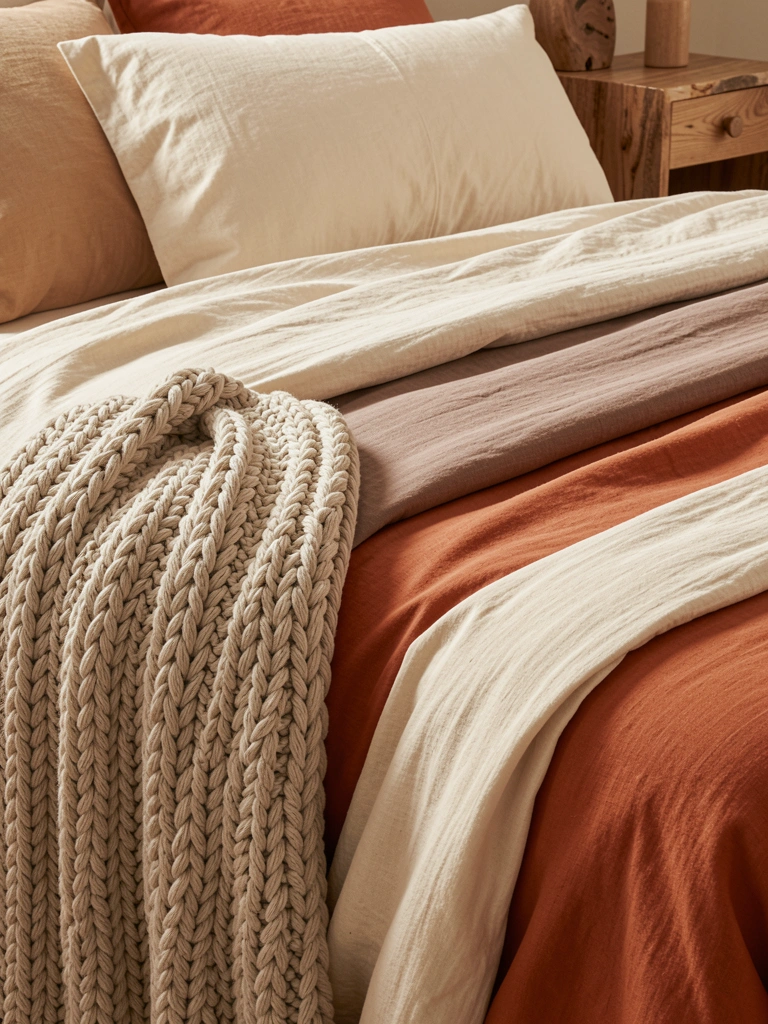
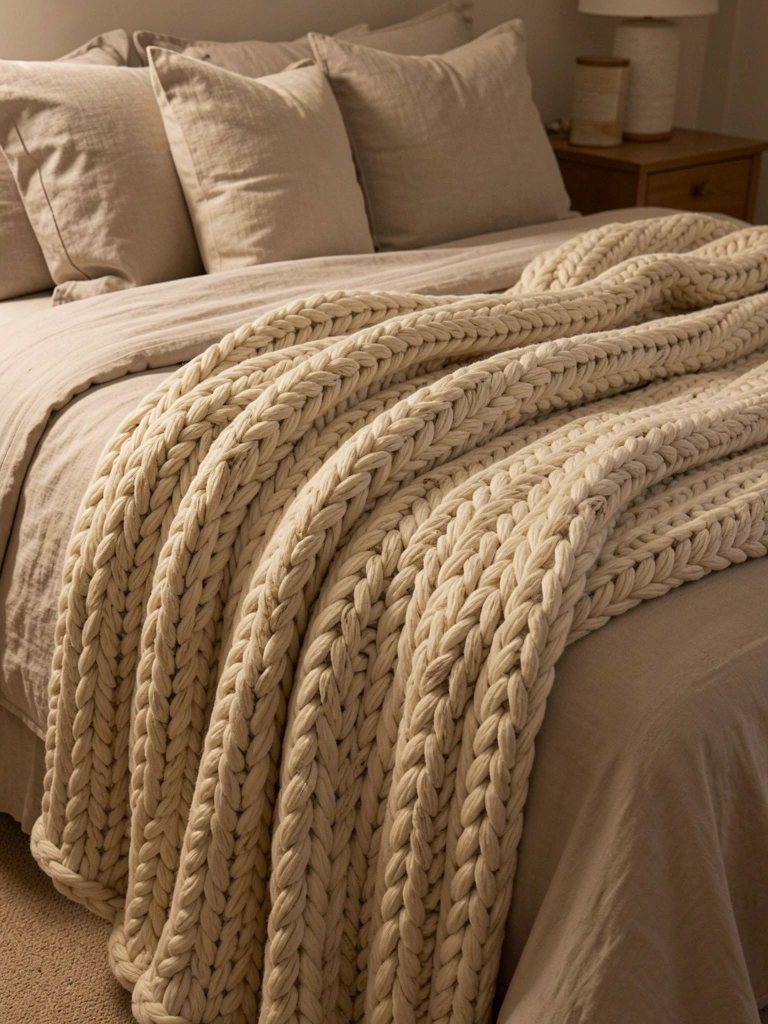
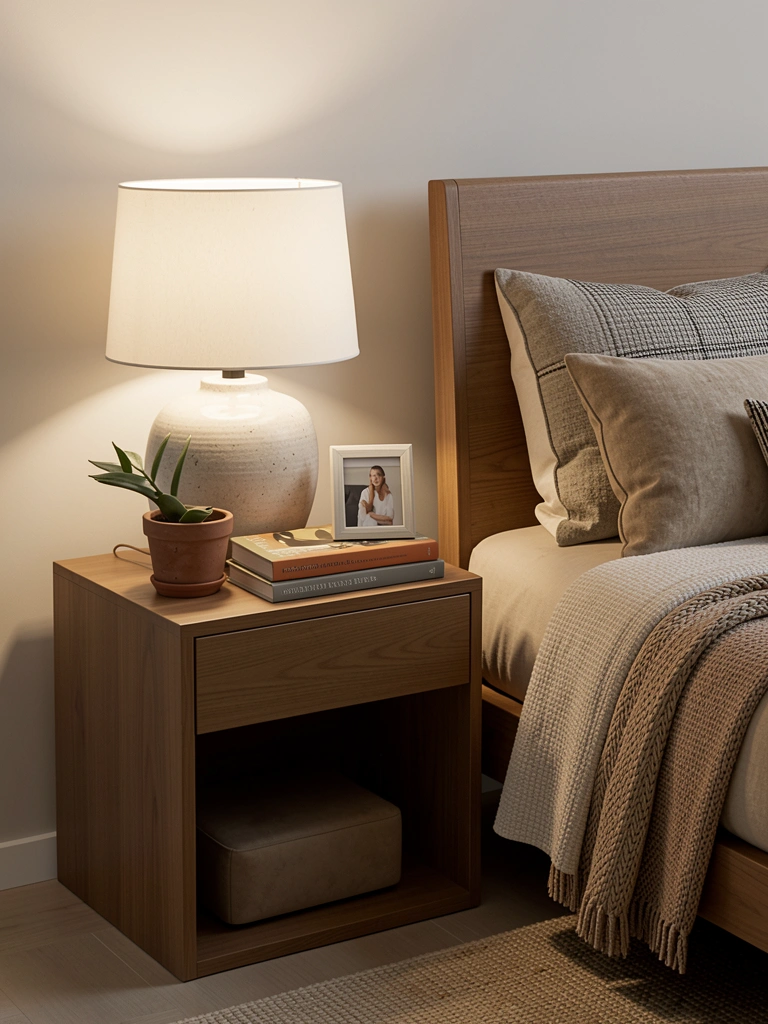
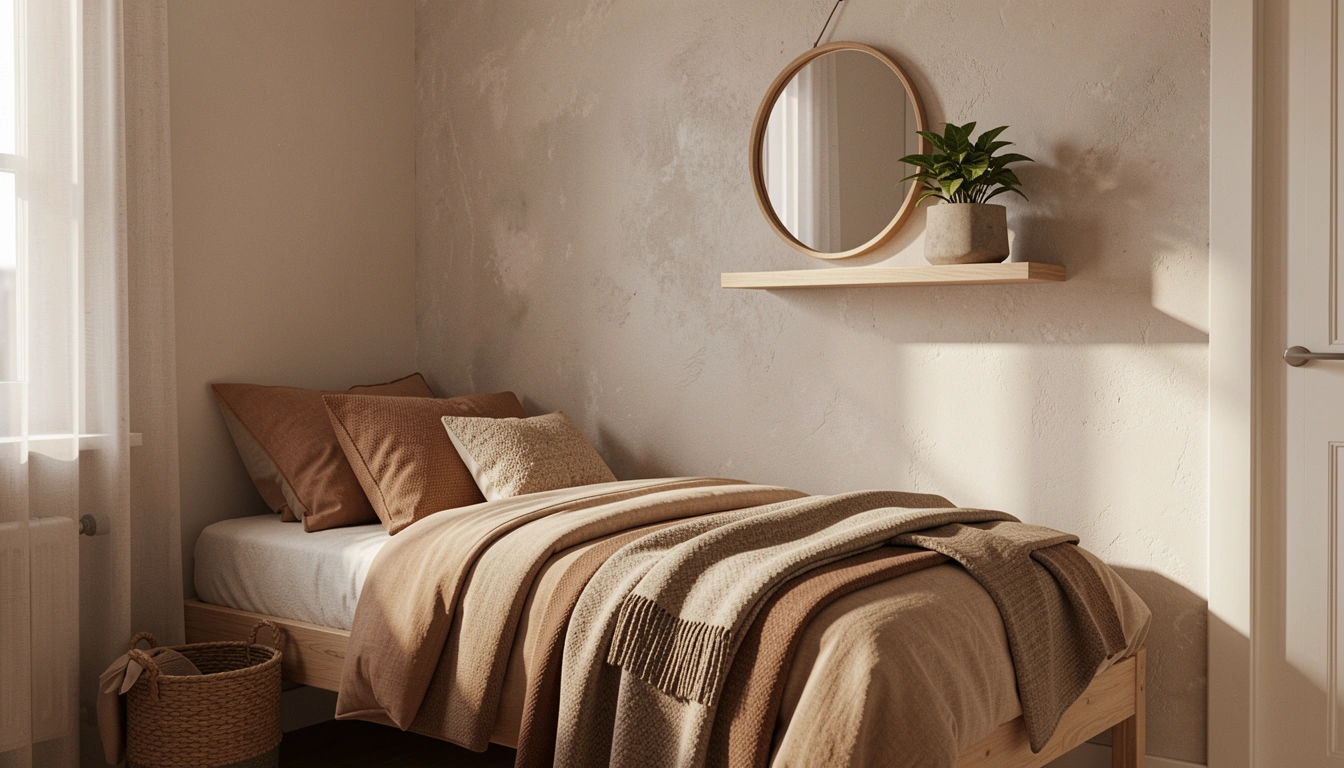
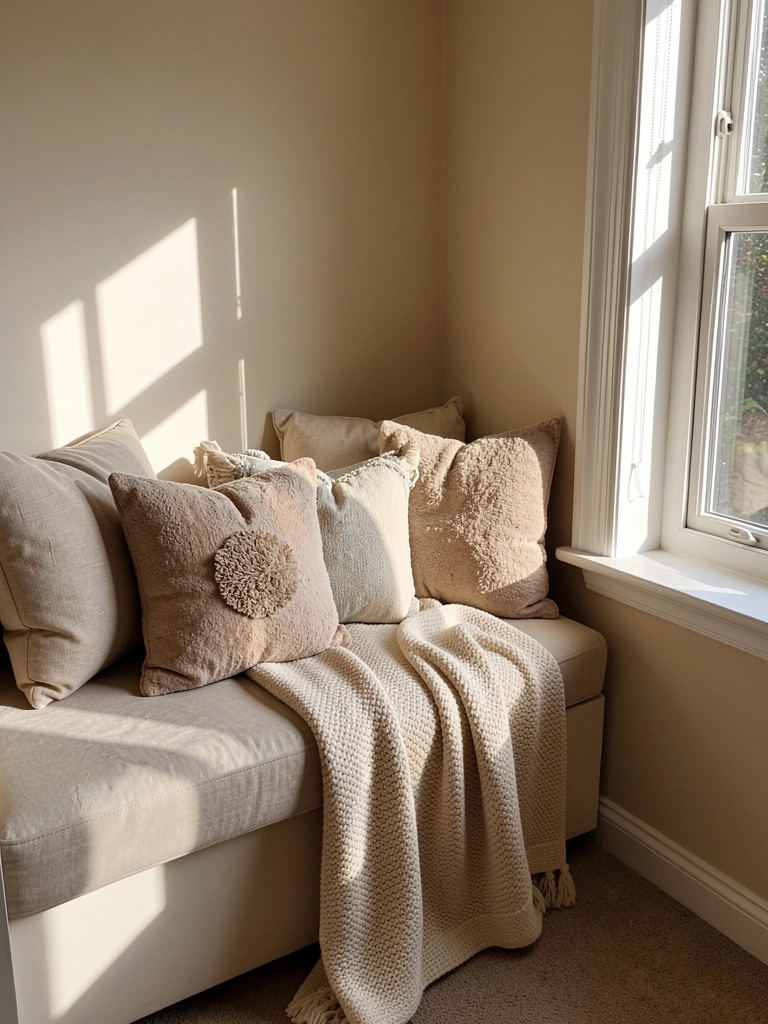
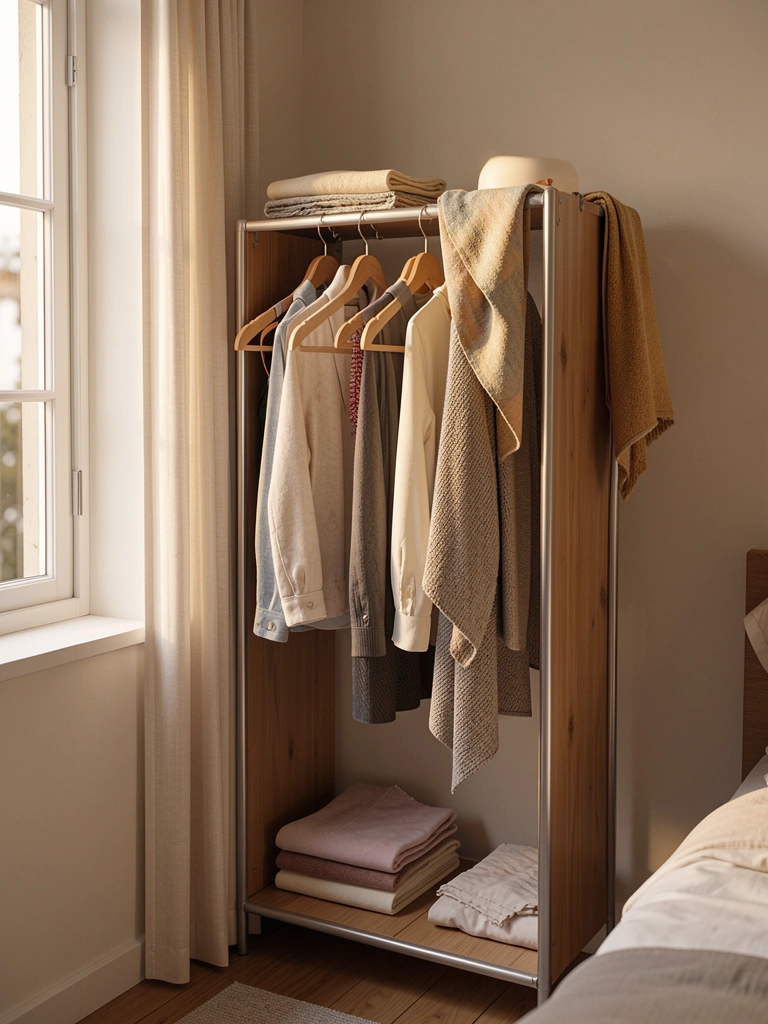
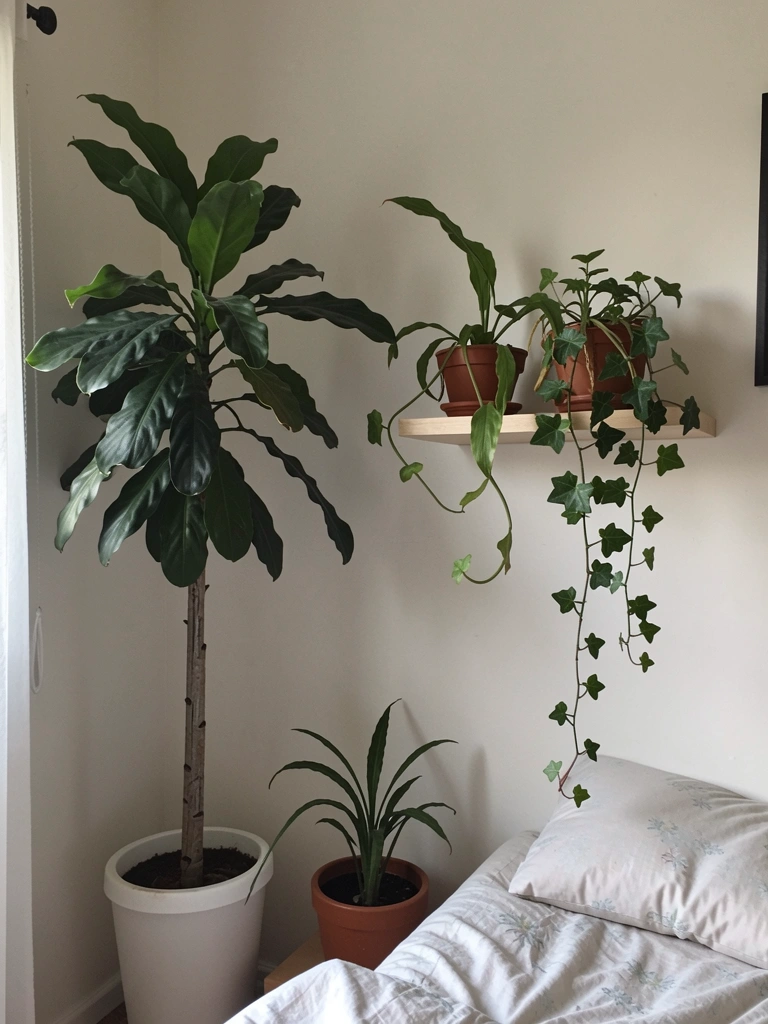
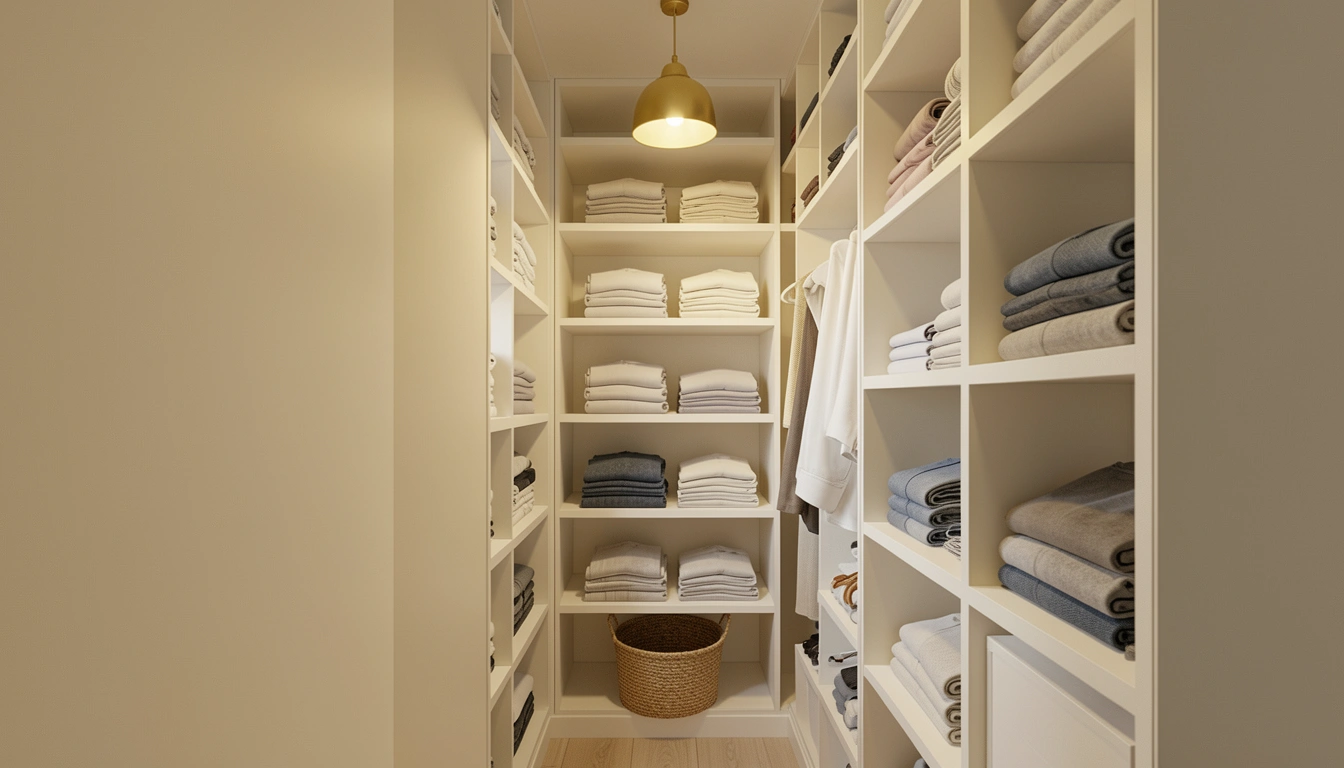
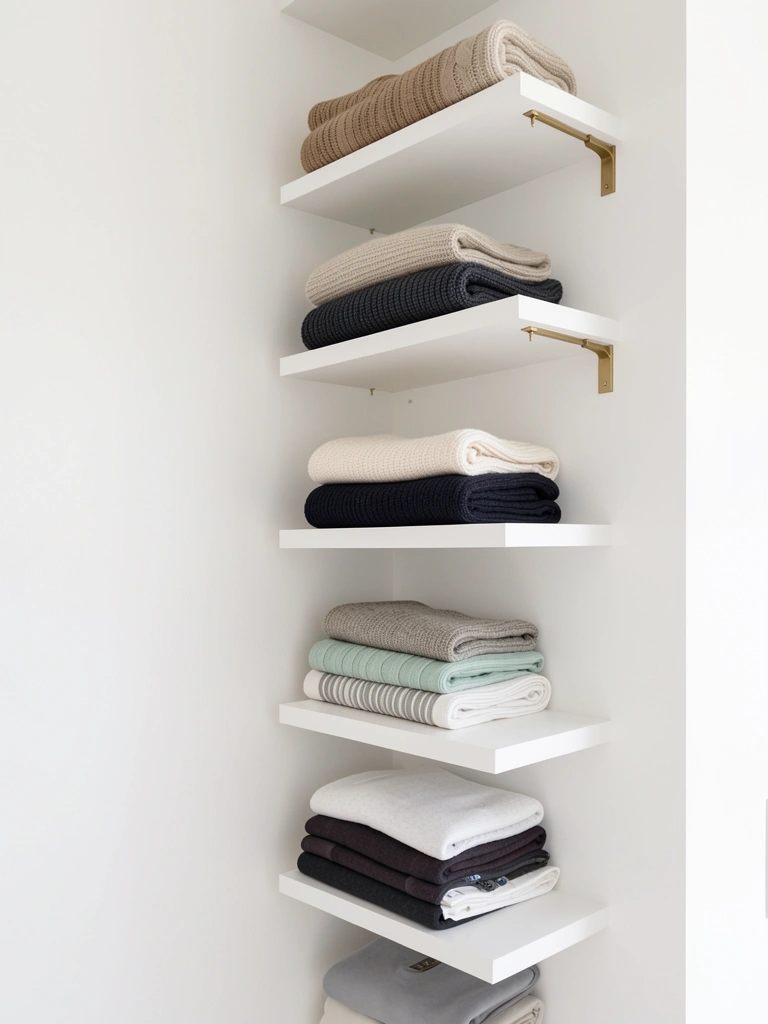
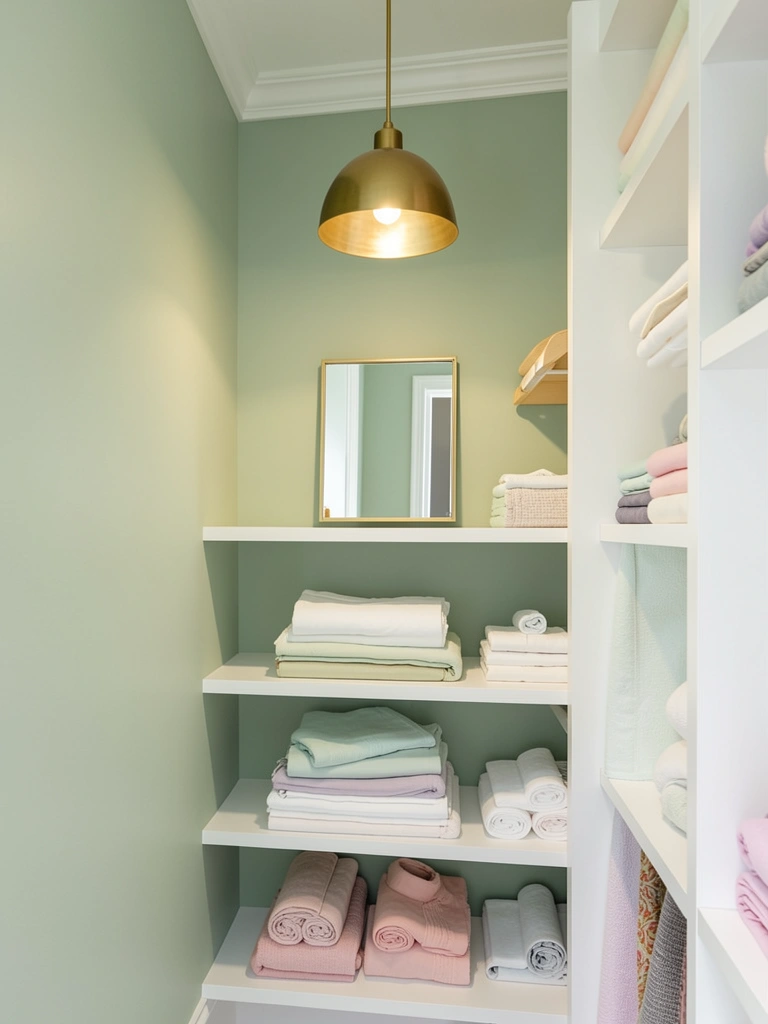
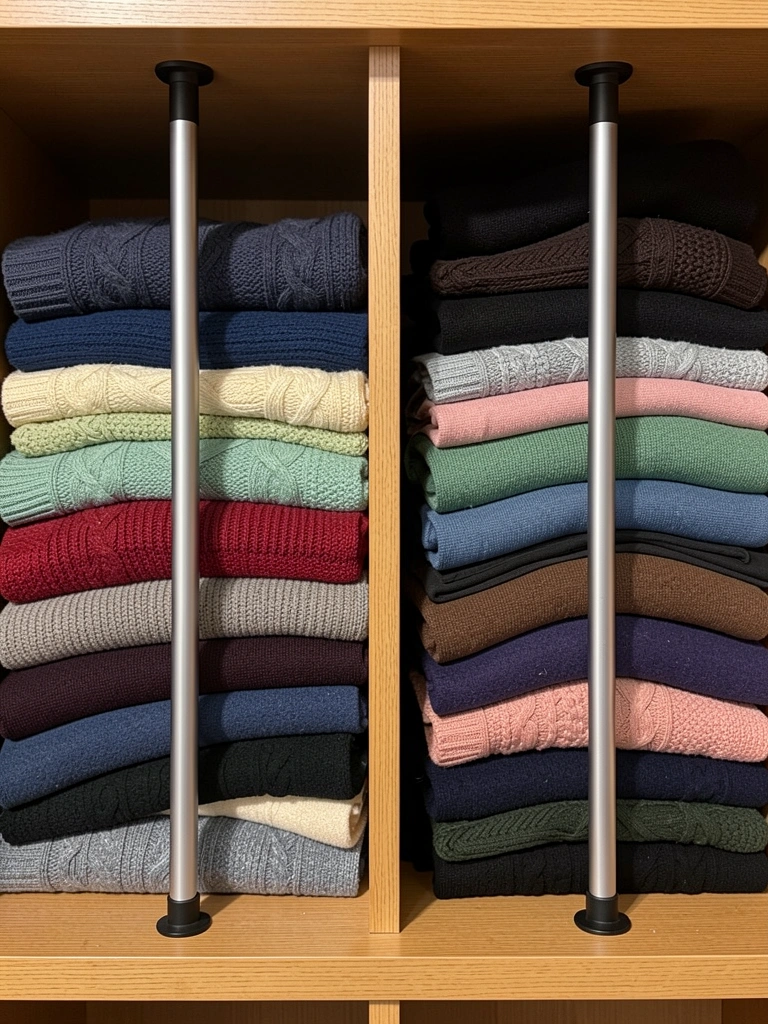
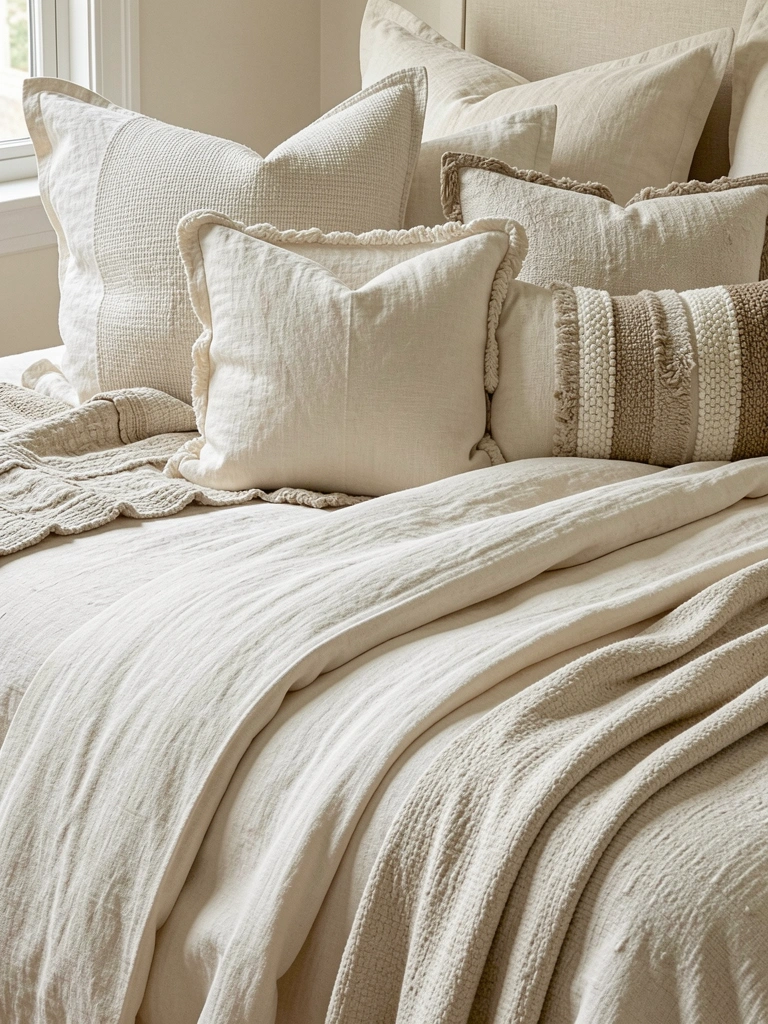
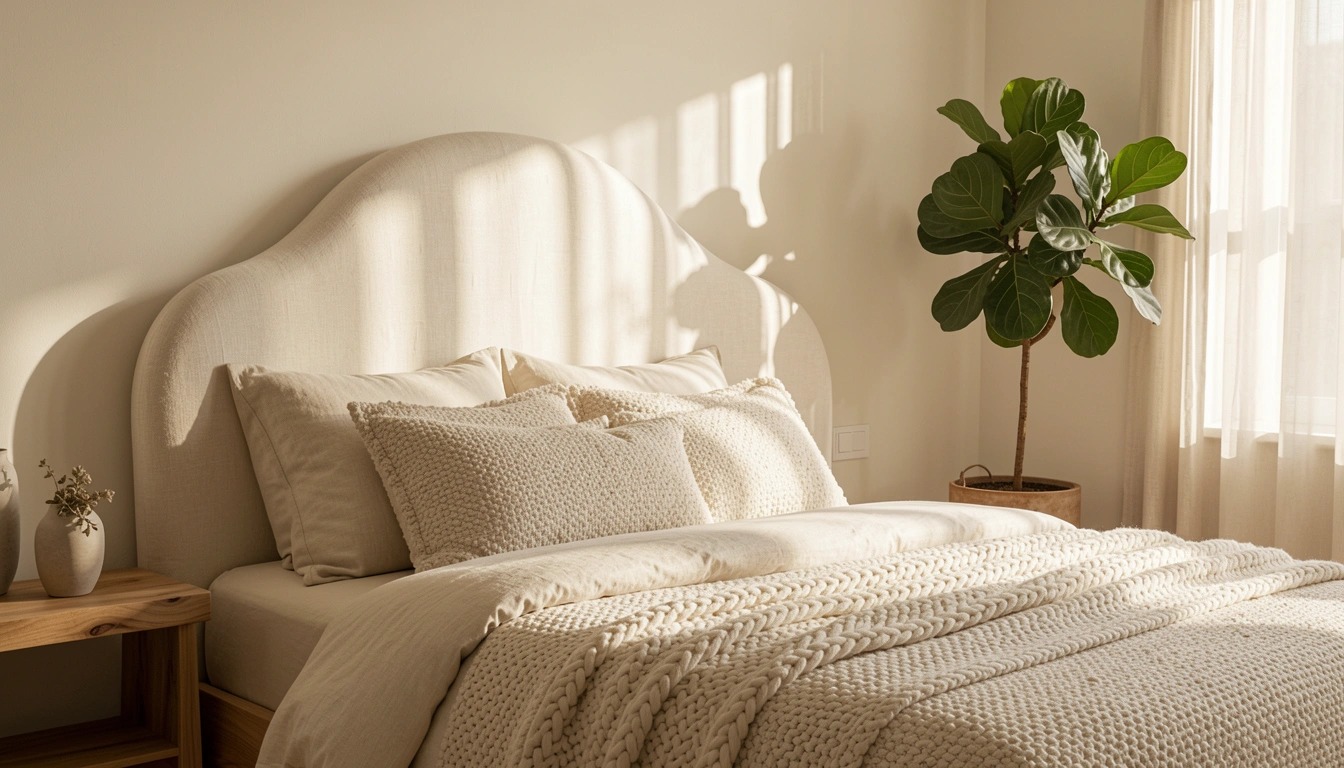
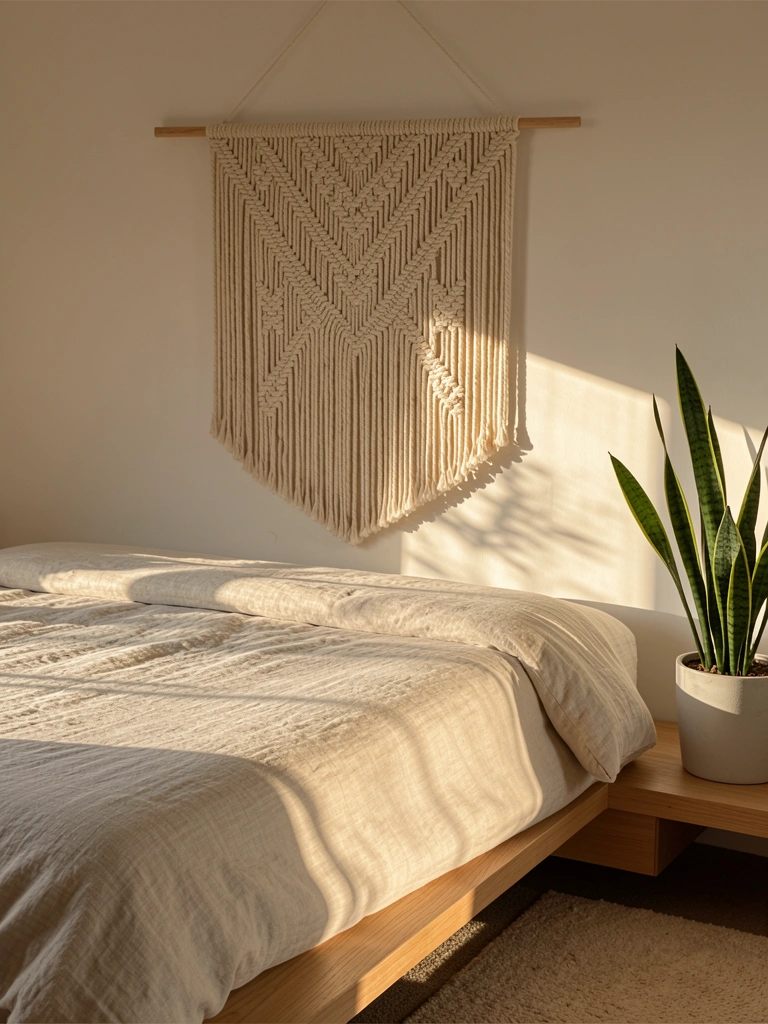
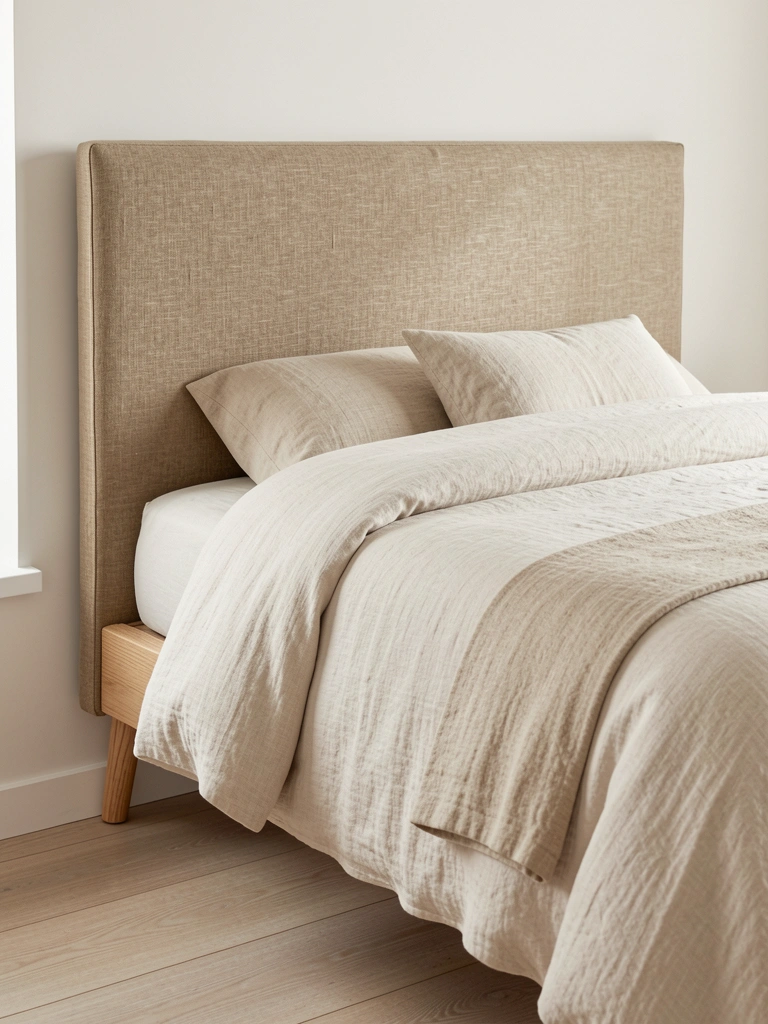
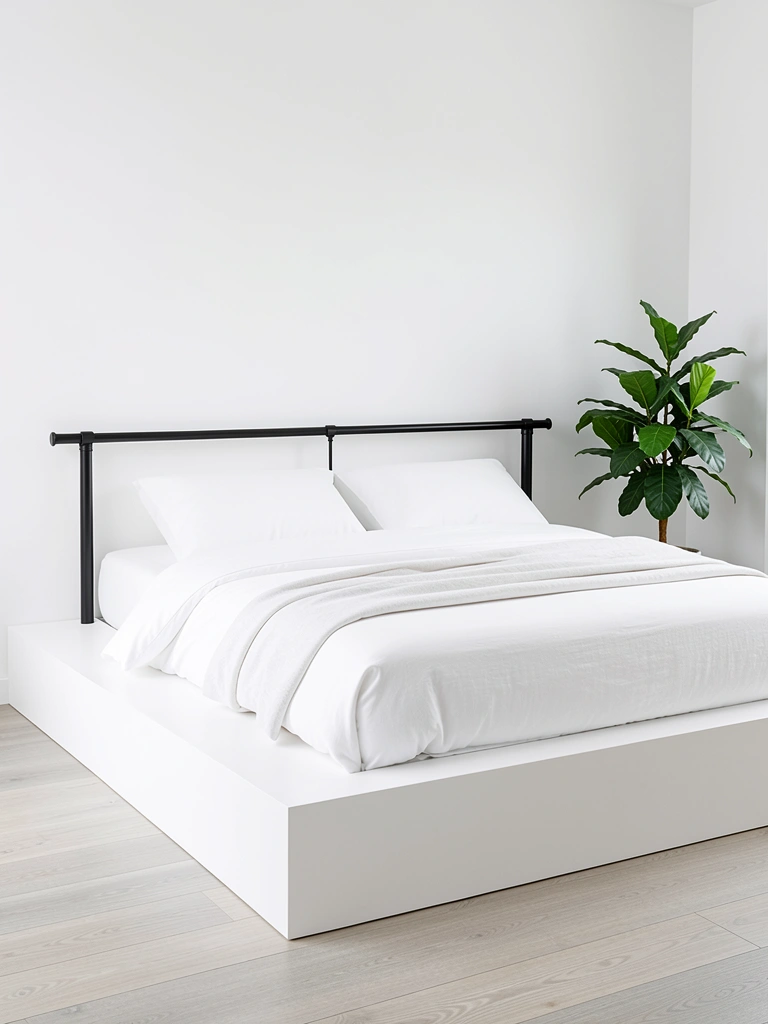
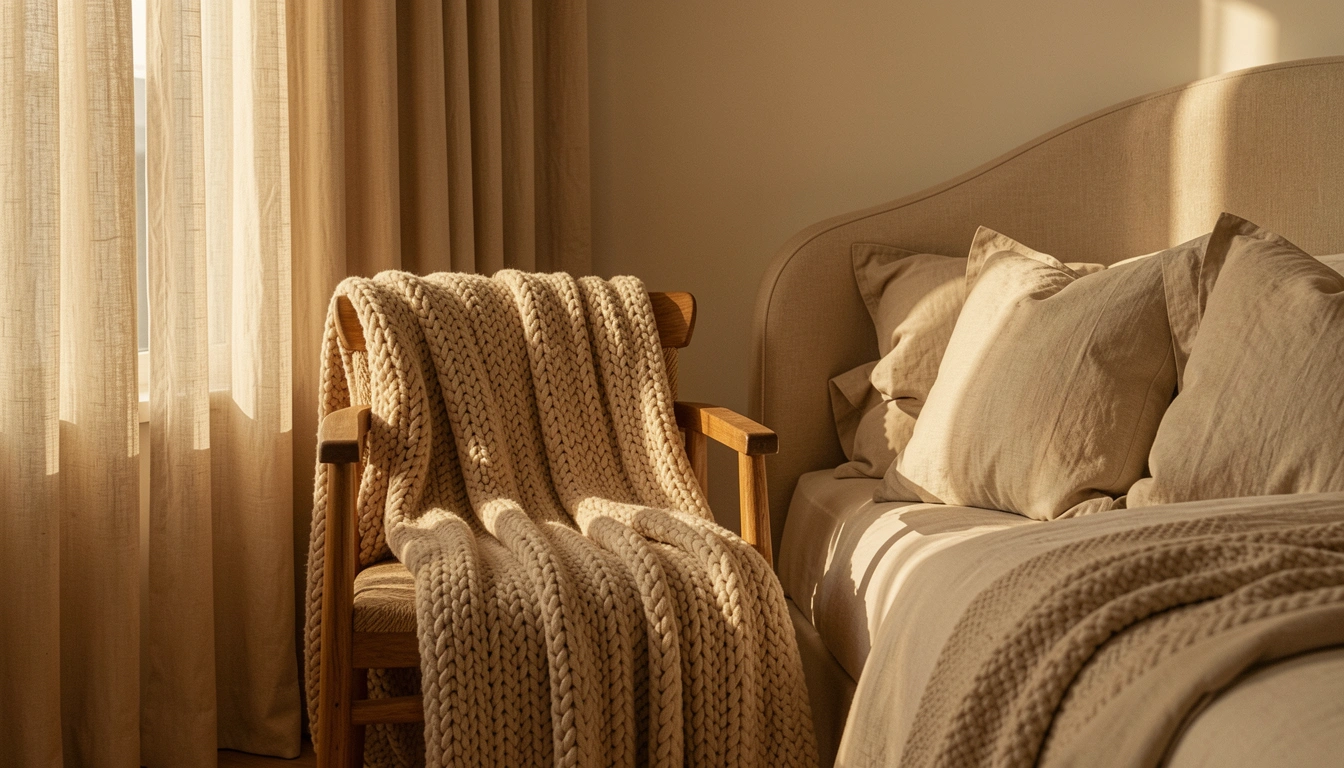
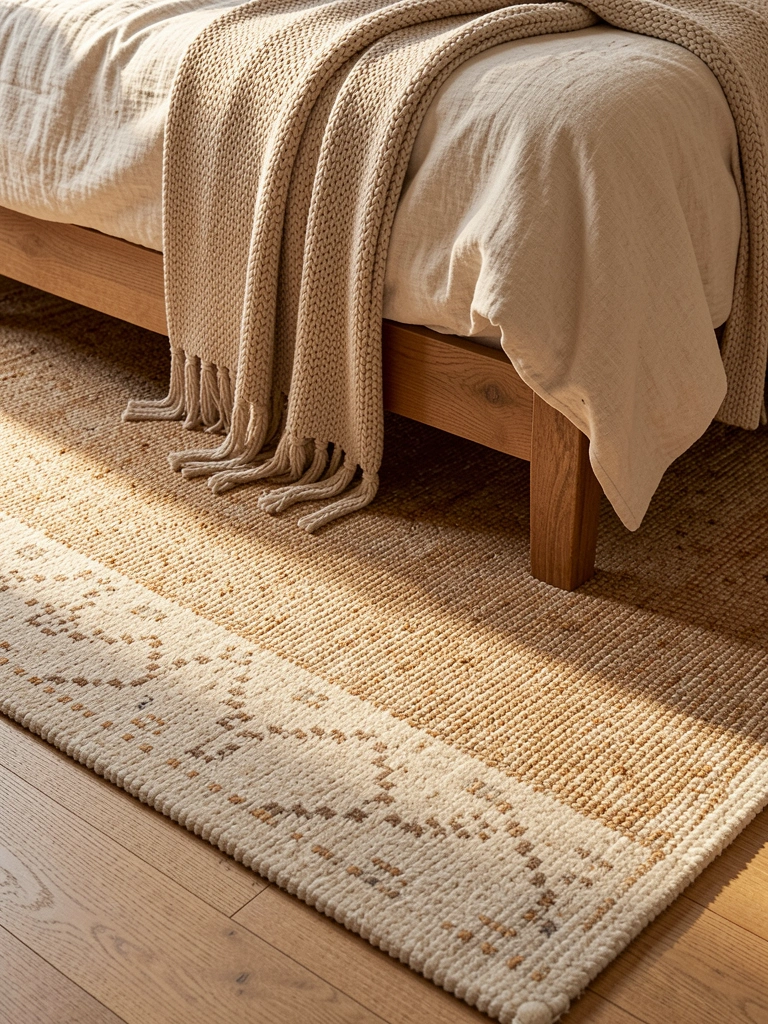
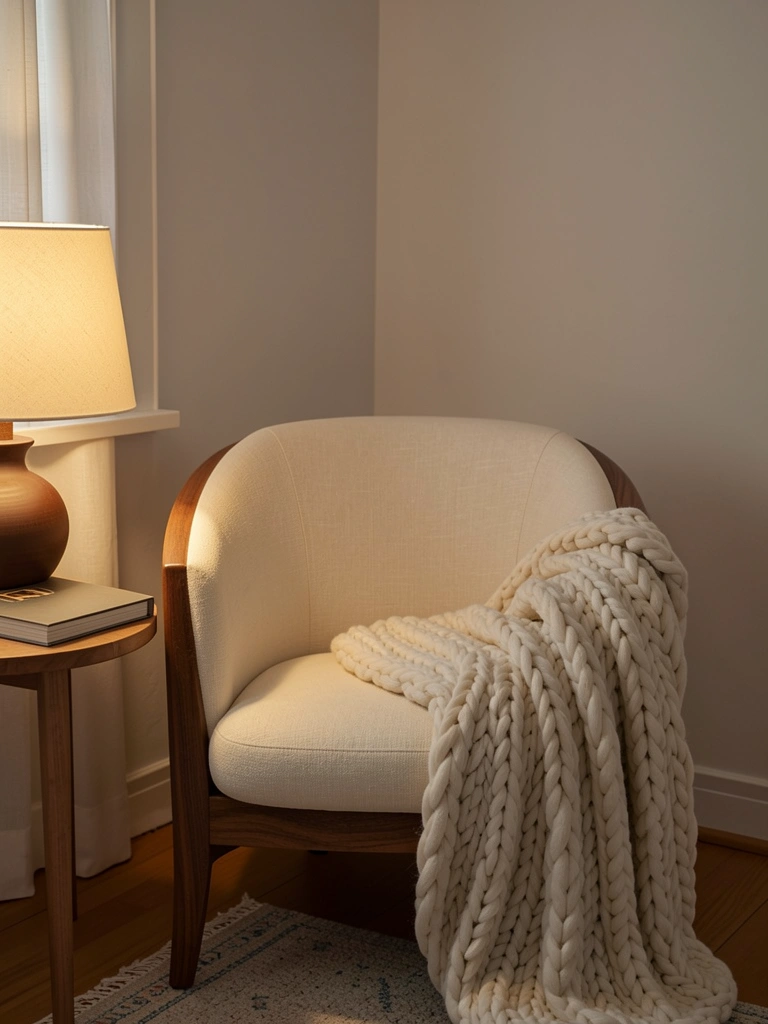
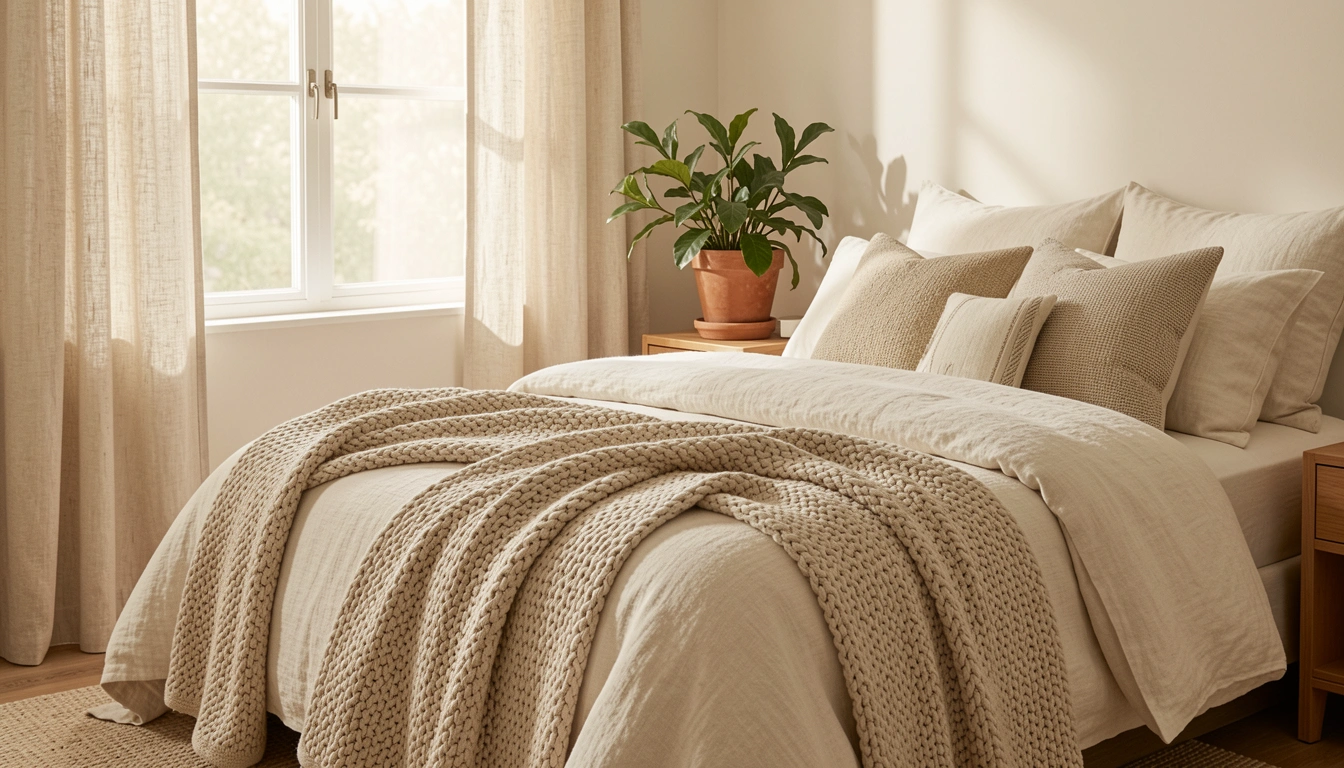
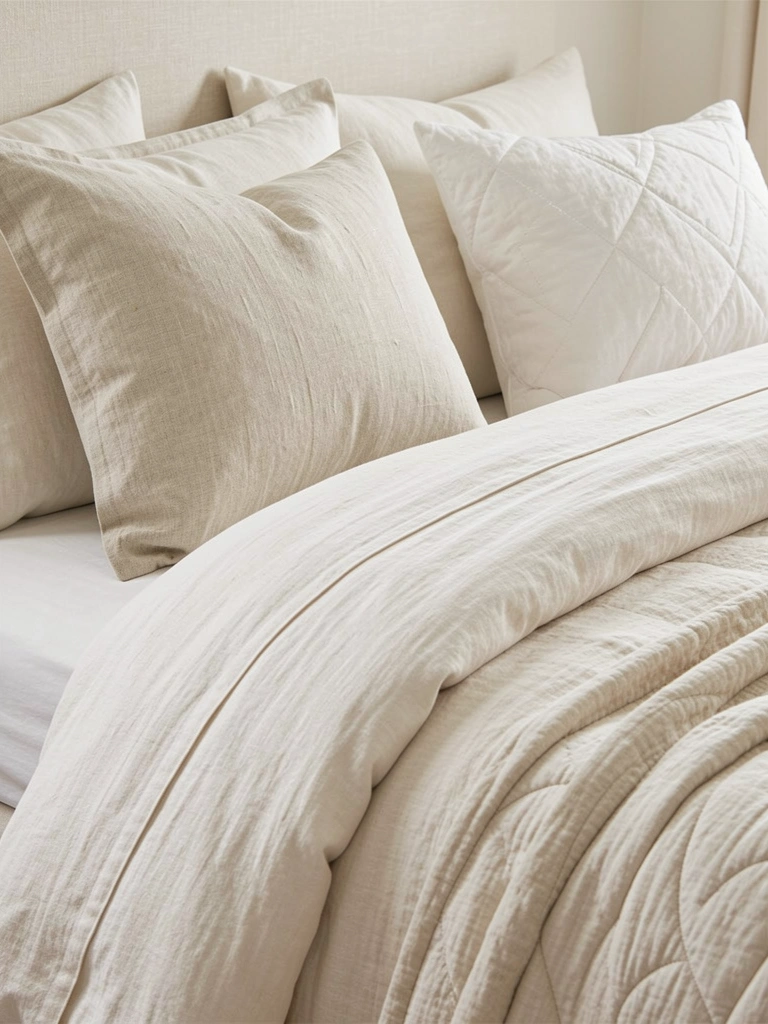
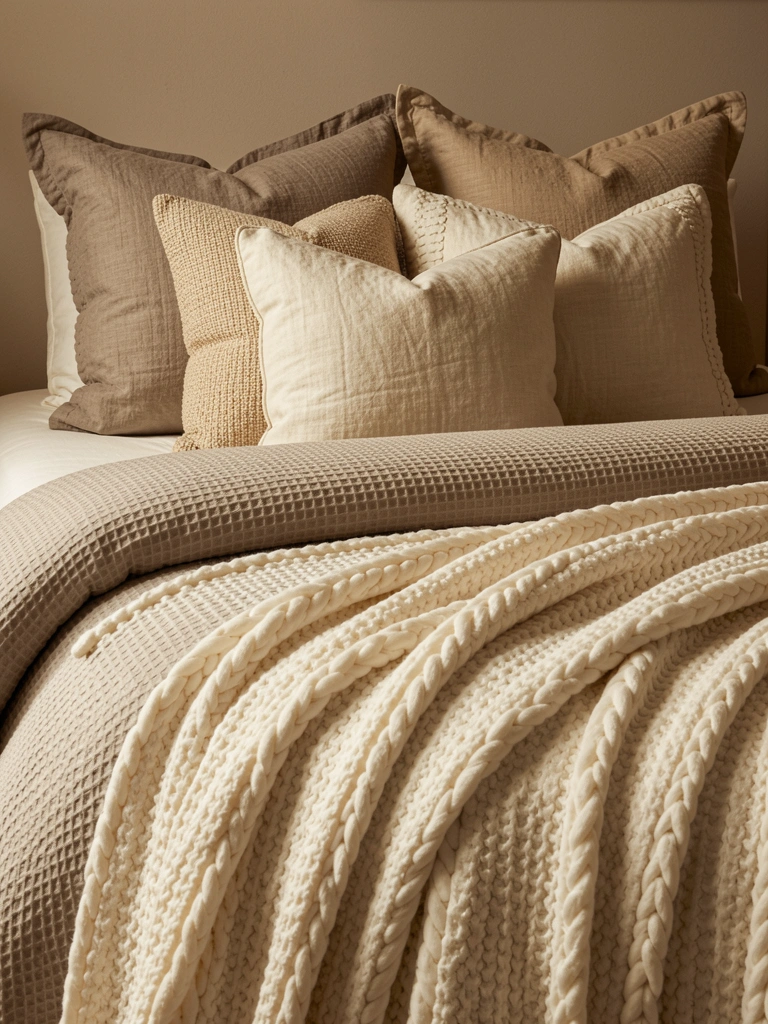
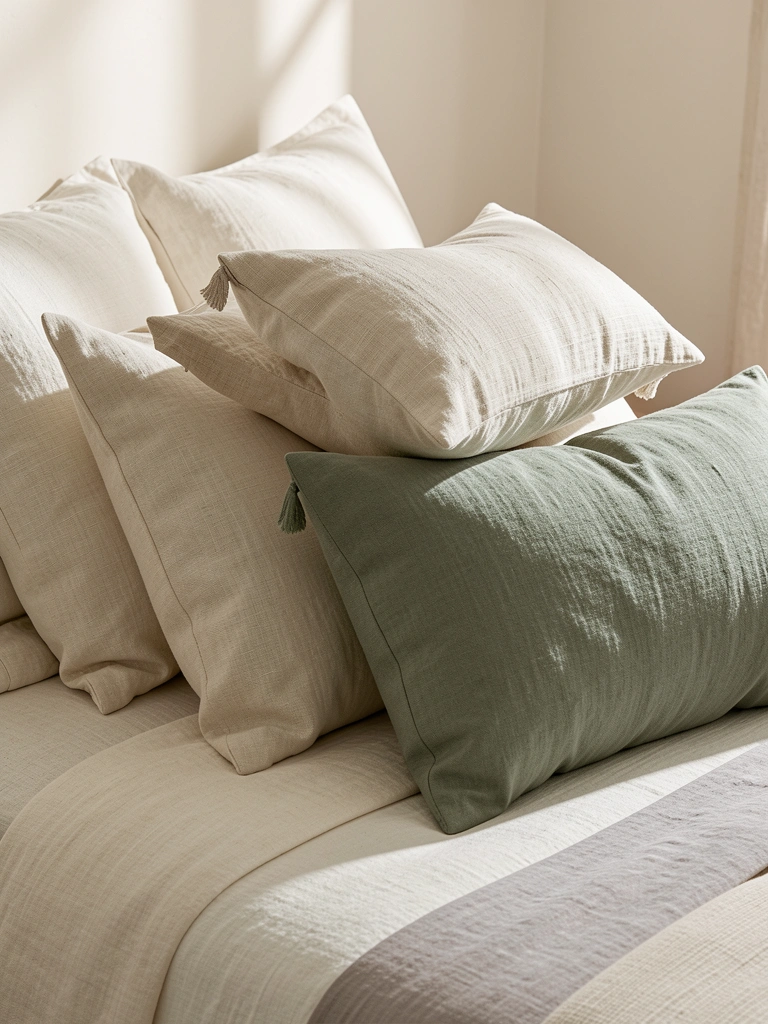
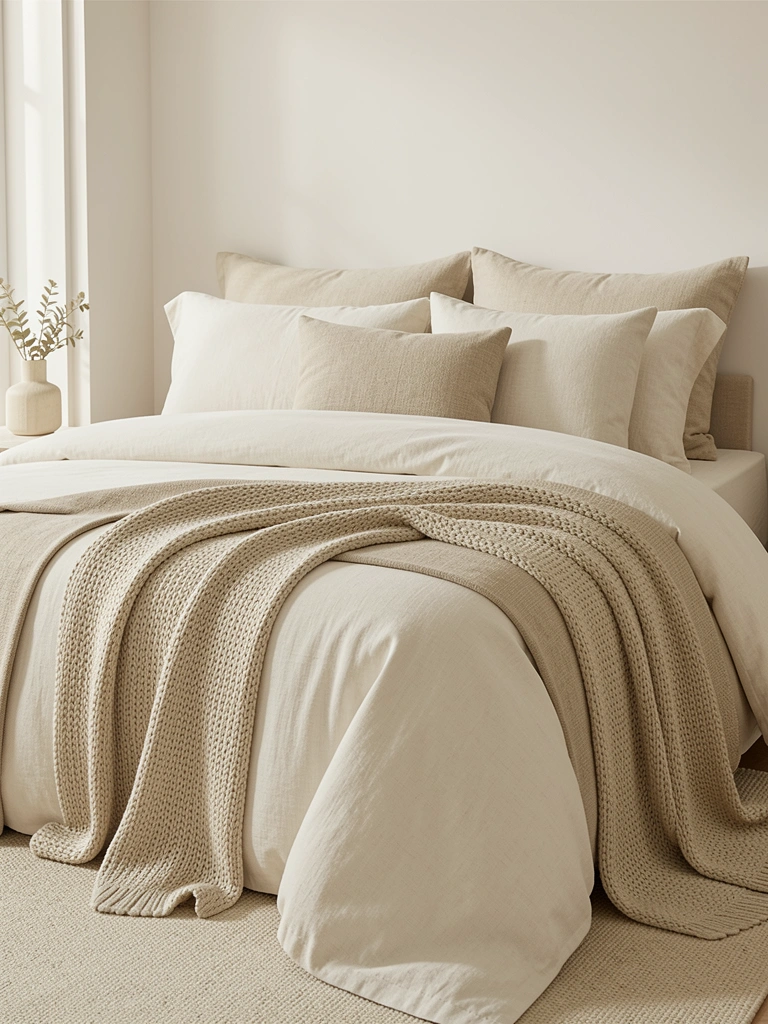
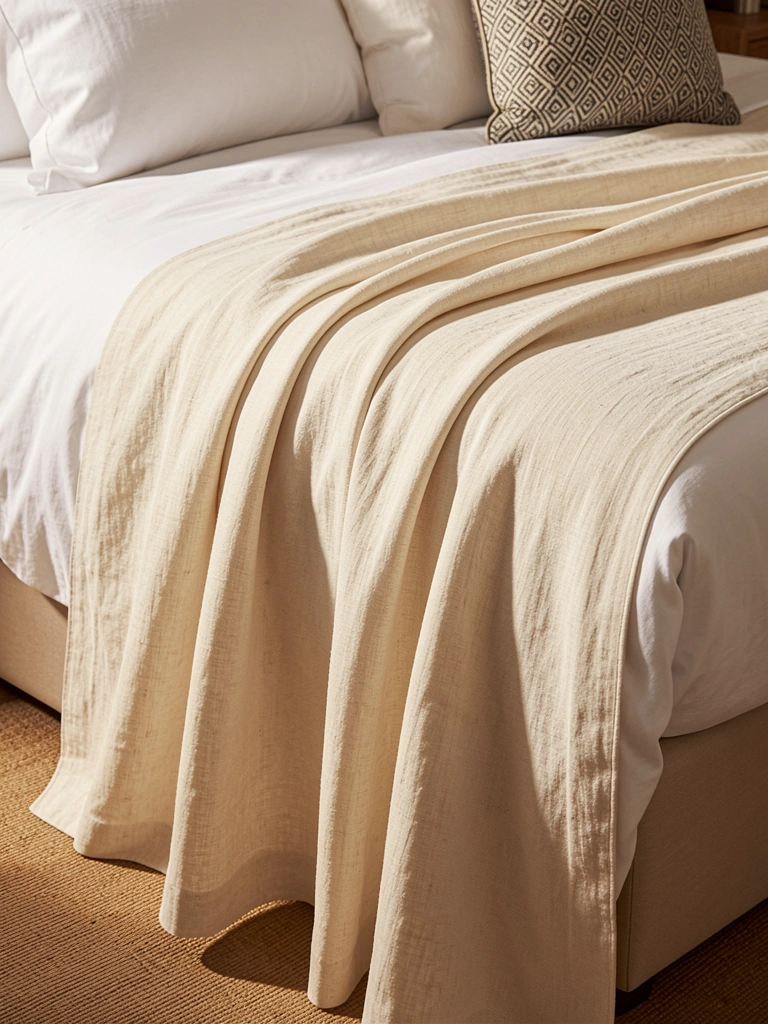
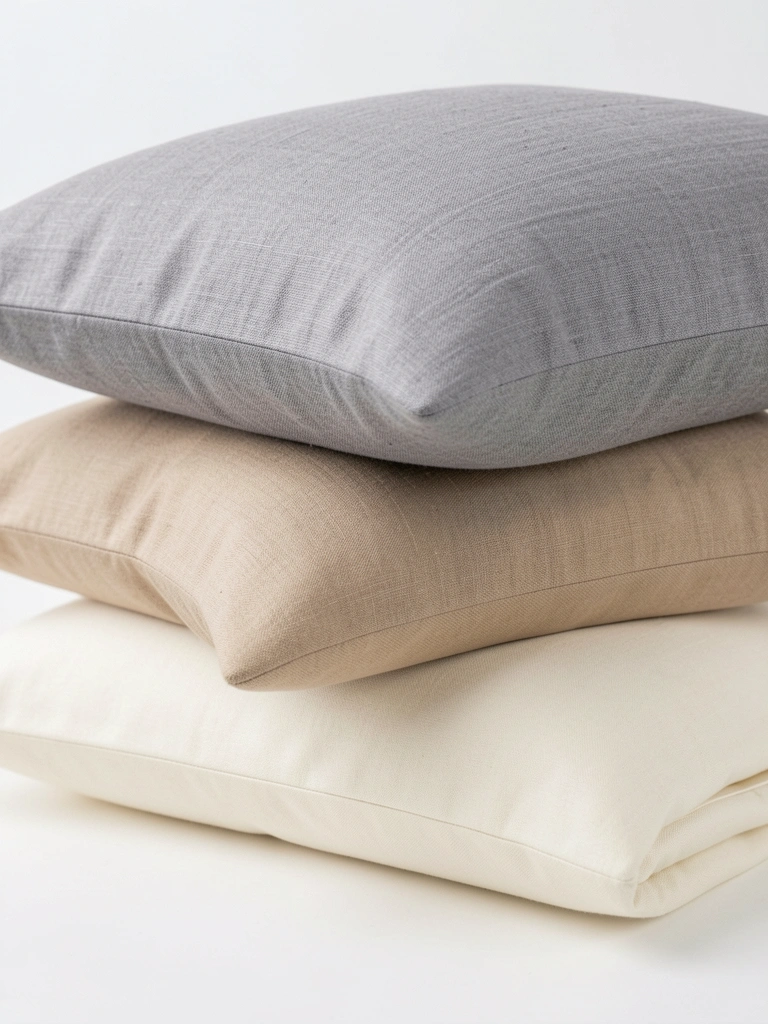
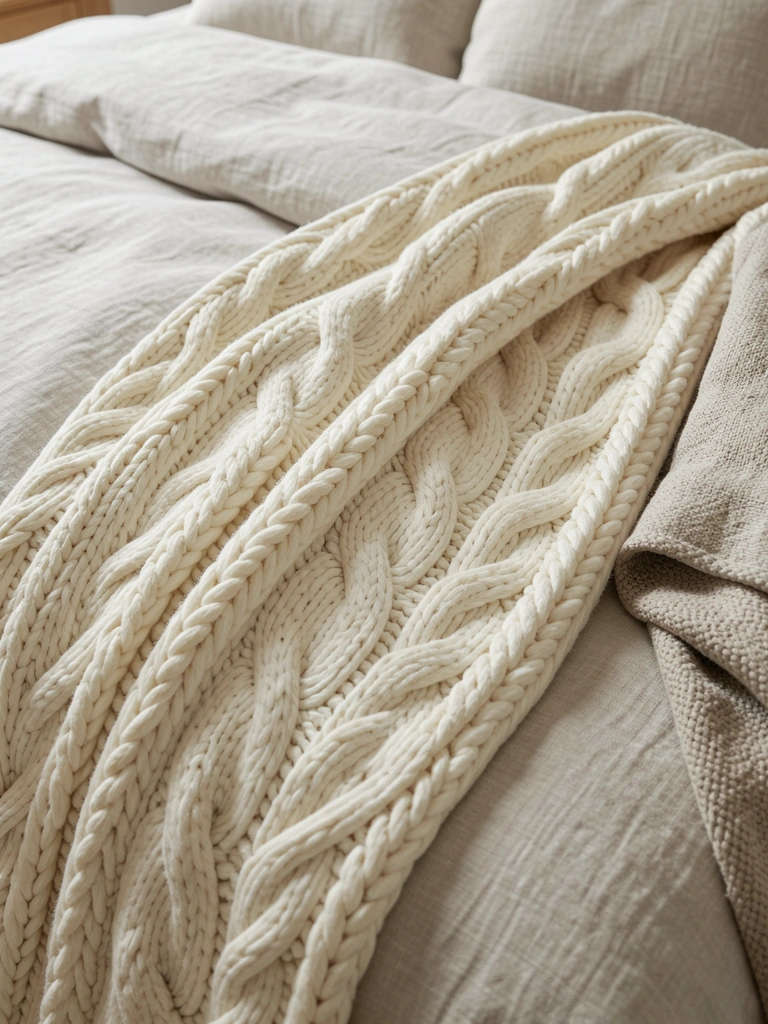
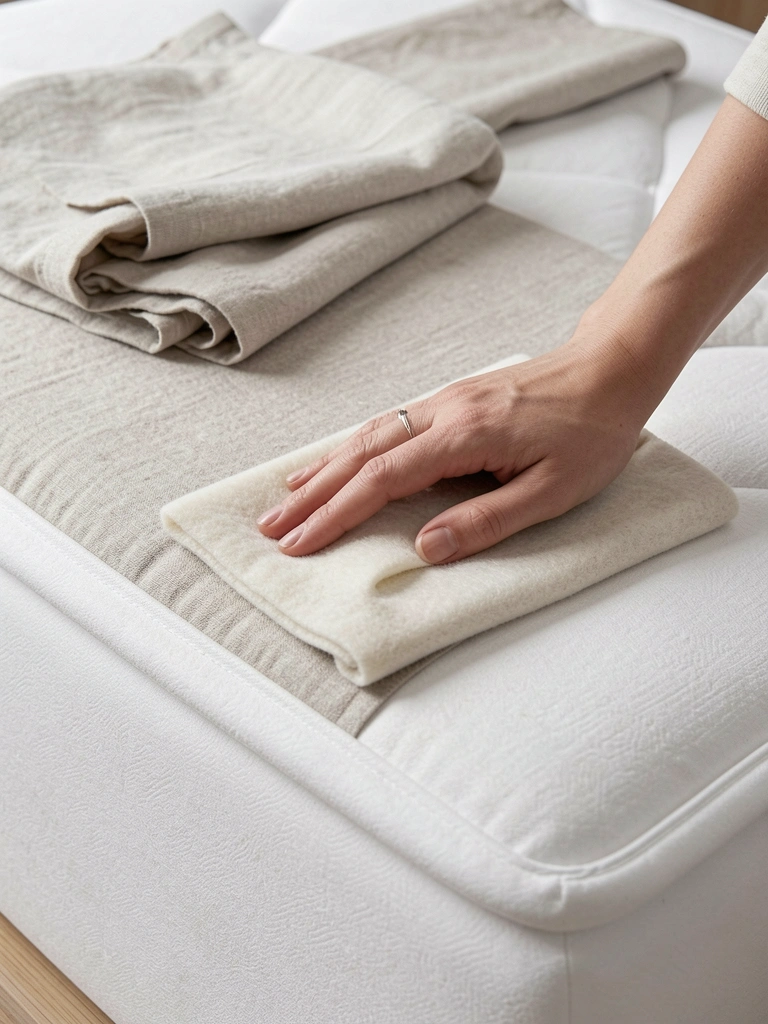
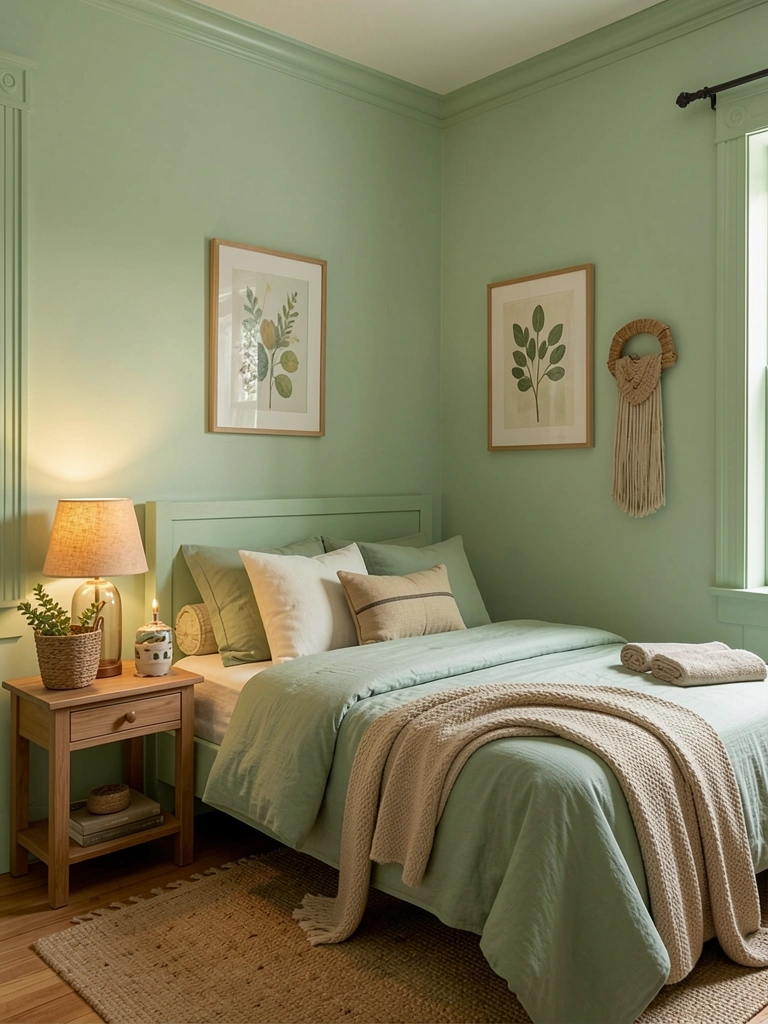
    13. Layer Neutrals for Softened Minimalism

    Softened minimalism adds warmth to minimalist aesthetics by layering textures, tones, and natural materials instead of leaving spaces stark and cold.

    Start with a neutral base (cream, warm white, soft gray, beige) and layer through texture: chunky knit throws ($20-$80), linen bedding ($60-$200), a textured area rug ($80-$300), and natural wood accessories ($30-$150). Add one or two natural elements (a potted plant, wood ladder, or woven basket). The key is avoiding flat, uniformly colored spaces.

    Your minimalist bedroom becomes warm and welcoming instead of cold or institutional. Everything feels intentional, but the space actually invites you to relax. It’s peaceful without feeling sterile.


    14. Say Goodbye to Accent Walls

    Accent walls feel dated. The 2025 move is to commit to full-room color or use texture variations instead.

    If you love color, embrace color drenching. If you prefer subtlety, use textured techniques on one wall (shiplap, wallpaper) paired with solid color on others—still cohesive, not “accent-focused.” Paint costs $20-$50 per gallon; a full bedroom refresh runs $100-$300 for DIY or $400-$1,200 professional. The psychological impact is immediate: your space feels finished and intentional instead of indecisive.

    Your bedroom stops looking like a Pinterest trend from 2015. Committing to full color or cohesive texture creates a space that feels confident and genuinely yours.


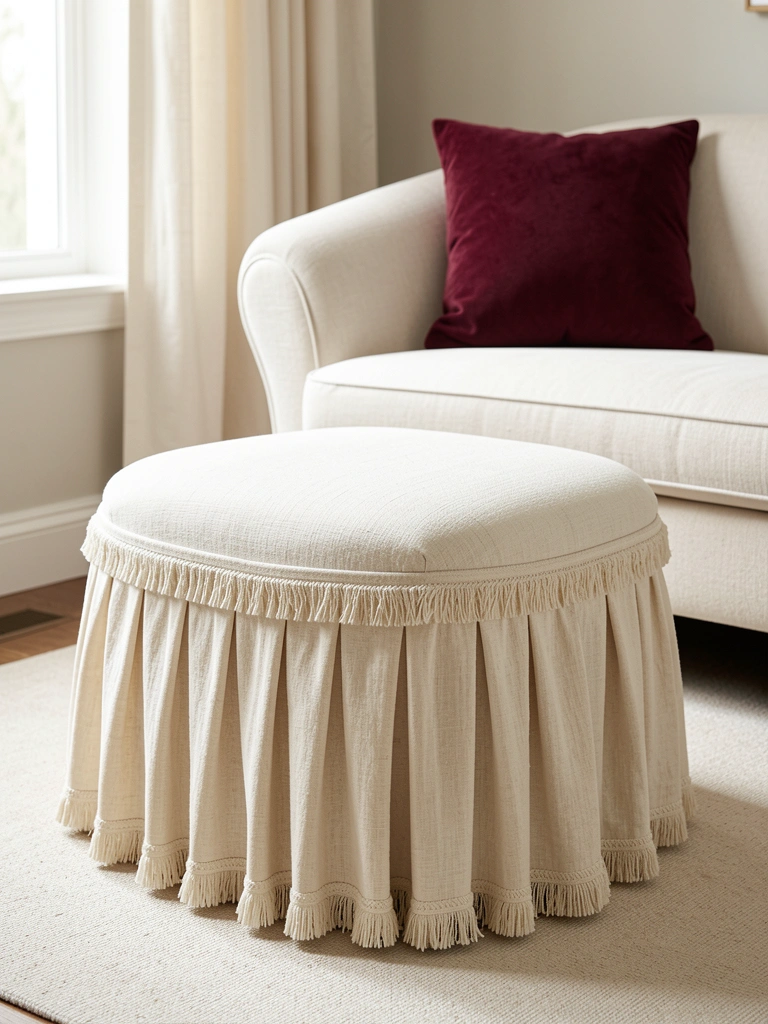
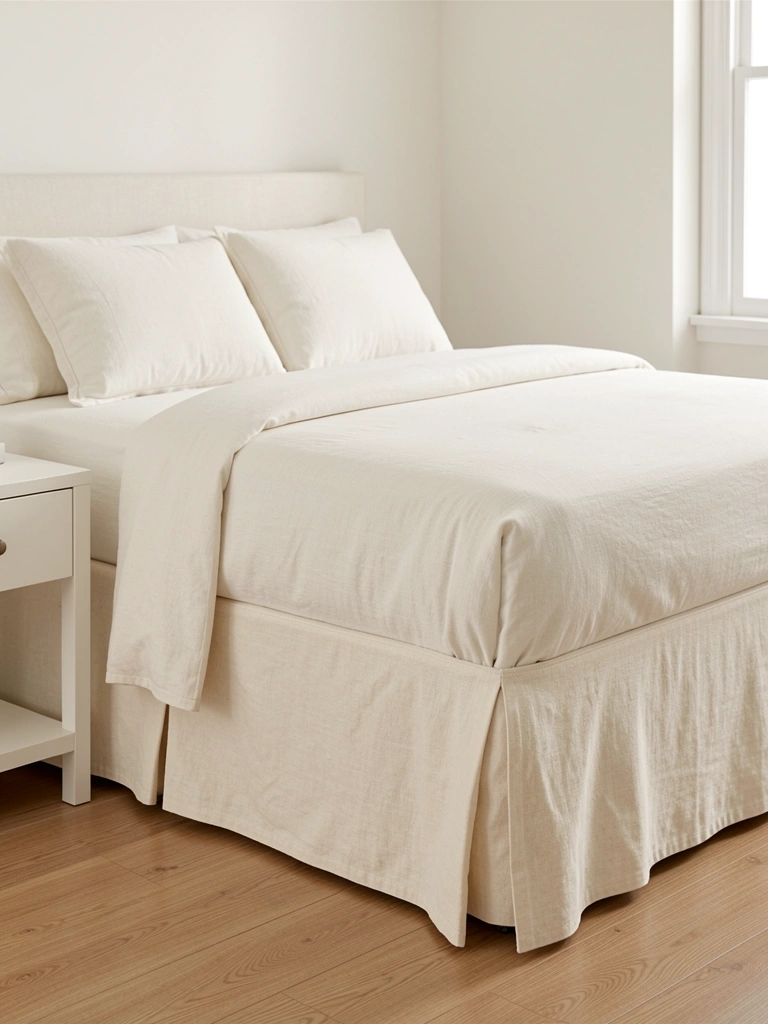
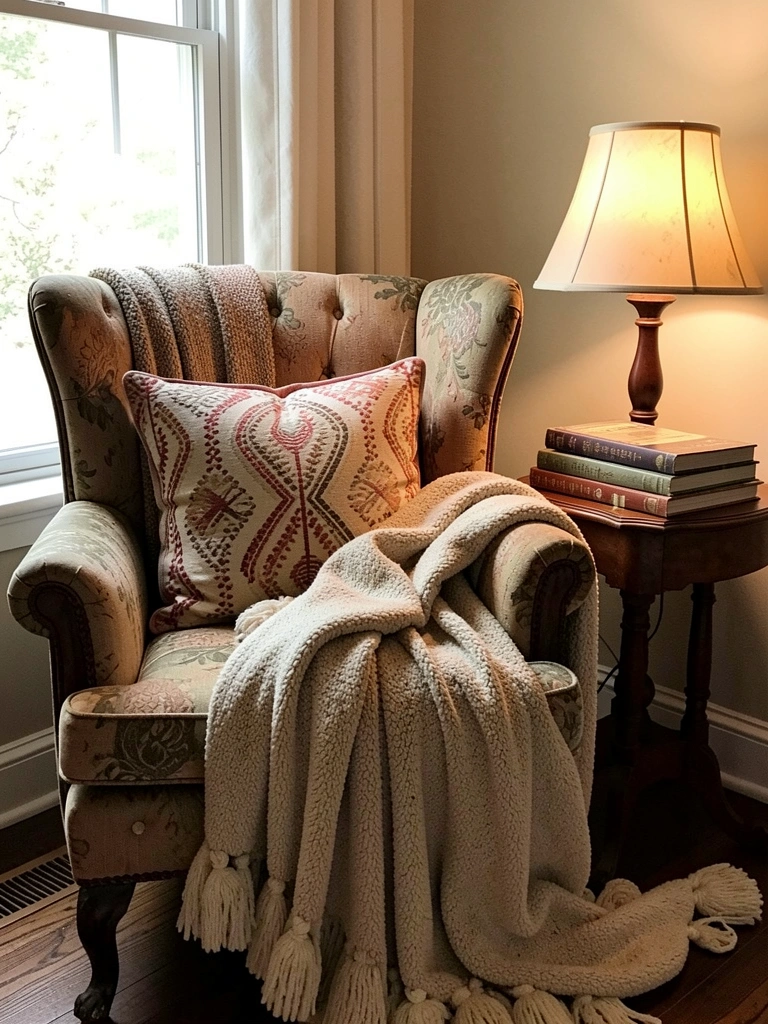
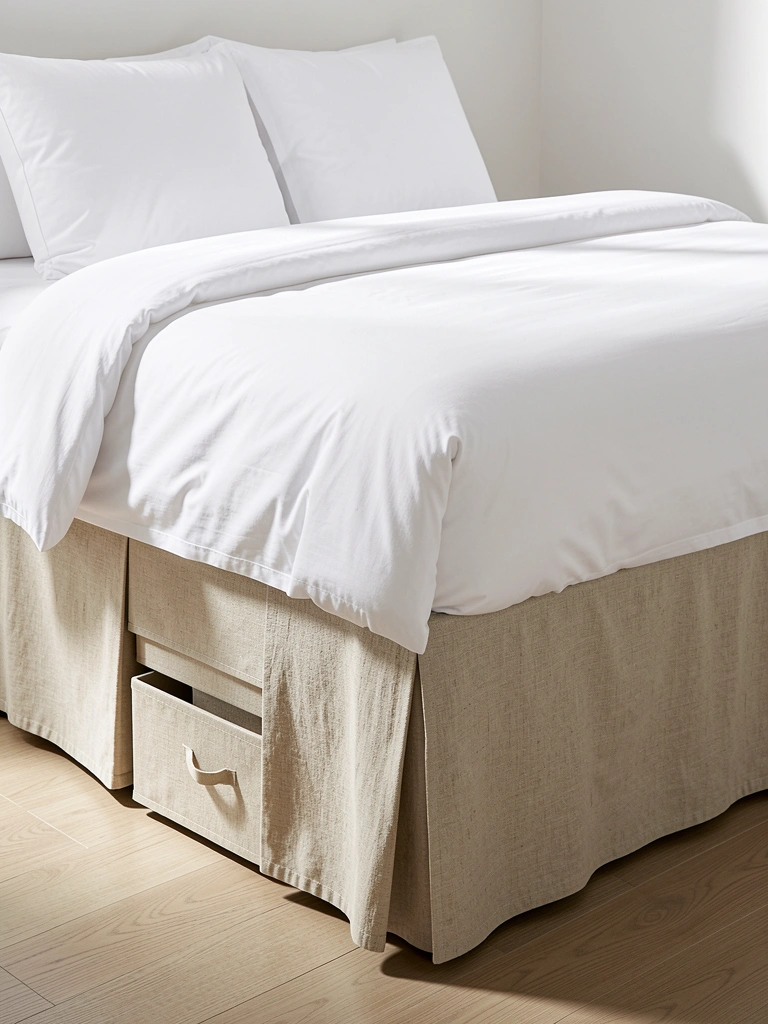
    15. Style With Skirted Furniture

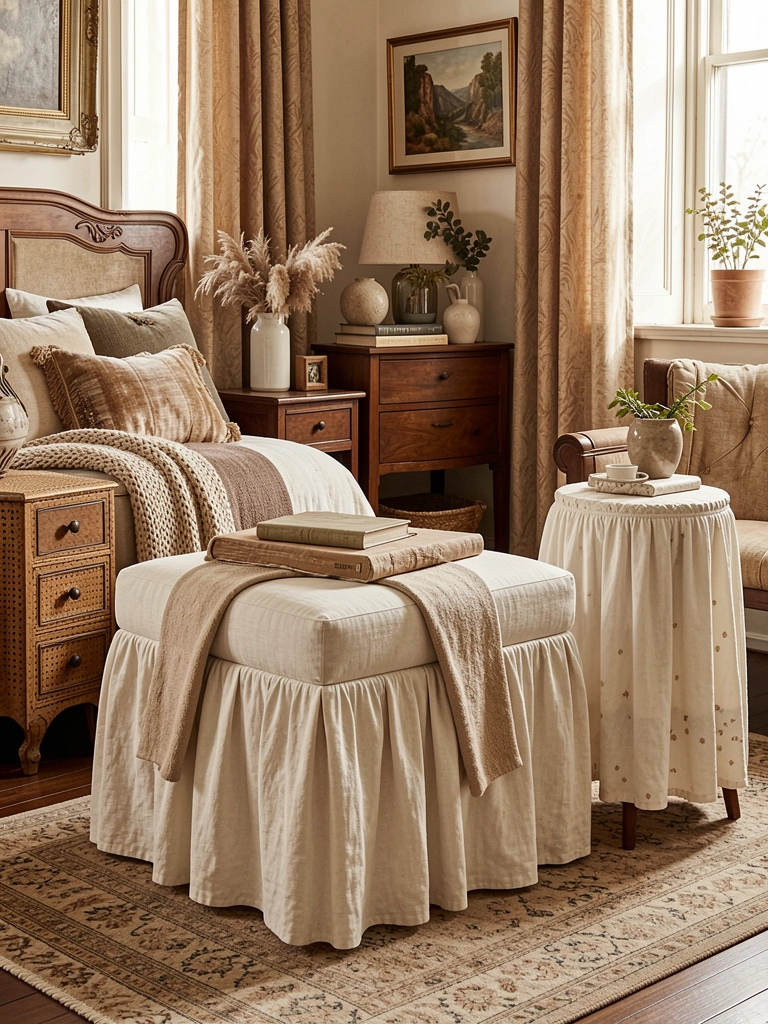
    Skirted furniture (ottomans, tables, benches with floor-length fabric skirts) adds vintage elegance and visual softness. This trend is having a quiet revival as people embrace nostalgia.

    Hunt thrift stores for older skirted pieces ($20-$100), or buy new styles from Wayfair, Article, or local furniture makers ($200-$600). DIY option: add fabric skirts to plain ottomans using iron-on hem tape or upholstery glue ($20-$50 in supplies). Pair with patterned or textured fabrics for maximum impact. Takes one afternoon if you’re gluing or sewing.

    Your bedroom gains vintage charm and unexpected softness. Skirted pieces photograph beautifully and create a designer-curated feeling. It’s a trend that feels personal, not corporate.


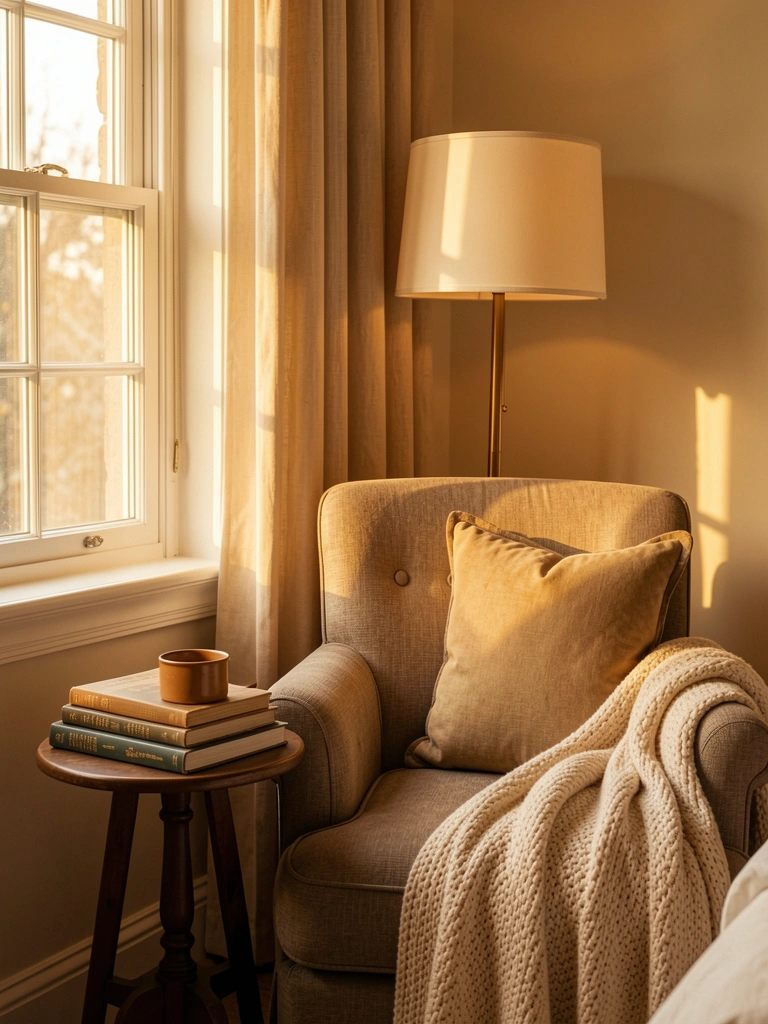
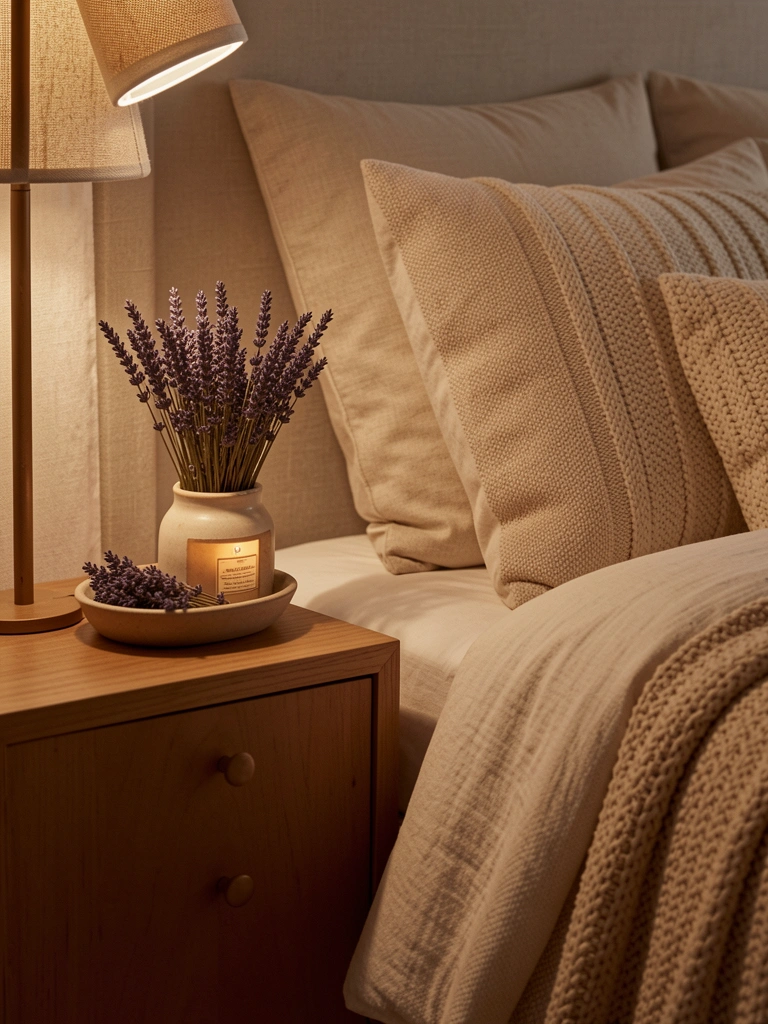
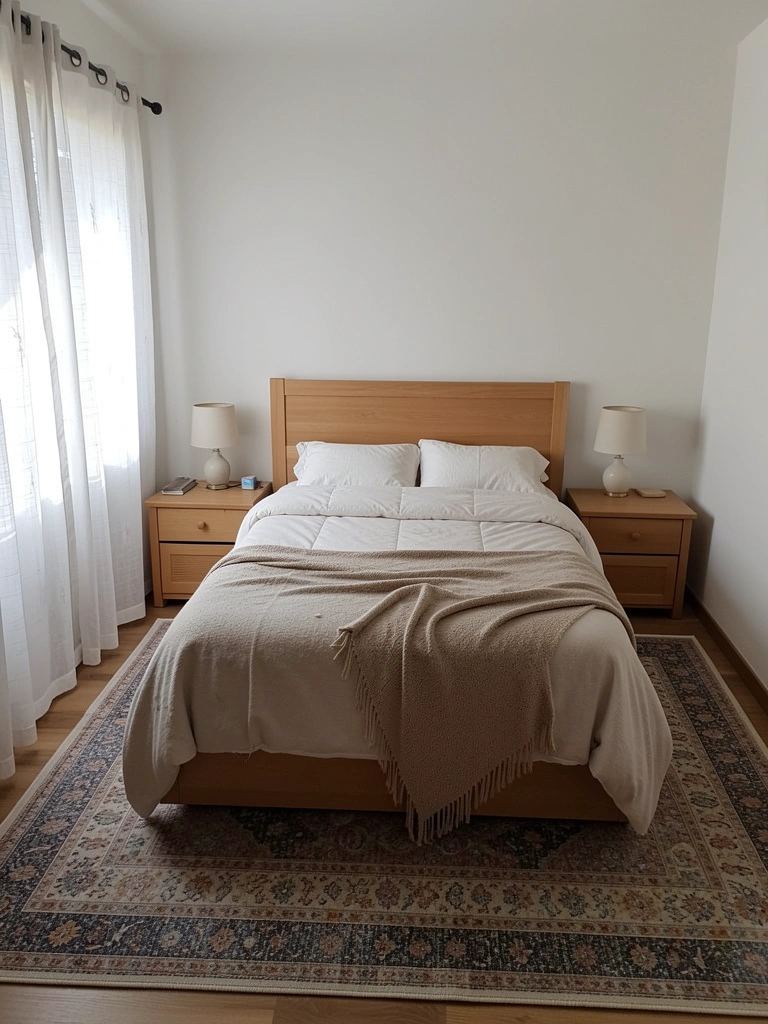
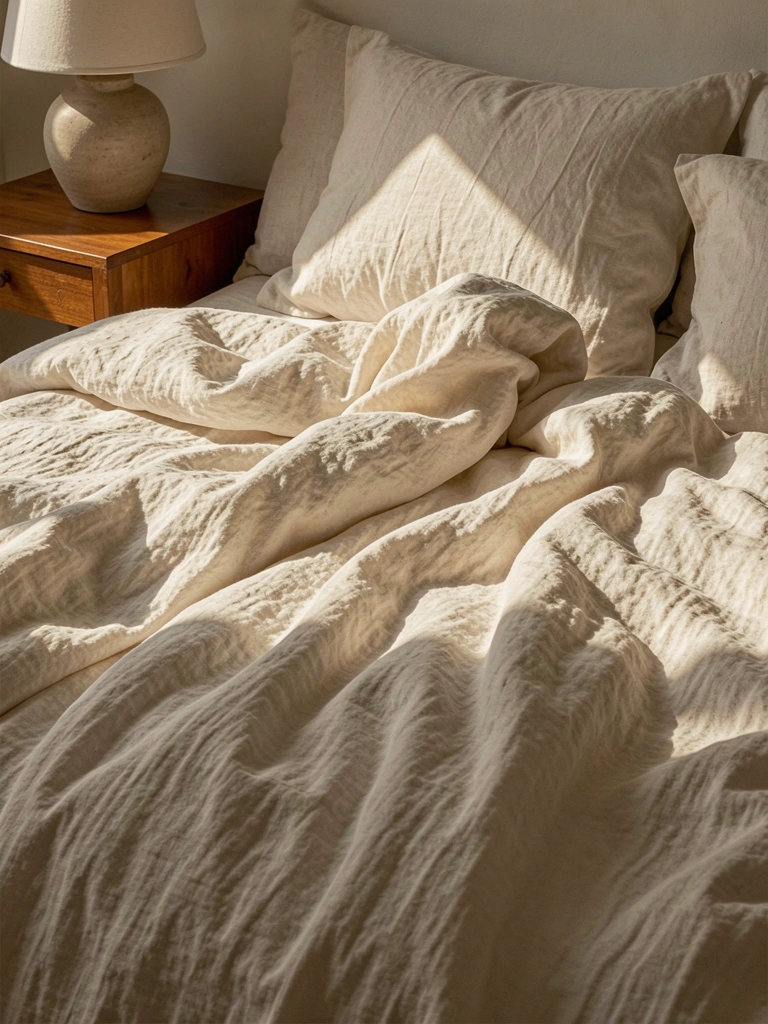
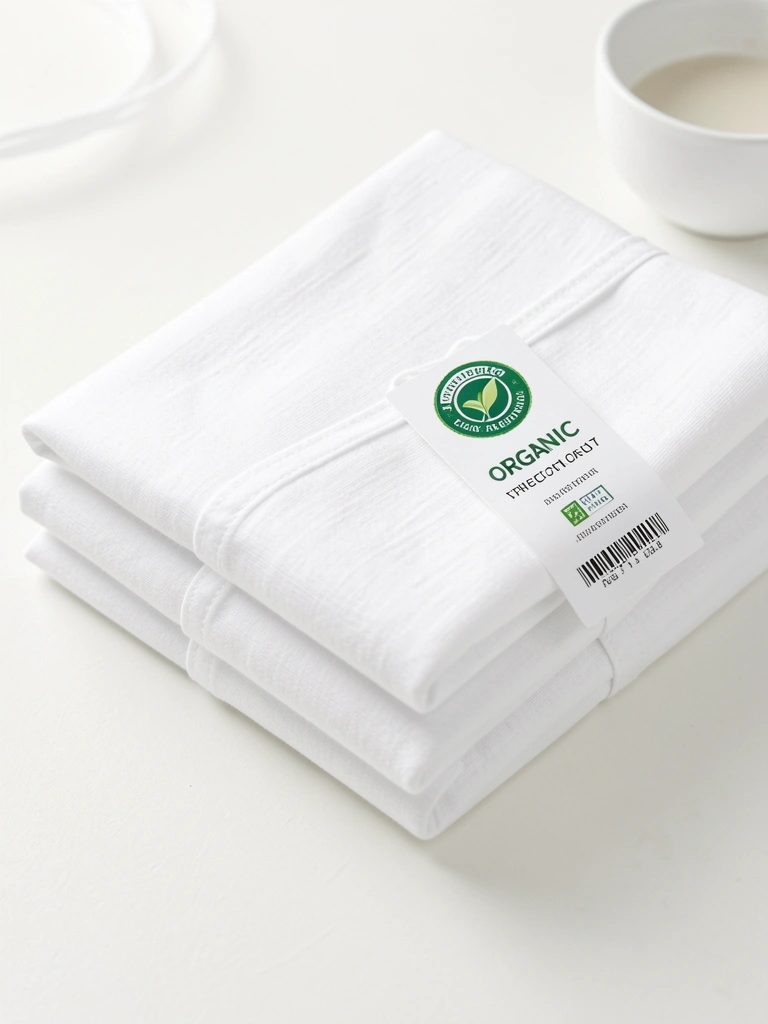
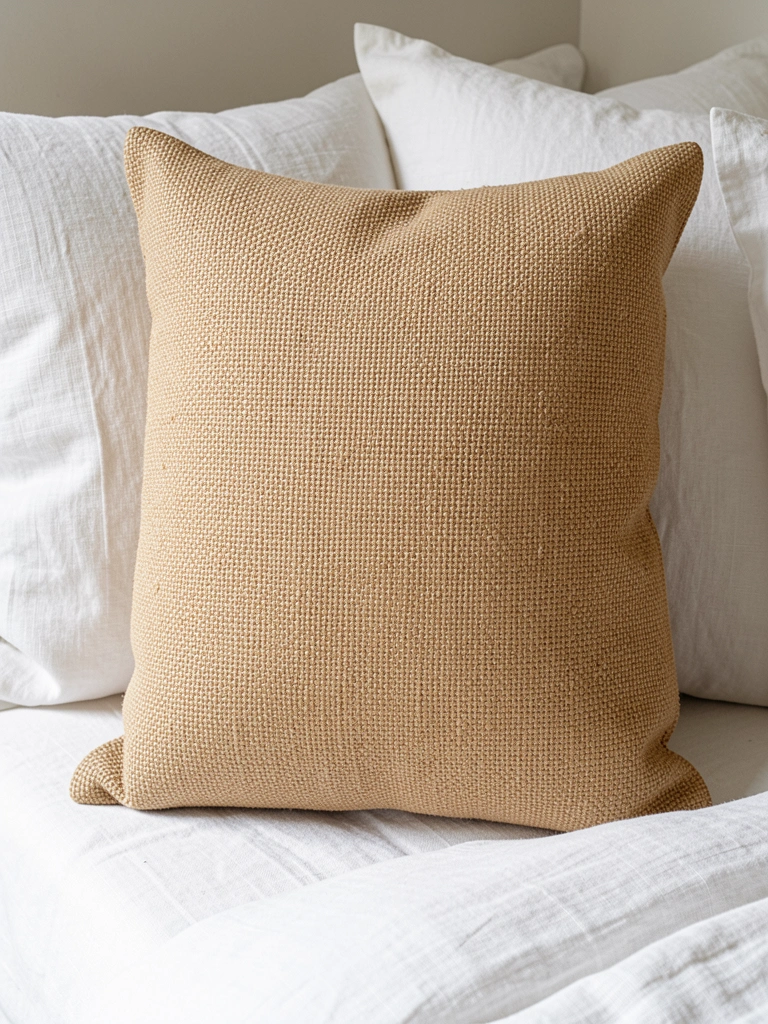
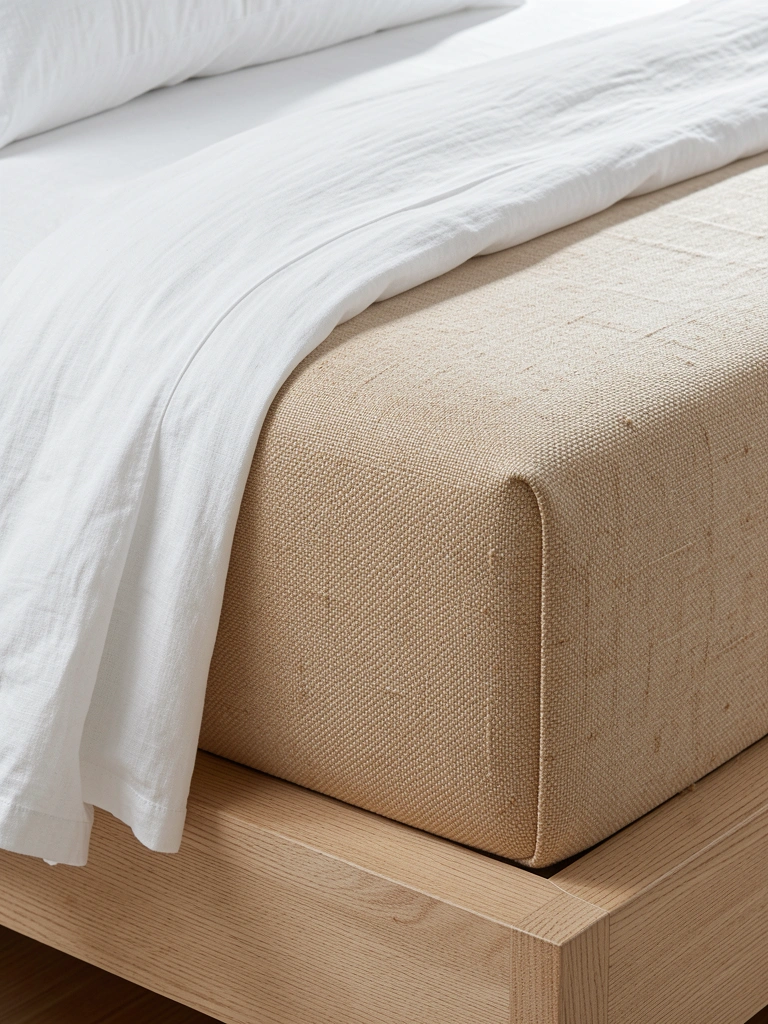
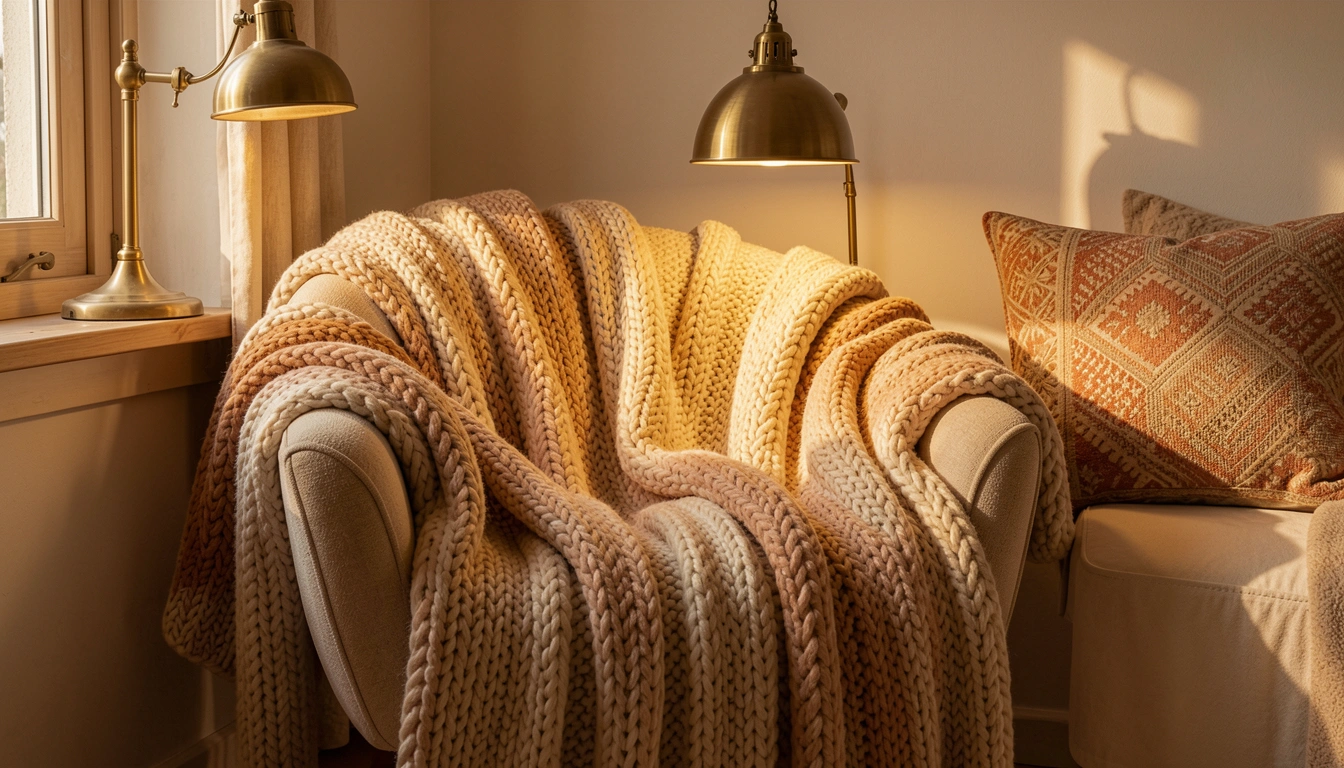
    16. Prioritize Comfort in Every Design Choice

    The biggest 2025 design shift is prioritizing comfort over aesthetics. Your bedroom should actually feel good, not just look good.

    Invest in quality bedding (thread count 400+, natural fibers): a duvet ($80-$250), sheets ($30-$100), and multiple pillows ($20-$60 each). Add soft layers: chunky throws ($30-$100), fuzzy area rugs ($50-$200), and comfortable seating ($200-$800). Budget for comfort; cheap synthetic fabrics feel cheap and aren’t actually restful. The point is: does it feel good to touch and use?

    When your bedroom prioritizes comfort, you actually want to spend time there. Sleep quality improves, and you genuinely relax. Comfort is the foundation of any great room, aesthetics second.


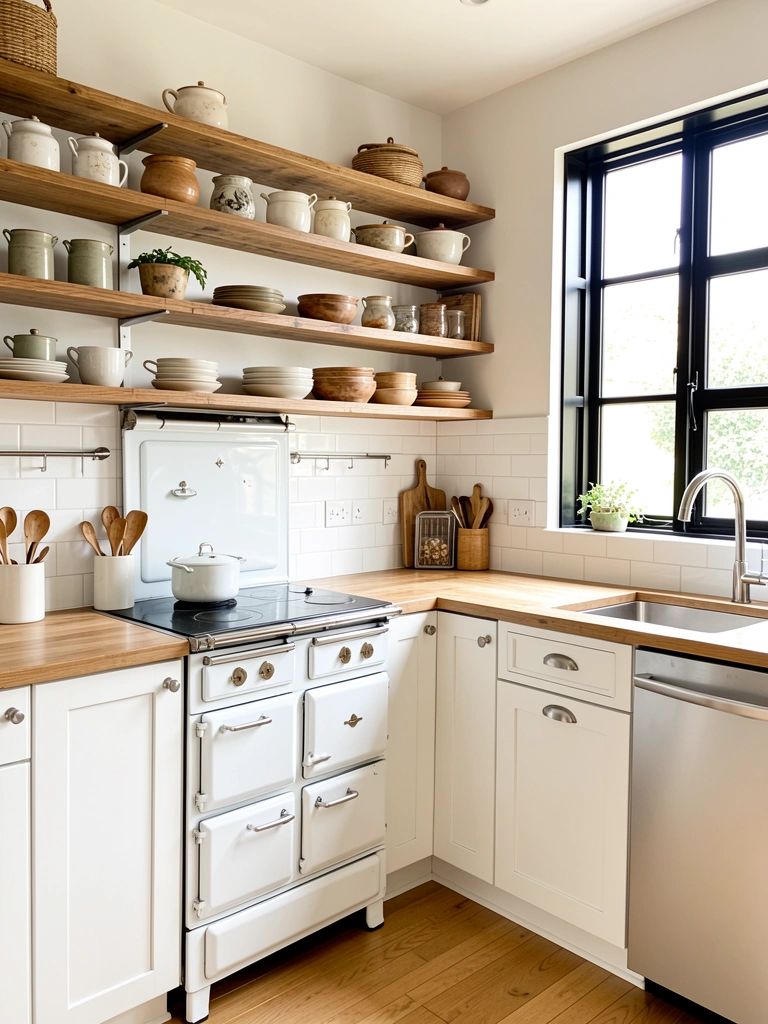
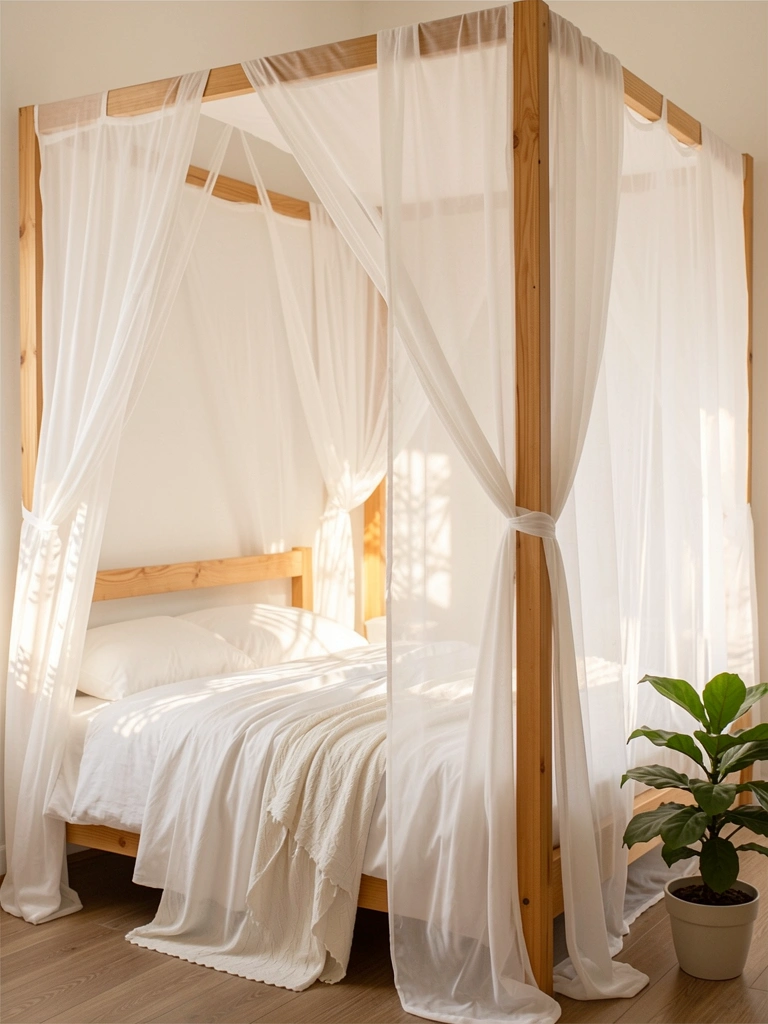
    17. Blend Modern Cottagecore With Sleek Details

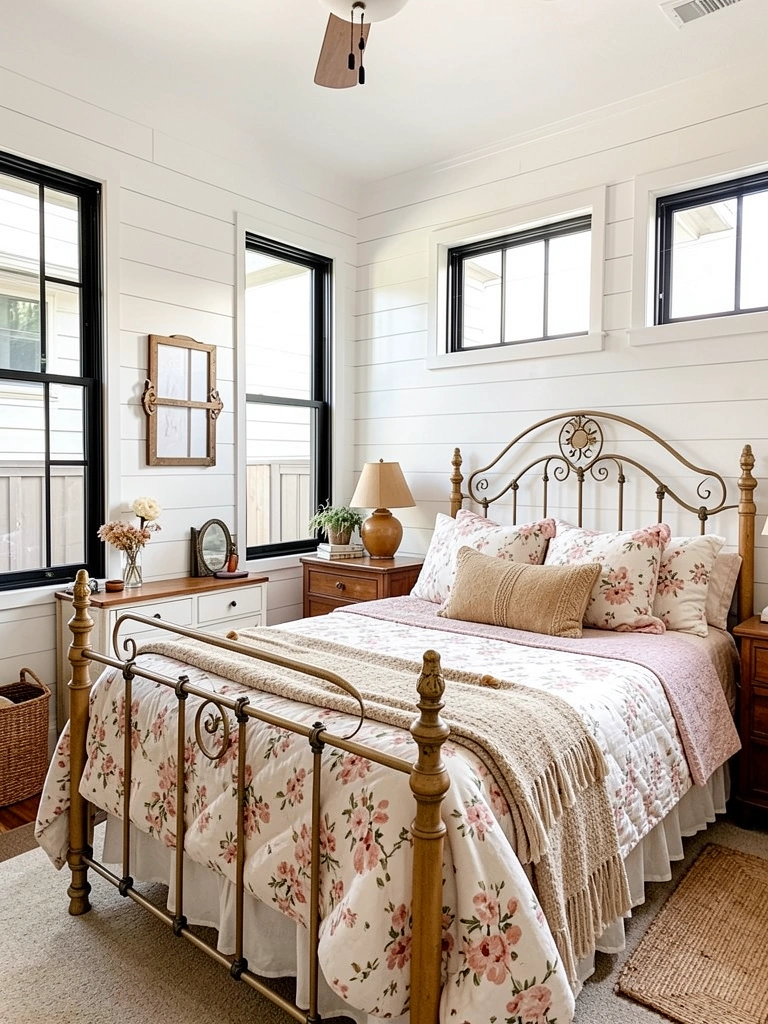
    Modern cottagecore softens farmhouse nostalgia by adding contemporary sleek elements (black windows, clean lines, minimalist art) instead of going full rustic.

    Mix vintage finds (thrifted quilts, wooden side tables, vintage mirrors) with modern accents: crisp white bedding, black window frames or blinds, and minimal artwork. Thrift stores provide authentic vintage ($5-$80 per item); pair with new modern pieces from Muji, CB2, or IKEA ($20-$300). The blend feels intentional and refined, not “grandmother’s house.”

    Your bedroom captures cozy nostalgia without feeling dated or clichéd. It’s Instagram-worthy and genuinely comfortable. The mix of old and new feels personal and curated.


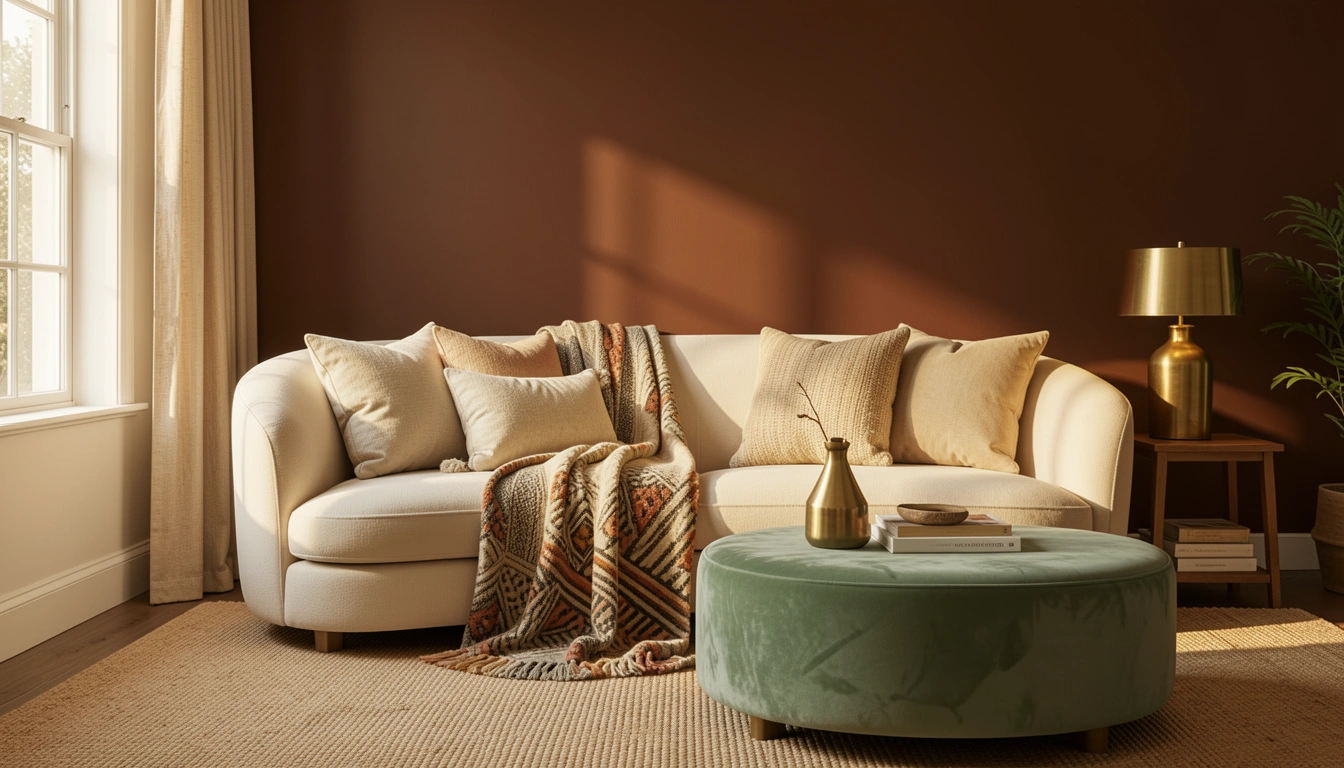
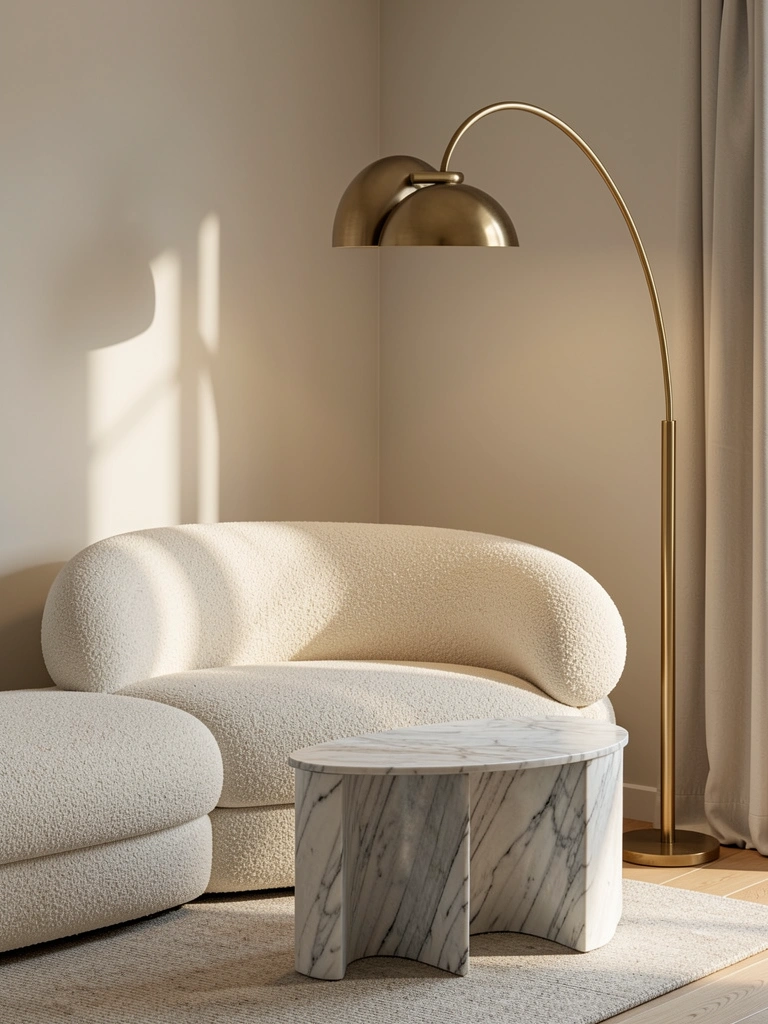
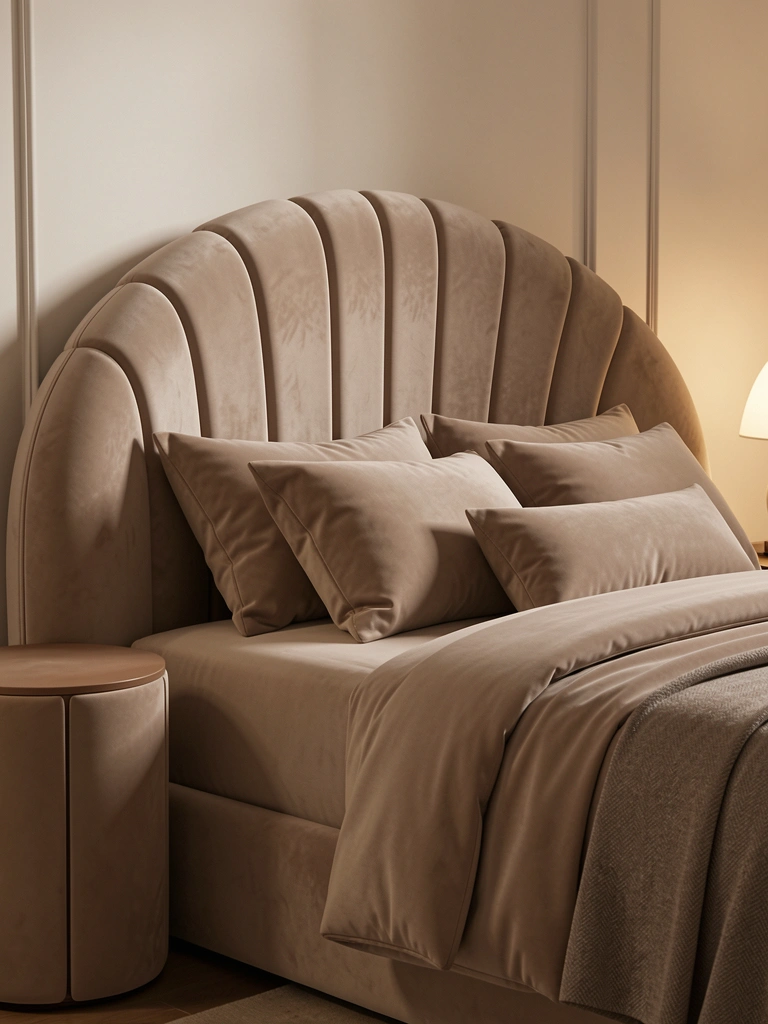
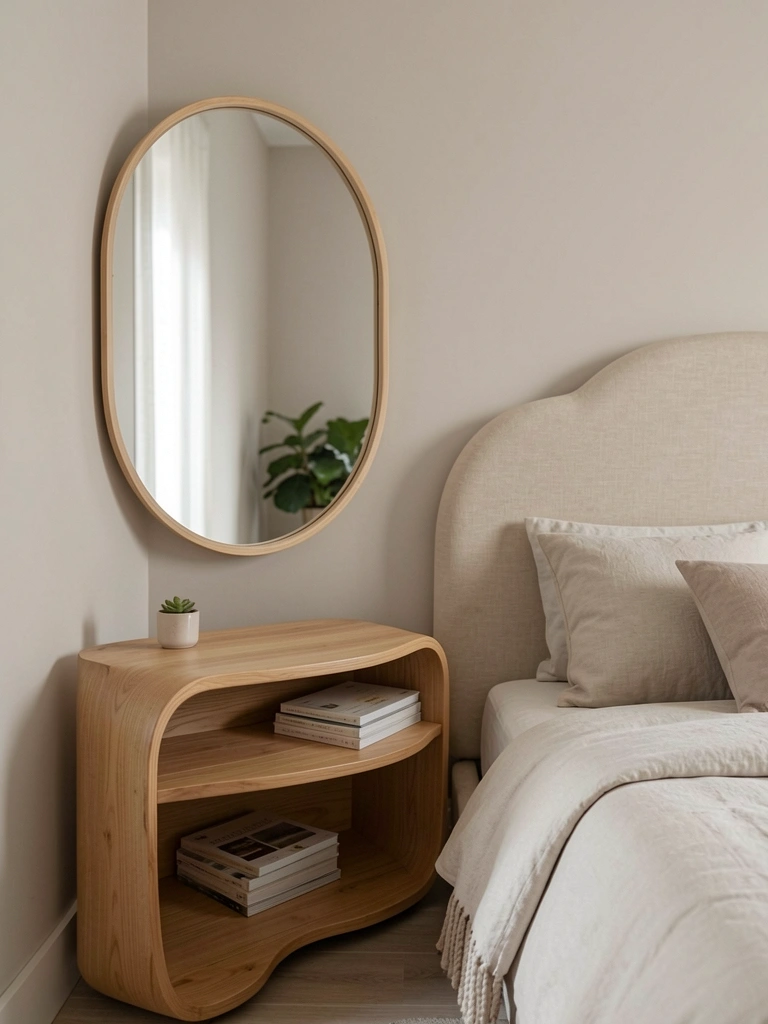
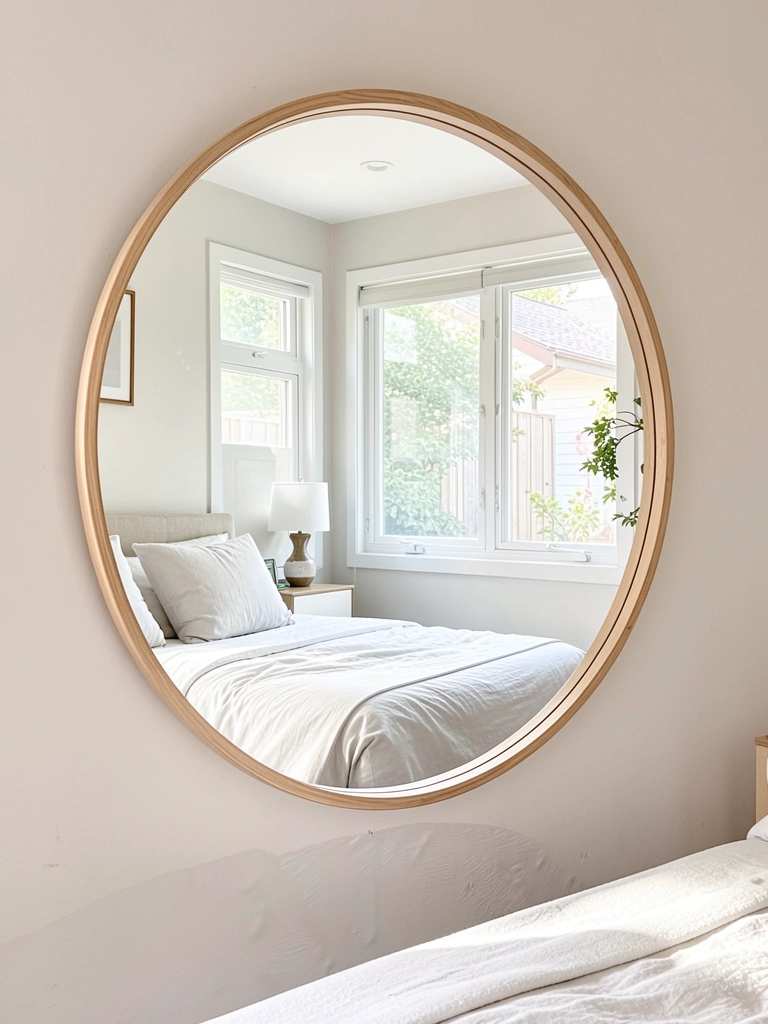
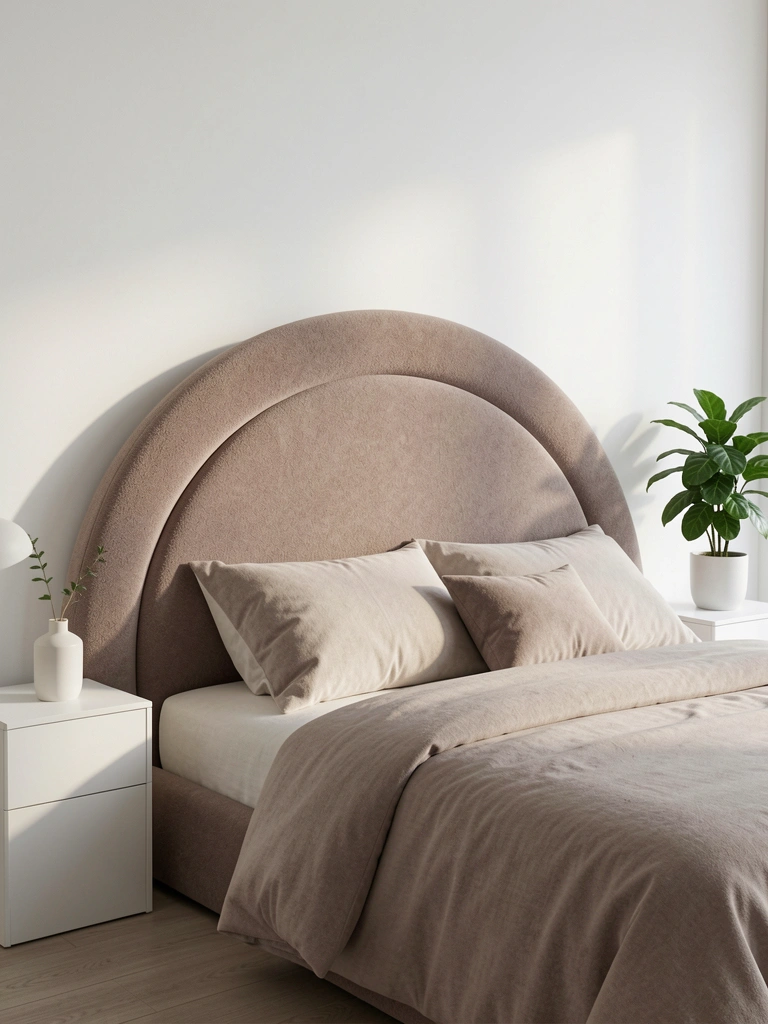
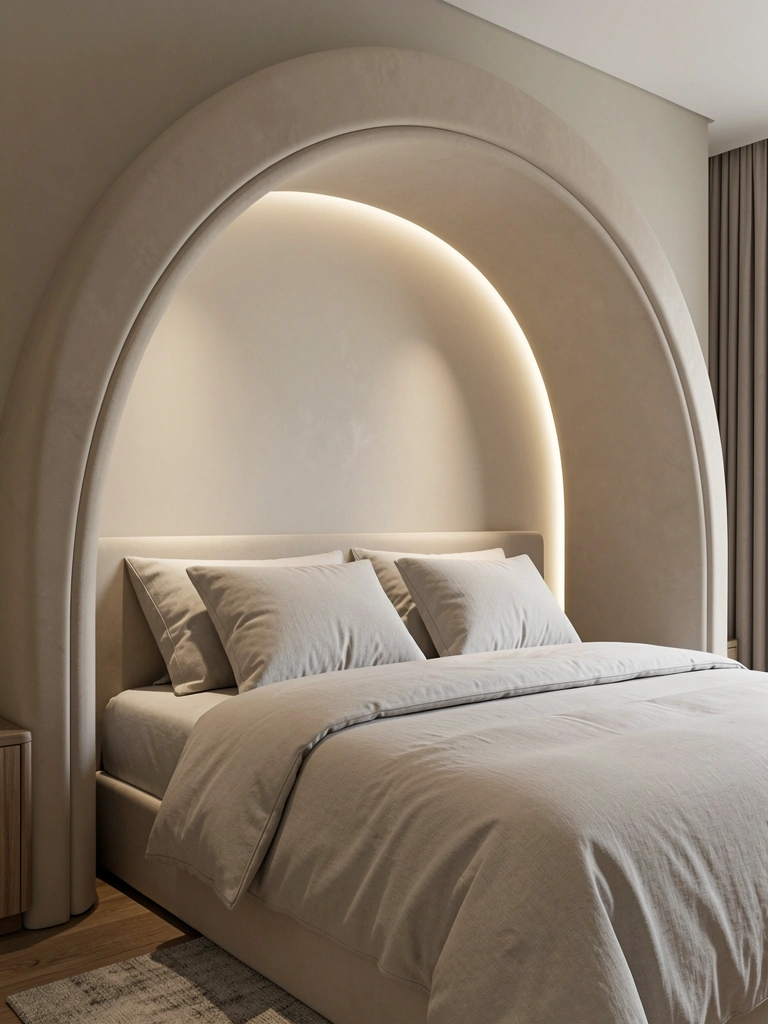
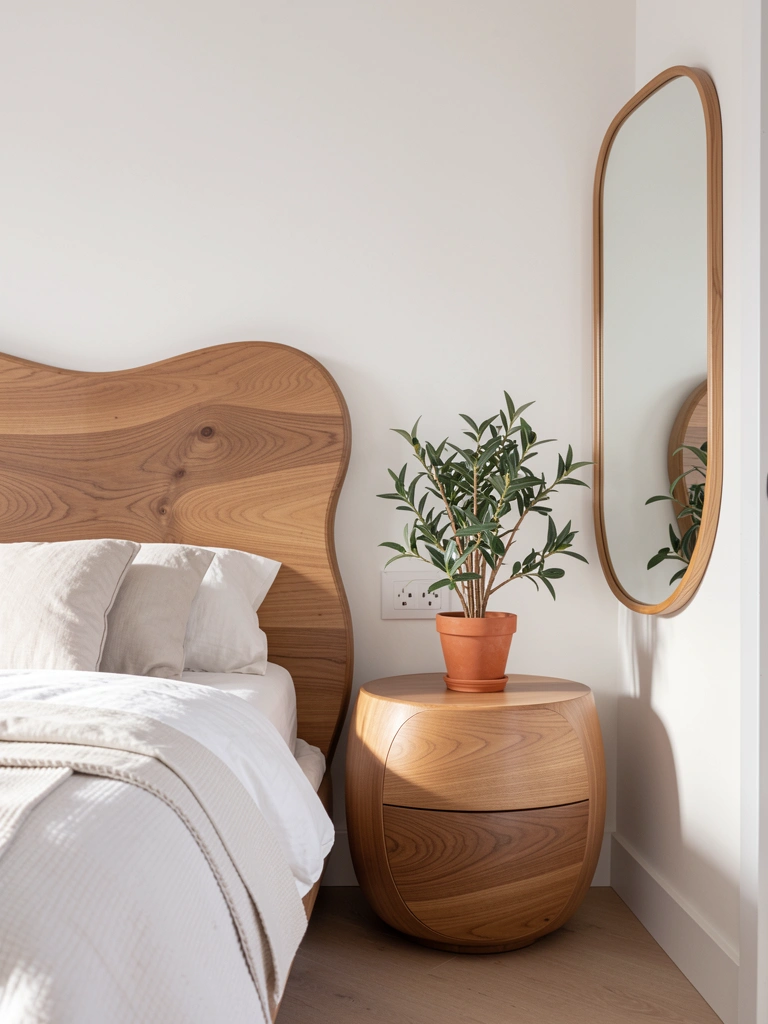
    18. Choose Curved Furniture for Soft Layouts

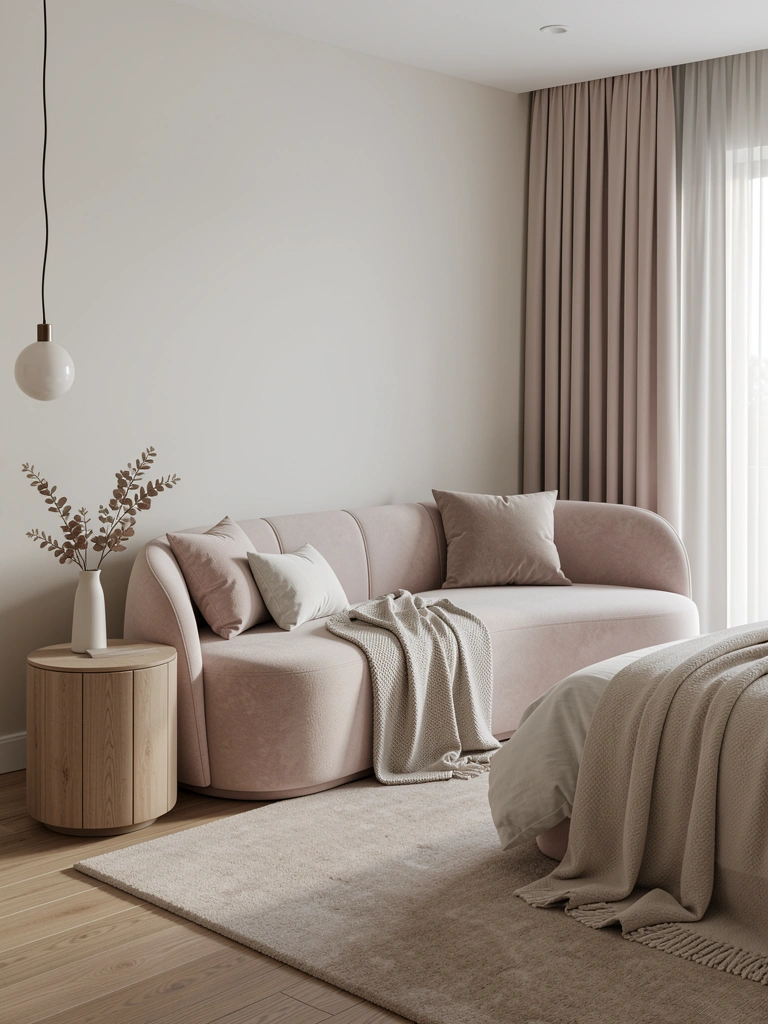
    Curved furniture softens room geometry and creates more flowing, less rigid layouts. Sharp edges feel cold; curves feel inviting.

    Invest in one curved statement piece: a rounded sofa or loveseat ($300-$1,200), a curved bed frame ($400-$1,500), or a round side table ($80-$300). Mix with angular pieces to avoid monotony. IKEA, Article, Wayfair, and West Elm all offer curved options in various price points. A curved bed headboard or ottoman makes the biggest visual impact for the budget.

    Your bedroom becomes visually softer and more welcoming. Curves psychologically read as comfort and luxury. The space feels less utilitarian and more sanctuary-like.


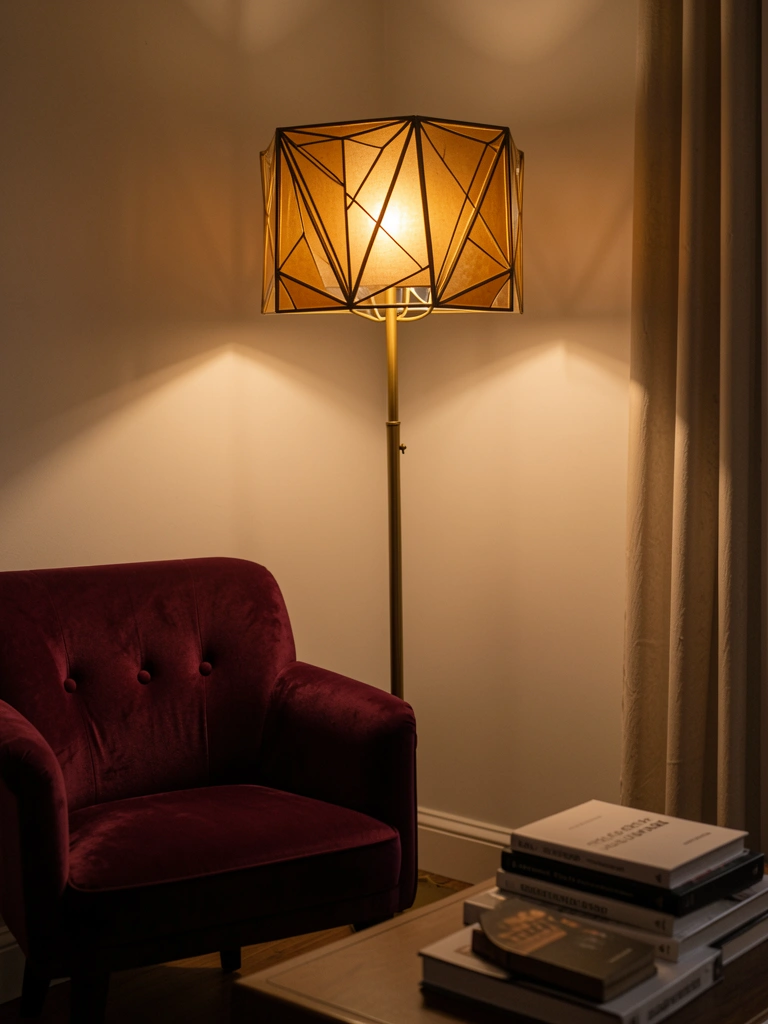
    19. Make Statement Lighting Your Focal Point

    Statement lighting does double duty: it’s functional and becomes the room’s visual anchor. A standout fixture makes even simple rooms feel designed.

    Choose one showstopper: a vintage chandelier ($50-$300 thrifted, or $200-$800 new from Anthropologie, west elm, or specialized retailers), a sculptural pendant ($150-$400), or an ornate wall sconce ($80-$250). Install yourself (simple swap for standard fixtures) or hire an electrician ($100-$200). Pair with dimmer switches ($15-$40) for mood control. Budget the fixture itself as your design investment—keep surrounding decor simple.

    Your bedroom instantly feels intentional and curated. Good lighting improves mood, functionality, and aesthetics simultaneously. A statement fixture makes guests notice your space.


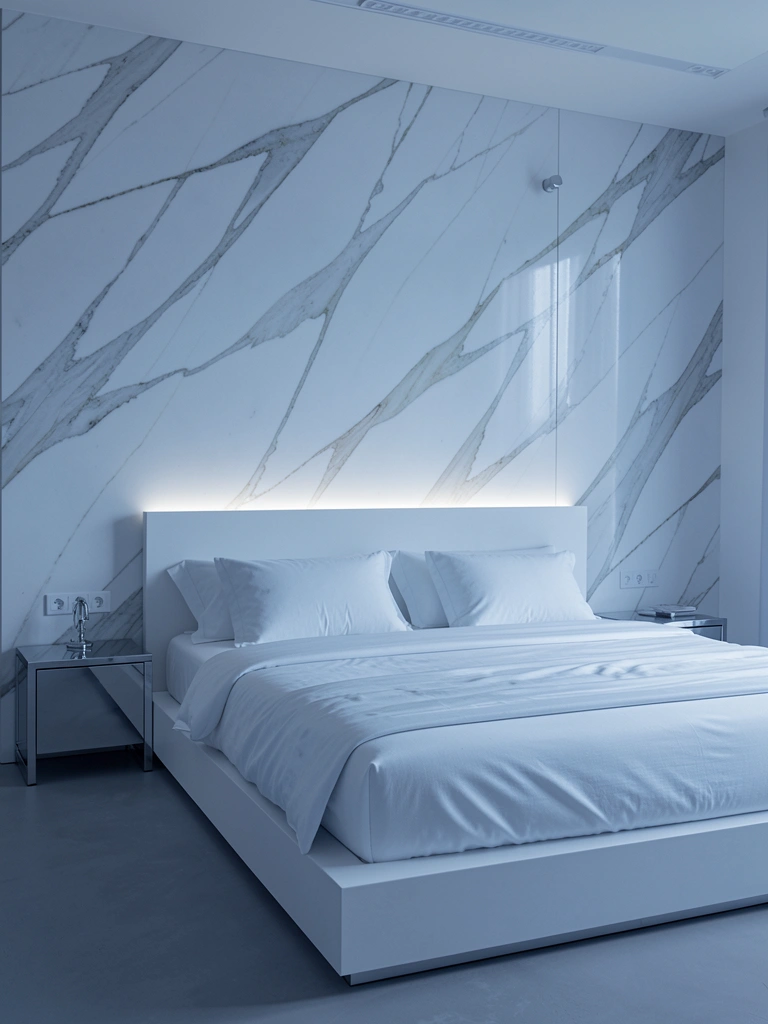
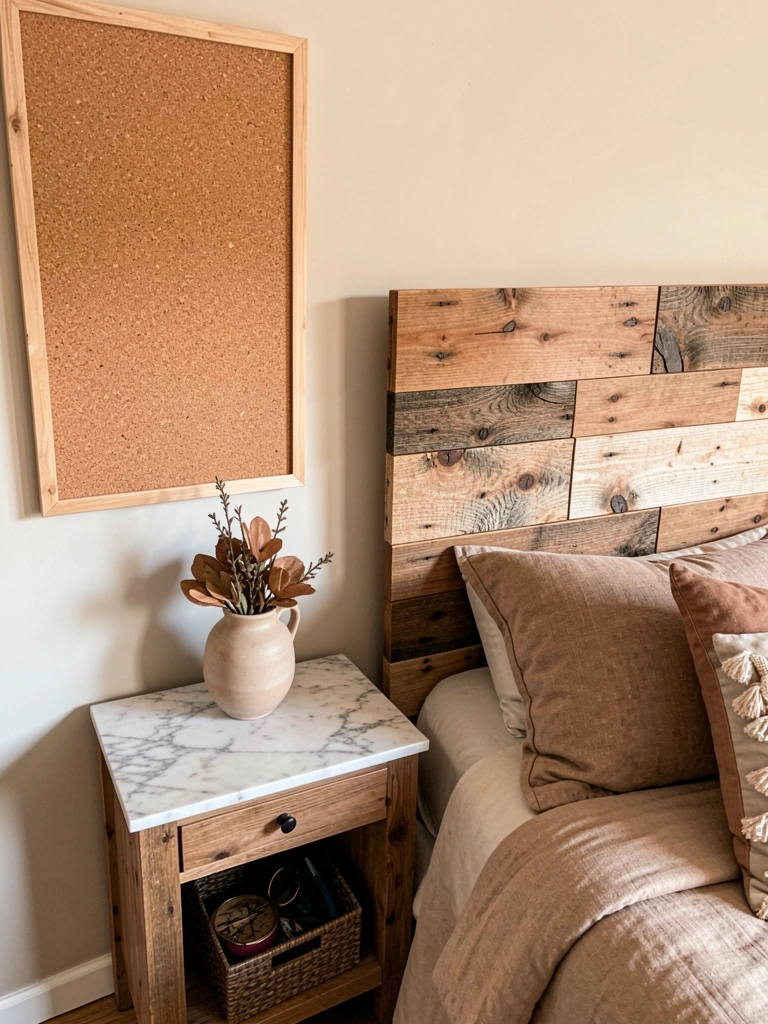
    20. Integrate Natural Stone Accents

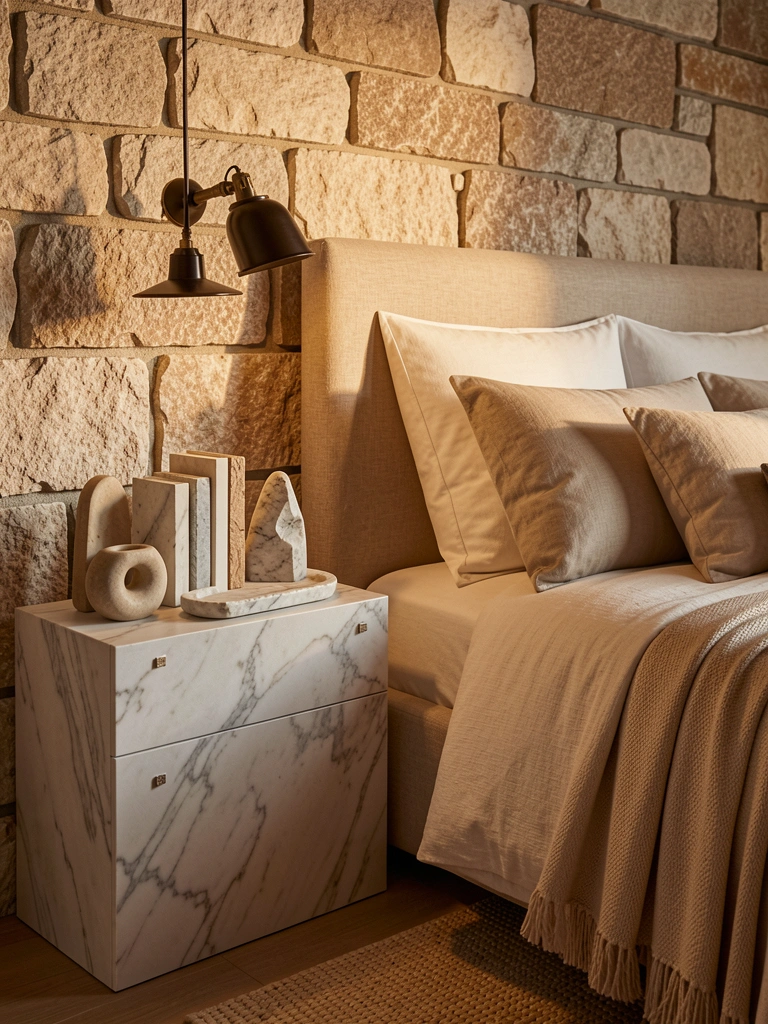
    Natural stone (marble, slate, limestone) adds organic luxury that feels timeless. Stone pairs beautifully with warm colors and natural wood.

    Invest in one statement piece: a marble nightstand ($200-$500), a slate accent wall ($500-$1,500 installed), or smaller accessories like marble trays or bookends ($20-$100 each). Thrift stores occasionally have vintage stone pieces ($30-$150). The key is quality—real stone matters more than quantity. Even one marble accessory elevates a space.

    Your bedroom feels grounded, sophisticated, and naturally beautiful. Stone ages gracefully and never feels trendy. It’s an investment that lasts and genuinely improves your space’s perceived value and quality.


    21. Curate Eclectic Layers Without Chaos

    Eclecticism tells personal stories but requires intention. The trick is picking a color story first, then mixing styles.

    Choose 3-4 colors (e.g., cream, terracotta, sage, brass) and collect pieces that fit those tones. Mix: vintage (thrift, $5-$100), new basics (IKEA, Target, $20-$150), and one investment piece (Wayfair, Article, $200-$800). Spacing matters—don’t overcrowd. Leave breathing room between collections. Thrift hunting is part of the fun and keeps costs down.

    Your bedroom becomes a reflection of your taste and travels. Eclectic styling is timeless because it’s personal. Guests feel the intentionality, and you genuinely love your space.


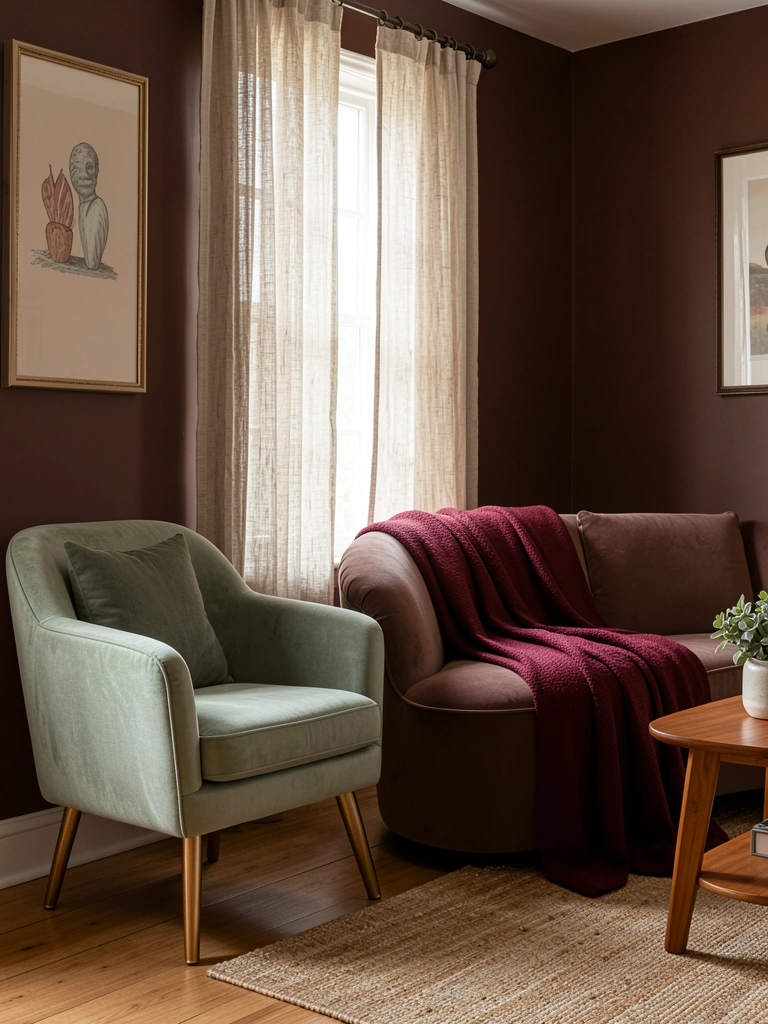
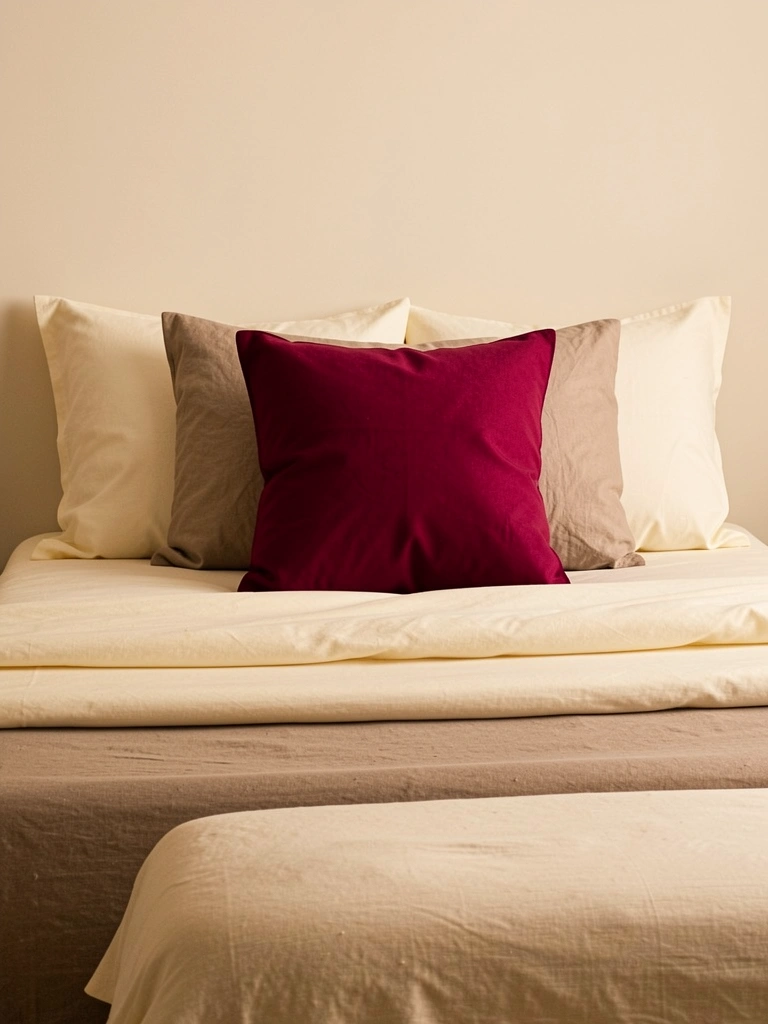
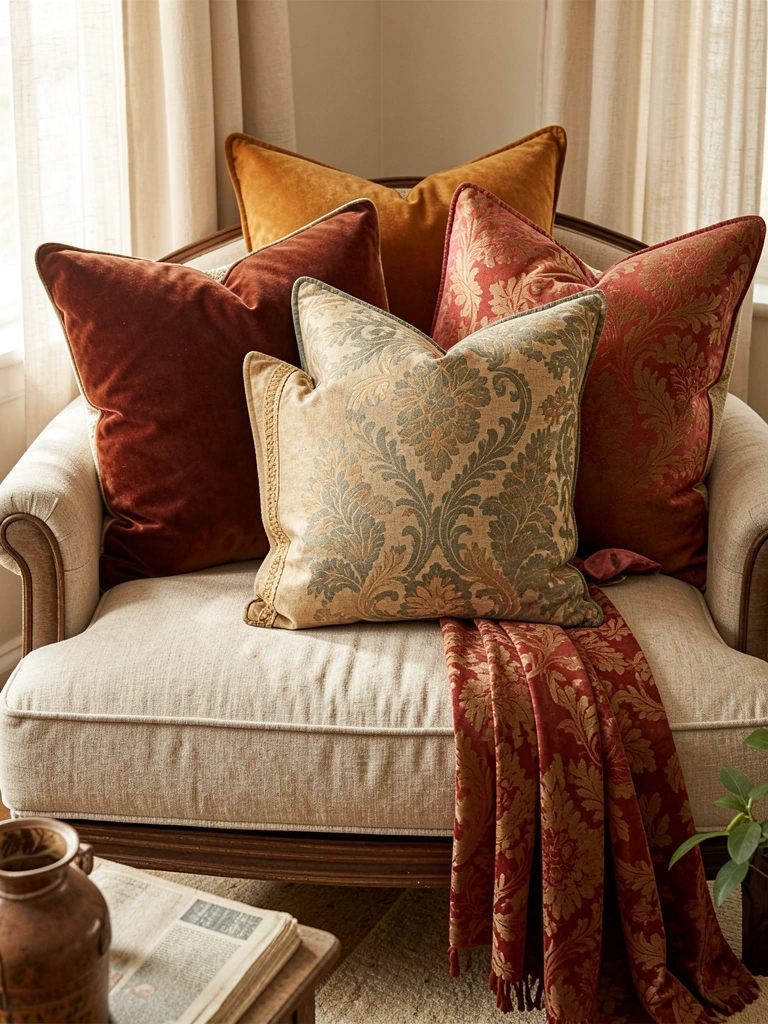
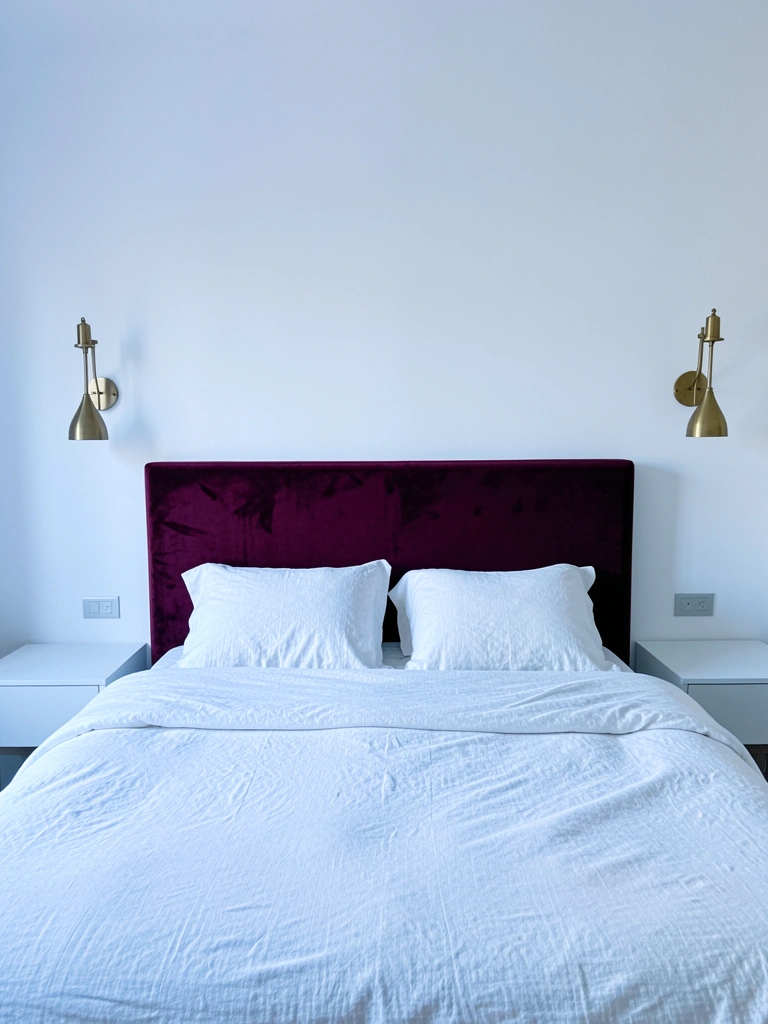
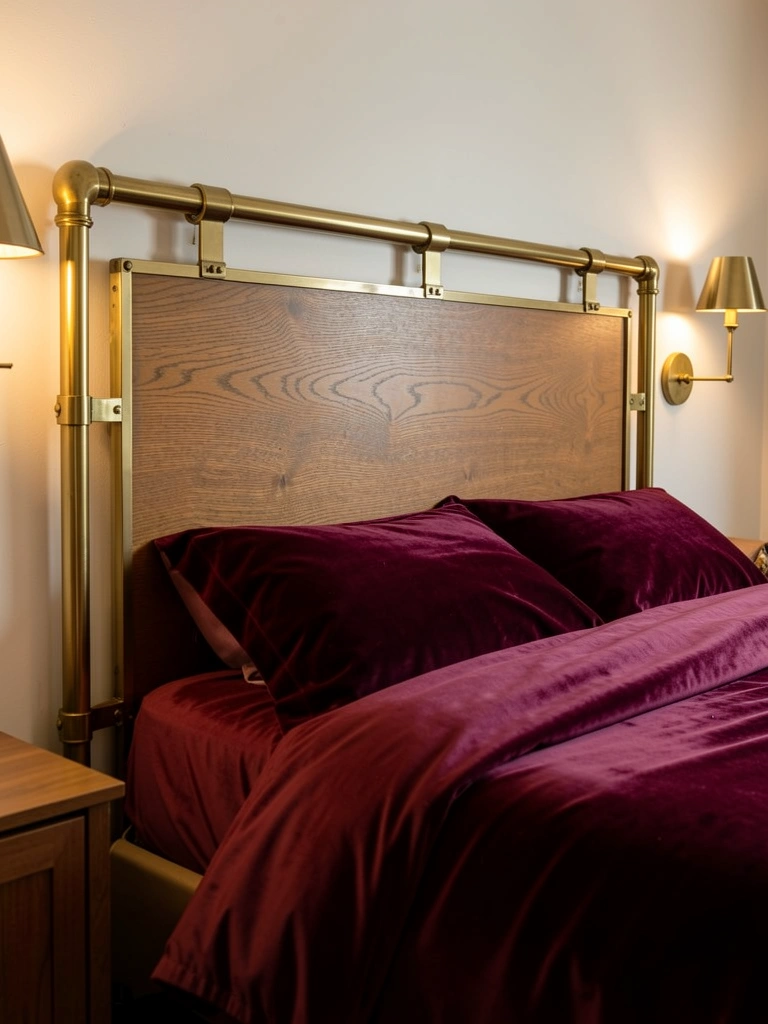
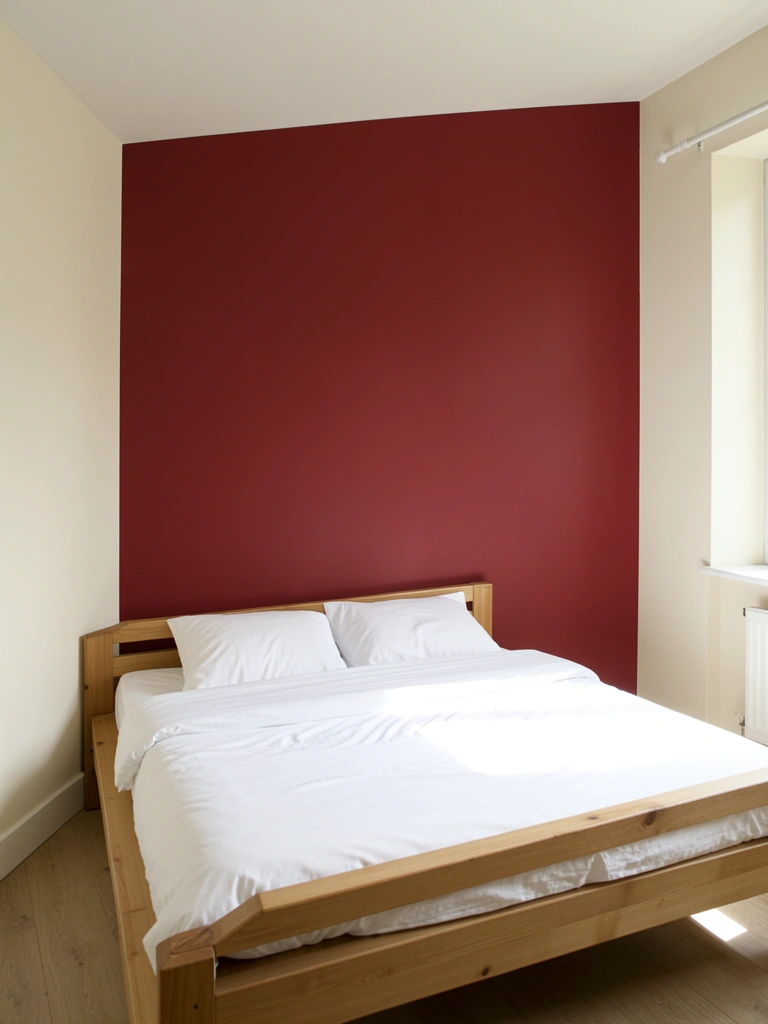
    22. Go Deep With Burgundy and Rich Reds

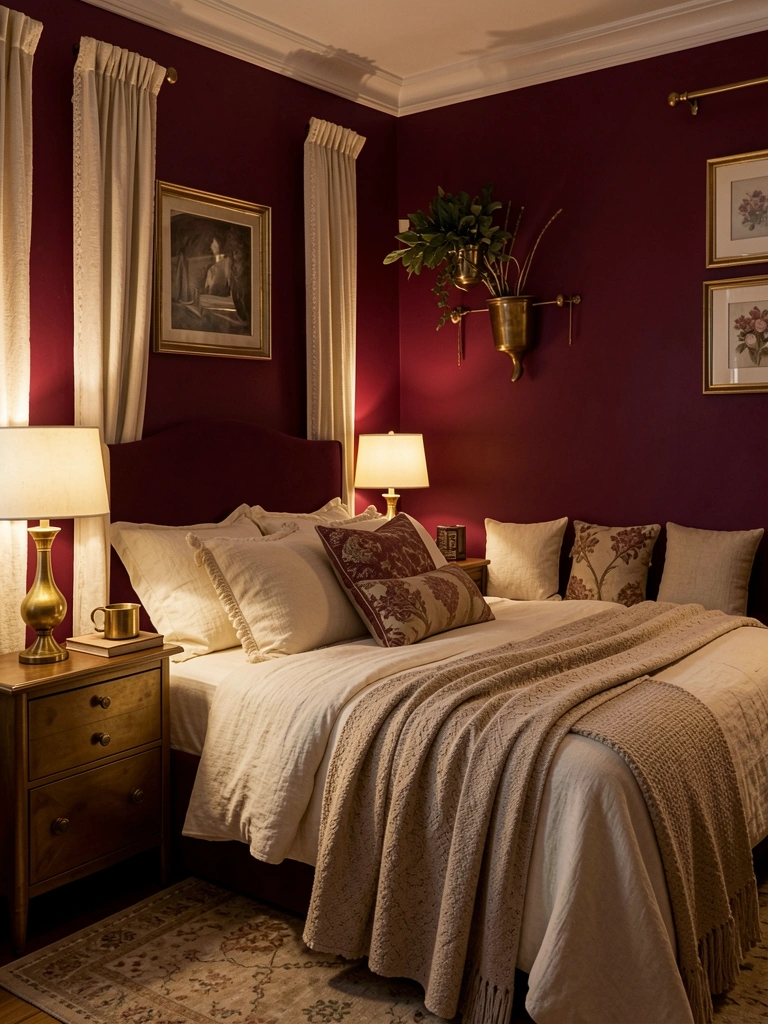
    Deep burgundy and rich reds are trending for bedrooms because they create intimate, serene spaces that feel luxe without being cold.

    Paint walls in deep burgundy, terracotta red, or wine ($30-$50 per gallon from Sherwin-Williams or Benjamin Moore). Pair with warm lighting, cream or gold accents, and soft textures to avoid heaviness. A full bedroom paint job costs $100-$300 (DIY) or $400-$1,200 (professional). This color works best with warm-toned lighting and natural wood elements.

    Your bedroom becomes a cozy retreat that feels genuinely sophisticated. Deep reds make small rooms feel intimate and luxe, not cramped. It’s bold enough to feel intentional, warm enough to feel genuinely restful.


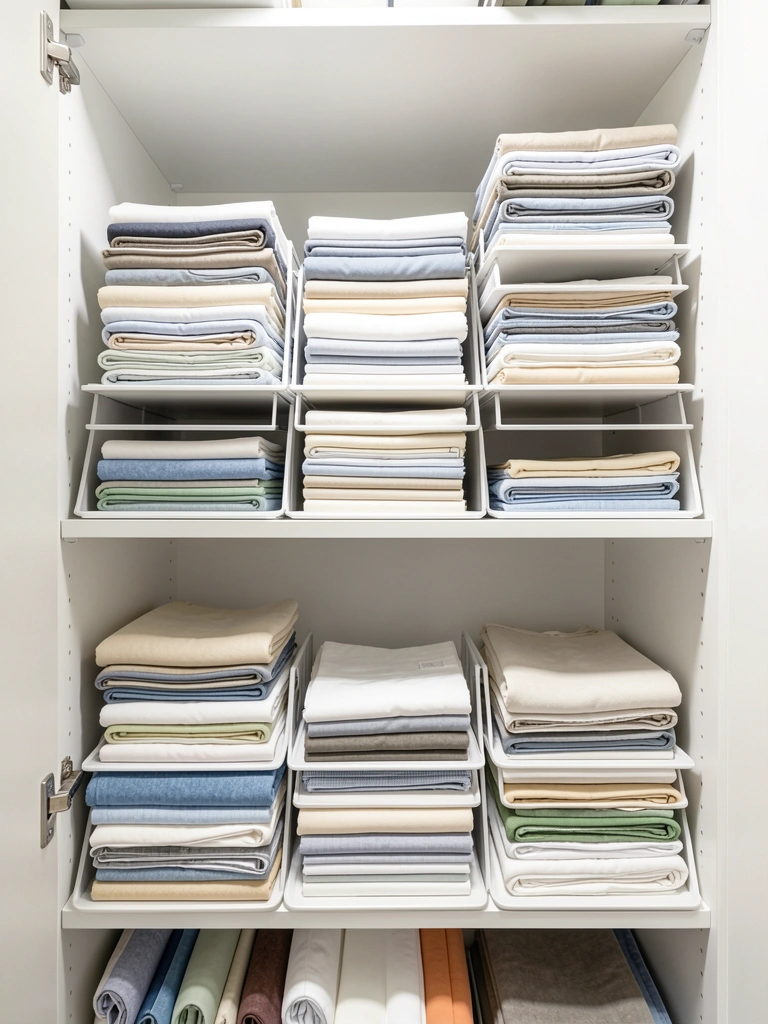
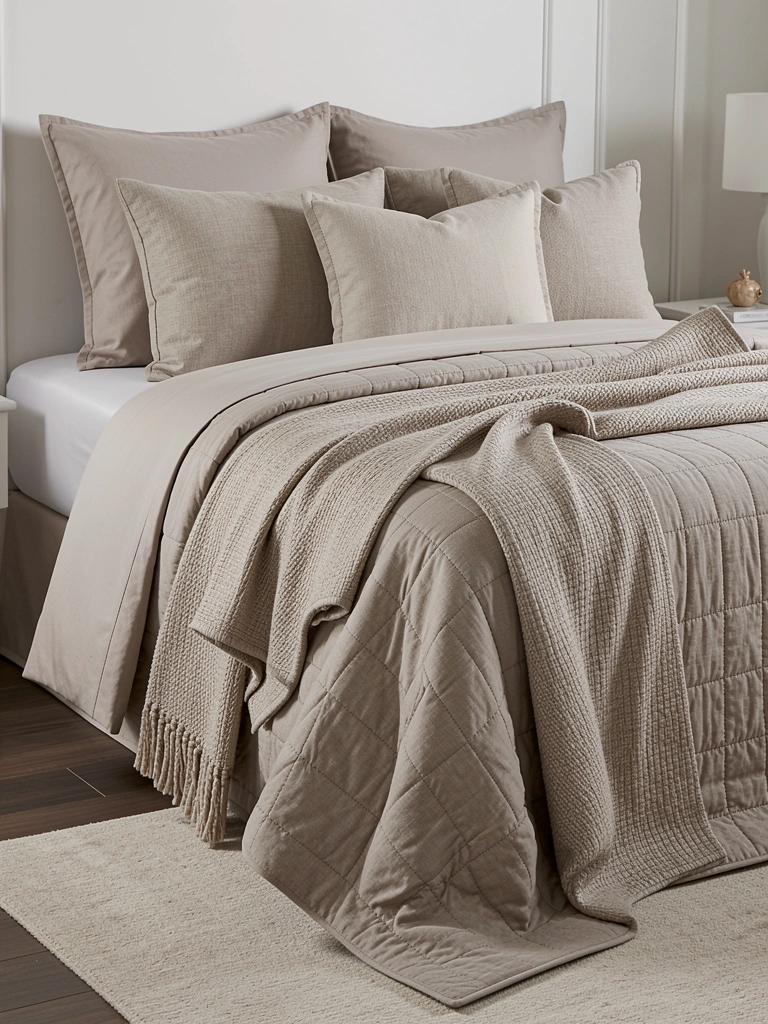
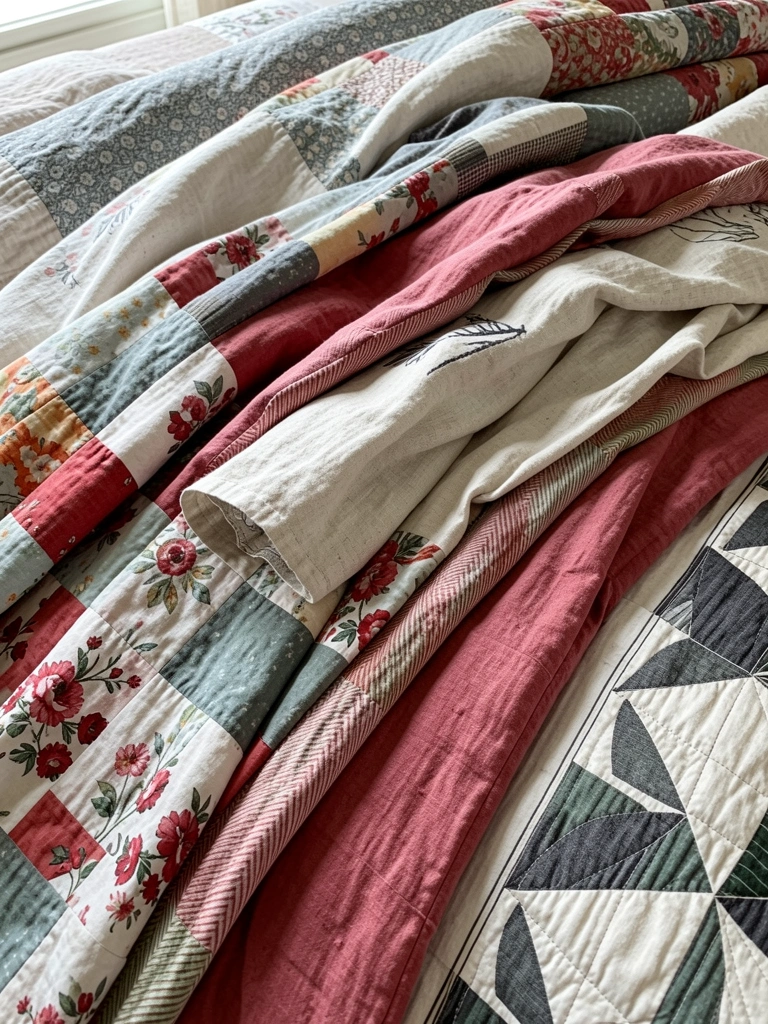
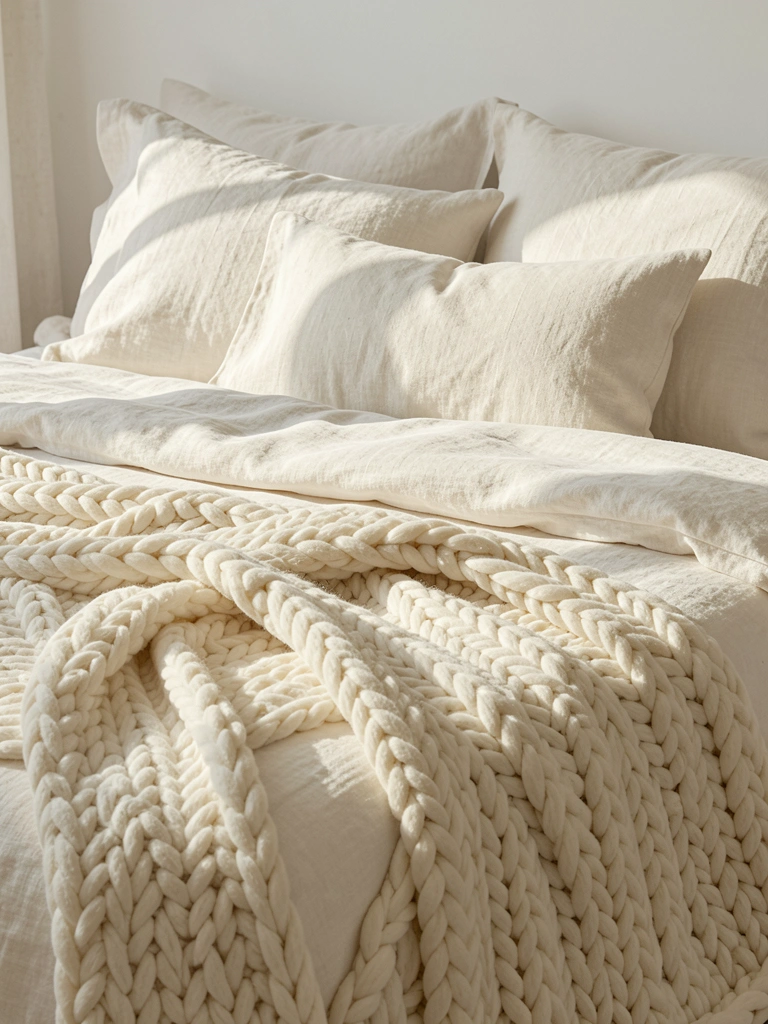
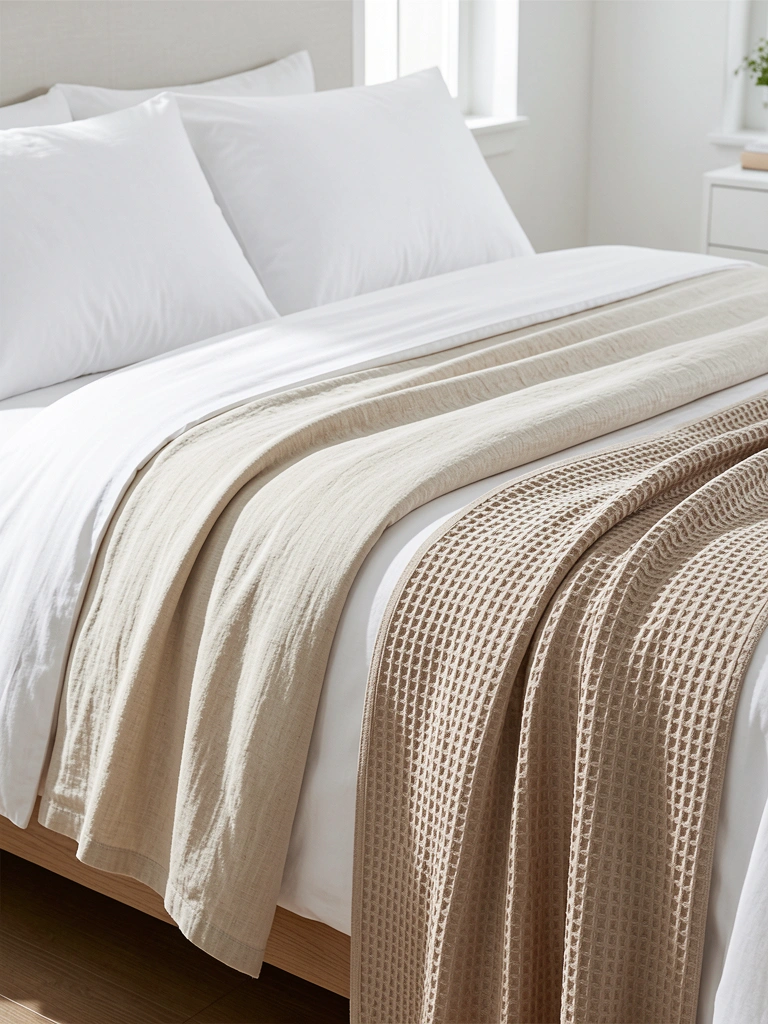
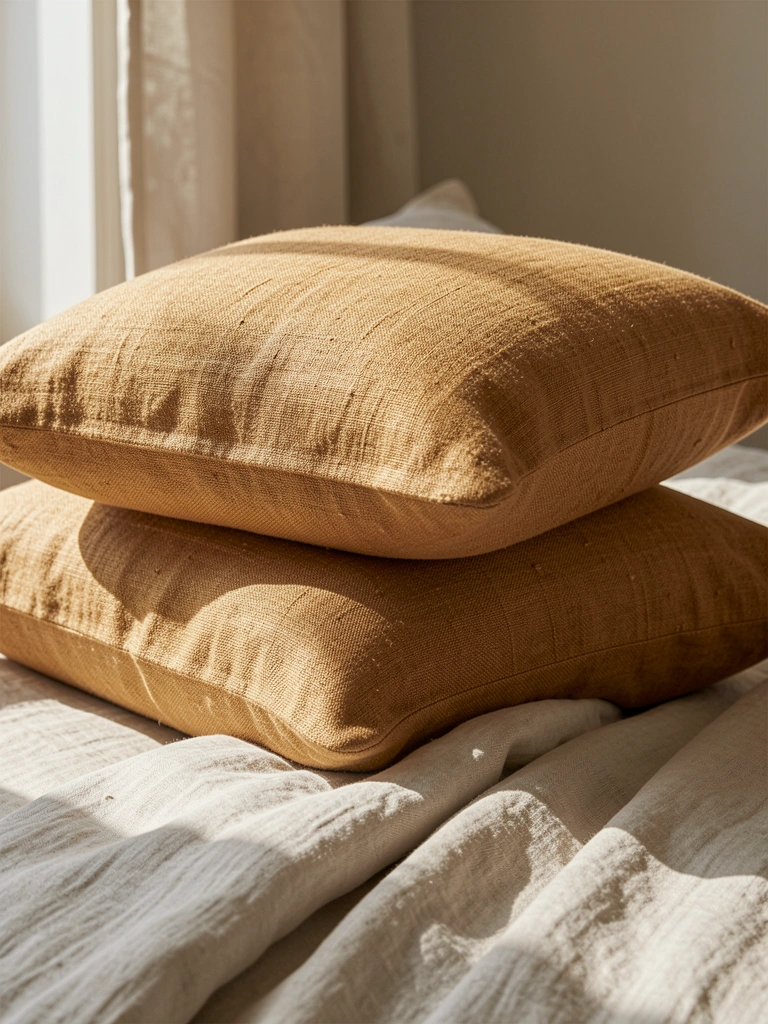
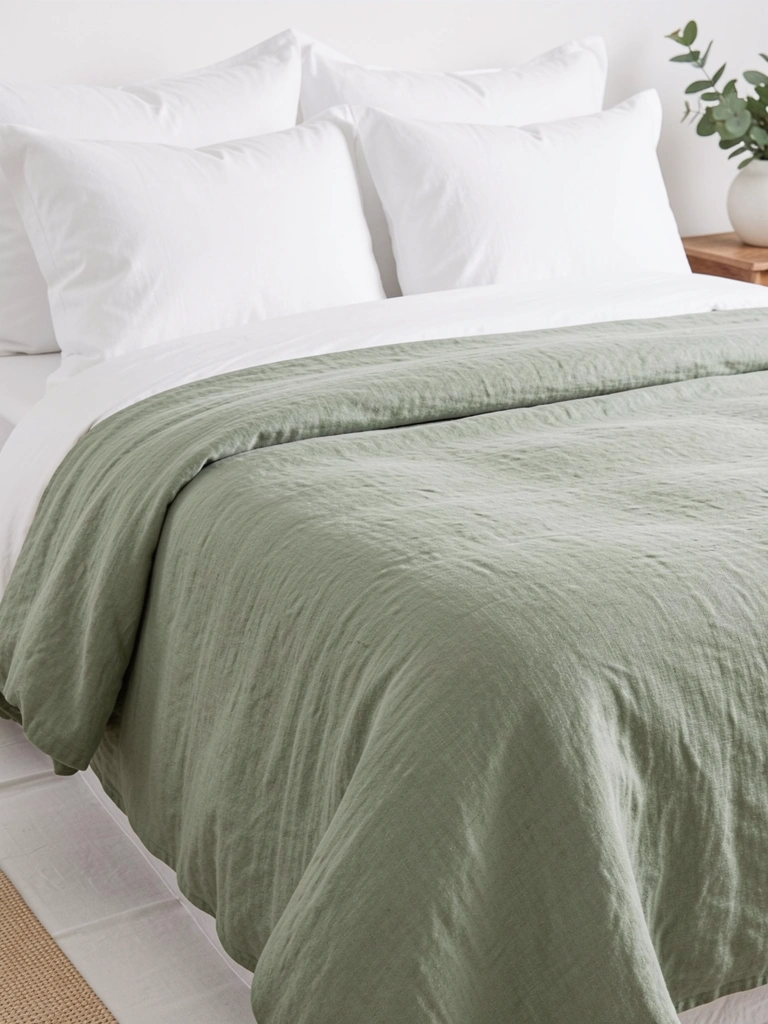
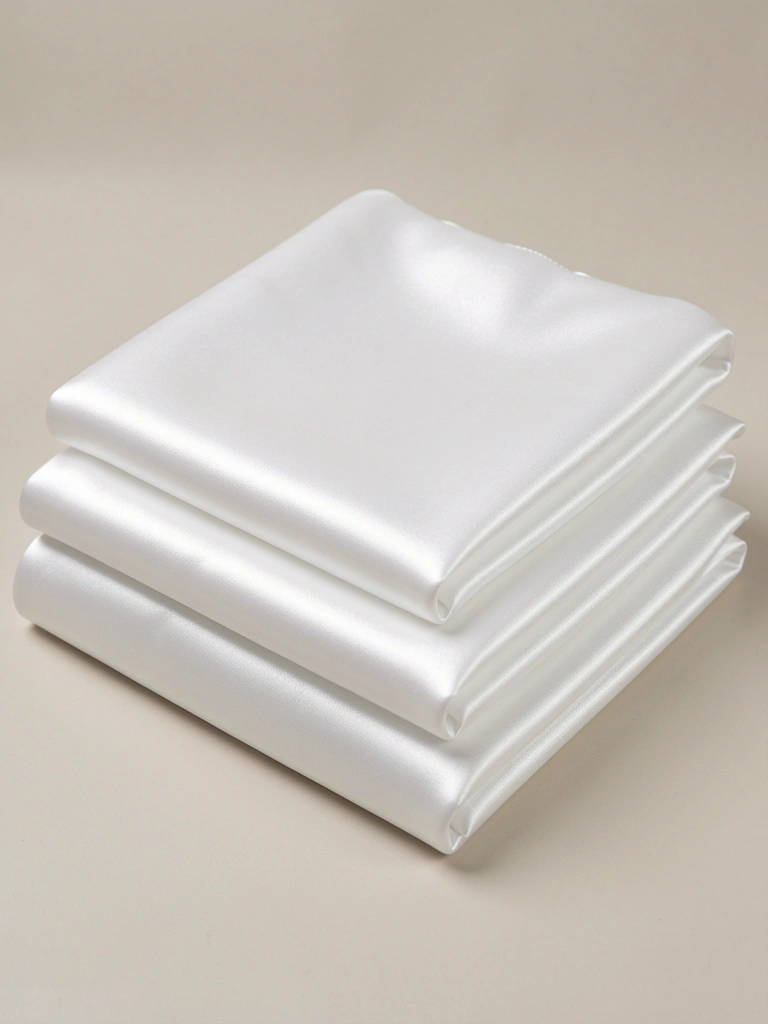
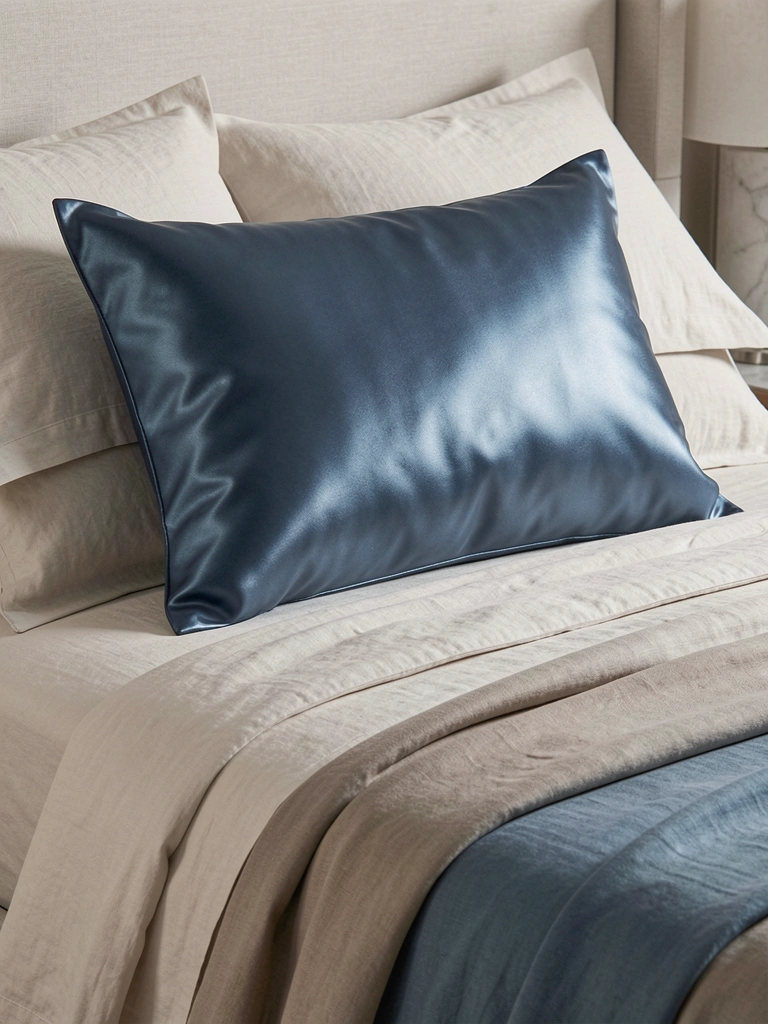
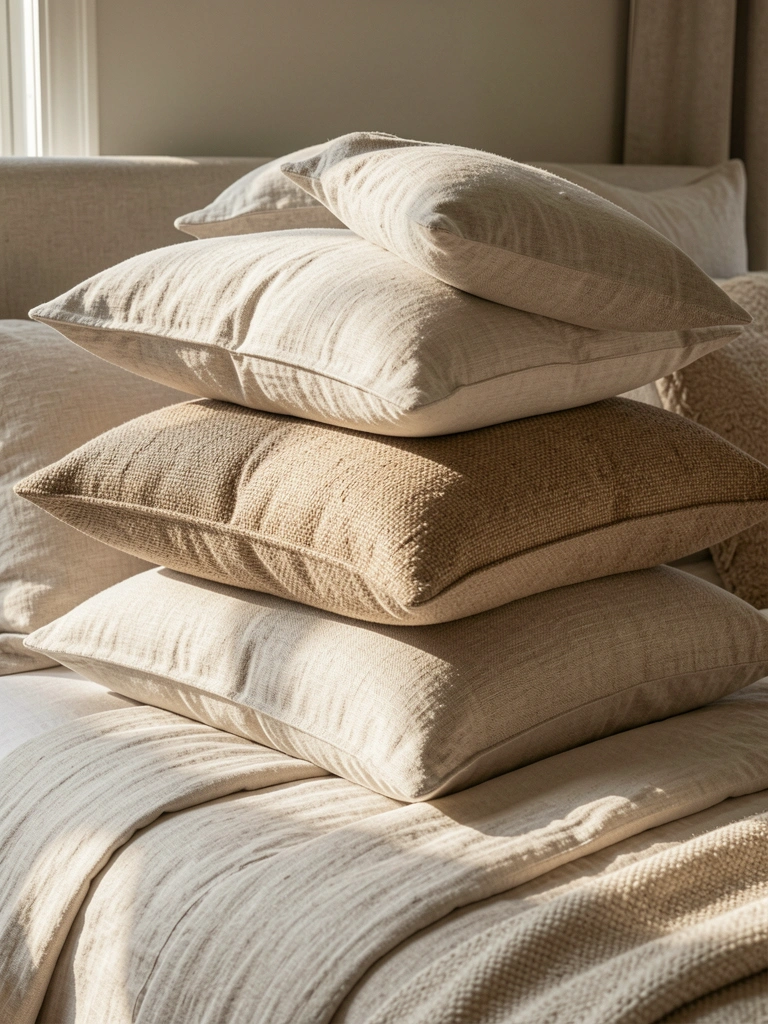
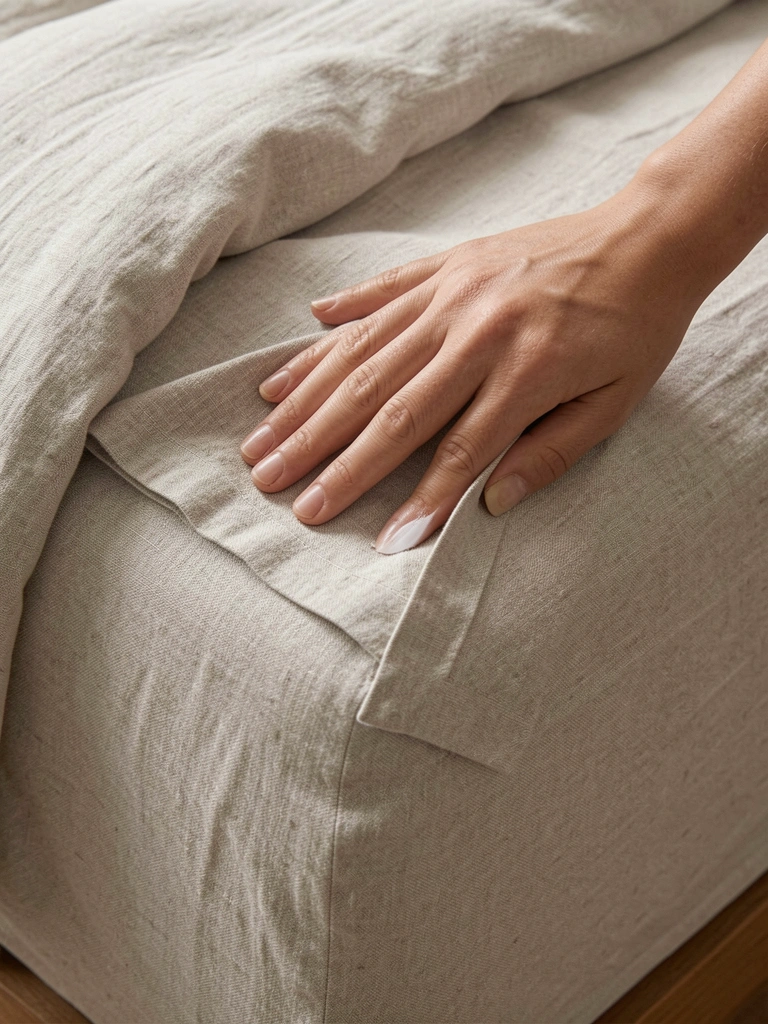
    23. Invest in Custom Bedding Over Sets

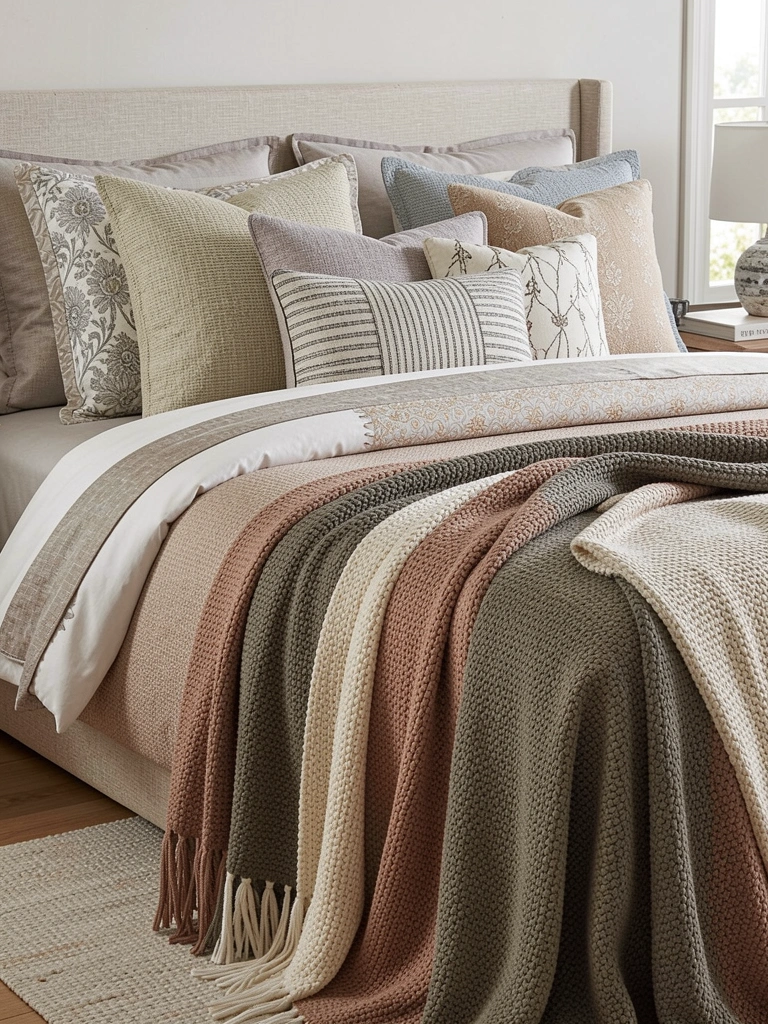
    Bed-in-a-bag sets are outdated. Curating custom bedding creates layered, designer-looking beds that feel personal.

    Start with quality sheets ($30-$100 from Parachute, Brooklinen, or standard retailers). Add a duvet or comforter ($80-$250) in one color or pattern. Layer throw pillows ($15-$40 each) in coordinating patterns and textures. Add a quality throw ($30-$100). Total investment: $200-$600 for a polished, layered look—similar to set prices but infinitely more stylish.

    Your bed becomes a true design focal point. Layering textures and patterns creates visual interest and genuine comfort. Custom styling photographs beautifully and feels intentional.


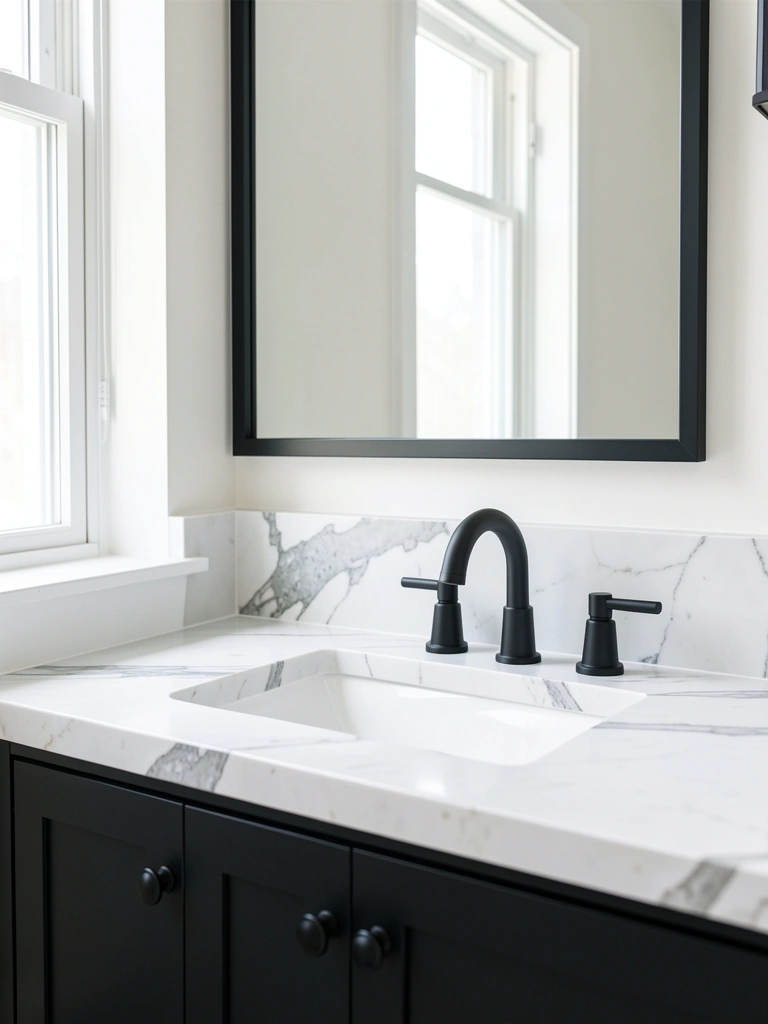
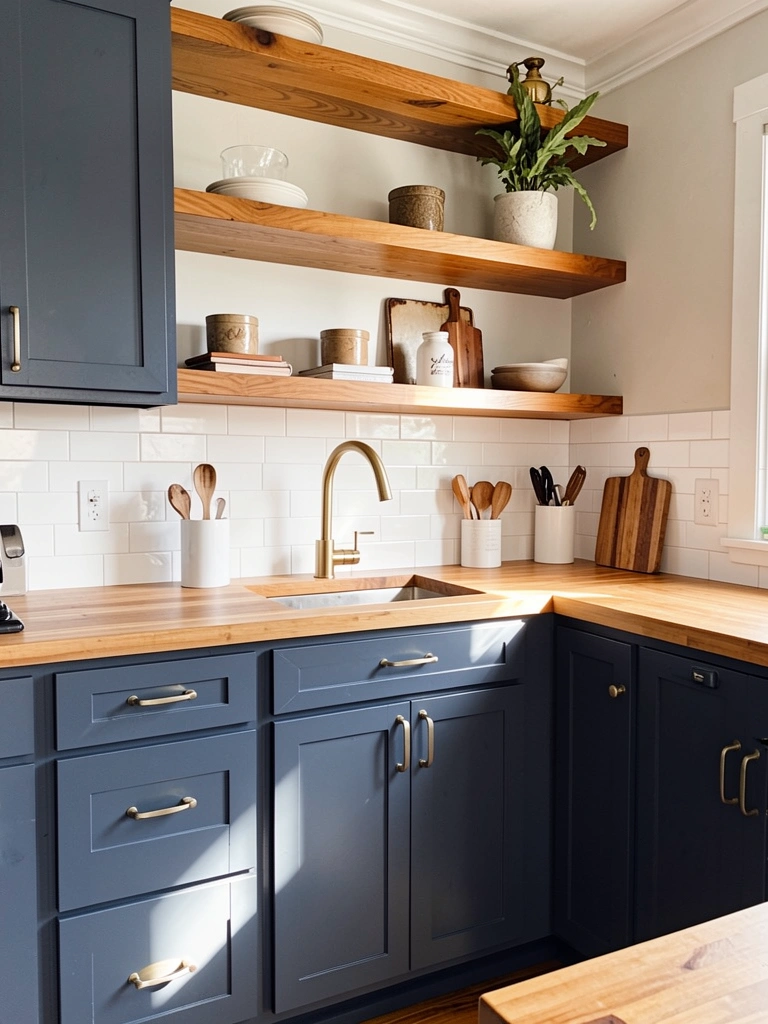
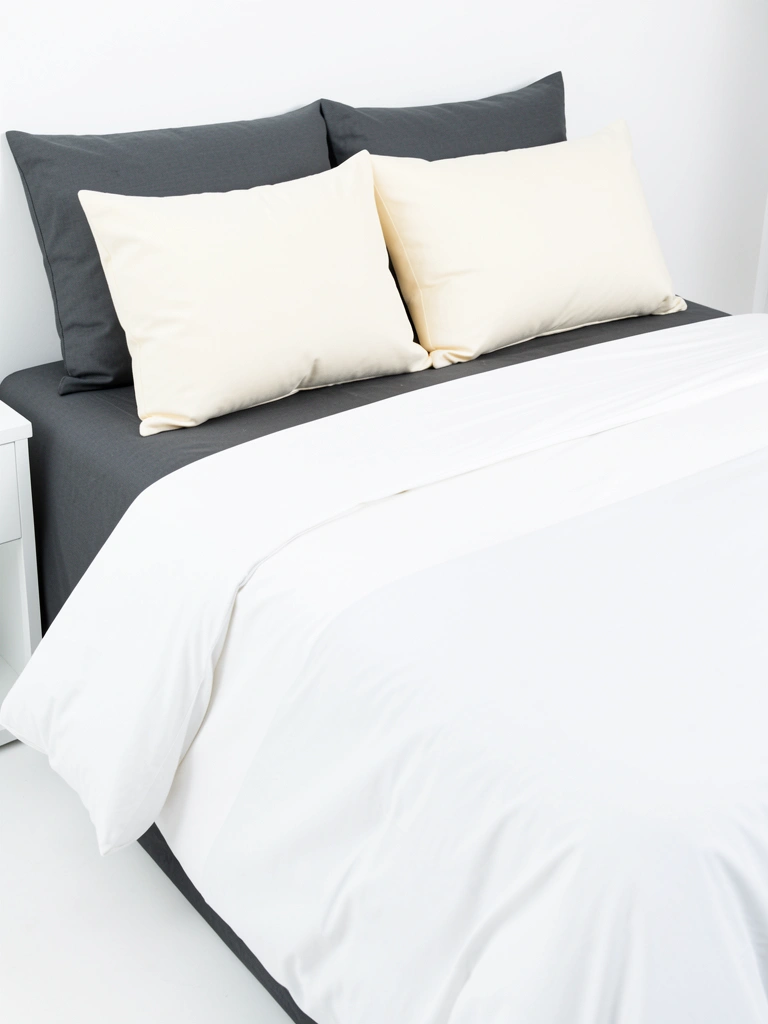
    24. Warm Up Black and White With Texture

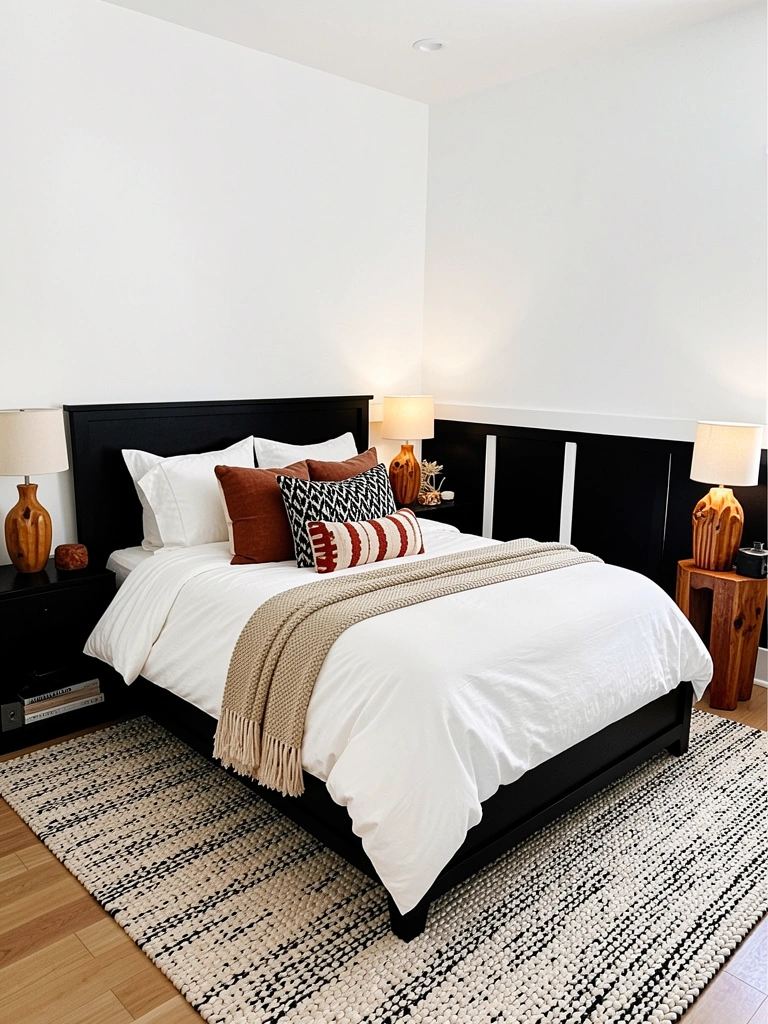
    Stark black-and-white palettes feel cold and design-school. Adding texture, warmth, and natural elements makes them feel sophisticated instead.

    Keep black-and-white as your base, then layer warmth: cream or ivory textures (chunky knit throw, linen pillows), warm wood tones (nightstand, frame, shelf), and warm lighting ($30-$150 for a quality warm-toned lamp). Add natural elements like plants, stone, or woven baskets ($10-$80). Skip pure white walls; opt for cream or soft gray instead.

    Your black-and-white scheme becomes elegant and genuinely comfortable. The additions feel intentional, not like afterthoughts. Your space photographs like a designed room, not an empty studio.


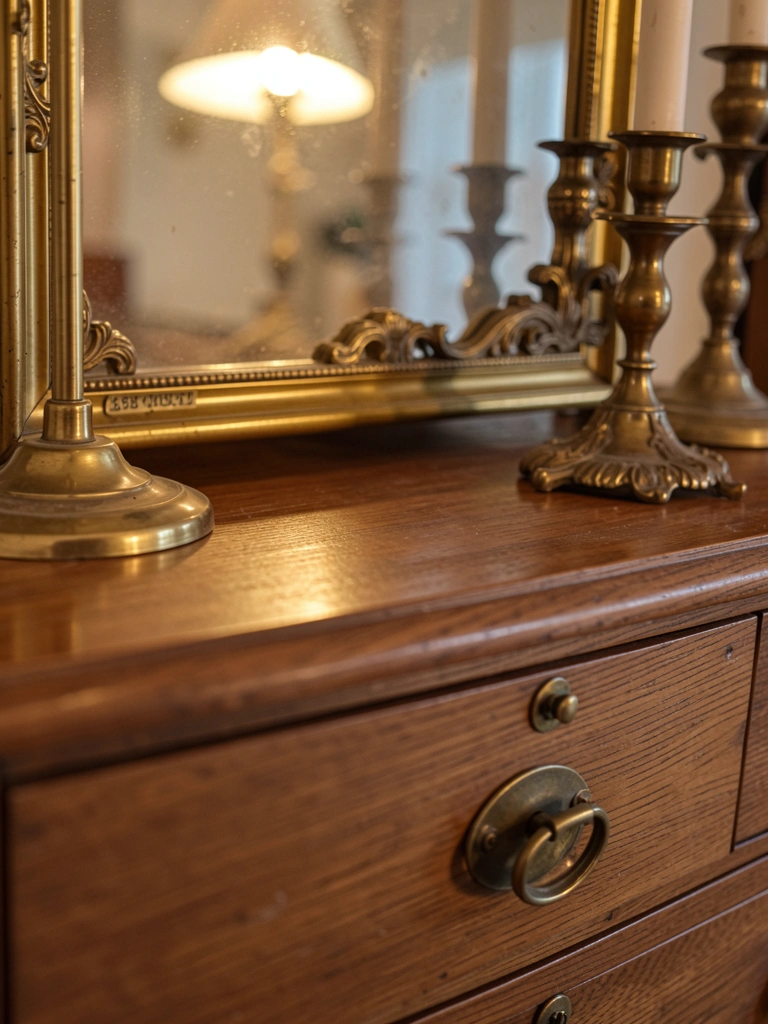
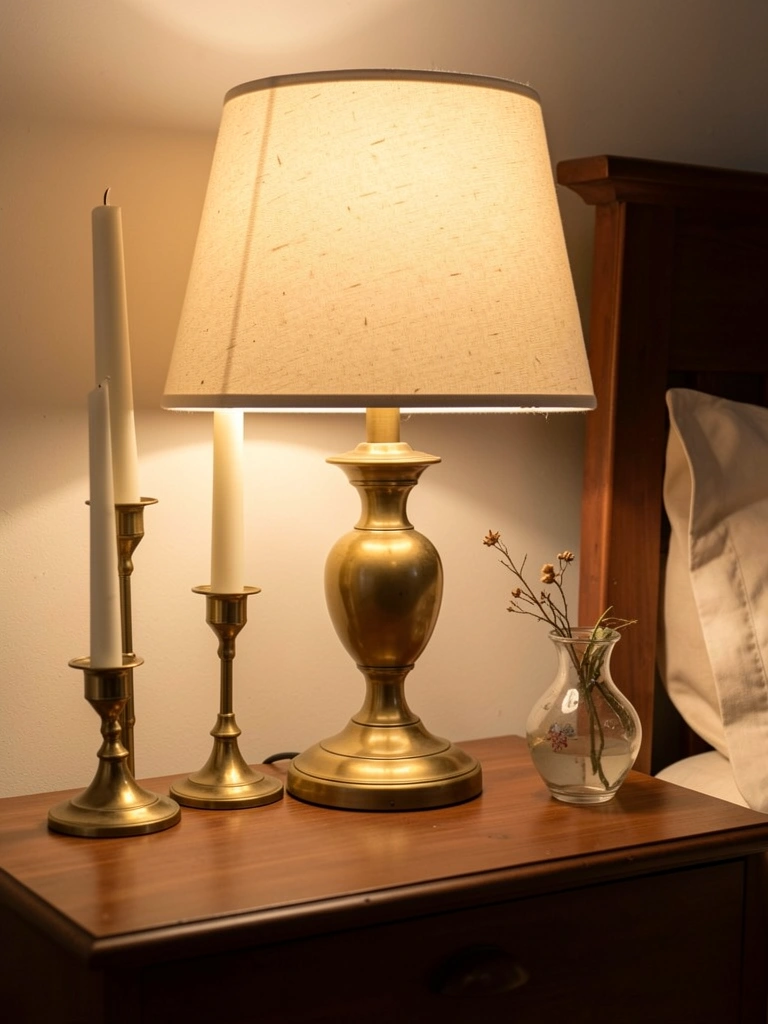
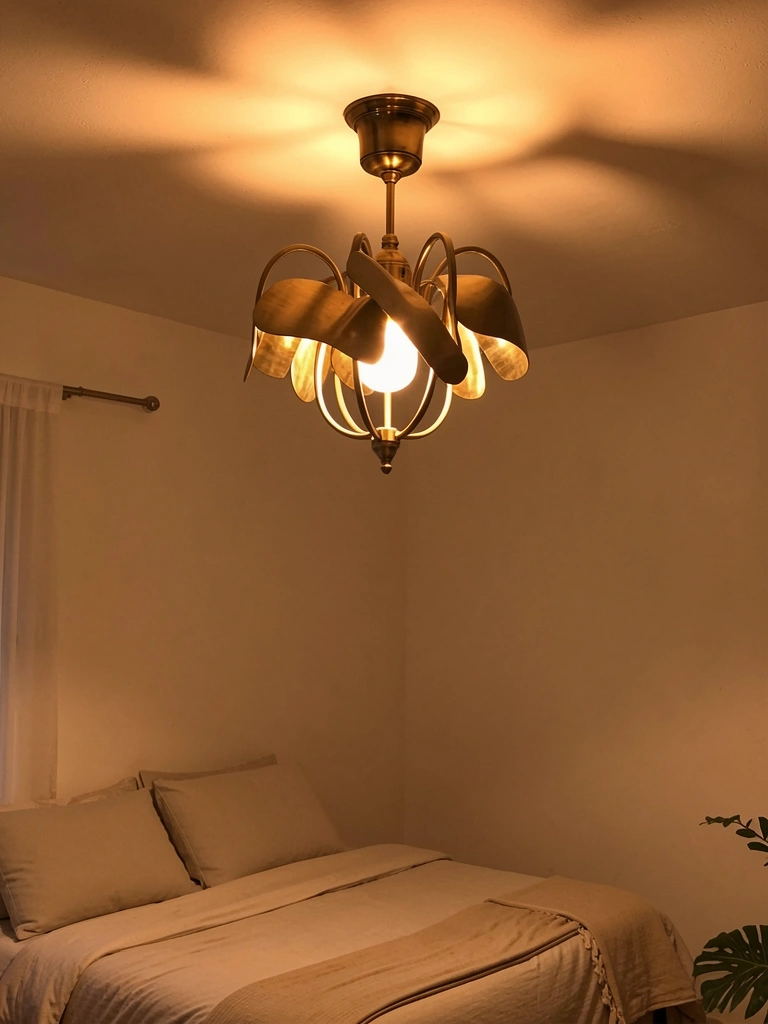
    25. Display Vintage Lighting as Art

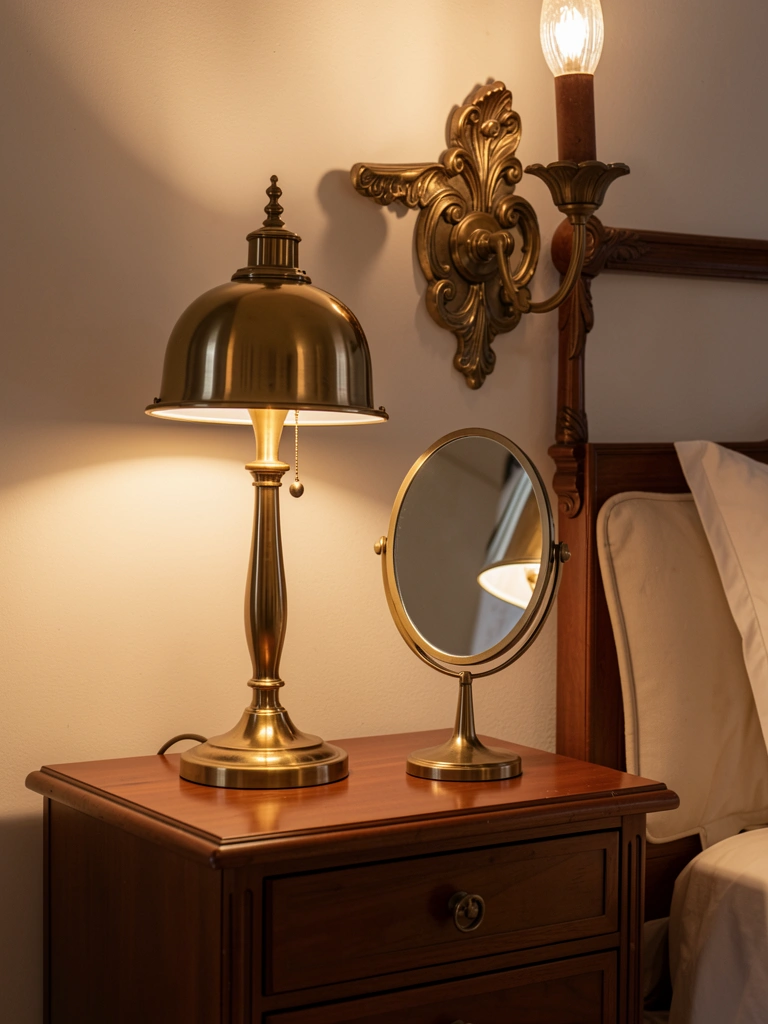
    Vintage lighting fixtures (chandeliers, ornate sconces, brass lamps) double as art installations. They’re functional and beautiful simultaneously.

    Hunt estate sales, thrift stores, and Facebook Marketplace for vintage fixtures ($20-$150). Rewire if needed ($50-$100 by an electrician). Display prominently—on nightstands, as a wall feature, or as a ceiling statement. Mix one vintage fixture with modern accessories for balance. The styling (placement, bulbs, nearby accessories) matters as much as the piece itself.

    Your bedroom gains character and conversation-starter appeal. Vintage lighting adds warmth, tells a story, and creates atmosphere that new fixtures struggle to match. It’s design-forward and sustainably minded.


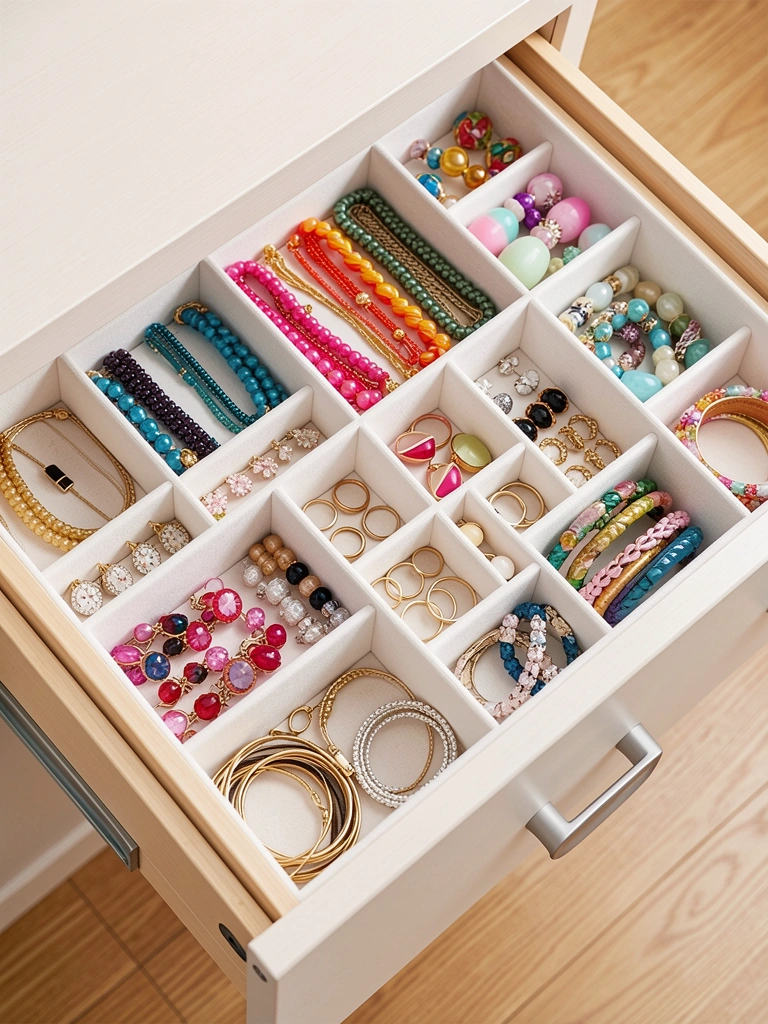
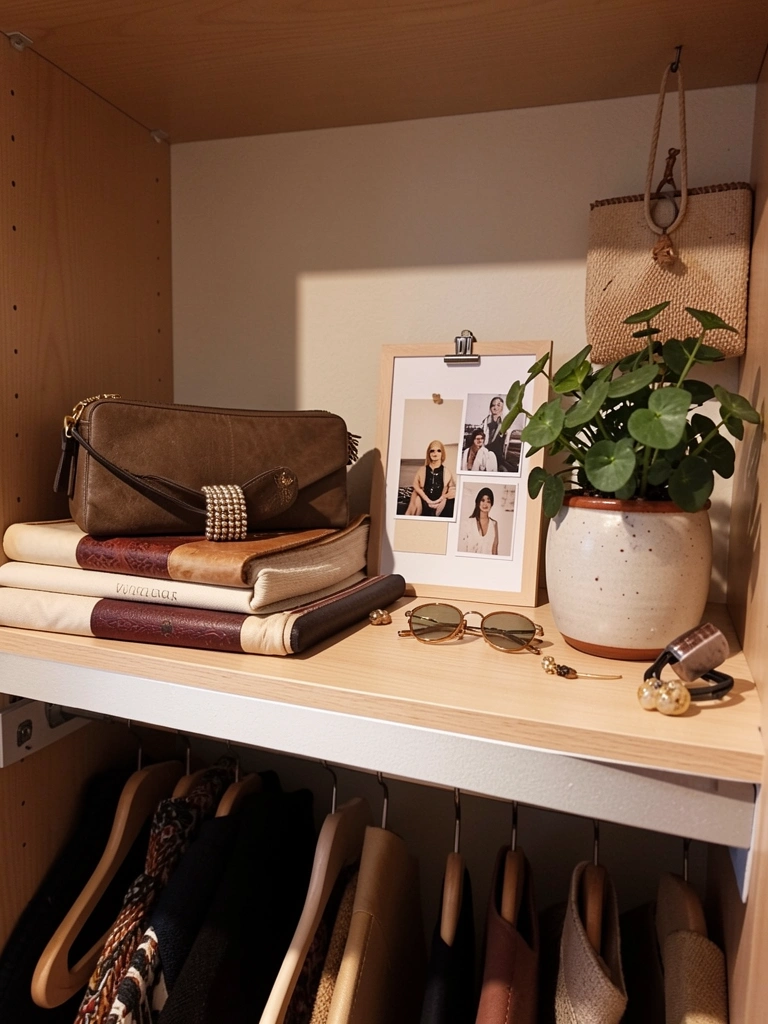
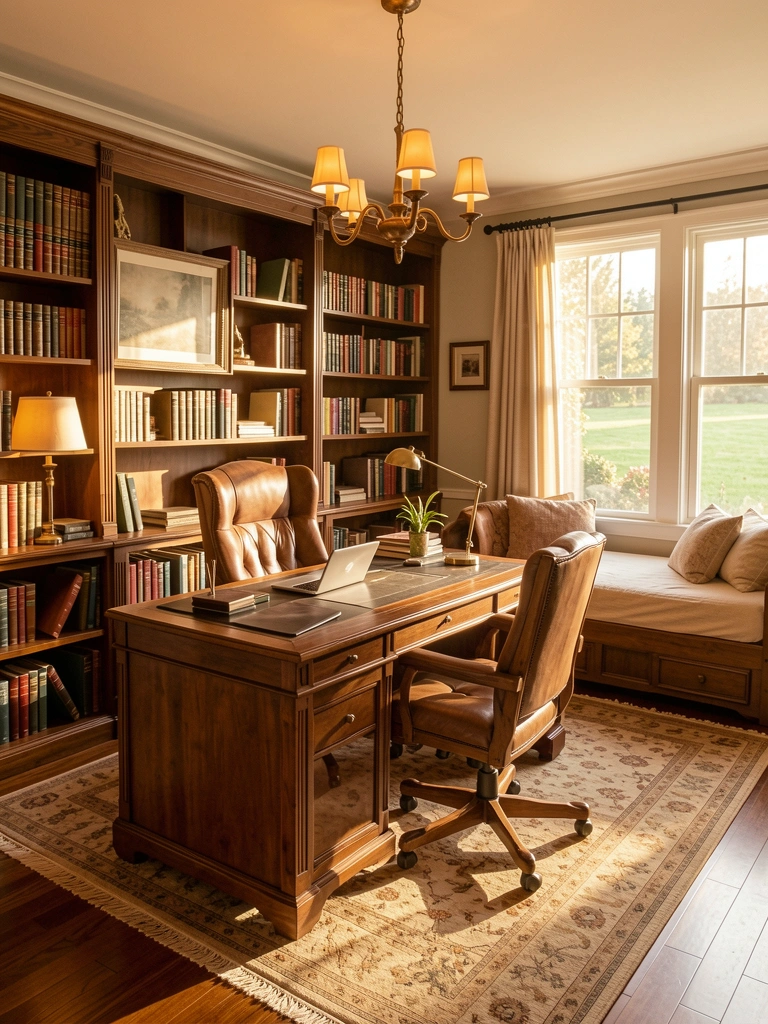
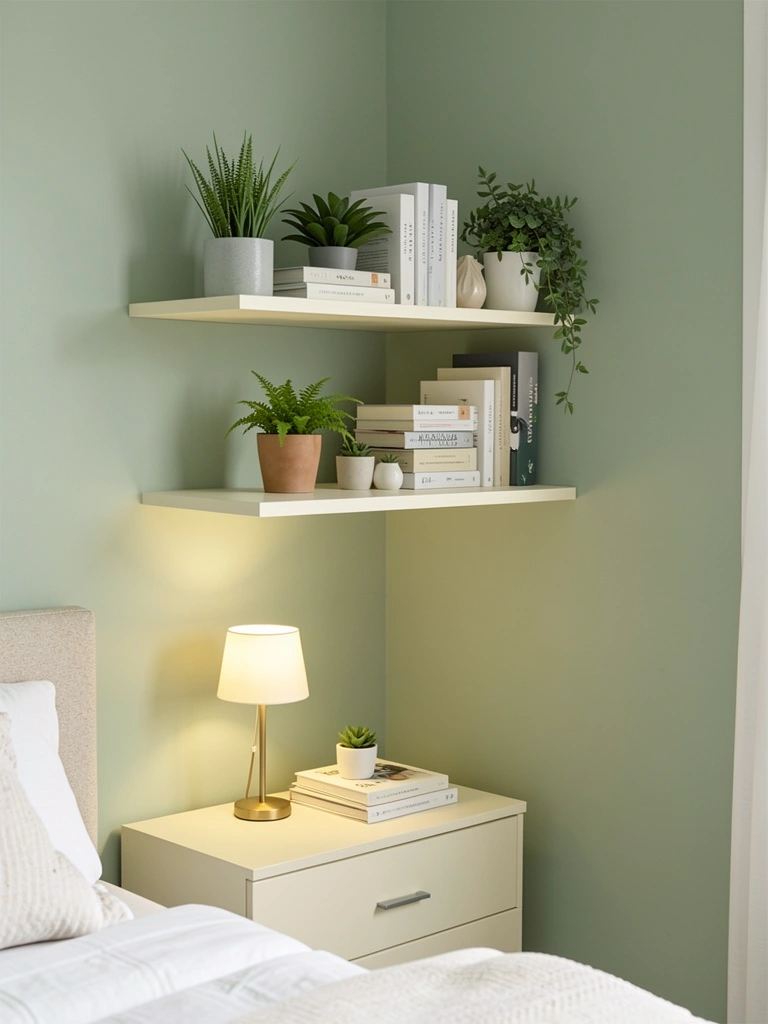
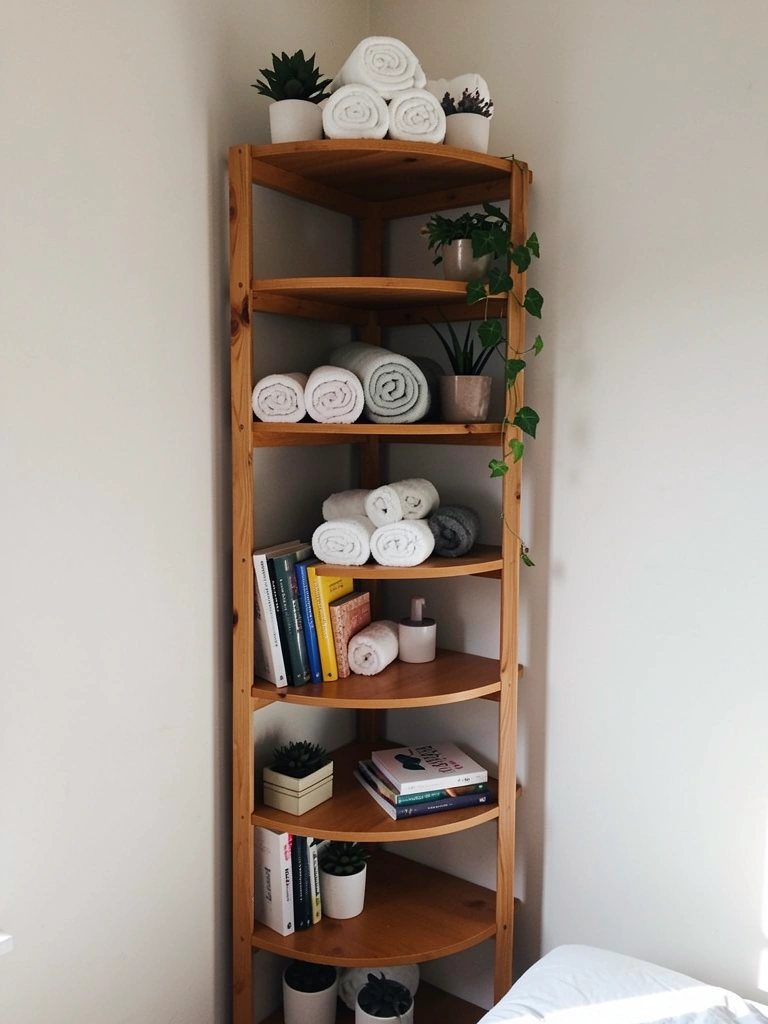
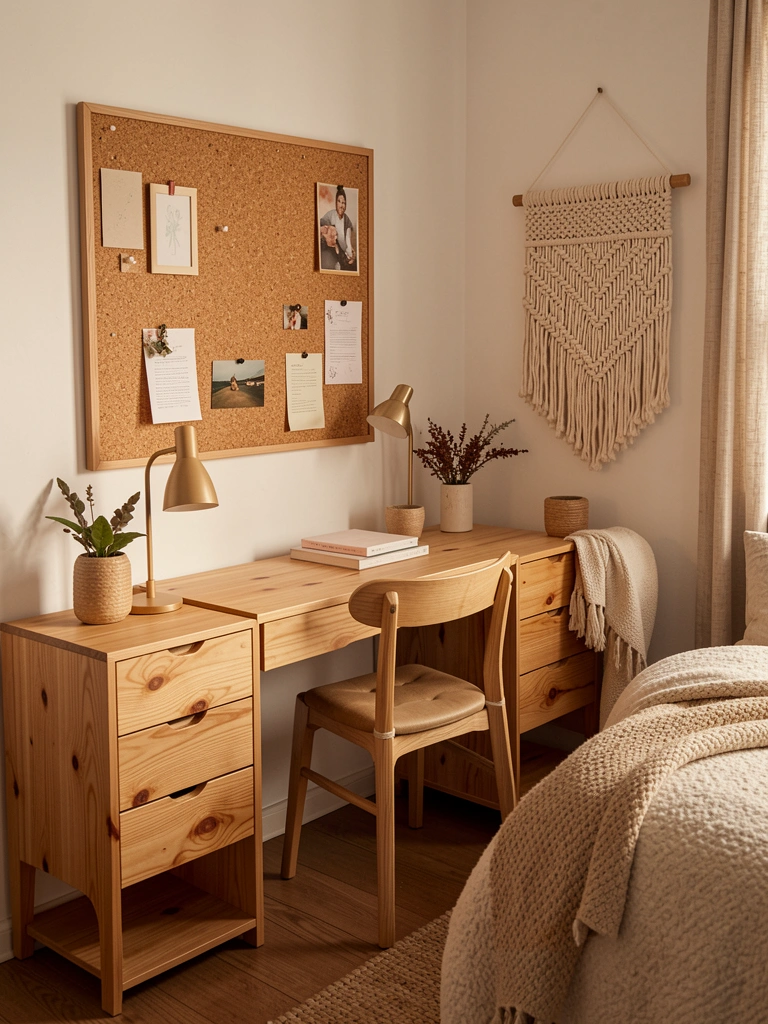
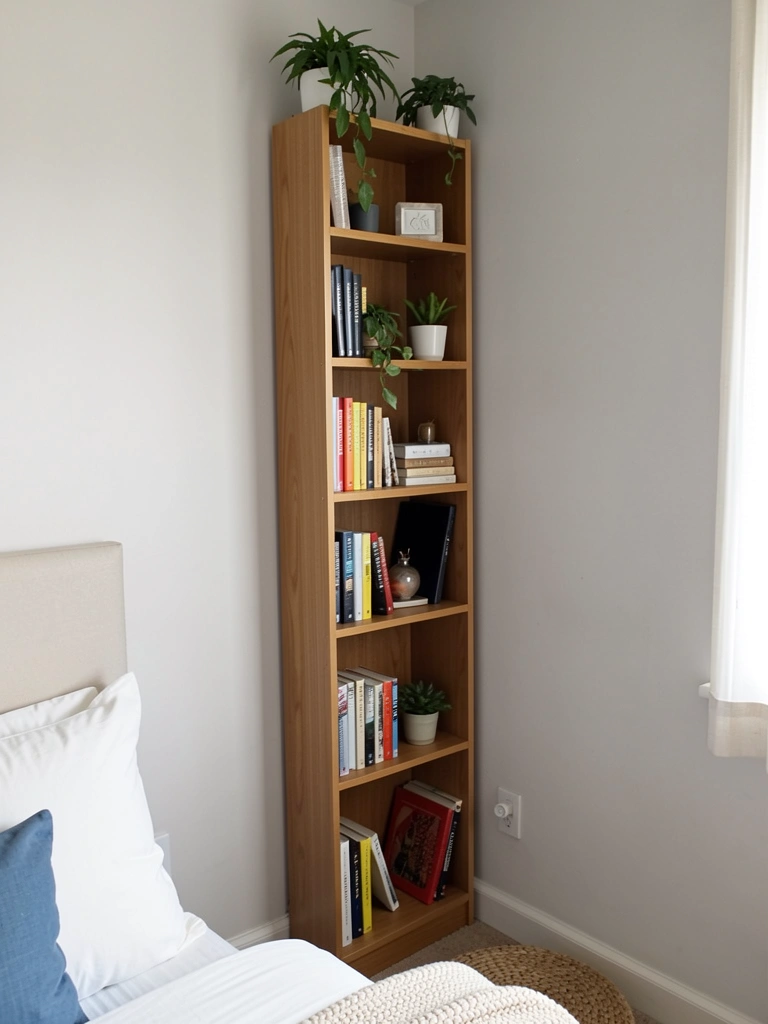
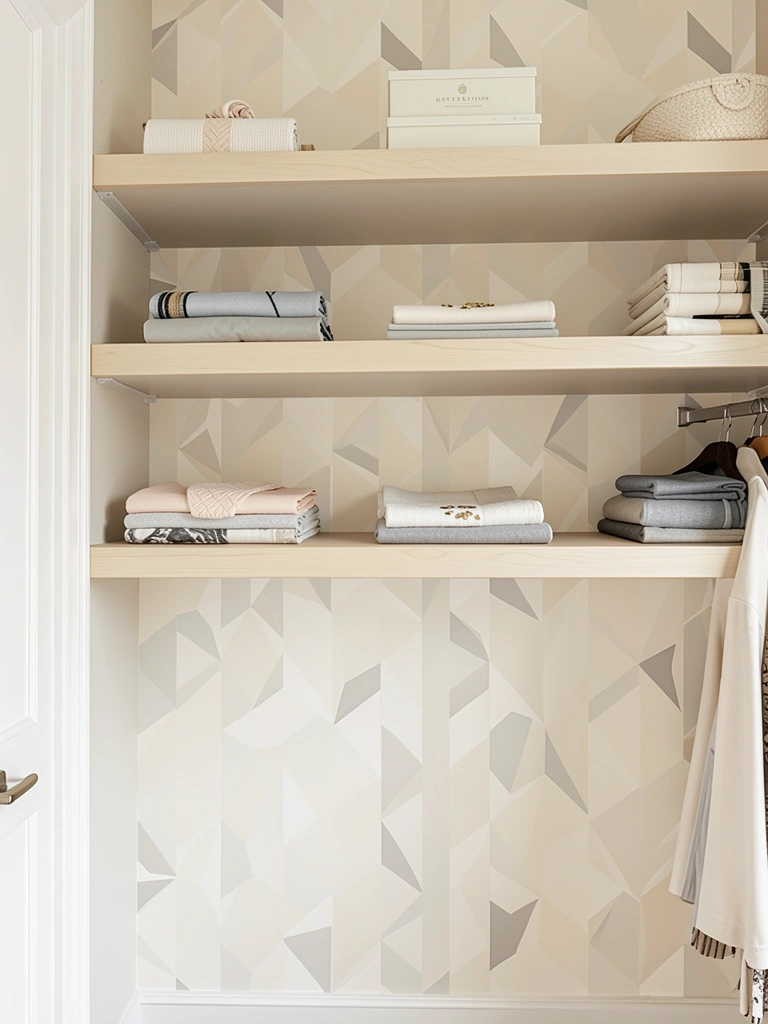
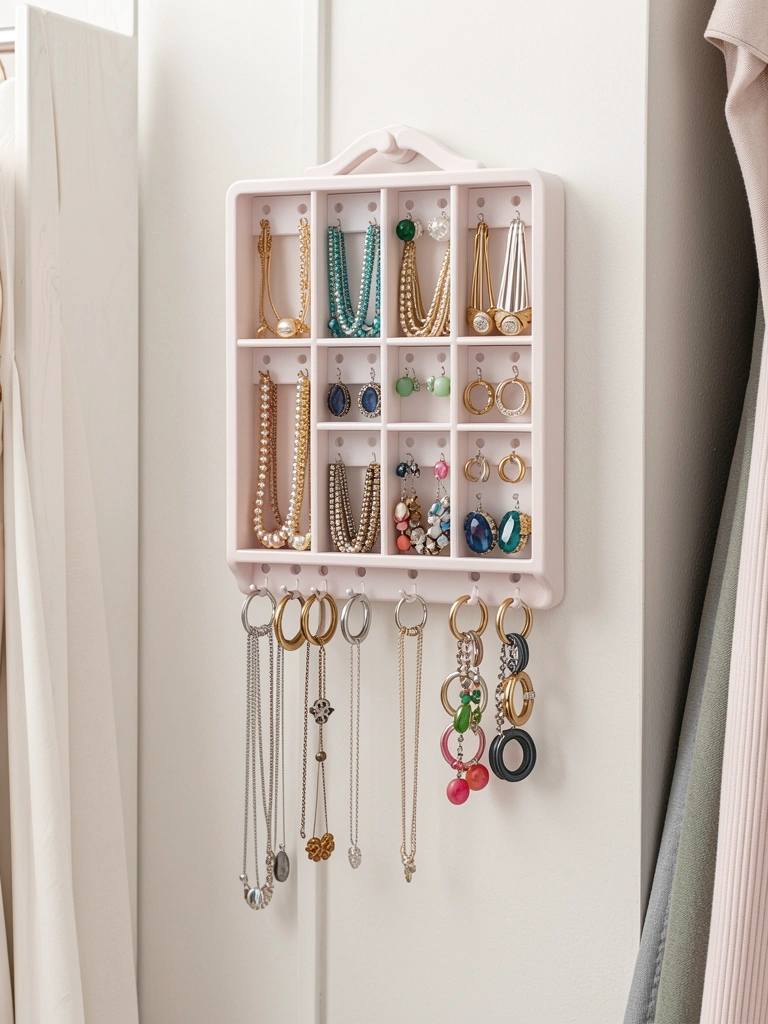
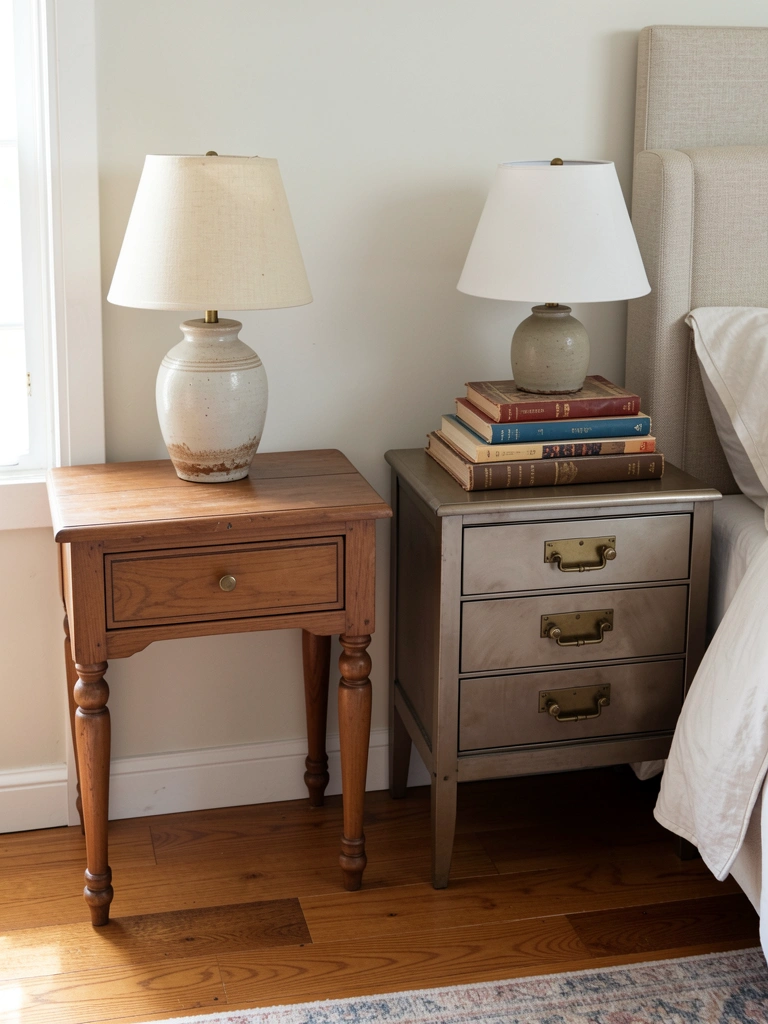
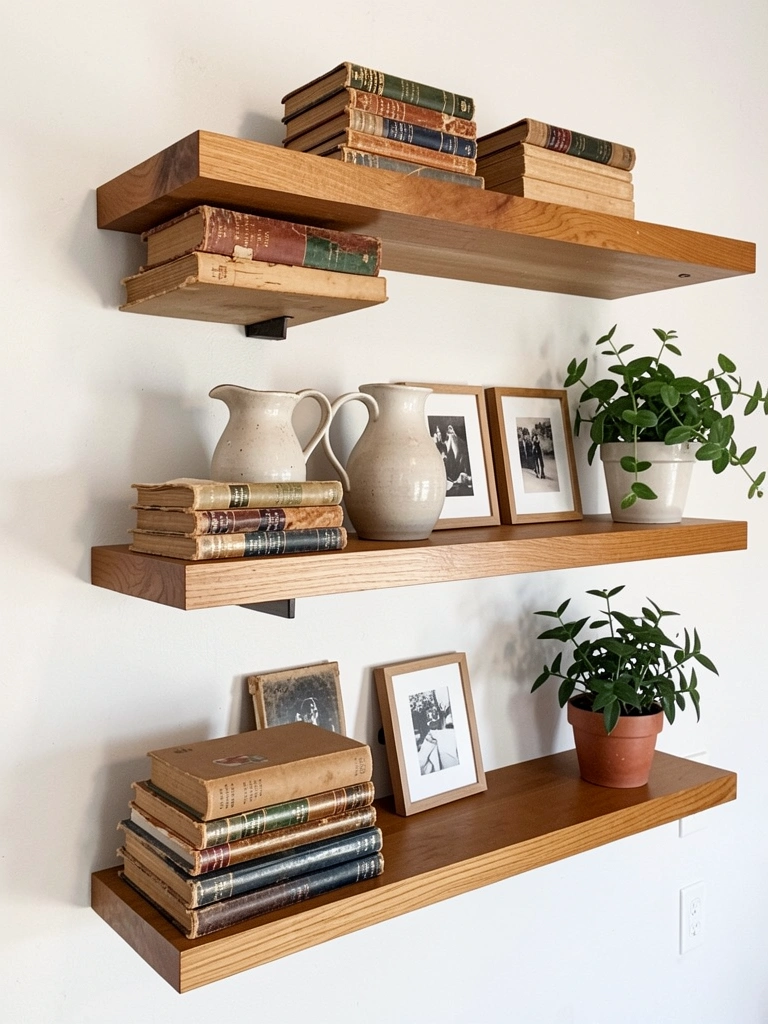
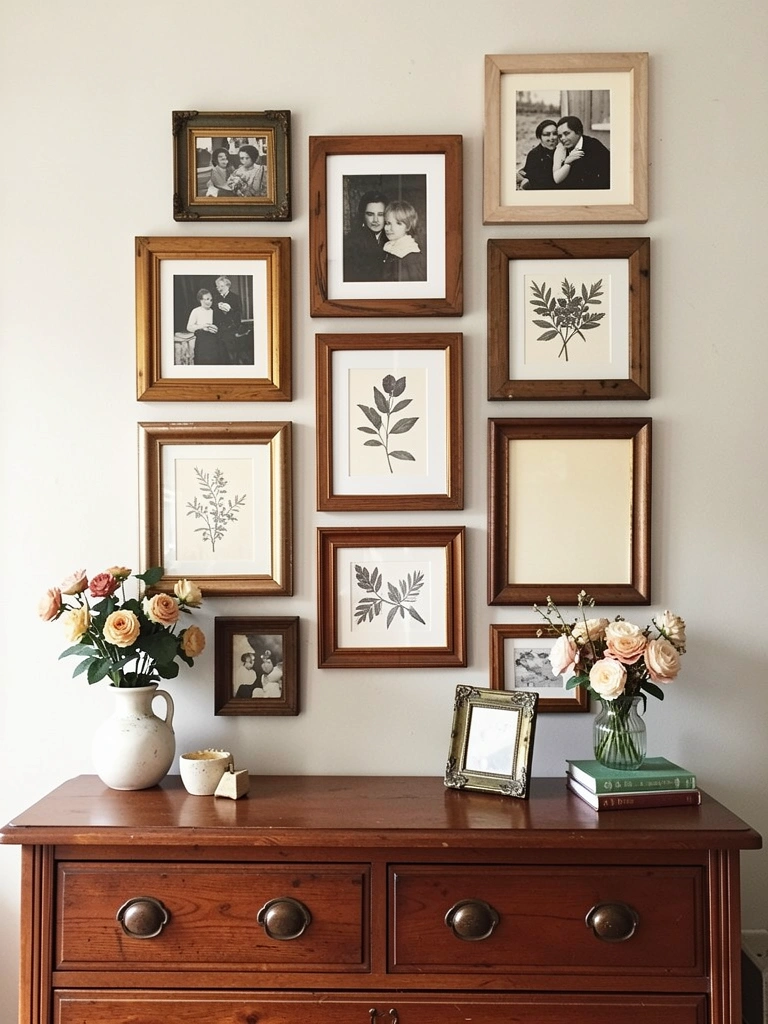
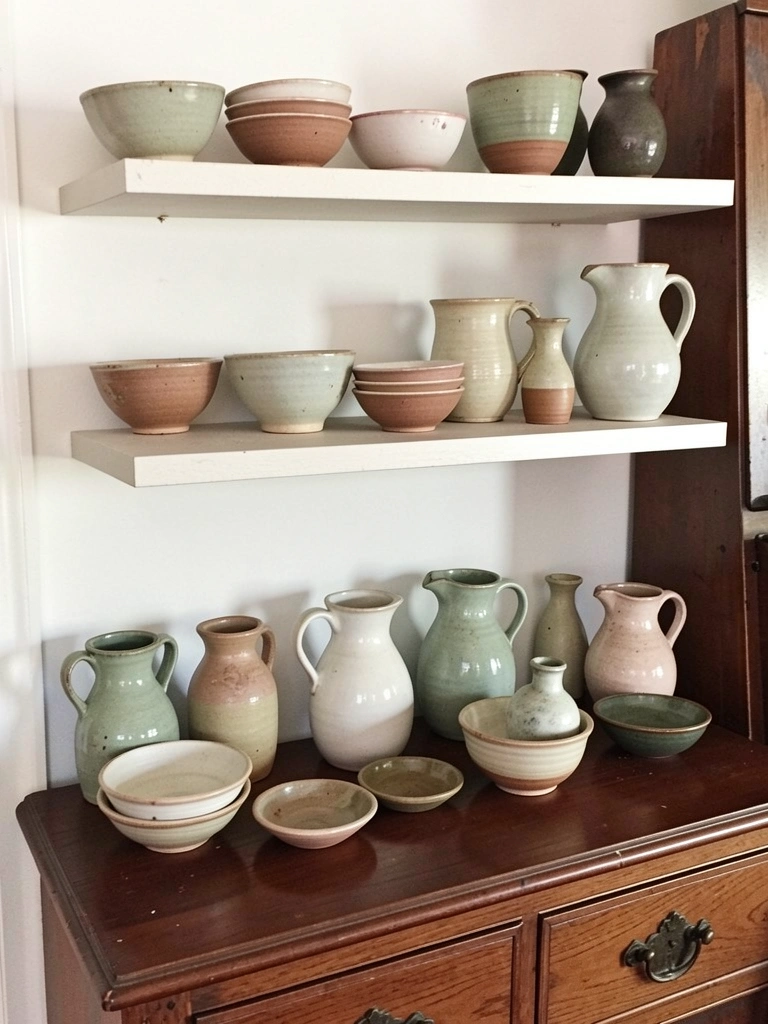
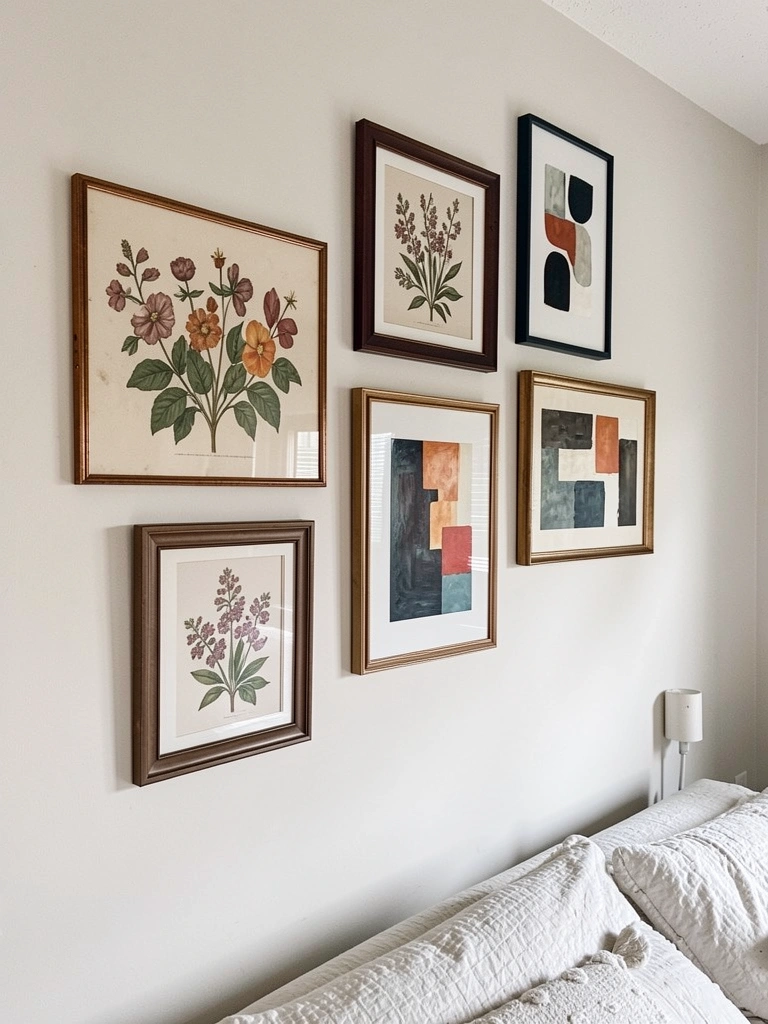
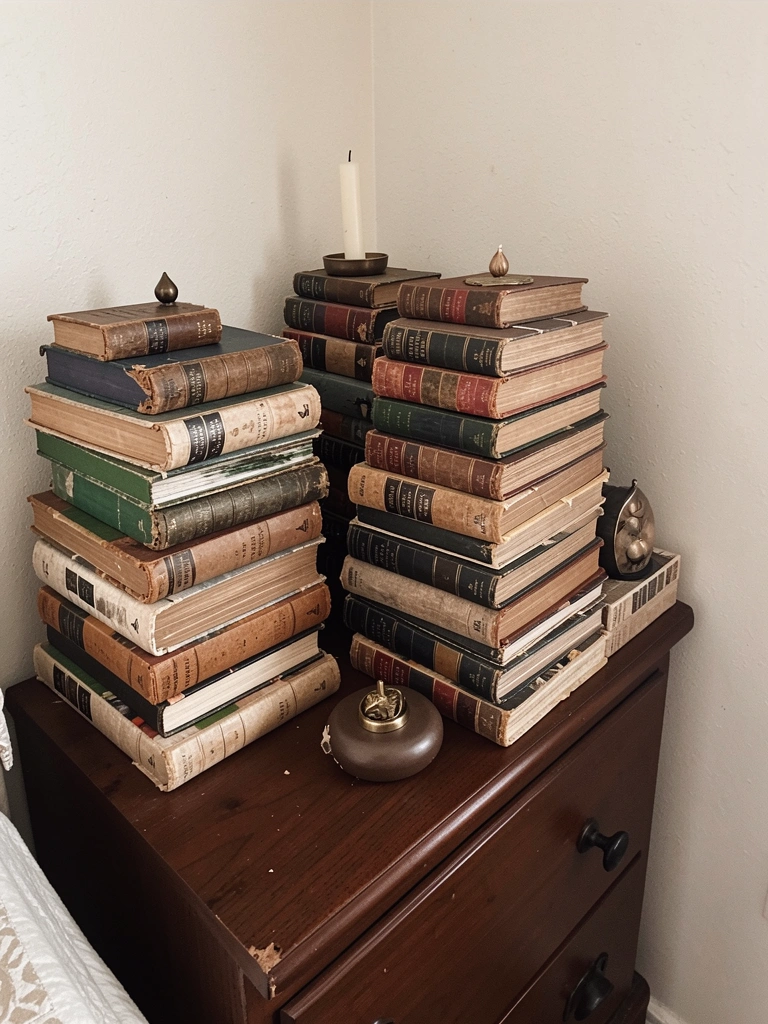
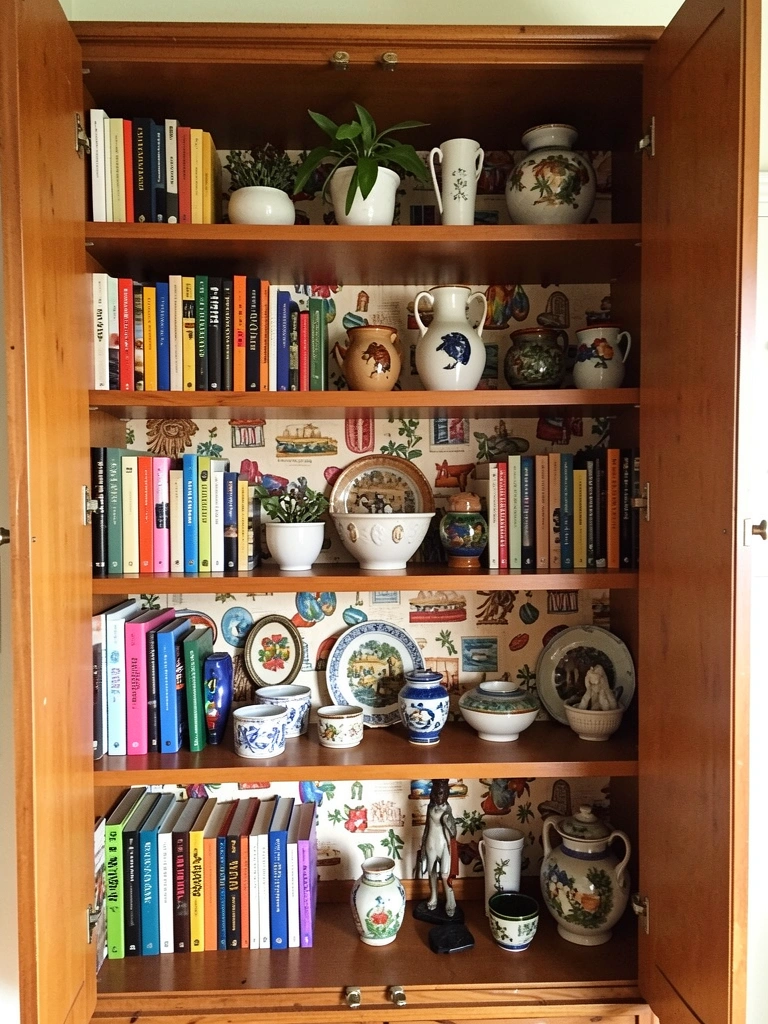
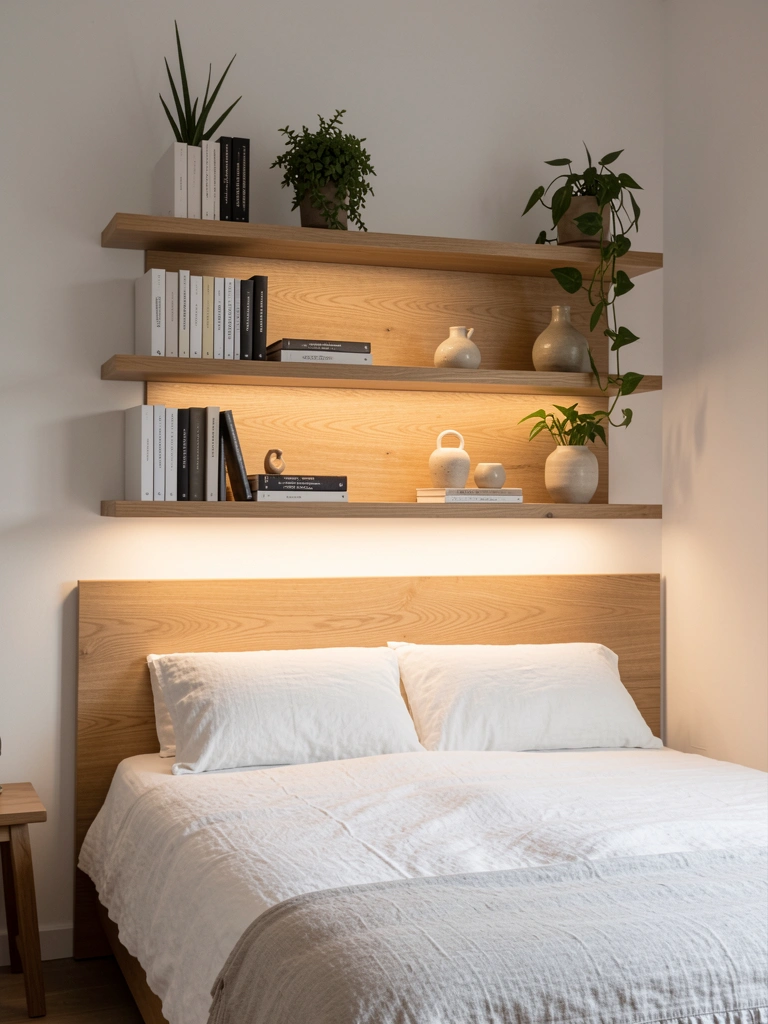
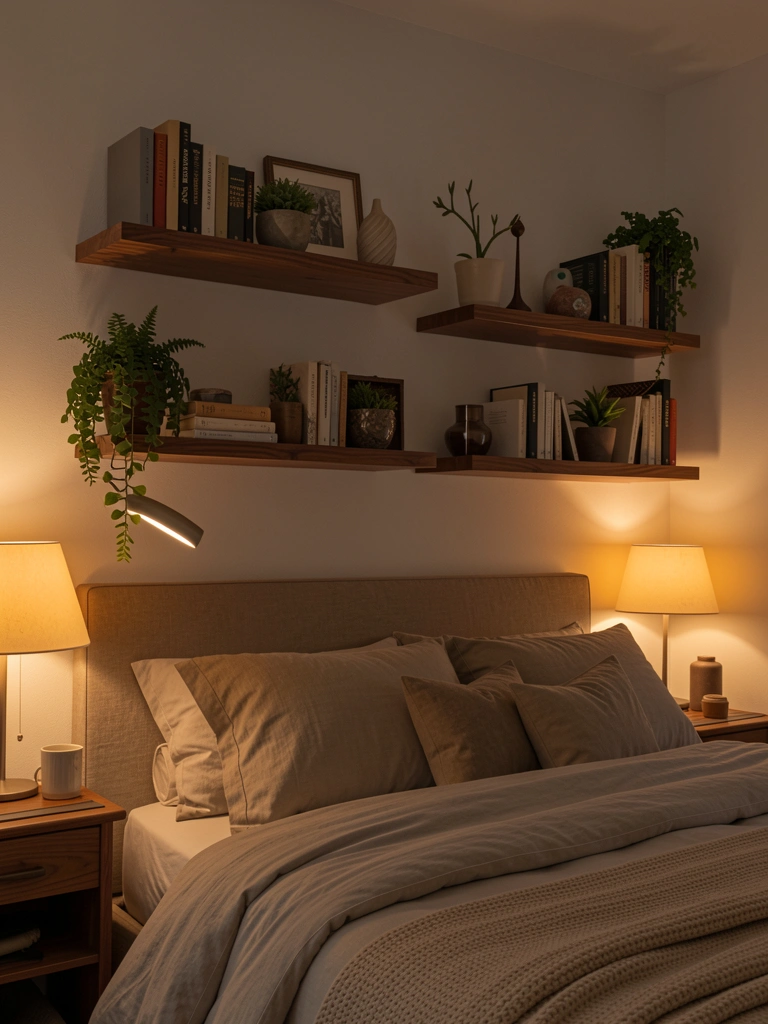
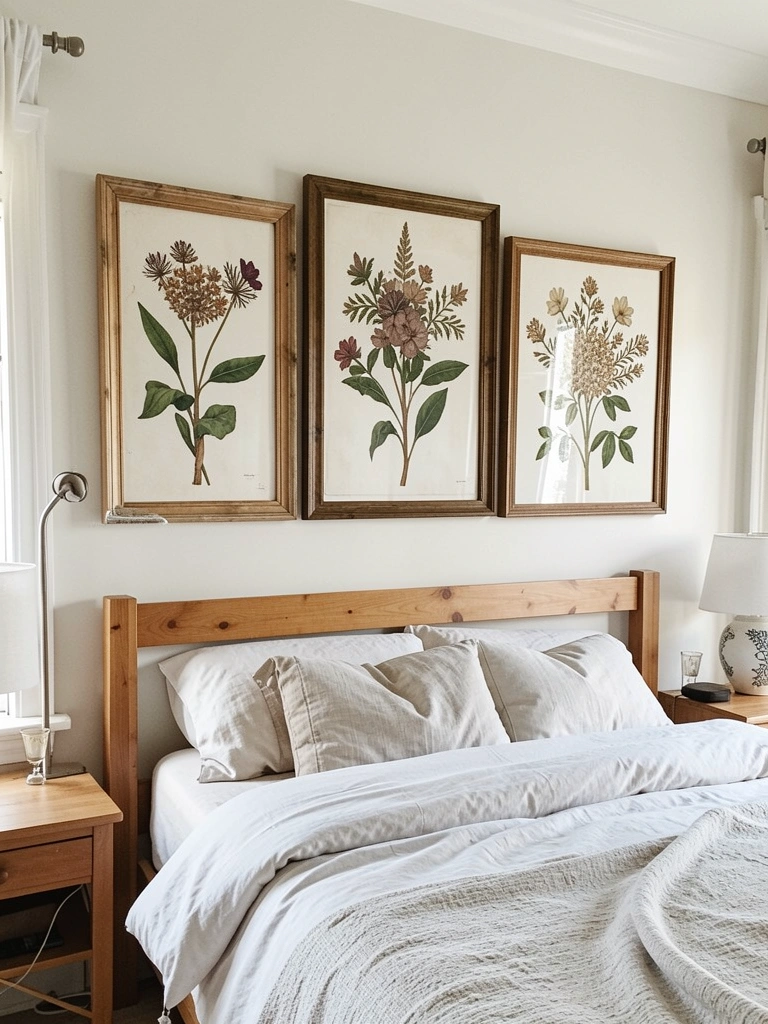
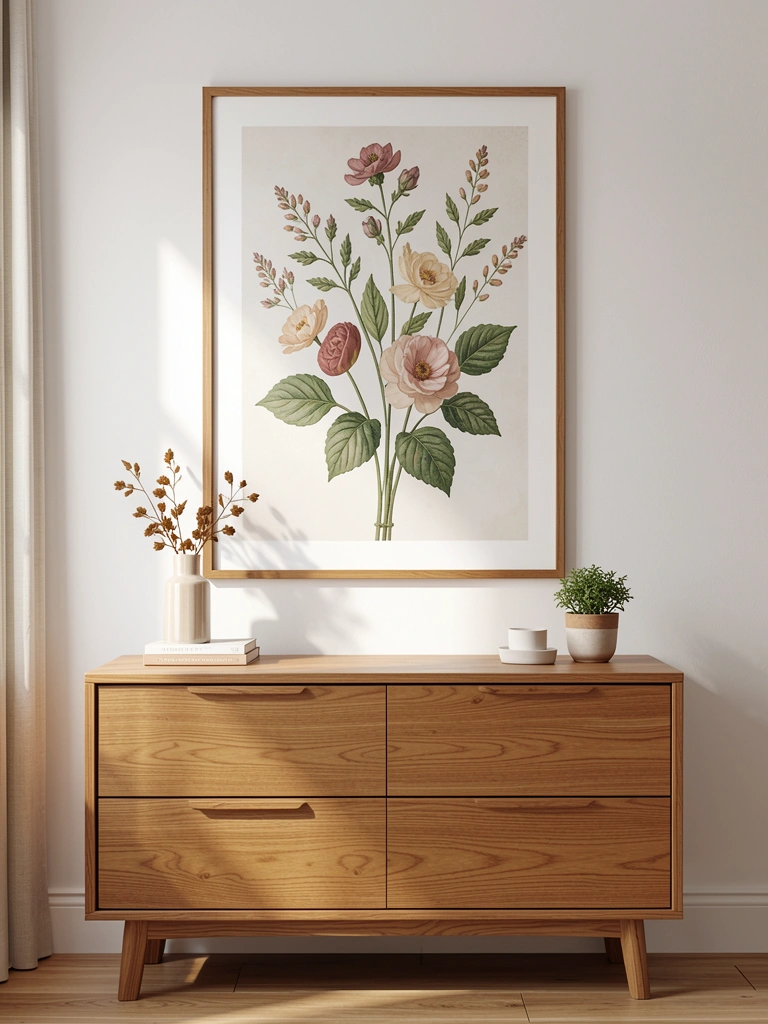
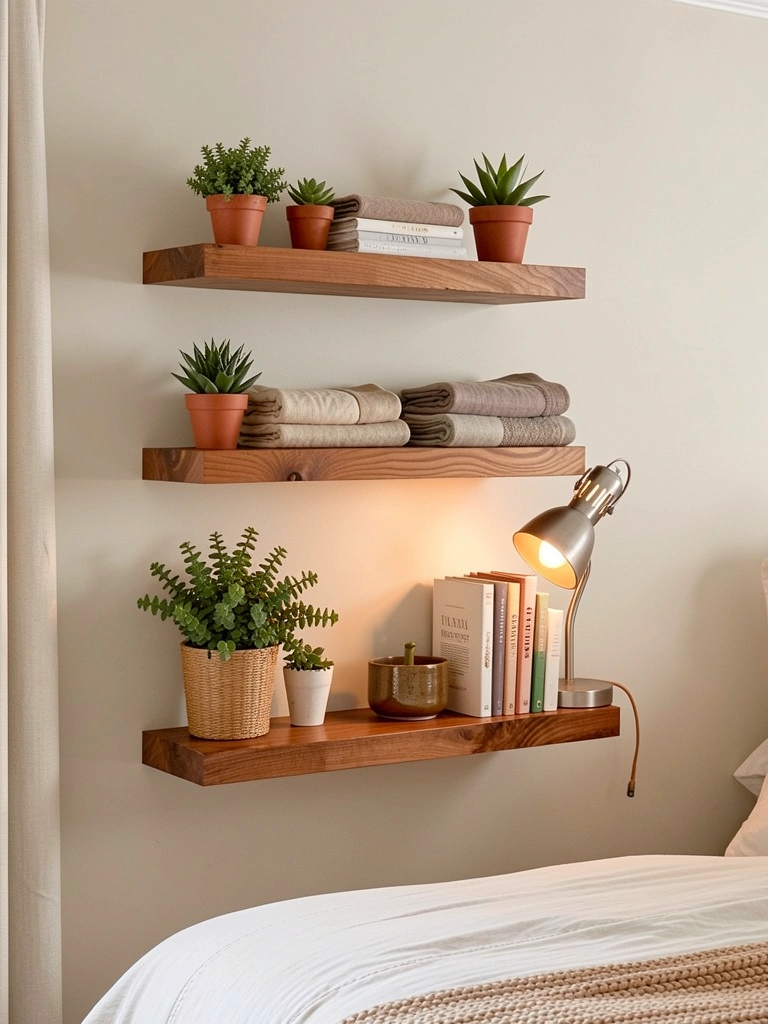
    26. Add Personal Collections as Room Decor

    Your personal collections (books, ceramics, plants, vintage finds) are design elements when displayed intentionally. They make rooms feel lived-in and authentic.

    Start with items you already own and arrange on floating shelves, a bookcase, or a dresser top. Group by color or theme; leave breathing room between items. Invest in one or two meaningful new pieces ($20-$100) if you want to strengthen your collection. The key is intentional spacing and lighting—don’t overcrowd.

    Your bedroom becomes a gallery of your interests and memories. Personal collections photograph beautifully and create conversation. Your space feels genuinely yours, not like a staged room.


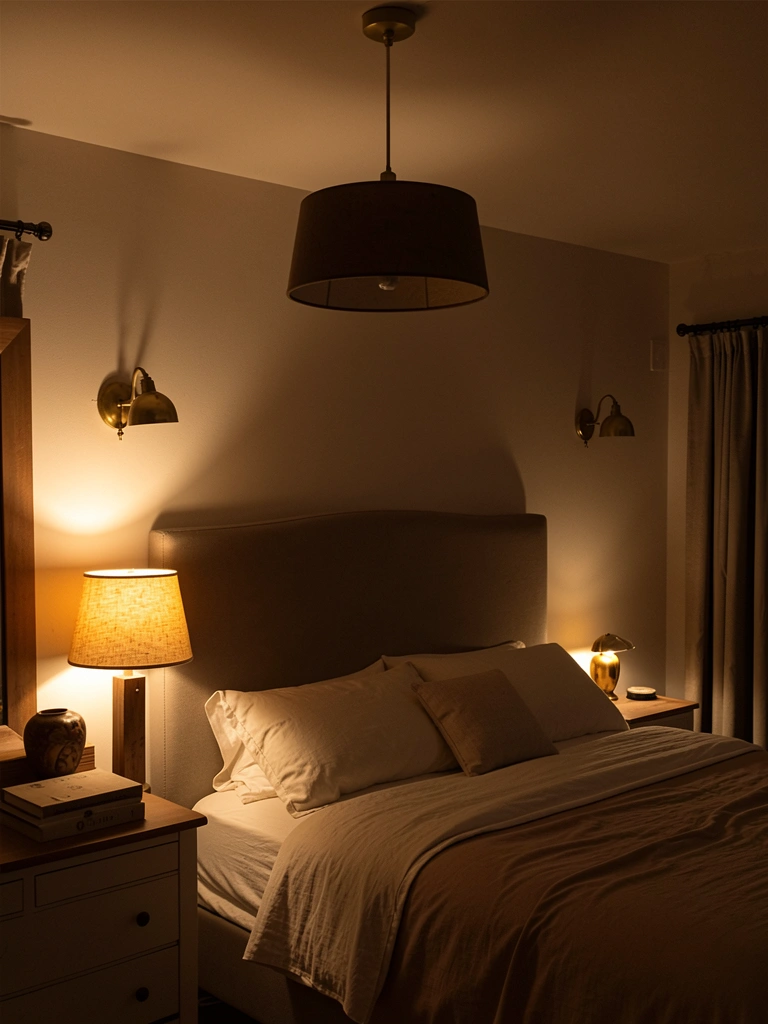
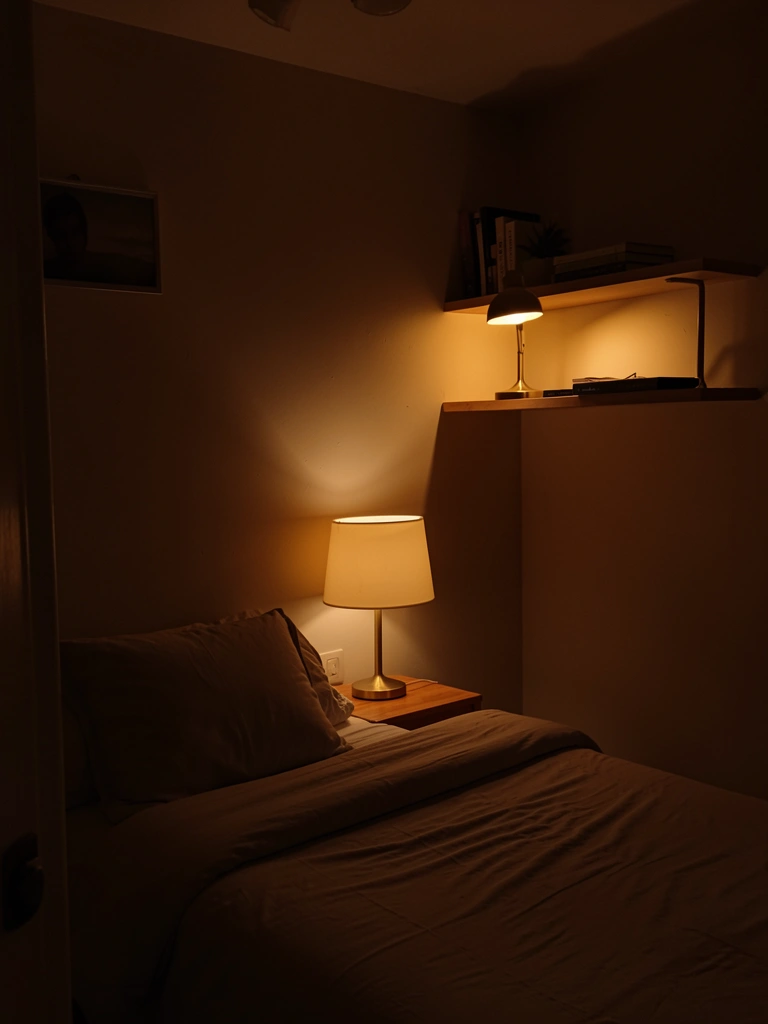
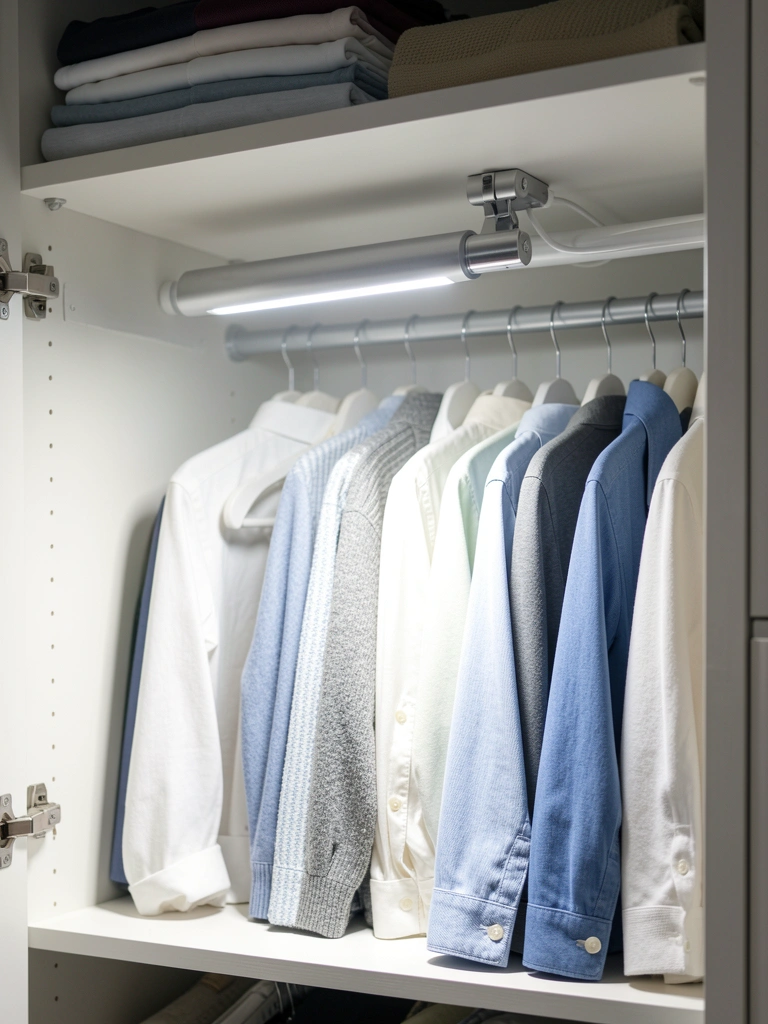
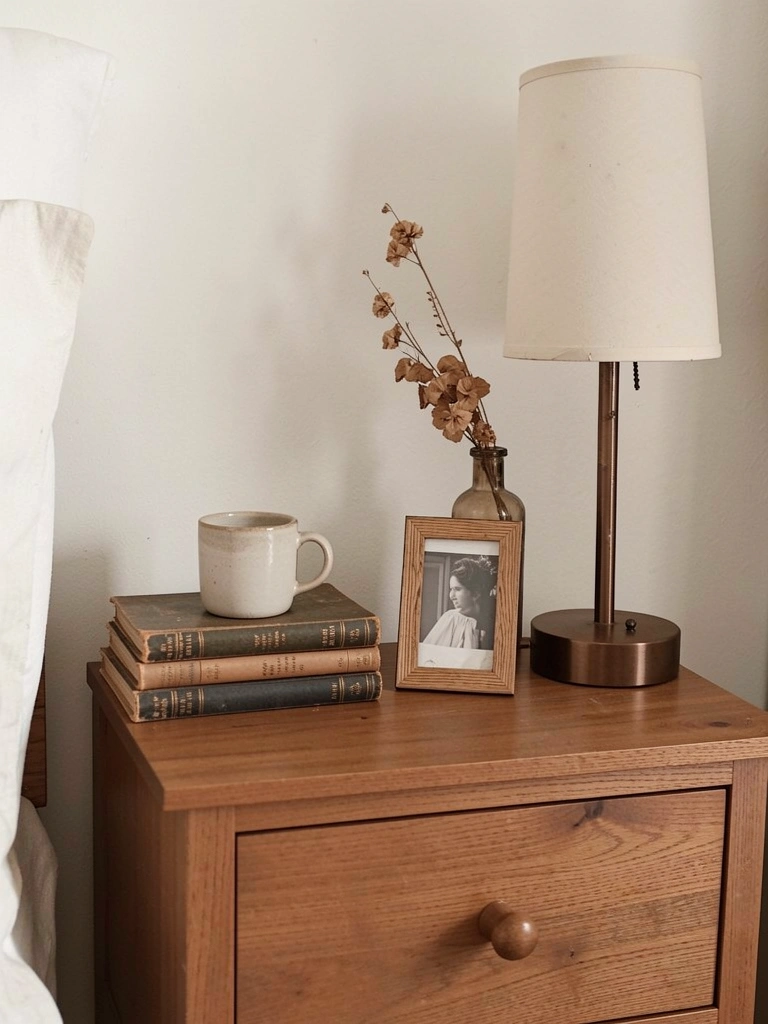
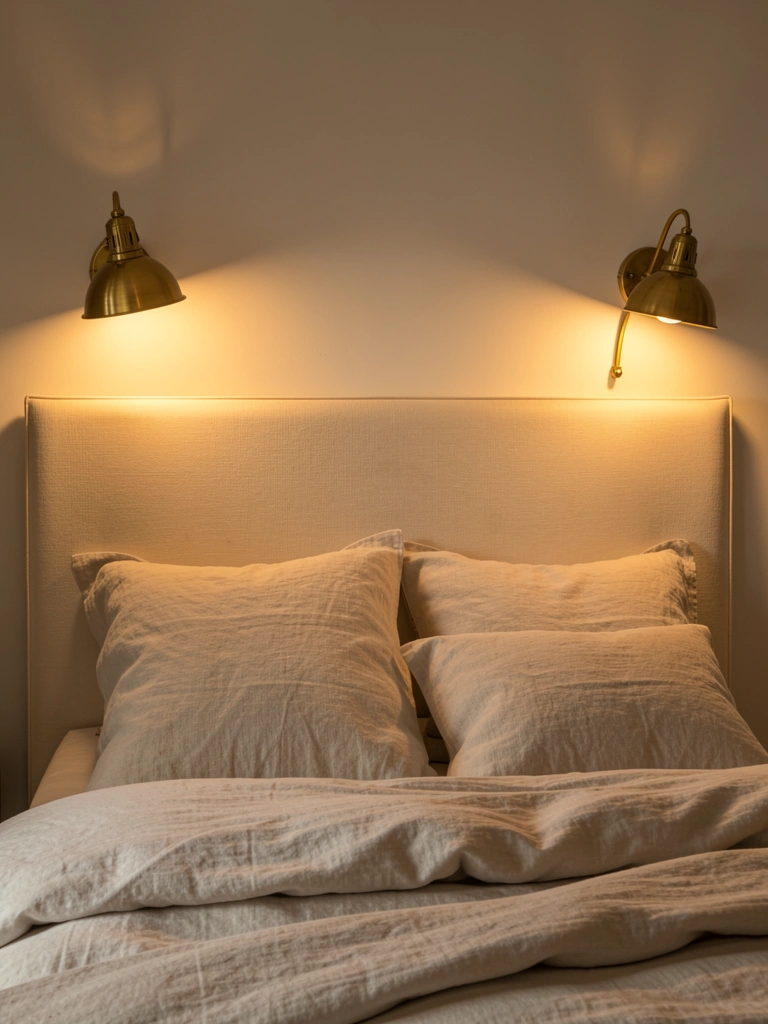
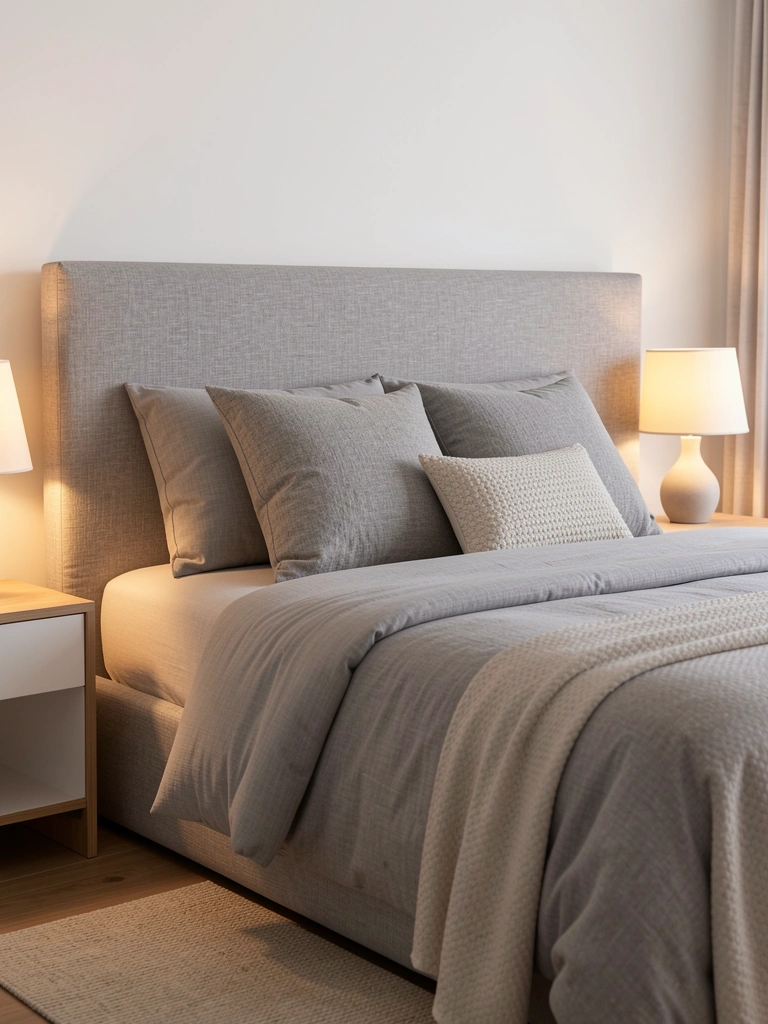
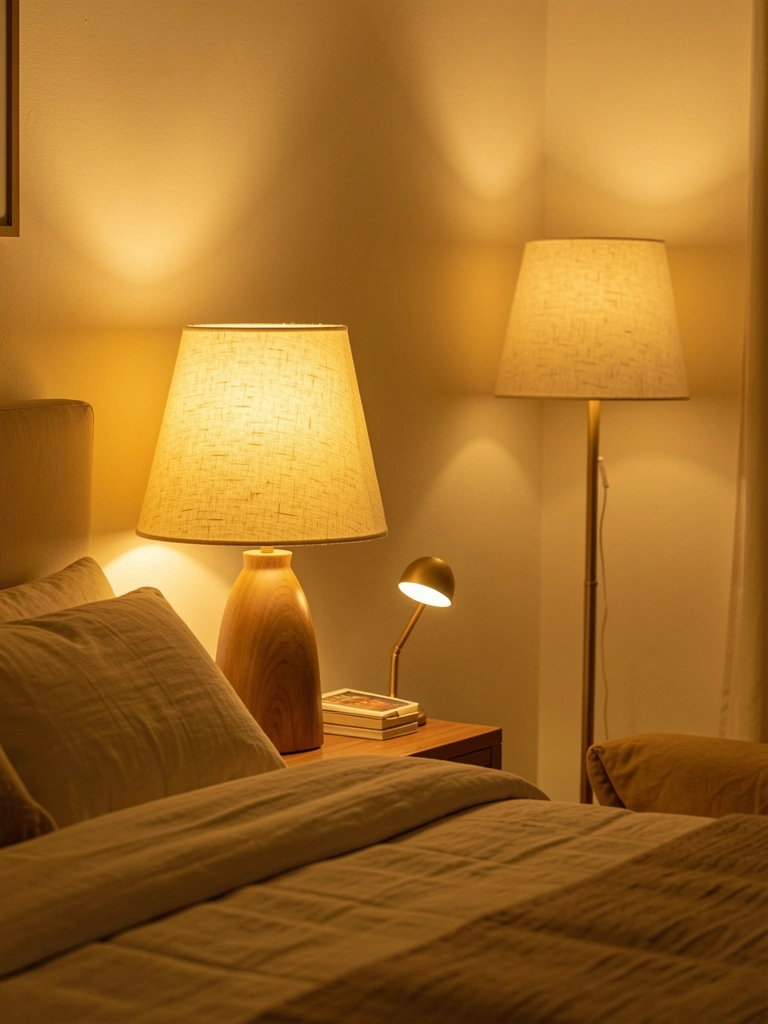
    27. Layer Soft Lighting for Mood and Function

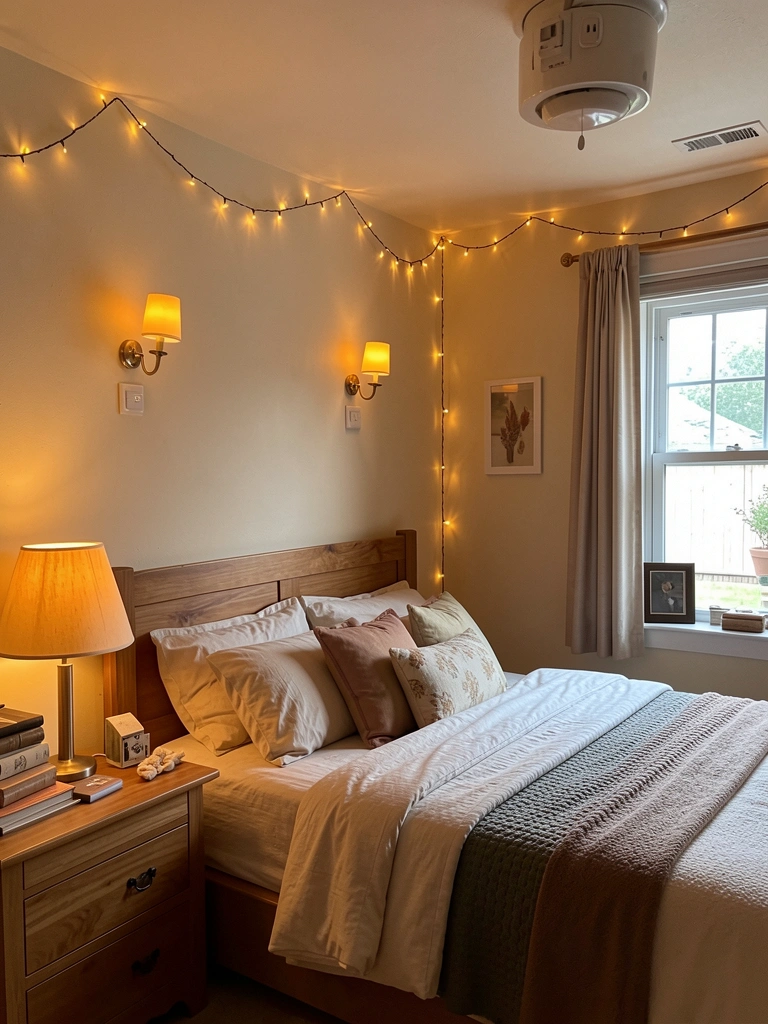
    Layered lighting—ambient, task, and accent—creates flexible, mood-appropriate spaces. One overhead light creates institutional vibes; layers create sanctuary.

    Combine: Overhead (ceiling fixture with dimmer, $50-$200), task (bedside lamps, $30-$150 each), and accent (string lights, $10-$30; wall sconces, $40-$150). Install dimmer switches for all overhead lights ($15-$40). Prioritize warm-toned bulbs (2700K color temperature, $2-$15 per bulb). Total budget: $200-$600 transforms a room’s feel entirely.

    Your bedroom adapts to your needs—bright for getting dressed, dim for relaxing, somewhere in between for reading. Lighting controls mood psychologically; layered lighting gives you complete control over atmosphere.


    Save this guide and try just one idea this weekend. Start with the easiest swap—better lighting or a single new throw—and watch how quickly your bedroom shifts from basic to genuinely charming.

  • 27 Small Walk-In Closet Organization Strategies for Perfect Order

    27 Small Walk-In Closet Organization Strategies for Perfect Order


    Small walk-in closets don’t have to feel cramped or chaotic—they can actually work better than sprawling ones because every inch counts. If you’re tired of digging through piles to find that one sweater, or frustrated by clothes you forgot you owned, you’re not alone. The good news? Strategic organization can transform your tight space into a functional, even beautiful retreat. Whether you’re renting or own, and whether you’re starting from scratch or refreshing what you have, these 27 strategies will help you maximize storage, find items instantly, and actually enjoy getting dressed each morning. Let’s dig into practical, budget-friendly solutions that really work.


    1. Declutter Before Anything Else

    Before you buy a single organizer, you need to know what you’re actually working with. Spend an afternoon pulling everything out and sorting ruthlessly—keep only items you wear, fit well, and genuinely like. This single step makes everything that follows easier and more effective.

    Go through each category (tops, bottoms, dresses) and ask: “Have I worn this in the last year? Does it fit right now? Do I feel good in it?” Be honest. Donate, sell, or consign pieces that don’t make the cut. This usually cuts closet volume by 30–50%. The result? You see and access everything you actually wear, and decision fatigue disappears. Your mornings get faster, and getting dressed feels lighter.


    2. Install Shelf Dividers for Neat Stacks

    Folded items topple over without dividers, and then your whole shelf becomes a jumbled mess. Acrylic or metal shelf dividers keep stacks upright and separate, so you see each item without disturbing the others.

    Grab acrylic shelf dividers from IKEA ($10–$15 for a pair) or bamboo dividers from Target ($8–$12). Install them on any shelf where you’re stacking sweaters, t-shirts, or jeans. Takes about 5 minutes per shelf—no tools needed. Adjust spacing based on your stack height. Pro tip: use clear dividers so you can see exactly what’s stacked on each side. You’ll stop forgetting about clothes buried underneath, and your shelves look intentionally styled instead of haphazard.


    3. Use Matching Hangers for Visual Cohesion

    Mismatched hangers are the visual noise that makes even an organized closet feel messy. Matching hangers create instant calm and make your space look curated, even on a budget.

    Pick one hanger style and replace everything. Velvet hangers ($15–$30 for 20) grip fabrics better than plastic, preventing slips. Slim wooden hangers ($20–$40 for 20) save space compared to chunky plastic ones. Metal non-slip hangers ($12–$25 for 20) work for heavier items. Whatever you choose, buy enough to outfit your entire closet. Yes, it’s an investment, but one you notice every time you open the door. Your clothes hang uniformly, nothing slides off, and your space instantly looks more intentional and expensive.


    4. Add Vertical Shelving Above the Rod

    If you’re not using the wall space above your closet rod, you’re wasting prime real estate. Floating shelves stack folded items and seasonal storage vertically, doubling your capacity without eating into floor space.

    Install floating shelves (18–24 inches deep) about 12 inches above your hanging rod. Use sturdy brackets rated for at least 25 pounds each. Cost runs $50–$150 for shelves plus installation hardware, or hire a handyperson for $100–$200 if drilling feels intimidating. Renters: ask your landlord before installing, or use removable tension rods with shelves designed for them. Stock upper shelves with folded sweaters, off-season items in labeled bins, or shoes. You’ll reclaim vertical airspace, and everything stays visible and accessible without cluttering your eye line.


    5. Label Everything (Including Bins)

    Without labels, you’ll forget what’s inside those bins within weeks, and the whole system collapses. Clear, visible labels take 10 minutes to make and save you hours of searching.

    Use a label maker ($20–$50, or borrow one) to print consistent, readable labels. Stick them on the front of storage bins where you can see them from the closet entrance. Label shelves too: “Everyday Tops,” “Work Blazers,” “Formal Wear.” Print extras so you can update as seasons change. The few minutes this takes upfront saves constant frustration later. You instantly know where everything lives, and you can find anything without moving bins around.


    6. Introduce a Pull-Out Hamper for Hidden Laundry

    Laundry piles destroy organization faster than anything else. A pull-out hamper hides dirty clothes while keeping them accessible, and your closet stays visually calm even when laundry day arrives.

    Install a pull-out hamper system ($40–$100) on a sliding track inside your closet, ideally in a corner or beside your hanging rod. Brands like Organized Living and Symphony Organizers make models that fit small spaces. Alternatively, use a sturdy rolling laundry cart ($25–$50) that slides in and out easily. Either option keeps laundry out of sight until wash day. The best part? You never see piles accumulating, so your closet maintains that clean, organized feeling all week long.


    7. Create a “Decision Rail” for Weekly Outfits

    Planning outfits the night before saves morning stress and prevents decision fatigue. Dedicate a small section of your rod to pre-planned outfits so you literally see your week at a glance.

    Each Sunday, select 5–7 complete outfits and hang them together as units. Include tops, bottoms, and even accessories clipped to hangers with safety pins or small clips. Leave a few hangers’ space between each outfit so they’re distinct. This takes about 20 minutes and transforms your mornings. You wake up, grab the pre-planned outfit, and you’re done. No second-guessing, no “I have nothing to wear” spirals. Mornings become smoother, and you actually wear thoughtfully coordinated pieces.


    8. Use Shelf Risers to Double Shelf Capacity

    Closet shelves have wasted air space between the shelf and the shelf above. Shelf risers create a second tier, instantly doubling your folded-item storage without sacrificing visibility.

    Grab adjustable shelf risers ($15–$30 per pair) from IKEA, Target, or Amazon. Place them on your existing shelf and add a secondary shelf layer on top. Stack folded sweaters, t-shirts, or jeans on the lower tier and lighter items on the upper tier. Takes 5 minutes to set up, and you get nearly double the storage. Pro tip: keep the upper tier reserved for items you don’t grab constantly, so you’re not reaching and destabilizing everything. This simple upgrade makes small closets feel spacious because you’re using every inch strategically.


    9. Incorporate a Jewelry Organizer Drawer

    Tangled jewelry takes up mental space and becomes unwearable. A drawer organizer keeps necklaces separated, earrings paired, and rings safe—all visible at a glance.

    Install a drawer insert organizer ($20–$40) inside a closet dresser drawer or nightstand. Brands like The Container Store and Etsy sellers make stackable, customizable options. Assign each compartment a category: necklaces, bracelets, earrings, rings, watches. Dedicate 15 minutes to untangling and organizing. Everything becomes instantly wearable again, and you’ll actually reach for jewelry you forgot you had. Your outfits level up because you’re not frustrated by knotted chains.


    10. Paint Walls a Light, Reflective Finish

    Dark closet walls absorb light and make small spaces feel cramped. Light, reflective paint opens up the space visually and makes organizing easier because you can see everything clearly.

    Paint your closet walls in soft neutrals like pale greige, off-white, or light gray ($30–$50 for paint plus brushes). A matte finish hides imperfections while matte-finish paint reflects light gently without glare. Use a quality eggshell or satin finish that’s washable. This takes a weekend, or hire a painter for $200–$400. Renters: check your lease first, or use removable wallpaper ($20–$40) as a temporary solution. The result is dramatic—your closet looks bigger, brighter, and more organized instantly. Better lighting also means you see colors accurately when picking outfits.


    11. Install LED Strip Lighting for Ambiance

    Standard overhead lighting casts shadows and doesn’t show colors accurately. LED strip lights create boutique-style ambiance and make your closet feel luxe while helping you see your entire wardrobe clearly.

    Stick adhesive LED strip lights ($15–$40 per strip) along the top shelf or above hanging rods. Choose warm white (2700K) for flattering, spa-like vibes. Brands like Nanoleaf and Philips Hue offer smart options ($30–$80) you can dim via phone. Installation takes 10 minutes—just peel and stick. If you want permanent wiring, hire an electrician for $150–$300. The payoff? Your closet becomes a place you want to spend time, and color-matching clothes for outfits becomes accurate. Plus, it photographs beautifully if you’re posting to social media.


    12. Use Over-the-Door Shoe Racks to Save Floor Space

    Shoes scattered on the closet floor eat up precious square footage and get lost. Over-the-door racks hold multiple pairs vertically, keeping floors clear and shoes instantly visible.

    Install an over-the-door shoe rack ($20–$40) on your closet door or the inside of an entry door. Metal or fabric racks hold 12–16 pairs depending on shoe size. Takes 5 minutes to mount. Arrange shoes by color or frequency of wear. Renter-friendly: choose models with adhesive hooks ($10–$15) instead of screws. Your floor suddenly feels open and spacious, and you’ll actually wear more shoes because you see every pair. No more rediscovering shoes buried under seasonal items.


    13. Roll Clothes Instead of Hanging to Save Rod Space

    Hanging everything means limited rod space in small closets. Rolling clothes and storing them vertically (like files) nearly triples what fits while keeping everything visible and accessible.

    Fold t-shirts, sweaters, and casual pants into thirds lengthwise, then roll tightly. Stand them upright on a shelf in rows, arranged by color or type. This method is called “file folding” or “KonMari” style. You can fit 20–30 items in the space that would normally hold 5–8 hangers. Takes about 10 minutes per shelf to set up. Reserve hanging space for delicate items, work clothes, or dresses that wrinkle easily. The payoff? You see everything at once, you use your rod space for pieces that genuinely need it, and your closet stores 2–3 times more without feeling stuffed.


    14. Install a Pant Rack to Prevent Wrinkles

    Pants folded or bunched together wrinkle and become unwearable without pressing. A dedicated pant rack holds multiple pairs wrinkle-free, and you see every option at once.

    Mount a pant rack ($30–$60) on your closet wall or purchase a portable pant hanger ($20–$40) that clips to your rod. These racks typically hold 8–12 pairs. Hang pants by the waistband so legs hang freely. Installation takes 15 minutes if wall-mounted. Alternatively, use S-hooks ($5–$10 for a pack) hung from a rod and clip pairs with plastic hangers. Your pants stay wrinkle-free and ready to wear, and you actually reach for pieces you’d forgotten about. Getting dressed becomes faster because you’re not choosing between crushed options.


    15. Corral Belts on a Tiered Belt Hanger

    Belts tangled in drawers or coiled in corners take up space and become invisible. A tiered belt hanger displays every belt visibly and compact, and it doubles as decor.

    Mount a tiered belt hanger ($15–$30) on your closet wall or inside the door. These usually hold 10–15 belts on separate tiers. Installation takes 5 minutes. Arrange belts by color for visual interest. Every belt becomes accessible, and you’ll use more of them because you see all options. Bonus: these hangers look intentional and stylish, adding personality to your closet space without taking much room.


    16. Add a Small Dresser for Folded Intimates and Socks

    Intimates and socks deserve their own organized home so you’re not digging through piles every morning. A slim dresser fits into even tight closets and keeps these items sorted and easy to grab.

    Fit a small 3–4 drawer dresser ($80–$200) into your closet corner or along one wall. Look for narrow options at IKEA, West Elm, or Wayfair. Assign each drawer a category: bras, underwear, socks, loungewear. Use drawer dividers ($10–$20) or folded cloth bins to separate items within each drawer. Setup takes 20 minutes, but saves you countless mornings of frustration. You’ll stop wearing wrinkled socks because they’re organized clearly. Mornings become smoother when intimate items are instantly accessible.


    17. Use Clear Drawer Dividers to Prevent Jumbles

    Even in organized drawers, items shift and jumble during the day. Clear acrylic dividers keep everything in separate compartments so nothing mingles or gets lost.

    Add clear acrylic drawer dividers ($10–$20 for a set) to any drawer. Arrange them to create compartments for bras, underwear, socks, tights—whatever you store. This takes 5 minutes. Pro tip: use dividers in dresser drawers, closet shelves, or even under-bed storage. Items stay exactly where you put them, and you see everything instantly. Mornings lose the “where is my favorite bra?” panic, and you remember what you own.


    18. Hang a Slim Full-Length Mirror for Outfit Checks

    Picking an outfit is one thing; seeing it together is another. A full-length mirror in your closet lets you check the complete look before committing, saving outfit regrets throughout the day.

    Install a slim full-length mirror ($40–$120) on one closet wall. Look for 16–20 inches wide to fit tight spaces. Alternatively, lean a standing full-length mirror ($50–$150) in a corner—no installation needed. Bonus for renters! This takes 10 minutes or zero minutes depending on style. You can see how tops pair with bottoms, how accessories complete a look, and whether colors coordinate before you leave. Outfit changes drop dramatically, and you have actual confidence in your choices.


    19. Create a “Try Me Later” Staging Shelf

    Clothes waiting for repairs, dry cleaning, or outfit experimenting become invisible if mixed with regular inventory. A dedicated staging shelf keeps these items visible and prevents them from getting lost.

    Reserve one shelf or rod section for items in transition: pieces awaiting hemming, dry cleaning, or outfit combinations you’re testing. Label this area or use a ribbon/clip to mark it visually. Check this shelf weekly to move items along. This keeps your main closet clean while preventing items from disappearing into forgotten piles. You’ll actually follow through on repairs and outfit experiments because they’re constantly visible.


    20. Stack Seasonal Storage Bins Vertically Behind Hanging Clothes

    Off-season clothes take up valuable closet real estate if mixed with current rotation. Stacking them vertically in labeled bins behind your hanging rod keeps them accessible but out of the daily view.

    Store winter coats, summer dresses, or holiday pieces in clear storage bins ($10–$25 each) labeled with season and contents. Stack 2–3 bins vertically behind your hanging rod where they won’t catch on clothes. Choose stackable, clear bins so you can see contents without opening them. This setup takes 30 minutes but gives you a closet that feels current and uncluttered. You know exactly where seasonal items live and how many of each you own. Swapping seasons becomes a quick organized task instead of a chaotic excavation.


    21. Use Slat Wall Panels for Customizable Accessory Display

    Accessories scattered in drawers become invisible. Slat walls with hooks and shelves let you display and organize belts, scarves, hats, and bags while adding design interest to your closet.

    Install DIY slat wall panels ($50–$150 for one wall) or hire it done for $300–$600. Add adjustable hooks and shelves ($15–$40) designed for slat walls. This project takes a weekend DIY or a day professionally. Arrange accessories by color or type. Suddenly your closet looks like a boutique, and everything stays visible and accessible. You’ll use more accessories because you see them constantly. Plus, if you ever move, some slat panels can be taken down and relocated.


    22. Implement a “One In, One Out” Rule to Prevent Creep

    After organizing, creep happens—you buy new items without removing old ones, and chaos returns. A simple “one in, one out” rule maintains order long-term and keeps your closet at a manageable size.

    Every time you bring a new item home, donate, sell, or move one old item out. This doesn’t mean they have to be the same category—just maintains overall balance. Takes 2 minutes per new purchase. Set a phone reminder or put a note on your closet door. This discipline keeps your closet from regressing into chaos. You’ll actually wear what you own instead of re-buying duplicates. Your space stays organized without constantly re-doing everything from scratch.


    23. Assign a “Currently Wearing” Section of the Rod

    Not all clothes deserve equal closet real estate. Designate a prime section of your rod for items you’re currently wearing so you reach for them naturally and rotate less-worn pieces less often.

    Mentally (or physically, with a small clip divider) mark off about 30% of your rod as your “now wearing” zone. This holds pieces you wear weekly or more. Rotate items in and out every 2–4 weeks. Everything else lives elsewhere on the rod or on shelves. This takes 5 minutes to set up and zero minutes ongoing. You’ll reach for current favorites naturally, and you’ll notice when it’s time to rotate. Outfits become easier because you’re working from a smaller, curated subset daily.


    24. Use Vacuum Storage Bags for Bulky Off-Season Items

    Bulky winter coats and sweaters hog closet space when not in season. Vacuum storage bags compress seasonal clothing to a fraction of their size, freeing up shelves and making storage efficient.

    Buy a vacuum storage bag set ($15–$30) in various sizes. Fill bags with off-season sweaters, coats, or parkas, then use a vacuum or pump to extract air. Bags compress to about 30% of original size. Label each bag clearly with contents and season. Store on high shelves or under beds. This project takes 30 minutes but reclaims significant space. Pro tip: use this method sparingly—some fabrics (especially delicates) do better in regular storage. But for sturdy basics and coats, it’s a game-changer. Your current season’s items get prime closet real estate without sacrifice.


    25. Create a “Styling Station” Shelf for Accessories and Mood Boards

    A small shelf devoted to styling inspiration and current favorite accessories keeps your creative energy alive and helps you outfit-plan thoughtfully instead of rushing.

    Dedicate one shelf to a rotating “styling station.” Include a few pieces you’re currently obsessed with, a small mood board (print or clip images to a wire or frame), current jewelry favorites, and a small plant or candle for ambiance. Update this shelf every 2–4 weeks. Takes 10 minutes to refresh. This zone becomes a place where styling happens intentionally, not by default. You’re reminded of pieces that work together, and you stay engaged with your closet as something creative rather than just functional.


    26. Add Notched Shelves to Work Around Obstacles

    Awkward closet layouts with obstructing rods, brackets, or windows waste usable shelf space. Custom notched shelves fit around these obstacles, capturing storage you’d otherwise lose.

    If you have a shelf space but something protrudes into it, have a shelf custom-cut or notched to fit around the obstacle. Many hardware stores offer cutting services ($20–$50 per cut), or order pre-cut shelves online. This is a DIY project if you’re handy with a jigsaw ($50–$100 tool rental plus materials). Project takes a few hours DIY or a few minutes professional. The payoff: you reclaim storage that would otherwise sit empty. Small closets often have quirks that waste space—notched shelves turn those quirks into advantages.


    27. Schedule a Quarterly “Closet Audit” to Maintain Order

    Organization isn’t a one-time event—it requires maintenance. A quarterly check-in keeps things tidy, helps you notice gaps in your wardrobe, and prevents slow regression into chaos.

    Mark your calendar for a “closet audit” every three months (perhaps seasonally). Spend an hour checking: Are labels still accurate? Do shelves need adjusting? Any duplicates creeping in? Any pieces you never wear? Are bins organized? Make tweaks as needed. This takes 60 minutes quarterly, or about 5 minutes per week if you stay on top of it. The result is a closet that stays organized all year without massive overhauls. You’ll actually know what you own, notice wardrobe gaps early, and feel calm opening your closet doors every single day.


    Ready to finally use your whole closet? Pick one or two ideas from this list and start this weekend—you might be surprised how quickly small changes add up. Save this post for your next organizing session, and share it with anyone else wrestling a tiny closet into submission.

  • 28 Aesthetic Room Ideas That Transform Your Entire Vibe

    28 Aesthetic Room Ideas That Transform Your Entire Vibe

    Your home should make you feel something the moment you walk through the door. Whether your space currently feels sterile, outdated, or just… blah, these 28 aesthetic ideas will help you craft rooms that actually reflect who you are. We’re moving past cold stark whites and minimalist emptiness into spaces filled with warmth, personality, and comfort. You’ll find a mix of quick fixes (some take 15 minutes), budget-friendly hacks, and investment pieces worth saving for. Each idea works for renters and homeowners alike—no major renovations required. Let’s build a home that feels as good as it looks.

    1. Swap Stark White Walls for Warm Neutrals

    Crisp white walls might photograph well, but they can feel sterile and expose every smudge. Warm neutrals—think creamy off-whites, soft taupe, or warm greige—create an instantly approachable atmosphere while still feeling clean and bright.

    Pick a warm-toned paint sample and test it in different lighting (morning, afternoon, evening). Most warm neutrals from Benjamin Moore, Sherwin-Williams, or Behr cost $30–$50 per gallon. A typical bedroom needs 1–2 gallons. Paint a small test section first—colors shift dramatically with your room’s natural light. If painting feels like too much, removable wallpaper in warm neutrals ($15–$30 per roll) works for renters.

    Your walls will create a backdrop that makes every piece of furniture look intentional. The change is subtle but profound—spaces suddenly feel like home instead of a showroom.

    2. Layer Earthy Color Palettes in One Room

    Color drenching—using multiple shades from one color family—creates an enveloping, sophisticated look. Combine chocolate brown, sage green, and warm burgundy in a single space for maximum coziness without looking chaotic.

    Start with one dominant color on your largest wall or furniture piece. Layer in 1–2 secondary shades through textiles (throws, pillows), accents, and art. Target, West Elm, and CB2 have excellent earth-tone collections ranging $20–$150 per item. This approach works beautifully in bedrooms, living rooms, and even home offices. The key? Stick to warm undertones—cool versions of these colors feel disconnected.

    You’ll create a room that feels cohesive and carefully curated rather than random. Guests will ask what designer you hired.

    3. Introduce Curved Furniture for Softness

    Straight edges can feel harsh and formal. Curved and sculptural furniture adds movement, comfort, and a contemporary softness that makes spaces feel less rigid and more inviting.

    Look for curved sofas, rounded ottomans, or sculptural accent chairs. Article, Wayfair, and IKEA have affordable curved options ($300–$800), while West Elm and Design Within Reach offer higher-end pieces ($1,500–$4,000+). Even one curved statement piece shifts the energy of a room. Pair with a curved coffee table or rounded mirror to echo the theme. For renters, curved throw pillows ($15–$40) and pouf ottomans ($50–$150) add the same effect without commitment.

    The softness becomes part of your daily comfort—you’ll notice yourself wanting to sit and stay longer.

    4. Create Defined Zones Without Walls

    Open-concept layouts lack privacy and purpose. Use furniture, rugs, and lighting to create defined zones that serve specific functions without actual walls.

    Position a low bookshelf, credenza, or curtain rod to visually separate spaces. Layer a 2–3 area rug in one zone ($50–$300 from IKEA, Rugs USA, or Amazon) to anchor furniture groupings. Add a floor lamp ($30–$150) to distinguish work zones from relaxation areas. This takes 1–2 hours to rearrange and costs $100–$500 depending on what you already own. Renters especially benefit—just move things back when you leave.

    Each zone gains its own identity and purpose. You’ll focus better at your desk, sleep more deeply, and relax more fully when spaces have clear boundaries.

    5. Paint Kitchen Cabinets in Bold, Soulful Colors

    Builder-grade builder-grade oak or white cabinets are dated. A fresh paint color gives kitchens personality and makes them feel custom without the custom price tag.

    Cabinet paint ($20–$60 per quart) from Benjamin Moore Advance or Sherwin-Williams ProClassic is worth the investment—it holds up to moisture and wear. Choose colors like sage green, warm navy, or terracotta. This is a weekend project (Friday evening prep, Saturday painting, Sunday second coat). If painting intimidates you, hire a local painter for $1,500–$3,000. Hardware upgrades ($50–$150 for a full set) amplify the change. Test your color on a sample board first—kitchens have diverse lighting.

    Your kitchen becomes the heart of your home instead of a functional afterthought. You’ll cook with more joy in a space that feels like yours.

    6. Use Pattern Drenching for Immersive Rooms

    Pattern drenching means choosing one bold pattern and weaving it throughout a room—walls, textiles, accents. This creates an immersive, gallery-like atmosphere instead of scattered, mismatched prints.

    Select a pattern you genuinely love (geometric, florals, Art Deco motifs). Use it on wallpaper ($15–$50 per roll), throw pillows ($20–$60), an area rug ($100–$400), and small accents like throw blankets or lampshades. This works best in bedrooms or reading nooks where you want escape and mood. A single room takes $200–$800 total and 1–2 weekends to execute. Start with one pattern wall and layer in textiles—you can build gradually if you’re nervous about commitment.

    The result is a deeply personal, curated space that feels intentional and designed. You’ll feel the difference immediately when you enter.

    7. Invest in Statement Vintage Lighting

    Lighting is the easiest overlooked design element. Vintage and Art Deco-inspired fixtures serve as both functional light and sculptural art pieces.

    Scour Etsy, Facebook Marketplace, local antique shops, and Wayfair for authentic or reproduction Art Deco chandeliers, floor lamps, or wall sconces ($50–$500+ depending on age and condition). A single statement piece above a reading nook or dining table shifts the entire mood. Brass, smoked glass, and geometric shapes feel especially timeless. If real vintage feels risky, IKEA’s Spöka collection and Target’s Project 62 line offer affordable Art Deco reproductions ($20–$120). Installation takes 15–30 minutes for most fixtures.

    Your room gains warmth and sophistication that regular overhead lights simply can’t provide. Evening feels intentional and special.

    8. Add Hand-Stenciled Details for Lived-In Charm

    Mass-produced perfection feels cold. Hand-stenciled details—even imperfect ones—add personality and artisan charm to cabinetry, walls, or furniture.

    Purchase stencil kits ($10–$25 from Michaels or Amazon) and craft paint ($5–$15 per bottle). Apply to cabinet doors, dresser drawers, or an accent wall using a sponge or brush—imperfections are the point. This takes 2–4 hours depending on coverage and dries overnight. No special skills required; wonky lines read as intentional and handmade. Renters can use repositionable stencils and temporary paint on removable wallpaper backing.

    Your space looks collected and thoughtfully designed rather than catalog-ordered. Visitors will assume you’re more creative than you realized.

    9. Go Maximalist with Bold Patterns and Layers

    Minimalism can feel sterile. Maximalism—layering bold patterns, textures, and colors—injects personality and joy into spaces that need soul.

    Start with a patterned sofa or statement wall. Layer in 3–5 throw pillows in different patterns (aim for one unifying color family). Add an area rug, textured throw blanket, and eclectic art. Etsy, Anthropologie, and vintage thrift stores have excellent maximalist pieces ($20–$200 per item). The key is choosing one anchor color (burgundy, navy, sage green) so patterns feel connected rather than chaotic. This approach works in living rooms, bedrooms, and home offices. Budget $300–$1,000 for a fully layered room.

    You’ll feel energized and inspired in a space that celebrates color and personality. Guests will remember your home as special and distinctive.

    10. Use Skirted Furniture for Dramatic, Cozy Vibes

    Skirted furniture—sofas, ottomans, and chairs with fabric skirts or fringed hems—adds softness and an old-world elegance that modern pieces can’t match. It’s cozy without being fussy.

    Look for pre-skirted furniture online (Article, West Elm, Anthropologie, $400–$1,500) or add custom skirts to existing pieces. DIY skirting kits from Etsy ($30–$80) work on ottomans and benches. Pair skirted pieces with fringe details for maximum drama. These pieces anchor a room and invite lingering. One skirted sofa or ottoman is enough—balance it with simpler pieces so the room doesn’t feel overwrought.

    The softness creates an atmosphere that welcomes relaxation. Your living room becomes a destination within your home.

    11. Repurpose Formal Spaces into Comfortable Hybrids

    Formal spaces often sit empty. Combine their elegance with comfort by giving them multiple purposes—a dining room that’s also a workspace, a formal living room that’s also a reading nook.

    Invest in multi-functional furniture: a console table that doubles as a desk ($150–$400), a dining bench with storage ($200–$600), or a daybed that fits in a formal sitting area ($400–$1,200). Keep the room’s formal bones (good lighting, quality architecture) but add comfort layers (plush rug, throw pillows, reading lamp). This takes a weekend to rethink and 1–2 weeks to source pieces. Budget $500–$2,000 depending on what you already own.

    Your unused formal room becomes the most-loved space in your home. Better still? It serves your actual life instead of looking pretty and empty.

    12. Refresh with Warm Color Drenching (Not Accent Walls)

    Full-room color immersion creates cohesion and mood. Skip single accent walls (they can look dated) and instead dip all four walls in one warm, carefully chosen shade.

    Select a warm undertone color from paint swatches (Benjamin Moore, Farrow & Ball, or Sherwin-Williams). Test it in morning, afternoon, and evening light—warm colors shift. Budget $30–$50 per gallon, and most rooms need 1–2 gallons. Hire help if painting feels overwhelming ($800–$1,500 for a professional job). This approach works best in bedrooms, bathrooms, and home offices where you want immersion and calm. A full paint takes 2–3 days.

    Your room becomes a unified retreat instead of a space with visual conflict. The color works harder when it’s everywhere, creating atmosphere rather than just decoration.

    13. Layer Your Bed for Personalized Comfort

    A perfectly made bed invites rest. Layering different textures and pillow heights creates a high-design look that’s also deeply comfortable.

    Start with quality base sheets (cotton or linen from Target, Parachute, or Brooklinen, $80–$250 per set). Add a lightweight quilt or duvet ($150–$400), then layer in throw pillows: standard pillows (two), euro shams (two larger square pillows), and 2–3 smaller accent pillows ($20–$60 each). Drape a throw blanket at the foot. This isn’t just for show—each layer serves comfort. Budget $300–$800 total for a fully curated bed. Styling takes 10 minutes each morning.

    Your bed becomes a focal point worth looking at. More importantly, you’ll sleep deeper in a bed that feels intentional and inviting.

    14. Install Frosted Glass Pocket Doors

    Frosted glass pocket doors solve two problems: they preserve privacy while letting light travel through spaces. They’re modern, space-saving, and feel high-end.

    Installation costs $300–$1,000 depending on existing framing (easier on existing doorways, trickier on walls). For renters, removable frosted film ($15–$40 per sheet) on a standard door approximates the effect. Pair frosted glass with marble accents and matte black hardware for a bathroom that feels boutique-hotel-worthy. If full installation feels too committed, even a frosted glass panel ($30–$80) propped in a doorway creates the vibe without permanence.

    Your space feels more intentional and luxurious. Privacy and light coexist beautifully.

    15. Combine Marble and Matte Black Fixtures

    The marble-plus-matte-black combination is timeless and sophisticated. It works in bathrooms and kitchens and elevates even budget-friendly spaces.

    A marble countertop or sink surround ($200–$2,000+ installed) pairs beautifully with matte black fixtures ($50–$300 from hardware stores, Wayfair, or specialty plumbing shops). You can start small: replace just the faucet and mirror frame ($100–$300 total) while keeping existing counters. This combo works with warm or cool undertones depending on your marble choice. Installation takes a few hours for hardware swaps or a full weekend for countertop work.

    Your bathroom instantly reads as intentional and curated. This combo never goes out of style—it’s been sophisticated for decades.

    16. Paint Dining Chairs for a Custom Set

    Mismatched dining chairs cost way less than a matching set. Paint them in coordinated warm tones to look intentionally eclectic instead of haphazard.

    Source affordable wooden chairs from thrift stores ($5–$15 each) or Facebook Marketplace ($20–$50). Use spray paint or brush-applied paint designed for furniture ($10–$20 per can). Choose 2–4 coordinating warm colors (think sage, cream, terracotta, soft blue). This takes 1–2 hours per chair including drying. Finish with polyurethane ($5–$15 per can) to protect from wear. Budget $50–$150 total for a full set of four chairs.

    Your dining area looks collected and curated, not budget-conscious. Guests will assume you had them custom-made.

    17. Create a Cozy Reading Nook

    Even tiny spaces benefit from a dedicated reading area. It’s a simple indulgence that changes how you spend your evenings.

    Choose a quiet corner near natural light. Position a comfortable chair ($200–$800), add a small side table ($40–$150), layer in a cozy throw ($30–$100), and place a floor or table lamp ($30–$150) for evening reading. Stack books on the table and keep a small shelf nearby. This takes an hour to arrange and costs $300–$1,200 depending on furniture quality. Even a single armchair in any room creates the effect—it doesn’t require much space.

    Your home now has a retreat built in. You’ll read more, rest deeper, and feel more content in a space designed specifically for pause.

    18. Update Navy and Gray Stained Cabinets

    Navy and gray cabinet stains feel modern and sophisticated while still fitting farmhouse or transitional styles. They’re the perfect compromise between bold and safe.

    Source cabinet stain samples from Minwax, Varathane, or Benjamin Moore ($5–$15 each). Test on hidden cabinet interior or scrap wood. Navy-gray tones cost $15–$40 per quart and cover approximately 200 square feet. Staining existing cabinets takes a full weekend including prep and drying. If cabinets are already painted, paint in Benjamin Moore Advance or Sherwin-Williams ProClassic ($30–$60 per quart) instead. Pair with brass or brushed gold hardware ($50–$200 for a full set).

    Your kitchen feels elevated and intentional. The warm undertones keep the space from feeling cold, while the color feels contemporary.

    19. Add Textured Layering to Soft Furnishings

    Texture variation makes spaces feel more interesting and tactile. Mixing boucle, corduroy, velvet, and linen creates depth that flat fabrics can’t achieve.

    Collect throw pillows in mixed fabrics ($15–$60 each) and layer them on sofas or beds. Add a chunky knit throw blanket ($40–$120) and a textured area rug ($80–$300). Aim for 5–7 different textures in one space. This takes a weekend to source and 30 minutes to style. Shopping at Target, West Elm, and Etsy gives you endless options. The key is keeping a cohesive color story (warm neutrals) while varying materials.

    Your space becomes more dynamic and interesting to look at. Better still? It feels better to touch and sit in.

    20. Use Removable Wallpaper for Rentable Risk-Taking

    Removable wallpaper lets renters and commitment-phobes take design risks without consequences. Quality versions ($15–$50 per roll) look legitimate and come off cleanly.

    Choose a pattern that speaks to you—geometric, botanical, Art Deco, maximalist. Measure your wall and order enough (typically 2–4 rolls for an accent wall). Installation takes 1–2 hours and requires just a smoothing tool (included or $5). Most removable wallpaper pulls off without damage when you move. Budget $40–$150 for a full accent wall. Peel-and-stick options exist but removable wallpaper adheres better and looks more polished.

    You get the design impact of permanent wallpaper without the permanence. When you’re ready for change, it peels away and your next look is waiting.

    21. Build a Functional Pantry with Roll-Out Shelves

    Deep pantries are useless if you can’t reach the back. Roll-out shelves make every inch accessible and transform storage from frustrating to joyful.

    Install roll-out shelf kits ($30–$100 per shelf) from IKEA, Amazon, or hardware stores. These slide in and out smoothly, eliminating the “reach to the back and hope” problem. A typical pantry needs 3–5 shelves ($150–$500 total). Installation takes 2–4 hours and requires a drill and basic tools—many hardware stores offer installation services ($50–$150). Pair with clear labeled containers ($20–$50 per set) to keep contents visible and organized.

    Your pantry becomes functional instead of chaotic. You’ll actually know what you have, reduce food waste, and spend less time searching.

    22. Incorporate Art Deco Details Throughout

    Art Deco elements—geometric shapes, brass accents, jewel tones, and streamlined forms—add nostalgia and sophistication. These details work scattered throughout a space, not concentrated.

    Source Art Deco-inspired pieces from Etsy, vintage shops, and modern retailers ($20–$500 per item). Look for geometric throw pillows, brass tables, geometric rugs, and streamlined lighting. Layer 3–5 pieces throughout your home rather than overloading one room. This approach works best in living rooms, bedrooms, and dining areas. Budget $200–$1,000 to weave Art Deco elements throughout a home.

    Your space gains sophistication and personality. These timeless details never feel trendy—they feel intentional and timeless.

    23. Paint an Old Dresser in a Bold Color

    A thrifted dresser gets new life with a fresh paint color. It costs $20–$100 and transforms a space immediately.

    Find a wooden dresser at thrift stores ($20–$50), Facebook Marketplace, or Craigslist ($10–$100). Sand lightly, prime with furniture primer ($10–$15 per quart), and paint with furniture-grade paint ($15–$25 per quart) in a bold warm tone (sage, terracotta, navy). Add new hardware ($20–$50) for polish. This takes a full weekend including drying time. Leave the top or side natural wood for visual interest. Seal with polyurethane ($5–$10) for protection.

    You’ve created a custom, one-of-a-kind piece that cost less than a mass-produced alternative. Your bedroom gains personality and character.

    24. Create Cozy Lighting Layers in Every Room

    Overhead lights alone are harsh. Multiple light sources at different levels—overhead, table lamps, wall sconces, accent lighting—create ambiance and flexibility.

    Aim for 3–4 light sources per room: a main fixture ($30–$200), table or bedside lamps ($30–$150 each), and a wall sconce or accent light ($30–$100). Use warm bulbs (2700K color temperature, $2–$8 each)—they’re infinitely cozier than cool white. Install dimmer switches ($20–$50) to adjust intensity. This takes 1–2 hours to install and costs $200–$500 per room. The payoff is enormous: your space adapts to your mood and time of day.

    Evenings feel intentional and special. You’ll lounge longer, sleep better, and find yourself drawn to rooms with thoughtful lighting.

    25. Mix Cottage Core with Modern Details

    Pure cottage core can feel dated. Blending cozy cottage elements with modern details (black windows, minimalist hardware, clean lines) creates a timeless hybrid.

    Pair open wood shelving with modern black hardware ($30–$100). Use black-trimmed windows ($500–$2,000+ to replace or film existing frames with $20 removable black tape). Add vintage touches like open shelving, brass accents, or vintage lighting ($20–$200) but keep counters and appliances sleek and modern. This takes an afternoon to style and weeks to install structural changes. Budget $500–$3,000 depending on what you’re updating.

    Your home feels collected and timeless rather than trendy in one direction or the other. It works for decades without feeling dated.

    26. Add Botanical Prints for Living Room Walls

    Botanical prints add life and warmth without fuss. They’re affordable, easy to swap, and work with nearly every design style.

    Purchase prints from Etsy, Rifle Paper Co, or even Botanical Art on Amazon ($5–$30 per print). Frame them in simple wooden or metal frames ($15–$40 per frame) or use clip frames for rentable flexibility ($10–$20). Arrange in groups of 3–5 on one wall or scattered throughout rooms. This takes 1–2 hours to hang and costs $50–$200 total. The beauty of prints is you can swap them as tastes change.

    Your walls feel curated and alive. Even simple rooms become more interesting with thoughtful art.

    SOFT CTA:

    Save this post and pick just one idea to tackle this weekend. Whether you refresh your wall color, layer some textures, or hunt for a vintage dresser to paint, small changes create big feelings. Your home deserves to be a space you genuinely love living in—start now.

  • 23 Bedsheets Aesthetic Ideas for a Stylish, Instagrammable Look

    23 Bedsheets Aesthetic Ideas for a Stylish, Instagrammable Look

    Your bedsheets are doing more work than you realize—they’re the first thing you see in the morning and the last thing at night. But between wrinkled cotton basics and the pressure to make your bed look magazine-worthy, it’s easy to feel stuck. The good news? You don’t need a complete bedroom overhaul to create that cozy, Instagrammable look you’re craving. These 23 ideas blend the 2025 trends of textured warmth, organic shapes, and grandmillennial nostalgia with practical, budget-friendly solutions that work for renters and homeowners alike. From layering hacks to color combos that actually work, you’ll find mix-and-match approaches to build a bedroom that feels both intentional and authentically yours.

    1. Layer Multiple Textures for Sensory Depth

    Stacking different fabric weights and weaves creates visual interest and makes your bed genuinely more comfortable. This isn’t just about throwing things on—it’s about building tactile richness that invites you to sink in.

    Start with a quality fitted sheet in natural linen or organic cotton ($40–$80). Add a waffle-weave or textured duvet cover ($60–$120) as your base layer. Top with a chunky knit throw blanket ($50–$100) draped casually across the foot. Tuck in silk or satin pillowcases ($20–$50 per pair) to catch light and reduce hair breakage. This whole project takes about 10 minutes to style once you have the pieces.

    Pro tip: Stick to a neutral base (cream, taupe, soft gray) and let textures do the talking rather than mixing competing colors.

    The result is a bed that looks high-end but feels even better—like a hotel setup you actually want to crawl into every night.

    2. Go Bold with a Statement Headboard

    A statement headboard anchors your entire bed and costs less than you’d think. It’s the focal point that makes people stop and notice.

    Invest in an upholstered headboard in a jewel tone or earth-toned velvet ($150–$400) as your bedroom’s anchor piece, or DIY a smaller version using fabric and plywood ($30–$60 for materials). For renters, a leaning headboard or tapestry as a faux headboard ($25–$100) works just as well. Mount it directly behind your bed at window height for maximum impact. Installation takes 30 minutes with basic tools.

    Alternative: If budget’s tight, create a headboard effect using a peel-and-stick wallpaper or fabric backdrop ($20–$50) instead of real upholstery.

    Suddenly your bed becomes the room’s star feature, and everything else feels more polished and intentional.

    3. Mix Pattern with a Patterned Duvet Cover

    Patterns are back—and they’re a lot softer than the boho overload of years past. Floral, geometric, and vintage-inspired prints add personality without chaos.

    Choose a duvet cover with a mid-scale pattern ($40–$90) in colors that match your room’s palette. Look for prints that feel nostalgic but modern—think small florals, Art Deco shapes, or subtle geometric tiles. Pair it with solid pillowcases in a complementary tone to keep things balanced. Swap it out in under 5 minutes once you’ve chosen your design. Search “grandmillennial bedding” or “vintage botanical duvet” on Wayfair, Target, or independent brands like Parachute.

    Pro tip: Test a pattern by pinning a photo to your Pinterest board for a week—if you still love it, commit.

    A patterned duvet gives you a complete style refresh that feels collected and curated rather than generic.

    4. Add Color Without Overwhelming—Start with Pillows

    Color injection through pillows lets you experiment without the permanence of painting walls. You can swap them seasonally or whenever you want a new vibe.

    Buy 3–5 decorative pillows ($15–$40 each) in a mix of earth tones (terracotta, sage, warm taupe) or a single jewel tone (aubergine, forest green, midnight blue). Vary sizes (standard, lumbar, square) and layer them by height against your headboard. Start with two solid pillows, then add textured or patterned accent pillows. Rearranging takes 2 minutes.

    Where to shop: IKEA, Target, Etsy for affordable options; Schoolhouse Electric, Lulu & Georgia for designer pieces ($40–$80).

    Your bed goes from one-note to full of personality, and you haven’t committed to anything—just fluff and arrange.

    5. Invest in Organic, High-Quality Sheets

    The sheets you sleep on matter more than the ones you see. Organic materials breathe better, soften with washing, and feel luxurious without pretension.

    Splurge on a set of organic cotton or linen sheets ($80–$200 for a full set) from brands like Brooklinen, Parachute, or Woolroom. Look for thread counts between 300–600 (high enough for softness, low enough to breathe). Linen wrinkles naturally, which adds authenticity; organic cotton gets softer every wash. One set costs about the same as a weekly coffee habit but lasts years. Buy one quality set first, then add a second set if budget allows.

    Budget alternative: Affordable organic options from Target or Amazon ($40–$70) are better than conventional high-thread-count sheets.

    You’ll genuinely sleep better, and the improved rest quality shows in your mood, skin, and energy all day.

    6. Style Your Bed Like a Hotel with Layering

    Hotel beds look intentional because they follow a formula—and you can recreate it at home. The trick is knowing why each layer matters.

    Layer like this: fitted sheet (tucked tight) → flat sheet (folded casually at the foot or turned down at the top) → quilted coverlet or duvet (reaching the floor) → throw blanket (draped across one corner at an angle). Add two sleeping pillows against the headboard and one or two decorative pillows in front. This takes about 15 minutes to style perfectly but becomes automatic once you know the steps.

    Pro tip: Tuck everything hospital-corner style, then slightly mess it up to look lived-in rather than sterile.

    The result? A bed that looks like a magazine shoot but feels warm and approachable—not stiff.

    7. Use Jewel-Tone Bedding for Wellness and Calm

    Deep jewel tones—midnight blue, emerald, aubergine—signal luxury while triggering calm. Unlike bright colors, these hues promote better sleep and look sophisticated from the moment you see them.

    Choose a jewel-toned duvet cover or sheet set ($50–$150) in midnight blue, forest green, or deep plum. Pair it with neutral pillows and throws (cream, soft gray, warm white) to keep the room from feeling cave-like. The jewel tone becomes your anchor, and lighter accents let it shine. One set of sheets and a duvet is $80–$200 total—a significant upgrade but worth it for the mood shift.

    Alternative: If you’re not ready to commit to full bedding, start with a jewel-toned duvet cover only ($40–$80).

    You’ll find yourself more relaxed in the evenings, and the space photographs beautifully in any lighting.

    8. Mix Earth Tones for a Grounded, Warm Palette

    Earth tones are 2025’s answer to gray minimalism—they ground your space while feeling warm and inviting. The key is mixing multiple shades rather than sticking to just one.

    Layer a cream or off-white base sheet with a warm taupe, caramel, or rust-toned duvet cover ($60–$120). Add pillows and throws in terracotta, sage, or warm oatmeal ($20–$60 each). These colors work together because they naturally exist in nature. Shop for bedding at West Elm, Schoolhouse Electric, or IKEA where earth tones are abundant and affordable. Styling takes 10 minutes once pieces arrive.

    Pro tip: Grab a paint chip sample of your desired earth tone and hold it against fabrics in-store to ensure they match your vision.

    Your bed becomes a visual retreat—cozy without being dark, warm without being heavy.

    9. Layer Sheer and Opaque Curtains for Luxury and Function

    Floor-to-ceiling curtains with layered sheer and solid panels create instant luxury and solve a practical problem—light control without blocking the view when closed.

    Hang a single rod at ceiling height ($20–$40) and layer two panels: a sheer white or cream panel ($30–$60) for soft light during the day and a heavier linen or cotton panel ($40–$100) that slides over it for darkness at night. Extend the rod slightly past your window frame on both sides to maximize the visual effect. DIY installation takes 1–2 hours with basic tools; hire help for $100–$200 if needed.

    Budget option: Thrift store lightweight fabric ($5–$15) works for sheer layers if you’re renting.

    The result is a bedroom that feels intentional and spa-like, plus you actually sleep better with blackout capability.

    10. Add Vintage or Thrifted Textiles for Character

    Handmade quilts, vintage throws, and thrifted textiles tell a story and add authenticity that new bedding can’t match. Plus, they’re usually cheaper and one-of-a-kind.

    Hunt for vintage quilts, woven blankets, or tapestries at local thrift stores, Etsy, or Facebook Marketplace ($15–$80 depending on condition and rarity). Lay a quilt over your duvet as a top layer, or drape a vintage throw across the foot. These pieces work beautifully with modern sheets and don’t need to match perfectly—slight color mismatches feel curated. Allow 30 minutes to an hour for browsing, but you might find multiple pieces in one trip.

    Pro tip: Look for quilts in geometric or floral patterns that echo grandmillennial aesthetics.

    A vintage textile transforms your bed from “decorator showroom” to “lived-in sanctuary with a personal story.”

    11. Create Textured Warmth with a Chunky Knit Throw

    A chunky knit throw adds instant coziness and a tactile element that’s perfect for 2025’s texture-focused trend. It’s functional and beautiful—plus extremely Instagrammable.

    Pick up a chunky knit throw blanket ($40–$120) in cream, oatmeal, or soft gray from West Elm, Target, or Etsy. Drape it over your footboard or fold it loosely at the bed’s end rather than centering it perfectly—the casual placement looks more intentional. Layer it with your duvet and pillows for maximum visual depth. No installation needed; styling takes 5 minutes.

    Budget hack: Chunky knit throws on sale ($25–$50) during off-season months at department stores.

    Your bed becomes a cozy refuge that makes you actually want to get in—and photographs beautifully from every angle.

    12. Use Pillow Arrangements to Define Your Bed’s Shape

    Smart pillow arrangement makes even a basic bed look curated and high-end. The key is layering by size and playing with proportions.

    Start with two standard sleeping pillows against the headboard, then layer one or two larger square pillows ($25–$60 each) in front of them, then a small lumbar or decorative pillow ($15–$35) at the very front. Vary your covers—mix solids and patterns, or go all one color with different textures. Rearranging takes 5 minutes but dramatically changes your bed’s visual weight. Shop IKEA for affordable pillow inserts ($10–$20) and source covers separately.

    Pro tip: Pillows with piping or contrasting seams read as more intentional than plain ones.

    Suddenly your bed looks styled and balanced rather than like you just threw pillows on top.

    13. Go Renter-Friendly with Removable Bed Skirts

    Bed skirts hide under-bed storage and add polish without requiring installation. The removable versions are perfect if you’re renting or want flexibility.

    Buy a removable bed skirt ($25–$60) that slips between your mattress and box spring, or try a magnetic bed skirt ($20–$45) that doesn’t require any installation at all. Choose a neutral color like cream, soft gray, or taupe to visually elongate your bed. Installation or setup takes about 5 minutes. Look for options at Target, Amazon, or Wayfair.

    Alternative: Create a DIY bed skirt using fabric and Velcro strips ($15–$30) if you want more customization.

    Your bed looks like it’s floating—more polished and high-end with minimal effort.

    14. Play with Contrast Using Opposite-Value Colors

    Contrast creates visual interest and prevents your bed from looking flat or one-dimensional. Pairing light and dark shades adds sophistication.

    Try a deep charcoal or navy duvet with crisp white sheets, or go inverse with cream linens and a deep jewel-toned duvet. Add neutral pillows that bridge both tones. The contrast reads as intentional rather than accidental. Full bedding sets with built-in contrast cost $80–$180 and are available at most major retailers. Styling takes 10 minutes once you’ve decided on your color combo.

    Pro tip: Use a color wheel to pick shades that are opposites (navy + warm gray, emerald + cream) rather than similar neutrals.

    Your bed automatically looks more designed, and the space photographs with better dimension and depth.

    15. Layer Organic Materials for Raw, Modern Texture

    Organic materials—linen, wool, cork, jute—bring raw warmth to your bed. They’re sustainable, tactile, and feel like a splurge without the price tag.

    Combine organic linen sheets ($60–$150) with a wool throw blanket ($50–$120), cork or jute accessories ($20–$50), and natural fiber pillows ($30–$80). These materials age beautifully and actually improve with use. Layer them casually rather than perfectly for an authentic, lived-in look. Quality organic pieces last years, so consider them investments. Shop Woolroom, Parachute, or sustainable brands on Etsy.

    Budget-friendly swap: Mix one organic piece (like organic cotton sheets for $50–$80) with affordable conventional pieces to ease into this aesthetic.

    The result is a bed that feels high-end and environmentally conscious—plus undeniably cozy.

    16. Use a Neutral Base with One Strategic Color Splash

    A mostly neutral bed with one bold color accent gives you impact without commitment. It’s easier to swap one pillow than redo an entire scheme.

    Build your bed in soft neutrals—cream sheets, taupe duvet, oatmeal throw—then introduce one jewel-toned pillow or accent throw in aubergine, forest green, or deep blue ($20–$50). Place it slightly off-center for a modern feel. This approach lets you test a color trend before committing fully. If you don’t love it after a month, swap the accent piece out for under $50. No installation or major decisions needed.

    Pro tip: Photograph your bed with and without the accent color to see which vibe resonates more.

    You get a styled, intentional bed that photographs beautifully while staying flexible and not feeling overwrought.

    17. Create Visual Softness with Curved or Organic Shapes

    Sharp lines feel tense; curved shapes calm your nervous system. This 2025 trend is as much about wellness as aesthetics.

    If replacing your headboard, choose one with rounded corners or curved edges ($150–$400), or DIY a curved accent wall using fabric and curved hardware ($40–$80). Layer your pillows in soft, rounded arrangements rather than stacking them in rigid rows. Even your throw blanket placement should follow gentle curves rather than straight lines. This project takes time only if you’re replacing a headboard; styling with existing pieces takes 10 minutes.

    Budget alternative: A curved headboard pillow or wedge ($30–$70) softens sharp headboard lines.

    Your bedroom instantly feels more restful and spa-like—and you’ll notice yourself actually relaxing more in the space.

    18. Mix Scales of Patterns Without Clashing

    Mixing patterns sounds risky, but it’s about varying scales and staying within one color family. The result feels curated, not chaotic.

    Start with a large-scale pattern (floral or geometric duvet, $50–$100), then layer smaller-scale patterns (pillow covers with dots, stripes, or tiny florals, $15–$30 each) and solid accent pillows ($15–$30). Keep all patterns within the same color palette—say, earth tones or jewel tones. This prevents visual chaos. Hunt for patterns at Target, Wayfair, or independent brands on Etsy. Styling takes 20 minutes to arrange perfectly.

    Pro tip: Use the “60-30-10 rule”—60% dominant pattern, 30% secondary pattern, 10% solid accents.

    Your bed looks intentionally styled like a designer put it together, not like you grabbed whatever matched.

    19. Invest in a Quality Duvet Insert for Years of Comfort

    A quality duvet insert is invisible but transformative. It’s what actually makes your bed feel luxurious versus just look that way.

    Buy an organic down or down-alternative duvet insert ($100–$300) rated for year-round use. Look for options with baffle-box construction (keeps filling from shifting) from brands like Parachute, Brooklinen, or Pottery Barn. The insert lives inside your removable duvet cover, so you can change covers seasonally while keeping the same insert. Quality inserts last 5–7 years, making them a worthwhile investment. Installation takes 10 minutes (stuffing the cover).

    Budget option: Synthetic alternatives ($50–$100) work well if you’re allergic to down.

    Suddenly your bed feels hotel-level comfortable, and you’ll actually look forward to bedtime—not just the aesthetic.

    20. Style Your Nightstand to Echo Your Bed’s Vibe

    Your nightstand should feel like an extension of your bed’s vibe. Cohesive styling makes the entire corner feel intentional.

    Pair your bed styling with a wooden or natural-material nightstand ($80–$300) in a finish that complements your bedding colors. Top it with a ceramic or vintage lamp ($30–$80), a small potted plant ($10–$25), a stack of 2–3 meaningful books ($5–$20 each), and optionally a framed photo or small artwork ($15–$40). Keep surfaces relatively clear—cluttered nightstands undermine even beautiful bedding. Styling takes 15 minutes once pieces are gathered.

    Pro tip: Thrift your nightstand and lamp for more character and lower cost ($10–$50 combined).

    Your entire bed corner reads as a designed space rather than random furniture, and you’ll feel more relaxed entering your bedroom.

    21. Add Scent to Complement Your Visual Styling

    Scent completes the experience. A bed that looks beautiful but smells stale loses points; one that’s styled and scented feels like a true sanctuary.

    Place a small candle, diffuser, or dried flowers ($10–$30) on your nightstand or dresser near your bed. Choose scents that match your vibe: lavender and chamomile for calm, cedar and oak for grounding, or vanilla and jasmine for warmth. Light your candle 30 minutes before bed as part of your wind-down routine. Look for natural or soy candles from brands like Jo Malone, Paddywax, or independent makers on Etsy.

    Budget hack: Dried lavender bundles ($5–$10) cost less than candles and last weeks.

    Your bedroom becomes a complete sensory experience—visually beautiful, tactilely rich, and now aromatherapeutically complete.

    22. Use a Bed Runner for Layered Visual Interest

    A bed runner (a narrow strip of fabric across your bed’s foot) adds a designer detail that’s both functional and beautiful—it catches wear so your duvet doesn’t.

    Choose a bed runner in a coordinating or contrasting color or pattern ($20–$50) and lay it horizontally across the foot of your made bed. Look for options in quilted, patterned, or textured fabrics that echo your overall palette. This styling takes 2 minutes but adds immediate polish. Shop Wayfair, Amazon, or home goods stores for affordable options.

    Alternative: Create a DIY runner using fabric and hem tape ($10–$20) if you’re crafty.

    Your bed instantly reads as more designed and intentional—like someone actually planned this space rather than threw things together.

    23. Swap Your Bedding Seasonally to Keep the Look Fresh

    Seasonal bedding swaps keep your space feeling fresh and let you enjoy different aesthetics year-round without commitment. It’s practical and fun.

    Buy two complete bedding sets—one for warm months (lightweight linen, light colors, $80–$150) and one for cold months (heavier cotton, jewel tones or earth tones, $80–$150). Store off-season bedding in vacuum bags ($10–$20 for a set) under your bed or in a closet. Swap them twice yearly, which takes about 30 minutes including laundry. This approach lets you experiment with different aesthetics without feeling stuck.

    Pro tip: Use seasonal swaps as an excuse to refresh your entire styling—rotate throw pillows, throws, and nightstand decor too.

    Your bedroom feels curated and intentional, and you get to enjoy multiple aesthetics throughout the year while your investment works harder.


    Save this post and try just one idea this weekend—start with the layer that speaks to you most (textures, color, or pattern). You’ll be amazed how a single change can make your entire bed feel more intentional and your bedroom more like a retreat.

  • 24 Smart Small Bedroom Layouts That Maximize Every Inch

    24 Smart Small Bedroom Layouts That Maximize Every Inch


    Small bedrooms don’t need to feel cramped or uncomfortable—they just need the right strategy. Whether you’re working with a tiny apartment, a guest room, or a child’s space, smart layouts can make every inch count. You’ll learn 24 actionable ideas that blend practical furniture placement, visual tricks, and storage hacks to create a bedroom that feels larger, more relaxing, and genuinely yours. From renter-friendly solutions to investment upgrades, these tips work whether you’re starting from scratch or refreshing what you already have. Let’s turn that small space into your favorite retreat.


    1. Float Your Bed Away from Walls

    Pushing your bed against the wall might seem logical, but floating it actually makes rooms feel bigger and more intentional. This layout creates visual flow and gives you functional space on multiple sides—perfect for rearranging without major upheaval.

    Measure your room first. You’ll typically need at least 2-3 feet of clearance on at least two sides to make this work. If you have one side against a wall, that’s fine; just float the foot end into the room. Add a layered area rug beneath to anchor the bed (looks polished, costs $60–$200). Position compact nightstands or floating shelves ($30–$150 each) to keep the footprint minimal.

    This setup works beautifully with curved headboards, which fit 2025’s organic furniture trend perfectly and soften the room’s overall look.

    The best part? You’ll feel less boxed in, and guests have easier access to help make beds or tidy up.


    2. Install Floating Shelves Above the Nightstand

    Nightstands take up floor space you probably don’t have. Floating shelves give you storage and styling without the bulk, and they’re a renter-friendly alternative to traditional furniture.

    Install two shelves at different heights above your bed’s headboard area or alongside it ($20–$80 for shelves plus installation hardware). Use the lower shelf for a reading lamp and the upper one for books, small plants, or a framed photo. This vertical approach pulls the eye upward, making ceilings feel higher.

    Look for shallow shelves (8–10 inches deep) at IKEA, Target, or Wayfair. If you’re renting, use damage-free adhesive shelves ($15–$30) instead of drilling.

    Add decorative items mindfully—too much clutter defeats the purpose. Stick to five or fewer objects per shelf.

    Your bedroom gains storage and visual interest without consuming precious floor real estate.


    3. Choose a Low-Profile Platform Bed

    Platform beds with minimal legs or no legs at all create a sense of spaciousness because you can see the floor underneath. They’re also perfect anchors for 2025’s organic modernism trend with their clean, grounded aesthetic.

    Invest in a quality platform bed ($300–$800) from brands like Article, West Elm, or Wayfair. Solid wood or curved headboards align with trending natural materials and organic shapes. The lower visual mass makes even a 10×12 room feel less cramped.

    Skip the box spring entirely—platform beds don’t need one. This saves money and floor space.

    Pair it with low nightstands (under 24 inches tall) to maintain the airy feel throughout the space.

    The open floor plane around your bed makes the room feel significantly more open and easier to clean.


    4. Use Corner Shelving Units for Dead Space

    Bedroom corners are easy to ignore, but they’re valuable real estate. Corner shelving units ($50–$200) utilize that awkward angle without taking up floor square footage anywhere else.

    Choose a narrow unit (12–18 inches wide) to maintain walkways. Stack rolled towels, display books, or position a small plant on each shelf to add height and life to the corner. Open shelving looks less heavy than closed storage in small spaces.

    Wood or metal options work well. Consider a DIY approach with floating corner shelves ($25–$60) if you’re handy and comfortable drilling into wall studs.

    Style with items you use regularly so it doesn’t become a forgotten dust collector.

    This smart use of dead space gives you storage without eating into your already-limited floor plan.


    5. Mount a Slim Desk Against One Wall

    If you work or study from home, a floating desk ($100–$300) against a wall gives you function without dominating the room. Mount it at standard desk height (28–30 inches) and tuck a slim chair underneath when you’re not using it.

    Look for desks 36–48 inches wide and 18–20 inches deep on Wayfair, IKEA, or Amazon. Pair with floating shelves above for supplies and décor. This setup keeps visual clutter contained to one wall.

    Cable management matters in small spaces. Use adhesive clips ($8–$15) or a wall-mounted cable box ($15–$30) to keep cords invisible.

    When paired with a chair that slides under the desk, you reclaim square footage instantly during off-hours.

    You get a dedicated workspace without sacrificing bedroom breathing room.


    6. Layer Textured Rugs for Warmth and Dimension

    Textured rugs bring 2025’s tactile warmth trend into play while defining zones in a compact layout. Layering rugs adds visual interest and makes the space feel more intentional and cozy.

    Start with a jute or natural fiber base rug ($100–$250 for a 5×8) in a neutral tone. Layer a smaller wool or flatweave rug on top ($80–$200) in a complementary shade or subtle pattern. This combination creates depth and softness underfoot.

    Shopping tip: anchor the bed’s foot end with the layered rugs. It visually grounds the bed and creates a small sitting area if space allows.

    Real talk—layered rugs do require more vacuuming, but the warmth and design payoff is worth it.

    Your bedroom feels more curated and inviting, and the textures make it read as a refined retreat rather than just a sleeping space.


    7. Install a Ceiling-Mounted Curtain Rod

    Hanging curtains all the way from ceiling to floor creates instant luxury and makes ceilings look higher—a visual hack every small room needs. This aligns perfectly with 2025’s floor-to-ceiling curtain trend.

    Mount your curtain rod as close to the ceiling as possible ($15–$40 for rod and brackets). Hang lightweight fabric—sheers, linen blends, or cotton—that filters light softly without adding visual weight ($40–$120 per panel). Let the curtains just kiss the floor for drama.

    Measure twice before drilling. If you’re renting, ask your landlord or use adhesive-backed temporary rods ($30–$60).

    Avoid heavy velvet or blackout curtains in small rooms unless paired with sheer layers.

    The vertical line draws the eye upward and makes your entire room feel more expansive and serene.


    8. Use Under-Bed Storage Containers

    Under-bed storage is a small room’s best friend. Clear or soft-colored containers ($15–$50 each) let you see contents without opening them, which speeds up finding what you need and maintains the room’s calm aesthetic.

    Measure the clearance under your bed (platform beds work best for this). Flat storage containers (4–6 inches tall) fit neatly and hold off-season clothing, extra bedding, or sentimental items. Rolling containers ($20–$40) make access even easier.

    Label them for quick identification. Choose neutral colors (cream, gray, natural wood tones) to keep visual noise down.

    Pro tip: rotate seasonal items quarterly so you’re not storing summer clothes during winter.

    You’ve essentially doubled your storage capacity without adding visible furniture to the room.


    9. Paint Walls a Soft, Light Color

    Color psychology matters in small spaces. Soft, light colors reflect light and expand the perceived room size, while dark walls can make compact bedrooms feel even smaller and heavier.

    Paint walls in soft neutrals (warm white, pale gray, soft sage) or muted pastels ($30–$60 per gallon; professional painting runs $300–$800 for a small room). Flat or matte finishes hide imperfections better than glossy, and they photograph beautifully on Pinterest.

    If you rent, ask your landlord for permission or use removable wallpaper ($20–$60 per roll) in light tones instead.

    Pair light walls with warm-toned wood furniture and layered textures (following trend toward earth tones and natural materials) so the space doesn’t feel sterile.

    The result? More light bounces around, your room feels 10–20% larger, and you’ve created a calm foundation for any décor style.


    10. Add a Statement Headboard Without Floor Space

    A wall-mounted headboard adds personality and luxury without consuming floor square footage. This trend is huge for 2025, and it’s the perfect focal point for small rooms.

    Mount a headboard directly to the wall ($150–$600) in upholstered, wood, or metal finishes. Choose bold colors (cherry red, aubergine, forest green) or natural textures (rattan, raw wood) to align with current trends. Upholstered headboards add softness and sound absorption too.

    DIY option: create a fabric headboard using tapestry and temporary adhesive ($30–$80 total, renter-friendly).

    Pair the statement headboard with simple bedding so it remains the star.

    Your bed becomes a bedroom anchor that looks intentional and high-end, while the rest of the room stays minimal and open.


    11. Swap Straight Furniture for Curved Pieces

    Straight, angular furniture can make small rooms feel harsh and cramped. Curved and organic shapes—a major 2025 trend—soften the environment and make spaces feel more relaxed and spacious.

    Gradually swap angular pieces for curved versions. Look for curved nightstands ($100–$300), rounded mirrors ($50–$200), and soft headboards ($200–$500) from brands like Article, West Elm, or local vintage shops. These pieces cost similar prices to their angular counterparts.

    Curved furniture reflects light differently and creates visual softness that reduces the “boxed in” feeling.

    Start with one curved element—maybe a rounded mirror—and build from there if budget is tight.

    The organic shapes make your room feel calmer and more intentional, and visitors always notice the sophisticated difference.


    12. Maximize Vertical Wall Space with Art

    Instead of relying on furniture to fill visual space, use wall-mounted art. This maximizes impact while keeping the floor open. Large-scale prints and gallery walls are huge for 2025 personalization.

    Create a gallery wall above your bed or on an empty wall using 5–9 frames ($30–$150 depending on frame quality and art). Mix frame styles and sizes for visual interest. Art can be affordable prints from Etsy or Minted ($15–$50 each) or thrifted frames ($5–$15) paired with printables you love.

    Vary heights and spacing for a curated look—use painter’s tape to map it out before hanging anything.

    Budget hack: Print personal photos or download affordable digital art from Etsy ($5–$20) and frame them yourself.

    Your walls become a reflection of your personality, and the art draws the eye upward, making ceilings feel higher.


    13. Install a Corner Reading Nook

    A reading nook transforms a neglected corner into a functional retreat. This uses dead space while creating a secondary focal point that makes the room feel intentional.

    Position a compact armchair ($200–$600) or window seat ($300–$1000) in your room’s quietest corner, ideally by a window. Layer it with cushions ($20–$80), a throw blanket ($30–$100), and a small side table ($50–$150). Add a clip-on reading lamp ($25–$50) for ambiance.

    Budget option: use a floor cushion ($30–$60) with pillows propped against the wall instead of a chair.

    Include a small bookshelf or floating shelf nearby to keep reading material within arm’s reach.

    You’ve created a dedicated retreat space within your bedroom where you can read, journal, or simply escape without leaving the room.


    14. Use Mirrors to Reflect Light and Space

    Mirrors are psychology tricks that make small rooms feel twice as big. They bounce light around and create the illusion of depth—absolutely essential for compact spaces.

    Hang a large mirror (at least 24×36 inches, $50–$250) opposite your window to reflect natural light back into the room. Leaning mirrors work for renters. Rounded or arched frames align with 2025’s organic shapes trend beautifully.

    Position it to reflect your best views—not the clutter. Avoid hanging mirrors opposite the bed if it makes you uncomfortable; instead, place them on adjacent walls.

    Budget option: thrift large mirrors ($10–$30) and refresh the frame with spray paint ($8–$12).

    Your room feels significantly larger, naturally brighter, and more open—one of the highest-ROI small-space hacks available.


    15. Incorporate Natural Materials and Raw Textures

    Natural materials like cork, jute, raw wood, and stone align with 2025’s biophilic and sustainability trends while adding warmth to compact spaces. They ground the room and make it feel lived-in and intentional.

    Swap one nightstand for solid wood ($100–$250), add a cork bulletin board ($20–$50), or layer a jute rug ($80–$200). Incorporate woven wall hangings ($30–$120) or a rattan headboard ($200–$500). These materials photograph beautifully and feel tactile.

    Real talk: natural materials show dust and wear, but that’s part of their charm—they age gracefully.

    Mix raw textures with softer fabrics (linen, cotton, wool) so the room feels balanced rather than rustic.

    The resulting bedroom feels grounded, warm, and connected to nature—creating a sanctuary vibe even in a tiny space.


    16. Create a Capsule Wardrobe Closet System

    Small bedroom = small closet. A capsule wardrobe system lets you own fewer clothes that work harder, reducing visual clutter and mental stress.

    Build a capsule of 30–40 items in a cohesive color palette (neutrals with 2–3 accent colors). Use matching wooden hangers ($20–$50 for a set of 10) and fold vertically so you see every piece. Add floating shelves ($30–$80) above for folded items. Use a slim rolling cart ($40–$100) for shoes.

    Shopping: Invest in quality basics from Uniqlo, Gap, or Everlane rather than many cheap pieces.

    Fewer items mean less visual noise, easier mornings, and a bedroom that stays tidier with minimal effort.

    You’ll discover that you wear the same 20 pieces anyway—why not embrace it and create more space?


    17. Mount a Narrow Wardrobe or Clothing Rack

    If your closet doesn’t exist or is absurdly small, a standalone wardrobe or open clothing rack becomes functional art while saving the limited closet space for off-season storage.

    A narrow wardrobe (18–24 inches wide) costs $150–$400 from IKEA, Wayfair, or vintage sellers. An open clothing rack ($80–$300) works if you’re stylish with your selections (showing too many chaotic clothes defeats the purpose).

    Style it intentionally with current outfits and a few special pieces. Add a basket beneath for accessories or off-season items ($30–$80).

    Position it where it’s visually anchored—a corner, beside a window, or as a room divider—not floating randomly.

    The arrangement becomes a styling focal point and solves storage without requiring major furniture moves or renovations.


    18. Add Biophilic Elements with Low-Maintenance Plants

    Plants bring calm, improve air quality, and align with 2025’s biophilic trend perfectly. They make small spaces feel alive and connected to nature without consuming much physical space.

    Choose low-maintenance plants (pothos, snake plant, ZZ plant, calathea) that tolerate lower light ($10–$30 each). Position them at different heights using shelves and plant stands ($20–$80) to draw the eye upward. Use ceramic or terracotta pots ($8–$25 each) that photograph beautifully.

    Cluster plants in one corner rather than scattering them to keep the room feeling organized.

    Watering schedule: most tropical houseplants need water every 7–10 days depending on light and season. Set a phone reminder if you forget easily.

    Your bedroom becomes a living, breathing retreat that purifies air and boosts mood without requiring floor space.


    19. Use Layered Lighting Instead of One Overhead Light

    Overhead lights alone make small rooms feel harsh and institutional. Layered lighting (overhead, task, ambient) creates depth and allows you to control mood throughout the day.

    Install a dimmer switch on overhead lights ($15–$30 installation). Add a reading lamp on your nightstand ($30–$80), a clip-on lamp for your desk ($25–$50), and string lights or a small floor lamp in a corner ($20–$60). Use warm-toned bulbs (2700K) to avoid cold, sterile vibes.

    Budget hack: battery-operated LED fairy lights ($10–$20) create ambiance without needing outlets.

    Layers let you adjust for morning energy, midday focus, and evening wind-down—all within the same small footprint.

    The result is a bedroom that feels warmer, more intentional, and adaptable to your needs rather than one-note and harsh.


    20. Install Floating Bedside Tables Instead of Nightstands

    Nightstands with legs take up floor space. Floating bedside tables ($60–$150 per side) create the same function with zero visual weight, making the room feel more open.

    Mount shallow floating shelves (10–12 inches deep) at the height of your mattress top ($40–$100 per shelf plus installation). Use one on each side if your layout allows, or just one on your preferred side. They hold lamps, water, books, and skincare without dominating the space.

    DIY: build simple floating shelves using reclaimed wood and heavy-duty brackets ($50–$100 total, if you’re handy).

    Style each shelf minimally—a lamp, one book, and maybe a small plant. Restraint keeps them from looking cluttered.

    You maintain all the nightstand functionality while gaining that crucial floor space that makes small rooms breathable.


    21. Opt for a Bench at the Foot of the Bed

    A bench at the bed’s foot adds style and function without the bulk of a dresser or storage unit. It’s practical for folding clothes and visually anchors the bed while maintaining flow.

    Choose a narrow bench ($150–$400) in upholstered or wood finishes that matches your aesthetic. Look for low-profile options (under 18 inches tall) so they don’t block views or feel heavy. Rounded designs align with 2025’s organic furniture trend.

    Position it only if you have the floor space—if it blocks walkways, skip it and use wall-mounted storage instead.

    Style with a folded throw blanket ($30–$100) for texture and to keep it looking intentional, not like laundry storage.

    This simple addition creates a finished, designed look and gives you a landing spot for daily outfit decisions.


    22. Create Zones with Rugs and Lighting

    Zone-ing makes small rooms feel intentional and larger by creating distinct purposes within one space. Rugs and lighting define these zones without walls or furniture barriers.

    Use different rugs to anchor sleeping, working, and lounging areas ($150–$400 total). Layer lighting—ambient overhead, task lighting at a desk, warm light in a reading corner—to reinforce each zone’s purpose. This costs less than adding furniture.

    Even in a 100-square-foot bedroom, you can suggest separate zones through design choices rather than physical barriers.

    Paint accent walls to subtly define zones, or use curtains if you share a space with a partner who has different schedules.

    Your tiny bedroom suddenly feels more sophisticated and multifunction, expanding its practical capacity.


    23. Go Vertical with a Tall Narrow Bookcase

    Tall, narrow bookshelves ($100–$300) draw the eye upward and make ceilings feel higher—perfect for small rooms. They store significant items (books, décor, plants) in a compact footprint.

    Look for bookshelves 18–24 inches wide and 72+ inches tall from IKEA, Target, or vintage shops. Position in a corner or along a single wall to anchor the room without cutting through traffic patterns.

    Styling: alternate books horizontally and vertically, add small plants and art objects, and leave some shelves partially empty so it doesn’t feel cluttered.

    Tall shelves work beautifully with rounded corners or open shelving designs to feel less institutional.

    You’ve created significant visual interest and storage in under two square feet of floor space.


    24. Use a Sliding Barn Door for Closet Access

    Swing-out closet doors eat into floor space. A sliding barn door ($300–$800 installed) saves room while adding farmhouse or modern charm depending on your style.

    Install a barn door track system ($150–$400 in materials; DIY installation saves $200–$300 labor). Paint or stain it to match your room’s aesthetic. The door slides flat against the wall, never blocking pathways.

    Renter option: Adhesive-backed or command-mounted temporary sliding door systems exist but are less stable; check with your landlord first.

    Organize the closet interior with vertical hanging, floating shelves, and labeled bins to maximize every inch.

    This upgrade makes your bedroom feel more designed and intentional while solving a real spatial problem.


    Save this post and try just one idea this weekend—you might be surprised how even the smallest change creates a noticeably calmer, more spacious bedroom. Share this with anyone drowning in a tiny room who needs a win.

  • 24 Very Small Closet Ideas That Transform Micro-Spaces

    24 Very Small Closet Ideas That Transform Micro-Spaces

    If you’re staring at a closet the size of a shoebox and wondering how you’ll ever fit your life into it, you’re not alone. Micro-closets are a real challenge—but they’re also a golden opportunity to get creative. The secret isn’t more space; it’s smarter storage, strategic styling, and a few tricks that professional organizers swear by. Whether you’re renting a studio, living in a dorm, or just stuck with an awkwardly small bedroom closet, these 24 ideas will help you maximize every inch. You’ll learn how to use vertical space like a pro, choose furniture that actually fits, and organize in a way that makes getting dressed easier, not harder. Ready to make your micro-closet feel twice as big? Let’s go.

    1. Install Floating Shelves Up to the Ceiling

    Floating shelves are the secret weapon of small-space organizing because they don’t eat floor space and draw your eye upward, making ceilings feel higher. Install shelves every 12-15 inches apart, starting about 6 inches from the floor and going as high as you comfortably reach. Floating shelves typically cost $15-$50 each at Target, IKEA, or Home Depot, and installation takes about an hour per shelf with basic tools.

    The key is securing them properly to wall studs using wall anchors rated for your closet’s weight capacity. Start with 2-3 shelves and add more as you see what works. For renters, removable adhesive shelves exist, though they hold lighter loads.

    You’ll gain usable storage that doesn’t require floor footprint. Suddenly, that wasted vertical space becomes prime real estate for off-season items, shoes, or folded essentials.

    2. Use Over-the-Door Hooks for Bags and Accessories

    An over-the-door hook organizer is the easiest no-commitment solution for cluttered surfaces. These adhesive or screw-in racks mount on the inside of your closet door (or the back of a bedroom door if your closet is doorless) and instantly corral bags, belts, scarves, and hats.

    A basic over-the-door hook rack costs $8-$20 at Target or Amazon, takes 5 minutes to install, and holds surprisingly much. Adhesive versions work for renters and require zero tools. Check weight limits if you’re storing heavy bags.

    You’ll reclaim shelf or rod space that was buried under clutter. Plus, you see all your accessories at a glance, so getting ready moves faster and you actually use what you own.

    3. Add a Slim Rolling Cart Between the Rod and Wall

    If your micro-closet has any gap between the hanging rod and the side wall, a slim rolling cart slides into that wasted space and becomes instant storage for folded items, shoes, or accessories. Look for carts designed specifically for narrow spaces—typically 12-18 inches wide, costing $40-$80 at IKEA, Target, or Wayfair.

    The beauty of a rolling cart is flexibility: you can slide it out when you need to access hanging clothes or reorganize. Three tiers give you multiple zones for different clothing categories. Measure your space first to ensure it fits.

    Your hanging rod suddenly feels less crowded, and you’ve added three whole shelves of storage without any installation. The cart also makes it easier to grab what you need without disrupting everything else.

    4. Swap Out a Standard Rod for an Adjustable Double Rod

    A standard single rod wastes half your vertical hanging space. Replace it with an adjustable double rod system, which lets you hang short items (like tops and blazers) on top and longer pieces (like dresses and coats) below. Double rod kits cost $30-$70 at Home Depot, IKEA, or Amazon, and installation takes 30-45 minutes.

    Measure your closet depth and width before buying. Most systems adjust to fit spaces from 24-48 inches wide. If you rent, some tension-rod versions don’t require wall holes and work surprisingly well.

    You’ll roughly double your hanging capacity without expanding the closet footprint. This alone can be the difference between an overstuffed nightmare and an organized, breathable wardrobe.

    5. Go Vertical with Shoe Cubbies or Wall-Mounted Organizers

    Shoes are closet space killers because they sit on the floor taking up real estate. Mount a fabric or wire shoe organizer on the inside of your closet door, wall, or even over a rod to store 12-24 pairs vertically instead of piling them on the floor. These organizers run $15-$40 at Target, Bed Bath & Beyond, or Amazon and attach with adhesive or screws.

    Over-the-door options work best for renters. Wire versions hold more weight and last longer than fabric, though fabric looks sleeker. Sort by season or style to make finding the right shoe quick.

    Your closet floor suddenly opens up, making the space feel bigger. You’ll also see every shoe you own without digging, so you actually wear what you’ve bought.

    6. Declutter Ruthlessly Before Adding Anything

    Before you buy a single organizational tool, be honest about what stays and what goes. Pull everything out, try things on if unsure, and create three piles: keep, donate, sell. Aim to remove at least 20-30% of what you own. This one step makes every other hack actually work.

    Set a timer for 2-3 hours to avoid decision fatigue. Use the “one year” rule: if you haven’t worn it in a year and it doesn’t make you happy, it goes. Keep quality basics, one version of similar items, and pieces that fit your current life.

    You’ll be amazed how much space you suddenly have. A decluttered micro-closet often feels spacious enough without any storage hacks—though combined with other tricks, you get even more breathing room.

    7. Choose Slim Velvet or Felt Hangers to Slim Down the Rod

    Switching from chunky plastic hangers to slim velvet or felt hangers saves roughly 1-2 inches of rod space per garment—and when you have 30+ items hanging, that adds up fast. Plus, velvet prevents slipping, so you can pack the rod more densely without clothes sliding off.

    A set of 50 slim velvet hangers costs $20-$30 at Target, Amazon, or Container Store. One weekend project to swap them all out. Keep 3-4 wooden hangers for heavy coats; swap everything else to velvet.

    Your closet rod now holds significantly more without looking chaotic. Getting dressed becomes easier because clothes don’t shift every time you grab something, and the slim profile makes the space feel less cluttered visually.

    8. Paint Walls a Light Neutral or Soft Moody Tone

    Color dramatically affects how big or small a space feels. Light neutrals (cream, soft gray, pale taupe) reflect light and expand the perceived space. If you want something moodier, soft sage, dusty blue, or warm greige still feel intimate without shrinking the closet further. Avoid dark colors in micro-closets unless you’re adding significant lighting.

    Closet paint costs $20-$40 per gallon at any hardware store, and you need just 1-2 gallons for a small space. Painting takes 2-3 hours once prep is done. Renters: use removable peel-and-stick wallpaper in light tones instead ($15-$25).

    A fresh coat of paint costs almost nothing compared to buying new storage and makes the space feel refreshed. You’ll notice the change every time you open the door—suddenly it feels intentional, not like a cramped afterthought.

    9. Add a Small Mirror to Reflect Light and Check Outfits

    A mirror serves double duty: it bounces light around, making the closet feel bigger and brighter, and it lets you check your full outfit without leaving the space. Mount a 20-24 inch round or rectangular mirror at eye level on the wall or door.

    A basic mirror costs $15-$40 at IKEA, Target, or Wayfair. Use adhesive strips (renter-friendly) or small nails. Position it opposite or near your light source to maximize reflection.

    The psychological effect is real—suddenly the space feels open and functional. You can try on outfits without stepping outside, which saves time and lets you make sure colors and fit actually work before committing.

    10. Install Peel-and-Stick Wallpaper for Renter-Friendly Style

    If you can’t paint or want to switch styles seasonally, peel-and-stick wallpaper gives you design flexibility without landlord drama. Choose light patterns (vertical stripes, subtle geometrics, or small-scale prints) to keep the space from feeling cramped. Avoid busy patterns in micro-closets.

    Quality peel-and-stick wallpaper runs $15-$35 per roll at Target, Wayfair, or Amazon. One roll typically covers about 28 square feet. Installation takes 1-2 hours and requires just a squeegee and a patient hand.

    Your closet instantly looks designed instead of utilitarian. Plus, you can peel it off cleanly when you move without damage—game-changer for renters who want their spaces to feel personal.

    11. Use Vacuum Storage Bags for Seasonal Bulky Items

    Bulky off-season items (winter coats, summer dresses, holiday decorations) take up prime closet real estate. Vacuum storage bags compress these items to about 1/3 their original size, freeing up shelf or floor space for daily-wear pieces.

    A set of 5-10 vacuum bags costs $10-$20 at Target, Walmart, or Amazon. Store them on high shelves where you access them seasonally, not frequently. Label clearly with permanent marker or printed labels.

    You’ll reclaim significant shelf space while keeping everything accessible. Come December, your winter coats don’t crowd out current outfits; they’re compressed and stored neatly above.

    12. Install a Narrow Cubby Shelving Unit Against the Wall

    If your closet has wall space but limited floor room, a narrow cubby unit (typically 12-18 inches deep and 30-36 inches wide) provides tons of vertical storage without protruding far. These units are shallower than standard shelves, so they don’t block the door or require much depth.

    A basic cube shelf unit costs $40-$100 at IKEA, Target, or Wayfair. Assembly takes 1-2 hours and requires just a screwdriver. Anchor it to the wall for safety, especially if you stack items.

    Your micro-closet suddenly has organized zones: tops on one tier, bottoms on another, accessories on a third. Everything’s visible and within reach, so getting dressed becomes a simple grab-and-go process.

    13. Add a Pull-Out Hamper to Hide Laundry

    A small pull-out hamper (or even a slim fabric laundry bag on a frame) hides dirty clothes without requiring a separate corner of your room. Look for narrow designs, around 12-18 inches wide, costing $25-$60 at Target, Bed Bath & Beyond, or Amazon. Wheeled bases make it easy to drag to the washer.

    Position it under your hanging rod or on the closet floor. If your closet is doorless, a hamper with a lid keeps odors contained and looks neater.

    Your bedroom looks instantly tidier because dirty clothes vanish into the closet instead of piling on the floor. Laundry day is also easier since you can just roll the hamper to the washing machine.

    14. Use Tension Rods to Create Dividers for Folded Items

    Tension rods aren’t just for hanging clothes—use them vertically on shelves to create dividers that keep folded stacks separated and upright. This prevents toppling stacks from collapsing into each other and makes individual items easy to grab without dismantling the whole pile.

    Tension rods cost $8-$15 each at IKEA, Target, or hardware stores. Buy 2-4 per shelf depending on your shelf width. Installation is instant; just twist and place. No tools needed.

    Your shelves look intentional and stay organized longer. Grabbing a shirt doesn’t require rebuilding an entire stack, which saves time and frustration on busy mornings.

    15. Maximize the Door with Behind-the-Door Shelving

    If your closet door swings inward, mount a thin over-the-door shelf unit on the back to store lightweight items like scarves, belts, socks, or shoes. These are lower-profile than hook organizers and act like small shelves.

    Over-the-door shelf units cost $20-$40 at Target, Amazon, or The Container Store. Weight limits are usually 5-15 pounds, so stick to lightweight items. Installation takes 10 minutes.

    You’ve essentially gained a second closet wall without any floor space. This is perfect for small accessories that would otherwise get lost in drawers or piles.

    16. Install Task Lighting with a Small LED Clip Lamp

    Poor lighting makes a small closet feel cramped and shadowy. A simple LED clip lamp ($15-$25 at IKEA, Target, or Amazon) clamps onto a shelf or rod and brightens the whole space. Battery-powered options work for renters and require zero wiring.

    Install it at eye level or slightly above to avoid glare. One lamp often suffices for a micro-closet, though two can work if you have deep shelving. Warm white bulbs (2700K) feel cozier; cool white (4000K) shows true colors for outfit matching.

    Suddenly you can see what you’re grabbing, and the space doesn’t feel like a dungeon. Getting dressed becomes actually enjoyable, and you’ll notice you wear more of your wardrobe because you can see everything clearly.

    17. Fold Using the KonMari or File Fold Method

    How you fold matters in micro-closets. The KonMari or “file fold” method stands items vertically so you can see each piece without unstacking. This maximizes shelf depth and makes inventory easier. Once you see what you have, you stop buying duplicates.

    Spend 1-2 hours refolding your entire closet using online tutorials (search “KonMari fold” or “file fold method”). No tools or purchases needed. This is pure organizational technique.

    Your shelf capacity doesn’t increase, but your usable capacity does because you can actually access items without destroying the pile. Plus, the visual improvement is remarkable—shelves look intentional and controlled.

    18. Add Adhesive Shelf Liners for Easy Cleaning

    Adhesive shelf liners protect closet shelves from dust, stains, and damage—especially important in small spaces where clutter lingers. They also make shelves quieter when sliding baskets or stacks around.

    Adhesive shelf liner costs $8-$15 per roll at Target, Bed Bath & Beyond, or Amazon. Measure your shelves, cut the liner to size, and stick it down. Takes 30 minutes for a whole closet. Peel and replace every 1-2 years.

    Your shelves stay cleaner longer, and baskets slide smoothly without catching on rough wood. It’s a small upgrade that extends the life of your storage furniture and keeps everything looking neat.

    19. Use Small Wire Baskets to Corral Socks, Underwear, and Accessories

    Tiny items get lost in micro-closets unless corralled. Small wire baskets (typically 6-10 inches wide) group socks, underwear, tights, belts, and accessories so you can grab a whole category at once. Wire lets you see what’s inside without opening.

    A set of 3-5 small wire baskets costs $15-$30 at Target, IKEA, or Amazon. Stack them on shelves or under hanging rods. Label the front of each basket with a printed or handwritten label for quick recognition.

    Mornings are faster when you know exactly which basket holds what. You also rediscover items you forgot you owned, so you stop buying duplicates.

    20. Install a Slim Rolling Rack for Extra Hanging Space

    If your closet genuinely can’t fit everything, a slim rolling rack (typically 24-36 inches wide) extends your hanging capacity without requiring wall installation. Position it just outside your closet or at the end of your bed. Perfect for seasonal overflow or current-rotation pieces.

    A basic rolling rack costs $30-$70 at Target, Wayfair, or Amazon. Look for designs with wheels that lock to prevent shifting. Compact models fit in tight spaces.

    You’ve doubled your hanging capacity without construction. The rack also makes it easy to rotate seasonal clothes—just move the rack in and out as seasons change.

    21. Mount a Narrow Hanging Organizer for Daily Outfit Planning

    A hanging organizer with multiple pockets (usually 5-7 slots) lets you pre-plan daily outfits, which cuts morning decision-making time in half. Some people use each pocket for Monday through Friday; others use pockets for outfit types (casual, work, weekend).

    A slim hanging organizer costs $15-$35 at Target, Container Store, or Amazon. Choose designs with clear pockets so you can see contents. Hang on the back of your closet door.

    You’ll get ready faster because decisions are made during calm moments, not rushed mornings. Plus, you’re more likely to actually wear outfit combinations because they’re visible and pre-planned.

    22. Use a Slim Dresser or Chest in Your Closet

    If you have any floor space (even 2-3 feet), a slim 2-4 drawer dresser fits into the corner and provides drawer storage for socks, underwear, and folded layers. Look for depths of 12-15 inches so it doesn’t protrude into walkways.

    A narrow dresser costs $50-$150 depending on quality and style at IKEA, Target, or Wayfair. This is an investment piece but lasts years and frees up bedroom drawers for other purposes. Assembly takes 1-2 hours.

    Suddenly your micro-closet becomes a complete dressing room with hanging and drawer storage. You’re not storing clothes throughout your bedroom; they’re all contained in one place.

    23. Use Clear Plastic Boxes for Off-Season Visibility

    Clear plastic boxes (instead of opaque cardboard) let you see what’s inside without opening them, which is crucial in tight spaces where you need to maximize high shelves. Label each box with a printed label or masking tape.

    A set of 3-4 clear storage boxes (medium size) costs $20-$40 at Target, Walmart, or Container Store. Measure your shelf depth and width before buying. Stack them wisely to avoid top-heavy situations.

    You’ll remember what’s stored where and can grab seasonal items without unpacking multiple boxes. Plus, clear boxes look neater than miscellaneous bags or unlabeled boxes.

    24. Install a Slim Jewel Rack or Jewelry Organizer

    Jewelry easily tangles or gets lost in micro-closets. A slim wall-mounted organizer (often mirrored, typically 12-18 inches wide) keeps necklaces, earrings, and rings visible and accessible. Some designs double as mirrors.

    A wall-mounted jewelry organizer costs $20-$50 at Target, Wayfair, or Amazon. Use adhesive strips or small nails to mount. Takes 10 minutes. If you prefer non-wall options, over-the-door jewelry organizers also work ($15-$30).

    You’ll stop layering necklaces in a tangled mess on a shelf. Everything’s visible, so you actually wear your jewelry, and getting ready feels organized instead of chaotic.


    Ready to tackle your micro-closet? Pick one or two ideas that address your biggest pain point—whether that’s vertical space, lighting, or visibility—and start this weekend. You’ll be amazed how one small change opens up your whole closet. Bookmark this post and share it with anyone else drowning in a tiny closet space; they’ll thank you.

  • 27 Vintage Bedroom Styling Ideas That Bring Nostalgic Beauty

    27 Vintage Bedroom Styling Ideas That Bring Nostalgic Beauty

    Introduction

    Vintage style doesn’t mean your bedroom feels stuck in the past—it means creating a space filled with personality, history, and pieces that tell your story. If you’re tired of the bland minimalism that dominates most bedrooms, or you’re craving warmth that mass-produced furniture just can’t deliver, you’re ready for a nostalgic refresh. The beauty of vintage styling is that it mixes perfectly with modern comfort, giving you a room that’s uniquely yours without feeling cluttered or chaotic. Whether you’re a seasoned thrifter or picking up your first secondhand find, these 27 ideas will show you exactly how to layer vintage charm into every corner. You’ll discover how to blend old and new, where to find authentic pieces on any budget, and the styling tricks that make vintage bedrooms feel both cozy and intentional.


    1. Layer Your Bed With Handmade Quilts Instead of Duvets

    A quality quilt tells a story in a way sleek duvets simply can’t. Quilts add instant warmth, texture, and often carry real history—whether you’re inheriting a family piece or finding one at an estate sale.

    Shop for vintage quilts at thrift stores, estate sales, or online at Etsy ($30–$150 for authentic pieces). Look for quilts with tight, even stitching as a sign of quality. Layer 2–3 quilts across your bed, letting them bunch naturally rather than making them look perfectly tucked. A weekend project to source and style. Pro tip: If you love the look but want new construction, brands like Schoolhouse Electric make modern-made quilts with vintage aesthetics ($200–$400).

    Your bedroom becomes a conversation starter, and you’ll actually want to spend time there. The bonus? Quilts photograph beautifully for your own inspiration board.


    2. Hunt Secondhand Nightstands for One-of-a-Kind Bedside Charm

    Nightstands don’t need to match or be expensive. Mixing two different vintage pieces creates visual interest and saves you hundreds compared to buying a matching set new.

    Scout Facebook Marketplace, Craigslist, local antique shops, and estate sales for wooden nightstands ($20–$80 each). Look for sturdy construction and minimal damage; cosmetic chips add character. Grab one mid-century modern side table, one Victorian-era piece—the mix is what makes it work. Takes one afternoon to source and style. If the finish looks tired, a simple wood stain or paint refresh takes 2–3 hours and costs under $15.

    You’ll save $300+ compared to buying a matched bedroom set, and your bedside will feel collected and curated rather than catalog-ordered.


    3. Add Vintage Brass Accents for Warm, Glowing Hardware

    Brass hardware and accessories instantly warm up a bedroom and tie vintage pieces together cohesively. It’s a detail that catches light and adds subtle luxury without shouting.

    Replace modern handles with vintage brass drawer pulls ($3–$8 per pull on Amazon or Etsy; budget $30–$50 for a full dresser refresh). Hunt thrift stores for brass picture frames, candlesticks, and mirrors ($5–$15 each). This is a free-to-$50 update requiring no special skills. Pro tip: Mix brass with aged wood and cream linens to avoid feeling too shiny or theme-park-y.

    Your accessories suddenly feel elevated and cohesive, and the warm tones make the entire room feel more inviting and lived-in.


    4. Style Floating Shelves With Collected Books and Vintage Objects

    Books are both functional storage and beautiful bedroom decor—they add color, texture, and the cozy feeling of a personal library without needing a full bookcase.

    Install floating shelves ($15–$40 per shelf plus hardware at Home Depot) or use existing shelving. Stack books by color or vary them horizontally and vertically for visual interest. Fill gaps with thrifted ceramics, vintage bottles, or framed photos. This is a weekend project—simple drilling if you’re comfortable, or hire help ($50–$100). Pro tip: Group odd numbers of objects (3, 5, 7) for a styled look that feels intentional, not accident.

    Your walls gain personality and storage simultaneously, and you’ll create the perfect backdrop for photos while keeping bedside reading within arm’s reach.


    5. Hang Vintage Floral Wallpaper on One Accent Wall

    Grandmillennial style loves bringing back florals—but done right, it’s sophisticated, not grandma’s guest room. One accent wall adds personality without commitment anxiety.

    Choose removable wallpaper ($15–$30 per roll) if renting, or traditional wallpaper ($20–$50 per roll) if you own. Brands like Rifle Paper Co. and Anthropologie offer vintage-inspired florals in modern colorways. A weekend DIY project for one wall (2–3 hours for beginners), or hire a pro ($150–$300). Pair florals with calm solid walls in cream, sage, or soft gray to keep things balanced. Pro tip: Smaller-scale prints photograph better and feel less busy in person.

    This single wall shift makes your entire bedroom feel intentional and collected, giving you something beautiful to wake up to without the commitment of full-room wallpaper.


    6. Collect Vintage Glass Bottles for a Vanity Vignette

    Vintage glass bottles are cheap, beautiful, and endlessly available at thrift stores. Clustered together, they become an instant vignette that reads as thoughtfully styled.

    Shop thrift stores for vintage bottles ($0.50–$3 each) and fill them with dried flowers, branches, or leave empty for a minimalist look. Group in odd-numbered clusters (3, 5, 7) on your dresser or nightstand. Completely free if you’re upcycling bottles you have; budget $5–$15 for thrifted ones. No time investment beyond shopping—this takes 10 minutes to arrange. Pro tip: Vary the heights and colors for more visual interest than matching sets.

    You’ll create a focal point that changes your dresser from functional storage to a styled display, and it costs nearly nothing.


    7. Drape Vintage Textiles as Wall Hangings or Bed Runners

    Vintage textiles (scarves, runners, tapestries, small rugs) are affordable alternatives to art and add instant warmth and pattern to bare walls or bed foot.

    Find vintage kilims, woven runners, or textile scarves at estate sales, Etsy, or local antique shops ($10–$50 for smaller pieces; $50–$150 for larger tapestries). Hang with a simple rod, peel-and-stick hooks (renter-friendly), or drape casually across the bed. 10 minutes to style—no installation required if draping. Mix colors and patterns with confidence; that’s the vintage charm. Pro tip: Layer 2–3 smaller textiles together for more visual impact than one large piece.

    You’ll add warmth, color, and collected-over-time charm to an entire wall without needing to frame or hang traditional art.


    8. Source a Statement Headboard From Antique Stores

    A vintage headboard is the ultimate focal point—it frames your bed beautifully and instantly elevates the entire room without needing to update everything else.

    Hunt antique stores, estate sales, and Facebook Marketplace for wooden or iron headboards ($50–$200 for solid pieces; investment-level ones up to $500). Look for sturdy construction; minor damage adds character. Measure your bed carefully before shopping. DIY mounting takes 1–2 hours or hire help ($75–$150 labor). Pro tip: Paint a tired headboard in soft cream or sage to refresh it without losing vintage character.

    This single piece becomes the anchor of your entire bedroom design, making everything else feel intentionally curated around it.


    9. Layer Mismatched Vintage Area Rugs for Textural Depth

    Layering rugs isn’t just a design trick—it adds visual interest, warms up hard floors, and is way cheaper than buying one expensive new rug.

    Source vintage rugs from estate sales, Etsy, or local rug cleaners ($20–$100 per rug; budget $50–$150 for 2–3 rugs total). Start with a larger neutral base rug, then layer a patterned vintage piece on top, letting the base show at the edges. Free project—just arrange and layer. Mix patterns and colors; the key is grounding colors (rust, navy, cream) that tie it together. Pro tip: Get rugs professionally cleaned once if buying older pieces ($30–$60 per rug).

    Your bedroom gains warmth, texture, and a collected, lived-in feeling that reads as intentionally styled rather than matchy-matchy new.


    10. Paint Your Walls in Soft, Warm Vintage Tones

    The right wall color can make or break a vintage bedroom—cool grays flatten the space, while warm earth tones make vintage pieces sing and create instant coziness.

    Choose warm neutrals like soft sage, muted terracotta, cream, or warm gray ($30–$50 per can). Brands like Farrow & Ball, Benjamin Moore, and even Sherwin-Williams have beautiful vintage-inspired palettes. DIY painting takes one full day for a bedroom; hiring a pro runs $300–$500. Test paint on your walls first (most stores sell sample sizes for $3–$5). Pro tip: Vintage pieces look richer against warm, slightly aged-looking walls rather than bright white.

    Your vintage furniture instantly looks more cohesive, and the warm backdrop makes the entire room feel inviting rather than cold or sterile.


    11. Collect Vintage Picture Frames for a Gallery Wall

    A gallery wall of mismatched vintage frames is the perfect way to display personal photos, vintage prints, or even blank matting for a collected, gallery-like feel.

    Hunt thrift stores for vintage wooden frames in different sizes and finishes ($1–$5 each; budget $20–$40 for 6–8 frames). Mix with new prints from Etsy ($5–$15 each) or use photos you already have. Lay frames on the floor first to plan placement, then hang—a weekend afternoon project requiring basic tools or $50–$100 if hiring help. Pro tip: Frame in an asymmetrical arrangement rather than a grid for a more intentional, collected look.

    You’ll create a focal point that celebrates your life and memories while adding sophisticated visual depth without saying a word.


    12. Incorporate Vintage Metal or Woven Baskets for Storage

    Vintage baskets solve the “where do I hide things?” problem while looking intentionally collected rather than cluttered.

    Score vintage woven baskets, metal storage bins, or wire crates at thrift stores or Etsy ($3–$20 each). Stack 2–3 in a corner, under a console, or use to corral blankets and textiles. Completely free if you’re organizing what you already own. Group odd numbers for a styled look. Pro tip: Label small baskets with hand-written tags for a cottage-core vibe that’s both functional and pretty.

    Your bedroom gains hidden storage and texture, while maintaining the clean, intentional look you want without visible clutter.


    13. Add Vintage Mirrors in Unexpected Sizes and Frames

    Vintage mirrors reflect light, make rooms feel bigger, and are available in endless styles—from ornate wood frames to simple iron designs.

    Find vintage mirrors at antique shops, estate sales, or Facebook Marketplace ($10–$50 for modest sizes; investment pieces up to $150). Mix frame styles and sizes; hang one large statement mirror alongside 2–3 smaller ones. Hanging takes 15 minutes; propping against a wall works beautifully too and is renter-friendly. Pro tip: Lean rather than hang for a relaxed, collected feel—it photographs beautifully too.

    You’ll brighten your space naturally, create visual interest on your walls, and gain practical mirrors without the stark, modern look of frameless styles.


    14. Layer Vintage Linens in Cream, Ivory, and Soft Neutrals

    Vintage linens in neutral tones create a soft, hotel-like bed that feels expensive and intentional—the foundation of a beautiful vintage bedroom.

    Shop Etsy, estate sales, or specialty linen retailers for vintage cotton and linen sheets ($20–$60 per set). Stick to creams, ivories, and warm whites for a cohesive, calming look. Layer sheets with lightweight blankets, quilts, and throw pillows. Budget 2–3 hours styling a bed the first time; afterward it’s instinctive. Pro tip: Vintage linens often feel softer than new ones—look for tight weaves and quality construction.

    Your bed becomes the focal point—inviting, comfortable, and so beautiful you’ll actually want to make it daily.


    15. Hang Vintage Fabric Scarves as Soft Window Treatments

    Fabric scarves are a cheap, renter-friendly way to add color and movement without committing to traditional curtains.

    Collect vintage silk scarves from thrift stores ($1–$3 each; grab 3–5 for a window) or use scarves you already own. Drape over a simple curtain rod ($15–$30) or tension rod ($10–$20). Takes 10 minutes to style. Layer scarves in colors that coordinate with your palette but aren’t matching—vintage charm means imperfection. Pro tip: Use lightweight scarves to let light filter through during the day; layer heavier ones at night for privacy.

    You’ll add instant color, softness, and a uniquely styled window treatment that costs under $30 and works in rentals.


    16. Display Collections of Vintage Ceramics and Pottery

    Collections tell stories. Vintage ceramics, whether handmade pottery or vintage kitchenware repurposed as decor, add warmth and personality instantly.

    Find vintage ceramics, pottery, and handmade bowls at estate sales, antique shops, or Etsy ($2–$15 per piece). Display on shelves or a dresser—grouping similar colors or styles creates a curated look. Budget $20–$50 for a nice starter collection. Arrange in 10 minutes by grouping colors or sizes together. Pro tip: Mix functional pieces (small bowls) with purely decorative ones for a lived-in, collected feel.

    Your shelves gain warmth and storytelling, and you support artisans and small makers rather than mass production.


    17. Create a Vintage Vanity or Dressing Table Setup

    A vintage dressing table is the ultimate bedroom luxury—functional storage, beautiful styling opportunity, and a cozy nook for your morning routine.

    Hunt for a small vintage desk or dressing table ($30–$100 at estate sales) and a matching stool ($15–$50). Add a simple mirror ($10–$30) and group vintage bottles, trays, and accessories. Takes 2–3 hours to source and style. Pro tip: Even a small side table can work; the key is grouping objects intentionally on top to feel purposeful rather than cluttered.

    You’ll create a beautiful, functional corner that makes your morning routine feel special and gives your bedroom a sophisticated, collected feel.


    18. Blend Vintage and Modern Art on Your Walls

    Mixing vintage prints with contemporary art keeps your room from feeling like a museum while honoring the vintage aesthetic.

    Pair vintage botanical prints or old illustrations ($5–$20 each on Etsy) with modern art prints ($10–$30 from indie artists). Frame in similar wood tones to unify the look. Hang at varying heights for a gallery feel. Budget 2–3 hours for a wall of 5–8 pieces. Pro tip: Stick to a consistent color palette (warm neutrals, jewel tones, earthy colors) to tie different eras together.

    Your walls feel sophisticated and collected rather than themed, and you’re supporting both vintage makers and contemporary artists.


    19. Use Vintage Trunks or Chests for Bed-End Storage

    Vintage trunks are beautiful storage solutions that add authentic charm and actually function as hidden space—practical and pretty simultaneously.

    Find vintage trunks or storage chests at estate sales or antique shops ($25–$75 for solid ones). Place at the foot of your bed or against a wall—instantly adds depth and style. Use for off-season clothes, extra quilts, or blankets. Takes 15 minutes to position and style. Pro tip: Top with a folded quilt or throw to make it look intentionally decorated rather than just storage.

    You’ve gained hidden storage while adding a focal point that reads as collected and intentional.


    20. Layer Vintage Throw Pillows in Different Textures

    Pillow layering is the simplest way to add softness, texture, and vintage charm to your bed or seating areas.

    Score vintage or vintage-inspired throw pillows at thrift stores ($3–$10 each), Target ($15–$25), or Etsy ($20–$40 for quality artisan pillows). Mix 4–6 pillows in different fabrics—velvet, linen, cotton prints—in coordinating colors. Arrange casually; imperfection is the point. 10–15 minutes to style. Pro tip: Larger pillows in the back, smaller in front, for layered visual interest.

    Your bed becomes exponentially more inviting and cozy-looking, and the mixed textures add sophistication without trying too hard.


    21. Paint or Stain Wooden Furniture for a Vintage Refresh

    That thrifted dresser with great bones but tired finish? Paint or stain it and you’ve got a custom piece for $30–$50 instead of $300 new.

    Choose vintage-friendly paint colors (cream, sage, soft blue, or warm gray) in matte finish ($25–$40 per can). Use chalk paint or milk paint for an aged look. Sand lightly, prime, and paint in one weekend. Keep original hardware for authenticity. Pro tip: Distress edges slightly for a lived-in, genuinely vintage vibe rather than too-perfect finish.

    Your thrifted find transforms into a custom piece that matches your palette and looks professionally styled.


    22. Add Vintage Books as Decorative Stacks

    Books are instant decor and convey collected taste and refinement—stack them on nightstands, dressers, and shelves for texture, color, and personality.

    Gather vintage or secondhand books from thrift stores ($0.50–$2 each). Stack horizontally on nightstands or shelves; lean vertically on shelves for variety. Free project if using books you own; budget $10–$30 for a nice collection from thrift stores. Top stacks with small objects (candles, bowls, framed photos) for styled impact. Pro tip: Choose books with beautiful spines or vintage covers for visual cohesion.

    You’ll add color, texture, and narrative to your space while supporting used bookstores and building an affordable library.


    23. Incorporate Vintage Brass Bedside Lamps or Candlesticks

    Vintage brass lighting is functional and beautiful—it casts warm light and instantly makes your bedroom feel more sophisticated and intentional.

    Hunt thrift stores for vintage brass lamps or candlesticks ($5–$15 each). Pair with new linen shades ($15–$30 each) if originals are damaged. Position on nightstands for ambient lighting. Takes 5 minutes to plug in or style—no installation needed. Pro tip: Layer brass lamps with battery-operated candles in brass holders for extra warmth without fire risk.

    Your bedroom lighting feels warm and curated, and you’ll actually want to keep lights on rather than switching to harsh overhead options.


    24. Style Your Nightstand With Vintage Books and Small Treasures

    Nightstands are the easiest place to practice styling—keep them functional but beautiful by grouping objects intentionally.

    Gather books, small vessels, framed photos, and objects you already own or thrift ($0–$20 total). Arrange in groups of 3–5 objects; add a small plant or dried flowers. Leave some breathing room—fullness without clutter. Takes 15 minutes to style. Pro tip: Vary heights and shapes for visual interest; don’t line things up in neat rows.

    Your bedside becomes a mini gallery that supports your sleep routine while looking intentionally curated.


    25. Add Vintage Wallpaper to the Inside of Open Shelving

    This under-the-radar trick adds pattern and color while keeping the main wall calm—perfect for small spaces or renters.

    Line open shelves with removable wallpaper or decorative paper ($10–$20 per roll; Spoonflower offers custom options). Apply to the back wall of shelves only—instant pattern without overwhelming the room. Takes 1–2 hours for multiple shelves. Renter-friendly with removable wallpaper. Pro tip: Choose wallpaper that echoes your bedroom palette to tie the room together without clashing.

    Your shelves suddenly feel styled and intentional—the pattern frames your displayed items beautifully.


    26. Create a Vintage Reading Nook With a Comfortable Chair

    A vintage chair transforms a corner into a cozy reading sanctuary—function meets styling perfectly.

    Find a vintage upholstered chair at thrift stores or estate sales ($30–$100 for solid pieces). Reupholster if needed ($150–$300 with a pro) or keep existing fabric if it’s charming. Add a small side table ($15–$40), warm lamp ($15–$30), and throws. Takes 1 afternoon to source and style. Pro tip: Position near a window for natural reading light during the day.

    You’ve created a retreat within your bedroom—a beautiful, functional corner that invites you to slow down and actually use your space.


    27. Mix Vintage and Contemporary Storage for Functional Beauty

    The secret to modern vintage bedrooms is blending old and new—it keeps things from feeling theme-park-y while honoring the aesthetic.

    Combine vintage wooden furniture with modern metal storage, contemporary shelving, and new textiles. Mix thrifted pieces ($20–$75 each) with affordable modern options (IKEA, Target, Wayfair). Budget $200–$500 for a full bedroom refresh using this mixed approach. Arrange over 2–3 weekends as you source items. Pro tip: Tie it together with consistent color palette and materials (warm woods, brass, cream, earthy tones).

    Your bedroom feels collected and intentional rather than themed, and you’ve created a space that’s genuinely yours—not a catalog page.


    Save this post and pick one idea to tackle this weekend. Start with the easiest win—whether that’s layering pillows or hunting for one thrifted treasure—and watch your bedroom transform into a space that actually feels like home. Share this with anyone craving vintage warmth over mass-produced blandness.

  • 26 Bedhead Design Ideas That Instantly Upgrade Your Bedroom

    26 Bedhead Design Ideas That Instantly Upgrade Your Bedroom

    Your headboard is the first thing you see when you wake up and the last thing before sleep—so why settle for boring? A great bedhead instantly anchors your entire bedroom and sets the mood for your space. Whether you’re renting, renovating, or just ready for a refresh, the right headboard choice can make your room feel intentional, cozy, and uniquely yours.

    We’ve rounded up 26 bedhead design ideas that range from budget-friendly DIY projects to statement investment pieces. You’ll find renter-friendly options, sustainable materials, curved modern styles, vintage finds, bold color plays, and nature-inspired designs. Pick one that speaks to you, or mix and match ideas to create your perfect bedroom sanctuary. Let’s get started.

    1. Curve Your Walls With Rounded Upholstered Headboards

    Curved headboards replace harsh angles with organic softness that makes your entire bedroom feel more calming. The rounded shape echoes nature and pairs beautifully with the trend toward organic modernism gaining traction among interior designers.

    Look for upholstered headboards with smooth, pillow-like curves at retailers like West Elm ($400–$800), Article ($300–$600), or Wayfair ($200–$500 for budget options). For renters, consider a freestanding curved headboard panel (often under $150) that leans against the wall—no installation required. Installation takes about 30 minutes if wall-mounted, or zero minutes if freestanding.

    Pro tip: Pair your curved headboard with matching curved mirrors or nightstands to reinforce the soft, flowing aesthetic throughout your room.

    The best part about curved headboards is how they soften the whole vibe of your space—suddenly your bedroom feels like a retreat, not just a place to sleep.

    2. Layer Rich Textures With Patterned Upholstery

    Mixing textures and patterns on your headboard creates visual interest and the cozy depth everyone’s after in 2025. Layered fabrics—think velvet, linen, and woven materials together—add tactile richness that makes your bed irresistible.

    Search for patterned upholstered headboards at CB2 ($400–$900), Etsy (handmade options $300–$1,200), or Restoration Hardware for luxury picks. If you’re handy, buy a plain wooden headboard frame ($80–$150) from IKEA or Home Depot and have it professionally upholstered ($150–$300) with patterned fabric of your choice—total investment under $500. This route takes one weekend for ordering, one week for upholstery completion.

    Budget hack: Visit local upholsterers for custom work; often cheaper than brand-name retailers and you get exactly what you want.

    You’ll notice how much personality a patterned headboard brings compared to plain painted drywall—suddenly your bedroom tells your story.

    3. Go Dark and Moody With Deep Jewel Tones

    Deep aubergine, forest green, and navy headboards are having a major moment as statement color accents that feel sophisticated, not overwhelming. These jewel tones create drama while still maintaining a calm, grounding energy in your sleep space.

    Shop statement color headboards at Pottery Barn ($600–$1,400), Article ($400–$700), or hunt vintage treasures at local consignment shops. For renters, Removable wallpaper in jewel tones applied to a basic headboard frame creates impact without commitment ($30–$80, takes 1–2 hours). Alternatively, paint a wooden headboard yourself with premium interior paint ($40 total, 1 afternoon project).

    Pro tip: Pair dark headboards with light walls and bedding to keep the room from feeling cave-like; balance is key.

    The result? A bedroom that feels grown-up, intentional, and like a true sanctuary instead of just a sleeping corner.

    4. Install Floor-to-Ceiling Curtains Behind Your Headboard

    Dramatic floor-to-ceiling curtains behind your bed act as both headboard and light-control solution. They add architectural height, softness, and a hotel-like polish that instantly elevates your space.

    Purchase lightweight linen or linen-blend curtain fabric ($15–$30 per yard from Joann Fabrics, Fabric.com, or Etsy). You’ll need roughly 4–6 yards depending on your bed width. Hang a simple ceiling-mounted curtain rod ($25–$50 from IKEA or Home Depot). DIY installation takes 1–2 hours; total project cost $100–$200. For renters, use tension rods ($20–$40) instead of drilling, though they work best on narrower windows.

    The elegant drape creates visual softness and makes your bedroom feel intentional and layered—plus you gain privacy and light control in one move.

    5. Embrace Raw Wood With Floating Shelving Headboards

    Floating shelves as headboard storage combine function with raw, natural material appeal. This trend aligns perfectly with 2025’s focus on organic modernism and sustainable design choices.

    Install floating shelves from IKEA ($15–$40 per shelf), Home Depot ($20–$60), or Wayfair ($30–$80). You’ll need a stud finder, wall anchors, and a drill—basic setup takes 2–3 hours for three shelves. Total cost: $100–$200 for shelves plus installation supplies. For renters, lean wooden ladder shelves against the wall behind your bed ($60–$150) for a similar aesthetic without wall damage.

    Style your shelves with a mix of books, plants, and meaningful objects to create personality without clutter.

    Your headboard becomes both beautiful and practical—you gain display space and a nature-inspired focal point that makes your room feel more collected and less empty.

    6. Add Warm Ambient Lighting With Bedhead Wall Sconces

    Wall sconces flanking your headboard serve double duty: they’re a design statement and they provide mood-setting light that beats harsh overhead fixtures. Warm lighting promotes better sleep and creates that spa-like atmosphere everyone craves.

    Shop bedside sconces at Rejuvenation ($200–$400 per pair), Anthropologie ($150–$350), or budget options at Target ($50–$100 per pair) and IKEA ($40–$80). Professional installation runs $150–$300; DIY with basic electrical knowledge takes 2–3 hours per sconce. Total project: $300–$700 installed. Renters: opt for plug-in wall sconces ($60–$150 per pair) that require no wiring.

    Pro tip: Choose warm-toned bulbs (2700K color temperature) for relaxation, and opt for dimmable options if possible.

    Once you install sconces, you’ll never want harsh overhead lighting again—the soft glow makes your bedroom feel like a luxury hotel retreat every single night.

    7. Create Textured Depth With Woven Wall Hangings

    Woven wall hangings and macramé bring texture, warmth, and handmade character that mass-produced decor can’t match. They work beautifully as a low-pressure alternative to traditional headboards.

    Find large woven hangings on Etsy ($60–$300 for artisan pieces), West Elm ($150–$400), or Anthropologie ($100–$300). For a budget option, Target and Urban Outfitters carry woven pieces ($40–$100). Hang with a simple wooden dowel and leather straps ($15–$30 from craft stores) or adhesive hooks ($5–$10). Installation takes 15 minutes; total cost $50–$150 for an affordable statement.

    The artisanal quality adds personality and story to your bedroom—unlike cookie-cutter alternatives, your space becomes uniquely yours.

    8. Paint an Accent Wall in Warm Earth Tones

    An accent wall in earth tones—terracotta, warm ochre, or soft clay—creates warmth and grounds your space without overwhelming it. This budget-friendly option works especially well if you’re renting (check your lease first).

    Purchase premium interior paint in your chosen tone from Benjamin Moore ($40–$70 per gallon), Sherwin-Williams ($35–$60), or budget brands at Home Depot ($20–$40). One gallon covers approximately 400 square feet; you’ll likely need just one can for a single wall. DIY painting takes 4–6 hours including prep and drying. Total cost: $25–$70. Renters: ask your landlord, or use removable wallpaper in earth tones ($30–$60) as a compromise.

    Pro tip: Paint the wall behind your headboard, not the full room, for maximum impact with minimal commitment.

    An accent wall instantly makes your bedroom feel intentional and warm—it’s one of the biggest design shifts you can make for under $50.

    9. Mix Cherry Tones With Dark Wood Headboards

    Cherry-themed decor is surging in popularity, with search trends up 100% year-over-year. Dark cherry wood headboards offer timeless elegance and pair beautifully with warm lighting and jewel-toned accents.

    Search for dark cherry wood headboards at Wayfair ($400–$1,200), Etsy ($300–$1,500 for solid wood pieces), or consignment shops for vintage finds ($200–$600). Real cherry wood represents an investment but lasts decades; laminate alternatives run $200–$500. Assembly or professional installation takes 2–4 hours. Budget alternative: Paint an existing headboard with cherry-toned stain ($20–$40, 1 afternoon project).

    Pair your cherry headboard with warm brass hardware and jewel-tone textiles to maximize the luxe effect.

    The deep richness of cherry wood elevates your entire bedroom aesthetic—it feels collected, intentional, and timeless rather than trendy or temporary.

    10. Layer Vintage and Handmade for Eclectic Personality

    Mixing vintage, handmade, and one-of-a-kind pieces creates personality that no single purchased headboard can match. Eclectic layering is very 2025—moving away from sterile minimalism toward nostalgic maximalism done right.

    Scout vintage headboards at local antique shops ($100–$500), Facebook Marketplace ($50–$300), Craigslist, or Etsy ($150–$600). Mix pieces by hanging a vintage quilt ($100–$400) alongside a reclaimed wood panel ($80–$250). Arrange multiple pieces as a gallery-style headboard using picture-hanging hardware ($20–$50). Assembly takes 2–3 hours; total project $150–$500.

    Pro tip: Look for pieces with patina and history rather than trying to match perfectly—the imperfections are the beauty.

    This approach tells the story of your life through design—every piece has meaning, and your bedroom becomes a reflection of your travels, values, and aesthetic journey.

    11. Install Marble or Stone Cladding for Luxury

    Stone or marble cladding brings raw, natural texture and undeniable luxury to your headboard space. This trend aligns with 2025’s focus on raw materials and organic surfaces.

    Real marble or granite cladding costs $400–$2,000+ installed through contractors or tile specialists. For a more affordable option, use peel-and-stick marble tile ($50–$150 from Amazon, Wayfair, or Home Depot) that mimics the look without the price tag. Professional installation takes 1–2 days; DIY peel-and-stick application takes 4–6 hours. Budget alternative: Paint drywall with marble-effect paint technique ($30–$50 in supplies, 1 afternoon DIY project).

    This investment creates a focal point that photographs beautifully and feels gallery-worthy every time you look at it.

    12. Go Minimalist With a Simple Wooden Frame Headboard

    Sometimes less is more—a clean wooden frame headboard offers sophistication through simplicity. This works beautifully in minimalist bedrooms and pairs perfectly with other 2025 trends like organic materials and calm aesthetics.

    Purchase or DIY a simple wooden frame headboard from IKEA ($60–$200), Article ($150–$400), or build your own from reclaimed wood at a local mill ($100–$300 in materials). DIY construction takes one weekend; IKEA assembly takes 1–2 hours. Total cost: $60–$300. This option works perfectly for renters since it’s non-permanent and can be moved.

    Style with minimal pillows and no throw blankets for a Scandinavian-inspired calm that feels intentional and restful.

    The stripped-down approach lets your other bedroom elements shine—plants, artwork, natural light—while your headboard provides subtle structure without visual noise.

    13. Add Dramatic Height With Tall Fabric-Covered Panels

    Oversized fabric panels extending from headboard to ceiling create architectural drama and make your bedroom feel more spacious and gallery-like. This bold approach works especially well in rooms with high ceilings.

    Install floor-to-ceiling fabric panels using a combination of wooden framing ($100–$200 from Home Depot) and upholstery fabric ($30–$60 per yard). Professional installation runs $400–$1,000; ambitious DIYers can tackle it in 1–2 weekends. Total project: $500–$1,500. For renters, use removable fabric panels ($100–$300) attached with adhesive strips.

    The towering height instantly makes your bedroom feel more intentional and luxe—suddenly your space reads as designed, not default.

    14. Combine Cork and Wood for Organic Warmth

    Cork and wood together create warmth, texture, and sustainability—three huge 2025 design priorities. This natural combination feels organic without being trendy or over-the-top.

    Purchase cork tiles ($30–$80 per sheet from Home Depot, Etsy, or specialty suppliers) and wooden slats ($40–$100 from lumberyards). Arrange in a geometric pattern and adhere to a plywood backing using construction adhesive ($15–$30). Mount to your wall using standard wall anchors ($10–$20). DIY project takes one full weekend; total cost $150–$300. For a quicker option, order a pre-made cork headboard ($200–$500) from online retailers.

    Pro tip: Cork naturally insulates sound and absorbs moisture, making it both beautiful and functional.

    The combination creates a bedroom that feels grounded and nature-connected—your space becomes a sustainable sanctuary, not just a room.

    15. Layer Geometric Wallpaper With Complementary Paint

    Geometric wallpaper on your headboard wall creates pattern interest without overwhelming your entire room. Pairing it with solid walls keeps the look balanced and intentional.

    Find geometric wallpaper at Spoonflower ($25–$50 per roll for custom designs), Anthropologie ($40–$80 per roll), or Wayfair ($20–$60). Installation takes 4–6 hours if you’re experienced; hire a pro for $300–$500. For renters, peel-and-stick geometric wallpaper ($15–$40 per roll) applies easily without damage. Total DIY cost: $60–$120; professional installation: $400–$650.

    Pair with warm or neutral paint on remaining walls to let your patterned wall be the star of the show.

    The pattern draws the eye and gives your bedroom personality without creating visual chaos—it’s the perfect balance between minimal and memorable.

    16. Commission Custom Art or a Mural Headboard

    Art-led personalization is huge in 2025—a custom mural or large art piece behind your bed becomes your headboard statement. This approach is completely unique to your space and style.

    Hire a local mural artist ($500–$2,000+ depending on wall size and complexity) or commission a custom painting from Etsy artists ($300–$1,500). Alternatively, purchase large-scale art prints ($50–$300 from Minted, Etsy, or galleries) and frame them DIY-style. For a budget approach, use removable wall decals ($30–$100) or paint your own mural with stencils ($20–$50) and paint ($30–$60).

    Pro tip: Choose artwork that speaks to your sleep goals—calming florals, nature scenes, or abstract patterns in soothing colors.

    Your bedroom becomes a personal art gallery—every time you wake up, you’re greeted by something beautiful and meaningful that no one else has.

    17. Install Floating Shelves With Lighting for Functional Style

    Floating shelves with built-in lighting combine storage, style, and practical ambient light—a trifecta for modern bedrooms. This works beautifully if you love reading or displaying collections.

    Install floating shelves ($25–$60 each from IKEA, Home Depot, or Article) paired with under-shelf LED lighting ($20–$50 per light from Amazon or Home Depot). Professional installation runs $150–$300; DIY with basic tools takes 2–3 hours per shelf. Total project: $150–$250 for two shelves with lighting. Renters: use adhesive-backed shelves ($30–$80) with battery-powered LED lights ($15–$40).

    Style shelves with a mix of books standing vertically and horizontally, small plants, and meaningful objects—aim for “collected” rather than cluttered.

    You’ll gain both display space and task lighting, eliminating the need for a traditional nightstand while creating a cozy reading nook atmosphere.

    18. Choose Linen or Organic Fabric Upholstery for Sustainability

    Sustainable materials are non-negotiable in 2025 design—an organic linen or wool headboard aligns your bedroom with eco-conscious values while feeling incredibly luxe and touchable.

    Shop organic upholstered headboards at Parachute ($600–$1,200), Etsy (sustainable makers, $400–$1,500), or Article ($300–$700). These pieces are durable investments—quality linen and wool last 10+ years. For budget-conscious shoppers, purchase a basic headboard and have it re-upholstered in organic linen fabric ($50–$80 per yard from Organic Fabric Company, Etsy) for $200–$400 total.

    Pro tip: Linen gets softer and more beautiful with time—it’s an investment that improves rather than ages.

    You’re creating a bedroom that feels luxe and intentional while knowing your materials are sustainably sourced—that peace of mind translates into better sleep.

    19. Add Curved Side Panels for a Cocoon Effect

    Curved side panels flanking your headboard create an intimate cocoon effect—they psychologically wrap around you and enhance that sanctuary feeling. This design aligns with the organic modernism trend gaining momentum.

    Commission a custom curved headboard with panels ($1,000–$2,500 from specialty furniture makers) or find pre-made versions at high-end retailers ($800–$2,000). For a budget DIY approach, attach curved wooden frames ($200–$400 in materials) and upholster in fabric ($150–$300). Professional installation takes 1–2 days; DIY takes one weekend. This is more of an investment piece but transforms your entire sleep experience.

    The enclosed feeling naturally promotes relaxation and better sleep—you’re literally creating a nest within your bedroom.

    20. Mix Stripes and Florals With Grandmillennial Patterns

    Grandmillennial aesthetics mix vintage grandma charm with millennial sensibilities—stripes paired with florals create playful, nostalgic personality that feels both retro and fresh in 2025.

    Find patterned upholstered headboards combining stripes and florals at Wayfair ($300–$700), Etsy ($250–$900), or Urban Outfitters ($400–$800). Alternatively, purchase a plain headboard and layer with a patterned throw ($50–$150) across the top to test the look before committing. Installation or assembly takes 1–2 hours; total cost $150–$400 for a statement piece.

    Style with coordinating pillows in complementary patterns—the key is intentional mixing, not random clashing.

    The playful pattern mix brings personality and nostalgia to your space—your bedroom becomes a conversation starter and feels uniquely yours.

    21. Install Brass or Gold Hardware and Framing

    Brass and gold hardware framing a simple headboard elevates it from basic to boutique-hotel-worthy. Metallic accents are having a major moment in luxury bedroom design.

    Purchase brass framing strips ($30–$80 per 8-foot section from Home Depot, Wayfair, or specialty hardware stores) and attach to the edges of your existing headboard using brass screws ($10–$20). Add brass wall sconces ($150–$400 per pair) on either side for cohesion. Installation takes 2–3 hours; total cost $200–$500. For renters, lean freestanding brass-framed panels ($100–$300) against the wall.

    Pro tip: Mix warm brass with cool chrome or nickel for an intentional eclectic vibe, or stick with one metallic finish for sleek consistency.

    The warm metallic detail catches light beautifully and makes your headboard feel curated and luxe—suddenly your bedroom looks professionally designed.

    22. Layer Taxidermy or Botanical Prints as Headboard Art

    Large-scale art prints hung above your bed function as a headboard while adding personality and sophistication. Botanical and nature themes align with 2025’s biophilic design trend.

    Find large art prints from Minted ($30–$150), Etsy ($20–$200), or vintage shops ($10–$100). Purchase picture frames ($20–$100 each depending on size) from IKEA, Target, or Home Depot. Arrange 2–4 prints in a gallery wall configuration using picture-hanging hardware ($15–$30). Installation takes 1–2 hours; total cost $100–$400 for a complete gallery.

    Pro tip: Vary frame finishes (wood, brass, black) for an intentionally eclectic look rather than matching frames perfectly.

    Your bedroom transforms into a personal gallery—the art becomes the focal point and sets the mood for your entire space.

    23. Create a Headboard Wall With Decorative Molding

    Decorative molding creates architectural detail and visual interest even on a blank wall. This approach works beautifully with any paint color and creates shadow depth through dimensional lines.

    Purchase decorative molding ($2–$15 per foot from Home Depot, Lowe’s, or lumber mills) and have a carpenter install ($300–$800 for a full headboard wall) or DIY with a miter saw and construction adhesive ($150–$300 in materials plus 1–2 weekends of work). Paint to match or contrast your wall color ($20–$40 in paint). Total professional installation: $400–$900; ambitious DIY: $200–$400 plus sweat equity.

    For renters, use peel-and-stick molding ($30–$80 that mimics the look without installation.

    The dimensional detail makes your headboard feel gallery-like and intentional—it’s architectural sophistication without requiring a major renovation.

    24. Combine Multiple Textures With a Patchwork Headboard

    Mixing multiple textures in a patchwork headboard design creates tactile richness and visual depth. This approach celebrates 2025’s love of layered, textured design.

    Collect fabric remnants ($5–$20 each from fabric stores, Etsy, or thrift shops) and have an upholsterer create a custom patchwork headboard ($400–$800) or DIY with a wooden frame ($100–$150) and adhesive ($20–$30). Assembly takes 1–2 weekends for a DIY project; professional creation takes 1–2 weeks. Total cost: $150–$400 DIY, $500–$900 professional.

    Pro tip: Stick to a cohesive color palette (all neutrals or all jewel tones) to keep the patchwork looking intentional rather than chaotic.

    The mixed textures become a meditation point—running your hand across different fabrics creates a grounding, sensory experience before sleep.

    25. Go Minimalist-Chic With a Simple Headboard Rail

    A single thin horizontal rail serves as a subtle headboard that adds definition without visual weight. This works beautifully in modern, minimalist, or Scandinavian-inspired bedrooms.

    Install a headboard rail ($30–$80 from IKEA, West Elm, or Article) using standard wall anchors ($10–$20) and basic tools. Installation takes 15–30 minutes; total project cost $50–$100. This ultra-budget option works perfectly for renters and small spaces.

    Style with minimal pillows and keep surrounding wall space open to maximize the clean, airy aesthetic.

    Sometimes the most elegant design choice is restraint—your headboard becomes a quiet architectural detail rather than a loud statement.

    26. Install a Bed Canopy Frame for Drama and Softness

    A canopy bed with draped fabric creates instant drama, intimacy, and a hotel-luxury vibe. The enclosed feeling promotes better sleep while the soft fabric diffuses light beautifully.

    Purchase a canopy bed frame ($400–$1,500 from Wayfair, Article, West Elm, or Etsy) or buy a canopy frame attachment ($80–$200) to convert your existing bed. Add sheer fabric ($20–$50 per panel from fabric stores) or lightweight linen ($30–$60). Assembly takes 2–4 hours; total project $150–$300 for fabric upgrade on existing bed, $600–$2,000 for a full canopy bed frame.

    Pro tip: Choose lightweight fabrics that allow light through without blocking circulation—sheer linen or gauze work beautifully.

    Sleeping under a canopy transforms your bedroom into a personal retreat—the soft enclosure creates security and the filtered light promotes deeper, more restorative sleep.


    Save this guide for your next bedroom refresh. Try just one headboard idea this weekend—whether it’s adding brass hardware, installing a simple rail, or layering new throw pillows—and notice how that single focal point shifts your entire room’s energy.

  • 23 Comfy Bedroom Ideas That Feel Warm & Hug-Like

    23 Comfy Bedroom Ideas That Feel Warm & Hug-Like


    Introduction

    Your bedroom should feel like a hug the moment you walk in—but if yours feels cold, flat, or uninspired, you’re not alone. The bedroom design trends that dominated the last few years (looking at you, minimalist gray) have left a lot of us craving warmth and personality. The good news? Creating a cozy, inviting space doesn’t require a complete overhaul or a huge budget. Whether you’re a renter with limited options or a homeowner ready to invest, these 23 ideas blend trending techniques with practical solutions. You’ll discover how to layer textures, mix patterns confidently, incorporate natural materials, and add those personality-packed details that make your space feel authentically yours. Let’s build a bedroom that actually feels as good as it looks.


    1. Layer Textured Walls Without Commitment

    Textured walls add instant depth and visual interest without requiring paint or permanent changes. They’re the secret behind bedrooms that feel expensive and thoughtfully designed, not sterile.

    Start with peel-and-stick textured wallpaper (Budget: $30–$80 per wall) from brands like Spoonflower or Wayfair—renters love this option since it removes cleanly. If you own, consider textured paint techniques like suede finish or faux plaster ($15–$40 per gallon, plus 2–3 hours of application). Another renter-friendly hack: hang lightweight fabric panels (linen or linen-blend) on one accent wall for soft, tactile appeal ($20–$60).

    Pro tip: Pair textured walls with smooth bedding to create contrast. The tactile combo makes your space feel sophisticated and layered.

    Your bedroom suddenly looks like it was styled by someone with a clear vision. Guests will notice the thoughtful details, and you’ll feel the difference every time you enter.


    2. Swap Sharp Furniture for Curved Pieces

    Curved furniture replaces the clinical feel of sharp angles with organic calm—exactly what sleep sanctuaries need. Even one curved statement piece shifts the entire room’s energy.

    Invest in a curved headboard ($200–$600 for quality wood options on Wayfair, Article, or West Elm). Can’t splurge? Start with curved nightstands ($80–$180) or a round mirror ($50–$150) with a soft wooden frame. Budget option: Look for vintage curved pieces on Facebook Marketplace or Craigslist ($30–$100). IKEA’s curved shelves ($30–$50) also work beautifully for plants and decor.

    Installation takes 1–2 hours (or hire help for $50–$100). The shift is subtle but powerful—your brain registers the space as calmer and more inviting instantly.

    You’ll notice yourself relaxing more quickly when bedtime arrives. Rounded lines feel supportive, not demanding.


    3. Introduce Earth Tones Through Accent Bedding

    Earth tones ground bold designs and create a naturally calming palette—but they work best as accents layered over neutrals, not as your entire room.

    Choose one statement bedding color from this palette: terracotta, warm ochre, sage green, or warm taupe ($40–$100 for quality sheets from Parachute, Brooklinen, or Pottery Barn). Layer it with neutral base sheets (cream or soft gray, $30–$60). Add throw pillows in complementary earth tones ($15–$40 each). Swap out bedding takes 15 minutes, and it’s totally renter-friendly.

    Pro tip: Mix matte and slightly textured fabrics (like linen and cotton) in these warm tones for depth that photos don’t even capture.

    The room feels grounded and intentional without being monotone. You’ve created a cohesive look that actually encourages better sleep.


    4. Add Floor-to-Ceiling Curtains for Drama

    Floor-to-ceiling curtains instantly elevate any bedroom by drawing the eye upward and controlling light like nothing else can. They’re genuinely transformative for small spaces too.

    Measure from your ceiling (not the window top) to the floor, then add 1–2 inches for a subtle puddle. Buy linen or linen-blend curtains ($50–$150 per panel, depending on width). Attach a simple curtain rod ($20–$50 from IKEA, Target, or Home Depot) close to the ceiling. You’ll need 2–4 hours and possibly a second person. Renters: Damage-free adhesive rods exist ($15–$25) though they work best on smooth walls.

    Pro tip: Slightly longer curtains that just kiss the floor photograph beautifully and feel more luxe than standard hemmed panels.

    Your room instantly looks taller and more intentional. Light control becomes genuinely restful—no more harsh morning sun or street light.


    5. Mix Patterns Confidently: Stripes + Florals

    Pattern mixing (the grandmillennial trend) feels intimidating but creates personality that solid colors can’t match. The key is sticking to a color palette and varying scale.

    Start with one bold pattern (florals, stripes, or geometric) on wallpaper or one statement pillow ($20–$80). Choose 2–3 coordinating colors. Layer in a second pattern in a different scale—if you use large florals, add small stripes or polka dots ($15–$40 per pillow). Use solid complementary pillows as anchors between patterned ones.

    Paint or wallpaper takes 2–4 hours. Pillow swaps take minutes and cost nothing if you already have extras.

    Pro tip: Start small—swap pillows before committing to wallpaper. You’ll build confidence fast.

    Suddenly your bedroom looks curated and playful, not generic. This is where your personality finally shows.


    6. Source Vintage Pieces for Authentic Soul

    Vintage and handmade pieces tell a story that mass-produced furniture simply cannot. They add character, sustainability, and often cost far less than new alternatives.

    Hunt on Facebook Marketplace, Craigslist, or Etsy for solid wood nightstands ($20–$80), dressers ($30–$150), and chairs ($15–$60). Thrift stores like Goodwill or local vintage shops offer deals too. For handmade textiles, explore Etsy quilts or throws ($40–$150). Bonus: Many vintage pieces need refinishing, which adds personalization (DIY with spray paint or take to a professional for $50–$150).

    Allow 1–2 weeks for hunting and 2–4 hours for refinishing if needed.

    Pro tip: Mix one vintage statement piece with 70% new/modern items to avoid chaotic “antique store” vibes.

    Your bedroom becomes a reflection of your taste and history, not a showroom. Visitors genuinely compliment the authenticity.


    7. Paint an Accent Wall in Cherry Red or Deep Green

    A single accent wall in a statement color like cherry red or forest green wakes up neutral rooms without overwhelming the space. Cherry searches spiked 100% year-over-year—there’s a reason this hue is everywhere.

    Choose your wall (usually the one behind your bed). Measure the square footage and buy 2 quarts of quality paint ($15–$25 per quart, Sherwin-Williams and Benjamin Moore offer rich jewel tones). Invest in good brushes and painter’s tape ($15–$20). The actual painting takes 2–3 hours plus drying time.

    Renters: Use removable wallpaper in these colors instead ($30–$80).

    Pro tip: These deep tones look richer in soft, warm lighting—consider adding a bedside lamp or warm string lights nearby.

    The room instantly feels intentional and sophisticated. Suddenly neutral bedding and simple furniture look curated instead of bland.


    8. Layer Rugs for Warmth and Definition

    Layered rugs add warmth, define sleeping spaces, and create the texture that makes bedrooms feel genuinely cozy. This trend works in rentals and owned homes alike.

    Start with a large neutral base rug (jute, sisal, or wool, 8×10 ft: $80–$250) as your foundation. Layer a smaller patterned or textured rug on top (5×8 ft: $50–$150). Budget option: Use what you already own or check vintage/thrift stores ($10–$40). Higher-end option: Invest in one exceptional wool or natural fiber rug ($200–$500) that anchors the entire room.

    Laying takes 15 minutes. Rugs are totally renter-friendly—just roll them up when you move.

    Pro tip: Angle the top rug slightly (even just 5 degrees) for a styled, intentional look.

    Your feet land on warmth instead of cold flooring. The room feels instantly more sophisticated and less institutional.


    9. Add Plants for Biophilic Calm

    Plants boost calm through biophilic design—your brain literally responds positively to living things. They’re also forgiving if you’re not a “plant parent” yet.

    Start with low-maintenance plants: pothos, snake plants, ZZ plants, or rubber plants ($10–$30 each). Group 3–5 plants at varying heights on floating shelves ($20–$60) or a corner stand ($30–$80). Place one large statement plant (fiddle leaf fig or monstera, $30–$80) near your window. Pots add cost ($5–$40 each depending on style).

    Installation takes 1–2 hours for shelves; daily care is minimal (weekly watering).

    Pro tip: Plants on shelves at eye level have more visual impact than floor-level placement. Group odd numbers (3 or 5) together for visual balance.

    The room becomes a living space—literally. Sleep quality improves when you’re surrounded by growth and greenery.


    10. Choose Quality Natural Bedding in Linen or Wool

    Natural bedding (linen, organic cotton, merino wool) elevates sleep quality and aligns with the luxury sustainability trend. These fabrics feel genuinely different and last years longer.

    Invest in 100% linen sheets ($80–$150 per set from Parachute, Etsy, or Brooklinen). Add a merino wool throw blanket ($50–$120 from Woolroom or Everlane). Both improve over time—they actually get softer with washing. Budget option: Start with one organic cotton sheet set ($40–$80) and build from there.

    Shopping takes 30 minutes; setup is immediate.

    Pro tip: Linen wrinkles naturally—this is charming, not a flaw. Embrace it.

    Climbing into bed becomes a tactile experience that encourages better sleep. You’ll notice yourself relaxing faster and sleeping deeper.


    11. Create a Statement Headboard with Fabric or Wood

    A statement headboard anchors your bed as the room’s focal point without requiring major renovation. Fabric and wood options both work beautifully.

    For renters: Hang removable fabric panels ($30–$80) or use a peel-and-stick headboard decal ($20–$60). For owners: Invest in an upholstered headboard ($200–$600) or a solid wood statement headboard ($300–$800 from Article, West Elm, or local woodworkers). DIY option: Build one from plywood and fabric for $50–$150.

    Installation ranges from 30 minutes (fabric panels) to half a day (wood). Some pieces ship ready-to-hang.

    Pro tip: Choose headboard fabric in a texture that contrasts with your walls—matte linen against smooth walls creates depth.

    Your bed becomes the undeniable centerpiece. The room organizes visually around this one strong statement.


    12. Hang Large-Format Art That Reflects Your Taste

    Large artwork personalizes a room more effectively than any trendy accessory. Art-led design is having a moment because it actually works—it communicates who you are.

    Find art on Etsy, Minted, local galleries, or print-on-demand sites ($20–$200 depending on size and quality). Frame it at Michael’s, Framebridge, or a local framer ($40–$150 for framing). Go oversized—one 36″x48″ print has more impact than five small ones. Budget hack: Print high-quality digital files yourself ($5–$15) and use affordable frames from IKEA ($15–$40).

    Hanging takes 30 minutes. Changing art out later is renter-friendly.

    Pro tip: Choose art in colors that already exist in your room for instant cohesion. Abstract, botanical, or vintage styles all photograph beautifully.

    Your bedroom finally feels like it belongs to you, not a generic rental or showroom. Visitors immediately notice the curated, intentional style.


    13. Install Floating Shelves for Plants and Styling

    Floating shelves provide storage and styling real estate without taking floor space—they’re renter-friendly, budget-conscious, and endlessly functional.

    Buy wooden floating shelves ($20–$50 each from IKEA, Home Depot, or Amazon). Install floating shelf brackets ($15–$30 per shelf, included with some shelves). The actual installation takes 1–2 hours with basic tools. Renters: Adhesive shelves exist ($15–$40) but work best on smooth walls and with light items only.

    Styling takes as long as you want—start simple with just plants and books.

    Pro tip: Style shelves with odd numbers of items (3, 5) and alternate between practical (books, storage boxes) and decorative (plants, art).

    You’ve added personality and function without visual bulk. The shelves become another design layer instead of clutter.


    14. Invest in Quality Lighting Beyond the Ceiling Fixture

    Lighting fundamentally changes how a room feels—harsh overhead lights drain energy, while layered warm lighting invites rest. This is one investment that pays off immediately.

    Add a bedside lamp with a warm bulb ($30–$80 from Article, Target, or IKEA). Include a floor lamp for reading ($40–$150). Upgrade bulbs to warm 2700K LED bulbs ($3–$10 each—these are crucial). A small reading light clipped to a headboard ($15–$40) adds functionality. Total: $100–$280 for a complete lighting refresh.

    Setup takes 30 minutes. Bulb swaps take 5 minutes but create massive visual and emotional shifts.

    Pro tip: Avoid cool-toned (blue) light after sunset—it disrupts sleep. Stick to warm (yellow) tones in your bedroom.

    Your room becomes genuinely relaxing. Evening wind-down becomes easier because the lighting supports it.


    15. Layer Throw Pillows in Coordinating Textures

    Throw pillow layering is the easiest way to add texture, color, and personality without commitment. You can swap them seasonally or whenever you crave change.

    Start with a neutral base pillow in linen or cotton ($20–$40). Add a patterned pillow in your accent color ($15–$35). Include a velvet or textured pillow ($20–$50) for luxury feel. Aim for 4–6 pillows total on a standard bed. Budget hack: Use pillows you already own and thrift stores ($5–$15 each).

    Shopping and arranging takes 1 hour.

    Pro tip: Mix matte and slightly shiny textures (matte linen + subtle velvet) for a styled, dimensional look.

    Your bed becomes inviting and layered. Every time you enter the room, you see intentional styling that says “this matters.”


    16. Add a Cozy Reading Nook with a Chair and Throw

    A reading nook transforms unused corner space into a sanctuary within your sanctuary. It’s not luxury—it’s necessity for people who actually read in bed.

    Find a comfortable chair ($100–$300 new, $30–$100 vintage from Craigslist or Facebook Marketplace). Add a small side table ($30–$80). Drape a chunky throw blanket ($40–$120). Include a clip-on reading light ($15–$40). Total investment: $150–$540, customizable to your budget.

    Setup takes 2 hours (move furniture, arrange, add lighting).

    Pro tip: Position the nook near a window for natural reading light during the day.

    You’ve created a dedicated retreat space. Instead of scrolling in bed, you now have an intentional spot for actual rest and reading.


    17. Swap Out Cabinet Hardware for Brass or Wood Details

    Hardware might seem small, but brass, wood, or matte black pulls instantly update existing furniture. This is a 15-minute refresh that costs under $50.

    Replace existing hardware on dressers or nightstands with brass pulls ($2–$8 per pull from IKEA, Wayfair, or local hardware stores). Wood knobs ($3–$10 each) work beautifully on rustic pieces. You’ll need a drill (or ask a handy friend). Total cost: $20–$50 for a full dresser. Takes 30–45 minutes.

    Renters: This modification is removable—keep original hardware and reinstall when you move.

    Pro tip: Mix metals in one room (brass + wood) as long as they’re the same warmth tone (both warm, not mixing warm brass with cool chrome).

    Your existing furniture suddenly looks intentional and updated. This single change can make a dated piece feel current.


    18. Paint Wooden Furniture in Earth Tones or Soft Pastels

    Refreshing wooden furniture with paint is cheap, high-impact, and deeply satisfying. You’re literally creating new pieces from what you already own.

    Choose paint in soft earth tones (sage green, warm taupe, terracotta) or soft pastels (cream, blush) from Benjamin Moore, Sherwin-Williams, or craft stores ($15–$25 per quart). Sand lightly ($0 if you already have sandpaper, $10–$20 if buying), apply 2–3 coats ($0–$10 in brushes), and seal if desired ($10–$20). Total cost: $35–$75 per piece.

    Painting takes 4–6 hours plus drying time spread across 2–3 days.

    Pro tip: Use chalk paint for easy application—it requires less prep and fewer coats than standard paint ($12–$18).

    You’ve transformed a piece into exactly what your room needed. Suddenly that old thrifted nightstand fits your aesthetic perfectly.


    19. Layer Window Treatments: Sheer + Blackout Options

    Layered window treatments give you light control and style—exactly what sleep spaces need. You get softness during the day and total darkness when needed.

    Install a lightweight tension rod near the window ($15–$30) with blackout panels ($30–$80 per panel). Add sheer linen curtains on a second rod ($40–$100 per pair) mounted higher or on the same rod. Renters: Adhesive rods work if your walls are smooth ($15–$25). Total: $100–$235.

    Installation takes 1–2 hours. Layering is totally renter-friendly since nothing is permanent.

    Pro tip: Sheer fabrics in cream or warm gray let filtered light in without washing out your room’s colors.

    You control light like never before. Early mornings feel peaceful instead of jarring, and nap time is genuinely dark when you need it.


    20. Incorporate Raw Materials: Cork, Marble, or Reclaimed Wood

    Raw materials ground modern designs with earthy authenticity. They read as thoughtful and expensive even when sourced affordably.

    Add a cork bulletin board or wall tiles ($20–$60, easily installed on renters’ walls). Swap nightstands for a marble-topped option ($80–$250) or DIY by placing a marble slab on a simple frame ($50–$150). Source reclaimed wood planks for a headboard ($50–$200 from salvage yards, Etsy, or building demolition sites). Each adds organic texture without trend-chasing.

    Projects range from 15 minutes (hanging cork) to 2–3 hours (assembling reclaimed wood).

    Pro tip: Mix raw materials with softer textures (linen, wool, plants) so your room doesn’t feel cold or industrial.

    Your room gains sophisticated, grounded energy. It looks like it belongs to someone who knows what they’re doing—even if you’re figuring it out as you go.


    21. Use Removable Wallpaper for Quick Pattern Impact

    Removable wallpaper is the renter’s secret weapon and a low-commitment way to add pattern. You get bold design without permanent commitment.

    Choose from Spoonflower, Etsy, Wayfair, or Peel & Stick Wallpaper brands ($20–$80 per roll depending on coverage). Measure your walls carefully. Installation takes 2–4 hours and requires patience but no tools. Removal is genuinely painless—just peel slowly.

    Total cost: $30–$100 for one accent wall.

    Pro tip: Apply wallpaper to one wall only for impact. Two walls can overwhelm a bedroom.

    Your room changes completely. When you move, you take it with you—zero damage, zero stress.


    22. Create Texture Contrast with Smooth vs. Chunky Fabrics

    Texture contrast is how high-end styling happens—mixing matte linen, soft velvet, chunky knits, and smooth cotton creates depth that photos actually capture.

    Start with smooth linen or cotton sheets as your base ($40–$80). Layer a chunky knit throw ($40–$120). Add smooth velvet pillows ($20–$50 each). Include a linen throw pillow ($15–$35). The key is intentional contrast, not matching textures.

    Shopping takes 1–2 hours. Arrangement is immediate.

    Pro tip: Group similar textures together (all smooth or all chunky) rather than alternating—it looks more intentional.

    Your bed becomes genuinely touchable and inviting. Visitors immediately notice how good it looks and feels.


    23. Add a Small Vintage Rug or Textile as Wall Art

    Hanging textiles as wall art is underrated—it adds craftsmanship, color, and personal history in one move. Vintage rugs and textiles tell stories.

    Find small vintage rugs or handwoven textiles ($20–$80) on Etsy, Facebook Marketplace, or thrift stores. Mount on a simple hanging rod ($10–$20) using basic hooks ($5–$10). Installation takes 30 minutes.

    Budget hack: Fold a favorite textile and lean it on a shelf instead of wall-mounting.

    Pro tip: Choose textiles in colors that already exist in your room for cohesion. A single textile becomes an art piece, not random clutter.

    You’ve added warmth and personality while supporting handmade craftsmanship. The room feels collected and intentional—like somewhere real people live.


    Pin this list for your next bedroom refresh. Try just one idea this weekend and watch how it shifts the entire vibe. Your cozy sanctuary is closer than you think.

  • 25 Natural Fiber Bedding Themes for Breathable, Relaxing Nights

    25 Natural Fiber Bedding Themes for Breathable, Relaxing Nights

    Introduction

    You know that feeling when you slip into bed and can finally breathe? That’s what natural fiber bedding does—it cools you down when you’re too warm, warms you up when you need it, and lets your skin actually breathe instead of getting clammy and uncomfortable. Whether you struggle with night sweats, overheating, or just want a bedroom that feels like a luxury retreat, natural fibers are the upgrade that actually delivers. Over the next few minutes, we’re walking through 25 specific bedding themes and styling ideas that use linen, cotton, hemp, and other breathable materials to create a bedroom that works with your body instead of against it. From budget-friendly swaps to investment pieces, you’ll find options that fit your lifestyle and sleep style.


    1. Go All-In with Pure Linen Sheets

    Pure linen sheets are the foundation of breathable luxury bedding. Linen regulates temperature like nothing else—it pulls moisture away from your skin and dries quickly, so you won’t wake up sweaty.

    Hunt for 100% linen sheets at Parachute ($150–$300), Brooklinen ($120–$200), or budget-friendly alternatives at Target ($40–$80). Linen wrinkles naturally, which adds to the charm, not against it. Expect 15 minutes to put them on your first time (the texture takes getting used to). Pro tip: Wash linen in cold water and air dry to preserve its lifespan—most quality linens last 5+ years with care.

    Your mornings feel instantly lighter when you’re not peeling yourself off sweaty sheets. Linen bedding becomes the reason you actually want to make your bed.


    2. Layer Two Cotton Weights for Temperature Control

    Different cotton weights serve different purposes—percale for crisp coolness, sateen for soft drape. Layering them means you adjust to seasons without buying new sets.

    Start with percale cotton sheets (crisp, cool; $60–$120 at Target or Amazon) as your base. Add a lightweight cotton blanket ($40–$80 at Bed Bath & Beyond or IKEA) on top for spring and fall, then swap it for a heavier quilt in winter. This takes zero skill—just try different combinations and see what works. Budget hack: Buy one quality set and one mid-range backup so you always have clean sheets.

    You’ll stop flipping your pillow to the cool side because your whole bed stays at the right temperature. The flexibility alone saves money because you’re not buying season-specific bedding.


    3. Mix Linen and Cotton for the Hybrid Sweet Spot

    Some nights you want linen’s breathability; other nights you crave cotton’s softness. Why choose? Linen duvets paired with cotton sheets give you the best of both.

    Grab a linen duvet cover ($100–$200 at Parachute or Etsy small makers) and pair it with quality cotton sheets ($60–$120). The duvet cover washes separately, so you can refresh the look seasonally without replacing everything. Takes 10 minutes to swap. Pro tip: Look for linen-cotton blends ($80–$150) if full linen feels too textured—they’re softer right out of the wash.

    This combination looks intentional and elevated without feeling fussy. Most people comment on how “resort-like” your bed looks, and you’re actually sleeping better.


    4. Use Hemp Pillowcases for Extra Durability

    Hemp is tougher than linen or cotton, so if you want bedding that survives years of washing, hemp pillowcases are your answer. They’re also naturally hypoallergenic and antimicrobial.

    Search for pure hemp pillowcases on Etsy ($35–$60 per pair) or try hemp-blend pillowcases at Target ($20–$40). They wrinkle like linen but feel softer initially. First wash: cold water, gentle cycle. Expect 5 minutes to put them on. Budget option: Buy just two hemp pillowcases for your side of the bed and test before committing to more.

    After a year of use, hemp pillowcases look better than cotton ones did after three months. They’re the investment piece that actually pays for itself in longevity.


    5. Create a Neutral Texture Stack with Waffle Weave

    Waffle weave adds visual interest and improves breathability—air pockets trap cooling air without adding bulk.

    Pick up a waffle-weave cotton duvet ($80–$150 at IKEA, Target, or Amazon) in cream, oatmeal, or gray. Layer it with a smooth linen throw ($60–$100) for contrast. Takes 20 minutes to style the full bed. Pro tip: Waffle weave shows wrinkles less than flat linen, so it photographs beautifully and requires less fussing.

    Your bed looks more expensive than it actually is because the texture does all the visual work. Guests always ask where you got “the fancy bedding.”


    6. Add a Linen Bed Skirt for Hidden Storage Magic

    A linen bed skirt hides under-bed storage and softens the whole room’s appearance. It’s one of those finishing touches that makes a bedroom look styled rather than slapped together.

    Buy a pre-made linen bed skirt ($50–$120 at Target, Wayfair, or Amazon) or DIY one using linen fabric ($30–$50 for fabric plus 30 minutes of basic sewing). Measure your bed first—full, queen, and king sizes matter. Slip it on after sheets, before your duvet. Budget hack: Use a flat linen sheet and safety pins if sewing feels intimidating.

    Suddenly your bedroom looks intentional and put-together. Plus, you’ve gained invisible storage for seasonal items or extra bedding.


    7. Switch to Organic Cotton for Sensitive Skin

    Conventional cotton is heavily pesticide-treated. If you have eczema, sensitive skin, or just want fewer chemicals touching your body eight hours a night, organic cotton is worth the upgrade.

    Look for GOTS-certified organic cotton sheets at Parachute ($150–$250), Coyuchi ($120–$200), or Organic Threads ($90–$150). They’re softer than conventional cotton and actually get softer with every wash. Takes 15 minutes to put on; you’ll notice the difference immediately. Pro tip: Many organic brands offer sample sets so you can try before committing.

    Within two weeks, your skin will feel less irritated in the morning. The long-term payoff is fewer wake-ups from itching and genuinely better sleep quality.


    8. Layer Linen Pillows in Mixed Sizes

    Stacking different pillow sizes and shades creates visual depth and lets you customize your comfort level. Mix textures so your bed looks effortlessly styled.

    Buy linen pillowcases in various sizes: standard ($30–$60), king ($35–$70), and body pillow ($40–$80) options from Etsy makers or Parachute. Fill them with down or buckwheat pillows based on your preference. Takes 10 minutes to arrange. Budget hack: Start with one pillowcase and add more over time as your budget allows.

    Your bed instantly looks like a designer styled it. You’re also supporting better neck alignment because you have pillow options.


    9. Use a Linen Throw Blanket as a Seasonal Swap

    Instead of buying completely new bedding for summer versus winter, rotate throw blankets made from different natural fibers. Linen for hot months, wool for cold ones, cotton for spring and fall.

    Grab a quality linen throw ($60–$120 at Etsy, Anthropologie, or Amazon) for warm seasons and rotate it out for a wool throw ($80–$150) come fall. Store off-season throws in a cedar chest to protect from moths. Takes 5 minutes to swap. Pro tip: Keep throws folded on a bench at the foot of your bed for easy access and visual appeal.

    You’re essentially getting four different beds’ worth of styling for the cost of one set, plus your room feels intentionally seasonal without overspending.


    10. Invest in a Linen Duvet Cover That Fits Your Aesthetic

    Linen duvet covers are the easiest way to shift your bedroom’s entire vibe seasonally. They’re durable enough to last years and look better the more you wash them.

    Choose from neutral linen ($100–$200), dyed options ($120–$180 for sage, terracotta, or navy), or patterned linen ($130–$220) at Etsy, Parachute, or Brooklinen. Insert your down duvet inside (15 minutes, feels awkward the first time but gets easier). Wash on cold, gentle cycle. Pro tip: Button closures stay secure better than ties during washing.

    Once you go linen duvet, you won’t go back—the wrinkled texture reads as “intentionally relaxed” rather than “I haven’t made my bed.” It’s the shortcut to that effortlessly styled look.


    11. Pair Natural Fiber Sheets with Vintage Quilts

    Combining modern natural fiber sheets with vintage quilts (found at thrift stores or inherited from family) creates a bedroom that feels like yours, not like a catalog page.

    Start with quality natural fiber sheets as your base ($60–$150), then layer a vintage or thrifted quilt ($20–$80 from estate sales, Etsy, or local antique shops). The sheets show off the quilt without it getting lost in synthetic fabrics. Takes 20 minutes to arrange. Budget hack: Check Facebook Marketplace and Craigslist before Etsy—you’ll find deals.

    Your bedroom tells a story now instead of looking generic. People notice the intentionality and want to know the history of each piece.


    12. Try Bamboo Rayon Sheets for Silky Softness

    Bamboo rayon sheets offer the softness of silk without the price tag or care hassle. They’re thermoregulating, hypoallergenic, and actually breathable despite their silky feel.

    Look for 100% viscose from bamboo sheets at Ettitude ($120–$180), Cariloha ($100–$150), or Amazon ($50–$100 budget option). They feel slippery at first—embrace it. Wash warm, tumble dry low. Takes 20 minutes to put on because they slide around. Pro tip: Use a duvet cover to keep sheets anchored if slipping bothers you.

    You get luxury softness without night sweats. Some people sleep cooler on bamboo rayon than any other natural fiber option.


    13. Create a Monochromatic Natural Palette

    Sticking to a monochromatic palette of natural tones makes your bedroom feel intentional and serene. Natural fibers shine when they’re the star, not competing with colors.

    Choose all natural fiber basics in cream/beige/oatmeal: linen sheets ($100–$200), cotton duvet ($120–$180), linen throw ($60–$100), and natural fiber pillows ($80–$150). Let texture—not color—be your visual interest. Takes 30 minutes to shop and style. Budget hack: Start with one or two pieces and add over time to avoid sticker shock.

    Your bedroom becomes a visual oasis. The lack of color noise actually helps you sleep better because your brain isn’t processing visual clutter.


    14. Use Linen Curtains to Echo Your Bedding

    Matching your curtains to your bedding creates a unified, high-design look without being matchy-matchy. Linen works especially well because wrinkles feel intentional across an entire room.

    Buy linen curtain panels ($80–$160 per panel at Etsy or Design Within Reach) to echo your linen bedding colors. Hang floor-to-ceiling if possible for drama. Takes 30 minutes to hang (or hire a handyman for $50–$100). Pro tip: Choose the same linen weight so they photograph together cohesively.

    Suddenly your room looks like it was designed by someone who knows what they’re doing. The continuity makes everything feel more expensive and intentional.


    15. Add a Natural Fiber Bed Runner for Visual Interest

    A bed runner (a decorative length of fabric across the foot) adds a designer touch without committing to a full new duvet. Plus, it protects your bedding from dust and spills.

    Find or make a linen bed runner ($30–$60 purchased, or DIY with $15–$25 of linen fabric). Drape it across your bed’s foot at a slight angle. Takes 5 minutes to arrange. Budget hack: Use a linen scarf or throw folded lengthwise if you don’t want to invest in a dedicated runner.

    You’ve added a polished finishing touch that makes your bed look professionally styled. Guests always comment on this detail.


    16. Incorporate Hemp Fabric Accents Gradually

    You don’t need to overhaul everything at once. Start by adding one or two hemp accents to your existing bedding to test the material without overspending.

    Buy one hemp throw pillow ($25–$50 on Etsy or Amazon) or hemp accent throw ($40–$80) and place it on your bed for two weeks. See how it feels, how it washes, whether you like the texture. Takes 5 minutes to style. Pro tip: Hemp softens significantly with washing, so don’t judge it until after the first wash.

    If you love it, gradually add more hemp pieces. If you don’t, you’ve only invested $50 instead of hundreds on a full set.


    17. Mix Natural Fiber Sheets with a Silk Pillowcase

    Combining breathable natural fiber sheets with a silk pillowcase gives you the best of both worlds: cool sleeping surfaces plus silk’s hair and skin benefits.

    Add one 100% mulberry silk pillowcase ($30–$80 on Amazon, Etsy, or Blissy) to your natural fiber sheet setup. The silk reduces friction on your hair and face while the linen or cotton keeps your body cool. Takes 5 minutes to add to your pillows. Pro tip: Hand wash the silk pillowcase to extend its life.

    You wake up with smoother hair, fewer sleep creases on your face, and the same cool sleep quality. It’s a small luxury that compounds over time.


    18. Try Linen-Cotton Pillowcases for Softness Without Texture

    Pure linen takes time to soften. If you want linen’s benefits right away without the initial stiffness, linen-cotton blends are the compromise.

    Search for 50/50 linen-cotton pillowcases ($25–$50 at Target, IKEA, or Etsy). They’re softer than pure linen immediately but still breathable. Takes 15 minutes to put on your first set. Budget hack: Buy two pairs so you always have one clean while the other is drying.

    You get improved breathability without sacrificing softness. Most people prefer this blend to pure linen for pillowcases specifically.


    19. Create Contrast with a Textured Knit Throw Blanket

    Smooth natural fiber sheets pair beautifully with chunky knit throws. The texture contrast makes your bed look magazine-worthy and adds coziness without overheating.

    Layer a chunky cotton or wool knit throw ($60–$120 from Etsy, Anthropologie, or Target) over your smooth linen or cotton duvet. Drape it casually at the foot or fold it neatly. Takes 10 minutes to style. Pro tip: Choose a throw in a slightly different shade to create visual depth.

    Your bed becomes a focal point people want to curl up in. The textural variety keeps the room from feeling flat or boring.


    20. Switch to Natural Fiber Mattress Pads for Added Breathability

    If you’re overheating even with good sheets, the issue might be your mattress itself trapping heat. A natural fiber mattress pad acts as a cooling barrier.

    Add a cotton or wool mattress pad ($80–$200 depending on size) between your mattress and sheets. Wool is especially thermoregulating—it cools you down when hot and warms you when cold. Takes 10 minutes to apply. Pro tip: Wash your mattress pad monthly to keep it fresh.

    This simple addition solves chronic night sweats for a lot of people. You’ll notice the difference within one night.


    21. Build a Layered Pillow Wall with Mixed Fibers

    Multiple pillows in different natural fiber fabrics create a hotel-like backdrop and let you customize your sleeping comfort by mixing and matching nightly.

    Collect 4–6 pillows in various natural fiber covers: linen ($30–$70 each), cotton ($25–$60), hemp ($35–$75). Layer them at the headboard with larger pillows in back, smaller in front. Takes 15 minutes to arrange initially, then seconds to adjust nightly. Budget hack: Buy one quality pillow and multiple affordable cases to rotate.

    Your bed looks luxuriously styled while actually being more functional—you can pull out exactly the pillow you need for comfort.


    22. Use Linen Fitted Sheets Under Your Duvet for Grip

    Linen fitted sheets grip better under your duvet than some other materials, so your duvet stays positioned instead of sliding around all night.

    Choose 100% linen fitted sheets ($40–$80) in your bed size (measure twice) and pair with any duvet. Linen’s natural grippy texture keeps everything anchored. Takes 20 minutes to put on properly. Pro tip: Tuck excess fabric under the mattress for maximum hold.

    You’ll stop waking up with your duvet twisted to one side. This one feature improves your entire sleep experience.


    23. Mix Vintage Linen with Modern Cotton for Texture Balance

    Pairing heirloom or thrifted linen pieces with modern cotton creates a bedroom that feels collected and intentional rather than matchy-matchy.

    Combine vintage or thrifted linen sheets ($15–$40 from estate sales or Etsy) with a new cotton duvet ($80–$150). The contrast in age and texture reads as intentional design. Takes 20 minutes to style. Budget hack: Thrift stores and Facebook Marketplace are goldmines for linen at 90% off retail.

    Your room tells a story. Guests sense that you have taste and personality, not just budget.


    24. Create Summer-Ready Bedding with Lightweight Cotton Voile

    Cotton voile is the thinnest, most breathable cotton weave available. It’s perfect for hot sleepers or summer months when heavy linens feel unnecessary.

    Hunt for 100% cotton voile sheets ($60–$120 at Target, Etsy, or specialty bedding sites). They drape beautifully and feel weightless. Wash cool, hang dry if possible. Takes 15 minutes to put on. Budget hack: Buy one voile set and rotate it into your collection seasonally.

    This is the bedding you actually want to get into during summer. No more sweating through sheets by 2 a.m.


    25. Layer a Wool Mattress Topper Under Natural Fiber Sheets

    A wool topper adds cushioning and temperature regulation without replacing your entire mattress. Pair it with natural fiber sheets for maximum breathability.

    Add a 100% wool mattress topper ($150–$300 depending on thickness) under your natural fiber sheets ($100–$200). Wool naturally wicks moisture and regulates temperature year-round. Takes 15 minutes to apply. Pro tip: Wool toppers need airing out monthly—flip them and leave them uncovered for a few hours.

    You’ve essentially upgraded your sleep comfort without investing in a new mattress. The difference between sleeping hot and sleeping perfectly is often this simple addition.


    Save this post and pick one idea to try this weekend—whether it’s swapping your pillowcases, adding a throw, or upgrading your sheets. Small changes in bedding quality add up fast, and you deserve to sleep as good as your bedroom looks.