
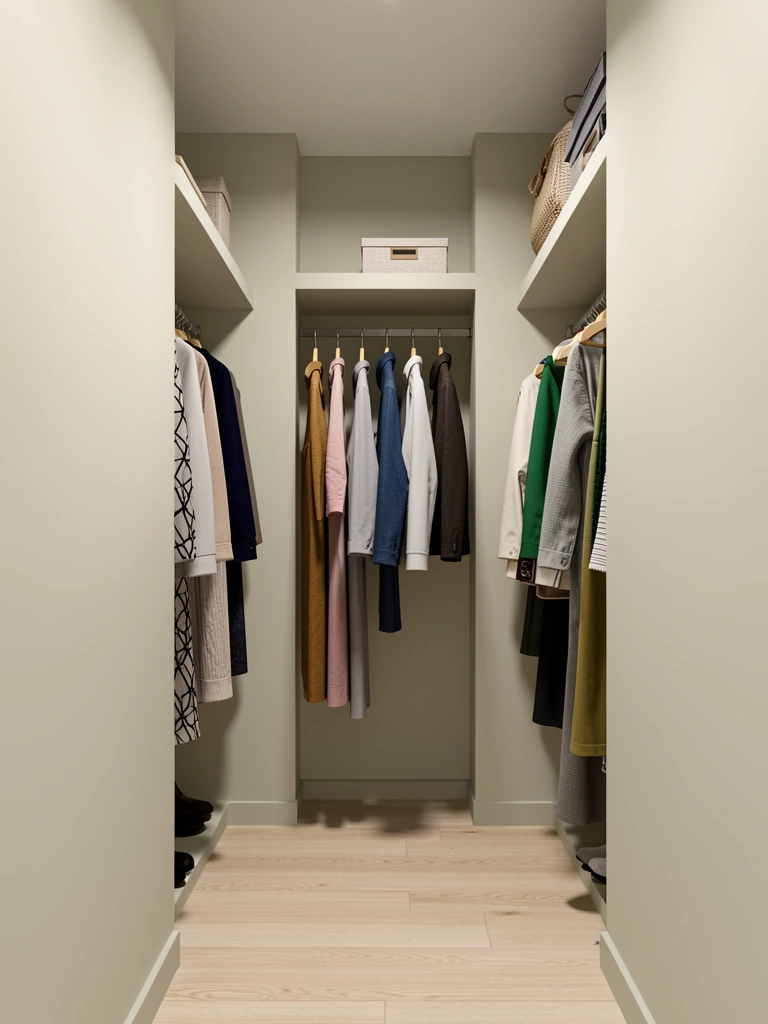
Small walk-in closets don’t have to feel cramped or chaotic—they can actually work better than sprawling ones because every inch counts. If you’re tired of digging through piles to find that one sweater, or frustrated by clothes you forgot you owned, you’re not alone. The good news? Strategic organization can transform your tight space into a functional, even beautiful retreat. Whether you’re renting or own, and whether you’re starting from scratch or refreshing what you have, these 27 strategies will help you maximize storage, find items instantly, and actually enjoy getting dressed each morning. Let’s dig into practical, budget-friendly solutions that really work.
1. Declutter Before Anything Else
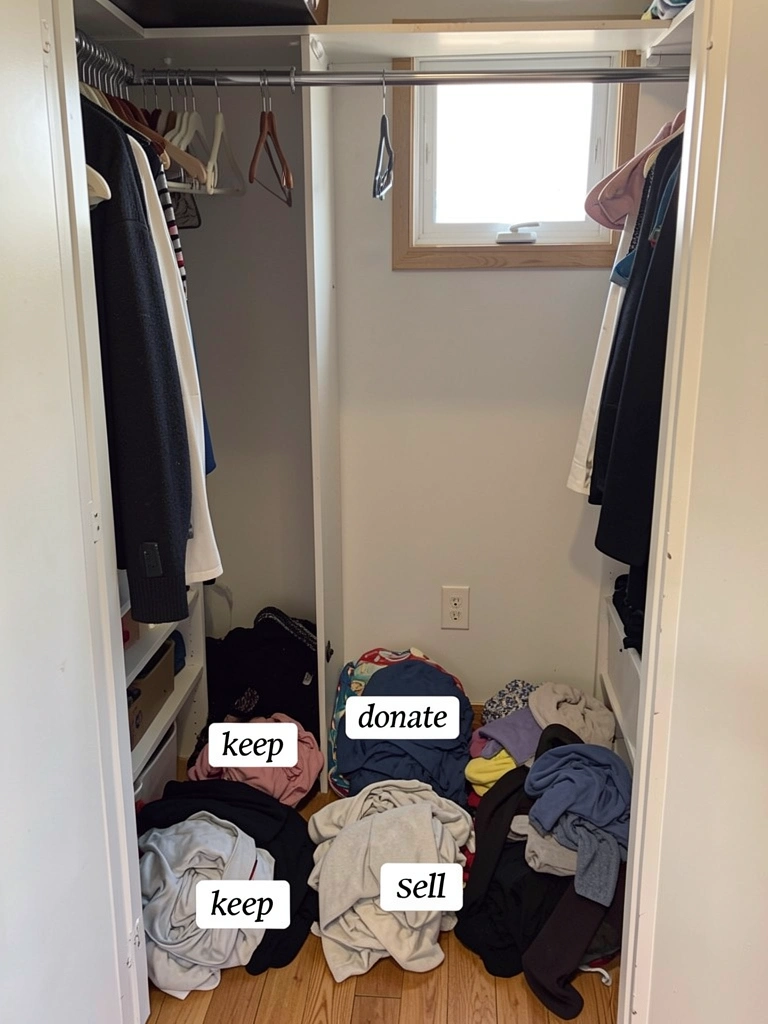
Before you buy a single organizer, you need to know what you’re actually working with. Spend an afternoon pulling everything out and sorting ruthlessly—keep only items you wear, fit well, and genuinely like. This single step makes everything that follows easier and more effective.
Go through each category (tops, bottoms, dresses) and ask: “Have I worn this in the last year? Does it fit right now? Do I feel good in it?” Be honest. Donate, sell, or consign pieces that don’t make the cut. This usually cuts closet volume by 30–50%. The result? You see and access everything you actually wear, and decision fatigue disappears. Your mornings get faster, and getting dressed feels lighter.
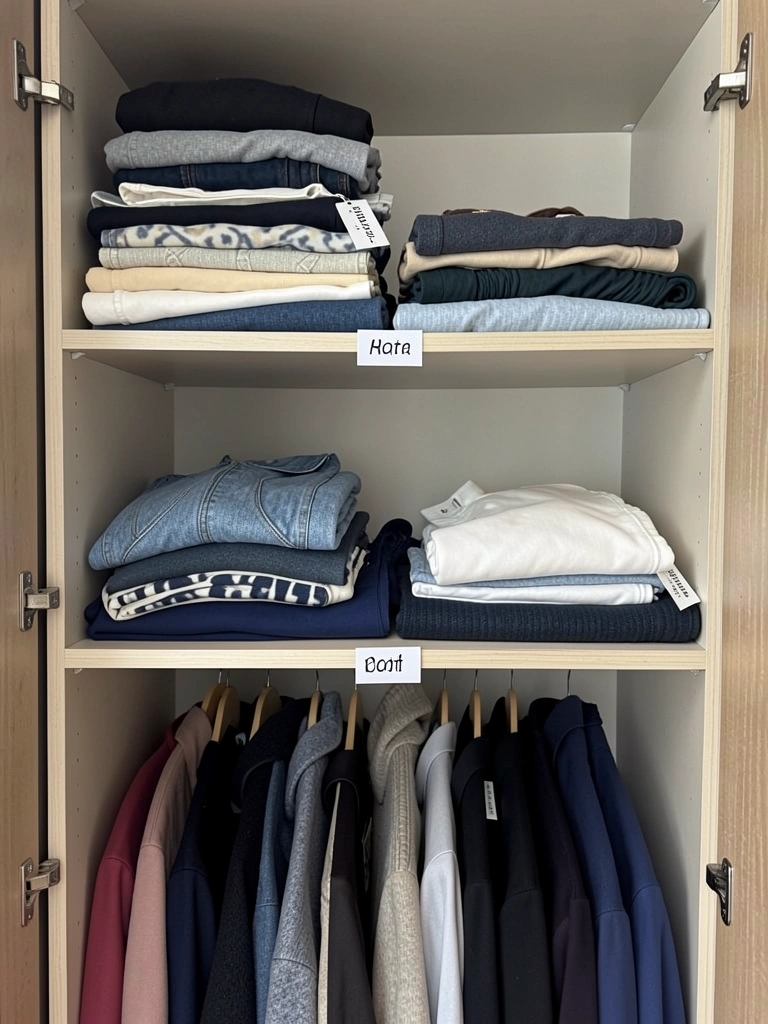
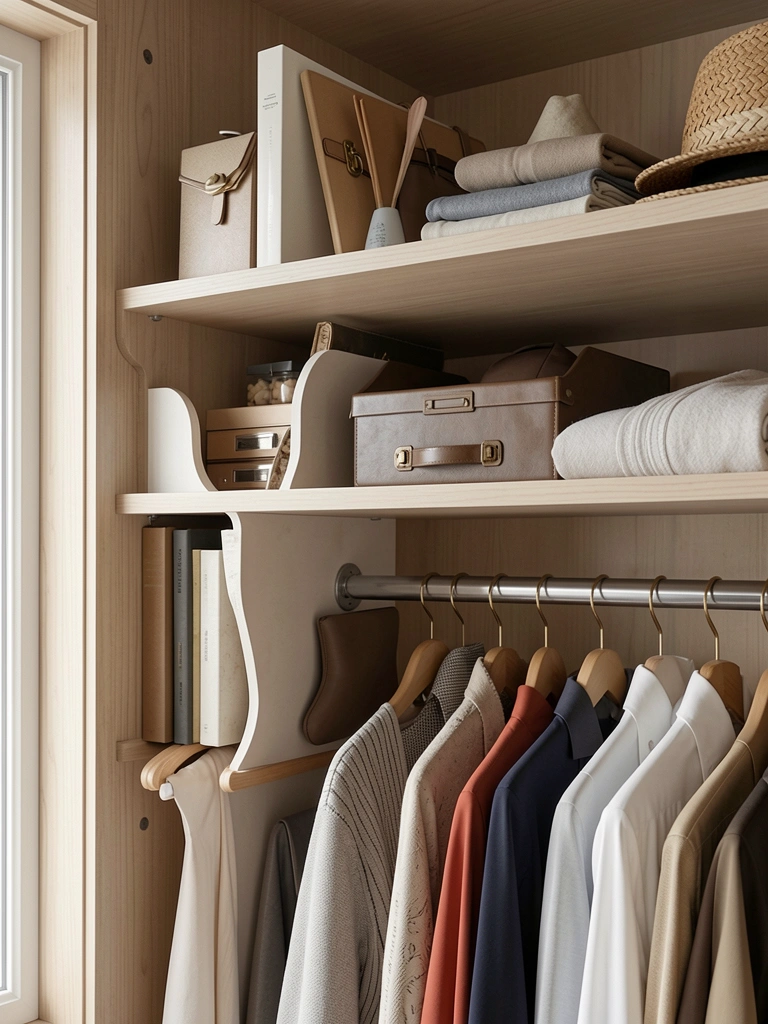
2. Install Shelf Dividers for Neat Stacks
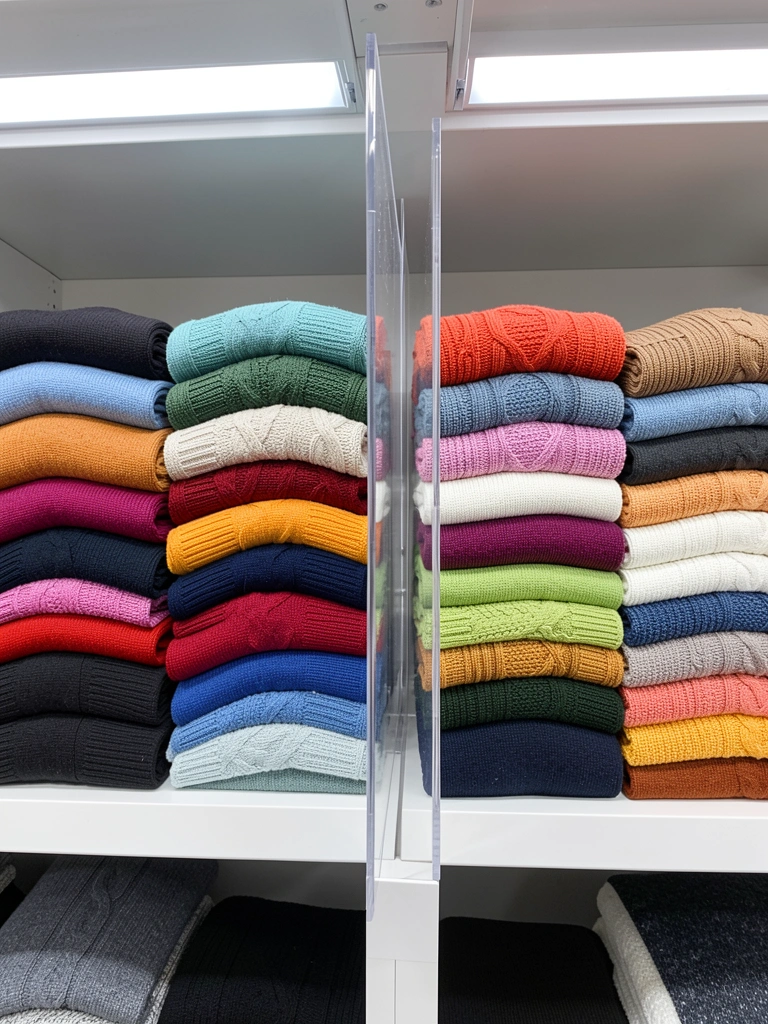
Folded items topple over without dividers, and then your whole shelf becomes a jumbled mess. Acrylic or metal shelf dividers keep stacks upright and separate, so you see each item without disturbing the others.
Grab acrylic shelf dividers from IKEA ($10–$15 for a pair) or bamboo dividers from Target ($8–$12). Install them on any shelf where you’re stacking sweaters, t-shirts, or jeans. Takes about 5 minutes per shelf—no tools needed. Adjust spacing based on your stack height. Pro tip: use clear dividers so you can see exactly what’s stacked on each side. You’ll stop forgetting about clothes buried underneath, and your shelves look intentionally styled instead of haphazard.
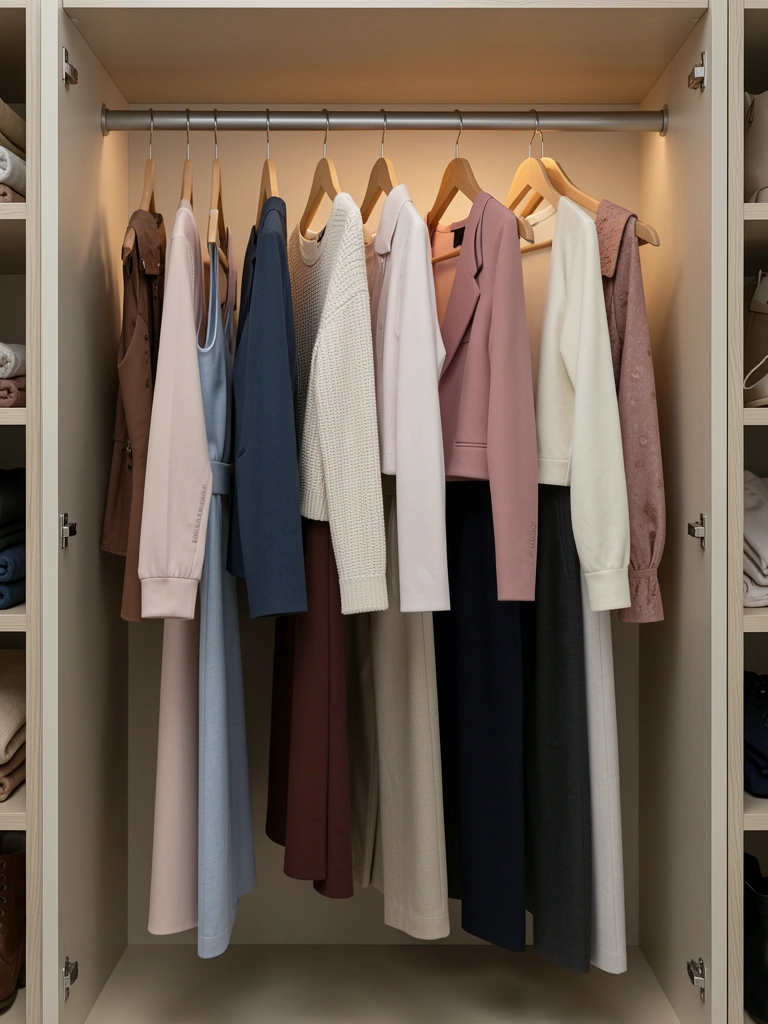
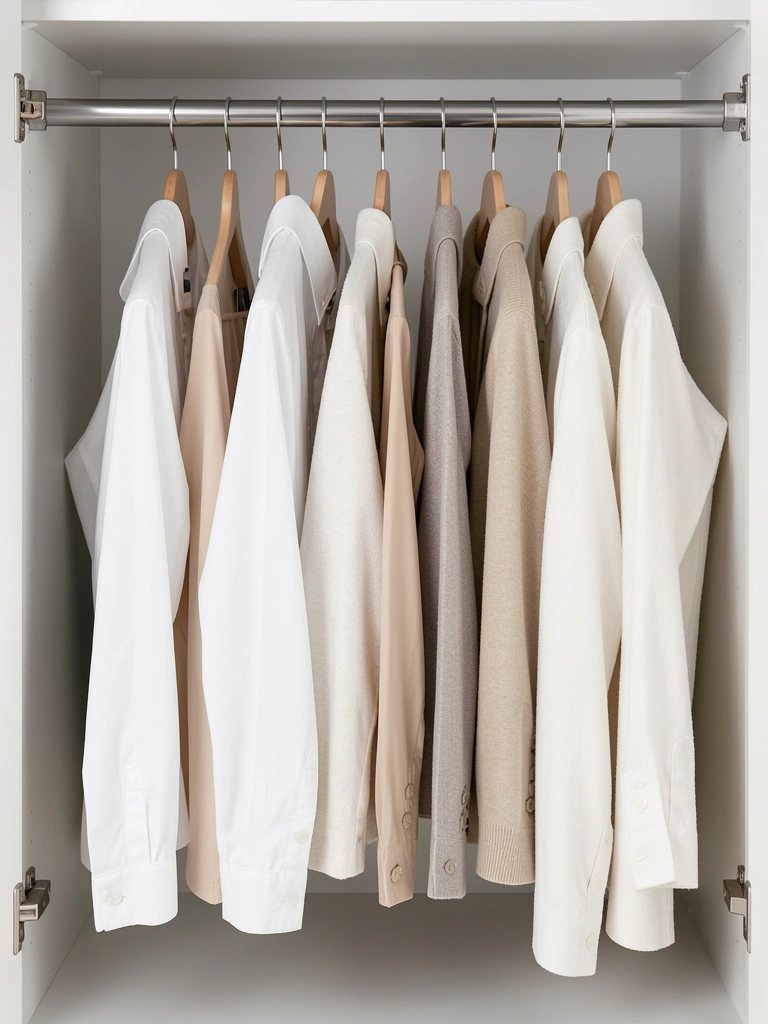
3. Use Matching Hangers for Visual Cohesion
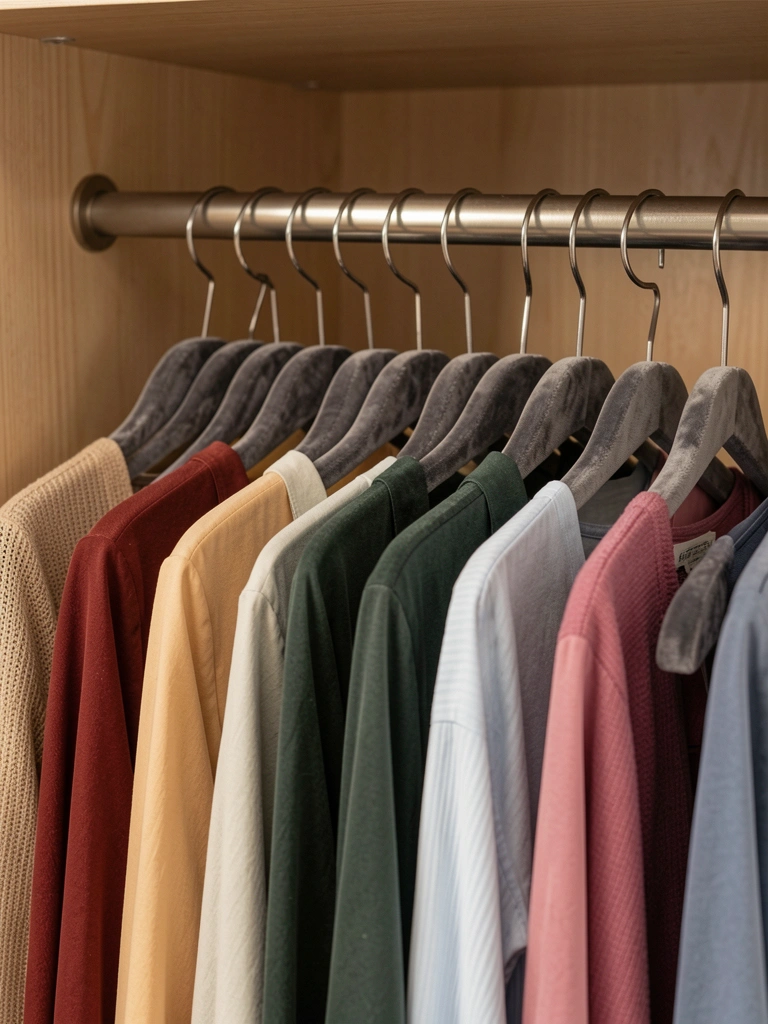
Mismatched hangers are the visual noise that makes even an organized closet feel messy. Matching hangers create instant calm and make your space look curated, even on a budget.
Pick one hanger style and replace everything. Velvet hangers ($15–$30 for 20) grip fabrics better than plastic, preventing slips. Slim wooden hangers ($20–$40 for 20) save space compared to chunky plastic ones. Metal non-slip hangers ($12–$25 for 20) work for heavier items. Whatever you choose, buy enough to outfit your entire closet. Yes, it’s an investment, but one you notice every time you open the door. Your clothes hang uniformly, nothing slides off, and your space instantly looks more intentional and expensive.
4. Add Vertical Shelving Above the Rod
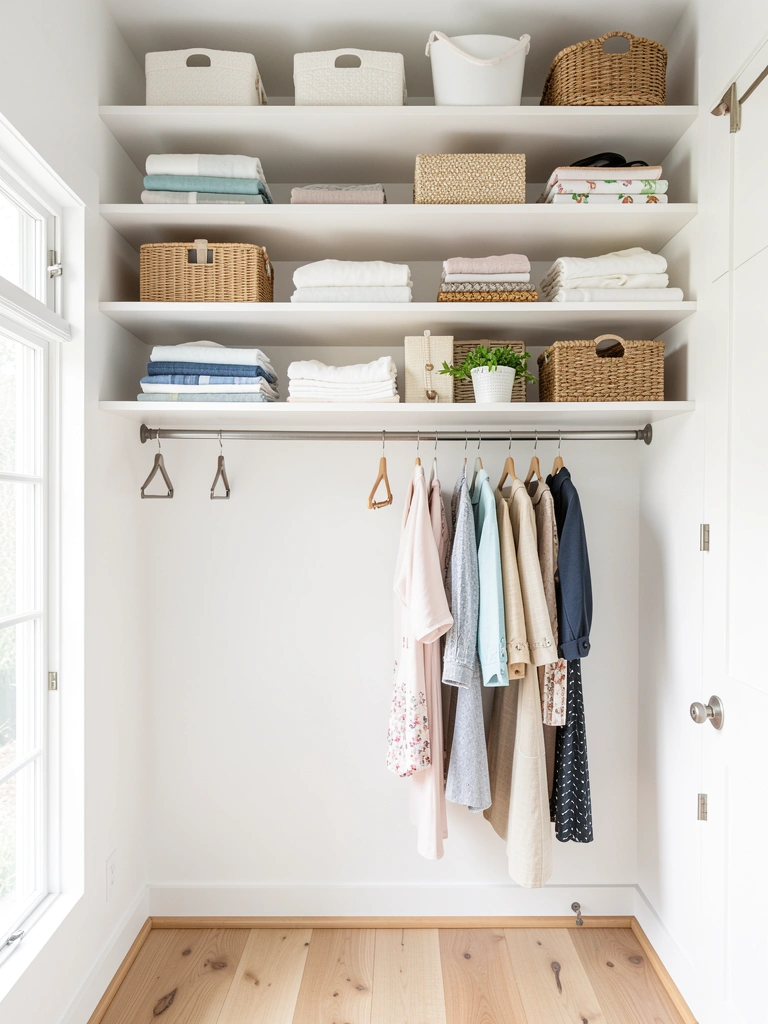
If you’re not using the wall space above your closet rod, you’re wasting prime real estate. Floating shelves stack folded items and seasonal storage vertically, doubling your capacity without eating into floor space.
Install floating shelves (18–24 inches deep) about 12 inches above your hanging rod. Use sturdy brackets rated for at least 25 pounds each. Cost runs $50–$150 for shelves plus installation hardware, or hire a handyperson for $100–$200 if drilling feels intimidating. Renters: ask your landlord before installing, or use removable tension rods with shelves designed for them. Stock upper shelves with folded sweaters, off-season items in labeled bins, or shoes. You’ll reclaim vertical airspace, and everything stays visible and accessible without cluttering your eye line.
5. Label Everything (Including Bins)
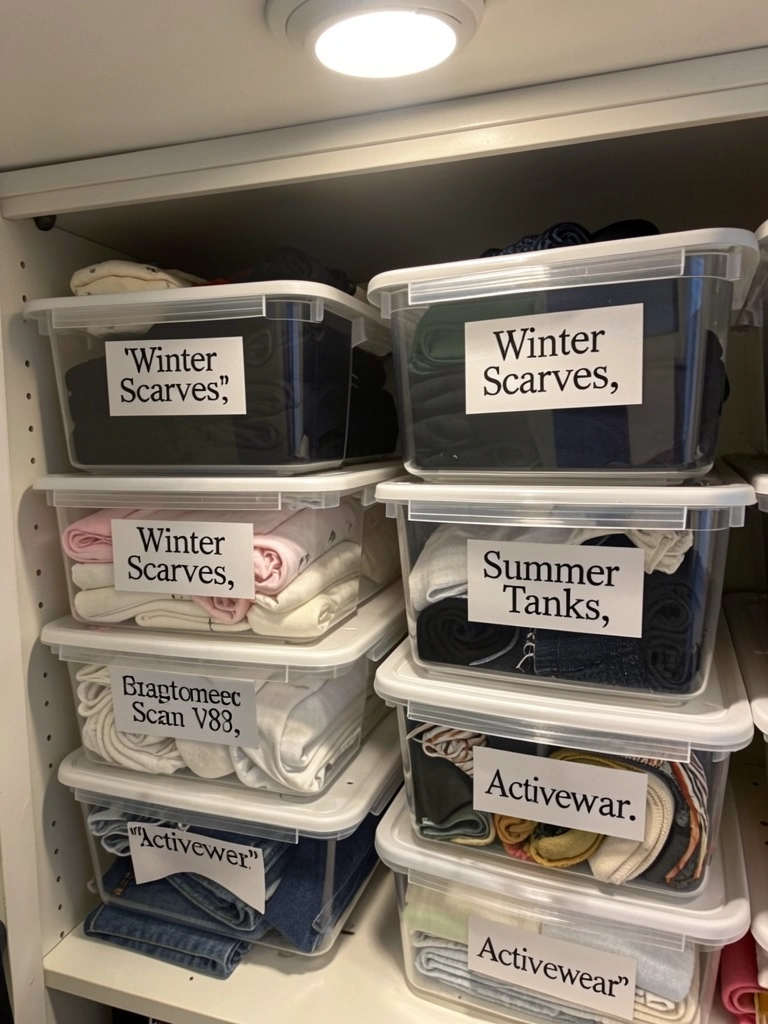
Without labels, you’ll forget what’s inside those bins within weeks, and the whole system collapses. Clear, visible labels take 10 minutes to make and save you hours of searching.
Use a label maker ($20–$50, or borrow one) to print consistent, readable labels. Stick them on the front of storage bins where you can see them from the closet entrance. Label shelves too: “Everyday Tops,” “Work Blazers,” “Formal Wear.” Print extras so you can update as seasons change. The few minutes this takes upfront saves constant frustration later. You instantly know where everything lives, and you can find anything without moving bins around.
6. Introduce a Pull-Out Hamper for Hidden Laundry
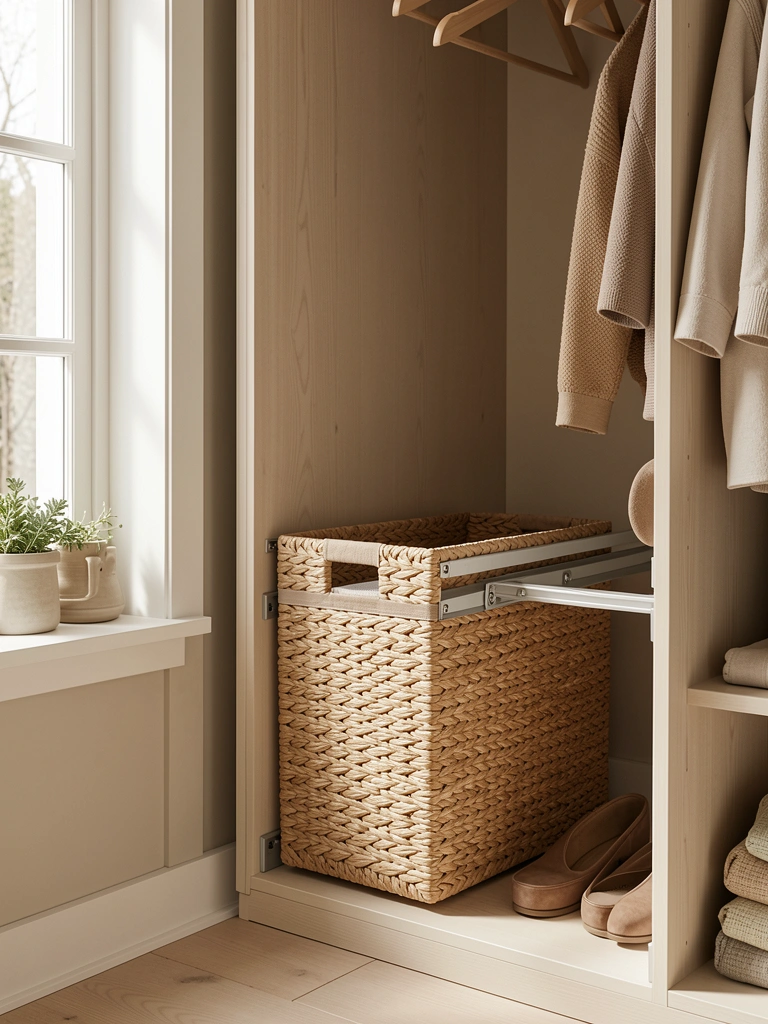
Laundry piles destroy organization faster than anything else. A pull-out hamper hides dirty clothes while keeping them accessible, and your closet stays visually calm even when laundry day arrives.
Install a pull-out hamper system ($40–$100) on a sliding track inside your closet, ideally in a corner or beside your hanging rod. Brands like Organized Living and Symphony Organizers make models that fit small spaces. Alternatively, use a sturdy rolling laundry cart ($25–$50) that slides in and out easily. Either option keeps laundry out of sight until wash day. The best part? You never see piles accumulating, so your closet maintains that clean, organized feeling all week long.
7. Create a “Decision Rail” for Weekly Outfits
Planning outfits the night before saves morning stress and prevents decision fatigue. Dedicate a small section of your rod to pre-planned outfits so you literally see your week at a glance.
Each Sunday, select 5–7 complete outfits and hang them together as units. Include tops, bottoms, and even accessories clipped to hangers with safety pins or small clips. Leave a few hangers’ space between each outfit so they’re distinct. This takes about 20 minutes and transforms your mornings. You wake up, grab the pre-planned outfit, and you’re done. No second-guessing, no “I have nothing to wear” spirals. Mornings become smoother, and you actually wear thoughtfully coordinated pieces.
8. Use Shelf Risers to Double Shelf Capacity
Closet shelves have wasted air space between the shelf and the shelf above. Shelf risers create a second tier, instantly doubling your folded-item storage without sacrificing visibility.
Grab adjustable shelf risers ($15–$30 per pair) from IKEA, Target, or Amazon. Place them on your existing shelf and add a secondary shelf layer on top. Stack folded sweaters, t-shirts, or jeans on the lower tier and lighter items on the upper tier. Takes 5 minutes to set up, and you get nearly double the storage. Pro tip: keep the upper tier reserved for items you don’t grab constantly, so you’re not reaching and destabilizing everything. This simple upgrade makes small closets feel spacious because you’re using every inch strategically.
9. Incorporate a Jewelry Organizer Drawer
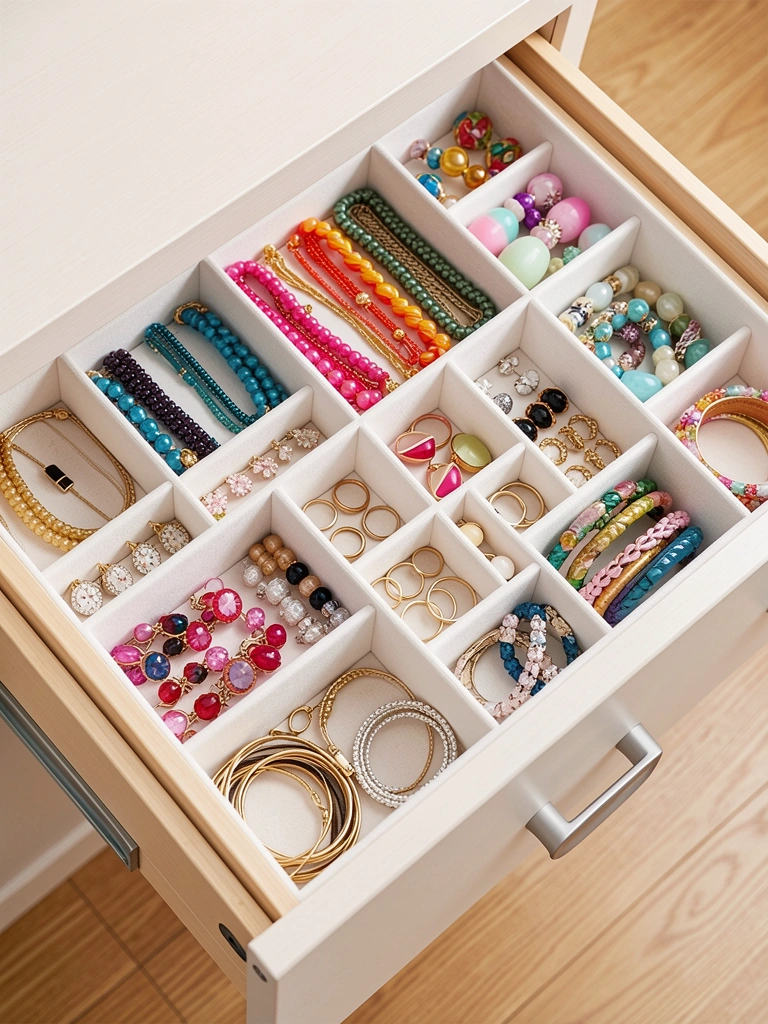
Tangled jewelry takes up mental space and becomes unwearable. A drawer organizer keeps necklaces separated, earrings paired, and rings safe—all visible at a glance.
Install a drawer insert organizer ($20–$40) inside a closet dresser drawer or nightstand. Brands like The Container Store and Etsy sellers make stackable, customizable options. Assign each compartment a category: necklaces, bracelets, earrings, rings, watches. Dedicate 15 minutes to untangling and organizing. Everything becomes instantly wearable again, and you’ll actually reach for jewelry you forgot you had. Your outfits level up because you’re not frustrated by knotted chains.
10. Paint Walls a Light, Reflective Finish
Dark closet walls absorb light and make small spaces feel cramped. Light, reflective paint opens up the space visually and makes organizing easier because you can see everything clearly.
Paint your closet walls in soft neutrals like pale greige, off-white, or light gray ($30–$50 for paint plus brushes). A matte finish hides imperfections while matte-finish paint reflects light gently without glare. Use a quality eggshell or satin finish that’s washable. This takes a weekend, or hire a painter for $200–$400. Renters: check your lease first, or use removable wallpaper ($20–$40) as a temporary solution. The result is dramatic—your closet looks bigger, brighter, and more organized instantly. Better lighting also means you see colors accurately when picking outfits.
11. Install LED Strip Lighting for Ambiance
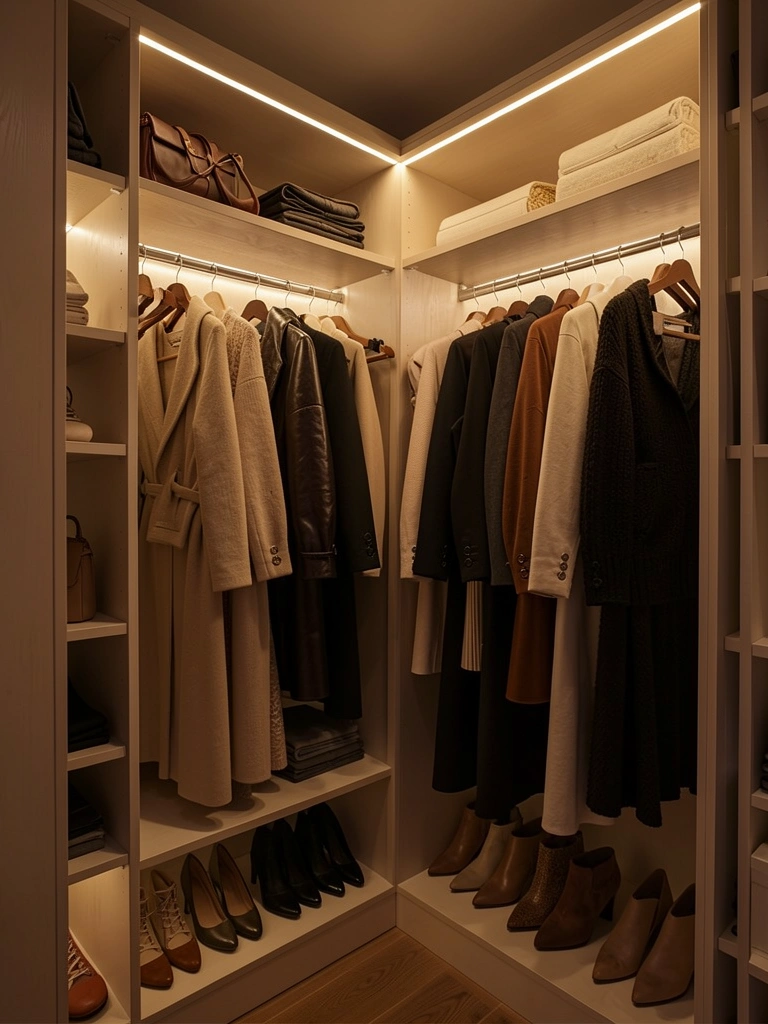
Standard overhead lighting casts shadows and doesn’t show colors accurately. LED strip lights create boutique-style ambiance and make your closet feel luxe while helping you see your entire wardrobe clearly.
Stick adhesive LED strip lights ($15–$40 per strip) along the top shelf or above hanging rods. Choose warm white (2700K) for flattering, spa-like vibes. Brands like Nanoleaf and Philips Hue offer smart options ($30–$80) you can dim via phone. Installation takes 10 minutes—just peel and stick. If you want permanent wiring, hire an electrician for $150–$300. The payoff? Your closet becomes a place you want to spend time, and color-matching clothes for outfits becomes accurate. Plus, it photographs beautifully if you’re posting to social media.
12. Use Over-the-Door Shoe Racks to Save Floor Space
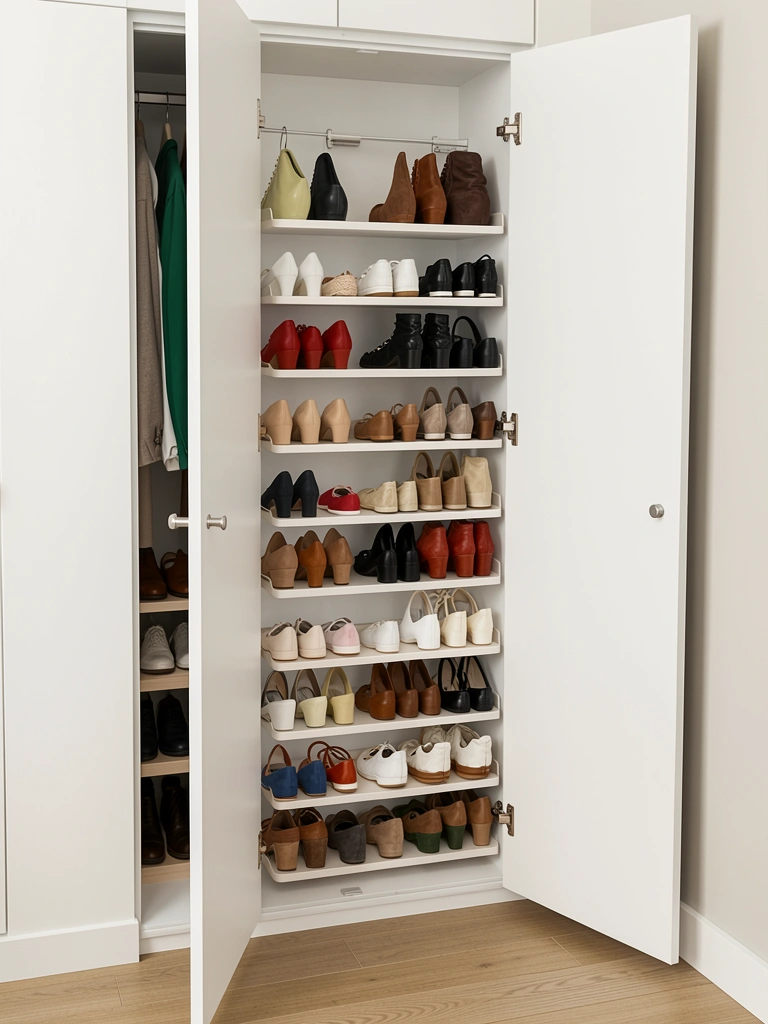
Shoes scattered on the closet floor eat up precious square footage and get lost. Over-the-door racks hold multiple pairs vertically, keeping floors clear and shoes instantly visible.
Install an over-the-door shoe rack ($20–$40) on your closet door or the inside of an entry door. Metal or fabric racks hold 12–16 pairs depending on shoe size. Takes 5 minutes to mount. Arrange shoes by color or frequency of wear. Renter-friendly: choose models with adhesive hooks ($10–$15) instead of screws. Your floor suddenly feels open and spacious, and you’ll actually wear more shoes because you see every pair. No more rediscovering shoes buried under seasonal items.
13. Roll Clothes Instead of Hanging to Save Rod Space
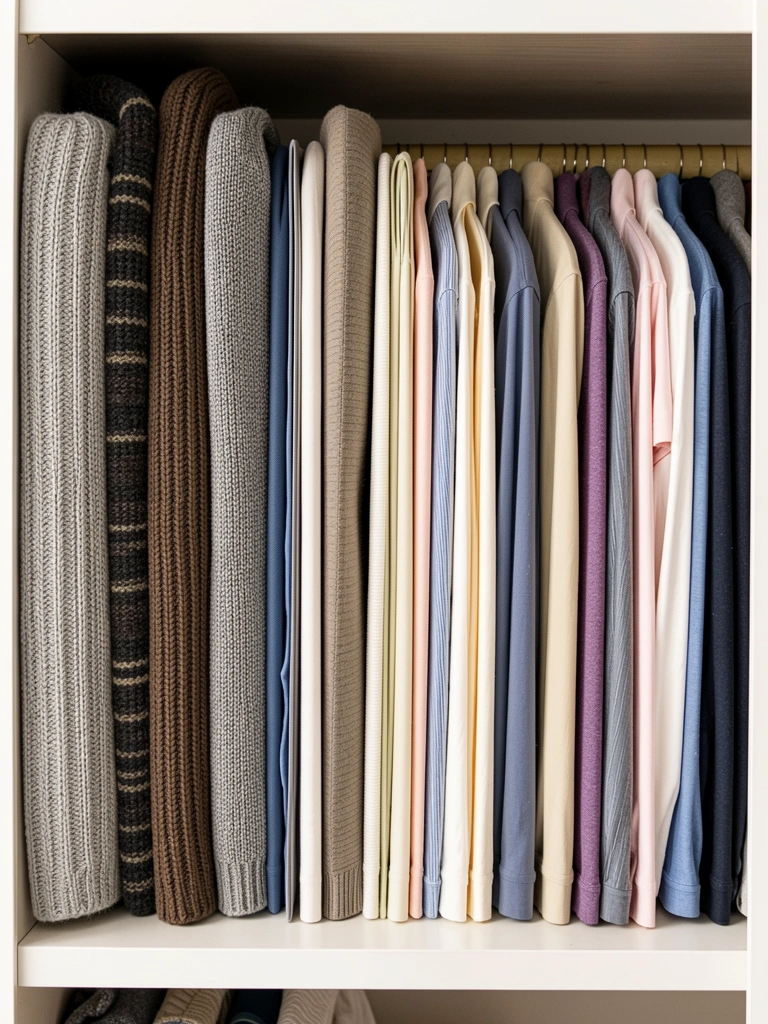
Hanging everything means limited rod space in small closets. Rolling clothes and storing them vertically (like files) nearly triples what fits while keeping everything visible and accessible.
Fold t-shirts, sweaters, and casual pants into thirds lengthwise, then roll tightly. Stand them upright on a shelf in rows, arranged by color or type. This method is called “file folding” or “KonMari” style. You can fit 20–30 items in the space that would normally hold 5–8 hangers. Takes about 10 minutes per shelf to set up. Reserve hanging space for delicate items, work clothes, or dresses that wrinkle easily. The payoff? You see everything at once, you use your rod space for pieces that genuinely need it, and your closet stores 2–3 times more without feeling stuffed.
14. Install a Pant Rack to Prevent Wrinkles
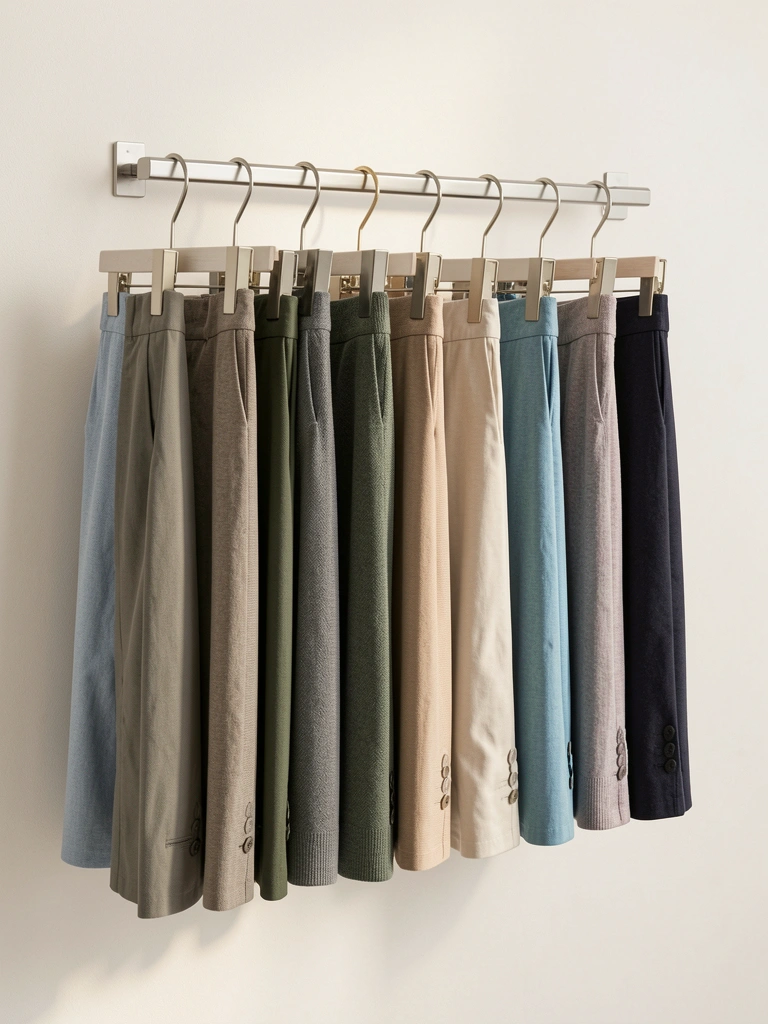
Pants folded or bunched together wrinkle and become unwearable without pressing. A dedicated pant rack holds multiple pairs wrinkle-free, and you see every option at once.
Mount a pant rack ($30–$60) on your closet wall or purchase a portable pant hanger ($20–$40) that clips to your rod. These racks typically hold 8–12 pairs. Hang pants by the waistband so legs hang freely. Installation takes 15 minutes if wall-mounted. Alternatively, use S-hooks ($5–$10 for a pack) hung from a rod and clip pairs with plastic hangers. Your pants stay wrinkle-free and ready to wear, and you actually reach for pieces you’d forgotten about. Getting dressed becomes faster because you’re not choosing between crushed options.
15. Corral Belts on a Tiered Belt Hanger
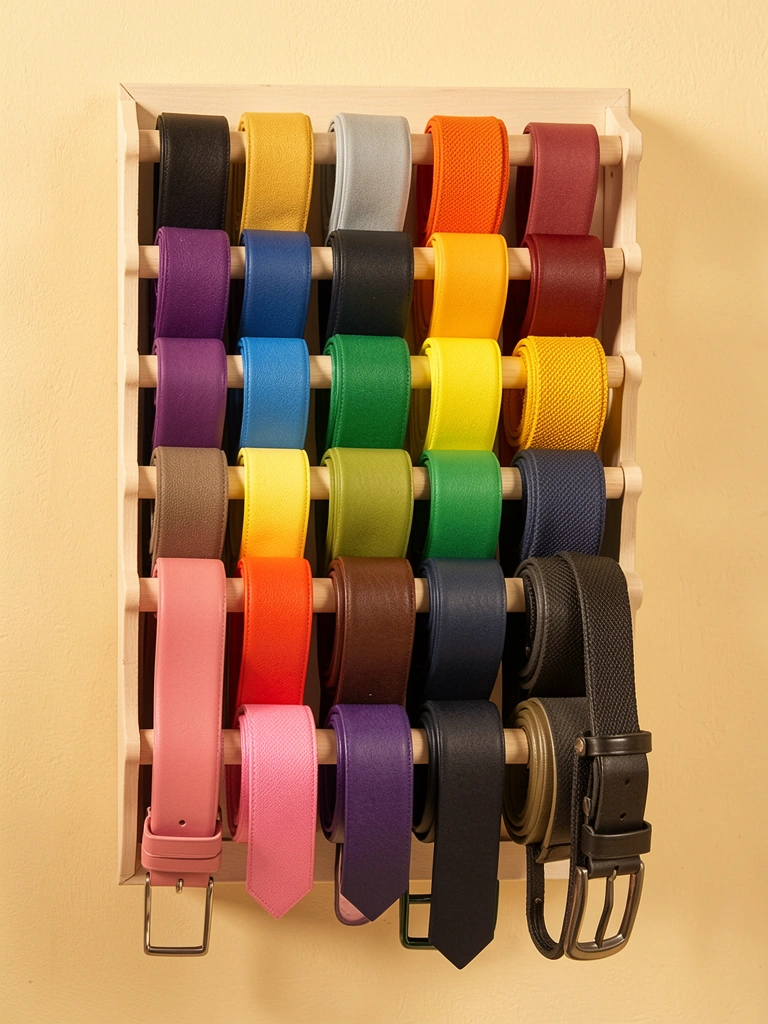
Belts tangled in drawers or coiled in corners take up space and become invisible. A tiered belt hanger displays every belt visibly and compact, and it doubles as decor.
Mount a tiered belt hanger ($15–$30) on your closet wall or inside the door. These usually hold 10–15 belts on separate tiers. Installation takes 5 minutes. Arrange belts by color for visual interest. Every belt becomes accessible, and you’ll use more of them because you see all options. Bonus: these hangers look intentional and stylish, adding personality to your closet space without taking much room.
16. Add a Small Dresser for Folded Intimates and Socks
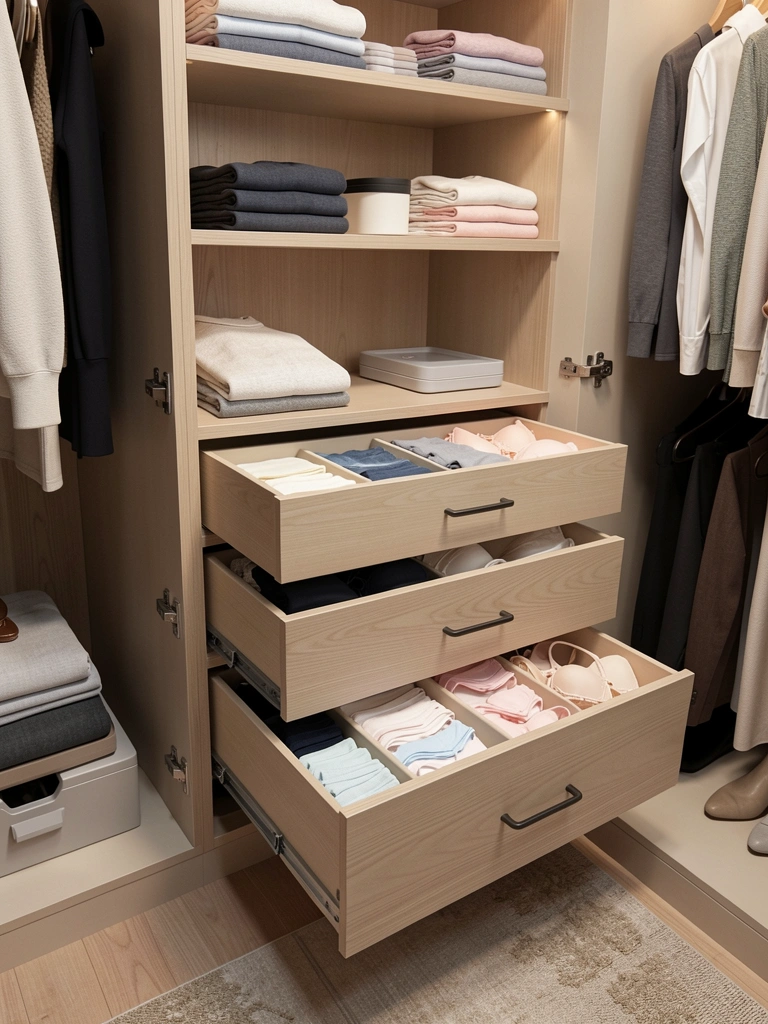
Intimates and socks deserve their own organized home so you’re not digging through piles every morning. A slim dresser fits into even tight closets and keeps these items sorted and easy to grab.
Fit a small 3–4 drawer dresser ($80–$200) into your closet corner or along one wall. Look for narrow options at IKEA, West Elm, or Wayfair. Assign each drawer a category: bras, underwear, socks, loungewear. Use drawer dividers ($10–$20) or folded cloth bins to separate items within each drawer. Setup takes 20 minutes, but saves you countless mornings of frustration. You’ll stop wearing wrinkled socks because they’re organized clearly. Mornings become smoother when intimate items are instantly accessible.
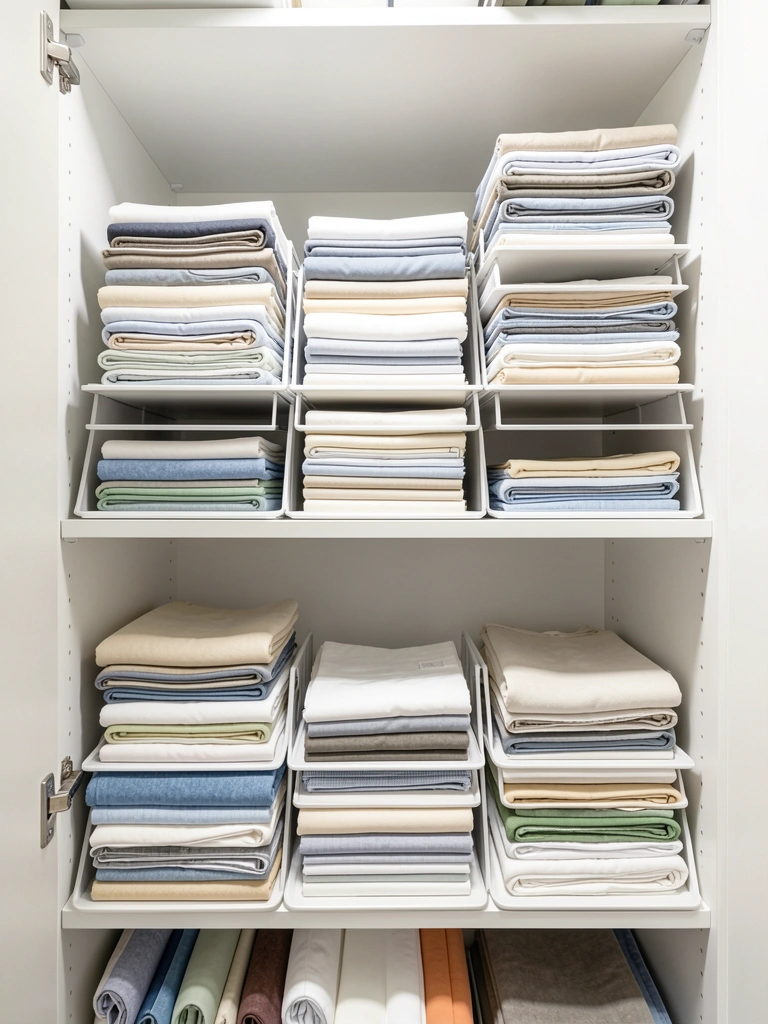
17. Use Clear Drawer Dividers to Prevent Jumbles
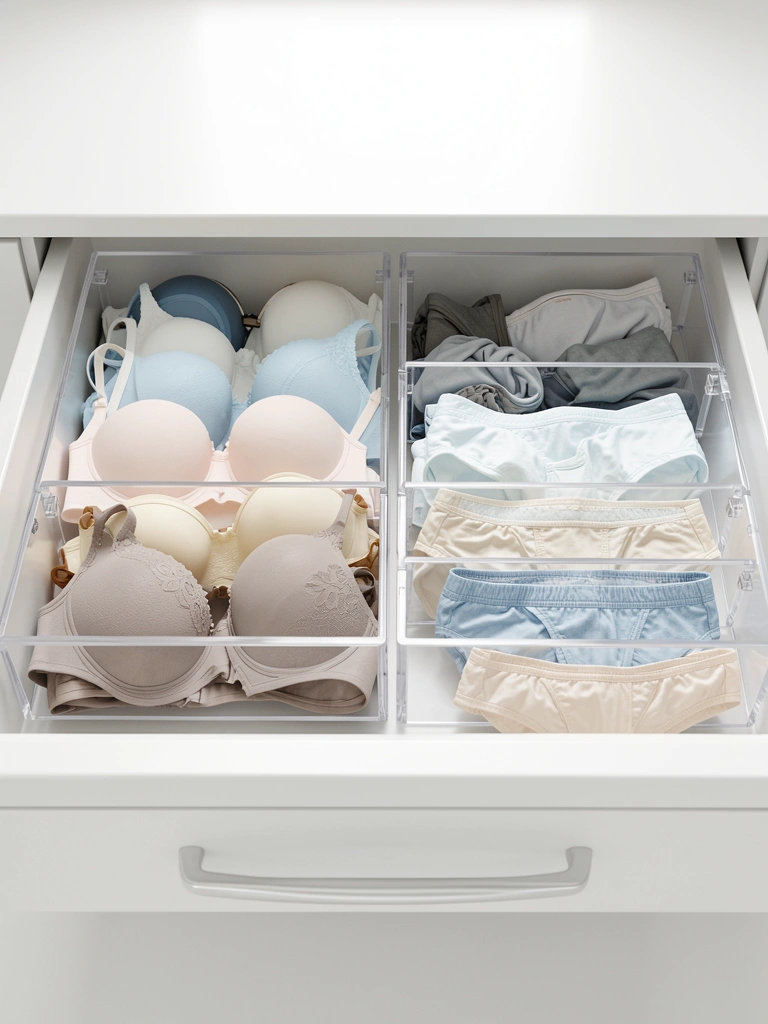
Even in organized drawers, items shift and jumble during the day. Clear acrylic dividers keep everything in separate compartments so nothing mingles or gets lost.
Add clear acrylic drawer dividers ($10–$20 for a set) to any drawer. Arrange them to create compartments for bras, underwear, socks, tights—whatever you store. This takes 5 minutes. Pro tip: use dividers in dresser drawers, closet shelves, or even under-bed storage. Items stay exactly where you put them, and you see everything instantly. Mornings lose the “where is my favorite bra?” panic, and you remember what you own.
18. Hang a Slim Full-Length Mirror for Outfit Checks

Picking an outfit is one thing; seeing it together is another. A full-length mirror in your closet lets you check the complete look before committing, saving outfit regrets throughout the day.
Install a slim full-length mirror ($40–$120) on one closet wall. Look for 16–20 inches wide to fit tight spaces. Alternatively, lean a standing full-length mirror ($50–$150) in a corner—no installation needed. Bonus for renters! This takes 10 minutes or zero minutes depending on style. You can see how tops pair with bottoms, how accessories complete a look, and whether colors coordinate before you leave. Outfit changes drop dramatically, and you have actual confidence in your choices.
19. Create a “Try Me Later” Staging Shelf
Clothes waiting for repairs, dry cleaning, or outfit experimenting become invisible if mixed with regular inventory. A dedicated staging shelf keeps these items visible and prevents them from getting lost.
Reserve one shelf or rod section for items in transition: pieces awaiting hemming, dry cleaning, or outfit combinations you’re testing. Label this area or use a ribbon/clip to mark it visually. Check this shelf weekly to move items along. This keeps your main closet clean while preventing items from disappearing into forgotten piles. You’ll actually follow through on repairs and outfit experiments because they’re constantly visible.
20. Stack Seasonal Storage Bins Vertically Behind Hanging Clothes
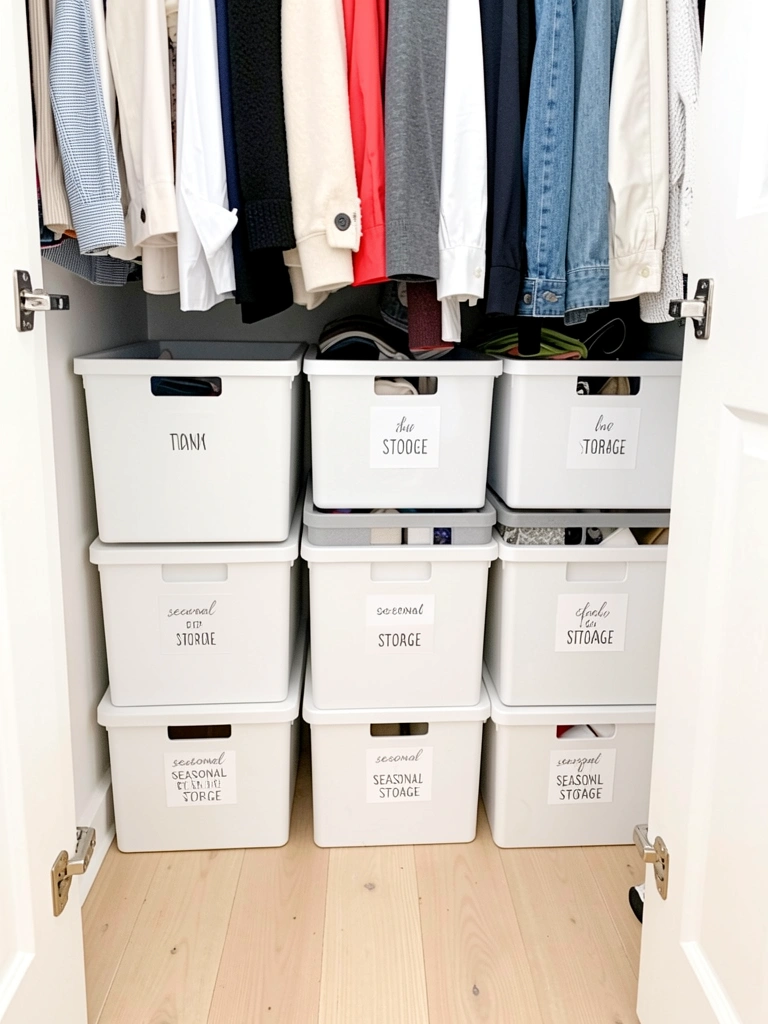
Off-season clothes take up valuable closet real estate if mixed with current rotation. Stacking them vertically in labeled bins behind your hanging rod keeps them accessible but out of the daily view.
Store winter coats, summer dresses, or holiday pieces in clear storage bins ($10–$25 each) labeled with season and contents. Stack 2–3 bins vertically behind your hanging rod where they won’t catch on clothes. Choose stackable, clear bins so you can see contents without opening them. This setup takes 30 minutes but gives you a closet that feels current and uncluttered. You know exactly where seasonal items live and how many of each you own. Swapping seasons becomes a quick organized task instead of a chaotic excavation.
21. Use Slat Wall Panels for Customizable Accessory Display
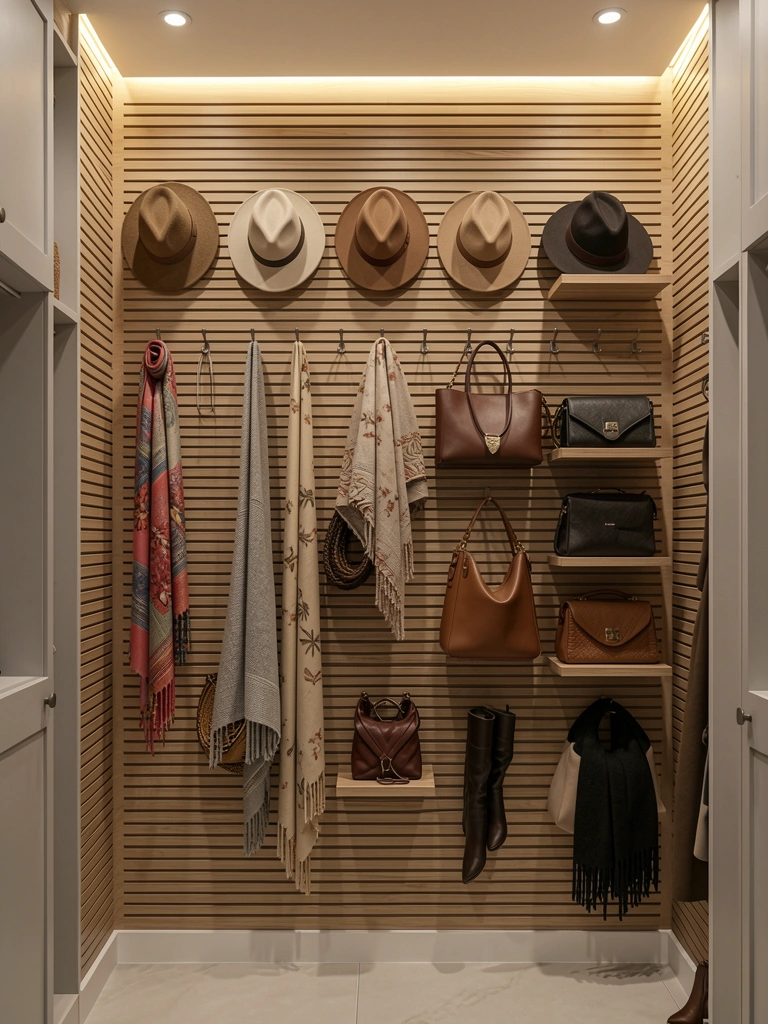
Accessories scattered in drawers become invisible. Slat walls with hooks and shelves let you display and organize belts, scarves, hats, and bags while adding design interest to your closet.
Install DIY slat wall panels ($50–$150 for one wall) or hire it done for $300–$600. Add adjustable hooks and shelves ($15–$40) designed for slat walls. This project takes a weekend DIY or a day professionally. Arrange accessories by color or type. Suddenly your closet looks like a boutique, and everything stays visible and accessible. You’ll use more accessories because you see them constantly. Plus, if you ever move, some slat panels can be taken down and relocated.
22. Implement a “One In, One Out” Rule to Prevent Creep
After organizing, creep happens—you buy new items without removing old ones, and chaos returns. A simple “one in, one out” rule maintains order long-term and keeps your closet at a manageable size.
Every time you bring a new item home, donate, sell, or move one old item out. This doesn’t mean they have to be the same category—just maintains overall balance. Takes 2 minutes per new purchase. Set a phone reminder or put a note on your closet door. This discipline keeps your closet from regressing into chaos. You’ll actually wear what you own instead of re-buying duplicates. Your space stays organized without constantly re-doing everything from scratch.
23. Assign a “Currently Wearing” Section of the Rod
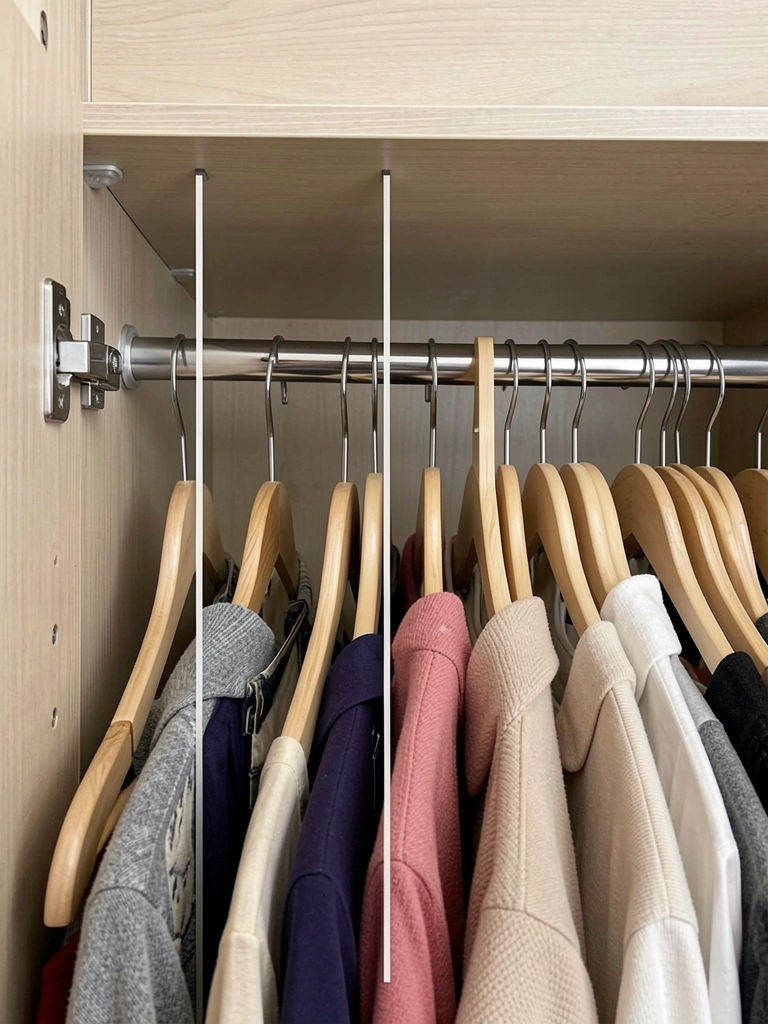
Not all clothes deserve equal closet real estate. Designate a prime section of your rod for items you’re currently wearing so you reach for them naturally and rotate less-worn pieces less often.
Mentally (or physically, with a small clip divider) mark off about 30% of your rod as your “now wearing” zone. This holds pieces you wear weekly or more. Rotate items in and out every 2–4 weeks. Everything else lives elsewhere on the rod or on shelves. This takes 5 minutes to set up and zero minutes ongoing. You’ll reach for current favorites naturally, and you’ll notice when it’s time to rotate. Outfits become easier because you’re working from a smaller, curated subset daily.
24. Use Vacuum Storage Bags for Bulky Off-Season Items
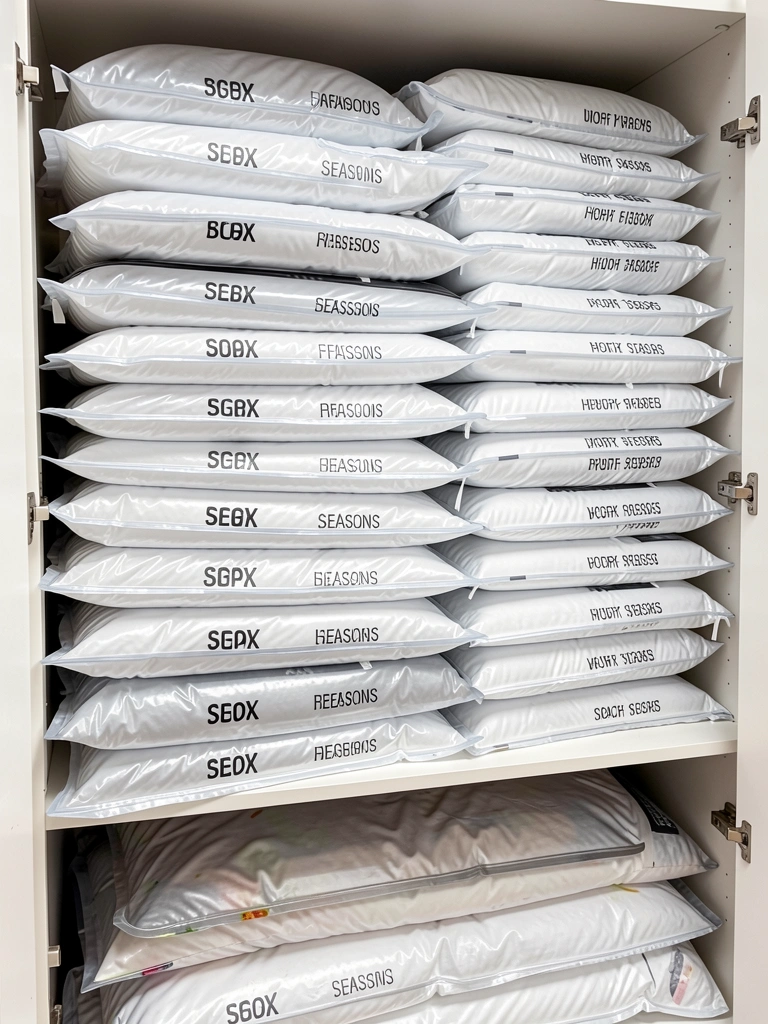
Bulky winter coats and sweaters hog closet space when not in season. Vacuum storage bags compress seasonal clothing to a fraction of their size, freeing up shelves and making storage efficient.
Buy a vacuum storage bag set ($15–$30) in various sizes. Fill bags with off-season sweaters, coats, or parkas, then use a vacuum or pump to extract air. Bags compress to about 30% of original size. Label each bag clearly with contents and season. Store on high shelves or under beds. This project takes 30 minutes but reclaims significant space. Pro tip: use this method sparingly—some fabrics (especially delicates) do better in regular storage. But for sturdy basics and coats, it’s a game-changer. Your current season’s items get prime closet real estate without sacrifice.
25. Create a “Styling Station” Shelf for Accessories and Mood Boards
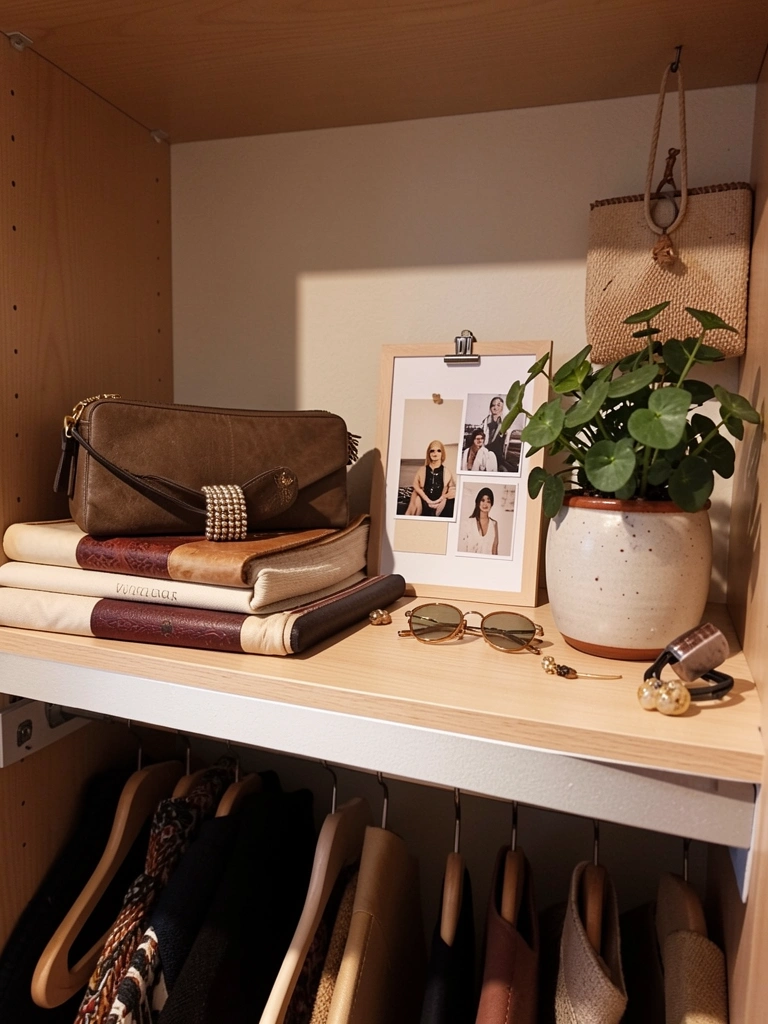
A small shelf devoted to styling inspiration and current favorite accessories keeps your creative energy alive and helps you outfit-plan thoughtfully instead of rushing.
Dedicate one shelf to a rotating “styling station.” Include a few pieces you’re currently obsessed with, a small mood board (print or clip images to a wire or frame), current jewelry favorites, and a small plant or candle for ambiance. Update this shelf every 2–4 weeks. Takes 10 minutes to refresh. This zone becomes a place where styling happens intentionally, not by default. You’re reminded of pieces that work together, and you stay engaged with your closet as something creative rather than just functional.
26. Add Notched Shelves to Work Around Obstacles
Awkward closet layouts with obstructing rods, brackets, or windows waste usable shelf space. Custom notched shelves fit around these obstacles, capturing storage you’d otherwise lose.
If you have a shelf space but something protrudes into it, have a shelf custom-cut or notched to fit around the obstacle. Many hardware stores offer cutting services ($20–$50 per cut), or order pre-cut shelves online. This is a DIY project if you’re handy with a jigsaw ($50–$100 tool rental plus materials). Project takes a few hours DIY or a few minutes professional. The payoff: you reclaim storage that would otherwise sit empty. Small closets often have quirks that waste space—notched shelves turn those quirks into advantages.
27. Schedule a Quarterly “Closet Audit” to Maintain Order
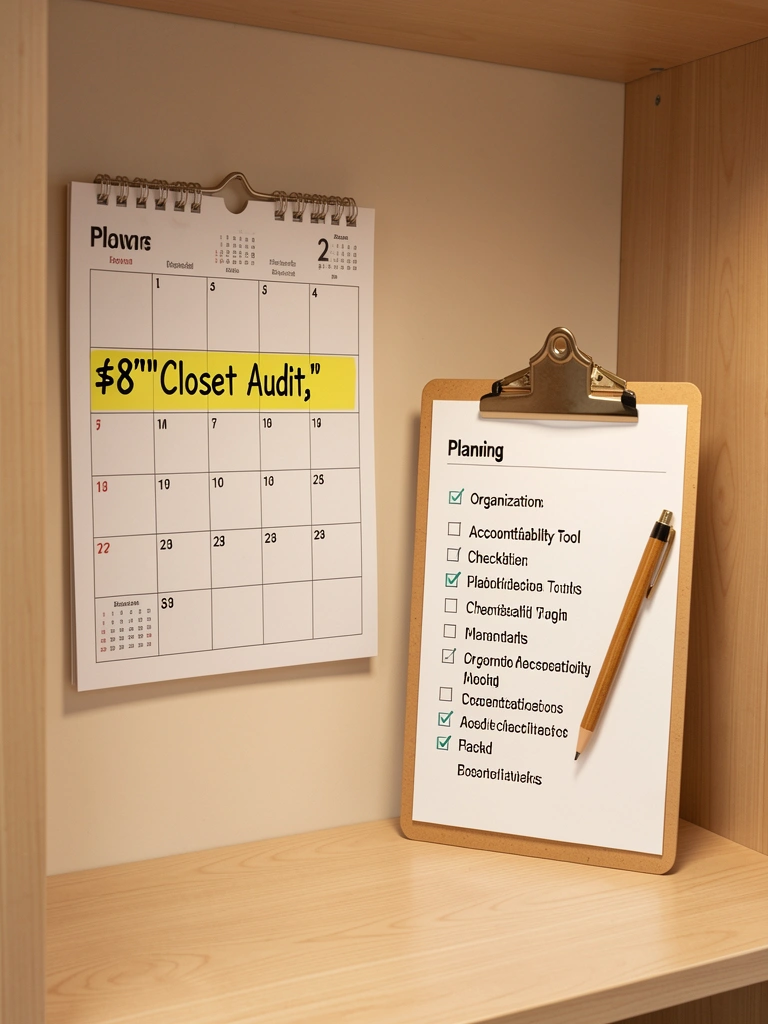
Organization isn’t a one-time event—it requires maintenance. A quarterly check-in keeps things tidy, helps you notice gaps in your wardrobe, and prevents slow regression into chaos.
Mark your calendar for a “closet audit” every three months (perhaps seasonally). Spend an hour checking: Are labels still accurate? Do shelves need adjusting? Any duplicates creeping in? Any pieces you never wear? Are bins organized? Make tweaks as needed. This takes 60 minutes quarterly, or about 5 minutes per week if you stay on top of it. The result is a closet that stays organized all year without massive overhauls. You’ll actually know what you own, notice wardrobe gaps early, and feel calm opening your closet doors every single day.
Ready to finally use your whole closet? Pick one or two ideas from this list and start this weekend—you might be surprised how quickly small changes add up. Save this post for your next organizing session, and share it with anyone else wrestling a tiny closet into submission.
Leave a Reply