You know that feeling when you walk into a beautifully styled bedroom and just want to sink into the bed? That’s not magic—it’s layering done right. A cozy bed isn’t about having expensive sheets (though quality helps). It’s about combining different textures, weights, and materials so your bed looks inviting AND feels amazing to crawl into. Whether you’re working with a tight budget or ready to invest in comfort, these 26 layering methods will show you exactly how to build a bed with real depth. From free styling tricks to thoughtful textile swaps, you’ll discover how to make your bedroom feel like the retreat you actually want to spend time in. Let’s get started.
1. Start with Quality Basics, Not Quantity

Good layering starts with a solid foundation. Cheap, thin sheets won’t hold texture or drape well, and they wrinkle into chaos when you pile things on top. You don’t need luxury brand prices—you need sheets with a reasonable thread count (300-400 for cotton) that actually feel substantial in your hands.
Target quality sheets around $60–$120 for a set (Brooklinen, Target’s Threshold, or Amazon Basics all work). You’ll notice the difference immediately when you add throws and quilts on top. Better sheets hold their shape, drape naturally, and make everything else look more intentional. Splurging here saves money later because everything else will look better on a solid base. Time to invest: 30 minutes shopping. The payoff? Your bed looks professionally styled from day one.
2. Layer Your Mattress Before the Sheets
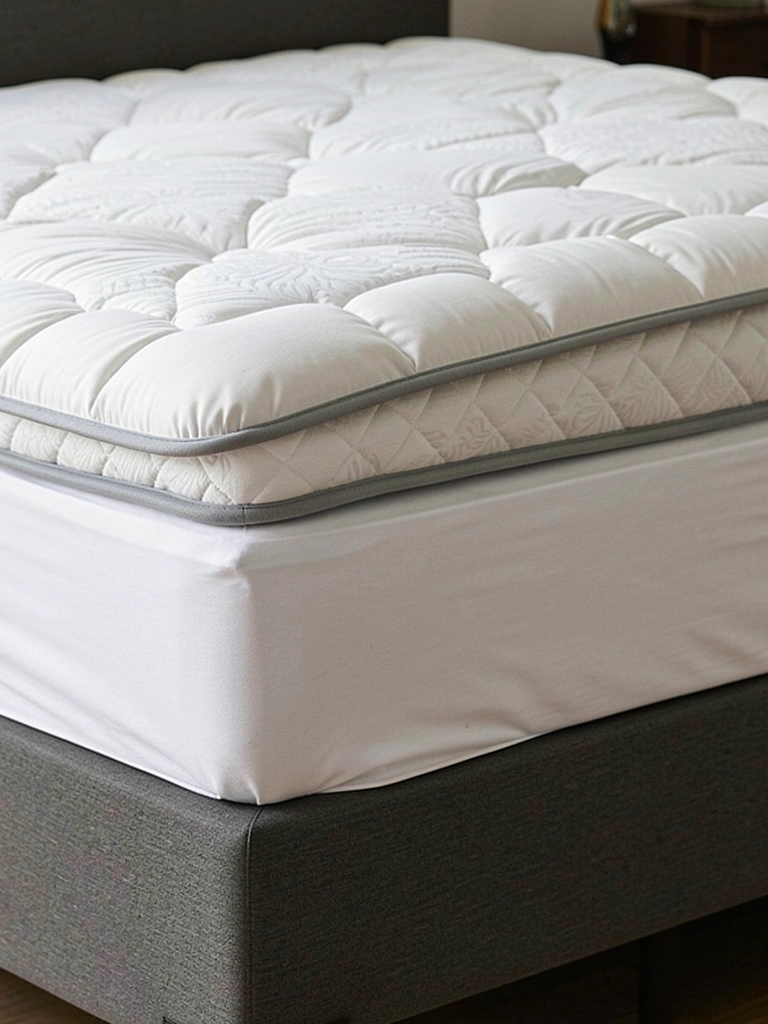
Most people skip this step, but adding a mattress topper or quilted pad under your top sheet is a game-changer. It creates volume and visual interest right away, plus it adds cushioning that makes your bed feel more luxe when you sit down.
A quilted mattress pad runs $30–$80 (Brookstone, Target, Amazon). Put your fitted sheet down first, then layer the quilted pad, then your top sheet. The topper peeks out subtly at the foot and sides, adding texture you can actually see. This takes 10 minutes to arrange and immediately makes your bed look fuller. Pro tip: Choose a quilted pad in a warm neutral tone (cream, oatmeal) so it complements, not clashes with, your sheets. The result is a bed with visual dimension even before you add pillows.
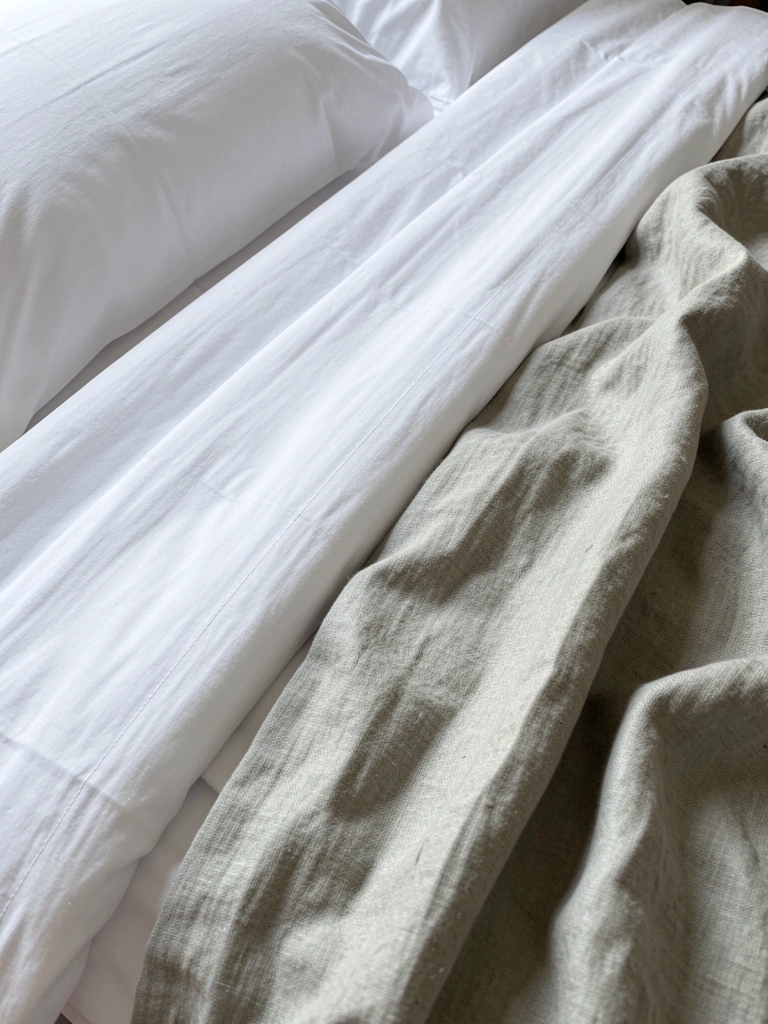
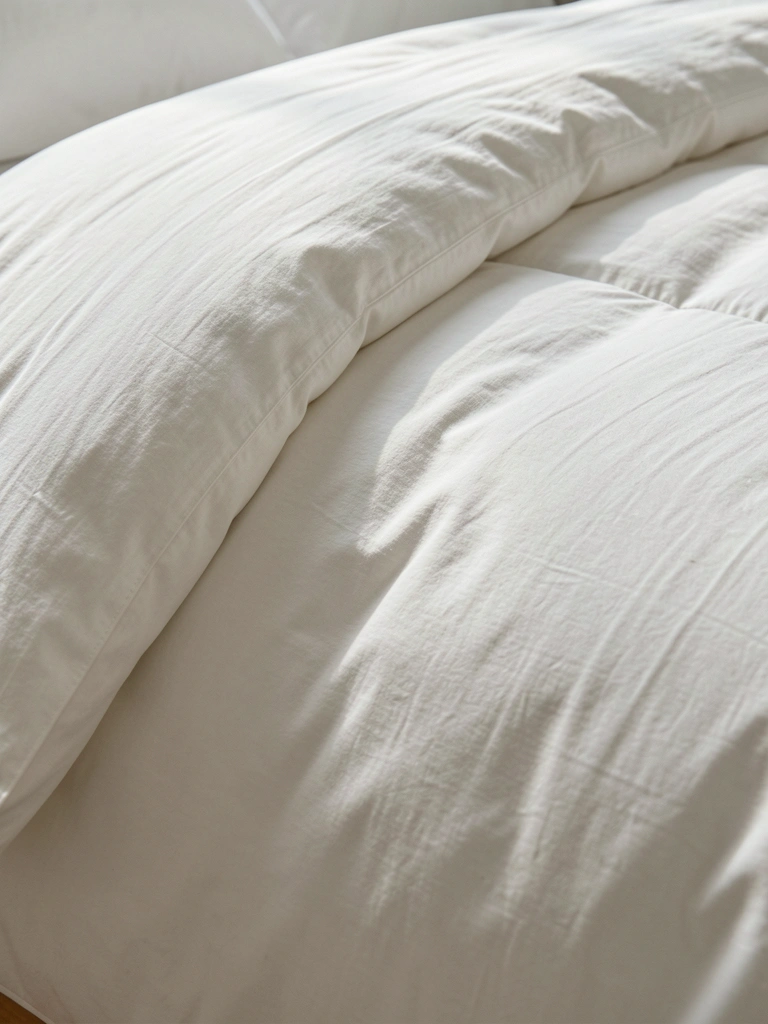
3. Use a Fitted Sheet + Top Sheet Combination, Not Just a Duvet
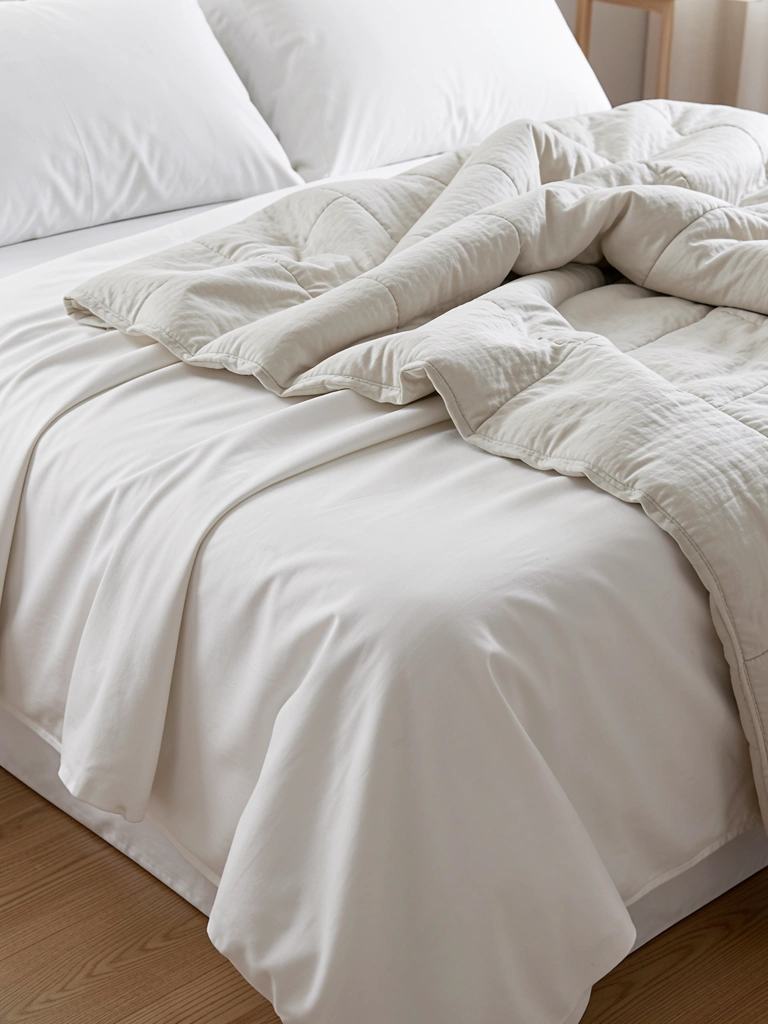
Duvets flatten everything. They’re practical but they visually compress your bed into a single, boring plane. Switching to a fitted sheet plus a top sheet gives you immediate texture from the way fabric naturally folds and drapes.
The combo takes 5 minutes longer to arrange than a duvet but looks dramatically better. Tuck your fitted sheet, lay your top sheet across loosely (let it wrinkle—that’s the point), and fold it back casually at the foot of the bed. This creates natural folds and shadows that look intentional and lived-in. Cost: $0 if you already own sheets, or around $40–$60 for good linen. Pair it with throws and quilts for even more texture. You get the warmth and function of a duvet with the visual appeal of thoughtful layering.
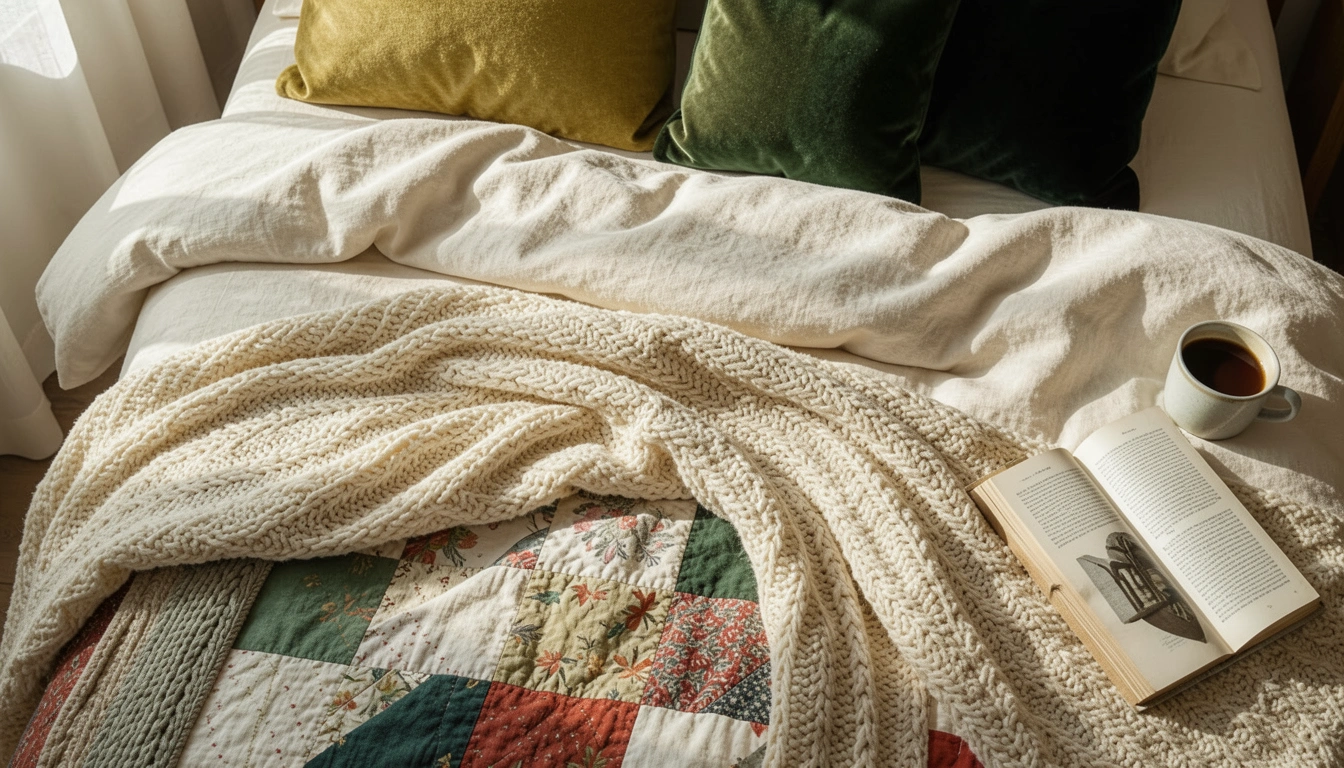
4. Add a Patchwork or Quilted Throw Blanket Across the Bed
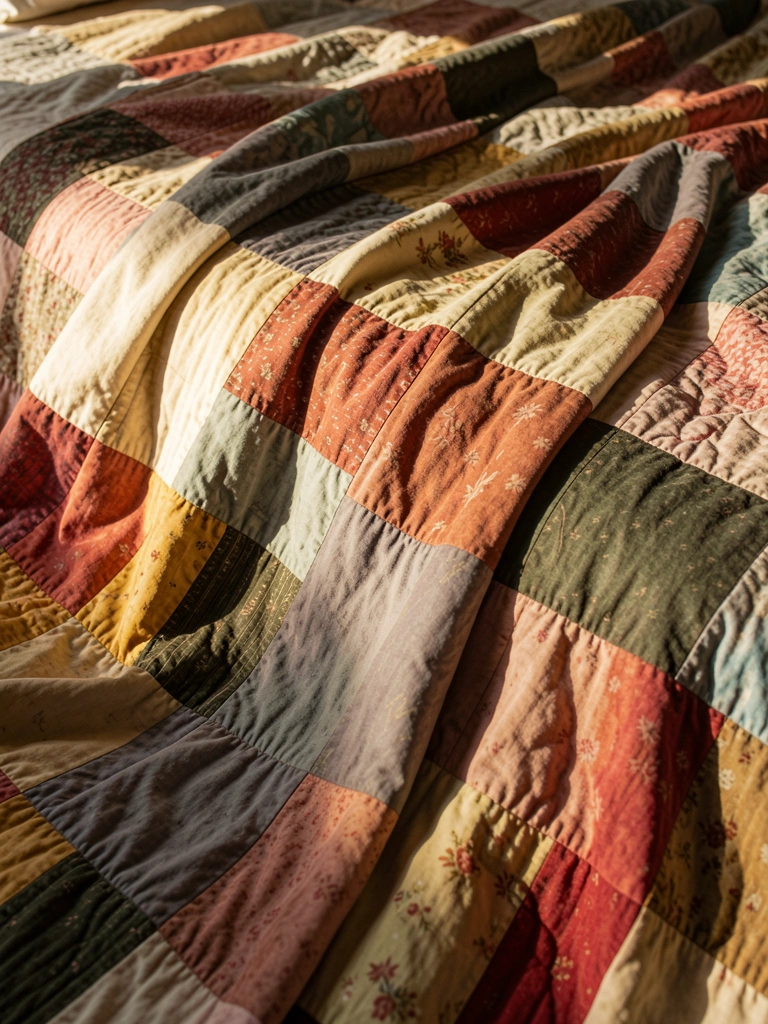
Quilts are having a major moment, and for good reason. They add instant character, visible texture, and that “heirloom” feeling without needing to actually own a family heirloom. A patchwork quilt tells a story visually in a way solid throws simply can’t.
Layer a quilted throw across the foot and lower third of your bed. Budget options: $40–$80 (check Etsy for secondhand quilts or Target’s new craft collections). Investment pieces: $150–$300. The patchwork creates visual interest and breaks up the monotony of solid sheets. Best part? Quilts photograph beautifully, so your bed will look even better in natural light. Time to arrange: less than a minute. The texture alone makes your whole bed feel warmer and more approachable.
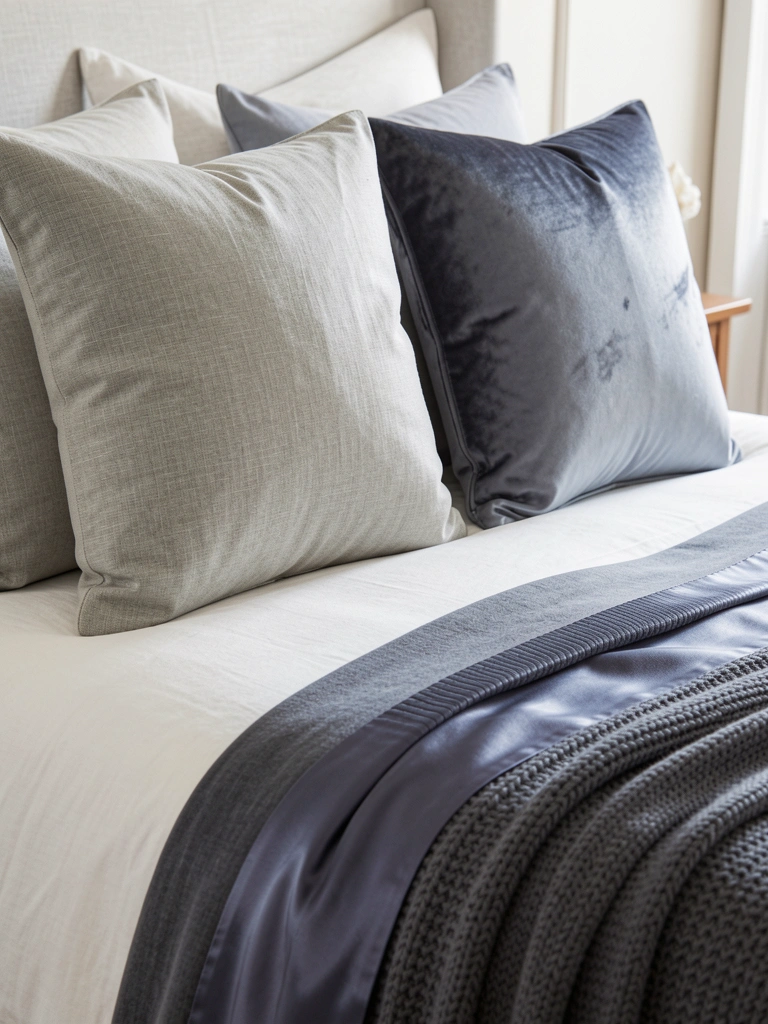
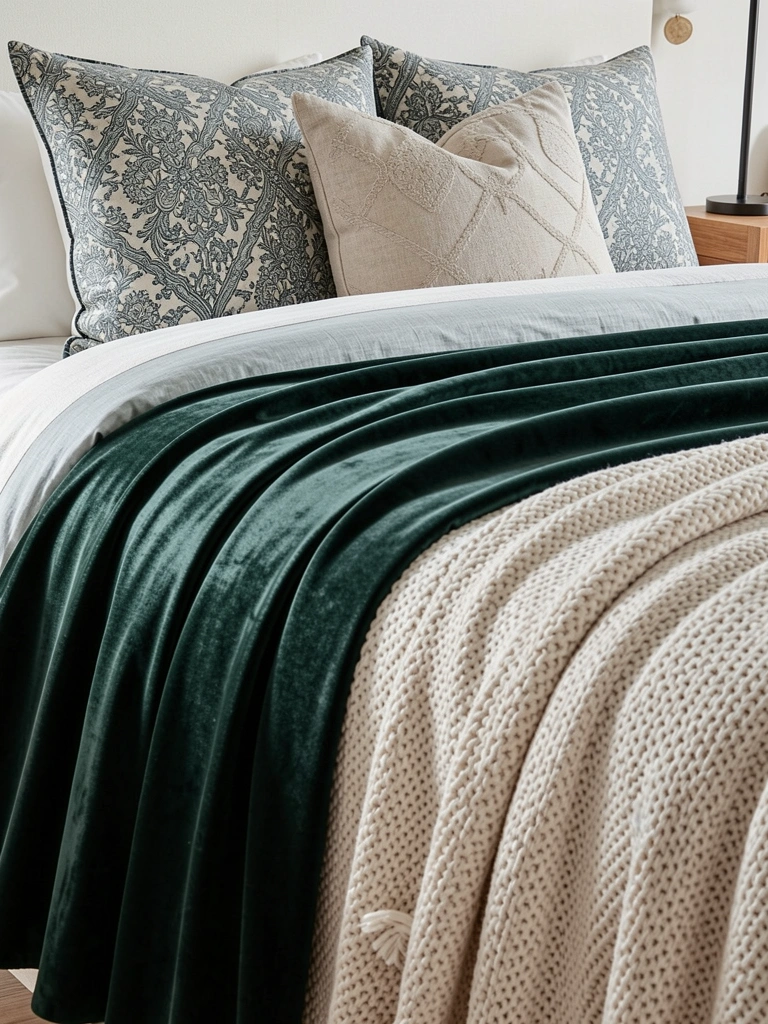
5. Layer Velvet Pillows for Tactile Luxury

Velvet pillows are the fast track to a cozy-looking bed. They catch light differently than cotton, adding depth immediately. You don’t need many—just 2–3 velvet pillows mixed in with your standard pillows creates that “designed” look.
Mid-range velvet pillows: $25–$60 each (Target, West Elm, Wayfair). Mix velvet with linen, cotton, and knit for variety. The different sheens and textures create visual layering that makes your bed look intentional. Pro tip: Stick to warm neutrals (cream, blush, warm gray) or earthy tones (terracotta, olive) to keep the cozy feeling cohesive. Arrange them in graduating heights—taller ones in back, shorter ones in front—so everything is visible. Five minutes to arrange, instant impact.
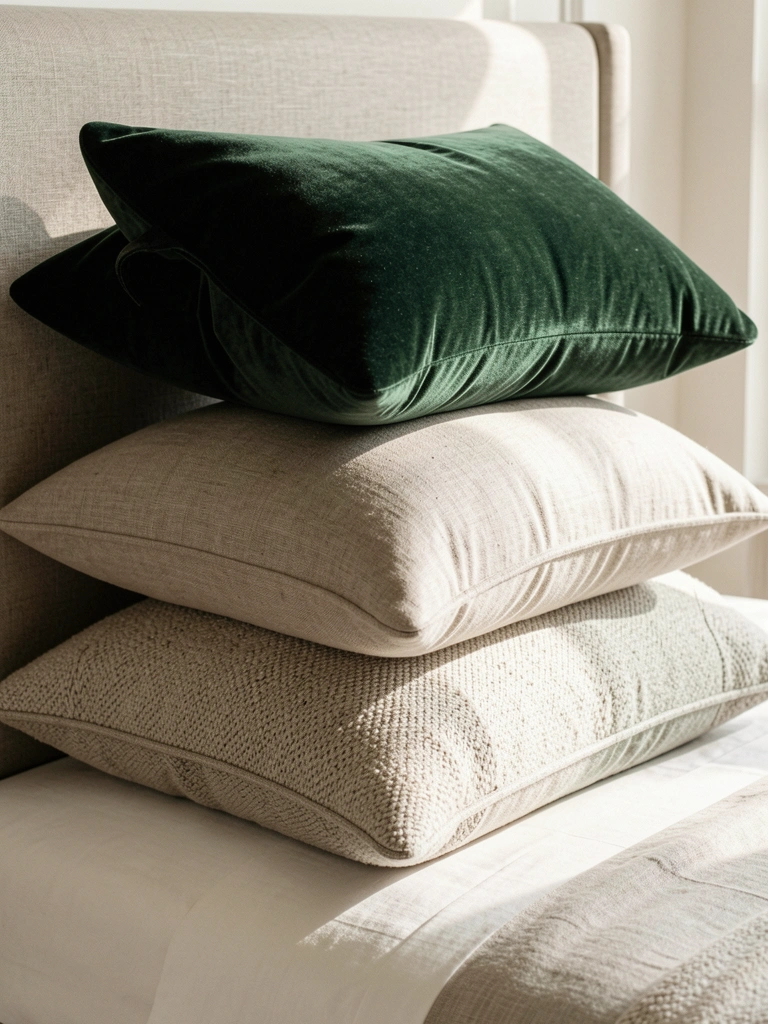
6. Mix Pillow Heights and Shapes for Visual Interest
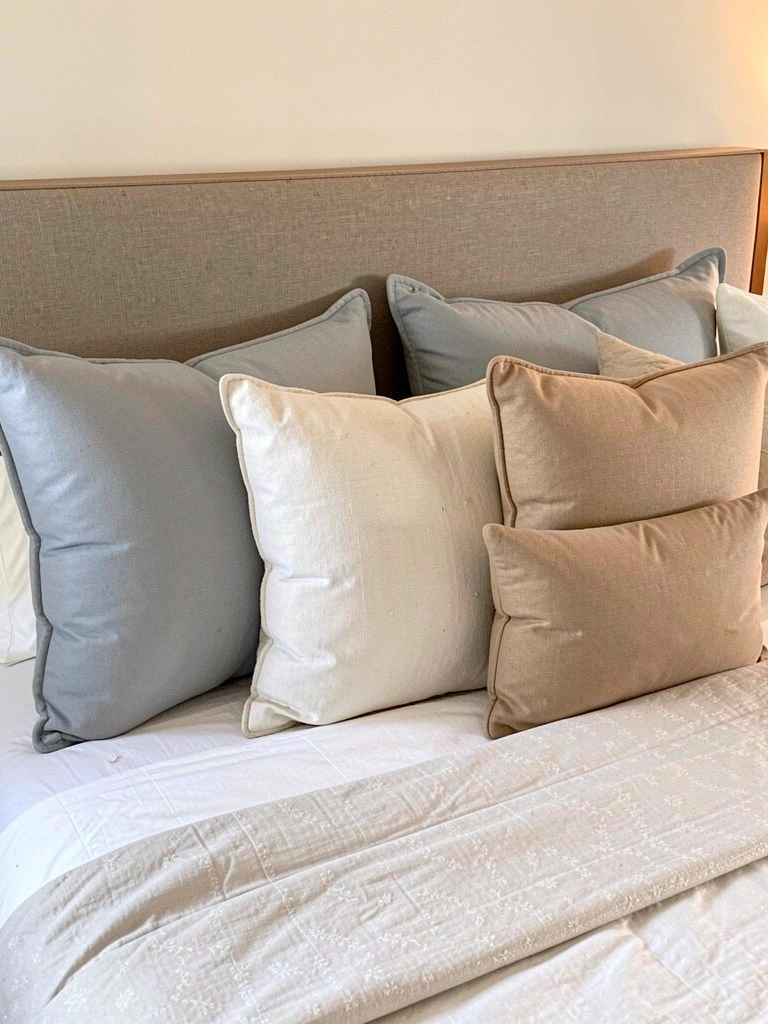
Uniform pillow heights are boring. Real layering means mixing a standard pillow, a king pillow, a lumbar pillow, and a small square cushion. The variety reads as “I know what I’m doing” even if you’re just experimenting.
Invest in 4–5 pillows in different sizes: $80–$150 total (mix budget brands with one nicer piece). Arrange taller ones behind shorter ones so everything’s visible. This takes 10 minutes to style but completely changes how your bed reads. The staggered heights create a sense of abundance and comfort. Pro tip: Use different fabric textures for each pillow—smooth velvet, chunky linen, knitted wool—so the variation feels intentional, not accidental. Your bed now looks like it belongs in a design magazine.
7. Add a Woven Throw Blanket Folded at the Foot
Woven blankets add both texture and an organic, handmade feel. Unlike smooth throws, woven fabrics show structural interest—you can actually see the weaving pattern, which reads as intentional styling.
Layer a woven throw—linen, jute-blend, or chunky cotton—at the foot of your bed. Budget: $30–$70 (Etsy, Target, H&M Home). The loose folds create organic-looking dimension. Time to position: 2 minutes. Pro tip: Choose a throw in a warm neutral or soft earth tone (cream, tan, rust) that complements your other textiles. The visible weave pattern makes your bed look curated. Best of all? You can actually use it when you’re cold, so it’s as functional as it is beautiful.
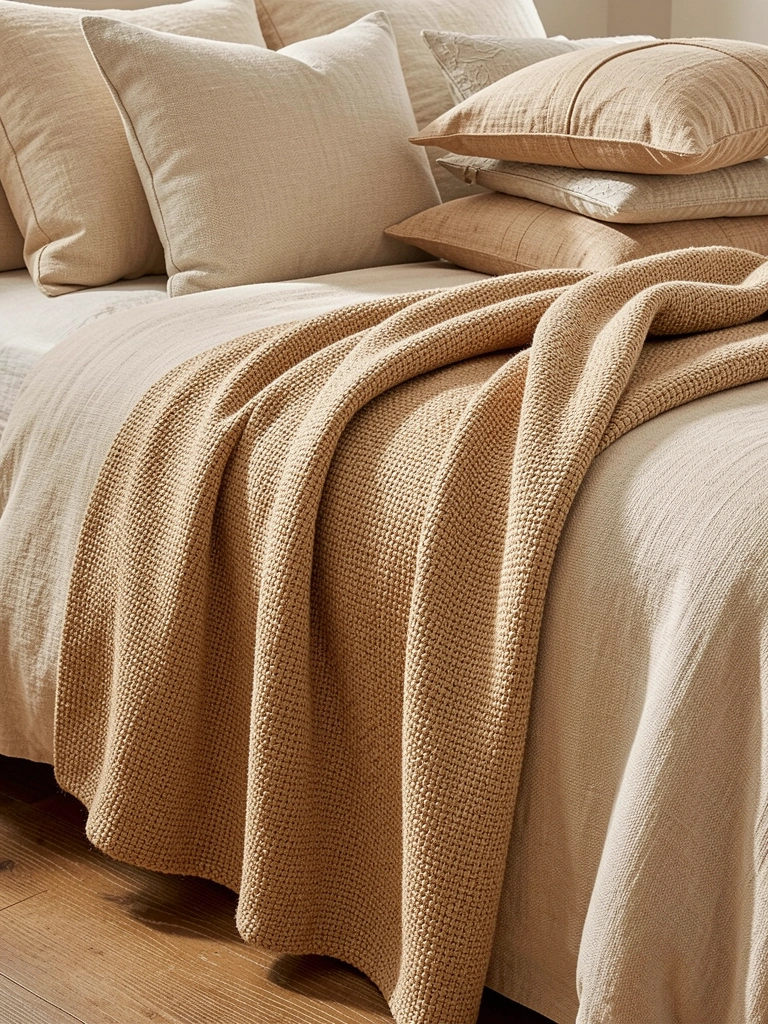
8. Use a Chunky Knit Throw for Texture and Warmth

If woven throws feel too formal, go chunky knit. The three-dimensional knit stitching creates shadow and depth that photographs beautifully and feels amazing to touch. It’s the ultimate cozy texture.
Chunky knit throws: $40–$100 (Pottery Barn, West Elm, Amazon). Drape it loosely over the foot of your bed or fold it casually over a corner. The bulky weave catches light differently from smooth fabrics, creating dimension. Time to arrange: 2 minutes. This works especially well in neutral or warm earth tones. Pro tip: Pair it with a smoother throw in a complementary color for contrast. The tactile combination makes your bed irresistible. You’ll reach for this throw constantly, so the investment pays off fast.
9. Layer Multiple Throw Blankets in Graduating Colors
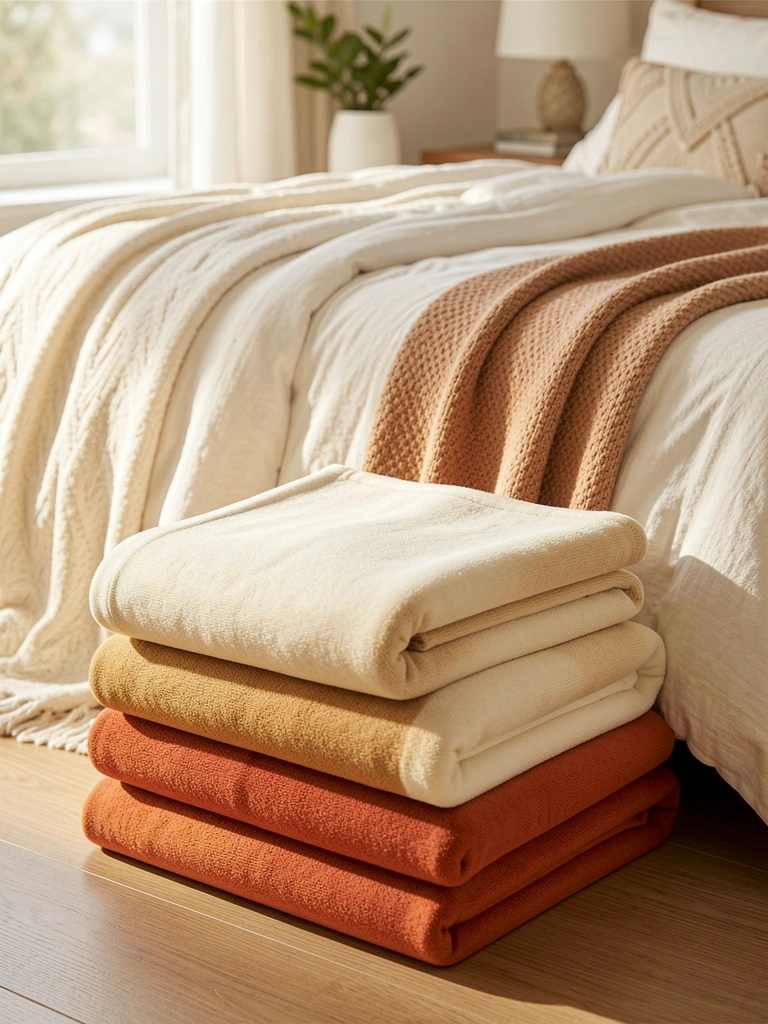
One throw is fine. Three throws in a color progression? That’s styled. Layering throws in warm-to-warmer tones (cream → tan → terracotta) creates visual depth without looking cluttered.
Budget for 3 throws: $80–$180 (mix budget and mid-range brands). Fold each one loosely and stack them so you can see all three—the graduated color effect is everything. Arrange them at the foot of your bed where they’re visible. Time: 5 minutes. This technique instantly makes your bed look more designed. Pro tip: Keep all throws in warm neutrals or soft earth tones so the progression feels intentional, not random. The cascading colors add warmth and dimension in a way single throws can’t match.
10. Introduce a Vintage or Heirloom Quilt as Your Star Layer
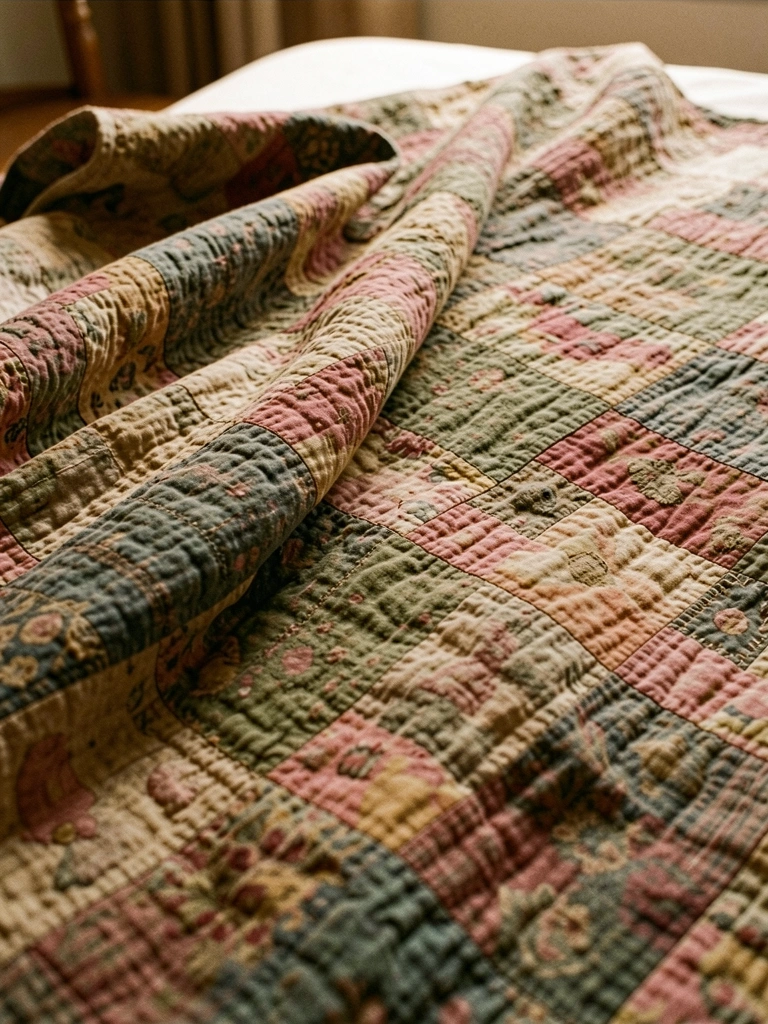
If you have access to a vintage or inherited quilt, this is your moment to feature it. Even worn quilts (especially worn quilts) add authenticity and warmth that new textiles can’t replicate. Real layering often means mixing new pieces around one special vintage item.
If you own a family quilt, drape it prominently—either across the bed or over a chair nearby. No budget here (you likely already own it), but it becomes your design anchor. Can’t find a family quilt? Etsy has authentic vintage quilts for $50–$200. Layer your new throws and pillows to complement the quilt’s colors. Time to arrange: 10 minutes for the perfect lay. The beauty of vintage quilts is they come pre-weathered, so imperfections add character. Your bed now tells a story beyond just looking cozy.
11. Mix Linen with Cotton for Natural Texture Contrast
Linen and cotton age differently and have distinct visual personalities. Linen looks relaxed and textured; cotton looks crisp and clean. Mixing them creates contrast that reads as intentional styling, not accident.
Use linen sheets ($80–$150 for a set) with cotton pillowcases or pair a linen throw with cotton sheets. The combination gives you visual interest and practical texture variation. Linen wrinkles beautifully (that’s a feature, not a bug in this context), adding movement to your bed. Time: 0 minutes—just style as normal. Pro tip: Warm-tone linens (cream, flax) pair best with cozy aesthetics. The slightly rough feel of linen against smooth cotton creates a sensory experience that makes your bed feel intentional and tactile.
12. Add a Textured Headboard Covering or Tapestry Behind Pillows
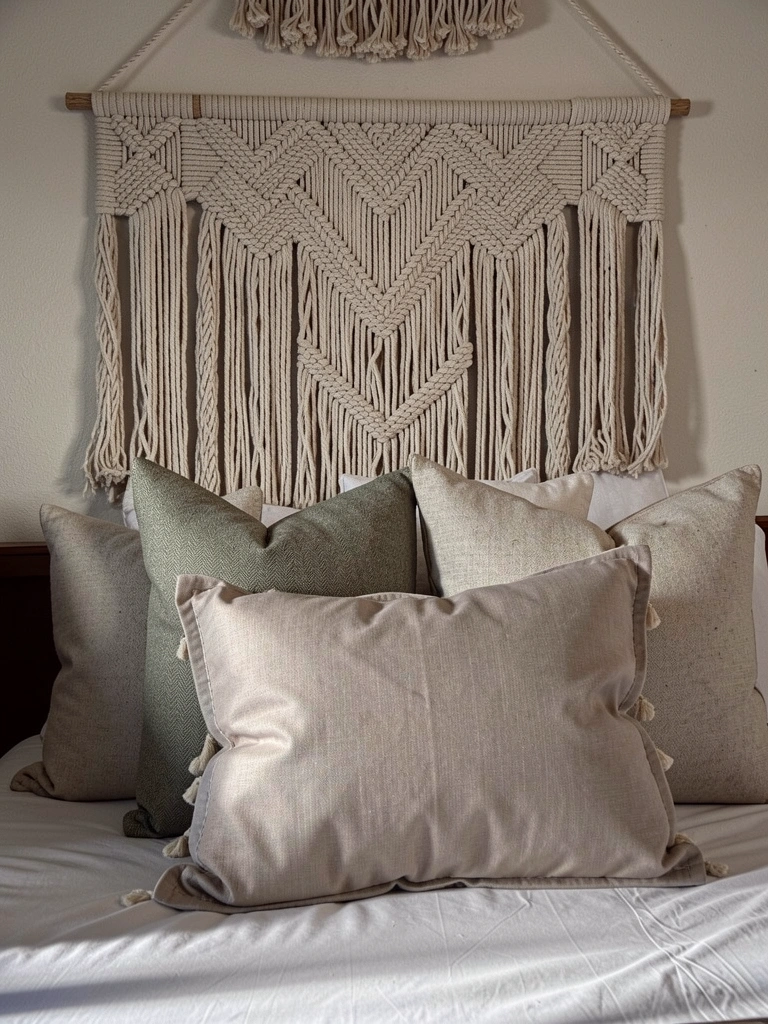
Your headboard is prime real estate for adding texture. If you don’t have a textured headboard, hang a tapestry, macramé, or woven textile directly behind your pillows. This instantly frames your bed and adds depth.
Tapestries and macramé: $25–$80 (Urban Outfitters, Etsy, Amazon). Hang it at pillow height so it creates a backdrop. This takes 30 minutes to hang (use a tension rod or removable hooks for renters). The texture behind your pillows makes the entire bed composition look more designed. Pro tip: Choose a neutral or earth-tone tapestry so it complements, not competes with, your throw pillows. The layering now extends to the wall, creating a cohesive, framed effect.
13. Layer Lumbar Pillows for Back Support and Visual Interest
Lumbar pillows serve dual purpose: actual back support and visual layering. Unlike square pillows, their elongated shape creates lines that make your bed look more intentional and designed.
Lumbar pillows: $20–$60 each (Target, Wayfair, CB2). Add 2–3 in varying textures and colors. Stack them vertically or position them at slight angles so they’re all visible. Time to arrange: 5 minutes. Pro tip: Use lumbar pillows in contrasting textures—pair a smooth velvet lumbar with a chunky knit one—so the visual interest is obvious. The rectangular shape breaks up the monotony of square pillows and draws the eye upward. Your bed now has architectural interest.
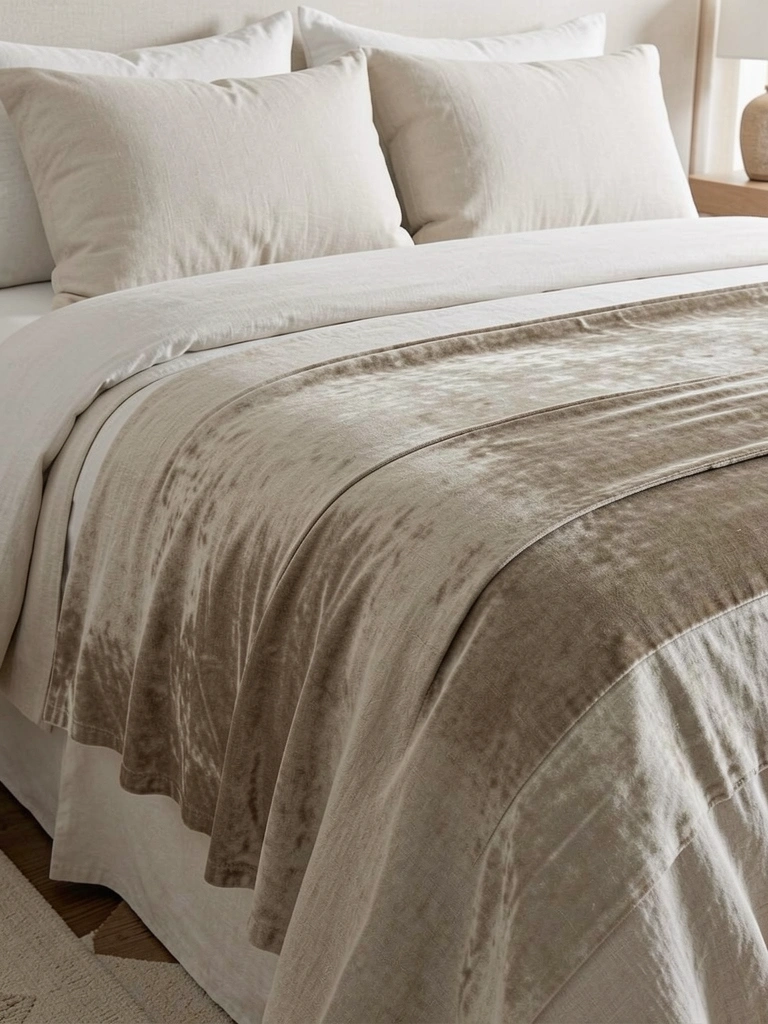
14. Use Faux Fur or Shearling Accents for Luxury Feel
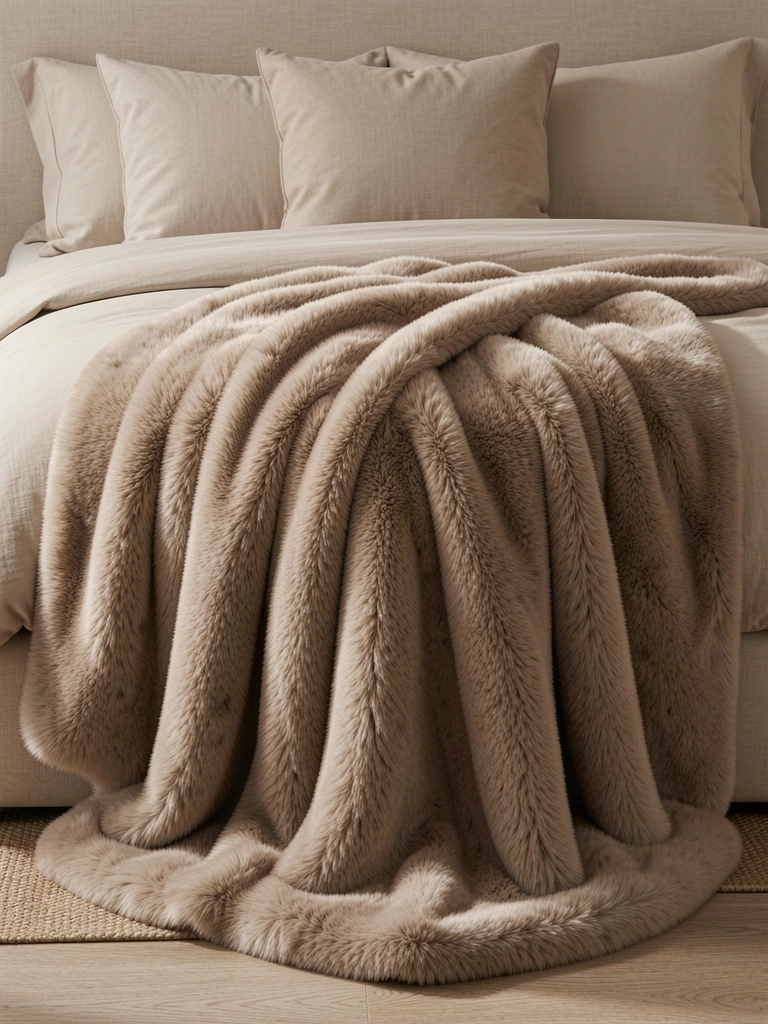
Faux fur and shearling add an instant luxury signal without the ethical concerns of real fur. The pile texture catches light beautifully and feels incredibly soft to touch. It’s a fast way to add “spa-like” vibes.
Faux fur throws: $40–$120 (check for quality—high-pile faux fur looks better than cheap versions). Drape it casually over the foot of your bed or fold it loosely for texture. Time: 2 minutes. The plush texture contrasts beautifully with smoother fabrics. Pro tip: Stick to white, cream, or gray faux fur so it reads as sophisticated, not costume-y. The tactile luxury of faux fur makes your bed feel like a splurge, even if the throw cost less than $100. Everyone who touches it will want one.
15. Layer a Duvet Inside a Duvet Cover for Extra Dimension
This sounds silly but works: put a thinner duvet inside your duvet cover, then layer throws on top. The extra layer creates volume and visual thickness without needing a heavy quilt.
Thin duvets: $30–$60 inside your existing cover. This costs nothing if you already have both items. Time: 10 minutes to layer. The result is a bed that looks fuller and more luxurious. The hidden duvet adds cushioning and structure to your layered look. Pro tip: Use a plain duvet inside a patterned cover, or vice versa, so the layering is intentional. Your bed now has the visual fullness of a luxury hotel bed without the price tag.
16. Mix Solid and Patterned Textiles Strategically
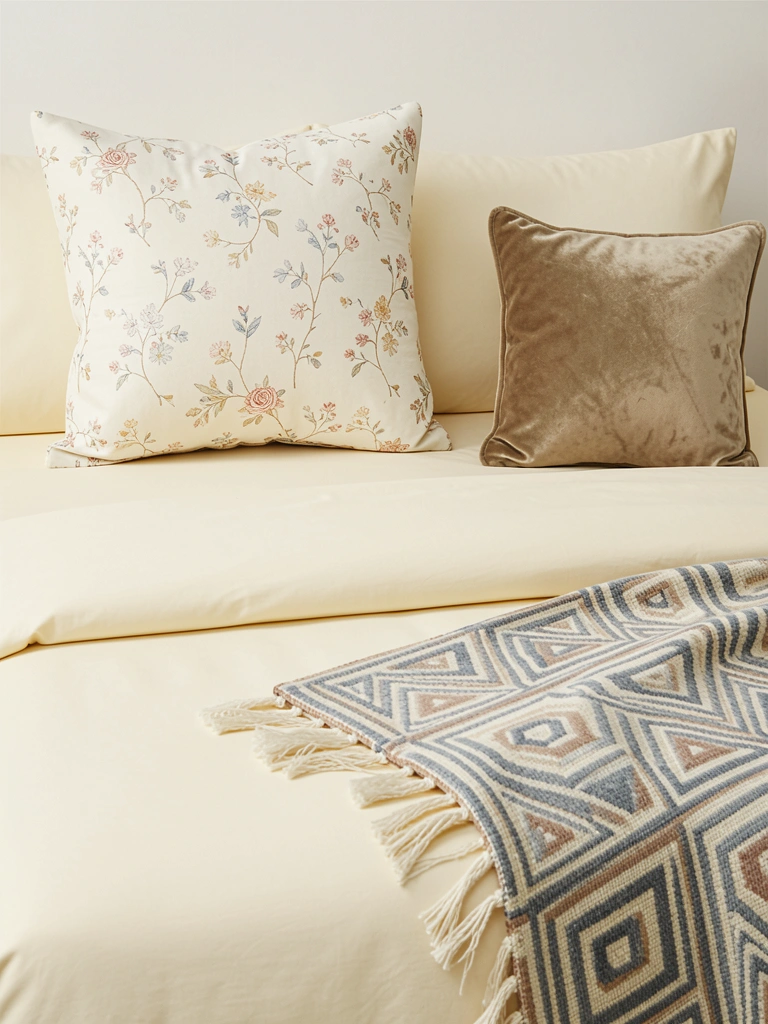
Too many patterns clash. Too many solids feel boring. The sweet spot is 60% solids, 40% patterned. This gives you visual interest without chaos.
Choose one statement pillow or throw in a subtle pattern (small florals, gentle geometric, classic stripes) and keep everything else neutral. Budget: $30–$80 for one patterned piece. This takes zero time—just choose pieces intentionally. Pro tip: Make sure your patterned piece uses the same color palette as your solids (if your base is cream and terracotta, choose a pattern that echoes those tones). The strategic mix of solid and pattern creates a curated, styled look. Your bed reads as designed, not chaotic.
17. Add a Bed Runner Across the Foot for Texture and Function
A bed runner isn’t just decorative—it protects your foot of your bed and adds a horizontal line of texture that breaks up vertical layering. It’s a small detail that reads as intentional styling.
Bed runners: $40–$100 (Target, Wayfair, Etsy). Choose a textured fabric (linen, cotton velvet, or jute-blend) in a complementary color. Lay it horizontally across the foot, centered. Time: 2 minutes. This creates a visual anchor point and adds texture without adding bulk. Pro tip: Choose a runner in a slightly deeper tone than your sheets (if sheets are cream, try warm tan) to create subtle depth. The layered effect makes your bed look professionally styled.
18. Incorporate Decorative Pillows in Mixed Sizes and Shapes
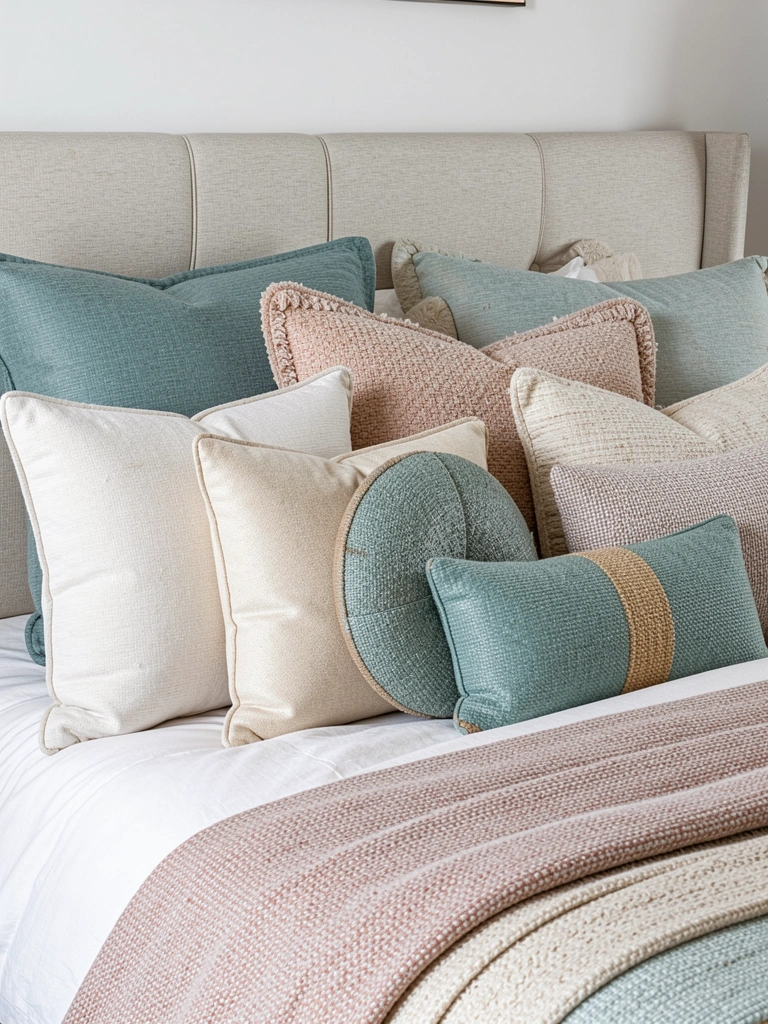
Decorative pillows aren’t just decorative—they’re your main layering tool. Go beyond standard sizes. Add round pillows, square cushions, lumbar supports, and body pillows in mixed textures.
Budget for 5–7 decorative pillows: $100–$250. Mix brands (one nicer piece with several budget finds works great). Arrange them in graduating heights so everything’s visible. Time: 10 minutes to perfect the arrangement. The variety in size and shape makes your bed feel curated and intentional. Pro tip: Use 3–4 colors maximum across all pillows (cream, warm gray, soft terracotta, for example) so the variety reads as cohesive, not chaotic. The layered pillow composition becomes the focal point of your whole room.
19. Use Contrasting Pillow Backs for Double Impact

Style hack: use pillow covers that are reversible or have a contrasting back. Position some pillows so you see the reverse side peeking out. This doubles your visual interest without buying more pillows.
Many pillow covers are reversible or have a contrasting back (check product descriptions on Target, Wayfair, or Etsy). Position 1–2 pillows so the back shows. Time: 2 minutes to rearrange. Pro tip: Choose contrasting backs that complement your palette (cream pillow with terracotta back, gray pillow with rust back). The peeking color creates depth and visual interest. This technique makes your bed look more layered than it actually is—perfect for budget decorating.
20. Add a Lightweight Gauze or Muslin Layer for Airiness

For a softer, more ethereal layering approach, add a gauze or lightweight muslin layer. It adds texture and visual interest without the weight or formality of a heavy quilt.
Gauze layers or lightweight throws: $20–$50 (Urban Outfitters, Etsy, Amazon). Drape it loosely so it creates soft folds—the wrinkles are the point. Time: 5 minutes. This works especially well in minimal or bohemian-style bedrooms. Pro tip: Keep gauze in cream or white so it feels light and airy. The translucent layer adds romantic texture while keeping things feeling open and breathable. Best for warmer months or lighter sleepers.
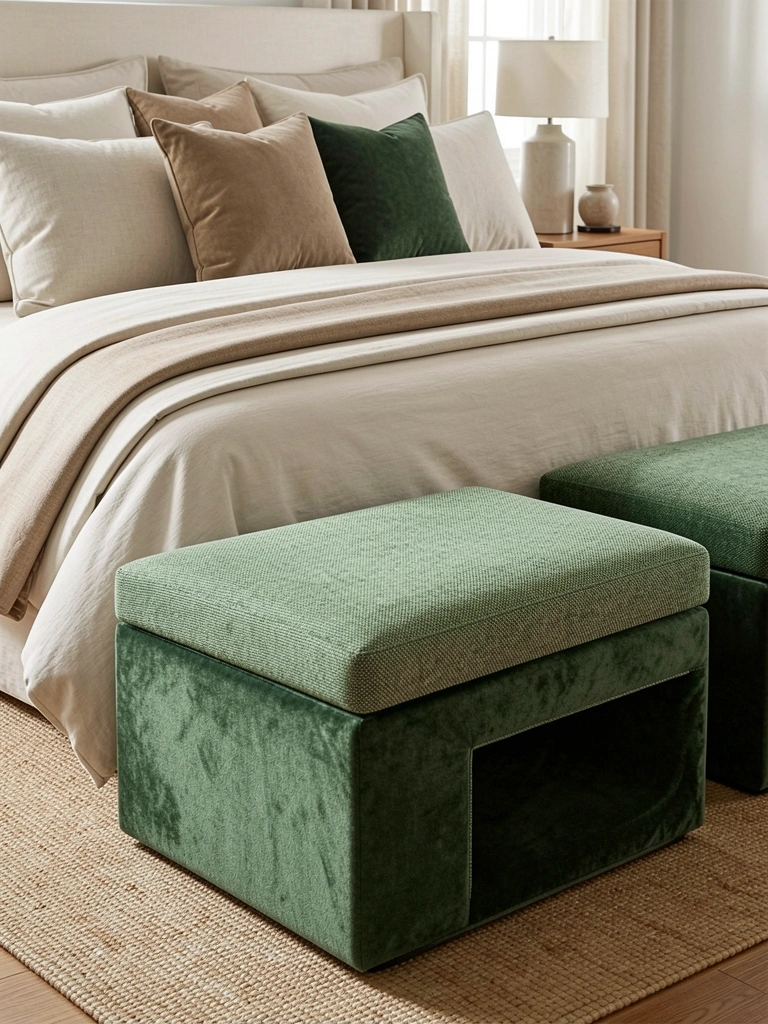
21. Layer a Structured Ottoman or Bench at the Foot
Furniture layering counts. An ottoman or bench at the foot of your bed adds dimension and serves as a styling piece. It creates horizontal interest and a place to fold throws.
Ottomans or benches: $150–$400 (IKEA has budget options at $80–$150). Choose one in a textured fabric that complements your palette. Time to position: 5 minutes. The structured furniture contrasts beautifully with soft textiles, creating visual interest. Pro tip: Drape one of your throws over the bench back so the layering extends beyond just the bed. The combination of soft textiles and structured furniture creates sophisticated depth.
22. Use Layered Nightstands for Balanced Visual Weight
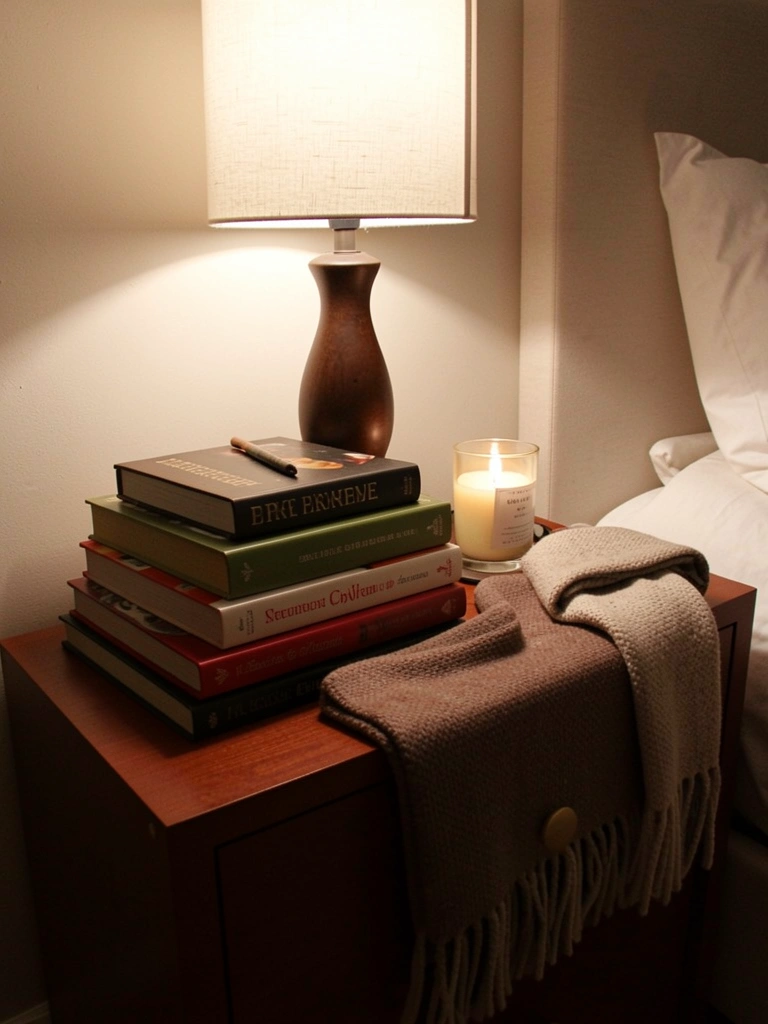
Your nightstands are part of your bed’s visual composition. Layer them with books, a lamp, a candle, and maybe a small throw. This extends your layering beyond just the bed itself.
Gather books you actually love, add a quality bedside lamp ($30–$80), a candle ($10–$30), and drape a small decorative throw. Arrange these in varying heights. Time: 15 minutes to style. Pro tip: Use odd numbers of objects (3 books, not 2) and vary heights so nothing looks flat. The styled nightstands frame your bed and add to the overall cozy aesthetic. Your whole sleeping zone now feels intentionally designed.
23. Add Textured Wall Decor Above Your Bed

Extend your layering vertically. Hang a textured piece—macramé, woven textile, or fabric art—on the wall above your bed. This creates a frame for your whole bed composition.
Wall textiles: $30–$120 (Etsy, Urban Outfitters, West Elm). Hang at eye level when lying down (usually 12–18 inches above your headboard). Time: 30 minutes to install. Choose something in warm neutrals or earth tones that echoes your bedding palette. The textured backdrop makes your bed feel like a designed vignette. Pro tip: Layer a few pieces if you’re confident (one large piece + two smaller ones), or stick with one statement piece for simplicity. The layering now extends to your walls, creating a cohesive, textured sleeping retreat.
24. Mix Matte and Shiny Fabrics for Subtle Depth
Light reflection matters. Mixing matte fabrics (linen, cotton, knit) with subtle-sheen fabrics (velvet, silk, satin) creates depth because they catch light differently. Your eye sees movement and dimension.
No extra budget needed—just be intentional about mixing finishes. Pair a matte linen throw with a velvet pillow. Use cotton sheets with a subtle-sheen duvet cover. Time: 0 minutes—just style with intention. The different light reflections make your bed look more complex and designed. Pro tip: Avoid too much shine (this isn’t disco ball territory)—stick to subtle sheen in one or two pieces. The finish variety creates sophisticated depth without looking busy.
25. Create a Seasonal Layer Rotation System
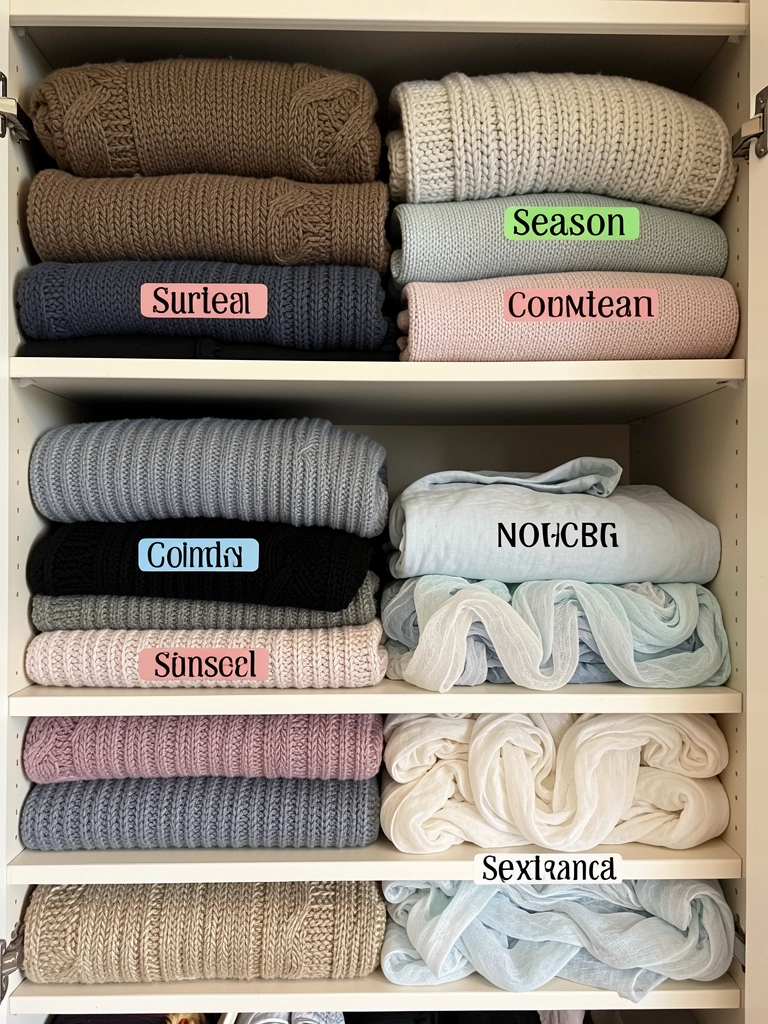
Real layering means rotating your textiles seasonally. Heavy quilts in winter, lightweight gauze in summer. Building a rotation system keeps your bed looking fresh and relevant.
Stock 2–3 extra throws and quilts ($100–$300 total) that you rotate seasonally. Store off-season pieces in a labeled bin under the bed or in a closet. Time: 30 minutes quarterly to swap. Pro tip: Photograph each seasonal setup so you remember which combinations worked best. Your bed stays cozy and intentional all year. The rotation system also extends the life of your textiles by reducing wear.
26. Layer with Intention: The Styling Rule of Three
The final rule: layer with intention, not accident. Choose 3 main textural elements (example: soft sheets + plush throw + woven blanket) and let them be the stars. Everything else supports these.
No additional budget—just edit ruthlessly. Remove pillows that don’t add texture or color. Replace flat throws with textured ones. Keep your palette to 3–4 colors maximum. Time: 30 minutes for a full edit. The result is a bed that looks curated, not cluttered. Pro tip: Step back and photograph your bed from across the room. If it reads as cozy and intentional in a photo, it’s working. The rule of three keeps your layering sophisticated and achievable.
Save this post for your next bedroom refresh. Pick one layering idea this weekend and test it out—you’ll be surprised how one intentional textile addition changes how your whole room feels. Which texture will you add first?
Leave a Reply