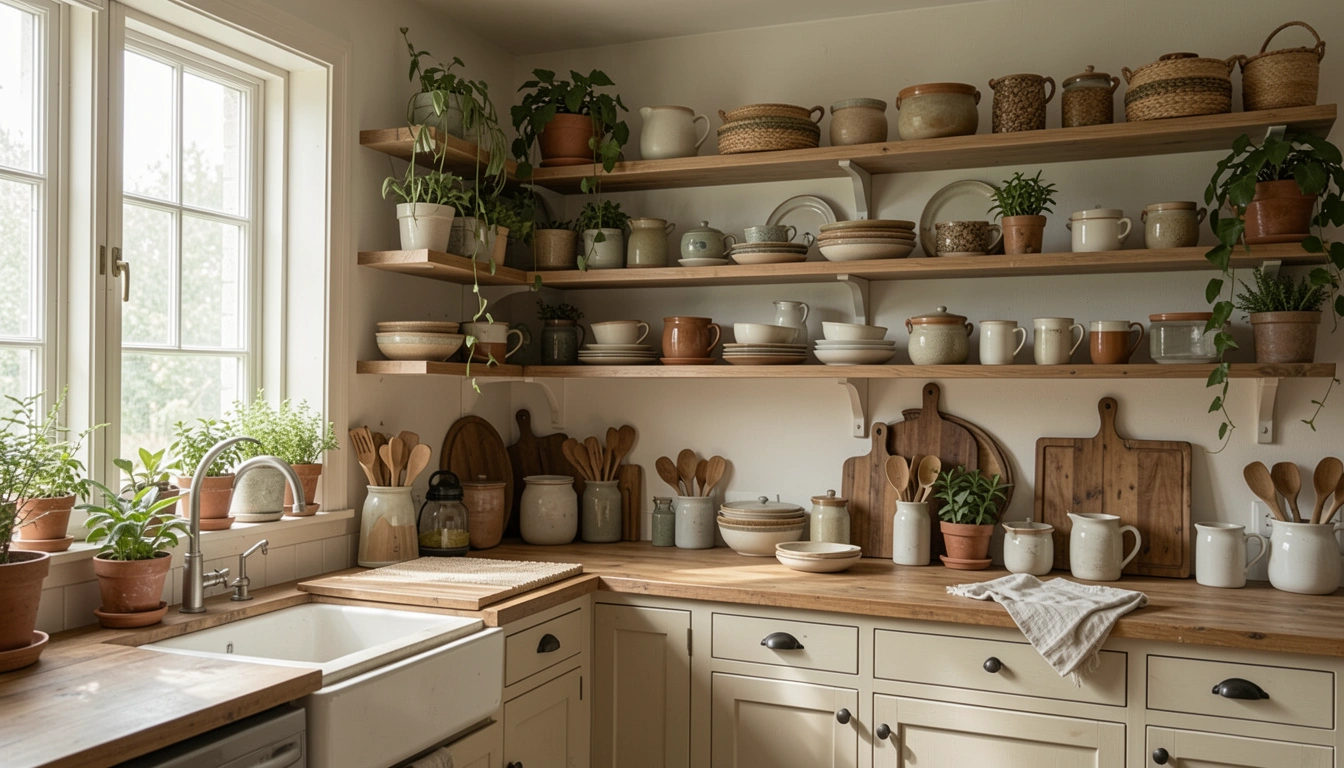
I stared at my kitchen shelves one morning. Empty except for a few mismatched mugs. They made the whole wall feel flat and cold. I wanted them to look like they belonged, not like a storage dump.
I'd tried piling everything on before. It just looked cluttered. Then I stepped back and thought about what makes a shelf feel right—balanced, not crowded.
This is how I fixed mine. Now they pull the room together.
How to Style Kitchen Shelves
This method shows you how to fill shelves so they look balanced and lived-in. You'll end up with shelves that feel comfortable, like they've always been there. It's simple, and it works every time.
What You’ll Need
- 12-inch white ceramic dinner plates
- Woven seagrass storage baskets, medium size
- Clear glass apothecary jars, 10-ounce
- Matte black metal mug hooks
- Faux olive branches in ceramic pot, 12 inches
- Neutral linen tea towels, set of 4
- Wooden cutting board, 18×12 inches
- Small brass candle holders, pair
Step 1: Empty and Measure Your Shelves
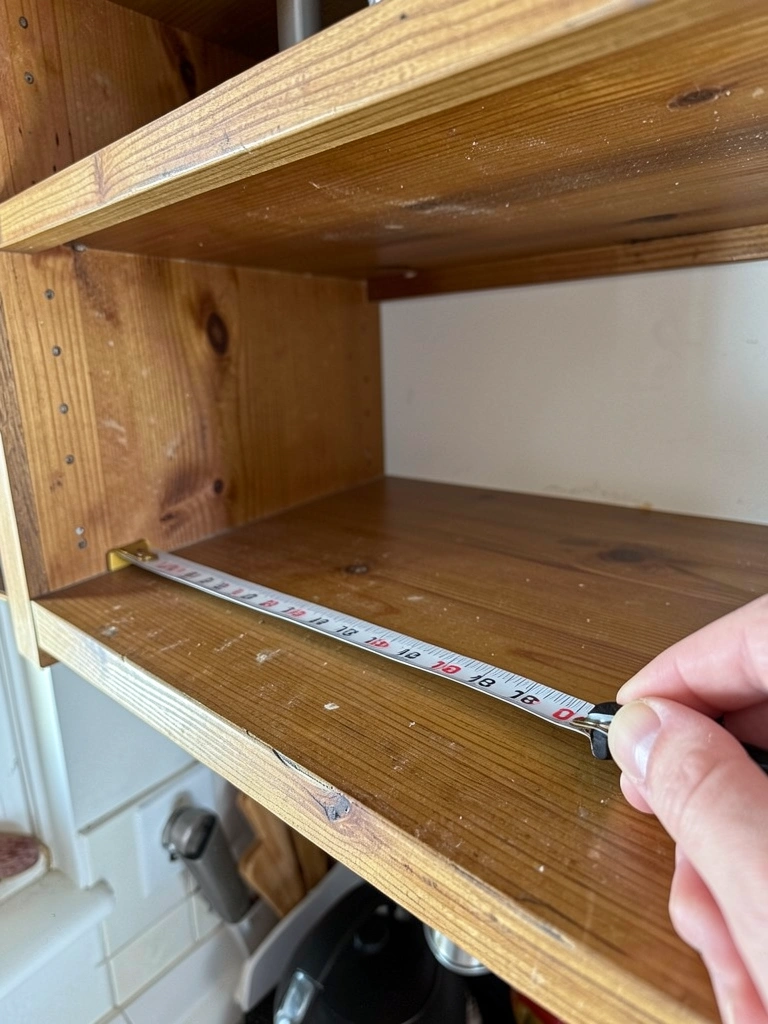
I start by taking everything off. Wipe them down. Then I stand back and look. This clears my head and shows the real space.
Visually, the shelves go from chaos to calm. Empty ones reveal odd heights or gaps I miss when full.
People forget to note shelf depth. Mine were shallower than I thought—forced smaller items later. Measure yours now. Avoid cramming big pieces that stick out.
It takes five minutes. But it sets everything right.
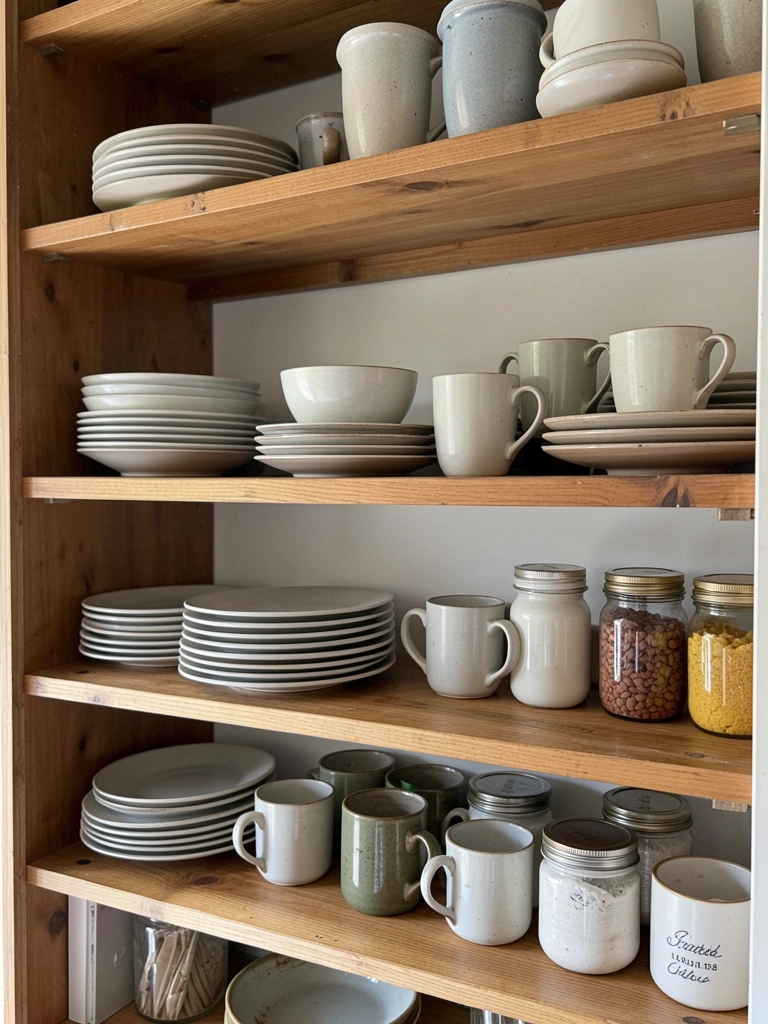
Step 2: Anchor with Everyday Plates and Boards
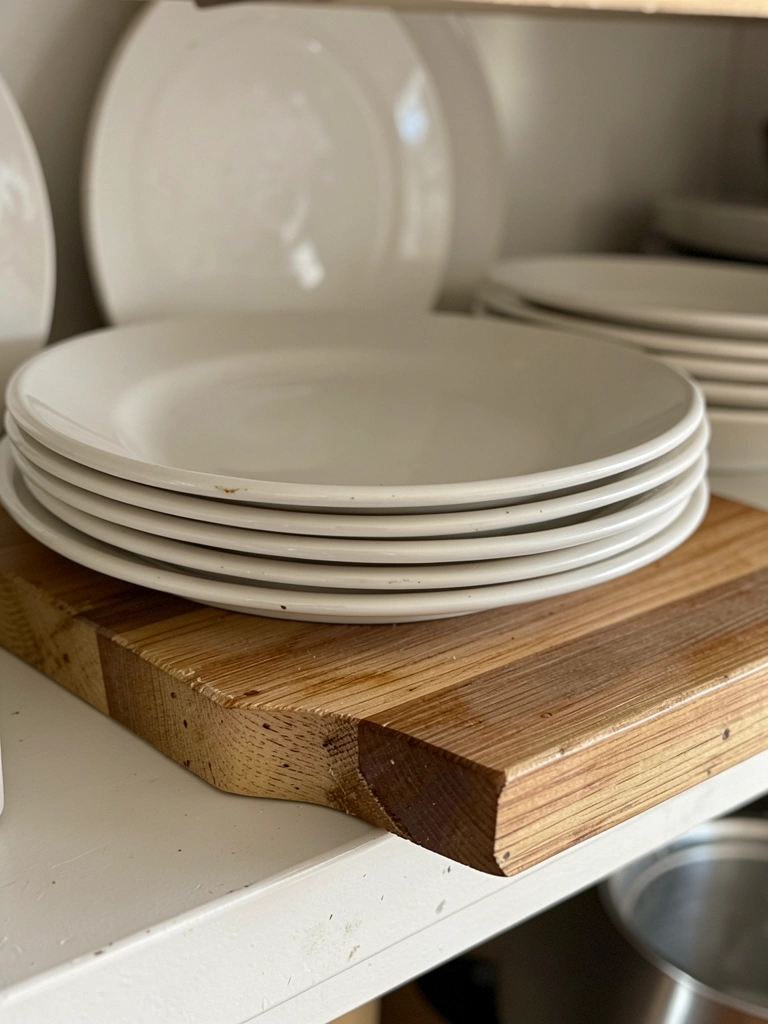
Next, I place plates and a board on the bottom shelf. Stack plates loosely, lean the board at an angle. These ground the whole setup.
The wall shifts—it feels sturdy now, not floating. Weight at the bottom draws your eye steady.
Most miss leaning one item. Flat stacks look stiff. Lean for depth.
Don't center everything perfectly. Off-center feels more natural, lived-in.
Step 3: Hang Mugs and Add Baskets for Height
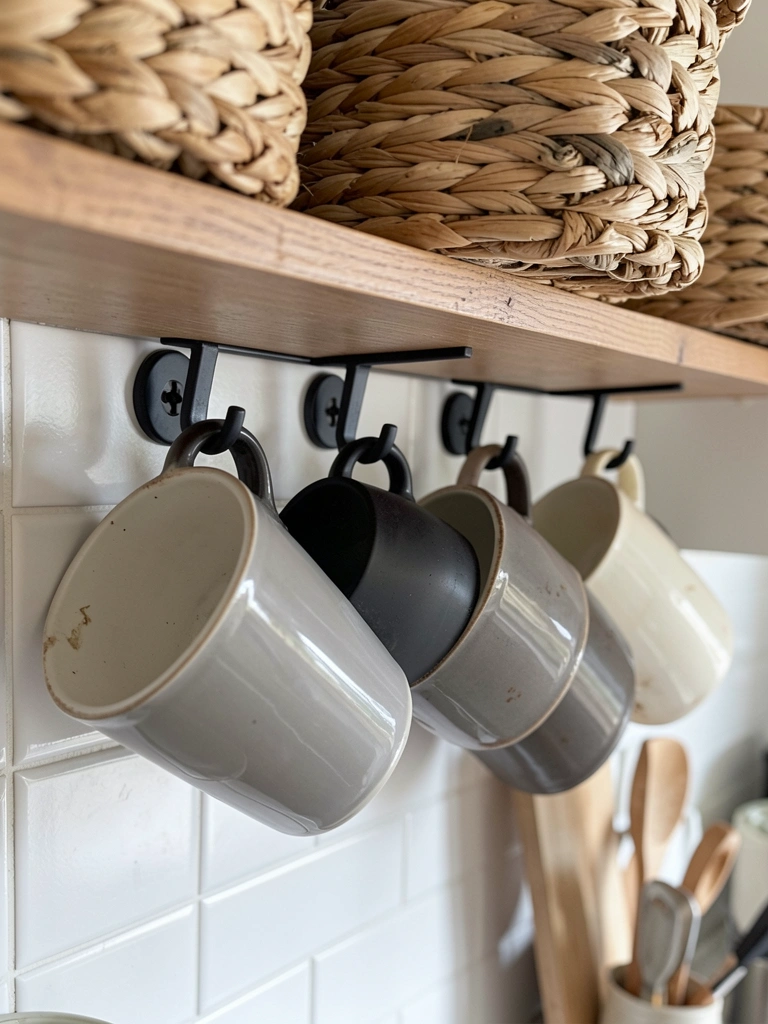
I screw in mug hooks on the middle shelf. Hang three or four mugs. Tuck a basket beside, half-filled with towels.
Now there's rhythm—low anchors, mid-height swing. It pulls the eye up without crowding.
The insight? Hooks add swingy movement others overlook. Static shelves stay dull.
Skip matching mug colors exactly. Mix neutrals. Uniform looks forced.
Step 4: Layer Jars and Greenery Up High
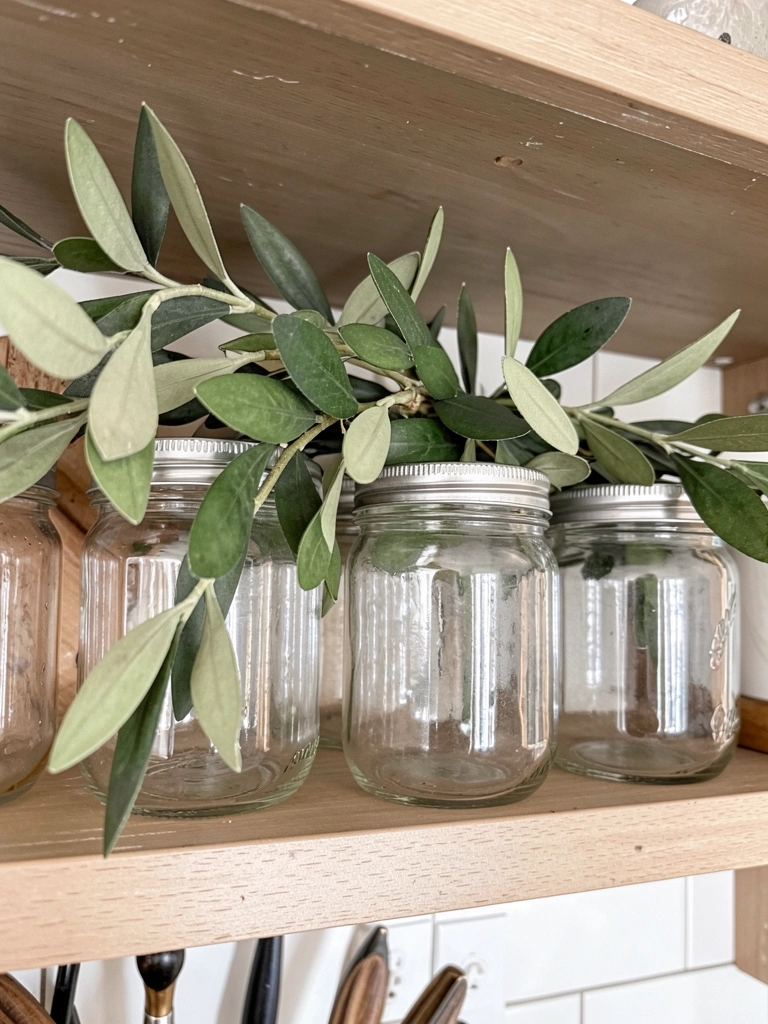
Up top, I group jars with dry pasta or spices. Slip in olive branches in a pot. Keep it light.
The top lightens the stack—balance from heavy base to airy finish. Room breathes.
Folks cram tops too. It weighs down the view. Go sparse.
One mistake: tiny jars alone. Cluster three for presence, not scatter.
Step 5: Step Back and Nudge for Flow
I walk back ten feet. Turn on lights. Nudge items left or right until it flows.
Everything settles—shelves link the kitchen, not fight it. Feels comfortable.
Missed insight: daylight changes feel. Check morning and night.
Avoid over-touching. First nudge often wins. Fussing makes it stiff.
Grouping Items the Right Way
I group by threes or fives. Odd numbers look natural.
Plates stack in threes. Jars too. Baskets pair with one tall item.
- Pull colors together loosely—whites, woods, greens.
- Face labels out on jars. Easy grab.
- Mix heights in each group. No flat lines.
This keeps shelves from spotting.
Why Balance Matters More Than Fullness
Balance stops overload. Heavy bottom, light top.
In my kitchen, it makes counters feel bigger.
- Test by squinting. Shapes should stack even.
- Empty spots are good. Let wall show.
- Everyday use first. Style around it.
Full shelves tire eyes fast.
Keeping It Fresh Without Starting Over
I swap one item monthly. Keeps it alive.
Tea towels change with seasons. Branches dust off easy.
- Wipe shelves weekly. No buildup.
- Rotate heavy items. Prevents sags.
- Live plants if light allows. Real greens warm it.
Small tweaks last years.
Final Thoughts
Start with one shelf. See how it sits.
You'll feel the shift—kitchen warmer, more yours.
These shelves stay put through meals and mess. Mine have for two years. Yours will too.
Leave a Reply