Introduction
Shelves are the backbone of any closet, but most of us aren’t using them to their full potential. If you’re staring at half-empty shelves or struggling to fit everything, you’re leaving storage power on the table. The good news? Small tweaks to how you organize, stack, and style your shelves can literally double your capacity while making everything easier to find. Whether you’re working with a tiny closet or just want to maximize what you have, these 27 ideas will show you exactly how to squeeze more out of every inch—without making your space feel cramped or chaotic. Let’s dig in.
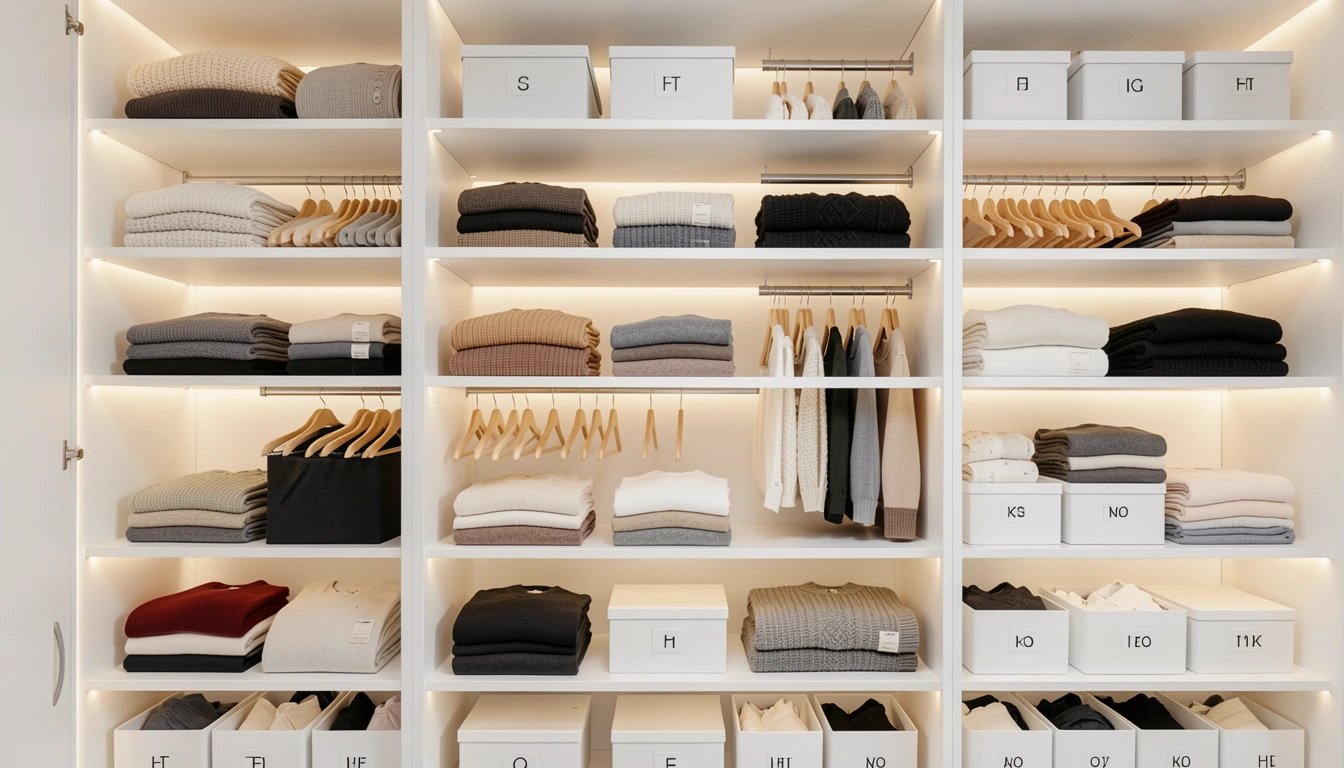
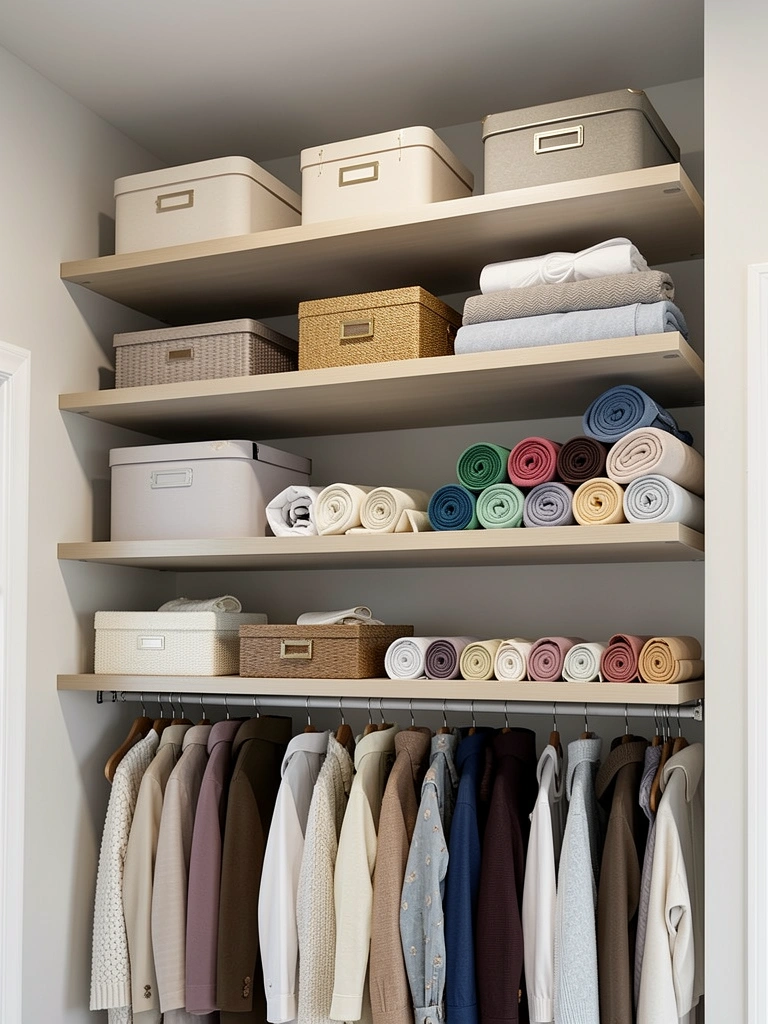
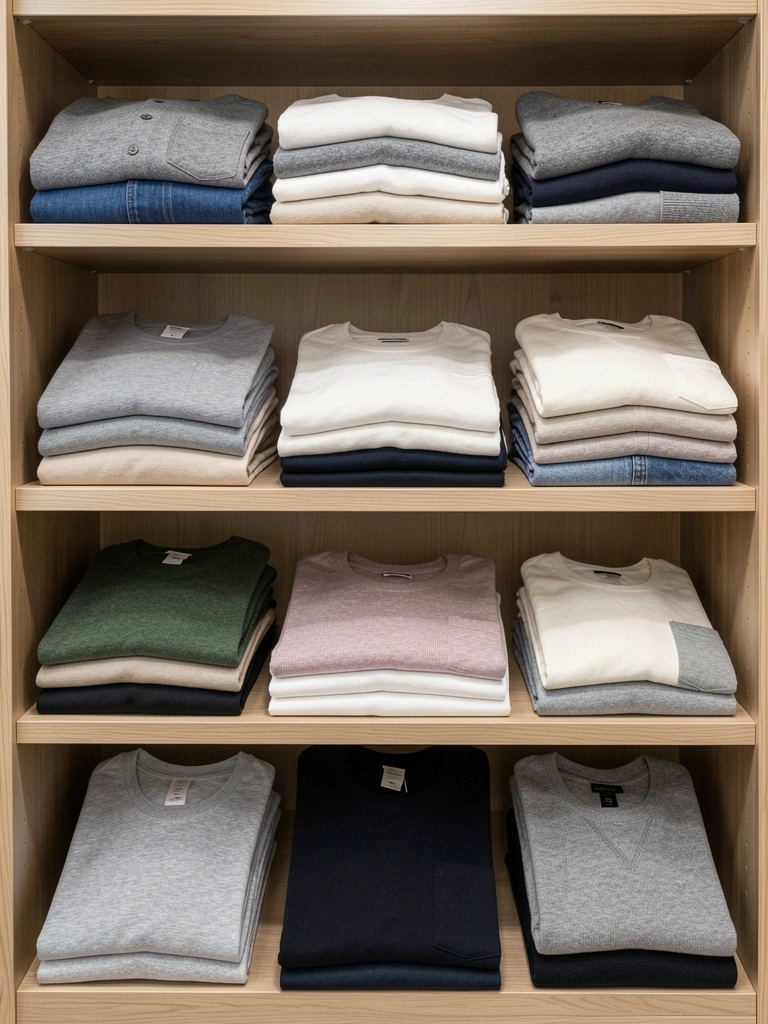
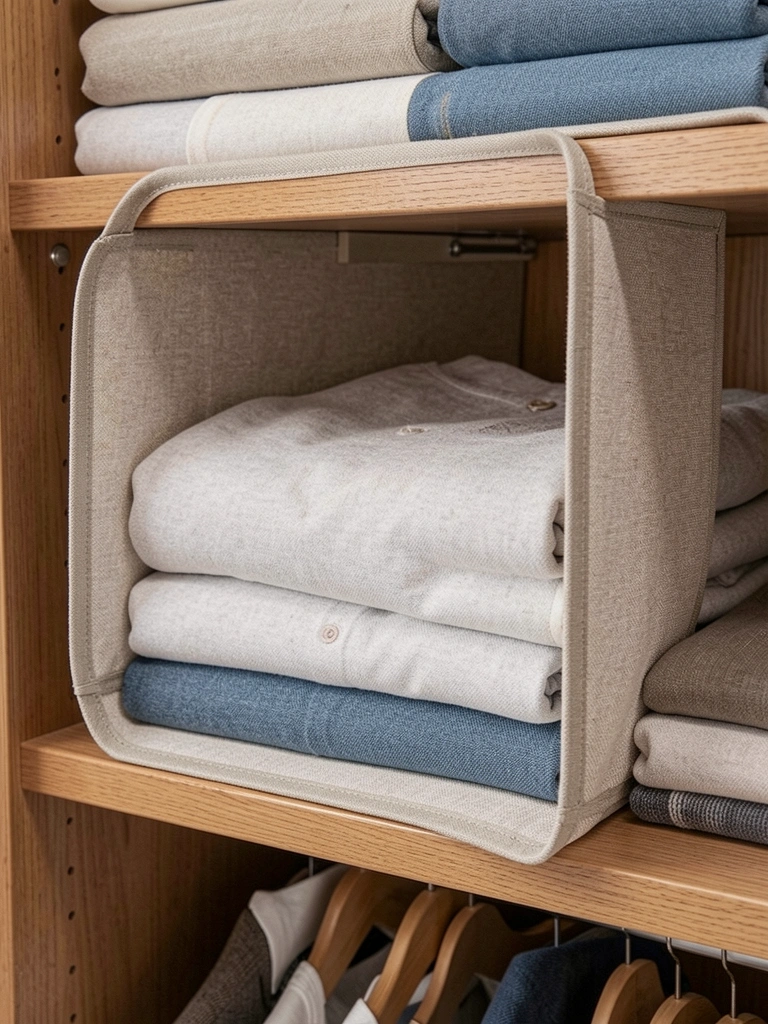
1. Stack Vertically With Shelf Dividers
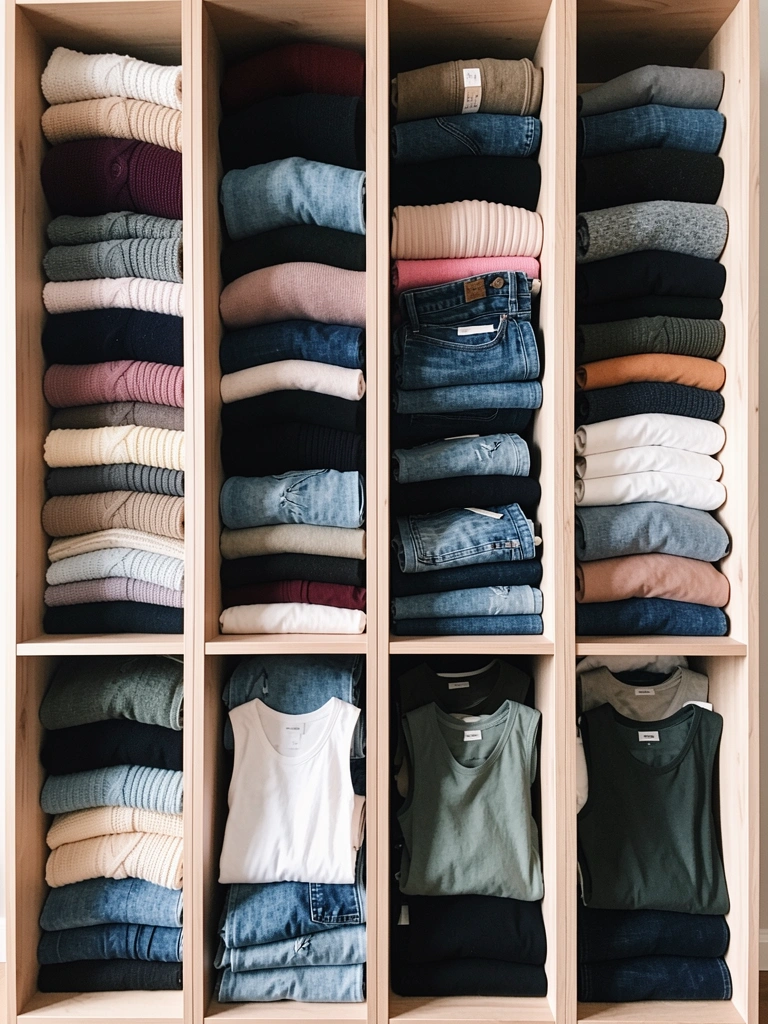
Sweaters and folded items topple over without support, wasting valuable shelf real estate. Shelf dividers keep stacks upright, visible, and stable, letting you fit 3-4 stacks where one used to sprawl.
Grab acrylic or bamboo shelf dividers (typically $15–$40 at IKEA, Target, or Amazon) and place them vertically to create sections. Position them about 4-6 inches apart, depending on your folded items’ width. This takes about 10 minutes to set up. The dividers work best for sweaters, jeans, and structured pieces. Pro tip: Measure your shelf width first—some dividers are adjustable, which is a game-changer for awkward spaces.
You’ll actually see what you own instead of fishing through buried piles, and getting dressed becomes faster.
2. Use Tiered Shelf Risers for Hidden Storage
Dead air above shorter items wastes precious shelf depth. Tiered risers create a second storage level on the same shelf, instantly doubling your real estate without adding a new shelf.
Buy tiered shelf risers ($20–$50, available at Container Store, Wayfair, or Amazon). Place taller items (shoes, bags) on the lower tier and fold or roll smaller pieces (lingerie, workout clothes) on the elevated platform. Riser heights typically max out at 12 inches, so measure your shelf clearance first. Installation takes 5 minutes—most just sit and adjust. This works especially well for shelves with 16+ inches of vertical space above them.
Now you’re storing twice as much without looking cluttered, and everything stays visible and accessible.
3. Fold Clothes the Capsule Way
Flat stacking hides items at the bottom of the pile, forcing you to unstack everything just to find one shirt. Vertical folding lets you see every piece from above, like a filing system for clothes.
Learn the vertical fold method (KonMari or similar)—fold shirts into rectangles about 4 inches wide and stand them upright on your shelf. You’ll fit 8-10 folded tops in the space one flat stack used to occupy. There’s no cost, just a 5-minute YouTube tutorial to master the technique. The initial learning curve takes one afternoon of practice; after that, it’s automatic. Pro tip: This works beautifully with a shelf divider to keep rows tidy.
You’ll see every piece at a glance, grab what you want in seconds, and rediscover clothes you forgot you owned.
4. Install Floating Shelves Above Existing Shelves
Your closet likely has wasted space above your current shelves—often 12-24 inches of prime real estate. Adding a floating shelf there stores seasonal items or rarely used accessories without eating floor space.
Purchase floating shelves in your preferred material (wood, metal, or engineered board; $40–$150 per shelf depending on length). Hire a handyperson or experienced friend to mount them securely with wall anchors ($100–$300 labor if DIY isn’t your thing). Installation takes 1–2 hours per shelf. Label boxes on these upper shelves so you know exactly what’s stored. This is a homeowner move—renters, try over-the-door shelves instead ($20–$50).
Your closet now has three tiers instead of two, and that ceiling space stops being wasted potential.
5. Use Clear Shelf Risers to Peek at What’s Underneath
Opaque risers hide everything below them, defeating the purpose of accessible storage. Clear risers let you see AND access items on both levels without stacking blind.
Buy clear acrylic tiered risers ($25–$60, found at The Container Store, Bed Bath & Beyond, or Amazon). Stack them on your shelf to create an upper and lower storage layer. The transparency lets you spot exactly what’s below without lifting anything. Riser depth ranges from 6–12 inches; choose based on your shelf depth. Setup takes 3 minutes. Pro tip: Use the lower tier for frequently worn basics and the upper for less-used pieces.
You get double the storage with zero mystery—everything’s visible and within arm’s reach.
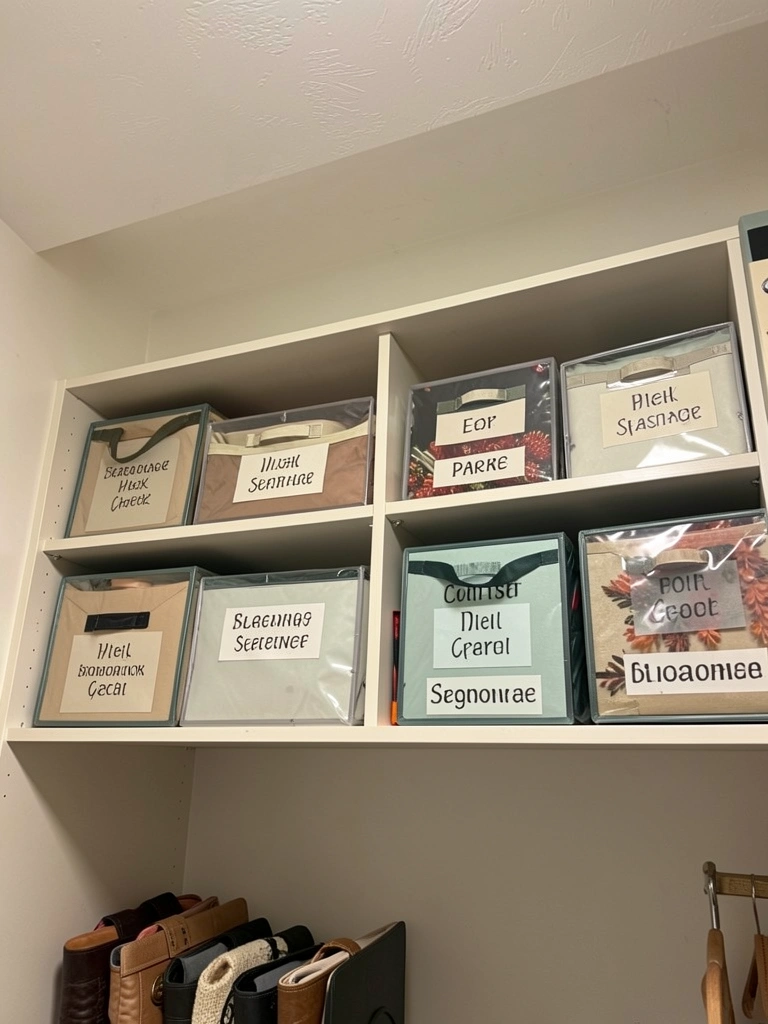
6. Label Every Shelf Zone
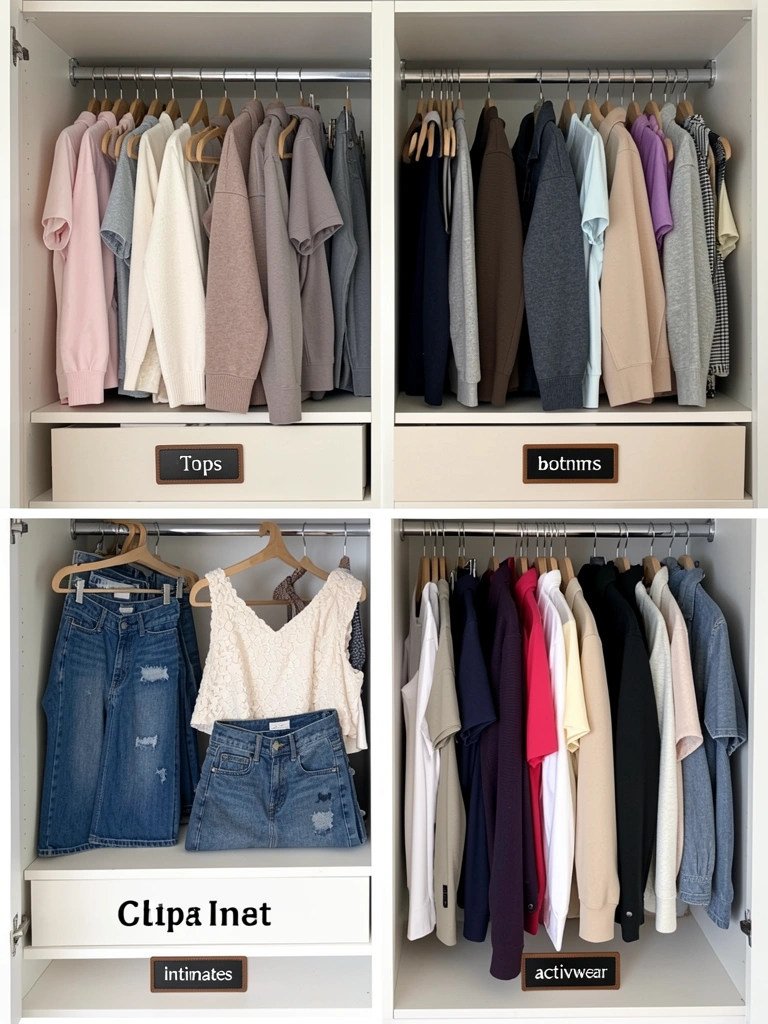
Without zones, you unconsciously stack items randomly, and soon everything’s mixed up. Clear labels remind everyone (and future-you) exactly what belongs where, keeping the system intact.
Grab a label maker ($20–$40 at Target, Amazon, or Office Depot) or use washi tape and a pen for a budget version ($5). Spend 20 minutes labeling each shelf or shelf section: “Sweaters,” “Folded Jeans,” “Activewear,” etc. Print or write labels that match your closet aesthetic. This is a 5-minute task once you decide on zones. For renters: use adhesive labels that peel off cleanly.
Now everyone knows the system, items return to the right spot, and your organization actually stays organized.
7. Add Under-Shelf Hanging Rod for Extra Vertical Tier

Shelves above hangers create dead air; under-shelf hanging rods reclaim that space for frequently worn layers like blazers or cardigans without using floor area.
Install an under-shelf hanging rod ($30–$80 at IKEA, Wayfair, or Amazon) using the mounting brackets included. Drill into studs if permanent, or use heavy-duty adhesive strips for renters. Hang lightweight pieces only—blazers, thin sweaters, or shirts. Installation takes 30 minutes. Load-bearing is typically 15–20 lbs, so test before overstuffing. This works best on shelves 18 inches or taller.
You’ve created a bonus hanging zone without sacrificing shelf space, and frequently worn layers are now within easy reach.
8. Roll Clothes Instead of Fold for Smaller Footprints
Folded stacks take up more depth than rolled items, limiting how many pieces fit per shelf. Rolling compresses volume while keeping everything visible and wrinkle-free.
Lay each item flat, fold in thirds lengthwise, then roll tightly from collar to hem. Stand rolls upright on your shelf in rows. Rolling takes about 20 minutes for a full closet and costs zero dollars. You’ll fit roughly 15–20% more items in the same space compared to folding. Pro tip: Roll similar colors together so you can see options at a glance. This pairs perfectly with shelf dividers.
Your shelf suddenly holds 20% more while looking intentional and boutique-like, plus everything’s immediately visible.
9. Create a Pull-Out Shelf Insert for Deep Closets
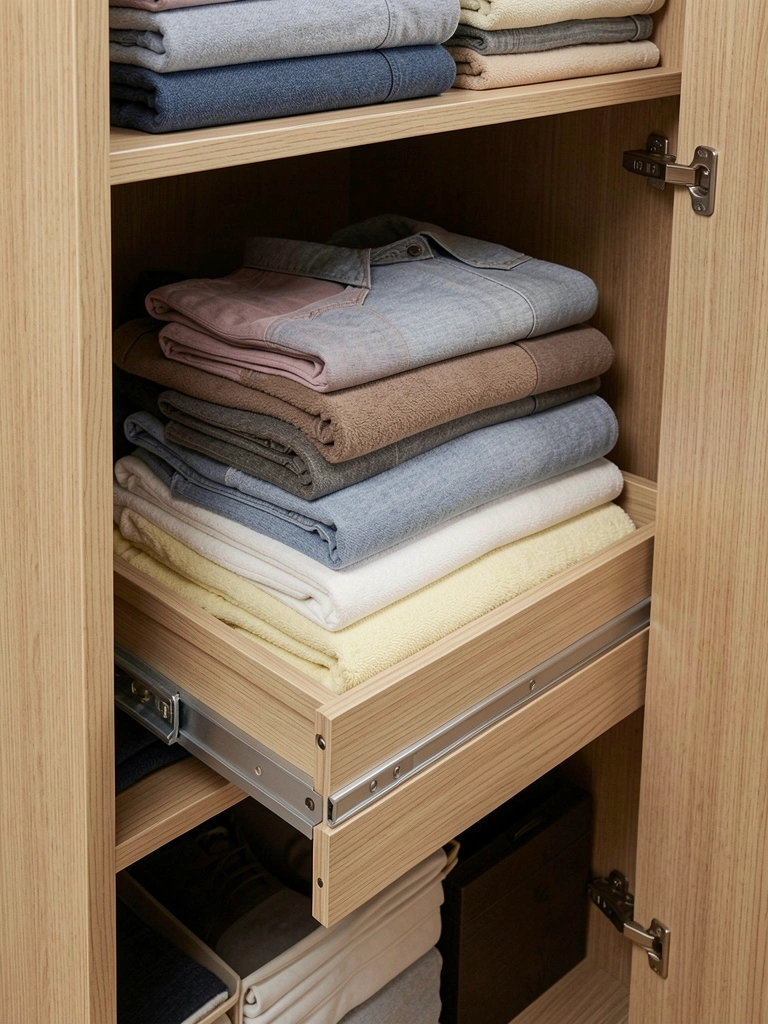
Deep shelves trap items at the back, forcing you to reach awkwardly or leave that space empty. A pull-out insert or sliding tray brings everything forward instantly.
Purchase a sliding shelf insert or pull-out basket ($40–$100, available at IKEA, Home Depot, or Wayfair). Measure your shelf depth first—most inserts max out at 24 inches. Installation takes 15 minutes with a screwdriver; some just rest and slide. Load capacity is usually 25–35 lbs, so distribute weight evenly. This works magic for awkward corner shelves where items disappear.
Now the back of your shelf is accessible, and you stop leaving prime real estate empty just because you can’t reach it.
10. Use Shelf Liners to Protect Clothes and Prevent Slipping
Bare shelves let items slide around, wrinkle clothes, and look bare and utilitarian. A liner protects both your clothes and the shelf, plus adds a polished, intentional look.
Buy adhesive shelf liners ($8–$20 per roll at Target, Dollar Tree, or Amazon) or non-adhesive versions for renters ($10–$30). Cut to fit your shelf and press down—takes 10 minutes per shelf. Non-adhesive liners work with any closet and peel off cleanly. Choose soft materials (felt or fabric-backed) to protect delicate items. Pro tip: Darker liners hide dust better and feel more boutique than stark white.
Your clothes sit securely without sliding, the shelf looks finished and intentional, and wear-and-tear on both clothes and wood decreases.
11. Install Shelf Dividers at Angles for Visual Interest
Standard vertical dividers work, but angled ones create visual rhythm and make your closet feel designed, not just functional. Plus they’re surprisingly effective at keeping stacks in place.
Use angled or geometric shelf dividers ($20–$50 at West Elm, CB2, or Wayfair) or create DIY versions with scrap wood and a saw ($5–$15 in materials). Position them at 45-degree angles or in a staggered pattern to create visual flow. Installation takes 15–20 minutes. These work best on shelves 18+ inches wide. Pro tip: Angle dividers toward the outer edge to visually guide the eye outward.
Your closet starts looking like a boutique display instead of a storage locker, and the diagonal lines make everything feel more intentional.
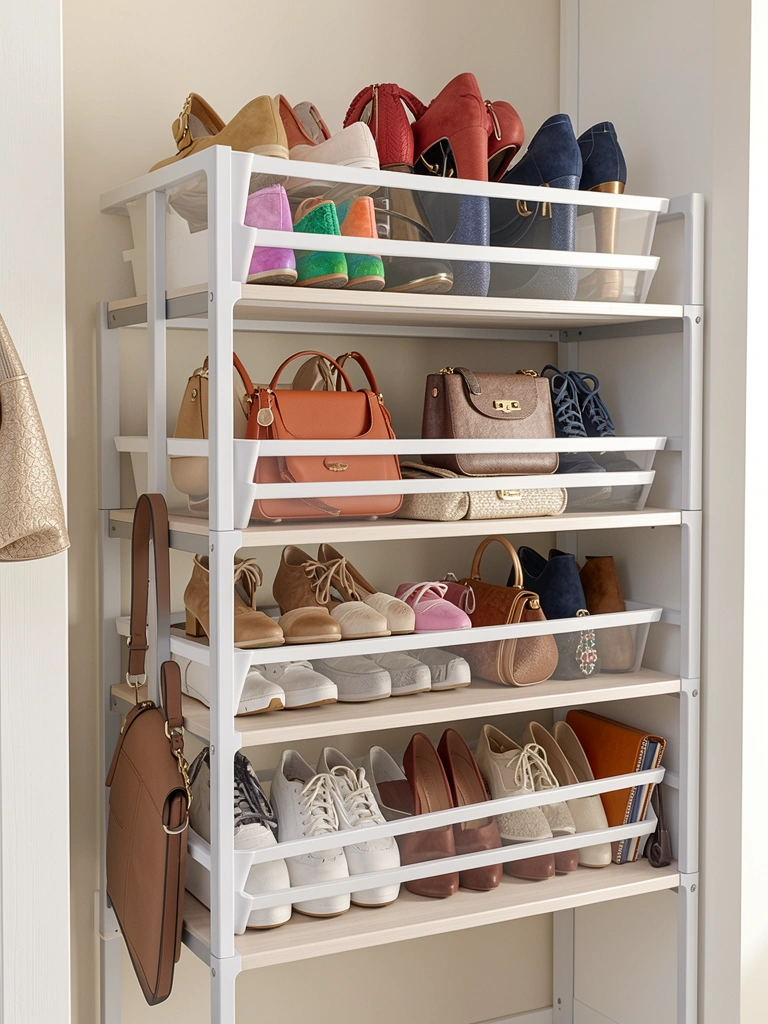
12. Stack Shelf Bins for Color-Coded Organization
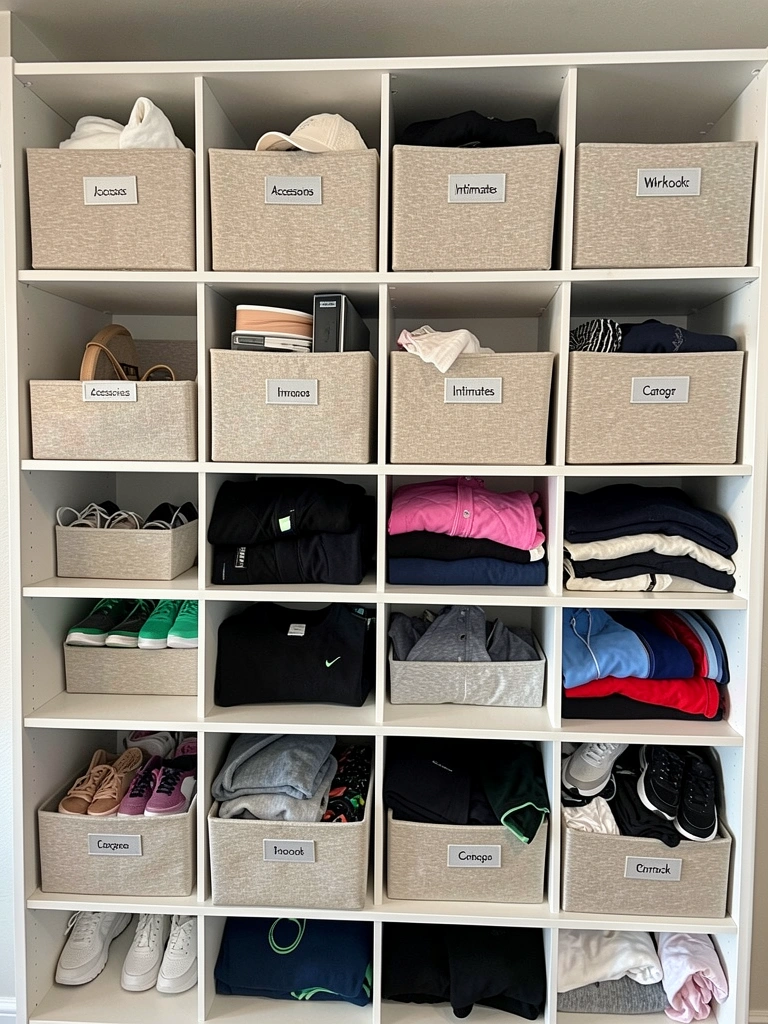
Loose items scattered on a shelf look chaotic, even when everything’s technically tidy. Matching bins corral everything, and color-coding by category adds visual order and functionality.
Buy a set of matching shelf bins ($40–$80 for 4-6 bins at Target, IKEA, or Container Store). Choose fabric, woven, or plastic based on your aesthetic. Label each bin: “Bras,” “Socks,” “Accessories,” “Workout,” etc. Group by color or category inside—all black pieces in one bin, colorful basics in another. Organization takes about 1 hour total. Pro tip: Use bins that match your shelf liner for a cohesive look.
Now your shelf looks curated and intentional, items are easy to locate, and nothing’s scattered or hidden.
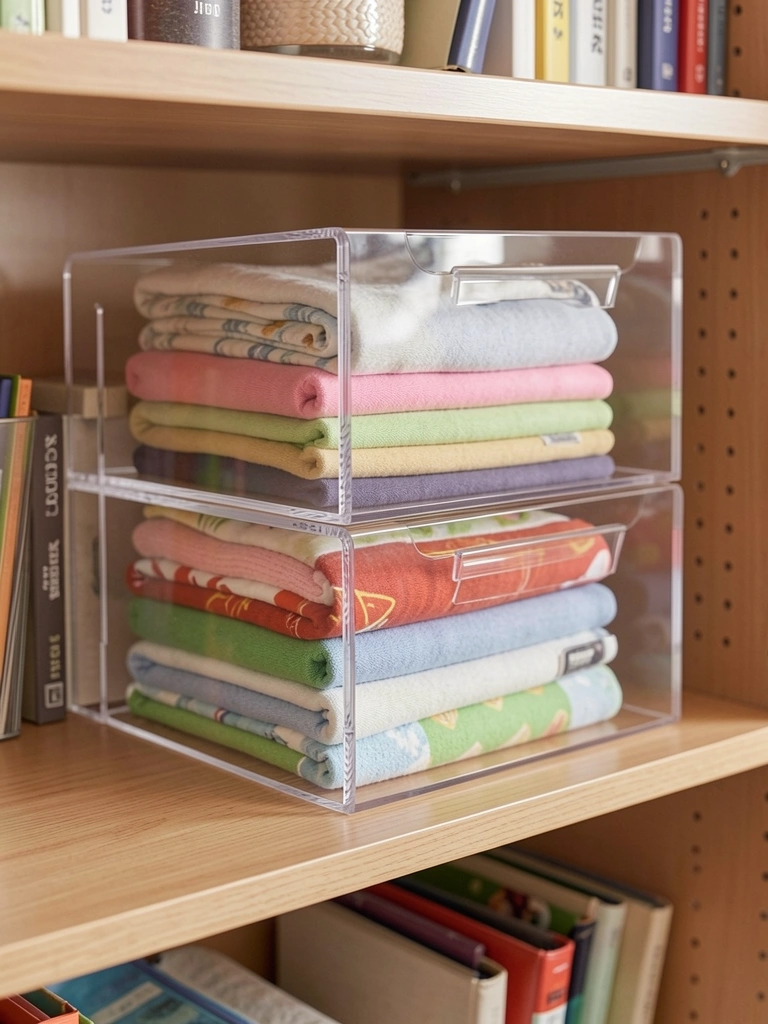
13. Maximize Vertical Space With Stackable Shelf Organizers
A single shelf can hold much more than flat stacking allows. Stackable organizers turn one shelf into three tiers without mounting anything new.
Purchase stackable shelf organizers ($25–$60, found at Containerstore.com, Wayfair, or Amazon). Look for options with removable tiers so you can adjust height. Stack shoes on the bottom tier, bags or small accessories on the middle, and lightweight items on top. Setup takes 5 minutes. Weight capacity is typically 20–30 lbs per tier, so don’t overload. This works best with items you wear frequently, as you’ll see everything at once.
You’re essentially creating three shelves’ worth of storage in the space of one, making every inch work harder.
14. Use Acrylic Shelf Dividers for a Modern Look
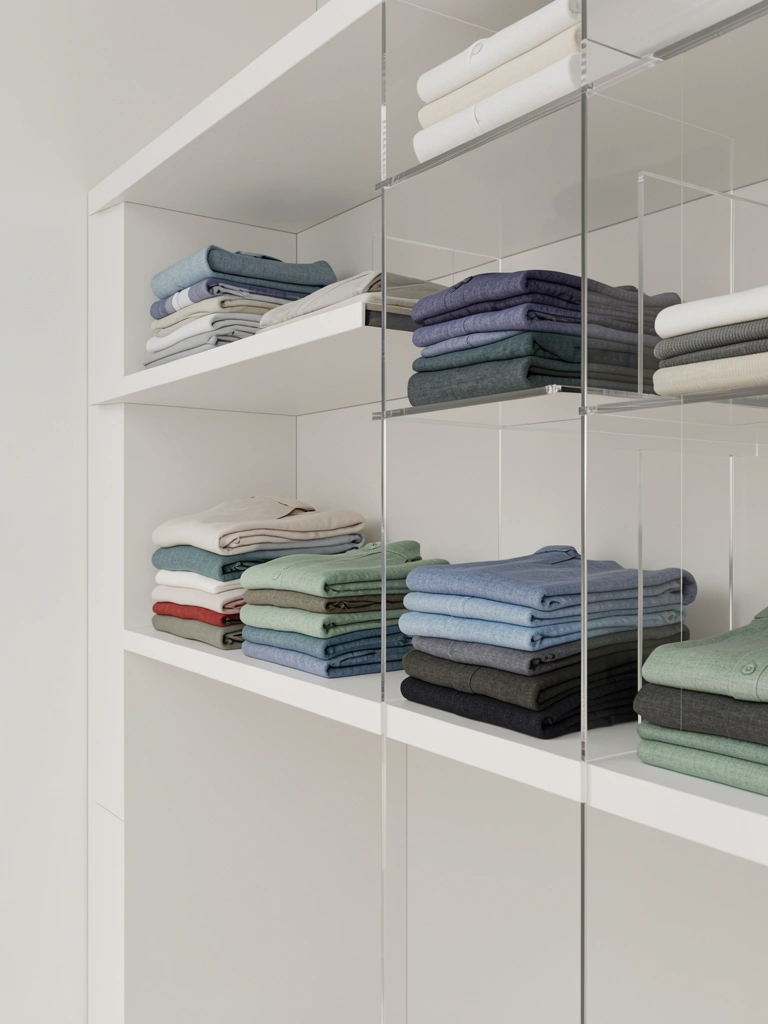
Plastic or metal dividers can look utilitarian or dated. Clear acrylic dividers are nearly invisible, letting your organized stacks become the visual star while still keeping items separated.
Buy clear acrylic shelf dividers ($15–$35 at Container Store, Wayfair, or Amazon). They come in various heights and thicknesses. Install as you would any divider—just slot them between stacks. No installation needed; they simply rest and support. Takes 5 minutes to position. Acrylic is durable, easy to clean, and looks more intentional than wire. Pro tip: Position them 4-6 inches apart, depending on your folded item width.
Your closet looks modern and gallery-like, with organized stacks that are contained but not hidden behind opaque dividers.
15. Create a Daily-Wear Shelf at Eye Level

Reaching too high or bending too low for daily basics wastes time every single morning. A dedicated eye-level shelf holds 5-7 pre-planned outfit options, speeding up your mornings significantly.
Choose a shelf at comfortable eye level (typically 48–60 inches from the floor). Dedicate it to this week’s planned outfits or your most-worn pieces. Fold items neatly or hang lightweight options. Refresh this shelf weekly during your Sunday routine. No cost; just a 15-minute reorganization each week. Pro tip: Include only pieces you’ve worn in the last two weeks, ensuring the shelf stays relevant.
You’ll cut morning decision time in half, wear pieces that fit well, and develop better outfit awareness without thinking about it.
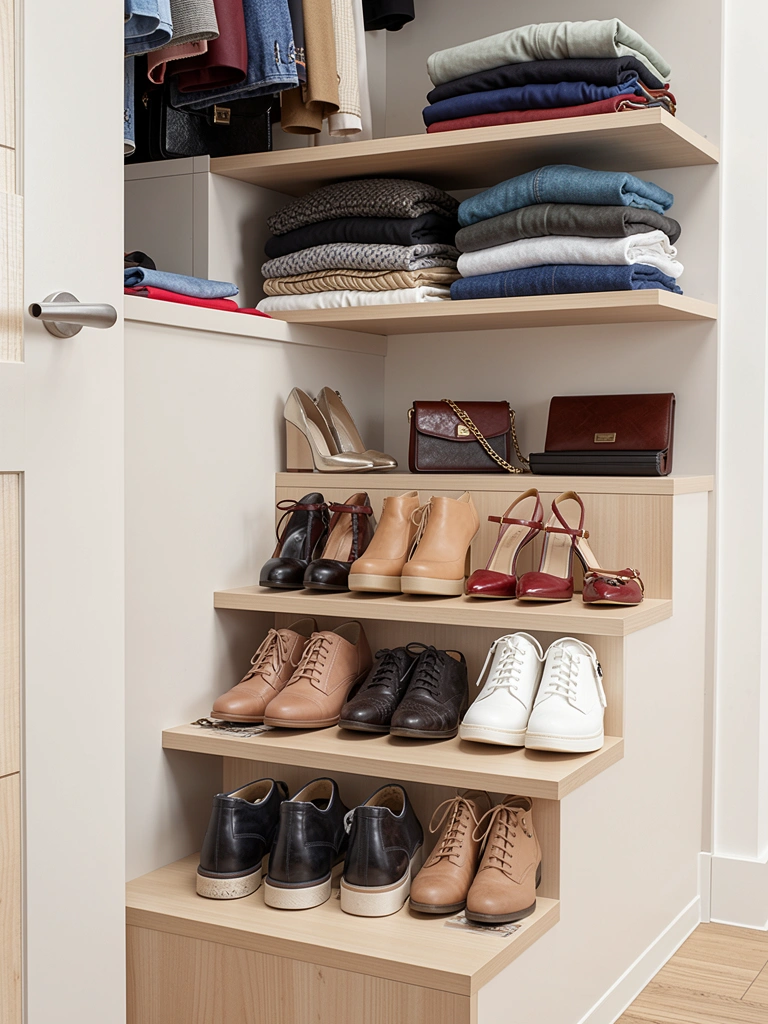
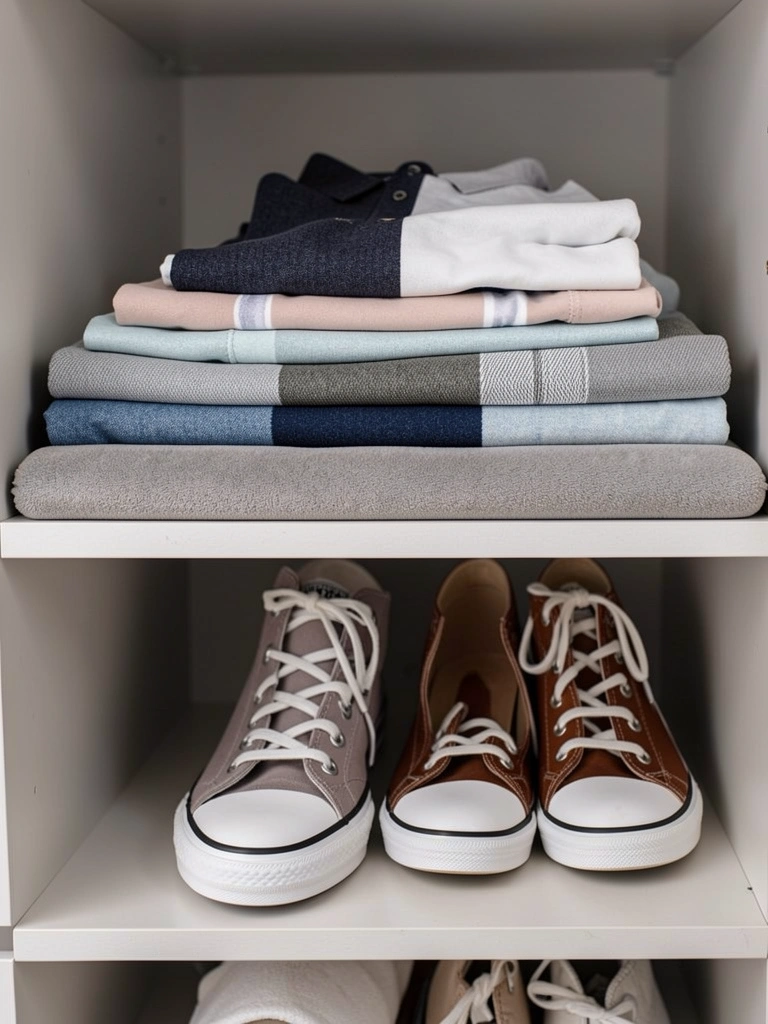
16. Add Slanted Shelf Risers for Shoe Display
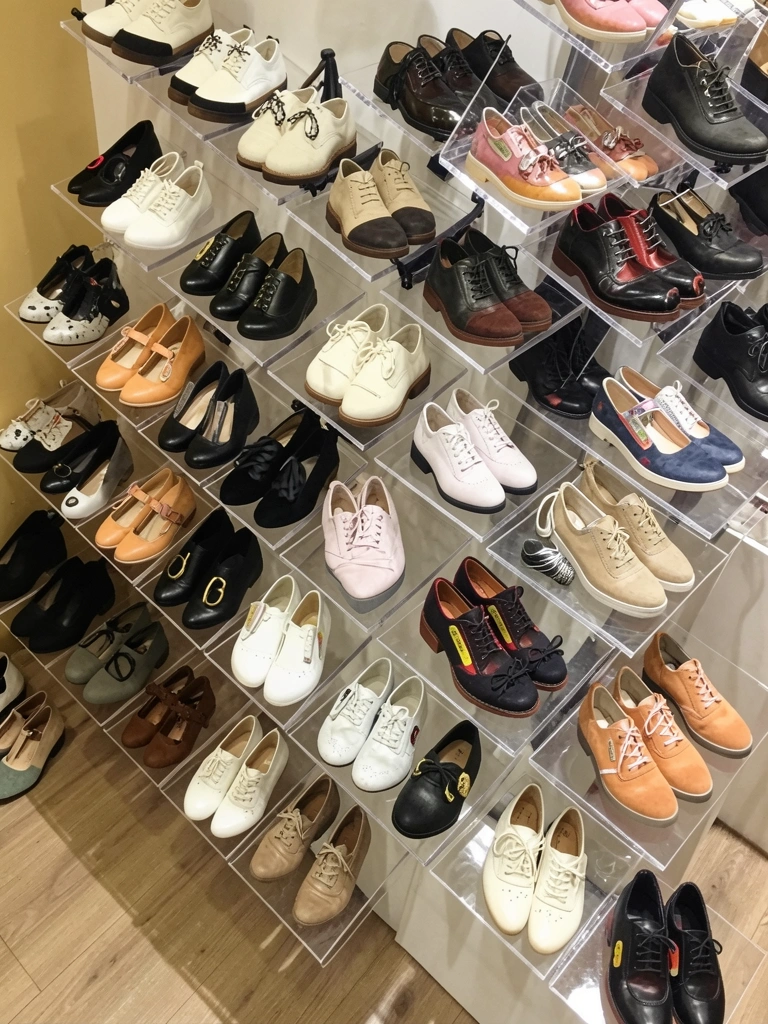
Shoes stacked flat or back-to-back hide half of your options, and you forget what you own. Slanted risers display shoes like a store display, making selection faster and more fun.
Purchase slanted shoe risers or acrylic shelf steps ($20–$50 at Container Store, Target, or Amazon). Position on your shelf to create an angled display. Each riser typically holds 4-6 pairs depending on shoe size. Setup takes 5 minutes. Weight capacity is usually 20–30 lbs per riser, so distribute evenly. This works especially well on narrow shelves where depth is limited.
Now you see every shoe at a glance, find pairs faster, and actually wear the options hiding in the back.
17. Label Shelf Fronts With a Leather Label Maker
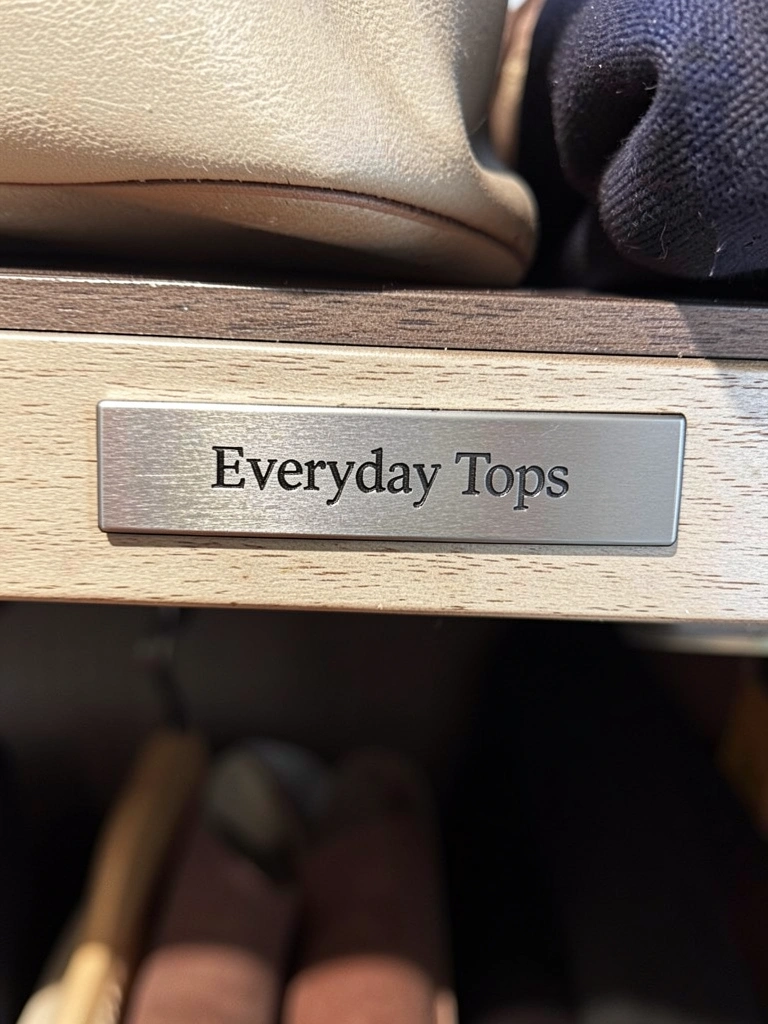
Small paper labels get lost or peel off. A leather label maker creates permanent, professional-looking labels that stay put and add luxury to your closet.
Buy a leather label maker ($15–$30 at Container Store, Amazon, or Etsy) or have custom labels embossed ($0–$10 per label online). Attach to the front edge of each shelf with adhesive or small screws. Takes 10 minutes to label all shelves. Leather labels look high-end and last years. Pro tip: Use a simple sans-serif font and white or embossed lettering for a boutique feel.
Your closet now looks professionally organized, and you can find zones instantly even from the bedroom doorway.
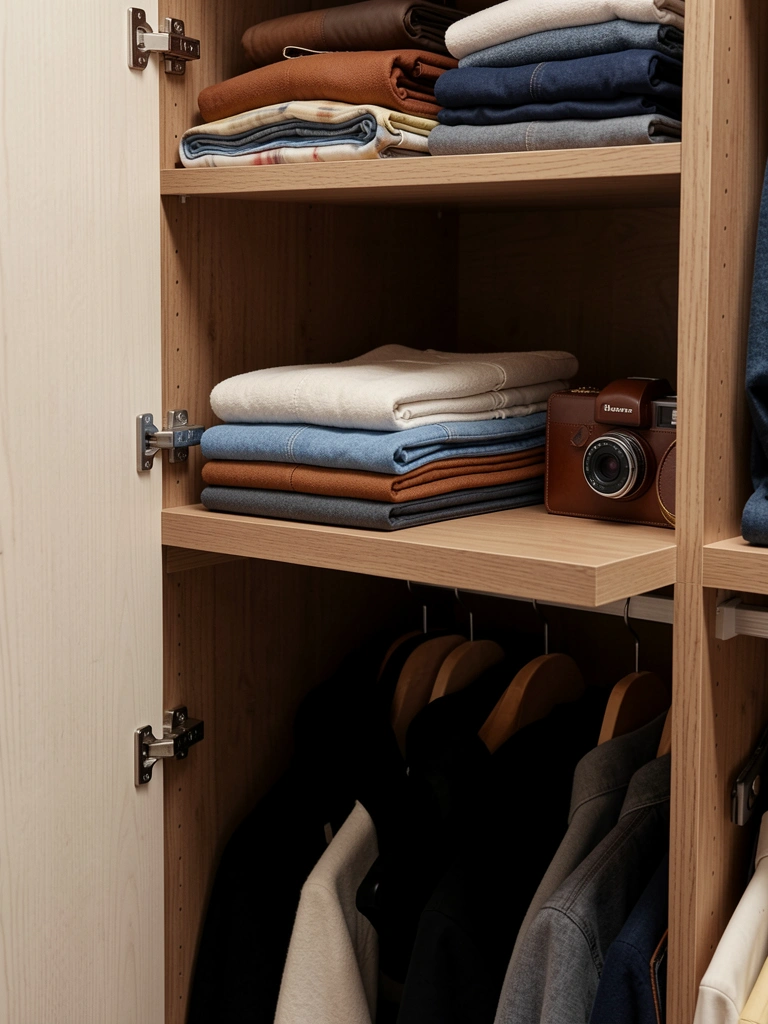
18. Store Off-Season Items on High Shelves
Off-season clothes clutter valuable eye-level and reach-level shelf space. Moving them to high shelves (or above-closet storage) frees up prime real estate for items you wear now.
Place labeled storage bins on high shelves with off-season items (winter coats in summer, shorts in winter, etc.). Use sturdy plastic bins with handles ($10–$20 each) for easier retrieval. Label clearly with a label maker or marker: “Winter Coats – Apr-Sept” or “Summer Dresses – Nov-Mar.” Rotation takes 1 hour quarterly. Pro tip: Invest in a step stool ($30–$50) for safe high-shelf access if you don’t have one.
Your daily-use shelves stay clutter-free and functional, and seasonal items are organized and protected until you need them.
19. Use Magazine-Style Shelf Dividers for Folded Items
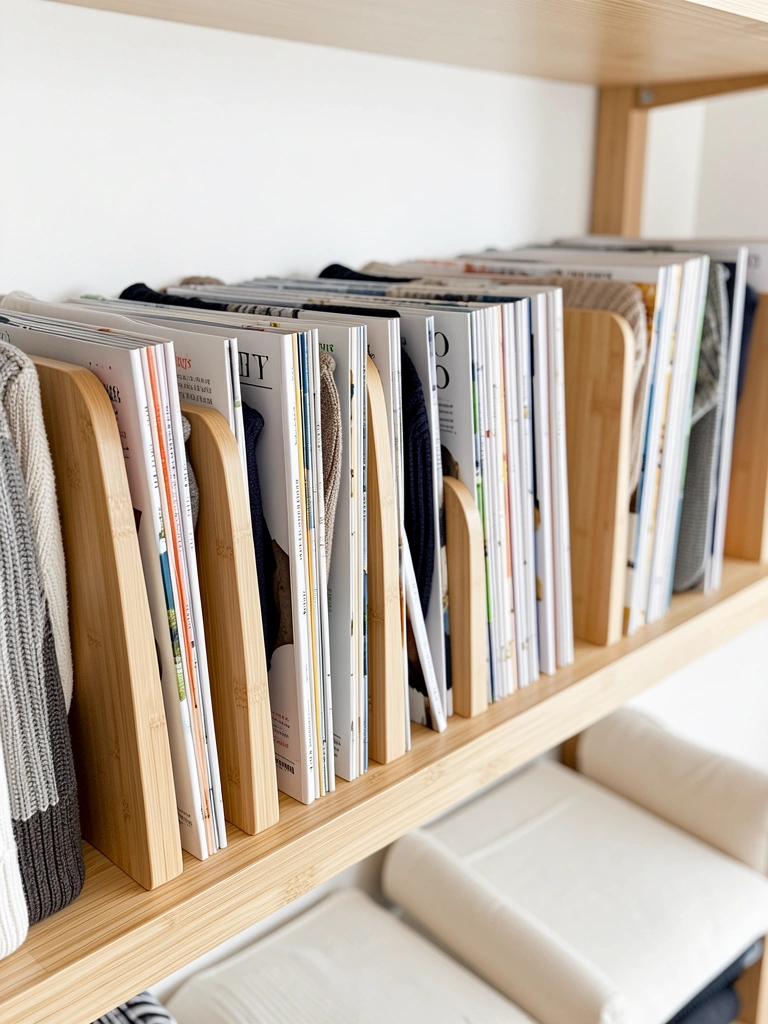
Magazine holders ($10–$20) aren’t just for magazines. They’re perfect dividers for folded clothes when you want a boutique-store vibe instead of a utilitarian look.
Purchase wooden or bamboo magazine holders ($8–$15 each at IKEA, Container Store, or Target). Stand them vertically on your shelf and fill them with vertically folded items. Use 2-4 holders per shelf depending on width. Takes 10 minutes to set up. These look far more intentional than plastic dividers and double as décor. Pro tip: Bamboo holders age beautifully and pair well with natural wood shelves.
Your organized shelves now look like a boutique display, and your setup feels designed rather than makeshift.
20. Install Tiered Wire Shelving for Maximum Adjustability
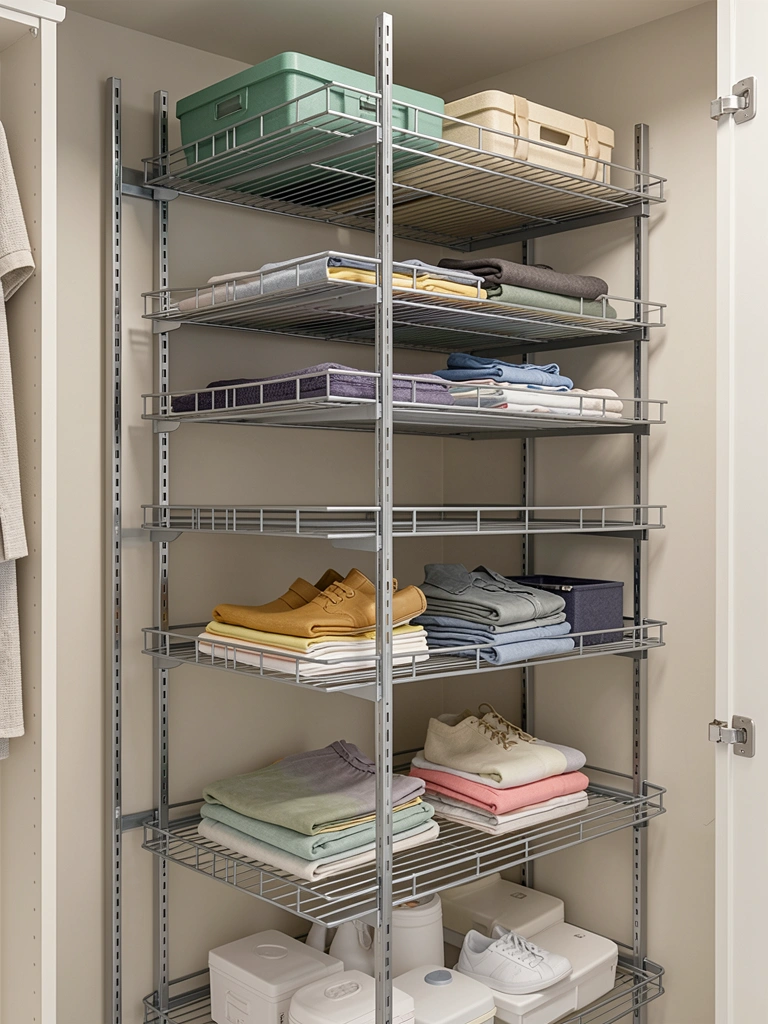
Fixed shelves don’t accommodate different items well—shoes need less height than stacked sweaters. Tiered wire shelving lets you adjust shelf height for each category.
Install adjustable wire shelving kits ($80–$200 depending on size, available at Home Depot, Lowes, or Wayfair). This is a homeowner investment; renters, ask your landlord or skip this one. Installation takes 2–4 hours with a drill and level. Most kits support 100+ lbs per shelf, so they’re sturdy. Once installed, you can adjust shelf heights in 10 minutes per adjustment.
Now every shelf accommodates its contents perfectly—tall stacks where they fit, lower shelves for shoes, and complete customization.
21. Add LED Strip Lighting Along Shelf Edges
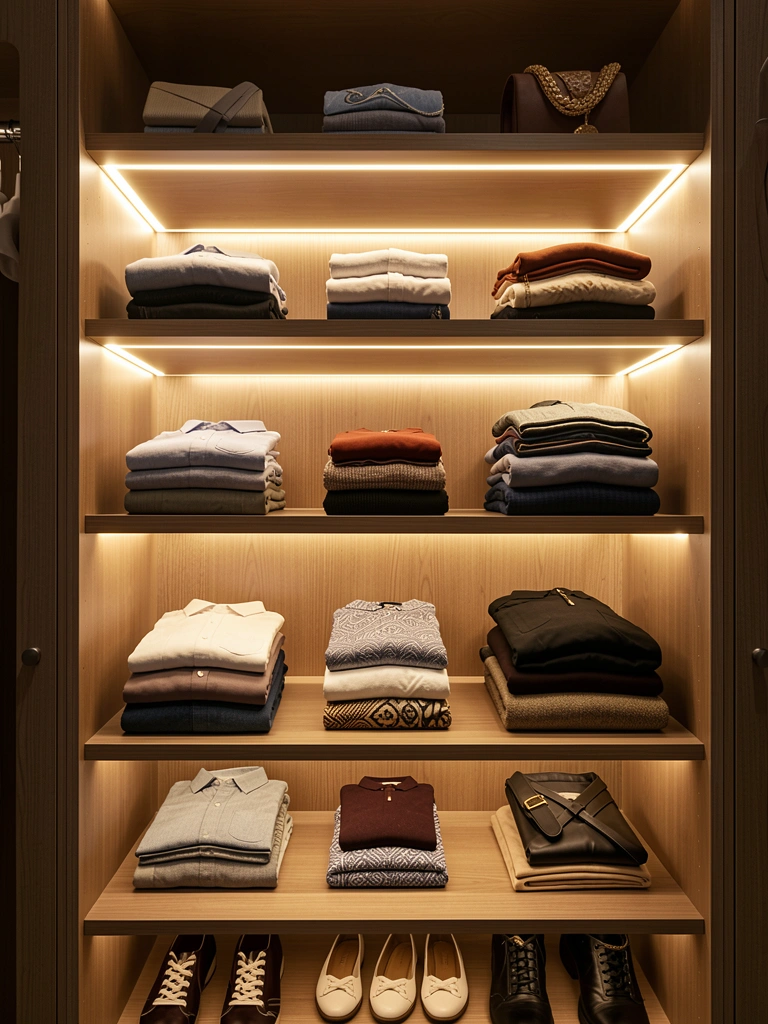
Dark shelves make finding items harder and feel less intentional. LED strips add warm, subtle light that makes everything visible and elevates your closet from storage to retreat.
Purchase adhesive LED strip lights ($20–$50 at Target, Amazon, or Best Buy). Choose warm white (2700K) for a cozy feel. Attach to the underside of each shelf edge with included adhesive—takes about 20 minutes total. Plug into a power strip or outlet (or go battery-powered for $30–$60 extra). These strips use minimal energy and last 2+ years. Pro tip: Warm lighting is more flattering for trying on clothes than cool white.
Your closet now feels spa-like and boutique-inspired, you see everything instantly, and the ambiance encourages you to actually use your space.
22. Create a Dedicated Shelf for Current-Season Basics
You wear the same 10 pieces 80% of the time, but they’re often buried among everything else. A dedicated shelf for current-season basics makes getting dressed easier and your closet feel curated.
Choose a mid-level shelf and stock it with only the basics you’ve worn in the last week: plain tees, neutrals, everyday staples. Refresh weekly. Takes 15 minutes to curate. No cost. Pro tip: Use shelf dividers to keep basics in neat sections by color or type (plain tees vs. striped tees). This works alongside your daily-wear shelf for maximum efficiency.
You’ll grab your go-to pieces in seconds, wear clothes you actually like, and feel more put-together without adding complexity.
23. Use Shelf Extenders for Corner or Awkward Spaces
Corners and shelf edges often waste space because items don’t fit neatly. Shelf extenders fill those gaps, turning dead space into usable storage.
Buy shelf extenders or corner shelf inserts ($15–$40 at IKEA, Home Depot, or Amazon). These fit inside corners or extend a shelf edge. Installation takes 15 minutes with a screwdriver. Most support 15–20 lbs, so store lighter items like rolled accessories or flat folded pieces. Measure your corner before buying to ensure fit.
You’ve claimed every inch of space, even awkward corners, and your storage capacity increases by 10–15% with minimal effort.
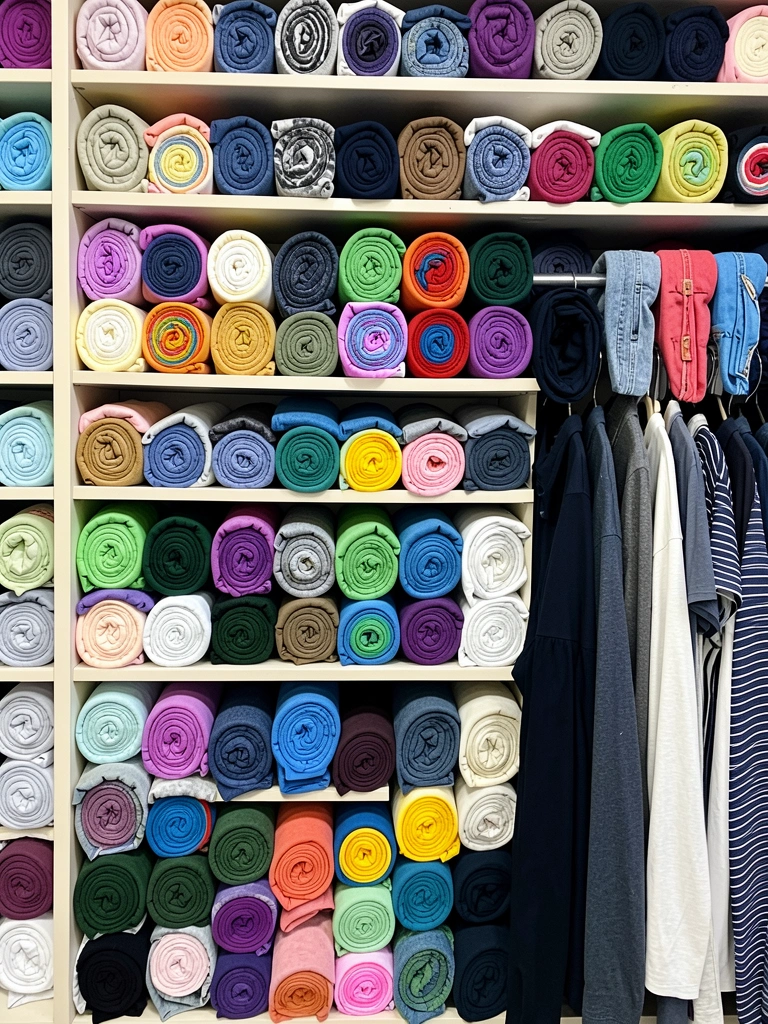
24. Stack Similar Colors Together for Visual Calm
Random colors on a shelf look chaotic, even when items are neatly folded. Grouping by color creates visual calm and makes outfit matching faster.
Sort your folded items by color: blacks together, whites grouped, neutrals stacked, and brights in their own section. Takes about 30 minutes for a full closet. No cost. This pairs beautifully with shelf dividers to keep color sections separate. Pro tip: Within each color, organize by weight or frequency to make selection even easier.
Your shelf becomes a visual retreat instead of visual noise, getting dressed takes seconds (you see all options of each color), and your space feels intentional.
25. Use Under-Shelf Baskets for Hidden Accessibility
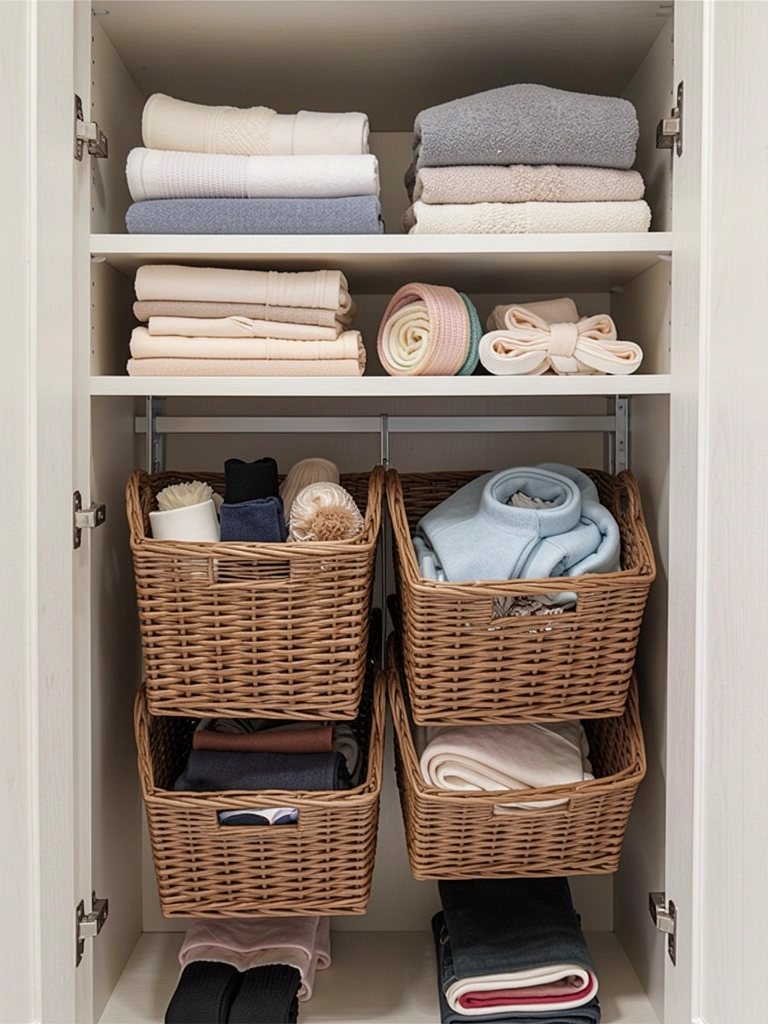
Items stored on shelves contribute to visual clutter. Under-shelf baskets store things below the line of sight, keeping your shelf surface clean and less busy.
Install under-shelf hanging baskets ($20–$40 per basket at Container Store, Target, or Amazon) using the brackets included. These hang from shelf bottoms and pull out like drawers. Load with off-season accessories, delicates, or things you don’t wear often. Installation takes 15 minutes per basket. Most support 10–15 lbs, so keep them light. Pro tip: Use mesh baskets so you can see contents without opening.
Your primary shelf surface stays clean and visible, but you’ve doubled your storage capacity with accessible hidden space below.
26. Install Shelf Protectors to Prevent Dust and Damage
Dust settles on shelves and damages wood over time. Protectors keep both your clothes and your closet furniture cleaner and in better condition.
Purchase removable shelf protectors ($10–$25 per shelf at Target, Amazon, or IKEA). These are thicker than liners and often washable. Lay them flat and press down—takes 5 minutes per shelf. They’re reusable for years and protect against spills, dust, and scratches. Non-adhesive versions work for renters. Pro tip: Choose colors that hide dust better than white (grays or soft taupes).
Your clothes stay cleaner longer, your shelves look better with age, and you’re protecting your closet investment.
27. Create a Shelf Inventory Chart and Photograph It
You forget what you own, where it is, and what still needs organizing. A simple inventory photo or chart reminds you of what’s actually stored and prevents duplicate purchases or forgotten pieces.
Use your phone to photograph each shelf, or create a simple spreadsheet listing contents: “Shelf 1: Sweaters – 12 pieces,” “Shelf 2: Folded Jeans – 8 pairs,” etc. Keep it in your phone notes or print and post inside your closet. Takes 20 minutes to document. Update quarterly when you refresh seasonal items. Pro tip: Color-code categories in your chart (blue for tops, green for bottoms, etc.) for quick scanning.
Now you know exactly what you own and where to find it, stop buying duplicates, and feel confident your closet’s organized from top to bottom.
SOFT CTA:
Save this post and pick your top three ideas this weekend. Even one shelf refresh will make getting dressed feel easier and faster. Tag a friend who needs a closet reset—they’ll thank you for sharing.
Leave a Reply