
23 Minimalist Kitchen Storage Ideas That Cut Clutter Fast
Introduction
If your kitchen counters look like a catch-all for every gadget, jar, and utensil you own, you’re not alone. But here’s the thing: a cluttered kitchen doesn’t just look messy—it makes cooking harder and stresses you out every time you walk in. The good news? You don’t need a complete renovation to fix it. Minimalist storage isn’t about owning less (though that helps); it’s about being smart about where everything lives and making it easy to find what you use. Whether you’re renting, renovating, or just tired of chaos, these 23 ideas will help you create a kitchen that feels spacious, functional, and genuinely yours. Let’s clear some space and get cooking.
1. Install Floating Shelves Above Counter Space
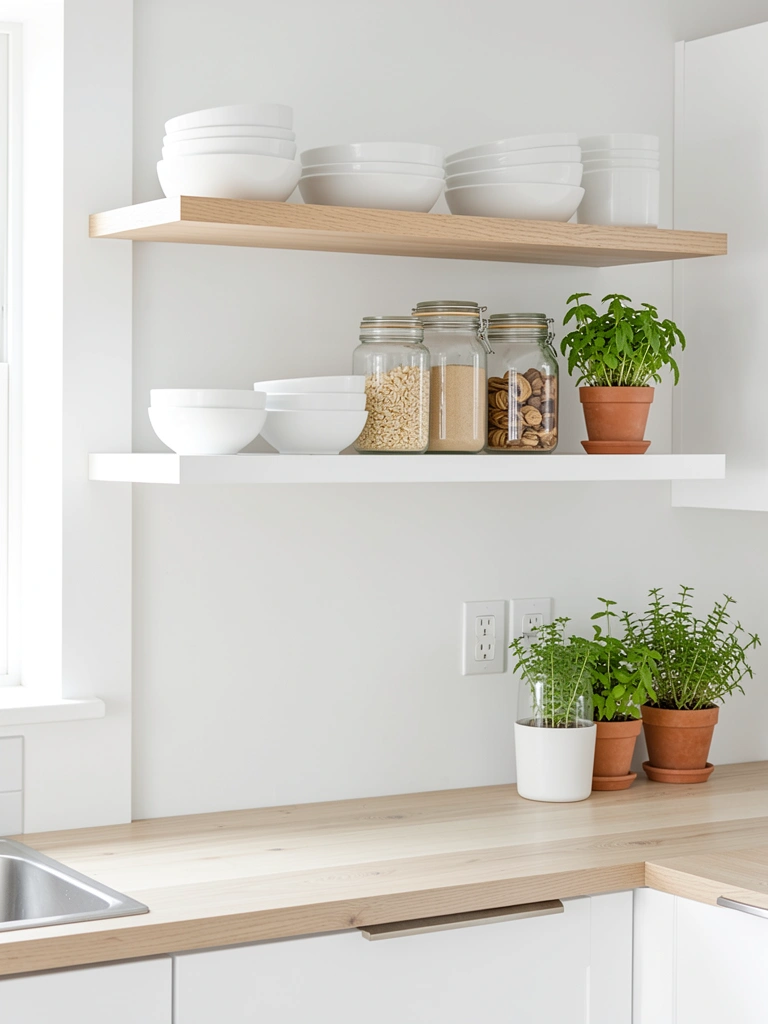
Floating shelves replace bulky cabinets and give you open storage that doesn’t eat up floor space. They’re perfect for displaying items you actually use daily—glassware, cookbooks, or pantry staples in glass containers.
Mount shelves 12-18 inches above your counter at eye level for easy access and visual impact. Use $40-$150 per shelf depending on materials (wood, metal, or composite). Installation takes 1-2 hours with a drill and level; renters can use adhesive-mounted options for $20-$50. Fill them with uniform containers—white ceramic, clear glass, or natural wood—to keep the look cohesive. Group similar items together (all mugs, all grains) rather than mixing everything randomly.
This approach opens up your counters and turns storage into part of your décor. You see what you have, so you’re less likely to buy duplicates or forget ingredients.
2. Use Clear Glass Containers for Pantry Visibility
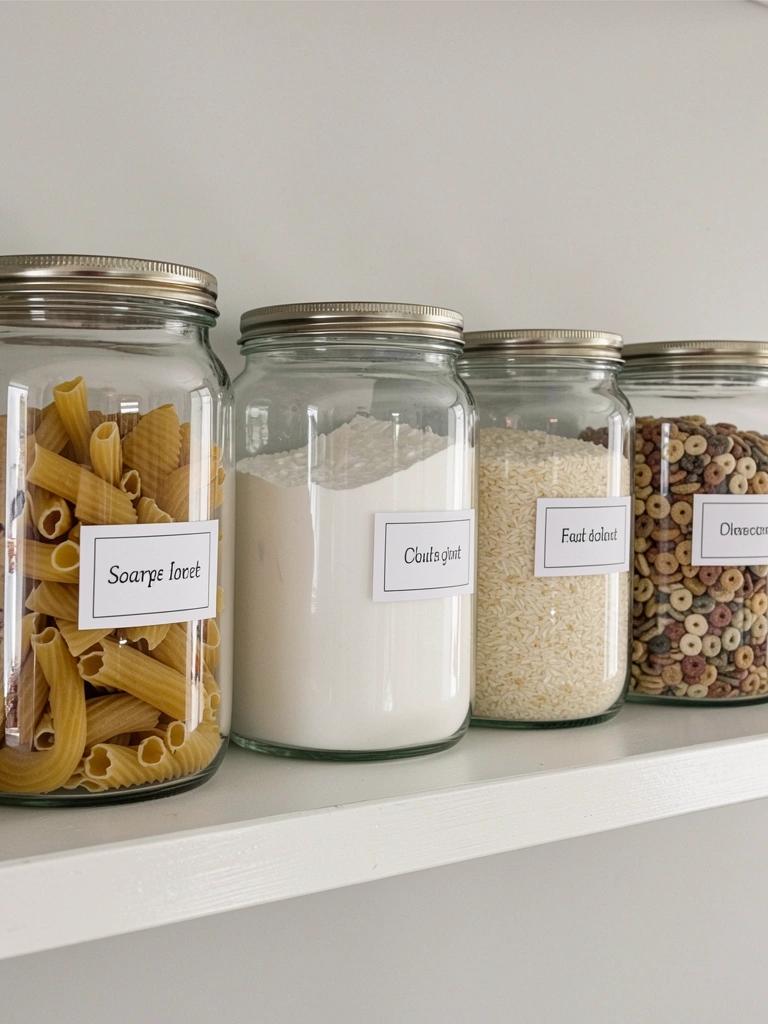
Clear containers eliminate mystery items hiding in the back of your pantry and make your storage system actually visible. You’ll know exactly what you need to buy.
Swap out boxes and bags for clear glass or plastic containers ($1-$5 each from Target, IKEA, or Amazon). Add minimalist labels using a label maker ($15-$30) or masking tape and a pen. Spend one afternoon decanting everything—it’s meditative and takes about 2-3 hours depending on how much pantry you have. Stack containers vertically or in rows so you can see everything at a glance. Pro tip: Take a photo of your labeled containers before organizing to remember what goes where.
Your pantry becomes functional and beautiful. No more expired items lurking in mysterious packages, and restocking is a breeze.
3. Install a Pegboard Wall for Hanging Tools
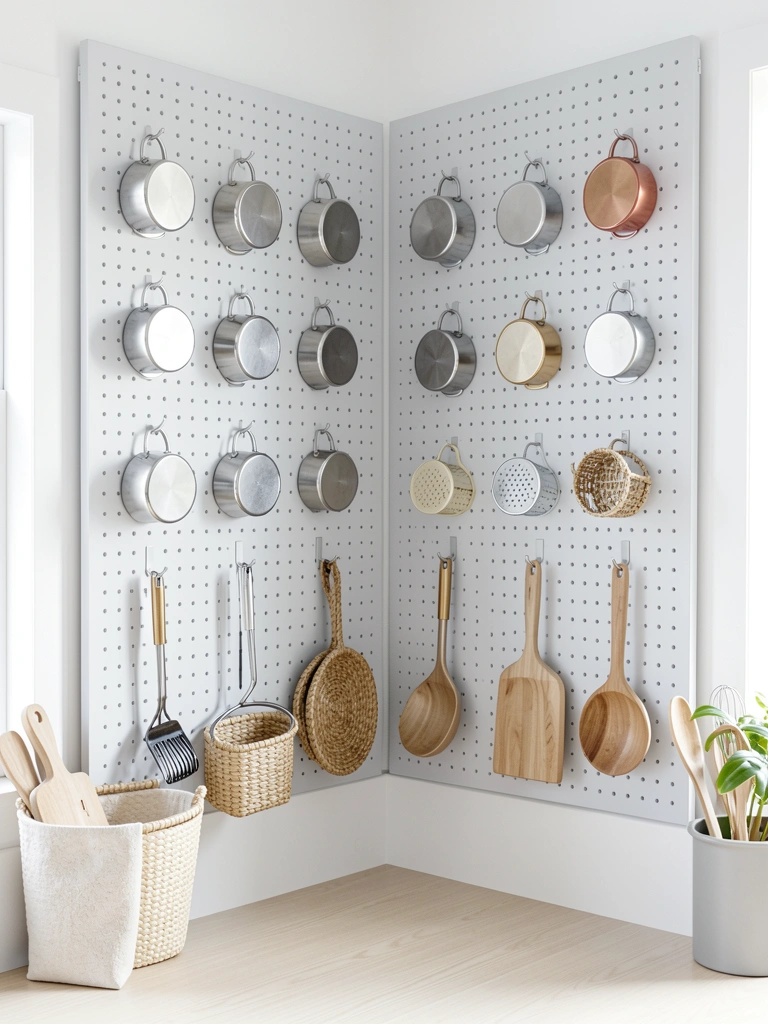
A pegboard keeps frequently used tools off counters and within arm’s reach without taking up cabinet space. Every item has a designated spot, so you know exactly where to find (and return) things.
Mount a pegboard ($20-$50) on any wall with stud finders and screws; adhesive-backed options work for renters ($15-$30). Add hooks, small baskets, and shelves ($10-$30 total). Takes 1-2 hours to install and style. Hang your most-used utensils, small pots, and measuring tools. Leave negative space (empty holes) intentionally—it’s part of the minimalist look and gives you room to adjust.
Your counters stay clear, tools are visible and easy to grab, and you’ve created a functional kitchen artwork that actually works.
4. Declutter Your Drawers with Divider Systems
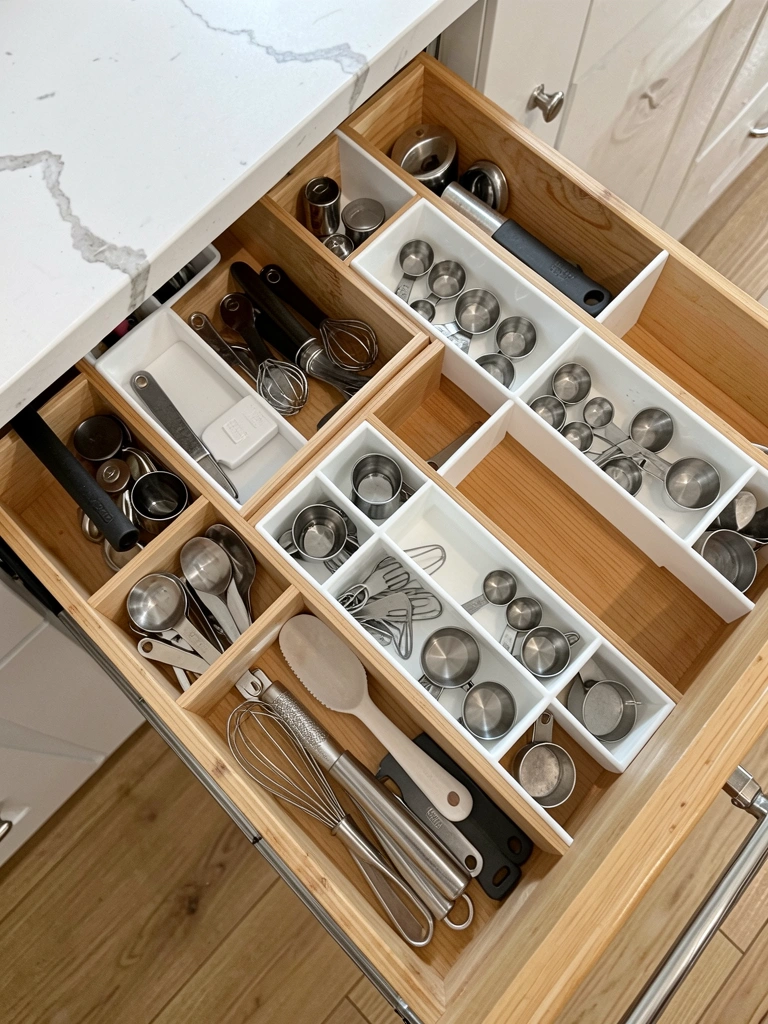
Drawer dividers transform chaotic junk drawers into organized zones where everything has a home. You’ll find things faster and actually close drawers smoothly.
Buy a drawer divider set ($15-$40 from IKEA, Target, or Amazon—bamboo or plastic) and spend 15-30 minutes sorting and placing items. Keep only utensils and tools you use at least monthly; donate or recycle the rest. Use each section for one category: measuring tools, whisks, spatulas, etc. Vertical dividers prevent items from sliding around and maximize visible space.
Your drawers become a satisfying system where you can find what you need without shuffling through clutter. Opening a drawer no longer feels like a small disaster.
5. Mount a Magnetic Knife Strip to Free Up Block Space
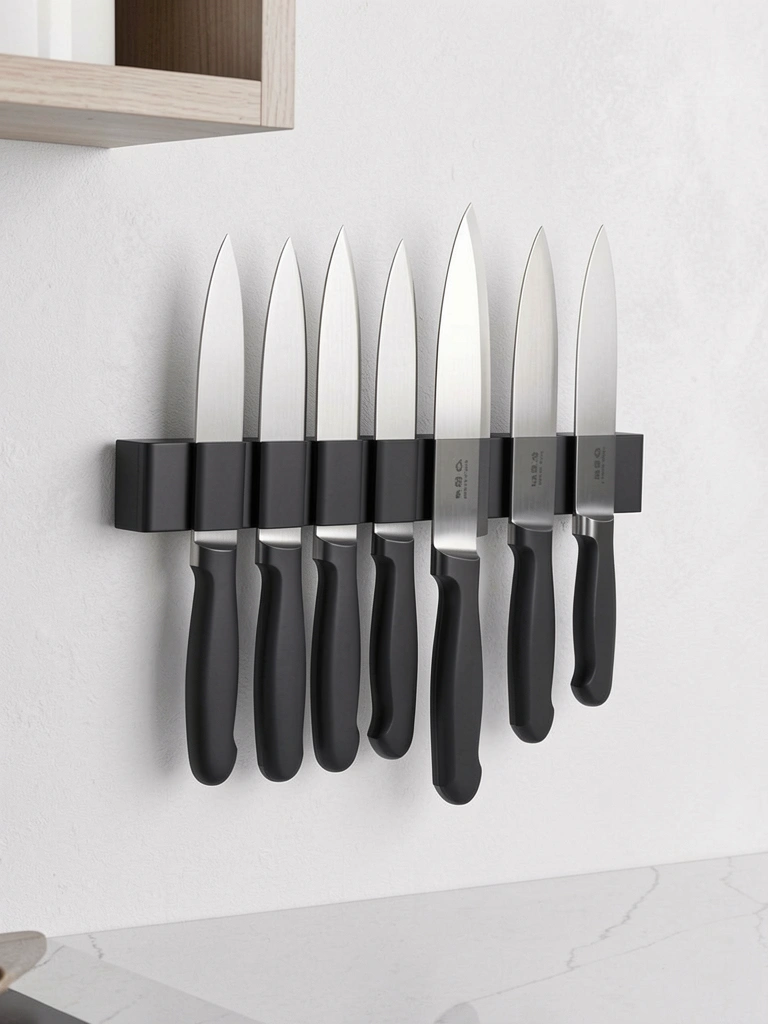
Knife blocks take up valuable counter space and often hold knives you never use. A magnetic strip is sleeker, takes minimal space, and looks intentional.
Install a magnetic knife strip ($20-$60 from Amazon, Williams Sonoma, or Sur La Table) on a wall or the side of a cabinet using mounting hardware ($5-$10. Takes 30 minutes. Mount at a height where you can safely reach without stretching. Keep only knives you actually use—a chef’s knife, paring knife, and one serrated knife cover most cooking tasks. Wipe the strip occasionally to keep knives secure.
Your counters open up, and you get a minimalist focal point that shows off quality knives. Bonus: knives stay sharper longer when they’re not rattling in a wooden block.
6. Create a Coffee Station in One Corner
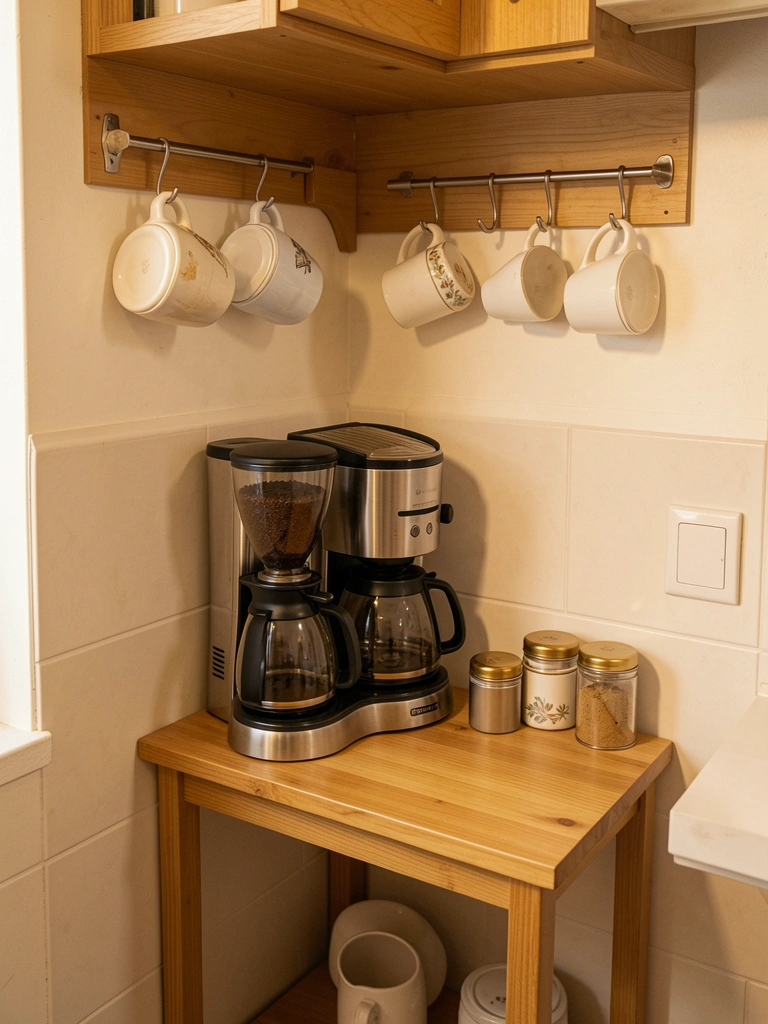
Corralling coffee items into one area keeps supplies grouped logically and prevents them from spreading across your kitchen. Everything you need is in one spot—no hunting for filters or that one mug.
Pick a corner with access to a plug and water source ($0 if using existing space). Use a small table, cart, or shelf ($30-$100 from IKEA, Amazon, or Target). Organize: coffee maker, grinder, and mugs on the surface; filters, beans, and sugar in a small basket or container ($10-$20). Install a small peg rail or hooks above for hanging mugs ($15-$25). Set up takes 1-2 hours.
Your coffee ritual becomes a calm, contained moment each morning. The rest of your kitchen stays free of coffee chaos, and guests know exactly where to find cups.
7. Use Vertical Dividers for Baking Sheets and Cutting Boards

Stacking sheets and boards wastes space and makes it impossible to grab one without moving five others. Vertical storage means you see everything and grab what you need instantly.
Buy a vertical divider set ($15-$30 from IKEA, Container Store, or Amazon) sized for your cabinet. Spend 20 minutes organizing. Stand baking sheets, cutting boards, and trays upright like files in a folder, one per slot. Keep only two cutting boards (wood and plastic) and two to three baking sheets—this is plenty for most cooking.
Your cabinet becomes efficient, and you’ll actually reach for items you couldn’t find before. Less wasted cabinet space, more usable items.
8. Consolidate Spices into Uniform Jars with Labels
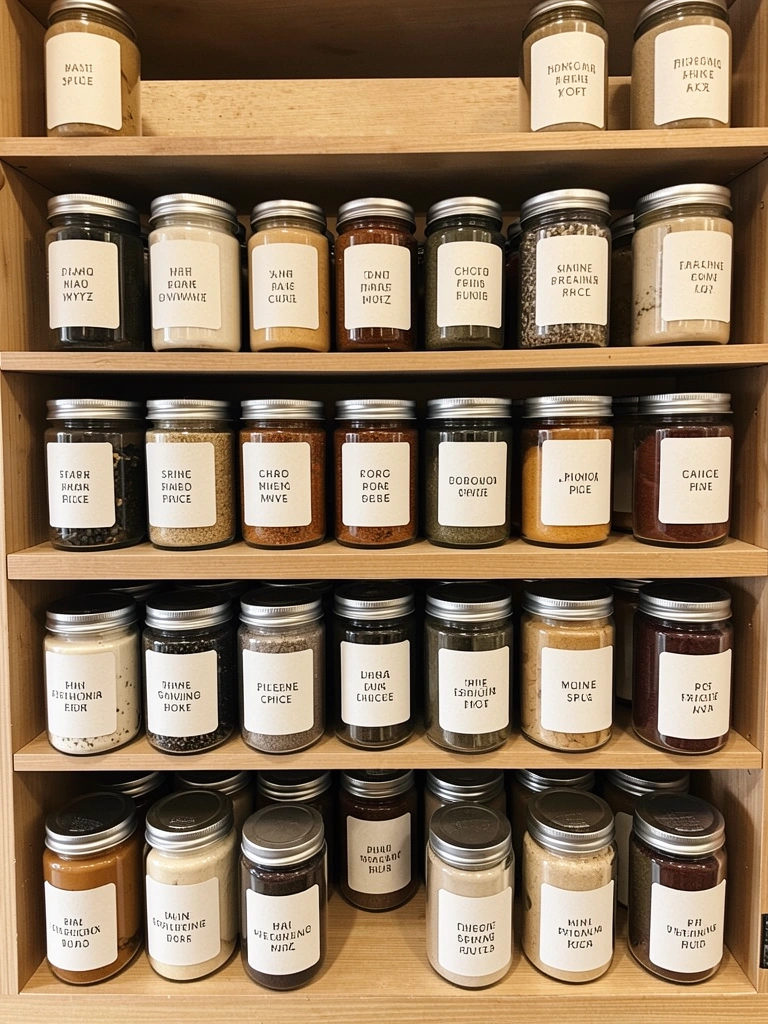
Mismatched spice containers and unclear labels waste money (you forget what you have and rebuy) and cabinet space. Uniform containers create visual calm and actually help you cook faster.
Buy empty spice jars ($0.50-$1.50 each; bulk from Amazon, Container Store, or Specialty Bottle). Get a label maker or use kraft labels and a pen ($15-$30 for maker). Decant all spices into jars over 1-2 hours. Label each jar clearly with the spice name and ideally the date purchased. Organize alphabetically or by cuisine type (baking, Italian, Asian). Keep only spices you’ve used in the past year.
You’ll cook more adventurously when spices are visible and easy to find. Your cabinet looks curated, not chaotic, and you’ll stop overbuyering duplicates.
9. Install Under-Sink Pull-Out Baskets
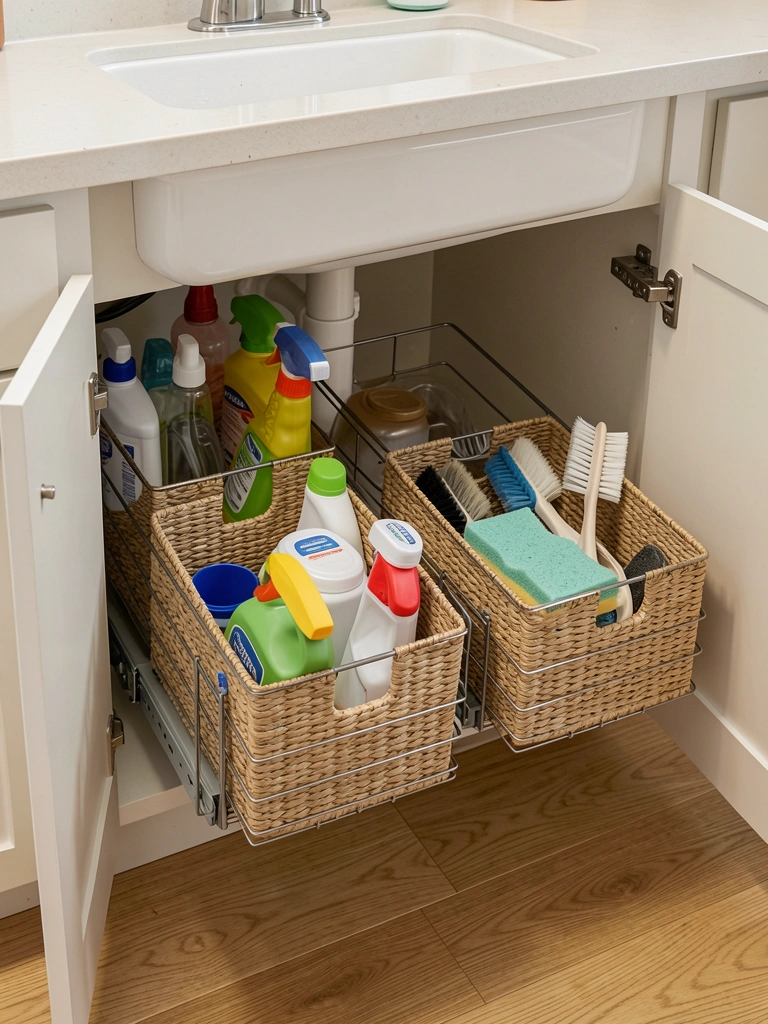
Under-sink space is usually a dark void where things disappear. Pull-out baskets make everything accessible and keep cleaning supplies and sponges separated from food storage.
Get pull-out baskets ($20-$50 per basket; IKEA, Target, or Amazon). They slide right into existing cabinet space—no installation needed. Organize one for cleaning supplies, one for sponges/brushes, and leave one area clear for your trash bin if it lives there. Takes 10 minutes to sort and place. Wipe baskets monthly to prevent mildew.
Everything under your sink becomes visible and grabbable. No more reaching to the back and disturbing a pile of mystery items. Much safer to keep cleaning products in a designated area away from food.
10. Add a Door-Mounted Spice Rack
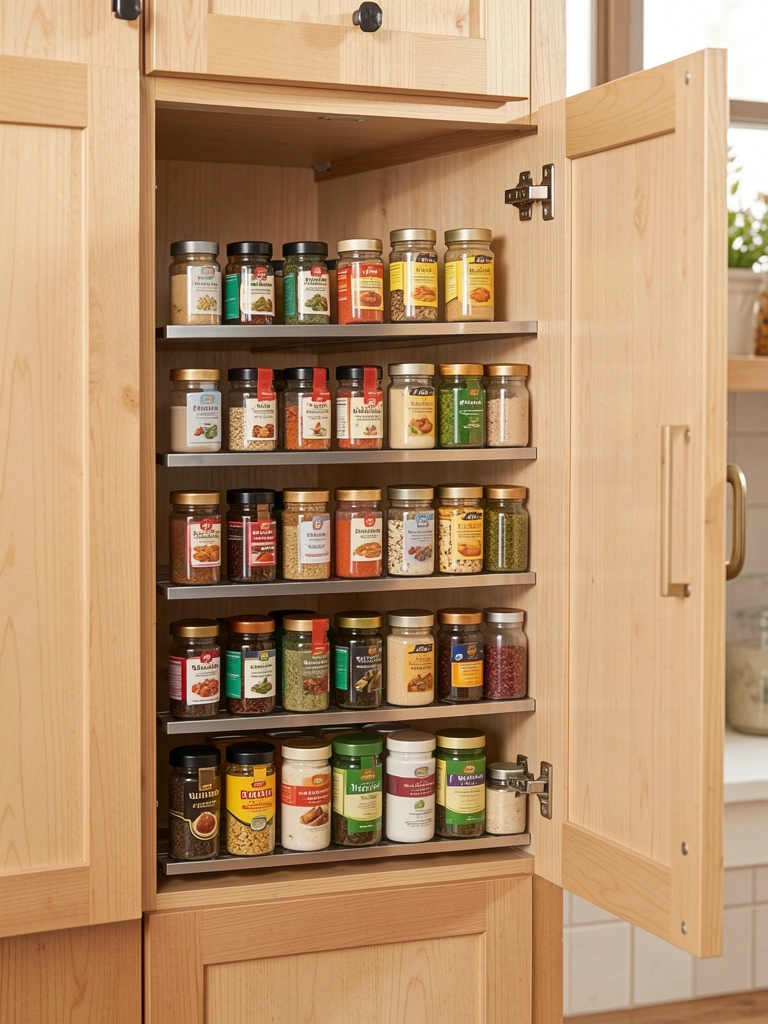
Cabinet doors are wasted real estate. A door-mounted rack holds spices, extracts, or small jars without eating into cabinet shelves.
Install a door-mounted spice rack ($15-$40 from Amazon, Target, or specialty kitchen stores). Adhesive or screw-mounted options both work. Takes 15 minutes to install and fill. Use it for frequently used spices, extracts, or small jars of nuts and dried herbs. Keep items under 5 pounds so the door isn’t weighted down.
Your cabinet shelves free up instantly, and you’ve created a second storage layer that’s completely out of the way but easily accessible.
11. Create a Drink Station with Labeled Containers
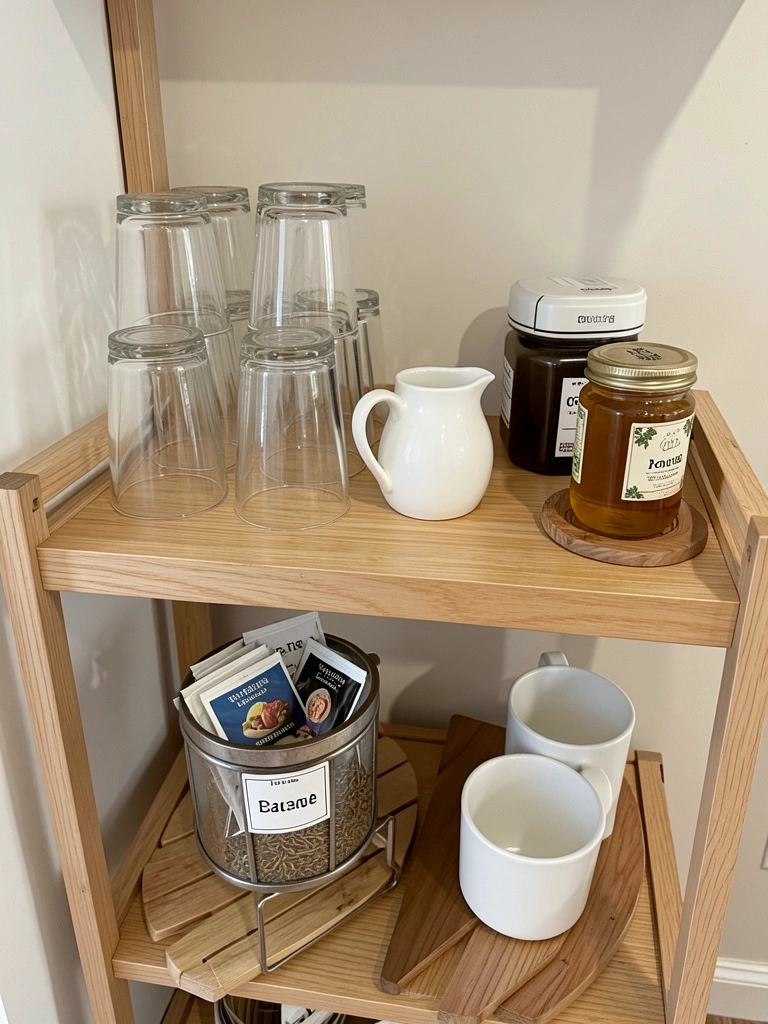
Drink items scattered across multiple cabinets mean you’re constantly hunting for a mug or can’t find the tea. Grouping everything in one spot saves time and looks intentional.
Pick a lower cabinet or shelf kids can reach (if applicable). Arrange: mugs on hooks or in a small stand ($10-$20), glasses in a contained area, tea/coffee items in labeled containers ($5-$15 for containers). Takes 30 minutes to organize. Stock only cups and glasses you actively use—keep two to three per person in your household.
Everyone knows where to find a drink cup, and your cabinet stays organized without looking like you’re trying too hard. A functional, accessible system beats a Pinterest-perfect but inaccessible one.
12. Use Stackable, Modular Cabinet Organizers
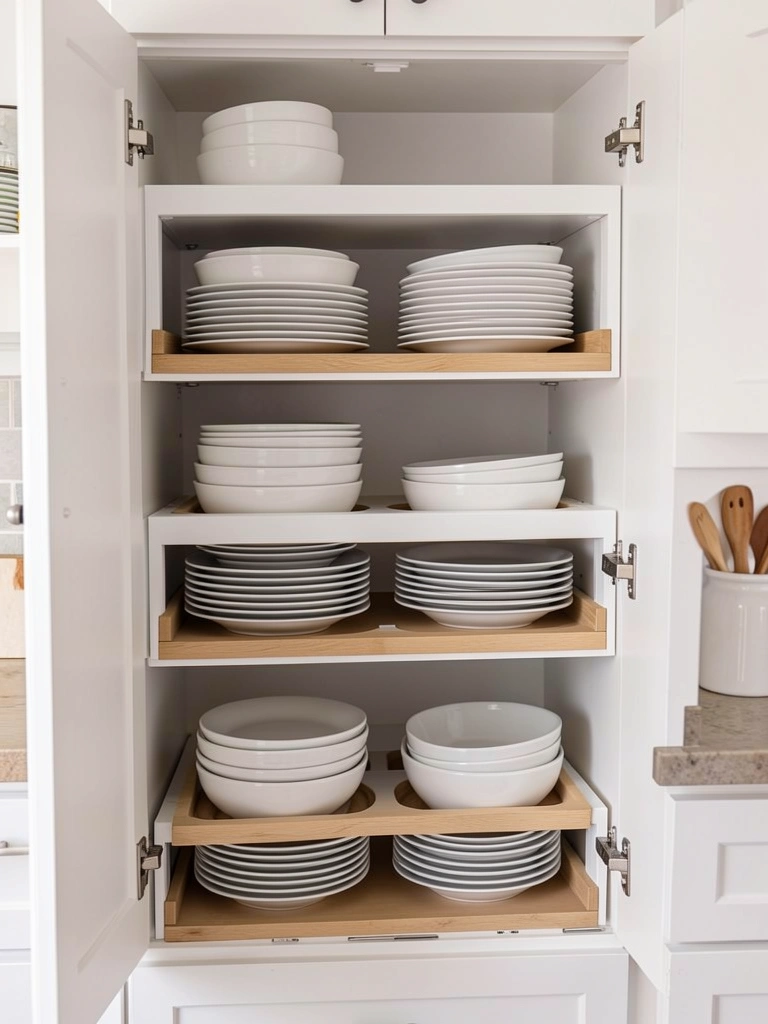
Cabinets with just one shelf waste vertical space. Stackable organizers create extra levels and let you fit more without creating a precarious tower.
Buy stackable organizers ($20-$50 per set from IKEA, Container Store, or Amazon). They’re adjustable and require zero installation—just place them on your shelf. Organize dishes, bowls, or glasses with one set per item type. Takes 20 minutes to arrange. Leave a small gap between levels for easy access and visibility.
Your cabinet instantly feels more spacious and organized. You fit more into less space, and everything remains easy to access without unstacking items.
13. Mount a Narrow Shelf Above the Stove
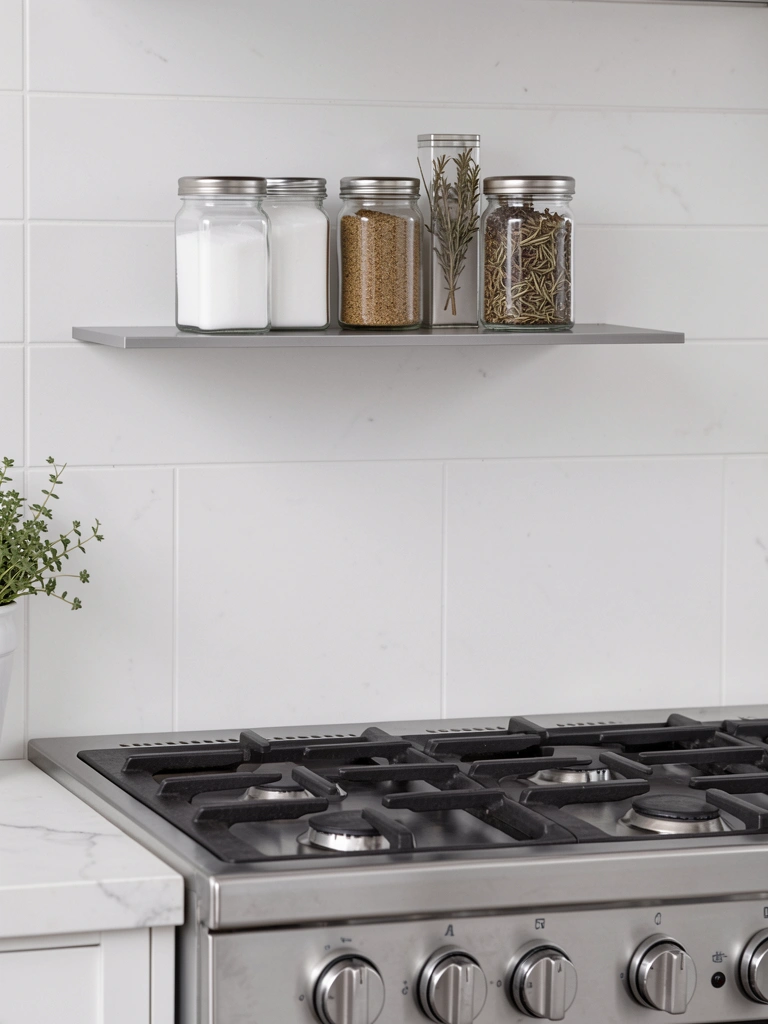
The wall above your stove is prime real estate for oils, vinegars, or salt that you need while cooking. It keeps the counter clear and puts essentials at hand level.
Mount a narrow shelf ($15-$40) using stud finder and brackets ($10-$15 hardware). Takes 1 hour. Place only heat-safe items here: salt, pepper, oils, and vinegars in glass containers. Keep a 6-8 inch clearance from the stovetop so nothing melts. Store heavy items lower on the shelf closer to the wall.
Cooking becomes more fluid when essentials are right there. Your counters stay clear, and you save cabinet space. The look is functional and chic—no clutter, just what you need.
14. Designate a Zone for Single-Use Appliances
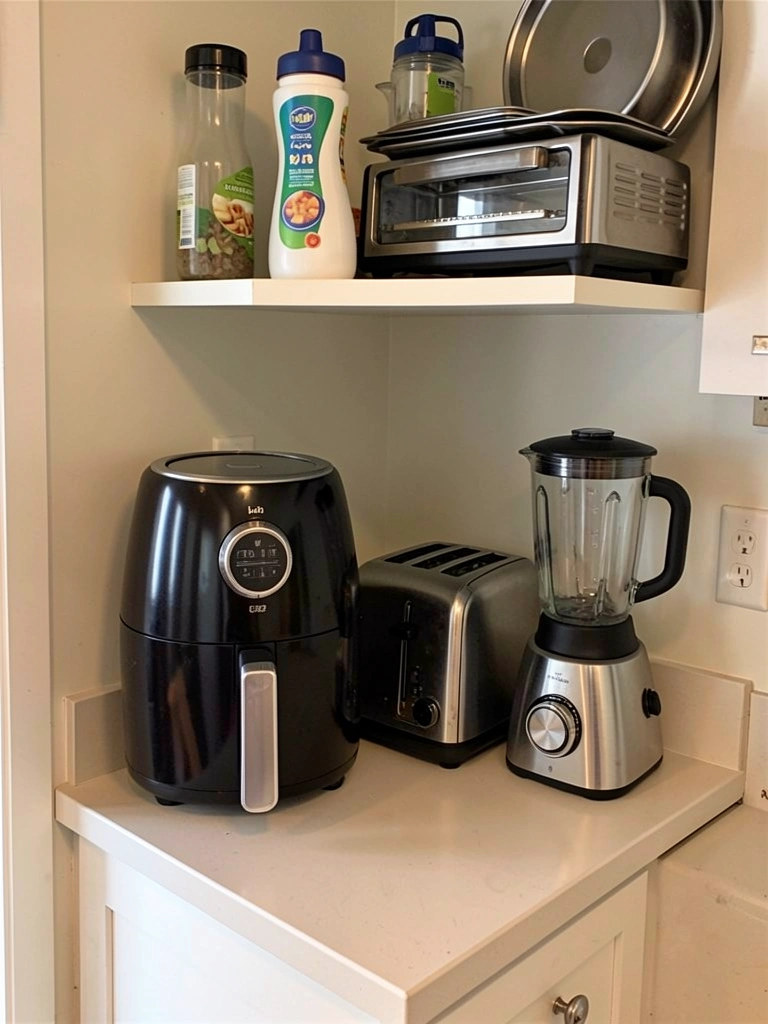
Small appliances scattered across cabinets and counters create visual chaos. Grouping them in one zone (ideally tucked away) keeps them accessible but contained.
Pick a lower cabinet, shelf, or a small cart ($0 if using existing space; $30-$80 if buying a cart). Store air fryer, toaster, blender, and other single-use items here. Keep power cords in a small cable organizer ($5-$10). Takes 30 minutes to relocate and organize. Only keep appliances you use at least monthly—donate or sell the rest.
Your counters transform instantly. You get a dedicated spot for tools you need but don’t want visible, and the rest of your kitchen stays open and breathable.
15. Install Hooks Inside Cabinet Doors for Tea Towels
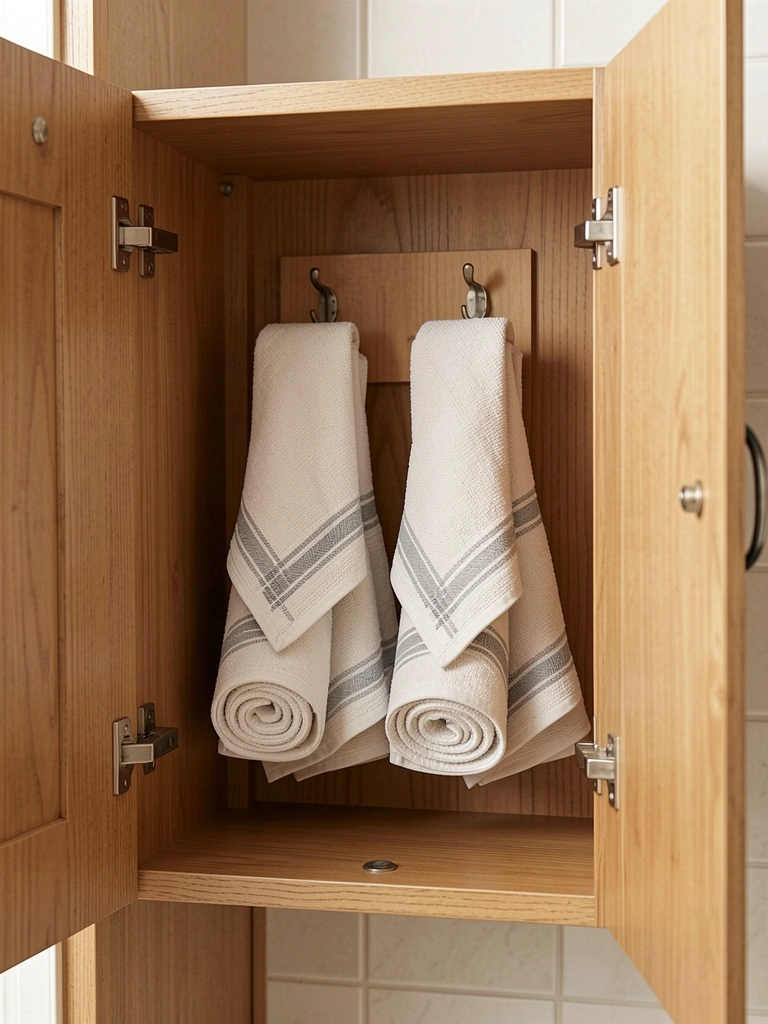
Tea towels draped over drawer handles or stacked in a drawer wrinkle and take up space. Cabinet door hooks keep them organized, hidden, and easy to grab.
Add adhesive hooks or screw-mounted hooks ($5-$15 per set) to the inside of a cabinet door. Takes 10 minutes. Hang tea towels neatly rolled or folded. Keep four to six towels maximum—enough for a week’s use before laundry day.
Your drawers open up, and towels are accessible without cluttering your counters. A small-space hack that feels intentional, not like a storage hack.
16. Create a Baking Supplies Corner
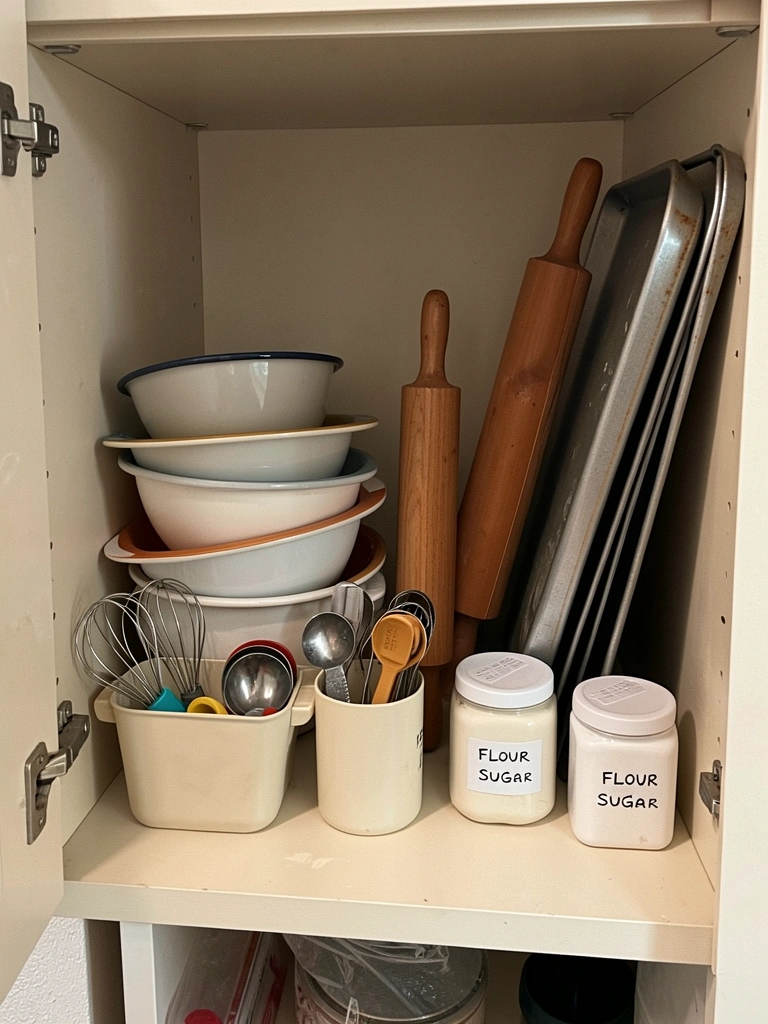
Baking supplies scattered through three cabinets make it impossible to set up for baking. A dedicated baking zone has everything in one spot—no hunting, no excuses.
Designate a large cabinet, shelf, or small cart ($0-$50 if buying a cart). Group: mixing bowls, measuring tools in a container ($5-$15), baking sheets standing vertically ($0 using dividers), and dry ingredients in labeled containers ($10-$20 for containers). Takes 1 hour to organize. Keep only mixing bowls you regularly use—two or three is plenty.
Setting up to bake becomes a pleasure instead of a treasure hunt. Everything lives in one intuitive zone, and you’re more likely to actually bake when it’s this easy to access supplies.
17. Use a Small Cart for Frequently Rotated Items
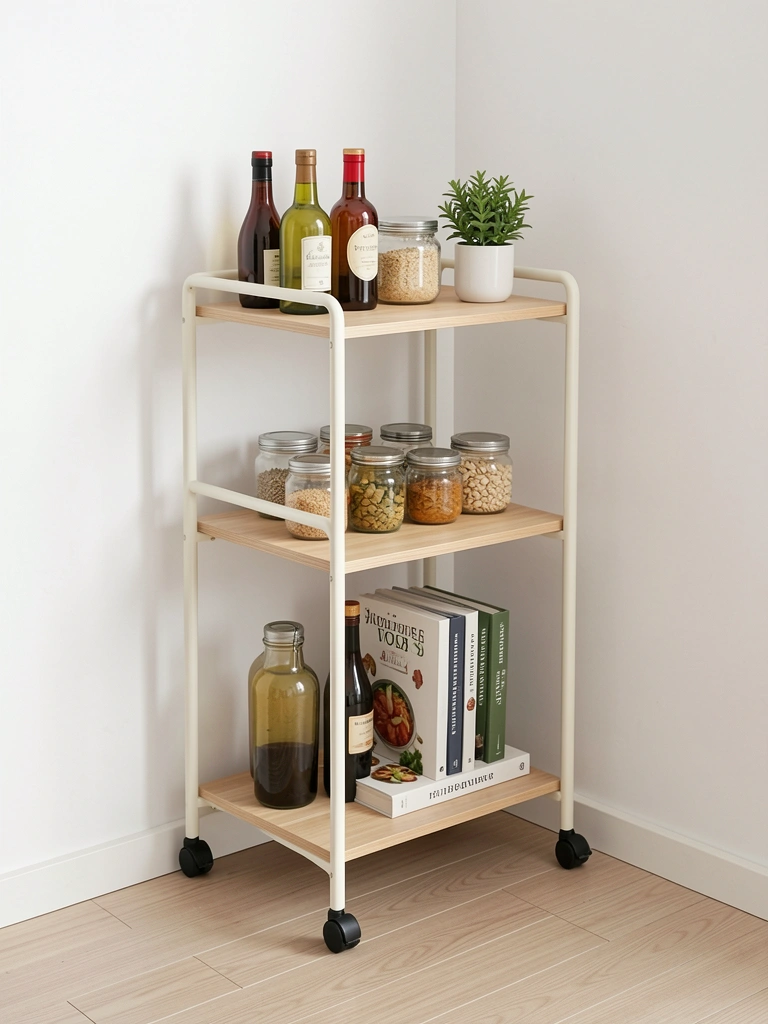
A rolling cart gives you extra storage that can move wherever you need it. Use it for items you rotate seasonally or need fast access to without permanent shelf installation.
Get a slim rolling cart ($40-$120 from IKEA, Target, or Amazon). Stock it with frequently used condiments, oils, or cookbooks. Takes 20 minutes to set up. Position it in a corner, next to the fridge, or anywhere it’s convenient. Use only three tiers—more gets top-heavy and looks cluttered.
You’ve added functional storage without permanently modifying your kitchen. If you rearrange, it moves with you. Perfect for renters or anyone who likes flexibility.
18. Install a Pull-Down Pantry System
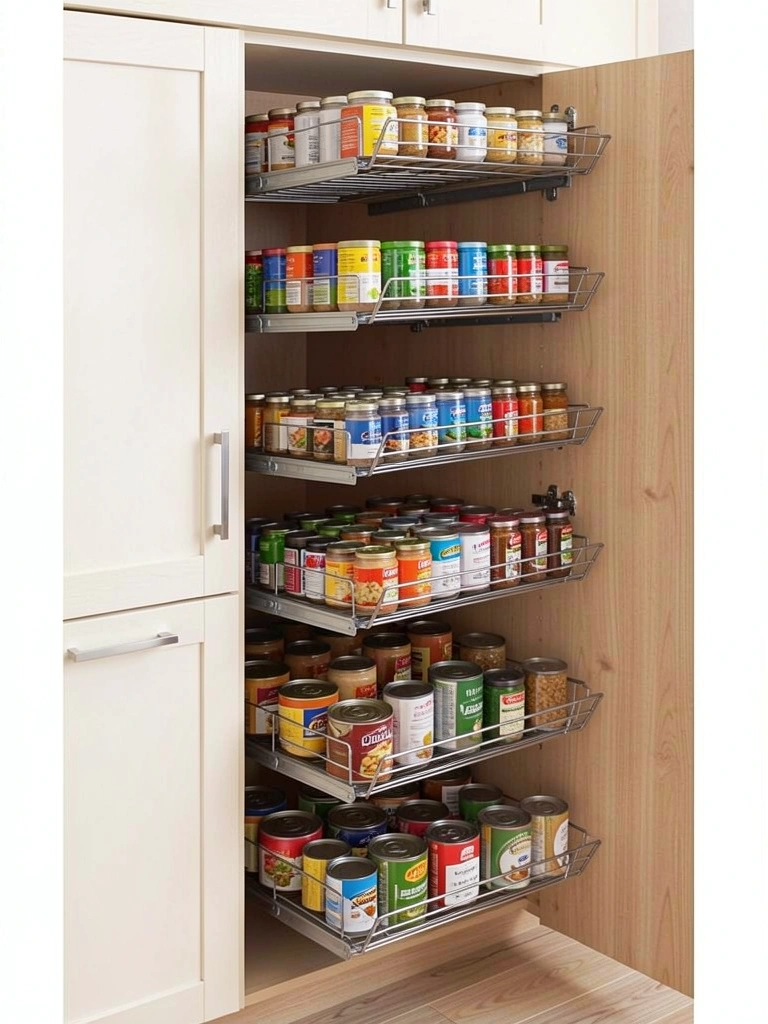
Deep cabinets waste space because items in the back disappear. A pull-down or pull-out system brings everything forward so you see and access everything easily.
Install a pull-down or pull-out shelf system ($40-$100 from Amazon, Wayfair, or specialty kitchen organizers). Professional installation runs $50-$150, or DIY with hardware (30 minutes-1 hour). Organize canned goods, small jars, and packaged items in order of use (most frequent in front). Keep only items you use within three months.
Your deep cabinet becomes usable, and you’ll stop losing food in the back. The system pays for itself in wasted groceries prevented.
19. Organize Snacks in a Lidded Container for Kids or Shared Access
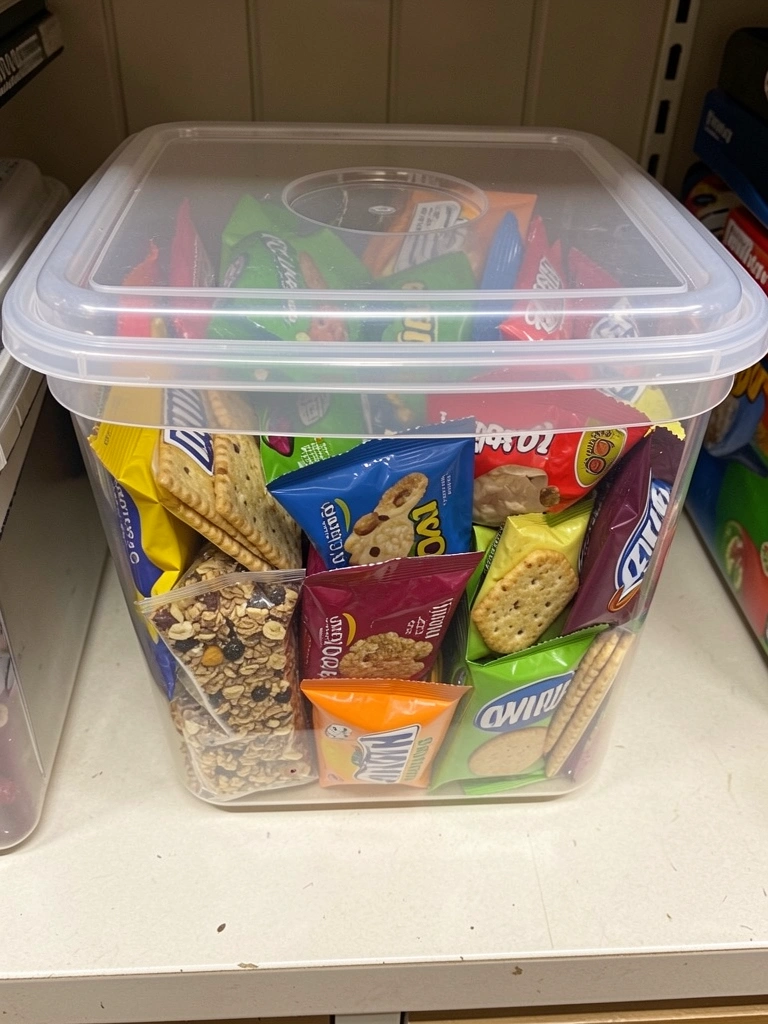
Snacks loose in a cabinet or scattered across the pantry means constant searching and spilled crumbs. A single lidded container contains everything and teaches kids (or guests) where snacks live.
Get a large clear container with a lid ($15-$30 from Target, Container Store, or Amazon). Fill with individual snack packs or pre-portioned items. Label it clearly if it’s for specific people (“Kids’ Snacks”). Takes 20 minutes to organize. Refill weekly or as needed.
Everyone knows where snacks are, you reduce packaging waste, and your cabinet stays tidy. A system that actually works for families or roommates sharing space.
20. Mount Magnetic Strips for Can Storage
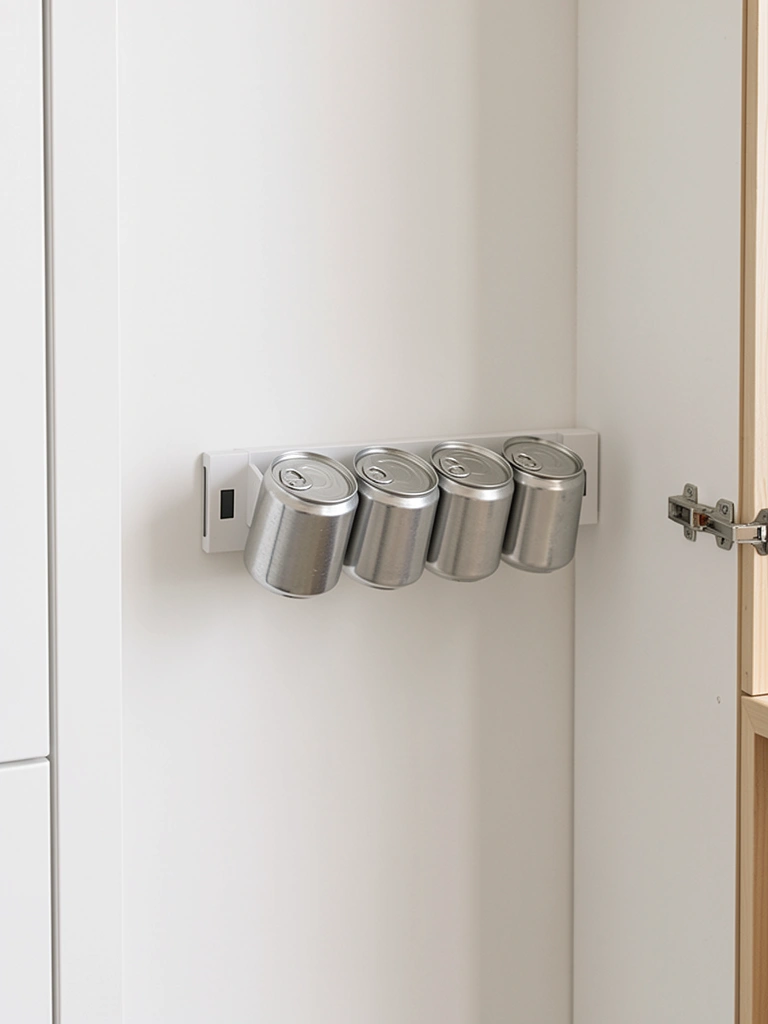
Cans roll around cabinets and take up surprising amounts of shelf space when stacked. Magnetic strips hold them safely on walls or cabinet sides, creating vertical storage.
Install a magnetic strip ($15-$30 from Amazon; make sure it’s food-safe and rated for weight). Mount it on the side of a cabinet or a wall near your cooking zone using screws and anchors ($5). Takes 20 minutes. Use it for canned tomatoes, beans, or broth—items you use weekly. Limit to 5-8 cans so it doesn’t get too heavy.
You’ve freed up valuable shelf space and created a visual, accessible storage system. Cans are always visible, and you never forget what you have on hand.
21. Create a Drawer Divider System for Utensils and Gadgets
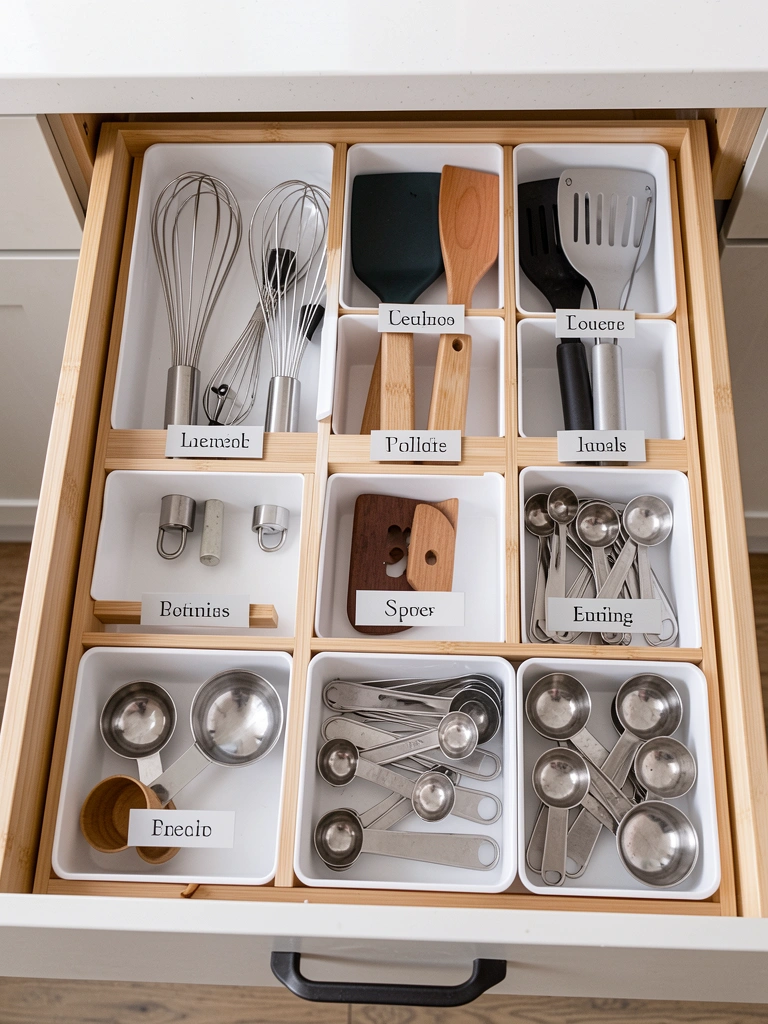
An organized utensil drawer saves time and prevents the frustration of digging through a tangled mess. Dividers create zones where each item has a home.
Buy a customizable drawer divider set ($20-$40 from IKEA, Target, or Amazon; bamboo or plastic). Organize by type: whisks together, spatulas together, measuring tools together. Takes 30 minutes. Keep only utensils you’ve used in the past three months—donate or recycle broken or redundant items.
Your drawer opens smoothly, and you find what you need instantly. A small change that makes daily cooking smoother and less frustrating.
22. Use Vacuum-Seal Bags for Seasonal or Bulky Items
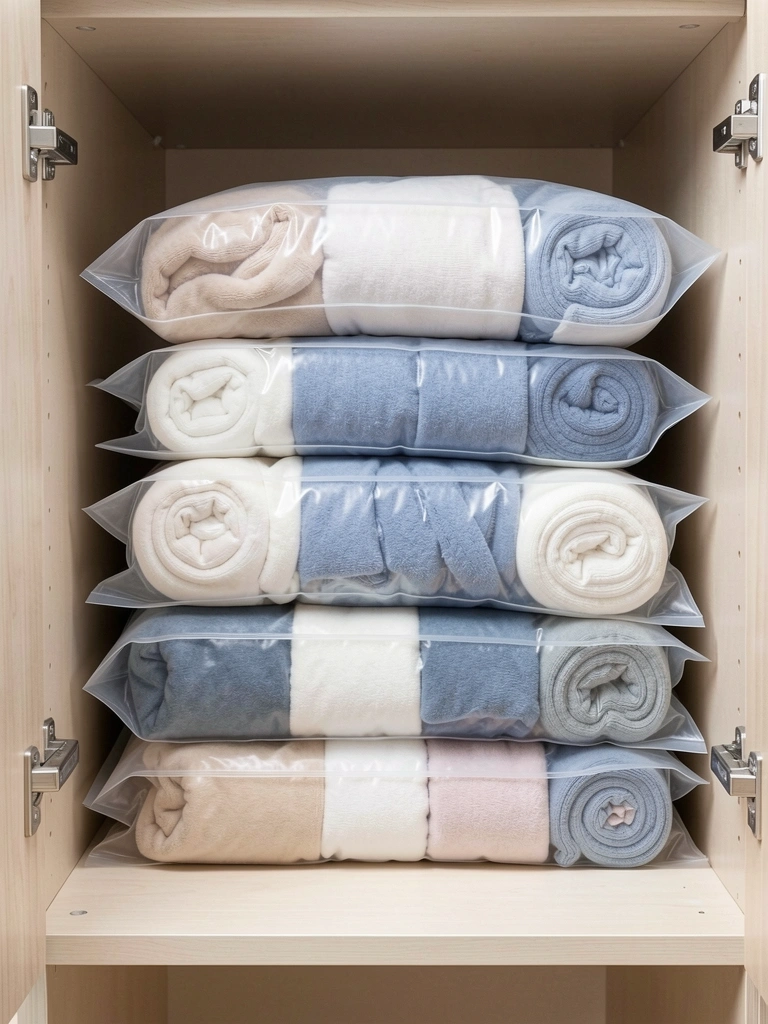
Bulky items like extra linens or seasonal decorations waste enormous cabinet space. Vacuum-seal bags compress them down to a fraction of their size and keep everything visible in one spot.
Buy vacuum-seal bags ($1-$3 per bag from Target, Amazon, or grocery stores) and a hand pump or vacuum sealer ($15-$40; most homes already have one). Store seasonal kitchen items, table linens, or extra towels. Takes 30 minutes-1 hour to pack and seal. Stack bags vertically in a designated cabinet or closet shelf so you can see labels and grab what you need.
You’ve dramatically freed up space without discarding anything. Perfect for storing backup supplies without creating clutter.
23. Install a Narrow Shelf for Cookbooks and Recipes
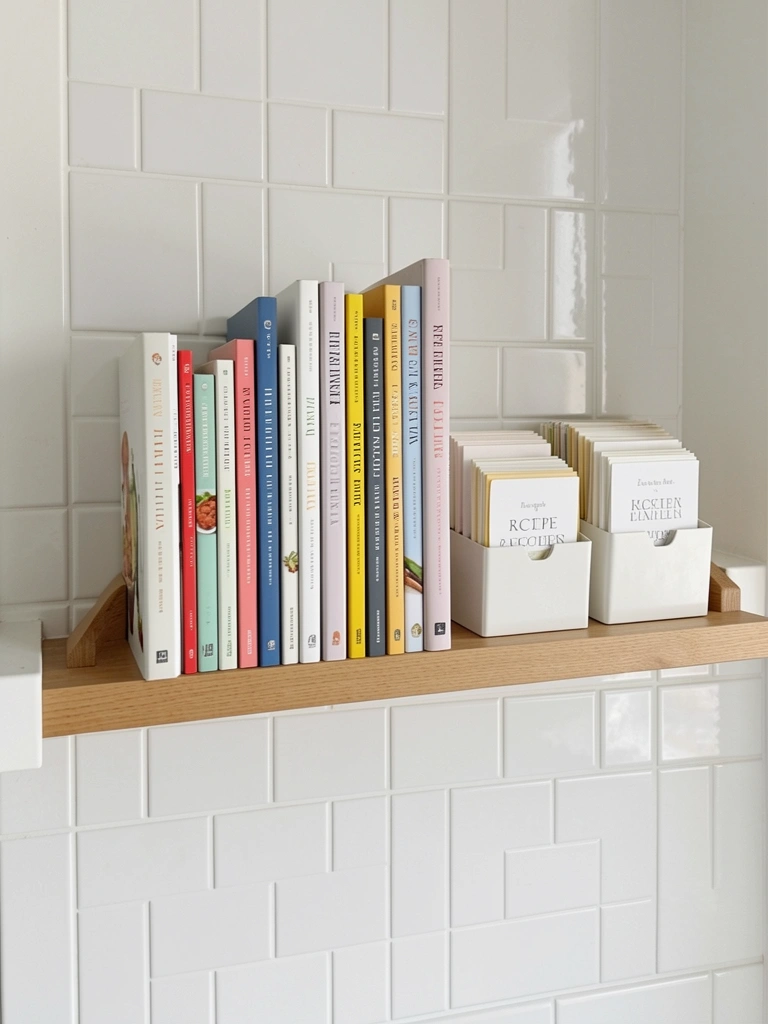
Cookbooks scattered through cabinets or piled on counters look chaotic. A dedicated shelf displays them beautifully and keeps them accessible for inspiration and actual cooking.
Mount a narrow shelf ($20-$40) at eye level or slightly above counter height. Takes 1 hour with stud finder and hardware ($10-$15). Keep only cookbooks you’ve cooked from at least twice and actively reference. Store recipes in a small box or filing system ($10-$20). Stand books upright with decorative bookends ($10-$20) or lay them flat if space is tight.
Your kitchen has a thoughtful focal point, and cookbooks become inspiration rather than clutter. The shelf adds character while staying functional and minimal.
Ready to reclaim your kitchen? Save this post and pick one or two ideas to try this weekend. Even small changes add surprising calm to your cooking space. Share this with anyone drowning in kitchen clutter—they’ll thank you for the roadmap.
Leave a Reply